Printable Version of Topic
Click here to view this topic in its original format
914World.com _ 914World Garage _ Mars on a budget
Posted by: Mayne Mar 20 2017, 08:39 PM
I thought I'd formally introduce my 914 project, now that I've been lurking on this great forum for a while.
A little back story: my younger brother and I are car fanatics, especially those of the German variety. He owns multiple BMWs, an early 911 with RS bodywork, and a manual 928, and I own an early Boxster, a 944 Turbo, and now the 914.
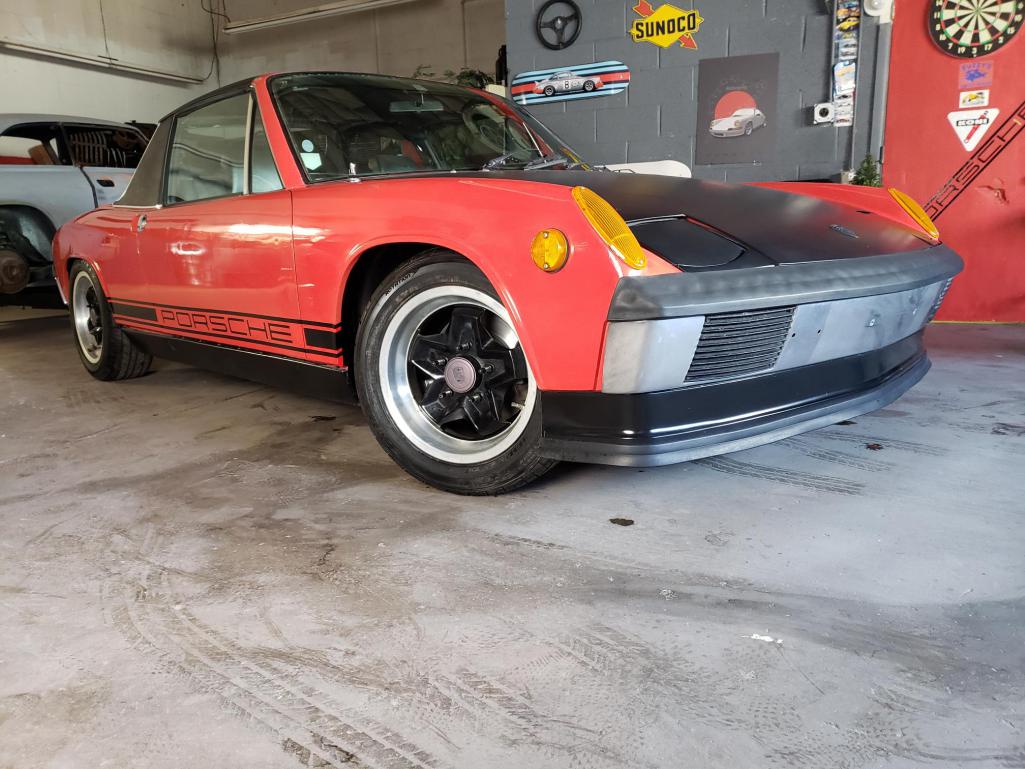
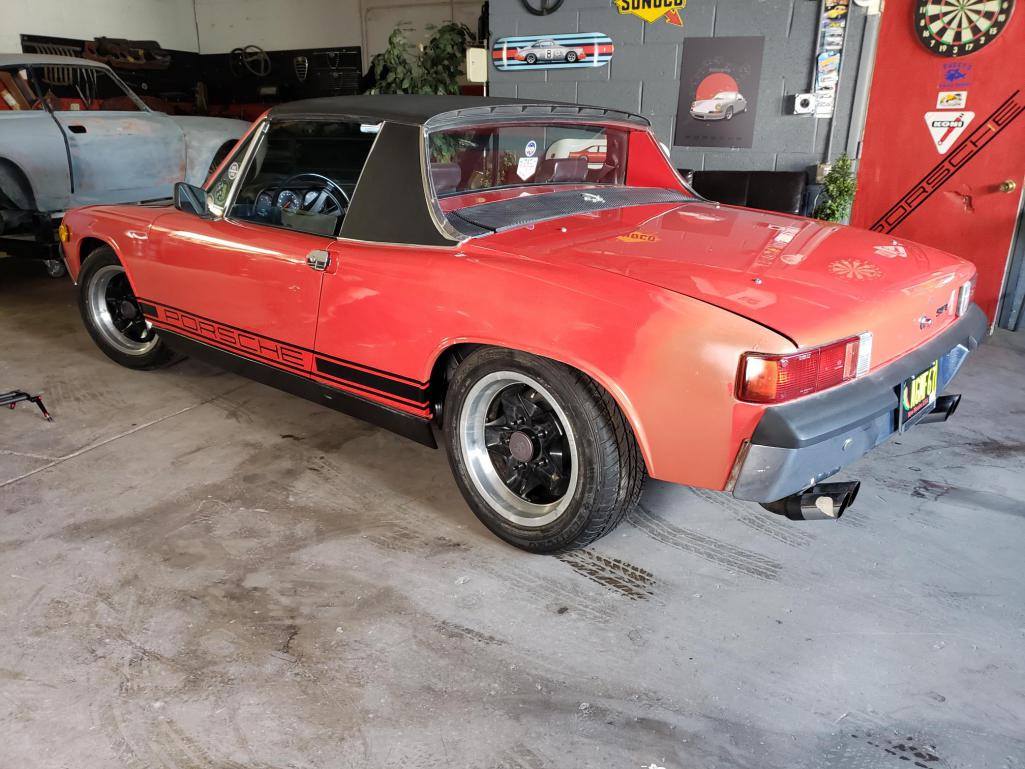
Last summer, my brother went to check out an E36 parts car for his M3 in rural New Mexico. Sitting under some trees was this solid but rather forlorn looking 914: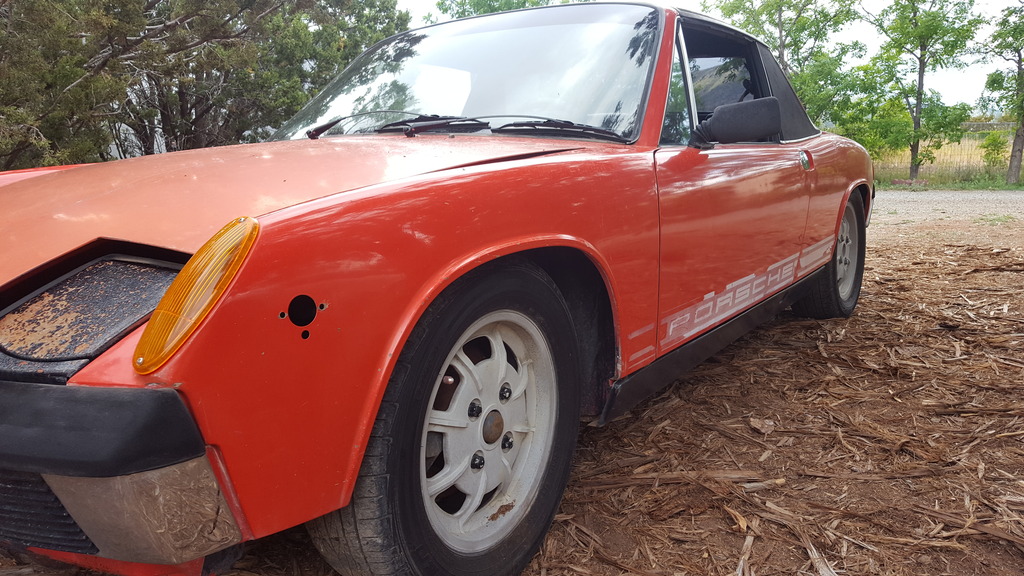
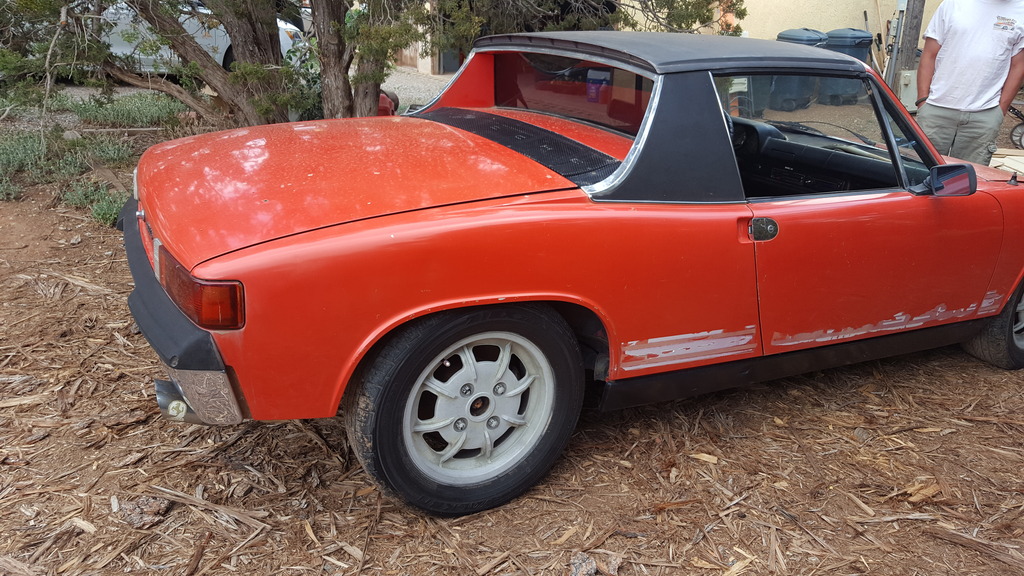
$1800 later, we towed home a mouse infested ran-when-parked 75 914. The 1.8 FI engine had been swapped out for a 1.7 with 1.8 heads and a single Weber carb, and the impact bumpers had been backdated to chrome bumpers. Mars Red with Mahle gas burners!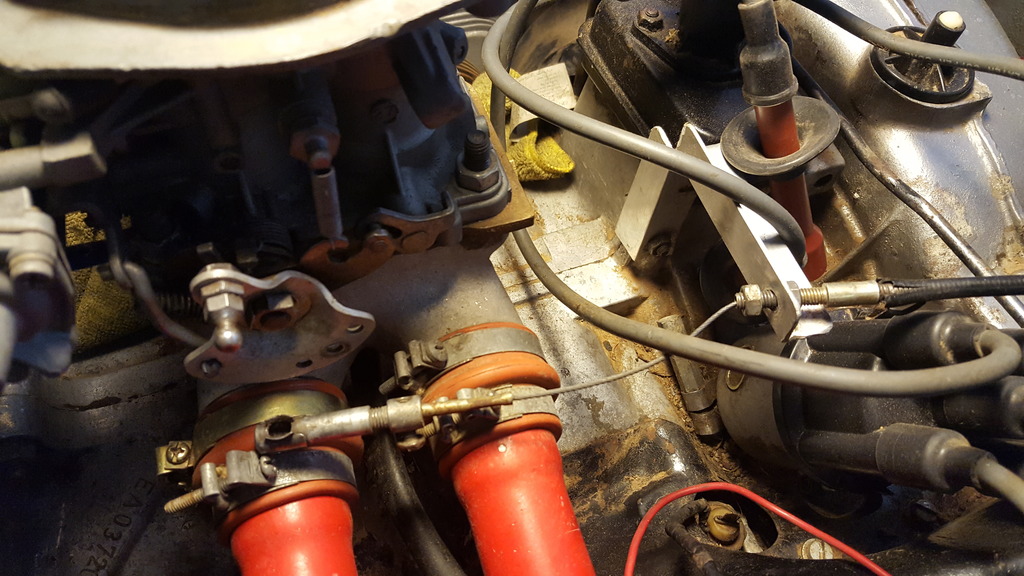
It had been parked because the previous owner thought it had developed a serious front main seal leak. We got it running with a minimum of effort and saw the significant oil leak. We impulsively dropped the motor and resealed the oil pump, suspecting that might solve the problem.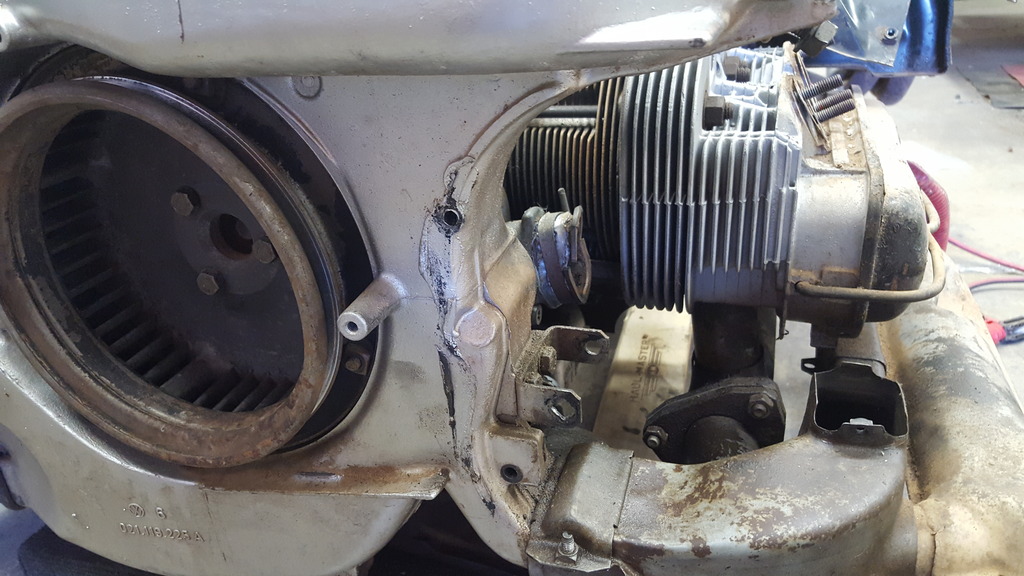
Motor back in, along with a dual Weber setup we came across, it seemed like the leak was fixed. But it was running so badly, we couldn't really drive it. Since my brother was working part time at a Ferrari shop that primarily builds vintage motors, we were able to get the carbs rebuilt for cheap by the excellent Ferrari mechanic.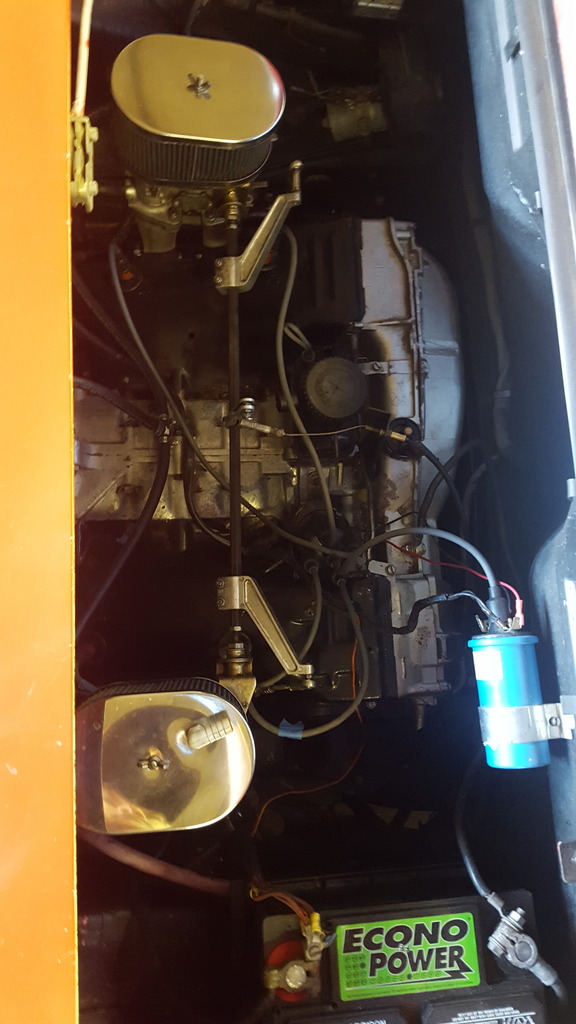
Now with the car running much better, two thing were apparent, 914s are fun  and we didn't fix the oil leak.
About this time, my growing love for this 914 was finally too much to resist. So my brother and I made a trade on his half of the purchase price for a ran-when-parked manual 928 that I had picked up. Still not sure who ended up with the better half of that deal, but we're both happy!
With the car mine now, I started in on some of the needed projects. Thanks to 914World, I solved the major oil leak with a bolt in thermostat pulley hole (quite a bit easier than dropping the motor). With that dealt with, I could see a decent driver on the horizon. More soon!
Cheers,
Jeremy
Posted by: whitetwinturbo Mar 20 2017, 08:50 PM

Go Go Go!
Posted by: Mayne Mar 20 2017, 09:13 PM
As mentioned above, I have two other Porsches and really the last thing I needed was another. But there it is, an addiction I suppose. But for as long as I can, I want to try to keep this "build" on a tight budget while making something fun and cool.
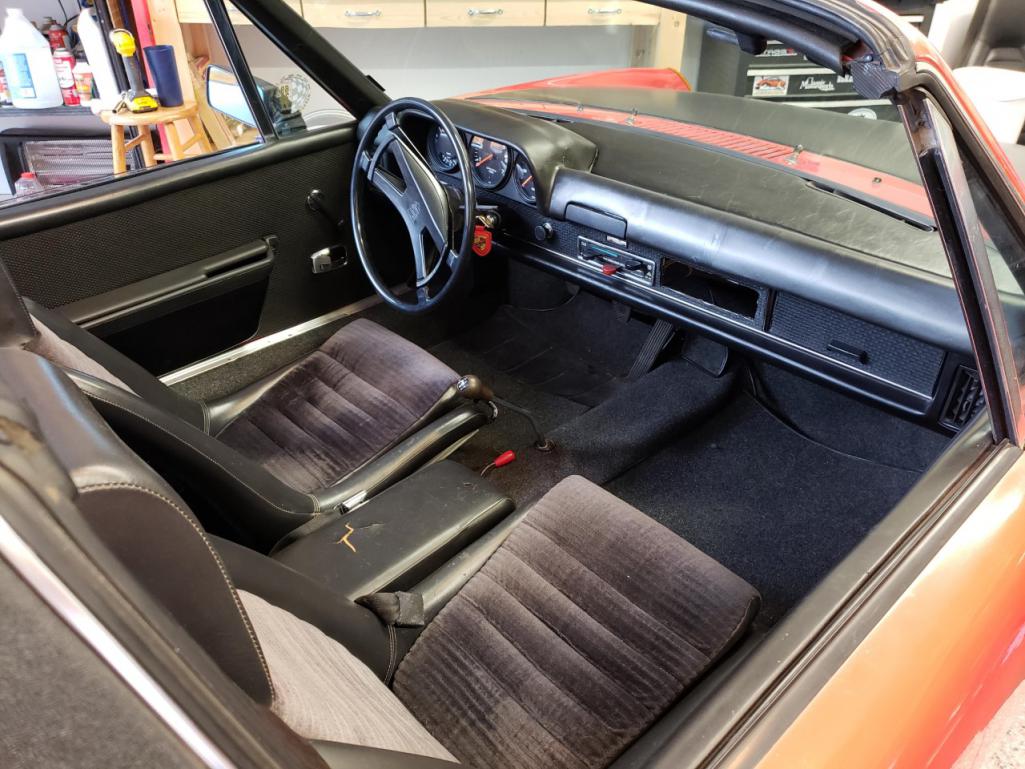
The interior really wasn't bad, thanks to some reupholstered seats in black vinyl with corduroy centers. The carpet was nice, but because of the mouse problem, it had to be trashed. Out came the interior, a bunch of scrubbing and deodorizing (not entirely effective), and a new carpet kit went in.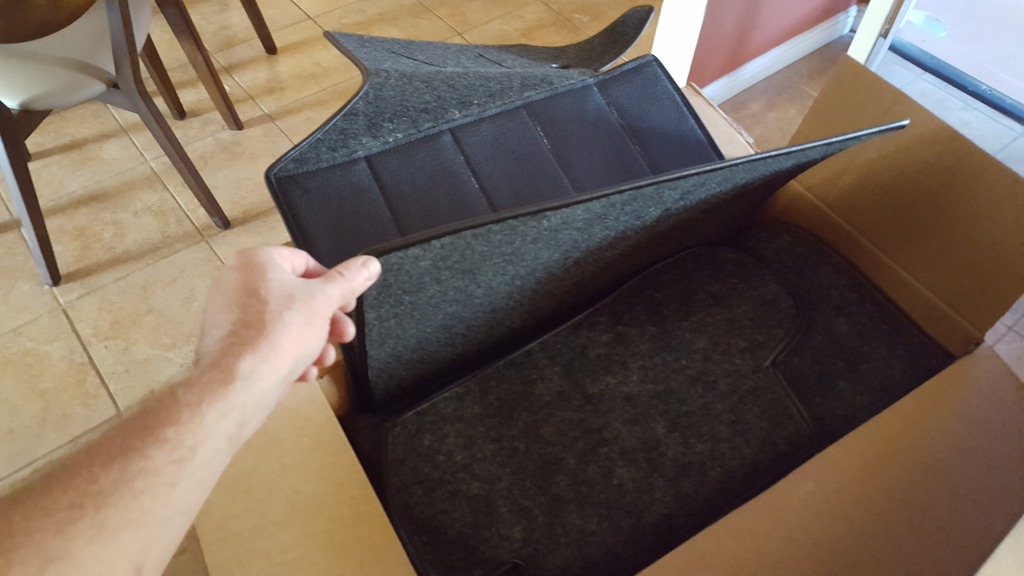
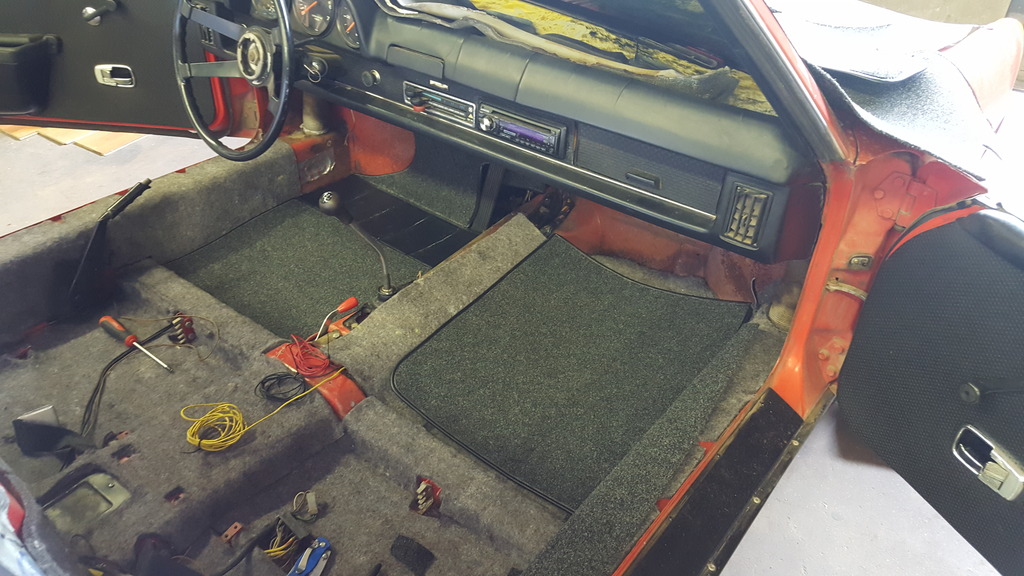
It will get a molded dash cover soon to cover up that cracked dash. A leather wrap with thicken up the factory wheel.
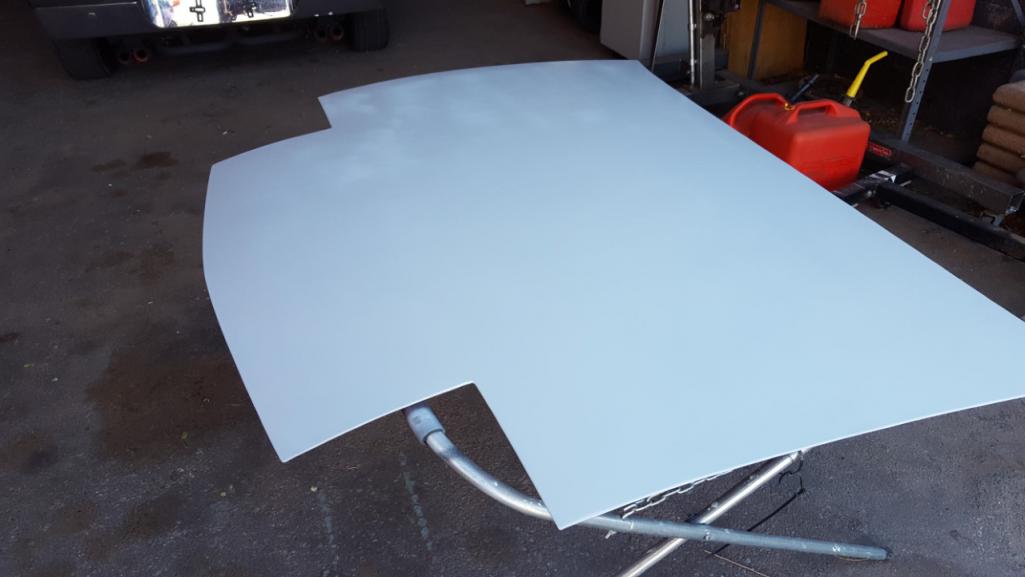
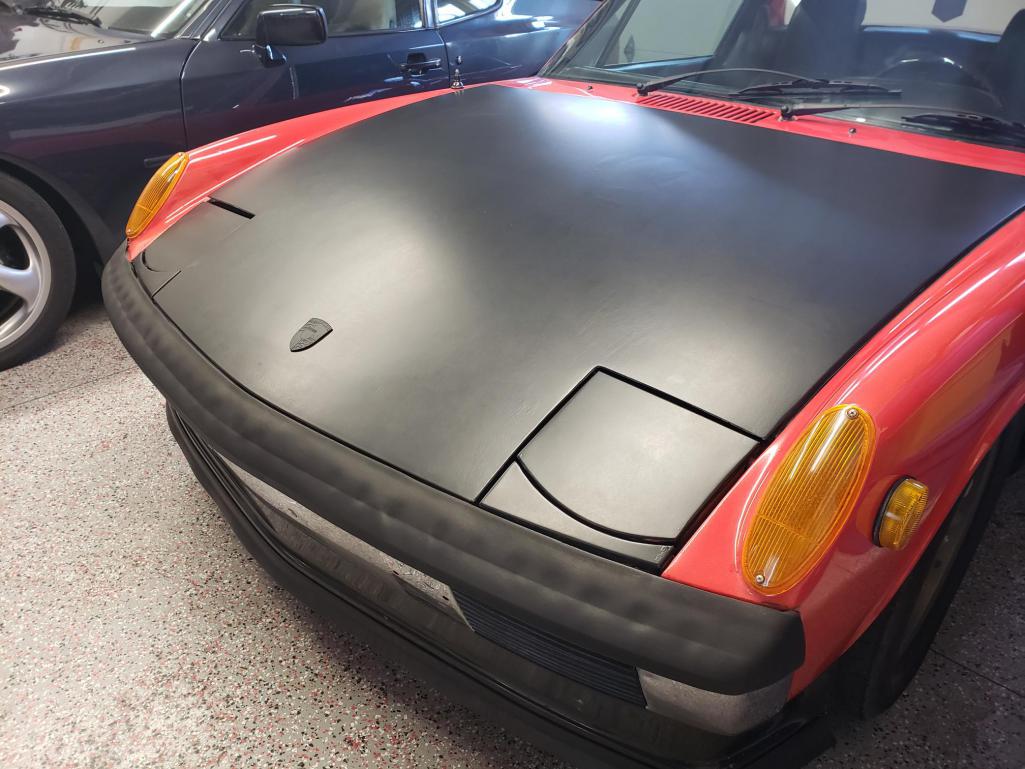
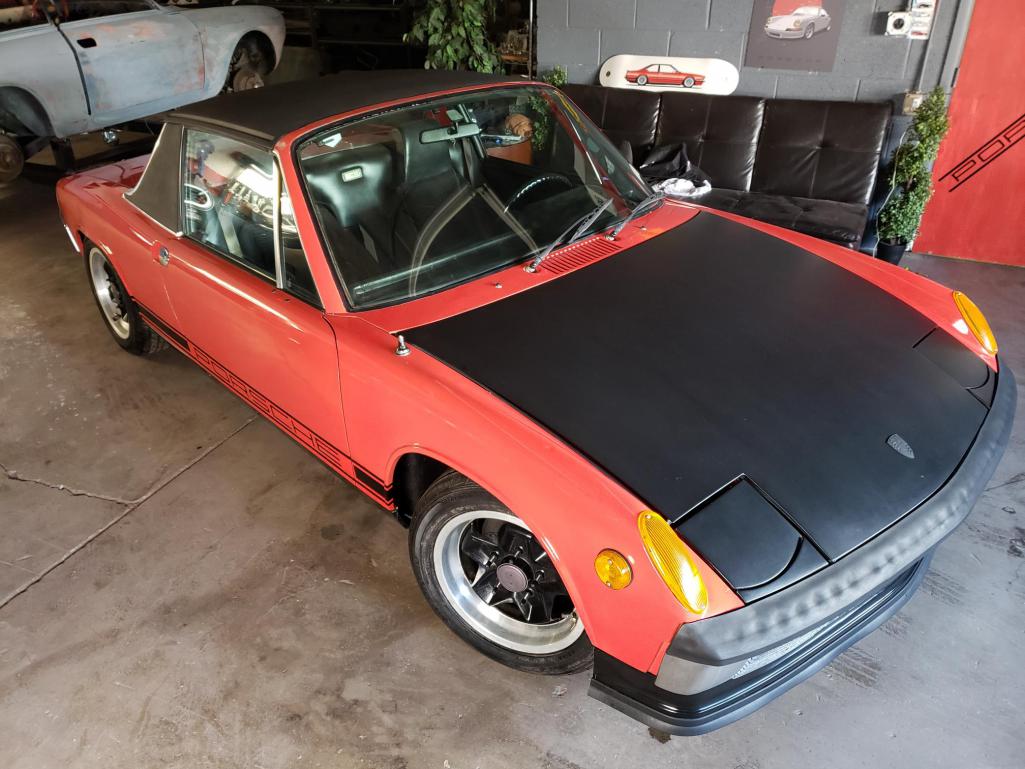
The nose of the car is a paint mess, but with pretty straight metal. The hood was painted orange  at some point and looks awful. It will be smoothed out and I will wrap it in 3M 1080 Matte Black.
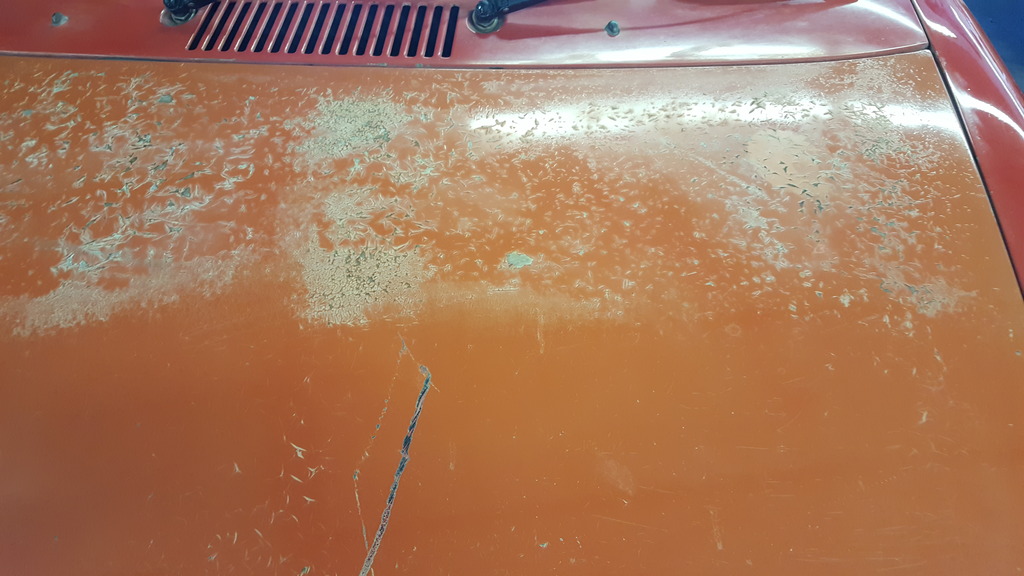
The popup headlights had been poorly painted in gloss black. They got smoothed and wrapped in the Matte Black.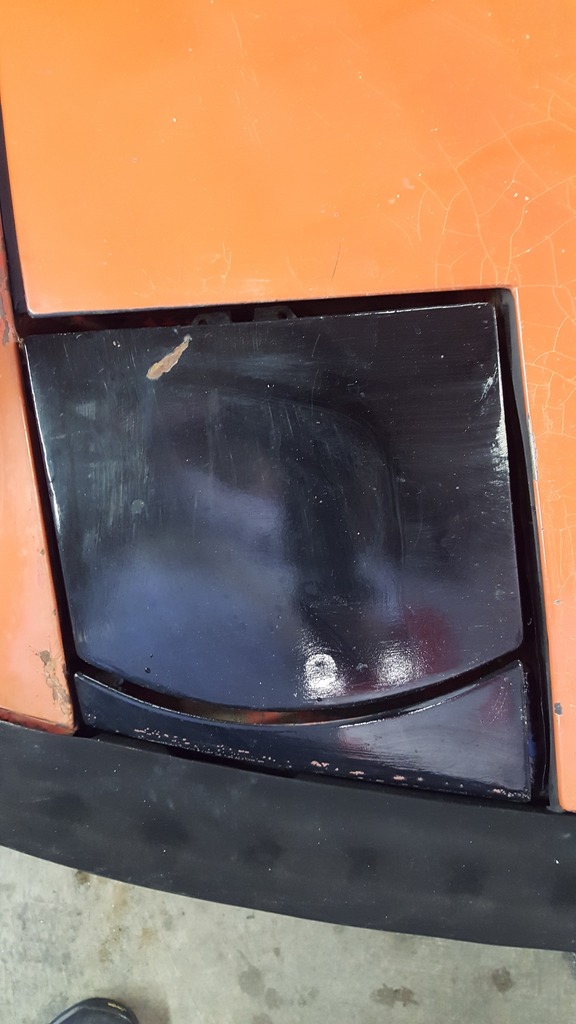
There was some orange paint overspray on the front fenders. A little wet sanding with 2000 grit removed it pretty well, followed up with some Meguires machine glaze.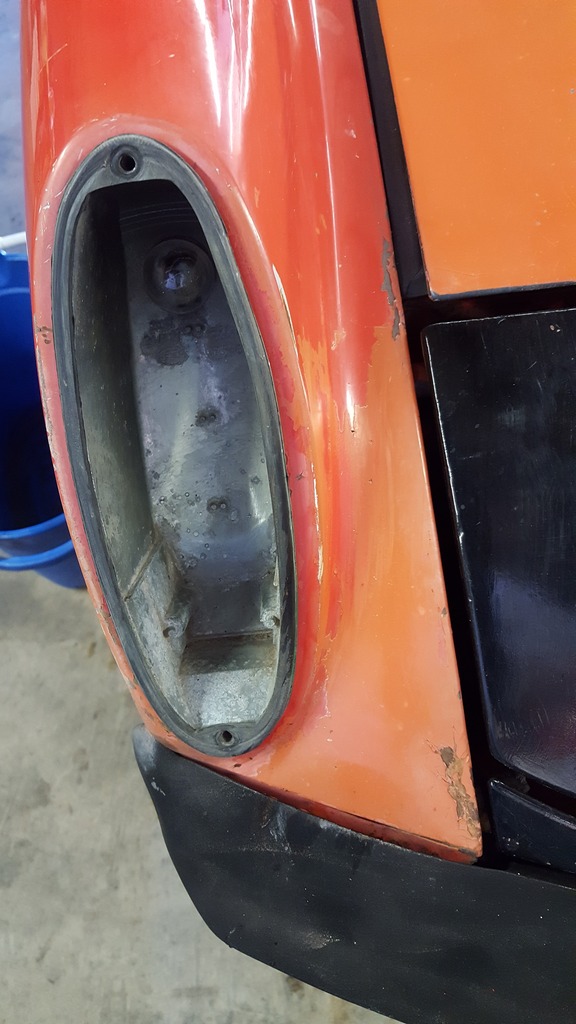
I picked up some Mars Red touchup paint and will gradually work on the chips and scratches.
Old white Porsche script is a major eyesore, so using an eraser wheel in a drill, I went to work to prepare the area for new black Porsche script.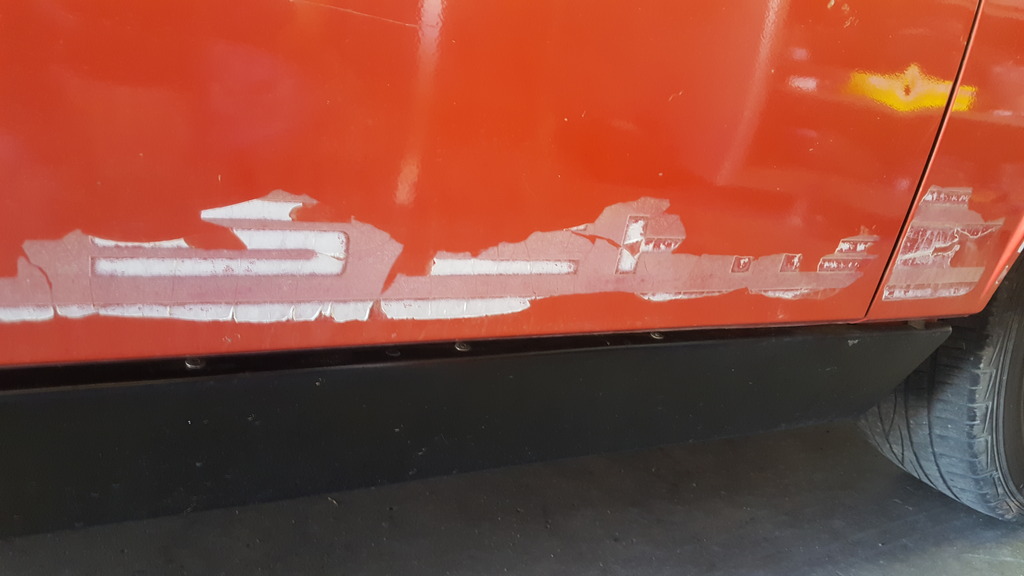
There'll be more!
Posted by: Frankvw Mar 21 2017, 03:38 AM
Great project and good start ! It is actually a nice basis to get things going, it looks rather solid. Have fun in this project !
Posted by: Shadowfax Mar 21 2017, 06:46 AM

Looks like the car is in good hands.
Posted by: Cairo94507 Mar 21 2017, 06:47 AM
Looks like a good start. You seem realistic in your approach and attitude too. 
Posted by: Mayne Mar 21 2017, 07:46 AM
Thanks for the encouragement! The car that is serving as an inspiration right now is the Magnus Walker 914. My car will end up looking a bit like this, but all chrome, vinyl sail panels, and stock targa top will remain intact.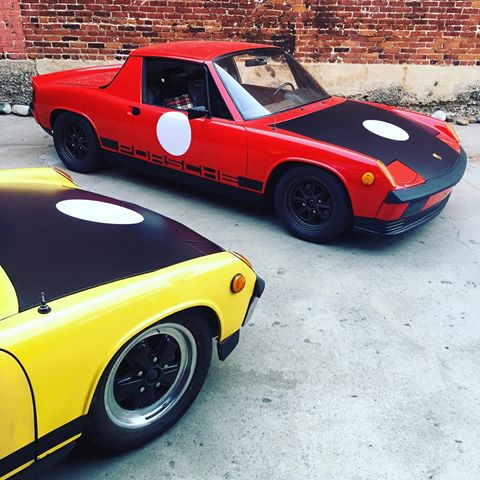
I just have to keep my sights on that, rather than my long-term dream build inspiration: Black Beauty built by Patrick Motorsports. If I ever get to that, it'll need a different thread, and a couple extra jobs!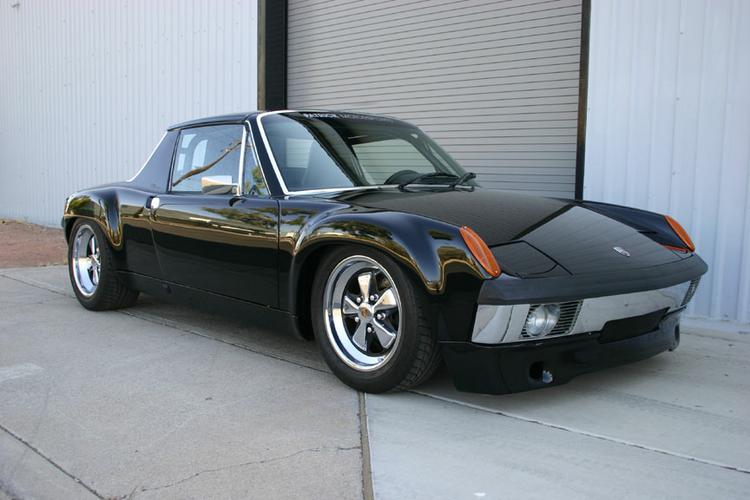
Back to the real world. When I got the car, it had Vitaloni mirrors which are okay but don't really suit the car. But that's fine for now. Since there was no mirror glass on the drivers side, I removed them both to see if they could be swapped. With a little wrangling, I managed it, so now I could at least change lanes without trying to look out that joke of a rear window. I'll see if can get a mirror cut for the other one and reinstall it.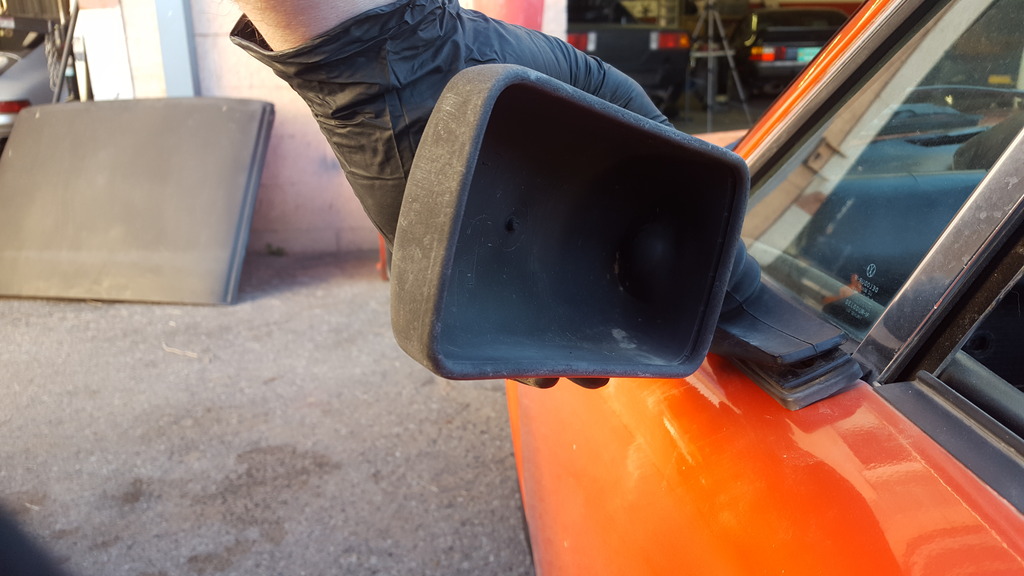

A coating of Plasti-Dip helped freshen up the chaulky plastic housing.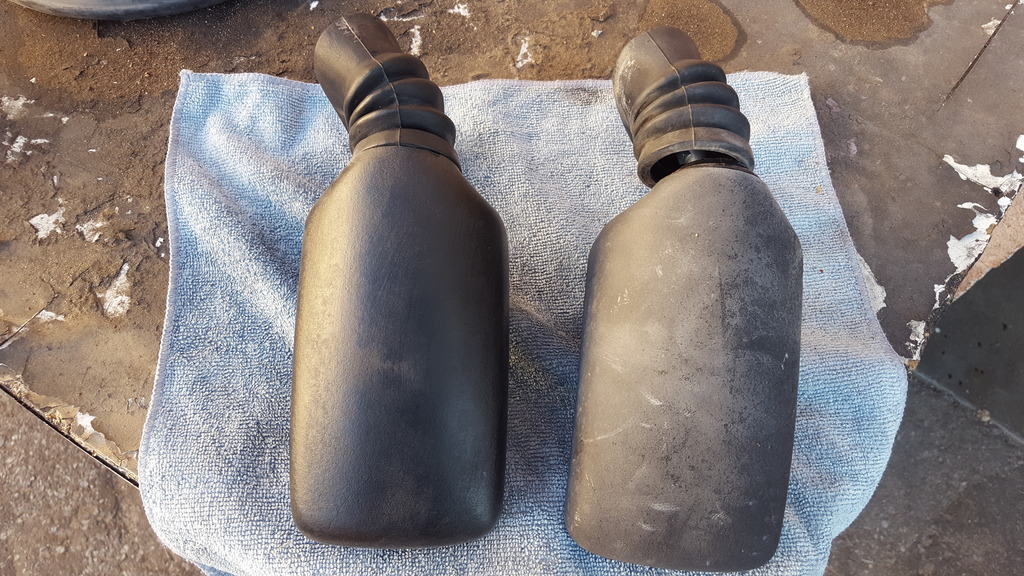
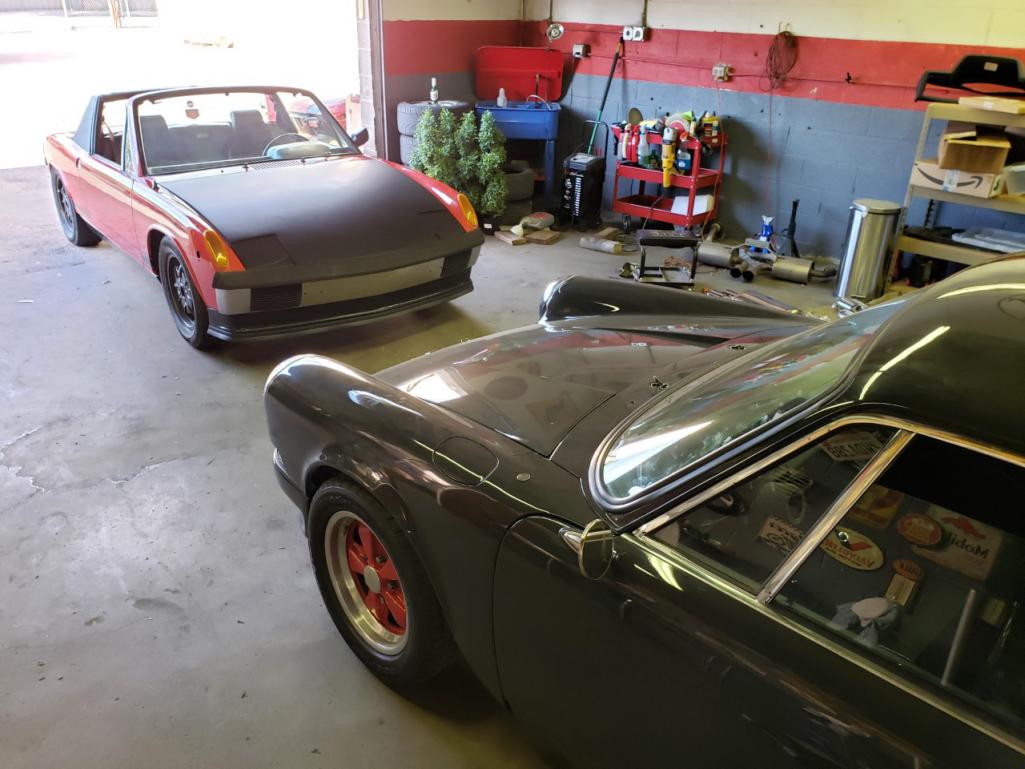
It's been awesome to take a few short drives in the industrial area by our little shop. Here's a few pics of the 914 and my brother's 911.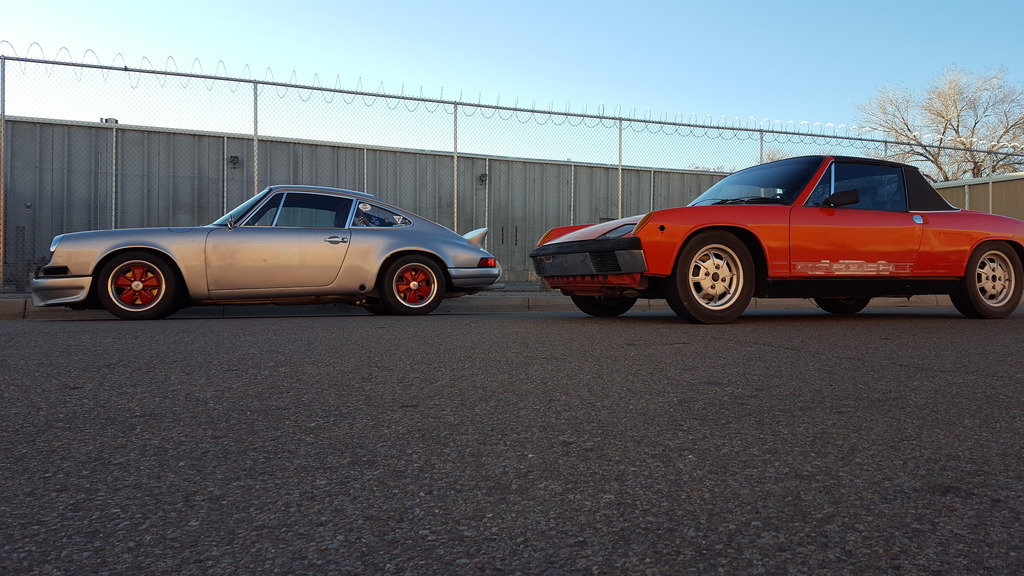
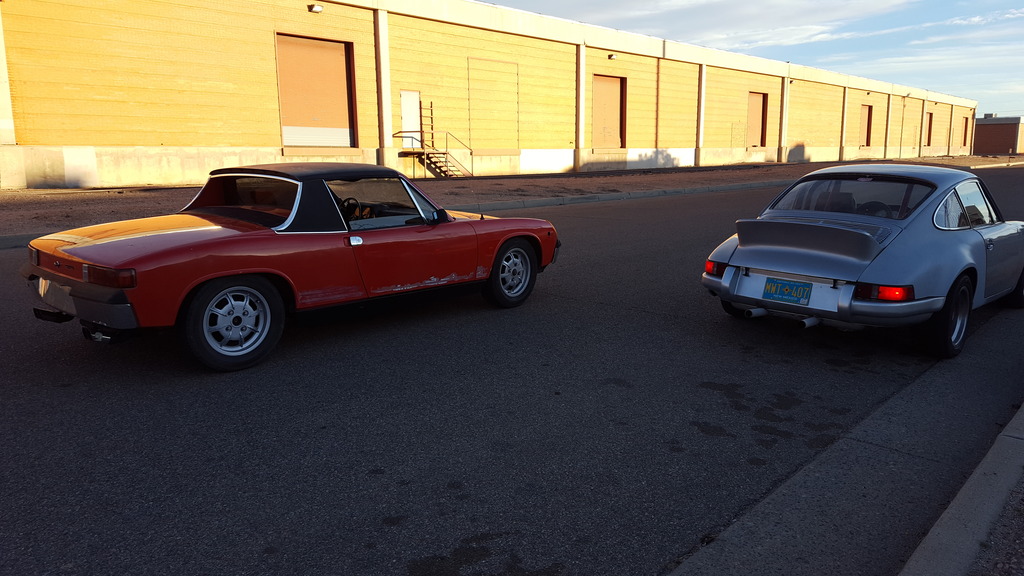
It's very cool being around these old road warriors! Hopefully soon we'll be able to get them out onto some winding mountain roads for a real drive.
I'm a school teacher on Spring Break and my wife is out of town so I better get my butt down to the shop!
Posted by: Eric_Shea Mar 21 2017, 08:03 AM
Looking good Zach! 
Posted by: Mayne Mar 21 2017, 09:08 AM

Looking good Zach!
Thanks Eric. The 914 is mine and the 911 is Zach's. Sometimes I forget my little brother is a minor celebrity in the car world. For context, you can check out his articles in many issues of Excellence, Panorama, Forza, and Bimmer. Plus his online magazine, http://www.retromodmag.com
Cheers,
Jeremy
Posted by: Jeff Bowlsby Mar 21 2017, 09:34 AM
What the paint code on this 914? It looks like it could be Tangerine.
Posted by: dlkawashima Mar 21 2017, 09:43 AM
What the paint code on this 914? It looks like it could be Tangerine.
... or Nepal Orange

Posted by: Mayne Mar 21 2017, 10:16 AM
Color code is L31B, Mars Red. It looks like the car had a good quality respray at some point, but the matching wasn't perfect compared to the trunk areas. But the orange on the front fenders and hood is not factory color.
Posted by: Jeff Bowlsby Mar 21 2017, 10:26 AM
Please post a photo of the chassis plate with the paint code for us to drool over. L31B is not 914 color.
Further...not convinced you have a 1975 car from the info made available. You have early (1970-74) bumpers, granted they may be backdated, but if original you could actually have a 1974 MY car, built in 1975. Your VIN will tell you the MY, does it start with 474 (1974) or 475 (1975)? This is all to suggest that the paint could be Tangerine if its a 1974, or Nepal if its a 1975.
Posted by: iwanta914-6 Mar 21 2017, 10:26 AM
Color code is L31B, Mars Red. It looks like the car had a good quality respray at some point, but the matching wasn't perfect compared to the trunk areas. But the orange on the front fenders and hood is not factory color.
L31B?
Posted by: Eric_Shea Mar 21 2017, 07:57 PM
Looking good Zach!
Thanks Eric. The 914 is mine and the 911 is Zach's. Sometimes I forget my little brother is a minor celebrity in the car world. For context, you can check out his articles in many issues of Excellence, Panorama, Forza, and Bimmer. Plus his online magazine, http://www.retromodmag.com
Cheers,
Jeremy
Zach writes articles? I had no idea!

Sorry Jeremy. I was speed reading and I thought it read the "911" was "his" brother (him being the 914).
Enjoy... Bring that thing up here and we'll turn it into a "little brother beater"
Posted by: Mayne Mar 22 2017, 08:54 AM
[/quote]
Zach writes articles? I had no idea!
Sorry Jeremy. I was speed reading and I thought it read the "911" was "his" brother (him being the 914).
Enjoy... Bring that thing up here and we'll turn it into a "little brother beater"
[/quote]
Haha, yeah the context was for everyone else.
Thanks for the offer to turn it into a 911 beater. For now I'll just have to live with a beater. Besides, if Zach gets too cocky in his 911, I'll just bring out the 951. 
Posted by: Mayne Mar 22 2017, 08:58 AM
As for the paint code, I was wrong, it's L 31 M.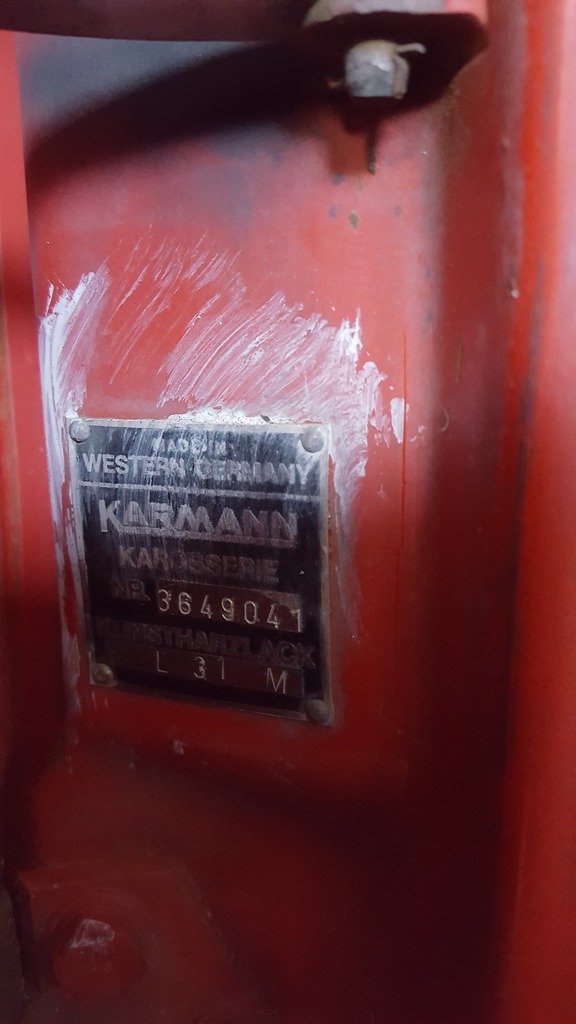
When I went to a paint store to get the touch up, they couldn't find it under Porsche colors, but did find it as a Volkswagen code for Mars Red.
Posted by: iwanta914-6 Mar 22 2017, 09:03 AM
L31M is Scarlet Red
http://www.914world.com/bbs2/index.php?act=colors
Posted by: Mayne Mar 22 2017, 10:28 AM
L31M is Scarlet Red
http://www.914world.com/bbs2/index.php?act=colors
Well that's just great. Now my cheeky thread title makes even less sense.
Oh well, back to stripping the hood. My matte black wrap arrives today!
Posted by: 3d914 Mar 22 2017, 01:32 PM
L31M is Scarlet Red
http://www.914world.com/bbs2/index.php?act=colors
Well that's just great. Now my cheeky thread title makes even less sense.
Oh well, back to stripping the hood. My matte black wrap arrives today!
Jeremy, not at all. Mars is red - so it still works. Plus you're about as likely as any of us to actually finish a 914 - which makes them feel as distant as Mars.

Posted by: Jeff Bowlsby Mar 22 2017, 03:39 PM
Scarlet Red is extremely rare color for 914s. Hopefully you can repaint this to the original color someday. Nice find.
Posted by: Mayne Sep 4 2019, 11:25 AM
Wow, it sure has been a while since I updated this thread. But the 914 is still around and I've been making steady (well, periodic) progress. Here's some of work that has happened over the last year and a half.
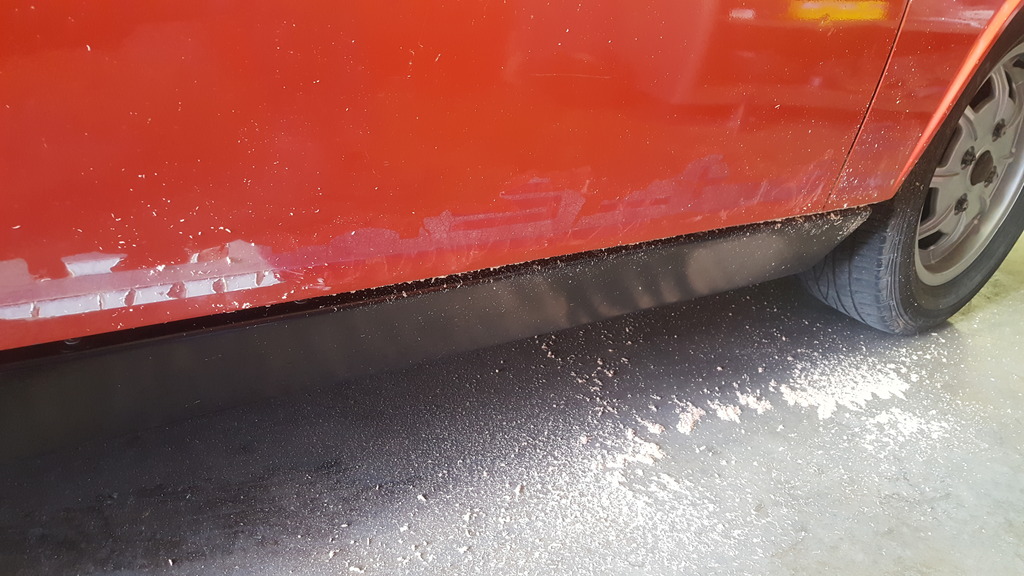
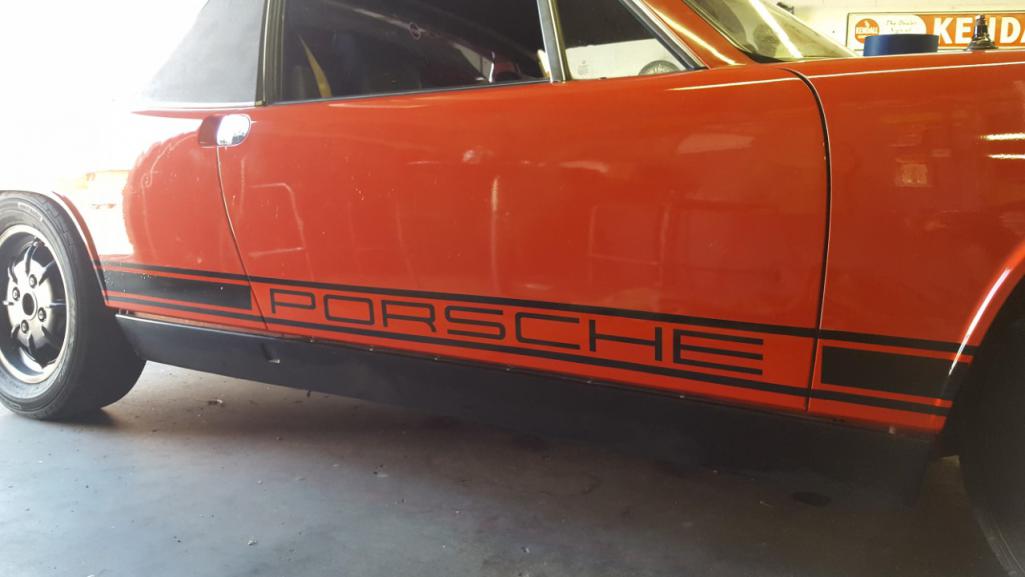
Previously, I had started removing the baked on Porsche script, but I gave up for fear of destroying the paint (not that it's very good, but the goal is to preserve it for now). So in a fit of cleverness, I order multiple samples of red vinyl wrap. Once I found one that was a reasonable match, I laid a swath of it over the old script and installed new black script. Not a bad result, I think: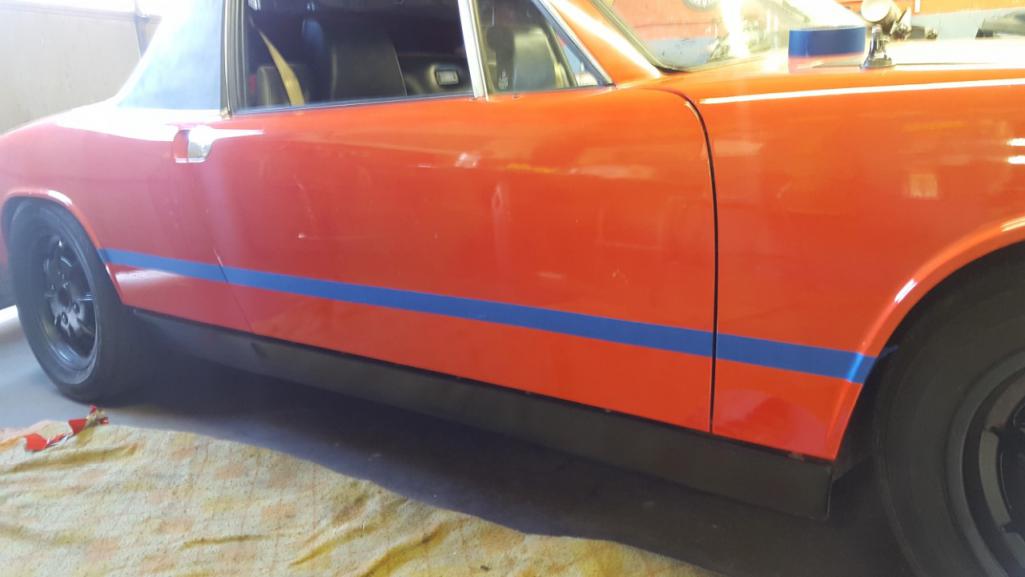
Attached thumbnail(s)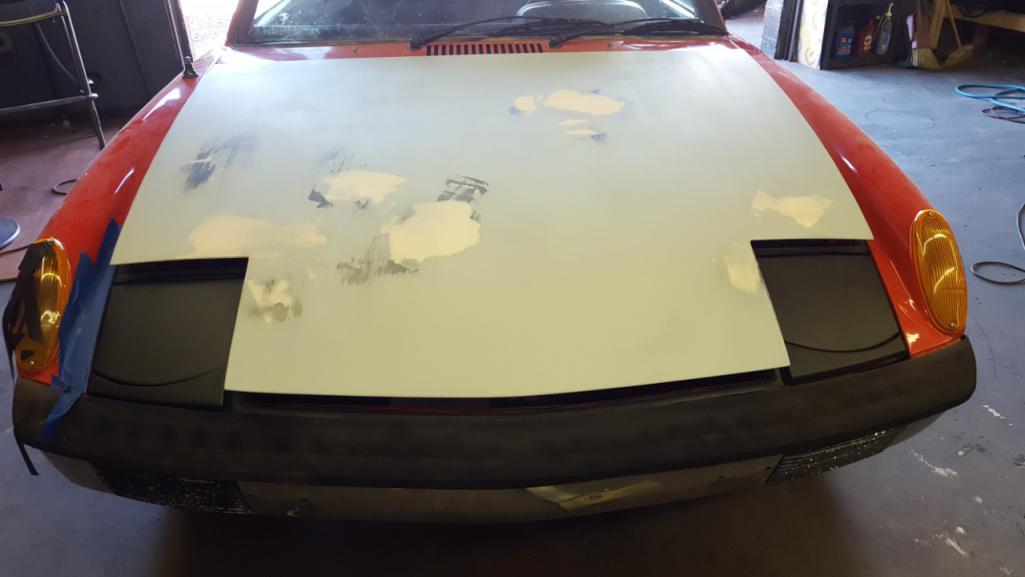
Posted by: Mayne Sep 4 2019, 11:28 AM
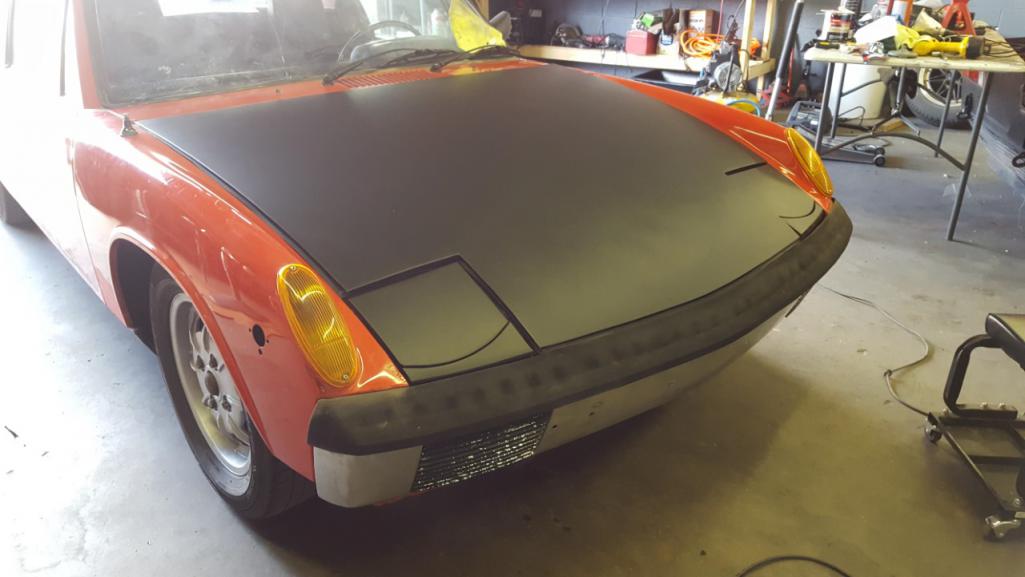
Woops, got ahead of myself with the pics of the hood. Anyway, that bodywork was in preparation of wrapping the hood with matte black vinyl. Again, a solid improvement IMO:
Posted by: Mayne Sep 4 2019, 11:36 AM
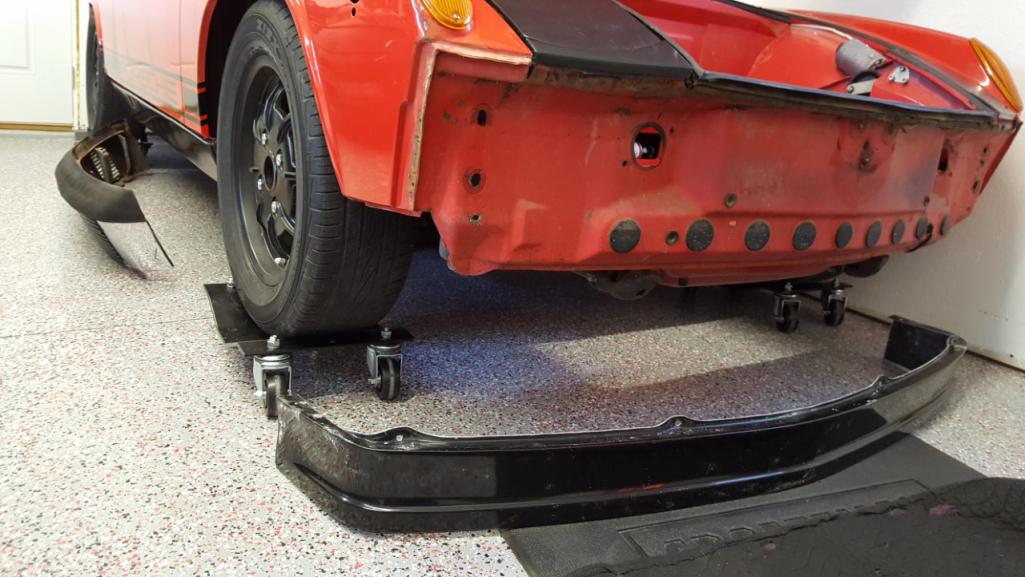
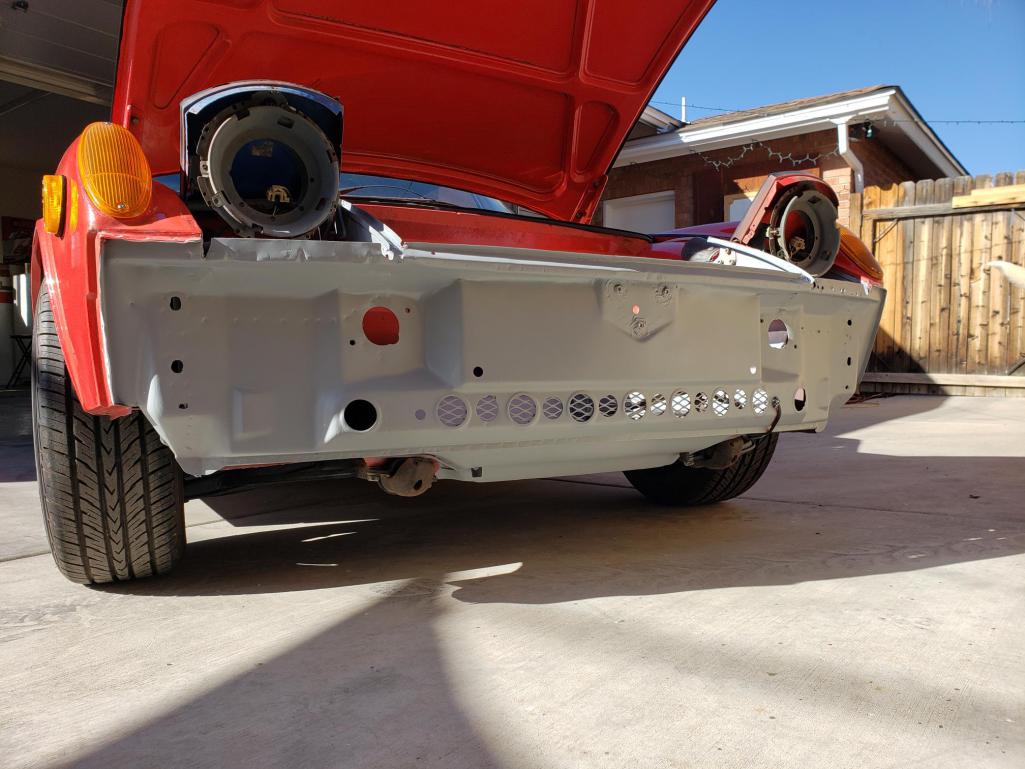
In the time I've owned the car, it's never had a front valance, leaving it looking pretty bare and unfinished. A front airdam/spoiler from 914Rubber solved that, and a universal rubber lip from eBay visually lowered things a bit more: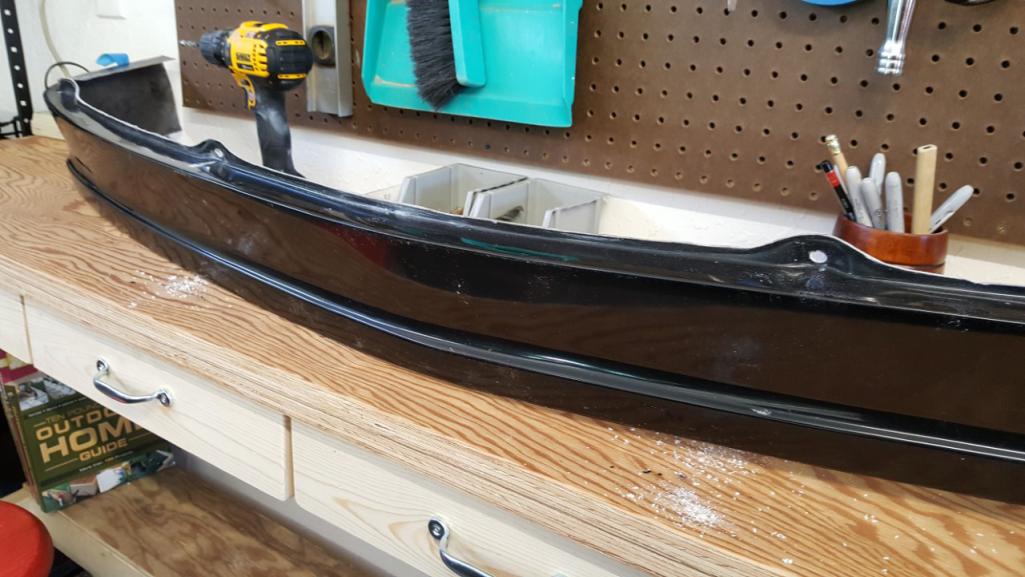
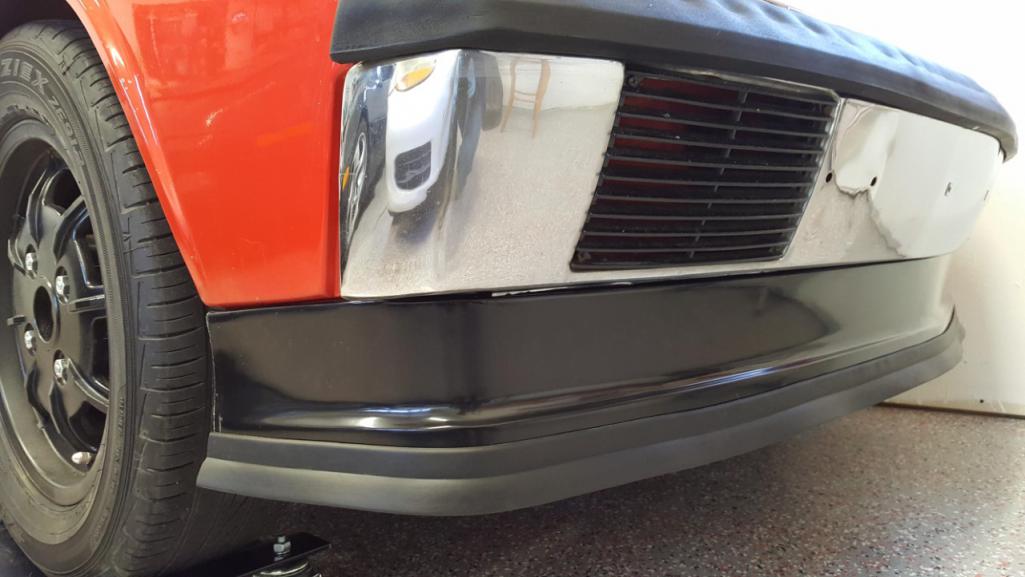
More to come...
Posted by: ndfrigi Sep 4 2019, 11:50 AM
Looking better and better Jeremy!
Posted by: tygaboy Sep 4 2019, 12:29 PM
Nice hot rod look! It's turning out great!
Posted by: Mayne Sep 4 2019, 01:08 PM
Looking better and better Jeremy!
Nice hot rod look! It's turning out great!
Thanks!
Posted by: Mayne Sep 4 2019, 01:15 PM
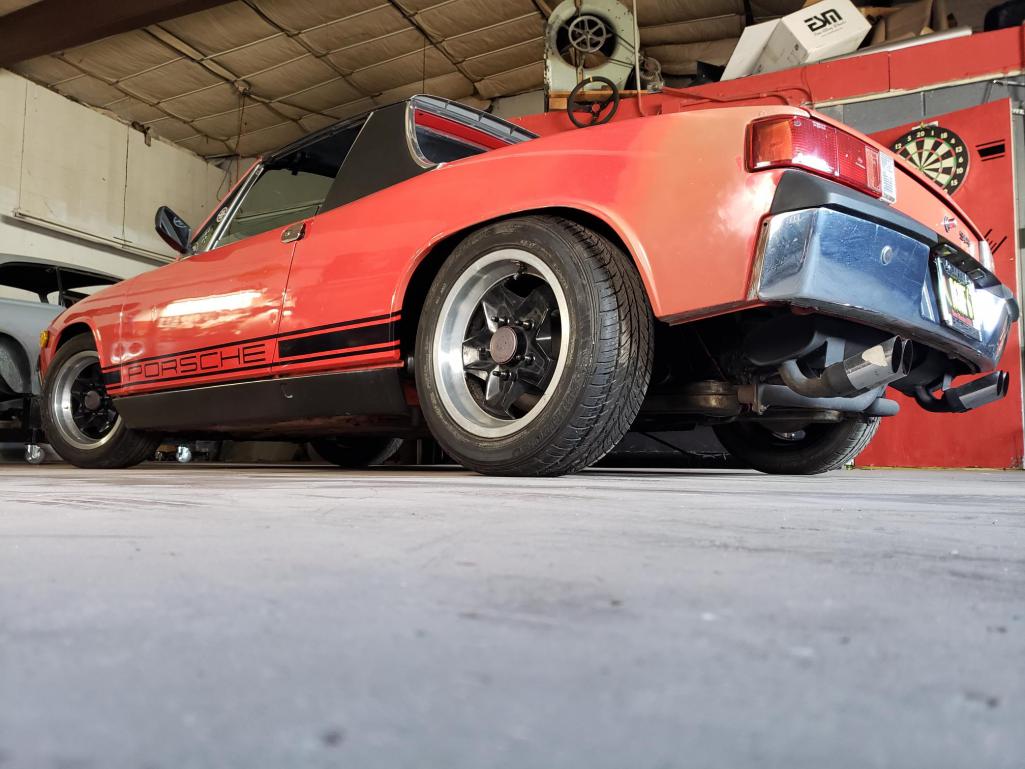
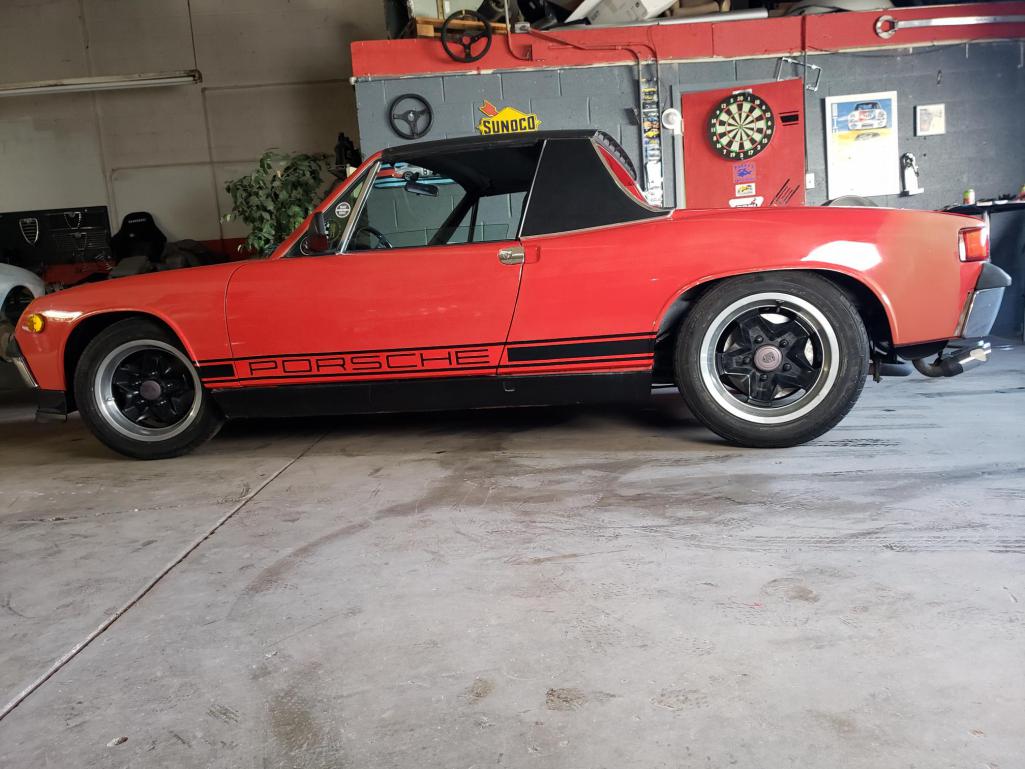
The car came with Mahles, which I like quite a lot. But they tuck under the arches so much, it's anti-stance! One inch bolt on wheel spacers at all four corners to the rescue. Fronts were easy, the rears took some fender rolling. That's with 205/60s. No rubbing now.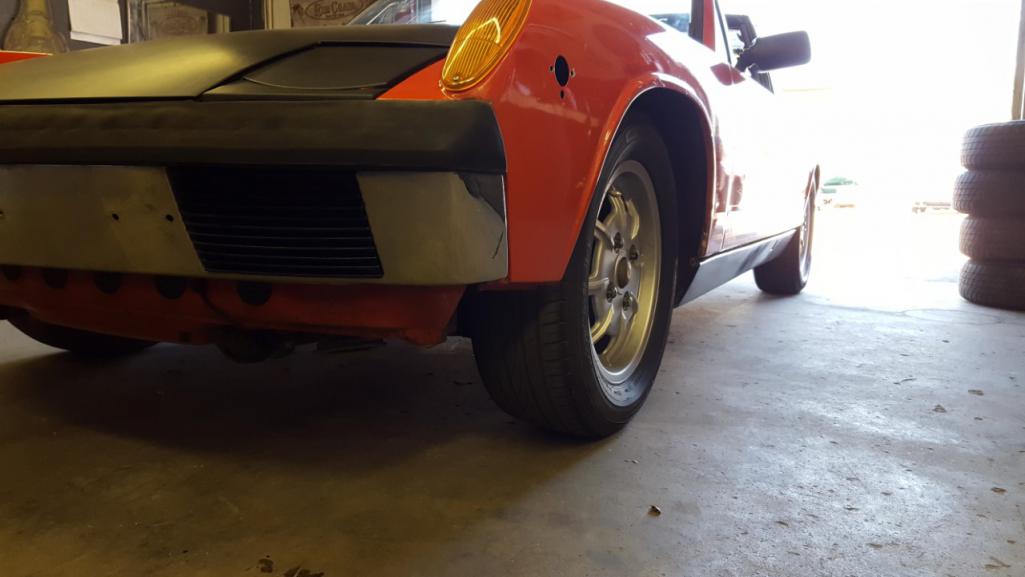
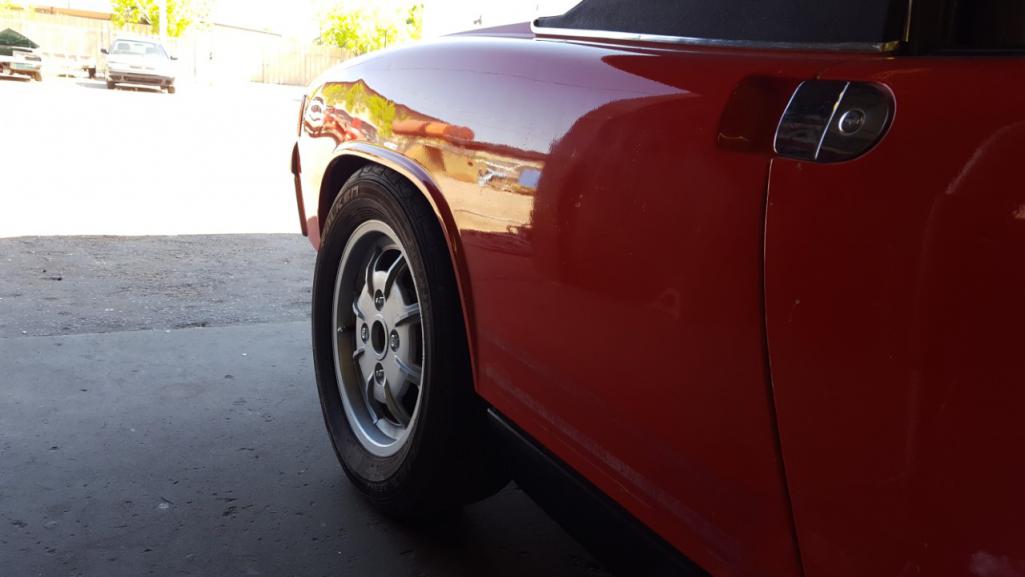
As you can see in some previous photos, I also painted the wheels black, against my better judgement! They actually look pretty good, but I think I might try plastidip Vintage Gold and see how that looks.
Posted by: Mayne Sep 7 2019, 07:43 AM
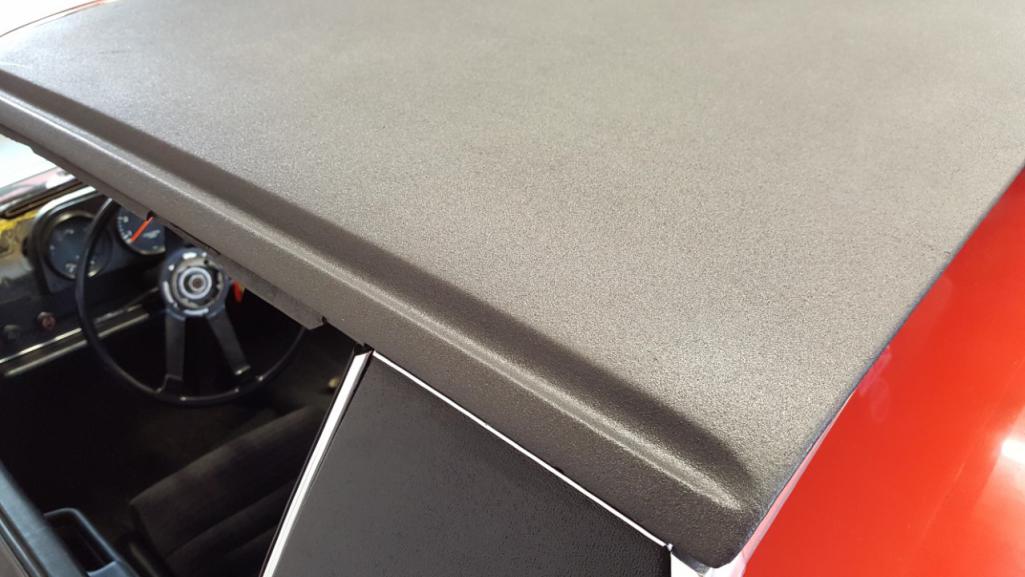
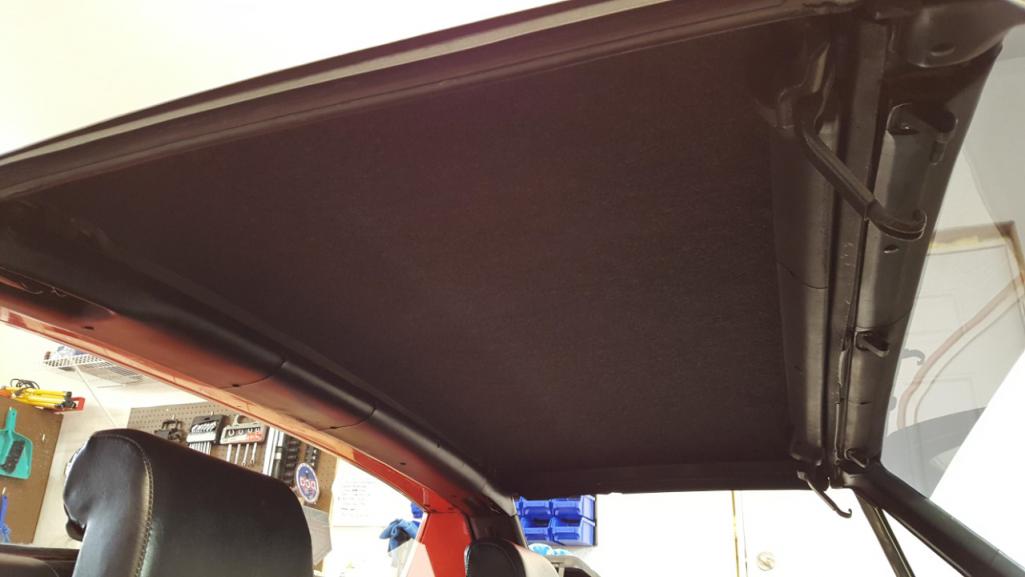
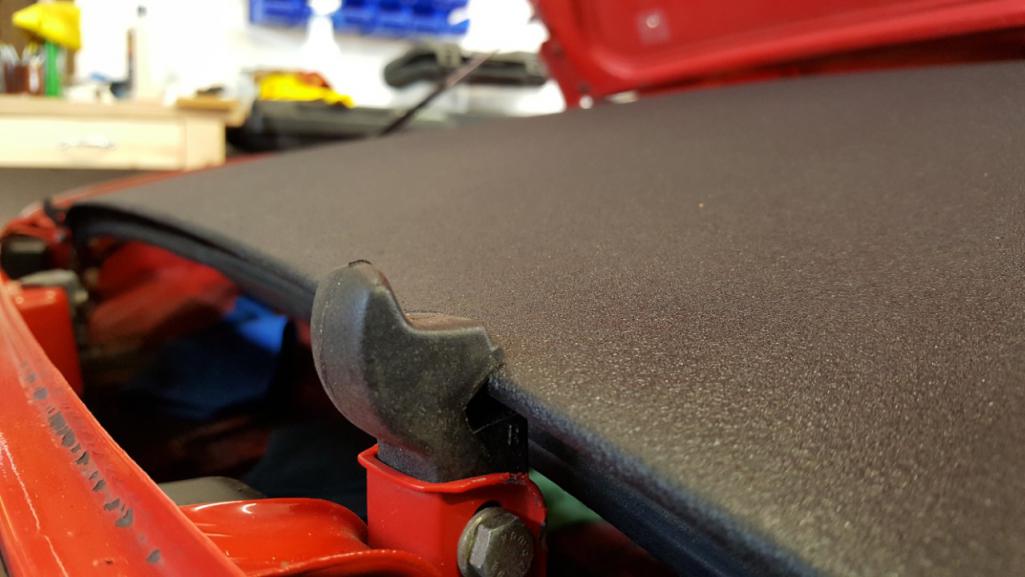
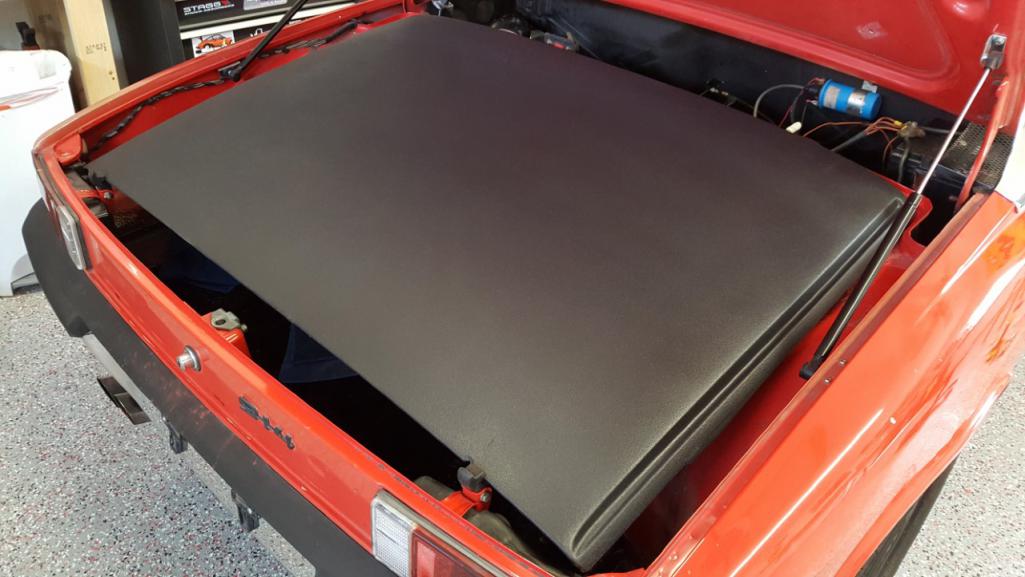
The targa top was in pretty solid shape, but faded and discolored from the New Mexico sun (like everything else on the car!). I tried some Duplicolor Rocker Guard, which I think worked pretty well. I also re-glued the sagging headliner.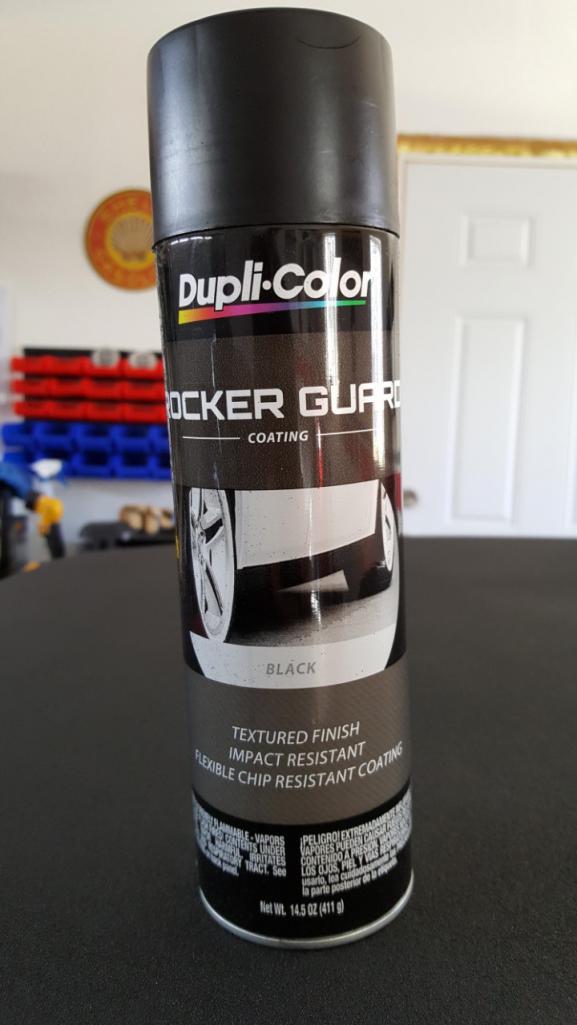
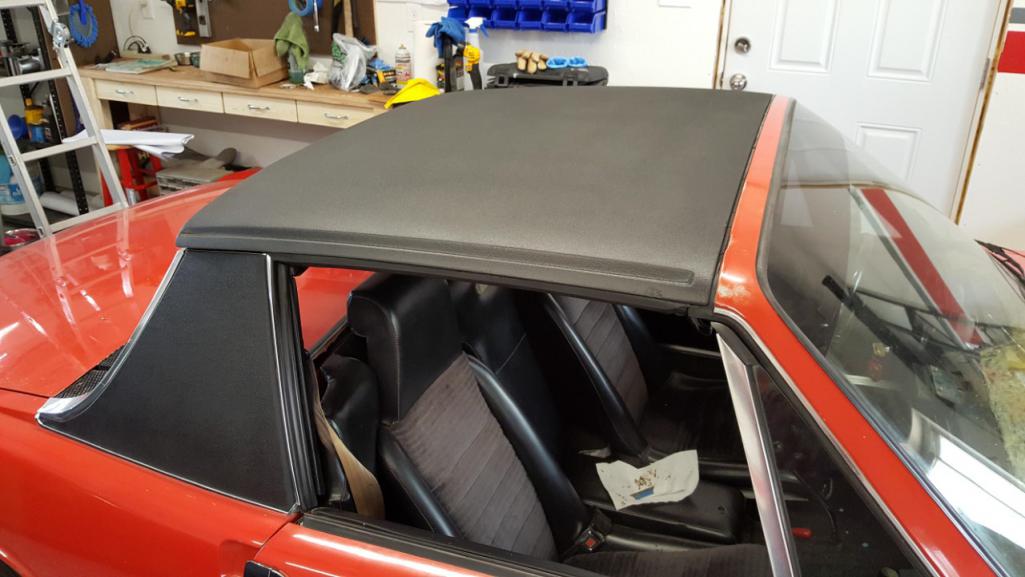
The targa storage clips were in rough shape, with the white plastic ones to the front broken and the rubber ones to rear torn. I rummaged around through the spare parts that came with the car and found some good white clips. I had to drilled out the rivets on the old ones. Then I ordered a few new rubber clips. Now the good looking top can be securely stowed. Having lived through the "charm" of other vintage convertibles, I love the 914 targa design!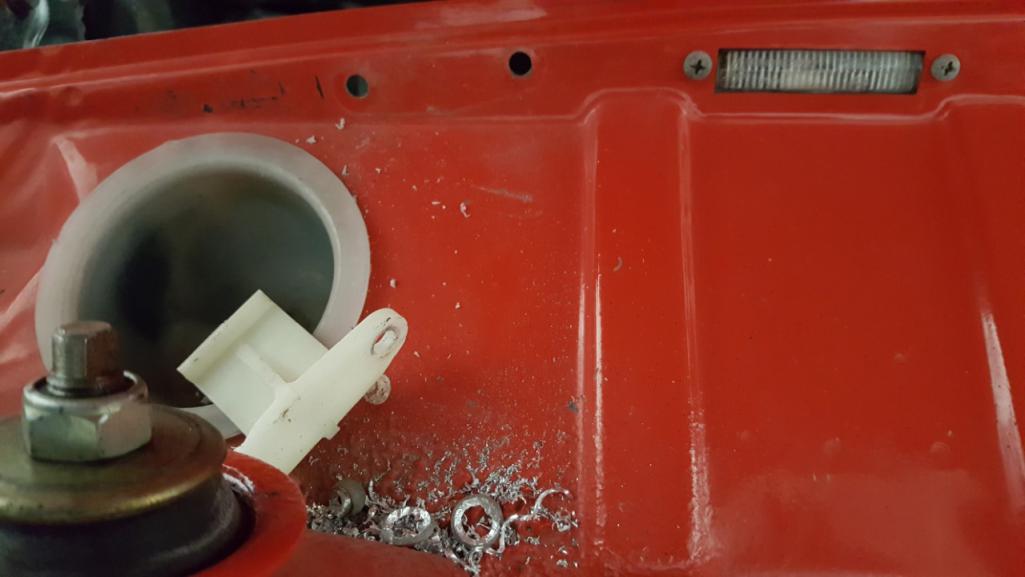
Posted by: Mayne Sep 7 2019, 08:11 AM
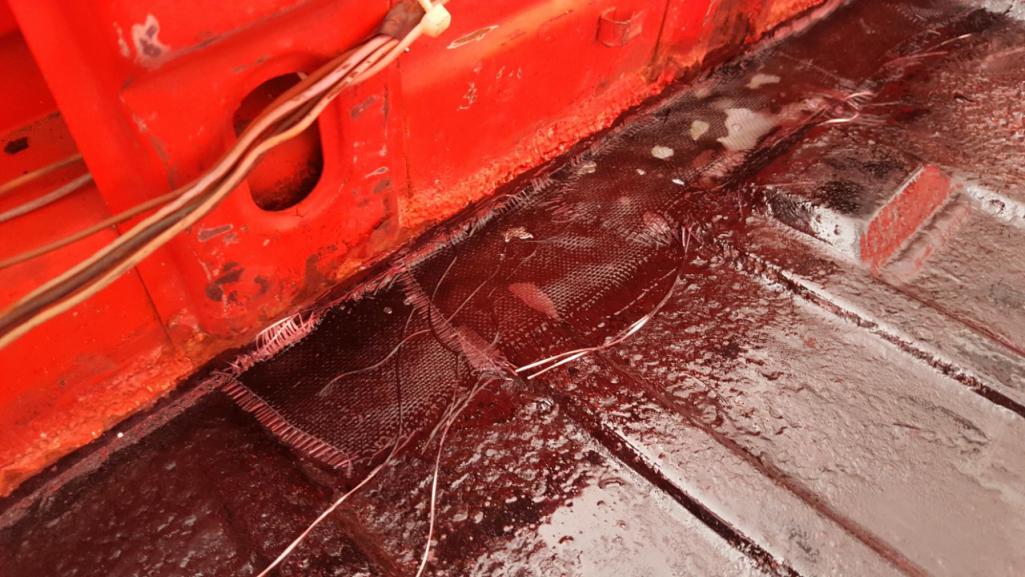
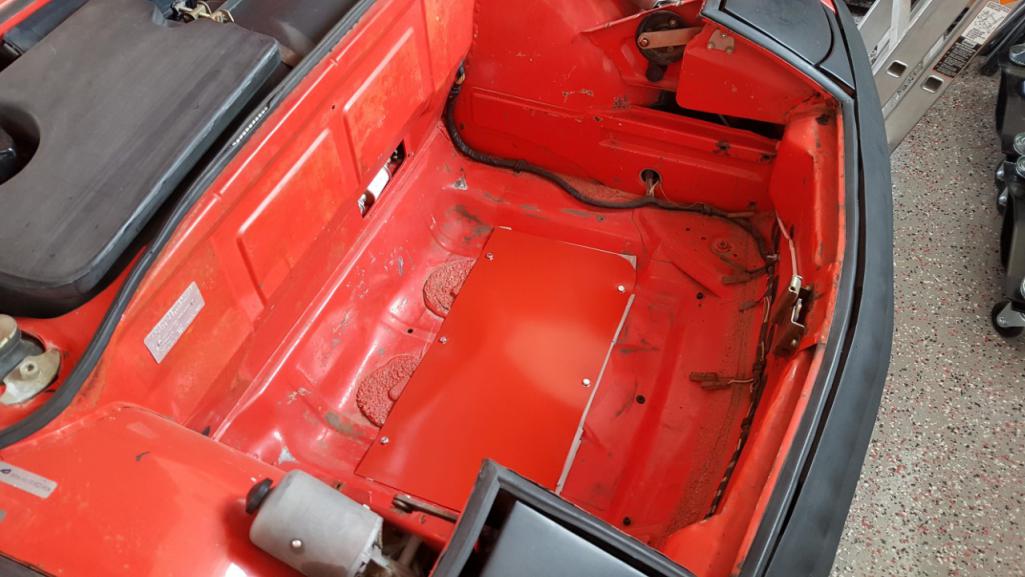
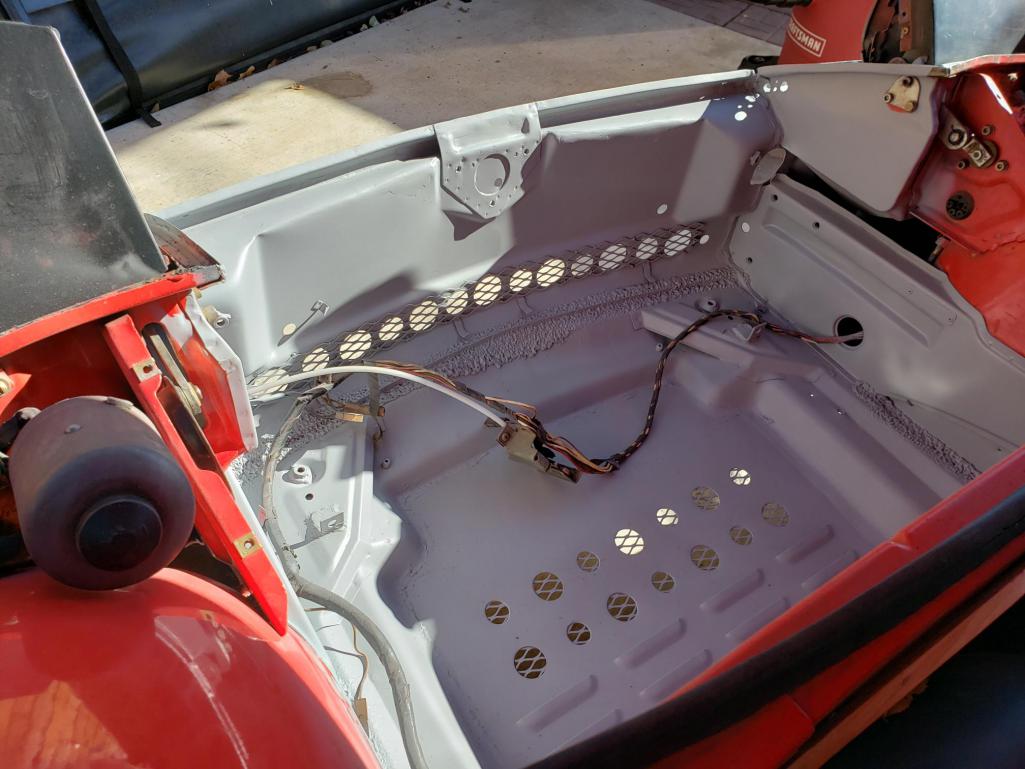
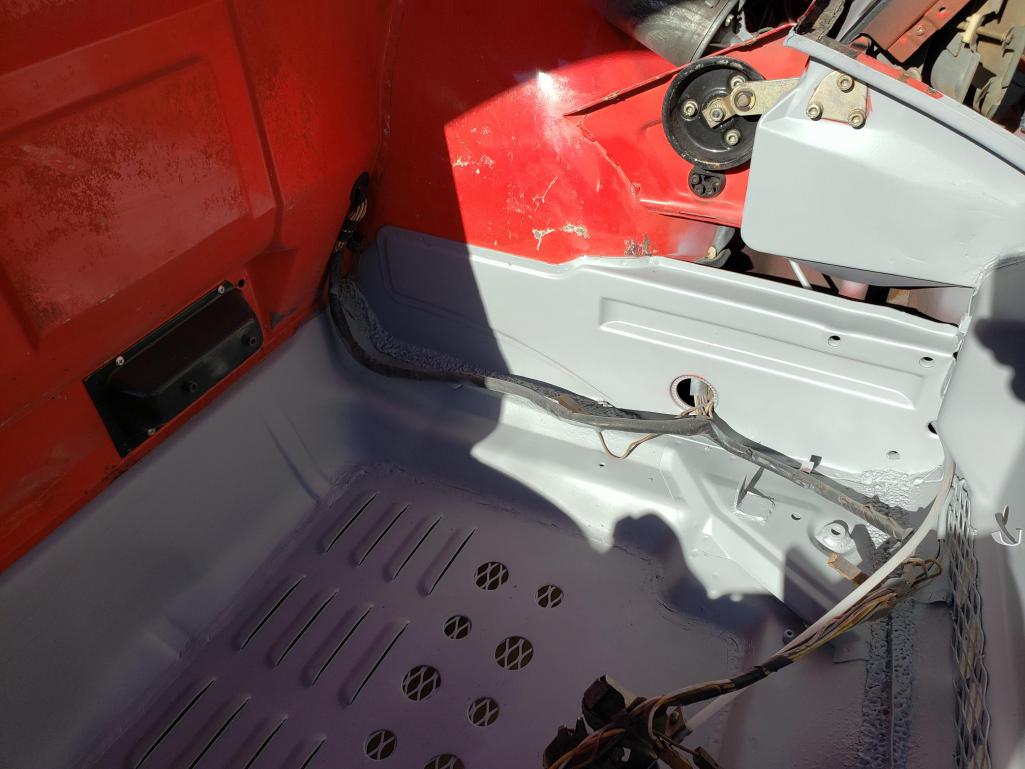
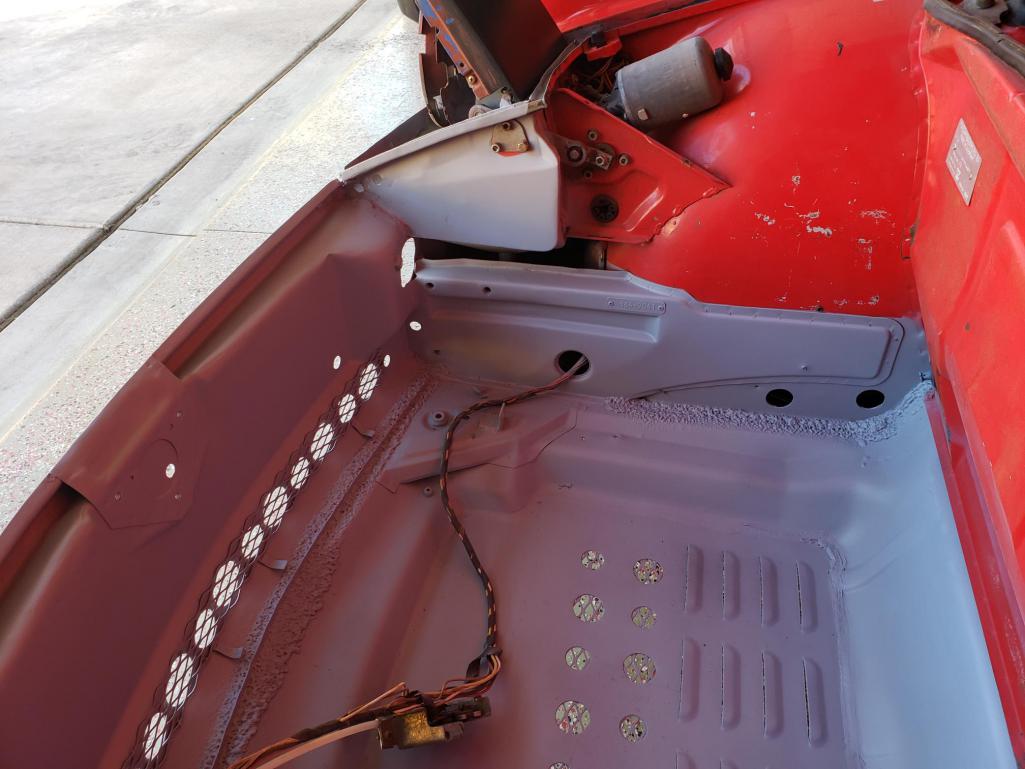
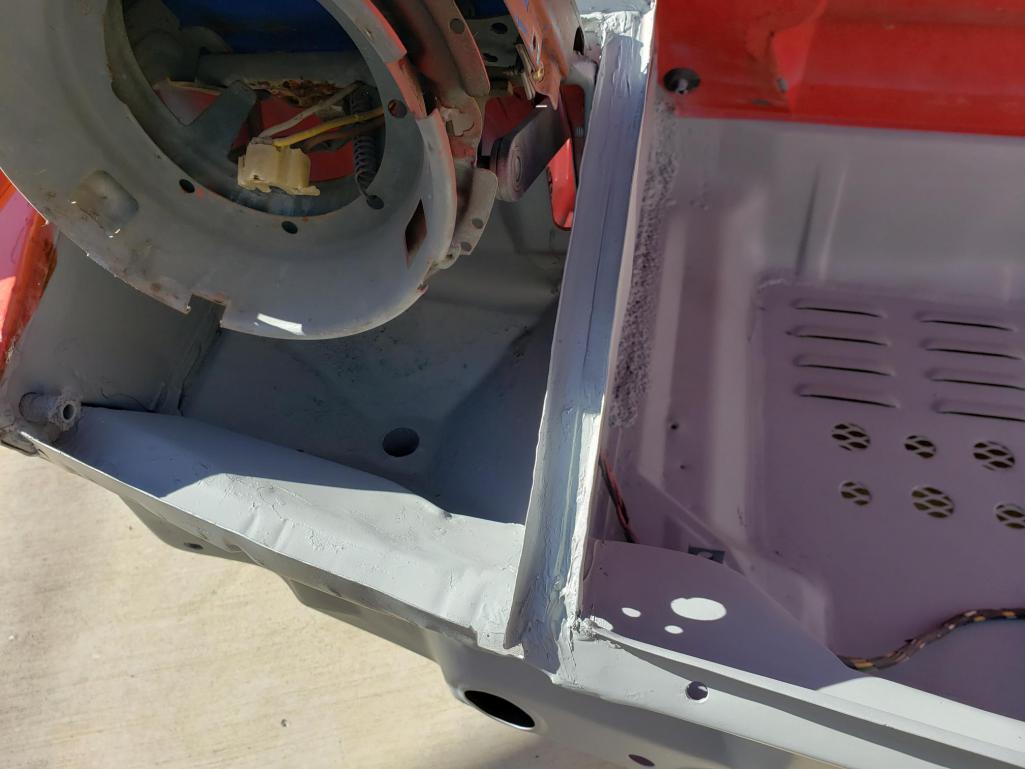
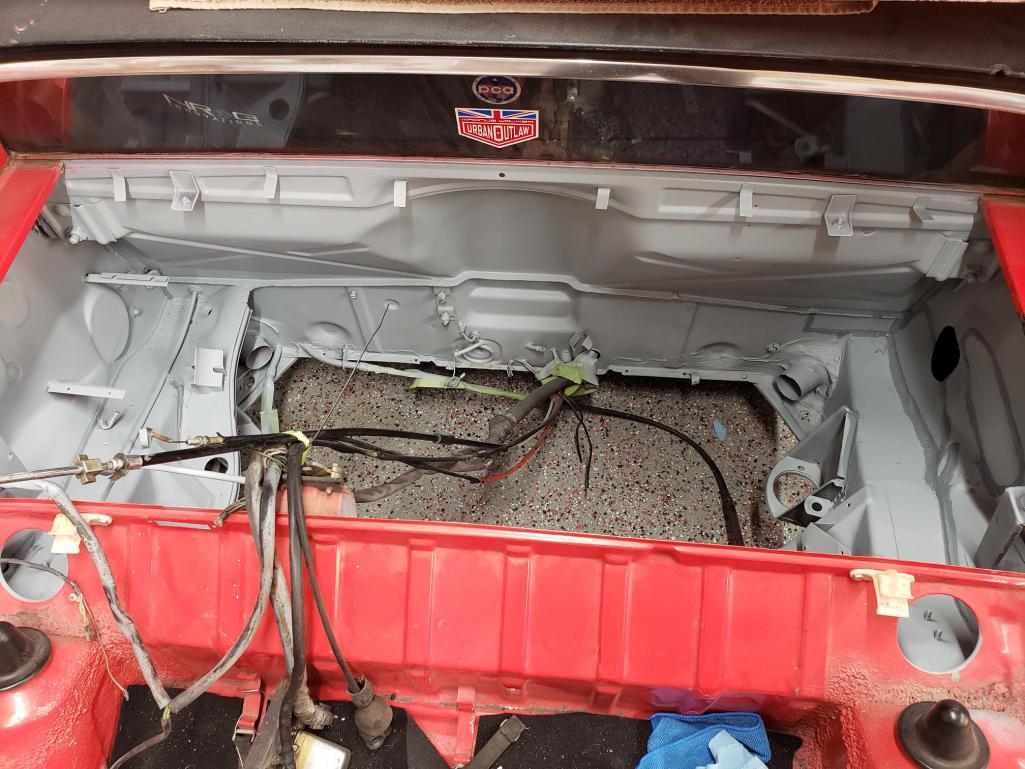
Overall, the car has very little rust (I know, if has some, it has more!). But one of the areas that had to be dealt with was the rear trunk floor. It is rusted through at the low point near the tailight panel. At some point, someone had drilled the trunk lid for a luggage rack and I believe that rain was getting through the holes during the years of outdoor storage. At any rate, it rusted through. I have done a fair amount of proper rust repair in the past, but I needed something quicker and cheaper for now. I cleaned up the rust, coated it in POR-15, and patched it up with fiberglass. It's not great looking but it serves its purpose!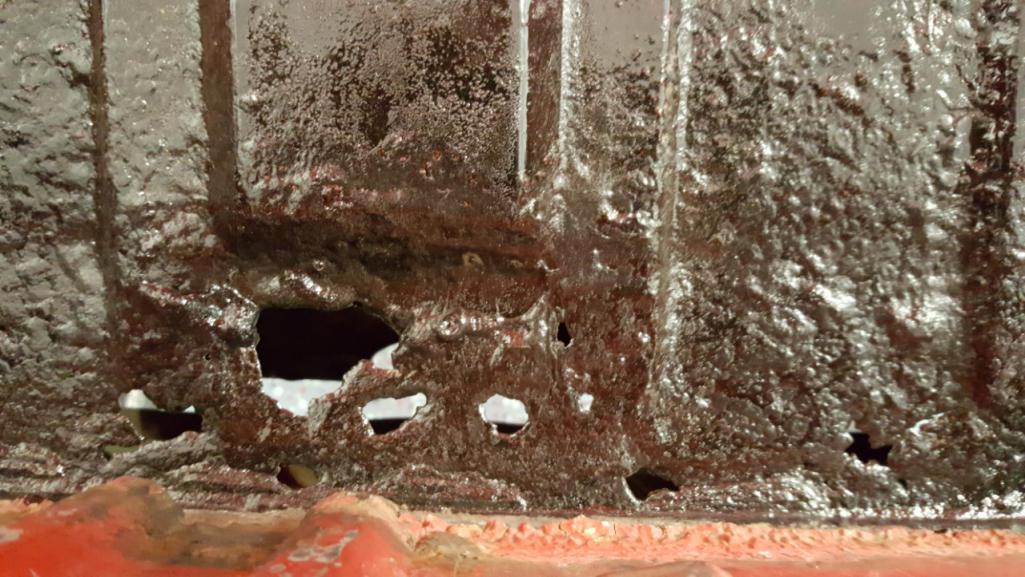
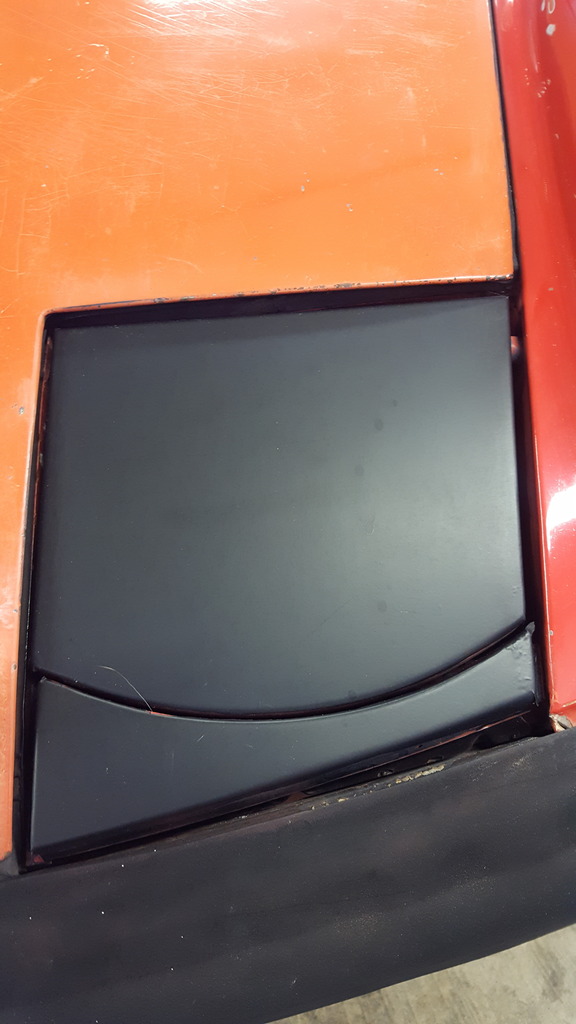
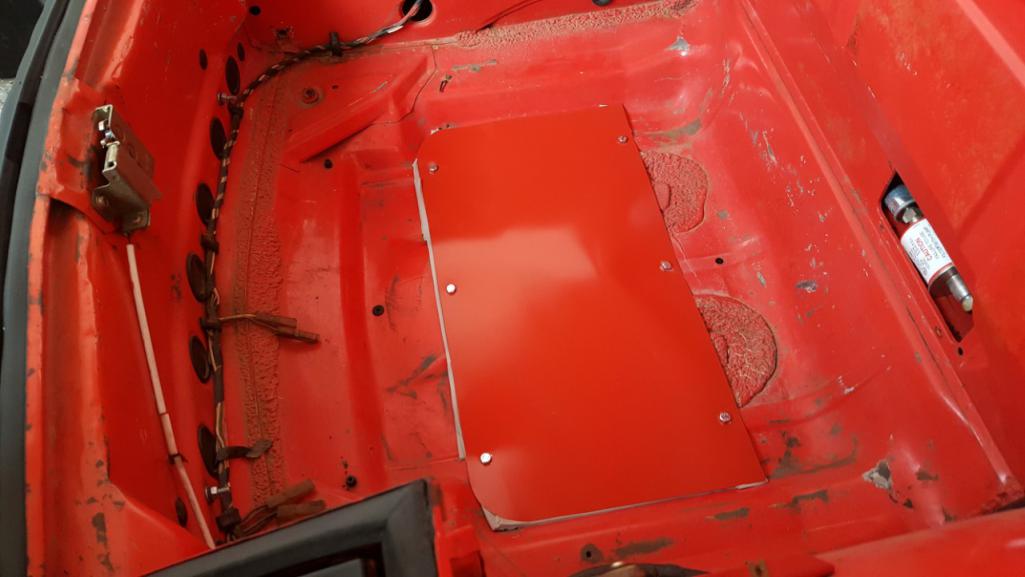
Another issue was in the front trunk where a substantial portion of the floor was cut out for AC, I guess. Some weatherstripping and a sheet metal panel (painted with some automotive paint I had mixed up at a paint supplier) made the trunk serviceable and protected from the elements. 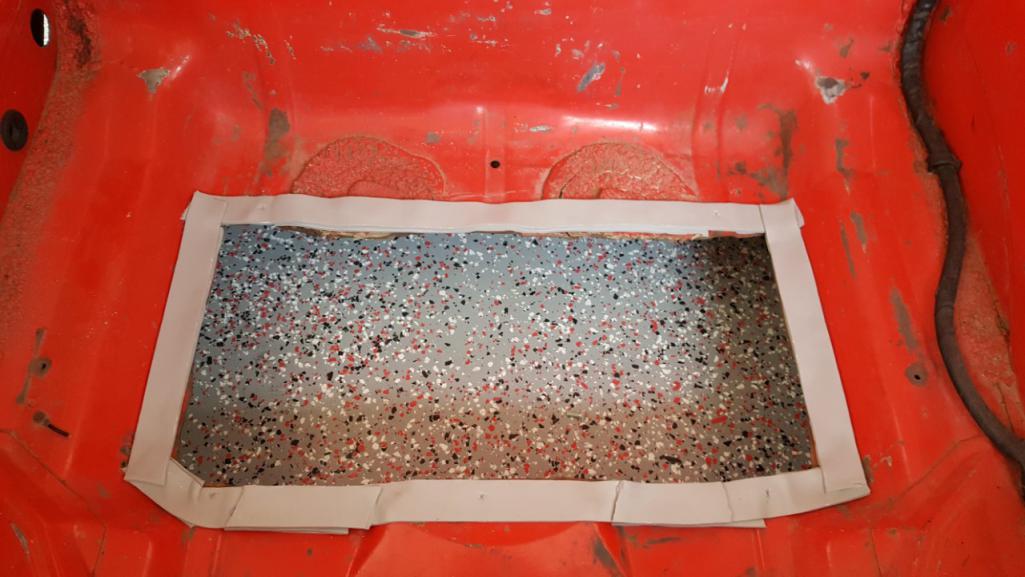
Posted by: Tbrown4x4 Sep 8 2019, 01:06 AM
I never even noticed Scarlet Red in the paint codes. It looks great! I understand the need to keep the budget down. Drive it now, and make it perfect later.
Posted by: rick 918-S Sep 8 2019, 05:24 AM


Posted by: Mayne Sep 8 2019, 09:14 AM
When we found the car in the field, the owner had put in a new windshield. While we were looking over the, car and the various parts he had, he place the extra tach he was showing us on the front cowl near the windshield. Meanwhile, the cable to the front trunk was stuck so we spent a bit of time getting it to open. Finally victorious, we opened the trunk. Well, we forgot the tach was there, so it got squished against the windshield and sent an impressive crack across the glass.
So, I had to have another one installed. Which was actually kind of helpful, since I wanted to deal with the dash. It made it a little easier to install the new dash cover (from 914Rubber) that goes between the dash and windshield, as well as a new rubber gasket.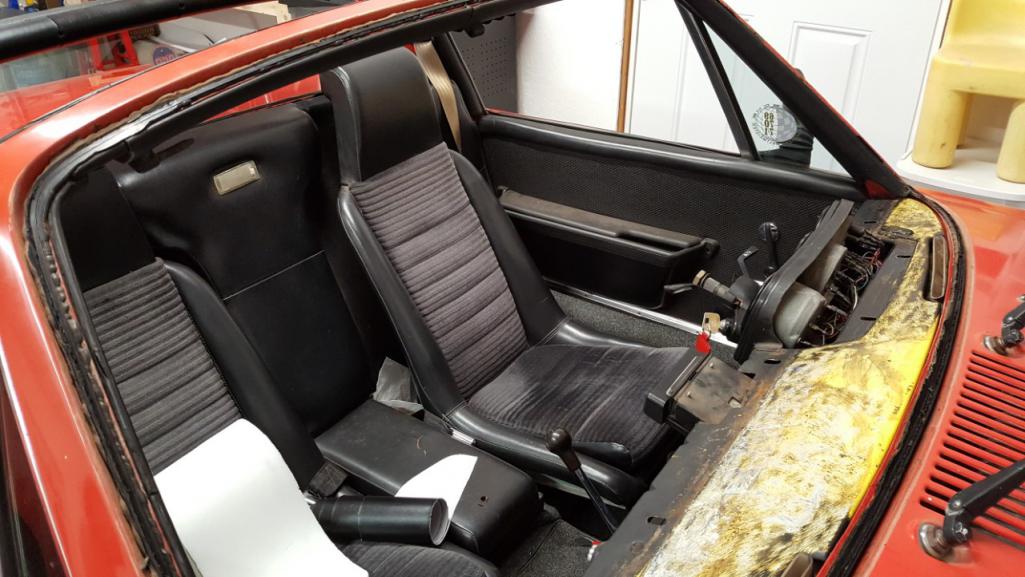
I also did a little repair work on the actual dash.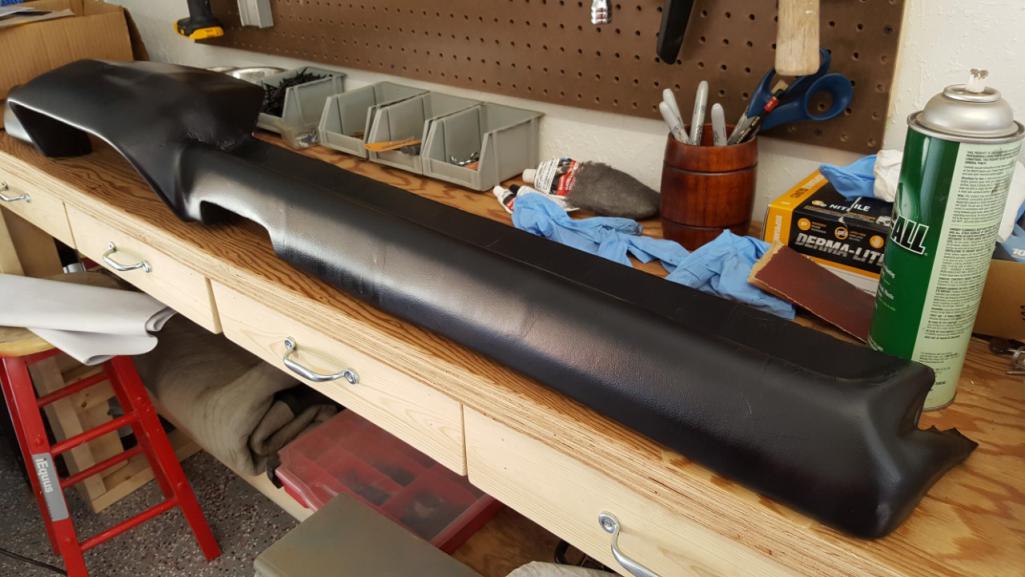
And the steering wheel, which was missing parts for the bowtie horn pad to stay in place, was refurbished. I actually ended up sending the center piece to Rich Bontempi and he sourced the necessary hardware to get it working again. Then I resprayed the rubber pad in low gloss vinyl paint and the metal part in satin enamel.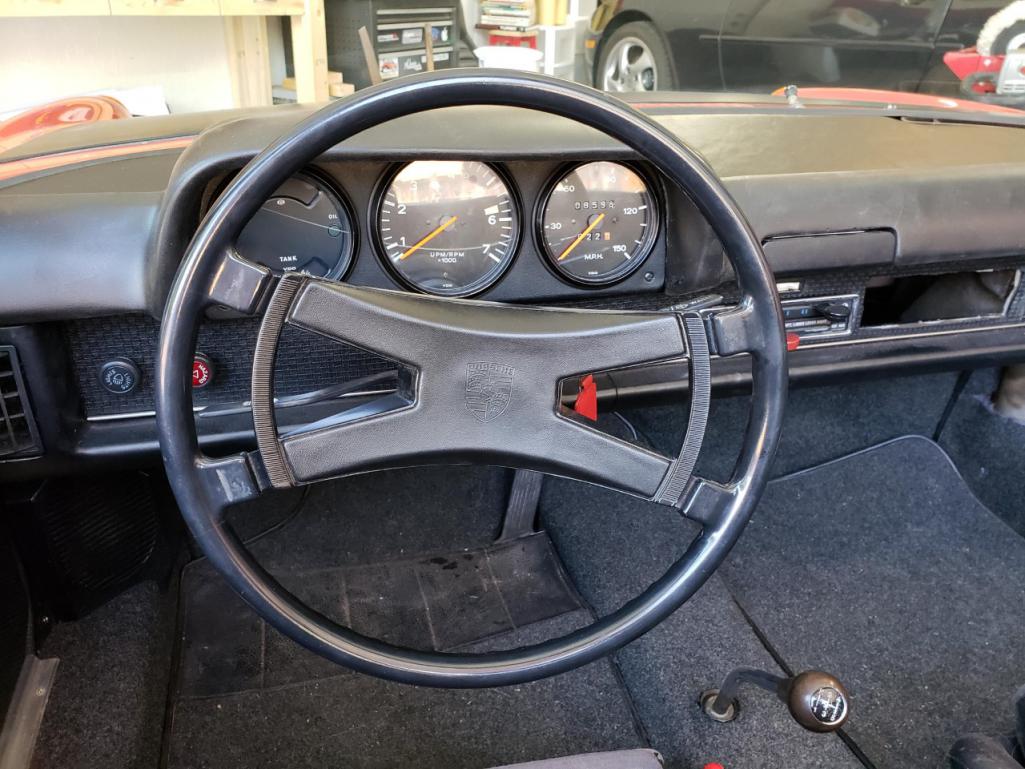
Posted by: Mayne Sep 8 2019, 09:33 AM
I never even noticed Scarlet Red in the paint codes. It looks great! I understand the need to keep the budget down. Drive it now, and make it perfect later.
Thanks. I admit it's been a challenge to keep things from getting out of hand. I want very much to do a full restoration/build on the car, but it's just not the right time.
So, the story goes on, of course. I had gotten the car to the point we see above. There were still plenty more things to sort out, but I was feeling pretty happy with the progress. Then, one day while trying to sync up the carbs, I found a wire that had come disconnected near the coil. It was sparking every time it hit metal. I messed around trying to figure out where it should go, but everything I tried resulted in a no-start.
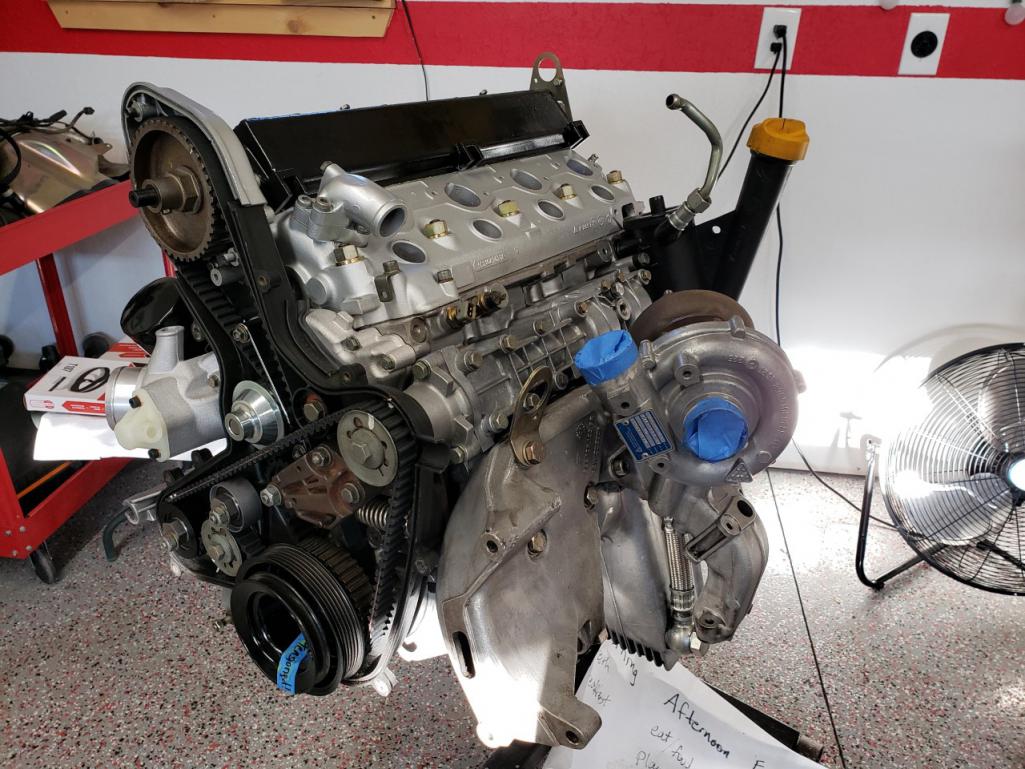
It was about this time that I had pulled the motor from my 87 944 Turbo for a complete reseal, clutch, rod bearings, and turbo upgrade. Feeling frustrated with the 914, I tucked it out of the way in garage. That was about six months ago. Now the 944 motor is almost ready to go back in the car. Gratuitous photo, because you know, "pics, or it didn't happen":
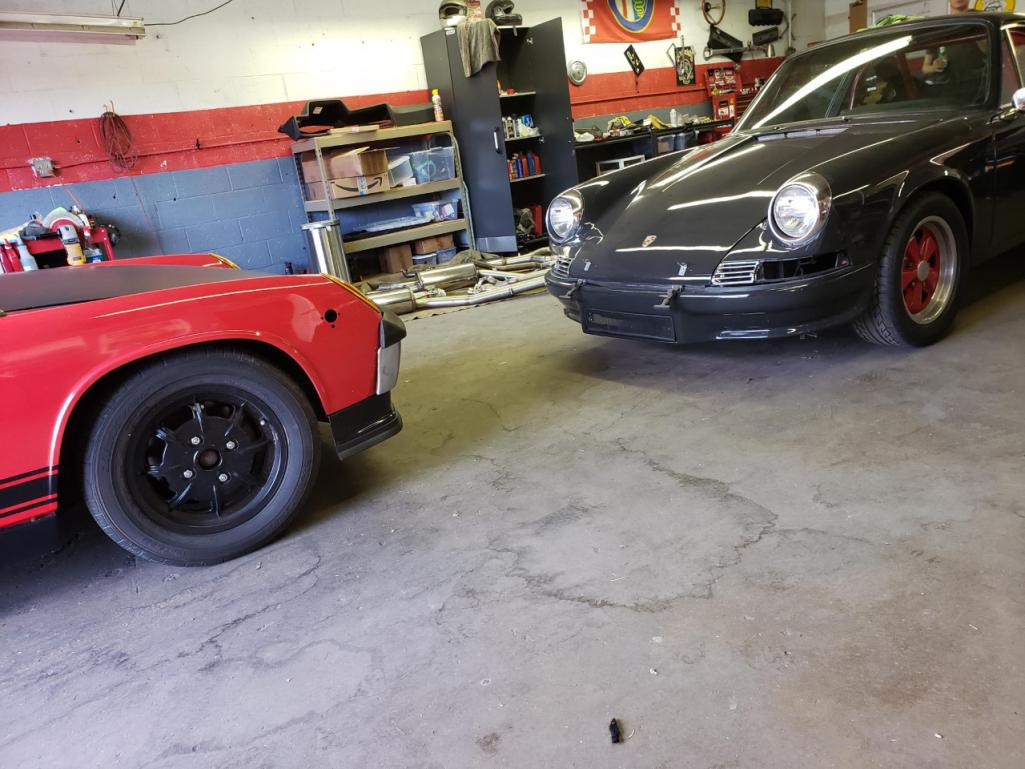
But recently, I had been thinking about why the 914 wouldn't start, and I decided that maybe I fried the electronic ignition module in the distributor. So a couple of weeks ago, I ordered a new one just to see. Last weekend, I got it in the mail, charged up the battery, installed it, and what do you know, it fired right up. I had to take it for a little drive to surprise my brother down at his shop. Here it is with his recently slate grey painted 69 911:
Posted by: johnhora Sep 8 2019, 02:21 PM
Jeremy...the top repaint came out nice....looks good!
Posted by: Mayne Sep 22 2019, 12:18 PM
Jeremy...the top repaint came out nice....looks good!
Thanks!
Posted by: Mayne Sep 22 2019, 12:29 PM
Managed to make it to Cars and Coffee on 9/14: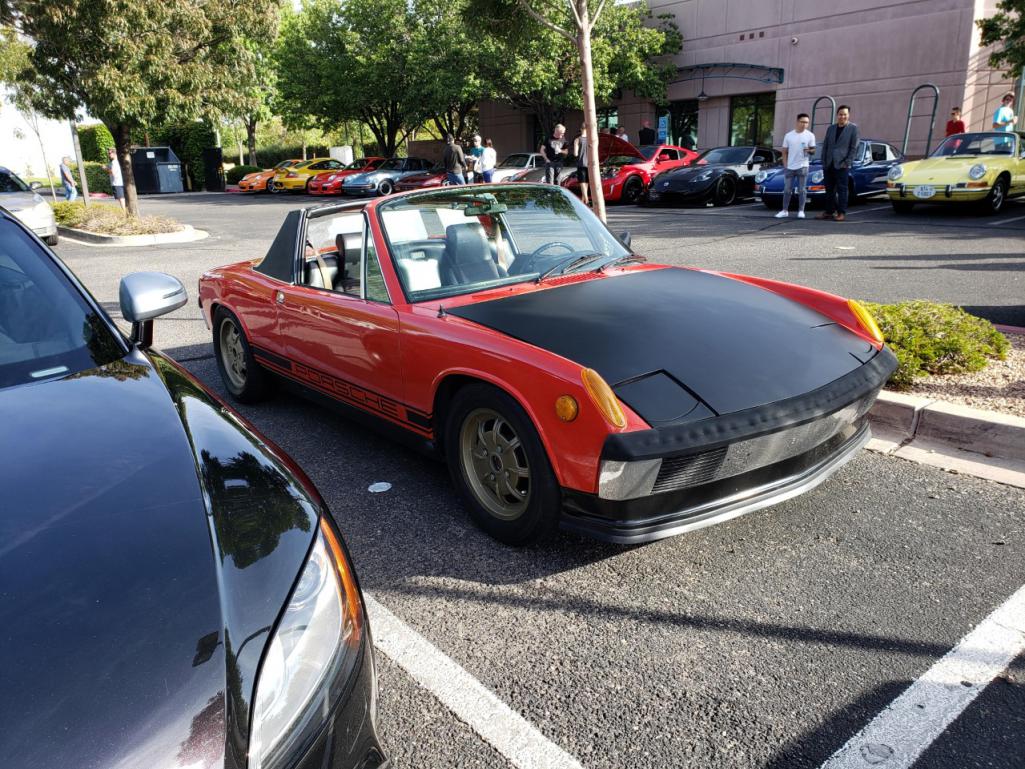
Shifting into first and reverse was just driving me crazy. This morning I adjusted the clutch cable this morning, moving the release point higher for the pedal. I will adjust it back a touch, but it's much improved.
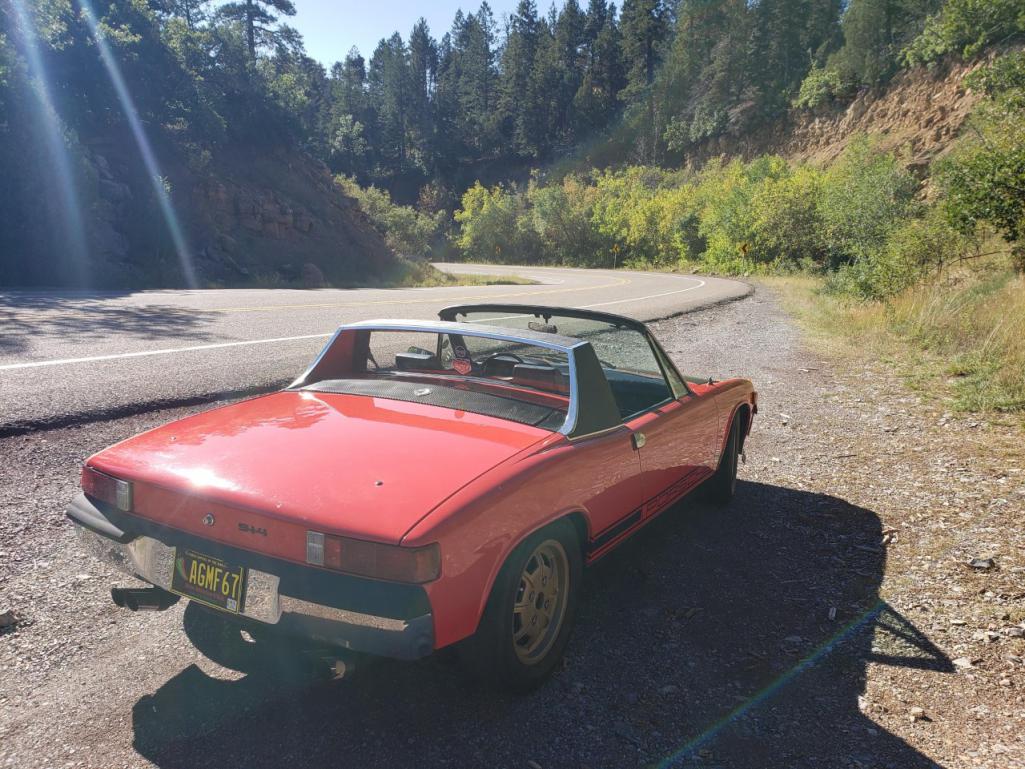
So, I took one of the longest drives I've done so far in the car, heading out to the foothills east of Albuquerque on a tight canyon road, then up part of the Crest road in the Sandia Mountains. The old 914 was doing well and loved the cool mountain morning air. It was lovely threading it through all the turns on a nice smooth road with that raucous type 4 bellowing away!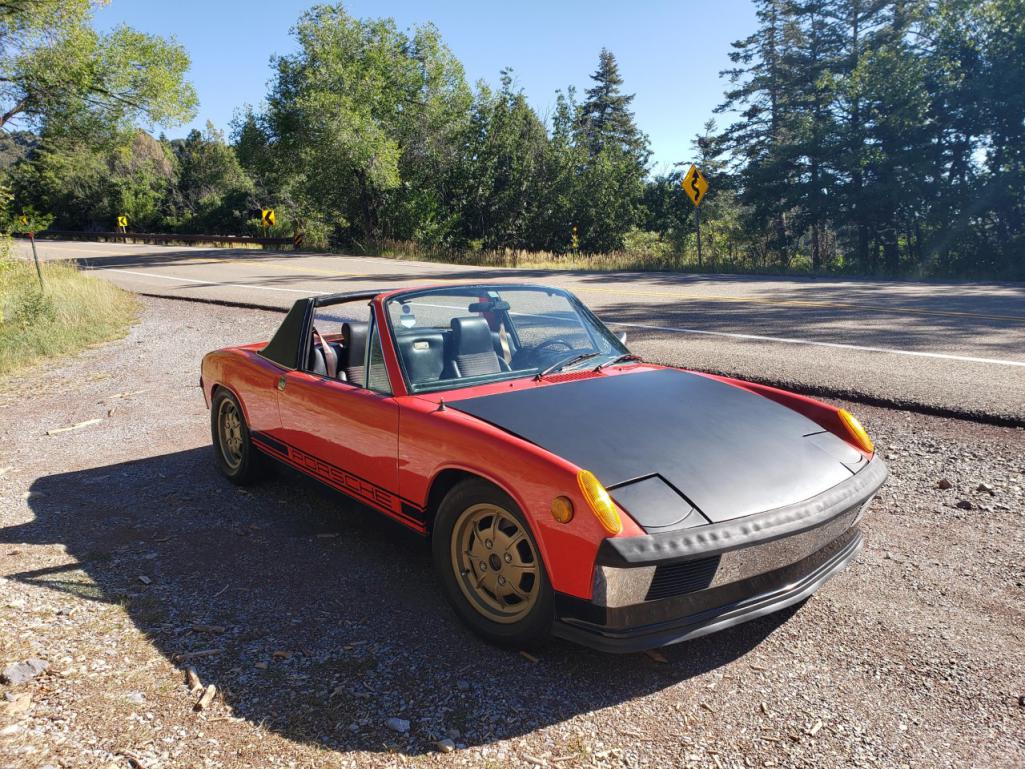
Posted by: Mayne Sep 22 2019, 01:11 PM
I also got an awesome 50th anniversary key fob. Thanks Oscar!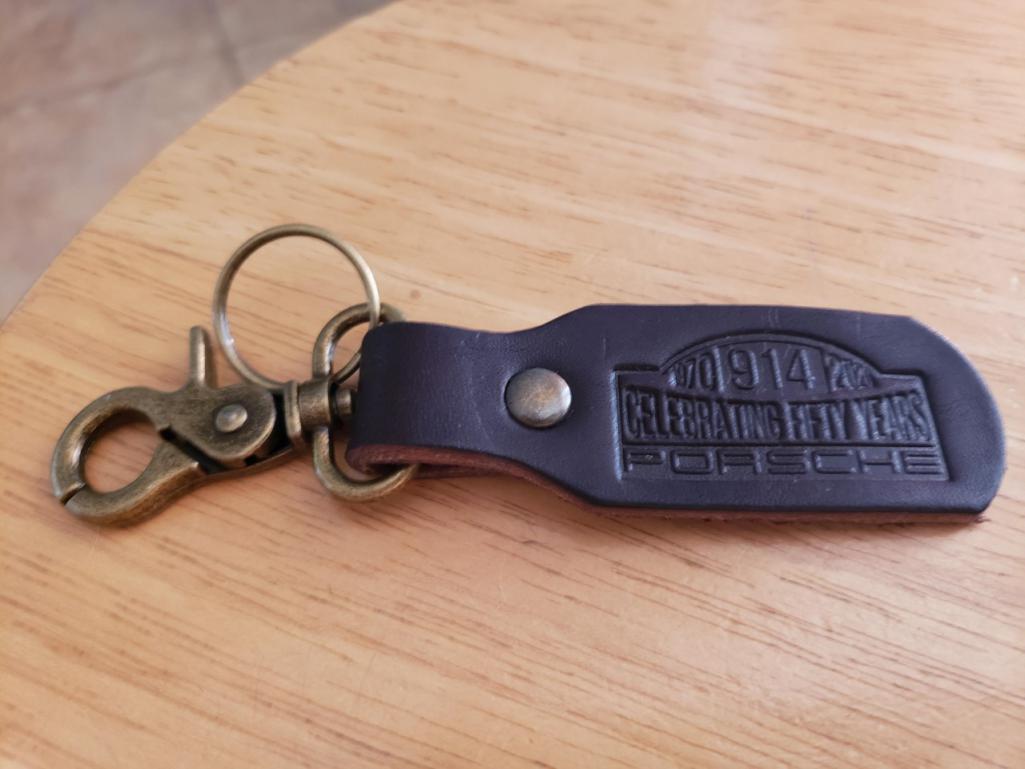
And I know many delete the side marker light "warts", but I added some used ones I picked up on eBay. Better than holes in the fenders! 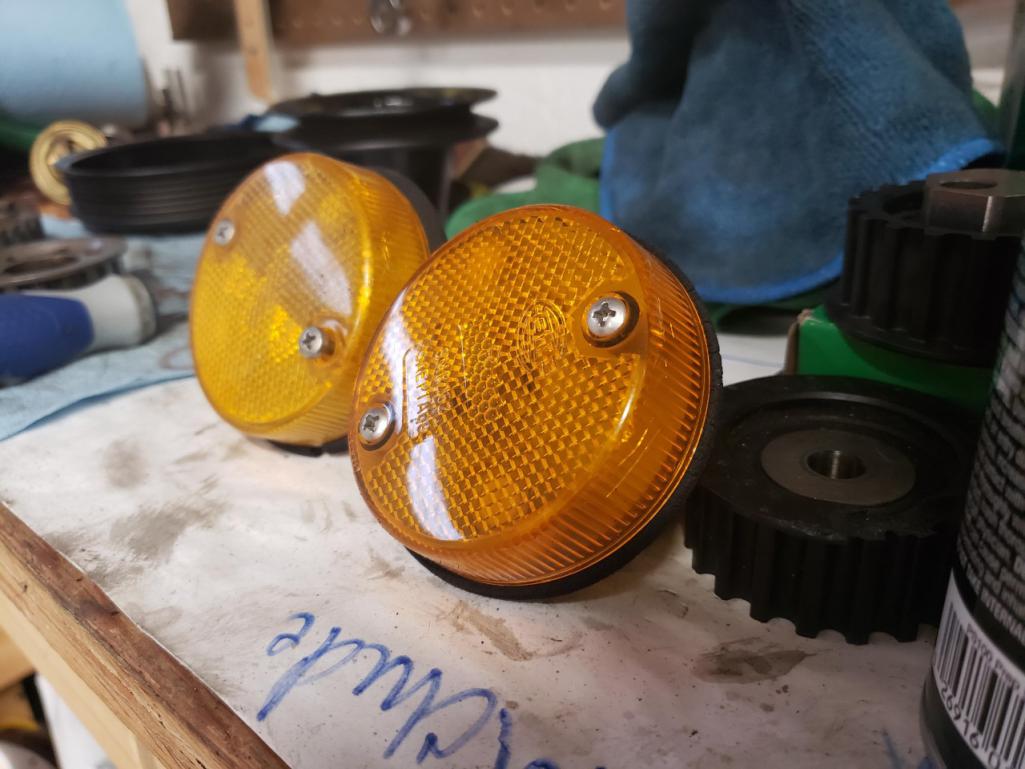
Posted by: Mayne Aug 21 2020, 12:55 PM
Continuing with my yearly update of my 914 project thread! I continue to make small bits of progress on the car, despite it not looking too different. The main thing I'm trying to do is get it to where it can be driven regularly with some reasonable reliability. In the words of Captain Ron:
"The best way to find out, Kitty, is to get her out on the ocean. If anything is going to happen, it's going to happen out there."
So with that in mind, I drive it, it breaks, I fix it, etc.
Waiting for my daughter to bring me a new battery: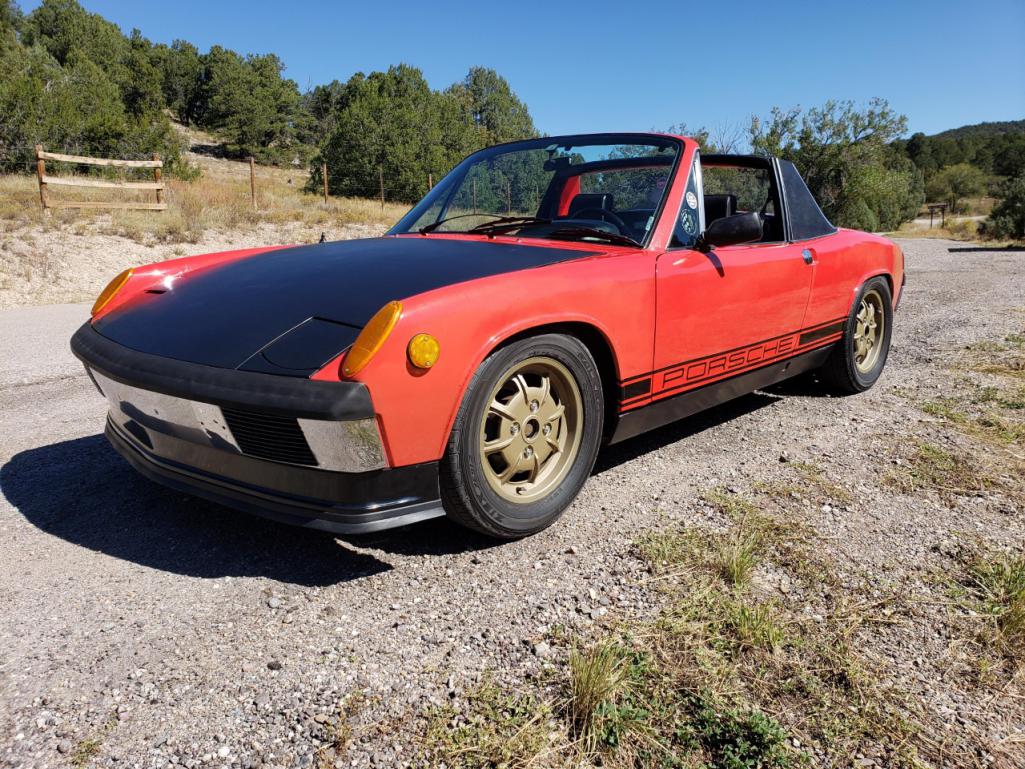
Broken clutch cable: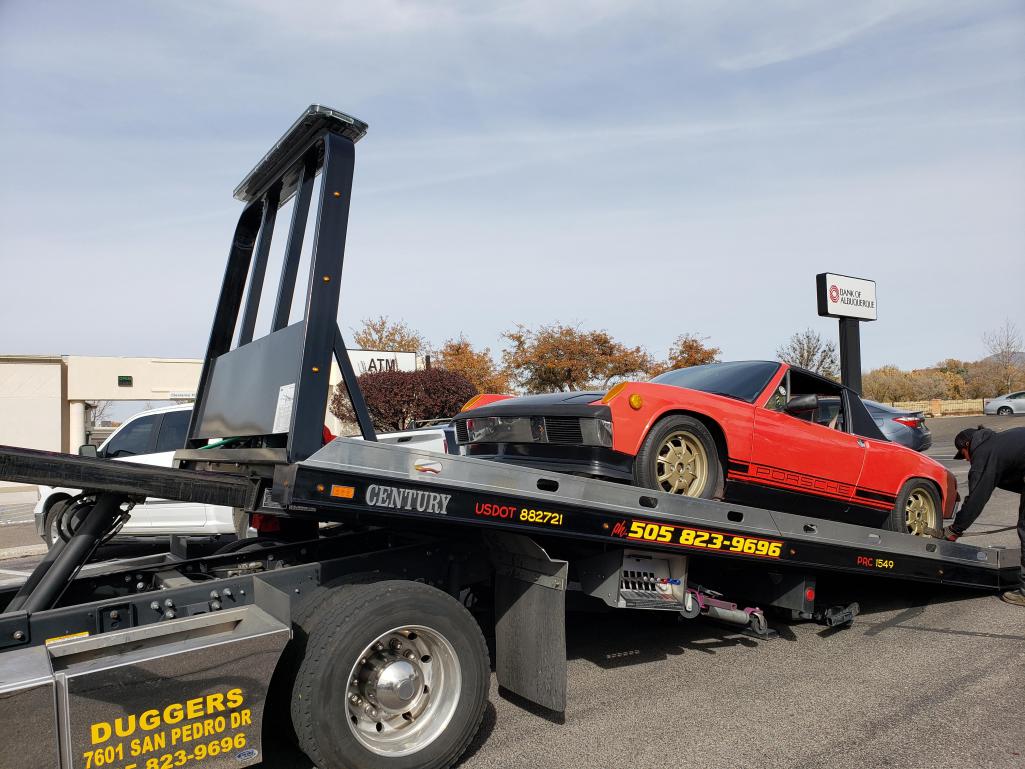
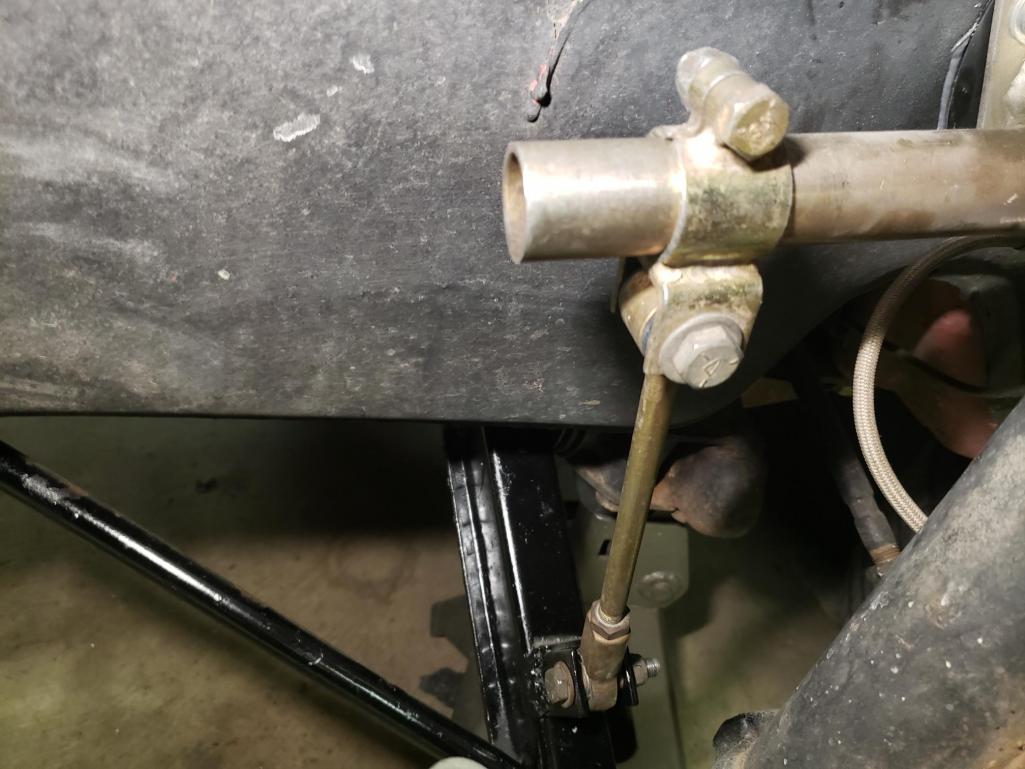
Lost taper screw at firewall shift linkage: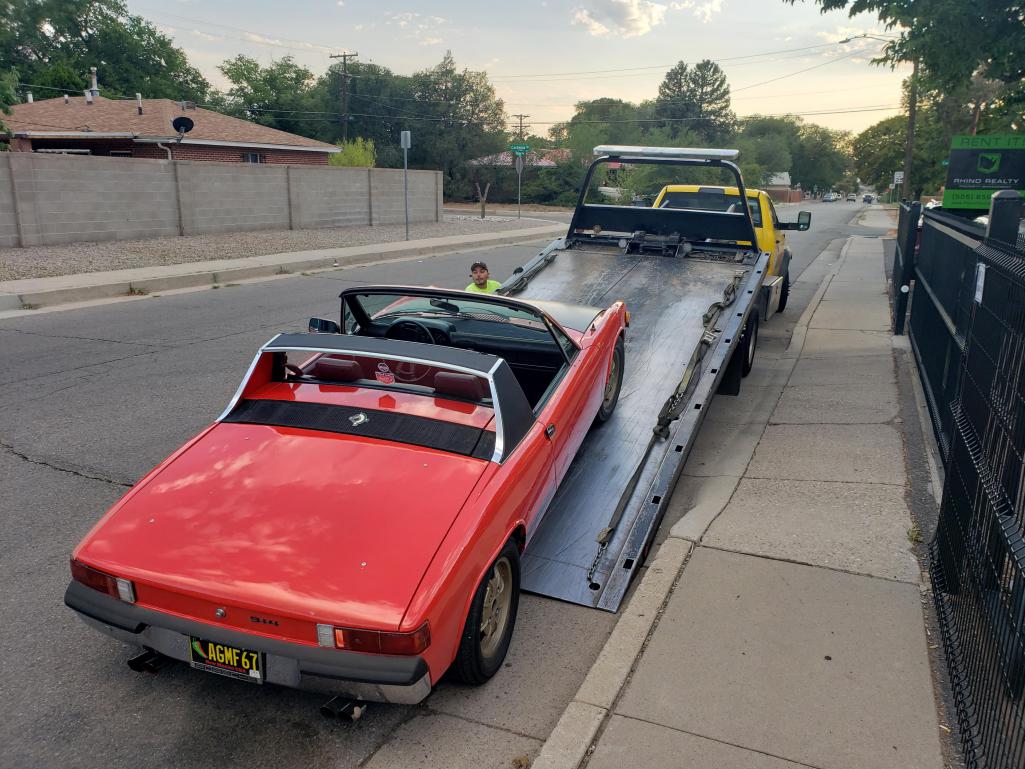
Posted by: Mayne Aug 21 2020, 01:00 PM
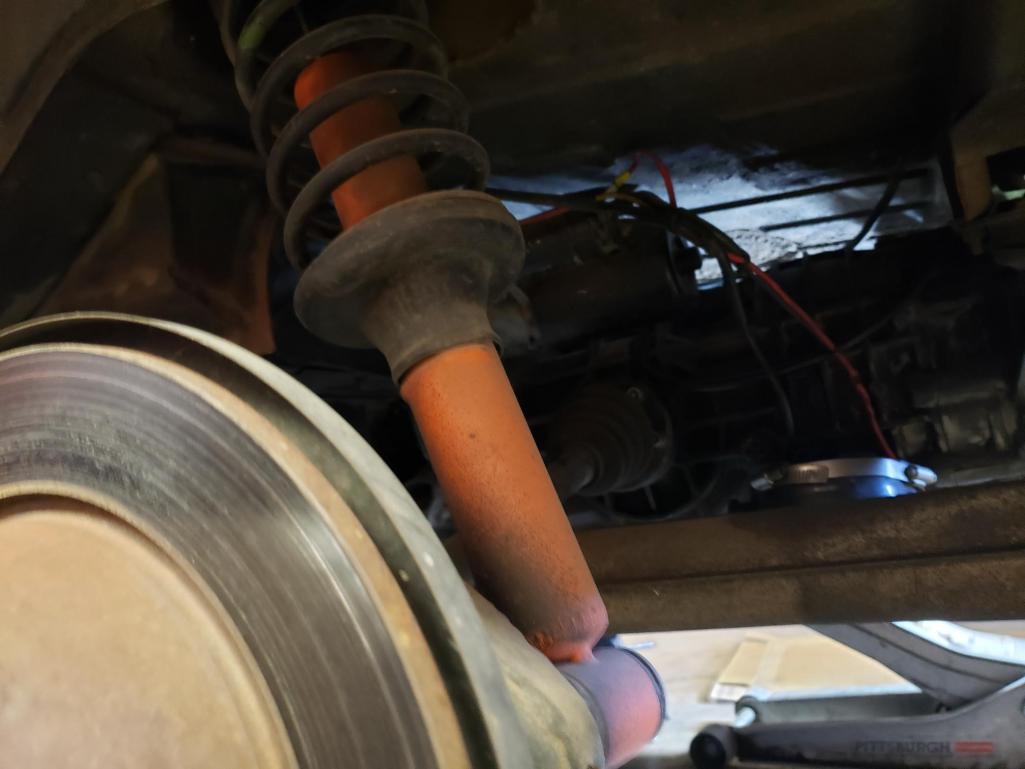
On one drive, I suddenly lost the ability to shift into 4th and 5th. Could this be the culprit?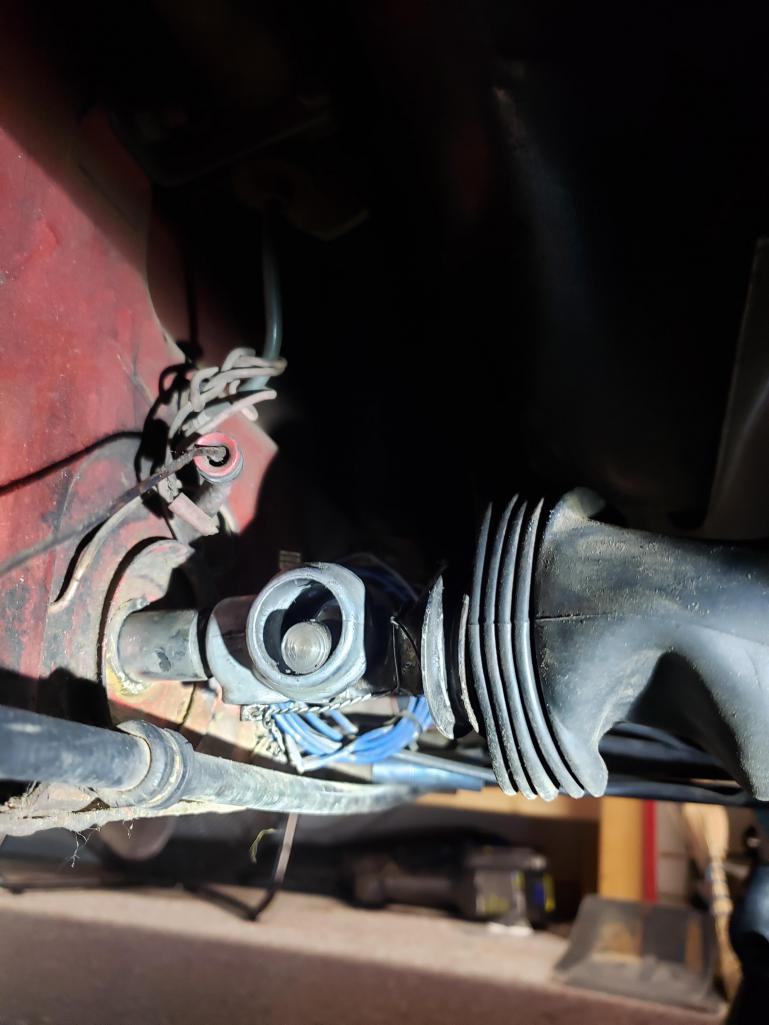
Better: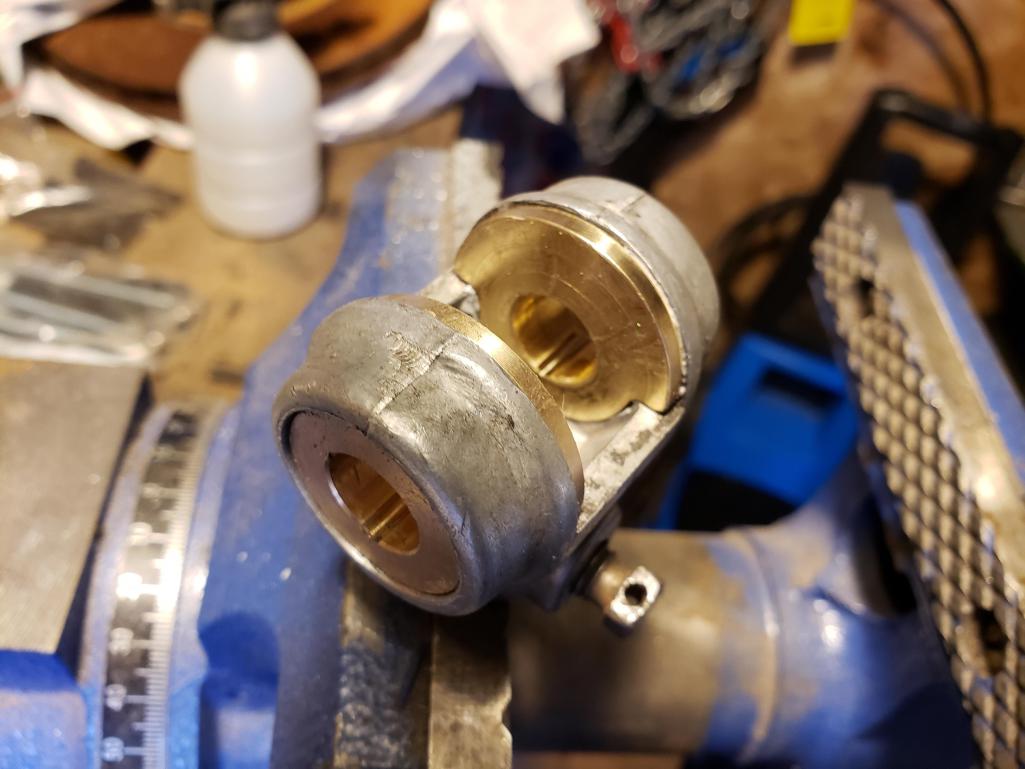
Also got a radio blank-off plate from 914Rubber: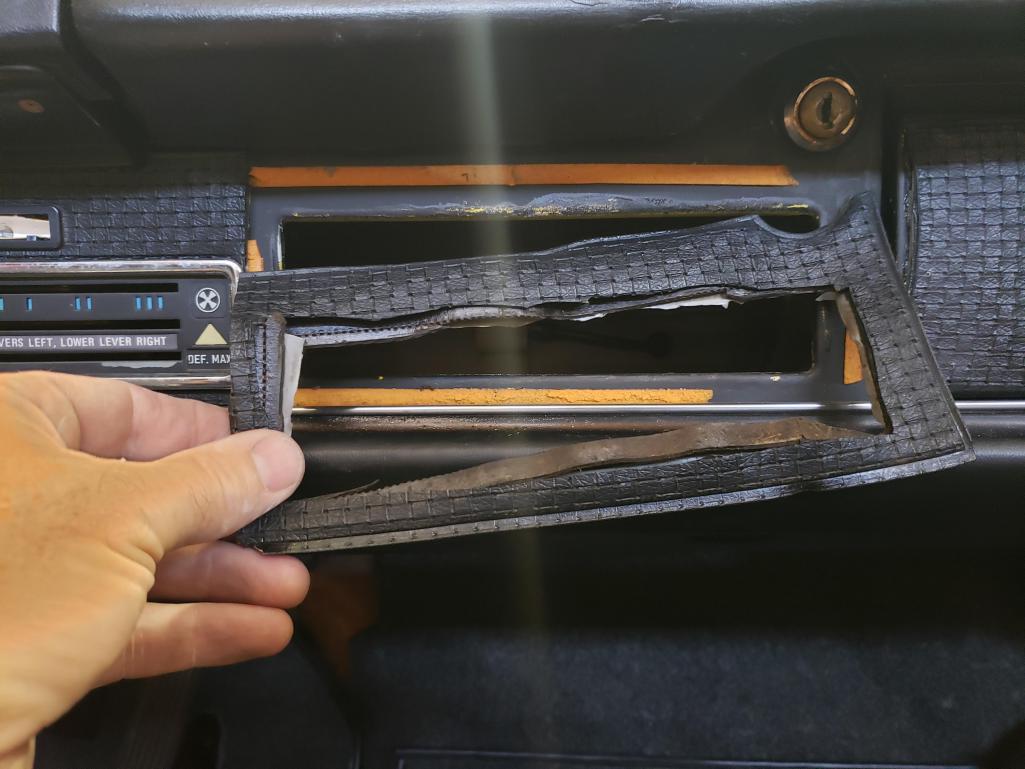
Best wishes to all!
Posted by: DRPHIL914 Aug 21 2020, 01:06 PM
lol i had the same thing happen to my 75 back in february , the original shift bushing gave out leaving me with 2&3 only , i also did the brass bushings and now shifting again like new. - btw i like the gold color on the wheels!!!
Posted by: rjames Aug 21 2020, 01:17 PM
Nice job on bringing back this car into the world again. Love the color! 
The only thing that I wish you'd done differently is fix the floor correctly instead of using fiberglass.  Welding in a new patch would be a fairly easy thing to do.
Posted by: ndfrigi Aug 21 2020, 01:31 PM
On one drive, I suddenly lost the ability to shift into 4th and 5th. Could this be the culprit?
Better:
Also got a radio blank-off plate from 914Rubber:
Best wishes to all!
Looking great Jeremy on your car.
That will definitely improved a lot on your shifting after replacing the coupler bushing. Maybe much as well replace the firewall bushing if it was not replaced yet or check if no much play on it.
Congratulations!
Posted by: Cairo94507 Aug 21 2020, 01:46 PM
Jeremy I like your car and that you keep working away as you are driving and enjoying it. I too wish you would address the front and rear trunk repairs properly. I get it is a time consuming thing and may cost a couple dollars. I would bet you could find the panels for almost nothing on here from a car getting parted out. Aside from that, it is looking nice.
Posted by: Root_Werks Aug 21 2020, 04:34 PM
Drive, enjoy and keep improving over time. It's part of the fun of the project. Looks good, another 914 saved!
Posted by: Mayne Aug 21 2020, 07:41 PM
lol i had the same thing happen to my 75 back in february , the original shift bushing gave out leaving me with 2&3 only , i also did the brass bushings and now shifting again like new. - btw i like the gold color on the wheels!!!
Yeah the brass bushings made a big difference, until the linkage came apart! Wheels are done in Plastidip Vintage Gold.
Nice job on bringing back this car into the world again. Love the color!
The only thing that I wish you'd done differently is fix the floor correctly instead of using fiberglass.
Welding in a new patch would be a fairly easy thing to do.Jeremy I like your car and that you keep working away as you are driving and enjoying it. I too wish you would address the front and rear trunk repairs properly. I get it is a time consuming thing and may cost a couple dollars. I would bet you could find the panels for almost nothing on here from a car getting parted out. Aside from that, it is looking nice.
I understand! It kind of made me cringe to do these half-assed fixes. I did a lot of rust repair on my old Datsun Roadster, so I know how satisfying it is to do it right.
70 Datsun Roadster inner fender repair:
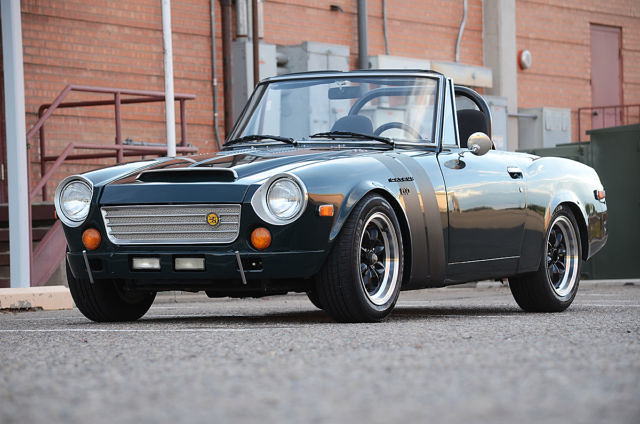
On the 914, they were temporary stop-gaps so I could use the car some and I didn't want to rush a welding job. I want those repairs to be high quality when I get to them. Thanks for the comments and encouraging words!
Posted by: Mayne Aug 21 2020, 07:44 PM
A shot from my most recent drive. The car didn't break on this one!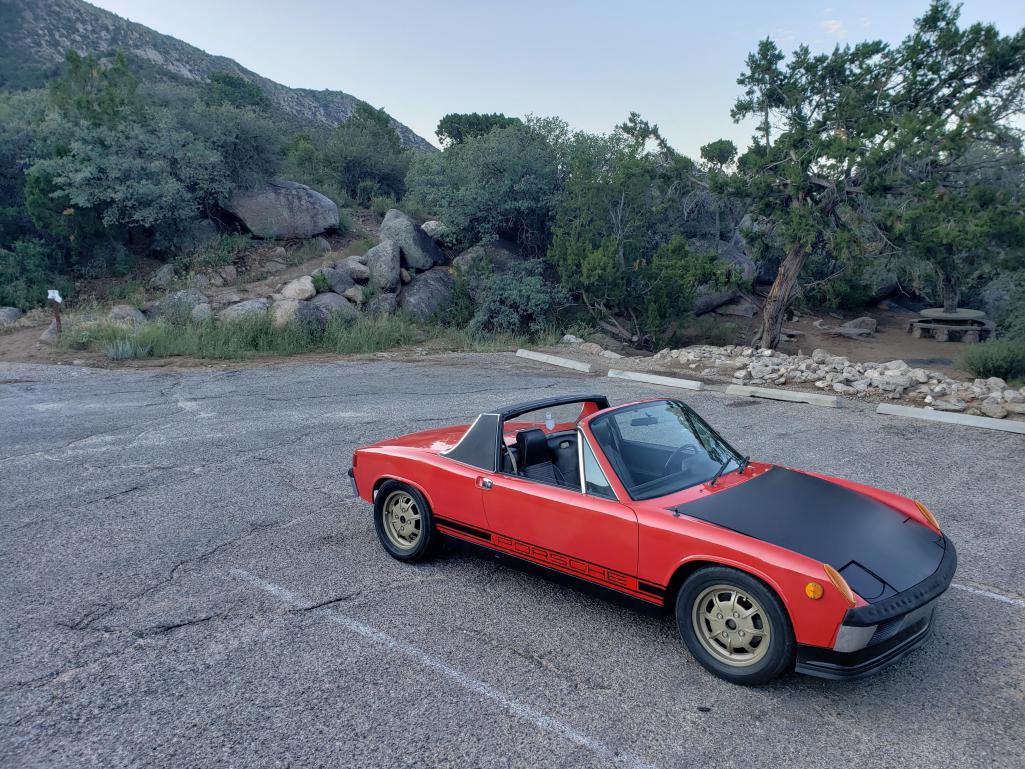
Time for my Friday beer! 
Posted by: Mayne Apr 1 2021, 04:07 PM
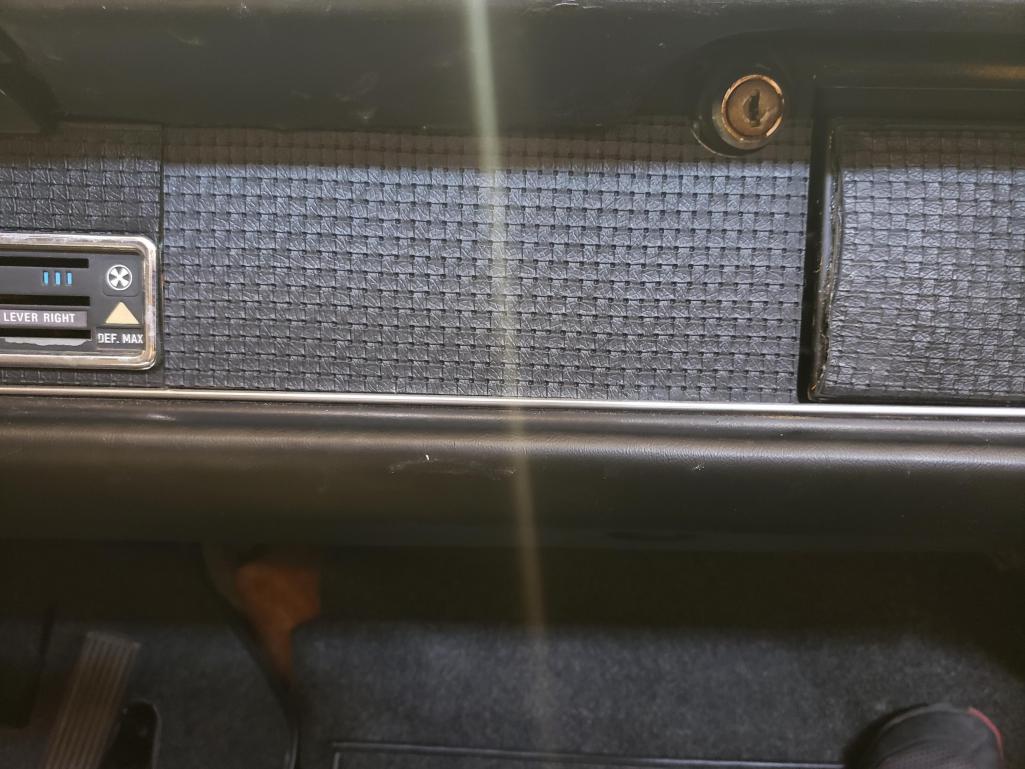
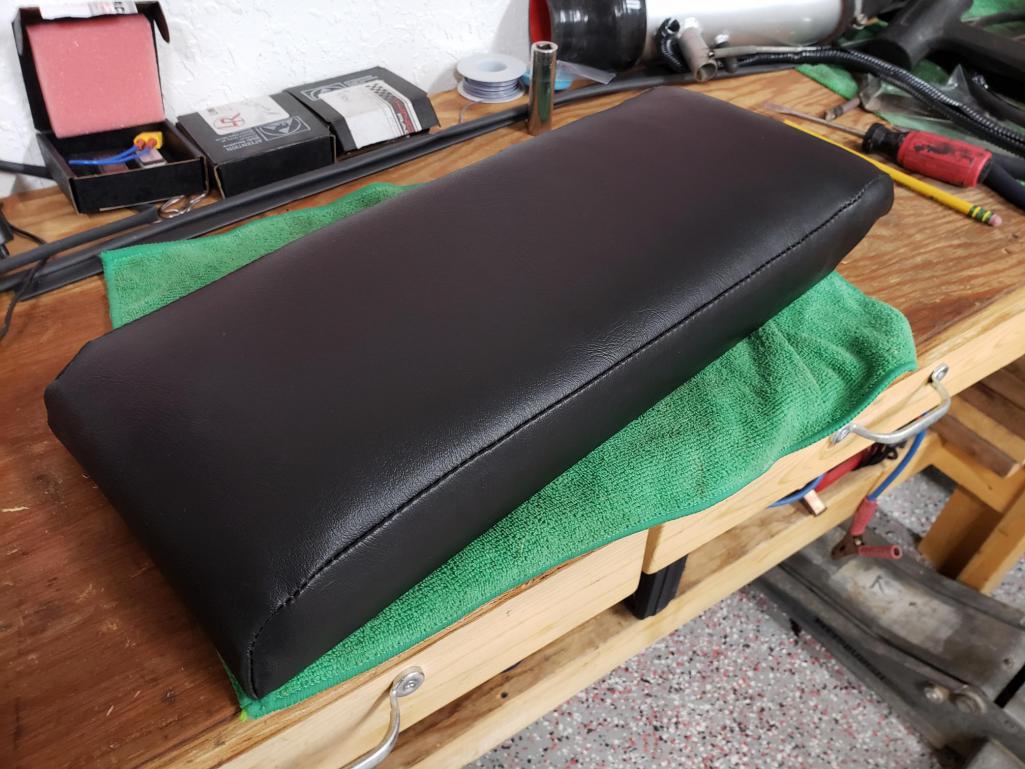
Here are a few updates of some work I've been doing on the teener. The center armrest has bugged me since I've owned the car, with it's torn and funky looking vinyl, especially now because the interior is looking pretty decent. I found this upholstery kit on eBay for like $30. It took forever to get, so much so that I pretty much gave up on getting it. Then one day, mystery package at the door!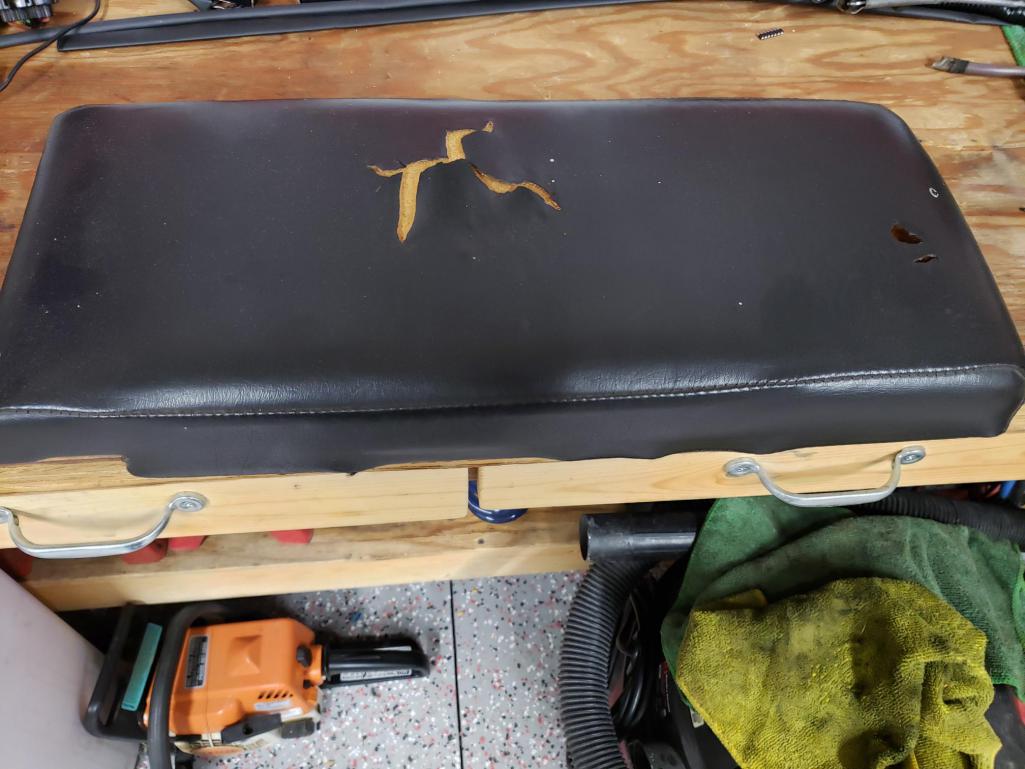

Then my brother Zach gave me an extra Porsche badge that he had blacked out for his dark grey 911. He didn't like it, but I though maybe it'd look cool on the matte black hood. I don't intend to run one when the car gets painted, but for now I like it. I cut off the pins on the back and stuck it on with 3M tape.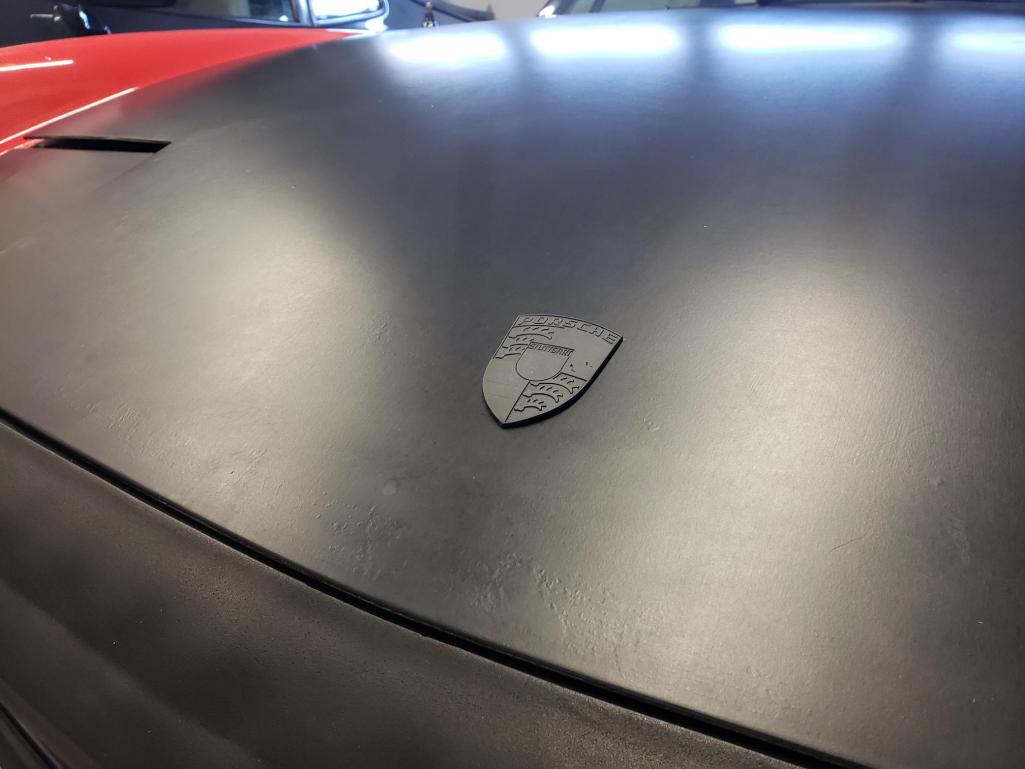
Posted by: Mayne Apr 1 2021, 04:14 PM
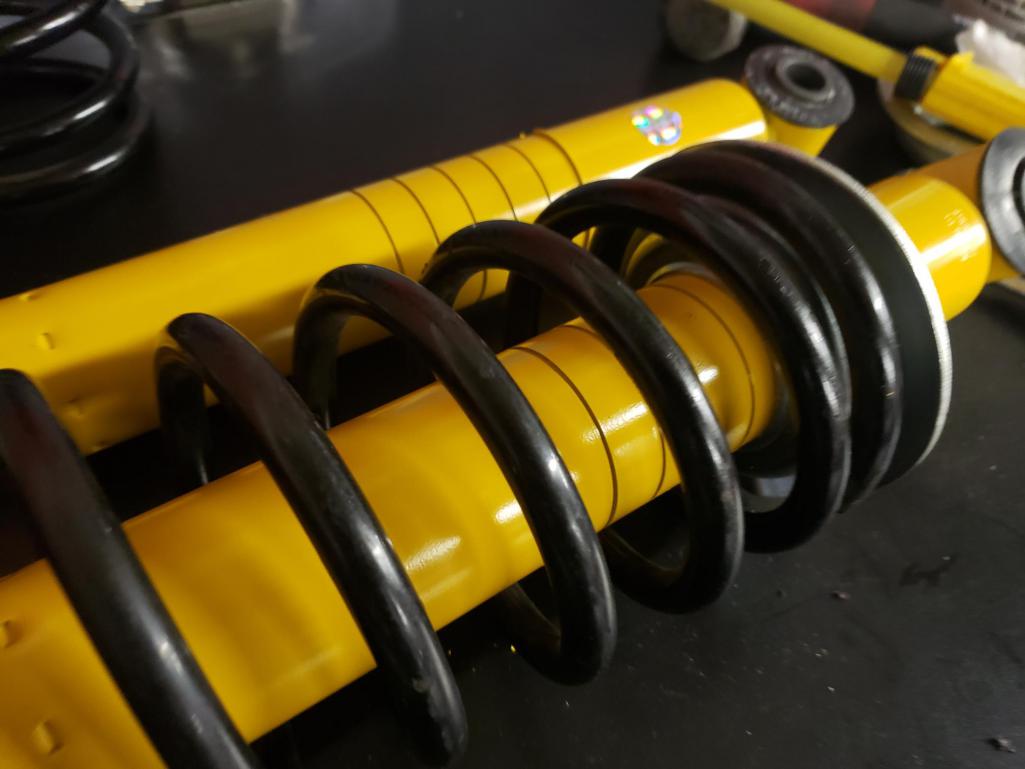
I also found a 19mm Weltmeister front sway bar on eBay. I was pretty excited about that and then when I had a chance to get some 165# Weltmeister rear springs from a forum member, that pushed it over the top. New rear Bilsteins followed for a nice little suspension upgrade.
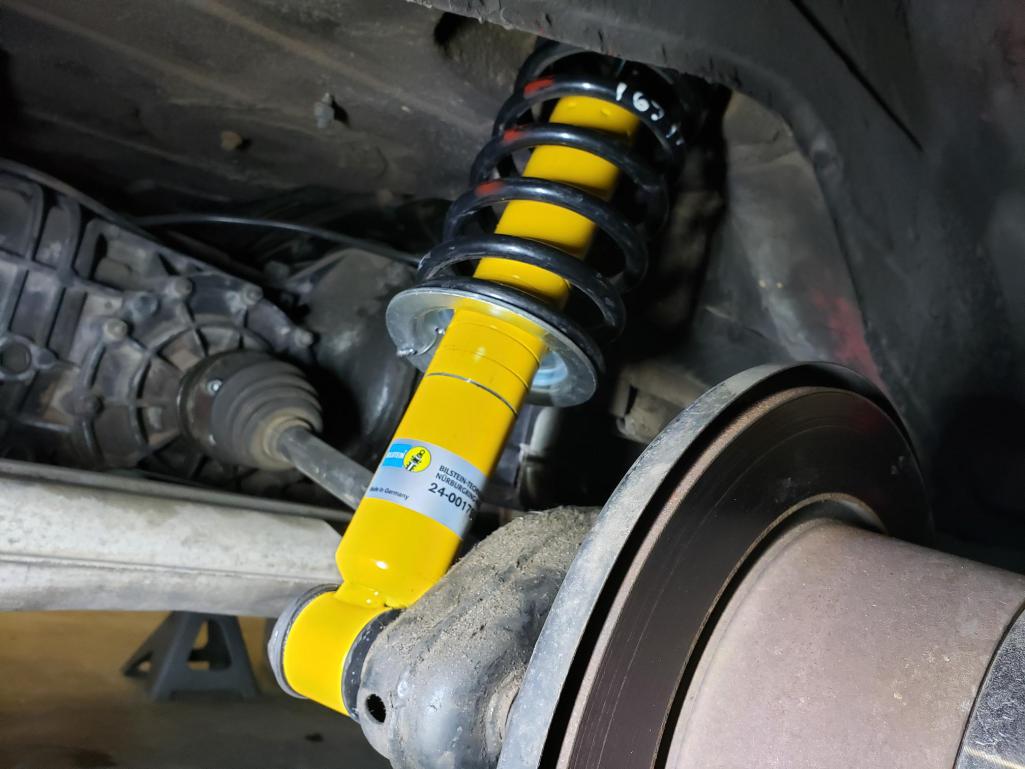
And, a little preview of coming attractions?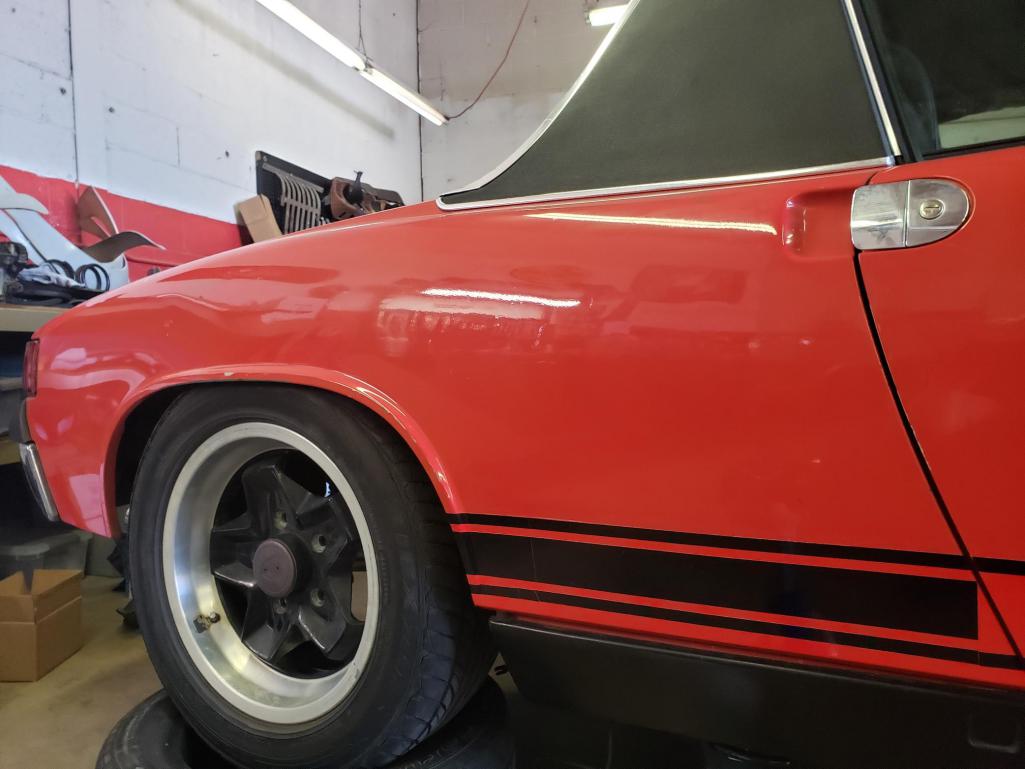
Cheers!
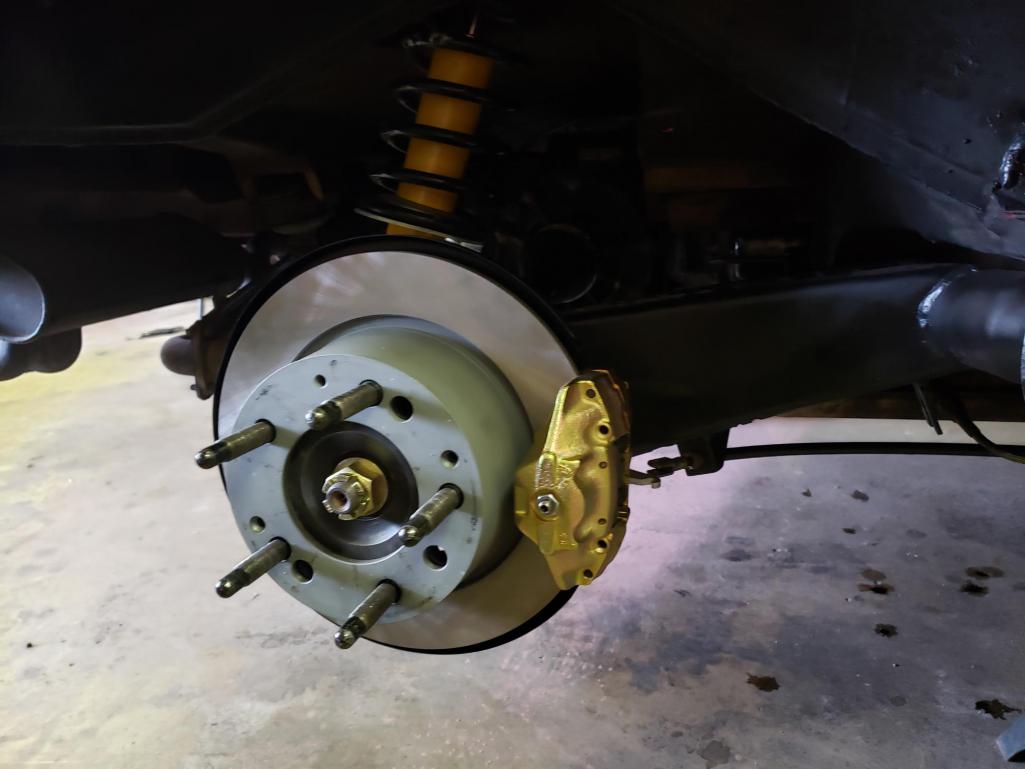
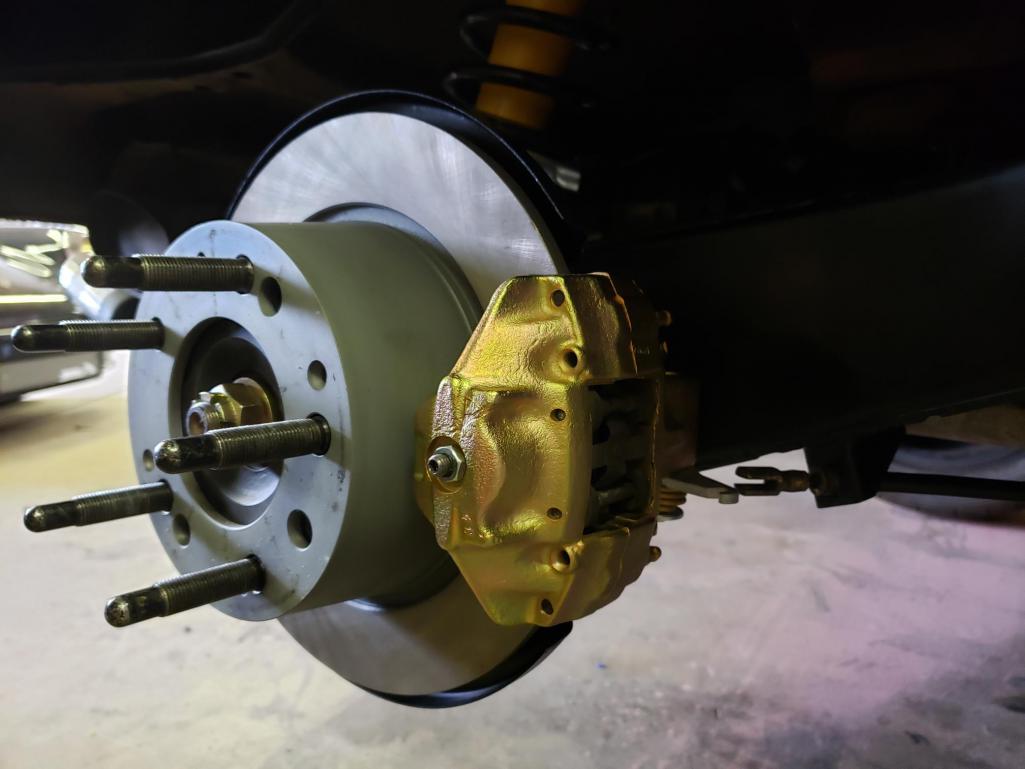
Posted by: Mayne Apr 25 2021, 09:37 AM
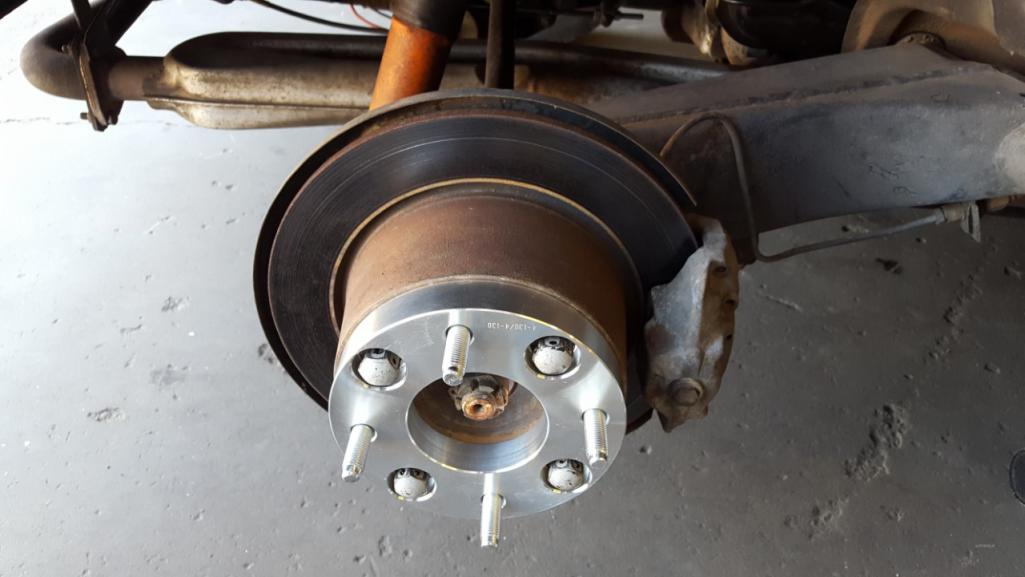
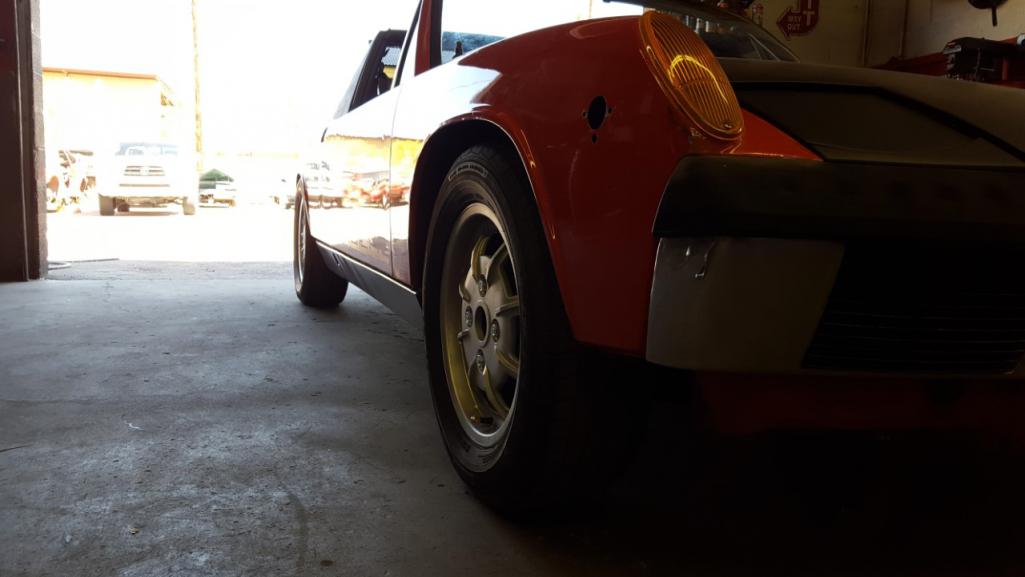
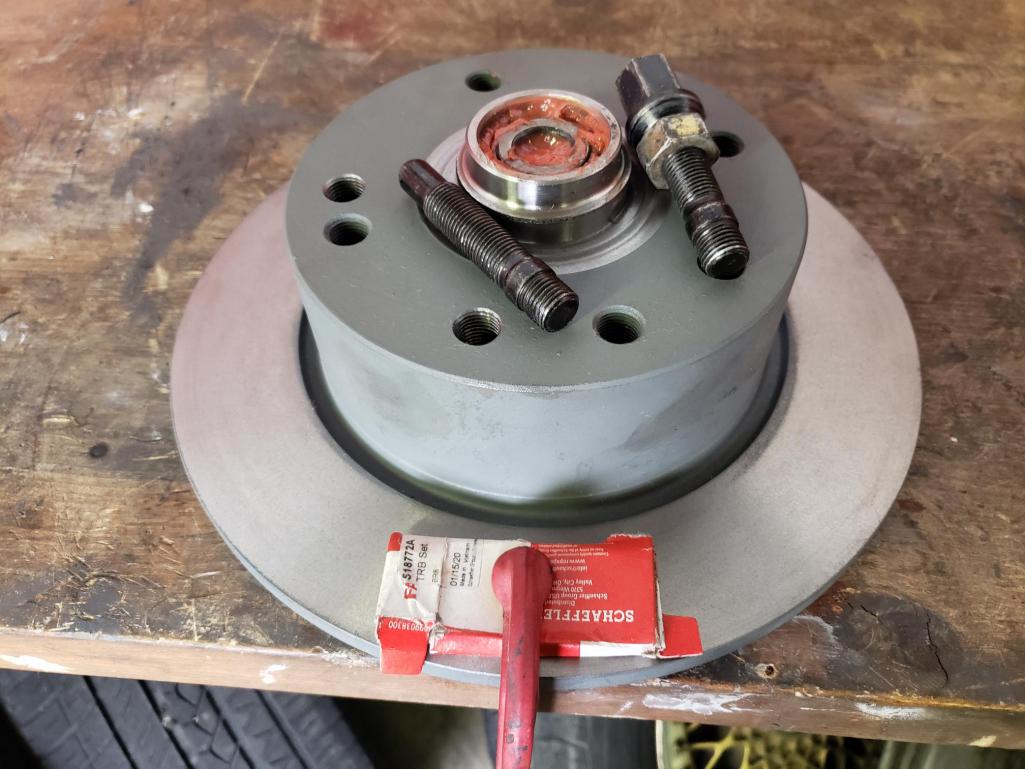
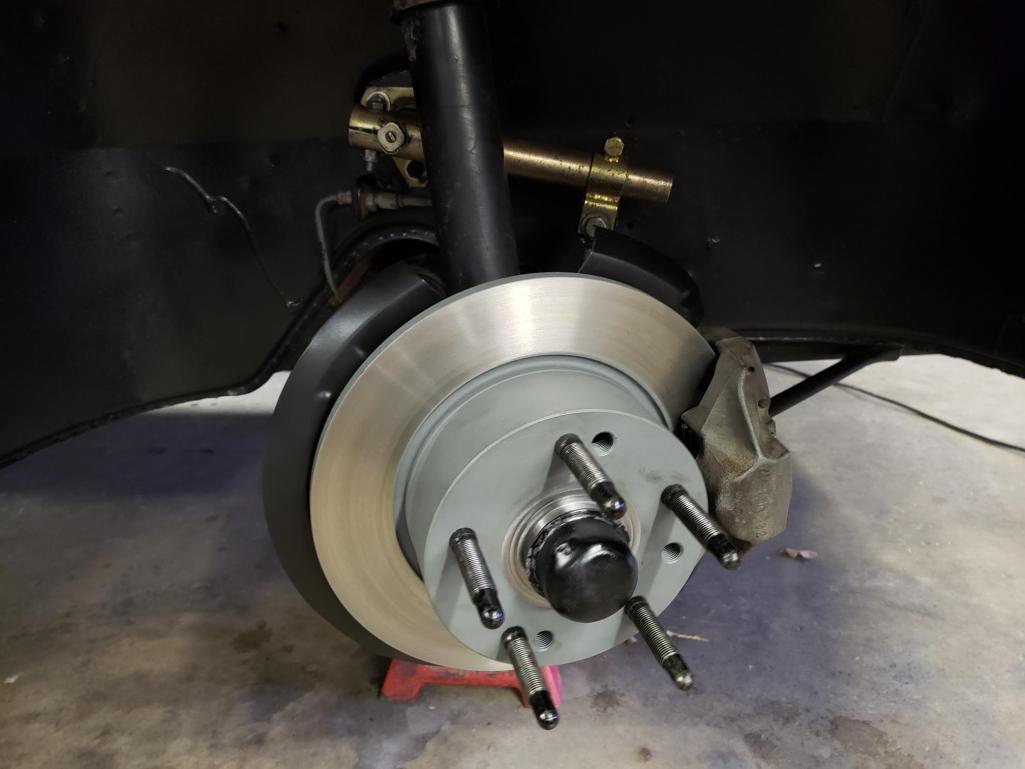
PMB five lug conversion complete!
The specs are as follow: PMB five lug kit, which includes new redrilled front rotors, new front wheel bearings, new redrilled rear rotors, redrilled rear 914 hubs, new rear wheel bearings. Also, 72mm bullet nose studs, 15x7 cookie cutters, 195/55-15 Sumitomos (I wanted 205/50 but my brother had these new tires that he donated to the project). The tires look pretty nice and I certainly don't need any more rubber for the street with the 1.7.
I thought I took more pics of the rear but I guess not. There will be a video in a couple of days.
Here are a few random photos from the conversion: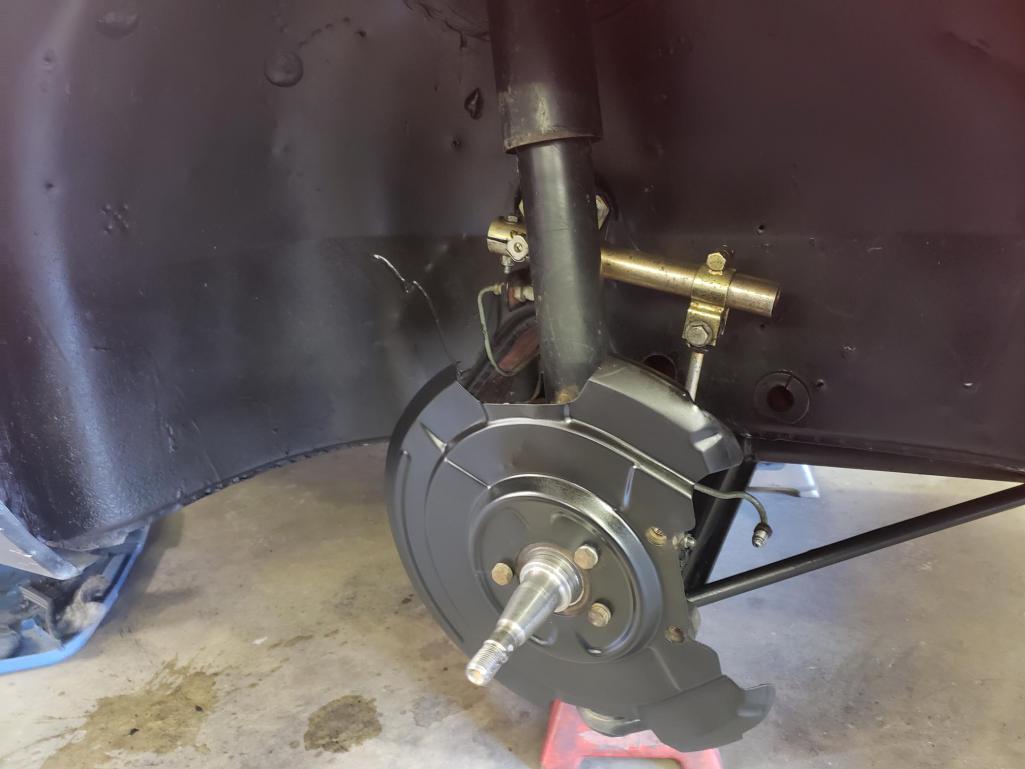
My rear calipers were frozen solid so they're out at PMB right now. Hopefully I can get those on in another week or so, then get it aligned and see how it feels.
Cheers!
Posted by: Mayne Apr 26 2021, 08:11 PM
As promised, a video on the five lug install. This is part one, covering the front end. Mostly just me blathering on for a while, but hopefully informative for someone considering the swap.
https://www.youtube.com/watch?v=F4jVNUjAOng
Posted by: VegasRacer Apr 27 2021, 12:48 AM
I normally don't like Cookies on a 914. But those are the right wheels for that car. 
I like the Skateboard Decks too. 
Posted by: Mayne May 9 2021, 09:35 AM
Okay, here's part 2 of the five lug swap video:
https://www.youtube.com/watch?v=xCLXsOg63ww
My rear calipers from PMB shipped last Friday, so hopefully I can get it back on the road soon!
Posted by: Mayne Oct 29 2021, 11:08 AM
It was a busy summer getting our house ready for my older daughter's wedding, but work continues slowly on the 914. I got my rear calipers from PMB, and of course, they're absolutely beautifully done.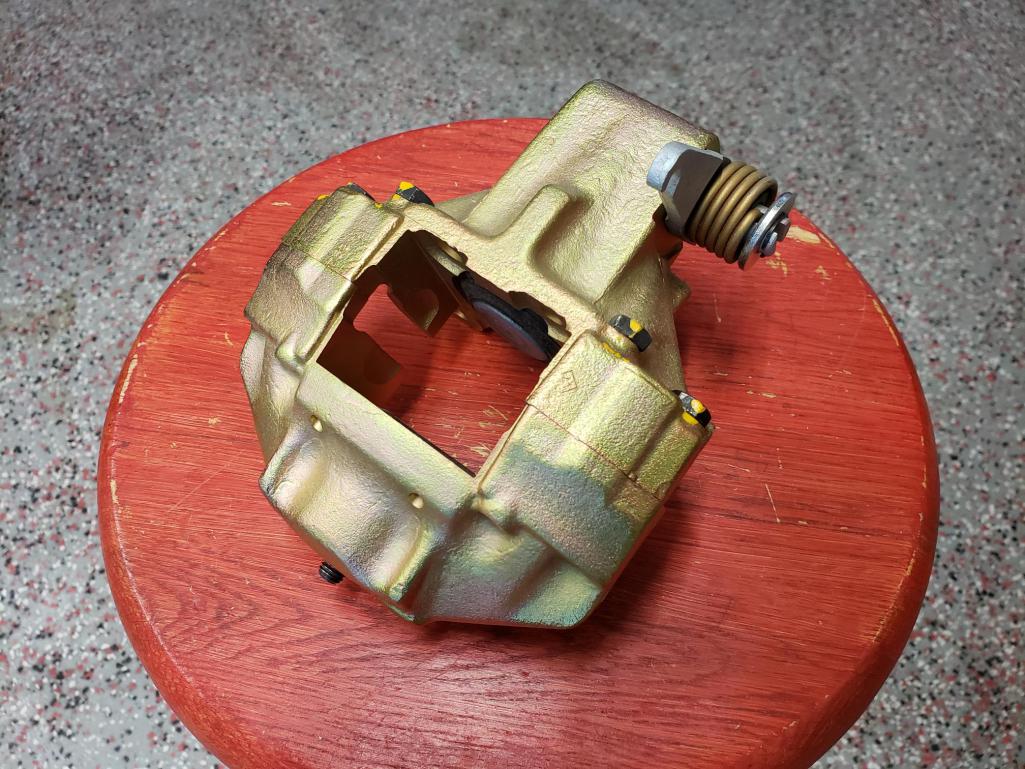
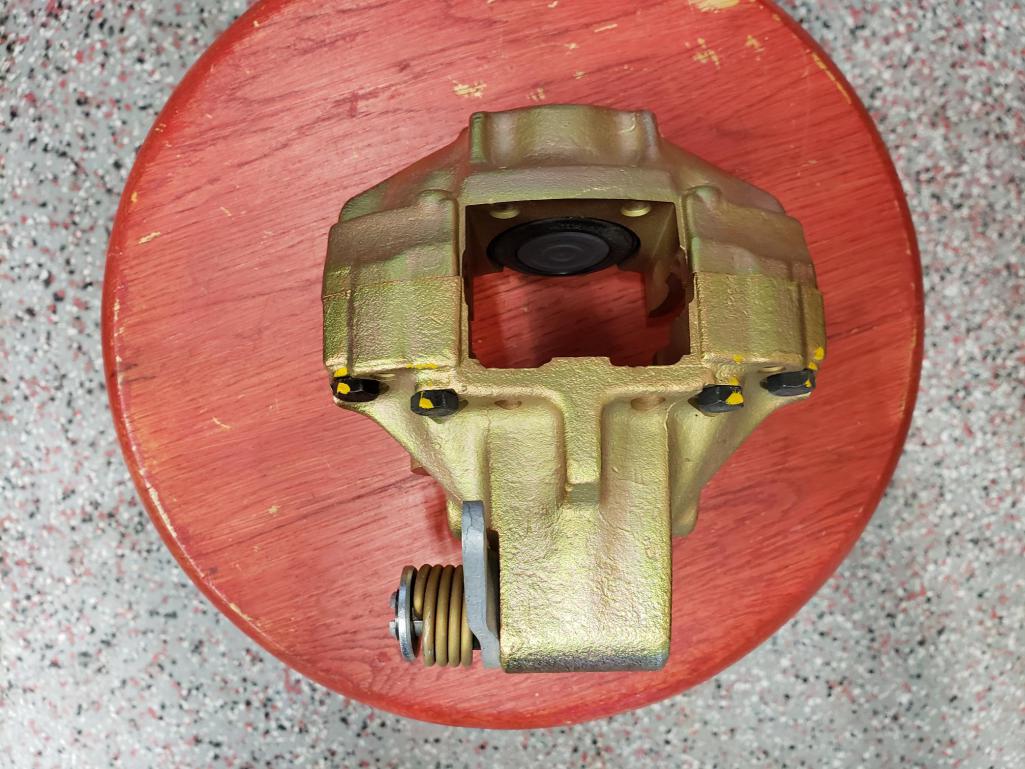
I'm still not totally happy with the brake performance, so there's some work to done. They just don't seem to bite as much as I think they should. Probably further adjustment on the rears and maybe replacing or rebuilding the pressure regulator?
Posted by: Mayne Oct 29 2021, 11:18 AM
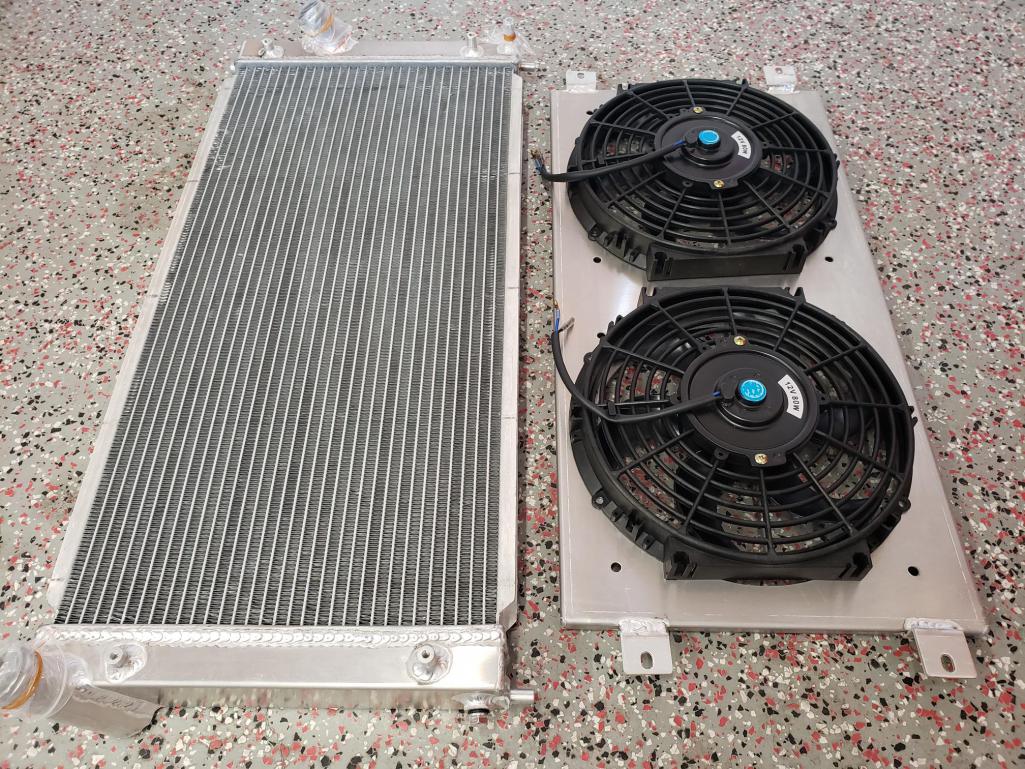
In other news, I finally got a new radiator...for my aircooled Porsche? Yes, the cat's out of the bag! I will begin the process of doing an EZ30 Subaru swap on my car. I will work on the cooling system at the front first to keep the car on the road. Here's the Celica GTS radiator with dual fans that I got off eBay. $240 to my door. Looks like it should fit pretty well.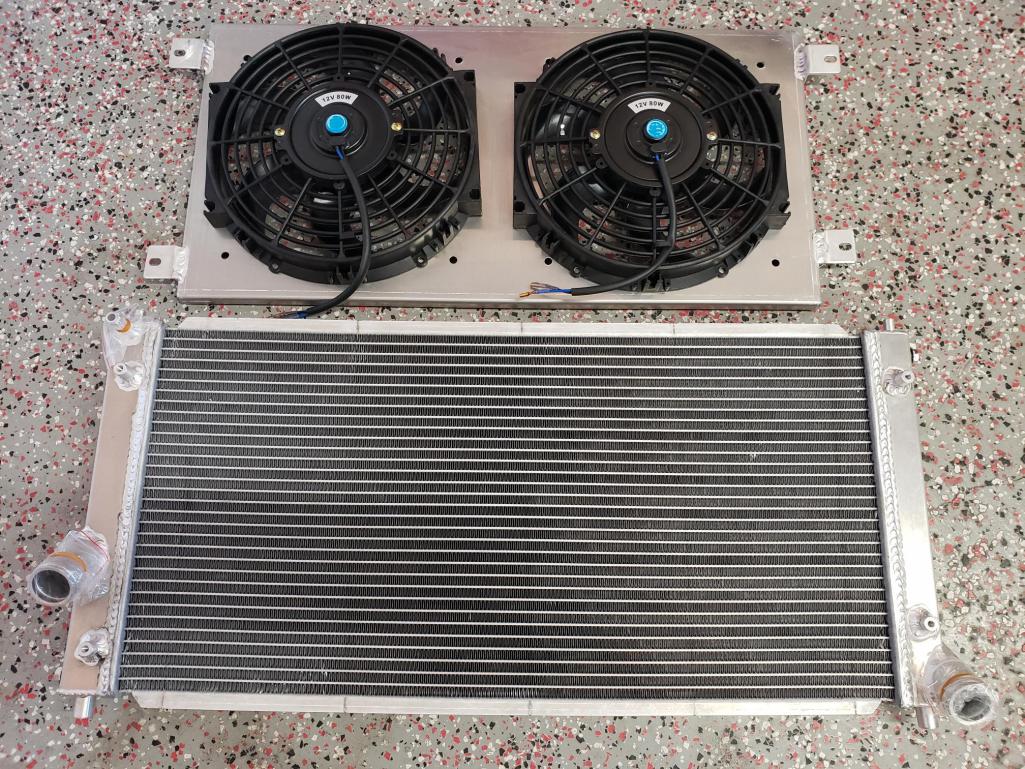
As previously shown, the floor of my trunk was cut out at some point for AC, so the plan for now is exit the air flow out the floor with ducting. I know some people concerns about the downward force of air creating front end lift, but I honestly don't know if I'll the car fast enough for it to be an issue. Time will tell, I guess!
More to come as I continue to steal everyone's clever solutions to these swaps.
Posted by: Mayne Dec 1 2021, 07:11 PM
Now that I've committed to doing the Subaru EZ30 6 cylinder swap, I've been trying to make some progress. Focusing on the cooling system fabrication in the frunk, I'm making a little headway. The first thing I did was to buy a small Titanium flux core welder to replace my well-used Chicago Electric welder. Still a budget unit, but I like it fine.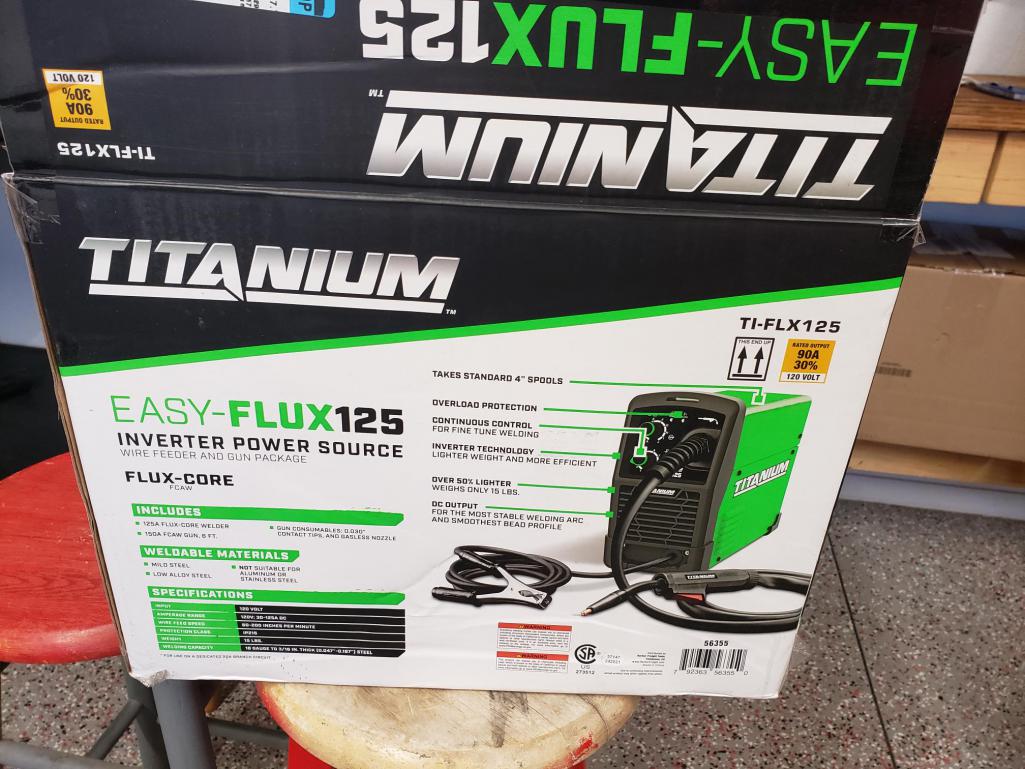
My first welding job was to make the frame that will accommodate the floating radiator mounts. One inch square tubing and some flat bar make up the bottom and sides. Not pretty welds, but they'll get the job done.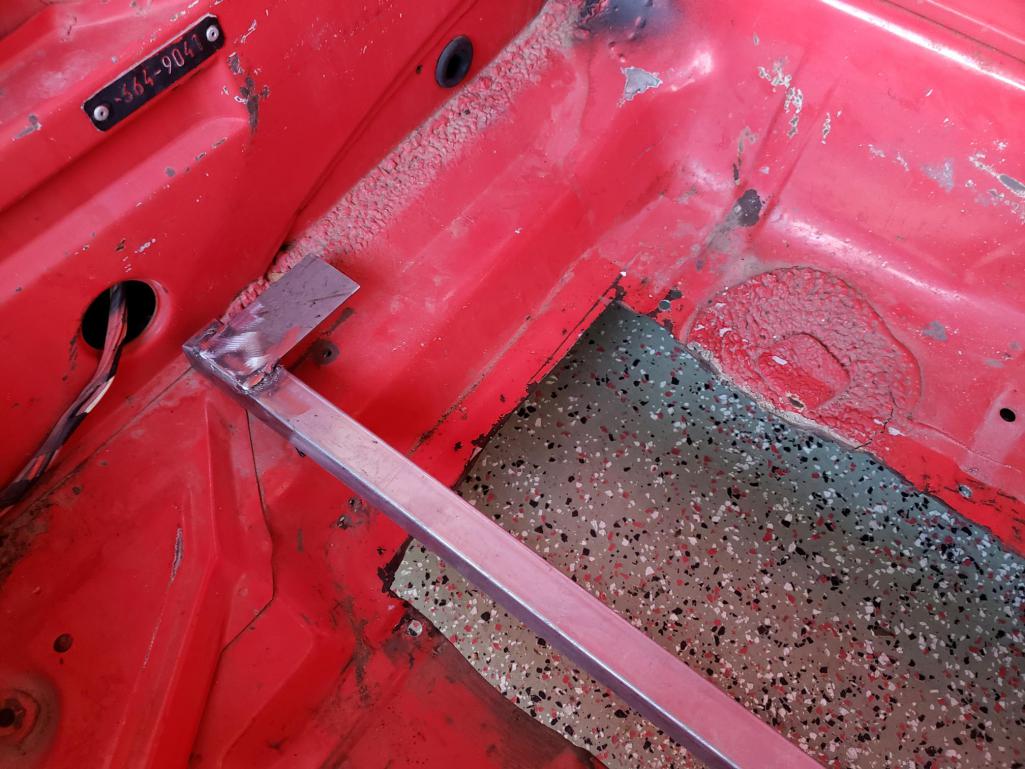
The flat bar tabs were drilled and grommeted for the bottom mounting posts on the radiator.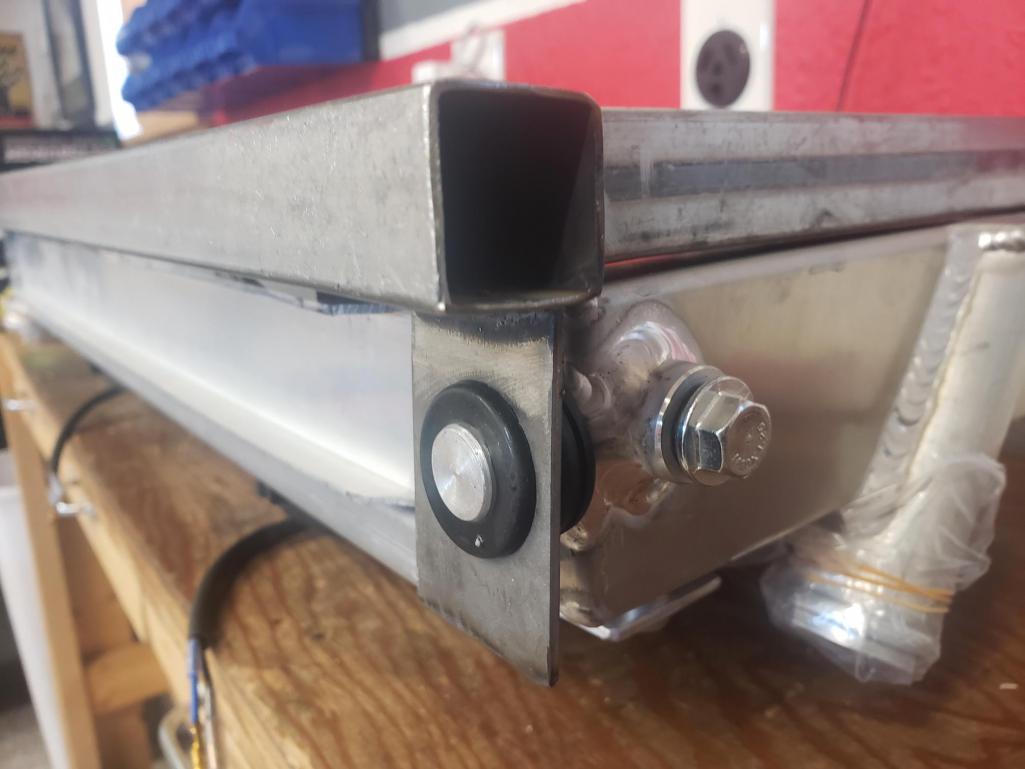
I should note that I basically ripped off the approach from forum member rmarx (how do you tag someone in a post?). Thanks for the ideas! As he did, I will make drilled and grommeted tabs for the top posts as well, that will mount below or above the sheet metal cowling that will cover the intake side.
Posted by: Mayne Dec 1 2021, 07:25 PM
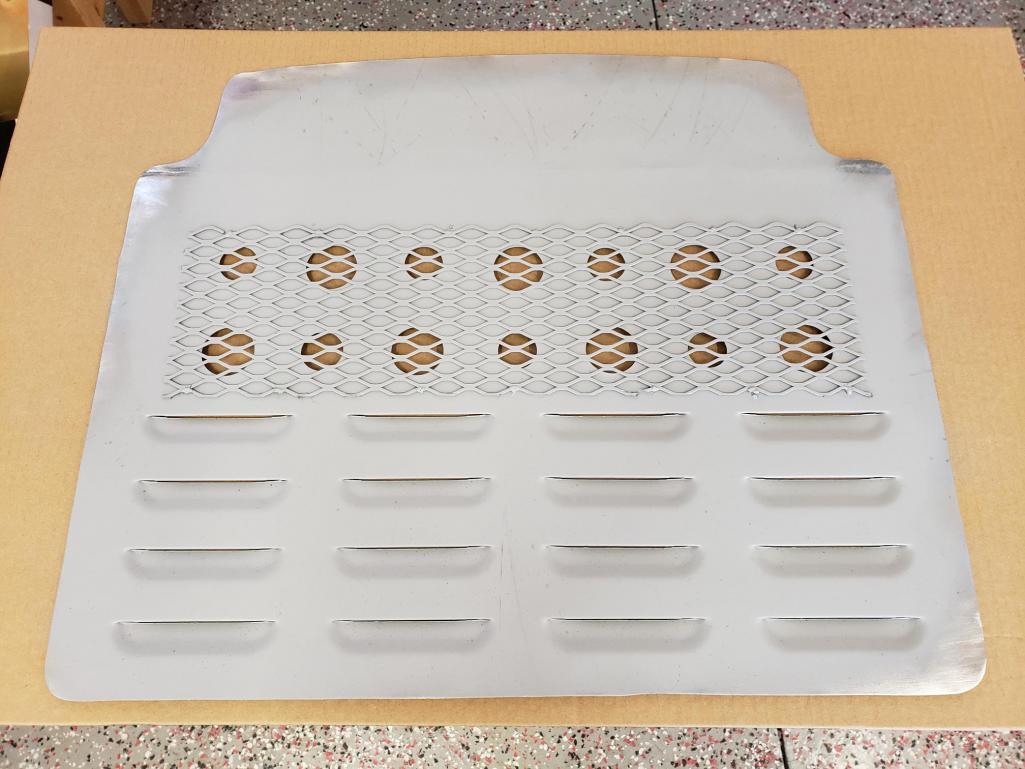
The next thing I needed to deal with was the terribly cut out floor pan, courtesy of the PO. I know some feel it's not the best way to vent air out, but I've decided to do it throught the frunk floor. I ordered the vented floor pan from Patrick Motorsports. For $65, it's fairly cheap, and it was fun to order something from them. Probably the only item ever! 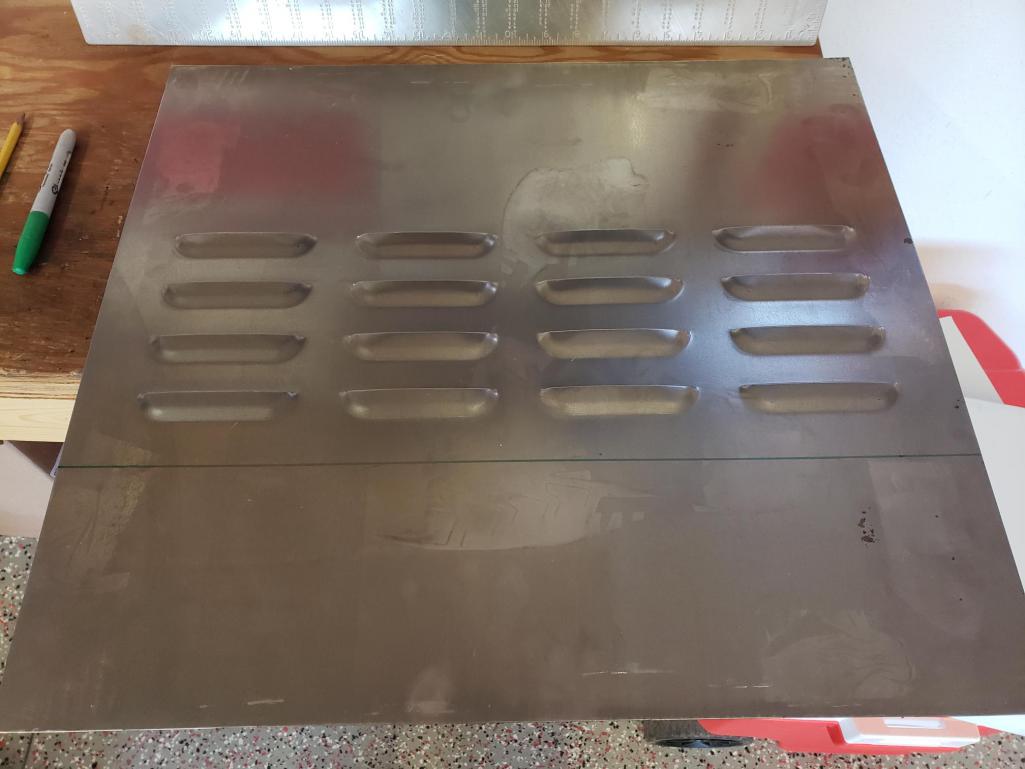
It's designed for an oil cooler, so for my purposes, I needed to get the louvers back closer to the bulkhead to accommodate the radiator and fans. So I lopped of the extra material and moved it to the other side.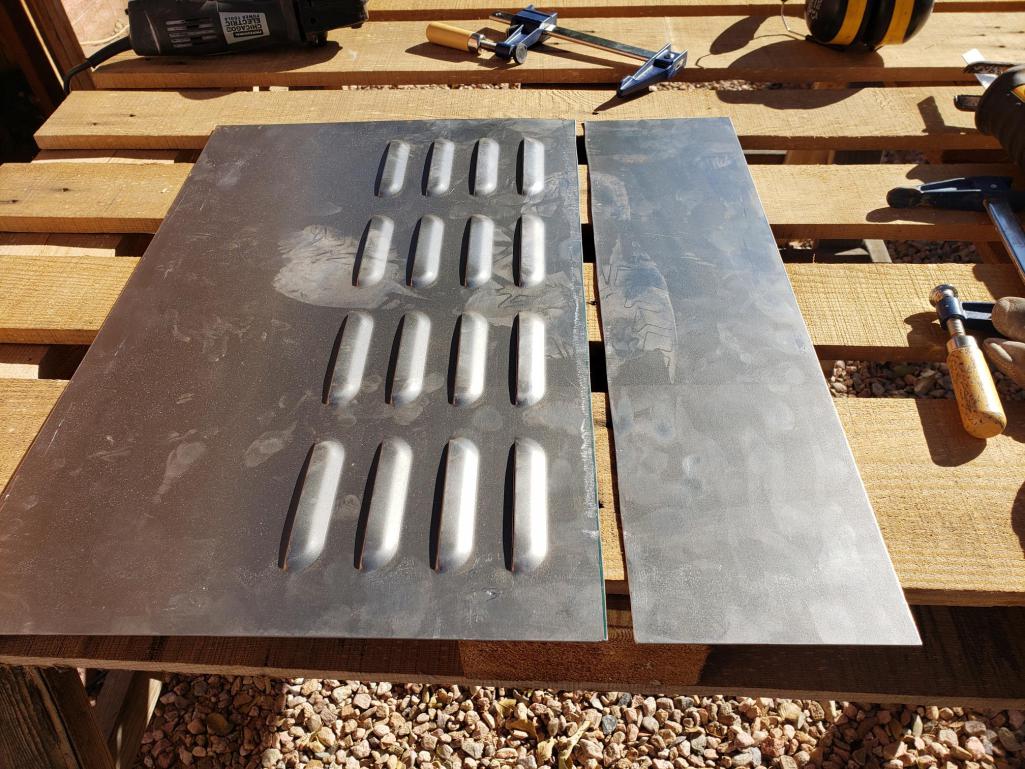

I cut it to the floor shape, then decided I needed more airflow. So I drilled a series of alternating 7/8" and 1 3/8" holes (trying to retain some strength), then covered them with expanded sheet metal to keep out rodents and debris. Wasn't too worried about covering the louvers.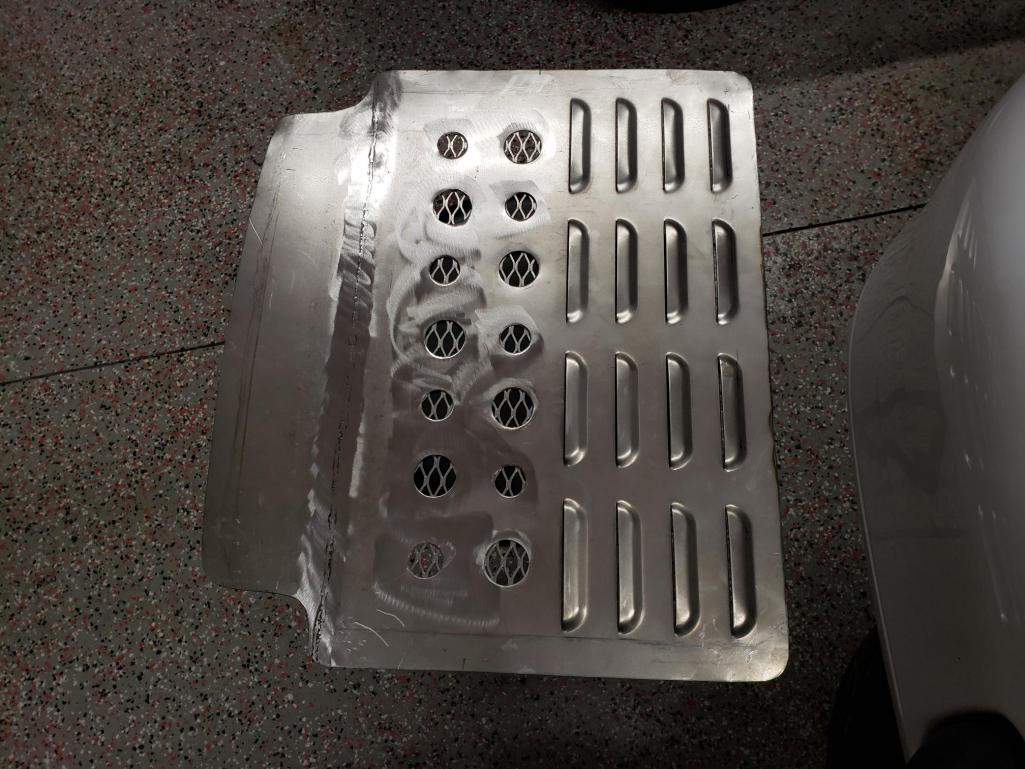
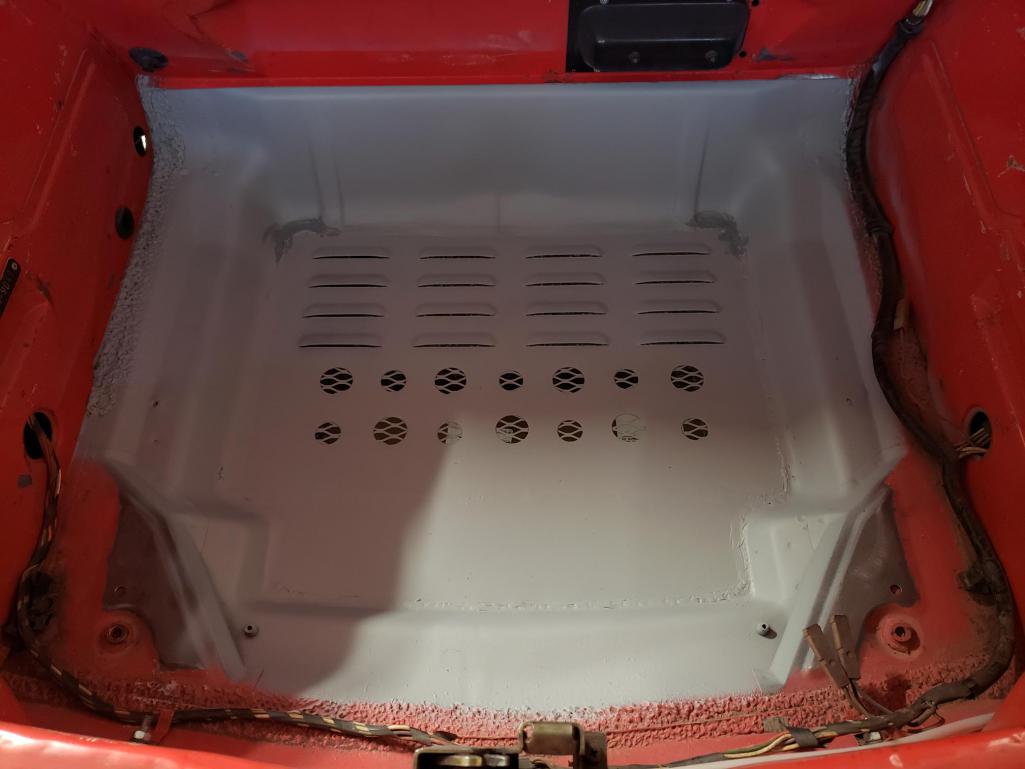
At this point the pan is mostly seam welded in place. I'll post a few pics when I get it primed and seam sealed.
Posted by: Mayne Jan 6 2022, 03:13 PM
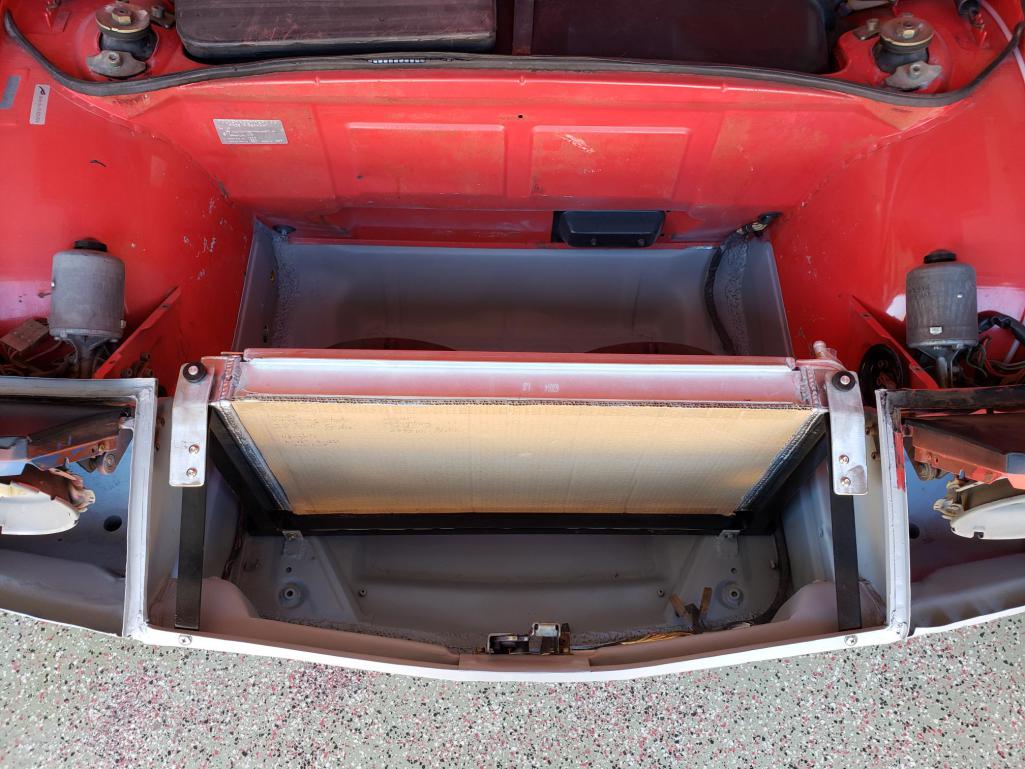
Work continues on the frunk-mounted cooling system. I got the vented floor pan welded in place, seam-sealed and primed. It felt great to repair that floor pan, even though its a different approach than I may have envisioned originally.
To mount the radiator frame to the floor, I made two tabs from 1/8" bar steel, drilled and bolted them to the bottom frame rail, then welded them to trunk floor. This way, the entire frame can be unbolted from the car relatively easily.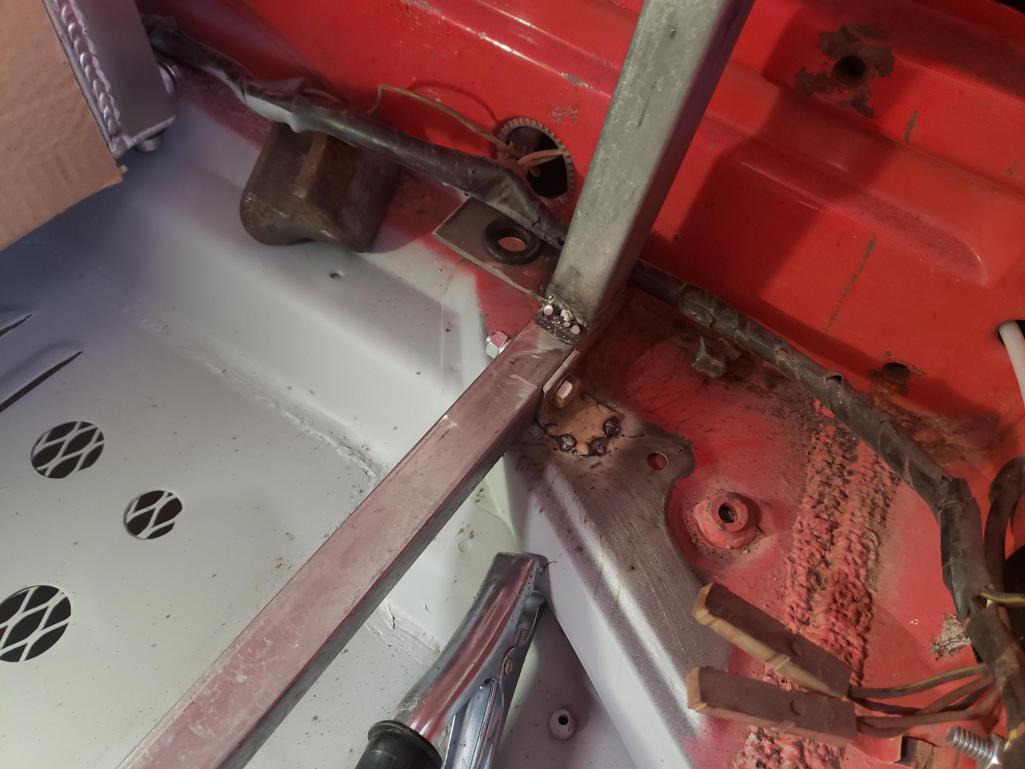
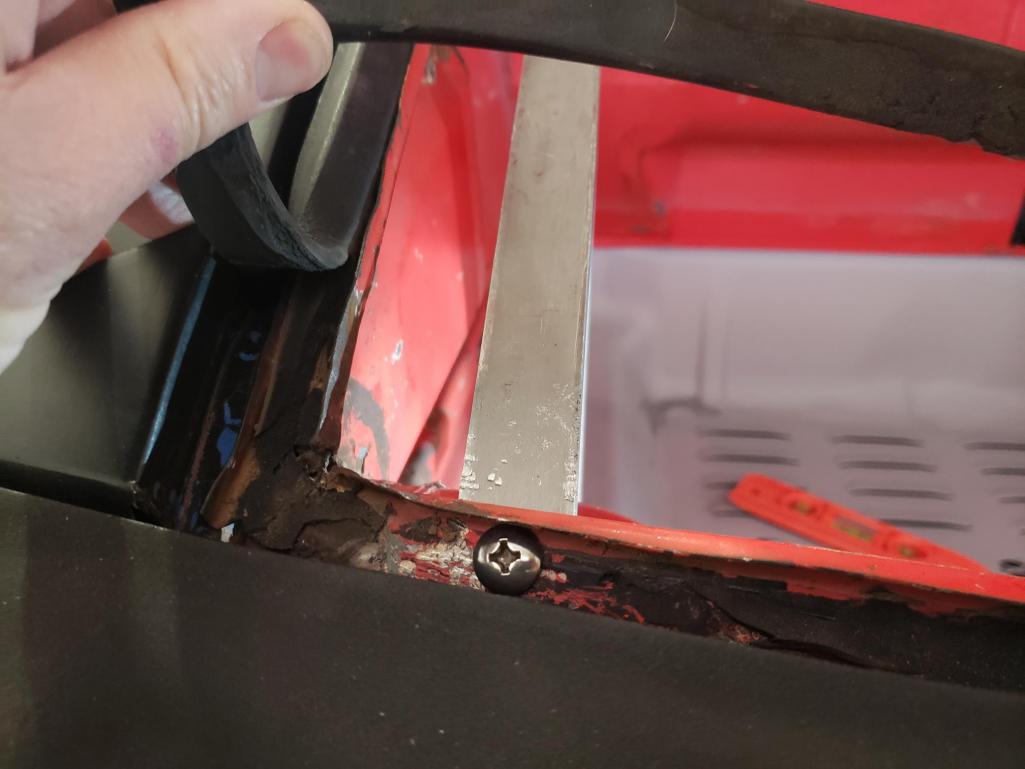
I bent and welded 1" bar steel supports to connect the upper frame to the front of the car. I lifted the weatherstripping and drilled holes for low-profile bolts to connect the supports. 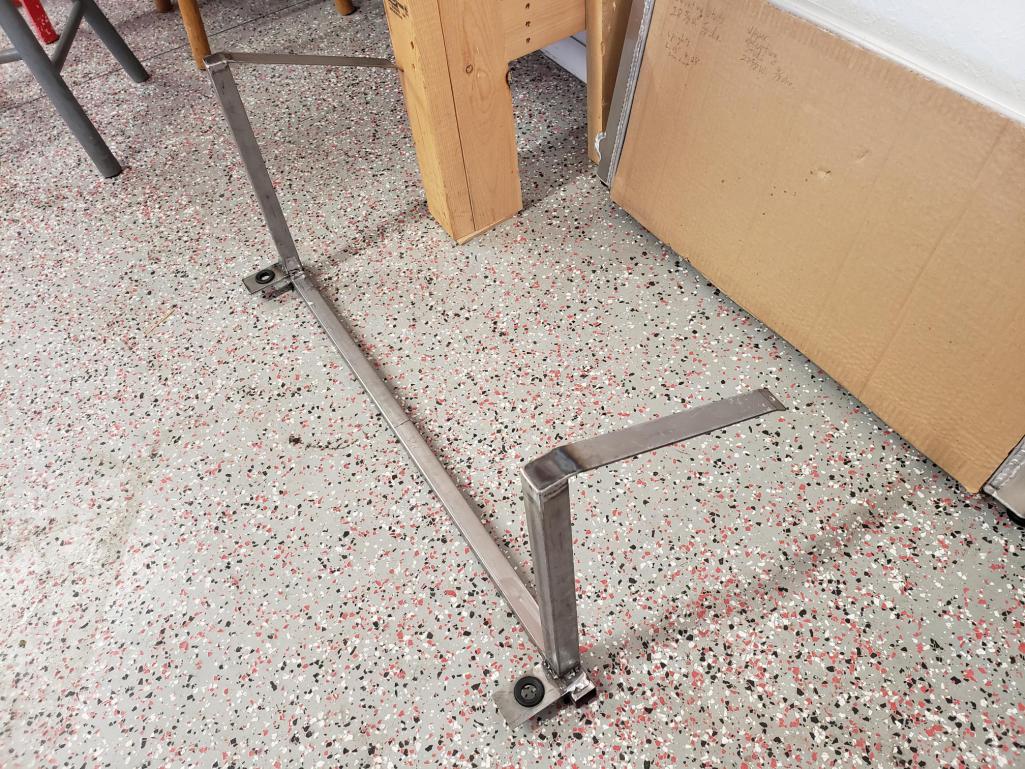
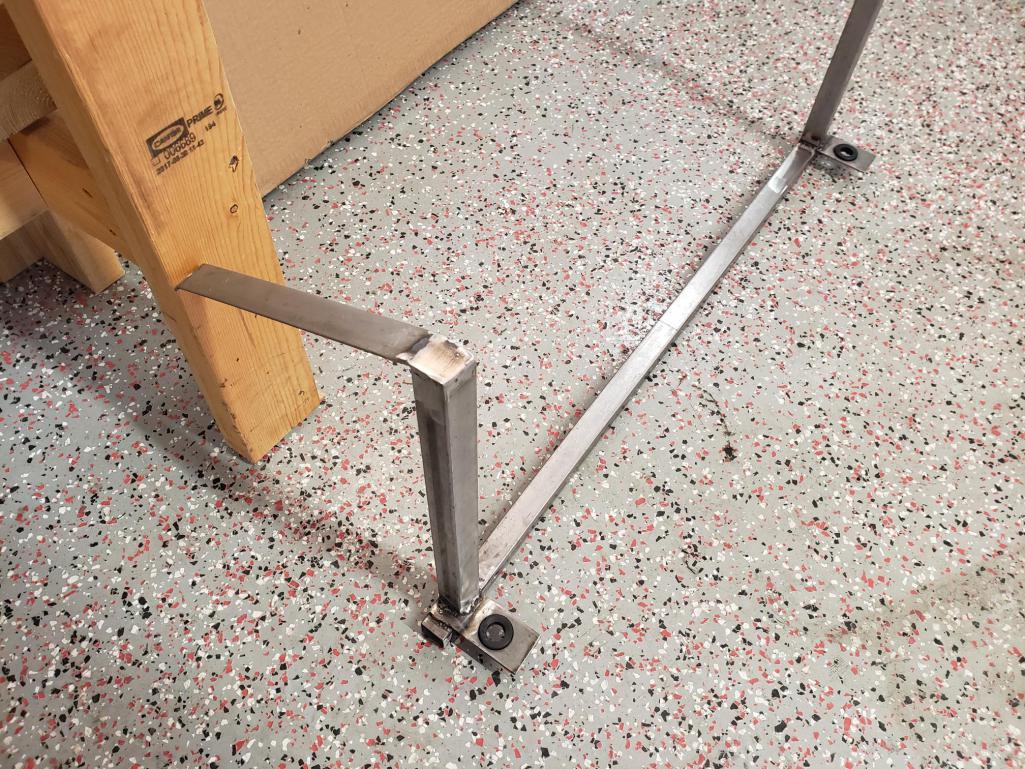
The final piece to be able to mount the radiator was to create tabs to be bolted to the upper frame supports that are also grommeted to the top rad mounting pins. By removing the bolts (nuts are welded underneath), I can easily remove the radiator. 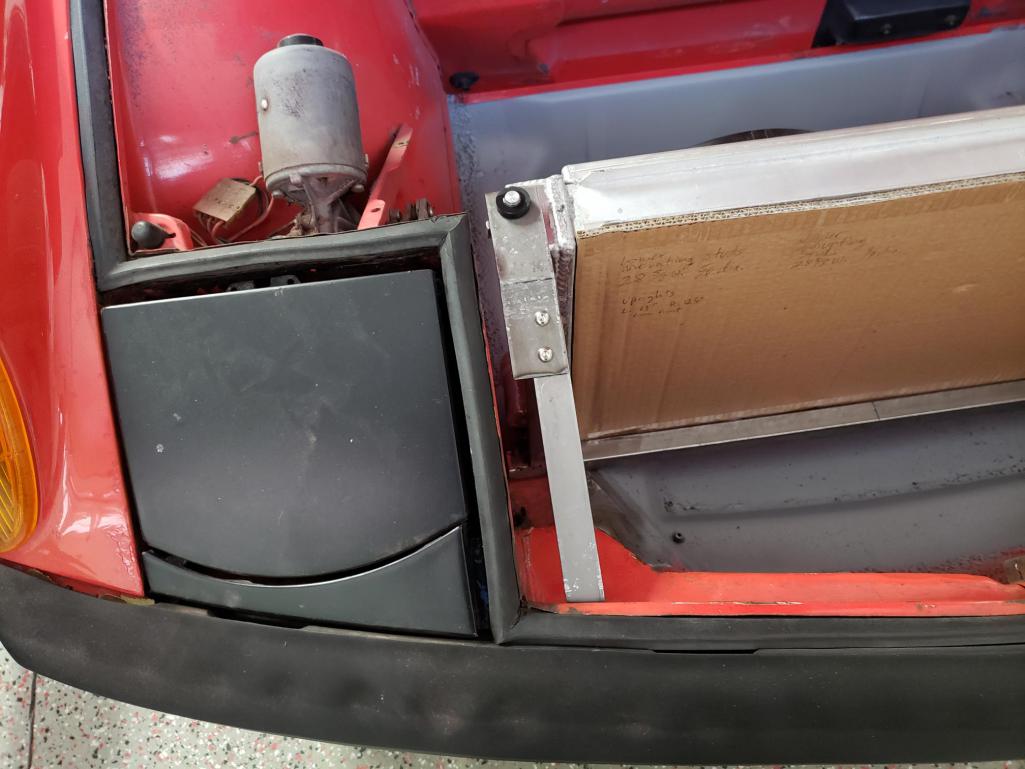
I'm actually going to re-do the tab design because I'm not happy with how it looks, but for now, the radiator is in position the way I planned.
Next step with be to start on the shroud design and execution, so we'll see how that goes. Happy New Year!
Posted by: brant Jan 6 2022, 03:18 PM
Nice Work !!
man that Datsun is sure pretty!
brant
Posted by: Mayne Jan 6 2022, 03:30 PM
Nice Work !!
man that Datsun is sure pretty!
brant
Thanks! I miss the old Roadster, especially when I'm hanging around some friends who still have them, but as sports cars go, they don't hold a candle to a 914!
But here's some cool Datsun Roadster content from my bro's YouTube channel. The owner of the cars is a friend here in NM.
https://www.youtube.com/watch?v=Vy0ijqcdmyc
Posted by: ValcoOscar Jan 6 2022, 03:58 PM
Very nice Jeremy-
I have always admired the sound and smoothness of 914 Suby conversions.
I see lots of smiles in your future. Keep at it.
Ask me how I know 
Hit me up if you're ever in SoCal
Oscar
Posted by: Mayne Jan 7 2022, 11:41 AM
Very nice Jeremy-
I have always admired the sound and smoothness of 914 Suby conversions.
I see lots of smiles in your future. Keep at it.
Ask me how I know
Hit me up if you're ever in SoCal
Oscar
Thanks for the kind words, and the invite, Oscar!
Posted by: Mayne Jan 10 2022, 09:11 PM
Made a little more progress on the radiator frame over the weekend. I welded on nuts to the frame arms to mount the tabs that will be grommeted to the radiator. I trimmed the lower frame crossmember, then cut tabs from 1" bar steel to cap off the ends. Did some more grinding on the welds, then finished them off with some JB Weld. Primed, then painted with gloss black VHT Chassis paint. Powdercoating would have been nice, but not in the budget at the moment.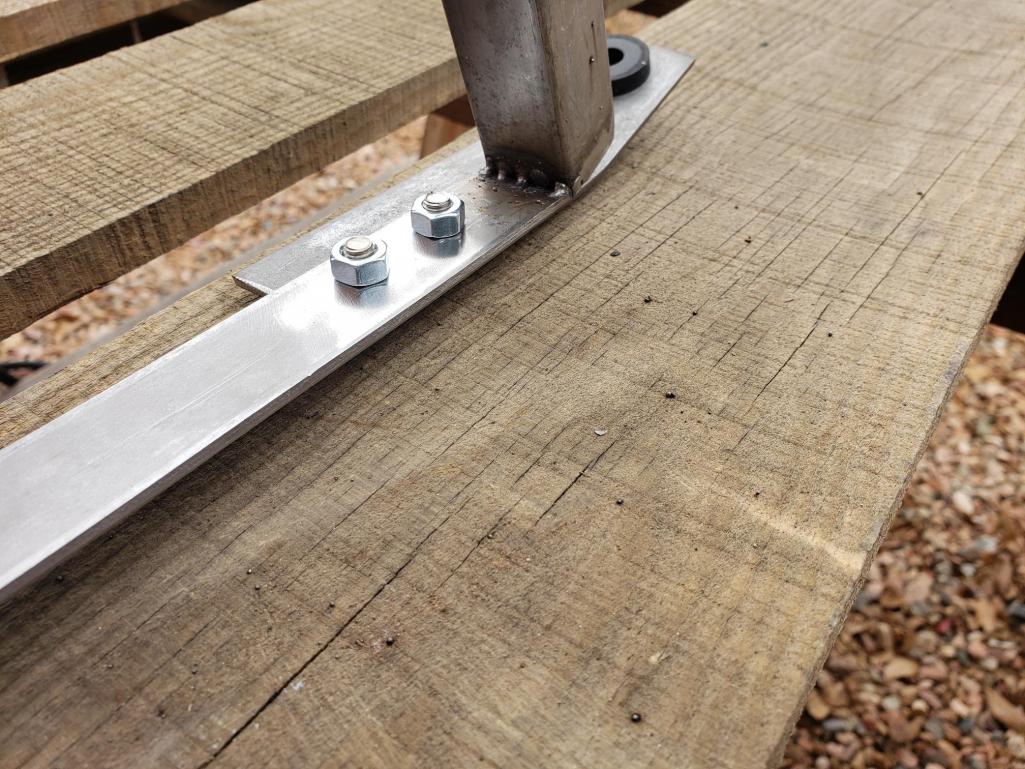
Posted by: Mayne Jan 25 2022, 03:16 PM
In working on the front of the car so much, I decided to deal with some body damage that has bugged me for as long as I've owned the car. I wasn't really planning on doing it at this stage, because I really want to complete the Subaru 6 conversion to the point of running and driving before I tackle body and paint. But dealing with the front end damage (to some extent, at least) makes me feel better moving forward.
I also plan to do similar work in the engine bay before putting the new engine in, so when it is finally time to strip it down for paint, much of the "B surface" work will be pretty good. I know many people start with paint and body, then do the powertrain, but for me it makes the most sense to do any cutting, welding and modifying to the body first so I don't have to cut into a freshly painted body (though I'm sure some of that will have to happen anyway).
I detailed some of this in a separate thread recently, so I'm just getting all the info into the build thread here.
Body damage and surface rust. The structure was reasonably pulled, but there was no effort to treat the bare metal, so a lot of superficial rust: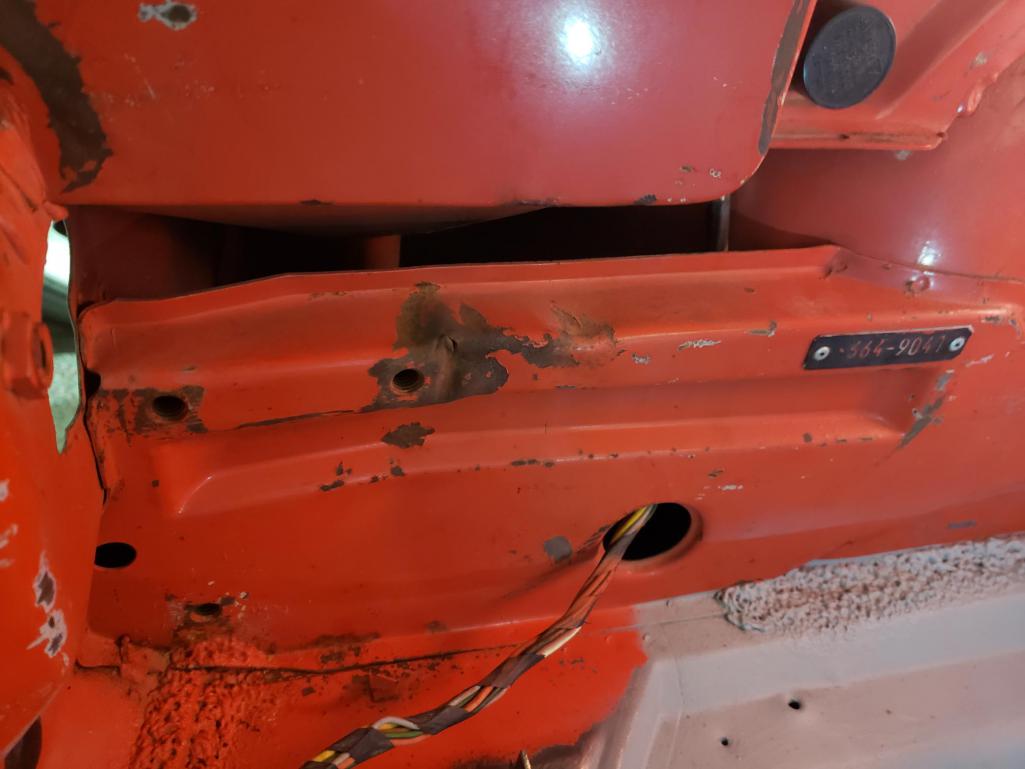
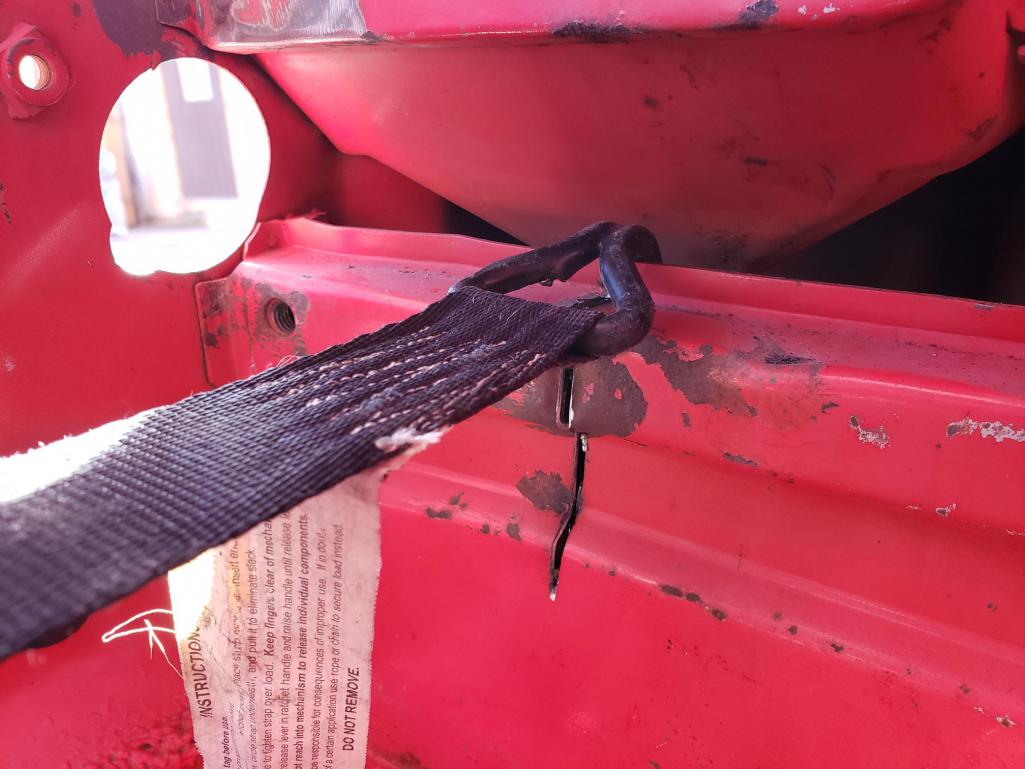
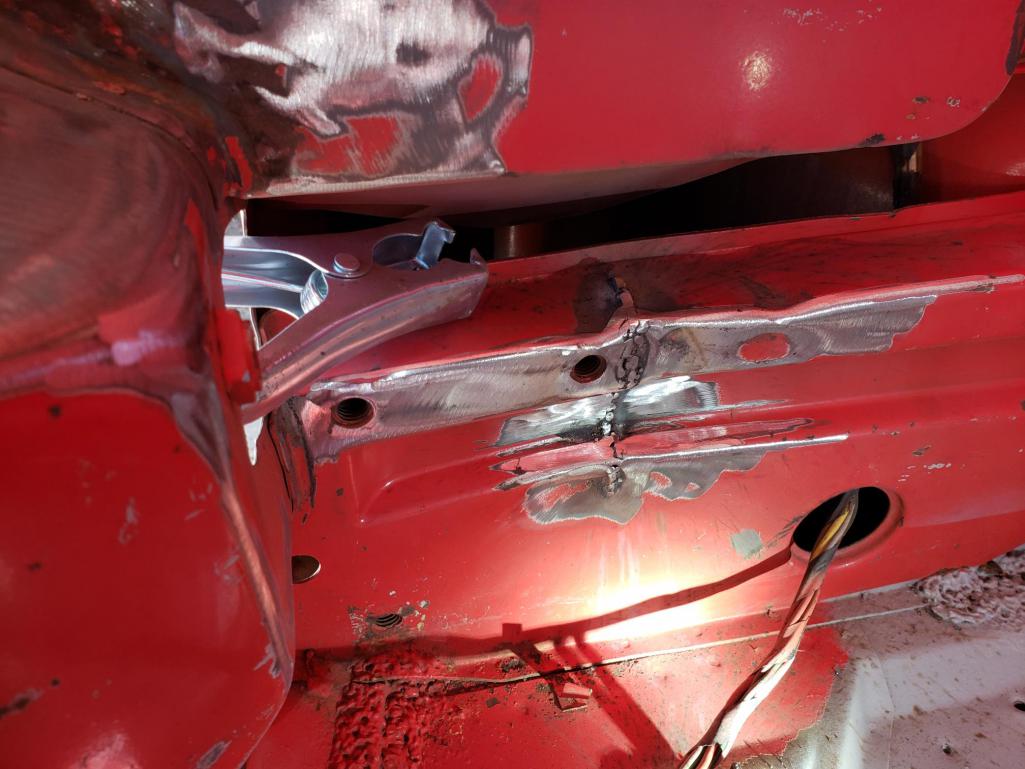
I cut the worst of the kink, then put a ratcheting strap on it to pull it inward a little. This really didn't move it too much, though maybe if I had cut it more, it would have. At any rate, added some metal to the opening and welded it up. I did some hammer and dolly work, then added some filler and seam sealer. 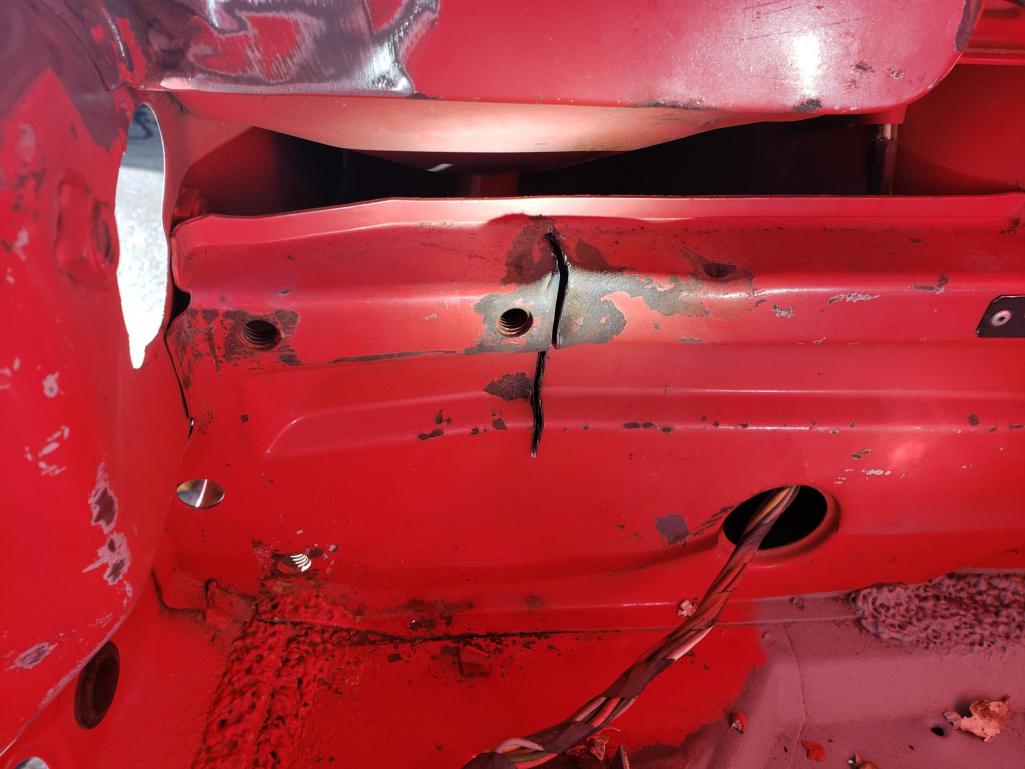
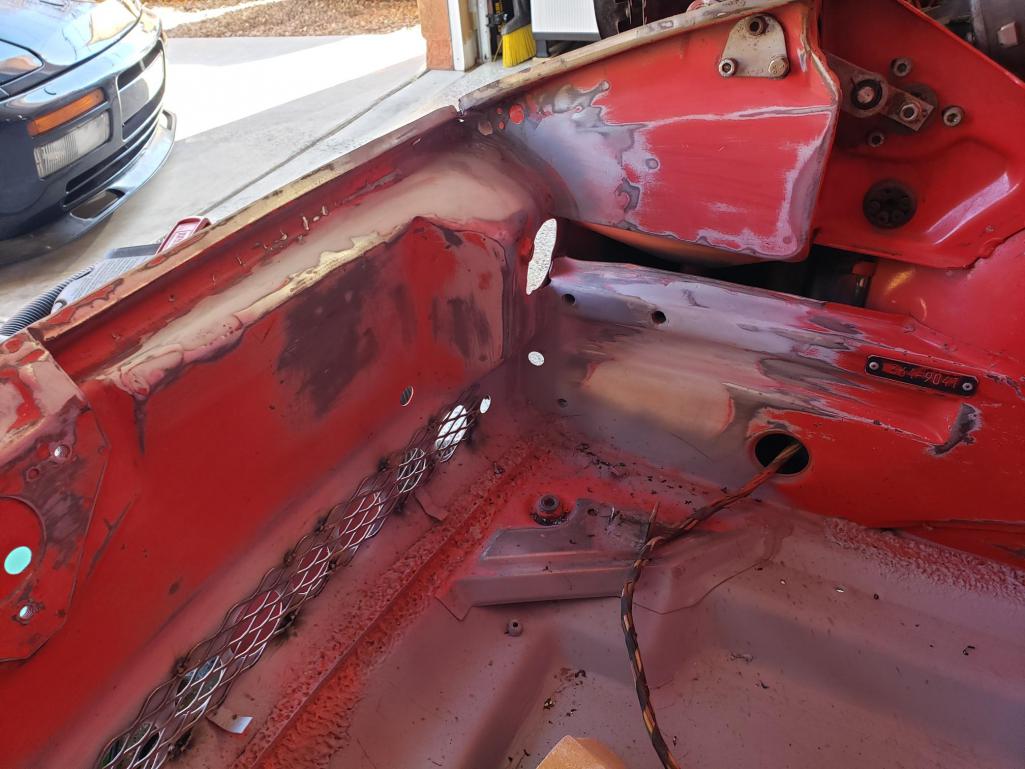
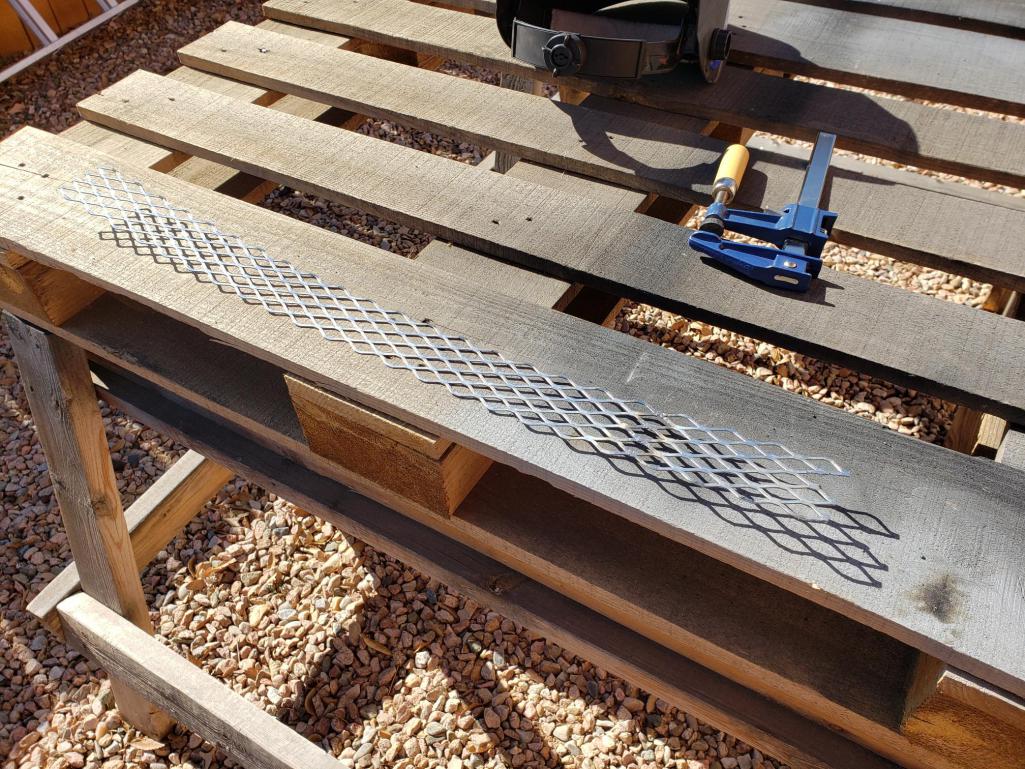
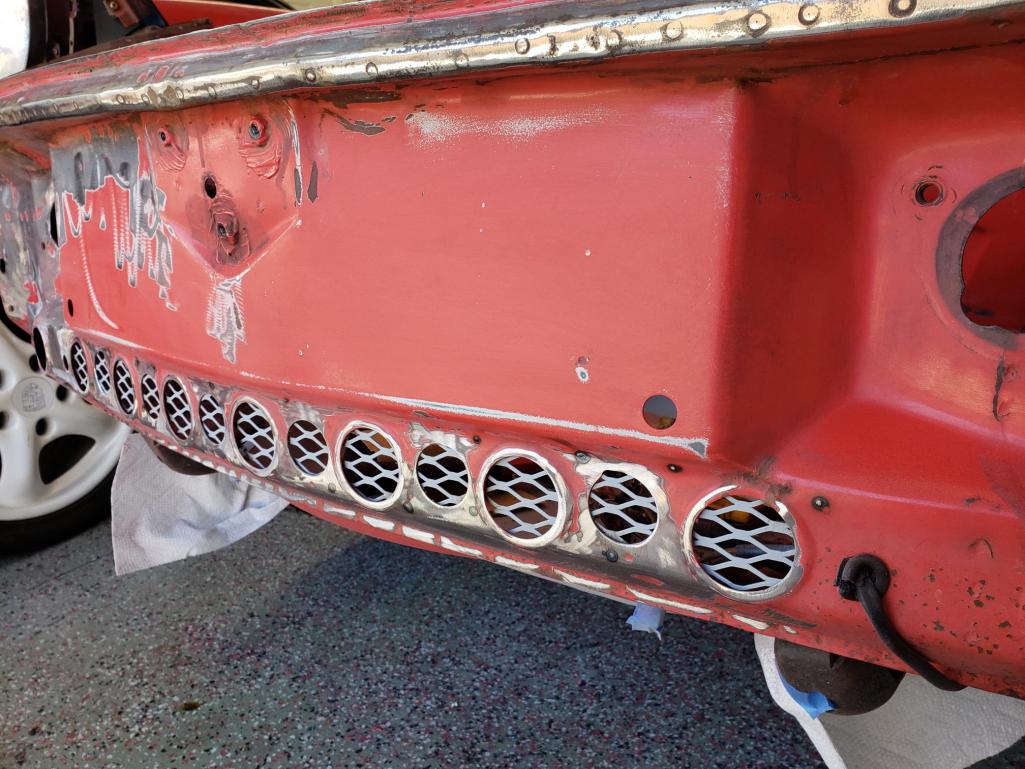
Before priming, I added extra holes between the factory holes in the nose for better airflow to the radiator. I cut some mesh, which wasn't quite long enough to span the distance. A few spot welds made it into one piece and I tacked it into place.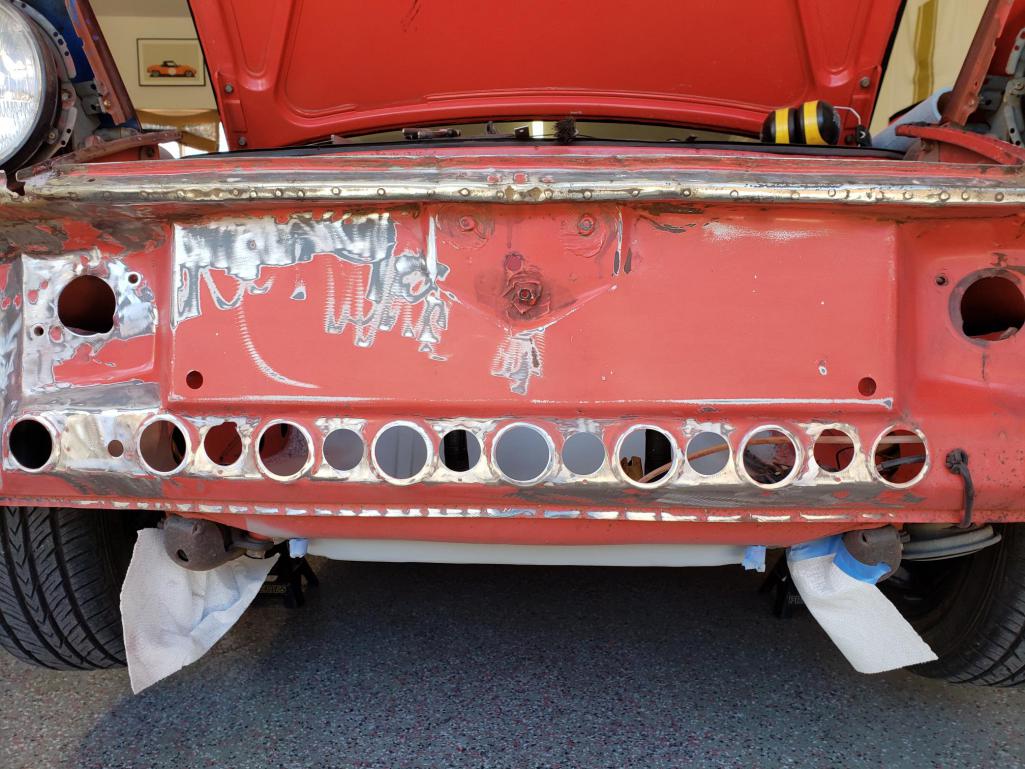

Posted by: Mayne Jan 25 2022, 03:30 PM
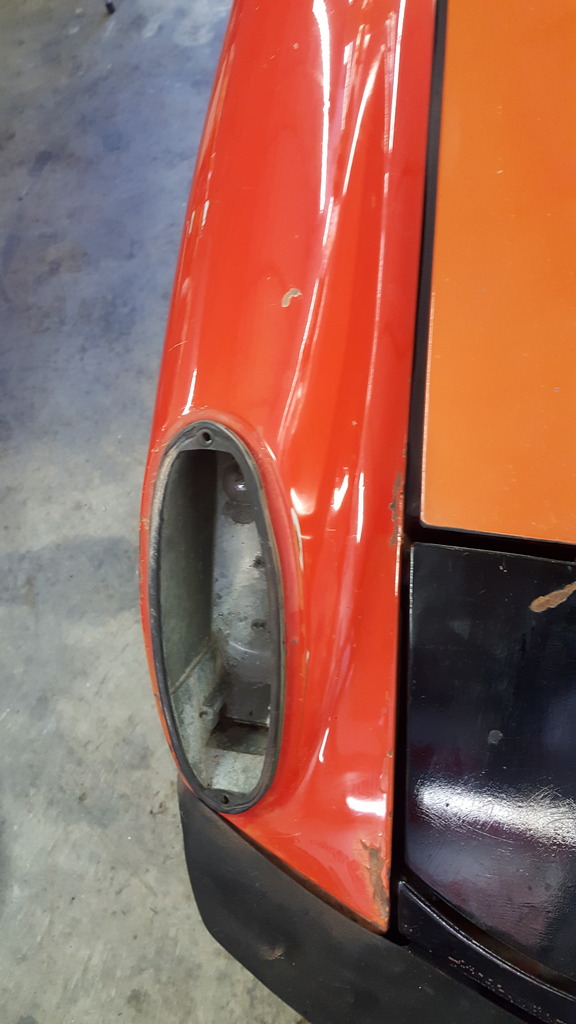
I stripped as much of the paint on the nose as I could, then taped it off and sprayed several coats of primer/surfacer. I got into the buckets below the headlights and treated some surface rust in there (as well as removing a substantial rodent nest!).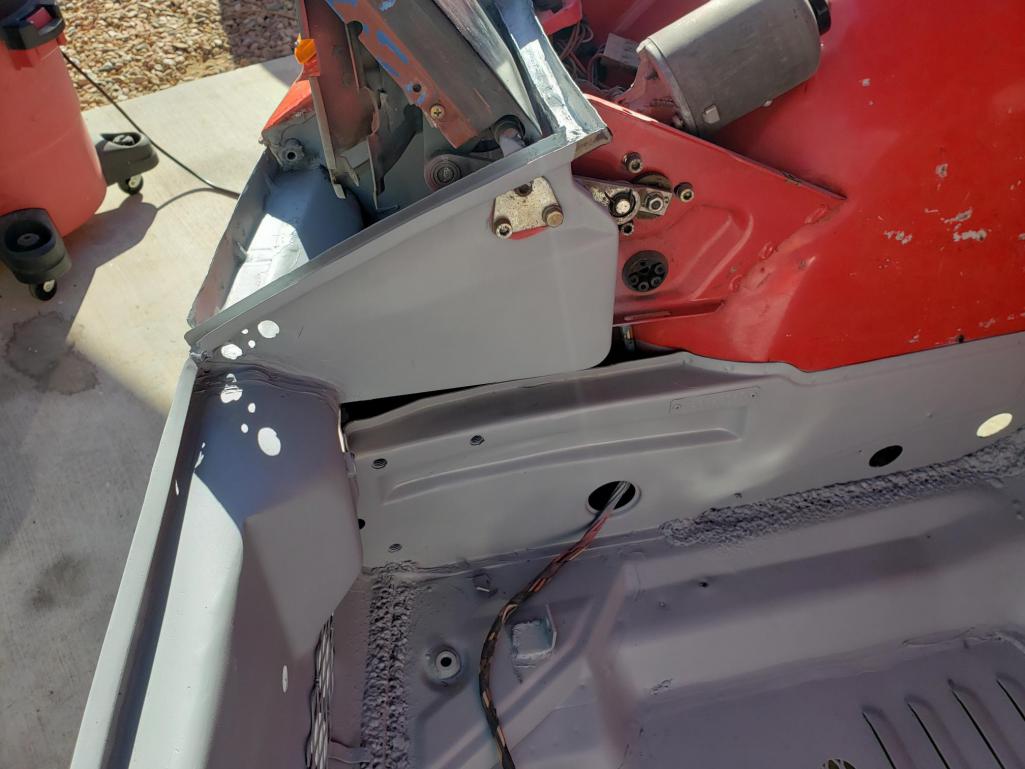

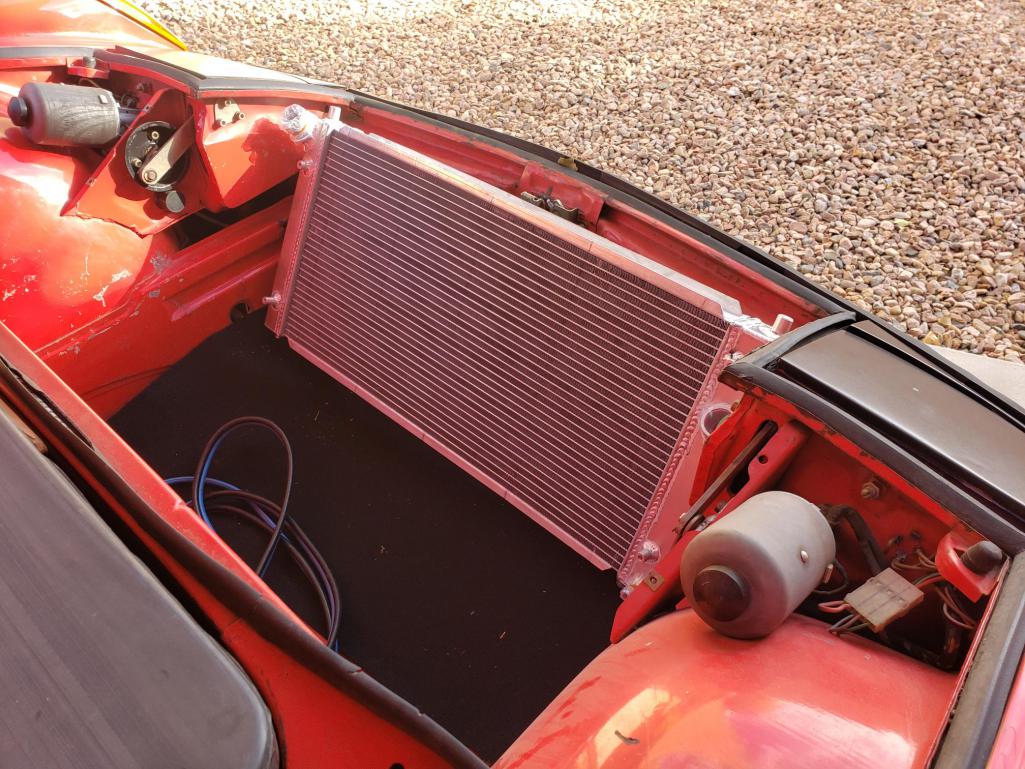
Now that the body work was decent, I finally got to install the radiator with my painted frame. The upper mounting tabs are just in bare metal, since I'm not sure how I want to finish them. Once the shrouds are in place, they will be about the only visible brackets. I'm considering drilling some "lightening" holes for aesthetics, burnishing the metal more, then clearing, but we'll see. But now that the radiator is in and I'm content with the mounting, I can start mocking up the lower and upper shrouds, maybe out of 1/16" aluminum.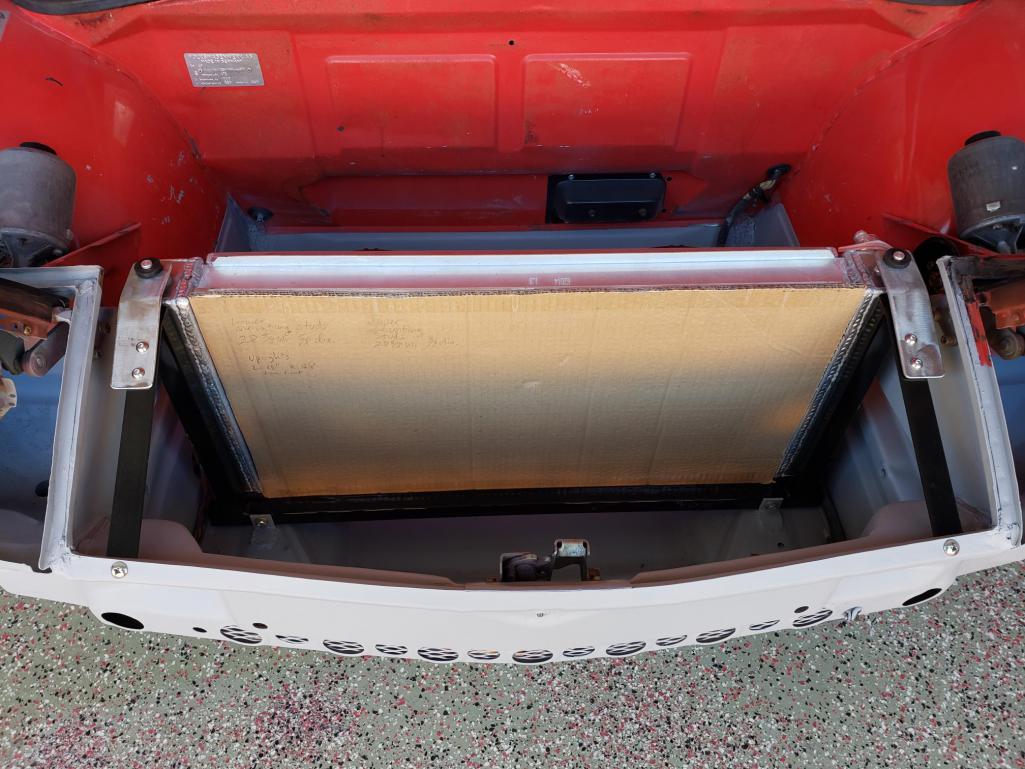
That's it for now!
Posted by: Eric_Shea Jan 26 2022, 06:27 PM
Did you and Zach ever do that 5-lug video?
Posted by: tazz9924 Jan 26 2022, 07:43 PM
I would be worried about cooling with your setup. You will definitely need to duct the front to make it effective and in the rear there is hardly anywhere for it to go. The radiator needs a lot of fresh airflow in and out. If you don’t do ducting you will need larger holes.
From a trusted source of mine:
With a well-designed inlet duct, the opening for your intercooler, radiator, oil cooler, etc. should be about 1/3 the surface area of the heat exchanger. If your intercooler core is 20” x 30” (600 square inches), In a perfect world, you’d then create an outlet duct that would then shrink down to the 1/3 size again and dump into a low-pressure zone
Food for thought anyway. maybe you have some good plans ![popcorn[1].gif](style_emoticons/default/popcorn[1].gif)
Posted by: Mayne Jan 26 2022, 09:07 PM
Did you and Zach ever do that 5-lug video?
Hey Eric! I thought Zach was going to send you the video, but I did post it earlier in the thread here. But at any rate, here are links to the two-part video:
https://www.youtube.com/watch?v=F4jVNUjAOng&t=1153s
https://www.youtube.com/watch?v=xCLXsOg63ww
Posted by: Mayne Jan 26 2022, 09:12 PM
I would be worried about cooling with your setup. You will definitely need to duct the front to make it effective and in the rear there is hardly anywhere for it to go. The radiator needs a lot of fresh airflow in and out. If you don’t do ducting you will need larger holes.
From a trusted source of mine:
With a well-designed inlet duct, the opening for your intercooler, radiator, oil cooler, etc. should be about 1/3 the surface area of the heat exchanger. If your intercooler core is 20” x 30” (600 square inches), In a perfect world, you’d then create an outlet duct that would then shrink down to the 1/3 size again and dump into a low-pressure zone
Food for thought anyway. maybe you have some good plans
I appreciate the input! I agree I'm flirting with a lack of airflow, though I do plan to fully duct the setup on both sides. I post on the Watered Down Facebook group as well, and Kent has been commenting on the design and seems to think it might work. My thinking is, that when it's all up and running, if I have cooling issues, I can drill or cut more openings without a major headache. I'm also banking on the low cooling demands of the EZ30 vs. a SBC or LS. We'll see!
Posted by: 76-914 Jan 26 2022, 10:53 PM
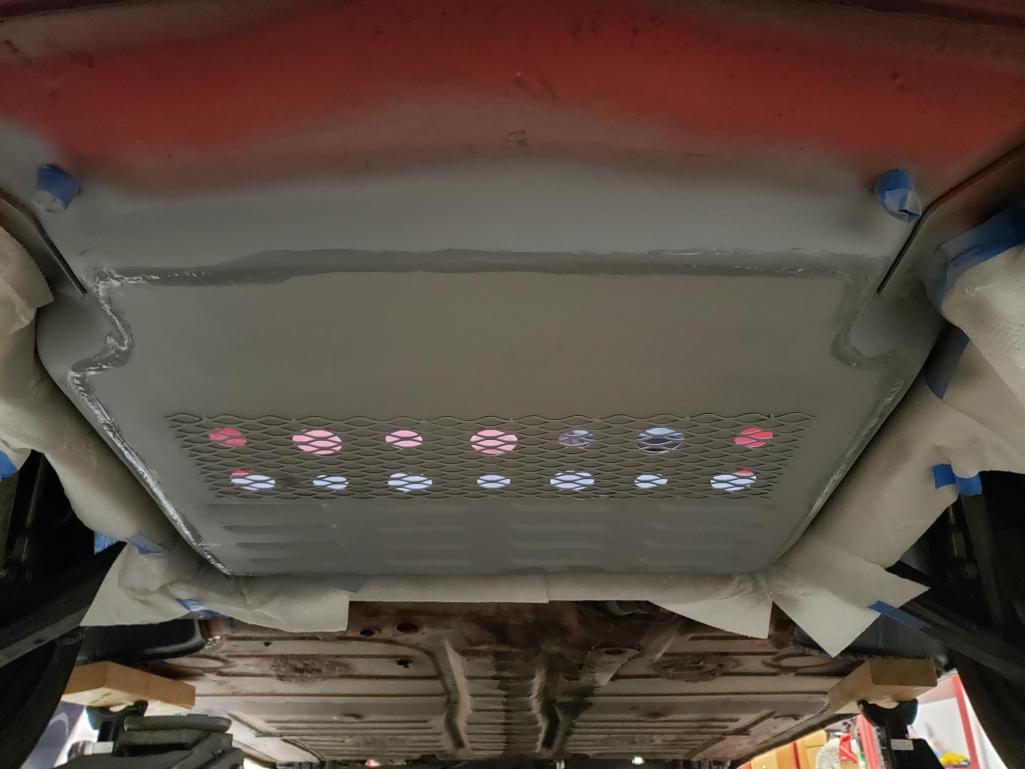
He should be OK. Here are both of my Subaru conversions and their openings for reference. On the 70 with the green & yellow bumper I cut out 5 of the centermost holes creating an oval opening and it cools fine. Jeremy is using 7 holes and has opened up smaller holes in-between each of those. Worst case is he'd need to open it up by removing the material between the holes. The EZ30's don't require much of an opening. Even with AC. HighJack over. 
Posted by: tazz9924 Jan 28 2022, 03:42 AM
He should be OK. Here are both of my Subaru conversions and their openings for reference. On the 70 with the green & yellow bumper I cut out 5 of the centermost holes creating an oval opening and it cools fine. Jeremy is using 7 holes and has opened up smaller holes in-between each of those. Worst case is he'd need to open it up by removing the material between the holes. The EZ30's don't require much of an opening. Even with AC. HighJack over.
I like how you did that, i wish i cut my hole open like that in a past life instead of cutting the bumper out so much. What does the backside of that look like? i went through the fender wells but i do really like the floor exit for non race car kinda swaps.
I was just more worried about exit, but he is right that he can cut more holes. Especially with ducting it’ll be better. If theres good water proof ducting and you have the grating, why not just cut it out so you don’t need to figure out if it works good enough on a hot day. Keep up the work though!
Posted by: Mayne May 27 2022, 08:41 AM
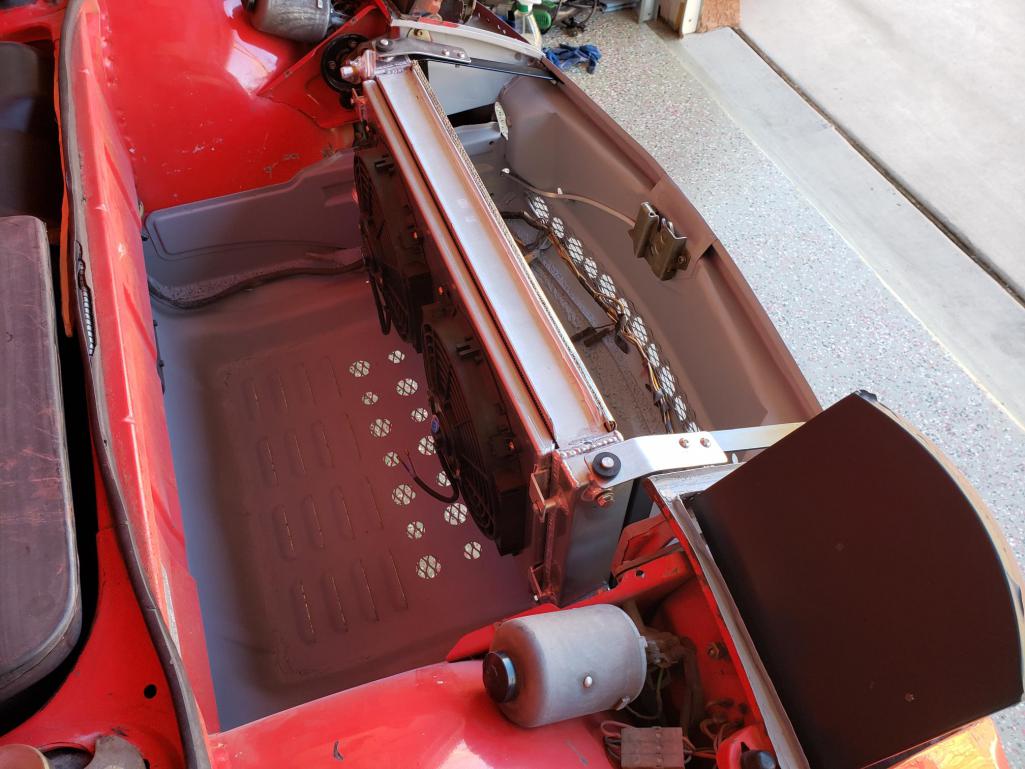
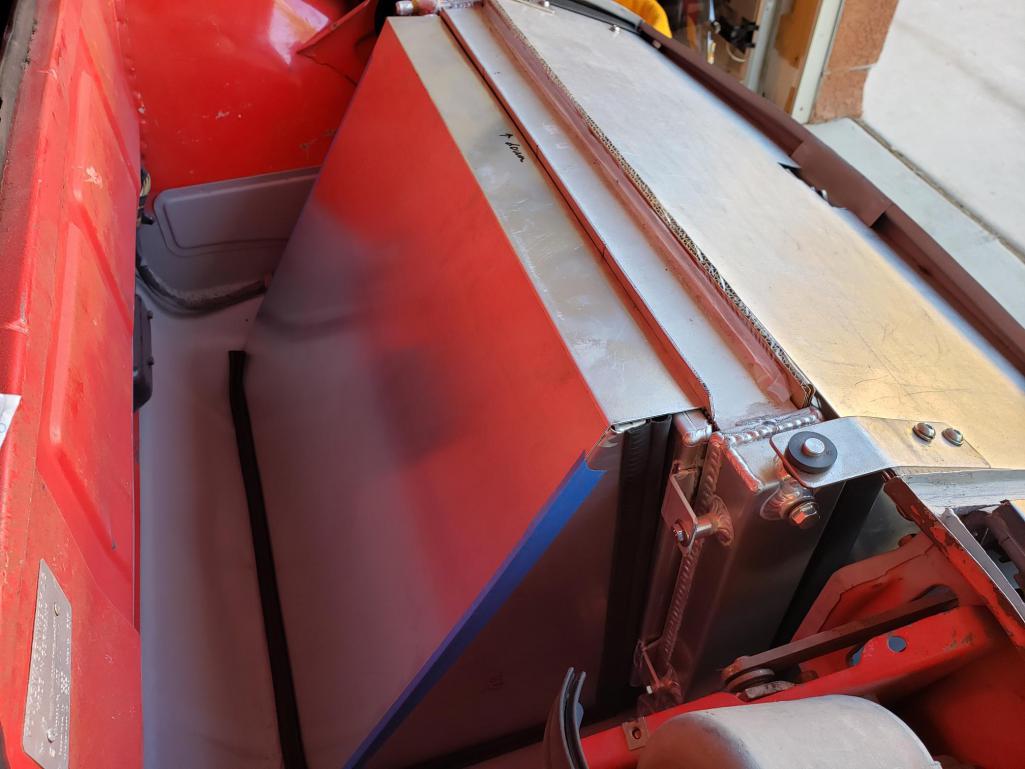
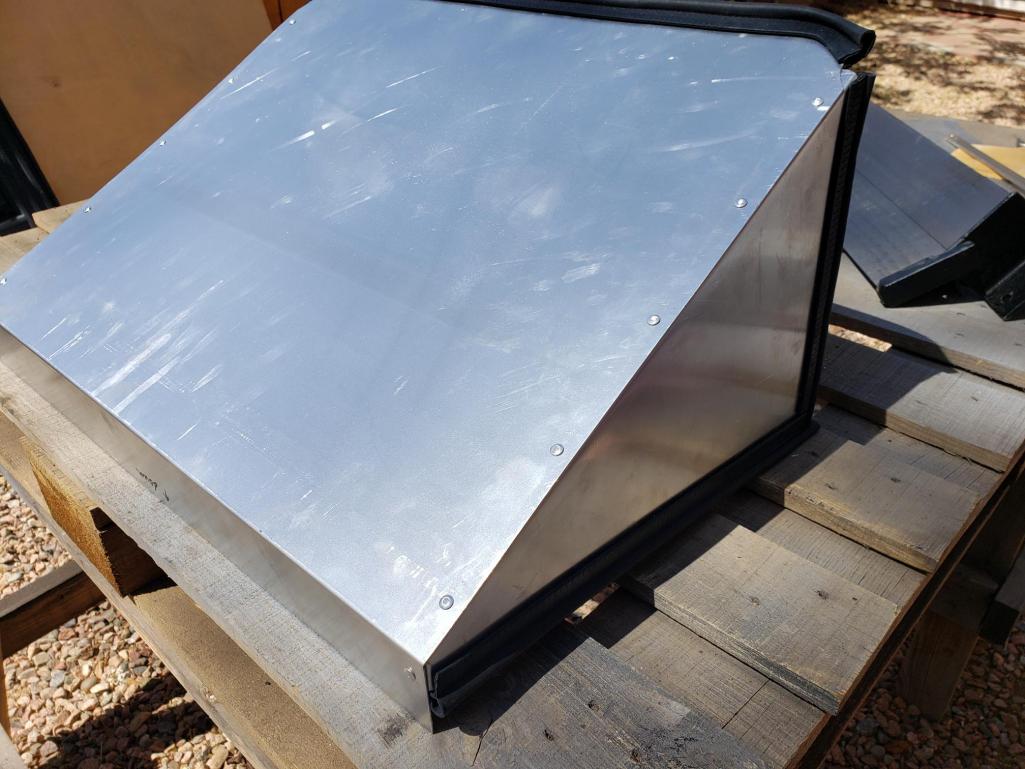
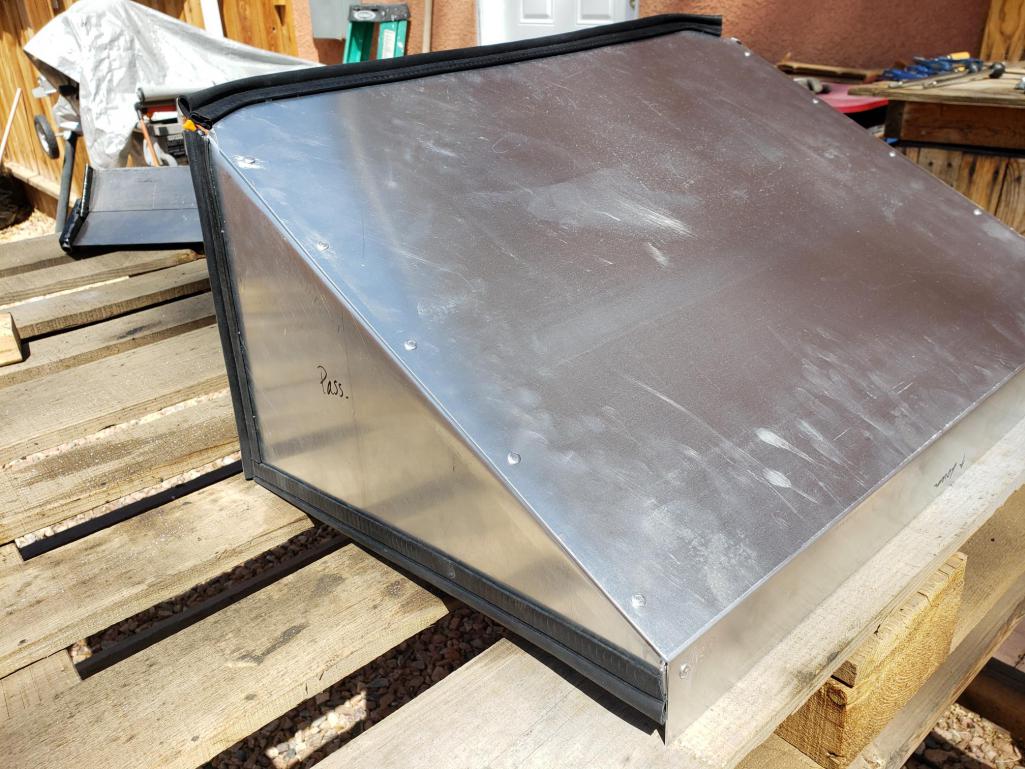
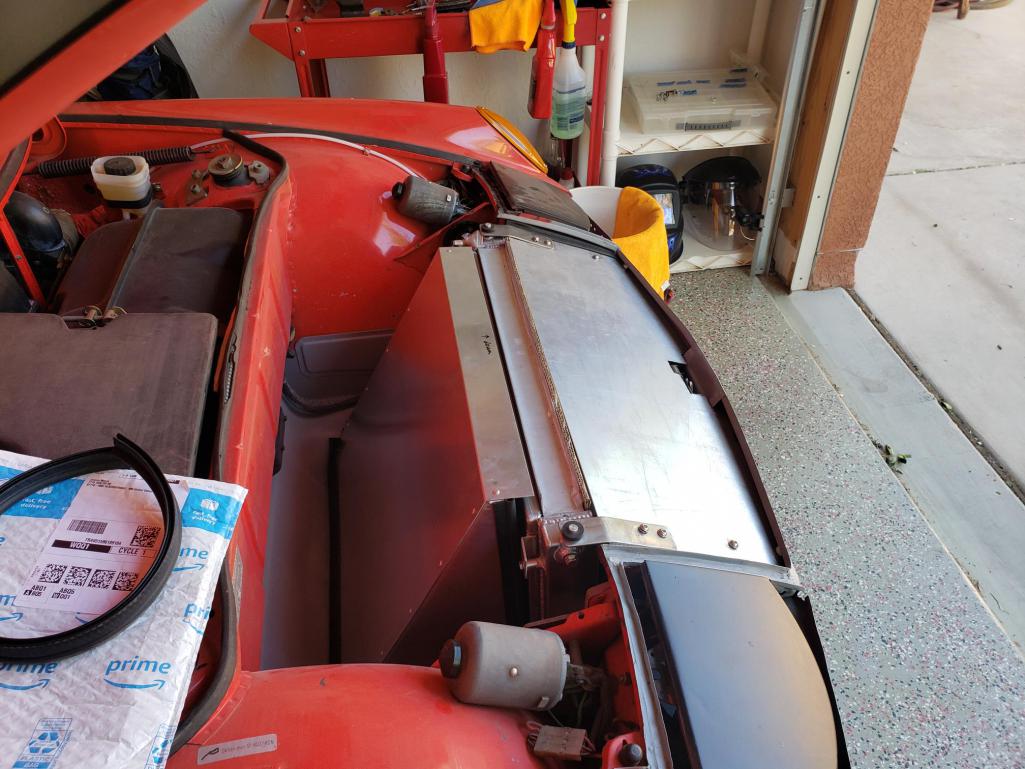
Time for a little update here. Up next was making aluminum sheet ducting on both sides of the radiator. I started with the inlet side:
Card stock template (card stock is silver, so not metal yet):
Metal brake ordered from Jegs:
First delivery of aluminum sheet, fairly light duty at .050: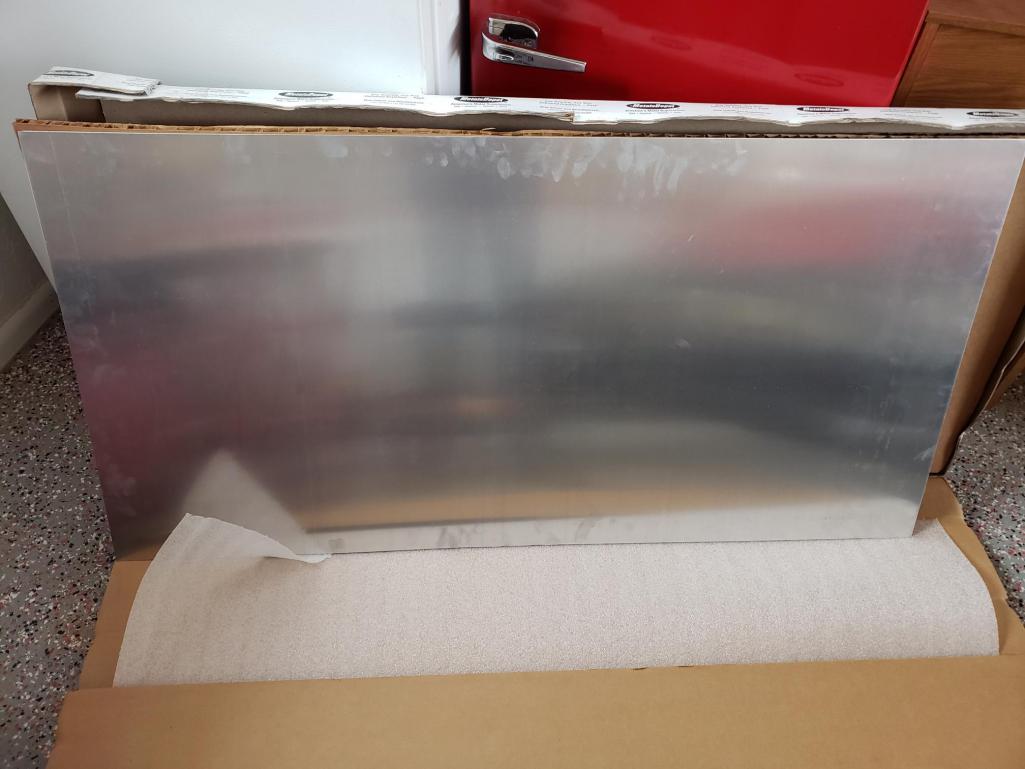
Duct floor: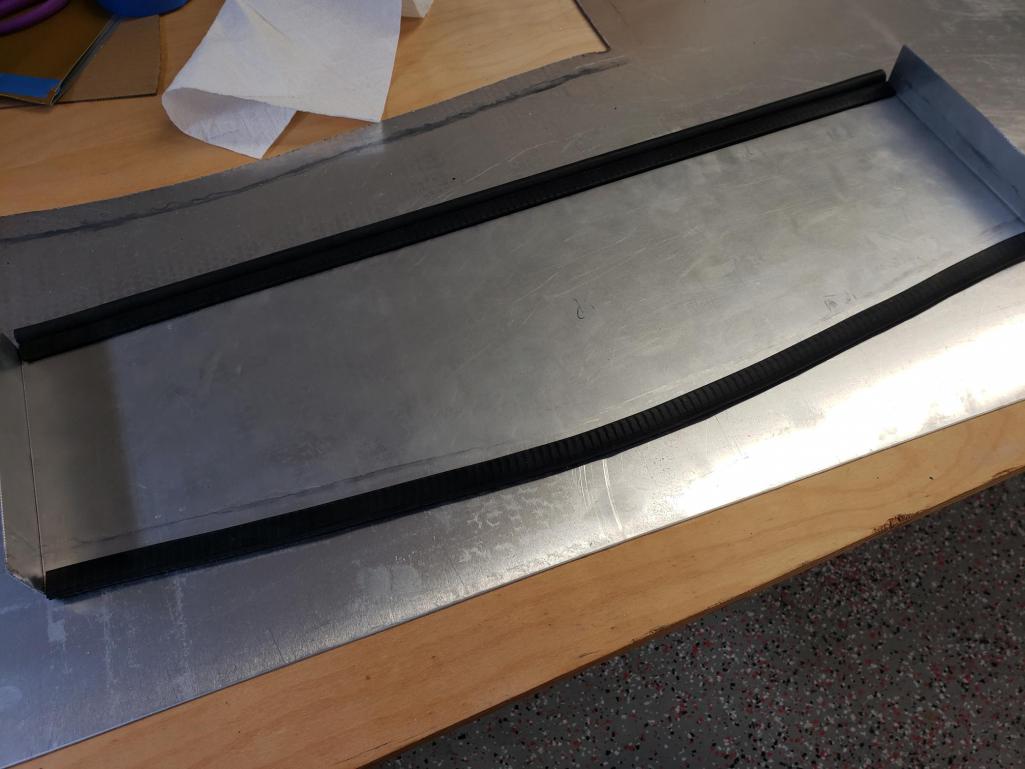
Duct floor and walls riveted together. I'm using weather stripping with "top bulb" rubber tube to help fill in an irregular edges: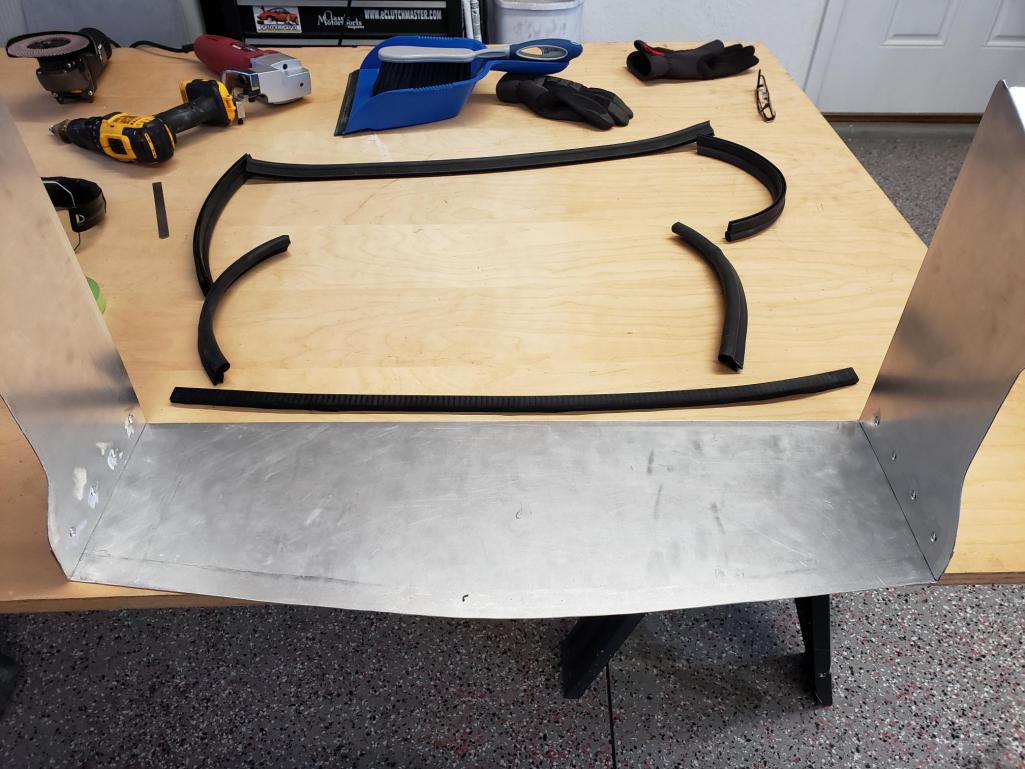
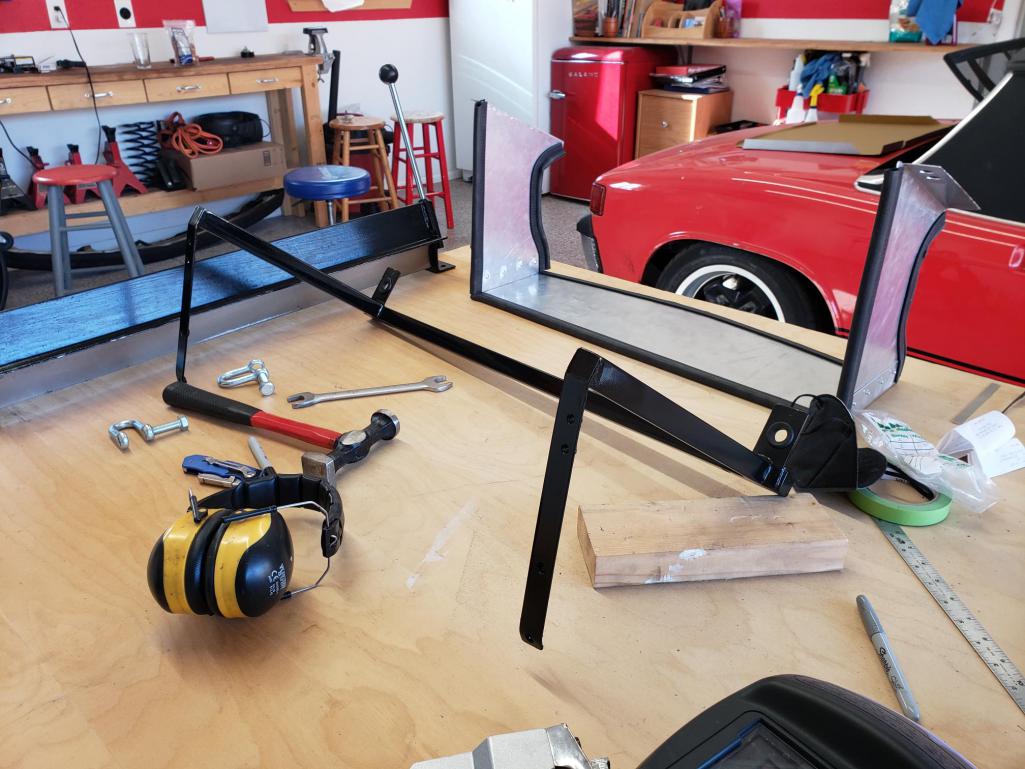

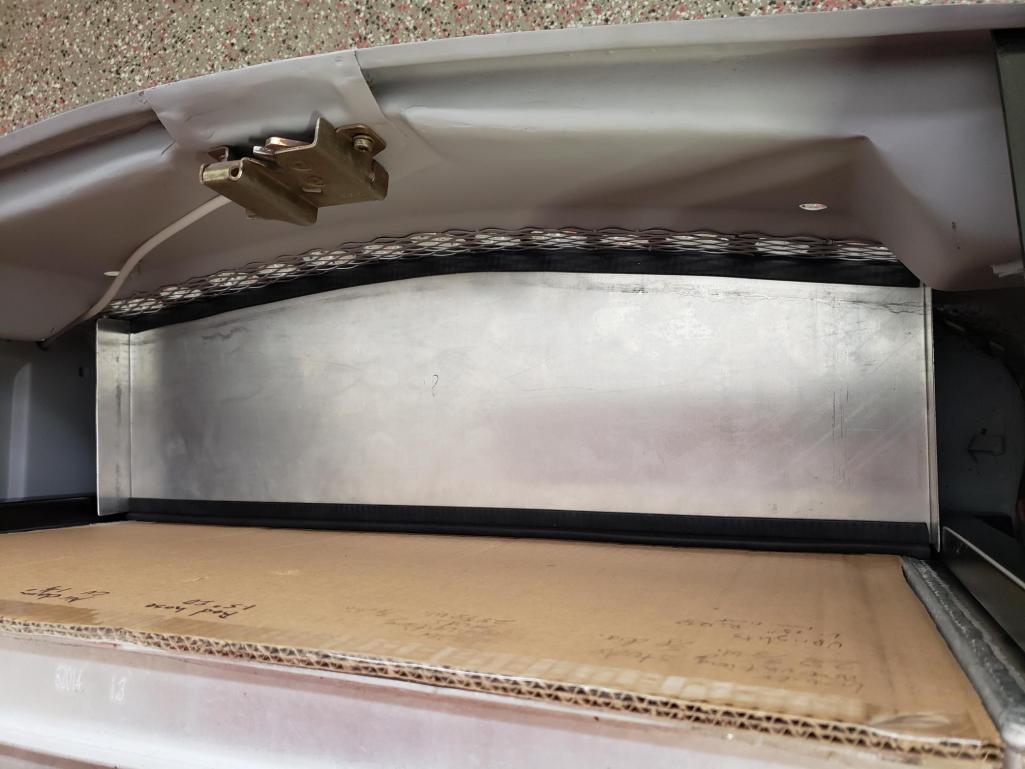
Here's the top and a close-up of the rough opening for the latch. I'll figure out some way to finish it off a bit. Also a close-up of mounting method.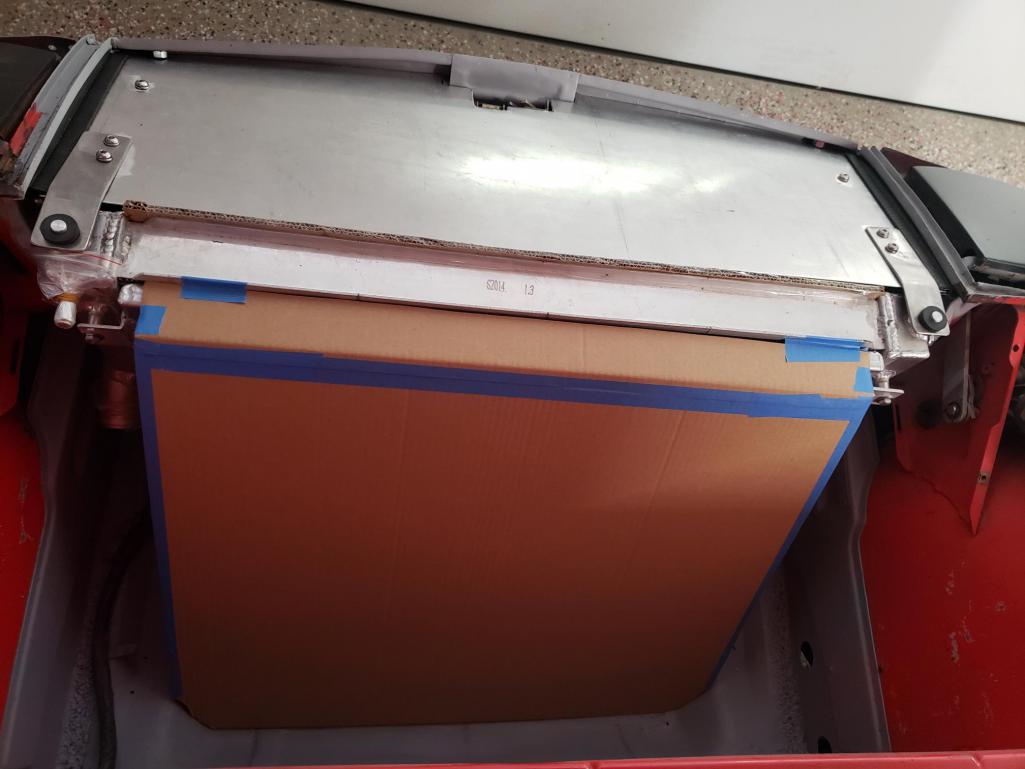
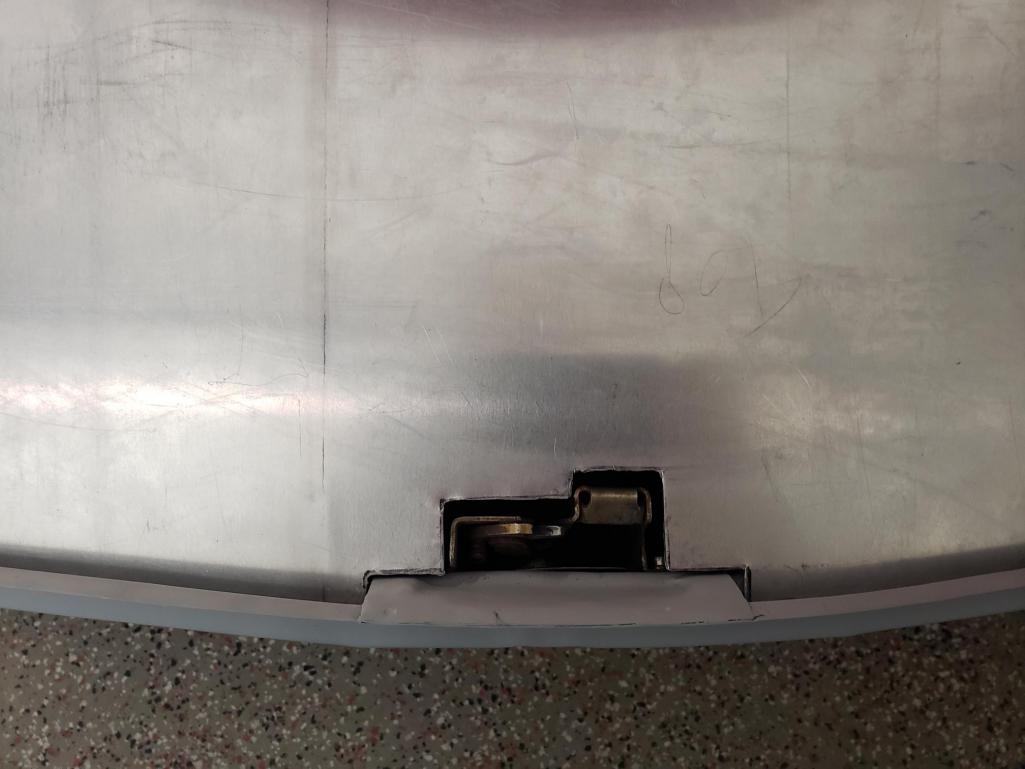
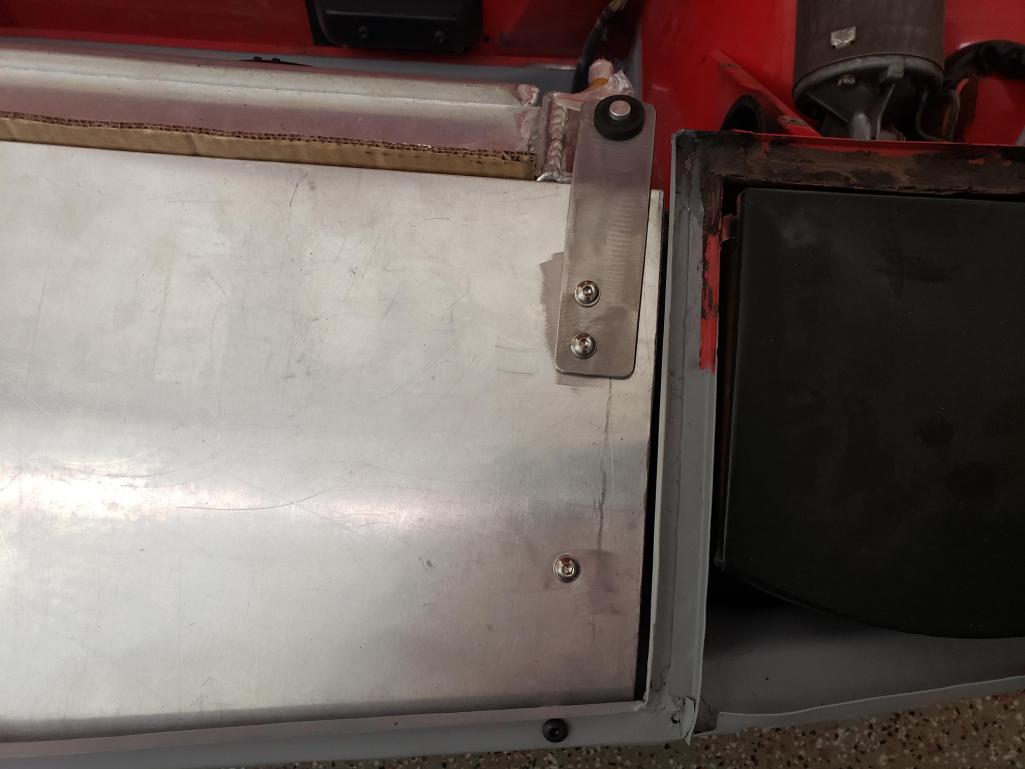
More to come!
Posted by: mepstein May 27 2022, 08:45 AM
Looking good.
Posted by: Shivers May 27 2022, 08:45 AM
Nice work
Posted by: Mayne May 27 2022, 08:54 AM
At that point, I got a little delivery :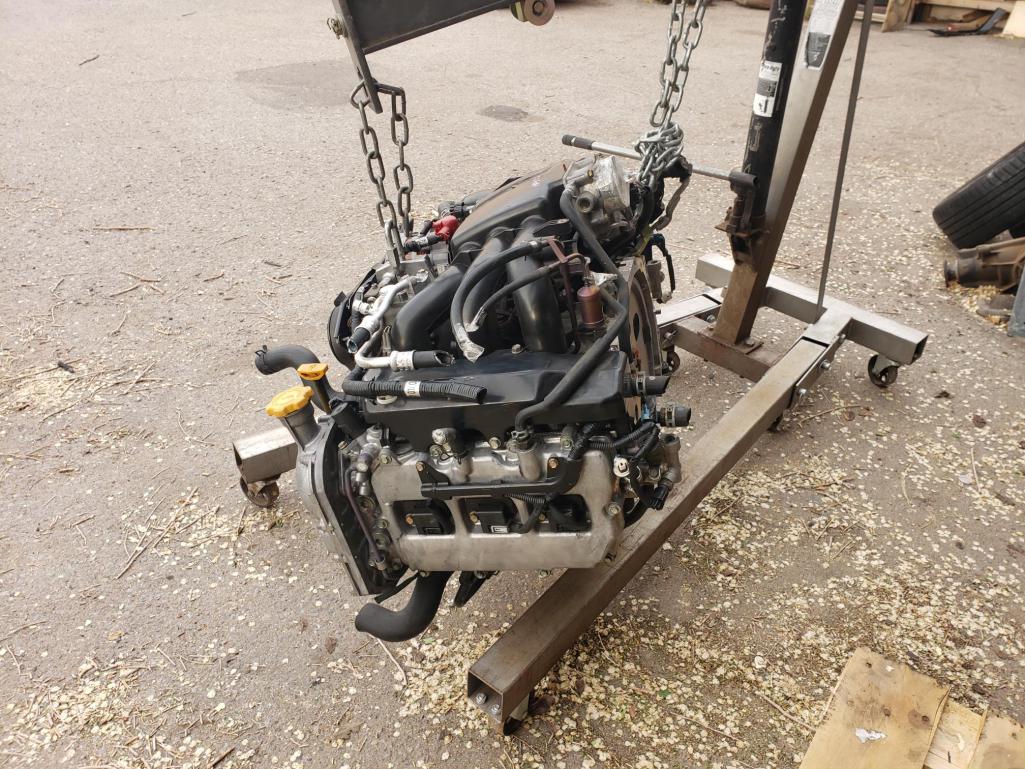
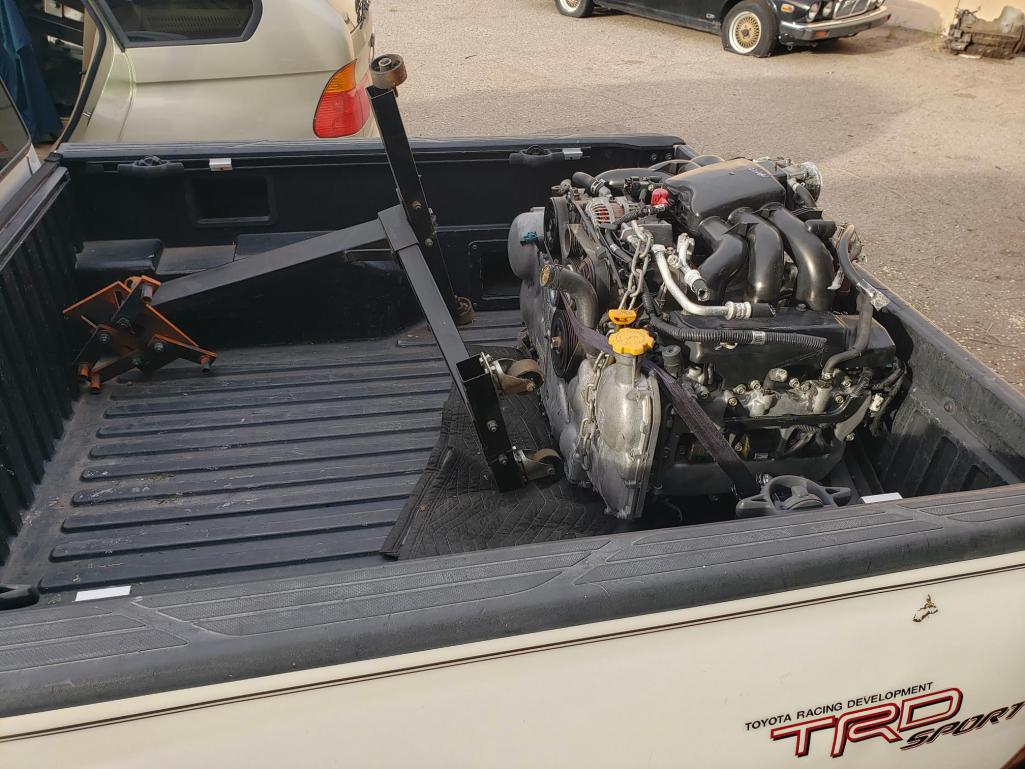
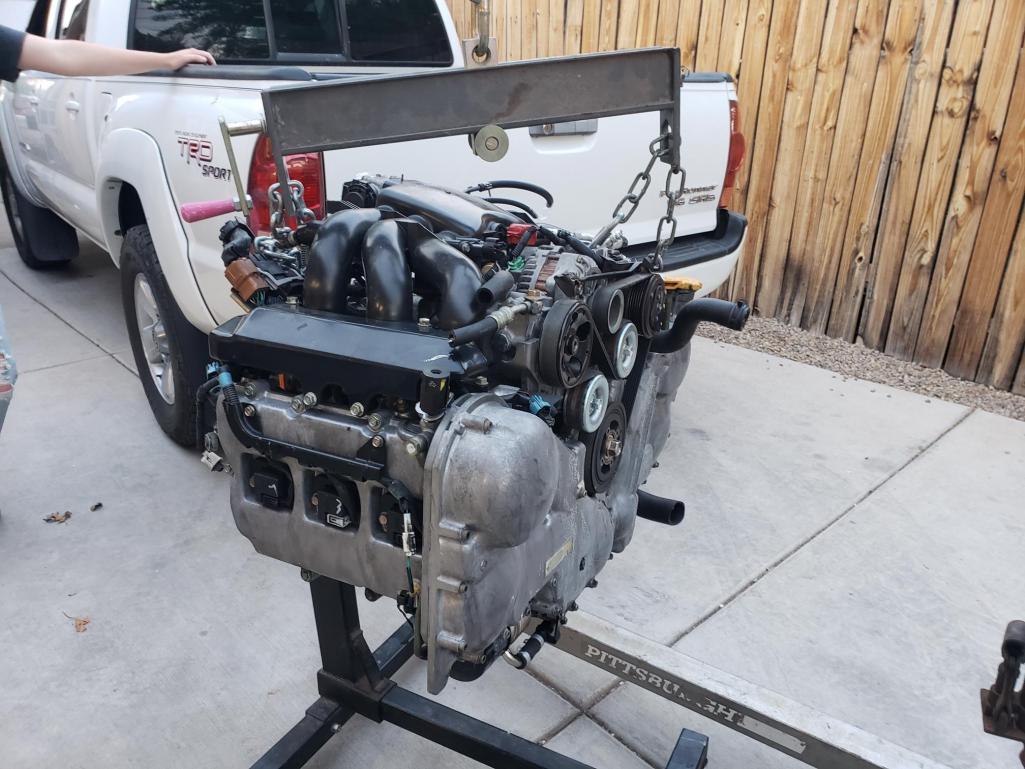
EZ30R, should motivate the car down the road.
Also, picked up a disgustingly dirty Impreza 5MT locally for $140, with starter, flywheel, engine bolts, and trans mount. Also picked up a nice quality trans end plate locally for $50: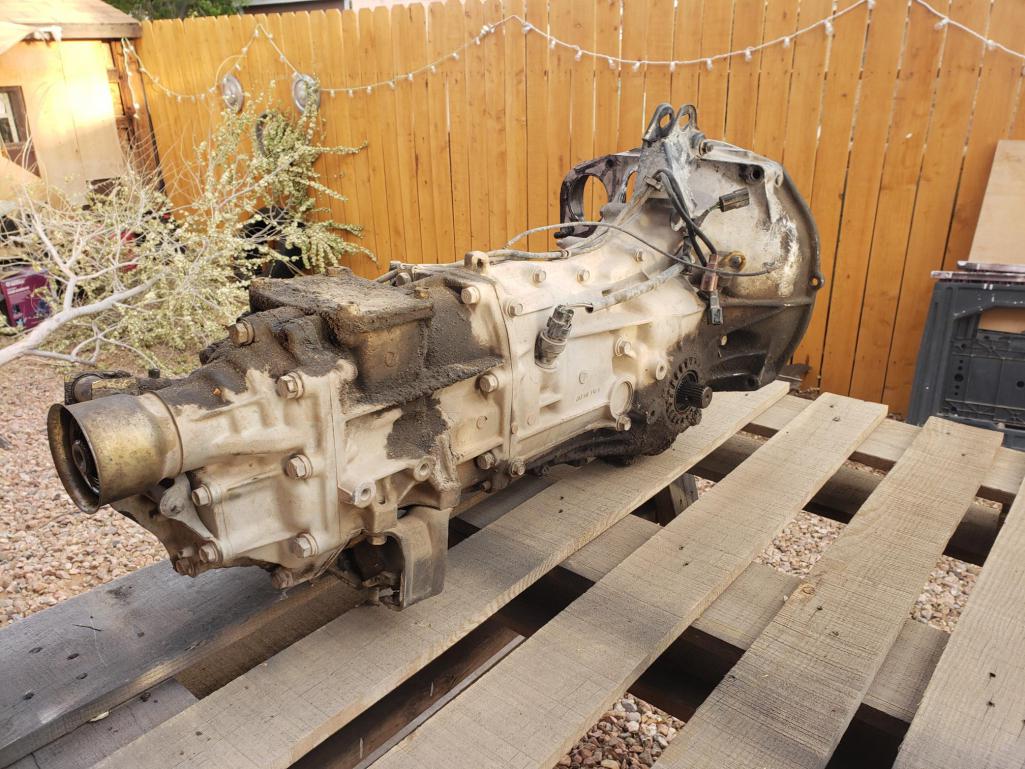
Still waiting on the Subaru Gears rear drive lockout collar, all the way from Down Under.
Attached thumbnail(s)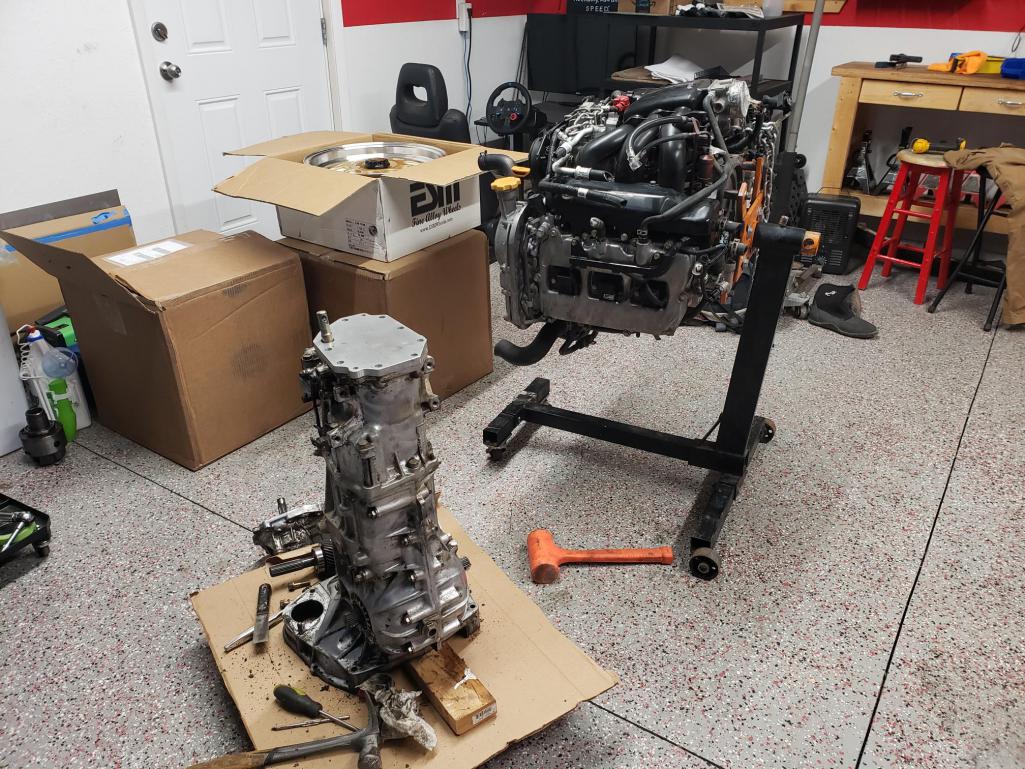
Posted by: Mayne May 27 2022, 09:05 AM
Next up was getting on to the exit side of the radiator.
Template (aluminum sheet is expensive so I don't want to do it twice if possible):
Taped up sheet metal before riveting: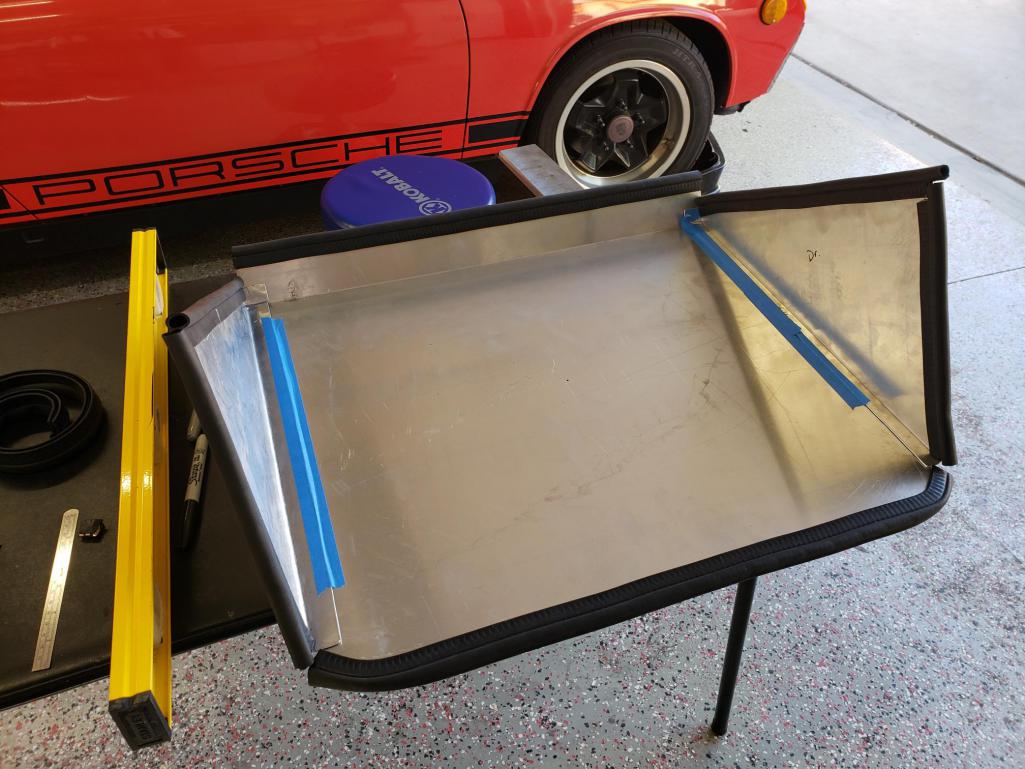
Riveting content: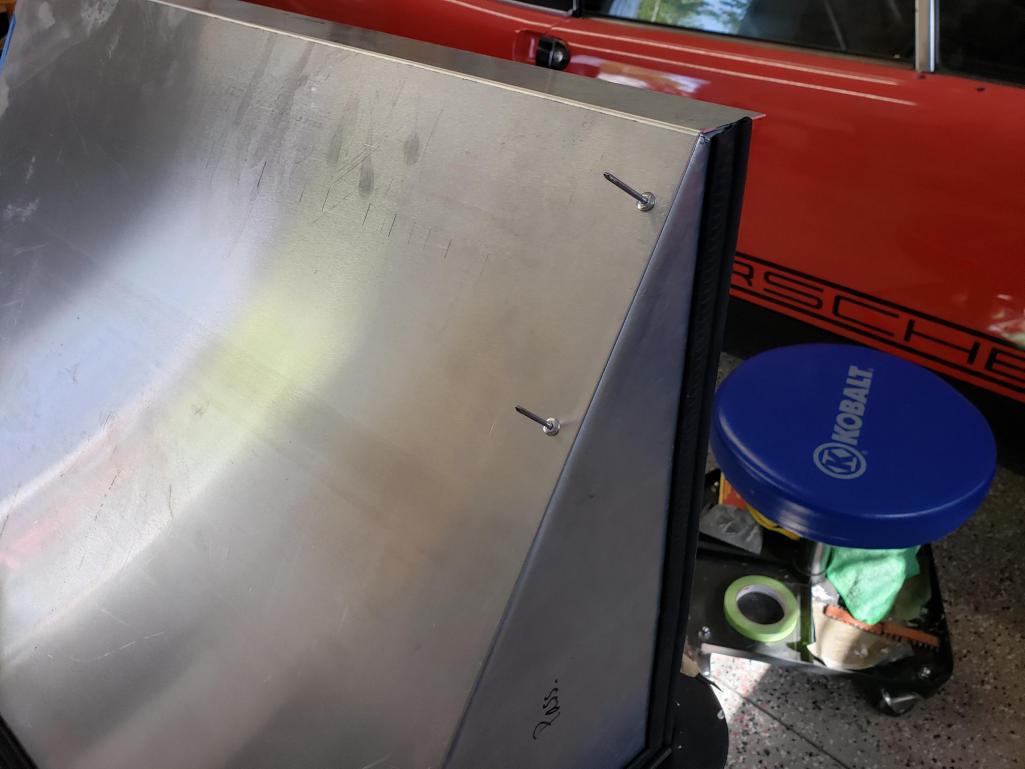
And in place, but I haven't decided how to mount it yet. 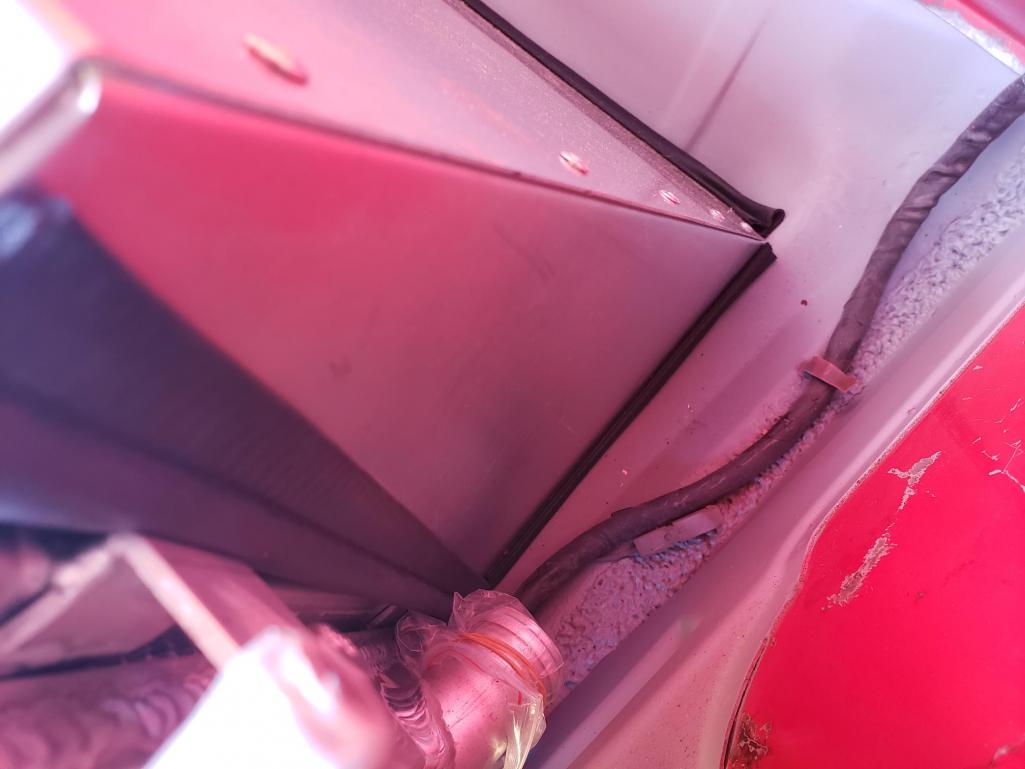
My cradle is built and being delivered as I write this from JWK-Engineering.
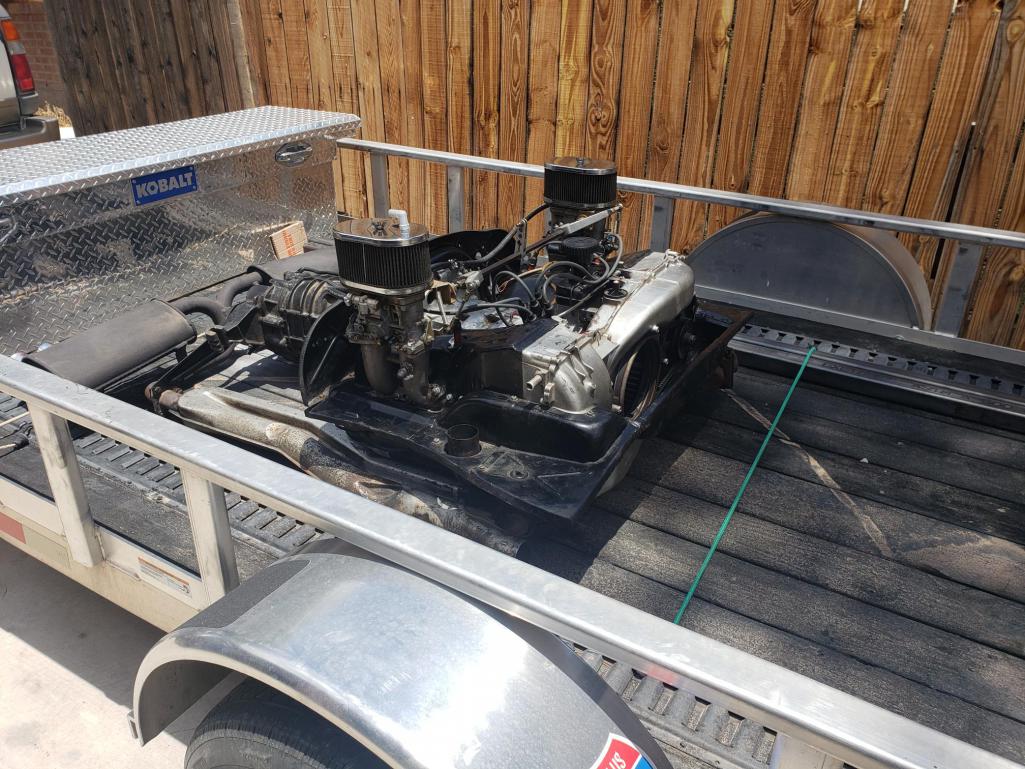
Drove the car for the last time last week with the air-cooled Type 4 and took a video of it running. If anyone is in the market for a running 1.7 with dual Webers and a side-shift 901, let me know.
Posted by: Literati914 May 27 2022, 08:30 PM
This is coming along nicely Jeremy, I’m following your build especially now that your doing the conversion Suby (I got one of them too that I’ll be dealing with eventually) - good work so far
A couple things I wanted to ask about - what exactly did you do to the dash? .. and also, I was wondering how much of the original ‘lumpy’ texture from the factory was on your roof when you shot it with the rocker guard? Did you sand it smooth first or go over original texture? Yours looks nice but I’m considering using it over a well aged original texture roof and was hoping for some of the original dimensionality to come thru. Not sure if doing that would produce good results though.
.
Posted by: Mayne May 28 2022, 06:08 AM
This is coming along nicely Jeremy, I’m following your build especially now that your doing the conversion Suby (I got one of them too that I’ll be dealing with eventually) - good work so far
A couple things I wanted to ask about - what exactly did you do to the dash? .. and also, I was wondering how much of the original ‘lumpy’ texture from the factory was on your roof when you shot it with the rocker guard? Did you sand it smooth first or go over original texture? Yours looks nice but I’m considering using it over a well aged original texture roof and was hoping for some of the original dimensionality to come thru. Not sure if doing that would produce good results though.
.
For the dash, I used red body filler (for small scratches and pinholes) to fill in cracks, sanded, then painted it with flat black vinyl paint. It has not held up too well, so the next step will be to put on a moulded dash cover that I have hanging around. Eventually, I hope to just do a complete 914Rubber dash.
For the top, I just sprayed the rocker guard over the existing texture. I’m not sure if it was original. The rocker guard doesn’t build up much texture on its own, so I think you’d be fine to spray over what you have.
Posted by: Front yard mechanic May 28 2022, 06:42 AM
Looking good 
Posted by: Mayne Jul 2 2022, 12:54 PM
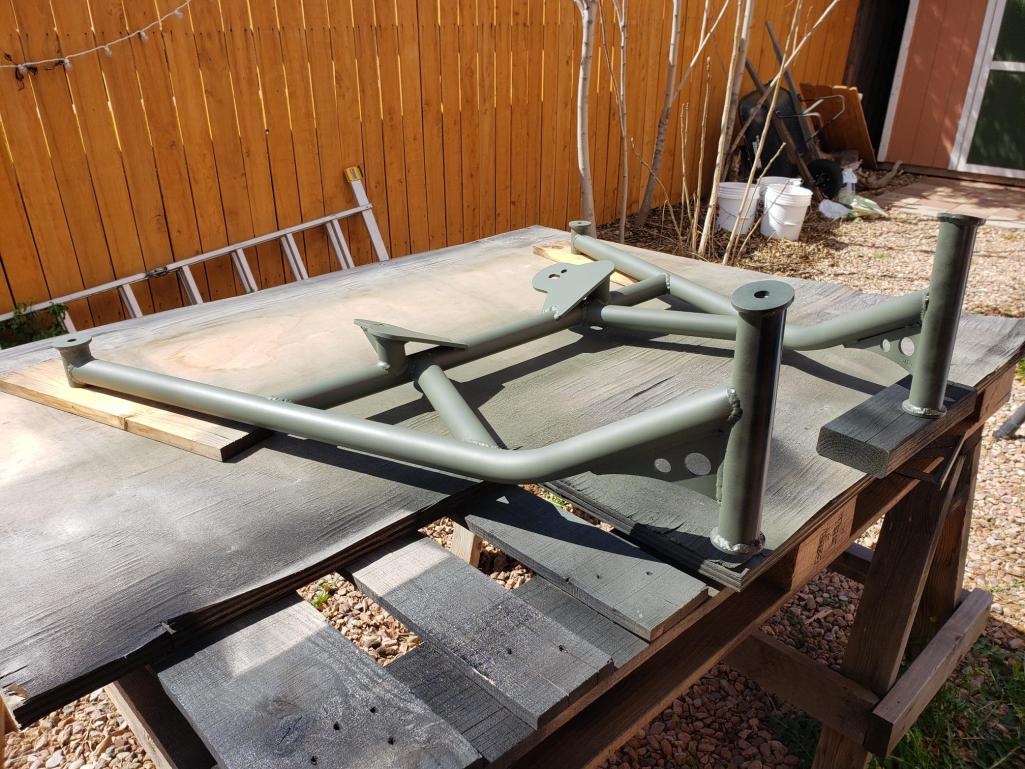
Slow but steady progress still being made here. I got my cradle from JWK Engineering and it looks to be a well made and solid piece. It includes the mount bracket for the Subaru transmission and new mounting hardware.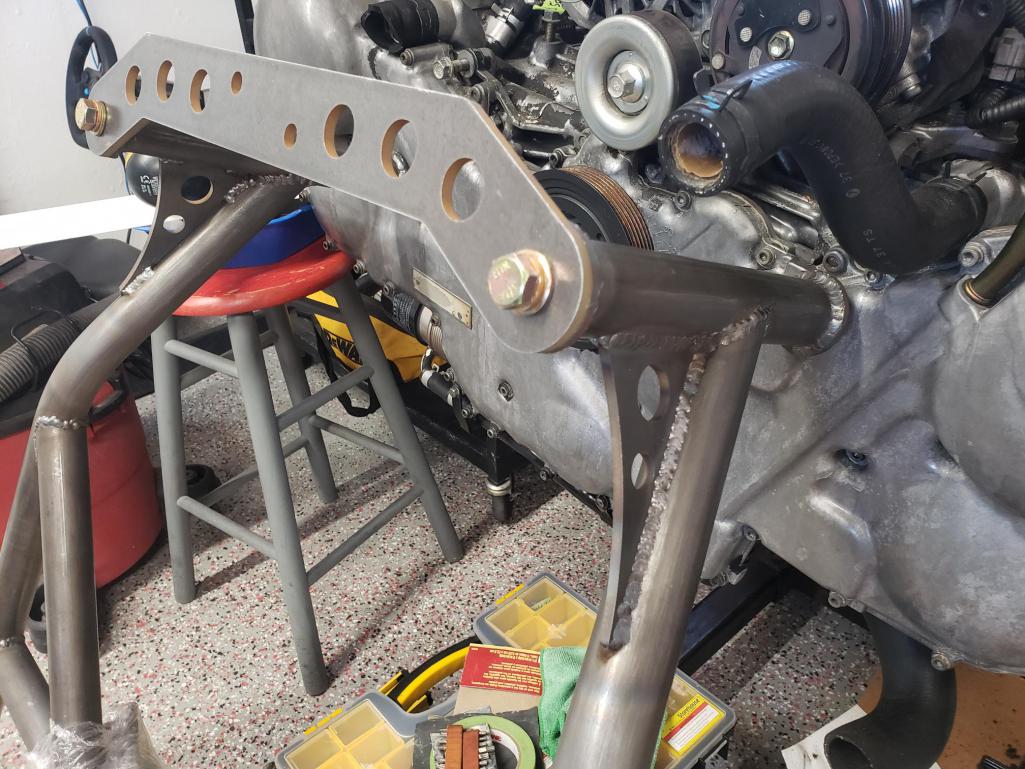
So that got me motivated to remove the Type IV engine and gearbox. Sold the entire drivetrain locally and gained some mad money to buy more parts.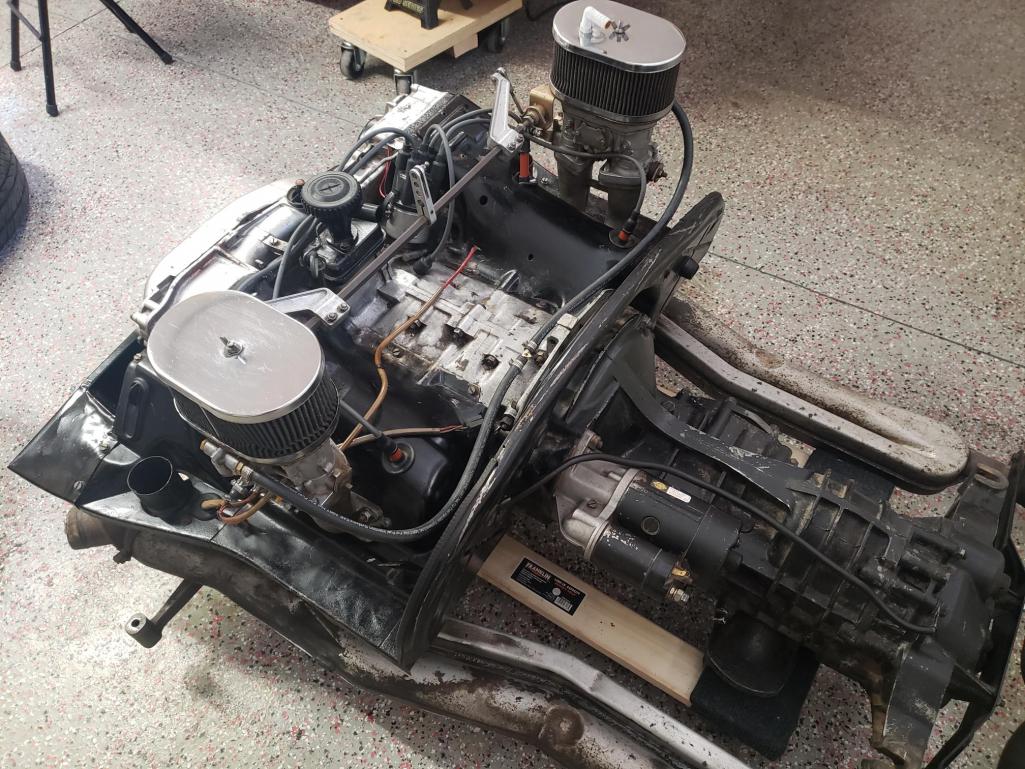
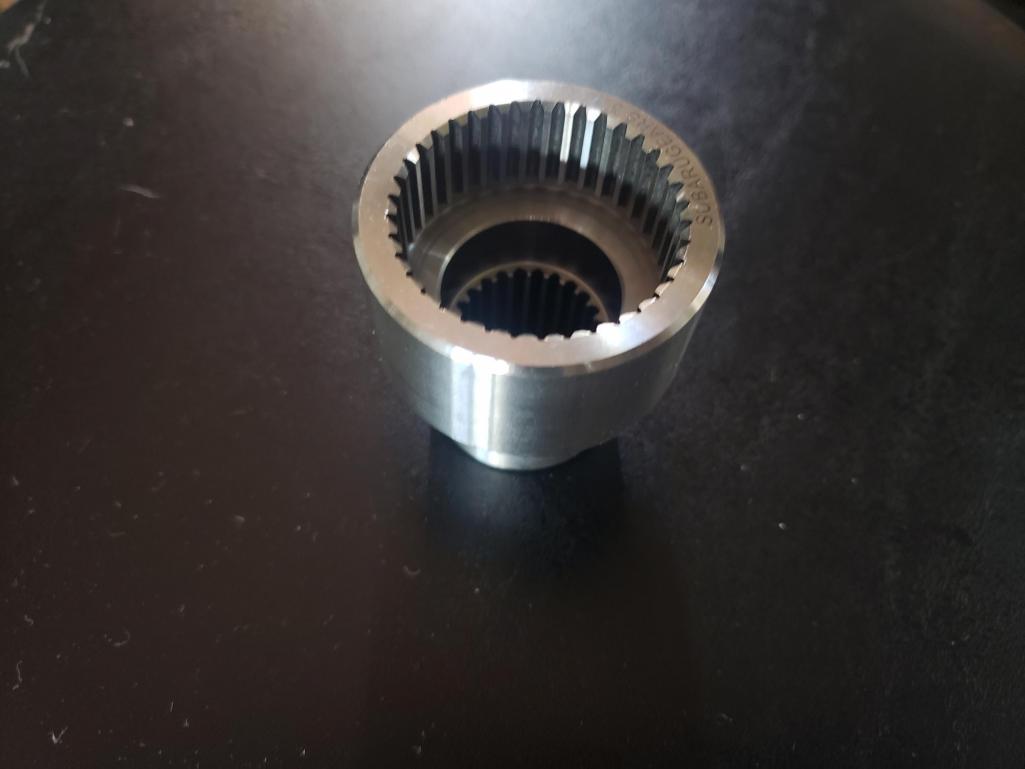
Also got my rear dif lockout from Subaru Gears; a beautiful piece, I think.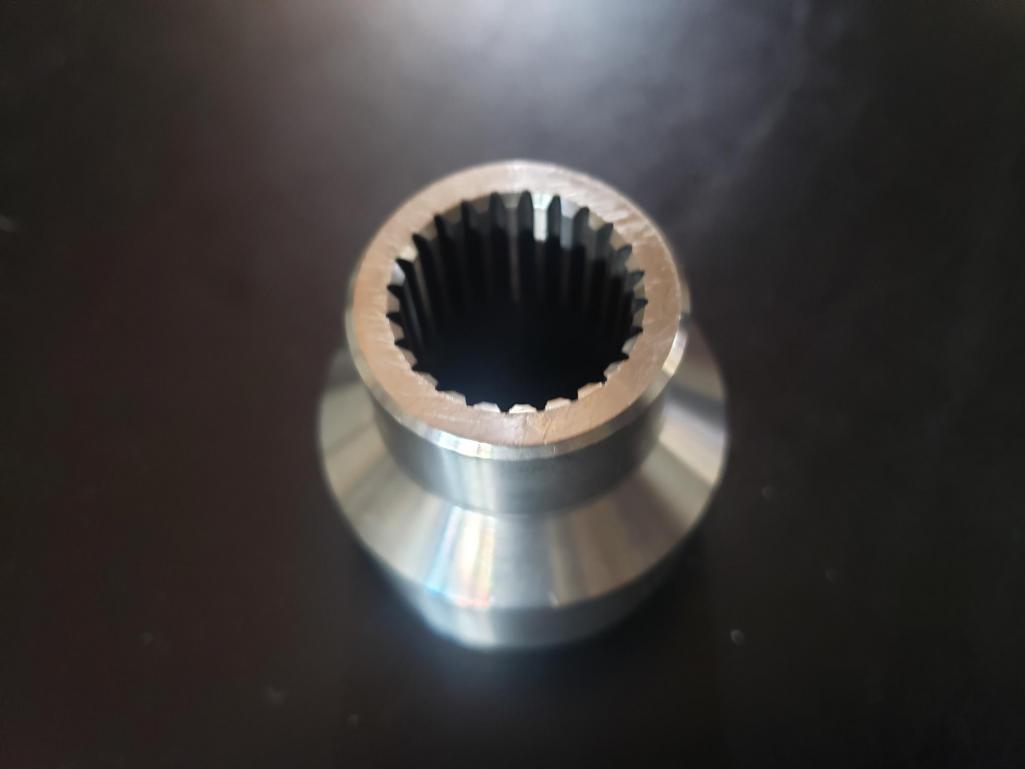
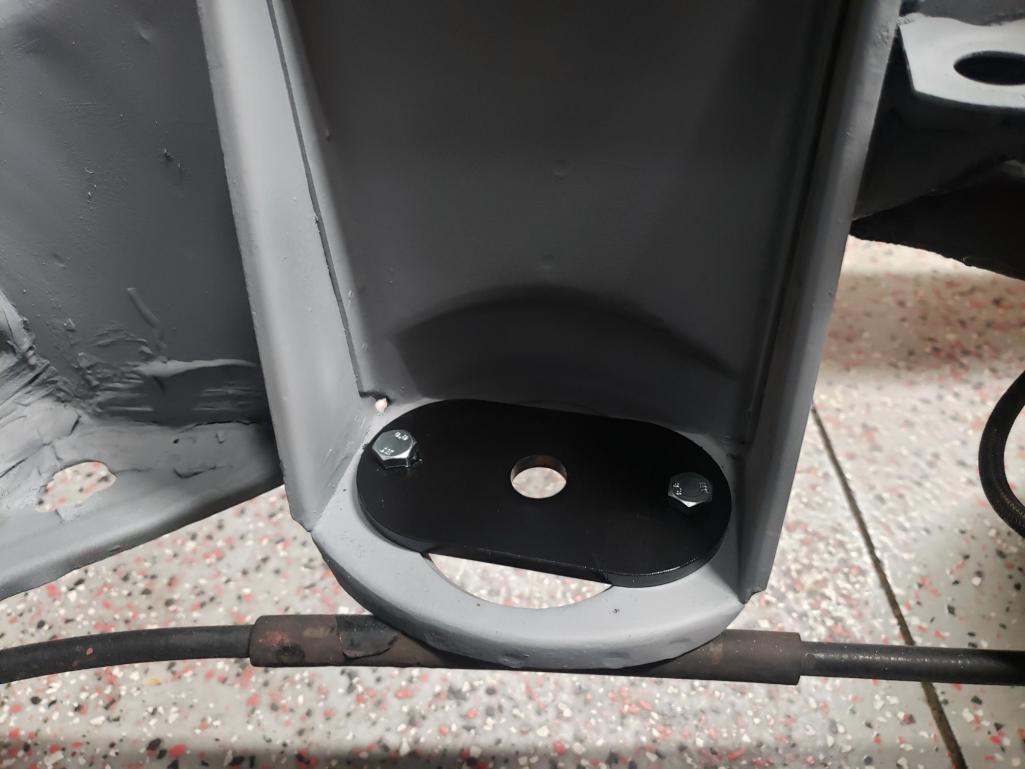
I'll be using an MR2 shifter, so I picked one up on eBay for what seems to me like too much money. But there ya go... And yes, they're all rusty looking, but i have some plans for that.
Hell hole repairs will be next! 
Posted by: rick_cv Jul 2 2022, 01:53 PM
Can I ask what you are going to use for engine management (ecu)? I keep seeing that you can't use the EZ30 stock ecu and have to purchase a standalone from private companies which is expensive and may not be fully featured.
Posted by: Mayne Jul 2 2022, 03:01 PM
Can I ask what you are going to use for engine management (ecu)? I keep seeing that you can't use the EZ30 stock ecu and have to purchase a standalone from private companies which is expensive and may not be fully featured.
Yes, this is sort of the elephant in the room when it comes to the EZ30R. Before I started ordering parts, and especially the engine, I felt confident that I would be able to use a fairly basic Link ECU. As I continued researching (after having bought the engine) and opening up lines of communications with several ECU companies, I became convinced there is only one truly well-developed ECU for the this engine at this time: Haltech Elite 2500. It is the only ECU I've found that has base start up maps for the 30R and can accommodate the DBW, Variable Cam Timing, Variable Valve Lift, and CanBus conversion that are inherent in the EZ30R.
So, once you're done spitting your last swig of beer all over the room, you try to come to grips with that reality. I pretty much have, and while it will be some time before I can spring for the Haltech and harness materials (seriously planning to build my own harness to understand how it all went together), I actually feel pretty good about it. And if that gets me closer to maximizing the potential of this swap, then I honestly believe it's money well spent compared to the other build/swap alternatives.
To take this just a bit further, I have heard of people successfully getting their 30Rs running in 914s and even Vangons, but I have yet to see any real video of this in action. So, while those JDM sixes with all their high tech look good, do your due diligence before you plunk down your money. Or just hang in there with me for another year or so, and see if I actually get this thing to work. I'm starting to work on a video series on the swap for my brother's YouTube channel, so this won't be the only place it will documented.
Long response here, but I was going to have to address it sooner or later!
Posted by: rick_cv Jul 2 2022, 03:07 PM
Awesome, thanks. I have thought about this swap quite a bit and have read many threads but have not seen a definitive answer.
Posted by: Front yard mechanic Jul 2 2022, 08:39 PM
Posted by: 76-914 Jul 2 2022, 10:05 PM
I've heard that you can use the factory ECU if you can find a place to stuff the donor car's gage cluster up under your dash. Also heard there is a guy in Australia that is making a work around but that may be for the 3.6. Either way it is supposedly pricey. Check with Jeff on Subaru Powered Porsche's.
Posted by: euro911 Jul 2 2022, 10:58 PM
Wow, just getting around to seeing your thread, Jeremy. Everything you've been doing looks great
Posted by: Mayne Jul 3 2022, 12:14 PM
I've heard that you can use the factory ECU if you can find a place to stuff the donor car's gage cluster up under your dash. Also heard there is a guy in Australia that is making a work around but that may be for the 3.6. Either way it is supposedly pricey. Check with Jeff on Subaru Powered Porsche's.
Yeah, I know people have worked around it, and in fact Outfront Motorsports told me they can adapt a Link ECU and build a plug-and-play harness for around $2500. It would delete the variable cam timing, which according to them is primarily there to help with low RPM torque for the big cars these engines were designed for. Deemed unnecessary in a 914, which is probably true. It's a back-burner option for me if I decide not to go Haltech. Hoping to see Michael at Rennch on YouTube to wire his up in his 911 Blasphemy Build before I commit.
Wow, just getting around to seeing your thread, Jeremy. Everything you've been doing looks great
Much appreciated, cheers!
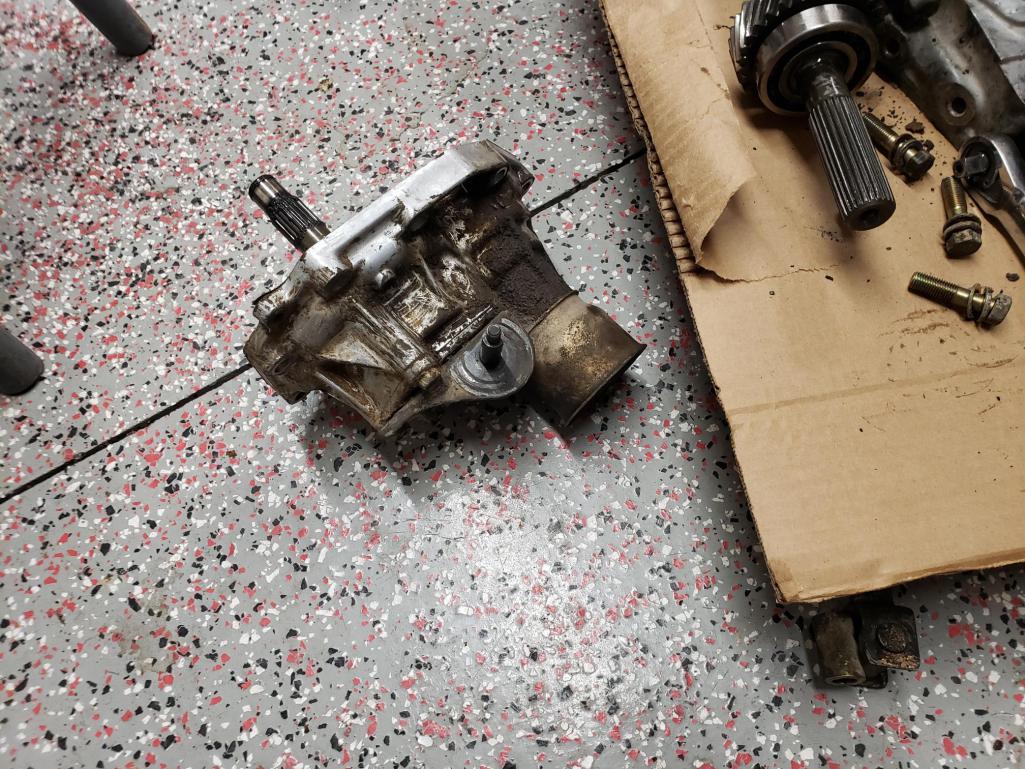
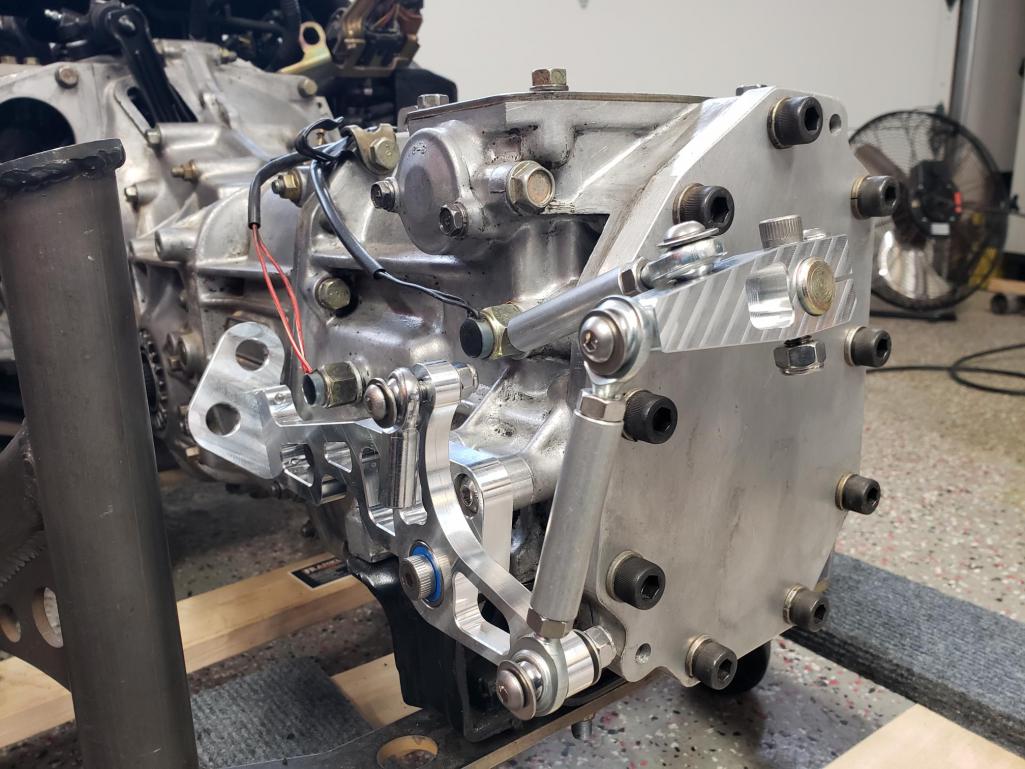
Posted by: Mayne Jul 28 2022, 04:33 PM
Small update here.
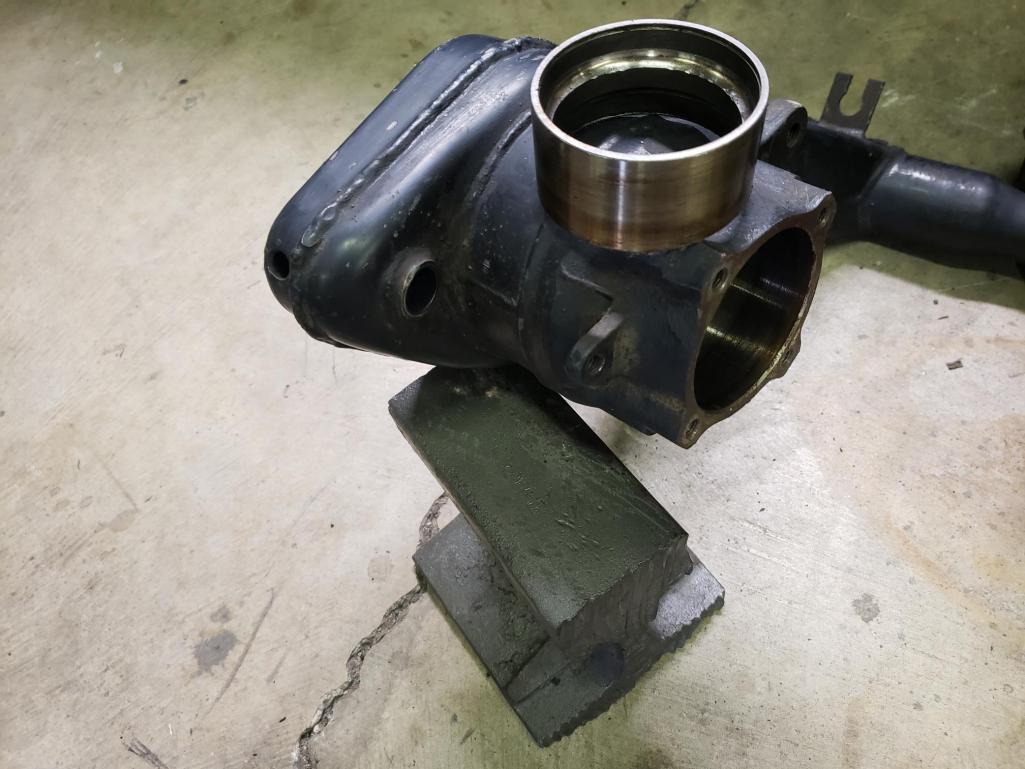
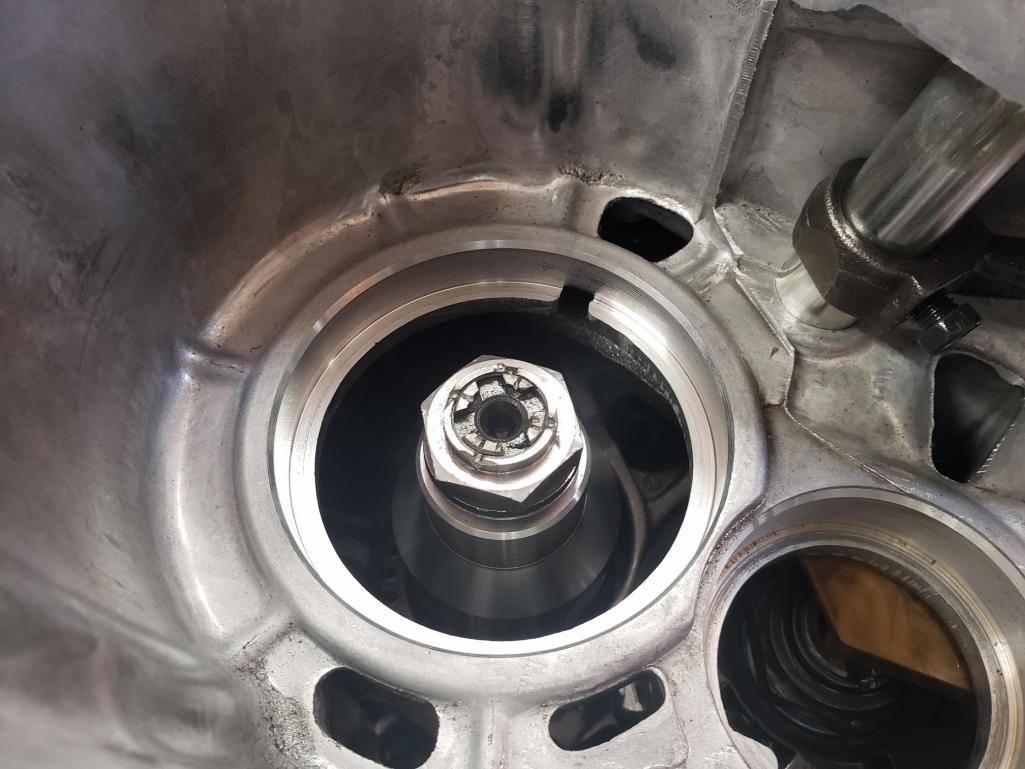
I had to remove the nut from the splined shaft in the transmission to put the spline lock in place. This is necessary to be sure all torque from the rear differential shaft goes to the front drive outputs. These are the bearings and washers.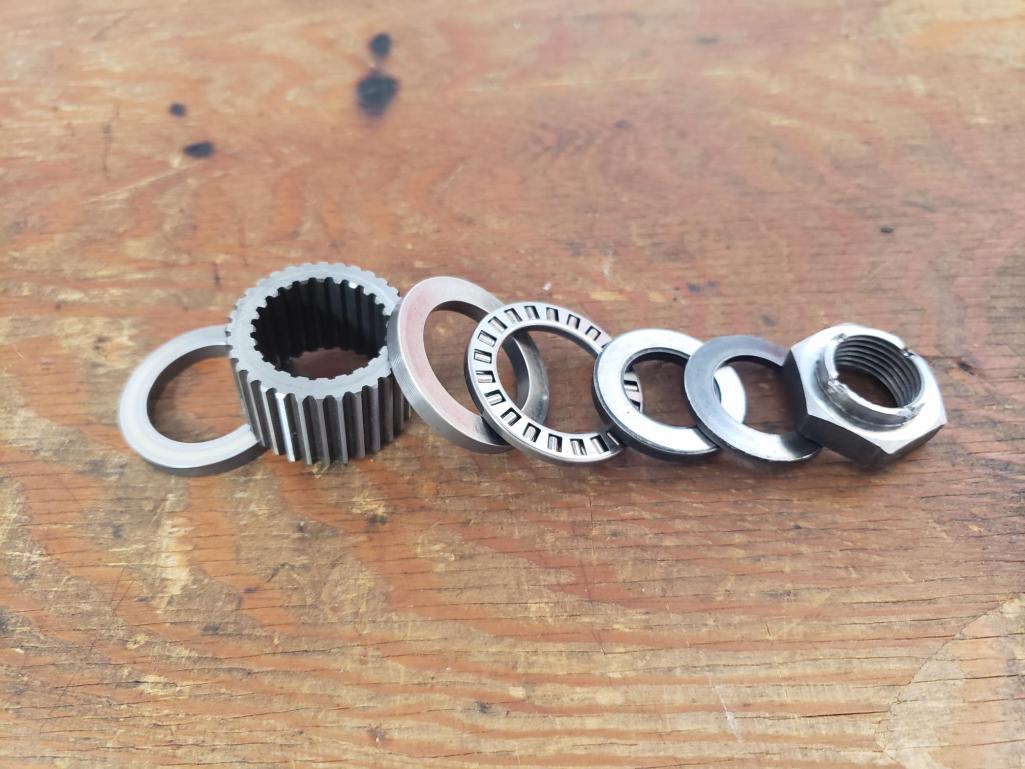
Only need the washers and the nut to connect the lock: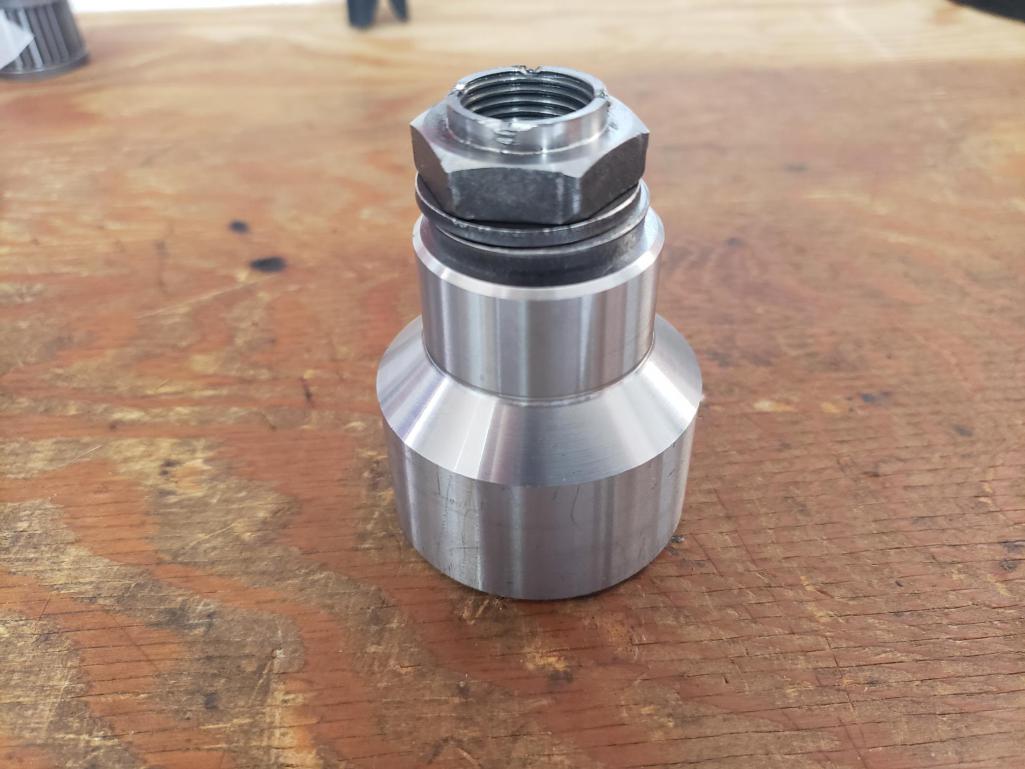
I had some flange sealant left over from resealing the balance shaft covers on my 944 Turbo, so I thought I'd try some here for the cover.
Attached thumbnail(s)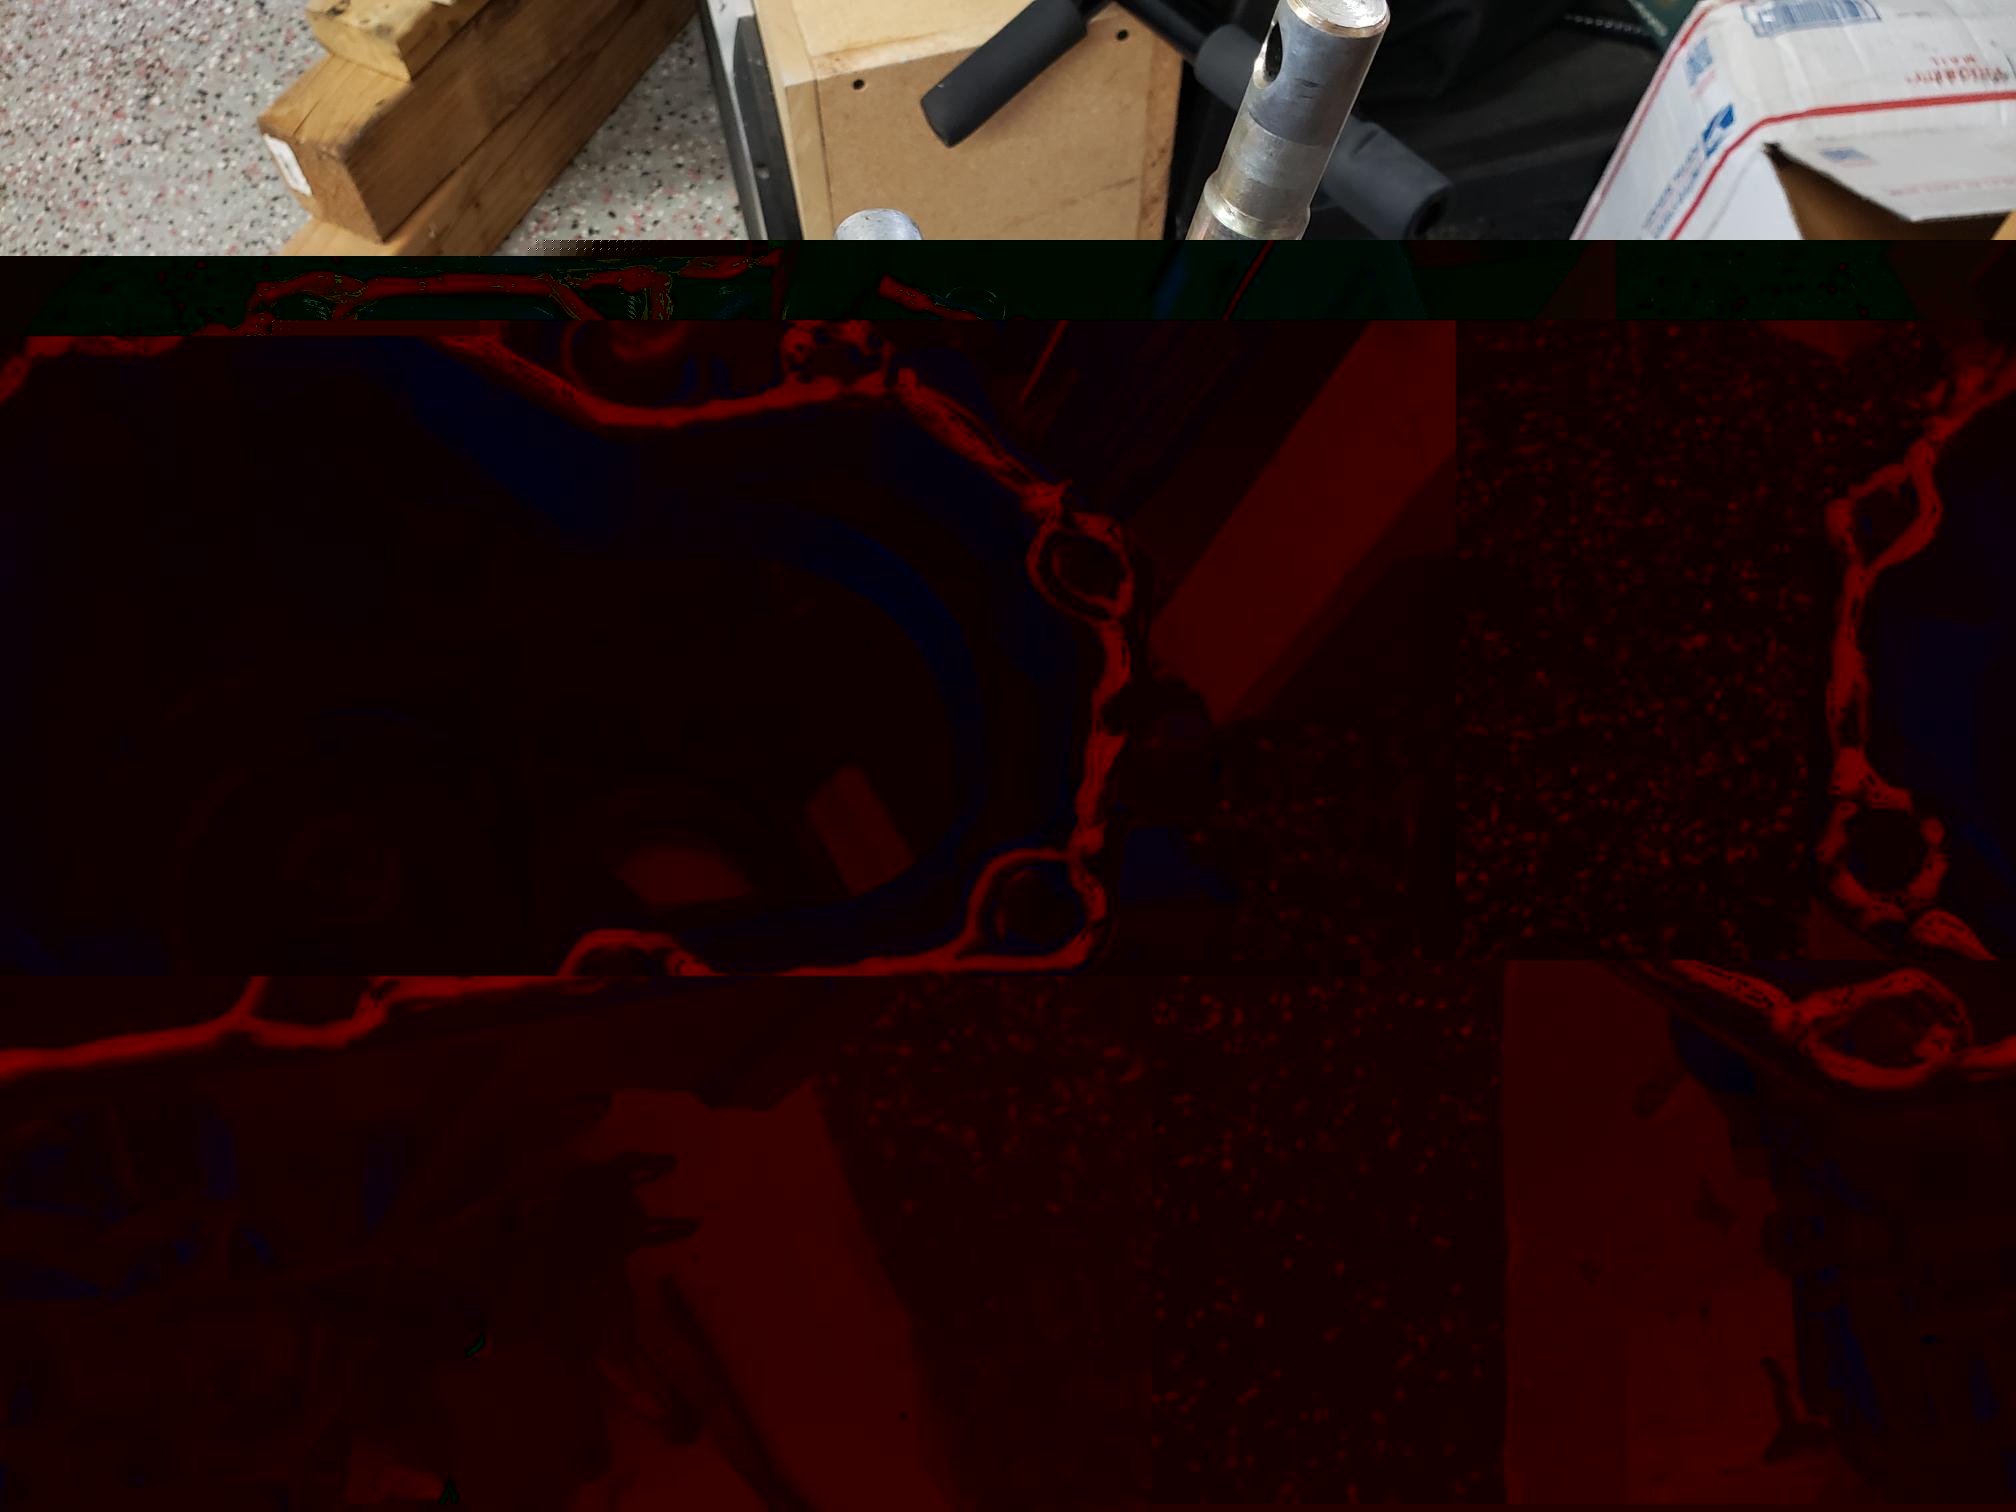
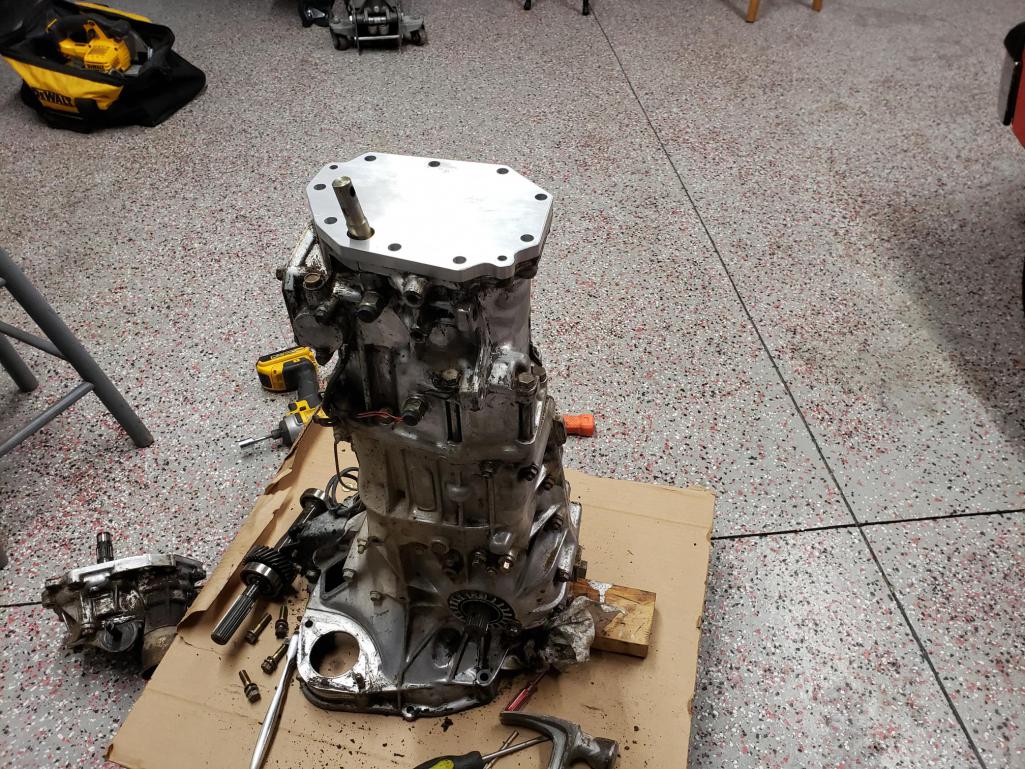
Posted by: Mayne Jul 28 2022, 04:35 PM
I don't know why my photos freak out sometimes!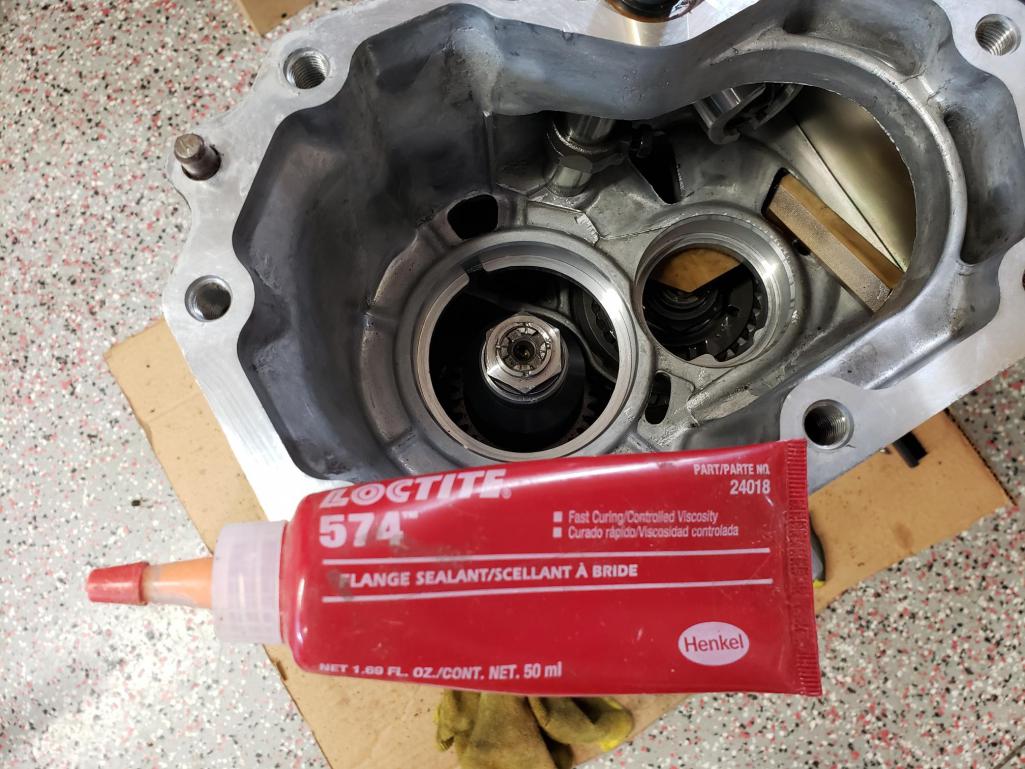
Posted by: Mayne Jul 28 2022, 04:47 PM
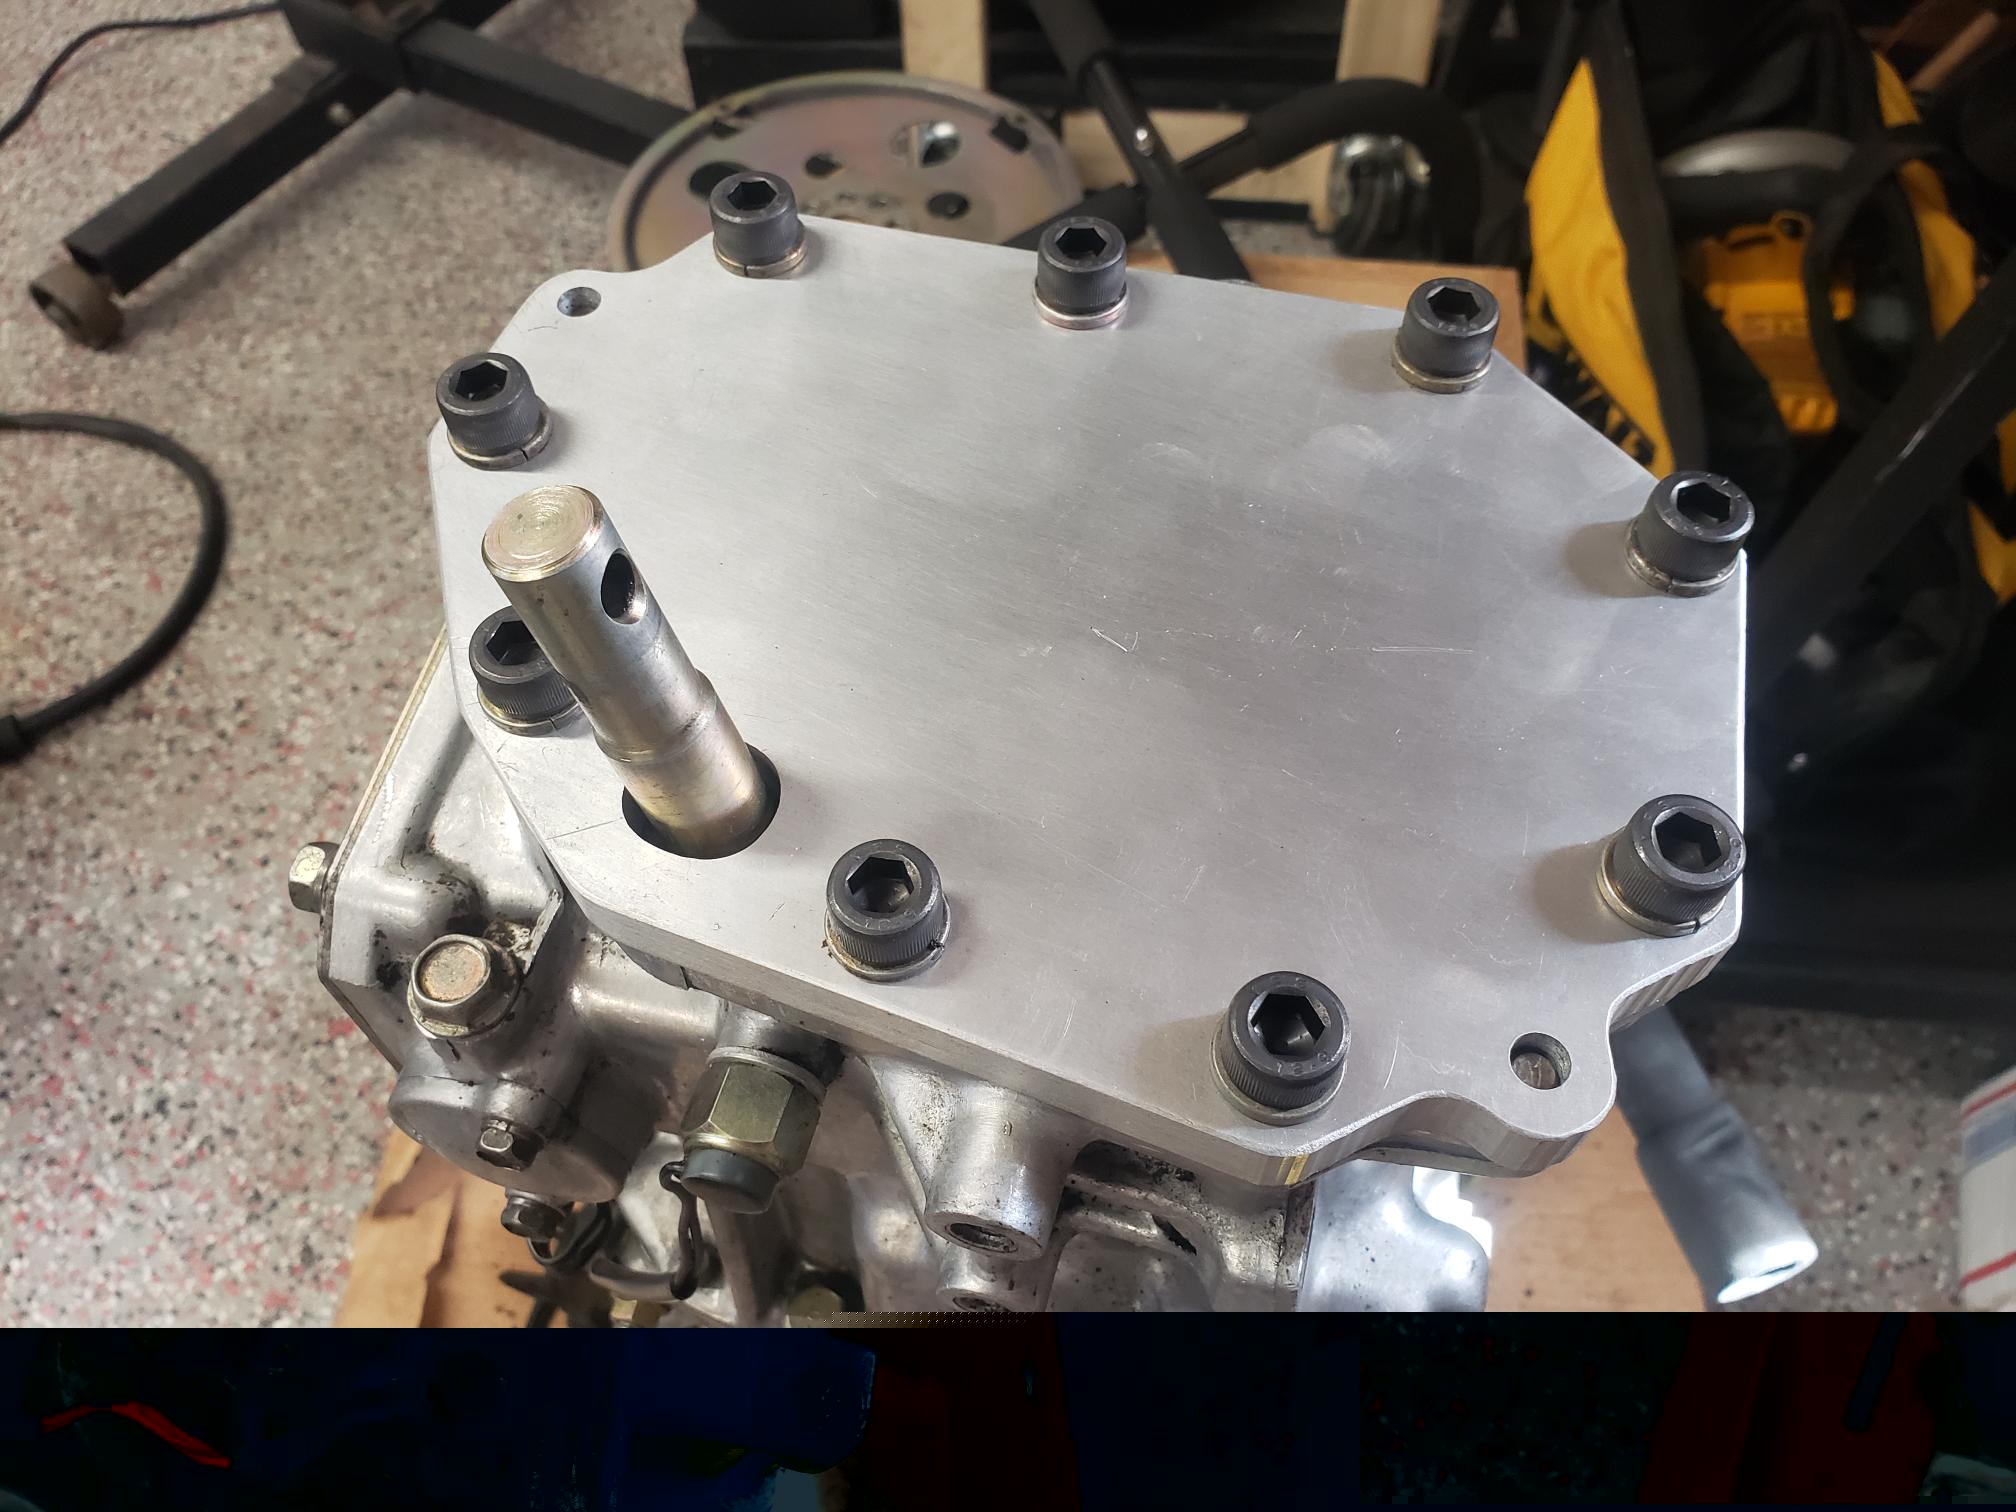
I also don't know why my brain freaks out sometimes, so you get duplicate pics for free!
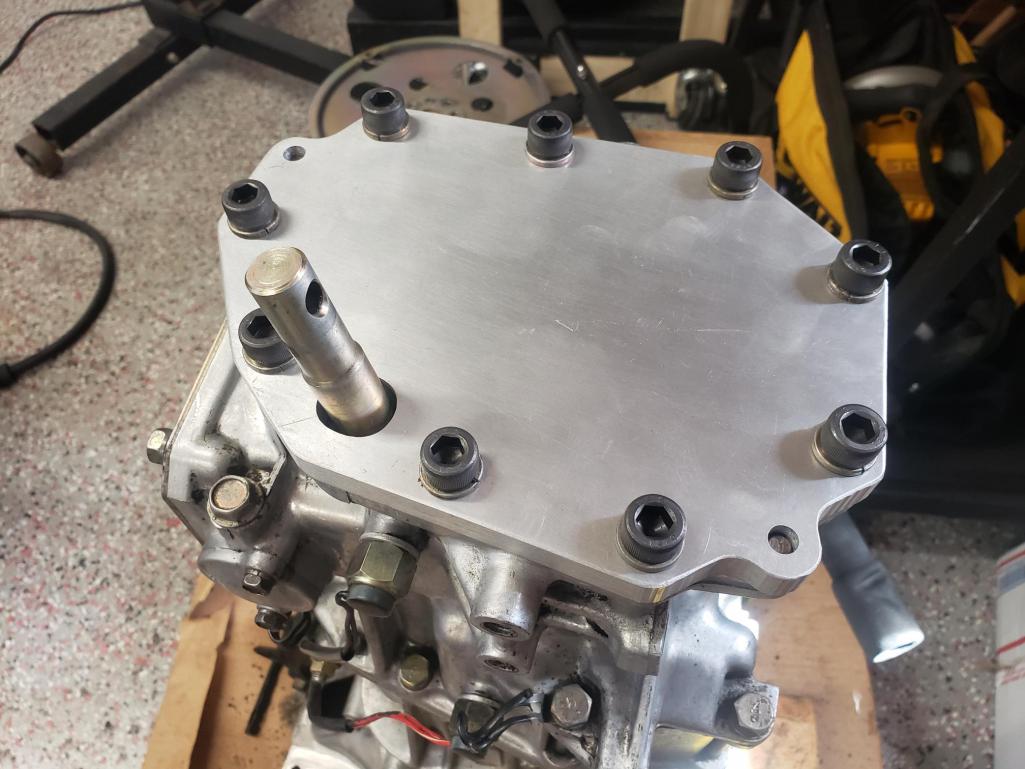
Anyway, time to remove the auto transmission plate to make way for the flywheel. I had heard the bolts were difficult to remove without damaging, and indeed I only got three of eight out. Thanks to a recommendation by rmarx here on the forum, I was able to weld large nuts on to the bolts and use a socket.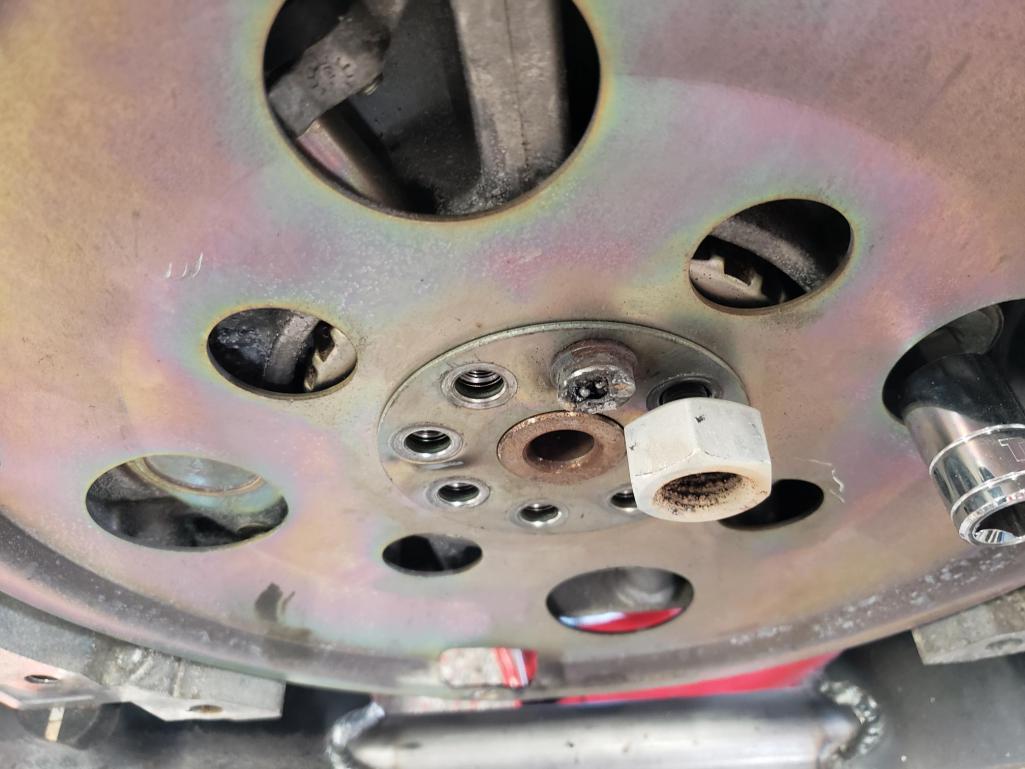
I had to order new flywheel bolts obviously, but even if I hadn't destroyed them, they are too short to make it through the flywheel thickness. No more torx bolts!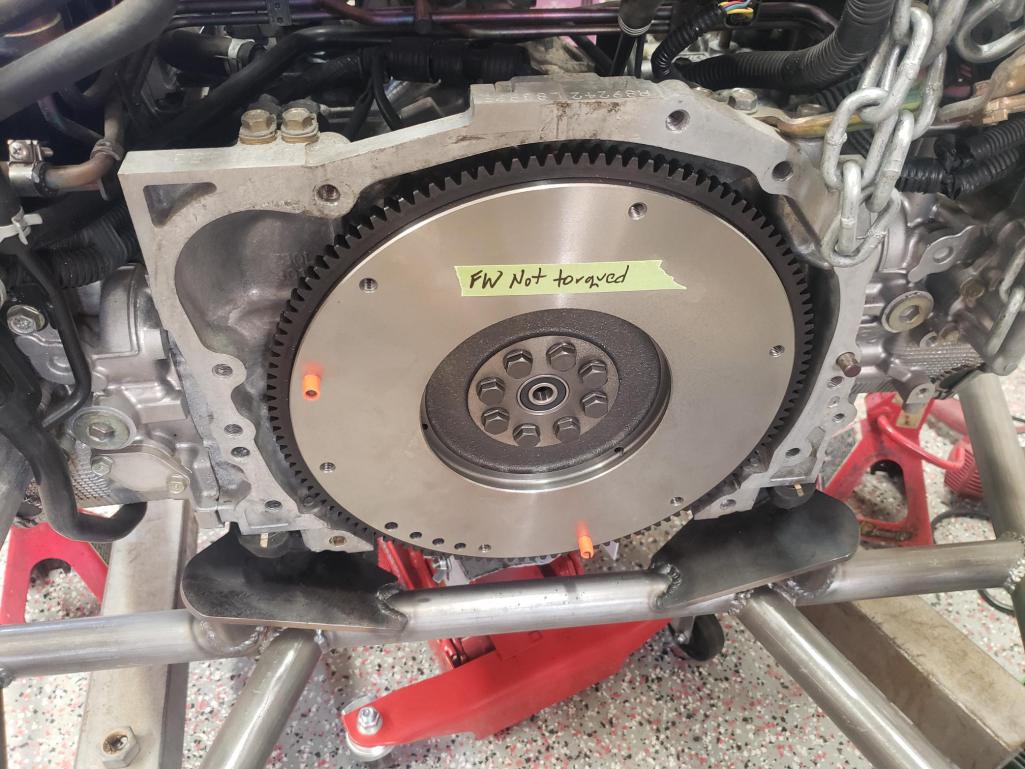
Run-of-the mill HD clutch in place.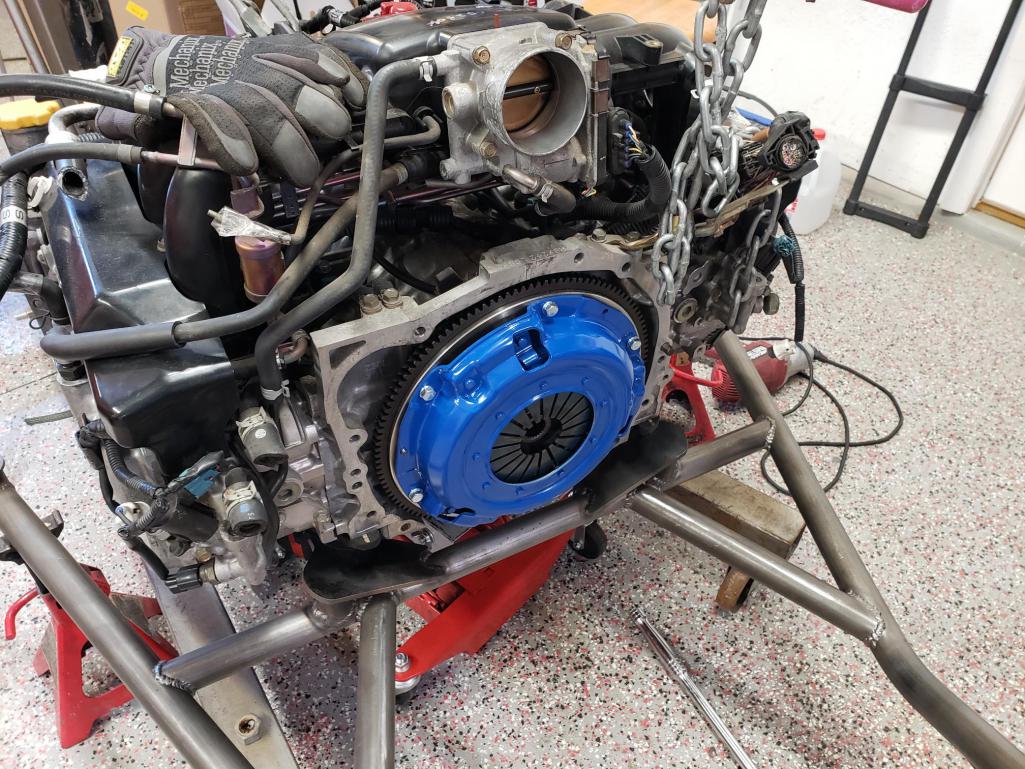
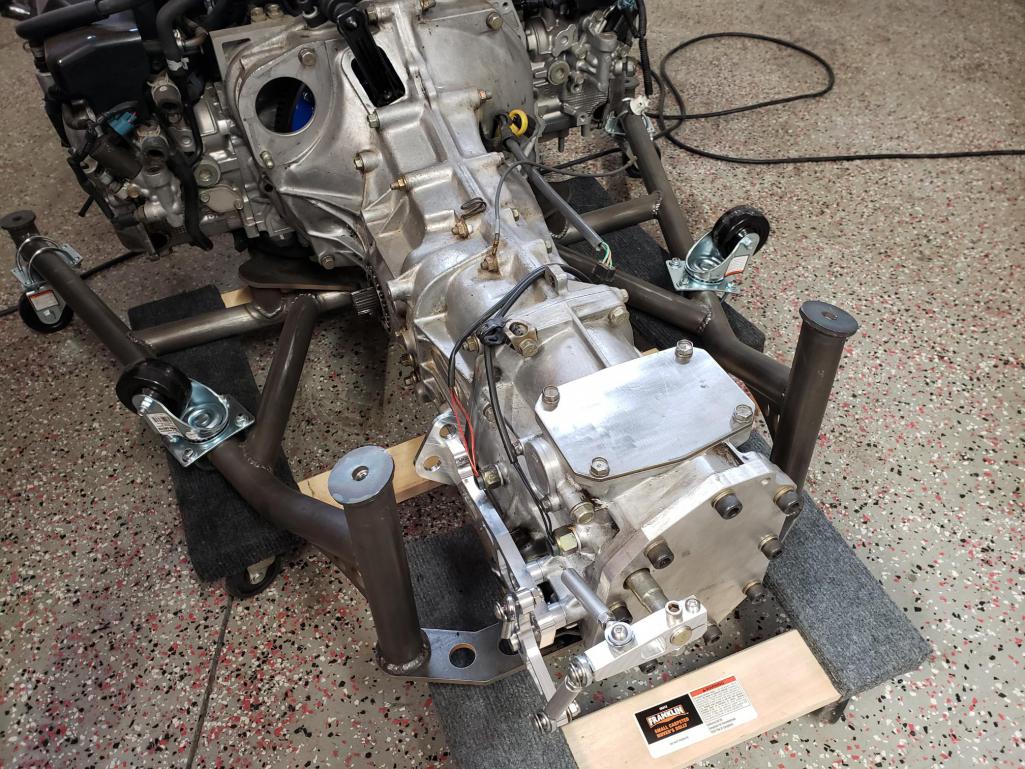
Big moment, engine mated to transmission and on the cradle. This is just in preparation for test fitting to measure out coolant lines and shift cables, but it feels great to see it at this point.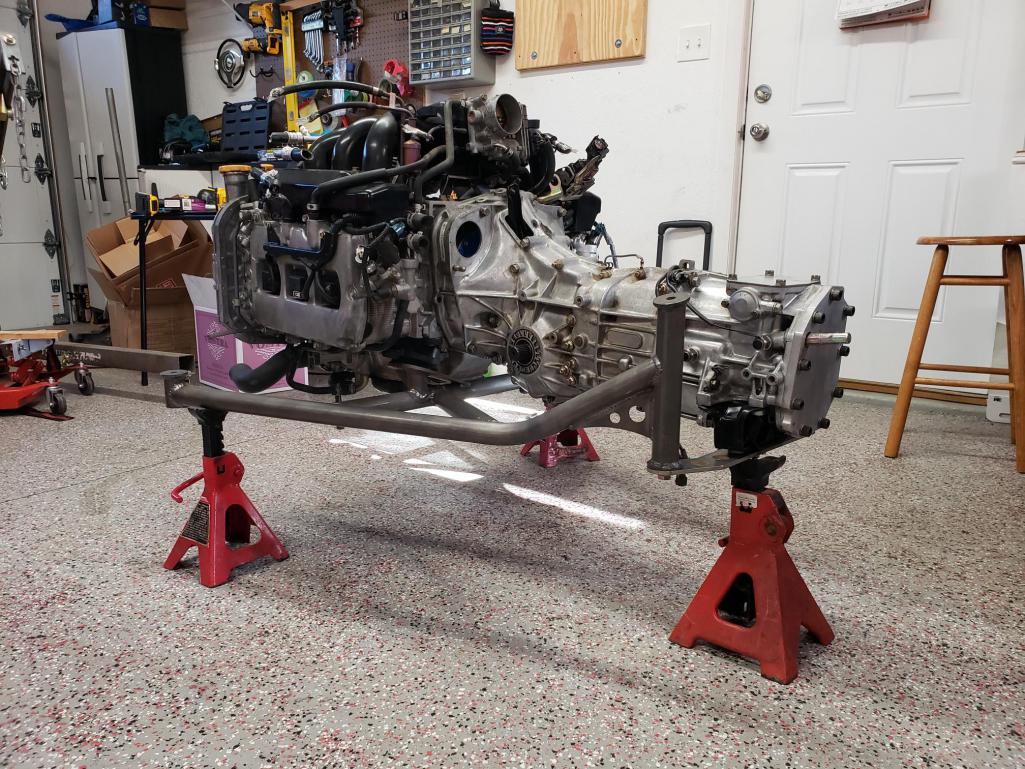
Posted by: Cairo94507 Jul 28 2022, 06:19 PM
Congratulations, that is a milestone.
Posted by: Front yard mechanic Jul 28 2022, 07:52 PM
That transmission cleaned up real nice ! This is going to be a nice one
Posted by: Mayne Jul 30 2022, 05:49 AM
Congratulations, that is a milestone.
Thanks! One of many ahead of me, but I’ll keep pedaling.
That transmission cleaned up real nice ! This is going to be a nice one
Yeah, I’m pretty happy with how it looks. It’s a big unknown in terms of condition but the little bit I’ve seen of the internals seem very promising.
Posted by: Mayne Dec 16 2022, 12:01 PM
Okay, let me see, where are we? Oh yeah, I'm doing a Subaru 6 swap on my car! Progress has been slow this Fall and Winter.
I teach classical guitar full time at a college-prep school, but I've been getting back into performing professionally and I got a bit more work than I had planned for this Fall. For the understandably few who might wonder what that means: early October: US premier of a newly-written guitar concerto (solo guitar and orchestra), late October: world premier of a newly-written opera featuring guitar throughout, early December: performances of Rodrigo's Concierto de Aranjuez. So, teach, practice, rinse and repeat.
Anyway, the hobby must continue for my sanity. As previously shown, the engine and transmission could be installed now, but I'm working on the engine bay, including hell hole repairs. I want to get this wrapped up and in primer before I put the drivetrain in for the first time.
After removing fiberglass installed by a PO: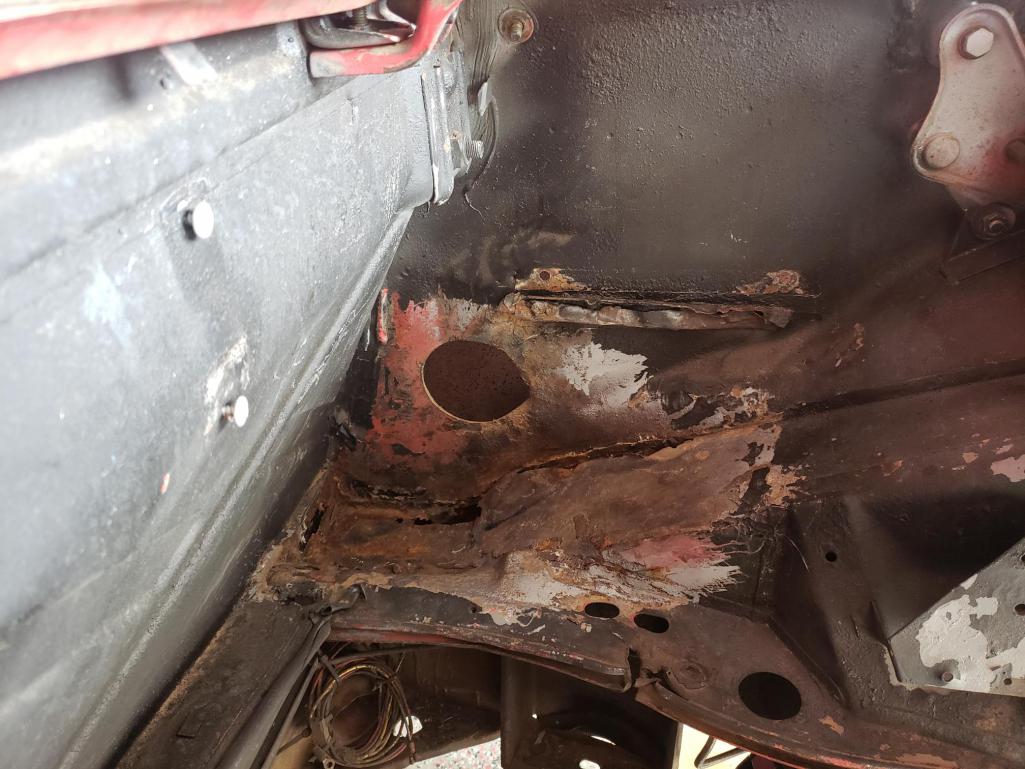
First cuts reveal more mouse nests. I would say a rodent infestation is a lot like rust; worse than you think: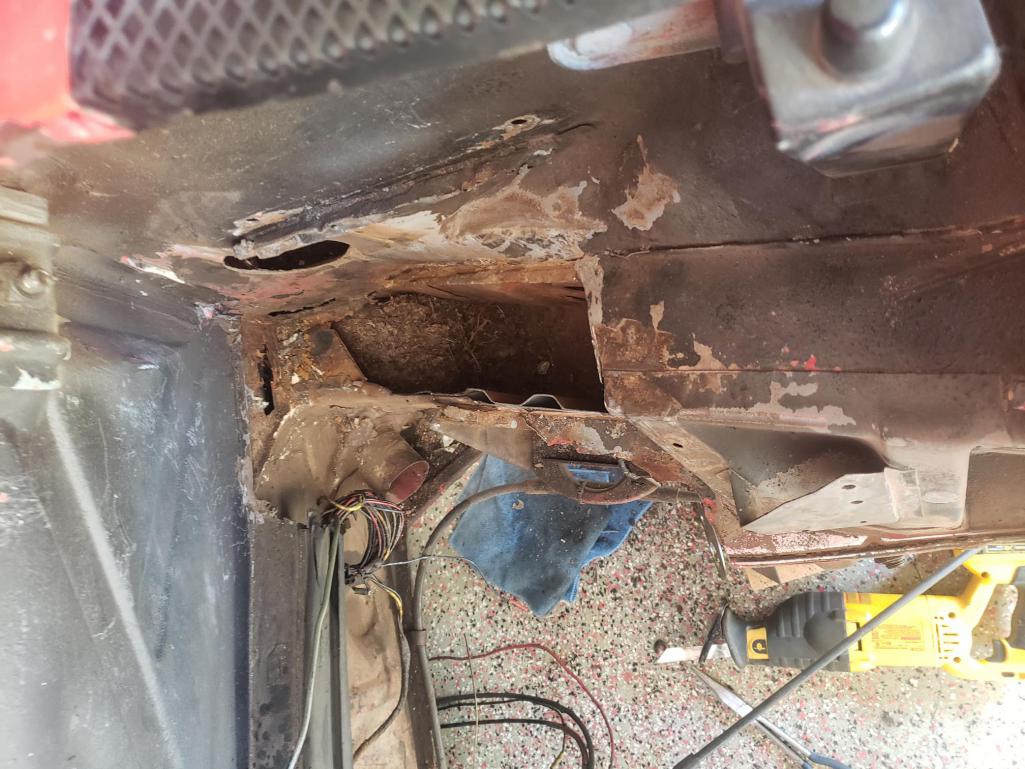
More trimming and cleanup work. Not pictured is a small metal patch I did on the bottom of the rocker, and then rust treated and POR-15 coated the inside of the long: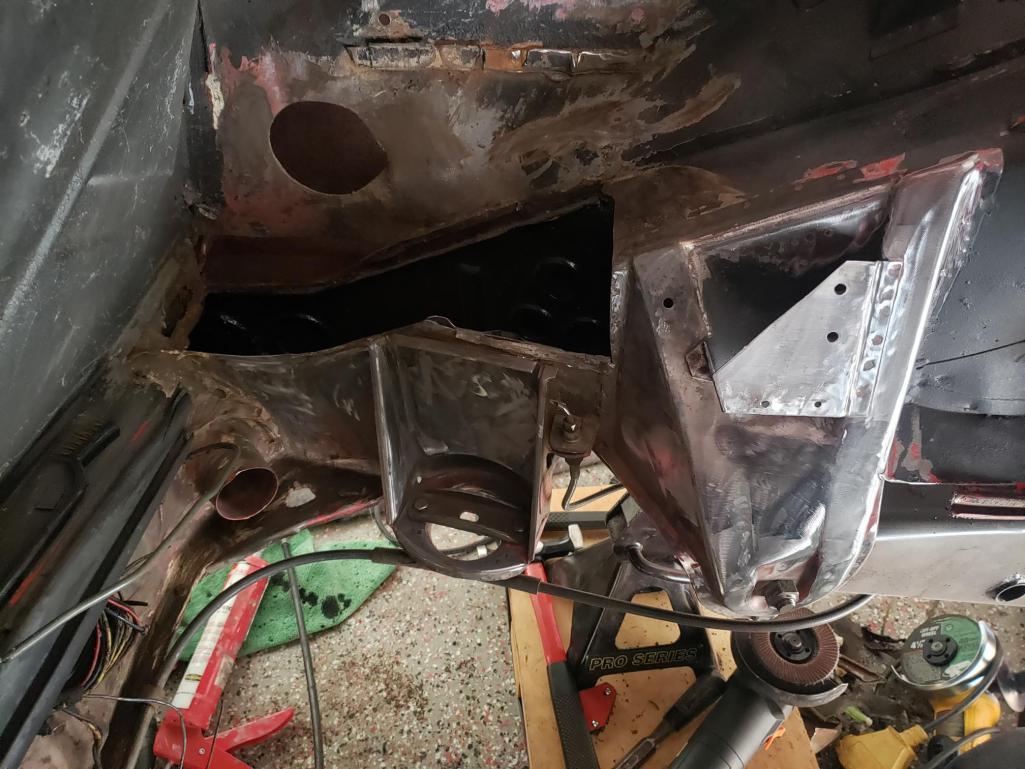
Most of the work was actually happening last summer, and here's a pic of what happens when your angle grinder with a cutoff wheel gets ripped out of your hands and bounces off your forearm (added here to remind me, and you, to be the F*** careful). I was wearing leather gloves and it hit right above the glove. Now I wear longer welding gloves when grinding and cutting. 
Went to Urgent Care and the female Russian doctor looked at it and said "Ah, it is just superficial!". Glad to hear, but not sure I felt that way. Superglue and Steristrips and now it looks like a smudge under my hairy arm.
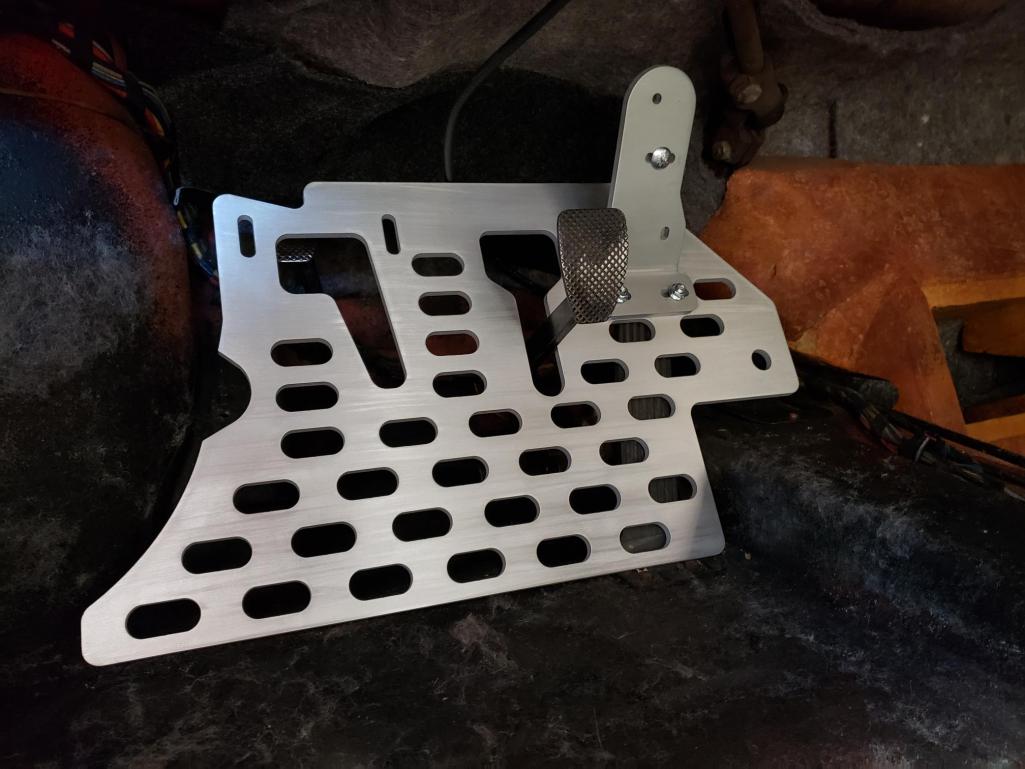
Also got my DBW pedal board from JWK Engineering: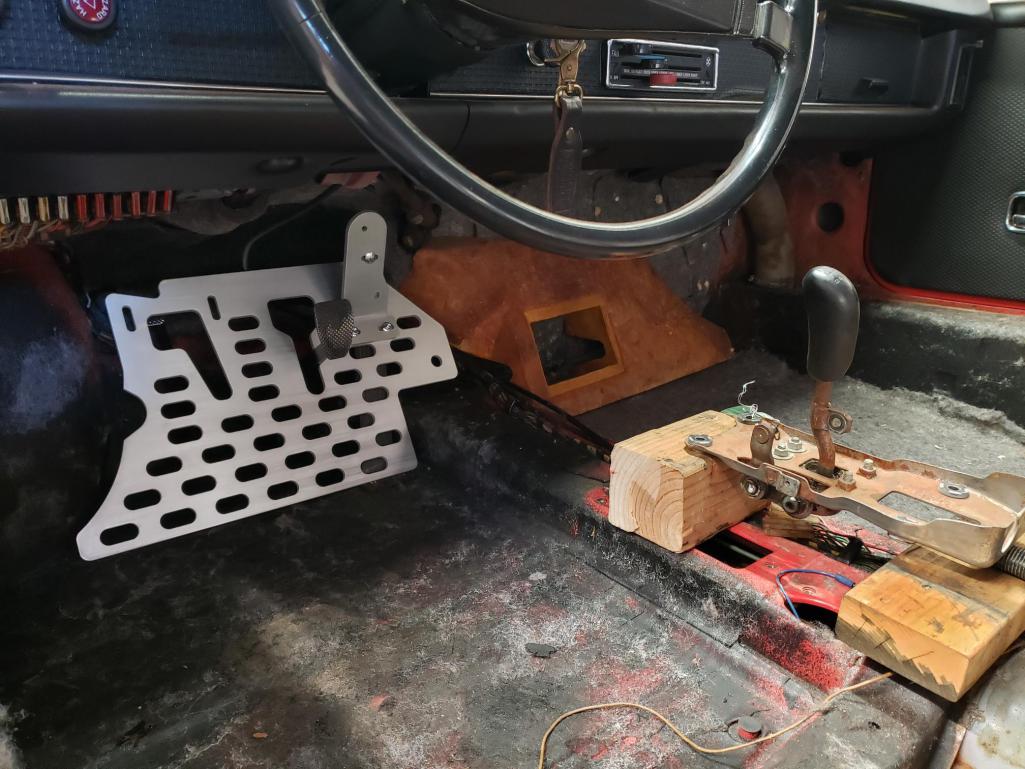
And, my brother and I made a project introduction video on his YouTube channel:
https://www.youtube.com/watch?v=enHVPV4mqeA
Posted by: Front yard mechanic Dec 16 2022, 07:21 PM
Ow
Posted by: Mayne Jan 11 2023, 01:45 PM
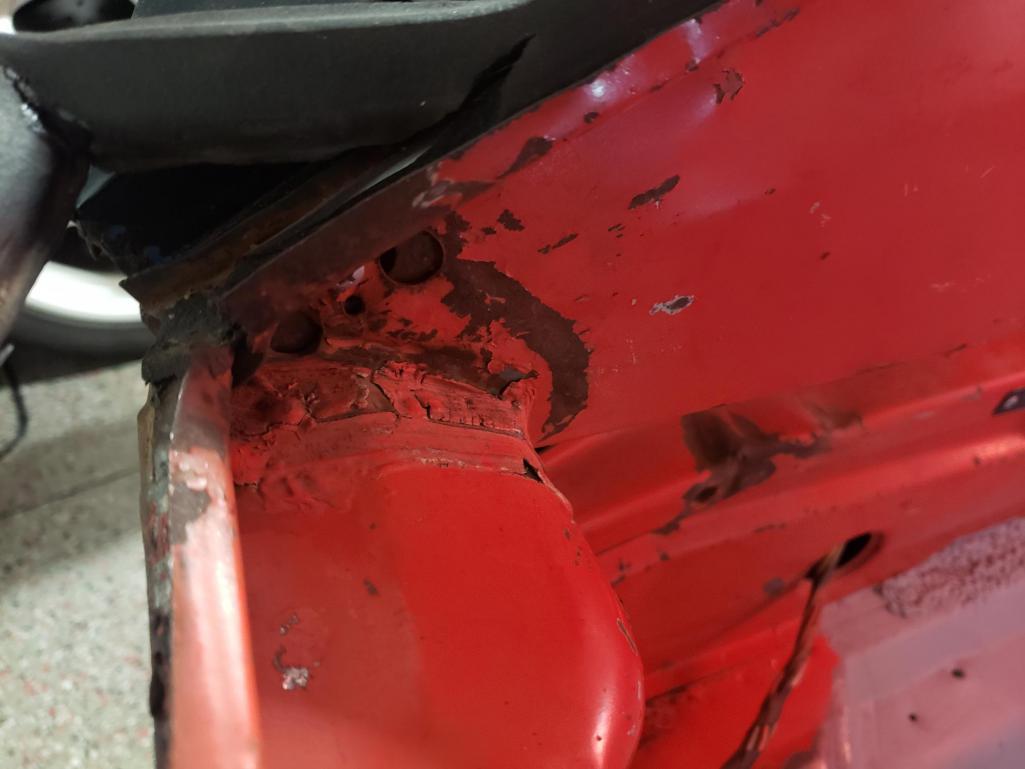
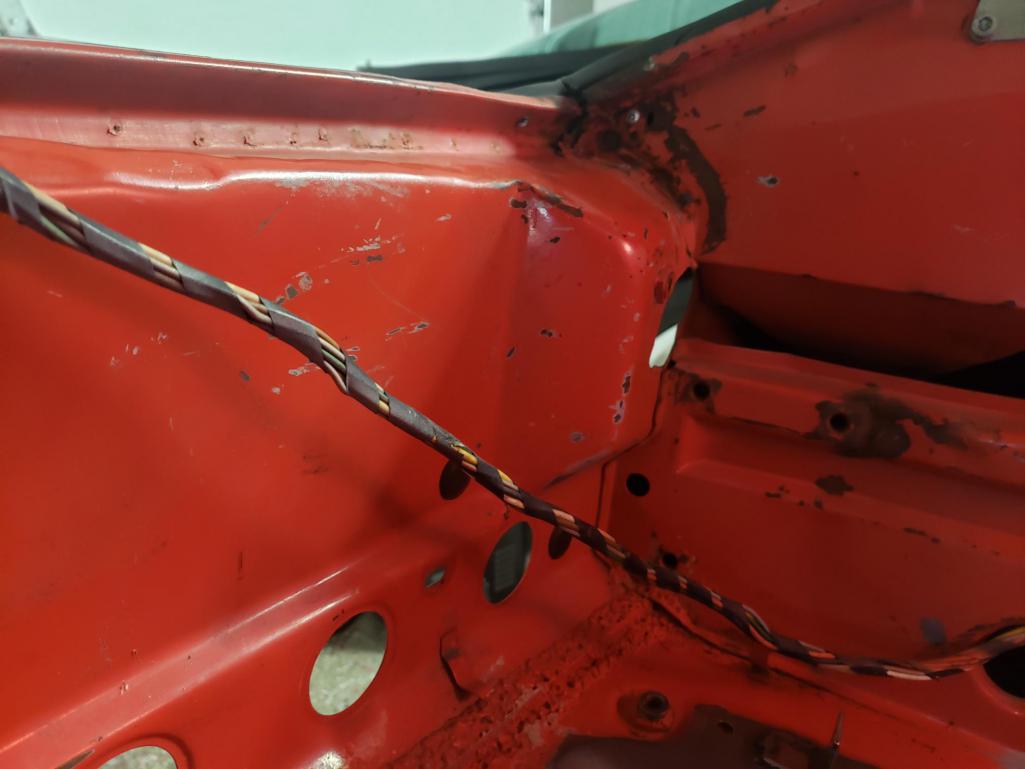
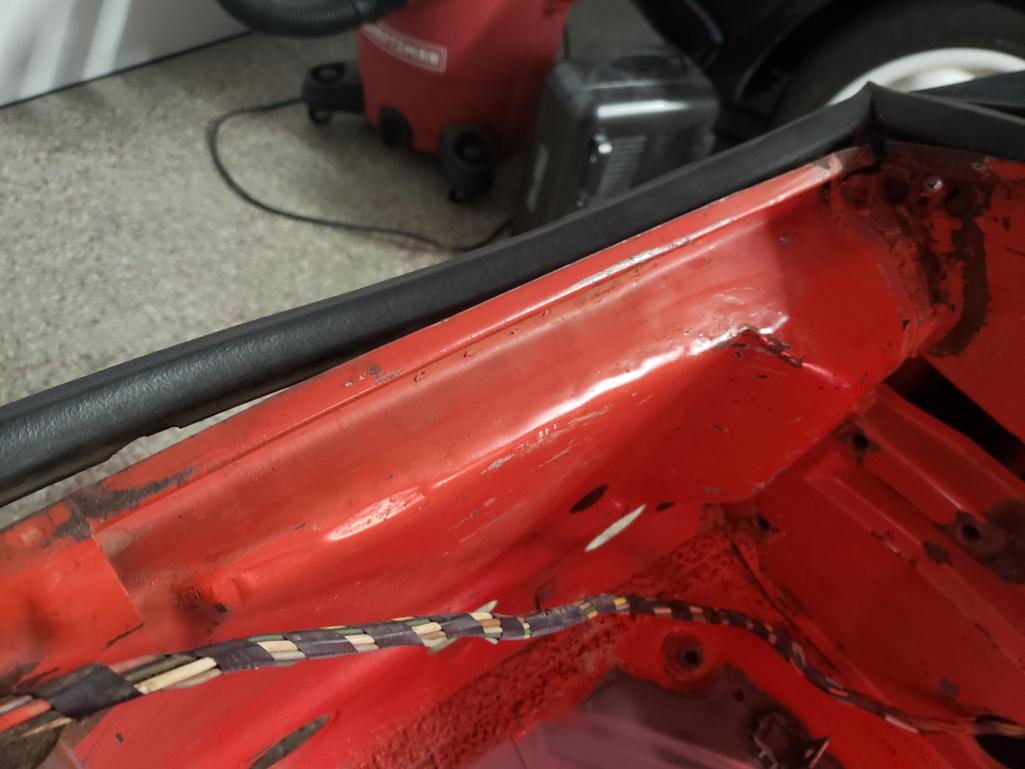
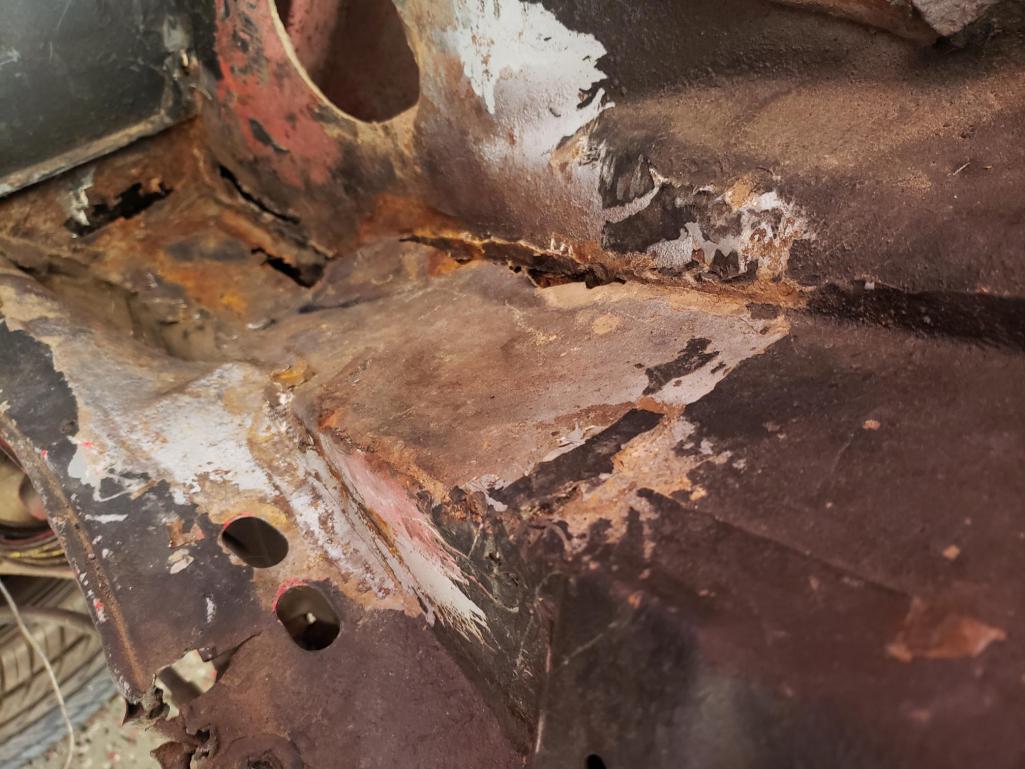
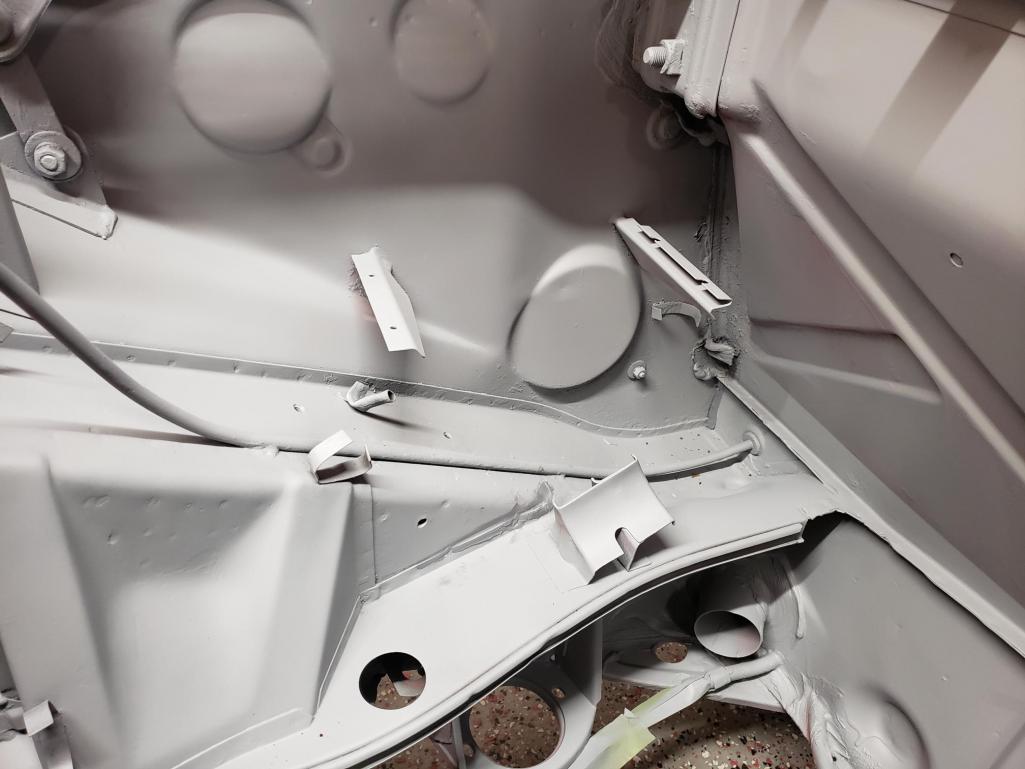
Latest update is that the engine bay rust repair and general preparation for primer is taking quite a bit of time. But I'm determined to get it prepped pretty well and primered before I put the engine in for the first time.
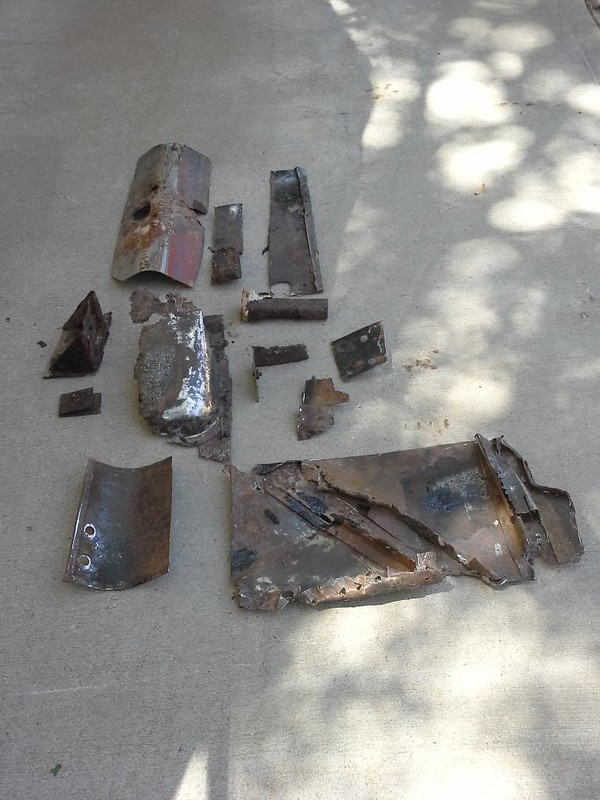
The rust repair in and around the hell hole has taken the most time, but ironically it's the undercoating that I sprayed into the engine bay shortly after getting the car that is slowing me down now. It has to be scraped off a bit at a time and it's just about taking forever. People complain about what the PO (previous owner) has done, but what about fixing the wrongs of the CO (current owner)? Anyway, a few pics:
Most of what I cut out: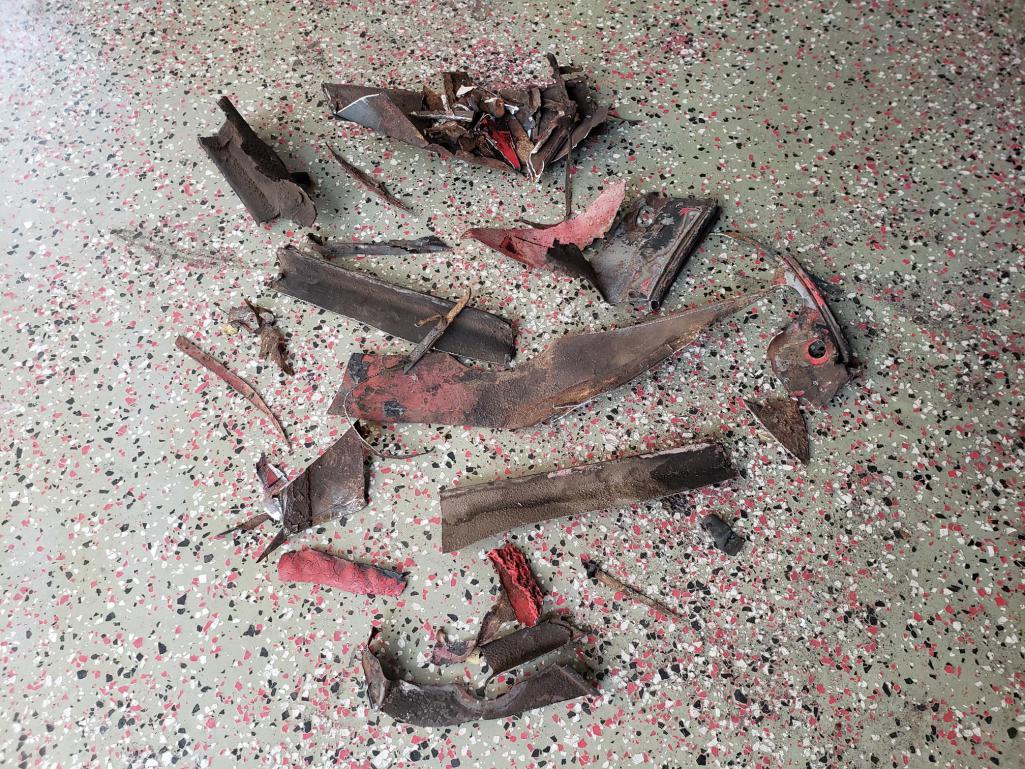
Where it's currently at. Still more welding to go, then POR-15 the welds, then seam sealer, then primer: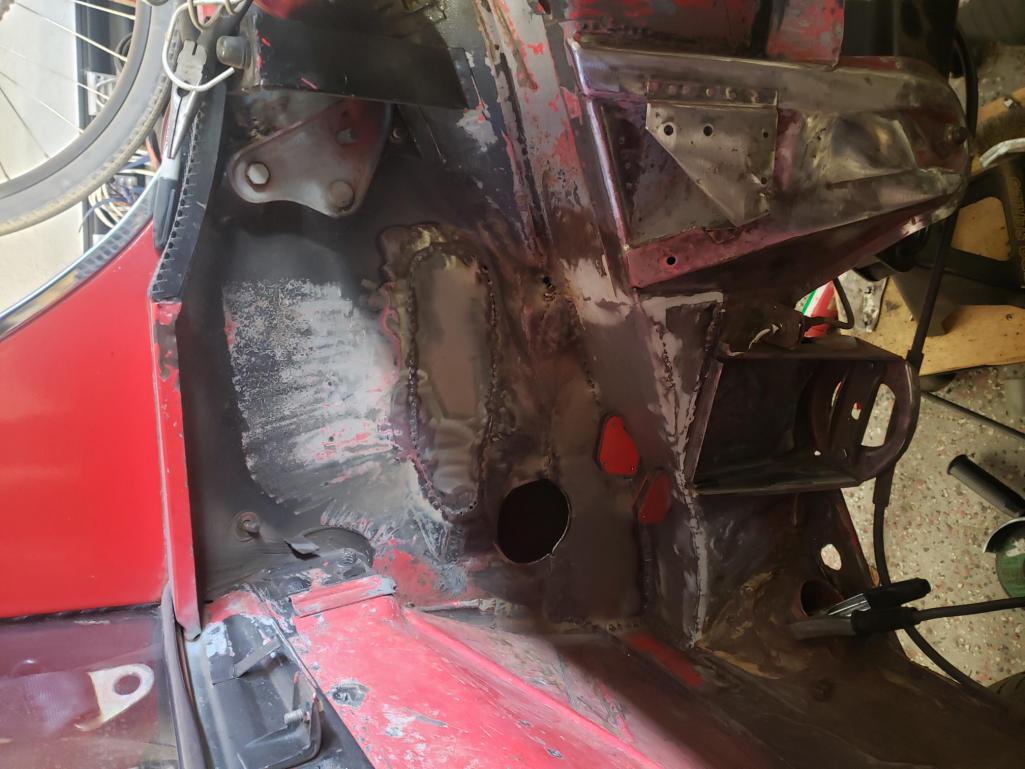
The latest part to arrive is my Zero Decibel Motorsports bell crank for the cable shift to the Subaru transmission. Very nice looking piece: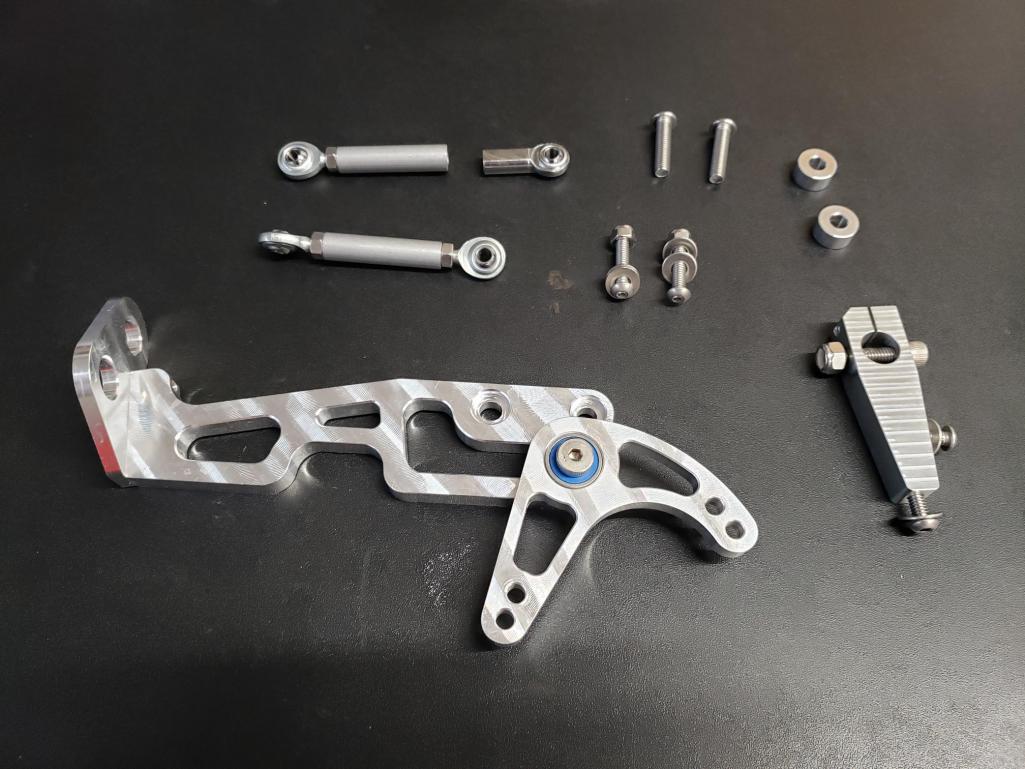
More to come...
Attached thumbnail(s)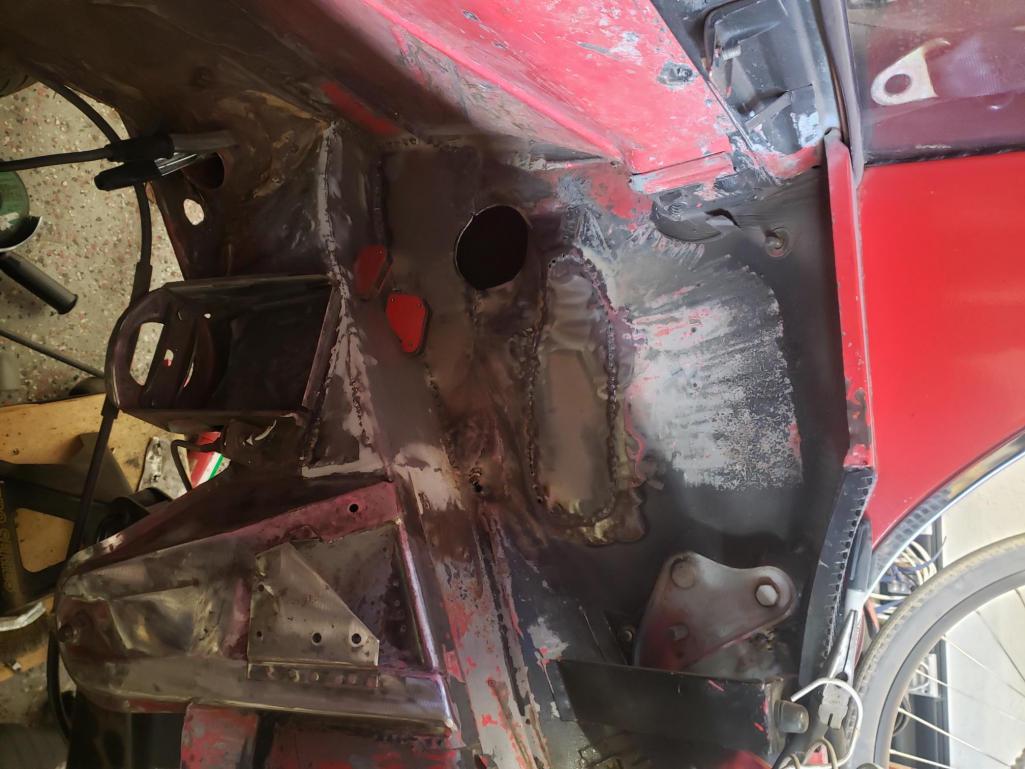
Posted by: 76-914 Jan 11 2023, 07:49 PM
Most of us are that PO at one time or another.  I was that PO when I fiberglassed that battery area and ended up doing the proper metal repairs 14 years later!
  It's coming along nicely Jeremy.
Posted by: 76-914 Jan 11 2023, 10:16 PM
I forgot to add this; you may already have this update. https://www.agtengineering.com.au/product-page/subaru-low-speed-canbus-dash-delete?fbclid=IwAR0cptNYn3yJK_W7kGIJogsiGN71dn3ghF-V6y1K5mTFEjr4GulBgKcm7Ss
Posted by: 914rrr Jan 11 2023, 10:34 PM
Thanks for including us on your resto journey! I'm likely going to be doing a lot of similar repairs to my 74 2.0.
Q: did you use stock aluminum windshield trim for the windshield or a rubber seal? I had a 914 awhile ago that had a rubber windshield seal and I never did figure out how it was done. I'll be replacing my cracked windshield and (hopefully) re-installing the aluminum trim, if I don't completely mangle it during removal. BTW, If anybody has any tips on how to successfully remove windshield trim, I'd appreciate it.
Regarding the flux core MIG: IIRC, I was told that flux core wire may have baked in impurities that may eventually pop out like a rust bubble later on on finished body panels. If anyone else can enlighten and/or correct me if I'm wrong, I'd appreciate it, as I'm getting ready to buy a MIG welder and want to ensure I'm getting the right type.
Posted by: 76-914 Jan 12 2023, 09:52 AM
Thanks for including us on your resto journey! I'm likely going to be doing a lot of similar repairs to my 74 2.0.
Q: did you use stock aluminum windshield trim for the windshield or a rubber seal? I had a 914 awhile ago that had a rubber windshield seal and I never did figure out how it was done. I'll be replacing my cracked windshield and (hopefully) re-installing the aluminum trim, if I don't completely mangle it during removal. BTW, If anybody has any tips on how to successfully remove windshield trim, I'd appreciate it.
Regarding the flux core MIG: IIRC, I was told that flux core wire may have baked in impurities that may eventually pop out like a rust bubble later on on finished body panels. If anyone else can enlighten and/or correct me if I'm wrong, I'd appreciate it, as I'm getting ready to buy a MIG welder and want to ensure I'm getting the right type.
MIG is correct but requires a little hammer/dolly work. TIG is better as less heat=less shrinkage. TIG units are more expensive and complex. MIG is easily learned.
Posted by: Mayne Jan 12 2023, 11:19 AM
I forgot to add this; you may already have this update. https://www.agtengineering.com.au/product-page/subaru-low-speed-canbus-dash-delete?fbclid=IwAR0cptNYn3yJK_W7kGIJogsiGN71dn3ghF-V6y1K5mTFEjr4GulBgKcm7Ss
Thanks for the link. I didn't know about that canbus module. I'll do some research on it, but one question that comes to mind is if it is needed when using engine management that accommodates canbus (like Haltech and Link).
Thanks for including us on your resto journey! I'm likely going to be doing a lot of similar repairs to my 74 2.0.
Q: did you use stock aluminum windshield trim for the windshield or a rubber seal? I had a 914 awhile ago that had a rubber windshield seal and I never did figure out how it was done. I'll be replacing my cracked windshield and (hopefully) re-installing the aluminum trim, if I don't completely mangle it during removal. BTW, If anybody has any tips on how to successfully remove windshield trim, I'd appreciate it.
Regarding the flux core MIG: IIRC, I was told that flux core wire may have baked in impurities that may eventually pop out like a rust bubble later on on finished body panels. If anyone else can enlighten and/or correct me if I'm wrong, I'd appreciate it, as I'm getting ready to buy a MIG welder and want to ensure I'm getting the right type.
When I had the windshield installed, I didn't have any of the factory trim, so the installer basically create a rubber seal with windshield silicone. It works but only looks okay closeup and when I eventually do full paint, I plan to spring for new stainless trim.
Yeah, my flux core welder gets me through for this kind of work that's sort of hidden away. I do sometimes get a burst bubble effect in my welds, which could be related to contaminates in the flux core. When I get to the point when I weld on GT flares, I plan to upgrade to MIG, or even a MIG/TIG combo unit. Though I doubt I'd try to do flares for my first TIG project.
Posted by: 76-914 Jan 12 2023, 11:52 AM
I could be wrong but I believe that it is intended to be used with the factory ECU. Previously one needed to stuff the instrument panel somewhere behind the existing panel because of the CanBus requirements. I believe with this you won't need to keep the Subaru panel and will be able to use the factory ECU. LMK, what you find out and cost comparison between the Halltech vs. this set up. Harness costs included.
Posted by: 914rrr Jan 13 2023, 10:25 AM
Thanks for including us on your resto journey! I'm likely going to be doing a lot of similar repairs to my 74 2.0.
Q: did you use stock aluminum windshield trim for the windshield or a rubber seal? I had a 914 awhile ago that had a rubber windshield seal and I never did figure out how it was done. I'll be replacing my cracked windshield and (hopefully) re-installing the aluminum trim, if I don't completely mangle it during removal. BTW, If anybody has any tips on how to successfully remove windshield trim, I'd appreciate it.
Regarding the flux core MIG: IIRC, I was told that flux core wire may have baked in impurities that may eventually pop out like a rust bubble later on on finished body panels. If anyone else can enlighten and/or correct me if I'm wrong, I'd appreciate it, as I'm getting ready to buy a MIG welder and want to ensure I'm getting the right type.
MIG is correct but requires a little hammer/dolly work. TIG is better as less heat=less shrinkage. TIG units are more expensive and complex. MIG is easily learned.
Thanks! I think my concern about flux popping through was actually a stick or gas + rod weld repair. I now remember what the flux core vs gas MIG concern was. Many years ago I borrowed a neighbor's cheap HF flux core welder and it was really difficult to weld body metal with it without blowing holes in the metal due to the wire size and heat. After that I bought my own gas MIG and it was a night and day difference in welding control and ease. This article explains why:
https://weldtalk.hobartwelders.com/forum/equipment-talk/mig-wire-welders/35719-flux-core-ok-for-auto-patch-panels
Posted by: Mayne Mar 26 2023, 12:05 PM
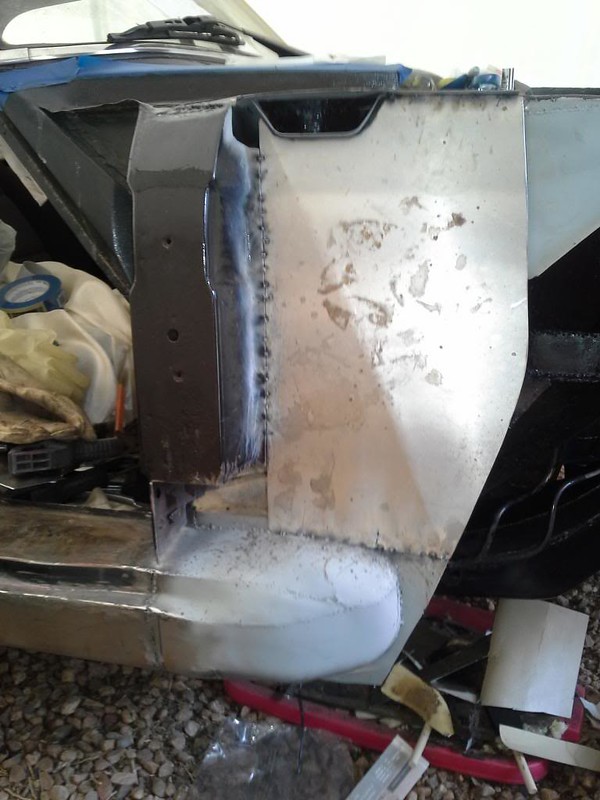
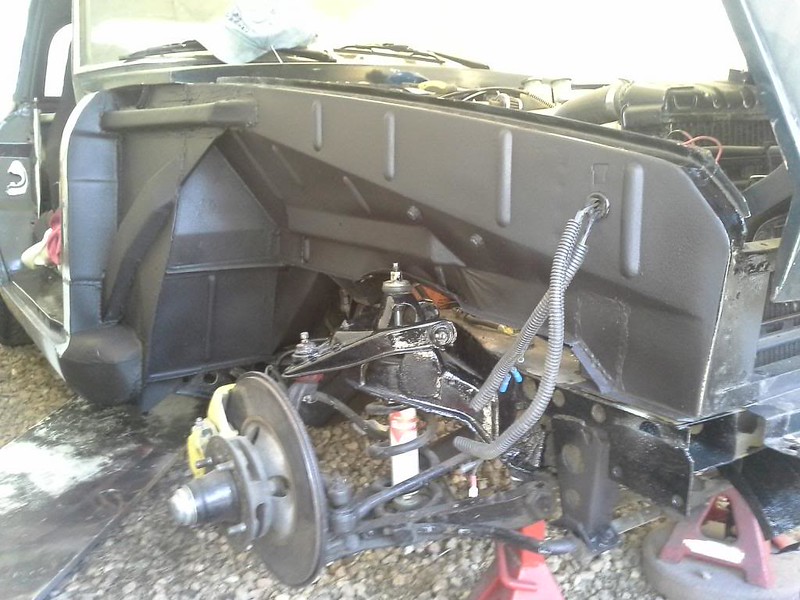
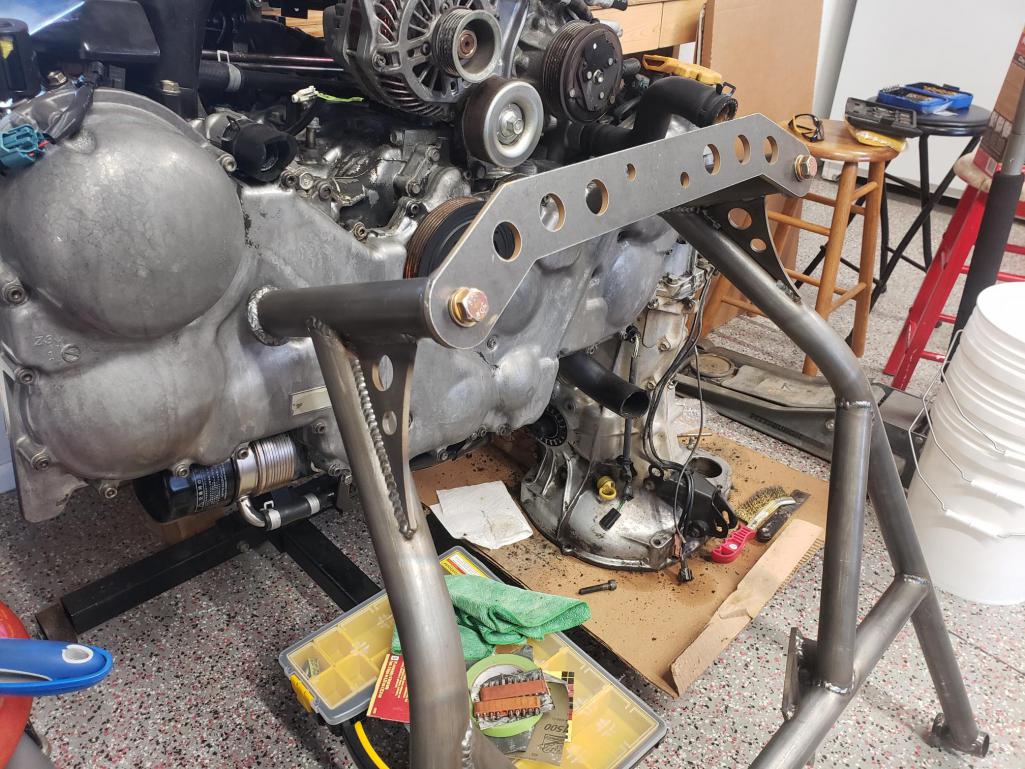
Here's another update on the 914 project. The engine bay repairs, though not extensive, were pretty time consuming. I finally got it to a point where I felt happy with the rust repair around the hell hole. I also removed a good amount of the engine shelf sheet metal to clean things up a bit and create more space around the engine. 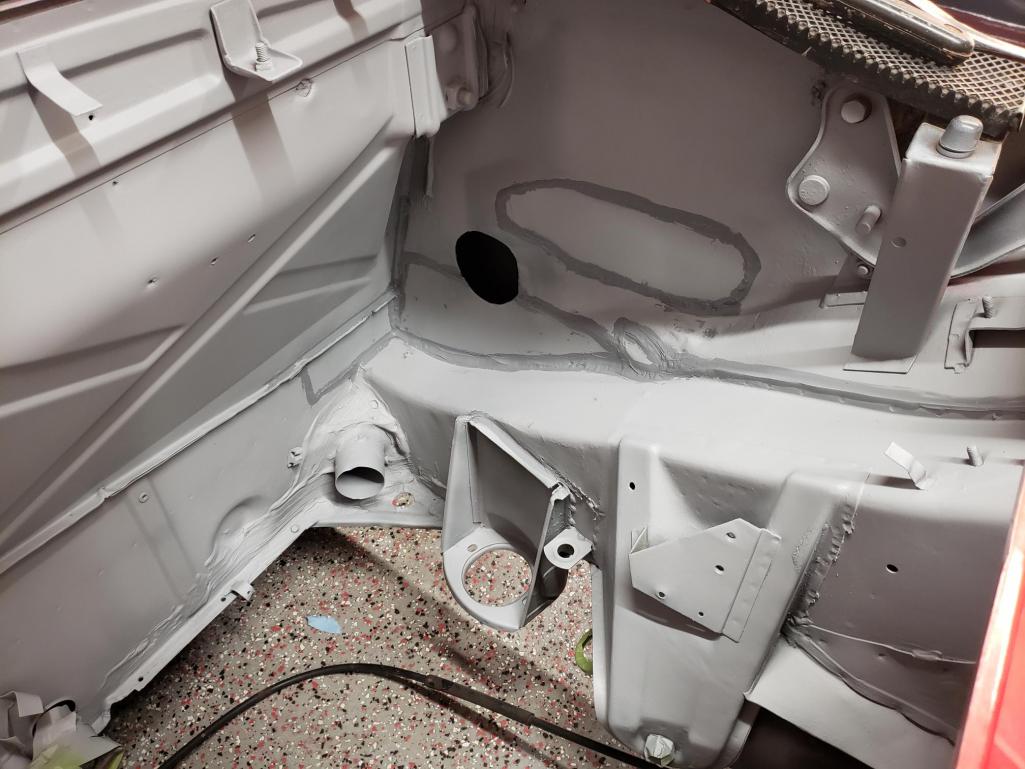

Time for an engine in that space! 
Attached thumbnail(s)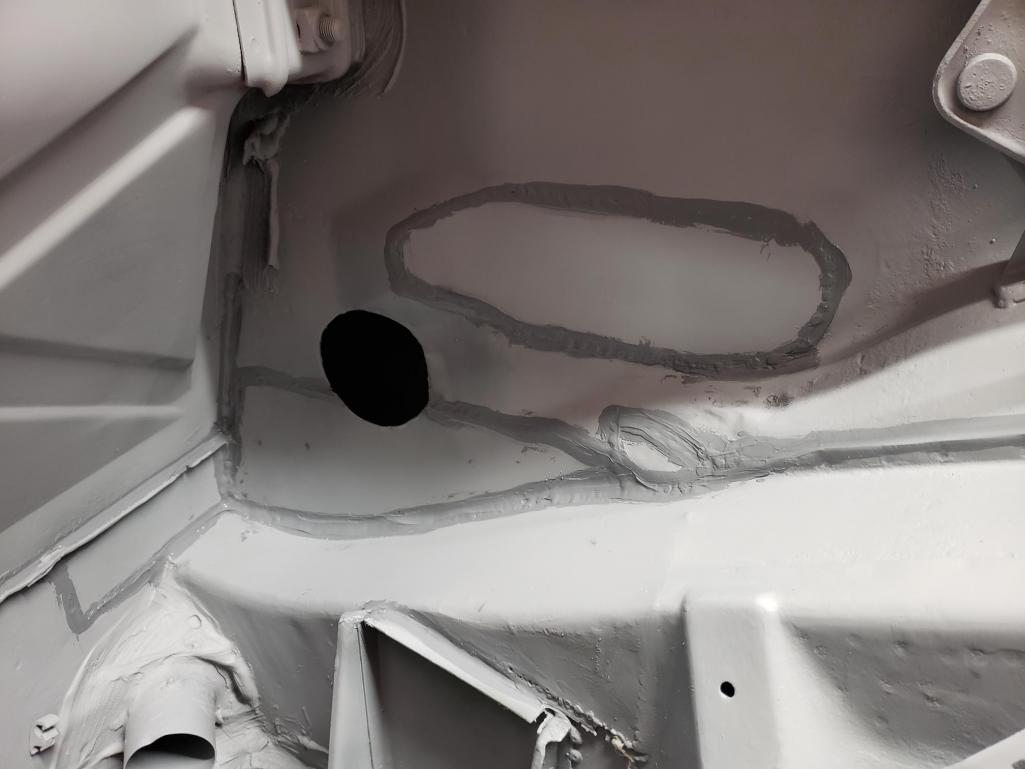
Posted by: Mayne Mar 26 2023, 12:14 PM
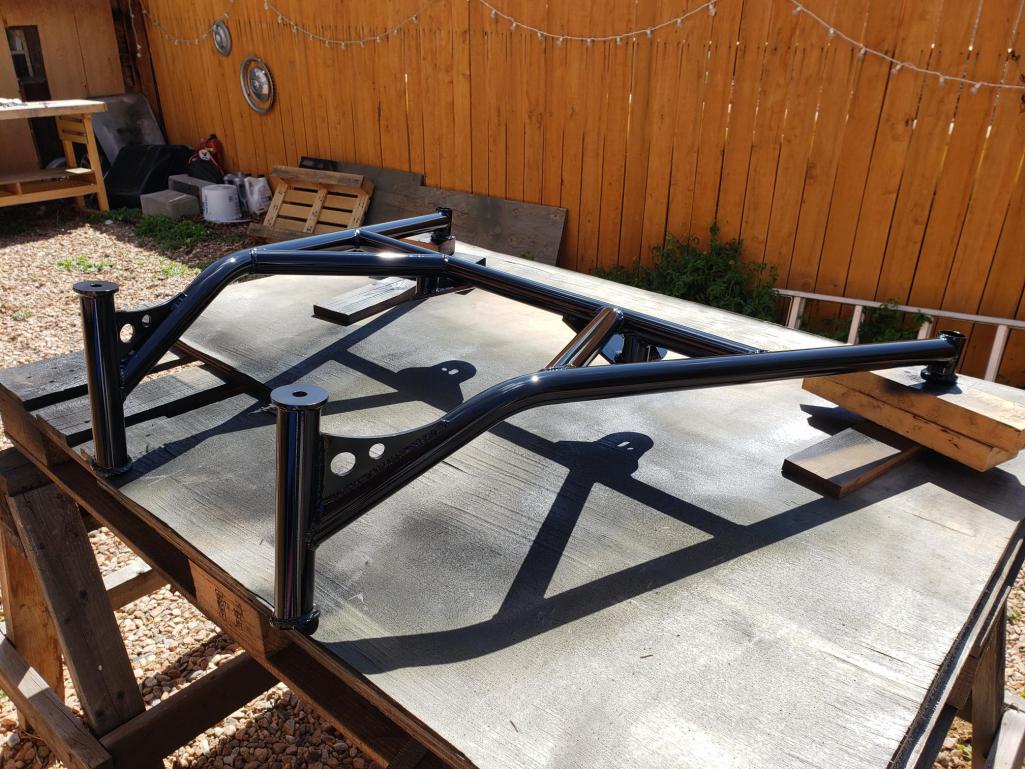
Here are some shots of the cradle, primed with self-etching primer and painted with gloss black VHT Chassis and Roll Bar paint.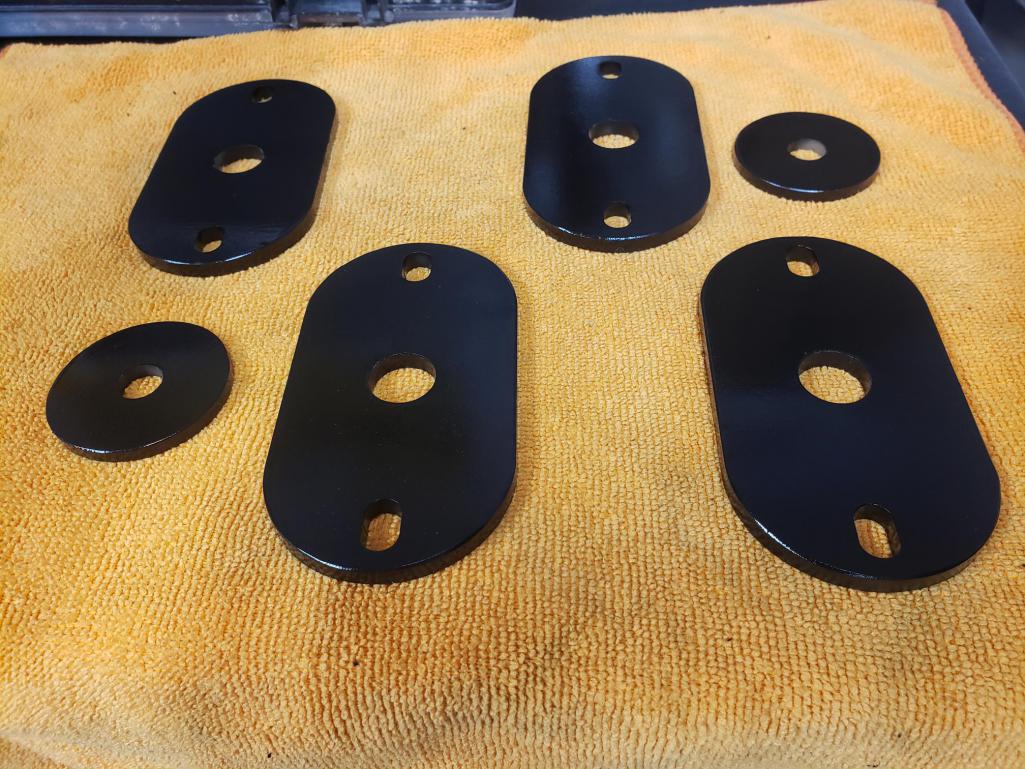
Posted by: Mayne Mar 26 2023, 12:21 PM
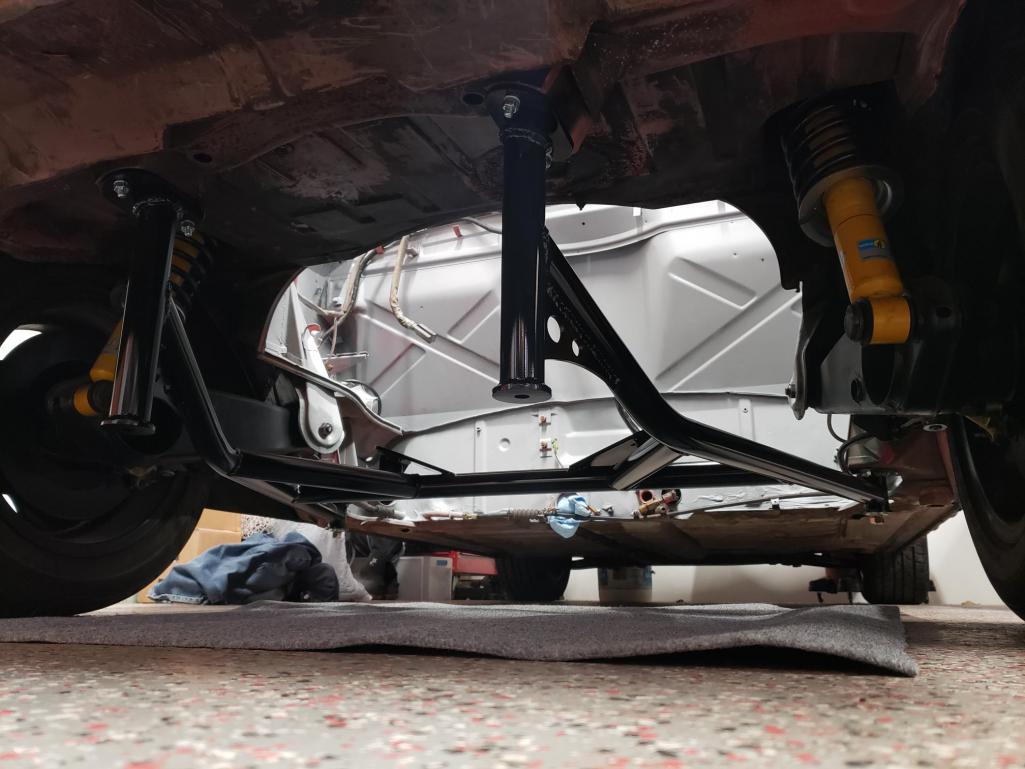
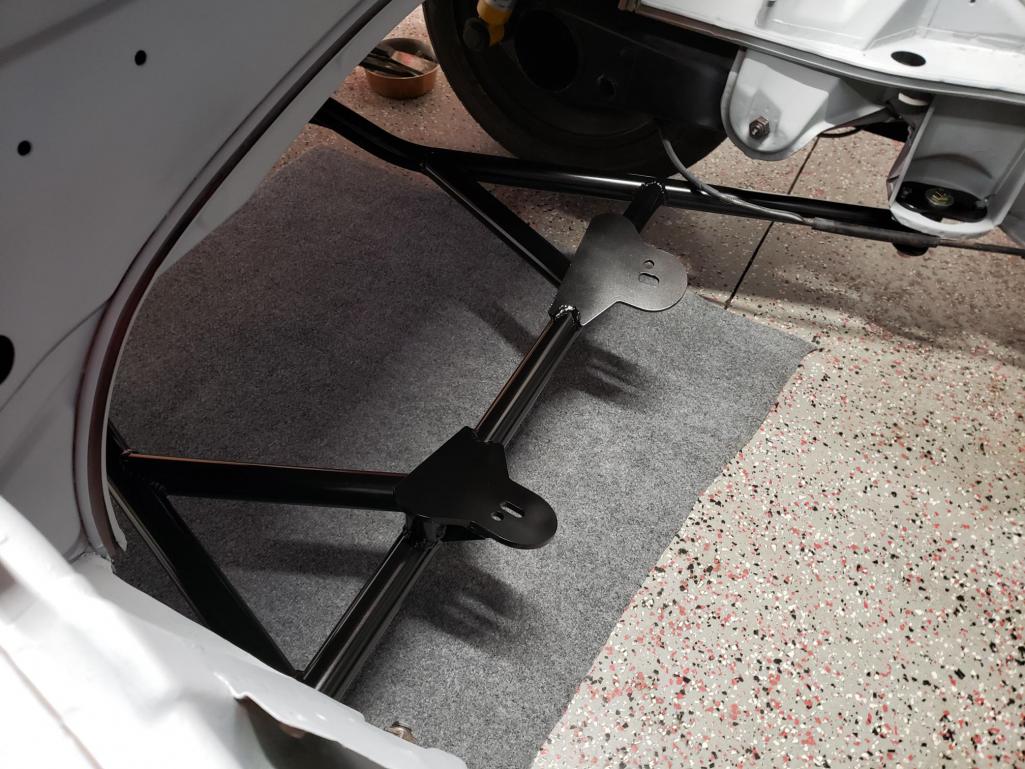
Reinstalled the drivetrain on the cradle and eased it in place. A big moment!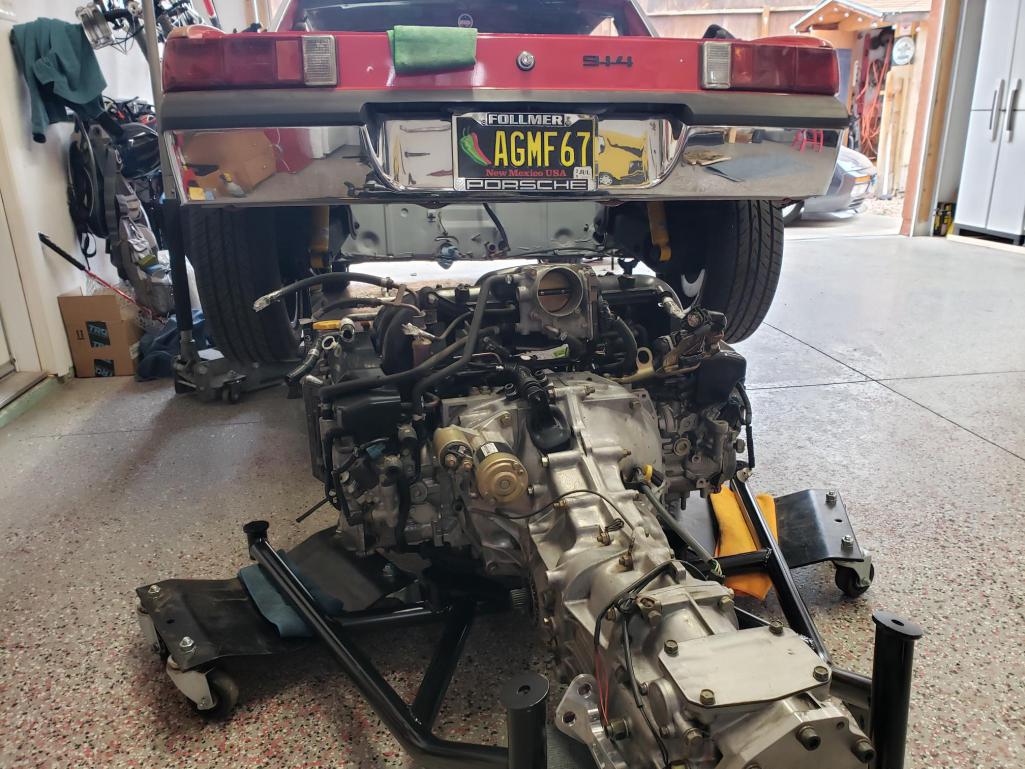

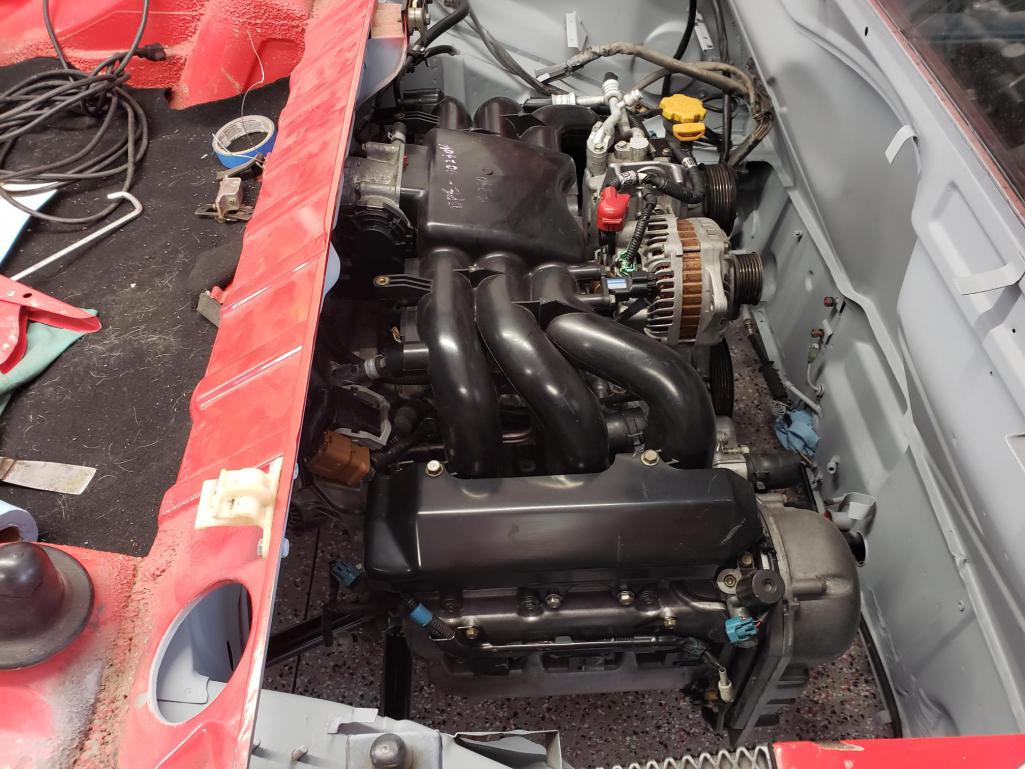
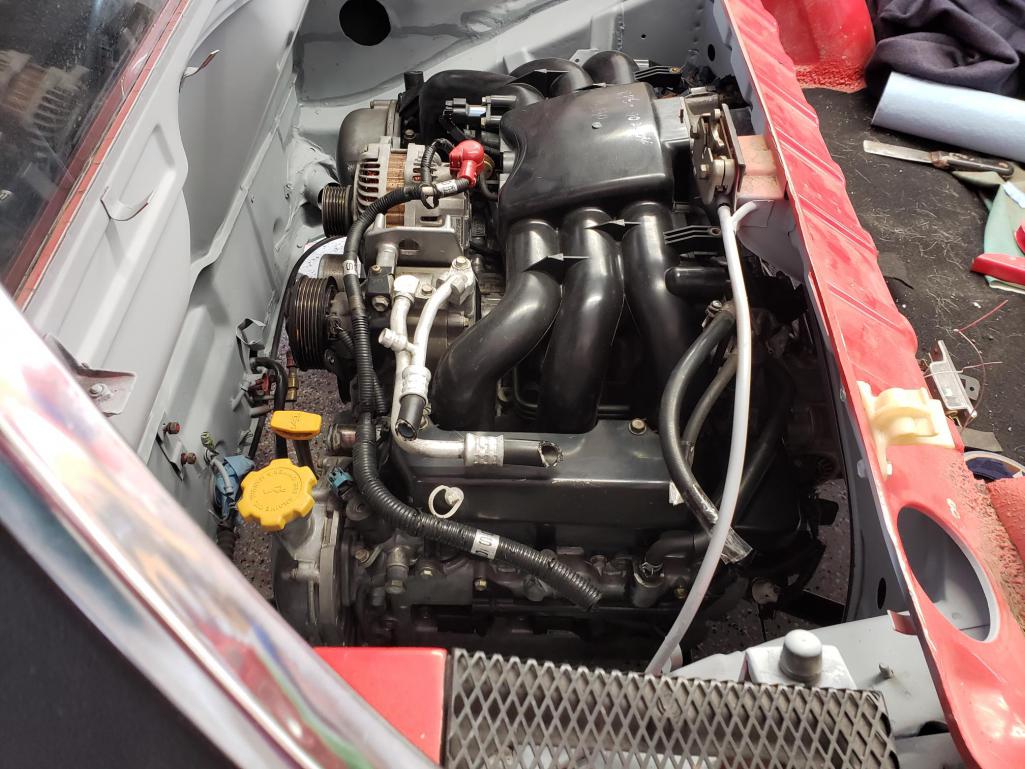
I'm amazed how much space there is at the front of the engine, and concerned about how little space there is at the throttle body. I may have to cut into the trunk for the air intake. Supposedly you can flip the intake manifold on the EZ30R, but it requires removing the AC compressor. I'll be doing AC on this car thanks to our hot desert summers, so I'll have to work with the clearance.
I'm now working on mounting the MR2 shifter, then I'll get cables ordered.
Posted by: emerygt350 Mar 26 2023, 02:35 PM
That is beautiful. What great work you are doing. Almost seems to fit better than the original.
Posted by: 76-914 Mar 26 2023, 02:50 PM
I don't understand why folks are so concerned with that cut out for the TB/air filter. That area can always be welded back in later if someone wanted to take it back to an air sucker. If you do need to cut into the trunk I'd suggest you cut out a square or rectangular piece that is at least 2" larger on all sides. Drive it for awhile and once you're certain you don't need to shift it to or fro you can go ahead and trim a nice tight circle out of that piece you cut out, weld it back in place then you'll have a nice look. Leave ~1/4"free space between the silicon & metal. Trim the hole with edge guard to protect the silicone 90 that penetrates the metal. It's looking real nice. Keep after it.
Posted by: East coaster Mar 26 2023, 08:20 PM
Nice work and progress!
Posted by: Front yard mechanic Mar 27 2023, 05:34 AM
Looks great now take the engine back out and in a couple of more times for practice
Posted by: mgarrison Mar 27 2023, 09:13 AM
Nice progress!
Have you looked into what headers your going to use? I was going to use the Outfront Motorsports headers, but believe they will hit my engine cradle...I believe the EZ36 I have, and the EZ30 your using both have the same exhaust port config. 
Posted by: Mayne Mar 27 2023, 10:36 AM
That is beautiful. What great work you are doing. Almost seems to fit better than the original.
Thanks! Everyone who has seen the engine in the car can't believe how well that lump that was taking up space on my garage floor fits in the engine bay.
Nice work and progress!
Thanks, cheers!
Looks great now take the engine back out and in a couple of more times for practice
No doubt that will happen at least a few more times!
Posted by: Mayne Mar 27 2023, 10:50 AM
I don't understand why folks are so concerned with that cut out for the TB/air filter. That area can always be welded back in later if someone wanted to take it back to an air sucker. If you do need to cut into the trunk I'd suggest you cut out a square or rectangular piece that is at least 2" larger on all sides. Drive it for awhile and once you're certain you don't need to shift it to or fro you can go ahead and trim a nice tight circle out of that piece you cut out, weld it back in place then you'll have a nice look. Leave ~1/4"free space between the silicon & metal. Trim the hole with edge guard to protect the silicone 90 that penetrates the metal. It's looking real nice. Keep after it.
Yeah, I do hesitate when it comes to cutting factory sheet metal, which is kind of ridiculous when I consider what I've already cut. Thanks for the tips and encouragement as always!
Nice progress!
Have you looked into what headers your going to use? I was going to use the Outfront Motorsports headers, but believe they will hit my engine cradle...I believe the EZ36 I have, and the EZ30 your using both have the same exhaust port config.
So, I do think the Outfront headers will hit the cradle. A while back I talked to Jeff at JWK, who built the cradle, and he said he ordered his headers from Outfront unwelded at the flanges, then adjusted the angles and welded in some extra material. If I go that route, I'm going to see if they'll send me headers unwelded, but with maybe an extra inch on the primaries. That way, I can just cut and grind existing material until they fit. I'll report back on what they say.
I have also reached out to Raptor SC in Australia, because they make some beautiful headers for the EZ30/36. They said they won't have them available until June or July and for whatever reason, they didn't want to give me dimensions until they were available. Protecting their design, maybe?
Posted by: brant Mar 27 2023, 10:59 AM
Nice Job!
Posted by: Mayne Oct 23 2023, 03:07 PM
It was a slow summer of progress on the 914. Had some traveling to do and much of the summer was just too hot in Albuquerque to feel very motivated to work in the garage. But I've been getting back to it recently so I thought I'd post up a few photos.
My Outfront headers for the EZ30R: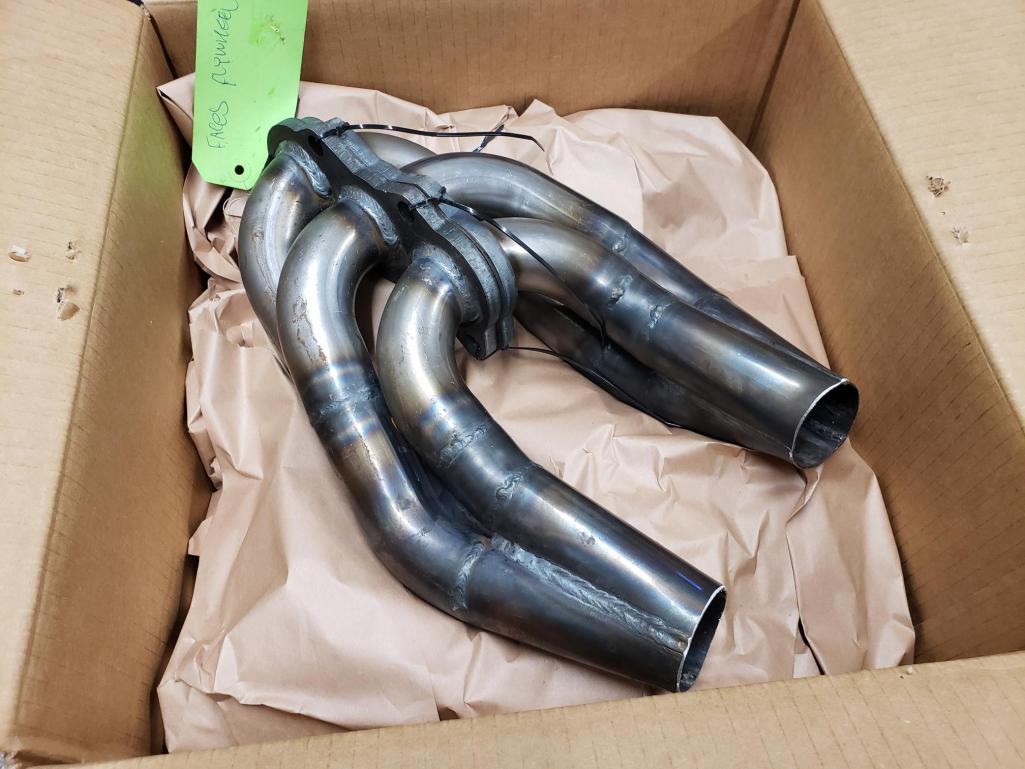

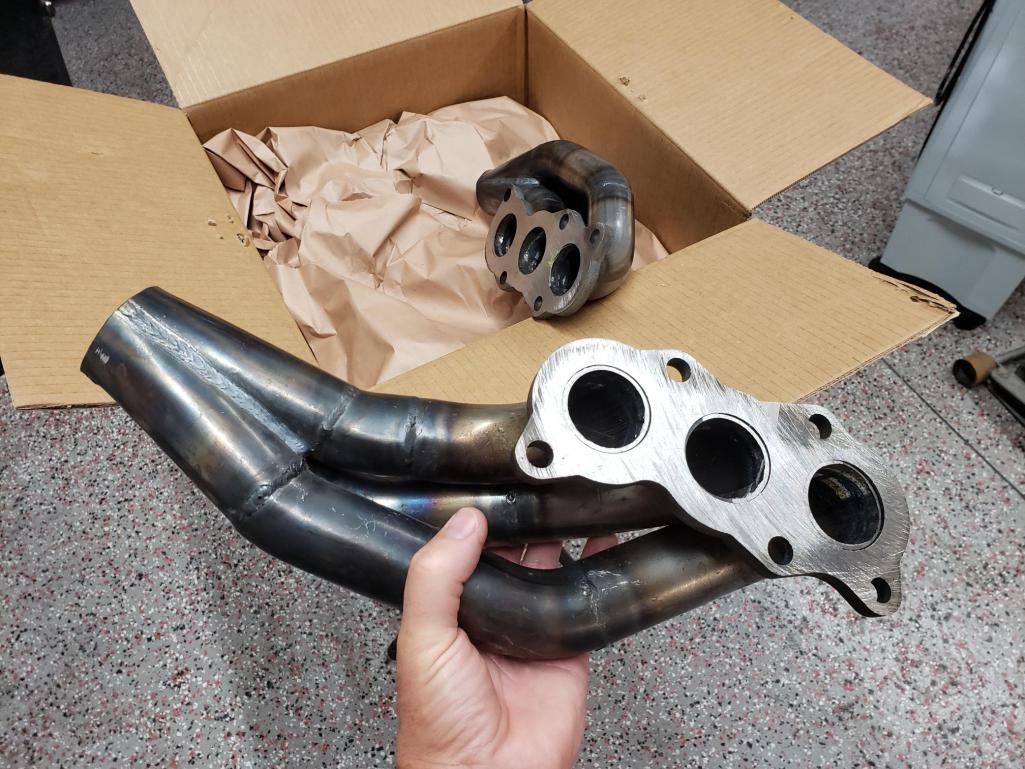
As I thought, these will not clear the engine cradle cross brace. Next I will remove the engine and explore a few ideas I have for creating the necessary clearance. Tune in for that adventure!
Since I've stripped out most of the interior to deal with a few rust spots, I figured this would be a good time to add a reinforcement kit to the inner longitudinals. If this engine puts out even close to its potential power, I'll need a bit more rigidity.
Inner long kit from Mad Dogs Motorsport: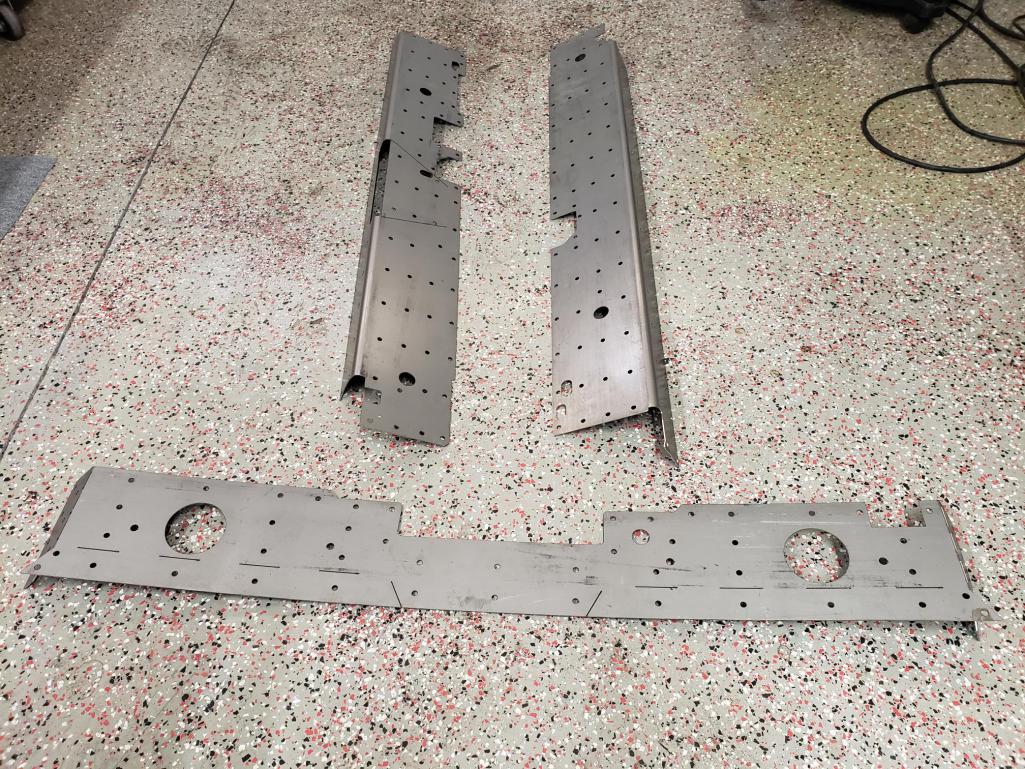
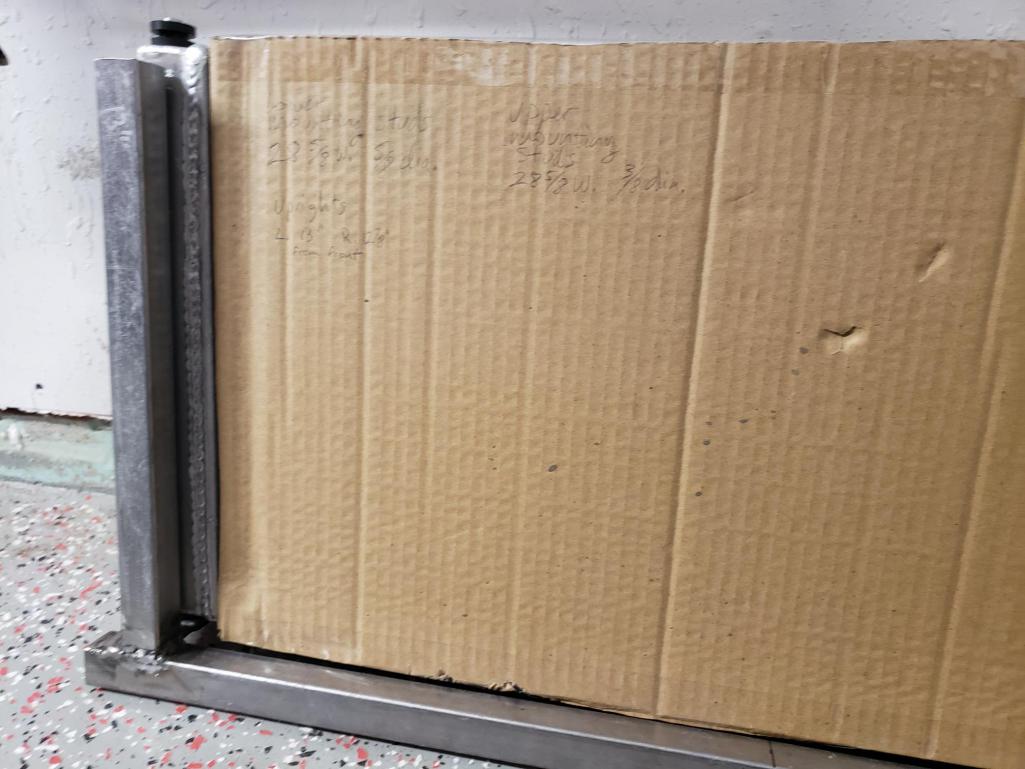
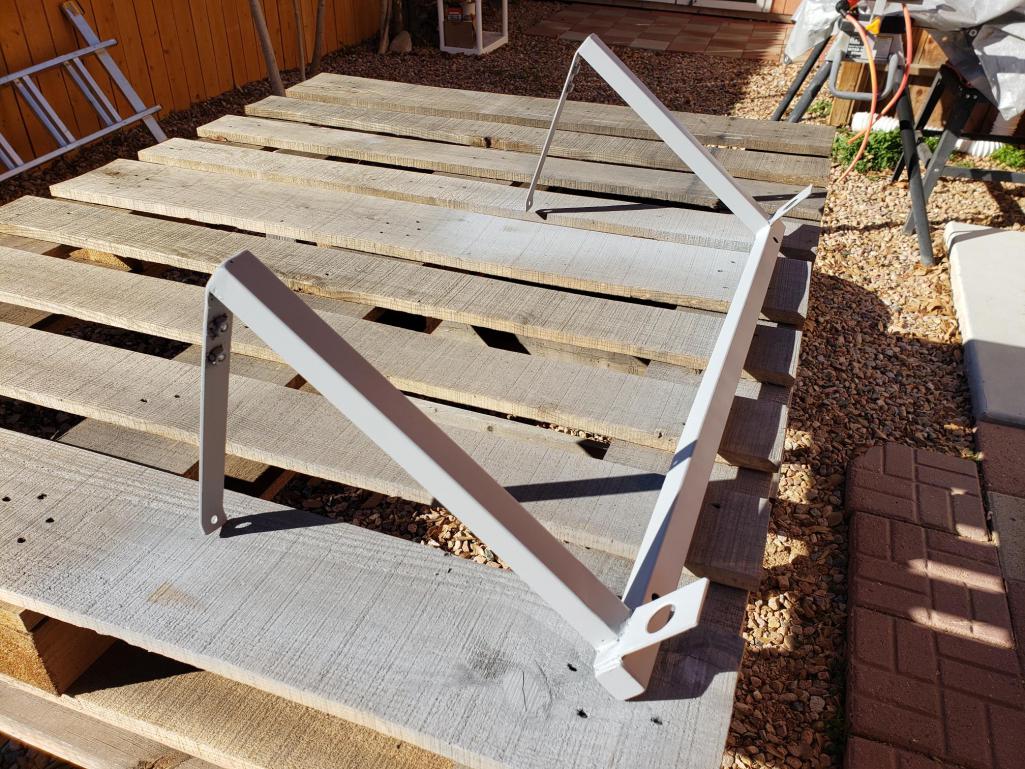
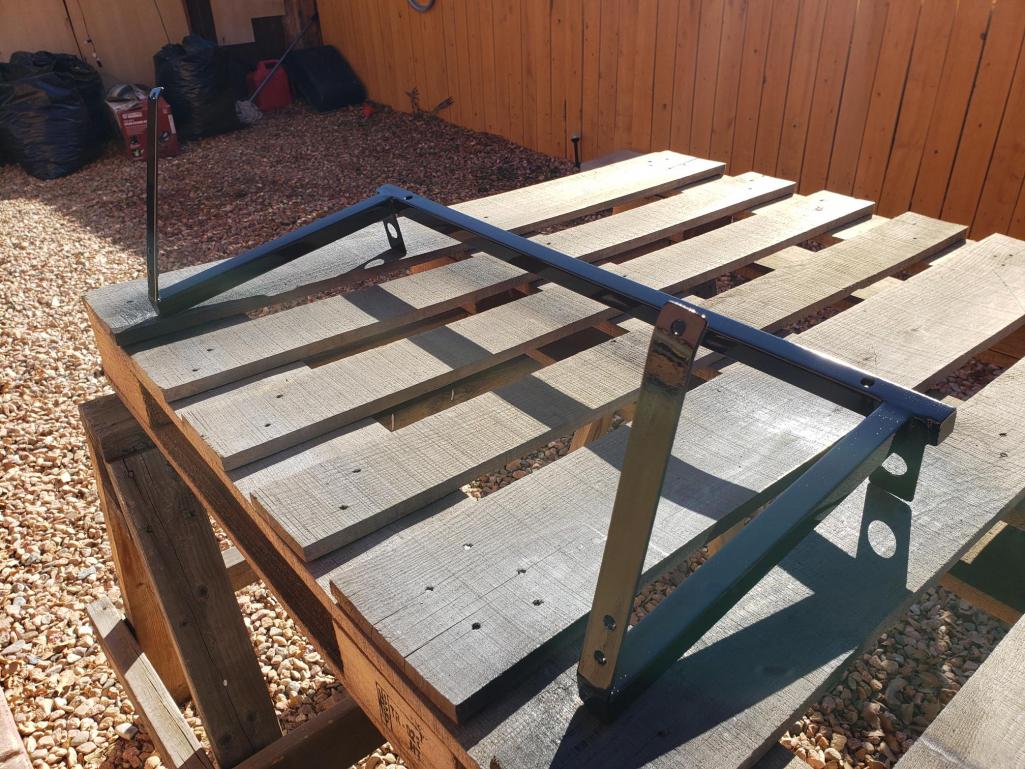
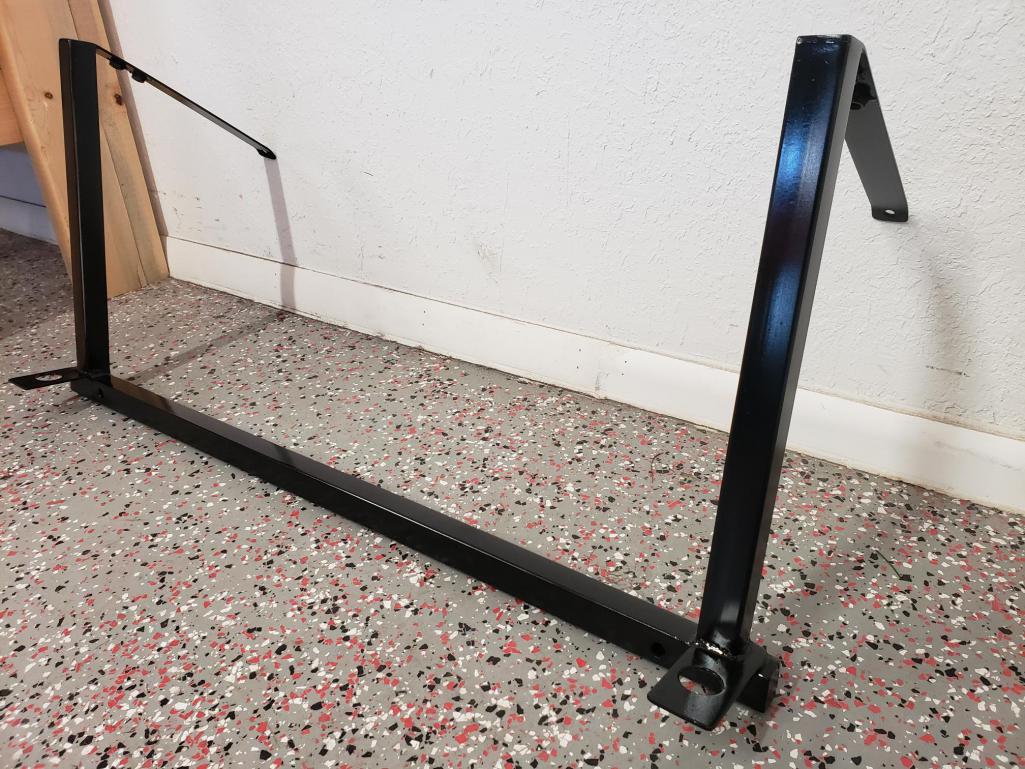
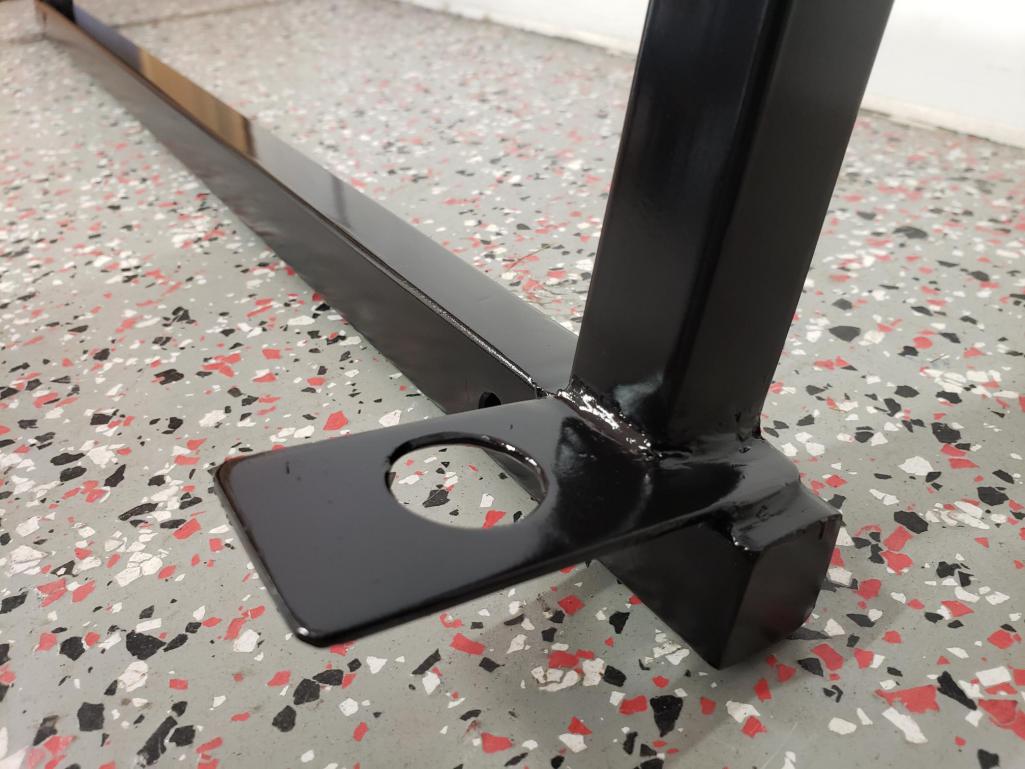
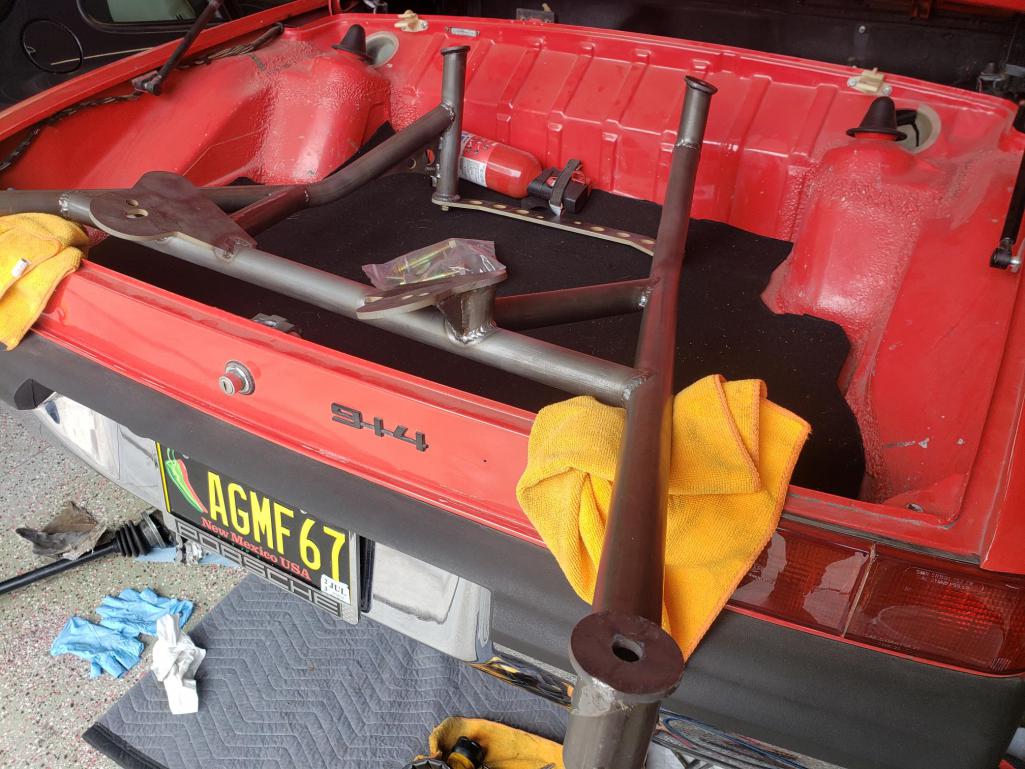
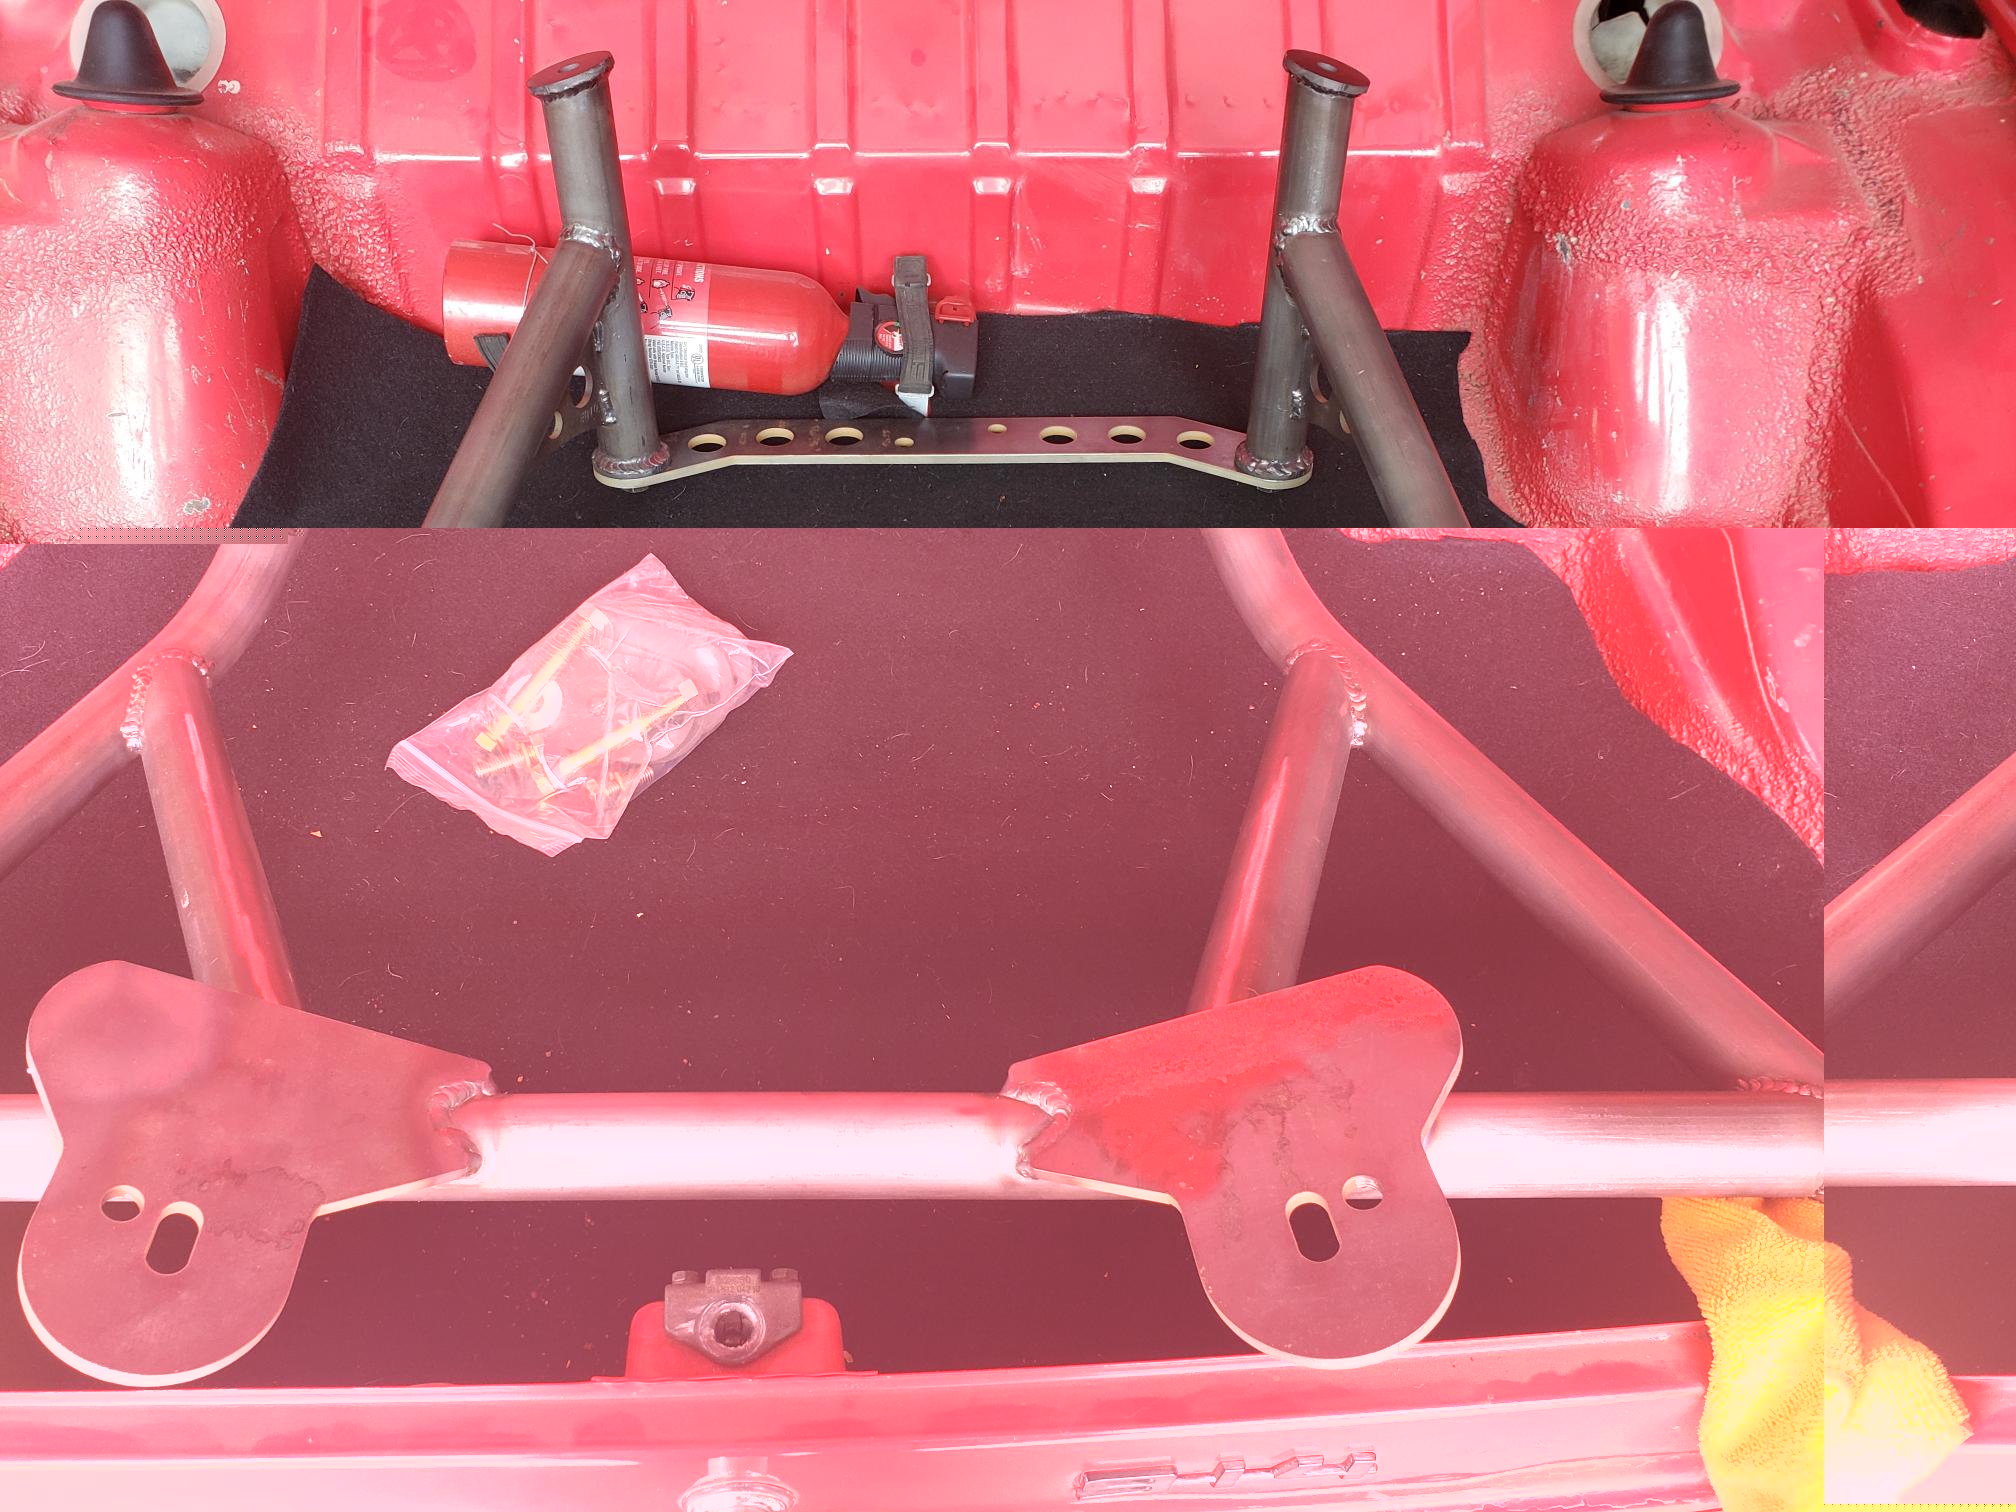
Before I get into welding the kit in place, I figured it'd be a good idea to make some door braces. Both my doors shut great and I don't want to loose that if possible. In looking at the door gaps and doing some measurements, I did come to the conclusion that the passenger side has sagged a tiny amount, like less than a millimeter. When I jack up the car at the center, it brought it nicely back to spec. So, as I made the passenger side brace, I fitted it with the car jacked a bit. Drivers side will be braced without the jack, thanks to good measurements and gaps.
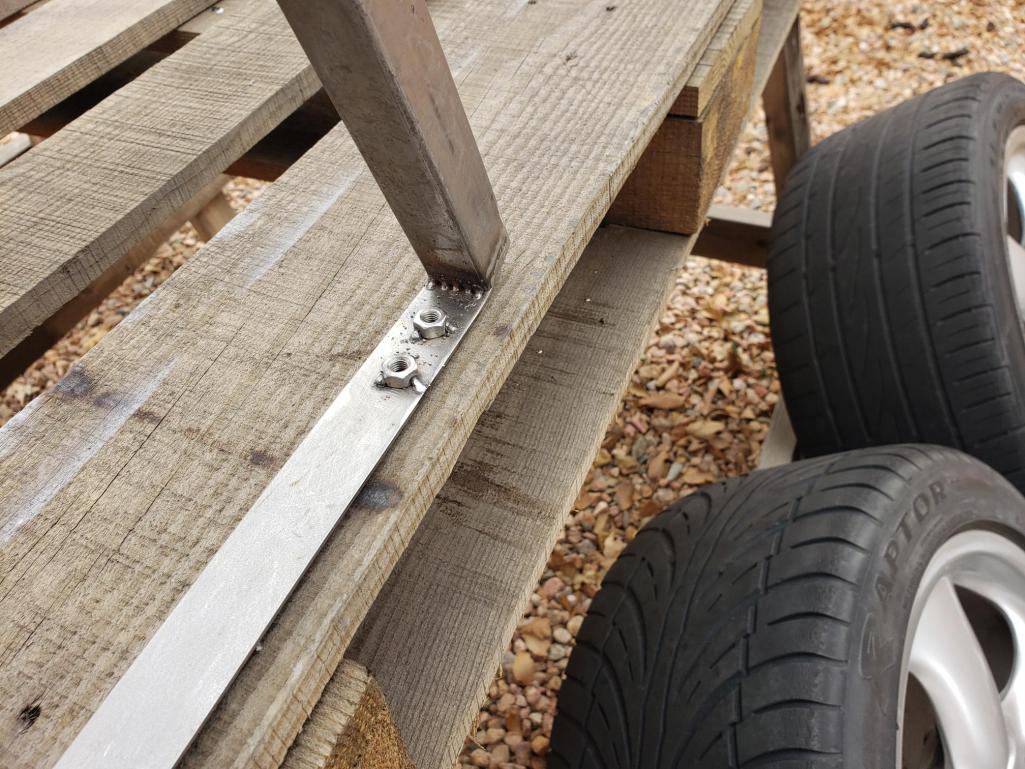
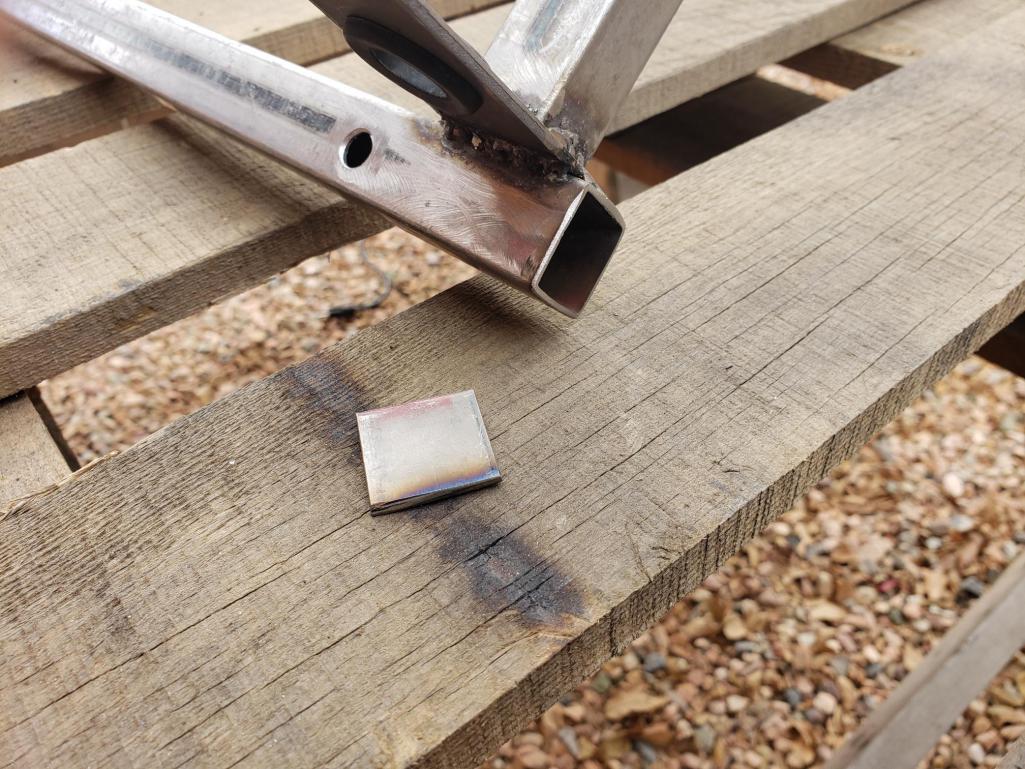
Here's a few photos of the way I build the first brace: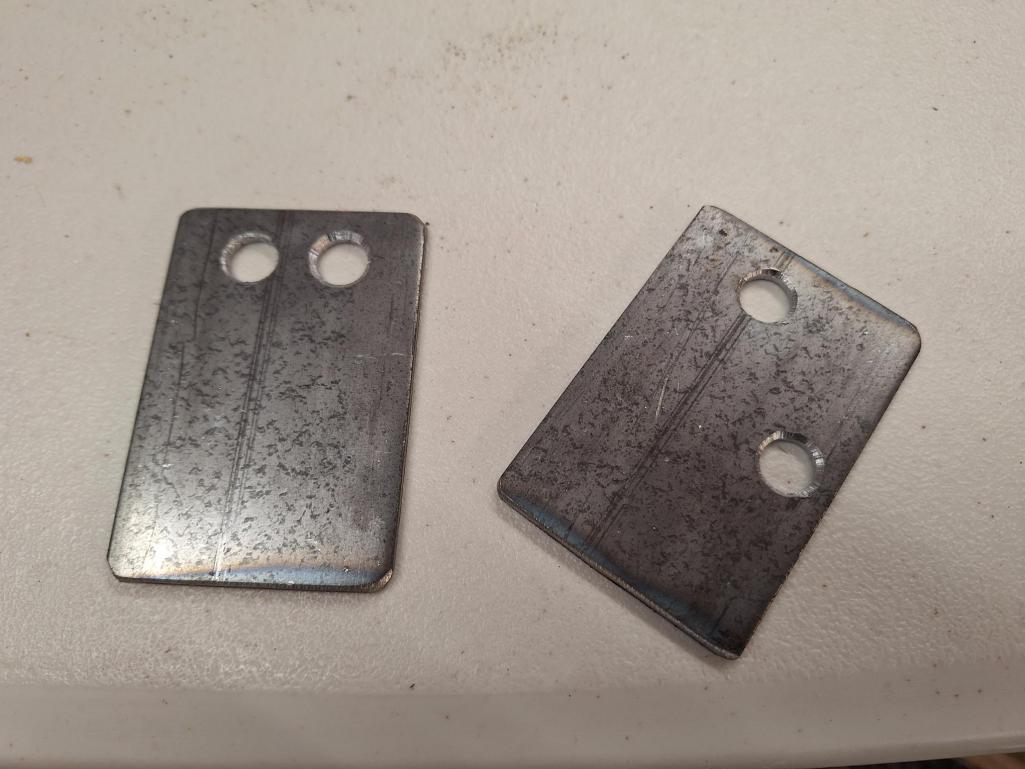
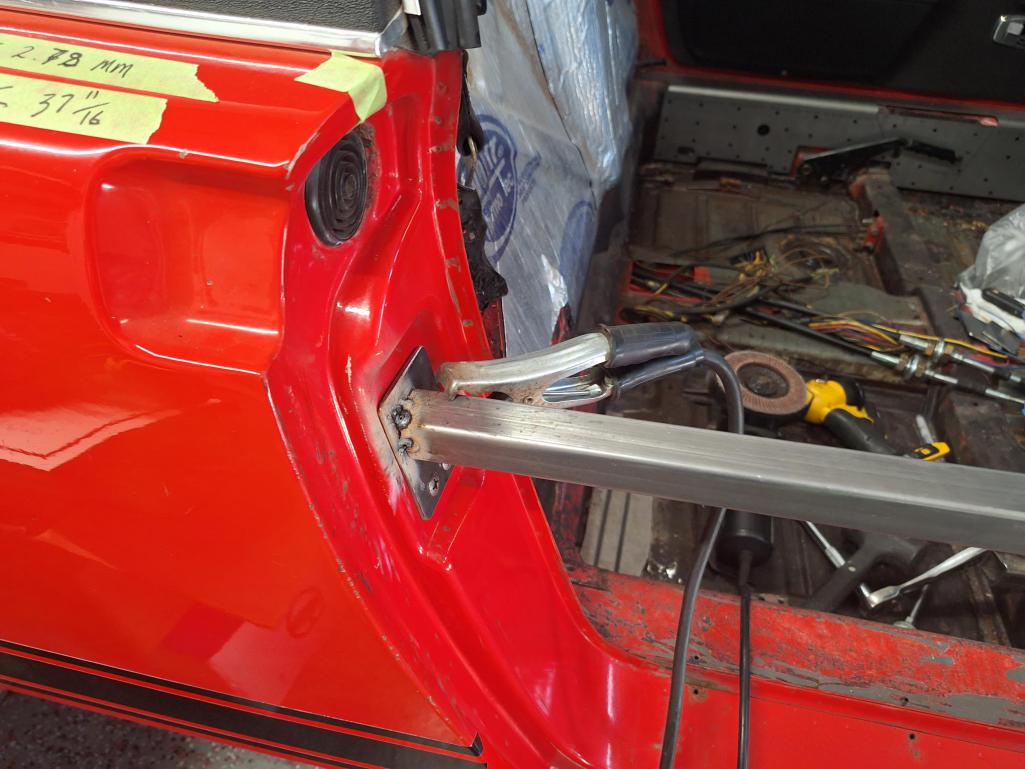
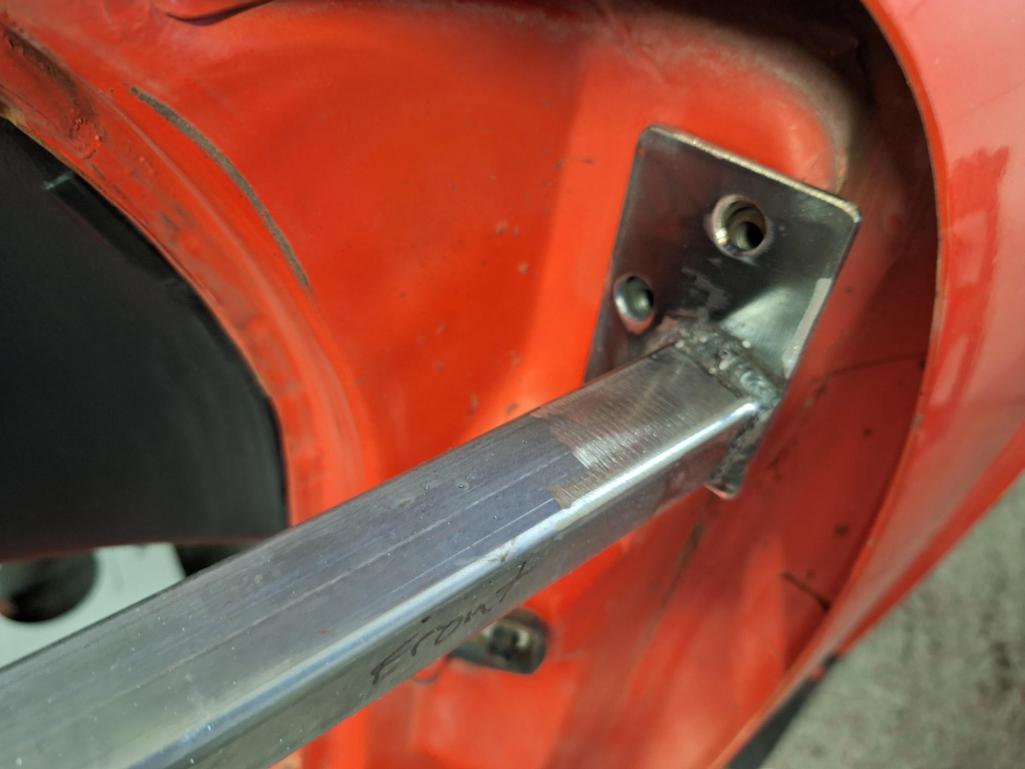
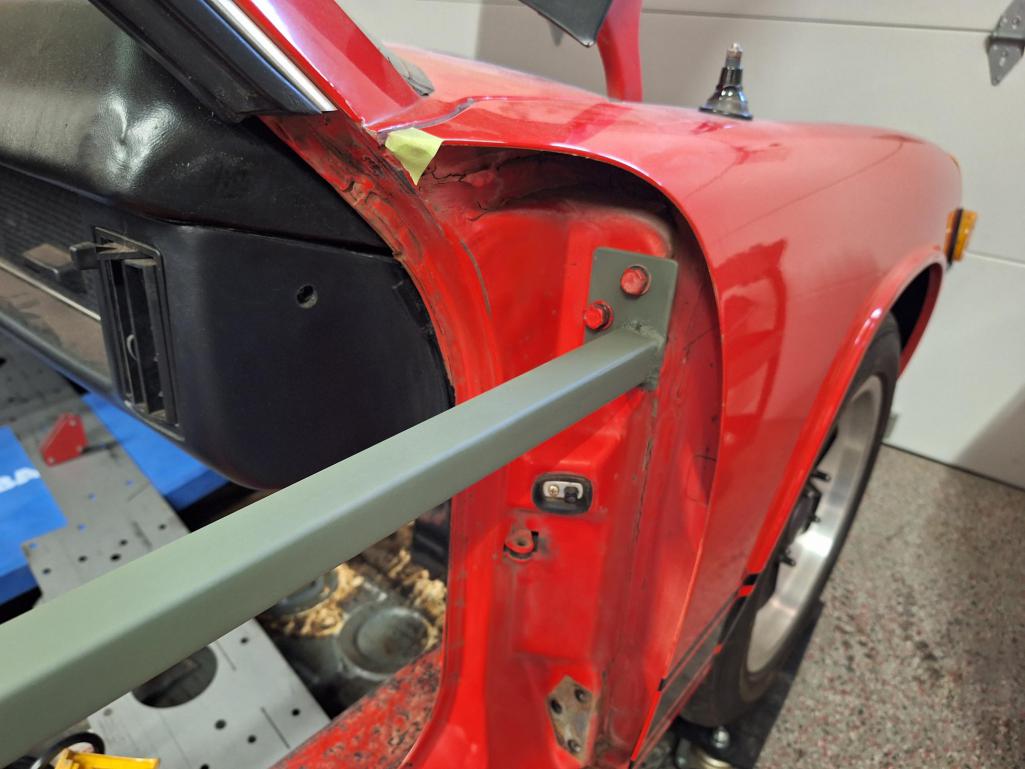
I feel happy with the way it came out, and if I do eventually rotisserie the body, they'll come in handy again.
Next up, CV axle debacle!
Posted by: burton73 Oct 23 2023, 04:29 PM
Before you start to Weld in the reinforcement kit, I'd like to point out that several members cars have bent and the gaps have closed up because too much heat was generated during the welding. Take your time. Weld real slow, Let it cool in between. Just don't move too fast, it'll be great.
O yea, very nice job bringing this car back.
Best Bob B
Powered by Invision Power Board (http://www.invisionboard.com)
© Invision Power Services (http://www.invisionpower.com)