Printable Version of Topic
Click here to view this topic in its original format
914World.com _ 914World Garage _ Question on the rubber engine seal
Posted by: NJTom Mar 23 2017, 07:21 PM
Hi, we installed the rebuilt 2.0 motor back in the car today and ran into a little "glitch" those darn gremlins keep popping up. As you can see from the photo there's a gap of about an inch in one corner. The rest is OK. Two questions, did we do something wrong when we installed the seal or perhaps this is common and not such a big deal. Thanks in advance, you guys have all been a tremendous help.
Attached thumbnail(s)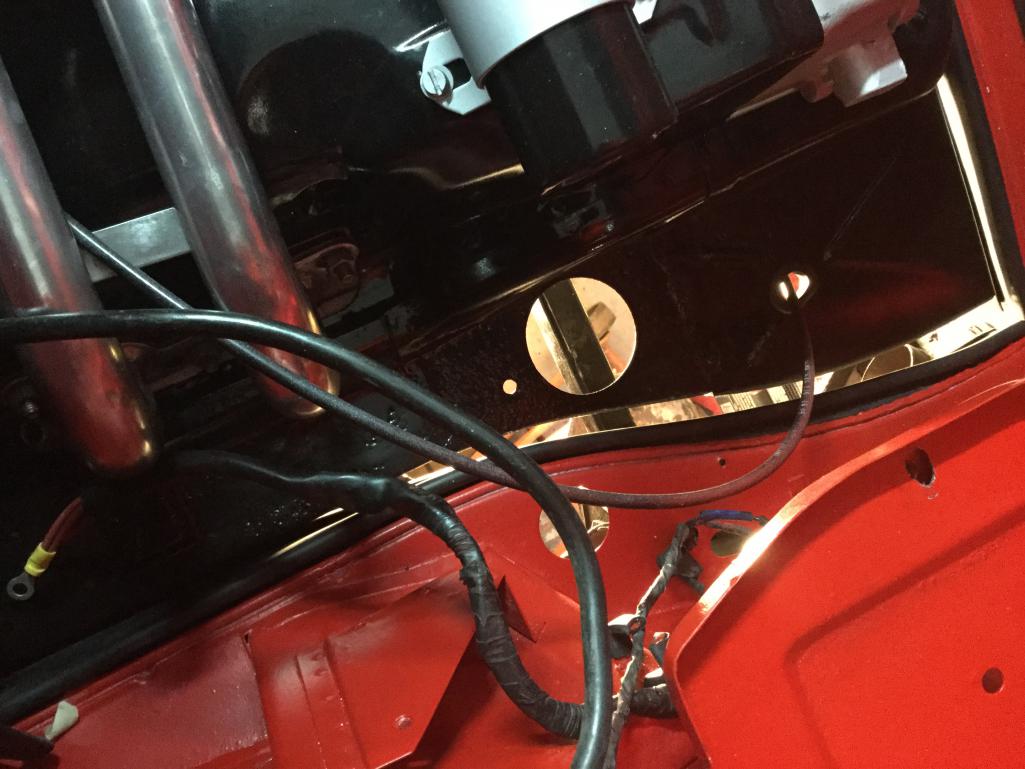
Posted by: cuddyk Mar 23 2017, 07:41 PM
Looks to me like the tin is bent downward. It's easy to have that happen when installing the motor if the tin gets hung up on something.
Posted by: NJTom Mar 23 2017, 07:48 PM

Looks to me like the tin is bent downward. It's easy to have that happen when installing the motor if the tin gets hung up on something.
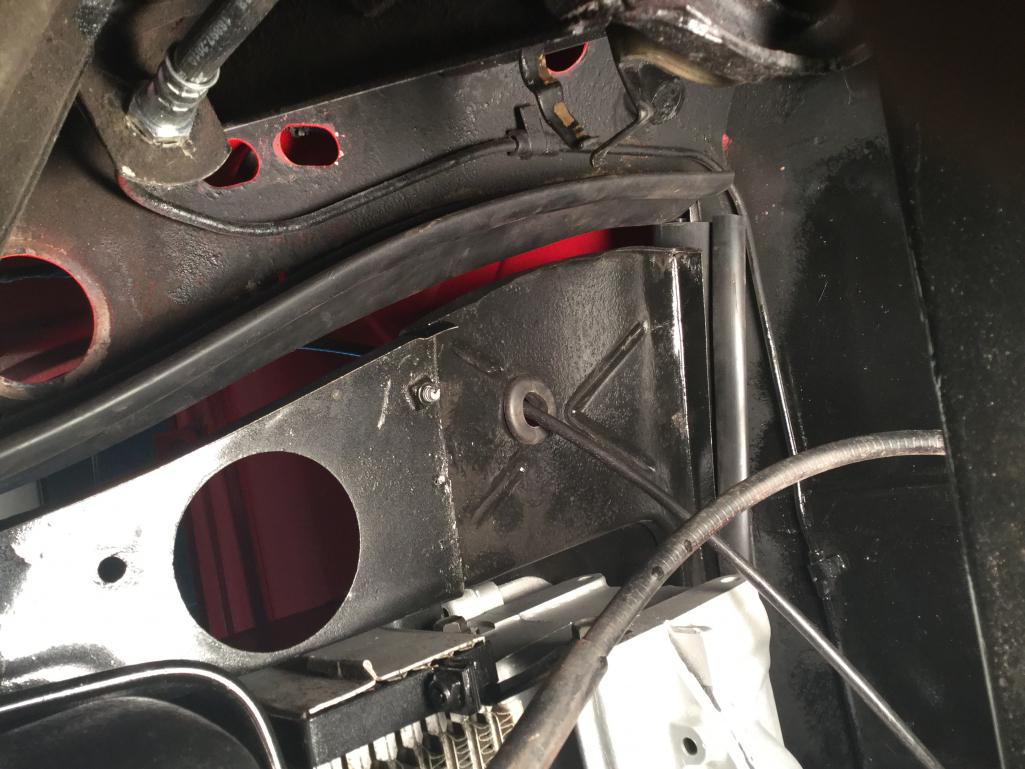
No, it's not bent see attached picture
Attached thumbnail(s)
Posted by: The Cabinetmaker Mar 23 2017, 08:06 PM
There's a lip on the bottom of the rubber that "clips" around the bend on the bottom of the tin
Posted by: NJTom Mar 23 2017, 08:09 PM
Yes I know what you are talking about. If we glued it we could get it to fit. Just wondering if that's our best course of action
Posted by: BeatNavy Mar 23 2017, 08:22 PM
Does your engine appear to be too low, or is there just too much room? FWIW, I had a similar situation when I put a 2056 I purchased in my '72. It seemed to sit about an inch too low so I couldn't get the rubber to fit reliably. I adjusted the mounts at the bar and tranny several times and managed to push the engine farther forward to get it close. But I could never get it to the point where the rubber would truly seal on four sides. Still don't know what I did or didn't do 
Posted by: NJTom Mar 23 2017, 08:24 PM
Got it, we will check tomorrow. Did you remember if you had a gap or not? Thanks.
Posted by: BeatNavy Mar 23 2017, 08:30 PM
Got it, we will check tomorrow. Did you remember if you had a gap or not? Thanks.
I think I had a pretty decent gap, maybe not quite as large as the one appears in your picture. I feel like I was able to get it a little closer when I loosened up the mounts and tried to budge the engine/tranny slightly forward. I can get the seals to sort of mate to the tin, but it's a stretch, and once I start driving they come off on at least one side.
Posted by: Mikey914 Mar 23 2017, 09:03 PM
Does not look too far off. The bottom of the J hooks under the tin lip. The orientation is correct. The ends can be punched and hog ringed or zip tied if you want a better seal on the ends.
Posted by: NJTom Mar 24 2017, 04:21 AM
Great thank, that's just what we needed to hear. Hopefully today we get to start it! Vroom vroom!
Posted by: Perry Kiehl Mar 24 2017, 06:03 AM
The factory used hog rings to attach the side rubber to the front, and then long staples to attach the rear to the sides.
They put one ring in the front corners at the bottom to hold them together
Posted by: BeatNavy Mar 24 2017, 06:19 AM
The factory used hog rings to attach the side rubber to the front, and then long staples to attach the rear to the sides.
They put one ring in the front corners at the bottom to hold them together
Very cool. That is something I did not know. Something else I can fix...
Posted by: 6freak Mar 24 2017, 07:00 AM
id loosen all the mount bolts and see if I could close the gap by moving trans toward left side of car. good luck
Posted by: cwpeden Mar 24 2017, 07:37 AM
That engine looks pretty clean. You didn't wash it with hot water and put it in the dryer? That will shrink it for sure! 
Posted by: r_towle Mar 24 2017, 10:34 AM
The whole engine and tranny package can be moved forward, just loosen up the four bolts without removing them and use a pry bar to jockey it forward. Helps if you take some weight off with a floor jack.
Posted by: jkb944t Mar 24 2017, 10:39 AM
The factory used hog rings to attach the side rubber to the front, and then long staples to attach the rear to the sides.
They put one ring in the front corners at the bottom to hold them together
That is news to me! I wish I had know that a few months ago when I was trying to get it to stay in place especially at the corners.
Jeff B
Posted by: porschetub Mar 24 2017, 12:52 PM
Mine was a poor fit like the OP,my engine was too far back due to the OP's 'balls up'' with copying the factory mount,I had to drop my engine and cut/weld the mount 12mm shorter,my gaps are good now.
I checked my engine placement by lining up the mount bolts into the tabs on the gearbox,when these are hard up and even side to side all is golden.
I think if the gaps were any tighter it would be hard to fit the engine,I needed to remove one of the side tins to get my engine in last time.
Secret with these rubbers is to cut them longer than they need to be and as mentioned hog ring the ends,I still have the rear bulkhead rubber to replace as I didn't have it when my engine was out last.
Posted by: worn Mar 24 2017, 12:53 PM
The factory used hog rings to attach the side rubber to the front, and then long staples to attach the rear to the sides.
They put one ring in the front corners at the bottom to hold them together
That is news to me! I wish I had know that a few months ago when I was trying to get it to stay in place especially at the corners.
Jeff B
Mine never held either. More of a question of more gap all around and the rubber not wanting to stay put. I had come to the conclusion that the system was designed to only sort of work.
Powered by Invision Power Board (http://www.invisionboard.com)
© Invision Power Services (http://www.invisionpower.com)