Printable Version of Topic
Click here to view this topic in its original format
914World.com _ 914World Garage _ '73 2.0, a yellow storage unit find
Posted by: arne Mar 27 2017, 11:01 AM
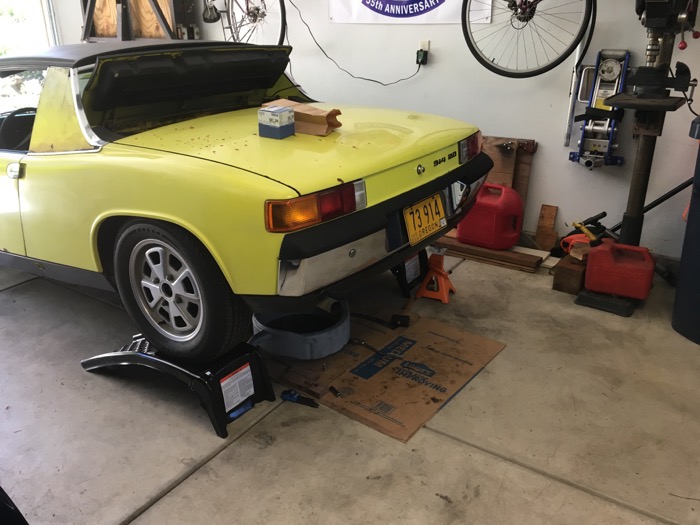
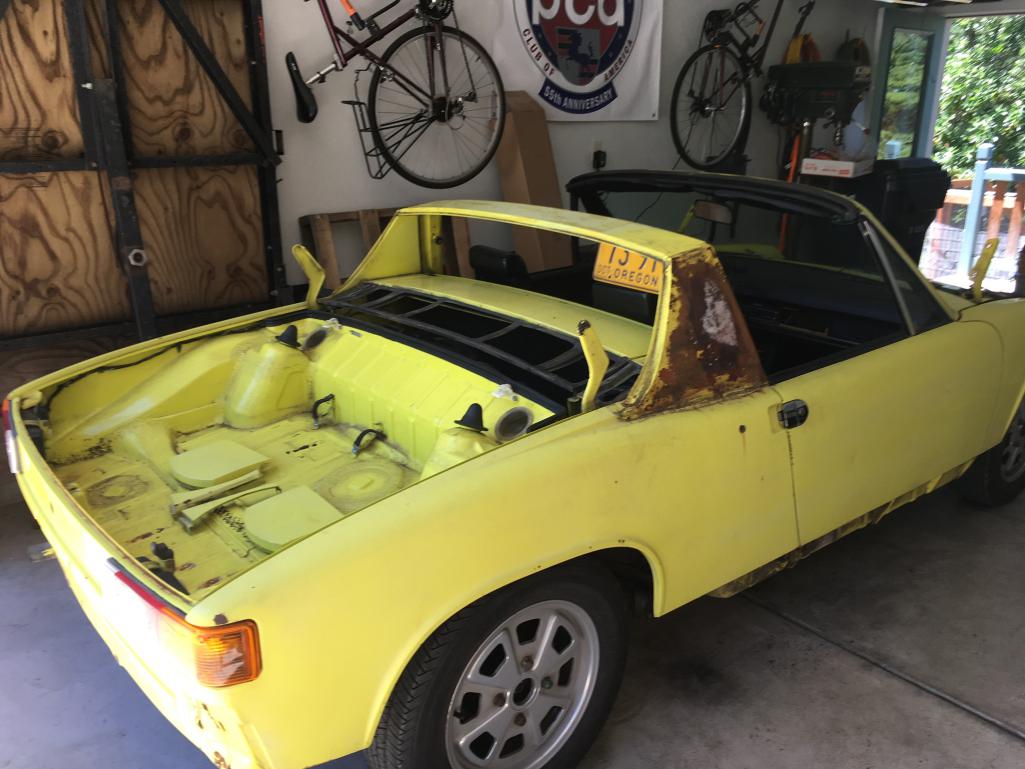
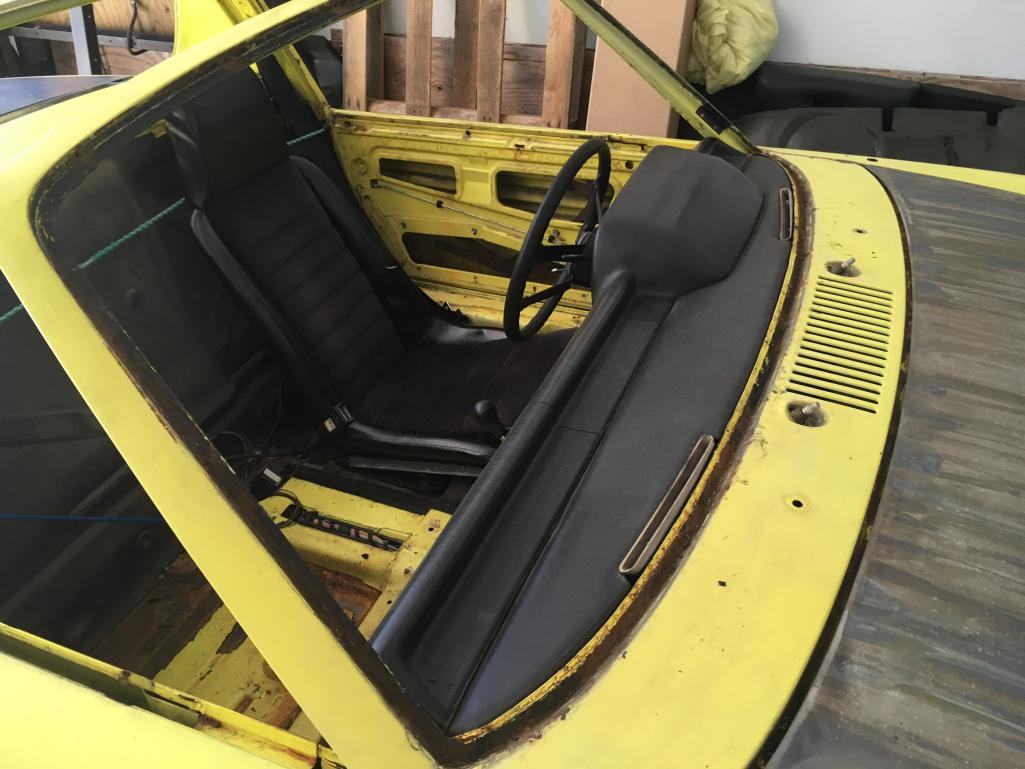
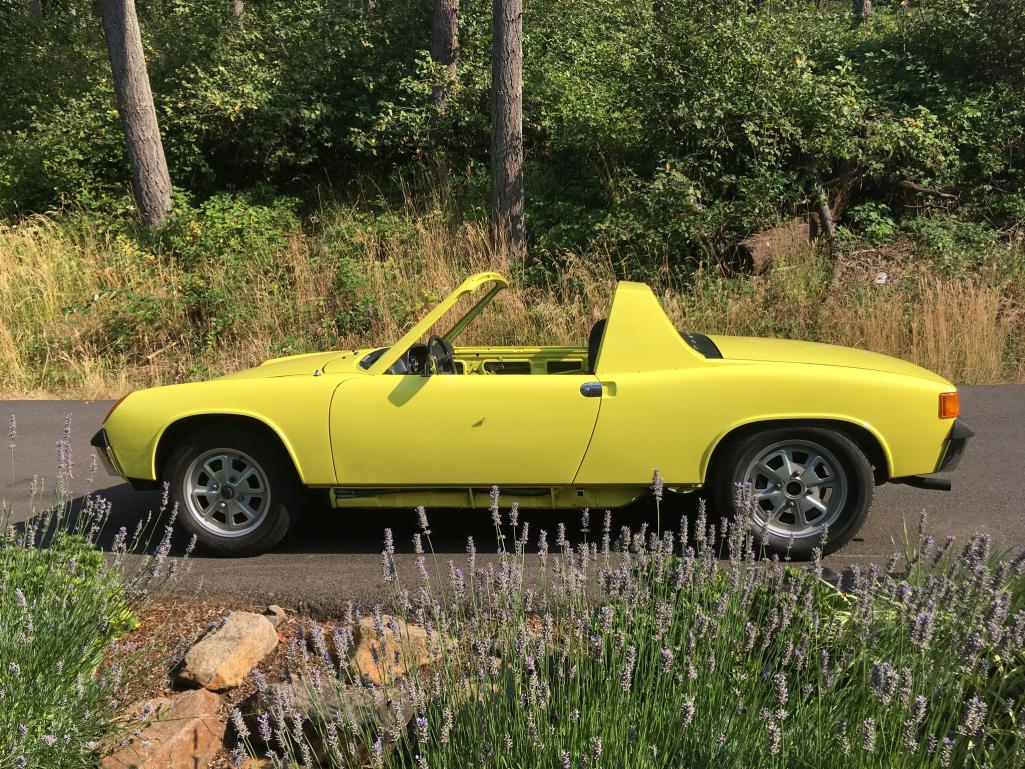
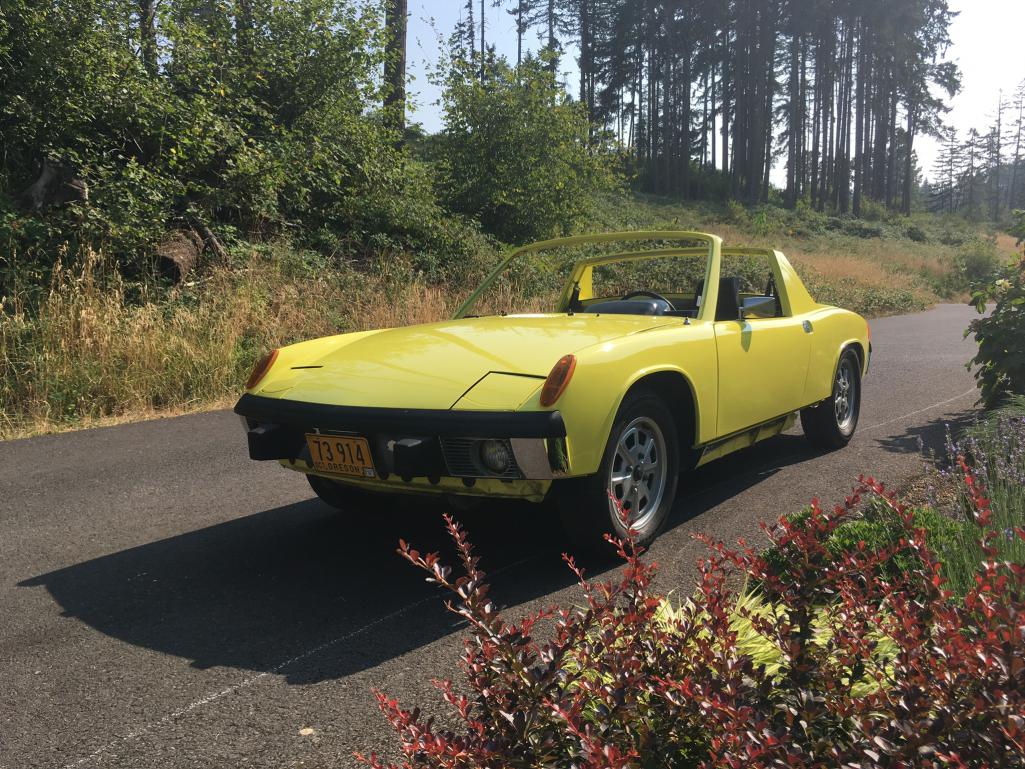
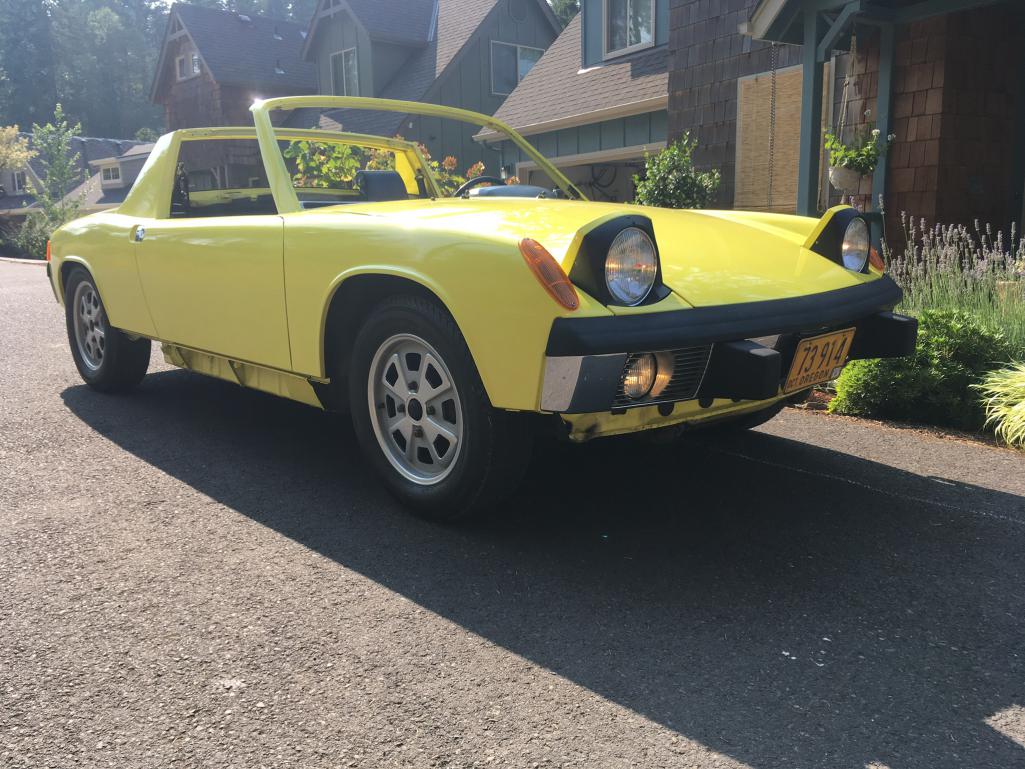
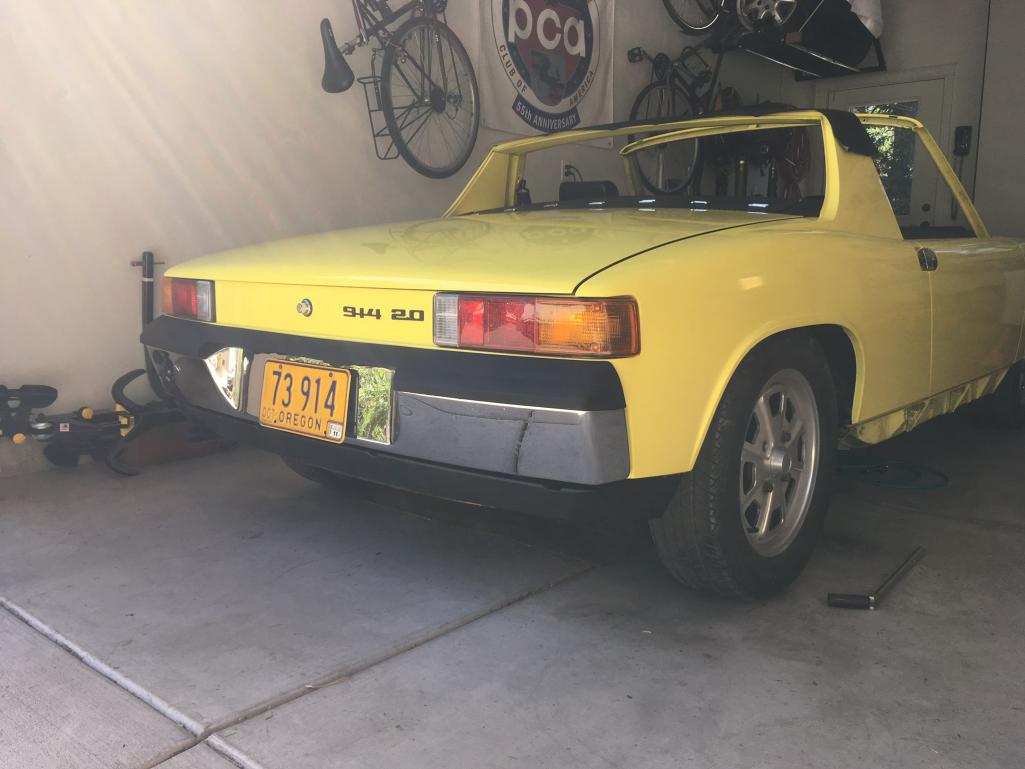
Well, as I posted at the end of my intro thread ( http://www.914world.com/bbs2/index.php?showtopic=303932&hl= ), I bought my 914 over the weekend. We've all heard of barn and garage finds, this car was found in a large storage unit.
Details - '73 2.0, 4732924138, yellow. Appears to me to be Saturn or Chrome yellow, but I never looked at the paint plate to say for sure. Will confirm that and correct later. Confirmed, L13M, Saturn or Chrome Yellow. Odometer shows just over 72k miles, seller claims that is correct, but I haven't gone through the paper trail to verify. The car does look like that could be accurate. I am the fourth owner.
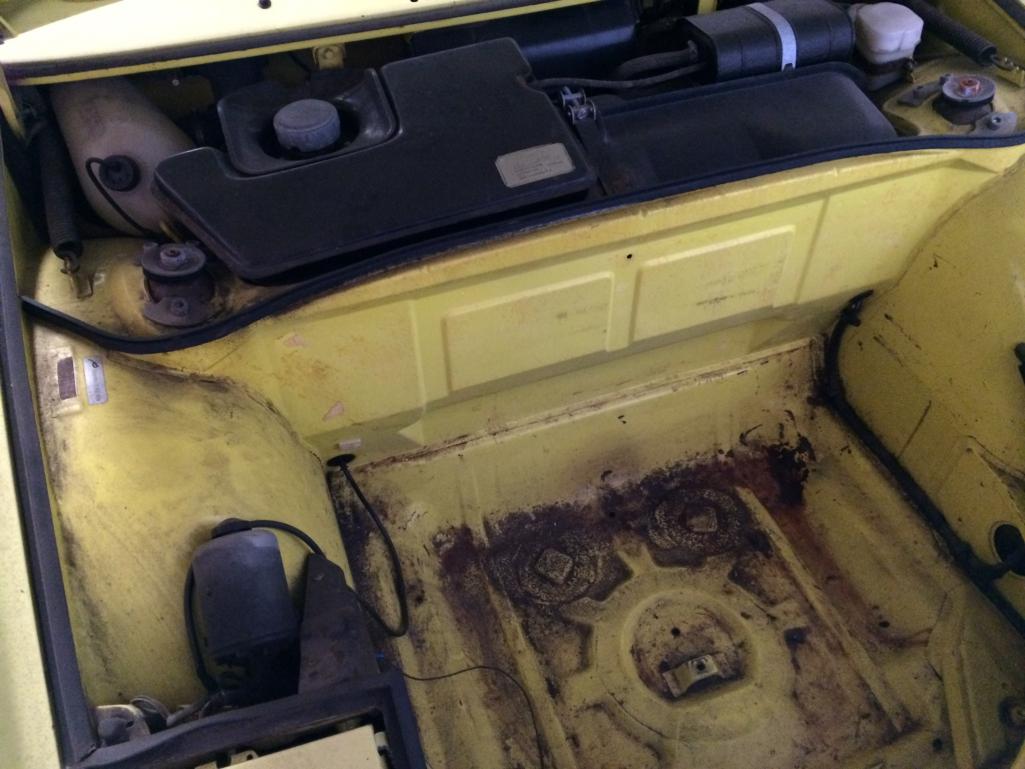
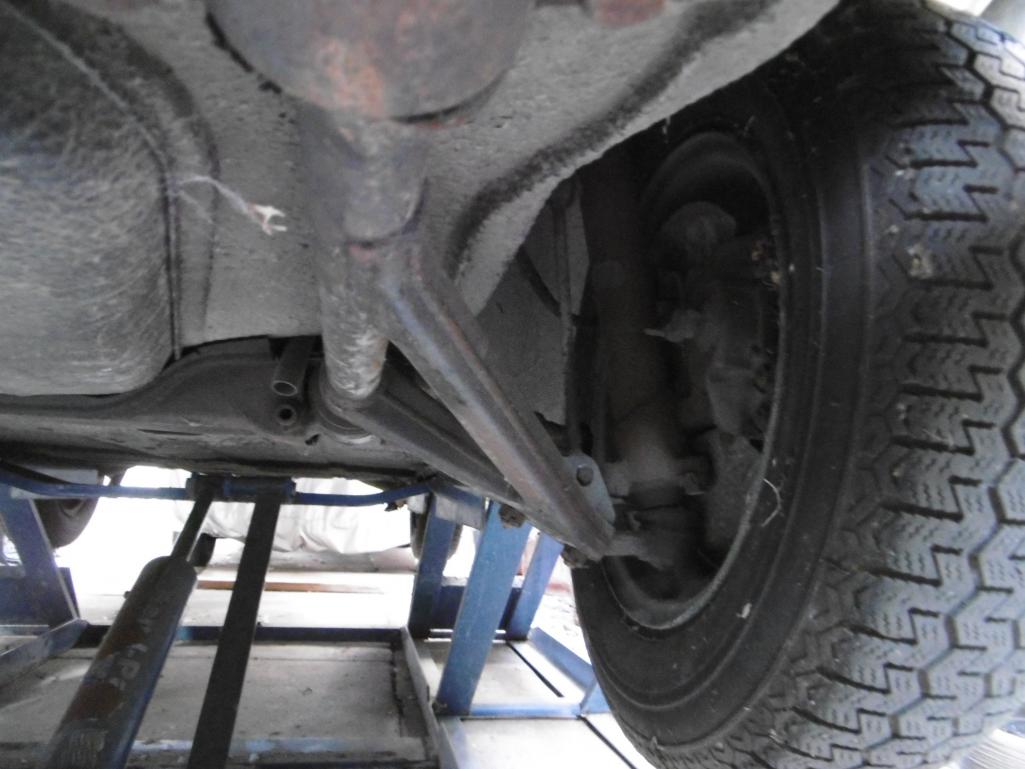
Rust seems limited to the battery tray, passenger floor and right sail panel (where water obviously got trapped behind the vinyl). The hell hole looks solid at this point. None of the rust appears to be holes yet. Definitely some work to do there.
The car was said to run when it was parked in the unit, other people not involved in the sale confirmed that it drove in under its own power. Been sitting for 6 years or so. After it got in, the seller began very rudimentary prep for restoring it, but life got in the way. So about all that was done was to pull all the lenses off.
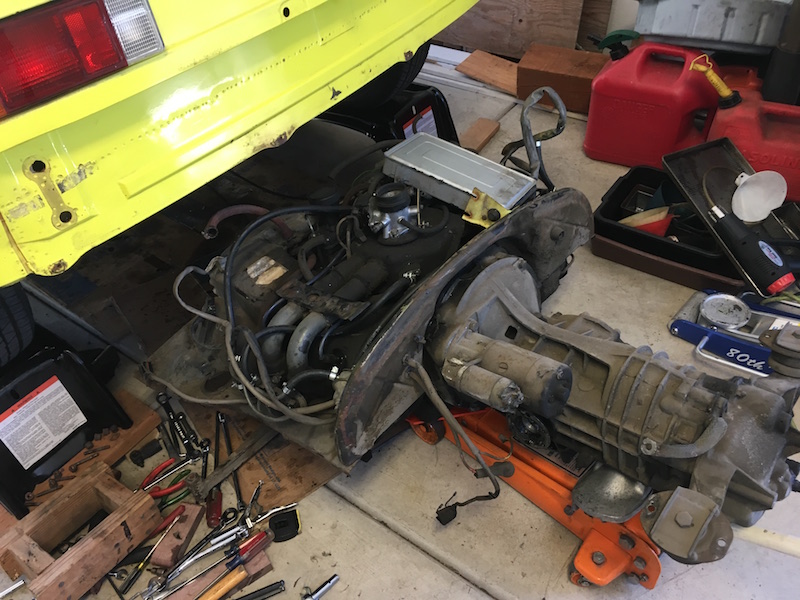
I'm waiting for a flatbed to gather it up now, should have it in my garage later today. Here are a couple of pictures to show the beginning.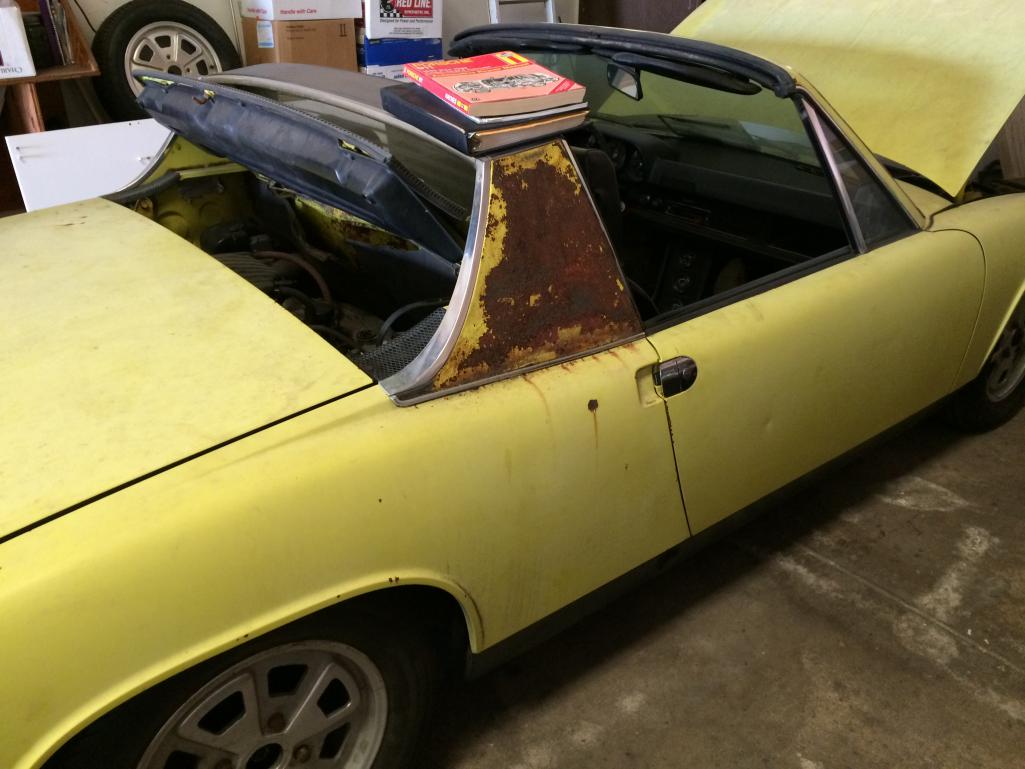


Posted by: PlantMan Mar 27 2017, 01:34 PM
Good Luck!
Looks like a good place to start from.....
Much better looking than my car!
Posted by: billh1963 Mar 27 2017, 01:39 PM
Congratulations! Looks like an Appearance Group car.
A '73 2.0 is the" Holy Grail" of the /4's these days
Posted by: arne Mar 27 2017, 02:47 PM
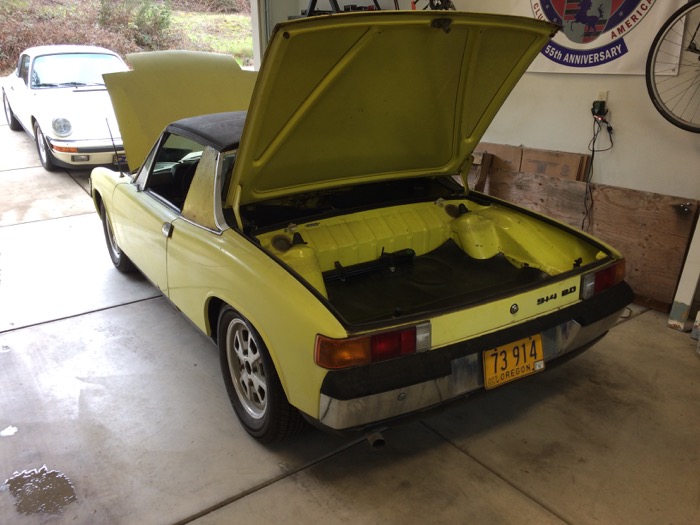
It's home, and the exploration is beginning.

Posted by: jrblackbox Mar 27 2017, 03:09 PM
Nice plate!
Posted by: RobW Mar 27 2017, 03:13 PM

Nice base. Good luck with your explorations!
Posted by: arne Mar 27 2017, 04:03 PM
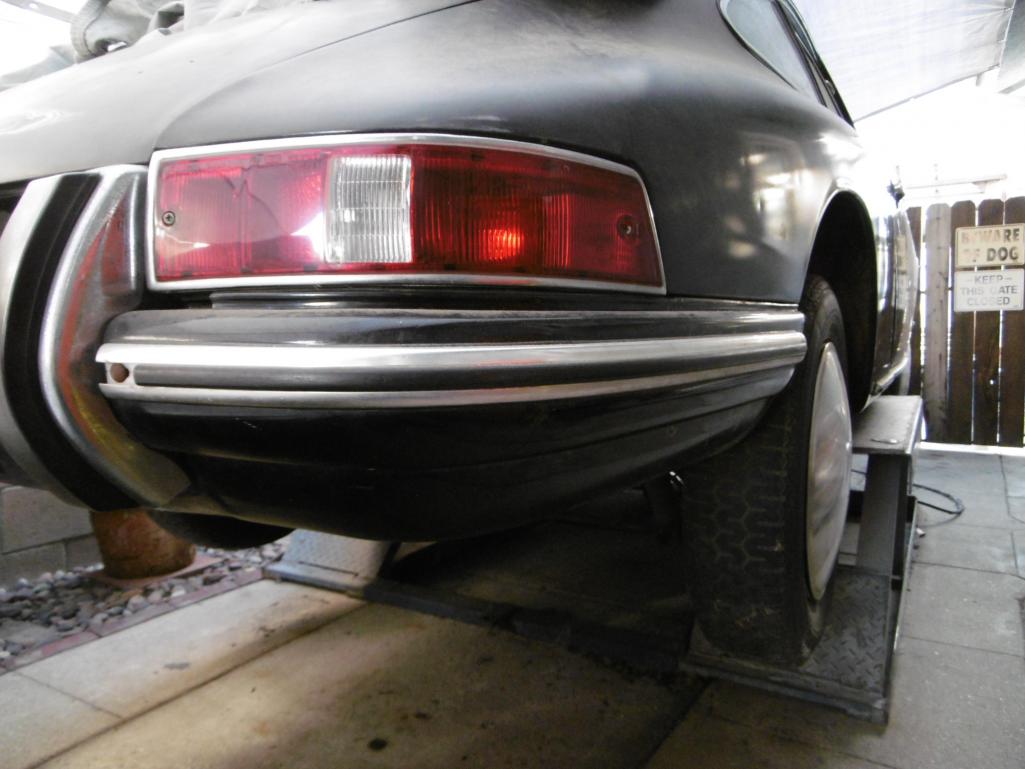
A few initial finds. The rear euro lenses and front US lenses are all Hella, not repro. I think they will clean up nicely. The spare tire is the original Continental TT714 on the matching Fuchs, has never hit the ground, no scuffs even in the lug seats. In the rear trunk were a few miscellaneous parts, including a brand new set of 4 original wheel center caps, still in the Porsche boxes.
Posted by: pete000 Mar 27 2017, 04:48 PM
Nice rescue !
Posted by: steuspeed Mar 27 2017, 05:36 PM
+1 on the plate. I just got the Pacific Wonderland.
Posted by: Cairo94507 Mar 27 2017, 05:43 PM
That sure seems like a terrific buy. The plate alone makes it work twice what you paid. Keep the pics coming. 
Posted by: Larmo63 Mar 27 2017, 05:51 PM

Great score, lucky YOU!!!!!!
Posted by: arne Mar 27 2017, 06:51 PM

+1 on the plate. I just got the Pacific Wonderland.
If - as the seller claimed to me - the plate has been kept current and is still reserved for this car, it is a great addition. I do have the Pacific Wonderland plates on my 911.
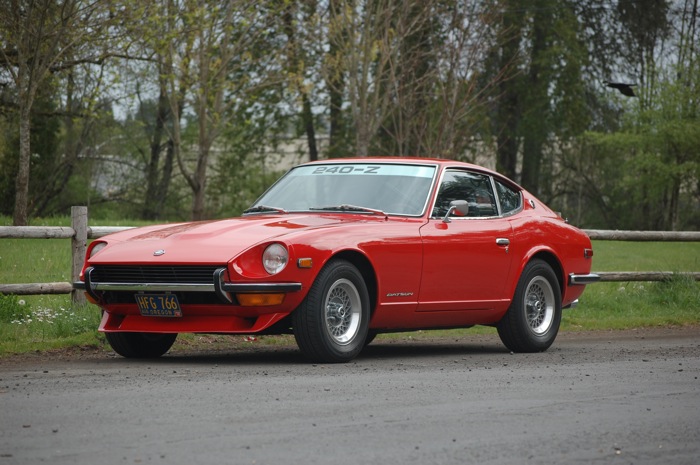
If the '73 914' plates have expired and someone else has claimed it, I do have a pair of period blue plates I've been hoarding for a potential future use, same ones I had on my 240Z, pictured here. They would also look good on a 914. But I'd rather keep the ones that came with the car, if I can.
Posted by: arne Mar 28 2017, 04:09 PM
Due to other prior commitments, I haven't begun in earnest yet, and probably won't until next Monday. But I have found a few more interesting tidbits:
- Rear shocks appear to be Konis. Obviously can't tell about the fronts yet.
- At least two of the brake calipers are toast, one on each end. No surprise there, I budgeted for a complete overhaul as I always do on projects like this. But it turns out the hoses are already braided stainless, which will save me a little cash and the time and effort to install new hoses, especially the rears.
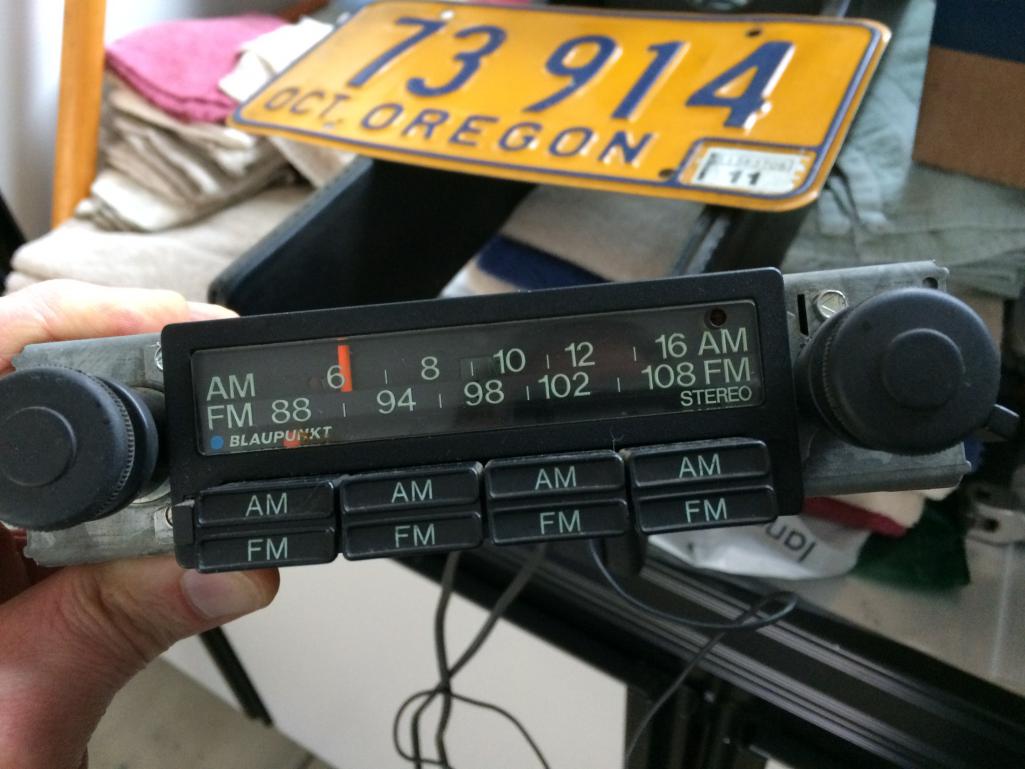
- Took a good look at the radio the previous owner had in the trunk, it's much cooler than I counted on, a mid-70s vintage Blaupunkt. Will look quite good in the dash.
Posted by: ConeDodger Mar 28 2017, 04:24 PM
Nice! 
Posted by: arne Mar 29 2017, 02:35 PM
Yay! Transferred the title today, DMV confirmed that the custom plates are still valid for this car, registration has not lapsed. Great news!
Posted by: arne Apr 2 2017, 10:38 PM
Spent some time with the car today. Charged a battery and began going through bits. After some prep (oil in cylinders, pull fuel pump relay, ect.), it spins freely, has oil pressure, and also has spark (after replacing the badly corroded points).
Then started checking over the fuel delivery. Total cr@p. The nylon/HDPE lines seem quite brittle and inflexible to me, the hoses appear to be 44 years old, the hose clamps are nasty worm gear type, and the fuel pump in stock location is leaking. Looks like I will need it all. Will probably upgrade pump to a later 2 port style and relocate to the front, since I'm going to have to pull the tank anyway. Trying to make sense of Tangerine's order page now, figuring out what kit I need.
Posted by: N_Jay Apr 3 2017, 07:24 AM
. . . .The spare tire is the original Continental TT714 on the matching Fuchs, has never hit the ground, no scuffs even in the lug seats. . . .
"Original German Air"!
Posted by: Mikey914 Apr 3 2017, 09:56 AM
Looks like you are on the right path. Fuel lines should all be replaced, and might as well relocate while you are there. You will probably need to replace much of the rubber, but soaking in glycerin can help some of it if it's not too far gone.
Enjoy the find!!
Posted by: arne Apr 4 2017, 04:57 PM
The replacement parts for the fuel delivery are now ordered. New Bosch 2 port pump, and the full package from Chris at Tangerine. Work on the engine is on hold until that stuff all arrives. I will drain the tank in the next few days, but that will be all on that front until the stuff arrives.
Side note - I sent Chris a PM asking if I could call him to ask a question or two, instead he called me within 3 minutes! Great pre-sale support!
Other work continues. I've been reassembling all the bits that the prior owner took apart while the car was in storage, primarily lights at this point. I now have all rear lights other than the back-up lights, and all front except high beams and fogs. The high beams are a bit odd, the bulbs are good as they would flash briefly sometimes when I pulled the stalk, but now they don't even do that. More digging....
Posted by: arne Apr 5 2017, 09:01 PM
Fixed high beams, fog lights and horn today.
The high beam problem was interesting, the ratcheting relay was working, but not sending current to the high beams. I took it apart, cleaned the contacts and re-tensioned the copper arm, now it works as it should again.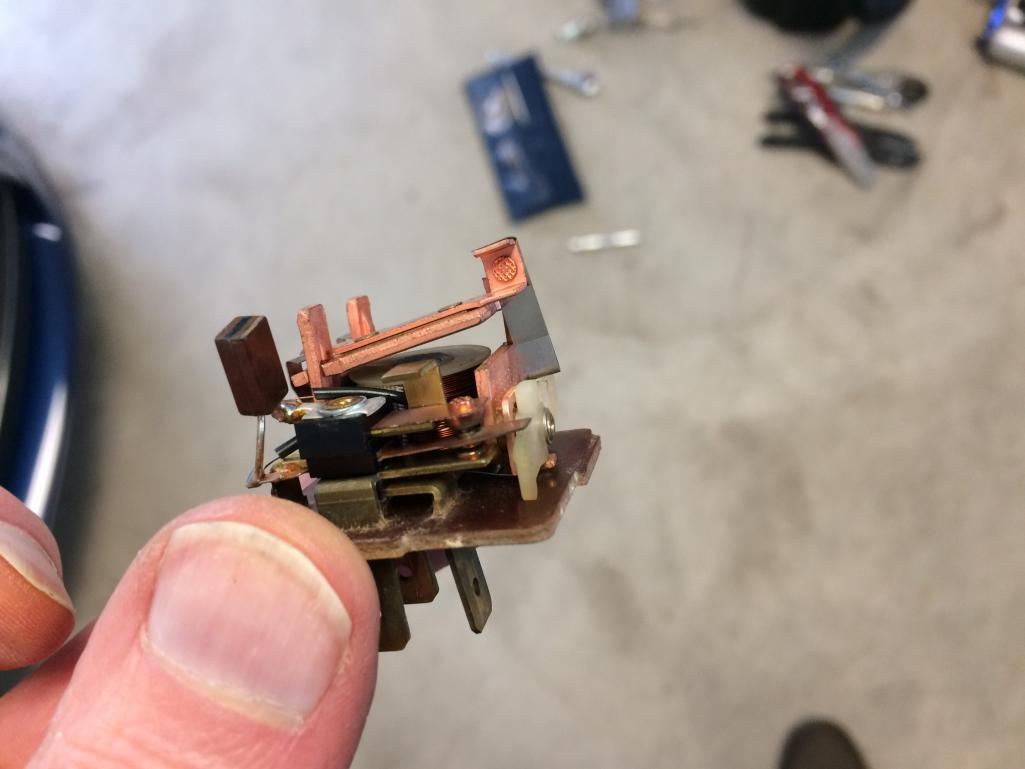
Posted by: Jason74914 Apr 6 2017, 04:31 PM
Welcome to 914 World!
I always love the "it ran great when I stored it" comment.
Me: "well then why did you store it?" Ha!
Keep us posted.
Posted by: Minerva's 914 Apr 6 2017, 05:01 PM
Fantastic find! I read thru your original post and your moving from the silver ghost to your "ran when parked" barn (storage bin) find and I must say it's tempting me to keep looking for that next fix. As I read your advancement it reminds me of all the trials and tribulations from my own 7 year reclaim on my wife's '73 2.0L (original owner BTW) with the short story thread http://www.914world.com/bbs2/index.php?showtopic=305870&hl=Lives%20again&st=0 Please keep us informed with LOTS of pictures (we love pictures)

Posted by: Olympic 1.7 Apr 6 2017, 07:48 PM
Other work continues. I've been reassembling all the bits that the prior owner took apart while the car was in storage, primarily lights at this point. I now have all rear lights other than the back-up lights, and all front except high beams and fogs. The high beams are a bit odd, the bulbs are good as they would flash briefly sometimes when I pulled the stalk, but now they don't even do that. More digging....
I had a similar issue with the lights, Fuses looked good but must not have been making a good contact. took them all out and polished up the fuses and fuse box connectors and everything works fine now.
Check the easy stuff first.
Posted by: arne Apr 6 2017, 08:44 PM
Welcome to 914 World!
I always love the "it ran great when I stored it" comment.
Me: "well then why did you store it?" Ha!
Keep us posted.
Actually, there was no claim made on how well it ran, just that it did run. I found two manifold pressure sensors under the hood. The original was still bolted to the bracket, but not hooked up at all. Another one was laying loose but was all connected, as if it had been temporarily installed for testing. Best guess is that someone tracked a poor running problem to a possible manifold pressure sensor problem, and installed the new one to see if it fixed it.
I'm guessing not. I decided to mount the new one correctly and keep the original just in case. During the process, I found what was likely the true cause, the hose that connects the sensor to the intake plenum was rotted at the manifold end and obviously causing a huge vacuum leak. I corrected that, and then reviewed all the rest of the vacuum hoses as well. Still awaiting the new fuel lines and pump before I can try to start it.
Posted by: arne Apr 6 2017, 09:10 PM
Pulled one of the wheels off today to see how it would respond to a bit of cleaning. Oh my!
I'm not a stranger to Fuchs, I've owned my 911 for more than 5 years, and even had its black centered Fuchs re-anodized so that I could paint them like the early wheels. So I know how durable these wheels can be.
But after just a bit of mild cleaning, I was floored. This 44 year old wheel looks fantastic, no stains, abrasions or even tire machine damage. The other three look like they should clean up the same, they have no scratches, scuffs or rash. What I thought might have been mild staining looks like it is just dirt. I'm impressed.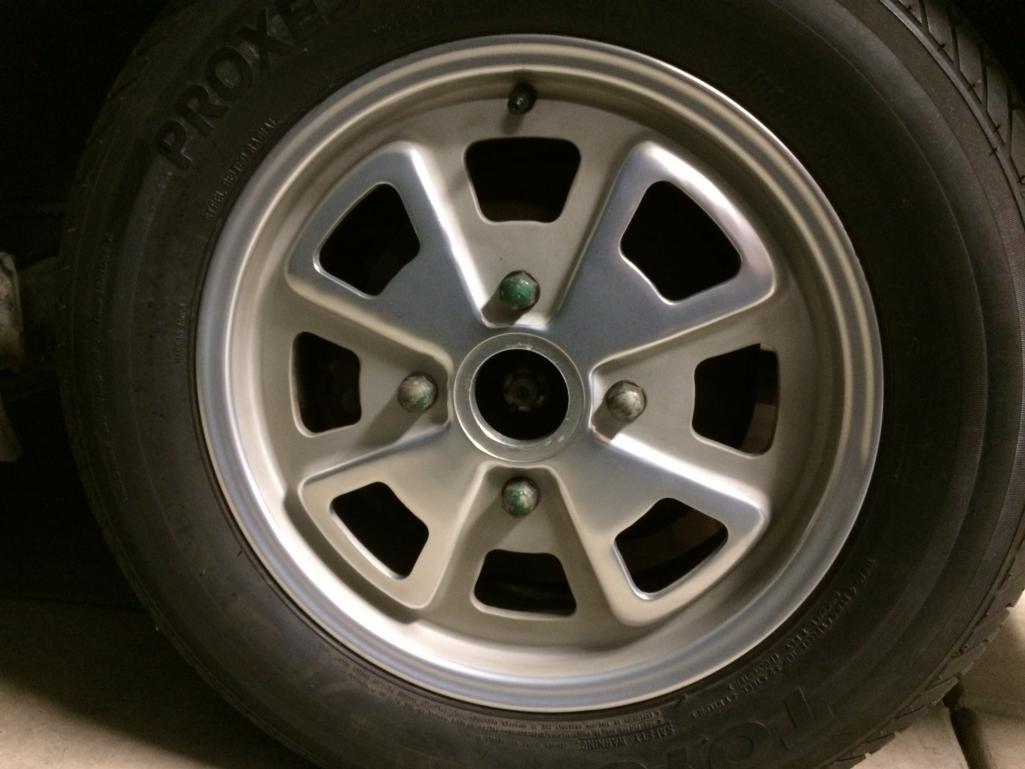
Posted by: JRust Apr 6 2017, 09:41 PM
Congrats on the find Arne. I'll have to make a point to stop by & see it in person. Look like a great starting point. It's all about the rust but hopefully it's just surface stuff & not into the longitude. Be great to see you bring this back to life & restore it. I will be watching this thread closely 
Posted by: arne Apr 7 2017, 08:55 AM
Congrats on the find Arne. I'll have to make a point to stop by & see it in person. Look like a great starting point. It's all about the rust but hopefully it's just surface stuff & not into the longitude. Be great to see you bring this back to life & restore it. I will be watching this thread closely
Yes, it is all about rust, which is why I paid more for this yellow car than I would have paid for the silver one. There is some rust, but it appears to be manageable on this car.
I hope to have it drivable by the end of May. If you want to see it before that you'll need to come to my place. Which you are certainly welcome to do, just drop me a line.
Posted by: arne Apr 7 2017, 09:45 AM
One of my local PCA buddies saw the post with the wheel picture and texted me saying it would look even better with a center cap. I told him, no worries, I've got that covered too. But since they are so easily damaged when removed, I don't plan to install them until the car is done.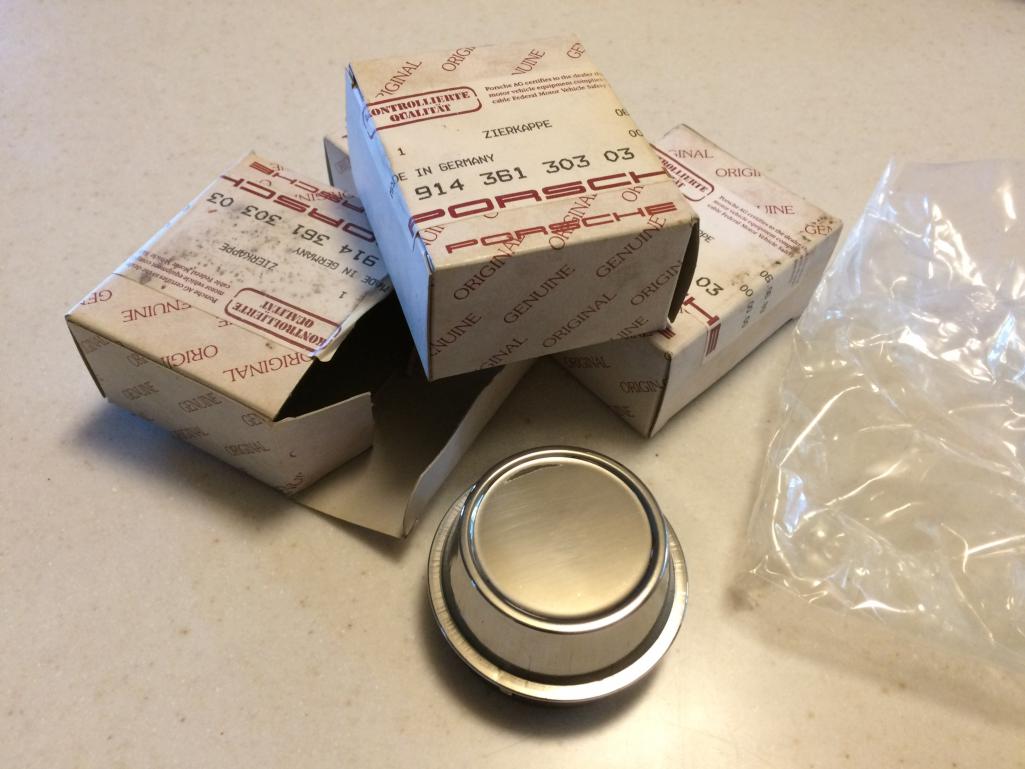
Posted by: mepstein Apr 7 2017, 02:41 PM
One of my local PCA buddies saw the post with the wheel picture and texted me saying it would look even better with a center cap. I told him, no worries, I've got that covered too. But since they are so easily damaged when removed, I don't plan to install them until the car is done.
Very hard to find nos. congrats.
Posted by: arne Apr 7 2017, 06:44 PM
Very hard to find nos. congrats.
True. Since my goal is a clean driver, I don't really need NOS, a set of repros from Mark at 914rubber would have been fine. But since I found these in the trunk of thei car...

Posted by: Minerva's 914 Apr 7 2017, 06:51 PM
Very hard to find nos. congrats.
True. Since my goal is a clean driver, I don't really need NOS, a set of repros from Mark at 914rubber would have been fine. But since I found these in the trunk of thei car...
(Center cap envy) Trade ya and throw in $$$
Posted by: arne Apr 7 2017, 10:50 PM
(Center cap envy) Trade ya and throw in $$$
Hmmm. I guess I might consider that, if someone made me a great offer. But I'll happily use them once the car is complete if not.
Cleaned up a second wheel this afternoon, same result as the first. Best parts of the car, so far.
Posted by: rgalla9146 Apr 8 2017, 05:25 AM
The lugs still have the green goop.
Great find.
Posted by: arne Apr 8 2017, 09:23 PM
My wife and I went on a PCA drive in the 911 today, so no progress on the '14. The new fuel pump is here, but the fuel line kit from Tangerine isn't due to arrive until next Friday.
I've received several offers to buy my NOS center caps. I knew they were a nice find, but didn't know just how much in demand they were. I've decided I'm going to keep them for now, not make a decision to sell until farther along in the project. If the car turns out as nice as I think it might, I may go ahead and use them myself. So for now, not for sale.
Posted by: arne Apr 11 2017, 04:50 PM
Attempted to drain the fuel tank today in preparation for the arrival of the new fuel lines later this week. Failed.
Disconnected the supply line from the old pump. Got nothing but a dribble. Reconnected to pump, disconnected the output line and ran the pump. Still only a trickle. Tried to blow back through the supply line with air to see if I could clear the line. Nope, the line actually holds pressure. 
Not sure where the blockage might be, but in the tank itself is a high possibility. I guess I'm going to need to hoist the tank out half full and see what I can do from there. Either that, or I need to go buy a siphon hose and suck it out from the filler.
Posted by: arne Apr 16 2017, 10:10 AM
Spent a good part of the day yesterday with the car. I did siphon the tank from the top. Didn't get it completely empty, but close enough to get it light enough to lift out.
While disconnecting the lines below, the return line flowed freely - all down my arm, of course. The supply line, not so much. Which I expected given my failure to drain the tank using that line.
After getting the tank out and on its side, I pulled the supply nipple to replace the sock with the new one from Tangerine. Here is what I found (top one is new, obviously, bottom is the one out of the tank):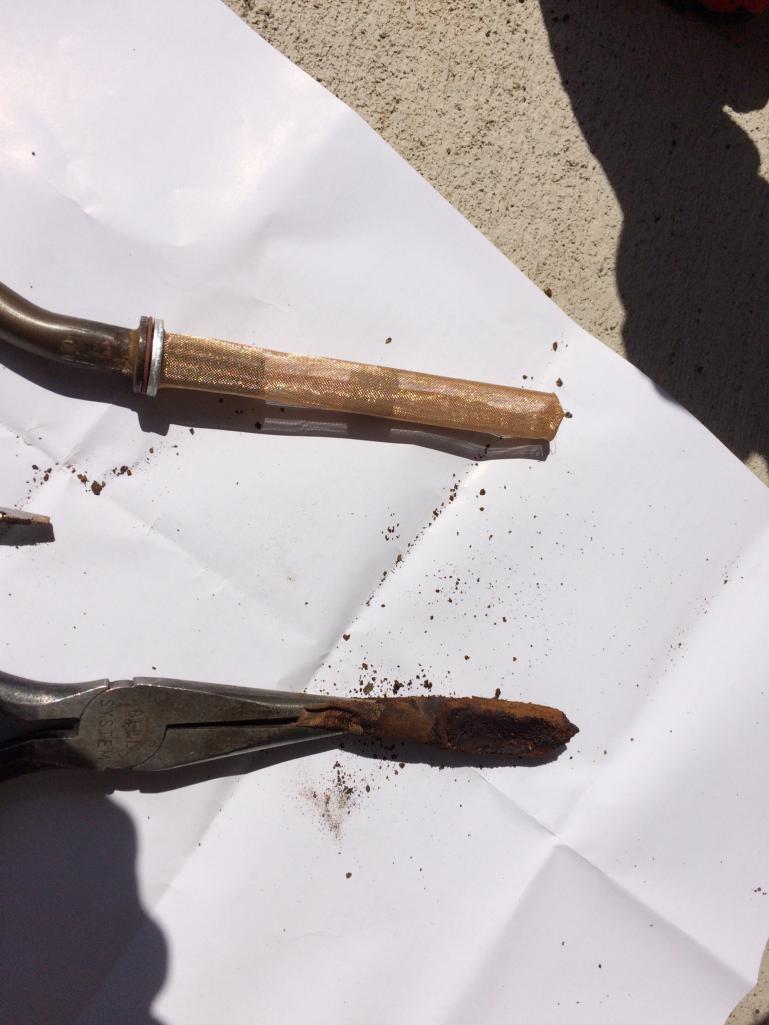
That explains a few things.
At this point, my exploration tends to lead me to believe the car was parked due to poor running, both clogged fuel supply and a big vacuum leak at the hose to the manifold pressure sensor. Hoping that addressing these two items will get the engine running decently once the fuel lines are completed.
Took out the driver's seat and both consoles so that I can see inside the tunnel, will attempt to pull and replace the tunnel lines either today or tomorrow.
Posted by: Calvinator2016 Apr 16 2017, 10:35 AM
Wow! Mystery Solved.
Posted by: rhodyguy Apr 16 2017, 10:42 AM
Possibly the worst tank sock I've ever seen. How bad is the tank interior rust?
Posted by: arne Apr 16 2017, 10:53 AM
Amazingly clean. I don't understand why, but the inside is actually really nice. The old sock was not clogged with rust, but simply brown crud.
Posted by: ConeDodger Apr 16 2017, 01:50 PM
Arne,
McMark and jcd914 and I discovered during a tuning of Jims (jcd914) Dwight Mitchell motor that you cannot let the MPS sit on top of the motor. Ran like crap until we put it in its proper place. Not sure if it was grounding or EMI, but it cleaned up after we put it where it belongs.
Posted by: arne Apr 16 2017, 02:04 PM
Arne,
McMark and jcd914 and I discovered during a tuning of Jims (jcd914) Dwight Mitchell motor that you cannot let the MPS sit on top of the motor. Ran like crap until we put it in its proper place. Not sure if it was grounding or EMI, but it cleaned up after we put it where it belongs.
Interesting, Rob. I did go ahead and mount the MPS properly, just because I didn't like the thought of it lying loose in there. So that shouldn't be a problem for me now.
In the garage right now, back to work replacing lines and hoses.
Posted by: arne Apr 16 2017, 03:46 PM
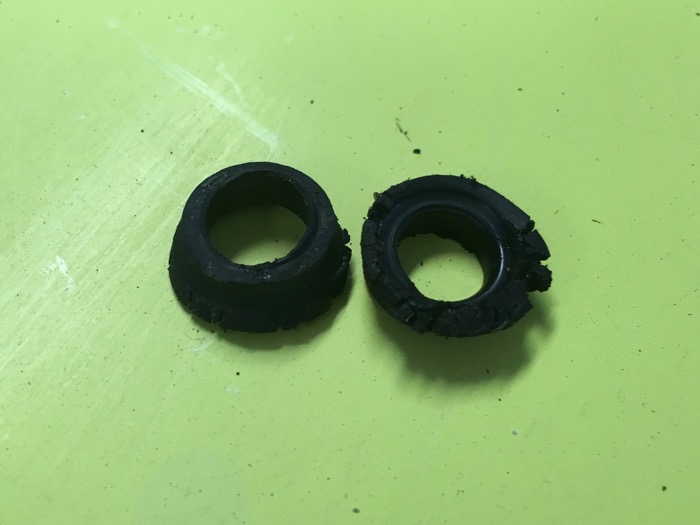
Injector seals... 
Posted by: rhodyguy Apr 17 2017, 07:32 AM
Wow. I think those are spent. Cheap fix tho.
Posted by: arne Apr 17 2017, 08:28 AM
Wow. I think those are spent. Cheap fix tho.
Spent is probably a good description. Or perhaps, as Edd China would say, "Perished."
Posted by: arne Apr 18 2017, 08:37 PM
Picked up new injector seals from a local shop who specializes in busses and Vanagons. All of 50¢ each. Have all the hoses under the hood done now, will probably crawl under the car to relocate pump and start pulling lines tomorrow afternoon. Hoping to finish and attempt to start it over the weekend.
Posted by: arne Apr 22 2017, 07:55 PM
Got the new stainless fuel lines installed in the tunnel today. Would have been easier with a second person, but not too bad as it was.
Also installed the new fuel pump, relocated to the rear firewall. Found that a PO had a different take on vapor lock prevention - he/she pulled the cap off of the right side heat flapper and ducted the outlet to the center of the car, using really tacky foil hose and lots of zip ties.
After adding today's work to the work over the past week (all the fuel rail hoses and new injector seals), all that's left in my fuel delivery refurbishment is to reinstall and connect the fuel tank. Once that is done, I will attempt to start it up. Maybe tomorrow, or Monday for certain.
Posted by: arne Apr 23 2017, 04:24 PM

Woohoo, it runs! First time for at least 6 years, more likely close to 8 years. Started pretty rough, was only hitting on two cylinders at first. Fiddled with plug wires, saw some extraneous sparks, got it running OK for now. New wires on my short list.
Posted by: arne Apr 23 2017, 07:09 PM
Drove the Audi down to the FLAPS, got a decent set of wires, definite improvement, no more miss.
Of course, if not one thing it's another. During my fiddling with the wires, the auxiliary air regulator has now stuck wide open. Idles at ~2300, but if I pull the AAR hose and plug it, drops to ~950. Will need to see if I can clean that up, have some time to look at it tomorrow.
Going to start on the brakes soon, all 4 calipers need attention. Will Contact PMB to see if they have any of the DIY kits available, if not will need to bite the bullet anyway. May just do the fronts myself for now, don't want to get in too deep into my budget until farther down the line.
Posted by: cuddyk Apr 23 2017, 09:03 PM
Congrats! Maybe it's just that the AAR wire came loose with the fiddling. That happened on mine.
Posted by: arne Apr 23 2017, 09:17 PM
Congrats! Maybe it's just that the AAR wire came loose with the fiddling. That happened on mine.
Possible, as I could have dislodged it while fishing the new plug wires in. Will check that possibility first when I get to it tomorrow.
Posted by: BillC Apr 24 2017, 08:41 AM
Going to start on the brakes soon, all 4 calipers need attention. Will Contact PMB to see if they have any of the DIY kits available, if not will need to bite the bullet anyway. May just do the fronts myself for now, don't want to get in too deep into my budget until farther down the line.
How old are your brake hoses? Brake hoses decay from the inside out, they usually swell inside and block fluid from returning. Could be the cause of your sticky brakes, and they're not very expensive.
Posted by: Shadowfax Apr 24 2017, 08:47 AM
Woohoo, it runs! First time for at least 6 years, more likely close to 8 years. Started pretty rough, was only hitting on two cylinders at first. Fiddled with plug wires, saw some extraneous sparks, got it running OK for now. New wires on my short list.
Sweet!
Posted by: arne Apr 24 2017, 08:49 AM
Posted by: arne Apr 24 2017, 05:15 PM
Despite the sticking brakes and intermittent AAR, it will now move under its own power. Just not very far or fast, and it stops by itself.  First, second and reverse gears all work, and the clutch seems great.
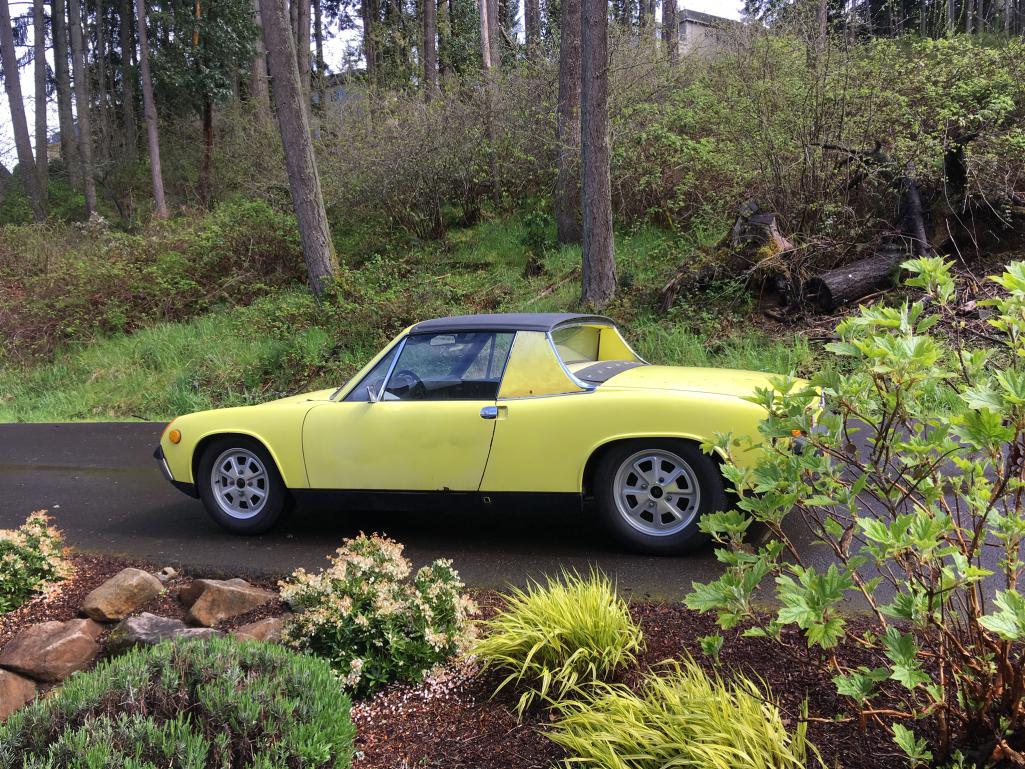
Posted by: arne Apr 27 2017, 12:35 PM
Some gratuitous 914 brake p0rn.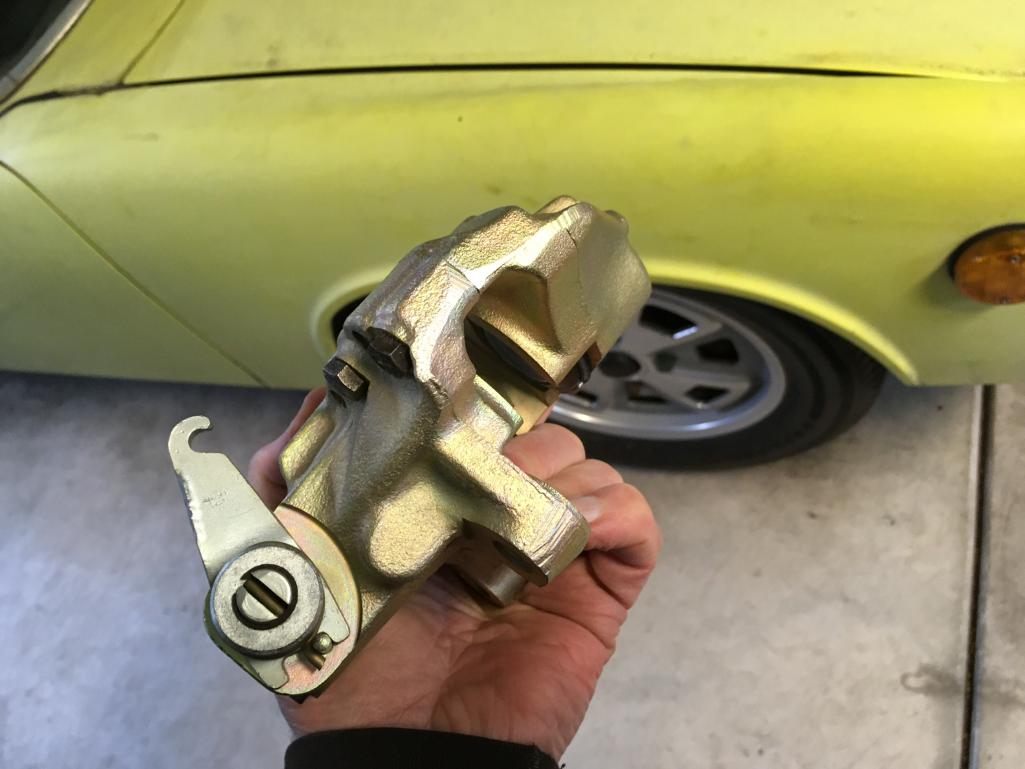
Posted by: rick 918-S Apr 27 2017, 05:01 PM
Great find! The car looks like a real solid project.
Posted by: arne Apr 29 2017, 09:42 PM
As you may have guessed from my previous post, I've been going through the brakes this week. I disassembled and cleaned out the front calipers myself, and replaced the rears with a fresh pair from PMB. The master cylinder seems ok so far, and all the flex hoses are braided stainless installed by the PO. I figured I'd try to reuse the existing pads and rotors if I could get good pedal feel.
Today, I took the car for its first real test drive. And the brakes aren't going to cut it this way. The pedal is soft and has a lot of travel. I believe this is because whoever worked on the front calipers last didn't pay any attention to the piston orientation, which caused uneven wear on the pads. Now that I have the pistons oriented properly, the pads aren't contacting the rotor surface properly, and there is a lot of flex in the pads and rotors. No way to fix that without new pads and rotors, at least up front. Which also means new bearings and races. I'd hoped not to have to go this far, this early. But the brakes have to be right, no shortcuts.
Beyond the brakes, the car ran quite well. A bit smelly, I'm going to have to address the oil leaks soon after I get the brakes handled. The transmission shifts well, but seems a bit on the noisy side. The odometer doesn't work, I suspect the little plastic gear has broken. The suspension seemed very harsh and bouncy. I now think that all four dampers are seized, no real suspension travel is happening. That will also need to be addressed sooner than later.
But for now, real progress has been made.
Posted by: Larmo63 Apr 29 2017, 09:55 PM
Your car reminds me of Speedy.
Attached thumbnail(s)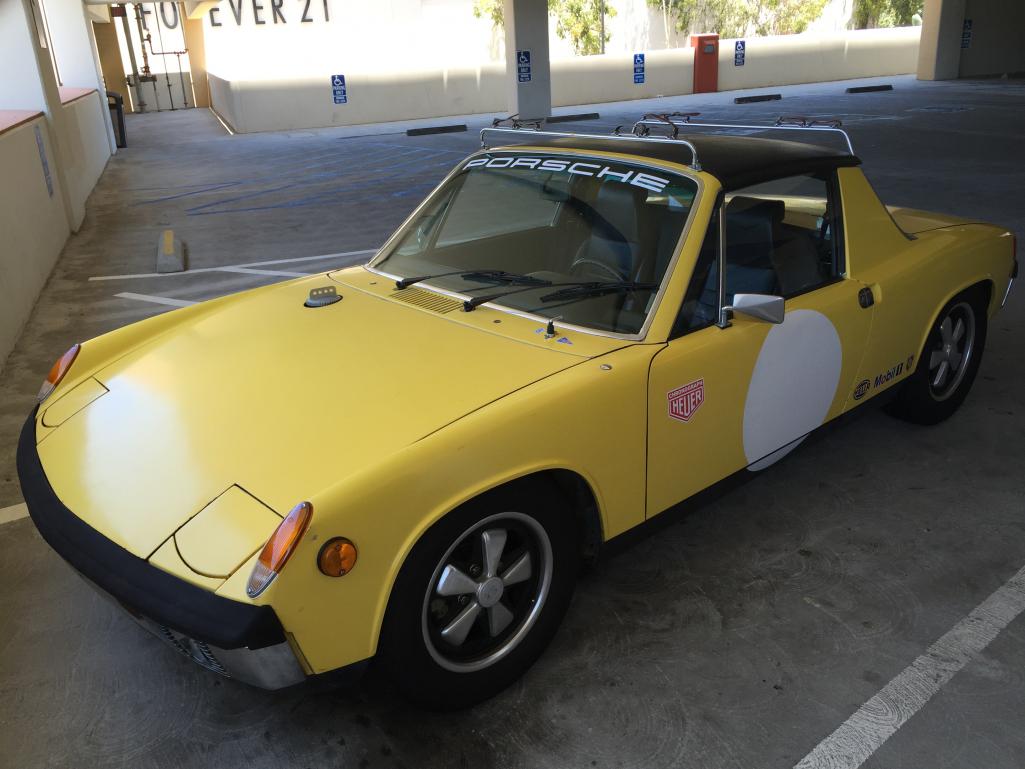
Posted by: arne Apr 29 2017, 10:18 PM
I've got a ways to go before it is that nice. But I can say this, it will remain yellow.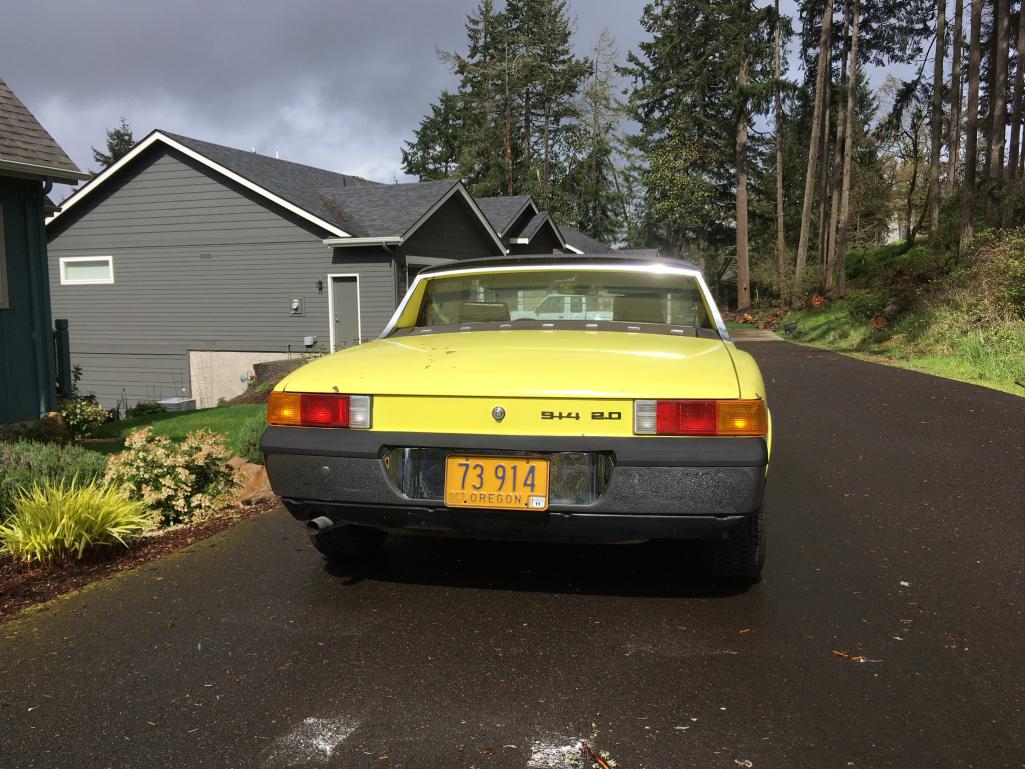
Posted by: euro911 Apr 30 2017, 12:44 AM
Nice progress. I did a thread on fixing the ODO issue years ago, on the old NARP forum. It's typically a gear that starts slipping on a splined shaft after about 80k miles or so (same for the '70's era BMWs). I gouged new splines on the shaft pressed the gear back on and the ODO worked again.
Posted by: arne Apr 30 2017, 11:39 AM
I fixed one of these odometer problems at least once before, many years ago. I think it was on one of my 1st gen Sciroccos. The only challenge will be opening up the gauge without damaging the bezel.
Posted by: Calvinator2016 Apr 30 2017, 04:33 PM
Arne, glad things are progressing. Its never fun to spend more than you think you will have to. So far, I am learning that some things on the car turn out better than you thought and others require more attention than first anticipated.
Keep pushing forward and we'll get there for sure. 
Posted by: arne May 5 2017, 08:41 PM
Progress continues. After further review, I decided that the pads were not worn unevenly after all, and that the soft brake pedal was the master cylinder. I was planning to perhaps let that sit for a while, but then other considerations made me change my mind, and today I installed a new 19mm Ate unit. Finally the brake pedal feels firm and correct. The brakes now work much better, although stopping power is a bit lacking due to the rusty and pitted surfaces of the rotors. That may correct itself with use, so I need to begin driving the car some.
On the other hand, the pads and rotors may be too far gone, and I may end up replacing them later. We shall see.
Got several things lined up now that the brakes are functional. Suspension is one, but first I think I'm going to look at the oil leaks, see if I can dry things out some. That and coming up with a good solution for the AAR, while also replacing all the hoses under the hood.
Posted by: arne May 6 2017, 12:57 PM
Drove it to the local PCA monthly coffee gathering today. (For any of you near Eugene, 1st Saturday of each month, 10:00 at Market of Choice at 29th & Willamette. Park way at the north end in back.)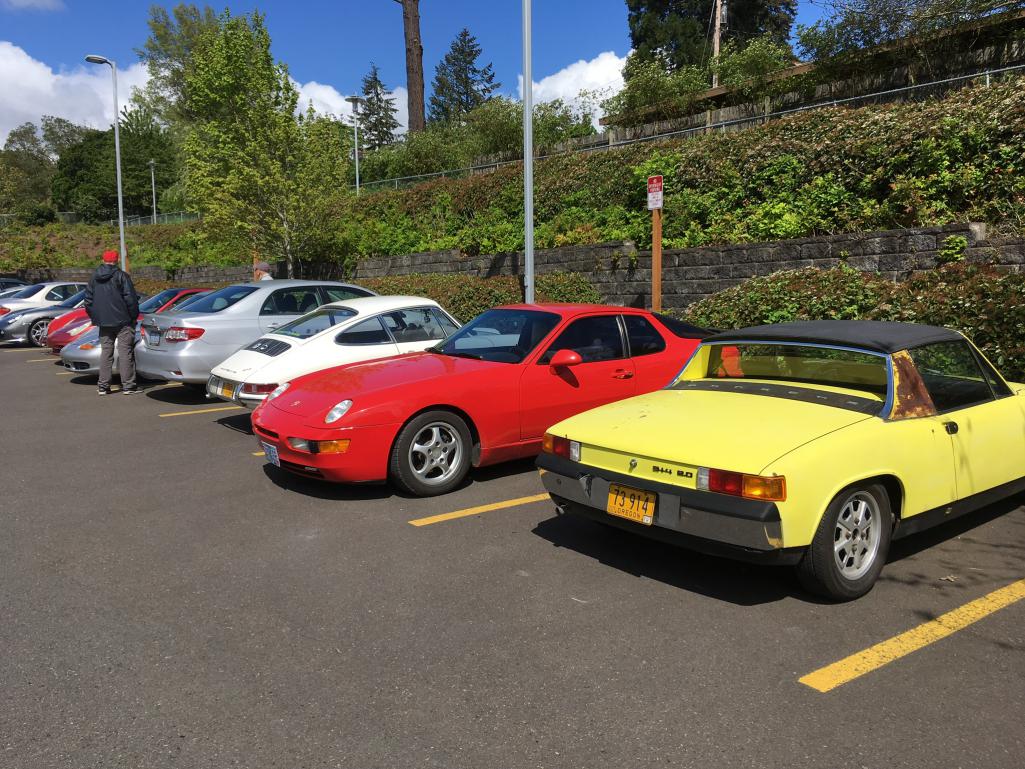
Admitting that it still has some needs, especially in the suspension, I can see that these cars are a riot to drive, even with just a stock 2.0. This is getting fun.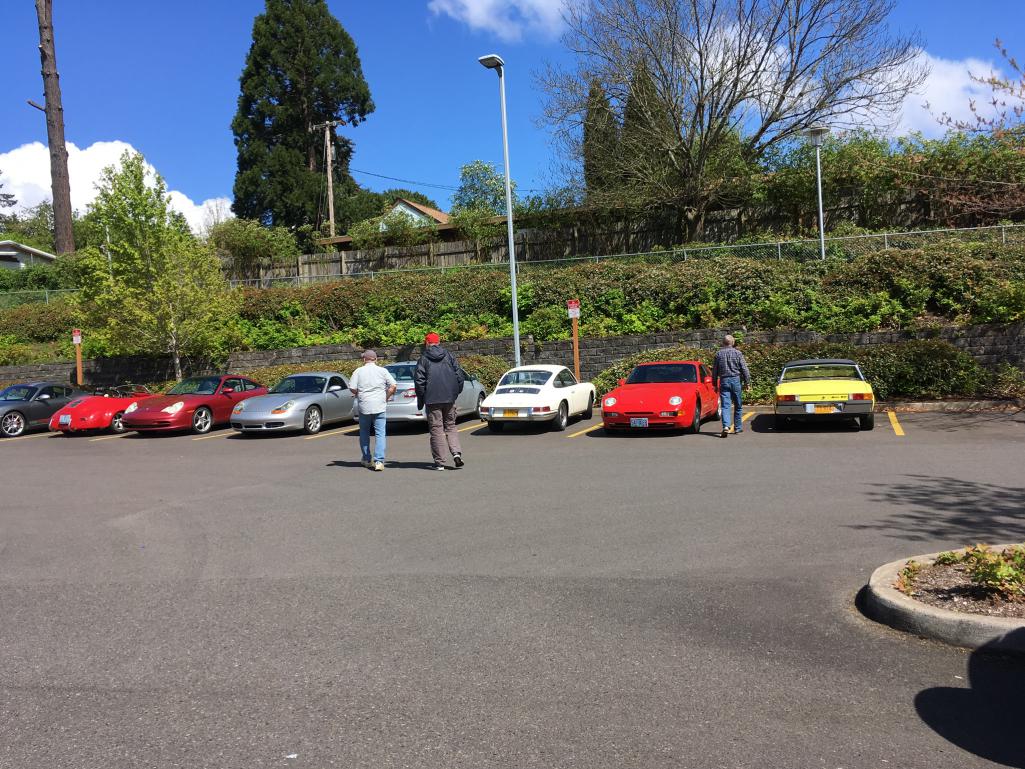
Posted by: arne May 7 2017, 06:57 PM
Updates:
Brakes - Still not 100% happy with the brakes. As appears to be common, I think there is still some air in there somewhere. Going to need to take another stab at bleeding, perhaps at the pressure regulator.
Suspension - Have determined that the front was lowered down to where it truly was riding on the bumpstops. After raising it back up to factory height the ride is much improved. Will order new springs for the rear shortly.
Oil leaks - Have determined the left side of the motor is dry, all motor leaks are on the right side. Looks like the bulk is from the valve cover, but the oil cooler just above it also looks a bit wet. Cleaning and driving it to see if I can track down the source(s).
New items - shift bushings are pretty sad, will address that soon. Also got the oil temp gauge reconnected, but it seems to work spastically. Once after a rather short test drive, I noticed that it had settled and appeared to be working normally, but was indicating rather hot. Will need to decide if the gauge is accurate, and if so if the engine is running hot. Going to need to check the flappers for function.
Posted by: ConeDodger May 7 2017, 07:16 PM
For all that is said about George and AA, (much of it true) his little pamphlet 700 Tech Tips is spot on. Four common oil leaks on the passenger side include the oil pressure sender, the oil cooler and the valve cover (both sides), as well as the return tube seals (both sides).
Posted by: arne May 7 2017, 09:29 PM
The cooler doesn't appear to be really wet, but I'll need to locate the pressure sender and check that. Will replace valve cover gaskets as a matter of course. Will probably check the valve adjustment too, no telling when it was last done.
Posted by: arne May 9 2017, 03:07 PM
Re-bled the rear brakes today, I think I got it this time. At least now it doesn't trip the warning light when I stomp on them. Will need to log some miles to see if the pads and rotors will bed properly after they wear off all the rust. If not, might have to deal with pads and rotors to get full brake power.
Posted by: pete000 May 9 2017, 03:16 PM
Great to see another 914 rescued and back in service !
Posted by: arne May 11 2017, 06:34 PM
Posted by: ConeDodger May 11 2017, 07:20 PM
What are you using for tires? That can make The suspension feel rock like as well...
Posted by: arne May 11 2017, 09:04 PM
Tires are 195/65HR15 Toyos, Rob. A bit on the old side, but definitely not what I was feeling. This car had serious suspension issues, now corrected. My guess is that the Konis went on years back, while the car was still fairly fresh. Then as the rear springs sagged out, the answer was to keep lowering the front so that the car sat level. By the time I bought it, both ends were riding on the stops, no travel at all. Now that I have raised it up some and we have suspension travel once again, all is quite well.
Posted by: arne May 13 2017, 11:01 AM
Am I correct in thinking the oil pressure sender is on the top side of the motor? If so, it is not leaking, the top side is completely dry. That leaves the right side valve cover as a known leak, and the right push rod tubes and the oil cooler as still suspect.
Stupid Type IV noob question - can I pull a valve cover (or adjust the valves) without draining the oil? Or am I going to make an Exxon Valdez sized mess if I do so? I ask because I can pull one side at a time on my 911 if I jack up the side of the car I am working on. Don't know if that is possible on a Type IV with its wet sump.
Posted by: 914_teener May 13 2017, 11:08 AM
Am I correct in thinking the oil pressure sender is on the top side of the motor? If so, it is not leaking, the top side is completely dry. That leaves the right side valve cover as a known leak, and the right push rod tubes and the oil cooler as still suspect.
Stupid Type IV noob question - can I pull a valve cover (or adjust the valves) without draining the oil? Or am I going to make an Exxon Valdez sized mess if I do so? I ask because I can pull one side at a time on my 911 if I jack up the side of the car I am working on. Don't know if that is possible on a Type IV with its wet sump.
Yes.
I.d replace the push rod seals and the cover gaskets if the car has been sitting for a while.
See also if the breather hose is hooked up.
Posted by: arne May 13 2017, 12:17 PM
Yes, the breather is connected. I've already got a new pair of cover gaskets, will pick up a set of tube seals before I tear into it.
Posted by: rhodyguy May 13 2017, 01:51 PM
Check the top side of the oil filter. If there is a puddle on top chances are the leak is cooler related.
Posted by: arne May 13 2017, 02:10 PM
Check the top side of the oil filter. If there is a puddle on top chances are the leak is cooler related.
Thanks, that's a good tip. Will look into that when I spend some time in the garage tomorrow.
Can the cooler o-rings be replaced with the engine in the car? Or is an engine drop required?
Posted by: mepstein May 13 2017, 03:38 PM
Check the top side of the oil filter. If there is a puddle on top chances are the leak is cooler related.
Thanks, that's a good tip. Will look into that when I spend some time in the garage tomorrow.
Can the cooler o-rings be replaced with the engine in the car? Or is an engine drop required?
Guys do it in the car. There's a thread somewhere. I'm sure it's not easy - at least for me. I did it why the engine was out along with some while you are there stuff.
Posted by: arne May 13 2017, 03:51 PM
Guys do it in the car. There's a thread somewhere. I'm sure it's not easy - at least for me. I did it why the engine was out along with some while you are there stuff.
Yeah, I found a Pelican tech article on it. Will probably give it a try. Just do all the leak points at once.
Posted by: euro911 May 13 2017, 04:51 PM
If you're planning to replace the push rod tube seals, that's going to facilitate engine removal (cooling tins and heads need to come off), so that would be the best time to replace the oil cooler seals.
Might also want to check to see if the rear main seal is leaking, and this will also give you the opportunity to check and replace the clutch disc (if needed).
Posted by: rhodyguy May 13 2017, 09:02 PM
"While I'm in there I might as well..." slippery slope.
Posted by: euro911 May 13 2017, 09:45 PM

Posted by: arne May 13 2017, 11:16 PM
Really? I've read (both online and in service manuals) that Type IV push rod tubes can be removed without pulling the heads. Am I missing something here?
Posted by: mark04usa May 13 2017, 11:41 PM
Push rod tube seals can be replaced without dropping the engine. It is not a difficult job, just uncomfortable if your car is on jackstands. There is a thread here or on Pelican that covers this repair.
Posted by: euro911 May 14 2017, 12:22 PM
Yeah, my goof ... I've been working on 616 motors too long 
Posted by: arne May 18 2017, 10:41 AM
Pretty sure I don't need to remind anyone here about how one thing leads to another...
Picked up some parts locally to address some of the oil leaks - push rod tubes, oil cooler seals, etc. I also got a rear shift rod bushing as the existing one seemed pretty sloppy.
Got the car in the air yesterday, figured I'd start with the shift rod bushing, as that was a separate job from the rest. And that's where the plan started to break down.
Pulled the shift linkage bowl/cover down, and found it full of gear oil. Not too surprised, really. But if I'm going to address that, I figured I better just start to really look things over - what else should I be looking at?
It would appear that sitting unused for several years magically transforms seals and o-rings into cheese. In addition to the shift linkage, both output flange seals are leaking, the left side especially. So I've started acquiring all the rest of the seals I can think to deal with, as well as the copper exhaust seals as I figure getting to all this stuff will be easier with the heat exchangers out of the way. Progress will resume some time next week after it all arrives.
Question - the new rear shift rod bushing doesn't appear to be any better than the one I pulled out. It is not snug on the shift rod, seems to allow close to 1/8" movement. Is that correct? Or is my shift rod a smaller diameter for some reason?
Posted by: euro911 May 18 2017, 11:30 AM
I think you'd be better off dropping the drive train and addressing all the seals at one time. If the shift console seal on your transaxle is shot, the input shaft seal might need to be replaced as well  - if it leaks, you'll be replacing the clutch too
Posted by: arne May 18 2017, 11:52 AM
Yeah, I'm sure you are right, Mark. I've been trying to avoid dropping it as I'm not well equipped in this garage for it. But I may need to work that out.
How high do I need to get the car up to have room to drop the lump and get it out from under the car? Assume that I have the heat exchangers pulled, if that gives any more room.
Posted by: mepstein May 18 2017, 12:16 PM
I've done it with the rear wheels on wheel ramps, dropping onto a furniture dolly. I think you need about 33-36" of clearance from back of car to the ground. Probably a couple inches less now that you pulled the he's. Dropping the engine and trans is easy and you can get stuff done so much easier once it's on the ground.
The bushing isn't a very good fit. Some guys make their own for a more precise fit.
Posted by: euro911 May 18 2017, 12:41 PM
I whole-heartedly agree with Mark Epstein ... it's much easier to drop the motor and transaxle as a single unit.
Definitely remove the HEs before dropping the drive train ... you don't want to get stuck trying to do it while it's on the ground (or dolly).
Having an engine stand is really nice for servicing the motor at a good working height ... maybe someone local to you has one you can borrow?
Posted by: arne May 18 2017, 12:57 PM
Mr. Epstein's ramps must be taller than mine. Looks like I have ~23" with the rear bumper off. Of course, the body will rise once the weight of the drivetrain is removed, but I'm not sure that will be enough.
Posted by: mepstein May 18 2017, 01:46 PM
Mr. Epstein's ramps must be taller than mine. Looks like I have ~23" with the rear bumper off. Of course, the body will rise once the weight of the drivetrain is removed, but I'm not sure that will be enough.
I'm measuring 14" from the sheet metal of the rear to the ground with the car sitting in my garage. So add in the height of the ramps plus a couple more inches once the engine is out. Plus when the front wheels are on the ground, the back angles up even more. It will work.

Posted by: arne May 18 2017, 02:08 PM
OK, I'll give it a shot. I guess worse case is I have to have several buddies over to lift the car as I slide it out the back. Good thing I brew my own beer, because bribing said buddies could get expensive otherwise. 
Posted by: euro911 May 18 2017, 03:00 PM
It's always nice to have some help doing this, although it's not impossible to do alone.
Posted by: mepstein May 18 2017, 03:14 PM
OK, I'll give it a shot. I guess worse case is I have to have several buddies over to lift the car as I slide it out the back. Good thing I brew my own beer, because bribing said buddies could get expensive otherwise.
Those are small ramps. But you can always jack up the car further once the engine is down.
Posted by: arne May 18 2017, 03:33 PM
I have access to a pair of ramps that will give me another 3-4". Will do that instead.
Posted by: arne May 18 2017, 08:23 PM
Now thinking about the "while I'm in there" things. Like better hell hole assessment, replacing the battery tray....
Posted by: rhodyguy May 19 2017, 08:47 AM
Everything will be fine.
Posted by: arne May 20 2017, 05:32 PM
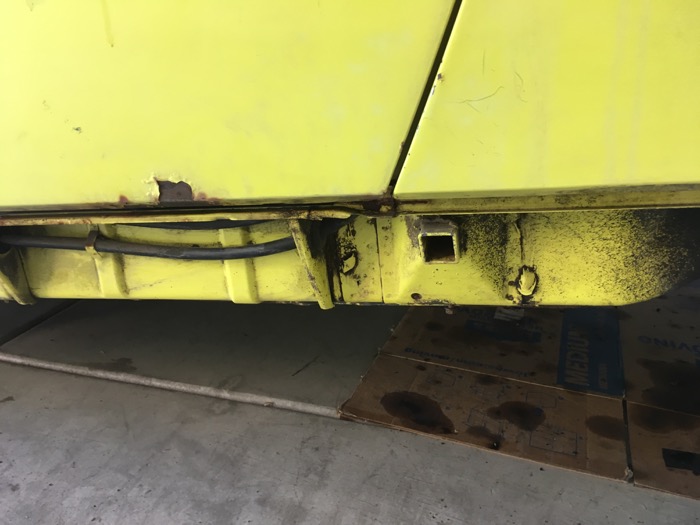
Left long and jack point exposed today.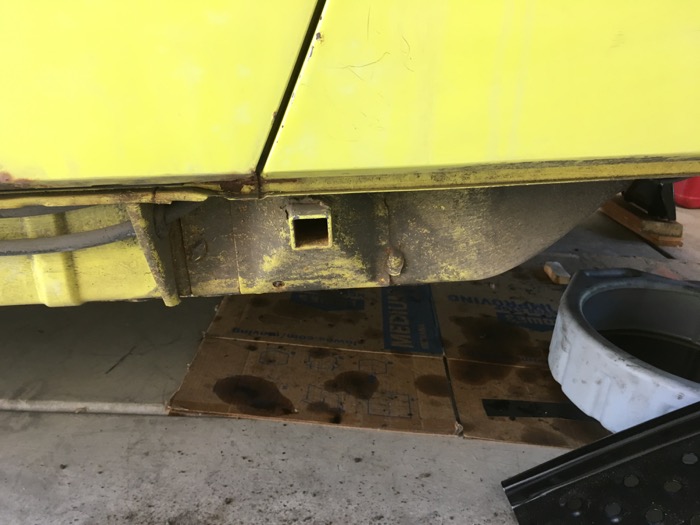
Posted by: Calvinator2016 May 20 2017, 05:41 PM
Left long and jack point exposed today.
Looks Great!
Posted by: arne May 20 2017, 05:47 PM
Yes, and even better after cleaning. Moving to the scary side now.
Posted by: arne May 20 2017, 06:09 PM
Right side. Very nice as well.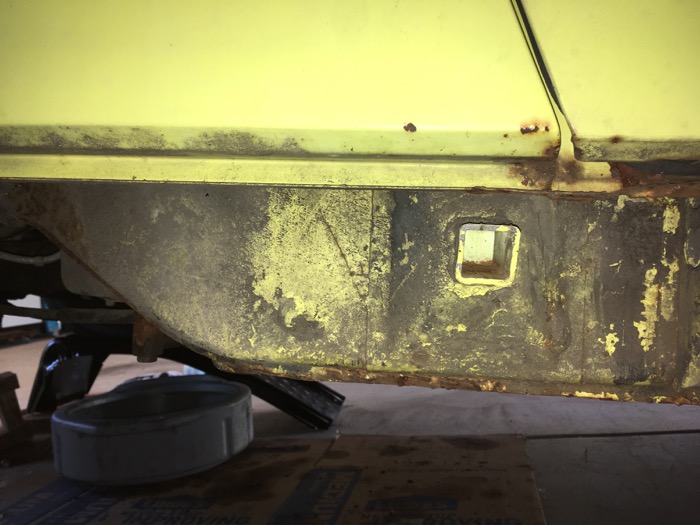
Posted by: ConeDodger May 20 2017, 07:31 PM
 one of those oh thank goodness moments!
Posted by: arne May 20 2017, 07:46 PM
one of those oh thank goodness moments!No kidding. It was really about what I had expected, based on crawling under the car prior to purchase, but in the back of my mind there have been these doubts....
Posted by: bigkensteele May 20 2017, 08:05 PM
It's always nice to have some help doing this, although it's not impossible to do alone.
My method for engine removal and installation never requires an assistant. Just two pieces of threaded rod and a floor jack. Piece of cake.
Search "threaded rod", and you will find it.
Posted by: euro911 May 20 2017, 09:30 PM
It's always nice to have some help doing this, although it's not impossible to do alone.
My method for engine removal and installation never requires an assistant. Just two pieces of threaded rod and a floor jack. Piece of cake.
Search "threaded rod", and you will find it.
Posted by: arne May 24 2017, 03:15 PM
Engine drop prep continues. Exhaust is out today.
Man, that is much heavier than I would have guessed.
Actual drop itself will be postponed a day or two. Another local 'teener (JB620) has contacted me, offering to loan me a brand new, never used Tangerine Racing Engine Lift Plate as soon as it arrives in the next day or two. I will gladly wait a bit for that kind of much appreciated help!
In the mean time, disconnecting all the other stuff will continue.
Posted by: mepstein May 24 2017, 04:36 PM
Engine drop prep continues. Exhaust is out today.
Man, that is much heavier than I would have guessed.
Actual drop itself will be postponed a day or two. Another local 'teener (JB620) has contacted me, offering to loan me a brand new, never used Tangerine Racing Engine Lift Plate as soon as it arrives in the next day or two. I will gladly wait a bit for that kind of much appreciated help!
In the mean time, disconnecting all the other stuff will continue.
I used the tangerine engine lift plate when I helped Zach - vacca rabbi, with his engine install. It's definitely worth waiting for.
Posted by: euro911 May 24 2017, 04:56 PM
I always remove the muffler before the heat exchangers ... because, yeah, the whole enchilada will be unwieldy.
Posted by: arne May 24 2017, 05:03 PM
I will probably put them back on that way, but didn't want to fight the rusty bolts to pull the muffler off. Easier to cut those off out here in the open.
Which reminds me - one fear was unfounded, I didn't break any exhaust studs during the removal! 5 of the 8 studs came out of the heads, but I am totally fine with that.
Posted by: arne May 24 2017, 07:30 PM
Other observations -
The little thermostat bellows works fine (tested with heat gun), but the wire cable that it pulls on is either disconnected or broken, so the flaps are in the hot engine position all the time. Will need to address that while it is out.
Want to replace the taco plate o-ring and crush washers, but it doesn't seem to have slack in the wire to pull it down far enough to get at the o-ring. Will need to look at that while it is out also.
Most of the rest of things looks pretty good, aside from oil leaks. Was thinking that I might be ready to put it back in soon, but then I remembered that I need to look at the hell hole closely while I have easier access. That could delay things...
Posted by: euro911 May 24 2017, 11:43 PM
The little thermostat bellows works fine (tested with heat gun), but the wire cable that it pulls on is either disconnected or broken, so the flaps are in the hot engine position all the time. Will need to address that while it is out.
Want to replace the taco plate o-ring and crush washers, but it doesn't seem to have slack in the wire to pull it down far enough to get at the o-ring. Will need to look at that while it is out also.
Most of the rest of things looks pretty good, aside from oil leaks. Was thinking that I might be ready to put it back in soon, but then I remembered that I need to look at the hell hole closely while I have easier access. That could delay things...
Posted by: mepstein May 25 2017, 04:02 AM
The thermostat wire is a derailleur wire available at any bike shop.
Posted by: arne May 25 2017, 08:29 AM
The thermostat wire is a derailleur wire available at any bike shop.
I wondered if that might not be so. I probably have some in the garage somewhere. Will get that connected while I have it out and easy to work on.
Posted by: arne May 26 2017, 05:54 PM
Engine down!
Thanks to the following, it was a relatively painless process, even solo.
- McMark - for the great how-to drop article in the tech section.
- Racer Chris (Tangerine Racing) - for designing the awesome Engine Lift Plate.
- JB620 - for the gracious loan of the above mentioned TR Lift Plate.
No surprises yet, but the exploration is just beginning.
Posted by: mepstein May 26 2017, 06:05 PM
Get 12mm copper plated exhaust nuts. They are easier to install than 13's.
You might also want to replace the ss soft brake lines with new rubber ones. SS don't last forever - the rubber inside can still collapse. It might help your brake issue.
Posted by: arne May 26 2017, 10:54 PM
Roger that on the copper plated nuts, I've used those on previous projects.
Will consider the rear hoses while I'm under there. The SS hoses appear to be quite fresh, they lack all the road grime that covers the rest of the suspension and brakes, so I'm leaning towards leaving them be.
Separated the engine and trans, no unpleasant surprises so far. Clutch looks fresh, input shaft and rear main seals are both appear to be dry now, will know more once I get it farther apart. Will likely replace those now anyway, just due to age.
Posted by: arne May 27 2017, 06:30 PM
More progress today. The clutch is fine, does not need replaced. Input shaft seal is not leaking now, but looks a bit sketchy and will be replaced. Rear main seal was starting to leak, so this was well worth the time. Replaced pushrod tube seals on the right side today, will next tackle the oil cooler seals before moving to the left side.
Building a list of parts for little things I want to address prior to reinstalling the motor.
Posted by: cary May 28 2017, 11:32 AM
Looks like a great car and gifted owner. I too (Jamie) would like to find some time and come down and see it.
Keep the pedal down .................
Posted by: cuddyk May 28 2017, 12:58 PM
Engine down!
Thanks to the following, it was a relatively painless process, even solo.
- McMark - for the great how-to drop article in the tech section.
- Racer Chris (Tangerine Racing) - for designing the awesome Engine Lift Plate.
- JB620 - for the gracious loan of the above mentioned TR Lift Plate.
No surprises yet, but the exploration is just beginning.
tangerine plate is essentialcongrats on all the great progress!
Posted by: arne May 28 2017, 01:09 PM
Looks like a great car and gifted owner. I too (Jamie) would like to find some time and come down and see it.
Keep the pedal down .................
Awww,
 I don't think of myself as gifted, just a competent mechanic. The stuff you do in the metalwork and rust abatement area seems much more of a gift to me, Cary.
The farther I go, I find that while I still find things that are worse than I hoped, it is still a really sound starting point, and will be a great car before long. Some of my recent acquaintances and new neighbors who have not seen projects I have done before have expressed some doubts about my sanity for starting something that doesn't look so good right now. My wife just smiles and says, "He's dragged home cars that were far worse..."
Cary, you and Jamie (and any other semi-local teeners) are welcome to come by any time. Although, I cringe a bit when I think of what an experienced 914 eye might spot...
Posted by: JRust May 28 2017, 02:33 PM
Hey Arne your making great progress. I saw you were dropping the motor. Had hoped my schedule would open up so I could come down to help. Just to much going on at the moment prepping for our move to Albany & our new home. I did manage to find a good pedal board if you still need one
Posted by: euro911 May 28 2017, 02:41 PM
Albay, OR ... PA ... or NY?
Posted by: arne May 28 2017, 08:16 PM
Posted by: porschetub May 28 2017, 09:01 PM
More progress today. The clutch is fine, does not need replaced. Input shaft seal is not leaking now, but looks a bit sketchy and will be replaced. Rear main seal was starting to leak, so this was well worth the time. Replaced pushrod tube seals on the right side today, will next tackle the oil cooler seals before moving to the left side.
Building a list of parts for little things I want to address prior to reinstalling the motor.
Good call on the input shaft seal mine was fine (looking) then leaking and about screwed my new clutch,just got it in time....
The RMS is a must do.
Posted by: arne May 29 2017, 06:31 PM
Spent time today compiling the parts I'll need to address before putting it back together. Also crawled inside to determine what the rust situation really is.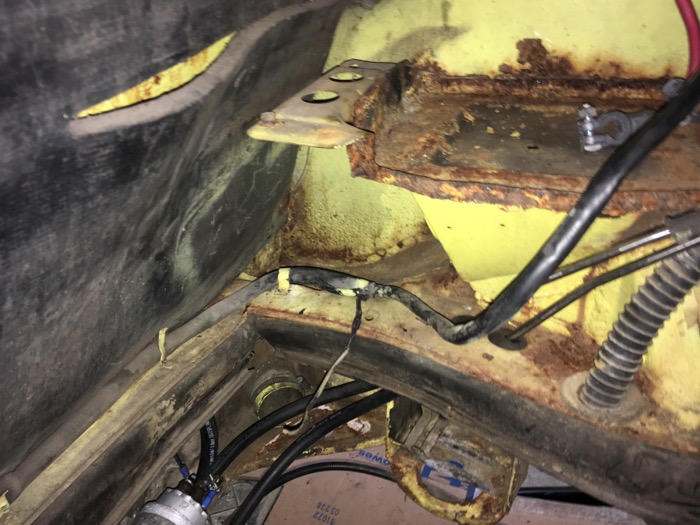
And it doesn't appear too bad. Someone has been in there before, someone who welds worse than I do, and didn't know how to clean up and prep for paint and sealer when they finished. Battery tray is probably a total loss, and I'm going to need to spend some time doing the cleanup, etching and prep before trying to seal things up. No perforations, nothing I could poke a pick through.
So I've got some work to do while I wait for the next batch of parts.
Posted by: mstein95 May 30 2017, 10:04 AM
Arne -
Sorry haven't been available to assist up until now. Maybe I can swing by this weekend to provide encouragement.
Morgan
Posted by: arne May 30 2017, 10:43 AM
Arne -
Sorry haven't been available to assist up until now. Maybe I can swing by this weekend to provide encouragement.
Morgan
No worries, Morgan. You're welcome to swing by anytime, as long as the sight of a small, cluttered work area doesn't faze you.
I will send you my contact info in a PM.Things are actually going fairly well so far. I will probably spend some time on it during the week, probably tomorrow or Friday afternoon. Will only have one of the two days this weekend, not sure which just yet. Focus will be on more rust cleanup and such, to see what real repairs might be necessary prior to putting the drivetrain back in.
Posted by: arne Jun 4 2017, 07:28 PM
I'm quite pleased with the hell hole situation. After much digging, poking, scraping, wire brushing, etc., it is all quite solid and acceptable. The visible rust was all superficial, caused by really poor cleanup and paint prep by whoever did the previous repairs. No, strike that, it wasn't poor prep, there was no prep at all. They apparently just welded in some patch panels and a battery tray support, and immediately sprayed it with yellow top coat. No cleanup of the welding flux, no primer, just paint. Sad.
I've done some remedial cleaning, etched and such with phosphoric acid solution, and gave it a good coat of high zinc primer. Will find some nice yellow paint to finish it off prior to putting the drivetrain back in.
The cleanup, resealing and other work on the engine and transmission is also going well. The transmission is done, so after replacing the rear main seal, I married the lump back together. Morgan (mstein95) stopped by today with his pretty Phoenix red '74 and gave a hand with that part.
No new surprises recently, so I expect to put the engine back in the car late this week. Might be mobile again by the weekend.
Posted by: mepstein Jun 4 2017, 08:03 PM
An engine drop sounds scary but once you do it, it turns really productive. Remember new schnor (so?) washers on the cv's and don't be afraid to buy a new grounding strap for the trans.
It's also a lot easier to replace the alternator belt at this time.
Posted by: rhodyguy Jun 4 2017, 08:27 PM
That doesn't look so bad. Consider pulling the pad. Stuff likes to hide.
Posted by: arne Jun 4 2017, 08:28 PM
Yeah, I was hoping I could avoid the drop because I'd not done one before, but doing it was definitely the right call.
Gotta laugh about your (very good) suggestions, Mark. The new ground strap is already on the transmission now. The new alternator belt is in the things-yet-to-do pile. In addition to those, I've got new front motor mounts in place as of today. I identified all of those as things I'd rather do with the engine down. Wasn't hard to figure out what things were best done now. While I'm a 914 noob, it is just a car, and this is far from being my first refresh project.
Posted by: arne Jun 4 2017, 08:29 PM
I've had the pad down, in fact getting it properly secured before I put the engine back is yet another task on the list.
Posted by: arne Jun 5 2017, 11:59 AM
Update - I was planning to put the engine back in late this week, but have decided to delay that while I wait for some proper Saturn Yellow paint for in the engine compartment. My original thought was just to paint it with something semi-close to cover and protect the primer and such. But in the end, I decided I needed to get as close to the correct color as possible, and will need to wait a few days for that to be mixed.
In the meanwhile, I will spend my time doing other bits and prep. Regardless, I figure it should be running again by the middle of this month.
Posted by: arne Jun 5 2017, 06:26 PM
Today's tech tidbit - Yes, it is possible to change the oil cooler seals without removing all the engine tin. I did it with the engine out, but it could probably be done with the engine in as well, but it would be even less fun. You do need to be able to thread a nut on the innermost stud with just two fingers by feel, there is no real way to see it.
The big tip? Use a 15mm end wrench to put the seals in place, as described in this Pelican tech article.
http://www.pelicanparts.com/techarticles/914_oil_cooler_seals/914_oil_cooler_seals.htm
The article talks about doing it with the engine in, but with it dropped I was able to remove the front mounting bar, which eased access a touch. The article also doesn't note that you probably want to remove the oil filter for access. I also had previously dropped the exhaust, so that also helped a bit, I suspect.
Posted by: mepstein Jun 5 2017, 07:47 PM
Personally, I think the engine pads on the engine side are a mistake. Pretty ineffective. Much better to have modern heat and sound pad on the inside of the firewall instead of trapping moisture on the exterior. Just my opinion.
Posted by: arne Jun 7 2017, 09:21 AM
Cleaning various bits and making things nice, while I wait the Saturn Yellow paint.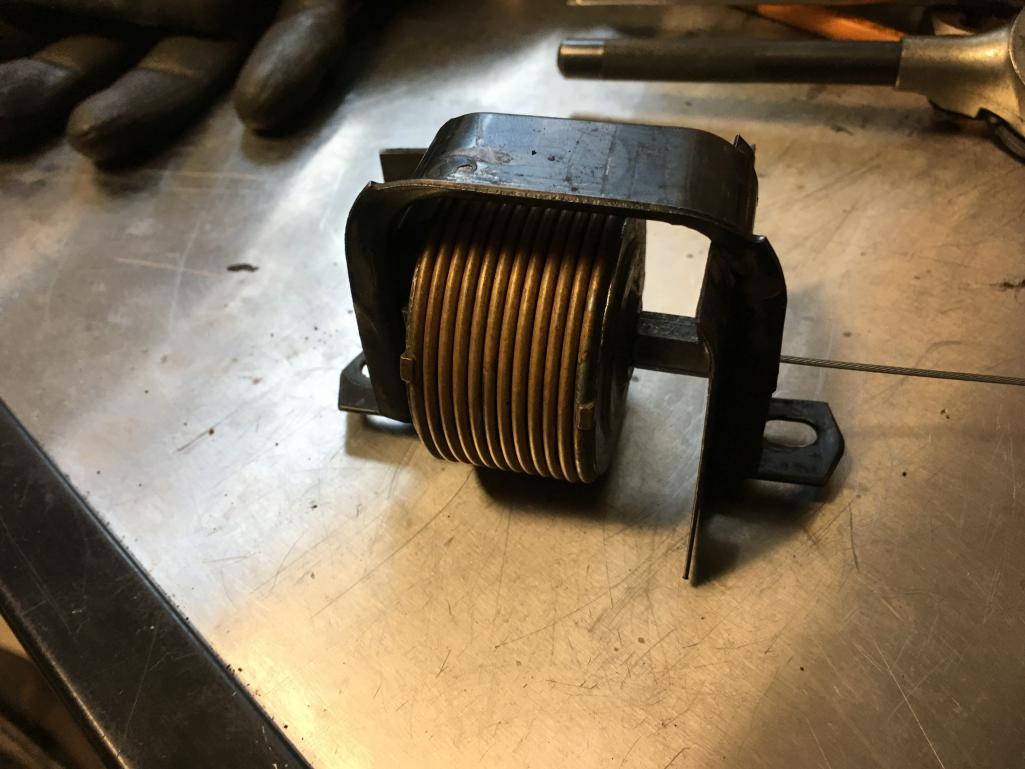
Posted by: arne Jun 8 2017, 04:39 PM
Well, I believe that most of the "have-to" tasks prior to putting the engine back are complete. Still waiting on the yellow paint, so I will spend some quality time with the car cleaning and tweaking things. Will be on the road a few days next week, so I don't expect to put it back until Father's Day weekend.
Posted by: arne Jun 10 2017, 12:20 PM
Have started gathering other parts that I will need/want later as I anticipate getting the freshly sealed engine and transmission back in the car soon.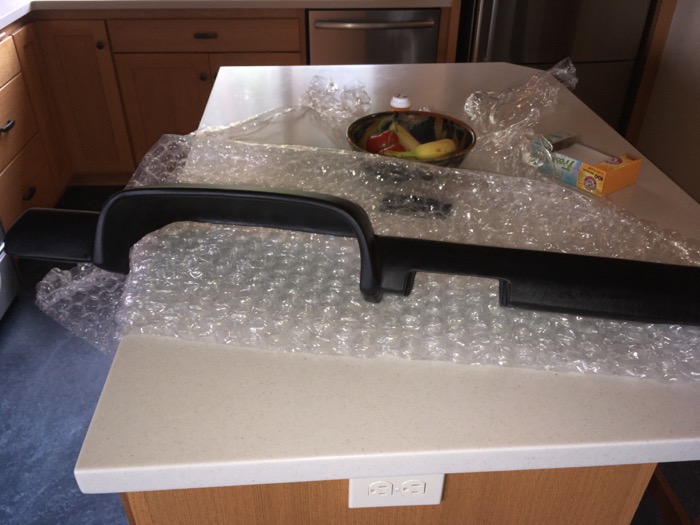
Posted by: Calvinator2016 Jun 10 2017, 12:49 PM
Have started gathering other parts that I will need/want later as I anticipate getting the freshly sealed engine and transmission back in the car soon.
Is that a dash pad top or the 914 rubber replacement dash? Just curious.
Posted by: arne Jun 10 2017, 01:15 PM
New complete pad from 914Rubber. Fantastic part.
Posted by: Calvinator2016 Jun 10 2017, 02:02 PM
New complete pad from 914Rubber. Fantastic part.
Nice, its on my wish list along with 90% of the available parts from their online store.
Posted by: JRust Jun 10 2017, 05:03 PM
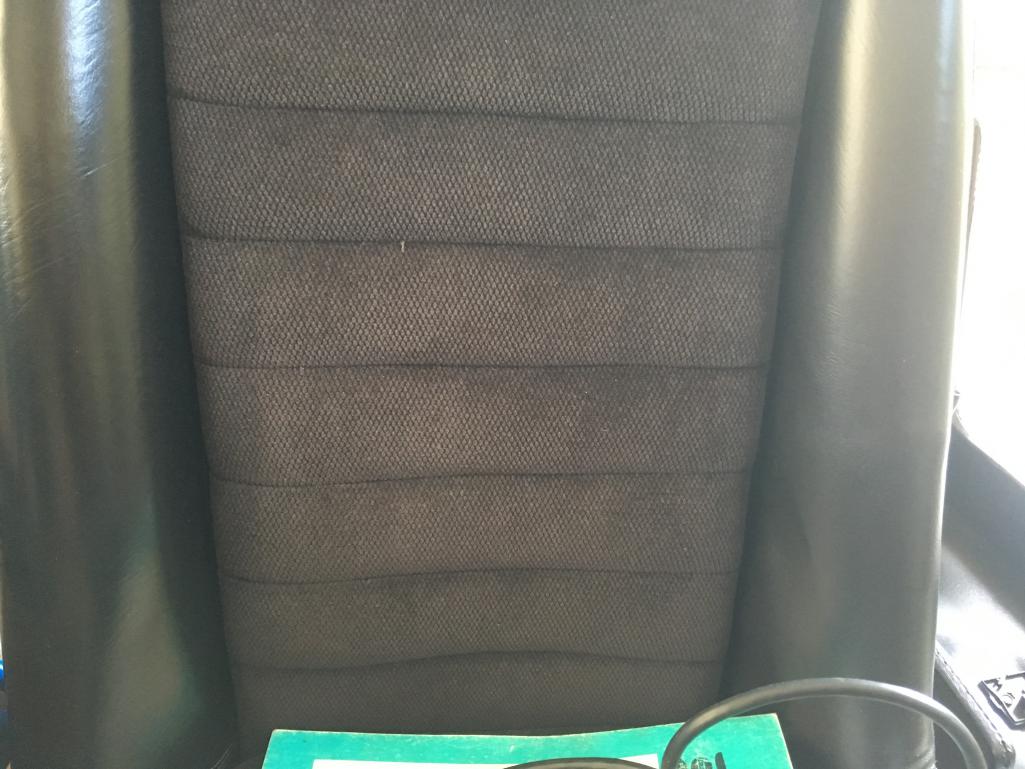
If your interior Backpad isn't great. I have a really nice one Available
Posted by: arne Jun 10 2017, 05:15 PM
Thanks, Jamie. The backpad in mine is pretty nice too. In fact, other than the carpet (shot), the dash and one small tear in the driver's seat, the interior is quite nice. I actually considered not replacing the dash pad, but those two cracks were just too obvious for me.
Oh yeah, it is still missing the pedalboard, but you knew that.
Posted by: arne Jun 18 2017, 07:46 PM
Got the engine and transmission back into the car today. It's had oil in both parts for a week, no leaks so far. So I may have it under control. Haven't started it yet, called it a day before I got everything done. Still need to attach the muffler and the heater ducting. But that about it, so I expect to start it up again tomorrow.
Posted by: arne Jun 18 2017, 09:31 PM
Got to thinking about what's next. Need to hang the muffler, clean and reinstall all the heater bits and adjust the shift linkage. At that point I should be back to where I was before, but better. No more oil leaks, no vacuum leaks (all new hoses), new front motor mounts, fresh shift bushings, and a whole lot cleaner underneath.
Posted by: arne Jun 19 2017, 03:04 PM
And it runs again. Hung the muffler, connected the battery and fired it up. No real drama. Had to loosen and readjust the left HE, exhaust leak at #2, easy fix.
At this point, no leaks at all, which was the big concern. Will work on the heater bits and linkage adjustment tomorrow. Should be on the road in a couple days at most.
Posted by: JRust Jun 19 2017, 11:12 PM
Nice Arne! Yeah I've got to snag the pedal board. Been moving the last week & prepping to move before that. Kinda got pushed down my list. I'll be over grabbing hopefully my last shop load tomorrow after work. The pedal board is there so should be able to bring it to work Wednesday
Posted by: arne Jun 22 2017, 09:30 PM
Since the last post when I said it was running again, it decided to not run. Details in this thread - http://www.914world.com/bbs2/index.php?showtopic=312013
As the final post in that thread indicates, I think I am getting a handle on that, and will be working on it again tomorrow afternoon.
In the mean while, I got a chance to use a borrowed pressure bleeder on the brakes. Did the two front this evening in between other non-car stuff I had to do. The fronts are easy to get to, just turn the wheels and do it on the ground, so no real setup time.
Got significant air from right side. Pedal now moves maybe 2" at most, and very firm. I think I may have that issue finally resolved too. Will do the rear and maybe even the master cylinder tomorrow just to make certain all is up to spec.
Posted by: arne Jun 23 2017, 03:29 PM
Got it! It runs again!
When dropping the engine, I must have bumped the new steel fuel lines, pushing the supply line forward a bit, which kinked the hose. I went ahead and put a longer hose with a loop in it to prevent this in the future.
Now I appear to be back where I was prior to the engine drop, except without the oil leaks!
Posted by: Calvinator2016 Jun 23 2017, 04:20 PM
Got it! It runs again!
When dropping the engine, I must have bumped the new steel fuel lines, pushing the supply line forward a bit, which kinked the hose. I went ahead and put a longer hose with a loop in it to prevent this in the future.
Now I appear to be back where I was prior to the engine drop, except without the oil leaks!
Looks like you have caught up. Running, driving
and no oil leaks! Congrats!
Posted by: arne Jun 23 2017, 05:02 PM
Got it! It runs again!
When dropping the engine, I must have bumped the new steel fuel lines, pushing the supply line forward a bit, which kinked the hose. I went ahead and put a longer hose with a loop in it to prevent this in the future.
Now I appear to be back where I was prior to the engine drop, except without the oil leaks!
Looks like you have caught up. Running, driving
and no oil leaks! Congrats!Yours still looks better so far. I have a ways to go on that part.
Posted by: euro911 Jun 23 2017, 06:55 PM
When dropping the engine, I must have bumped the new steel fuel lines, pushing the supply line forward a bit, which kinked the hose. I went ahead and put a longer hose with a loop in it to prevent this in the future.
Now I appear to be back where I was prior to the engine drop, except without the oil leaks!

Posted by: arne Jun 23 2017, 07:01 PM
Took it out for a short drive. It is running good, with a touch high idle speed. Clutch and transmission are nice. The old Koni reds are firm, but not harsh when paired with stock front bars and 100 lb. springs. Still rather smelly, the right heat exchanger is still burning itself clean even after all the degreasing I did on it. Brakes now feel good, but still a bit short of grab. But all in all, not too bad.
Posted by: JRust Jun 23 2017, 07:31 PM
I've got the pedal board in my truck now Arne. I'll have it at work on Monday & will leave it in my office. that way you can swing by whenever is convenient. I found a complete set of new FI hose in my stash. Did you replace any hoses?
Posted by: arne Jun 23 2017, 07:46 PM
Yeah, I've replaced all the fuel lines, don't need that. The only hoses that are not new are a few of the evap hoses.
Got any heat flappers? One of mine was "modified".
Shoot me a PM with the office address and I'll swing by Monday.
Posted by: arne Jun 27 2017, 09:45 AM
Had the car out and about yesterday, a couple of trips. Running quite well, very pleased. The ride with those way-old Koni reds is quite firm, but not harsh. I think once I get things all tied down inside so that every bump doesn't rattle it will be less noticeable.
Still no oil leaks seen, so it is looking like I may have that issue handled.
In any case, drove it over to see JRust and pickup the pedal board he had for me (thanks again for that, Jamie), and then out to talk to a couple of painters. The first one (who I've used on before with my 240Z) has shifted his business model and doesn't want to take on any full repaints. Since I am a repeat customer, he didn't want to say no, but the ballpark price he quoted made it obvious he didn't want the job.
Talked with a second painter, looks promising, going to be checking out some customer references over the next couple of days. Will probably start pulling all the trim, lights and glass soon.
Lastly, it was obvious that the fuel sender or gauge was bad. No matter what the situation, it showed a half tank. Even after I siphoned it out for the fuel line work. Half full. I had a spare sender from my 911 on the shelf, which a quick part number check showed was interchangeable. Connecting it up made the gauge show empty with warning light on with the sender vertical, and went to Full if I turned the sender upside down. So the gauge is good. Swapped in the sender last night, gauge now shows 3/8 and is probably close to correct now, so one less thing on the car that doesn't work.
Posted by: arne Jun 27 2017, 10:14 AM
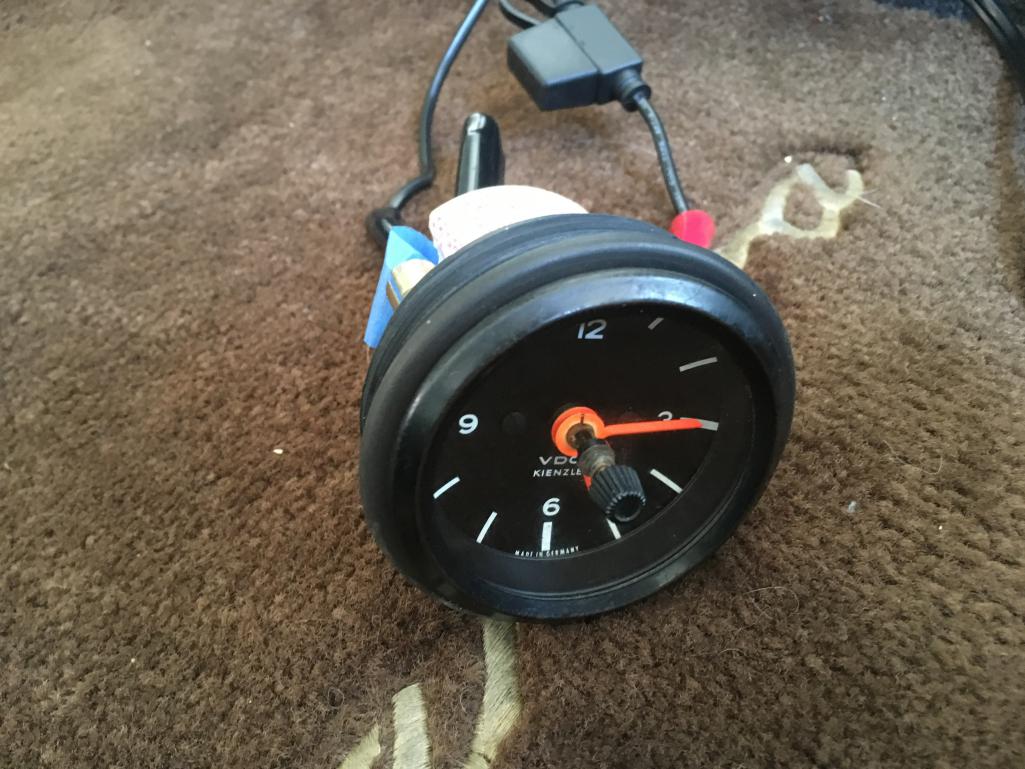
Speaking of things that don't work, it's really a pretty short list.Odometer - Fixed by scribing the shaftClock - Fixed with a new solder fuseTemp gauge - Fixed with a good cleaning
Parking brake ratchet
Seat belts don't retract wellPassenger exterior door handle - ReplacedRear defroster
I thought I only had one working horn, since it sounds like a single tone, not high and low. But it turns out that both ARE working, but both are apparently the same, not one high and one low. Will probably want to correct that at some point.
I think that's it. All the lights, everything else I've checked seems to work.
Posted by: Cevan Jun 27 2017, 10:46 AM
Get 12mm copper plated exhaust nuts. They are easier to install than 13's.
You might also want to replace the ss soft brake lines with new rubber ones. SS don't last forever - the rubber inside can still collapse. It might help your brake issue.
I concur. Now is the time to replace those rear brake lines with the engine out.
Posted by: euro911 Jun 27 2017, 04:40 PM
Odometer
Clock
Temp gauge
Parking brake ratchet
Seat belts don't retract well
Passenger exterior door handle
Rear defroster
I thought I only had one working horn, since it sounds like a single tone, not high and low. But it turns out that both ARE working, but both are apparently the same, not one high and one low. Will probably want to correct that at some point.
I think that's it. All the lights, everything else I've checked seems to work.
Here's a write-up I did on how to fix the ODO issue: http://www.914world.com/bbs2/index.php?s=&showtopic=312297&view=findpost&p=2500537
... and here's a thread on the 912BBS for the clock repair: http://www.912bbs.org/vb/showthread.php?38430-My-67-clock-repair-with-small-video&highlight=Clock+solder
Someone on this board did a write-up on the seat belt issue ... you'll have to do a search for it, unless someone remembers where to find it.
Posted by: arne Jun 27 2017, 04:56 PM
Thanks, Mark. I have dealt with the odo issue on prior German cars. Hardest part is to get the bezel off without ruining it. I repaired a clock on one of my 240Zs in the past, figure this is probably similar. And I had already seen the seatbelt fix thread, will be doing that shortly.
Actually, the one that bothers me most is the parking brake handle. I've looked at that already, fear I'm going to need a replacement.
Posted by: JRust Jun 27 2017, 10:10 PM
Speaking of things that don't work, it's really a pretty short list.
Passenger exterior door handle
Rear defroster
I've got an extra passenger door handle. I also have 2 rear defrost windows if need be. For paint I used a guy in Junction city. He repainted my passenger side on my car after my snafu with hydroplaning into guard rail
 . My synergy green metallic I thought would be impossible to match. Guy absolutely nailed it. He does more molar restorations besides usual insurance work. He isn't cheap but does excellent work. I want to say a full repaint of a 914 he quoted me 10k. That is for an Excellent paint job. After having 2 different 5k paint jobs that sucked. Dbl that for a pristine one is damn cheap
Posted by: arne Jun 28 2017, 08:30 AM
I'll send you a PM on the handle, Jamie. Not sure yet if it's the handle or something disconnected/broken inside the door. Will know for sure in a few days.
The painter I'm talking with is well known around here in the British car community, but not much beyond that. There are many MGs, Morris Minors, early Minis and the like running around these parts that he has painted. The owners of those cars are universally happy with his work, and his prices are realistic.
Posted by: euro911 Jun 28 2017, 02:53 PM
Tim (timothy_nd28) is the gauge guru on this board ... you might ask him how he removes and re-crimps the bezels
Posted by: arne Jun 28 2017, 09:18 PM
Disassembly has begun. This appears to be a recurring theme - I buy a car that doesn't run, then I make it drivable, then I take it apart, then I make it drive again, then I take it apart...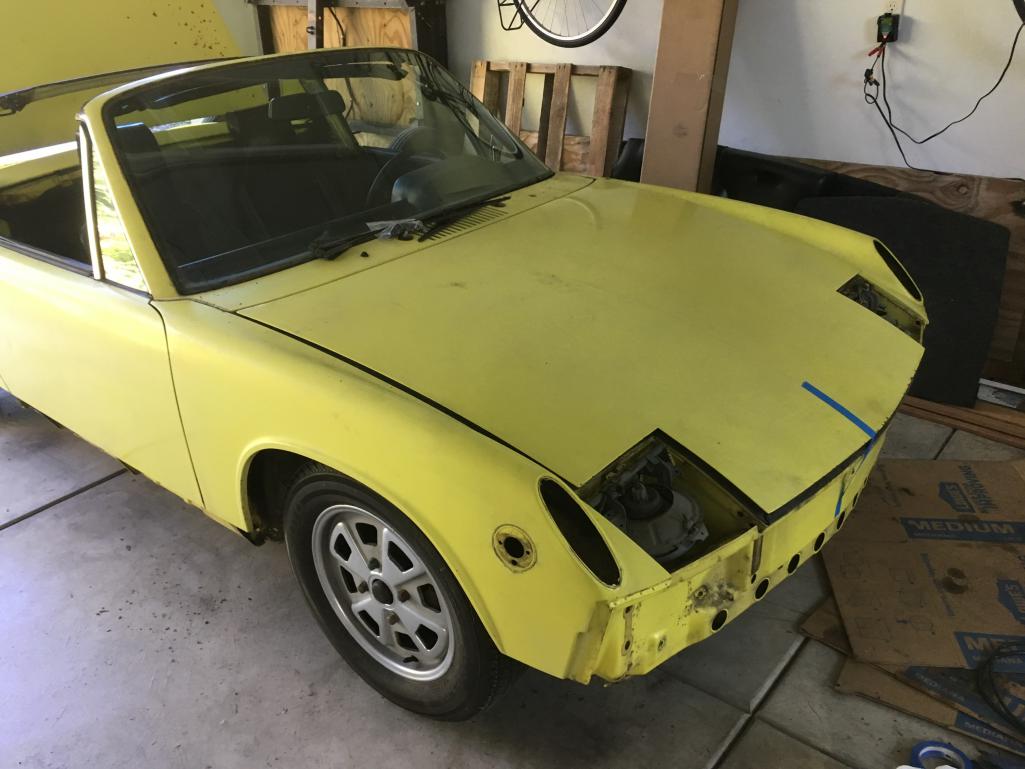

Posted by: arne Jun 29 2017, 05:48 PM
More...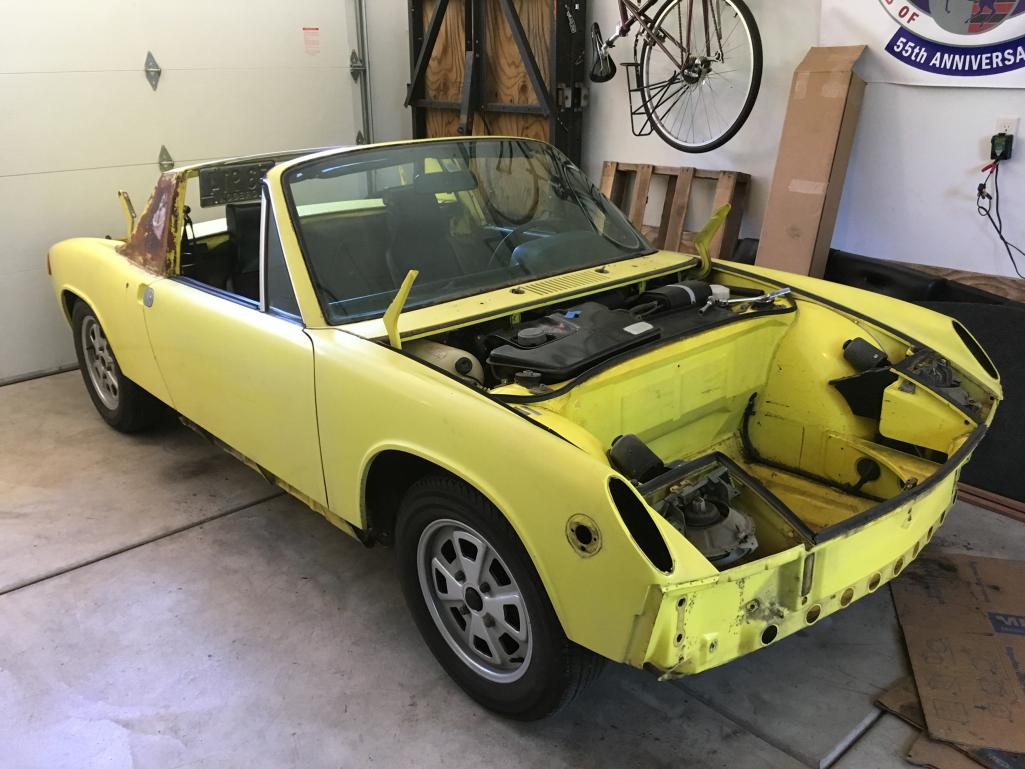
Posted by: euro911 Jun 29 2017, 07:34 PM
That's precisely why one needs two of them ... one to drive while restoring the other one 
Posted by: arne Jun 29 2017, 07:56 PM
That's precisely why one needs two of them ... one to drive while restoring the other one

Posted by: euro911 Jun 29 2017, 08:29 PM
Nice. Just lifted my '66 up in the air this afternoon ... getting ready to send some calipers up to Eric for 'restoration' 
Posted by: arne Jun 30 2017, 01:47 PM
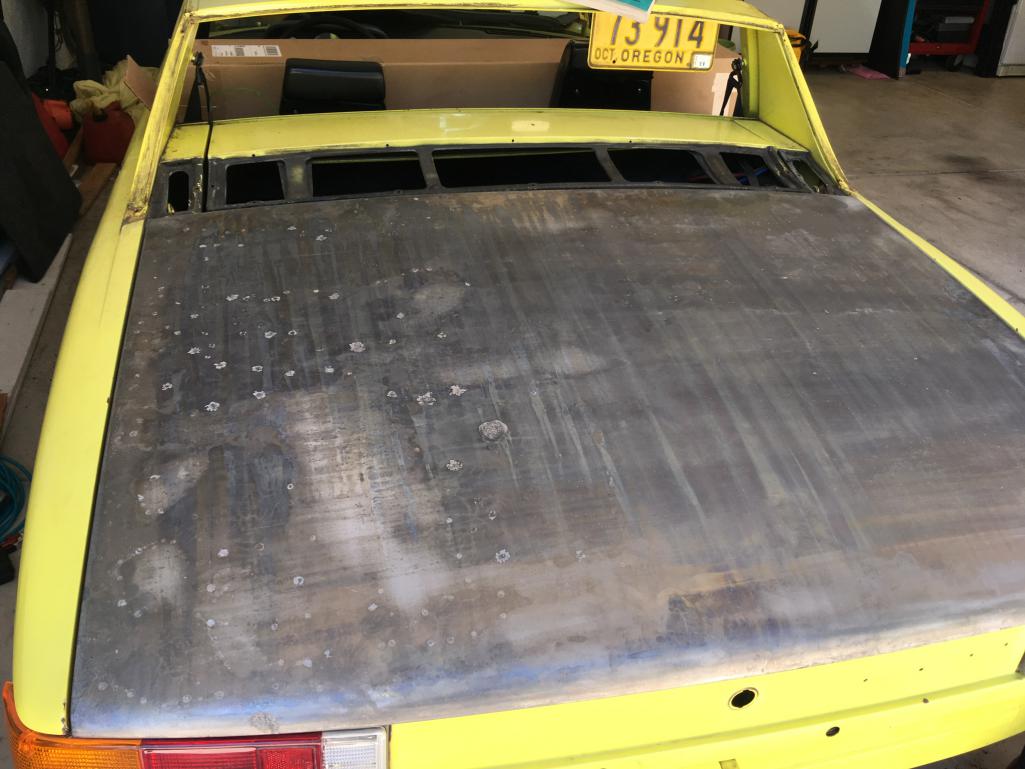
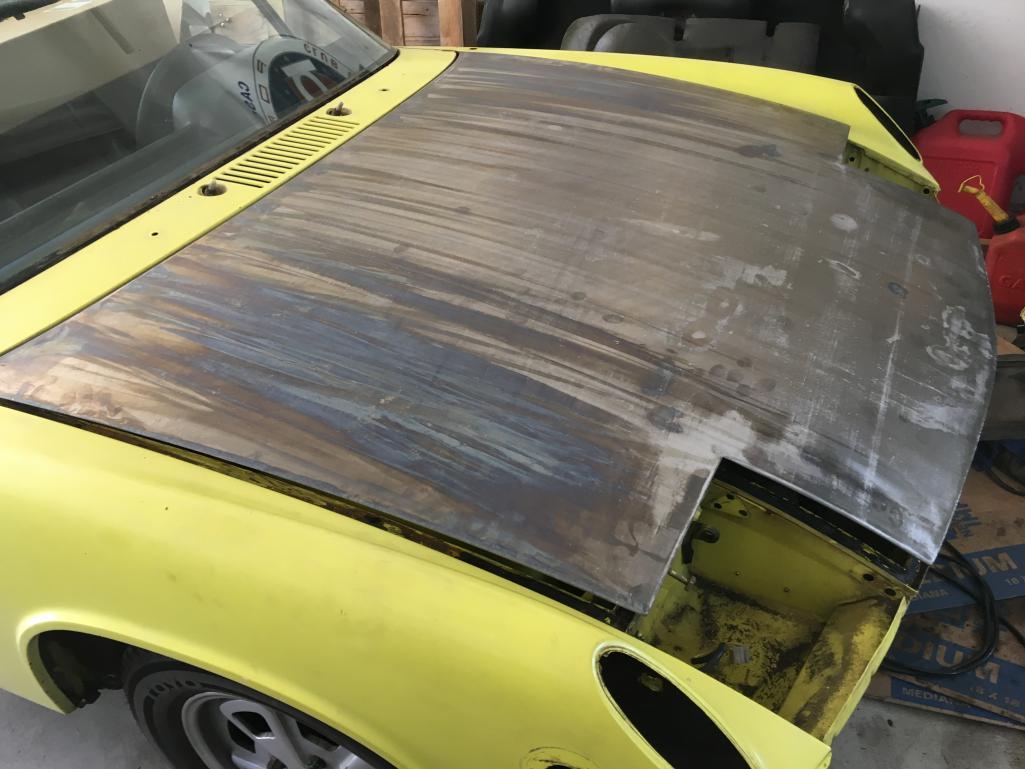
Dropped off both front and rear deck lids to be base/acid stripped. Handy that these guys are local. http://metaldipping.com
This will eliminate any rust in the crimped seam between the frame and skin. Highly recommended by body and paint people.
Also, have soaked both seat belts in a bucket of hot, soapy water, rinsed and let dry. They work amazingly well now. Very happy with this.
Posted by: arne Jul 7 2017, 04:27 PM
Disassembly and paint prep continues. Aiming for mid-week to get into paint shop. Can't work on it tomorrow because we'll be in the 911 on a PCA drive. More work on Sunday, though, and the windshield should come out on Monday.
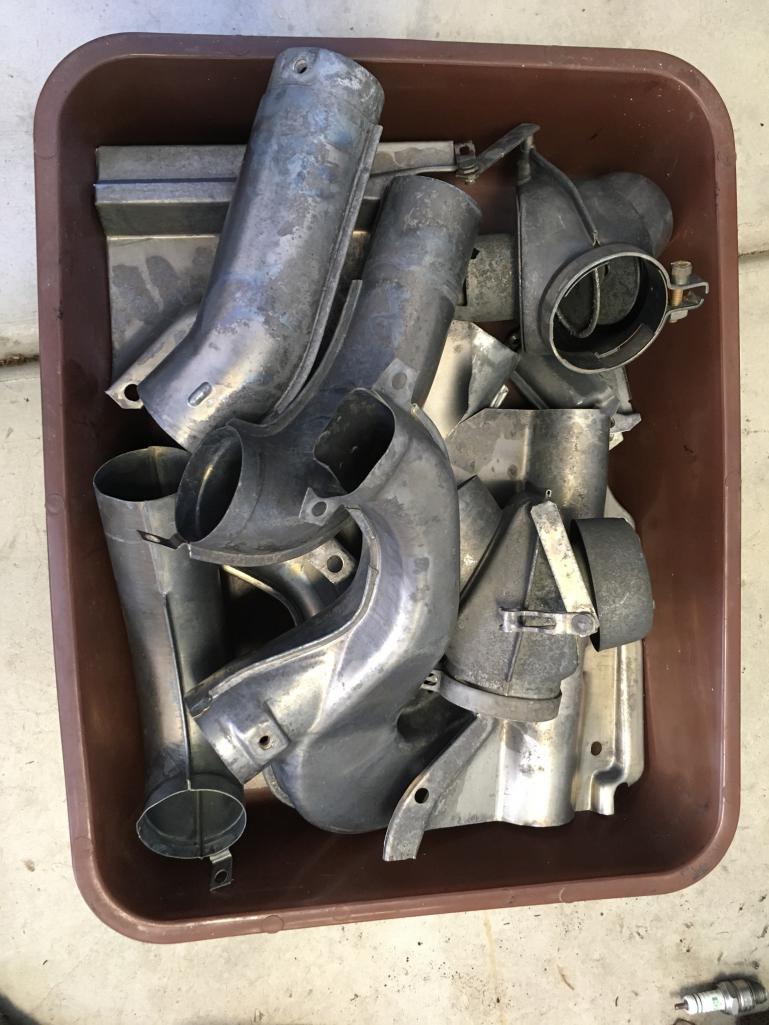
Both lids back from the stripper. Impressive! No filler found in either lid. Had the heater parts stripped too, way easier than me cleaning all the built up oil crud off of them.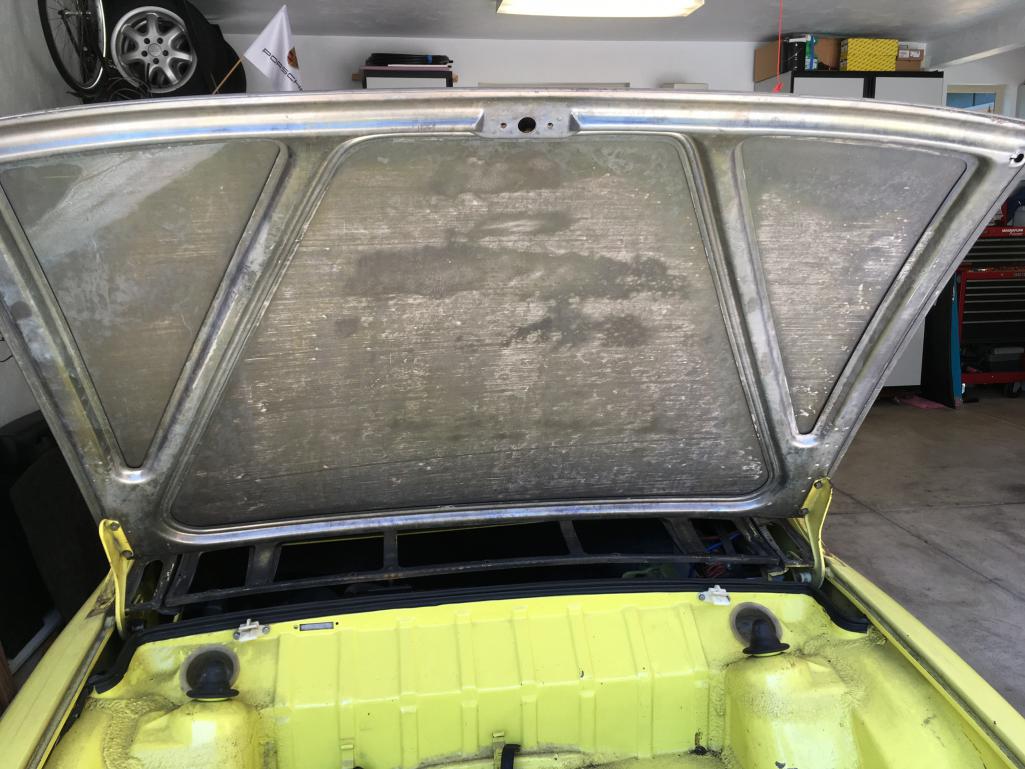
Posted by: arne Jul 7 2017, 05:15 PM
Front lid.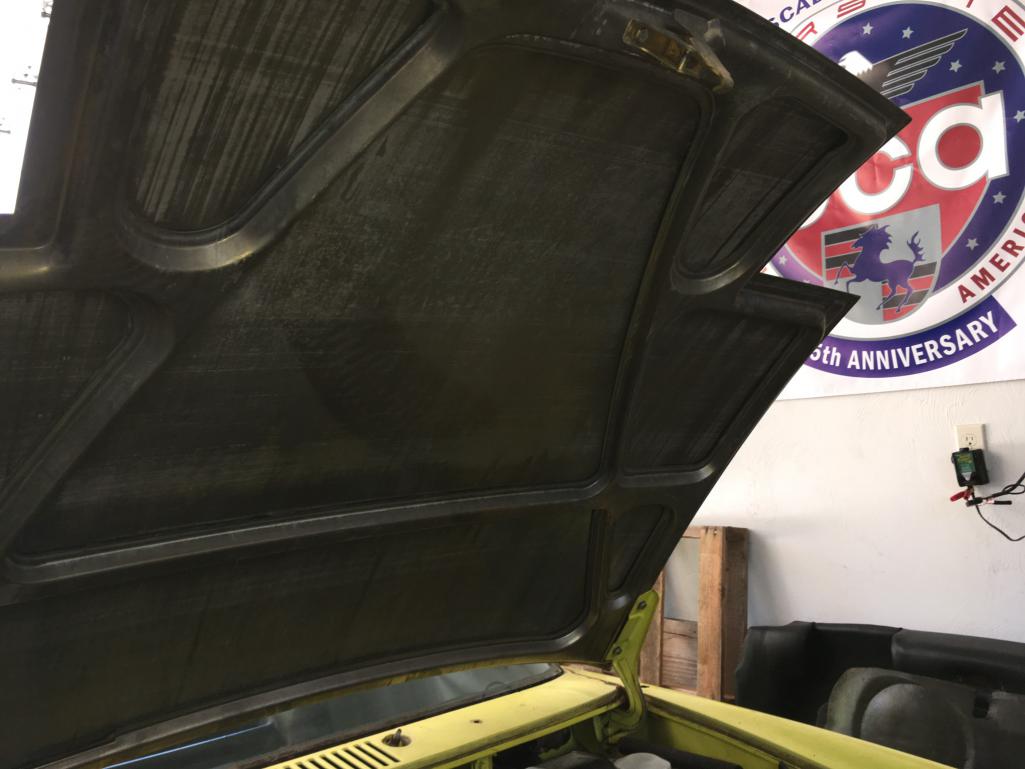
Posted by: Cairo94507 Jul 7 2017, 05:34 PM
Nice lids for sure.
Posted by: arne Jul 10 2017, 06:02 PM
Pulled the final bits out yesterday, then had the windshield removed today. Good news there, no new rust found under the glass. Goes to the painter tomorrow morning.
Posted by: euro911 Jul 10 2017, 07:30 PM
Nice. You're making a lot better progress than me 
Posted by: Calvinator2016 Jul 10 2017, 07:30 PM
Pulled the final bits out yesterday, then had the windshield removed today. Good news there, no new rust found under the glass. Goes to the painter tomorrow morning.
Looks like you are going to drive it there.
Posted by: arne Jul 10 2017, 07:37 PM
I'm pleased that I haven't found much other rust to deal with, just a little in the front trunk seal channel. Add to that the fact that the car is VERY straight, so perhaps this will go fairly quickly.
Posted by: Calvinator2016 Jul 10 2017, 07:51 PM
I'm pleased that I haven't found much other rust to deal with, just a little in the front trunk seal channel. Add to that the fact that the car is VERY straight, so perhaps this will go fairly quickly.
The progress you are making on this car in such a short time is remarkable. This is going to be a great car for the lucky person to acquire it once you have completed the restoration.
Posted by: arne Jul 10 2017, 10:25 PM
Agreed on both counts. It is progressing much faster than I planned/expected, and it is shaping up to be a nice example. Not pristine or show quality, but a really great weekend driver.
Posted by: arne Jul 11 2017, 06:06 PM
Dropped it off with the painter today. Initial discussion went well. Side marker wart holes will be welded up, everything else fairly standard. I will be checking back with him later this week.
In the mean time, I've got a lot of parts to clean, and a whole pile of new rubber and such to order. "Hello, 914rubber.com?"
Posted by: arne Jul 16 2017, 07:26 PM
I've been on the road for a few days, but some stuff was done before I left. In general, I'm going through the piles of removed parts, sorting, cleaning, refurbishing and then setting them aside for later. I've repaired the clock (running fast for now, slowly backing off the adjustment), had the rip in the driver's seat repaired, and spiffed up the headlight mechanisms and the engine lid grill. Will be working on the tail light housings next. Also have begun ordering the parts I will need for reassembly. SMC has a nice sale on the windshield trim parts now, so that is already ordered. Will be placing a good sized order with 914rubber.com in a few days, as soon as I finish compiling the list of needed parts.
Not many pictures of the stuff. A before-after of the seat repair, and a boring picture of the clock ticking away.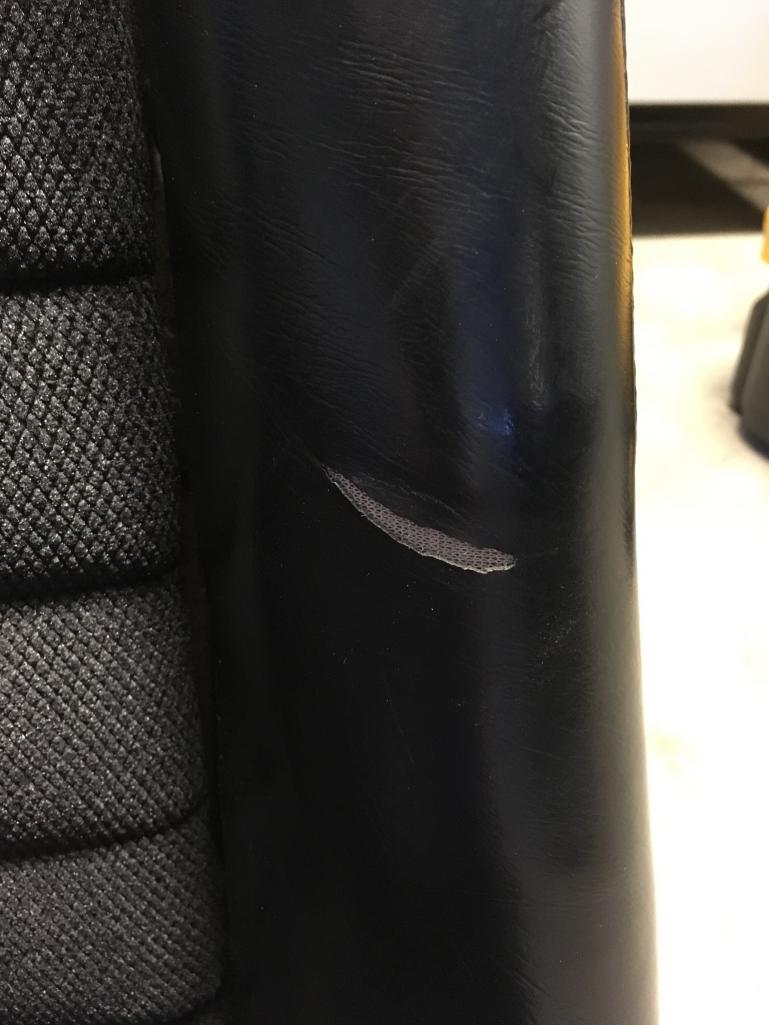
Posted by: arne Jul 26 2017, 01:30 PM
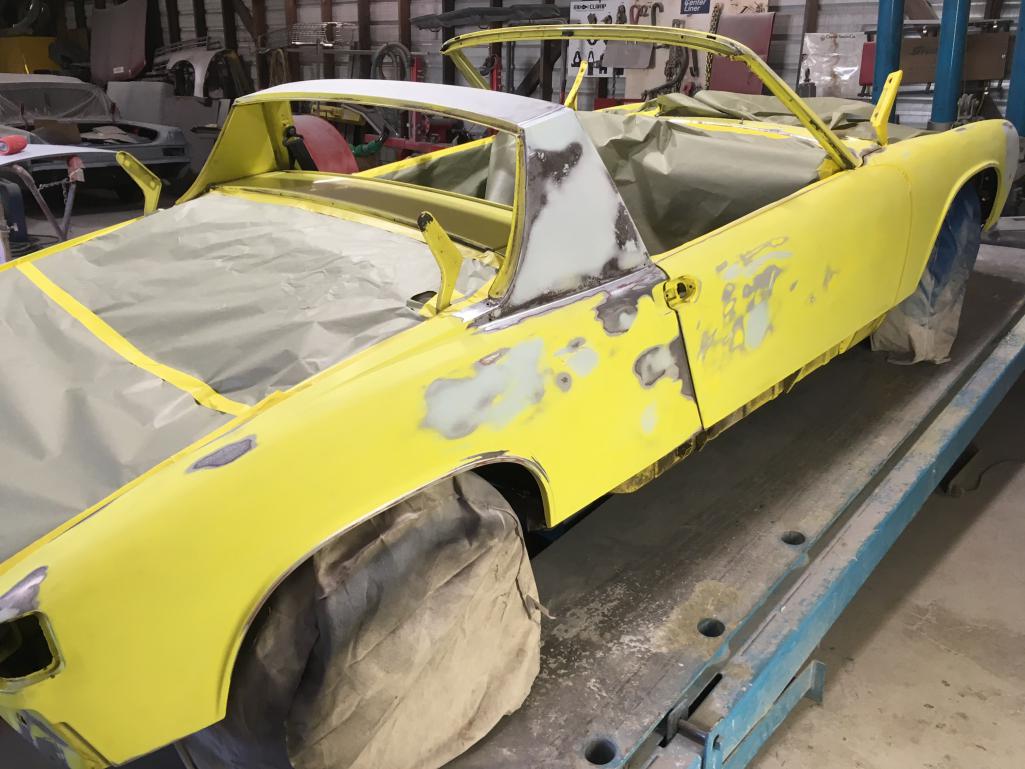
No surprises so far...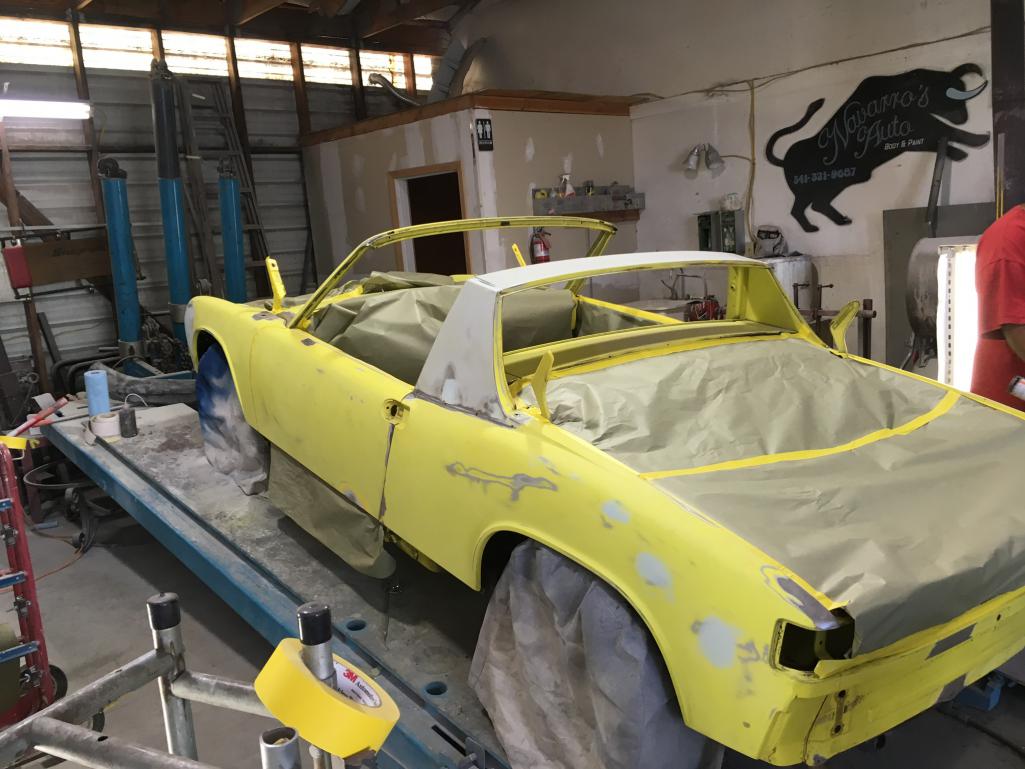
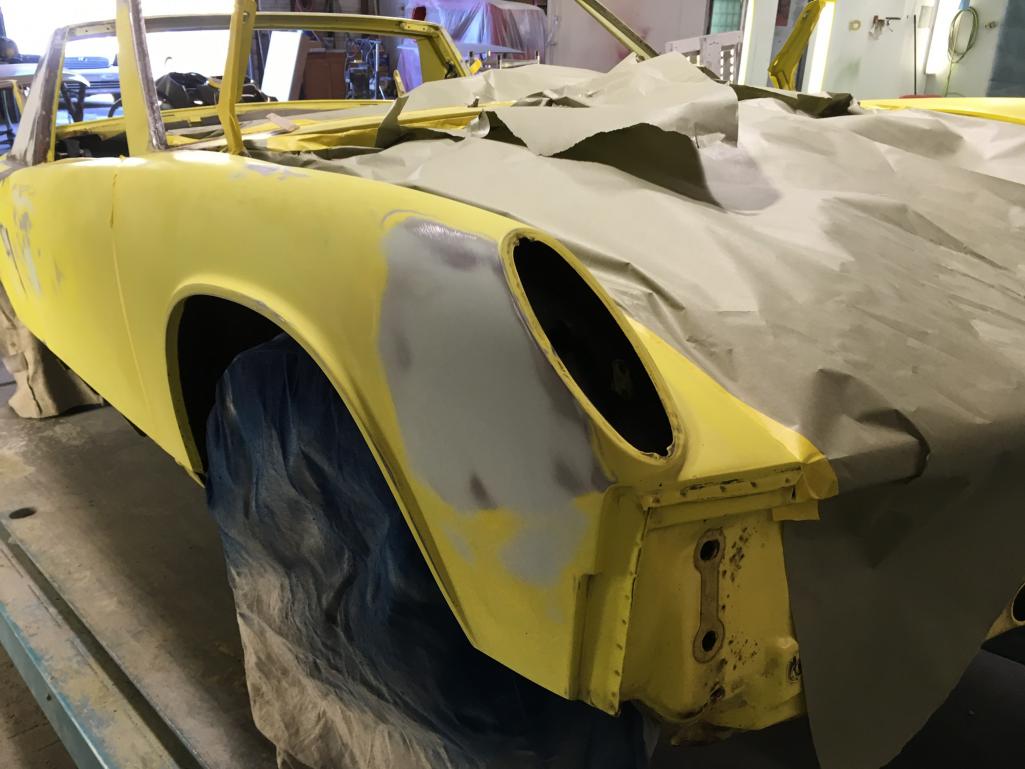
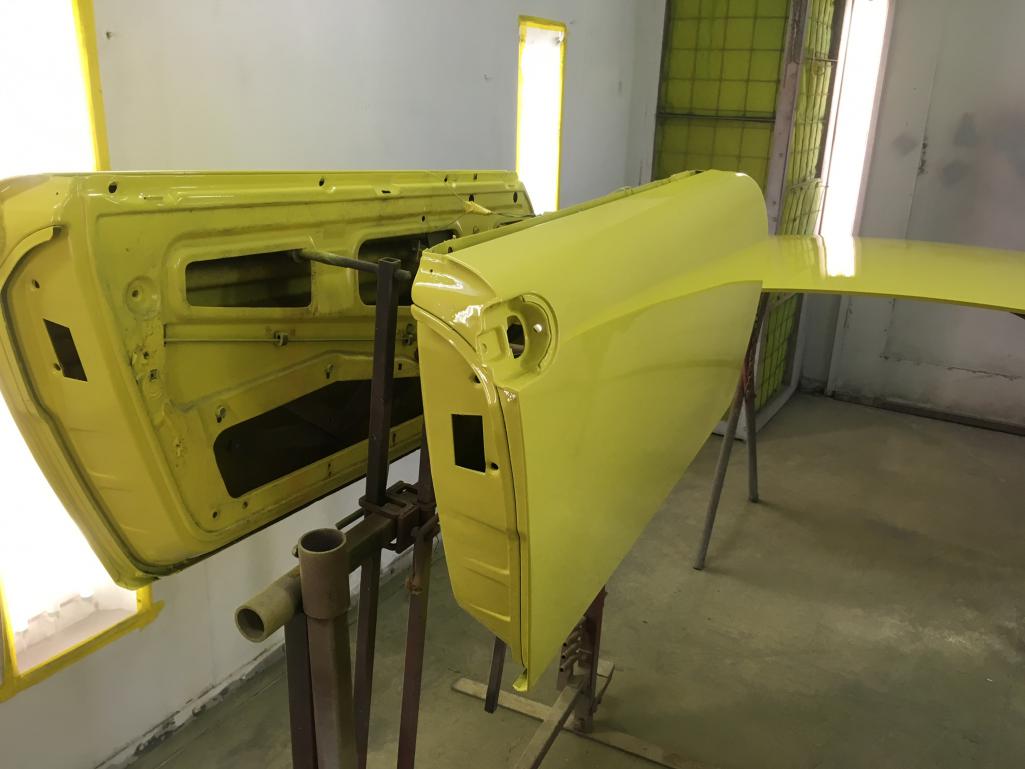
Posted by: arne Aug 1 2017, 12:30 PM
More progress. Should be back in my garage in a few days.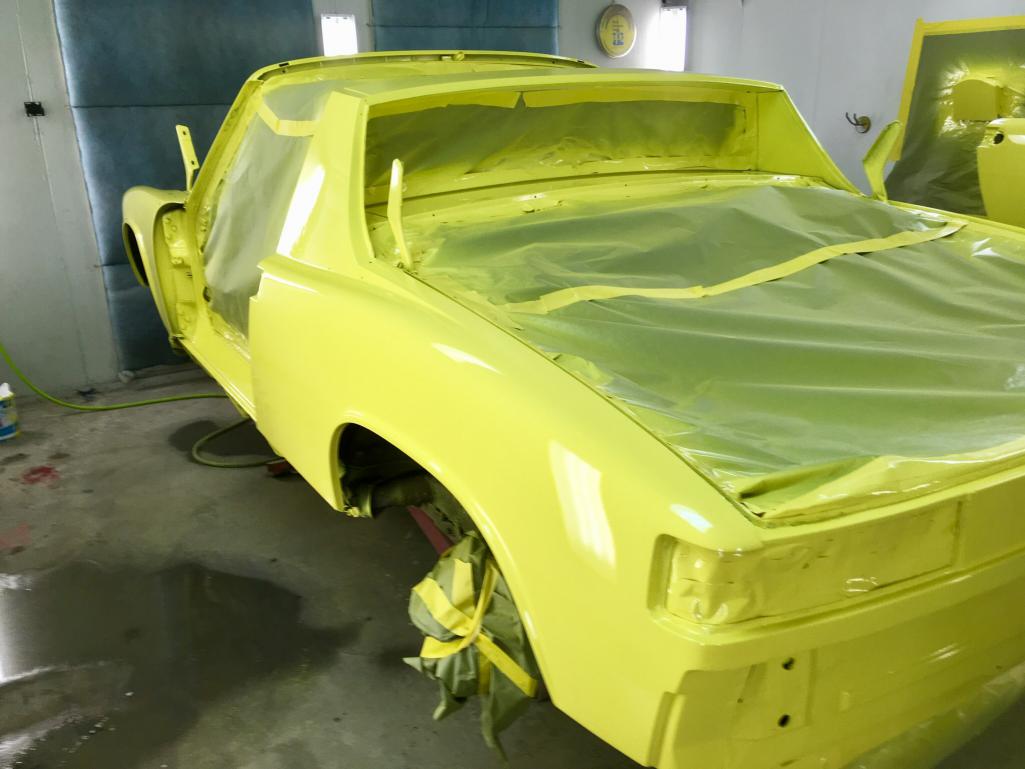
Posted by: 914 7T3 Aug 1 2017, 12:47 PM
Outstanding!!!

Posted by: JRust Aug 1 2017, 12:56 PM
Nice! Looking good Arne
Posted by: Ed_Turbo Aug 1 2017, 02:04 PM
Drove it to the local PCA monthly coffee gathering today. (For any of you near Eugene, 1st Saturday of each month, 10:00 at Market of Choice at 29th & Willamette. Park way at the north end in back.)
Admitting that it still has some needs, especially in the suspension, I can see that these cars are a riot to drive, even with just a stock 2.0. This is getting fun.
Tell Aunt Tuty to move that friggin Corolla out of there man

Posted by: arne Aug 1 2017, 02:06 PM
Finalized a good sized order with Scott at 914rubber. Much new stuff. Rubber, carpet, vinyl, etc.
Reassembly will be slower than progress so far, both due to the need to be careful and do it right, and also because I will be on the road for a few days in the middle of the month at Werks in Monterrey.
Posted by: rgolia Aug 1 2017, 04:02 PM
love that color....just a little biased of course
Posted by: arne Aug 1 2017, 04:52 PM
love that color....just a little biased of course
Posted by: euro911 Aug 1 2017, 05:12 PM
... and a lot of little flying bugs
Posted by: arne Aug 1 2017, 05:47 PM
... and a lot of little flying bugs
Speaking of, the painter used tinted sealer before paint, rather than white. The sealer coat is yellow too, so rock chips aren't going to be as obvious.
Posted by: arne Aug 1 2017, 06:07 PM
Also have noted I still have a small oil drop from the taco plate, so I ordered a billet replacement from Boatyard Buses (http://www.914world.com/bbs2/index.php?showuser=15293) in the UK. Will dump the oil and install it sometime prior to getting the car assembled.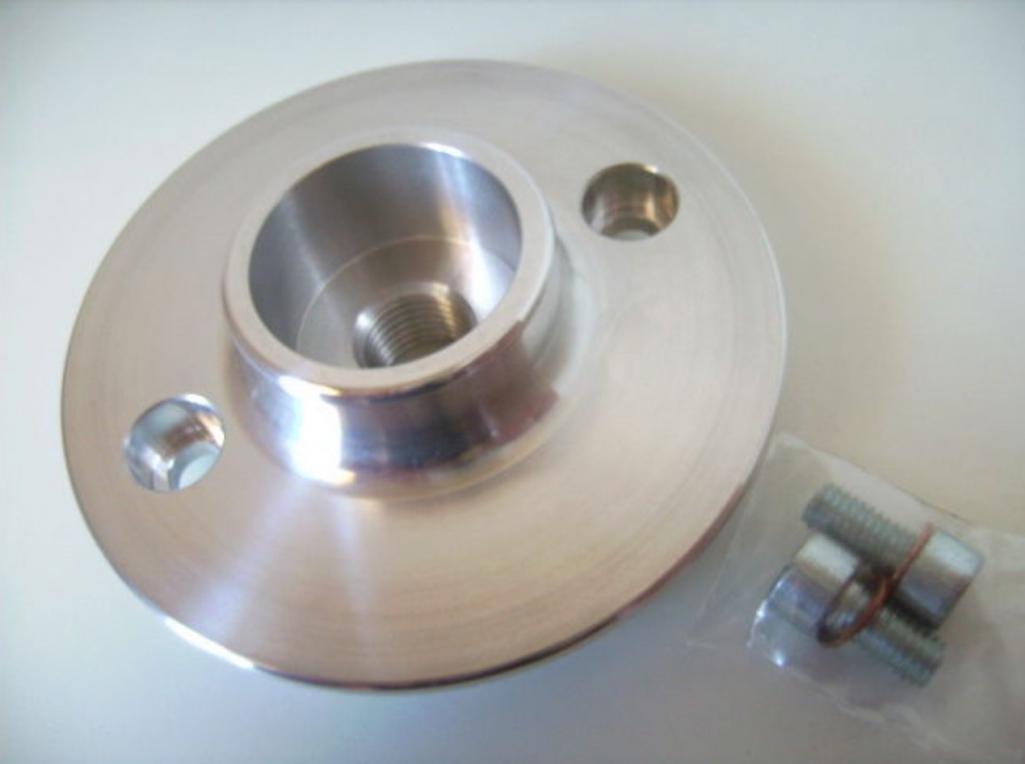
Posted by: porschetub Aug 1 2017, 06:12 PM
Going really well ,you are going fast,nice solid car well done, .
Posted by: euro911 Aug 1 2017, 09:03 PM
Posted by: arne Aug 1 2017, 09:22 PM
Posted by: euro911 Aug 1 2017, 10:20 PM
Looks like the price has gone up a little in the past 4 years.
VDO # 323-055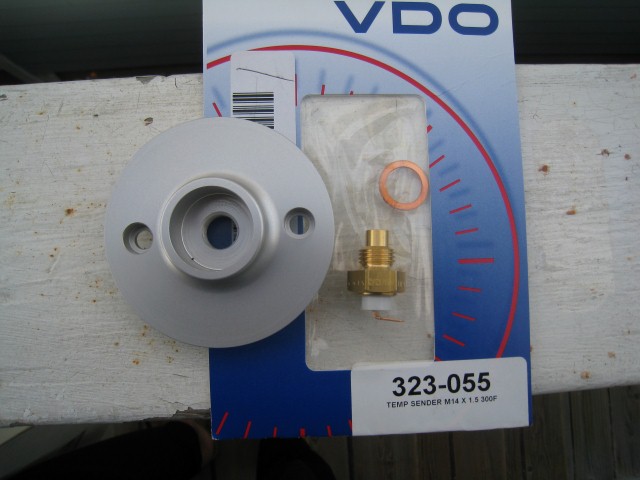
Looks like Amazon might have the best price at the moment ... https://www.amazon.com/VDO-323-055D-323055-Temperature-Sender/dp/B00029XDSU
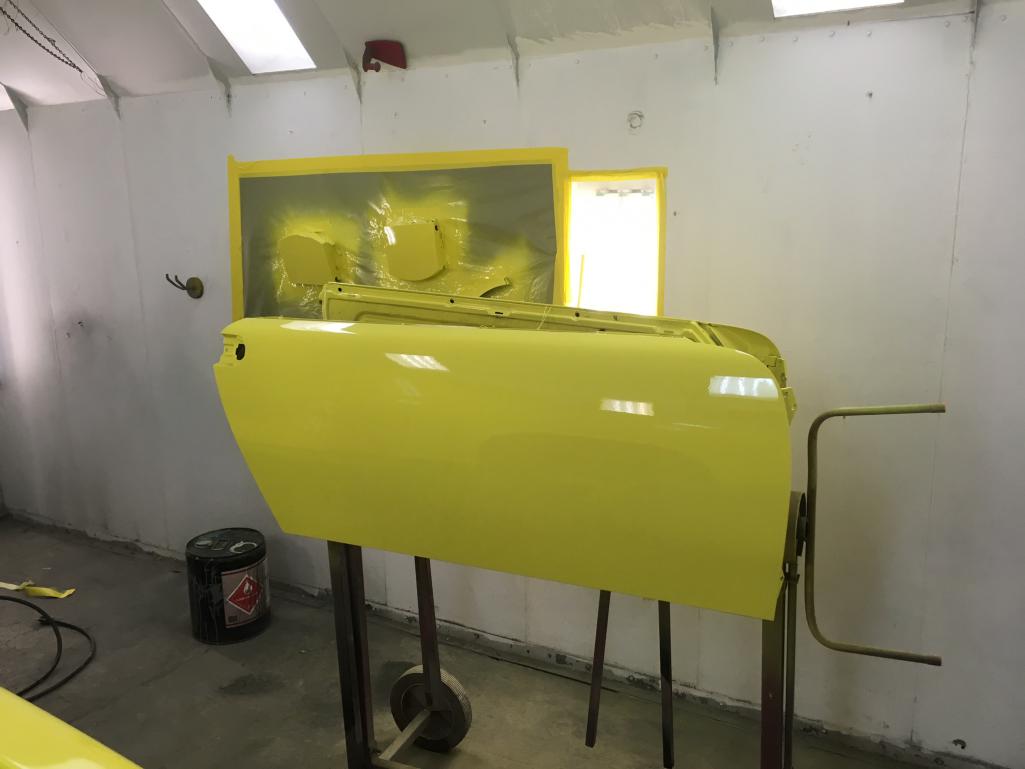
Posted by: arne Aug 2 2017, 11:13 AM
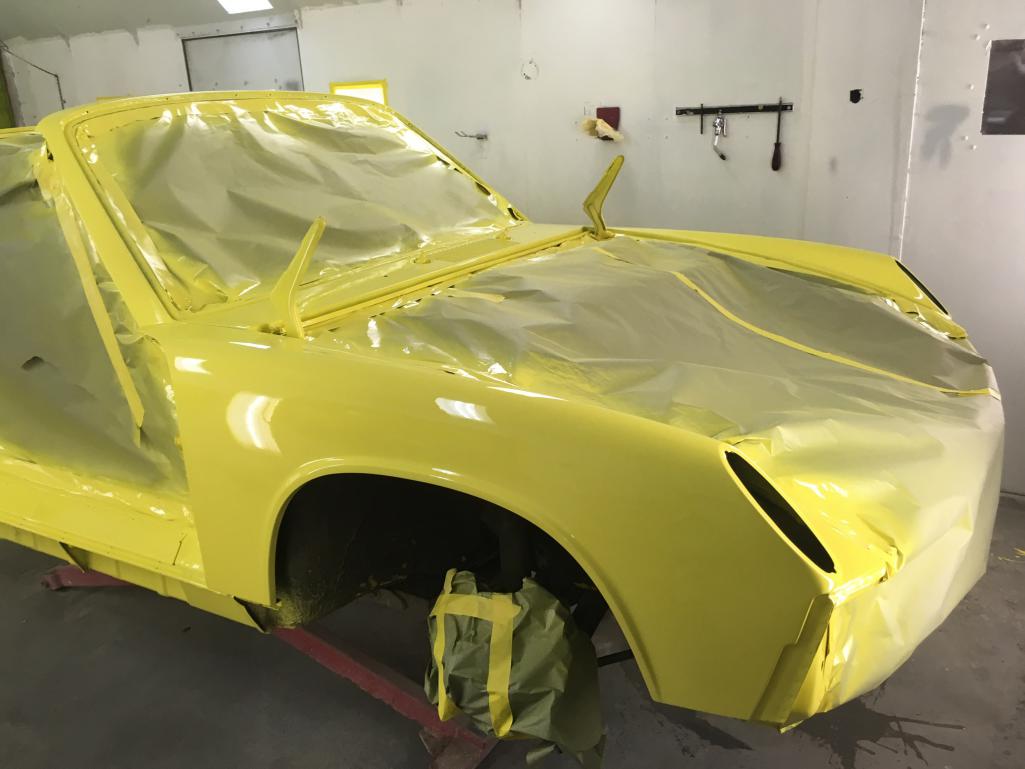
Out of the booth...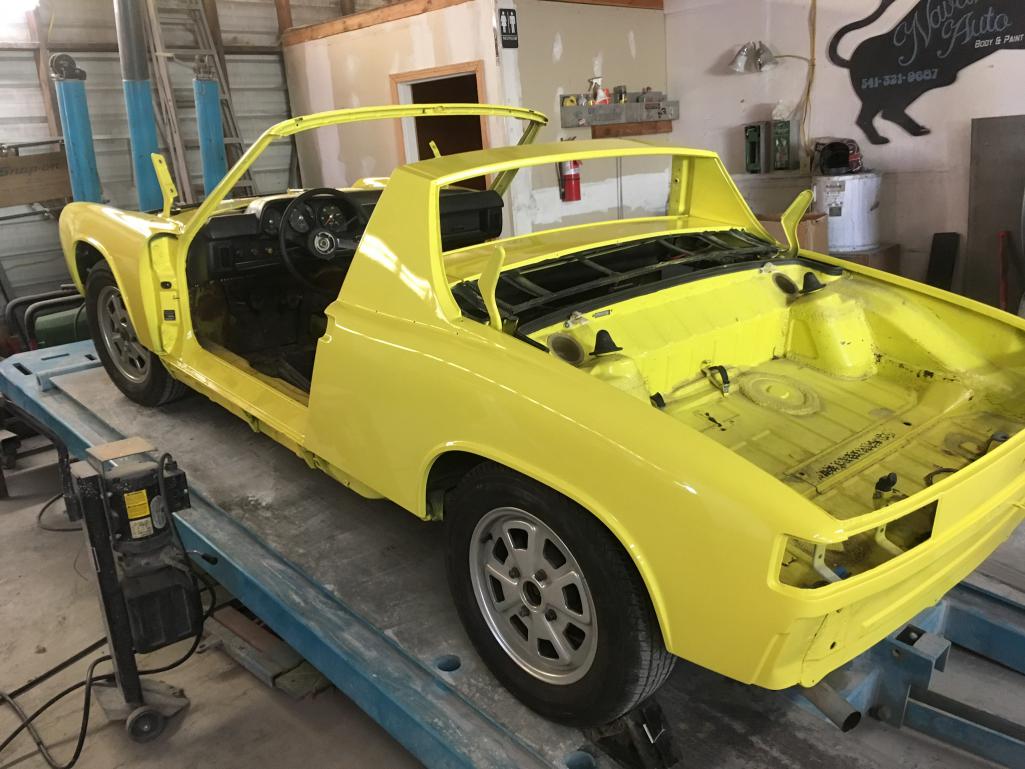
Posted by: arne Aug 2 2017, 08:58 PM
And a big box from 914rubber arrived today. Carpet, seals, other misc. stuff. Assembly set to begin soon.
Posted by: euro911 Aug 2 2017, 09:45 PM
Your car looks great already
Wished I could afford a nice new paint job
Posted by: arne Aug 7 2017, 01:58 PM
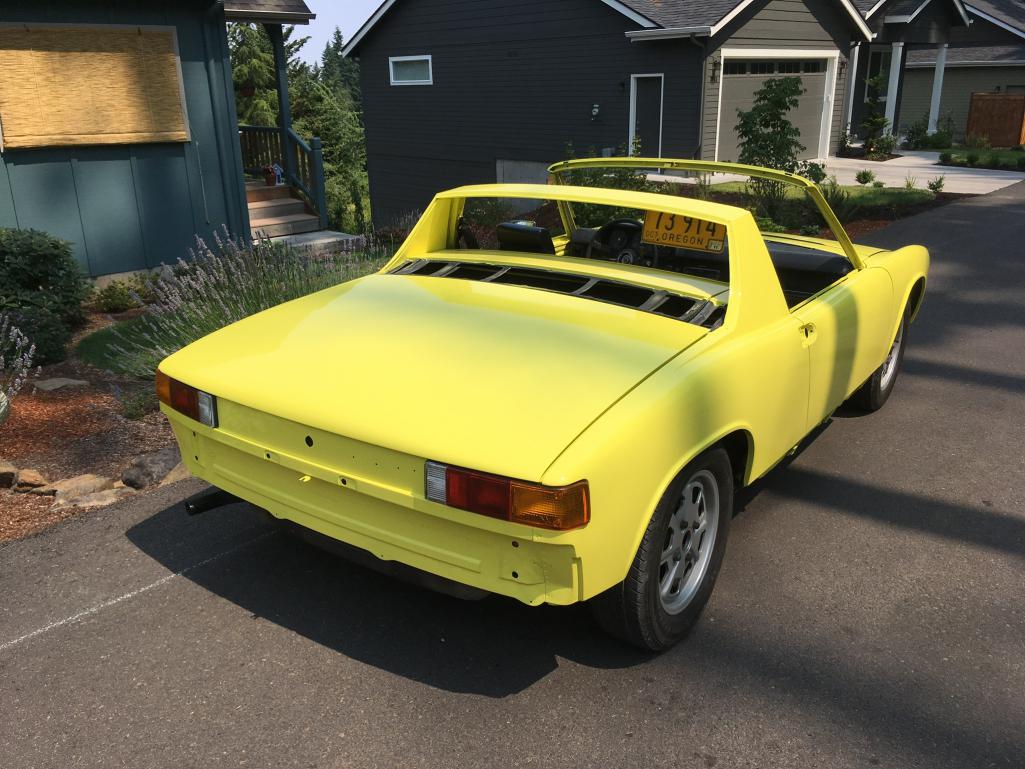
Brought it home from the paint shop today. Haven't had time to really inspect it closely yet, but what I've seen so far is really good. Very pleased.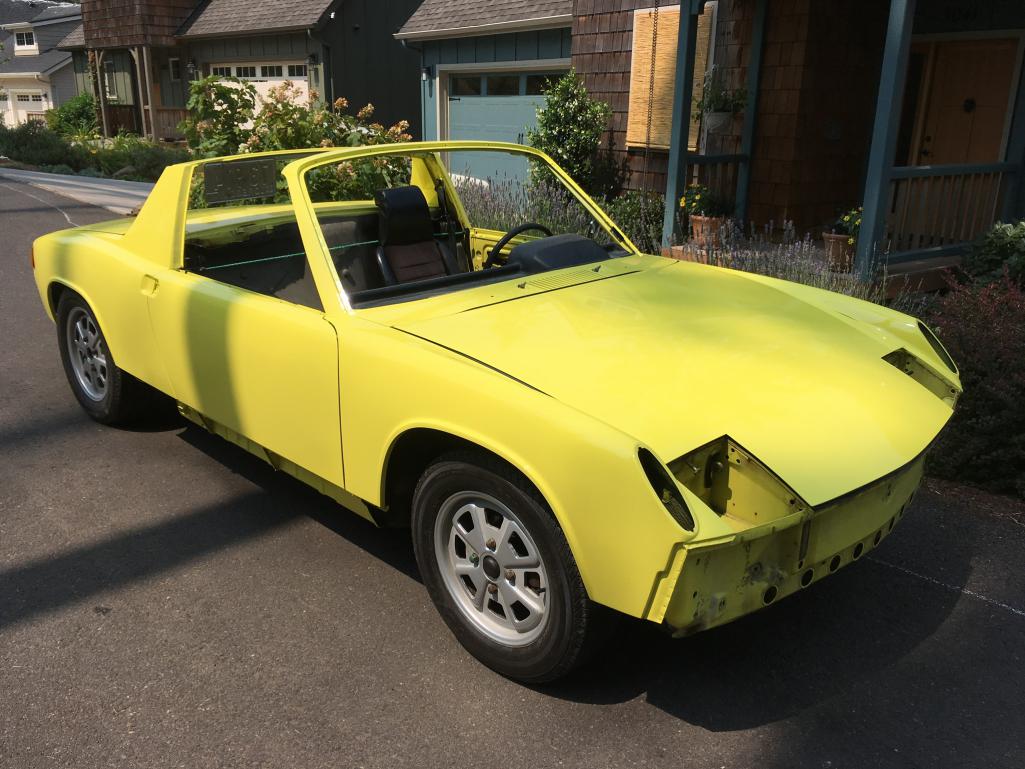
Posted by: arne Aug 7 2017, 09:37 PM
Reassembly has begun. Will have some time to work on it tomorrow, but perhaps not a lot the rest of the week. Then leaving in the 911 for Werks in Monterrey middle of next week. So progress will slow down some shortly.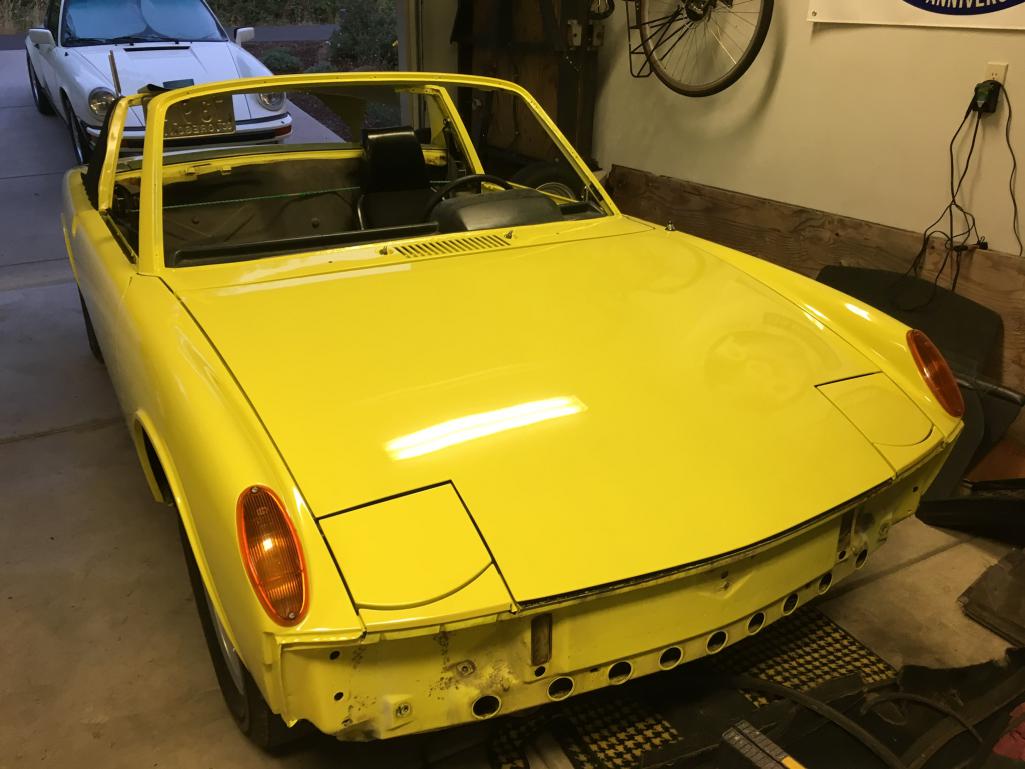
Posted by: arne Aug 8 2017, 08:41 PM
All the lights except the license plate lights in back are on and tested. Horns are back as well. Rear deck lid seals are on, and I spent a fair amount of time today repainting the black on the deck lid and then refitting the refreshed engine grill.
Hoping to have time to start on the door latch hardware tomorrow, but I may have to shuttle a friend down to pick up his just completed 911T targa. If so, may not get very far on mine tomorrow.
Pics...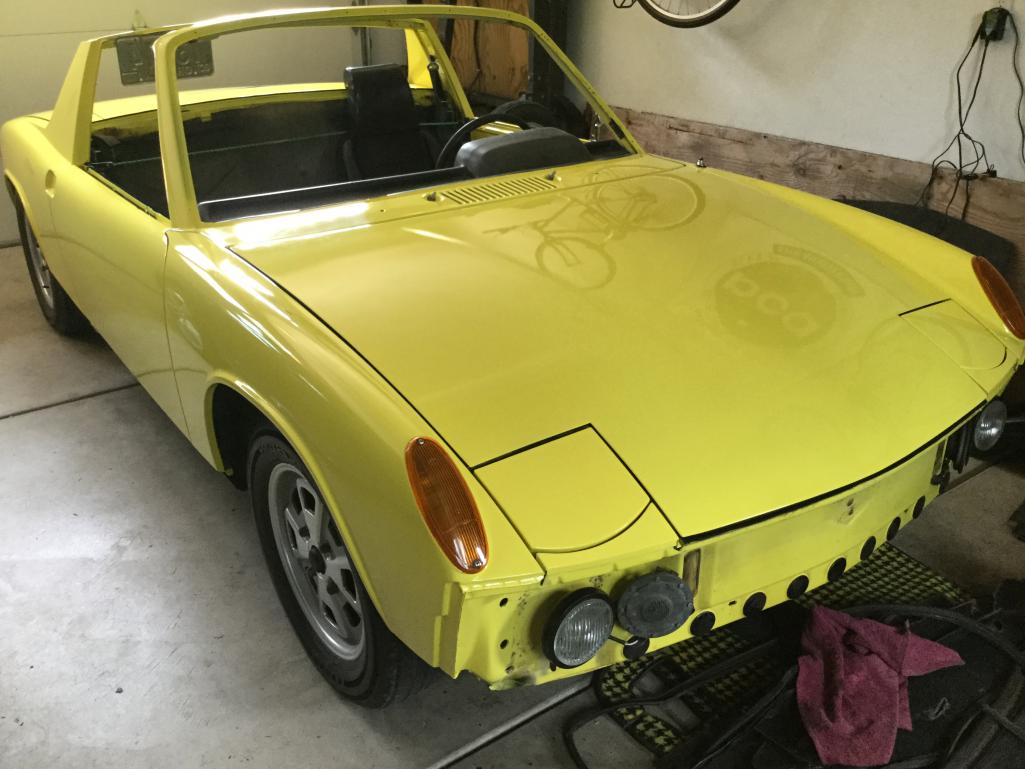
Posted by: Cairo94507 Aug 8 2017, 09:33 PM
Very nice and just exciting to see another one going back together.
Posted by: arne Aug 11 2017, 06:11 PM
Starting to look like a functional 914 again. Still a long ways to go, though. I've been stalling on a couple of jobs, tackling the easy stuff first. But soon I will need to reinstall the rear glass and glue down the sail vinyl. Luckily, there are good how-to threads on both jobs.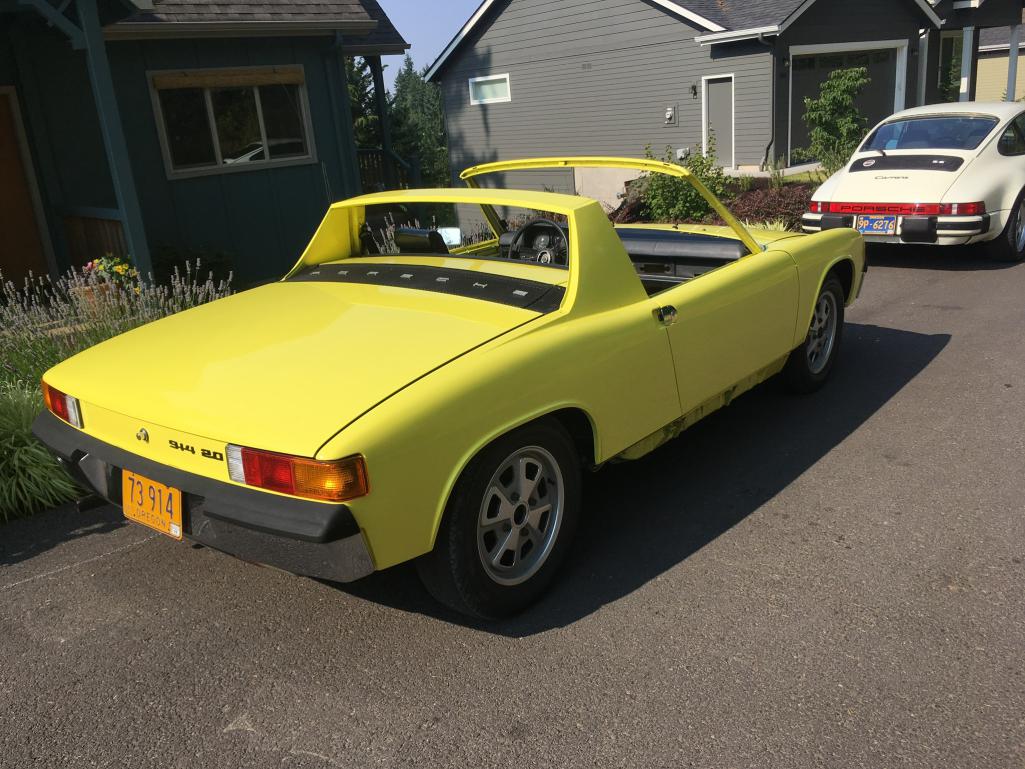
Posted by: arne Aug 11 2017, 06:12 PM
Posted by: euro911 Aug 11 2017, 07:06 PM
Read up on how to lower the front suspension
Posted by: arne Aug 11 2017, 07:13 PM
Looks worse in the wide angle photos than it is, but yes, it does need to come down about a 1/2" in front. It's on my to-do list.
Posted by: arne Aug 13 2017, 06:23 PM
Speaking of things that don't work, it's really a pretty short list.
Temp gauge
Parking brake ratchet
Rear defroster
I thought I only had one working horn, since it sounds like a single tone, not high and low. But it turns out that both ARE working, but both are apparently the same, not one high and one low. Will probably want to correct that at some point.
I think that's it. All the lights, everything else I've checked seems to work.
As seen here, I've been working through the list as I assemble things. Today I repaired the odometer, although I haven't completely reassembled the speedo yet as I'm waiting for fresh paint on the bezel to dry.
Posted by: arne Aug 25 2017, 06:43 PM
Easing back into things now that I'm back home from Werks, and got the home stuff caught up.
Both front and rear valances have been refinished and installed, the front main trunk seal glued in, got the gauge cluster reassembled and ready to go back in. Have been gathering more parts, I may be getting close to done there.
Prepping to repair the rear defroster grid while the glass is still out of the car, then reinstall it. Sail panel vinyl sometime next week, I hope.
Dash will get some love too. New top pad is ready, but will need to glue on new basketweave vinyl while the pad is off. Then a new windshield, at which point I can begin putting the bulk of the interior back together.
I'm guessing completion around the end of October. Then 
Posted by: euro911 Aug 25 2017, 07:02 PM
Looks like you're making great progress
Posted by: arne Aug 26 2017, 03:35 PM
Looks like you're making great progress
Yeah, I'm pleased with how it is going so far. Working on de-rusting the lug bolts today, and the defroster grid repair.
Have determined the windshield washer leaks pressure (no fluid currently) at the column switch. Probably hose fatigue just like I found at every fitting so far.
Posted by: arne Aug 28 2017, 04:29 PM
Rear window is back in the car. The defroster grid repair epoxy that I'd had for some years was old, apparently beyond its shelf life, so a few of the repair spots didn't stick. Will have to deal with that later.
Lug bolts are now presentable, not rusty.
Dash top has been removed now, but I need to drop the steering column to replace the face basket weave vinyl before putting the new dash top in.
Got a friend coming over tomorrow to help with the first of the sail vinyl install.
New windshield should go in next week, or the following week for sure.
Posted by: Eric_Shea Aug 28 2017, 04:48 PM
Arne, you kicked this one in the ass. Great job.
Posted by: euro911 Aug 28 2017, 04:51 PM
Finding a good, working defrost glass is like finding hen's teeth. Whatever type of conductor they used just didn't hold up over time. I've had two of them and the 'opens' in them were too numerous to attempt repair - if it was even possible
I just carry a rag behind the seat 
Posted by: arne Aug 29 2017, 08:07 PM
Took a bit more of the dash apart today, to prepare for new basket weave. Still need to drop the column and pull the heater controls. Then I can glue, and finally start putting that all back together.
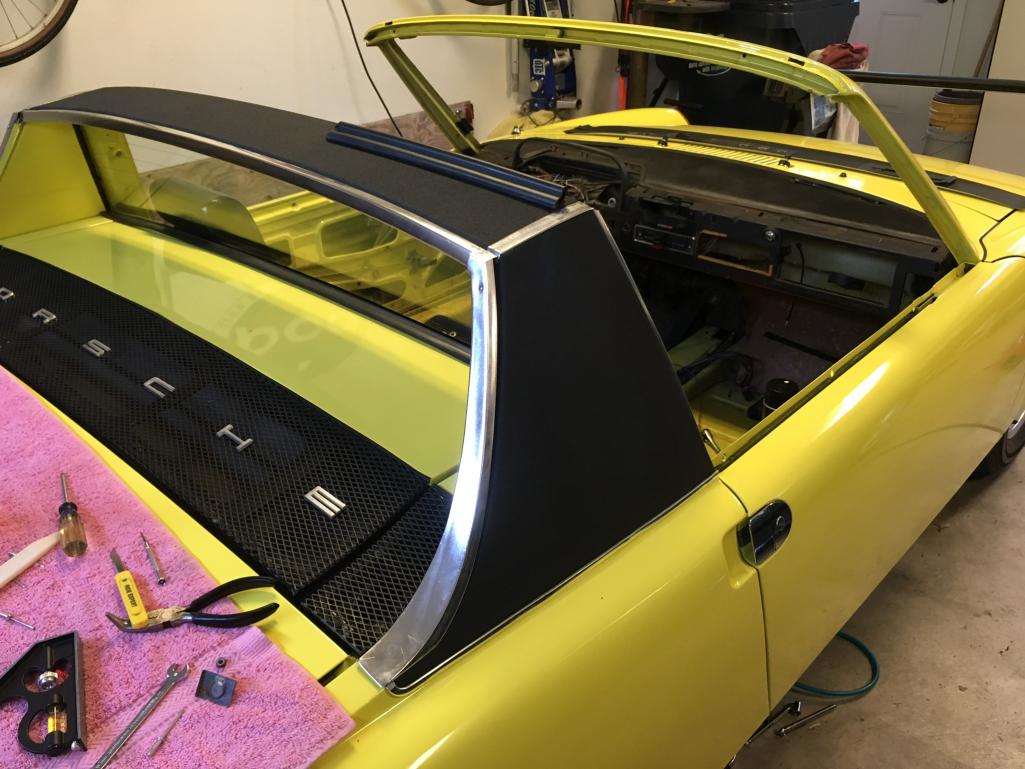
Then this afternoon, with help of one of my 911 owning friends, I got all the sail vinyl on. That black vinyl against the yellow paint looks the business!
Posted by: horizontally-opposed Aug 29 2017, 09:09 PM
Read up on how to lower the front suspension*
*But not before you put all of the trim and fixins' back on.
My car self-lowered quite a bit after reassembly. I think we weighed it before paint and it was ~1590 pounds as something you could still drive down the street.

Car is really looking great. Wow. And love love love the plate!
Posted by: horizontally-opposed Aug 29 2017, 09:14 PM
[quote name='horizontally-opposed' date='Aug 29 2017, 08:09 PM' post='2522237']
[quote name='euro911' post='2516052' date='Aug 11 2017, 06:06 PM']
Read up on how to lower the front suspension*
[/quote]
*But not before you put all of the trim and fixins' back on.
My car self-lowered quite a bit after reassembly. I think we weighed it before paint and it was ~1590 pounds as something you could still drive down the street.
Car is really looking great. Wow. And love love love the plate! With the right tires and ride height, this car will be a stunner. Already is…
Posted by: JRust Aug 29 2017, 09:27 PM
Looking kick ass Arne! Nice job. I can't wait to see it in person all finished
Posted by: euro911 Aug 29 2017, 10:19 PM
My car self-lowered quite a bit after reassembly. I think we weighed it before paint and it was ~1590 pounds as something you could still drive down the street.
... Posted by: horizontally-opposed Aug 29 2017, 11:20 PM
Paint, bling and gizmos added 500 pounds?
More like 300-400. I'd need to go back and see if I can find those scale readings, but 1591 on good race scales sticks with me. Car was STRIPPED out but for suspension, engine, transmission, dash, and one seat. No glass, no top, no interior, no door guts, no bumpers, no lights, etc. Even so, I remember being shocked by the number.
Posted by: horizontally-opposed Aug 29 2017, 11:31 PM
Ok, finding that wasn't as hard as I thought:
Finally, just for fun, we decided to weigh the car as is, with all mechanicals (it's a running, driving car but for its lack of a 15-pound driver's seat), both windshields, steel wheels, tar over most of the floors, the engine sound pad, the headlight assemblies less the lights themselves, and about a half tank of gas. Engine lid and headlight bits were in the back trunk.
To my surprise, it came out at 1,591 pounds.
My guess is that, with a light battery, alloy wheels, FG decklids and bumpers, Perlon carpeting, Plexi side windows on 356 GT/911R style strap adjusters but with seats, a top, all rubber seals, lights, and steel sides (fenders and doors), you might be able to build a streetable 914 in the 1650-1750-lb range.
Very tempting, but not what my car is.
pete
What surprises me now is it still had its windshield and back window in. I can't remember if we pulled the windshield before we weighed it, but I left the back window in place for paint.
Thread is here. Hard to believe that was nearly ten years ago...
http://www.914world.com/bbs2/index.php?showtopic=80724&st=120
Attached thumbnail(s)

Posted by: horizontally-opposed Aug 29 2017, 11:33 PM
And you can watch it self lower as parts go back on...
Zero suspension changes in this time. I'd say it dropped 1.0 inch to 1.5 inches as it was reassembled.
Attached thumbnail(s)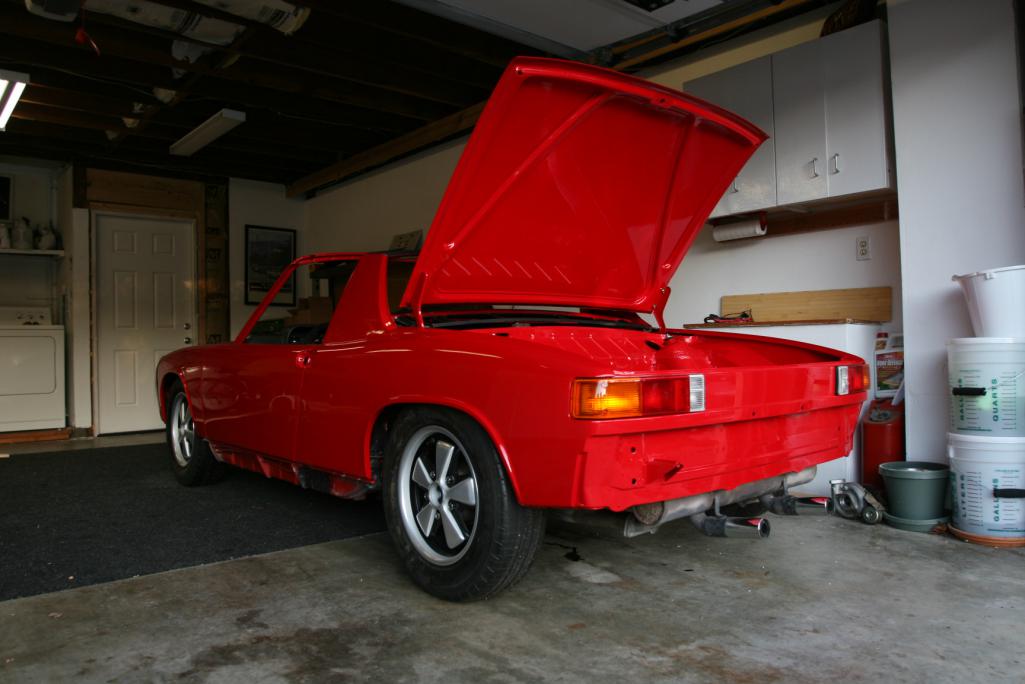
Attached image(s)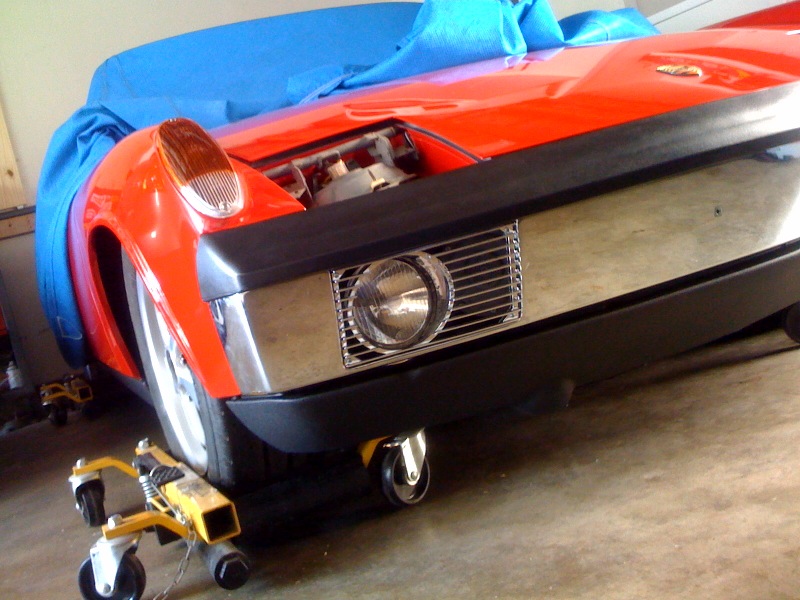
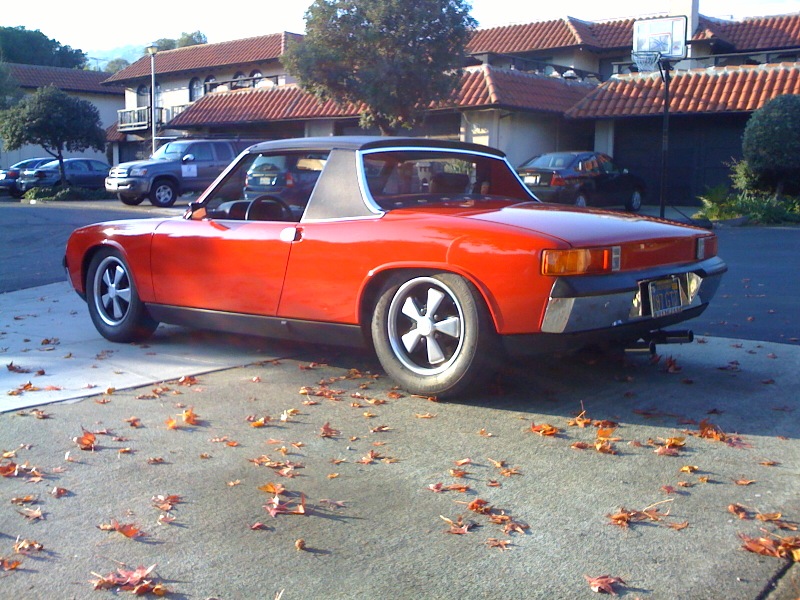
Posted by: horizontally-opposed Aug 29 2017, 11:35 PM
...
Posted by: arne Aug 30 2017, 09:22 PM
Never occurred to me to find a scale and weigh mine while I had it stripped for paint. Mine was also drivable, barely, but I pulled the windshield and rear glass too. Still have no interior in it now, but I can see that it has come down some as I put more parts back on.
Looking kick ass Arne! Nice job. I can't wait to see it in person all finished
Target is late October, at this point. Maybe sooner if all continue to go well. Will make sure to contact you, Morgan and Maren once it is done.
A little more work finishing the targa sail trim today. Very pleased with how this is turning out. It will have its flaws if you look for them, but they won't be terribly obvious for the most part. It is turning out to be a really great looking driver quality car.
Posted by: arne Sep 1 2017, 07:24 PM
Installed new dash face vinyl, dash top from 914rubber.com, reinstalled all gauges after testing each warning and instrument bulb. It's all back in, it all works, and with the new basket weave vinyl and dash top pad, it looks REALLY good.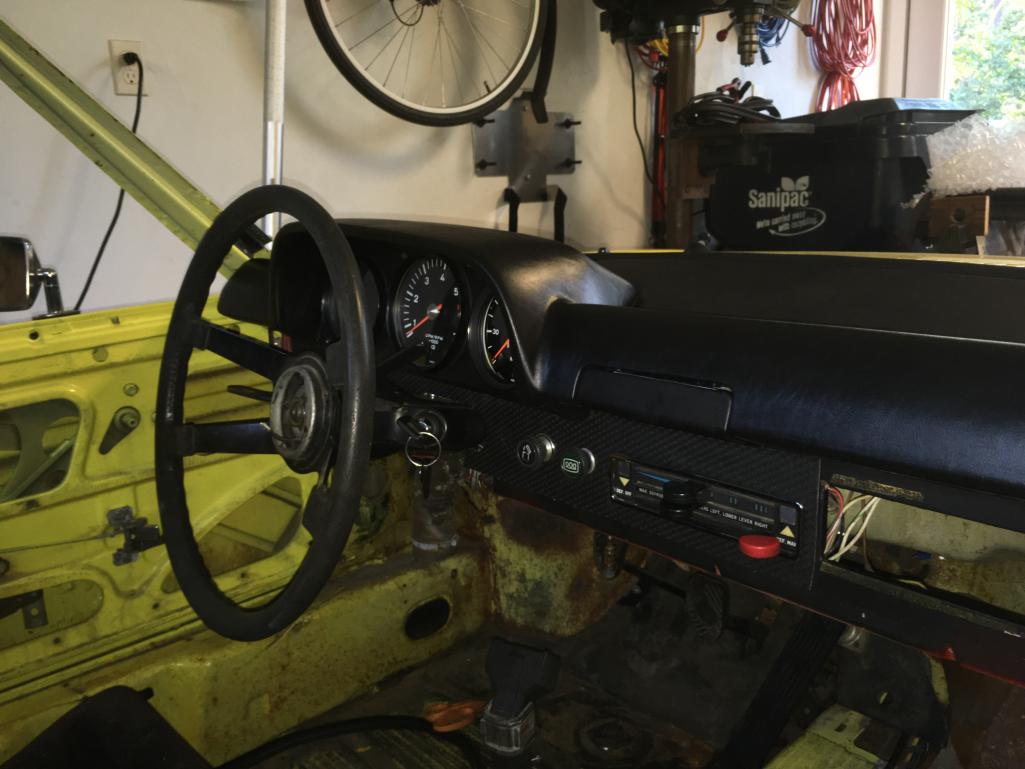
I have a few non-914 things to do over the long weekend, but next items will be to recover and reinstall the glovebox, the recover the radio plate and install the radio. Will try to get the new windshield installed soon.
Posted by: horizontally-opposed Sep 1 2017, 10:31 PM
Looks GREAT!!!
Kind of a strange request, but if you get a chance, can you take some close-ups of the dash pad and its material as seen in differing light cast across its skin? Been wondering how "correct" the pattern is, as my dash pad is gonna need to be replaced at some point.
No hurry at all.
Posted by: arne Sep 1 2017, 11:10 PM
Will get the Nikon out tomorrow instead of the phone and take some shots of both new and original. Will be easier to shoot while the windshield is still out.
Posted by: arne Sep 2 2017, 03:17 PM
Pete, give these a look. The camera is immaterial, to try to image this is all about light and reflections. Here's my best efforts. I tried to take shots from similar spots and angles on the two pads, as close as the lighting would allow..
FWIW, the grain is VERY close, perhaps indistinguishable to my eye.
Original Dash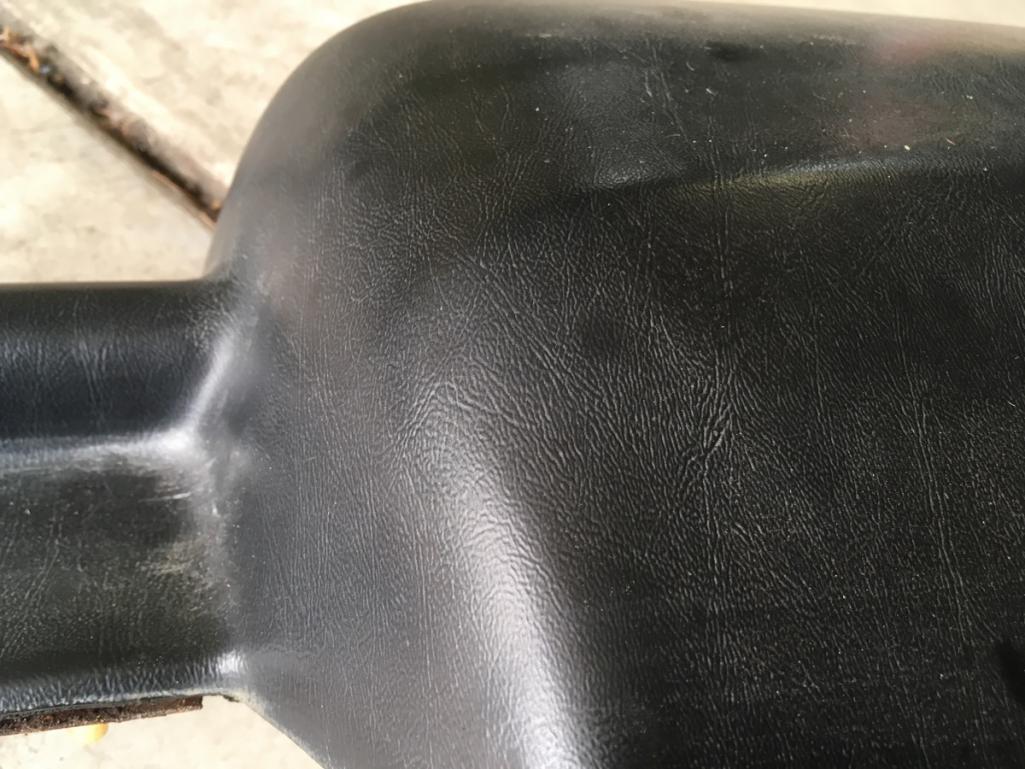
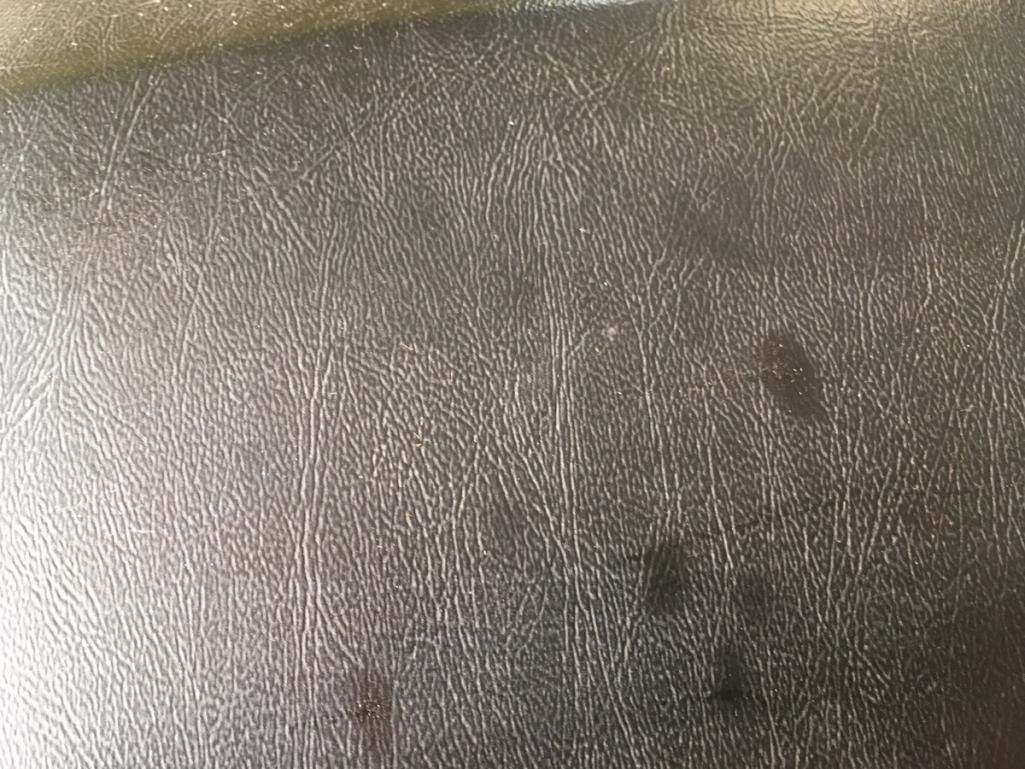
New dash from 914rubber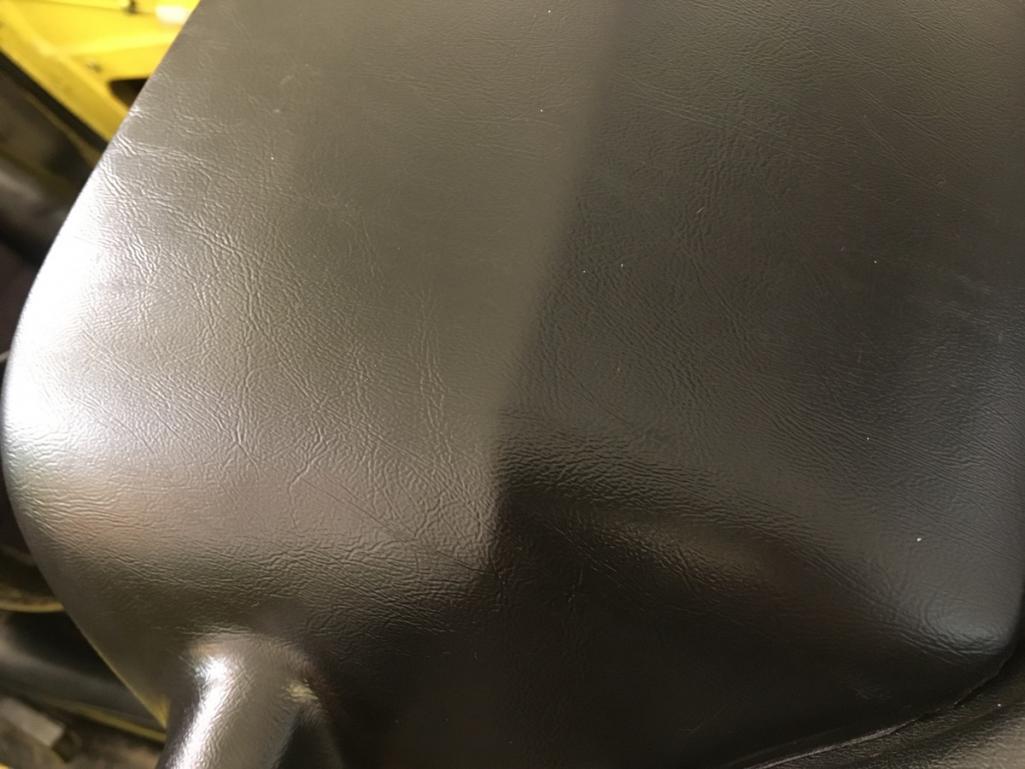
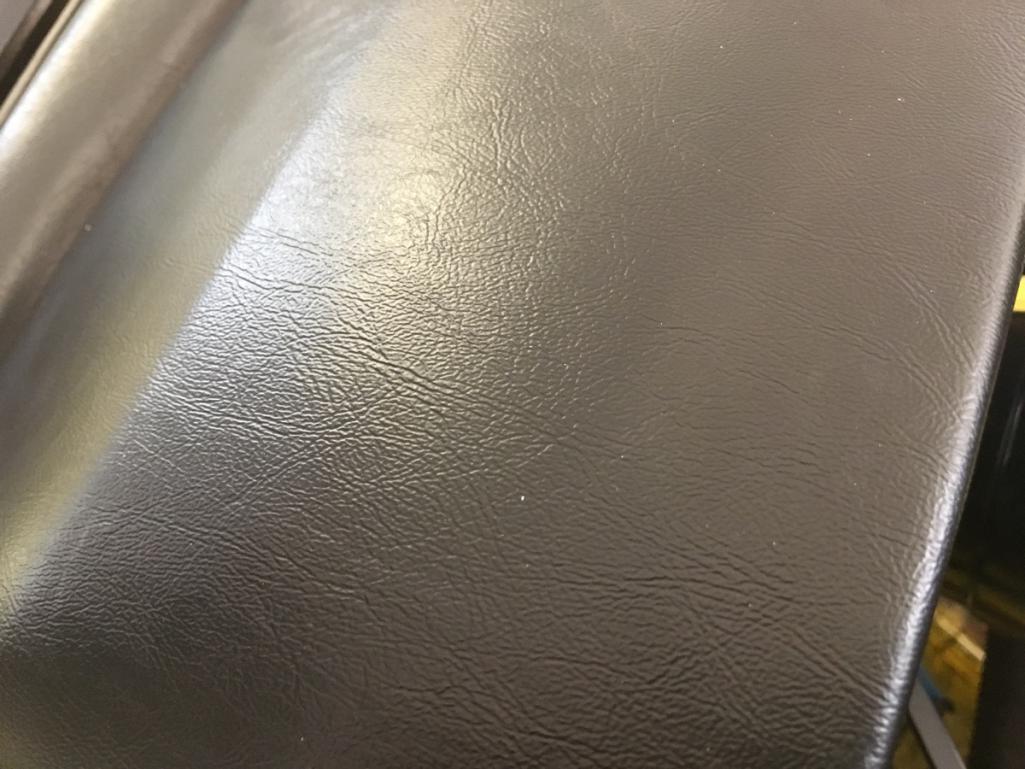
Posted by: bigkensteele Sep 2 2017, 05:14 PM
Looks GREAT!!!
Kind of a strange request, but if you get a chance, can you take some close-ups of the dash pad and its material as seen in differing light cast across its skin? Been wondering how "correct" the pattern is, as my dash pad is gonna need to be replaced at some point.
No hurry at all.
Pete, the 914rubber dash was molded from my NOS straight-out-of-the-box dash. The grain is exact.
Posted by: arne Sep 2 2017, 07:02 PM
Today's work - glovebox and radio.
Actually started the car today, because it had been a while. I didn't want to energize everything while the gauges were all missing, but now that the main dash is all back together...
And if you look closely at these pictures, sharp eyes may notice a deviation from stock...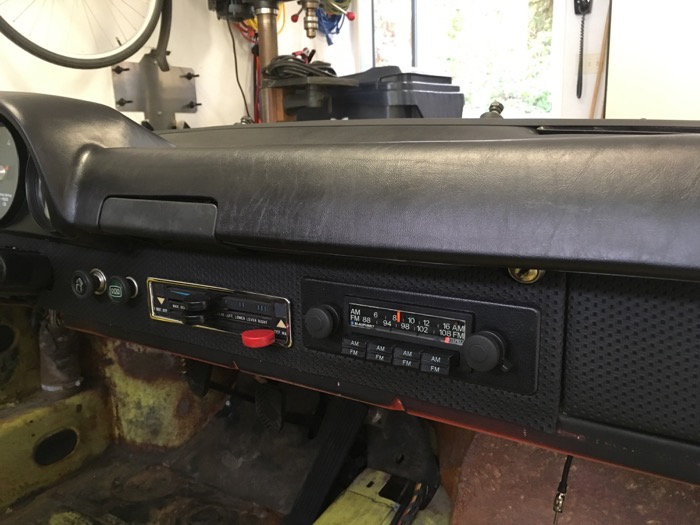
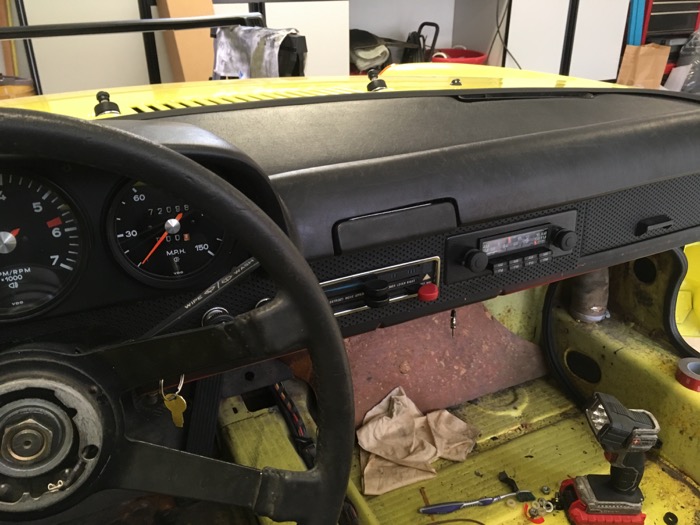
Posted by: euro911 Sep 2 2017, 07:45 PM
Continuous run of vinyl from the steering column to the glove box?
Posted by: arne Sep 2 2017, 08:20 PM
Continuous run of vinyl from the steering column to the glove box?
No, the radio vinyl is separate, as normal, although I did try to cut to match the pattern closely. It does look continuous unless you look closely.
But that's not what I was thinking of.
Posted by: JRust Sep 2 2017, 08:59 PM
I got it! No windshield wipers 
Posted by: horizontally-opposed Sep 2 2017, 09:31 PM
Pete, give these a look. The camera is immaterial, to try to image this is all about light and reflections. Here's my best efforts. I tried to take shots from similar spots and angles on the two pads, as close as the lighting would allow..
FWIW, the grain is VERY close, perhaps indistinguishable to my eye.
Original Dash
New dash from 914rubber
Hey, thanks for these, Arne!
Looks very close, indeed. Looks like they did a good job on this dash pad...
Posted by: arne Sep 2 2017, 10:25 PM
Here's a hint. Something is missing, and it was probably only there on certain years, not all cars.
Posted by: horizontally-opposed Sep 2 2017, 10:46 PM
Seatbelt light delete. I dig. Always felt it was a bit VW 412.
Posted by: cuddyk Sep 2 2017, 10:58 PM
did that on my 73. looks great!
Posted by: Mikey914 Sep 2 2017, 11:09 PM
Looks GREAT!!!
Kind of a strange request, but if you get a chance, can you take some close-ups of the dash pad and its material as seen in differing light cast across its skin? Been wondering how "correct" the pattern is, as my dash pad is gonna need to be replaced at some point.
No hurry at all.
Pete, the 914rubber dash was molded from my NOS straight-out-of-the-box dash. The grain is exact.
Yes, A big thanks to Ken. I could not have made this part without him. At least not as exact. It literally is an EXACT copy of the NOS dash.
I will send you a new roll bar pad when done.
Mark
Posted by: arne Sep 2 2017, 11:25 PM
Seatbelt light delete. I dig. Always felt it was a bit VW 412.
did that on my 73. looks great!
Yup. I looked at that when I took it out and thought, "Now why would I want to put that back in?"
Posted by: euro911 Sep 3 2017, 01:46 AM
Posted by: arne Sep 4 2017, 05:23 PM
Picking away at tasks this weekend, as I try to stay cool and out of the smoke. Door seals (inner and outer), floor vinyl, starting with carpet, new speakers in the new speaker pods, and taking a stab at fixing the slipping grip on the steering wheel. All good so far, although the verdict on the steering wheel won't be in until tomorrow.
Not much to show in pictures yet, just the speakers.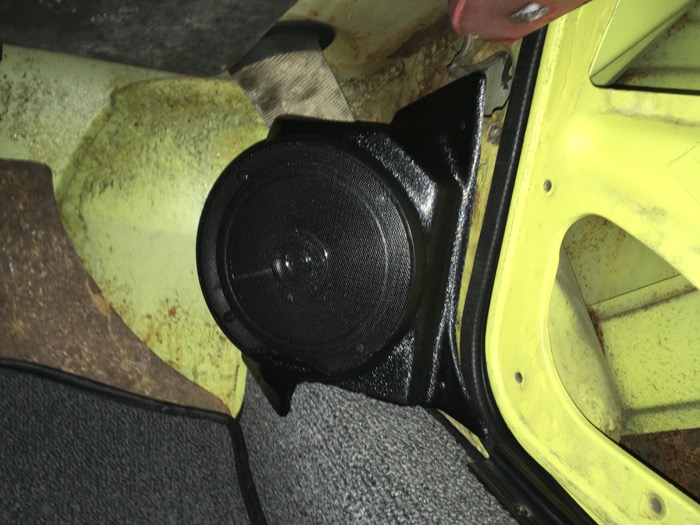
Posted by: ConeDodger Sep 4 2017, 09:45 PM
Seatbelt light delete. I dig. Always felt it was a bit VW 412.
did that on my 73. looks great!
Yup. I looked at that when I took it out and thought, "Now why would I want to put that back in?"
Send it to me. I want to make an "ejection seat" light! This one no longer functions with the DME.
Attached image(s)
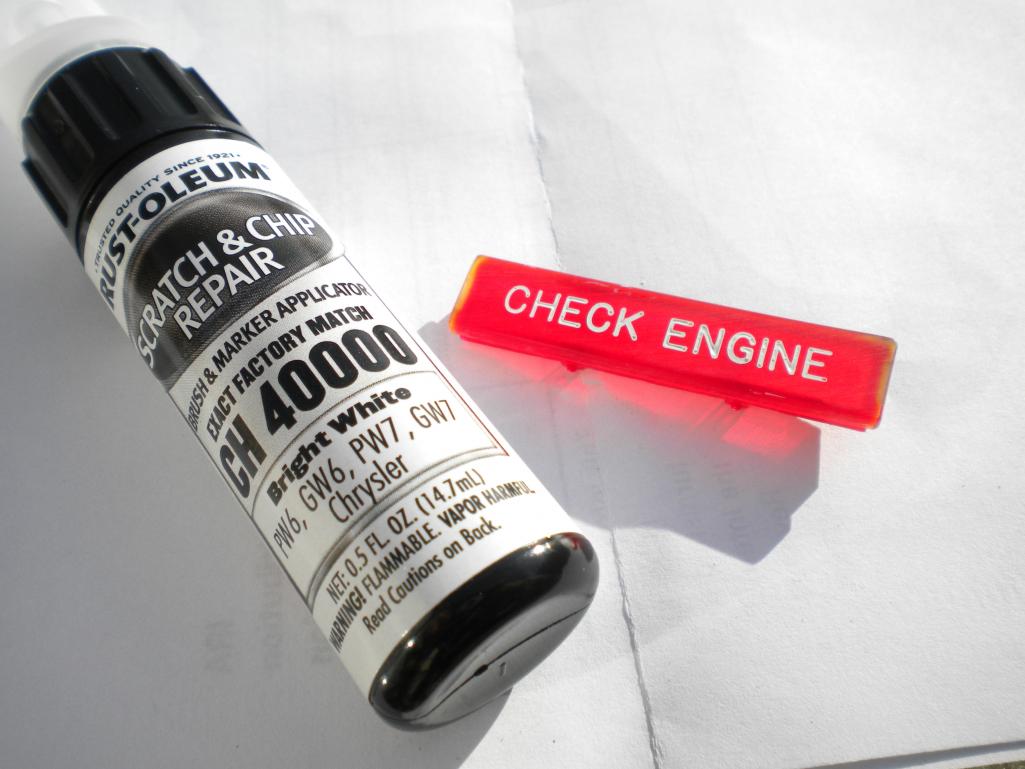
Posted by: arne Sep 4 2017, 10:53 PM
Let me think on that, Rob. My thought was to leave it in the glovebox in case the next owner might be so silly as to want it.
Posted by: arne Sep 7 2017, 04:41 PM
I have an appointment tomorrow for the new windshield. So I've been making sure that it's ready to drive, and that everything works. Put some gas in it yesterday. Here in Oregon, we still have gas pump jockeys (no self serve to speak of), and the car has not failed to baffle the young kids manning the pumps. Yesterday one asked me if it was a kit car I was building.
I've got most of the interior together now. Waiting to put on the inside windshield trim until the glass is in place, of course. And I'm not going to put the backpad in until I figure out what to do about the interior light. (See http://www.914world.com/bbs2/index.php?showtopic=315994&hl= )
Still need to get the glass into the doors, and then the door cards, then refinish and install the rocker covers. That should be it, appearance-wise.
Other bits will be getting all the heater ducting reinstalled, installing the billet taco plate, replacing the upper steering shaft bearing in the column, and anything I find wrong in the test driving phase. On track to wrap this up by the middle of October, I figure.
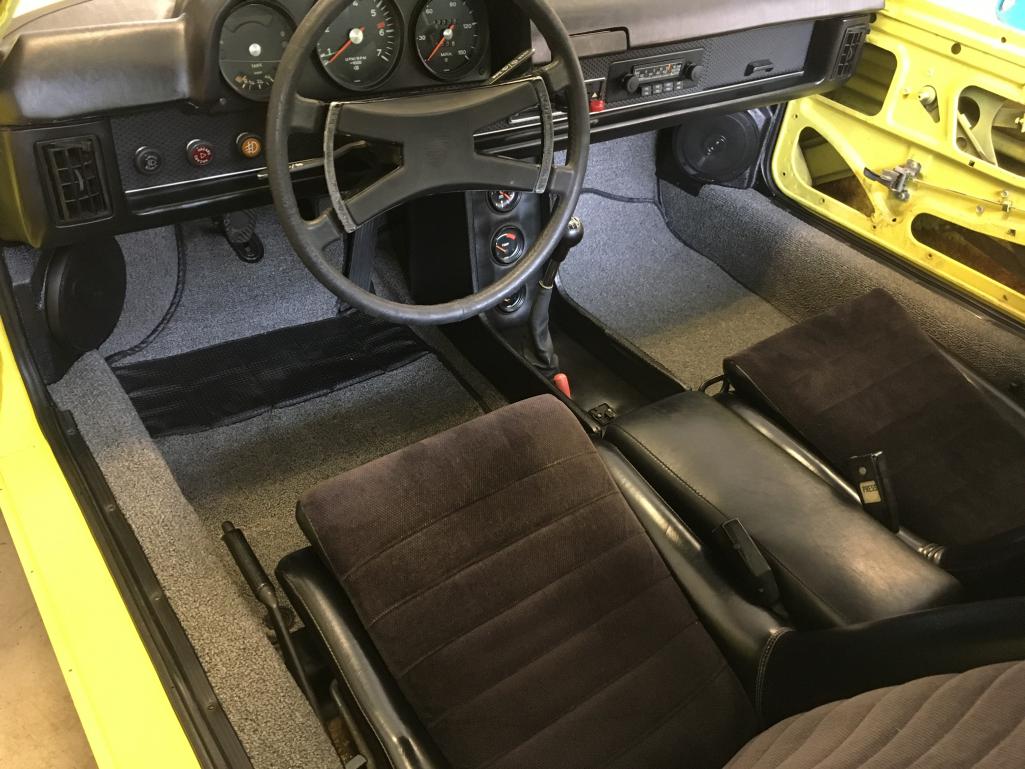
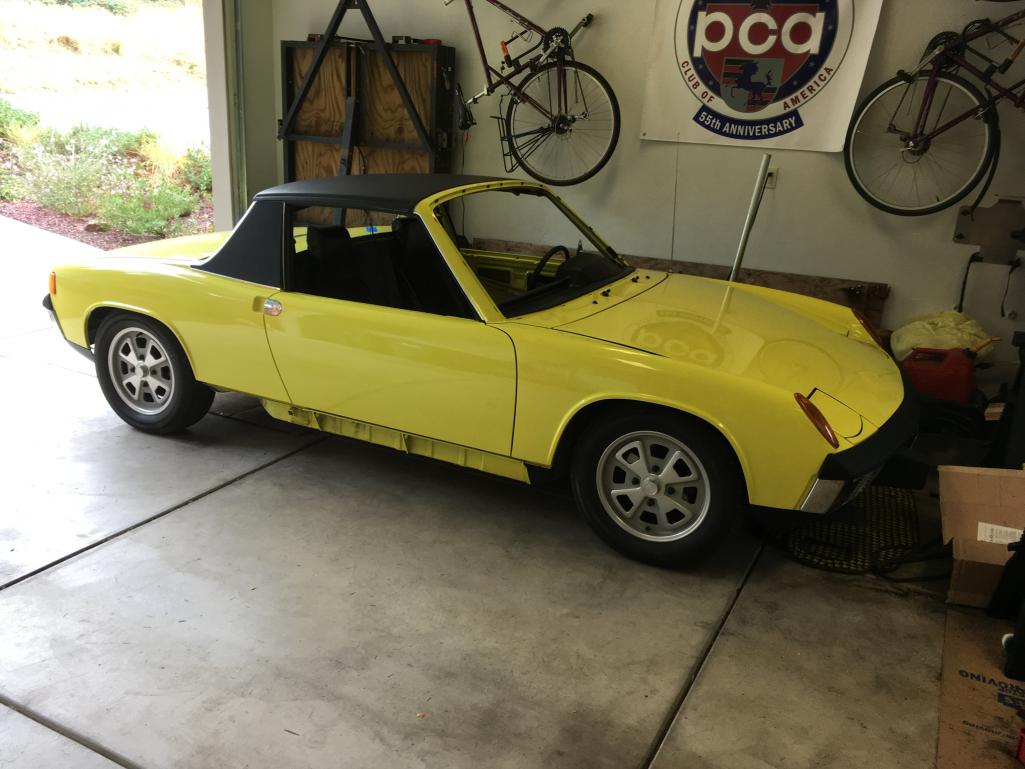
Posted by: rhodyguy Sep 7 2017, 05:09 PM
Turned out very nice. Does the lense on the 911 switch toggle on and off? I bought one, it didn't fit at all and i wasn't willing to cut on the backpad. A generic beetle switch sorta fits if you play with spring tabs.
Posted by: ndfrigi Sep 7 2017, 05:18 PM
Congratulation Arne! One of the fastest restoration! Started March 2017 and before the end of this September, your car is already on twisty road of Oregon!
Posted by: arne Sep 7 2017, 06:01 PM
Turned out very nice. Does the lense on the 911 switch toggle on and off? I bought one, it didn't fit at all and i wasn't willing to cut on the backpad. A generic beetle switch sorta fits if you play with spring tabs.
Congratulation Arne! One of the fastest restoration! Started March 2017 and before the end of this September, your car is already on twisty road of Oregon!
Posted by: ndfrigi Sep 7 2017, 06:07 PM
Turned out very nice. Does the lense on the 911 switch toggle on and off? I bought one, it didn't fit at all and i wasn't willing to cut on the backpad. A generic beetle switch sorta fits if you play with spring tabs.
Congratulation Arne! One of the fastest restoration! Started March 2017 and before the end of this September, your car is already on twisty road of Oregon!
About your back pad, you might consider just doing like this. Borrowed pic from online. several members did this already. Looks clean and space for small items at your rear seat.
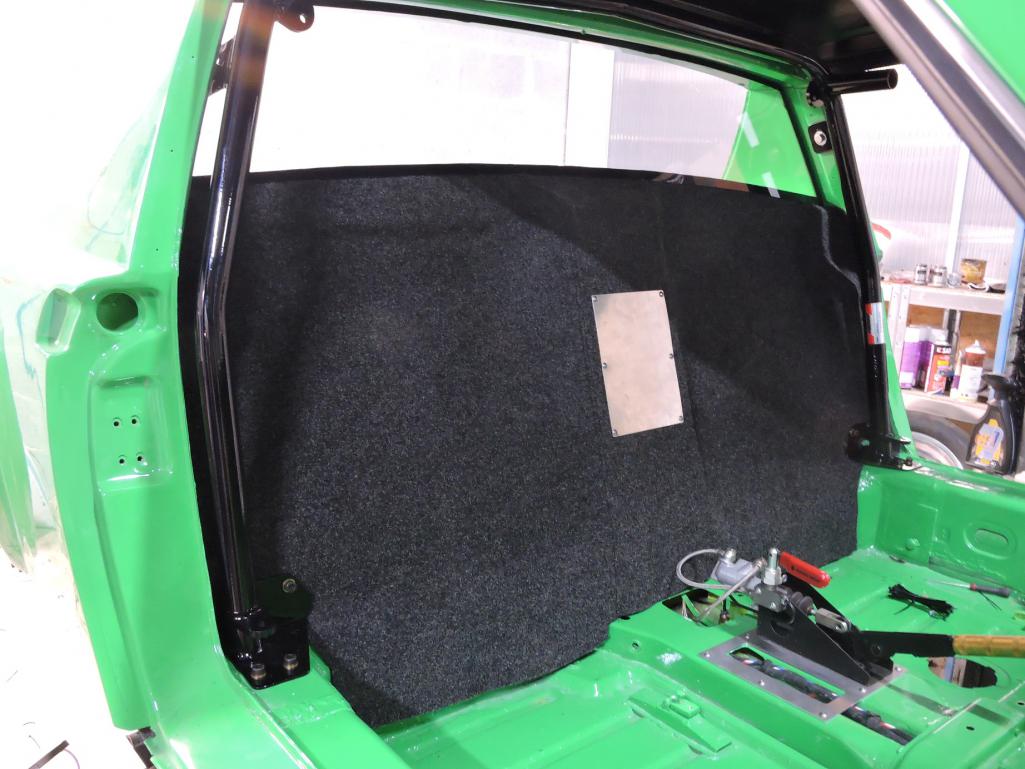
Posted by: 914 7T3 Sep 7 2017, 06:16 PM
I have an appointment tomorrow for the new windshield. So I've been making sure that it's ready to drive, and that everything works. Put some gas in it yesterday. Here in Oregon, we still have gas pump jockeys (no self serve to speak of), and the car has not failed to baffle the young kids manning the pumps. Yesterday one asked me if it was a kit car I was building.
I've got most of the interior together now. Waiting to put on the inside windshield trim until the glass is in place, of course. And I'm not going to put the backpad in until I figure out what to do about the interior light. (See http://www.914world.com/bbs2/index.php?showtopic=315994&hl= )
Still need to get the glass into the doors, and then the door cards, then refinish and install the rocker covers. That should be it, appearance-wise.
Other bits will be getting all the heater ducting reinstalled, installing the billet taco plate, replacing the upper steering shaft bearing in the column, and anything I find wrong in the test driving phase. On track to wrap this up by the middle of October, I figure.
Looking good Arne! The car is so clean, you should already have a few World Members lined up to buy it.
Posted by: arne Sep 7 2017, 07:34 PM
No, no one is lined up to buy it so far. But I suspect that it may not be clear to most of the World that I will be putting it up for sale as soon as I'm convinced it is ready. A few of you understand that, as we've chatted about it in person or on the phone.
But as you've gathered, for someone looking for a decent weekend driver, it should end up being a nice car. It will not be perfect, and I may leave a few simple things as minor projects for a new owner. But it will drive nice, and no one is likely to be embarrassed to be seen driving it. And judging from what I've experienced with it even not completed, it WILL attract a lot of attention. The yellow with black accents guarantee that.
Posted by: arne Sep 7 2017, 09:40 PM
A few additional thoughts. The car's ride seems better than when I drove it prior to the paint job, but I think that's just because now that the rear window and other bits are all properly secured, the car doesn't rattle like a death trap over every little road irregularity. The ride is firm, but controlled and not harsh. Very appropriate.
One of the things I may leave for the next owner is tires. Tire choice can be rather personal, and what I might pick for the car may not be pleasing to a potential buyer, either for brand or performance level. I will just need to be upfront about the need for tires and price the car accordingly. I could even facilitate new tires of the buyer's choice if they want them on before delivery.
Speaking of tires, I took a good look at them recently, and that has given me reason to think the car was sitting unused for much longer than I had been led to believe. I was told the car drove into the storage unit under its own power 6-8 years ago.
Maybe. But the tires on the car are nearly new, wear wise. I doubt they have more than a few hundred miles on them. They are H rated Toyos, nice tires, no signs of rot. I figured they were installed shortly before the car went to storage, so 6-8 years ago.
Not so. I finally got around to hunting down one of the date codes on the back side of the tires. Turns out they were built in 1996!
So while the car may have been started and driven a bit now and then before the 6-8 year slumber in the storage unit, I figure it hasn't really been on the road in more like 20 years. So the rescue of the car is more significant than I had thought.
Posted by: arne Sep 9 2017, 07:14 PM
The new windshield was installed yesterday, along with the new trim. Today I got the glass, associated bits, and the door card and hardware installed on the driver's side. Should be able to do the same on the passenger side tomorrow.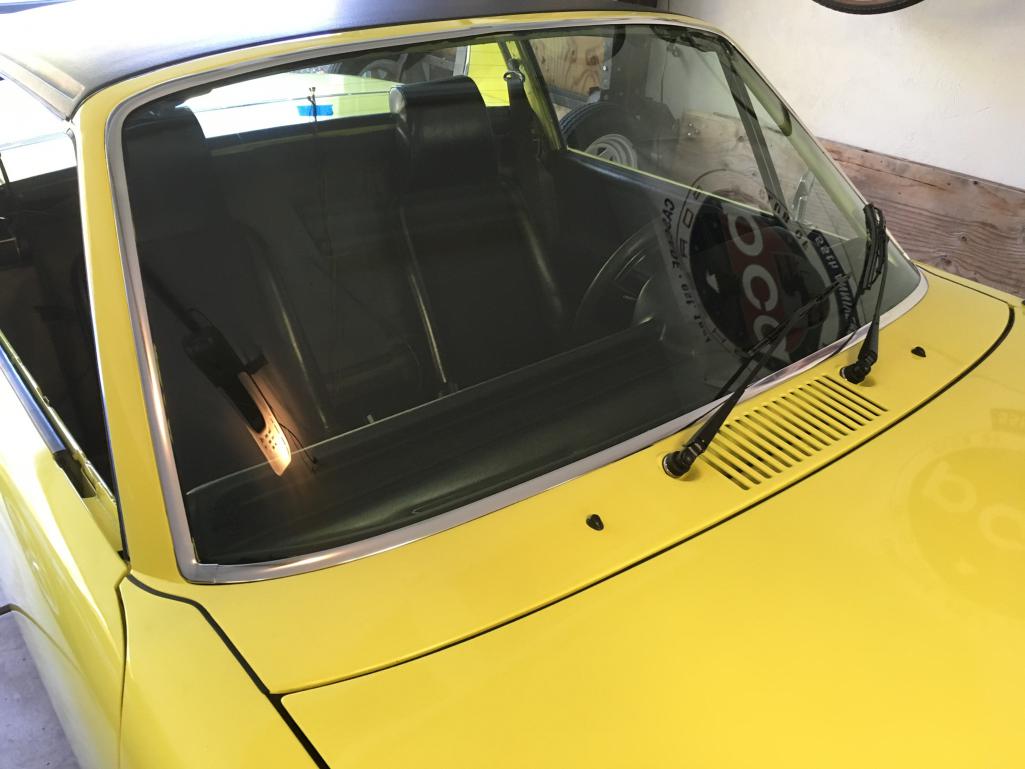
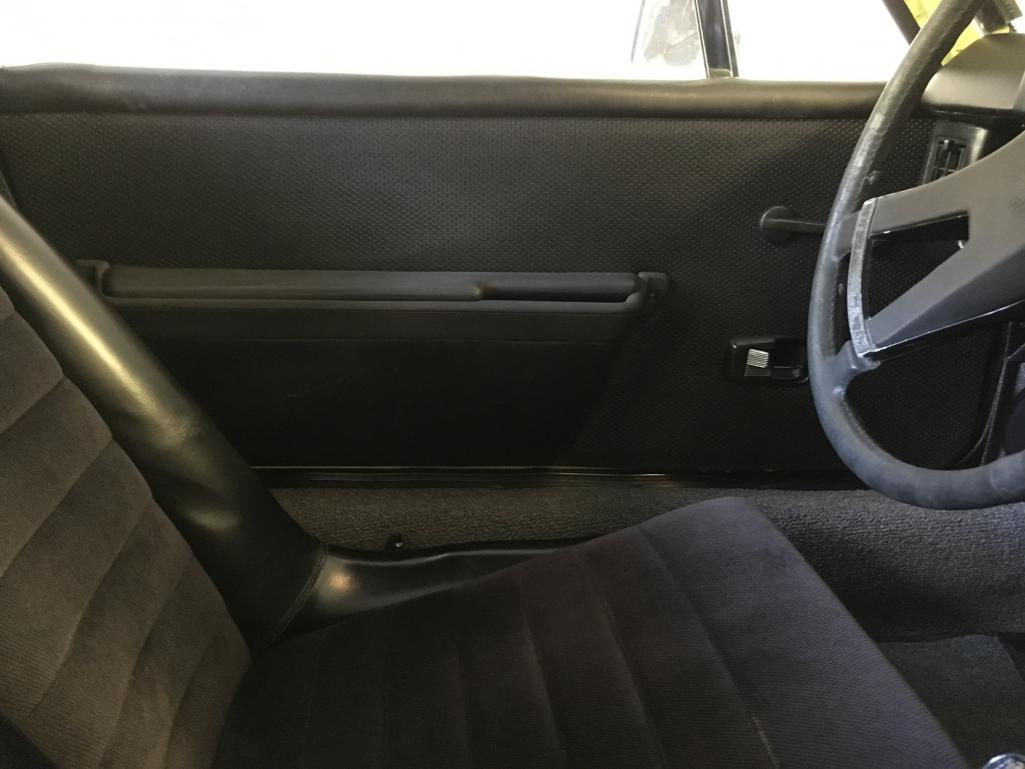
Posted by: raynekat Sep 9 2017, 09:30 PM
Looking great!
Posted by: napasteve Sep 9 2017, 09:34 PM
Looks fantastic Arne. Great work.
Posted by: arne Sep 10 2017, 07:17 PM
More progress today. The passenger door assembly is complete. Considering that the door cards and armrests/pockets/pulls are original, they came out looking pretty good. Not perfect, but totally in line with my vision for the car. Replace what is needed, but keep as much original as makes sense.
Also, I was talking about the car today with someone who noted that the wipers looked rather high when parked. I re-evaluated how I had them installed, and brought them down some. (If you are reading this, thanks, Andrew.)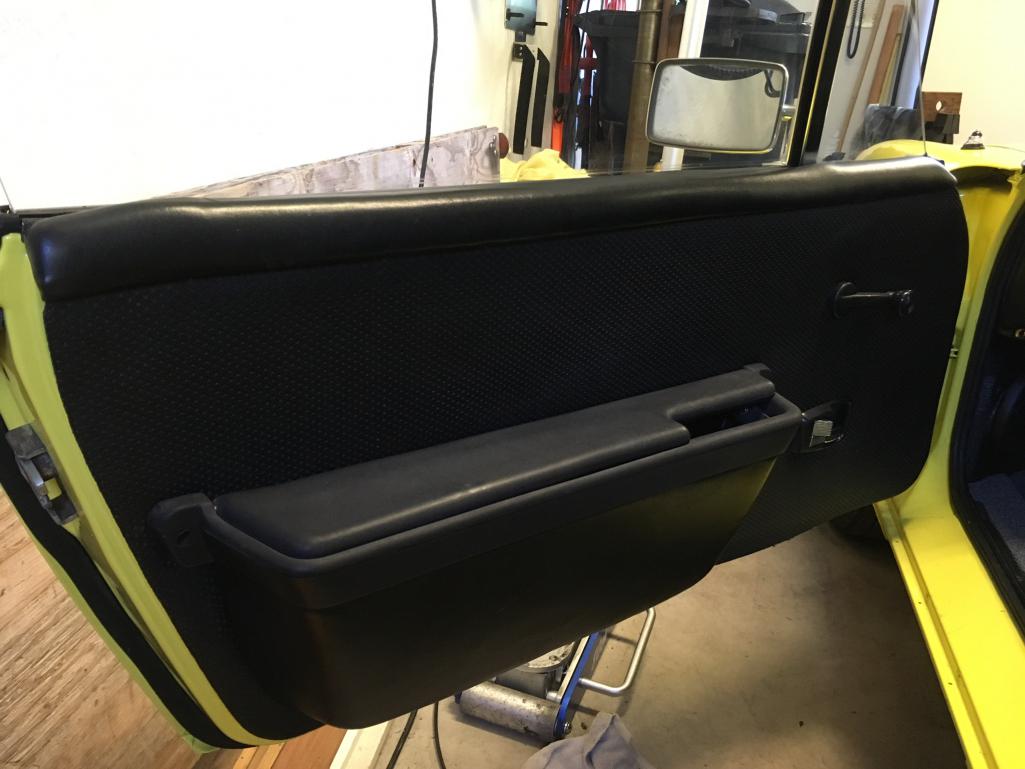
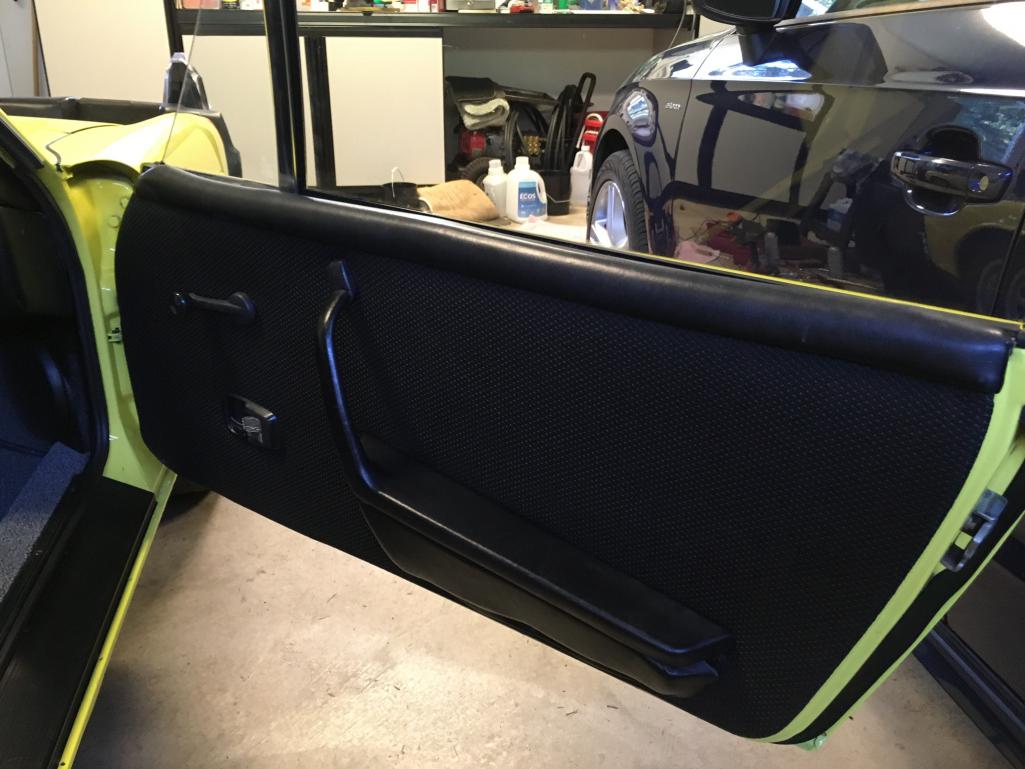
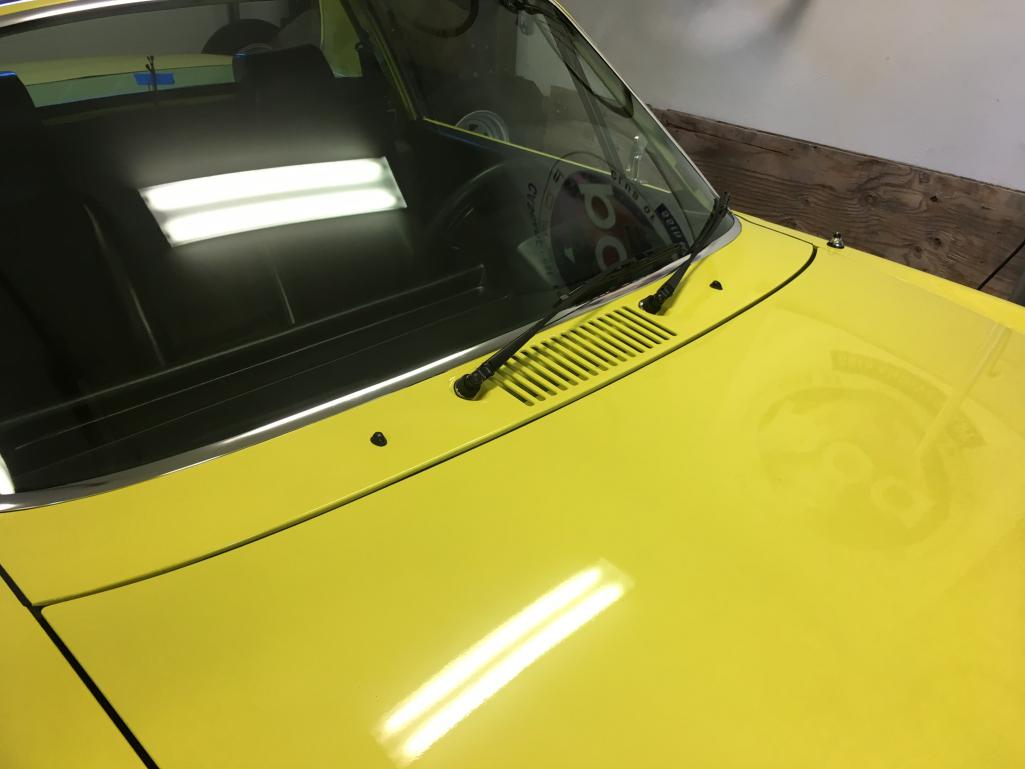
Posted by: Cairo94507 Sep 11 2017, 08:29 AM
That is a terrific looking car and someone is going to be quite happy when you list it and they buy it.
Posted by: Perry Kiehl Sep 11 2017, 10:53 AM
Did you take the wiper rack out Arne? If not ignore the following advice.
If so, I'd recommend taking the wiper arms off and making some little pointers on the wiper shafts with masking tape. Turn on the wipers to make sure it's moving the correct direction.
It's possible to put it in wrong and have the wipers move the wrong way and gouge out two big chunks of paint out of your shiney new paint right there on the cowl for all to see. You can guess how I know this
Posted by: arne Sep 11 2017, 11:17 AM
That's a good tip. Perry. I have experienced similar issues on other cars, so I intentionally did not pull the wiper rack this time. And even so, I tested the rotation and proper park position prior to installing the wiper arms. Just to be certain, you know...
Just now finishing up installing the billet taco plate. Really nice part.
This makes the 3rd oil change since I got the car. Fresh oil prior to first start, 2 changes since. I think it should be clean and good to go inside now.
Posted by: LowBridge Sep 11 2017, 11:28 AM
OK.. I thing I can speak for everyone here.. slow down you are making the rest of us look bad  .
.
Seriously what a fantastic job, very impressive on the speed on this project..
well done
Posted by: arne Sep 11 2017, 06:44 PM
Ran some errands in the car after the oil/taco plate change, mostly to see how the oil temp gauge works with the new sender. (With the original sender the gauge was flakey, if it registered at all.) The gauge seems to work fine now, the readings look sane, and - as expected - not running hot.
Going to start on cleaning up and refinishing the rocker panel covers over the next few days.
Posted by: napasteve Sep 12 2017, 08:21 AM
Arne, maybe I missed something; where did you get the new sender unit for the oil temp gauge? Is the new sender unit the same size as the VDO oil temperature sender (M14 x 1.5mm thread)?
Posted by: arne Sep 12 2017, 08:51 AM
Arne, maybe I missed something; where did you get the new sender unit for the oil temp gauge? Is the new sender unit the same size as the VDO oil temperature sender (M14 x 1.5mm thread)?
Posted by: napasteve Sep 12 2017, 08:59 AM
Thanks Arne. Any issues getting the new plate from Jonesy? Any leaks so far?
Posted by: arne Sep 12 2017, 09:50 AM
Thanks Arne. Any issues getting the new plate from Jonesy? Any leaks so far?
No leak at the taco plate now, although it's only been in for a day. But I don't expect leaks in the future, either. It's a very nice piece. Comes with the longer bolts needed (nice Allen head), and new copper washers for the bolts. You'll want a fairly fresh o-ring, but that's it. The new VDO sender comes with a copper washer as well. Torque it all down and leaks should be a thing of the past.
The only other thing I did was to put some heat shrink on the wire's terminal to ensure it does not ground out against the taco plate if bumped.
Posted by: arne Sep 12 2017, 09:29 PM
I've started making a punch list of items that I need (or in some cases, want) to address before I feel it'll be ready to sell. I will add to and edit this list as time goes on.
Refit all heater parts, one new hose- New bearing in steering column
- Address pressure leak in windshield washer
- Regulate clock (runs fast)
- Install new interior light
- Steering wheel grip slips - repair
- Cover steering wheel grip, leather
- Replace horn pad mushroom
- Replace rear seal on targa top
- Repair rear defroster connector tab
- Repair rear defroster grid
- AGM battery and hold down
- Replace door switches
- Re-check valve adjustment & timing
- Recover console
- Replace strut inserts to cure clunk, rear shocks to match
- Replace heater fan blower motor
- Reattach rearview mirror
- Repaint and install rocker panel covers
- Wax car
- Miscellaneous detailing
- New bumpers
- New tires
Posted by: arne Sep 17 2017, 03:42 PM
As I continue to wrap up various parts, I've been driving the car a bit more the past few days to help identify areas of concern. Mostly seems ok so far. The only real thing I've found so far is that there may be a slight clunk in the front suspension on rough road surfaces. Sounds to me like either one of the struts, or more likely a bad sway bar link bushing. Will explore that soon.
Other than that, it seems pretty good. It drives nicely, the engine runs fine, transmission shifts well. The transmission does make some raspy sounds at times, but overall it is probably quieter than the 915 in my Carrera.
Posted by: ConeDodger Sep 17 2017, 05:15 PM
Check your shock nuts in the trunk. Hard to get a socket on them and I've seen them loosen up. 
Posted by: arne Sep 18 2017, 10:35 AM
Check your shock nuts in the trunk. Hard to get a socket on them and I've seen them loosen up.
Posted by: ConeDodger Sep 18 2017, 10:52 AM
Check your shock nuts in the trunk. Hard to get a socket on them and I've seen them loosen up.
Yikes.

Posted by: arne Sep 18 2017, 02:32 PM
Unfortunately, it is the RF strut insert. I was hoping not to have to replace the struts and shocks, I really like the ride/handling combo of those old red Konis. But while all 4 had consistent resistance through the entire stroke before, now that I have begun driving the car, the bad one feels good through the lower 40% of the travel, but suddenly no resistance toward the top. If I lowered the front ride height a little, it might clunk less often than now, but that ain't right.
Reviewing the choices now. I see only 5 options:
- New KYB are out, they are affordable but

- I don't feel Koni yellow are the best choice for stock bars and the 100# springs on the back.
- Bilstein HD/B6 are good, but not cheap.
- Would consider OEM Sachs if I could find them, but they'd probably cost almost as much as the Bilsteins.
- Not feeling too good about finding decent used Koni reds (82R-1730), but it might be a possibility. First I'd need to hunt them down, then hope they were better than what I have.
Posted by: mepstein Sep 18 2017, 02:45 PM
Arne - I’ll sell you a pair of brand new, oem Sachs front inserts for $150 shipped. Mark
Posted by: mepstein Sep 18 2017, 02:47 PM
Arne - I’ll sell you a pair of brand new, oem Sachs for $150 shipped. Mark
And for another $50, I’ll include good used Sachs rears shipped.
Posted by: arne Sep 18 2017, 05:35 PM
Arne - I’ll sell you a pair of brand new, oem Sachs for $150 shipped. Mark
And for another $50, I’ll include good used Sachs rears shipped.
Seems like a good option for an essentially stock car, Mark. PM coming your way.
Posted by: ConeDodger Sep 18 2017, 05:46 PM
Koni still rebuilding them?
Posted by: arne Sep 18 2017, 05:56 PM
Koni still rebuilding them?
Some disagreement on that. Some say they still can, others note that they no longer do the old red single-adjust units.
In any case, the cost to rebuild (if they still do them) would exceed the cost of the units Mark has offered. Can probably buy new Bilsteins for what it would cost to rebuild them. For a stock car, the Sachs are probably the better option.
Posted by: euro911 Sep 18 2017, 06:00 PM
Yes, they do ... http://www.koniracing.com/services.cfm
Posted by: arne Sep 18 2017, 08:08 PM
Got in touch with Mark, he has the new front Sachs inserts, and a pair of good used shocks to match, but no rear spring perches for them. So looking for either a pair of perches, or other rear options. Really don't want to mismatch the dampers front and rear.
Posted by: ConeDodger Sep 18 2017, 09:23 PM
Koni still rebuilding them?
Some disagreement on that. Some say they still can, others note that they no longer do the old red single-adjust units.
In any case, the cost to rebuild (if they still do them) would exceed the cost of the units Mark has offered. Can probably buy new Bilsteins for what it would cost to rebuild them. For a stock car, the Sachs are probably the better option.
I agree. I seem to recall that Koni's rebuild facility is located pretty close to my shop in Sonoma...
Posted by: arne Sep 19 2017, 08:54 AM
I had a pair of Bilstein inserts rebuilt 12 or so years back. Cost more than most new ones. But it was worth it in that case, they were custom-valved Alpina inserts based on normal Bilsteins that were also NLA.
That is the only case I'd think about rebuilding for a street car - if there were no correct new options available at all.
Posted by: arne Sep 19 2017, 08:53 PM
I’ve been checking a few things off of the punch list above (http://www.914world.com/bbs2/index.php?showtopic=307264&pid=2529262&st=264&#), but keep adding more as I go. But most are not major items, the end is - maybe not in sight yet, but not far around the corner. Waiting on a few parts now.
Posted by: arne Sep 20 2017, 11:48 AM
I’ve got the shock/strut situation figured out thanks to Mark and Craig. Will be a bit before they all arrive, but only a few hours work to install. Thanks, gentlemen.
Posted by: arne Sep 20 2017, 12:29 PM
Posted by: arne Sep 21 2017, 11:23 AM
Realized I hadn't posted the most recent pictures here yet. Still plenty of small items left on the punch list (link in my signature), but getting close now.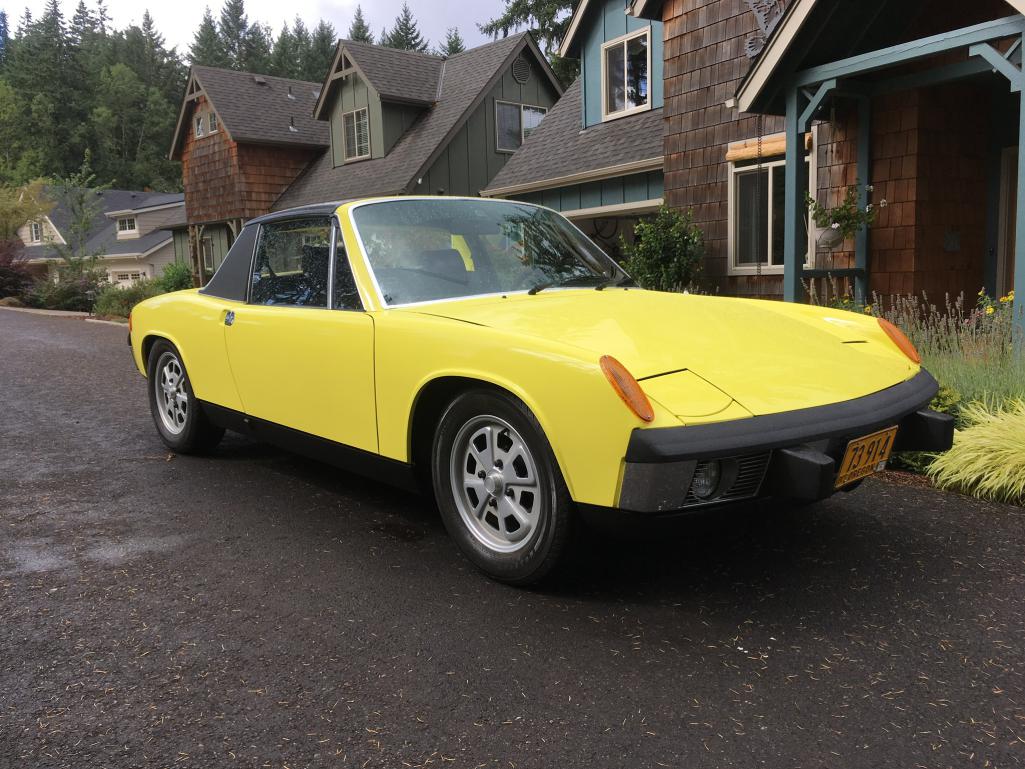
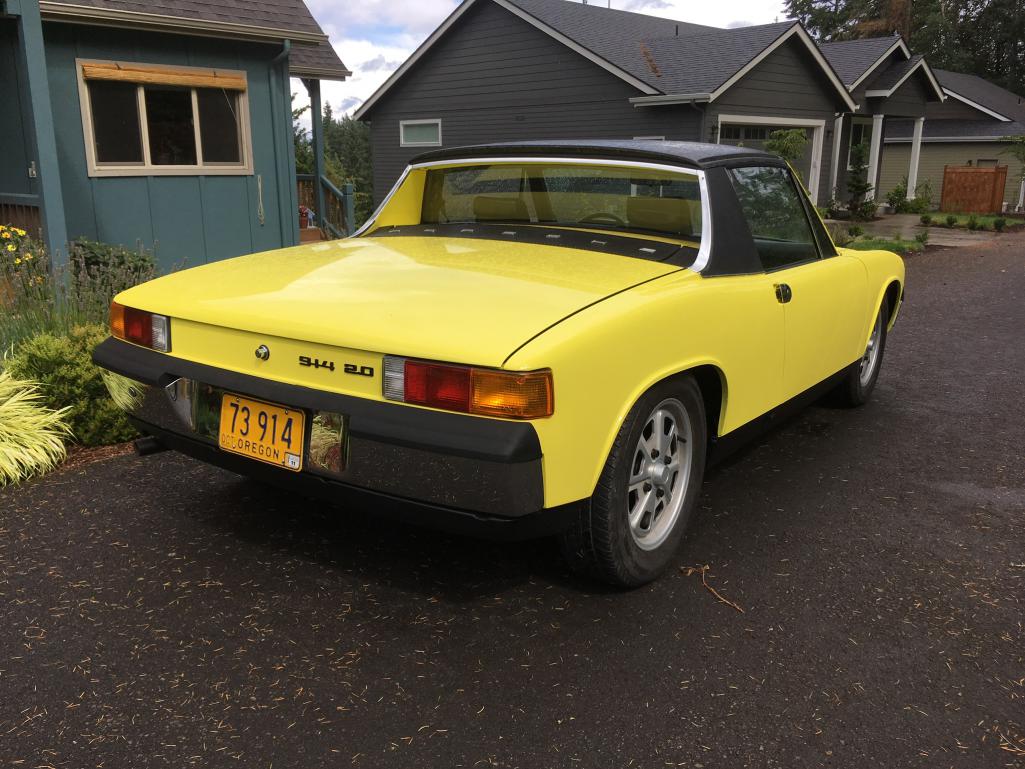
Posted by: arne Sep 21 2017, 09:02 PM
Finally tested the repaired rear window defroster (after the relay that the car was missing arrived today). It works!! Well, after a fashion, I suppose. Can’t expect it to work like a modern car. But a bit of fog applied by breathing on it while switched on does start to clear at the grid lines and goes from there. Calling it good.
This is actually a bigger thing than it seems, at least to me. I dislike selling cars with disclaimers about things that don’t work. I want EVERYTHING to work when I’m done.
Well, almost everything. I normally don’t fix the door and seat belt buzzers, if they still exist. I hate those things...
Posted by: arne Sep 23 2017, 06:34 PM
Checked a few more things off the punch list recently, but had to add another item. (You’d think I’d be past the point of finding new problems now, but that’s not true.)
Notable things are the new bearing in the steering column, and fixing the pressure leak in the windshield washer at the column switch. Love the newly solid steering wheel.
Ready to start on the struts and shocks soon, they were supposed to be delivered USPS today, but the mailman hasn’t made it up here yet.
And that new issue? The heater blower motor in the engine compartment is mostly rust inside, and is totally seized. I’m going to have to hunt down a replacement.
Posted by: arne Sep 24 2017, 07:02 PM
And the shocks and struts (which the mailman brought at about 7:00 pm last night) are in as well. I’m very pleased, the Boge/Sachs OEM dampers seem to be even better matched to the stock t-bars and light 100# springs than the Konis were, even when they seemed ok. The car rides better and is less fussy to drive fast.
This weekend’s work was big. The two most important of the punch list items are done - the steering column bearing and the shocks. With those two done, the car is pretty much a functional car again. If I had to, I could sell it now and not feel too bad about it.
But I don’t need to sell it tomorrow, so I will continue to pick away at the remaining items. Definitely on track to have it ready to go by mid-October.
Posted by: 914 7T3 Sep 24 2017, 07:07 PM
Posted by: arne Sep 25 2017, 06:26 PM
Today’s work was the new AGM battery and hold down, and the rubber horn pad mushroom spring thingie.
Tomorrow, I’ve got no new parts, so will be working on some fiddly detailing bits. Waiting on the heater blower motor and console recovering kit from 914rubber.
Still pondering the leather steering wheel cover. I like the look of the AGLA cover better as it covers the rubber part of the grip that goes a ways up the spokes. But I’m not sold on the quality of AGLA leather on shift boots I’ve bought in the past, so their wheel kit is a bit suspect to me. I’ve used Wheelskins in the past, nice quality leather, but those only cover the grip, not the spoke bases. Decisions, decisions...
Posted by: napasteve Sep 25 2017, 08:12 PM
Jesus Arne, drive it for a while and enjoy it! Just sayin.
Posted by: arne Sep 25 2017, 09:24 PM
Already snooping about for my next project...
Posted by: Larmo63 Sep 25 2017, 09:29 PM
I'm surprised you haven't fallen a bit in love with it and have decided to keep it?
Posted by: arne Sep 25 2017, 10:17 PM
I will say that I have grown to respect the 914 more during this project. They are a really fun little sports runabout even when stock. I can see why people love them. (I’ll admit that I like the 914 a lot more than I do last year’s project 944.) While I like learning new stuff, and so I typically don’t do the same car twice, the 914 has been fun, and I could see doing another if a suitable example showed up.
Posted by: napasteve Sep 25 2017, 10:24 PM
Well Arne, let me say that I have enjoyed watching your build and I have a lot of respect for your approach and skills. And I have learned some things while following. Thanks.
Posted by: Larmo63 Sep 25 2017, 11:23 PM
Posted by: arne Sep 26 2017, 05:49 PM
Goes in for PPI on Thursday. I will still wrap up the loose ends prior to final sale, but things are proceeding.
Posted by: dax1969 Sep 27 2017, 05:49 AM
Goes in for PPI on Thursday. I will still wrap up the loose ends prior to final sale, but things are proceeding.
Woow sold before even advertised ? I missed already a few good ones in the classifieds due to being overseas and timedifference but now cars are getting sold even before they're finished... How will I ever find one ?

Amazing job/skills.
krgds
Dax
Posted by: arne Sep 27 2017, 10:48 AM
Amazing job/skills.
krgds
Dax
Posted by: dax1969 Sep 27 2017, 11:27 AM
Nice... just build another one... for me
Posted by: arne Sep 27 2017, 02:30 PM
Posted by: arne Sep 28 2017, 11:06 PM
PPI found no new issues, all is as expected. Will resume finishing the loose ends tomorrow.
Posted by: 914 7T3 Sep 29 2017, 04:30 PM
PPI found no new issues, all is as expected. Will resume finishing the loose ends tomorrow.
Not sure that you would have expected anything different after already dismantling and rebuilding the entire car.
Posted by: arne Sep 29 2017, 05:29 PM
Wrapped the steering wheel today. Heater blower fan ETA is Monday. Will recheck valve adjustment early next week, and complete the detail stuff by end of the week.
Posted by: 914 7T3 Sep 29 2017, 06:07 PM
Wrapped the steering wheel today. Heater blower fan ETA is Monday. Will recheck valve adjustment early next week, and complete the detail stuff by end of the week.
Congrats & GLWTS!
Posted by: arne Oct 2 2017, 10:37 AM
And yesterday it died. Looking into this now, see http://www.914world.com/bbs2/index.php?showtopic=317230
Posted by: arne Oct 2 2017, 01:57 PM
And now it lives again. Troubleshooting data in the thread linked above, but the short answer was "dirty trigger points".
Now, where was I?
Posted by: arne Oct 2 2017, 08:42 PM
Once running again, I took advantage of having everything all apart to verify valve adjustment and timing. The car starts a lot quicker and smooths out faster now. No idea which of today’s work helped that.
Will do some final clean up and detailing over the next few days, also will put a few miles on it to make certain no new bugs turn up. I’ve been planning on recovering the center console, but the kits for that from 914rubber have been delayed. Not certain that kit will arrive in time. The pending buyer is planning on flying up to see and drive it in person, probably next week. Then there will likely be a short time before transport is arranged and the car collected. So even if the console kit doesn’t arrive for another week or so, I should still be able to get that done prior to handoff to the transporter.
Posted by: 914 7T3 Oct 2 2017, 09:17 PM
Once running again, I took advantage of having everything all apart to verify valve adjustment and timing. The car starts a lot quicker and smooths out faster now. No idea which of today’s work helped that.
Will do some final clean up and detailing over the next few days, also will put a few miles on it to make certain no new bugs turn up. I’ve been planning on recovering the center console, but the kits for that from 914rubber have been delayed. Not certain that kit will arrive in time. The pending buyer is planning on flying up to see and drive it in person, probably next week. Then there will likely be a short time before transport is arranged and the car collected. So even if the console kit doesn’t arrive for another week or so, I should still be able to get that done prior to handoff to the transporter.
If your car will indeed be going where I think its going, I have no doubt our cars will eventually meet-up for a canyon run one day. Pretty cool.
Posted by: arne Oct 2 2017, 09:33 PM
I suspect you are correct, Jeffery. I’m pretty sure you are restoring yours to a higher standard than I did for this car. But still, this yellow car looks really sharp, its few shortcomings are not obvious unless you get right up close and personal. For a normal walk-by, it really attracts attention. My goal was to build a fun driver that looks good enough that no need feel embarrassed to show up at a Porsche event or cars and coffee somewhere. I think I’ve got that part down.
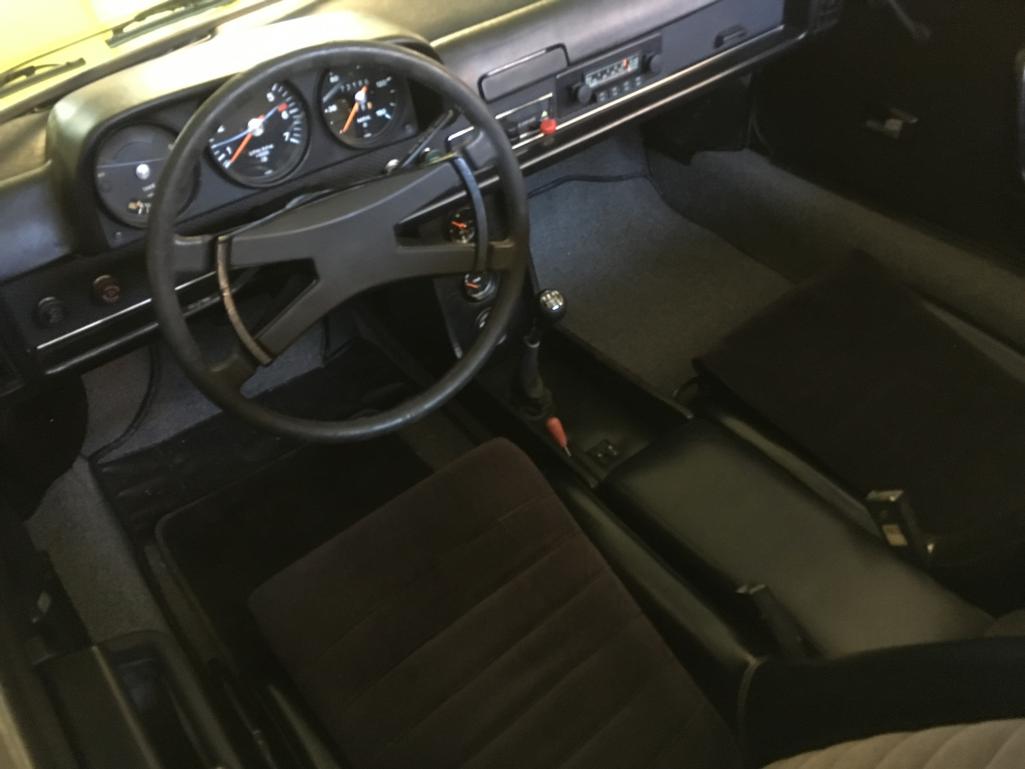
Posted by: 914 7T3 Oct 2 2017, 10:09 PM
I suspect you are correct, Jeffery. I’m pretty sure you are restoring yours to a higher standard than I did for this car. But still, this yellow car looks really sharp, its few shortcomings are not obvious unless you get right up close and personal. For a normal walk-by, it really attracts attention. My goal was to build a fun driver that looks good enough that no need feel embarrassed to show up at a Porsche event or cars and coffee somewhere. I think I’ve got that part down.
You certainly do! Ironic that we both got these cars around the same time. You are all all finished and I'm just getting started, but at at least had a couple thousand miles of fun!
Posted by: arne Oct 4 2017, 04:33 PM
Almost there. The final few trim bits were shipped today, probably arriving tomorrow. Should be complete by Friday.
Drove on some errands today, and met Jamie (jrust) at work to let him look it over. Had a nice chat.
Here’s a few pictures from today.
Overall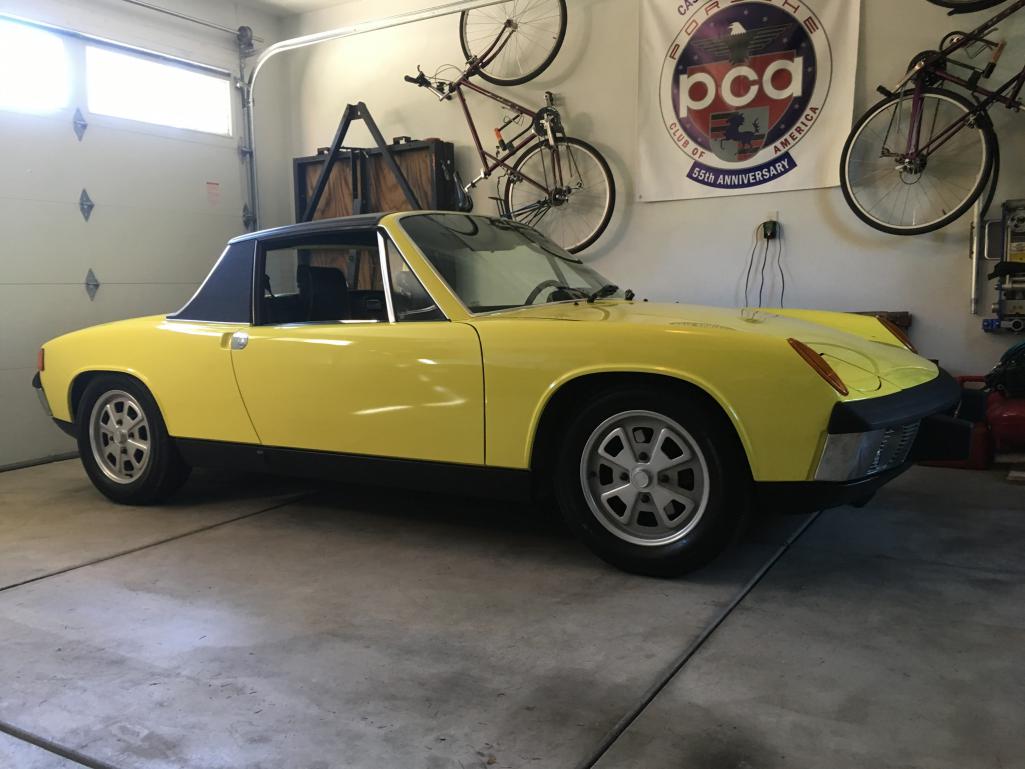
Right side door gap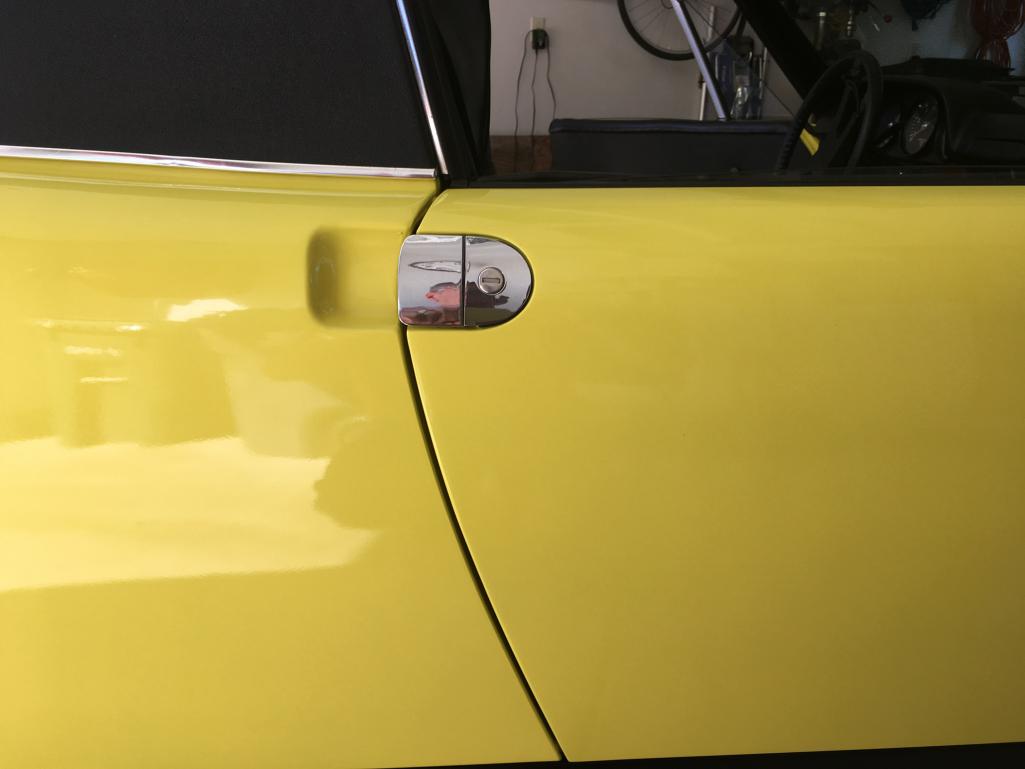
Down the side 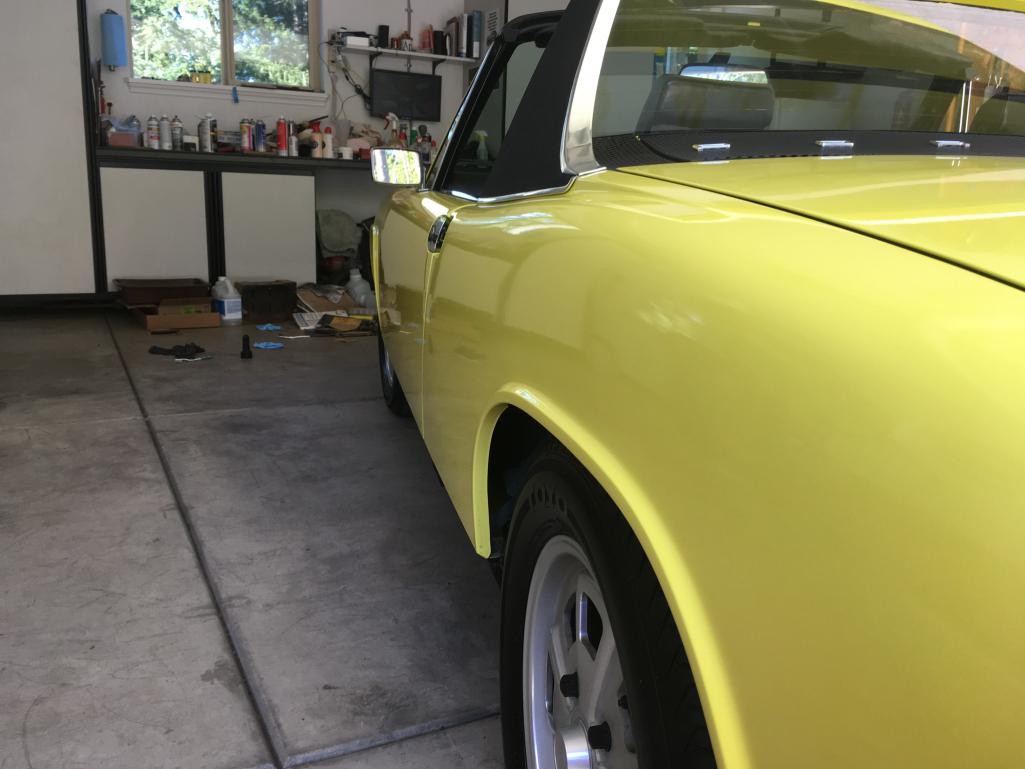
Posted by: arne Oct 4 2017, 04:40 PM
How about some before and after pics?
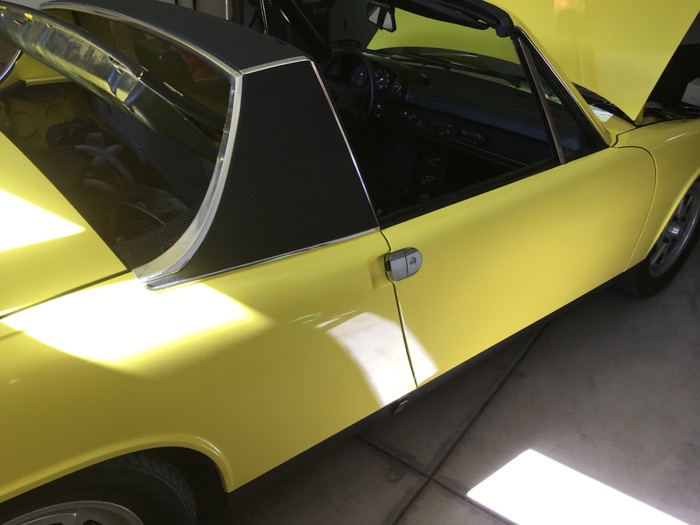
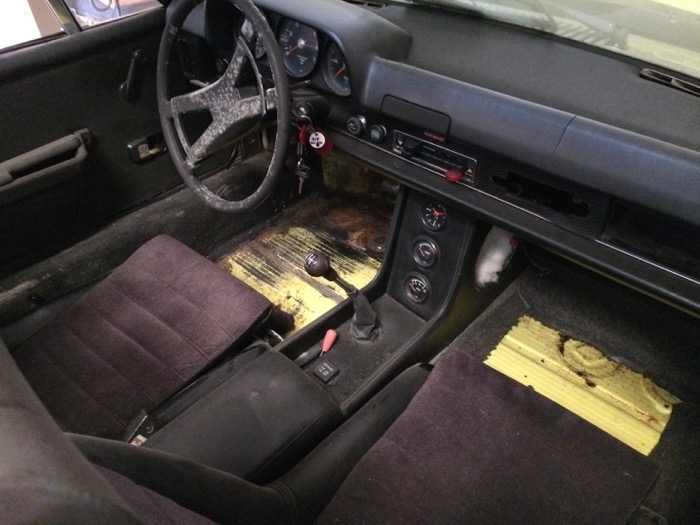
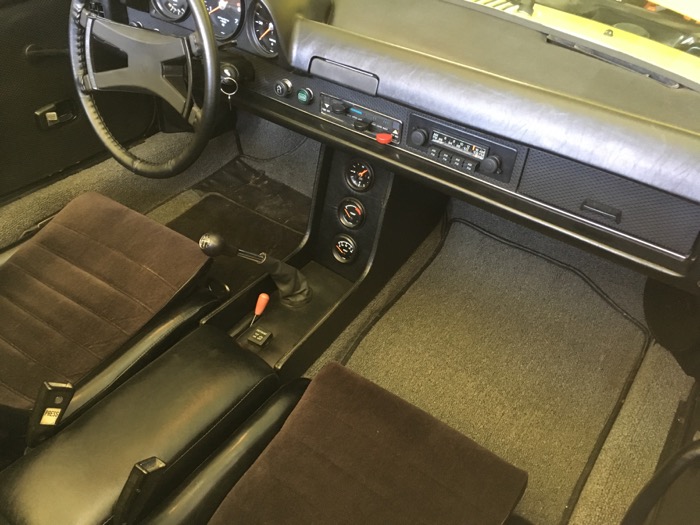
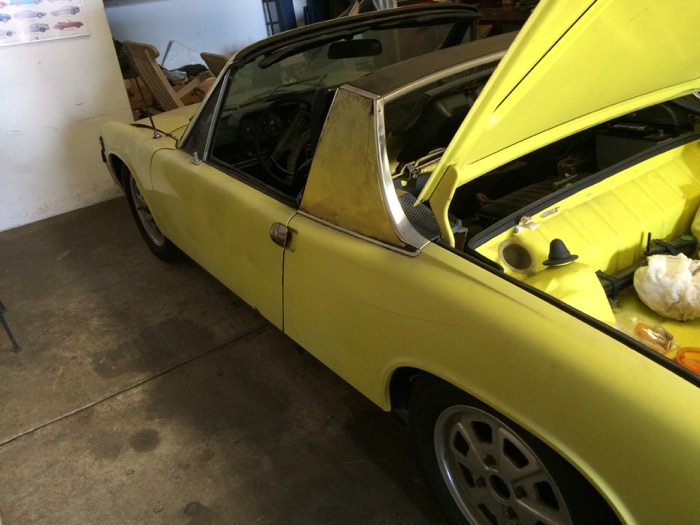
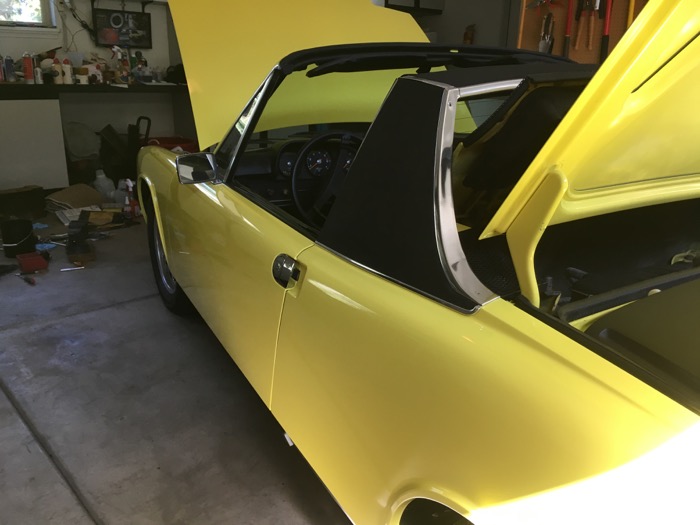
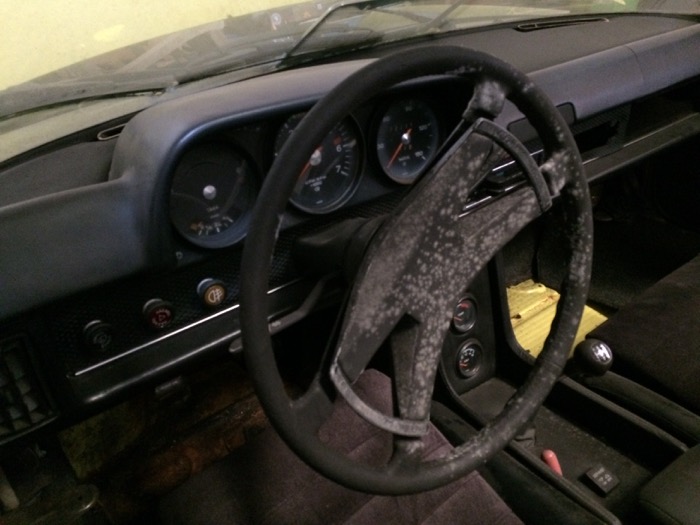

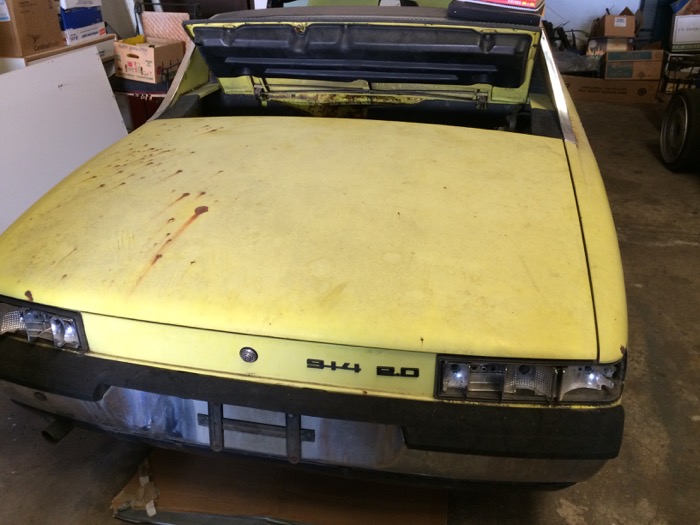
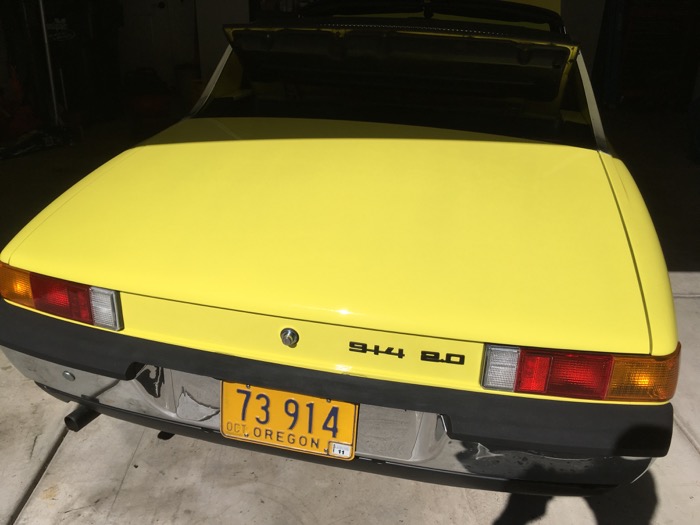
Posted by: Cairo94507 Oct 4 2017, 04:48 PM
Whomever gets that car is going to get a great car.
Posted by: mepstein Oct 4 2017, 05:11 PM
Whomever gets that car is going to get a great car.
Posted by: napasteve Oct 4 2017, 06:14 PM
Looks great Arne. Well done.
Posted by: 914 7T3 Oct 4 2017, 07:43 PM

Posted by: arne Oct 4 2017, 08:25 PM
A few more Before and After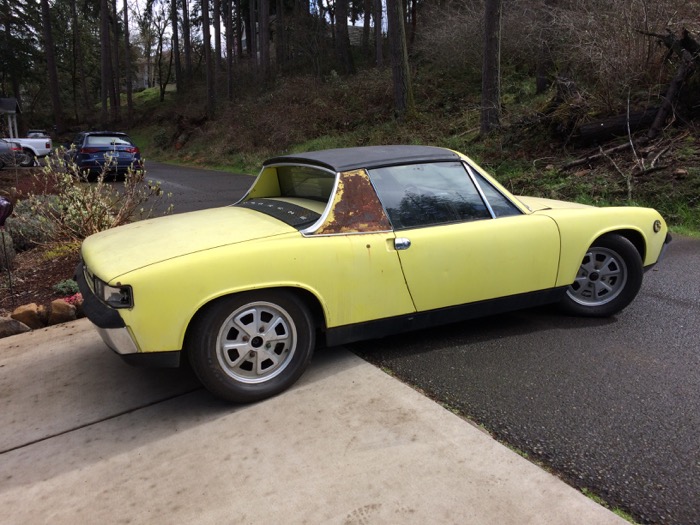

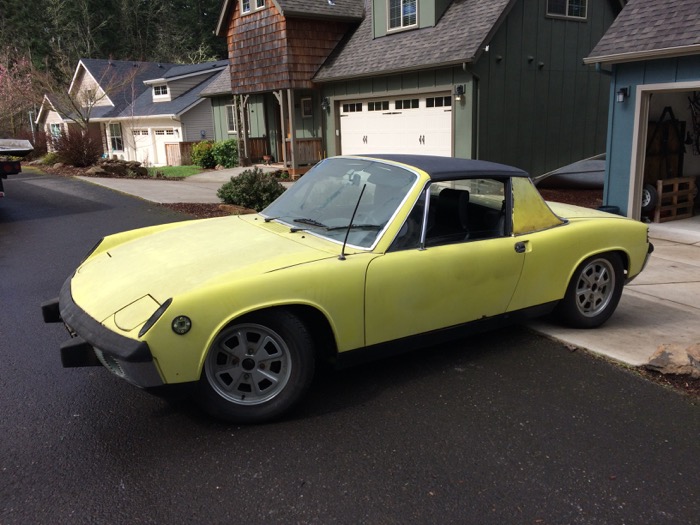
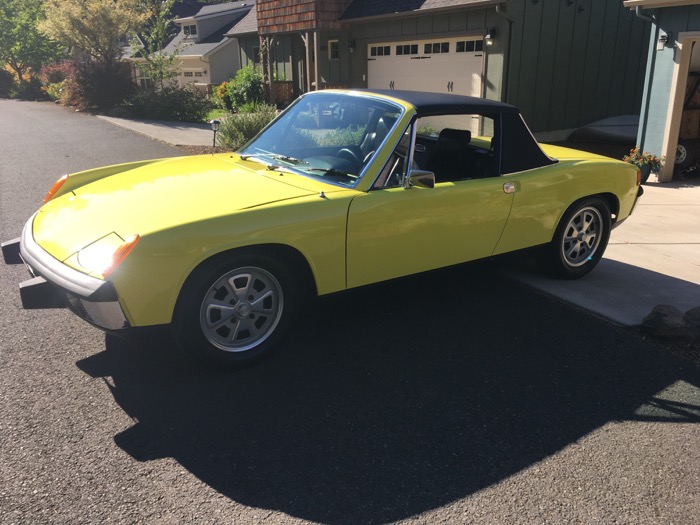
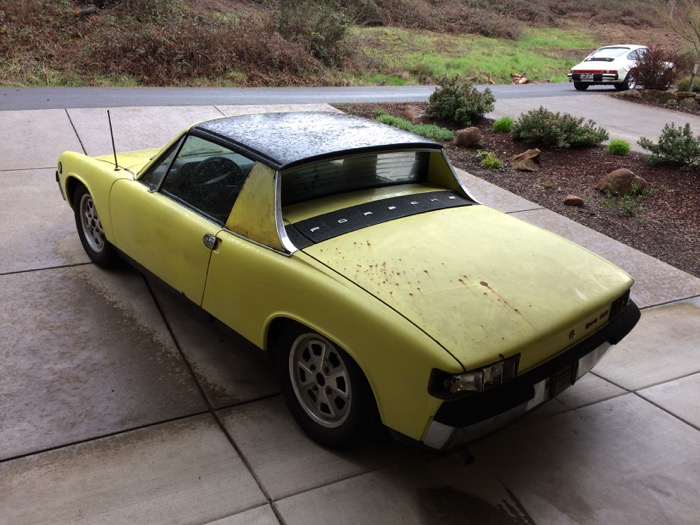
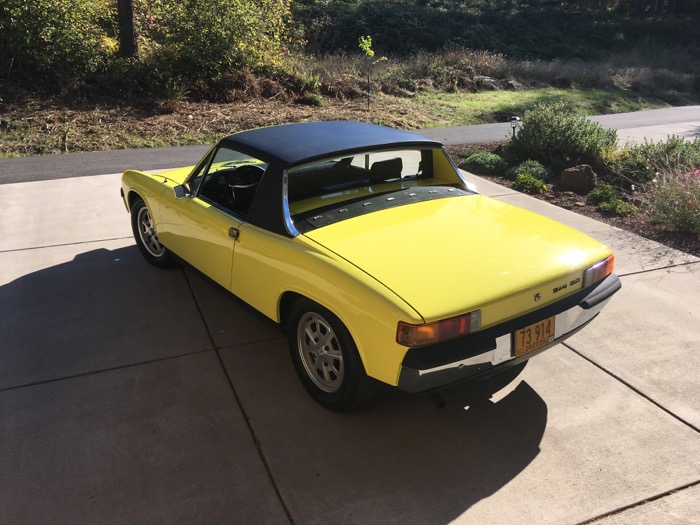
Posted by: arne Oct 5 2017, 10:27 AM
Almost there. The final few trim bits were shipped today, probably arriving tomorrow. Should be complete by Friday.
Well, maybe not by Friday. I now expect the remaining bits to arrive late Friday afternoon, or possibly Saturday. In either case, should be plenty of time to finish it before my probable buyer arrives for a look-see next Wednesday.
Posted by: arne Oct 5 2017, 03:55 PM
Gathering all the included bits now.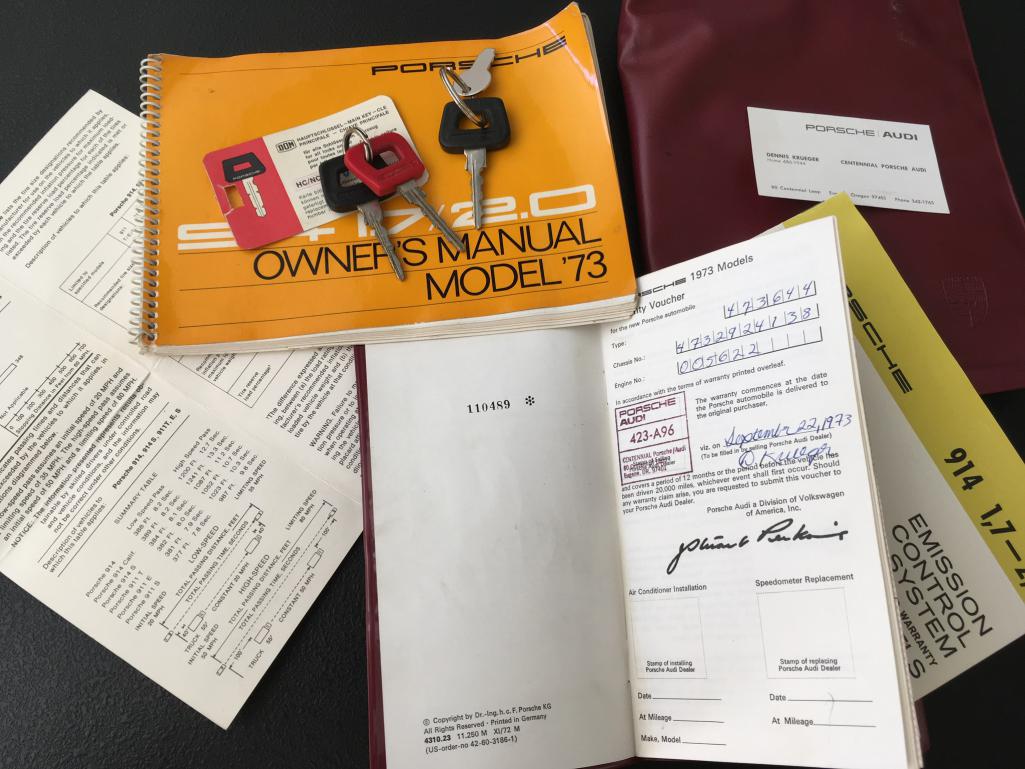
Posted by: arne Oct 7 2017, 09:15 PM
The only air-cooled at our monthly gathering today. It was very popular, however.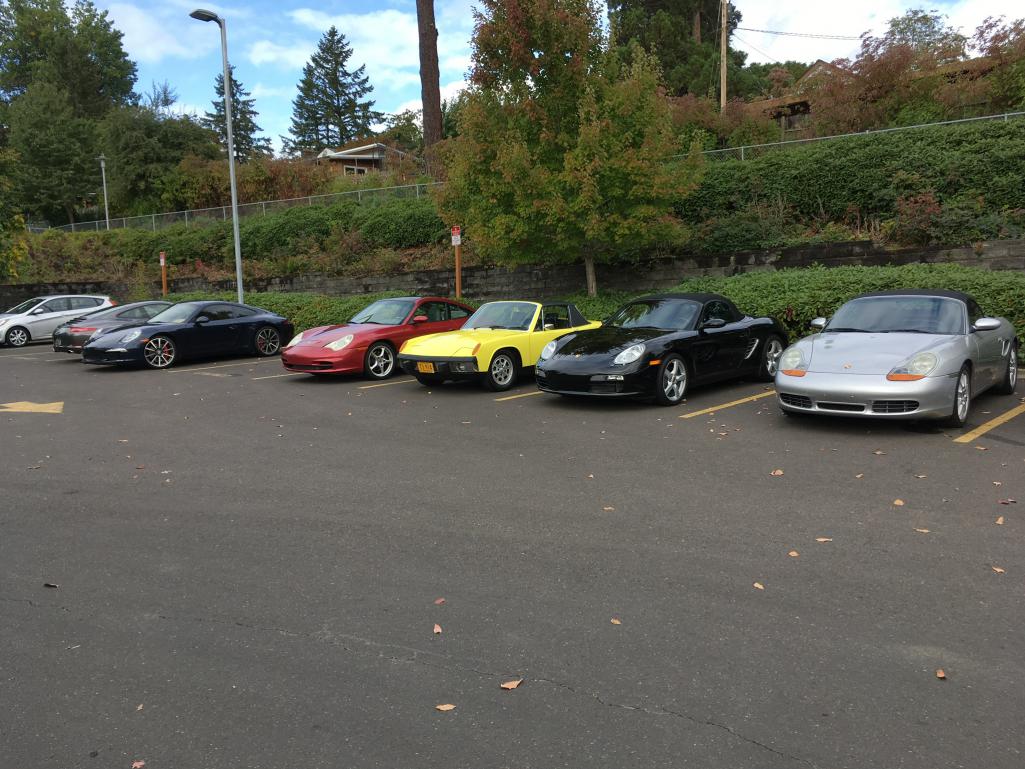
Posted by: arne Oct 9 2017, 04:11 PM
On this day, 9 October 2017, I am declaring this project to be complete.
I'm satisfied.
Today's tasks that led to that declaration were installing the threshold plates with the correct plastic rivets, recovering the sides of the center console, and replacing the pair of rear transmission mounts with fresh 911 Clubsport mounts. Oh yeah, I changed the bulb in the rear trunk light. So that works now also.
Obviously, there are always more things that could be done, but for a driver-quality car I believe I have reached the point of diminishing returns.
Overall, I'm pleased with how it turned out. The car looks good, drives good, and everything works. It attracts attention and draws compliments everywhere I take it. It is a fun car to drive. What more can you ask?
Posted by: 914 7T3 Oct 9 2017, 06:44 PM
On this day, 9 October 2017, I am declaring this project to be completed.
I'm satisfied.
Today's tasks that led to that declaration were installing the threshold plates with the correct plastic rivets, recovering the sides of the center console, and replacing the pair of rear transmission mounts with fresh 911 Clubsport mounts. Oh yeah, I changed the bulb in the rear trunk light. So that works now also.
Obviously, there are always more things that could be done, but for a driver-quality car I believe I have reached the point of diminishing returns.
Overall, I'm pleased with how it turned out. The car looks good, drives good, and everything works. It attracts attention and draws compliments everywhere I take it. It is a fun car to drive. What more can you ask?
Once on the subject of threshold plates, my car is a late '73 and wanted to know if mine should be black plastic or aluminum? They came with black plastic and I would like to put back the correct ones. Let me know and good luck on Wednesday.
Thanks
Posted by: arne Oct 9 2017, 07:18 PM
My car is 6/73, threshold plates are black plastic.
Posted by: Mikey914 Oct 9 2017, 07:26 PM
I may be incorrect, but I thought 75 was the start of the plastic. One of the cost cutting measures that went into production as part of the model change.
Posted by: arne Oct 9 2017, 07:57 PM
Nope, apparently the change was mid-year '73. PET shows part #914.551.419.11 as "cover strip, inner, plastic material, from 4732918919"
Posted by: Jamie Oct 9 2017, 08:04 PM
My Feb. '73 has aluminum plates.
Posted by: 914 7T3 Oct 9 2017, 08:51 PM
Nope, apparently the change was mid-year '73. PET shows part #914.551.419.11 as "cover strip, inner, plastic material, from 4732918919"
Thanks that makes sense as my 05/73 Vin ends in 21258.
Posted by: arne Oct 9 2017, 09:04 PM
Nope, apparently the change was mid-year '73. PET shows part #914.551.419.11 as "cover strip, inner, plastic material, from 4732918919"
Thanks that makes sense as my 05/73 Vin ends in 21258.
And mine is 24138. Both well past the change.
Posted by: jmitro Oct 9 2017, 09:06 PM
wow, great job, and a fast restoration.
I love the before and after pics!
Posted by: mbseto Oct 10 2017, 12:19 PM
That's a beautiful car!
Posted by: turk22 Oct 10 2017, 06:35 PM
Nope, apparently the change was mid-year '73. PET shows part #914.551.419.11 as "cover strip, inner, plastic material, from 4732918919"
Thanks that makes sense as my 05/73 Vin ends in 21258.
And mine is 24138. Both well past the change.
and mine is 25935 (also 6/73) and it had black plastic sill plates. I replaced them with aluminum...
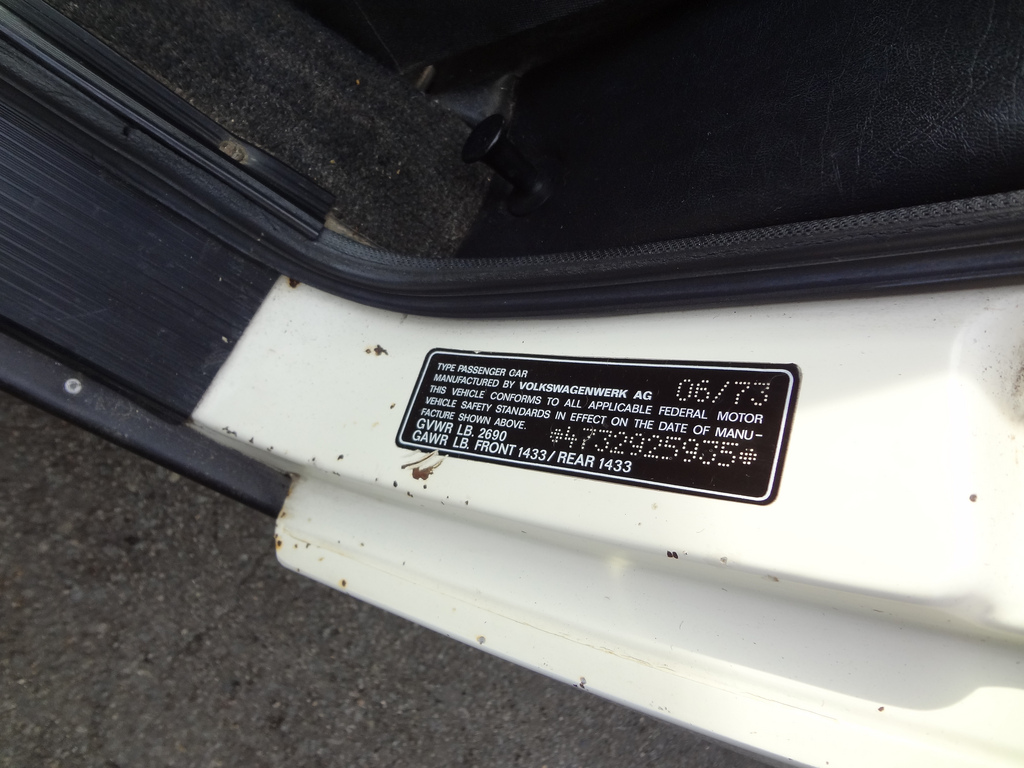
Posted by: porschetub Oct 10 2017, 07:30 PM
Mine is 74 but according to our countries rego database is a 73....that's the way the clowns do it .
Plastic trims but carpet strips missing when I bought it,have new set of both plastic ones to go on.
Posted by: arne Oct 11 2017, 06:00 PM
And as of today, it is officially sold. Transport being arranged for next week.
Time to start looking in earnest for the next project!
Posted by: arne Oct 12 2017, 02:30 PM
Time for some closing credits.
Thanks to the following 914world members (in no particular order) for their help, parts, advice, knowledge, moral support and general encouragement.
JRust
JB620
mepstein
euro911
914 7T3
mstein95
Mike Fitton
Garold Shaffer
914sixer
And the following vendors were instrumental in making this car complete.
914rubber.com
Pelican Parts
Tangerine Racing
Camp 914
Sierra Madre Collection
Boatyard Buses, UK
Stoddard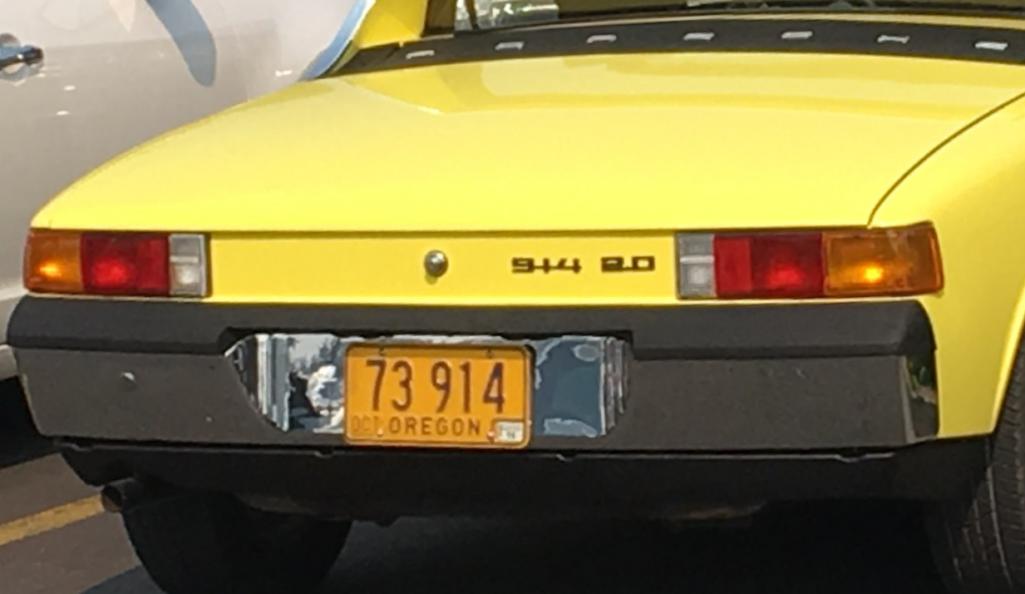
Posted by: porschetub Oct 12 2017, 04:17 PM
Are you going to do another 914 ?....I think you should do a "6" conversion with your skills...just saying .
Posted by: arne Oct 12 2017, 04:29 PM
Are you going to do another 914 ?....I think you should do a "6" conversion with your skills...just saying
.I might do another 914, depends on whether I find the right car. Whether I’d do a 6 conversion would also depend on the car. The one I just finished was too original to mess with. A different car might go a totally different direction.
Posted by: 914 7T3 Oct 14 2017, 10:08 AM
Are you going to do another 914 ?....I think you should do a "6" conversion with your skills...just saying
.I might do another 914, depends on whether I find the right car. Whether I’d do a 6 conversion would also depend on the car. The one I just finished was too original to mess with. A different car might go a totally different direction.
Have you considered a Super Project! Bidding opens today.
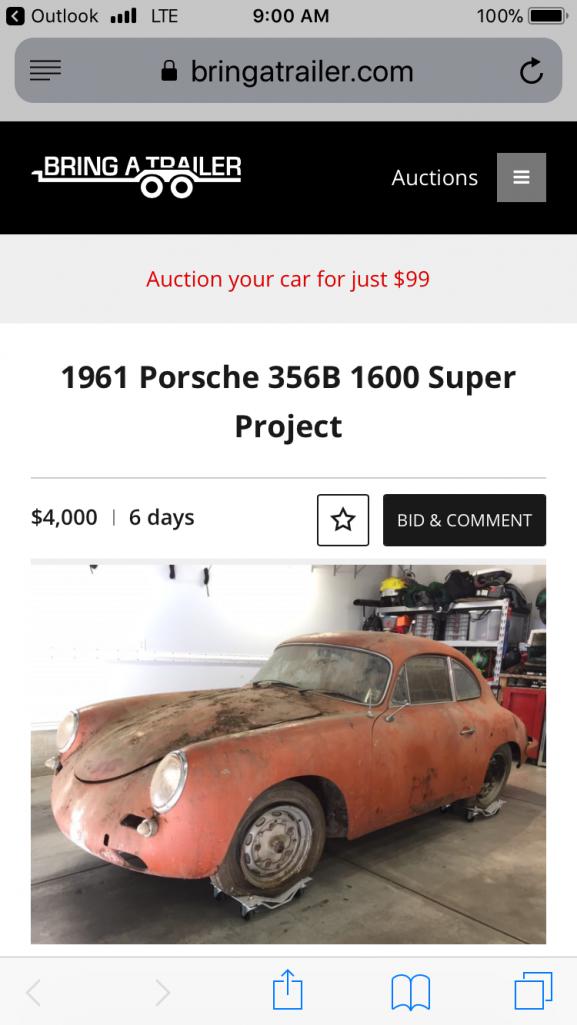
Posted by: arne Oct 14 2017, 11:23 AM
I don’t think so, Jeffrey. I’ve never been a big 356 fan, buy in price will likely be higher than I want to go, and the rust is too extensive for my comfort. Strike 3...
Posted by: 914 7T3 Oct 14 2017, 11:26 AM
I don’t think so, Jeffrey. I’ve never been a big 356 fan, buy in price will likely be higher than I want to go, and the rust is too extensive for my comfort. Strike 3...
That’s why it’s a “SUPER” Project!
Cool car though, even if it’s “SUPER” slow!
Posted by: arne Oct 14 2017, 12:20 PM
I don’t think so, Jeffrey. I’ve never been a big 356 fan, buy in price will likely be higher than I want to go, and the rust is too extensive for my comfort. Strike 3...
That’s why it’s a “SUPER” Project!
Perhaps. But for my recreation projects, I need to look at them a lot closer than I would if they were cars that I planned to keep because I wanted them. A car that I might keep for a few years at least gives me more flexibility to overlook some condition shortcomings, compared to a car that I want to sell when finished. The resale car needs to meet a higher standard, I can't afford to overlook something and get underwater.
Cool car though, even if it’s “SUPER” slow!
Not as slow as you might think. I've seen a couple of well driven 356s on spirited PCA drives up here, they keep up just fine for quasi-legal twisties.
Posted by: euro911 Oct 14 2017, 01:59 PM
Yeah, a big-bore motor will bring it to life. I have two 1720s here
Posted by: 914 7T3 Oct 14 2017, 02:33 PM
Yeah, a big-bore motor will bring it to life. I have two 1720s here
What don’t you have there? It’s better than Disneyland.

Posted by: arne Oct 14 2017, 03:29 PM
One of my friends has a ‘67 912 with a 1720 in it. He also has a stock ‘66 912. The difference is impressive.
Posted by: euro911 Oct 14 2017, 04:31 PM
What don’t you have there? It’s better than Disneyland.
Posted by: 914 7T3 Oct 14 2017, 06:00 PM
What don’t you have there? It’s better than Disneyland.
Since the 914 is going to a 2056, seems only fitting that my future ‘66 should have a 1720.
Posted by: arne Oct 14 2017, 06:11 PM
What don’t you have there? It’s better than Disneyland.
Since the 914 is going to a 2056, seems only fitting that my future ‘66 should have a 1720.
If you are after a 912, the one with the big motor up here is for sale. Nice car. Danish delivery, so all euro bits - lights, gauges, etc. Silver over black.
Posted by: 914 7T3 Oct 14 2017, 06:20 PM
What don’t you have there? It’s better than Disneyland.
Since the 914 is going to a 2056, seems only fitting that my future ‘66 should have a 1720.
If you are after a 912, the one with the big motor up here is for sale. Nice car. Danish delivery, so all euro bits - lights, gauges, etc. Silver over black.
Need to slow down after the 986 acquisition and 914 resto within 6 months.
By the time Euro911 finishes the car and if I can wear him down at some point in the future, maybe......just maybe.
Posted by: arne Oct 15 2017, 02:37 PM
On its way to the new owner. Sitting above an Aston Martin DBS. Probably the most affordable car on the transport.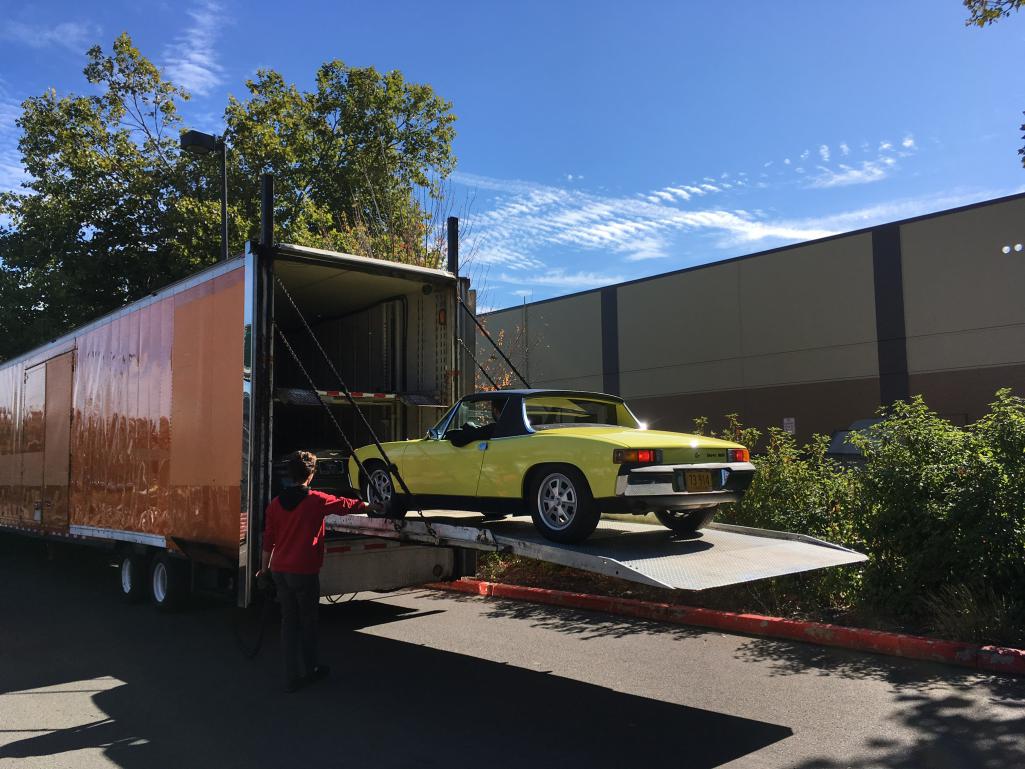
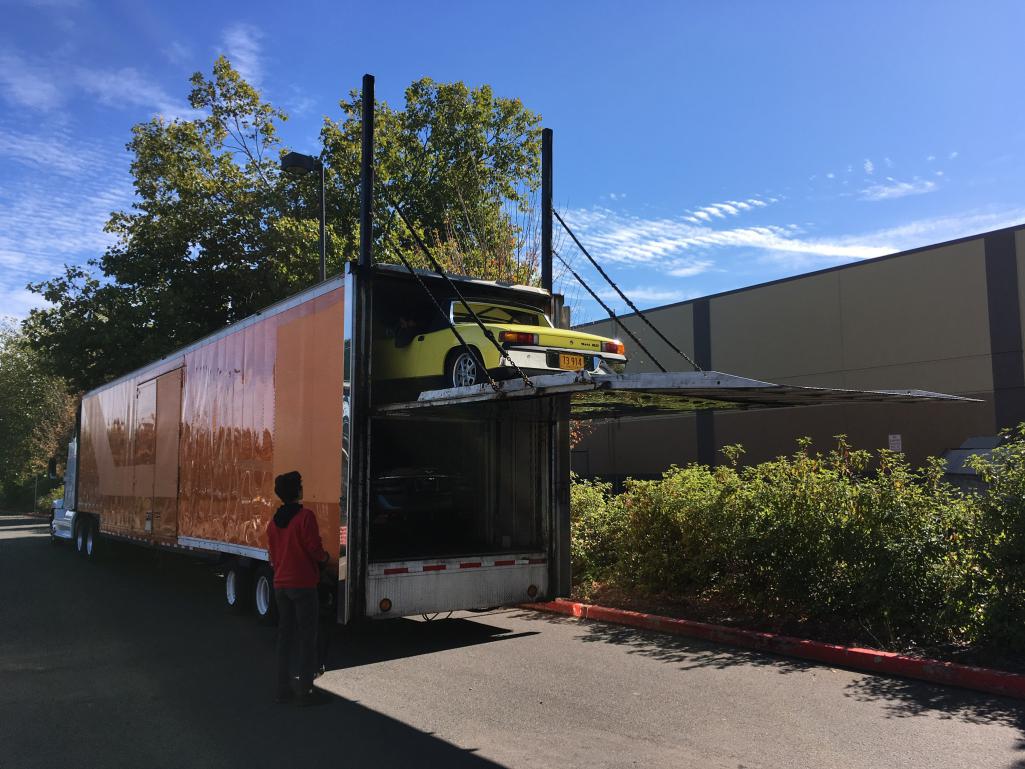
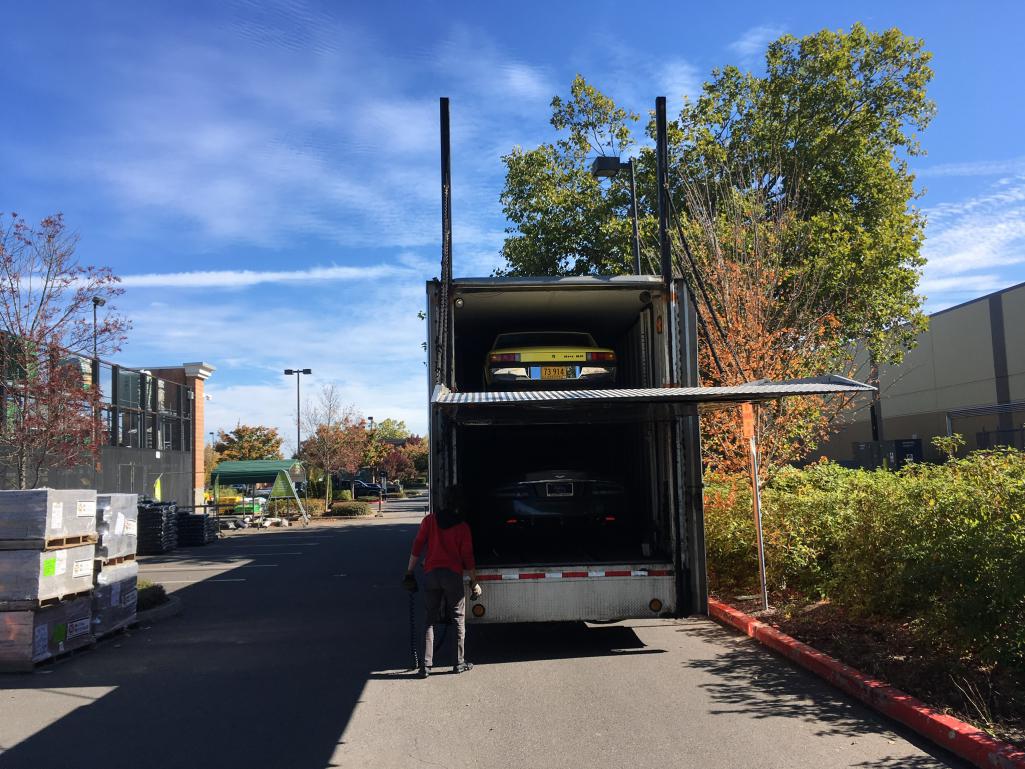
Posted by: arne Oct 17 2017, 08:51 PM
I’ve received word that the new owner now has possession. The torch has been passed successfully.
Posted by: arne Oct 17 2017, 08:52 PM
Oops! Duplicate post!
Powered by Invision Power Board (http://www.invisionboard.com)
© Invision Power Services (http://www.invisionpower.com)