Printable Version of Topic
Click here to view this topic in its original format
914World.com _ 914World Garage _ Resto-Thread: '73 Marathon Blue 2.0
Posted by: Calvinator2016 Apr 21 2017, 01:28 PM
I have been on 914 World for just a few weeks and with the knowledge and support of everyone was able to get up to speed quickly on values and things to look out for. when considering a vehicle to purchase.
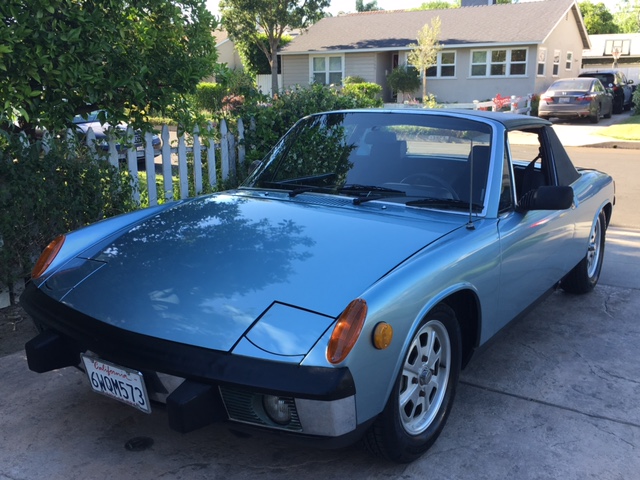
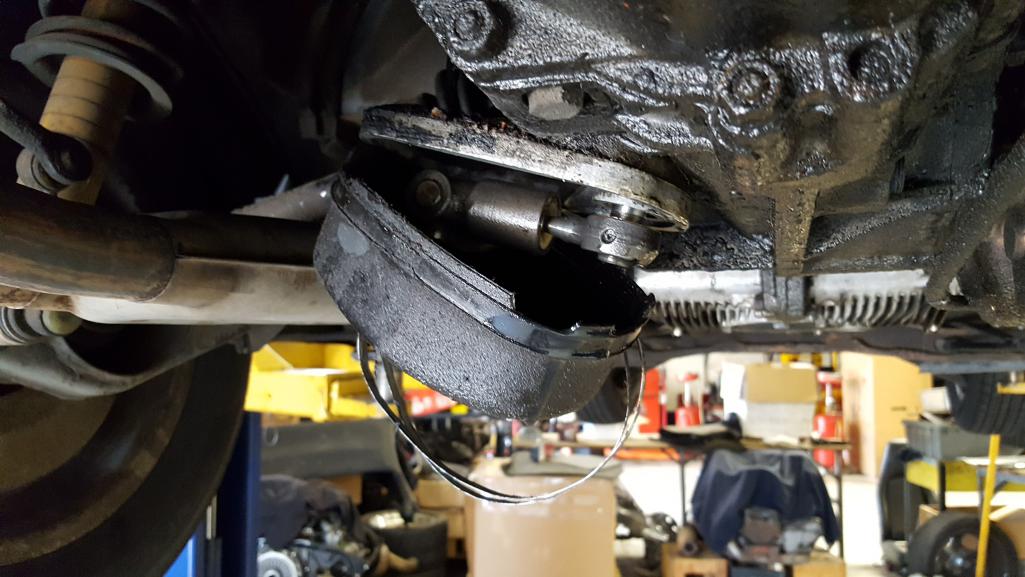
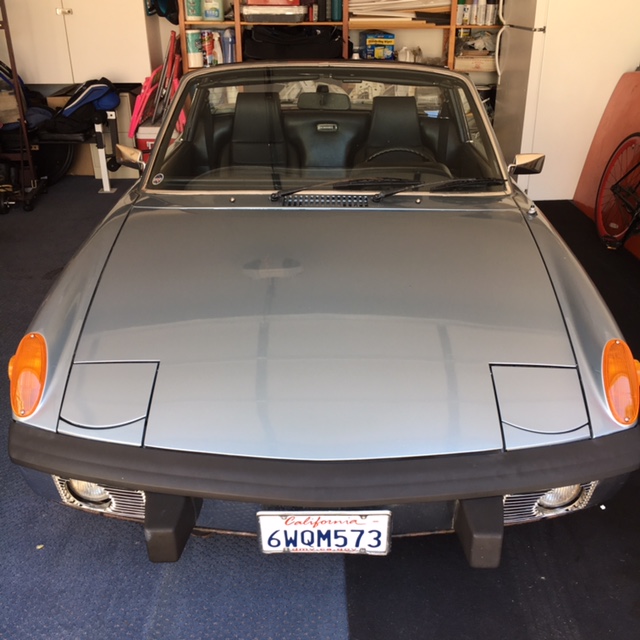
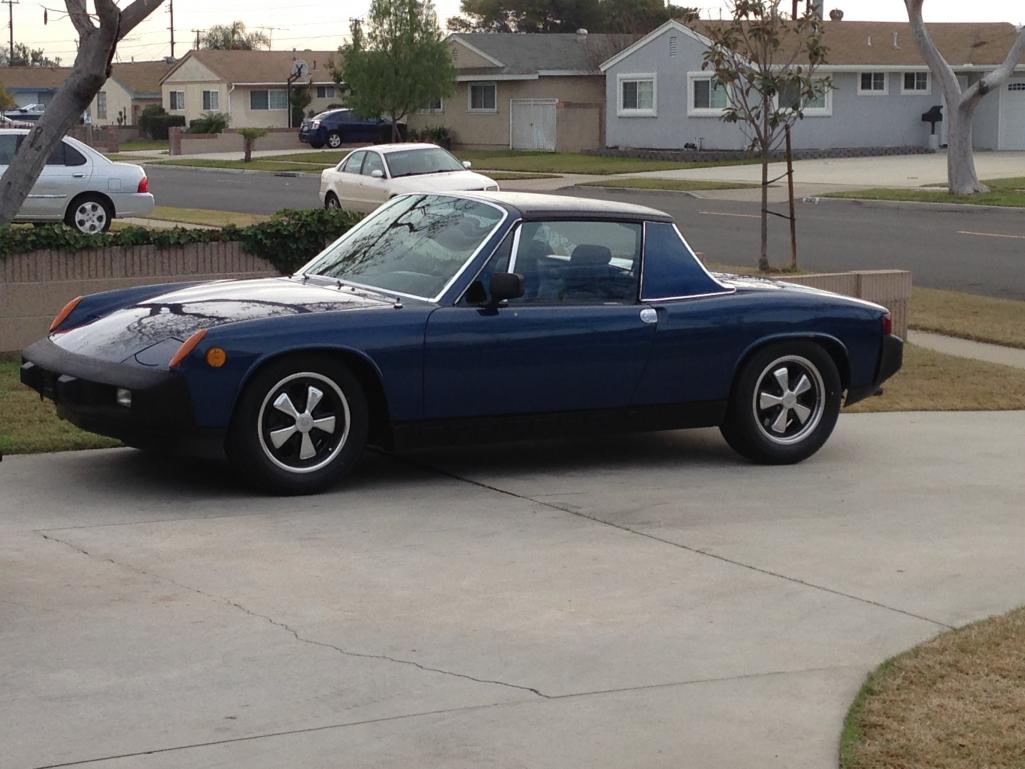
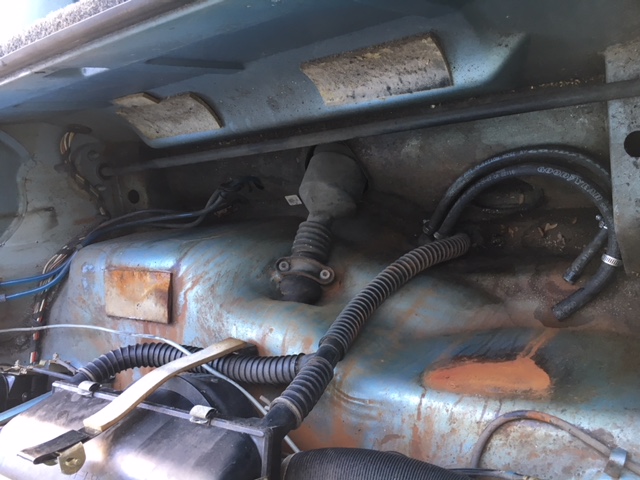
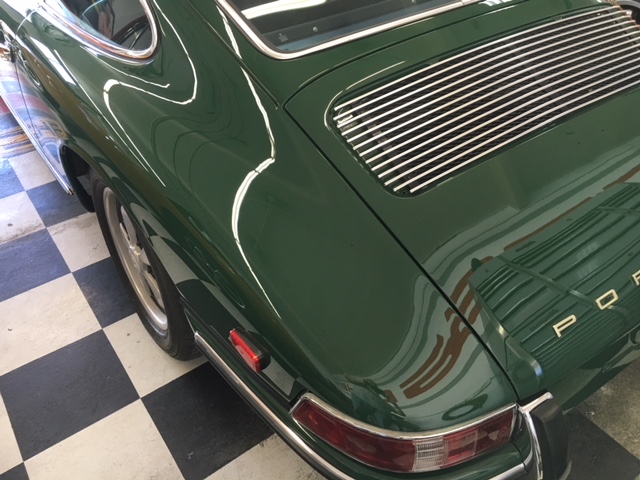
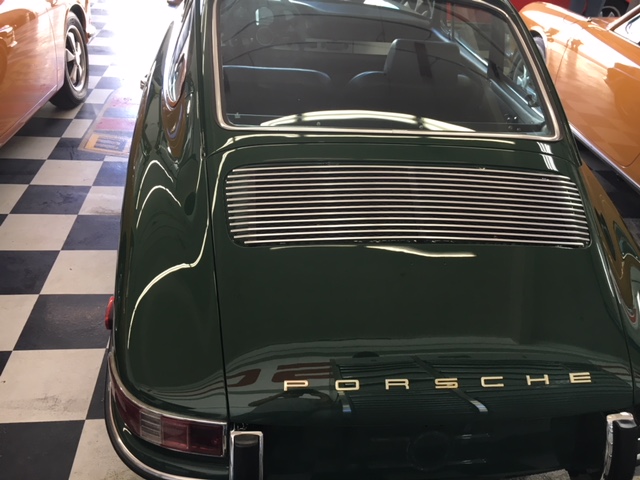
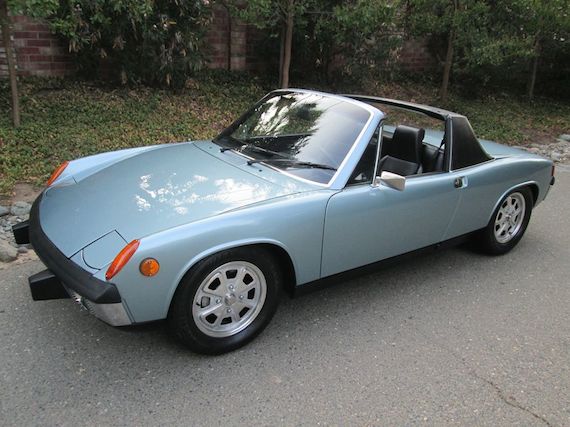
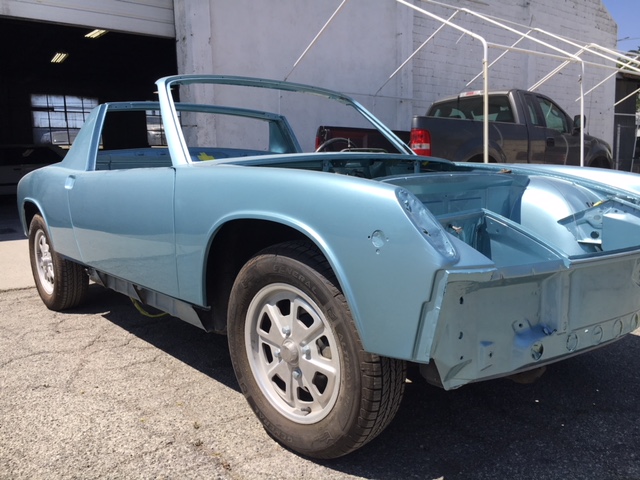
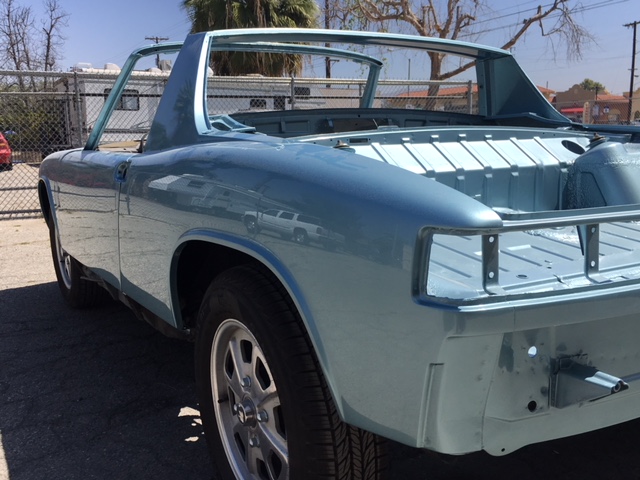
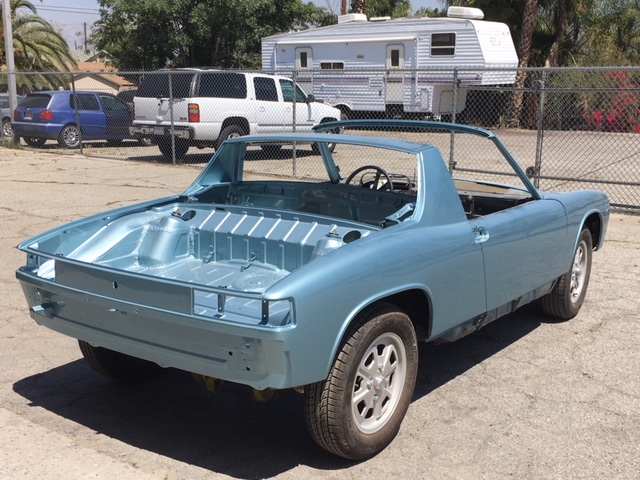
I just acquired this matching numbers '73 Marathon Blue 2.0 up in NorCal on Wednesday. Straight car with a strong motor and minimal rust issues. Fuel lines and pump have already replaced and rear suspension and brakes were done about 5,000 miles ago back in 2012.
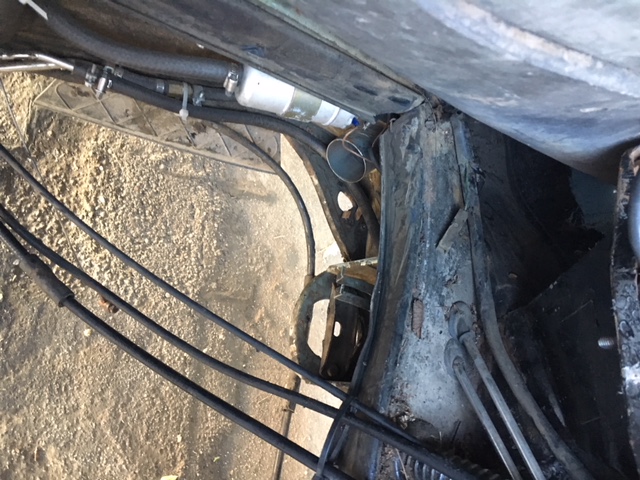
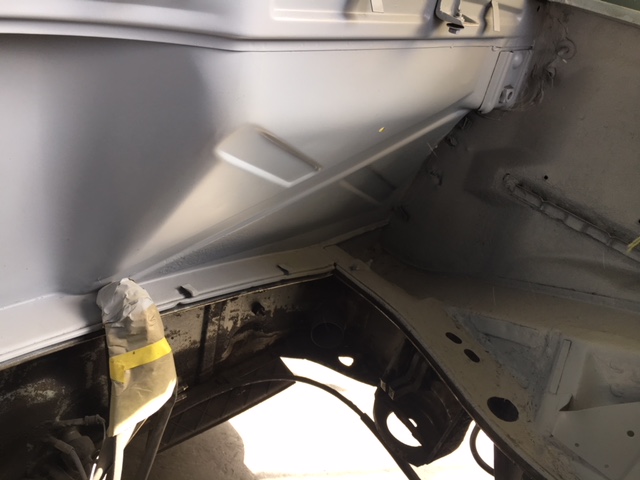
The required rust repairs of significance will entail a partial front trunk pan and minor hell hole repair so in the grand scheme of things a great starting point.
My plan is to get her tuned up, fix oils leaks and anything else of concern while I drive her over the summer. Once fall/winter hits I would like to do a full repaint down to the metal.
Special shout out to Arne as well as Craig from Camp 914 for the behind the scenes consults. Also shout out to John at Hayes European in Santa Cruz for the PPI!
Wish me luck! 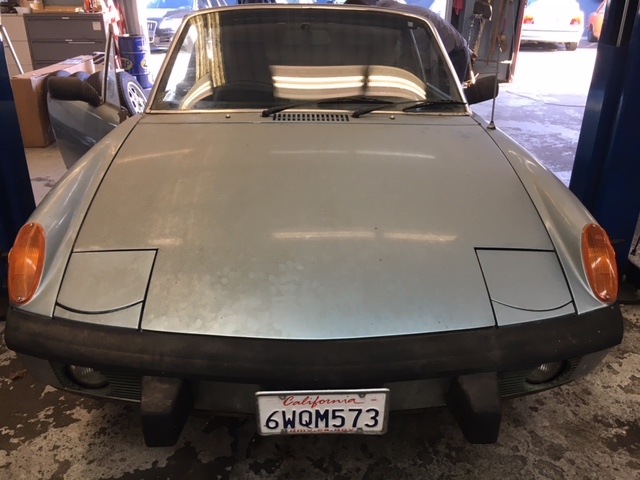
Posted by: mepstein Apr 21 2017, 01:29 PM
Congrats! 
Posted by: Calvinator2016 Apr 21 2017, 01:29 PM
More Pics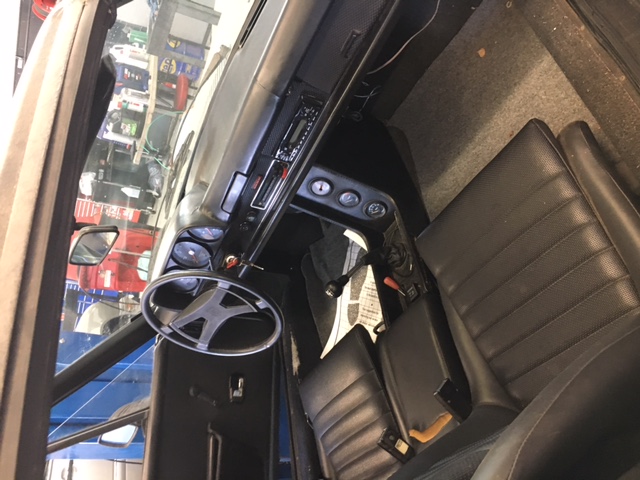

Posted by: LowBridge Apr 21 2017, 01:32 PM
congrats, looks like a nice one... 
Posted by: Tom_T Apr 21 2017, 01:34 PM
Congratz!
Marathon is a great color - hopefully you'll keep it!
.... officially now! 
Cheers!
Tom
///////
Posted by: arne Apr 21 2017, 01:53 PM
Well, you leap-frogged me, Jeffery, by buying a car that already runs and drives. I figure I've got a few weeks yet to get to that point. Once there, we can continue to compare notes on our progress.
I better head to the garage now, I'm behind....
Posted by: Cairo94507 Apr 21 2017, 01:57 PM
Looks like a terrific car. 
Posted by: iwanta914-6 Apr 21 2017, 02:02 PM
Must be rough living in the land where 914s are plentiful...congrats!
Posted by: infraredcalvin Apr 21 2017, 02:07 PM
Congrats...
Posted by: JOEPROPER Apr 21 2017, 02:10 PM

Must be rough living in the land where 914s are plentiful...congrats!
No matter where you are, they're just a click away...
Posted by: JOEPROPER Apr 21 2017, 02:11 PM
Looks Great! Good Luck!
Posted by: Coondog Apr 21 2017, 02:24 PM
Congrats, I would have a detailer look at your paint job. Seen them make old paint jobs look new again.
Posted by: iwanta914-6 Apr 21 2017, 02:57 PM
Must be rough living in the land where 914s are plentiful...congrats!
No matter where you are, they're just a click away...
Yes, they are a click away but shipping costs suck

Posted by: Calvinator2016 Apr 21 2017, 06:52 PM
Must be rough living in the land where 914s are plentiful...congrats!
No matter where you are, they're just a click away...
Yes, they are a click away but shipping costs suck
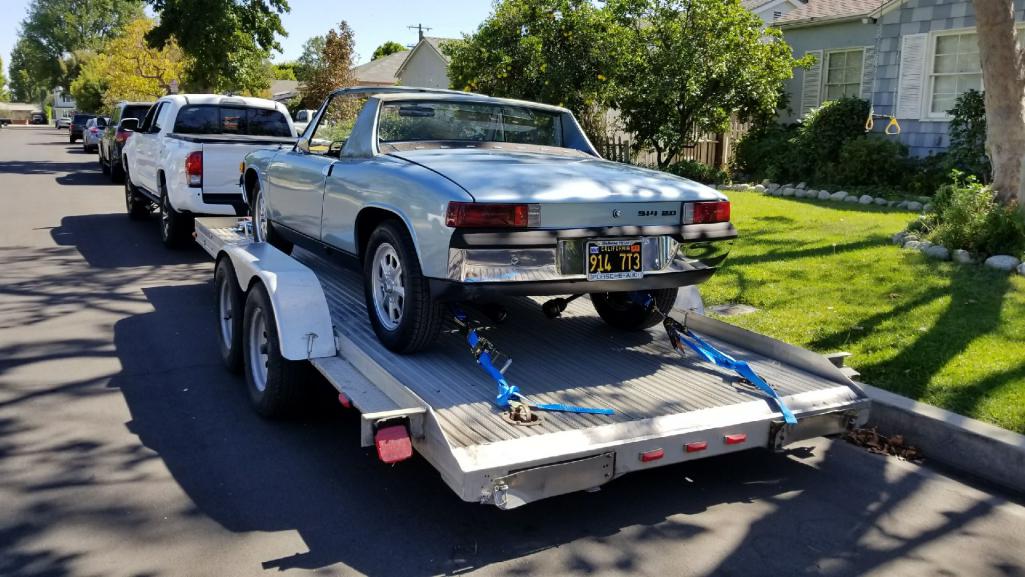
Many of them around Cali are still beaters. I had to drive 700 miles round trip to get her bought and will still ship back here to LA. Luckily, the cost of intrastate transport is about 1/3 of what it costs to ship cross country.
Should see her here on Wednesday.
Posted by: Jett Apr 21 2017, 07:44 PM
Congrats and great color!
Btw. You should bookmark 914Rubber.com 
Cheers!
Posted by: Calvinator2016 Apr 21 2017, 08:18 PM
Congrats and great color!
Btw. You should bookmark 914Rubber.com
Cheers!
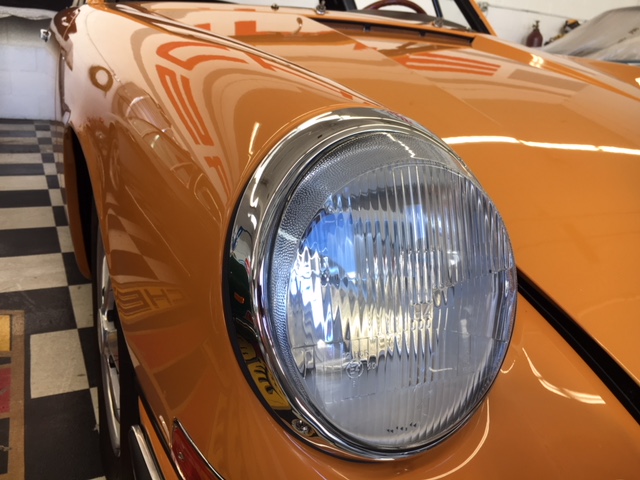
I love the color too. The car also came with a box of parts, including all new rubber from those guys. I have to list it and verify against the complete kit that they sell to see what if anything is missing. It also came with a set of yellow Hella Euro lenses for the fogs.
Posted by: Calvinator2016 Apr 21 2017, 08:28 PM
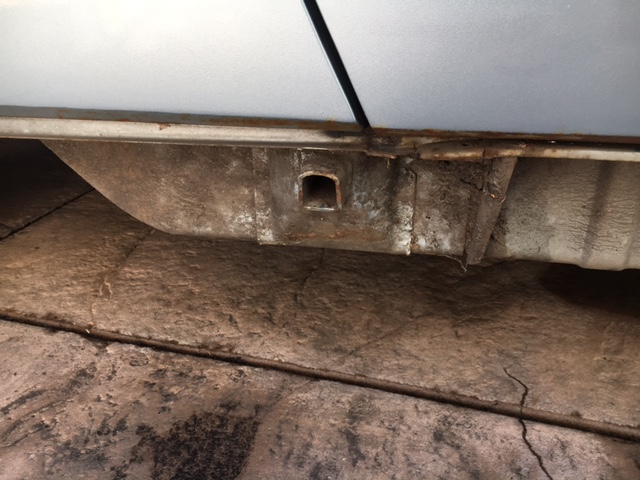
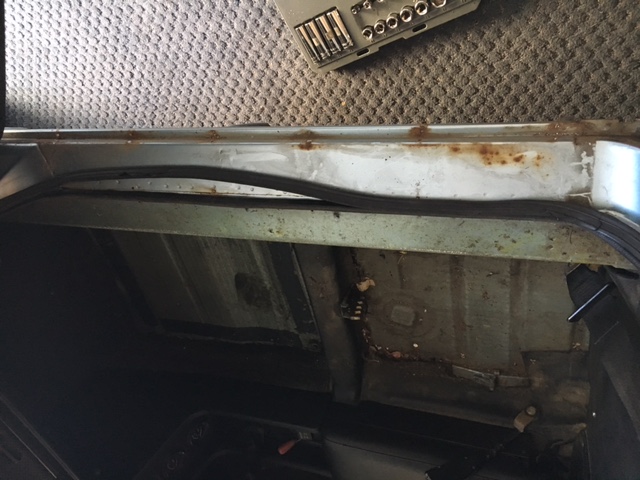
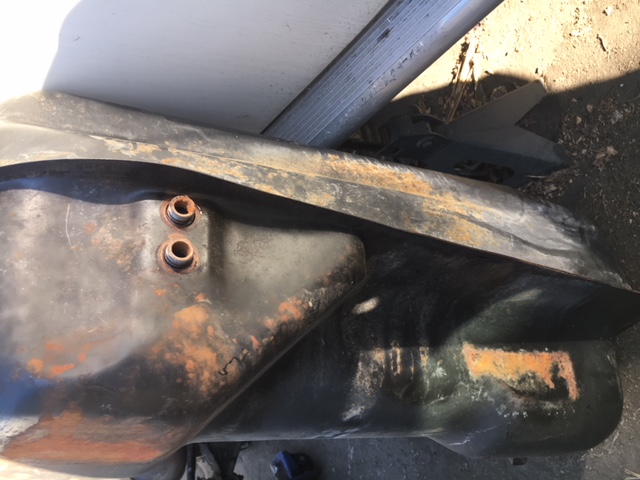
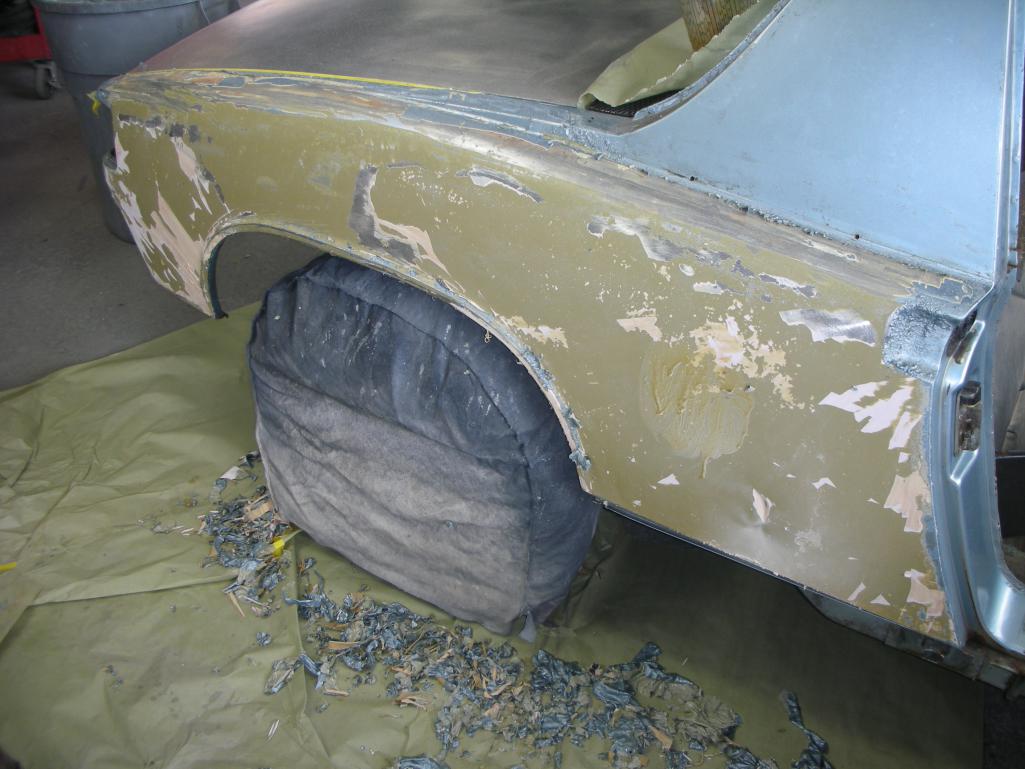
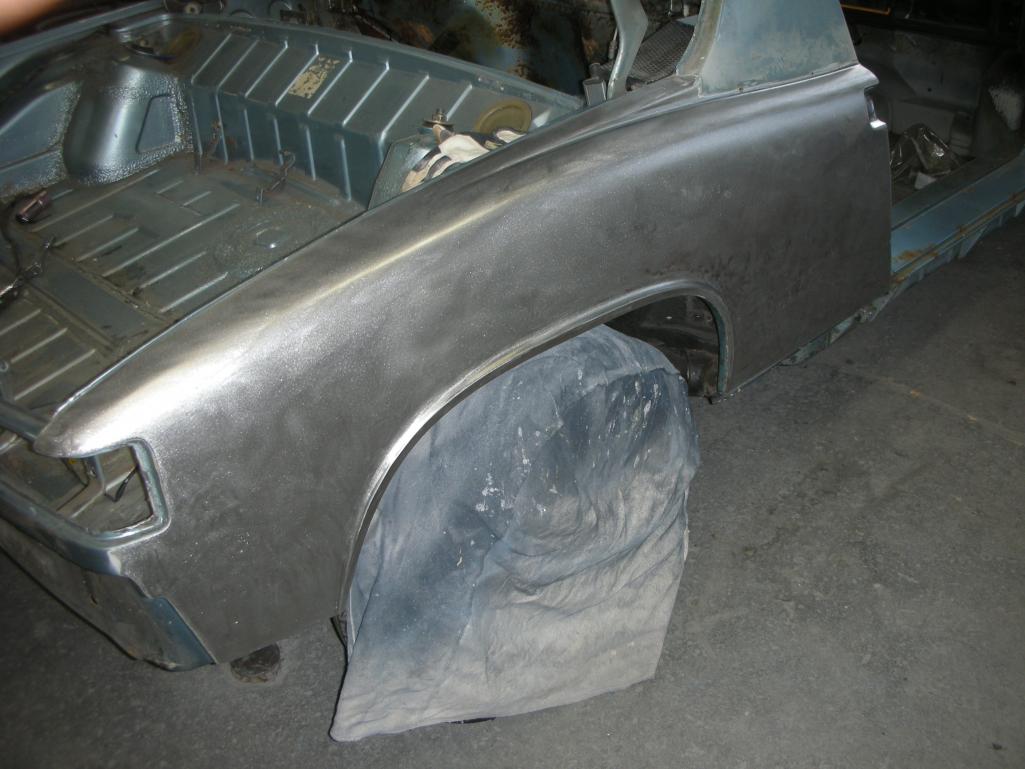
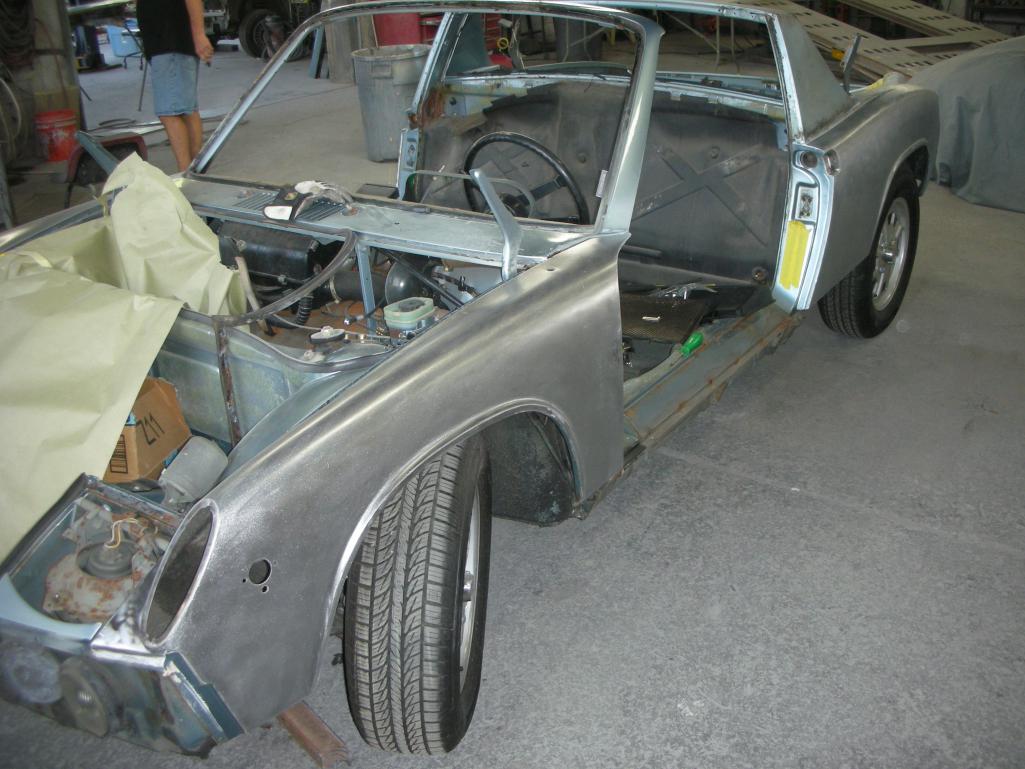
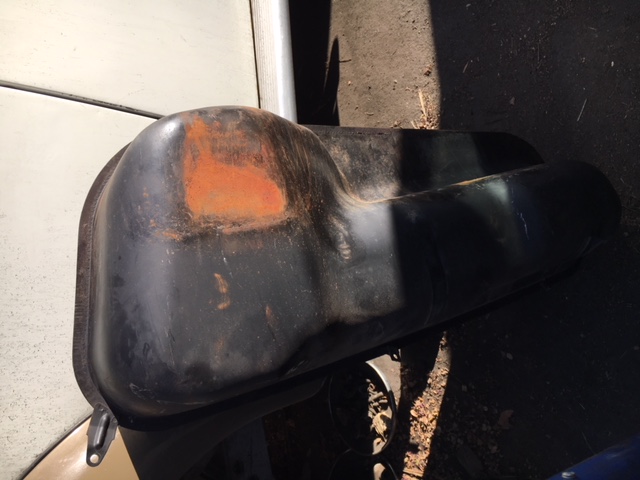
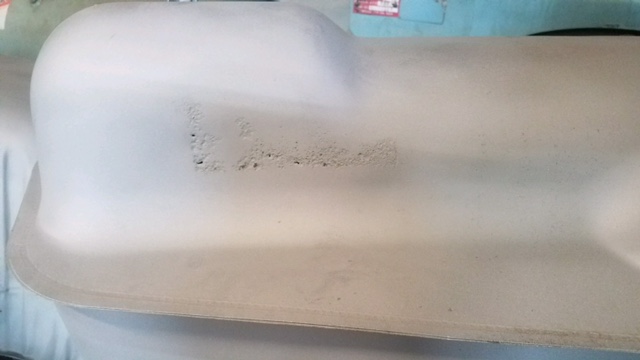
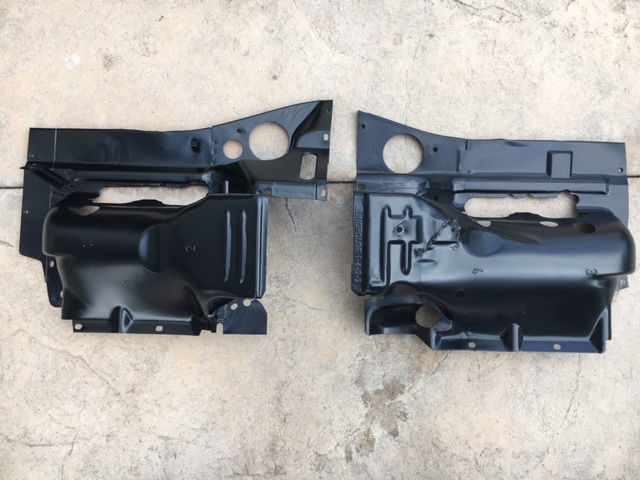
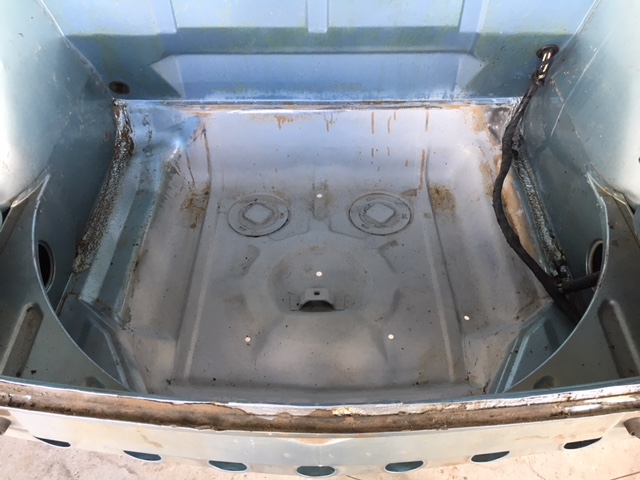
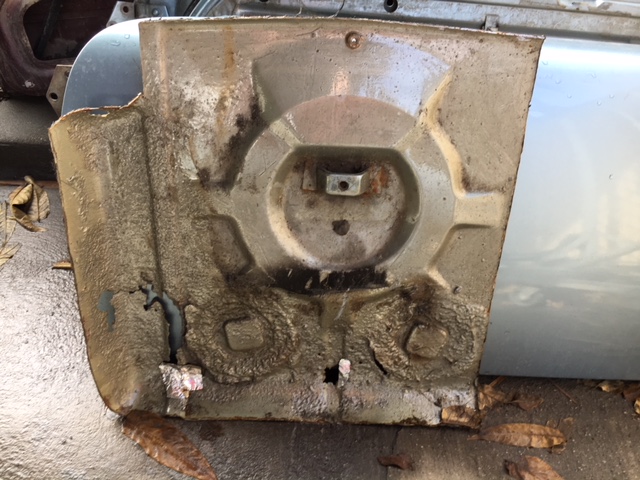
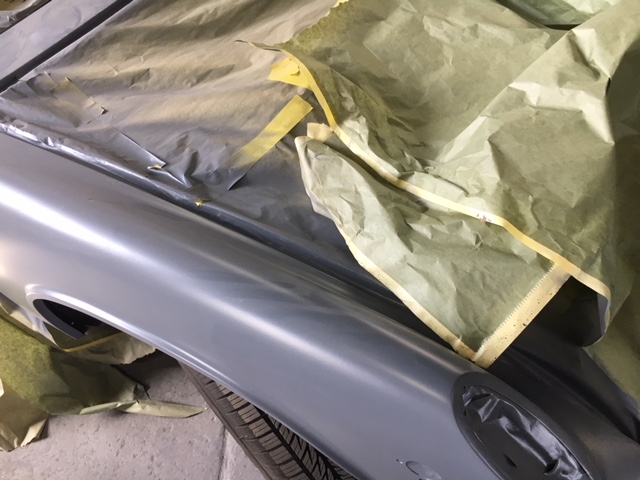
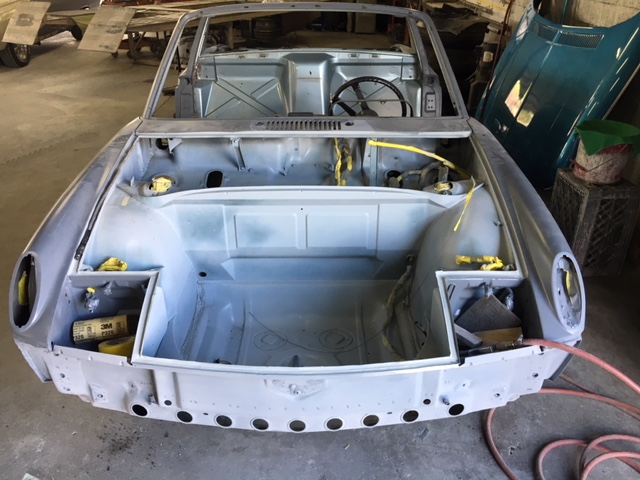
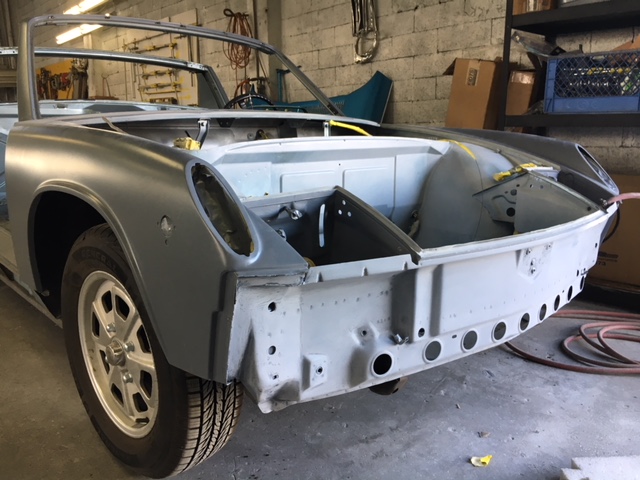
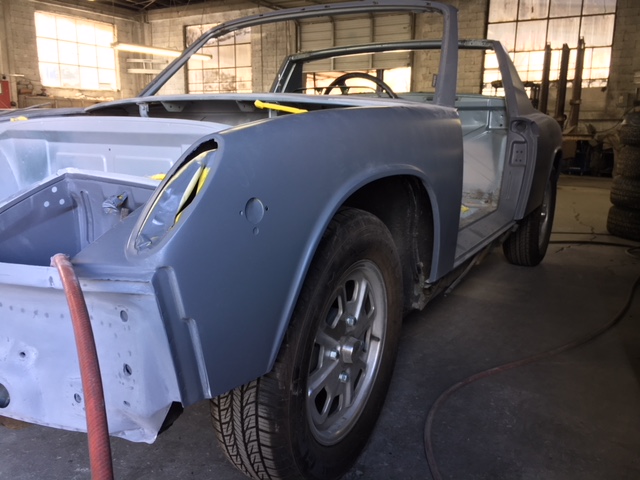
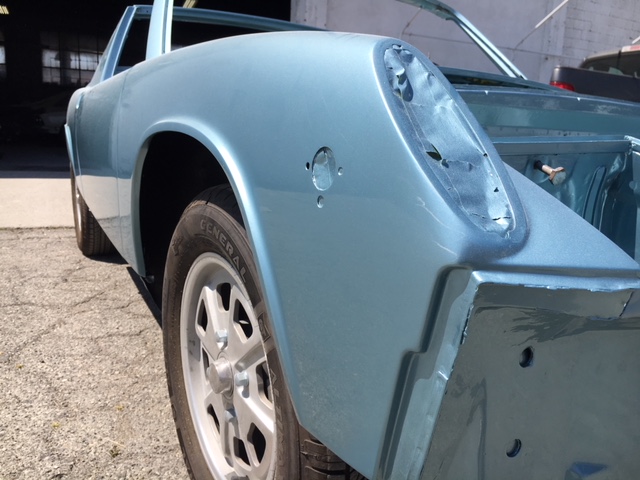
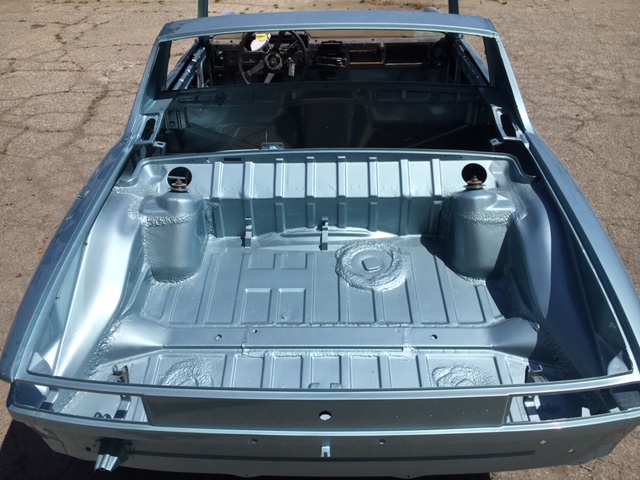
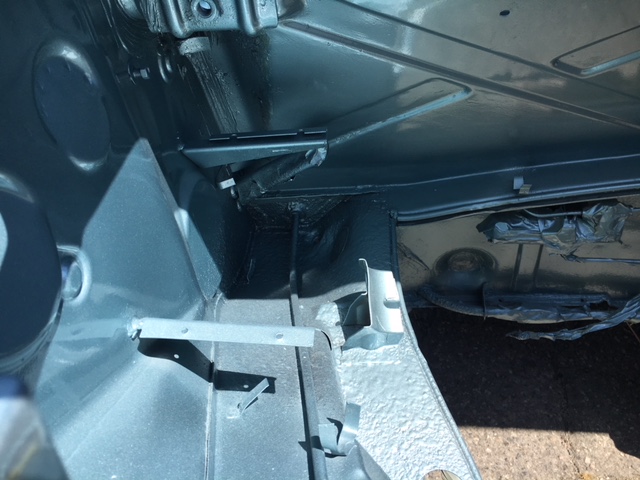
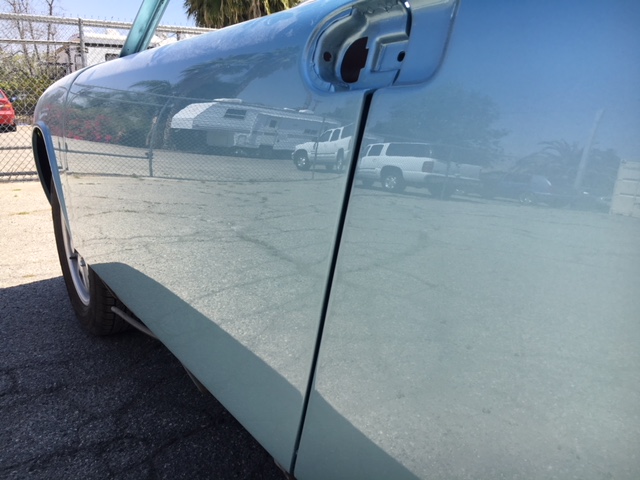
Not all is perfect however. Here are pics of the front pan where there was fiberglass repair and the hell hole corrosion. Paint is bubbling in areas, but nothing major.
The rest is pretty straight as you can see.

 [attachmentid=601
490]
Attached image(s)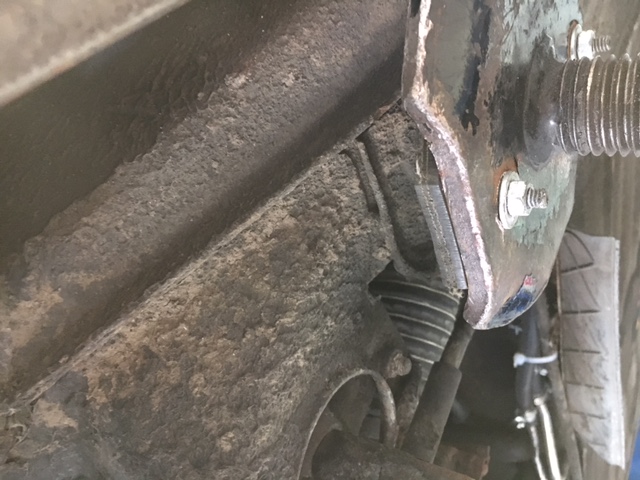
Posted by: RobW Apr 21 2017, 09:16 PM
Congratulations! 
Posted by: Calvinator2016 Apr 21 2017, 10:43 PM
Congratz!
Marathon is a great color - hopefully you'll keep it!
.... officially now! Cheers!
Tom
///////
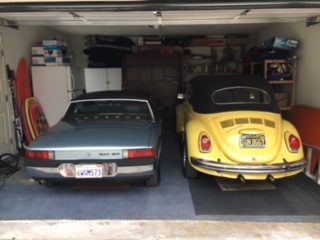
That's the plan. I've also got a '72 Super Beetle Convertible going on 30 years this June. Need to clean out the garage and they can park side by side.
Posted by: Calvinator2016 Apr 21 2017, 10:56 PM
Well, you leap-frogged me, Jeffery, by buying a car that already runs and drives. I figure I've got a few weeks yet to get to that point. Once there, we can continue to compare notes on our progress.
I better head to the garage now, I'm behind....
Difference is you may be challenged by time and I'll be challenged by $ as I am going to have to bring mine to the Pros. I will be the Project Manager and General Contractor on this deal.
This car was purchased new from Gateway Porsche Audi in Portland, OR on July 26, 1973.
Hope you have yours on the road ASAP!
Posted by: arne Apr 22 2017, 10:20 PM
You'd think a retired guy would have more time, but I seem to be busier than ever now. In any case, I've got a new goal now - to get mine running and driving before you get yours trucked home! 
Posted by: Calvinator2016 Apr 23 2017, 12:29 AM
You'd think a retired guy would have more time, but I seem to be busier than ever now. In any case, I've got a new goal now - to get mine running and driving before you get yours trucked home!
That would be Wednesday. I will schedule an afternoon delivery just to be fair.
Back to work for you if yours is going to look anything like this

Posted by: Calvinator2016 Apr 26 2017, 06:32 PM
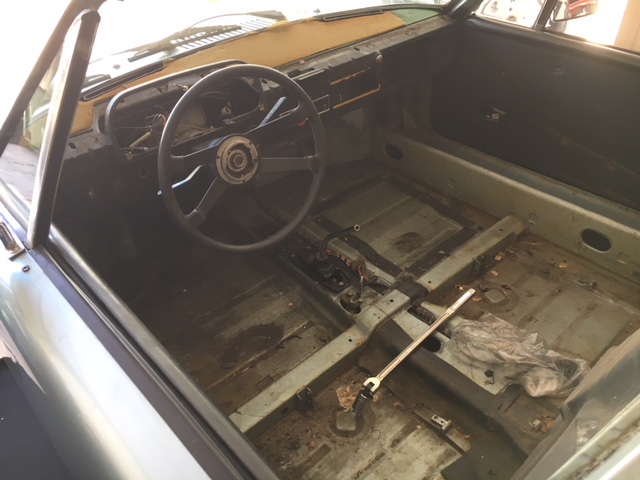
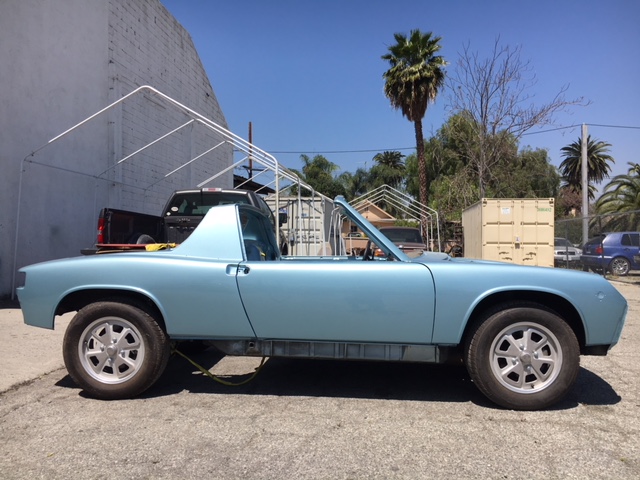
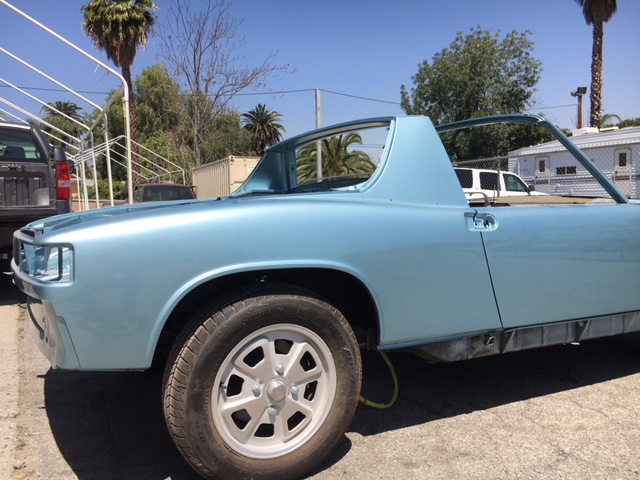
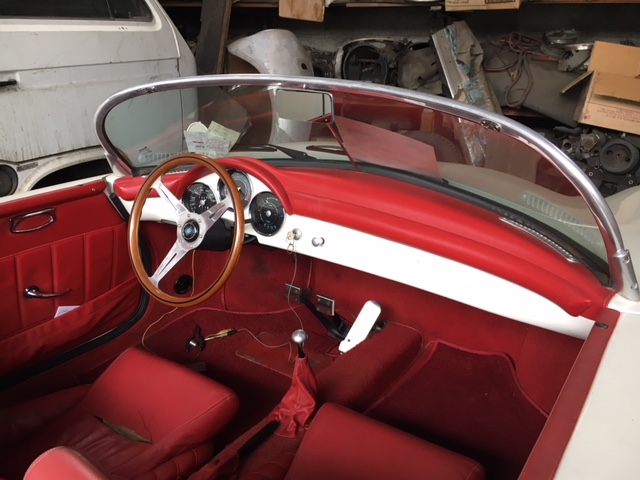
Finally got my '73 delivered today and after a quick wash was amazed at how well she cleaned up. I was surprised to see a nice car under the grime. All gauges are working except the clock and interior is in better shape than I originally thought.
Off to TRE Motorsports in the morning for a more thorough once over, but she is already running great. Shifting is just a little crunchy getting into first sometimes however.
I will get her detailed and a new set of tires and start enjoying the ownership experience while I sort out the rest.
Even better, I got Porsche to verbally confirm my original matching numbers motor this morning while awaiting the COA.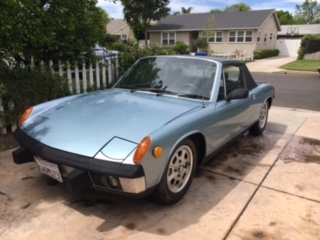
Posted by: arne Apr 26 2017, 07:17 PM
Ok, so I did get mine running before you got yours home, but while I have moved it around under its own power some, I can't truly say that it is drivable yet. So you win!
Posted by: Calvinator2016 Apr 26 2017, 11:10 PM
We all win in 914World!!!
Posted by: Calvinator2016 Apr 27 2017, 12:13 PM
I think we will be in good hands here at TRE Motorsports for a Major Service!
Posted by: ValcoOscar Apr 27 2017, 12:27 PM
Great color indeed.....here's mine.
Enjoy!!!!
Attached thumbnail(s)
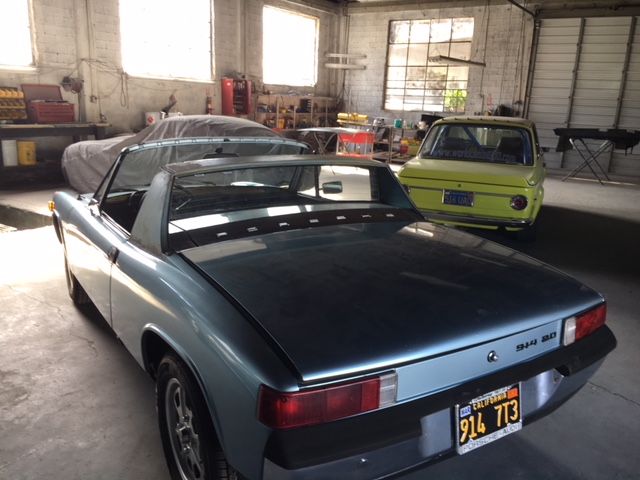
Posted by: Calvinator2016 Apr 30 2017, 04:45 PM
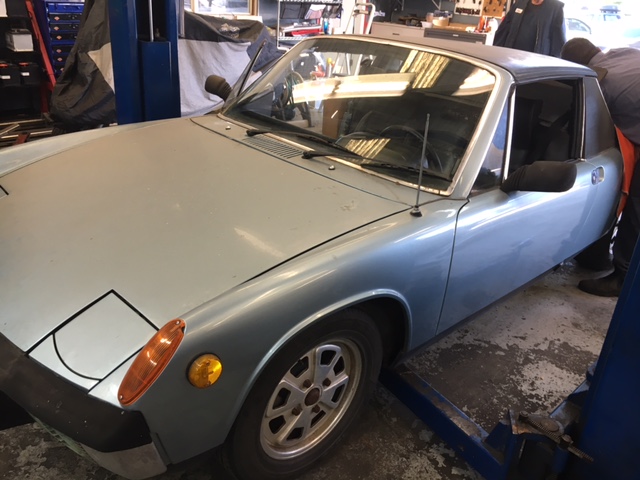
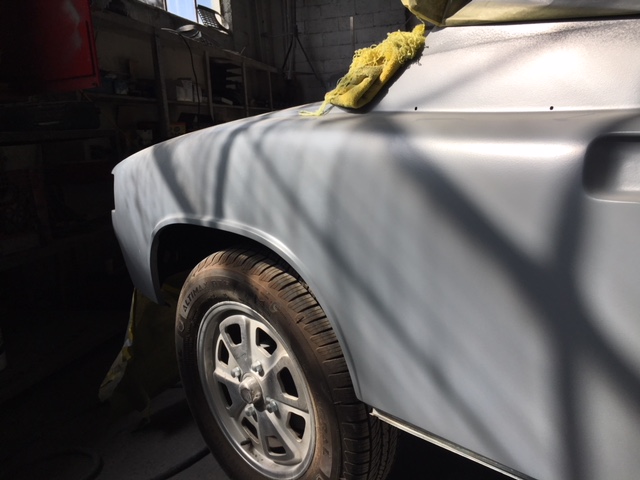
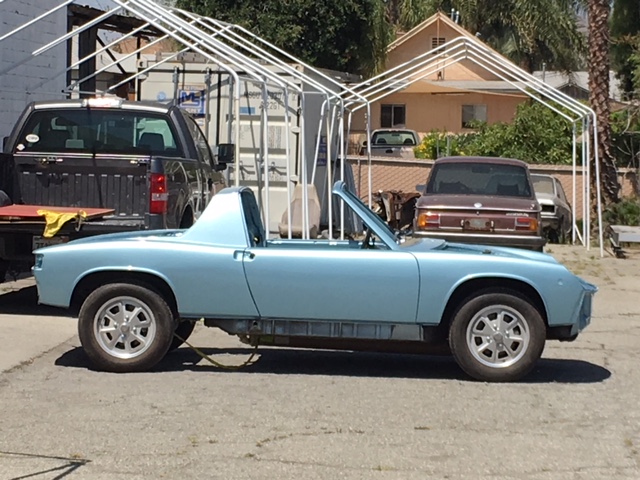
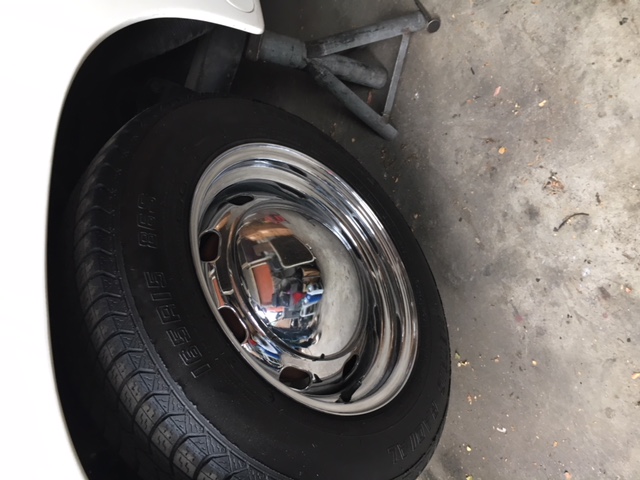
Probably going about this the wrong way, but I decided to spring the Car from the mechanic for the weekend to get the new tires installed. Decided on the 195/65 Altimax RT 43s for handling on dry roads and ride comfort.
Also took it in for a quick detail and was able to get the exterior cleaned up and waxed. Looks like a different car altogether, but still a 10 footer.
Once the mechanics are complete, this will be a respectable driver until the repaint gets underway at some point next year.
Posted by: Mitox May 1 2017, 08:44 AM
Very Nice - Congrats!
Posted by: forrestkhaag May 1 2017, 11:25 AM
My first 914 1.7 back in the early seventies was that color. Many a chick fell in love...with the car....
Nice score. Your car......... Not the 74chicks 
Attached thumbnail(s)
Attached image(s)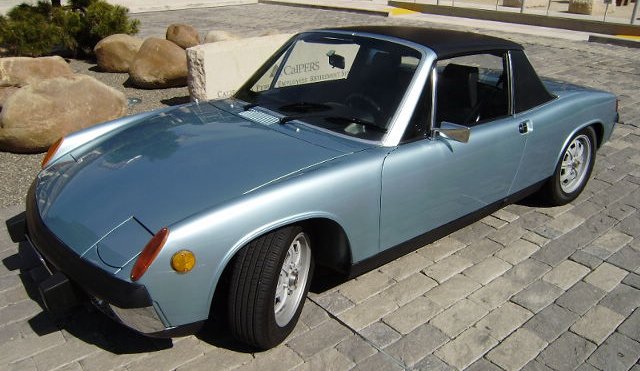
Posted by: Calvinator2016 May 1 2017, 04:00 PM
My first 914 1.7 back in the early seventies was that color. Many a chick fell in love...with the car....
Nice score. Your car......... Not the 74chicks
Sweet Pics! As for the Chicks, it really depends on what they looked like.

Curious to know if "Tranche" is in reference to the french translation for slice.
Posted by: SHREK914 May 1 2017, 07:54 PM
Did you buy this car in Santa Cruz, Ca?
Posted by: Calvinator2016 May 1 2017, 08:15 PM
Did you buy this car in Santa Cruz, Ca?
Yes it was listed here on 914 World in December and again in March, however I first saw it on Craigslist.
Posted by: SHREK914 May 1 2017, 10:15 PM
I thought it looked familiar, that car lived a few blocks away from me.
Posted by: Larmo63 May 1 2017, 10:38 PM
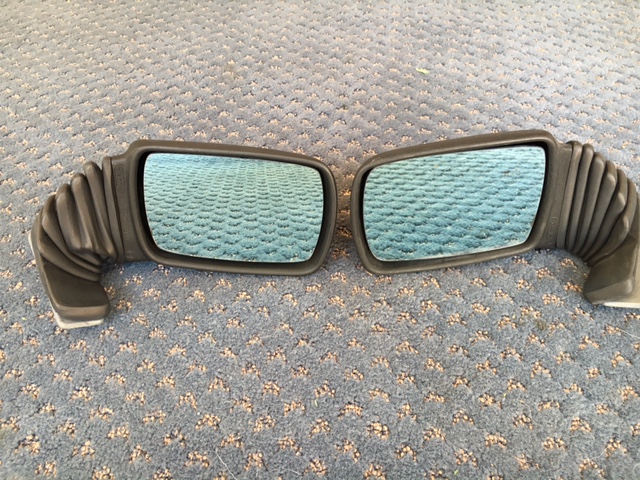
Cool car, great color, but GET RID OF THOSE mirrors.
That's all.
Posted by: Calvinator2016 May 3 2017, 10:09 AM
Cool car, great color, but GET RID OF THOSE mirrors.
That's all.
Ok then! The question is, "Do I feel lucky"
"Go ahead, Make my Day!"

http://www.914world.com/bbs2/index.php?showtopic=309416
Posted by: Calvinator2016 May 3 2017, 09:31 PM
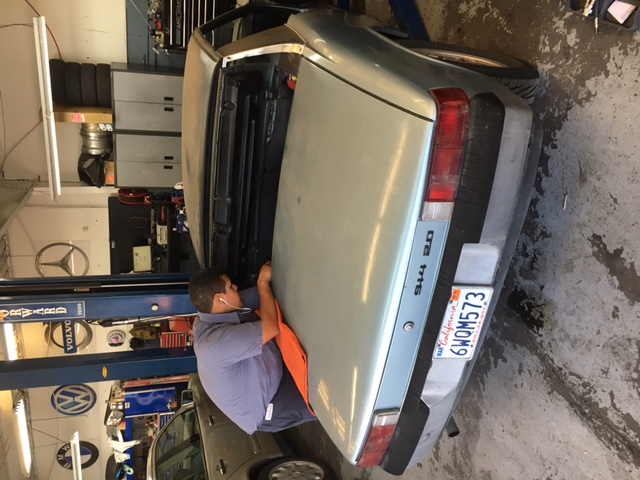
The full service up at TRE Motorsports has been going very well overall. So far dealing with a lot of minor issues,
valve adjust
filters
new plugs
clean fuses and headlight relay
replace headlights with a new set of H4s
clutch adjust
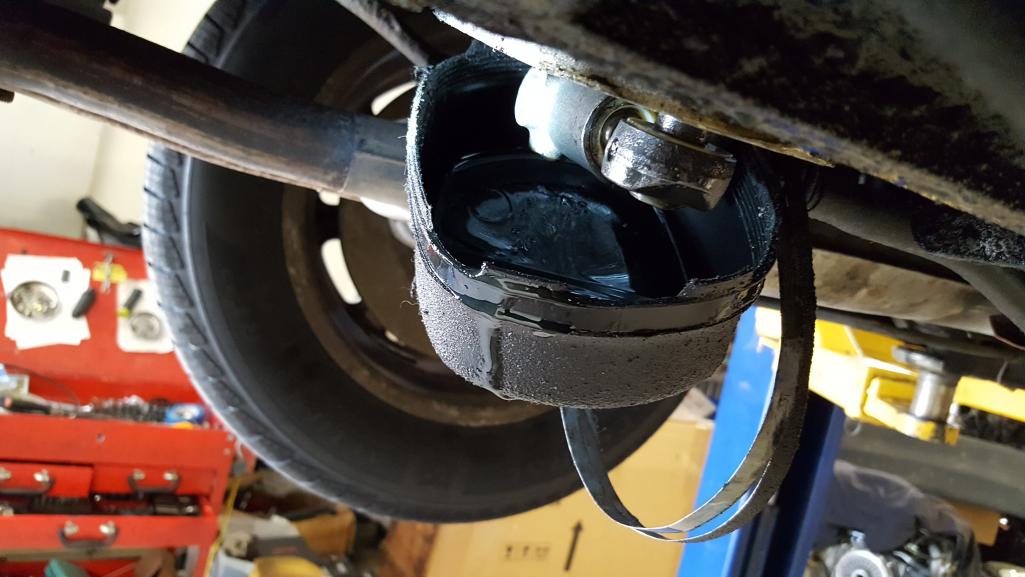
fuel line & pump, suspension and brakes all found to be in good condition
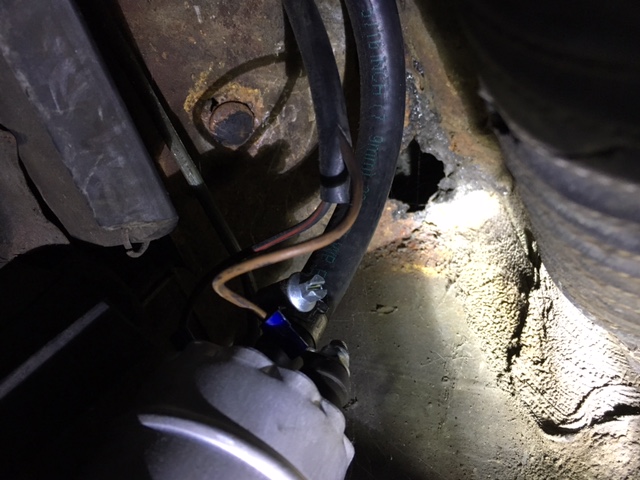
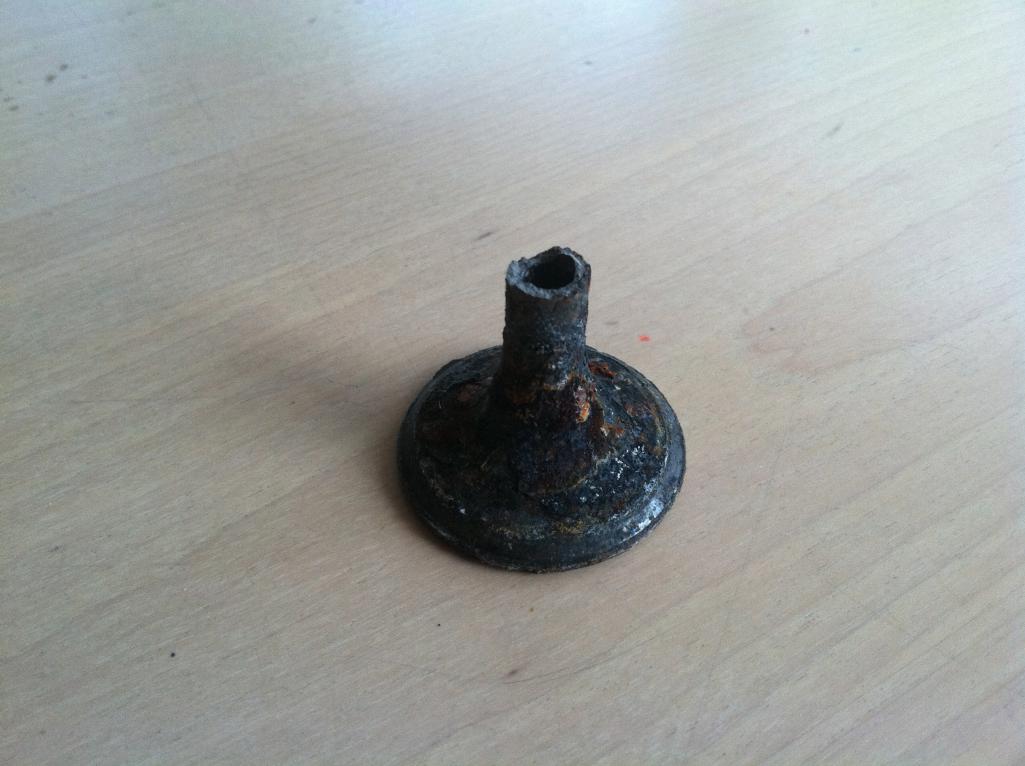
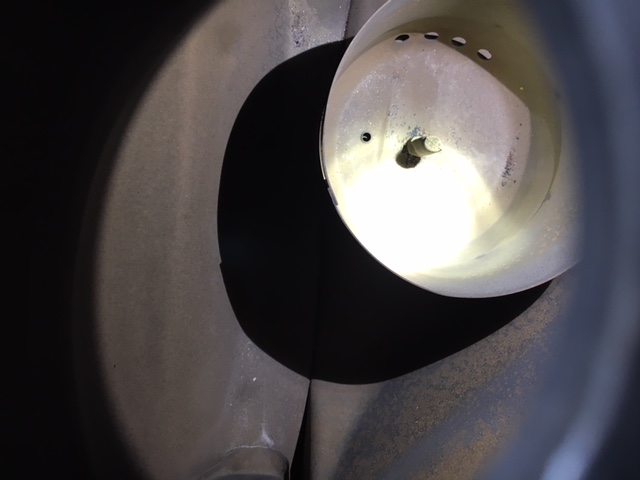
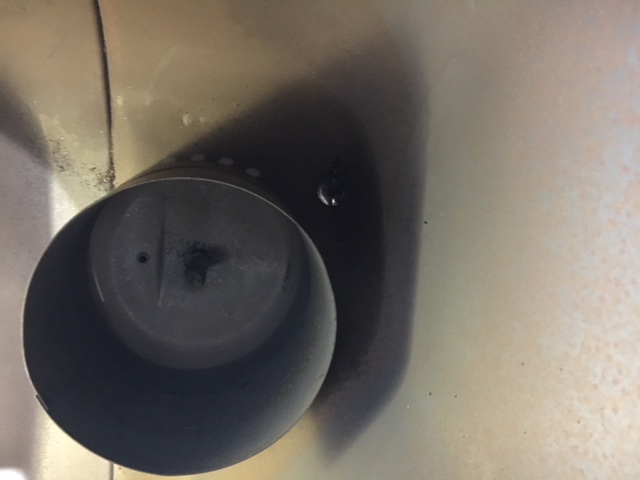
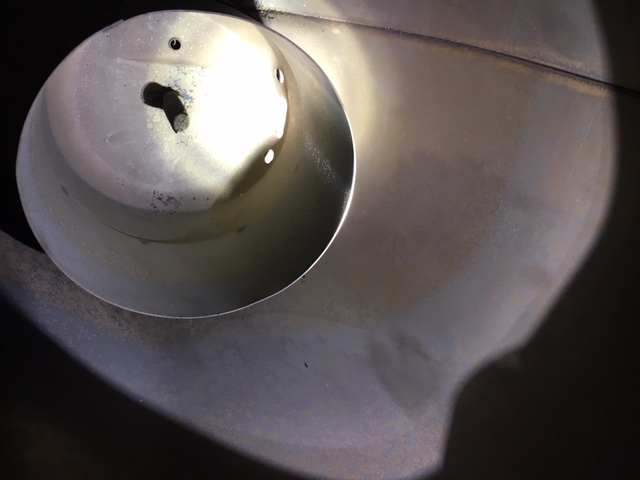
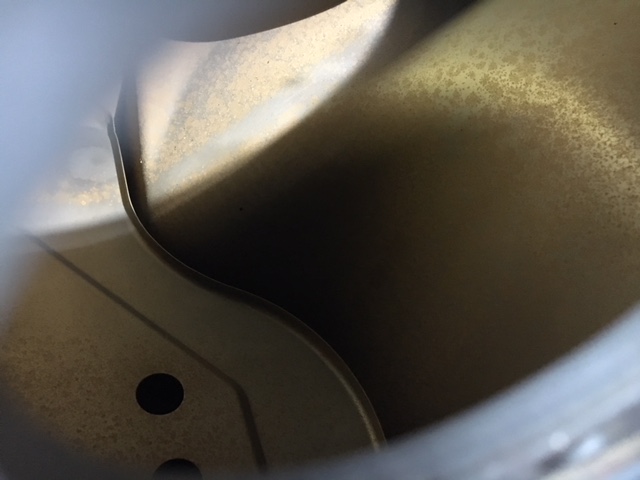
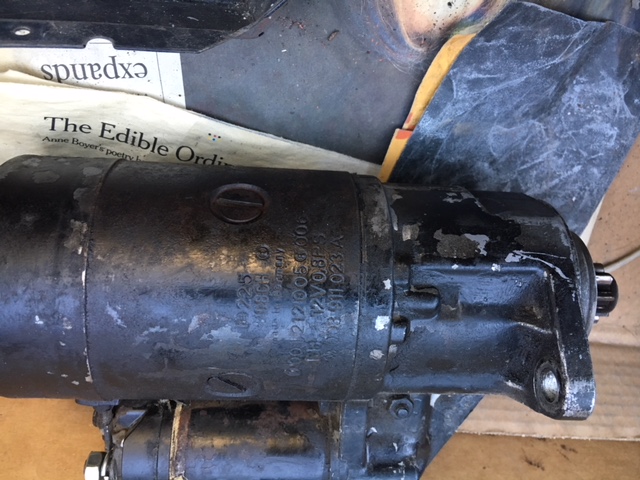
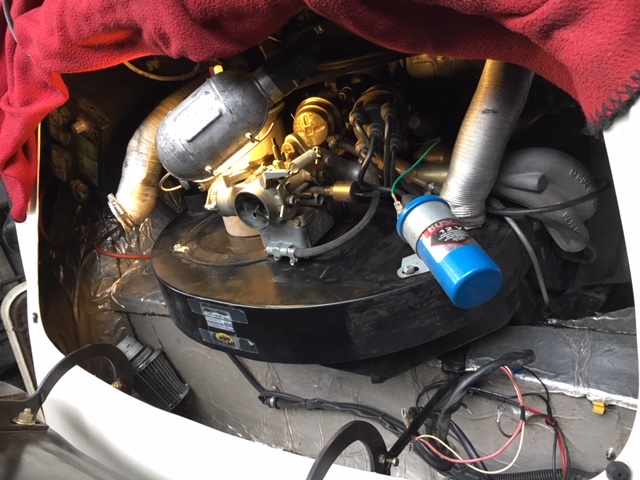
A large oil leak has been found under the plastic cover of the side shifter. The seal most likely has been leaking for a while as the cup is full of oil.
Needless to say, seals will be replaced in the morning and shift bushings and linkage will also be verified.
If all goes well, she will be good to go by the end of the day.
Overall, more mechanically sound than I anticipated. Hopefully there will be no surprises before they finish.
Posted by: 914-300Hemi May 3 2017, 10:08 PM
Great color 
It will great to have another Marathon Blue in the neighborhood.
Posted by: 914_teener May 3 2017, 11:10 PM
My first 914 1.7 back in the early seventies was that color. Many a chick fell in love...with the car....
Nice score. Your car......... Not the 74chicks
Sweet Pics! As for the Chicks, it really depends on what they looked like.
Curious to know if "Tranche" is in reference to the french translation for slice.
Yes....slice of a mortgage pie.
It is a financial term. AAA bonds with shit value is what got us the Great Recession.
Your thread, your question so no Hijack.

Posted by: Calvinator2016 May 9 2017, 10:29 PM
Update:
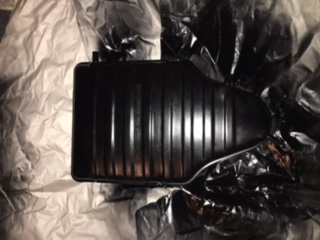
Sanded and Painted the Air Cleaner Cover that I bought from Mark S. with 2 coats of semi-gloss. Thanks Mark!
Had the cover installed when I picked up the Car from TRE MotorSports earlier today.
All mechanical work has been completed and the car is running great! Can't say enough good things about how great this shop is and the knowledge of their techs in getting everything sorted out.
Major Service Complete; valve adjust, plugs, points, belts, filters, fluids etc...
Oil leaks fixed, new shift bushings, wheel bearing replacement, new Hella H4s & chasing down some electrical/lighting issues with contacts, grounds & switches relays.
Now after three weeks from purchase she is home and settling in with the '72 VW Room mate.
Finally ready to be to be Driven!!!!
Posted by: Cairo94507 May 9 2017, 10:45 PM
Great looking car - nice job getting her road worthy.
Posted by: Calvinator2016 May 20 2017, 05:07 PM
COA-Birth Certificate Arrived Today!
Turns out the car celebrated its 44th birthday yesterday unbeknownst to me as per the Production Completion Date.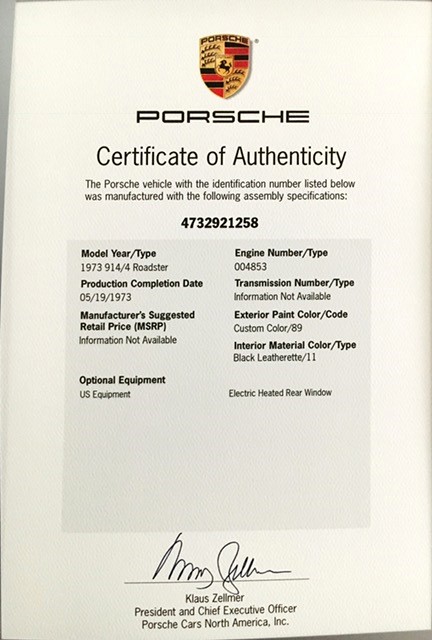
Posted by: Calvinator2016 Jul 14 2017, 04:11 PM
So After 3 months of ownership, it has become apparent that my 105,000 mile original motor with good compression burns a shit ton of oil after spirited driving in the canyons.
It is noticeable on deceleration and the also likely the result of oil getting in where it shouldn't be from all of the sloshing around in the turns and cresting the downside of the hills.
I have been advised it is most likely valve guides and/or rings. So here is the question, would it be advisable to consider only a partial rebuild on the top half if the bottom checks out?
Or rather would it be a mistake to pull the motor and not go all the way in the event one day it could just:

I would like to hear the opinions of those that are more knowledgeable than I.
Posted by: mepstein Jul 14 2017, 04:36 PM
Do a leak down test first.
Make sure you are not overfilling the oil.
Posted by: Cairo94507 Jul 14 2017, 05:19 PM
Assuming the problem is not as pointed out by Mark, if you are going to touch the motor, and you have the resources, I would really touch it. I would pull it and do a complete rebuild and take it to a 2056 but otherwise keep it essentially stock so it remains very reliable and trouble free.
That, of course, would be a great time to freshen the engine compartment, repair any rust issues in the engine compartment, send the tins out for powder coating, have the exhaust blasted and jet-hot coated, SS fuel lines if not already done, new clutch, etc.
Yeah, it is a slippery slope. But for me, if it goes up on jack stands, I would want to get as much of the mechanical out of the way at that time as possible. Then once it goes back together it is just the cosmetics, suspension, paint, etc.
Then again, you could just drive it and wait until you are ready to pull it apart.
Posted by: T H O M A S Jul 16 2017, 09:05 AM
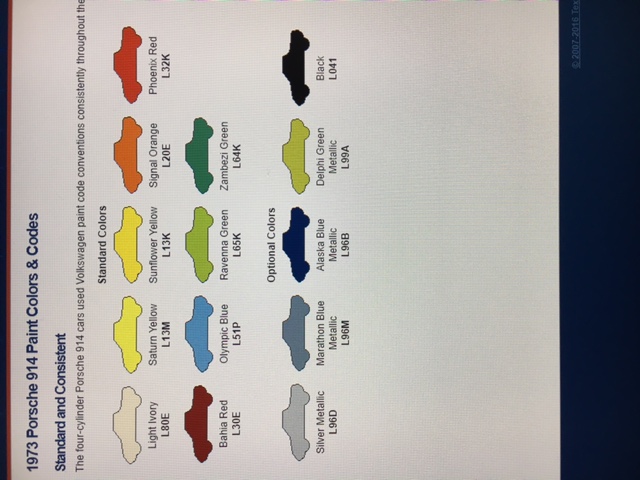
COA Paint Code 89  ,is it not L96M
Posted by: Calvinator2016 Jul 16 2017, 12:10 PM
COA Paint Code 89
,is it not L96MAs per an email from Porsche North America, "The exterior color is Custom Color/89. The sample color was not recorded on the kardex. The COA will read Custom Color/89."
L96M was an optional color as was L96D, L96B, L99A & L041. The Karmann plate in the door frame is stamped L96M as per the color of the car.
Apparently many of the kardexs from the factory were not 100% specific with respect to build dates & paint codes.
Posted by: Calvinator2016 Jul 16 2017, 12:15 PM
Do a leak down test first.
Make sure you are not overfilling the oil.
Are we talking right on the top line of the dipstick and no more? Presently I am slightly above the top line.
Also, for some reason my mechanic says that the leak down tests may not necessarily be conclusive.
In the event a rebuild is in order, is it OK to do the top half only if the bottom appears to be good. Some say yes, some say no. I want to hear all opinions.
Posted by: Calvinator2016 Jul 16 2017, 12:27 PM
Assuming the problem is not as pointed out by Mark, if you are going to touch the motor, and you have the resources, I would really touch it. I would pull it and do a complete rebuild and take it to a 2056 but otherwise keep it essentially stock so it remains very reliable and trouble free.
That, of course, would be a great time to freshen the engine compartment, repair any rust issues in the engine compartment, send the tins out for powder coating, have the exhaust blasted and jet-hot coated, SS fuel lines if not already done, new clutch, etc.
Yeah, it is a slippery slope. But for me, if it goes up on jack stands, I would want to get as much of the mechanical out of the way at that time as possible. Then once it goes back together it is just the cosmetics, suspension, paint, etc.
Then again, you could just drive it and wait until you are ready to pull it apart.
Reason why I am asking is that at first I was enamored with doing the 2056 from a specialty shop. Can't argue with the upgrade.
However, I also have an old school air cooled specialist locally that can do it stock for literally half the cost in about two weeks. If it is top end only it would be about 30% of the cost of doing the 2056. The air cooled specialist works on VWs & 914s and has been working on my Beetle for 20 years and is in the same location for 50.
I have no doubt he can do a great job so long as it is bone stock and I'm OK with preserving the originality. Truth be told I did a PCA run last month with all the 911 & Cayman types and couldn't keep up. So when my lease is up on the daily driver I will consider a pre-owned Cayman or 996. No need to worry about making the teener quicker at that point.
Posted by: arne Jul 16 2017, 07:38 PM
Whether to do just the top end or the whole enchilada at this point is a hard call. If it is in fact burning oil badly, at a minimum rings and valve guides need to be addressed. At that point, if oil pressure is good (indicating good bearing clearances) you could leave the bottom alone. Could still bump the compression and displacement while at it, but I'm not thinking that would be satisfying with the stock cam.
The performance aspect is what clouds the decision. If there was no desire to boost the output, top end only would be my choice. But trying to get more HP without splitting the case to change the cam doesn't seem viable.
Posted by: Larmo63 Jul 16 2017, 07:43 PM
If you have the money, do the whole motor to a 2056. Peace of mind. EMW did my /4 motor very quickly when I had it done for the yellow car.
Slippery slope, ask me how I know....
Posted by: cuddyk Jul 16 2017, 08:34 PM
Whether to do just the top end or the whole enchilada at this point is a hard call. If it is in fact burning oil badly, at a minimum rings and valve guides need to be addressed. At that point, if oil pressure is good (indicating good bearing clearances) you could leave the bottom alone. Could still bump the compression and displacement while at it, but I'm not thinking that would be satisfying with the stock cam.
The performance aspect is what clouds the decision. If there was no desire to boost the output, top end only would be my choice. But trying to get more HP without splitting the case to change the cam doesn't seem viable.
 If you're just looking to get it tightened up and back on the road, The top end refresh is what I'd do. Did it myself and had no regrets.
Posted by: Calvinator2016 Jul 16 2017, 10:08 PM
If you have the money, do the whole motor to a 2056. Peace of mind. EMW did my /4 motor very quickly when I had it done for the yellow car.
Slippery slope, ask me how I know....
I'll bite, how do you know?
Posted by: Calvinator2016 Jul 16 2017, 10:10 PM
Whether to do just the top end or the whole enchilada at this point is a hard call. If it is in fact burning oil badly, at a minimum rings and valve guides need to be addressed. At that point, if oil pressure is good (indicating good bearing clearances) you could leave the bottom alone. Could still bump the compression and displacement while at it, but I'm not thinking that would be satisfying with the stock cam.
The performance aspect is what clouds the decision. If there was no desire to boost the output, top end only would be my choice. But trying to get more HP without splitting the case to change the cam doesn't seem viable.
If you're just looking to get it tightened up and back on the road, The top end refresh is what I'd do. Did it myself and had no regrets.This is what I'm leaning towards and I am more than fine with the present 1,971 displacement.
Posted by: Calvinator2016 Jul 19 2017, 05:03 PM
Cool car, great color, but GET RID OF THOSE mirrors.
That's all.
Finally!!!

Posted by: 914 7T3 Aug 9 2017, 10:37 AM
I am now about three weeks out from engine rebuild and paint. My air-cooled mechanic has a stash of NOS German Parts that will be used, so that is beyond awesome. Should take several weeks and I will also use the 4 NOS Bosch Injectors that I recently picked up.
I am scurrying around this week trying to pick up the last of the donor parts required, just need some rear trunk hinges (thinking about the J West kit) if anyone can chime in with their experiences with that product.
Also need to do a 914 Rubber order and source a front trunk pan and I think I will be good to go. 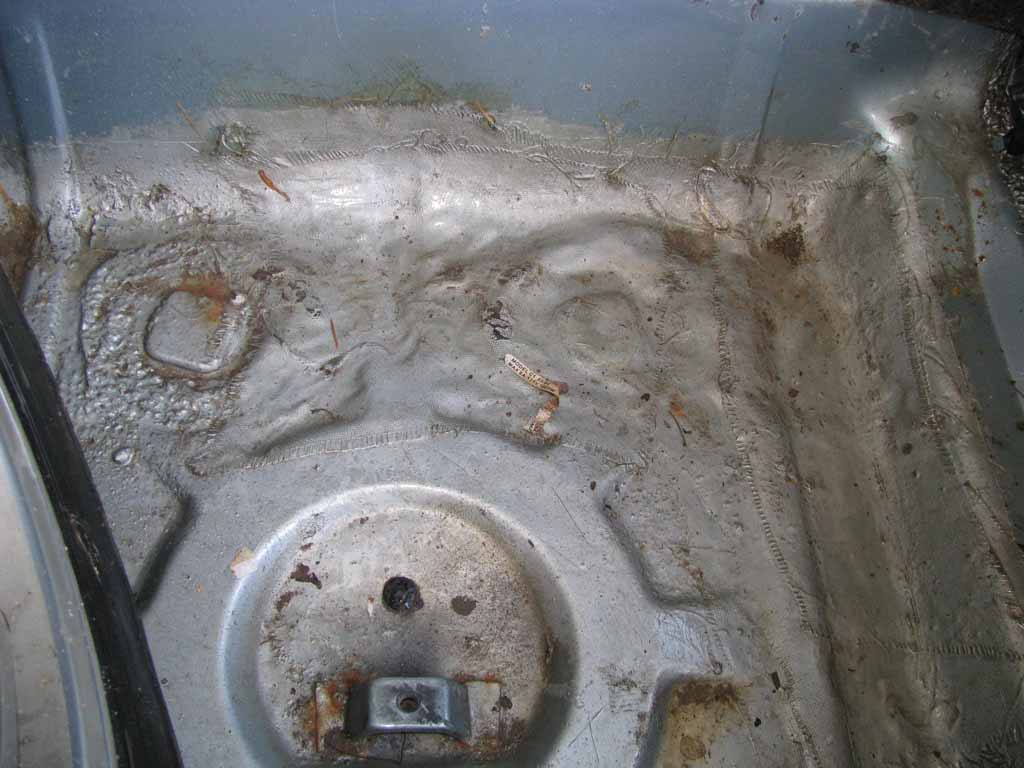
The paint shop is just finishing up two 911s including a '73 RS America. I can't wait to see those after final wet sand and polish next week.
As for paint, they use BASF R-M Onyx HD. Does anyone have experience with this product? In Cali, I believe they must shoot water based paint for environmental reasons.
Not sure why, but I am starting to freak out a little. 
This has turned into a fairly in depth project with lots to do and learn. I am open to any advice, guidance and recommendations at this point.
Posted by: Larmo63 Aug 9 2017, 11:17 PM
You seem to be on the right track, just grab your ankles and know it will all work out in the end.
Posted by: arne Aug 10 2017, 09:04 AM
Totally normal, even after you've done it a few times. My 914 project is my fourth comprehensive refresh in the past 25 years or so, and I still feel it at times.
Just bear in mind that when shepherding a project of this complexity, there will always be things that don't go as you expect, some good, some less so. But if you have your ducks queued up as best as you can figure in advance (and it appears you do), it will turn out ok if you stick with it.
Posted by: mepstein Aug 10 2017, 09:12 AM
You want the painter to use what they are comfortable using. Just like most things, it's 90% prep, 9% skill and 1% materials.
I hope you are keeping the stock mirrors on the car.
Posted by: arne Aug 10 2017, 09:34 AM
Posted by: 914 7T3 Aug 10 2017, 10:14 AM
Hmmmmmmmmmmmmmm.....................................

I guess we'll just have to wait and see.
Posted by: 914 7T3 Aug 16 2017, 06:34 PM
HERE IS THE MONEY SHOT!
Looks like this car's many years up in Oregon & Washington State have not adversely affected it. Solid underneath as anticipated.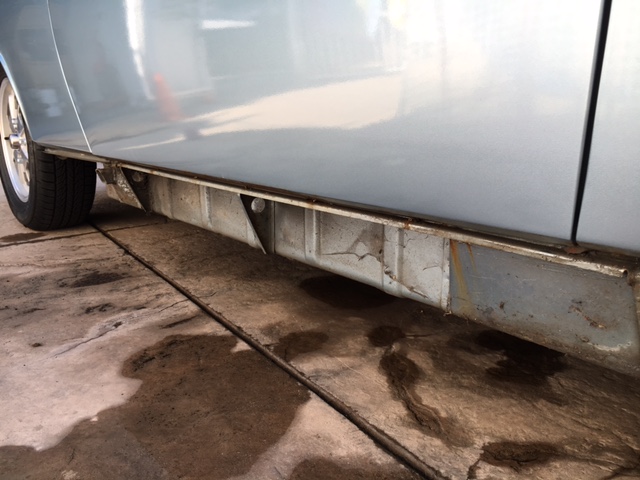
Hey Arne, looks like you're ahead of me after all!
Posted by: arne Aug 16 2017, 10:49 PM
No road salt in Oregon, makes a difference.
Posted by: 914 7T3 Aug 21 2017, 08:22 PM
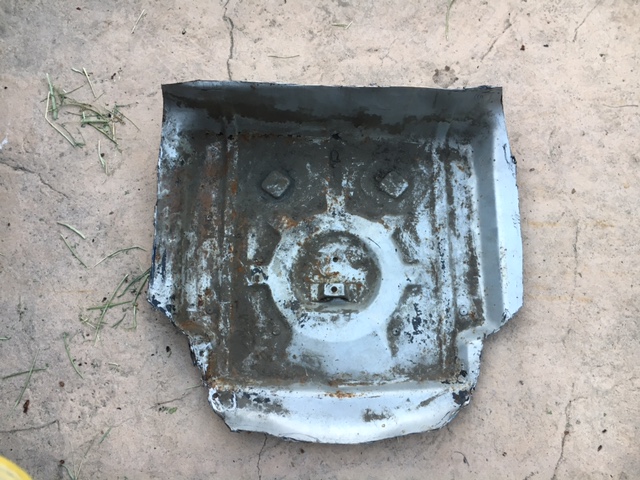
Got help from my friend and Neighbor, Carl in cutting out the front trunk pan from a '71 donor car.
It put up a good fight, but the saws and grinder prevailed.

Posted by: 914 7T3 Aug 25 2017, 04:33 PM
Sooooooooo, my body shop bailed on me on Tuesday and I headed out earlier today to a restoration shop about 35 miles away to see if they could take on the project.
Their work is truly next level, so just trying to figure out when they can slot me into production (like 6-12 month wait).
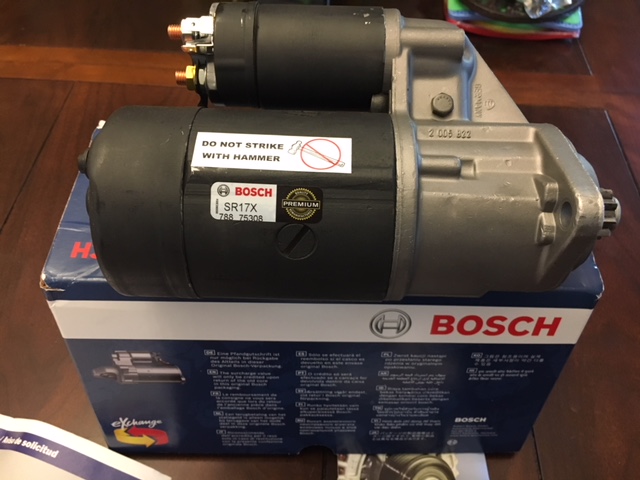
After telling them how awesome and reliable my car is I go to leave and my starter sh-t the bed. With a courtesy push and a pop of the clutch, off I go to my mechanic who informs me that he can't pull the motor for another couple of weeks nor deal with my starter as he is backed up.
So now the car is DOA in my garage and all I need now is a set of jack stands!

PLEASE SOMEBODY: OFFICIALLY WELCOME ME TO 914 WORLD!
I finally get how this works now!
Posted by: kahluver Aug 25 2017, 04:55 PM
Awesome and Congrats! Your car and my car could be brothers!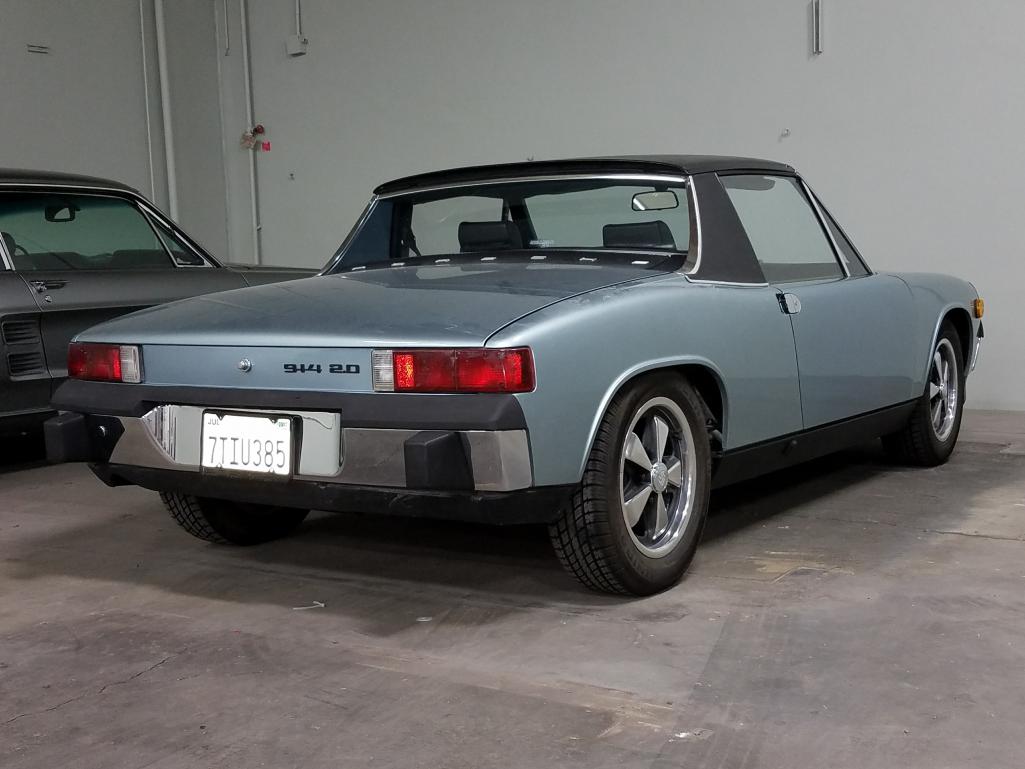
Posted by: 914 7T3 Aug 25 2017, 05:06 PM
Awesome and Congrats! Your car and my car could be brothers!
Yes sir, if I had those spiffy 5 lug Fuchs on mine.
Did you recently pick up that car as it looks like one that was on Craigslist Orange County a few months back.
Posted by: kahluver Aug 26 2017, 03:50 PM
Awesome and Congrats! Your car and my car could be brothers!
Yes sir, if I had those spiffy 5 lug Fuchs on mine.
Did you recently pick up that car as it looks like one that was on Craigslist Orange County a few months back.
No, I've had the car for a while now. That was my ad as I was thinking of selling the car due to having two other Porsche projects. It's a really nice car so I changed my mind about selling it.
Posted by: 914 7T3 Aug 26 2017, 04:39 PM
Sooooooooo, my body shop bailed on me on Tuesday and I headed out earlier today to a restoration shop about 35 miles away to see if they could take on the project.
Their work is truly next level, so just trying to figure out when they can slot me into production (like 6-12 month wait).
After telling them how awesome and reliable my car is I go to leave and my starter sh-t the bed. With a courtesy push and a pop of the clutch, off I go to my mechanic who informs me that he can't pull the motor for another couple of weeks nor deal with my starter as he is backed up.
So now the car is DOA in my garage and all I need now is a set of jack stands!
PLEASE SOMEBODY: OFFICIALLY WELCOME ME TO 914 WORLD!
I finally get how this works now!
Today, she fired up right away. Seems like a hot start problem with no crank.

Posted by: 914 7T3 Sep 13 2017, 09:21 PM
Came across these pics on the Original Customs website of the work that was done on my car by the PO back in 2012. I guess that's why the brakes & suspension did not require any attention.
http://www.originalcustoms.com/invoice/images.php?p=145
Posted by: ndfrigi Sep 13 2017, 09:54 PM
Awesome and Congrats! Your car and my car could be brothers!
Yes sir, if I had those spiffy 5 lug Fuchs on mine.
Did you recently pick up that car as it looks like one that was on Craigslist Orange County a few months back.
Nice! looking forward for my 74 Marathon Blue Mettalic L96M to look like your car Kahluver and 914 7T3. Below is my new project and my 1st garage baby 75 1.8 FI I just sold last June.

Posted by: 914 7T3 Sep 13 2017, 10:12 PM
Awesome and Congrats! Your car and my car could be brothers!
Yes sir, if I had those spiffy 5 lug Fuchs on mine.
Did you recently pick up that car as it looks like one that was on Craigslist Orange County a few months back.
Nice! looking forward for my 74 Marathon Blue Mettalic L96M to look like your car Kahluver and 914 7T3. Below is my new project and my 1st garage baby 75 1.8 FI I just sold last June.
That looks like a solid roller for a project. The two other SoCal Marathon Blues that I know of belong to ValcoOscar and 914-300Hemi. Both Solid Porsche People!
Posted by: ndfrigi Sep 13 2017, 10:59 PM
Awesome and Congrats! Your car and my car could be brothers!
Yes sir, if I had those spiffy 5 lug Fuchs on mine.
Did you recently pick up that car as it looks like one that was on Craigslist Orange County a few months back.
Nice! looking forward for my 74 Marathon Blue Mettalic L96M to look like your car Kahluver and 914 7T3. Below is my new project and my 1st garage baby 75 1.8 FI I just sold last June.
That looks like a solid roller for a project. The two other SoCal Marathon Blues that I know of belong to ValcoOscar and 914-300Hemi. Both Solid Porsche People!
wow all from SoCal. I will see sir Oscar's car this weekend.
Posted by: porschetub Sep 14 2017, 08:55 PM
Nice tidy car really like the colour,considering I only like silver cars .
Can't wait to see it back from the painters,BTW thanks for the drivers door box cover WAY better than mine .
Posted by: 914 7T3 Sep 14 2017, 10:00 PM
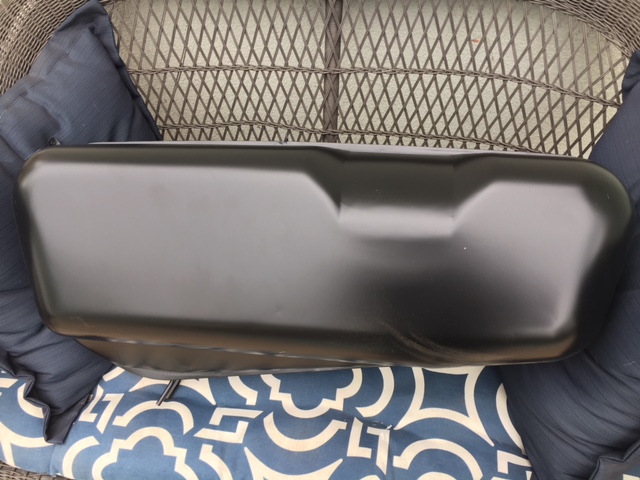
Nice tidy car really like the colour,considering I only like silver cars
.Can't wait to see it back from the painters,BTW thanks for the drivers door box cover WAY better than mine
.Seeing that I am a landed immigrant from the Dominion of Canada, I am glad that you can spell "colour" correctly.
I will update this thread regularly as things get underway the week of the 24th. Finding the right paint shop has turned into a real struggle.
Great to hear that the door box cover is doing the job for you as those are getting hard to find in decent shape.
Posted by: 914time Sep 15 2017, 02:33 PM
Great car and great updates!
I've enjoyed following your progress.
Hang in there-
Posted by: amfab Sep 25 2017, 11:11 AM
914 7T3, are you in the west valley? i saw a car that looked like yours about a month ago
-Andrew
Posted by: 914 7T3 Sep 25 2017, 11:41 AM
914 7T3, are you in the west valley? i saw a car that looked like yours about a month ago
-Andrew
Sherman Oaks so East Valley, but I may have been en route to Topanga or Mulholland to drive the twisties if it was a weekend.
Posted by: 914 7T3 Sep 26 2017, 01:24 PM
Finally have my resto plan sorted and has shifted from good driver quality to excellent driver. I will be looking at a #2 car upon completion
Timeline 4 months.
Motor Drop on 10/02/17
Full rebuild with 96mm Pistons, sticking with original cam & should see a 10% or 9 HP boost up to 100 HP
Engine Tin, Fan cover & misc parts off to powder coat
Remove, clean & refinish fuel tank
steam clean & verify oil cooler and all engine parts as required
new ignition harness, starter & ignition coil
install NOS injectors & seals
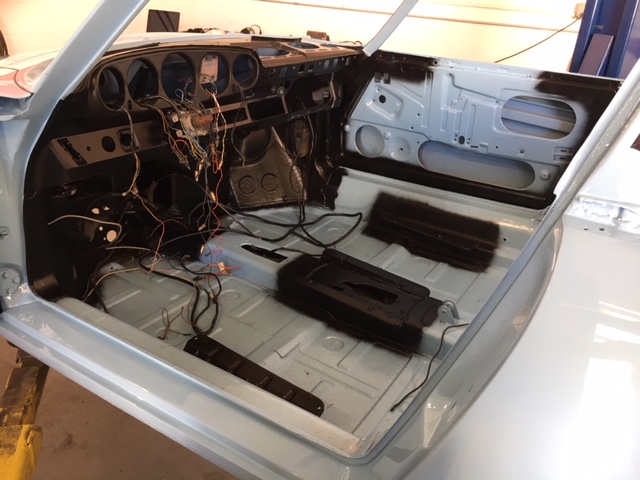
Interior Removal 10/03-10/09
Off To Paint Shop 10/10
all rust to be repaired and weld as needed
interior pans/compartment, both trunks & Engine Bay repair & paint as required
down to bare metal and full prep
2 Stage paint to original L96M
New Sekurit windshield & OE trim kit, carpet kit, dash & a sh-t ton of parts from 914 rubber.
This Thread will be updated with pics regularly as things progress. Wish me luck!


Posted by: arne Sep 26 2017, 01:44 PM
Your fun is about to begin, Jeffrey!
Posted by: 914 7T3 Sep 26 2017, 09:05 PM
Got so excited that I started removing some easy interior pieces/parts for about 1 1/2 hours this evening:
Passenger seat, threshold sills, speaker pods & visors. Bagged & tagged, seems pretty straight forward so far. 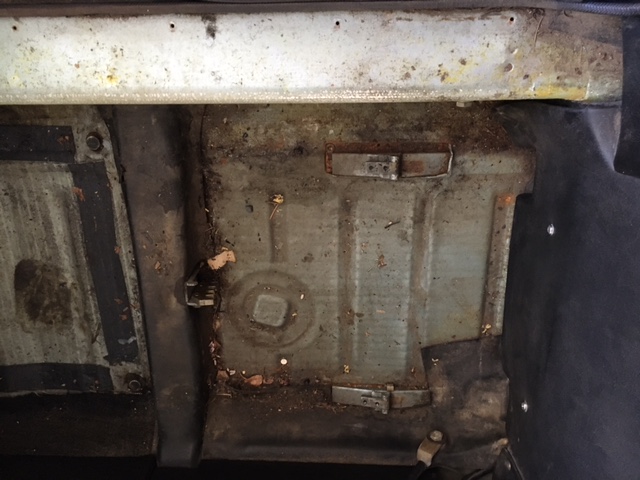
Posted by: 914 7T3 Sep 27 2017, 04:06 PM
Got some new shiny parts in the mail today including the new ignition harness from Jeff Bowlsby. This is sweet and can't wait to get the old POS one out of there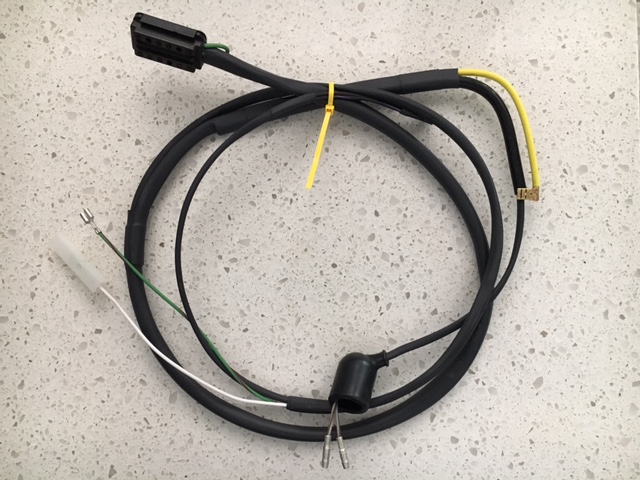
914 Registry Engine lid grille badge for once the car is complete.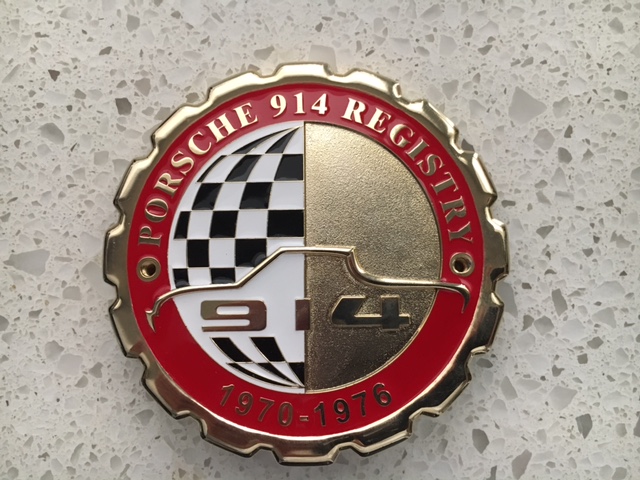
Posted by: ndfrigi Sep 27 2017, 04:18 PM
Good you drove the car to Temecular Jeffrey before this project. I guess next Temecula Fun Day your car could be converted to 6 already!
Posted by: 914 7T3 Sep 27 2017, 04:49 PM
Good you drove the car to Temecular Jeffrey before this project. I guess next Temecula Fun Day your car could be converted to 6 already!
No 914-6 for this car. As an original '73 2.0 survivor, it will stay stock.
Posted by: ndfrigi Sep 27 2017, 05:10 PM
Good you drove the car to Temecular Jeffrey before this project. I guess next Temecula Fun Day your car could be converted to 6 already!
No 914-6 for this car. As an original '73 2.0 survivor, it will stay stock.
Nice! keep it original and maybe just buy the boxster or build another 914-6.
Posted by: amfab Sep 28 2017, 02:56 PM
914 7T3, are you in the west valley? i saw a car that looked like yours about a month ago
-Andrew
Sherman Oaks so East Valley, but I may have been en route to Topanga or Mulholland to drive the twisties if it was a weekend.
Ah makes sense, Im off Mulholland in Calabasas, although the 914 is up in the air in pieces
Posted by: 914 7T3 Sep 28 2017, 03:13 PM
Good you drove the car to Temecular Jeffrey before this project. I guess next Temecula Fun Day your car could be converted to 6 already!
No 914-6 for this car. As an original '73 2.0 survivor, it will stay stock.
Nice! keep it original and maybe just buy the boxster or build another 914-6.
In for a PPI right now. Hope all goes well.
Posted by: 914 7T3 Oct 2 2017, 06:15 PM
Good you drove the car to Temecular Jeffrey before this project. I guess next Temecula Fun Day your car could be converted to 6 already!
No 914-6 for this car. As an original '73 2.0 survivor, it will stay stock.
Nice! keep it original and maybe just buy the boxster or build another 914-6.
In for a PPI right now. Hope all goes well.
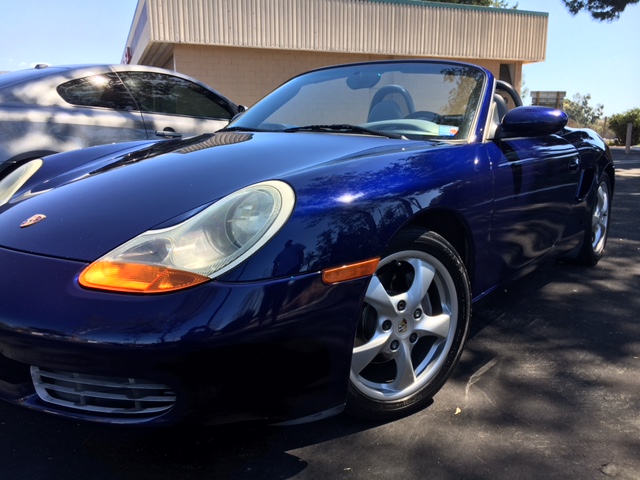
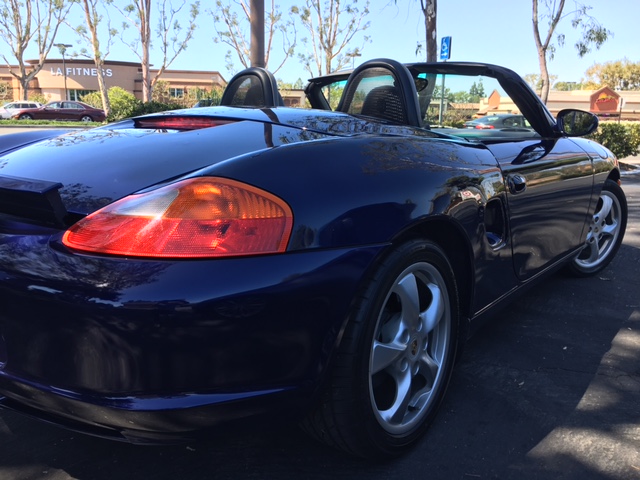
A lot going on this weekend. Picked up a sweet '02 986 and it passed the PPI as being mechanically sound. Two front tires, an alignment and some cosmetics and this car is beyond ready to go.
PPI done by Hergesheimer Motorsports in Lake Forest, CA. Lots of great cars there including a '74 Teener that is getting a 6 Conversion. I highly recommend this shop to anyone looking in OC.
Posted by: 914 7T3 Oct 2 2017, 06:23 PM
Today the awesome audio set-up was torn out. Car was brought in for engine drop and it was tough knowing that the car won't be driven again for at minimum 4 months.
In case anyone is wondering, this is what a 50 year old air cooled shop in the Valley looks like. A real blast from the past with lots of NOS parts.
Today we discovered NOS German CV joints and even a set of Boge shocks. The box says VW, but if they fit, they will replace my original Boges up front.
Things will move quickly this week to get the car ready for transport to the paint shop on Saturday.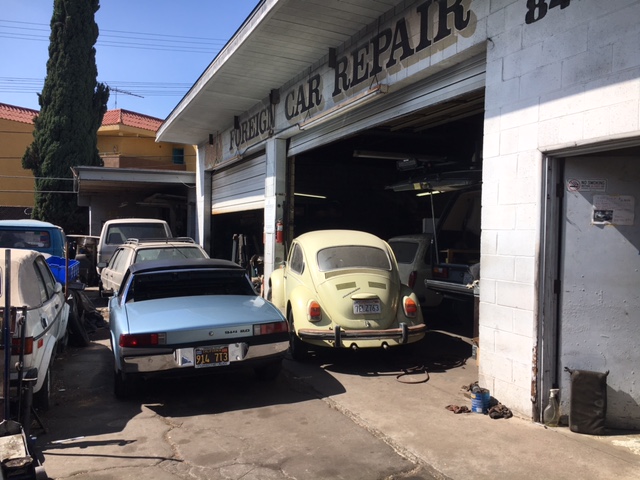
Posted by: 914 7T3 Oct 6 2017, 10:20 PM
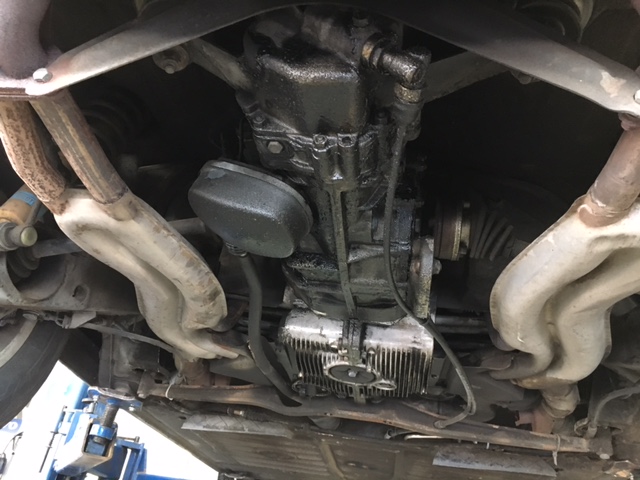
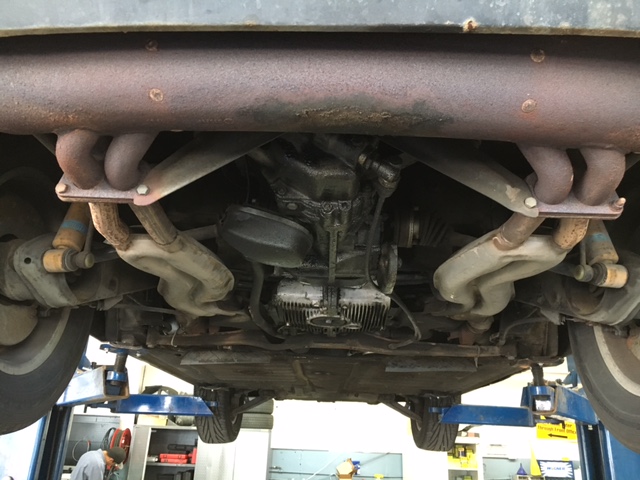
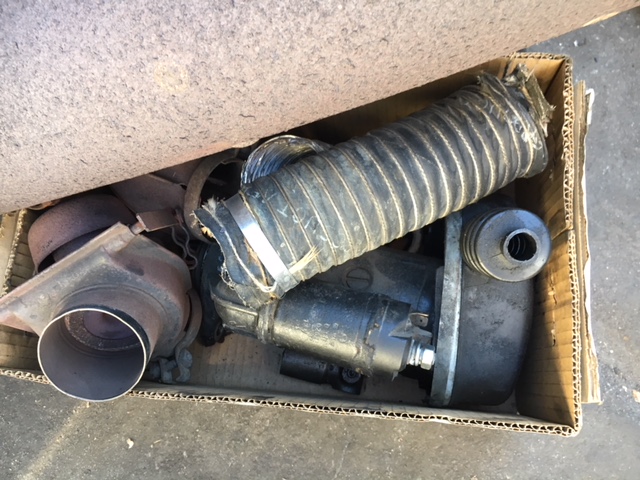
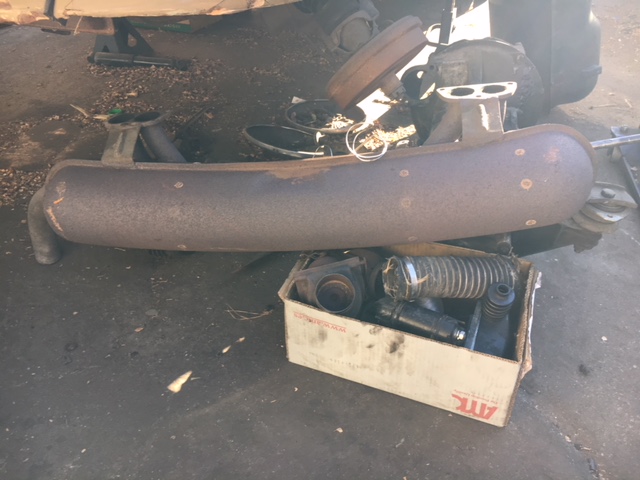
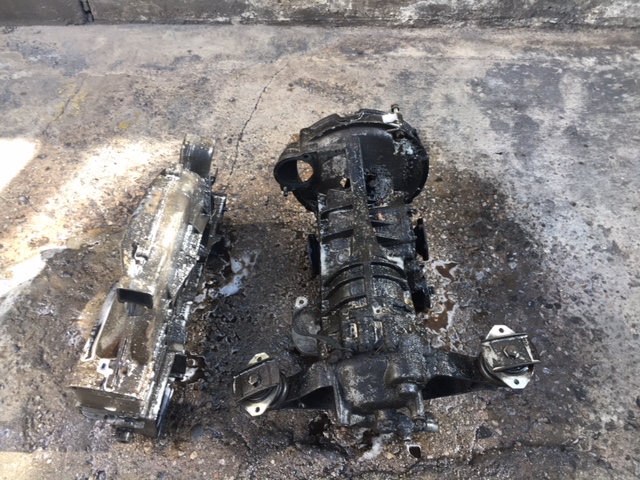
Engine, tranny, exhaust and gas tank removed.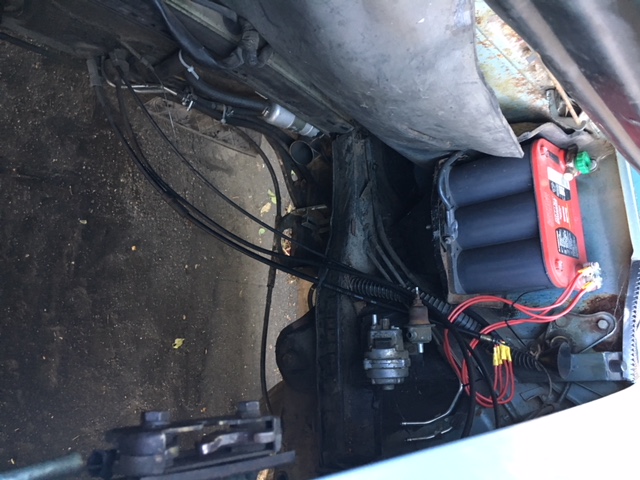
The Moment of Truth when the pieces/parts of your car look like all of the other POS stuff on Craigslist. 

Transport Home to Remove Interior!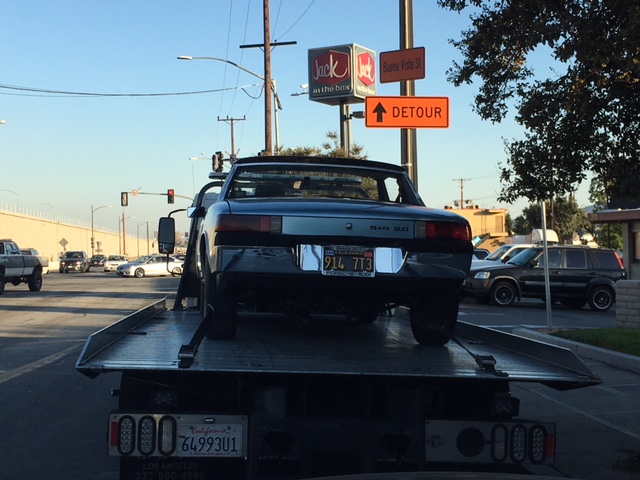
Posted by: drem914 Oct 6 2017, 11:02 PM
Was the 914 a green one? If so, it's the owner's son's car.
They are a great shop. Right around the corner from my office.
Posted by: 914 7T3 Oct 7 2017, 01:47 PM
Interior stripped, off to paint! Thanks to Sir Oscar! 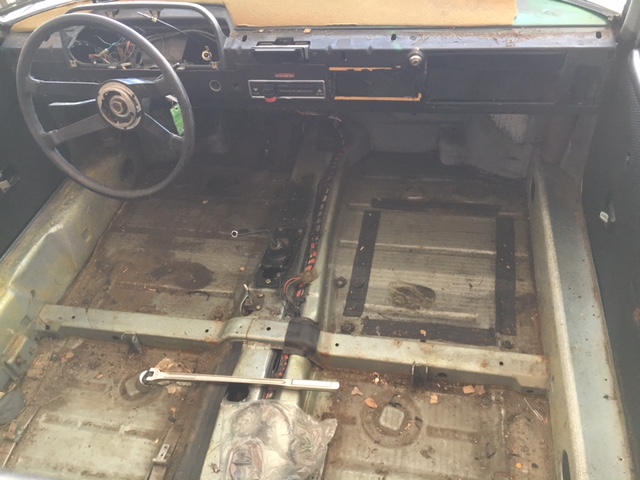
Posted by: 914 7T3 Oct 7 2017, 10:29 PM
Arrived at Shop, things get underway first thing Monday with paint to be stripped and yes all metal work is done in-house.
Yellow BMW 1600 and freshly painted Jag XKE under the cover.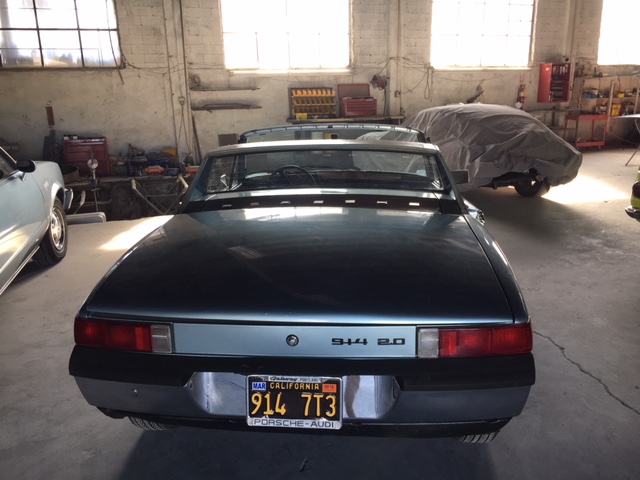
Posted by: ValcoOscar Oct 9 2017, 09:58 AM
Jeffrey-
It was fun hanging out Saturday. I know we were short of time but we still got it done and delivered.
You need to decide if want to cad plate your old hardware or reuse as is. Up to you.
See ya,
Oscar
Posted by: 914 7T3 Oct 18 2017, 07:25 PM
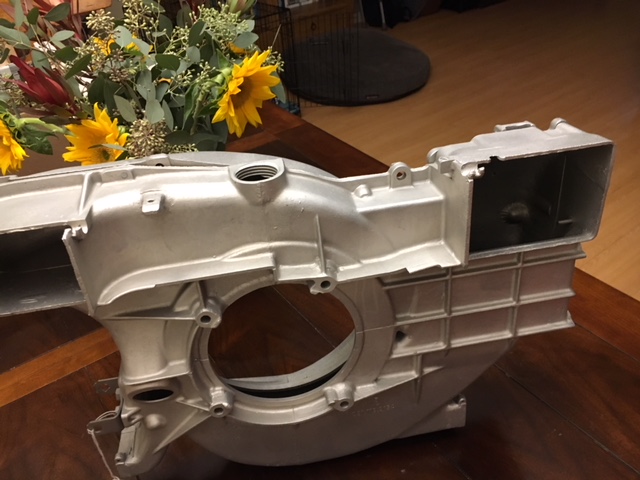
Motor is up on the stand and getting torn down.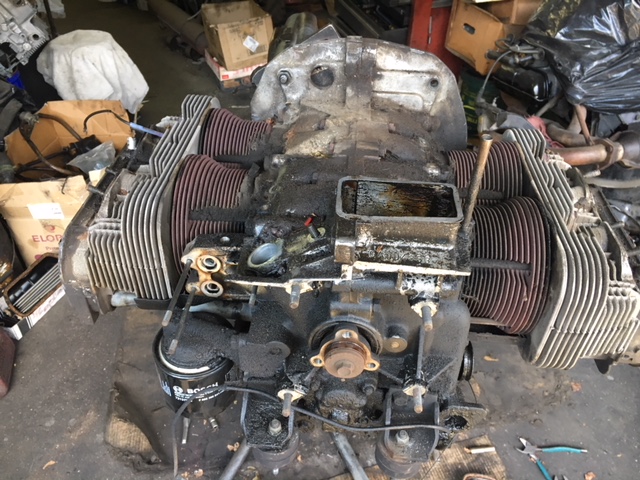

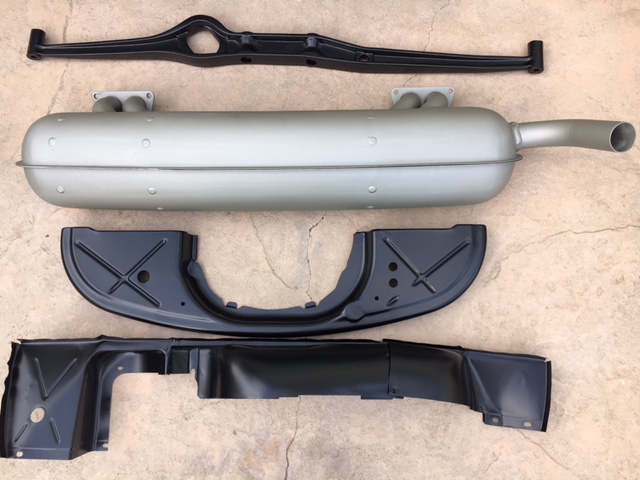
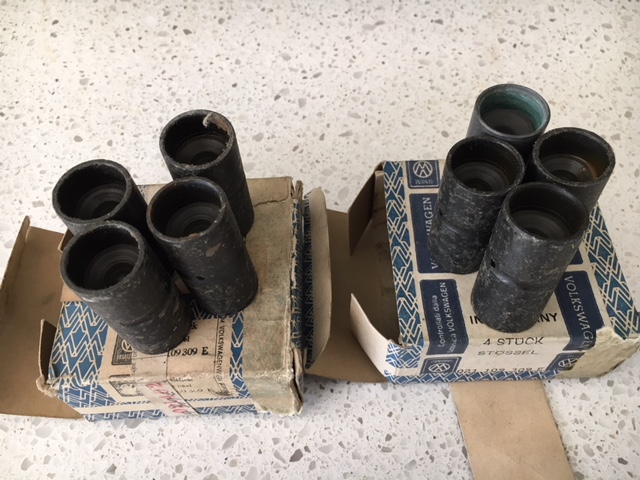
Took the transmission, engine tin, fan shroud, motor support, shift rod, muffler, heat exchangers and related parts for degreasing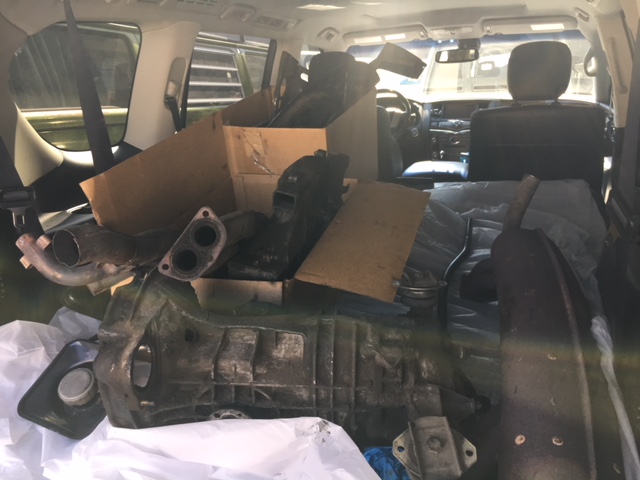
Once completed, off for blasting and powder coating. Muffler needs to be re coated with a high heat paint, but not sure what to do with the transmission case as far as finishing.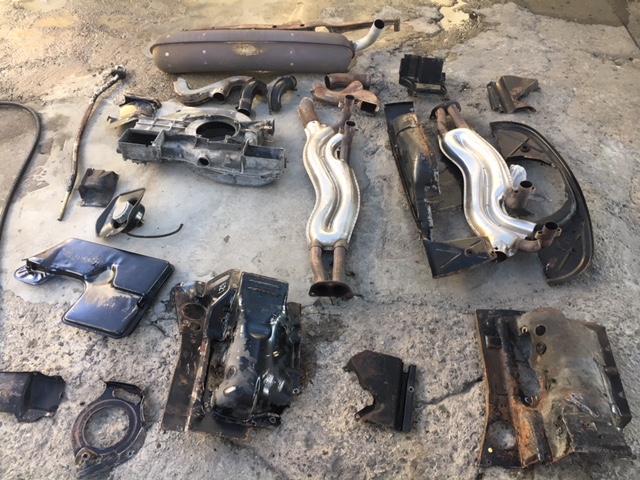

Car should be down to the metal by end of the week so hopefully will have pics when I get to Riverside on Saturday.
Posted by: 914 7T3 Oct 18 2017, 07:28 PM
Also more parts delivered including a full set of window gutters including:
NOS & NLA Part # 914 531 824 11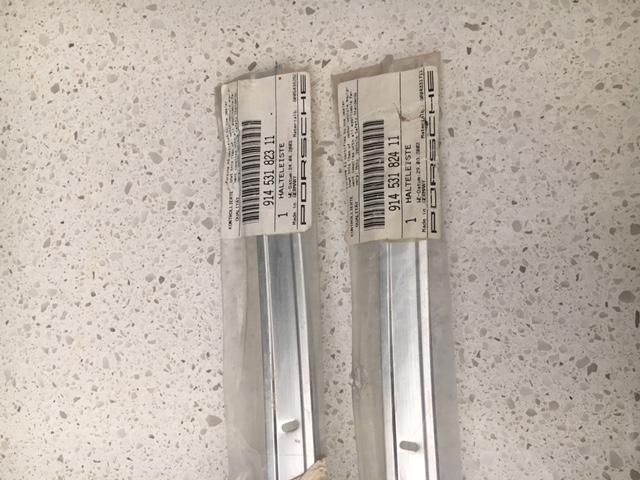
Posted by: 914 7T3 Oct 18 2017, 07:48 PM
Also saw these numbers painted white on the motor support and engine tin which must be something that the factory did back in the day...would love to know if anyone knows the significance.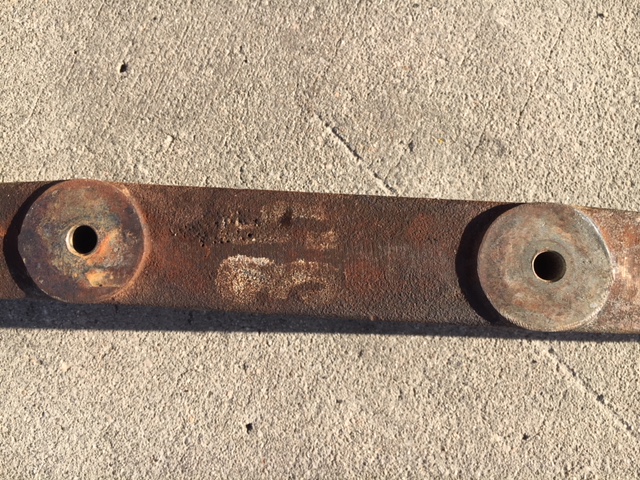

Posted by: 914 7T3 Oct 19 2017, 04:14 PM
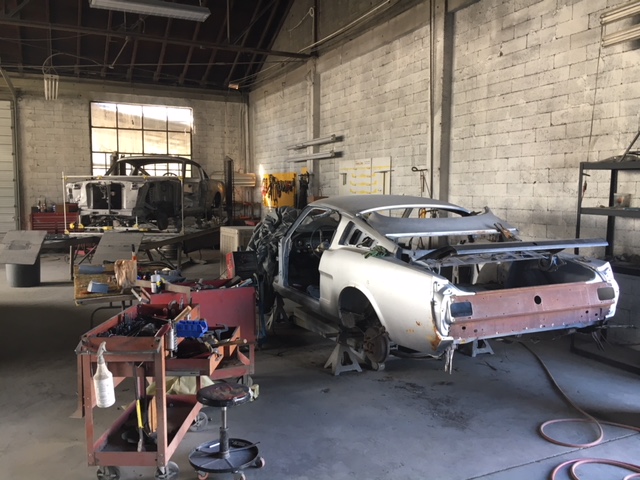
Less Than Two Weeks Into It.....Now Ready For Body Work!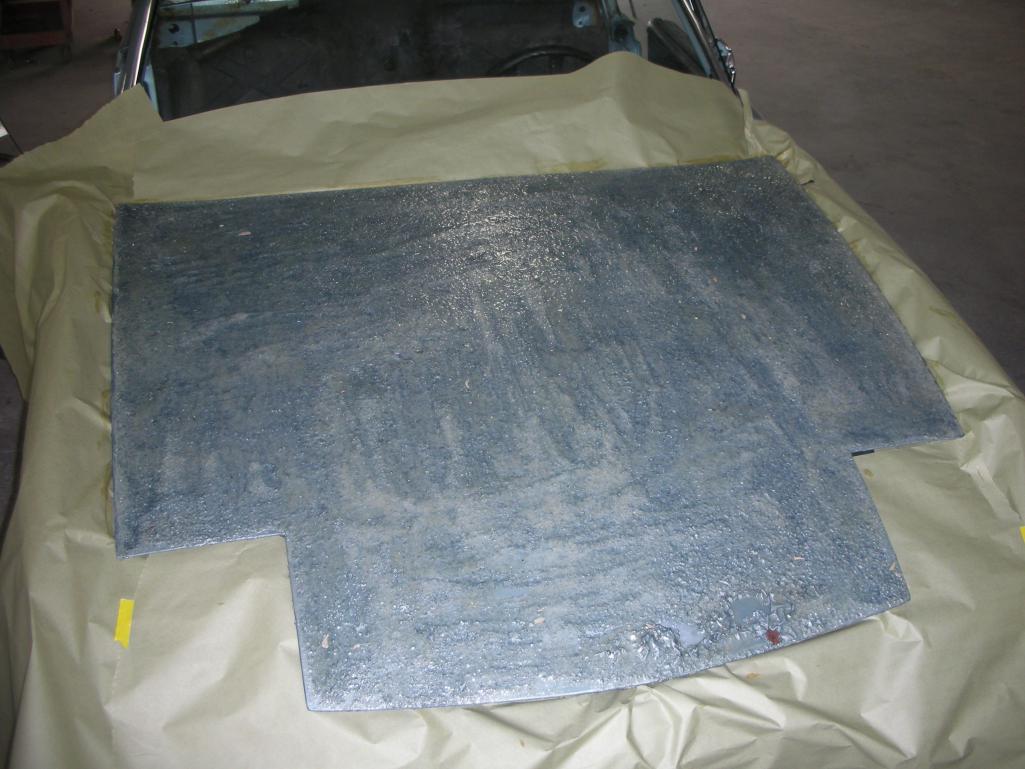
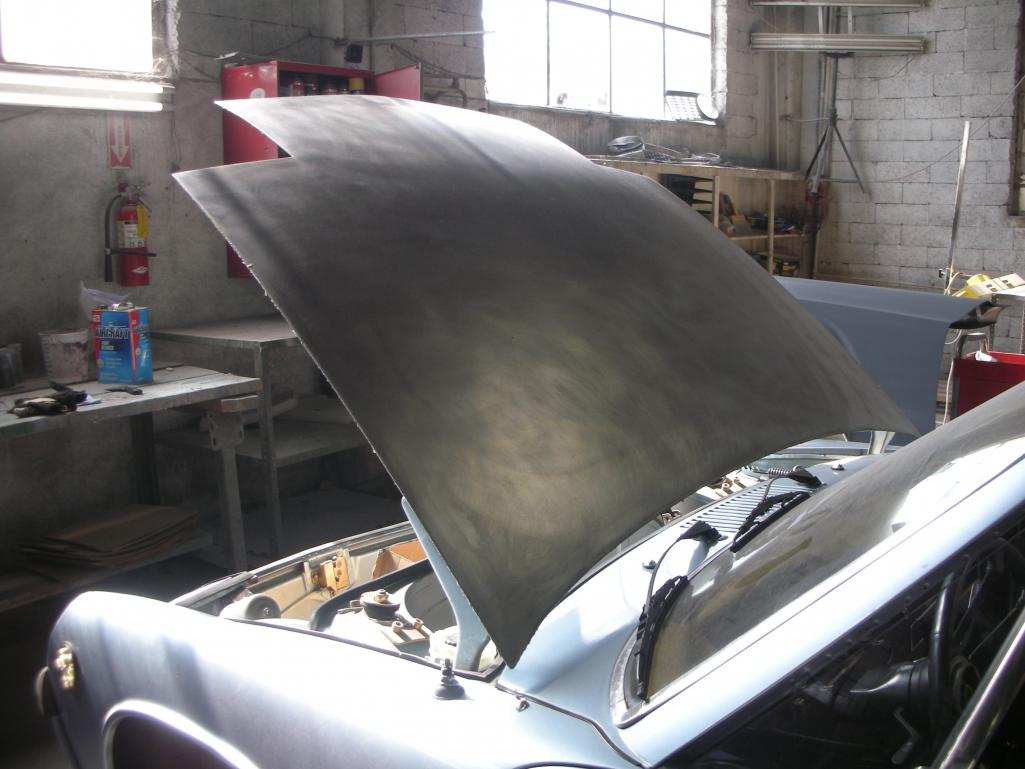
Posted by: 914 7T3 Oct 19 2017, 04:16 PM
Posted by: 914 7T3 Oct 19 2017, 04:17 PM
Posted by: 914 7T3 Oct 19 2017, 04:19 PM
Posted by: arne Oct 19 2017, 05:06 PM
Very nice, Jeffrey. Hope the progress continues at a pace like this.
Posted by: 914 7T3 Oct 20 2017, 07:33 PM
Update:
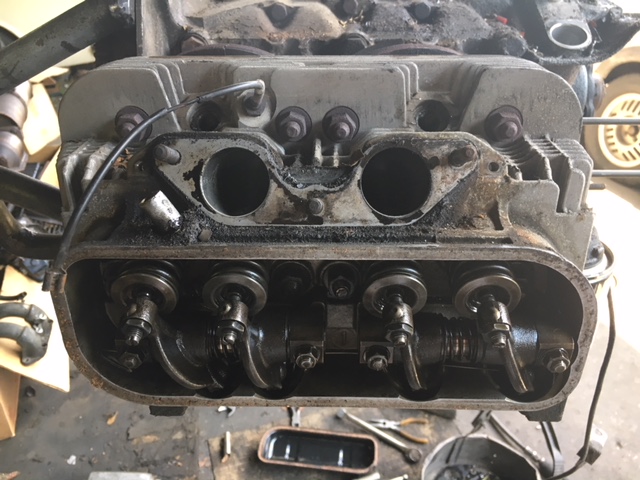
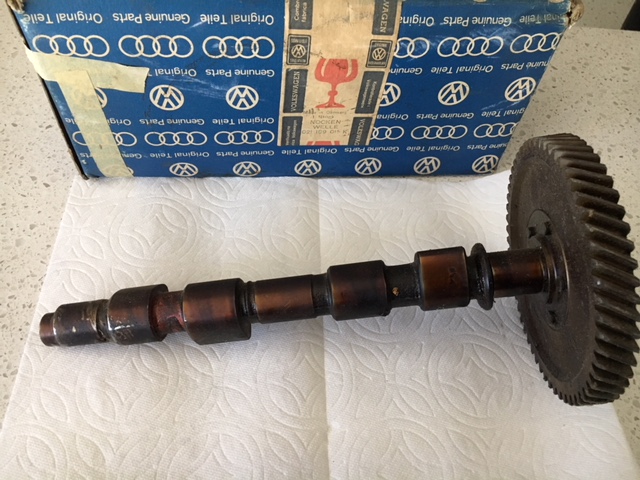
Case has been split & everything blasted 
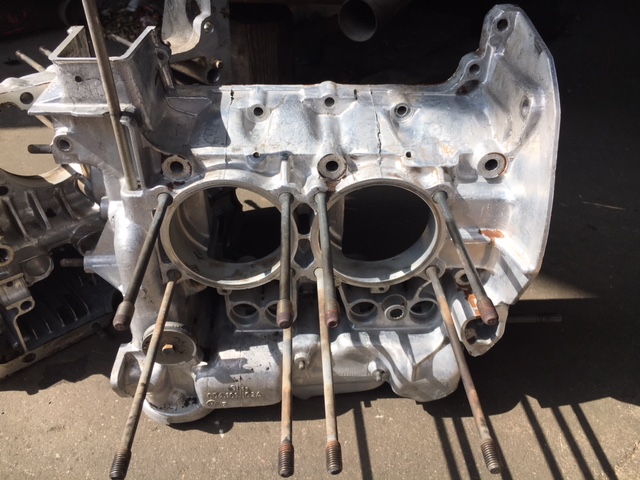
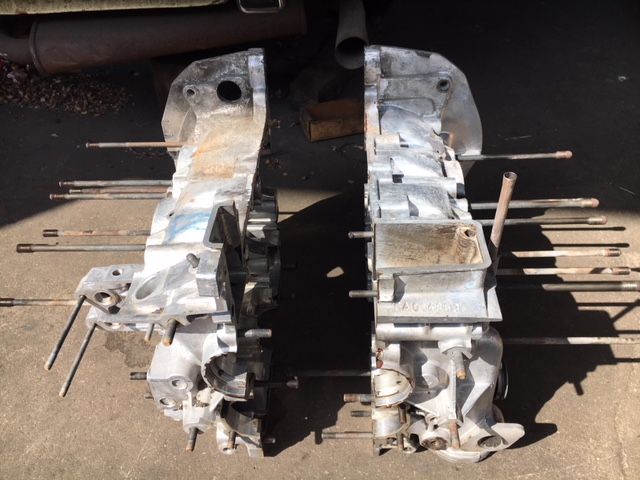
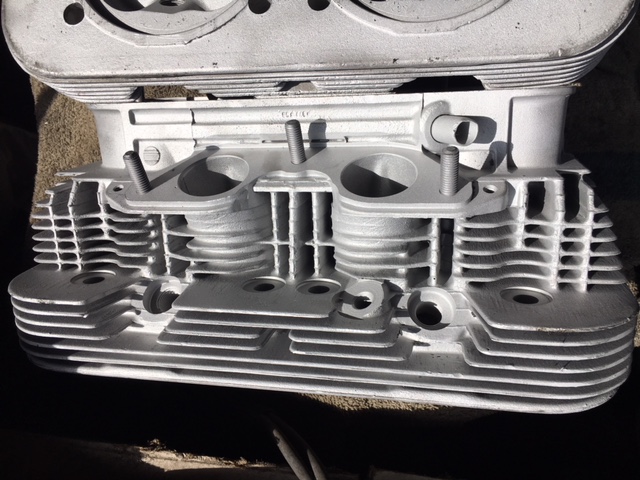
Cam is worn and will be replaced with NOS German along with the 96mm Pistons and Cylinders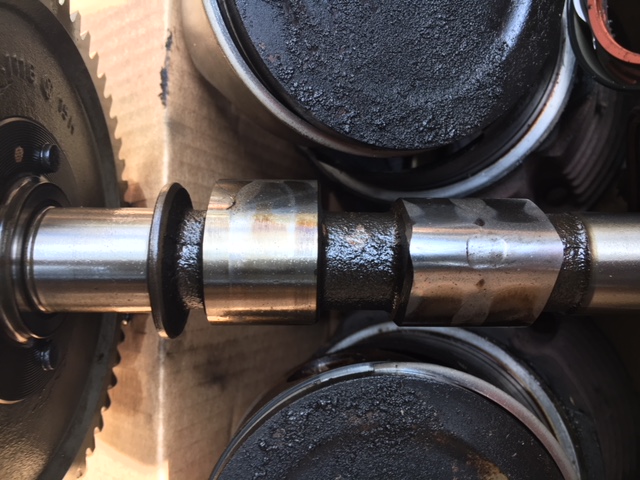
Crank is good
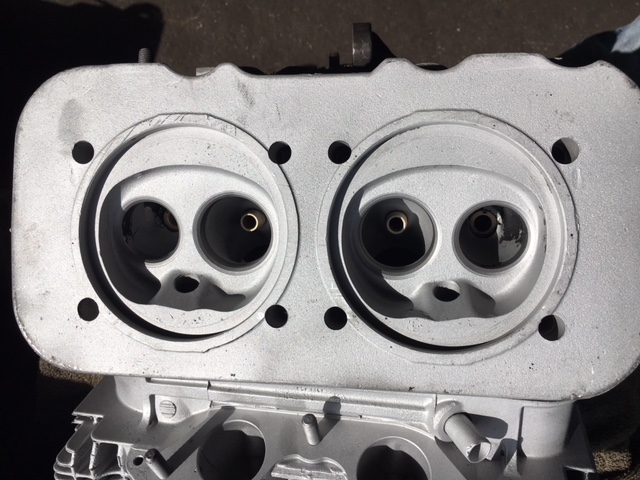
Valve guides were shot, but intakes good.
Original German Valves look great and will be put back in along with the crank.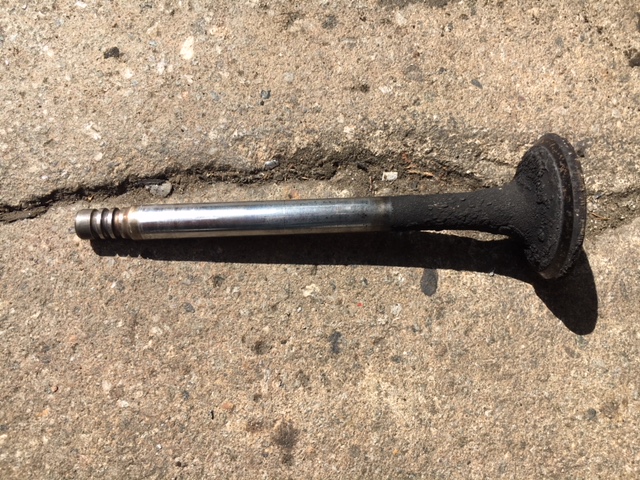
Should start going back together in a few weeks.
Posted by: 914 Oct 20 2017, 08:10 PM
Jeffery,
Wow really looking good.. Keep on adding progress posts. Good luck..
914/Alan
Posted by: 914 7T3 Oct 24 2017, 10:43 AM
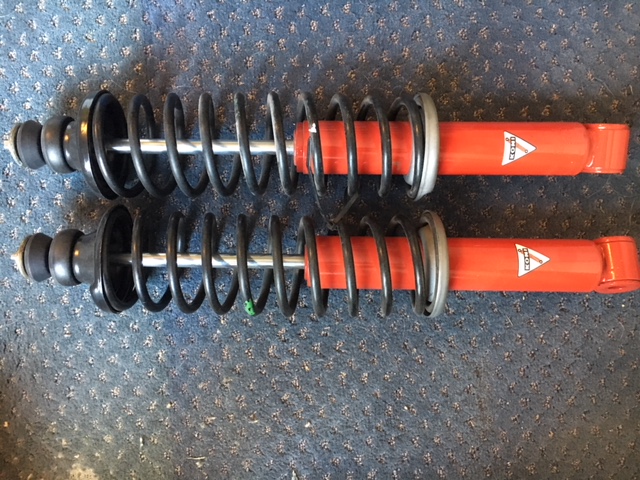
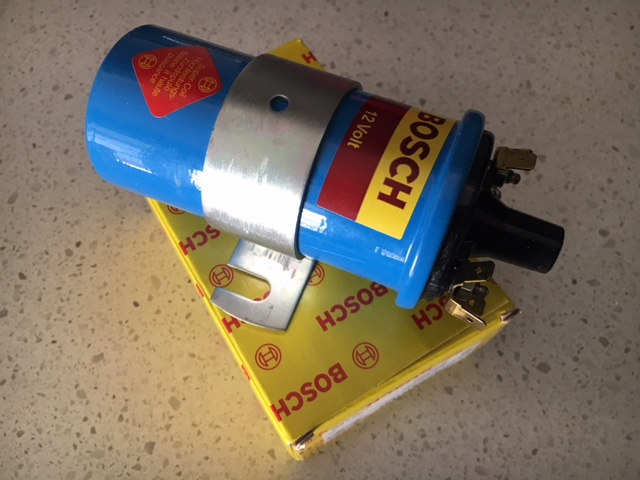
Parts update: Recently acquired NOS/NLA Bumperettes & Regulator, rebuilt Koni reds with Rear Springs and 12v ignition coil

Posted by: 914 7T3 Oct 27 2017, 07:59 PM
Thanks to Tom_T, was able to get an updated COA that specifically states "Marathon Blue Metallic" although they will not list the paint code of L96M
As per PCNA, "The COA will only list the Porsche Exterior Color code. It is similar to an option number/code for the exterior color that was chosen therefore the COA will list 89. We do not list paint codes on the COA"
Not sure that it matters so long as the proper color is listed as per the L96M punched into the chassis plate.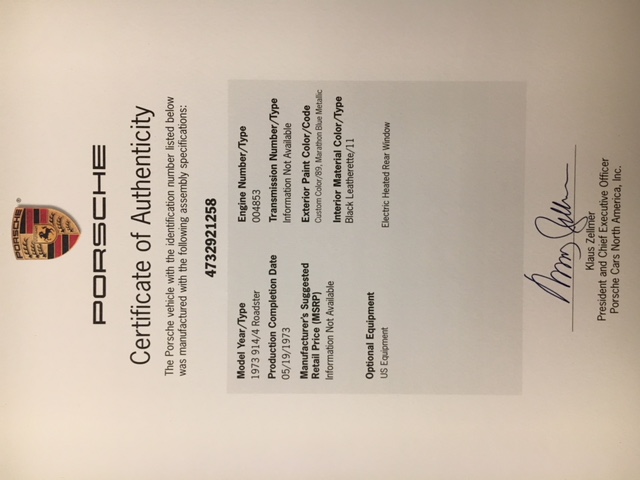
Posted by: 914 7T3 Oct 27 2017, 08:10 PM
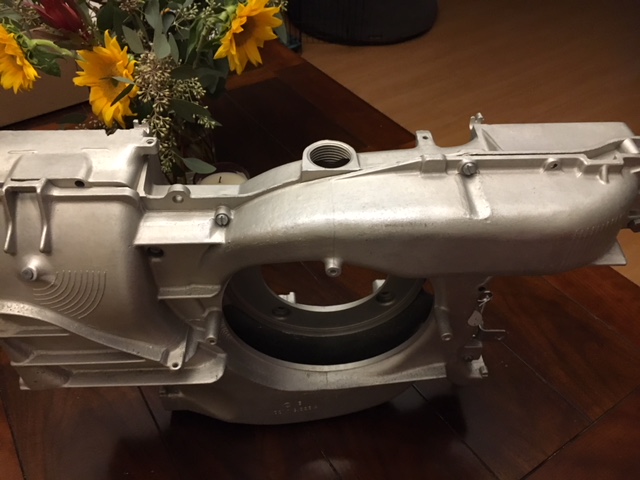
Picked up the Fan Shroud earlier today from the tumble blast procedure. The process and type of media used was not disclosed when asked.
The results far exceeded my expectation as the Magnesium case looks as new. The process actually closes the pores so it will not absorb any coatings and I am leaving it as is so as not to impede any heat dissipation once reinstalled. It looks so good that I will use the process on my transmission case as well as the decision was recently made to rebuild it now that it is out of the car.
Here are some before and after pics.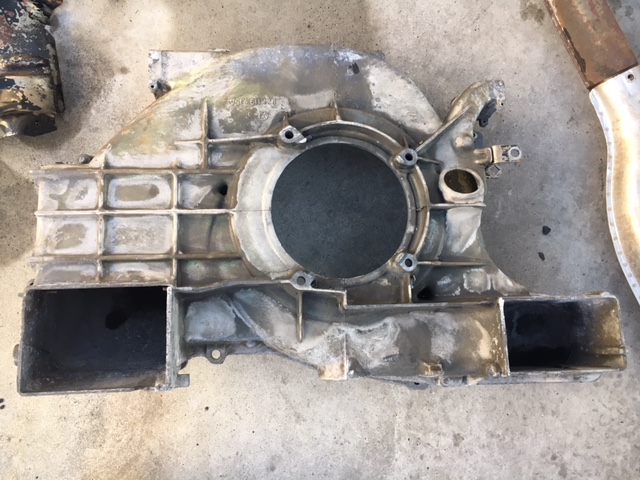

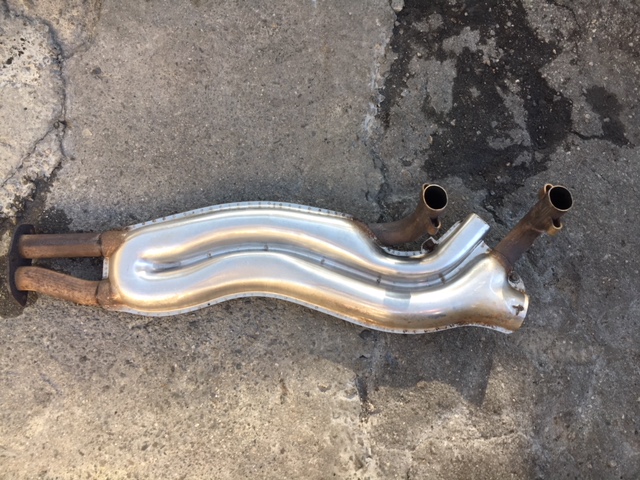
Posted by: 914 7T3 Oct 28 2017, 04:57 PM
Had some Weld repairs done to the Heat Exchangers compliments of Tim at Morse Muffler & Performance Exhaust in Burbank...great shop!
Spent some time cleaning them up with a baking soda/water mixture and a soft/medium brush.
Might get into it a little more with some oxalic acid tomorrow. 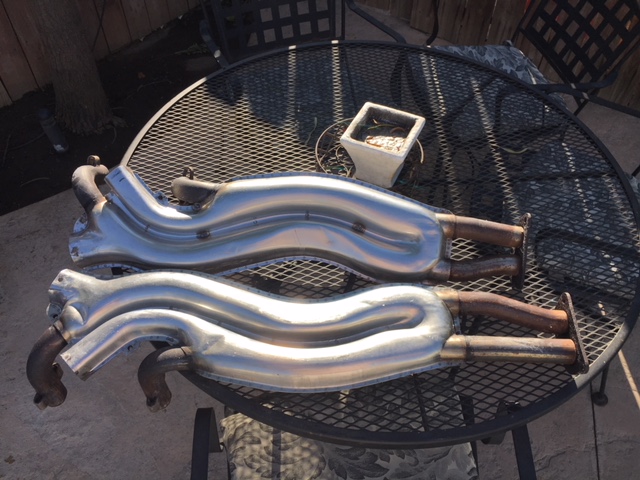
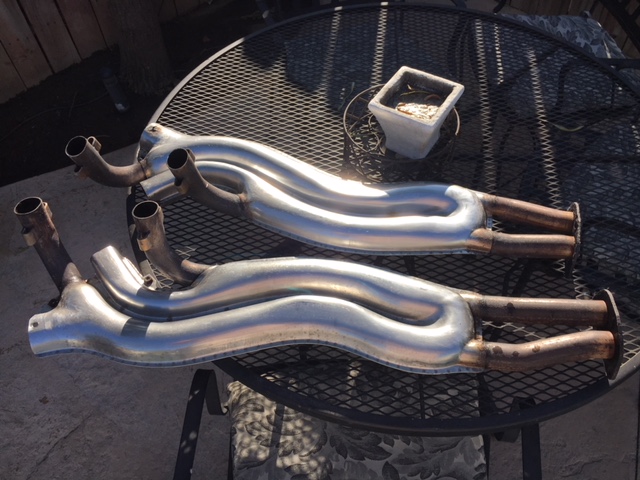
Update:
Cleaned up a bit better with some Barkeeper's Friend containing Oxalic Acid. Looks like this is as good as they're going to get.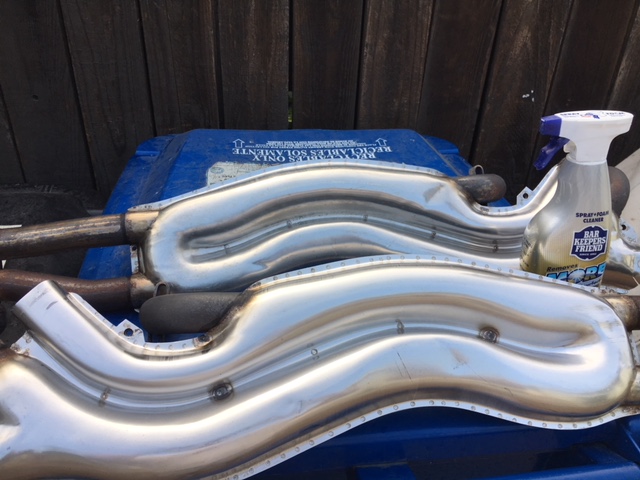
Posted by: 914 7T3 Nov 1 2017, 01:49 PM
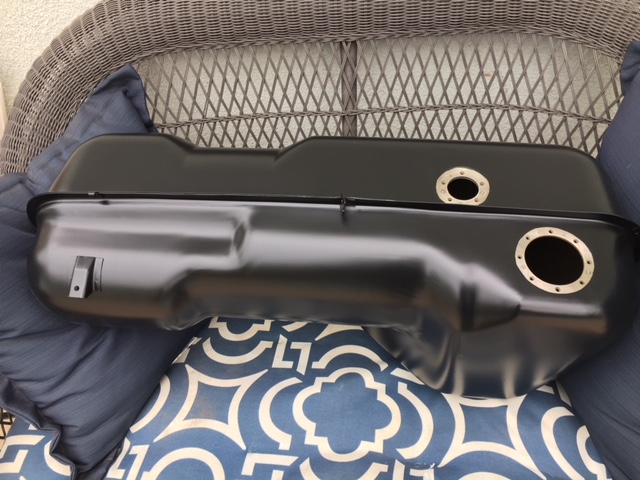
After treating the fuel tank to an acid bath and blasting prior to powder-coat, it seems the little rust demons were a little farther along than originally anticipated. Better to find out now than later.
Will now start the process over with a different tank.
Posted by: 914 7T3 Nov 1 2017, 01:50 PM
Was also able to source a replacement set of rubber bumpers for the tank.
Posted by: ValcoOscar Nov 1 2017, 03:28 PM
Was also able to source a replacement set of rubber bumpers for the tank.
Jefferey-
I like the detail you're sharing with us. Very motivating to say the least!!!
I'm starting to tear down my ORANGE 914 now.
I have a hunch you'll complete your resto before I complete my 914 Hauler.
See ya this weekend my friend....
Oscar
Posted by: Lucky9146 Nov 1 2017, 10:10 PM
Had some Weld repairs done to the Heat Exchangers compliments of Tim at Morse Muffler & Performance Exhaust in Burbank...great shop!
Spent some time cleaning them up with a baking soda/water mixture and a soft/medium brush.
Might get into it a little more with some oxalic acid tomorrow.
Update:
Cleaned up a bit better with some Barkeeper's Friend containing Oxalic Acid. Looks like this is as good as they're going to get.
Great cleaning tips that I sure didn't know. They look great!
Thanks
Posted by: 914 7T3 Nov 2 2017, 10:50 AM
Calvin & Tucker Jumped right into this morning's Fed EX delivery thinking it was their dog food delivery from Chewy.com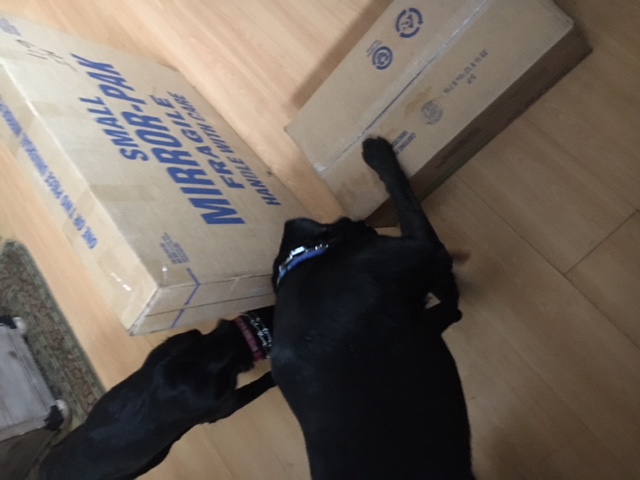
But even better, turned out to be two boxes full of 914 Resto parts from 914Rubber.com. A big thank you to Mark and Scott for getting me sorted out with all this. This stuff looks really good and I'll spend some time on Saturday going through it.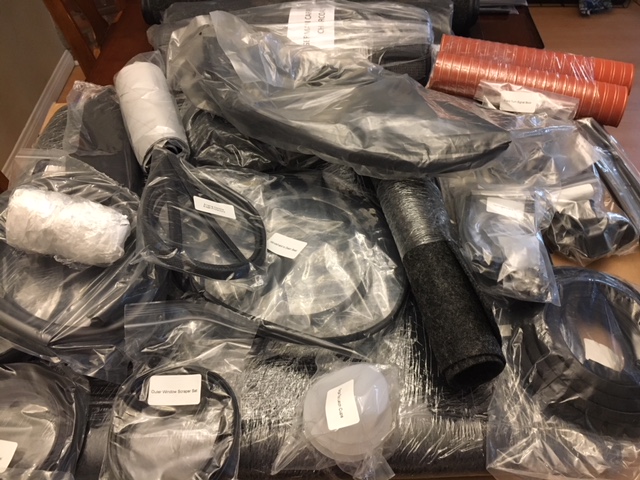
Posted by: ValcoOscar Nov 2 2017, 11:04 AM
Calvin & Tucker Jumped right into this morning's Fed EX delivery thinking it was their dog food delivery from Chewy.com
But even better, turned out to be two boxes full of 914 Resto parts from 914Rubber.com. A big thank you to Mark and Scott for getting me sorted out with all this. This stuff looks really good and I'll spend some time on Saturday going through it.
I want your deep pockets....keep it coming.
Oscar
Posted by: 914 7T3 Nov 2 2017, 11:09 AM
I want your deep pockets....keep it coming.
Oscar
Getting down to just the lint way at the bottom....

Posted by: Socalandy Nov 2 2017, 01:52 PM
nice progress ![popcorn[1].gif](style_emoticons/default/popcorn[1].gif)
Posted by: 914 7T3 Nov 4 2017, 11:17 PM
Still moving along on schedule.
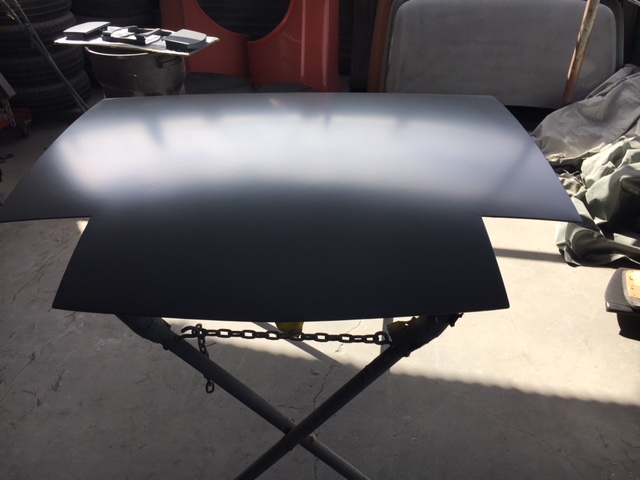
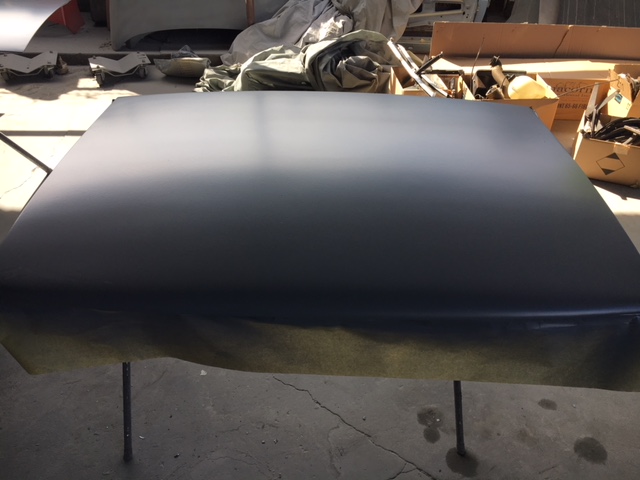
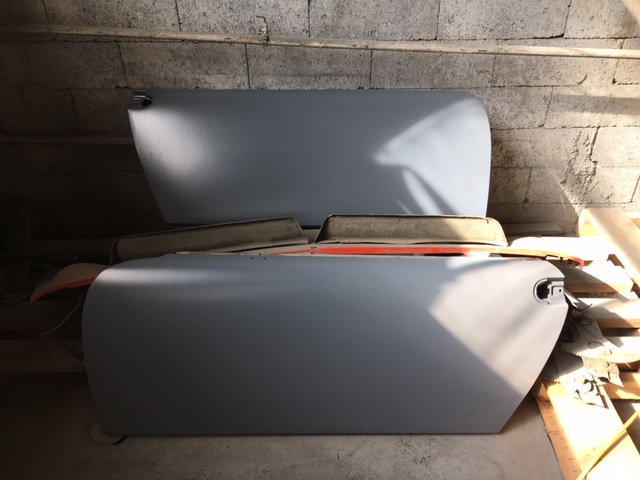
Doors and Trunk lids are already done up with Primer. Body work starts in earnest on Monday. 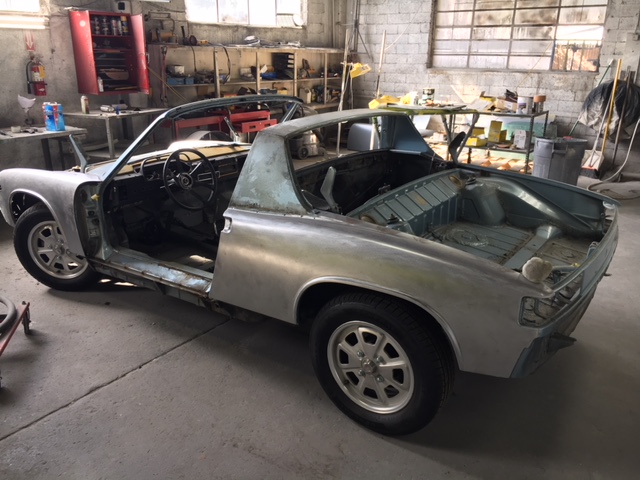
Posted by: barefoot Nov 5 2017, 05:34 AM
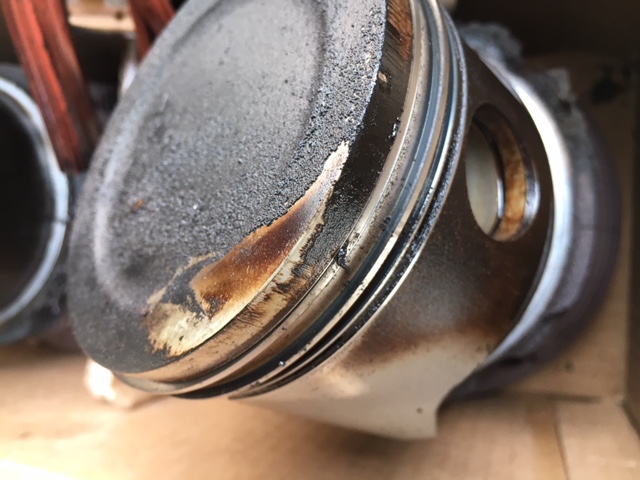
Update:
Original German Valves look great and will be put back in along with the crank.
Should start going back together in a few weeks.
DO NOT re-use 40 year old sodium filled exhaust valves disaster waiting to happen !
This is what happened as I was dis-assembling my 2L head, just tapped valve stem with mallet to insure stems not frozen in guides when spring popped loose.
Posted by: 914-300Hemi Nov 6 2017, 10:00 PM
Jeff,
You are making great progress. Wish I had much energy as you do.
Posted by: 914 7T3 Nov 9 2017, 12:51 PM
Picked Up a second fuel tank over the weekend and had the inside treated. Upon pic- up noticed that it is also rusted in the exact same spot as the original tank and will open up upon prep for powder coat.
Unbelieveable, I still need to source a fuel tank without rust! This is a real PITA!!!
Posted by: tygaboy Nov 9 2017, 01:08 PM
I have a few good tanks... PM sent.
Posted by: ndfrigi Nov 9 2017, 01:37 PM
Sir Jeffrey, maybe just need to buy new fuel cell!
Posted by: 914 7T3 Nov 9 2017, 06:28 PM
Back from Powder Coating, clean and ready for re-installation! All I need is a matching Fuel Tank 

Posted by: 914 7T3 Nov 12 2017, 08:26 PM
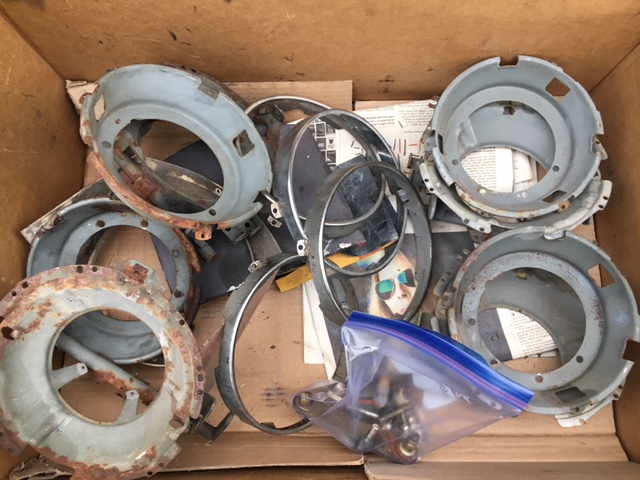
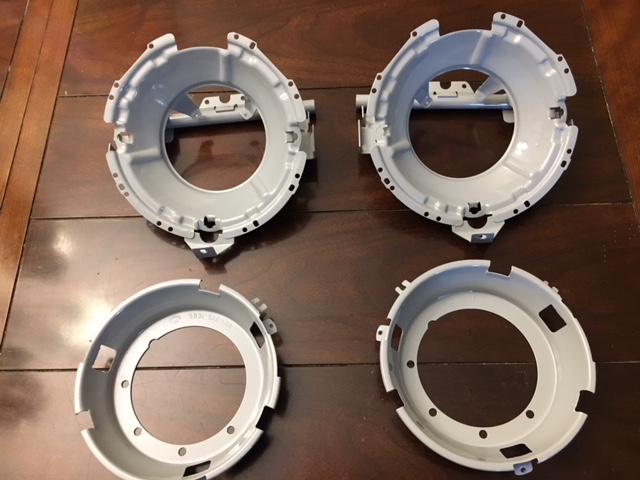
Disassembled two sets of head light buckets and need to figure out whether or not to media blast and powder coat these. Would also need to refinish all of the hardware and re-assemble.
Right brain would feel very accomplished in doing that. Left brain wants to buy a nice clean set and not even bother. What would you do?
Posted by: 914 7T3 Nov 12 2017, 08:34 PM
Here are some pics of the inside of Fuel tank #3 that I picked up from Bob B. As you can see its pretty clean.
I had treated the previous two tanks, however I am thinking to just go with it as is and just get the exterior powder coated.
Problem with rust treatment is that it needs to be resealed, but neutralized first with Muriatic acid and I'm not into burning the insides of my lungs with that stuff.
Is there any reason why I couldn't go with this tank as is on the inside? If so, let me know.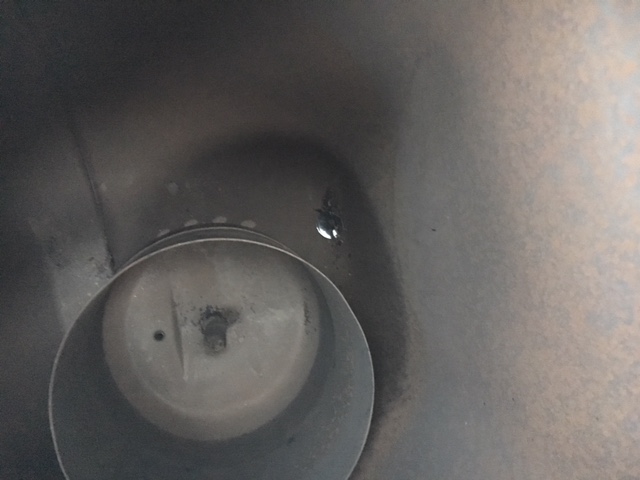
Posted by: Larmo63 Nov 12 2017, 09:51 PM
That tank looks fine. I'd run it.
Just PC or paint the headlight stuff proper gray color.
Posted by: banananose914 Nov 13 2017, 12:31 AM
Disassembled two sets of head light buckets and need to figure out whether or not to media blast and powder coat these. Would also need to refinish all of the hardware and re-assemble.
Right brain would feel very accomplished in doing that. Left brain wants to buy a nice clean set and not even bother. What would you do?
I have done quite a few of these. Sandblast, paint and send the hardware out for re-plating. The chrome rings usually clean up pretty well. I have a gas tank as well. If you need help, let me know. I'll do what I can for you. Jim.
Posted by: McMark Nov 13 2017, 07:05 AM
Run that tank.
Posted by: 914 Nov 13 2017, 09:36 AM
Jeffery,
Its great you met Bob B. as he lives really close to me..
Looks like you 914 is really coming along as its a labor of love..
Take Care,Alan
PS.Haven't done anything with the Lic Plates..Been busy..
Posted by: ValcoOscar Nov 13 2017, 10:18 AM
Disassembled two sets of head light buckets and need to figure out whether or not to media blast and powder coat these. Would also need to refinish all of the hardware and re-assemble.
Right brain would feel very accomplished in doing that. Left brain wants to buy a nice clean set and not even bother. What would you do?
I have done quite a few of these. Sandblast, paint and send the hardware out for re-plating. The chrome rings usually clean up pretty well. I have a gas tank as well. If you need help, let me know. I'll do what I can for you. Jim.
Jeffrey-
My 2 cents...
Right brain all the way so listen to Jim's expert advice...you won't regret it.
Oscar
Posted by: arne Nov 13 2017, 10:18 AM
with the others, run the tank as is, Jeffery. I’m not a big fan of inside tank coating anyway, as if the prep isn’t perfect the coating may not adhere to the inside properly and can cause just as many problems as rust does.
Posted by: 914 7T3 Nov 13 2017, 09:56 PM
Thanks to all who have responded. Tank and headlight assemblies went off for Powder Coating earlier today.
For anyone that is looking in the Valley contact Marcille at Powder Craft. Their work is excellent.
http://www.powdercraftlosangeles.com/
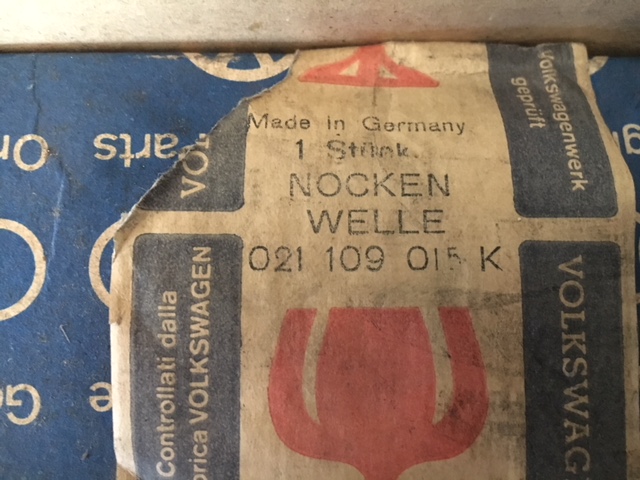
Posted by: 914 7T3 Nov 20 2017, 11:22 AM
After an exhaustive search, I was able to find the correct NOS VW Camshaft for my build. It is actually the part that supersedes part #021109015M. Its listed as a 1.7, but we know that all 1.7-2.0 D-Jet Cams were the same so all good. Below is the listing and called the supplier to verify and its being shipped out today.
Item#: 021109015K Camshaft, w/ -3 Riveted on Gear p/n 021109111B, 1700 Solid Lifter Bus Typ. II IV 72-74, 914 Porsche 70-76
NOS Genuine German Box, still coated in Cosmoline
Once it gets here, the motor will start to go back together next week. Almost ready to turn the corner on this project!
Decided to also provide a link to the back story if anyone is interested in the details.
http://www.914world.com/bbs2/index.php?showtopic=319785&st=20&gopid=2550062&#entry2550062
Posted by: 914 7T3 Nov 22 2017, 11:50 AM
Sooooooooo, my body shop bailed on me on Tuesday and I headed out earlier today to a restoration shop about 35 miles away to see if they could take on the project.
Their work is truly next level, so just trying to figure out when they can slot me into production (like 6-12 month wait).
After telling them how awesome and reliable my car is I go to leave and my starter sh-t the bed. With a courtesy push and a pop of the clutch, off I go to my mechanic who informs me that he can't pull the motor for another couple of weeks nor deal with my starter as he is backed up.
So now the car is DOA in my garage and all I need now is a set of jack stands!
PLEASE SOMEBODY: OFFICIALLY WELCOME ME TO 914 WORLD!
I finally get how this works now!
Today, she fired up right away. Seems like a hot start problem with no crank.
Today's delivery along with the new ignition harness and 12V coil should take care of that issue!
Posted by: 914 7T3 Nov 22 2017, 03:47 PM
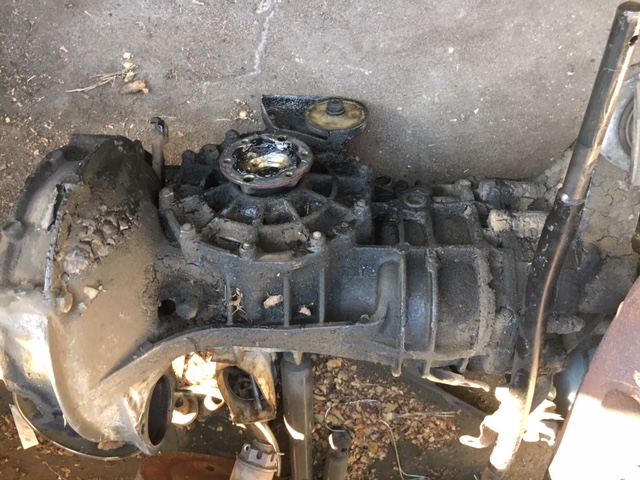
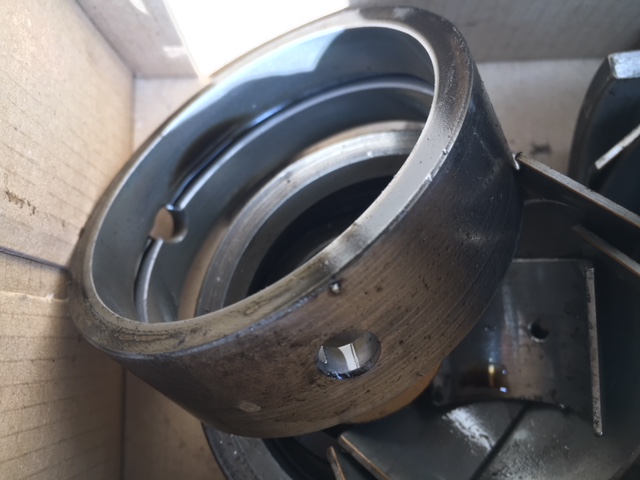
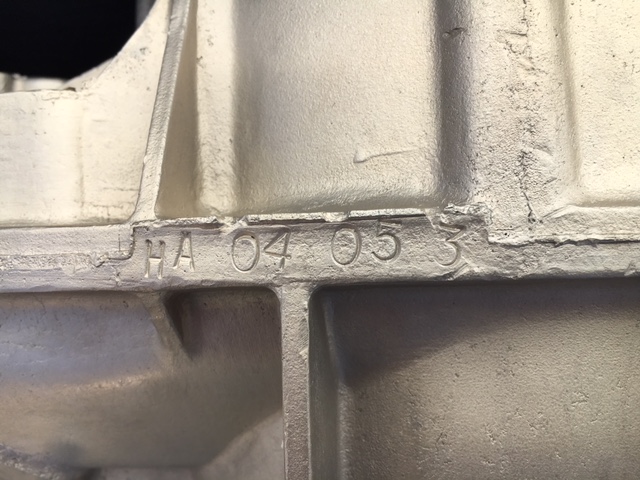
Transmission Case # HA 04 05 3 Cleaned Up and Ready For Rebuild.


Posted by: ValcoOscar Nov 22 2017, 04:28 PM
Too nice....

Rotisserie time yet?????
Posted by: 914 7T3 Nov 22 2017, 07:34 PM
Too nice....
Rotisserie time yet?????
C'mon Oscar its a Car, not a Chicken!
Sticking with the plan for an Excellent driver. I have no intention of making the car better than when it left the factory.
Did have the opportunity to tour John Esposito's new shop up in the Valley this past Saturday as part of a PCA organized tour. If you want a car that's better than new with respect to paint and finish, look no further. Would definitely consider depleting the kid's college funds if I were to jump into that World.
Posted by: 914 7T3 Nov 25 2017, 01:21 PM
After an exhaustive search, I was able to find the correct NOS VW Camshaft for my build. It is actually the part that supersedes part #021109015M. Its listed as a 1.7, but we know that all 1.7-2.0 D-Jet Cams were the same so all good. Below is the listing and called the supplier to verify and its being shipped out today.
Item#: 021109015K Camshaft, w/ -3 Riveted on Gear p/n 021109111B, 1700 Solid Lifter Bus Typ. II IV 72-74, 914 Porsche 70-76
NOS Genuine German Box, still coated in Cosmoline
Once it gets here, the motor will start to go back together next week. Almost ready to turn the corner on this project!
Decided to also provide a link to the back story if anyone is interested in the details.
http://www.914world.com/bbs2/index.php?showtopic=319785&st=20&gopid=2550062&#entry2550062
NOS Cam arrived today and the box appears to be older than dirt. Part # ends in the letter K instead of J as this part is so old, it supersedes it. Shout out to Bug City in Berlin, CT for hooking me up!
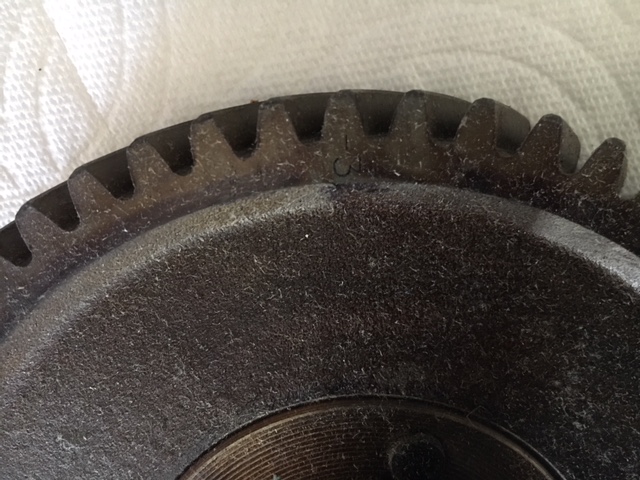
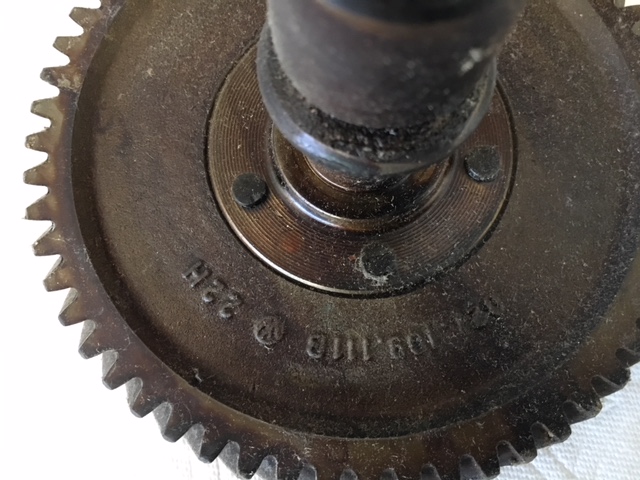
Camshaft is still coated in Cosmoline to protect it, just have to get it all off of there! The cam is smooth above the center bearing journal and has the 1/2 ring below it just like the original.

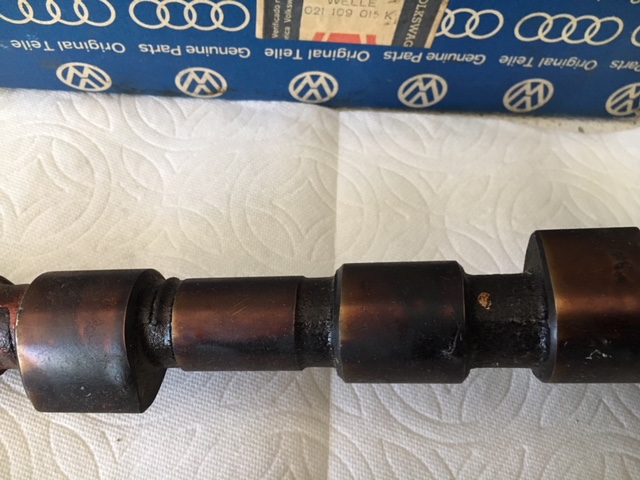
It is a -3 at the teeth and matching Cam Gear number 021 109 111B just like the original.
Just as difficult was tracking down a set of NOS OEM Cam Followers (lifters), but I found those too.
Thanks to Scott at German Supply in Toronto for his box of 7 and Terry at Griffin Motor Werke in Berkeley for the lead to the remaining one at Capitol VW in San Jose.
Happy to put this chapter to bed!
Posted by: 914 7T3 Nov 28 2017, 06:47 PM
Progressing Well. Should be ready for paint in 3 weeks!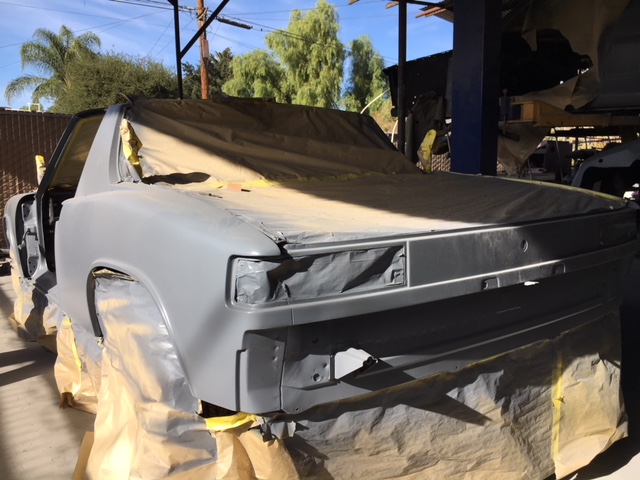
Posted by: ValcoOscar Nov 28 2017, 09:10 PM
Progressing Well. Should be ready for paint in 3 weeks!
What a nice X'mas present you got there....you must have been nice this year.

Oscar
Posted by: 914 7T3 Nov 28 2017, 11:11 PM
Four Spray Outs of L96M (Marathon Blue) from several different paint manufacturers.
Amazing how far off some of them are from the actual color. They had to shoot it with a camera to get the right match. Can anyone guess which is closest to the original?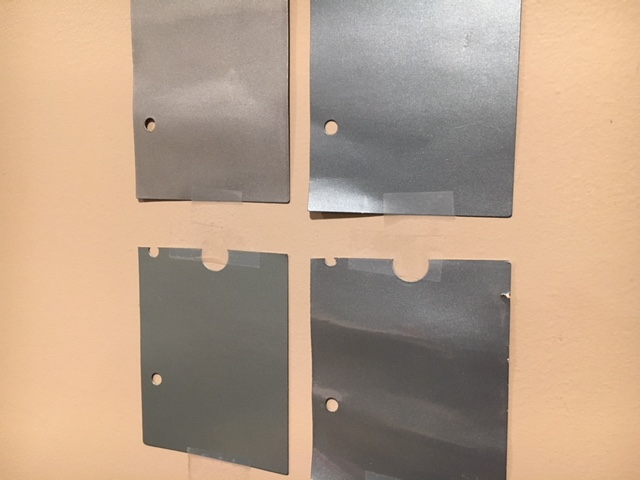
Posted by: KELTY360 Nov 28 2017, 11:19 PM
Four Spray Outs of L96M (Marathon Blue) from several different paint manufacturers.
Amazing how far off some of them are from the actual color. They had to shoot it with a camera to get the right match. Can anyone guess which is closest to the original?
Lower left.
Posted by: 914 7T3 Nov 28 2017, 11:22 PM
Four Spray Outs of L96M (Marathon Blue) from several different paint manufacturers.
Amazing how far off some of them are from the actual color. They had to shoot it with a camera to get the right match. Can anyone guess which is closest to the original?
Lower left.
We have a winner!
Posted by: KELTY360 Nov 29 2017, 10:44 AM
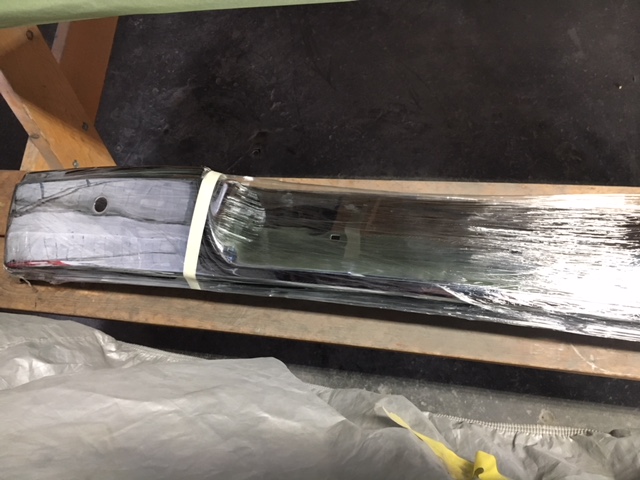
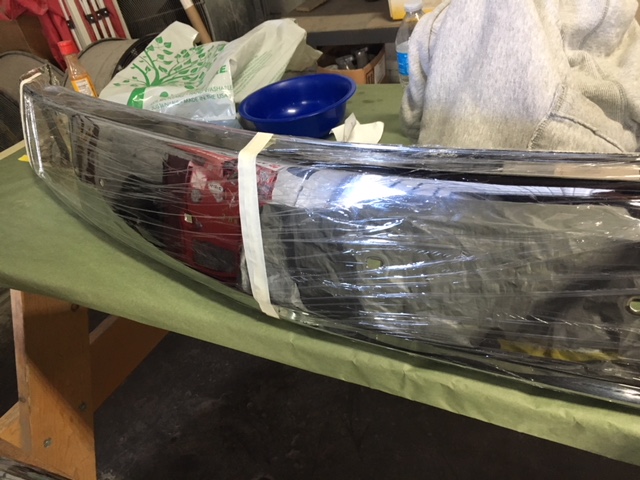
Marathon Blue is a strange color to look at in the context of individual pieces. Here's what my bumpers looked like after paint, in the booth: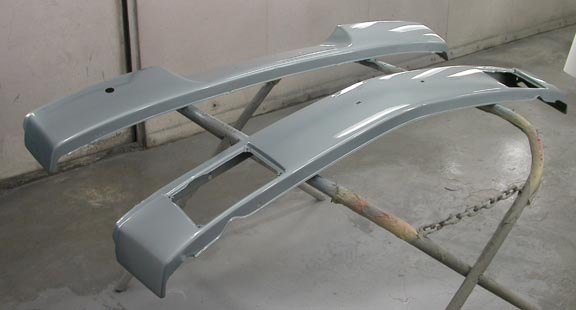
This is what it looked like when it was all back together: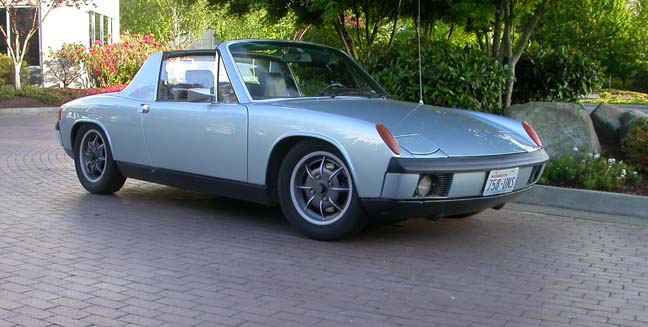
You're going to love the color!
Posted by: Cairo94507 Nov 29 2017, 11:28 AM
That looks terrific.
Posted by: 914 7T3 Nov 29 2017, 12:10 PM
Marathon Blue is a strange color to look at in the context of individual pieces. Here's what my bumpers looked like after paint, in the booth:
This is what it looked like when it was all back together:
You're going to love the color!
So true and when you look at those bumpers in fluorescent light, they look gray. Luckily, we were able to match the paint to specific areas in the frunk that were original paint.
The below pic has always been my vision for this car

Posted by: 914 7T3 Nov 29 2017, 12:18 PM
That looks terrific.
Been following your threads and am amazed at the level of work that is required on your car. At least it will be worth it on a real 6.
Luckily, there were no surprises with my car once it got torn down. Only a set of donor doors were used and everything else is original. Had to repair some bad body work on the passenger side quarter panel and other than perhaps a few dings, the car was not accidented. The initial assessment at time of PPI for minor hell hole and front trunk pan repair was also correct.
Hope your progress continues and cant wait to see it out there soon.
Posted by: burton73 Nov 29 2017, 12:27 PM
When you where out at my place getting the gas tank I told you back in 1972 I had a brand new 1972 Super Beatle in Marathon blue I bought new for $2.700.
What ever paint you get for your car, get much more than you think you will need and if they mix it out in quarts, mix them all together and then pour them back in the quarts so the colors are all the same. If you need to do a fender or a repair you will have the right color. Ask the paint shop what pressure they are shooting at and mark it on the cans.
Great color for 2-stage paint.
Bob B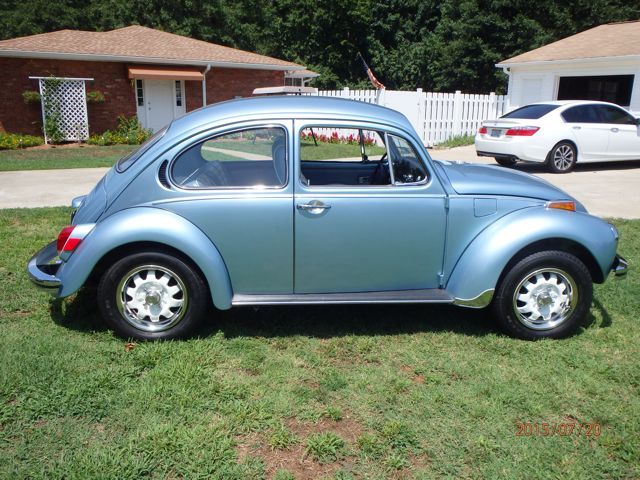
Picture is Not my car but a special edition Baja Bug with its special wheels that where silver gray from VW just like mine. It was my first brand new car.
VW dealer 5 houses from my house.
Posted by: 914 7T3 Nov 29 2017, 12:39 PM
When you where out at my place getting the gas tank I told you back in 1972 I had a brand new 1972 Super Beatle in Marathon blue I bought new for $2.700.
What ever paint you get for your car, get much more than you think you will need and if they mix it out in quarts, mix them all together and then pour them back in the quarts so the colors are all the same. If you need to do a fender or a repair you will have the right color. Ask the paint shop what pressure they are shooting at and mark it on the cans.
Great color for 2-stage paint.
Bob B
Great advice, I'll take it. Thanks.
Posted by: 914 7T3 Dec 2 2017, 05:50 PM
Disassembled two sets of head light buckets and need to figure out whether or not to media blast and powder coat these. Would also need to refinish all of the hardware and re-assemble.
Right brain would feel very accomplished in doing that. Left brain wants to buy a nice clean set and not even bother. What would you do?
I have done quite a few of these. Sandblast, paint and send the hardware out for re-plating. The chrome rings usually clean up pretty well. I have a gas tank as well. If you need help, let me know. I'll do what I can for you. Jim.
Great advice, here are the assemblies,like new back from powder coating.
Posted by: 914 7T3 Dec 2 2017, 05:51 PM
Now the motor is officially ready for reassembly with this fresh batch of zinc plating.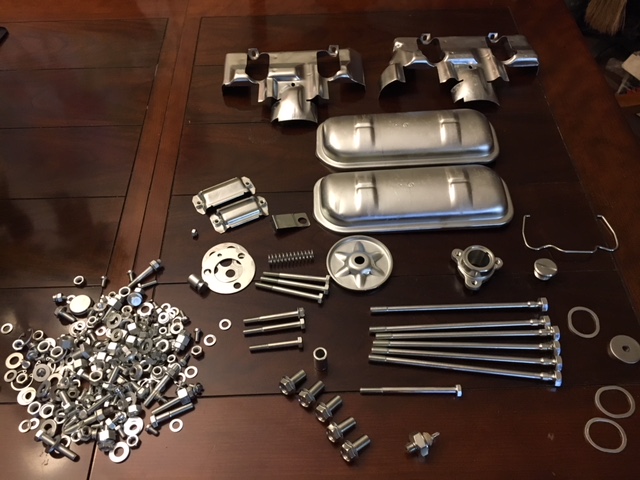
Posted by: Cairo94507 Dec 3 2017, 07:56 AM
Very nice. I love plated and powder coated parts.
Posted by: 914 Dec 3 2017, 09:49 AM
Jeffery,
Looking good.. You doing a great Job..
914/Alan
Posted by: 914-300Hemi Dec 3 2017, 10:01 AM
Great job Jeff. Can’t wait to see the final product.
Posted by: 914 7T3 Dec 14 2017, 11:52 AM
My new clutch kit has been AWOL since November 21st, but finally arrived today 
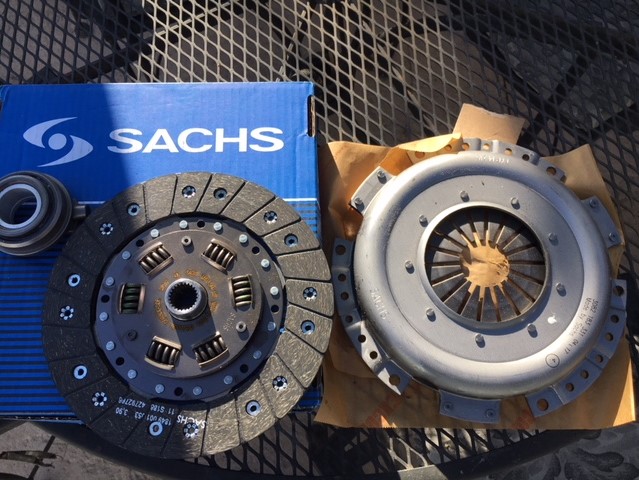
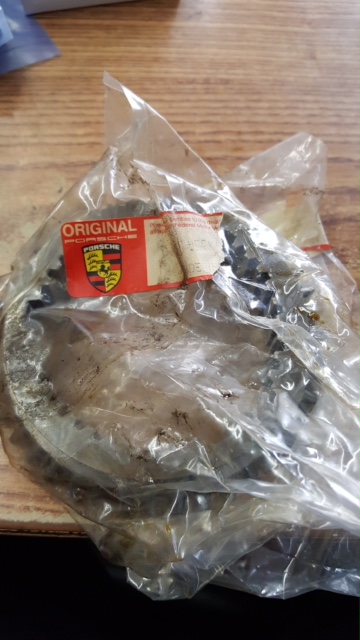
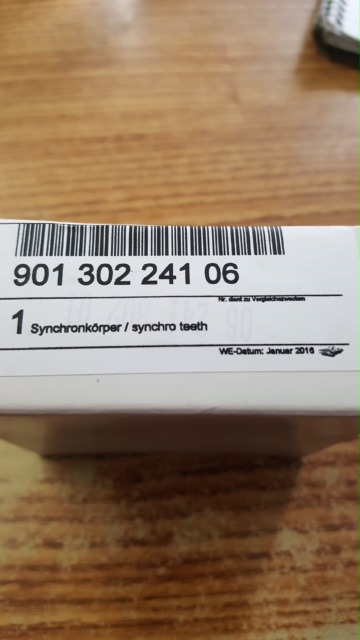
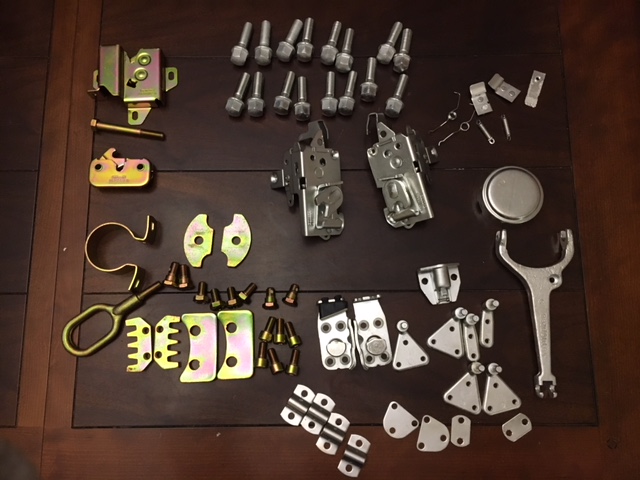
Have also been working with Kevin @KCR Transmissions and he advised me on required parts for the rebuild. I have sourced all Genuine Porsche parts including:
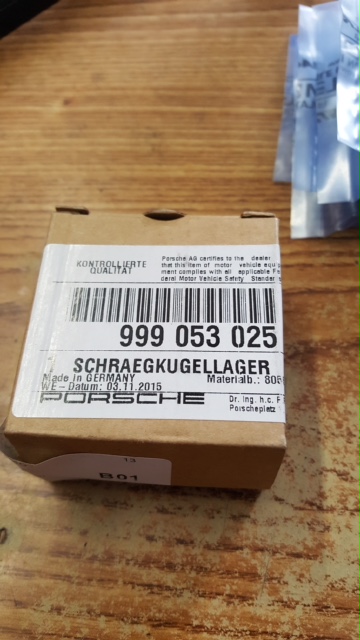
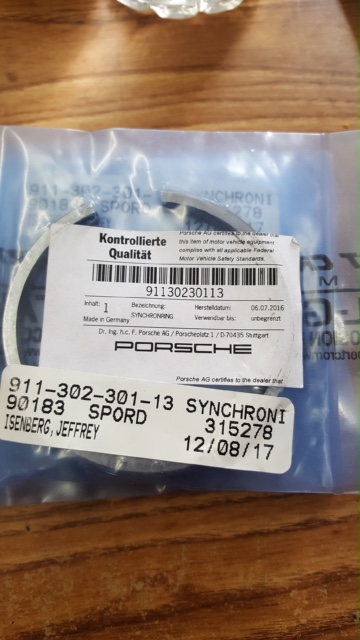
main shaft bearing Part #: 999-053-025-00
1st/Reverse slider, Part # 911-302-226-00 (bag is marked made in West Germany so you know its been around for a few years )
(5) synchronizers for all gears, Part # 911-302-301-13
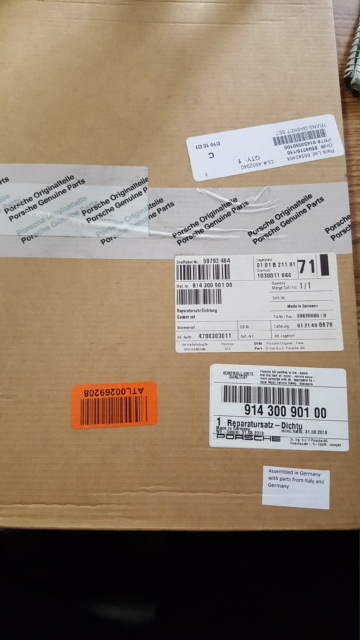
Complete Gasket Set, Part # 901-300-901-00
1st gear engagement teeth, Part # 901 302 241 06
Shout out to all the vendors including:
AASE Sales
Patrick Motorsports
Sunset Porsche
She is going to shift silky smooth for sure when put back together.
Posted by: 914 7T3 Jan 3 2018, 12:08 PM
Have also been working with Kevin @KCR Transmissions and he advised me on required parts for the rebuild. I have sourced all Genuine Porsche parts including:
main shaft bearing Part #: 999-053-025-00
1st/Reverse slider, Part # 911-302-226-00 (bag is marked made in West Germany so you know its been around for a few years
)(5) synchronizers for all gears, Part # 911-302-301-13
Complete Gasket Set, Part # 901-300-901-00
1st gear engagement teeth, Part # 901 302 241 06
Shout out to all the vendors including:
AASE Sales
Patrick Motorsports
Sunset Porsche
She is going to shift silky smooth for sure when put back together.
Everything has arrived at KCR and now ready for reassembly!
Posted by: burton73 Jan 3 2018, 01:48 PM
Jeffrey,
Your car is looking great and the level of detail you are putting into it make me want it. If you ever want to sell this car call me. It’s the color that I want and the rest makes it a good deal.
Bob B
Posted by: 914 7T3 Jan 3 2018, 03:18 PM
Jeffrey,
Your car is looking great and the level of detail you are putting into it make me want it. If you ever want to sell this car call me. It’s the color that I want and the rest makes it a good deal.
Bob B
Very flattering and kind of you to say. However, the plan right now is getting it finished and enjoying it as the super clean & proper running classic 914 that I envision it to be.
Here are some bonus pics of the fuel tank you sold me after powder coating!
Posted by: bbrock Jan 3 2018, 03:48 PM
Very flattering and kind of you to say. However, the plan right now is getting it finished and enjoying it as the super clean & proper running classic 914 that I envision it to be.
You are very inspring as I chase the same goal. Keep 'em coming!
Posted by: burton73 Jan 3 2018, 03:58 PM
You are the man for the info on who does good work in the L.A. area. Very good information to have and share. Who did your bumpers around here?
Thanks,
Bob B
Posted by: 914 7T3 Jan 3 2018, 04:09 PM
You are the man for the info on who does good work in the L.A. area. Very good information to have and share. Who did your bumpers around here?
Thanks,
Bob B
Truth be known, my body shop is bringing them down to Mexico to do them the Old Fashioned Way! I told them that I'd be better off not knowing that parts of my car will be leaving the country.
Posted by: 914 7T3 Jan 3 2018, 04:12 PM
Very flattering and kind of you to say. However, the plan right now is getting it finished and enjoying it as the super clean & proper running classic 914 that I envision it to be.
You are very inspring as I chase the same goal. Keep 'em coming!
Actually, its your build that is inspiring as your car needs significantly more time and attention to bring it back. The awesome thing is that you can do the work yourself. I'm just the general contractor on my project with minor cleaning and reassembly.
Posted by: krazykonrad Jan 4 2018, 12:41 PM
Lookin' good!
Konrad
Posted by: Mueller Jan 4 2018, 12:52 PM
Great restoration project, so glad to see people go the extra mile to make up for the slackers and hacks such as myself
Posted by: 914 7T3 Jan 4 2018, 01:38 PM
Thanks for the encouragement, My motivation is that I never want to tear it apart again so might as well do it right. So far I have been very fortunate to source the Genuine Parts required especially for the engine and transmission build among others.
For the rest, there is 914Rubber so there is no compromise with this car. If it wasn't a '73 2.0 there is no way I would undertake such a project.
Posted by: Phoenix914 Jan 5 2018, 10:07 AM
As another Marathon Blue car owner, I am thoroughly enjoying your restoration. Thanks for all the pictures.
Which paint manufacturer had the best color match? I painted the interior and front trunk of my car years ago, but the color wasn't exact. The original had some gold tones that weren't in the new paint. That paint came from NAPA.
Posted by: 914 7T3 Jan 5 2018, 11:16 AM
As another Marathon Blue car owner, I am thoroughly enjoying your restoration. Thanks for all the pictures.
Which paint manufacturer had the best color match? I painted the interior and front trunk of my car years ago, but the color wasn't exact. The original had some gold tones that weren't in the new paint. That paint came from NAPA.
The spray out from NAPA had too much silver and not enough blue. I can not recall the paint manufacturer of the spray out that was approved, but can update you on Tuesday as I will be out at the shop to check in.
The front pan and hell hole weld repairs have been completed and blocking begins next week.
Posted by: MRCUPPS Jan 7 2018, 09:20 PM
nice 914. I'm on my second. Adding the finishing touches on once and about to get stuck into another.
Posted by: 914 7T3 Jan 9 2018, 07:12 PM
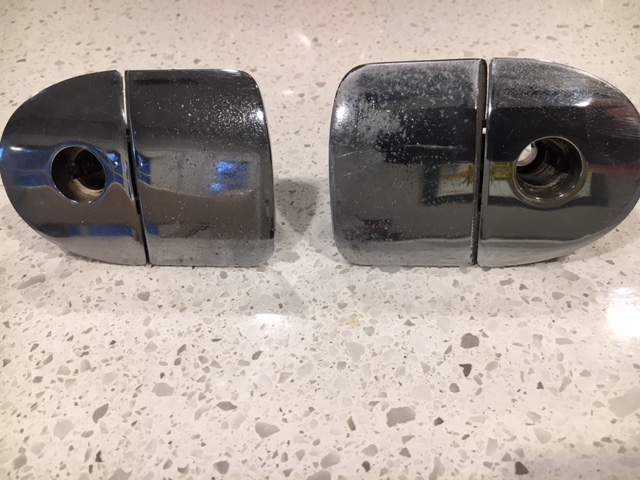
Lock cylinders have been cleaned and several new tumblers added to replace the worn ones. Now paired with a new and shiny set of door handles.
Before and after pics 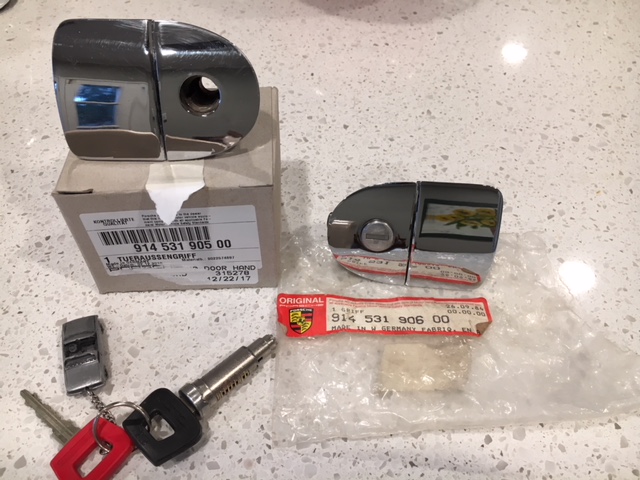

Posted by: 914 7T3 Jan 10 2018, 06:10 PM
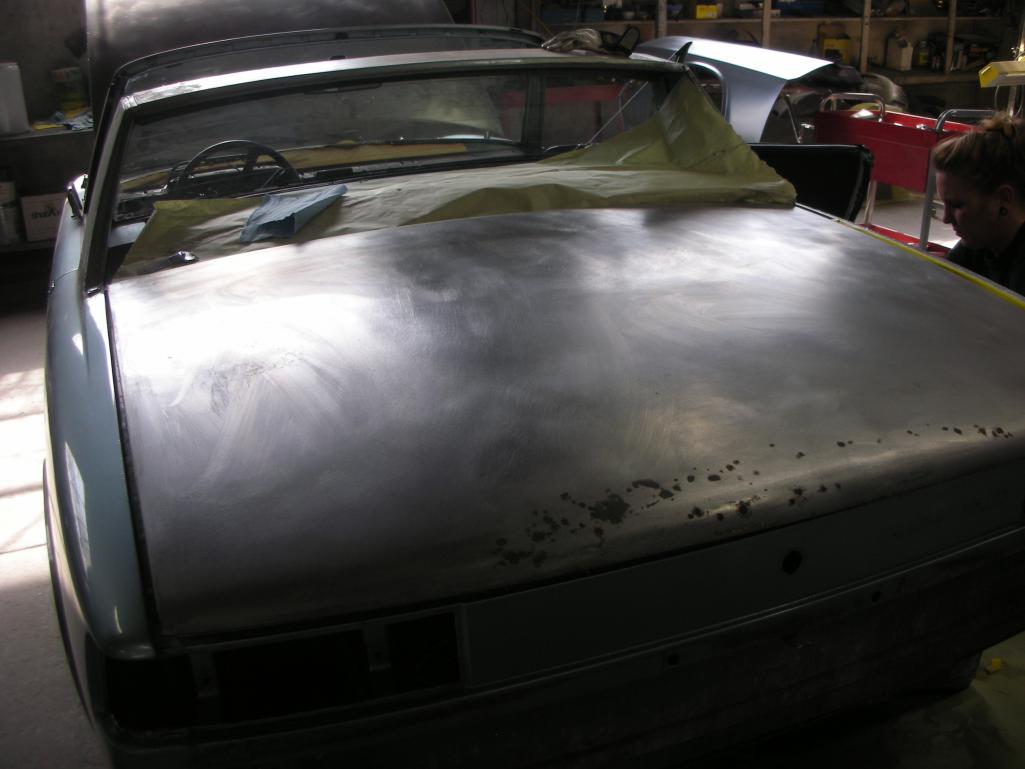
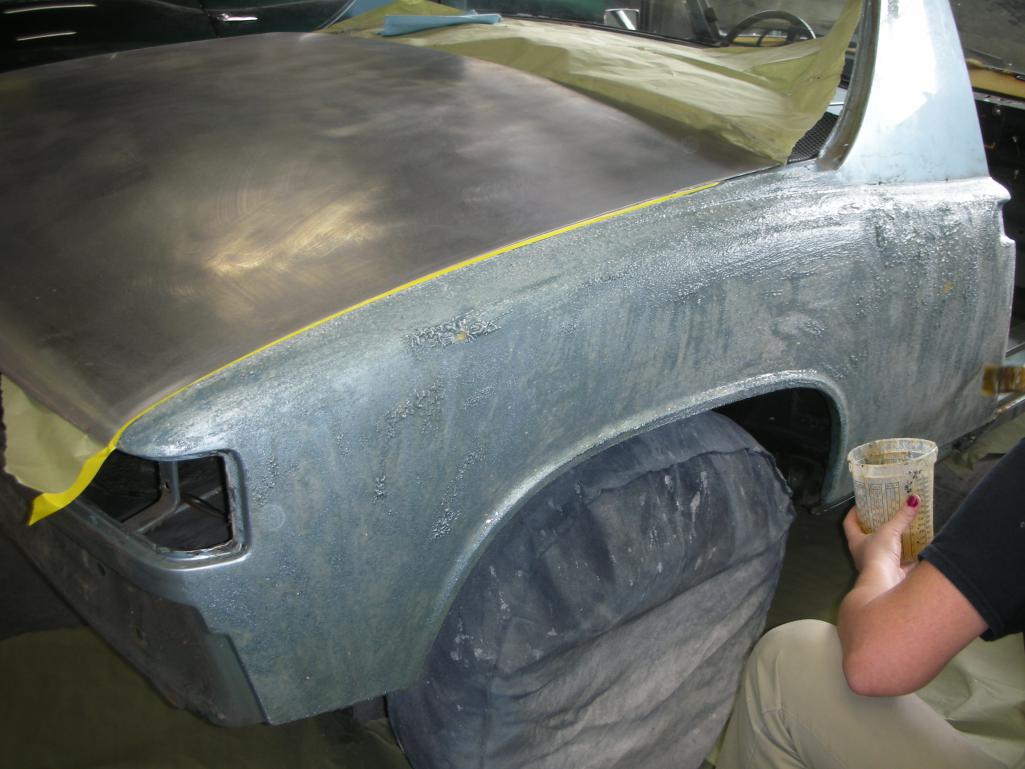
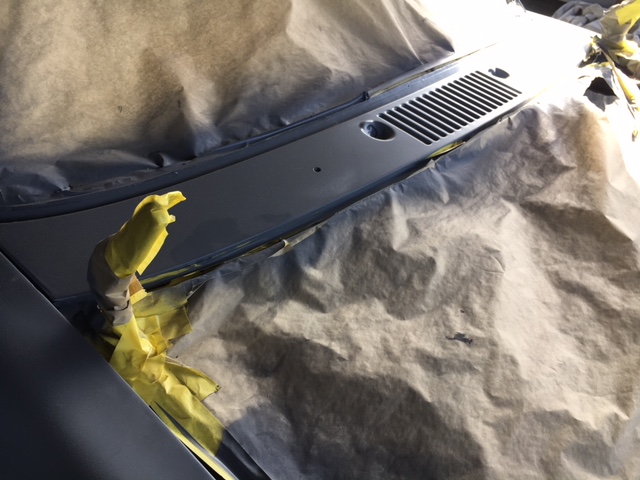
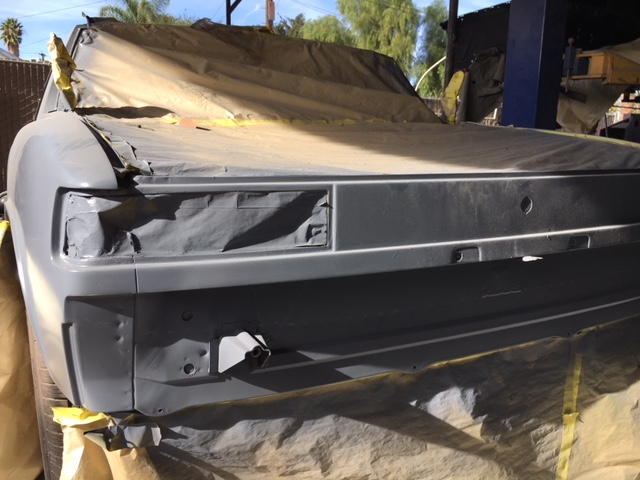
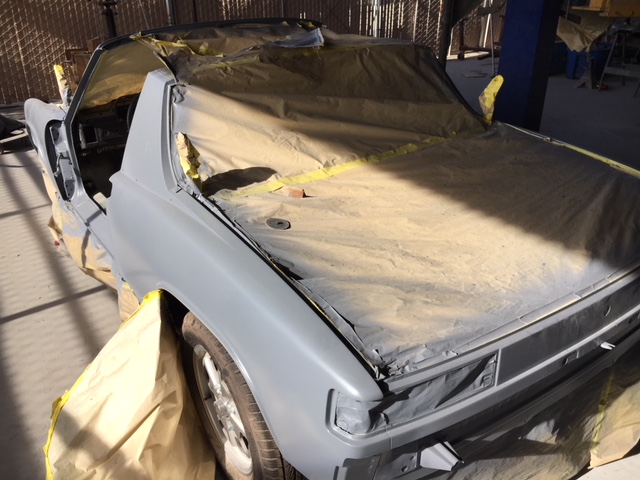
Body work is progressing slowly with the Holidays taking up a big chunk of time and now the push is on for completion of prep and hope to get the car into the booth within 3 weeks.
Donor Front trunk pan has been welded in and just needs some prepping and seam sealer....
BEFORE PICS
AFTER PICS
Posted by: burton73 Jan 10 2018, 10:48 PM
Jeffrey,
Spare no expense with my car. O, your car but my future car.
Bob B
Posted by: 914 7T3 Jan 10 2018, 11:15 PM
Jeffrey,
Spare no expense with my car. O, your car but my future car.
Bob B
That’s right out of my play book! I told Euro911 the same thing about his 1966 912!
Posted by: 914 7T3 Jan 10 2018, 11:57 PM
Super Shiny Yellow Zinc Plating too.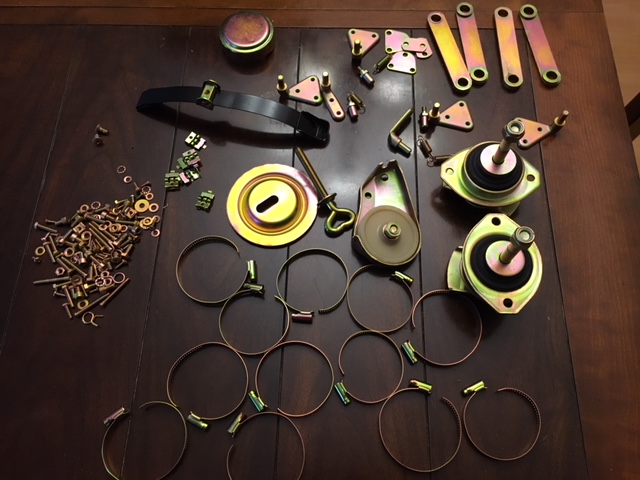
Posted by: 914 7T3 Jan 16 2018, 09:50 PM
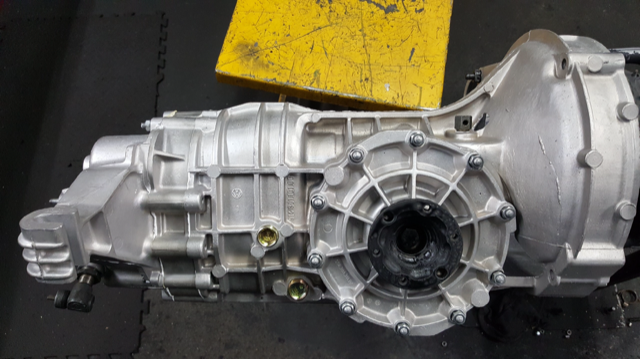
Transmission Rebuild is Now Complete!

Posted by: burton73 Jan 16 2018, 10:00 PM
Jeffrey,
Spare no expense with my car. O, your car but my future car.
Bob B
That’s right out of my play book! I told Euro911 the same thing about his 1966 912!
That was his 66 911
Bob B
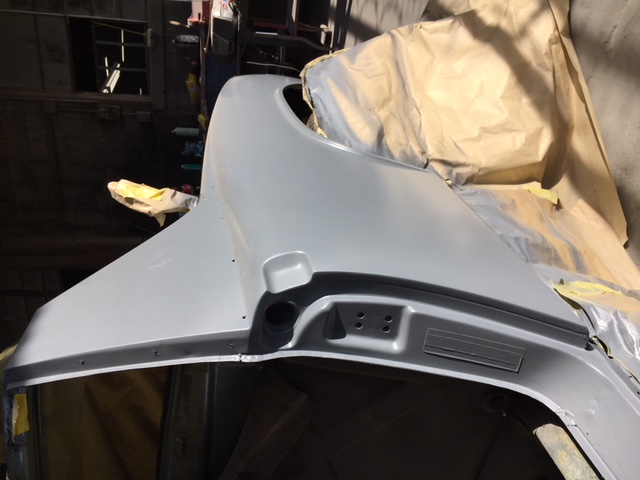
Posted by: 914 7T3 Jan 18 2018, 06:30 PM
Both Lids & Doors are in the booth and ready to be installed on the car for blocking. Fluorescent lighting is harsh as evidenced by the color difference in the photos.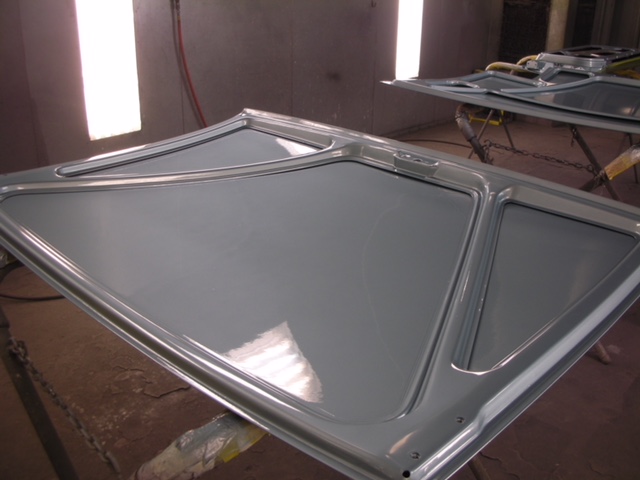
Posted by: Larmo63 Jan 18 2018, 07:32 PM
Wowzers. I'm jealous.
Posted by: Phoenix914 Jan 19 2018, 10:28 AM
So shiny... Your car is going to look amazing.
Posted by: Cairo94507 Jan 19 2018, 10:35 AM
Nice progress.
Posted by: 914 7T3 Jan 19 2018, 11:38 AM
Color Match to approved sample card is excellent and looks way better on a full panel.
Posted by: 914 7T3 Jan 27 2018, 04:31 PM
Just received my set of back up gauges as my original set went AWOL! Long story, but should have them here on Monday.
Shout out to Mark Heard for hooking me up with this gorgeous refurbed set...and remember to support our member vendors!!!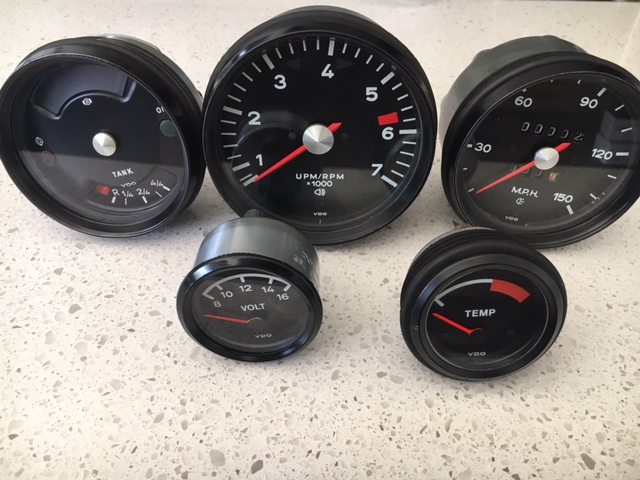
Posted by: 914-300Hemi Jan 27 2018, 05:02 PM
Looks great and very jealous.
Posted by: 914 7T3 Jan 29 2018, 12:23 PM
Got my original set of Restored Gauges back today to go along with the back up set that was acquired just in case. 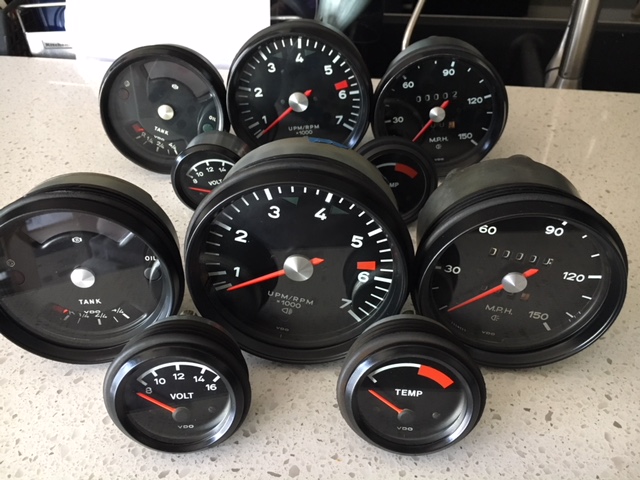
Fill my eyes with that double vision
No disguise for that double vision
Ooh, when it gets through to me, it's always new to me
My double vision always seems to get the best of me, the best of me, yeah-ah
Ooh, double vision, I need my double vision
Ooh, It takes me out of my head, takin' me out of my head
Ooh, I get my double vision
Ooh, seeing double double, double vision
Ooh, oh my double vision
Ooh, double vision
Yeah-ah, I get double vision, ooh . . .Songwriters: Lou Gramm / Mick Jones
Posted by: 914 7T3 Jan 31 2018, 12:17 PM
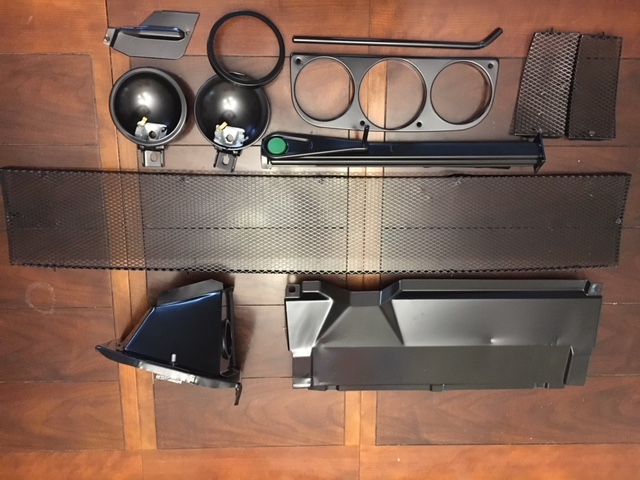
Picked up a second round of parts for powder coating from the body shop. In particular need of extra attention are the fog lights: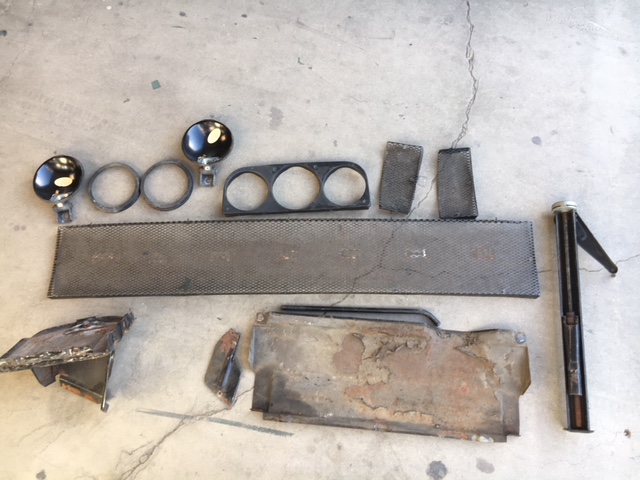
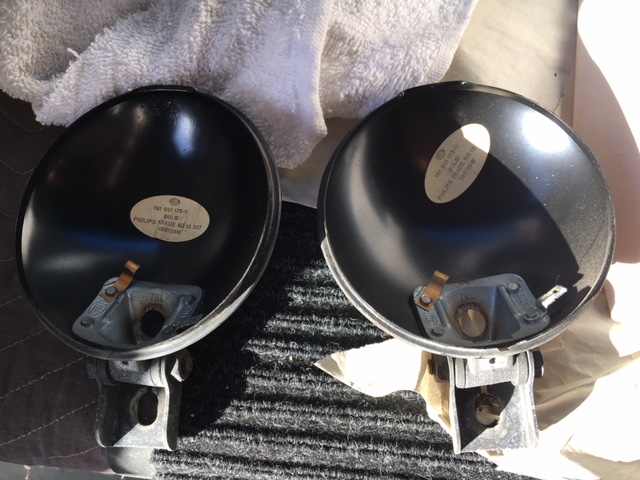
-fog light housings will be powder coated inside & out
-procured a new set of Hella TN4 lenses with seals & protectors from 914 Rubber 
-just need advice on how to refurb the inside of the reflectors where corrosion is present
Any Ideas???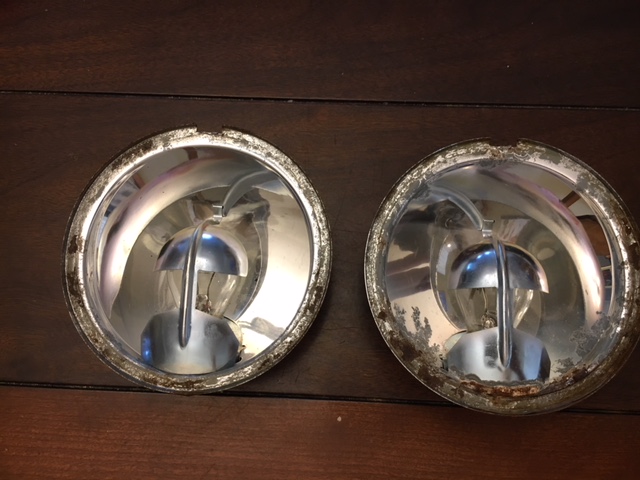
Posted by: 914 7T3 Feb 13 2018, 09:25 PM
Some More Pieces Parts getting sorted. Will bring required hardware back to the body shop on Thursday so the doors can be hung and blocking will begin.
Posted by: burton73 Feb 13 2018, 09:55 PM
Nice fresh parts!
Bob B
Posted by: 914 7T3 Feb 15 2018, 09:39 PM
Bumpers are on their way to Mexico for Re-Chroming & The Clean Up Continues! Car Is Scheduled for the Paint Booth late next week, however, that probably means week after next! Regardless, getting closer......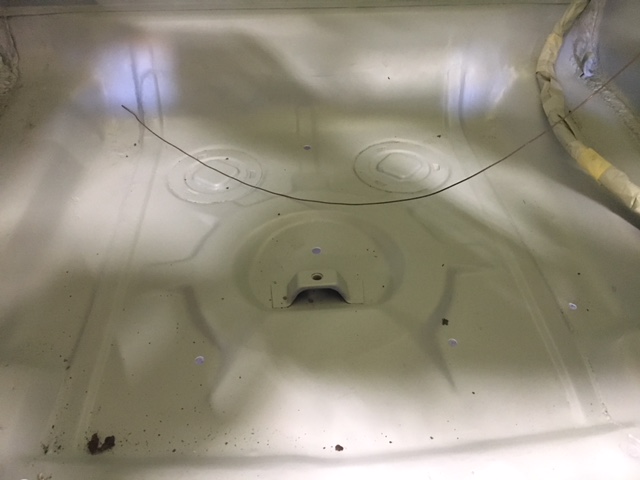
Posted by: 914 7T3 Mar 10 2018, 07:28 PM
Paint has been delayed several weeks, but final prep should be completed by the end of the week. Doubtful though that the car will get into the booth with this much rain and humidity.
In the meantime, have been collecting many NOS and excellent condition parts required. As stated, this thread will serve as the documentation for the restoration so going to keep posting parts as they get acquired:
Window Regulators and Lifters. Was shocked to see that these regulators are original and not re-furbed like the accompanying lifters. Acquired these along with an original 12V ignition coil from Retro Automotive Products in NH. They don't get much bandwidth on the forum, but they have a great selection of really clean parts at fair pricing. 
Scored a spare MPS and trigger points because you just never know when that may come in handy. NOS seat belt light and low tone horn from 914Sixer Also a set of rear targa latches from bdstone914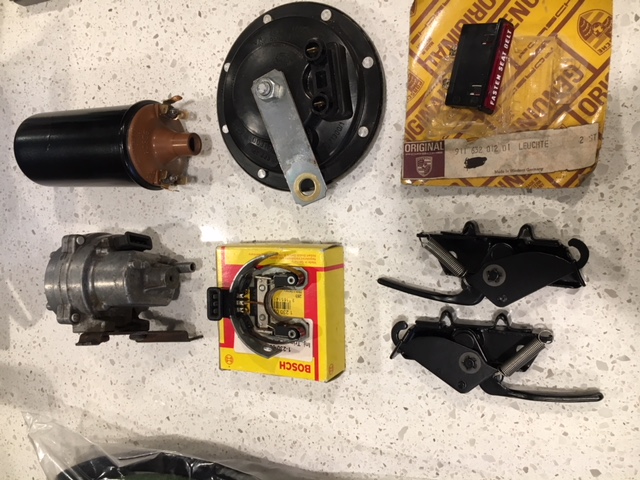
Vacuum Hose Kit & Interior Hardware Kit from AA. I know they get a bad rap here, but overall a decent experience. One billing issue with respect to delivery charges, but that was rectified and I'm OK with it.
Hope to have more updates by later in the week.
Posted by: pete000 Mar 10 2018, 08:04 PM
Bumpers are on their way to Mexico for Re-Chroming & The Clean Up Continues! Car Is Scheduled for the Paint Booth late next week, however, that probably means week after next! Regardless, getting closer......
Who is doing your bumper chrome?
Posted by: 914 7T3 Mar 10 2018, 09:07 PM
Bumpers are on their way to Mexico for Re-Chroming & The Clean Up Continues!
Who is doing your bumper chrome?
My body shop has a vendor in Riverside that brings them over the border, not sure who it is though. I can inquire if you would like to know. Price was reasonable too.
Posted by: 914 7T3 Mar 14 2018, 10:03 PM
Once they get this '65 out of the booth and final prep, it'll be the 914's turn.
Just need the trunks and doors put on and then blocked and car will be painted in short order.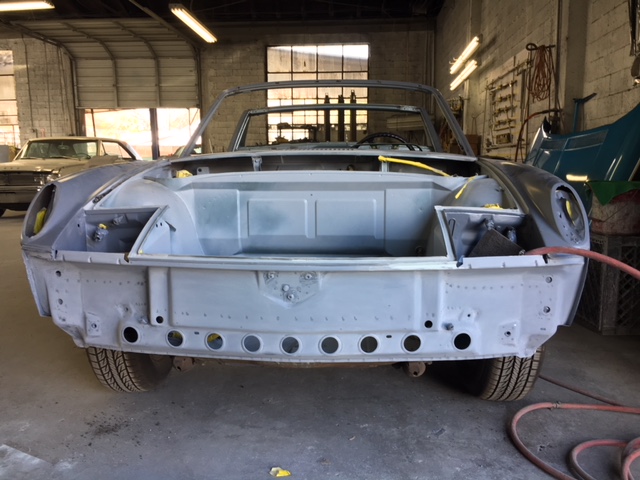
Bumpers are back from Chroming and came out AAAmazing!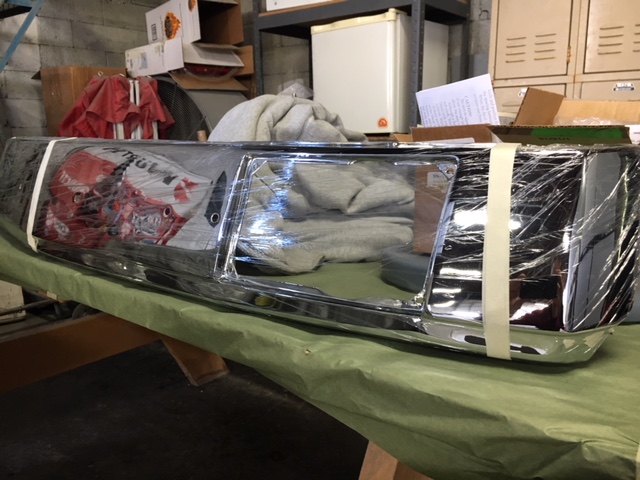
Attached image(s)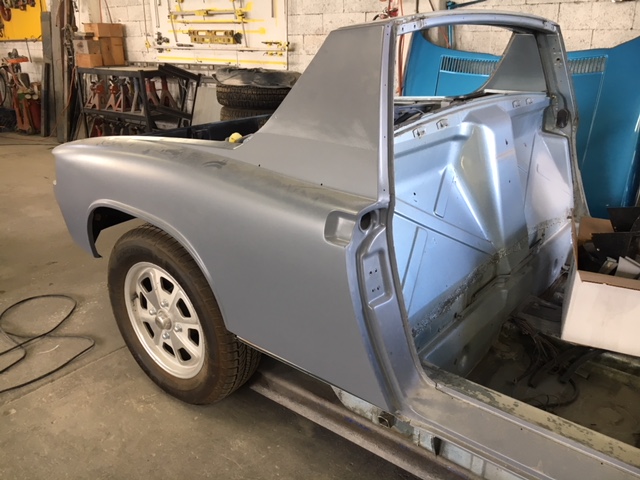
Posted by: KELTY360 Mar 14 2018, 11:02 PM
I'll bet it's getting harder to sleep at night. Looking good.
Side note: when I bought a new 914 1.7 in '73, my trade-in was a '66 2+2 Mustang. I went from one great car to another.
Posted by: Philip W. Mar 15 2018, 07:43 AM
just read thru the whole thread and we are about at the same point in our peojects- i just didnt do the 2056 like i wanted, not in the budget- i would have liked to have bought the 2056 that Mike Blizzard sold but i didnt see it soon enough- i might still do upper end i have not decided,- you will be glad you did- also just sent my COA in so i wonder if i will get that same issue as you had with the color code, i have custom one year color L99k-copper metallic so it will be interesting to see how that shows up on the COA- looking forward to seeing your car back on the road- my paint should be done about the same time as yours!
Posted by: Philip W. Mar 15 2018, 08:52 AM
oh and there was a 65 mustang in the same shop as my car as well! keeping it in good company- I didn't take any pictures, but there was a '69 jag convertible that was just painted and being reassembled
Who did your chrome?? they look great!
Posted by: ndfrigi Mar 15 2018, 09:02 AM
Nice Jeffrey! Your car will be running soon and hoping Oscar will do the Temecula Fun Day again! And maybe your son can drive ur boxster and you drive your beautiful restored 73 914!
Posted by: 914 7T3 Mar 15 2018, 09:03 AM
I'll bet it's getting harder to sleep at night. Looking good.
Side note: when I bought a new 914 1.7 in '73, my trade-in was a '66 2+2 Mustang. I went from one great car to another.
I'm excited to get the car back and get it finished up. The enjoyment for me comes from driving it, not working on it.
Posted by: 914 7T3 Mar 15 2018, 09:13 AM
just read thru the whole thread and we are about at the same point in our peojects- i just didnt do the 2056 like i wanted, not in the budget- i would have liked to have bought the 2056 that Mike Blizzard sold but i didnt see it soon enough- i might still do upper end i have not decided,- you will be glad you did- also just sent my COA in so i wonder if i will get that same issue as you had with the color code, i have custom one year color L99k-copper metallic so it will be interesting to see how that shows up on the COA- looking forward to seeing your car back on the road- my paint should be done about the same time as yours!
I would recommend that if you are going to get into the motor to split the case and do the whole thing. Many people suggested just a top end refresh and as you can see from earlier in the thread, in addition to valve guides, my Cam was in serious need of attention.
So if you are going to spend time and money, I'd do the whole thing so hopefully you won't have to go through the process again.
Please keep me updated on your progress on a another great option color 914!
Posted by: 914 7T3 Mar 20 2018, 07:09 PM
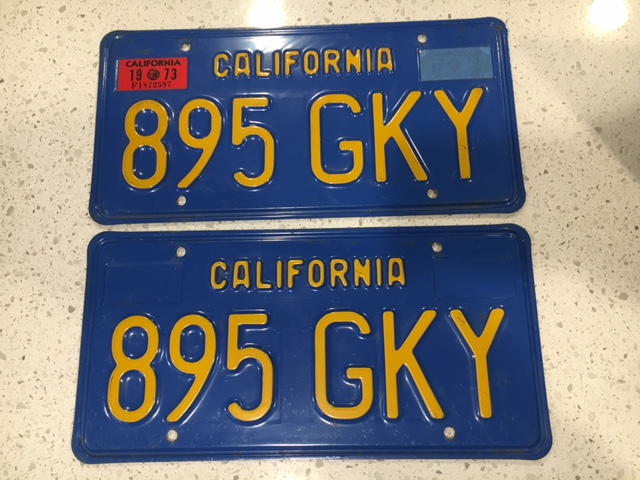
45 Year Old, original set of Blue & Yellow Plates now officially assigned to a certain 1973 Porsche 914 thanks to CA DMV Year of Manufacture program!
Posted by: 914 7T3 Mar 22 2018, 03:21 PM

Posted by: bbrock Mar 22 2018, 04:01 PM
I need to learn to put on a bib before opening this thread so I don't get drool all over my shirt!
Posted by: Mueller Mar 22 2018, 04:05 PM
45 Year Old, original set of Blue & Yellow Plates now officially assigned to a certain 1973 Porsche 914 thanks to CA DMV Year of Manufacture program!
Painful process? Cost on doing it? Not a fan of my new reflective white plates
Posted by: 914 7T3 Mar 22 2018, 04:30 PM
45 Year Old, original set of Blue & Yellow Plates now officially assigned to a certain 1973 Porsche 914 thanks to CA DMV Year of Manufacture program!
Painful process? Cost on doing it? Not a fan of my new reflective white plates
If you have the plates already, cost is $40 or $50 to assign them and then a $10 annual renewal. Easy process with one form to fill out so long as you have the plates and proper year sticker designation on them...available for sale on the internet.. hint hint wink wink
Posted by: Mueller Mar 22 2018, 05:21 PM
45 Year Old, original set of Blue & Yellow Plates now officially assigned to a certain 1973 Porsche 914 thanks to CA DMV Year of Manufacture program!
Painful process? Cost on doing it? Not a fan of my new reflective white plates
If you have the plates already, cost is $40 or $50 to assign them and then a $10 annual renewal. Easy process with one form to fill out so long as you have the plates and proper year sticker designation on them...available for sale on the internet.. hint hint wink wink
Thanks, found a few on the bay already... will do this after the car is running since I should put the $200 to $300 price towards getting the car on the road 1st.
Posted by: 914 7T3 Mar 31 2018, 01:28 PM
Was able to piece together an early '73 tool kit from 3 different purchases. Although my car is late, it is certainly possible that some late cars may have come with the earlier tool kits. Baby Steps....
Posted by: 914 7T3 Apr 16 2018, 05:03 PM
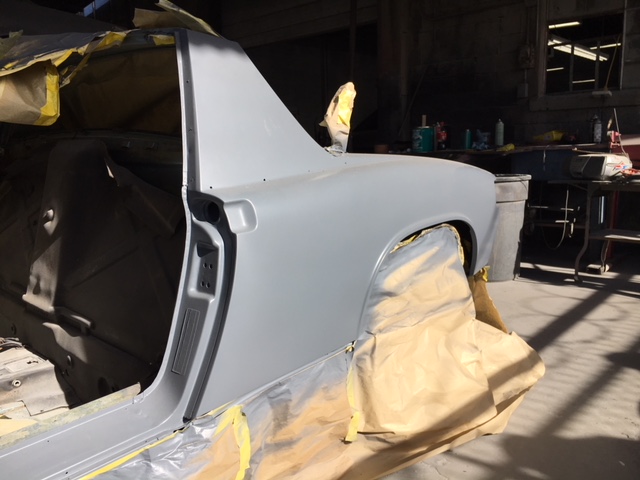
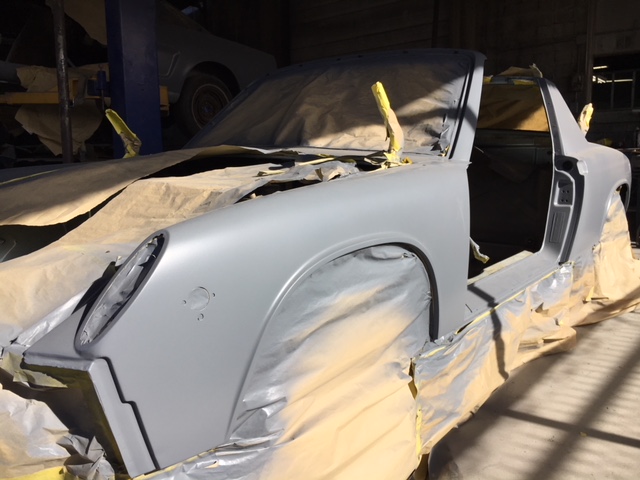
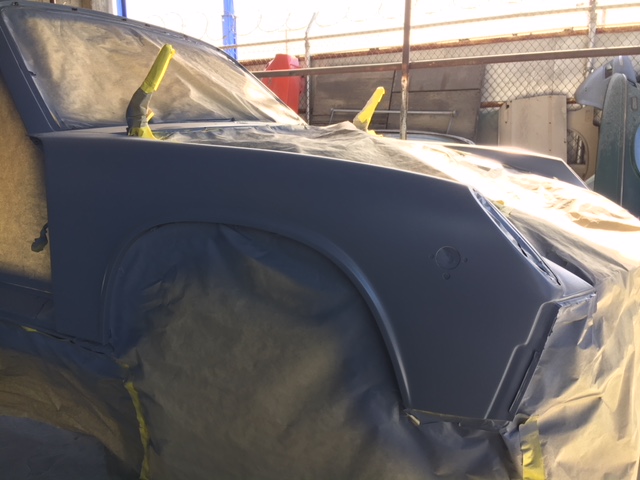
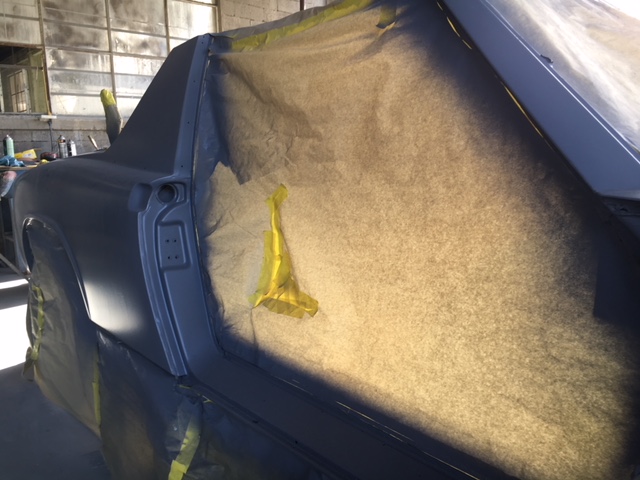
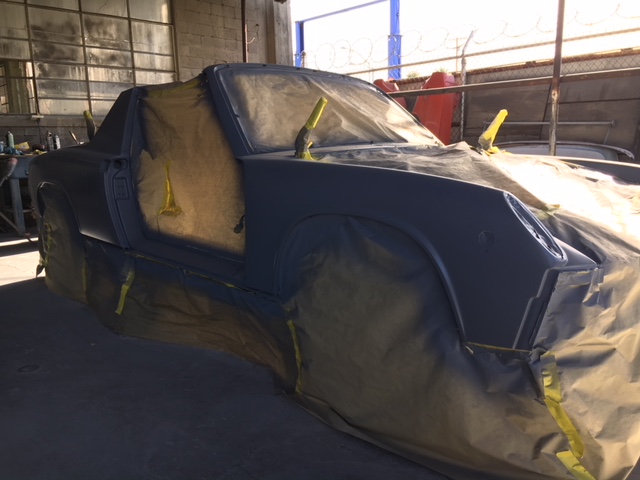
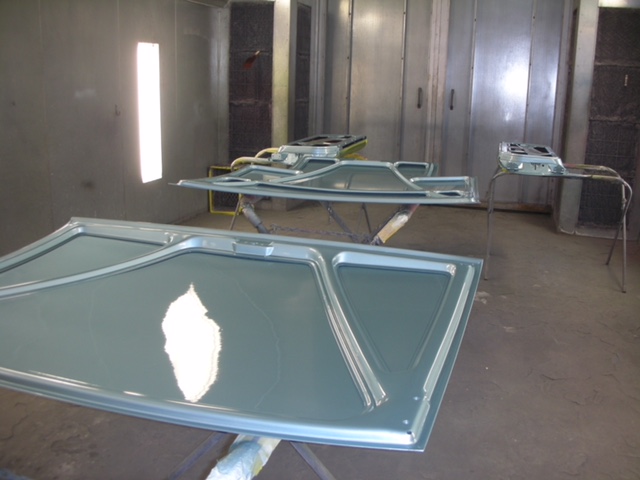
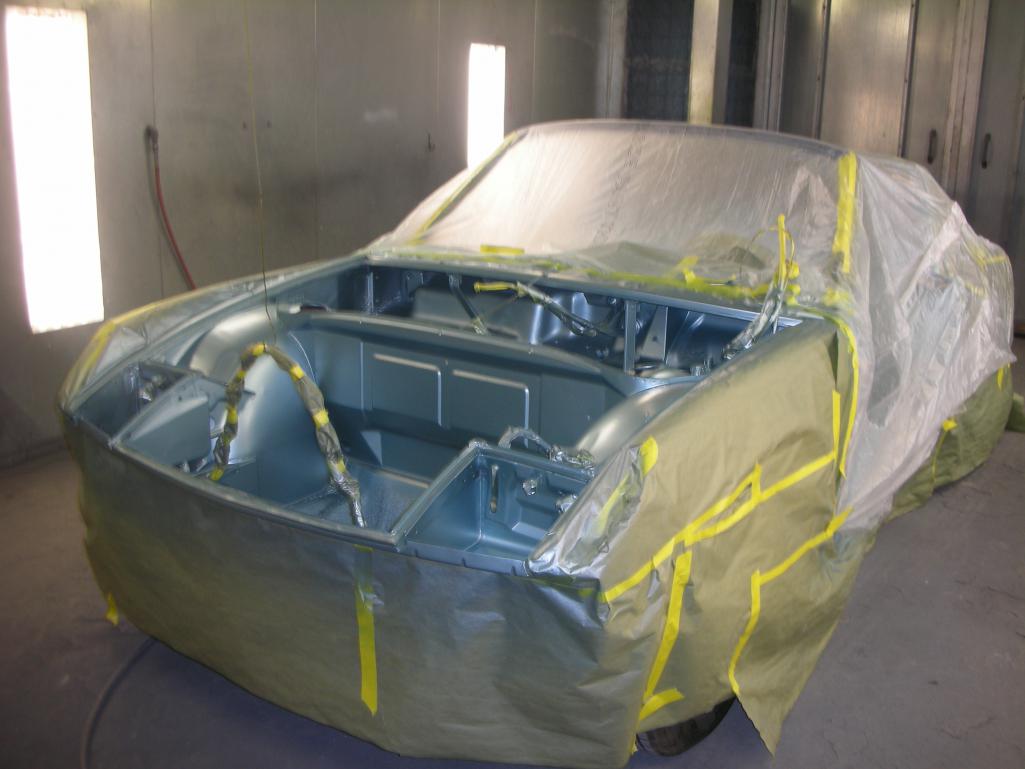
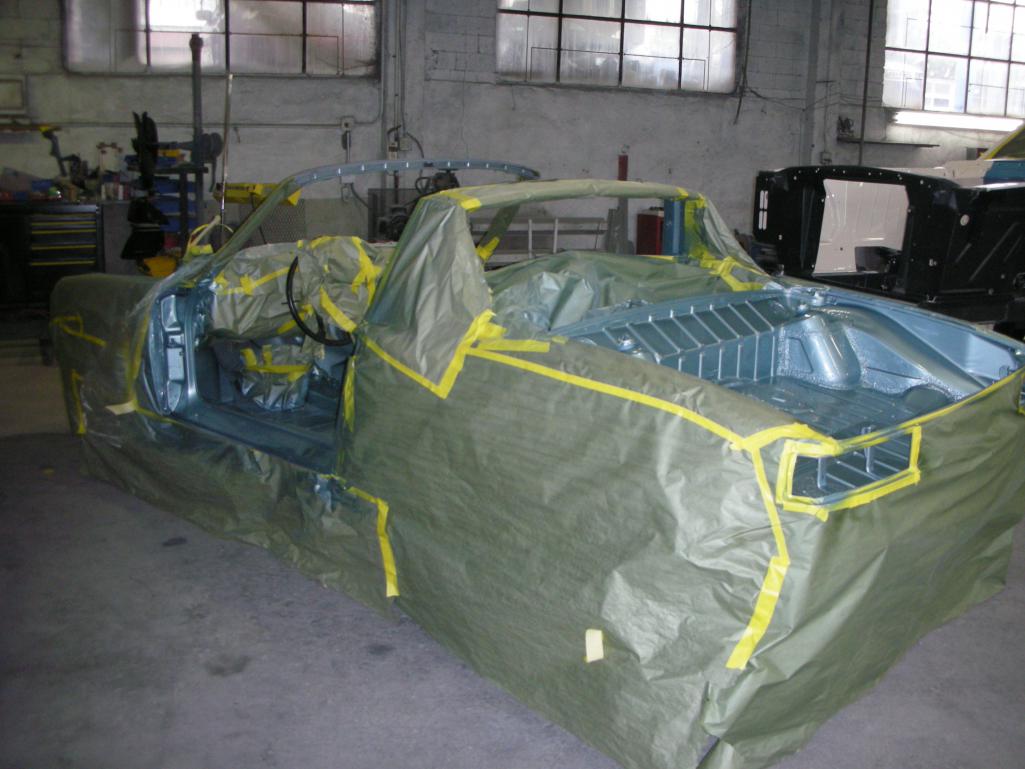
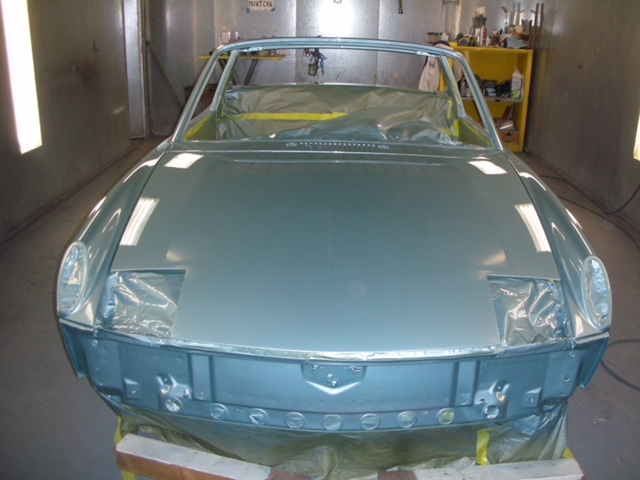
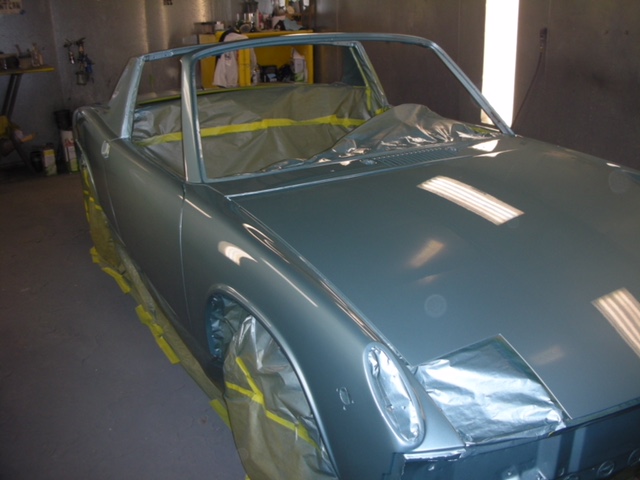
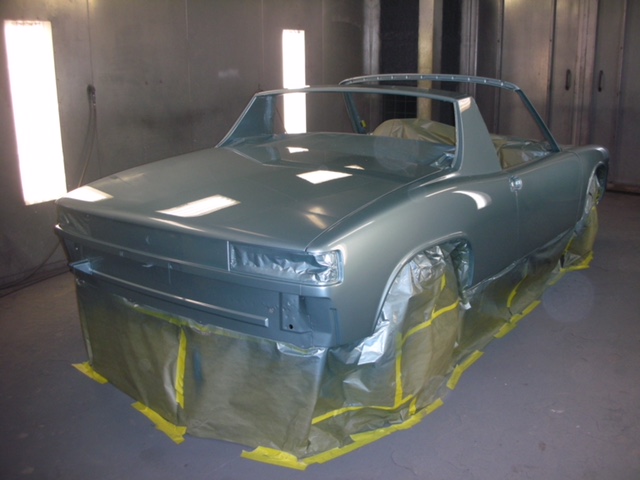
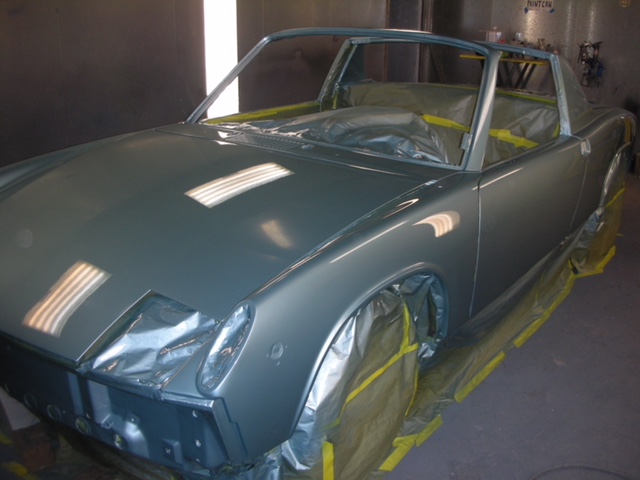
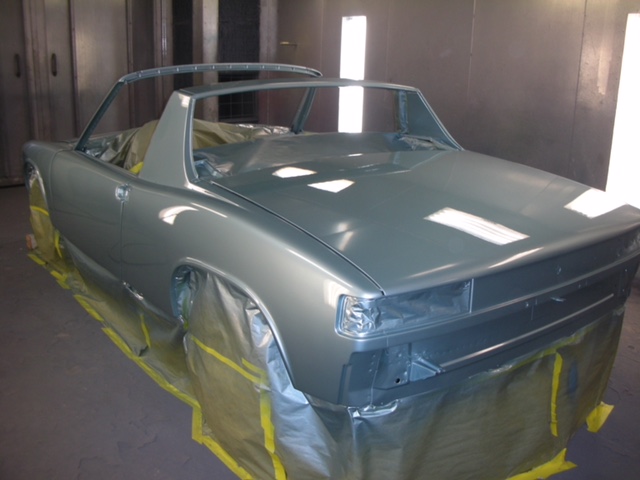
Out of the Booth and ready for Color Sanding & Polish. The fluorescent lighting makes it look more grey than it is. Last photo is the one that appears closest to the approved spray out.


Posted by: bbrock Apr 16 2018, 05:37 PM
Posted by: Phoenix914 Apr 16 2018, 05:51 PM
It looks amazing!
If you could, please post what brand of paint you're using.
Posted by: 914 7T3 Apr 16 2018, 06:14 PM
It looks amazing!
If you could, please post what brand of paint you're using.
Martin Senour Automotive Finishes manufactured by Sherman Williams. Its the only one that color matched on the spray out. Nothing else came even remotely close.
Posted by: 914-300Hemi Apr 16 2018, 06:45 PM
Looks great.
Posted by: PanelBilly Apr 16 2018, 07:20 PM
Looks great. Now for some sanding.
Posted by: burton73 Apr 16 2018, 10:00 PM
It's is looking like it is coming along nicely!
Bravo
Bob B
Posted by: raynekat Apr 16 2018, 10:29 PM
Snazzy!
Posted by: Maltese Falcon Apr 16 2018, 10:37 PM
Great project and I dig the Marathon Blue !
Posted by: 914 7T3 Apr 21 2018, 04:25 PM
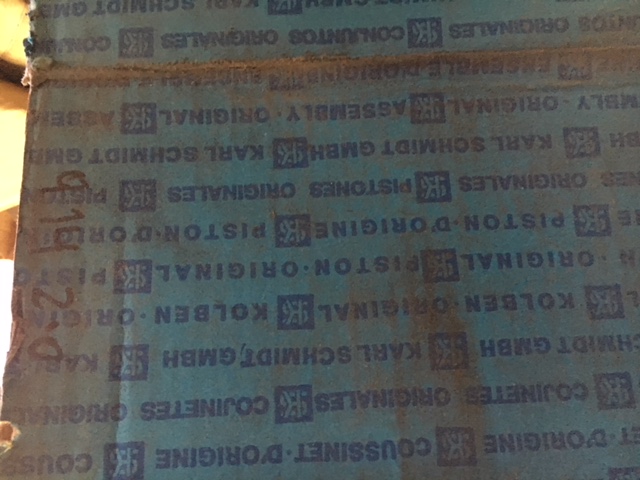
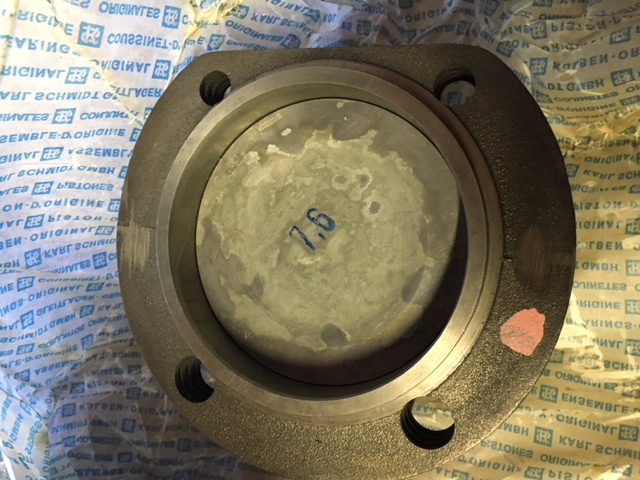
Slight change in direction away from the 96MM P&Cs as the block is ready to go back together. I have since learned that the set of 96mm NPR P&Cs will tend to make the engine run hotter and will not be as quiet at idle. The quality is good, but not on par with German.
So decision was made to go with a NOS set of Kolben Schmidt 94mm P&Cs. Although, I'll be giving up the 10% power boost, the motor will be stock through and through with all German OEM parts. 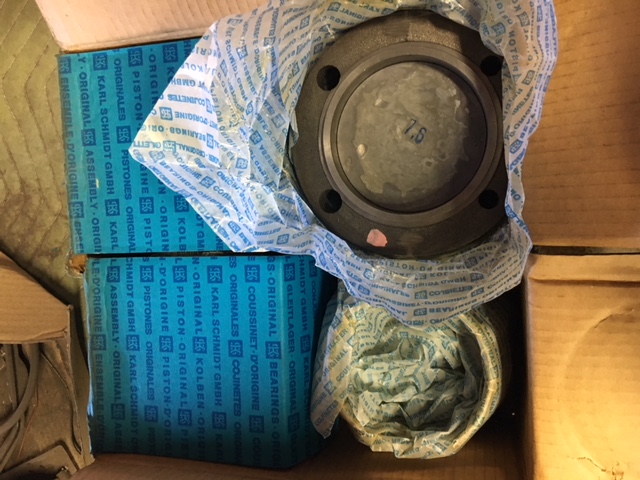
Posted by: 914 7T3 Apr 25 2018, 05:29 PM
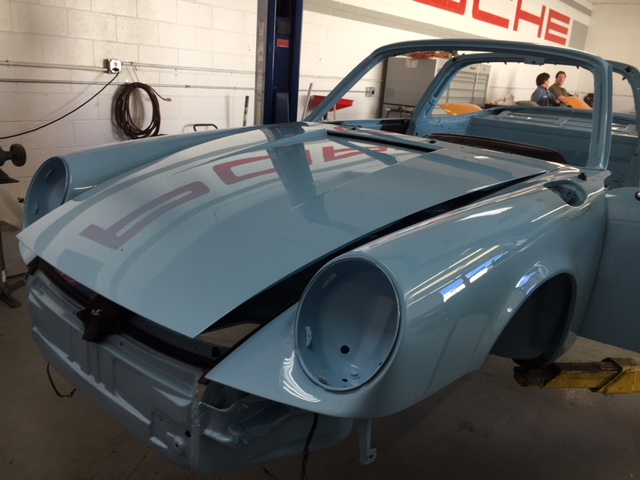
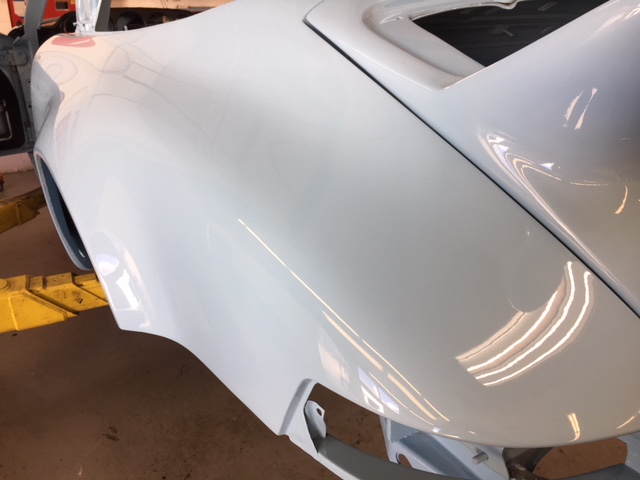
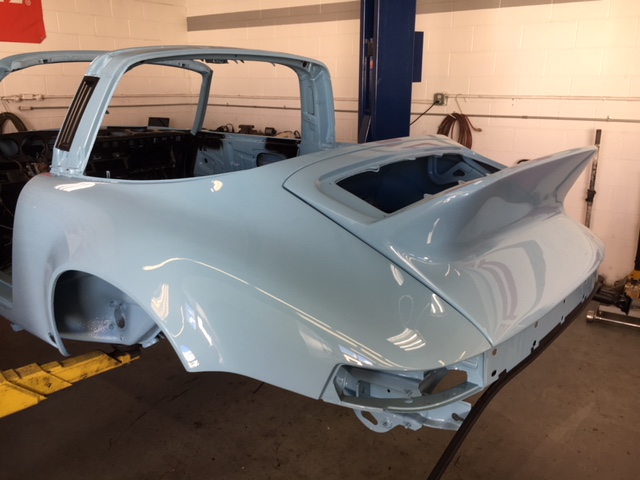
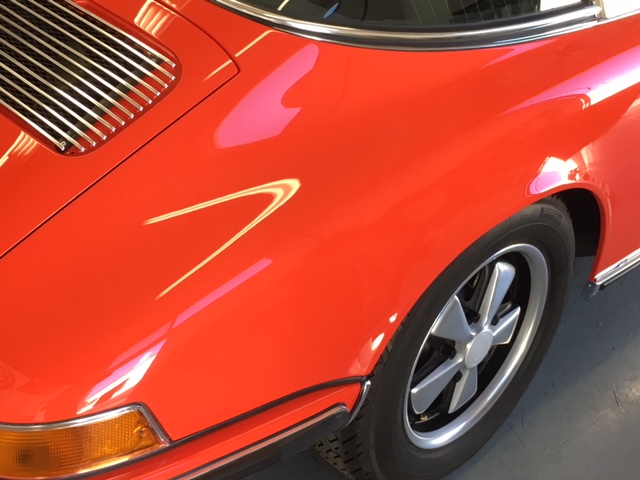
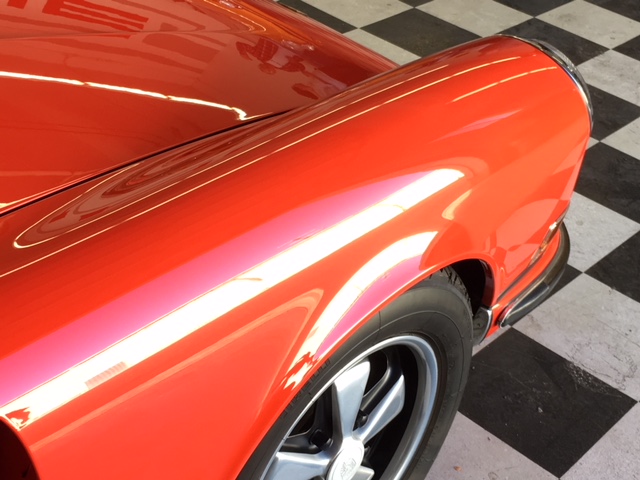
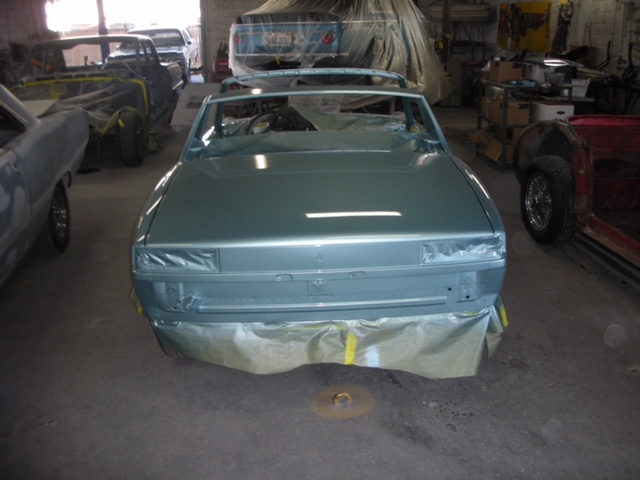
Had the Opportunity to finally see my car out of paint in the natural light. Color is a perfect match to the original and she is as straight as an arrow!
Couldn't be more pleased with how it turned out. Still need to get the bottom coated and sprayed and some partial reassembly before I can get her home.

Posted by: 914 7T3 Apr 25 2018, 05:33 PM
And These too, spamming my own thread!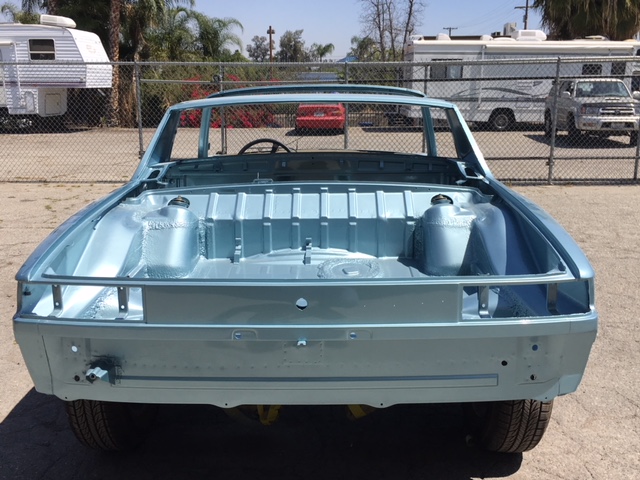

Posted by: tygaboy Apr 25 2018, 06:36 PM
Beautiful!
You have to be happy with that result!
Now the joy of working on reassembly and working near all that perfect paint! 
I have that to look forward to, as well...
Lots of tape and padded materials, a bit of patience and you'll do fine! Keep the pics coming. 
Posted by: burton73 Apr 25 2018, 09:11 PM
Jeffery,
Eric at PMB Performance wraps the cars in his shop with a clear cling wrap to protect the paint jobs while the cars are getting reassembled.
A good tip as people can get near the new paint with tools or anything and even if they do not break paint you will be freeking out.
You car is a super nice Blue and from here it looks very good.
Assembly is going to be a big job and take more time than you may think but if steady you will get it done.
Regards,
Bob B

Posted by: Mueller Apr 25 2018, 09:18 PM
wow that paint job is pretty.
Posted by: Lucky9146 Apr 25 2018, 09:31 PM
Nothing like new paint! Congrats! Looks great.
Posted by: 914 7T3 Apr 25 2018, 10:09 PM
Appreciate the tips & suggestions along with all of the positive feedback and encouragement from the 914 World community.
I realize that there is a lot to be done and will have less than a 4 month time frame to complete the project in order to have the car ready for the Werks Reunion in late August. Everything has taken longer than it should and that's just how it goes.
Truth is the learning curve is quite steep in under taking this project, however things are going well. I will be reaching out for assistance to the local World members once I get the car back in my possession.
The plan is to drop the suspension and mount up a fully restored set up with the help of some good friends that have offered their time and expertise. Then onto reassembly of interior, dash, gauges, windshield and exterior trim. Up next will be the wiring issue of the headlight motors and then the drive train will be reinstalled.
Luckily, aside from a clean set of bumper tops, I've got everything required to get this project done.
Keep posted for updates.
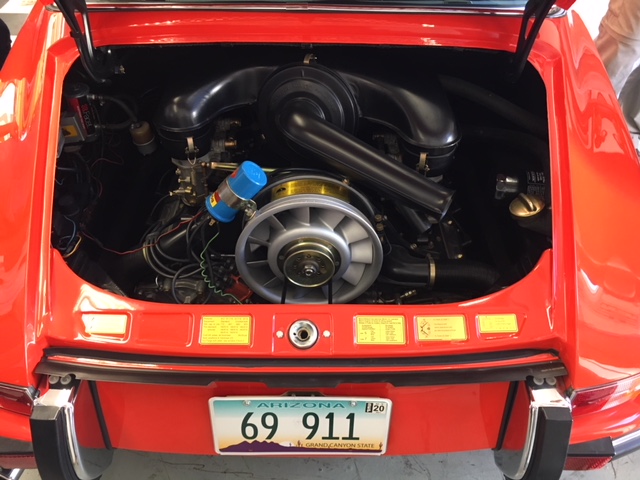
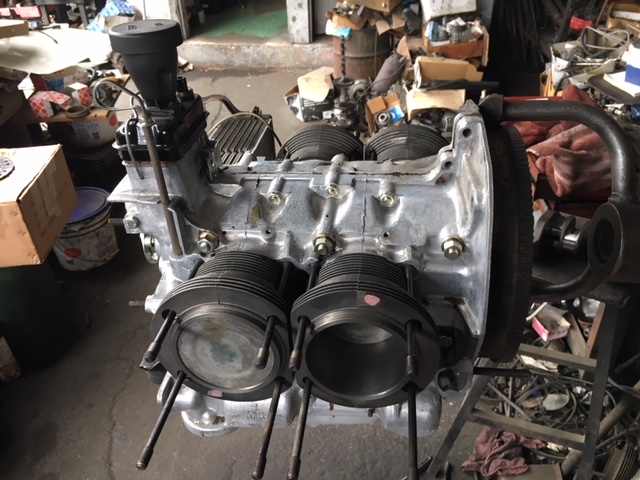
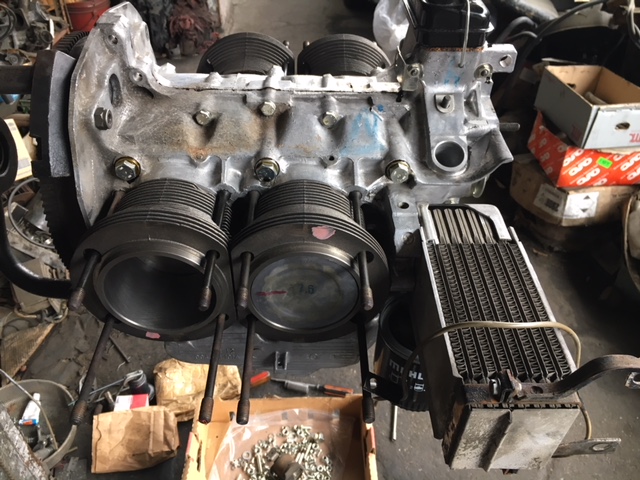
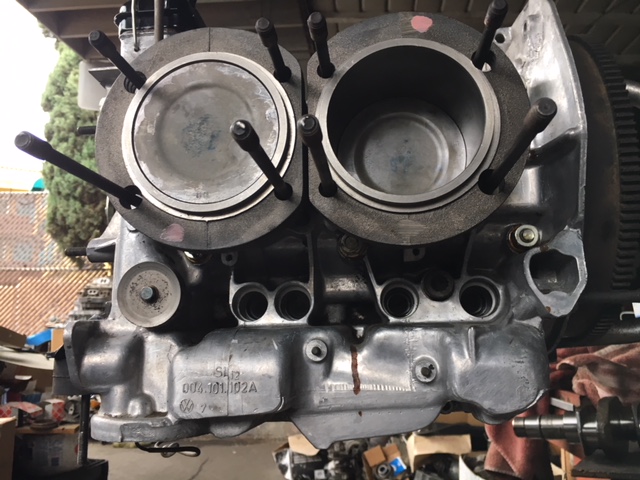
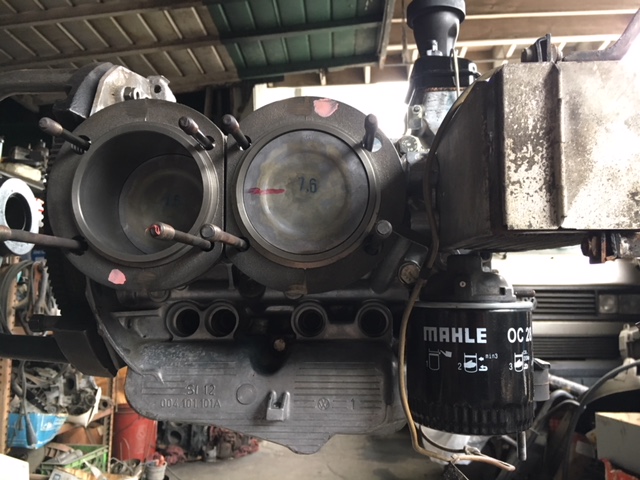
Posted by: 914 7T3 May 12 2018, 12:09 PM
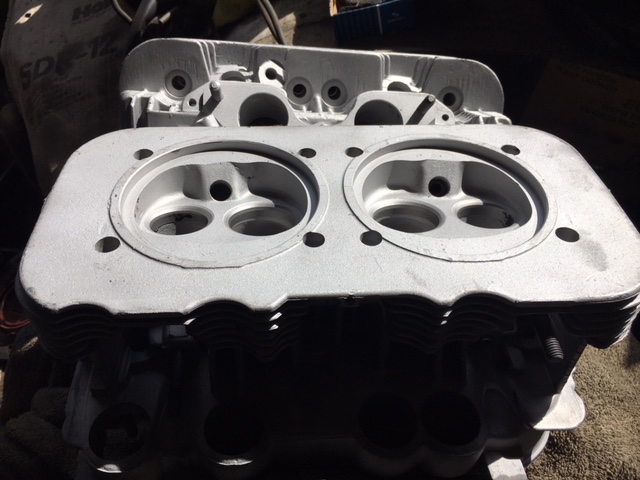
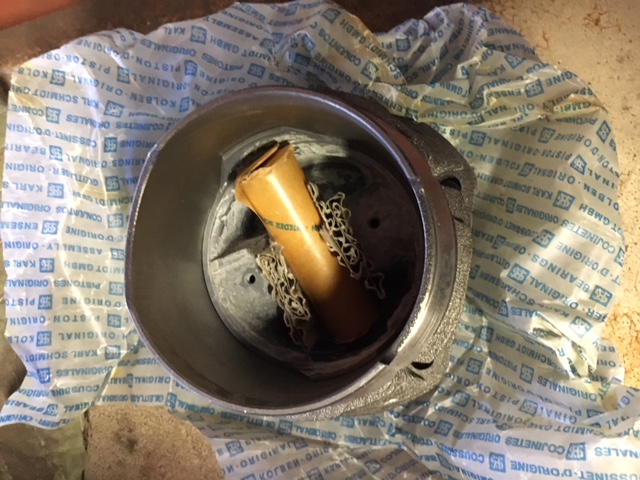
Long Block is fially back together. Top end will be completed next week. Here are some photos recapping the NOS parts that have been included in the rebuild. Crank has also been micropolished. 


Apparently, I am not the only Porsche at the VW Shop!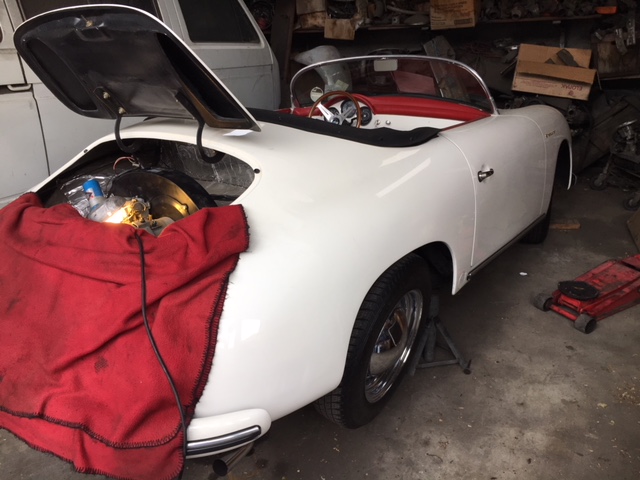
Posted by: bbrock May 12 2018, 12:18 PM
That looks sweet. Was there a reason you opted for the US spec pistons? Just curious.
Posted by: 914 7T3 May 12 2018, 01:34 PM
That looks sweet. Was there a reason you opted for the US spec pistons? Just curious.
Yes, wanted to stay bone stock except bump up to 96mm to a 2056. However, I could only find Japanese NPR P&Cs. The quality is good, but not as good as German. Then found out that the 96mms will make the motor run a bit hotter and that's a no no here in SoCal when you are pulling through the hills in 90 degree plus temperatures.
Decided to go back to NOS German 94mm. I am more than fine with the performance as is. Its going to be my little canyon carver for solo drives, cars & coffes and club meet-ups.
My 986 is fine when I want a bit more power and end up driving with quicker crowd.
Posted by: bbrock May 12 2018, 07:34 PM
That looks sweet. Was there a reason you opted for the US spec pistons? Just curious.
Yes, wanted to stay bone stock except bump up to 96mm to a 2056. However, I could only find Japanese NPR P&Cs. The quality is good, but not as good as German. Then found out that the 96mms will make the motor run a bit hotter and that's a no no here in SoCal when you are pulling through the hills in 90 degree plus temperatures.
Decided to go back to NOS German 94mm. I am more than fine with the performance as is. Its gpoing to be my little canyon carver for solo drives, cars & coffes and bclub meet-ups.
My 986 is fine when I want a bit more power and end up driving with quicker crowd.
I like it!
 I bought my OEM Mahle jugs back when they were still readily available for not much $. I opted for the euro flat tops but have yet to finish the engine. I'm in the same boat as you with never feeling like I needed more HP with stock 2.0 and often wonder if I wouldn't have been happier sticking with the lower compression pistons. For some reason, it made me happy to see them in your build.
 Posted by: 914 7T3 May 12 2018, 07:55 PM
That looks sweet. Was there a reason you opted for the US spec pistons? Just curious.
Yes, wanted to stay bone stock except bump up to 96mm to a 2056. However, I could only find Japanese NPR P&Cs. The quality is good, but not as good as German. Then found out that the 96mms will make the motor run a bit hotter and that's a no no here in SoCal when you are pulling through the hills in 90 degree plus temperatures.
Decided to go back to NOS German 94mm. I am more than fine with the performance as is. Its gpoing to be my little canyon carver for solo drives, cars & coffes and bclub meet-ups.
My 986 is fine when I want a bit more power and end up driving with quicker crowd.
I like it!
I bought my OEM Mahle jugs back when they were still readily available for not much $. I opted for the euro flat tops but have yet to finish the engine. I'm in the same boat as you with never feeling like I needed more HP with stock 2.0 and often wonder if I wouldn't have been happier sticking with the lower compression pistons. For some reason, it made me happy to see them in your build. I’m glad and thanks for your continued support. FYI, my mechanic has a duplicate set that I just listed in the parts forum at a Sweet price if you are interested. Keep chipping away on your build and you’ll get there!
Posted by: bbrock May 12 2018, 11:02 PM
That looks sweet. Was there a reason you opted for the US spec pistons? Just curious.
Yes, wanted to stay bone stock except bump up to 96mm to a 2056. However, I could only find Japanese NPR P&Cs. The quality is good, but not as good as German. Then found out that the 96mms will make the motor run a bit hotter and that's a no no here in SoCal when you are pulling through the hills in 90 degree plus temperatures.
Decided to go back to NOS German 94mm. I am more than fine with the performance as is. Its gpoing to be my little canyon carver for solo drives, cars & coffes and bclub meet-ups.
My 986 is fine when I want a bit more power and end up driving with quicker crowd.
I like it!
I bought my OEM Mahle jugs back when they were still readily available for not much $. I opted for the euro flat tops but have yet to finish the engine. I'm in the same boat as you with never feeling like I needed more HP with stock 2.0 and often wonder if I wouldn't have been happier sticking with the lower compression pistons. For some reason, it made me happy to see them in your build. I’m glad and thanks for your continued support. FYI, my mechanic has a duplicate set that I just listed in the parts forum at a Sweet price if you are interested. Keep chipping away on your build and you’ll get there!
I actually still have the originals that came out and they look to be in great shape. I'll stick with the flat tops on this build though. I'm all in with euro specing this car.
Posted by: 914 7T3 May 31 2018, 11:13 PM
Finally had the car picked up today from the body shop and transported over to ValcoOscar's to do a full suspension swap next weekend. Will be working with Larmo63 and will post separately for some additional assistance. Should be a great day.
Here are some pics of where we are at today. Now the real work gets underway!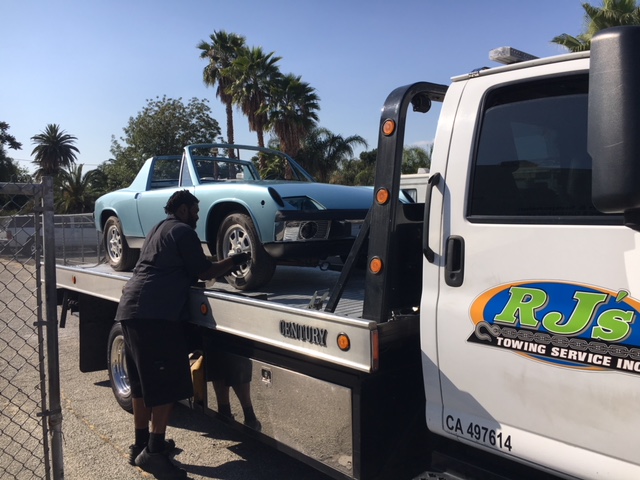
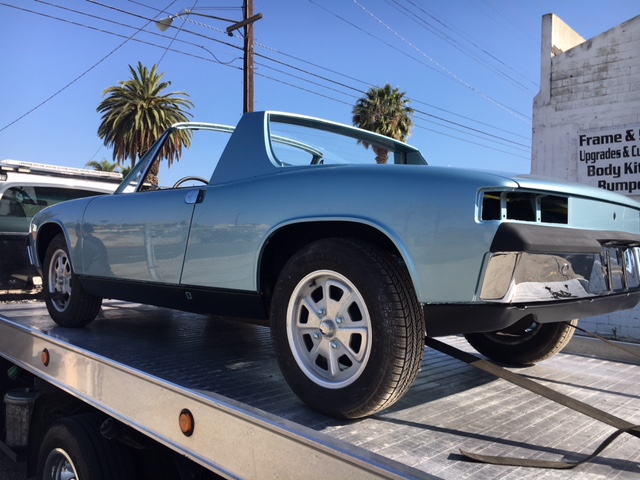
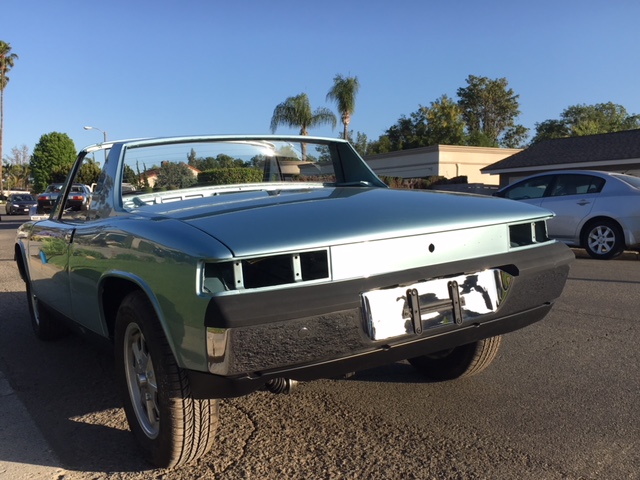

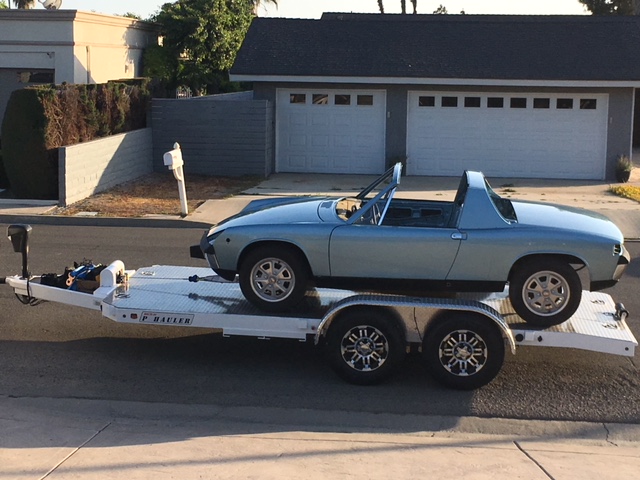
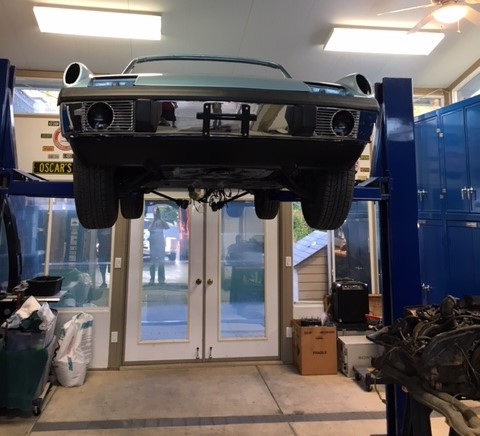
Posted by: burton73 Jun 1 2018, 02:43 PM
That is a sweet ride. Bravo
It did not look bad when you got it but wow. A time capsule of a Porsche dealer’s showroom back in the day.
Bob b
Posted by: CHIZ 914 Jun 1 2018, 03:03 PM
Nice looking car! Still working on mine and looks to be close to the same color!
Attached thumbnail(s)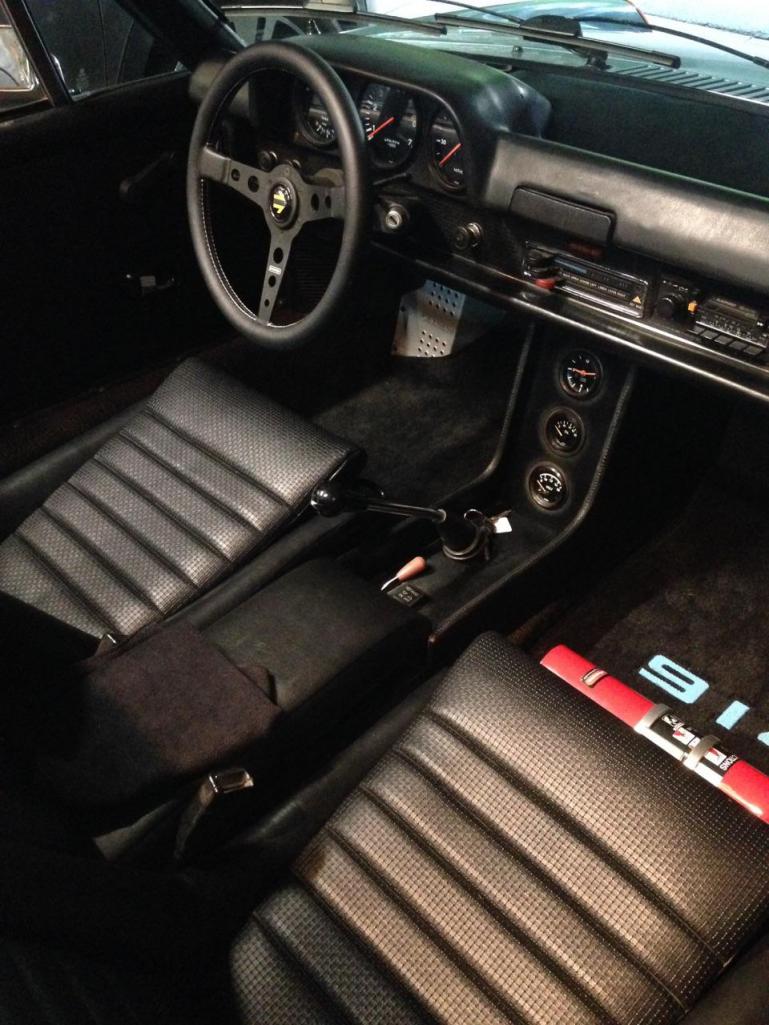
Attached image(s)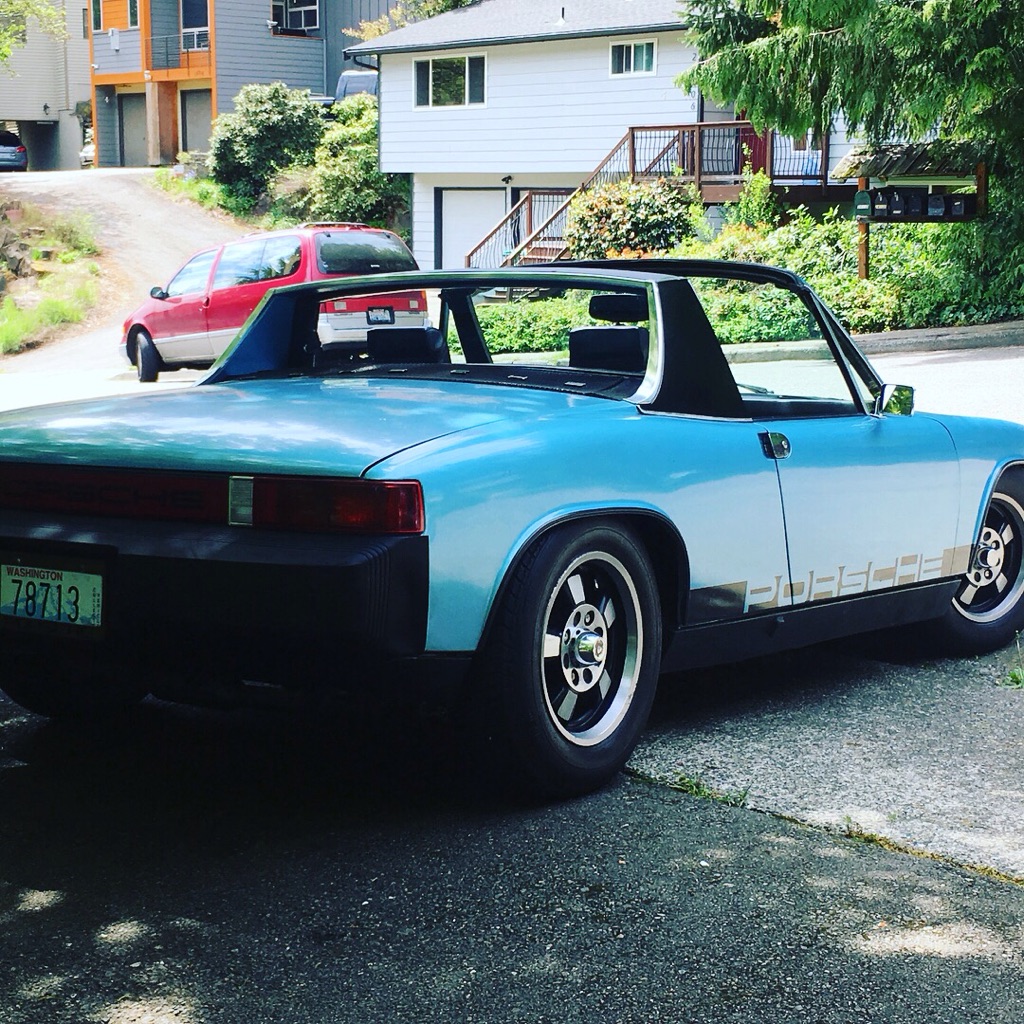
Posted by: 914-300Hemi Jun 1 2018, 05:53 PM
Finally had the car picked up today from the body shop and transported over to ValcoOscar's to do a full suspension swap next weekend. Will be working with Larmo63 and will post separately for some additional assistance. Should be a great day.
Here are some pics of where we are at today. Now the real work gets underway!
Jeff,
Let me know if you need an extra pair of hands or a side line spectator with unwanted commentary.

Posted by: saigon71 Jun 1 2018, 06:22 PM
Your car looks awesome. Nice work!
Posted by: 914 7T3 Jun 1 2018, 06:48 PM
Nice looking car! Still working on mine and looks to be close to the same color!
Beauty!!!
Posted by: 914 7T3 Jun 1 2018, 06:53 PM
Finally had the car picked up today from the body shop and transported over to ValcoOscar's to do a full suspension swap next weekend. Will be working with Larmo63 and will post separately for some additional assistance. Should be a great day.
Here are some pics of where we are at today. Now the real work gets underway!
Jeff,
Let me know if you need an extra pair of hands or a side line spectator with unwanted commentary.
For sure, that is much appreciated. We will have a Marathon Blue reunion with Oscar. Commentary is welcome. We will get underway at 8:00am on June 9th. I will DM you the particulars.
Posted by: 914 7T3 Jun 1 2018, 06:55 PM
That is a sweet ride. Bravo
It did not look bad when you got it but wow. A time capsule of a Porsche dealer’s showroom back in the day.
Bob b
It will be when its done. Truthfully, I couldn't sleep last night thinking about everything that needs to get done. Still shooting for Werks Reunion in late August!
Posted by: arne Jun 2 2018, 06:25 PM
That should be no problem. I could do it...
Does look exquisite. Excellent so far.
Posted by: 914 7T3 Jun 2 2018, 06:50 PM
That should be no problem. I could do it...
Does look exquisite. Excellent so far.
Thanks Arne, I bet you could!
Let me know if you want to fly in for a week to help out. We are about 4 months behind the initial time line.
We miss having you on the forum on a regular basis. Hope the FJ is coming along quicker than this project.
Posted by: 914 7T3 Jun 10 2018, 02:18 AM
Here is an update from Suspension Swap Saturday. The link to the full thread is provided below:
http://www.914world.com/bbs2/index.php?showtopic=329988&st=0
We had a great day at ValcoOscar's with the OC crew. Before posting more pics from today, just wanted to take the time to thank and show appreciation to the following people:
bdstone 914 for the many hours spent prepping the parts and making sure we had everything required down to the last nut and bolt. He took charge of the project with Larmo63 and was able to see it through right to the finish well into the night. Couldn''t even imagine taking this on without your knowledge and expertise.
A special thanks to Larmo63 for getting on board early and jumping right into it with the guys. Your hands on approach is exactly what was needed to get things going and moving along to get this project completed in a single day.
ValcoOscar for your continued support and hosting the day along with the use of your facilities. We are now one more Step Forward with this build. 
ED Turbo, sb914 & BoomingBeetle for coming out and wrenching on the car. Couldn't have done it without you.
Also Kahluver, Jerry J Joesph, Tdskip & abes914 for coming to check us out and lend your support
Now for the pics: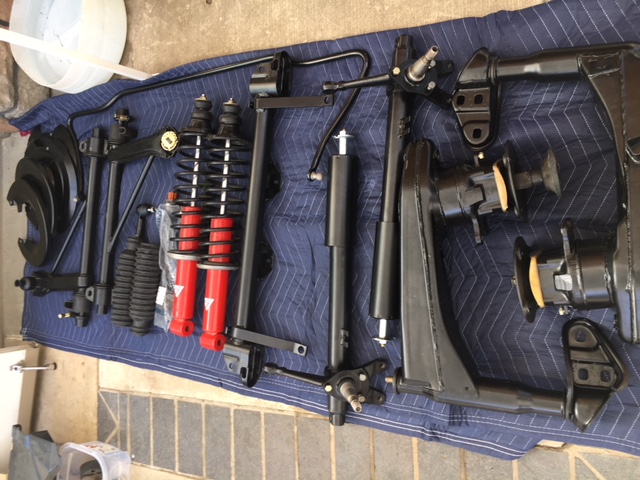

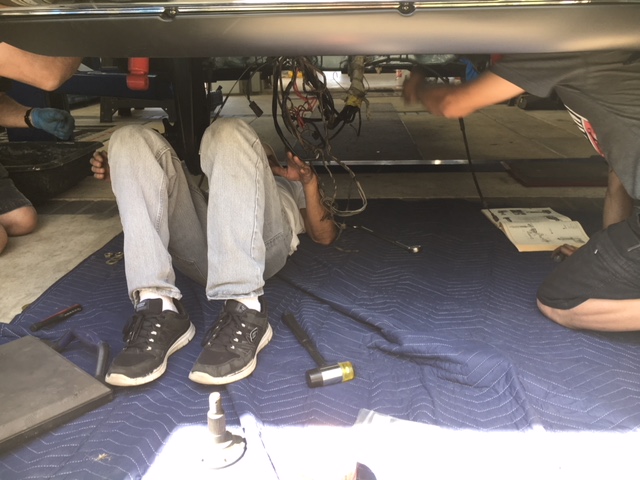
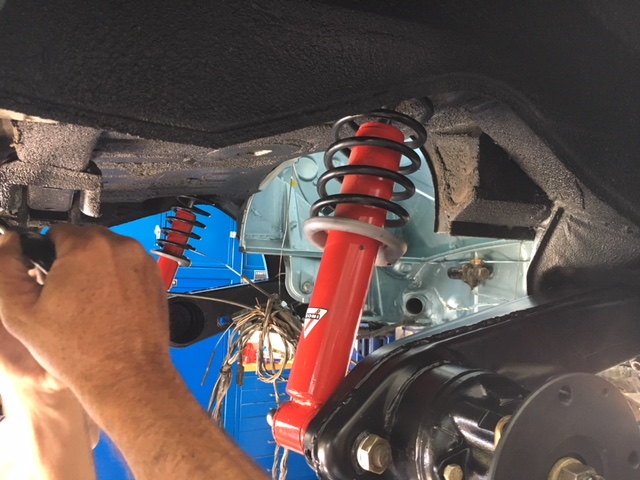
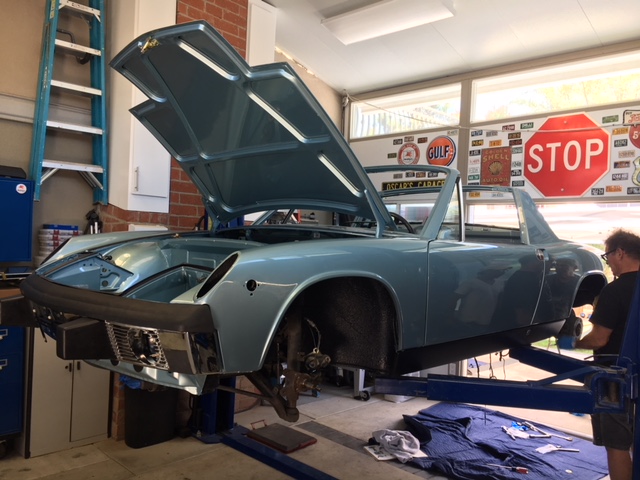

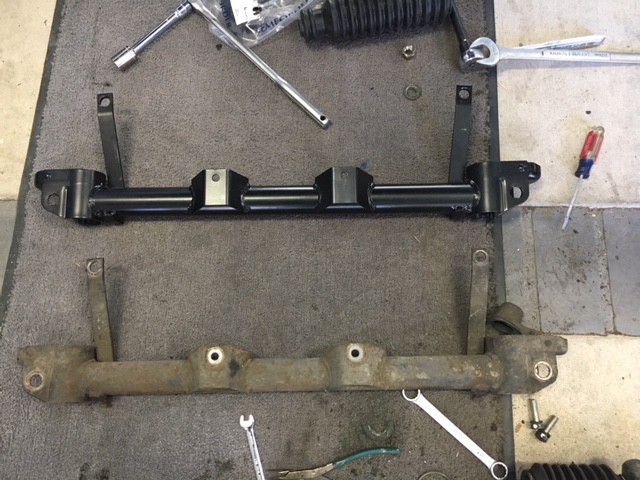
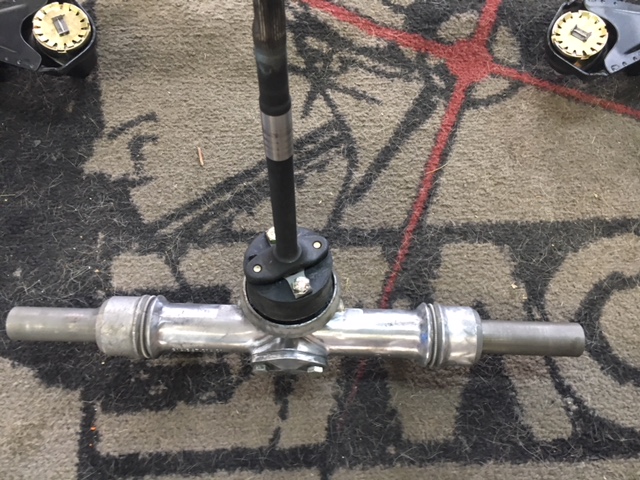
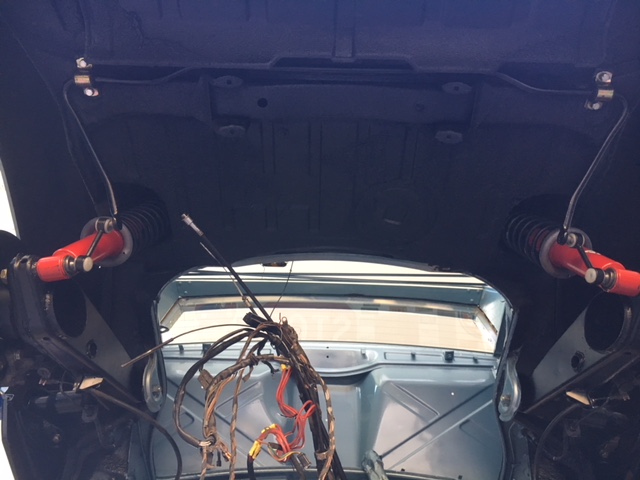
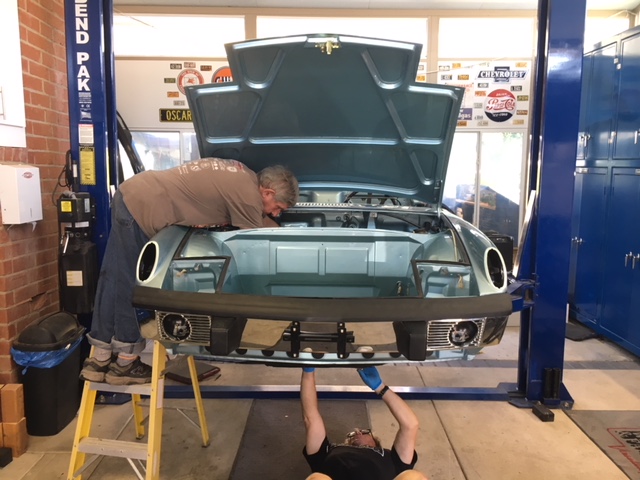
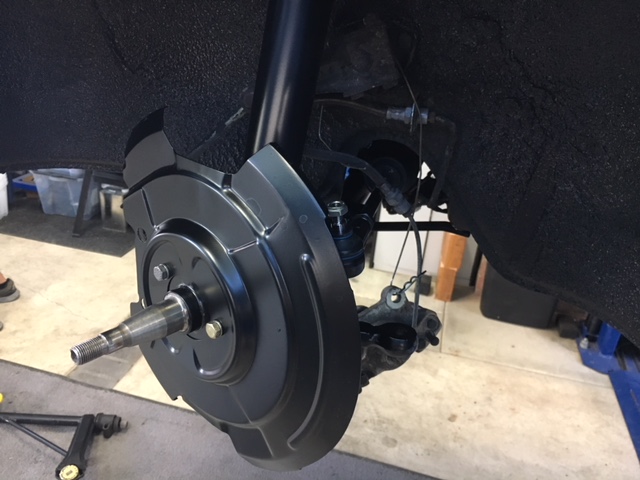
Posted by: billh1963 Jun 10 2018, 05:11 AM
Those pictures are awesome!
The car looks like new. But, even more importantly, it shows the comradery that makes 914 ownership so rewarding.
Posted by: Cairo94507 Jun 10 2018, 06:46 AM
Great job guys.
Posted by: arne Jun 11 2018, 08:33 AM
That should be no problem. I could do it...
Does look exquisite. Excellent so far.
Thanks Arne, I bet you could!
Let me know if you want to fly in for a week to help out. We are about 4 months behind the initial time line.
We miss having you on the forum on a regular basis. Hope the FJ is coming along quicker than this project.
Posted by: 914 7T3 Jun 11 2018, 01:43 PM
Those pictures are awesome!
The car looks like new. But, even more importantly, it shows the comradery that makes 914 ownership so rewarding.
Couldn't agree more! Without the help and collective brain trust, this car could never be brought back at this level.
Posted by: burton73 Jun 11 2018, 03:51 PM
Great group of 914 Bros. My only suggestion is to get some clear removable film that PMB uses for the cars in reassembly in there shop just in case someone kisses the car with a loose tool.
Loving your car!!
Bob B
Posted by: ValcoOscar Jun 11 2018, 04:25 PM
Great group of 914 Bros. My only suggestion is to get some clear removable film that PMB uses for the cars in reassembly in there shop just in case someone kisses the car with a loose tool.
Loving your car!!
Bob B
Bob-
It's funny you mention that protective film. We should have had some on hand, Jeffrey looked like a novice bullfighter all day waving a moving blanket over his car.
I will give him credit...he got his hands pretty dirty.
Kudos to all that joined in and all that gave us props.
Oscar
Posted by: 914 7T3 Jun 16 2018, 10:54 AM
Ready to bring the Powder coated tin and peripherals over to the mechanic as we get ready to test fire the motor. Just picked up the intake manifold from getting ceramic coated. Just need to clean up the unpainted portion. Think I'll go with the mothers Metal Polish on that and see what I get.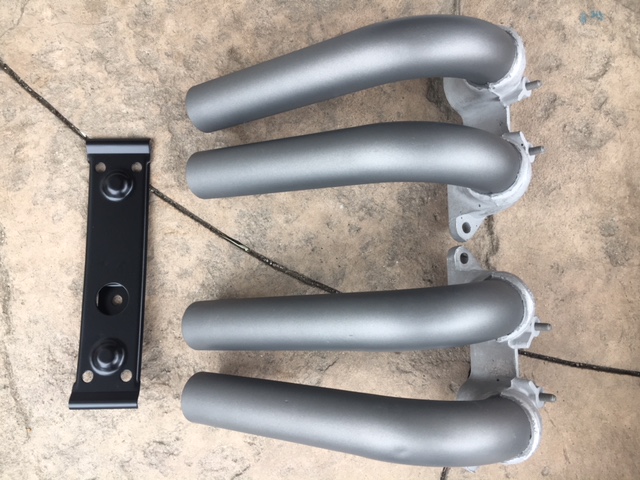
From there I need to regroup and secure everything needed for reassembly. The plan is to reinstall the main harness from the tunnel and engine Bay seal set first along with tail lights and side turn signals (head light wiring repair can wait for now). Then get the partial interior ready: dash, guages, driver seat, ebrake and front windshielsd installed.
From there the drivetrain can go back in and the car can then move under its own power.
That's the plan for now, anyway.
Posted by: 914 7T3 Jun 30 2018, 05:41 PM
Started off by inflating the tires that were low from being in the body shop for 8 months and then got the car up on dollies.
Spent the day on the engine bay including installing the 4 piece 914 rubber kit. It slid in fairly easily without the need for silicone or soapy water. Just needed to use a plastic pry tool that I picked up in a multi-piece kit. The trick is it secure either the top or bottom into the channel and pry it in from the other side. The whole process was way easier than anticipated.
Also used the cloth tape from Mark to re-wrap the rear harness. Did not bother to do any cleaning on the wires as its original and I'd rather not mess with anything that could pose a problem down the road. Here are some upside down progress pics. 
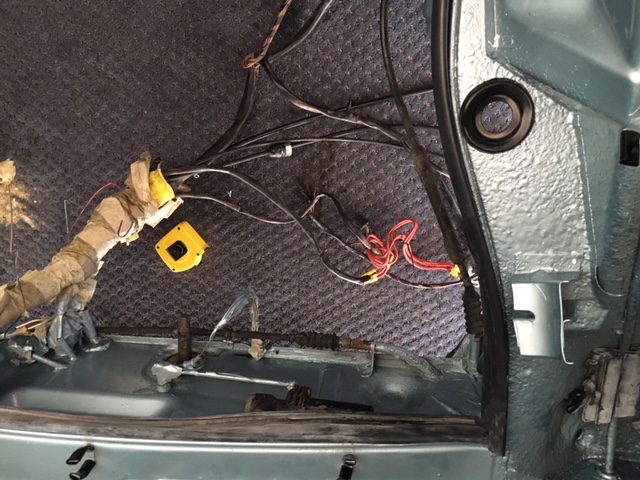
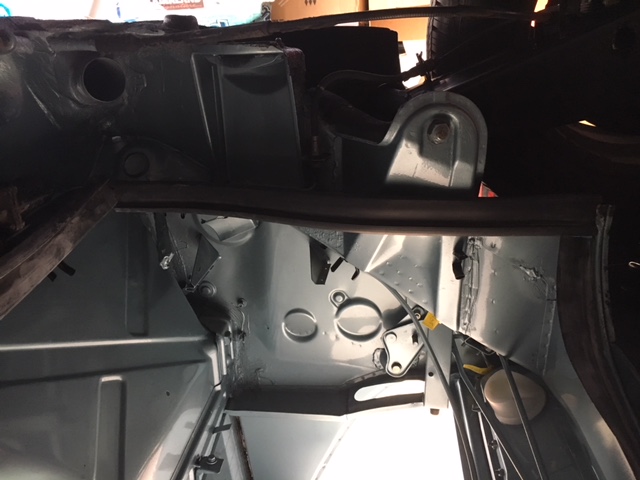

Posted by: 914 7T3 Jul 21 2018, 02:09 PM
Spent the the morning working on the car with ValcoOscar & friend Rod. We were able to complete the reinstallation of the warts and Parking Light/Turn Signal Buckets.
Oscar meticulously cleaned the wires and connectors while we scrubbed down the buckets and hardware. I may revisit the buckets & hardware down the road. Although not visible, they are now clean, but there is room for improvement.
Baby Steps.........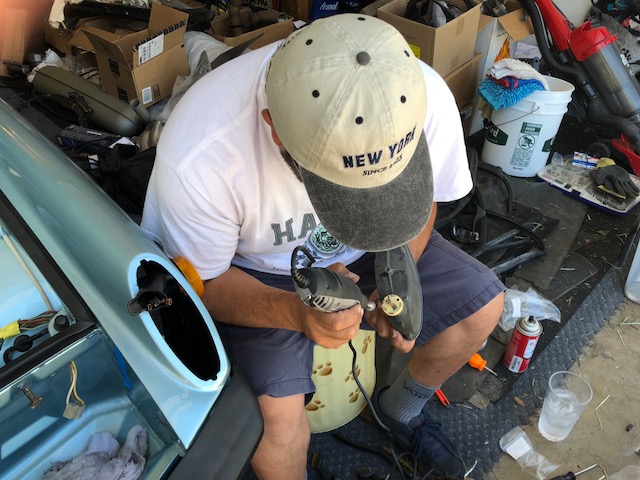
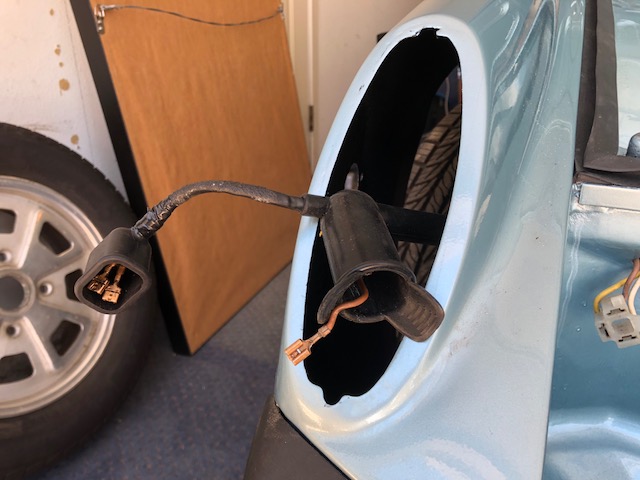
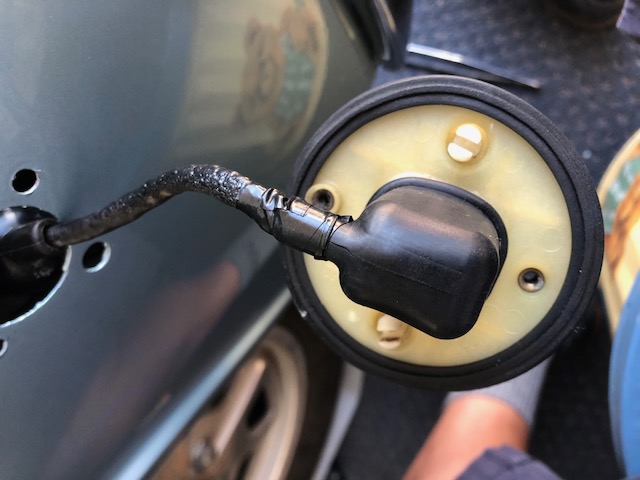

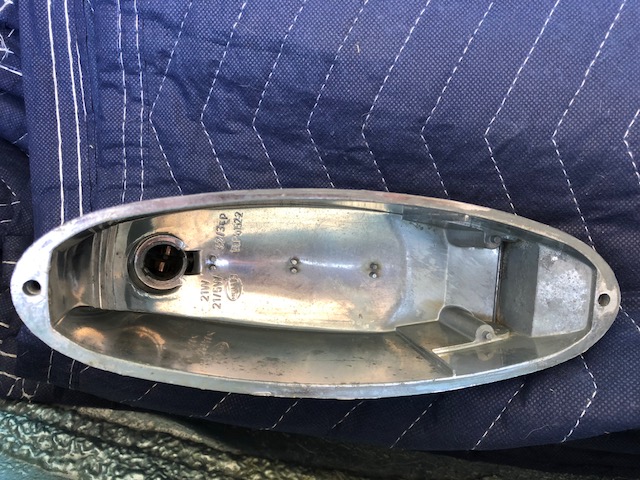
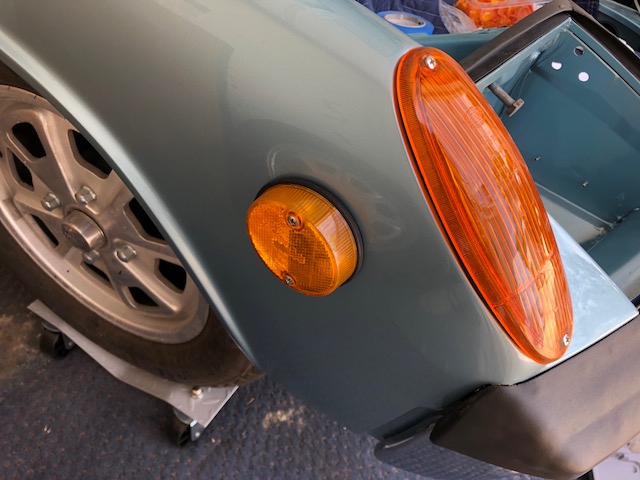
Posted by: Cairo94507 Jul 21 2018, 02:37 PM
Very nice.
Posted by: 914 7T3 Jul 21 2018, 03:44 PM
Special thanks to Sled9146 for hooking me up with the NOS Bumper Tops that have been eluding me for so long.
Also picked up a few other items that may be cleaner than what I've got!
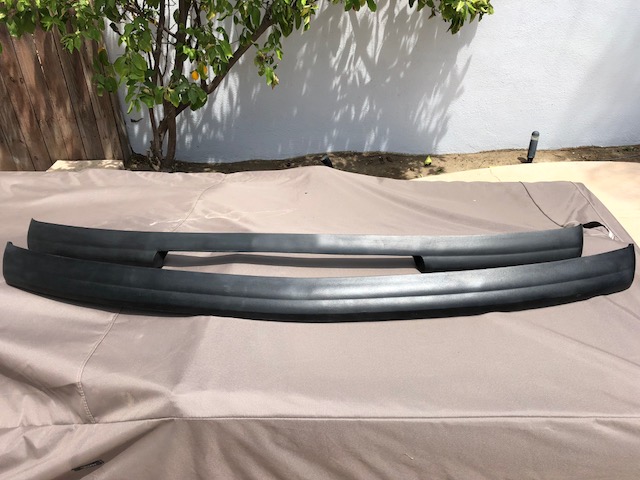
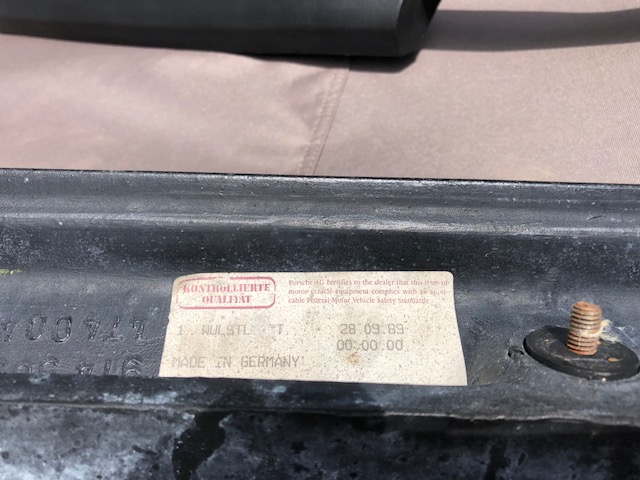
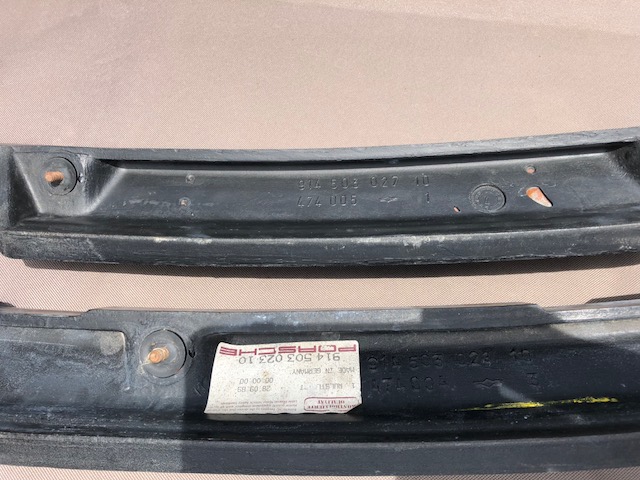
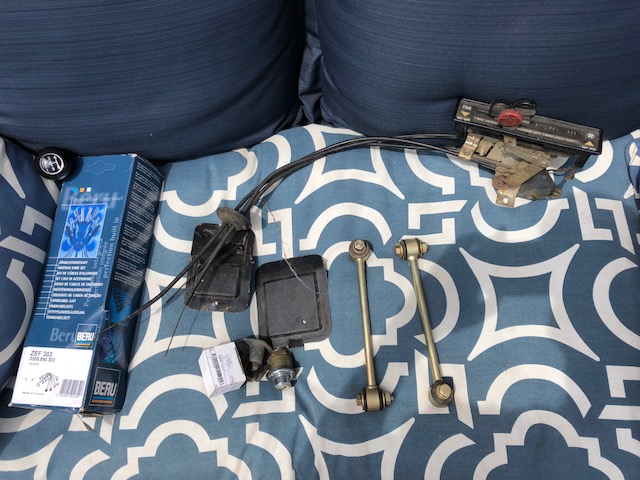
Posted by: Philip W. Jul 21 2018, 05:57 PM
Spent the the morning working on the car with ValcoOscar & friend Rod. We were able to complete the reinstallation of the warts and Parking Light/Turn Signal Buckets.
Oscar meticulously cleaned the wires and connectors while we scrubbed down the buckets and hardware. I may revisit those details down the road. Although not visible, they are now clean, but there is room for improvement.
Baby Steps.........
very nice! we are very close to the same on our progress! i need to do my new lights next- those turn signal buckets look really nice! i have a feeling you will get there before me though.
Posted by: 914 7T3 Jul 28 2018, 05:18 PM
More Wiring Harness Clean Up & Taping Today with Oscar's Secret Weapon: Methyl Ethyl Ketone! Some Before & After Pics!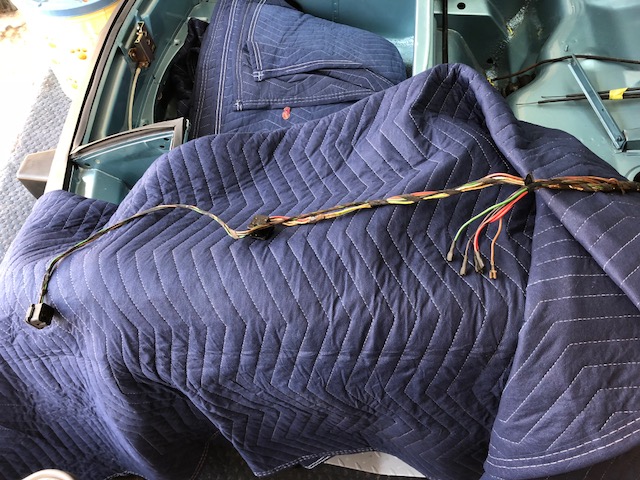
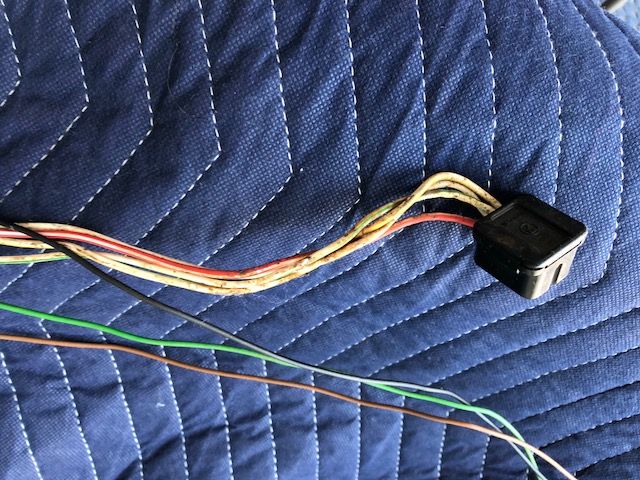
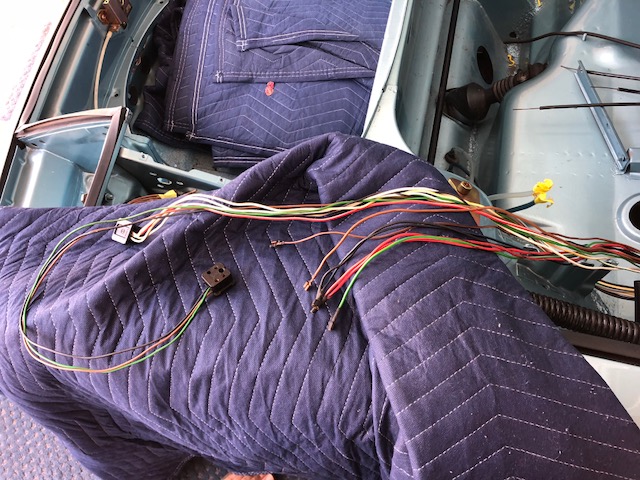

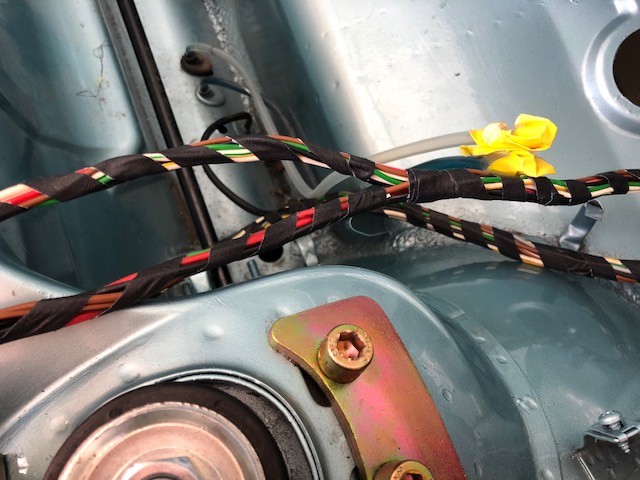
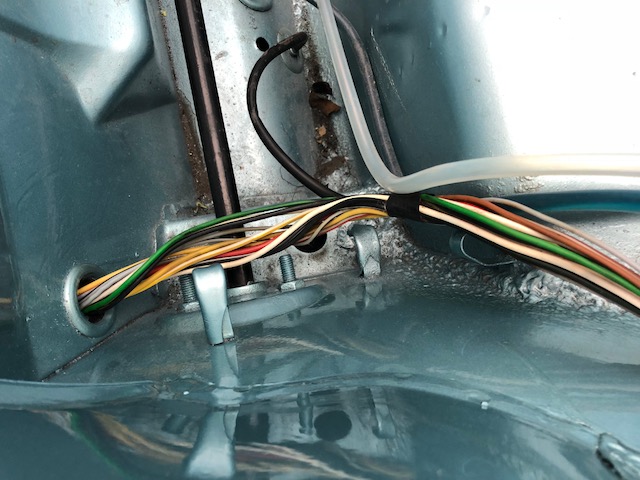
Posted by: Philip W. Jul 28 2018, 05:33 PM
looks so awesome, wish i could have done mine to this level! well, maybe the next one.
even as i work on my own , your documentation has helped me as well.
Posted by: burton73 Jul 28 2018, 06:17 PM
Do not get MEK on your paint. You should use a respirator and gloves with it as well.
Carful that shit can catch fire very easy.
Bob B
Posted by: 73-914 Jul 28 2018, 06:47 PM
IIRC the flash-point is around 80F
Posted by: raynekat Jul 29 2018, 04:35 PM
I've always used 3M general purpose adhesive remover.
It's good on most things.
Have to do a test on some plastics as it will melt them.
Not quite as toxic/dangerous as some of these other things.
Posted by: ndfrigi Jul 29 2018, 05:41 PM
Looking great sir Jeffrey! Hope you will able to drive it before winter comes! Or maybe you can drive it if there will be 2nd Temecula Day at sir Oscar’s place this september.
Posted by: sb914 Jul 29 2018, 05:41 PM
Jeff, thought you might want to see, as Here's my 45 year old harness. Never touched! 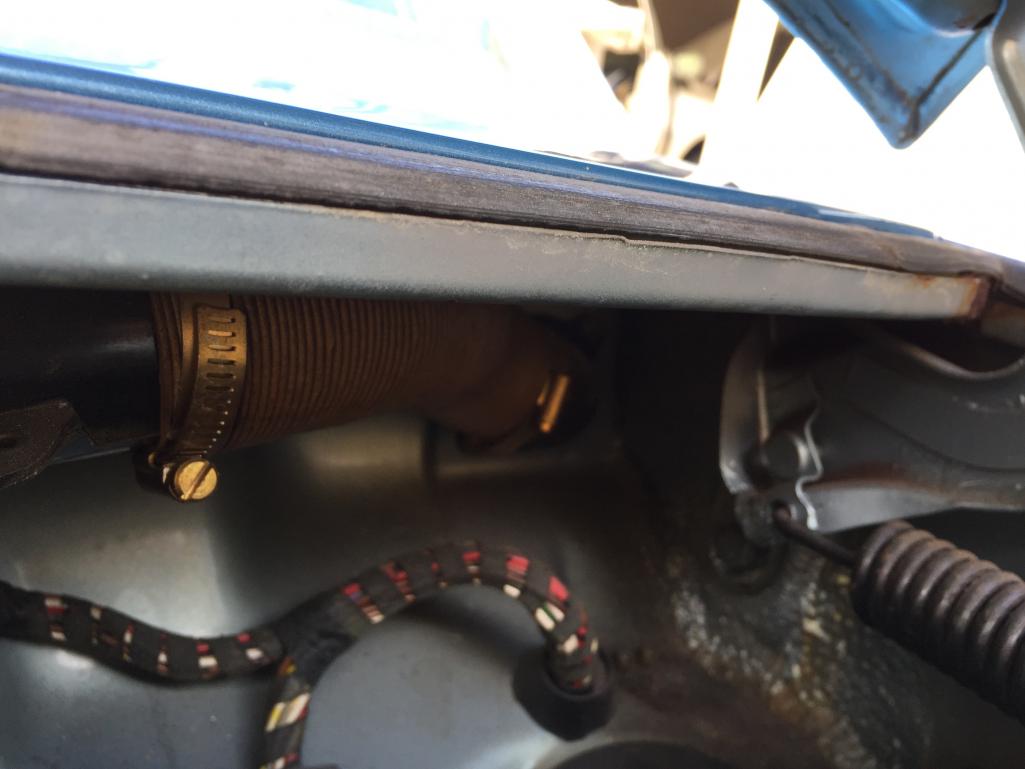
Posted by: 914 7T3 Jul 29 2018, 05:51 PM
Jeff, thought you might want to see, as Here's my 45 year old harness. Never touched!
That looks really nice! There was some type of water leak that rusted my wiper linkage and stained all the wiring with rust, so it was necessary to get in there.
The existing rubber over the terminals was virtually melted on so glad its been taken care of. Connectors have been cleaned, with new heat shrink as well. Hopefully, this will eliminate any potential electrical issues down the road.

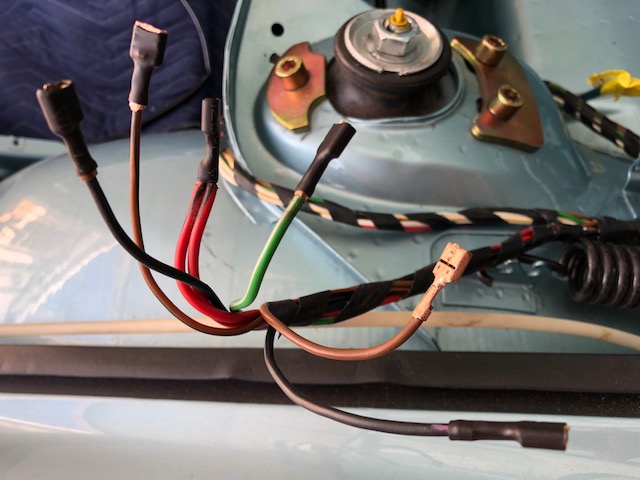
Posted by: ValcoOscar Jul 29 2018, 05:55 PM
Way to go...
Keep it up.
Oscar
Posted by: Freezin 914 Jul 29 2018, 06:01 PM
Great project! I am sure all of us like to see progress being made, keeps some of us “slackers” a little less slackerish, and keeps us more motivated! Looks great!
Posted by: arne Jul 29 2018, 08:57 PM
Looks like it is coming along nicely, Jeffery. Sorry I couldn't get free to meet up with you when you came through these parts a bit ago. Looking forward to seeing this car complete and back on the road. Werks?
Posted by: 914 7T3 Jul 29 2018, 10:59 PM
Looks like it is coming along nicely, Jeffery. Sorry I couldn't get free to meet up with you when you came through these parts a bit ago. Looking forward to seeing this car complete and back on the road. Werks?
Thanks Arne! Looks like your FJ project is a lot more involved than the 914 and you will soon be ready for paint. That will be a big turning point so Congrats on your progress.
I'm just trying to tackle as much reassembly as possible before the drive train goes back in. Have also learned that no shortcuts can be taken once there is access to all areas. Makes no sense to skip a step and have to revisit it again. Still learning, but I just want to get it finished and enjoy the car. Now Shooting for Mid September-Early October completion, but even that is ambitious. Its just going to take the time that it takes.
As for Werks, I will be there, but the 914 will not. Hope to see you there.
Posted by: arne Jul 29 2018, 11:14 PM
Don't think I'm going to make it to Werks this year. Too much PCA stuff gong on locally, and I seem to have my fingers in all of it.
Posted by: 914 7T3 Aug 12 2018, 05:58 PM
After several weeks, finally done cleaning up the wiring harness except for repair of the pinched headlight motor wires (thats for later).
Prepped the engine bay, rear trunk & frunk with new plastic for the metal tabs and a coat of wax too. Finally in a place where various pieces/parts can be re-installed, Drive Train included!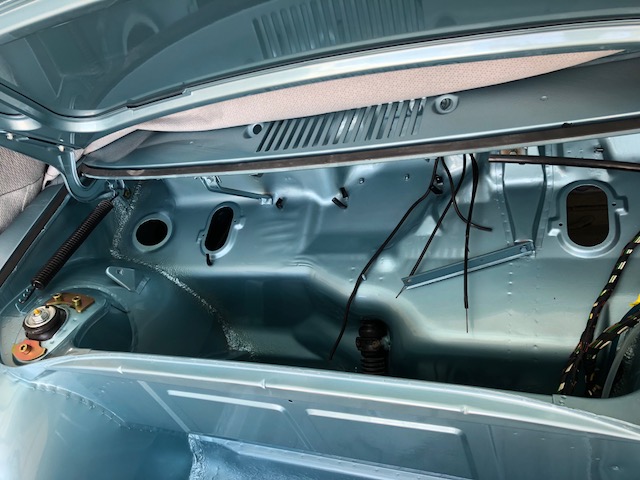
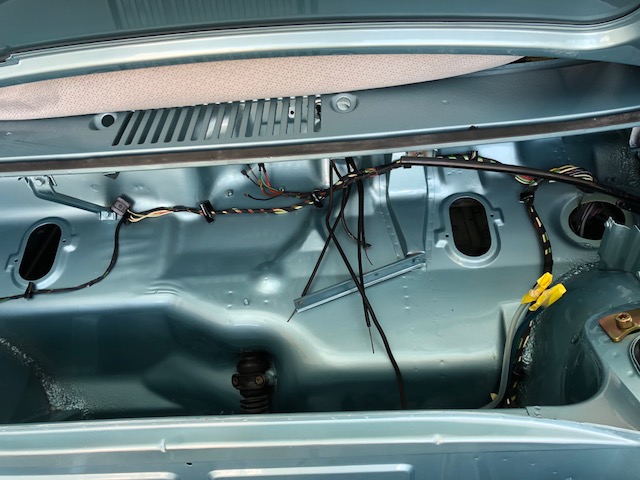
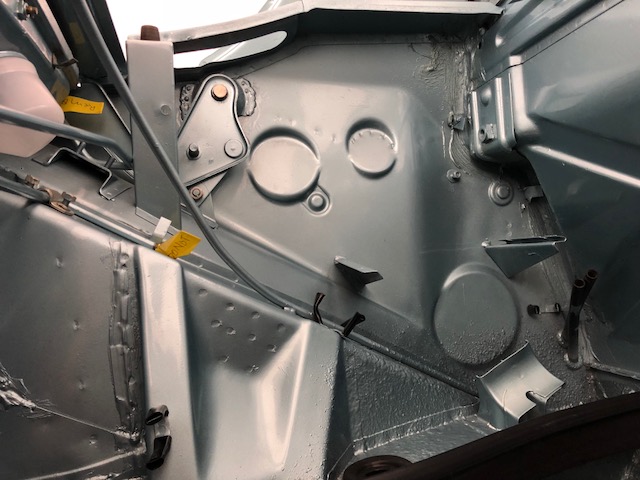
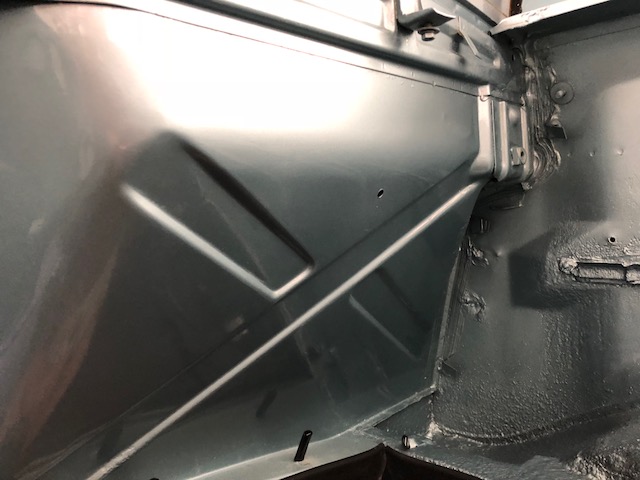
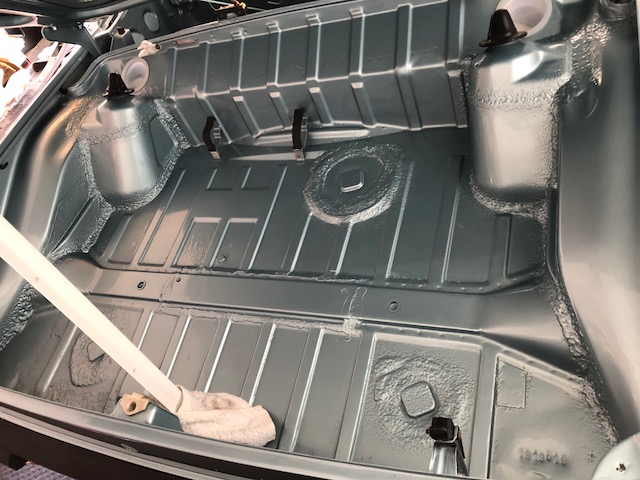
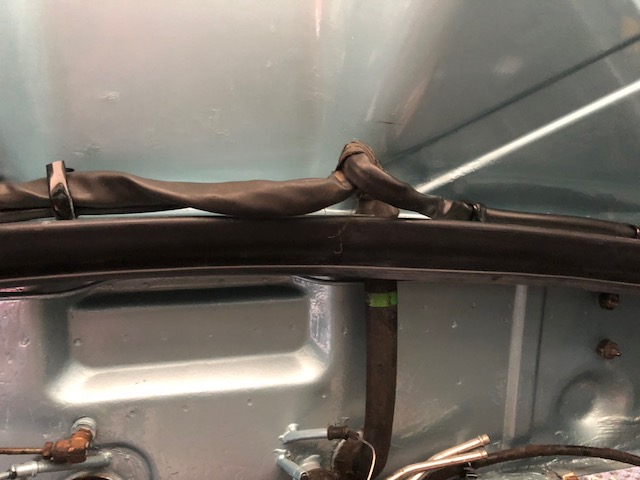
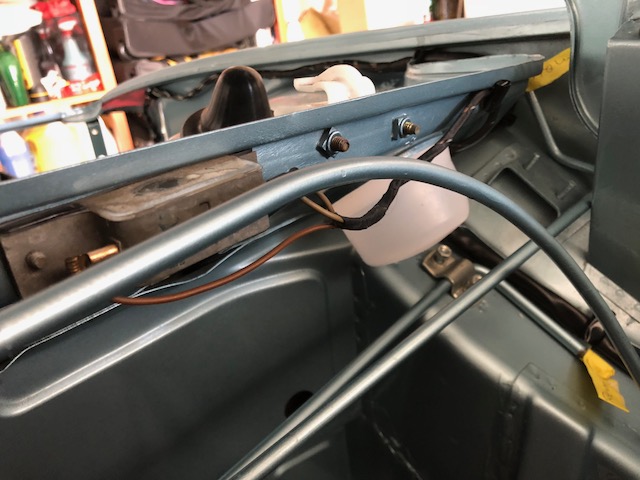
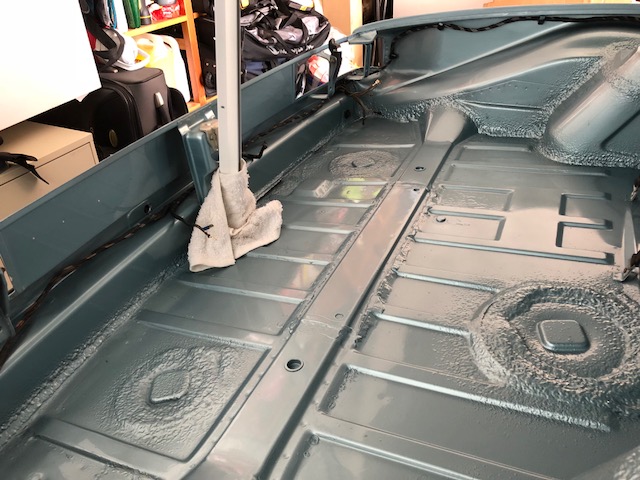
Posted by: 914 7T3 Aug 12 2018, 06:00 PM
Bonus Project-New Gas Cap Seal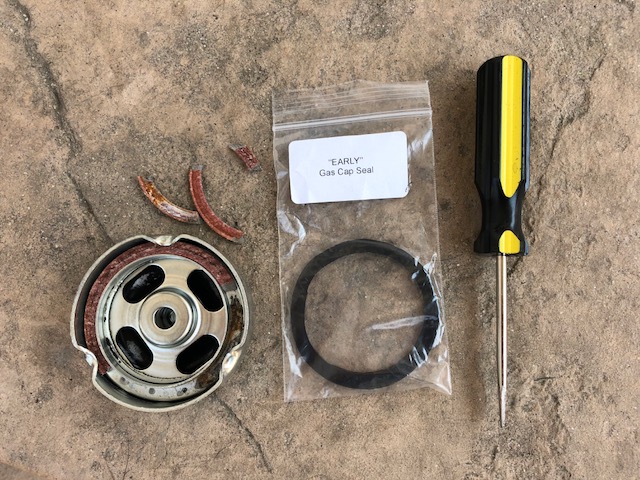
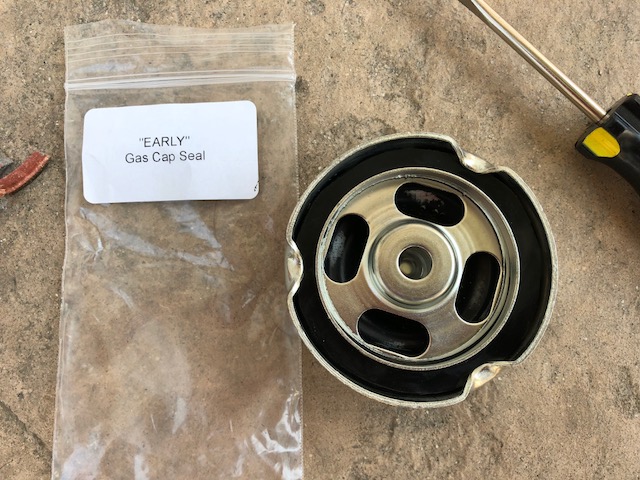
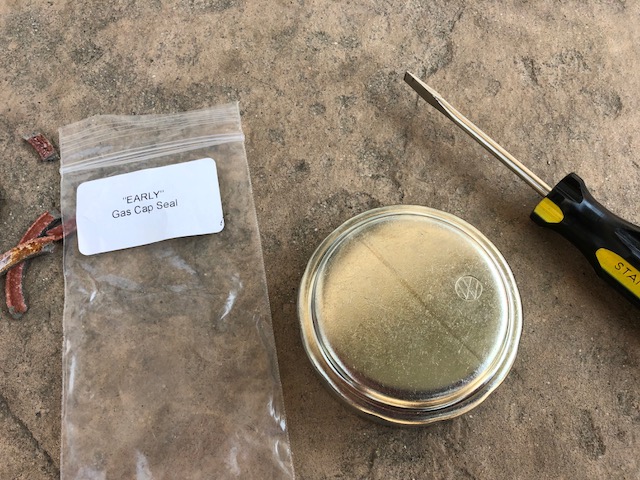
Posted by: bbrock Aug 12 2018, 06:06 PM
Fantabulous work! I hope I can get where you are some day. Right now that seems like a long way off. Here's to the inspiration you give me.
Posted by: Dion Aug 12 2018, 06:09 PM
Your car is coming along beautifully. Marathon Blue.....Mmmmm
Very nice progress. I’m sure you can’t wait to...
Certainly tuned in.
Posted by: simonjb Aug 12 2018, 08:19 PM
Looking great !
A suggestion - you may find it easier to remove the front hood while finishing up all the front end...
Posted by: 914_7T3 Aug 26 2018, 10:31 PM
Distracted with Monterey Car Week, but had the chance to clean up some parts for reassembly a bit this afternoon:
Fresh Air Box
Fan Motor
Air Deflectors
Windshield Fluid Resevoir
Tech tip: the plastic pry tools used to install rubber trim doubles as a great scraper for plastic parts that does not scratch. Was able tremove a great deal of baked on oil from the air deflectors with an all natural non-toxic cleaner and the the scraper with excellent results.
Only photgraphed the dirty one 2/3rds through the clean up, they were actually pretty bad to start.
Every part of this car will be cleaned, refurbished or replaced!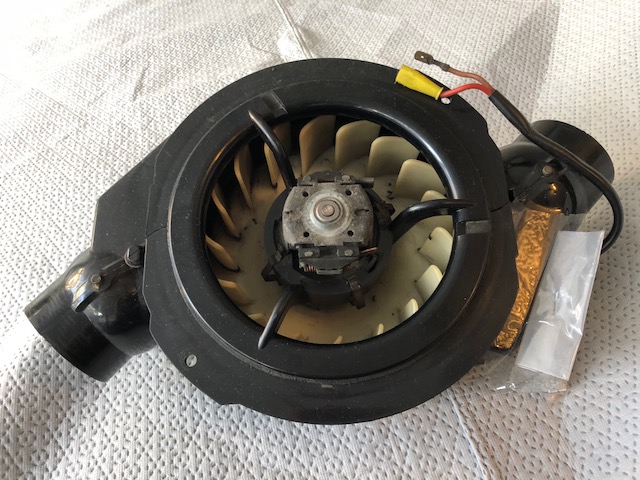
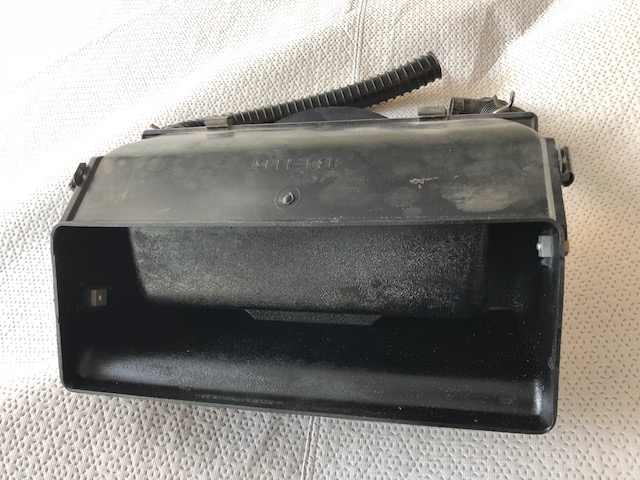
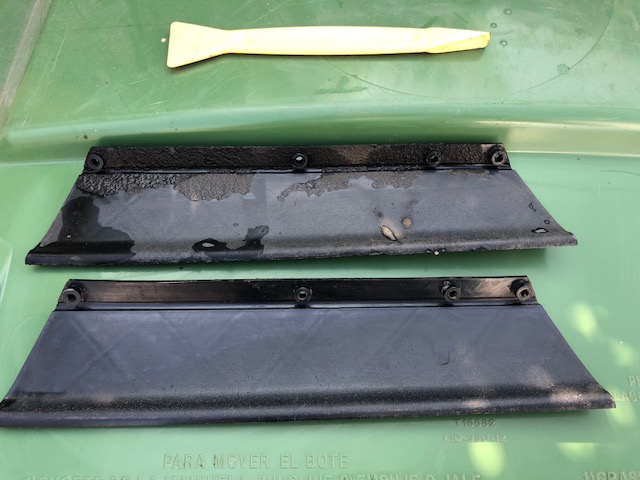
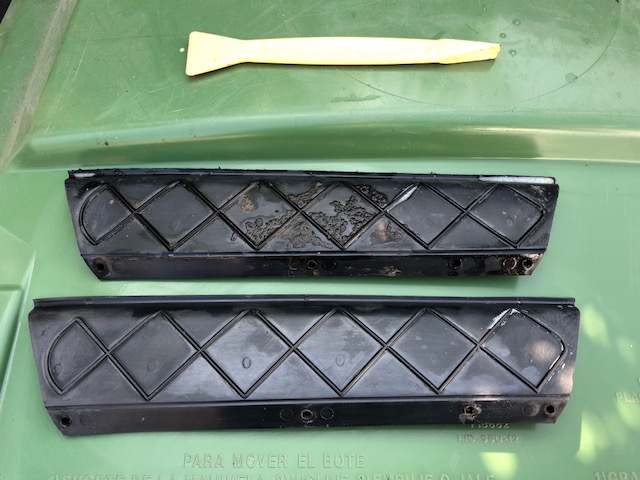
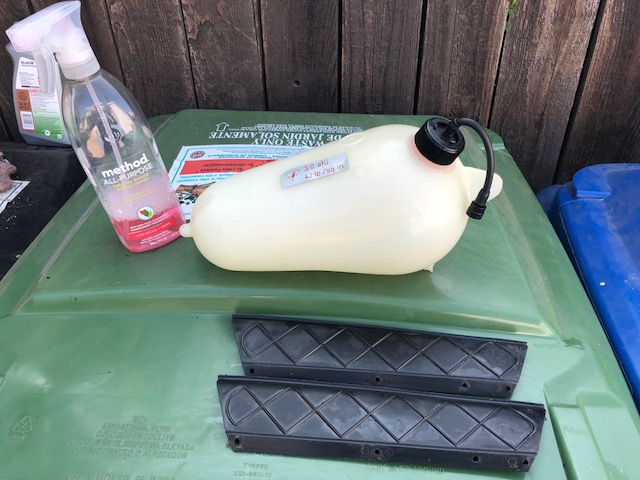
Posted by: Eric_Shea Aug 29 2018, 03:26 PM
Posted by: burton73 Aug 29 2018, 04:30 PM
I see you and raise you!!
Bob B
Posted by: 914_7T3 Aug 29 2018, 07:09 PM
I see you and raise you!!
Bob B
Thanks guys, I appreciate the support. Now that I'm back from Monterey, I am more motivated than ever to get this finished.
Spoke at length today with @http://www.914world.com/bbs2/index.php?showuser=1110 regarding the brakes and even though the calipers were rebuilt in 2012 by PMB through @http://www.914world.com/bbs2/index.php?showuser=419 at Original Customs, we're going to do them again as the car lived outside for several years in Santa Cruz.
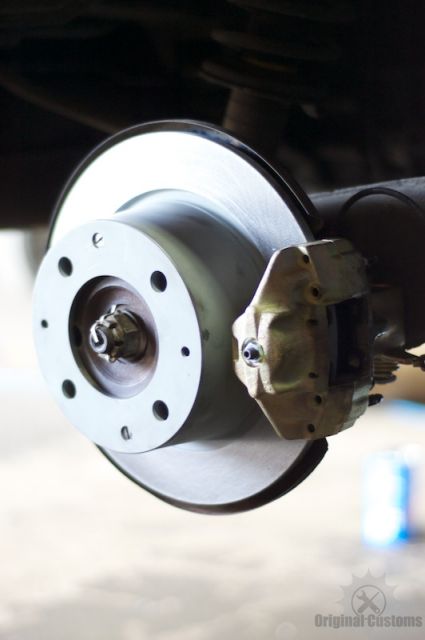
More importantly, PMB is going to restore the Pressure Regulator too. Strangely enough, I had no idea what this part was or its function. For such an important element of the braking system, I'm surprised that I've never seen any mention of it in the forums since I acquired the car last April.
Another shout out to our great member vendors for the invaluable service that they provide!
Posted by: Larmo63 Aug 29 2018, 08:01 PM
Actually, there have been a ton of discussion about the rear pressure compensation brake valve.
Your car is coming along very nicely, slowly but surely.
Posted by: 914_7T3 Aug 29 2018, 08:54 PM
Actually, there has been tons of discussion about the rear pressure compensation brake valve.
Your car is coming along very nicely, slowly but surely.
Things are about to get moving a little quicker as its scheduled to get over to the shop next week to get the drive train and Frunk Junk Reinstalled.
Also called Hagerty earlier today and upped the insurance to full value!
Posted by: 914_7T3 Sep 2 2018, 11:15 AM
Also part of the brake restoration:
ATE 19mm Master Cylinder (only other upgrade than Turbo Tie Rods)
NOS Left & OEM Right Replacement E-Brake Cables
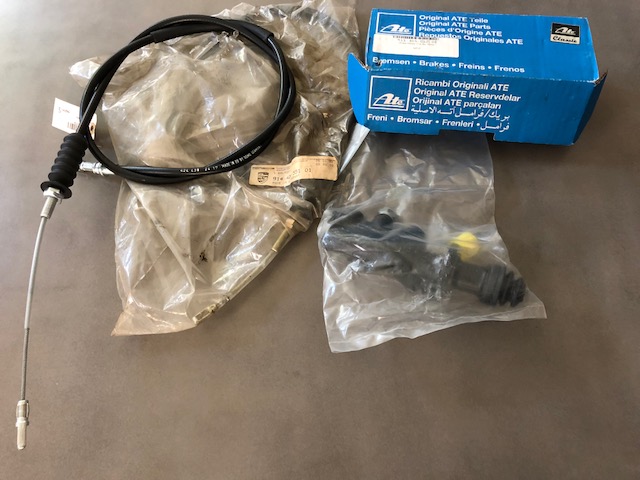
Posted by: 914_7T3 Sep 14 2018, 06:03 PM
Heads have been finished and motor is complete awaiting test fire. 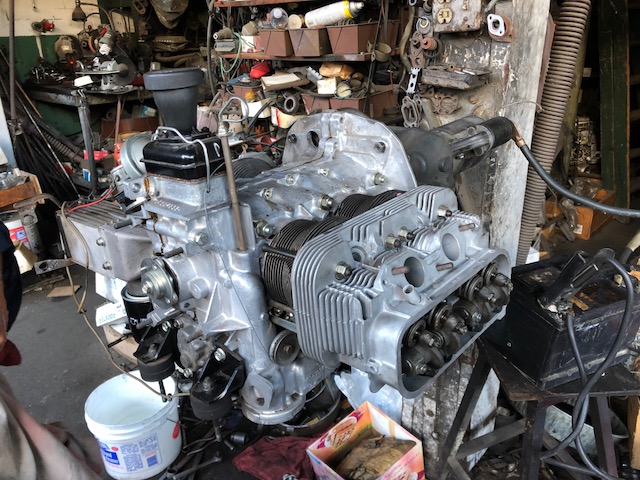
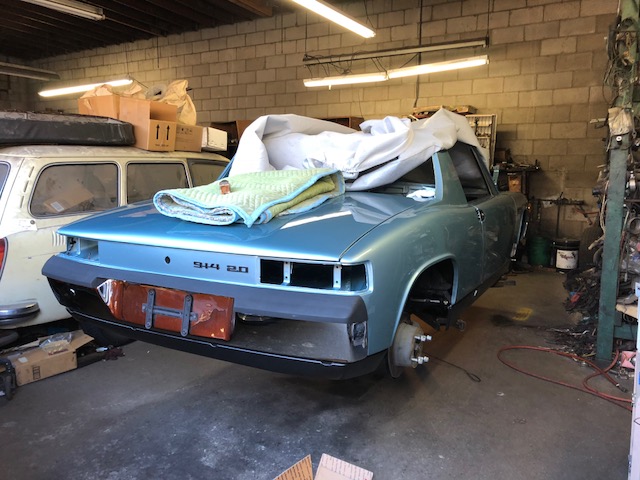
The car will now be completed underneath before the drive train gets installed including the following:
ATE 19mm Master Cylinder
rebuilt pedal cluster from @http://www.914world.com/bbs2/index.php?showuser=1319
rebuilt pedal board
OEM accelerator pedal
Rebuilt Calipers & Pressure Regulator from @http://www.914world.com/bbs2/index.php?showuser=1110
ATE & FTE soft lines.
OEM Gemo cables: accelerator, clutch & speedo too!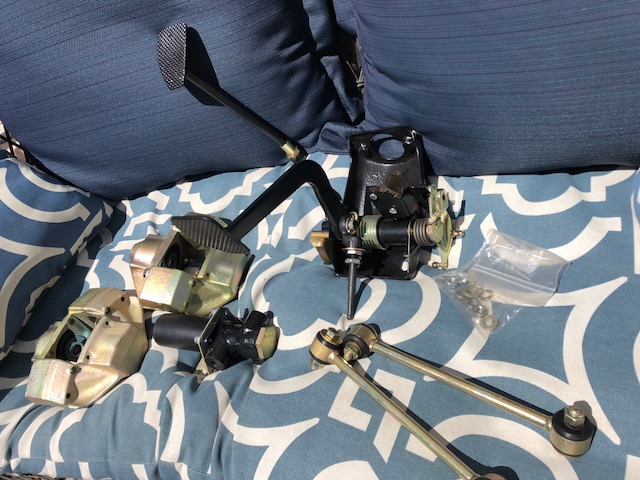
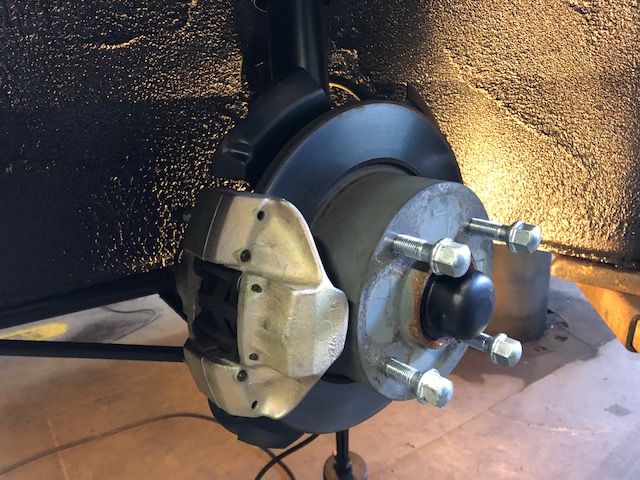
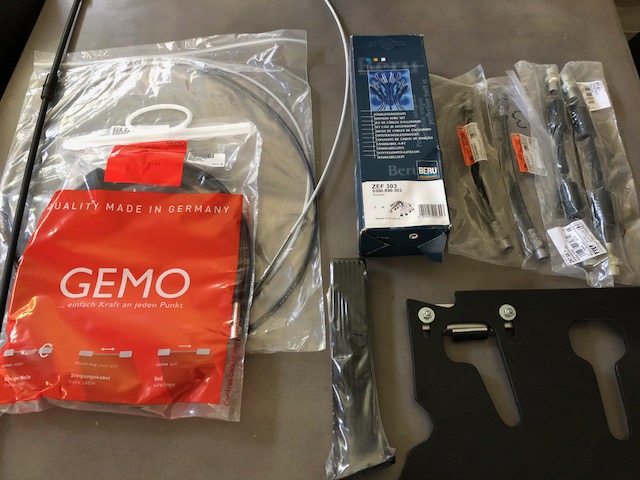
With the wheels off the car, they are currently in for Refinishing too!
More pics to follow!
Posted by: ndfrigi Sep 14 2018, 06:05 PM
One more week and this car should be on the road already!
Posted by: 914_7T3 Sep 15 2018, 12:04 PM
This restored set of rear calipers arrived today from @http://www.914world.com/bbs2/index.php?showuser=1110 at PMB with some cool swag! Cores were shipped yesterday.
Remember to support our member vendors!!!! 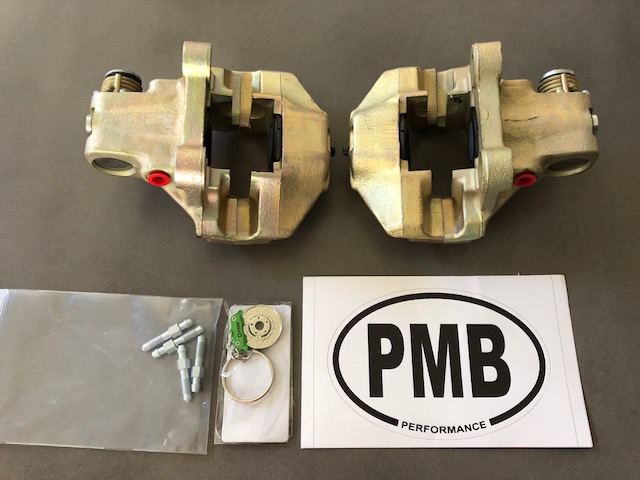
Posted by: 914_7T3 Sep 25 2018, 09:06 PM
Front Drop Links are now complete with new bushings from @http://www.914world.com/bbs2/index.php?showuser=3348 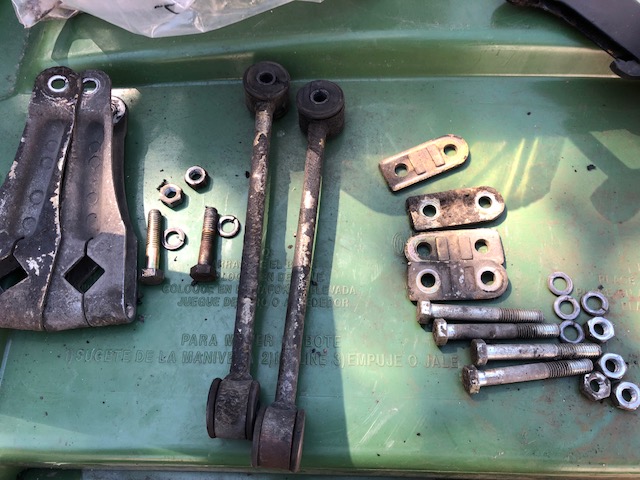

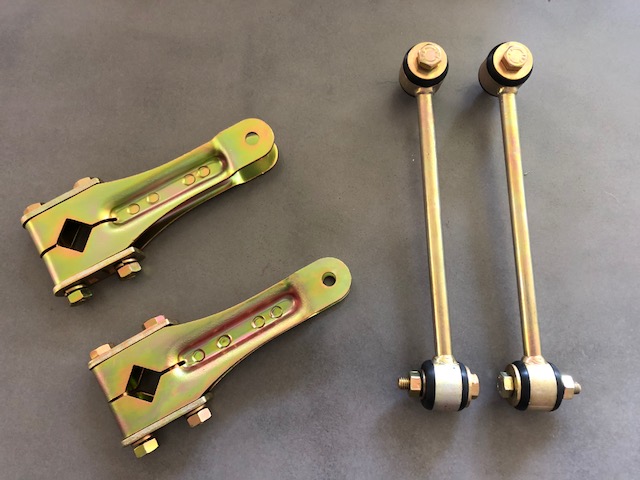
Rear Calipers & Pressure Regulator from @http://www.914world.com/bbs2/index.php?showuser=1110 also installed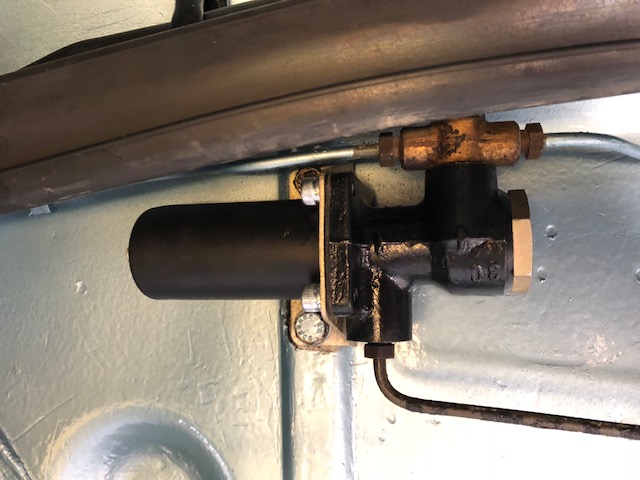
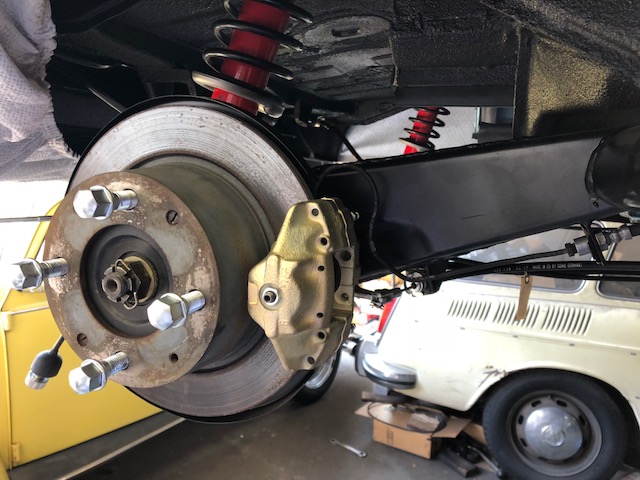
Going to run the existing pads and rotors as they are still very good!
Clutch, Accelerator, Speedo, Ebrake Cables and Soft Lines are all in along with rebuilt Pedal Cluster and Master Cylinder.

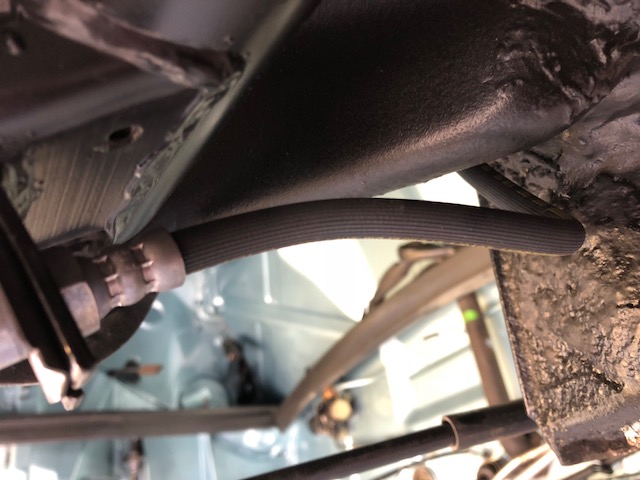
Slowly, but surely!
Posted by: 914_7T3 Oct 9 2018, 03:24 PM
Got the set of 5/73 date matched Fuchs Refinished at Al Reed Polishing in Anaheim. Also added a period correct 165 SR 15 Michelin XZX for the spare.
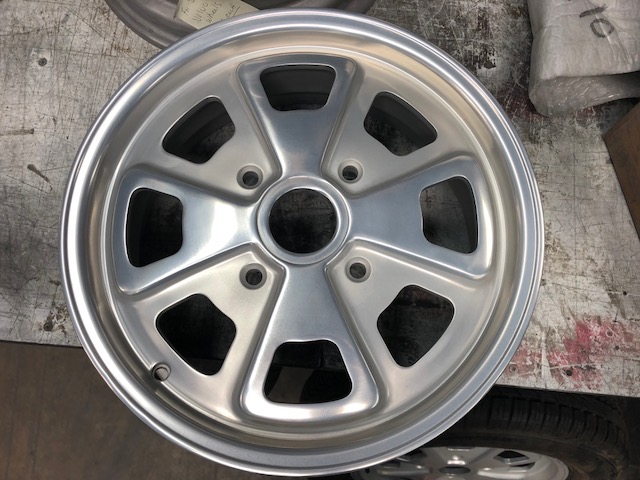
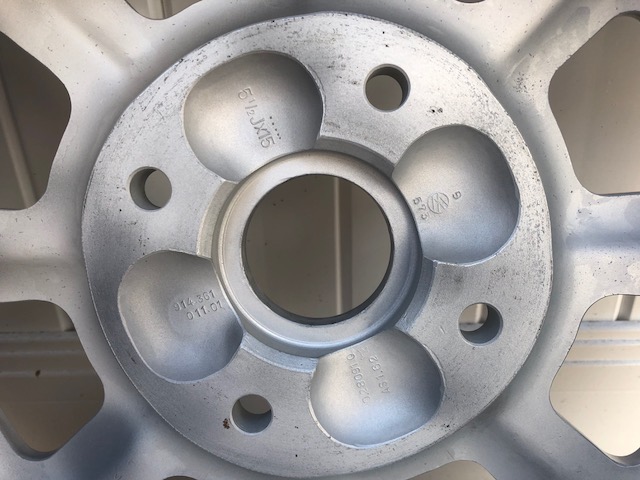
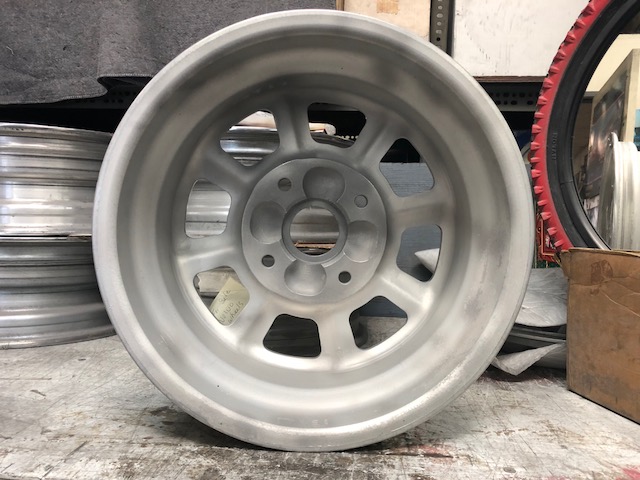
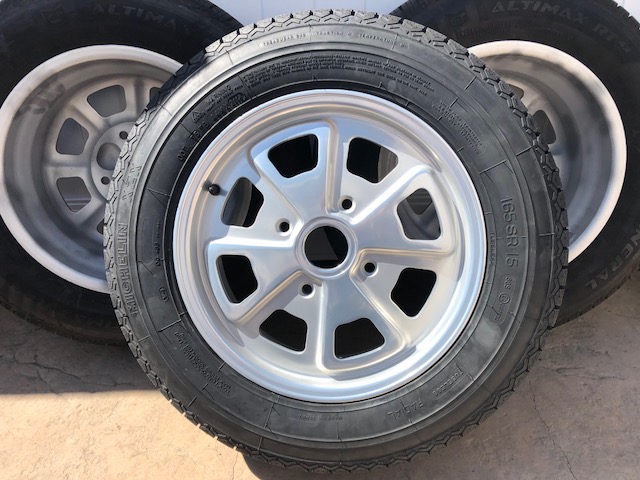
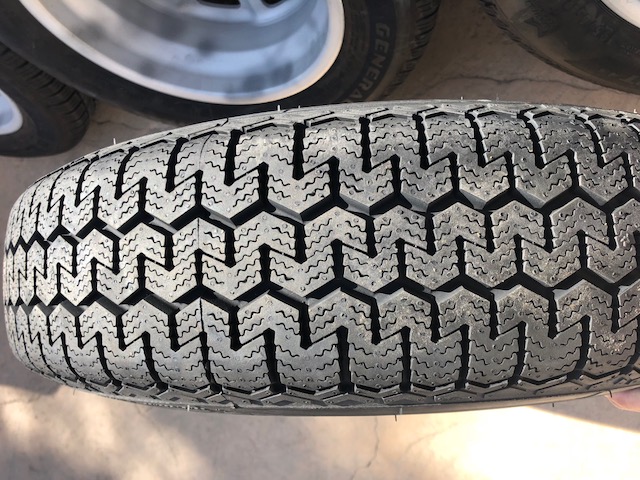
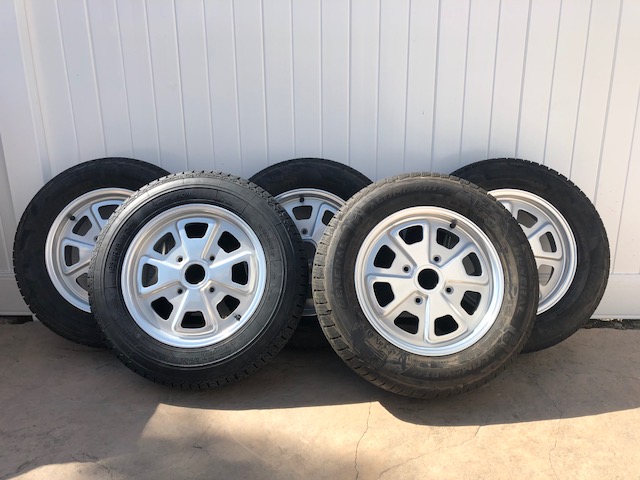
Posted by: ValcoOscar Oct 9 2018, 03:33 PM


Posted by: tygaboy Oct 9 2018, 04:33 PM
Wow... You'll have one of THE nicest cars on the planet! Great job.
Posted by: burton73 Oct 9 2018, 05:24 PM
Wow... You'll have one of THE nicest cars on the planet! Great job.
Bob B
Posted by: porschetub Oct 9 2018, 10:30 PM
Wow 100 point show car here,be interesting to see insurance valve,when asked the condition do you say brand new ???...….I would in this case,well done .
Posted by: pete000 Oct 9 2018, 11:10 PM
Who is doing your cad plating, looks really good...
Posted by: 914_7T3 Oct 10 2018, 10:39 AM
Wow 100 point show car here,be interesting to see insurance valve,when asked the condition do you say brand new ???...….I would in this case,well done
.The insurance value on the car was increased in late August with Hagerty from $25,000 to full value at $55,000.
One week later, after Monterey Car Week, the Hagerty valuation was increased to $66,900. This is something that should be watched closely at least twice a year.
Posted by: 914_7T3 Oct 10 2018, 10:39 AM
Who is doing your cad plating, looks really good...
Van Nuys Plating
Posted by: 914_7T3 Oct 10 2018, 10:43 AM
Wow... You'll have one of THE nicest cars on the planet! Great job.
Shooting for top tenth percentile anyway. There are some other amazing cars out this way that I can think of offhand including the 914-6s belonging to @http://www.914world.com/bbs2/index.php?showuser=10742 and @http://www.914world.com/bbs2/index.php?showuser=16681
Hope to get really close to the level of those two examples.
Posted by: 914_7T3 Oct 11 2018, 03:12 PM
Sunset Porsche comes through again. Truth be known that these Genuine Porsche Caps are closer to the @http://www.914world.com/bbs2/index.php?showuser=3348 version than the original 45 year old ones.
Therefore, I'll still be looking looking for a set of NOS caps. 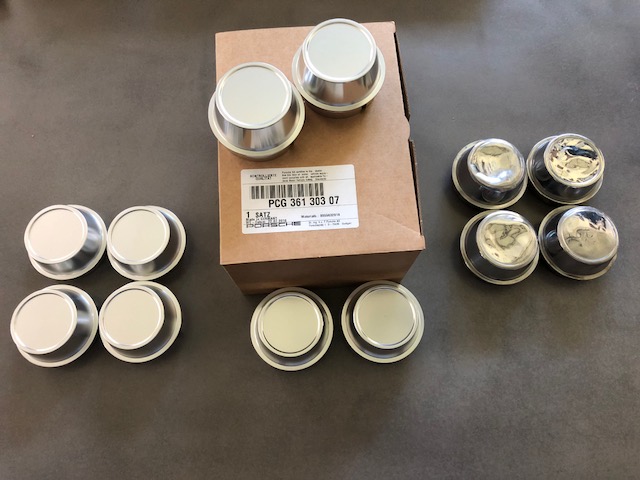
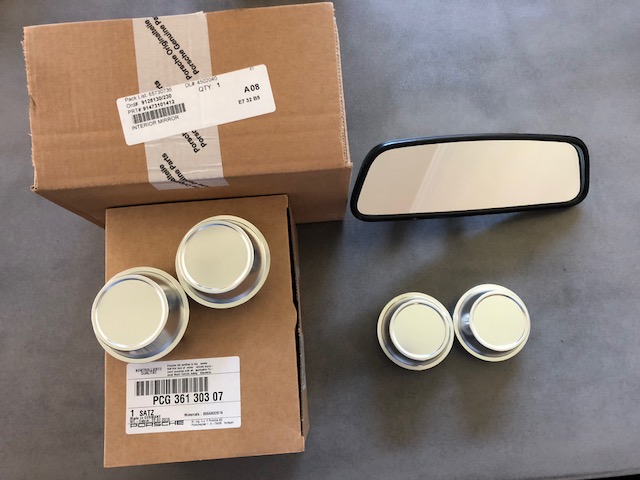
Also refurbed the E-Brake handle with fresh Powder Coating, Plating and a new bushing!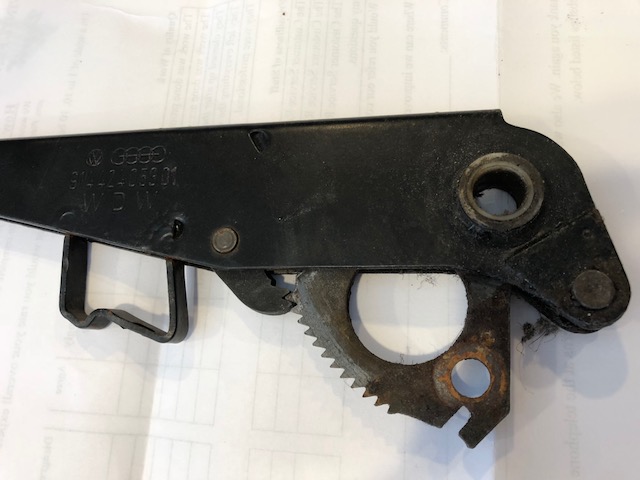
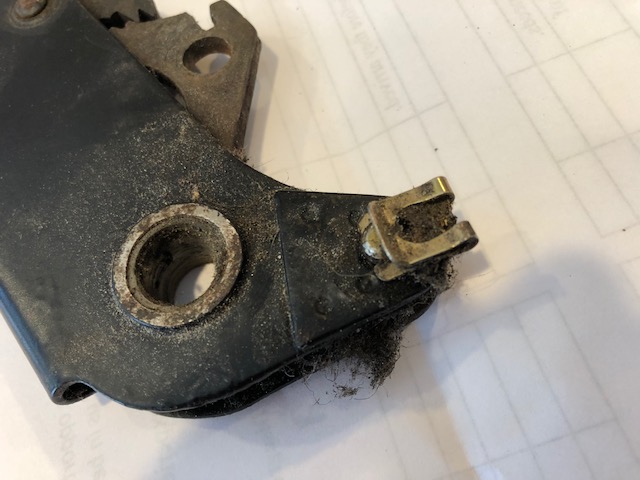
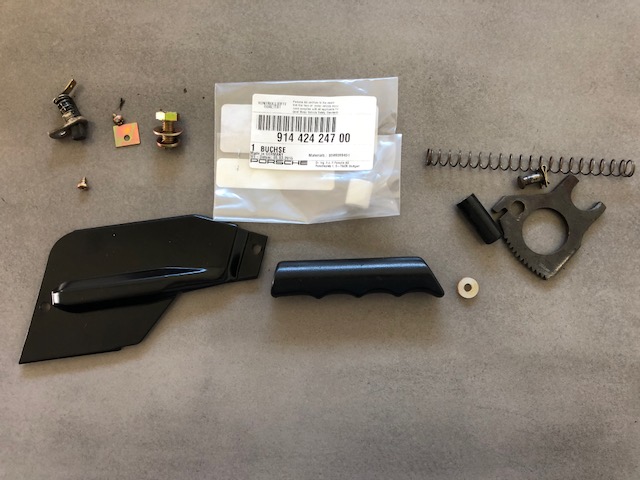

Posted by: arne Oct 11 2018, 08:46 PM
Sunset Porsche comes through again. Truth be known that these Genuine Porsche Caps are closer to the @http://www.914world.com/bbs2/index.php?showuser=3348 version than the original 45 year old ones.
Therefore, I'll still be looking looking for a set of NOS caps.
That's going to be a hard thing to find, Jeffery. The set of NOS that came with my car had date codes on the boxes from June 1989. I don't recall that they were the same as the originals, probably similar to the current parts. So just NOS probably won't do, you are going to have to find NROS (New REALLY Old Stock).
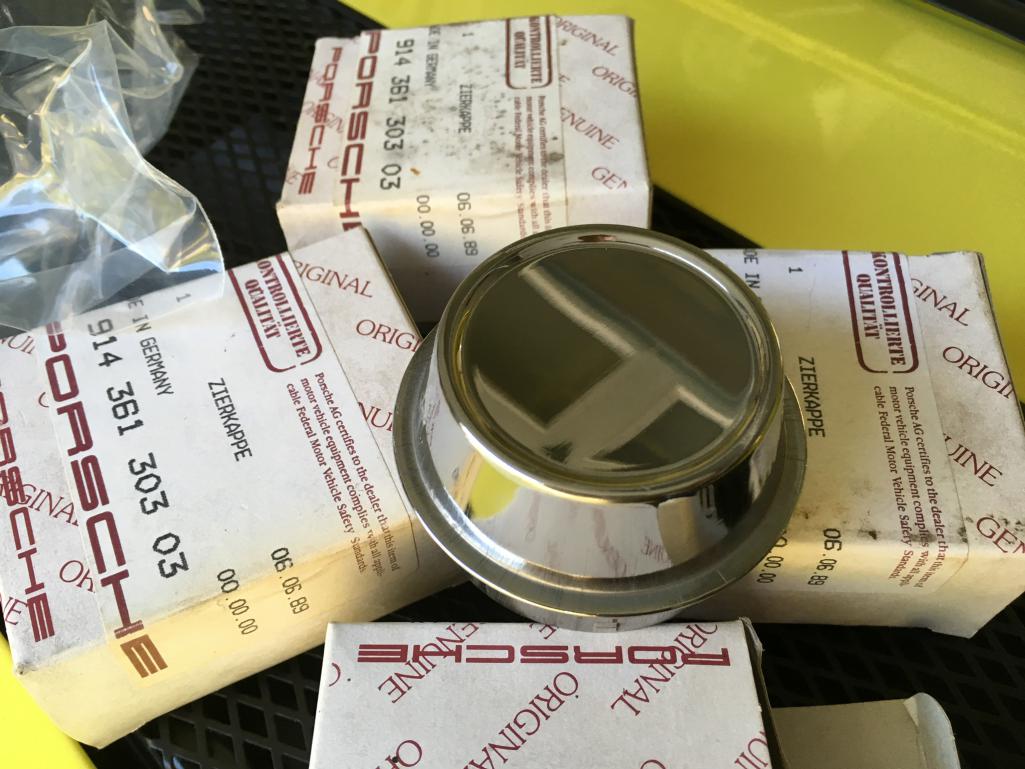
Posted by: mepstein Oct 11 2018, 09:09 PM
Sunset Porsche comes through again. Truth be known that these Genuine Porsche Caps are closer to the @http://www.914world.com/bbs2/index.php?showuser=3348 version than the original 45 year old ones.
Therefore, I'll still be looking looking for a set of NOS caps.
That's going to be a hard thing to find, Jeffery. The set of NOS that came with my car had date codes on the boxes from June 1989. I don't recall that they were the same as the originals, probably similar to the current parts. So just NOS probably won't do, you are going to have to find NROS (New REALLY Old Stock).
http://www.914world.com/bbs2/index.php?showtopic=332290&hl=caps
I promised Jeffrey the next set.
what was funny about that sale was I immediately got a PM about how I was charging too much and nobody was going to buy. New from Porsche was only $275 and nobody cares about the difference. I'm fine with what I sold them for but there are some parts that make people dig deep.
Attached image(s)

Posted by: 914_7T3 Oct 11 2018, 10:43 PM
Sunset Porsche comes through again. Truth be known that these Genuine Porsche Caps are closer to the @http://www.914world.com/bbs2/index.php?showuser=3348 version than the original 45 year old ones.
Therefore, I'll still be looking looking for a set of NOS caps.
That's going to be a hard thing to find, Jeffery. The set of NOS that came with my car had date codes on the boxes from June 1989. I don't recall that they were the same as the originals, probably similar to the current parts. So just NOS probably won't do, you are going to have to find NROS (New REALLY Old Stock).
http://www.914world.com/bbs2/index.php?showtopic=332290&hl=caps
I promised Jeffrey the next set.
what was funny about that sale was I immediately got a PM about how I was charging too much and nobody was going to buy. New from Porsche was only $275 and nobody cares about the difference. I'm fine with what I sold them for but there are some parts that make people dig deep.
Posted by: 914_7T3 Oct 14 2018, 05:33 PM
Spent some time cleaning misc parts this afternoon. Love the before and after pics, especially when parts come out close to new!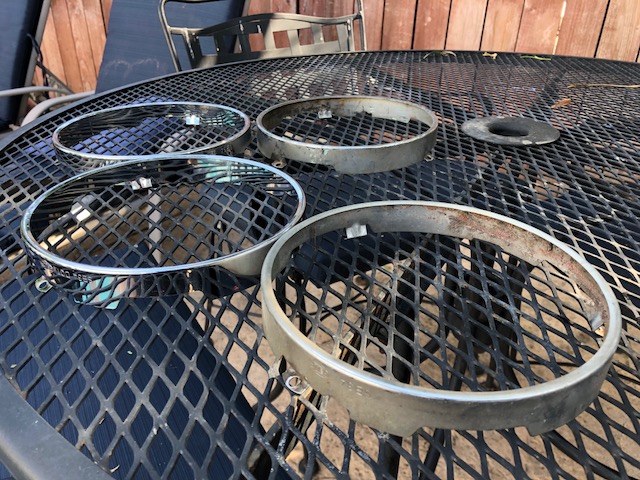
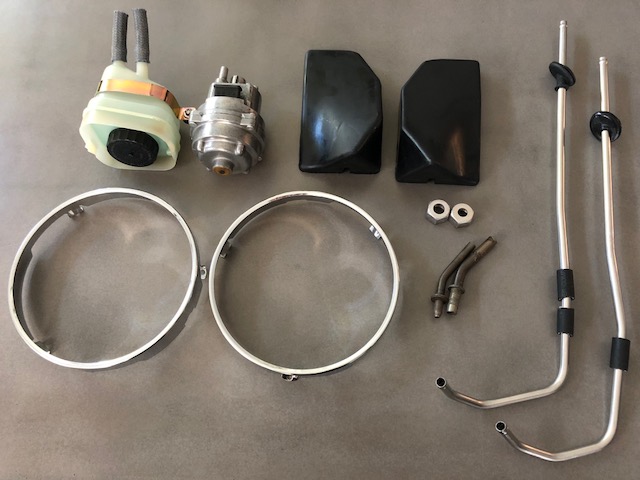
Posted by: 914_7T3 Nov 17 2018, 07:50 PM
Some progress on getting the motor completed, but got hung up on the fact that I needed to order a new set of Manifold Spacers. Should have those delivered before Thanksgiving. big push to get the car back moving under its own power by Christmas. 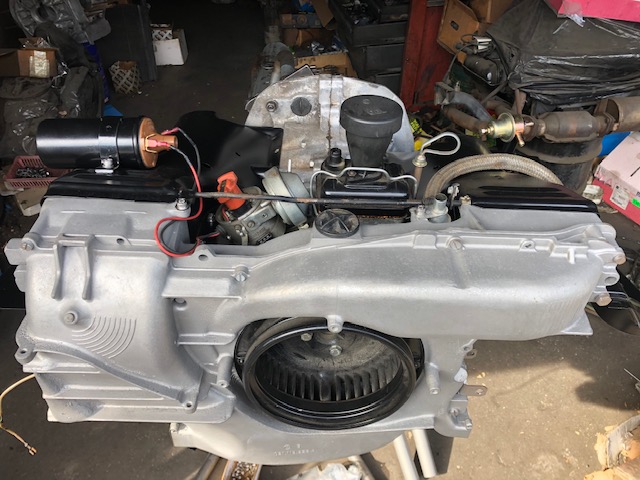

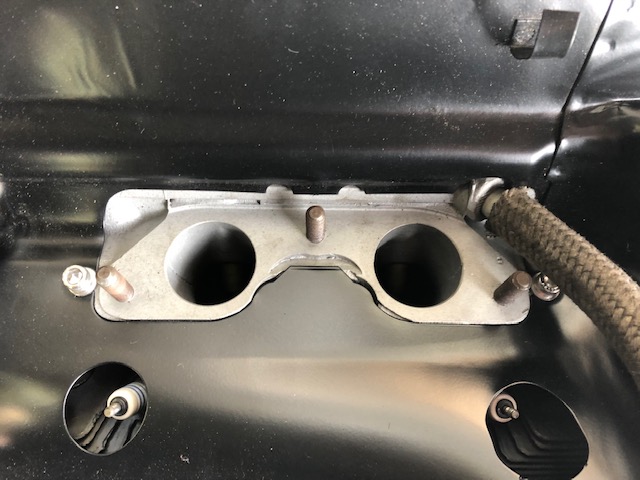
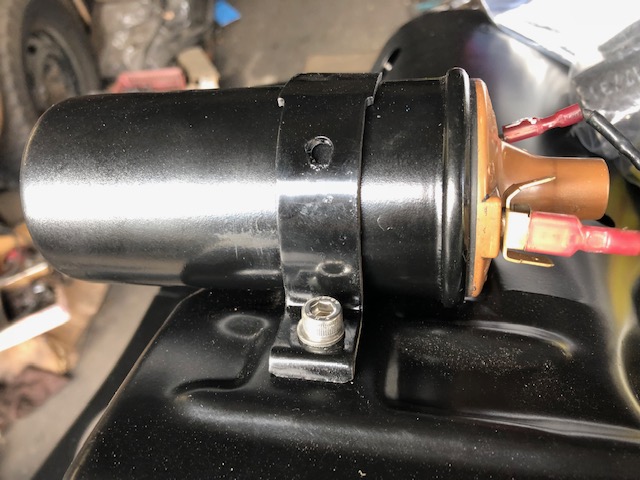
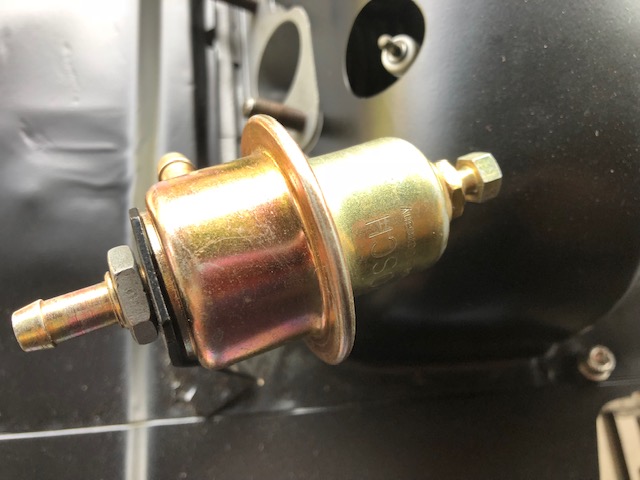
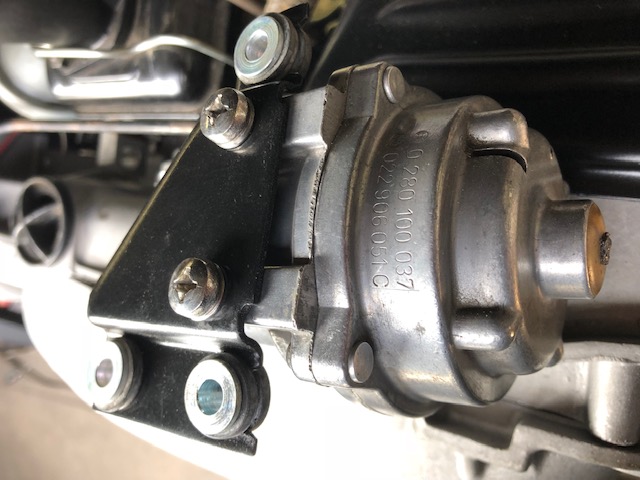
Spent the day organizing and prepping parts for reassembly. Front drop links are installed as is the new ATE Master Cylinder.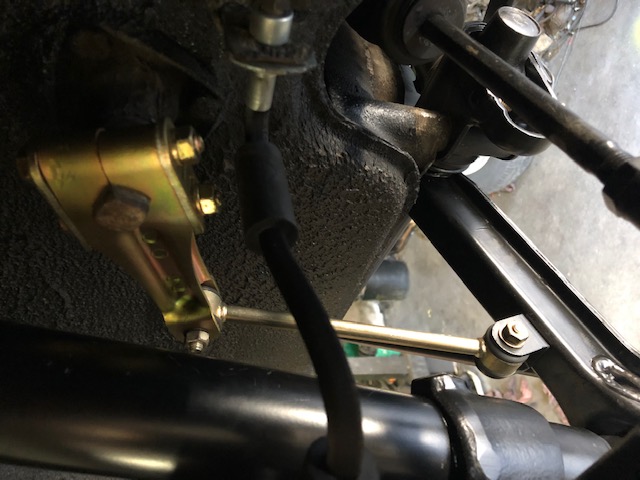
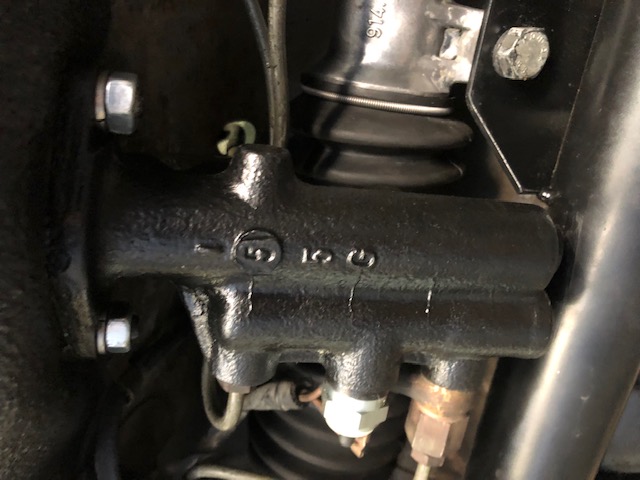
Also swapped out steering wheels and my rear sway bar brackets as those missed the first round of plating. 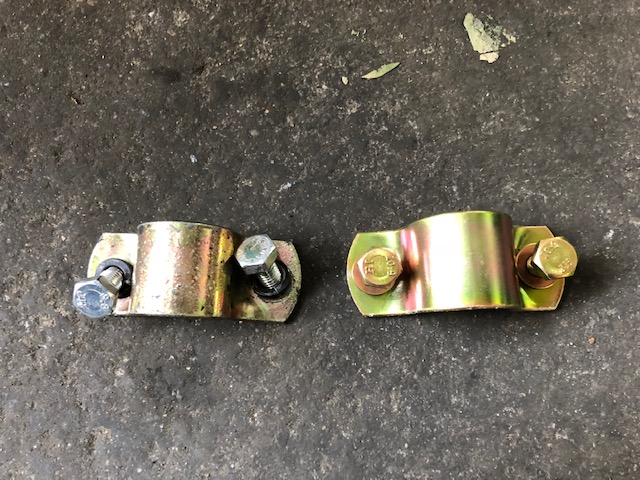
See a new thread for an upcoming mini tech session on December 8th in the Valley, all our welcome.
Posted by: cuddy_k Nov 17 2018, 10:34 PM
NIce to see the great progress! Congrats!
Posted by: 914_7T3 Nov 17 2018, 11:10 PM
NIce to see the great progress! Congrats!
@http://www.914world.com/bbs2/index.php?showuser=18749 Let me know if you will be back in town Dec 8th, I'm planning a tech session to do the dash install, wiper linkage and airbox install! We could really use your expertise.
Posted by: rstover Nov 18 2018, 11:09 AM
The fan housing looks great. Is it paint or powder coated.
Posted by: 914_7T3 Nov 18 2018, 01:29 PM
The fan housing looks great. Is it paint or powder coated.
@http://www.914world.com/bbs2/index.php?showuser=13785 It is the original bare magnesium finish. The fan housing was tumble blasted, not sure as to the type of media used.
Posted by: cuddy_k Nov 18 2018, 08:55 PM
NIce to see the great progress! Congrats!
@http://www.914world.com/bbs2/index.php?showuser=18749 Let me know if you will be back in town Dec 8th, I'm planning a tech session to do the dash install, wiper linkage and airbox install! We could really use your expertise.
Sounds like a great day. Would love to meet Oscar too. No current plans to be out west on 12/8, but with my schedule, who knows? Happy to facetime and join the party virtually. I onlhy have two working brain cells left, but you're welcome to them. BTW, I had four cells, but the airbox killed one, and the DAP Weldwood cement for the upper dash vinyl snuffed the other
Posted by: 914_7T3 Nov 20 2018, 09:25 PM
Paid a visit to @http://www.914world.com/bbs2/index.php?showuser=1319 earlier today to pick up some odds & ends that needed freshening and ended up with this perfectly powder coated air filter box. 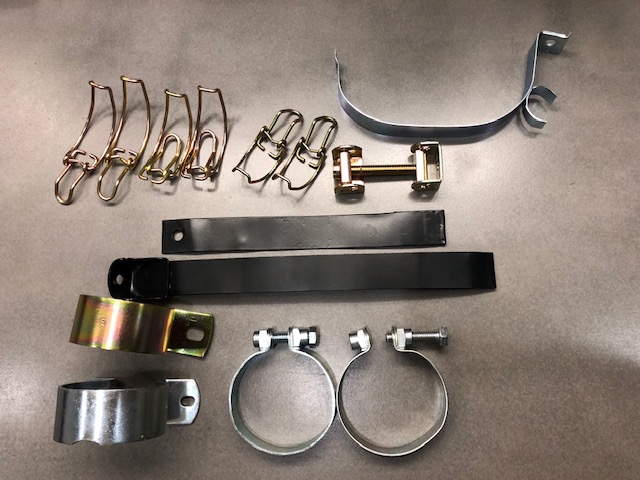
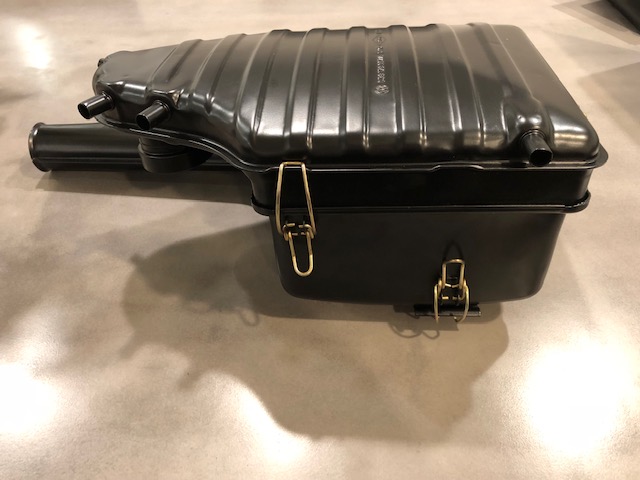
Posted by: bbrock Nov 20 2018, 09:51 PM
Are you familiar with the spirit lines that Navajo weavers weave into the edge of their rugs? A little flaw that allows the soul that the weaver put into the work to find a path home so it isn't trapped. Your car is so perfect, you might want to think about adding a spirit line.
Posted by: 914_7T3 Nov 24 2018, 06:45 PM
Are you familiar with the spirit lines that Navajo weavers weave into the edge of their rugs? A little flaw that allows the soul that the weaver put into the work to find a path home so it isn't trapped. Your car is so perfect, you might want to think about adding a spirit line.
@http://www.914world.com/bbs2/index.php?showuser=20845 I am now! I've got a few spirit lines on the car, just not posting any close ups of those.

Love the pics on your wiring harness, very well done!
Posted by: 914_7T3 Nov 24 2018, 07:22 PM
Cleaned up and installed the oil cooler bracket yesterday on the rebuild.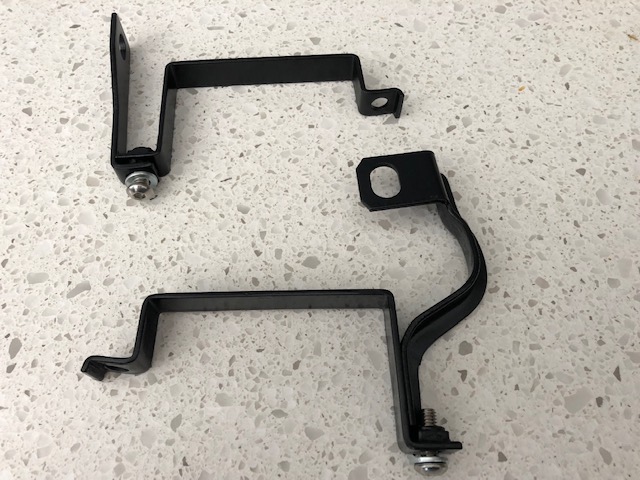
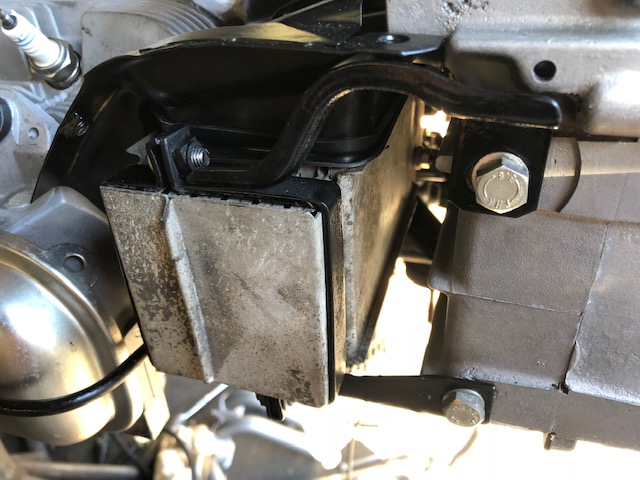
Alternator is now attached with the new harness from @http://www.914world.com/bbs2/index.php?showuser=3348 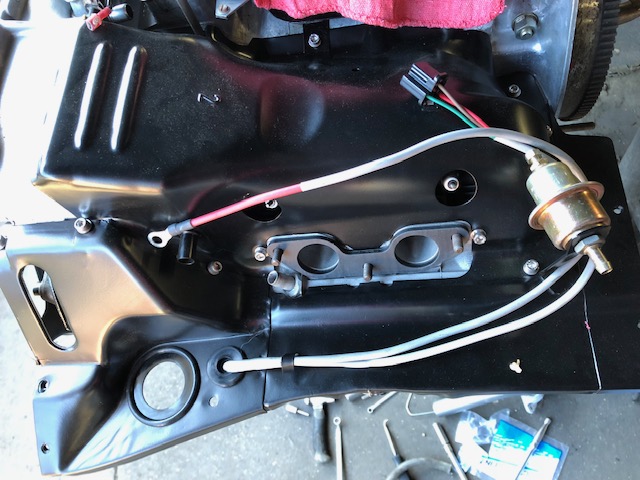
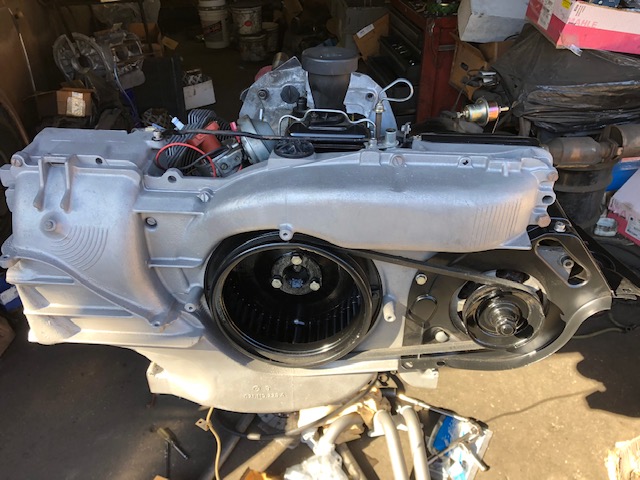
NOS Bosch wiper arms, washer jets and fuel pump rubber boot arrived from Bug City in CT where I found my NOS Camshaft last year.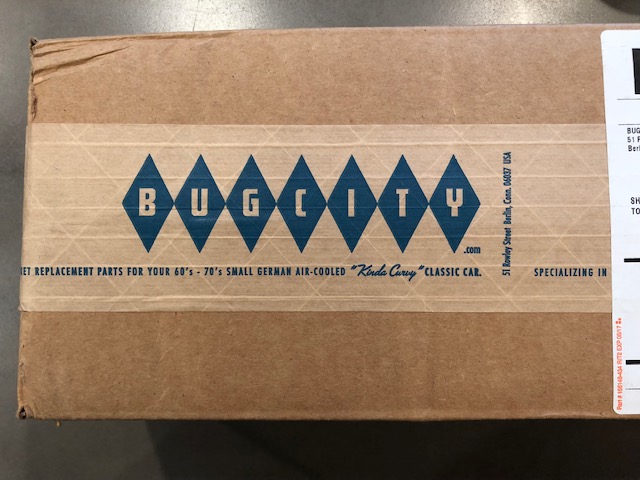
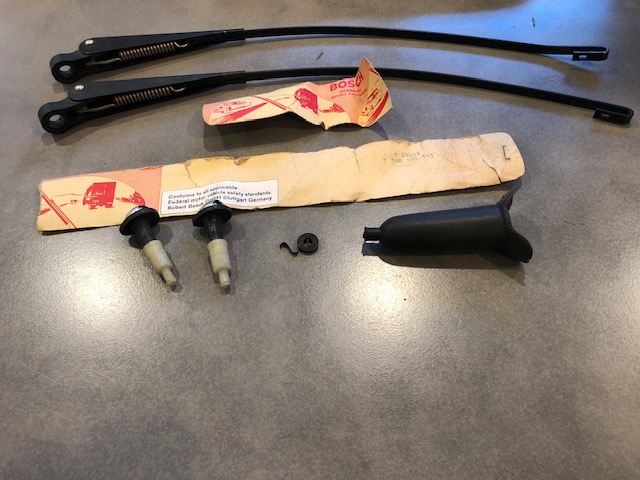
Also received the much needed NOS Axle hardware from @http://www.914world.com/bbs2/index.php?showuser=3457 This stuff is labelled Made in W Germany and dates back to the '80s 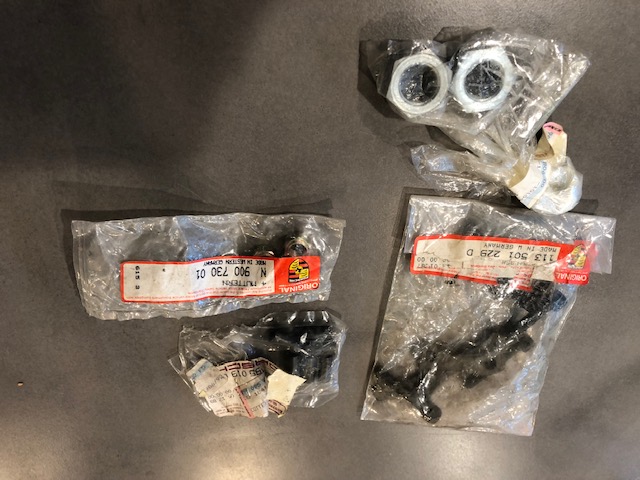
Posted by: Larmo63 Nov 24 2018, 07:32 PM
Uhhhh, those are supposed to be KAMAX bolts holding everything together.
I'm calling the concours weenies and telling on you.
Posted by: 914_7T3 Nov 24 2018, 07:55 PM
Uhhhh, those are supposed to be KAMAX bolts holding everything together.
I'm calling the concours weenies and telling on you.
Shhhhhhhhhhhhhhhhhhhhhhhhhhhhhhhhhhhhhhhh!
Posted by: Mikey914 Nov 26 2018, 12:33 PM
How did you like the fit of the new oil cooler gasket. It should grab the sheet metal better to stay on while installing.
Attached image(s)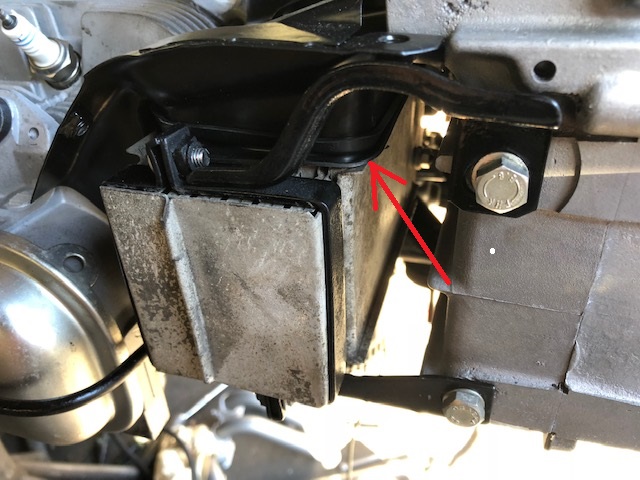
Posted by: 914_7T3 Dec 7 2018, 08:45 PM
After a 14 month slumber, GA004853 roared back to life and ran nice and smooth. New Sachs Clutch kit has been installed & balanced and she's off the motor stand. Now getting ready to re-install!
Some before and after pics for dramatic effect! 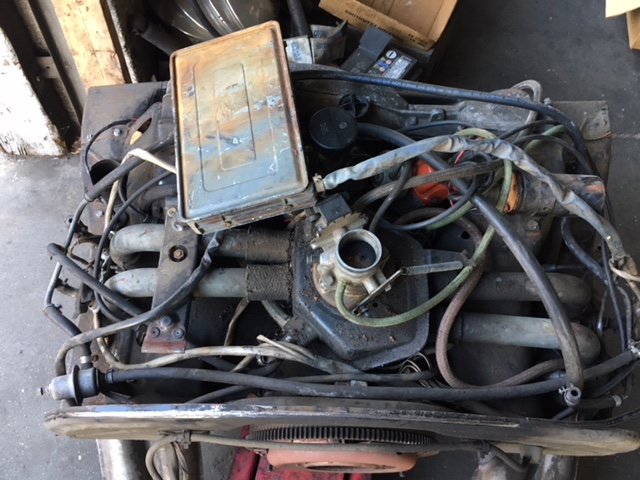
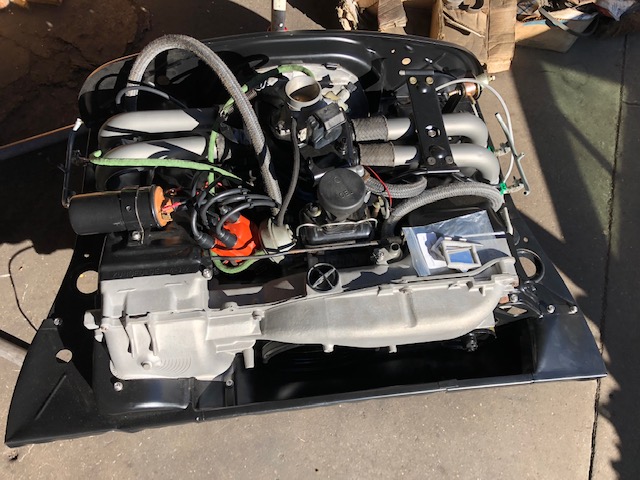
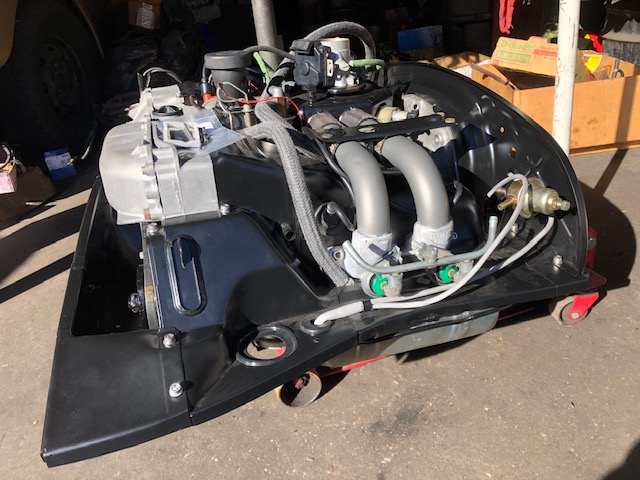

Posted by: bbrock Dec 7 2018, 08:49 PM
SWEET!!!!
Posted by: mepstein Dec 7 2018, 08:56 PM
Posted by: Dion Dec 7 2018, 09:11 PM
Cleaned up and installed the oil cooler bracket yesterday on the rebuild.
Alternator is now attached with the new harness from @http://www.914world.com/bbs2/index.php?showuser=3348
NOS Bosch wiper arms, washer jets and fuel pump rubber boot arrived from Bug City in CT where I found my NOS Camshaft last year.
Also received the much needed NOS Axle hardware from @http://www.914world.com/bbs2/index.php?showuser=3457 This stuff is labelled Made in W Germany and dates back to the '80s
“Holy time warp Batman” that’s great. A beautiful flat 4!
Posted by: 914 Dec 7 2018, 09:45 PM
Jeffery,
Congratulations.. Great Build..
914/Alan
Posted by: DRPHIL914 Dec 8 2018, 12:52 PM
looking great!! its nice to meet goals and hit milestones! you know its getting close when the motor goes in!
make sure you have good ground on the alternator! i found that out the hard way after it was all in and done. if paint on the fan housing is too thick it wont ground well thru the case .
Where did you get the NOS wiper assemblies?? i would love to source a set .
this is going to be a very nice , top 10 restoration for sure!
Posted by: TravisNeff Dec 8 2018, 12:56 PM
That engine cleaned up nicely!
Posted by: 914_7T3 Dec 9 2018, 08:24 PM
Dash, Wiper Linkage, Fresh Air Box, Vents & Control Cables were installed yesterday as part of the SoCal Tech Session.
Details can be found in the below link to a separate thread:
http://www.914world.com/bbs2/index.php?showtopic=334539
Once again before and after pics for dramatic effect!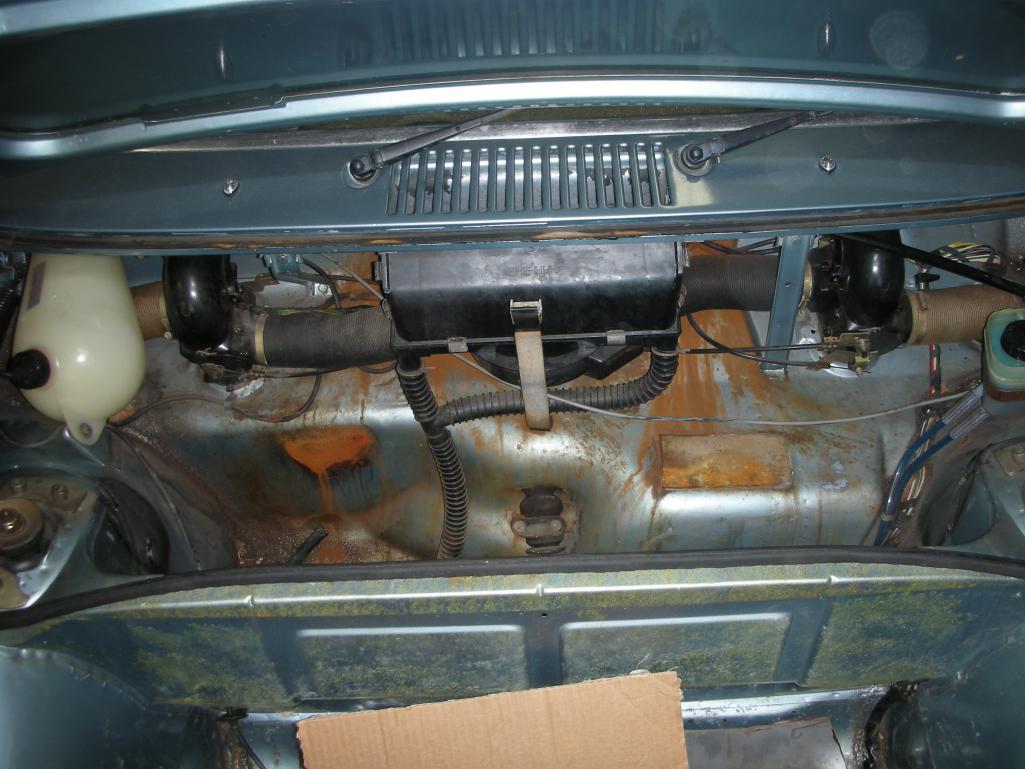
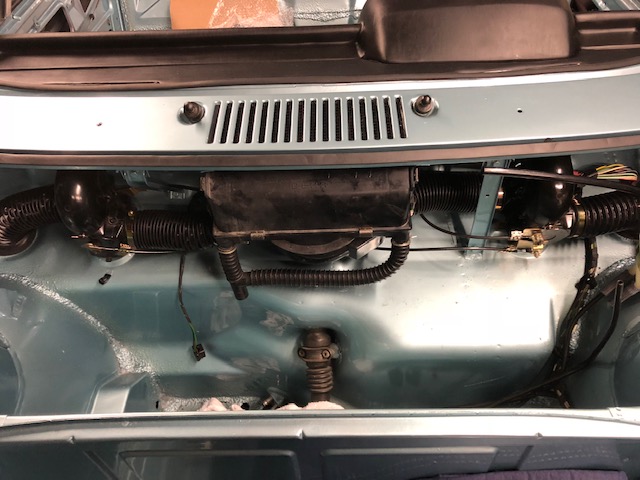
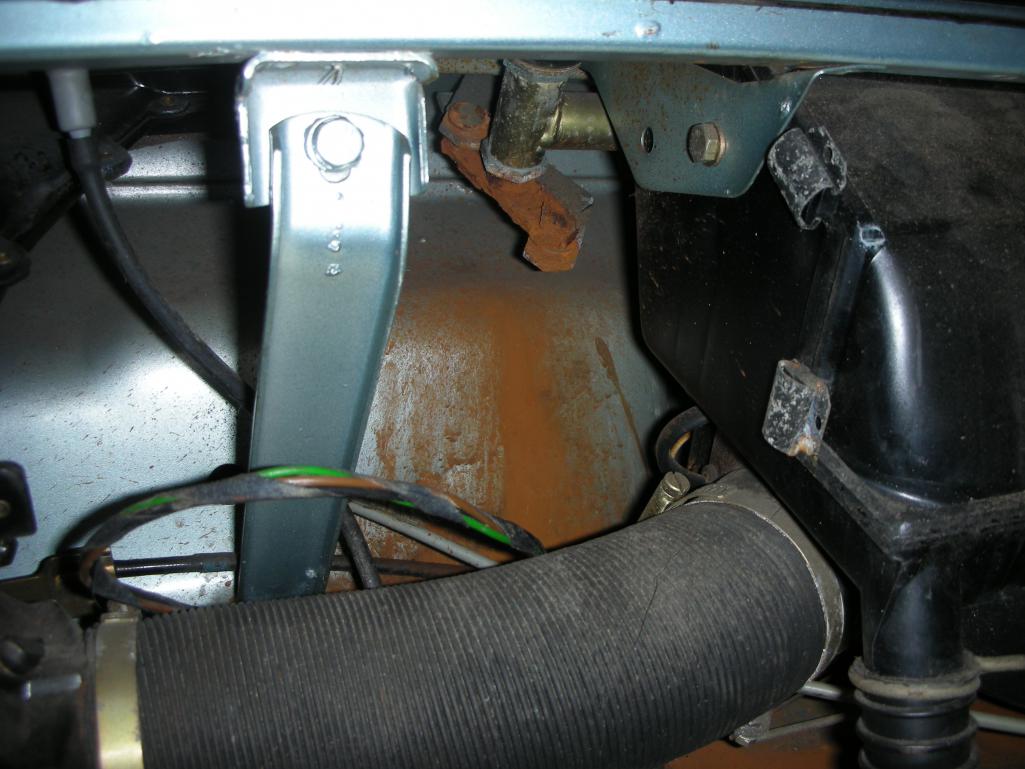
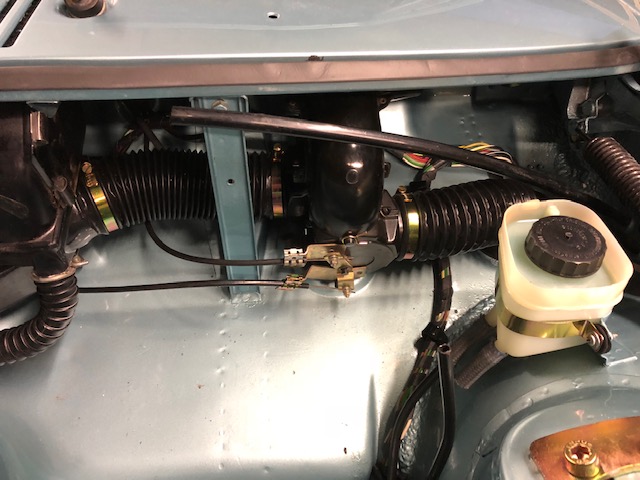
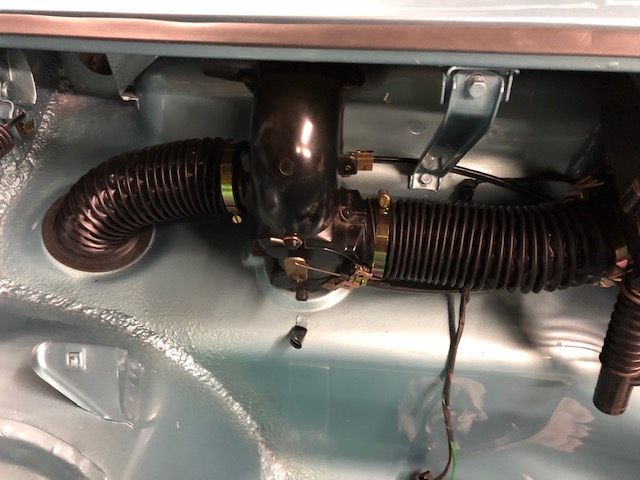
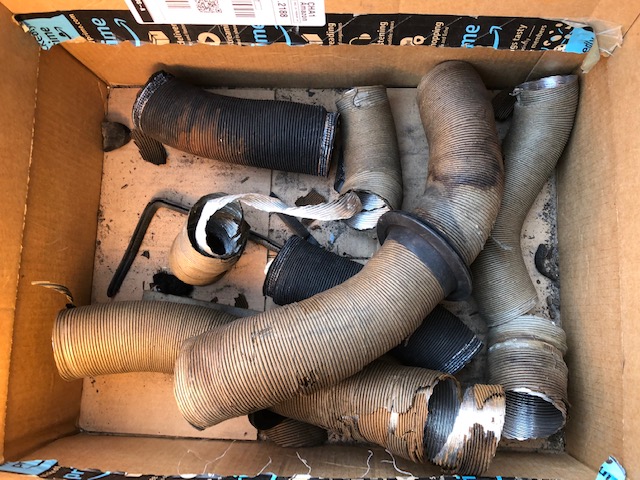
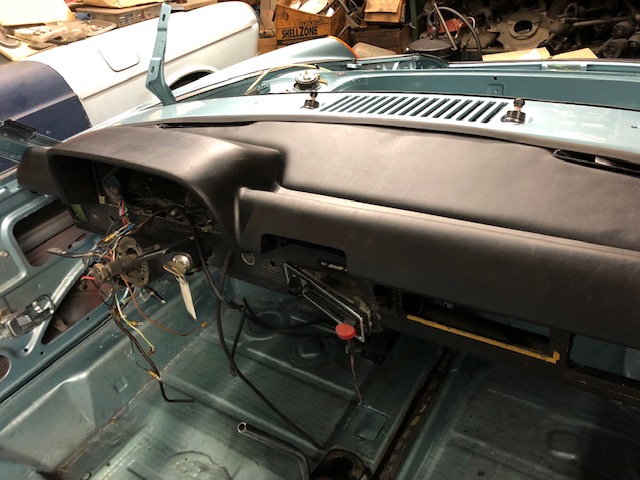
Now the drive train and fuel system can be installed along with the windshield. I hope things will move quickly from this point forward!
Posted by: 914_7T3 Jan 27 2019, 05:15 PM
Finally received the 50mm diameter vent to mixing box hoses from @http://www.914world.com/bbs2/index.php?showuser=3348 along with the wiper hose kit. Fuel tank that I picked up from @http://www.914world.com/bbs2/index.php?showuser=7414 is now installed as well. Happy to be finally done with the frunk junk aspect of this project!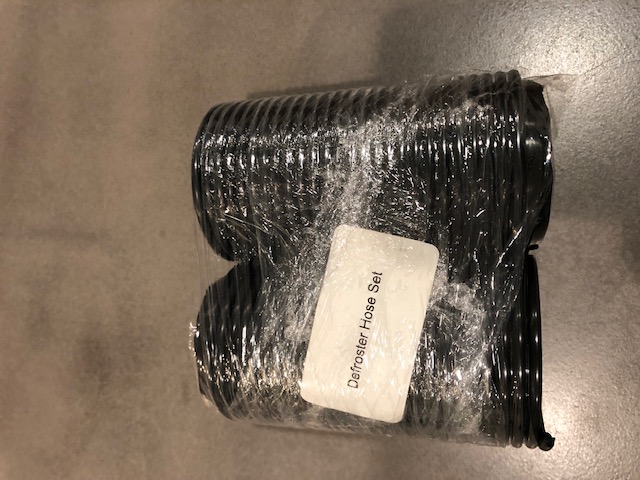
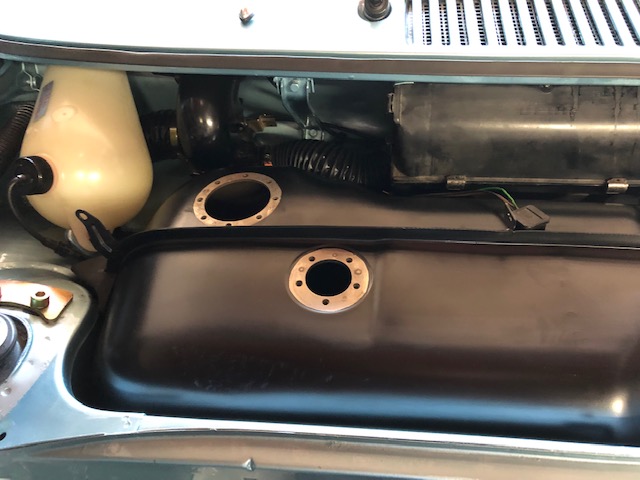
Hopefully drivetrain goes in soon and then the the car gets back home for the final push.
Posted by: Mikey914 Jan 28 2019, 12:21 AM
Dry nic, I love it when a project comes together.
Posted by: dr914@autoatlanta.com Jan 28 2019, 09:34 AM
beautiful job! Your car's brother just arrived here Saturday for a complete reassembly. Do not particularly like the polish on the wheels, but that was the owner's choice.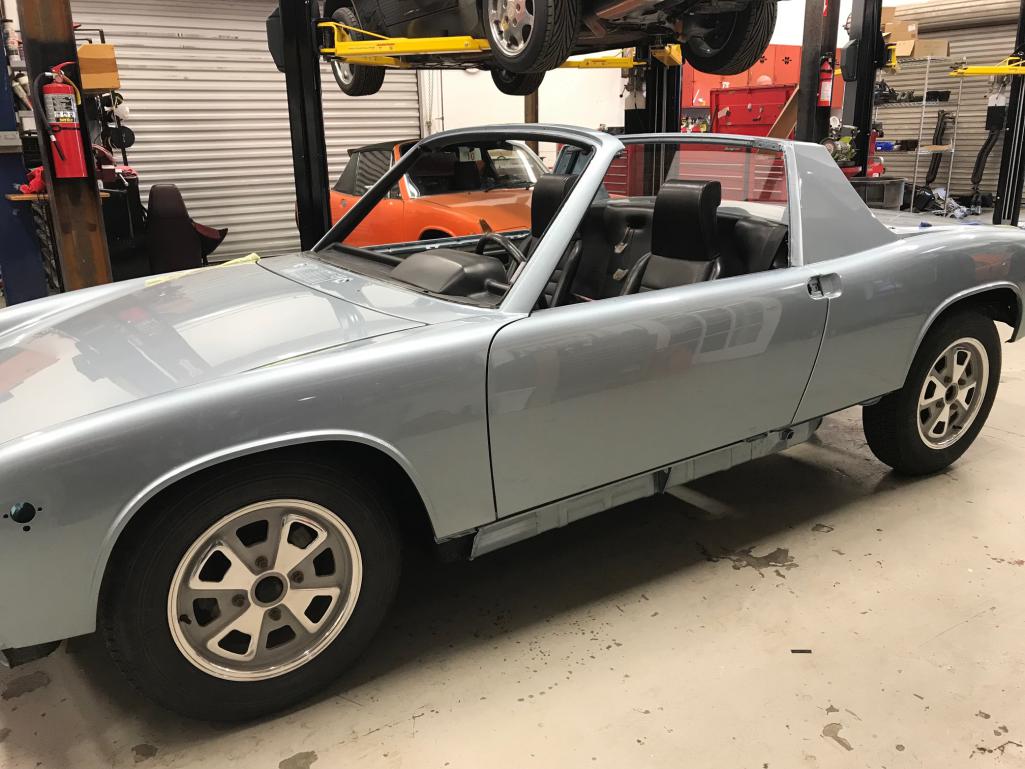
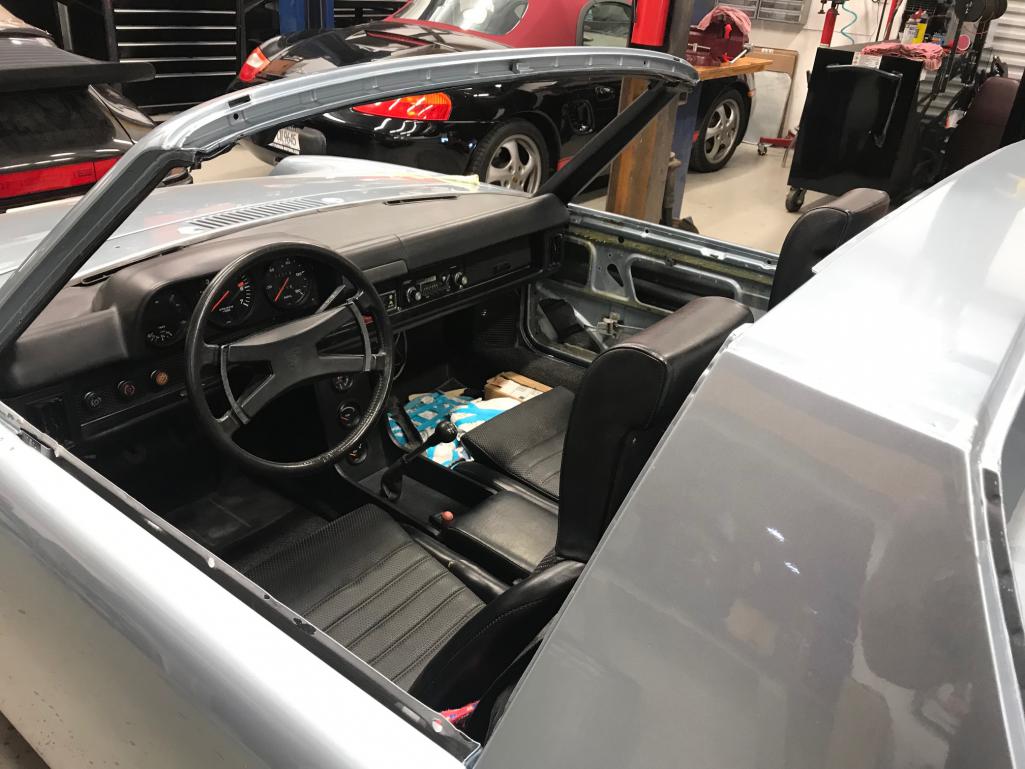
Posted by: 914_7T3 Jan 31 2019, 06:24 PM
Scored a set of NOS Half Shafts yesterday! Original Boxes were still sealed too! 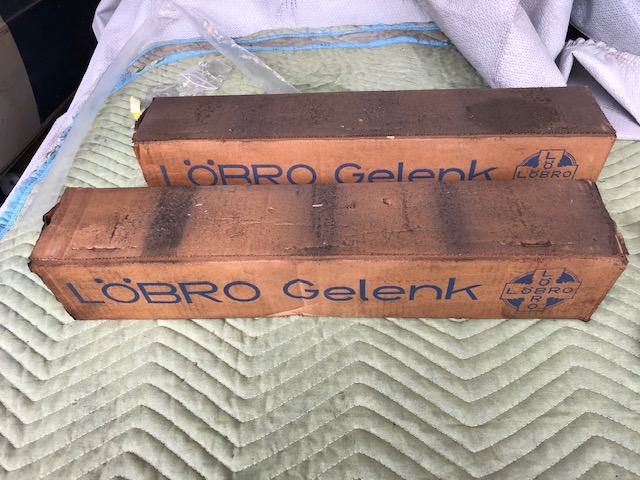
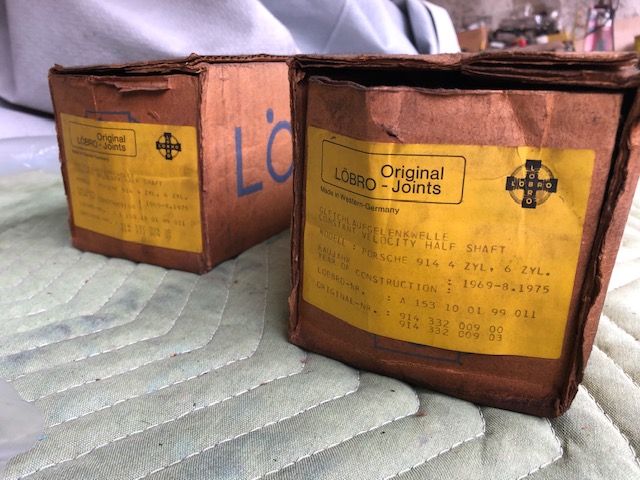
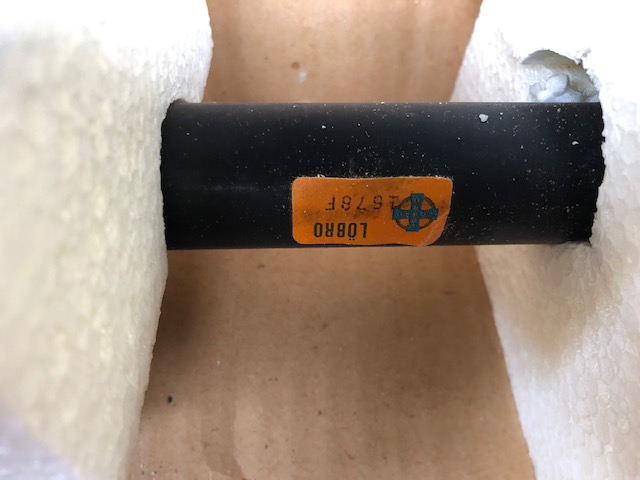
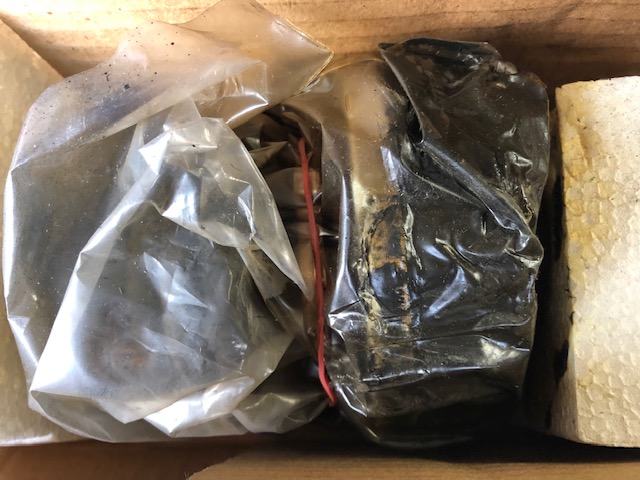
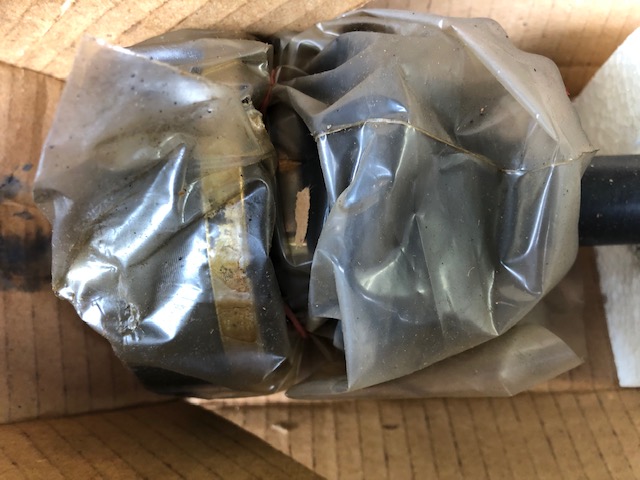
Posted by: mepstein Jan 31 2019, 06:27 PM
Posted by: 914_7T3 Feb 9 2019, 04:39 PM
Drive Train Reinstalled With a Before and After Pic!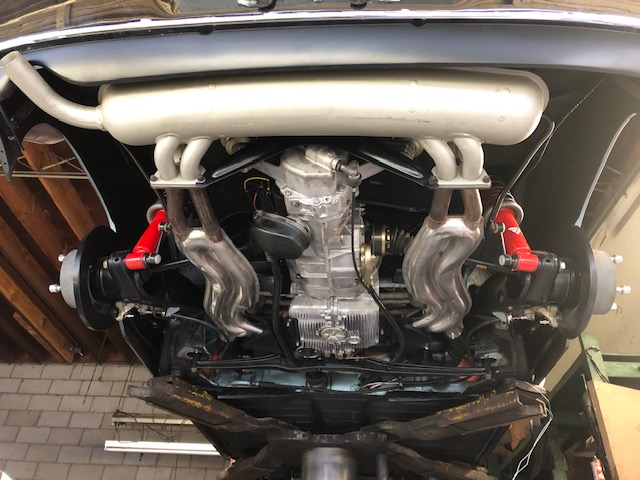


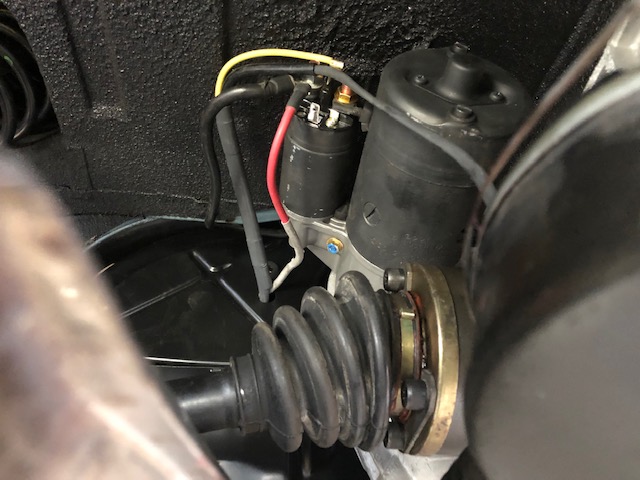

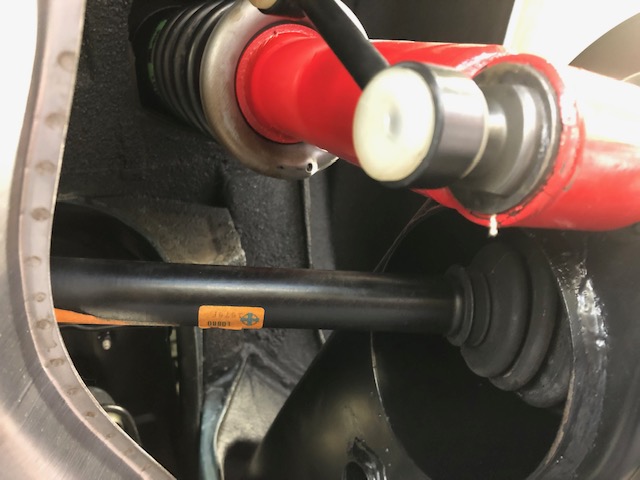
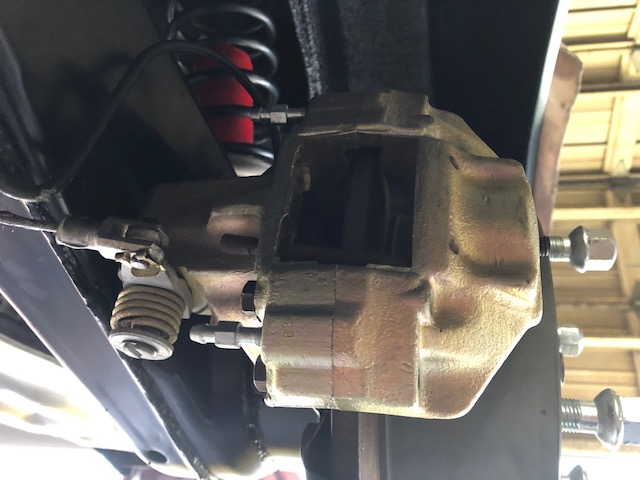
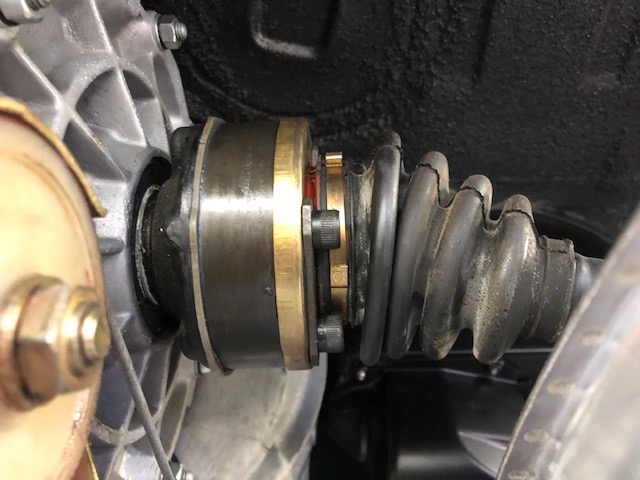
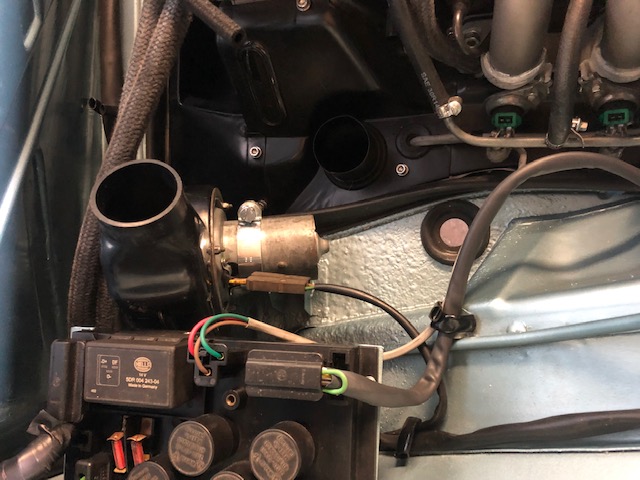
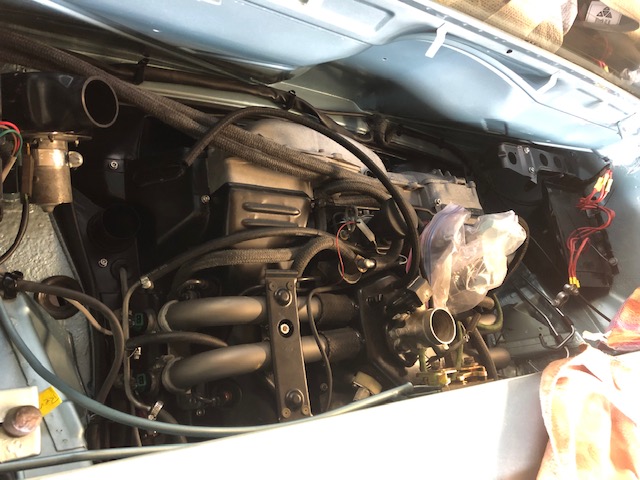
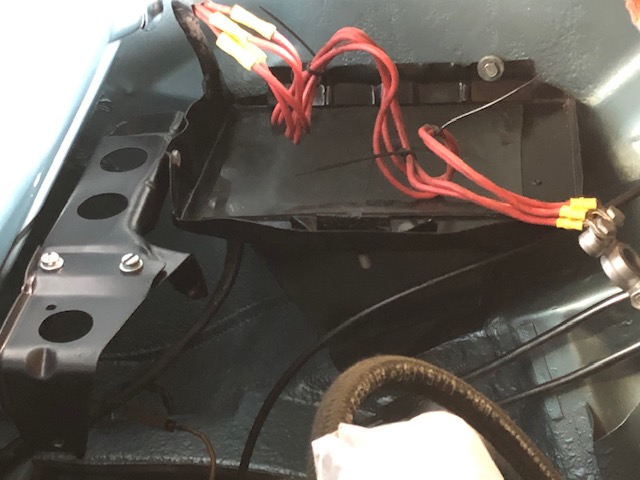
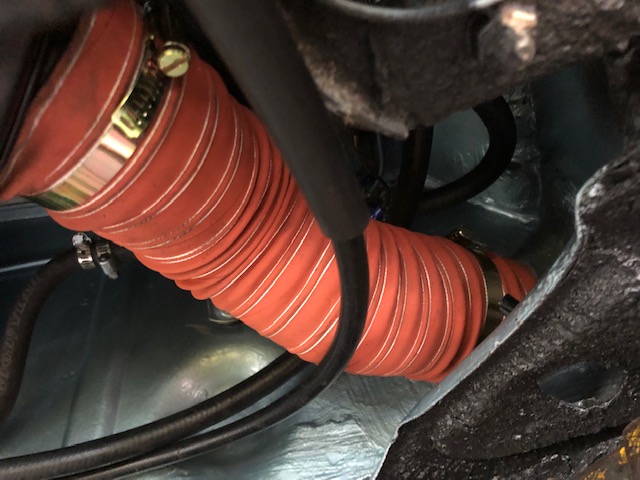
Posted by: 914_7T3 Feb 23 2019, 02:06 PM
Transmission leak fixed by swapping out the Speedo Angle Drive, Seal & Gasket with OEM VDO unit.
Acquired a really clean AAR & additional NOS Parts from @http://www.914world.com/bbs2/index.php?showuser=3457 & AASE Sales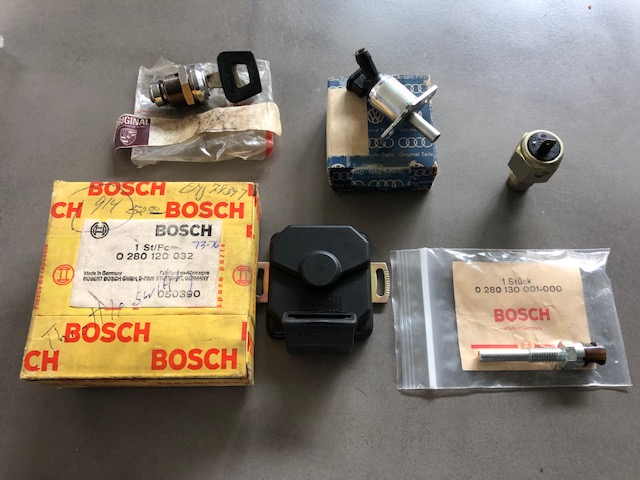
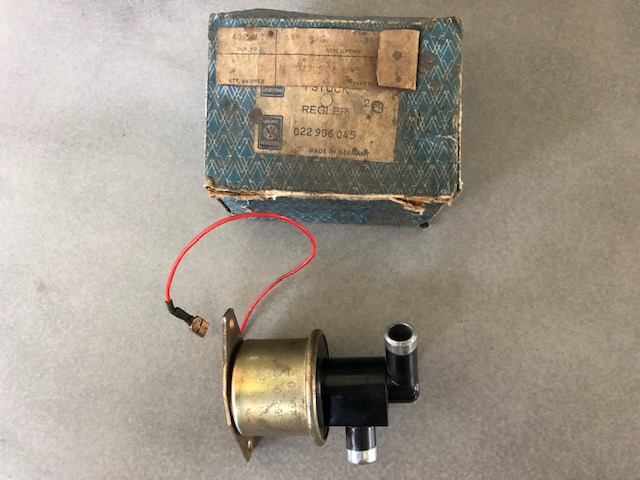
and this NOS driver's side seatbelt from @http://www.914world.com/bbs2/index.php?showuser=7418 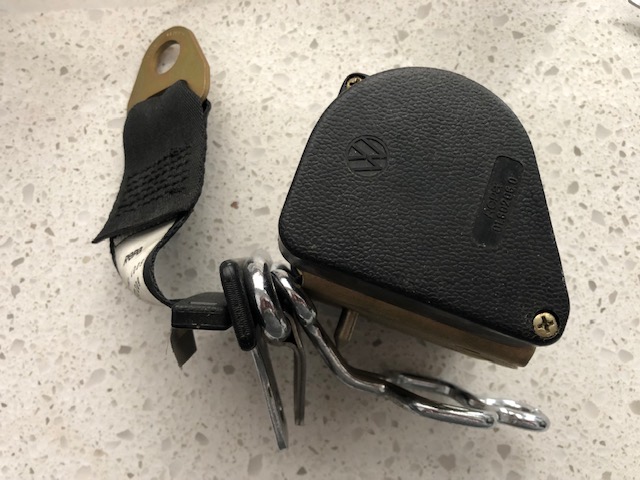
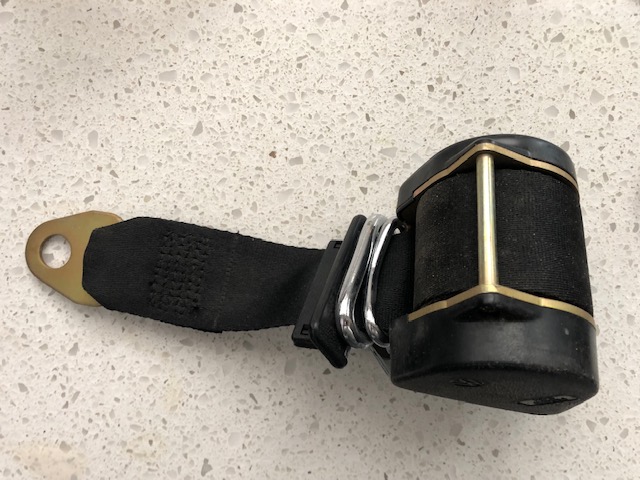
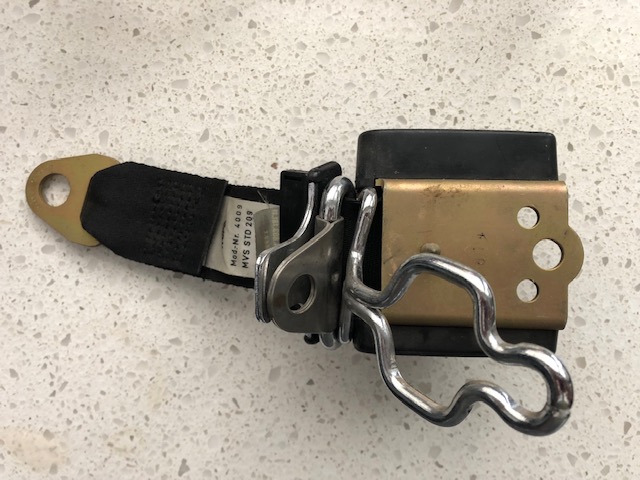
Posted by: 914_7T3 Mar 4 2019, 08:59 PM
All the mechanical pieces parts are installed. Just need to dial it in!
Before & After!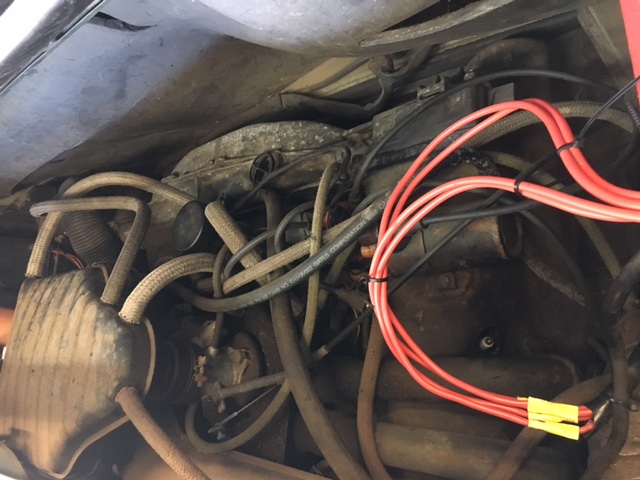
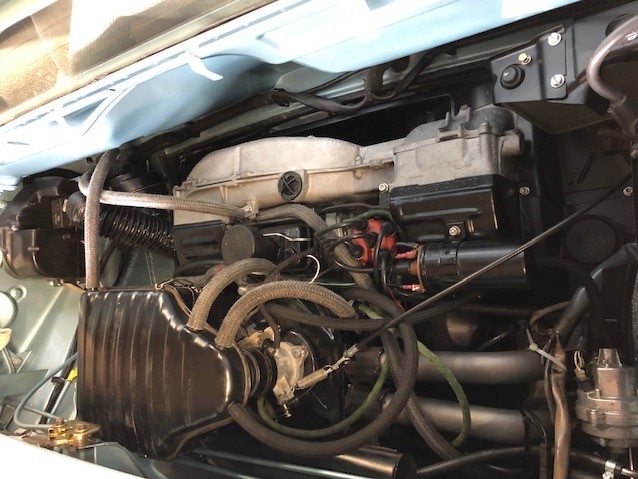
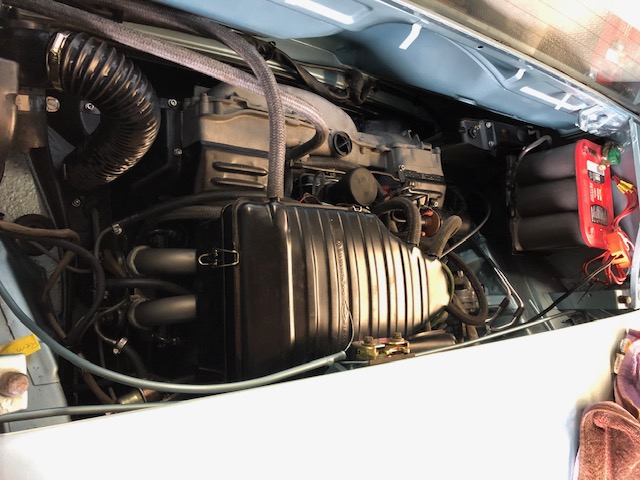
Posted by: bbrock Mar 4 2019, 09:30 PM
That looks fabulous! Wait... uh, oh... is that tin missing a "621" stamp?
Posted by: 914_7T3 Mar 4 2019, 11:25 PM
That looks fabulous!
Wait... uh, oh... is that tin missing a "621" stamp? @http://www.914world.com/bbs2/index.php?showuser=20845 The 621 is only visible under ultraviolet light along with the Kamax markings on some of the bolts. However, you'll need to come out to Cali sometime to verify firsthand if the "35" marking is present on the underside of the engine bar. In fact, please consider joining us at the WCR, we'd love to have you!
Posted by: 914_7T3 May 4 2019, 11:37 PM
Powder Coated Seat Frames with cleaned up hardware and new bushings from @http://www.914world.com/bbs2/index.php?showuser=3348 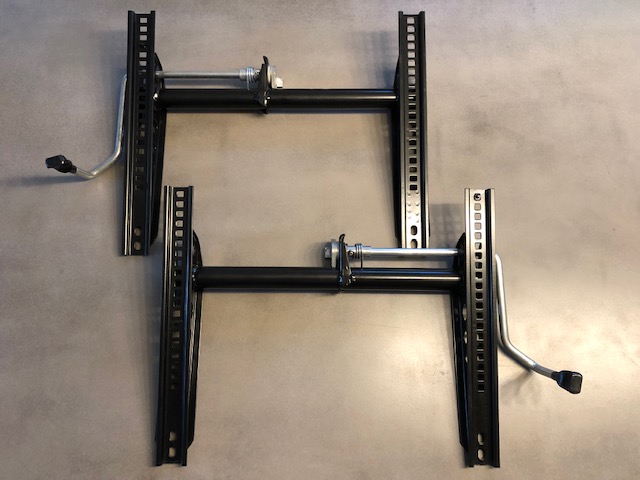
Hope to have the repainted seat rail handles wet sanded and fininshed up tomorrow!
Posted by: 914_7T3 May 4 2019, 11:49 PM
Today's project was refurbing the tail lights. Spent the afternoon cleaning and wet sanding the housings by hand with 1,000 grit progressively up to 7,000 grit. After a coat of wax, installed new German "Jahne" bulbs for the 21W double and single filaments.
Installed the set of Hellas lenses that I bought from @http://www.914world.com/bbs2/index.php?showuser=13069 some time ago and was surprised by how nice they turned out.
Before & After!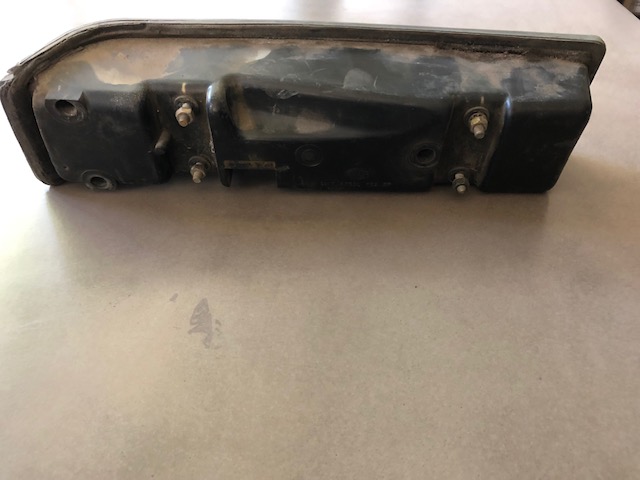
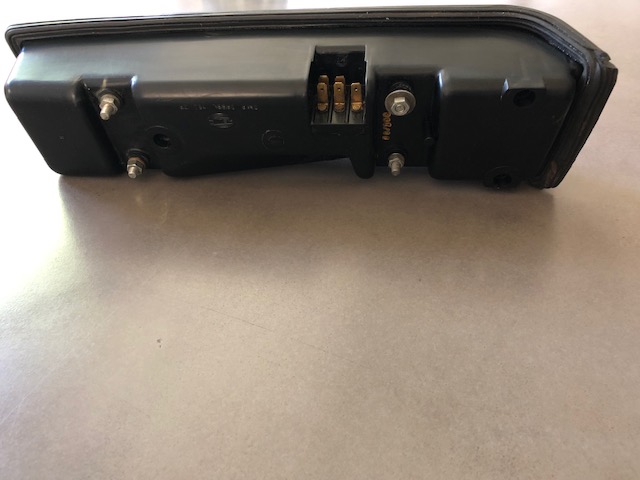
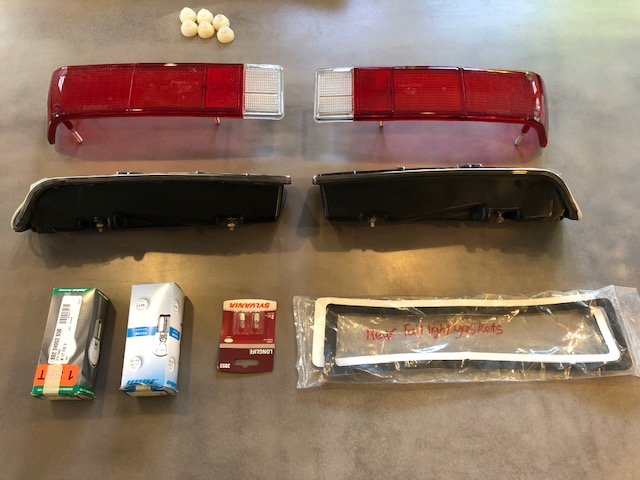
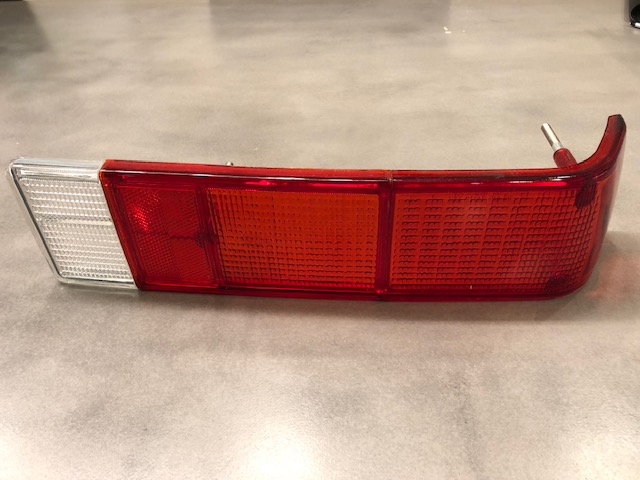
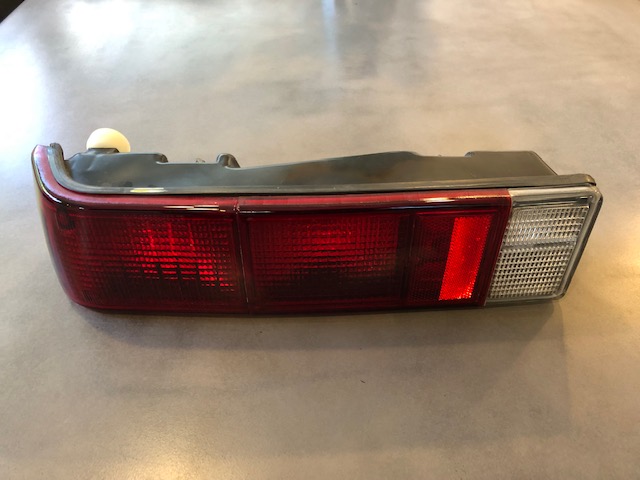
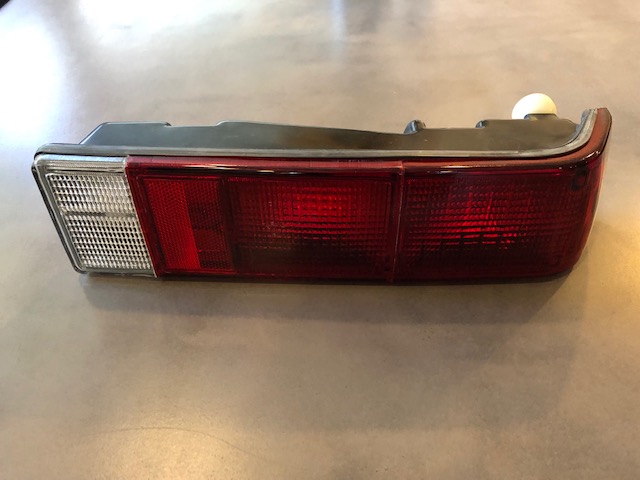
Posted by: FlacaProductions May 14 2019, 08:59 PM
After meeting Jeffrey yesterday (he kindly passed on a washer fluid tank that my 74 is missing..) I was compelled to read all 17 pages. What a journey of dedication and commitment. Wow. I'm lucky enough to live close by and look forward to seeing this on the road very soon. Did i say wow already? (and Jeffrey - if you ever need a hand on anything, just yell...)
Posted by: 914_7T3 May 15 2019, 01:33 PM
After meeting Jeffrey yesterday (he kindly passed on a washer fluid tank that my 74 is missing..) I was compelled to read all 17 pages. What a journey of dedication and commitment. Wow. I'm lucky enough to live close by and look forward to seeing this on the road very soon. Did i say wow already? (and Jeffrey - if you ever need a hand on anything, just yell...)
Thanks for your positive feedback, but its more like a journey into insanity!

Posted by: mepstein May 15 2019, 02:06 PM
All you guys with perfectly restored cars are going to have to find a driver so you can go out and have fun.
And I’m not knocking what you are doing in the least. It’s a beautiful car.
Posted by: horizontally-opposed May 15 2019, 03:23 PM
This is really going to be one of the prettiest, most desirable -4s out there. Wow.
And there are a lot of great 4s out there. Marathon with those wheels really pops.
Some of the restoration/resurrection projects of late are just very cool to see.
Posted by: raynekat May 15 2019, 05:04 PM
Yeah.. .great job on those rear housings. Your entire resto of your rear lights look awesome.
Posted by: 914_7T3 May 17 2019, 10:45 AM
Original Style Speed Nuts, I must be Nuts! 
Can't deal with the gooey half metal hex style speed nuts so picked up these for my rear badges & grill lettering. This project is officially on hold until after the WCR.

Posted by: DRPHIL914 May 17 2019, 10:52 AM
Nice work! Too bad Okteenerfest is so far for you , would love to see this in person
Posted by: ndfrigi May 17 2019, 11:02 AM
Hey Jeffrey, is ur car goin to finish before WCR?
Posted by: 914_7T3 May 17 2019, 11:03 AM
Hey Jeffrey, is ur car goin to finish before WCR?
Negative.................

Posted by: ndfrigi May 17 2019, 11:11 AM
Hey Jeffrey, is ur car goin to finish before WCR?
Negative.................
Oh no! ur 914 should be on that event!
Posted by: Superhawk996 May 18 2019, 08:33 AM
Original Style Speed Nuts, I must be Nuts!
Can't deal with the gooey half metal hex style speed nuts so picked up these for my rear badges & grill lettering. This project is officially on hold until after the WCR.
For some reason I don't recognize these parts. You mention use on badges and grill lettering. I that the only place?
Dang - now I'm going to have to go look at my old engine grill off the original 73 I had (one of the surviving souvenirs from that car) that hangs on my rafters as decoration.
Just as a reminder - you don't need an interior to drive that puppy to WCR assuming you have the important mechanical bits sorted.
Posted by: rhodyguy May 18 2019, 09:34 AM
Where did you buy the speed nuts?
Posted by: Superhawk996 May 18 2019, 10:12 AM
Where did you buy the speed nuts?
Looks like AASE sales according to the bag. AASE always seems to be a decent source for obscure bits and correct NOS stuff like this.
I did check my original engine grille. Sure enough these are the proper NOS style fasteners. Would have expected nothing less!
Funny to me the stuff that I've forgotten since I did my last 914. When I was done with that vehicle I pretty much had touched every nut, bolt and fastener. I find I'm now having to relearn stuff I once knew. I guess I'm getting old!
Posted by: bbrock May 18 2019, 12:42 PM
They're still available through Porsche.
Posted by: 914_7T3 May 18 2019, 03:50 PM
They're still available through Porsche.
These are Genuine Porsche, however they are made of plastic and not rubber as the originals were. Regardless, the hex style ones are a nightmare.
@http://www.914world.com/bbs2/index.php?showuser=10742 informed me that if you don't scrape off the rubbery material beyond just outside of the area that holds the pin that it heats up and oozes out all over the engine grill. There's no way I'm going to deal with that!
Posted by: 914_7T3 May 28 2019, 05:23 PM
Sunset Porsche comes through again. Truth be known that these Genuine Porsche Caps are closer to the @http://www.914world.com/bbs2/index.php?showuser=3348 version than the original 45 year old ones.
Therefore, I'll still be looking looking for a set of NOS caps.
Center Cap Update. Wasn't loving the finish on the New New Stock Porsche Caps, so they are going back. Another shout out to Sunset Porsche for taking them or a full refund 7 months later.
Solution was to refurb the 46 year old originals. They came out really nice considering. Only one of them has the lip that is not pronounced as the others 3, but its not as bad as the photo.
Before & After
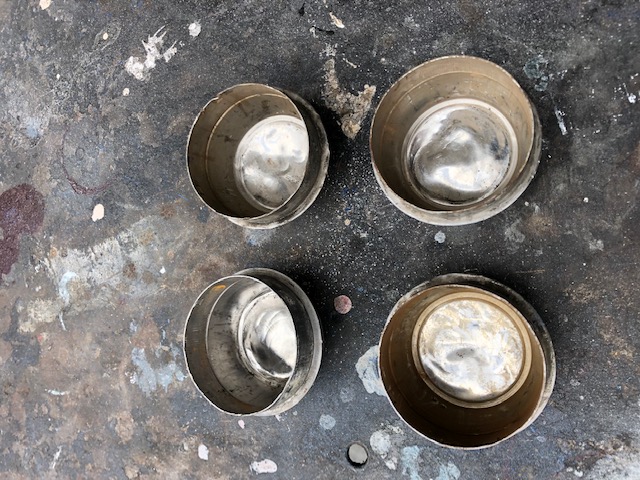
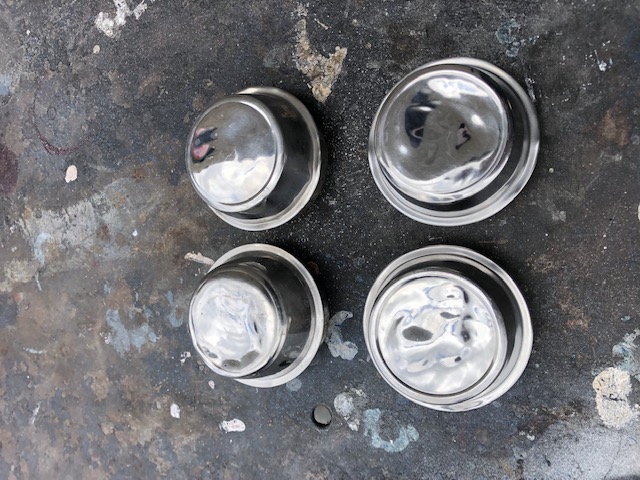
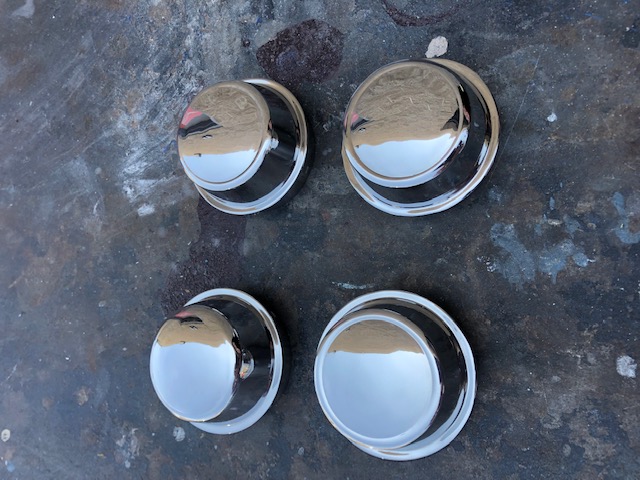
Posted by: bbrock May 28 2019, 06:17 PM
Those look fantastic! Can you share the process for refurbishing? I have a bag full of those I was going to try to rehab.
Posted by: 914_7T3 May 28 2019, 09:15 PM
Those look fantastic!
Can you share the process for refurbishing? I have a bag full of those I was going to try to rehab.@http://www.914world.com/bbs2/index.php?showuser=20845 The old fashioned way, very labor intensive. Hand straightened and triple polished!
Posted by: bbrock May 29 2019, 11:46 AM
Those look fantastic!
Can you share the process for refurbishing? I have a bag full of those I was going to try to rehab.@http://www.914world.com/bbs2/index.php?showuser=20845 The old fashioned way, very labor intensive. Hand straightened and triple polished!
What I'm wondering is if you used a hammer and dolly or some other method? I was thinking about having a billet turned to serve as a form to straighten them back out, but whatever you did worked so I would like to steal your secret!
Posted by: 914_7T3 May 29 2019, 12:20 PM
Those look fantastic!
Can you share the process for refurbishing? I have a bag full of those I was going to try to rehab.@http://www.914world.com/bbs2/index.php?showuser=20845 The old fashioned way, very labor intensive. Hand straightened and triple polished!
What I'm wondering is if you used a hammer and dolly or some other method? I was thinking about having a billet turned to serve as a form to straighten them back out, but whatever you did worked so I would like to steal your secret!
I sent them out to be done! However, there was a die that was sold on the 914 World classifieds last year. If you can find who purchased it, that would make it easier for sure.
Posted by: 914_7T3 Jul 15 2019, 07:24 PM
Duplicate Post from the below thread
http://www.914world.com/bbs2/index.php?showtopic=339088&st=0
Just want to update the timeline of my build.
Another Great Day in the SoCal 914 Community @http://www.914world.com/bbs2/index.php?showuser=16669 's
Thanks for opeining your home garage to everyone:
@http://www.914world.com/bbs2/index.php?showuser=17068
@http://www.914world.com/bbs2/index.php?showuser=22979
@http://www.914world.com/bbs2/index.php?showuser=21151
@http://www.914world.com/bbs2/index.php?showuser=21290
Special thanks to @http://www.914world.com/bbs2/index.php?showuser=10742 for spear heading the non-spark issue on the '73 resto-project
Many thanks to
@http://www.914world.com/bbs2/index.php?showuser=21596
@http://www.914world.com/bbs2/index.php?showuser=13474
for guest wrenching and
@http://www.914world.com/bbs2/index.php?showuser=18255 for the special guest appearance in getting her fired up to end the day!
So what if we burnt up a couple of PerTronix Electronic Injections and went back to points! Swapped the ignition harness back to OEM, coil, starter and cleaned up some grounds.
So awesome to have the engine finally running in the car! Another milestone acheived for sure!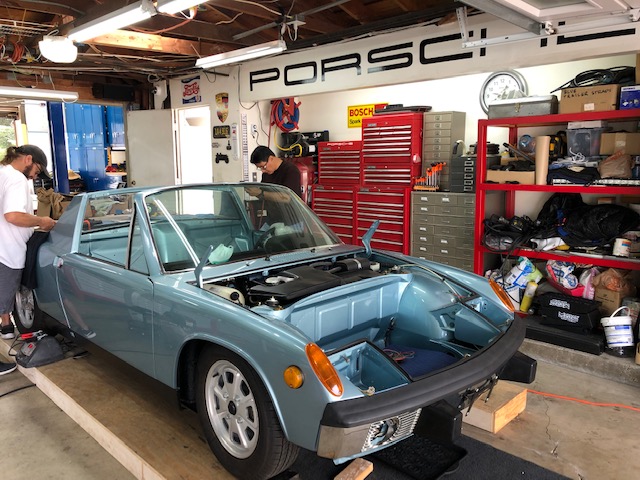
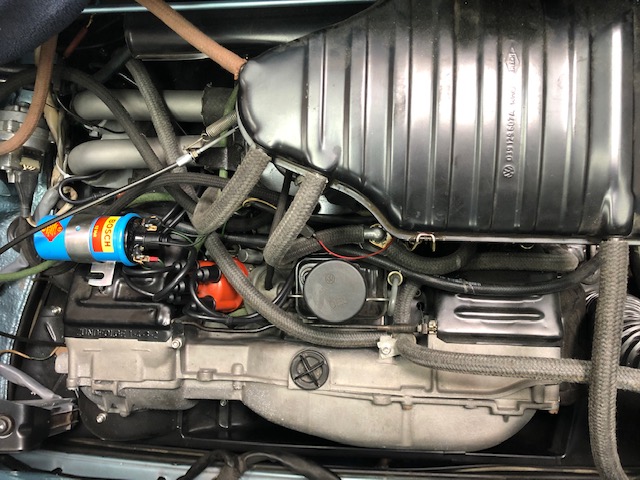
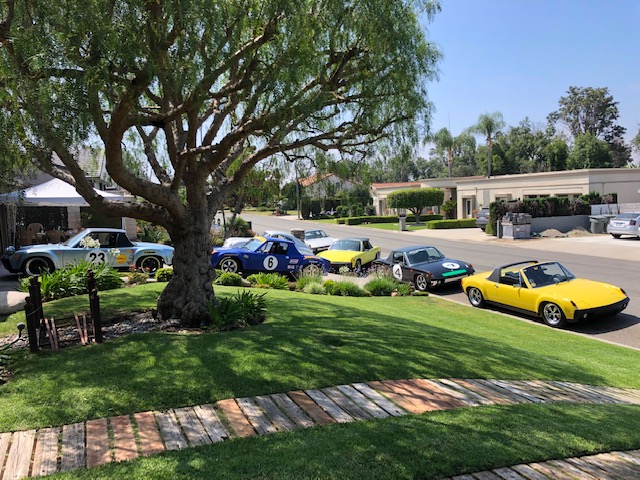
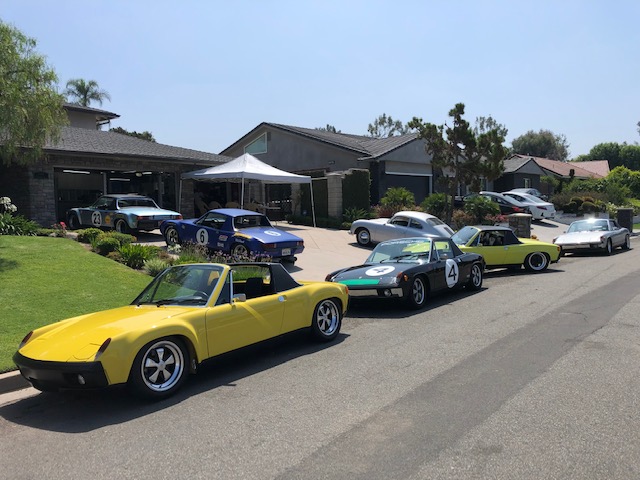
Posted by: mepstein Jul 15 2019, 08:07 PM
Are these washers upside down. I can never remember.
Attached image(s)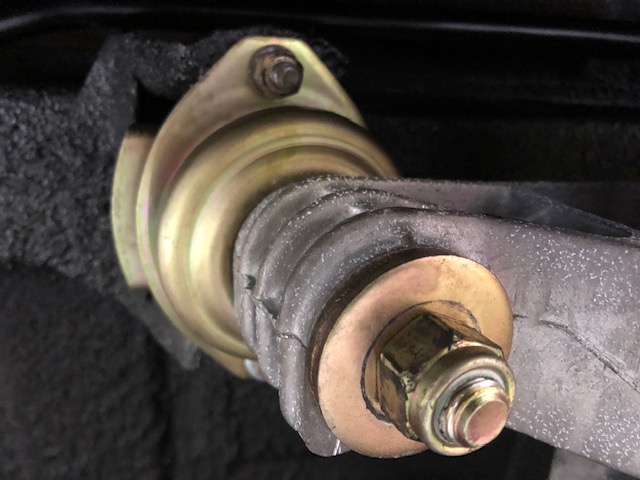
Posted by: 914_7T3 Jul 15 2019, 09:18 PM
Are these washers upside down. I can never remember.
Based on the black ring around it, I would say so. We are going to get it up on the lift this weekend and ask @http://www.914world.com/bbs2/index.php?showuser=10742 to walk around and advise. There are some minor things to this build that need to be revisited including which way the bolts orient from the heat exchangers to the muffler among others. The hot start relay was thankfully removed as well this weekend.
It's a process.......
Posted by: mepstein Jul 15 2019, 09:32 PM
I think it goes the opposite of the way it looks like it should go.
Attached thumbnail(s)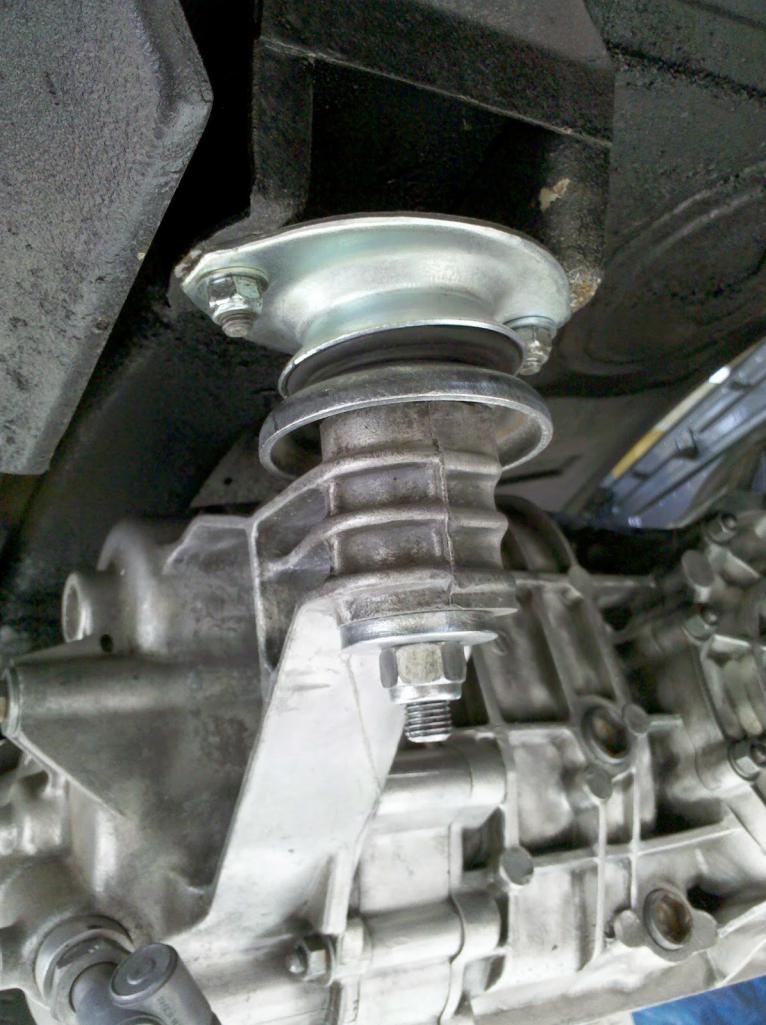
Attached image(s)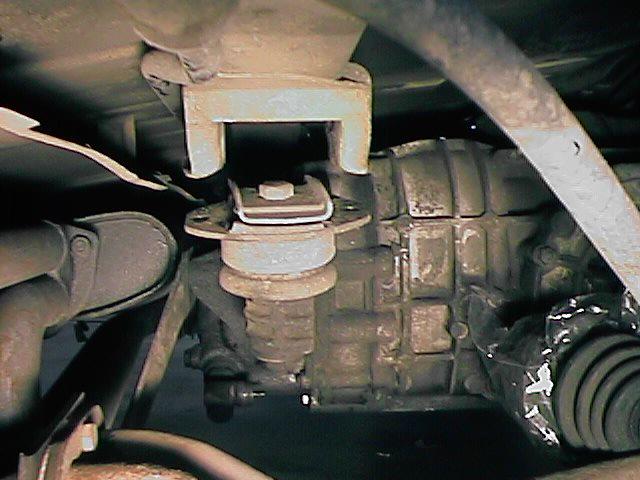
Posted by: 914_7T3 Jul 15 2019, 09:51 PM
I think it goes the opposite of the way it looks like it should go.
Now I see it!
Posted by: bbrock Jul 15 2019, 10:27 PM
I think it goes the opposite of the way it looks like it should go.
There are a couple of pics that you have to look carefully, but can see them oriented with the cup down.Congrats on getting her running! Major milestone
Did you remove the hot start relay for originality, or was there some other reason?
Posted by: 914_7T3 Jul 15 2019, 11:41 PM
I think it goes the opposite of the way it looks like it should go.
There are a couple of pics that you have to look carefully, but can see them oriented with the cup down.Congrats on getting her running! Major milestone
Did you remove the hot start relay for originality, or was there some other reason?
My understanding is that it accomplishes nothing unless you are cheating a voltage problem elsewhere, so why not just fix the problem? As for originality, did you even have to ask?
Posted by: bbrock Jul 16 2019, 08:07 AM
As for originality, did you even have to ask?
That part was a given
I'm going to add a relay to mine. I've always thought running all those amps all the way up the wire harness and through the trouble-prone ignition switch was bad engineering. Plus, I think the relay will be a nice compliment for my carbs
Posted by: Cairo94507 Jul 16 2019, 08:37 AM
Your car looks fantastic. You have the right people working on it too. I would love to make it to one of Oscar's gatherings one of these times.
Posted by: 76-914 Jul 16 2019, 10:00 AM
As for originality, did you even have to ask?
That part was a given
I'm going to add a relay to mine. I've always thought running all those amps all the way up the wire harness and through the trouble-prone ignition switch was bad engineering. Plus, I think the relay will be a nice compliment for my carbs You are correct. 50 years and several improvements to the 914. Most are widely excepted. But not this one. Stigmas can linger. Bosche seemed to think it was a good improvement as they make a kit to do this. If this kind of thinking ever infects the Plumbing Industry we'll be working with cast iron drains and galvanized water lines again.
Your car looks great. Don't park in any commercial parking areas unless you have some touch up paint!
Posted by: 914_7T3 Jul 16 2019, 05:30 PM
As for originality, did you even have to ask?
That part was a given
I'm going to add a relay to mine. I've always thought running all those amps all the way up the wire harness and through the trouble-prone ignition switch was bad engineering. Plus, I think the relay will be a nice compliment for my carbs You are correct. 50 years and several improvements to the 914. Most are widely excepted. But not this one. Stigmas can linger. Bosche seemed to think it was a good improvement as they make a kit to do this. If this kind of thinking ever infects the Plumbing Industry we'll be working with cast iron drains and galvanized water lines again.
Your car looks great. Don't park in any commercial parking areas unless you have some touch up paint! Commercial Parking Areas???
Other than my garage, local canyon roads, Cars & Coffee and local Porsche Events this car isn't going anywhere!
Posted by: 914_7T3 Jul 16 2019, 05:32 PM
Your car looks fantastic. You have the right people working on it too. I would love to make it to one of Oscar's gatherings one of these times.
Thanks Michael! Hopefully, we can drive some break-in miles together before yours goes back up to NorCal!
Posted by: 914_7T3 Jul 16 2019, 05:34 PM
As for originality, did you even have to ask?
That part was a given
I'm going to add a relay to mine. I've always thought running all those amps all the way up the wire harness and through the trouble-prone ignition switch was bad engineering. Plus, I think the relay will be a nice compliment for my carbs @http://www.914world.com/bbs2/index.php?showuser=20845 Let me know if you want mine, its in "like new condition". Trade you for some K Stamped Suspension bits and a 621 Stamped piece of engine tin!
Posted by: Cairo94507 Jul 17 2019, 07:06 AM
Now that would be a blast.
Posted by: 914_7T3 Jul 24 2019, 10:47 PM
Spent last Saturday with @http://www.914world.com/bbs2/index.php?showuser=21151 & @http://www.914world.com/bbs2/index.php?showuser=16669 working on the car and making slow but steady progress. Got some small stuff out of the way before getting back to some of the more pressing items this coming weekend.
The new ignition switch is in and now re-keying the replacement cylinder that I picked up from @http://www.914world.com/bbs2/index.php?showuser=12094
Tail lights in and wired up and trunk lock installed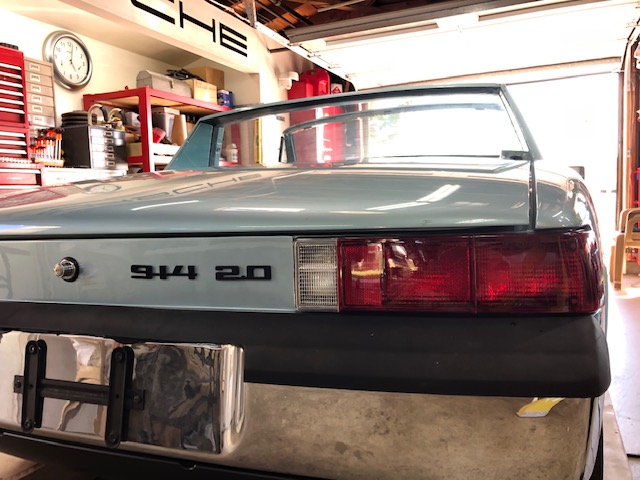
Wiper nozzles, mirrors and sail panel trim hardware as well. It's amazing how time consuming these seemingly easy tasks are. We fought excess paint build up on the cowl for the washer jets and retapped the mirror screw holes. Sail trim hardware required a new hole to be drilled on the passenger side as it was not there nor was there evidence of any filler.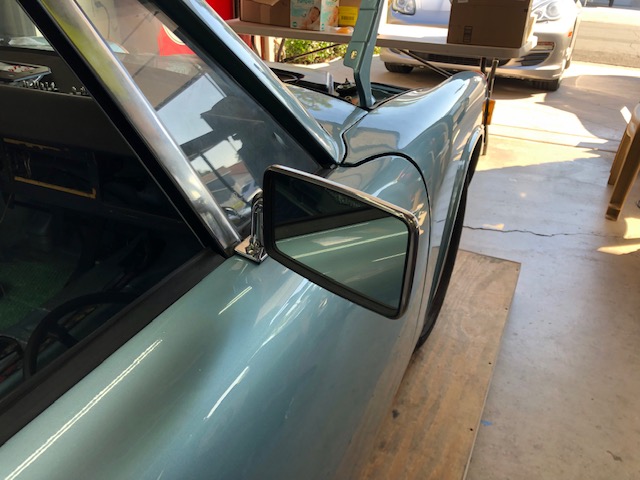
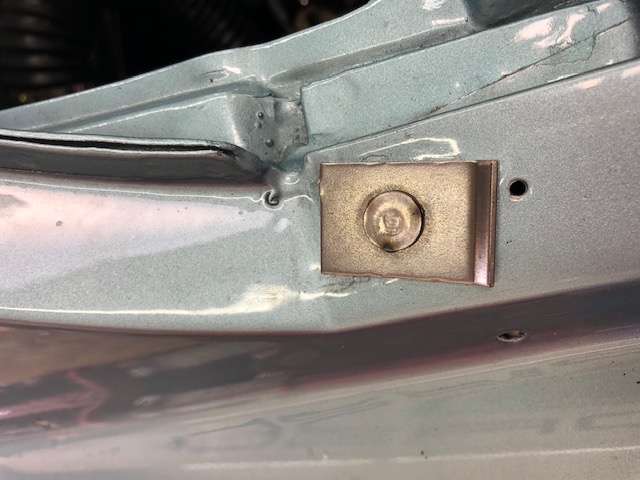
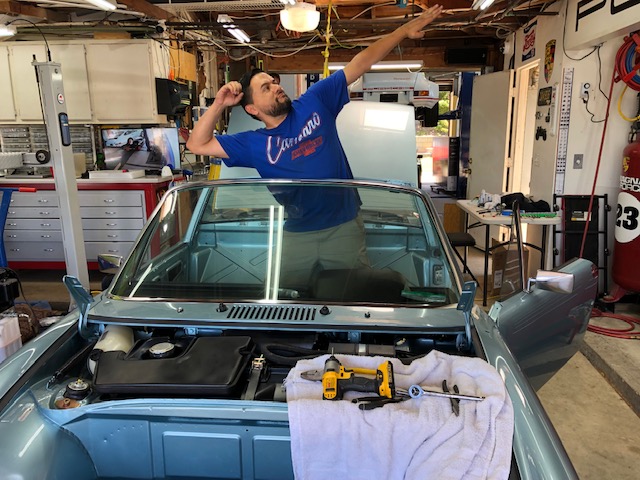
Next up was the fuse panel restoration and cleaning up the harness in the tunnel. Pretty pleased with how it turned out thanks to the spare panel from @http://www.914world.com/bbs2/index.php?showuser=10825 that was used as a place holder for all of the connections.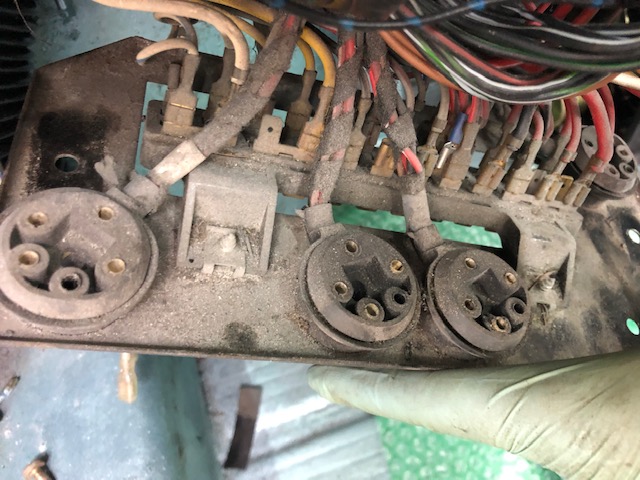
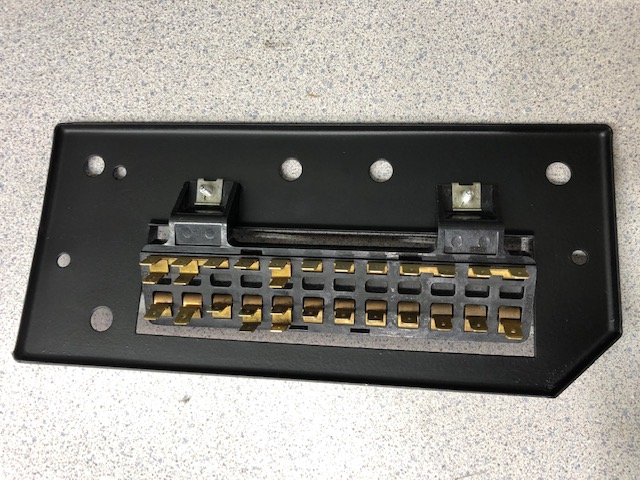
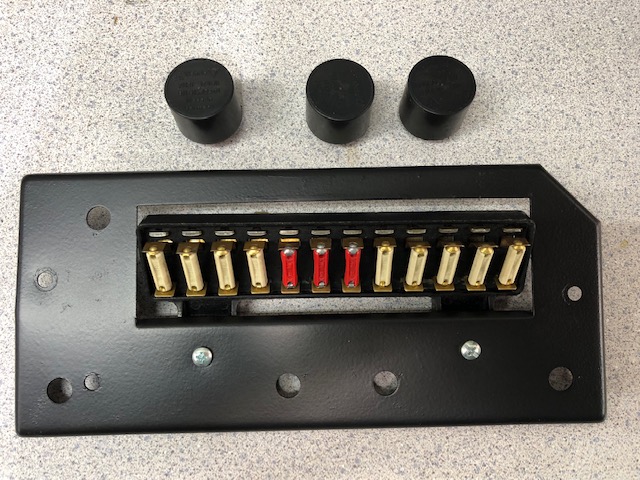
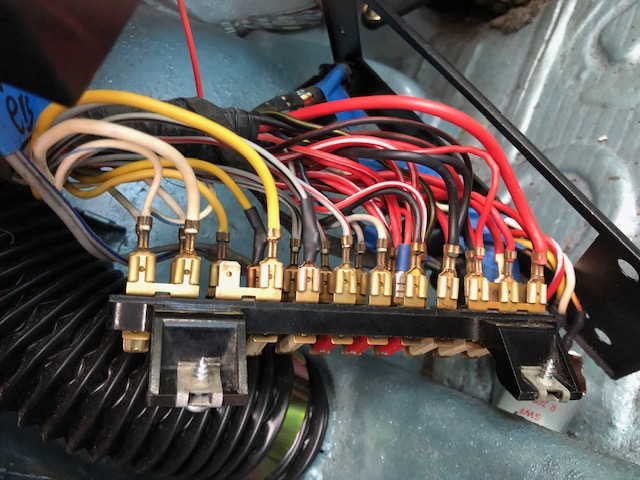
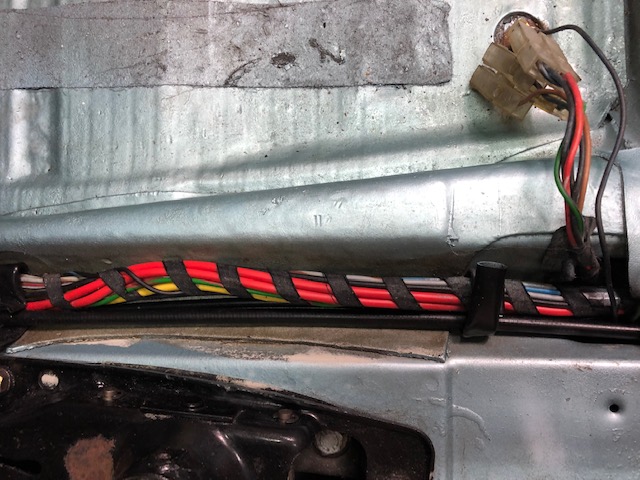
Ready to get back at it this weekend along with helping out on @http://www.914world.com/bbs2/index.php?showuser=18749 's brake project. 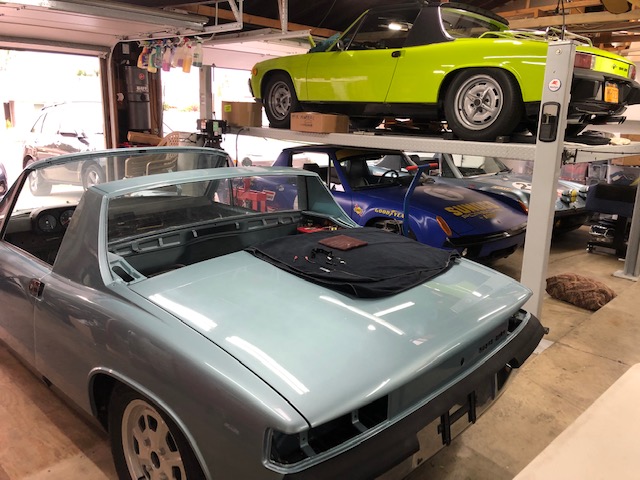
Posted by: FlacaProductions Jul 24 2019, 10:55 PM
Fantastic.
Posted by: 914_7T3 Jul 30 2019, 02:45 PM
3rd consecutive weekend @http://www.914world.com/bbs2/index.php?showuser=16669 's 914 Resort & Spa!
@http://www.914world.com/bbs2/index.php?showuser=22446 stopped by with some plated hardware and was kind enough to spend some time getting me sorted on replacing the burnt headlight motor wire. Luckily, the damage was contained to the front of the harness. The second strand from the driver's side motor back to the remainder of the harness turned out to be unaffected as verified back to the bulkhead of the frunk.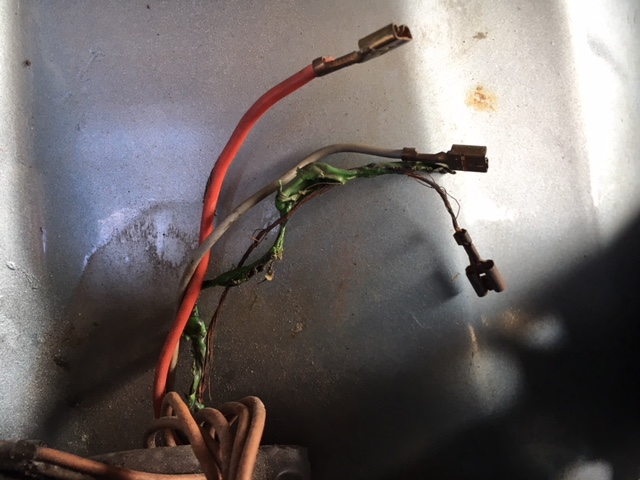
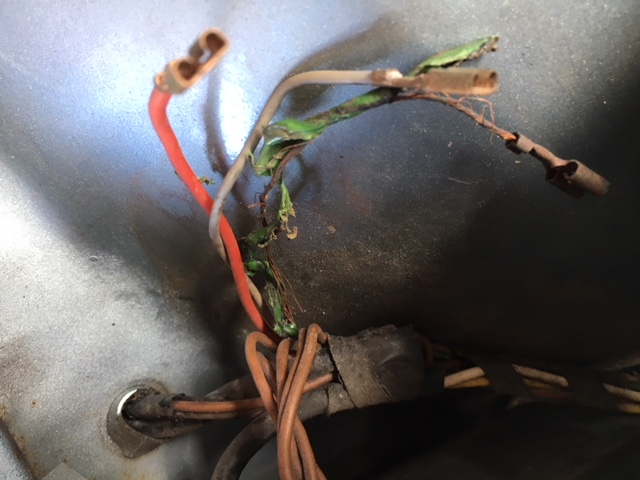
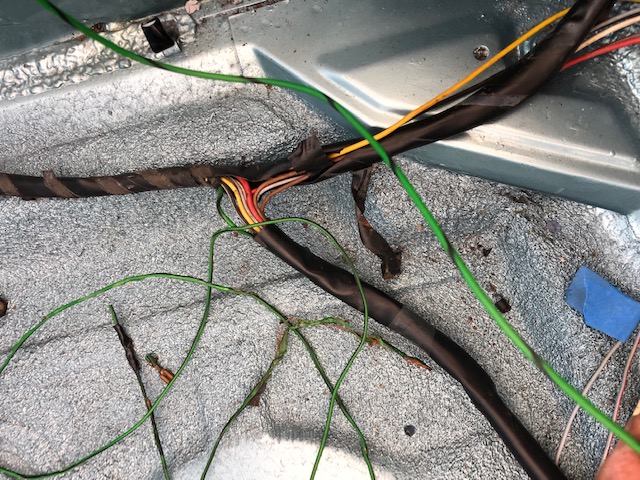
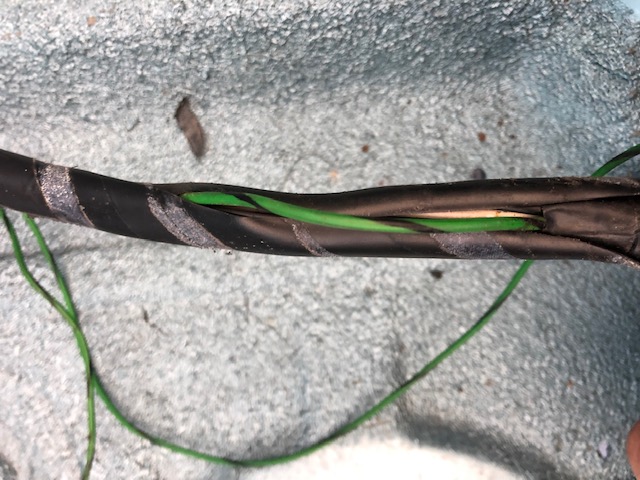
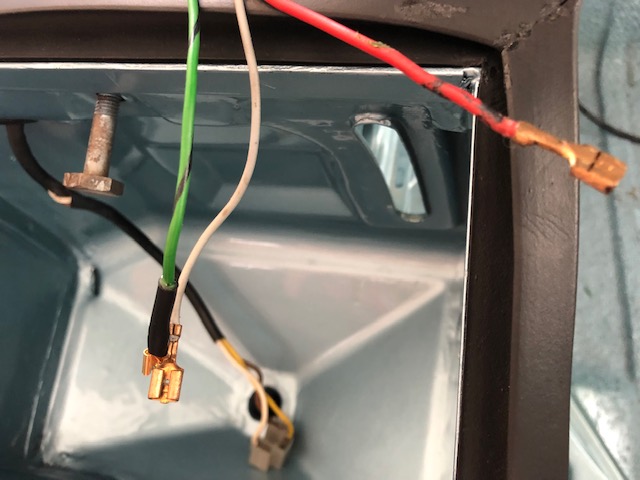
@http://www.914world.com/bbs2/index.php?showuser=1319 showed me how to bleed the brakes with @http://www.914world.com/bbs2/index.php?showuser=18749 's power bleeder and @http://www.914world.com/bbs2/index.php?showuser=21151 was solid on the pedal.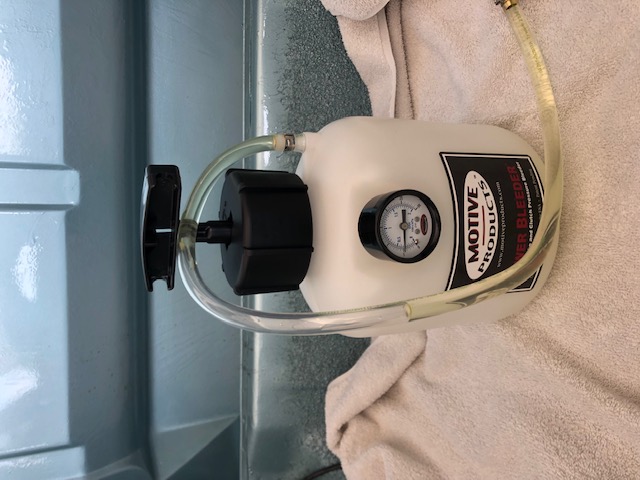
The car is now back home for final assembly. So happy to be done with towing it around SoCal. It was incredible to drive it into the garage under its own power.
Hoping for a miracle and a 9-14 completion date. Don't want to miss out on the PCA LA Concours and PECLA activiites!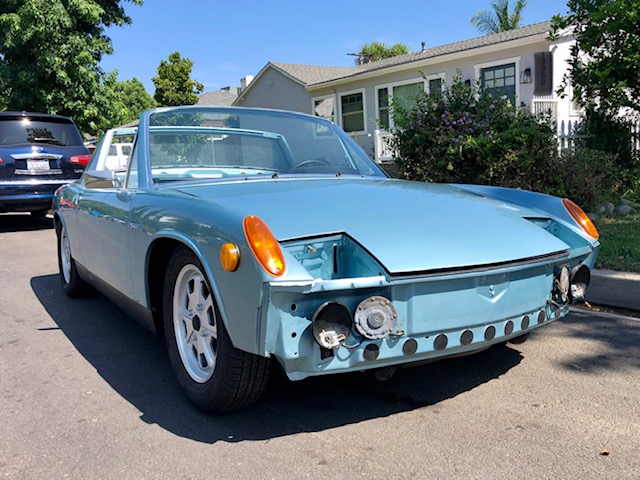
Posted by: sb914 Jul 30 2019, 02:48 PM
3rd consecutive weekend @http://www.914world.com/bbs2/index.php?showuser=16669 's 914 Resort & Spa!
@http://www.914world.com/bbs2/index.php?showuser=22446 stopped by with some plated hardware and was kind enough to spend some time getting me sorted on replacing the burnt headlight motor wire. Luckily, the damage was contained to the front of the harness. The second strand from the driver's side motor back to the remainder of the harness turned out to be unaffected as verified back to the bulkhead of the frunk.
@http://www.914world.com/bbs2/index.php?showuser=1319 showed me how to bleed the brakes with @http://www.914world.com/bbs2/index.php?showuser=18749 's power bleeder and @http://www.914world.com/bbs2/index.php?showuser=21151 was solid on the pedal.
Congrats! Won’t be long now .
The car is now back home for final assembly. So happy to be done with towing it around SoCal. It was incredible to drive it into the garage under its own power.
Hoping for a miracle and a 9-14 completion date. Don't want to miss out on the PCA LA Concours and PECLA activiites!
Posted by: raynekat Jul 30 2019, 05:52 PM
Great job on that wiring fix.
Posted by: pete000 Aug 1 2019, 05:52 PM
I'm smelling concours winner...
Posted by: Gudhjem Aug 5 2019, 06:01 PM
What an amazing build. Truly inspiring. I feel a new surge of motivation to get back to my going-on-9-years '73 2.0 marathon blue restoration.
Attached image(s)
Posted by: Superhawk996 Aug 6 2019, 04:58 AM
Car is coming along so nicely. Great job.
Posted by: 914_7T3 Aug 7 2019, 05:18 PM
@http://www.914world.com/bbs2/index.php?showuser=20845
Have you considered plating the guides for the bumper bolts inside the dog bones? I think @http://www.914world.com/bbs2/index.php?showuser=22446 mentioned it and I'm now obsessed. Time to up my game!!!
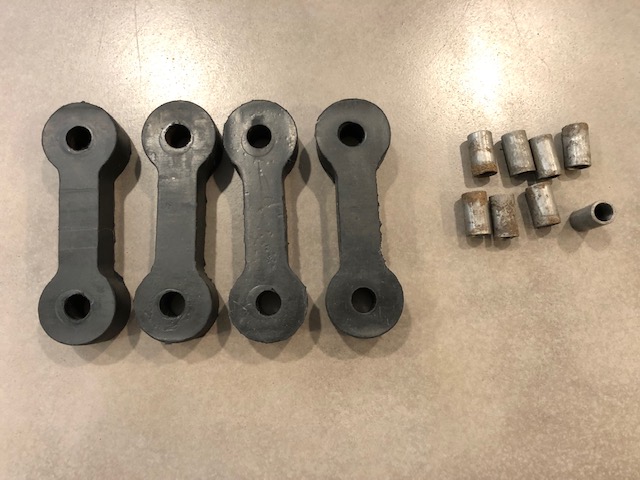
Posted by: bbrock Aug 7 2019, 09:13 PM
@http://www.914world.com/bbs2/index.php?showuser=20845
Have you considered plating the guides for the bumper bolts inside the dog bones? I think @http://www.914world.com/bbs2/index.php?showuser=22446 mentioned it and I'm now obsessed. Time to up my game!!!
Well now I have. I should probably fish them out to see what condition they are in and throw them in the tub of parts yet to be plated. Good tip!
Posted by: Larmo63 Aug 7 2019, 10:05 PM
I got kicked off the build crew for some reason.
I tried, but a few too many hands in the kitchen......
Posted by: 914_7T3 Aug 10 2019, 06:53 PM
I got kicked off the build crew for some reason.
I tried, but a few too many hands in the kitchen......
Fake News!!!
@http://www.914world.com/bbs2/index.php?showuser=17068 has always been a great supporter of my project. The day he disrespected my Vitaloni Tornado Mirrors a strong and lasting friendship was born.
Cheers!!!
Posted by: Larmo63 Aug 10 2019, 09:47 PM
I'm the guy that runs out with the floor jack when Jeffrey pulls into the pits.
Posted by: 914_7T3 Aug 11 2019, 12:36 AM
Spent last weekend going through the car and dealing with any plating and powdercoating that was overlooked and there was way more that anticipated. Picked up some duplicate place holders while the Kamax and other good stuff was sent out for plating. ( @http://www.914world.com/bbs2/index.php?showuser=17068 )
Spent the day in the garage installing some 914 Rubber parts including fender to windshield seal, front & rear bulk head and rear trunk seals.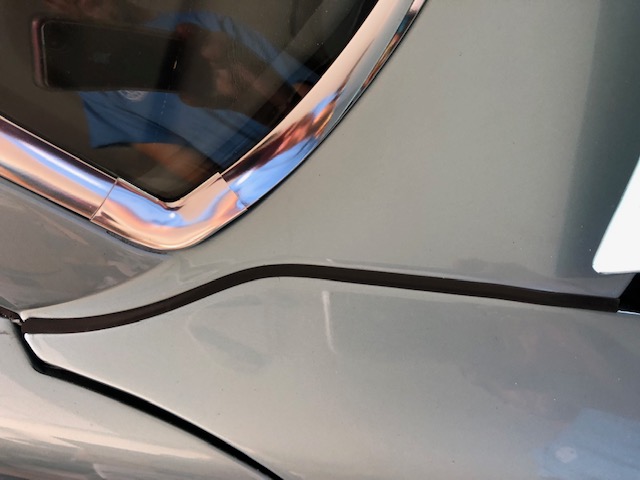
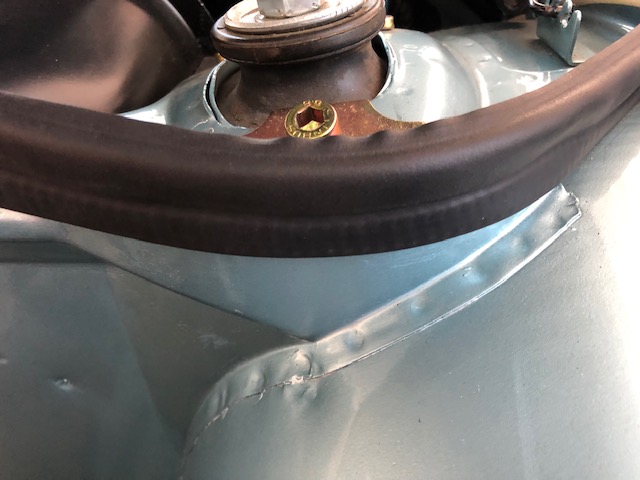
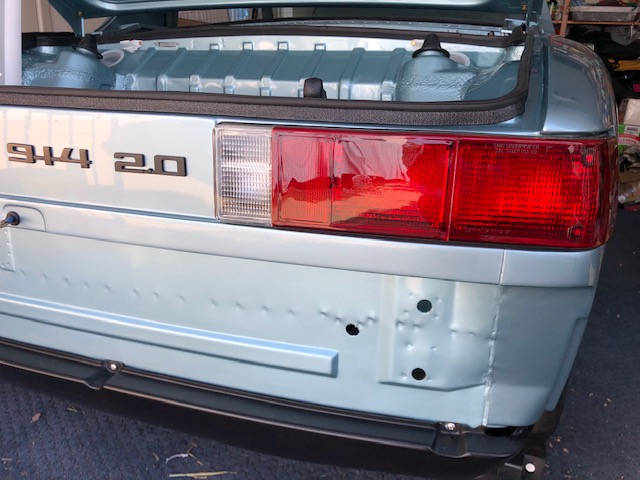
Had an opportunity to reclaim my VIN # from the overspray of previous paint jobs.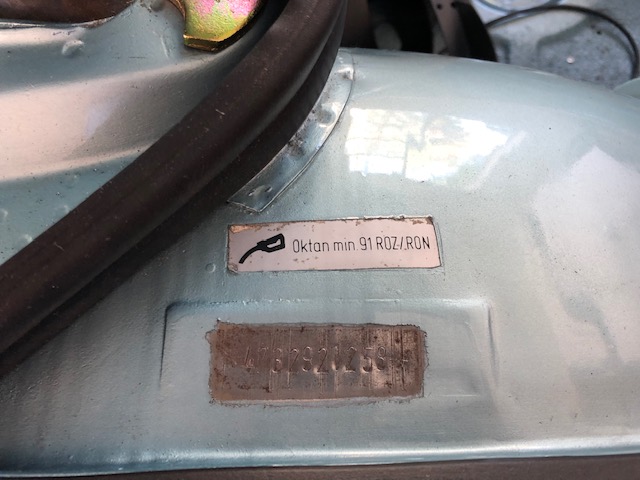
Turns out the the bumpers were flash chromed and not triple plated, not to mention the poor prep so they are in the process of being redone. This allows for proper clean up of the harness up front where the fog lights and horns terminate. Happy to have the opportunity to re-address this area.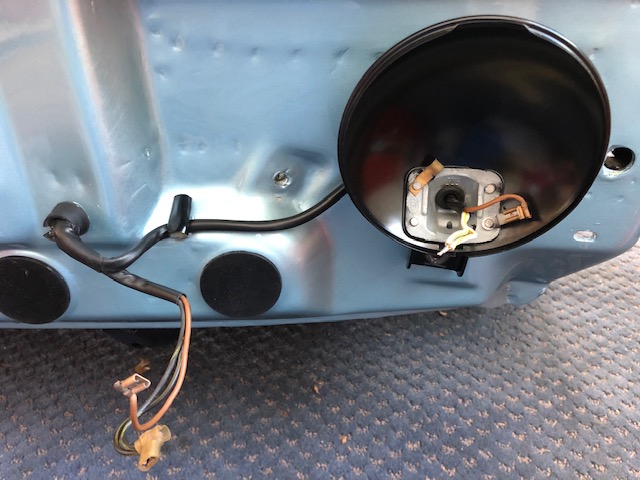
Cleaned the headlight motors too and finally finished taping up the right ride of the harness from the frunk up to the headlights. Hopefully done with the wiring from here on in.
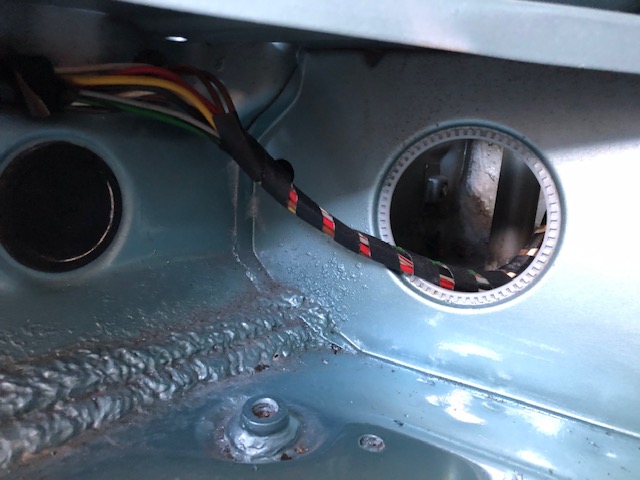
Will get at it again tomorrow!
Posted by: 914_7T3 Aug 20 2019, 10:36 PM
Got the replacement ignition lock that was rekeyed installed with the new switch. Should come as no surprise that those wires needed to be cleaned and retaped as well as the ones for the wiper and turn signal switches.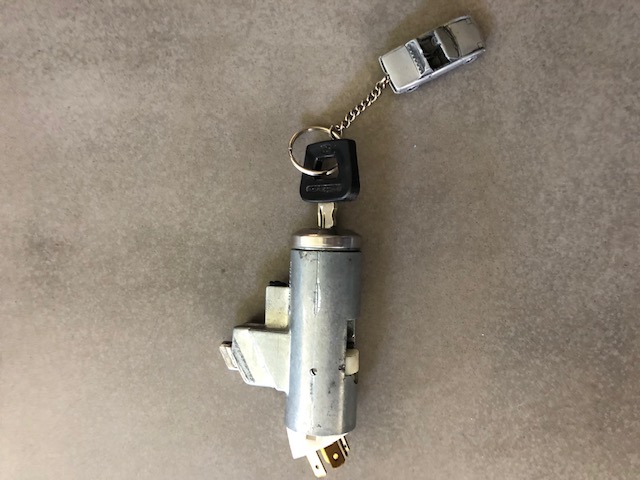
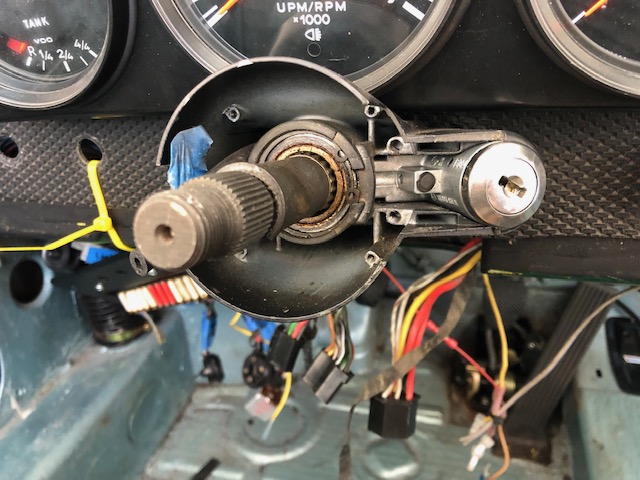
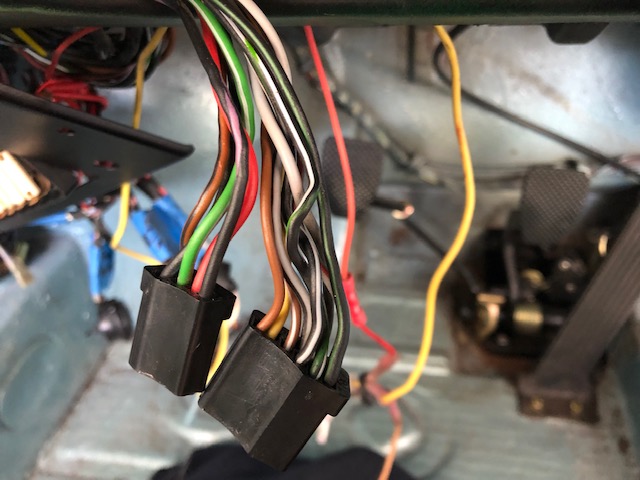
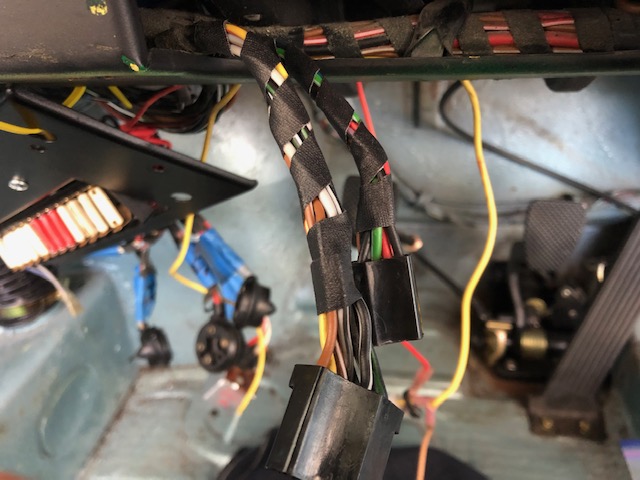
Also dealt with the wiring out of the tunnel for the dome light and defroster (in case of snow in the forecast this winter) 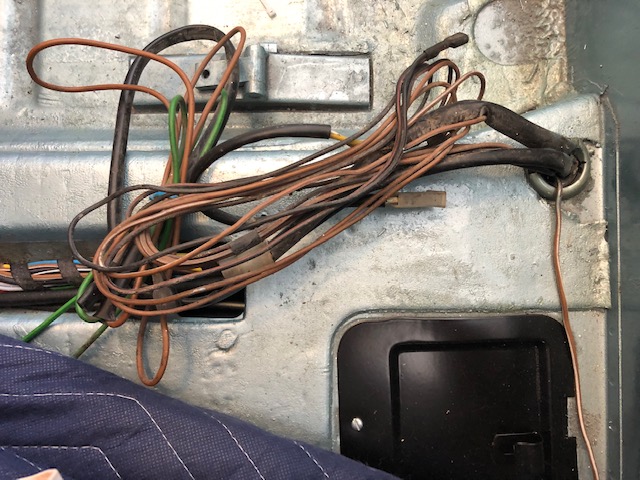
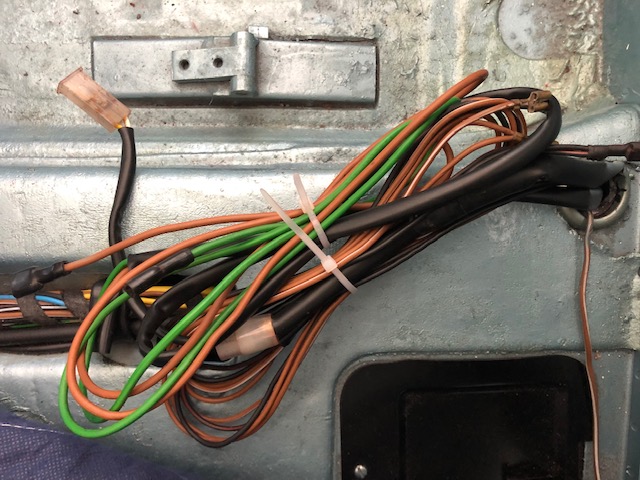
Speaking of wiper and turn signal switches, I managed to end up with a spring, connector and plastic piece breaking off after cleaning those up. So decided to replace them with a set of NOS SWF switches. 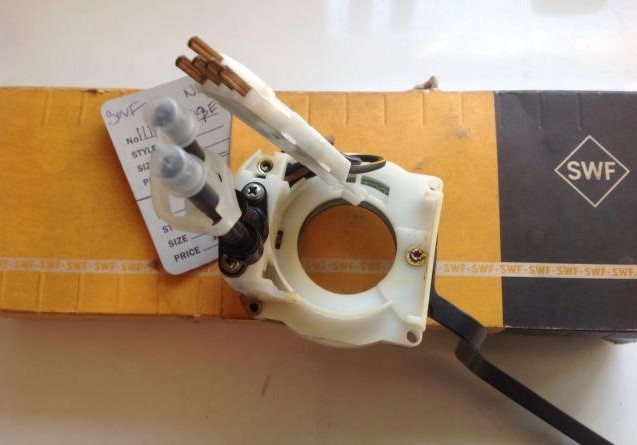
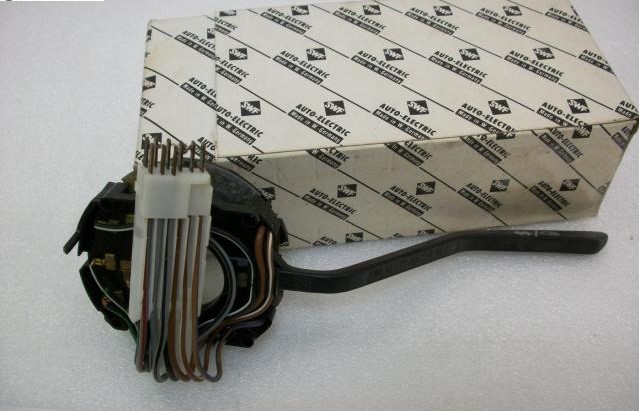
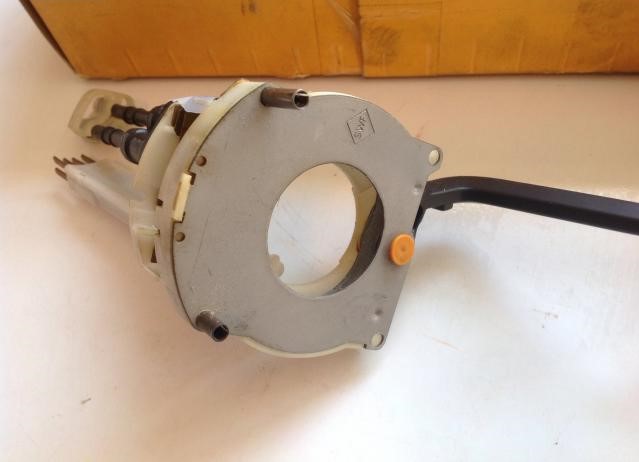
Posted by: second wind Aug 20 2019, 10:50 PM
Hello Jeffrey.....coming along nicely. I have learned from experience that I let my new 914 Rubber parts sit out in the sun for a week or two before installing as they shrink. I have gone through window trim and fender rubber as you mention and it comes up short in a month or two on the car. I keep them in the sun for quite a while and then cut to fit.....works out great. FYI.
All the best,
gg
Posted by: second wind Aug 20 2019, 11:42 PM
I mean ANY rubber parts.....not 914 Rubber parts. 914 Rubber parts have resurrected my 914 and thank you for that.
All the best,
gg
Posted by: 914_7T3 Aug 25 2019, 10:15 PM
@http://www.914world.com/bbs2/index.php?showuser=10742 spent some time on Saturday getting me sorted and prioritized for future tasks. Best part is he was kind enough to remind me that I have AC in my garage that hasn't been used in over 10 years, but that fired right up and kept us comfortable throughout the day.
Started with getting the Wiper and Turn Signal switches installed and then built up the headlight buckets and installed the motors. @http://www.914world.com/bbs2/index.php?showuser=22446 's wiring repair did the trick and the motors spun up right away after 22 months off of the car. 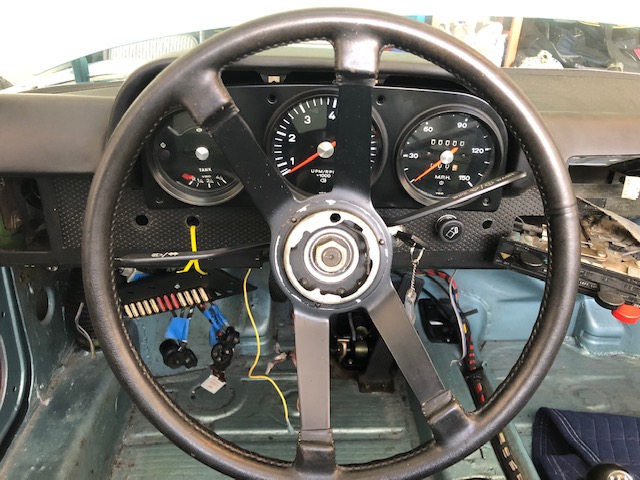
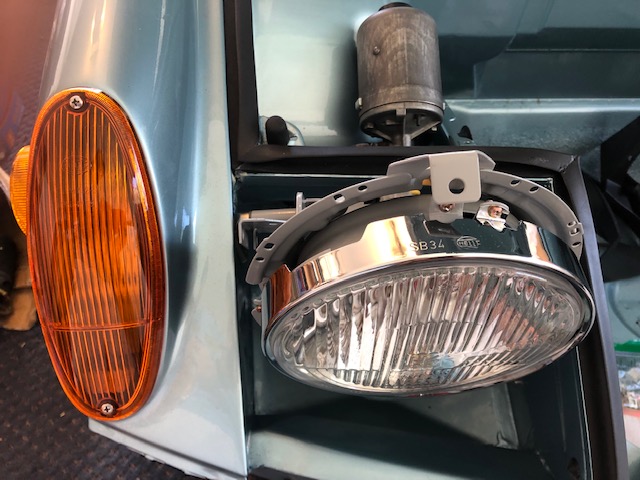
Verified all the lights front and rear and after a quick bulb replacement and reseating some others in the tail lights, we were all lit. Best part is that I didn't screw up the gauges and everything is working save fo the parking brake light, but that's for another day.
On Sunday, I went deep on the horn restoration and started to reinstall the plating that was picked up on Friday. 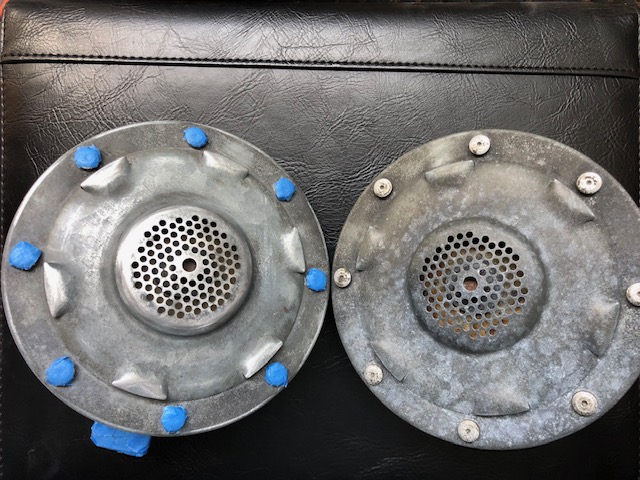
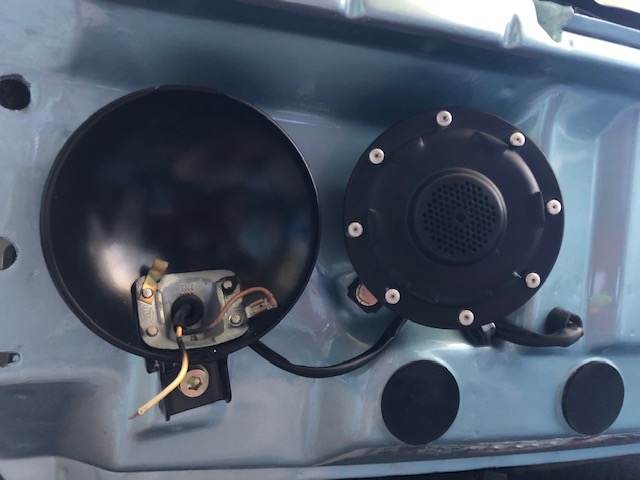
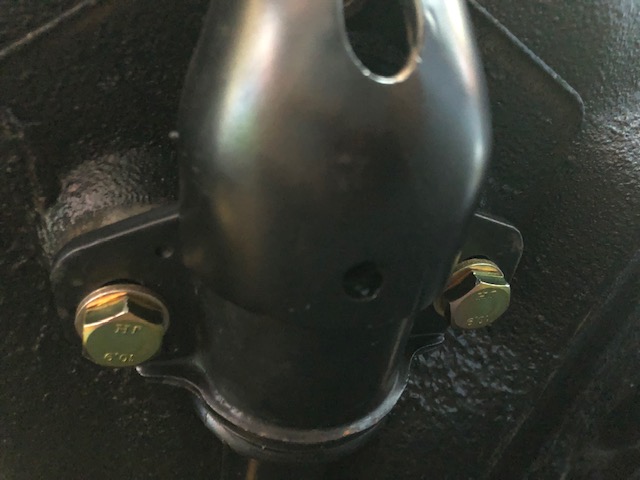
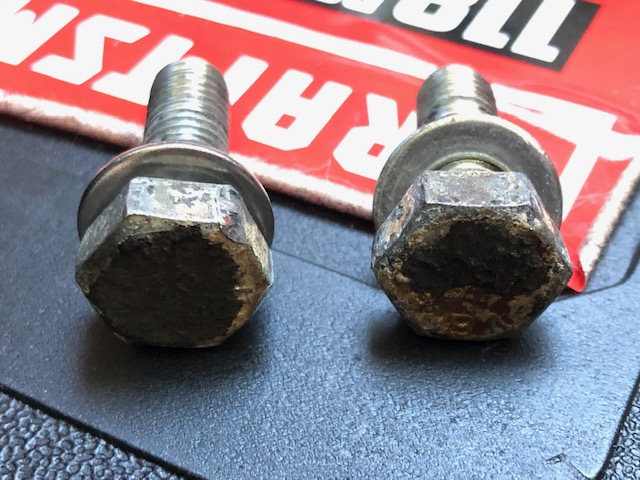
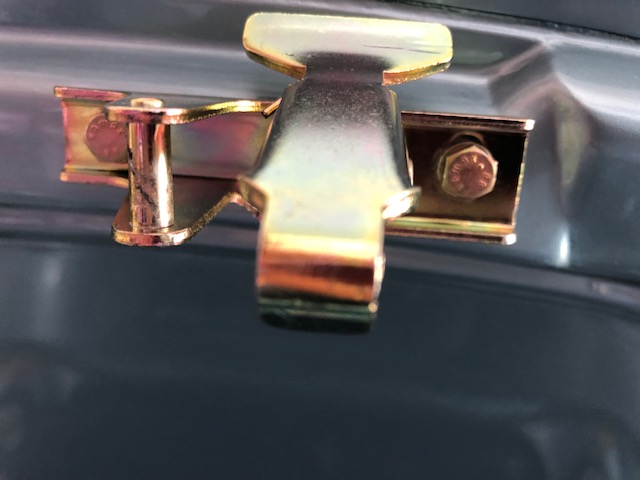
@http://www.914world.com/bbs2/index.php?showuser=20845 Project Dog Bone has been completed!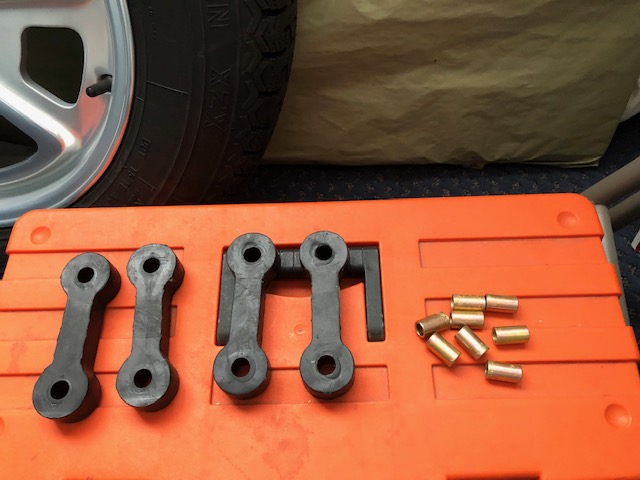
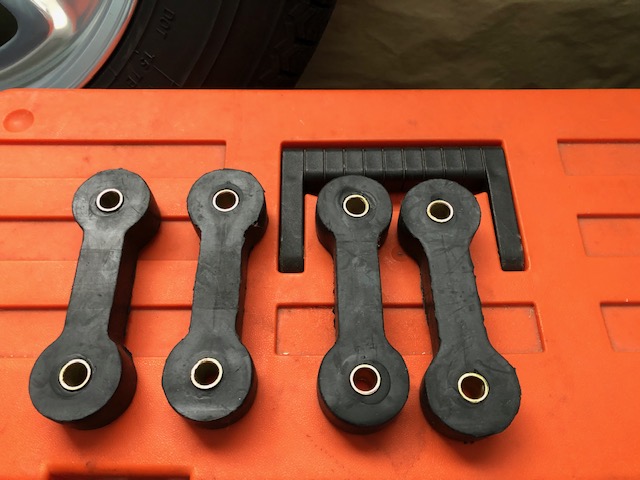
@http://www.914world.com/bbs2/index.php?showuser=22428 Stripped Viser Cores with Corinthian leather are schedule to arrive @http://www.914world.com/bbs2/index.php?showuser=3348 's place on Monday.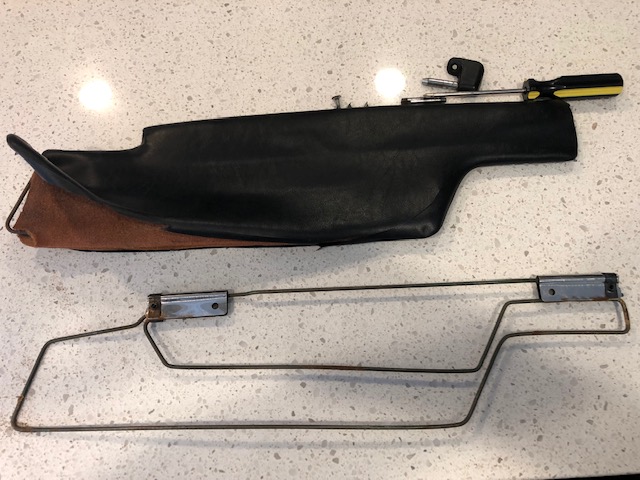
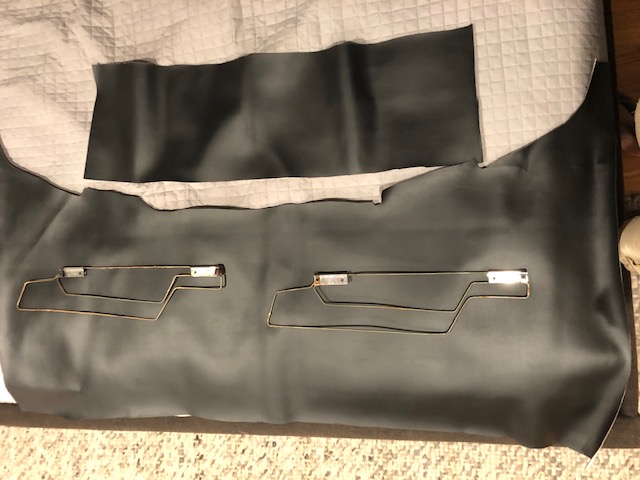
Still lots to do.
Posted by: Mikey914 Aug 25 2019, 10:24 PM
Hello Jeffrey.....coming along nicely. I have learned from experience that I let my new 914 Rubber parts sit out in the sun for a week or two before installing as they shrink. I have gone through window trim and fender rubber as you mention and it comes up short in a month or two on the car. I keep them in the sun for quite a while and then cut to fit.....works out great. FYI.
All the best,
gg
What you may have experienced is pulling the targa to window seals through the track on the roof.
Do not install this way as you can never relieve the tension completely. Install by putting trim in place from the side and pushing the inner side down.
Posted by: AHudson Aug 26 2019, 04:04 AM
This is one fantastic rebuild thread. Thanks for sharing! It's not just work to do the 'work' but to photo-document and comment is like another job. Really excellent to watch and read.
Posted by: Superhawk996 Aug 26 2019, 05:36 AM
@http://www.914world.com/bbs2/index.php?showuser=22428 Stripped Viser Cores with Corinthian leather are schedule to arrive @http://www.914world.com/bbs2/index.php?showuser=3348 's place on Monday.
Still lots to do.
Love it. The shine on the headlamp surround is blinding me. I don't think I've seen one that polished before! Great job. So nice to see this car being put back together with such care.
Just packed up my box of Corinthian Leather yesterday for 914Rubber - sending out early this week. I picked up a nice remnant of black leather from a shop that does lots of custom interior work for various show cars (think Autorama, NAIS, Concours d' Elegance). At first he didn't want to sell it until I assured him that I'd have him doing some of the work like the dash top and the seats downstream. I love these crusty custom car shop guys, they are all such characters (and I mean that in a good way).
Can't wait to see the end result of all these visor rebuilds. Lord knows we need them - they are all crispy by now.
Posted by: 76-914 Aug 26 2019, 08:40 AM
Delete. Opps, wrong thread.
Posted by: bbrock Aug 26 2019, 08:21 PM
Good call on plating those dog bone inserts. I'll add that to my to-do list. But.. Shazam!!! Look at that horn! Nice work. That headlight bezel isn't too shabby either if you are into the whole impeccable perfection thing. Spirit lines dude. You need spirit lines. 
Posted by: 914_7T3 Sep 21 2019, 08:07 PM
Progress Report:
Spent some time weekend before last with @rod928 installing the front gutters, moldings and both top and bottom targa moldings.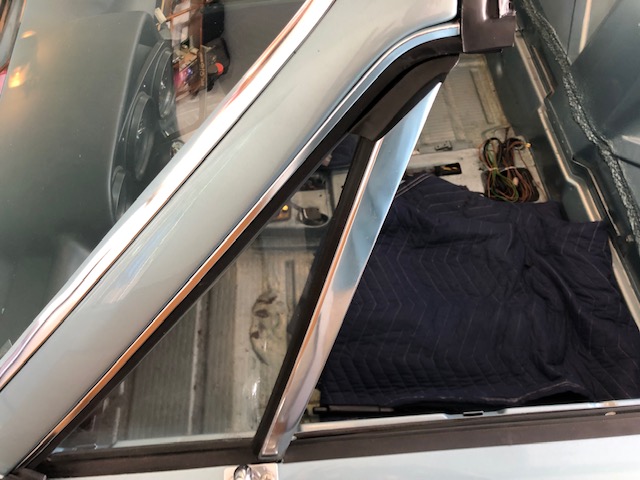
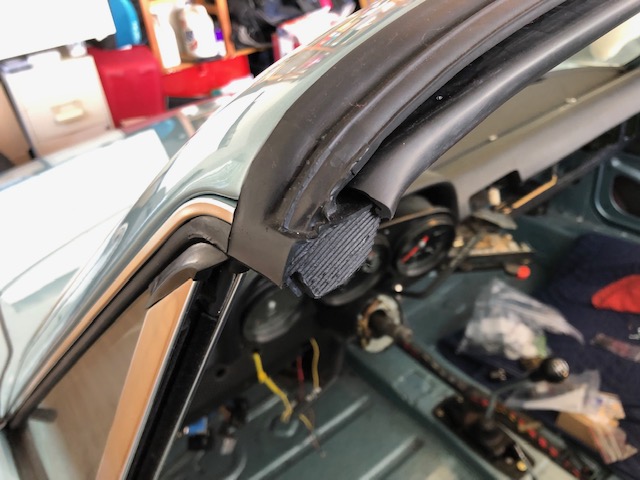
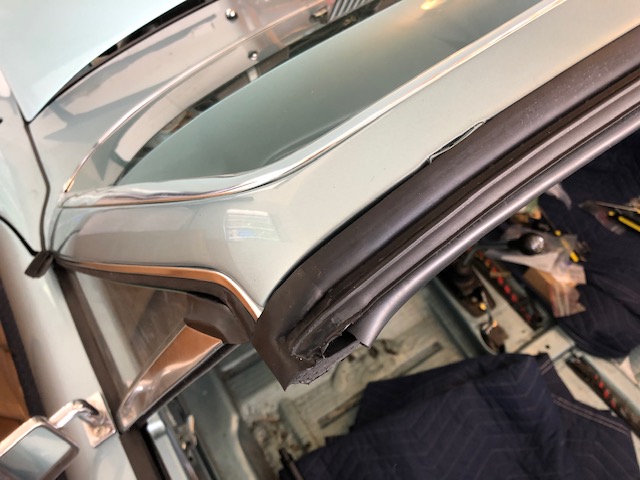
@http://www.914world.com/bbs2/index.php?showuser=10742 spent some time up here today trouble shooting electrical and it was pretty lit!!! 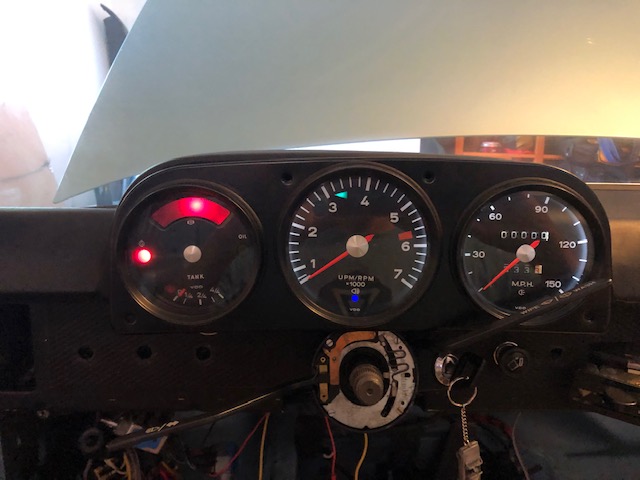
I also figured out that you can't get your wiper motor to work if you previously pulled the relays from the board without reinstalling them.
Next up was Andy's expertise in action for the sail panel vinyl installation. I then moved onto the rear gutters and moldings.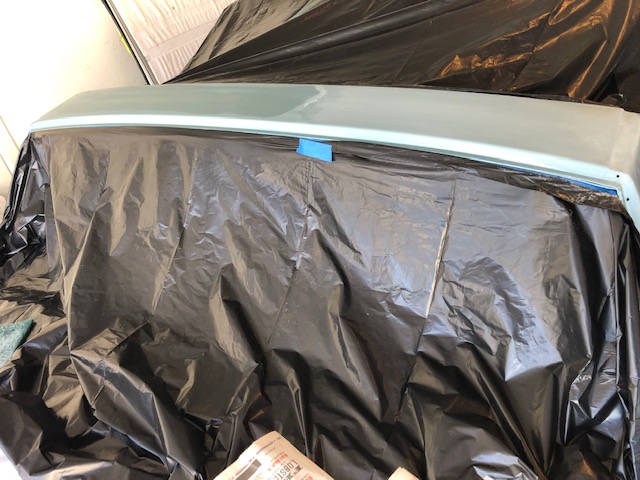
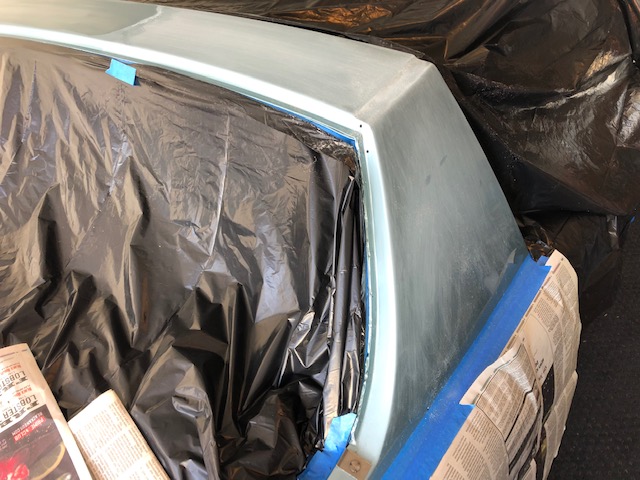
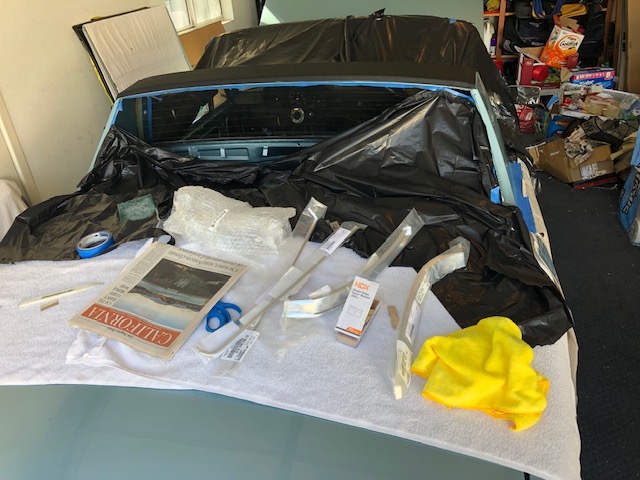
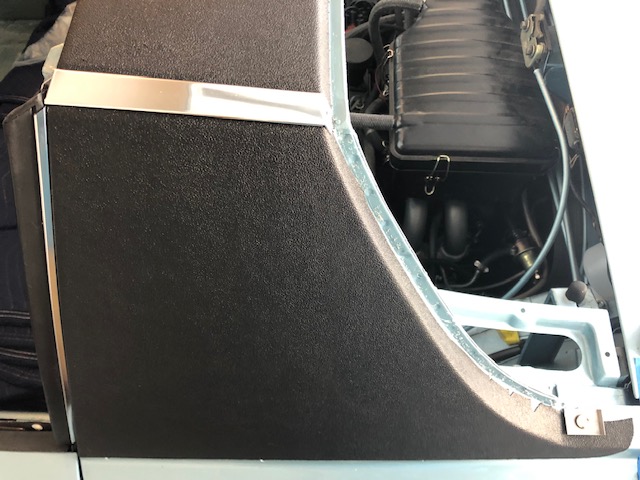
Of course no post is complete without some NOS parts including this timing plaque. Looks like a decal, but is made of aluminum.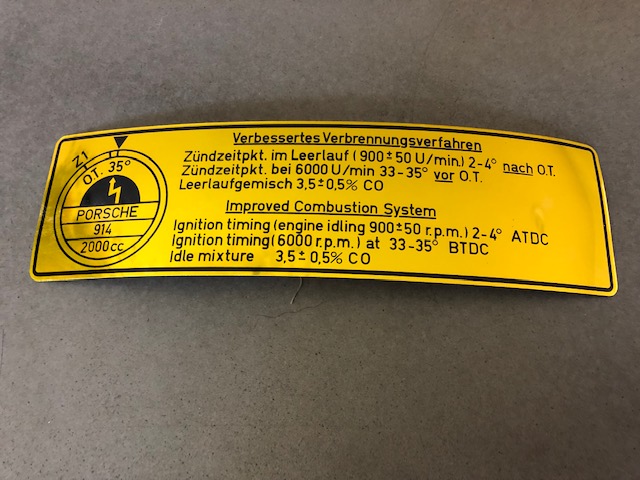
Also here are the proofs of my decal dilemma project currently in production. Other than the extra "t" in metallic they are super great! 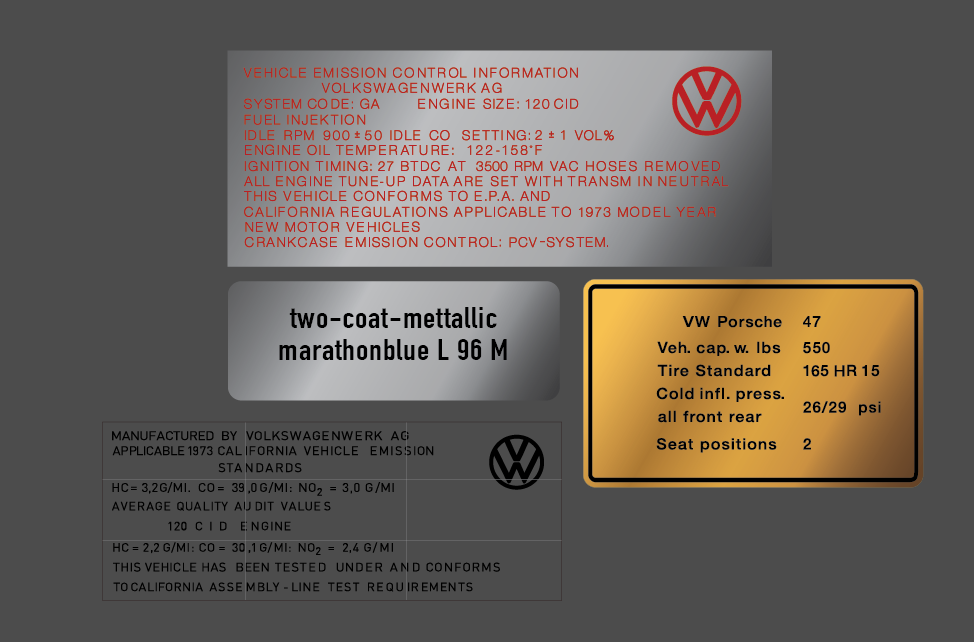
Posted by: bbrock Sep 21 2019, 08:35 PM
Okay, where does that timing plaque go and where do I get one?
Beautiful work as usual. I sure would like to see an example of the 73 49-state emission decal.
Posted by: FlacaProductions Sep 21 2019, 10:24 PM
Looks great - just like every other step of the way here.
What was your approach and result on the main targa seal?
Posted by: DRPHIL914 Sep 22 2019, 06:33 AM
For the vinyl install did you use the 3M 99 spray?
Phil
-looks awesome!
Posted by: 914_7T3 Sep 22 2019, 10:07 PM
Okay, where does that timing plaque go and where do I get one?
Beautiful work as usual.
I sure would like to see an example of the 73 49-state emission decal.@http://www.914world.com/bbs2/index.php?showuser=20845
https://www.aasesales.com/collections/porsche-914-decals-stickers/products/h2b-id-num-101131
I would call the dep't. at Porsche that does the COAs to see if such a decal exists. I know most if not all modern day cars reference 49 states and California.
My '96 Prelude was a CDN car with a metric Speedo in kp/h and kilometers on the odometer and still had the california emission decal that allowed me to import it.
Posted by: 914_7T3 Sep 22 2019, 10:08 PM
For the vinyl install did you use the 3M 99 spray?
Phil
-looks awesome!
@http://www.914world.com/bbs2/index.php?showuser=11106
Posted by: 914_7T3 Sep 22 2019, 10:18 PM
Looks great - just like every other step of the way here.
What was your approach and result on the main targa seal?
@http://www.914world.com/bbs2/index.php?showuser=21628
Top seal first, both sides install into the vertical channels and should slide in with a little convincing. You can use a little Windex for some lubrication that will dry up pretty quick.
Many on the forums use silicone or soapy water and neither is necessary and may cause other issues. Horizontal section is next and you need to not bend the metal tabs under the rubber that affix to the frame. Will take some effort by hand or gentle finessing with a mallett
Lower Targa seal is next and should be cut on an angle only after installed. Start at the center and work your way out. A little frustrating of a process, but not fatal!
Posted by: raynekat Sep 23 2019, 02:37 PM
I used the same 3M high strength contact spray adhesive on just about everything.
It really holds where the "normal" spray adhesives didn't do too well.
For the vinyl install did you use the 3M 99 spray?
Phil
-looks awesome!
@http://www.914world.com/bbs2/index.php?showuser=11106
Posted by: 914_7T3 Nov 3 2019, 11:24 PM
Worked with @http://www.914world.com/bbs2/index.php?showuser=16669 a few weeks ago on the passenger window as it wouldn't lift properly and would tilt towards the front. Gave up on all the adjustments after figuring out that the glass was 1" too forward in the lifter. Pulled the regulator, window and lifter to correct it. Didn't want to mess with urethane so ended up having a local shop reseat it. 
This also allowed the opportunity to Evapo-rust the lifter and hardware. Also installed a new triangle window seal. Glad to have the opportunity to clean that up and just need to polish the window frame. 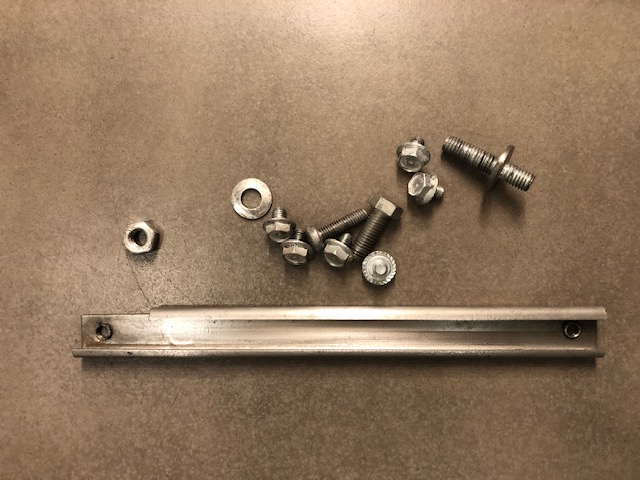
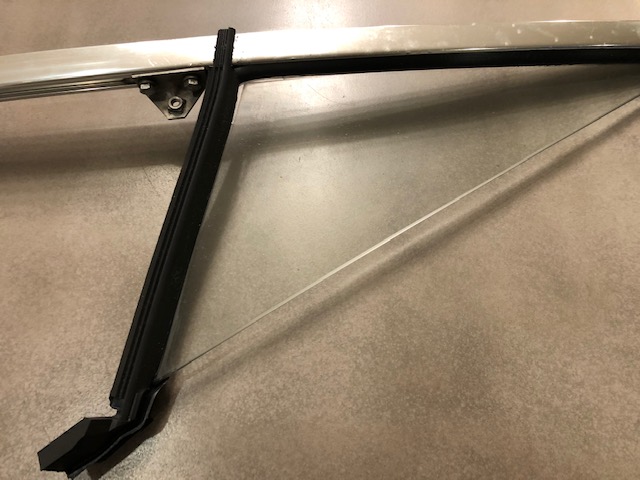
Next up was to redo the basket weave on the dash face and glove box. 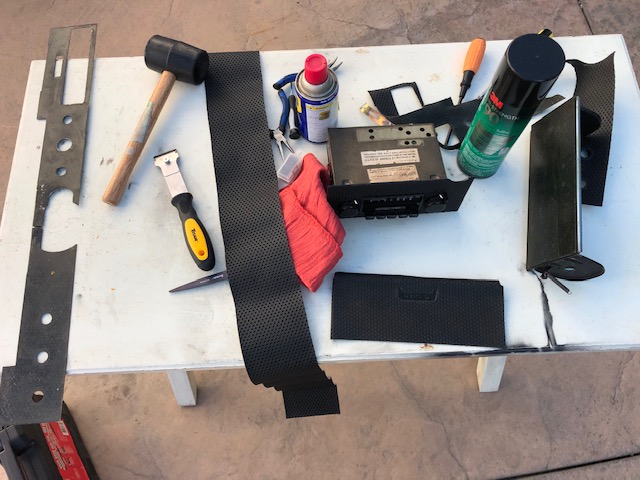
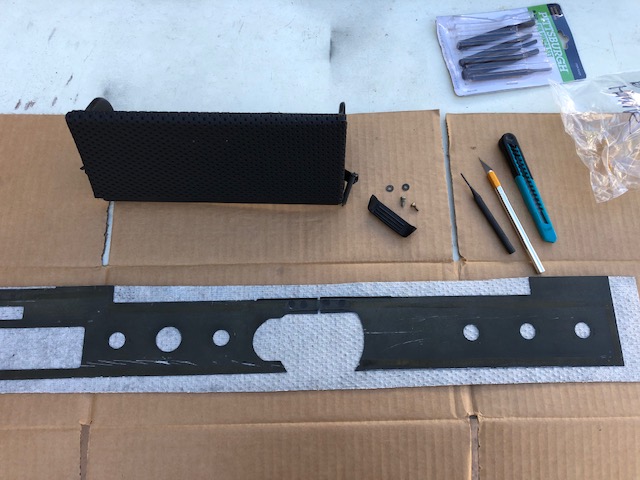
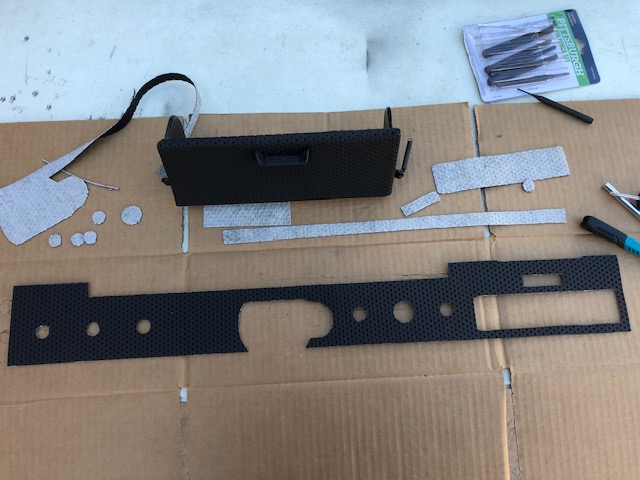
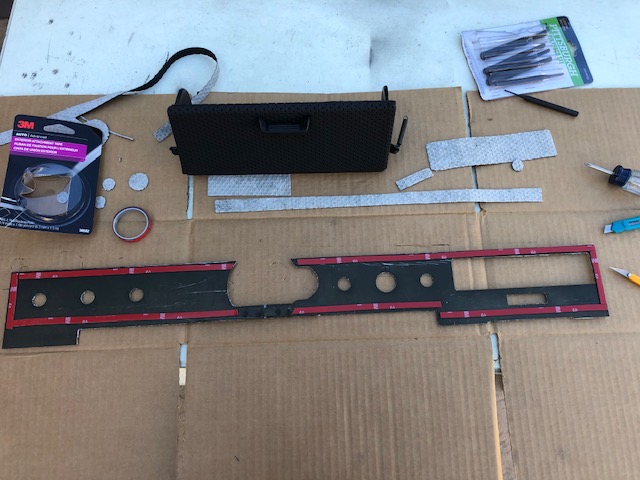
Sanded and resprayed the seat handles for the 3rd time. Finally got the desired result and just need to hit them with clear.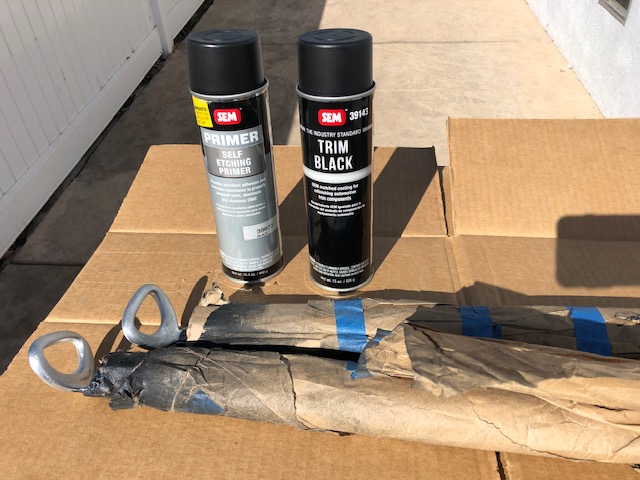
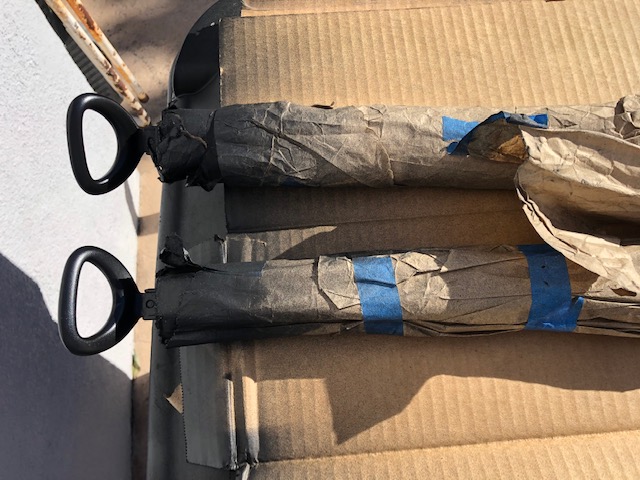
More to come....................................
Posted by: 914_7T3 Nov 19 2019, 11:54 PM
@http://www.914world.com/bbs2/index.php?showuser=16427 @http://www.914world.com/bbs2/index.php?showuser=22865 & @http://www.914world.com/bbs2/index.php?showuser=16669 were kind enough to come over weekend before last to help get the passenger window sorted and installed. We fought with it for longer than I care to admit. Finally raises and lowers smoothly & properly. 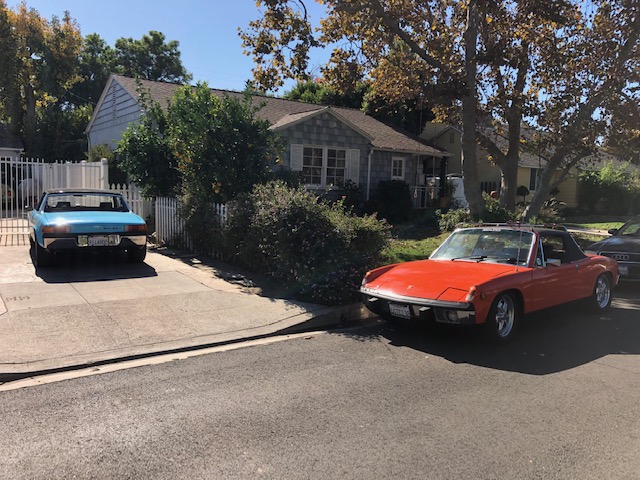
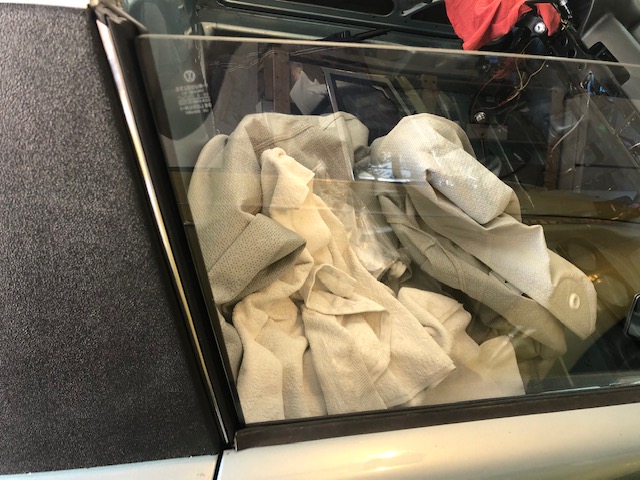
Still dealing with a funky gap where the triangle window meets the frame at the top. Got the door fuzzies in and sprayed my seat handles with a couple of coats of clear and called it a day, but not before some bad guys ripped off my headlights. Picked it up on my security cams and it took all of 37 seconds from start to finish. Now dealing with a big fat insurance claim.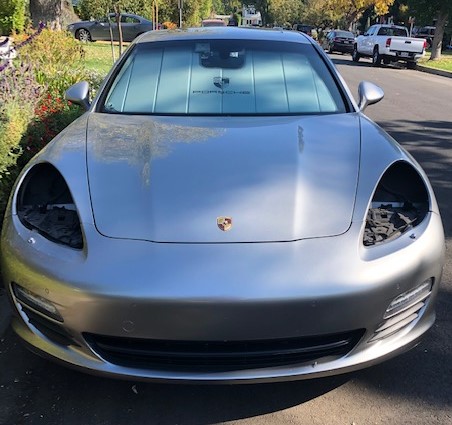
Spent some time in the garage on Sunday with my helper Calvin. He is patiently waiting his first drive in the teener...poor fella!
Started in the frunk adding white felt to the underside of the fuel tank strap that @http://www.914world.com/bbs2/index.php?showuser=17068 gave me. 
Installed the expansion tank that I got from @http://www.914world.com/bbs2/index.php?showuser=3457 that was expertly painted by @http://www.914world.com/bbs2/index.php?showuser=16669 as my other one literally "expanded" from the powder coating process. 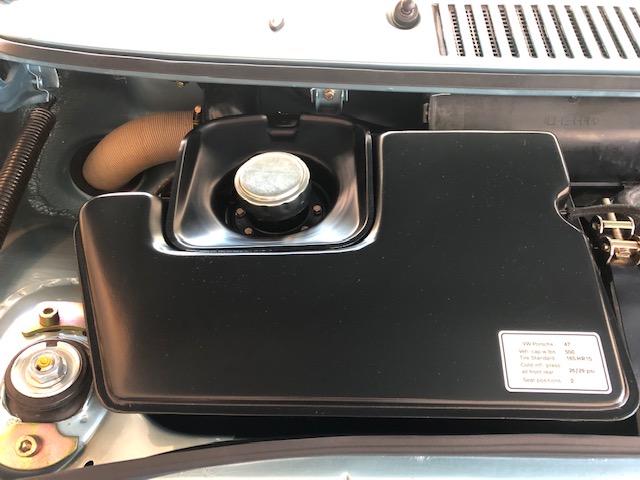
Recently been on the wrong side of air hose shaming by @http://www.914world.com/bbs2/index.php?showuser=20845 & @http://www.914world.com/bbs2/index.php?showuser=10742 so had to pull the 914 Rubber hoses and replace them with the the period correct paper variety. 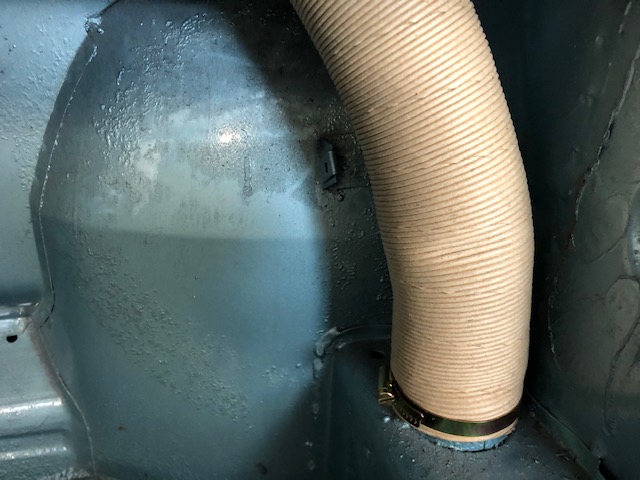
@http://www.914world.com/bbs2/index.php?showuser=1319 stopped by to check my progress and deliver a NOS lower rear trunk latch. Already had a nice replated one, but NOS is NOS. 
Posted by: bbrock Nov 20 2019, 12:55 AM
Man that looks good. Your build was looking a little sketchy but those paper hoses saved the day.
Great helper you've got there! Too bad about the frickin' thieves.
Oh, the expansion tank decal arrived yesterday. Looks great!!! Thanks! and also thanks to @Superhawk966
Posted by: horizontally-opposed Nov 20 2019, 01:42 AM
Car is looking great!!
As to those headlight thieves...we did a story on 996 headlight theft in Excellence back in the day, but I hadn't heard of it for a while. Looks like it may be pot growers. 
https://www.businessinsider.com/marijuana-growers-steal-porsche-headlamps-2012-11
And a possible fix:
http://www.insanegarage.com/prevent-panamera-headlights-theft-stolen/
Posted by: 914_7T3 Dec 15 2019, 10:04 PM
More progress on getting the engine lid finished up. Working with the plastic speed nuts was no fun at all, but everything came together.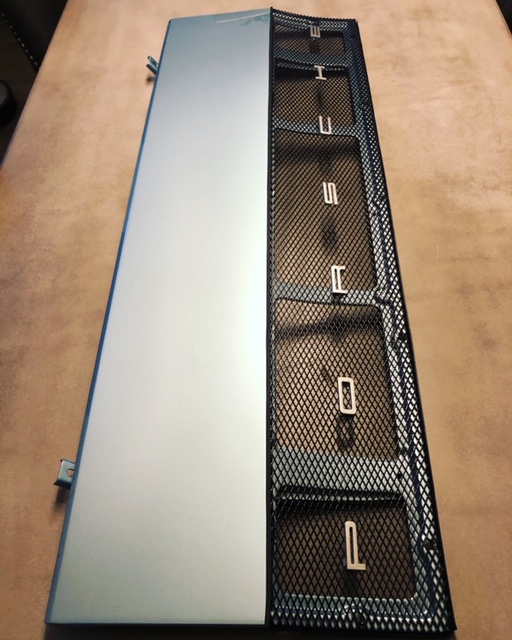
Got the driver side triangle window seal and fuzzy installed and just needs to go back in the door.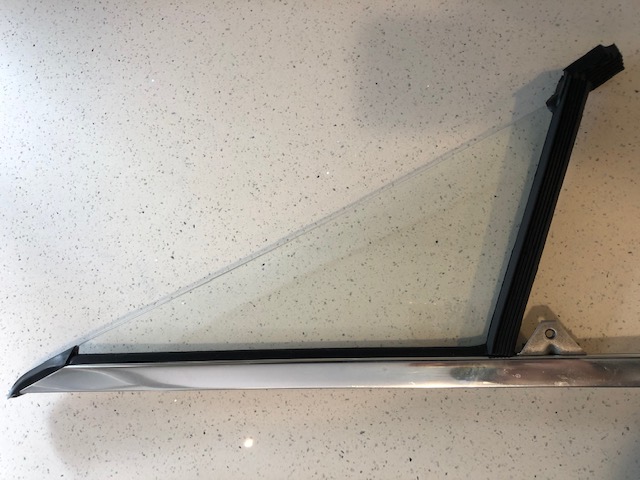
Dash face with new basket weave is in as well
Also had some time to replace the rear reflectors on the Sun Buggy with some NOS Hella which are getting difficult to find.
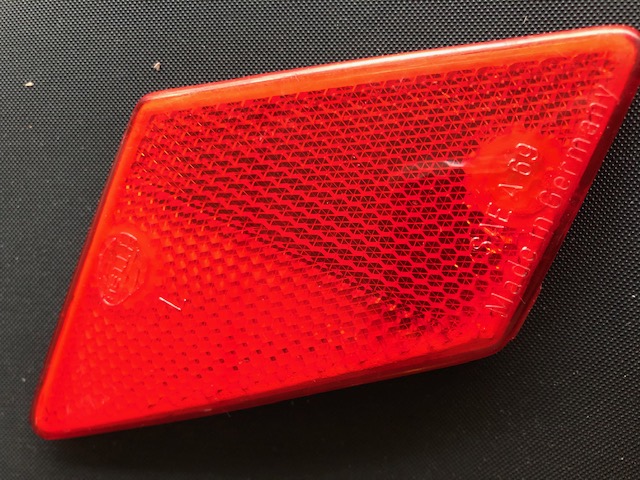
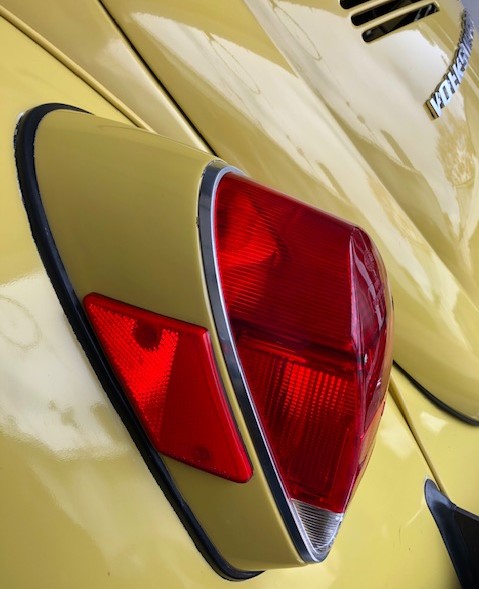
Posted by: DRPHIL914 Dec 16 2019, 07:34 AM
that window triangle seal was the worst thing I had to do on all my reassembly!! looks good though.
where did you get the NOS paper air hose for inside cabin and the front trunk area? mind are original and would like to replace with correct stuff not plastic repro.
Phil
Posted by: 914_7T3 Dec 16 2019, 03:25 PM
that window triangle seal was the worst thing I had to do on all my reassembly!! looks good though.
where did you get the NOS paper air hose for inside cabin and the front trunk area? mind are original and would like to replace with correct stuff not plastic repro.
Phil
@http://www.914world.com/bbs2/index.php?showuser=11106
It is 60mm aftermarket and availlable pretty much everywhere, although I got it from another World member.
Posted by: 914_7T3 Feb 16 2020, 09:04 PM
Didn't realize it has been this long since this thread was updated and will add some more photos in the coming days.
Spent most of the last 1/2 dozen Saturdays working on the car. In trying to get the dash buttoned up, some electrical gremlins have appeared and have been working to get that sorted. Nothing major, but tedious nonetheless. Partial list: ebrake ground to the body, 4 Way flashers, high beam and parking light indicator lights........
Revisted E -brake install
Changed the fresh air controller and reinstalled the dash face with new basketweave.
New Battery and New Negative Battery Cable installed.
Head light and fog light installation completed. 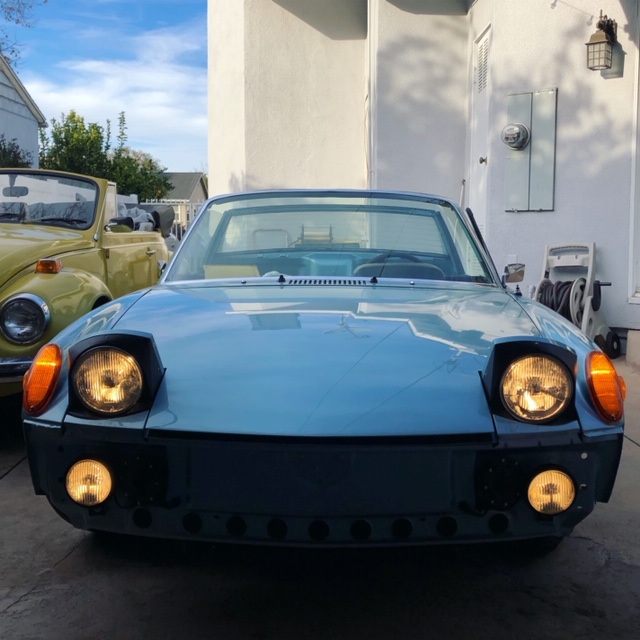
Rear Bumper with NOS top and plate holder installed.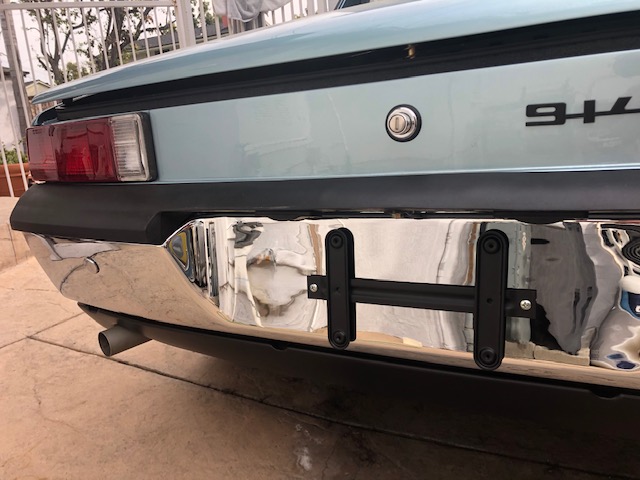
Front Bumper Assembled awaiting fresh paint to the Valance to correct previous damage.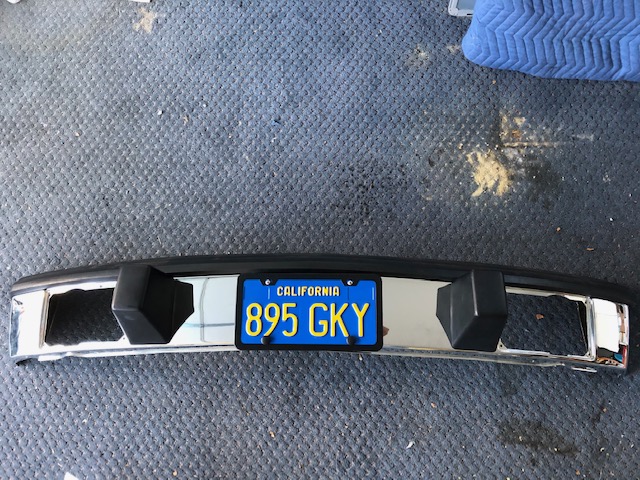
Received a new loop carpet kit from Autobahn interiors. 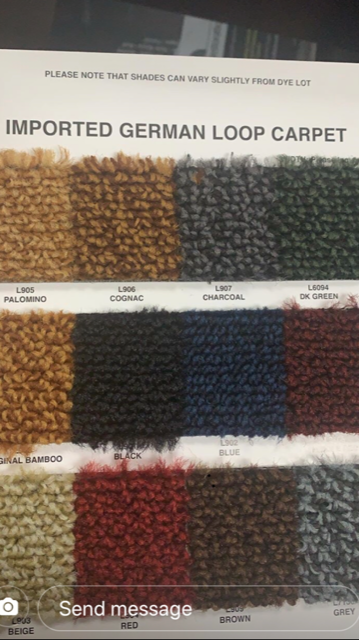
Even went so far as to source the correct Kamax bolts for front & rear trunk lids that are in for plating.
Doesn't seem like much, but everything that was touched needed more work and is now correct.
Probably have about two days work to button up some smaller projects like sail panel trim, targa latches etc... before sending the car to the interior shop to install the Z Mat, back bad, door cards, seats, etc that have all been previously recovered.
Hope to be on the road by end of March to shake this thing down. Seems strange to be this close and so mentally fatigued by the project at the same time. Looking forward to completion.
Posted by: Dion Feb 16 2020, 09:55 PM
Keep at it. Looks beautiful. Of course I’m partial to this build what a colour!
Posted by: FlacaProductions Feb 17 2020, 08:33 AM
Hey Jeffrey - did you change the fresh air controller since the day I was there?
I was pretty sure you'd go back and re-do the dash face basketweave but wasn't going to say it out loud....
It looks really great. Still.
I'm out of town now - actually getting to tinker with MY 914 in Indiana - and when I get back, I'm tied up thru March 9 - wish I could help again!
Posted by: arne Feb 17 2020, 06:34 PM
Posted by: 914_7T3 Mar 5 2020, 10:59 PM
Speaking of details, when @http://www.914world.com/bbs2/index.php?showuser=21628 was out here back in December we figured out that the fender opening for the antenna was too small to fit a NOS Hirschmann that was acquired.
End result was that the old and tired looking original Bosch Blue Tip was reinstalled. Came across a NOS Blue Tip on Evil Bay out of Sweden at a great price and could not resist. It is these details that are really upping the level of this project.
Can't wait to get all the remaining pieces/parts back on the car.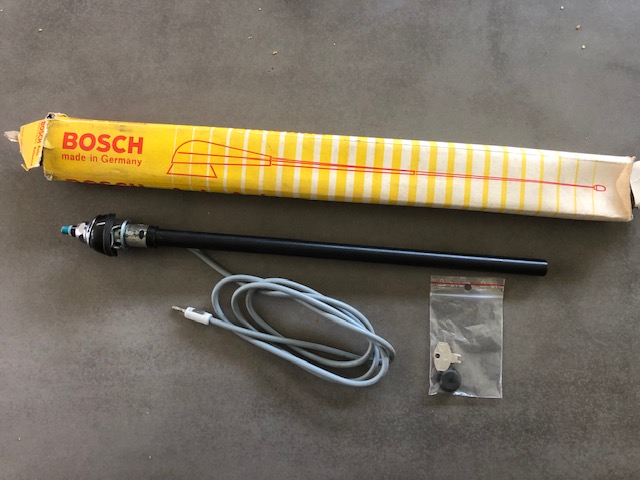
Posted by: FlacaProductions Mar 5 2020, 11:27 PM
Hubba hubba. That’s perfect!!! Your patience and internet sleuthing is amazing.
Posted by: bbrock Mar 6 2020, 08:29 AM
Nice find! Completely empathize about installing the old and tire antenna. Went through something similar myself.
Posted by: 914_7T3 Mar 8 2020, 11:08 PM
Two sets of incorrect wiper blades & clips later, finally received the correct clips so that the Bosch blades now fit the NOS arms and got those on the car.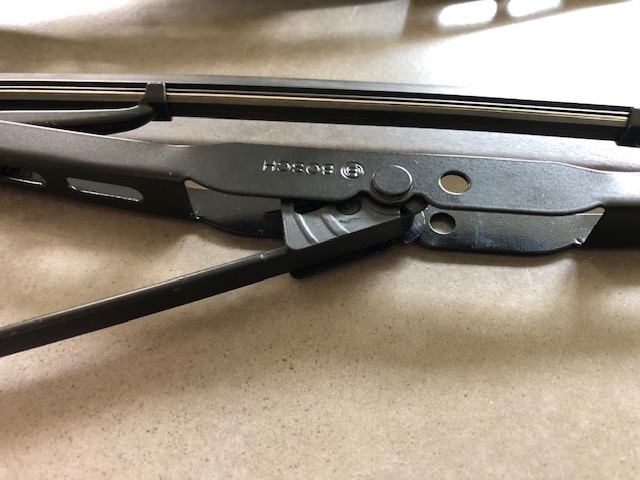
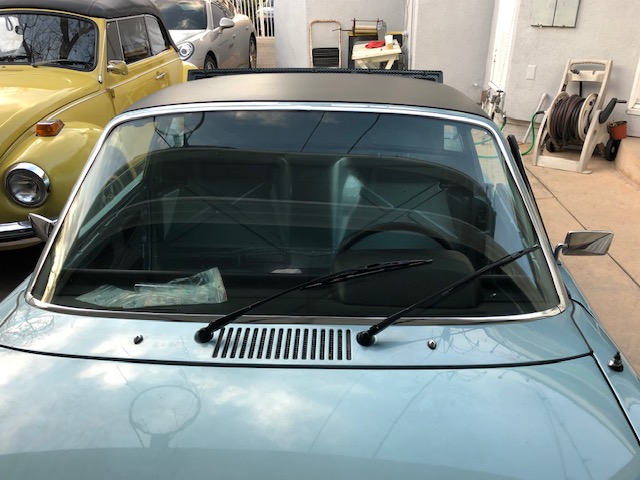
Also have the engine lid on the car after wet sanding the original rain tray down to 7,000 grit and its silky smooth. Used some new hardware and better release cable than what was on the car, but need to reposition the grill badge as its sitting too high. Is there a correct placement for grill badges?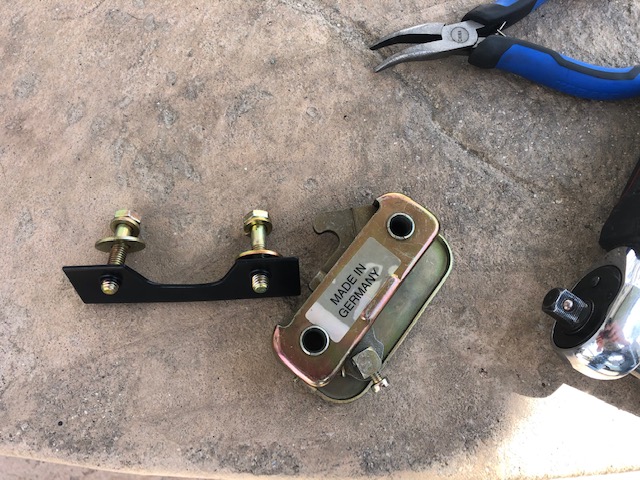
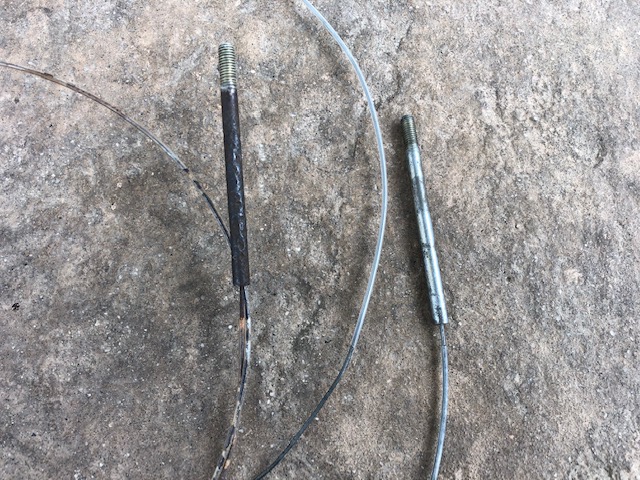
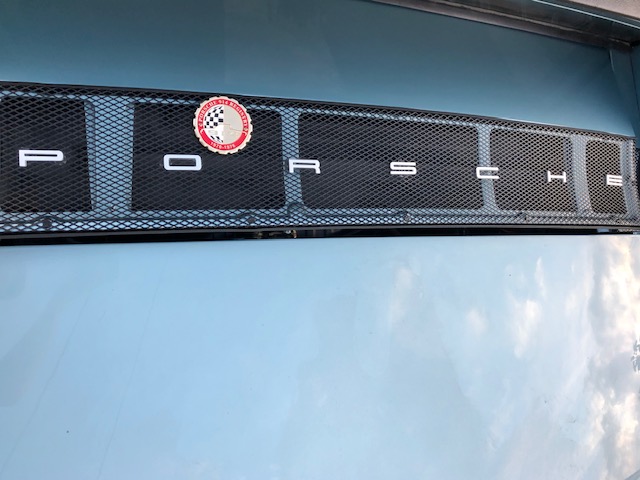
Next problem is that after going through the trouble of getting the Optima R battery with terminals closer to the lid opening, the rain tray doesn't clear the battery connections. So now it has to be turned to sit like the non-R battery. Grrrrrrrrr 
Moral of the story is everything was a certain way for a reason in these cars. So when you think you are improving something, you're just scewing up something else, but don't know it yet!
Ended up removing the 914 Rubber door stay kit and going back to an original replated set supplied by @http://www.914world.com/bbs2/index.php?showuser=1319
Driver door is still crunchy as the hole on the body where the pin sits has worn larger so will need a solution for that, but that's for another day.
Targa latches are on with the roof in place to properly seat the front targa trim.
A couple of more tweaks then off to the interior shop, final mechanical tweaks and to sort an exhaust leak. Then its shakedown time.
Posted by: bbrock Mar 9 2020, 12:09 AM
Next problem is that after going through the trouble of getting the Optima R battery with terminals closer to the lid opening, the rain tray doesn't clear the battery connections. So now it has to be turned to sit like the non-R battery. Grrrrrrrrr
I flipped my battery around too. I don't think it's a big deal but I need to get a longer ground cable so I can route both cables out the same side of the battery to install the battery cover.
Good job finding those wiper adapters!
Posted by: 914_7T3 Mar 22 2020, 04:41 PM
Had a weather window to wash the car for the first time since it came out of the body shop in June of 2018 and she looks pretty good in the daylight
Even without an interior, drove it a couple of blocks and that was pretty cool. Problem is that my flasher relay went on the fritz on start up. No parking brake indicator, no turn signals and no 4 ways. What a PITA! Need to drop the fuse box and get in there before the car goes off to have the interior installed on Thursday. Also going to need to leave the door cards off as the window fitment is still pretty FUBAR.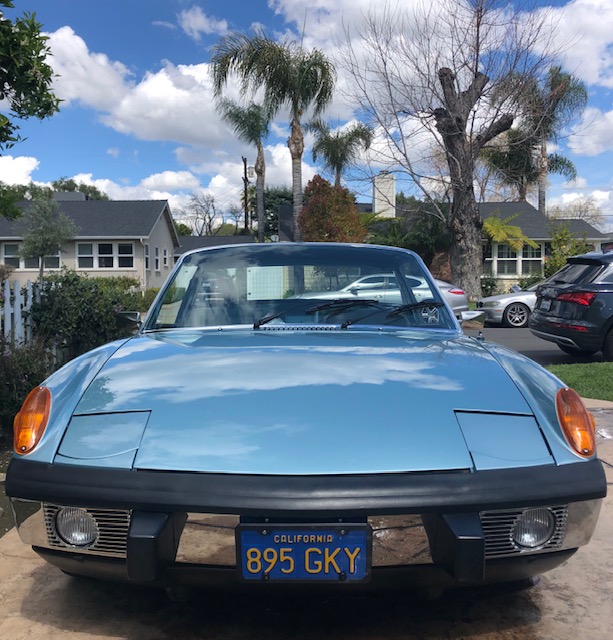
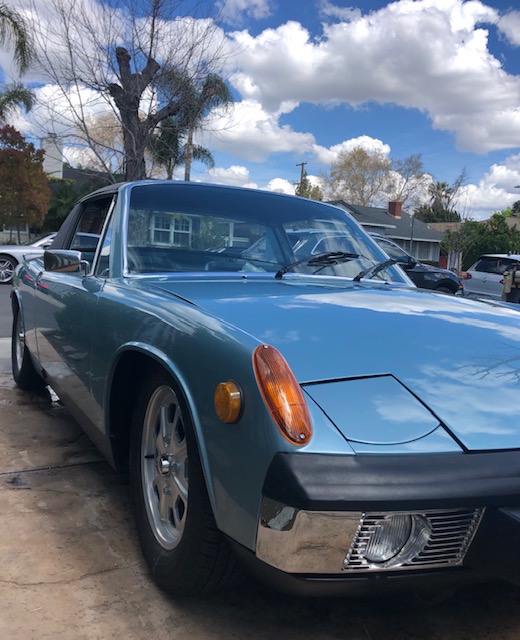
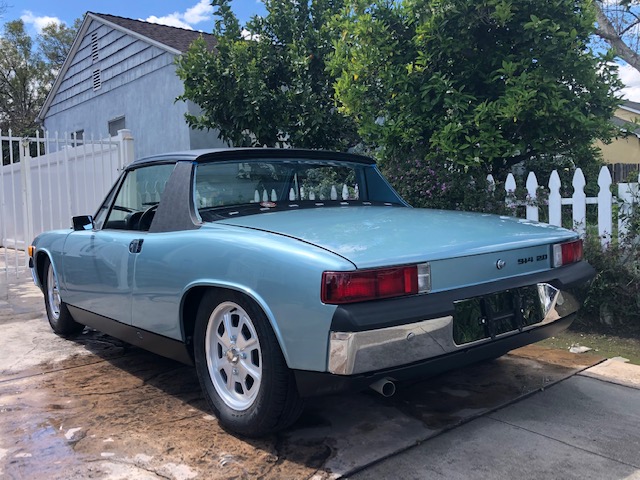
Posted by: FlacaProductions Mar 22 2020, 04:47 PM
FANTASTIC!!!
Call me this week if we can stay 6-feet apart and still get something done....
Posted by: bbrock Mar 22 2020, 05:23 PM
WOW! That car is absolutely amazing!
BTW, did you see on another thread that someone mentioned a bad flasher relay can cause the turn signal indicators to both flash at the same time? I meant to bring that to your attention but got sidetracked.
Posted by: euro911 Mar 22 2020, 08:40 PM
Your car is looking fabulous, Jeffery
Posted by: raynekat Mar 22 2020, 08:54 PM
Yes, adjusting those windows/doors so that everything closes nicely is a pain.
It took me a long time to get something I could live with.
You just have to thinking about it and which way everything needs to move.
I also had a lot of issues with the 914Rubber door stays.
They were making all kinds of noise and snapping.
Finally tracked down a set of these Porsche door stay pins and drove them home.
All is quiet on the western front....as least for now.
Just google Porsche door stay and you'll see that different folks carry these. 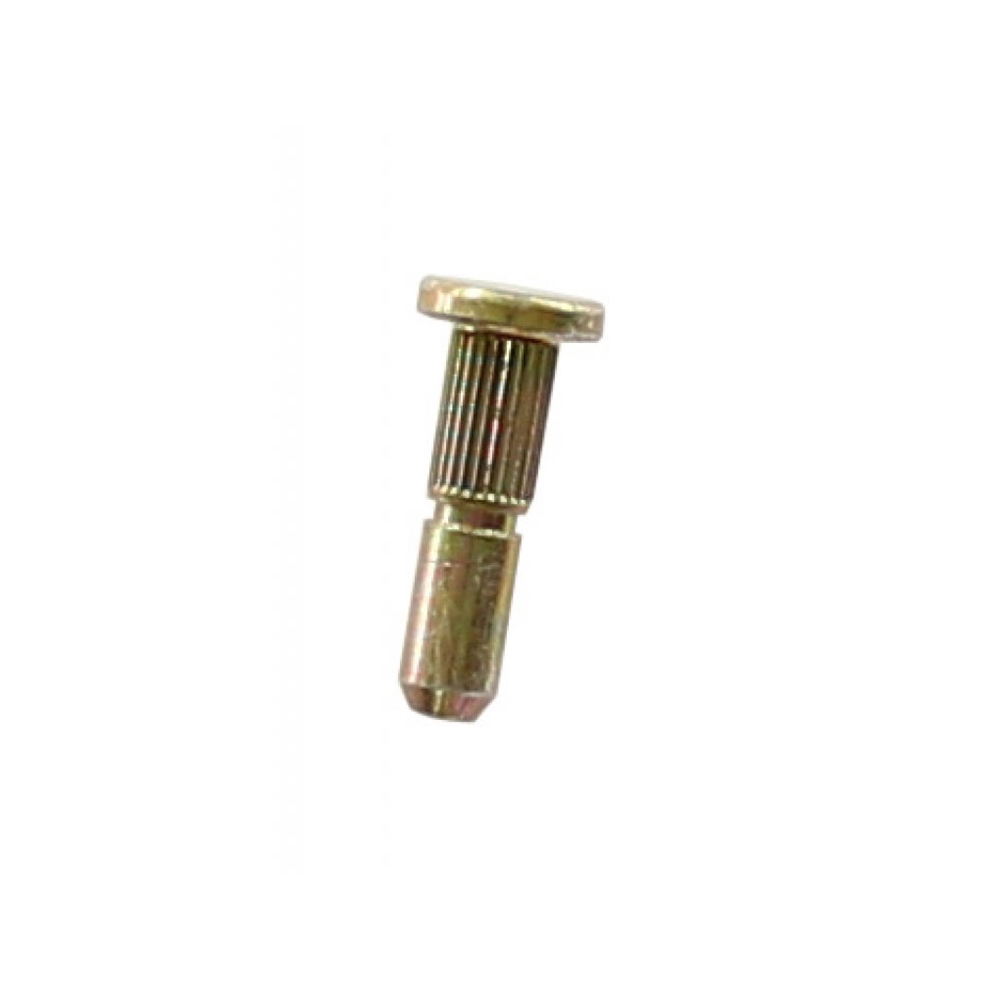
Posted by: arne Mar 22 2020, 09:22 PM
Finally tracked down a set of these Porsche door stay pins and drove them home.
All is quiet on the western front....as least for now.
The Porsche pins are quieter when new, but after a few years the popping will return. That's been my experience, anyway.
Posted by: 914_7T3 Mar 22 2020, 09:28 PM
Finally tracked down a set of these Porsche door stay pins and drove them home.
All is quiet on the western front....as least for now.
The Porsche pins are quieter when new, but after a few years the popping will return. That's been my experience, anyway.
@http://www.914world.com/bbs2/index.php?showuser=18263 & @http://www.914world.com/bbs2/index.php?showuser=20799
Thanks guys, so after a quick web search, the new style pins pictured are Porsche part #911.531.275.01 that supercedes the original door check pin with cotter at the bottom part #911.531.275.00
I have an order in already with my local dealer so will add a set of these as well, but what happens after the hole widens and they snap, crackle pop again?
Posted by: 914_7T3 Mar 29 2020, 10:21 PM
Received a replacement relay this week to trouble shoot the intermittent one. Also got the new door pins for replacement. Didn't get to either project over the weekend though. 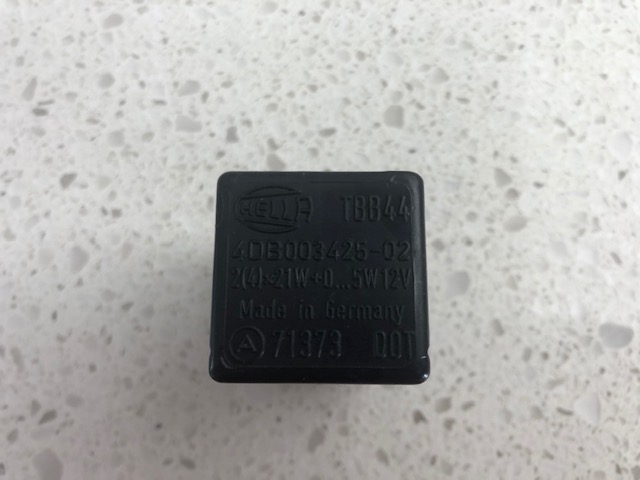
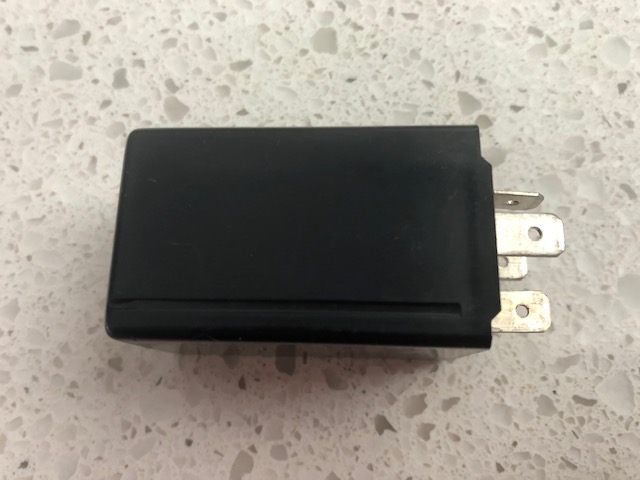
Got the replacement antenna installed and had to use all hardware from the old one to get enough thread for the mounting nut to grab onto. Took way longer than it should.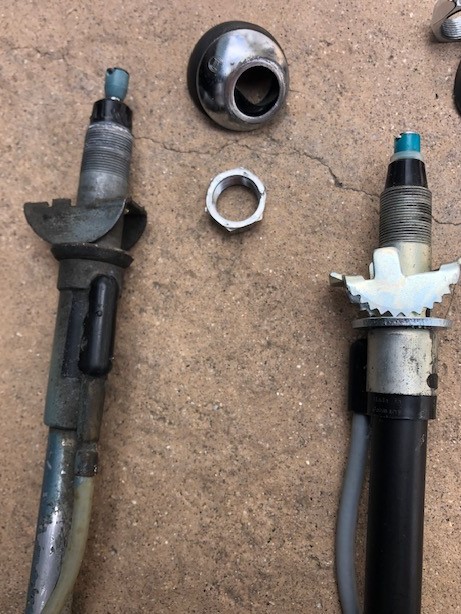
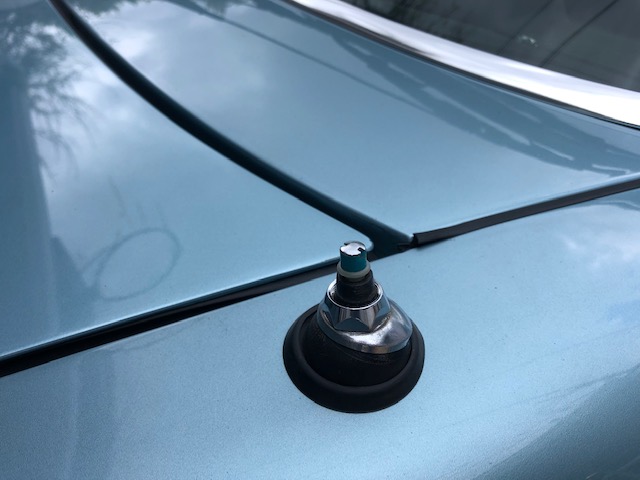
Moved onto the seat belts and went with the best example of each from my stash. Got some tech tips and support from 914World seat belt expert @http://www.914world.com/bbs2/index.php?showuser=21628 to get them installed. Once in, got them cleaned up and lubed the center mechanism with silicone spray. They will still need the tension adjusted and @http://www.914world.com/bbs2/index.php?showuser=21628 has offered to do that so they are on their way to him 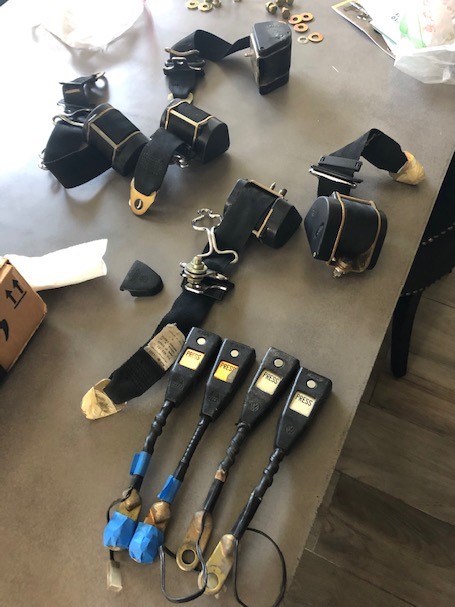
Next up was the clean up of the receivers and they came out looking really good.
Hopefully more can get done in the coming days.
Posted by: DRPHIL914 Mar 29 2020, 11:13 PM
looks great!! - you have a sickness sir!!! (not viral but i think contagious!)
ask me how i know, takes one to know one. it seems i keep looking for things to fix replace or refurbish but seriously that car is awesome and what i appreciate most is that you’ve done most of it yourself. nothing wrong with getting help or paying for stuff to be done but it’s cool to see people do this stuff themselves and really cool share it and help show other’s how to do it as well. thanks for the awesome documentation. my next project will be the seat belt receivers !
Posted by: 914_7T3 Mar 30 2020, 10:16 AM
@http://www.914world.com/bbs2/index.php?showuser=11106
Appreciate the kind words, but truth be told I have not done nearly enough of the work myself. Turns out my sweet spot has been sourcing parts and light refurb, cleaning, & painting of small projects and working along side those more knowledgeable.
Outside of choosing a great mechanic, trans rebuilder & body shop, I have relied heavily on the community for their help and have learned a ton in the process. Prior to this project, I have never wrenched and that is what has made it so difficult and exetnded the timelines.
Without the support of the 914World community, the level of this build would not be possible. 
Posted by: bbrock Mar 30 2020, 12:57 PM
And you have sourced a few crucial parts and provided plenty of wisdom for my build and others too. It's all reciprocal.
Posted by: raynekat Mar 30 2020, 05:20 PM
Looking good on your seat belt resto/install.
Posted by: 914_7T3 Apr 6 2020, 07:39 PM
Had a nice chat with @http://www.914world.com/bbs2/index.php?showuser=20845 on Saturday who was kind enough to point out that I should verify the window stop adjustment on the regulator to get the window to raise the extra 1/4" that was needed. TBH, didn't even know what that bolt to nowhere was for...
Thanks Brent 
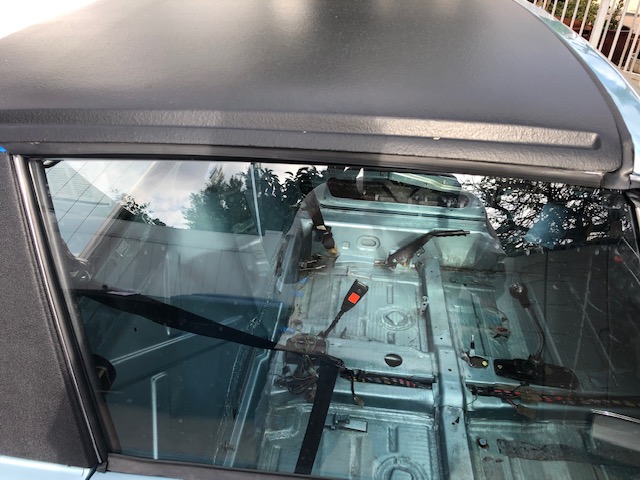
Got the seat belts back from @http://www.914world.com/bbs2/index.php?showuser=21628 and was super appreciative of his offer to adjust the tension and happy to report they are really good. I am going to send him one of my old ones to crack open and experiment with the spring mechanism.
Reinstalled the belts and driver seat and went for a drive yesterday for a couple of miles. 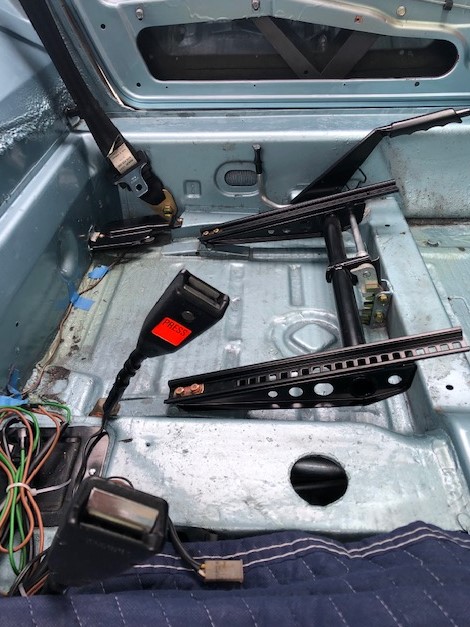

Was super cool, but once up to operating temperature ended up heading back because I was unsure as the whether or not the burn off from the rebuild was normal. Apparently it is, so all good. 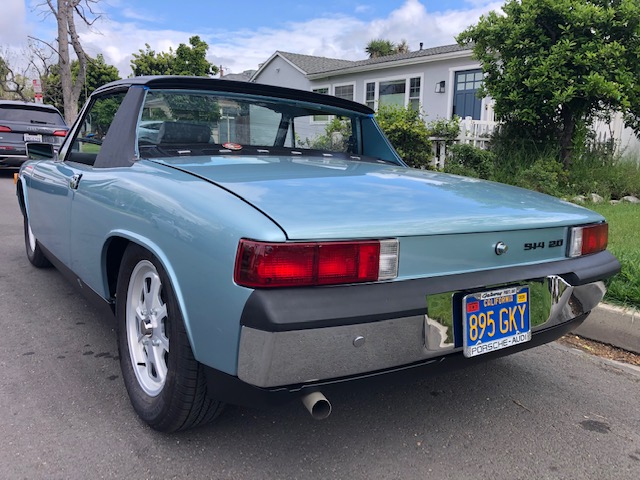
Going to get it over to @http://www.914world.com/bbs2/index.php?showuser=15093 at TRE Motorsports by the end of the week to give it a once over. Still needs the timing adjusted from when the distributor was off trouble shooting the non-spark issue back in August.
Although she shifts really smooth, the bushings need attention as I really need to go hunting to find first gear some of the time. Finally able to trust the transmission and downshifting into second without a grind is Aaaaaaamazing!
Once that's done, I'll address the exhaust leak before getting back to the interior.
Posted by: bbrock Apr 6 2020, 07:46 PM
Had a nice chat with @http://www.914world.com/bbs2/index.php?showuser=20845 on Saturday who kind enough to point out that I should verify the window stop adjustment on the regulator to get my window to raise the extra 1/4" that I needed. TBH, didn't even know what that bolt to nowhere was for...
Thanks Brent
You mean I was helpful? What are the odds?
Looking great. Love that you went for a drive!!!!

Posted by: FlacaProductions Apr 6 2020, 08:14 PM
Yay! Another step ahead (or two)!
I'll be happy to snag one of the "extra" belts when this Corona things simmers down - I've read enough to be really dangerous now.
What a great project and a great car!
Posted by: ndfrigi Apr 6 2020, 09:32 PM
Had a nice chat with @http://www.914world.com/bbs2/index.php?showuser=20845 on Saturday who kind enough to point out that I should verify the window stop adjustment on the regulator to get my window to raise the extra 1/4" that I needed. TBH, didn't even know what that bolt to nowhere was for...
Thanks Brent
Got the seat belts back from @http://www.914world.com/bbs2/index.php?showuser=21628 and was super appreciative of his offer to adjust the tension and happy to report they are really good. I am going to send him one of my old ones to crack open and experiment with the spring mechanism.
Reinstalled the belts and driver seat and went for a drive yesterday for a couple of miles.
Was super cool, but once up to operating temperature ended up heading back because I was unsure as the whether or not the burn off from the rebuild was normal. Apparently it is, so all good.
Going to get it over to @http://www.914world.com/bbs2/index.php?showuser=15093 at TRE Motorsports by the end of the week to give it a once over. Still needs the timing adjusted from when the distributor was off trouble shooting the non-spark issue back in August.
Although she shifts really smooth, the bushings need attention as I really need to go hunting to find first gear some of the time. Finally able to trust the transmission and downshifting into second without a grind is Aaaaaaamazing!
Once that's done, I'll address the exhaust leak before getting back to the interior.
Yahooo! finally it is driven! Congratulations Jeffrey!
Posted by: 914_7T3 Apr 9 2020, 01:21 PM
Today's delivery!
Scored one on Evil Bay crack free 
Posted by: 914_7T3 Apr 9 2020, 01:21 PM
Double Post
Posted by: 914_7T3 Apr 13 2020, 03:48 PM
Drove the car 7 miles to my Porsche shop, no easy feat with the timing needing adjustment. Once I got her going again after every traffic light everything was uneventful from there.
First issue discovered, transmission leak from a loose drain plug. Let's see what else isn't doing what it should.
At least I'll get those transmission mounts turned right side up among other things. 
Posted by: burton73 Apr 13 2020, 06:49 PM
Jeffrey,
Really nice. Almost there and all the great work really shows. This is the car I personally want for my 914 in Blue.
Best Bob B
Posted by: 914_7T3 Apr 13 2020, 08:35 PM
Jeffrey,
Really nice. Almost there and all the great work really shows. This is the car I personally want for my 914 in Blue.
Best Bob B
@http://www.914world.com/bbs2/index.php?showuser=7414
Bob, thanks for the kind words. This is not the car you want.....IIRC, you want an Olympic Blue with a V8 powerplant to go with the Yellow 6 and the one with the motor up front.
Posted by: 914_7T3 May 4 2020, 05:21 PM
Three weeks later, the car is still in the air as the exhaust leak was identified as a loose heat exchanger at the exhaust manifold. Upon tightening, with minimal torque, the stud snapped. A bolt was welded to the remaining thread to successfully remove it.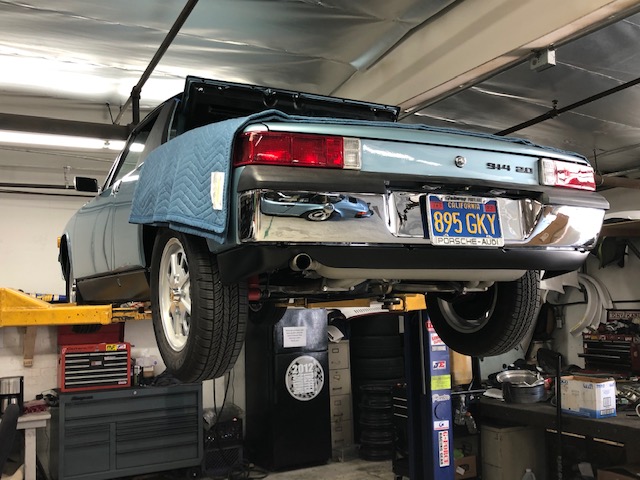
After looking at all of the available options, decided to go with a set of NOS & NLA German exhuast studs (8mm x 56mm). Found them on the Samba from a vendor out of the Yukon as in the North West Territories. Canada Post is slow on shipments to the USA and the seller is approx. 50 miles from the nearest post office...............hoping to get them any day now.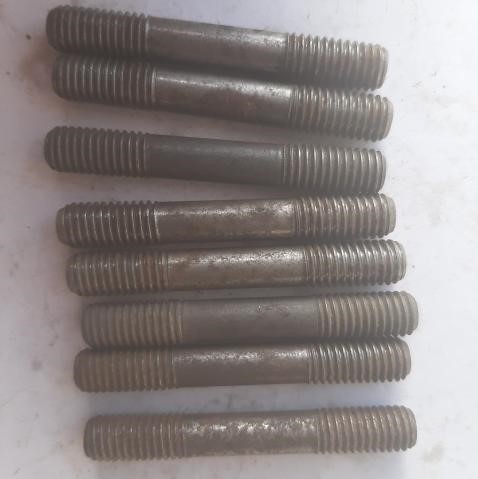
Check out Magnus' '67 Urban Outlaw in the next bay that was getting a new rebuild installed. Bet he's never seen a bone stock 914 before 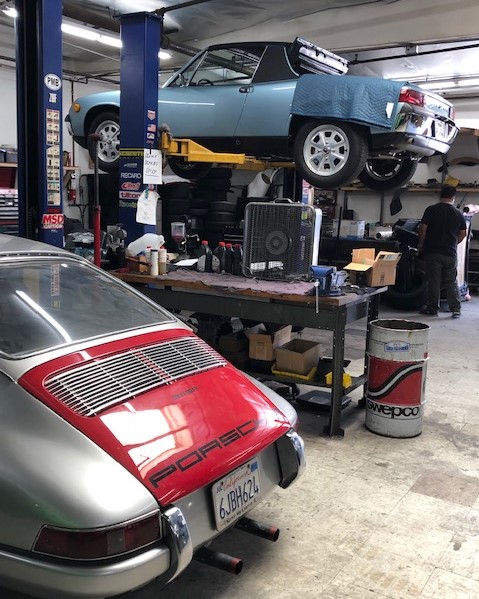
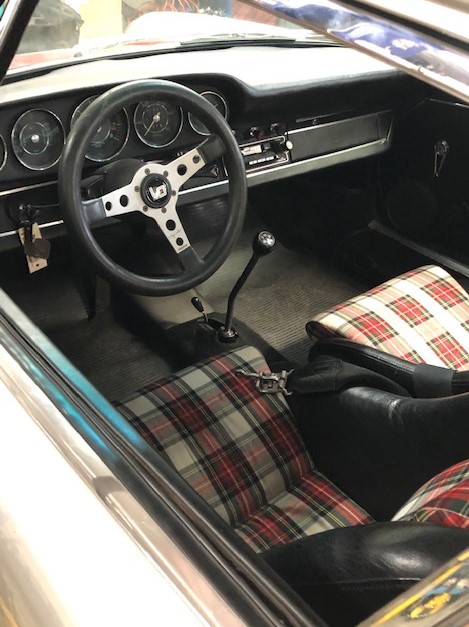
Posted by: FlacaProductions May 4 2020, 06:24 PM
oh, dude. SO close!! Nice that it'll be done right....like everything else on that car.
Posted by: 914_7T3 May 11 2020, 03:11 PM
Bought these....
They shipped these,
Posted by: FlacaProductions May 11 2020, 04:18 PM
Missed it by thaaaaat much.....rats.
Posted by: cuddy_k May 11 2020, 04:19 PM
They use a different measuring system up there in Canada 
Sorry dude. Will check my bin for some....
Posted by: Larmo63 May 11 2020, 04:22 PM
I wouldn't use those.
Your heat exchangers will drag on the ground.
Posted by: 914_7T3 May 11 2020, 05:15 PM
I wouldn't use those.
Your heat exchangers will drag on the ground.It's OK Larmo, some guy named Daniel in Sarasota, FL should get my studs any day now!
Posted by: 914_7T3 May 11 2020, 05:17 PM
They use a different measuring system up there in Canada
Sorry dude. Will check my bin for some....
Sure make fun of the CDNs as I am one of them too!

Regardless, its metric up there so why the misunderstanding?
Posted by: 914_7T3 May 11 2020, 05:22 PM
Missed it by thaaaaat much.....rats.
Posted by: arne May 11 2020, 06:14 PM
Regardless, its metric up there so why the misunderstanding?
Their 'process' (long O) may not be 'about' (pronounced 'a-boot') accuracy...
Posted by: 914_7T3 May 11 2020, 07:25 PM
Regardless, its metric up there so why the misunderstanding?
Their 'process' (long O) may not be 'about' (pronounced 'a-boot') accuracy...
Now you too?

Posted by: arne May 12 2020, 06:13 PM
You know I'm on your side, Jeffrey.
Posted by: euro911 May 12 2020, 11:05 PM
Lookin' good, Jeffery
Posted by: arne May 15 2020, 01:47 PM
I understand, Jeffery. The final details can be very tiring. One of the reasons I generally shoot for "nice driver" level on my projects. Pretty sure you are finally going to beat me this time, though.
Oops! Looks like I beat you again! Going for a drive this afternoon. Sorry!
Posted by: 914_7T3 May 15 2020, 02:17 PM
I understand, Jeffery. The final details can be very tiring. One of the reasons I generally shoot for "nice driver" level on my projects. Pretty sure you are finally going to beat me this time, though.
Oops! Looks like I beat you again! Going for a drive this afternoon. Sorry!
I admit defeat x2! Enjoy your drive
Posted by: 914_7T3 May 15 2020, 02:27 PM
Bought these....
They shipped these,
5 days later, no sign of the NOS studs that supposedly got shipped to Sarasota, FL and are now AWOL.
However, a big thank you to @http://www.914world.com/bbs2/index.php?showuser=1319 for the referral to George at European Motorworks in Hawthorne. Those guys saved the day as they just got in a shipment so I ran down there to pick up a set.
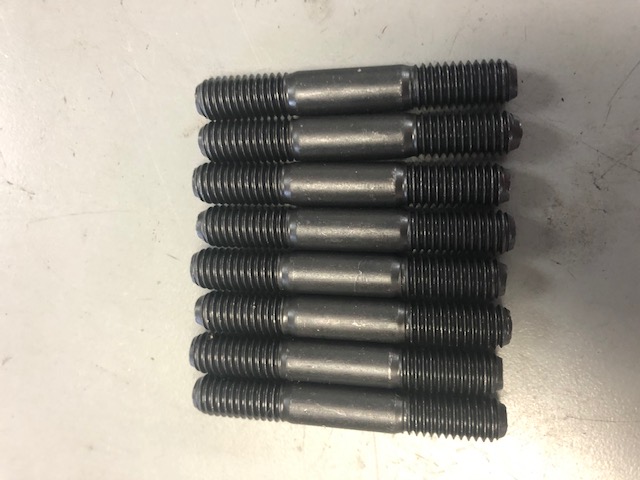
Now have to wait my turn to get back up on the rack and outta there!
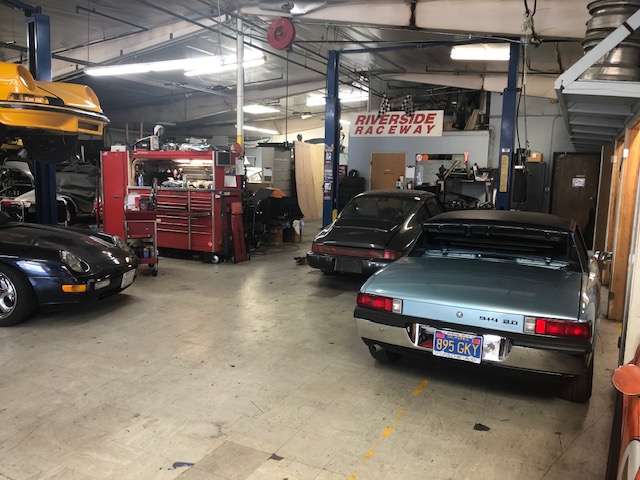
914s everywhere........
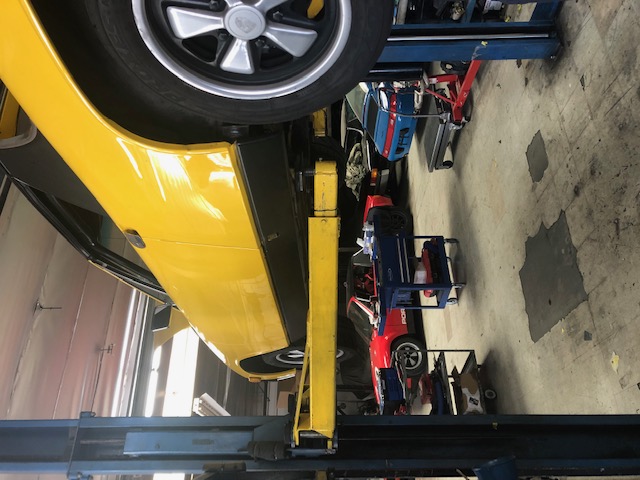
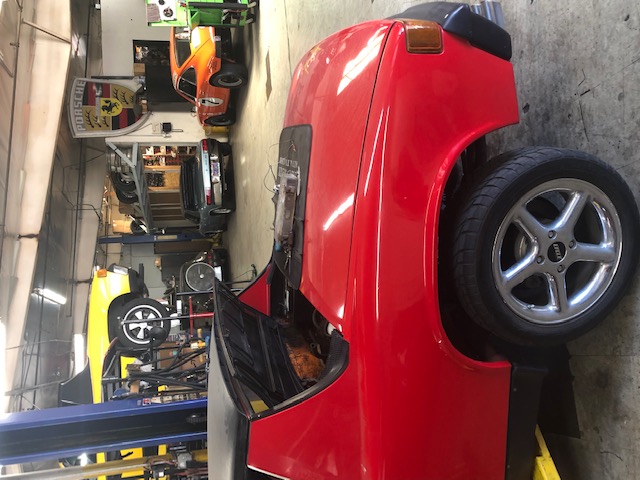
Posted by: arne May 15 2020, 06:14 PM
Well that's actually x3 (yellow 914, blue FJ40, silver 911T). But who's counting?

Posted by: 914_7T3 May 15 2020, 07:30 PM
Well that's actually x3 (yellow 914, blue FJ40, silver 911T). But who's counting?
 I forgot about the FJ...............
Posted by: 914_7T3 Jun 3 2020, 11:34 PM
Finally sprung the car on Monday from TRE Motorsports and wanted to give a shoutout to @http://www.914world.com/bbs2/index.php?showuser=15093 for getting me sorted.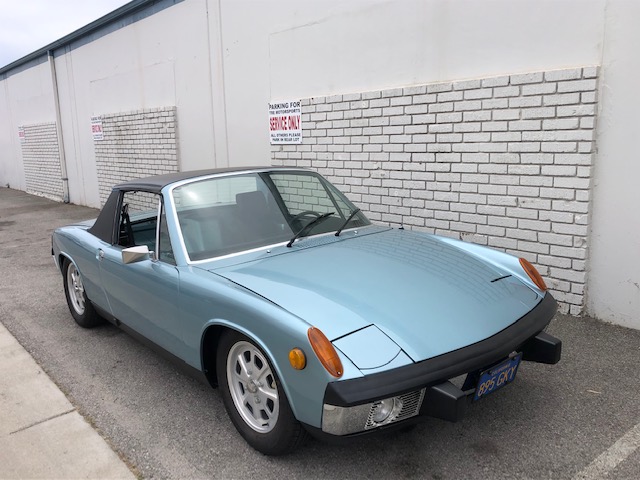
There were a lot of items overlooked or still requiring attention after the drive train went back in. Once the car was in the air, all remaining issues mechanical or otherwise were addressed.
This was the punch list:
Adjust points, dwell & timing
Install rev limiter on distributor
Verify vacuum hose install
Reinstall transmission mounts in correct position
Exhaust leak- replace all 8 Exhaust Studs & take HE for flange welding
Rocker panels secured with correct plated hardware & spacers
Swap steering pan, master cylinder & proportioning valve hardware with plated ones
Clean up previously spliced battery wires & install to new connector
Install correct grommets in rear engine tin
Replace thermostat with NOS unit & cable
Swap incorrect driver side flapper box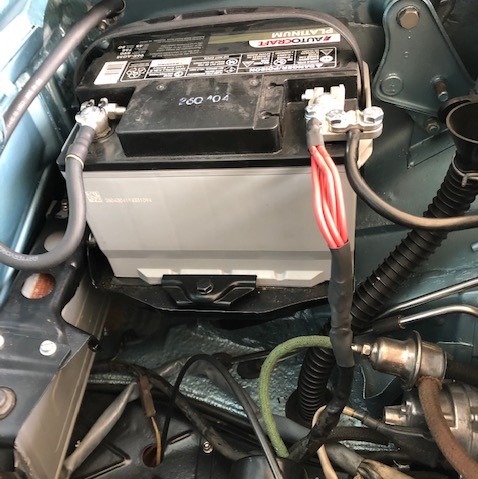
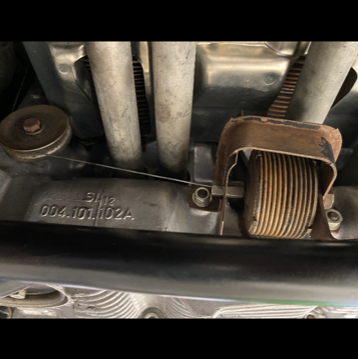
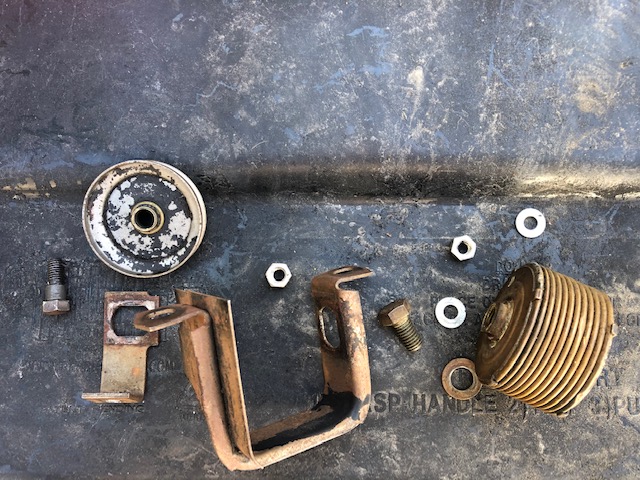
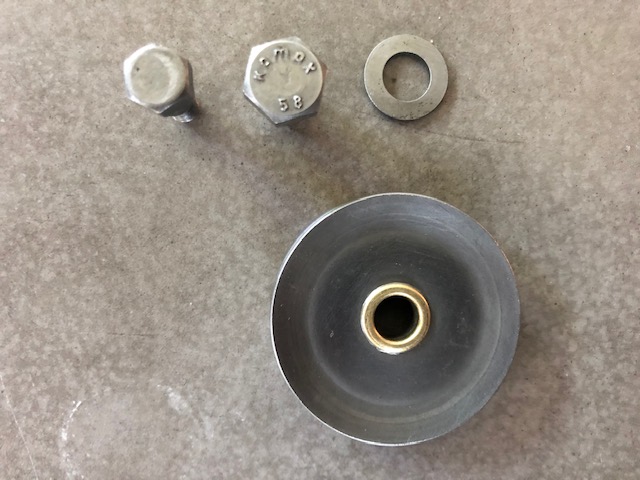


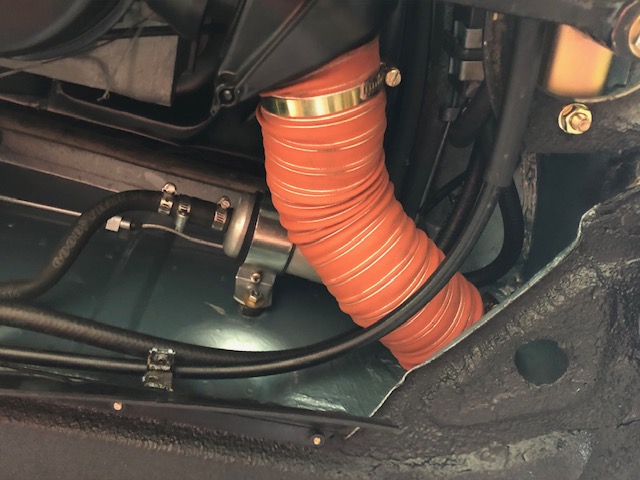
Took the long way home on a 20 mile run down the 405 Fwy and back across Mulholland down to the Valley. The car drives incredibly well, pulling strong and shifting very smoothly even though all synchros and 1st/reverse slider are new and yet to be worked in.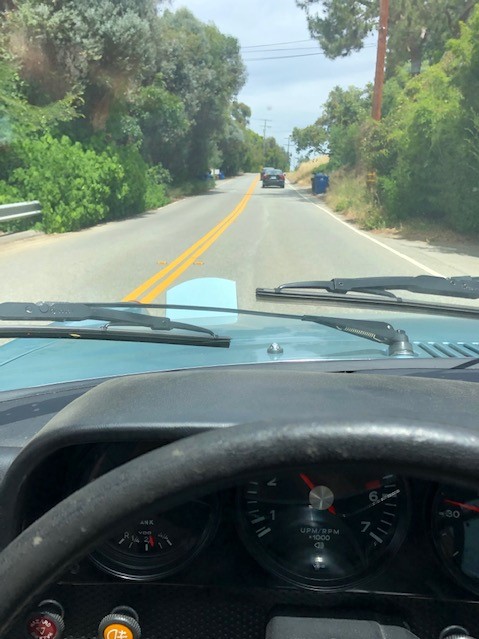
Now need to focus on my ground issue, interior install, final trim fitment and targa trim install.
Getting closer!
Posted by: Larmo63 Jun 3 2020, 11:48 PM
Wow, she lives!!!
Very nice and a long time coming.
Posted by: FlacaProductions Jun 4 2020, 10:43 AM
Awesome - love this build!
Posted by: 914_7T3 Jun 4 2020, 12:10 PM
Thanks guys, almost forgot the best part. Car was running super cool in 86 degree ambient temperature with 25% humidity.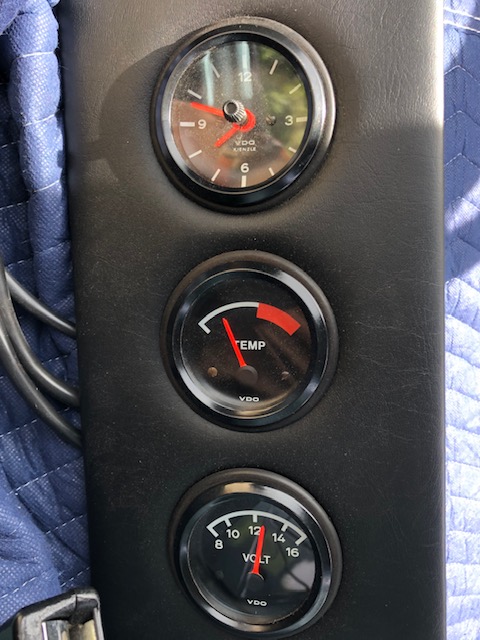
Posted by: 914_7T3 Jun 16 2020, 10:56 PM
70 mile Shake Down Run this evening in the canyons of Malibu!
Now showing 240 miles and one more run before I get the break in oil out of there & bleed the brakes on Sunday.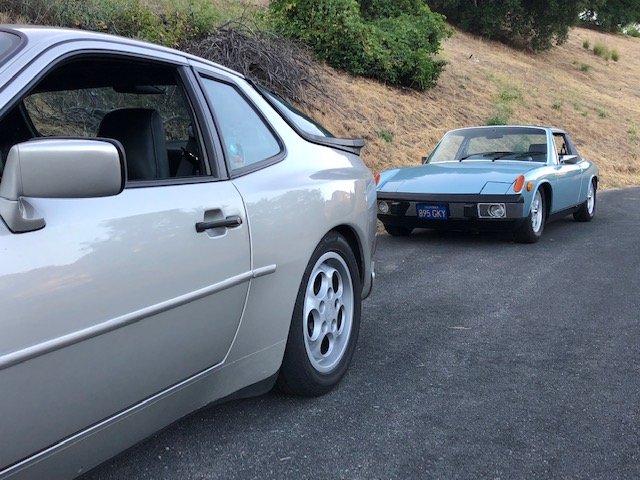
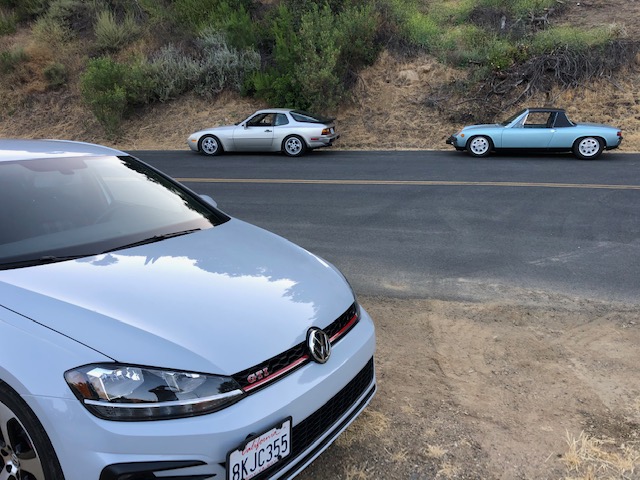
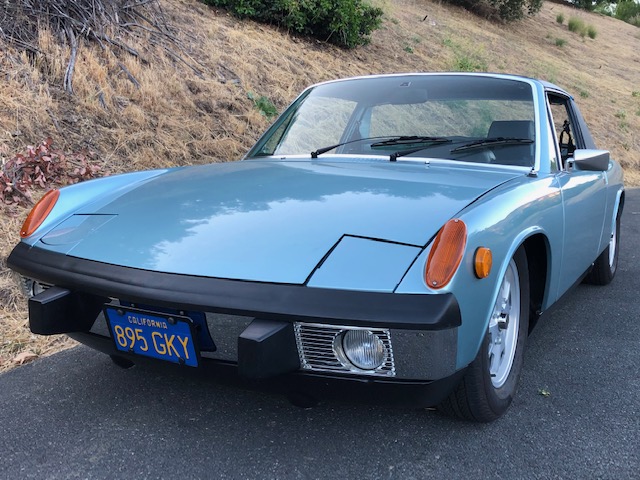
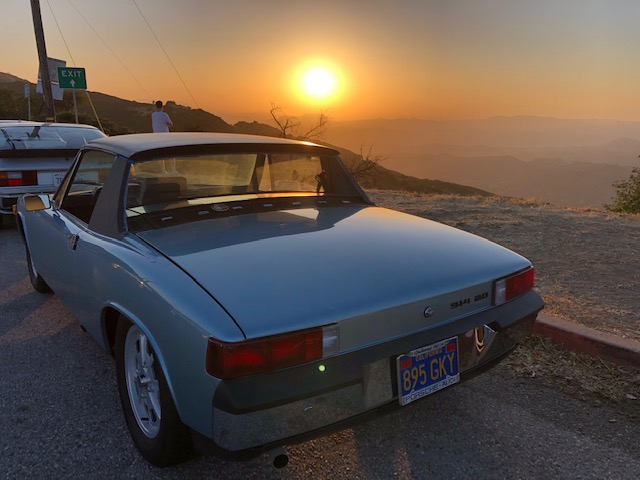
Posted by: 914_7T3 Jun 16 2020, 10:56 PM
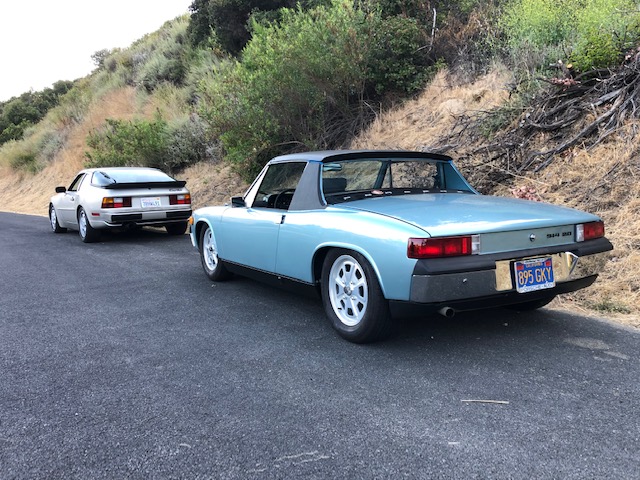
Posted by: euro911 Jun 16 2020, 11:33 PM
Looking good, Jeffery
Posted by: bbrock Jun 17 2020, 07:52 AM
You give me inspiration sir. Proof that it CAN be done!
Posted by: ndfrigi Jun 17 2020, 08:50 AM
Nice and congrats Jeffery!
For sure lots of smile and joy driving it now!
Oh what happen to the black License plate “914 7T3”?
Posted by: euro911 Jun 17 2020, 11:42 AM
Blue plates are actually the correct ones for 914s
Posted by: 914_7T3 Jun 17 2020, 04:38 PM
Blue plates are actually the correct ones for 914s
Yes and G-K is correct lettering for the '73 model year for the most part.
Posted by: 914_7T3 Jun 17 2020, 04:42 PM
You give me inspiration sir. Proof that it CAN be done!
@http://www.914world.com/bbs2/index.php?showuser=20845
Yes, it can with the help of the 914 World community! As you know, its not all rainbows and unicorns.
Finally the mechanical is sorted and the car drives amazing. The feel of the Konis sports are great and the engine pulls strong, surprisingly so for a 1911 cc. Transmission shifts smoothly too.
Aside from all that the punch list is quite long, but we will get there...
Posted by: 914_7T3 Jun 17 2020, 06:47 PM
Nice and congrats Jeffery!
For sure lots of smile and joy driving it now!
Oh what happen to the black License plate “914 7T3”?
Yes, for sure! 914 7T3 plates are now garage art. Wanted to run the period correct blue & yellows!
Posted by: 914-300Hemi Jun 17 2020, 09:16 PM
Looking good.
Posted by: tygaboy Jun 18 2020, 07:40 AM

and now:
Posted by: sb914 Jun 18 2020, 08:40 AM
Congrats!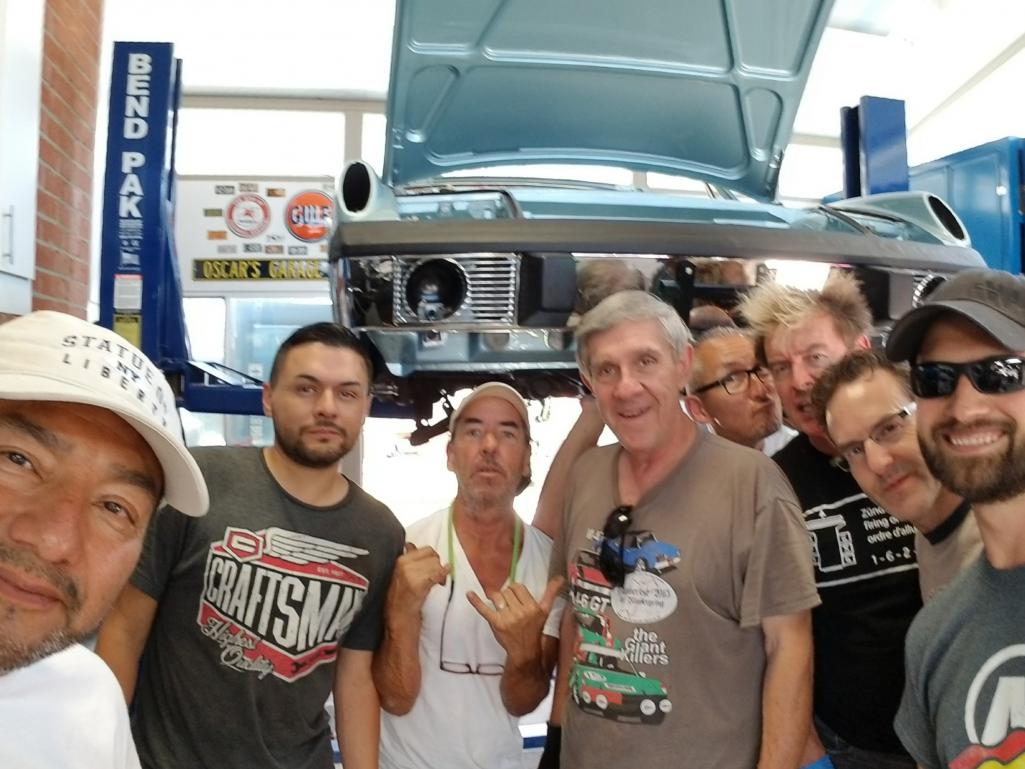
Posted by: sb914 Jun 18 2020, 08:41 AM
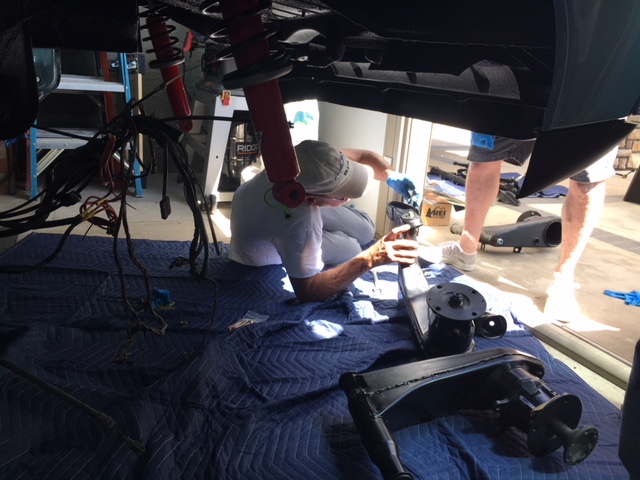
Posted by: 914_7T3 Jun 18 2020, 11:50 AM
Congrats!
Look at that SoCal crew
Couldn't have done it without you guys and hard to believe that photo was taken two years ago on suspension swap saturday! (Saturday June 9, 2018)
Posted by: 914_7T3 Jul 5 2020, 01:35 PM
Haven’t posted for the last few weeks, so here is the update:
Was down in OC a few weeks ago and spent the day on electrical trouble shooting (more like trial and error) and solved what was originally thought to be a ground issue on the 4-way flasher circuit. Swapped in a couple of different relays and cleaned the connections where it seats in the fuse box and that did the trick. 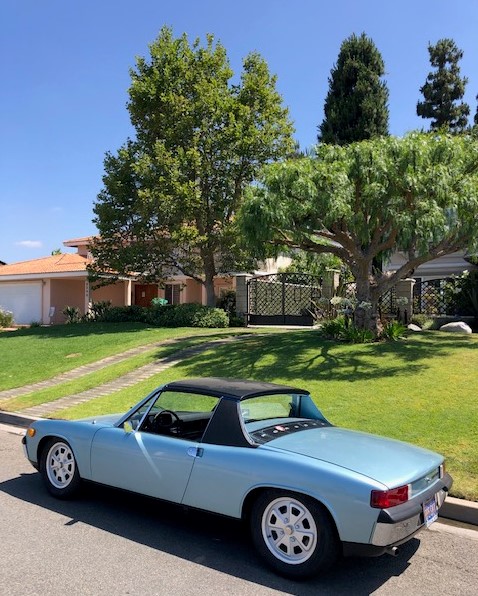
Next issue: later that week the fog lights and high beams started going intermittent when toggling back to low beams. Correctly guessed this to be a realy issue as well. Shout out to @http://www.914world.com/bbs2/index.php?showuser=15438 for hooking me up with a NOS one from a 6 ½ year old FS classified. 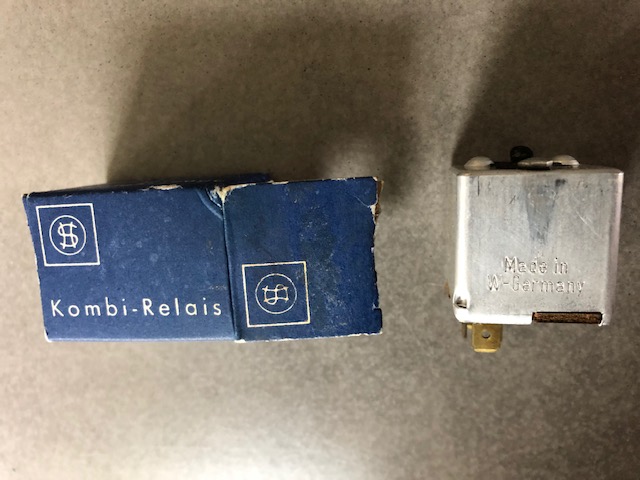
Lesson learned, these little f-ckers fail so always have back up on hand.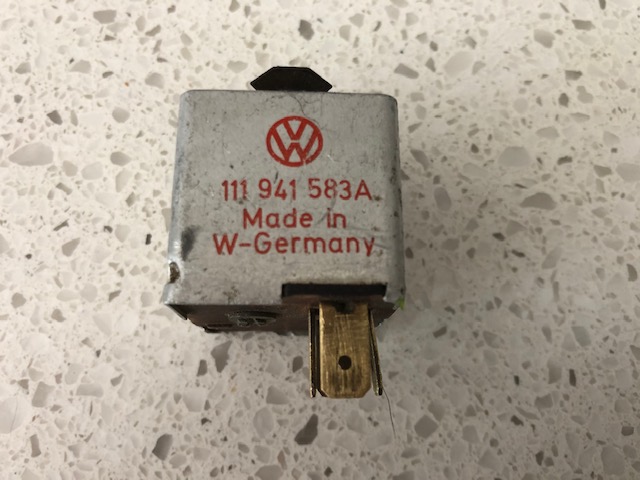
Last electrical items are to crimp new connectors to the 4 pole door switch and swap out the fasten seat belt light assembly that tested bad. I think the switch may be grounding so ignition buzzer and courtesy light activated by the driver’s side is not functioning as it should. Also need to revisit the green/white wire that connects to the fan control lever. There is another wire connected there and haven’t had the chance to figure out what it is or where it goes, but the fan is not working for sure.
Restored the rear-view mirror by sanding down the trapezoid mount to ready it for new adhesive pad and hit it with Krylon plastic paint. Now good as new.
Some more shake down runs and miles are up over 300 so it was time to change out the break in oil for some Penn Grade 20W 50. I had been monitoring the oil before every drive and was at the fill line before changing it. Once under the car, realized that it was leaking from the filter. Dodged a bullet there.
Next step was to bring the car back to the body shop to revisit the gaps and touch up some boo boos that happened on reassembly. Oil level was perfect after that 75 mile run.
All the rain tray fitment issues stem from the fact that the battery tray is bolted to the quarter panel incorrectly. Tired of this oversight from the first go round so decided to source a NOS tray and support to be welded in and painted. Not the correct way to do it after the drivetrain was reinstalled and mechanicals dialed it, but it is what it is. 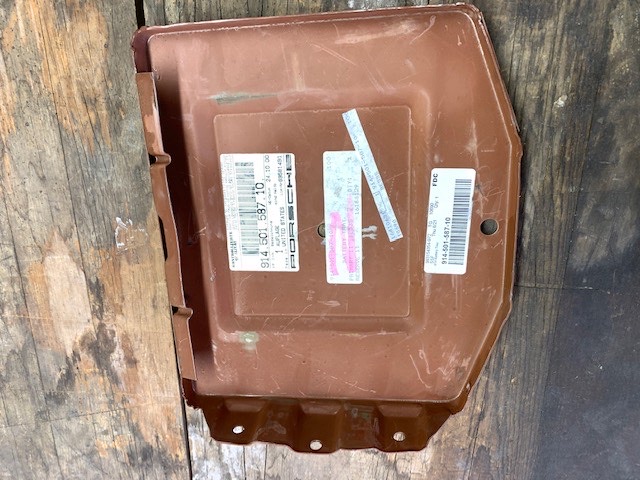
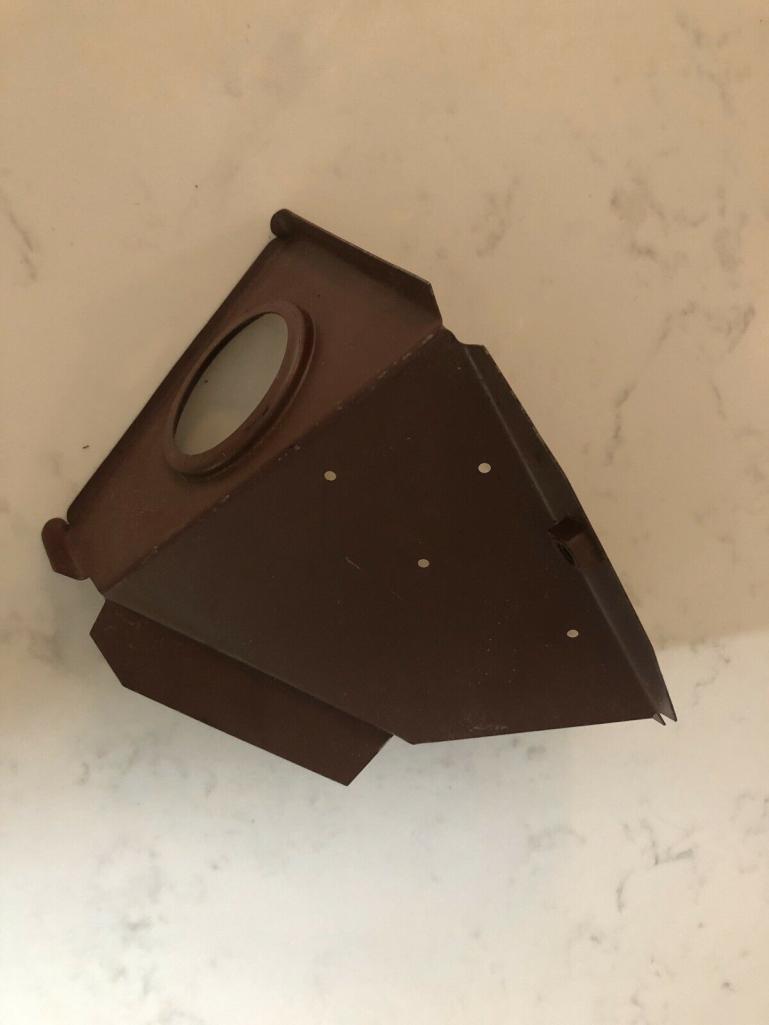
Heat in the rear trunk along with poor prep has caused the paint to bubble up and discolor in the area above where the muffler sits. Solution is to prep and repaint along with installing a thermal absorption pad under the heat shield. 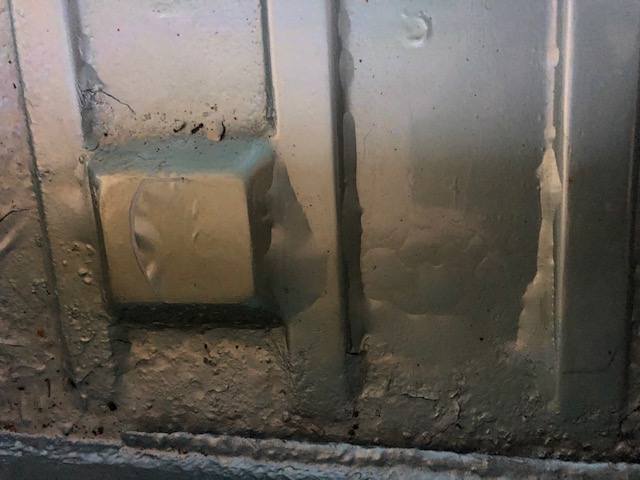
Should be another week and then its onto the interior and install the targa trim. Rear targa bar has been sanded & polished and ready to re-anodize.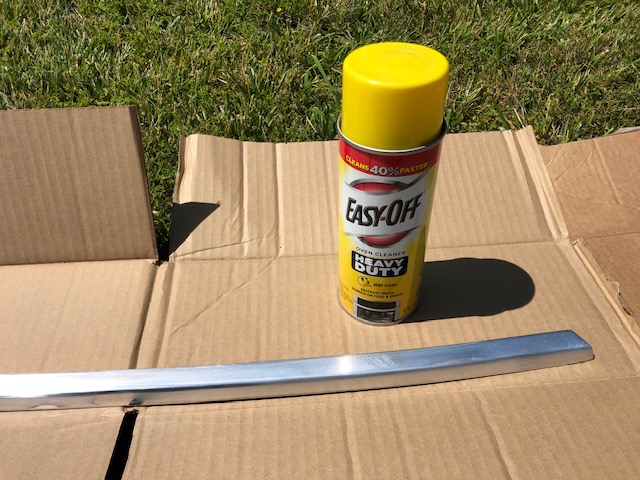
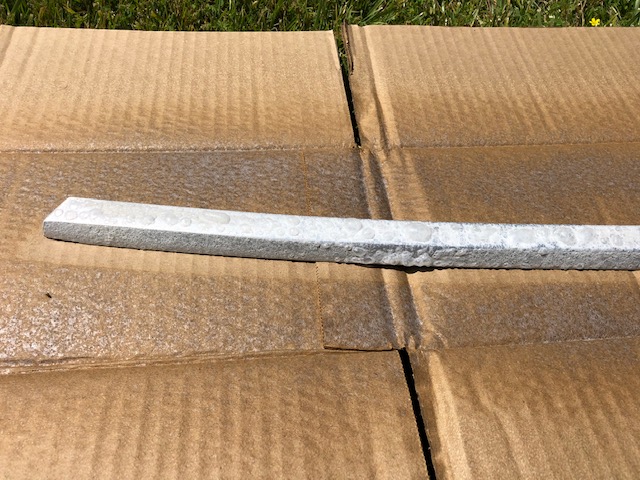
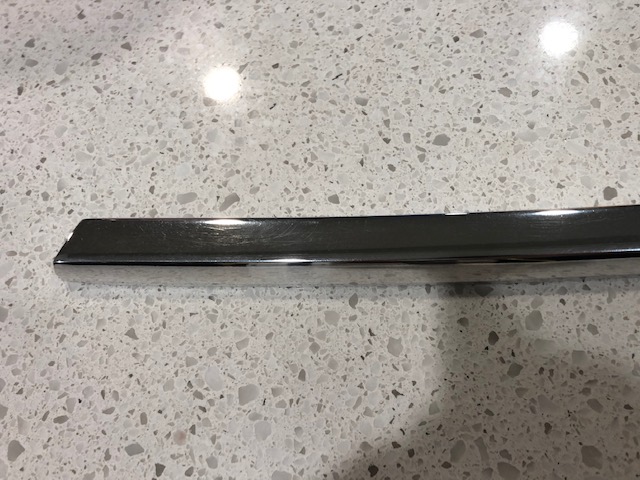
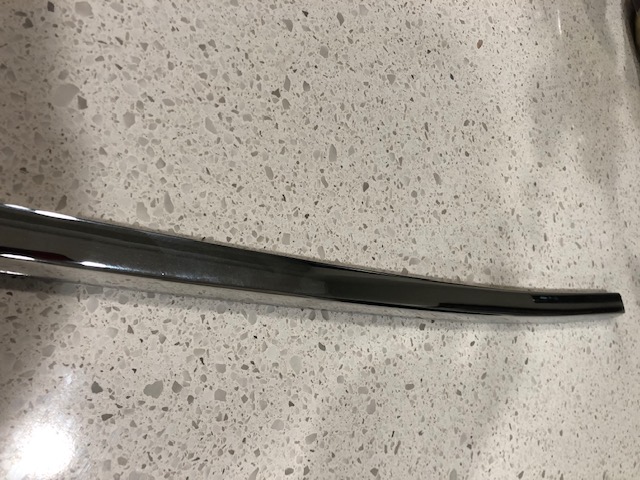
Getting really close and already looking forward to cooler driving weather in the fall.
Posted by: Cairo94507 Jul 5 2020, 02:31 PM
You are doing a great job of working your way through all of the issues. You are going to be thrilled with the end result.
Posted by: cuddy_k Jul 5 2020, 09:54 PM
Looking great, Jeffrey!
Posted by: logica Jul 8 2020, 05:44 PM
Congratulations - I have one with the same color - '74.
Posted by: 914_7T3 Aug 1 2020, 02:52 PM
Picked up the car in Riverside last Friday, but first got some help from @http://www.914world.com/bbs2/index.php?showuser=1319 & @jordan_29 in installing some thermal protection on the heat shield above the muffler.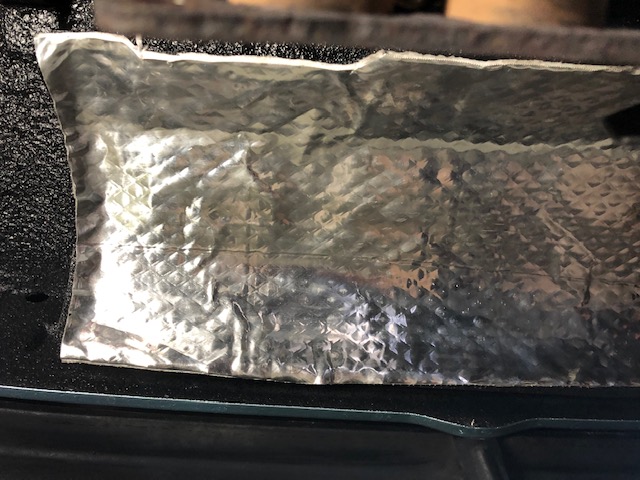
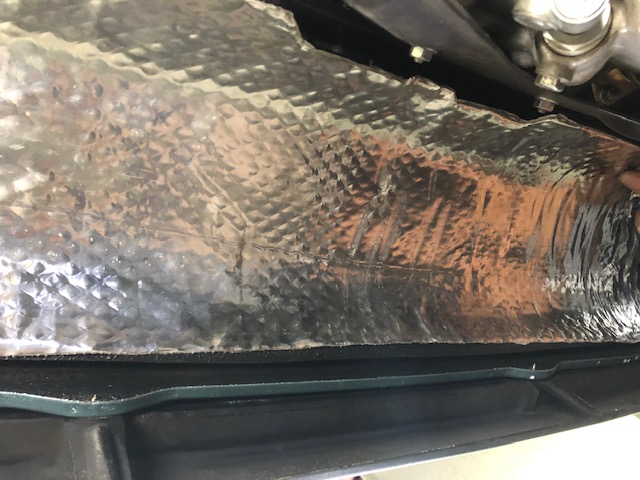
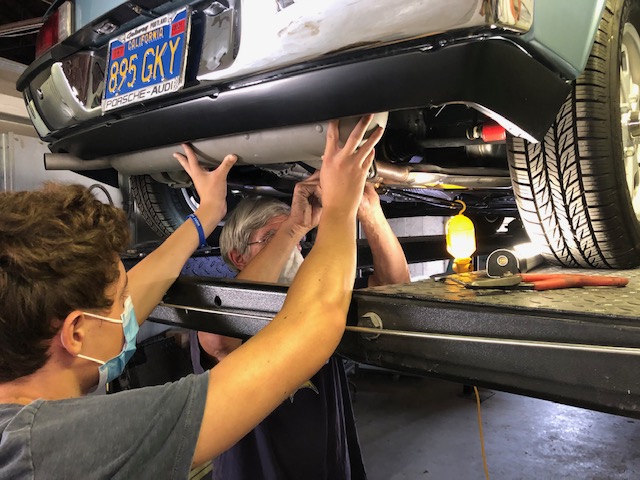
Battery tray install is finally complete and the rain tray clears as it should. Also reconnected the previously repaired green/white wire to the rear fan motor lever at the tunnel. Figured out that there was never a second ground wire on it after all, but merely the broken tab from the original wire. Pulled the lever down and the fan fired up right away. Surprising how powerful it is.
Gaps are much better, but still need to get into the headlight cover and height adjustments some more. Also stumped that the rear decklid is sitting a little high on the passenger side and need to wrap my head around that.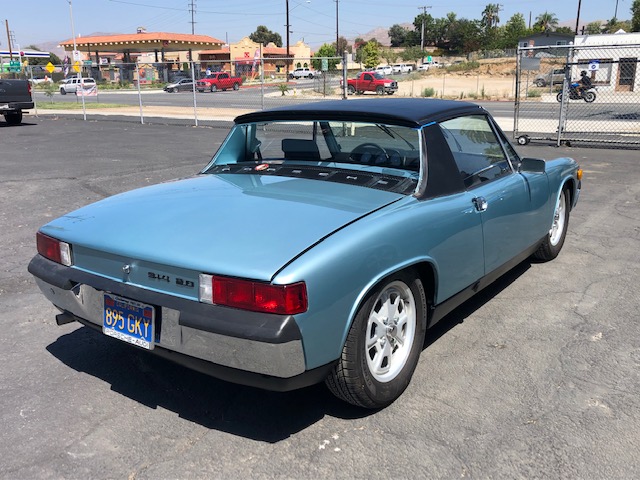
Now the car is in process of getting the interior installed. Z-Mat insulation is in and carpets will be next.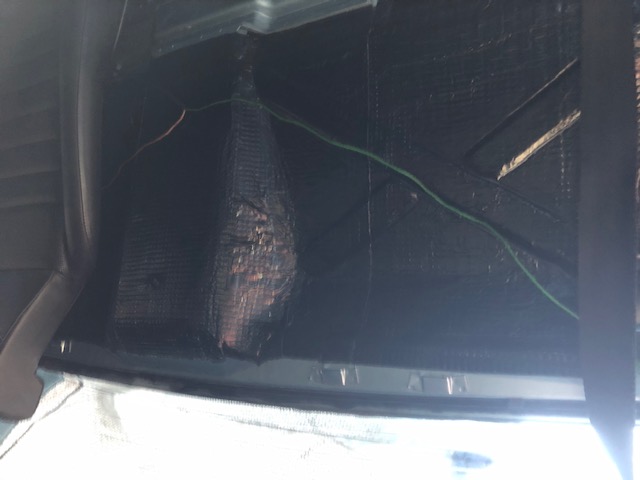
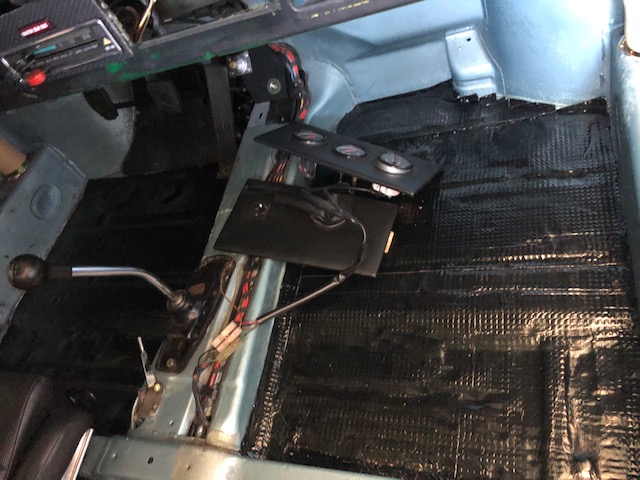
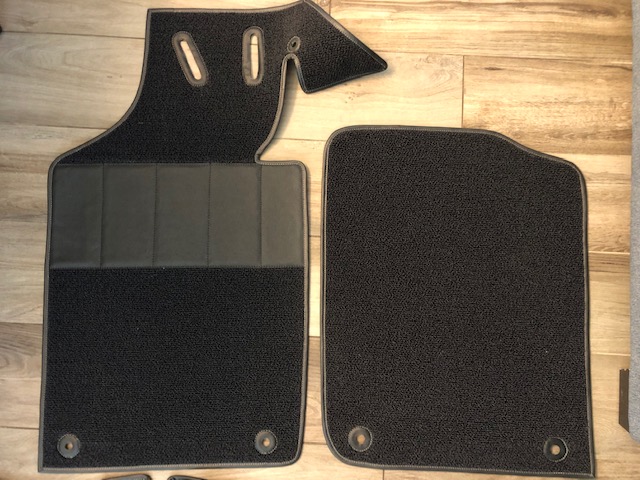
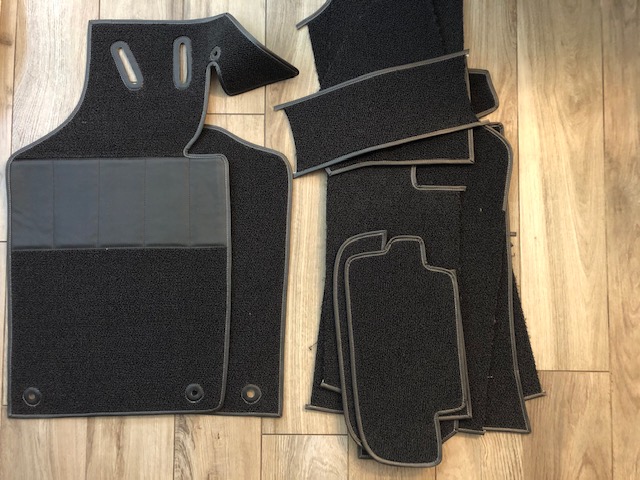
Spent the morning sorting hardware for the door panels, carpet strips, backpad, speakers and center console. Should have that complete by the end of the week. 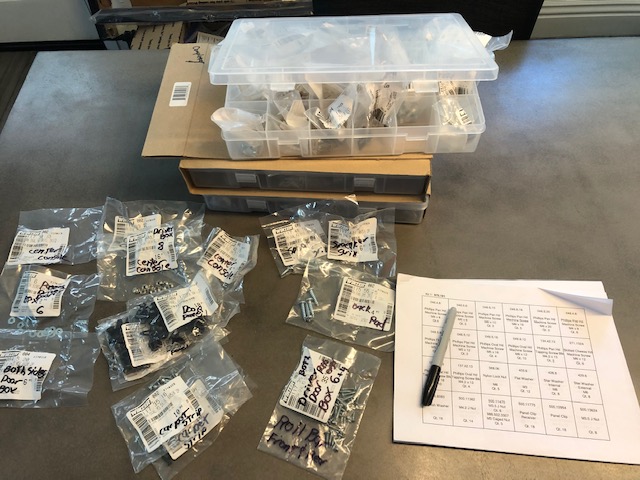
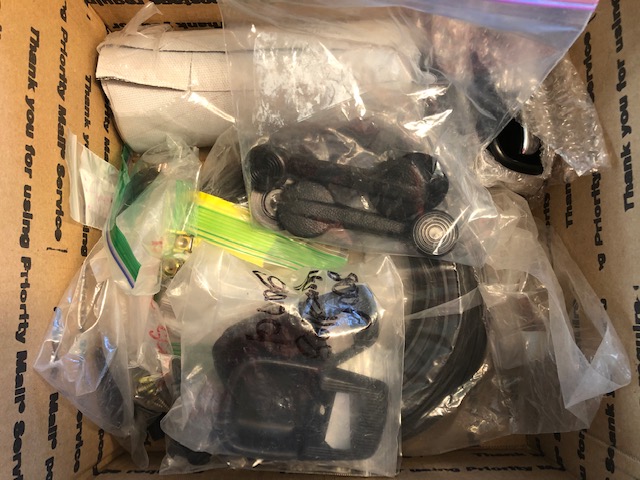
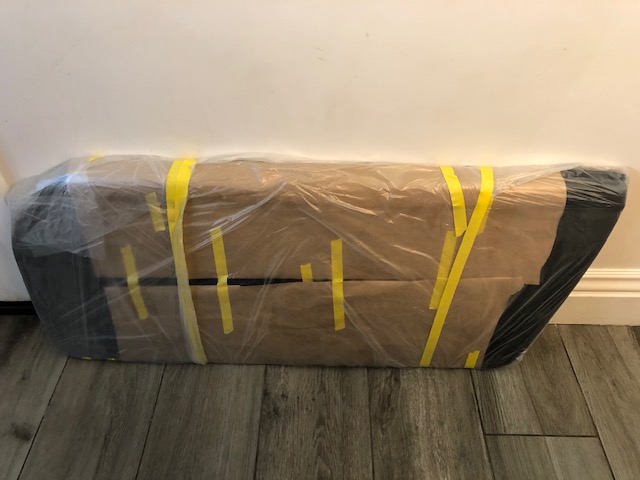
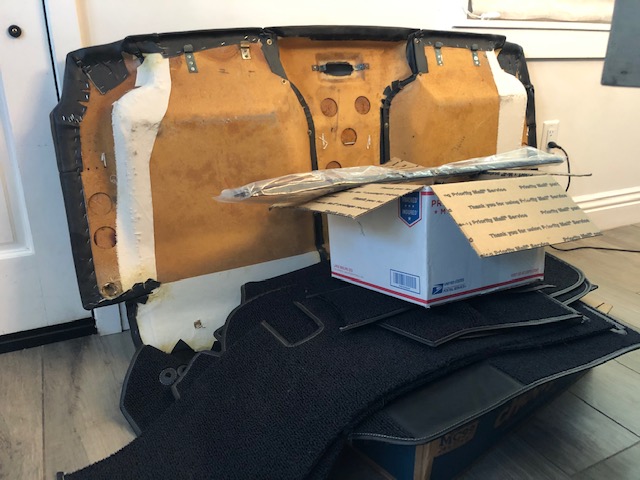
Next appointment will be getting full front end X-Pel clear bra installed on August 12th.
Posted by: 914_7T3 Aug 8 2020, 04:38 PM
More interior install pics...
Used the original 8 piece vinyl kit as a template and re-cut with OEM German materials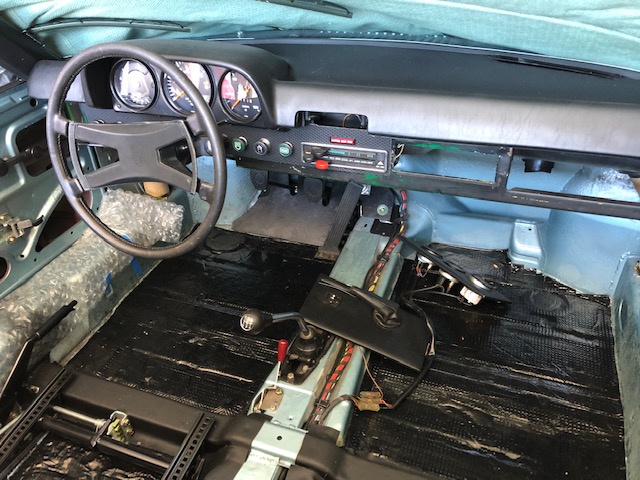
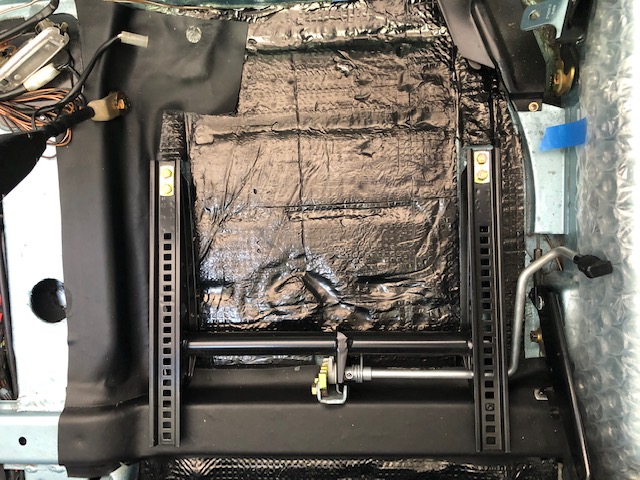
Loop Carpet Kit from Autobahn Interiors 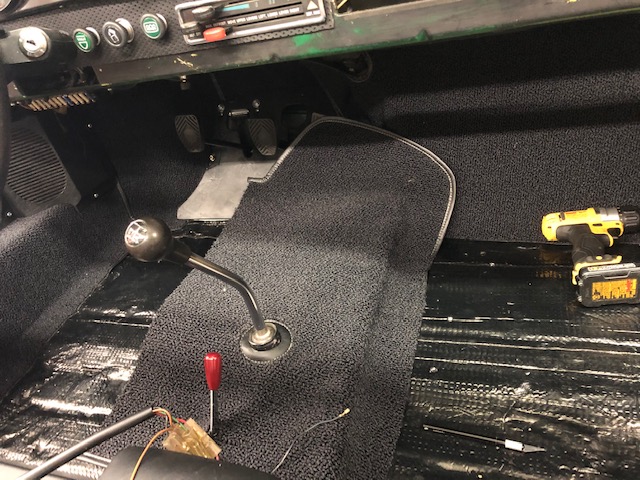
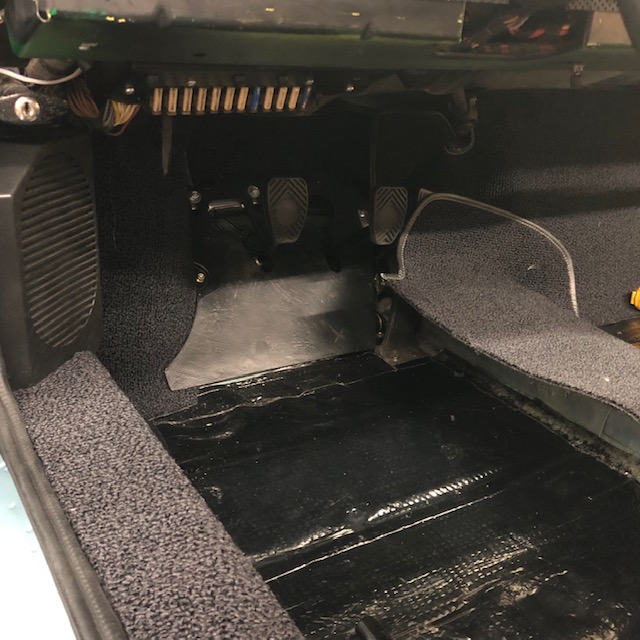
Rear Targa Pad installed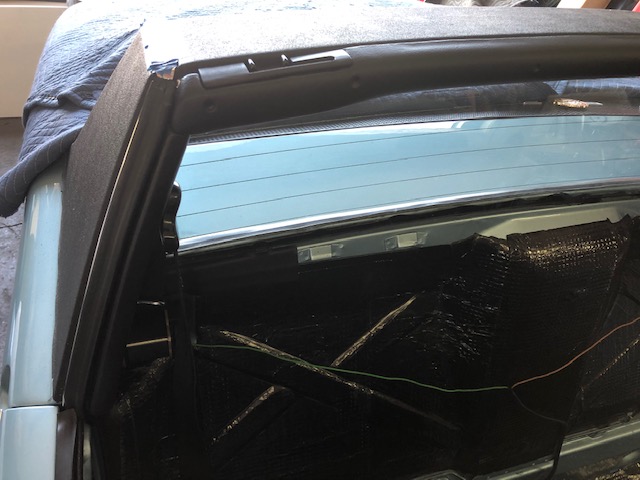
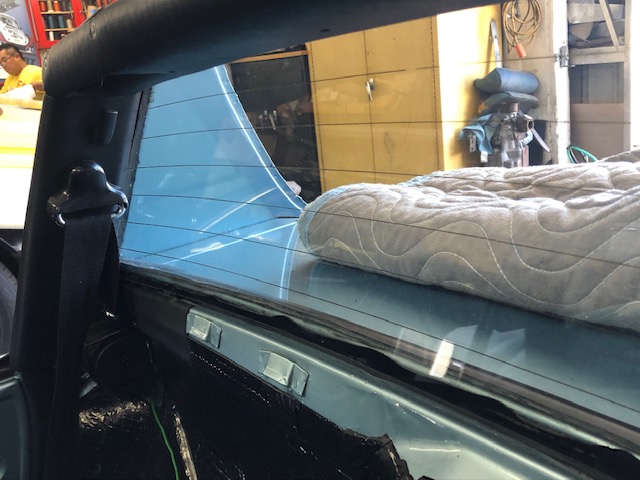
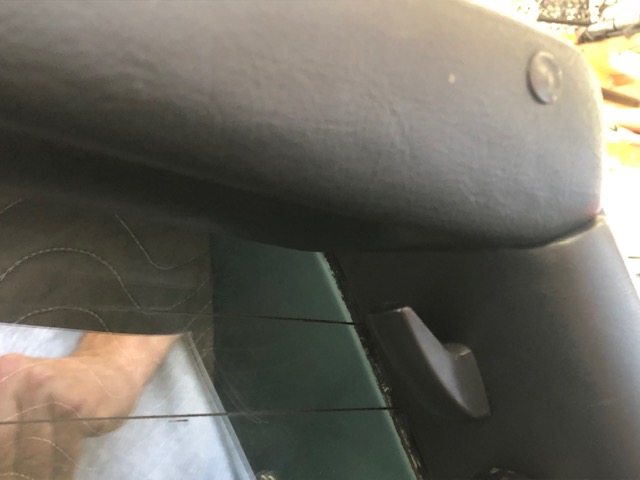
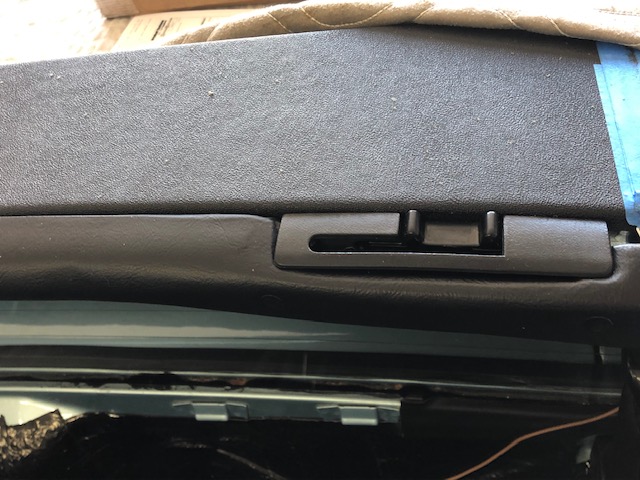
re-chromed visor clips compliments of @http://www.914world.com/bbs2/index.php?showuser=3457 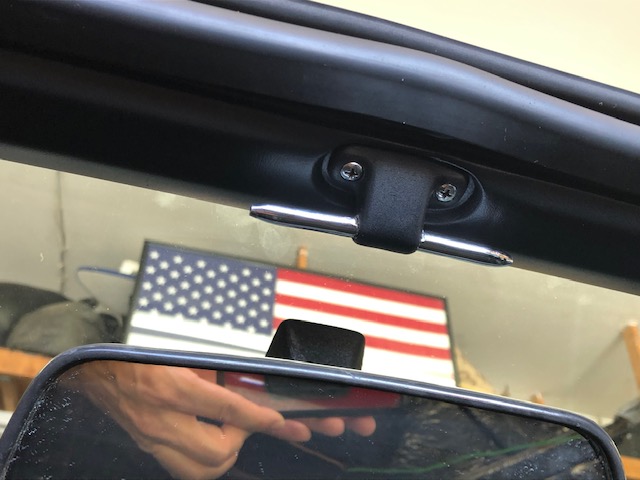
Backpad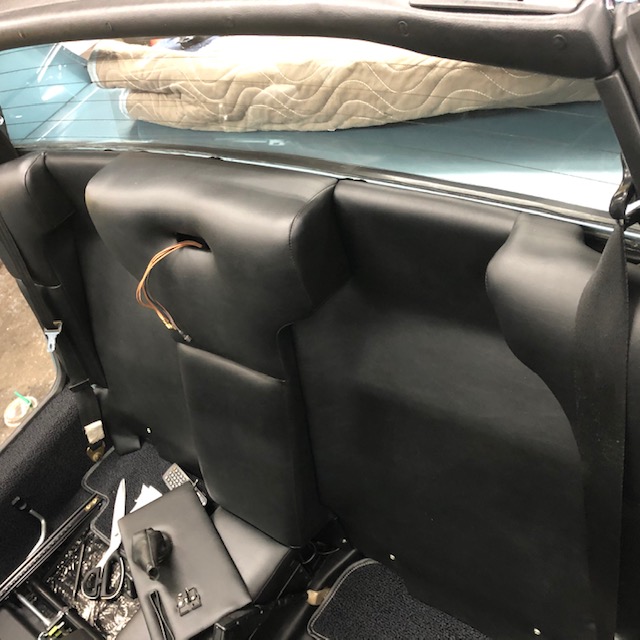
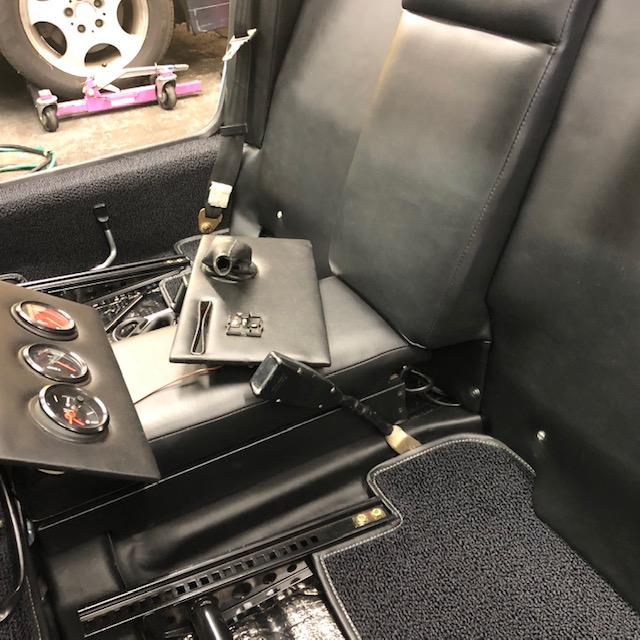
Should be good to go on Monday......
Attached image(s)
Posted by: 914_7T3 Aug 8 2020, 04:38 PM
Backpad
Should be good to go on Monday......
Posted by: second wind Aug 8 2020, 05:49 PM
You are setting the bar pretty high Jeffrey.....appreciate it....I'd best get some work done on my car to get even close.....looking good!!
gg
Posted by: Superhawk996 Aug 8 2020, 05:56 PM
Coming along nicely! Keep hammering it.
Posted by: FlacaProductions Aug 8 2020, 05:59 PM
Monday is gonna be a good day...
Posted by: euro911 Aug 8 2020, 07:19 PM
Lookin' gr8, dude
Posted by: Cairo94507 Aug 9 2020, 06:42 AM
Your car is looking great. I love to see them back on the road so everyone can see and enjoy them.
Posted by: bbrock Aug 9 2020, 09:16 AM
How exciting! For once I'm going to implore you to ignore @http://www.914world.com/bbs2/index.php?showuser=22428 . Do not get a hammer anywhere near that beautiful ride!!!
Posted by: 914_7T3 Aug 10 2020, 06:58 PM
Monday is gonna be a good day...
Yah, I didn’t have to use my AK!...... Ice Cube
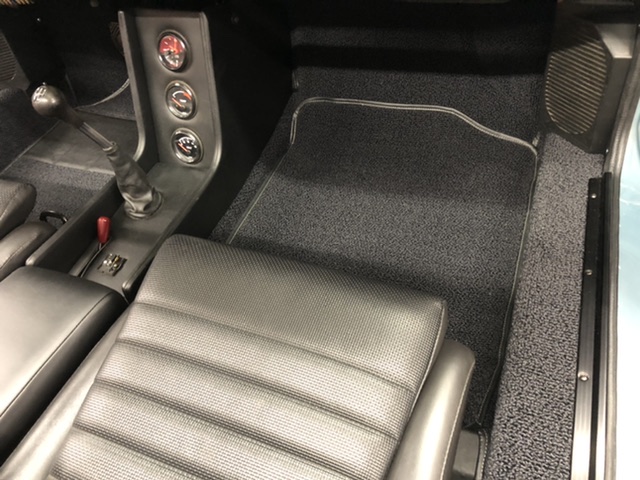
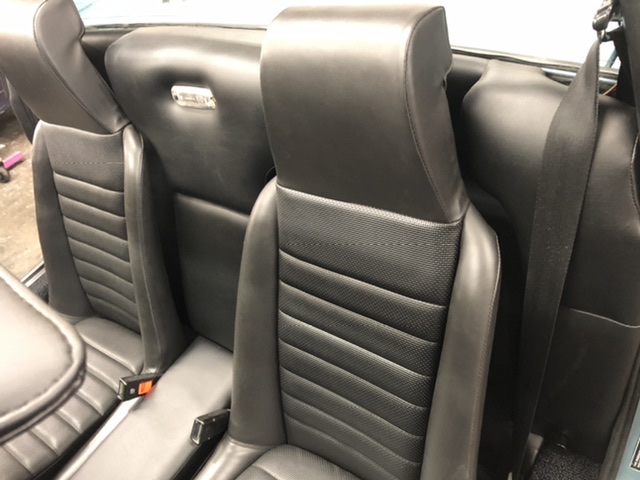
Left the knee pad off until the radio goes in and need to swap out the backpad light to the chrome surround version.
Posted by: 914_7T3 Aug 13 2020, 02:05 PM
Had the Xpel clear bra installed yesterday and was dreading the 35 mile trip back. Timing was at 5:00pm in rush hour with potential for triple digit temperatures for a portion of the drive.
Not a good plan in an air cooled, but what a great test for how the motor would perform.
Final grade A+ So glad the decision was made to keep the motor stock that would run cooler than going with 96mm P&Cs. 
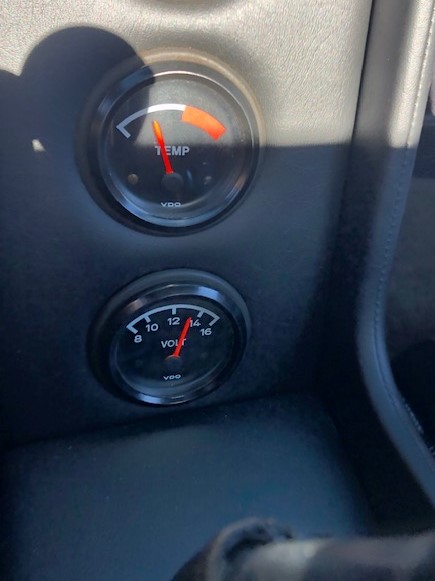
Posted by: second wind Aug 13 2020, 05:53 PM
Hello 914_7T3....that weather report tells me the upcoming week is perfect for touching up the paint....will dry hard as a rock in about four minutes.....can do ten coats in under an hour....with sanding each coat. Was picking up my kid at 3:pm from West Hills (Chatsworth adjacent) in September and the school sign said 104 degrees.....in the pick up line for 20 minutes....car blew up days later. Stay cool
gg
Posted by: bbrock Aug 13 2020, 05:56 PM
You already knew this but now you have measurable proof. Your car is cool!
Posted by: Superhawk996 Aug 14 2020, 06:14 AM
Not a good plan in an air cooled, but what a great test for how the motor would perform.
@http://www.914world.com/bbs2/index.php?showuser=20991
Perfect day for aircooled.
Not sure why so many think air cooled isn't OK in hot weather. Aircooled has proven itself over millions of miles in all environments including desert conditions. Radial airplane engines. Air cooled tank engines. Kübelwagen in N. Africa.
Continental motors in American tanks:
https://en.wikipedia.org/wiki/Continental_AV1790
https://bangshift.com/bangshiftxl/watch-listen-v12-continental-tank-engine-huge-cool-makes-real-power/
Love the gauge picture. So nice to see the gauges working properly.
Congratualations on doing this properly. So much better to rebuild properly, make sure flaps and thermostat are working properly, and to have the wiring sorted. You should get lots and lots of trouble free miles. Great Job!!
Posted by: 914_7T3 Aug 14 2020, 04:22 PM
You already knew this but now you have measurable proof. Your car is cool!
I see what you did there
Posted by: 914_7T3 Aug 14 2020, 04:25 PM
Not a good plan in an air cooled, but what a great test for how the motor would perform.
@http://www.914world.com/bbs2/index.php?showuser=20991
Perfect day for aircooled.
Not sure why so many think air cooled isn't OK in hot weather. Aircooled has proven itself over millions of miles in all environments including desert conditions. Radial airplane engines. Air cooled tank engines. Kübelwagen in N. Africa.
Continental motors in American tanks:
https://en.wikipedia.org/wiki/Continental_AV1790
https://bangshift.com/bangshiftxl/watch-listen-v12-continental-tank-engine-huge-cool-makes-real-power/
Love the gauge picture. So nice to see the gauges working properly.
Congratualations on doing this properly. So much better to rebuild properly, make sure flaps and thermostat are working properly, and to have the wiring sorted. You should get lots and lots of trouble free miles. Great Job!!
Great info! My only point of reference is driving the car with bad valve guides when I first got it. Was on my first PCA run to Tehachapi and had to pull over several times to add oil and let it cool down in 94 degree ambient temperature.
Posted by: 914_7T3 Aug 15 2020, 11:36 AM
Had the car in on Wednesday at American Wrap Co. for installation of XPel clear bra. This is a great shop and their installers have won many industry awards at automotive events around the country. They also do the work for Singer Automotive so I was glad to find them. Quality of service was first rate.
The film was applied to the "full front"; hood, fenders, headlight covers & brows and backs of the mirrors.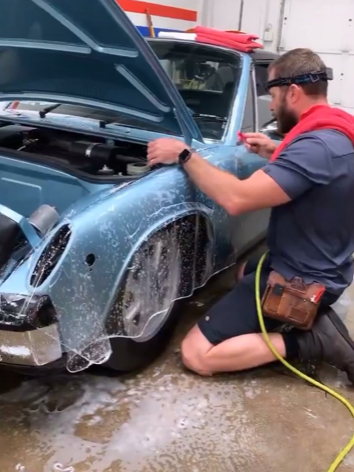
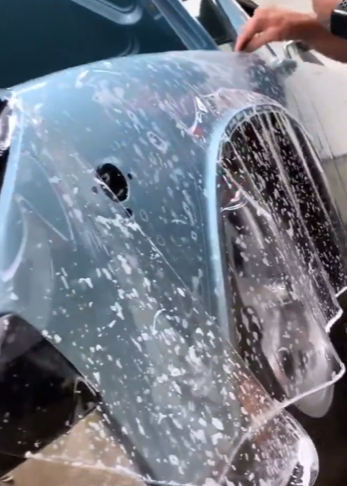
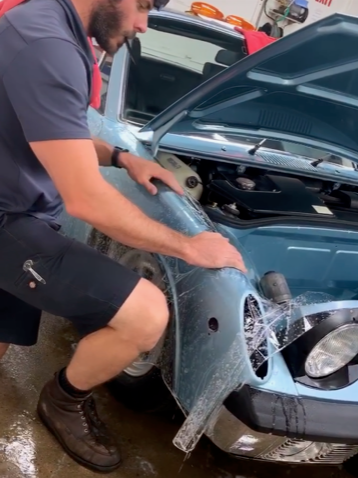
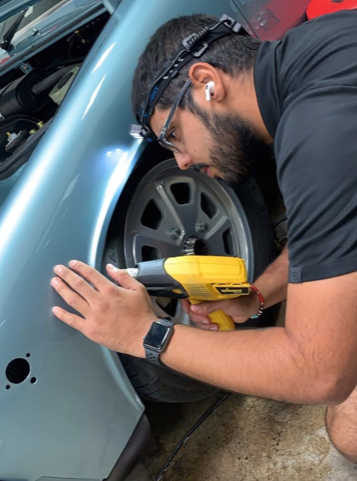
In answer to @http://www.914world.com/bbs2/index.php?showuser=20845 's question, when you look from panel to panel with and without film, in this case fender to door, you can not see a difference to the naked eye. The key is to have it installed correctly and to use the 8mm film and not the 10mm.
Posted by: bbrock Aug 15 2020, 11:40 AM
In answer to @http://www.914world.com/bbs2/index.php?showuser=20845 's question, when you look from panel to panel with and without film, in this case fender to door, you can not see a difference to the naked eye. The key is to have it installed correctly and to use the 8mm film and not the 10mm.
That is impressive! Thanks!
Posted by: Cairo94507 Aug 15 2020, 06:04 PM
Beautiful job!
Posted by: Tdskip Aug 16 2020, 07:23 AM
I can see why you would want to protect that car, thanks for the updates and great thread.
Posted by: 914_7T3 Aug 26 2020, 03:25 PM
Just got back the oil analysis on the break in oil and wanted to share for those that have not seen the format from Blackstone Labs. Added a quart of 20W50 at 270 miles as the oil filter was not correctly tightened and was leaking.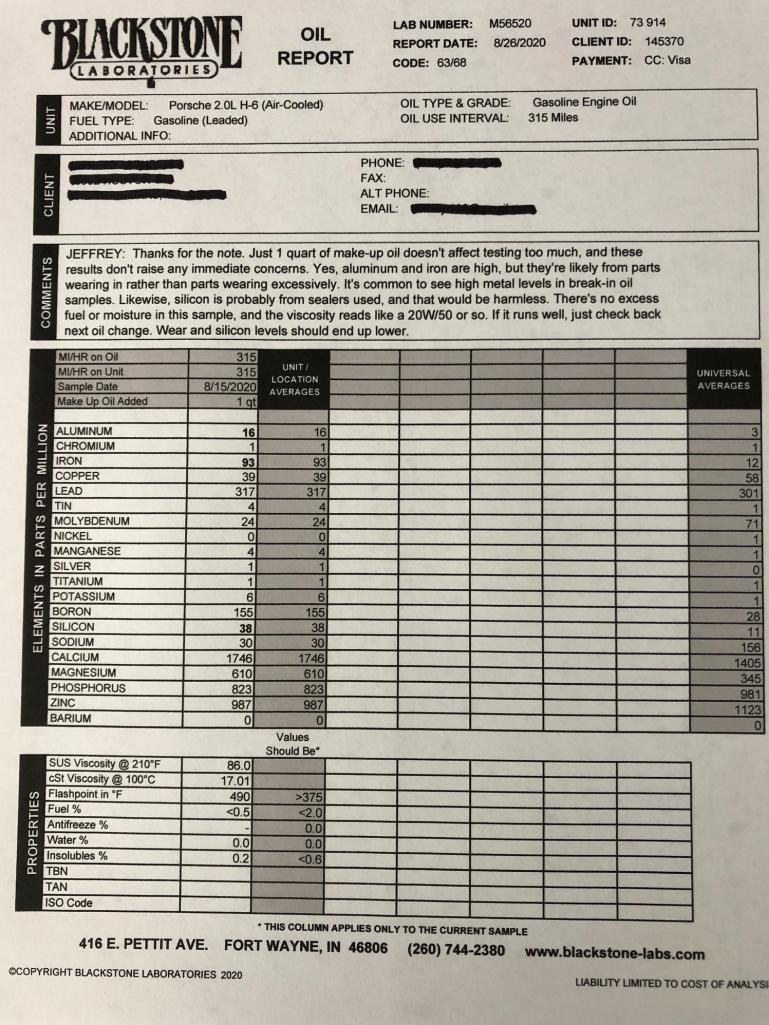
Posted by: 914_7T3 Aug 26 2020, 03:25 PM
Random Photos from last weekend's brake bleed with @http://www.914world.com/bbs2/index.php?showuser=13474 & @http://www.914world.com/bbs2/index.php?showuser=16669 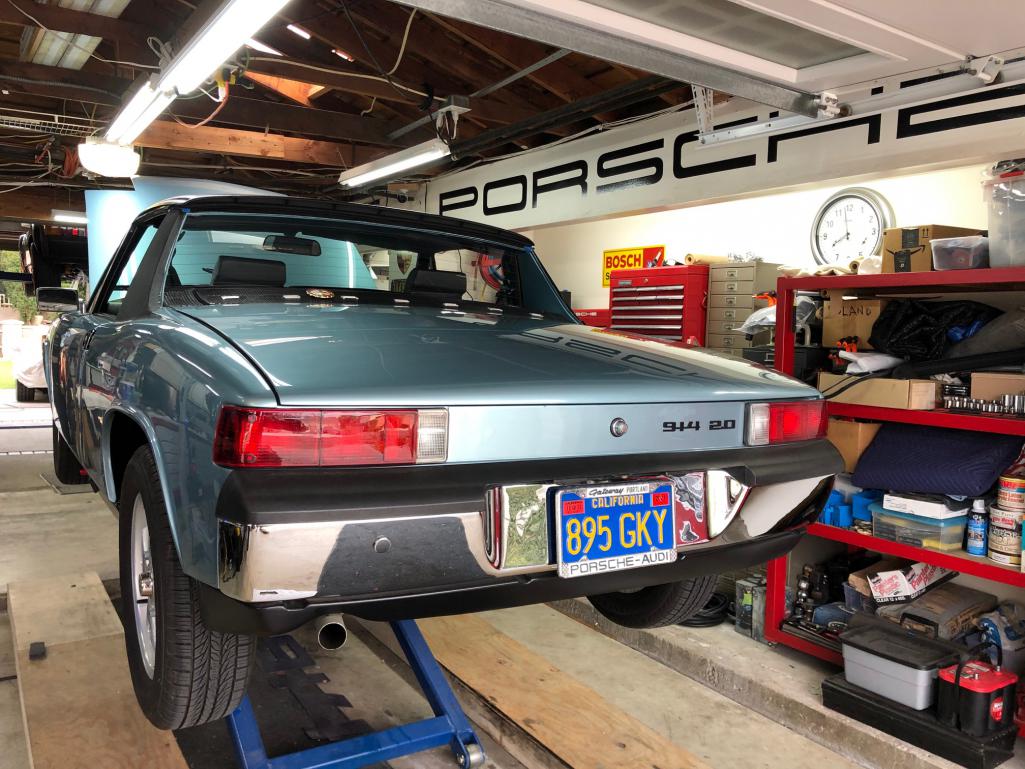
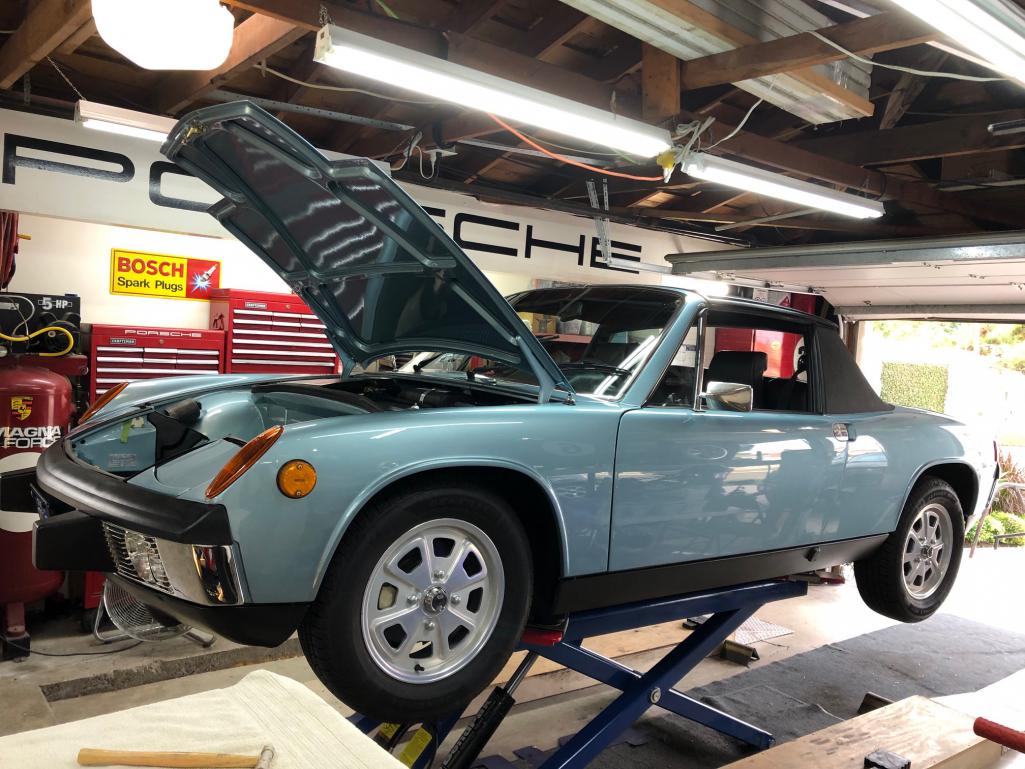
Posted by: ndfrigi Aug 26 2020, 07:37 PM
Finally I was able to test drove this beautiful car! yehey!
Jefferey also replaced his front hood seal.
Posted by: 914_7T3 Aug 30 2020, 10:46 PM
Please refrain from moving about the cabin when the fasten seat belt light is on!
Posted by: FlacaProductions Aug 30 2020, 10:51 PM
Ok. Now you’re just showin’ off. Ha!
Posted by: 914_7T3 Aug 30 2020, 11:24 PM
More excited than I should be, but the thing never worked from day one. Just got around to swapping out the housing. Started her up and nothing happened ‘til the E-brake was lowered.
Posted by: DRPHIL914 Aug 31 2020, 08:19 AM
Had the car in on Wednesday at American Wrap Co. for installation of XPel clear bra. This is a great shop and their installers have won many industry awards at automotive events around the country. They also do the work for Singer Automotive so I was glad to find them. Quality of service was first rate.
The film was applied to the "full front"; hood, fenders, headlight covers & brows and backs of the mirrors.
In answer to @http://www.914world.com/bbs2/index.php?showuser=20845 's question, when you look from panel to panel with and without film, in this case fender to door, you can not see a difference to the naked eye. The key is to have it installed correctly and to use the 8mm film and not the 10mm.
this looks awesome , they did a great job. So based on your posts here and a couple others, i just found someone here locally that has a great reputation and worked on some member cars etc from our car group andt he PCA,
called them and booked this to be done next week. Apparently some cars they have templates for, and the 914 front and hoods are in the Xpel system, so i guess those that participate in their dealer network have access to these so it saves a lot of time and therefore $$., my quote here is $1000 plus tax for the front hood, front quarters and that included the headlight covers that have to be done free hand at $50.
I am now also considering having them do the doors now as well, and the rears and rear quarters in a few months. .
Its probably a good investment if youve spent $10k on repaint, right?
Phil
Posted by: Cairo94507 Aug 31 2020, 09:27 AM
I had those same thoughts re PPF on essentially the exterior. But I ended up just wrapping the hood, eye brows and headlight covers, headlights and fogs. My front fenders are fully wrapped to. I did a door edge piece from the handle down and the door handle cups. I had to drW a line in the sand there or the clear bra would have been about $3K. I went with xpel too and it looks great.
Posted by: kroelofsen Aug 31 2020, 09:36 AM
Random Photos from last weekend's brake bleed with @http://www.914world.com/bbs2/index.php?showuser=13474
@http://www.914world.com/bbs2/index.php?showuser=20991 What kind/brand lift your using? Do you like it? What's the lifting height?
PS Your car looks fantastic
Posted by: 914_7T3 Aug 31 2020, 04:04 PM
Random Photos from last weekend's brake bleed with @http://www.914world.com/bbs2/index.php?showuser=13474
@http://www.914world.com/bbs2/index.php?showuser=20991 What kind/brand lift your using? Do you like it? What's the lifting height?
PS Your car looks fantastic
@http://www.914world.com/bbs2/index.php?showuser=23255
It’s a Bend Pak, but I don’t have specs on it as it is @http://www.914world.com/bbs2/index.php?showuser=16669 ‘s. Sadly, there is no budget left for me to Remodel the garage with a good lift solution for a while!
Posted by: ValcoOscar Aug 31 2020, 04:45 PM
Random Photos from last weekend's brake bleed with @http://www.914world.com/bbs2/index.php?showuser=13474
@http://www.914world.com/bbs2/index.php?showuser=20991 What kind/brand lift your using? Do you like it? What's the lifting height?
PS Your car looks fantastic
@http://www.914world.com/bbs2/index.php?showuser=23255
It’s a Bend Pak, but I don’t have specs on it as it is @http://www.914world.com/bbs2/index.php?showuser=16669 ‘s. Sadly, there is no budget left for me to Remodel the garage with a good lift solution for a while!
______________________________________________
Here you go... @http://www.914world.com/bbs2/index.php?showuser=23255
https://www.youtube.com/watch?v=DaqoJEkJN2Y
Oscar
Posted by: 914_7T3 Sep 13 2020, 03:42 PM
Busy weekend, picked up the car from @http://www.914world.com/bbs2/index.php?showuser=15093 at TRE Motorsports on Friday afternoon after the 1st valve adjust and compression check. Compression was even at 125 across all cylinders. Motor was intentionally built at slightly lower numbers to run cooler with increased durability.
On the way back, stopped in at Morro Auto interiors to get the new bulkhead perlon glued in. The adhesive was applied in a custom pattern with my name in it They will also recover the original tire board & create a new rear trunk carpet in matching material.
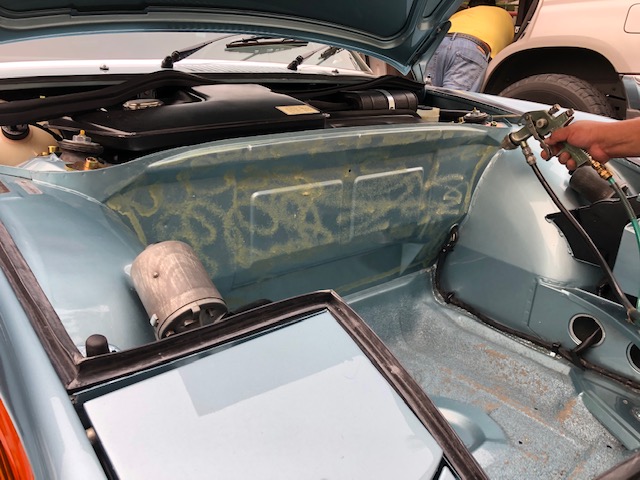

Also prepped and polished a second rear targa trim as the first one was anodized black by mistake instead of clear, so now it is anodize Take II!
Spent Saturday with @http://www.914world.com/bbs2/index.php?showuser=16669 & @http://www.914world.com/bbs2/index.php?showuser=1319 working on yet another brake bleed and getting the rear trunk torsion rods onto the rollers. All I can say is thanks for risking various body parts to get this done. Not easy and downright scary for sure, but look Ma no hands!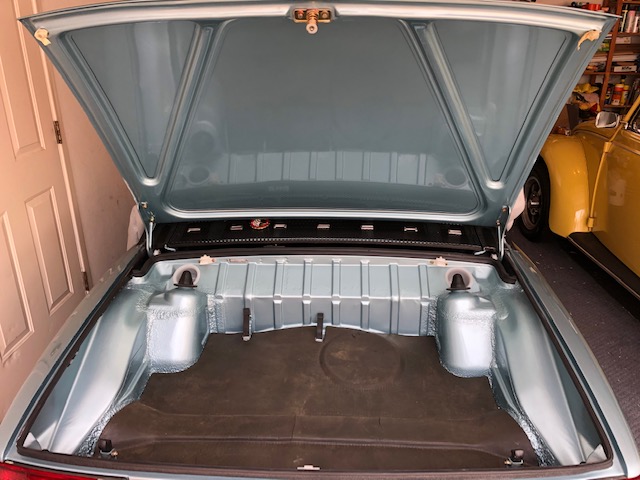
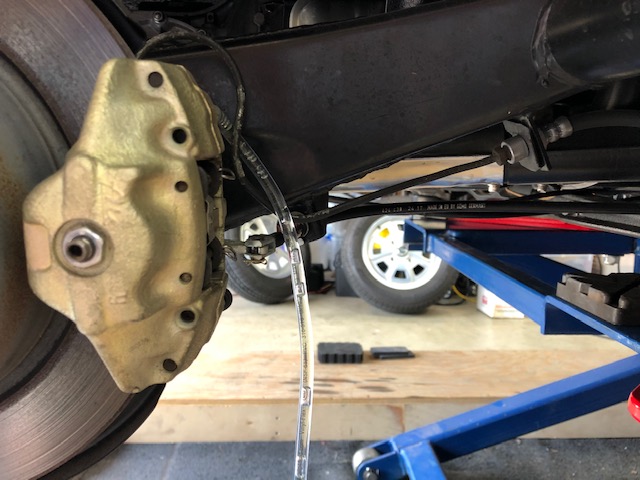
Also corrected some more fuse and relay issues causing the 4-way flashers and fog lights to be intermittent. Now that I'm done under the dash, will get the radio installed and lower dash pad in to finish off the interior.
Oscar also had the correct size rivets & rivet gun and so we were finally able to get the threshold plates on correctly.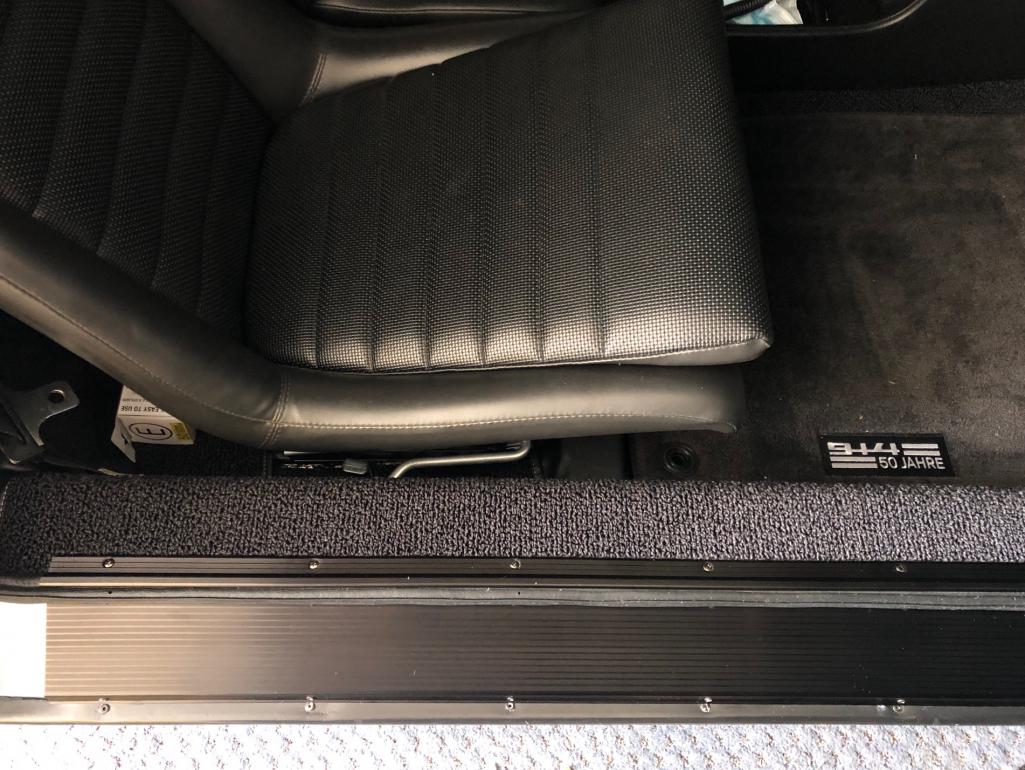
Other items completed;
Swapped out engine lid hook for a freshly plated one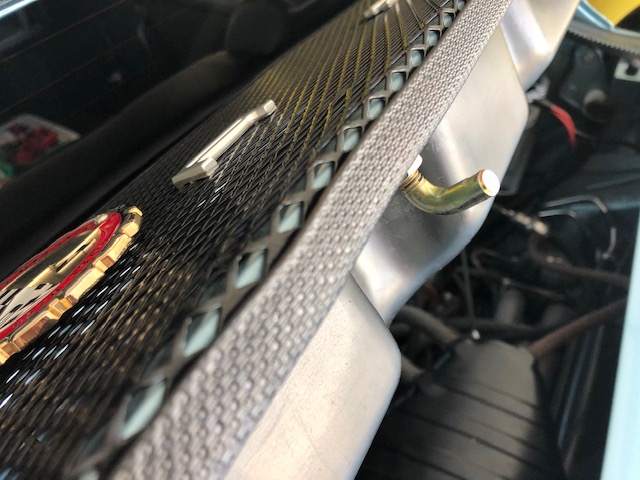
New element from @http://www.914world.com/bbs2/index.php?showuser=4184 arrived yesterday for the replacement lighter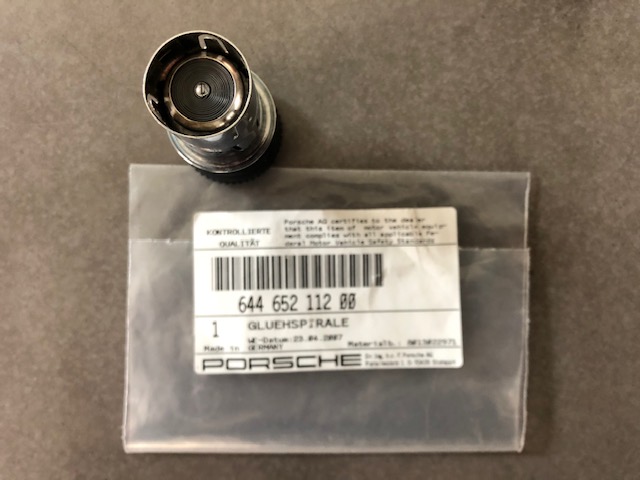
Cleaned up a replacement original dome light. @http://www.914world.com/bbs2/index.php?showuser=1319 suggested an LED bulb to prevent heat build up and avoid cracking the lens.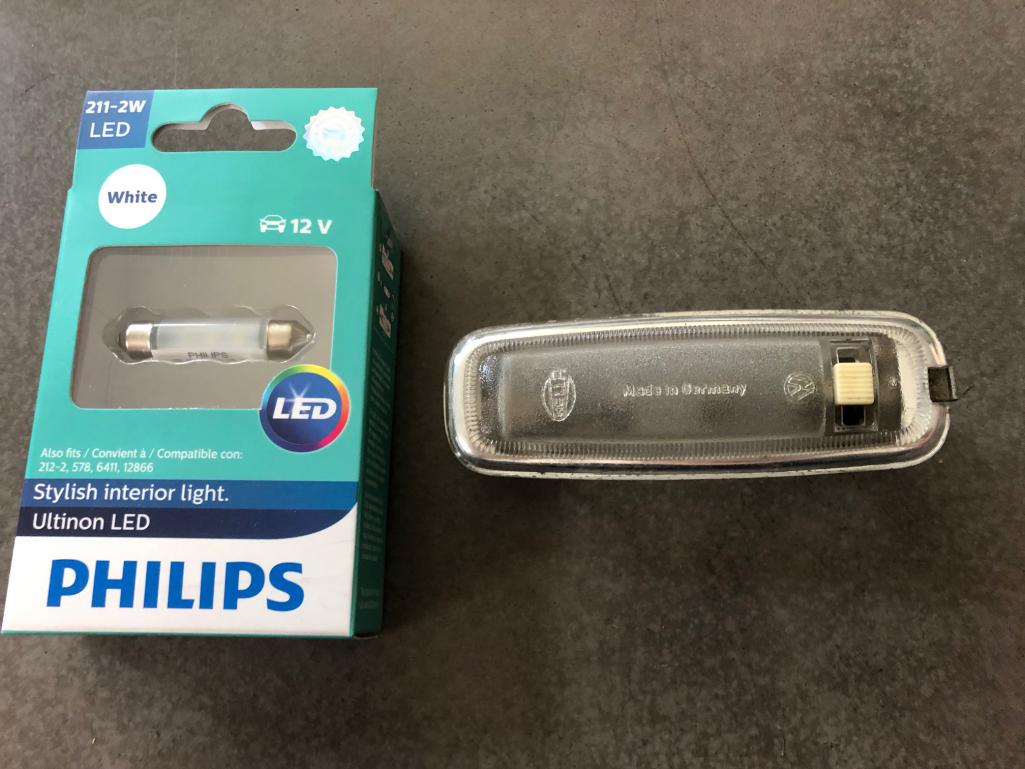
Lastly, have been experimenting with waterless car wash products and have joined the converted. Super easy to work with and no reason to put a hose over the car!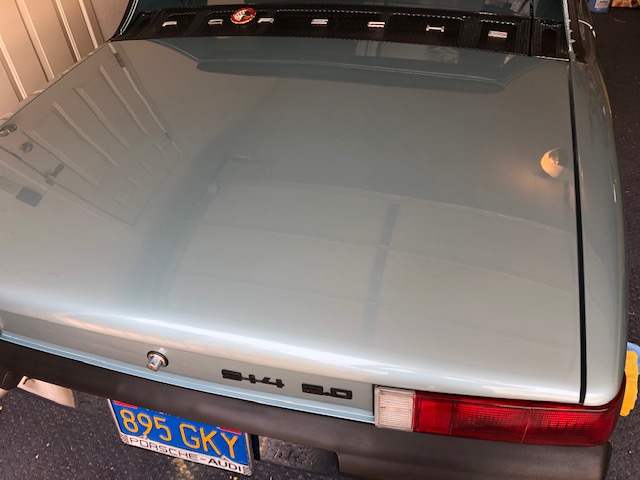
So close now, I can smell it
Posted by: 914_7T3 Sep 13 2020, 03:52 PM
Almost forgot, the oil pressure light was intermittient for the drive home. Pulled over immediately to make sure oil level was good, temp was good and no leaks. Phoned a friend and
searched a bunch of threads and figured it was the oil pressure sender or the green/red wire to the sender was somehow grounding.
Sure enough the wire was disconnected so got my hand in there, reconnected it and all was good again. Luckily a simple fix.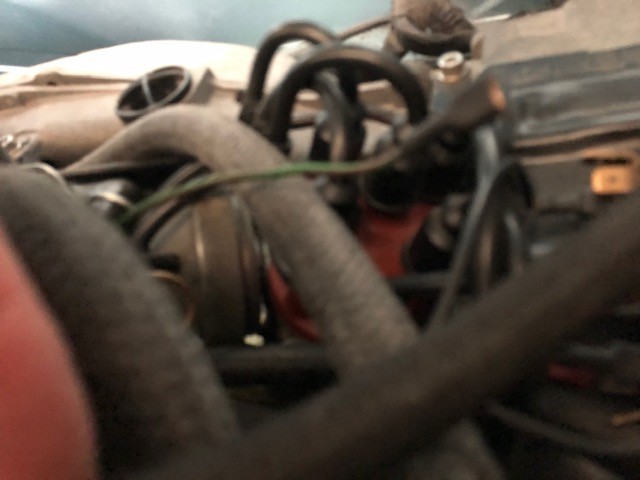
Posted by: 914_7T3 Sep 13 2020, 03:52 PM
Also the throttle is starting to stick a little bit and back off slowly. Need to verify accelerator cable tightness or maybe its wrapped too closely to the clutch cable from what I have been reading in other threads. Return spring and throttle body seem to be OK. More on this later.
Posted by: FlacaProductions Sep 13 2020, 04:22 PM
Nice save on the oil pressure wire! and it's so close that I can smell it!
Really exceptional work...and patience. Wow.
Posted by: 914_7T3 Oct 13 2020, 09:58 PM
Had the connectors on the driver's side, 4-pole door switch re-crimped which solved my dome light & fasten belt buzzer issue. Passenger side switch is bad, but have a NOS set on the way.
Battery hold down was painted same color as the tray so went back to black.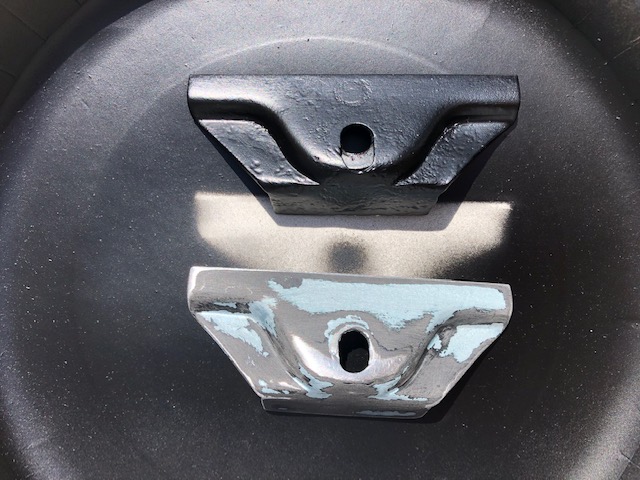
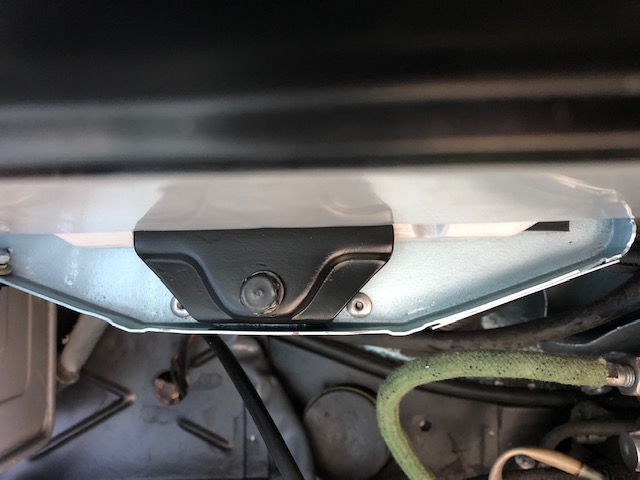
Next project after getting the radio install done was to deal with the lower dash. The one original to the car had one nasty crack. Went through the other two that were acquired and chose the best one and the best chrome strip. Needed to remove the oxidization and clean the trim before reinstalling. Nothing a Scotch Pad, Evapo Rust and Oxcylic Acid couldn't fix. Then had it redyed for freshening. 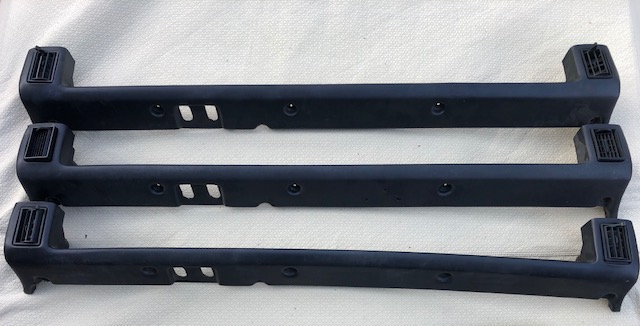
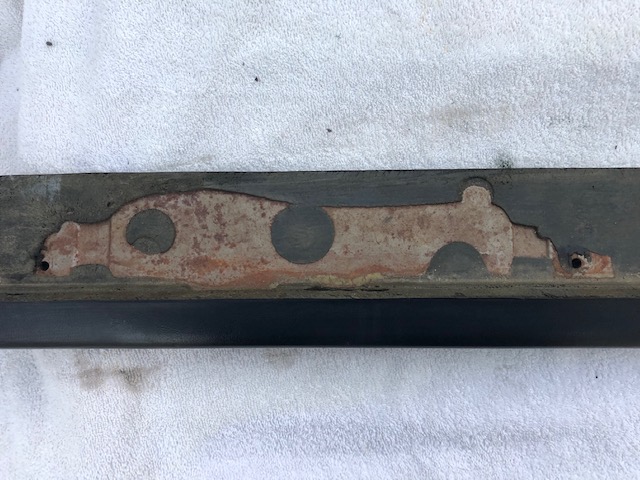
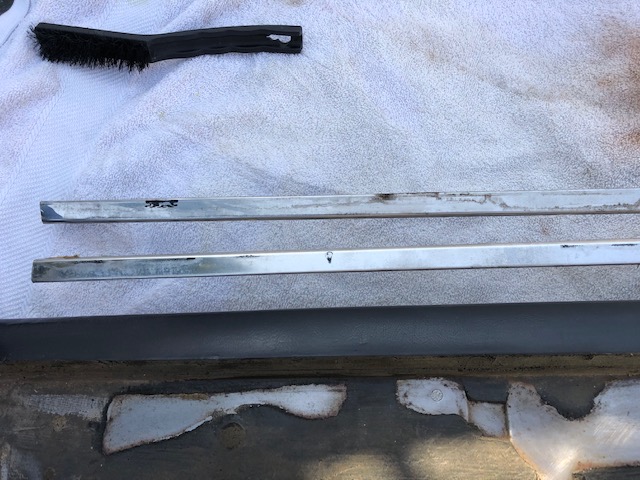
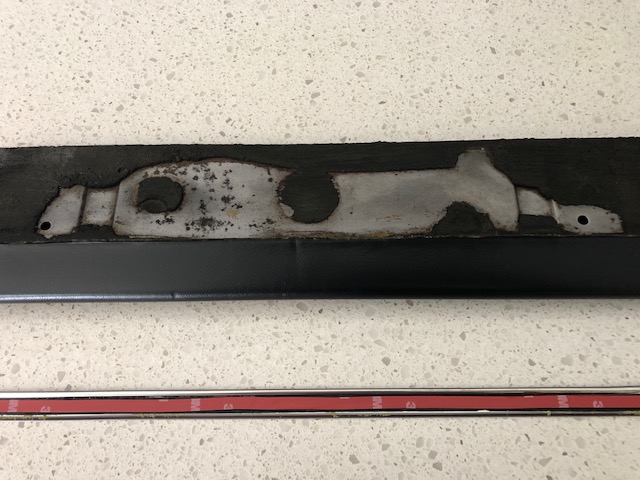
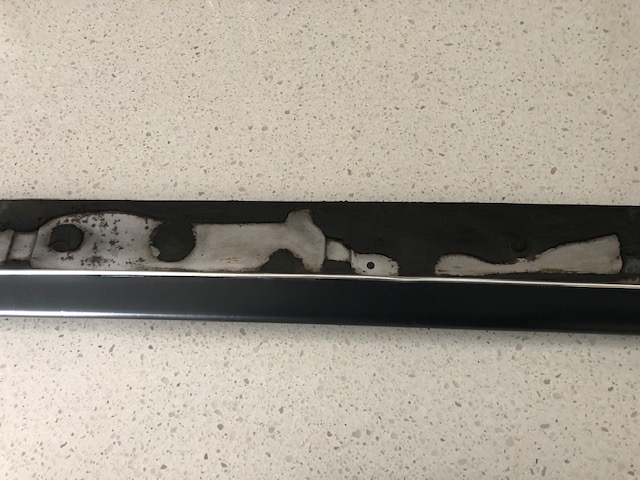

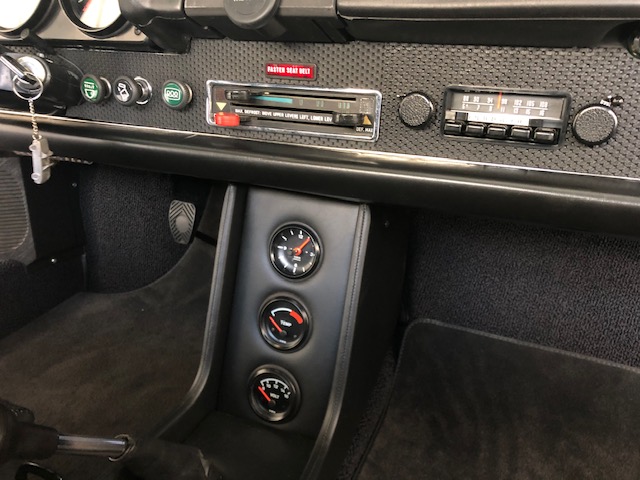
Picked up my double wrapped wheel today. LOVE the feel, had the second layer wrapped on top of the original leather so its not too soft and of course stays "original" underneath. Shout out to @http://www.914world.com/bbs2/index.php?showuser=16669 for the prep and paint.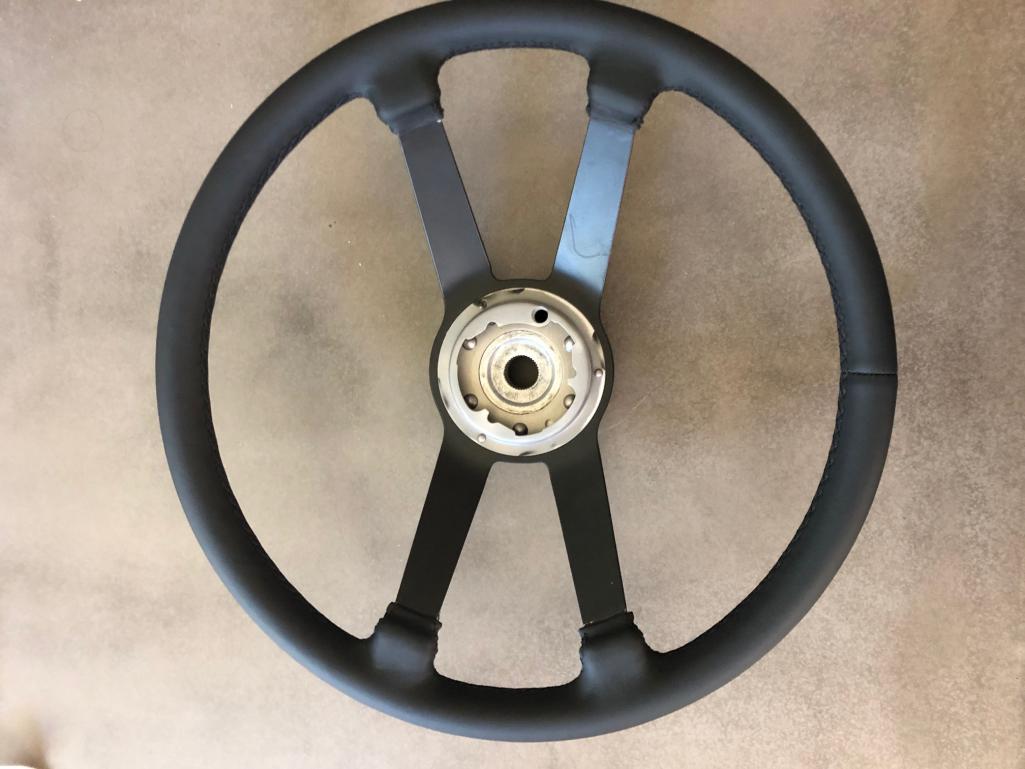
Just need the Targa trim installed, emission & paint code decals affixed and then a hard core detailing.
Posted by: 914_7T3 Oct 13 2020, 10:09 PM
Went for a solo drive Sunday, roof off, first real pleasure drive and can't wait to do it again now that SoCal driving weather is here! 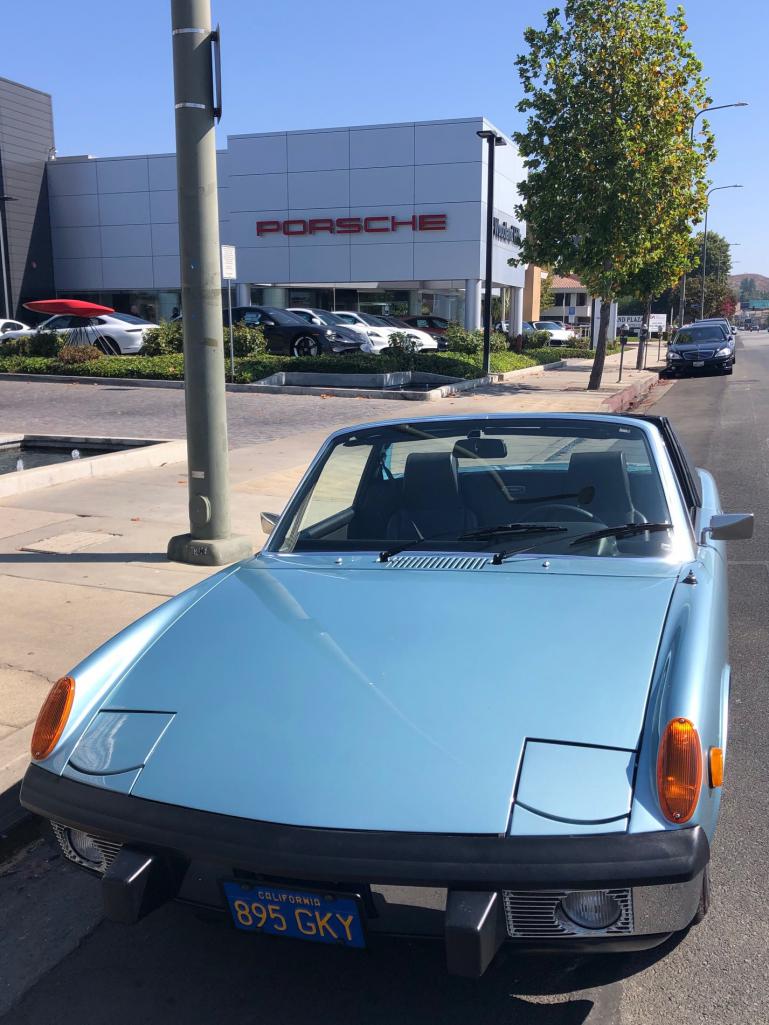
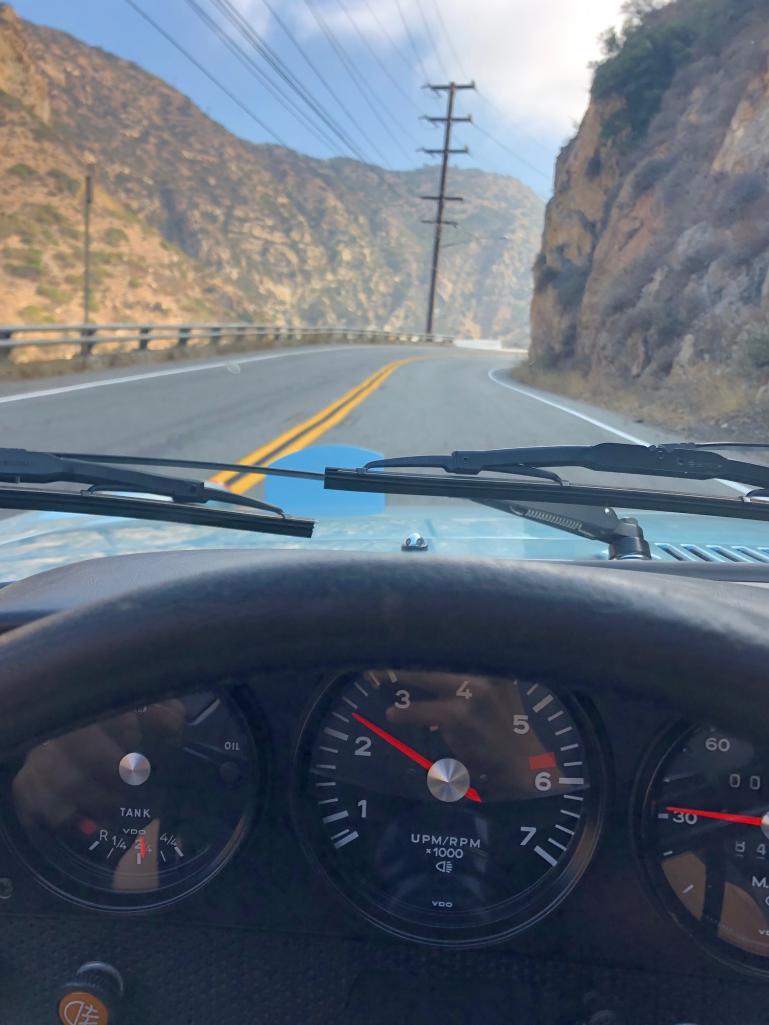
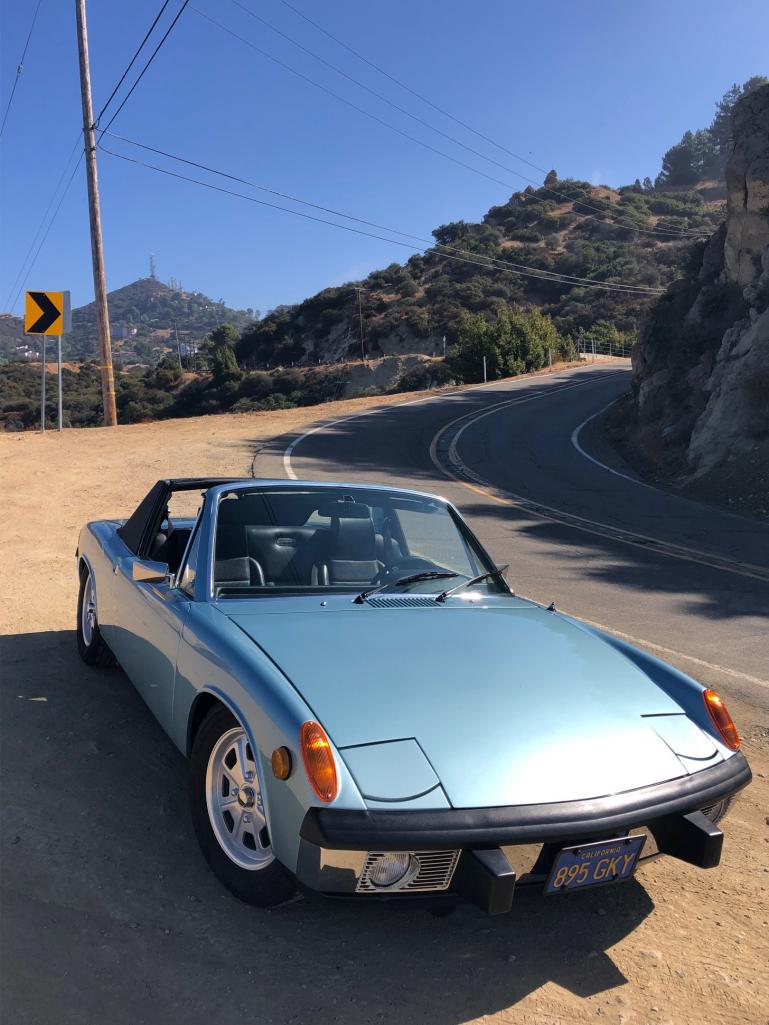

Posted by: kroelofsen Oct 13 2020, 11:19 PM
Super nice car, great color! Enjoy it...
Posted by: ndfrigi Oct 14 2020, 01:55 AM
Yehey! finally you installed a knee dash pad. Last time we test drove your car, I bang my left lower knee to the corner of the lower dash frame and had the bruise for atleast 2 weeks.
Car looks very beautiful with top off with mountain road scenery!
Posted by: FlacaProductions Oct 14 2020, 08:53 AM
Fantastic - love that you're gettin it on the road!!
Posted by: DRPHIL914 Oct 14 2020, 09:19 AM
how do you like the wheel done like that? i have a nice original wheel but leather is marked from someone wrapping it before and its pretty hard. i would like a wheel thats a bit softer, easier to grab/grip so i am curious who you had wrap it for you and what you used leather wise over the other leather, also was $$ reasonable?
Phil
Had the connectors on the driver's side, 4-pole door switch re-crimped which solved my dome light & fasten belt buzzer issue. Passenger side switch is bad, but have a NOS set on the way.
Battery hold down was painted same color as the tray so went back to black.
Next project after getting the radio install done was to deal with the lower dash. The one original to the car had one nasty crack. Went through the other two that were acquired and chose the best one and the best chrome strip. Needed to remove the oxidization and clean the trim before reinstalling. Nothing a Scotch Pad, Evapo Rust and Oxcylic Acid couldn't fix. Then had it redyed for freshening.
Picked up my double wrapped wheel today. LOVE the feel, had the second layer wrapped on top of the original leather so its not too soft and of course stays "original" underneath. Shout out to @http://www.914world.com/bbs2/index.php?showuser=16669 for the prep and paint.
Just need the Targa trim installed, emission & paint code decals affixed and then a hard core detailing.
Posted by: DRPHIL914 Oct 14 2020, 09:20 AM
oh and i left off my original commend i wanted to make, that interior looks super!!!
Posted by: Superhawk996 Oct 14 2020, 09:39 AM
I'm getting rather jealous. Your car looks beautiful and is
Posted by: 914_7T3 Oct 14 2020, 09:59 AM
how do you like the wheel done like that? i have a nice original wheel but leather is marked from someone wrapping it before and its pretty hard. i would like a wheel thats a bit softer, easier to grab/grip so i am curious who you had wrap it for you and what you used leather wise over the other leather, also was $$ reasonable?
Phil
Picked up my double wrapped wheel today. LOVE the feel, had the second layer wrapped on top of the original leather so its not too soft and of course stays "original" underneath. Shout out to @http://www.914world.com/bbs2/index.php?showuser=16669 for the prep and paint.
Just need the Targa trim installed, emission & paint code decals affixed and then a hard core detailing.
Phil,
You can expect to Pay $350-$400 to have a wheel rewrapped. I know that many use Dallas Steering Wheel, but I use a local interior shop by me called Morro Auto Interiors and he sources German leather. As with most, I prefer the wider grip, but was not looking for anything soft.
You could always have the first layer removed and use foam underneath for a softer feel.
Posted by: 914_7T3 Oct 14 2020, 10:02 AM
I'm getting rather jealous. Your car looks beautiful and is
Thanks, as you know its baby steps so just keep chipping away at it. This is the culmination of 3 years worth of "Uh Ohs" and "I don't knows", but finally got there with the help of this forum and its members!
Posted by: 914_7T3 Oct 14 2020, 10:03 AM
Fantastic - love that you're gettin it on the road!!
Finally
Posted by: 914_7T3 Oct 14 2020, 10:05 AM
Yehey! finally you installed a knee dash pad. Last time we test drove your car, I bang my left lower knee to the corner of the lower dash frame and had the bruise for atleast 2 weeks.
Car looks very beautiful with top off with mountain road scenery!
Thanks Noel. FWIW, I didn't know that you bruise easily
Posted by: ndfrigi Oct 14 2020, 11:14 AM
Yehey! finally you installed a knee dash pad. Last time we test drove your car, I bang my left lower knee to the corner of the lower dash frame and had the bruise for atleast 2 weeks.
Car looks very beautiful with top off with mountain road scenery!
Thanks Noel. FWIW, I didn't know that you bruise easily
Hahaha, yup I just ignored the pain after I bumped to the corner of ur lower dash. Just want to make sure you will still allow me to drive ur car. hehehe
That is why I also mentioned that something wrong engaging the 1st gear (well probably it is my left leg that can’t push the clutch pedal properly).
Enjoy ur car before the winter comes!
Posted by: mbseto Oct 14 2020, 03:03 PM
Your car turned out beautiful, nice to see you enjoying it now!
...Pulled over immediately...searched a bunch of threads...
Hadn't thought about this, but I guess the toolkit needs to include a laptop!!
Posted by: 914_7T3 Oct 14 2020, 03:40 PM
Your car turned out beautiful, nice to see you enjoying it now!
...Pulled over immediately...searched a bunch of threads...
Hadn't thought about this, but I guess the toolkit needs to include a laptop!!
Thanks, iPhone 8+ actually. It’s like a multi-tool.
Posted by: 914_teener Oct 14 2020, 04:00 PM
Hey Jeff....car looks beautiful.
I've never seen it in person.
Can I? PCA meeting this weekend in Pasadena. Can you bring it?
Rob
Posted by: sb914 Oct 14 2020, 06:17 PM
Turned out great Jeff.
Posted by: porsche914rick Oct 14 2020, 06:25 PM
Posted by: euro911 Oct 14 2020, 08:28 PM
Posted by: Montreal914 Oct 14 2020, 09:13 PM
Congratulations!
Beautiful driving car.
Thank you for sharing the local steering shop.
Posted by: 914_7T3 Oct 14 2020, 11:09 PM
Hey Jeff....car looks beautiful.
I've never seen it in person.
Can I? PCA meeting this weekend in Pasadena. Can you bring it?
Rob
@http://www.914world.com/bbs2/index.php?showuser=9489 I just might, PM me!
What about the missing Targa trim?
Posted by: 914_7T3 Oct 14 2020, 11:10 PM
@http://www.914world.com/bbs2/index.php?showuser=7300 After all it’s more important to loooook goooood than to feel good
Posted by: 914_7T3 Oct 14 2020, 11:12 PM
Turned out great Jeff.
@http://www.914world.com/bbs2/index.php?showuser=15191 Too bad we couldn’t get together b4 you relocated. Hope you are enjoying the new place up there
Posted by: 914_7T3 Oct 15 2020, 04:41 PM
RS Wheel was installed today with the help of @http://www.914world.com/bbs2/index.php?showuser=15093 over at TRE Motorsports as I dont have a 27mm Socket. The contacts on the cancel ring are on their last legs so @http://www.914world.com/bbs2/index.php?showuser=3457 is going to hook me up with another one and we'll do it all again at some point in the future.
Also used the NOS batwing I bought from @http://www.914world.com/bbs2/index.php?showuser=13069 awhile ago. Lools & feels fantastic! 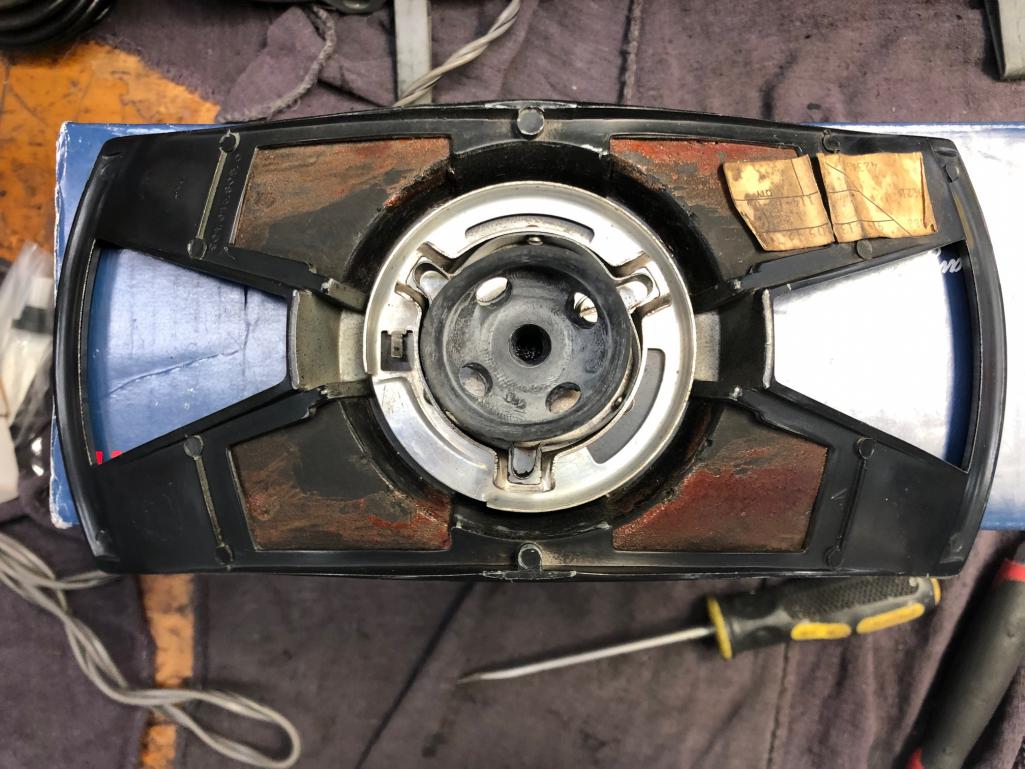
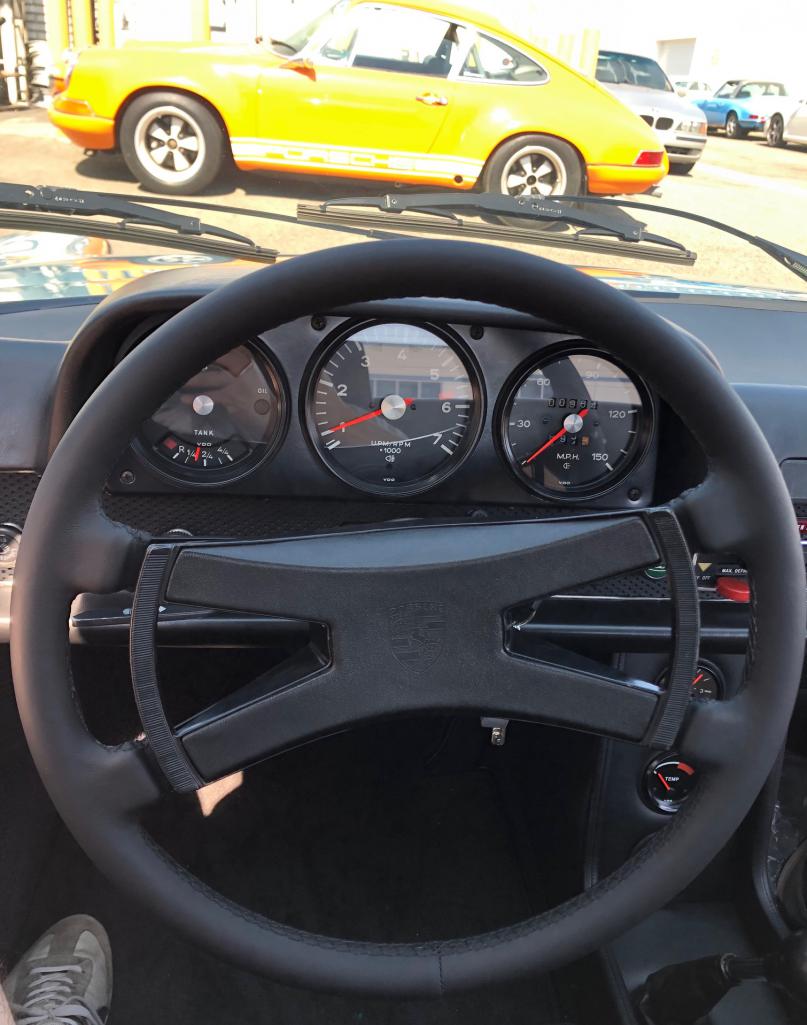
Saw @http://www.914world.com/bbs2/index.php?showuser=24470 's chrome yellow 914 over there so that was pretty cool. 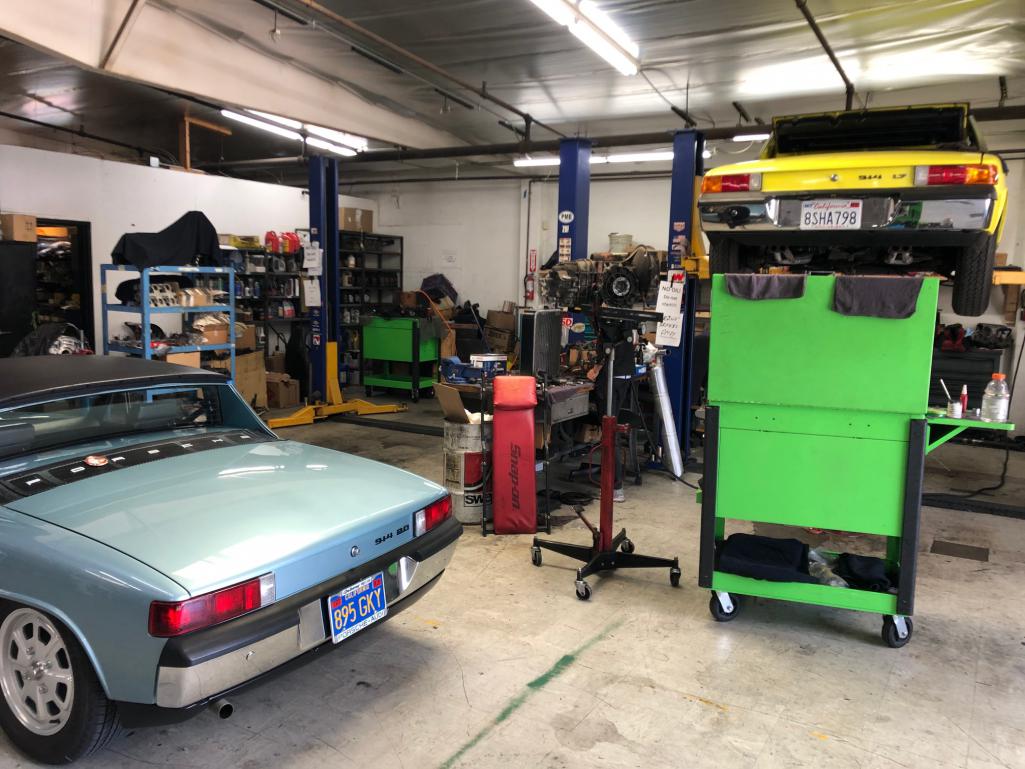
Posted by: FlacaProductions Oct 15 2020, 04:53 PM
That wheel is the bomb. I have a double-wrapped Dallas Customs version and love it.
Posted by: 914_7T3 Oct 15 2020, 05:25 PM
That wheel is the bomb. I have a double-wrapped Dallas Customs version and love it.
Posted by: euro911 Oct 16 2020, 01:39 AM
Posted by: DANNYMAC Oct 16 2020, 04:06 PM
RS Wheel was installed today with the help of @http://www.914world.com/bbs2/index.php?showuser=15093 over at TRE Motorsports as I dont have a 27mm Socket. The contacts on the cancel ring are on their last legs so @http://www.914world.com/bbs2/index.php?showuser=3457 is going to hook me up with another one and we'll do it all again at some point in the future.
Also used the NOS batwing I bought from @http://www.914world.com/bbs2/index.php?showuser=13069 awhile ago. Lools & feels fantastic!
Saw @http://www.914world.com/bbs2/index.php?showuser=24470 's chrome yellow 914 over there so that was pretty cool.
Just picked her up from TRE (new clutch) Saw 914_7T3 's Marathon Blue "I love that color" ! and the steering wheel... I can't do that, mine is "all" original, however, the "71" is up for that wheel, where did you get that ?
Posted by: DANNYMAC Oct 16 2020, 04:16 PM
Went for a solo drive Sunday, roof off, first real pleasure drive and can't wait to do it again now that SoCal driving weather is here!
Love that Color !
Posted by: DANNYMAC Oct 16 2020, 04:19 PM
Hey Jeff....car looks beautiful.
I've never seen it in person.
Can I? PCA meeting this weekend in Pasadena. Can you bring it?
Rob
@http://www.914world.com/bbs2/index.php?showuser=9489 I just might, PM me!
What about the missing Targa trim?
@ 914_7T3 and 914_teener how did you know about the PCA meeting in Pasadena ? I was just logged in and NO meetings, events listed ???
Posted by: 914_7T3 Oct 16 2020, 05:29 PM
@http://www.914world.com/bbs2/index.php?showuser=24470 @http://www.914world.com/bbs2/index.php?showuser=9489 turns out I’m going to drive in Malibu with a friend tomorrow. You’re welcome to join, just looking to avoid crowds with Covid on the rise.
Posted by: DANNYMAC Oct 19 2020, 11:29 AM
@http://www.914world.com/bbs2/index.php?showuser=24470 @http://www.914world.com/bbs2/index.php?showuser=9489 turns out I’m going to drive in Malibu with a friend tomorrow. You’re welcome to join, just looking to avoid crowds with Covid on the rise.
@http://www.914world.com/bbs2/index.php?showuser=20991 didn't see this until this morning ! Hope you had a great drive, I keep looking at your car, I am in love with that color...
Posted by: DANNYMAC Oct 19 2020, 11:41 AM
RS Wheel was installed today with the help of @http://www.914world.com/bbs2/index.php?showuser=15093 over at TRE Motorsports as I dont have a 27mm Socket. The contacts on the cancel ring are on their last legs so @http://www.914world.com/bbs2/index.php?showuser=3457 is going to hook me up with another one and we'll do it all again at some point in the future.
Also used the NOS batwing I bought from @http://www.914world.com/bbs2/index.php?showuser=13069 awhile ago. Lools & feels fantastic!
Saw @http://www.914world.com/bbs2/index.php?showuser=24470 's chrome yellow 914 over there so that was pretty cool.
Original Sales Receipt says "Saturn Yellow" ???
Posted by: DANNYMAC Oct 19 2020, 11:43 AM
RS Wheel was installed today with the help of @http://www.914world.com/bbs2/index.php?showuser=15093 over at TRE Motorsports as I dont have a 27mm Socket. The contacts on the cancel ring are on their last legs so @http://www.914world.com/bbs2/index.php?showuser=3457 is going to hook me up with another one and we'll do it all again at some point in the future.
Also used the NOS batwing I bought from @http://www.914world.com/bbs2/index.php?showuser=13069 awhile ago. Lools & feels fantastic!
Saw @http://www.914world.com/bbs2/index.php?showuser=24470 's chrome yellow 914 over there so that was pretty cool.
Original Sales Receipt says "Saturn Yellow" ???
I LOVE that wheel, even if mine is original I think I am going to have to get one. I'll just keep the original
Posted by: DANNYMAC Oct 19 2020, 02:43 PM
RS Wheel was installed today with the help of @http://www.914world.com/bbs2/index.php?showuser=15093 over at TRE Motorsports as I dont have a 27mm Socket. The contacts on the cancel ring are on their last legs so @http://www.914world.com/bbs2/index.php?showuser=3457 is going to hook me up with another one and we'll do it all again at some point in the future.
Also used the NOS batwing I bought from @http://www.914world.com/bbs2/index.php?showuser=13069 awhile ago. Lools & feels fantastic!
Saw @http://www.914world.com/bbs2/index.php?showuser=24470 's chrome yellow 914 over there so that was pretty cool.
Original Sales Receipt says "Saturn Yellow" ???
But... just looked at the Porsche Production Specifications for my car, lists "Saturn (Chrome) Yellow/26"
Posted by: 914_7T3 Oct 19 2020, 05:46 PM
RS Wheel was installed today with the help of @http://www.914world.com/bbs2/index.php?showuser=15093 over at TRE Motorsports as I dont have a 27mm Socket. The contacts on the cancel ring are on their last legs so @http://www.914world.com/bbs2/index.php?showuser=3457 is going to hook me up with another one and we'll do it all again at some point in the future.
Also used the NOS batwing I bought from @http://www.914world.com/bbs2/index.php?showuser=13069 awhile ago. Lools & feels fantastic!
Saw @http://www.914world.com/bbs2/index.php?showuser=24470 's chrome yellow 914 over there so that was pretty cool.
Original Sales Receipt says "Saturn Yellow" ???
@http://www.914world.com/bbs2/index.php?showuser=24470 Thanks for the love. This is my original paint Saturn Yellow Car, but it does not look as bright as yours.
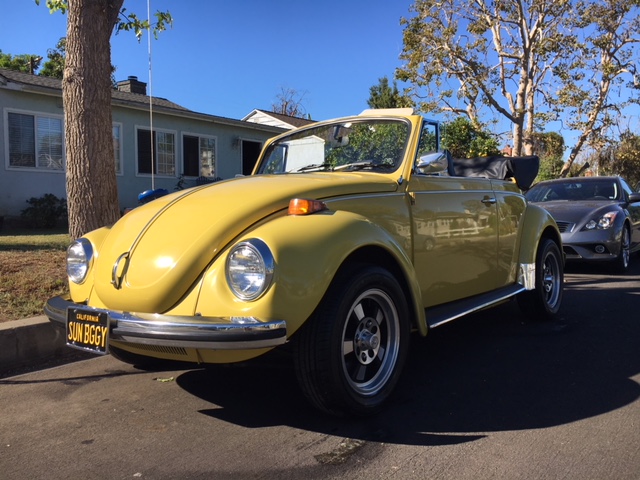
As for the steering wheel it is all original, however it just has an extra layer of leather wrapped over 'the original" leather. You could easily pick up a 2nd wheel to cover and have it done a 1/2 block from TRE at Morro Auto Interiors.
Posted by: arne Oct 19 2020, 06:24 PM
Pretty amazing work, Jeffery. MUCH superior to what I did. Can't find a hat-tipping smilie, these will have to do. 
Saturn and Chrome are the same color. Name varied from year to year, and also depending on the market area.
In my experience, the original Saturn does tend to darken and mellow bit over the decades, which is probably why Jeffery's Bug doesn't seem as bright.
My 914 was pretty bright when done as well.
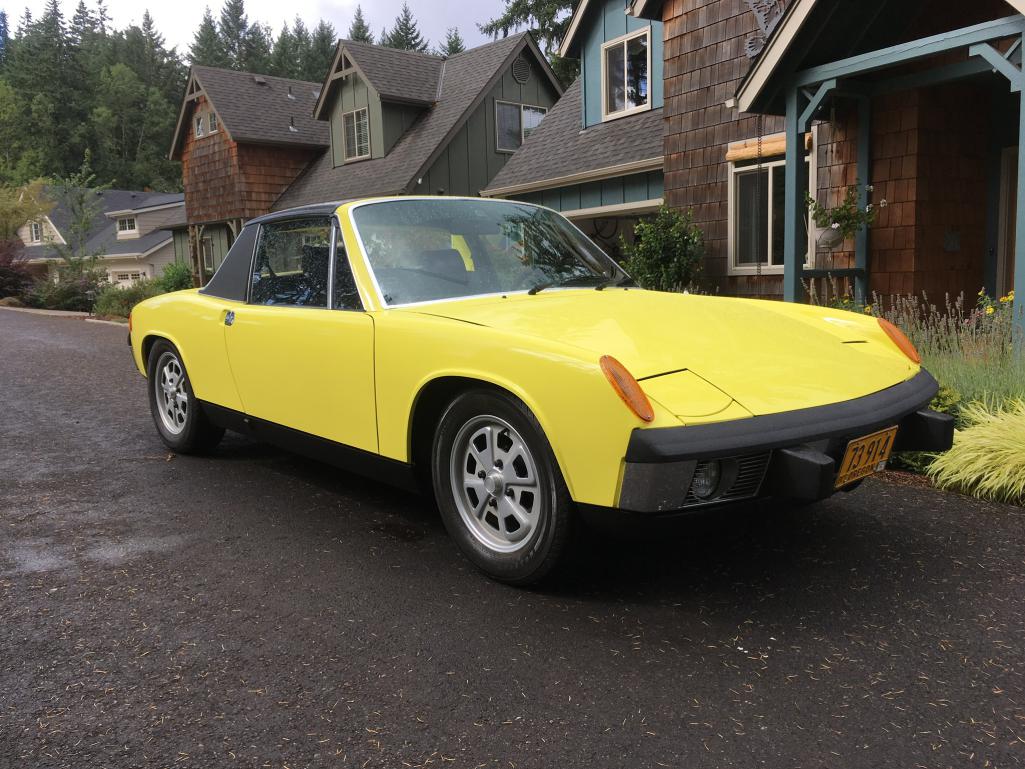
Posted by: 914_7T3 Oct 19 2020, 06:44 PM
Pretty amazing work, Jeffery. MUCH superior to what I did. Can't find a hat-tipping smilie, these will have to do.
Saturn and Chrome are the same color. Name varied from year to year, and also depending on the market area.
In my experience, the original Saturn does tend to darken and mellow bit over the decades, which is probably why Jeffery's Bug doesn't seem as bright.
My 914 was pretty bright when done as well.
Thanks for clarifying and appreciate the props. There was a long period of time where I never thought the car would get to this point especially not really grasping what it takes to get there. I've learned alot and be happy to share it with others, because I will never undertake a restoration again.........unless...............
Posted by: 914_7T3 Oct 19 2020, 06:51 PM
@http://www.914world.com/bbs2/index.php?showuser=24470 @http://www.914world.com/bbs2/index.php?showuser=9489 turns out I’m going to drive in Malibu with a friend tomorrow. You’re welcome to join, just looking to avoid crowds with Covid on the rise.
@http://www.914world.com/bbs2/index.php?showuser=20991 didn't see this until this morning ! Hope you had a great drive, I keep looking at your car, I am in love with that color...
Thanks, drove with my son and @http://www.914world.com/bbs2/index.php?showuser=22865 (mid-engine mafia). It was epic down Tuna Canyon
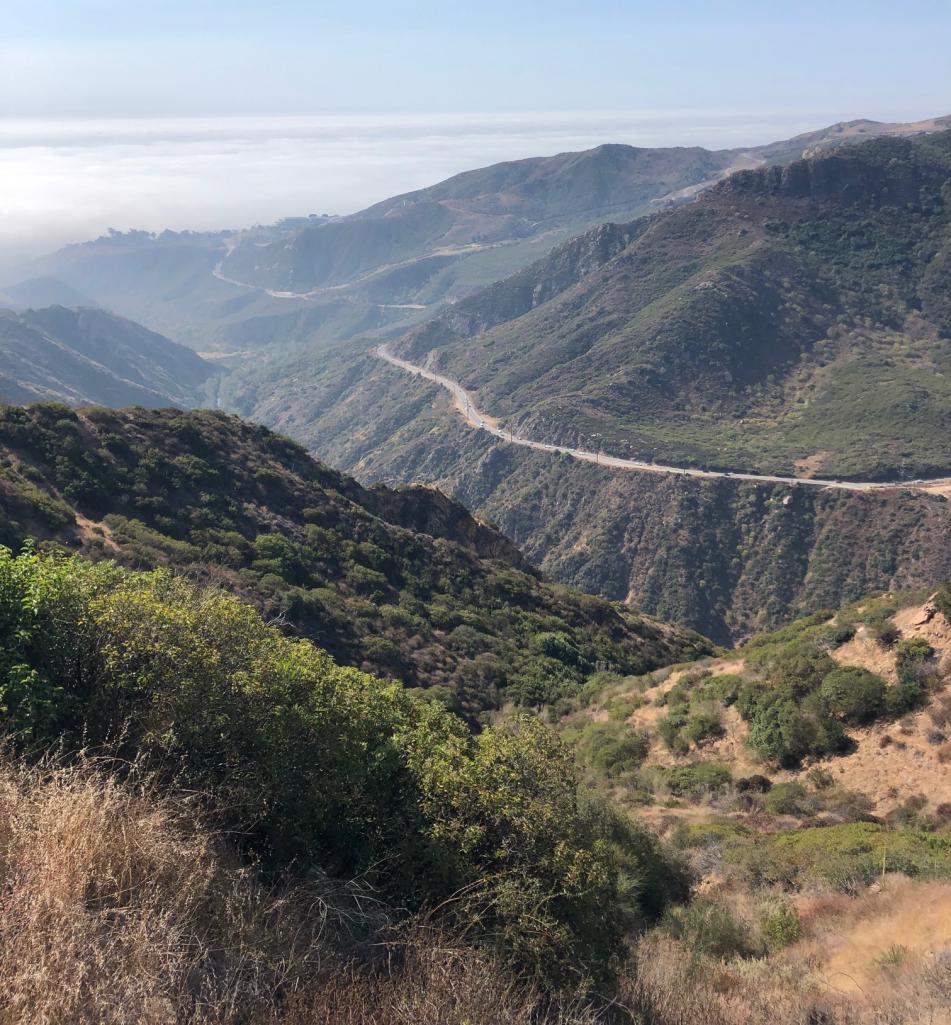
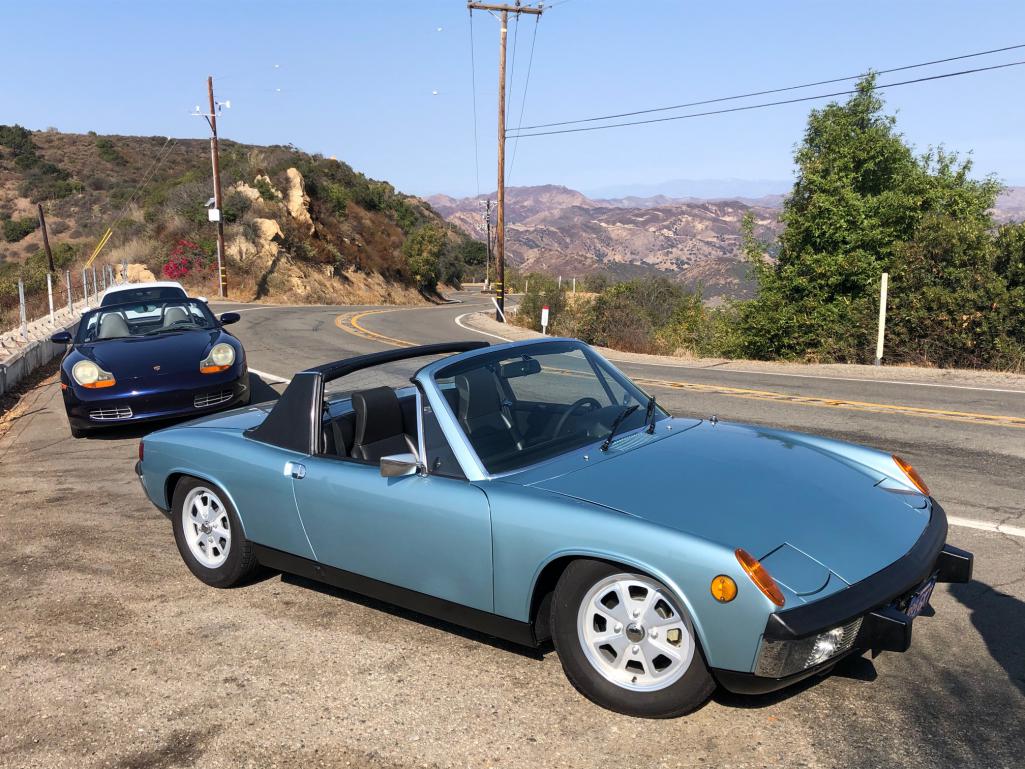
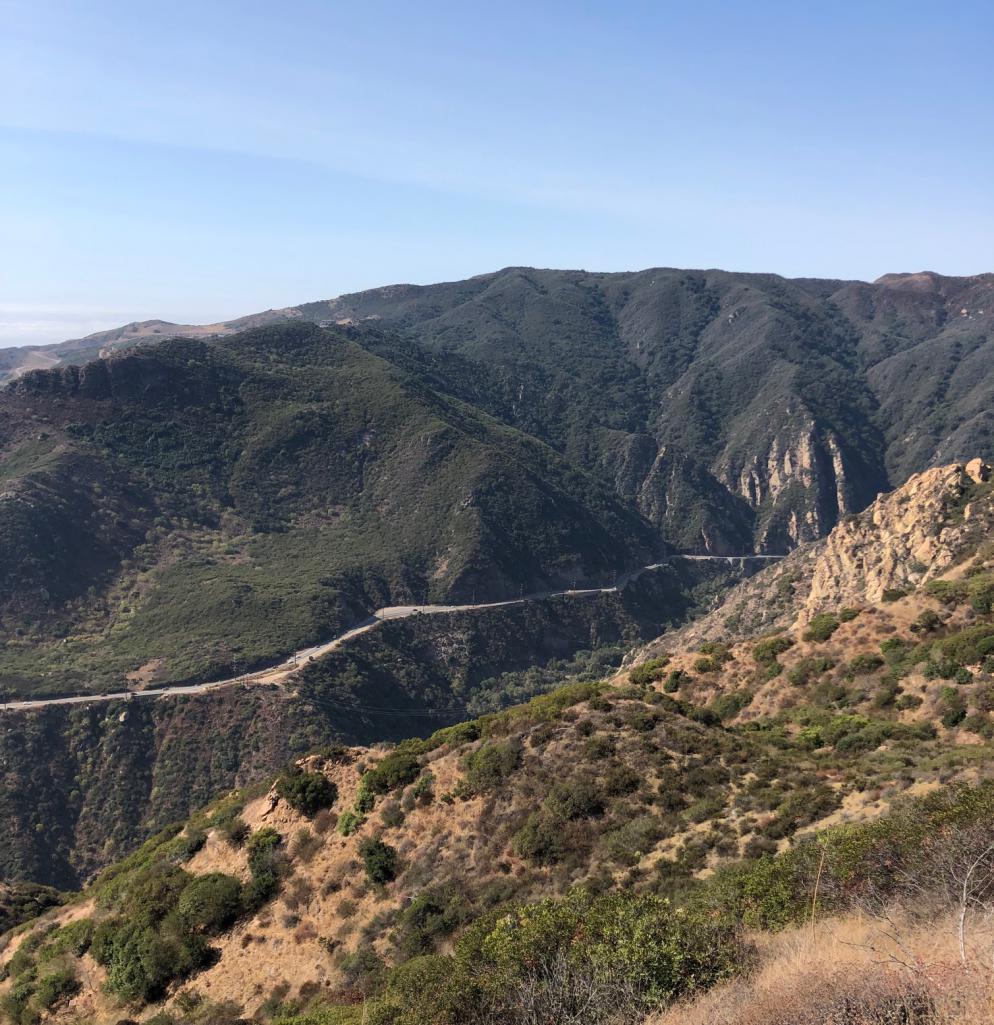
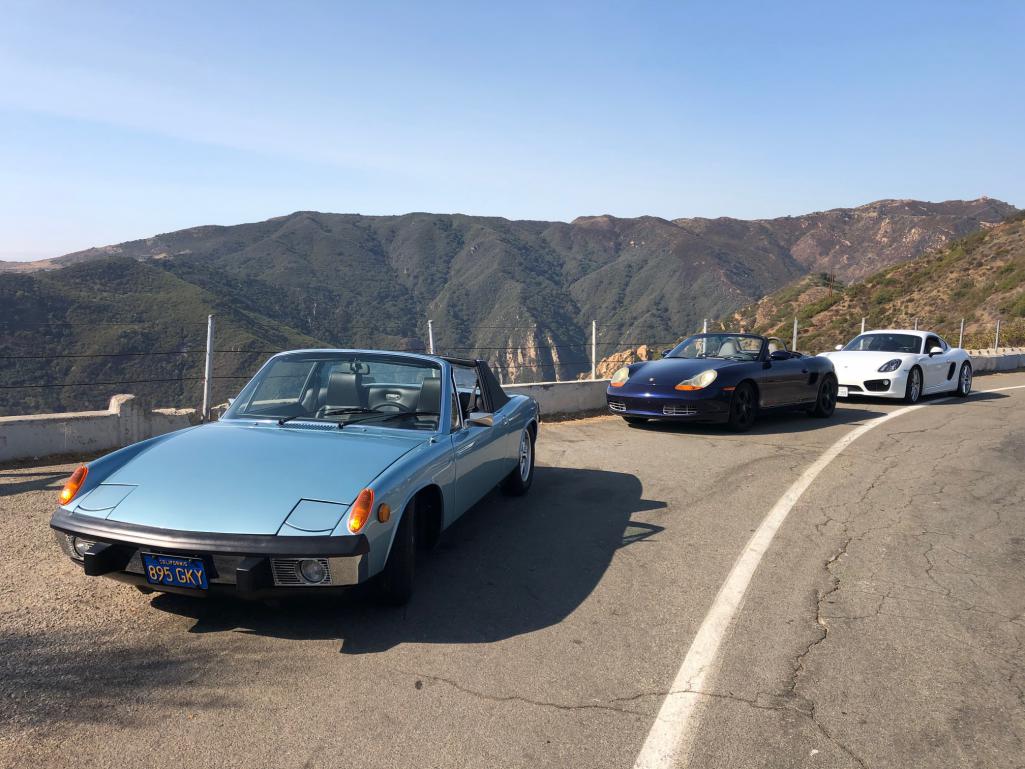
Posted by: burton73 Oct 20 2020, 01:16 PM
Jeffery,
I must have told you this but your car is totally outstanding. Way to go. You got it done.
Now use it in good health.
Best Bob
Posted by: Gint Oct 20 2020, 09:44 PM
Nice job with a beautiful end result. Thanks for the window regulator adjustment tip.
Posted by: 914_7T3 Nov 15 2020, 11:05 PM
Three things that I learned from the last few items on punch list in no particular order:
1-Settting the venting clearance on the calipers is a thing!
Not sure how, but this got overlooked during the reassembly. After several brake bleeds, I continued to progressively lose pedal firmness. Assumed it was a defective MC and got that swapped out, but made no difference. Turns out the restored calipers had no inner adjustment screws. Thanks to @http://www.914world.com/bbs2/index.php?showuser=1110 for working through this with me and getting them overnighted.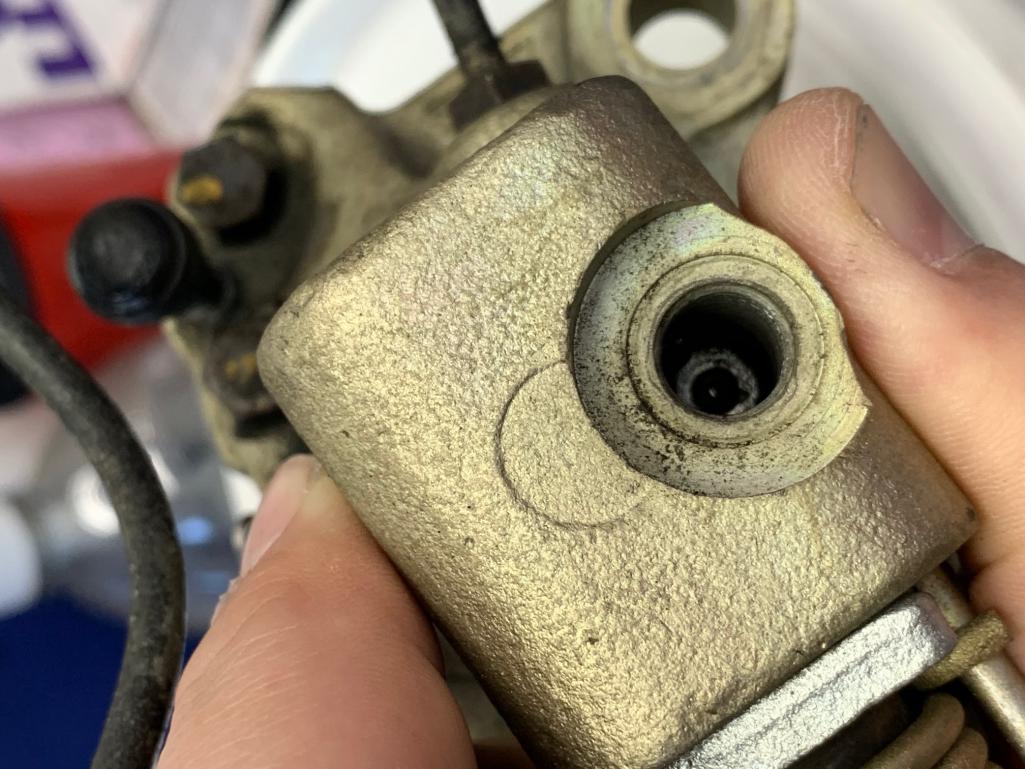
2-Installing the RMS properly is a thing!
Had a small seep of Black Gold (20 W50 to be exact) coming out of the rear of the case. After the 350 mile round trip to Julian, had three drops hanging on underneath the car and some travel along the trans. At this point, it was necesary to drop the trans and put in a new RMS and now she is dry as a bone.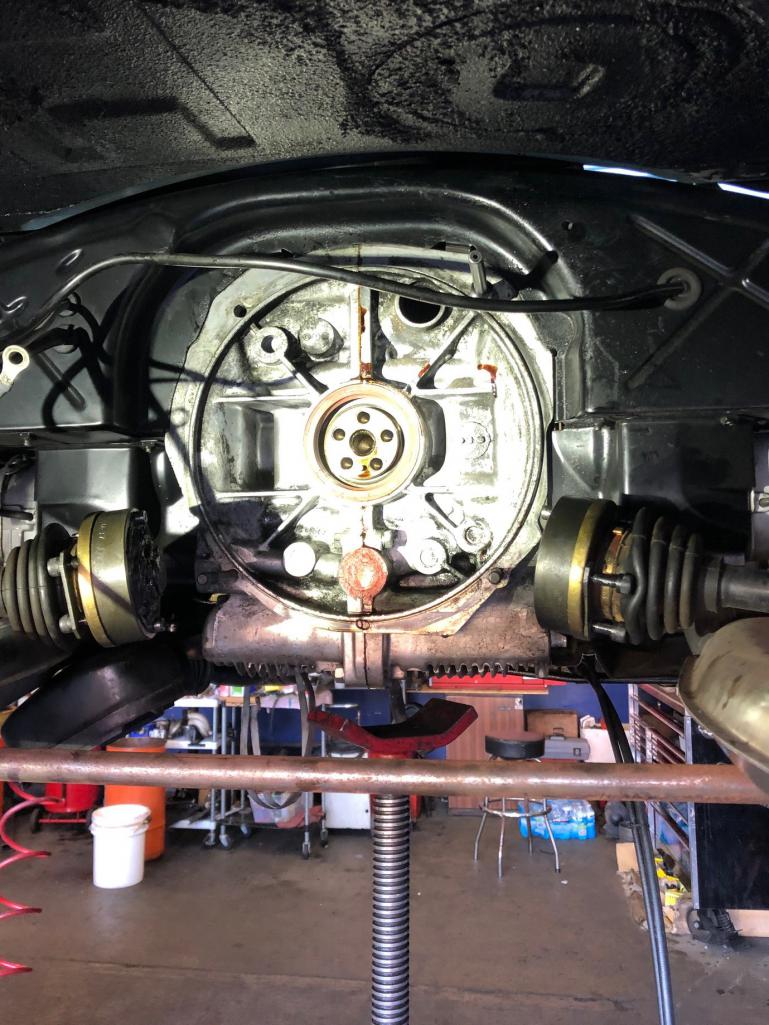

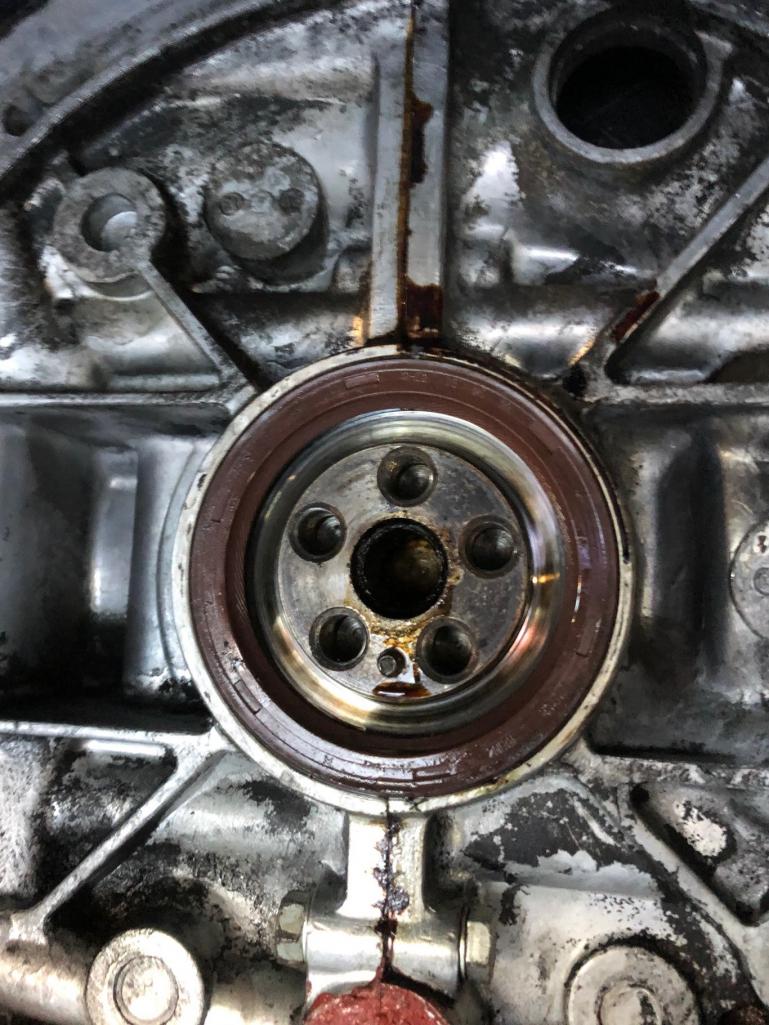
3-The Targa Trim gods hate me! Yes Virginia there is a Santa Claus and Targa Trim Gods too. Was unsuccessful in restoring not one but two horizontal targa trims. One was anodized black by mistake and the other came out looking worse after clear anodize. Sourced a really clean one for number three, but arrived bent in several places. Once I get that straightened out (literally), all of the targa trim can be installed.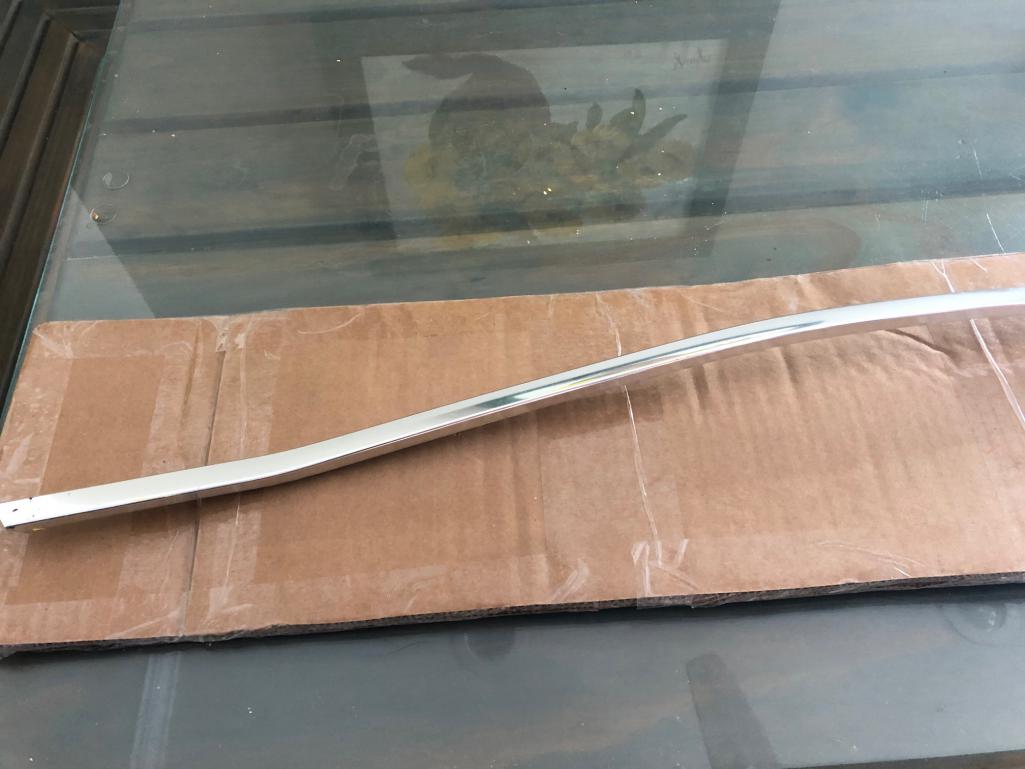
Posted by: 914_7T3 Nov 15 2020, 11:07 PM
Had a great drive today along the coast and now have 1,500 miles on the clock. Was very surprised by all of the positive reactions to the car. It was weird to see a guy in a McLaren do a touble take on the 914 on PCH and another guy in a brand new M5 lower his window to snap some pics. The 911 crowd was showing some love out there too! 
Posted by: Cairo94507 Nov 16 2020, 07:05 AM
Congratulations on being able to enjoy your beautiful car.
Posted by: 914Sixer Nov 16 2020, 07:16 AM
Sweet, glad the oil leak and soft pedal got resolved.
Posted by: bbrock Nov 16 2020, 11:59 AM
Yes, that is weird. I always had faith some day the 914 would gain some of the appreciation it deserved, but turning heads of McLaren and M5 owners is wild indeed. Thanks for sharing your post resto fun. It motivates me to keep going!
Posted by: mepstein Nov 16 2020, 12:17 PM
Yes, that is weird. I always had faith some day the 914 would gain some of the appreciation it deserved, but turning heads of McLaren and M5 owners is wild indeed. Thanks for sharing your post resto fun. It motivates me to keep going!
I was parked next to a Ferrari California during parents weekend at my kids school. A girl walked by and shouted out “nice car”. Both the Ferrari dad and I turned around for the compliment but she was looking at my ‘71.
Posted by: Superhawk996 Nov 21 2020, 10:09 AM
At my age, I'll take any sort of shout out that I can get from a young (legal) girl. Looking forward to seeing these types of favorable reactions to 914's. Even back in late 90's when I had my last 914 they always attracted their fair share of attention. Can only imagine that it has increased given how rarely I see a teener vs. what I used to see back then.
Posted by: 930cabman Nov 21 2020, 05:55 PM
At my age, I'll take any sort of shout out that I can get from a young (legal) girl.
Looking forward to seeing these types of favorable reactions to 914's. Even back in late 90's when I had my last 914 they always attracted their fair share of attention. Can only imagine that it has increased given how rarely I see a teener vs. what I used to see back then.+1, "At my age", you might restate that comment to include "any attractive female"
I most certainly would and I am over .... well old
BTW, great looking ride 7T3
Posted by: 914_7T3 Jan 14 2021, 02:07 PM
Targa trim gods still hate me.....
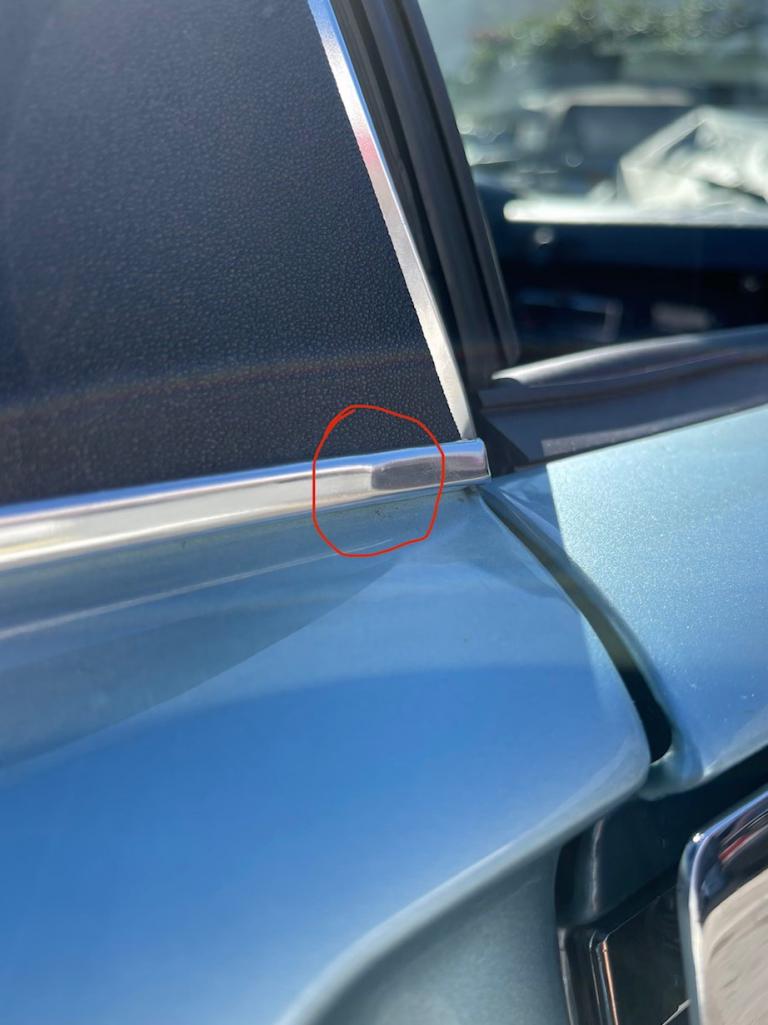
Shout out to @http://www.914world.com/bbs2/index.php?showuser=3348 Just talked to Scott at 914 Rubber and he is overnighting me some replacement trim and vinyl. These guys are the best.
Not only do the Targa Trim gods hate me, but so do the shock absorber gods.
The rebuilt set of Koni reds of unknown origin have leaking seals. This is a blow to my quest for originality, but I'm over it and have a new set of adjustable Koni Sport yellows going in.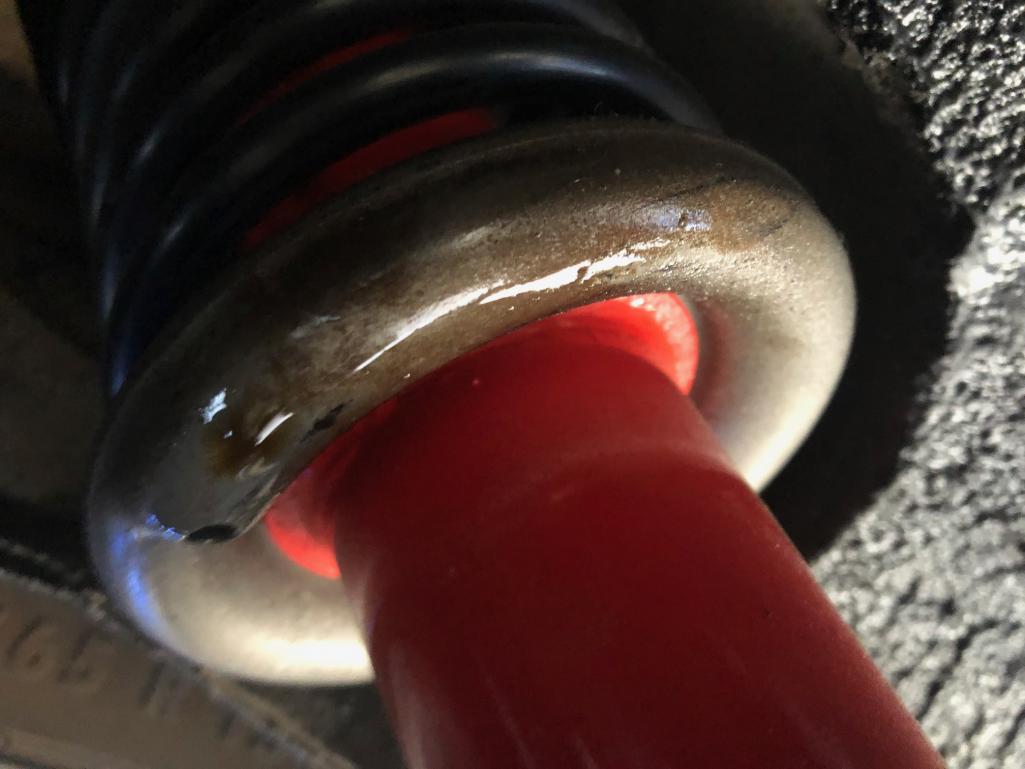
Posted by: Superhawk996 Jan 14 2021, 02:14 PM
Car is beautiful.
Red Krylon . . .
Posted by: ValcoOscar Jan 14 2021, 03:48 PM
Targa trim gods still hate me.....
Shout out to @http://www.914world.com/bbs2/index.php?showuser=3348 Just talked to Scott at 914 Rubber and he is overnighting me some replacement trim and vinyl. These guys are the best.
Not only do the Targa Trim gods hate me, but so do the shock absorber gods.
The rebuilt set of Koni reds of unknown origin have leaking seals. This is a blow to my quest for originality, but I'm over it and have a new set of adjustable Koni Sport yellows going in.
Oh so close....
Oscar
Posted by: ClayPerrine Jan 14 2021, 03:52 PM
You do know that you can have Koni shocks rebuilt?
Clay
Posted by: 914_7T3 Jan 14 2021, 05:29 PM
You do know that you can have Koni shocks rebuilt?
Clay
Yes, but the cost is $650 plus return shipping while the car is disabled throughout the process. Was able to get the new set for $400 all in and can do a direct swap.
The plan is to keep the reds and perhaps rebuild at a later date.
Posted by: 914_7T3 Mar 28 2021, 04:53 PM
Its been a while since my last post and am updating as the rear shocks have been replaced with Koni adjustable Sport yellows. They are on the medium setting and are super firm which I don’t mind at all. The car feels great.
The targa trim from Porsche Classic is finally installed. It looks good enough, but I am not entirely satisfied with the fitment nor the quality. I managed to source some clean original replacements in good condition and would like to get them re-anodized from an automotive restorer and not industrial anodizer. Now that the car is together and dialed in there is no rush on that.
Had the car out today at Cars and Coffee Los Angeles and here are some pics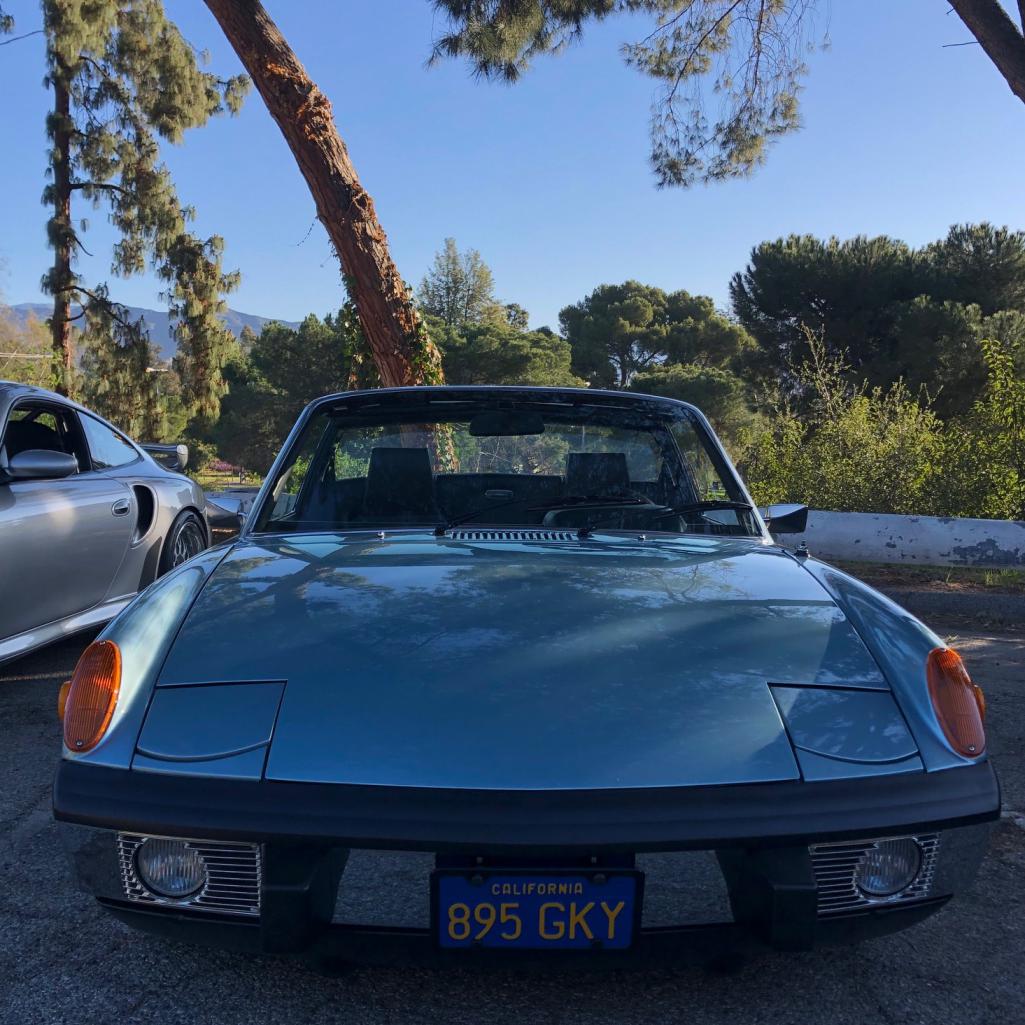
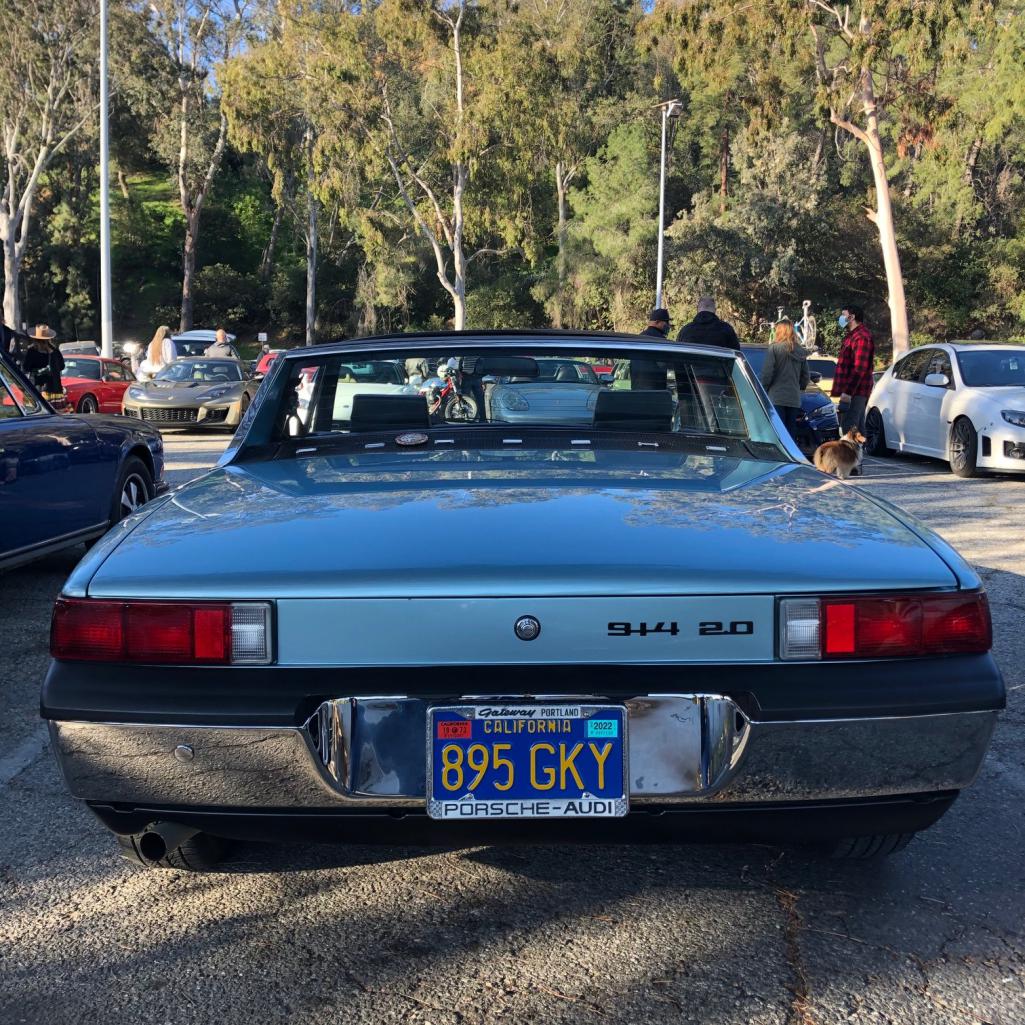

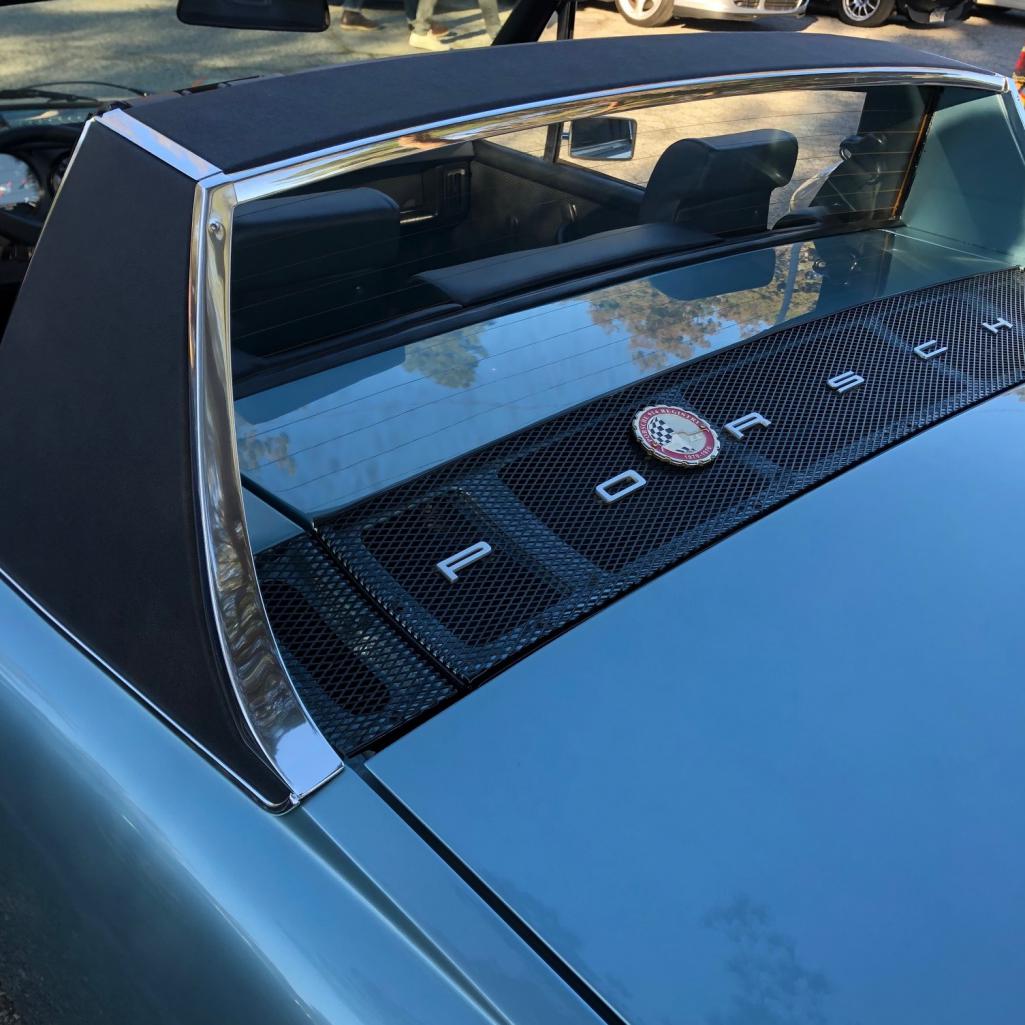
Posted by: FlacaProductions Mar 28 2021, 05:06 PM
Malibu? Looks great - what a fantastic day for a drive, too!
Posted by: 914_7T3 Mar 28 2021, 05:10 PM
Now is the time to officially call this project DONE! It has been quite the journey and am grateful for the experience, but more so from the support of this fantastic community!
If you have so much as commented on a post or to offer advice or encouragement, Thank you!
If you have sold me a part on the forum, Thank you!
If you have taken time to join in on any of the build days in OC or here in LA, Thank you!
With that said, I would also like to thank the following people and the entire SoCal/OC Cal crew for going above and beyond in moving the project forward:
@http://www.914world.com/bbs2/index.php?showuser=20799 & Craig at Camp 914 for helping me get the car bought
@http://www.914world.com/bbs2/index.php?showuser=16669 for your unwavering support and willingness to help when I was in completely over my head. Also for the generous use of your garage to help get stuff done!
@http://www.914world.com/bbs2/index.php?showuser=1319 for always being a great resource with parts, Suspension Swap Saturday and many a reassembly day!
@http://www.914world.com/bbs2/index.php?showuser=3457 The King of NOS parts who always found the time to dig up whatever was eluding me and giving great advice!
@http://www.914world.com/bbs2/index.php?showuser=17068 Not only for being a wiseass, but all your help on Suspension Swap Saturday!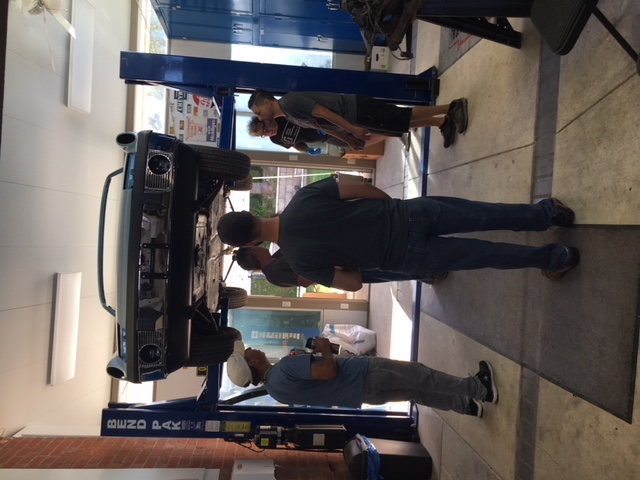
@http://www.914world.com/bbs2/index.php?showuser=10742 for the advice and reassembly days and especially trouble shooting the no spark issue!
@http://www.914world.com/bbs2/index.php?showuser=18749 What a time on the airbox installation and all the way from the east coast too!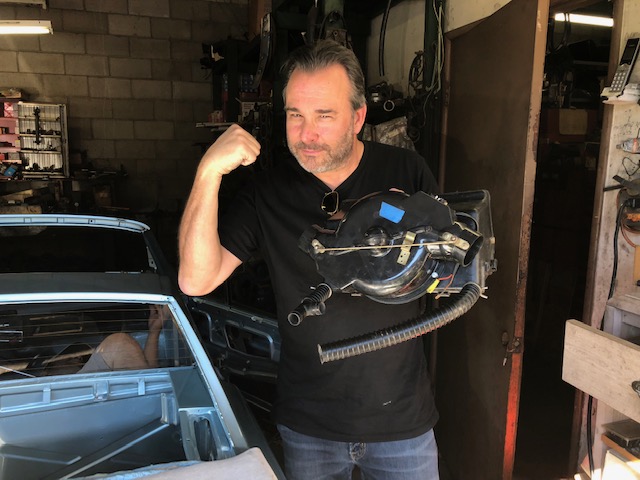
Special thanks to the following vendors for their role in assisting on this Resto:
Bela Szekely of Bela’s Foreign Auto Repair in Burbank, CA for the awesome build of my Type IV. An incredible talent and one Helluva great guy!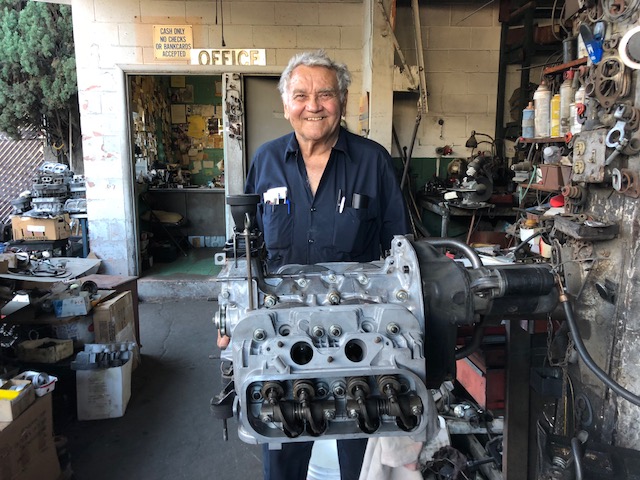
Regan Seegraves of World Class Restoration in Riverside, CA for a World Class Paint Job!
Kevin at KCR Transmission in Riverside, CA for the 901 rebuild!
Dave & Jeremy at TRE Motorsports
James at German Motors
Powder Craft Los Angeles
Van Nuys Plating
@http://www.914world.com/bbs2/index.php?showuser=1110 at PMB for awesome service and tech support on all things braking (not breaking)!
@http://www.914world.com/bbs2/index.php?showuser=3348 & Scott at 914 Rubber
Tucker at AASE Sales
Roger at Retro Automotive Products
Car Bone
Auto Atlanta
Continued on next post.....
Posted by: 914_7T3 Mar 28 2021, 05:10 PM
Continued from previous post......
Morro of Morro's Auto Interior in Van Nuys, Ca
Tyler at American Wrap Co in Thousand Oaks, CA
John Hayes at Hayes European in Santa Cruz, CA for the PPI
The 5 previous custodians of this awesome survivor that left enough of a paper trail to connect with all of you! From Portland to Seattle, back to Portland & onto Santa Cruz before finding a new home in LA!
Rod Torres, @http://www.914world.com/bbs2/index.php?showuser=21628 , @http://www.914world.com/bbs2/index.php?showuser=21151 , @http://www.914world.com/bbs2/index.php?showuser=16427 @http://www.914world.com/bbs2/index.php?showuser=22865 @http://www.914world.com/bbs2/index.php?showuser=22446
My ’73 Restoration Support Crew @http://www.914world.com/bbs2/index.php?showuser=20845 & @http://www.914world.com/bbs2/index.php?showuser=22428
@http://www.914world.com/bbs2/index.php?showuser=8476 @http://www.914world.com/bbs2/index.php?showuser=11890 @http://www.914world.com/bbs2/index.php?showuser=6395
Hopefully, I haven’t forgot anyone!
Forget about a Village, it takes a World…914World!
See you out there in the Twistys!!! 
Posted by: 914Sixer Mar 28 2021, 05:15 PM
Got to be a great feeling.
Posted by: Superhawk996 Mar 28 2021, 05:31 PM
Done? I don't think I've ever seen a 914 that was declared Done.
What a great looking car! Glad you're finally able to drive and enjoy it. Well Done!
Posted by: 914_7T3 Mar 28 2021, 05:32 PM
Done?
I don't think I've ever seen a 914 that was declared Done. Car's not done....I'm done
Posted by: Superhawk996 Mar 28 2021, 05:38 PM
Car's not done....I'm done
I can relate to that feeling. I'm not even close yet but I have those days! Posted by: ndfrigi Mar 28 2021, 05:38 PM
Finally it is 99.9% done
Posted by: iankarr Mar 28 2021, 08:02 PM
It's never really done till you sell it
Congrats, Jeffrey! Your car is amazing!
Hope to take a celebration lap with you soon...
Posted by: Ed_Turbo Apr 3 2021, 08:48 AM
Congrats Jeff! Glad to hear the 2.0 project is wrapping up.
Now don't drive your Concours d'elegance
-Ed
Posted by: 930cabman Apr 3 2021, 01:37 PM
Congrats on a job well done and Marathon Blue to boot, enjoy her in good health and Happy Motoring
Posted by: flyer86d Apr 3 2021, 02:05 PM
Congrats on a job well done and Marathon Blue to boot, enjoy her in good health and Happy Motoring
It’s a beauty! Congratulations!
Charlie
Posted by: 914_7T3 Oct 18 2023, 10:30 PM
Haven’t updated this thread for quite some time so here we are! Now at 5,800 miles on the clock and still running great! 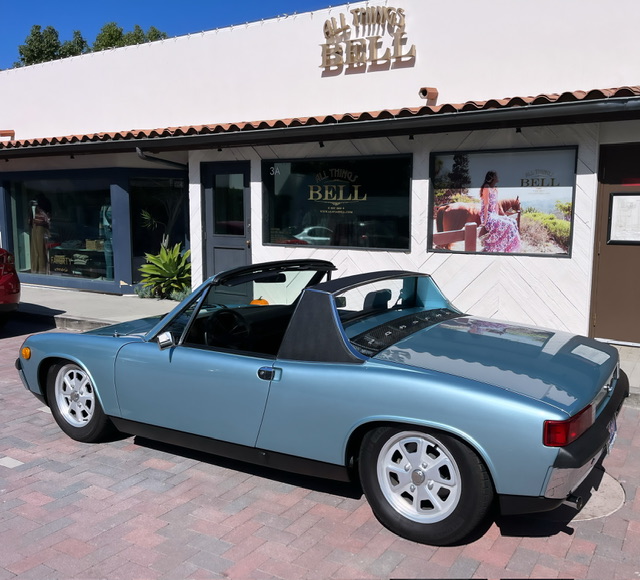
Posted by: 930cabman Oct 19 2023, 04:53 AM
Lookin good
Wish my Marathon Blue was in this condition, but , still a few miles to go
Posted by: Cairo94507 Oct 19 2023, 07:12 AM
Stunningly beautiful and sitting perfectly.
Posted by: Superhawk996 Oct 19 2023, 07:47 AM
Posted by: burton73 Oct 19 2023, 09:01 AM
Jeffrey, Still looking great. I lust for your car.
Best Bob B
Posted by: FlacaProductions Oct 19 2023, 09:06 AM
Fantastic - well deserved.
Posted by: second wind Oct 19 2023, 06:16 PM
That is a damn nice looking car Jeffrey....drive safe (as possible) and hope to see you on the road again soon !!
gg
Posted by: technicalninja Oct 19 2023, 07:07 PM
I'm a bit superstitious about finishing a project car.
I've had three friends tell me their cars were DONE!
Within a month of this statement all three were...
One was consumed in a garage fire. 1971 Pantera
One was stolen and stripped. 72 Datsun 510 BRE clone
One was T-boned by a lady in a Subaru with no insurance. 70 Datsun 240Z
These were the ONLY cars I've heard of being "done" and they really, really were.
I'll NEVER finish any of mine...
Posted by: DRPHIL914 Oct 20 2023, 09:28 AM
Haven’t updated this thread for quite some time so here we are! Now at 5,800 miles on the clock and still running great!
man that looks superb! what a great color, glad you are getting some miles on it!!
I just turned 35,000 miles since my car came back from paint 5 years ago!! going to get some dings but as Dr. Porsche said, " they are made to be driven" , not sitting!
Powered by Invision Power Board (http://www.invisionboard.com)
© Invision Power Services (http://www.invisionpower.com)