Printable Version of Topic
Click here to view this topic in its original format
914World.com _ 914World Garage _ Bottom oil line on 914/6 oil tank....
Posted by: ! May 9 2005, 04:15 PM
Stoopid freaking rotten godamned oil line is sweating out the pores of the rubber and cloth weave oil ine.....looks like a replacement is needed.....I don't think it can be removed without pulling the tank.
Anyone been able to get up to that nut with the tank in place? Should be the 36mm one ........ 
Posted by: Lawrence May 9 2005, 04:20 PM
Yeah, it can be done, but you need the special wrench.
Posted by: ! May 9 2005, 04:29 PM
OK....anyone got one?????
All I have is one of those thin bicycle 32/36mm double open ended ones....
Posted by: Porsche Rescue May 9 2005, 04:55 PM
Mine's leaking too. I was thinking the fitting was loose. Same question, where do you get the magic wrench?
Posted by: Lawrence May 9 2005, 04:58 PM
I hate to say this... check SkyRat.
-Rusty 
Posted by: brp914 May 9 2005, 06:59 PM
I took it off with a crow foot and long extensions. I dont recall the size. I didn't have a metric one so I substituted a close sae.
Posted by: xitspd May 9 2005, 07:31 PM
| QUOTE ("Z" @ May 9 2005, 02:15 PM) |
| Stoopid freaking rotten godamned oil line is sweating out the pores of the rubber and cloth weave oil ine.....looks like a replacement is needed.....I don't think it can be removed without pulling the tank. Anyone been able to get up to that nut with the tank in place? Should be the 36mm one ........ |
Z, I called my crew chief Steve Aven. He has the tool. The brand is Stahlwille. It can be purchased from Baum Tools. Bring your 914 to Orange, California and we will take it off for you for free, if the oil has been removed from the car in advance of your visit.
Dan
Posted by: Porsche Rescue May 9 2005, 08:54 PM
Can you give a more detailed description of the tool? Just looked at Baum's online listing of 78 Stahlwille tools and don't see anything that looks like it would do the job.
Will Baum know what I want if I ask for a wrench to remove lower hose from a 914-6 oil tank?
Posted by: xitspd May 9 2005, 09:19 PM
| QUOTE (Porsche Rescue @ May 9 2005, 06:54 PM) |
| Can you give a more detailed description of the tool? Just looked at Baum's online listing of 78 Stahlwille tools and don't see anything that looks like it would do the job. Will Baum know what I want if I ask for a wrench to remove lower hose from a 914-6 oil tank? |
Sorry, I'm the driver and Steve Aven is the wrench. I will call him tomorrow and then post the nature of the tool.
Dan
Posted by: brp914 May 9 2005, 09:28 PM
from Stahlwille "programme 2002":
crow ring spanner
36mm
1/2 "dr
code:03190036
note this is tool I used to do it. When others say "special tool" as if there is a "lower 914-6 oil line remover" - well, good luck. Also, the code # is for the 36mm. They also make them in 30, 32, 41, and 46mm
Posted by: ! May 9 2005, 09:29 PM
Pulled the tank replaced the line and fixed the tach.......woo hoo...I'm ready for the track.... 
Posted by: xitspd May 9 2005, 09:33 PM
| QUOTE ("Z" @ May 9 2005, 07:29 PM) |
| Pulled the tank replaced the line and fixed the tach.......woo hoo...I'm ready for the track.... |
Special tools, we don't need no "stinkin" special tools! Good job Z!
Posted by: Gint May 9 2005, 09:53 PM
| QUOTE (brp914 @ May 9 2005, 09:28 PM) |
| from Stahlwille "programme 2002": crow ring spanner 36mm 1/2 "dr code:03190036 note this is tool I used to do it. When others say "special tool" as if there is a "lower 914-6 oil line remover" - well, good luck. Also, the code # is for the 36mm. They also make them in 30, 32, 41, and 46mm |
And just where does one purchase such a tool?
Posted by: brp914 May 9 2005, 10:31 PM
stahlwille.com
800 695-2714
sarasota, fl
please confirm size - 36mm sounds about right, but this was 10 years ago and I no longer have it. BTW, "Z" took the tank out - I've had to do that too and its a miserable job.
Posted by: Mrs. K May 9 2005, 10:47 PM
| QUOTE (xitspd @ May 9 2005, 08:33 PM) | ||
Special tools, we don't need no "stinkin" special tools! Good job Z! |
 That quote was from......
Attached image(s)

Posted by: Carl May 10 2005, 12:40 AM
For a fix of a related problem …
The oil line on the bottom of the 914-6 tank uses aluminum fittings (read: fragile) on a very rare hose. The design relies on the aluminum squeezing the hose between the inner and outer portions of the fitting to secure the seal.
Over time they begin to leak. Why? Because the heat cycles eventually harden and shrink the rubber. When it shrinks there’s more gap between the inner and outer parts of the fitting and oil escapes.
Unless you scavenge one from a 6 or an early 911, a replacement hose is very tough to find. The following is a simple repair my brother worked out on his 911S that has also worked on my 6.
Remove the rocker panel. Separate the fitting at the union where you typically drain the oil. If the hose at the tank end is loose on the aluminum fitting connected to the tank, it will unscrew pretty easily by twisting the hose. Of course, this presumes that the aluminum fitting is tight where it mounts to the tank. If it isn’t then you need the crows foot wrench or take the Z approach by doing a tankectomy.
Once the hose is separated from the aluminum fittings, rinse with solvent then clean thoroughly with acetone to remove all traces of oil from the rubber hose ends. Likewise, clean the fitting ends with solvent and acetone. Carefully coat the hose ends with a thin film of silicone sealer (Permatex or equivalent) and reassemble snugly. Silicone won’t bond to anything oily so be sure to get it clean. Let it set for 24 hours or so before putting oil back in the tank.
I know Cap’n Krusty is going to gag with the use of silicone sealer but there aren’t many other choices with this one. BE CAREFUL not to apply excess sealer but this fix is cheap and it works.
I had difficulty getting the tank end of the hose installed and had to bend the hose in half and keep it that way with a tie-wrap in order to thread it back onto the tank fitting. That hose is stiff. I also had to start threading the outer fitting onto the inner one BEFORE screwing the hose in because the hose was so stiff that it would cause the outer housing to cross-thread on the inner fitting.
Below are some photos of the typical swedge-style fitting that’s used on each end of the hose.
HTH,
Carl
Attached image(s)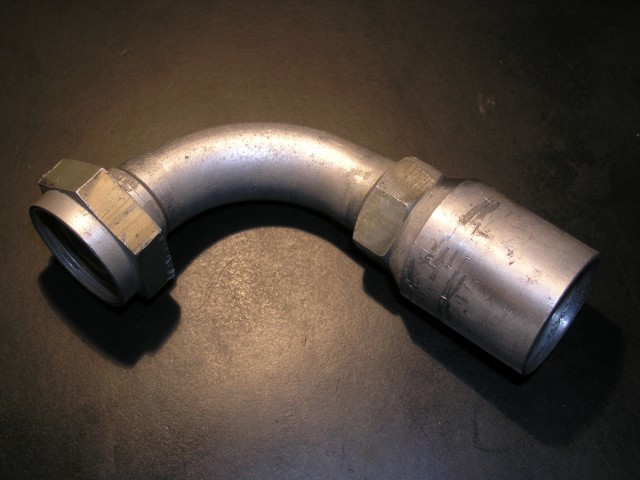
Posted by: Carl May 10 2005, 12:40 AM
asdf
Attached image(s)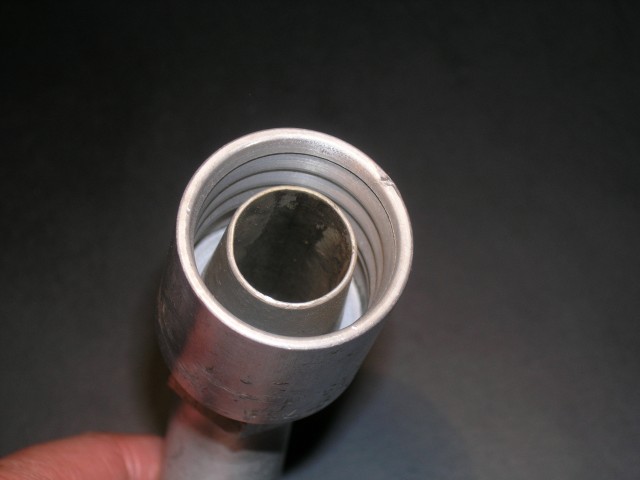
Posted by: Carl May 10 2005, 12:41 AM
asdf 2
Attached image(s)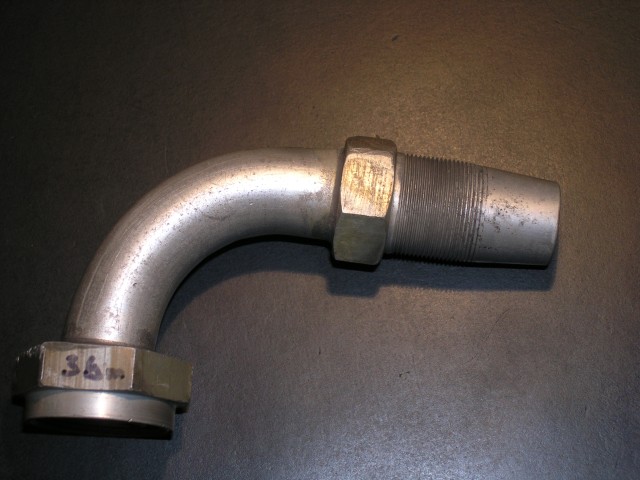
Posted by: Carl May 10 2005, 12:41 AM
that's it. The end.
Attached image(s)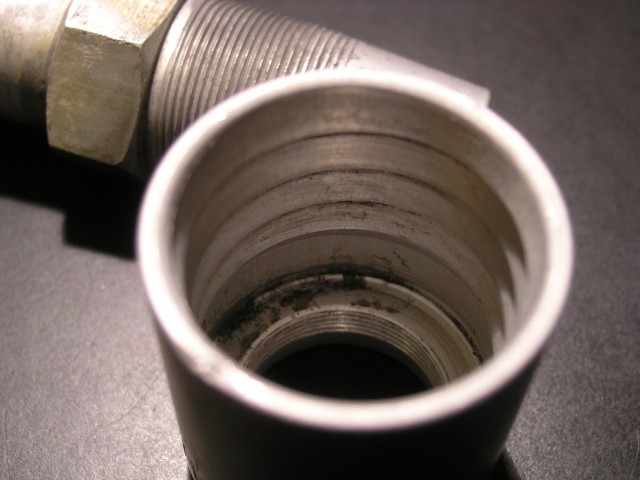
Posted by: michel richard May 10 2005, 05:07 AM
When I built my /6 conversion I found I could readily source rubber oil lines that work with those fittings by going to the local hydraulic stuff supply store. I have found that even a fairly large one will be happy to help.
Posted by: xitspd May 10 2005, 07:20 AM
| QUOTE (Mrs. K @ May 9 2005, 08:47 PM) | ||||
That quote was from...... |
 Your right! My post deleted!
Posted by: Carl May 10 2005, 10:01 AM
| QUOTE (michel richard @ May 10 2005, 03:07 AM) |
| When I built my /6 conversion I found I could readily source rubber oil lines that work with those fittings by going to the local hydraulic stuff supply store. I have found that even a fairly large one will be happy to help. |
Michel,
Do you have a spec on the hose and the name of the place where you found it?
My brother couldn't find one locally and even tried to buy a replacement hose from Porsche. They quoted an outrageous price and never delivered it even after waiting for months.
Posted by: michel richard May 10 2005, 10:06 AM
I probably have some left over. I'll look in the garage tonight and provide details.
Posted by: Carl May 10 2005, 10:10 AM
| QUOTE (michel richard @ May 10 2005, 08:06 AM) |
| I probably have some left over. I'll look in the garage tonight and provide details. |
Great! Thanks! I'd like to have some available for the next time it leaks.
Posted by: Gint May 10 2005, 10:14 AM
| QUOTE (Carl @ May 10 2005, 10:10 AM) | ||
Great! Thanks! I'd like to have some available for the next time it leaks. |
Yeah, same here!
Posted by: Porsche Rescue May 10 2005, 10:25 AM
And me too.
Carl, should I decide to try the "re-seal" approach, where exactly do I apply the sealer?
On the outer surface of the hose before re-inserting into the fitting?
Thanks very much for the detailed info. and pictures. I had no idea that the rubber hose could be separated from the aluminum fittings.
Posted by: Carl May 10 2005, 10:34 AM
Hi Jim,
Since the hose end comes into contact with a large surface area of both the inner and outer fittings then the sealer can be applied to both surfaces of the hose. Obviously, the risk of getting sealer into the engine is greater if there's excess on the inner surface.
Posted by: michel richard May 10 2005, 07:10 PM
OK, I don't have any of the supply hose left. I think I threw out what I had left, and what's on the car does'nt have markings. I remember it was relatively expensive stuff: armored (steel mesh) thin wall construction, so it would be flexible. I've got a few shots of my setup that follow. Further down will be shots fo the return line, with the markings clearly shown.
HTH
Michel Richard
914/6 2.2E MFI
Attached thumbnail(s)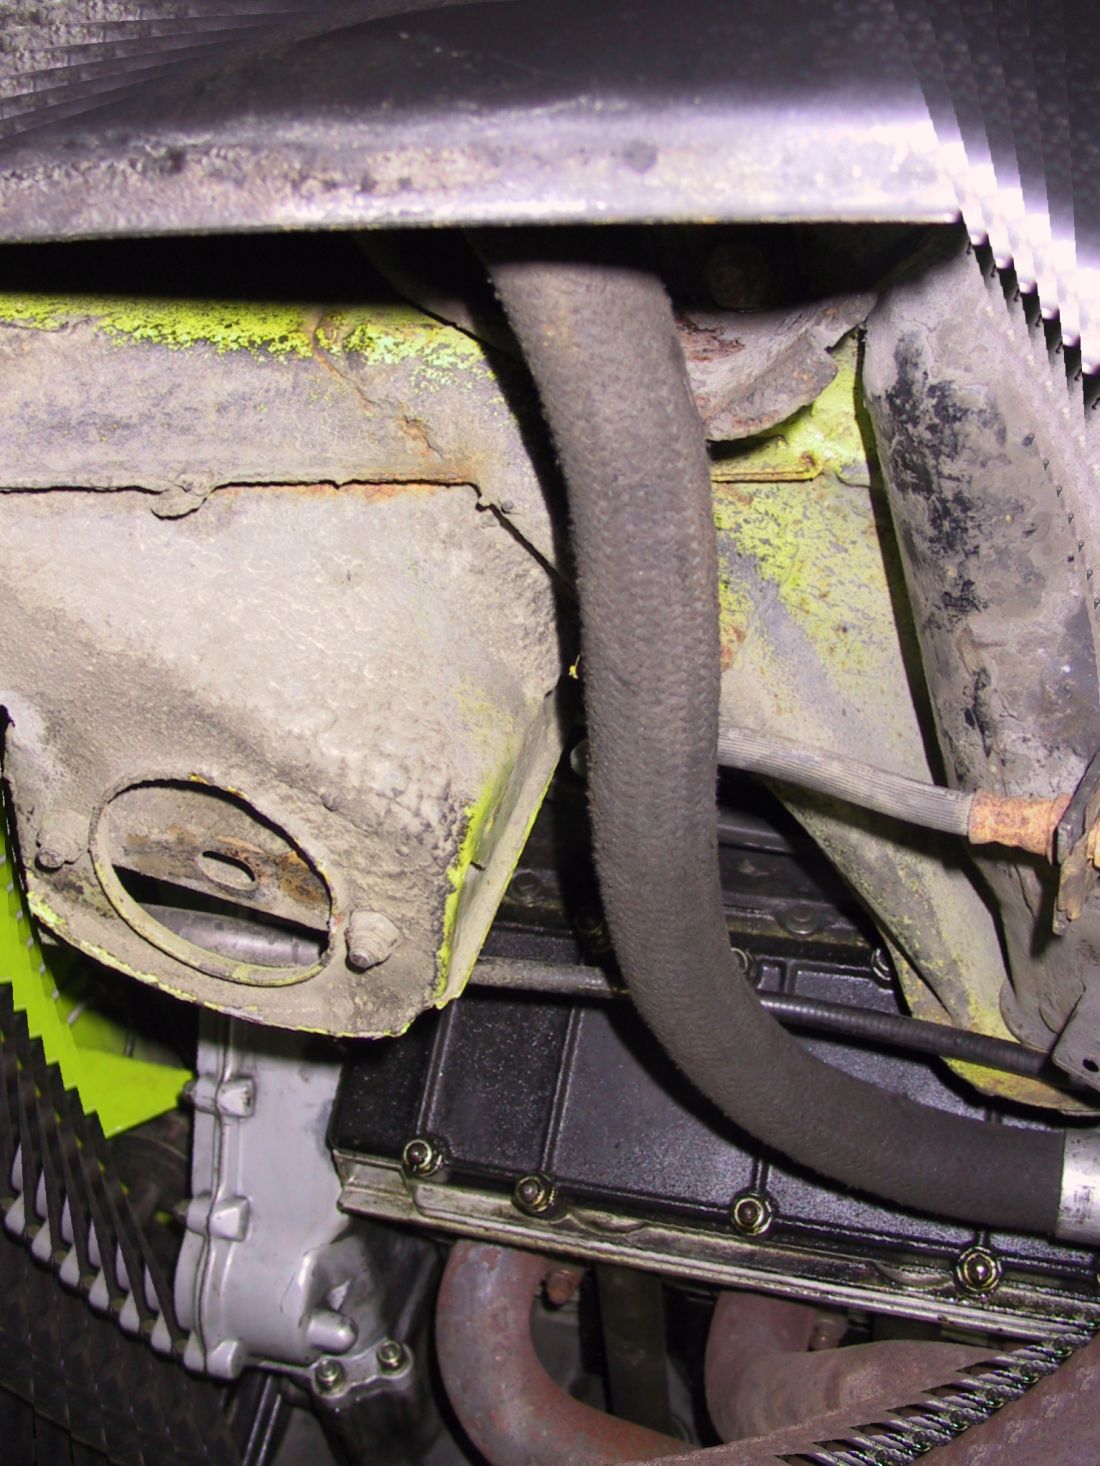
Posted by: michel richard May 10 2005, 07:11 PM
Previous shpt may not speak much. Sorry. Here's the tank end of the supply line.
Posted by: michel richard May 10 2005, 07:11 PM
Oops
Attached thumbnail(s)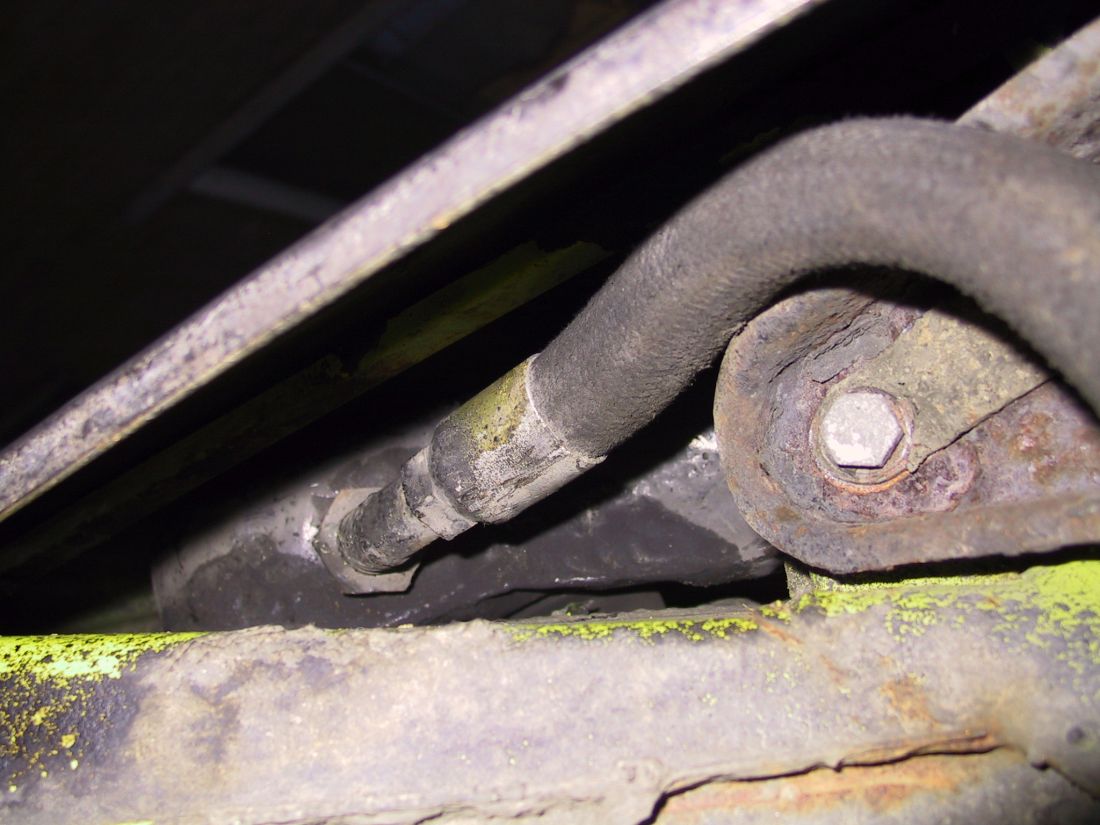
Posted by: michel richard May 10 2005, 07:12 PM
Her's how my supply line connects to the elbow
Attached thumbnail(s)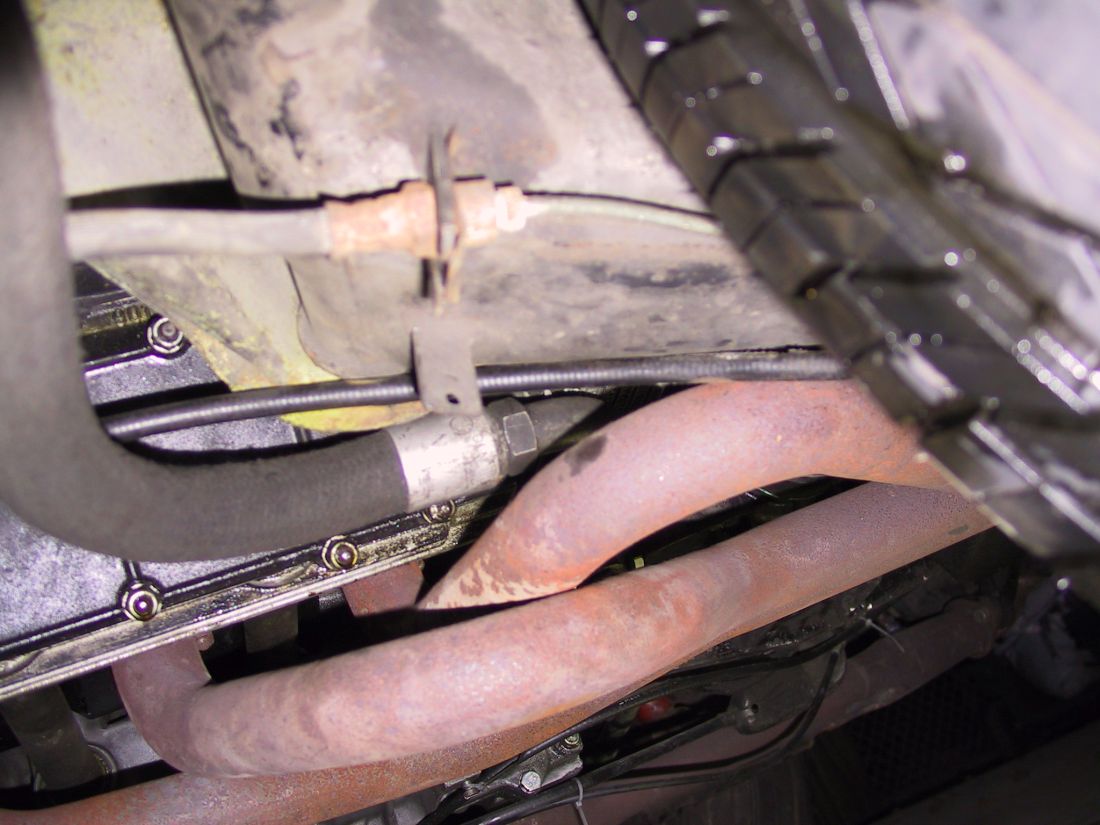
Posted by: michel richard May 10 2005, 07:13 PM
And then on to the engine. I addd a drain fitting, to change the oil.
Attached thumbnail(s)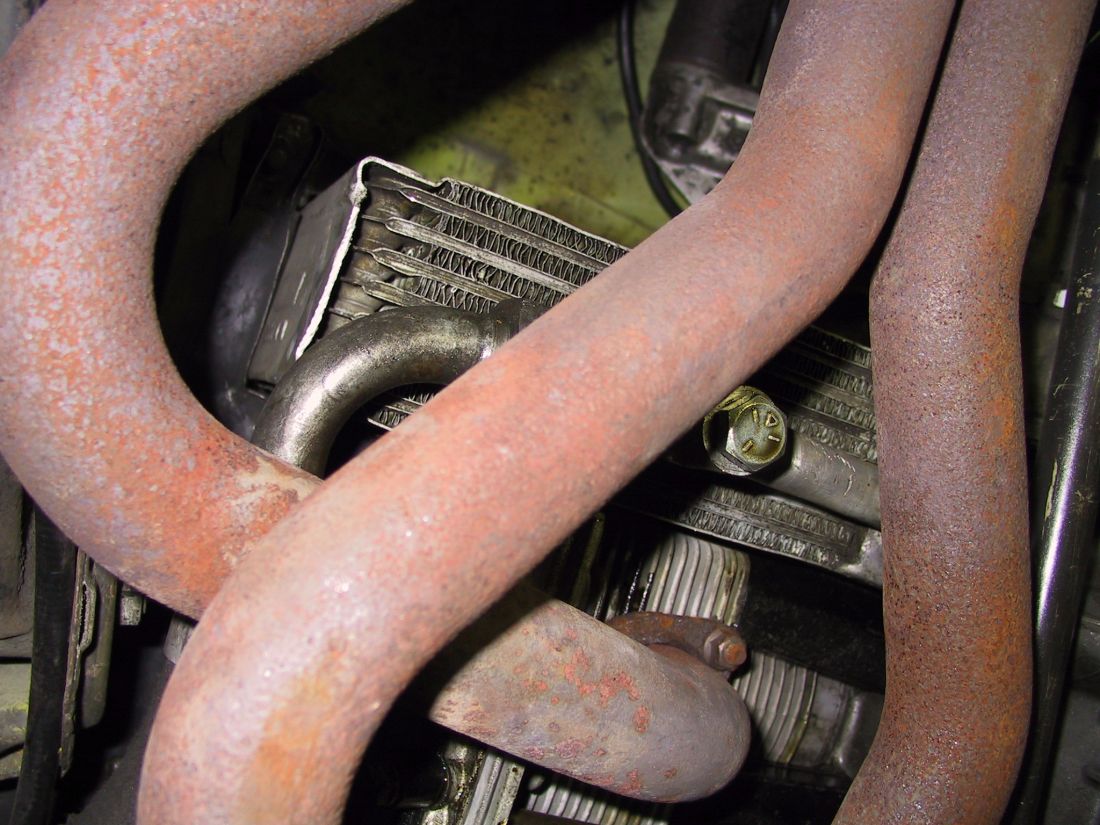
Posted by: michel richard May 10 2005, 07:14 PM
Good news is, the return line has clear markings:
Attached thumbnail(s)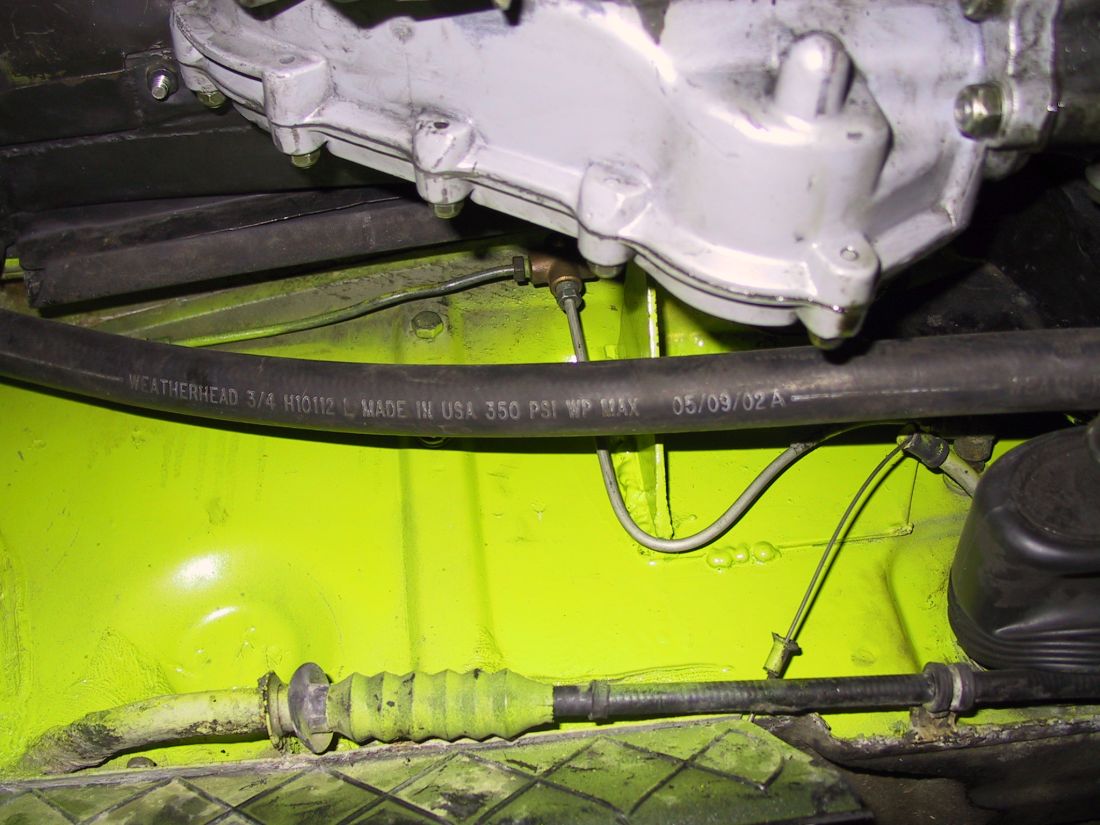
Posted by: michel richard May 10 2005, 07:15 PM
I'm in Canada, and I love stuff made in the USA, including this site !
Here's a broader shot of the return line:
Attached thumbnail(s)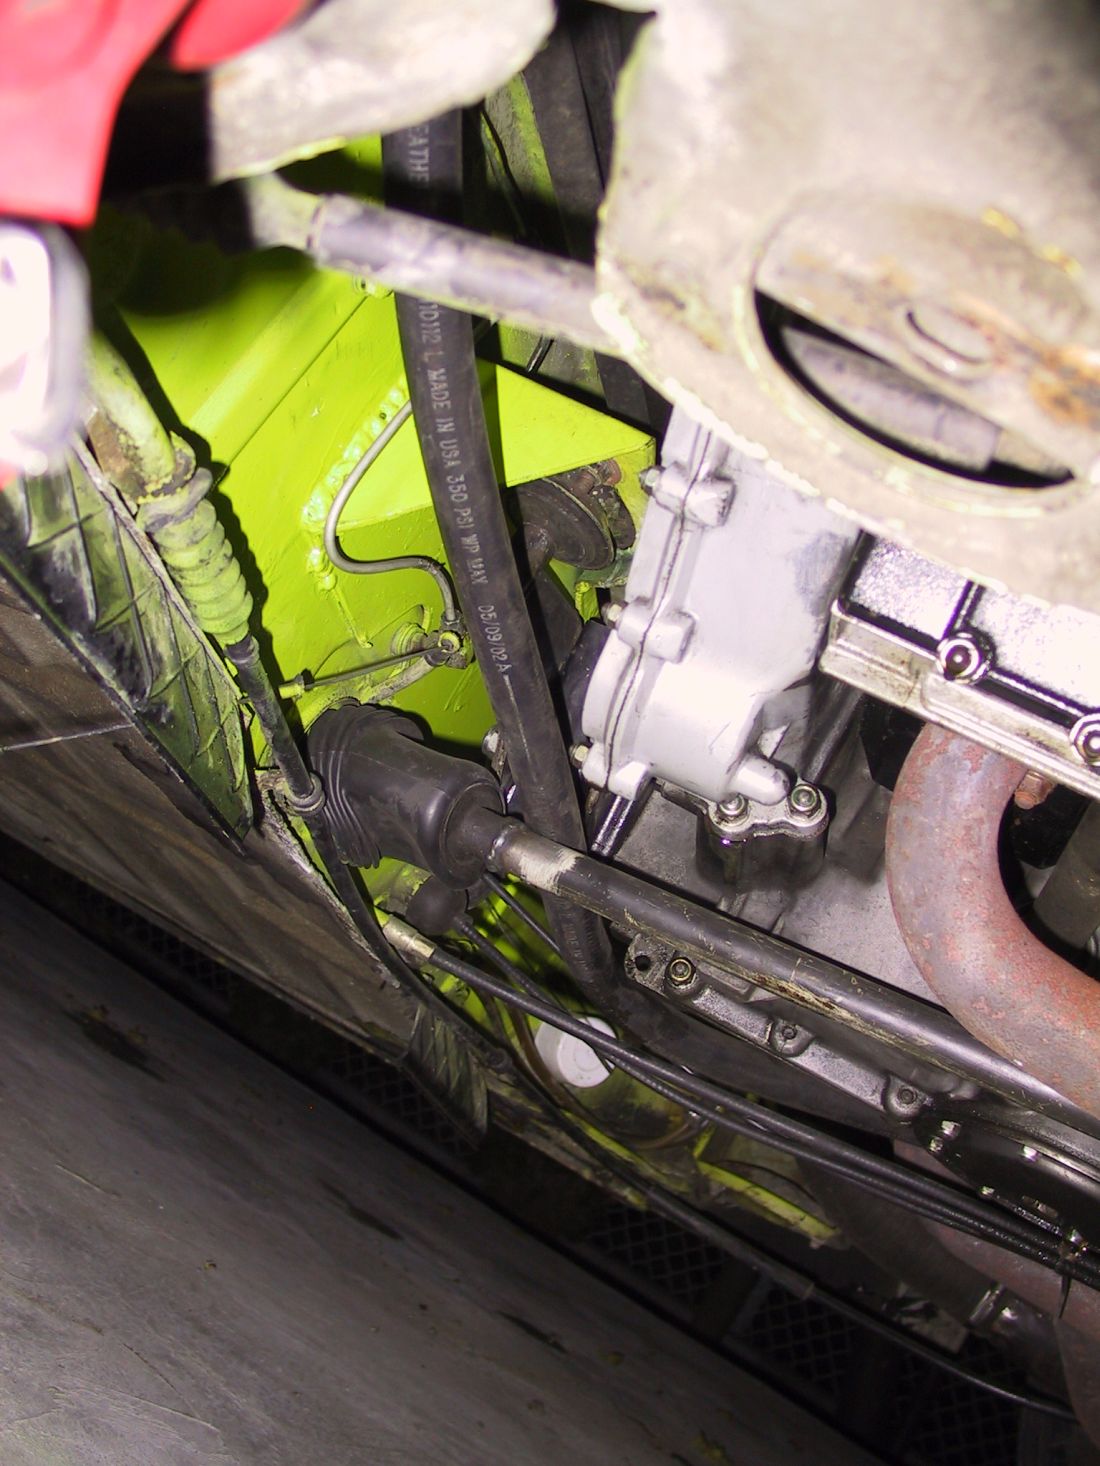
Posted by: michel richard May 10 2005, 07:16 PM
Where it goes through the engine shelf of driver's side:
Attached image(s)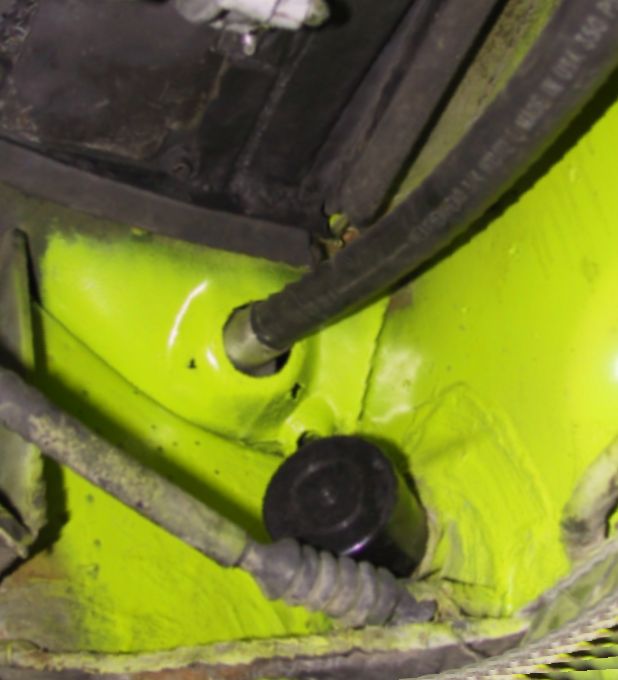
Posted by: michel richard May 10 2005, 07:19 PM
In the last shot, the aluminum you see is a sleeve I added in addition to the fitting at the end of the line, to keep the hose from rubbing on the shelf.
Here's the other end of the scavenge hose, where it connects to a Porsche fitting, on the passenger side of the engine. This fitting connects to an elbow and to the engine crankcase.
Attached thumbnail(s)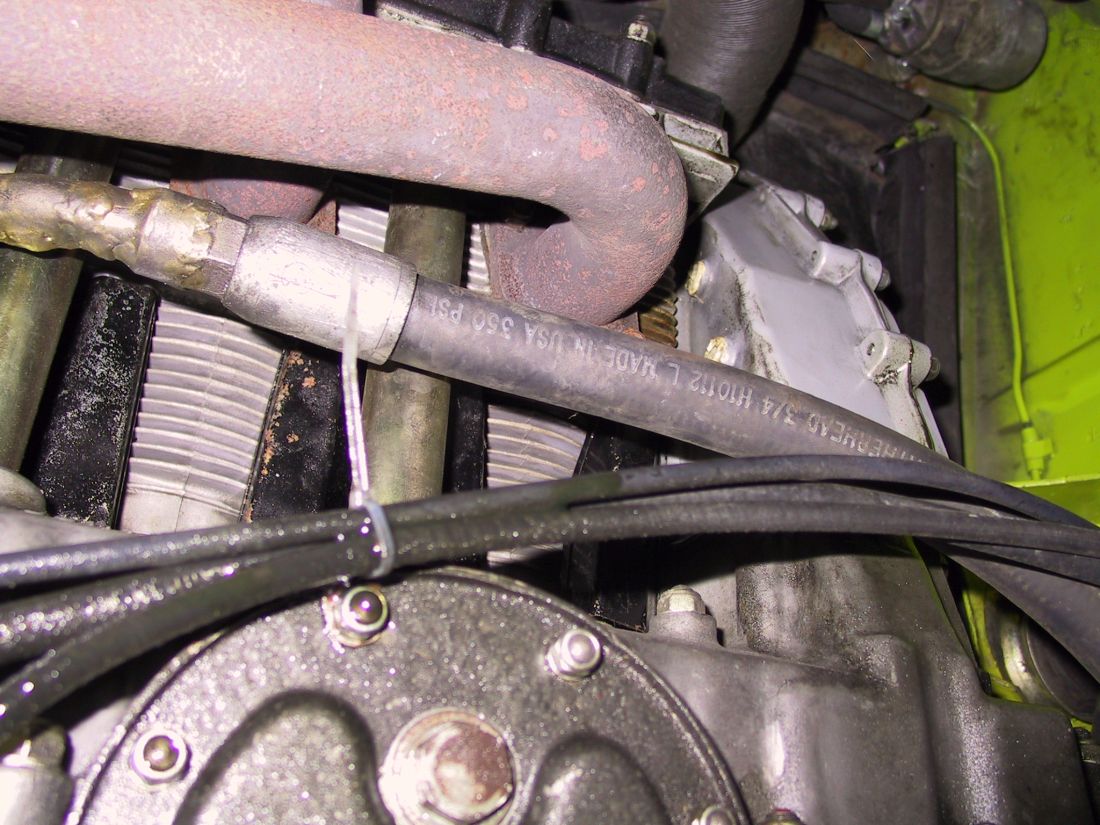
Posted by: michel richard May 10 2005, 07:23 PM
In setting these up, my thought was that a lot of the steel braied lines we see are massive overkill. These line see only a little more than atmospheric pressure, so using fittings and line that are rated above 100 psi is more than enough. A lot of the stuff that is used in convrsions is rated at thousands of psi, which is a pure waste. IMO.
Once again, I hope this helps.
Posted by: Porsche Rescue May 10 2005, 07:23 PM
So the supply and return hoses are a different size?
Posted by: michel richard May 10 2005, 07:28 PM
I guess they are. I'll go and measure, be back in a couple of secs.
Posted by: michel richard May 10 2005, 07:41 PM
The supply hose is 1.250 O.D. Here's a shot, for fun
Attached thumbnail(s)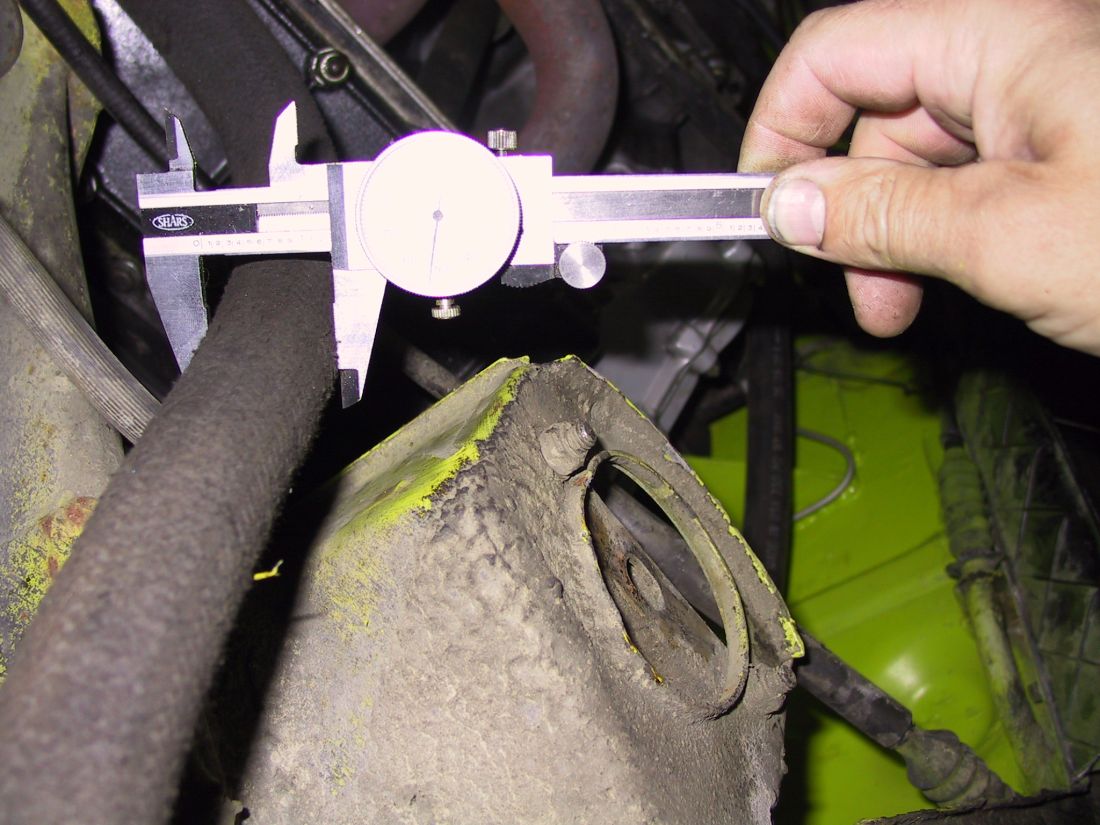
Posted by: michel richard May 10 2005, 07:42 PM
The return line is 1.050 O.D. I added a shot of the elbow at the engine end.
Attached thumbnail(s)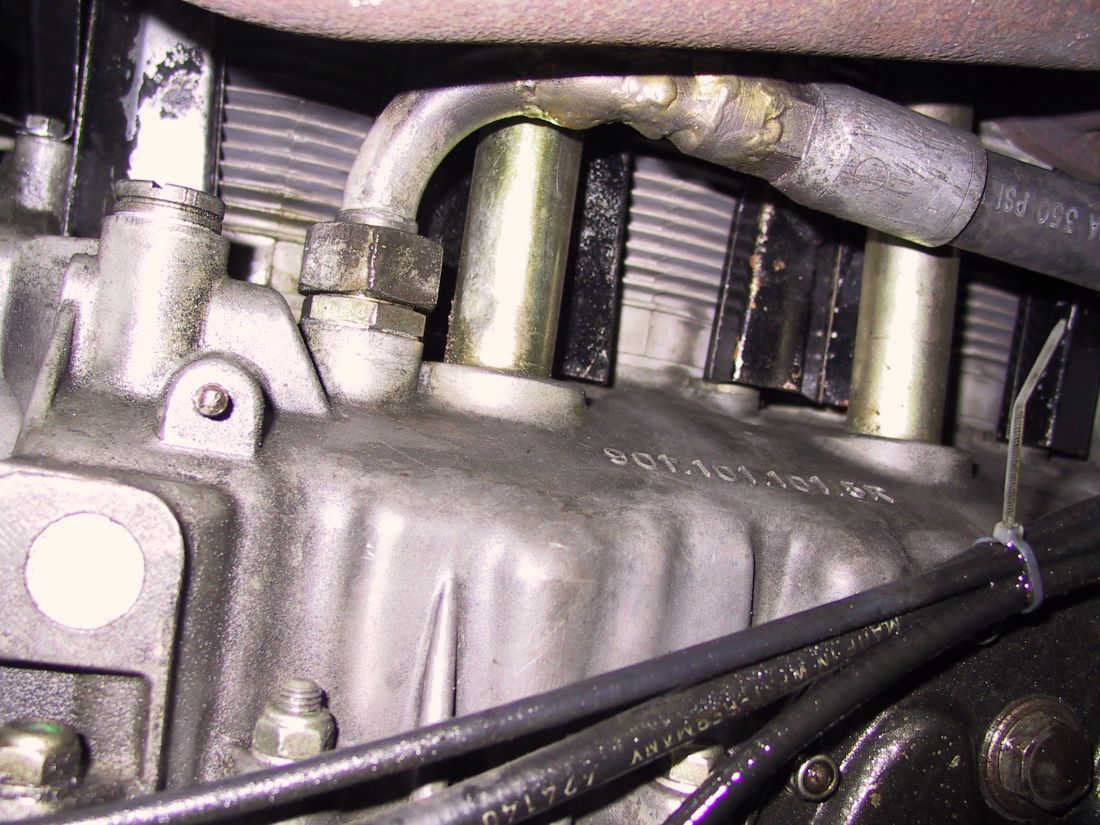
Posted by: michel richard May 10 2005, 07:44 PM
Note that none of the fitting-to-hose connections show any oil stains - somewhat proud of that.
Posted by: Porsche Rescue May 10 2005, 07:47 PM
Thanks a lot for all your good info and pics.
Posted by: michel richard May 10 2005, 07:51 PM
This is the place where I got the hose. The owner probably can speak some English, but I'm not positive. Saint-Constant is a suburb of Montreal. I doubt he would remember me, although I've been there a few times and he sort of recognizes me when I show up. The worst that can happen if you phone him up is that you will waste the long distance charges. Canadian and US phone systems are integated. You dial "1", then the area code.
Duroy Pièces d'Autos inc.
264 Route 132, Saint-Constant, Québec J5A 2C9
(450)632-9871
(450)632-5272 Fax
Posted by: Gint May 10 2005, 08:05 PM
Thanks Michel! 
Posted by: J P Stein May 10 2005, 09:09 PM
| QUOTE (michel richard @ May 10 2005, 05:23 PM) |
| In setting these up, my thought was that a lot of the steel braied lines we see are massive overkill. These line see only a little more than atmospheric pressure, so using fittings and line that are rated above 100 psi is more than enough. A lot of the stuff that is used in convrsions is rated at thousands of psi, which is a pure waste. IMO. Once again, I hope this helps. |
I put enuff pressure on my scavenge line to blow my Aux cooler (one of my glorius fuckups). I talked to a guy(racer) that had a pressure gage rigged on his scavenge line. He reported up to 165 psi on it with a cold engine.....that's bout 10 bar, slightly over atmospheric, I'd say.
GPR used to sell a 2 piece feed line that is similar to the stocker.....steel fittings at each end.
Posted by: Carl May 10 2005, 11:58 PM
Thanks for the pics, Michel. You've got a clean install with no leaks. Congrats!
Your setup is different in several respects. The replacement hose we've looked for is the supply line. If you find a vendor for that I'd sure like to know about it.
Posted by: michel richard May 11 2005, 05:14 AM
I'll see if I can get details after all.
Michel
Posted by: michel richard May 11 2005, 05:17 AM
| QUOTE (J P Stein @ May 10 2005, 07:09 PM) |
| I put enuff pressure on my scavenge line to blow my Aux cooler (one of my glorius fuckups). I talked to a guy(racer) that had a pressure gage rigged on his scavenge line. He reported up to 165 psi on it with a cold engine.....that's bout 10 bar, slightly over atmospheric, I'd say. |
I stand corrected, but I suspect that the presence of an auxiliary cooler changes things significantly. In any event, the scavenge line I use, as you can see, is rated to 350 psi, the supply is even higher.
Michel
Posted by: J P Stein May 11 2005, 06:53 AM
You are correct, aux coolers were involved.
The SS braided lines may be overkill, but one can fab the lines
in the comfort of one's own garage and I found that I had to fab the aux cooler lines "in place"......run the lines then add the fittings.
Powered by Invision Power Board (http://www.invisionboard.com)
© Invision Power Services (http://www.invisionpower.com)