Printable Version of Topic
Click here to view this topic in its original format
914World.com _ 914World Garage _ metal repair of hood
Posted by: 914 RZ-1 May 17 2017, 10:15 AM
I was using a DA sander on my hood. Lots of layers! Wondering if anyone can tell me if the hood was repaired correctly. It looks pretty good, but I'm wondering what the green area in the photo is? Bondo? Primer? Another color hood? There is also what appears to be filled cracks at lower right. I'm wondering if these are dents/creases that were repaired and bondo'd over.
I'd like to paint the car and want to make sure the paint will look good; the paint over the area over the cracks was a little cracked, which is why I sanded it down.
BTW, the car was originally silver and is currently white.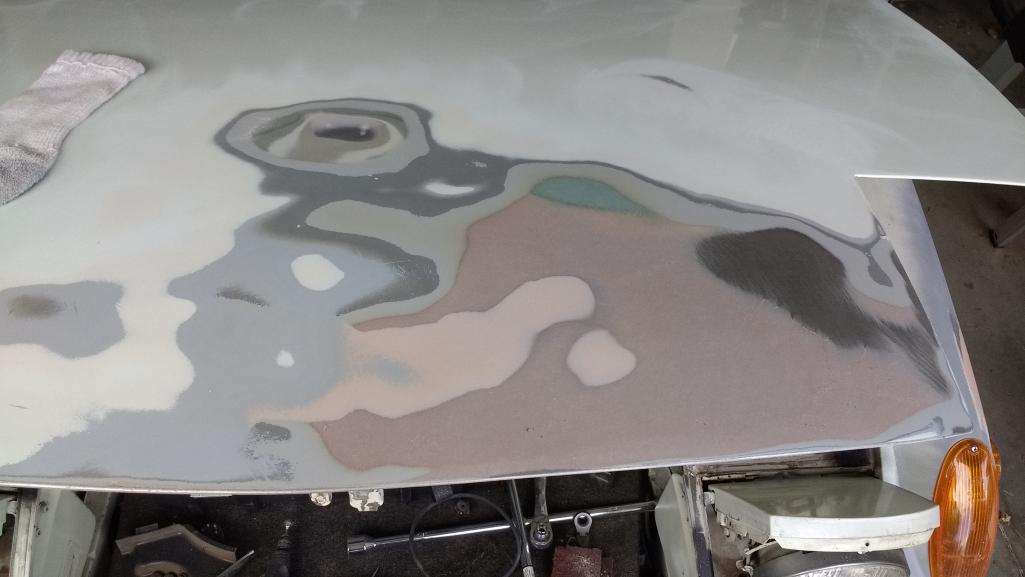
Posted by: 914 RZ-1 May 17 2017, 10:16 AM
Here is a close-up of the cracked area.
Posted by: McMark May 17 2017, 10:24 AM
IMHO, that hood should be stripped completely. That 'cracking' looks like it'll come back later to haunt you.
Posted by: dlee6204 May 17 2017, 10:27 AM

Remove all the old filler and start fresh.
Posted by: Olympic 914 May 17 2017, 11:28 AM
That green spot looks like tiger hair or some other brand of fiber filler.
I just stripped my hood all the way down yesterday. It took a long time.
When you are sanding off the old paint and filler be sure to move around the panel a lot, it is real easy to get it too hot and possibly add warping to the hood. You will know when you look at the underside of the hood and see spots where the paint burned from getting the metal too hot.
My hood had a nice shape to it but I uncovered a lot of work to get it that way.
It was painted with acrylic lacquer many years ago that is why I stripped it. I didn't was to shoot new paint over an unknown base.
Posted by: McMark May 17 2017, 11:30 AM
YES!

Posted by: gandalf_025 May 17 2017, 11:36 AM
Don't waste your time with a questionable hood.
It unbolts and is easy to replace.
Not worth messing with a damaged one when you can buy a
nice example for around 200.00 and not have it come back
to haunt you in the future...
Just my 2 cents....
Posted by: burton73 May 17 2017, 12:23 PM
The different colors are different bondos. There are light filled bondos and there are strand fiberglass filled bondo to help falling put. The more hardener that is put in bondo the faster it goes off and the color changes intensity. Green hardner is the green you see. Not sure what the cracking is. I do see that you are up very close on the hood with the cracked shot. I would of started with removing the hood so sanding dust did not get in the car. I worked on panels off of the car on a table. Are you going to paint the full car or just the hood? Are you going to spray it yourself?
Bodywork is an art form. You can get ideas on how to do it right on Utube but the really good guys have years of practices. The idea of a new used hood is one that I have
Used on some cars if there is any rust because there has been a good supply in California. Front hoods are harder to get because a lot of front crashes. You are local to the biggest supply of body parts in the USA. What you have is no virgin but it may not be that bad.
Bob B
Posted by: 914 RZ-1 May 17 2017, 12:47 PM
Bob:
Thanks for the info. I thought the green might be some sort of bondo.
I've done a fair bit of wood sanding over the years (I taught woodshop for 4 years) and bit of metal sanding, so I'm kinda familiar with the "art" of sanding and bondo, but I'm still learning as I go on the car. I'd like to paint it myself at some point, probably a nice gray (silver seems like it would be too hard). I'm not looking for perfection, just a 10' paint job (or is that considered good?).
I found some lead rods in a shop that are for filling metal. Anyone ever work with these? Maybe I could fill the cracks with that instead of bondo.
I've sent a few local people PM's about hoods. If I can't get a good deal on one, I'm fine with what I have.
Posted by: 914 RZ-1 May 17 2017, 12:49 PM

IMHO, that hood should be stripped completely. That 'cracking' looks like it'll come back later to haunt you.
It already did! The hood had cracks in it, which is why I sanded it down to see what was up. At least it's not rust!

Funny thing is, the underside of the hood looks good; no sign of dents, but it could just be a good repair job.
Posted by: McMark May 18 2017, 10:55 AM
Don't waste your time with a questionable hood.
It unbolts and is easy to replace.
Not worth messing with a damaged one when you can buy a
nice example for around 200.00 and not have it come back
to haunt you in the future...
Just my 2 cents....
You can get a nice example to $200 if you're lucky. But I'm always afraid that my replacement 'good' hood will be worse than my 'bad' hood.
Sometimes replacement is the answer, but far from universally, IMHO.
Posted by: Olympic 914 May 18 2017, 11:28 AM
I'm Not a body man by a long shot, But IMHO you will not be able to get it flat, or the nice curvature that it should have by using a DA sander. it might look OK in primer but when you sight across it you will see the slight humps and valleys
Get some long sanding boards, something flexible, like the long dura blocks or the yellow and blue softsanders in these pictures .

Posted by: toolguy May 18 2017, 11:29 AM
Looks at the underside. . you should be able to see where big dents have been. . that is
probably where you'll find the most filler on the top. .
Why spend countless trying to get a dented hood straight with more filler when you'd be better off to start with a better hood. . . . Remember, it will only be a pig with lipstick when done. .
Posted by: Costa05 May 18 2017, 11:40 AM
Use the long blocks for leveling. Even a simple 12" one with hook n loop paper attachment will do wonders for flattening your surface and blending. Be sure to cross sand and change papers often. Doing your own painting as well is not too difficult and very rewarding. 
Posted by: burton73 May 18 2017, 01:26 PM
Lead is a whole art in is self. Look on Utube.
Also as I said great video on how to do body work.
When I was a kid at 16 in 68, my 1st car was a 58 VW and it ha 4 dented fenders. At that time there where guys in Los Angeles called Gypsy Body men that would come up to you and fix your car right on the corner. Lots of bondo and then primer so you could not tell just how bad the work was. $25. Back in 69 got 3 fenders done bad. As I got older I saw how the good body shops pulled the dents and used just little bondo and used water to see how the body work looked when wet. That or painted the car and then went back and did it over till it was perfect. The truth is a show paint job is massaged over and over till it is puss. Later I got new fenders for my VW for $20 each
The difference between wood and bondo is wood has grain and softer spots. Tooling is done on uniform material. Some time on special wood but better on tooling plastic. No grain to deal with. Epoxy or urethane tooling material. Bondo is filled Polyester resin with chemicals to get it to go off (harden) faster. Much like surfboard resin with fillers.
Bob B
Posted by: burton73 May 18 2017, 02:11 PM
The secret on painting to look great is great bodywork and then prep and putting a good layer of paint. After the paint is hard, the great looks from finishing the surface and going through the grits and polishing the paint with a DA buffer. The tools for finishing are better than they where just 10 years ago. I am working on large 8 in cast Polyester rods at my shop and I spayed them with catalyzed clear coat some 20 years ago. I am now color sanding them and going up to 2000 grit and then buffing them with supplies I got from Chemical Guys. They also have some tube videos on how to buff or refinish a car paint job.
Really paint can look super with modern paints and polishing of the paint. You have to think of the surface as mountains and valleys and you have to be the guy grading the area to level and then remove each of the scratches with new finer scratches till it buffs so easy. I have been finishing plastic for 43 years in my business and painting cars and motorcycles for over 50 years. Back in the day I used lacquer and went to 600.
I do not think I am too good at bodywork.
Picture of 8 Inch diameter solid cast polyester resin rod 18 inches tall for coffee table legs with glass top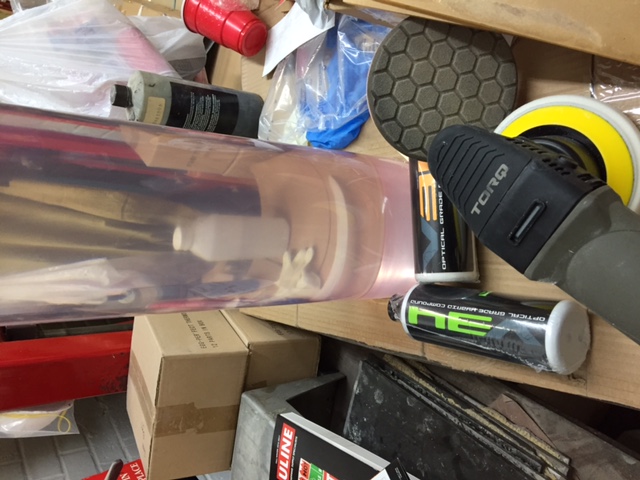 that I cast and am just refinishing this week. .
Bob B
Posted by: mepstein May 18 2017, 02:50 PM
Remember though, Porsche paint has some orange peel to it. Polishing to look like glass is great for a show car but won't look authentic or correct on a Porsche.
Posted by: burton73 May 18 2017, 03:29 PM
We are not concourse guys going for factory orange peel. Note my paint on my 76 original factory paint. If you ask most guys they want their cars to shine and do not care if it does not have the factory peel. Also the new cars are very shiny.
Picture of my 70 914-6 at PMB with $20,000 paint.
Bob B

#41 in paint area
my 76 in my garage buffed a number of times over the years
Posted by: 914 RZ-1 May 18 2017, 08:16 PM
[quote name='Olympic 914' date='May 18 2017, 10:28 AM' post='2487200']
I'm Not a body man by a long shot, But IMHO you will not be able to get it flat, or the nice curvature that it should have by using a DA sander. it might look OK in primer but when you sight across it you will see the slight humps and valleys
Get some long sanding boards, something flexible, like the long dura blocks or the yellow and blue softsanders in these pictures .
I was looking at those sanding blocks. Guess I'll have to just get some. I was planning on doing the hoods the best, followed by the doors and quarter panels. The trunks and places that don't show I would just do "good enough". I'm thinking I will paint the car glossy gray, which is close to the original color, which is metallic silver.
Posted by: 914 RZ-1 May 18 2017, 08:22 PM
Looks at the underside. . you should be able to see where big dents have been. . that is
probably where you'll find the most filler on the top. .
Why spend countless trying to get a dented hood straight with more filler when you'd be better off to start with a better hood. . . . Remember, it will only be a pig with lipstick when done. .
The underside looks perfect! I need to rough it up for paint (it's the underside, I don't need it perfect), so maybe I'll sand it down where the bondo is anyway and see what I find.
Posted by: 914 RZ-1 May 18 2017, 08:23 PM
Bob: I sent you a PM.
Posted by: 914 RZ-1 May 18 2017, 08:27 PM
IMHO, that hood should be stripped completely. That 'cracking' looks like it'll come back later to haunt you.
I sanded it some more and the cracks are gone. I'll have to check it and make sure I'm not shaving down the metal.
Maybe I'll just sand the rest of the car down a little instead of all the way to bare metal. I'm not looking for a show car. I understand about not knowing what I'm spraying over, but I'm not sure I want to ruin anything. Then again...

Posted by: burton73 May 18 2017, 10:44 PM
Jeff,
You are not going to shave down any metal. It would take silicone carbide paper or a grinder and it is very hard to damage the panel if you do not overheat it. One way of thinking is you have to build up the bondo or new primer and then sand it level. The trick is to know where the low spots are. Look at the Utube videos to learn how to find out where that is by a light spray of primer just small dots’ and then block sand a little and see what primer is removed and those are the high spots.
Videos will show you.
I did not know how to sweat water copper pipes and after a plumber gave me a quote 15 years ago that seemed like a lot I looked it up on Utube and did it my self.
I went fearless into it and it came out great and I saved $500. For a 13 ft. section.
Bob B
Posted by: rick 918-S May 19 2017, 03:53 AM
Strip off all that old product and old paint a d start over. You will never a good result going over poor prior repairs.
Powered by Invision Power Board (http://www.invisionboard.com)
© Invision Power Services (http://www.invisionpower.com)