Printable Version of Topic
Click here to view this topic in its original format
914World.com _ 914World Garage _ Custom Quad Gauge
Posted by: Evan0 Aug 5 2017, 09:57 AM
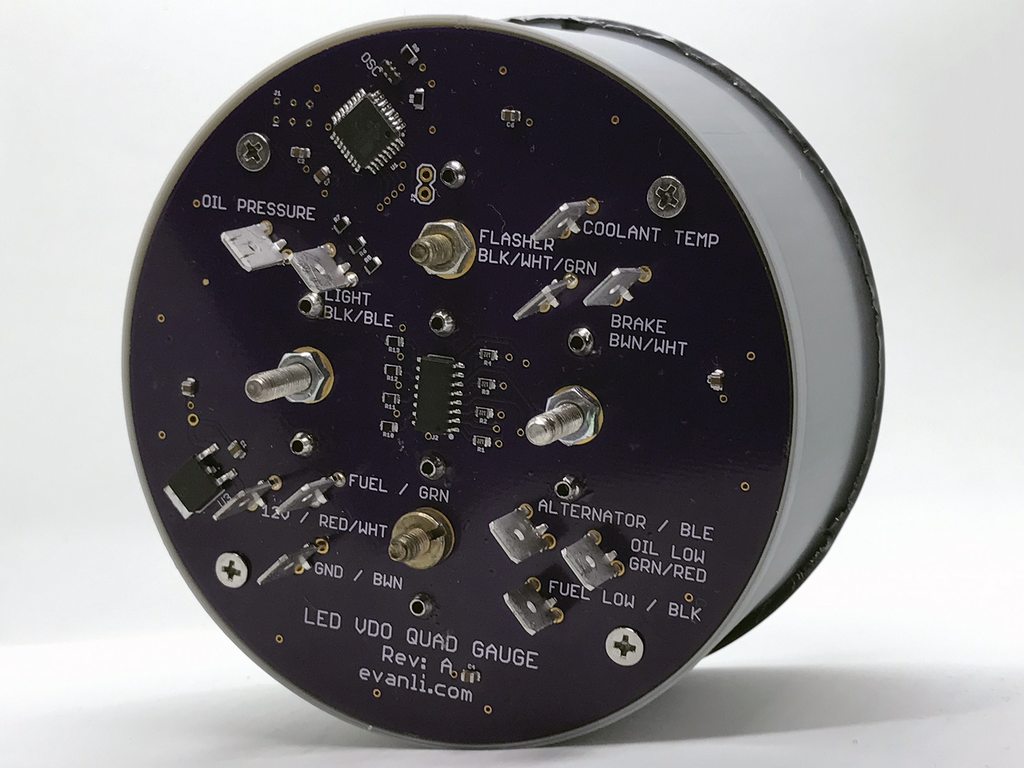
I recently finished assembling my own custom quad gauge to replace the combo fuel gauge and though I would share the results. The gauge has coolant temperature, oil pressure, fuel level, and voltage gauges. The indicators for parking brake, generator, low oil, and low fuel are present as well. Watch the demo video at the link below to see it in action. 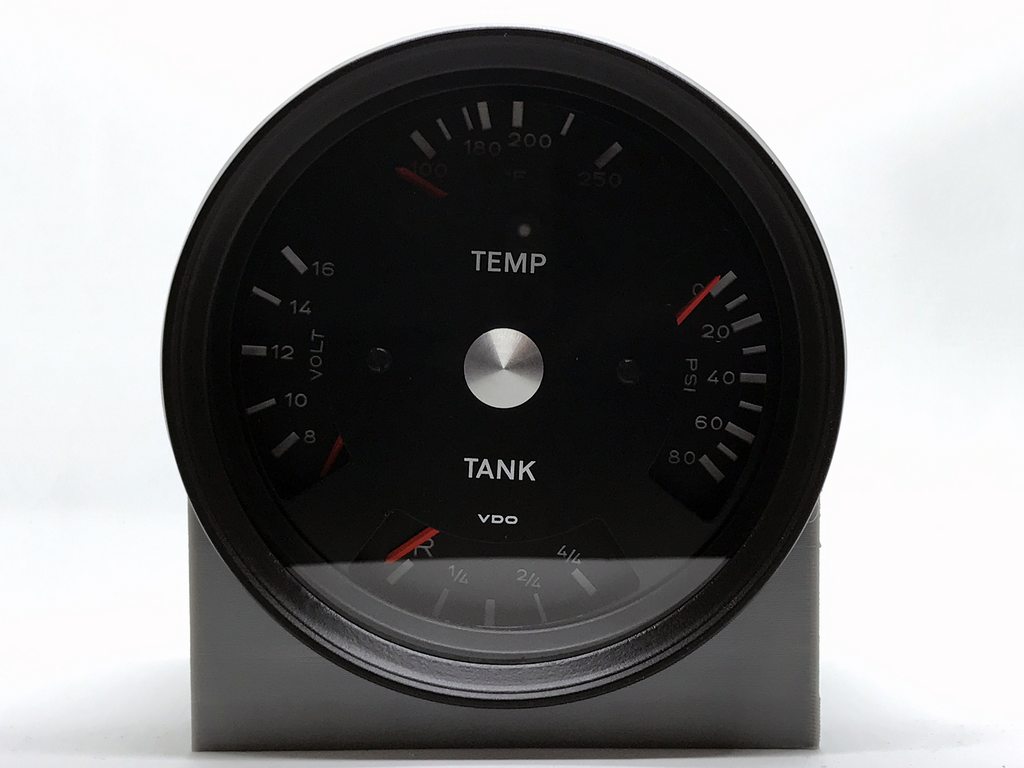
https://www.youtube.com/watch?v=OmlP3aLodiw
I have a full write up on my blog for those are interested in the details. https://evanli.com/quad-gauge-for-a-porsche-914/
Posted by: 914-300Hemi Aug 5 2017, 10:07 AM
Very impressive. 
Posted by: timothy_nd28 Aug 5 2017, 10:18 AM
Very very impressive!
Posted by: Porschef Aug 5 2017, 10:29 AM


Sweet.
Posted by: worn Aug 5 2017, 11:05 AM
I am very impressed. Also, I think you may have solved a problem with my own search for the triple gauge. My problem has been generating the gauge face, which is on a stamped piece of aluminum. I have tried vinyl through the laser printer and silk screening. The vinyl is best, but the edges want to lift from the compound curves. Silk screening wasn't accurate for me - but my experience has been with art and T-shirts, so tiny precision I haven't gotten.
Laser etching!
Also, very cool. In the end, since you used 40-50 year old technology for the gauges themselves, what drove you to the micro controller route? I think it is because you can!
Ah, jealousy creeping in. Oh, well done!
Posted by: mepstein Aug 5 2017, 11:08 AM
I struggle with basic wiring so this kind of creativity blows me away.
Having every thing labeled on the back might give me a fighting chance.
Posted by: tygaboy Aug 5 2017, 11:22 AM
Dude! "Tidy" is the word that come to mind. Very nice, you should be very proud of that. 
Posted by: mlindner Aug 5 2017, 11:24 AM
EvenO.....will you make these available for purchase. Mark
Posted by: Evan0 Aug 5 2017, 11:26 AM

I am very impressed. Also, I think you may have solved a problem with my own search for the triple gauge. My problem has been generating the gauge face, which is on a stamped piece of aluminum. I have tried vinyl through the laser printer and silk screening. The vinyl is best, but the edges want to lift from the compound curves. Silk screening wasn't accurate for me - but my experience has been with art and T-shirts, so tiny precision I haven't gotten.
Laser etching!
Also, very cool. In the end, since you used 40-50 year old technology for the gauges themselves, what drove you to the micro controller route? I think it is because you can!
Ah, jealousy creeping in. Oh, well done!
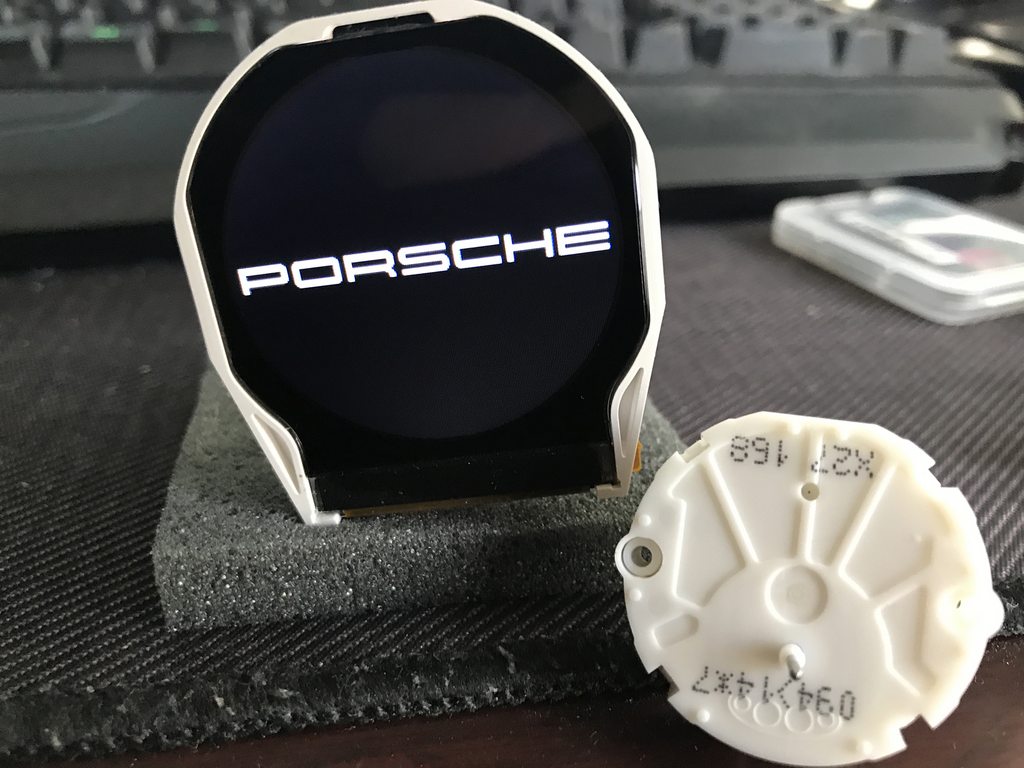
Funny enough, half way through this project, i concluded that a second version using modern gauge steppers may be a cheaper and easier route than using the VDO gauges. I'm working on a version 2.0, but this gauge suits my immediate needs, so progress will be slow on 2.0. Also since the stepper gauges are much more compact, this give a lot more space for other stuff, like a 1.38 round LCD screen. Here's a peak on what 2.0 will have.
As for the microcontroller, it was the only realistic way to control the LEDs in a compact fashion.
Posted by: napasteve Aug 5 2017, 12:00 PM
Evan, your work is amazing. If you should decide to make these for you fellow teeners, I would be interested in one for a stock 2.0.
Posted by: Montreal914 Aug 5 2017, 12:01 PM
Really nice stuff!
Posted by: amfab Aug 5 2017, 12:15 PM
Best looking quad gauge ever!
Posted by: 914forme Aug 5 2017, 12:59 PM


I actual had just thought of a similar setup last night for my triple gauge as was going to look into what it took to make up a new version.
I really like what you did here, modern manufacturing and technology makes this so much easier to do from when I was a lad. Yes using s stick to propel a hoop down the street.
Way to go great work, you should be very proud.
And if you have an extra I would purchase it in a heart beat, as I have all the other parts all ready to do the build. The 924 gauge will also work, you just need to get rid of the Madonna Bra Cup gauge glass.
Posted by: Cairo94507 Aug 5 2017, 02:26 PM
Wow! That just takes it all to the next level. Amazing work. Awesome.
Posted by: 914Sixer Aug 5 2017, 04:22 PM
Well Done !!!!
Posted by: gereed75 Aug 5 2017, 05:31 PM
Cairo, click on the demo link.
That is seriously cool. High tech yet retains the retro style. Not sure what you have in mind for version 2.0, but I think this version nails it for those wanting comprehensive, reliable instrumentation without losing the vintage style. This combo gauge with a matching Tach and speedo would be the tits and I suspect you could sale a 100 or so sets right off the get go.
Posted by: lonewolfe Aug 5 2017, 06:20 PM
Awesome work! I want one too!
Posted by: Cairo94507 Aug 5 2017, 10:31 PM
Thanks gereed75. Really really well done.
Posted by: bbrock Aug 5 2017, 11:06 PM
Do I spy OSH Park purple on those circuit boards? If so, does that mean the boards could be available for purchase?
Very nice work!
Posted by: Valy Aug 5 2017, 11:17 PM
Posted by: My 914 Aug 6 2017, 06:40 AM
I like the design very much. Lots of information with one glance down. Your lighting effects are also very cool. Its impressive day and night!
Posted by: 914dave Aug 6 2017, 07:29 AM
Fantastic job!!
Posted by: timothy_nd28 Aug 6 2017, 08:29 AM
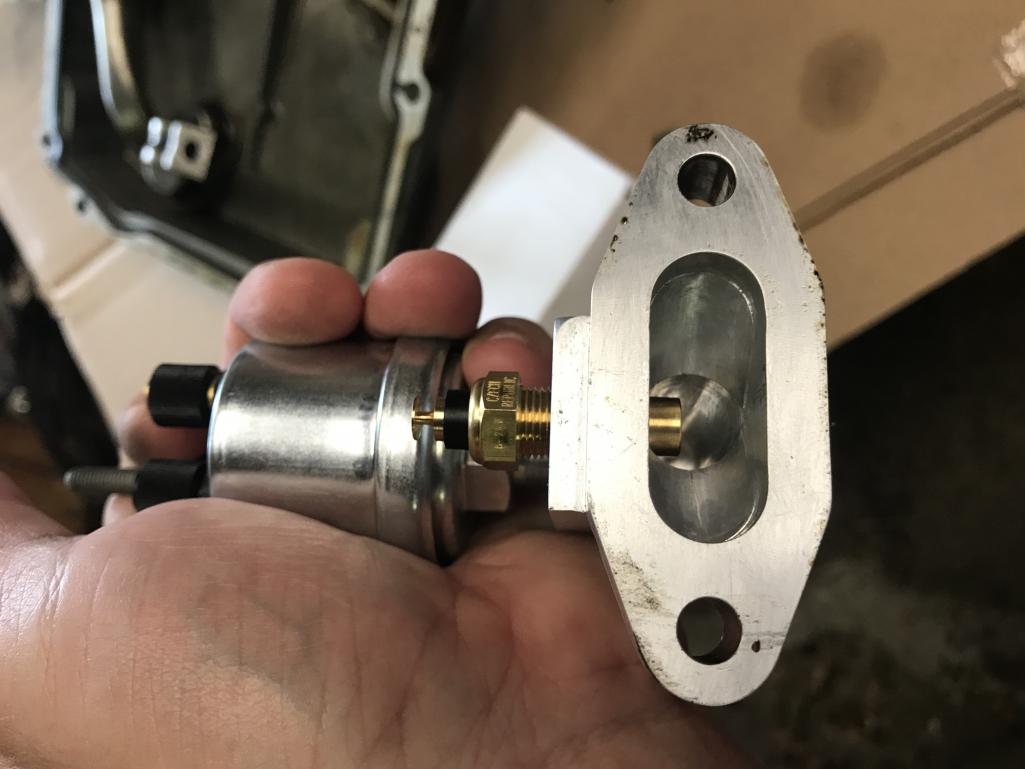
You may want to add this to your LS oil pan, it compliments your quad gauge nicely. 
Posted by: mb911 Aug 6 2017, 08:40 AM
Found a local guy has a 924 cluster with a quad gauge in iy pretty cheap. What would be a good offer for it and could the parts be supplied here to do the conversion?
Posted by: slotty008 Aug 6 2017, 08:47 AM
So cool!! 
Posted by: RickS Aug 6 2017, 09:09 AM
You have mad skills. Well done sir.
\
Posted by: Evan0 Aug 8 2017, 12:35 AM
Thanks for the kind words everyone. Producing these in quantity is going to be pretty difficult and expensive. This single gauge took over 40 hours of labor to complete. Could probably slim that down to 20 hours if you optimized the process, but that's only 2 gauges a weeks if you work full time. Offering the custom parts as a kit might be doable and I'll look into it. Version 2.0 might be better suited for mass production as it doesn't rely on VDO gauges. I'll update when there is more progress on the the next version.
Posted by: whitetwinturbo Aug 8 2017, 10:22 PM
![popcorn[1].gif](style_emoticons/default/popcorn[1].gif) ...........I want that
...........I want that
Posted by: Mark Henry Aug 9 2017, 11:01 AM
Kits, with a full how to thread, would be you best seller while same time being the least work for you.
Interested 
Posted by: bbrock Aug 9 2017, 11:24 AM
Kits, with a full how to thread, would be you best seller while same time being the least work for you.
Interested
 I don't mind spending lots of quality time with my soldering station. But figuring it all out and designing the boards is the killer. A kit with instructions would be awesome!
Posted by: 914forme Aug 9 2017, 05:30 PM
Like Megasquirt, kit, or built. let it be our choice.
I would also like a sub kit with the file to print it on my 3d printer and I can even do the laser engraving if I really needed to.
Posted by: tazz9924 Aug 9 2017, 09:27 PM
if u ever sell em i might b in the market just sayin!
Posted by: My 914 Aug 11 2017, 02:43 PM
Yes, and if you ever decide that you don't want the one you have anymore and you're going to make another, let me know as I would be happy to buy it from you
Powered by Invision Power Board (http://www.invisionboard.com)
© Invision Power Services (http://www.invisionpower.com)