Printable Version of Topic
Click here to view this topic in its original format
914World.com _ 914World Garage _ Bolster Upholstrey Install
Posted by: Ross Aug 9 2017, 06:15 AM
Hi Guys, do you know if there have been any postings on how to install the bolster upholstery? I checked Youtube and couldn't find any information.
Thanks for any help, Ross
Posted by: cuddyk Aug 9 2017, 07:23 AM
Here's a helpful link with pics...
http://www.914world.com/bbs2/index.php?showtopic=71844
I've done 4 seats and the tips I can add are...
-be careful bending the barbs. They're sharp and love to stab you. They're also NLA so be gentle.
- also use caution on the bottom two barbs closest to the rear of the seat. They're held in place with pop rivets and the fiberglass around them can be crumbly.
- get yourself some 1/2" open cell upholstery foam. You'll need it for the lower sides, which are definitely compressed by now. Otherwise you'll have wrinkles.
- put some plastic wrap over the foam as you slip the bolster on to help it slide.
- heat the bolster material in the sun to get it more pliable.
- use a good strong contact cement for the top "ears"
One final note...you'll notice that the new material is considerably thinner than OEM. From what I'm told, thicker is available, but the texture isn't right. So we have to deal with correct looks, but a tougher install since the foam really needs to be full for the bolster to fit tight. It's doable. You just need to take your time. Good luck and PM me if you need help.
Posted by: Ross Aug 11 2017, 09:12 AM
Thanks very much CuddyK!
Posted by: Mikey914 Aug 11 2017, 03:33 PM
This is what we send out when guys need a little help. There is a thread here I did but can't seem to find (We also stock these)
Pics of some plaid for inspiration
http://www.914world.com/bbs2/index.php?showtopic=244388&hl=tutorial%20install&st=125
914 seats are one of the most neglected parts of our cars. I’ve decided to break this process into 2 articles as I didn’t want to make a small novel on these.
Part I Side bolsters and back
The sides take much of the abuse that we dish out, every time you get in and out. They also show the damage as there is no texture. One of the most commonly damaged pieces of the seat are the side bolsters.
To get o the Bolster you do need to disassemble much of the seat but if you are careful you will be able to re assemble without damaging the center upper section.
On a scale of 1-10 this is a solid 7. It’s not that it takes any incredible skill, but it requires patience and attention to detail. Particularly when re stretching the side bolsters to get then to look right. Time required per set 3 hours for just the side and back piece. Add another hour for the back if you are going that far and another for the base, as it has a few tricks you will need to make it look correct.
Tools needed
10mm socket with ratchet – set removal
Med sized standard screwdriver
#1 Phillips screwdriver
5mm Allen socket or socket key – base removal
Small sharp knife (Exacto works well)
Automotive contact cement – Camie 313 is my preference
Optional –
new seat adjuster handle
chair to set the seat in while working
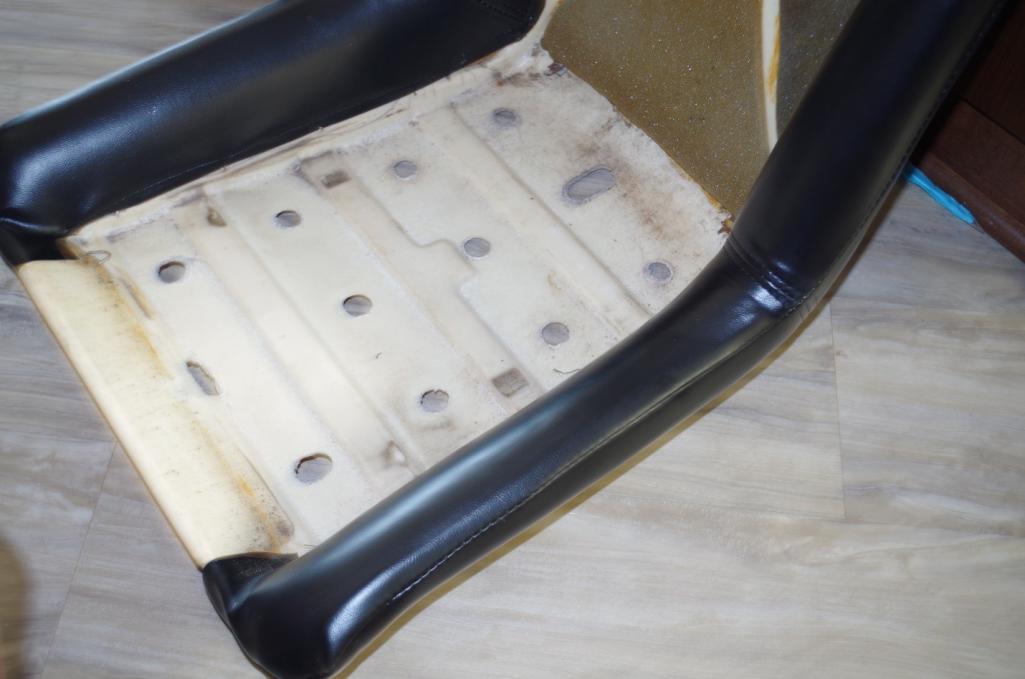
To begin, remove the seat from the vehicle utilizing the 10mm socket. This is most easily done by sliding it forward and taking out all 4 10mm bolts from the back of the seat rail. The height adjustment mechanism can sometimes bind it up a little, so you may find it helpful to pull the lever arm on the side back to disengage the front section of the seat if it will not come right out.
One the seat is removed you will need to take the base off .
Remove the 4 allen bolts with washers and set aside for later. The seat adjuster handle need not be removed unless you are replacing yours. There is a short pictorial how to on this thread on world -
http://www.914world.com/bbs2/index.php?showtopic=256159&hl=seat+adjuster+handle
If yours is missing, now if the time to replace it.
Once the rails are removed, you need to start to remove the old piece. The center section will need to be removed to get access to the side sections. If you keep it intact you can easily re assemble.
Attached image(s)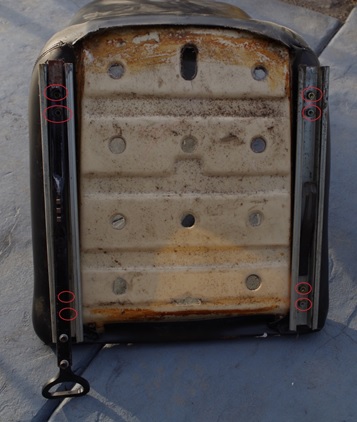
Posted by: Mikey914 Aug 11 2017, 03:35 PM
Start by removing the 2 screws on the back of the seat at the headrest flap.
This will allow you to get at 2 hidden screws that hold the base of the headrest.
Attached image(s)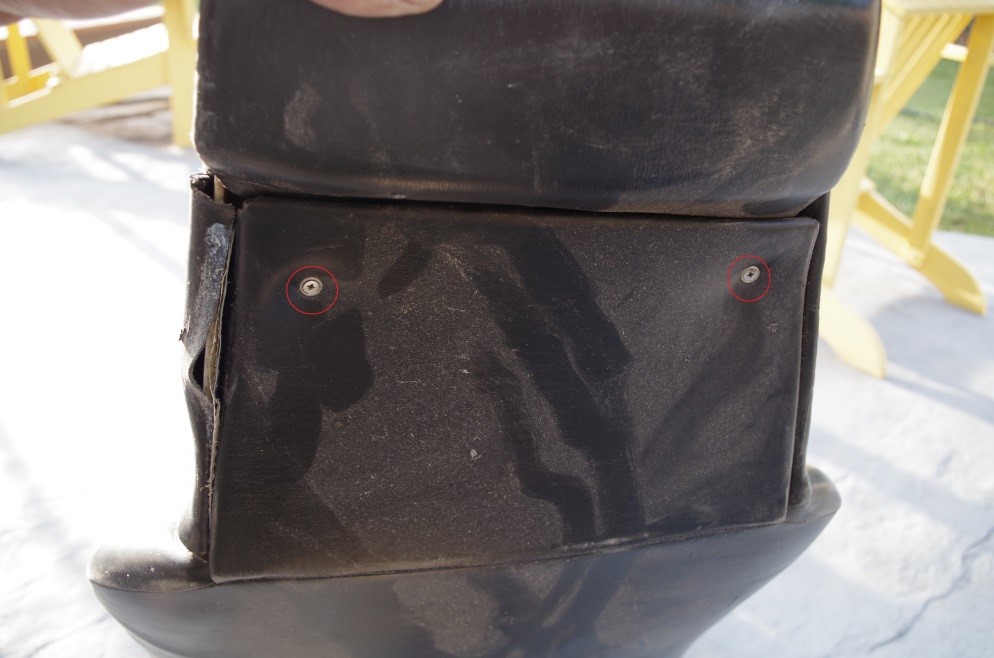
Posted by: Mikey914 Aug 11 2017, 03:36 PM
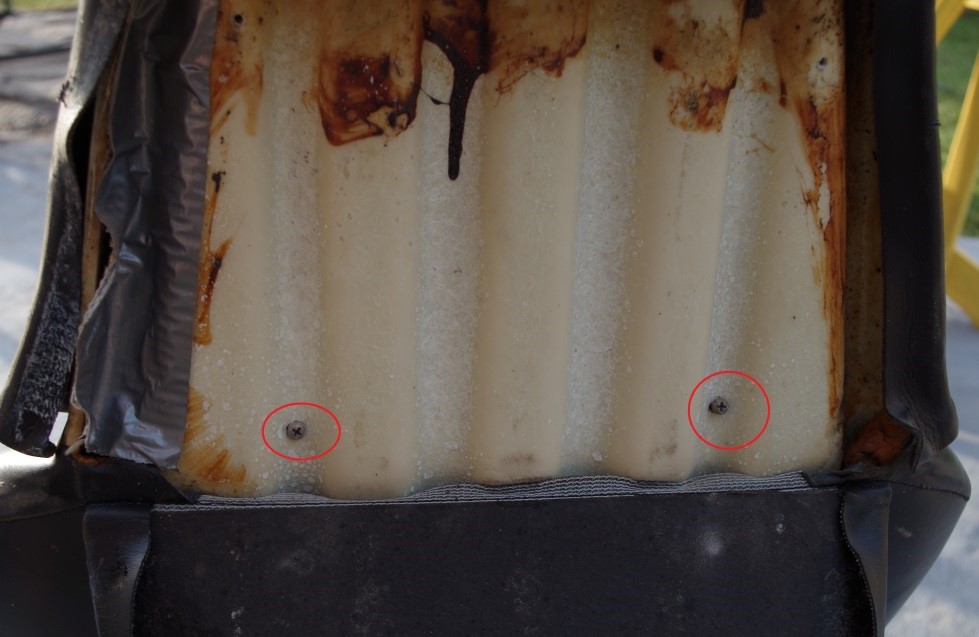
At the base of the seat there is a wire that holds it down, you will need to dislodge the wire to allow the center section to come up, if not out.
There are 2 pointed prongs at the base that hold the wire on the base of the center section securely at the base. I chose to carefully bend these up using the standard flat screwdriver. You can then pull the base down to release.
Attached thumbnail(s)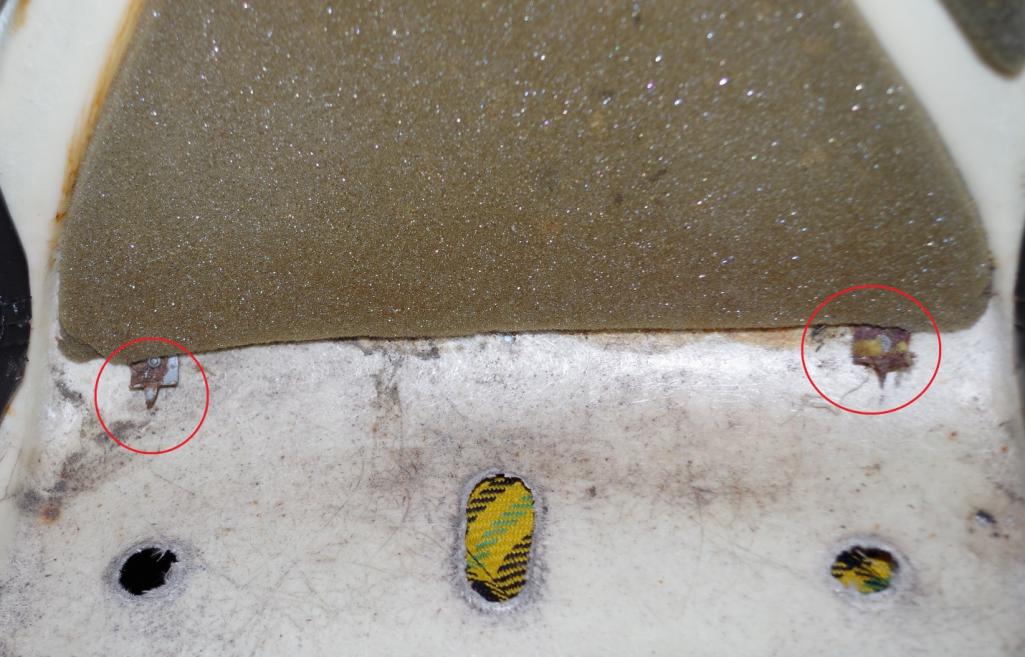
Posted by: Mikey914 Aug 11 2017, 03:37 PM
This will leave you with the center section ready to remove. The headrest tilts slightly back to allow it to come off the fiberglass top that it molds around.
Attached image(s)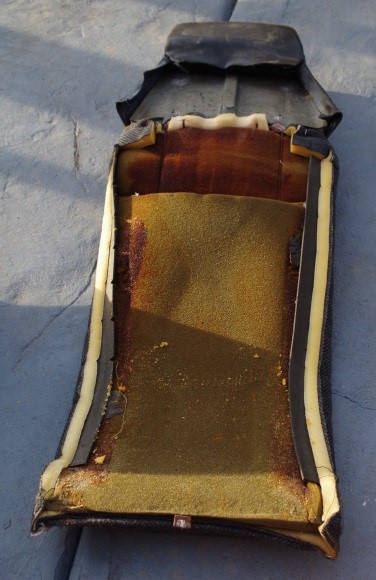
Posted by: Mikey914 Aug 11 2017, 03:38 PM
With the center removed you can now have full access to remove the side bolsters.
You will want to start with the hidden prong under the front base of the seat.
Attached image(s)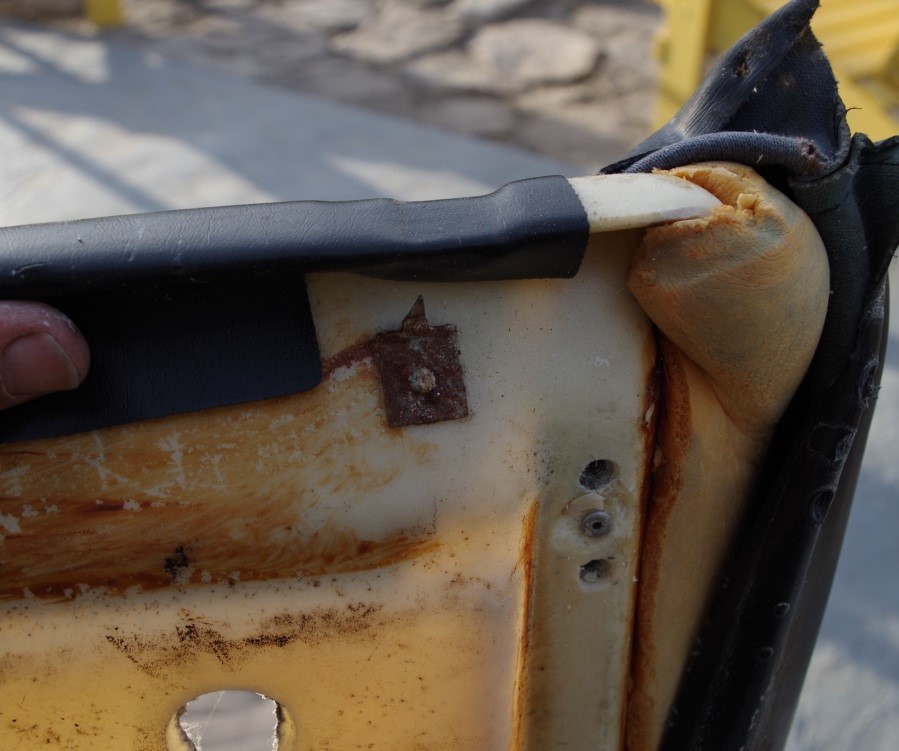
Posted by: Mikey914 Aug 11 2017, 03:39 PM
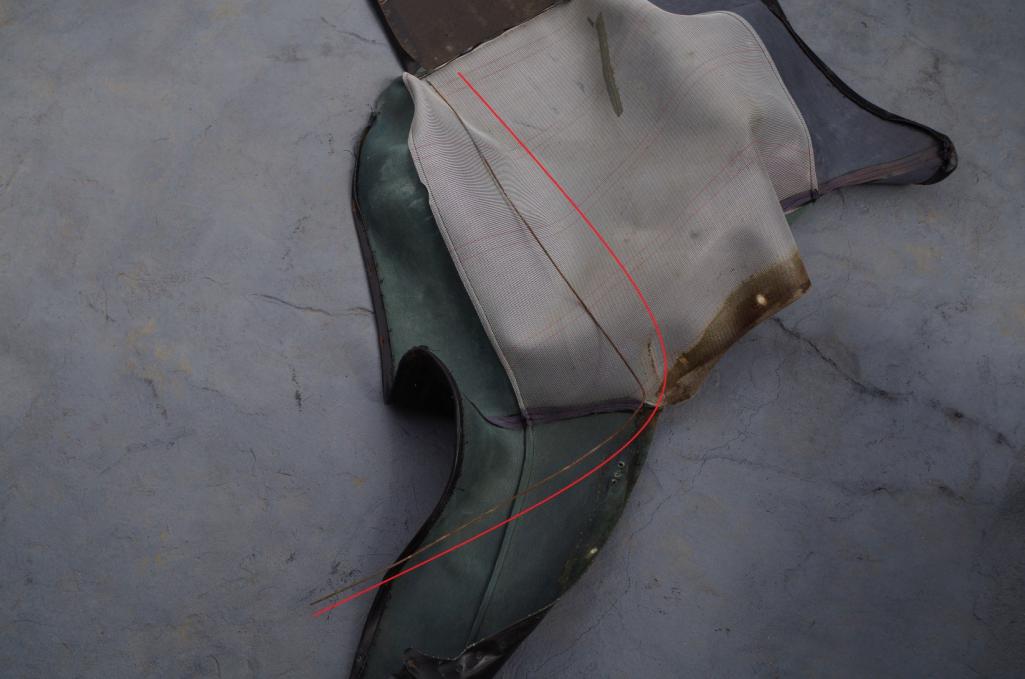
Followed by the upper section.
Once removed you will need to harvest the metal from the old piece. This is most easily done using a small sharp knife to cut the stitches.
Attached thumbnail(s)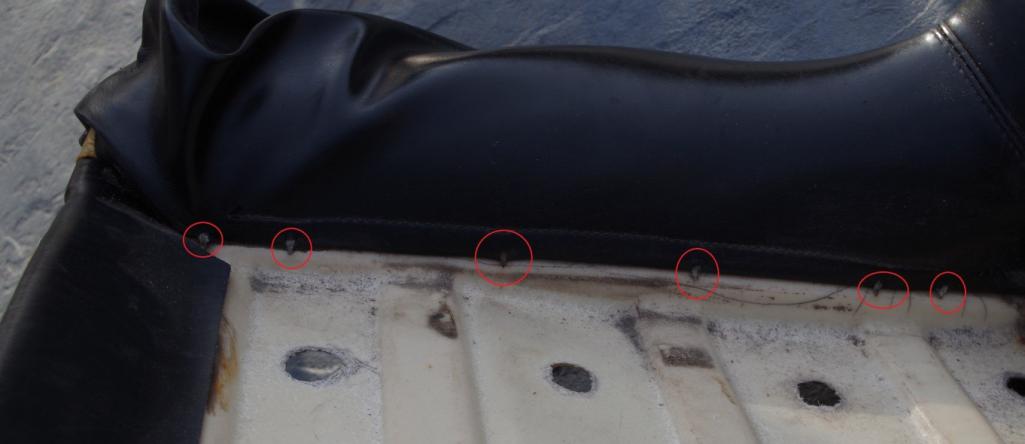
Posted by: Mikey914 Aug 11 2017, 03:40 PM
Each side has one. Once removed, you will need to thread into the new section. Make sure the loop on the metal is at the top by the headrest, so you will feed the un looped section through from the top. This takes a little patience, and when you get to the corner you will need to be gentle as the path is more restricted and more difficult to find. With a little probing, you will be able to get it through.
Attached thumbnail(s)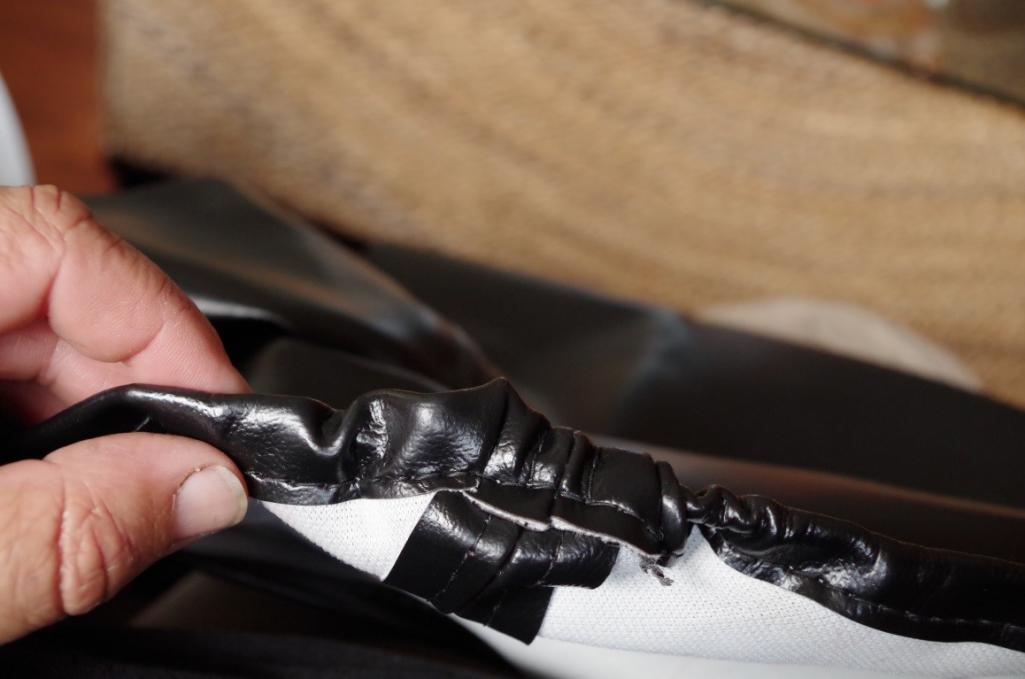
Posted by: Mikey914 Aug 11 2017, 03:41 PM
Once you have the metal in you can begin the reassembly.
I supported the seat in a folding camping chair as I found it worked well to get it to a level that I could work and was readily available.
I started at the front base and secured the first 2 prongs on each side Making sure that I had the same amount of material on each side.
Attached thumbnail(s)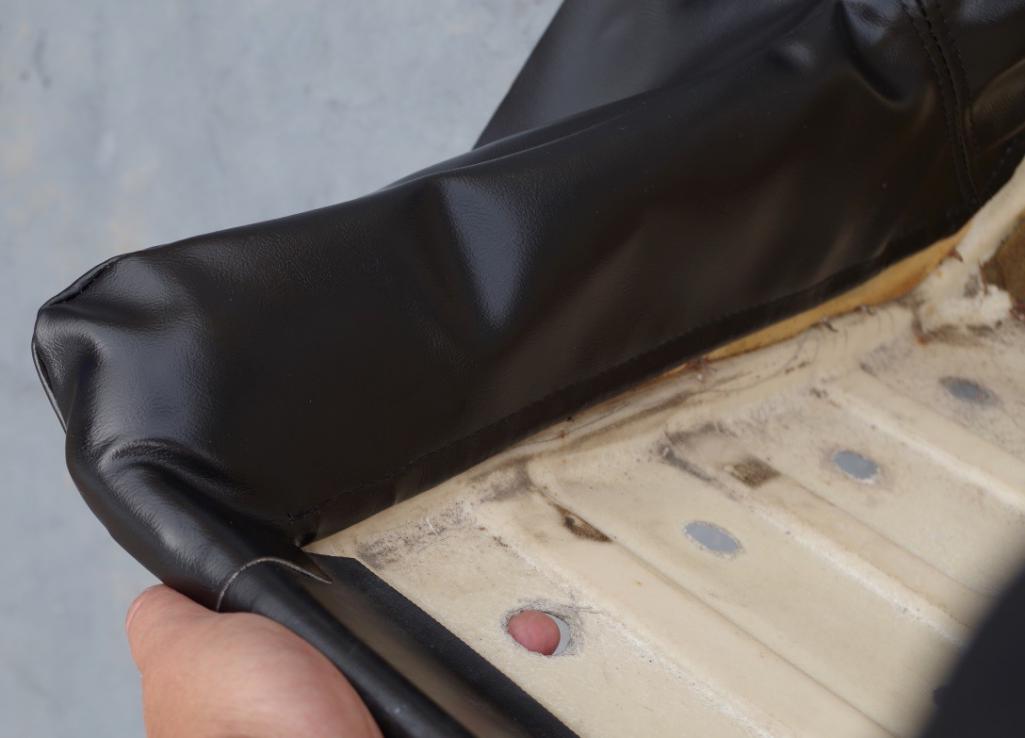
Posted by: Mikey914 Aug 11 2017, 03:41 PM
I then proceeded to work my way back trying to keep the material even on each side.
Attached image(s)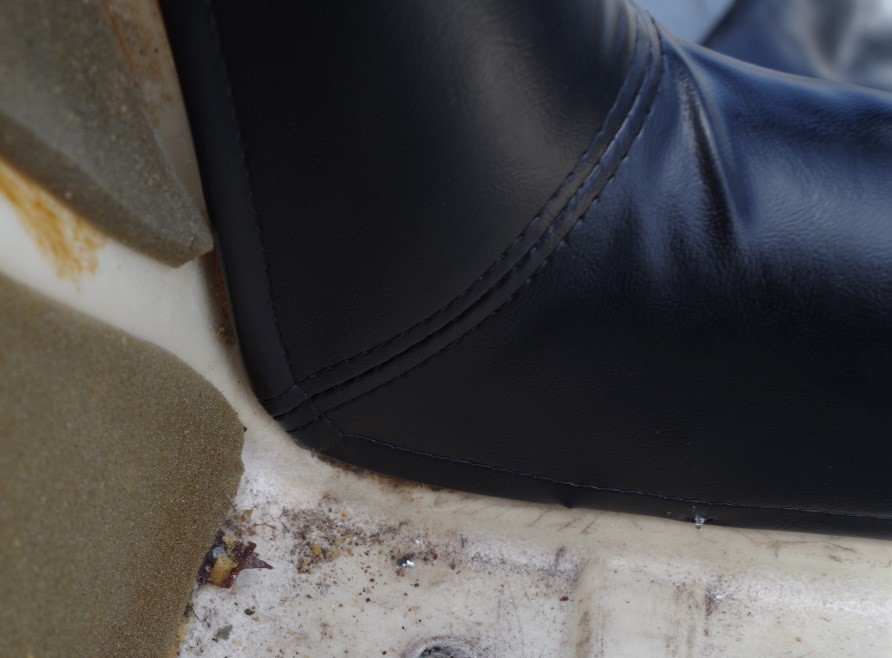
Posted by: Mikey914 Aug 11 2017, 03:42 PM
Continue up the side slowly making sure that you are securing it evenly as you progress. The fold on the seam in the last picture will stretch out, but your work here makes that much easier.
When this step is finished yours should look something like this.
Attached thumbnail(s)
Posted by: Mikey914 Aug 11 2017, 03:43 PM
Now is the best time to secure the base back on as you will be using the contact cement to tension the vinyl. I prefer the Camie 313. Once tensioned and glued, re attach the based. Your completed product thus far will look like this.
Attached thumbnail(s)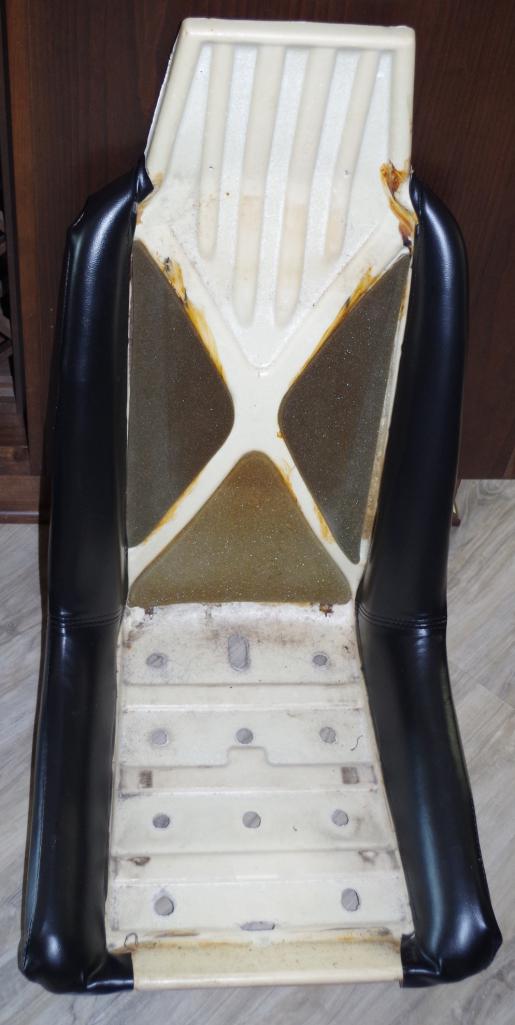
Posted by: porschetub Aug 12 2017, 03:30 PM
Really nice fit on those replacement covers Mark great job,my seats are in great condition but the drivers side in particular was a bit baggy,I found a few of the metal spikes had pulled out where the rivets go into the fiberglass.
It was a bitch to fix them but when refastened properly then whole edge of the fabric tightened up on the internal wire....problem solved.
Is it hard to contour the floor vinyl around the edges ? I presuming its fairly thin for this reason or atleast whats left of mine appears to be thinner than say the seat material.
I can confirm the strips along the back by the rear window my car has them also,my car is very original (50K miles) except for what I have barstardized  .
.
Posted by: porschetub Aug 12 2017, 03:32 PM
Sorry double post.
Posted by: Mikey914 Aug 14 2017, 12:25 AM
Not too hard to contour. We are adding slits like the OEM on the part that covers the adjuster "bar" on the floor area. It will make folding the edges up like OEM easy (you don't have to cut).
Powered by Invision Power Board (http://www.invisionboard.com)
© Invision Power Services (http://www.invisionpower.com)