Printable Version of Topic
Click here to view this topic in its original format
914World.com _ 914World Garage _ Painting my targa top
Posted by: Fatboy007 Aug 13 2017, 09:41 PM
So my targa top is uneven and needs painting any adive on good products to use for best results?  gotta look its very best
Posted by: GregAmy Aug 14 2017, 06:42 AM

So my targa top is uneven and needs painting any adive on good products to use for best results?
gotta look its very bestFind the Wheeler Dealers S09 E5 1974 Porsche 914 episode. Edd China did exactly that and it came out pretty nice.
Posted by: McMark Aug 14 2017, 07:08 AM
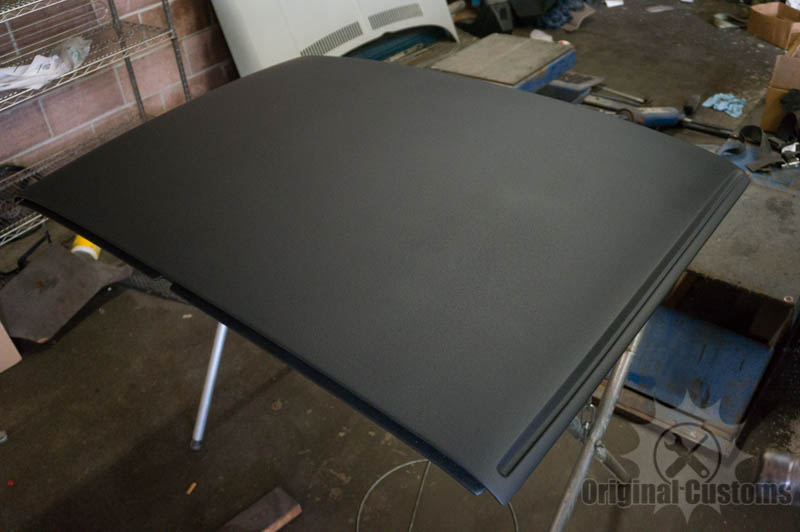
Sand it smooth.
Use reinforced body filler (kitty hair) to repair any broken corners.
Add additional 'normal' body filler to smooth out any prominent bumps or gouges.
Clean, clean, clean.
Shoot diluted black gel coat from a HVLP gun.
The big trick there though is getting the correct mix of gel coat, hardener, thinning agent, and flattening agent (you don't want too much shine). And the second trick is getting the gun set up correctly for air pressure, air flow, nozzle size, etc.
But after playing with a few test pieces (don't shoot your top on the first batch) you can get a very original looking refinish.
All told, plan on at least 20 hours.
Attached image(s)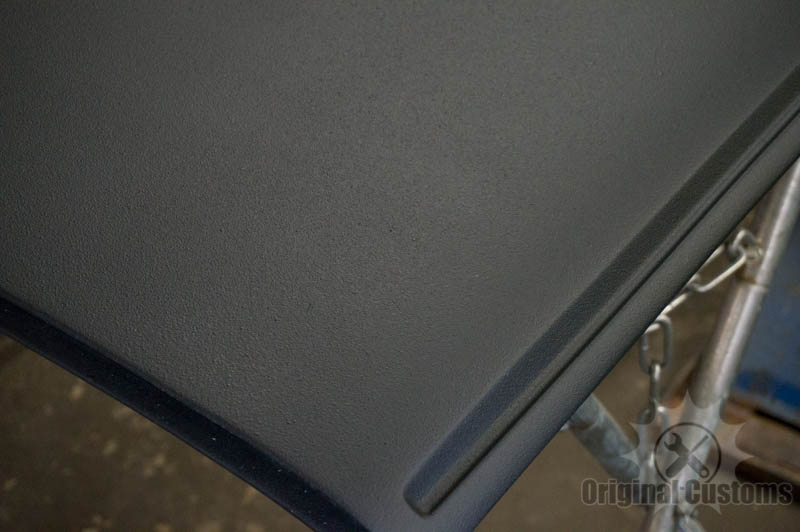
Posted by: Perry Kiehl Aug 14 2017, 08:43 AM
I would add that you want to clean, clean, and clean it first. Silicones, vinyl treatments, and black shoe polish has to be removed before you do anything. Wash with soap and water, clean with prep-sol, and then soap and water again. Use lots of clean rags to wipe off the solvent. Repeat above steps until you don't get anymore black on your solvent rag.
Failure to get it clean before sanding will cause you to just smear the contaminants all over the roof, and you'll get fisheyes or other problems. BTDT
Posted by: Tom_T Aug 14 2017, 09:36 AM
If you don't have the equipment McMark mentions, there is a good topic in the O&H Forum on refinishing it with Wurth underbody schutz (instead of his gelcoat step) which is what the factory used (or very similar), then satin black (or semi-flat) over coating.
If you can't easily find it in O&H, then try to google for it as a search, since that works better in finding stuff on here, than does the search function on here.
I've not seen the Wheeler Dealers episode, so I don't know if their technique is correct or not, but too many refinish them with too much gloss or semi-gloss - but the top is supposed to be dull - satin or semi-flat.
PS - Also the texture is not supposed to be too spikey, pointy, rough - but more of small rounded blobs giving a somewhat rounded tiny pebble finish.
In addition to the prep suggestions above, I'll add to do some practice on some cardboard or something with the Wurth (or other) to get the texture right, before you shoot the top itself.
Since there seems to be this question coming up semi-regularly, perhaps Pat G. the O&H Mod or one of the Admins can make the Targa Top & Valance/Rocker Panels refinishing trhead(s) as nailed references in O&H. 

Tom
///////
Posted by: McMark Aug 14 2017, 12:29 PM
Oh no! Tom, are you claiming the top was shot with Wurth Underbody Schutz? Are we gonna get into it again? 
The tops were gel coated from the factory. Schutz would stay soft and dissolve in solvent.
Posted by: arne Aug 14 2017, 12:42 PM
Wheeler Dealer technique was too glossy. My wife even commented on that.
Posted by: JawjaPorsche Aug 14 2017, 01:56 PM
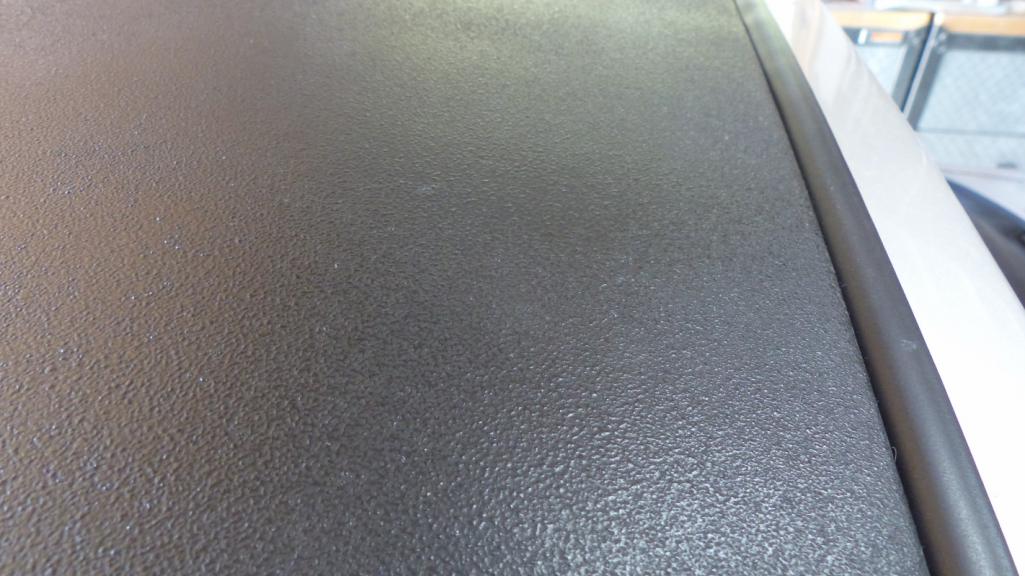
Prepped my top (sand and masked) and took to local Line-X shop and they sprayed it. Looks great and is very durable.
Line-X is a truck bed spray store. You might have another nearby with another name.
Attached image(s)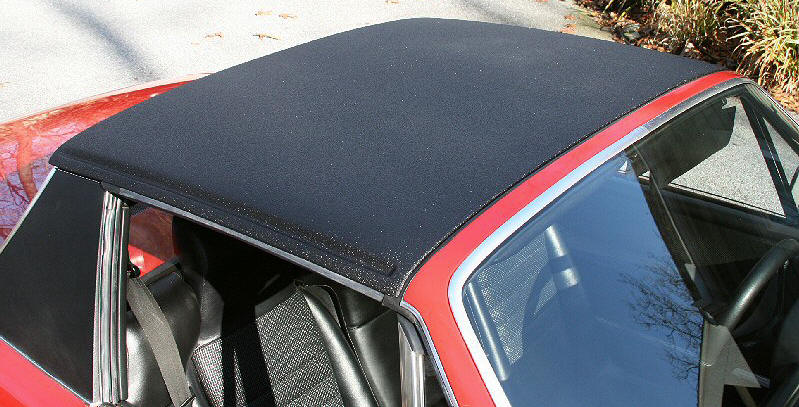
Posted by: bbrock Jan 6 2020, 07:59 PM
@http://www.914world.com/bbs2/index.php?showuser=419 I'm going to try refurbing my targa top using your gelcoat method. Wonder if you have any additional tips on gel coat and flattening agent brands, mix ratios, HVLP nozzle size, etc. It's all new to me.
Posted by: PCH Jan 7 2020, 10:55 AM
I painted my top with SEM Landau Black. It came out really nice. The top was, however, so dried out that it soaked up 4 cans of spray paint.
Posted by: dr914@autoatlanta.com Jan 7 2020, 11:07 AM
sand smooth and then paint with wurth black SKS with their special gun. Looks identical to the original finish
So my targa top is uneven and needs painting any adive on good products to use for best results?
gotta look its very bestPosted by: Ansbacher Jan 7 2020, 02:46 PM
The most inexpensive but a remarkably good method is:
Clean and prep with acetone; then spray with Krylon Fusion Black Satin that you can get at Walmart or Ace Hardware. Wears very well too.
Ansbacher
Posted by: burton73 Jan 7 2020, 03:24 PM
Wurth satin black in spray can worked great on my 76 car.
Top was in very good shape just faded
Bob B
Posted by: Wyvern Jan 7 2020, 05:18 PM
I used the krylon black satin..
So many of the rattle can paints actually dry too fast so it is hard not to fog your own work on a larger expanse.
I did it once in summer and it was "OK"
Then did it in winter (california @ 50deg) and it was GREAT
Posted by: bahnzai Jan 8 2020, 05:53 AM
FWIW- Another data point/approach, this was from 914dave Dave Toppin’s beautiful Stein Grau GT car:
“Raptor brand bed liner. 20% thinned shot thru a 2.0mm primer gun. “
I am sure application technique is as key as the components used.
Posted by: dt4 Jan 8 2020, 09:19 AM
I have used stone chip through a primer gun to get the finish, primered with plastic primer and intending to finish with satin black cellulose with 20% high gloss thinner
I find cans flash too quickly on large areas.
I am tempted by the truck bed liner paint though
Posted by: horizontally-opposed Sep 8 2020, 08:56 AM
Some of these are really close, and would be just fine by me as my car isn't concours. Mark's looks really good, and some of the other techniques described make me curious to see photos.
However, I have yet to see a really accurate replication of the original finish—which is a random mix of blobs big and small that was certainly hard and certainly durable. Has anyone managed to actually replicate it—or determine how it was done in the first place? If so, pics?
Posted by: bbrock Sep 8 2020, 10:13 AM
Some of these are really close, and would be just fine by me as my car isn't concours. Mark's looks really good, and some of the other techniques described make me curious to see photos.
However, I have yet to see a really accurate replication of the original finish—which is a random mix of blobs big and small that was certainly hard and certainly durable. Has anyone managed to actually replicate it—or determine how it was done in the first place? If so, pics?
I think Mark's technique is the correct replica of original but there is technique involved in getting the splatter pattern correct. After attempting this myself, I'm pretty sure the original was applied with a gelcoat gun at low pressure to splatter the gelcoat on. The resulting surfaces is hard, exactly like the orginal. I couldn't justify buying an expensive gelcoat gun for a one-off project so drilled out an old spray gun. I didn't get it quite right but with enough experimentation of getting the gelcoat thinned just right and setting the pressure correctly, I think you could match it perfectly. Even though not a perfect match of the original, I think mine came reasonably close. BTW, I didn't use any flattener like Mark did. If I had more gelcoat to experiment with, I would have tried thinning it just a little more to try to make larger blobs puke out.
Posted by: fsh2liv Mar 16 2022, 10:34 PM
My goal was to restore a faded targa top:
1) clean with Simple Green, gray scotch brite pad
2) solvent (I used 5 Star)
3) Bulldog adhesion promoter
4) Wurth matte black
I found this on this here. Came out nice.
Powered by Invision Power Board (http://www.invisionboard.com)
© Invision Power Services (http://www.invisionpower.com)