Printable Version of Topic
Click here to view this topic in its original format
914World.com _ 914World Garage _ My '70 V-8 Assembly Thread
Posted by: 76-914 Oct 14 2017, 02:44 PM
If you didn't see elsewhere this is a 1970 914 w/ a 327 and 901 transmission. I purchased the car from "Bullit" and here is some info I gotten thus far. The wiring harness is out of a '73; the front end is off a 911 but I forget which year w/ "M" calipers; Trailing arms have some of Foley's reinforcement kit; Engman inner stiffener kit was installed; Griffen radiator;window regulators from a '73; stock 914 1/2 shafts and a lot more which I'll note later.
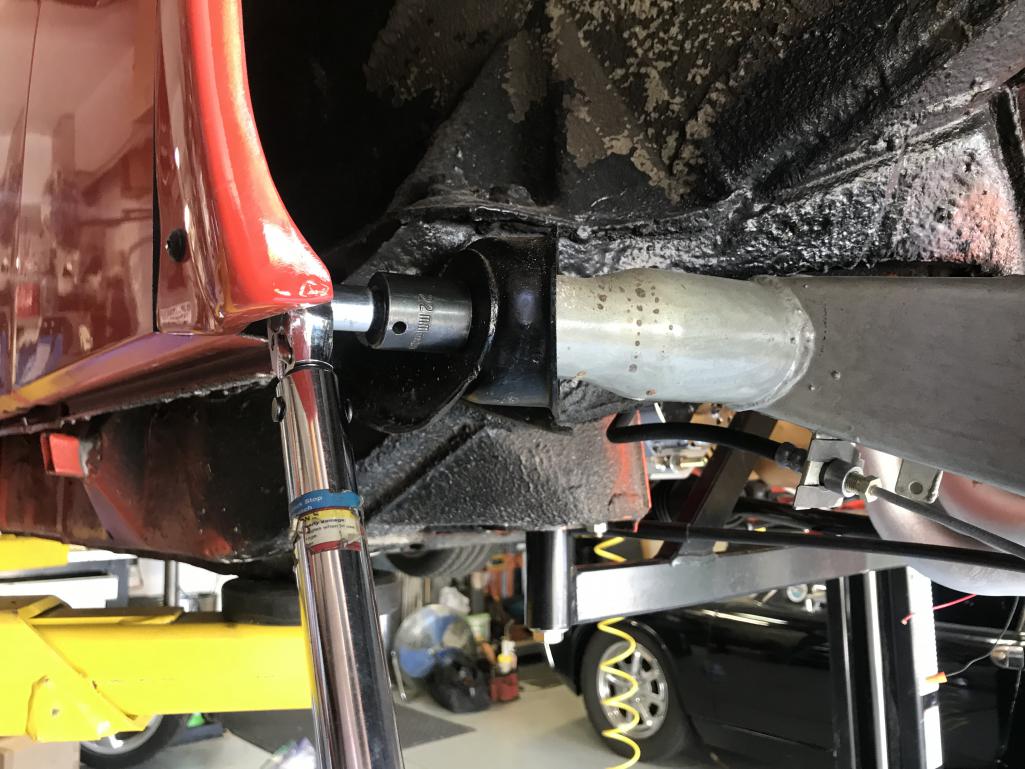
I'm presently working on the rear brakes and trailing arms and have 2 questions. What is the torque valve for the nut that my torque wrench is attached to; 108 ft lb or 50 ft lb?
The manual says 50 for "Control arm bearing/body" and 108 ft lbs for the "Control arm bearing/control arm". Not sure which is which! 
Posted by: Chris914n6 Oct 14 2017, 02:53 PM
108. 50 is for the 3 bolts on the "adjustment plate". You will want the susp loaded (at ride height) to set the rubber bushings. If it's not rubber then it won't matter.
"M" calipers are SC, 20mm rotors.
Oh, and nice score on the new project.
Posted by: 76-914 Oct 14 2017, 03:13 PM
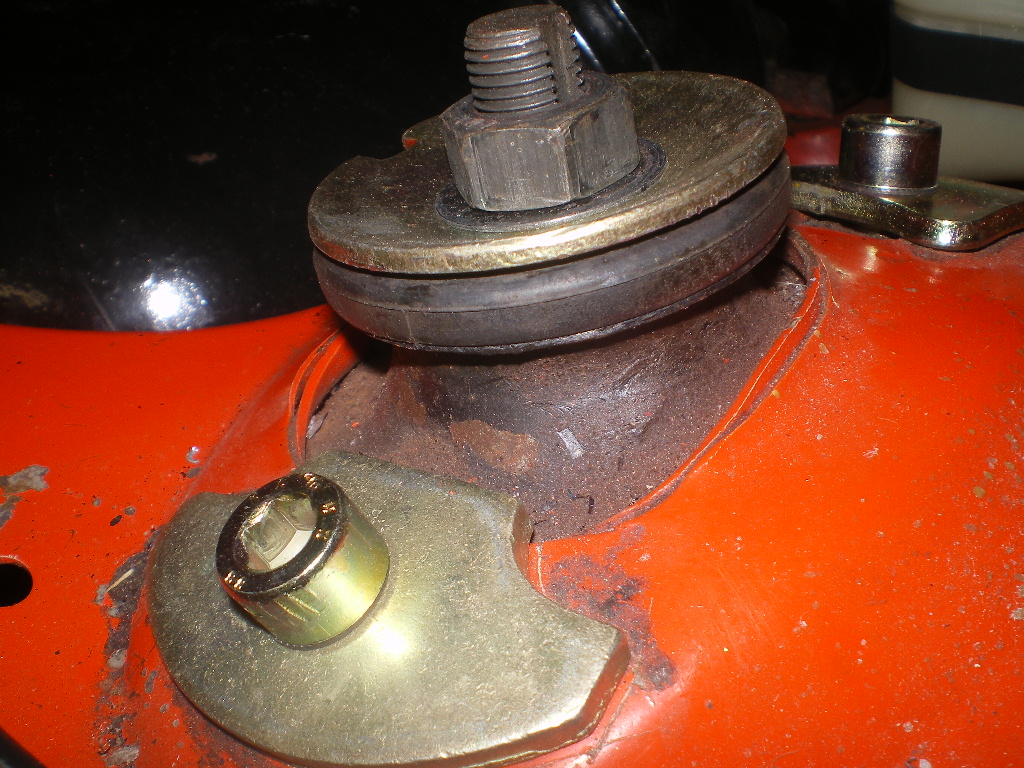
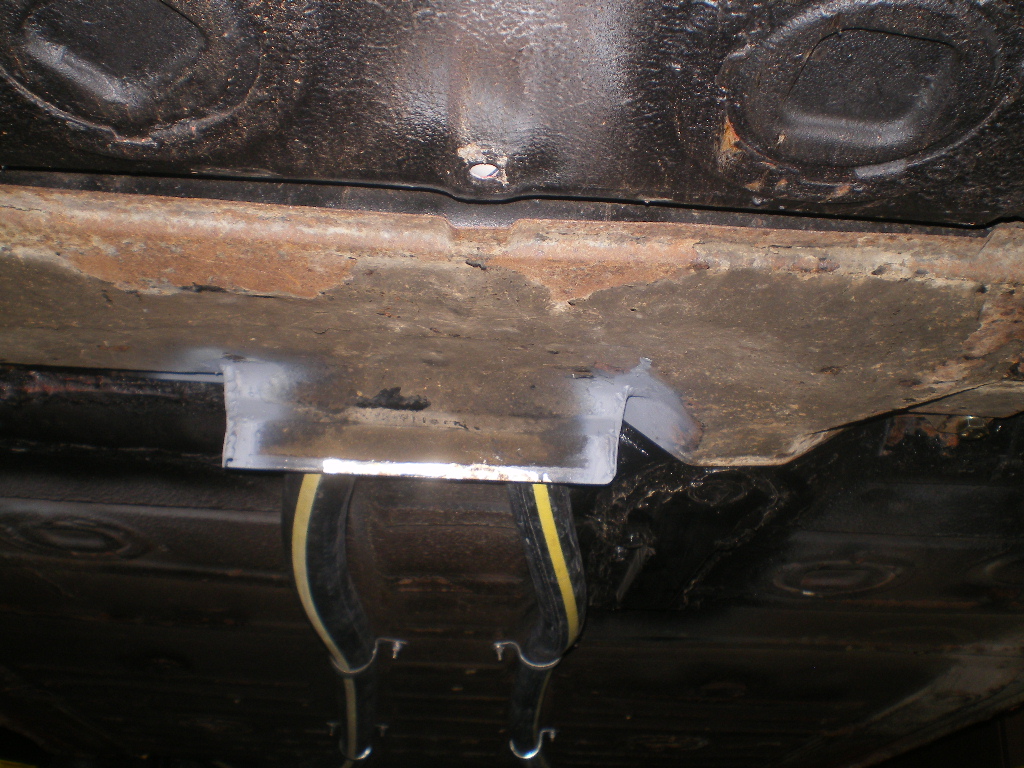
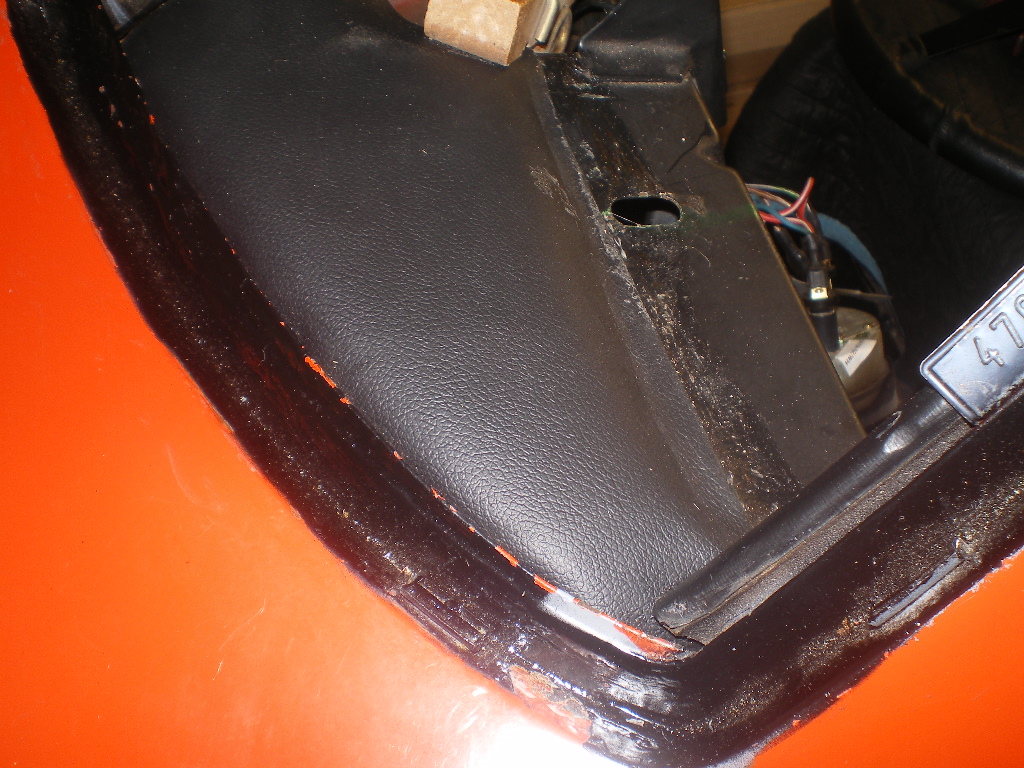
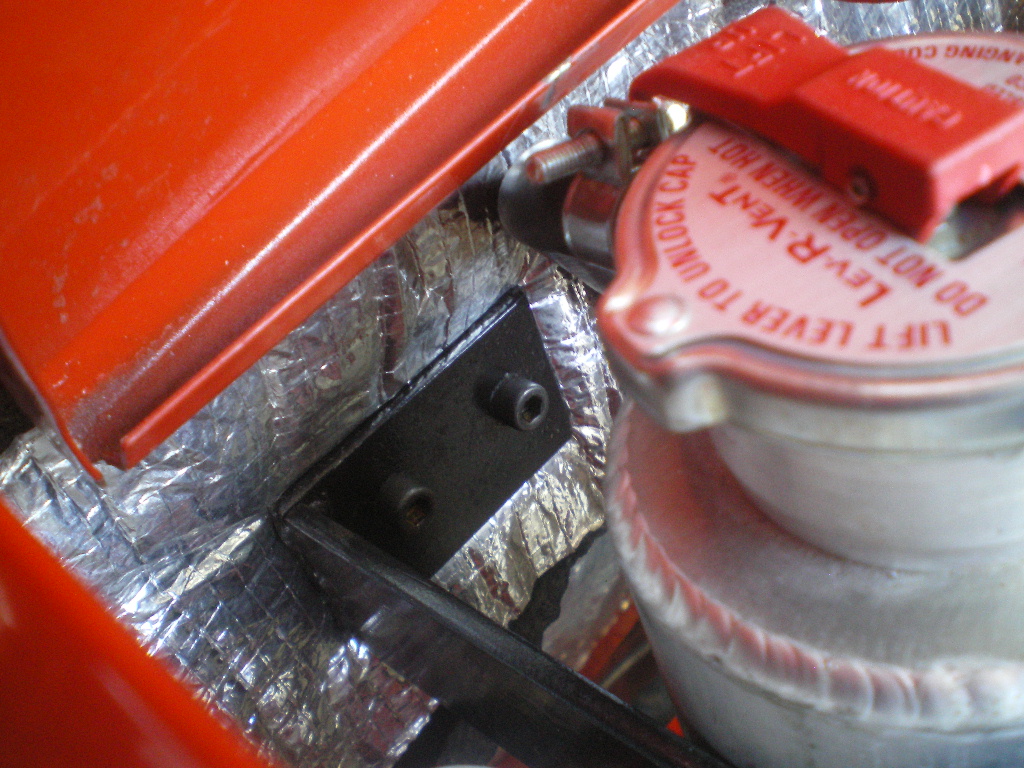
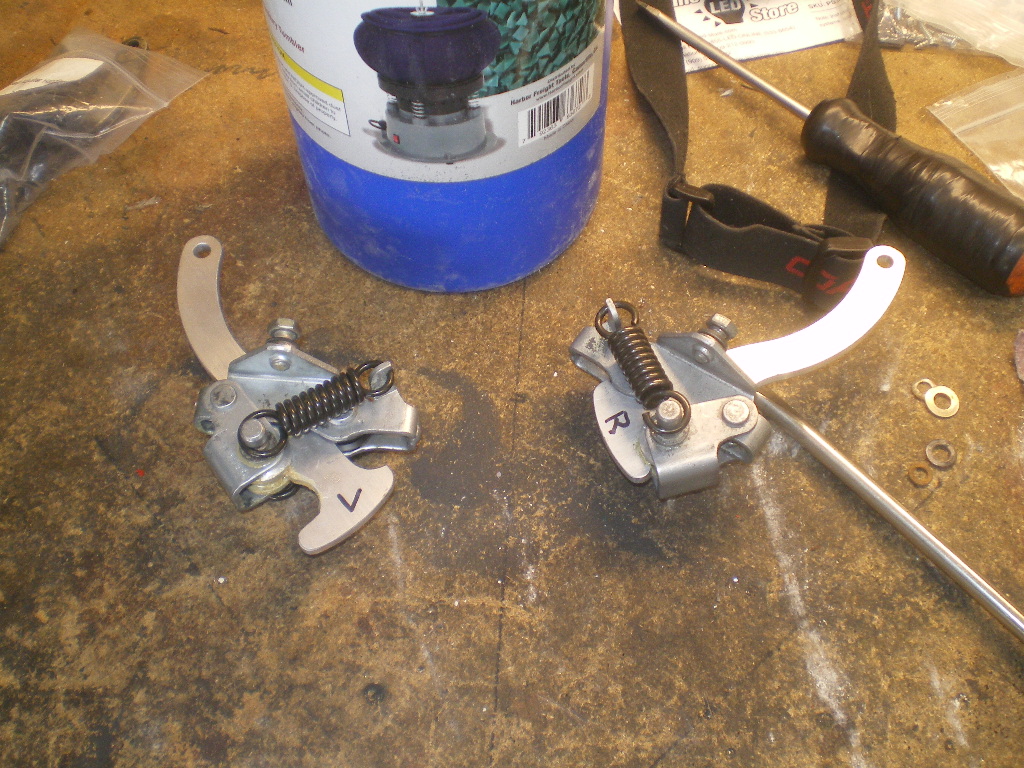
2nd question. The new E brake cable head came with a retaining clip I hadn't seen before. I have several of the standard style clips but they won't slide on because there isn't enough of the groove protruding thru the bracket. It's as if the bracket is 1/32" too thick as shown in this pic.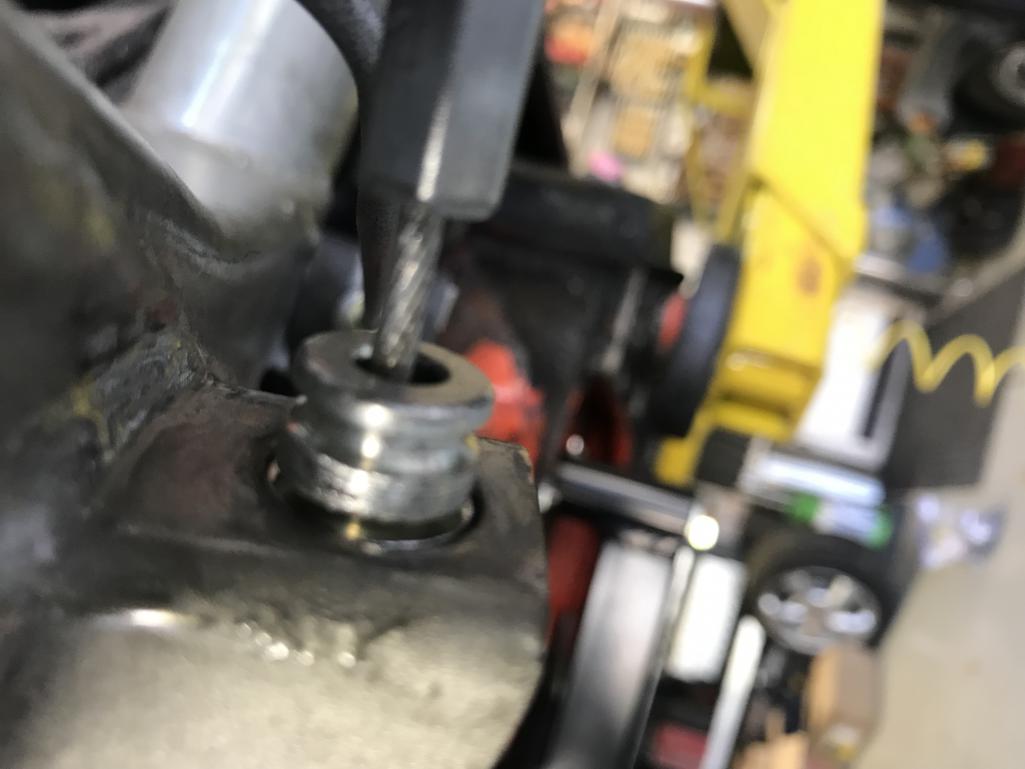
This is a pic of the small clip installed as I received it but with 2 washers between it and the bracket to take up the slack. Without the spacer it just wobbles. 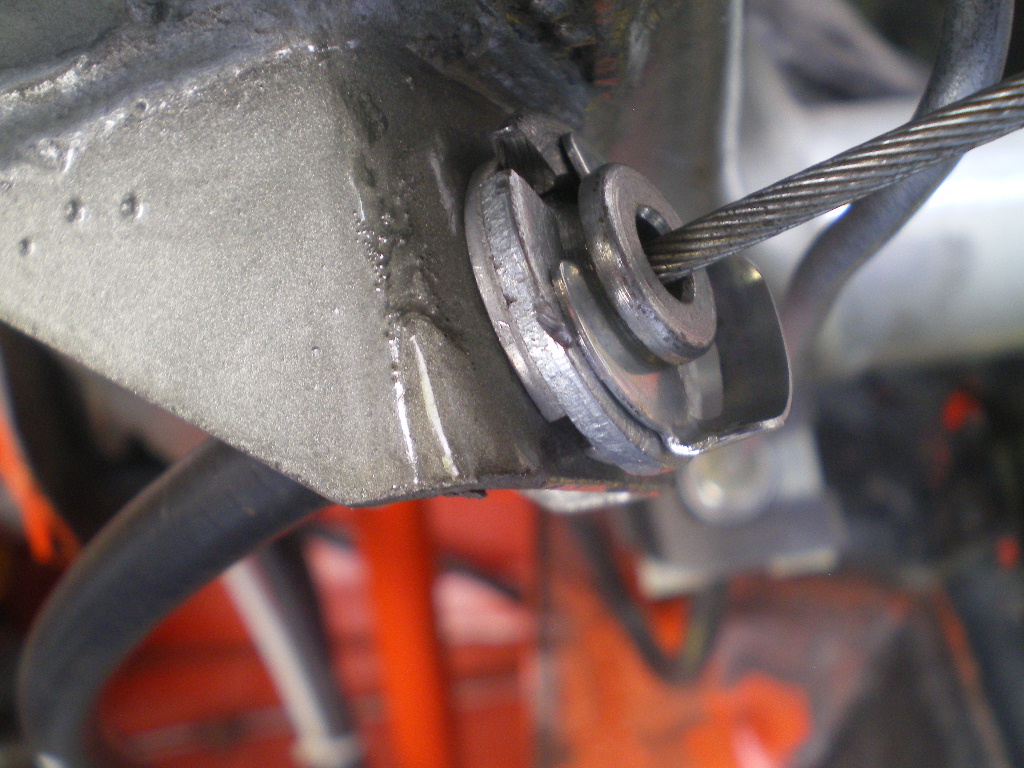
Posted by: 76-914 Oct 14 2017, 03:15 PM

108. 50 is for the 3 bolts on the "adjustment plate". You will want the susp loaded (at ride height) to set the rubber bushings. If it's not rubber then it won't matter.
"M" calipers are SC, 20mm rotors.
Oh, and nice score on the new project.
Thx Chris, I thought that was it but wasn't sure. I totally forgot about loading it though. Thx.
Posted by: zig-n-zag Oct 14 2017, 04:10 PM
I say 108 ftlbs for the nut, and the three bolts which mount the bracket to the body are torqued to 50 ftlbs. I allow myself to be wrong, though I think I could be right.
Posted by: 76-914 Oct 14 2017, 05:30 PM
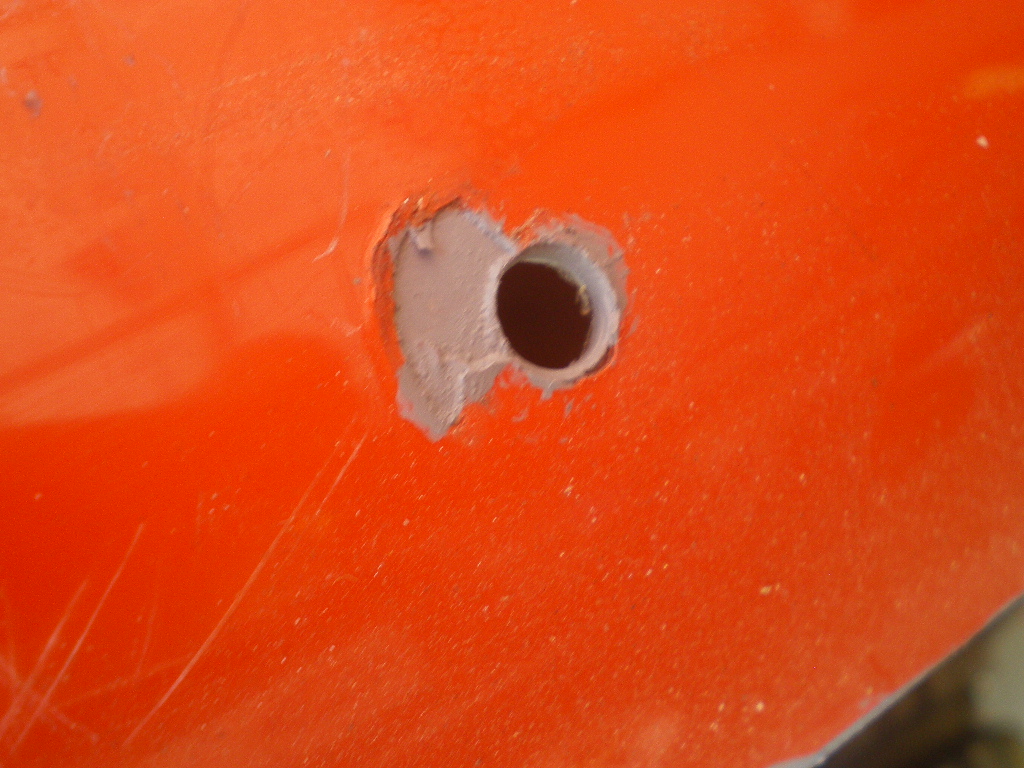
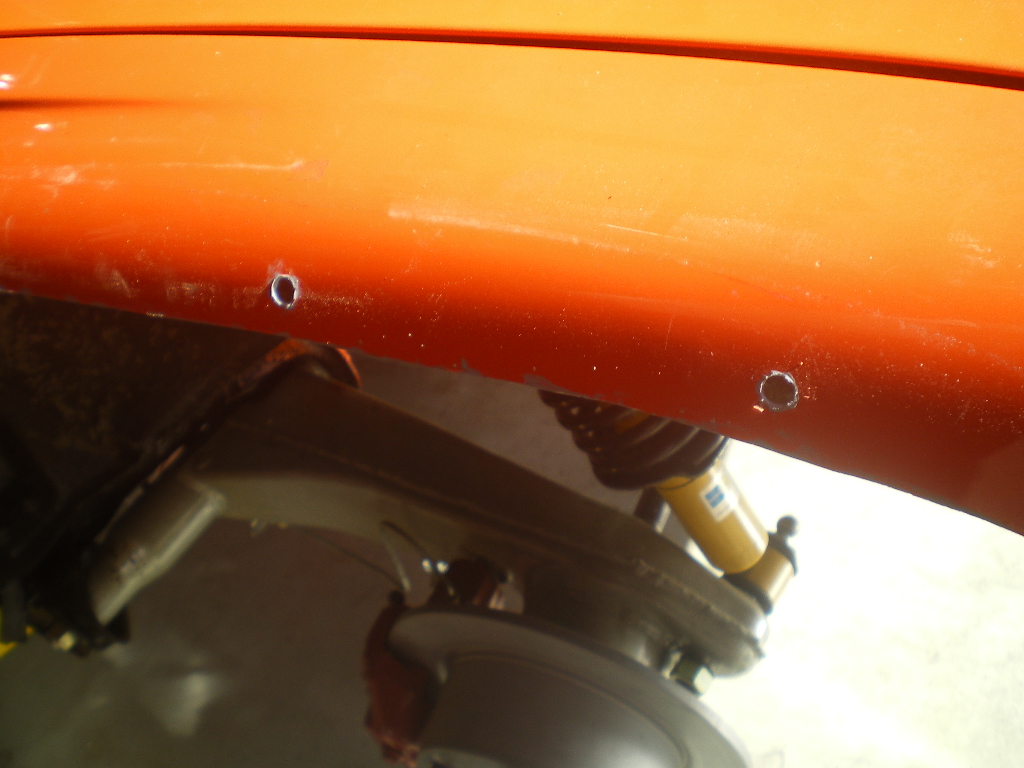
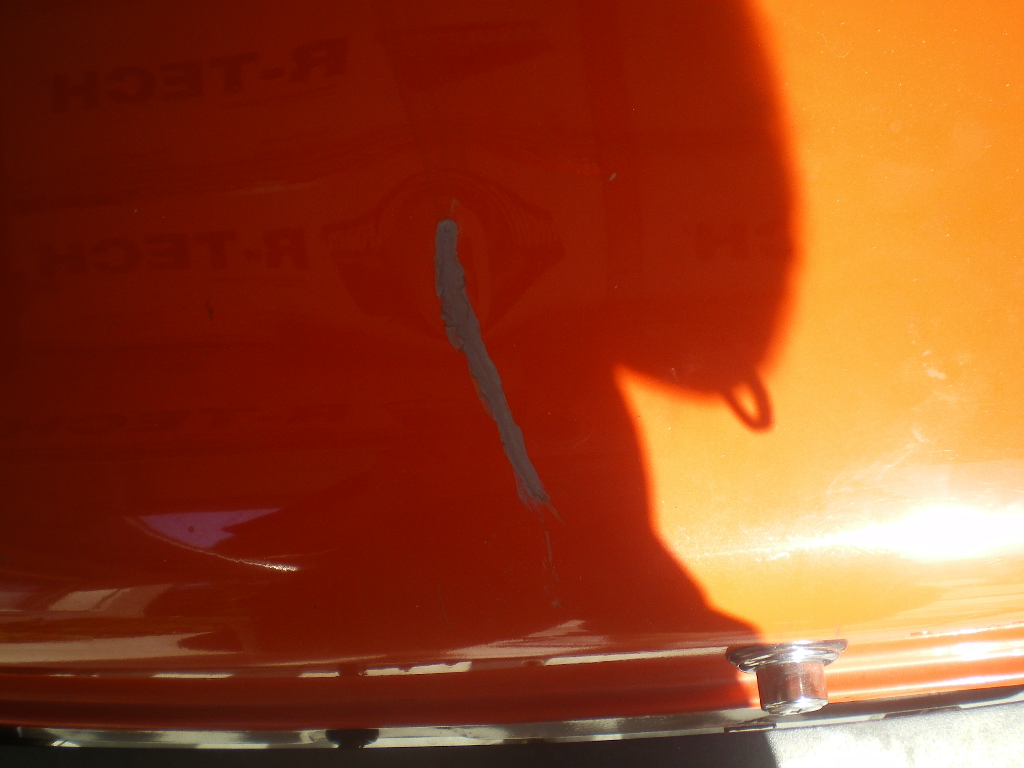
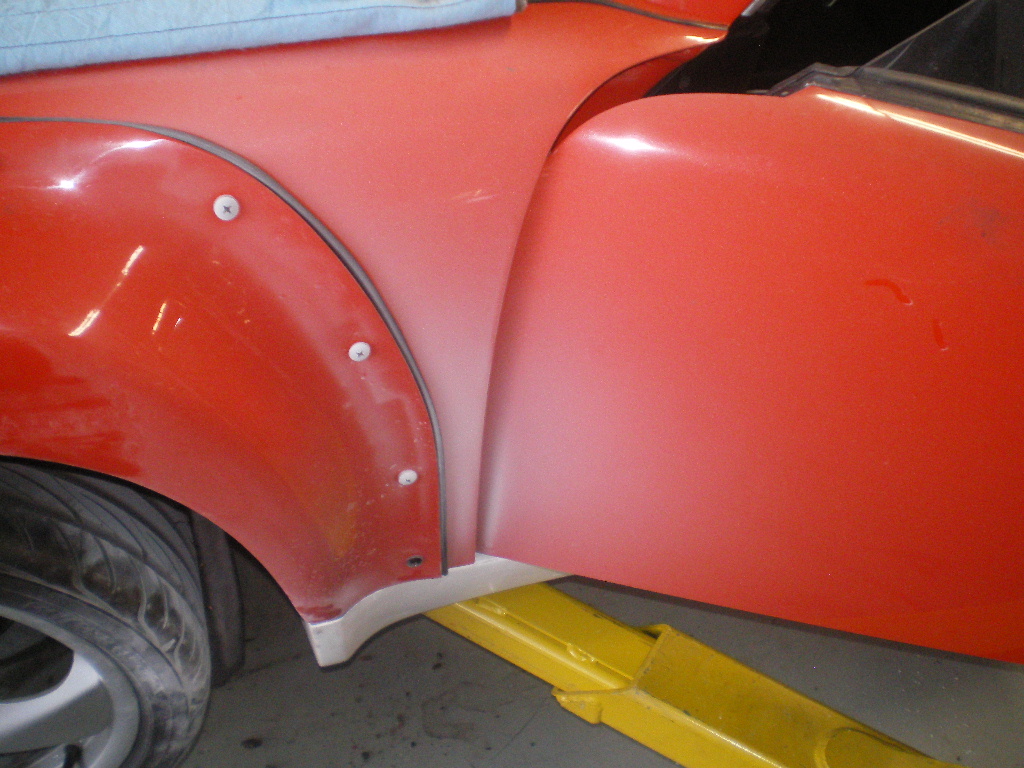
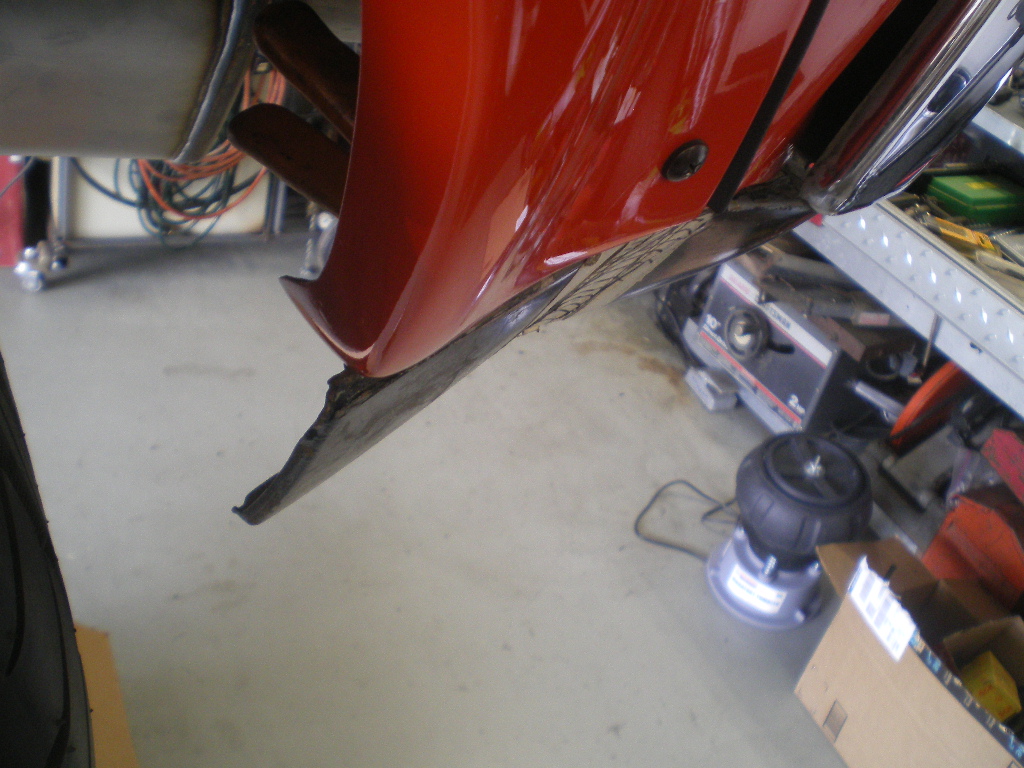
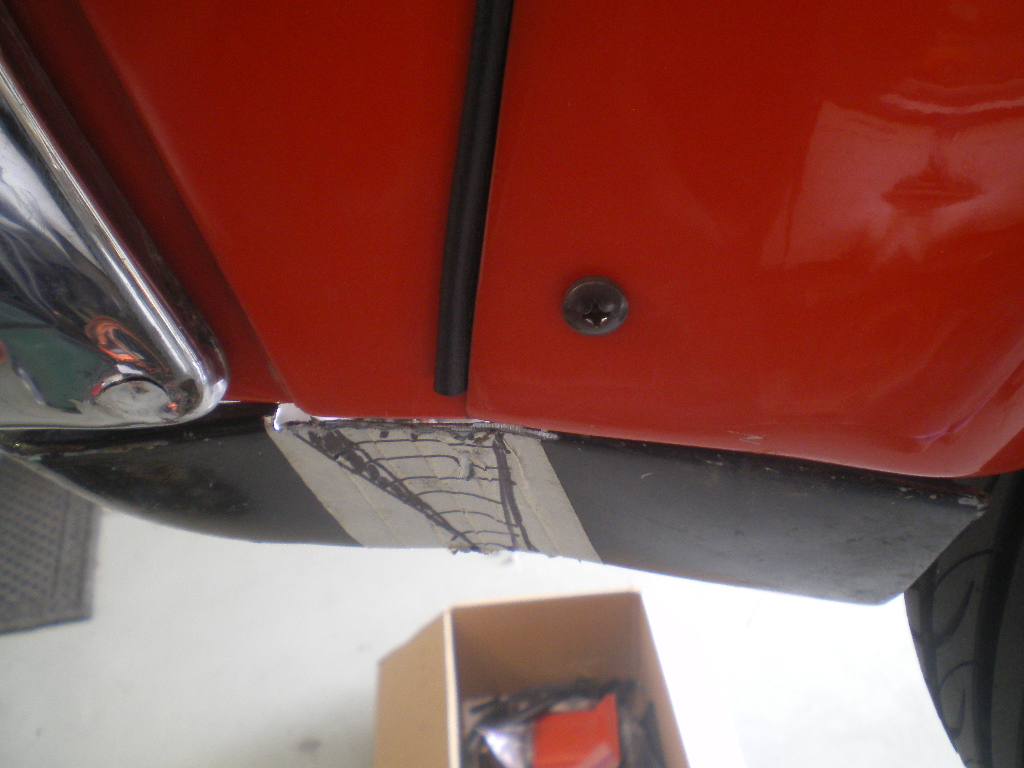
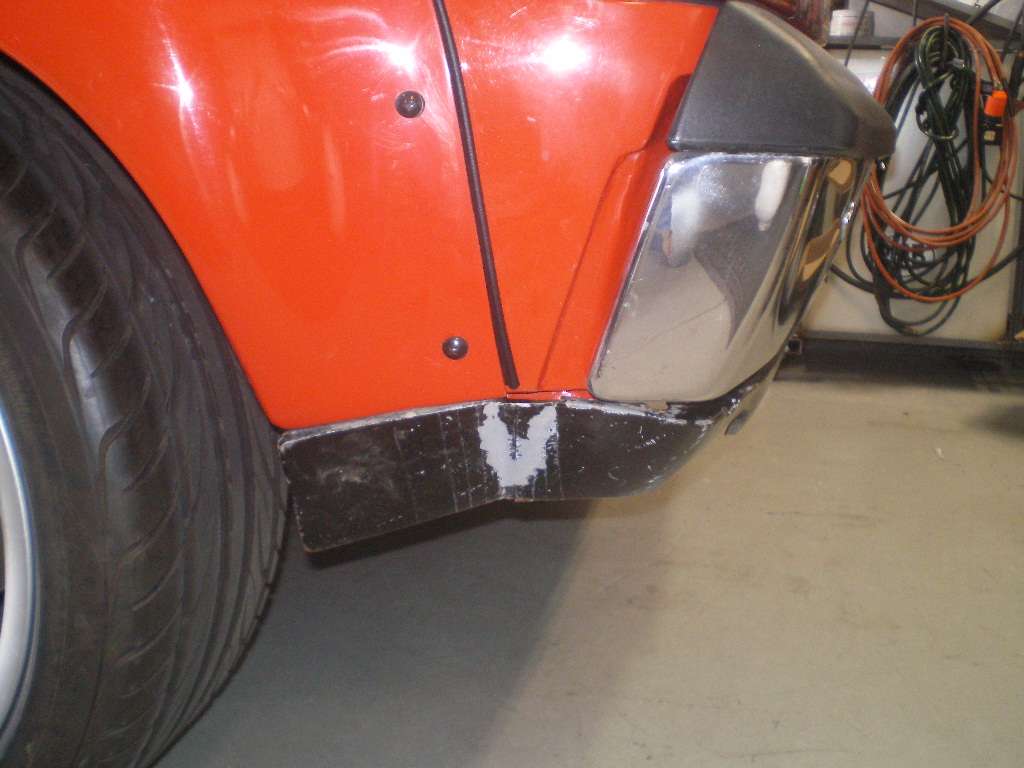
Must be 108 if both you guys agree. I couldn't access the R side as well so I pulled the flare I found the holes for the flare were drilled after it was painted so I sanded/cleaned and primed the bare metal spots where it was drilled out and on the cut line as well. While I was at it I did the same on the left side and for a gash on the rear trunk lid. That spot will be covered by a Ducktail spoiler so it will probably just get some bondo filler later.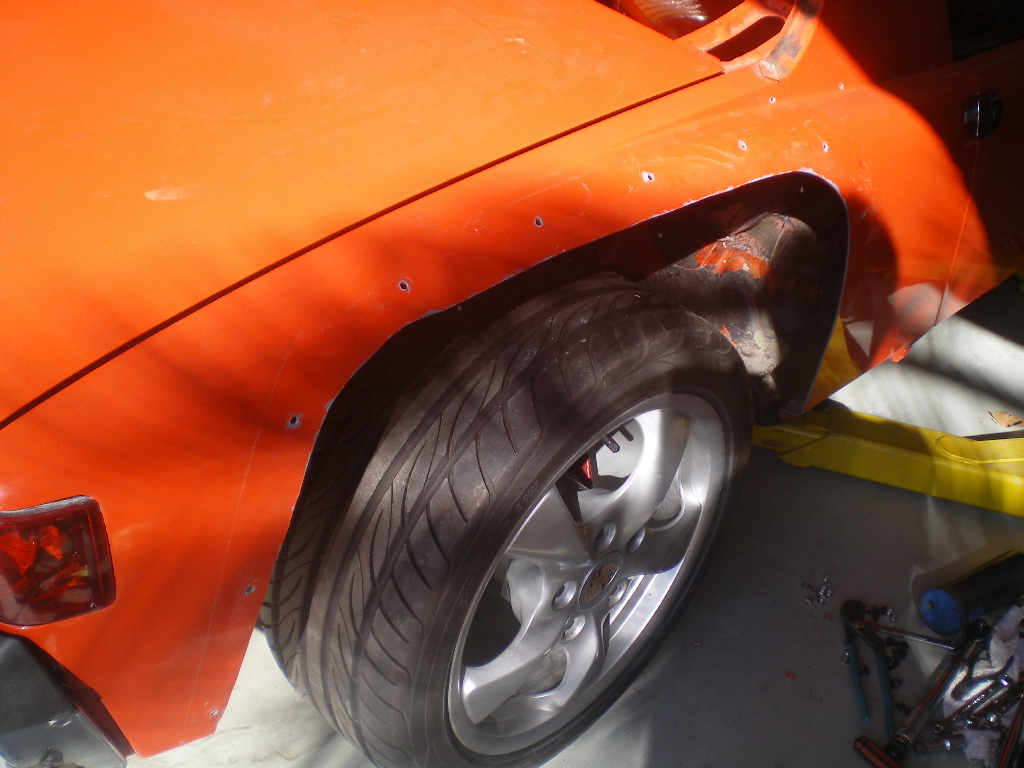

Attached image(s)
Posted by: burton73 Oct 14 2017, 09:03 PM
That spot will be covered by a Ducktail spoiler so it will probably just get some bondo filler later.
Do you have the Ducktail spoiler? I have a nice small wing that was on a V8 car I had.
Bob B
Posted by: 76-914 Oct 15 2017, 09:42 AM
That spot will be covered by a Ducktail spoiler so it will probably just get some bondo filler later.
Do you have the Ducktail spoiler? I have a nice small wing that was on a V8 car I had.
Bob B
I do indeed, thanks. It came with the car but had not been installed. I haven't even unwrapped it yet.

Posted by: 76-914 Oct 15 2017, 02:40 PM
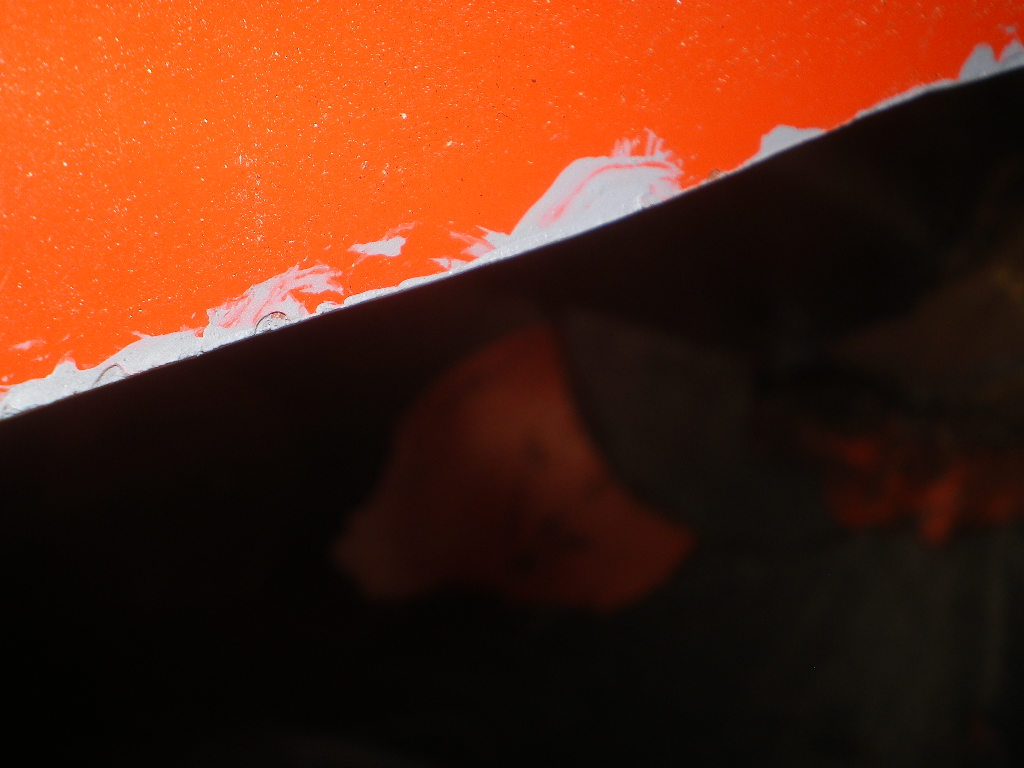
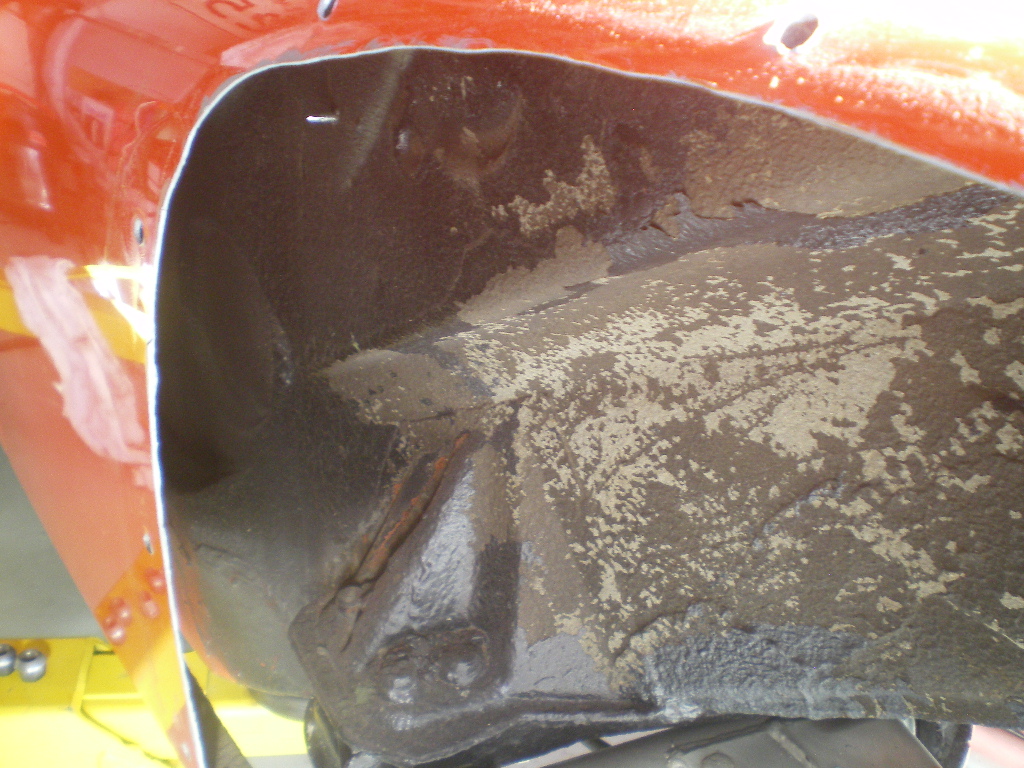
I spent this morning doing a little house cleaning. When the Hell Hole wall was patched it was done so using 3-4 smaller pieces that were welded together with lap joints. Not the prettiest but functional. I had seen this in the photos posted prior to buying the car. Before I reattached the flare I decided to take a look under some very thick undercoating and found Mr. Ugly staring back at me! There is also another small patch closer to the front that you can see in the after pics. Glad I looked or this would have needed another repair in a few years.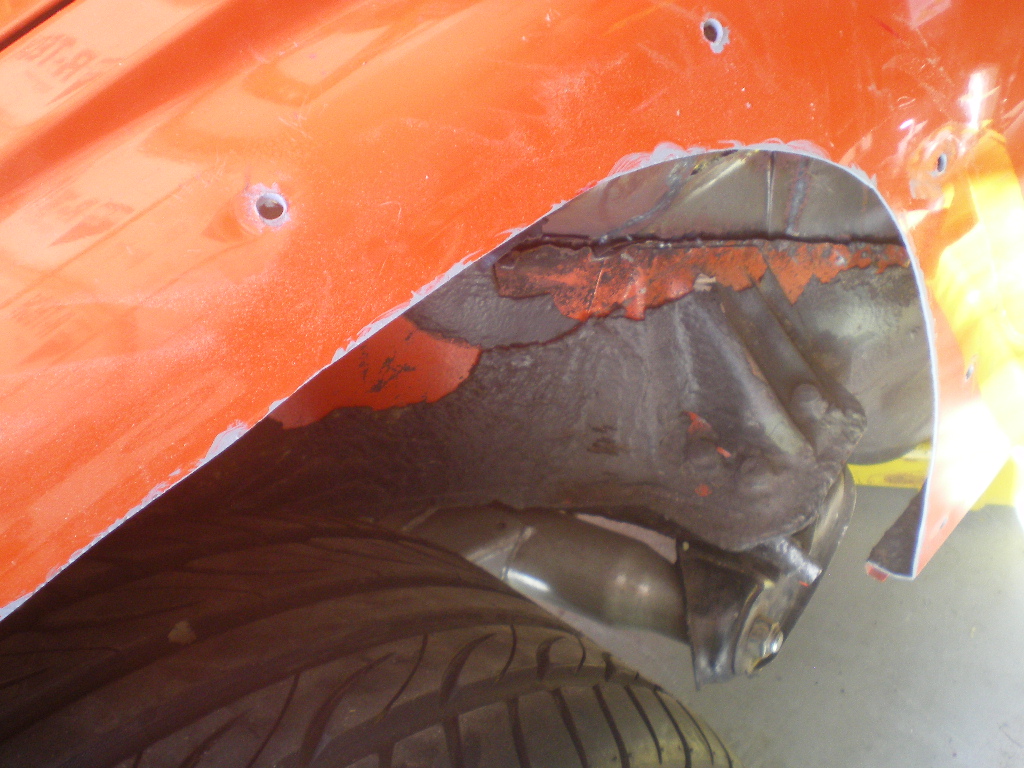
I cleaned the metal with a wire brush on my grinder then primed the recessed and exposed areas as well. Next I filled the voids and lap joints with Wurth's
Seam Sealer followed up with 2 coats of primer. Doesn't look like 3 hours work but it was.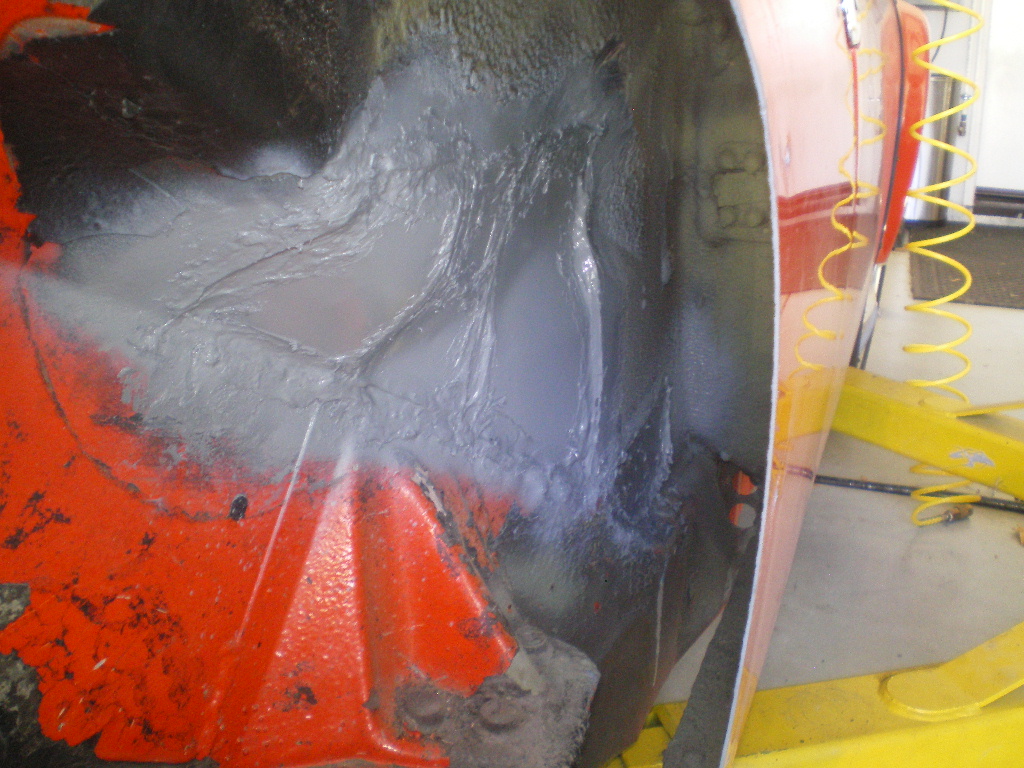
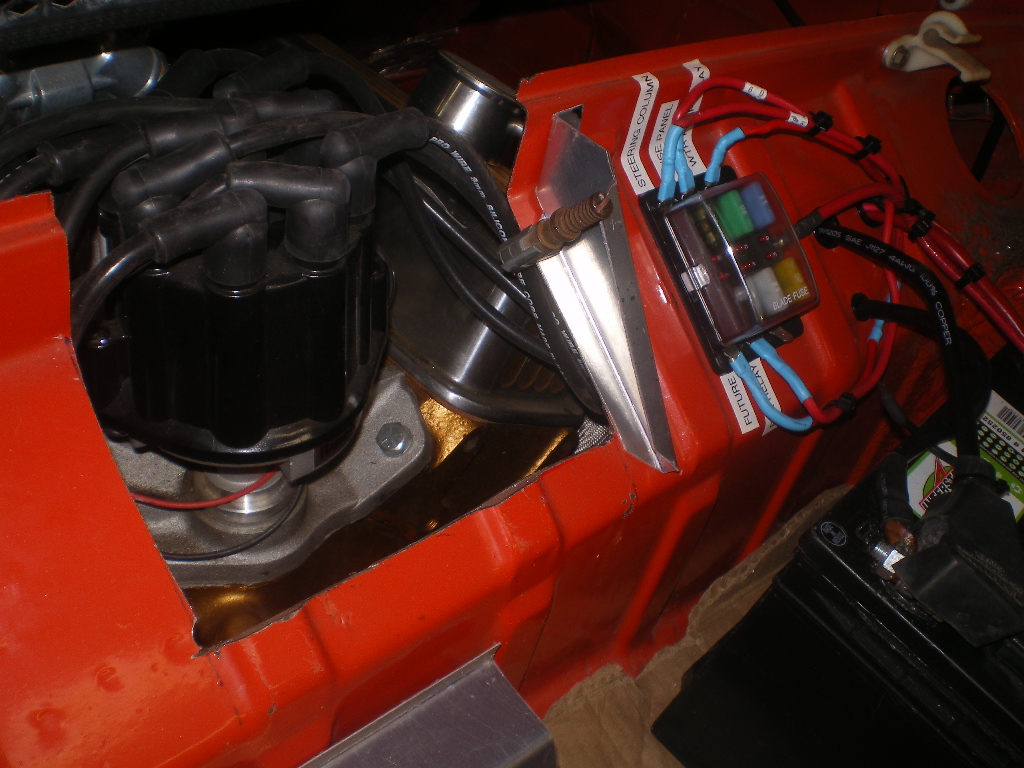
Also took a good pic of the block casting #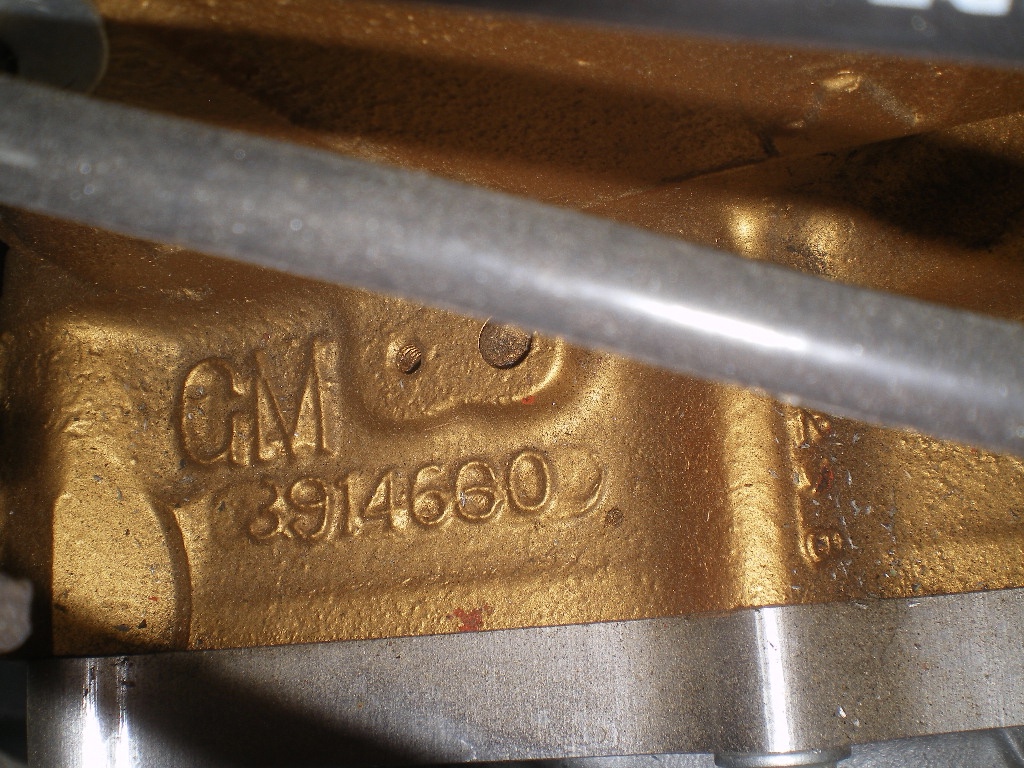
So. it's a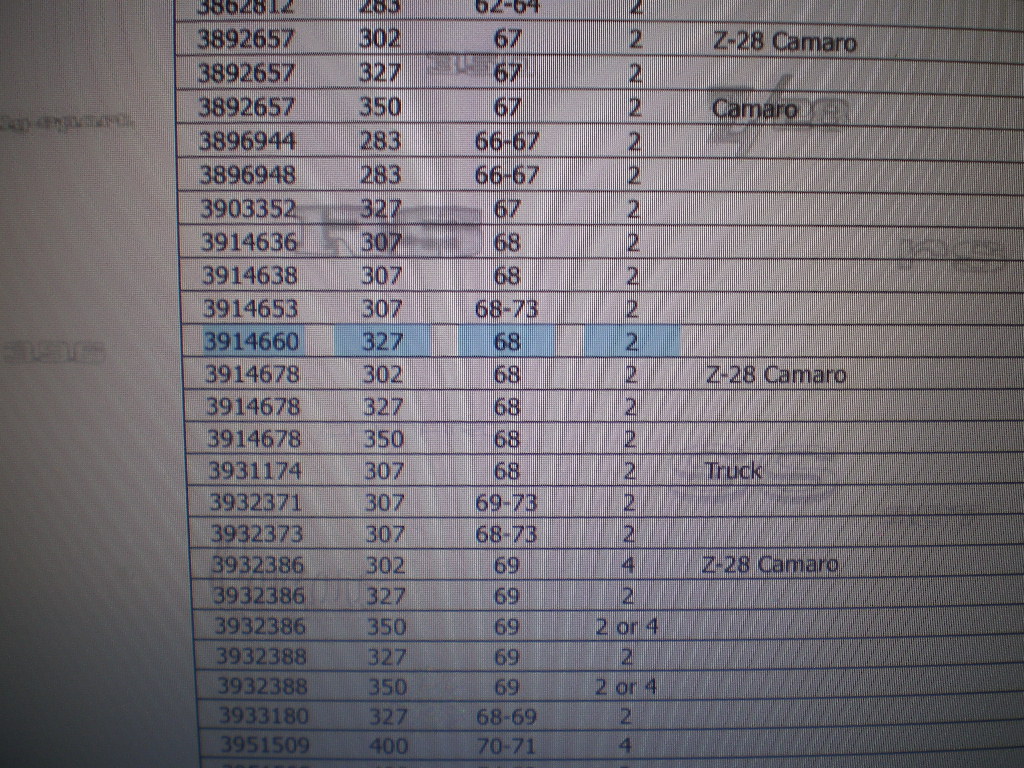
Head casting ID but I haven't lifted a valve cover to get the casting #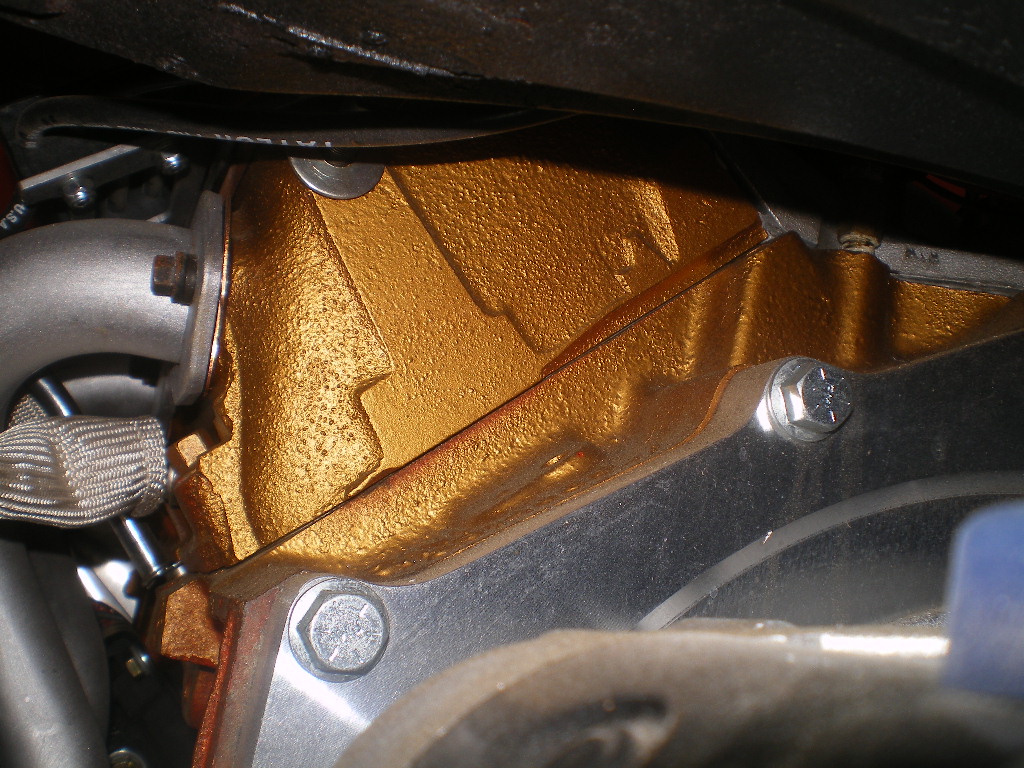
So apparently it's "G" which is a 350 head. Will the 350 mate to a 327?. That's why the casting number will be more accurate. I guess it's possible that some modification was done.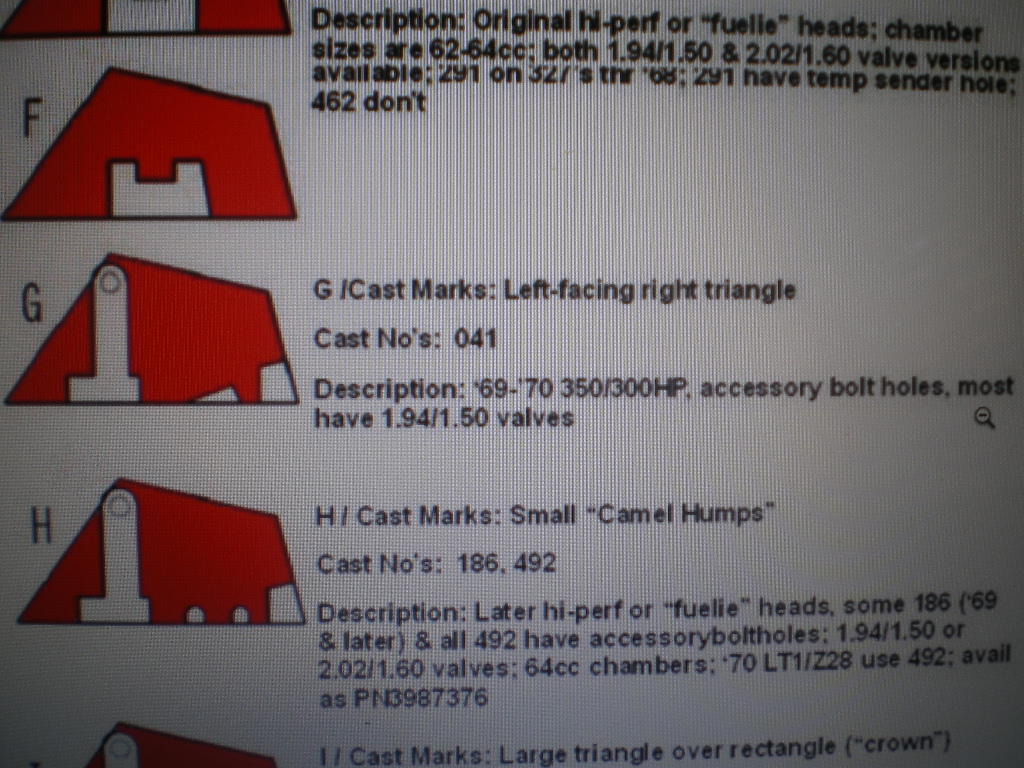
Posted by: Andyrew Oct 15 2017, 06:52 PM
I found this on the head casting, looks like maybe a crate 350 head.
3998993
Might be the same head I ran on my v8. Lemme look. If so, I made 240hp and 290 tq to the wheels on a less than ideal setup without messing with the head. It was a torquey sob.
Attached thumbnail(s)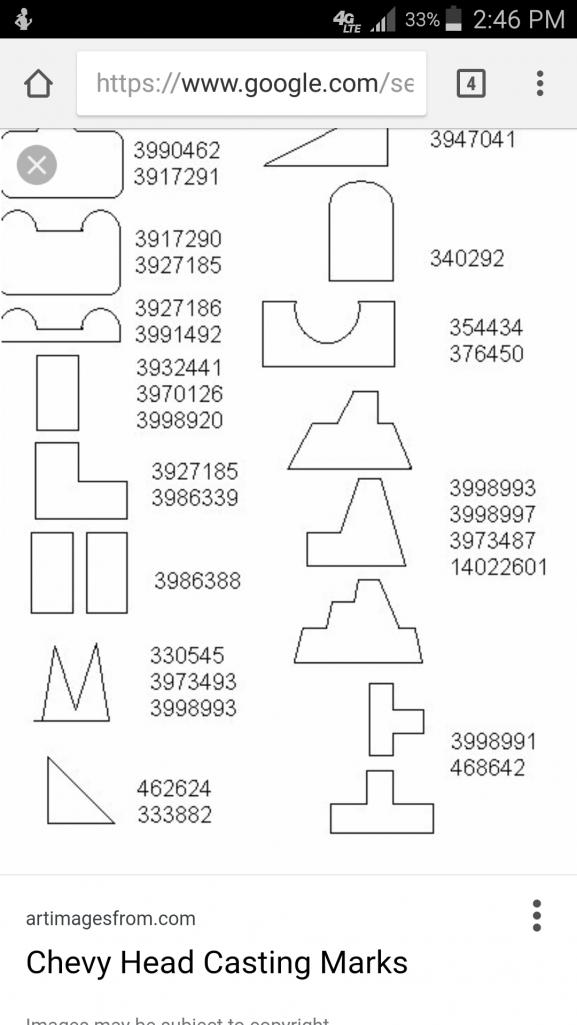
Posted by: bulitt Oct 15 2017, 07:46 PM
Andrew thats the info I have
Heads- 3998993 rebuilt with
Intake valves 2.02
Exhaust 1.60
76cc chamber
Roller rockers
Hydraulic lifters
Block bored .060 over
Your doing a great job Kent!
Posted by: rhodyguy Oct 16 2017, 07:14 AM
Be pointed forward when you go for the first big throttle stab. Steep and fast learning curve. Be prepared for the hot gun that thinks they want to challenge the poser in the flared 914.
Posted by: 76-914 Oct 16 2017, 06:47 PM
Be pointed forward when you go for the first big throttle stab. Steep and fast learning curve. Be prepared for the hot gun that thinks they want to challenge the poser in the flared 914.
That won't happen for awhile Kev. Renegade is very explicit about breaking in the clutch sold with that kit. 500 miles of normal stop and go driving before you can punch it. That works out to be about $150-$200 of Petro.
I bought a sand blaster kit recommended by another member about 6 months ago and finally got to use it today. OMG, what a
 difference from that POS HF gun. I purchased a cabinet and gun from HF and that SOB put me in a bad mood every time I used it. It had a mind of it's own and would work then not work. I would shake the cabinet, change media, cuss, threaten it, pray, stir the sand, unclog the pick up tube, take the gun a part, you name it. This kit was made to modify the HF set up (you think they know it is a POS) and came with a big pick up hose, a beefy pick up tube and larger pistol with 3 different size metal tips. IIRC, it was about $60 and worth every penny. All it does is work, very well, every time you pull the trigger. To give you and idea, in 20 minutes of cleaning this afternoon I've blown the paint off the back wall of the cabinet. It never came off in the 2 years that I used it with HF's gun. Life is once again good!
  A pic showing 5 minutes work. Only did 1/2 of each piece to illustrate.
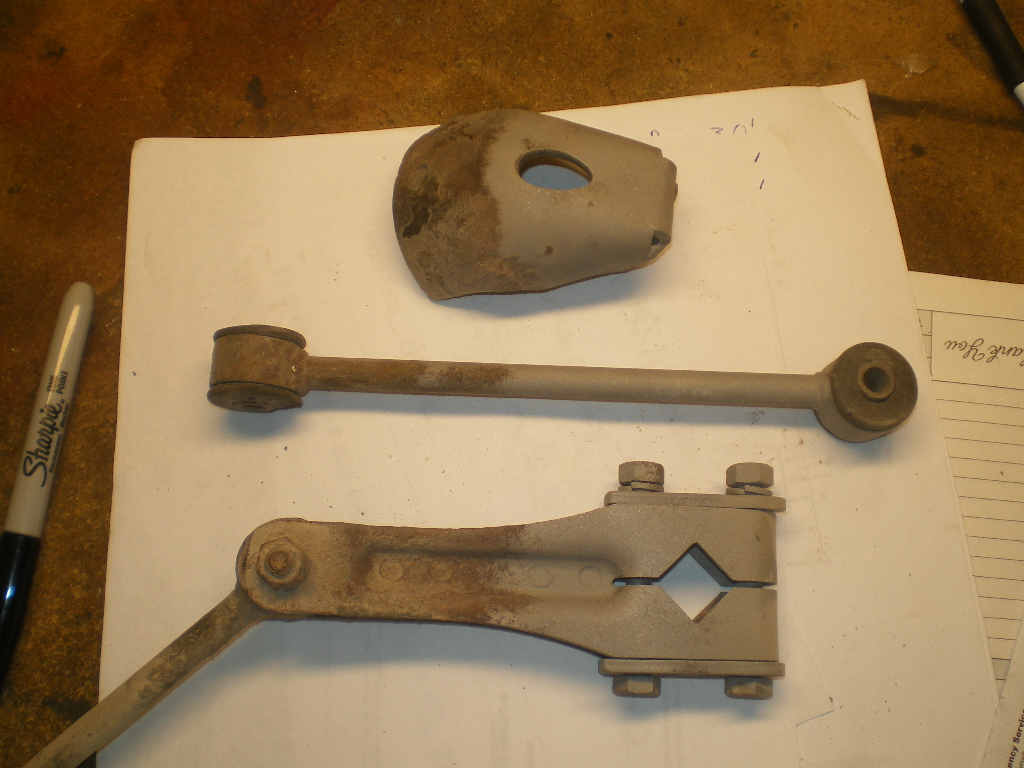
Posted by: ValcoOscar Oct 16 2017, 07:53 PM
Be pointed forward when you go for the first big throttle stab. Steep and fast learning curve. Be prepared for the hot gun that thinks they want to challenge the poser in the flared 914.
That won't happen for awhile Kev. Renegade is very explicit about breaking in the clutch sold with that kit. 500 miles of normal stop and go driving before you can punch it. That works out to be about $150-$200 of Petro.
I bought a sand blaster kit recommended by another member about 6 months ago and finally got to use it today. OMG, what a
difference from that POS HF gun. I purchased a cabinet and gun from HF and that SOB put me in a bad mood every time I used it. It had a mind of it's own and would work then not work. I would shake the cabinet, change media, cuss, threaten it, pray, stir the sand, unclog the pick up tube, take the gun a part, you name it. This kit was made to modify the HF set up (you think they know it is a POS) and came with a big pick up hose, a beefy pick up tube and larger pistol with 3 different size metal tips. IIRC, it was about $60 and worth every penny. All it does is work, very well, every time you pull the trigger. To give you and idea, in 20 minutes of cleaning this afternoon I've blown the paint off the back wall of the cabinet. It never came off in the 2 years that I used it with HF's gun. Life is once again good! A pic showing 5 minutes work. Only did 1/2 of each piece to illustrate.Great job Kent...let me know if you need help blasting larger pieces. Just hit me up so we can coordinate. I usually run garnet for steel or glass bead for Alum and Stainless.
Oscar
Posted by: Larmo63 Oct 16 2017, 08:02 PM
"Mr. Ugly" was staring back at you?
Looks like a fun project, Kent!!!! Good luck with it. 
Posted by: 76-914 Oct 18 2017, 08:17 PM
I tried to install these today but their appx 1" longer than the opening. Did the 70 model have a different size guard or did they not have them, period? TIA, Kent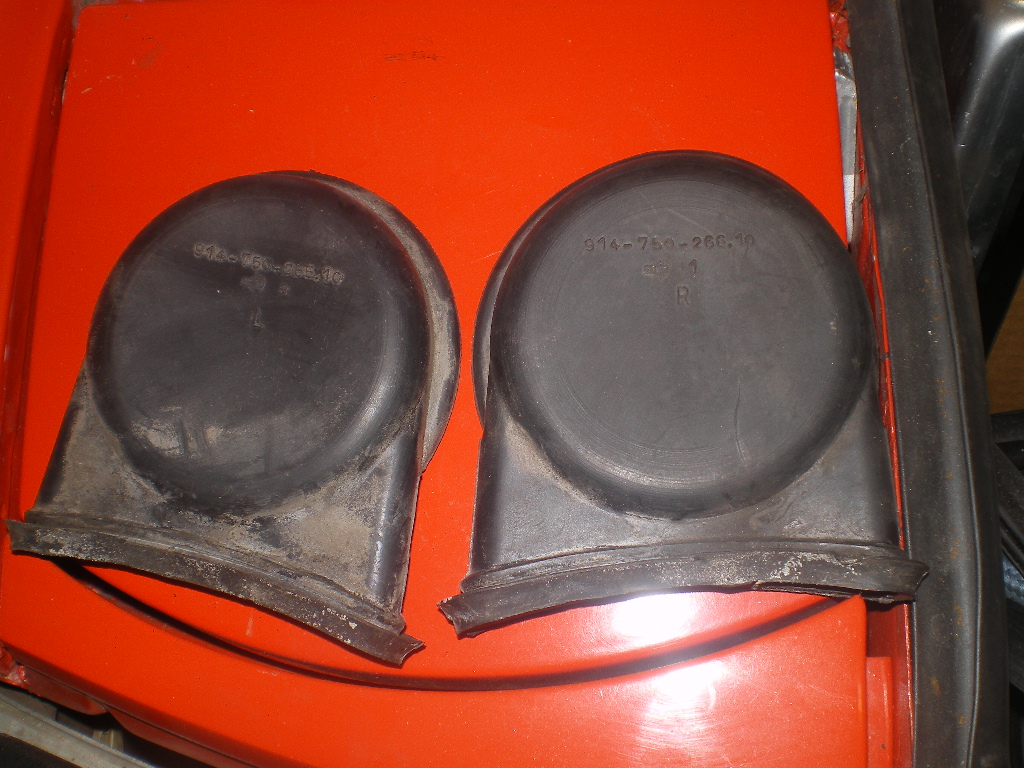
Posted by: Mike Bellis Oct 18 2017, 08:58 PM
327 is a great SBC choice in a 914. Good power, not too torquey. I put 225lb springs on the rear of mine and it felt great. It was super predictable and always "set" in the corners exactly the same. This car will be a blast! Just throw the wheels away. They are super ugly.
Posted by: Chris914n6 Oct 18 2017, 11:29 PM
I tried to install these today but their appx 1" longer than the opening. Did the 70 model have a different size guard or did they not have them, period? TIA, Kent
Early cars had a brush. 914rubber had talked about making them.
Posted by: Cracker Oct 19 2017, 04:26 AM
Welcome to the World of fun 914's Kent...nothin' like na torque and sound! Enjoy!
Tony
Posted by: barefoot Oct 19 2017, 05:43 AM
. While I was at it I did the same on the left side and for a gash on the rear trunk lid. That spot will be covered by a Ducktail spoiler so it will probably just get some bondo filler later.
[/quote]
for a V8 you may want a more aggressive spoiler like the one i have for sale in the WTB forum.
Posted by: 76-914 Oct 19 2017, 07:53 AM
[quote name='Mike Bellis' date='Oct 18 2017, 07:58 PM' post='2539207']
327 is a great SBC choice in a 914. Good power, not too torquey. I put 225lb springs on the rear of mine and it felt great. It was super predictable and always "set" in the corners exactly the same. This car will be a blast! Just throw the wheels away. They are super ugly.
[/quote]
I haven't checked the spring rate yet but good to know 225# are good. I can't see the wheels from the drivers seat so I'm good with the look. The tire options are many, now.
[quote name='Chris914n6' date='Oct 18 2017, 10:29 PM' post='2539251']
[quote name='76-914' post='2539195' date='Oct 18 2017, 07:17 PM']
I tried to install these today but their appx 1" longer than the opening. Did the 70 model have a different size guard or did they not have them, period? TIA, Kent
[/quote]
Early cars had a brush. 914rubber had talked about making them.
Thx Chris. This body style is new to me.
[/quote][quote name='Cracker' date='Oct 19 2017, 03:26 AM' post='2539271']
Welcome to the World of fun 914's Kent...nothin' like na torque and sound! Enjoy!
Tony
When I was a kid I'd clip Playing Cards to my bicycle fender so the spokes would make a faux motor sound. So the sound just may become addictive. 
[/quote][quote name='barefoot' date='Oct 19 2017, 04:43 AM' post='2539287']
. While I was at it I did the same on the left side and for a gash on the rear trunk lid. That spot will be covered by a Ducktail spoiler so it will probably just get some bondo filler later.
[/quote]
for a V8 you may want a more aggressive spoiler like the one i have for sale in the WTB forum.
[/quote]
I would if I drove like Tony. 
Posted by: Andyrew Oct 19 2017, 09:23 AM
I had 225's on mine as well, even had 275's for a while and felt they were fine. Currently have 225's on mine with the 4 and like it.
For a street car anything from 180-225 should work just fine.
Posted by: whitetwinturbo Oct 21 2017, 08:22 AM
![popcorn[1].gif](style_emoticons/default/popcorn[1].gif) ..and who makes that "better" media blaster?
..and who makes that "better" media blaster?
Great work!
Posted by: 76-914 Oct 21 2017, 09:02 AM
..and who makes that "better" media blaster?Great work!
Here you go. HF must have complained because they're no longer "called out" in this ad. However, if you read the comments below the ad, several satisfied customers mention that their HF blasting cabinets were total transformed into functioning cabinets. Order the catalog; it's free. They are an Internet Body Shop supply. They currently have a sale going on.
http://www.tptools.com/USA-Cabinet-Gun-and-Pickup-Tube-Upgrade-Kit,2320.html?b=d*8012!r*PriceRange*%2460+-+%2499.99
Posted by: 76-914 Oct 22 2017, 05:15 PM
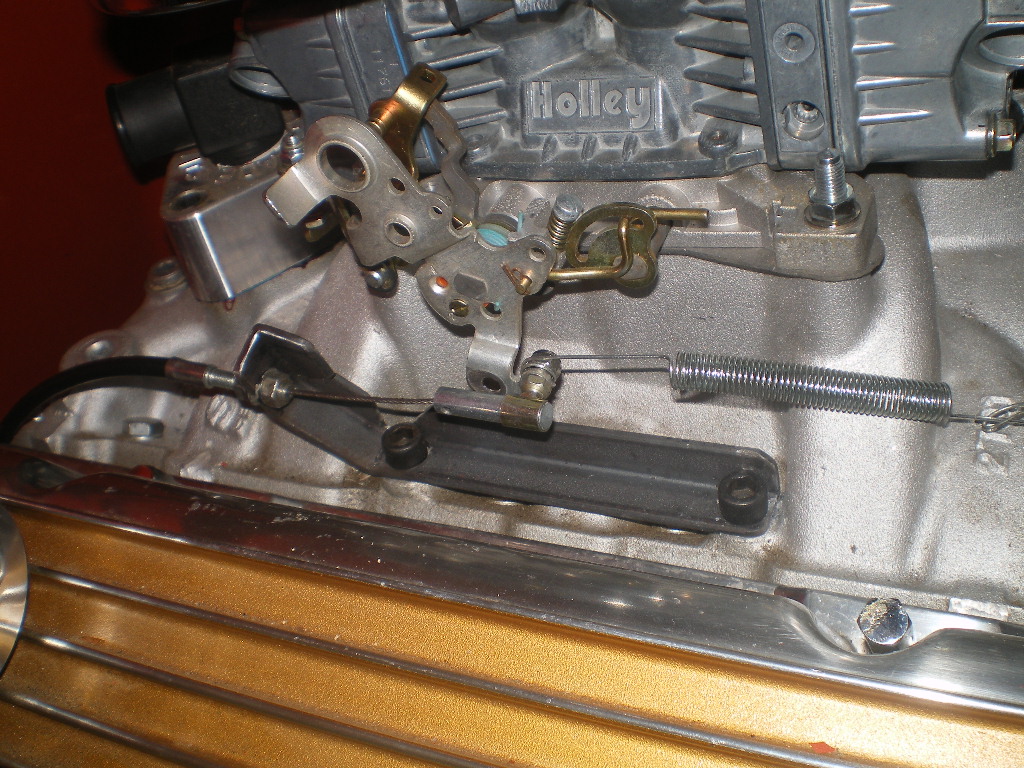
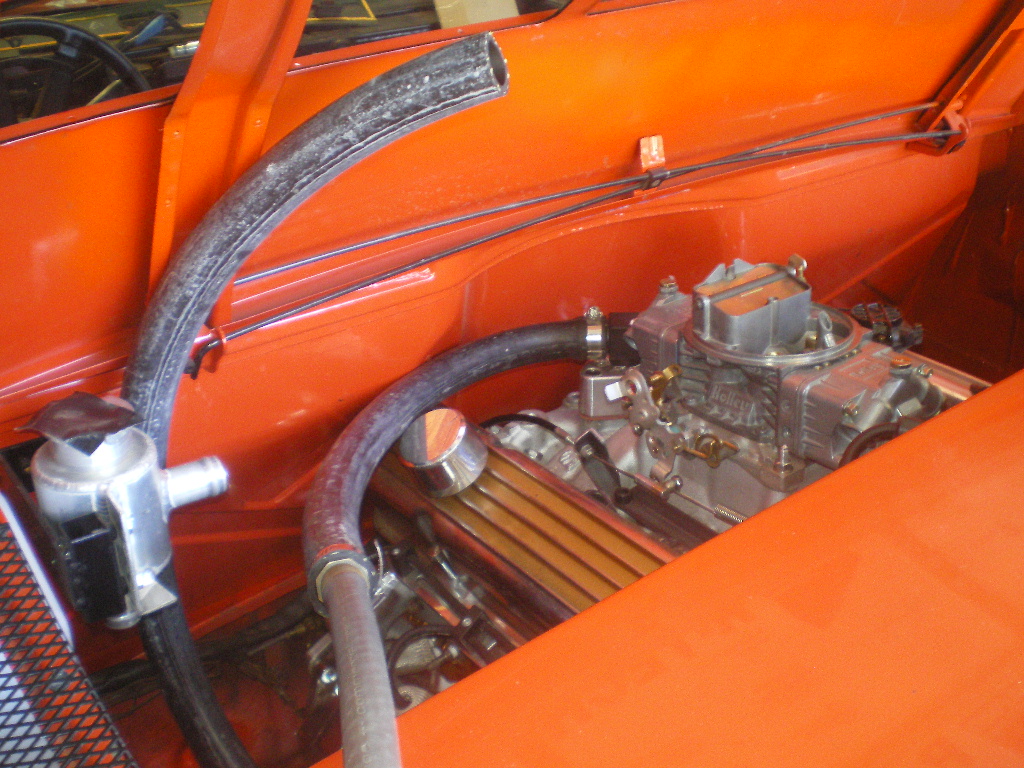
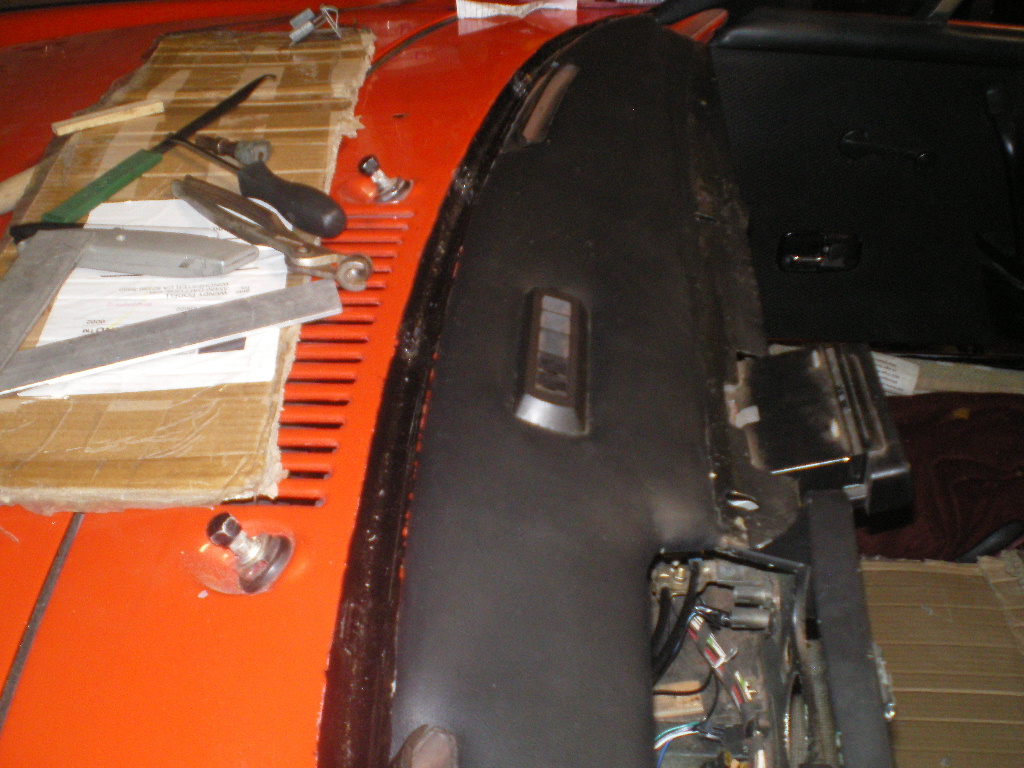
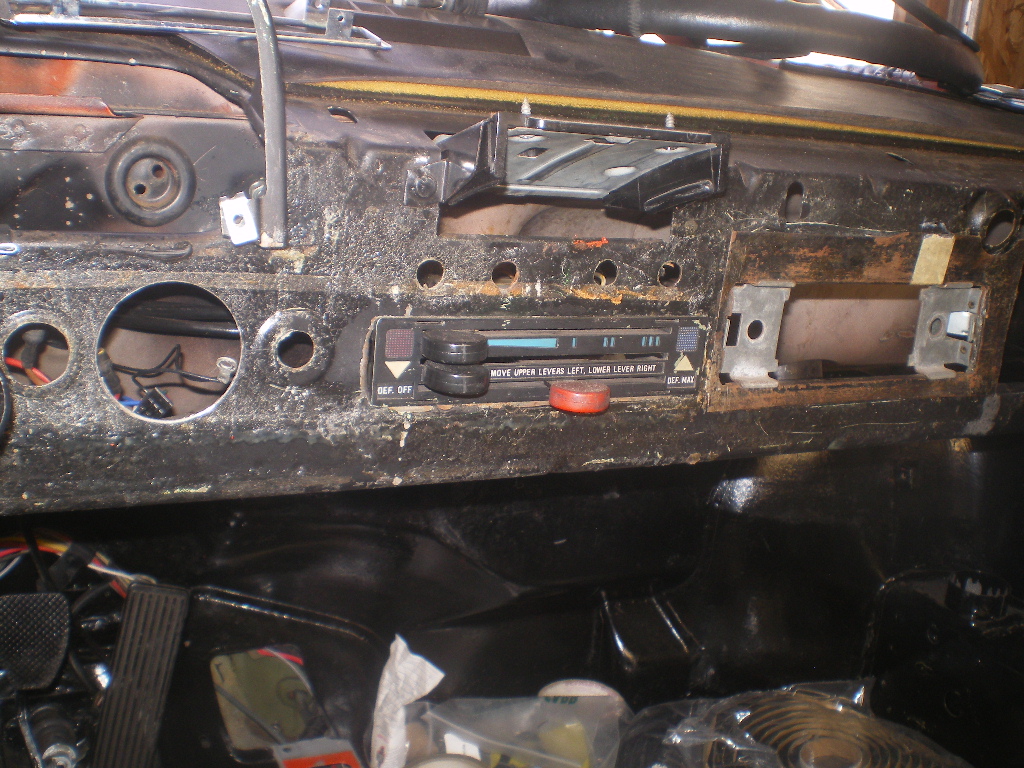
I'm working on "how to" use the existing 914 throttle cable. I fished the cable reasonably close to the carb to see if it would reach. There wasn't any place to connect the cable on the carb linkage so I drilled out that small tab that is bent at a 45 degree angle then straightened that tab out to accept the barrel adapter that I had laying around.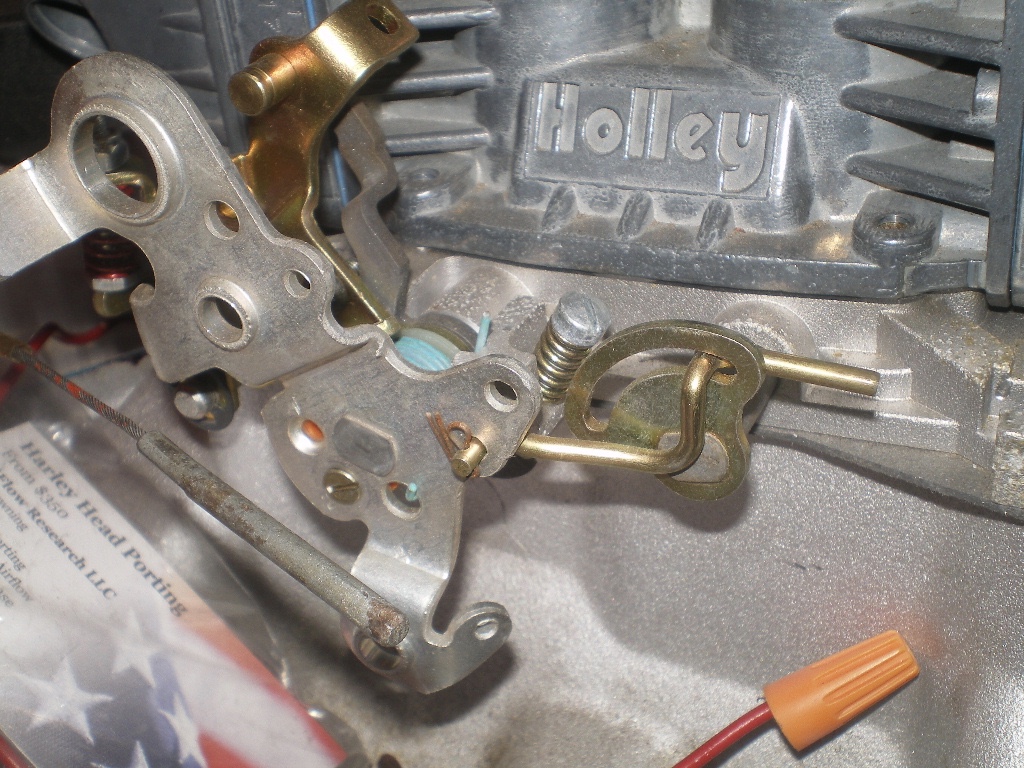
After fitting the barrel to the linkage I cut the end off the cable and fit it inside the barrel.
Next I heated that stiff plastic sheathing to bend it towards the carb.
I made this bracket to hold the cable in place. I couldn't bend this bracket to 90 degrees or the barrel would contact it before it reached maximum pull i.e. full throttle but at this angle the cable was pointing up and would bind.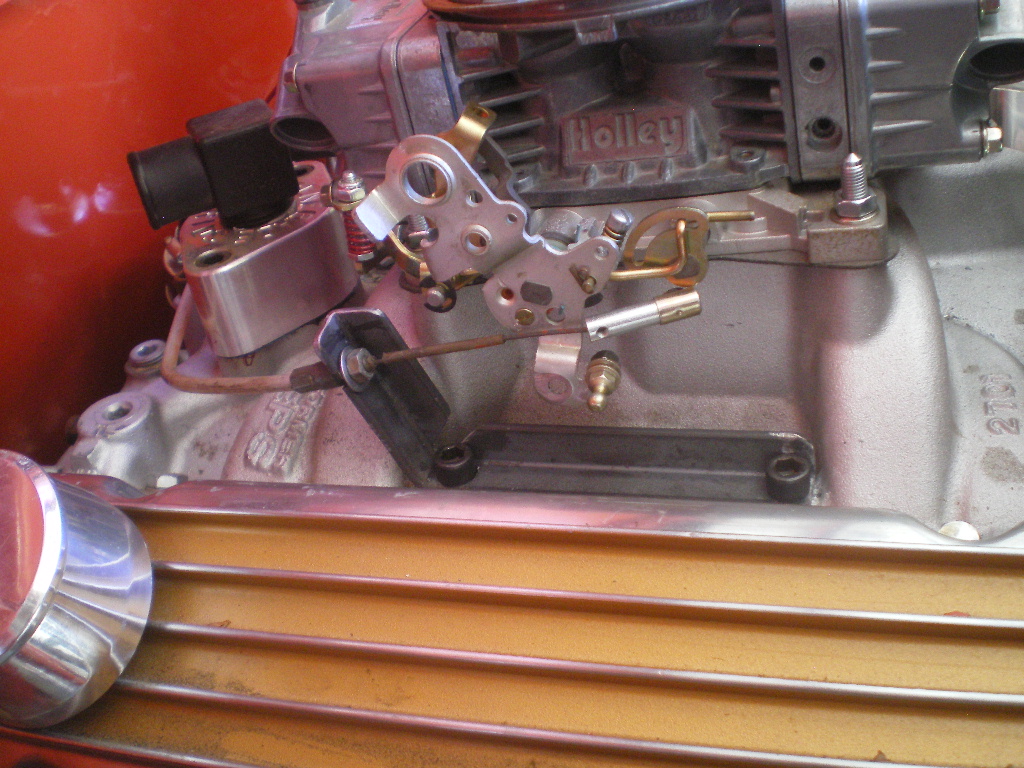
I placed another bend in the bracket to level it out. seems to line up alright so next step is to remove this old cable and replace it with a new one. 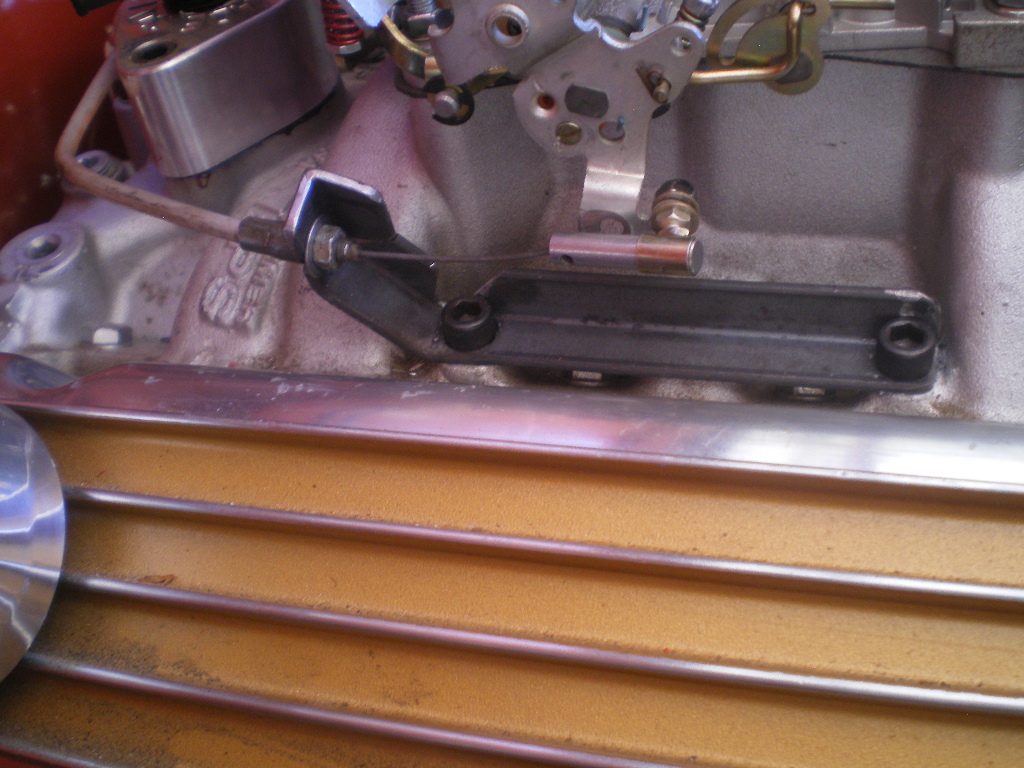
Posted by: 76-914 Oct 28 2017, 09:40 PM
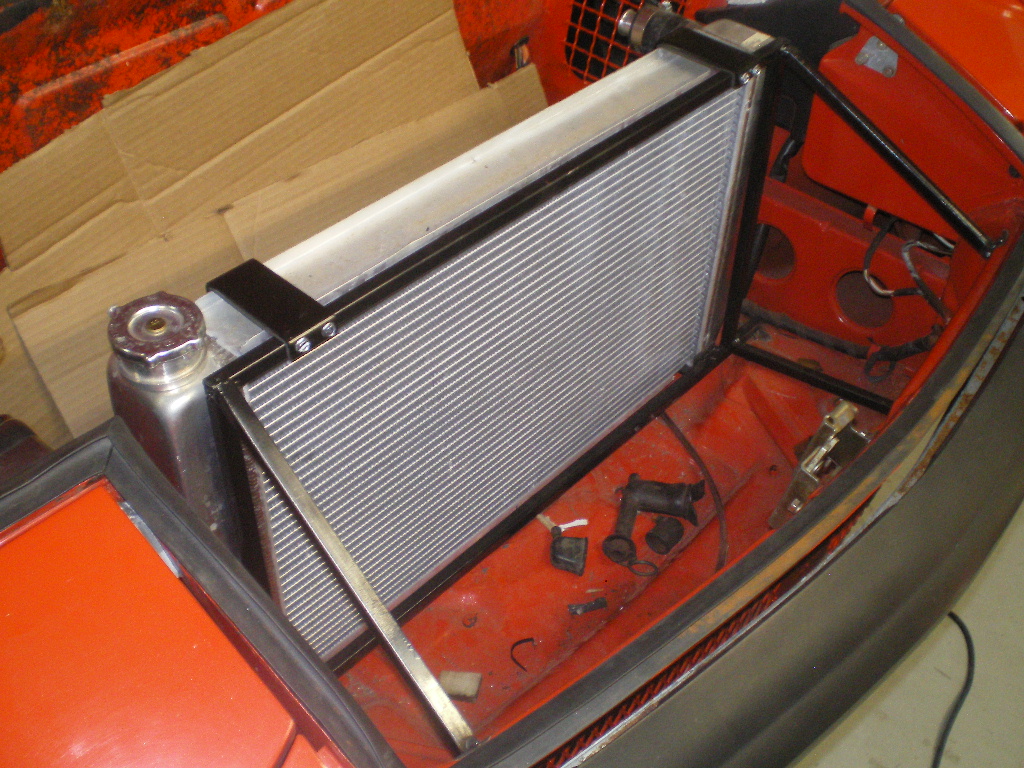
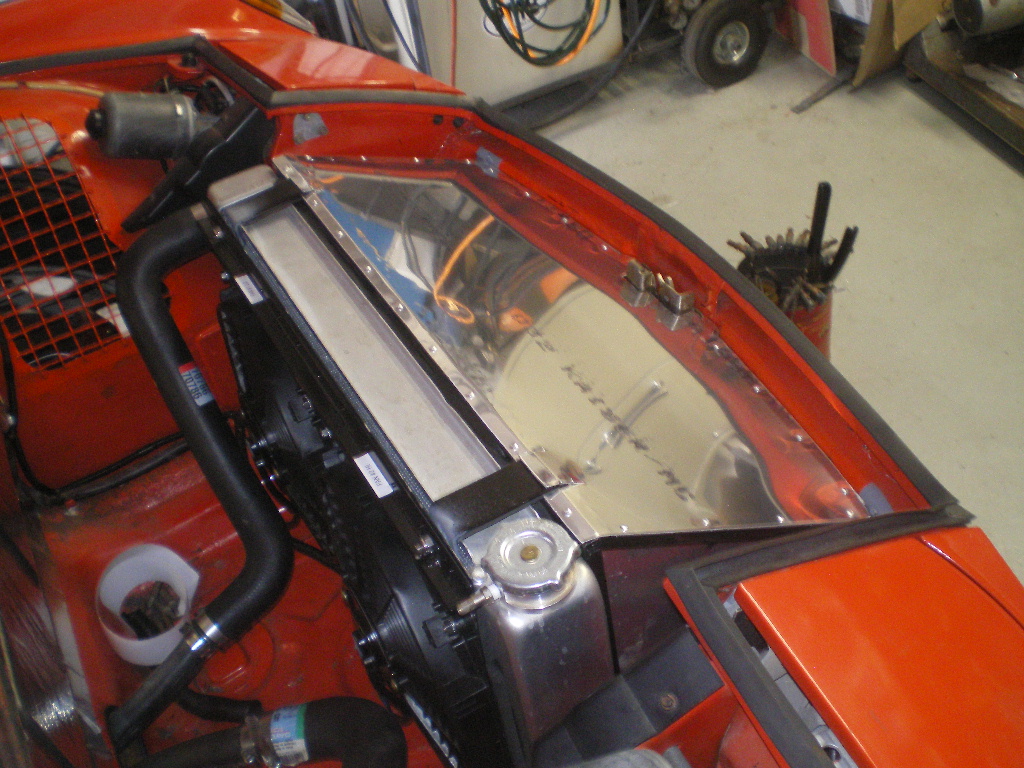
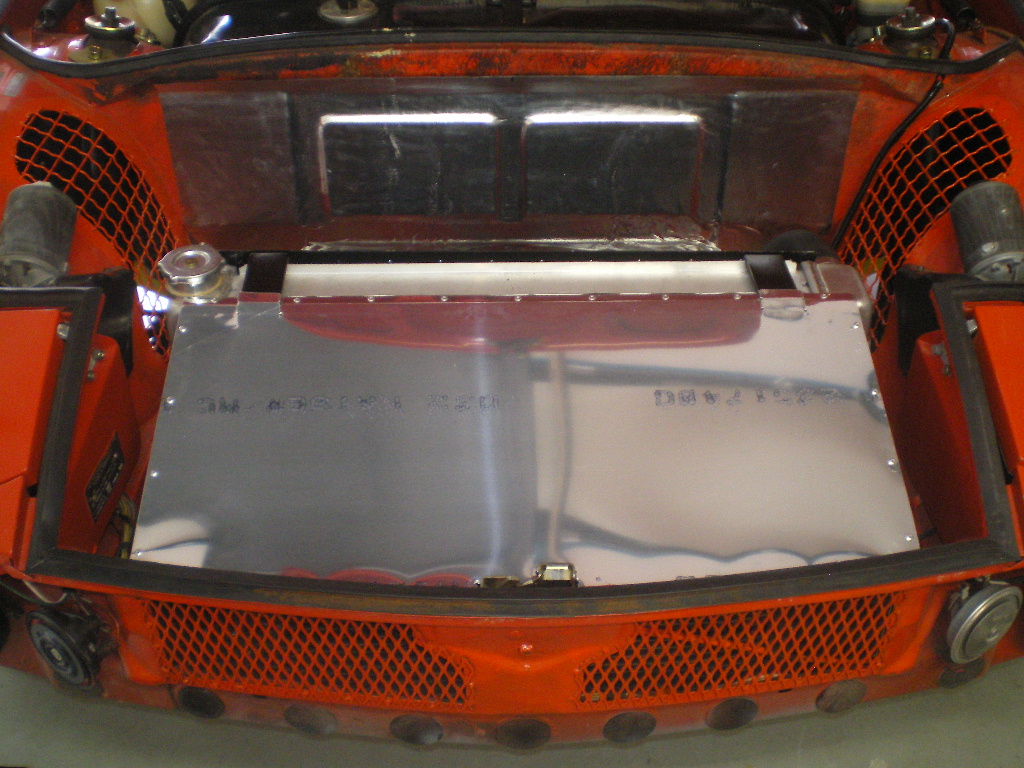
Finally got a chance to work on Red today. Finished mounting the radiator but still need to fab the plenum and mount the fans. That'll have to wait until I get up to Aircraft Spruce for some aluminum. Guess I should start plumbing it in the meantime. 
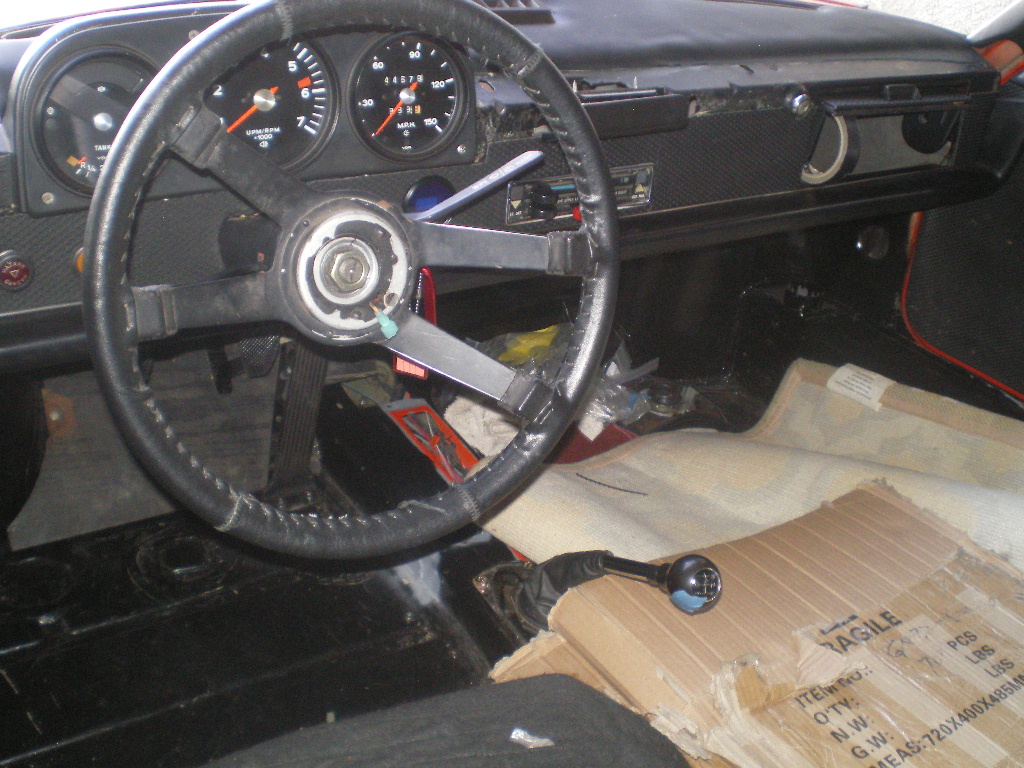
Installed some of the "Bling" that came with the car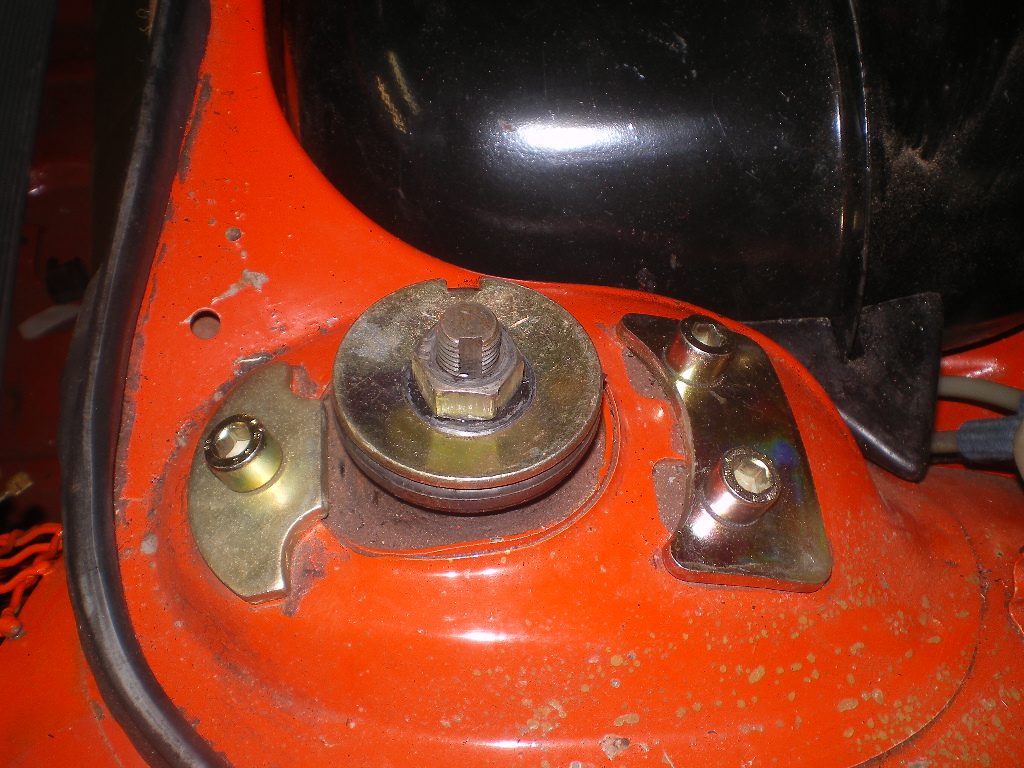
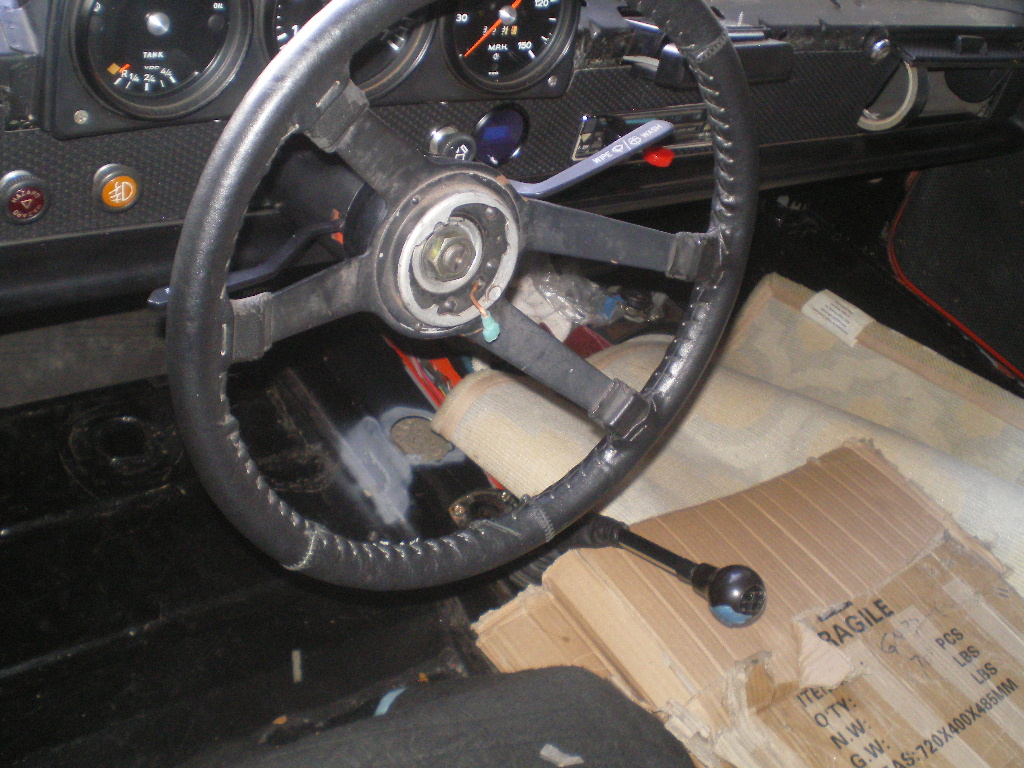
My clutch pedal now stands on it's own since I connected the clutch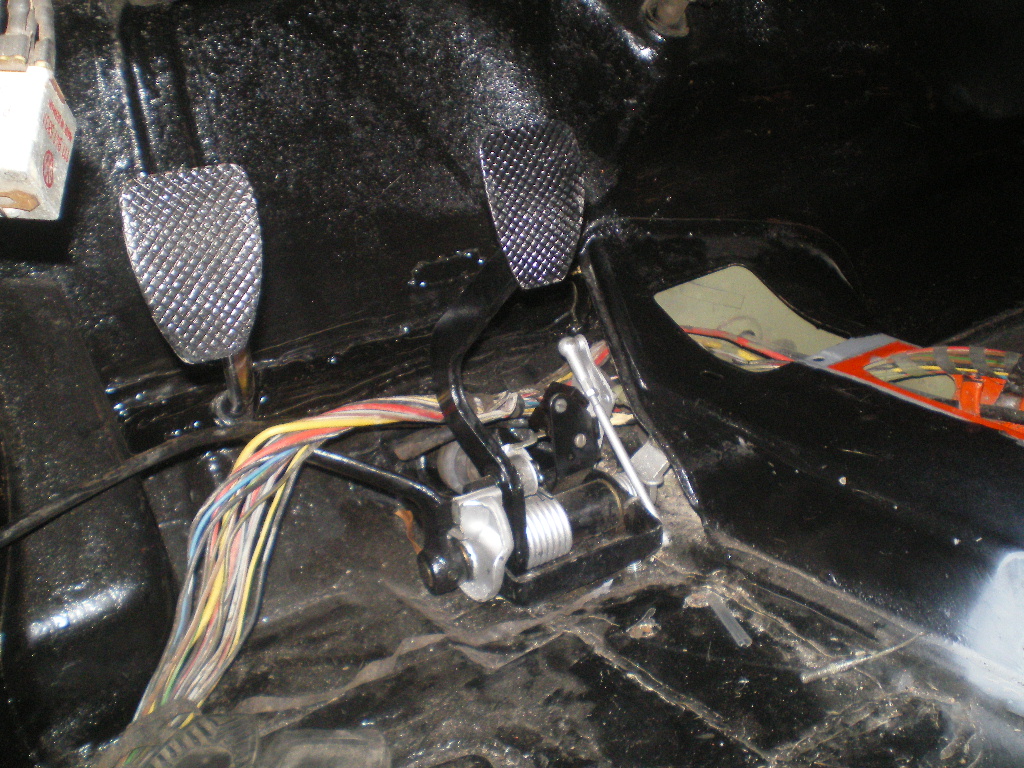
And my acellarator now functions. The old cable was toast so I put a new one in. I used one that I had ordered for Kugal when I converted it to a Suby 6 but they made it wrong so they gave it to me. Well guess what; it fit Red perfectly.  The only thing I need to do now is attach the pedal but that would just be in the way at this stage.
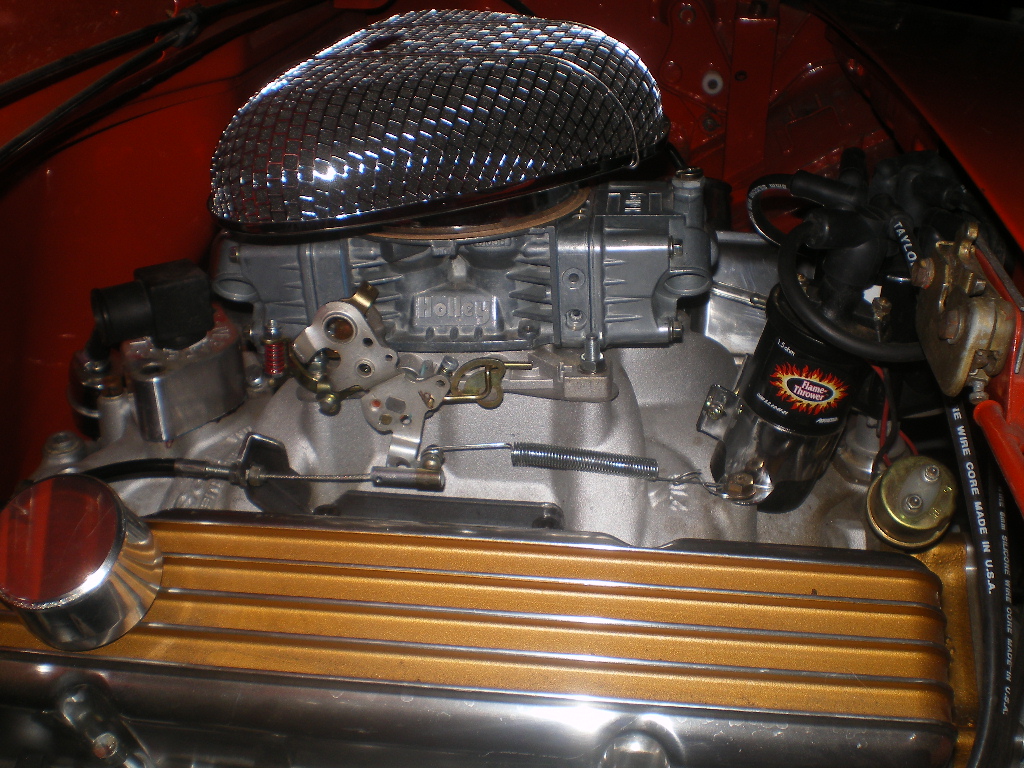
Posted by: 76-914 Nov 2 2017, 08:23 PM
Made the rough cut templates out of cardboard. They give me a general idea of the size to cut the second set out of poster board which is easier to bend and fit.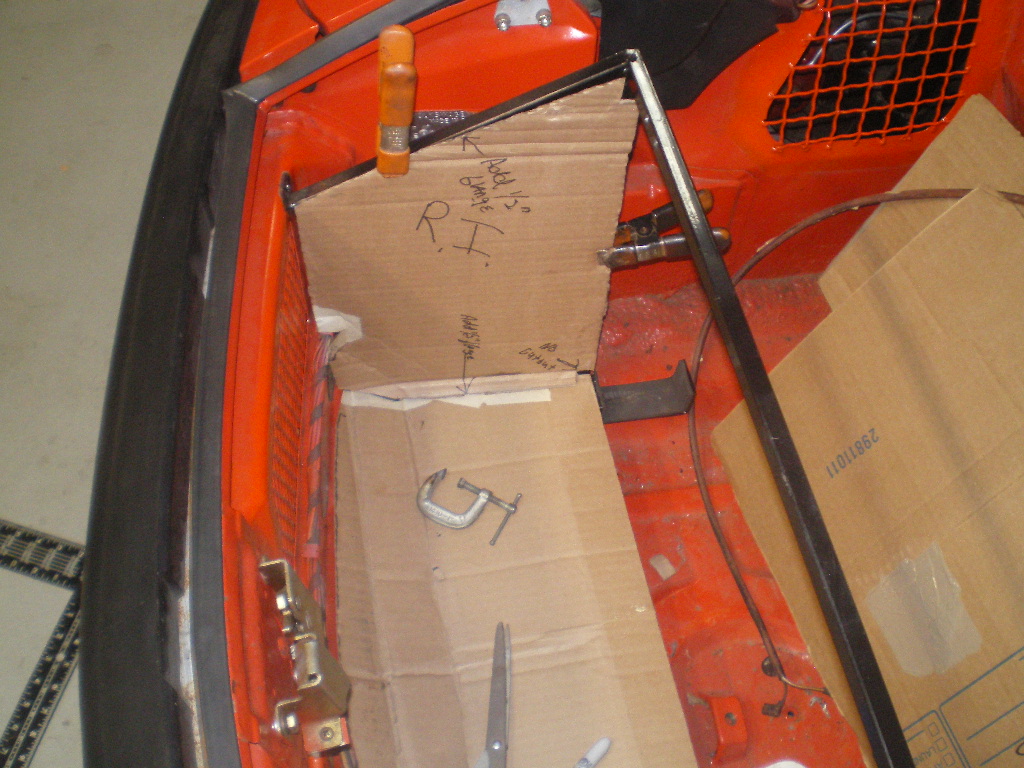
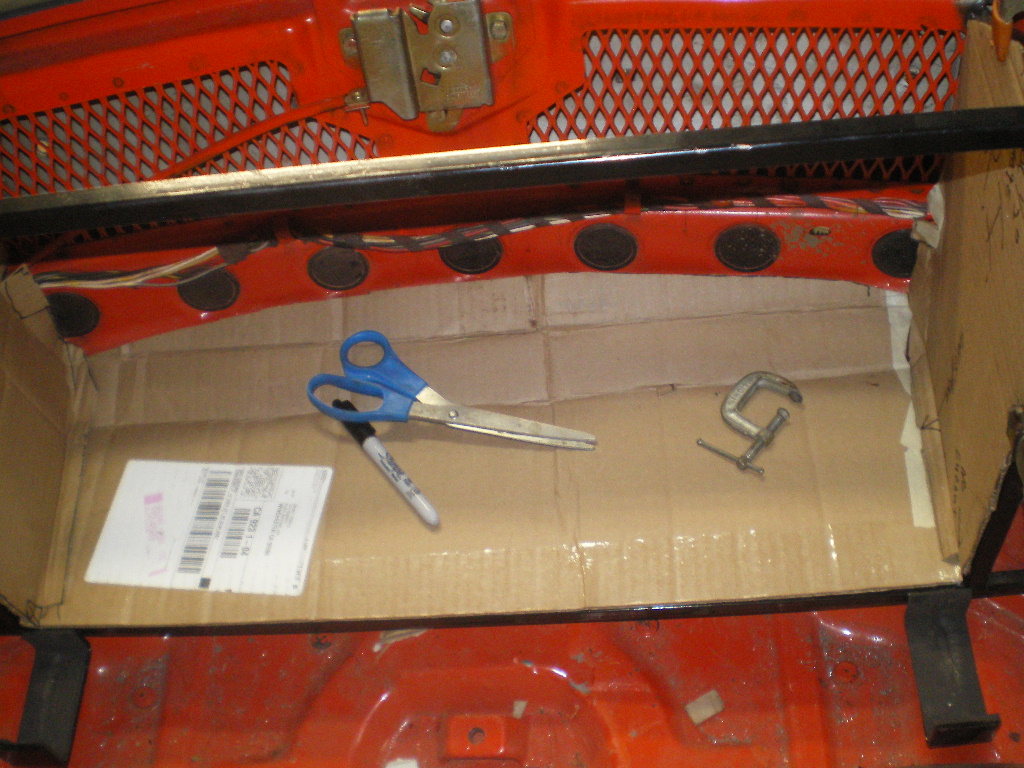
Then the poster board templates are fit and trimmed.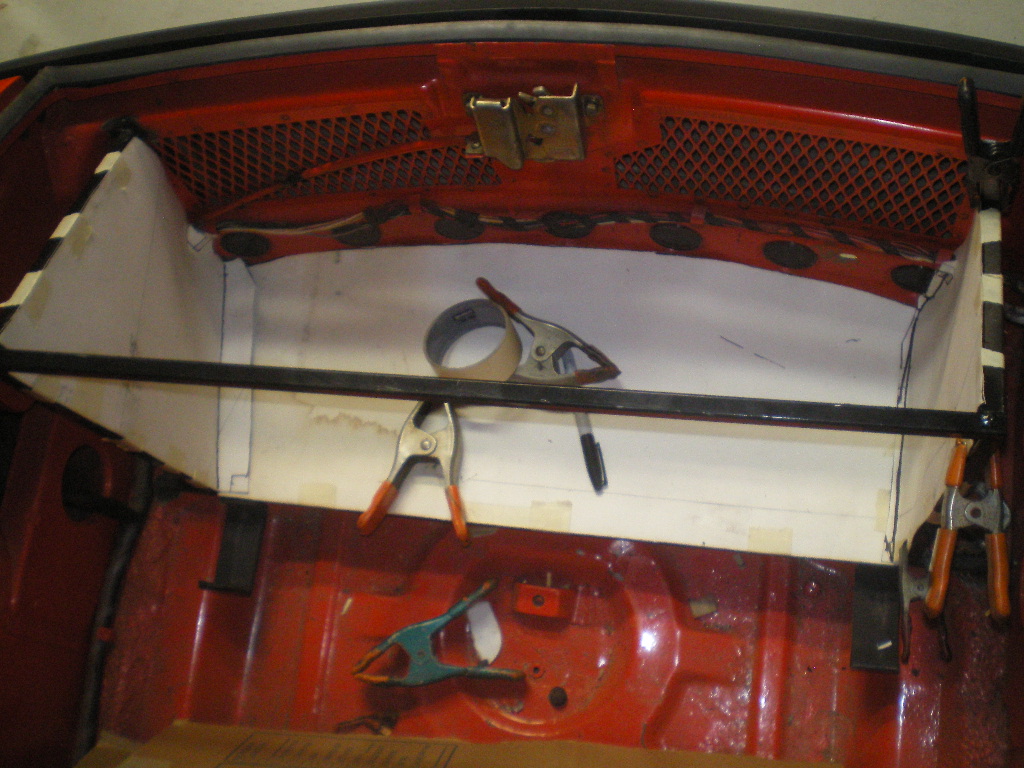
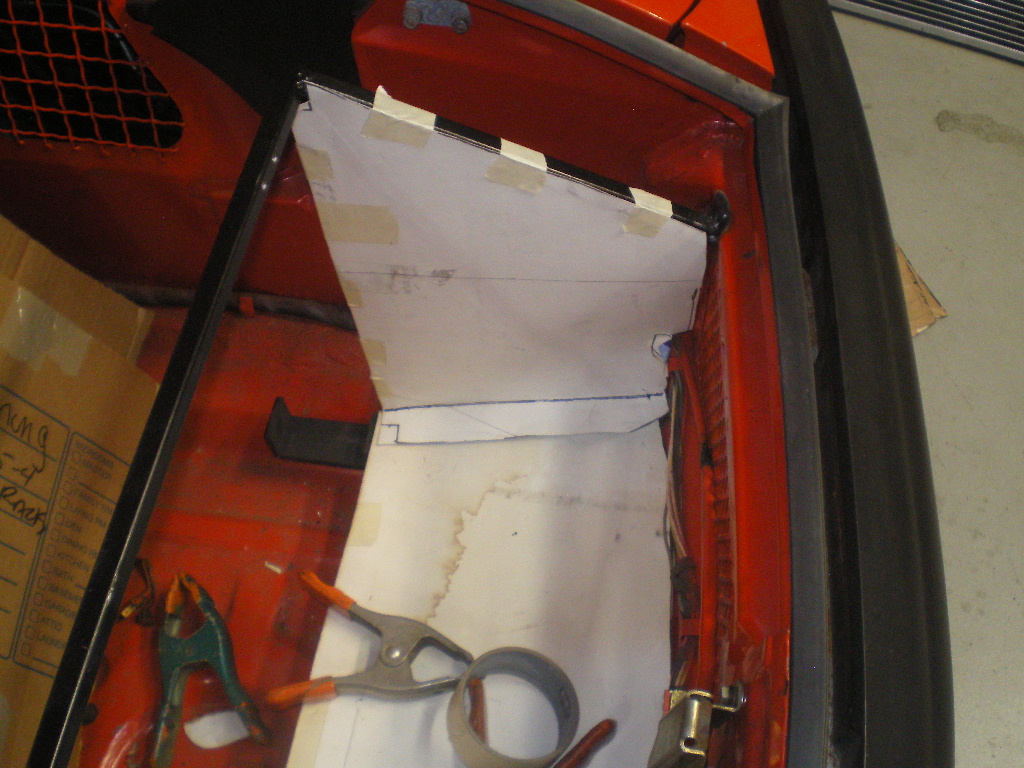
Bottom piece checked in place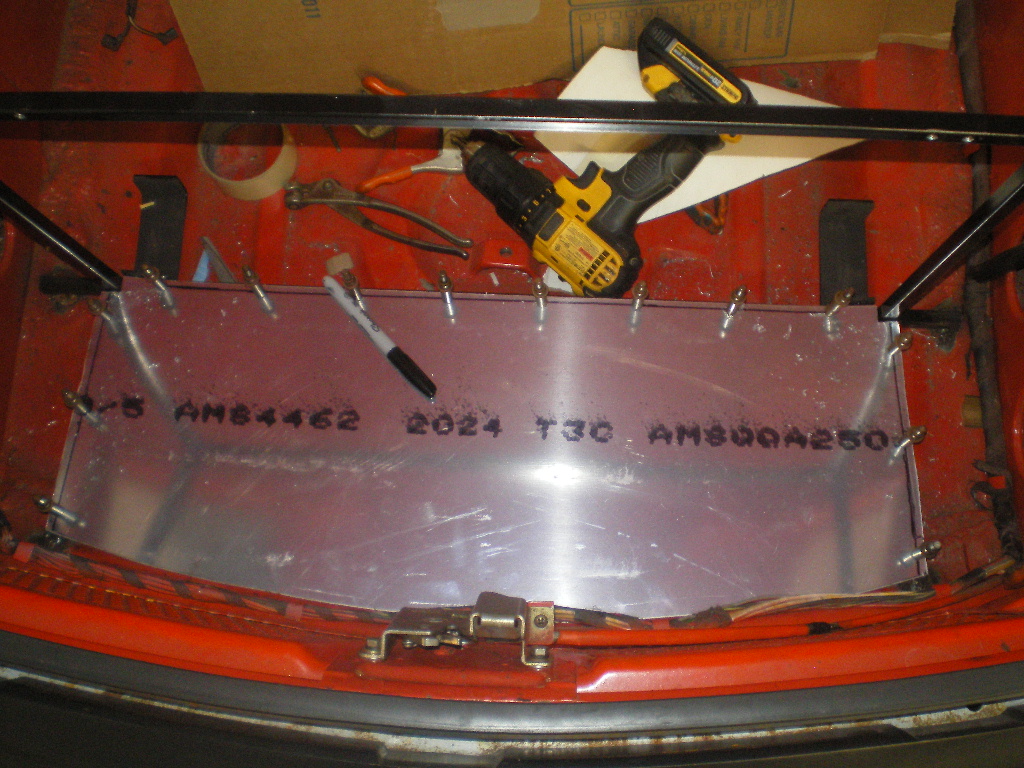
Then the sides and top pieces are cut, trimmed and clecoed in place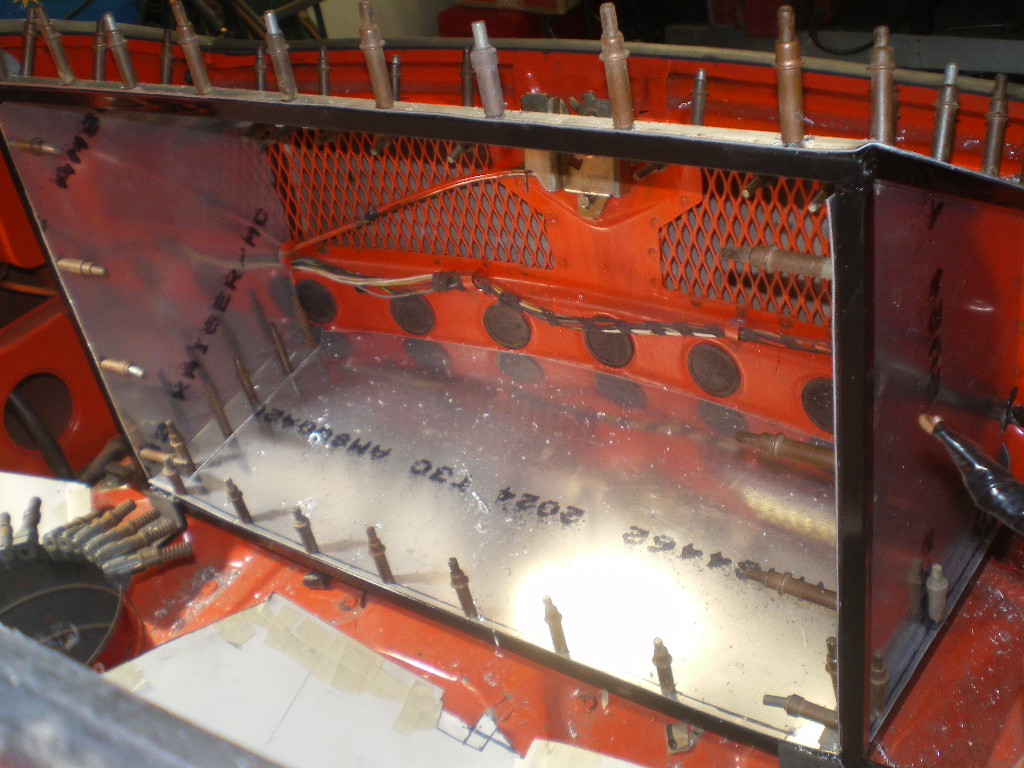
Next I riveted the bottom to the frame but can't rivet the remaining pieces in because the right side headlight harness passes thru and I haven't checked out the electrical yet.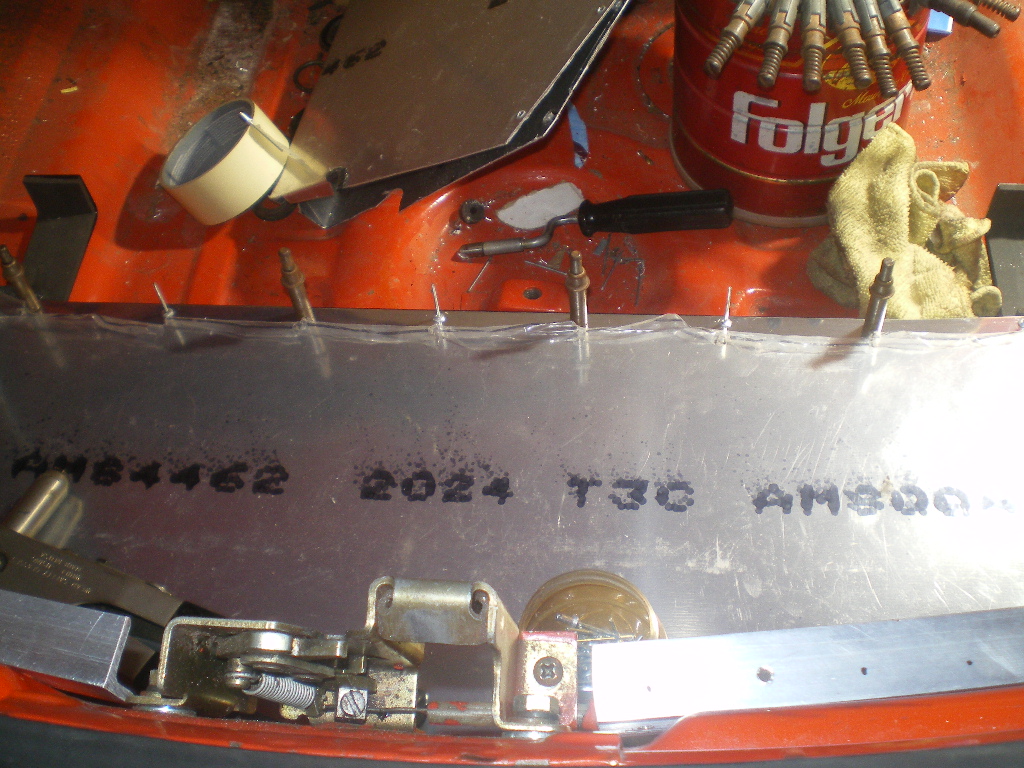
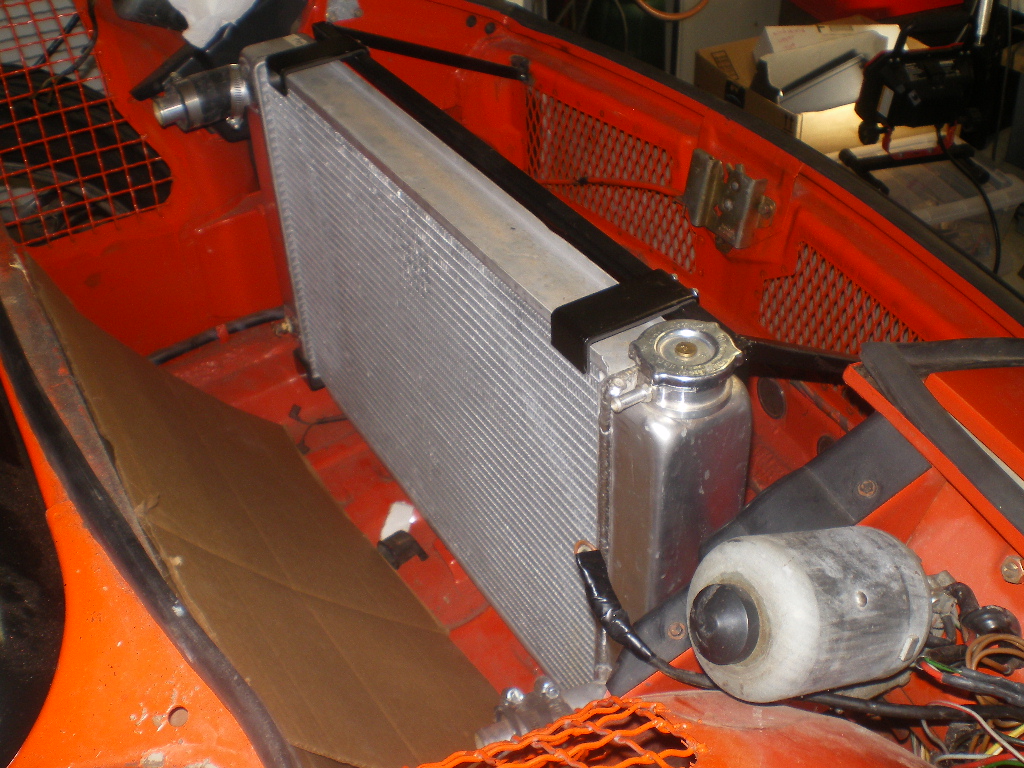
Reinstalled the radiator to check fit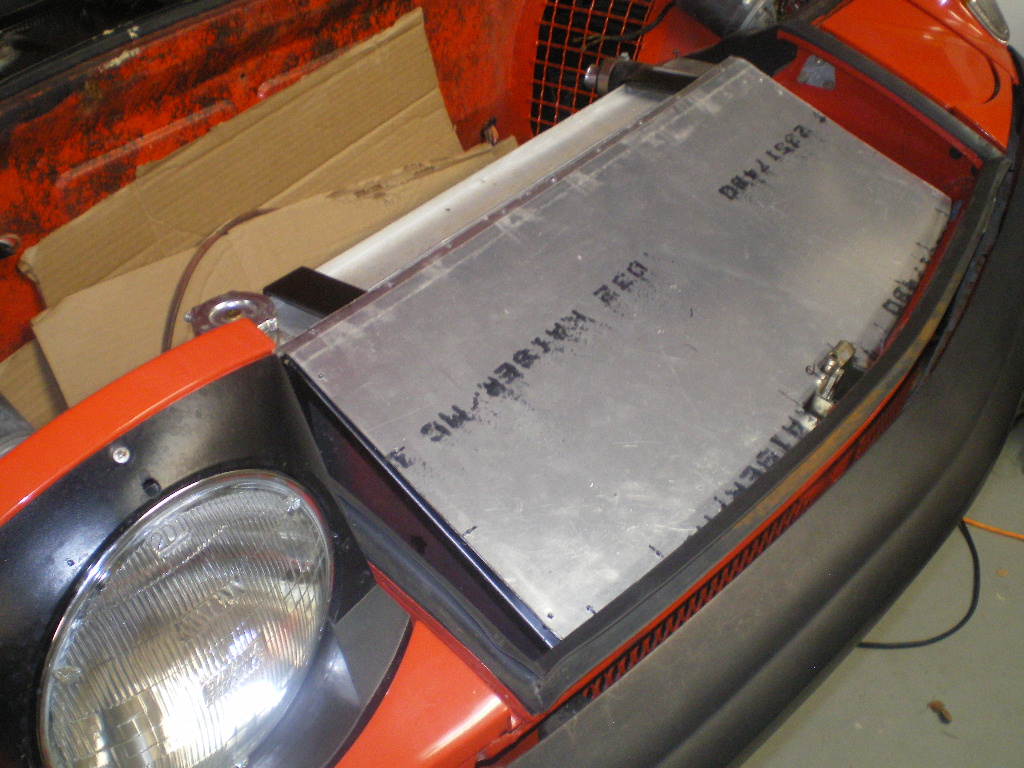
Posted by: 76-914 Nov 2 2017, 08:27 PM
The side will get a trim flange to fill the void once the side pieces are riveted in place.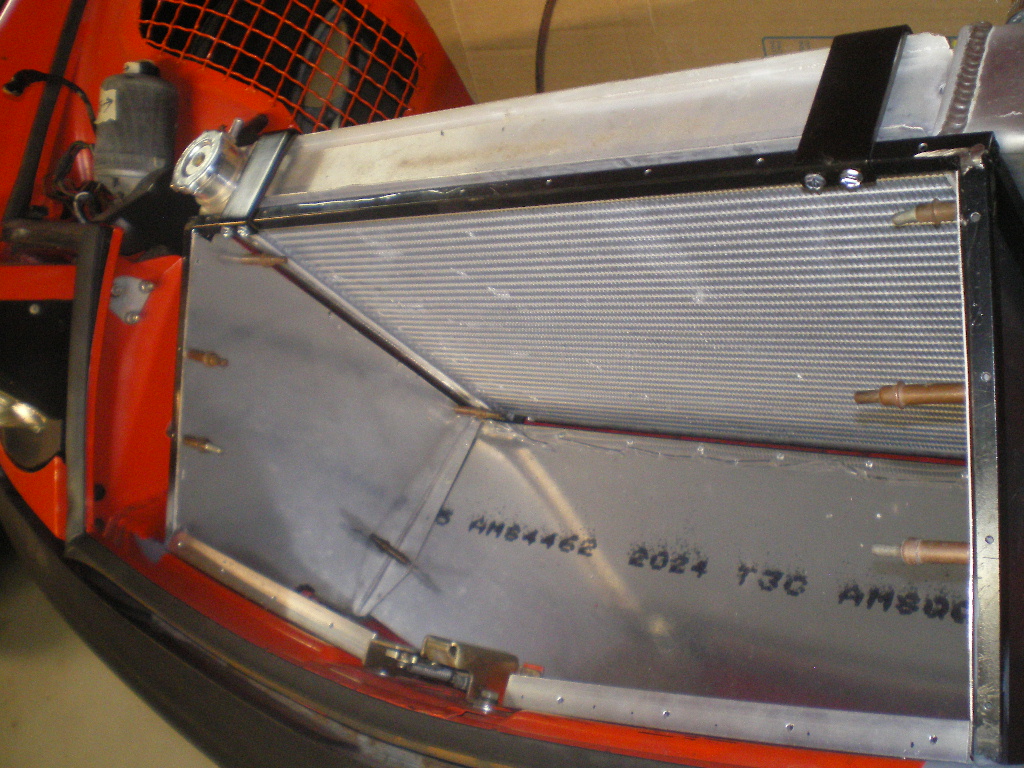
A shot from the front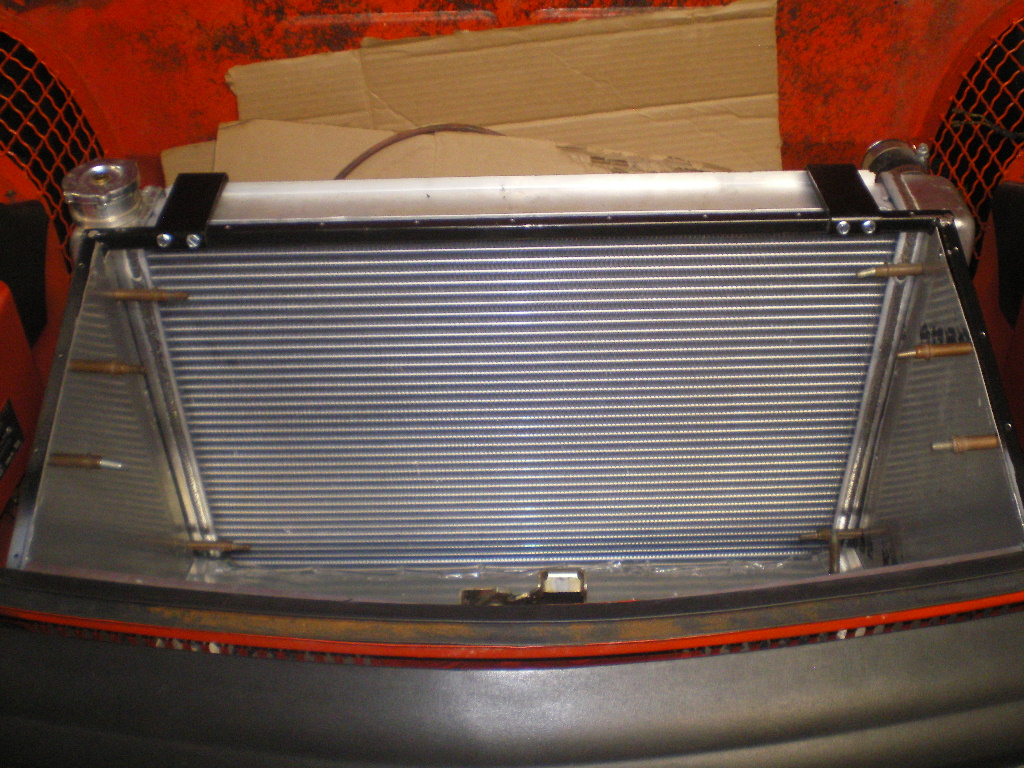
Posted by: Andyrew Nov 2 2017, 08:40 PM
Looks good!!!
Posted by: bulitt Nov 3 2017, 05:15 AM

Posted by: rhodyguy Nov 3 2017, 09:11 AM
Kent, contact TC914-8 (tony) about the carb linkage in his car. The one he uses solved some issues. Looks real slick too.
Posted by: 76-914 Nov 3 2017, 05:33 PM
Thx Andrew and Bob. When I peel back that protective coating it will really Pop! Hey Kev, I'll see how this works but if it with me I'll be looking him up. Does he have a build thread I could reference?
Posted by: KELTY360 Nov 3 2017, 07:48 PM
Also took a good pic of the block casting #
Nice, Kent, a 914 part# on your V-8!
Posted by: 76-914 Nov 8 2017, 10:10 PM
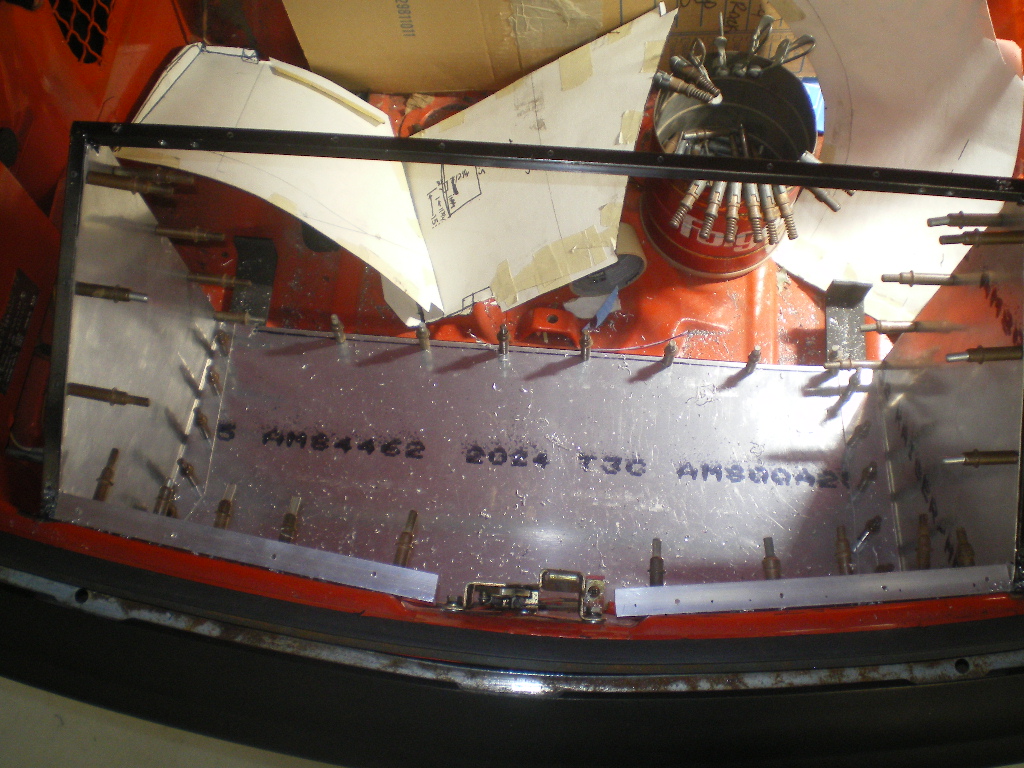
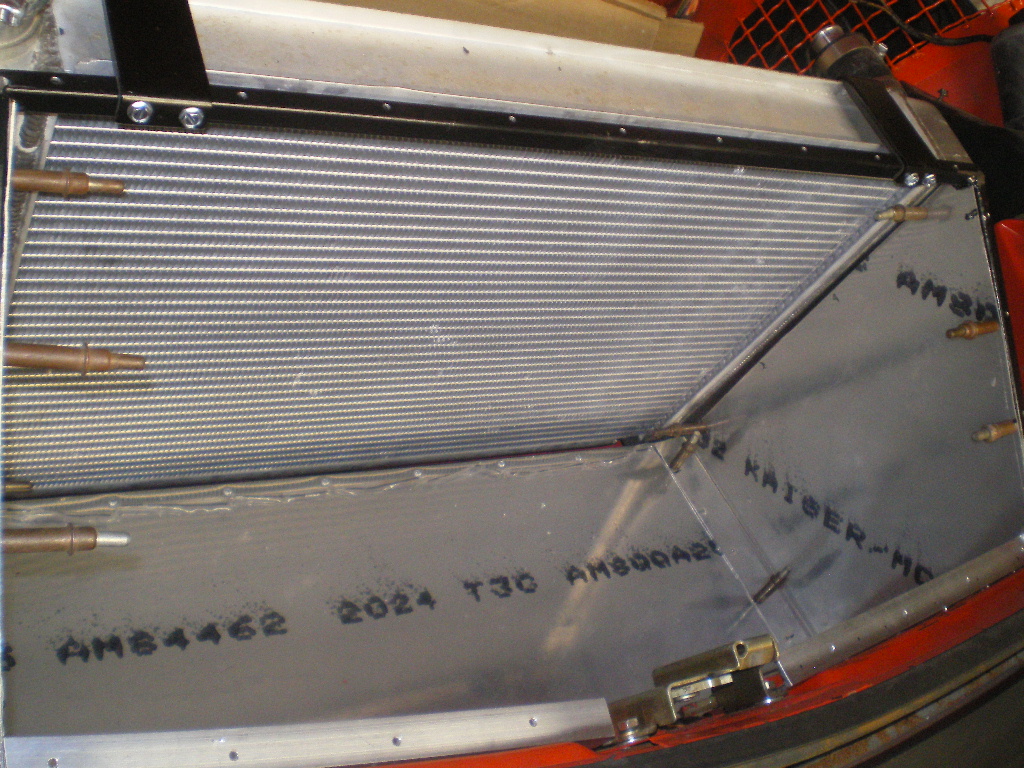
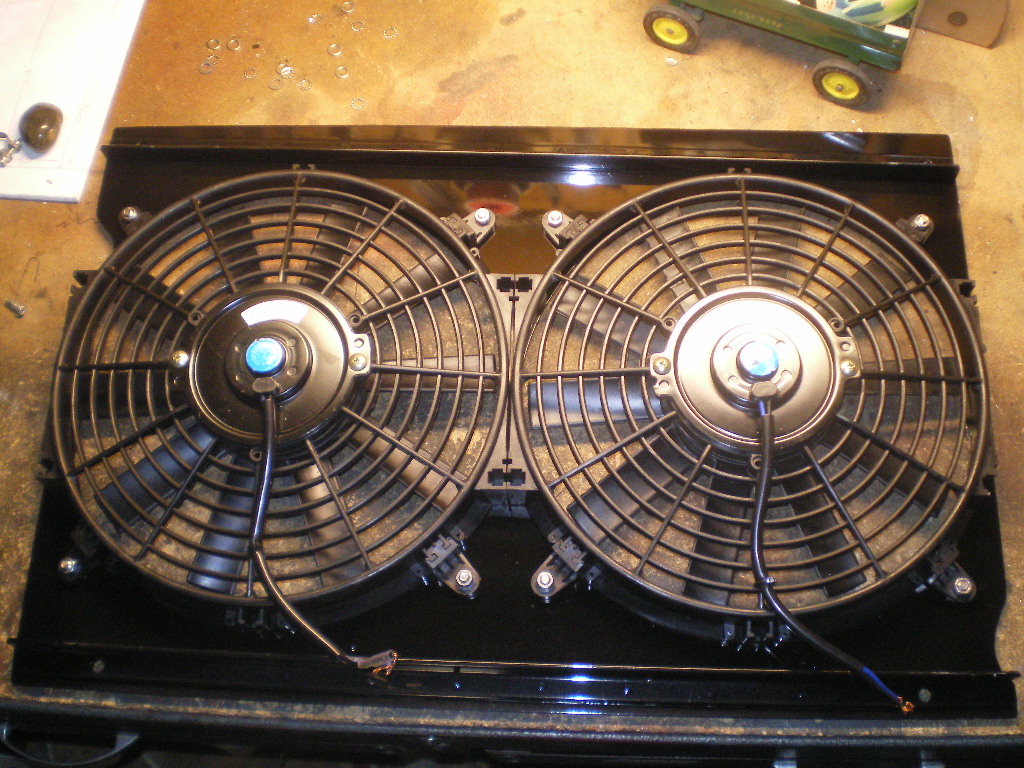
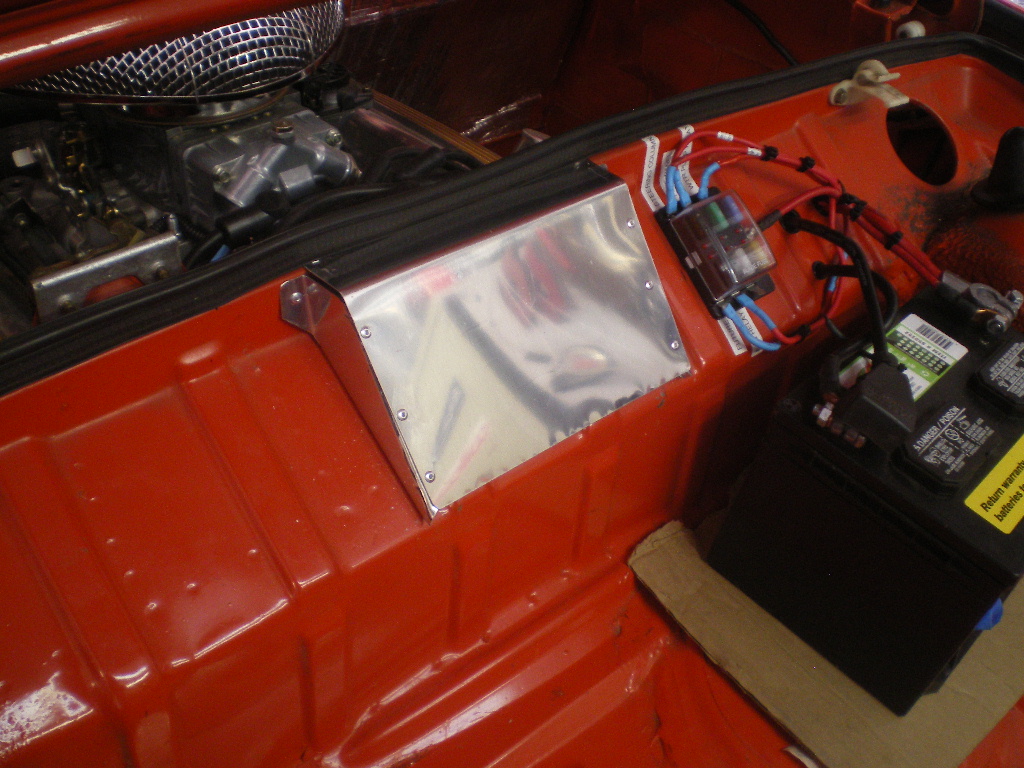
Good eye Mark. I totally missed that. Now where was I? Oh yes, so that's a far as I can go with the plenum until I can get the electrical to the horns and running lights tied in and tested because that harness passes thru the plenum. So it was time to hang those fans. Another good reason to buy the Celica radiator that comes WITH fans. That feature alone will save you 6 hours. I managed to piss off and hour trying to devise a shroud that would mount to the radiator before I pulled my head out of my  and used the radiator mounts for the shroud as well. Can't believe I didn't see that immediately. I used some 1/4" bolts that came with the car. They do not have a hex head but rather a round thin base. Bob's intention was to weld those to the bottom from which to hang the radiator hoses but I preferred using 6mm SS nuts, bolts and washers like I did on the Suby conversion. The radiator brackets were all on the same vertical plane so it was just a matter of welding one of these threaded pieces to each brace. You can see the top ones but not the bottom where the grey primer is on the bracket.
I took a piece of this 1/8" backer board and pressed it against the bolts until they popped thru to mark their location then laid the fans across the template to check for fit. Looked like everything would mount up OK.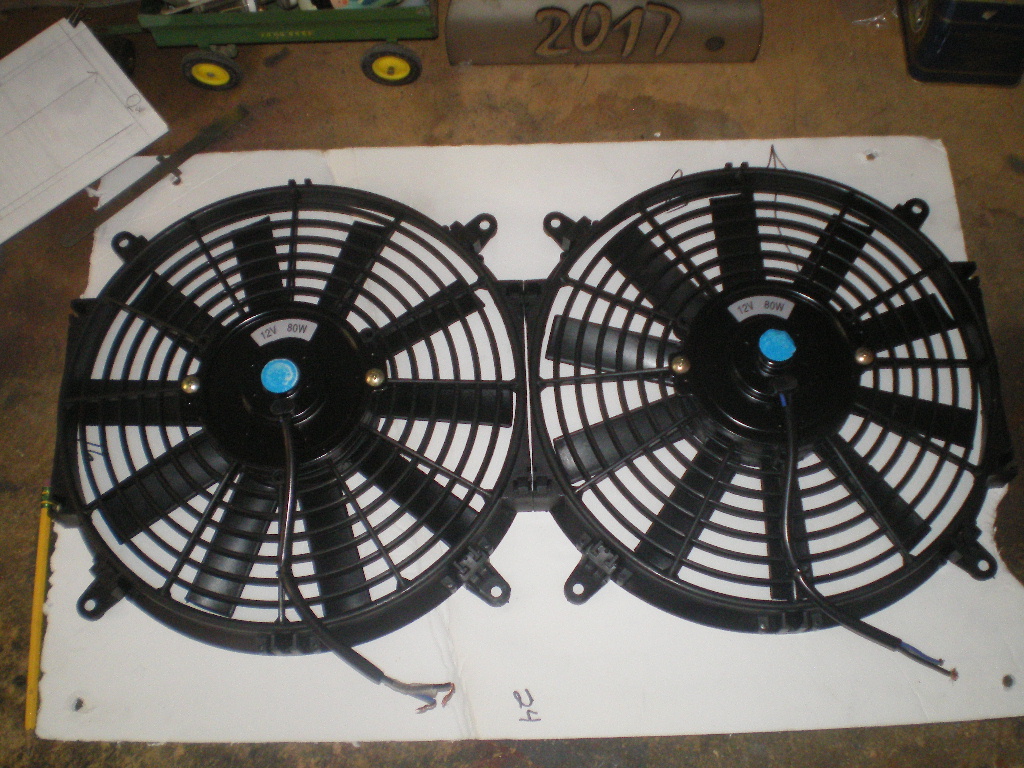
Then I took a piece of .050" aluminum and drilled it to match adding some 3/4" x1/8" filleted (AC grade) angle to stiffen and re-inforce the attach points.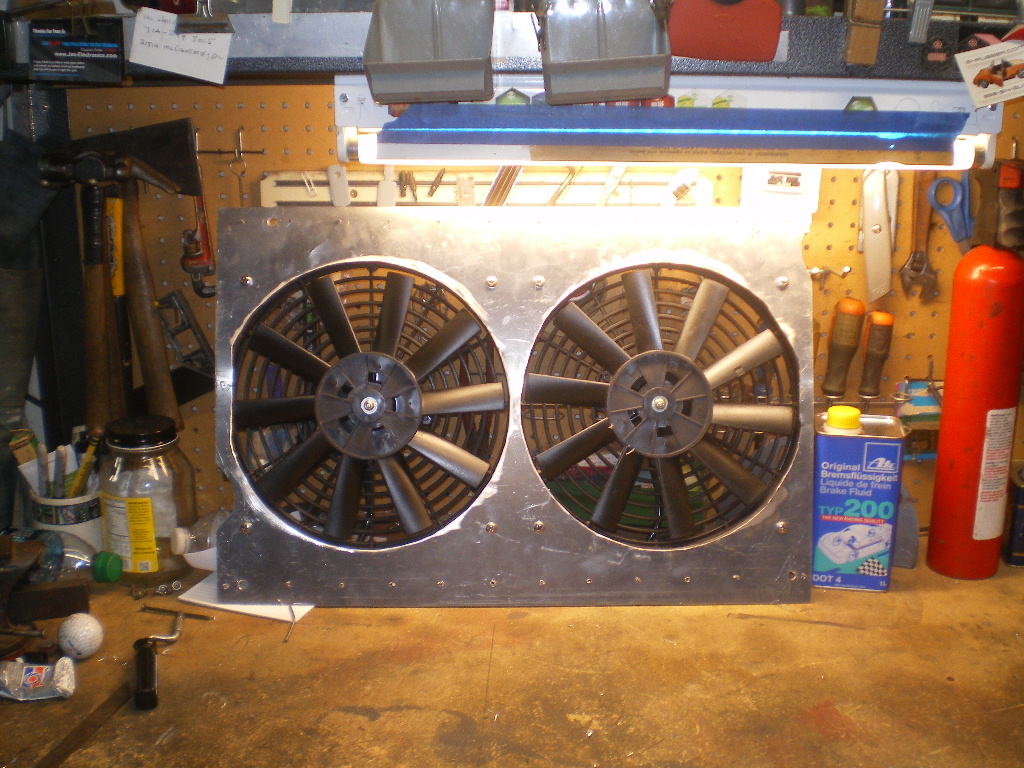
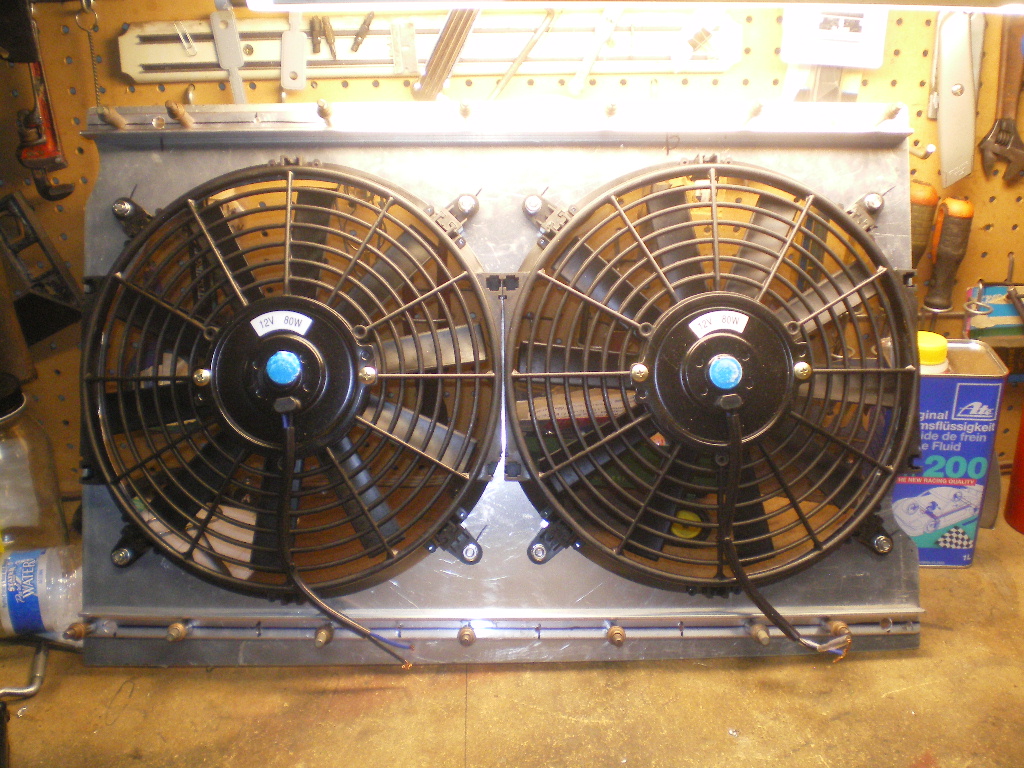
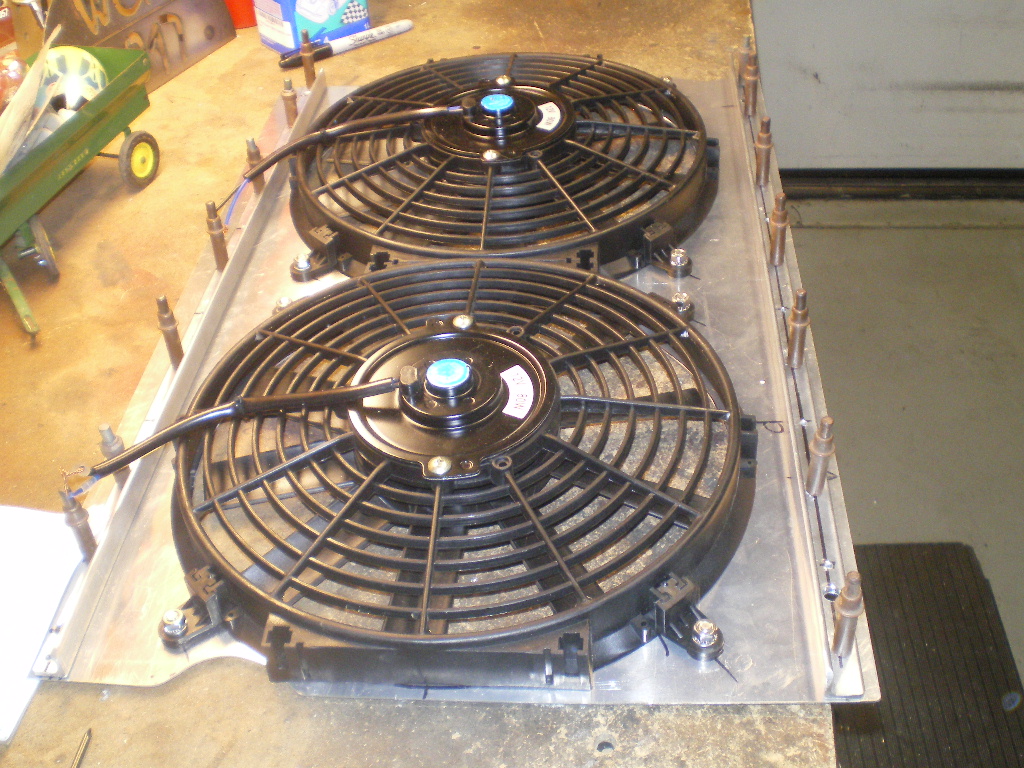
After a quick test fit the shroud was riveted and prepped for painting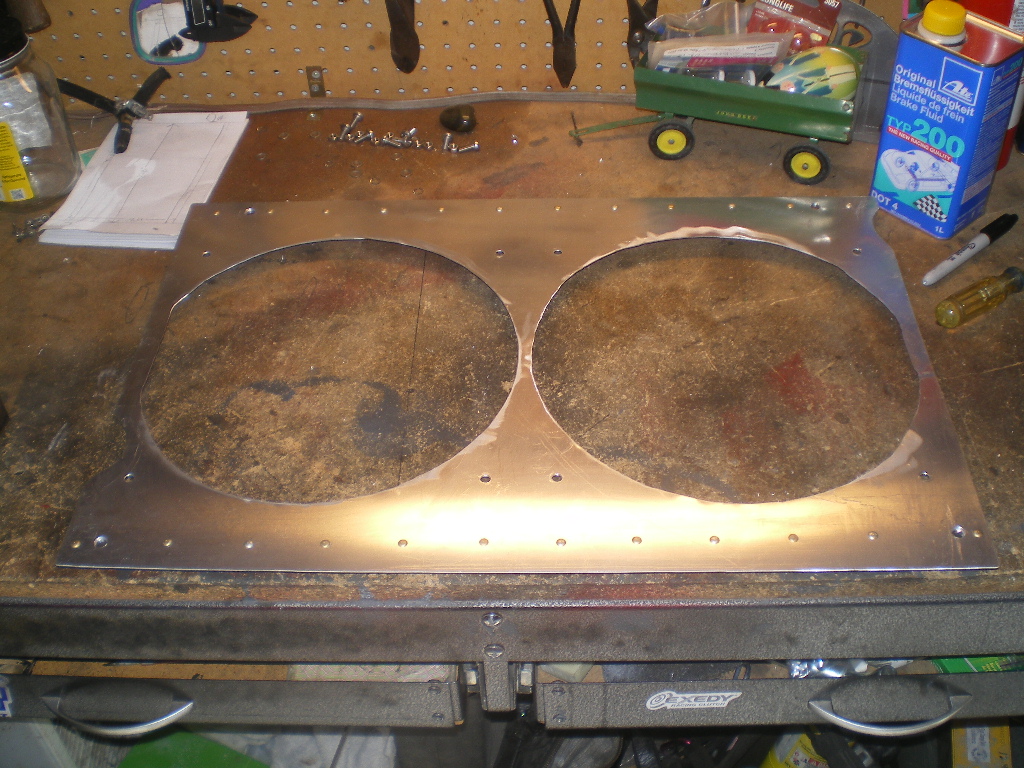
Then 2 coats etching primer and 3 coats of paint.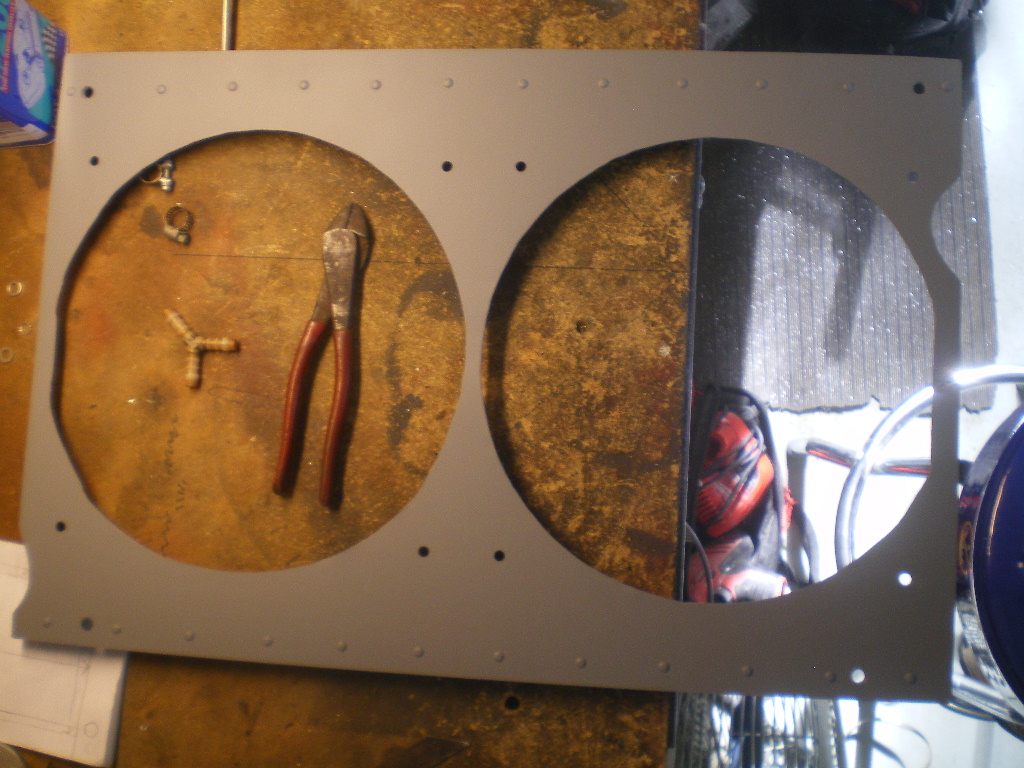
Posted by: Blue6 Nov 8 2017, 10:43 PM

Posted by: Larmo63 Nov 8 2017, 11:19 PM
Damn, Kent. That looks pretty good. I have to get myself to Aircraft Spruce to pick up some aluminum to do my oil cooler shrouding.
You're inspiring me...!!!!!!!
You might try a German engine in a 914 someday? 
Posted by: rhodyguy Nov 9 2017, 07:51 AM
Fast work Kent! Carry on.
Posted by: 76-914 Nov 9 2017, 08:50 AM
Got'a keep moving if I want to sell this thing in time for Spring Fever. One good thing about posting the pic's is you have a chance to review your work. I just noticed that I have my radiator lines bass-akwards.  An easy fix no harm done.
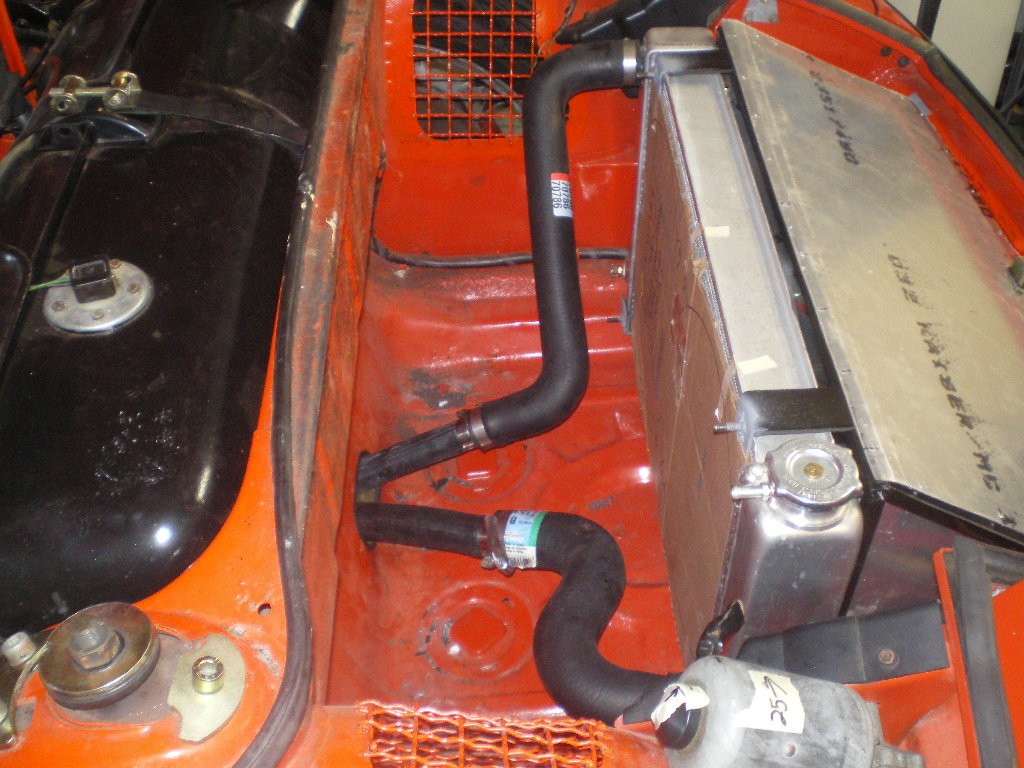
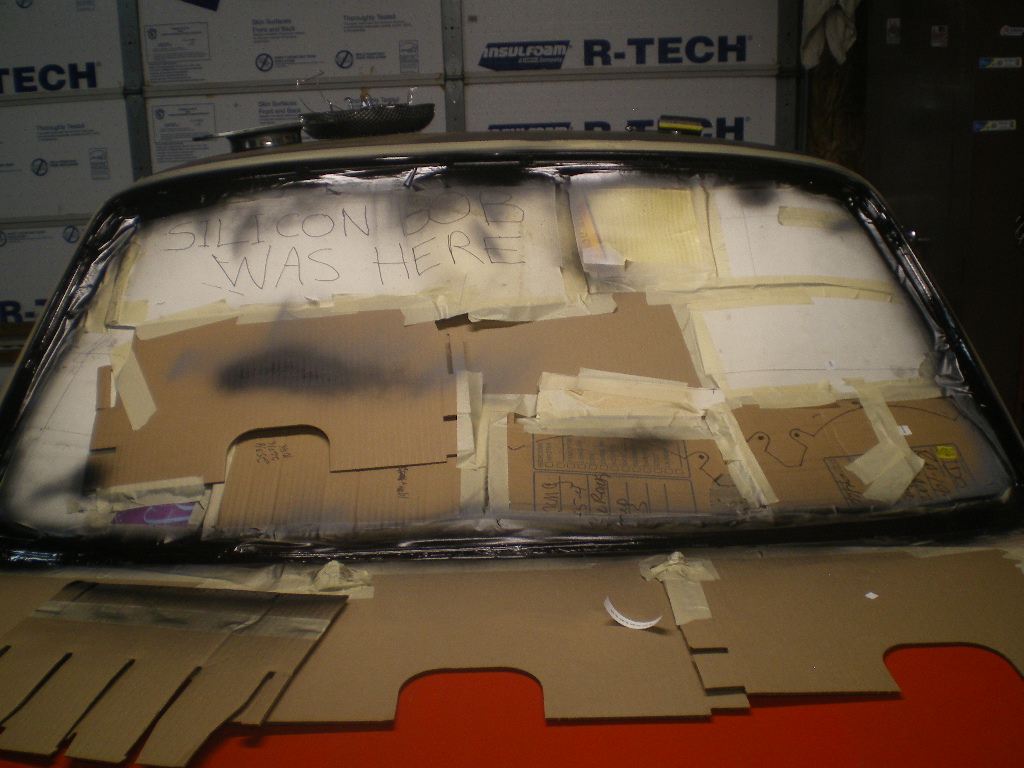
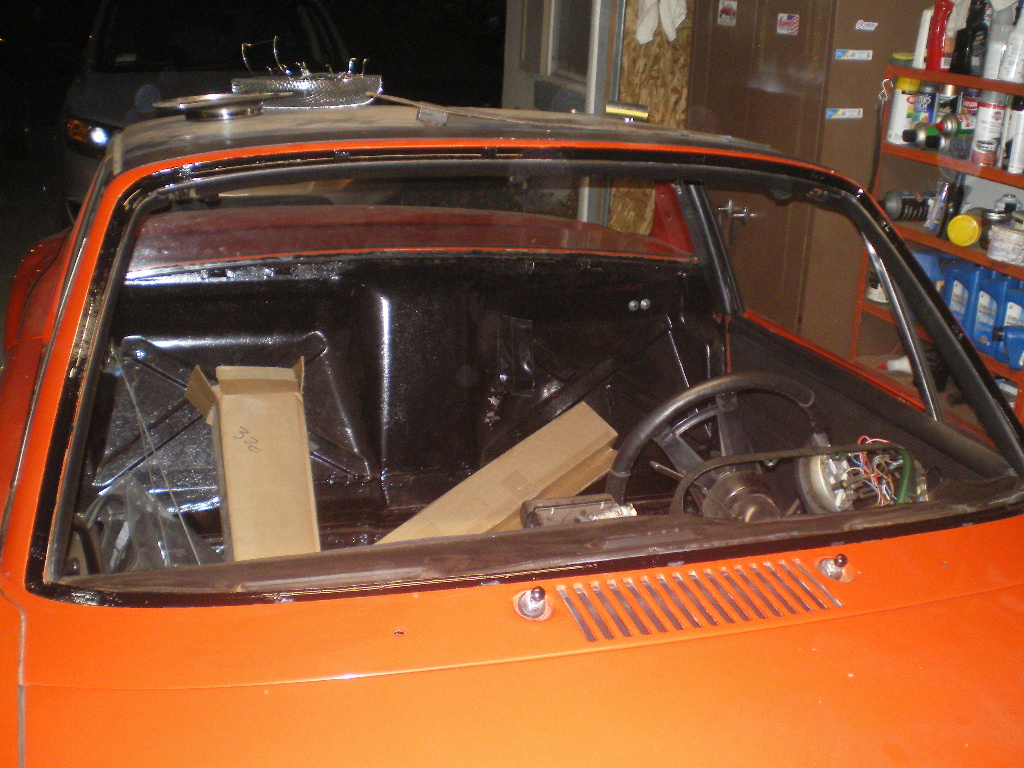
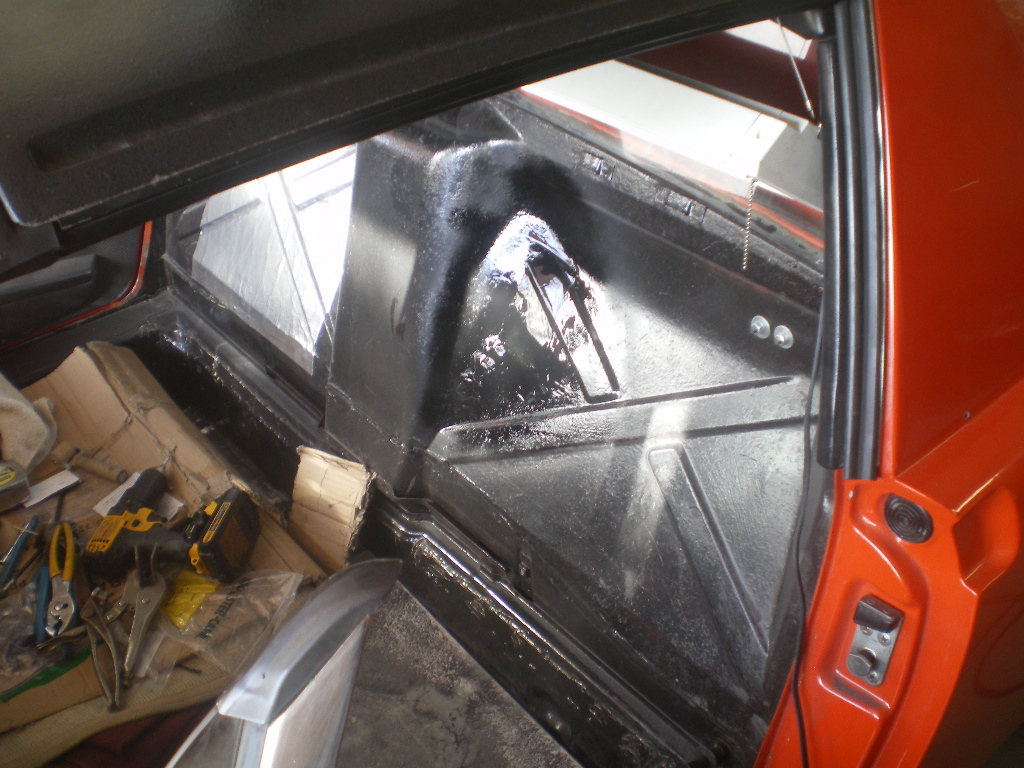
While waiting for the paint to dry on the shroud I worked up the courage to remove the windshield. It was held in place by approximately 11 tubes of silicon. Once I was able to open up an area large enough to fish a wire through I was able to slice thru it.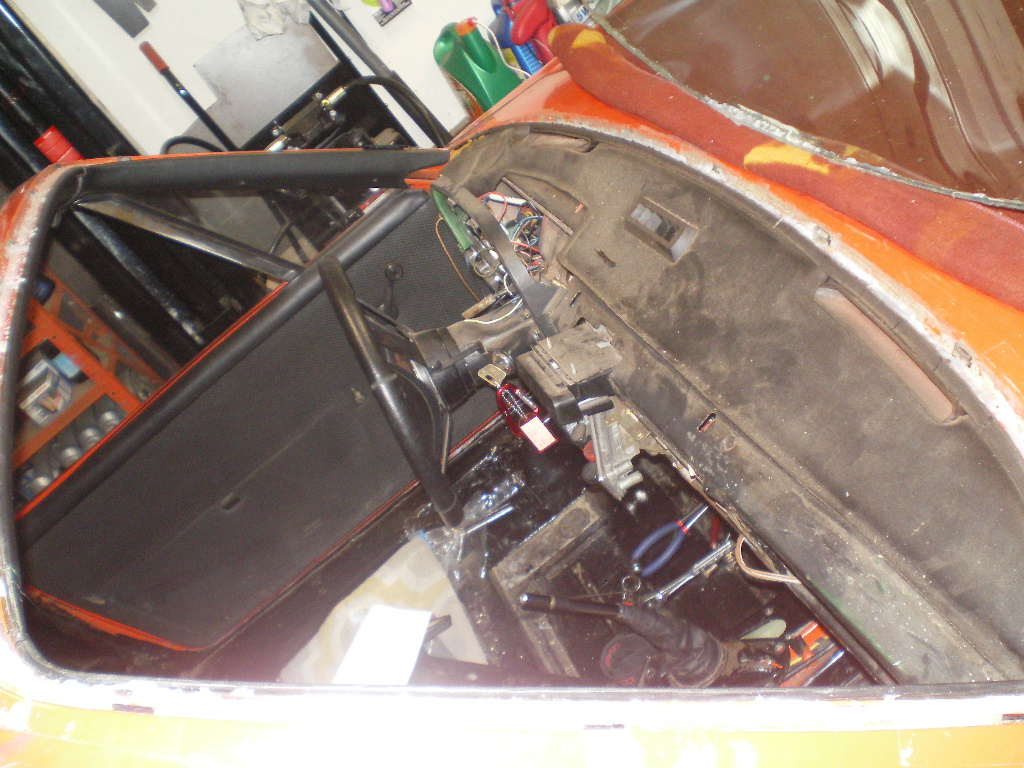
This will give you an idea of how much silicon needs to be removed. 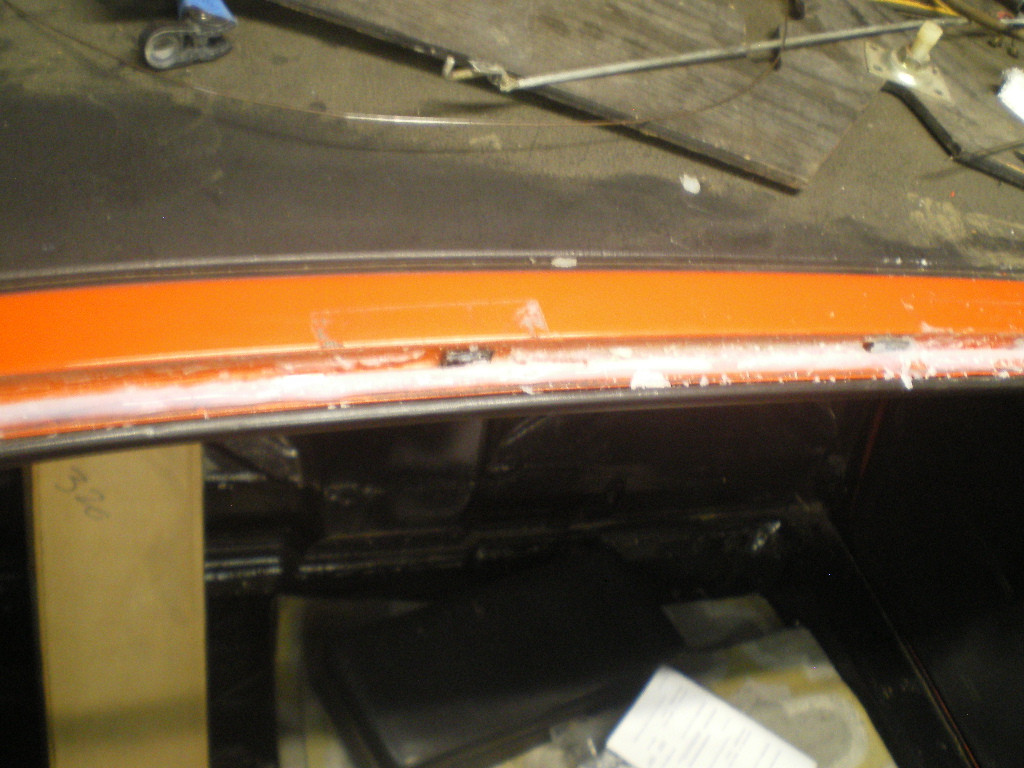
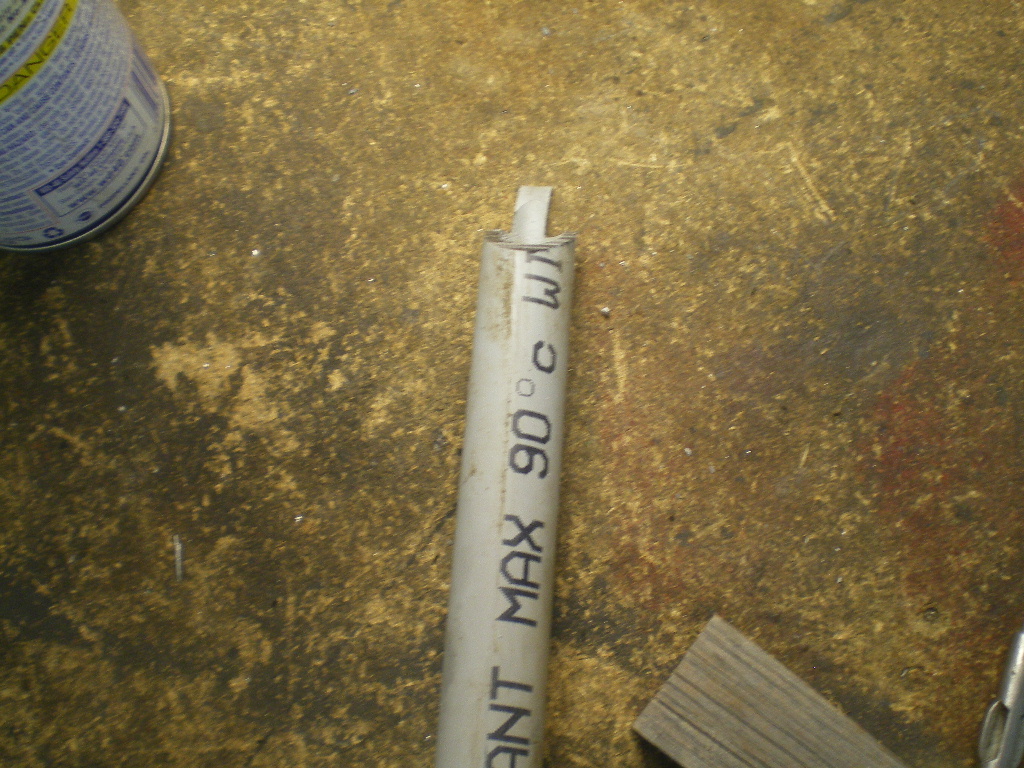
I fashioned the scraper out of some 1/2" PVC conduit and gave it an edge.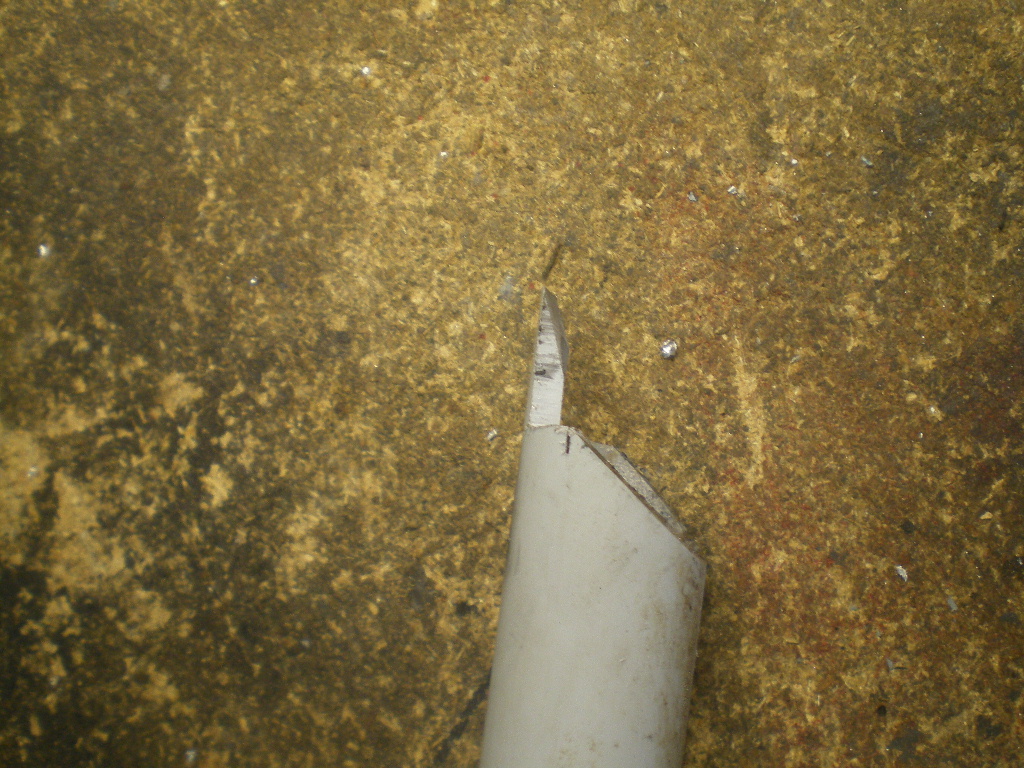
It works well. I removed about a 3rd of the caulking in 5 minutes as you can see in this pic. There is a small skim coat that remains in the channel so I'm thinking what would be the smart approach to remove it. Maybe a brass bristle roto brush chucked in a drill so the rpm's aren't high enough to bubble the paint Then mask and prime the area if any paint comes of during the process? 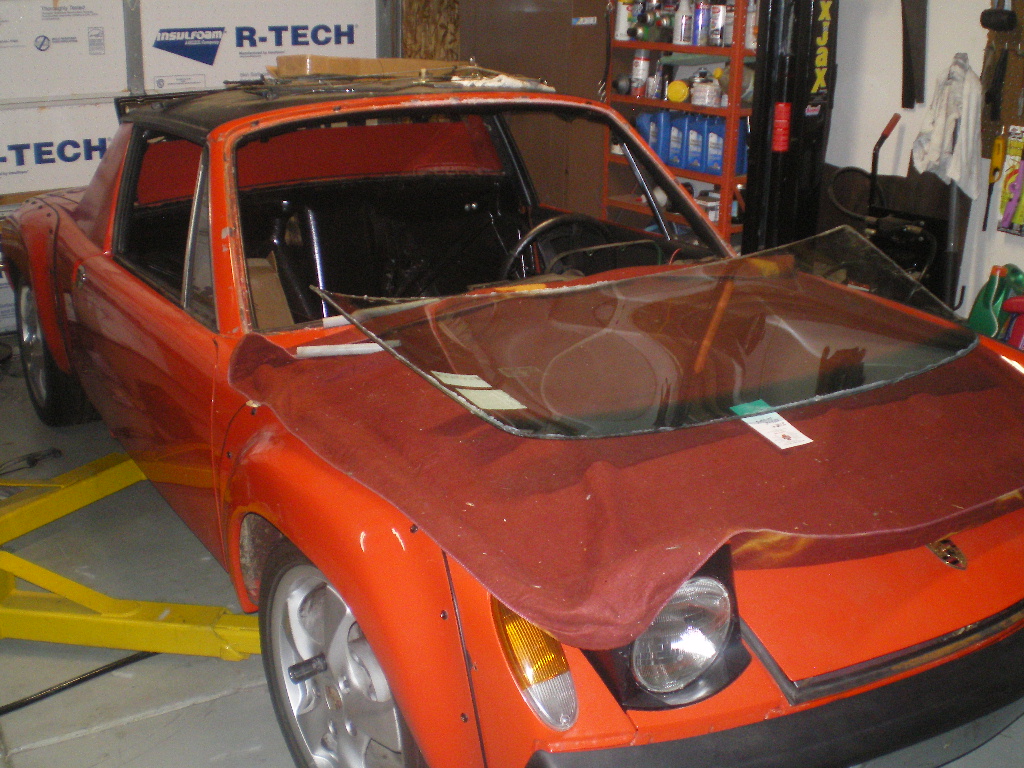
Posted by: Andyrew Nov 9 2017, 09:33 AM
A chemical might help remove it. There might be something that would lift silicone but not harm the paint. Im thinking maybe Goo-Gone or similar.
Maybe WD-40?
https://www.youtube.com/watch?v=mq2Z-i5Iy7s
Never seen anyone use clear silicone for a window.
Posted by: bulitt Nov 9 2017, 03:59 PM
It was a temp install to transport the car 2500 miles. However all I could see was 2500 miles in driving rain resulting in the seats, lower dash, fuse block, and wiring ruined. Problem with silicone is it needs to be really thick around the windshield frame or it won't even contact the windshield. The normal window weld stuff is about 1/8" thick. Sorry Kent, please forgive me!
Thats my story and I'm sticking with it... 
Posted by: Chris914n6 Nov 9 2017, 03:59 PM
I usually just use a wire brush by hand and my thumb. Take the pillar trim off first, don't need to damage that for no reason.
Posted by: 76-914 Nov 9 2017, 08:09 PM
Yeah Chris, When I get after it I will remove that pillar trim for sure. Tonite I was able to get 99% of it off to the point it is basically a skim coat. I think one of those eraser wheels that body men use to remove decals might be the ticket. What are those called Chris? No problem Bob. I spent more time whining about it than it's taken to remove it! Keeping it dry was priority #1.
Posted by: 914forme Nov 9 2017, 08:39 PM
https://www.amazon.com/3M-03612-Adhesive-Eraser-Wheel/dp/B005RNGN8I
Posted by: 76-914 Nov 9 2017, 10:16 PM
That's it Stephan. But it's about 3/16" too wide. Damnit. You've put me on the right trail though. I wonder if I could wear it down on the sides w/o much trouble. That channel is only about 8mm wide some places. There are some spray n adhesive removers too but I'm doubtful they'd breakdown silicon. I see they also make plastic razor blades for safe scrapping.
Posted by: bulitt Nov 10 2017, 06:10 AM
Wire wheel for a dremel?
Posted by: 76-914 Nov 10 2017, 08:41 AM
Wire wheel for a dremel?
Yea Bob, I'm thinking along those lines but a softer brass one and something I can chuck into a die grinder. Dremel tools are fine for tiny stuff but this is about 12'. Did I mention that their terribly overpriced, as well.
 Next on the schedule is flushing the block.
Posted by: 914_teener Nov 10 2017, 08:45 AM
Wire wheel for a dremel?
Yea Bob, I'm thinking along those lines but a softer brass one and something I can chuck into a die grinder. Dremel tools are fine for tiny stuff but this is about 12'. Did I mention that their terribly overpriced, as well.
Next on the schedule is flushing the block. Jeez Kent, impressed with your sheet metal work. Cleeco's and everything.
Your wife must be a Saint.
Posted by: 76-914 Nov 25 2017, 06:05 PM
Delete that Rob. I don't want her to see that.
So it's time for an update as it's been a couple of weeks. I'm not able to report the progress I had hoped but here I am.
Flushed the block. Surprisingly small amount of rust in the block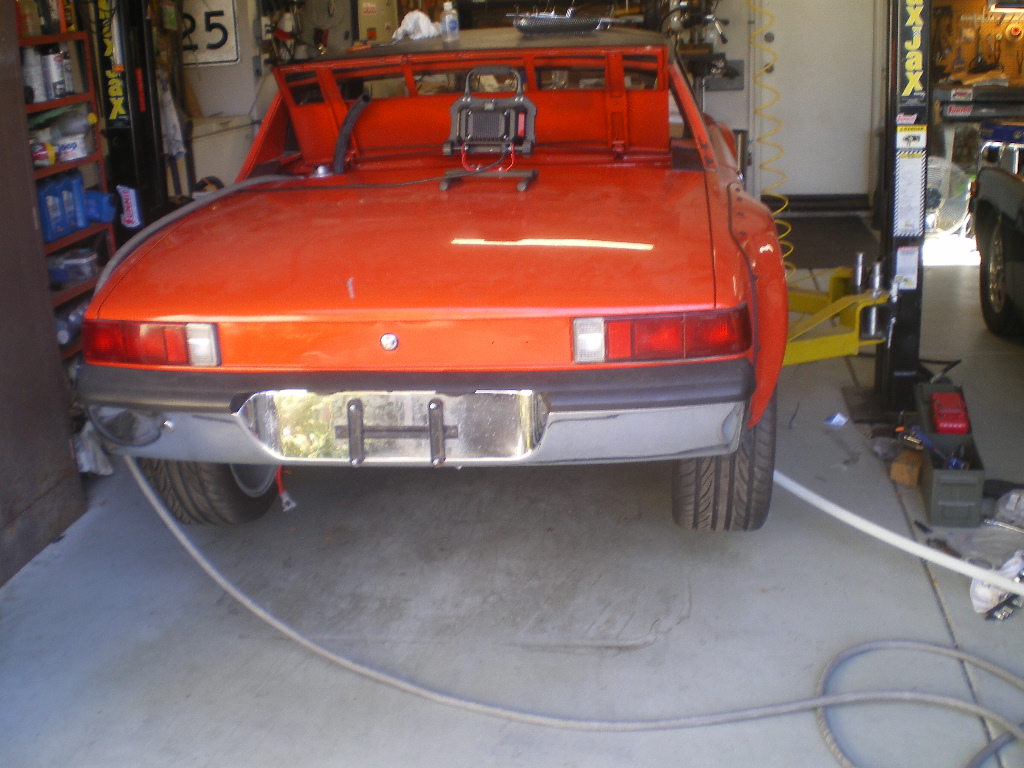
Finally removed the last of the silicone from the frame with a wire goto brush. Lost a little paint here and there so I primed and painted that area with some black which I had on hand. No biggie as it will be hidden from view. Just teasing you in that one pic Bob. 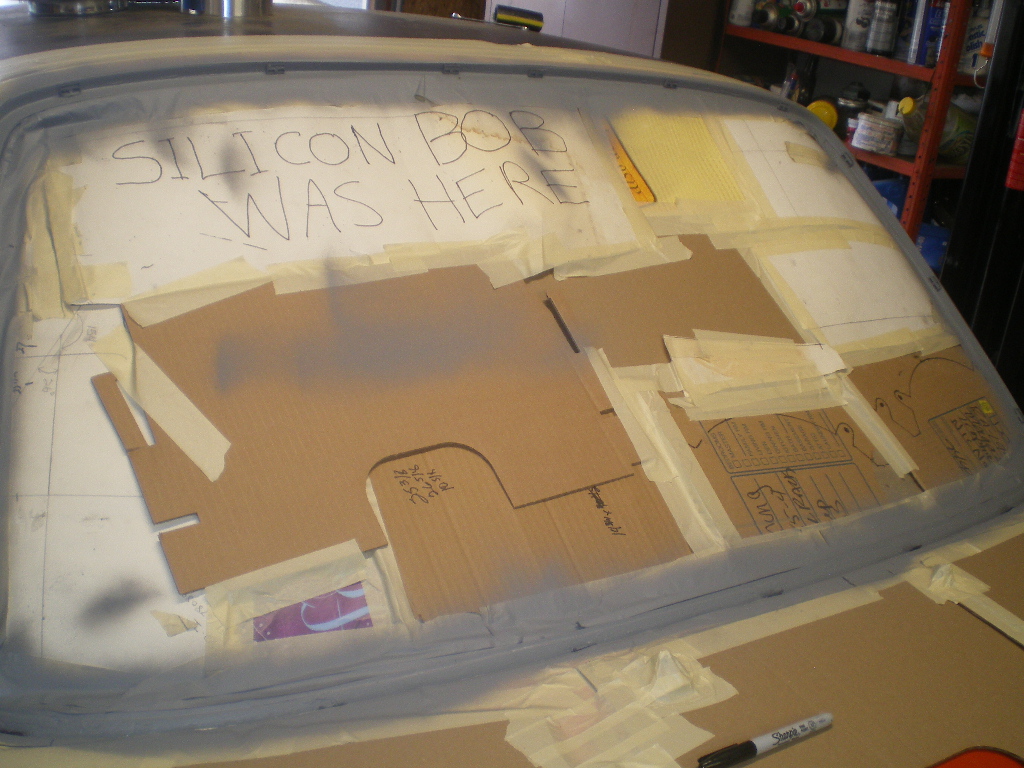
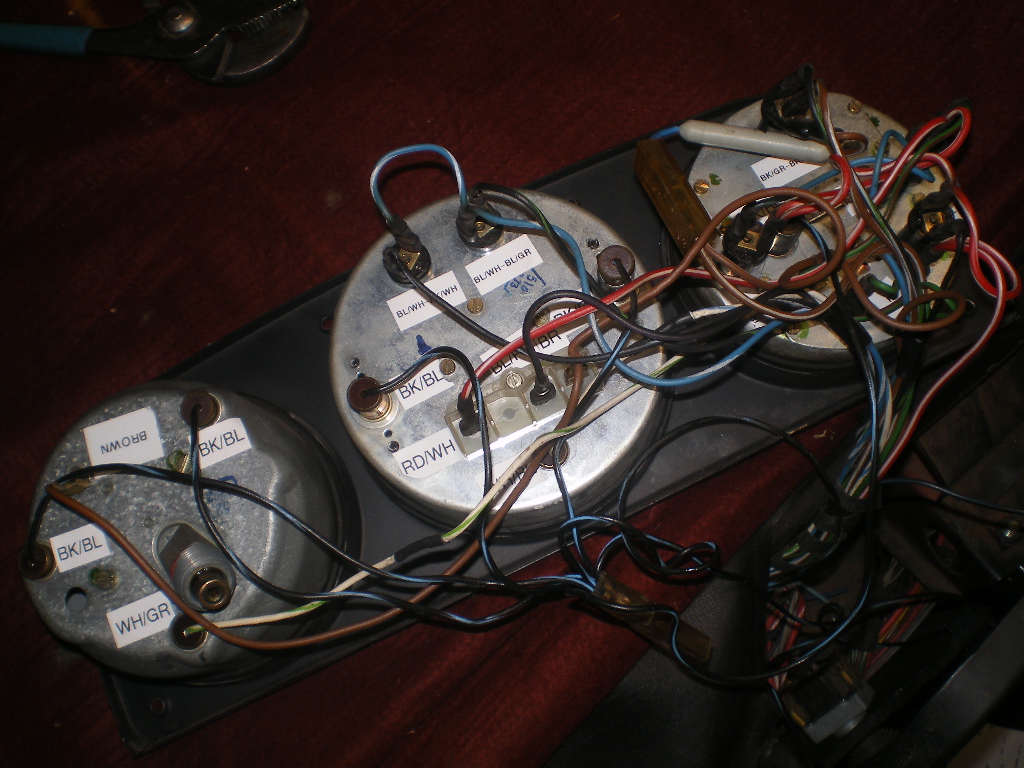
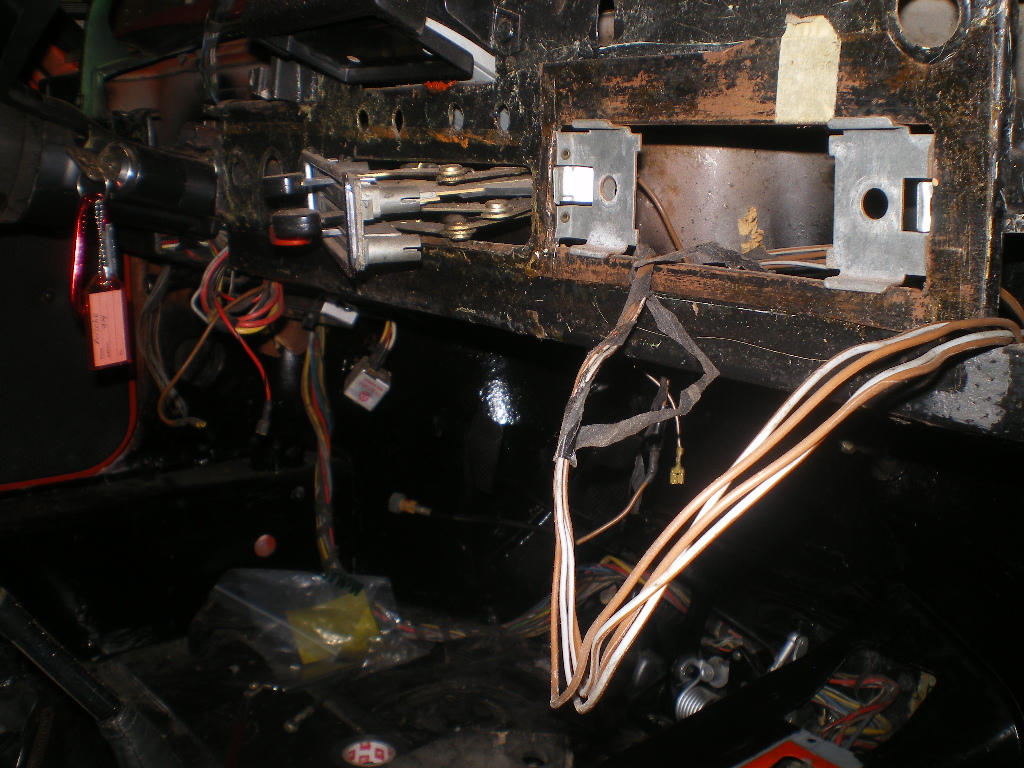
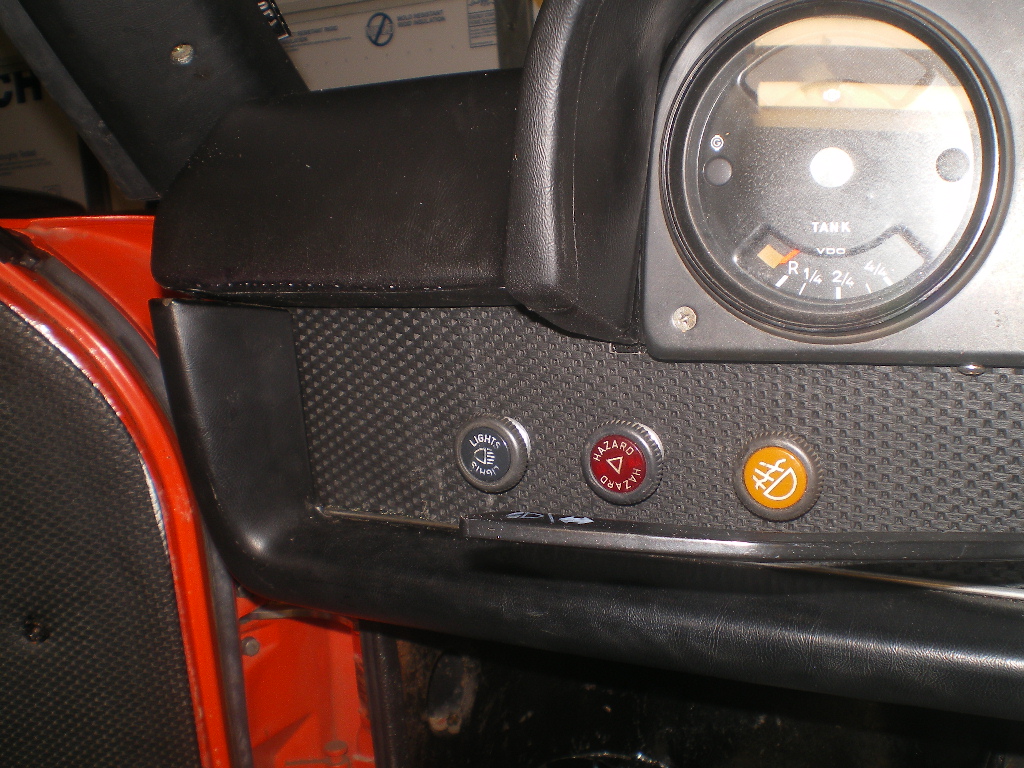
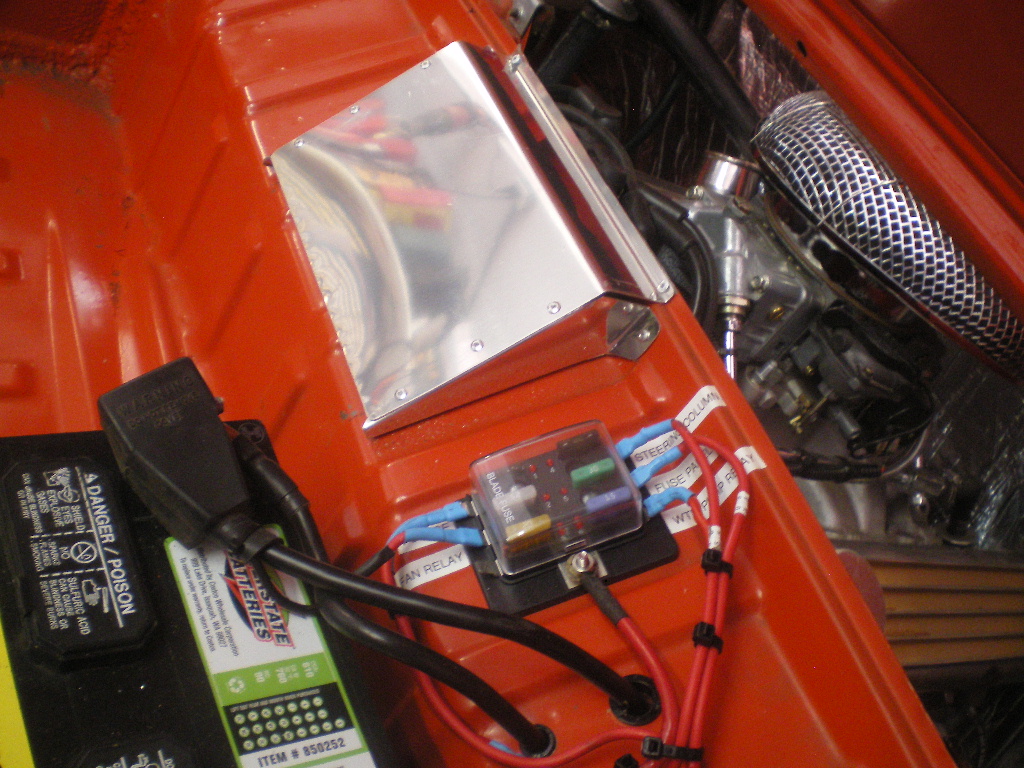
I believe I'm at about 90% complete with the wiring. I've powered up both circuits going into the cabin. I have all of the gage lights working, as well as headlights, parking and turn signals, fan lights, pop up headlights and horns. Jesus H Christ Bob. What horns are those? I can't hear myself fart anymore and those horns scared the Hell out me. :rotfl : I should receive the fan controller and Dakota Digital Quad gauge by Monday and hope to be complete with wiring in the next week.
Attached image(s)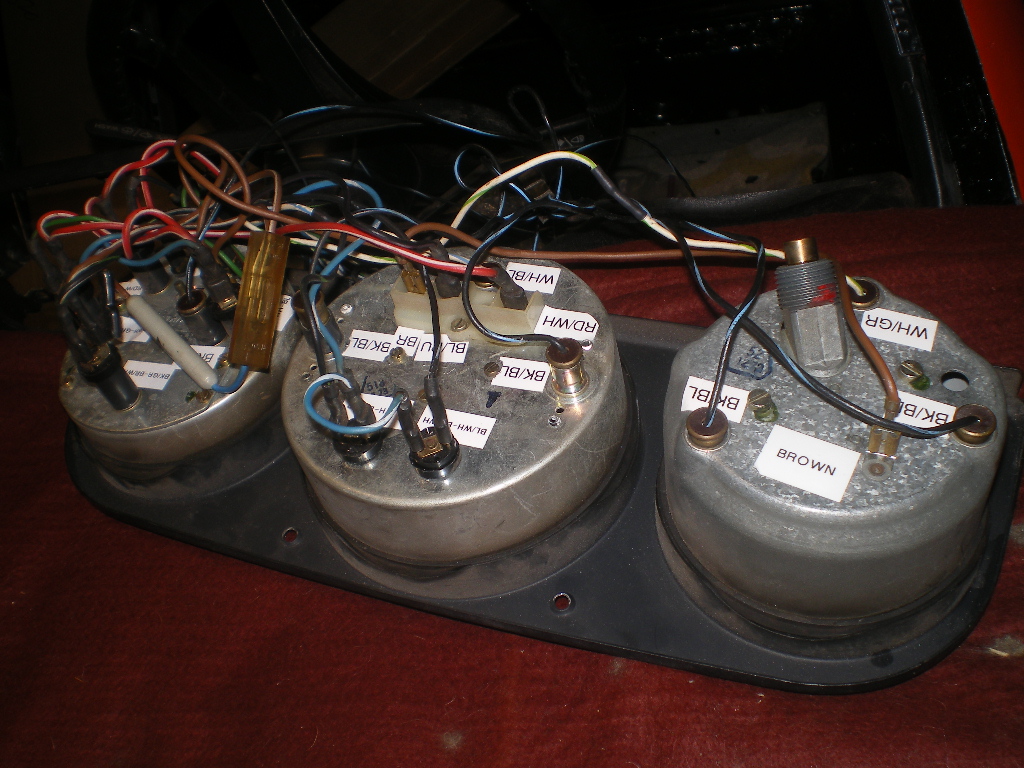
Posted by: 76-914 Nov 25 2017, 06:41 PM
Since I have this huge mass of cast iron I added an anode rod to protect my aluminum radiator. Cheap insurance. 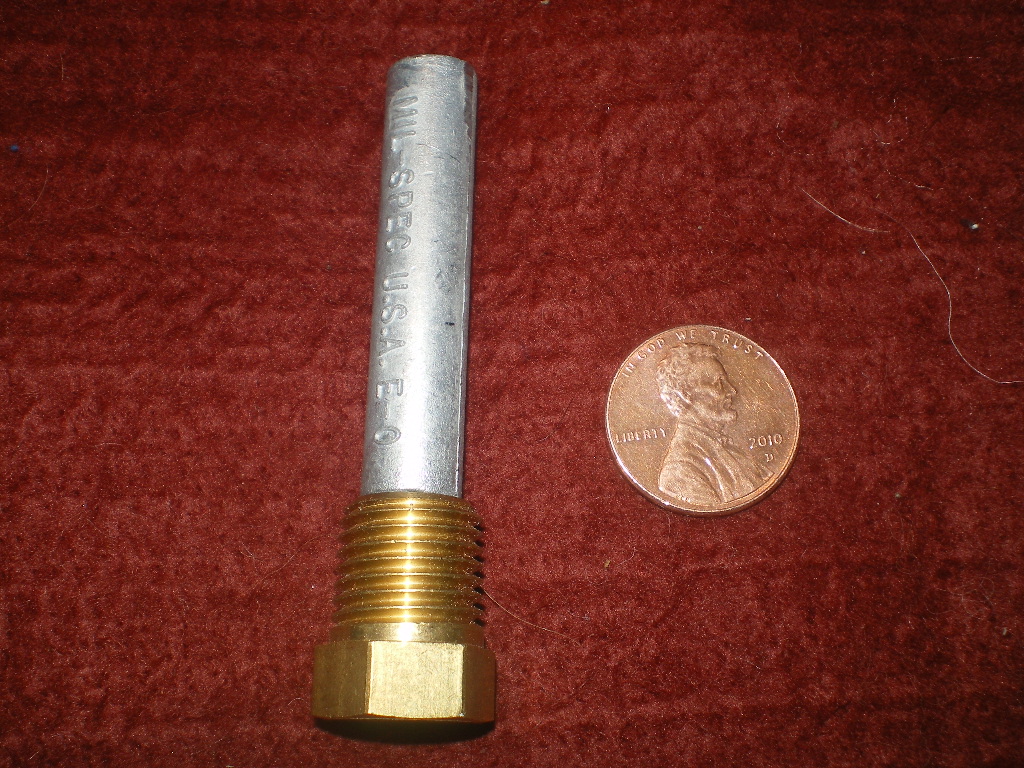
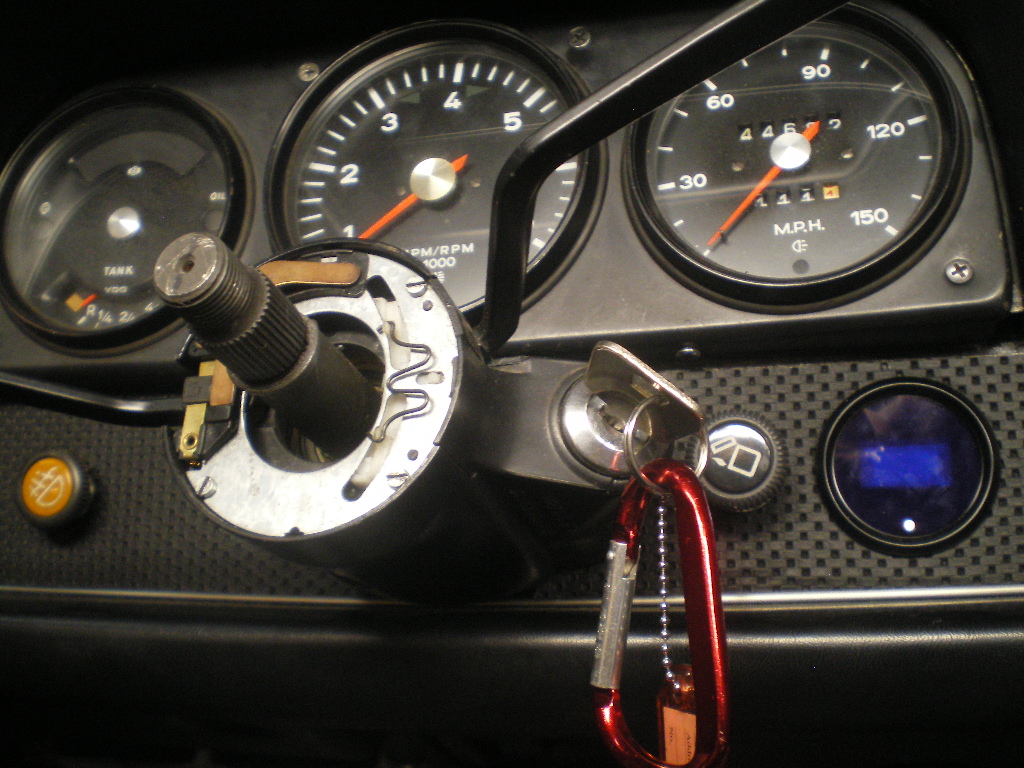
Of all things the blinkers quit working so I submersed myself again only to find it was the ignition switch. BTW, Pelican does not stock them and only orders one once they've received your payment. Big of them, Huh. May Mark will stock them as we all know the Chinese switches are crapola. 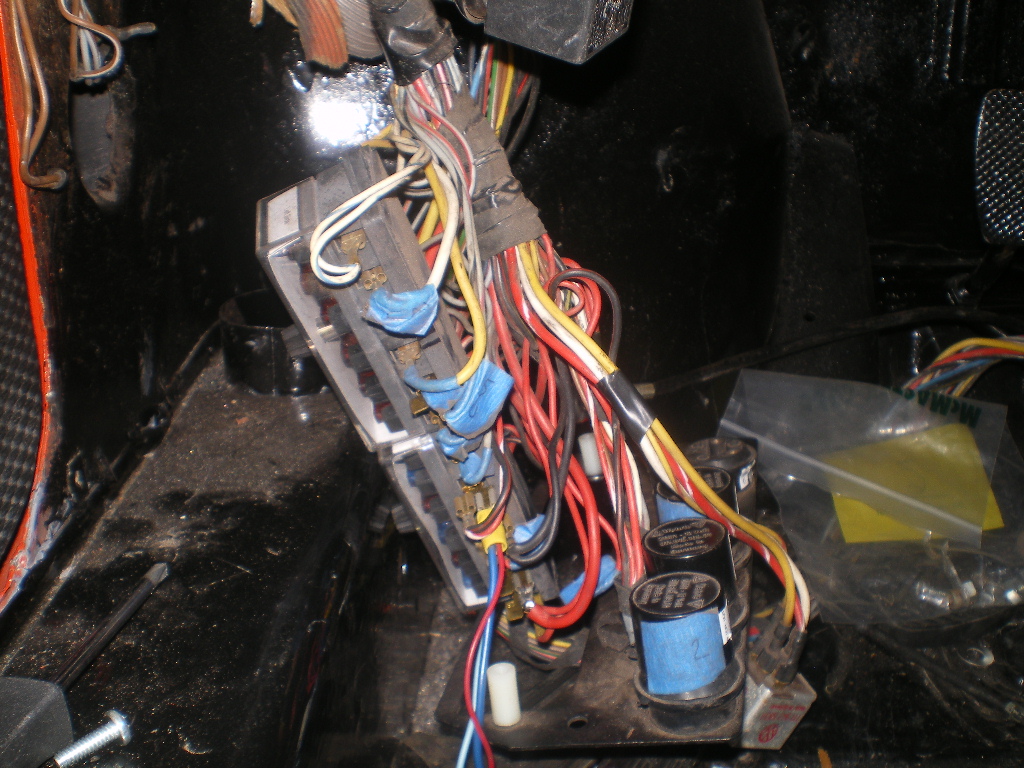
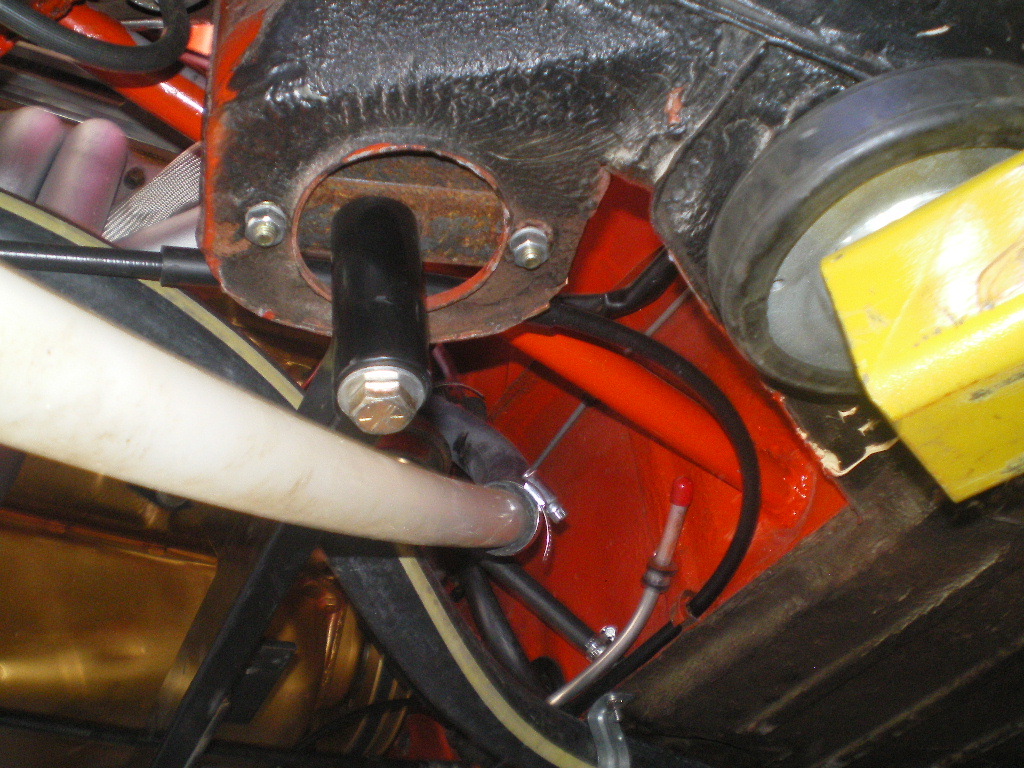
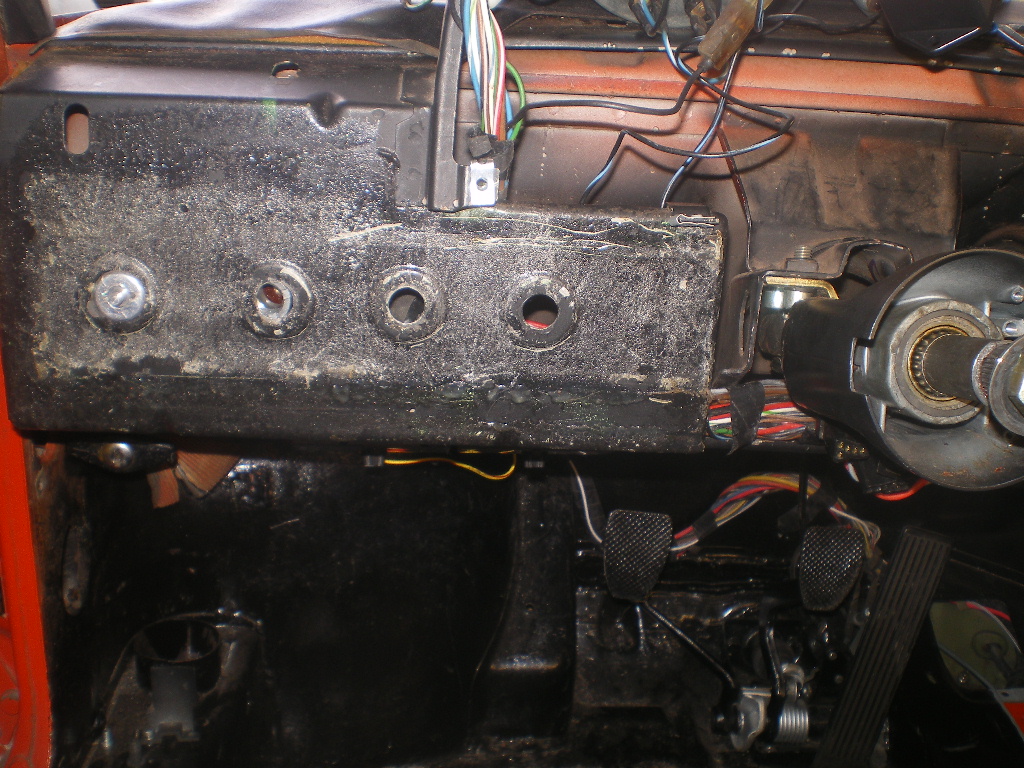
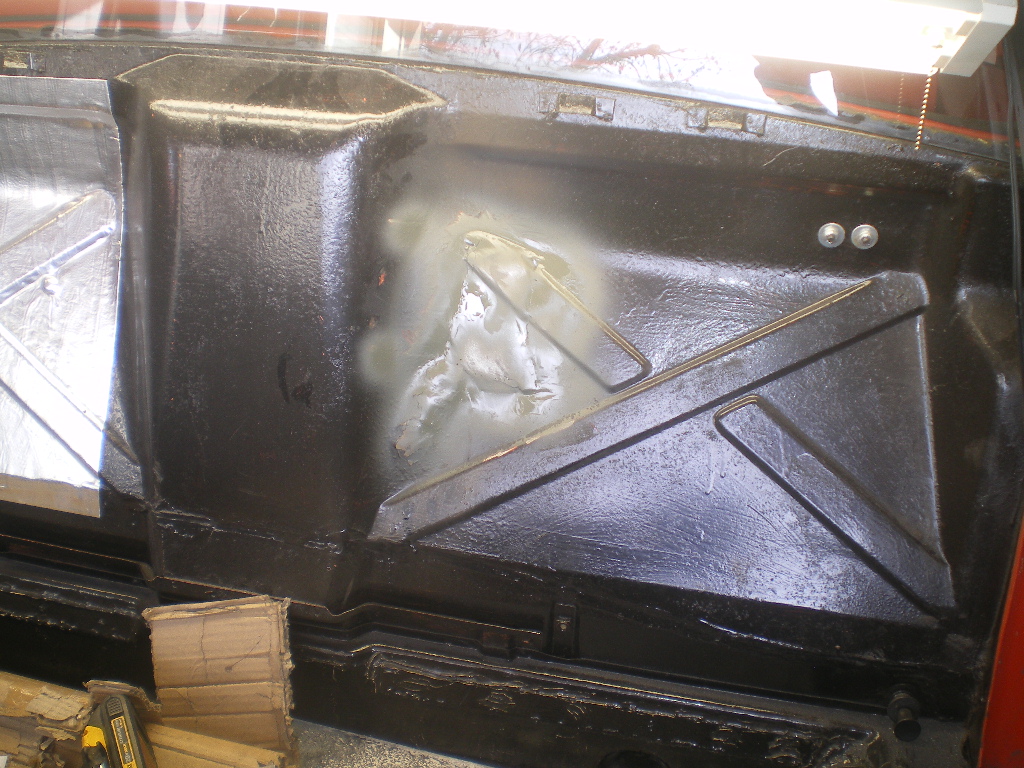
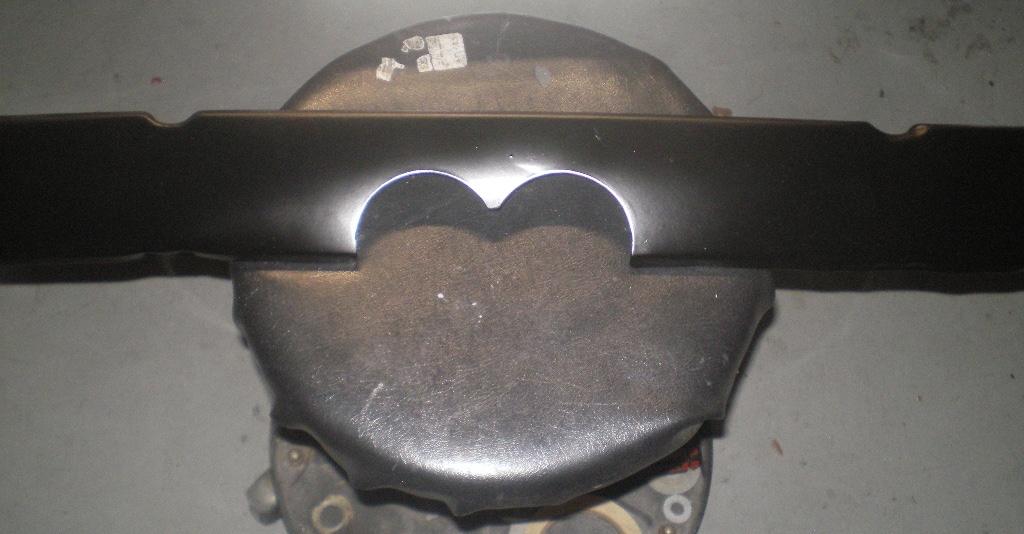
Modified the Most Excellent steering pan cover that I received from Bruce aka bdstone, to accept the hoses run beneath.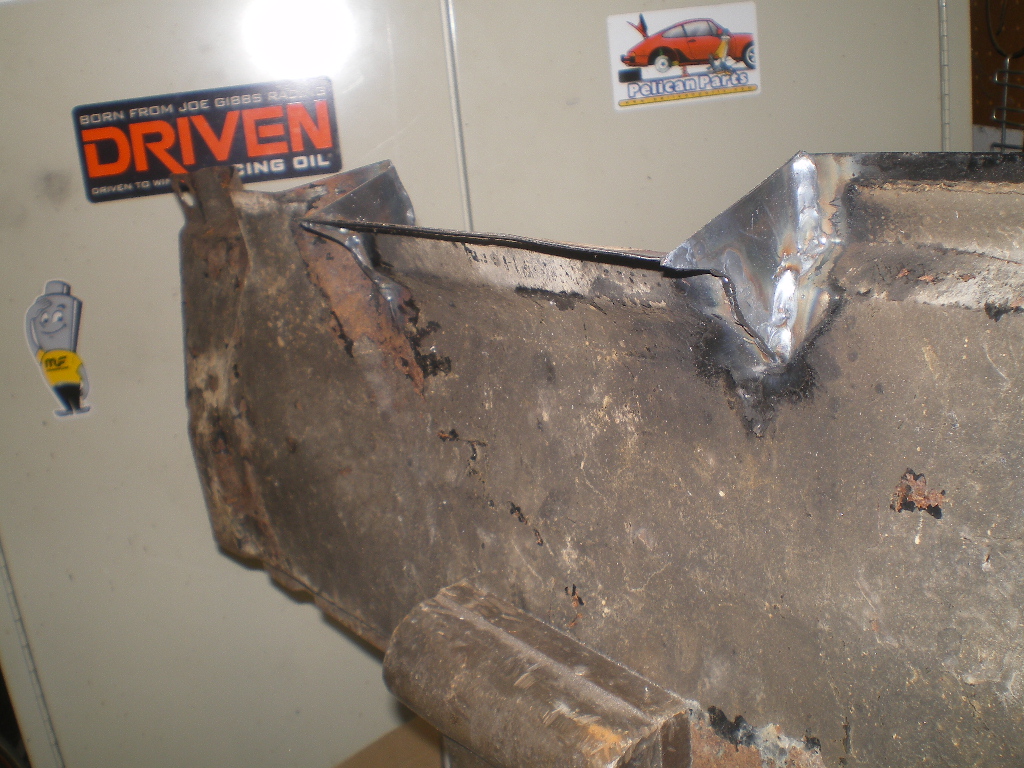
Then I happened upon the 4th Circle of Hell. The dip stick tube was broken and needed to be replaced. This is the old one. I thought the broken piece was difficult to remove but it paled in comparison to installing the new one.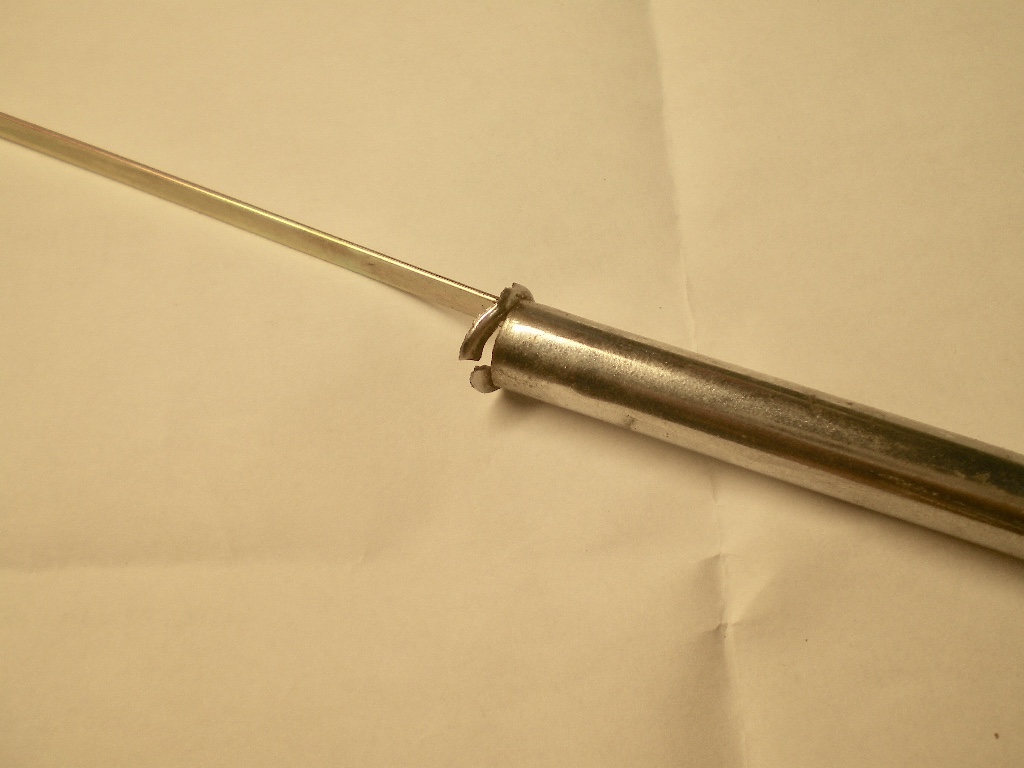
There was no Good place to tap the new one into place. I thought about using a long large screwdriver but that would have place too much force upon the flared section of the tube. I farted around for 2 hours before deciding upon this method. I heated a cheap 7/16" wrench. It spread the load across the flared section enough that I could hammer it into place with a 1/4" steel rod. Hard to visualize but it worked. Three damned hours to R&R that thing.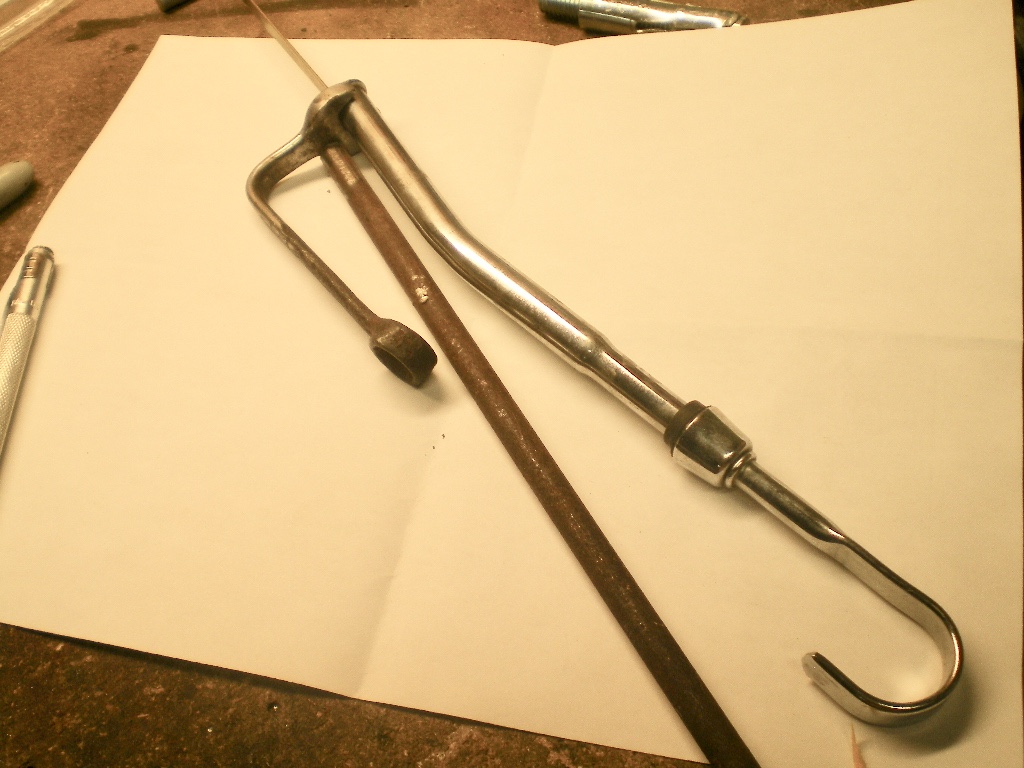
Attached image(s)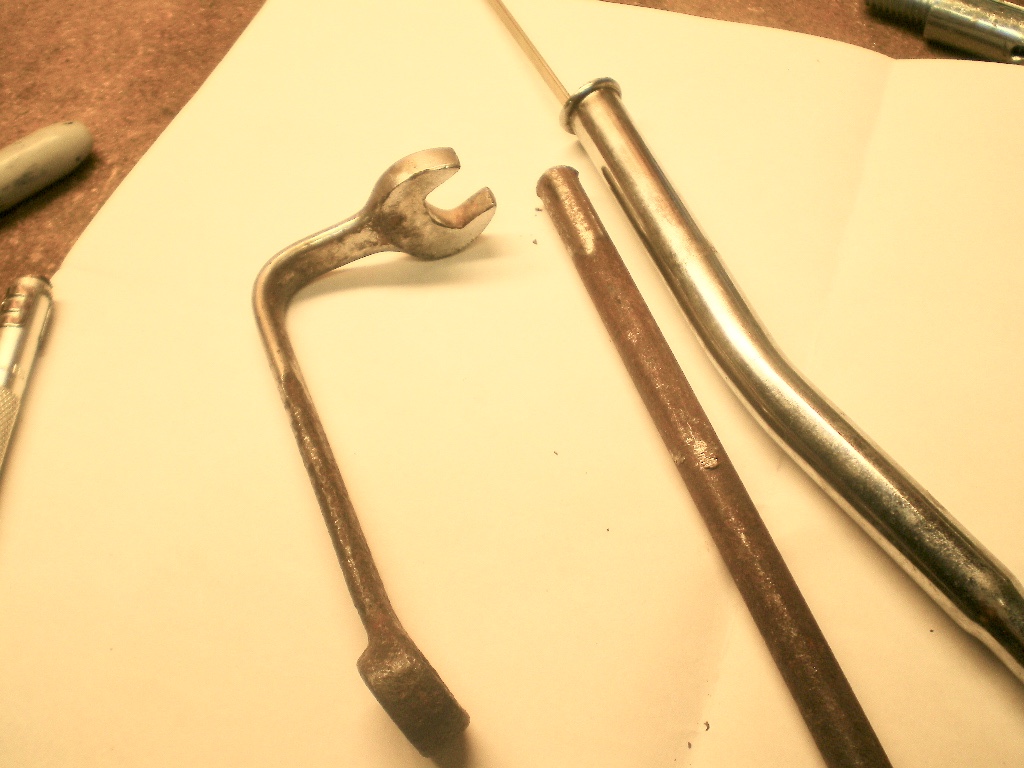
Posted by: bulitt Nov 26 2017, 09:18 AM
Isn't this car running yet?
Great Job Kent !!!
Horns were on the car when I bought it...
Posted by: 76-914 Dec 11 2017, 06:27 PM
It is now but there is still a lot to do. Check this out then embed it for me if you have time. https://youtu.be/7hCf3HRTc84
Posted by: ValcoOscar Dec 11 2017, 08:08 PM
It is now but there is still a lot to do.
Check this out then embed it for me if you have time. https://youtu.be/7hCf3HRTc84Sounds absolutely terrific Kent...I remember my 914-V8 days back in the 80's.....love that sound, who needs a sound system in a car like that. Oh yeah...maybe buddy Eddy
Congrats my friend...
Oscar
Posted by: bulitt Dec 11 2017, 08:42 PM
Woo Hoo! Can't tell if you hooked up the elec choke yet? The idle speed adjustment screw is upside down under the pass side carb linkage.
Bet the neighbors loving it ! It's an animal...
I see you have the tach working! Any other gauges work?
Posted by: Cracker Dec 11 2017, 08:50 PM
Way to go Kent!!!
Tony
Posted by: bulitt Dec 11 2017, 08:53 PM
Way to go Kent!!!
Tony
Rear coil overs and springs on this car I purchased from you Tony
Posted by: Cracker Dec 11 2017, 08:59 PM
I remember that now...long time ago! Cool.
Tony
Way to go Kent!!!
Tony
Rear coil overs and springs on this car I purchased from you Tony
Posted by: Andyrew Dec 12 2017, 07:08 AM
Mmmm Torque, glorious torque!!! Congraats!!!!
Posted by: sb914 Dec 12 2017, 07:17 AM
Nice job !
Posted by: bulitt Dec 12 2017, 07:43 AM
Posted by: rhodyguy Dec 12 2017, 08:15 AM
Do you need another horn pad?
Posted by: Larmo63 Dec 12 2017, 07:36 PM
Sounds great so far....!!!!!!
Now finish it and drive the snot out of it 
Posted by: 76-914 Dec 12 2017, 09:19 PM
Thanks guys. The growl raised my testosterone level by a factor of 5. And Kevin, I have the Horn Pad; just not going on until carpet goes in. I won't even tighten the steering wheel until the last thing. I like to remove it for the access. Thanks though. I ordered the exhaust parts tonight so it will be a little quieter next time. Once I get the brakes operational I'll take it around the block. I am looking for a knee pad if anyone has a lead on one. I just noticed there isn't a hole for the antenna so I may just skip the radio/stereo addition. The door cards aren't drilled for any speakers either. Figured out why the fans didn't come on. I forgot to put the fuses in. Second time I've done that in as many cars.  I figure 8-10 more weeks and I should be finished. What do ya'll think the going rate for a car like this would be on eBay? I'm thinking the proceeds from this one will finance my next project this summer.
Posted by: 914350 Dec 13 2017, 11:18 AM
I love the way you mounted the radiator. The shroud and plenum look excellent too.
Posted by: burton73 Dec 13 2017, 12:44 PM
Thanks guys. The growl raised my testosterone level by a factor of 5.
And Kevin, I have the Horn Pad; just not going on until carpet goes in. I won't even tighten the steering wheel until the last thing. I like to remove it for the access. Thanks though. I ordered the exhaust parts tonight so it will be a little quieter next time. Once I get the brakes operational I'll take it around the block. I am looking for a knee pad if anyone has a lead on one. I just noticed there isn't a hole for the antenna so I may just skip the radio/stereo addition. The door cards aren't drilled for any speakers either. Figured out why the fans didn't come on. I forgot to put the fuses in. Second time I've done that in as many cars. I figure 8-10 more weeks and I should be finished. What do ya'll think the going rate for a car like this would be on eBay? I'm thinking the proceeds from this one will finance my next project this summer. I knew you where going to dig the sound. Just wait for the feeling of the torque! Try for 4times what you paid. I have seen them go for all kings of different money. I guy would have to think how much it would cost him to build one and at $20,000
It may be a right number. Then a guy that has cash and that may not be a big deal for him may just want to roll right now. You could try for more. Who knows as parts and cars are going up, up, up!
Back in 79 I had one and sold it for $10,500 as I kept lowering the price. The guy that bought it said he would of paid $12,500 as it was going to cost $20,000 to convert his 912 over. Now at renegade it is super bucks. It was all timing. In cars as in life. Timing is everything.
Bob B
Posted by: 76-914 Dec 13 2017, 06:31 PM
I love the way you mounted the radiator. The shroud and plenum look excellent too.
Thx Kent. Coming from you I'll take that as a big compliment. Kent
Posted by: 76-914 Dec 13 2017, 06:34 PM
Thanks guys. The growl raised my testosterone level by a factor of 5.
And Kevin, I have the Horn Pad; just not going on until carpet goes in. I won't even tighten the steering wheel until the last thing. I like to remove it for the access. Thanks though. I ordered the exhaust parts tonight so it will be a little quieter next time. Once I get the brakes operational I'll take it around the block. I am looking for a knee pad if anyone has a lead on one. I just noticed there isn't a hole for the antenna so I may just skip the radio/stereo addition. The door cards aren't drilled for any speakers either. Figured out why the fans didn't come on. I forgot to put the fuses in. Second time I've done that in as many cars. I figure 8-10 more weeks and I should be finished. What do ya'll think the going rate for a car like this would be on eBay? I'm thinking the proceeds from this one will finance my next project this summer. I knew you where going to dig the sound. Just wait for the feeling of the torque! Try for 4times what you paid. I have seen them go for all kings of different money. I guy would have to think how much it would cost him to build one and at $20,000
It may be a right number. Then a guy that has cash and that may not be a big deal for him may just want to roll right now. You could try for more. Who knows as parts and cars are going up, up, up!
Back in 79 I had one and sold it for $10,500 as I kept lowering the price. The guy that bought it said he would of paid $12,500 as it was going to cost $20,000 to convert his 912 over. Now at renegade it is super bucks. It was all timing. In cars as in life. Timing is everything.
Bob B
Thx Bob. I had no idea since I've only bought them and never sold one.
 And absolutely no idea with a V8 conversion.
Posted by: Cracker Dec 13 2017, 07:13 PM
I believe it is way too early to determine value...the car has to be finished near 100% so everyone can see what we what we would be price-guessing. Enjoy the car; be safe in doing so; finish to the highest levels you can; and finally let the chips fall where they may.
Tony
PS: Regarding the 4x paid...really? I have done well on some cars over the decades - far better than most and I doubt I have ever seen a return of greater than 1x - at best. Good luck with that...
Posted by: burton73 Dec 13 2017, 07:58 PM
I believe it is way too early to determine value...the car has to be finished near 100% so everyone can see what we what we would be price-guessing. Enjoy the car; be safe in doing so; finish to the highest levels you can; and finally let the chips fall where they may.
Tony
PS: Regarding the 4x paid...really? I have done well on some cars over the decades - far better than most and I doubt I have ever seen a return of greater than 1x - at best. Good luck with that...
A lot of times it is what the market will bear.
I said that because I think he paid 5,000 plus for her.
So you are right but one can guess. Just because he got a great deal does not mean he can not get fare market value. Timing is everything. A year ago I was going to blow out my V8 car with fresh mod/cooled 930 trans for $8,000. Happy I did not sell it. The trans is worth that. One of our guys sold his V8 with 930 trans for like $5,000 after he had a small electoral mishap. Timing
I only say that because I make Egg Timers.
Bob B
Posted by: Cracker Dec 13 2017, 08:03 PM
Ok. With that logic...why stop at 4x? Kent - go for 8x...
If your intent is to flip it I hope you do the best you can!
Tony
Posted by: 76-914 Dec 14 2017, 09:13 AM
Who knows? I certainly don't. The interior should be nice as it will have the new windshield, new dash, carpets, dash face, new mirrors and newly recovered seats. Most likely will need some aftermarket seat belts but those would be new as well. What are your thoughts on a radio delete as far as resale? Currently the fender is not drilled for the antenna. Mufflers and related parts are due in today and hopefully I can get that all fabricated Saturday. Headed to Austin for the holidays so there won't be any progress until after the New Year. 
Posted by: Andyrew Dec 14 2017, 09:27 AM
A sorted v8 car in good condition is between 10-15 with the mods you have. It all depends on how nice the car really is. I had a lot of interest in the narrow body car at about 9k, Seller has it on hold for the past 6 months but still, I had 4 buyers on the line when he put me on hold around that price.
Posted by: Cracker Dec 14 2017, 09:41 AM
Anyone wanting a radio in that car should not be allowed to own it...I am obviously not a fan of sound systems in what I believe are "drivers cars". The "soundtrack" is built in...now if it were a SIX, maybe...
Not that I follow these cars (I do notl) but the most expensive 901/SBC 914 I ever saw sold went for 18.5 (back in '09l). That car was exceedingly clean with a brand-new crate motor.
Tony
Posted by: rhodyguy Dec 14 2017, 10:07 AM
 don't fret about a radio.
Posted by: 76-914 Dec 14 2017, 07:16 PM
So I'm killing time waiting on the mufflers to arrive and thought I'd take a look as to why the fog lights weren't working. It was one of the last things on my electrical "to do" list. I pop the relay and it tested OK. I had 12.37v at #30's socket so I jumped it with #87 and the lights, well one of them, came to life. I assume the other one has a bad bulb or connection but I could at least confirm that there was a good wire going to the fog light harness. Since the relay tested OK I knew it had to be that the coil side wasn't closing, i.e. a bad ground or voltage not reaching it. So I turn on the lights and check for voltage at #85. 12.37v, good. But no ground at #86. Traced it and the ground was indeed good but when I turned on the fog lamp switch I had voltage on pin #86. Voltage on both sides  . So I pull the fog lamp switch only to find that 2 of the 3 wires were crossed. I placed them on the correct spades and confirmed all of the light switch terminals were correctly attached as well. Pulled the fog switch to on again and what the Hell? No lights and now my fans are kicking on to boot. Pulled the switch again and began to ohm it out. One tab is getting a semi continuity so I ordered one from Bruce today. For the life of me I don't know why the fan controller was energized but I'll wait for the replacement switch before going berserk. There are 2 things I will try if this isn't the problem. 1 is to replace the defective brake switch (currently it is pulled and not connected but it was in place prior to this episode) or reconnect the old blue wire that goes to the generator idiot light. I cut that blue wire close to the fuse panel and used it to connect my temp sender to the fan controller and quad gage. This is the wire that has the diode up at the gage and I may have screwed that circuit up when I cut it. I won't be using that light since I have a single wire alternator i.e. the regulator is internal. It's easy enough to reconnect it and run a new dedicated wire back to the temp sender. Just last week I told Spoke I was a little weary about cutting that wire from the circuit because I didn't know if it could manifest itself into a Gremlin or not. Maybe I should have followed my Gut feeling. Again, I'll wait for the Brake and Fog light switch replacements and if those don't help I'll run a new dedicated line. If that doesn't help I either shit can the fog lights or remove them from the light switch and create a dedicated circuit for them. As far as I can tell, on the #53 relay, #85 receives power from fuse #1 and the Fog lamp switch merely grounds the the relay's coil. If I going at it bass ackwards please advise. On a positive note the mufflers arrived today so I'll have something to do while I await those 2 switches.
Posted by: burton73 Dec 14 2017, 10:32 PM
Anyone wanting a radio in that car should not be allowed to own it...I am obviously not a fan of sound systems in what I believe are "drivers cars". The "soundtrack" is built in...now if it were a SIX, maybe...
Not that I follow these cars (I do notl) but the most expensive 901/SBC 914 I ever saw sold went for 18.5 (back in '09l). That car was exceedingly clean with a brand-new crate motor.
Tony
I saw one go for $25,000 not too long ago. A trick car.
Bob B
Posted by: Chris914n6 Dec 16 2017, 03:35 PM
Anyone wanting a radio in that car should not be allowed to own it...I am obviously not a fan of sound systems in what I believe are "drivers cars". The "soundtrack" is built in...now if it were a SIX, maybe...
Tony
Says a guy that tows his car from inside a quiet truck with a radio
 It's for the long trips
 ![yellowsleep[1].gif](style_emoticons/default/yellowsleep[1].gif)
Posted by: 76-914 Dec 16 2017, 07:40 PM
I've decided to complete this 914 w/o a radio. Got to thinking about it and Tony has a point. Besides, I wouldn't be able to hear it anyway. Can someone post a pic and dimensions for a radio block off plate so I can make one. TIA Kent
Posted by: Chris914n6 Dec 16 2017, 08:57 PM
I've decided to complete this 914 w/o a radio. Got to thinking about it and Tony has a point. Besides, I wouldn't be able to hear it anyway.
Can someone post a pic and dimensions for a radio block off plate so I can make one. TIA Kent I have used a DIN size pocket/storage bin. Like one would see under the stereo of a 90s Japanese car.
The pocket from a 968/944 will work too with a little plastic trimming, plus it has a clock that sometimes works.
Posted by: 76-914 Dec 19 2017, 09:22 PM
Thx Chris. I've since discovered that 914rubber makes a block off plate w/ appropriate vinyl for 25 bucks. Hard to pass that up.
I finally have the brakes working. I never had this much trouble getting the brakes to work but then again I've never had a 914 with an entirely new barking system. I've always been able to bleed a system using slave labor on the brake pedal or the "long tube method' or a Mighty Pump pull down. Not this time. I used the Mighty Pump to pull fluid to all the calipers until no bubbles were present. That didn't do a thing. Then I realized that the new master cylinder wasn't bench bleed before hand so I broke fittings apart and bleed it in place. Nothing. Pulled fluid thru again with the Mighty Pump and still nothing. Pumped the brake using the "long tube" method till the lines were clear and still nothing. I thought maybe the MC was used so I asked Bob and he said it was new so I ruled out a torn cup seal in the MC. I ordered a set of speed bleeders and attacked it again. The right rear required a little over 500 pumps before the line quit passing tiny, tiny bubbles. I shit you not. On each caliper bleed I didn't move on to the next caliper until the line was perfectly clear for 25 pumps. Approximately 200 pumps on the left rear, 300 on the right front and 100 on the left front. As I said these were tiny bubbles but enough that the reservoir was half empty by the time I'd finished.
Posted by: 76-914 Jan 4 2018, 11:32 AM
I don't know how people get anything done on their conversion if they don't work on them daily. I didn't touch mine for two weeks because of the Holidays & and related travels. I went out to the garage last nite and just stared at it. Couldn't get the motion going whereas if I work on it a little every day I can immediately pick up where I left off. Be it a 20 min session or an 8 hour session.
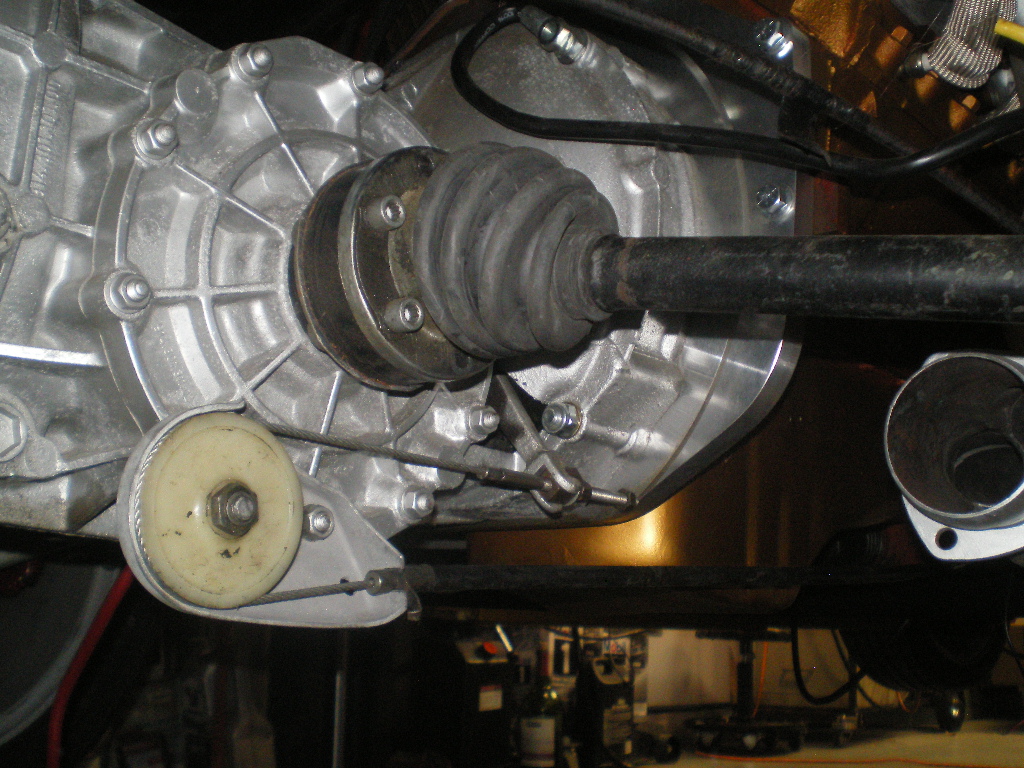
Since I have the brakes working and an exhaust system in place it's time to address the 1st gear issue with the transmission. Bob said it was rebuilt at one of Dr Evil's clinics but he skipped installing a new synchro on 1st. Hope I don't discover it's the more expensive 1st gear slider. However, I've decided to surprise my son in Tx with this car and want him to have a fully functional transmission. I'd thought about giving him the Subaru conversion but if he had a mechanic that wasn't willing to spend extra time figuring out how the old and new electronics were married then the car might sit and rot should he encounter any problems. This car with the old school carb, mechanical fuel pump, etc can be serviced by most mechanics. Besides, he is young enough to enjoy this type car. Flashy and loud. A steroid emitting Hot Rod!
So, next up is the transmission repair and installing an interior. I'll post a few pics next time.
Hope all of you guys had a great Christmas and New Years.
Posted by: Mueller Jan 4 2018, 11:51 AM
Anyone wanting a radio in that car should not be allowed to own it...I am obviously not a fan of sound systems in what I believe are "drivers cars". The "soundtrack" is built in...now if it were a SIX, maybe...
Not that I follow these cars (I do notl) but the most expensive 901/SBC 914 I ever saw sold went for 18.5 (back in '09l). That car was exceedingly clean with a brand-new crate motor.
Tony
Getting stuck in traffic a few times and you'll wish you had a radio or at least ear buds for your phone

Posted by: Cracker Jan 4 2018, 11:54 AM
Great idea Kent - great Dad!!! I hope he doesn't look up your posts here...
Tony
I've decided to surprise my son in Tx with this car and want him to have a fully functional transmission.
Posted by: rhodyguy Jan 4 2018, 12:16 PM
Nice.
Don't forget to add transport to the purchase price. Still a great deal.
Posted by: bulitt Jan 4 2018, 07:34 PM
I don't know how people get anything done on their conversion if they don't work on them daily. I didn't touch mine for two weeks because of the Holidays & and related travels. I went out to the garage last nite and just stared at it. Couldn't get the motion going whereas if I work on it a little every day I can immediately pick up where I left off. Be it a 20 min session or an 8 hour session.
Since I have the brakes working and an exhaust system in place it's time to address the 1st gear issue with the transmission. Bob said it was rebuilt at one of Dr Evil's clinics but he skipped installing a new synchro on 1st. Hope I don't discover it's the more expensive 1st gear slider. However, I've decided to surprise my son in Tx with this car and want him to have a fully functional transmission. I'd thought about giving him the Subaru conversion but if he had a mechanic that wasn't willing to spend extra time figuring out how the old and new electronics were married then the car might sit and rot should he encounter any problems. This car with the old school carb, mechanical fuel pump, etc can be serviced by most mechanics. Besides, he is young enough to enjoy this type car. Flashy and loud. A steroid emitting Hot Rod!
So, next up is the transmission repair and installing an interior. I'll post a few pics next time.
Hope all of you guys had a great Christmas and New Years.
Kent- When the Dr installed the flipped H in 5th I am almost positive he removed the 5th gear syncro and installed it in first gear. You will know the first time you shift into first!
Posted by: 76-914 Jan 4 2018, 09:00 PM
Great idea Kent - great Dad!!! I hope he doesn't look up your posts here...
Tony
I've decided to surprise my son in Tx with this car and want him to have a fully functional transmission.
He doesn't know about this site; yet! I watched him as he watched the video of it running and decided then and there. The biggest profit I'll realize is watching his reaction and joy when I deliver it to him.
Posted by: 914forme Jan 4 2018, 09:34 PM

Posted by: Chris914n6 Jan 4 2018, 09:36 PM
I don't know how people get anything done on their conversion if they don't work on them daily. I didn't touch mine for two weeks because of the Holidays & and related travels. I went out to the garage last nite and just stared at it. Couldn't get the motion going whereas if I work on it a little every day I can immediately pick up where I left off. Be it a 20 min session or an 8 hour session.
It's nice to hear I'm not the only one with that problem.
And being a 914 I have to block off 1-2 hours minimum to get anything done. Since I have the brakes working and an exhaust system in place it's time to address the 1st gear issue with the transmission.
I rarely start off in 1st with my V6, won't need it at all with a V8. So not really a problem if it isn't up to snuff. Go drive it.
Posted by: 76-914 Jan 5 2018, 11:34 PM
Oh yea, I forgot your in that tribe Stephen. Your approval speaks volumes for passing it on.
Your right Chris. Time to drive it around the block. To quote Cap'n Ron, "If anything is going to happen it's going to happen out there".
Posted by: get off my lawn Jan 8 2018, 06:29 PM
About a million years ago I was at Irwindale raceway with my V8 914.
We called it an autocross but we ran continuous laps for 10 or 15 minutes at a time, it was a blast.
IIRC there were around 60 cars entered and at least 10 full on instructors running.
I ended up 6th overall which is really saying something considering my lack of go-fast skilz.
One of the hot shots came up to me inbetween sessions and asked how I was able to turn such fast times with my clutch slipping so bad.
I 'splained to him that weren't my clutch, it was my back tiars spinning out of every corner (channeling JP there for a second).
I could light em up from one corner to the next and rotate that little car with my right foot.
That darn 800 cfm quadrajet made more noise than the exhaust did.
200# rear springs, stock front sway bar, kuhmo victoracers on the back and hard as a rock Michelins on the front was the perfect balance.
Posted by: 76-914 Jan 13 2018, 10:20 PM
About a million years ago I was at Irwindale raceway with my V8 914.
We called it an autocross but we ran continuous laps for 10 or 15 minutes at a time, it was a blast.
IIRC there were around 60 cars entered and at least 10 full on instructors running.
I ended up 6th overall which is really saying something considering my lack of go-fast skilz.
One of the hot shots came up to me inbetween sessions and asked how I was able to turn such fast times with my clutch slipping so bad.
I 'splained to him that weren't my clutch, it was my back tiars spinning out of every corner (channeling JP there for a second).
I could light em up from one corner to the next and rotate that little car with my right foot.
That darn 800 cfm quadrajet made more noise than the exhaust did.
200# rear springs, stock front sway bar, kuhmo victoracers on the back and hard as a rock Michelins on the front was the perfect balance.
I don't think mine will ever see a race track. Maybe some spirited driving. So I've gotten a bit further. I didn't want to destroy a perfectly good air box so I worked around the existing vent. Took longer to work the material into place but much easier than removing the air box.
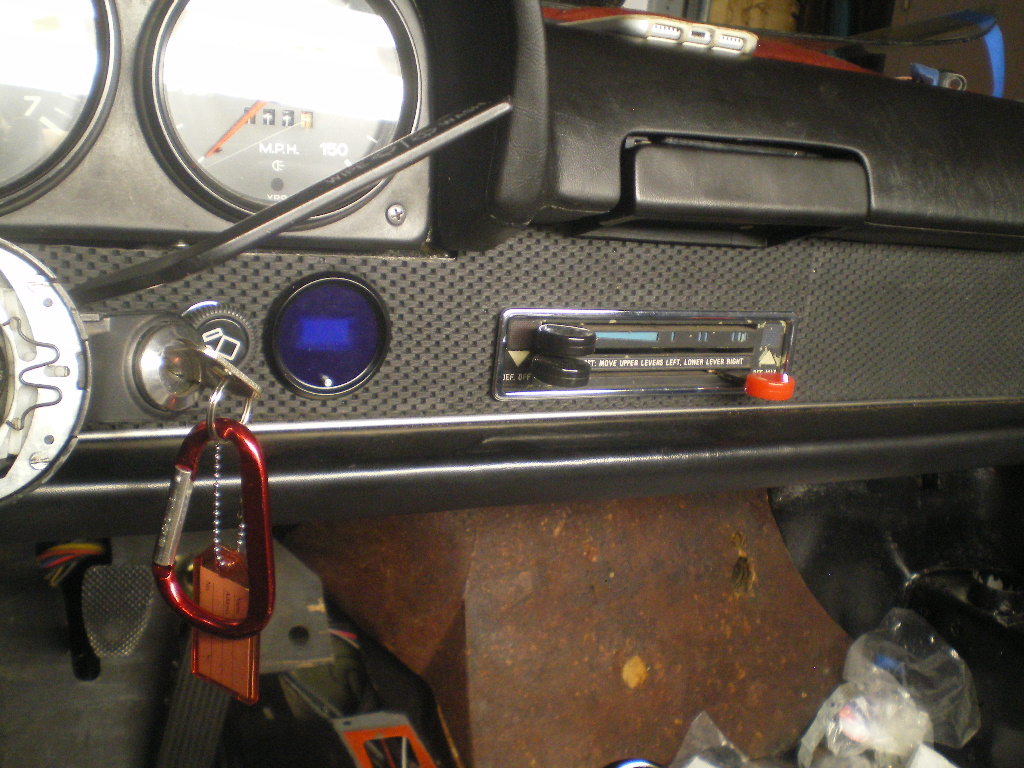
Installed some new dash face material then reinstalled the switches,Quad gauge and cigarette light. There will be no radio.
Attached image(s)
Posted by: bulitt Jan 14 2018, 06:09 AM
Wow! Great job!
Posted by: 76-914 Jan 14 2018, 10:44 AM
Thx Bob.Wow, I just realized I forgot to mention that I've driven it. Twice. Last week I went about 4 blocks then straight back on the lift to check for flubs. I still have air in the brake lines so more bleeding is in order. Yesterday I put about a 1/2 mile on it. Without tags or a windshield I have no reason to drive it any further. Damn that thing has some torque. And whoever said 1st isn't needed was correct. I accidentally took off in 3rd once. Looking forward to a more lengthy drive once the windshield is installed. Presently awaiting a reply from 914rubber, be it an email or phone call (I've left both) on the status of my new dash top.  So, a longer drive is on hold until that hits my doorstep. I may need to adjust the idle mixture screw. This early into it, I'm not sure if it is the cam lope or a rich mixture. I'll have to hook up a temporary vacuum gage so that it can be adjusted. And, if this cam is too radical I'll need to do it by ear because it may not pull enough vacuum while idling.
I hadn't fully closed the front hatch until last weeks 1st drive and got a little surprise. After my first drive, the hood did not pop when I tried to open it. I checked out my options then decided to give it another try before cutting open a spot in the front grille. After yanking on the pull it opened about the 3rd try. Hmmm. Before the 2nd drive and before closing the hood again I ran a pull wire thru the grill as a backup and I'm glad I did.  The cable pull is not stiff and has a good range of motion. The cable is taunt as well so I suspect there is an area where the cable isn't properly secured and is flexing away from an unsupported spot. Shouldn't be hard to locate. Now I need to get Kugle on the road. I haven't driven it since before Christmas.
Posted by: Cracker Jan 14 2018, 11:01 AM
Good for you Kent...
When the "hand-off" occurs - I hope some planning goes into it! Some video and maybe setting your son up (for instance: in a parking lot after a meal and then "noticing a 914" parked near by - admiring it before declaring "t's yours Son!"). Pretty damn cool and would love to see that in person!
Cracker
Posted by: 76-914 Jan 14 2018, 11:19 AM
Good for you Kent...
When the "hand-off" occurs - I hope some planning goes into it! Some video and maybe setting your son up (for instance: in a parking lot after a meal and then "noticing a 914" parked near by - admiring it before declaring "t's yours Son!"). Pretty damn cool and would love to see that in person!
Cracker
Absolutely! He knows the car from a few pic's but not that well. I think we shall do something along that thought, Tony. I must admit, I'm a bit surprised that you didn't suggest some sort of an involvement from some local Cop.
Poor Andy still has flashbacks every time he spots a Cop in the rearview!
Posted by: 76-914 Jan 14 2018, 01:39 PM
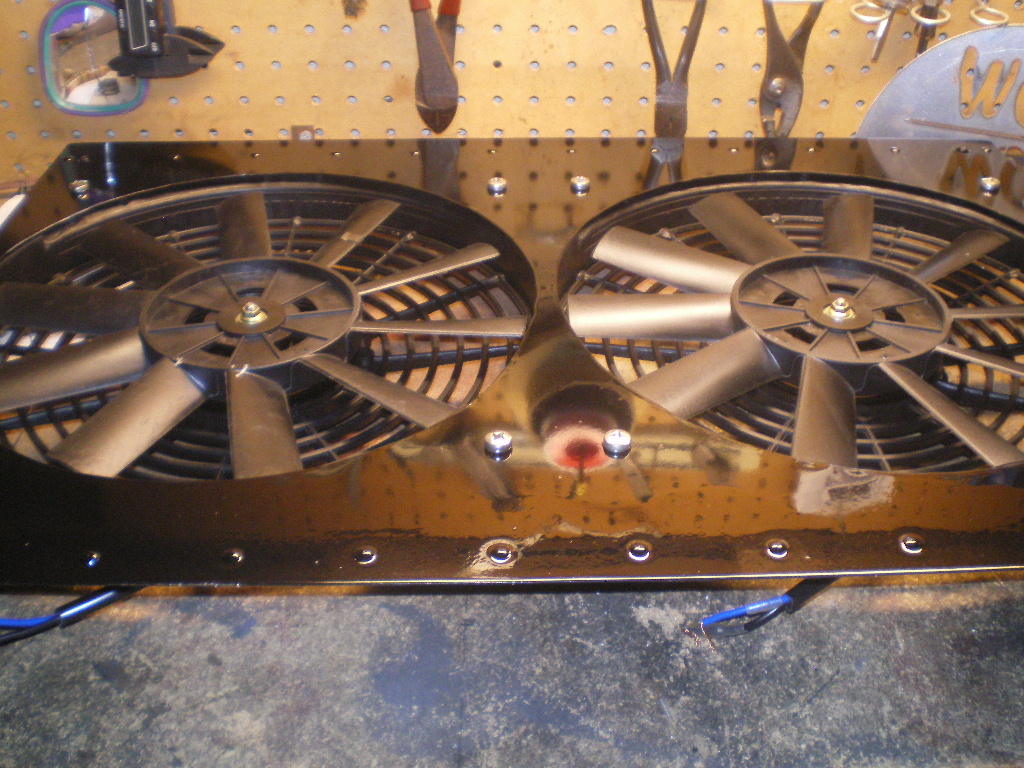
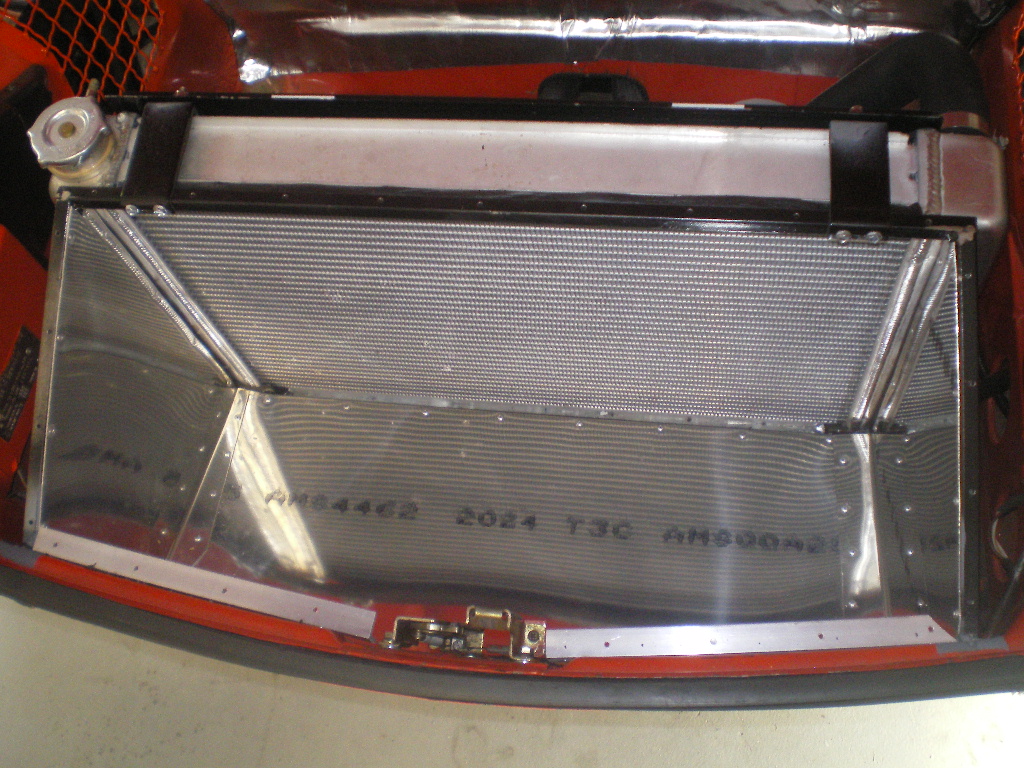
I forgot to add these pic's once I closed up the radiator plenum and removed the protective film wrap from the aluminum.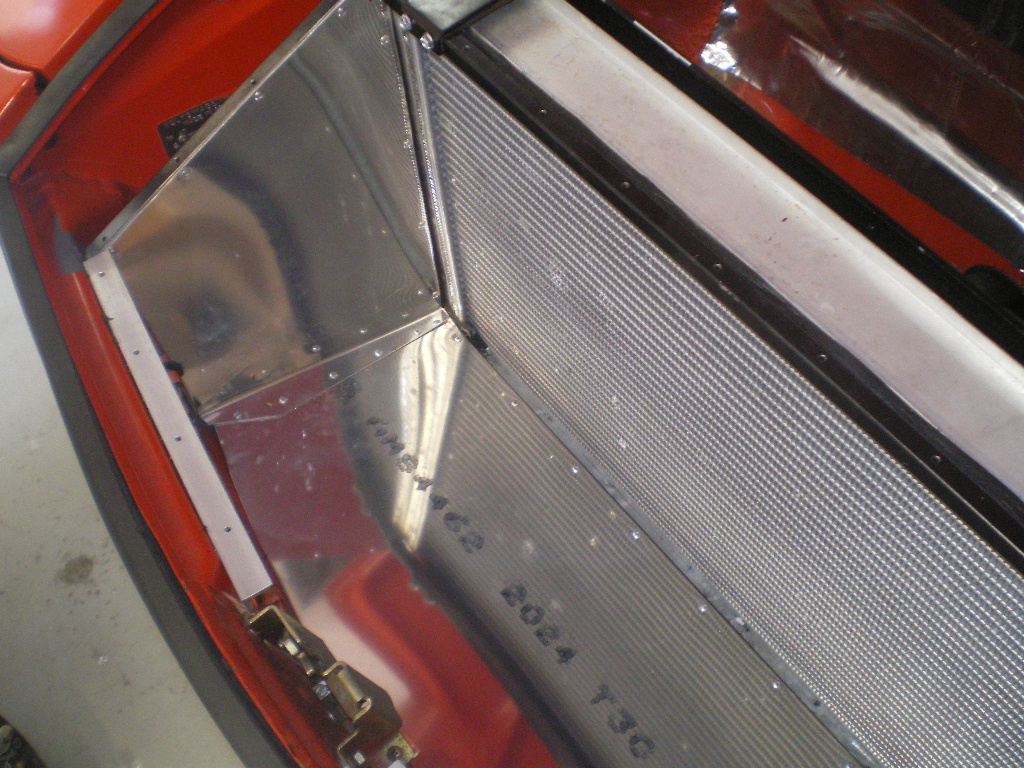

Posted by: mepstein Jan 14 2018, 01:49 PM
Very clean looking. Is that an RH setup?
Posted by: Mueller Jan 14 2018, 02:31 PM
Nice radiator setup...might want to add a bead or two to that top cover. Wondering if it'll make some noise or flex when the fans kick in.
Posted by: dakotaewing Jan 14 2018, 05:42 PM
Try some Denatured alcohol to the cover to remove the ink imprinting on the metal...
Home Depot sells it - I buy it by the gallon in the paint section.
Posted by: rhodyguy Jan 14 2018, 06:00 PM
Nice work Kent.
Posted by: 76-914 Jan 15 2018, 09:19 AM
Very clean looking. Is that an RH setup?
Don't know Mark. The fans & radiator were part of the package and came with the car. It is a dual core Griffin, generic 10" fans and I made the plenum and fan shroud.
Nice radiator setup...might want to add a bead or two to that top cover. Wondering if it'll make some noise or flex when the fans kick in.
The engine is so noisy I can't hear the fans when they do come on.
Try some Denatured alcohol to the cover to remove the ink imprinting on the metal...
Home Depot sells it - I buy it by the gallon in the paint section.
I kinda liked the bleed through. Never seen it before.
Nice work Kent.
Thx, Kevin.
Posted by: 76-914 Jan 17 2018, 09:20 PM
The more I looked at patching the hole in the firewall the more I complicated the job. A hole was cut before I got the car presumably to allow for the left valve cover to clear. I decided to just cut some metal, form a rib and see what that would allow. The pic that shows it painted makes it look bad but it really came out OK. The new piece comes in the cabin about 8mm more than stock. 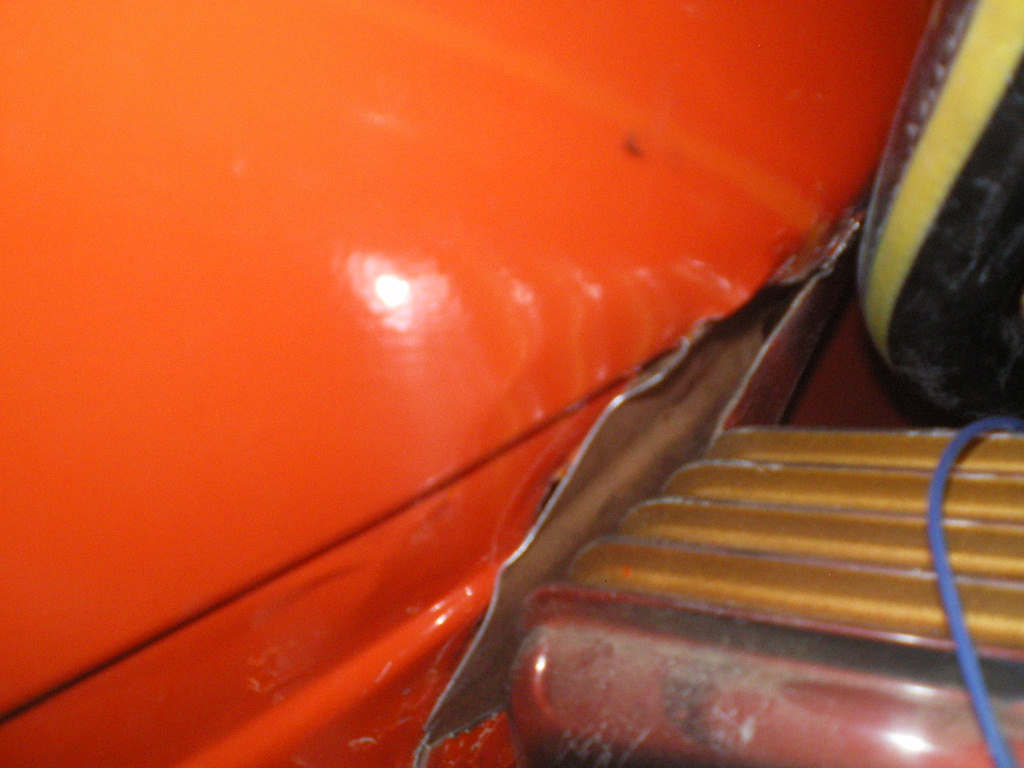
I tack a length of this "Windshield to Dash" seal about 6" long, let it dry about 6 hours then rinse and repeat. Someone offered to sell me an OEM NOS seal but never got back with me so I'm stuck using this one. If you have an OEM one presently, keep it. Even if you need to paint it. 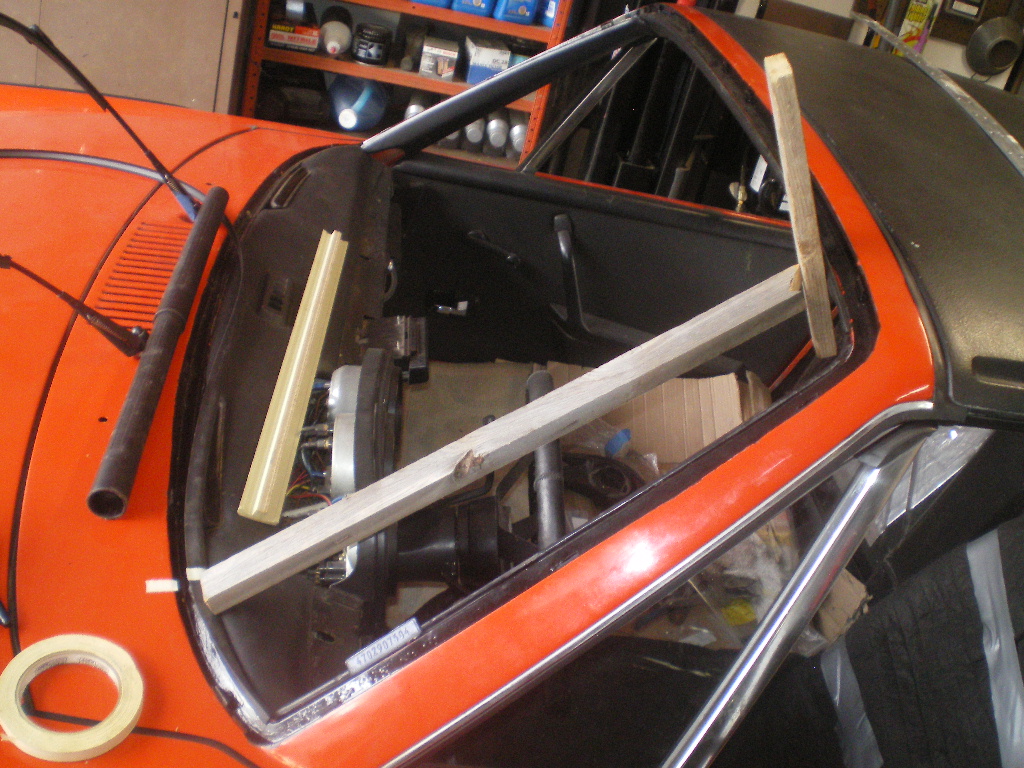
Posted by: 76-914 Jan 21 2018, 10:18 PM
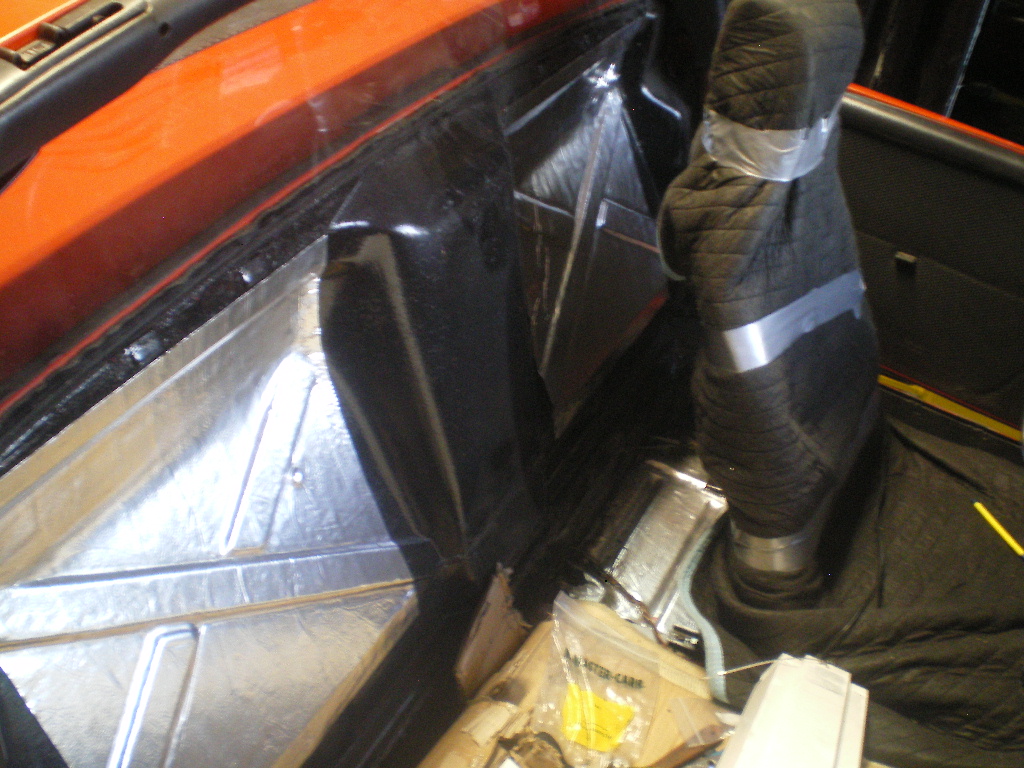
A quick update,
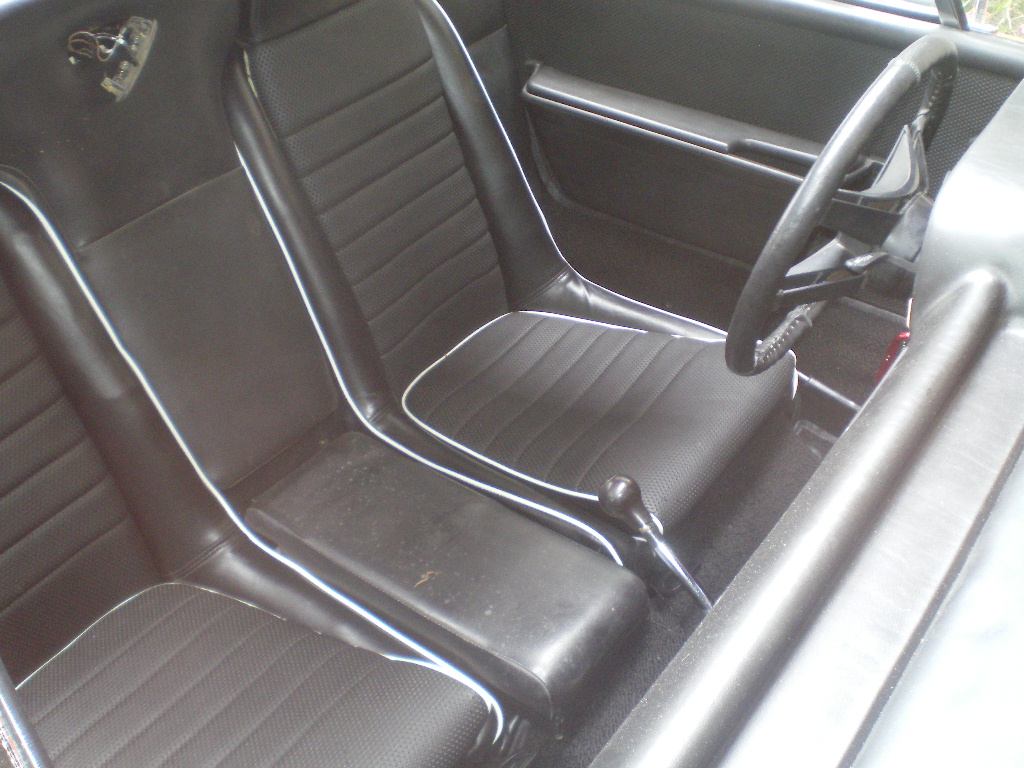
Both seats are installed. Passenger side has a slider like later models.
Front and rear sway rebuilt bars are in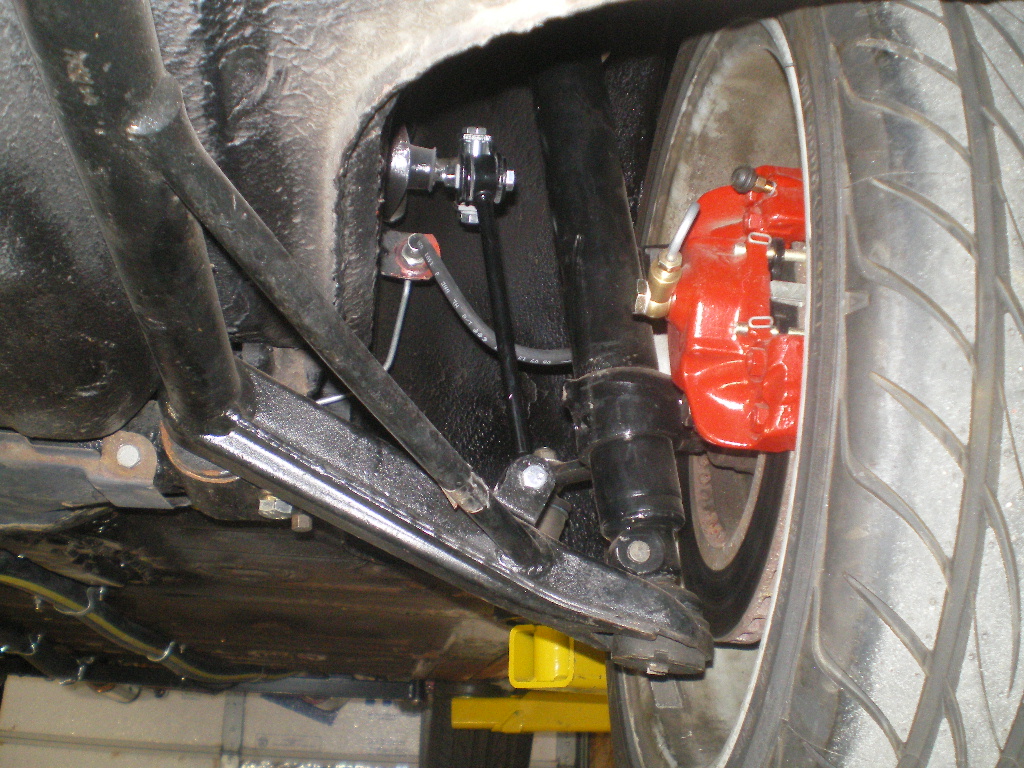
Windshield just taped in until the new Dash Top arrives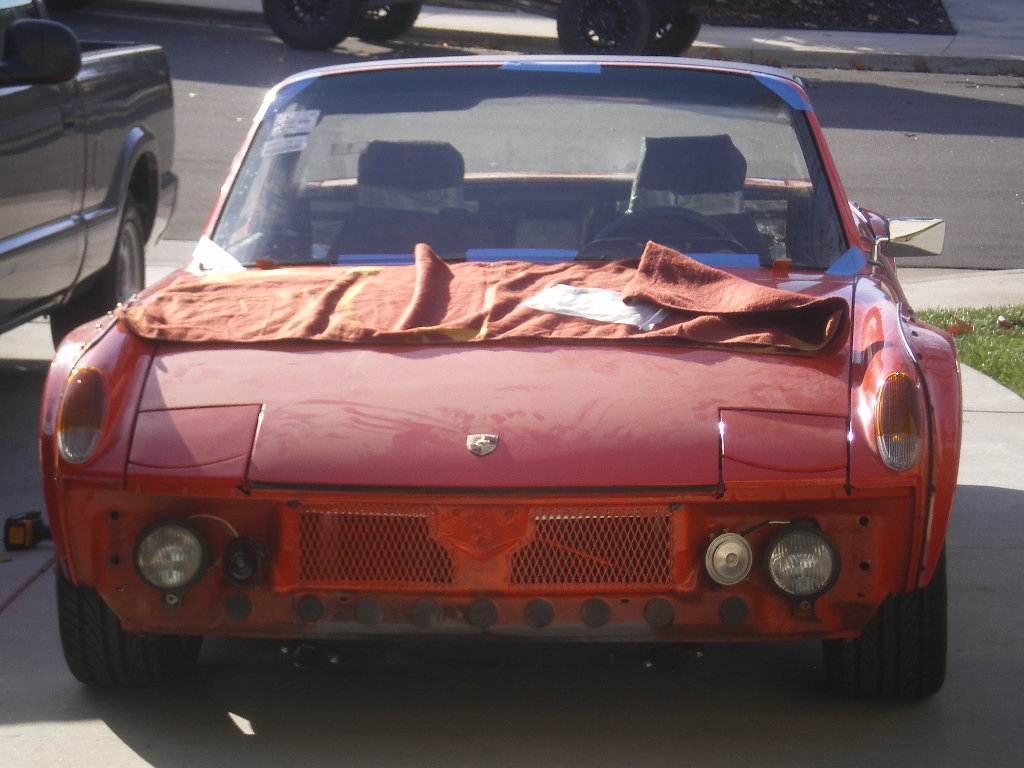
Installed the ends on the torsion bars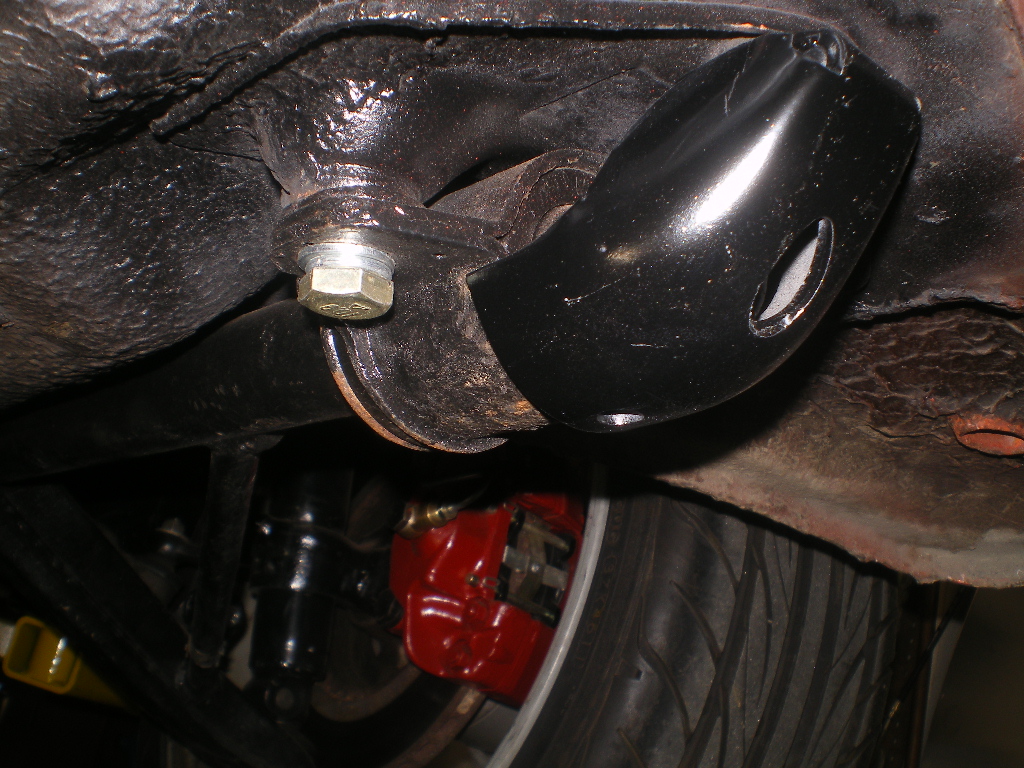
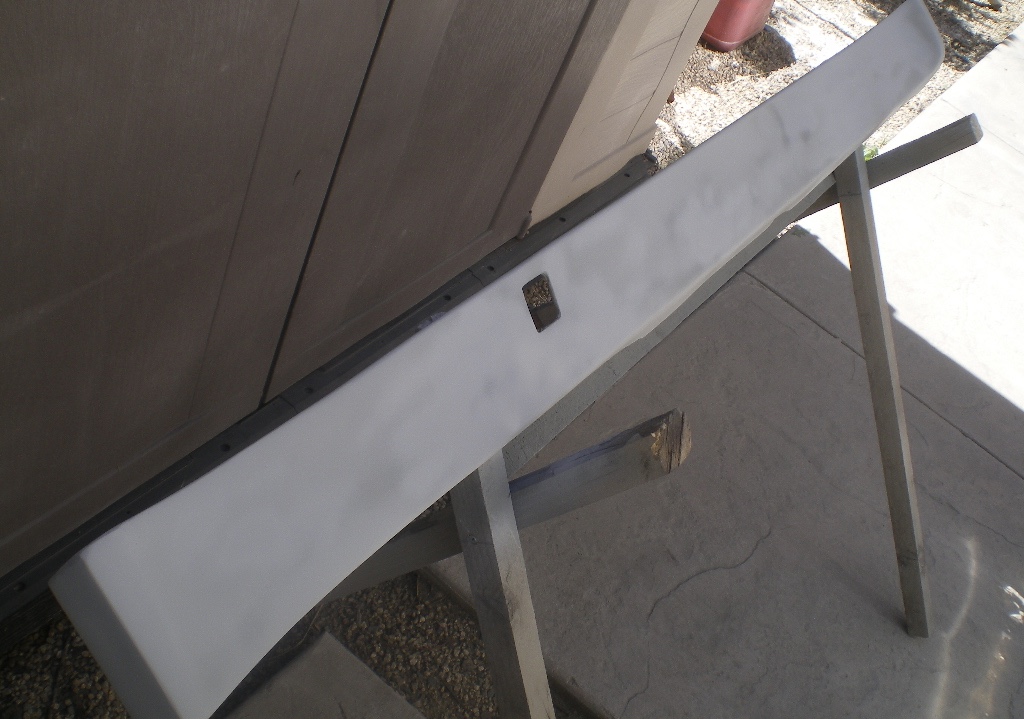
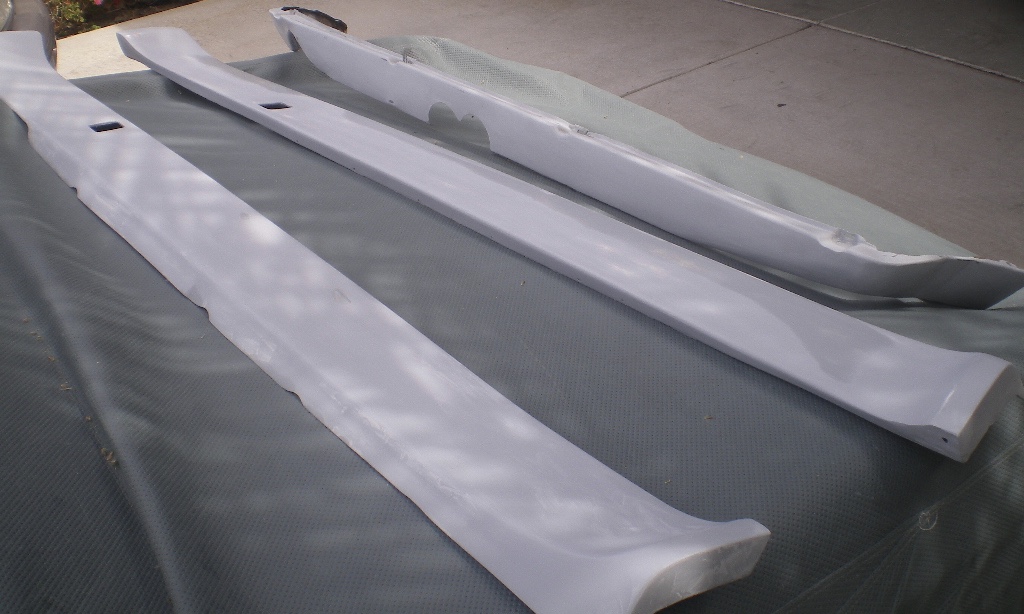
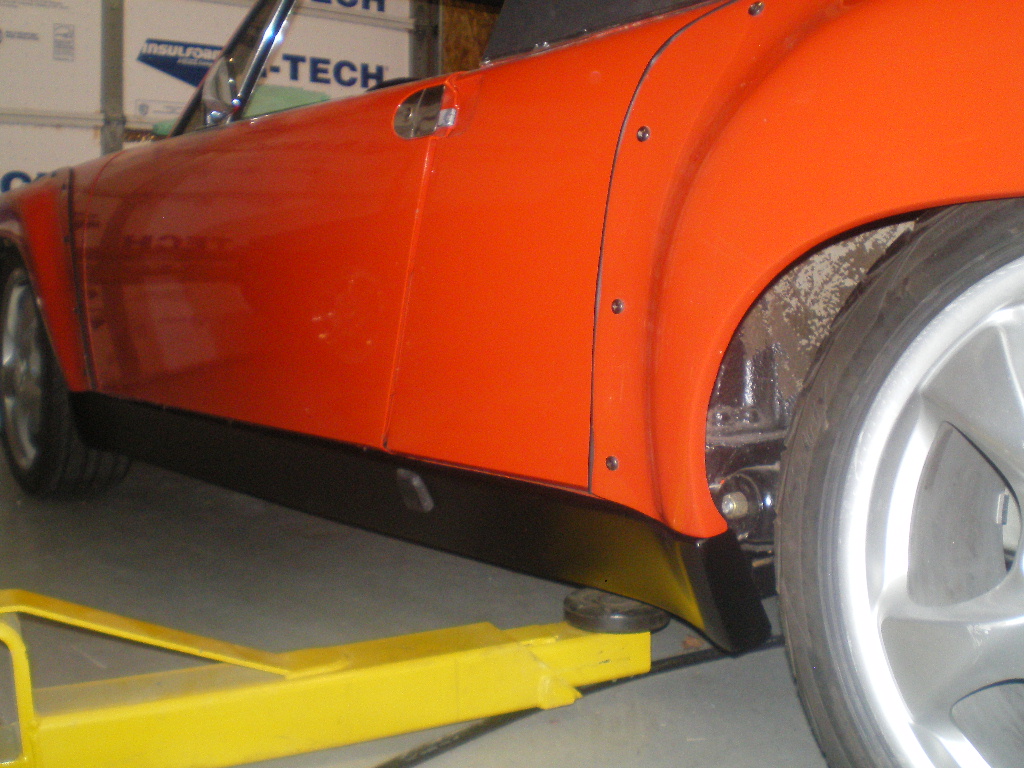
Trimmed and fitted the fiberglass valances. There will be a bit more fiberglass work to dial these in 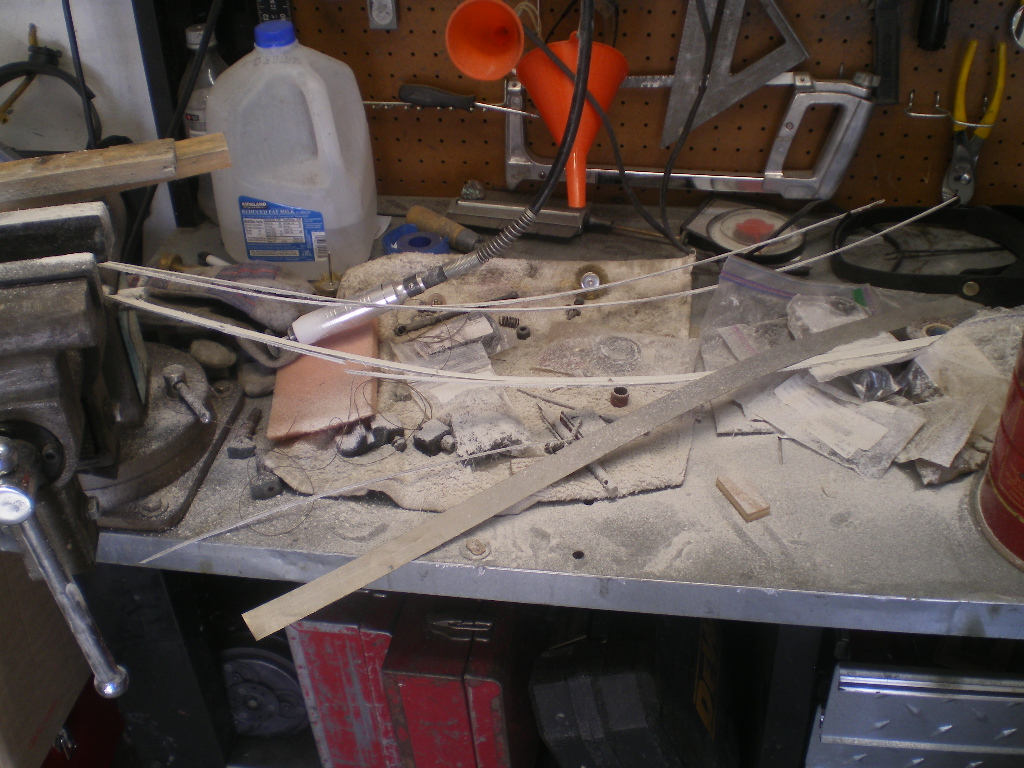

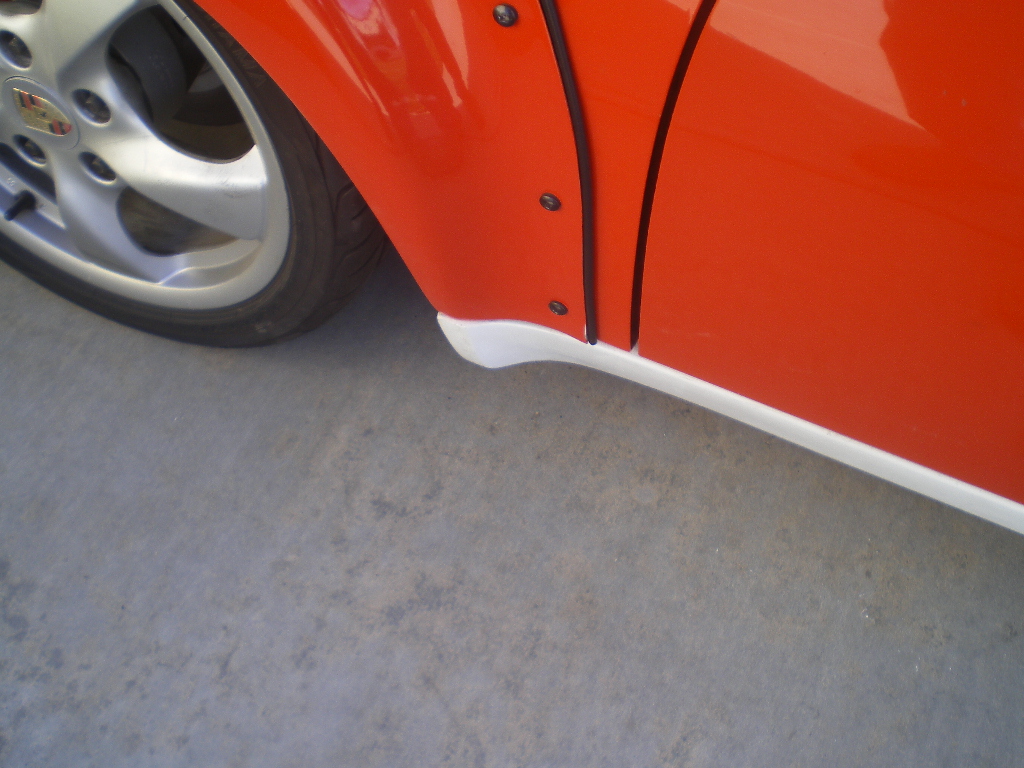
Posted by: 76-914 Jan 21 2018, 10:36 PM
Case in point. Notice the opposing lips at the front where the red flare meets the white valance. Little bit of sanding and shaping will straighten it out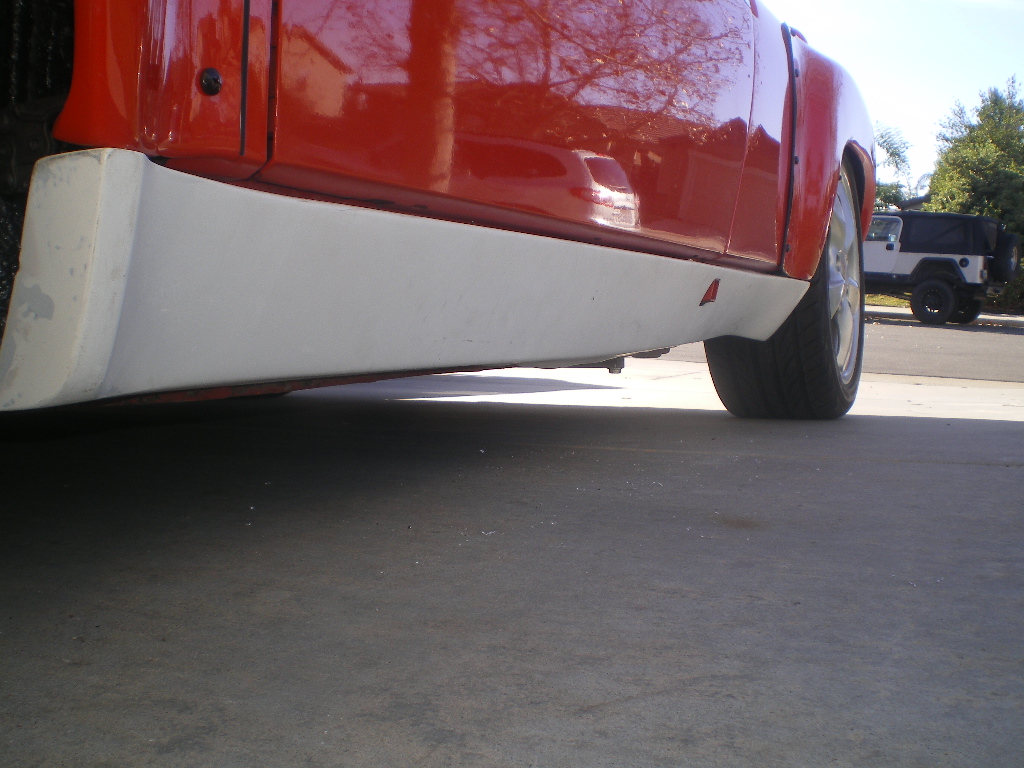
Another view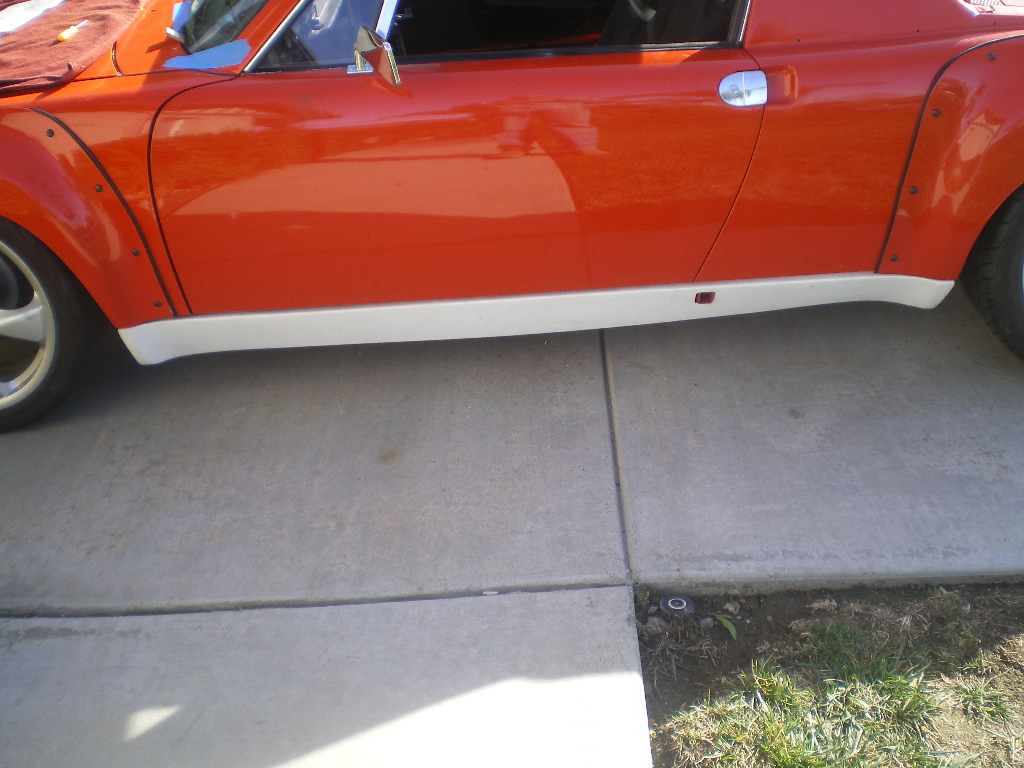
Stuck the Ducktail on to get an idea of how to attach it.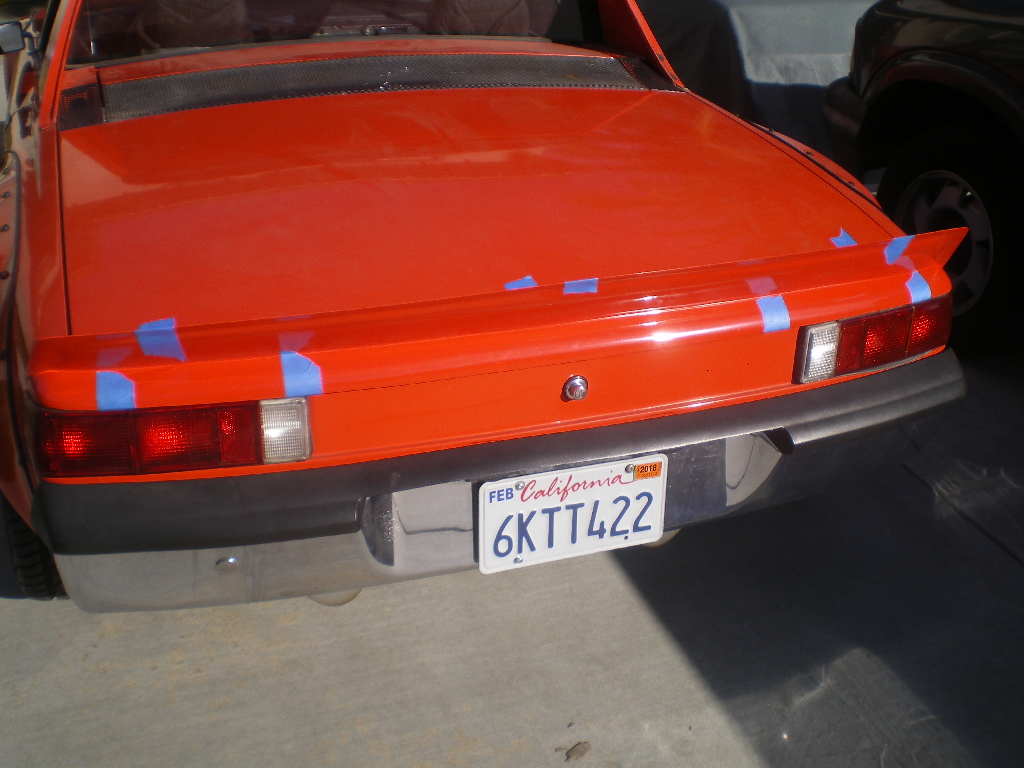
Installed these two beauties. Newly recovered visors.
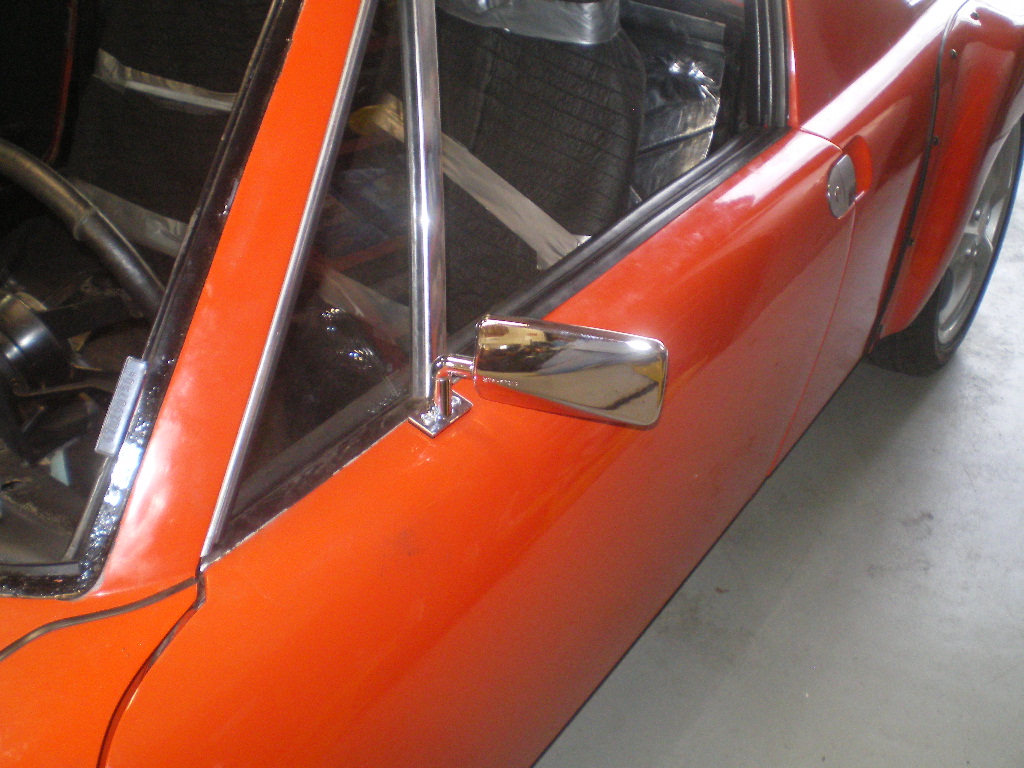
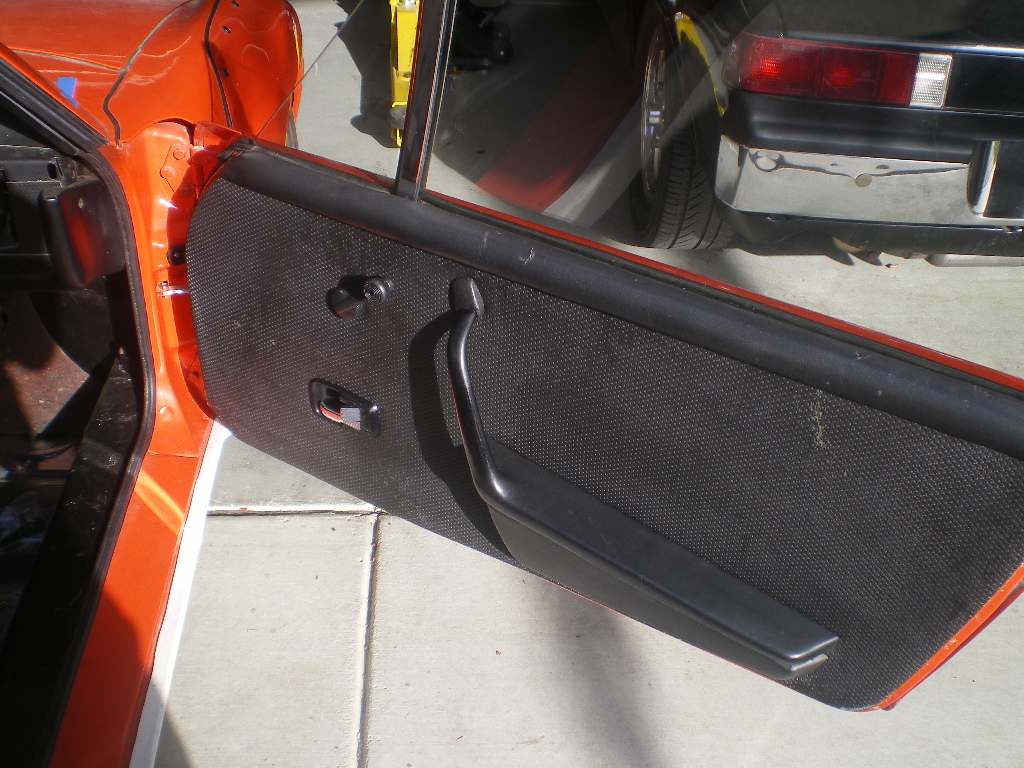
And one, yes one new side mirror. The right door isn't drilled for one and I'm going to leave it as such. I like the "period" look. You can also see the new door fuzzy's and squeegee in this same pic. 
Attached image(s)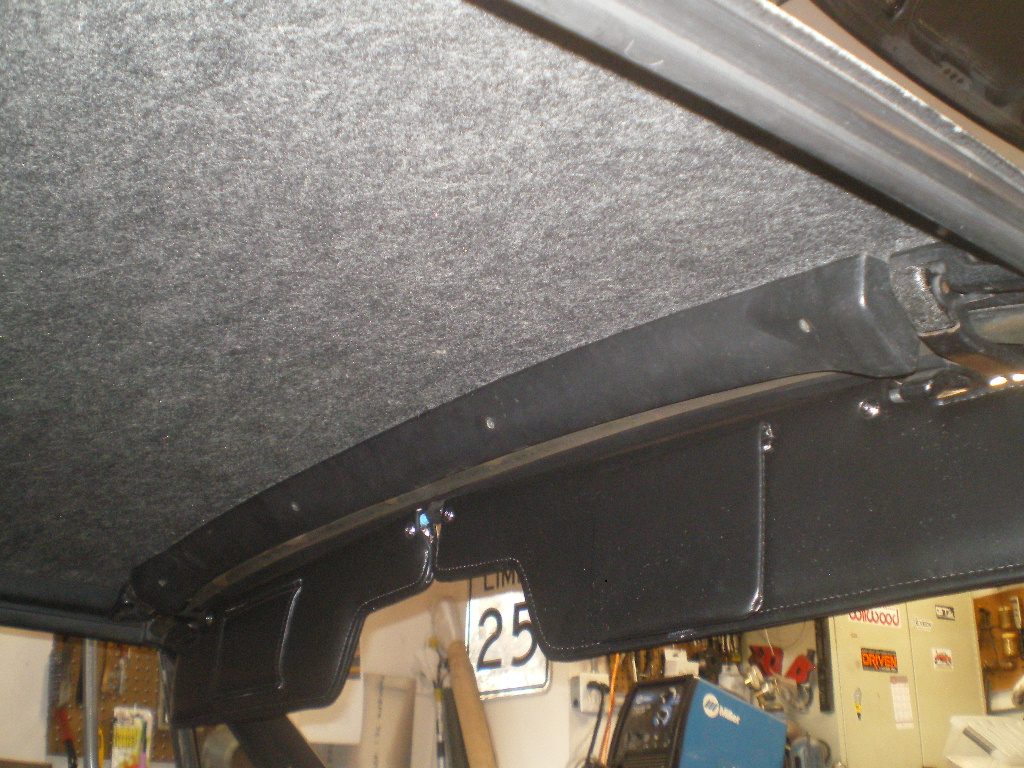

Posted by: Andyrew Jan 21 2018, 11:07 PM
Thats the same spoiler I have!
Details look good! The fiberglass valances look 10x better than ones I see in most cars
Posted by: mgp4591 Jan 22 2018, 03:29 AM
Thats the same spoiler I have!
Details look good! The fiberglass valances look 10x better than ones I see in most cars
Who makes that spoiler?
Posted by: bulitt Jan 22 2018, 03:53 AM
Sheridan spoiler. However, ScottyB spent many hours finishing the back side
Posted by: Cracker Jan 22 2018, 06:00 AM
[quote name='76-914' post='2570503' date='Jan 21 2018, 11:36 PM']
Stuck the Ducktail on to get an idea of how to attach it.
Kent - Just an idea...I have the same spoiler.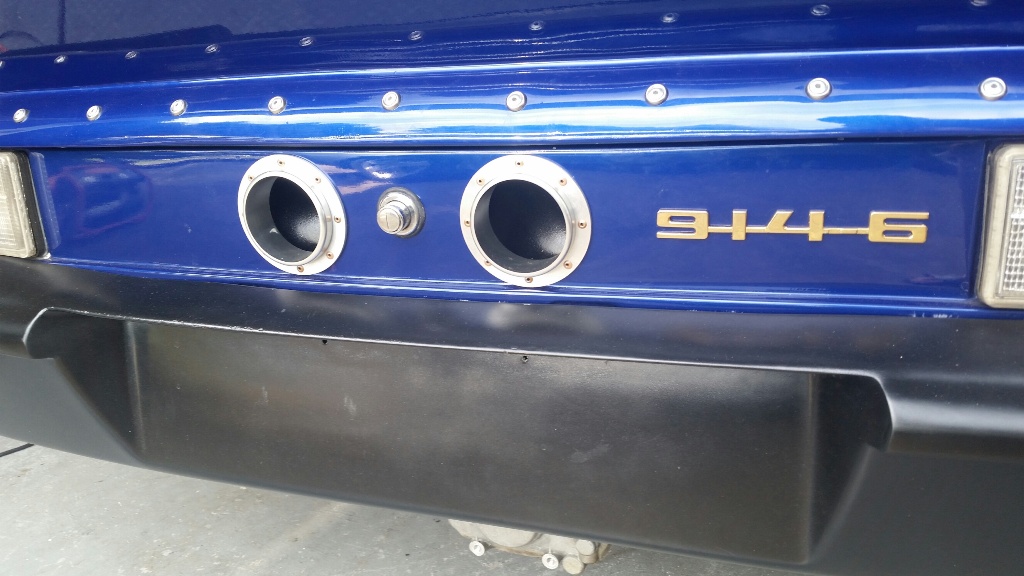
Posted by: 76-914 Jan 22 2018, 09:21 AM
[quote name='Cracker' date='Jan 22 2018, 04:00 AM' post='2570555']
[quote name='76-914' post='2570503' date='Jan 21 2018, 11:36 PM']
Stuck the Ducktail on to get an idea of how to attach it.
Kent - Just an idea...I have the same spoiler.
[/quote]
Tony, that appears to be what I have in mind. I was planning on either Dzus fasteners or SS screws and Tinnerman washers to spread the load. I can't tell from your pic; are those are Tinnerman washers or not??
Posted by: jd74914 Jan 22 2018, 12:14 PM
Those look like the countersunk washers McMaster sells. They're also the inverse of a Tinnerman; they have the countersink, but not the extended flange because the countersink is on top and not level with the surface.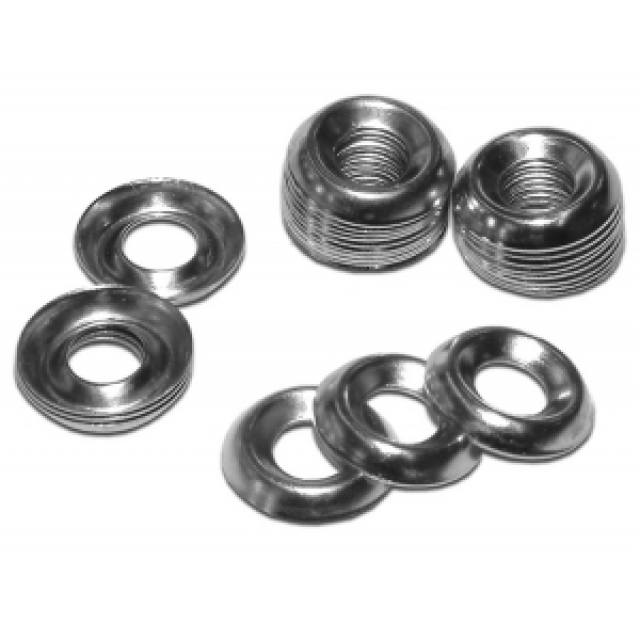
Posted by: 76-914 Jan 22 2018, 06:31 PM
Those look like the countersunk washers McMaster sells. They're also the inverse of a Tinnerman; they have the countersink, but not the extended flange because the countersink is on top and not level with the surface.
Your right! Good eye. I just ordered #10 SS Tinnerman washers and the SS hardware from Aircraft Spruce. All input is gut!
Posted by: 76-914 Jan 30 2018, 11:26 AM
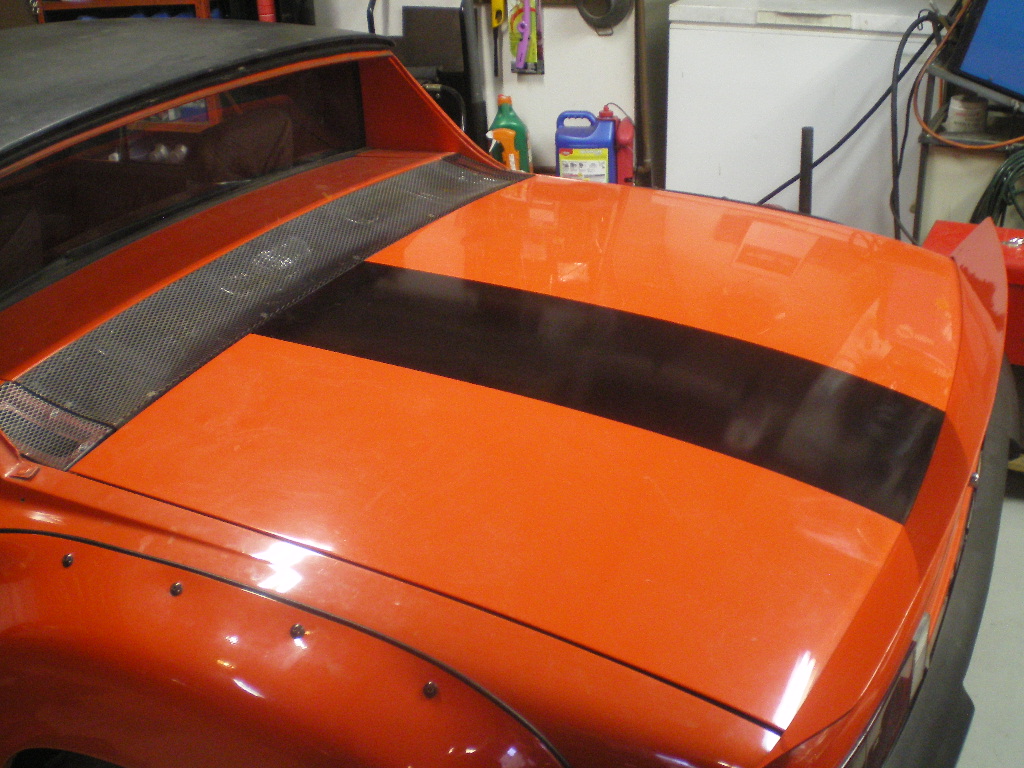
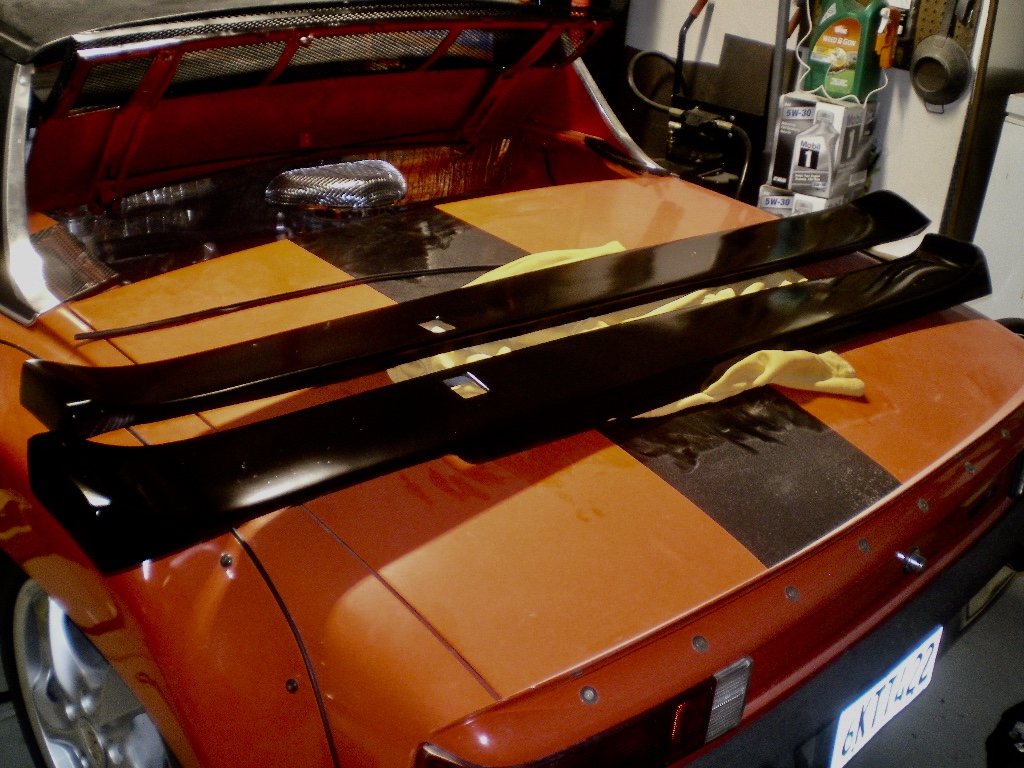
The rear trunk lid came with a gash in it. Looks like it got whacked with an axe blade because it tore the metal and was very narrow. I had hoped the Ducktail spoiler would cover it but it does not. I decided to forgo painting the lid (unknown color and would be a bitch to match) and to just repair the area and cover it with a 12" wide stripe. This must have been Bob's idea too because the car came with a 5' roll of 12" black decal material. 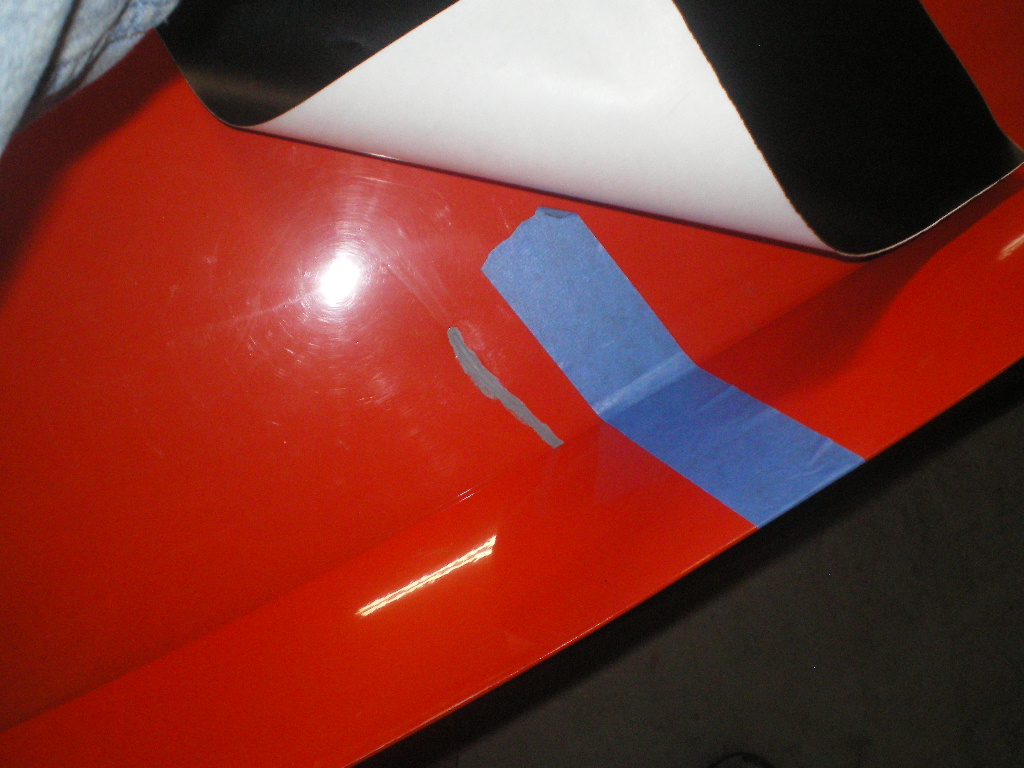
You can see how narrow an area is effected. 
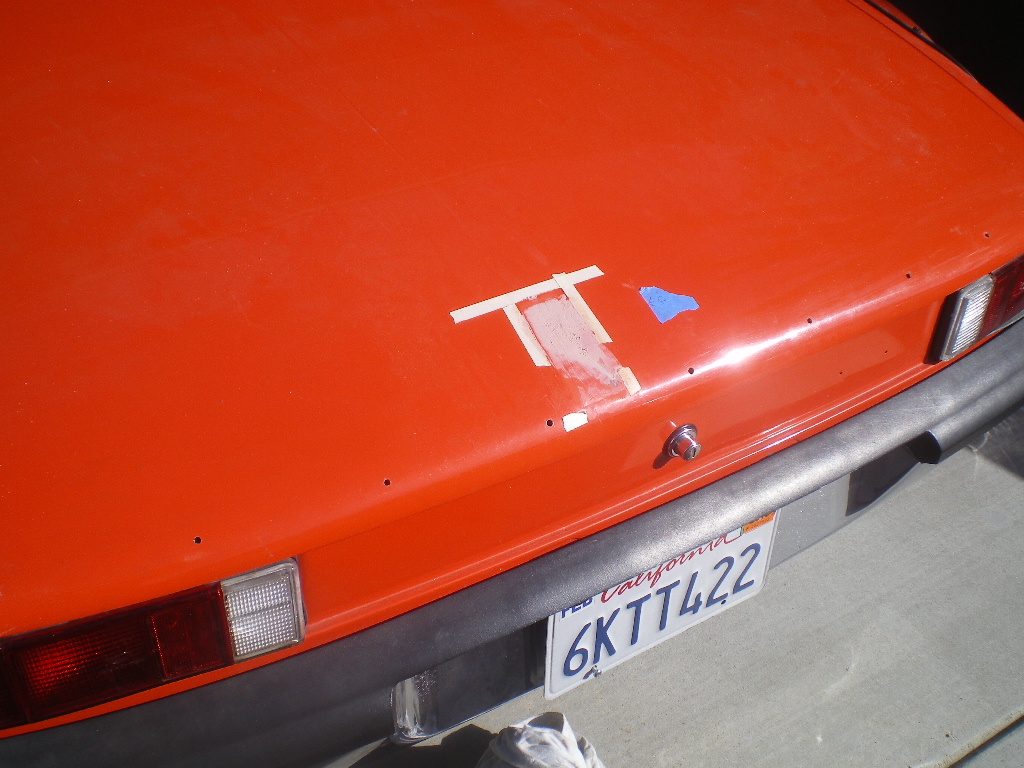
I must have had my head in my ass and my mind in Arkansas because I believed the vinyl decal material would hide minor imperfections and therefor didn't float out the repair area as I might have done for a proper repair. WRONG. That flat black material magnified my half assed repair. So I ripped it off and sanded down that area as I should have done in the first place. "Stupid is as stupid does!"; Forest Gump.
So from this: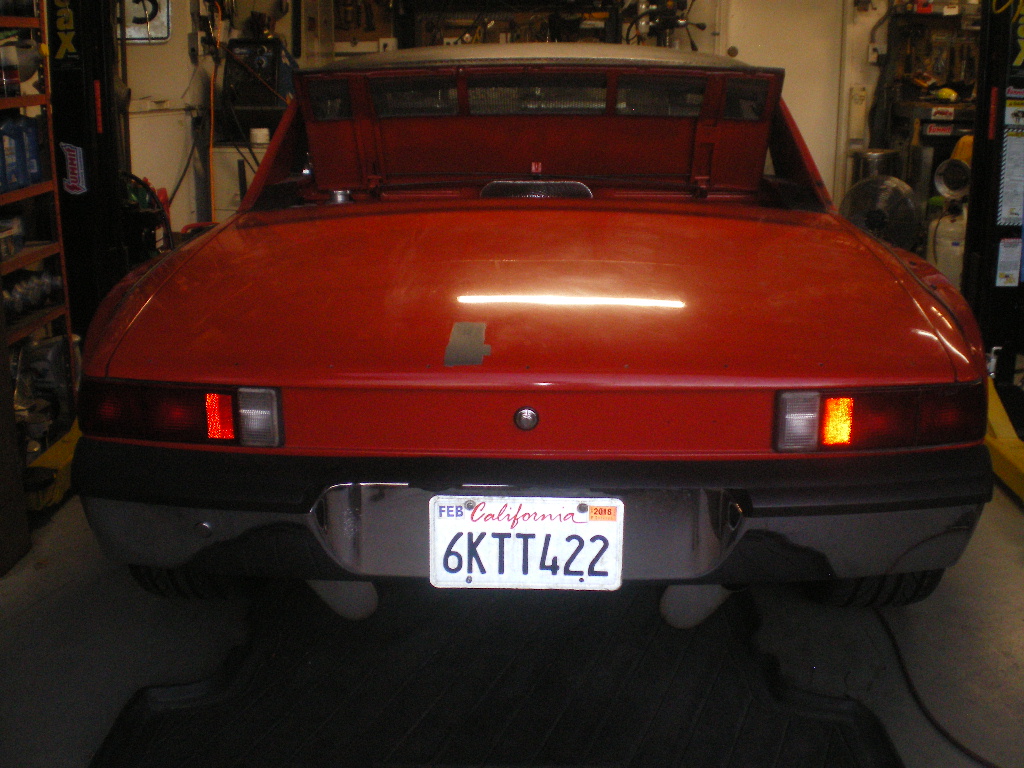
To this. Two hours out the window because of laziness!  Once the vinyl arrives I'll be back on track.
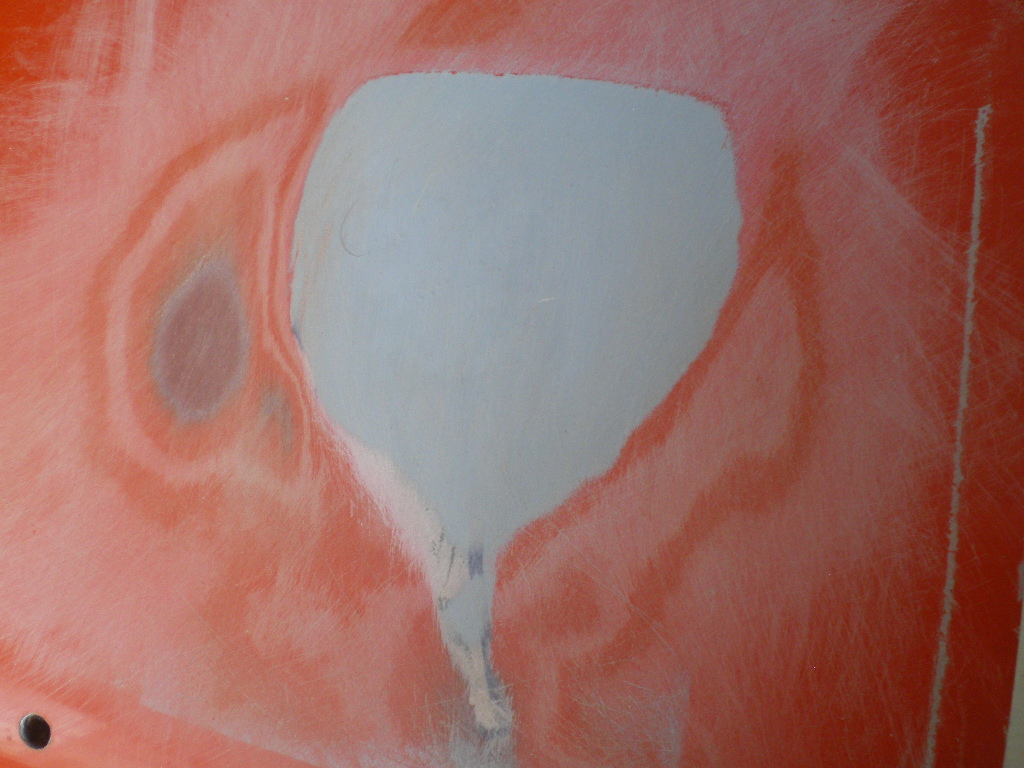
This is the intended look but staggered to the left somewhat. And after the tinnerman washers arrived, I did manage to fit the spoiler without conflict. 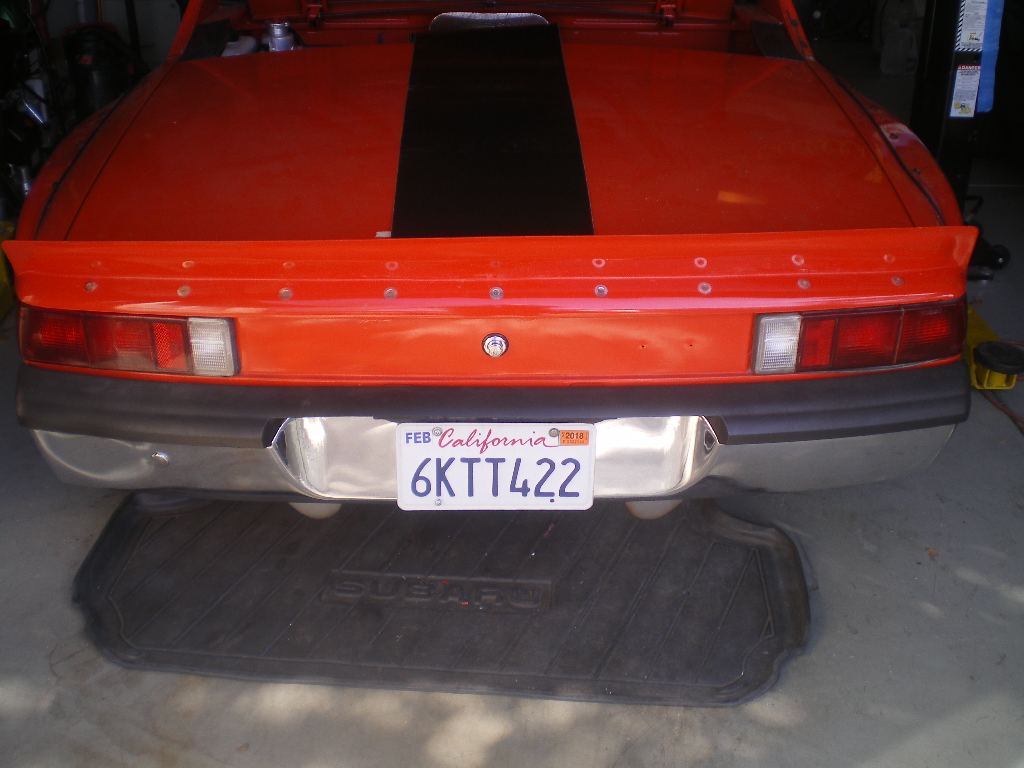
The exhaust remains in limbo until I decide as to whether I will twin the outlets in the center or stub them out individually. 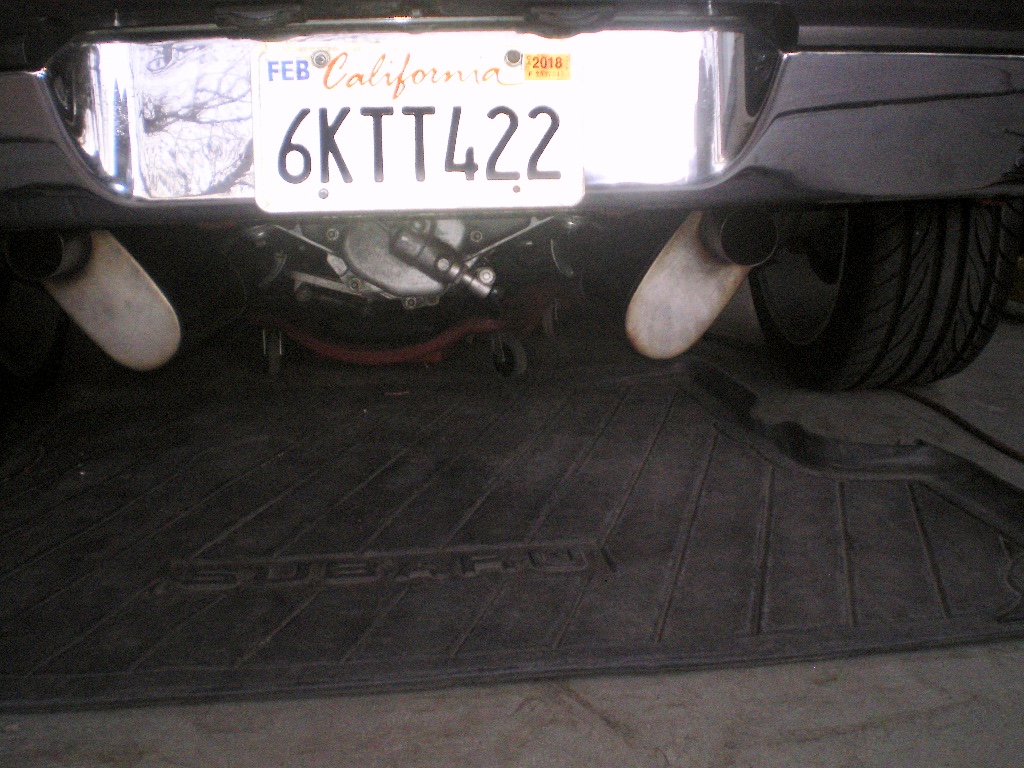
In my mind, I had decided it would be extremely difficult to add this insulating pad as the engine fits so close to the firewall and thusly put off the task. However the solution was simple enough. Just remove the trans hangers and drop the tranny end while leaving the front mounts attached. Quick and easy after all.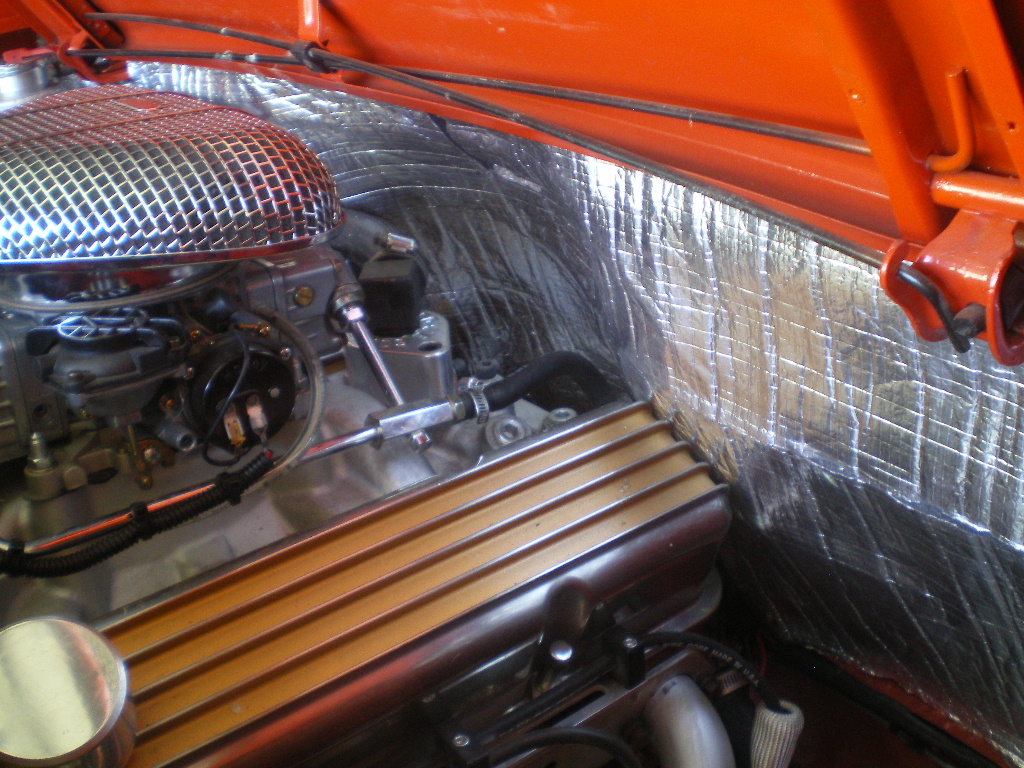
Posted by: burton73 Jan 30 2018, 01:09 PM
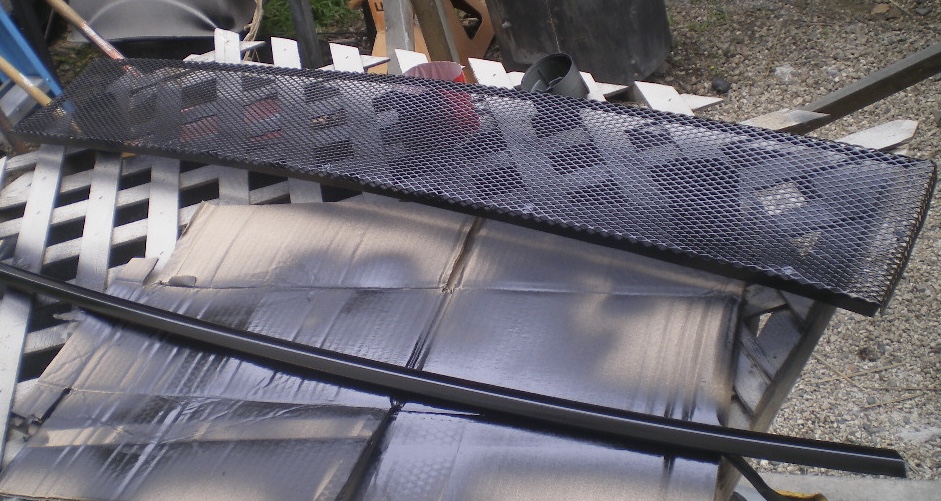
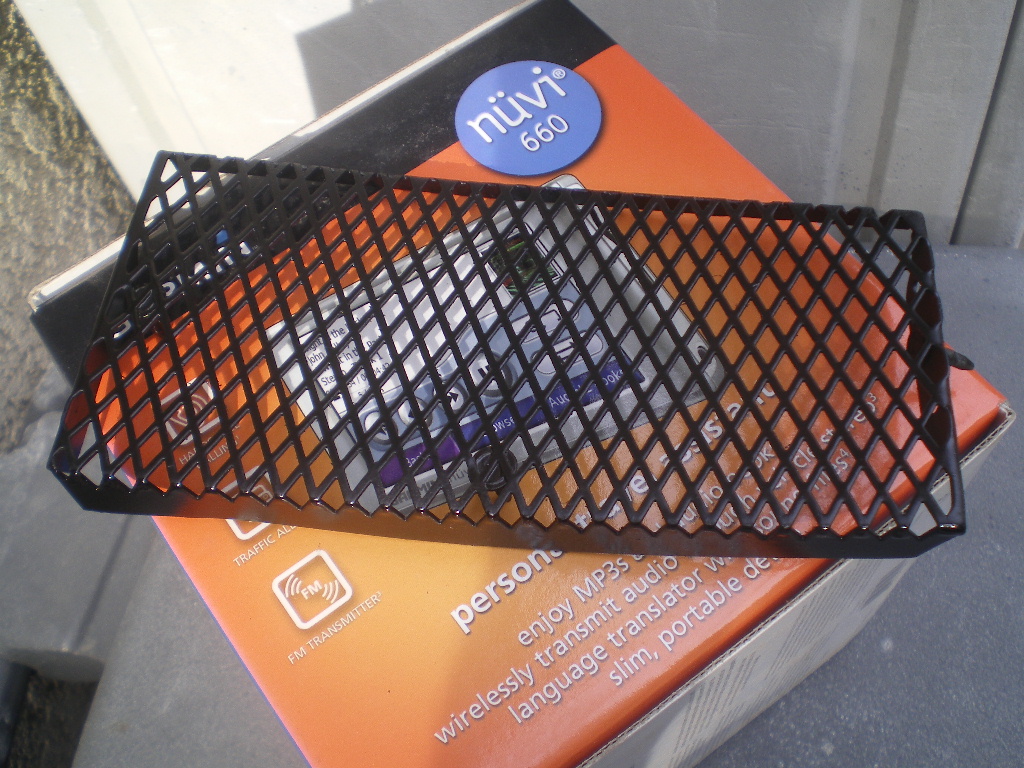
I was looking over your build and I thought I would point out what I am doing for my grill for my V8 car. Got the idea from someone on this board a long time ago. The front grill is for a 350Z car and it looks like the shape is right on. I got it n EBay several years ago and the price seemed very good. Comes with fasteners and area to thread from the back. Very good quality in finish.
Bob B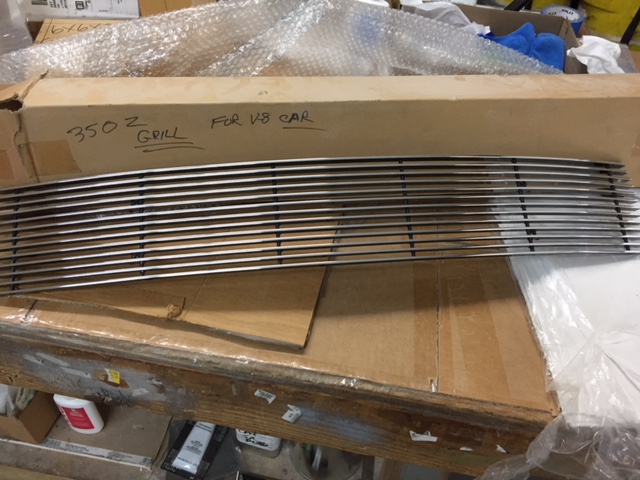
Posted by: rhodyguy Jan 30 2018, 01:49 PM
Jerry Mahoney used a Z grill on his blue Ls car. That was the first application I had seen. They fit like they were made for a 914.
Posted by: bulitt Jan 30 2018, 04:05 PM
Kent- the vinyl was for the top of the windshield...
I had the car up on the lift and one day my wife decided to open the door on the bay so she could get over to the garage windows to clean them. Well, the grage door bracket dug into the trunk lid...
She's happy now that I showed her your repair!
Posted by: 76-914 Jan 30 2018, 11:10 PM
I was looking over your build and I thought I would point out what I am doing for my grill for my V8 car. Got the idea from someone on this board a long time ago. The front grill is for a 350Z car and it looks like the shape is right on. I got it n EBay several years ago and the price seemed very good. Comes with fasteners and area to thread from the back. Very good quality in finish.
Bob B
I'll look into that. Damn nice looking too. Thx for the tip Bob.
Jerry Mahoney used a Z grill on his blue Ls car. That was the first application I had seen. They fit like they were made for a 914.
Kent- the vinyl was for the top of the windshield...
I had the car up on the lift and one day my wife decided to open the door on the bay so she could get over to the garage windows to clean them. Well, the grage door bracket dug into the trunk lid...
She's happy now that I showed her your repair!
To quote Jim Carey, "I got it all wrong!".
Posted by: 76-914 Feb 1 2018, 06:22 PM
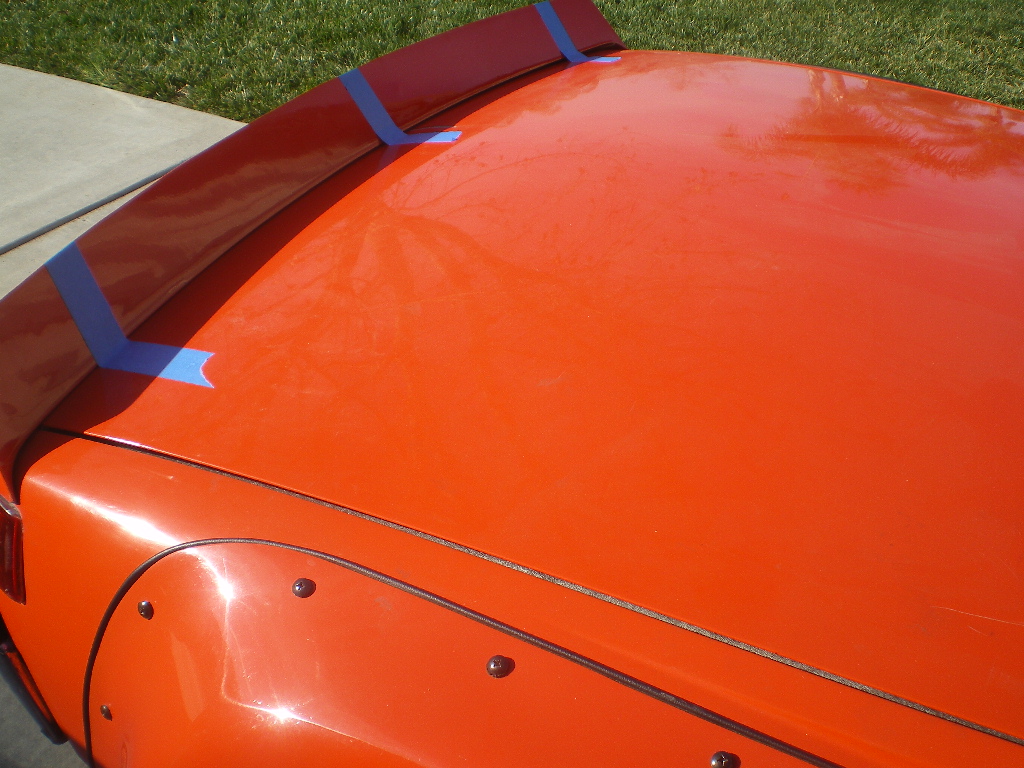
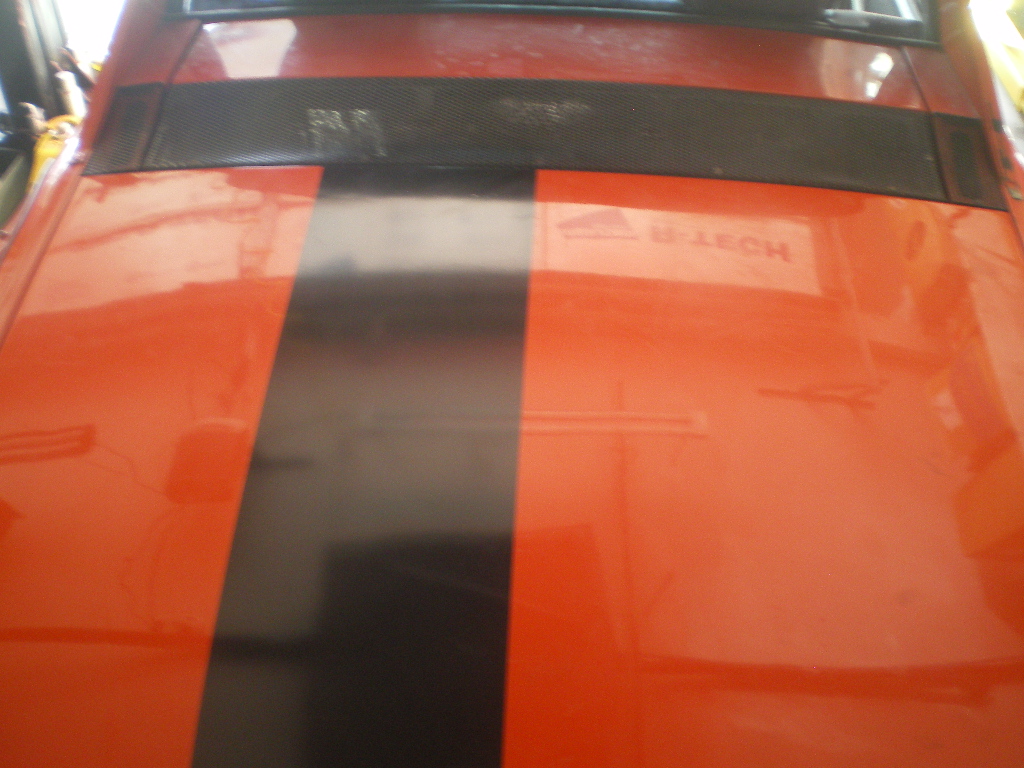
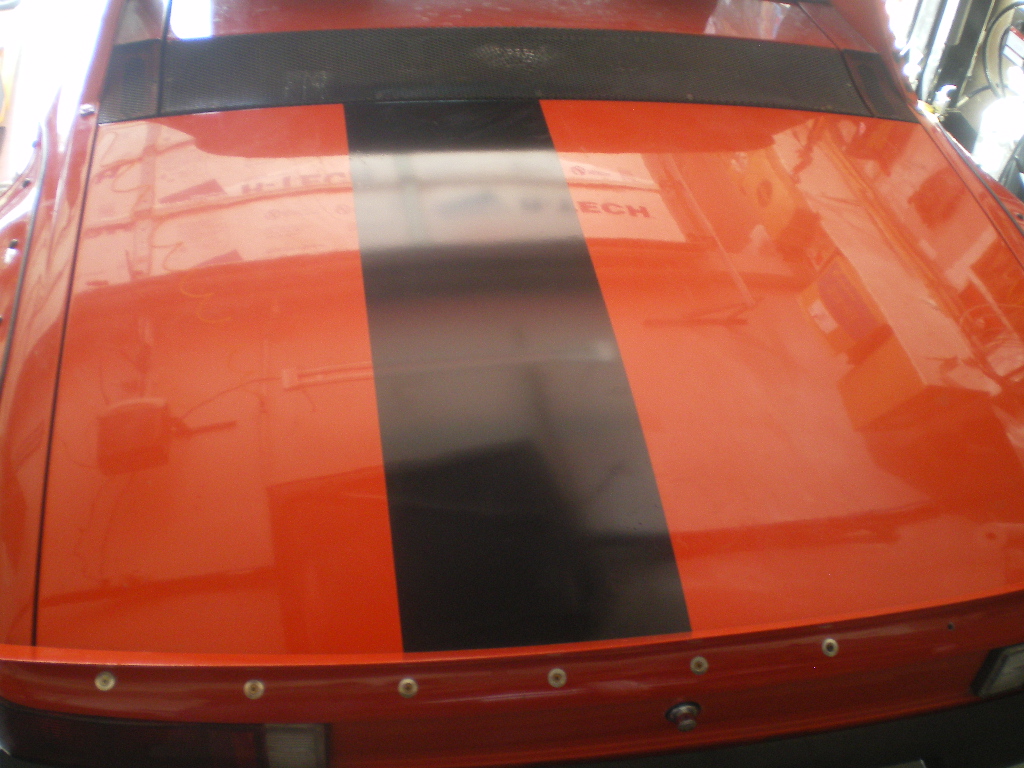
Now that I have the black stripe and ducktail installed I'm wondering if I should extend the stripe to the rear glass. Should it continue onto small section on the engine lid or stay as is? What say yee?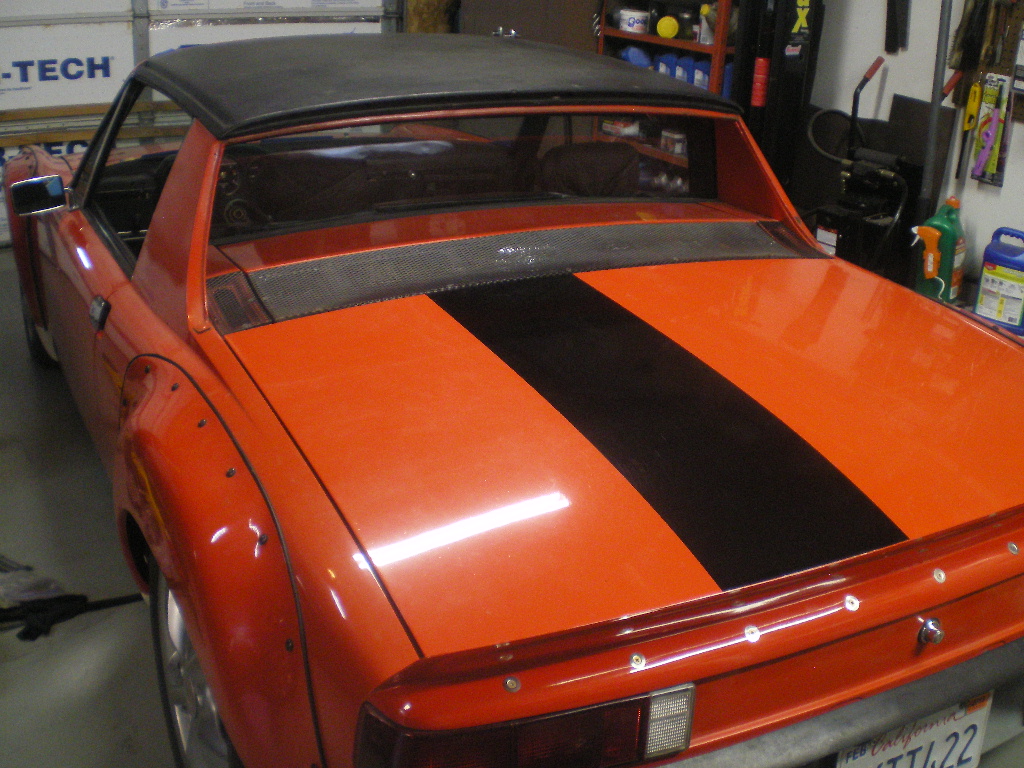
Posted by: Andyrew Feb 1 2018, 11:58 PM
Its just vinyl right? I would put it on and see how you like it. Do both sides of the spoiler.
Posted by: sb914 Feb 2 2018, 07:03 AM
Do it and the front trunk as well. Looks un finished
Posted by: rhodyguy Feb 2 2018, 08:25 AM
Paint the top orange.
Posted by: Chris H. Feb 2 2018, 09:43 AM
If it's vinyl do the spoiler and also the engine lid at a minimum.
Posted by: theer Feb 2 2018, 09:50 AM
Stripe all the way - front & rear.
Top: paint the top orange and add stripe there, too. OR... leave the top black and reverse and put orange stripe on the roof?
Posted by: Larmo63 Feb 2 2018, 09:59 AM
That car has come a long way, Kent. You might like it so much when you are done, that you'll want to keep it.
Stripe the engine lid and front trunk.
Don't paint the top orange.
Carry on.
Posted by: burton73 Feb 2 2018, 10:21 AM
Ideas for stripe: I have a smooth top from the 74 that I cut up and if you wanted to paint it and try I would give it to you.
Its in Inglewood.
Bob B
Pictures Corvette 2015
Bob B

Posted by: rhodyguy Feb 2 2018, 11:09 AM
Paint a different one orange. A smooth one.
Posted by: Andyrew Feb 2 2018, 11:53 AM
Paint a different one orange. A smooth one.
I did this and found I never liked the OEM top. The smooth top is so much nicer, especially on a modern body design. Got rid of the OEM top.
Posted by: burton73 Feb 2 2018, 01:25 PM
I have a smooth top from the 74 that I cut up and if you wanted to paint it and try I would give it to you.
To be clear the top was not cut up just the car. It is painted a sick green but the price is right. Just a drive over the hill.
Bob B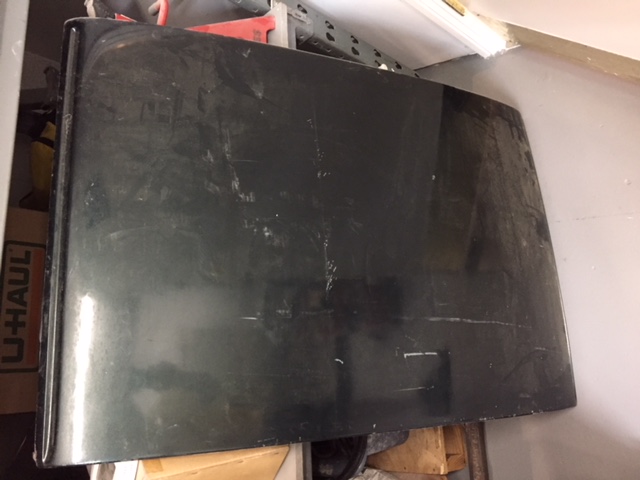
Posted by: 76-914 Feb 2 2018, 08:14 PM
OK, thx for the suggestions and offer of a top. I have one that is sanded down but thx very much anyway. I'll keep the OEM top as it will see lots of use and might need the heavy duty eggshell finish. My son has 2 kids. I'll order some more stripe material to complete the run. Only takes one day to arrive. Oh I liked the idea of covering the Ducktail as well! Those Datsun grilles are < $40. I like the bulk powder coat one but realized how often it would need to be cleaned because of the bugs. Chrome wouldn't show bugs as much.
Posted by: 76-914 Feb 12 2018, 12:10 PM
Wow. 10 days w/o an update. Probably because I've been goofing off again. Let's see; where did I leave off? Oh yes, the stripe. I've decided do only the rear trunk sans the spoiler. I did order another 10' roll of the vinyl incase I change my mind later.  The new dash is due this week so I can button up the windshield and dash area by next weekend. I've developed a small leak beneath the reservoir but haven't looked into it yet. It's plastic and may have developed a crack. No big deal.
Painting these ducts was the last thing on the list before the dash goes in.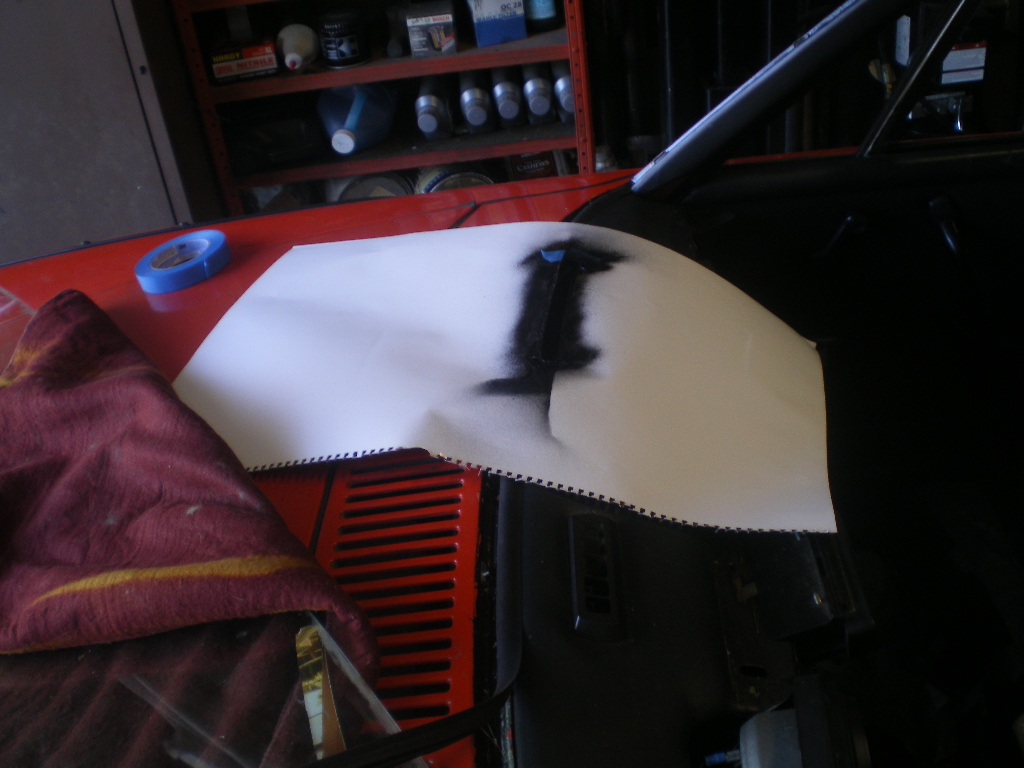
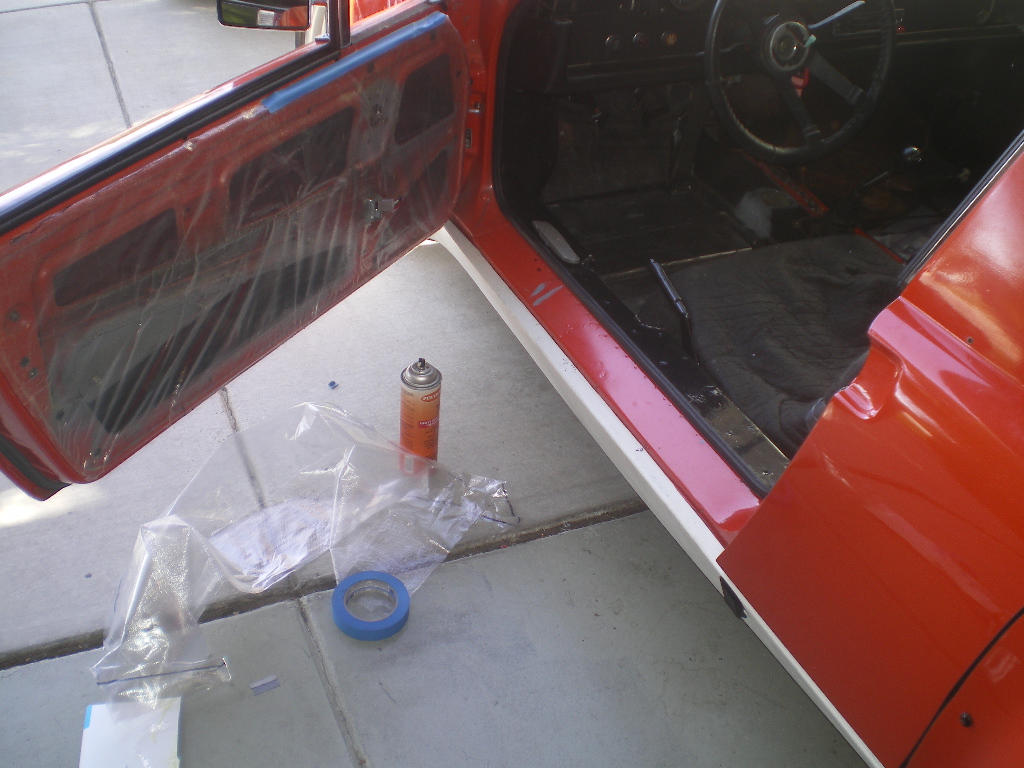
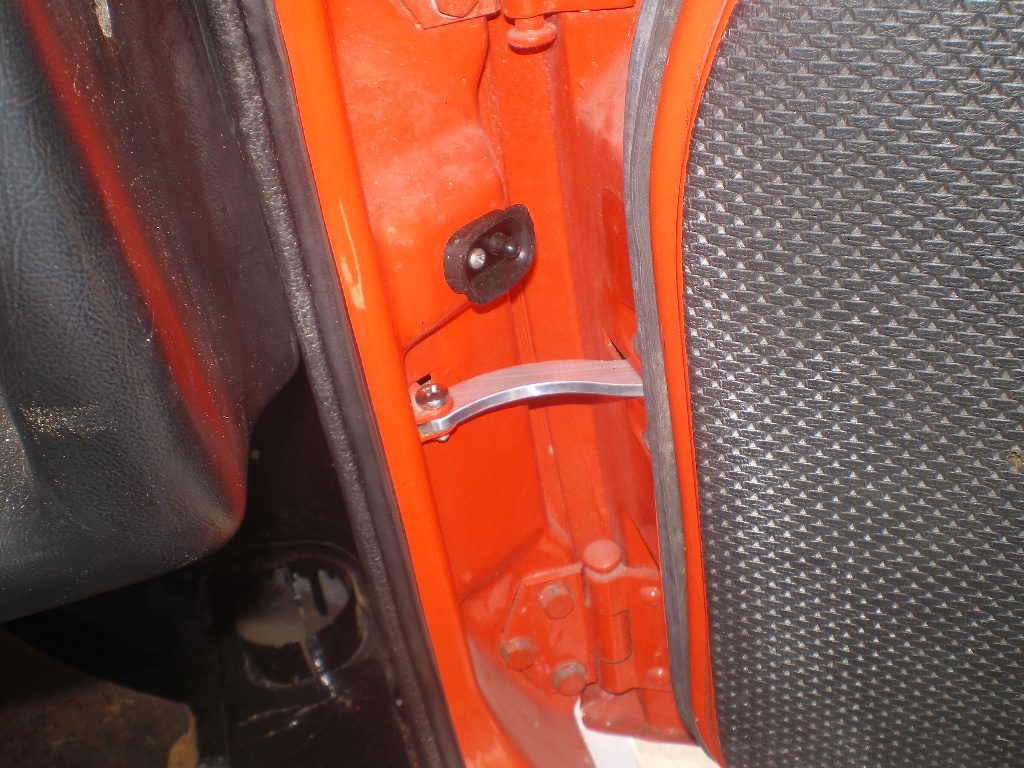
The last item on the door list was to rebuild the door stays. 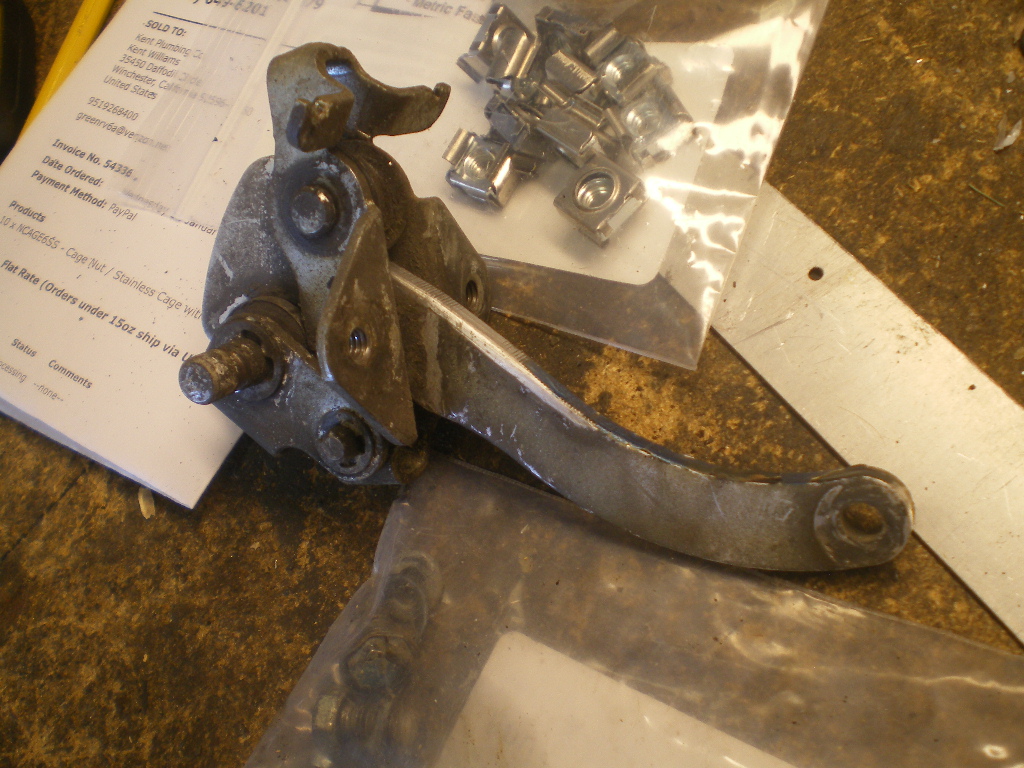
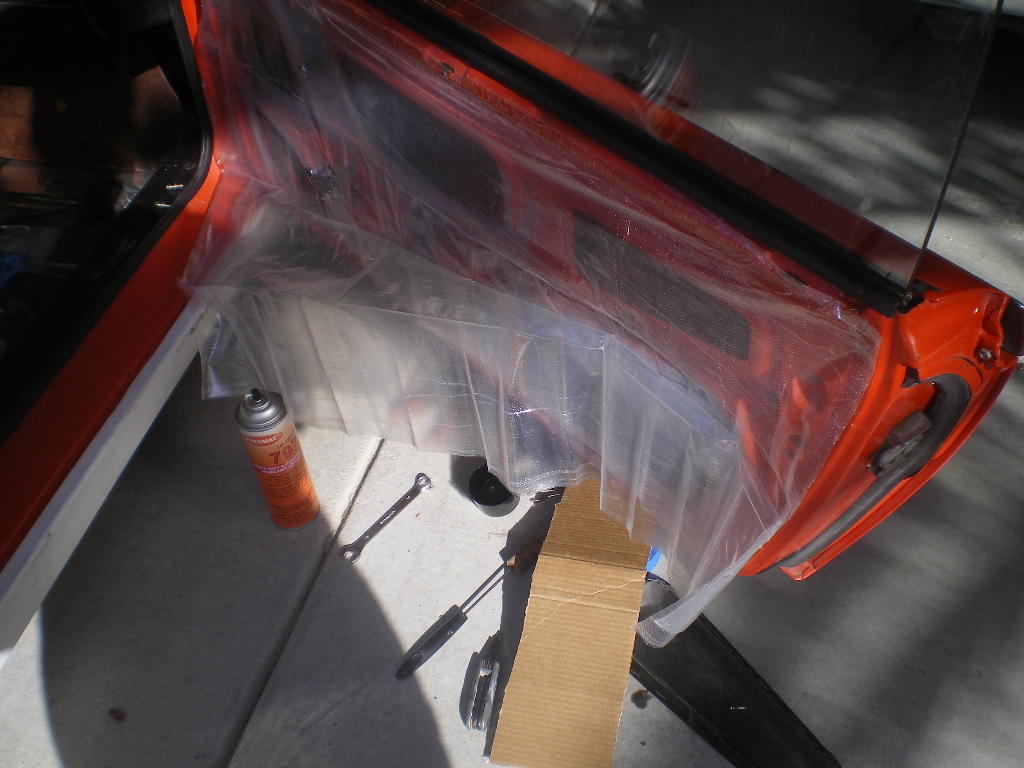
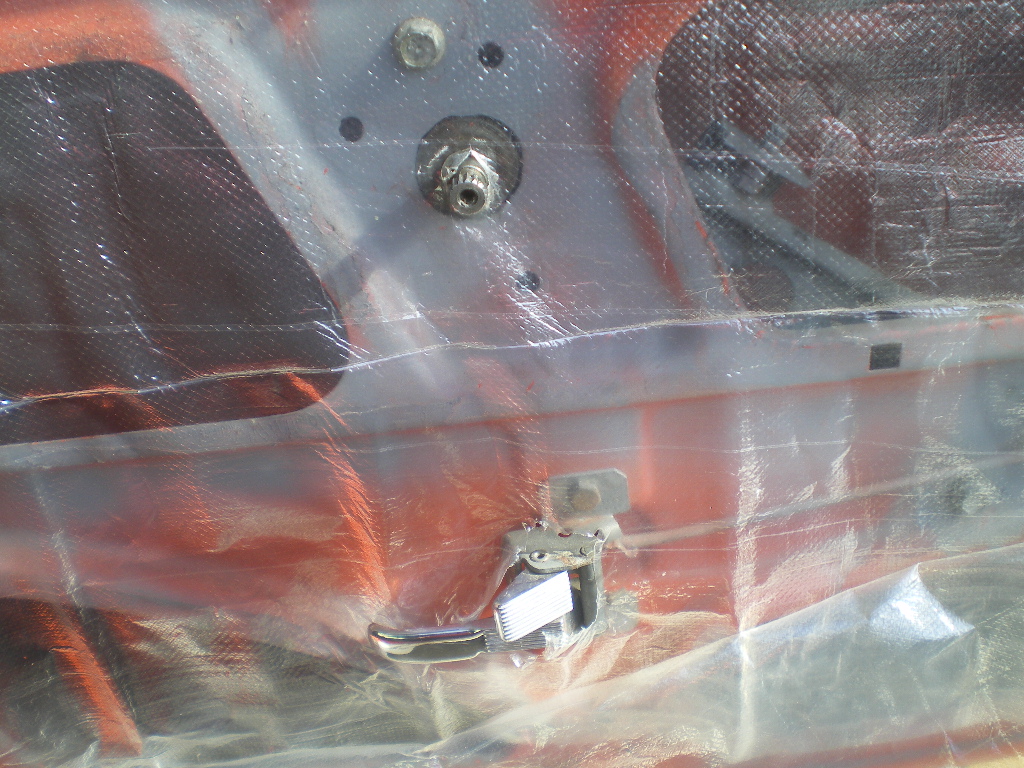
These door cards are in such nice shape they required sealing the doors.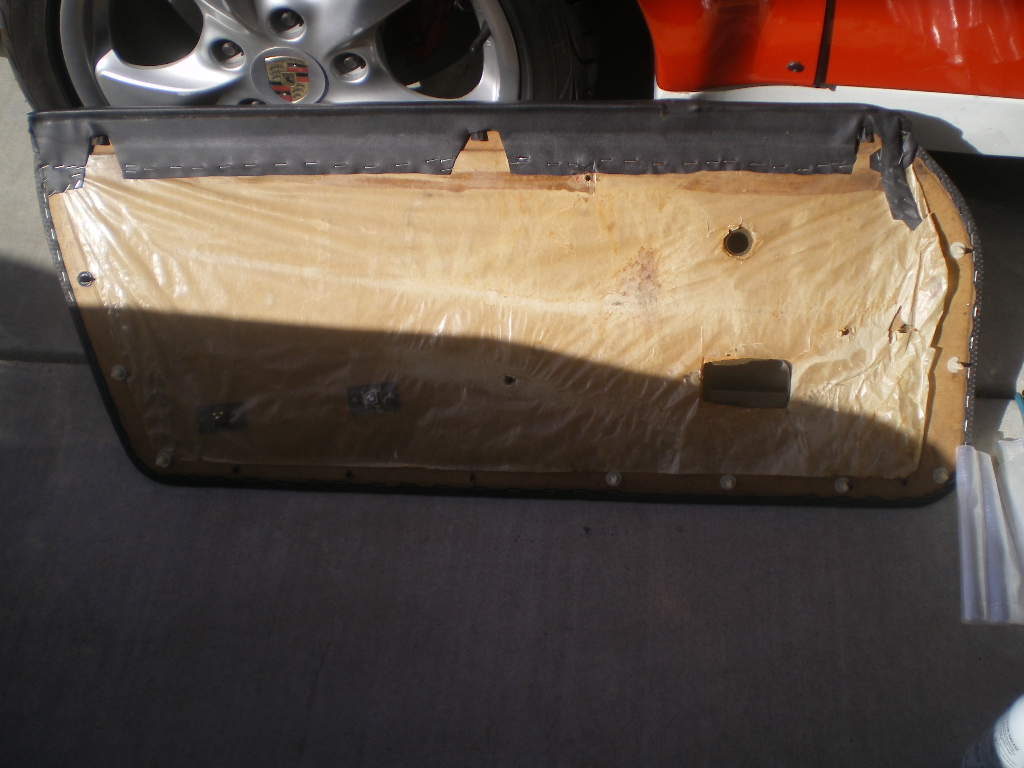
Posted by: 76-914 Feb 12 2018, 12:26 PM
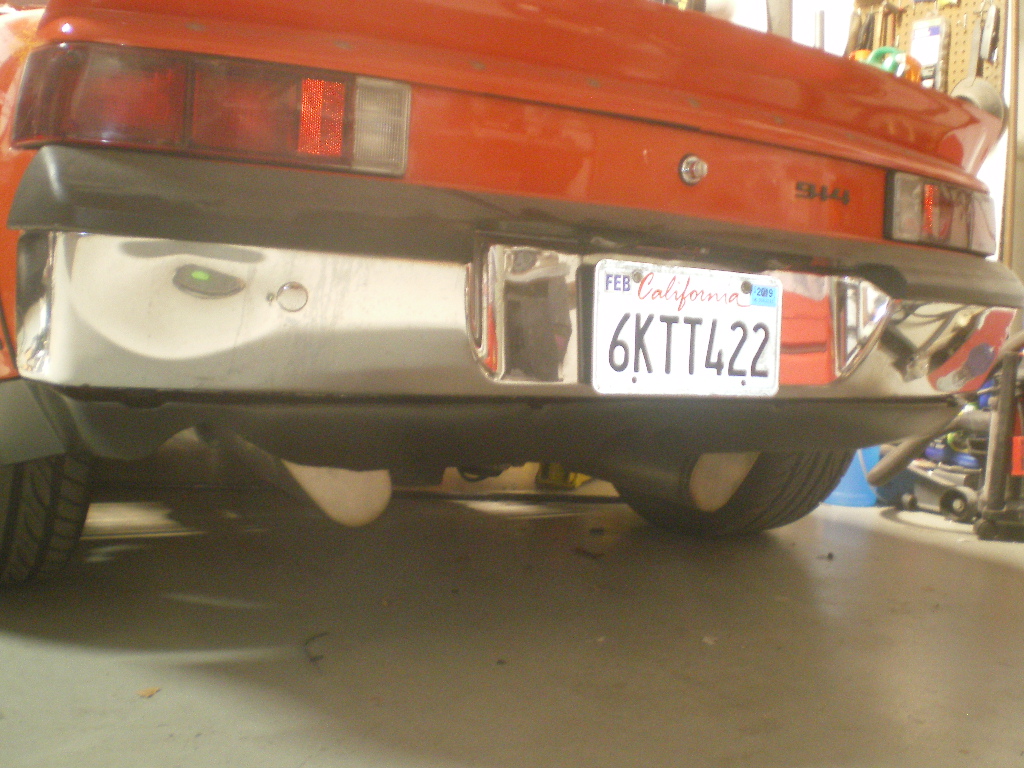
Threw on a beater bumper and rear fairing before hacking up anything of value. The front bumper will remain like this until I enlarge it to meet additional cooling requirements or I discover it works as is. I'm not sure if I'll keep the rear fairing or not. Exhaust will determine that later on.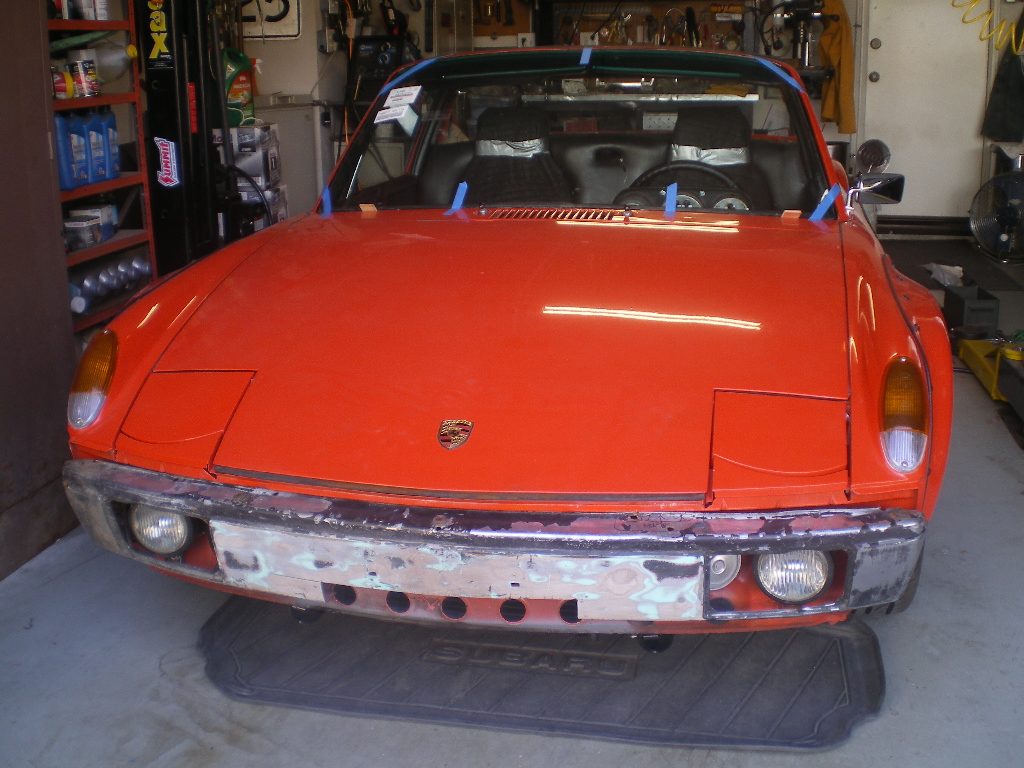
I'd found 1st and reverse a challenge to locate so I decided to take a look into it. I found the plastic bushing had lost a very small piece of plastic and one conical screw was slightly worn. Having a modern day trans and cable shifter in another 914 I felt as if I had been demoted once I was behind a 901 and it's shifter, again. I thought I should give it every possible chance at success so I ordered the pricey ($55) brass bushings and I'm pleased with the results. No more hunting, fishing and poking around for those 2 gears. This is now the best shifting 901 I've owned. 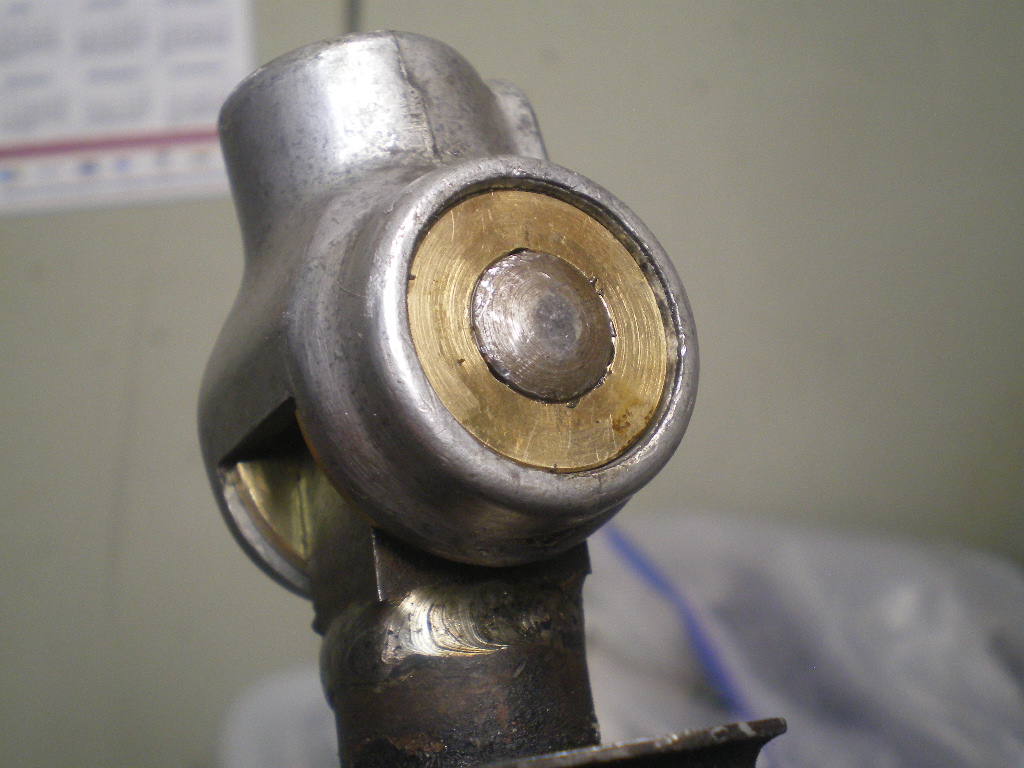
Posted by: rhodyguy Feb 12 2018, 03:16 PM
Are those the ones from pelican?
Posted by: 76-914 Feb 12 2018, 03:47 PM
They are indeed, Kevin. Now if someone made a brass ball cup we could eliminate all of the plastic bits along that route!
Posted by: 76-914 Feb 14 2018, 09:56 AM
Wohoo! My Dash finally arrived yesterday. I ordered one during the 914 Christmas sale. Scott offered send it before Christmas but I told him I wan't ready for it yet and to send it to someone who needed theirs immediately. I should have asked "How long if I don't accept this one?" 
Posted by: bulitt Feb 14 2018, 10:00 AM
Posted by: ValcoOscar Feb 14 2018, 10:23 AM
Way to go Kent. 914 Dash replacements are not my favorite with my fat fingers.
It's very motivating seeing all these build threads. I absolutely just love it, plus I'm constantly learning something new. Never a dull moment. My problem is I can't find the time for all my projects but I wouldn't have it any different. I like multitasking my projects, my body doesn't.
Keep going my friend.
Posted by: 76-914 Feb 22 2018, 03:00 PM
Time for an update. One week ago, last nite, my computer spilled a glass of my favorite Cab upon itself and immediately became drunk refusing to budge. Thank God I purchased the Apple Care policy. After one week in their care my computer has sobered up and is again working.
One week ago today I placed my windshield upon a wool blanket on the front hood. My cell rang and as I was speaking the windshield slid off the hood and shattered upon impact with the drive. Stupid mistake; yes. Was I upset? Nope. Good riddance. That &$%#@*! windshield had been a point of contention since day one and I'm glad it's gone. It was like a little Gremlin that had caused me numerous headaches at every turn. The good news is that Hagerty stepped up to the plate and cut a check the next working day. Four cars with Hagerty and my first claim.
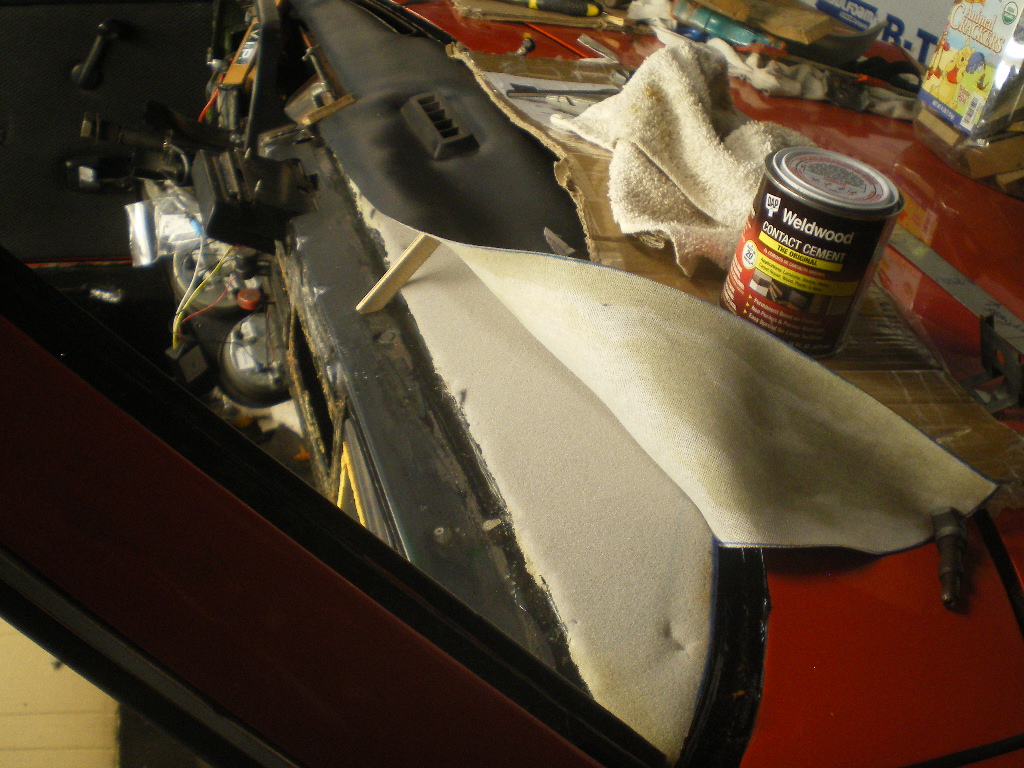
Back on topic, the sail panel and roll bar trimming is now complete sans a few parts.
First I position the vinyl piece by lining up the pre-punched holes with the existing holes in the sail panel. The vinyl pieces are held in place with some small rare earth magnets.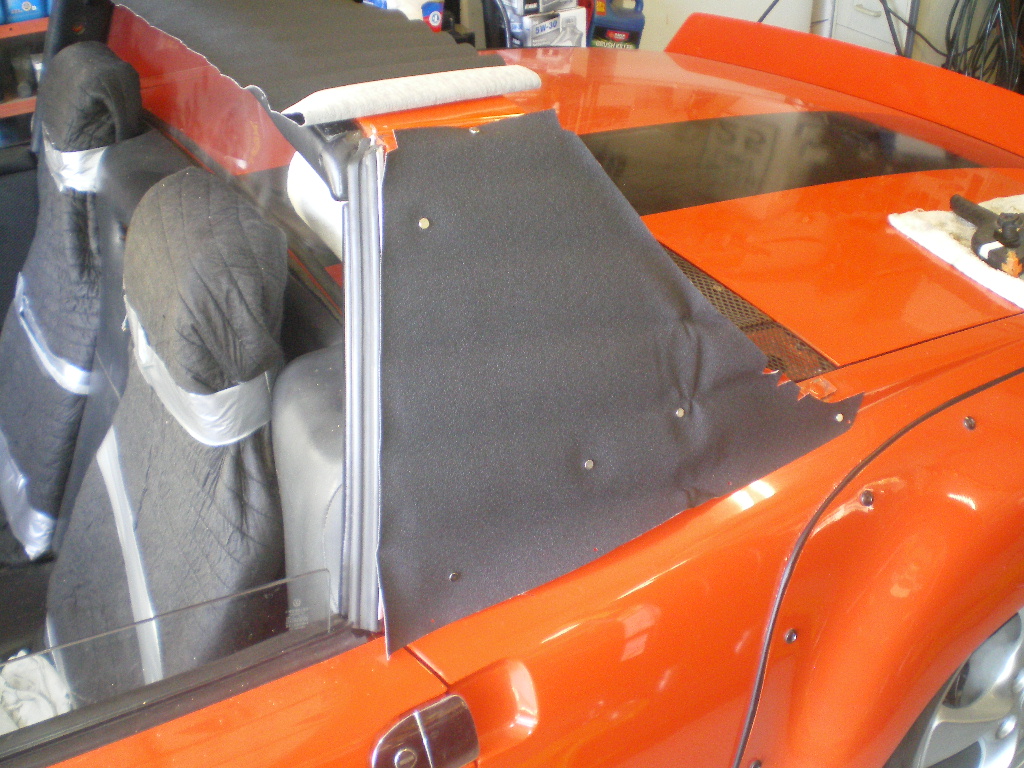
I laid the blue tape down to mark the lower edge of thin piece of trim and to mask off the area before applying the adhesive.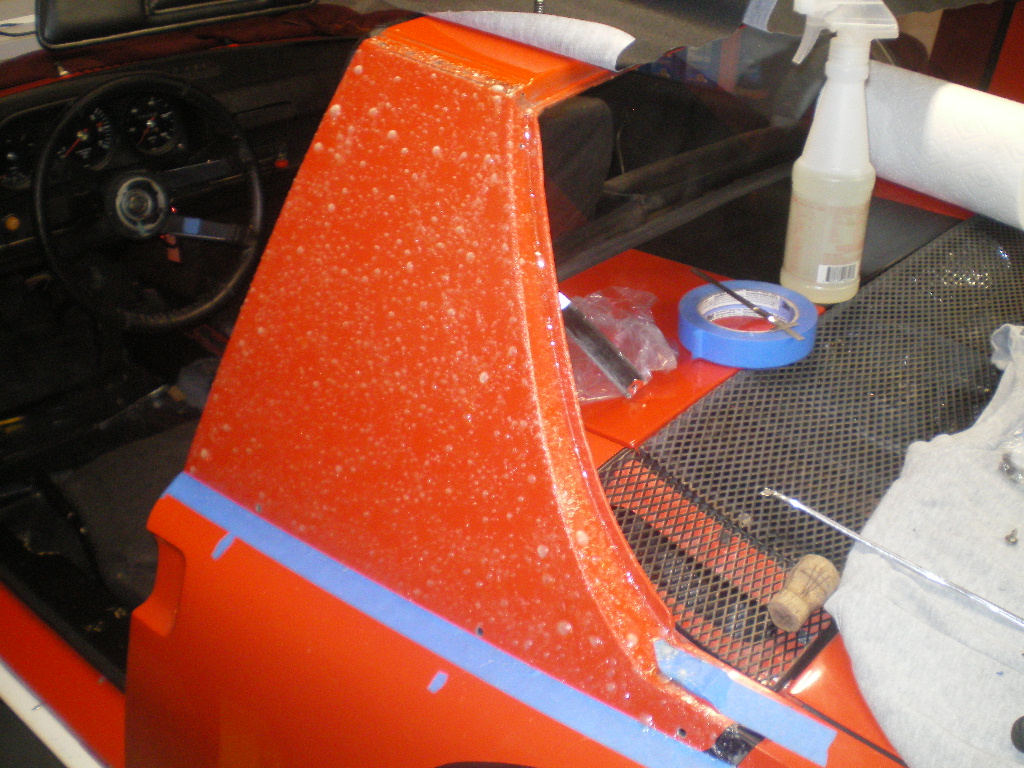
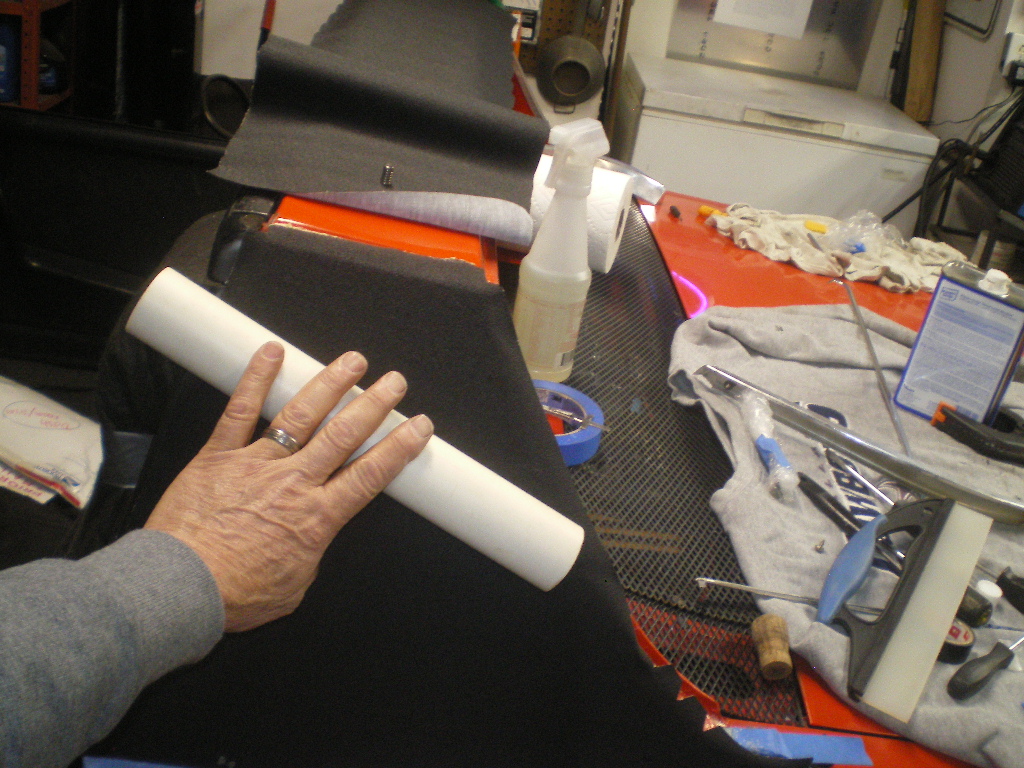
Look closely and you can see the 2 trim clips inserted in the vinyl piece. This was my starting point. This is a good time to say that I had replaced these pieces on my 76 in 2010 and that it did not go well. Too late, I noticed that I had not located it correctly at the beginning and of course it would not line up at the other end. I pulled it loose and repositioned it but it never looked right after that. I suspect that the vinyl had stretched in some spots but that's water under the bridge. I was determined that I wouldn't repeat this mistake so I approached the task differently this time. That is why you see the wax paper in the pic. The spray adhesive recommends applying the vinyl between 5 and 60 minutes after the adhesive is applied. I found that the wax paper will stick to this adhesive if applied between minutes 5 - 10. However, if I waited 10 minutes the waxed paper wouldn't stick to the glue. I exposed the bottom of the vinyl piece just enough to expose those 2 clips and pushed them into their respective holes. Next I began to smooth the vinyl with a squeegee working my way towards the top and peeling back the wax paper a few inches at a time. This worked beautifully and allowed me to achieve the accuracy I wanted. After the piece was in place I went over it again rolling a piece of plastic pipe over the area to be sure there were no high spots from the glue splats. 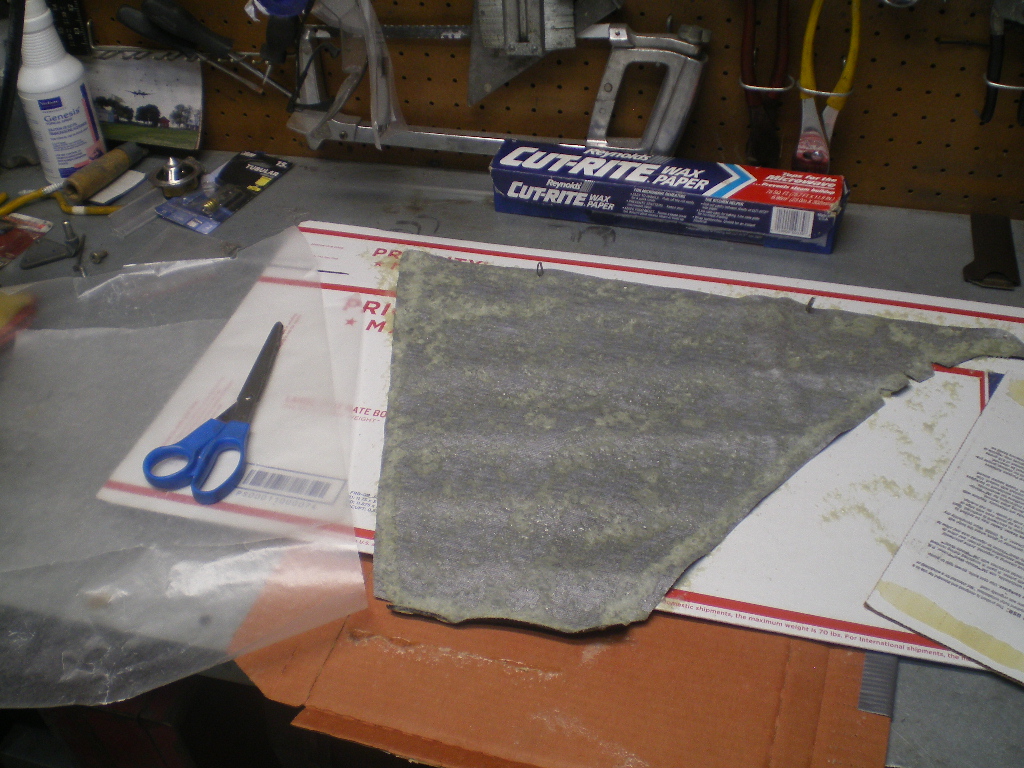

I did the roll bar in the same manner except I matched the end of the strip with the end of the sail panel piece as a starting point. Here the piece is being rolled out with the wax paper in place. 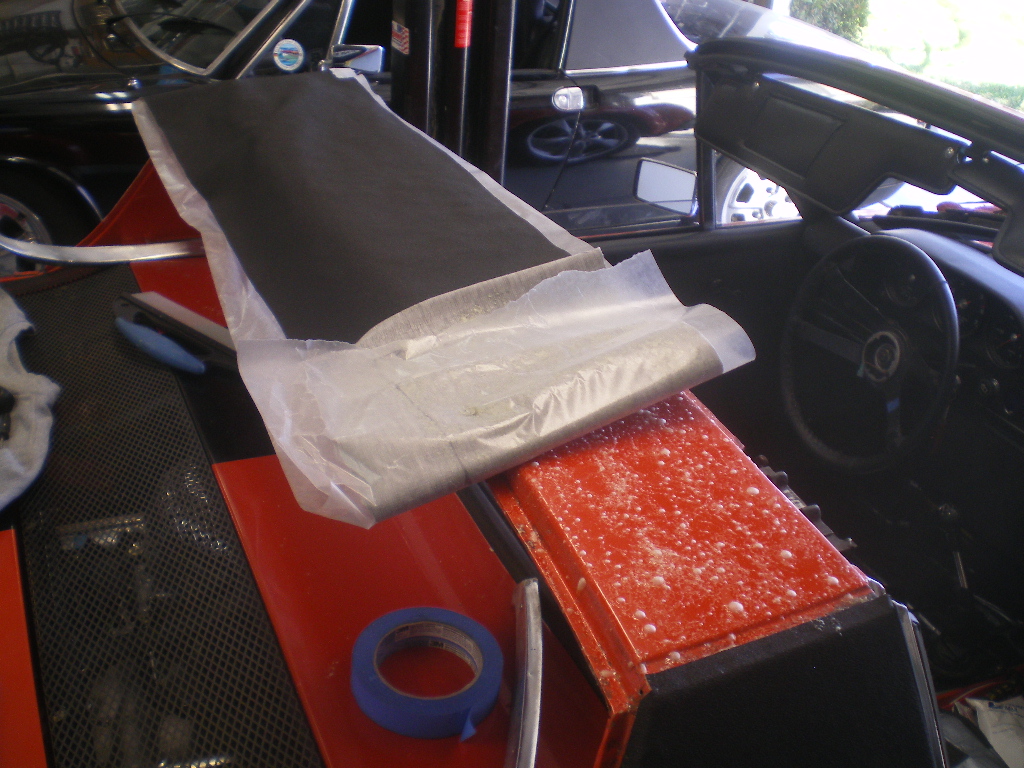
Finished product. I found this application method to be very forgiving and a goof proof approach. Hopefully I can remember this method the next time I do this. 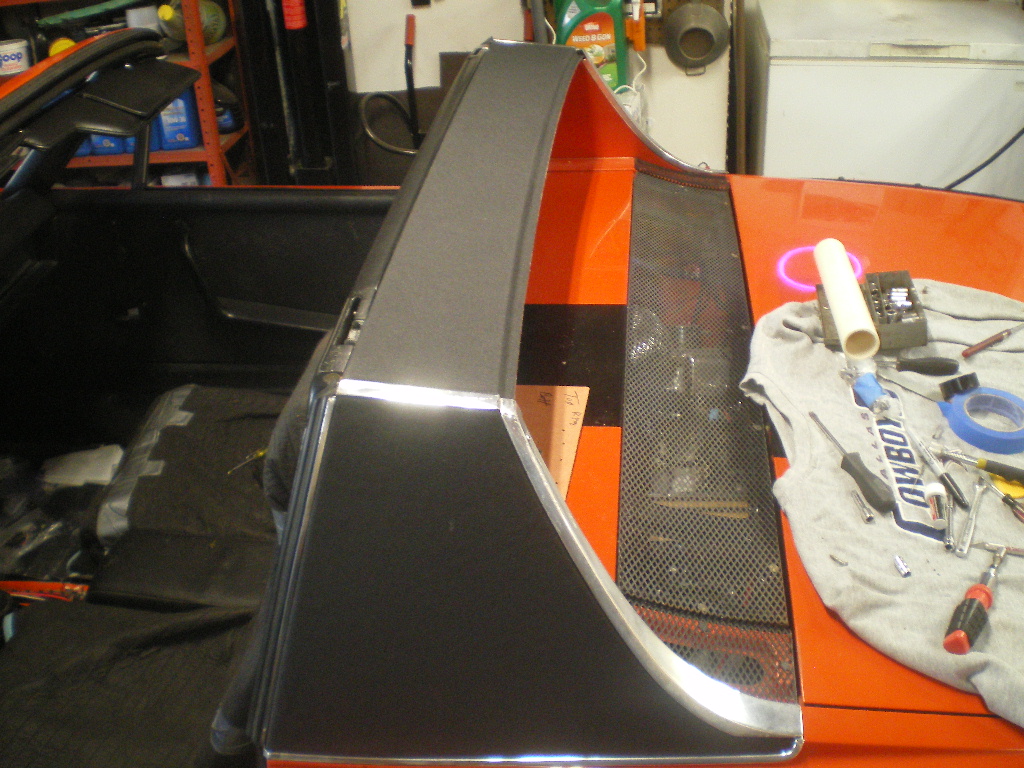
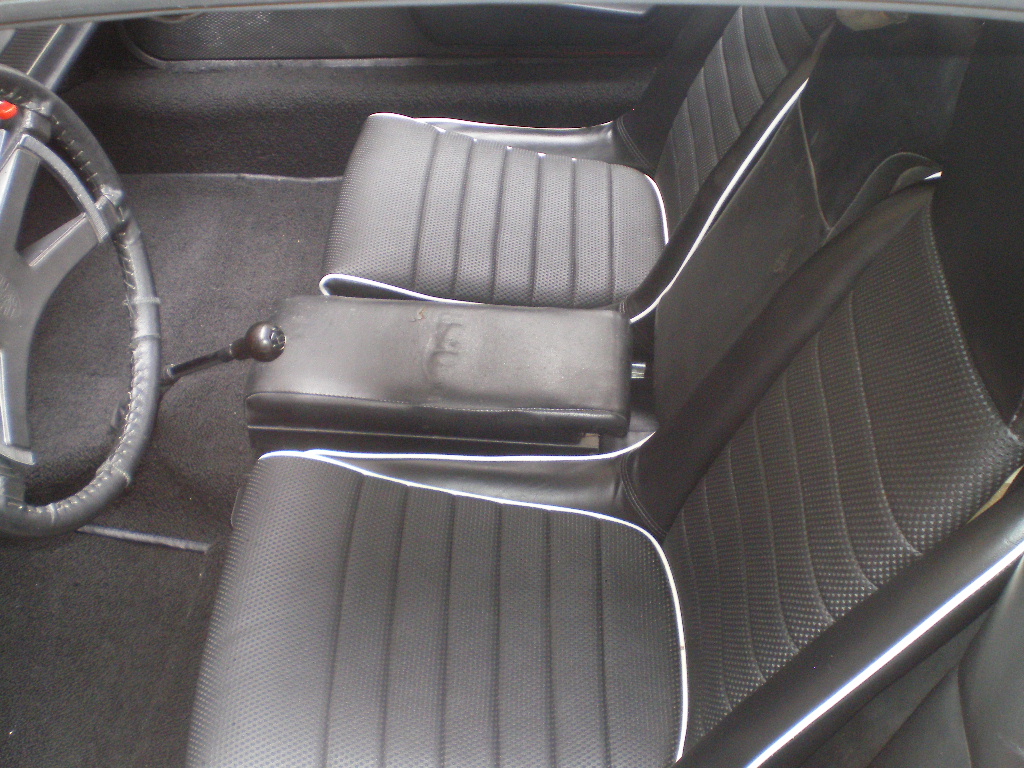
So now it was time to install the carpet trim pieces, carpet and seats. I've been waiting to see what the seats looked like installed. I wasn't crazy about them when I peeked under the wraps but once installed I think I like them. 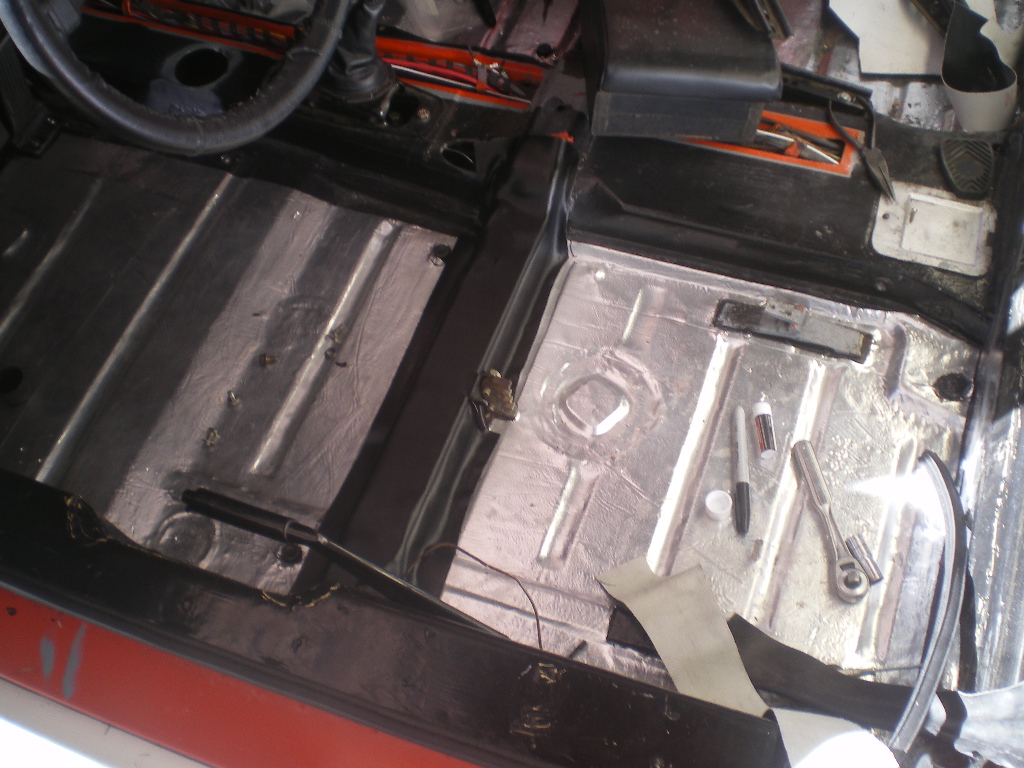
Posted by: sb914 Feb 22 2018, 03:06 PM
Looking fantastic dad .
Posted by: 76-914 Feb 22 2018, 03:06 PM
One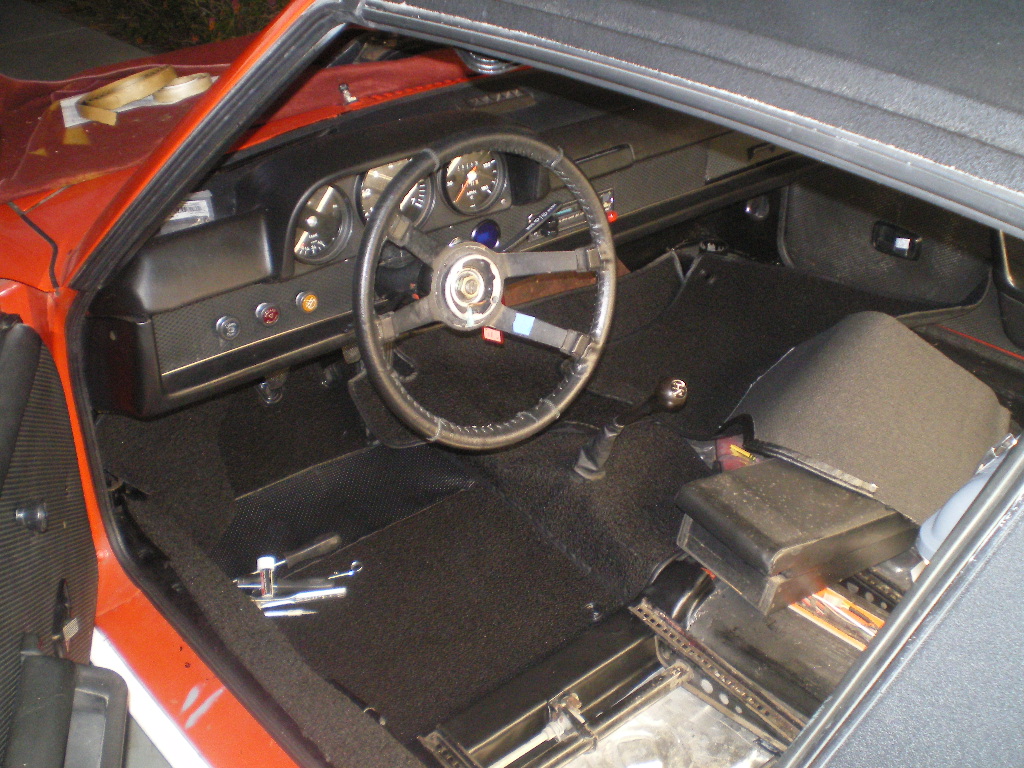
Two
Three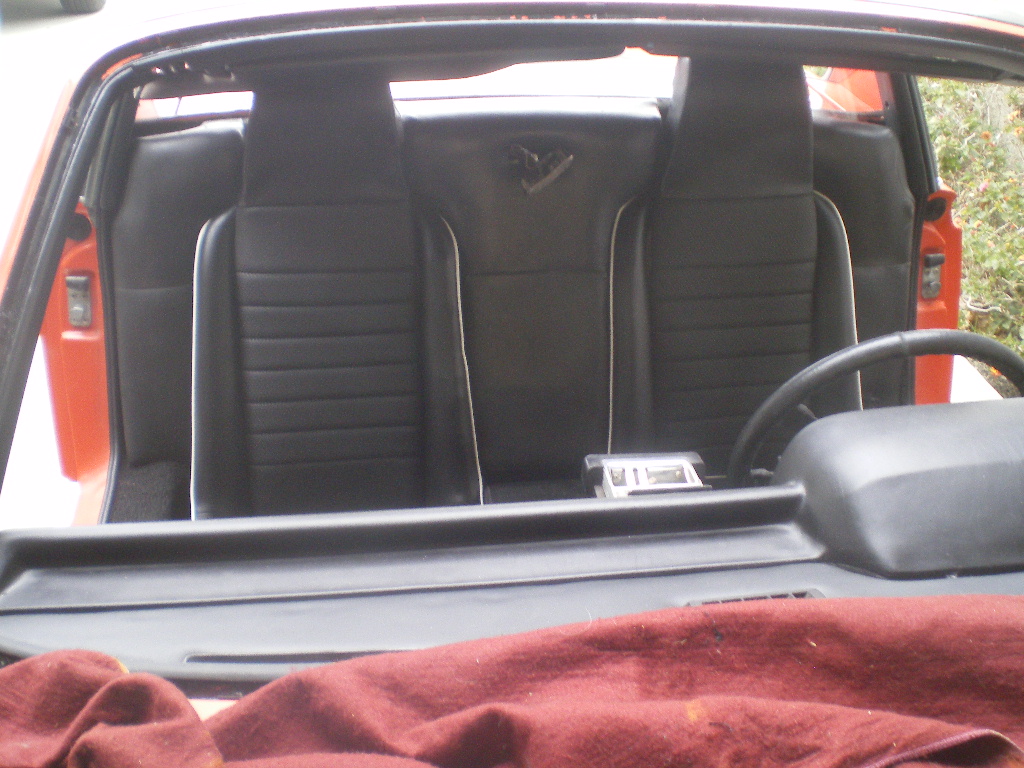


Posted by: 914forme Feb 22 2018, 05:28 PM
This is coming together nicely.
Posted by: Andyrew Feb 22 2018, 06:12 PM
Seats look great!!!
Posted by: bulitt Feb 22 2018, 07:27 PM
Posted by: 76-914 Feb 22 2018, 10:12 PM
Thx guys. It's been fun but all accolades go to Bob. I'm just the assembler. The new windshield is on hold for me just north of here. I'll get it Friday or Monday then it's off to AAA for registration. Yes, still a lot to do e.g. fiberglass work on rocker covers, finalize exhaust, seat belts, front bumper, coolant system testing, glove box lid modification, then paint the rear fairing, rocker covers and engine grilles plus who knows what else will pop up during the 500 mile break-in.
Posted by: 76-914 Feb 26 2018, 10:23 AM
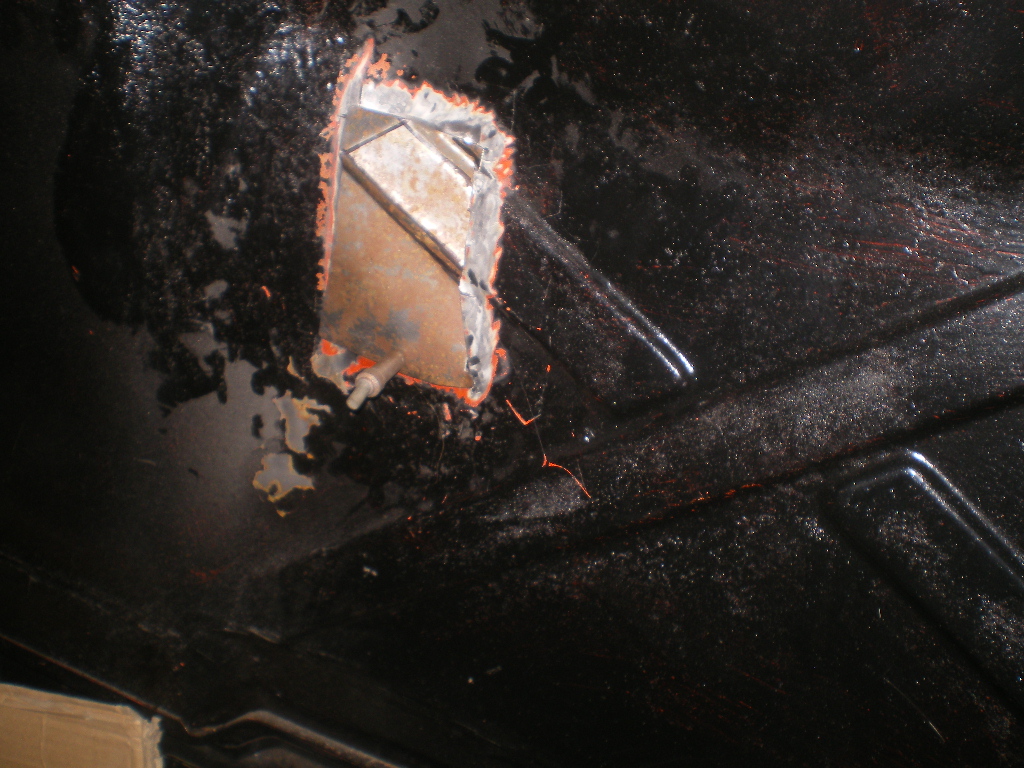
I tired of seeing the dizzy when I opened the trunk. That and the gap prevented the trunk seal from seating properly. I was going to modify this cutout piece but decided not to because it would just scorch the paint so................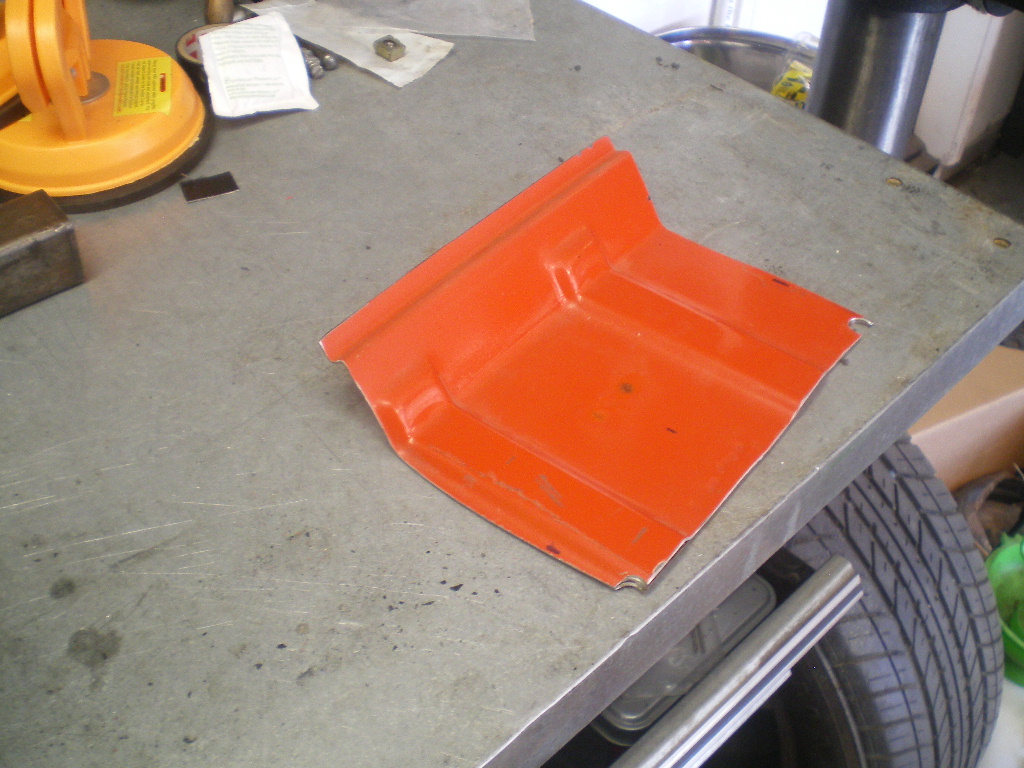
While digging thru the stash I found and installed the shiny, new threshold trim I had forgotten about. 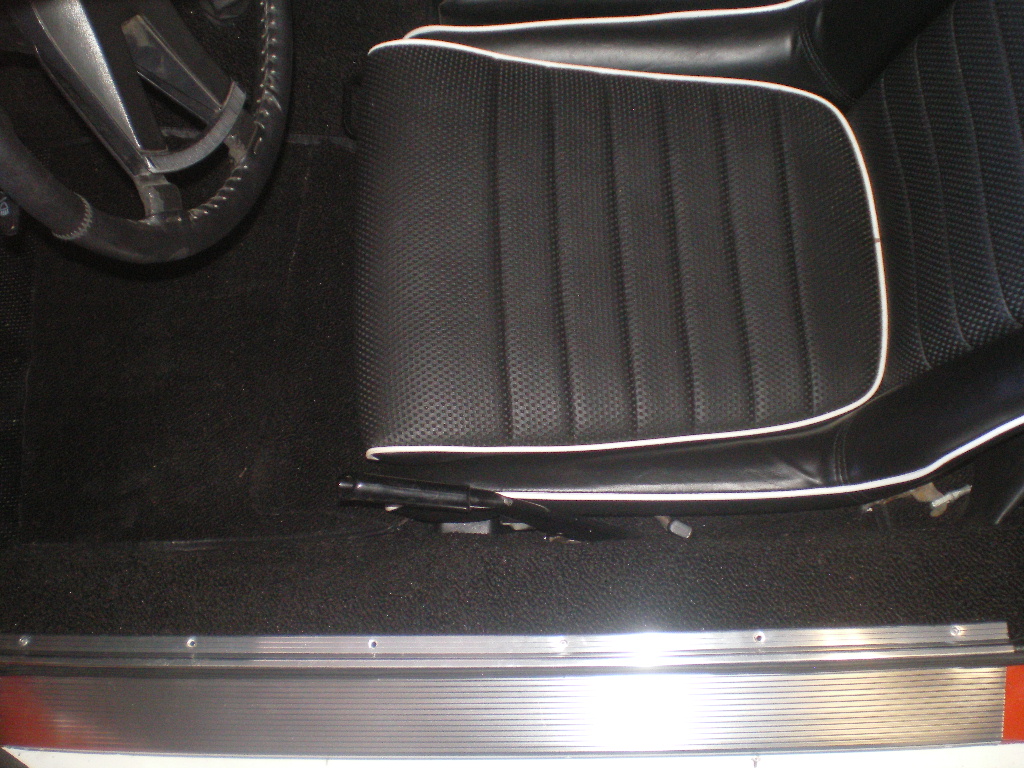
Posted by: 76-914 Mar 3 2018, 11:46 AM
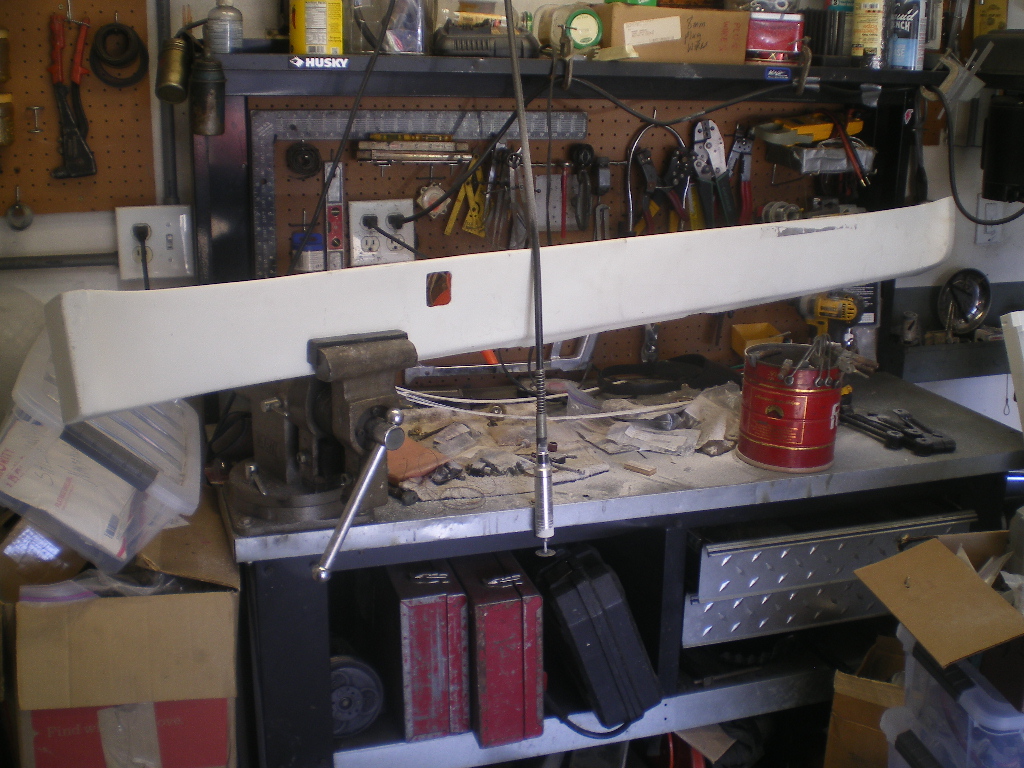
Damn it was cool this week. So much so that I didn't get much accomplished. I did the final fit and grind of the rocker covers. I needed to do a little glass work but not much. After waiting 20 mins (should be around 10-12 mins) for the resin to "fire off" I looked at the thermometer in the garage and found the problem. Too cold, 53 degrees. Pulled out the shop heater and once it hit 72 the resin finally fired off. Super pleased with the final fit. Paint and primer of same up next.
Raising the temps
Fitted up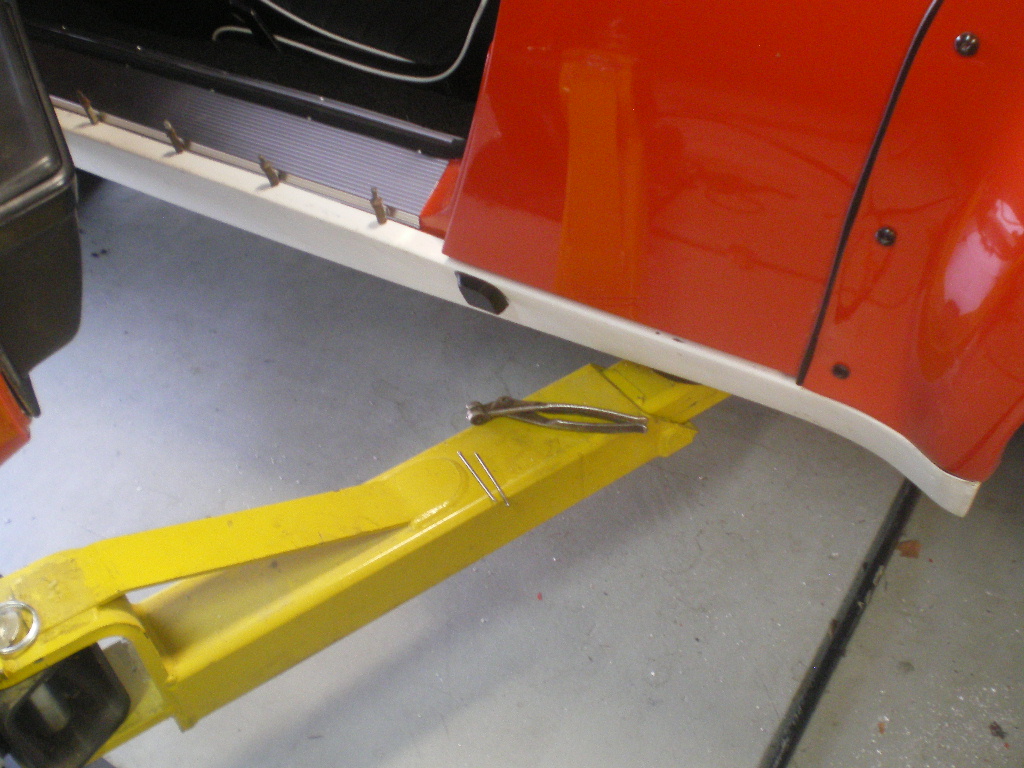
The metal fairing will need some work as well. Tape marking proposed bend lines. 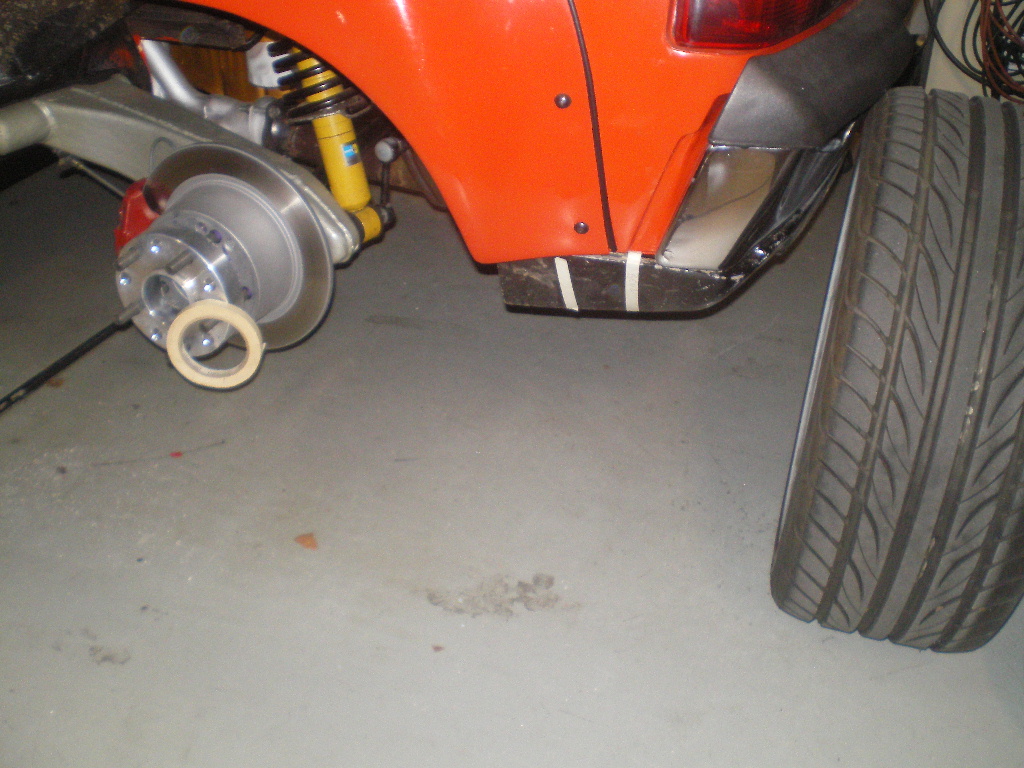
Posted by: rhodyguy Mar 3 2018, 03:10 PM
Keep it up and you might not want to give it away.
Posted by: 76-914 Mar 4 2018, 06:27 PM
Ha ha, good one Kev. There are many very nice things on this car but alas it is not my cup o' tea. My Subaru six is more than enough for me.
Back on track. Didn't want to create a "Hell Hole" in the trunk so.....I installed this.
[attachmentid=64158
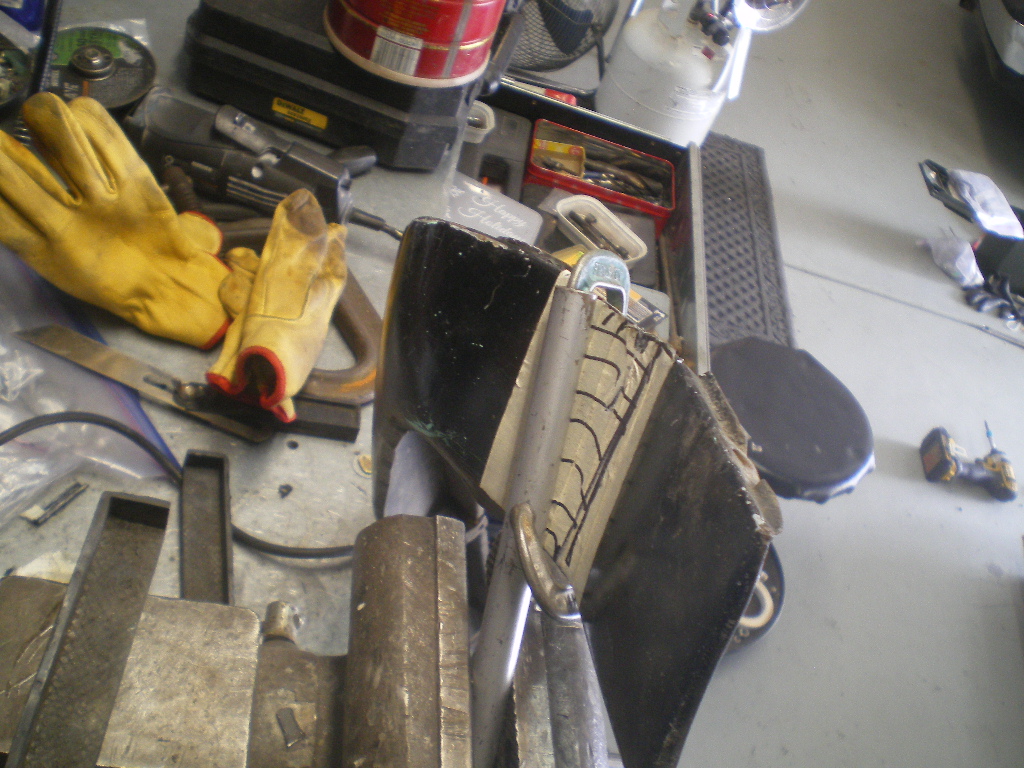
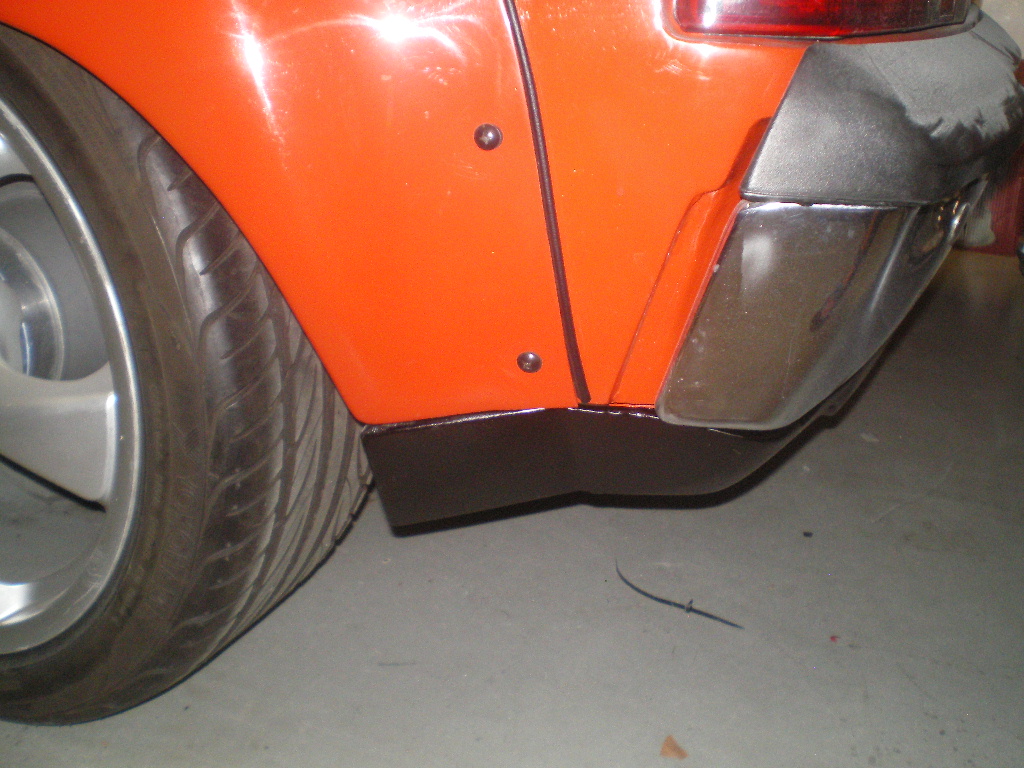
Then it was time to bend the rear fairing to match (somewhat) the fiberglass flairs. I started by marking a cone shape on the tape. One edge the cone goes past the edge of flair about 5/16" and goes straight down. Well not straight. About a 95 degree angle. The 2nd edge of the cone lines up with the recess for the bumper. Once drawn out the top of the cone will be about 2" across and the bottom about 3/4". Here is a pic of one side marked out.
Next you need to trim out a small stiffener strip on top and bottom. In the pic below you can see the cut out on the upper portion next to the clamp. Later a small piece will be welded back in and I'll cover that later.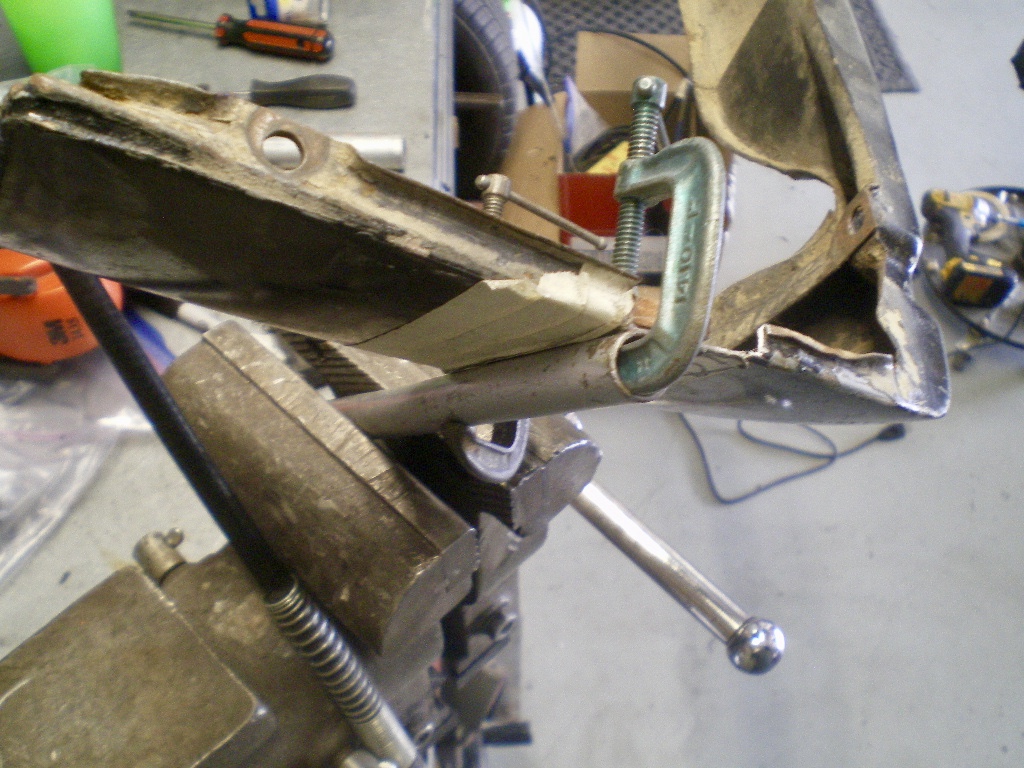
Now clamp the tube down with 2 clamps and a piece of 1/4" plywood on the back side to spread the load of the clamp. Line up the clamp with the edge of the cone furthest from the wheel. As you can see I this pic, once clamped down the curvature of the metal flattens out. Yes, I know it is on the wrong side of the cone in this pic.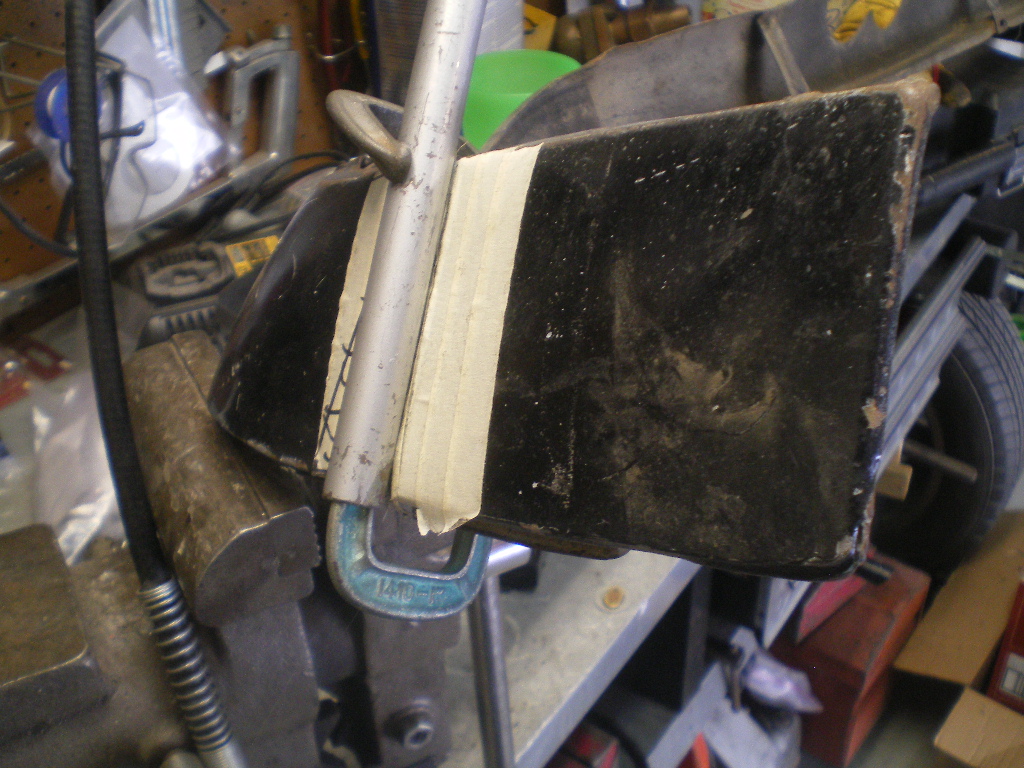
A few more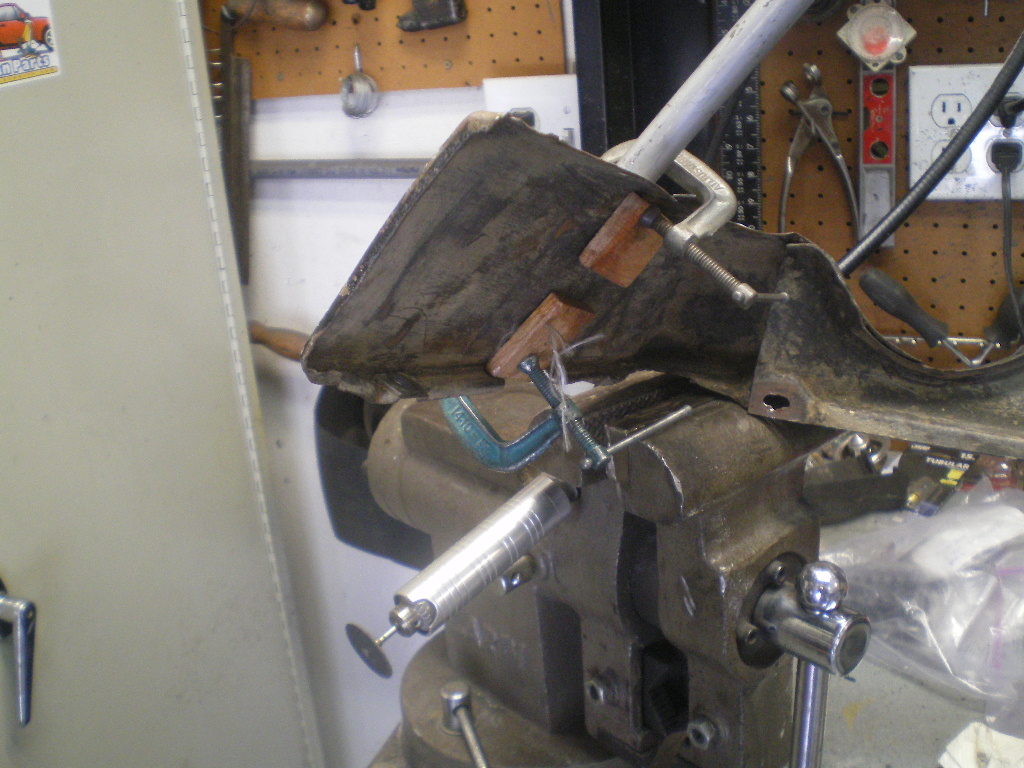
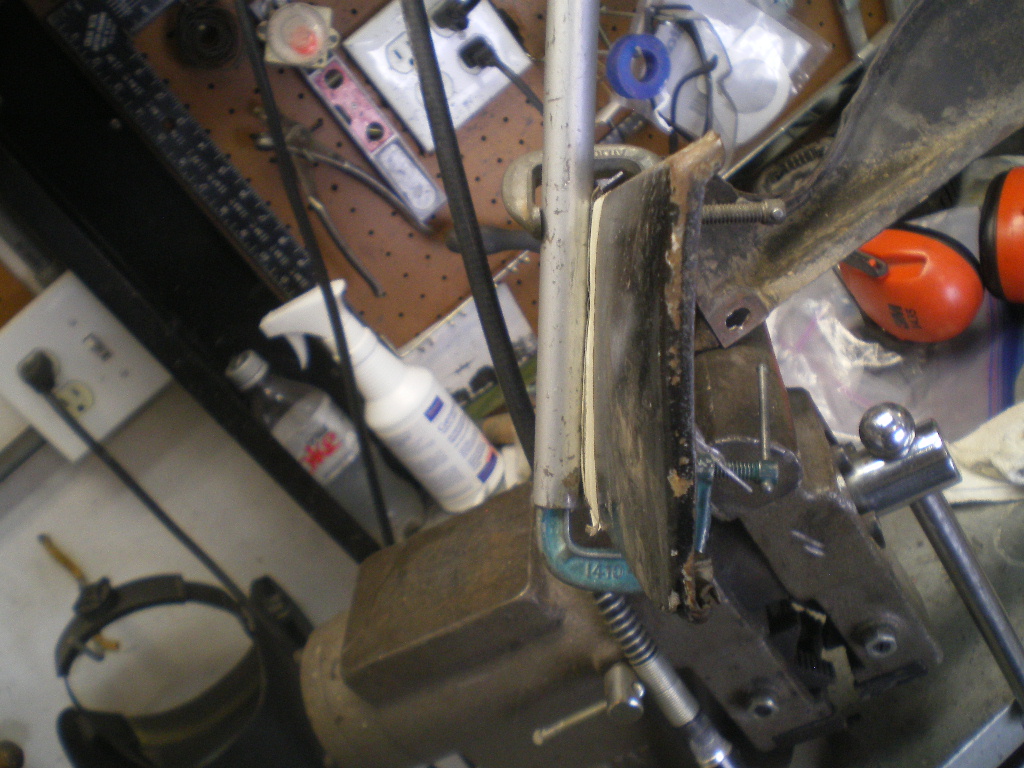
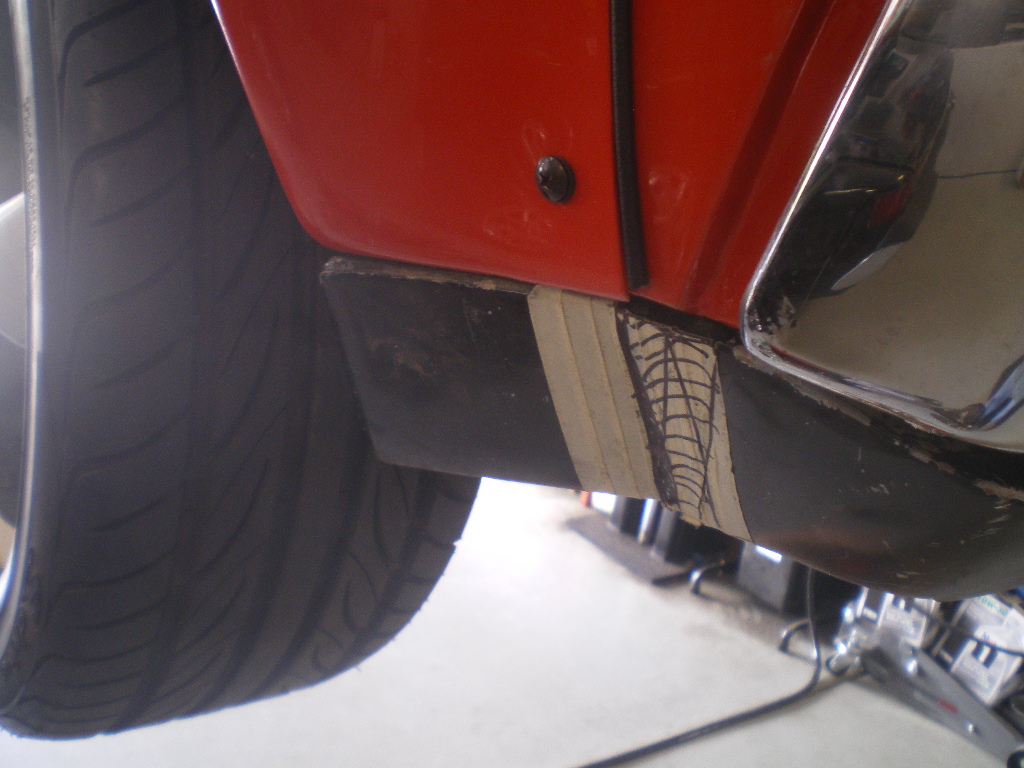
At this point the metal is quite flimsy and you can bend it by hand. The first bend is slight. The 2nd one (closest the wheel) is more acute. The important thing here is to set an angle. It doesn't matter if you go 15 or 35 degrees because once it is fitted to the car you can bend back or a little more. As mentioned, it is very plyable at this point.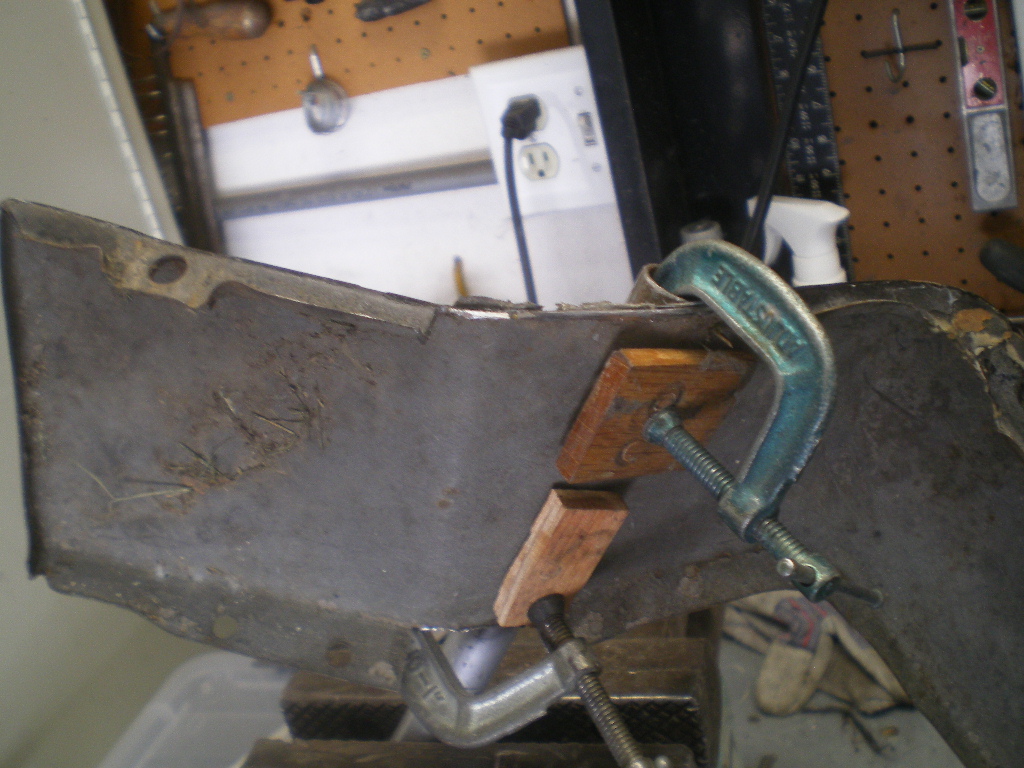
Attached image(s)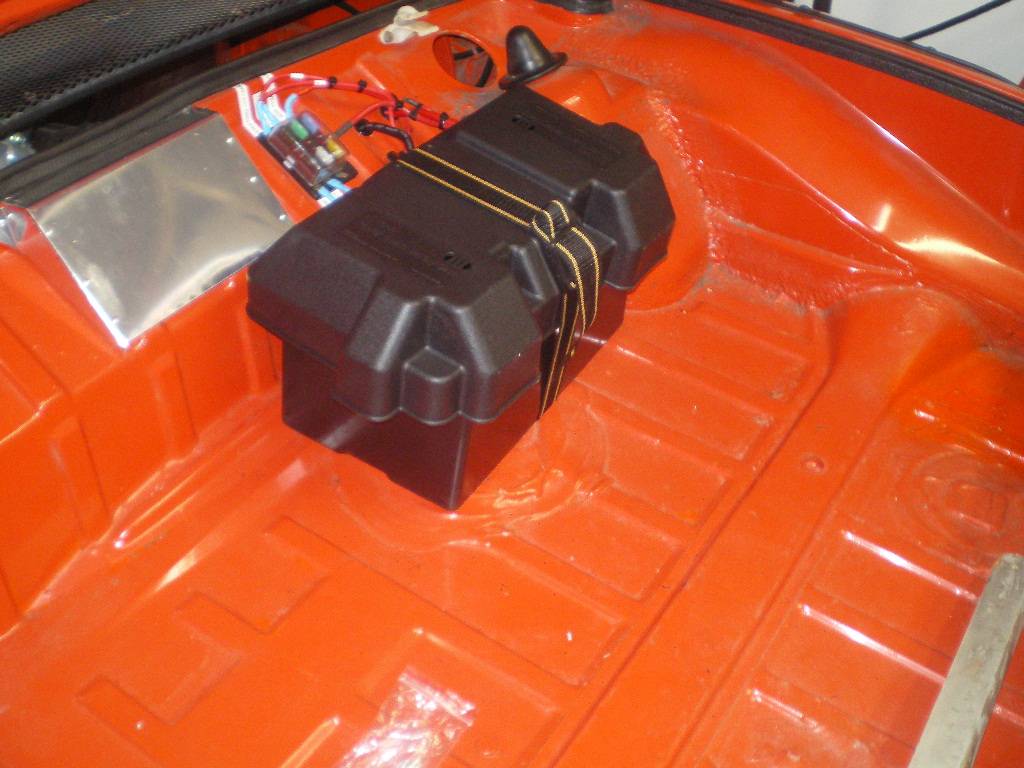
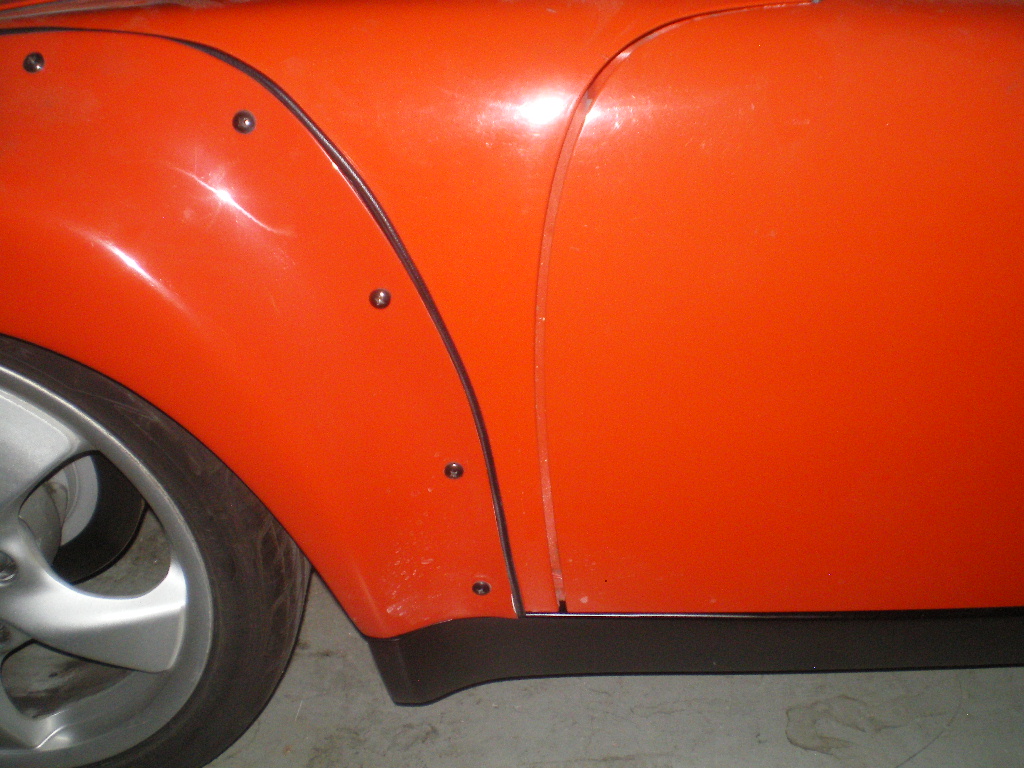
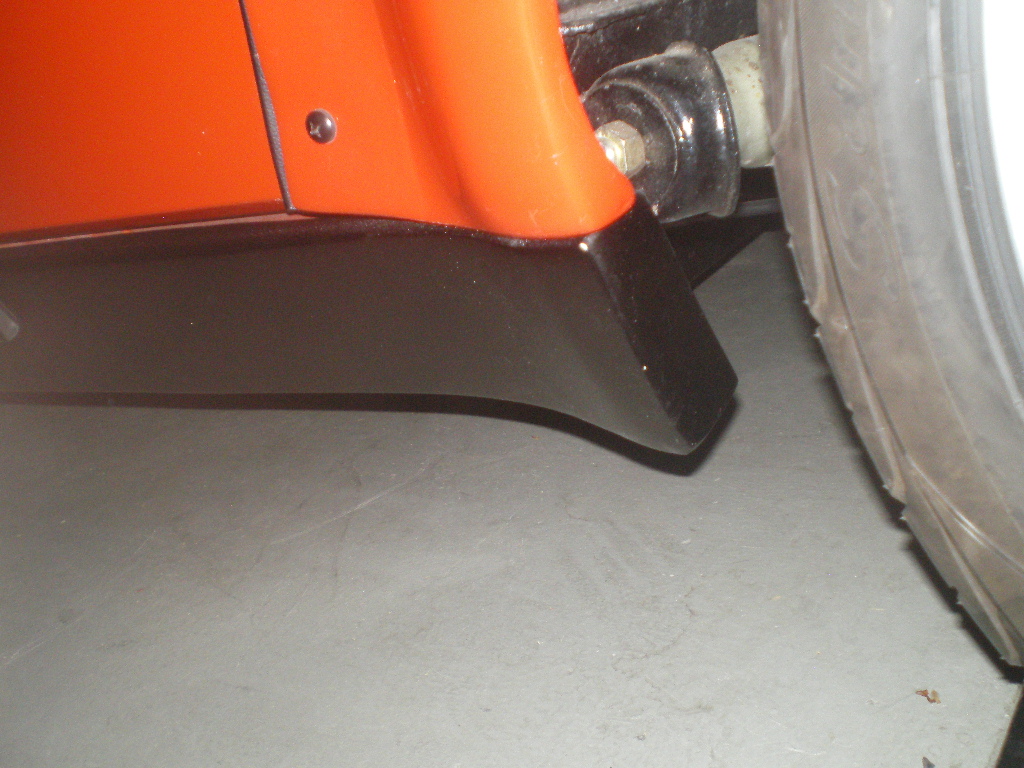
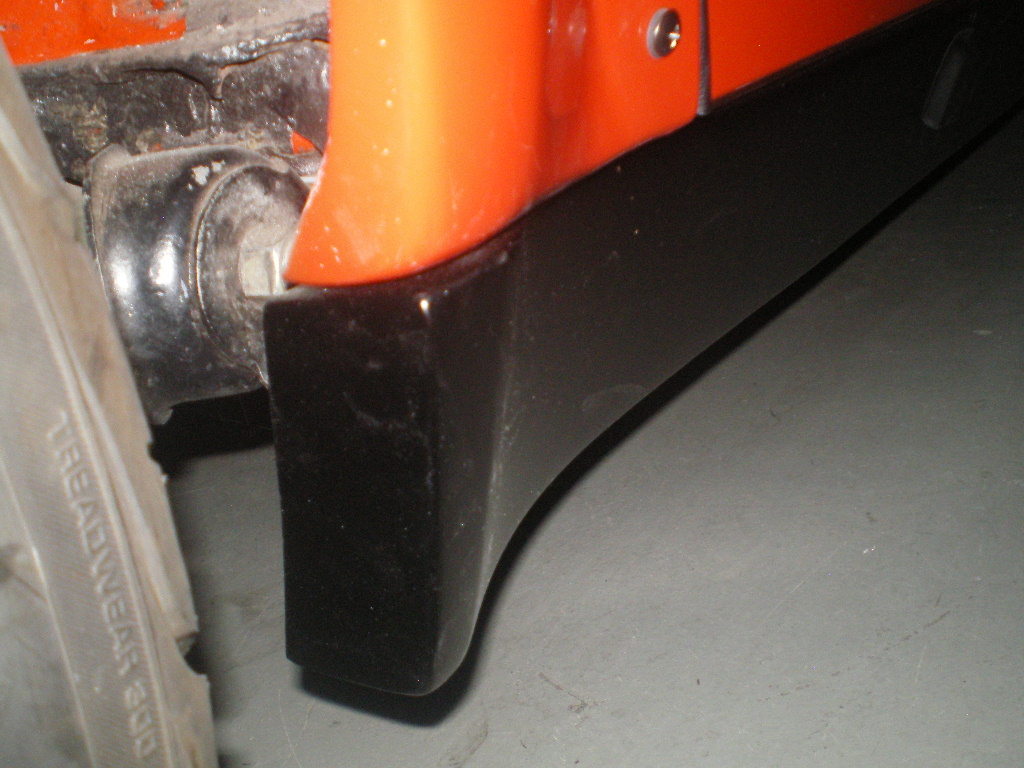
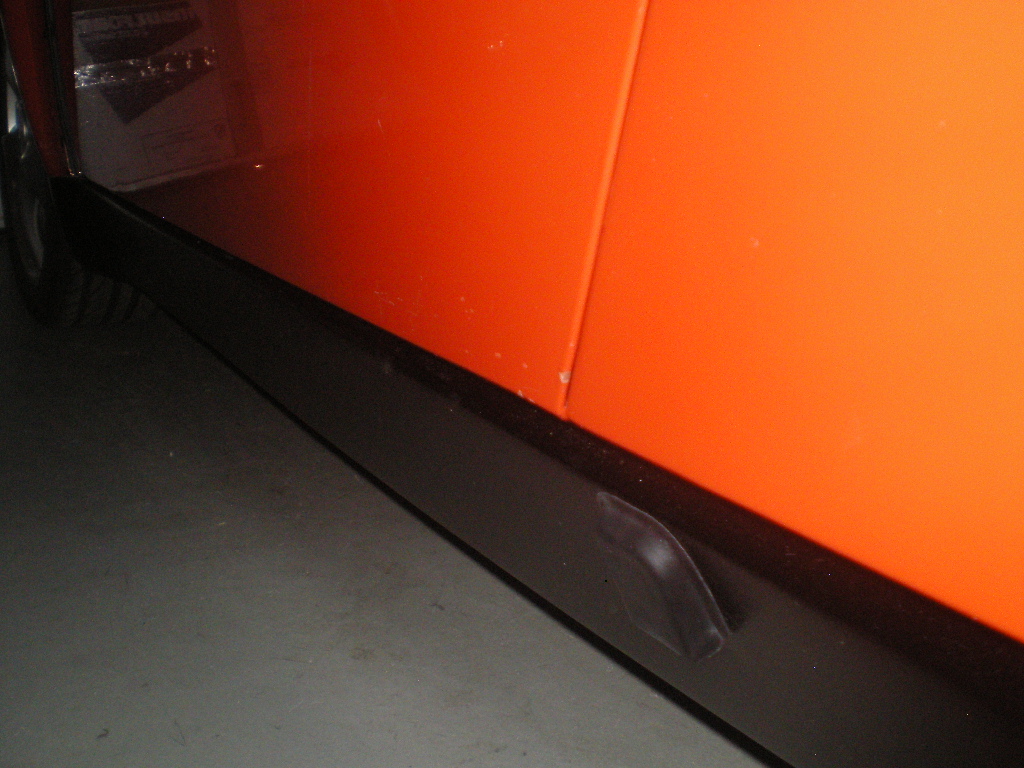
Posted by: 76-914 Mar 4 2018, 06:35 PM
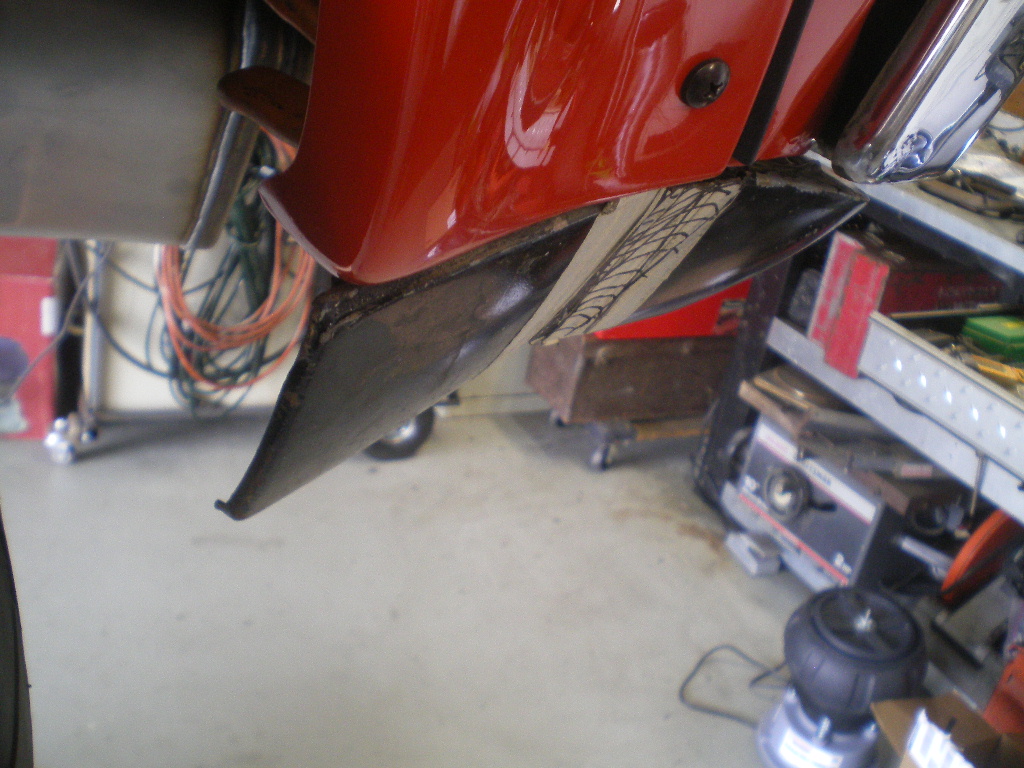
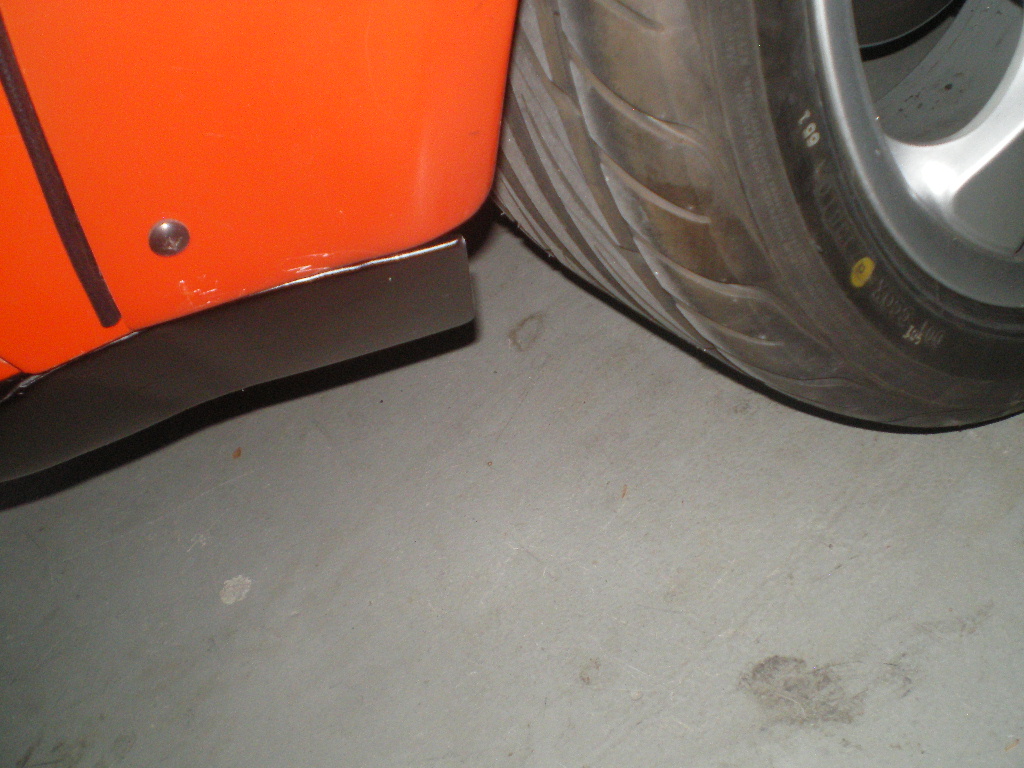
Anyway, here are some pics of it in place. Fits great. Just need to weld back in some stiffness, prime n paint.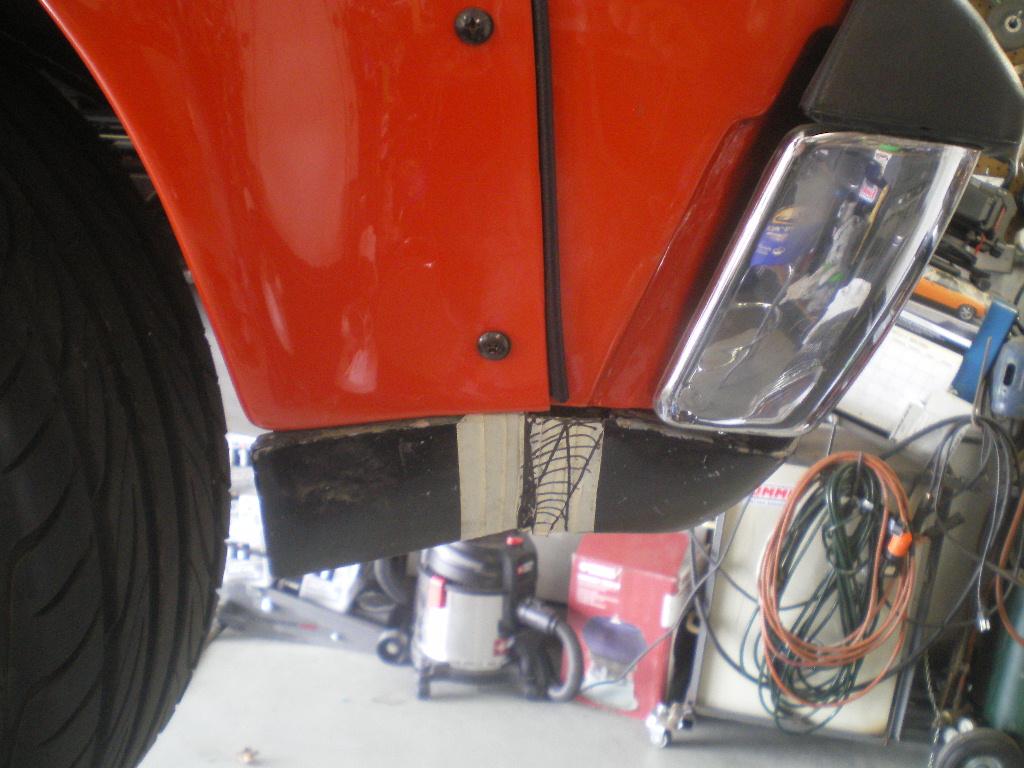


Posted by: rhodyguy Mar 5 2018, 09:01 AM
The vise, pipe, clamp 'fixture' is very clever.
Posted by: 76-914 Apr 6 2018, 08:44 AM
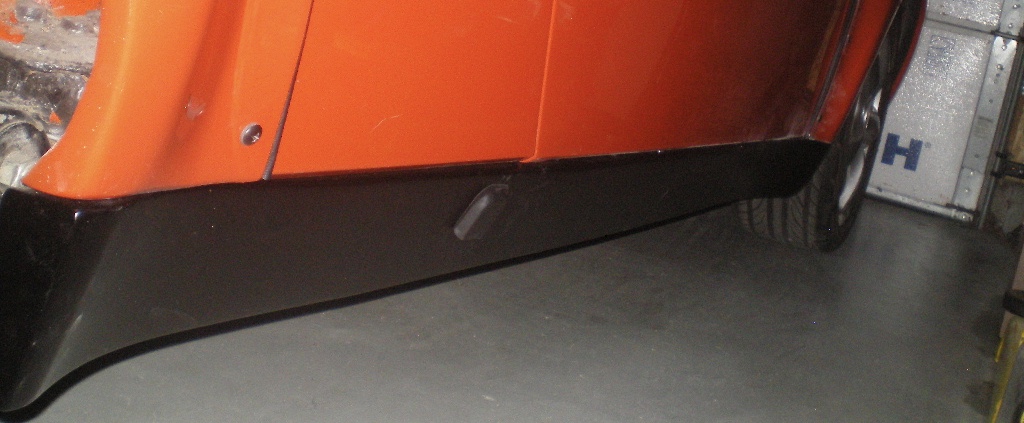
Thx Kevin. Every once in awhile something works. I'm happy with the results and glad that I took the time to get these last few items fitted. It makes a difference once they're painted and installed. Here are several pic's during assembly of the final trim pieces after paint.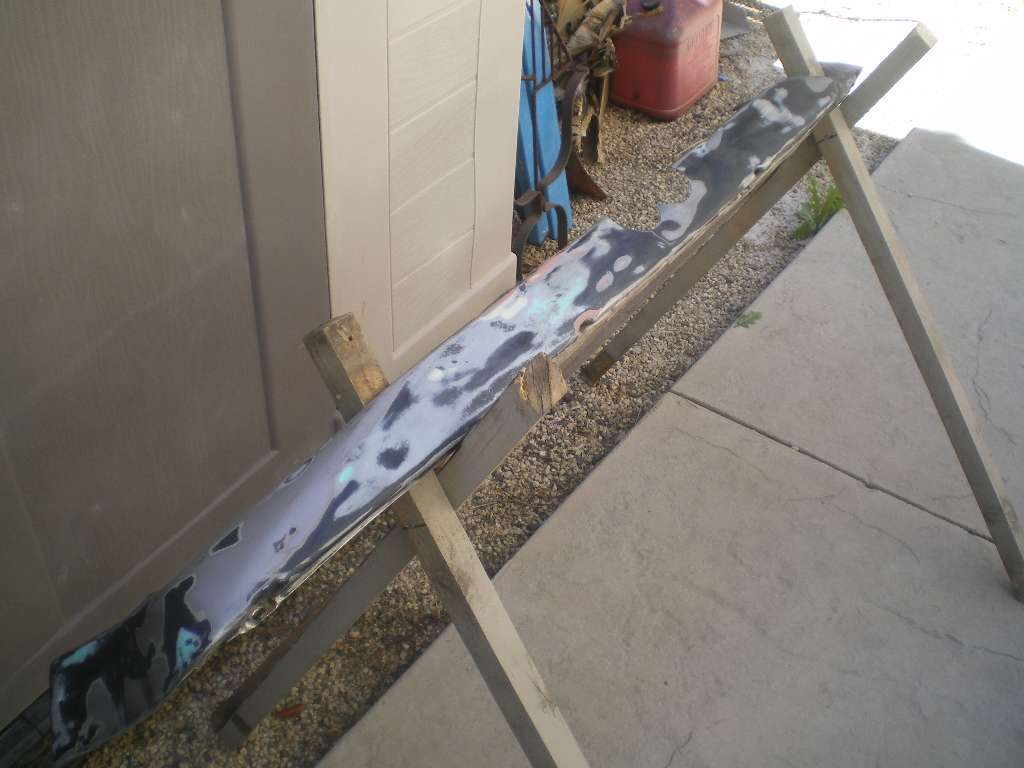

Posted by: 76-914 Apr 6 2018, 09:03 AM
It still needs a good cleaning and the all important Windshield then it will be time for road testing and de-bugging. 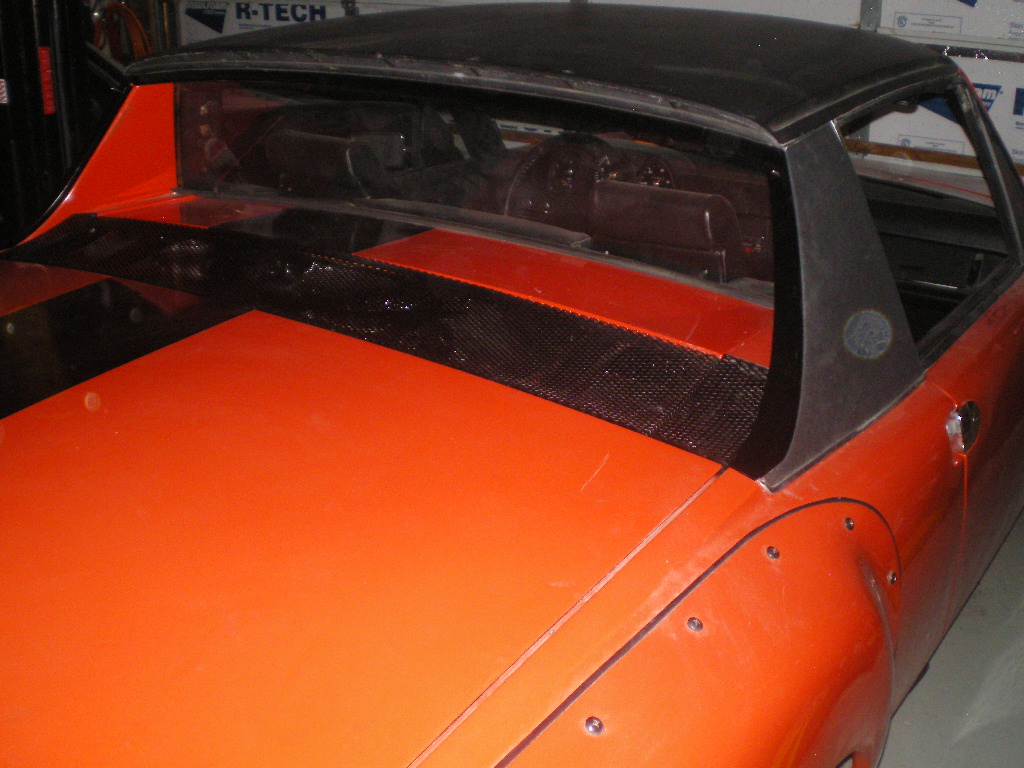
Posted by: Andyrew Apr 6 2018, 09:14 AM
Good work on the rocker!!!
Posted by: AZBanks Apr 6 2018, 11:43 AM
Excellent work. Looks Great!
Posted by: 76-914 May 3 2018, 09:31 AM
Well, I'm still waiting on my windshield to arrive and rather sit around with "my thumb in my ass and my mind in Arkansas" I decided to investigate this large clump of under coating. I noticed this upon arrival but left it unattended until now. You know the thought process. If I don't touch it then things will take care of themselves. AKA Rust Phobia.  So on the lift I removed the front wheel to expose said clump. I pinched it and the hive crumbled only to reveal rust. Oh well this repair was detailed in a couple of restos recently so I grabbed the grinder and began to clean the area only to discover I'm one lucky SOB. The rust was from the small truss piece. I don't know why it rusted away other than poor metal prep at the factory. I left 1/2 of it in place and ground out the rusted part. No, I'm not going to replace it. If this was stock I would but we're way past that now. This pic shows the extent of the damage. It also let me see into the front area of the long which was in great shape. Why? I'll get to that in a moment.
The small hole on the left was patched, welded and ground down in a few minutes. 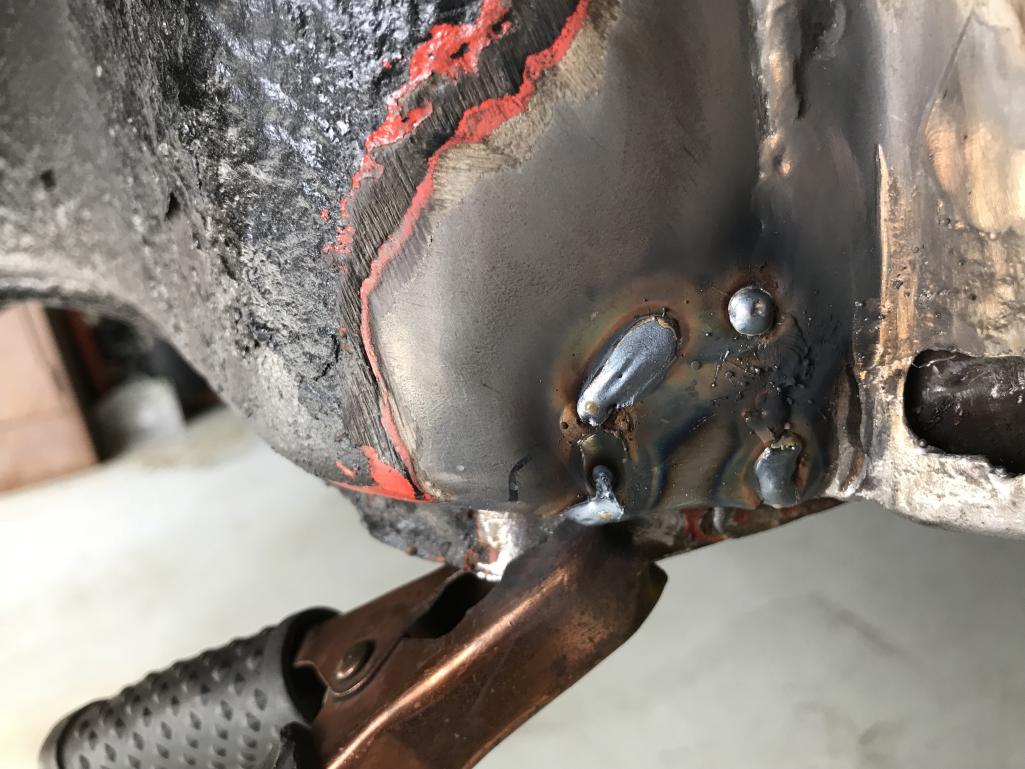
Posted by: 76-914 May 3 2018, 09:49 AM
Easy peasy. Now onto the hole in the long. At this rate I'll be finished in 45 min's.
[attachmentid=649200]
Wrong! After stitching in the top of the repair piece I decided to weld up the left side because it was more difficult (in the corner) then finish up the right and bottom side of the patch piece. After about and inch of welding the left side the welder began to act as if there wasn't any shielding gas. Screw it. I moved onto the right side and as I welded I noticed something dripping from the bottom of the long. Then those drops began to burn and smelled of paraffin. Reminded me of a Zilch Bag! What the Hell. I scraped this crap off the garage floor and now believe it was either Cosmoline (spl) or some home brew anti rusting agent made with paraffin. I spent the next 2 hours heating the front of the long with a torch, spraying the crevice with brake cleaner, blast with compressed air, rinse and repeat. Eventually I was able to create a welded glob that ground down nicely. What a Royal PITA but I remind myself how lucky I am and that this waxy agent has seemingly worked! 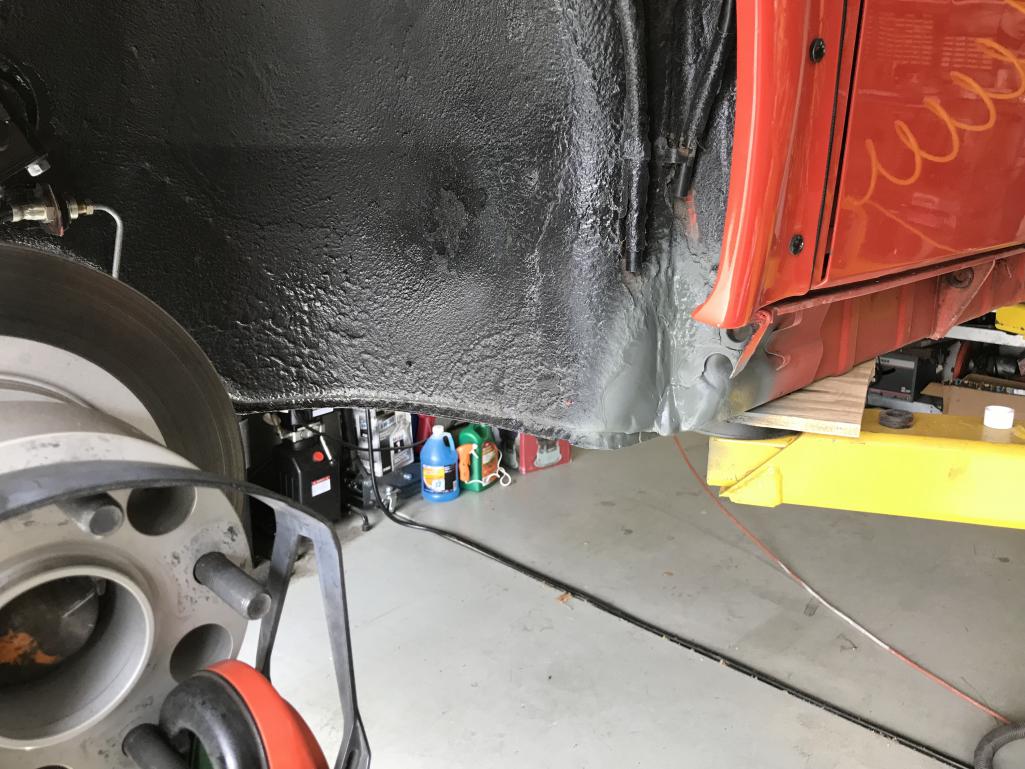
Posted by: bbrock May 3 2018, 11:10 AM
I wonder if someone sprayed cavity wax in there. I love that stuff but have to keep reminding myself not to spray any until all my welding and painting is done. I feel your pain on those corners. They are a giant PITA and I still have one more to work on. Ugh! Nice work on yours!
Posted by: bulitt May 3 2018, 06:03 PM
I sprayed the longs with the Eastwood Internal Spray Coating. Their site says it is
"phenolic resin". Could that be it? Lime green.
If not, I got nothing...
Great Job as always!
Posted by: 76-914 May 3 2018, 09:13 PM
Bob, this stuff is brown but who's to say it wasn't green before it was heated and began to burn? I'll taste it and get back with you.
Posted by: 76-914 Jun 11 2018, 12:28 PM
I gave up on acquiring the correct glove box door. One member vendor and another member both said they had them but they didn't get back with me so.................I ordered a piece of .032" 4130 from Aircraft Spruce. $8.37 later and a quick trimming I had my Glove Box door.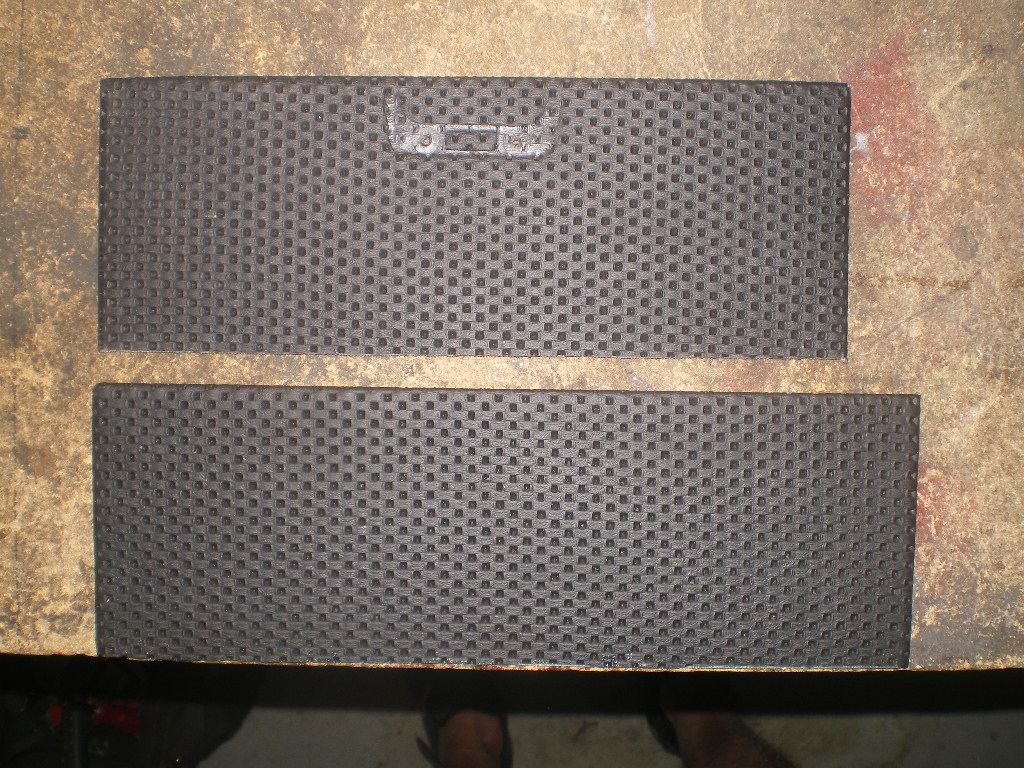
This project came with the smaller GB door (later model) however this is a '70 and needed the wider GB door. I used an 8mm threaded rod socket and an 8mm x 16mm SS bolt. It's not pulled up in this pic.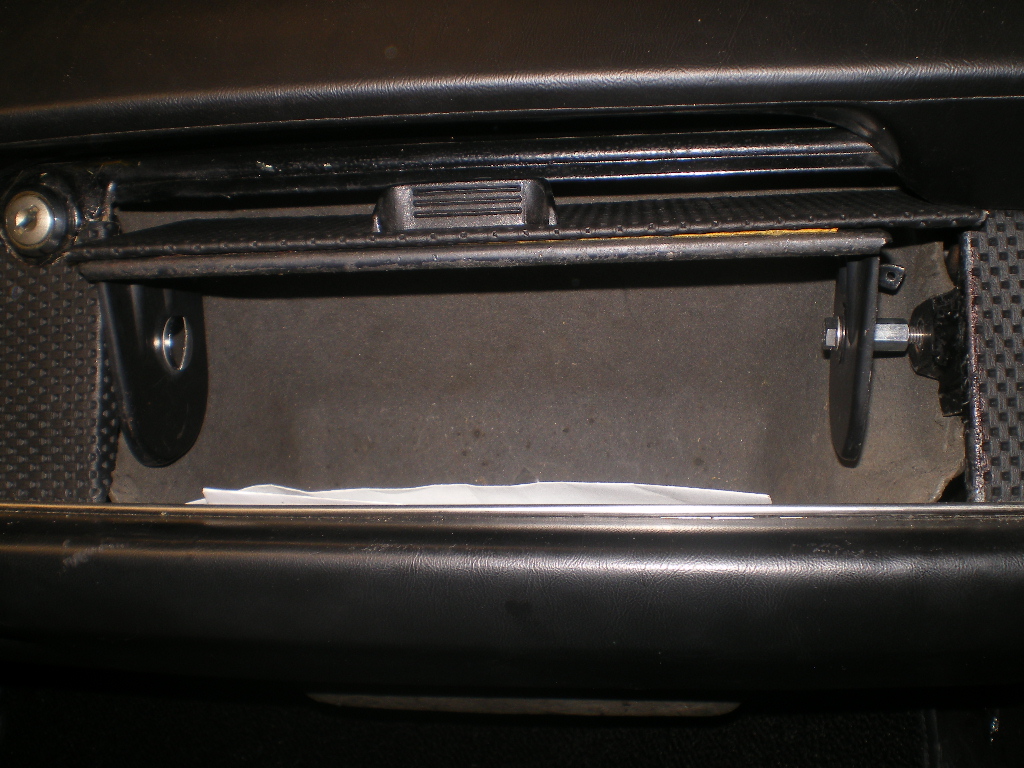
Done and done with that.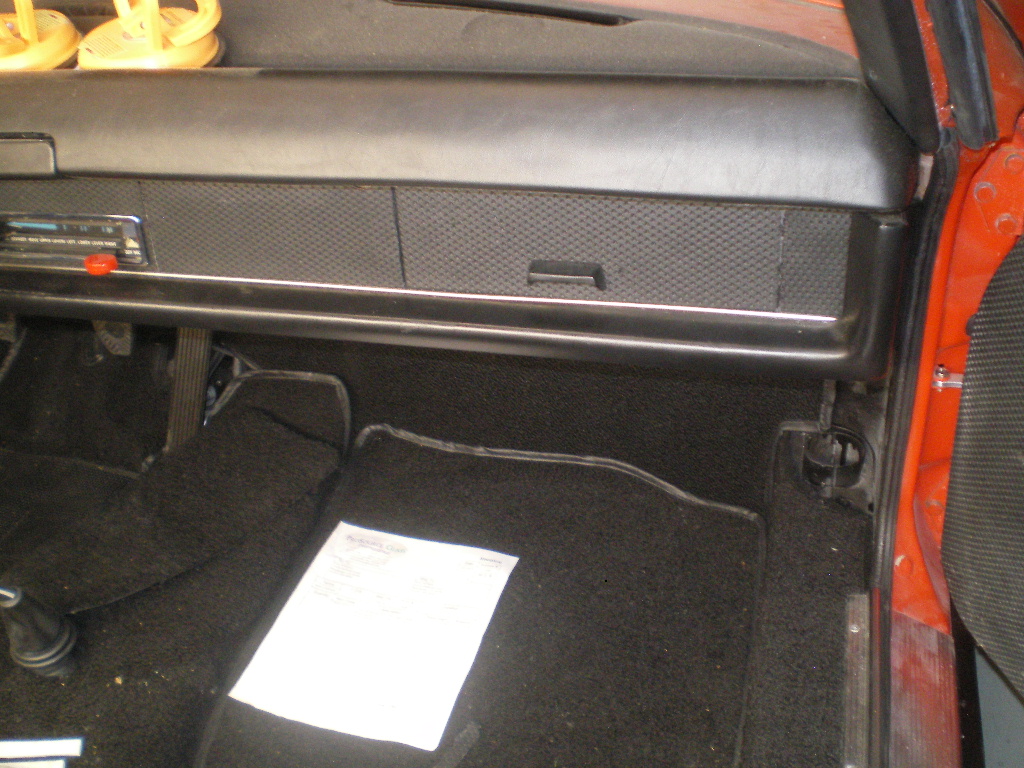
Posted by: 76-914 Jun 11 2018, 12:43 PM
Another item checked off the list. I noticed there was a Tick-Tick coming from the right bank. My rubber hose stethascope revealed it was coming of the center of the right header. Pulled the header and found this.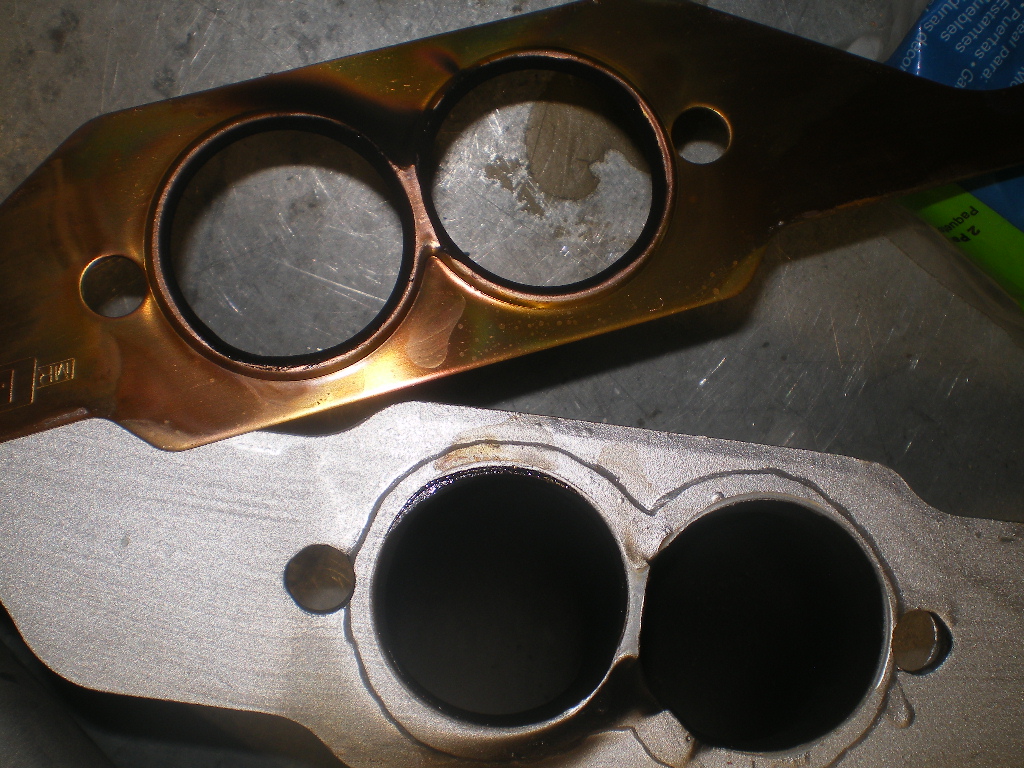
Dye and file revealed a low spot between the exhaust ports. A quick couple of passes over the header and it was dressed. I used the newer style SS multi-layer gaskets. They ain't cheap but I wanted to do this one time only. A drop of oil on each bolt and a proper torque wrenching later and it was silenced. 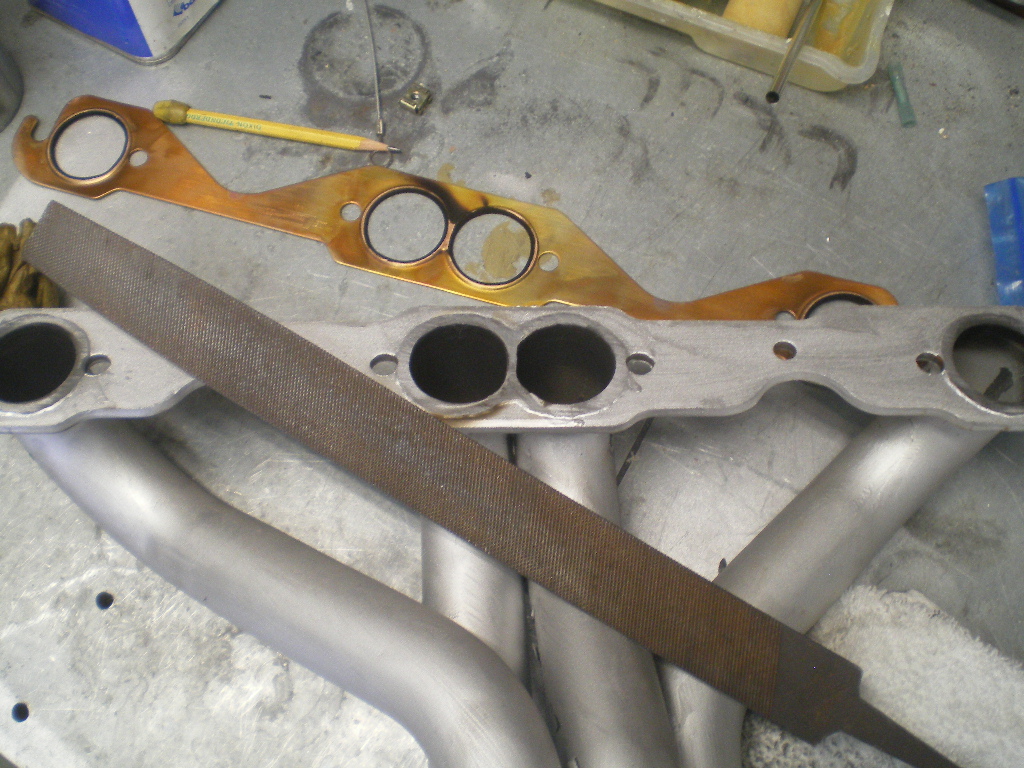
While I was in there I increased the plug gap to .045". That made a big difference in idle.
Posted by: 76-914 Oct 28 2018, 03:07 PM
I've been driving a 25 mile course while ringing out the cooling issues. I run the same exact course when the ambient temp is 84F. I know 98F would be better but I needed at temp I might see everyday, this time of year, in order to have a base from which to accurately compare the runs. At times this becomes boring so I kicked on my WSW to see how they were doing. Fine on low but when I switched to Hi my digital combo gage went blank. Since I was familiar with this run and expected temps I continued home where I replaced #8 fuse and everything was back to normal. The next day while returning and close to home I kicked on the lights as it was dusk. Bingo, the little Gremlin returned. Once again the gage went blank. This time it was a 20a fuse on a remote fuse panel I added earlier to handle the fans, pump and the 2 large red wires which feed the OEM fuse panel and steering column. Those two were originally unfused. A different fuse this time but on the same circuit basically. I disconnected ground at the battery and pulled all of the fuses as well as the 3 molex plugs on the steering column. Then I re-connected the battery and and added one fuse at a time. Nothing. I plugged the molex plugs back in and when I connected the one to the ign switch it blew another fuse. When I pulled that harness down to look for burned wires I saw the culprit's. There were small punctures on both the large red and yellow wires. 
I stuck my finger where they contacted metal and could feel a couple of small sharp points that felt like slag although I couldn't see them with a mirror. I removed the spades from the plug and slipped 3 different sizes of Marine Heat Shrink over the pictured areas to serve as thick spacer so those spikes wouldn't penetrate the wire sheathing again. 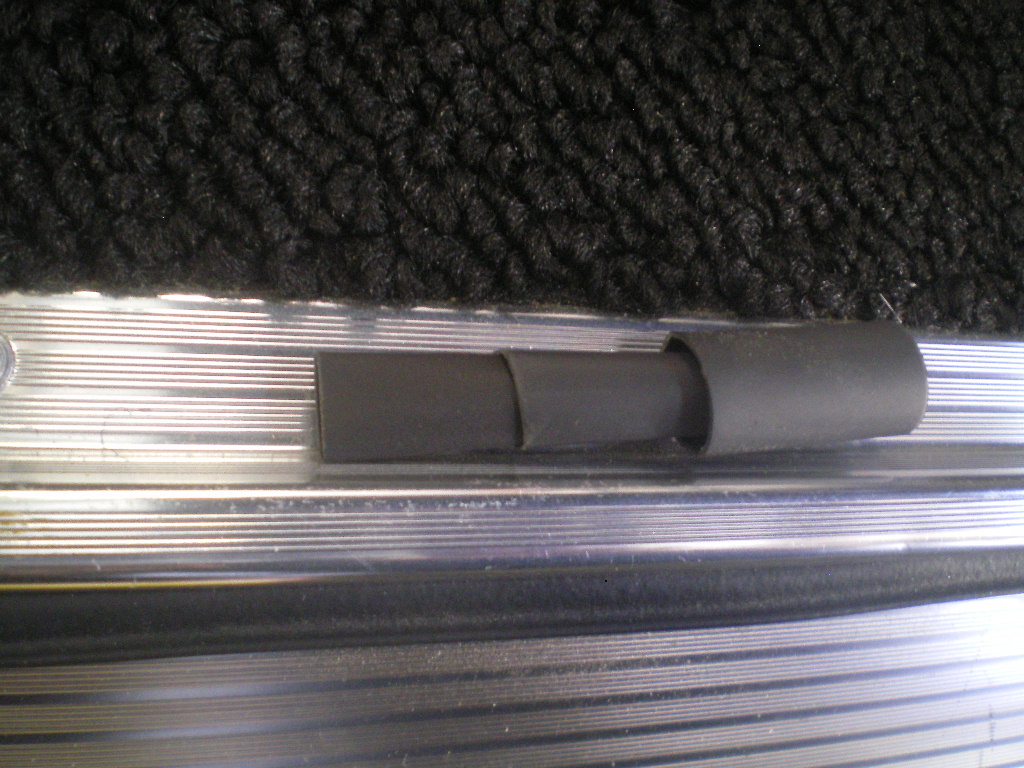
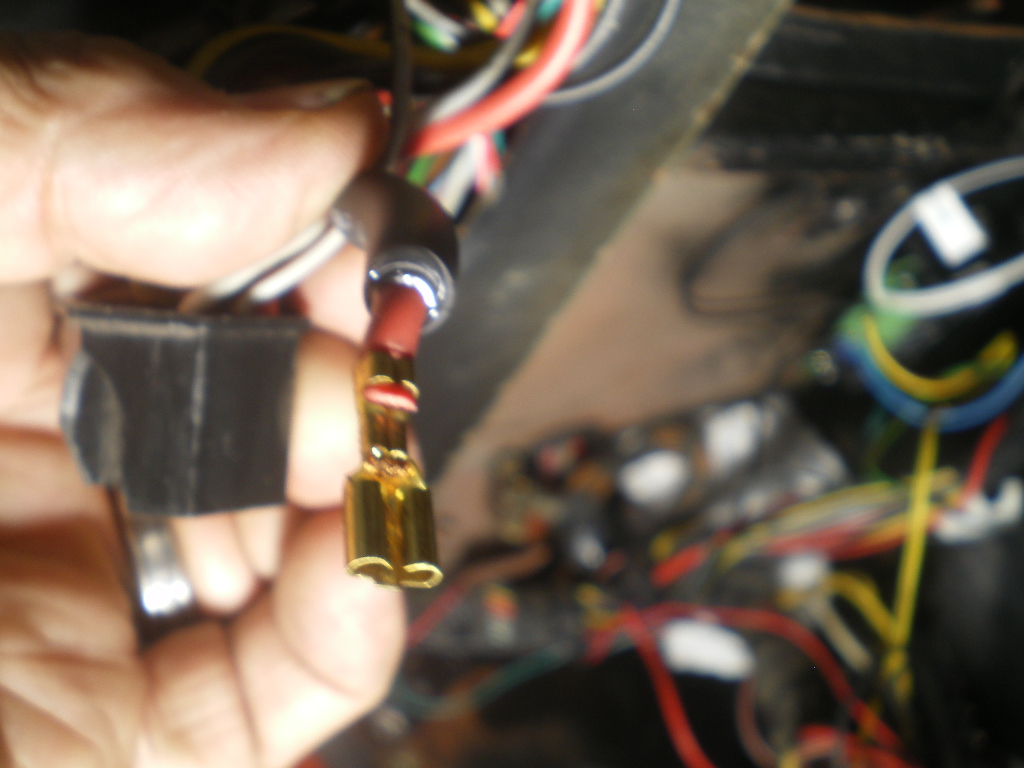
I'm guessing the reason those fuses hadn't blown before was because I'd never placed a "load" on those wires but once I did it was enough draw to arch and blow the fuse. Who knows? I'm not an electrical whiz. Anyway, that did take care of it and all systems are back to normal.
Posted by: 76-914 Dec 18 2018, 05:14 PM
I traded a crappy Dan Gurney spare to @euor911 for this crappy bumper. I had planned on using it for the Subaru conversion but it was just too much work to bring it back to something worthwhile so it's been in the attic until now. This V8 conversion had the large Renegade cut out in the front so I dug this out and with very little trimming it fits the build. I welded a couple of gussets in so the incoming air flows threw the radiator instead of out the sides of the bumper. You guys that have added a radiator know what I'm talking about. I need to spray some hi build primer, sand and paint it next. 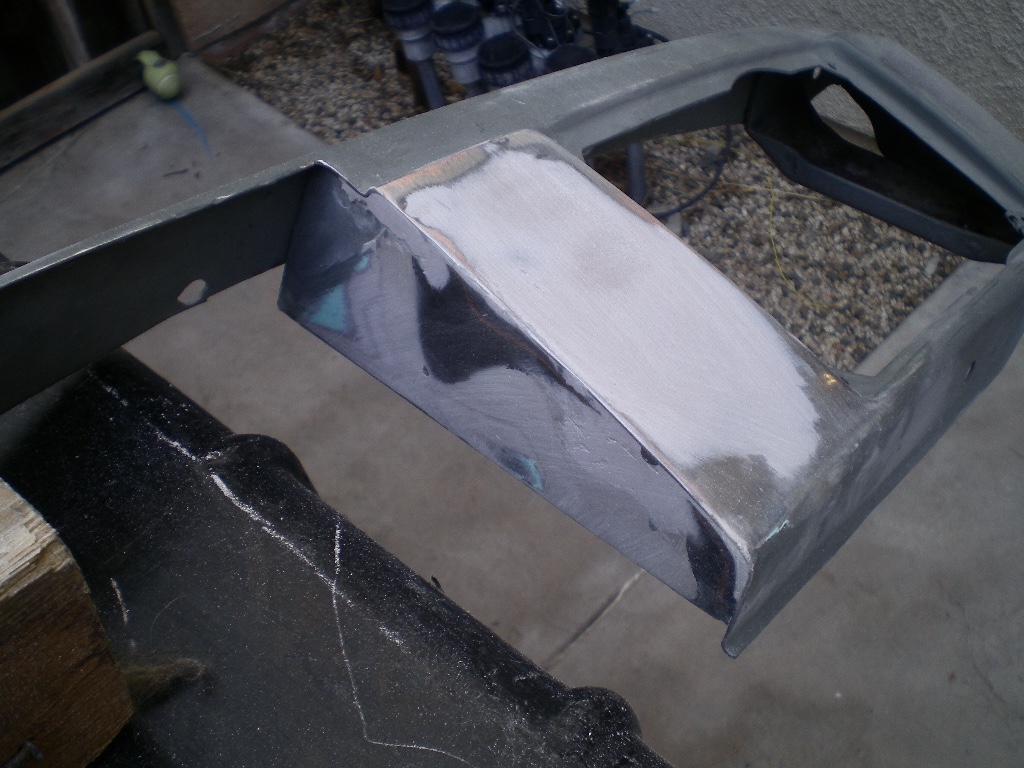
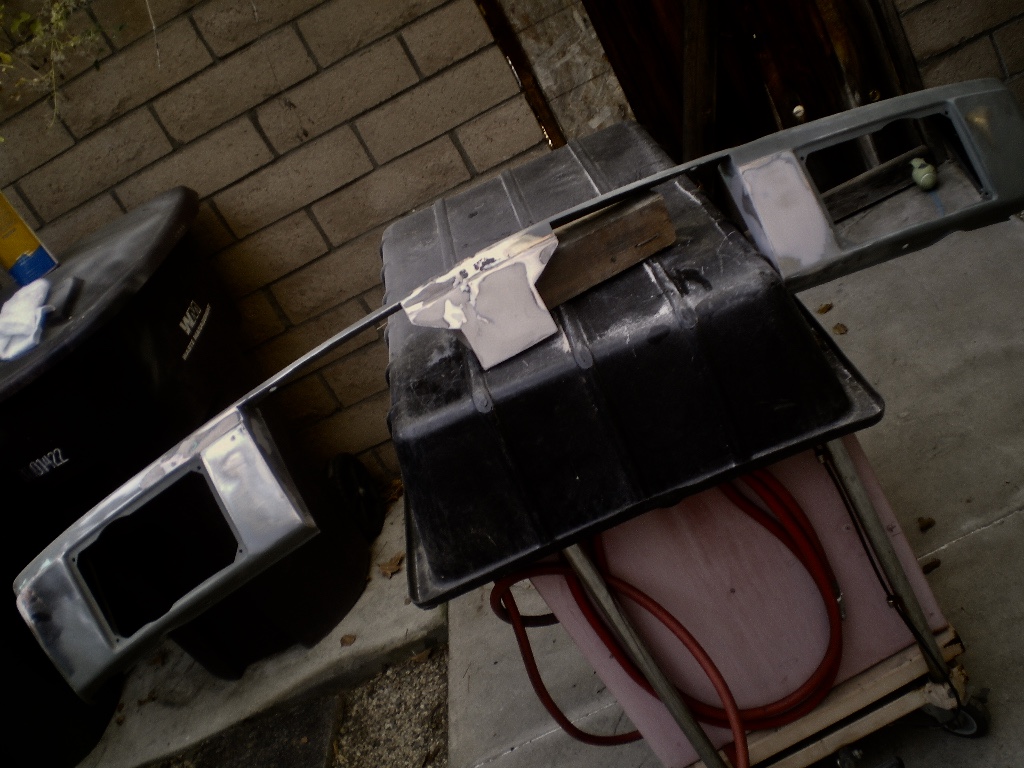
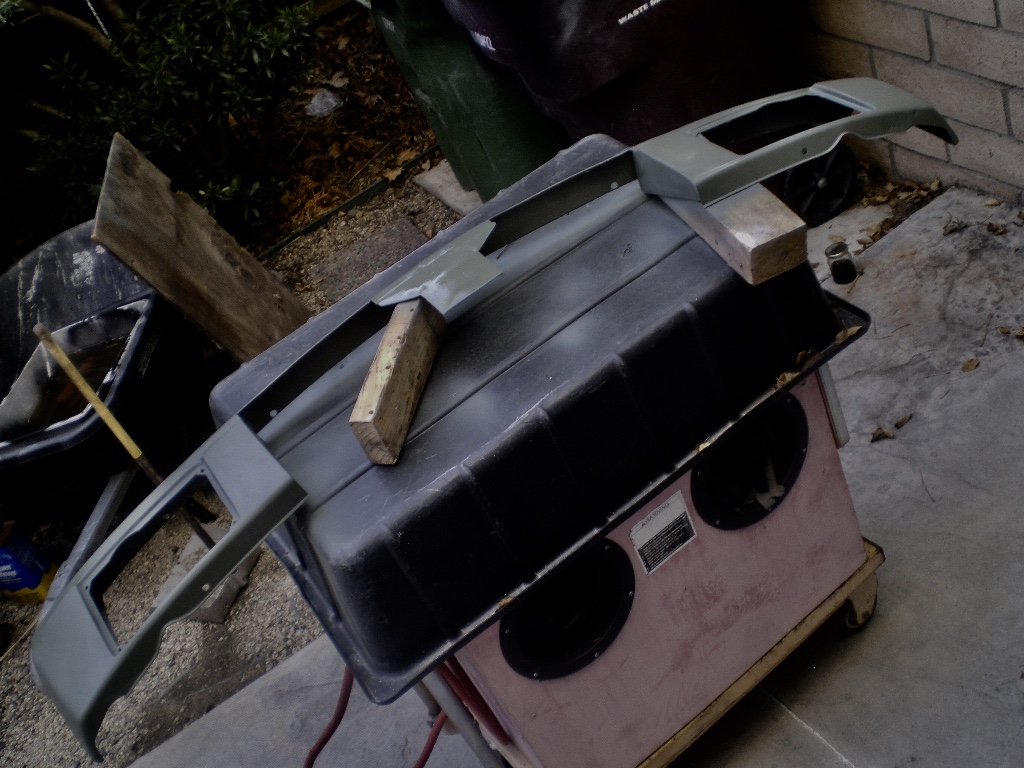
Posted by: ValcoOscar Dec 18 2018, 05:36 PM
I traded a crappy Dan Gurney spare to @euor911 for this crappy bumper.
I had planned on using it for the Subaru conversion but it was just too much work to bring it back to something worthwhile so it's been in the attic until now. This V8 conversion had the large Renegade cut out in the front so I dug this out and with very little trimming it fits the build. I welded a couple of gussets in so the incoming air flows threw the radiator instead of out the sides of the bumper. You guys that have added a radiator know what I'm talking about. I need to spray some hi build primer, sand and paint it next. Hey..Hey Kent
I thought Ben and I were the only ones modifying bumpers
Just kidding
Nice job my friend!!!
Oscar
Posted by: 76-914 Dec 18 2018, 06:00 PM
A few months back I attached the ducktail spoiler using Tinnerman washers and some Bev headed brass screws w/ lock nits. I was good with that install until I noticed the witness marks left in the trunk seal. 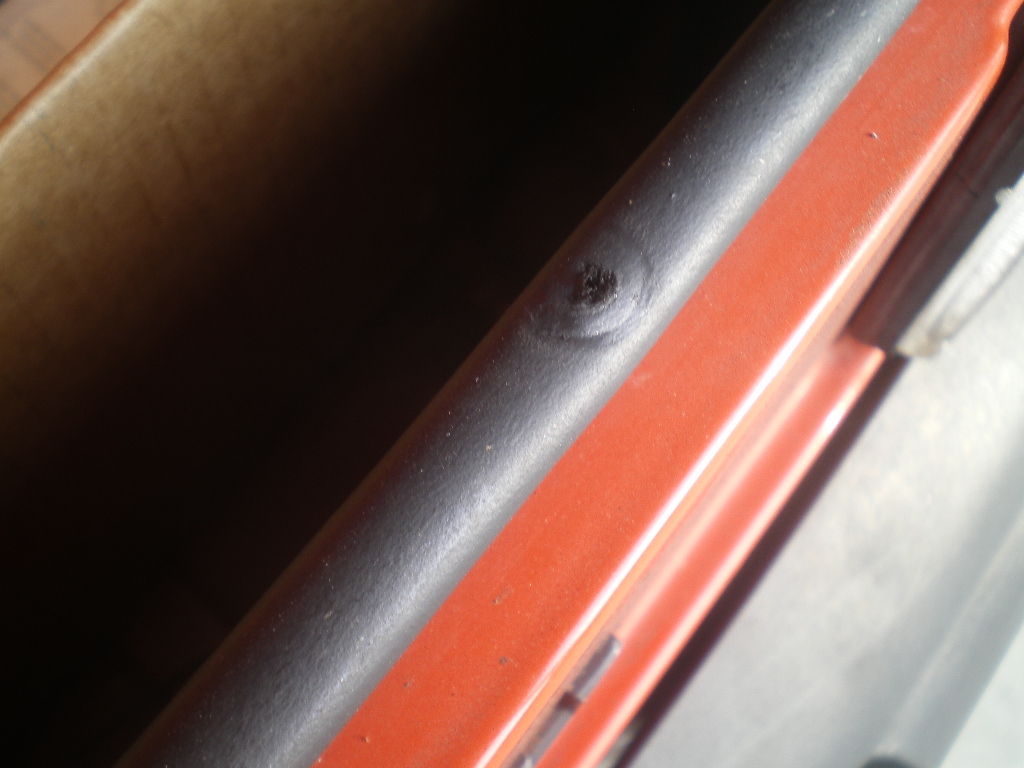
This is what I used that left the impressions on the seal. Even though the nut was flush with the trunk skin.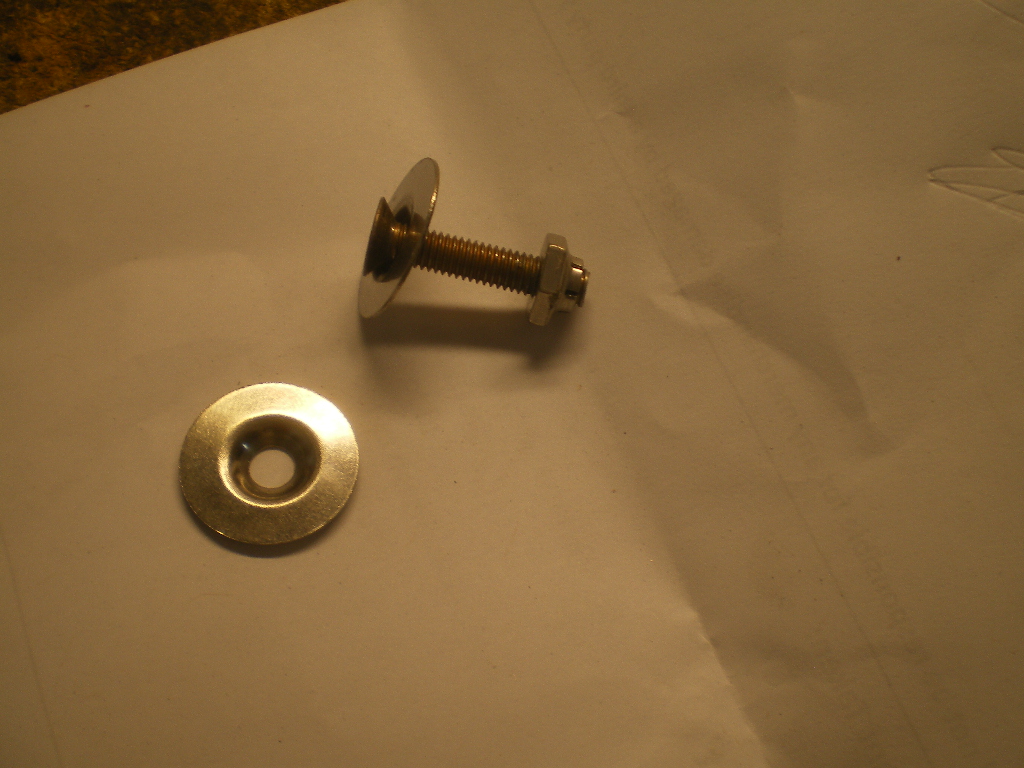
Then I found these solid SS beveled washers and the 6mm x 1.00 Bev head screws.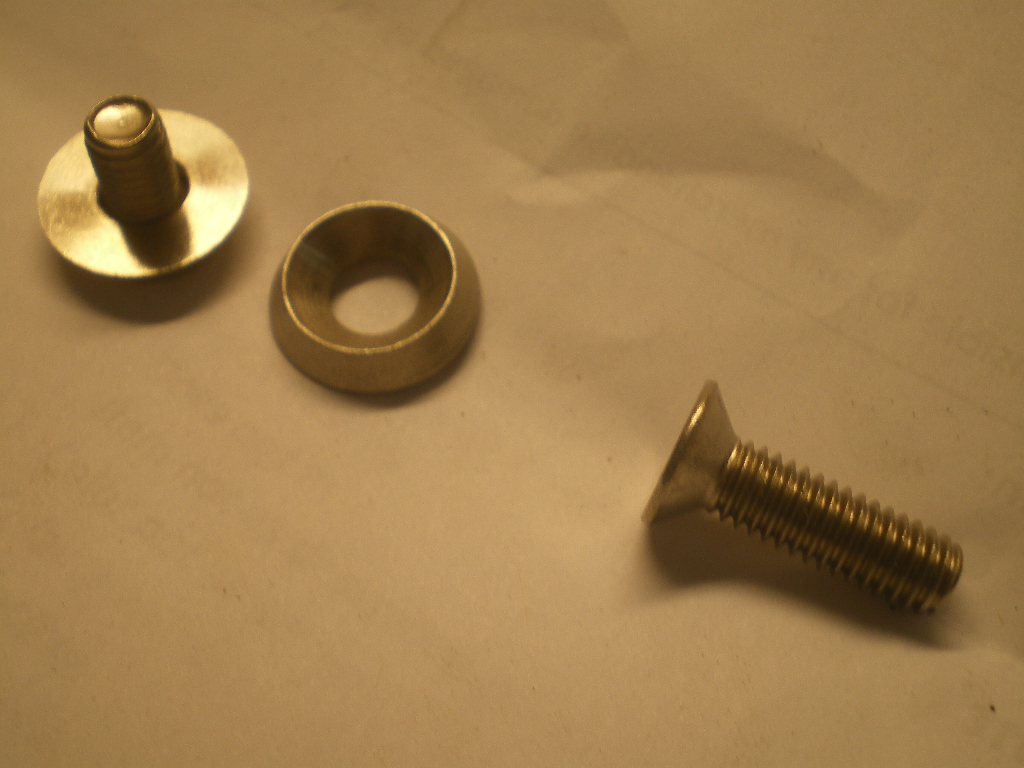
I increased the inner hole diameter to allow the nut to move up against the 2nd layer of metal which is the outer skin of the hood we always see. The trick was getting the nuts to line up with the screws in this void.. I placed a very small strand of butyl tape on the top of the nut then slipped the nut over a small drill bit. This let me push the bit and nut into the void and onto the screw.The butyl kept the nut from falling into the void and also acted as locktite so no lock washer was required. In one pic you can see the butyl that squeezed out. If the screws need to be removed one day then the butyl will keep the nuts in place. 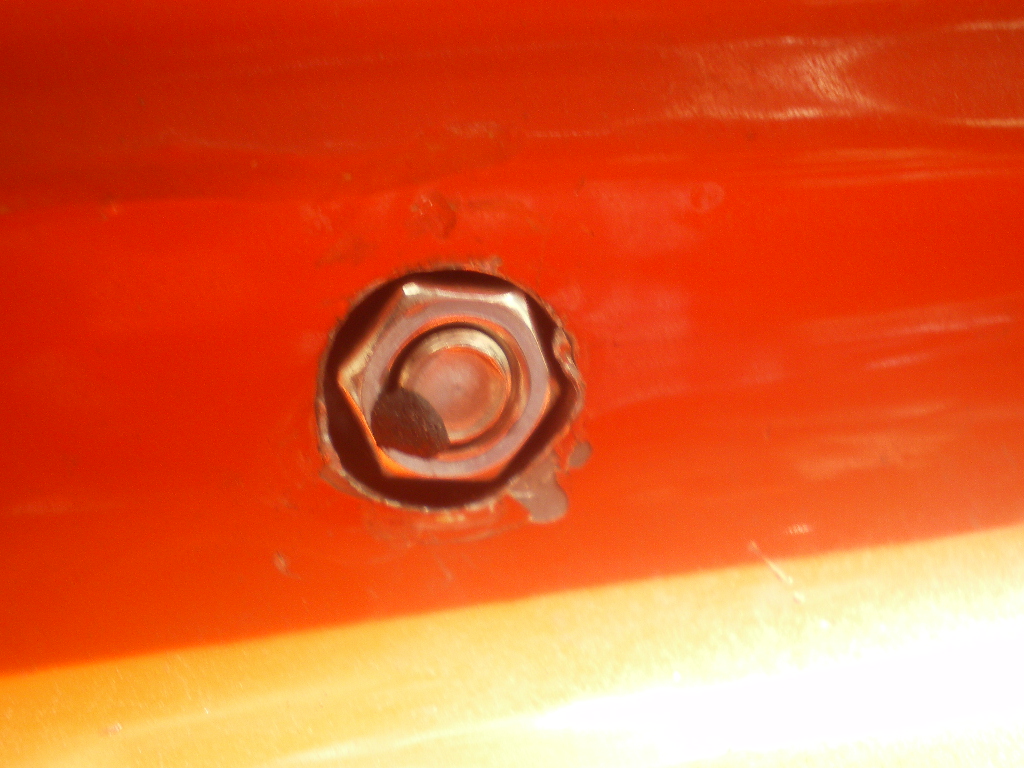
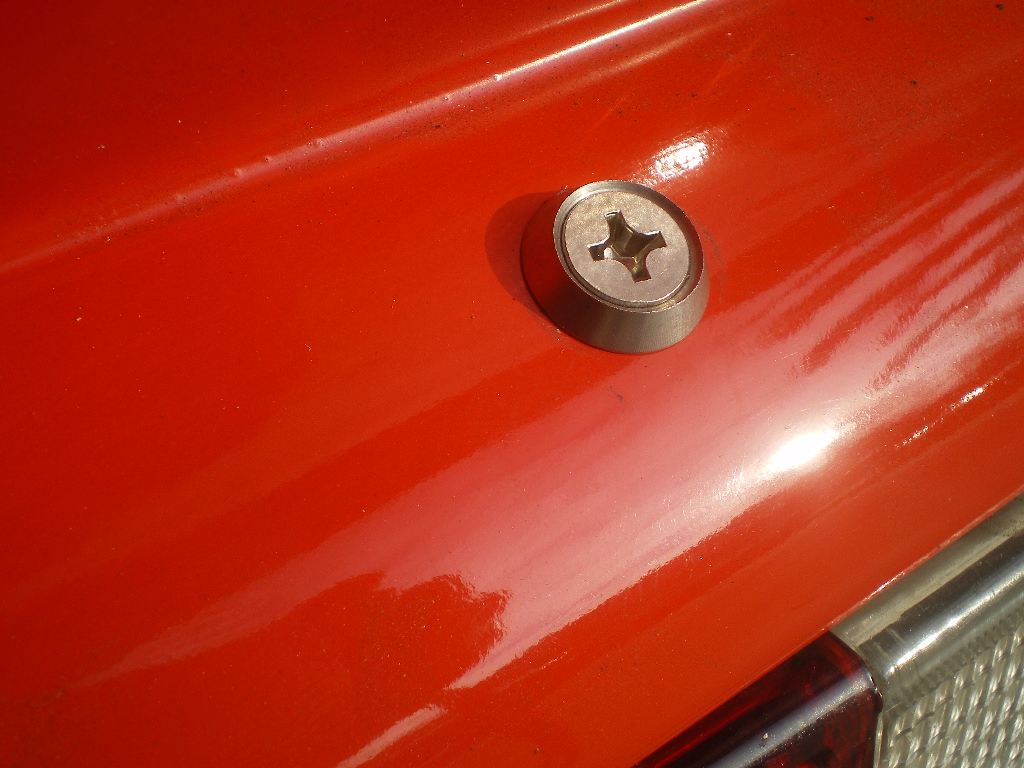
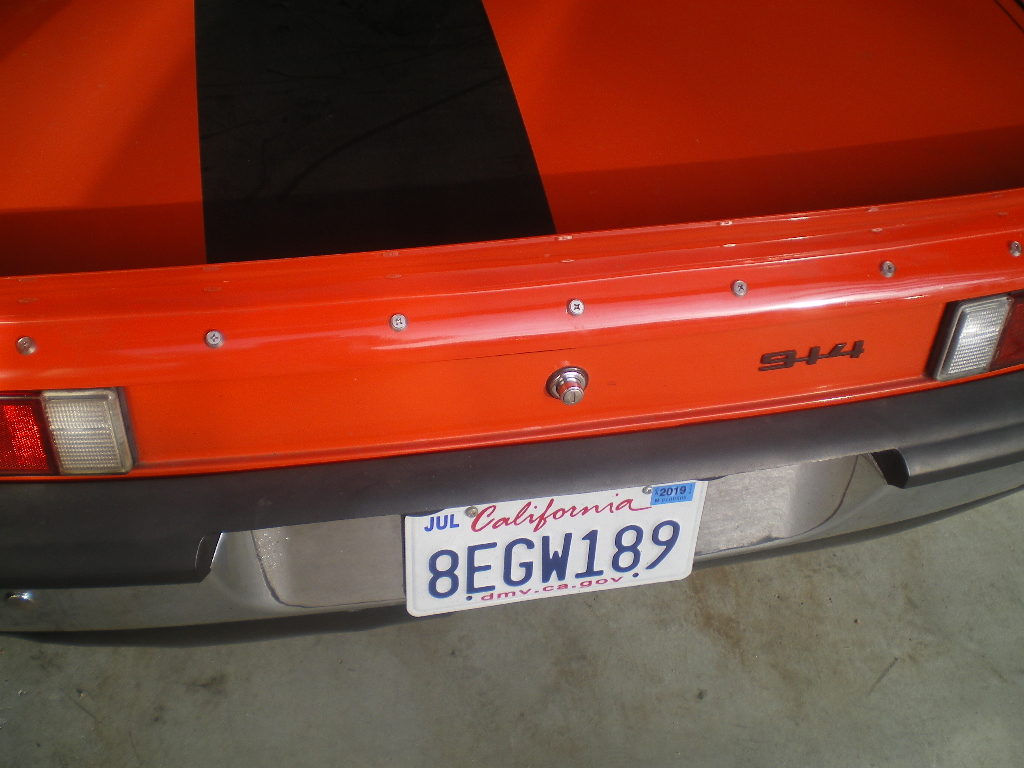
Posted by: 76-914 Dec 30 2018, 08:49 PM
I pulled into the garage after a 1 hr drive and noticed my voltage was 11.3 and didn't change with RPM. Ignition off and I had 12.4 at the battery.  Dead alternator and it has less than 900 miles on it. When I opened it up I found a little ball of fuzz laying against the fins of the rectifier so I probably fried a diode. I'll test them tomorrow hoping to find that one is fried. If not the internal regulator took a . It's a Delco, one wire 10SI series and the only have three cooling fins ( one long and two short) so they're prone to heat failure anyway. If it does it again I'll go with a larger series that has 7 fins.
The fuzz ball that was sucked in the rear cooling slots: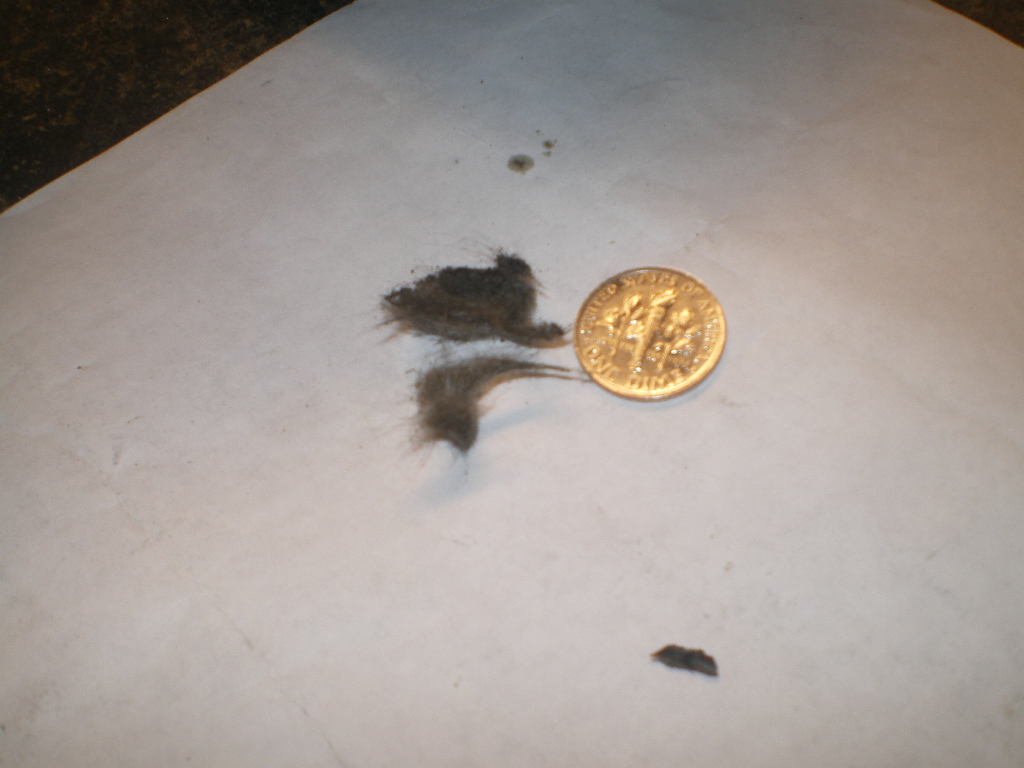
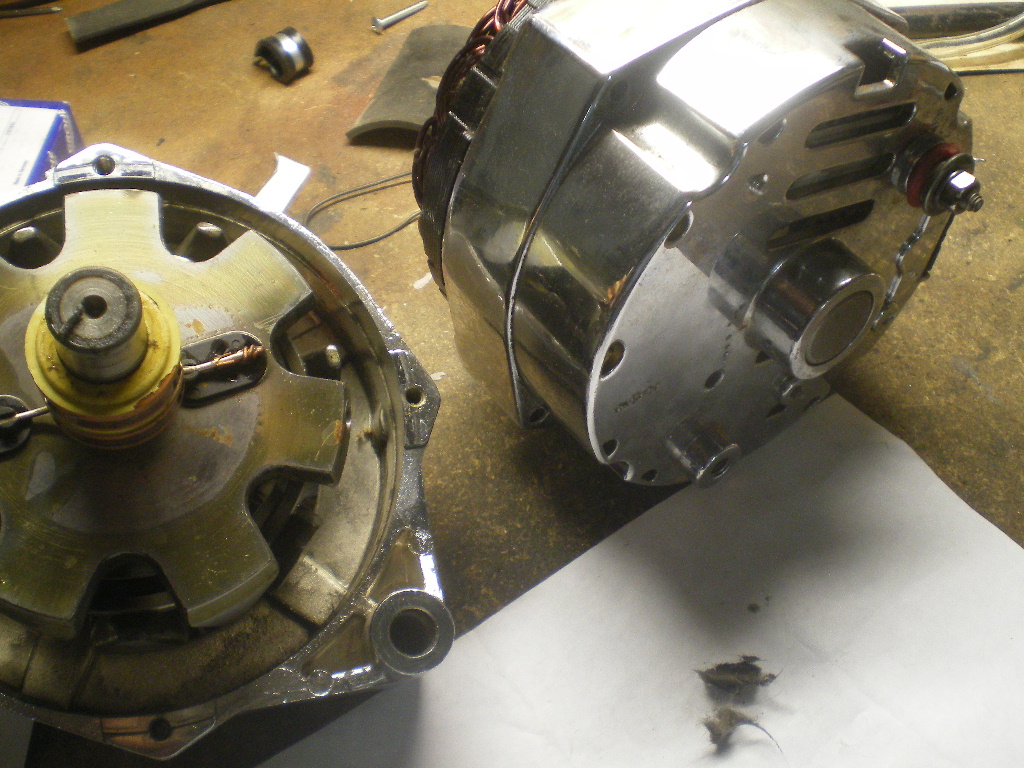
A pic of the rectifier showing the small set of cooling fins.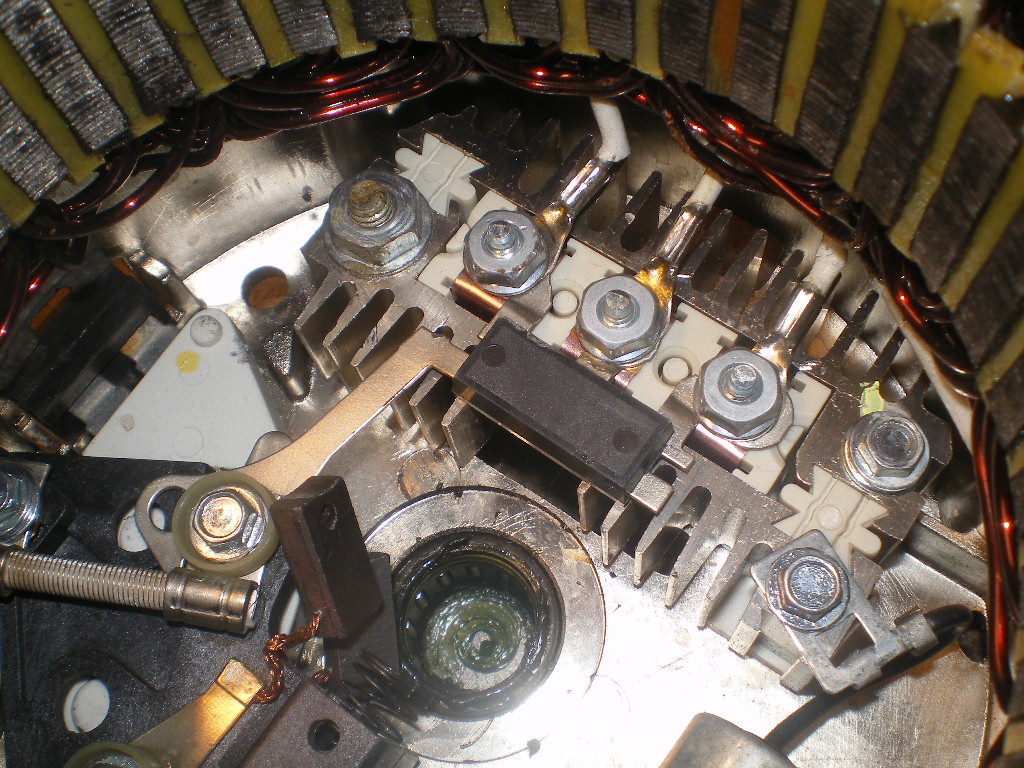
Posted by: 76-914 Jan 26 2019, 10:10 AM
Didn't get much done on the car this past month. The rainy, cold Wx consumes my energy. I did finally get my fog light's to work w/o kicking on my fans so thought I'd finish up the front area.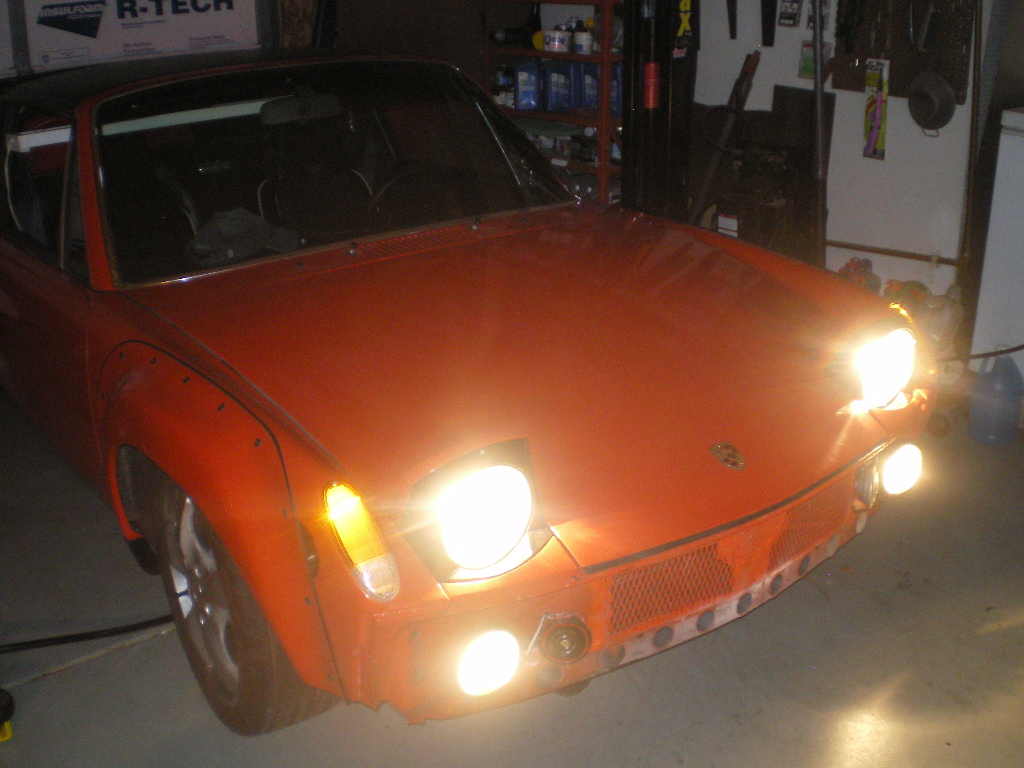
I traded a crappy old wheel with @http://www.914world.com/bbs2/index.php?showuser=7300 for a crappy front bumper a few years back. I had planned on using it for my Suby conversion but ended up shelving it. After a little tweaking it fit the car so I cut it, welded and dolled it up a bit.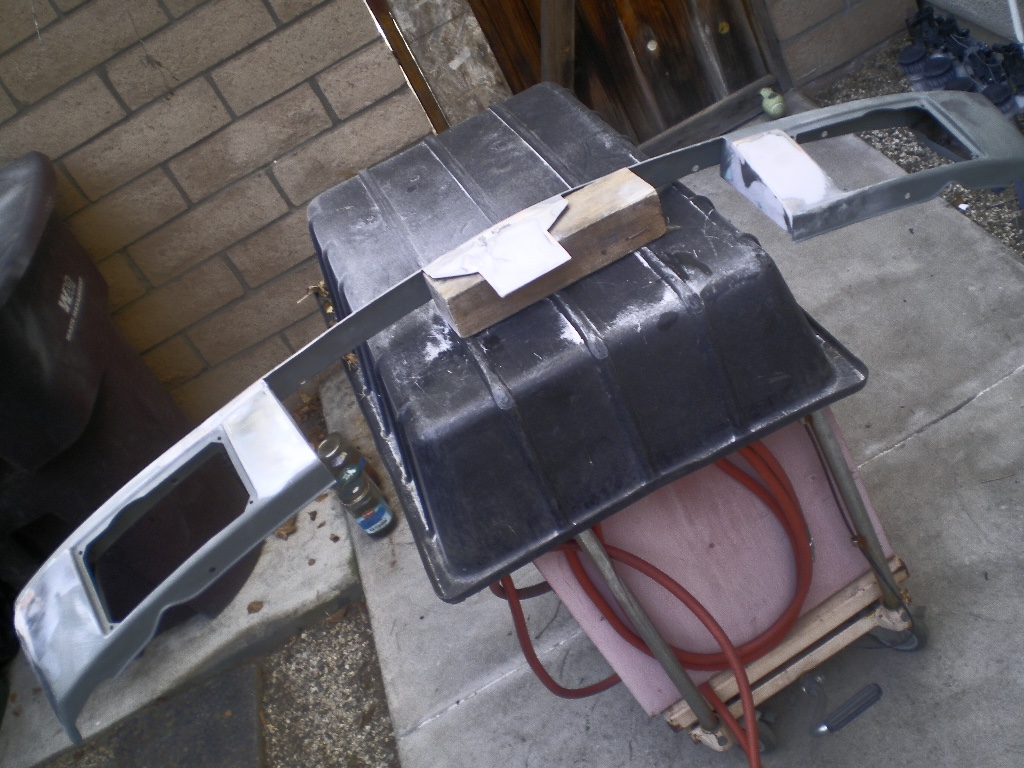
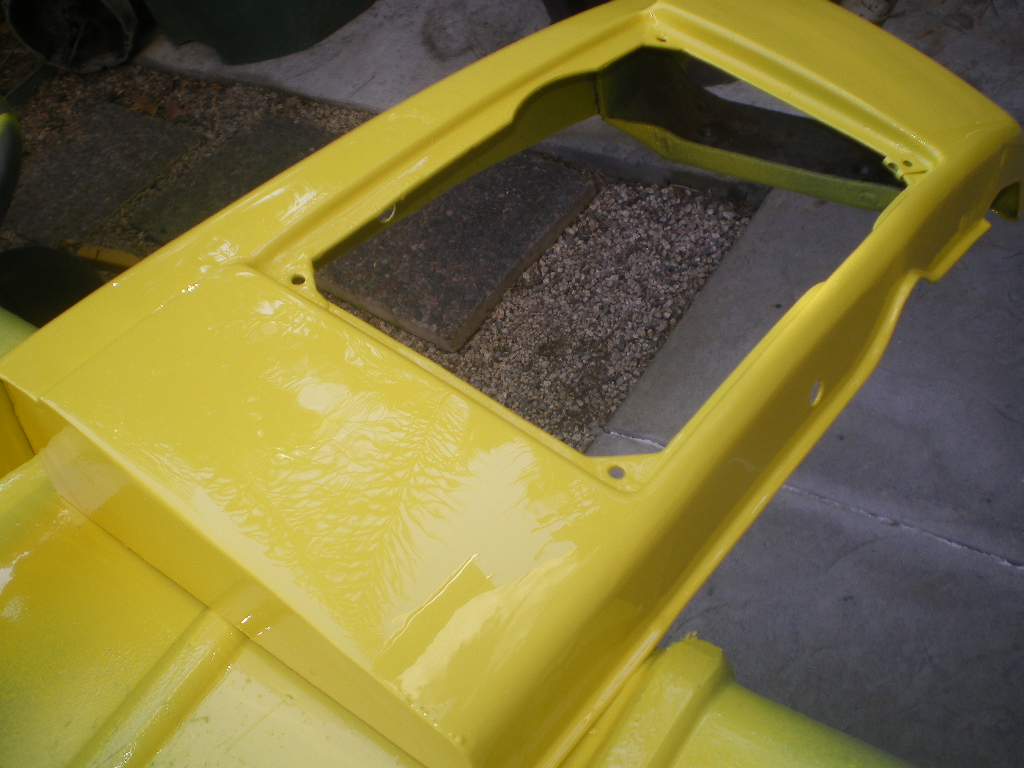
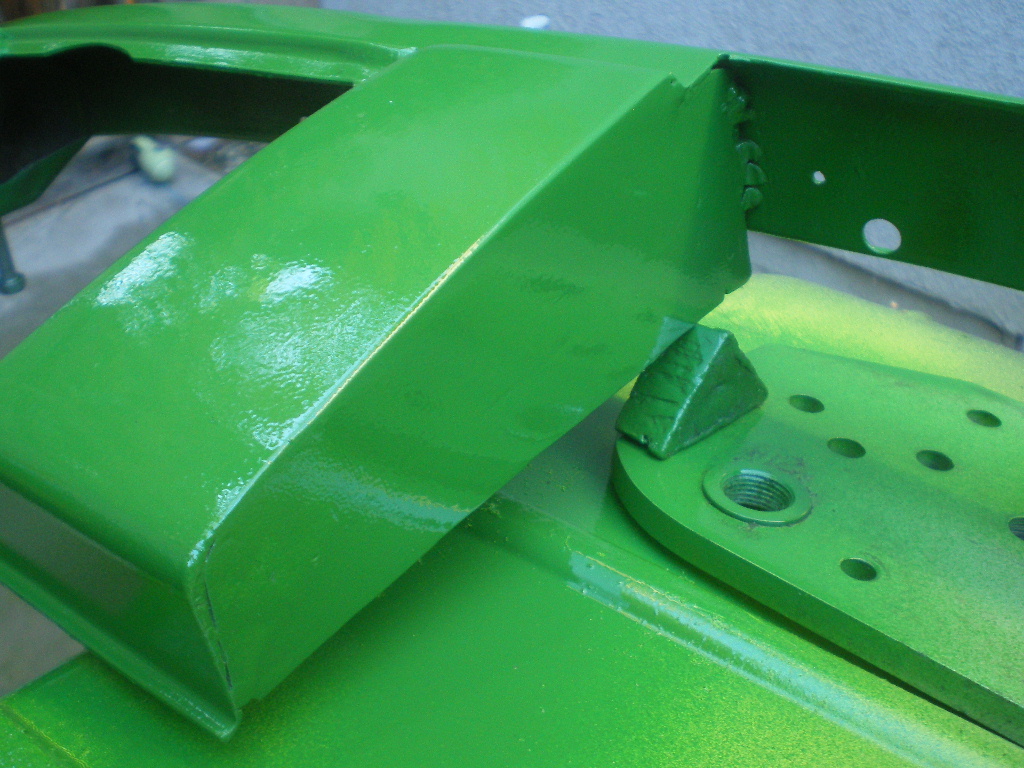
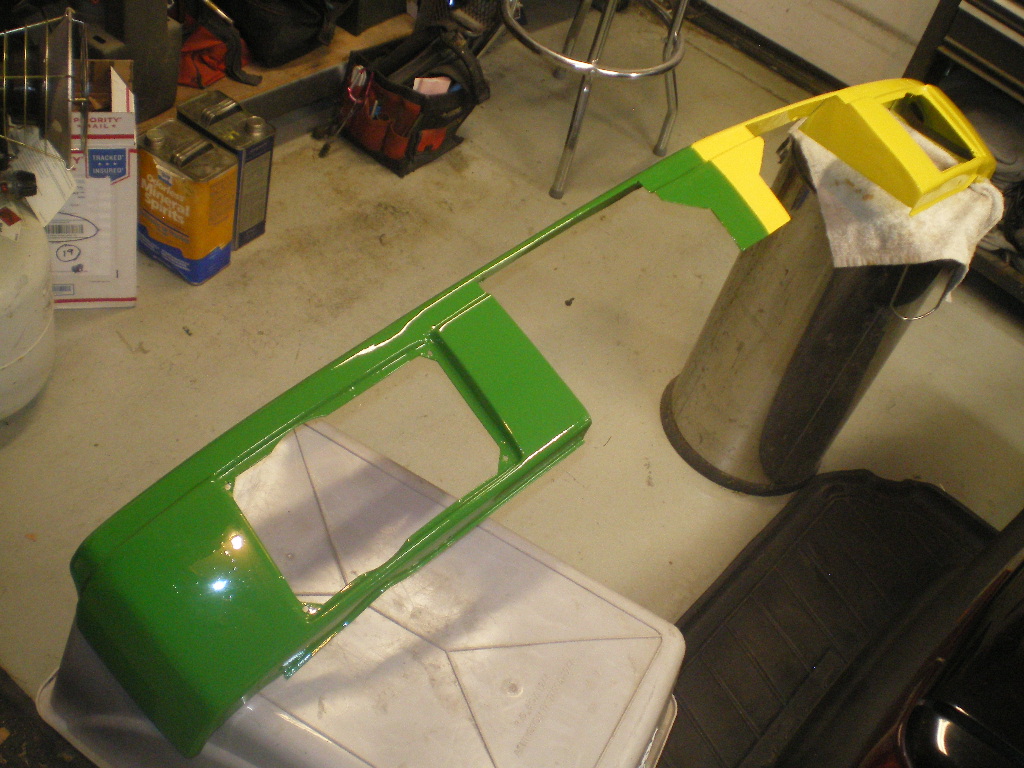
A new bumper top and Fog Light hardware (sans the black anodized screws).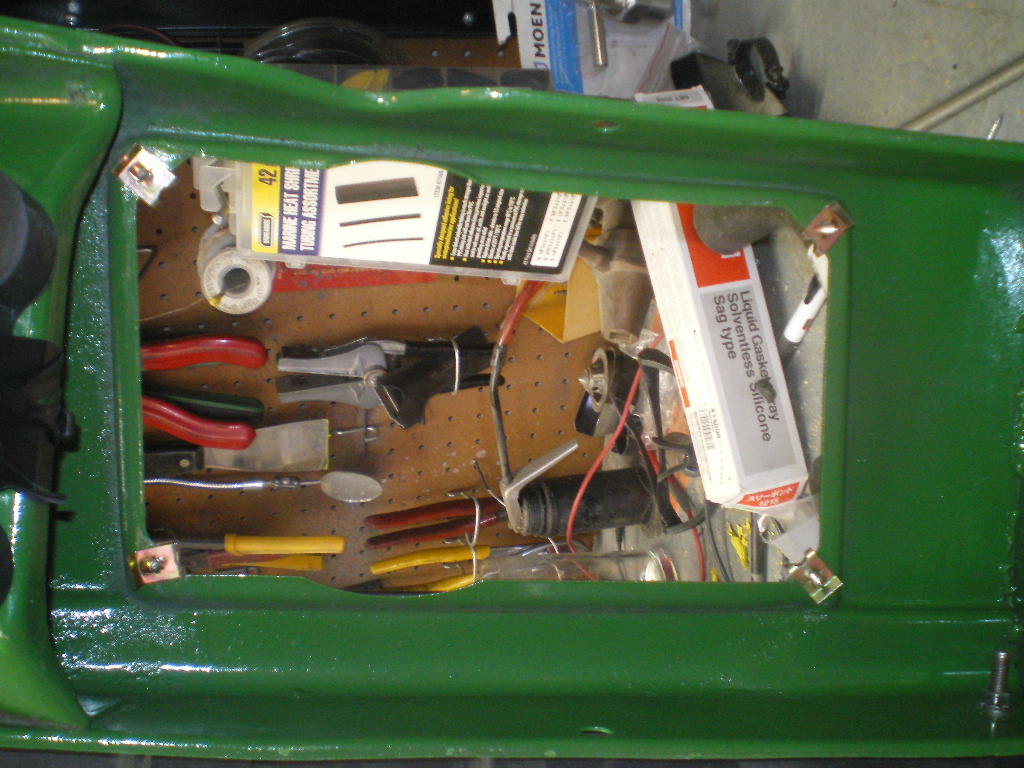
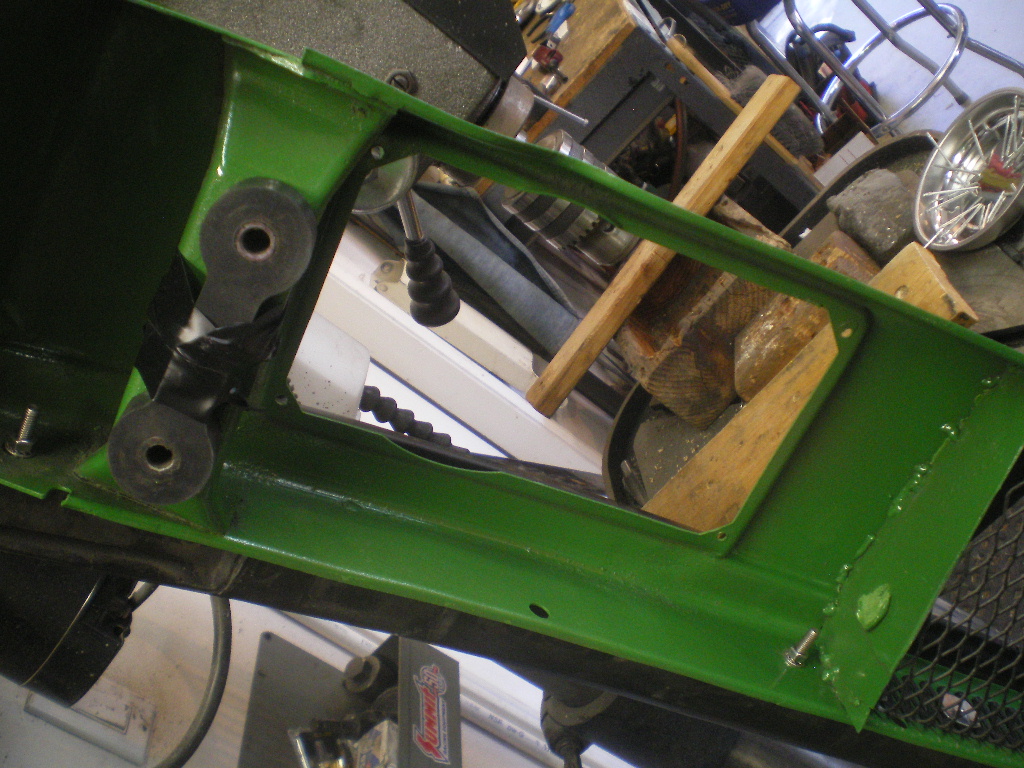
I had a 1/2 sheet of this powder coated diamond sheet so I cut out a piece and fitted it up. It was very easy to shape with multiple curves and bends. It is riveted onto the bumper and the rivets are concealed by the bumper top.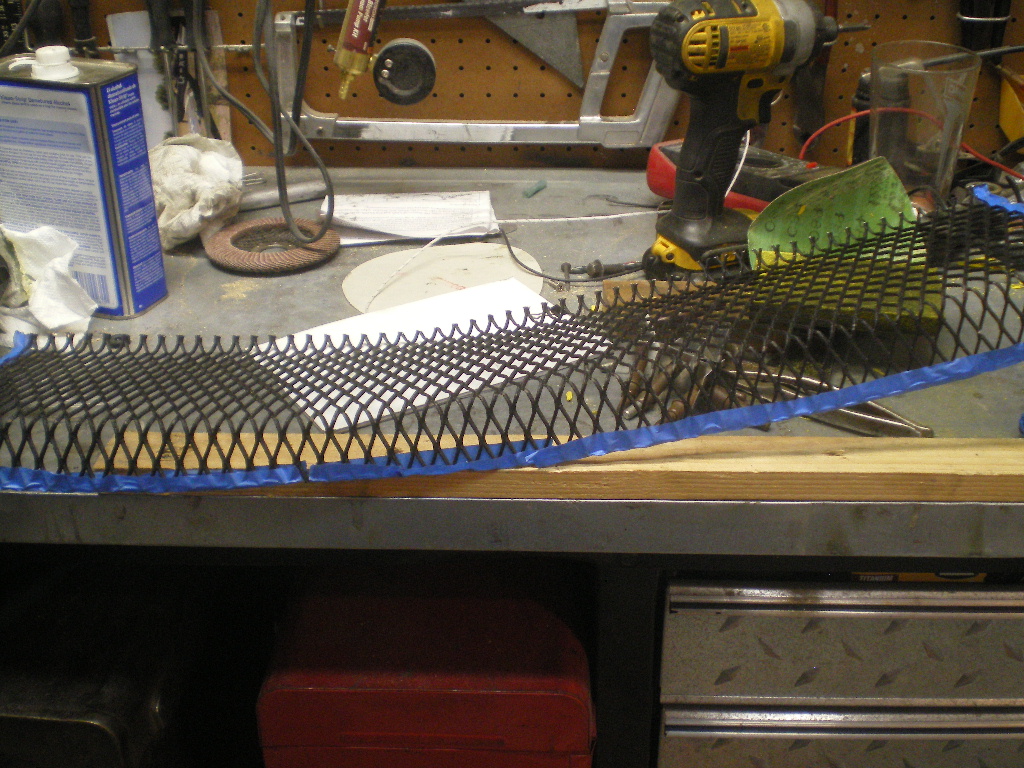
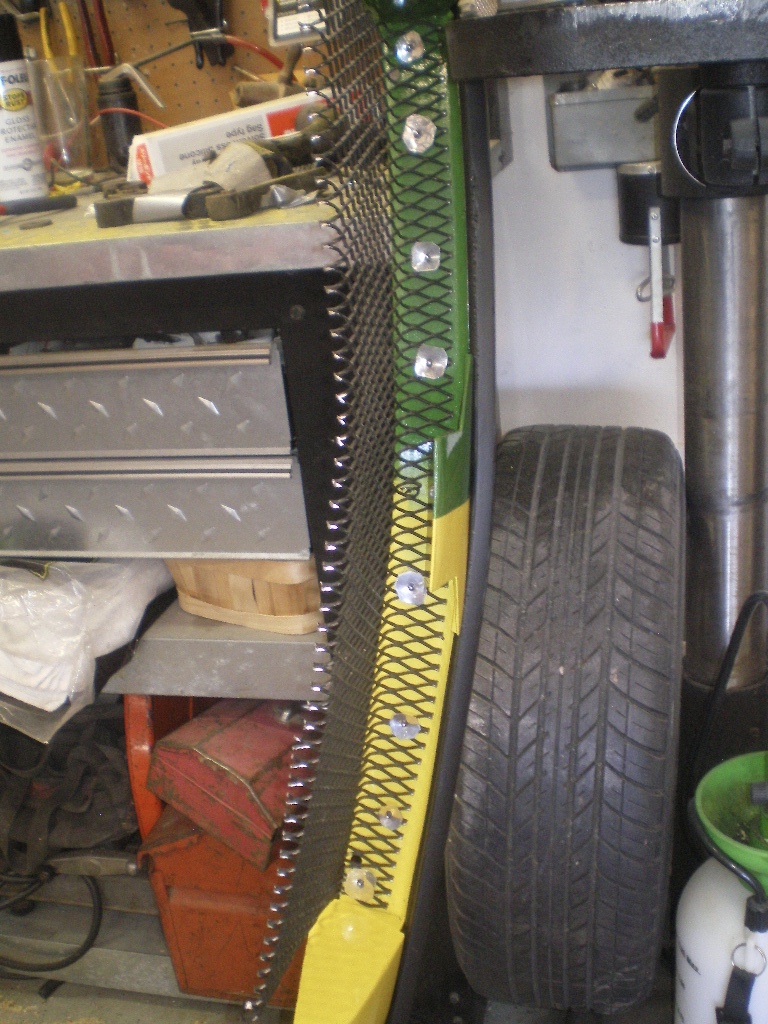
And with the black grilles in place 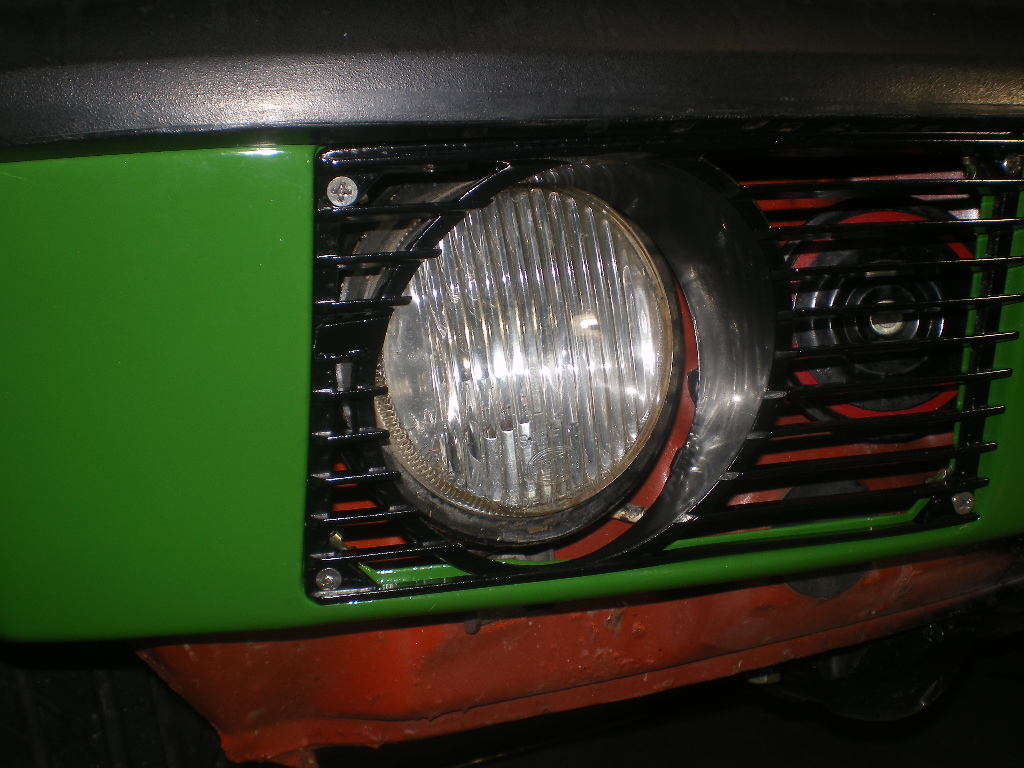
Posted by: 76-914 Jan 26 2019, 10:15 AM
A few more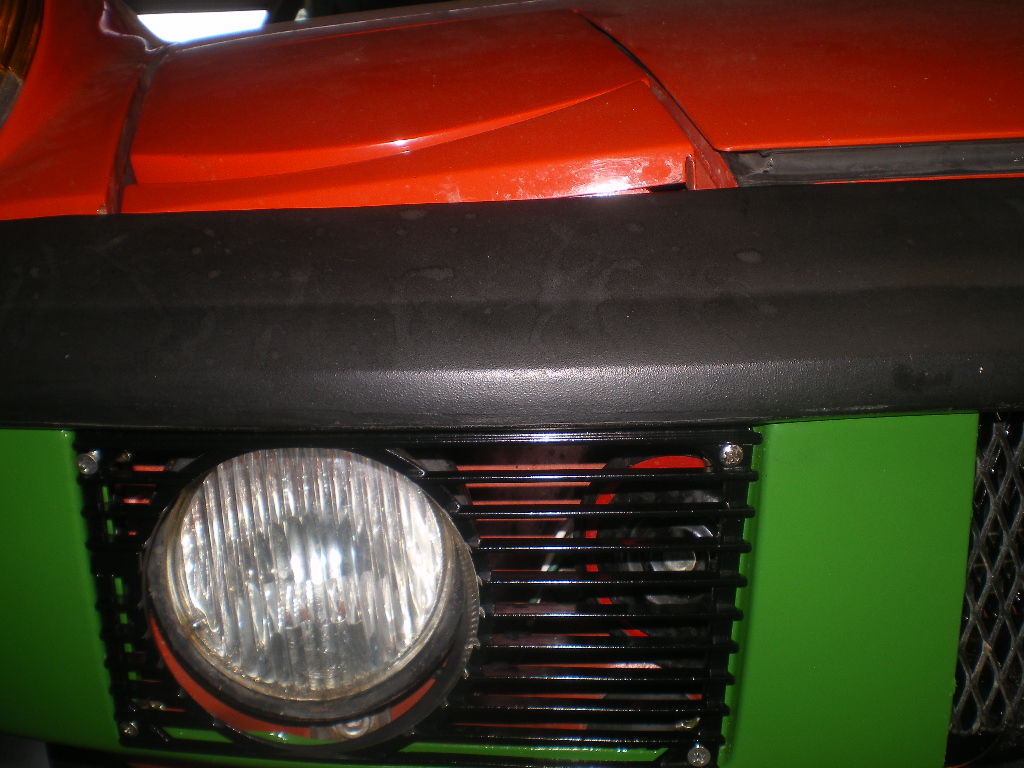
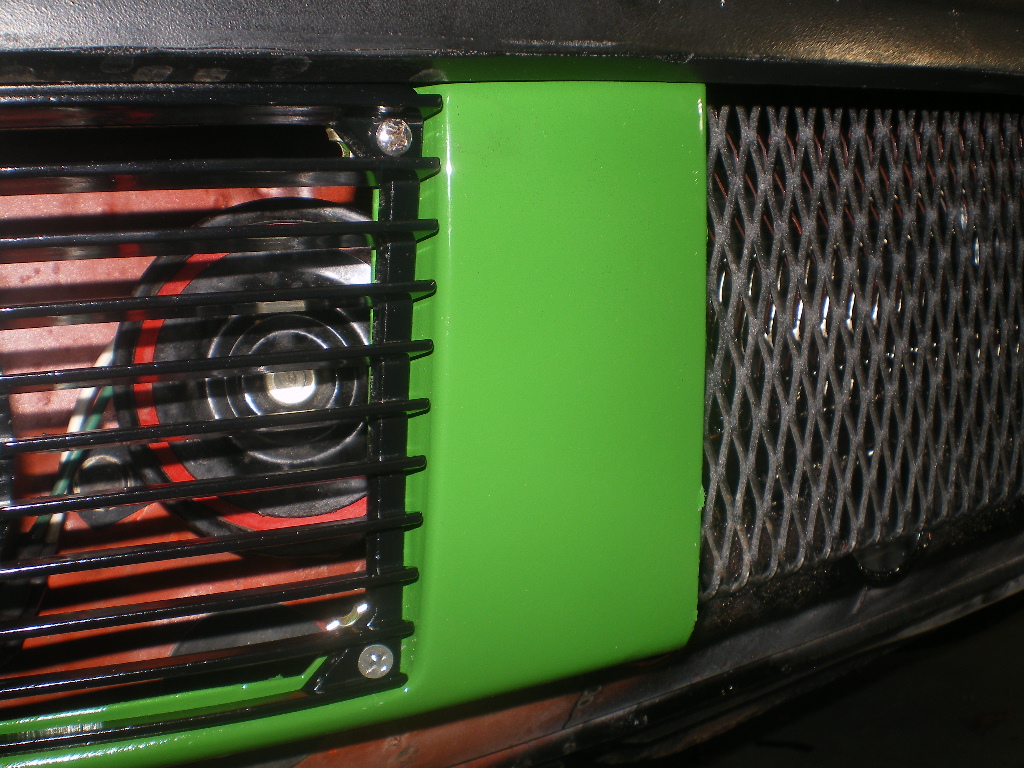
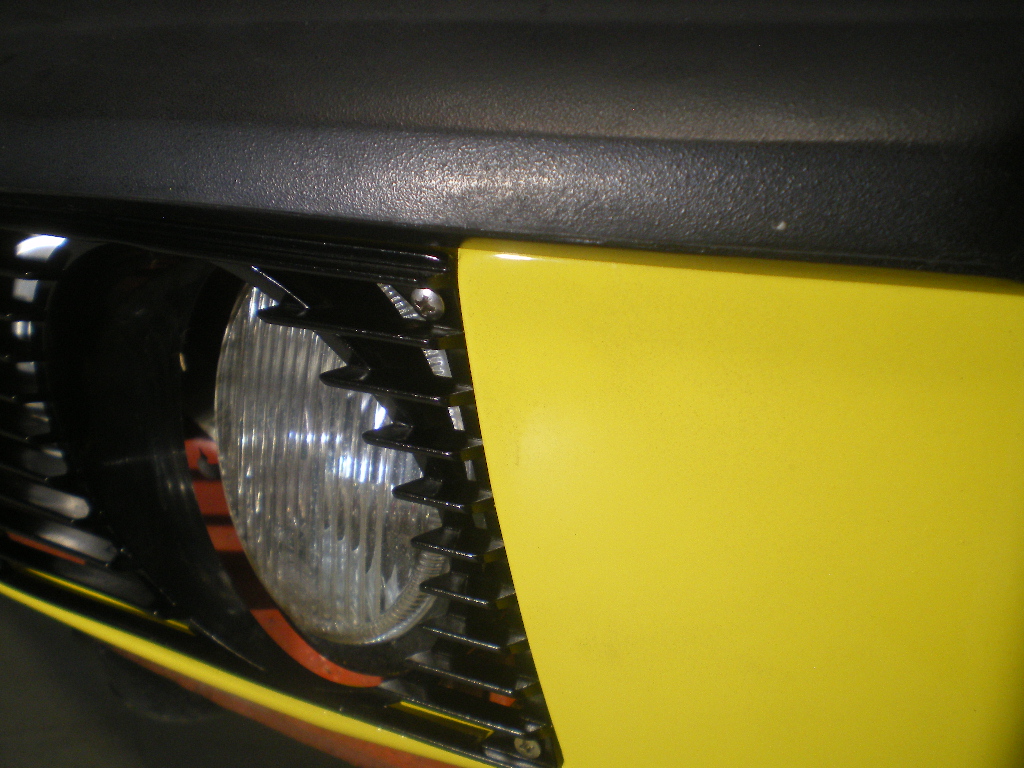
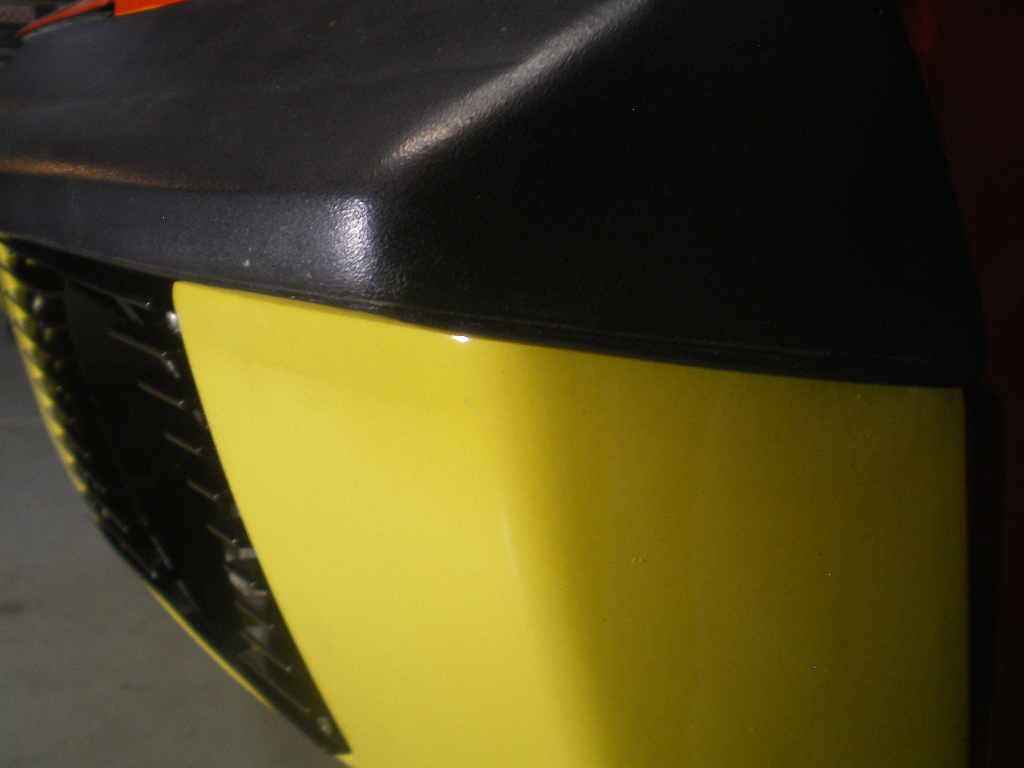
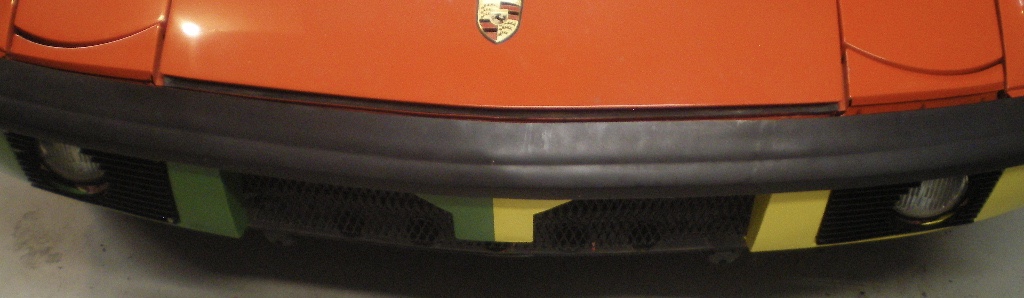
Posted by: euro911 Jan 26 2019, 02:46 PM
Glad to see you could put it to good use, Kent
Posted by: euro911 Mar 6 2019, 02:21 PM
..and who makes that "better" media blaster?Great work!
http://www.tptools.com/USA-Cabinet-Gun-and-Pickup-Tube-Upgrade-Kit,2320.html?b=d*8012!r*PriceRange*%2460+-+%2499.99
I have an HF blast cabinet with 'the kind' vac unit ...
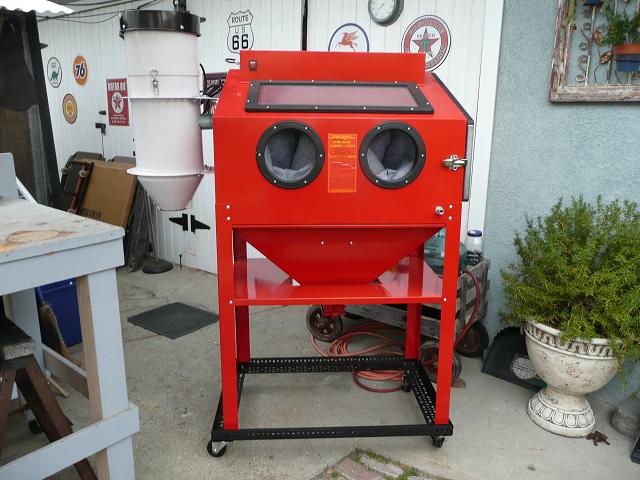
... but it's nothing compared to the $20k cabinet I had access to when I was gainfully employed at a major aerospace company
They're listing the upgrade kit at $90.00. I'm not in a hurry, should I wait for a sale?

Posted by: 76-914 Mar 6 2019, 03:57 PM
..and who makes that "better" media blaster?Great work!
http://www.tptools.com/USA-Cabinet-Gun-and-Pickup-Tube-Upgrade-Kit,2320.html?b=d*8012!r*PriceRange*%2460+-+%2499.99
I have an HF blast cabinet with 'the kind' vac unit ...
... but it's nothing compared to the $20k cabinet I had access to when I was gainfully employed at a major aerospace company
They're listing the upgrade kit at $90.00. I'm not in a hurry, should I wait for a sale?
They do have a sale a couple of times a year. IIRC, an honest 10% off.
I guess I should update this thread too. Between the record low SoCal temps and torrential rains I was able to repurpose the front fairing which came off the black '73 Suby 6. Rather than Pontificate a fairly simple procedure I'll list just the pic's.Here it is still on the '73. Just a rough cutout and an aluminum flange screwed to the bottom of the cutout. A LE replica replaced it so I decided to use it here. Besides repairing a damaged screw flange it needed a scoop of sorts and to flare out the ends to meet the flares. The flange is an aluminum skeleton with 4 wraps of glass mat and then attached to the old fairing with 4 overlapping pieces.
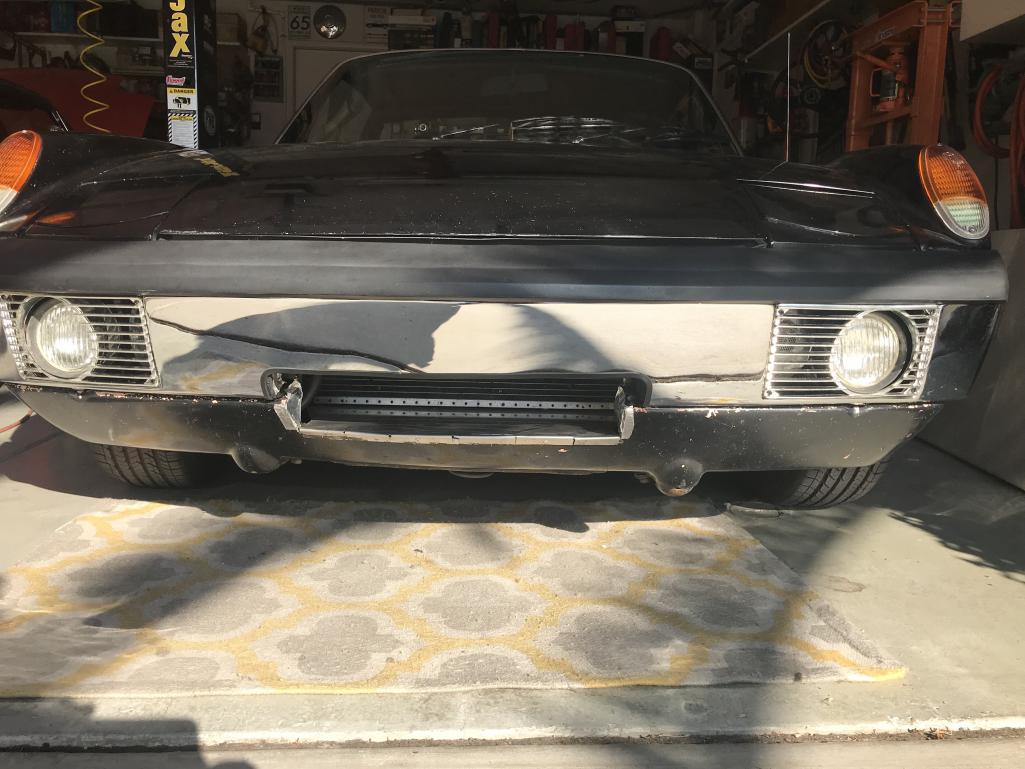
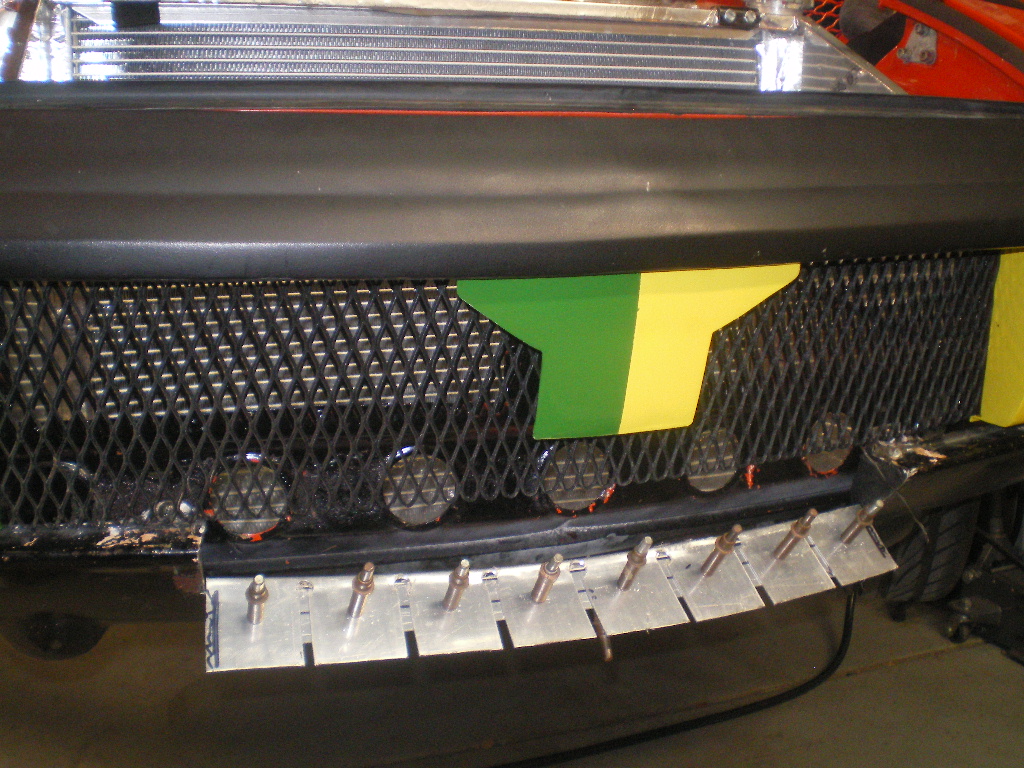
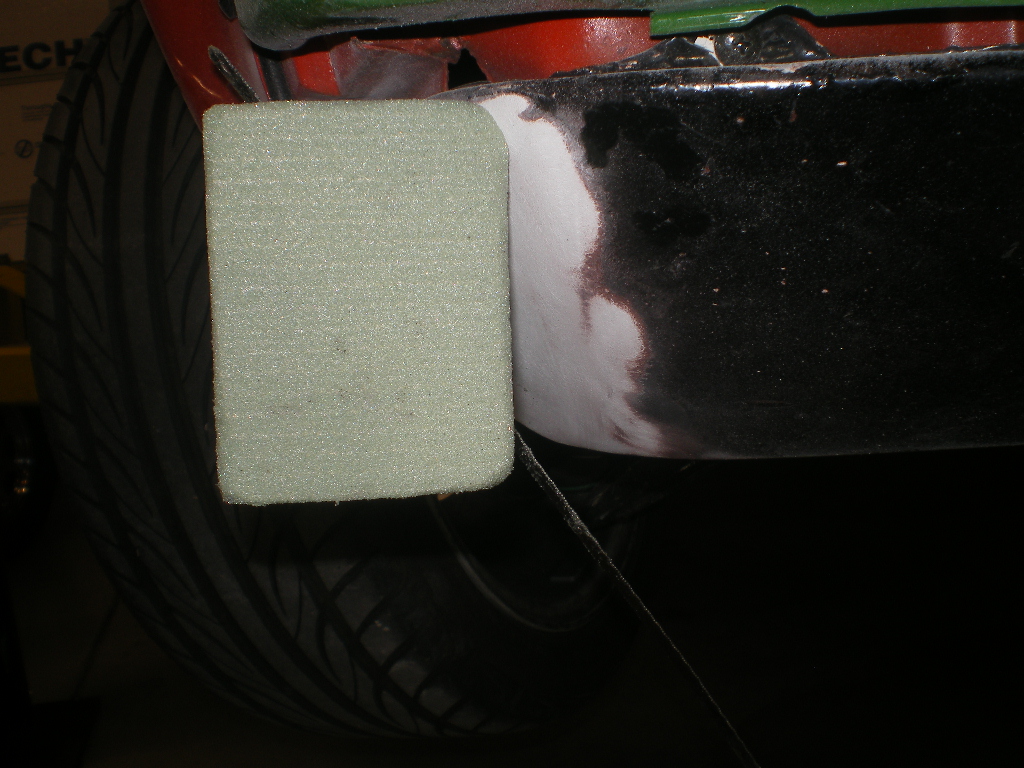
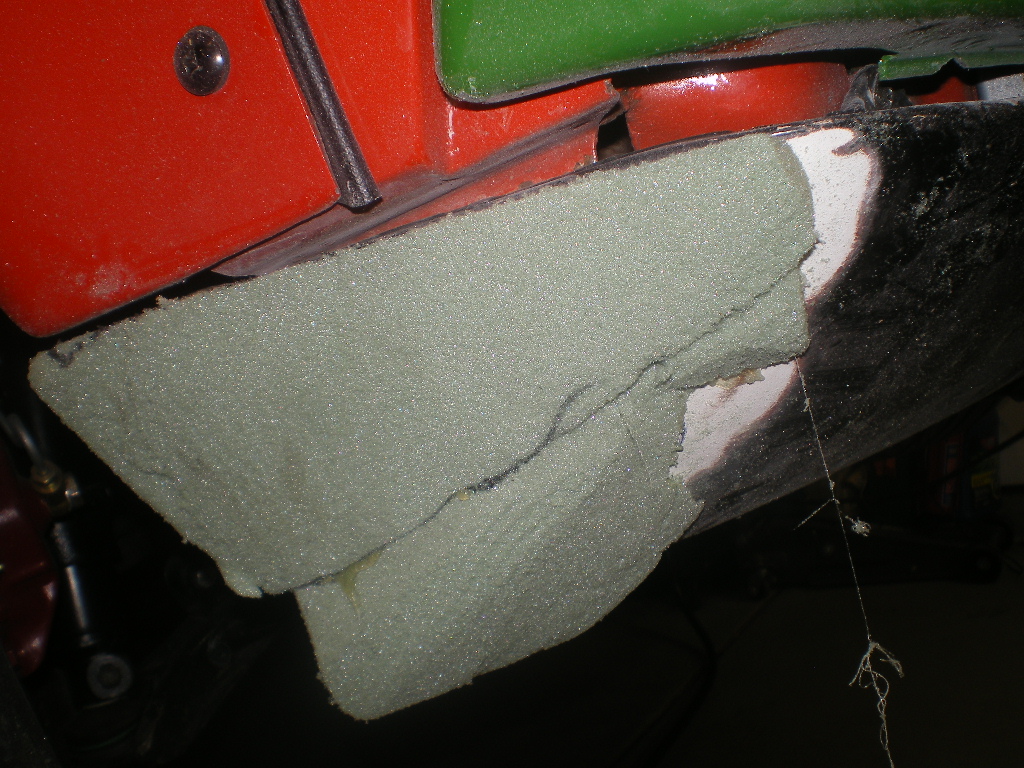
Posted by: 76-914 Mar 6 2019, 04:18 PM
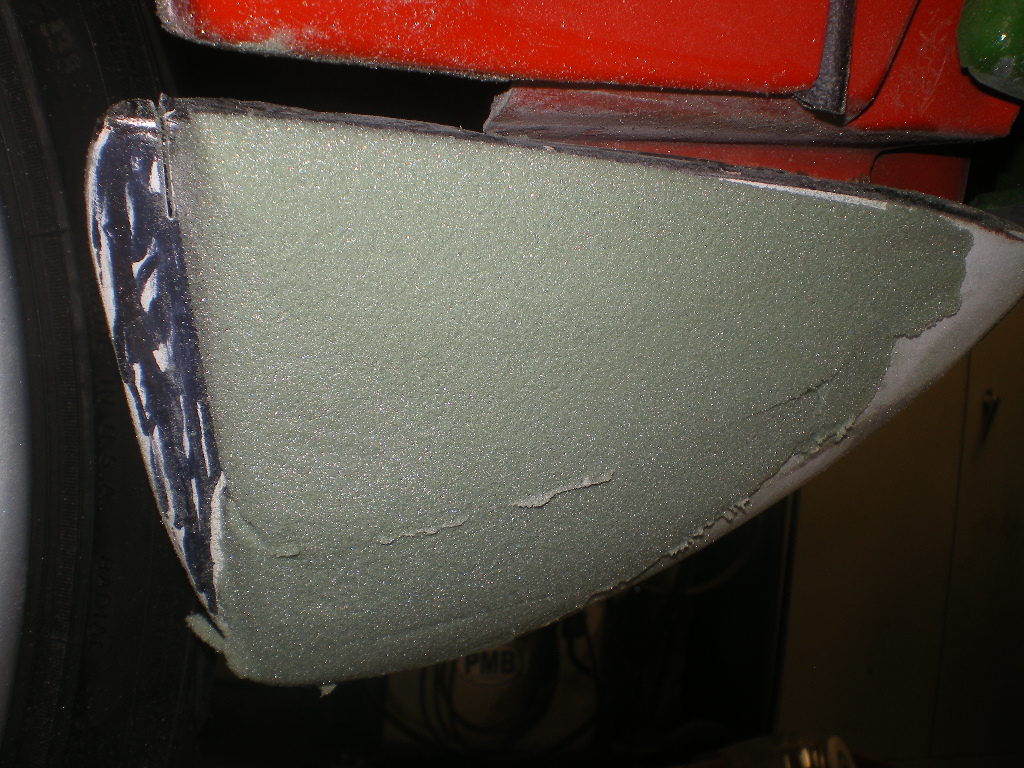
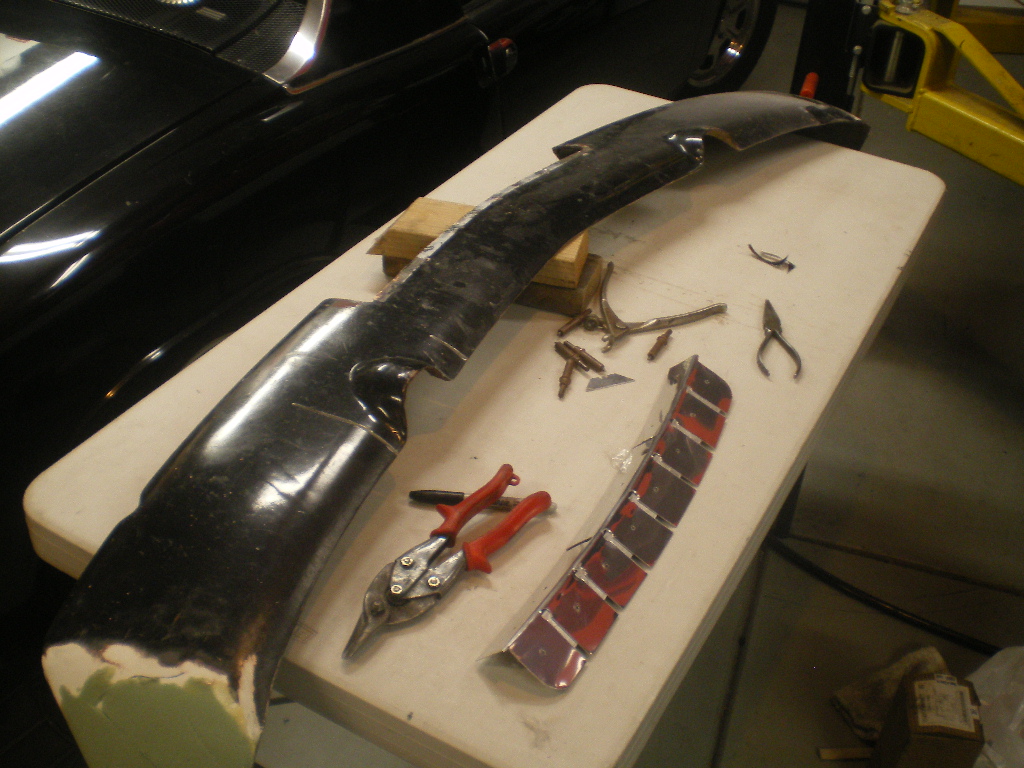
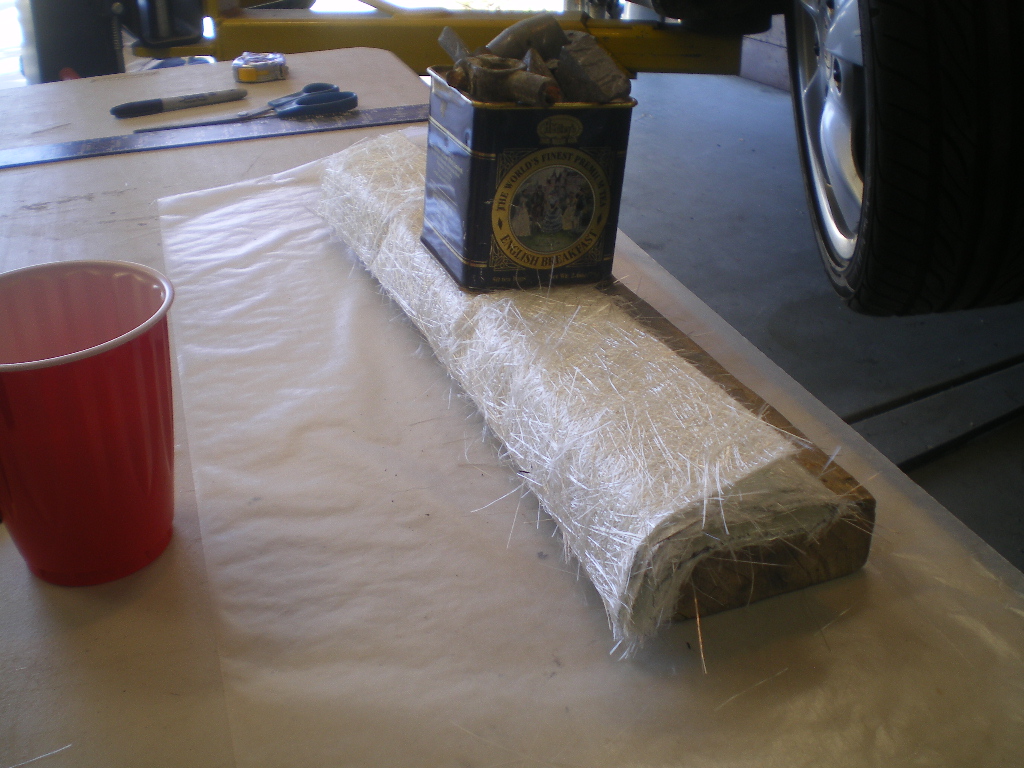
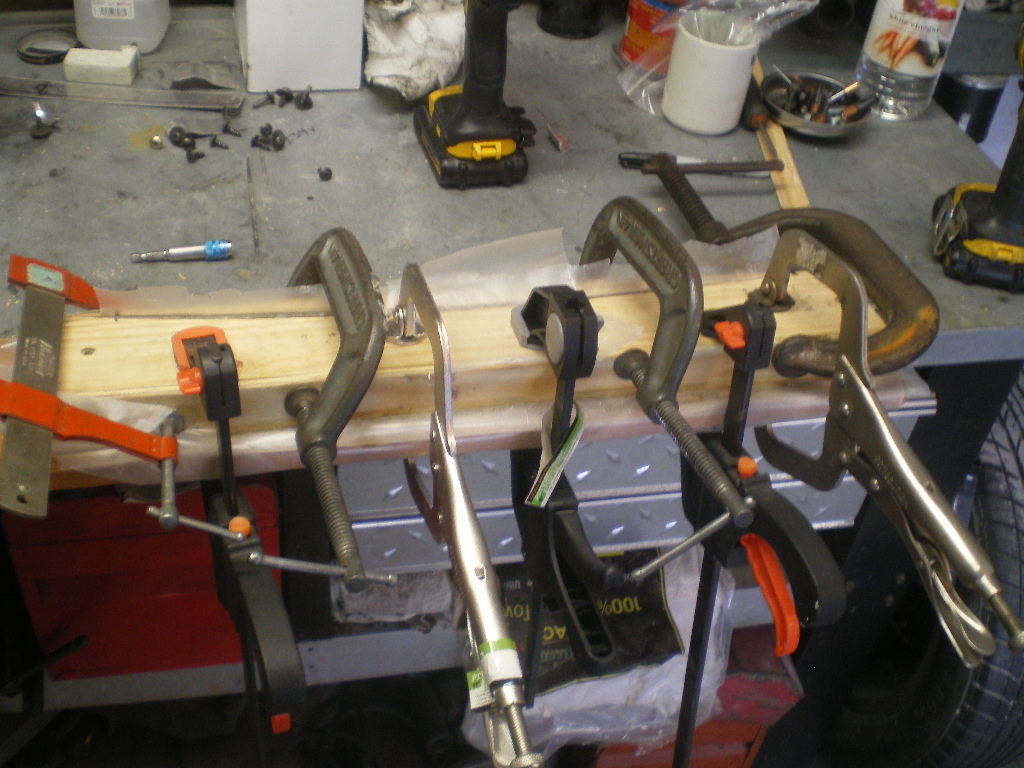
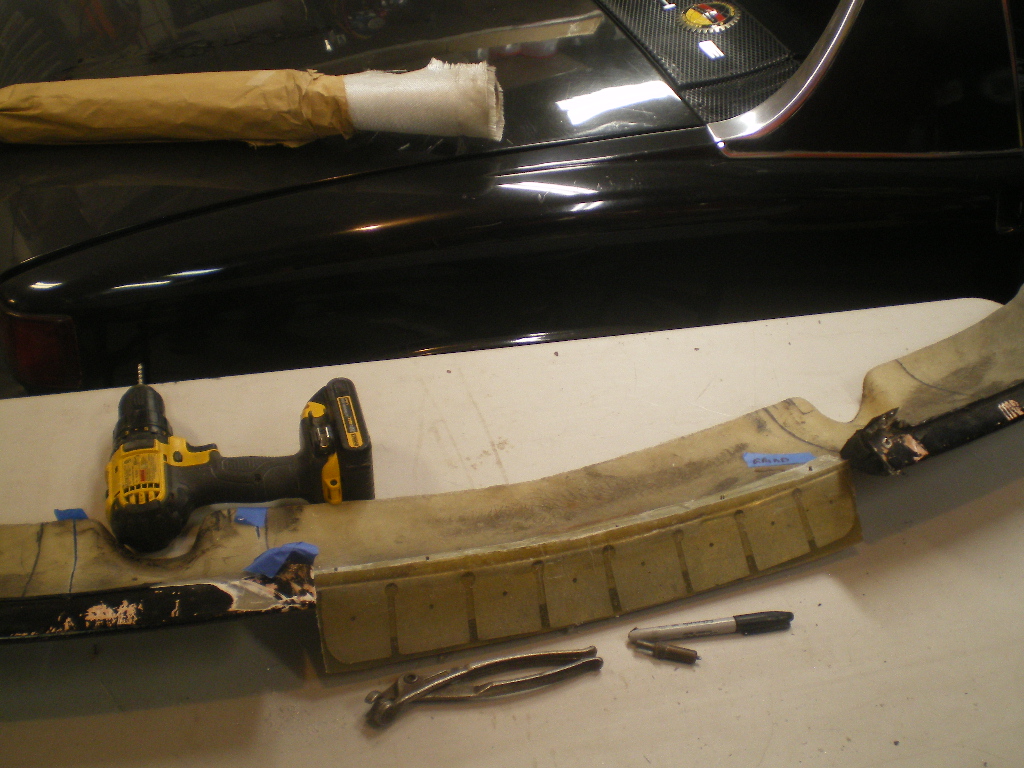
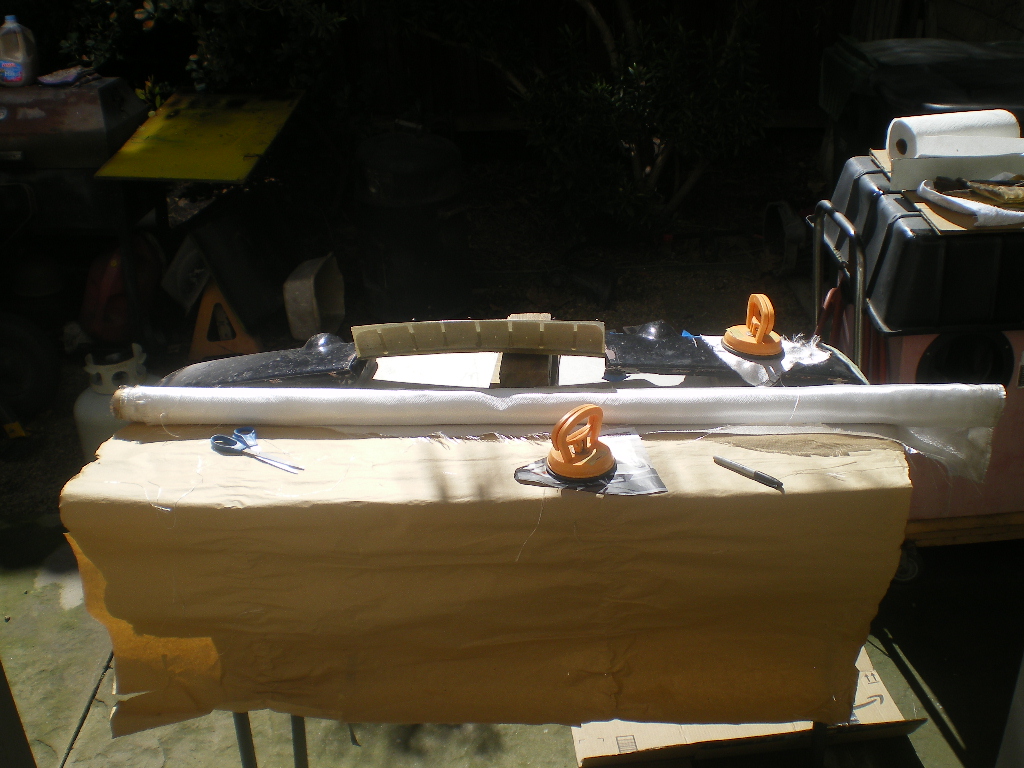
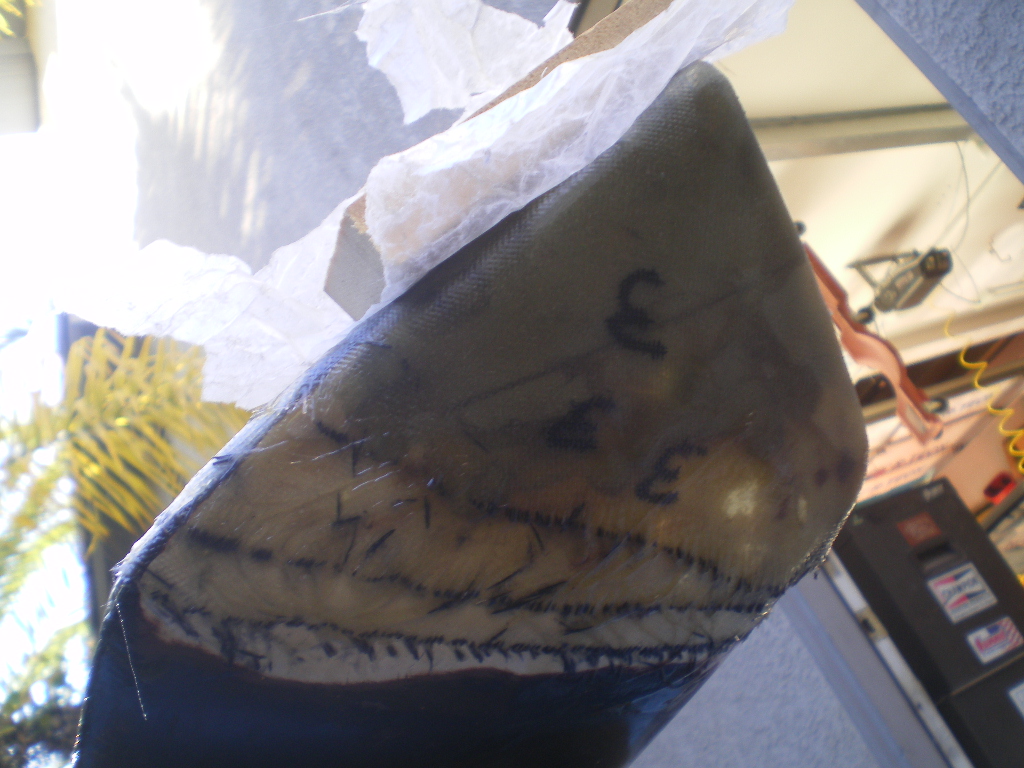
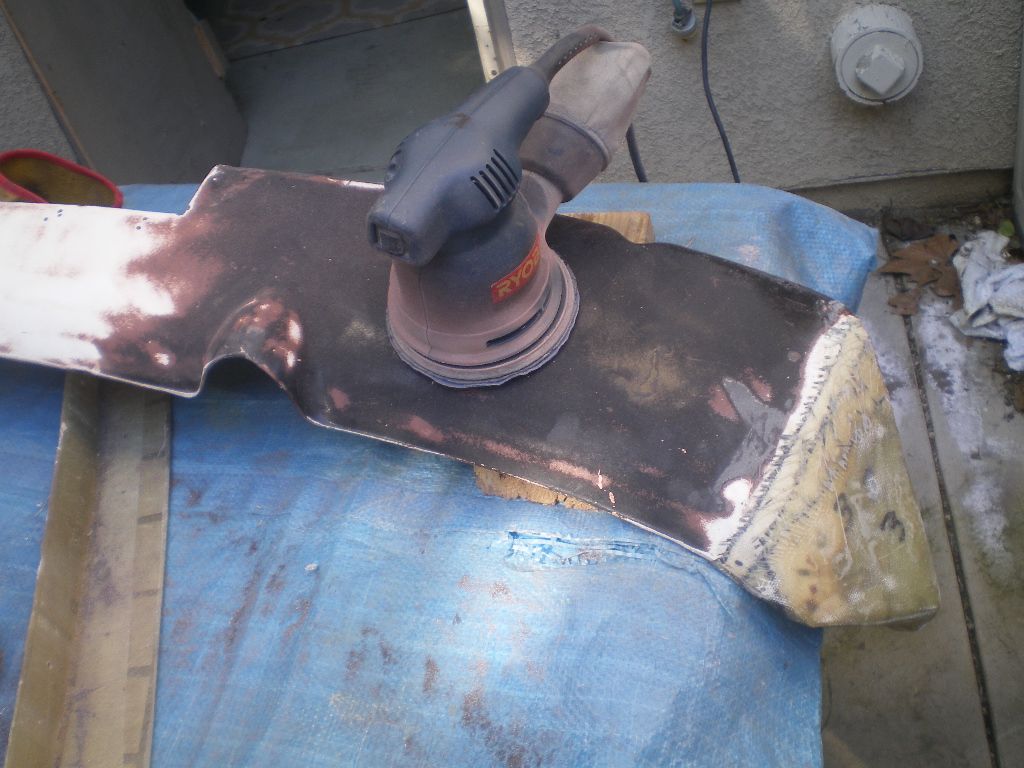
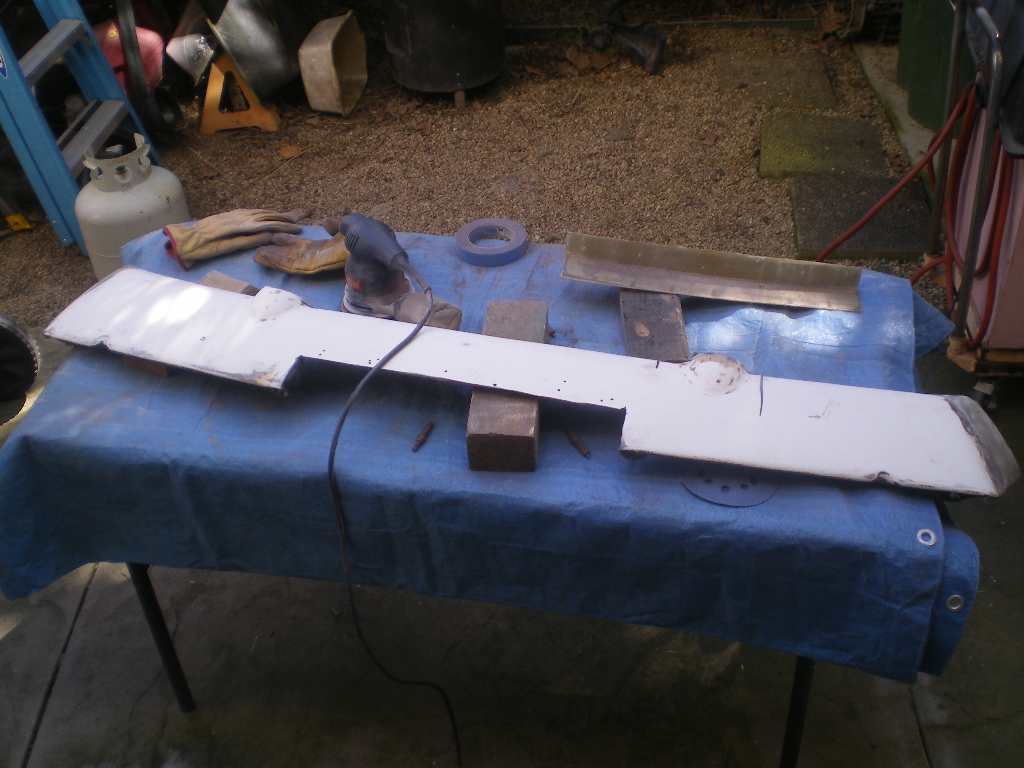
Posted by: 76-914 Mar 6 2019, 04:32 PM
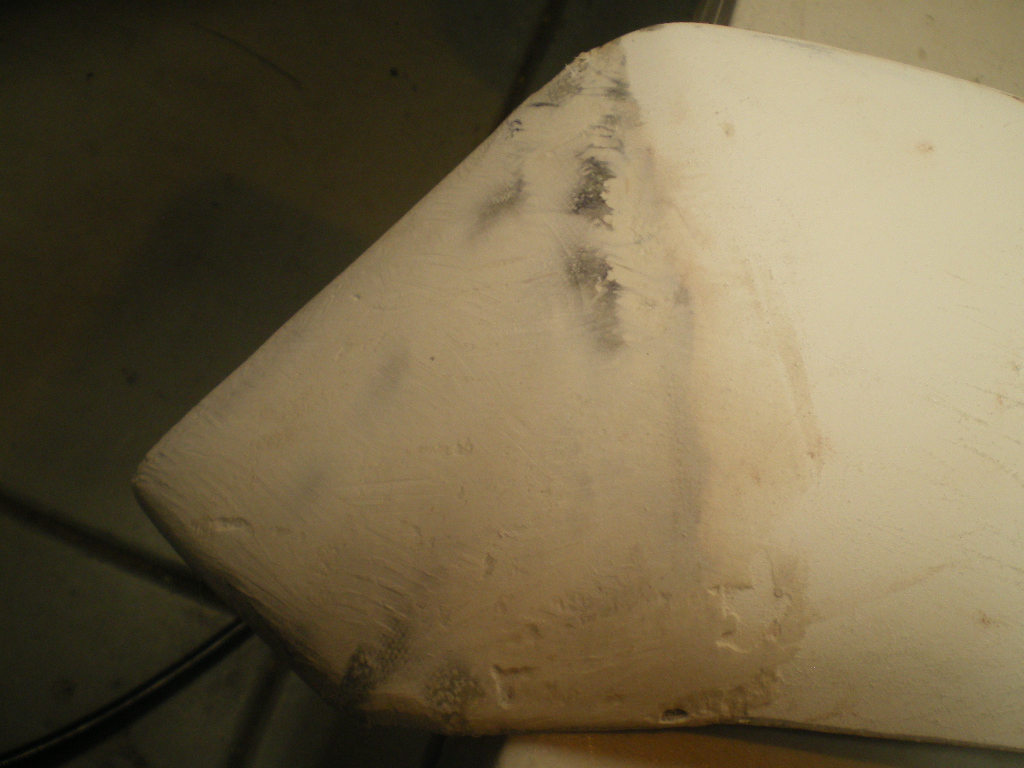
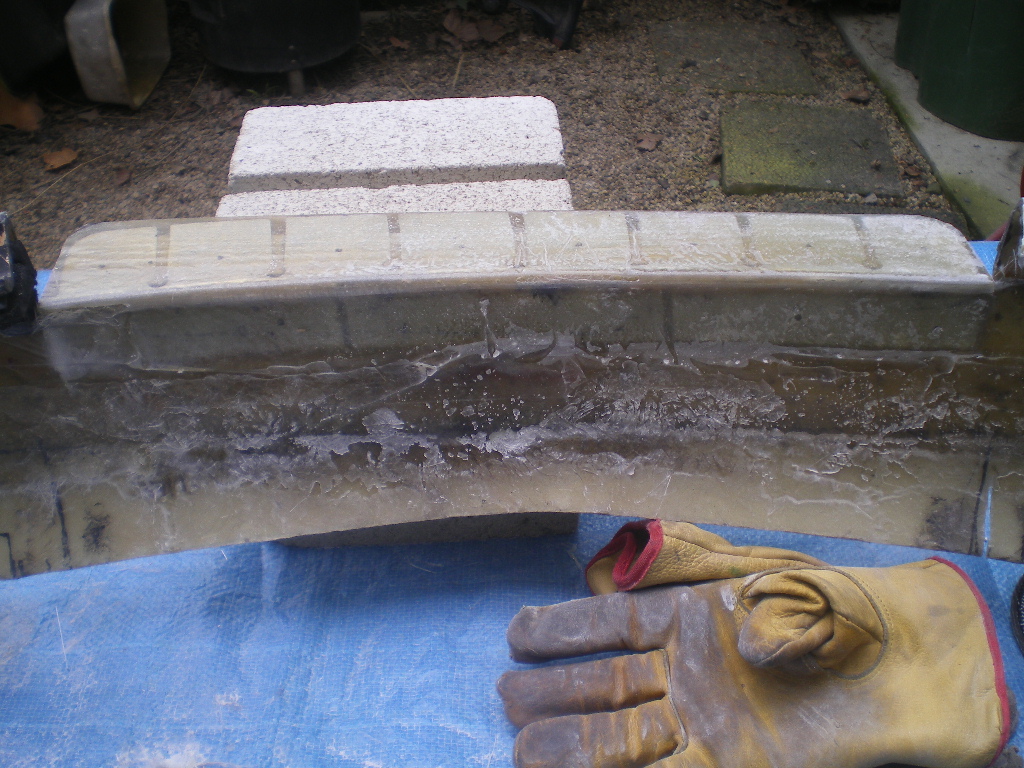

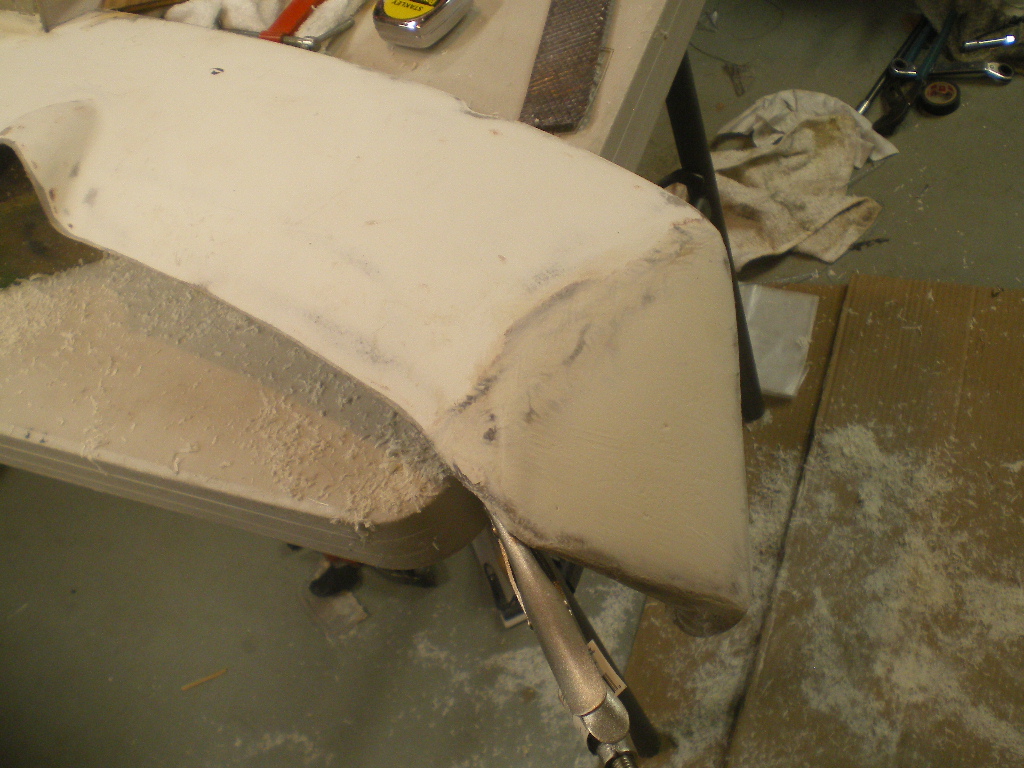

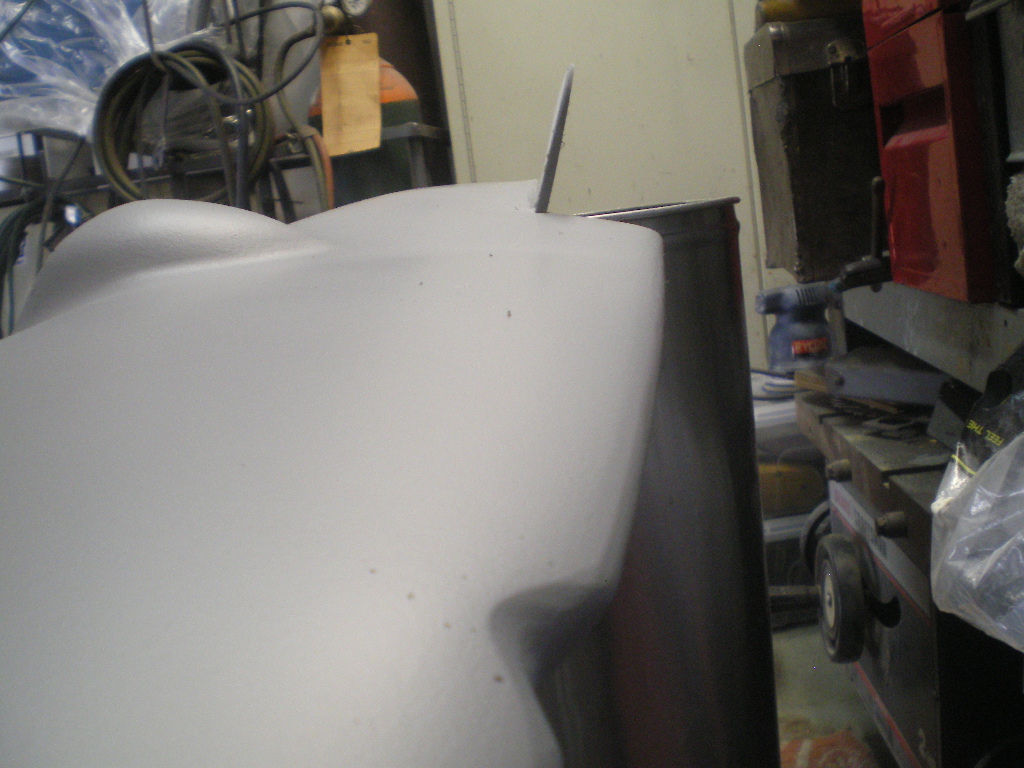
Posted by: 76-914 Mar 6 2019, 04:58 PM
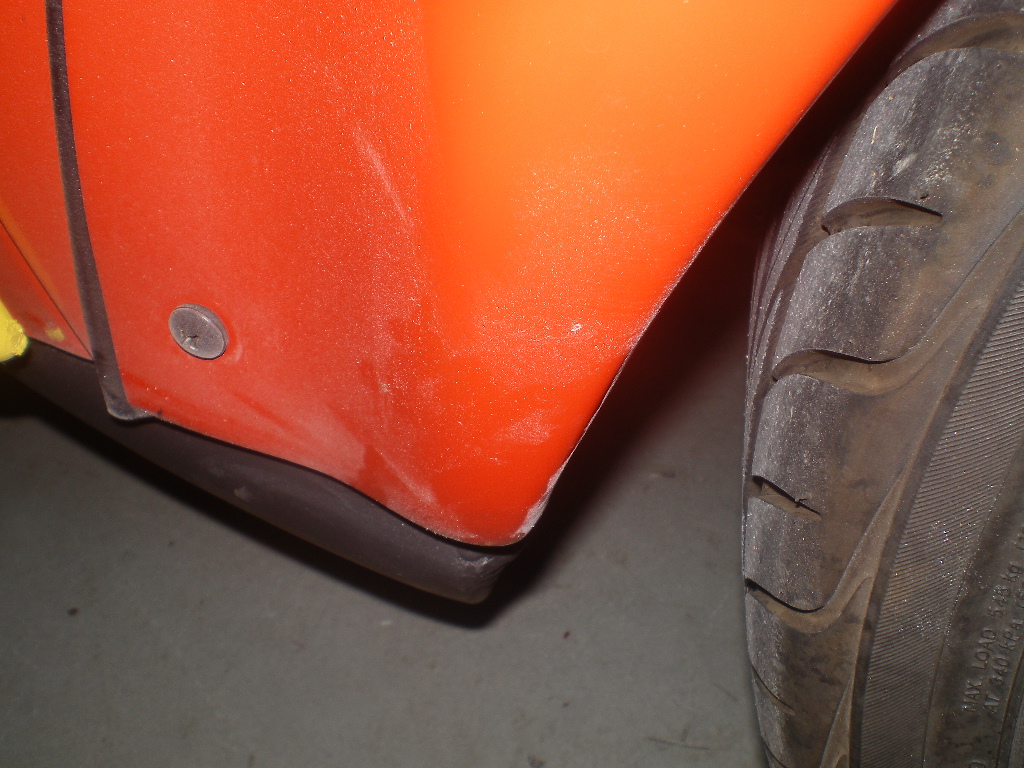
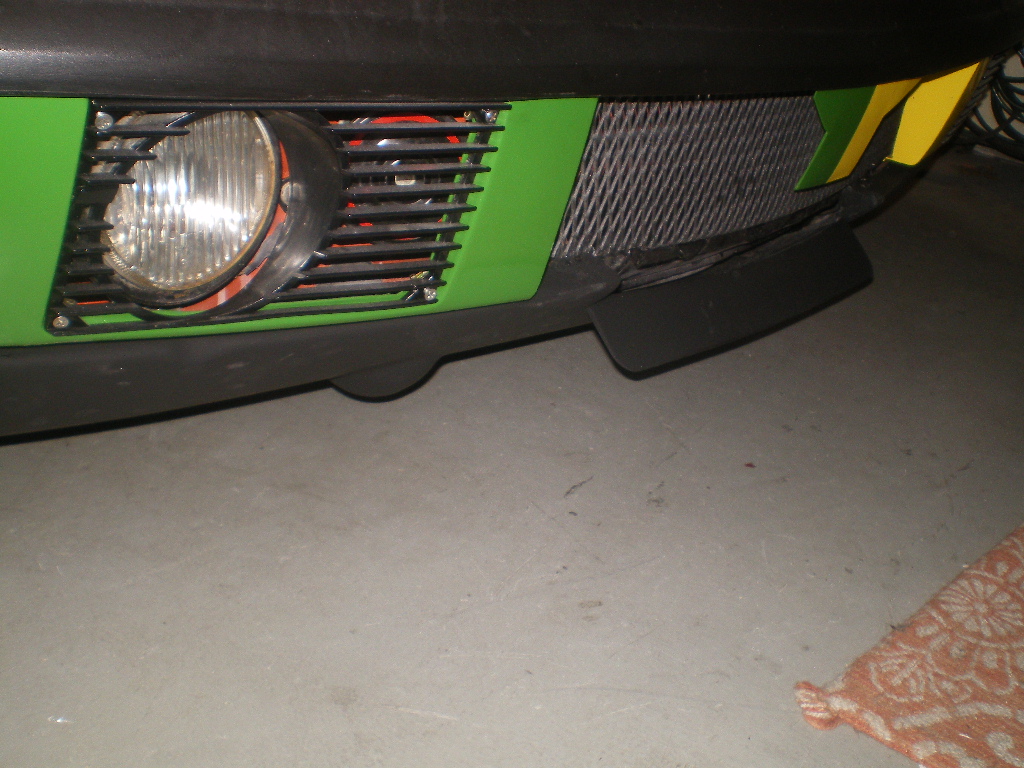
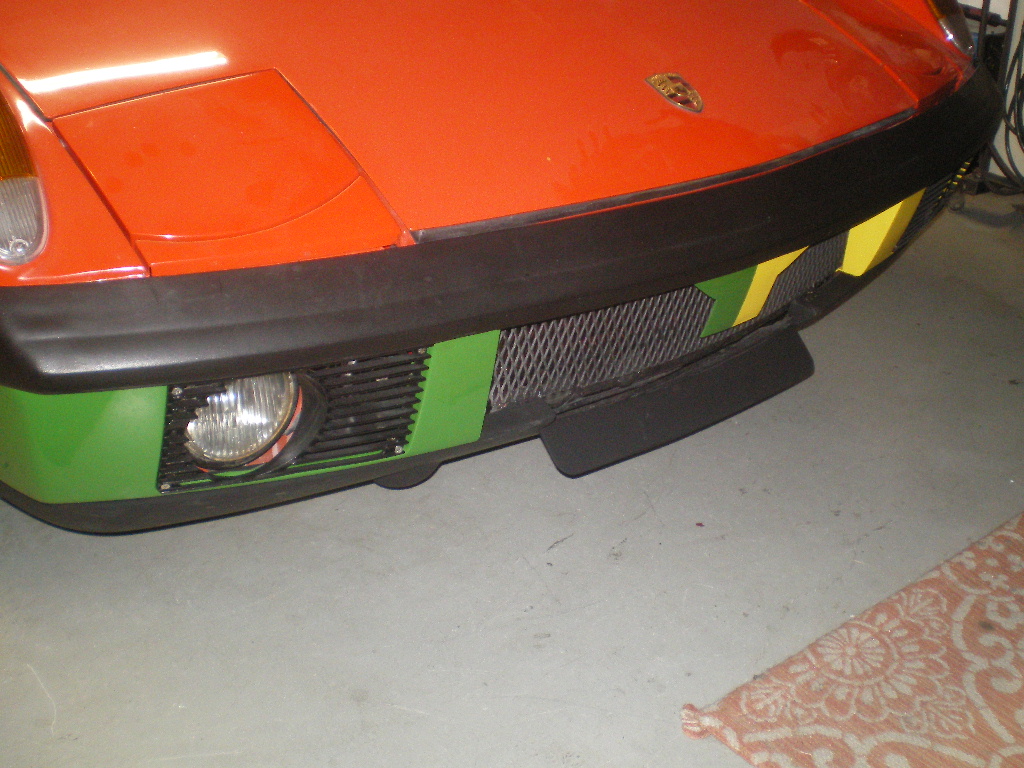
Powered by Invision Power Board (http://www.invisionboard.com)
© Invision Power Services (http://www.invisionpower.com)