Printable Version of Topic
Click here to view this topic in its original format
914World.com _ 914World Garage _ Dr Phil’s copper 914 restoration thread- paint and body work on deck- getting fenders fixed and car repainted! New thread to document process
Posted by: Philip W. Oct 28 2017, 11:47 AM
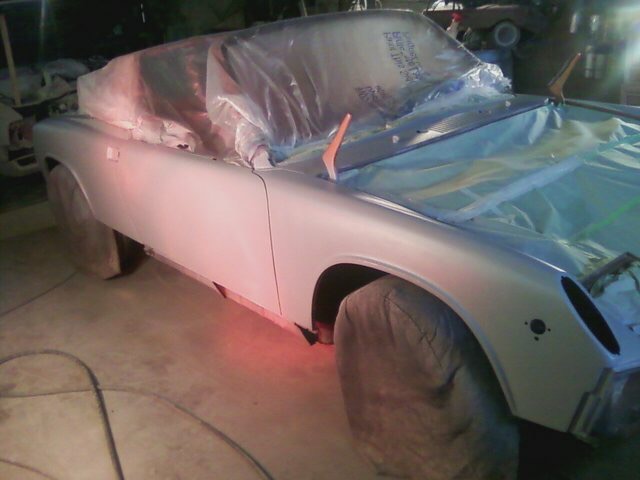
after 8 years of ownership, and 2 years of rust repair and other such stuff, i am fuinally getting ready to take it to get the fenders repaired the reat of the way and the crappy respray sanded off and car repainted.
i wantes to start a new thread apart from the failed entry into the first rebuild contest. with the help of BillH1963 and a friend of his (Mike) i hope to have this done in 2 months!
i am pulling this motor and transmission today.
stripping car down this week and next week taking bare car with windows out, interior out, up to Mikes shop up near Columbia SC.
They will be sanding it down by hand to the original primer and fixing and missed rust etc not repaired last year- as previously documented the floor pan rust jack points longs and pedal area were all repaired by Chis and Ed at Tangerine Racing in 2016. they also repaire the fender lips that were bent and damaged and massaged the rear fenders out to get room for the 7" fuchs. Now those will be smoothed out the rest of the way.
and a proper match of L99k copper metallic ( goimg with the PPG - thanks for advice on this from Bill Dunster!
will document this for fun and future reference-
car is original matching numbers 2.0 with appearance group car- but i decided this week
since i have 5 lug etc im goimg to back date the bumpers- none of this ruins originality as far as it cant be undone- i thint it will look better too
so here we go!!!
Attached thumbnail(s)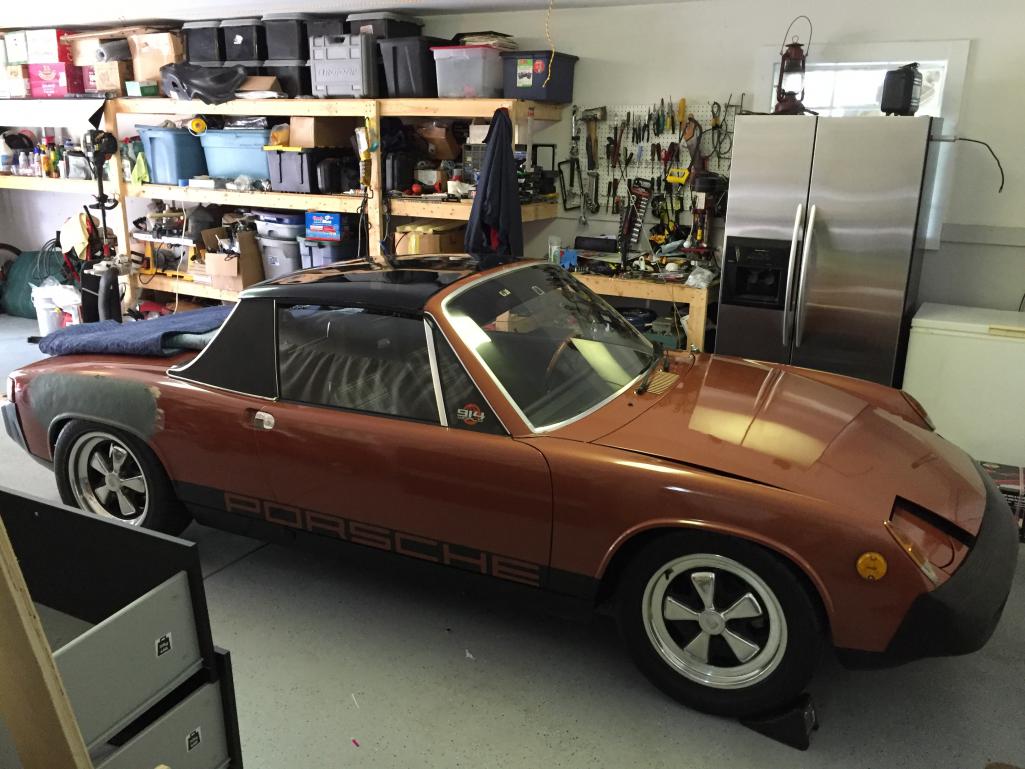
Posted by: billh1963 Oct 28 2017, 11:54 AM
I'm glad you are getting the paint done. This car will look fantastic with a new coat of the very rare one year only Copper metallic!
Posted by: Elliot Cannon Oct 28 2017, 12:22 PM
That car looks great right now even with the primered fenders. After paint it will be fantastic. Nice job. Doing it right. 
Posted by: bulitt Oct 28 2017, 02:21 PM
Nice! Seems like yesterday you sent it to Chris... 
Posted by: Coondog Oct 28 2017, 03:45 PM
Are you going delete the side bulbs ??
Posted by: Philip W. Oct 28 2017, 03:55 PM
i knownits been over a year since i got it back from chris- went to last 2 Okteenerfest with it like this. I will not delete the side markers, i would like to make some someday that are more flush but will stay.
does anyone have a number for how high up i need to get car to get motor down and out? i have the motor lift plate from Tangerine.
and other than the jack donought where else can i put jack stands? they dont sit well on those jack points - wish the jack stands had a round support point to match up on there.
Attached thumbnail(s)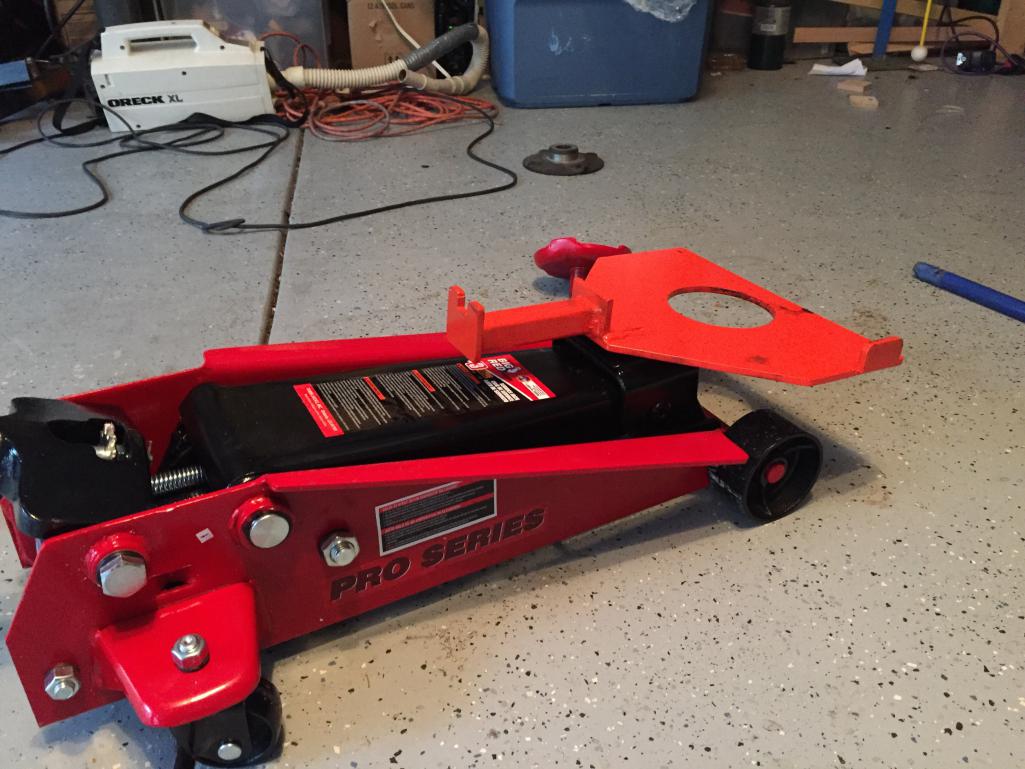
Posted by: Philip W. Oct 28 2017, 04:16 PM
found this- so i guess the rear foor pan at the fire wall or the side where the outer long seam is ?
Attached image(s)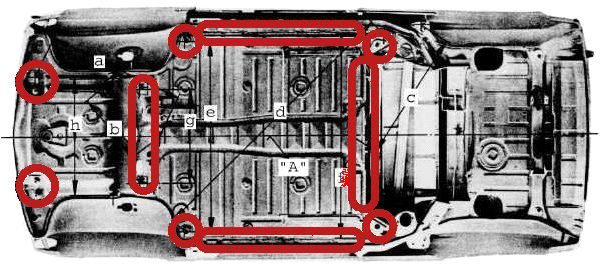
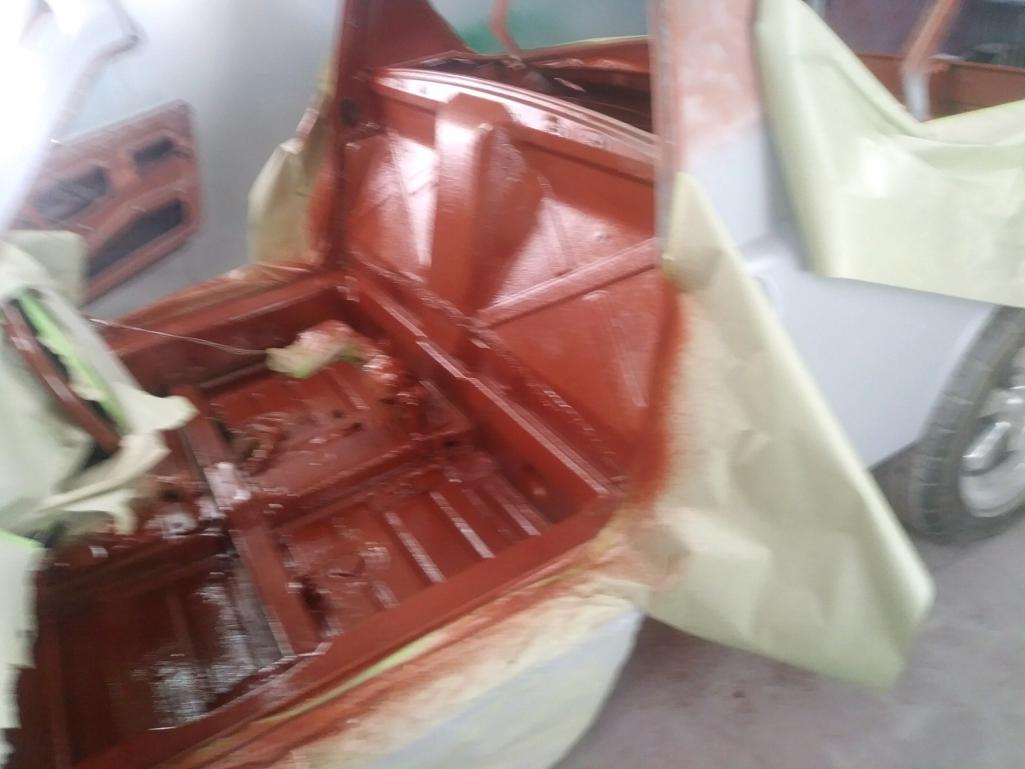
Posted by: Philip W. Oct 28 2017, 04:31 PM
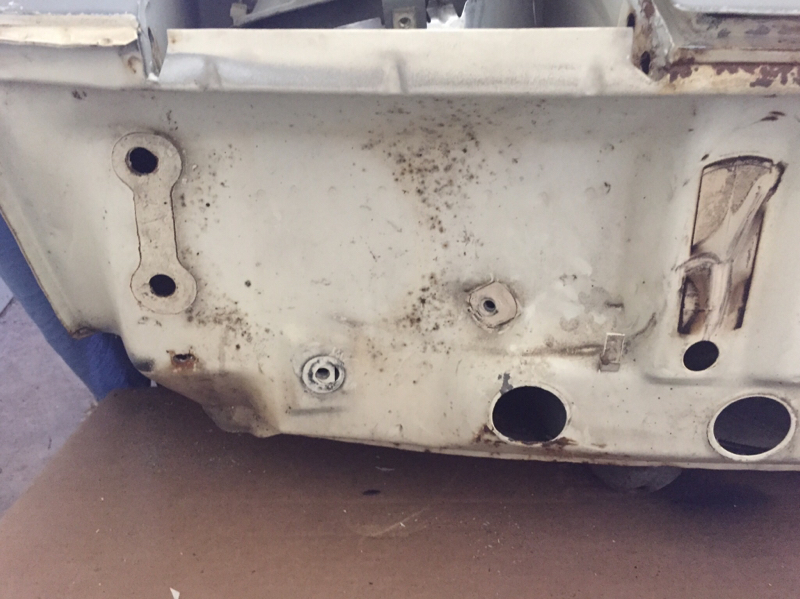
hell hole is full of junk - but no rust!
Attached thumbnail(s)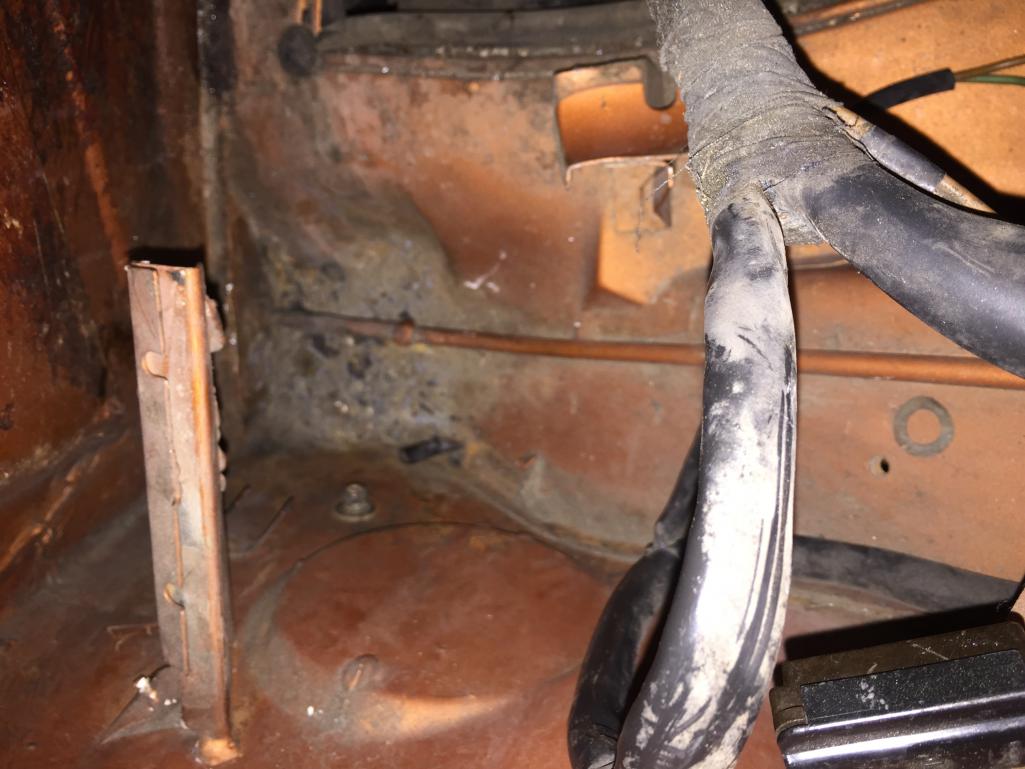
Posted by: Philip W. Oct 28 2017, 05:12 PM
this is a pleasant suprise, no rust but huge chunks of seam sealer i thought was caulk someone put in but it wasnt.
This car came to Dublin, Ohio first, but the Marine i bought it from had it in 29 Palms CA so that may have saved its life but really amazed with all the hell hole rust ive seennin other cars here in past 10 years i really cant believe my luck. yea i repaired long and jack point rust but wow it could have been way worse! - I paid $2500 for a not running car 8 years ago and didnt know what a hell hole was or what a long was either!
Attached thumbnail(s)
Posted by: Philip W. Oct 28 2017, 05:46 PM
Owner 1- Philip DeVore , October 24 1975
LAST owner Philip W. ! that is appropriate
Attached thumbnail(s)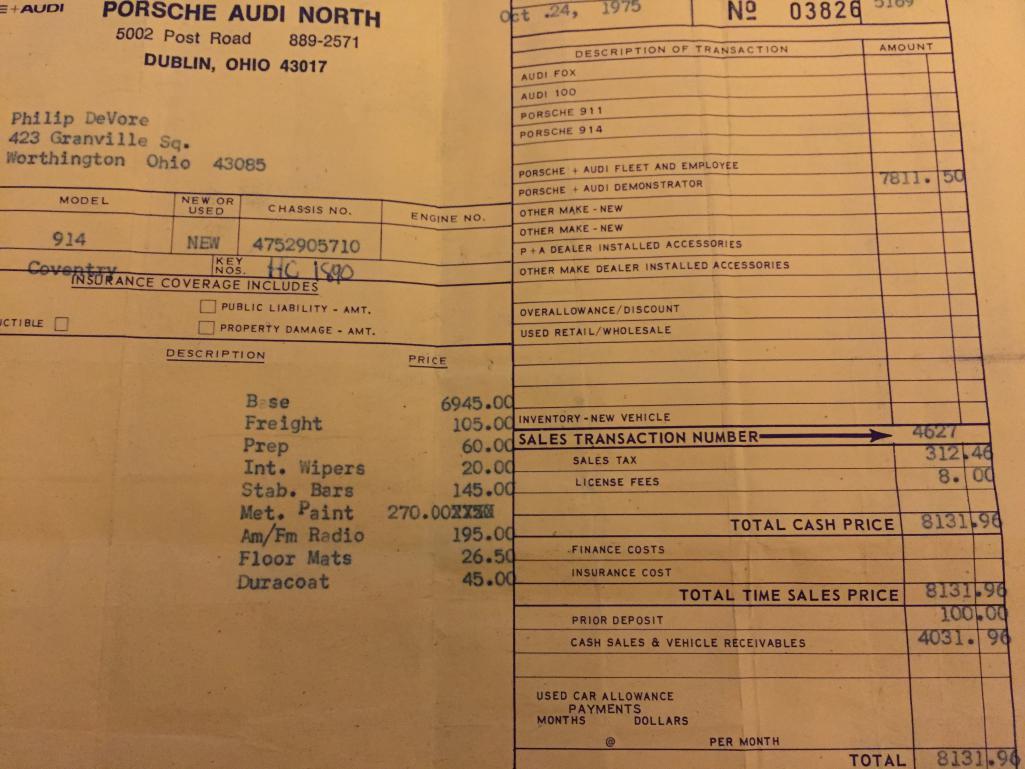
Posted by: rick 918-S Oct 29 2017, 07:13 AM
Love that color 
Posted by: Cairo94507 Oct 29 2017, 07:24 AM
Congratulations on moving your car along to paint. That is a very exciting process and seeing the end result will be worth all of the work. Cheers. 
Posted by: Shadowfax Oct 29 2017, 08:01 AM
Exciting! Am a bit envious as I’d love to repaint mine. Looking forward to updates on your progress.
Posted by: Philip W. Oct 29 2017, 08:33 AM
the color has grown on me for sure,
Yesterday i went over to a local guys storage shop , he has a few 911's and a 914 he is rehabbing, and needs to repair the trunk hinge ,
i have an extra JWest set , made a little trade for a rocker panel and a front window!,
anyway while there i saw another rare color- an original '72 911 Gold Metallic- beautiful! its in reassembly now- sorry no picture- does anyone know if any 911 were ever ordred in this Copper metallic? never seen one-
So I also will be doing a clean up if the motor- the car runs great, but i get an occasional buck ive got all new tin , going to get the air cleaner re powder coated and the intake runners- i'd also like to get the Triad exhaust jet hot coated too- new steal rocker panels, etc so a few other side projects- i will have a couple months to put some of this together- will be searching for a few parts--
a few years ago i had to re-do all the brakes- m.c. , brake lines and callipers- so while at it that winter i did the front a rear suspension- all new bushings, bearings, shocks and springs , rear control arm pivot shafts and bushings- newly powdercoated a-arms and trailing arms from bruce stone - I actualy have a list of about 2 pages of whats been done already- so really there isnt much left to do but paint- interior was done as well -- I guess i kind of did this all backwards! well difference being ive been driving snd enjoying the car. what i ddint want is to have it on blocks for years. even now i was not going to give the csr to someone who was not going to have id done for a year. thats partly why i waited so long or it took so long to find someone that could get it done in a timely fashion.
at soem point at the end i will post all the contributors from this site and others i have had both parts and services. Thats going to be a long list!
Now-
back to work!
Posted by: Dion Oct 29 2017, 08:59 AM
Good luck Philip. Subscribed.
Posted by: whitetwinturbo Oct 31 2017, 11:13 AM
For old times sake.............paint the 'fridge' coppertone too 
Posted by: mgphoto Oct 31 2017, 11:41 AM

i knownits been over a year since i got it back from chris- went to last 2 Okteenerfest with it like this. I will not delete the side markers, i would like to make some someday that are more flush but will stay.
does anyone have a number for how high up i need to get car to get motor down and out? i have the motor lift plate from Tangerine.
and other than the jack donought where else can i put jack stands? they dont sit well on those jack points - wish the jack stands had a round support point to match up on there.
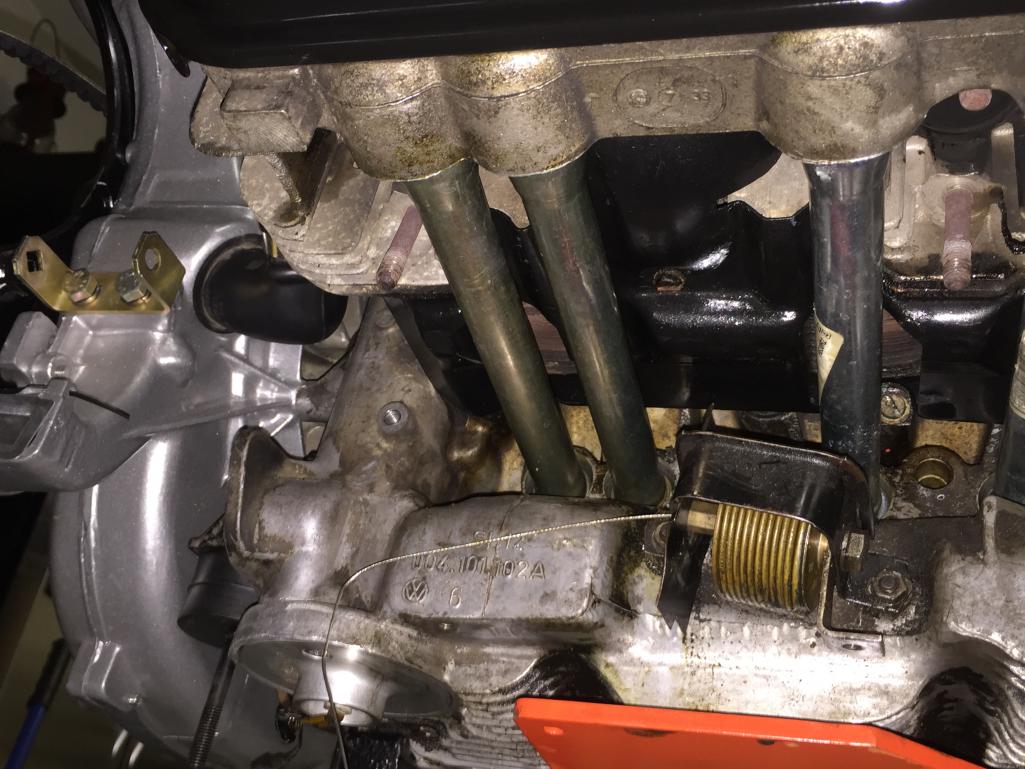
27 inches, rear fender to ground, I don't have a rear valance.
Posted by: mgphoto Oct 31 2017, 11:50 AM
i knownits been over a year since i got it back from chris- went to last 2 Okteenerfest with it like this. I will not delete the side markers, i would like to make some someday that are more flush but will stay.
does anyone have a number for how high up i need to get car to get motor down and out? i have the motor lift plate from Tangerine.
and other than the jack donought where else can i put jack stands? they dont sit well on those jack points - wish the jack stands had a round support point to match up on there.
I used this EZ Car lift, the car spent 3 years up and down on this lift, I bought the wheel set so I could move it around.
Portable easy to move and store.
Posted by: mepstein Oct 31 2017, 12:34 PM
when i pulled the engine on my 4, i jacked up the car and slid an old set of car ramps under the rear wheels. They are probably only 12-18" high but with the rear tires sitting on the ramps, there was plenty of room to drop the engine. I did not have a rear valence on the car.
I wish I had used a tangerine lift adapter. I used one at Zach's house for his car and it makes it easy. Worth every penny even if you only use it a couple times.
Posted by: Philip W. Oct 31 2017, 01:36 PM
so last night I did a dry run fit to see if jack goes up high enough- check! it goes up 25" , but the jack plate where the tuna can goes is a bit tight- I have the deep one and it was hard to get it lined up properly and slipped over the deep tuna can sump so I might remove that ( guess im doing another oil change). also I have plenty of leaks here and there, possibly the stock oil cooler and a few of the push rod tubes- I did new tubes and seals back when I did all my suspension and brakes a few years ago, same time I pulled the transmission and rebuilt it at an EVIL clinic, I also did the clutch pressure plate and flywheel and RMS at that time - I can happily report that the transmission and RMS are leak free still- so glad I don't have to go down that road. - I also hesitate to do much with anything else since the compression # were good- all 4 @ 135-140 when checked by CFR- chris said no reason to do anything there, leak down was good too., so makes me thing that this car with 153,000 miles must have had some type of refresh done at some point but I have no record of it ---
for now plan is just take care of some of the leaks, then I already have brand new repowdercoated tin, intakes and air box so top end will be nice and clean. I will put no Alt belt on it while there too- ive been running what ever was there when I go it 8 years ago . - also I need to source the SS fuel lines - now will be the time- I didn't have any leaks, plastic lines are supple not brittle so I left it alone- didn't want to put it up just to do that when it didn't seem necessary.
Also coming out is the fresh air box since tank is coming out too, that has never worked so now I can get one that works in there (unless someone suddenly comes up whith and AC box that will fiit there).
hope to have motor out tomorrow night- will see - going to pull the rear valance just to get a few more inches but I think I[m good- it has to come off anyway though.
Posted by: Philip W. Nov 4 2017, 07:57 PM
using the bracket from tangerine - it went well except it appears the motor mounts have never been changed and the engine bar mount bolt on one side snapped due to being rusted in the bar - iv not removed a motor but i see here that my motor mounta were not attached to he motor- just resting on the rubber mounts- crazy wndwr how long those have been in this condition?
Attached thumbnail(s)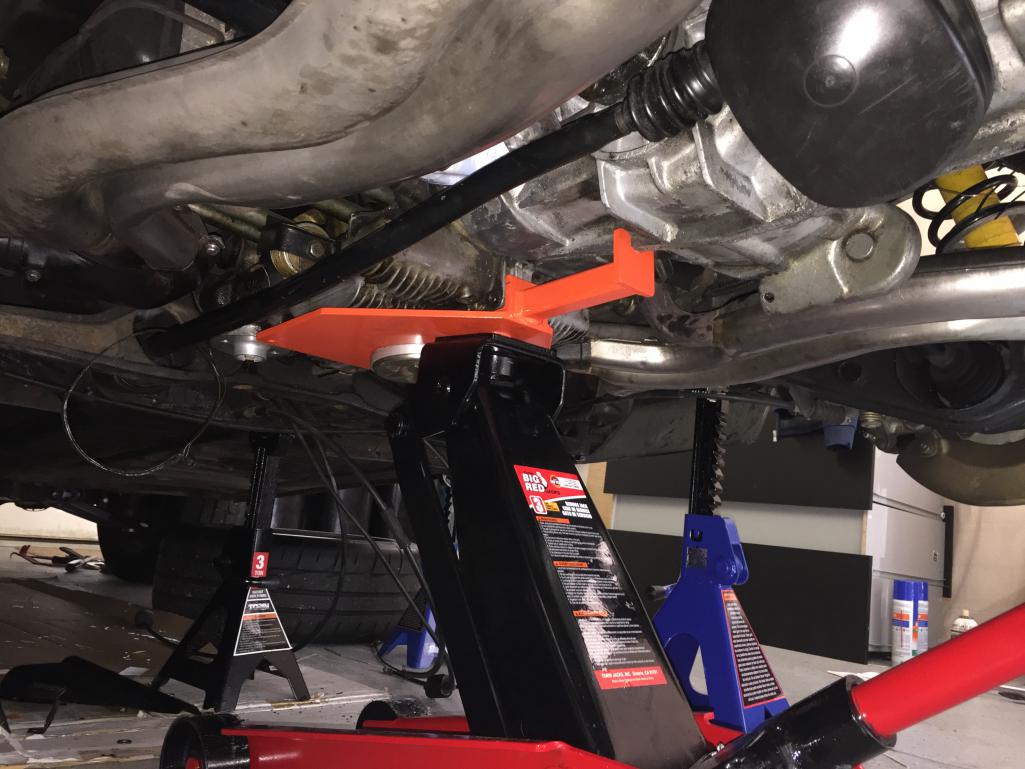
Posted by: Philip W. Nov 4 2017, 07:58 PM
and out-
Attached thumbnail(s)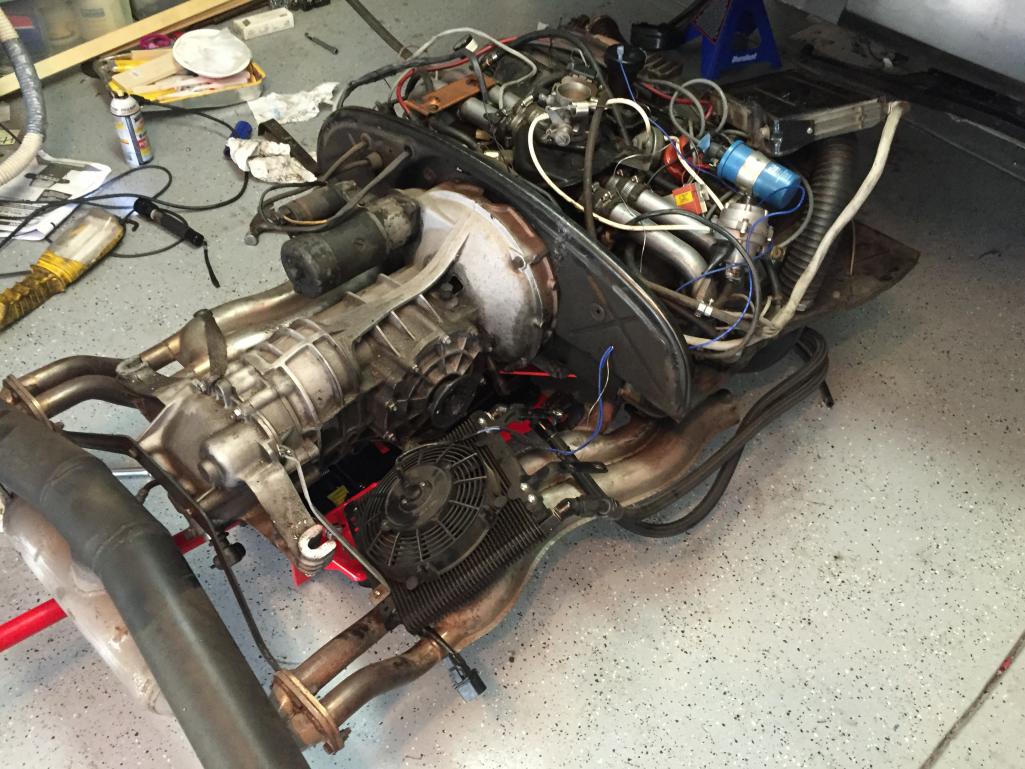
Posted by: Philip W. Nov 4 2017, 08:12 PM
i dont normally do pictures of myself , thought it might be appropriate to document - my friend Jim came over and helped out - went a lot easier with an extra hand! he still doesnt have a 914 but has a background as a aricraft mechanic very helpful
Attached thumbnail(s)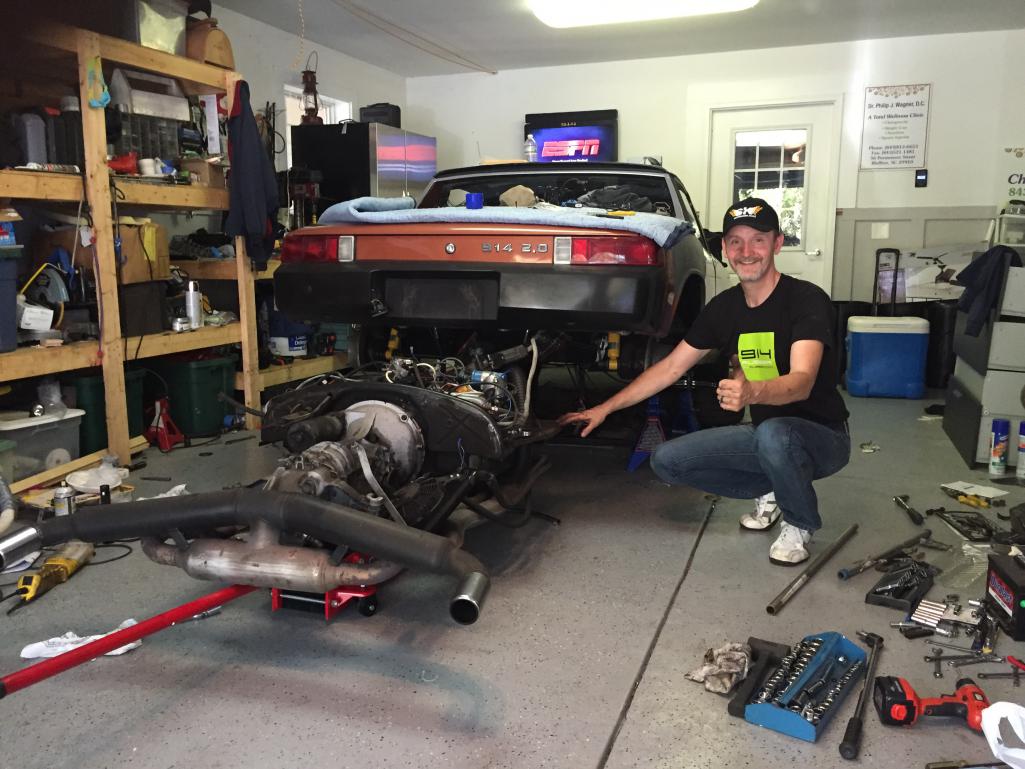
Posted by: Philip W. Nov 4 2017, 08:16 PM
how does one remove the rear bumper cover?
Posted by: Philip W. Nov 4 2017, 08:32 PM
also need a better picture of how the bar is supposed to attach to the motor and necessary hardware
Posted by: 914Sixer Nov 5 2017, 08:14 AM
BUB come off with two bolts each. Disconnect and remove the fog lights and plate lights. Look about 18" off each bumper corner and you will find bolts. I think they are 17 or 19 mm. Pull the corner bumper flaps on each end. Pull straight out.
Posted by: Philip W. Nov 5 2017, 05:16 PM
BUB come off with two bolts each. Disconnect and remove the fog lights and plate lights. Look about 18" off each bumper corner and you will find bolts. I think they are 17 or 19 mm. Pull the corner bumper flaps on each end. Pull straight out.
thata the front but what about the rear, same?
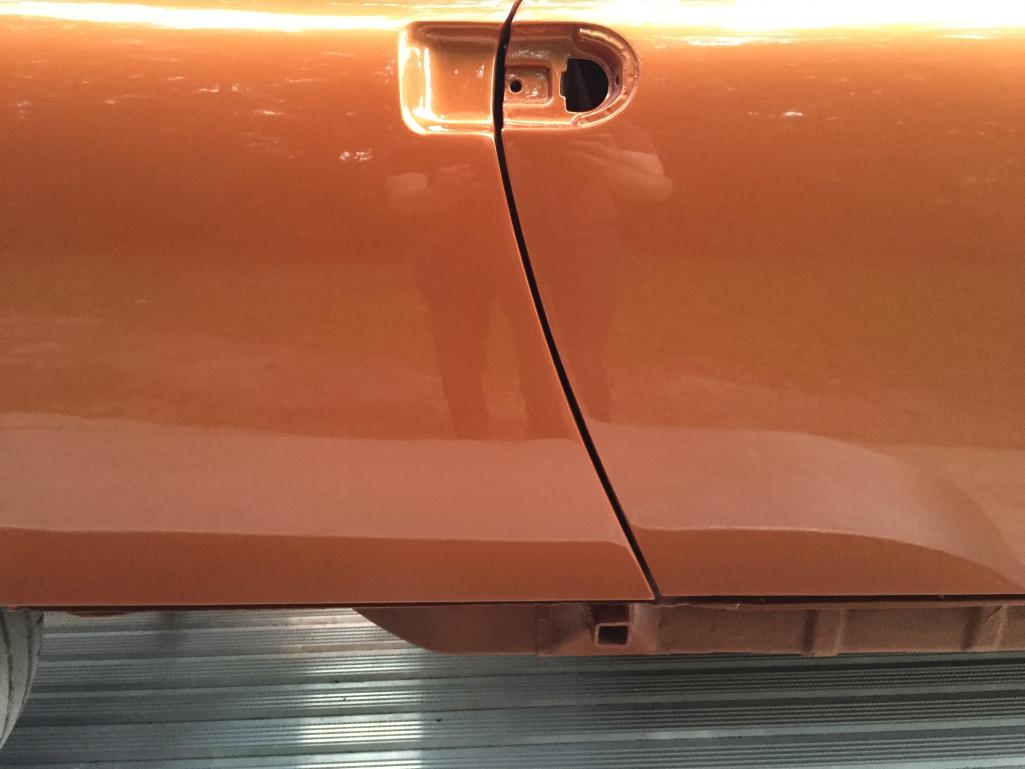
Posted by: Philip W. Nov 5 2017, 05:20 PM
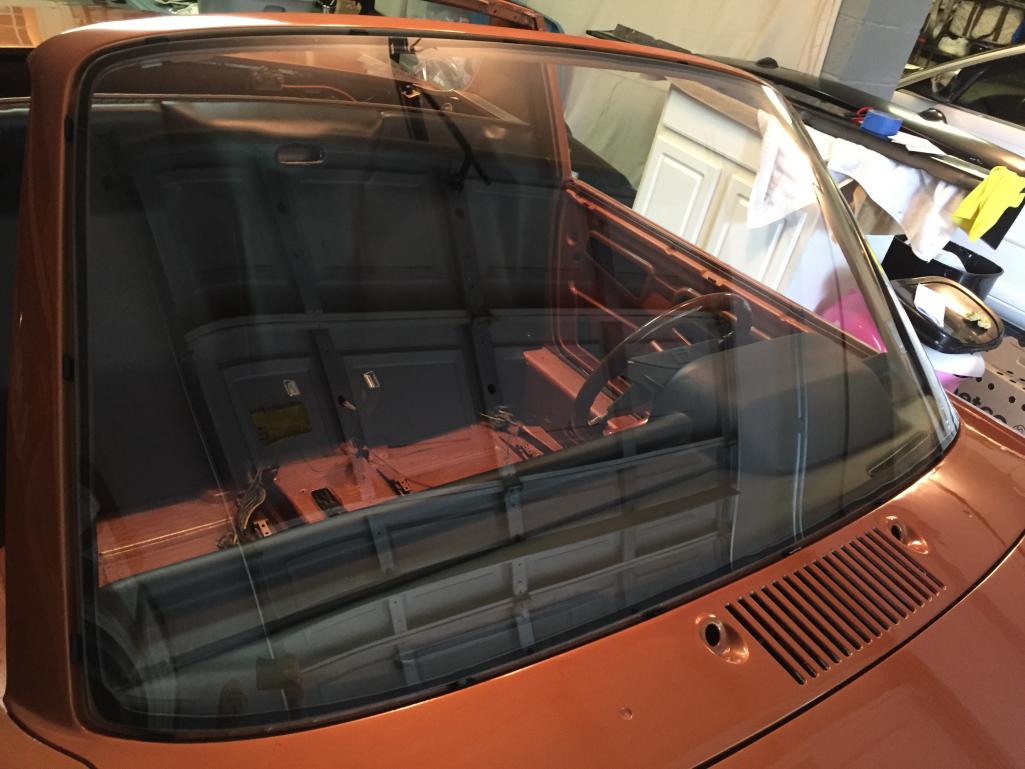
also i have the window trim off - completely loose , so easy to remove only thing holding it in place was the chrome trim
Attached thumbnail(s)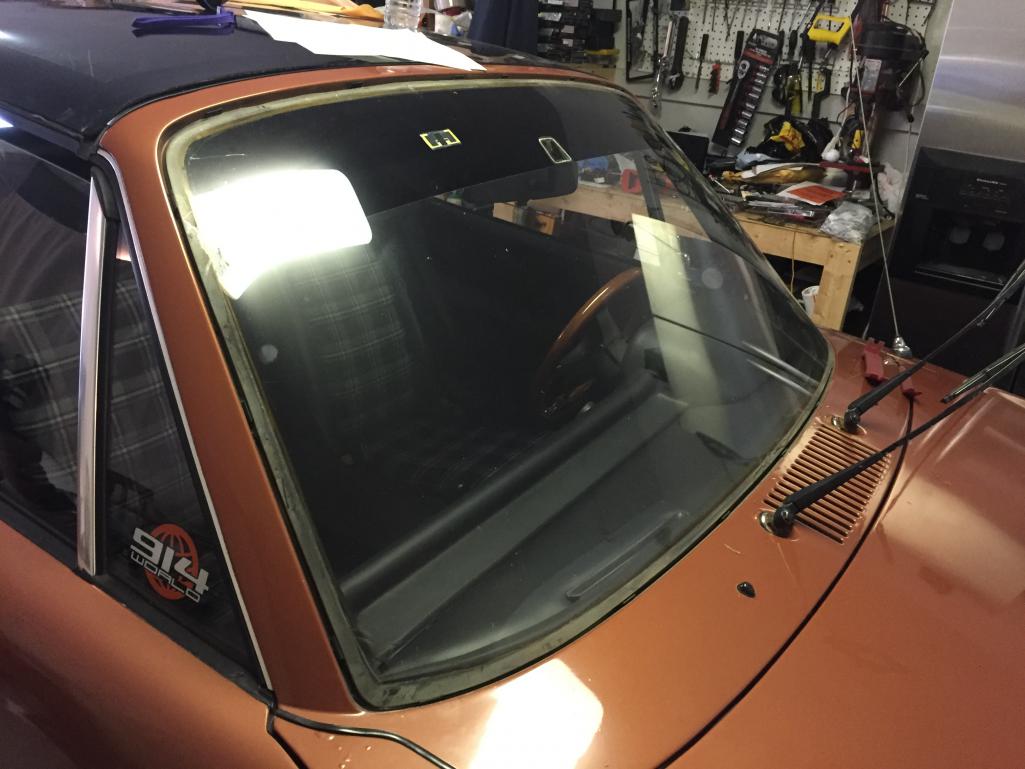
Posted by: Philip W. Nov 5 2017, 05:32 PM
interior partly out
Attached thumbnail(s)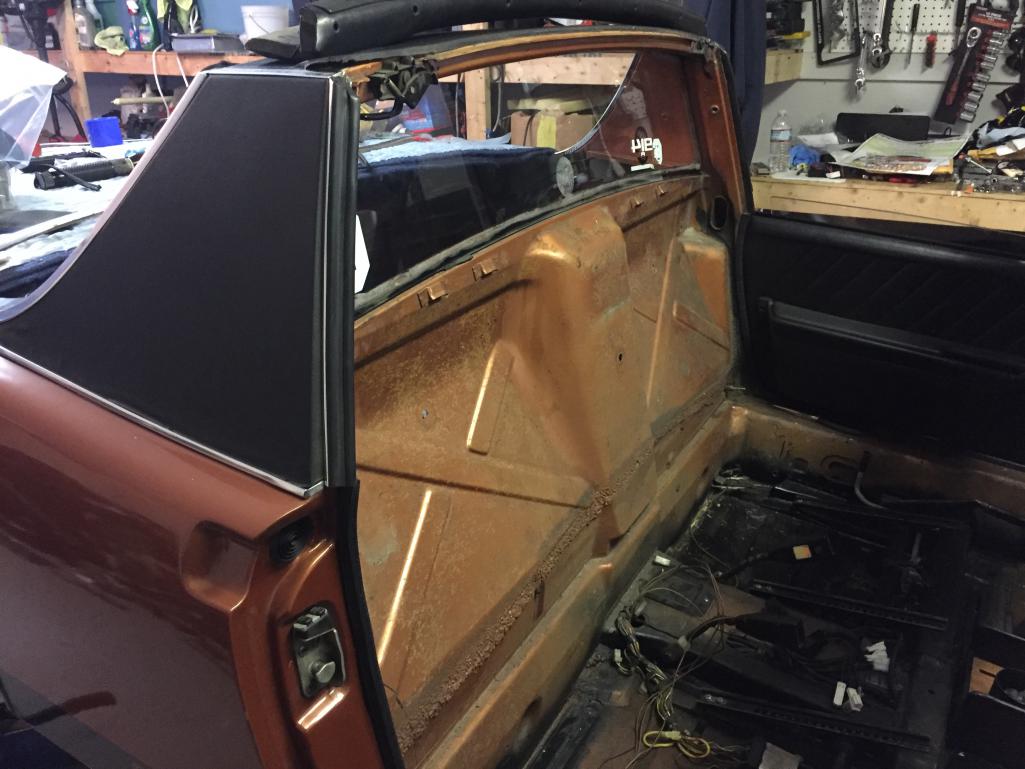
Posted by: Philip W. Nov 5 2017, 05:37 PM
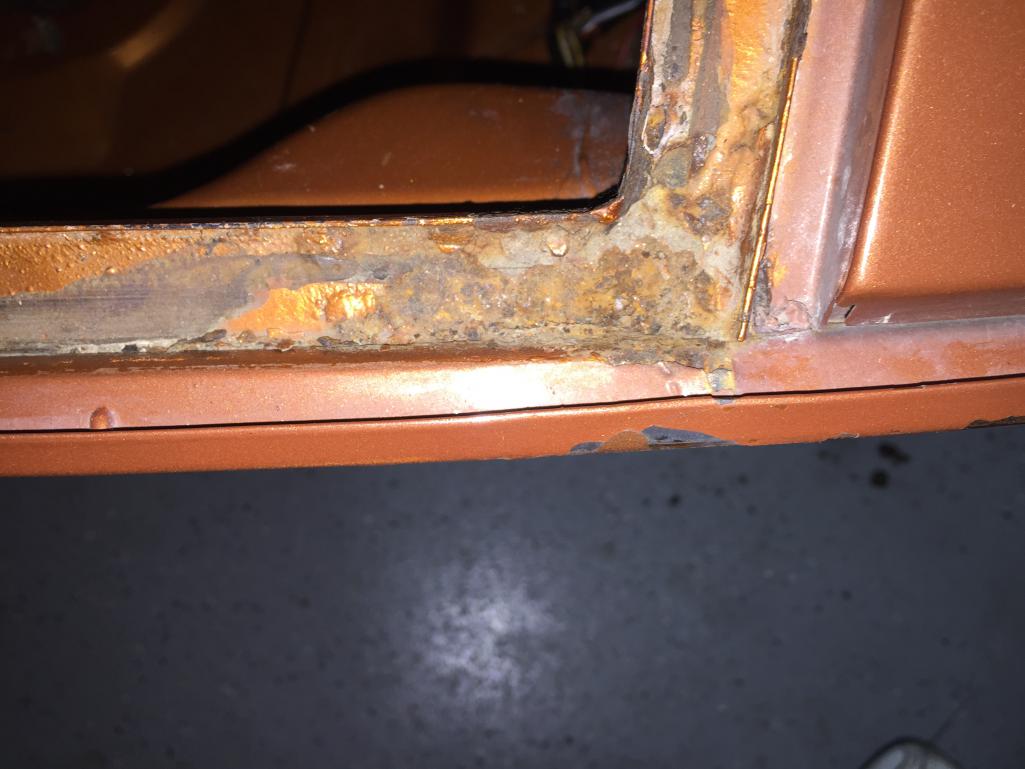
one small sopt of rust thru on the targa area on right side,
any advice here for my guy when he fixes that? should spray the inside with rust reformer and some type if epoxy primer?
Attached thumbnail(s)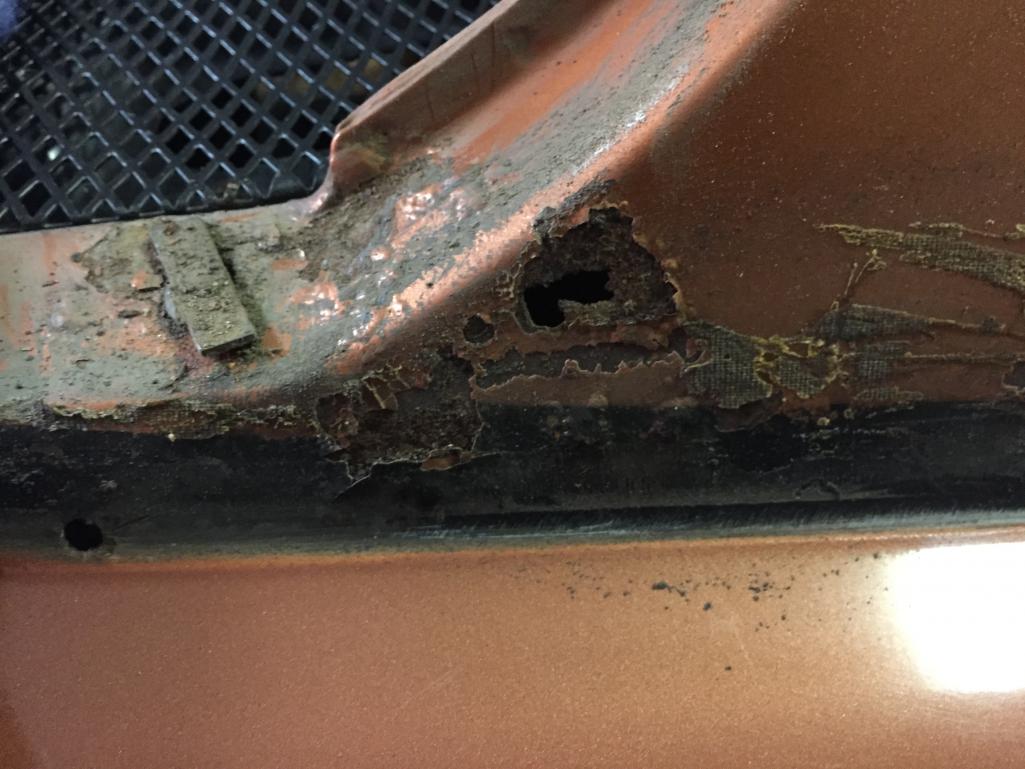
Posted by: Philip W. Nov 5 2017, 06:08 PM
rear window out, no rust surprises here , pretty clean on drivers side-
hey Bob, going to need that drivers door soon!
Attached thumbnail(s)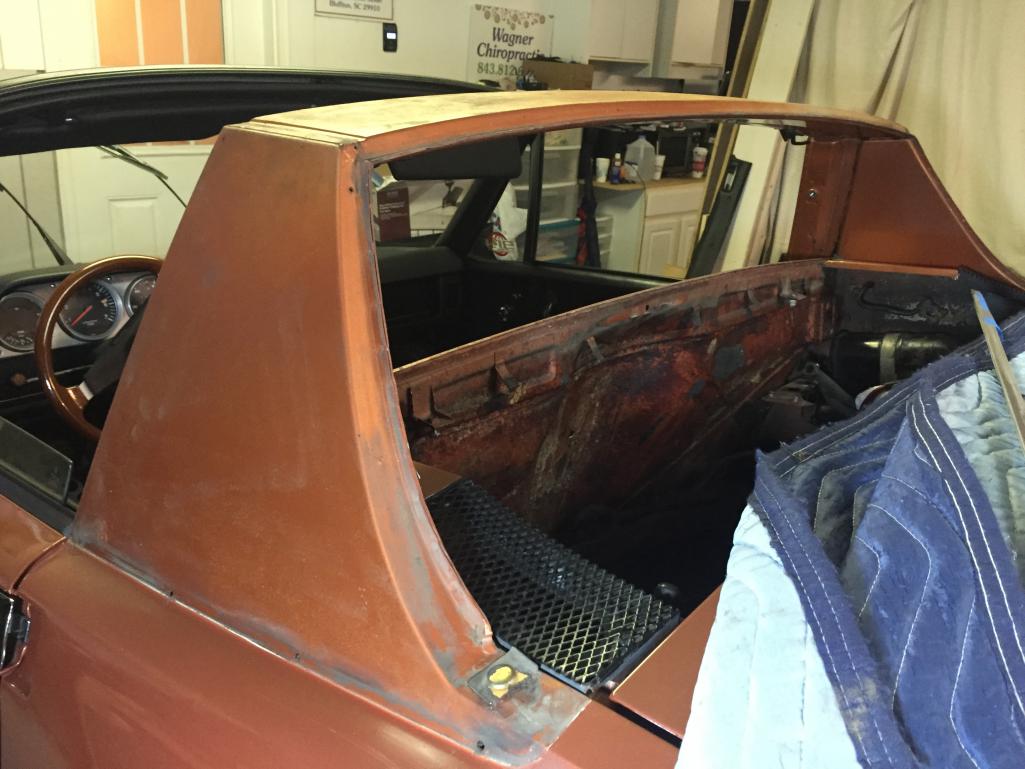
Posted by: mepstein Nov 5 2017, 06:08 PM
The sails had foam so they rust from the inside out. You need to cut back to solid metal, remove the foam, epoxy or etch prime, weld new metal and then prep and prime.
I would remove all the paint from the intersection of the sail panel and rear fender. Many times the paint just hides the rust.
Posted by: Philip W. Nov 5 2017, 06:11 PM
The sails had foam so they rust from the inside out. You need to cut back to solid metal, remove the foam, epoxy or etch prime, weld new metal and then prep and prime.
I would remove all the paint from the intersection of the sail panel and rear fender. Many times the paint just hides the rust.
plan is to sand all the second coat of paint(respray) and the original paint down to primer unless rust is found
Posted by: Philip W. Nov 7 2017, 06:28 PM
more good news!! window is out , no rust under seal-
Attached thumbnail(s)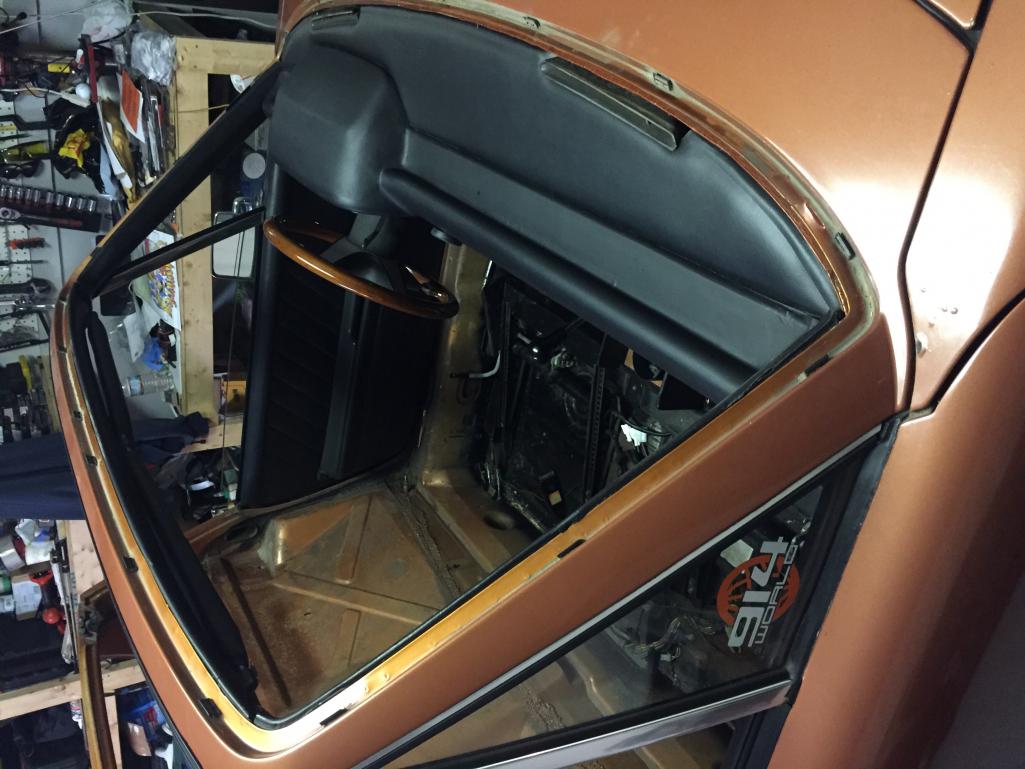
Posted by: Perry Kiehl Nov 7 2017, 08:52 PM
Lookin' good Phil! Looks like you are doing this right.
Posted by: Philip W. Nov 7 2017, 09:37 PM
Perry,
i've been encouraged by finding less rust than expected. its amazing that this is the original glass. i am looking forward to the color being returned to what it is supposed to be- i was originally just going todo only outside panels but its not thst much work to clean it up and strip it down enought for them to do the trunk and rear firewall, engine compartment while we are at it- for a car that was originally from Dublin Ohio, its amazing the hell hole and engine shelf and rear fire wall are as clean as they are. When i saw how bad the rust was in the jack points and rear longs i almost didnt do it- almost scrapped it - glad i didnt!
Posted by: Philip W. Nov 7 2017, 09:42 PM
just a reminder of some of the challenges along the way- rear floor , jack points and rear outer longs were swiss cheese thanks to the Ohio winters i believe
Attached thumbnail(s)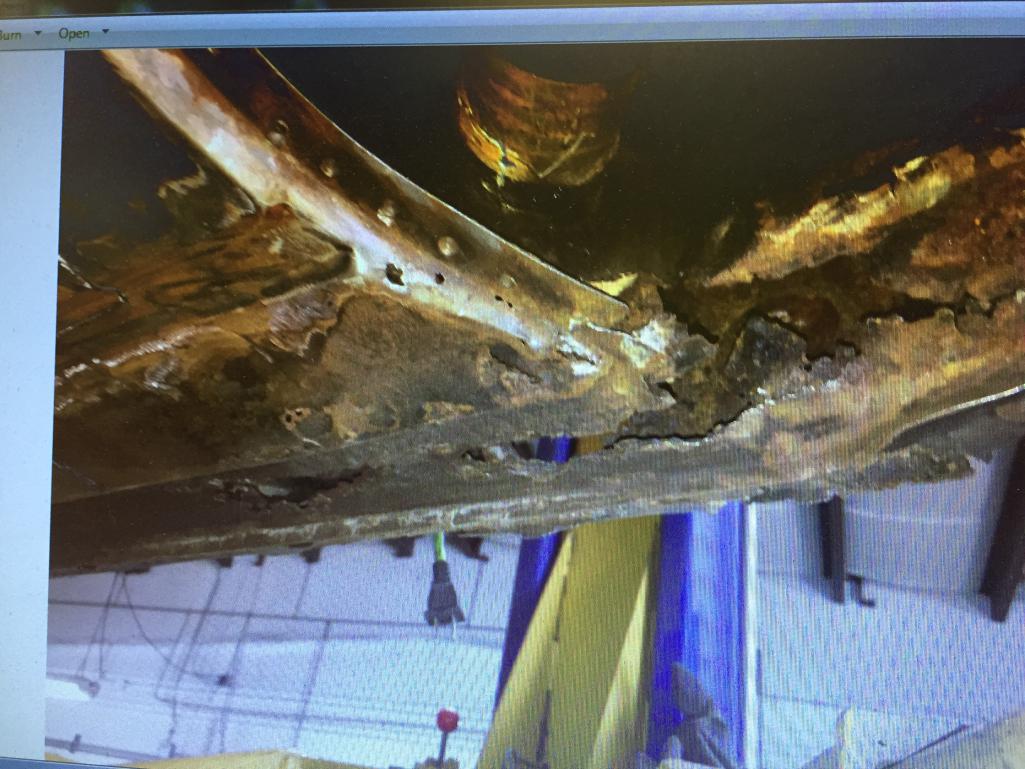
Posted by: Racer Chris Nov 8 2017, 07:23 AM
using the bracket from tangerine -
So you didn't need my special adapter with your new jack?
Posted by: Philip W. Nov 8 2017, 12:45 PM
using the bracket from tangerine -
So you didn't need my special adapter with your new jack?
Nope, - the jack I bought worked fine, just pulled the round jack plate off, and put yours on it the peg on the bottom of yours fit perfectly, same size so no nneed for the adaptor. - - btw at some point id like to get the adaptor you make for the side jack point in the long if you still make them.
Thanks for sending that down so quickly it made the job much easier, I had help to balance the drivetrain just in case but could have done it myself if I had to.
going to get with you about the SS fuel lines next- I will install once car comes back from paint.
Posted by: billh1963 Nov 12 2017, 04:34 PM
Phil,
Was good seeing you Saturday! Thank you for bringing my Okteenerfest swag.
Hope you enjoyed your rides in the 911s!
Posted by: Philip W. Nov 13 2017, 11:35 AM
Guys, I don't have a picture to post - but car was stripped down to the bare except for my dash which was new and installed last year- , I took the car to storage of my new body paint guy- Mike on Saturday- a short 90 minute drive up from beaufort/bluffton . Mike has done work for a few other guys int he area, including billh, and I am confident he is up to the task.
While there I met up with Bill to give him his swag from theOkteenerfest that he missed due to the flooding from the hurricane- so he treated me to a couple drive in some other aircool rides tail-draggers but very cool- Bill - thanks for the awesome rides and I look forward to you having a 914 actually running soon!!!
while cleaning out the wheel wells I found a rust thru spot on passenger side front behind bumper and that will have to be patched, the other was drivers side wheel well but inside the back of front wheel well, at the bottom- Mike says no problem, all will be cleaned out they will be cleaning out all the undercoating out of wheel wells and off the bottom of the car, and all rust spots cut out, cleaned patched and sealed properly!!!
I now have a decision to make- I'm still on the fence for doing bumper back dating- now is the time to do it or never look back , to modify the front now would be best so it gets primed sealed and painted, later would be bad to cut and grind off parts newly painted- so should I or shouldn't I ?? I really would like to do this, I think early bumpers look way better. , lighter etc. even just to do the fiberglass for now and SS later, ( probably cant afford it- )
I'd like some input from the peanut gallery - back date nor not!??
- new parts I need to get:
*new rocker panels- probably RD
* new carpet-
* new side marker lights
* I also need new bright parts- chrome trim for the rear targa sail panels
* new a-pillar and side pillar interior trims needed with front top edg trim that goes under the visors, and rear targa bar trim that goes across inside top edge of targa bar. - has anyone had thse recovered?? I know Mark might eventually but this would really be awesome as Ive already done my seats and dash
- I will also be installing new gauge set I have from Tim, LED etc, inside will be SWEET!
will spend the next few months getting motor cleaned up and sorted out- I have to reseal , replace oil cooler seals, I already have allnew tin, and I have parts coming from Bruce Stone , - I might send the TB out to rebuild,
This car has 150k miles on it just turned over on the Okteenerfest trip- so at some point the motor must have had work done because the leak down and compression numbers are very good. - no need to dig into that, just a freshing up of the cosmetics on top side.
any advice about "while I am in there"?
Thanks!
will post pictures as they start sanding down and repairing stuff, then its prime, block paint -- 3 coats of base and 3 coats of clear , PPG L99K, Copper Metallic!
Posted by: mepstein Nov 13 2017, 12:20 PM
If you think the early bumpers look way better, do the backdate. Its your money and you are the only one that matters when it comes to your car.
But I would suggest finding some steel ones. Fiberglass usually takes so much bodywork to fit and look right that its not a cheap way to go and a tap will crack or brake it.
Posted by: Philip W. Nov 16 2017, 10:20 AM
If you think the early bumpers look way better, do the backdate. Its your money and you are the only one that matters when it comes to your car.
But I would suggest finding some steel ones. Fiberglass usually takes so much bodywork to fit and look right that its not a cheap way to go and a tap will crack or brake it.
Bill suggested the same thing, so I am looking now - some decent painted steel ones would be fine, but I am sure I will eventually go with chrome or SS ones. Just cant afford that will all the other stuff that I have to get- like new rocker panels getting ordered from RD right now.
Does the stock front valence stay on under there even if I put steel back dated bumpers on and put LE type valence?
Posted by: Philip W. Nov 16 2017, 10:27 AM
also I found that pelican has some of the chrome trim pieces in stock fro the roll bar and all the parts for front window! I am going to check with dealer since we get a nice discount for PCA member and see how prices compare.
-
Posted by: Cairo94507 Nov 17 2017, 07:32 AM
Hi Phillip,
I think you will be very happy with the early bumpers, painted or chrome. You will not regret the early bumper swap.
If you do the LE front valance, the stock valance is removed first. I like both looks. I have a modified stock valance for the front (oil cooler opening) of my Six but on my last six had the LE front valance.
Good luck and enjoy the process.
Cheers,
Michael
Posted by: Philip W. Nov 27 2017, 08:47 AM
will be looking for bumpers to back date with - unfortunately I was not able to get a set of the bumper tops on the black Friday sale on 914rubber.com - go LOTS of other parts but just could never seem to be able to get those when restocked!!
so I will wait for another sale, and keep looking for some bumpers - cant afford the SS ones at this time, so maybe some fiberglass bumpers for now? so many things to consider- the fog lights for one thing and the grills as well, not cheap or easy - so I will be listing my barely used NOS late fog lights - never mounted before I put them on 6 months ago, will be listed for sale along with my very clean and good/great condition late rubber bumper covers, with shocks etc.
-Phil
Posted by: Coondog Nov 27 2017, 09:23 AM
Congrats on your decision to back date your bumpers, best mod you can make on a 75/76 914.
Posted by: AZBanks Nov 27 2017, 09:56 AM

Posted by: Coondog Nov 27 2017, 10:06 AM
Really !!!!
I counted 15......

Posted by: Larmo63 Nov 27 2017, 10:10 AM
Backdate now, you'll be so glad you did.
Posted by: Philip W. Nov 27 2017, 11:03 AM
Really !!!!
I counted 15......
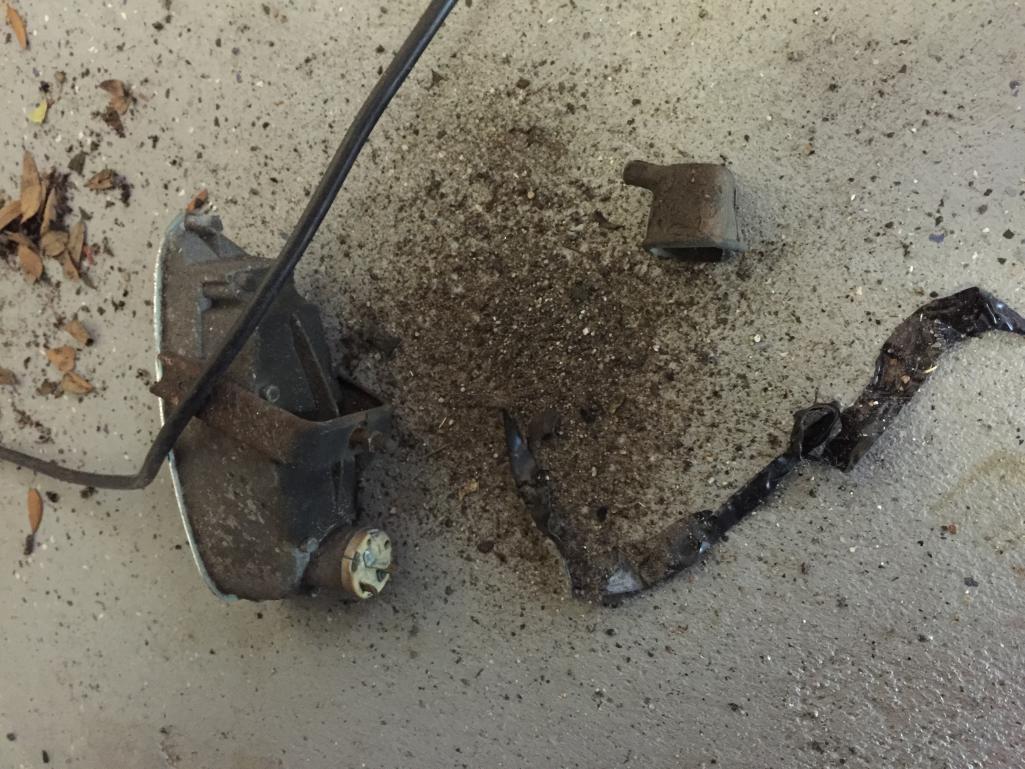
lots of sand in the rubber seal thst is supposed to cober the back side of electrial connectors for turn bucket - also some rust in the ftont trunk seal channel,
Attached thumbnail(s)
Posted by: Philip W. Nov 27 2017, 11:05 AM
mess and a bit of rust in the fender wells behind front bumper
Attached thumbnail(s)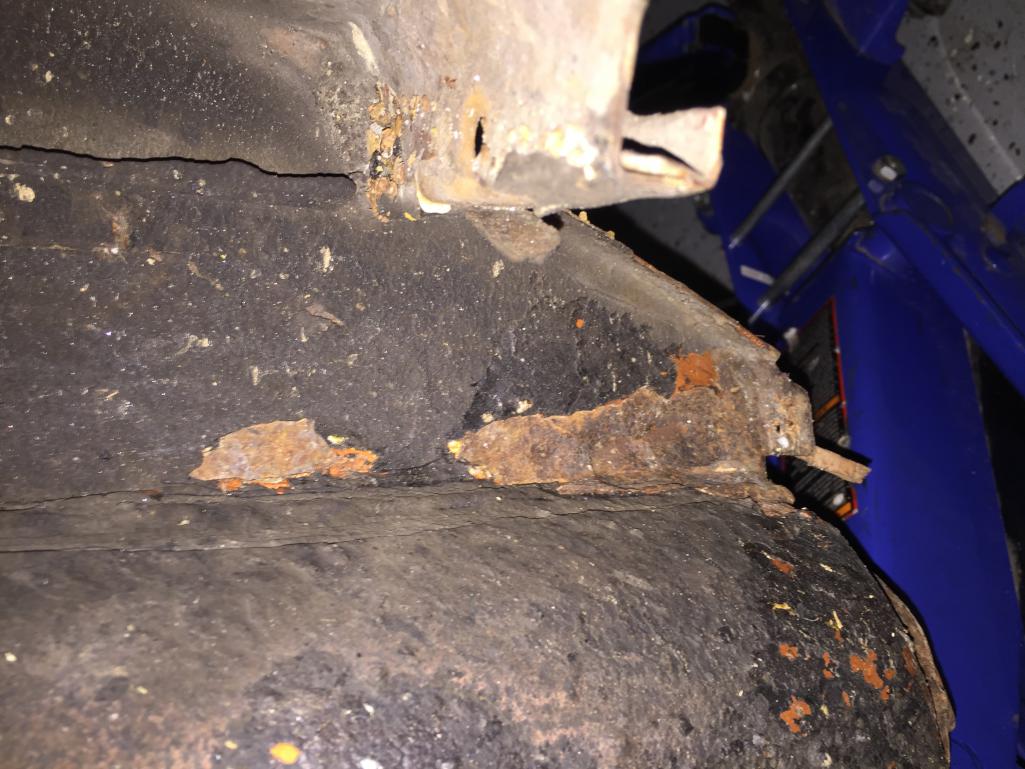
Posted by: Philip W. Nov 27 2017, 11:07 AM
original copper undwr the window trim show the difference from the respray thats coming off
Attached thumbnail(s)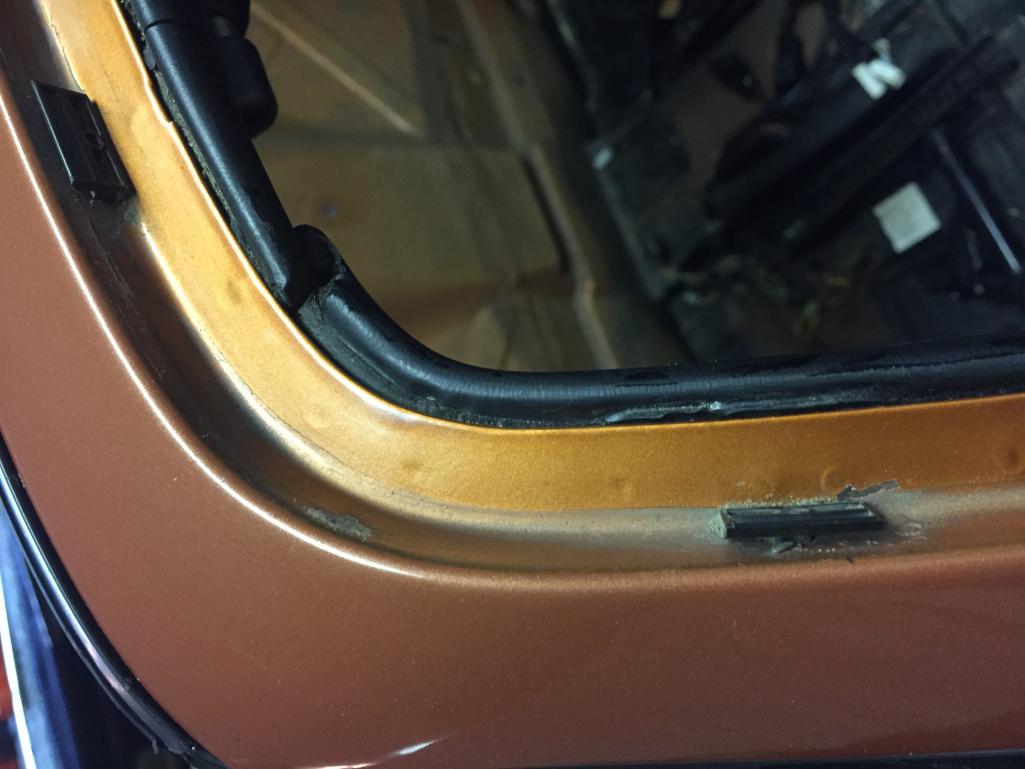
Posted by: Philip W. Nov 27 2017, 11:08 AM
front foot well with the foam out, this will all get cleaned up and resprayed with aound deadener thsn new unsullation pad under carpet
Attached thumbnail(s)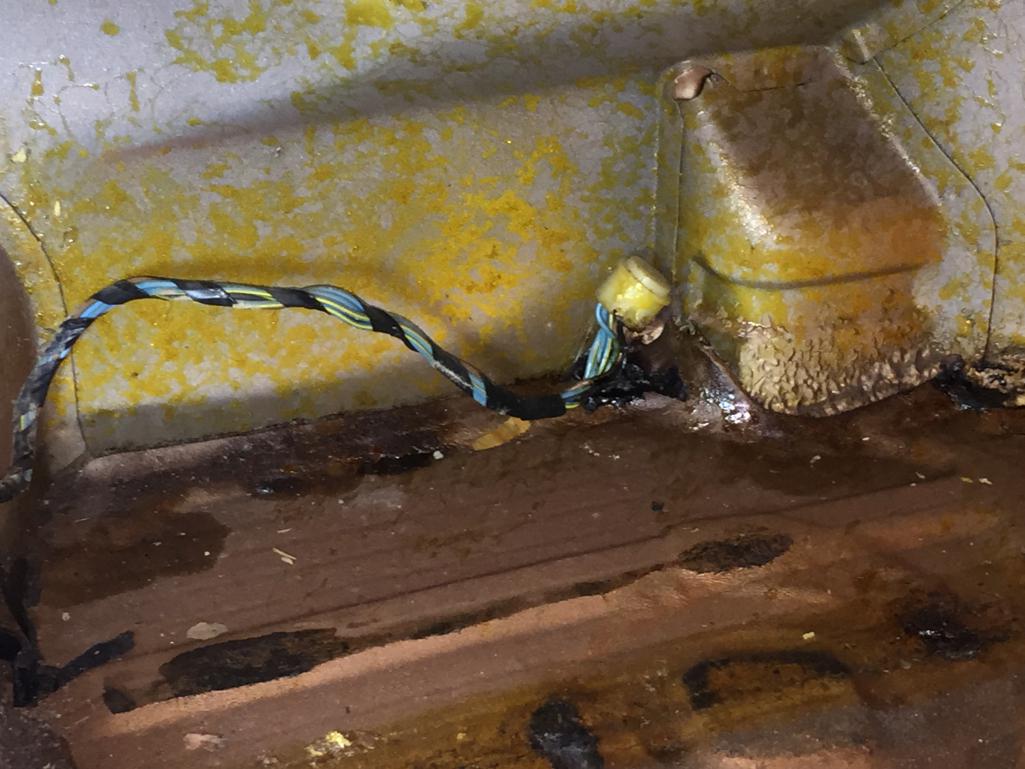
Posted by: Philip W. Nov 27 2017, 11:09 AM
can you name that wire??
Posted by: mepstein Nov 27 2017, 01:44 PM
can you name that wire??
Erg wire
Posted by: Philip W. Nov 27 2017, 02:10 PM
can you name that wire??
Erg wire
Winner! - matches the plug in the trunk , rear drivers side- didn't know what this was when I was trouble shooting some electrical issues when i first bought the car, had some wiring shorted out in the trunk- my understanding it was in 75-76 for the emissions add-ons with the catalytic converter etcc.
Posted by: Philip W. Dec 19 2017, 09:45 PM
progress!
finally some pictures to post
old paint has been stripped off, outside anyway, and is in primer!
Attached thumbnail(s)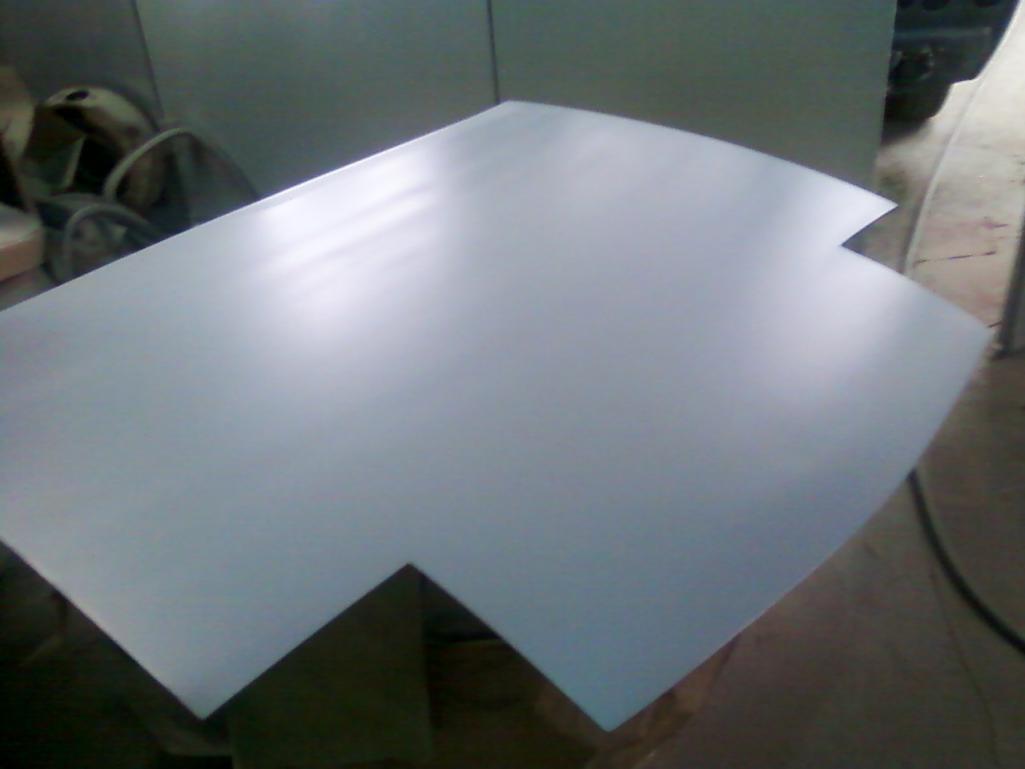
Attached image(s)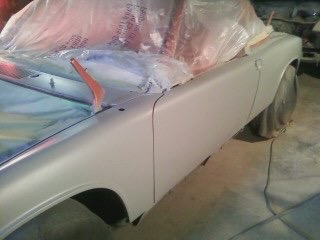
Posted by: Philip W. Feb 22 2018, 02:05 PM
update coming! car should be ready for paint in a few weeks, , just got my bumpers in, and have been cleaning up the engine, ready to put the new shroud and tin back on
Posted by: Philip W. Mar 5 2018, 07:01 AM
been working on getting all my bits together for the
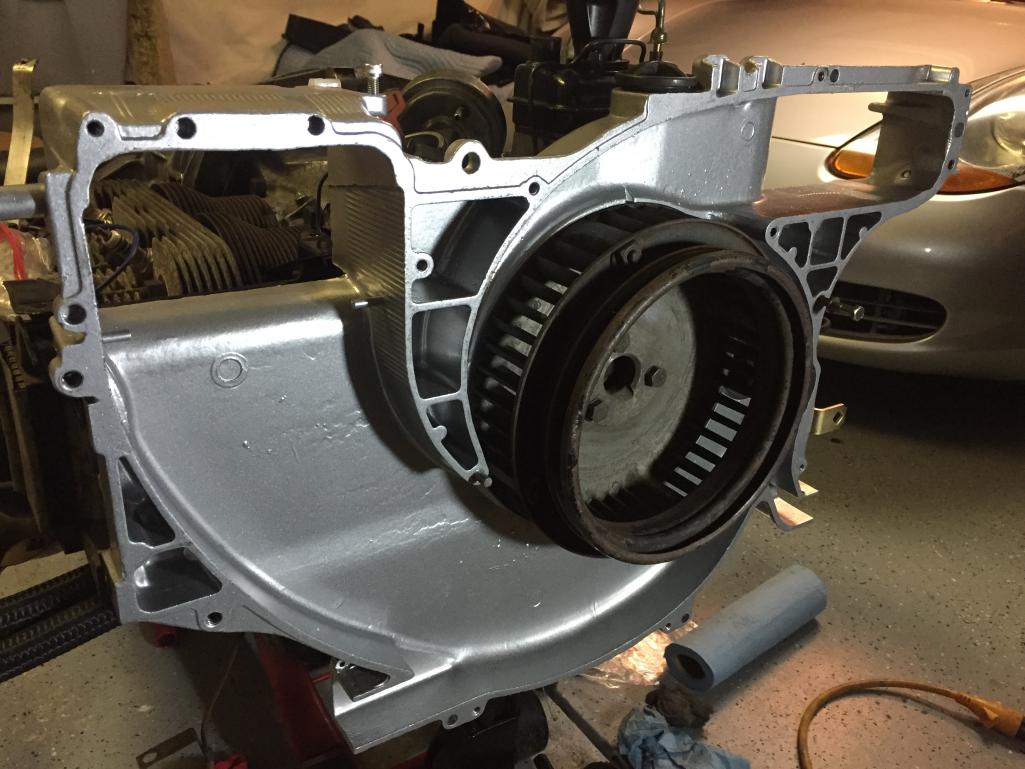
motor, cleaning stripping and repainting some of the tin pieces like the air cooling flaps this past weekend, pulled all the tin off the motor,
pulled the shroud impeller etc to clean behind it all and look for leaks-, replaced the front crank seal too.
The car itself is really close to being ready to paint. Had to source a new driver door- Thanks BigKat Bob for providing one for me! That was stripped last week cleaned up primed etc and fit back on the car.
The last step before pain is to go up and help this weekend do the mods for the bumper back dating- I will post many more pictures this next week when I get to the shop.
I was able to source some bumpers, and right now I am chasing down some quotes for rechroming the bumpers.
Found out I have a 50amp alt which should be 55, might get a rebuilt one that's built to a 75, not sure yet. the costs of stuff and the "while you are there" is adding up. so much easier to do some of this while I have the motor out - like the push rod tube seals, alternator
Big thanks to Bruce Stone for a lot of powdercoated bits! all of the heater accessories like the j-tubes and s branch parts and the beautiful redone fan shroud.
Also the intake runners,
nfrigi - provided me with a late chrome front bumper and tops for front and rear, Thanks Noel
this weekend right here locally I found early door panels with MINT vinyl and pockets!! I will post some pictures. - very by accident one mile from my house there is some wharehouse area, and I see a beautiful aircooled 911 turbo pulled over by local PD, I think it someone I know so I go back around to see where it is and the cop leaves, it goes to a warehouse and there is a half dozen porsches inside getting various rehab- this car is sitting outside and has bee getting prepped for Ameila Island Concourse this week- there is a rare factory 924 race car inside, etc etc and a 1950's Citroen, a really nice mint 912E(1976), etc
he has some 914 stuff he says that he picked up in a batch of other 911 things, and these door panels were there- no warp no cuts not mold or mildew - This guy says he has owned more than 400 Porsche's - hundreds of 356's, a few 914-6's and now just mainly 911 stuff- AND I got an early 8/10 front chrome bumper with out the bumper guard holes and a mint bumper top on it!! it was my lucky(blessed) day!!!
More parts this week and next from Mark and 914 Rubber- just got in a whole new set of vacuum lines from them.
Things I want to do yet but $$ may have to wait-
- send in the throttle body for rebuild and cleaning service but - $350
- get brand new outer rocker panels from Restoration Design but- $$300
- new windshield maybe- I have mine and another no cracks but -est. is $450
I should have the car back in about a month and begin reassembly-
will post some pictures as the day goes on to update all the motor work clean up and parts sourced.
Phil
Posted by: Philip W. Mar 5 2018, 07:28 AM
dirty motor
Attached thumbnail(s)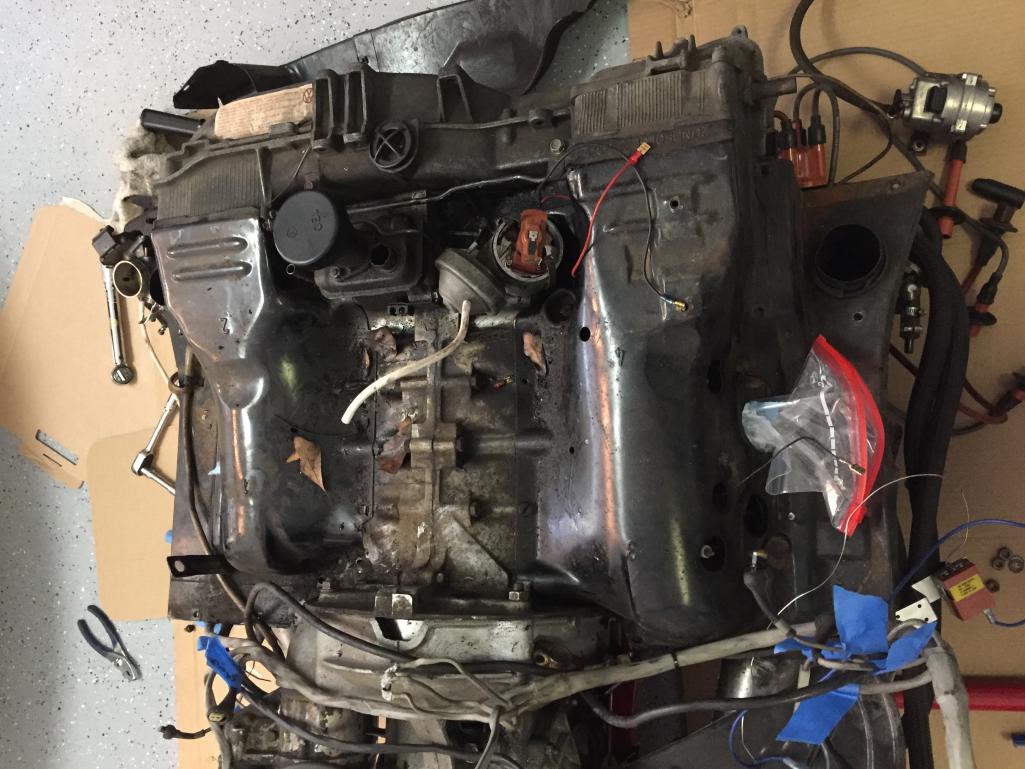
Posted by: Philip W. Mar 5 2018, 07:37 AM
so dirty, lots of undercoating spray and 40 years of dirt oild and dust
Attached thumbnail(s)

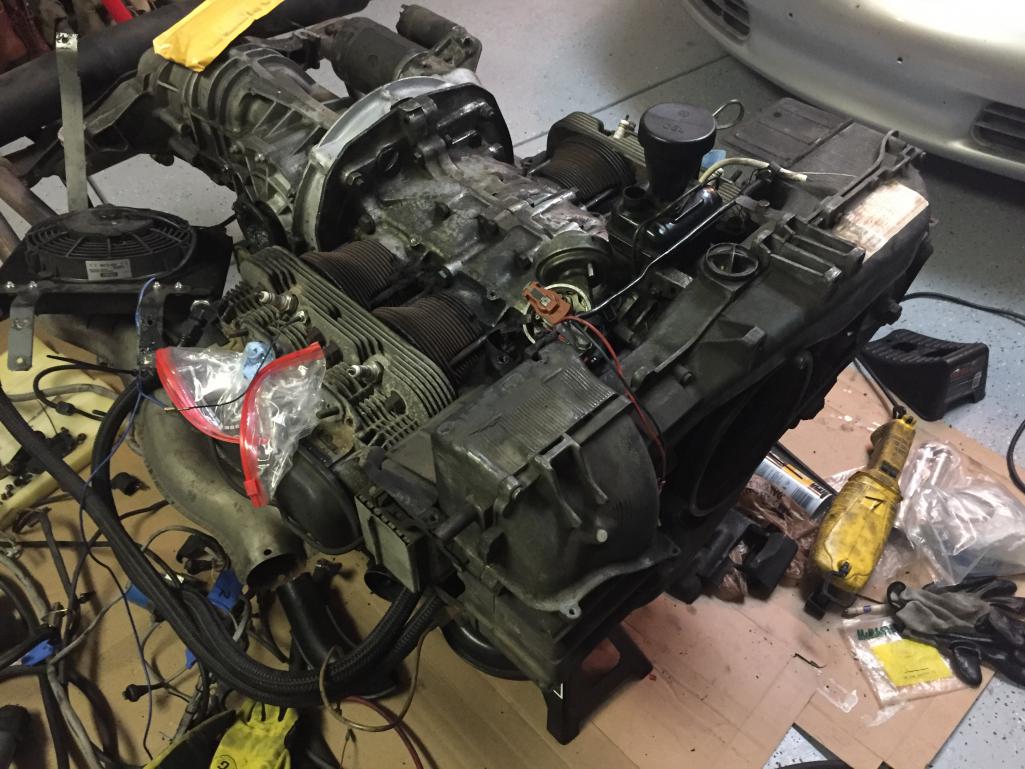
Posted by: Philip W. Mar 5 2018, 07:40 AM
so much nicer !
Attached thumbnail(s)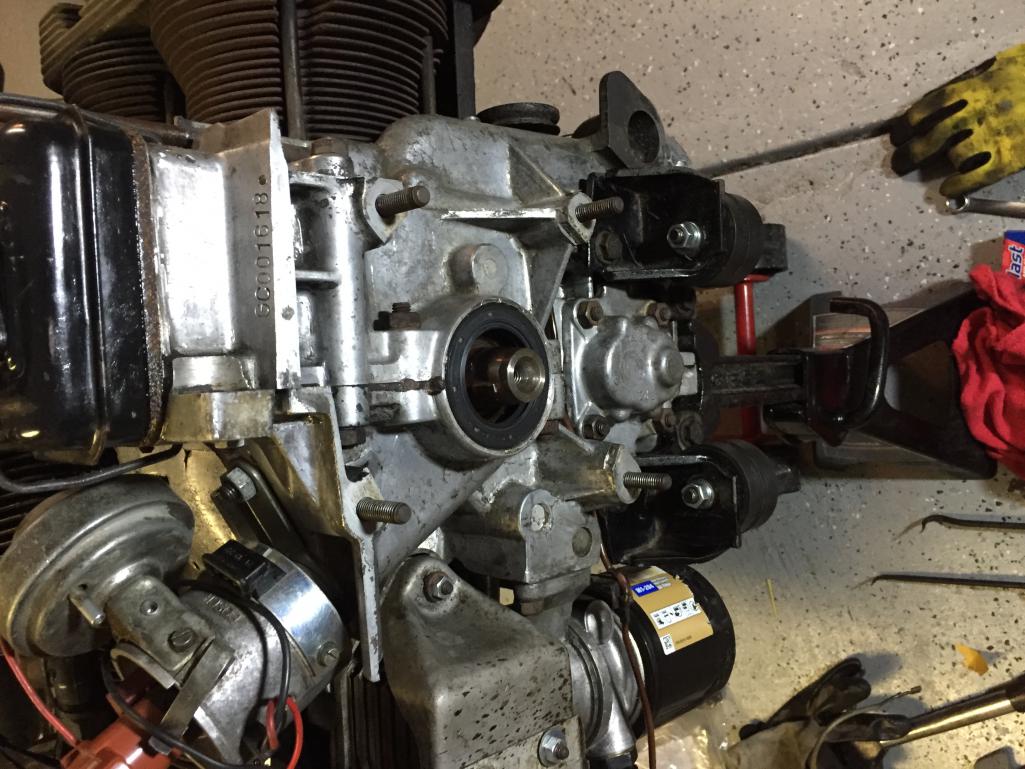
Posted by: Philip W. Mar 5 2018, 07:43 AM
shroud back on
but the Alternator cover i got is wrong, told by mechanic here its foe a 912, so i have to find correct one - oh and need to get a 55 amp alt or a 75 if i can
Attached thumbnail(s)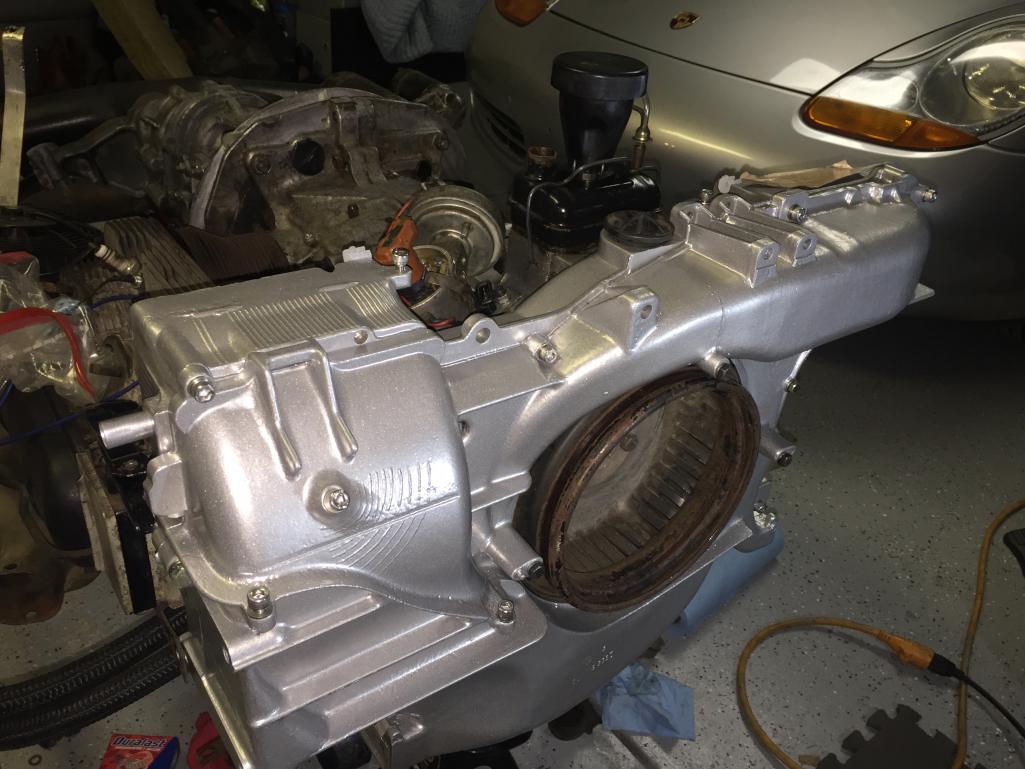
Posted by: Philip W. Mar 5 2018, 07:47 AM
assembling the new clean runners with zinc plates fuel rails
Attached thumbnail(s)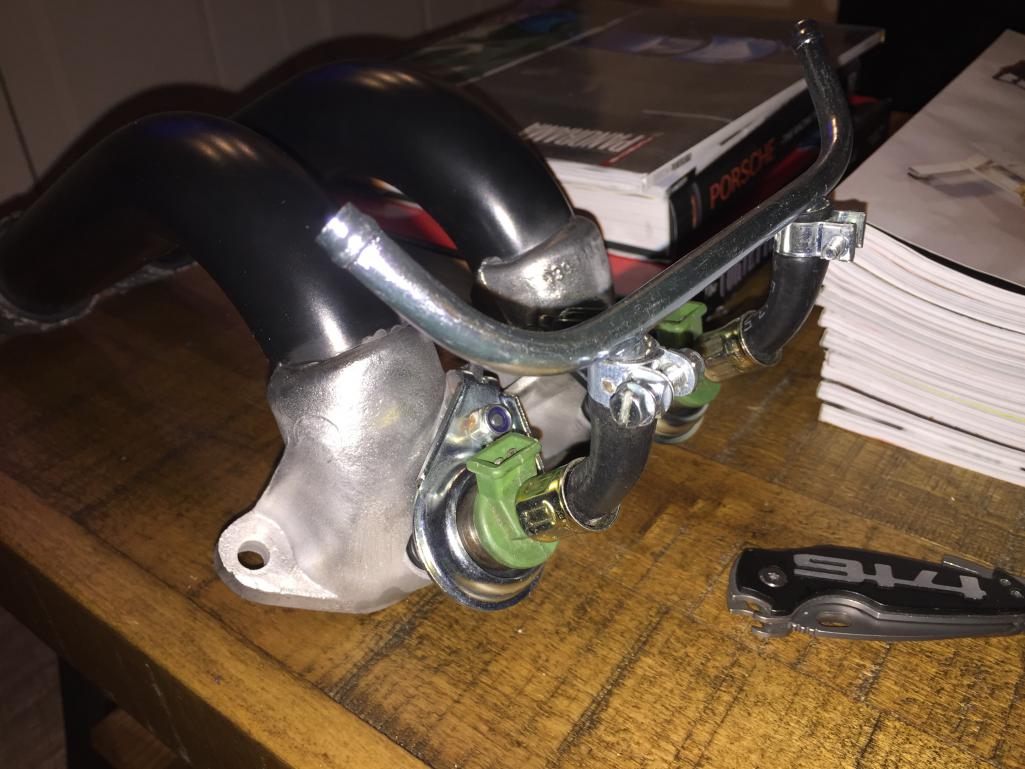
Posted by: Philip W. Mar 5 2018, 07:48 AM
new motor mounts and brackets
Attached thumbnail(s)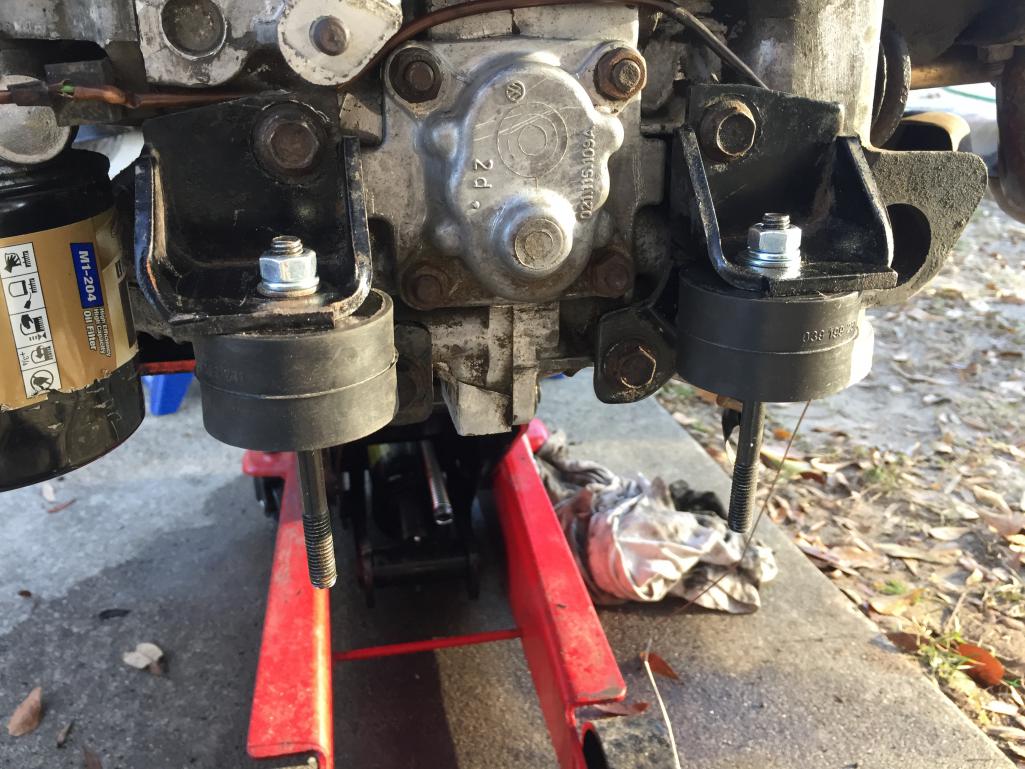
Posted by: Philip W. Mar 5 2018, 07:54 AM
i ulled the oil cooler to put in new seals ans also this seal for between the tin and the oil cooler
i am trying to do everyting i can while i am there- i dont want to have to pull this until i decide to do a bigger motor
Attached thumbnail(s)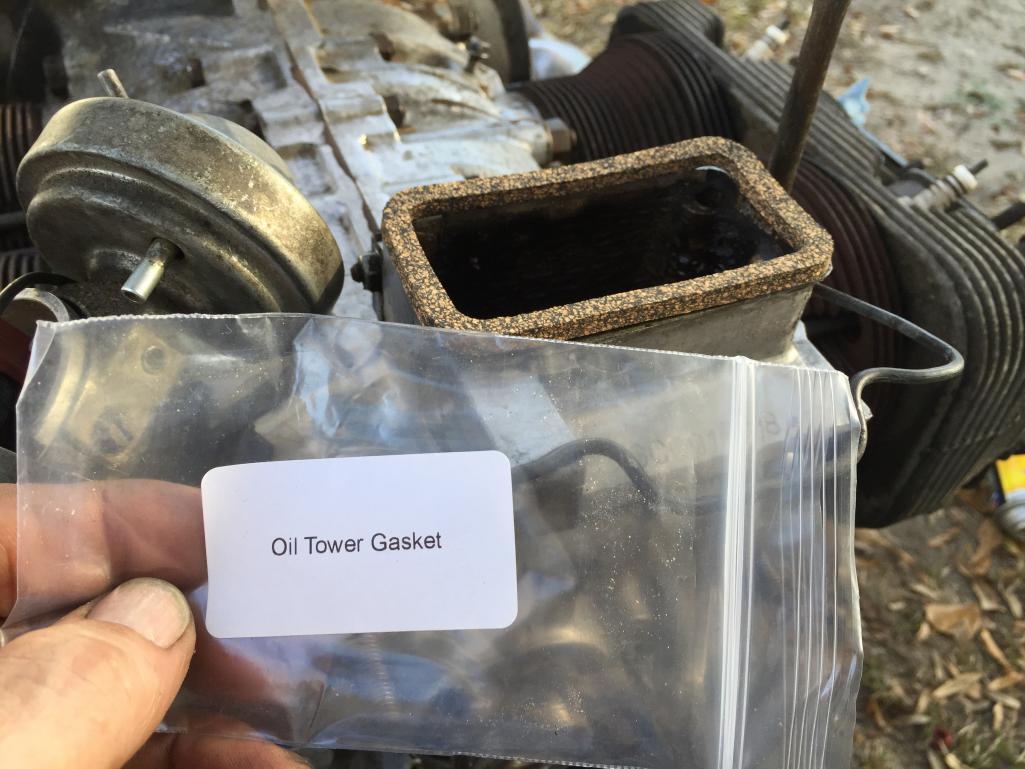
Posted by: Philip W. Mar 5 2018, 07:56 AM
thanks 914 rubber for another great part
Attached thumbnail(s)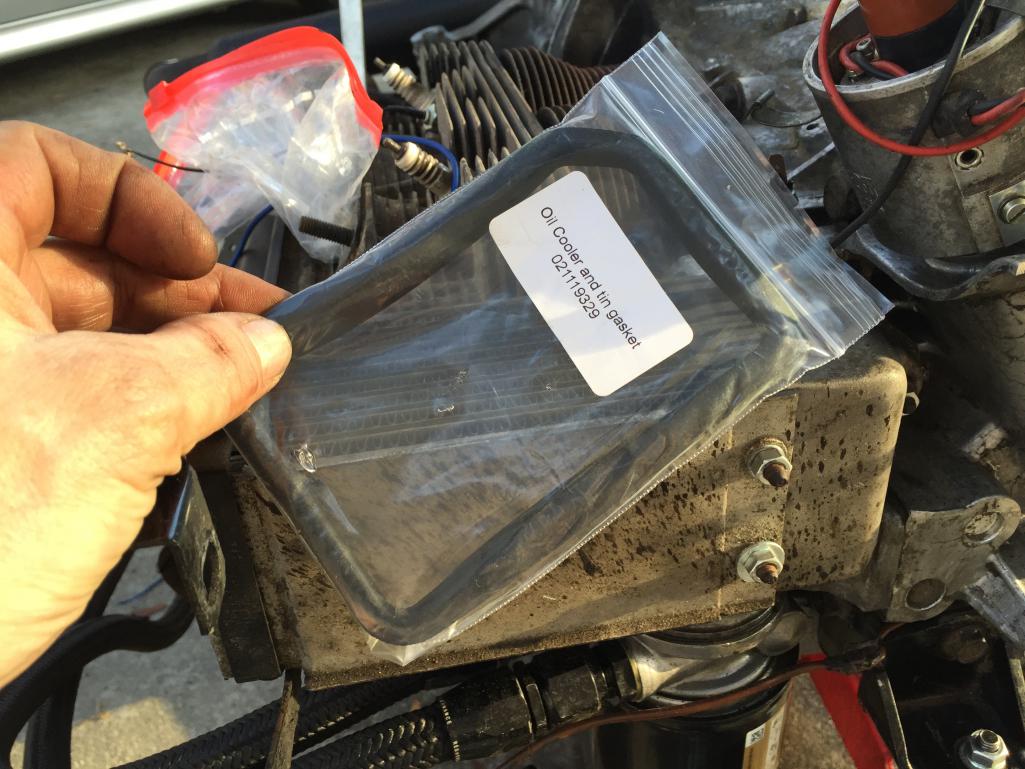
Posted by: Philip W. Mar 5 2018, 08:00 AM
bumpers!
Attached thumbnail(s)
Posted by: Philip W. Mar 5 2018, 08:09 AM
feont bumper with top- i have 2 now ans will have to sell one
Attached thumbnail(s)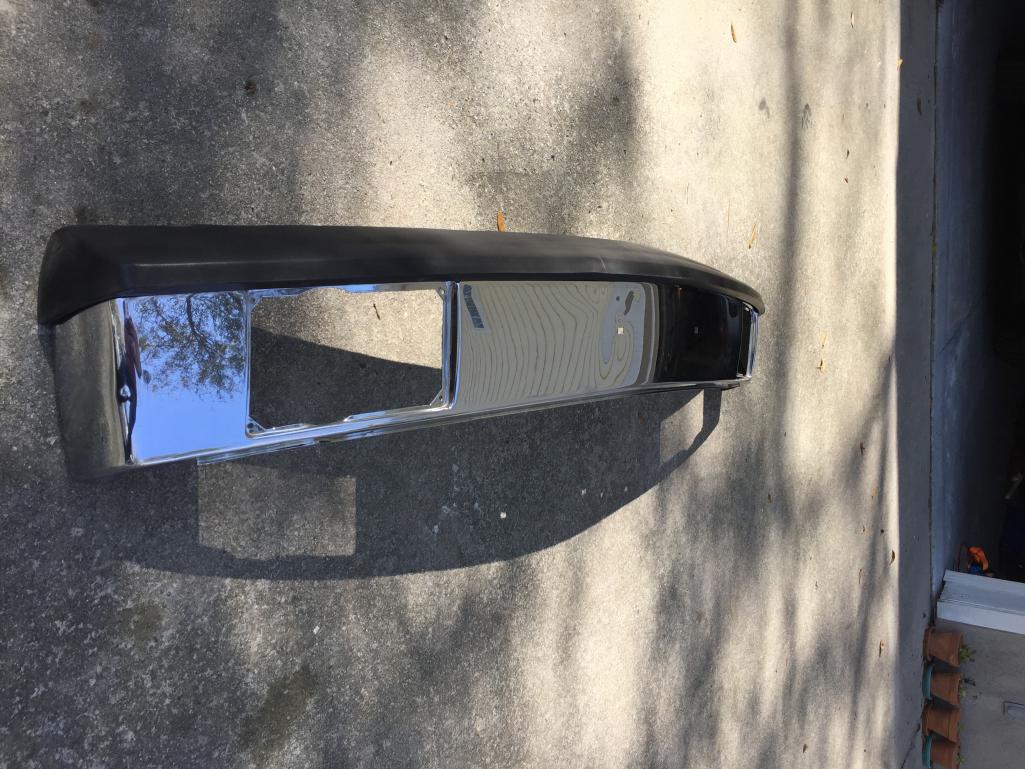
Posted by: Philip W. Mar 5 2018, 08:12 AM
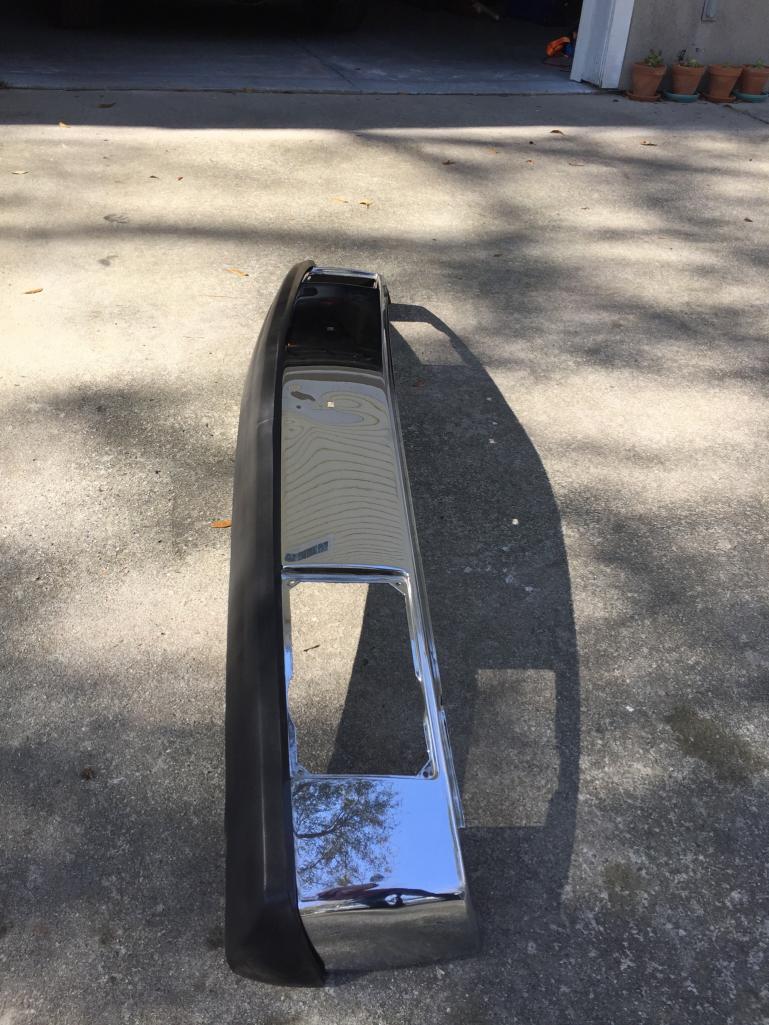
this one has the holes for bunper guards and has a few dings some fading- if i can get a food price dor repair and chrome i might get that done before i relist it for sale
Attached thumbnail(s)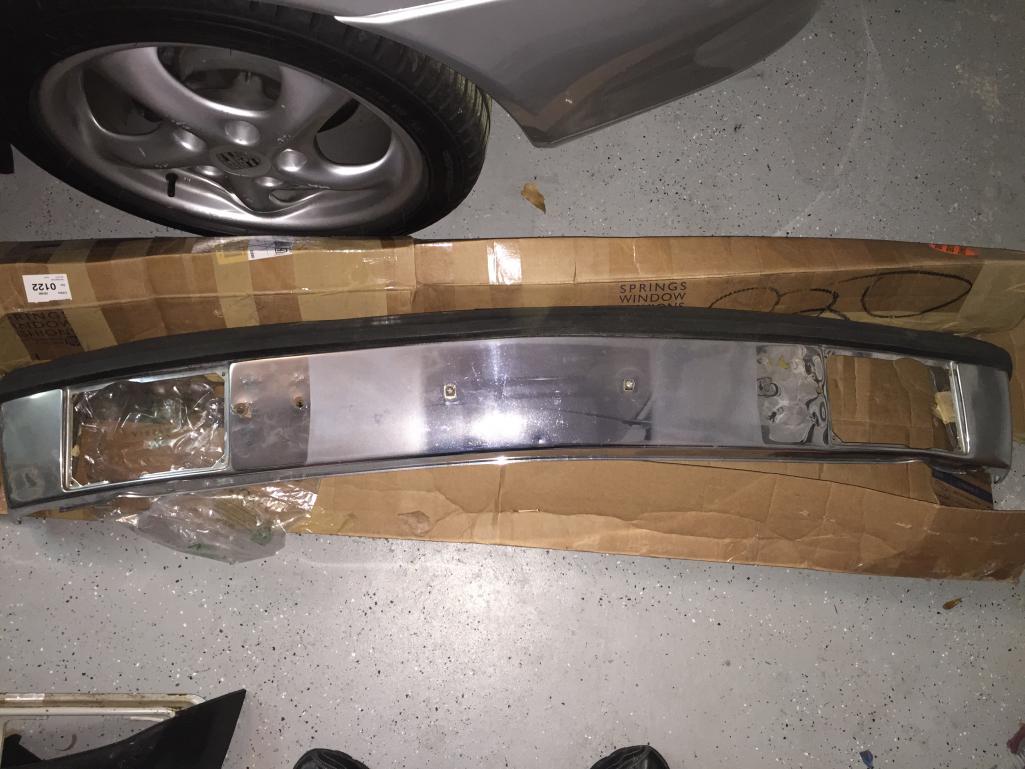
Posted by: Philip W. Mar 5 2018, 08:13 AM
new door panels! these are really like new its amazing
Attached thumbnail(s)
Posted by: Philip W. Mar 5 2018, 08:14 AM
and an undamaged drivers pocket
Attached thumbnail(s)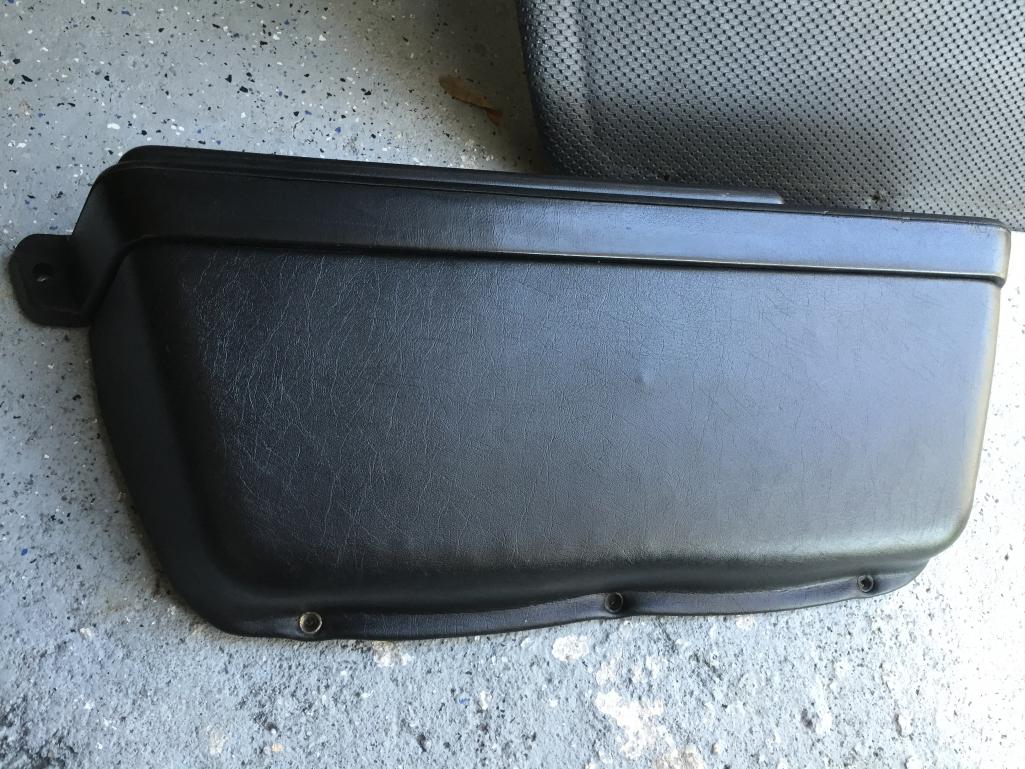
Posted by: Philip W. Mar 7 2018, 01:05 PM
so new door, was way better than the old ine with rust in channel, inside and thru- some po used a bunch of bondo to cover up - now new door primed and in the car- rear bumper and a front bumper with super nice top sourced last weekend locally,
trying to decide about using early bumper no guards etc or this later one that will need some work and has thr holes for thr tits, either paint it or rechrome it we will see- been trying to get some prices on chrome work and repair
Attached thumbnail(s)
Posted by: Mblizzard Mar 7 2018, 02:27 PM
Amazing Progress!
will be the star of Okteenerfest next year. Cant wait ti see! Really like the bumpers. I will do the same when I paint mine.
Posted by: Philip W. Mar 7 2018, 02:48 PM
i will be helping with the bumper back date this weekend, once trimming drilling and fitment are done he can do the last prep for paint- my goal is to have the car in my garage in april and back in the road by May!
Posted by: rhodyguy Mar 7 2018, 03:17 PM
#66 is a great example of the brackets/mounts as part of a trans conversion and the correct routing for the factory oil temp wire. Nice picture.
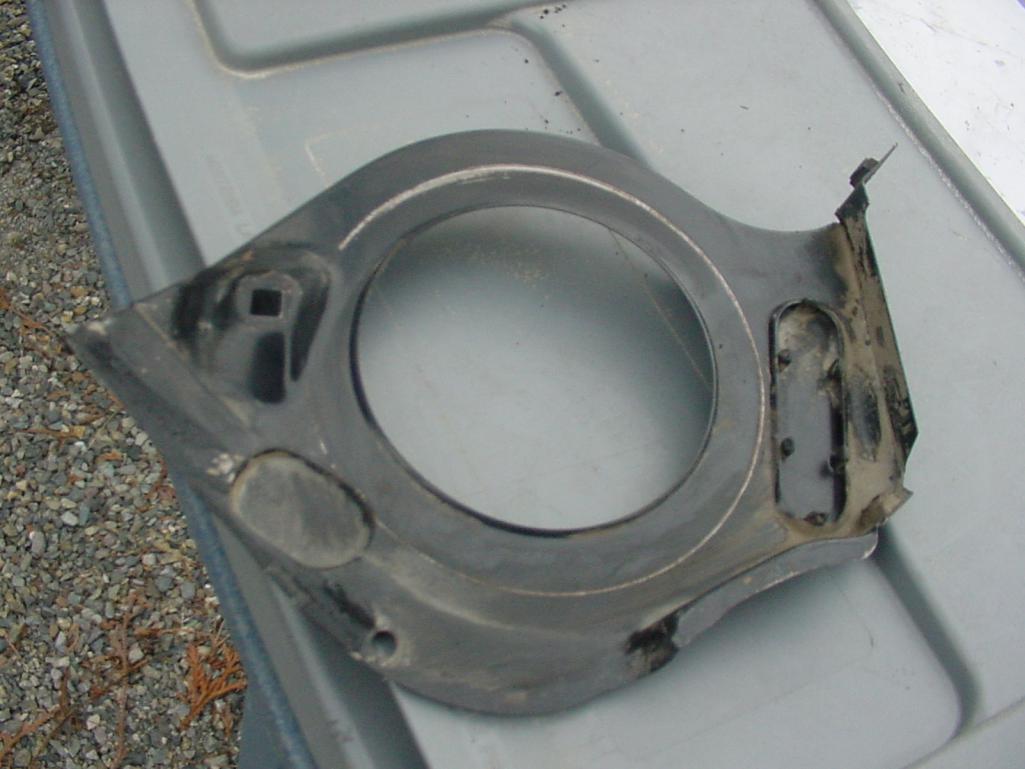
Posted by: rhodyguy Mar 7 2018, 06:11 PM
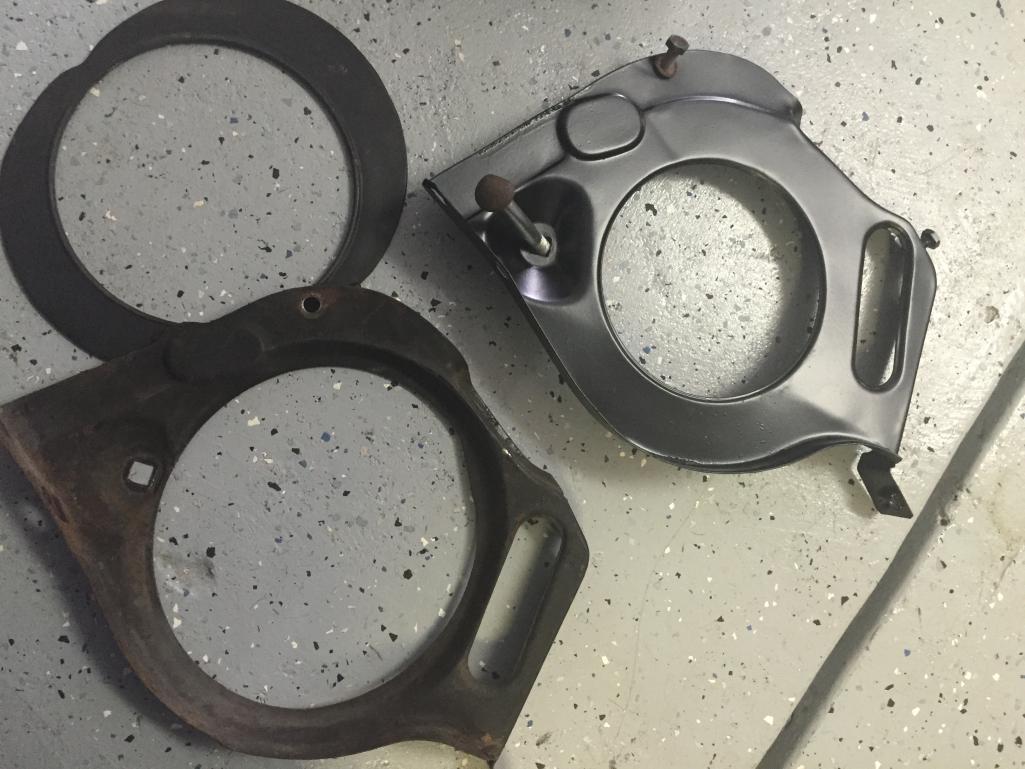
will this one work for you Phil? came off of a 1.7. that upper tang that gets torn is perfect.
Attached thumbnail(s)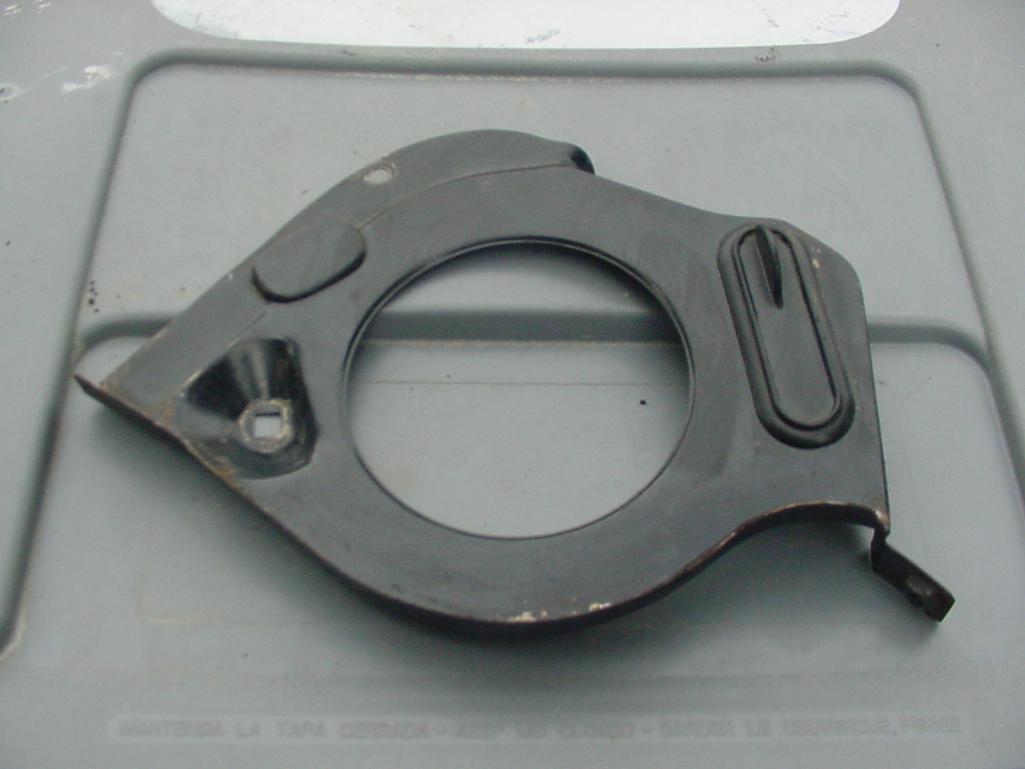
Posted by: mepstein Mar 7 2018, 07:07 PM
What color?
Posted by: Philip W. Mar 7 2018, 09:06 PM
What color?
what color is the car going to be?? original Copper Metallic L99k of course!
it had a respray of something 20 years ago in CA, looks like metallic but almost Sepia brown- Copper looks more orange almost like you took signal orange and added sowm metallic to it. pretty sure his plan is PPG they have a formula for it but he will shoot some sample ans we can match to the front trunk that didnt get repainted back then- talked with Bill Duenster who works for PPG about it and Mike has his number , which will help but Mike has painted for 30+years and restored many cars.
cant wait to see the correct color on it!
Posted by: Philip W. Mar 7 2018, 09:07 PM
will this one work for you Phil? came off of a 1.7. that upper tang that gets torn is perfect.
that should work if the interior opening fits a standard alternator ,
Posted by: Philip W. Mar 10 2018, 05:06 PM
did the back date work on the car today- front was a perfect fit and really the rear was perfect but the bumper fit was not, it will have to be really cranked down , it doesnt have as much curve as the car .
Bigkensteel's thread was spot on for instructing how to do this.
front trimmed off
Attached thumbnail(s)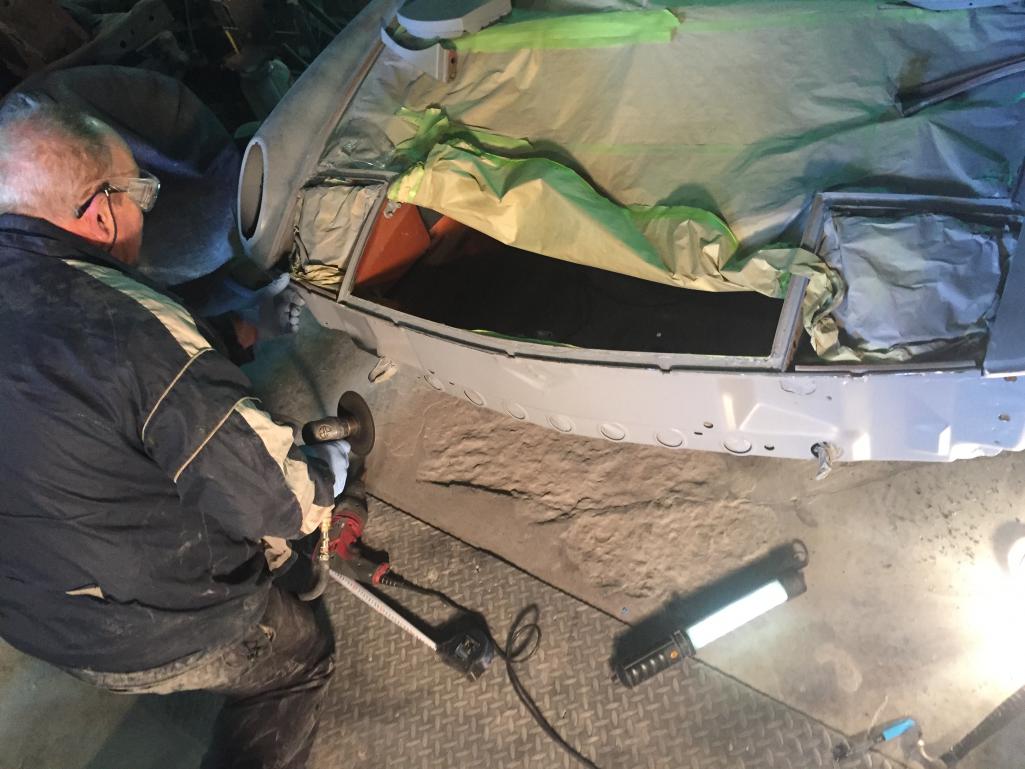
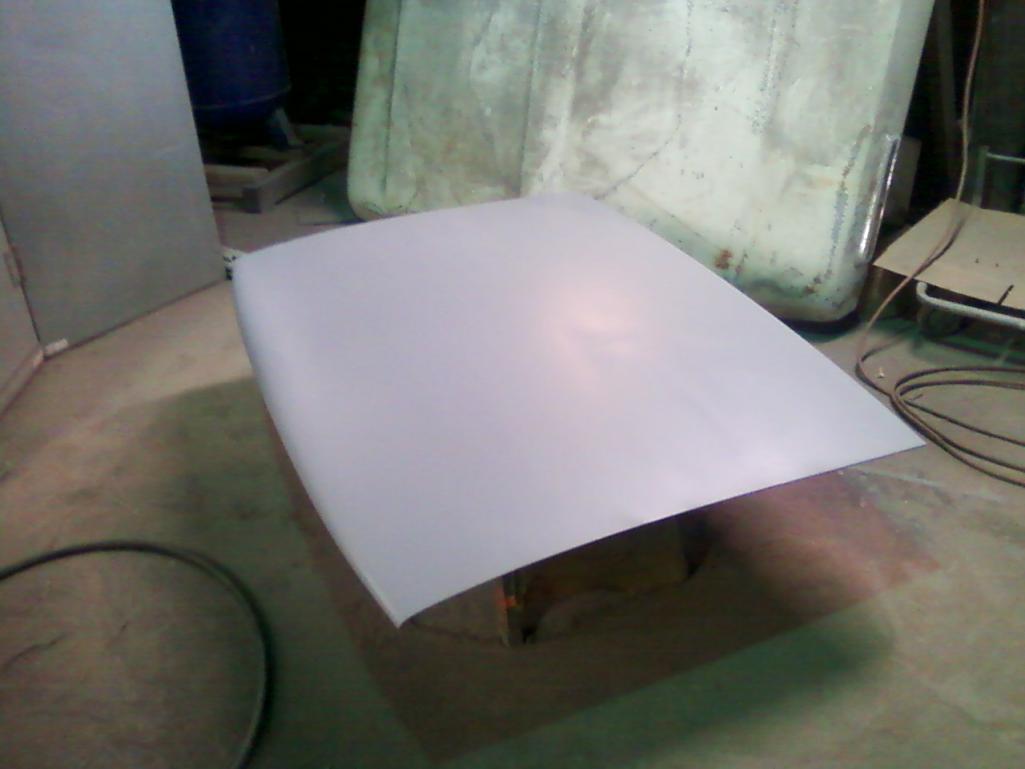
Posted by: Philip W. Mar 10 2018, 05:08 PM
holes primmed ans side brackets taken off, ground down the weld spots and primed
Attached thumbnail(s)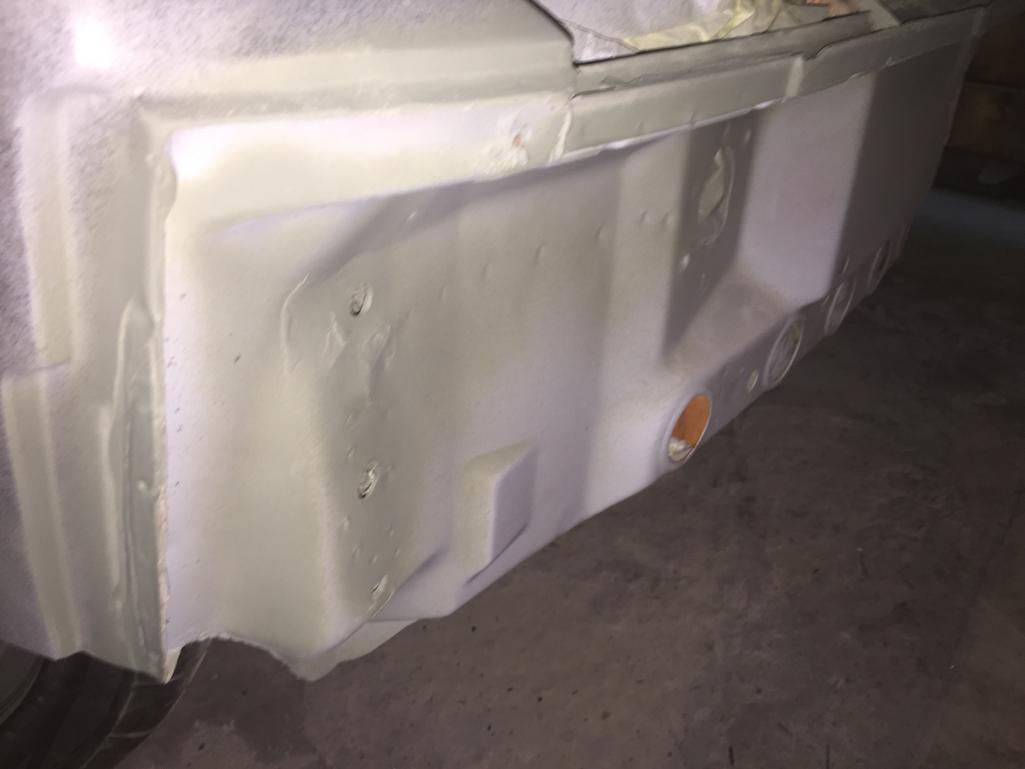
Posted by: Philip W. Mar 10 2018, 05:13 PM
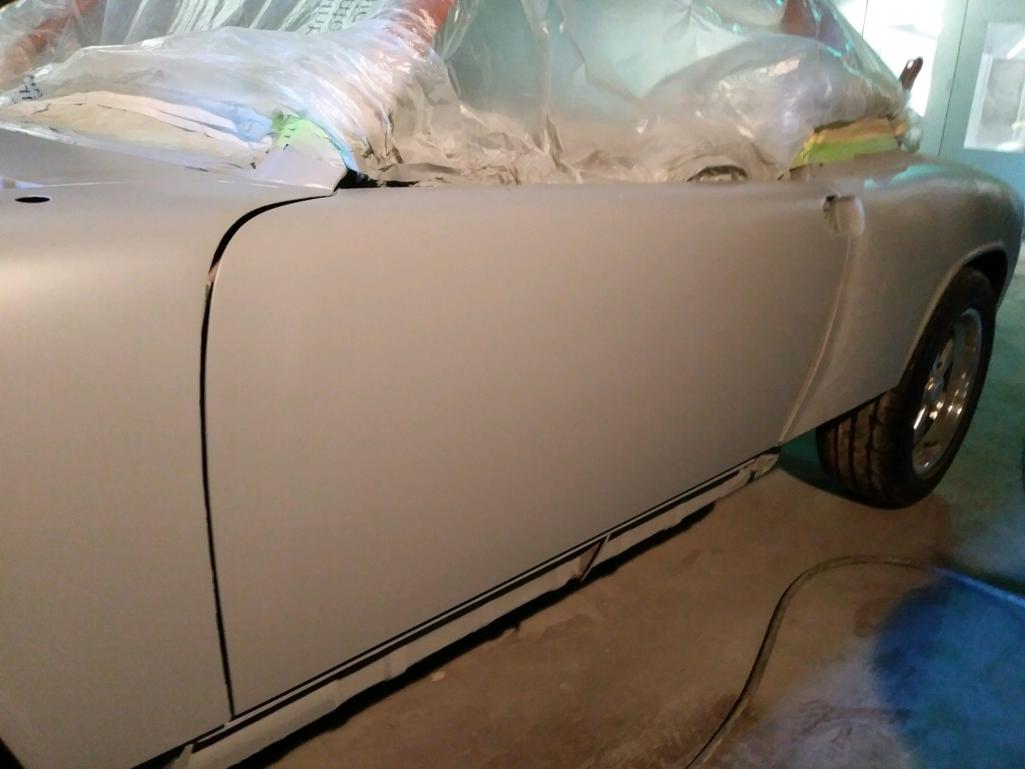
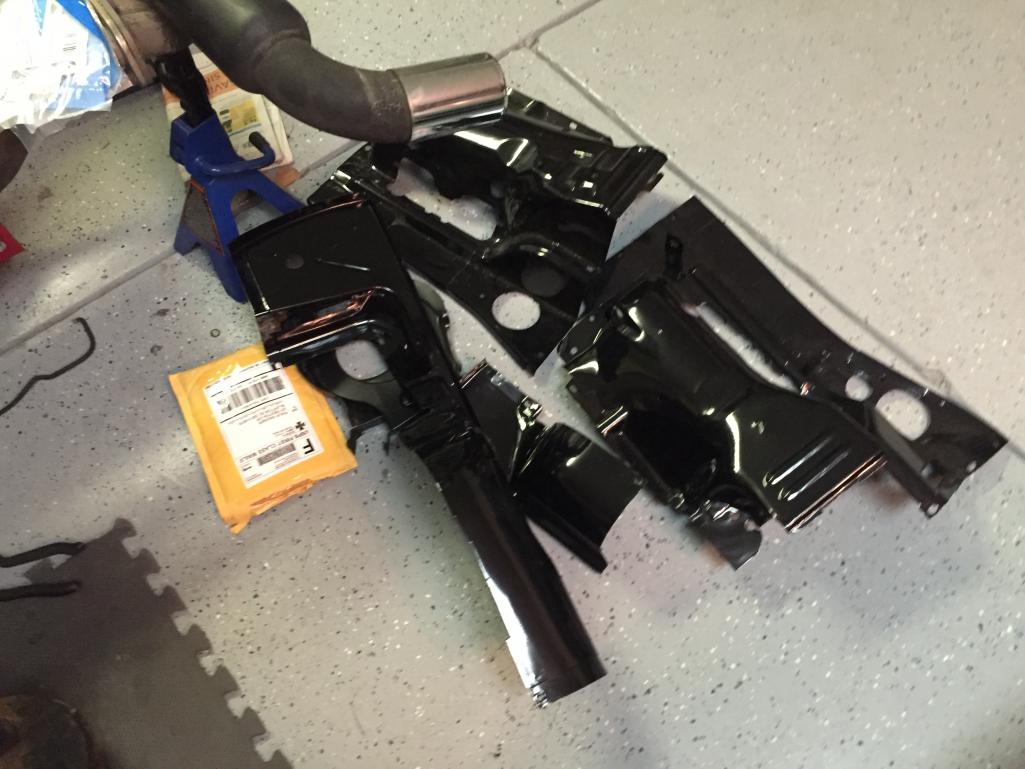
boy these fenders look great! almost done- Mike did a great job this was all hammer and dolly work, no filler- just good metal work and had been primed and sanded, has some high build primer on there, one more pass then the under side gets prepped for texture and paint- thats next week, then the base and clear on the outside in 2 !
Attached thumbnail(s)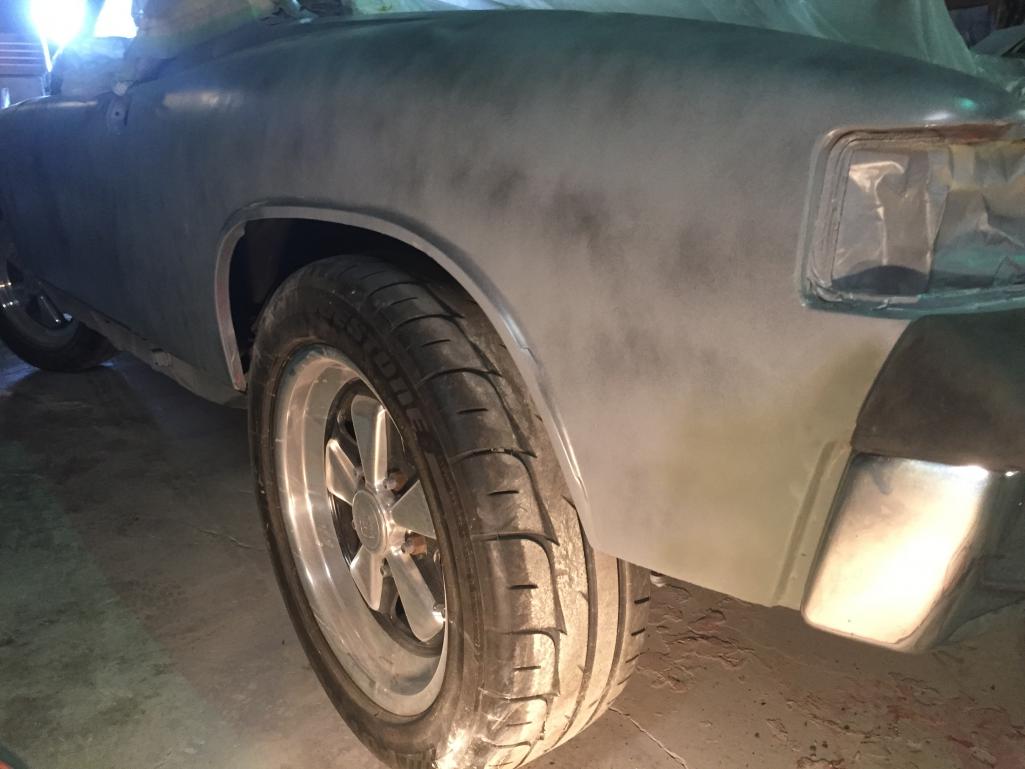
Posted by: Philip W. Mar 10 2018, 05:15 PM
other side- - thats it until i get the tin back in motor- atill tryimg to decide if i ahould put a head temp sender on and install a gauge
Attached thumbnail(s)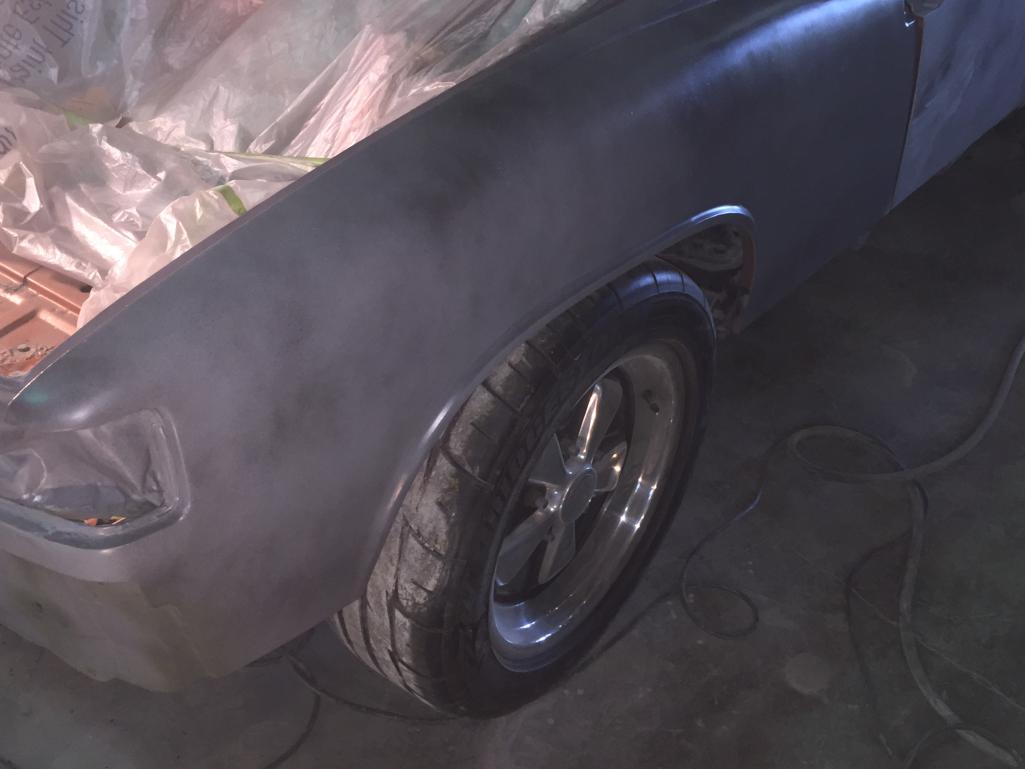
Posted by: pete000 Mar 10 2018, 05:45 PM
That color is going look fantastic with the chrome bumpers ! Keep the pictures rolling.
Posted by: Philip W. Mar 19 2018, 09:17 AM
got a bit more done with motor tin over the weekend, ready to do push rod tube seals and then get all the tin back on- but before I do that I might paint the transmission- have not decided on chrome shop for bumpers yet,
made short list of stuff I need and stuff I want getting ready for assembly
- new outer rockers, still need to get those ordred
- sent my throttle body for rehab ,
- trim bits, - more of a want than need- interior rear targa bar pad from 914rubber, side pieces, and all the aluminum trim parts for targa and window -
- will order SS fuel lines soon, , I pulled some pictures from an old thread fo the floor pan and jack point rust repair I will repost here soon, the work done by Tangerine was significant . Not the best pictures but good for documentation.
- every day I wake up thinking of things to source and do , its neverending!
Posted by: Mblizzard Mar 19 2018, 09:54 AM
got a bit more done with motor tin over the weekend, ready to do push rod tube seals and then get all the tin back on- but before I do that I might paint the transmission- have not decided on chrome shop for bumpers yet,
made short list of stuff I need and stuff I want getting ready for assembly
- new outer rockers, still need to get those ordred
- sent my throttle body for rehab ,
- trim bits, - more of a want than need- interior rear targa bar pad from 914rubber, side pieces, and all the aluminum trim parts for targa and window -
- will order SS fuel lines soon, , I pulled some pictures from an old thread fo the floor pan and jack point rust repair I will repost here soon, the work done by Tangerine was significant . Not the best pictures but good for documentation.
- every day I wake up thinking of things to source and do , its neverending!
What the issue on your TB? I have one with new sensor board already installed.
Posted by: Philip W. Mar 19 2018, 12:03 PM
got a bit more done with motor tin over the weekend, ready to do push rod tube seals and then get all the tin back on- but before I do that I might paint the transmission- have not decided on chrome shop for bumpers yet,
made short list of stuff I need and stuff I want getting ready for assembly
- new outer rockers, still need to get those ordred
- sent my throttle body for rehab ,
- trim bits, - more of a want than need- interior rear targa bar pad from 914rubber, side pieces, and all the aluminum trim parts for targa and window -
- will order SS fuel lines soon, , I pulled some pictures from an old thread fo the floor pan and jack point rust repair I will repost here soon, the work done by Tangerine was significant . Not the best pictures but good for documentation.
- every day I wake up thinking of things to source and do , its neverending!
What the issue on your TB? I have one with new sensor board already installed.
nothing horrible, its 45 years old, a bit sticky on full return, and at first opening, I did clean it but the butterfly valve gets wear as does the shaft, I just decided that it would be nice to have one that was like or better than new to put back on car - I was getting a weird occasional buck that I could never nail down for sure. might have to do with the hotspark module, or TPS but the TPS has zero wear was an NOS one I picked up and installed. It doesn't do it on full hard acceleration , like it used to when I had a worn bad TPS circuit board. either way I guess its another think to try and eliminate- it will be interesting to see if that occurs with the 123ignition distributor vs the stock one- I wont know for probably 6 weeks.
oh, also trying to decide if I should repaint the gas tank while its out- wish I had a powder coater in the area close I would love to have that done.
Hold on to that t.b. you never know if you will want to use that , - what you need is a car that you can drive and one that is a project..
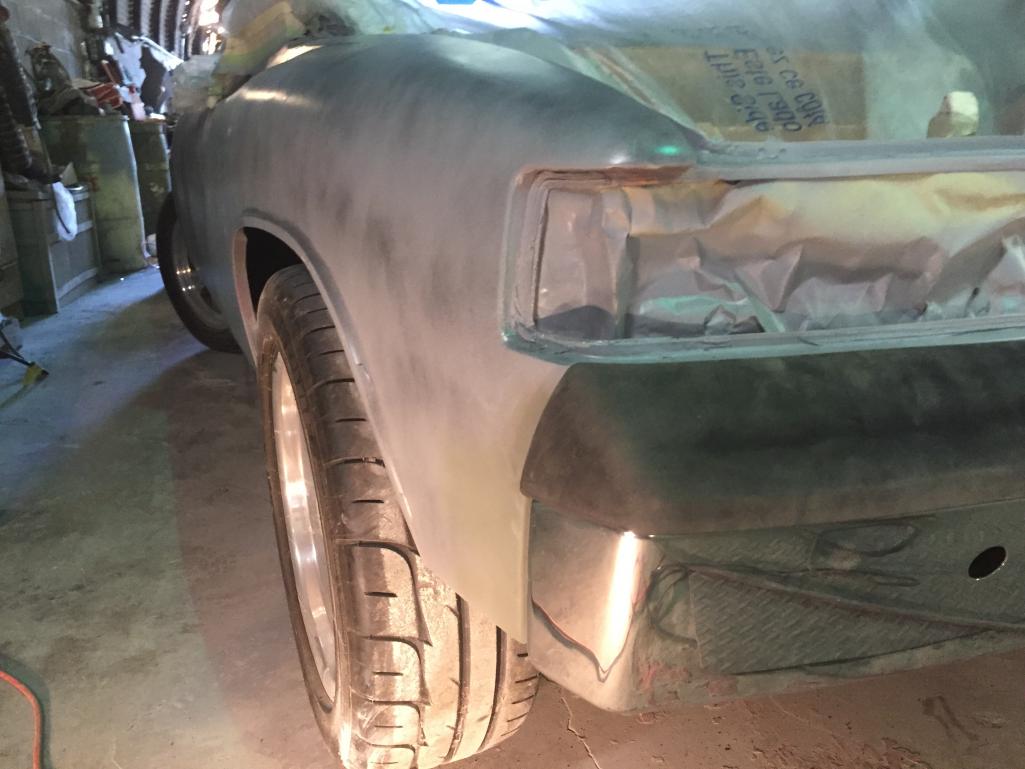
Posted by: Philip W. Mar 19 2018, 12:07 PM
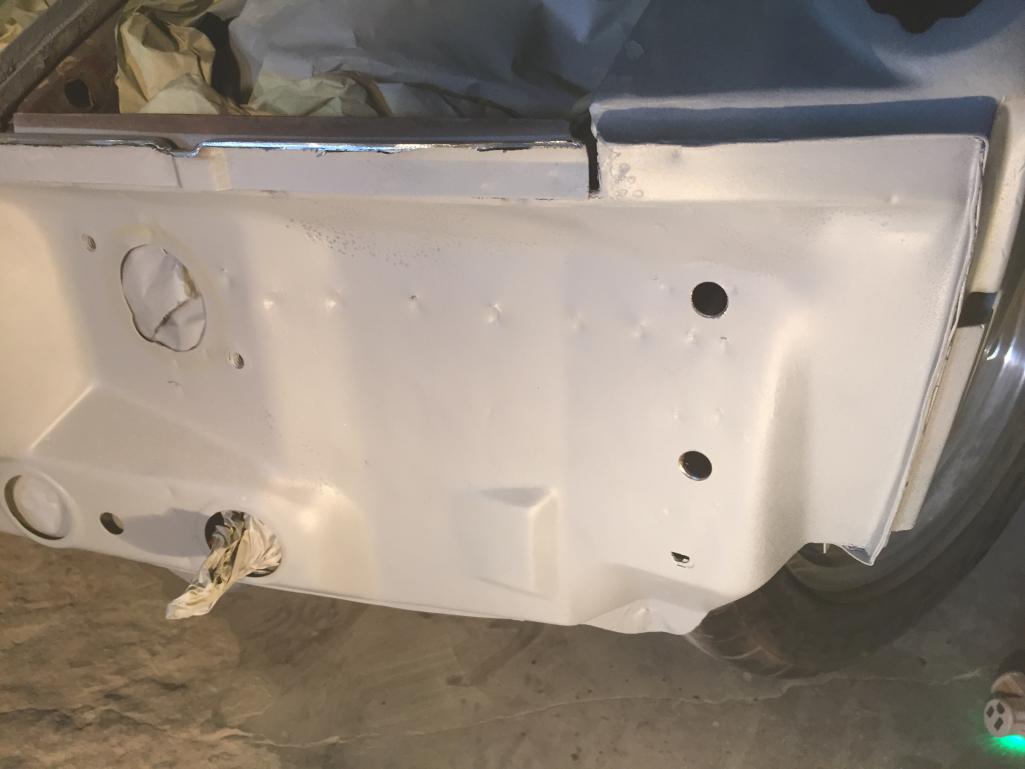
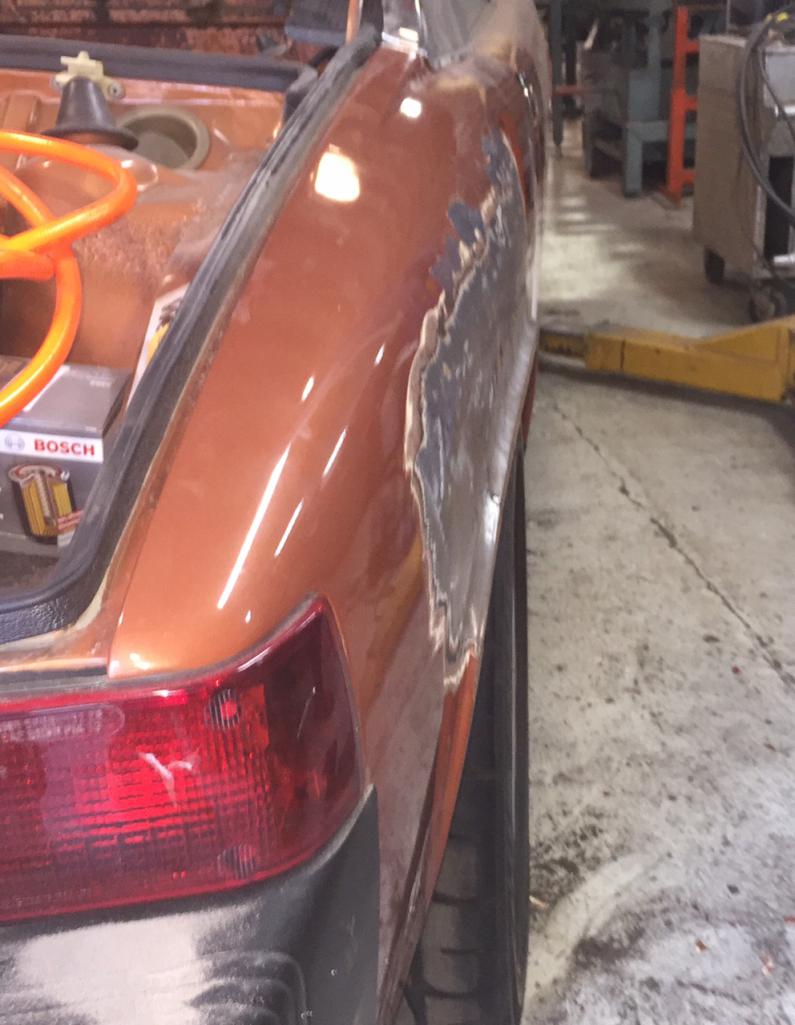
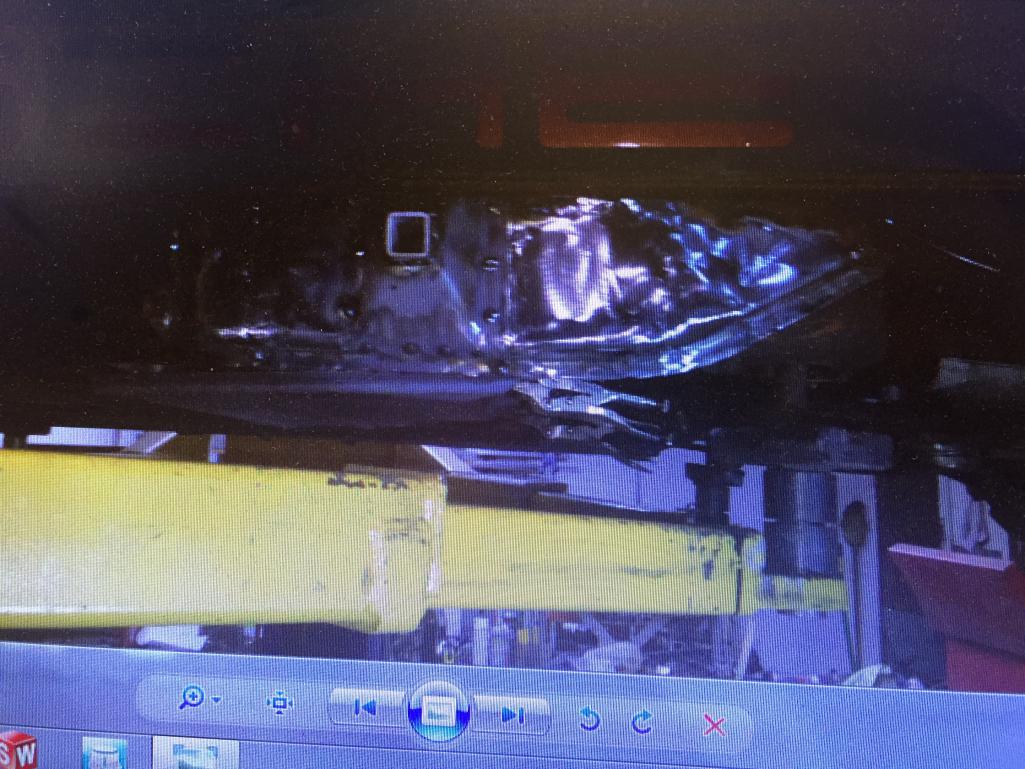
these 2 pictures you can see the bend or crease of the fender and paint blistering from the tire rubbing, this was before any repair began,
Attached image(s)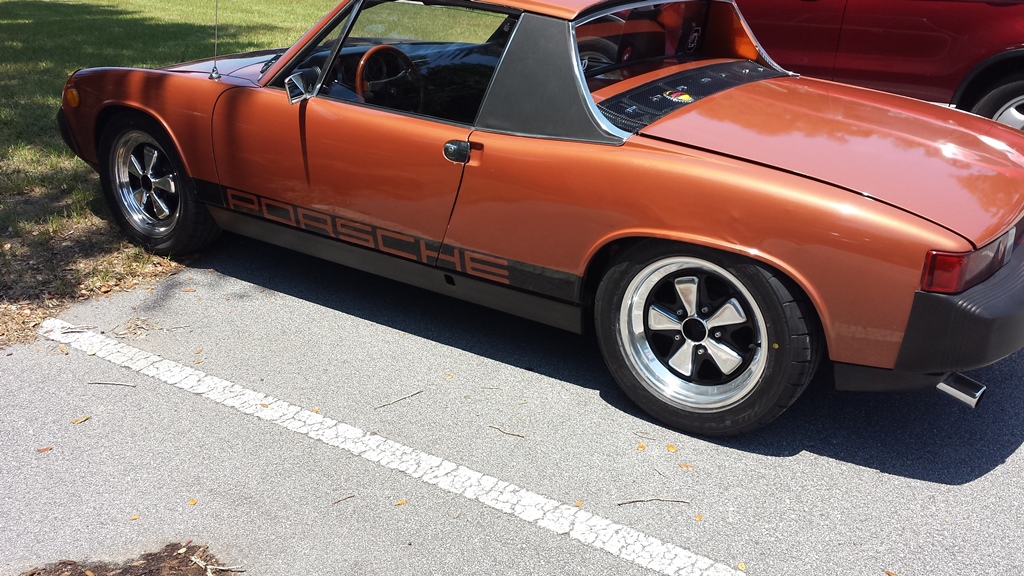
Posted by: Philip W. Mar 19 2018, 12:09 PM
rusty long on passenger side
and drivers side
Attached thumbnail(s)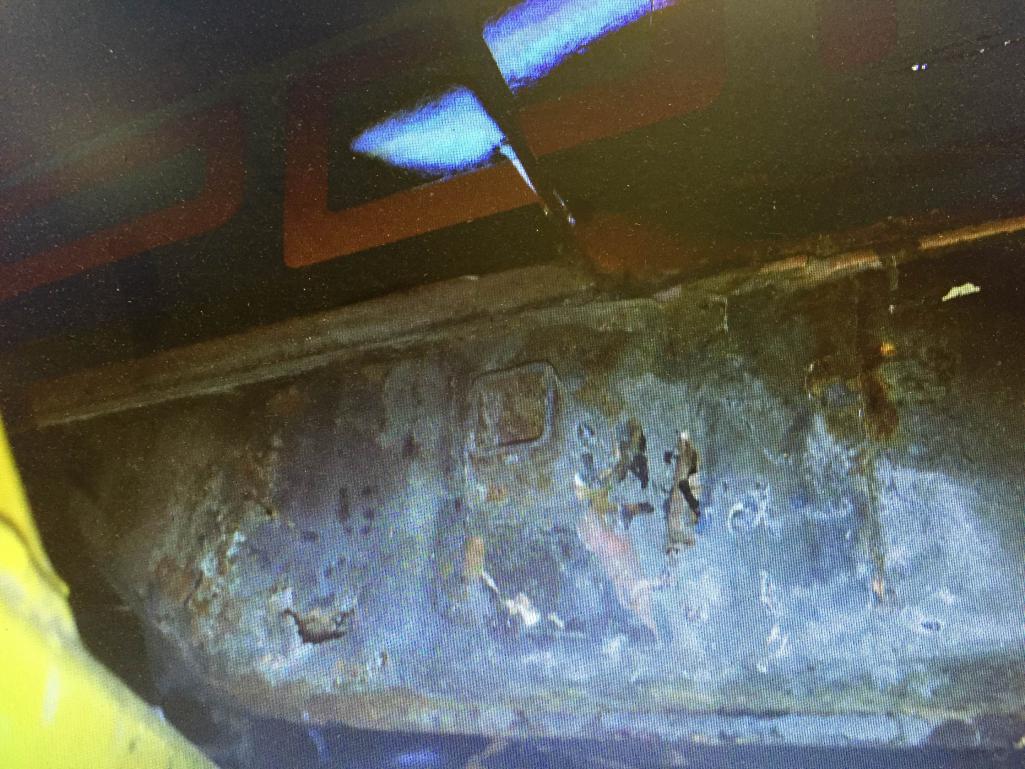
Posted by: Philip W. Mar 19 2018, 12:11 PM
removal process began - drivers side half floor pan out, jack points removed long etc.
Attached thumbnail(s)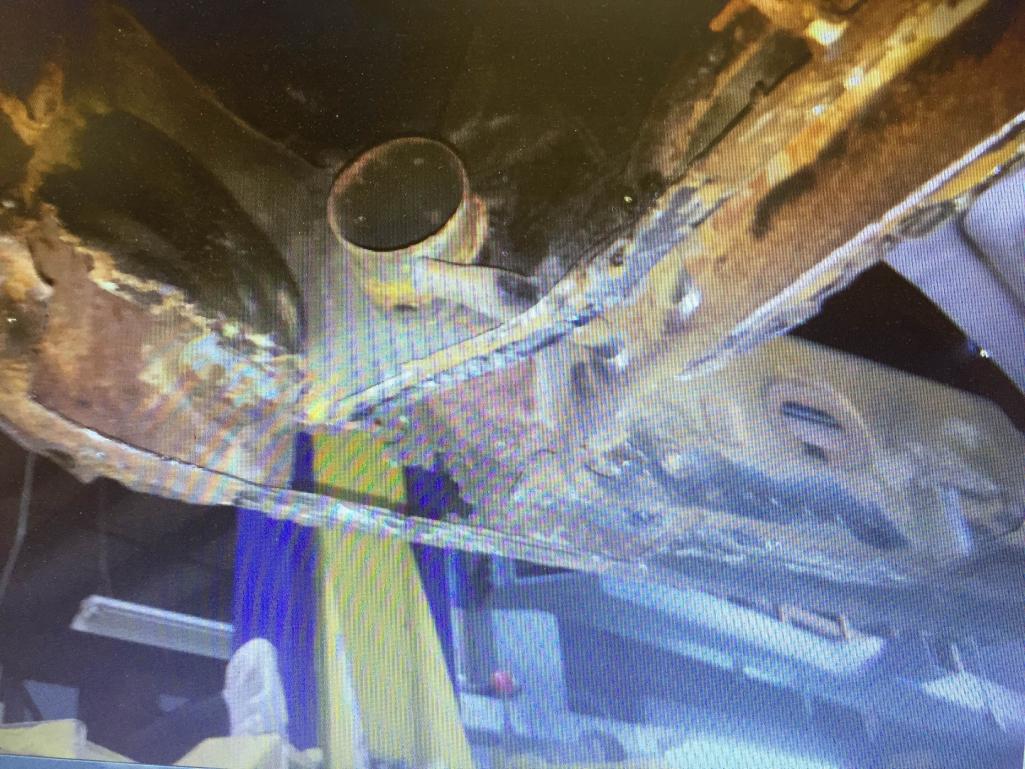
Posted by: Philip W. Mar 19 2018, 12:14 PM
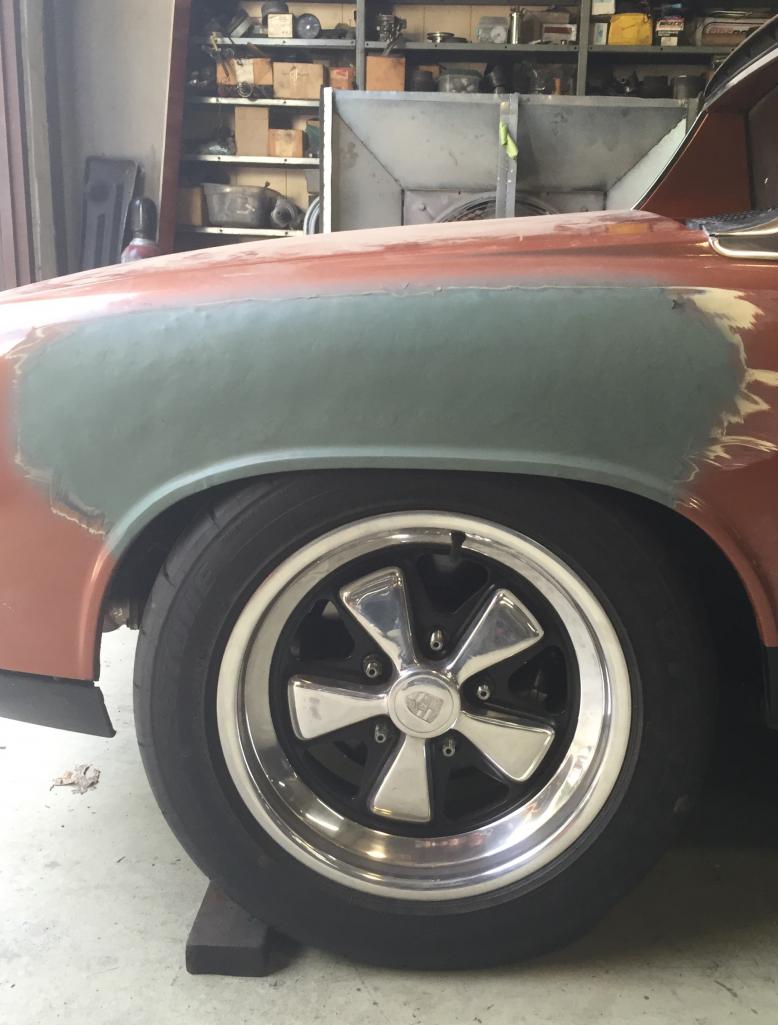
fender lip repair, then worked some by Ed to get more room for the 7" fuchs, primed,
Attached image(s)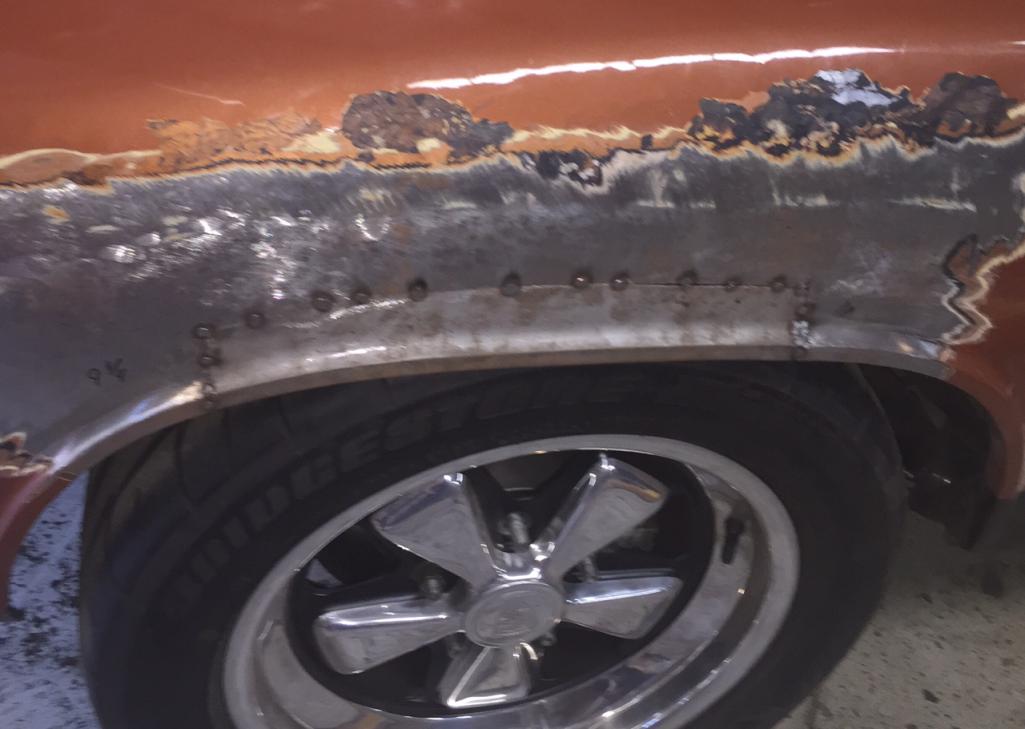
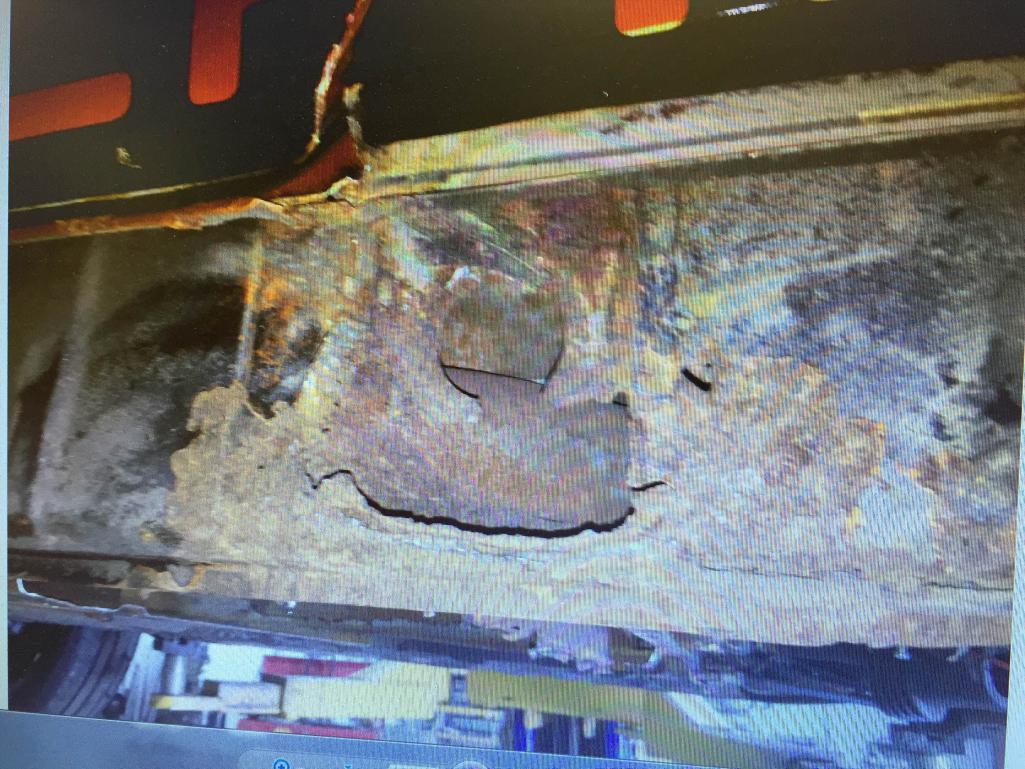
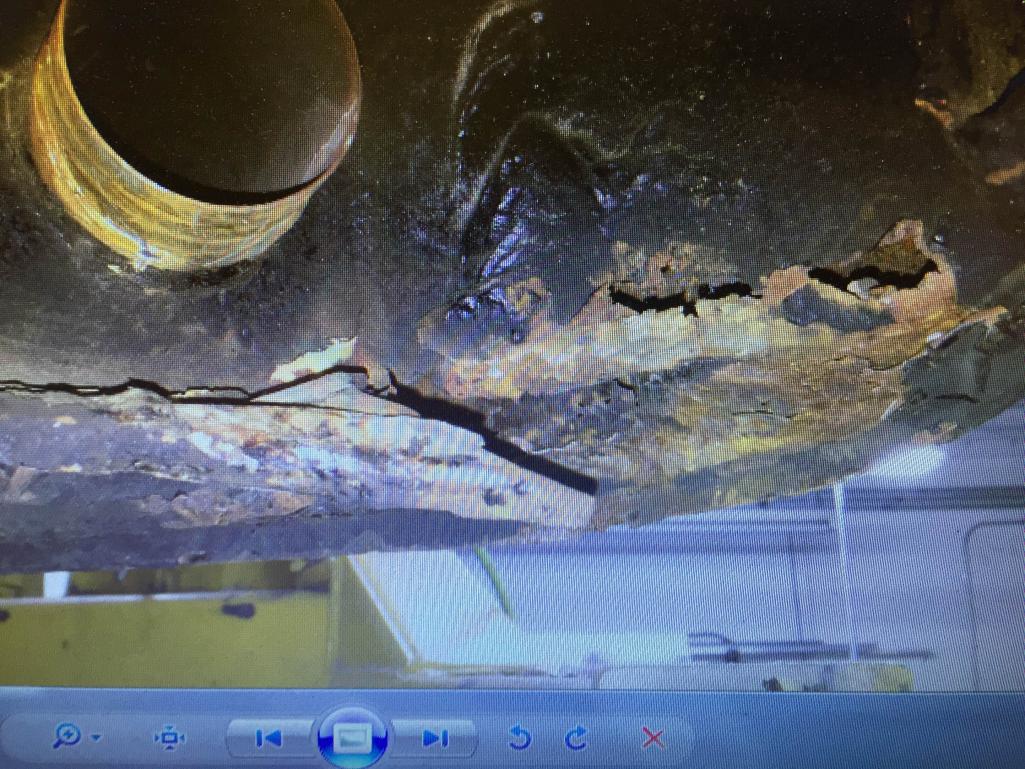
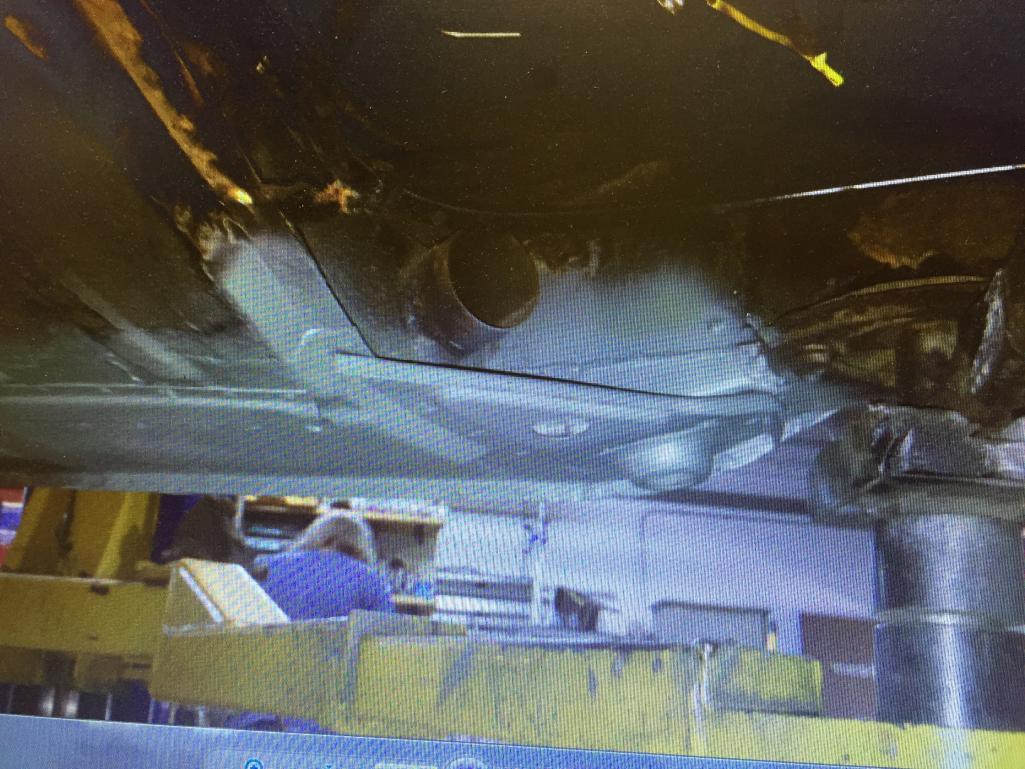
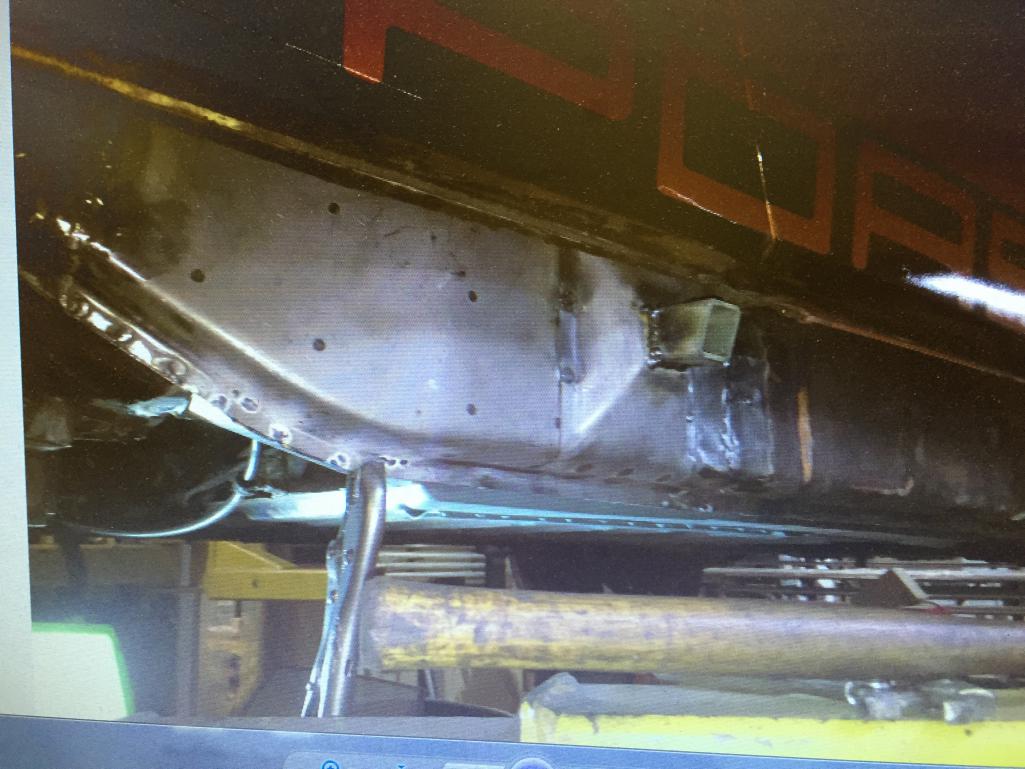
Posted by: Philip W. Mar 19 2018, 12:17 PM
a few more pictures of the long and jack points replacement - someday I will get Chris Foley to forward me better pictures if he has them, this is what I took with my phone camera off the computer screen.
Attached image(s)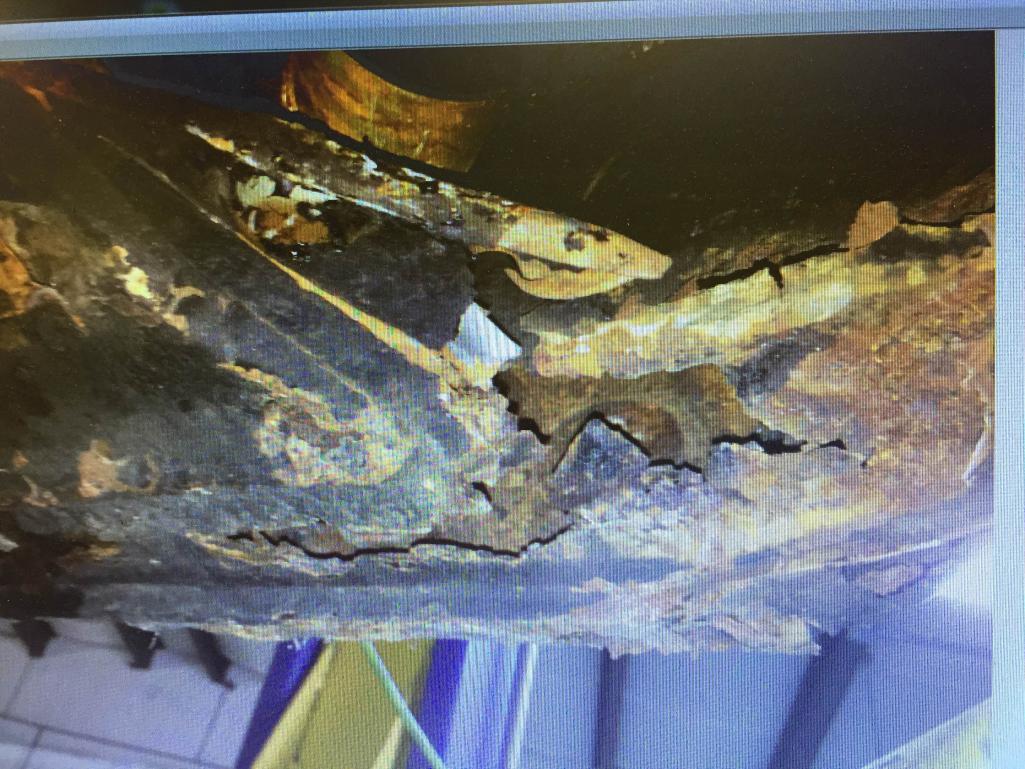

Posted by: Philip W. Mar 19 2018, 12:18 PM
will get more off the phone later, - back to work!
Posted by: Philip W. Mar 19 2018, 04:05 PM
out with old and in with new, new zinc plates parts from BD Stone and some new kind of push rod tube seals from Original Customs!
Attached thumbnail(s)
Posted by: Mblizzard Mar 19 2018, 05:14 PM
out with old and in with new, new zinc plates parts from BD Stone and some new kind of push rod tube seals from Original Customs!
Bruce does great work!
Posted by: 914 7T3 Mar 19 2018, 07:40 PM
- every day I wake up thinking of things to source and do , its neverending!
Tell me about it, you should see my credit card bills!

Posted by: Philip W. Apr 3 2018, 10:08 PM
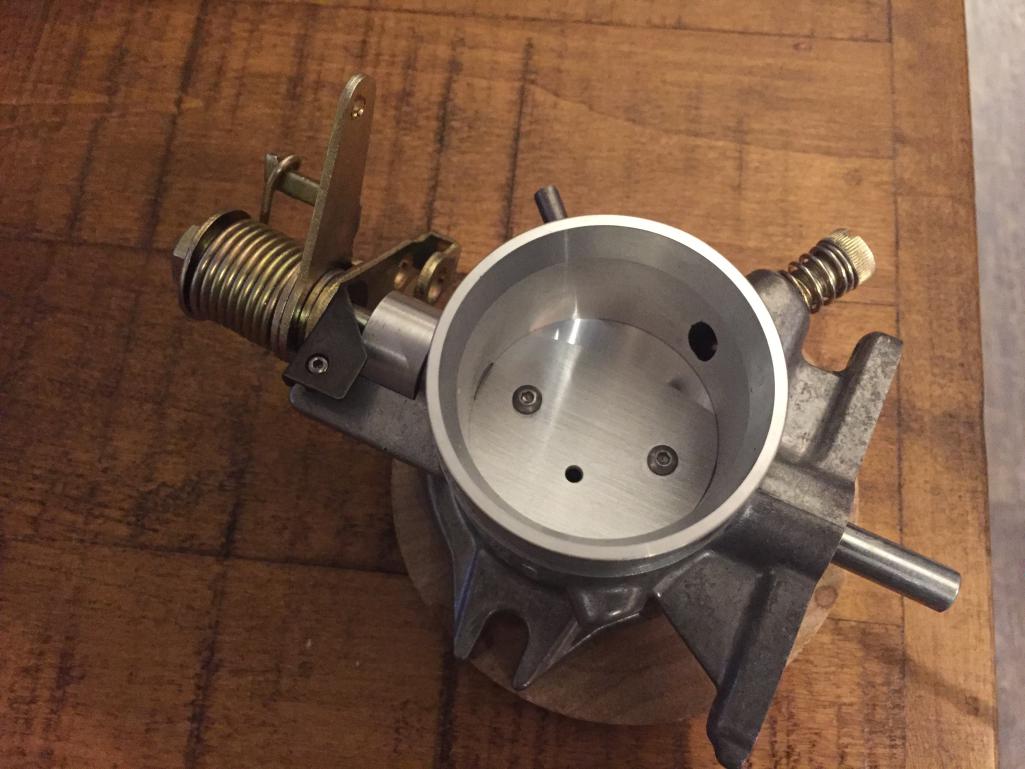
i will bet this throttle body didnt look this good brand new!
just got it back from Phil in NM. so what do you think? I also have a bag of new vac hoses, new TB seal, intake runner seals etc.
i am just buying time waiting foe the body and paint to be done. not updates in that front at this time.
Attached thumbnail(s)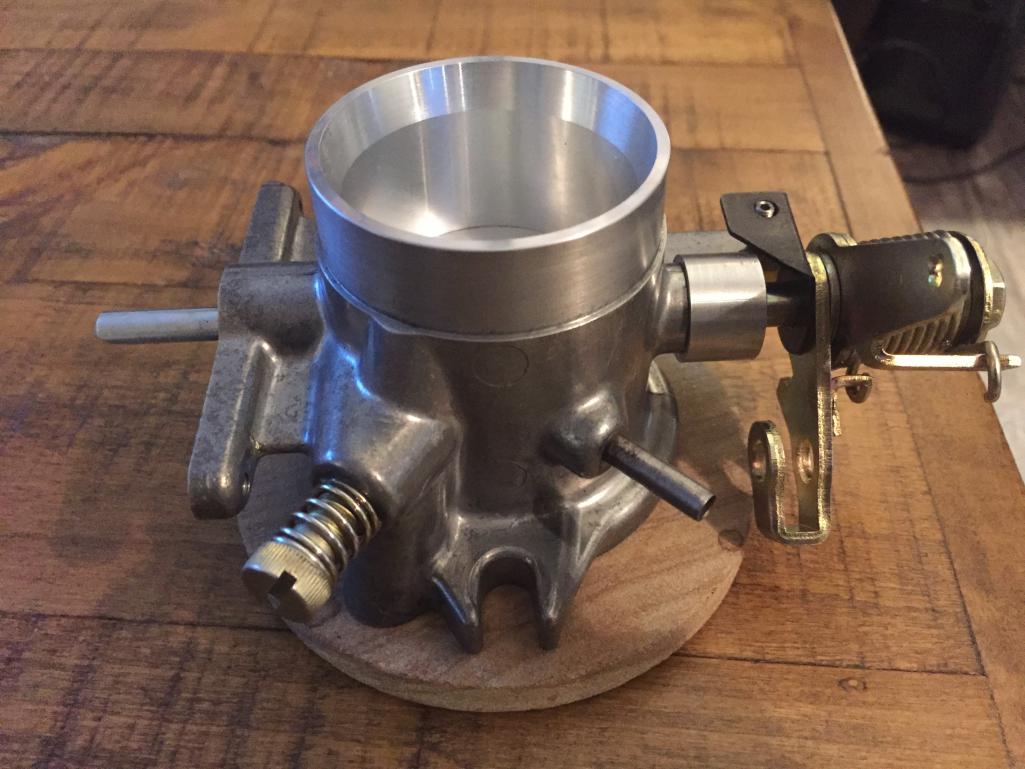
Posted by: Philip W. Apr 4 2018, 08:29 AM
just talked to mike, touch up and repairs done welded geound etc, car had the last block and sand, final prep for paint complete this week, bottom was stripped and reprimed, ready for texture, paint will be shot next weekend!!!!
Posted by: Philip W. Jun 25 2018, 10:14 AM
![]()
just talked to mike, touch up and repairs done welded geound etc, car had the last block and sand, final prep for paint complete this week, bottom was stripped and reprimed, ready for texture, paint will be shot next weekend!!!!
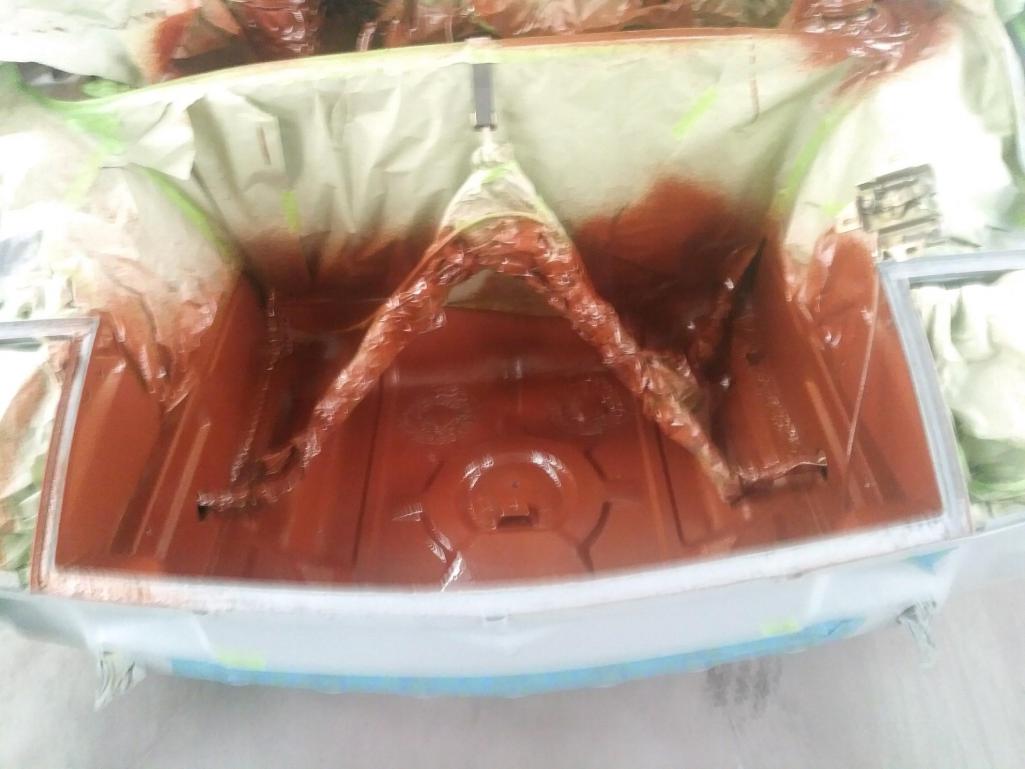
finally an update worth updating! this was delayed for several reasons, some additional repair, and then weather(humidity etc) and just schedules, but last week the floorpan and bottom trunk were painted, and then the rear trunk and the engine compartment , followed by the firewall inside and out!. The rest of the car has now been taped off and all the outer panels doors etc etc are in process of paint - 3 coats base and 3 clear, I pick up the car on Saturday !! I will post some pictures soon and am finishing up the pushrod tube seals and all the tin replacement on the motor this week so it can go back in the car next week. so many things to do...... I have been gathering parts and pieces over the past 4-5 months as time and money would allow. I am sure I have missed some stuff. I didn't get the chrome bumpers over to get chromed yet and now I am afraid I would not get them back in time to be mounted before the trip to Okteenerfest in Sept. well , that and close to a $1000 or more to get them done- I have a very nice rear early bumper and a nice early front,(also a rough later front with bumperguards). Will see how it all goes but I would like to get new front Sekurit glass and might order this from dealer, not sure how else to do it hear. any advice would be nice.
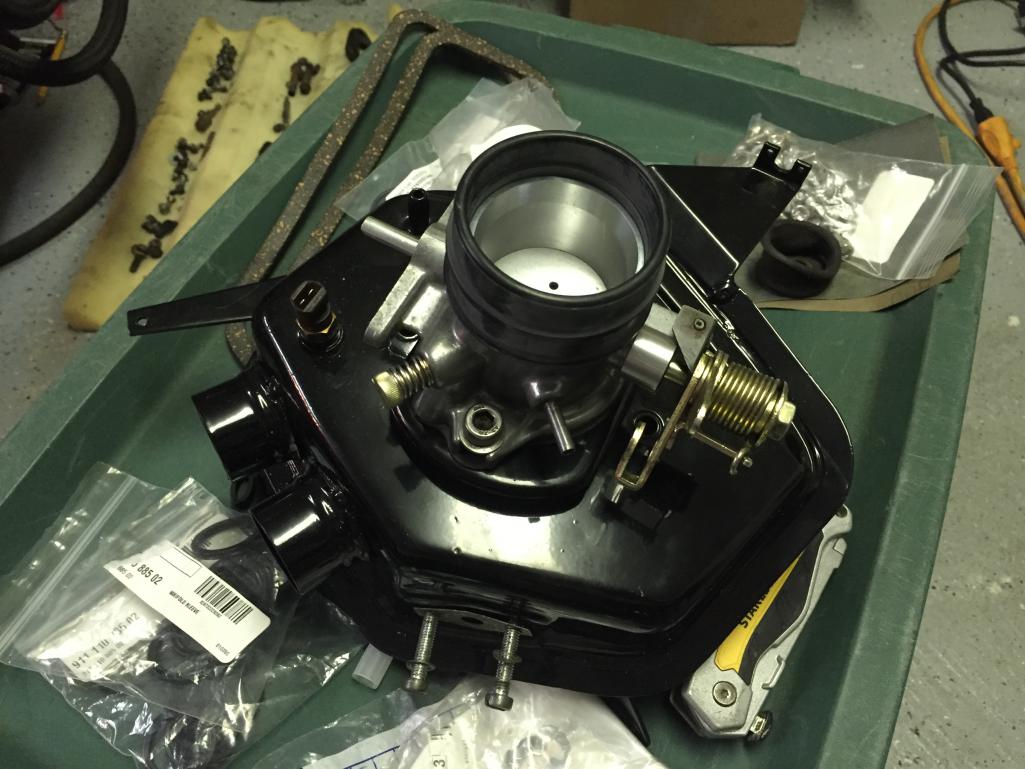
Painted the tank over the weekend, few other bits like fitting the air deflector cooling flaps on the fan housing , and mounted the rebuilt throttle body on the newly repainted plenum. small steps but progress none the less.
just talked to mike, touch up and repairs done welded geound etc, car had the last block and sand, final prep for paint complete this week, bottom was stripped and reprimed, ready for texture, paint will be shot next weekend!!!!
finally an update worth updating! this was delayed for several reasons, some additional repair, and then weather(humidity etc) and just schedules, but last week the floorpan and bottom trunk were painted, and then the rear trunk and the engine compartment , followed by the firewall inside and out!. The rest of the car has now been taped off and all the outer panels doors etc etc are in process of paint - 3 coats base and 3 clear, I pick up the car on Saturday !! I will post some pictures soon and am finishing up the pushrod tube seals and all the tin replacement on the motor this week so it can go back in the car next week. so many things to do...... I have been gathering parts and pieces over the past 4-5 months as time and money would allow. I am sure I have missed some stuff. I didn't get the chrome bumpers over to get chromed yet and now I am afraid I would not get them back in time to be mounted before the trip to Okteenerfest in Sept. well , that and close to a $1000 or more to get them done- I have a very nice rear early bumper and a nice early front,(also a rough later front with bumperguards). Will see how it all goes but I would like to get new front Sekurit glass and might order this from dealer, not sure how else to do it hear. any advice would be nice.
Painted the tank over the weekend, few other bits like fitting the air deflector cooling flaps on the fan housing , and mounted the rebuilt throttle body on the newly repainted plenum. small steps but progress none the less.
Posted by: Philip W. Jun 25 2018, 10:18 AM
motor refresh assembly progress
Attached thumbnail(s)
Posted by: Mblizzard Jun 25 2018, 10:49 AM
It is amazing how when you start this process it gets to the point of it seems like everything on the car needs attention!
Glad all I have left is a dyno tune, alignment, and corner balancing. Or at least that is what I keep telling myself.
Posted by: Philip W. Jun 25 2018, 11:56 AM
this was last week right before final prep for paint
Attached thumbnail(s)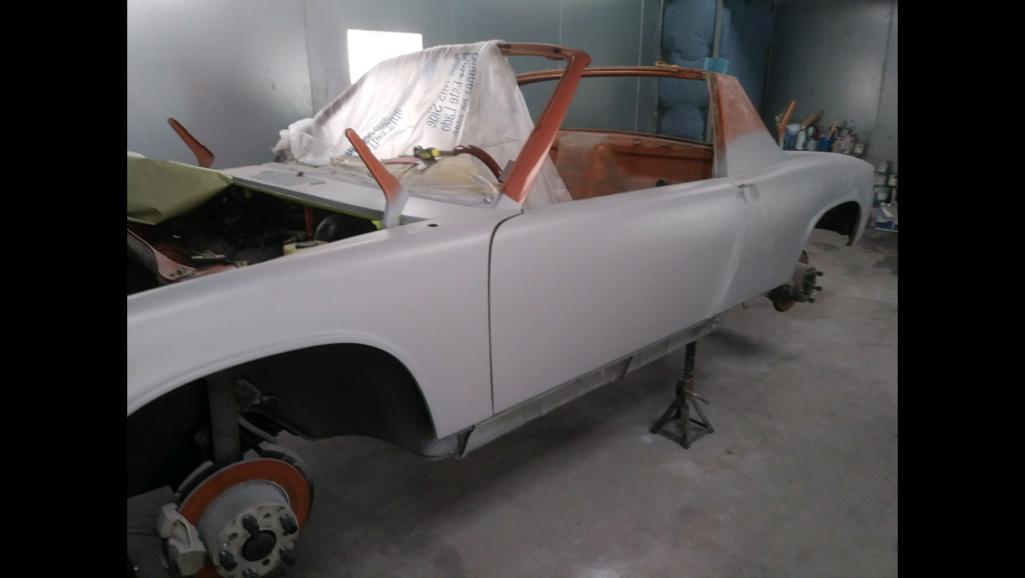
Posted by: Mblizzard Jun 25 2018, 12:31 PM
this was last week right before final prep for paint
Lucy! YOU got some assembling to do before Okteenerfest!
Posted by: Philip W. Jun 25 2018, 12:48 PM
this was last week right before final prep for paint
Lucy! YOU got some assembling to do before Okteenerfest!
YUP!. and I have not done the rebuild on the fresh air box yet- I was going to order a new motor for the fan and put in new controls as well- And I have the
LED gauge set that I won 2 years ago in the raffle that have to go in(want to- don't really have to but I would like to get this done sooner than later, and the 123ignition distributor, and all new targa vinyl , and new carpet and floor vinyl, and and and!!
I do have help, my friend Jim that came with to Banner Elk Okteenerfest 2 years ago(year I got food poisoning from the pink pig bbq place
 ) will be helping me out - he helped me pull the motor, and is way over qualified for this work, having a back ground in aircraft mechanics and electronics(avionics?) anyway way better to have help.
 I have to say later I will put together a list of all the stuff I have amassed over past year or 2. but as a quick side note I have sourced more parts from
Bruce Stone, 914Rubber, and AA than I can count. But recently also a few other odds and ends from 914ltd(Brad M.) and a bunch of other members. Bob Bishoff when out of his way to get me a rust free driver door since mine was not really savagable. Thanks Bob!! I mean out of his way - he drove the door and a set of outer rockers and a front valance from his place in Athens GA to my guy's shop just outside of Columbia SC!!!! talk about helping out a brotha!! saved me 10 hours of road time if I had made road trip to go get parts and take them over to the shop and then back home!

Posted by: billh1963 Jun 25 2018, 12:48 PM
Phil...Let me know when you go over there and I'll meet you.
Posted by: Philip W. Jun 25 2018, 12:49 PM
Phil...Let me know when you go over there and I'll meet you.
Will do- if it works for Mike I am planning on leaving here in time to get to the shop at about 9-9:30 Saturday morning.
Posted by: Mblizzard Jun 25 2018, 01:07 PM
this was last week right before final prep for paint
Lucy! YOU got some assembling to do before Okteenerfest!
YUP!. and I have not done the rebuild on the fresh air box yet- I was going to order a new motor for the fan and put in new controls as well- And I have the
LED gauge set that I won 2 years ago in the raffle that have to go in(want to- don't really have to but I would like to get this done sooner than later, and the 123ignition distributor, and all new targa vinyl , and new carpet and floor vinyl, and and and!!
I do have help, my friend Jim that came with to Banner Elk Okteenerfest 2 years ago(year I got food poisoning from the pink pig bbq place
) will be helping me out - he helped me pull the motor, and is way over qualified for this work, having a back ground in aircraft mechanics and electronics(avionics?) anyway way better to have help. I have to say later I will put together a list of all the stuff I have amassed over past year or 2. but as a quick side note I have sourced more parts from
Bruce Stone, 914Rubber, and AA than I can count. But recently also a few other odds and ends from 914ltd(Brad M.) and a bunch of other members. Bob Bishoff when out of his way to get me a rust free driver door since mine was not really savagable. Thanks Bob!! I mean out of his way - he drove the door and a set of outer rockers and a front valance from his place in Athens GA to my guy's shop just outside of Columbia SC!!!! talk about helping out a brotha!! saved me 10 hours of road time if I had made road trip to go get parts and take them over to the shop and then back home!
Awesome. If it starts looking grim as it gets close put out a call. Not super close but could make the trip over and do a massive build weekend!
Posted by: billh1963 Jun 25 2018, 01:28 PM
Phil...Let me know when you go over there and I'll meet you.
Will do- if it works for Mike I am planning on leaving here in time to get to the shop at about 9-9:30 Saturday morning.
Cool. Maybe I'll drive the new whip over there

Posted by: Philip W. Jun 28 2018, 08:25 AM
old dirty oily undercylinder air deflector
Attached thumbnail(s)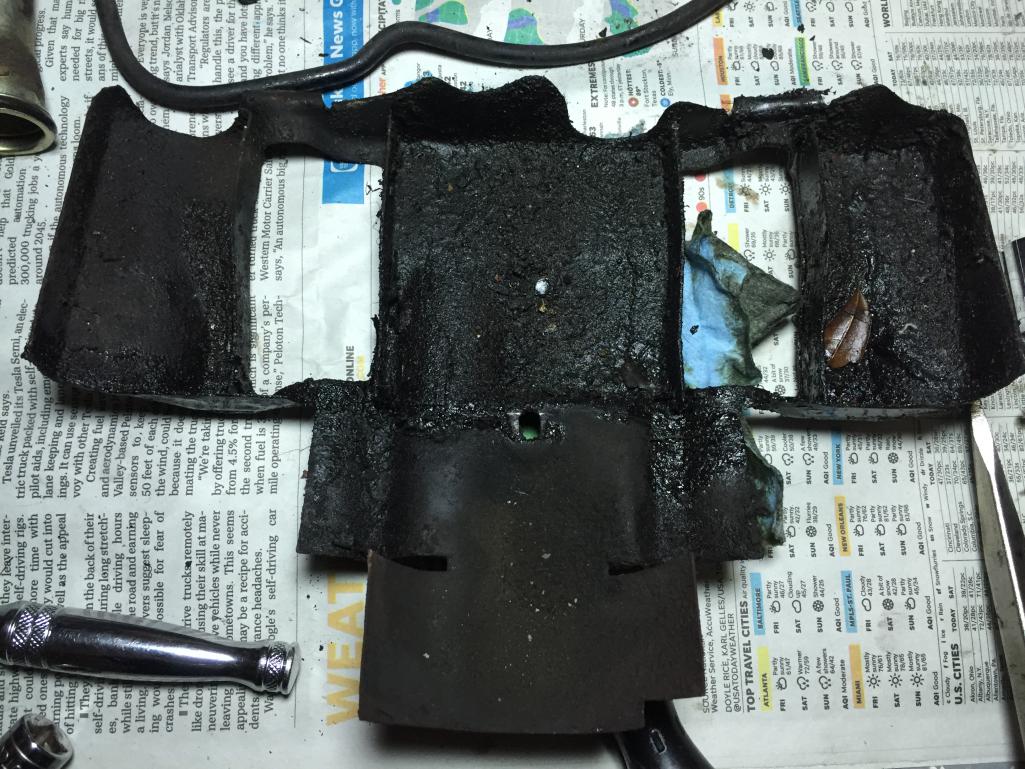
Posted by: Philip W. Jun 28 2018, 08:27 AM
not sure how bad the cylinder head leak is i think this was over a very long time.
new tubes ans seals in place
Attached thumbnail(s)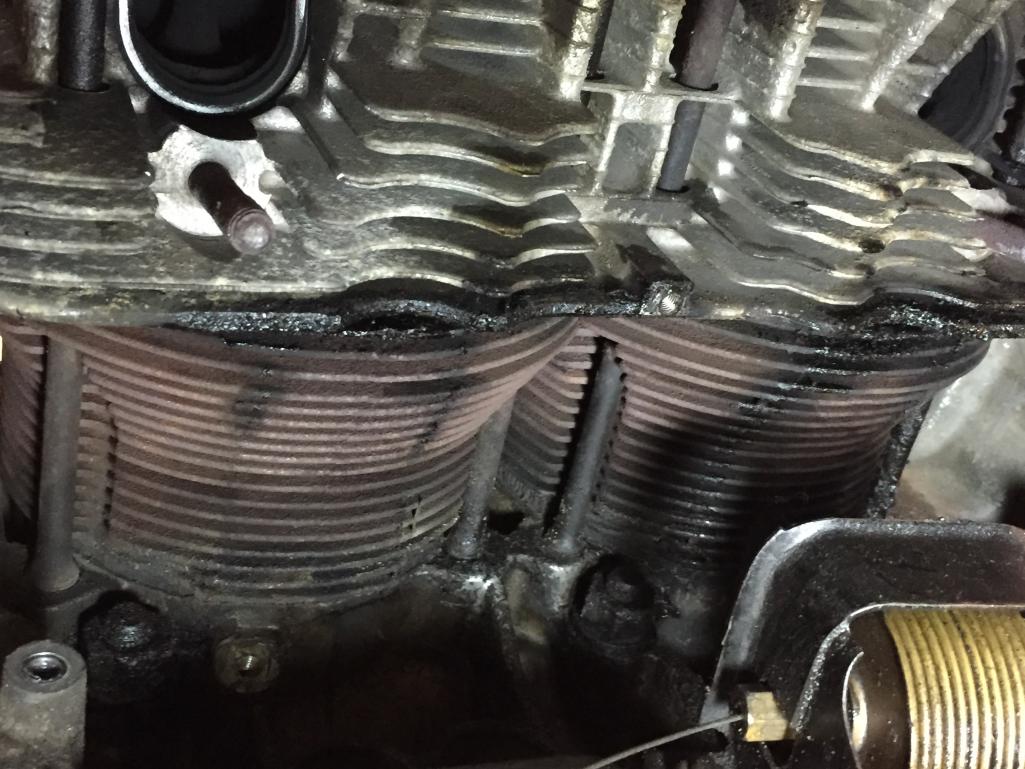
Posted by: Philip W. Jun 28 2018, 08:30 AM
new seals from Mcmark and will see how they work.
Attached thumbnail(s)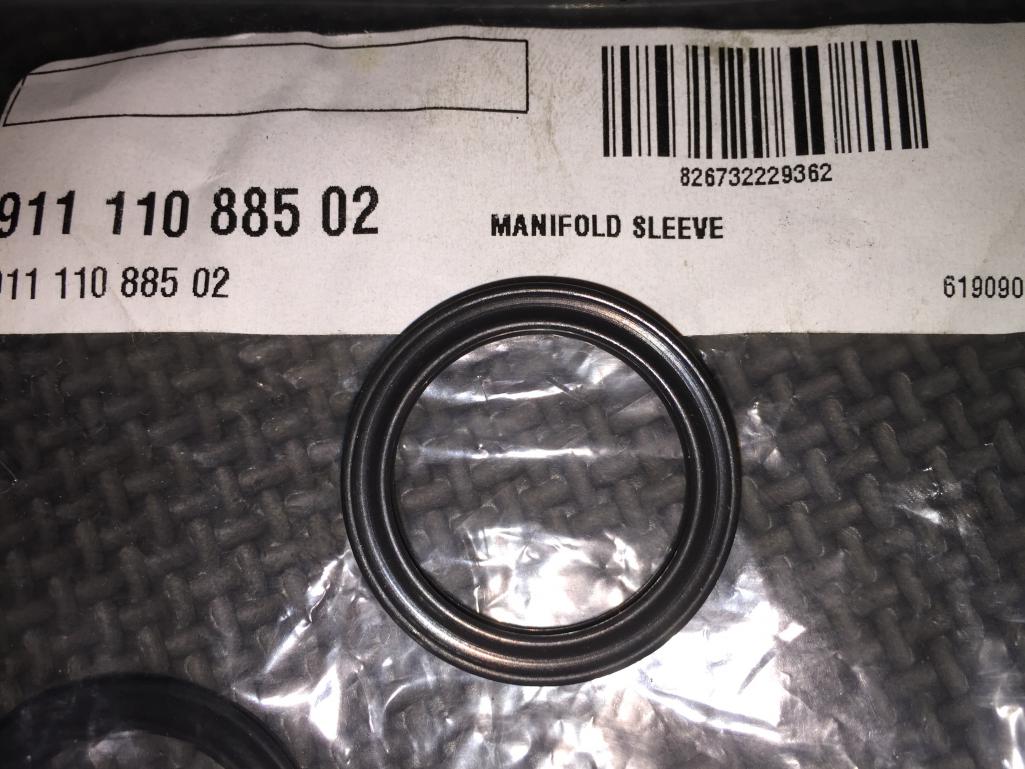
Posted by: Philip W. Jun 28 2018, 08:32 AM
new powdercoated valve covers from Bruce Stone
Attached thumbnail(s)
Posted by: Philip W. Jun 28 2018, 08:43 AM
more stuff from Bruce--and out with old and in with new stuff that will not be seen by the average person, unless you are crawling under my car.
Attached thumbnail(s)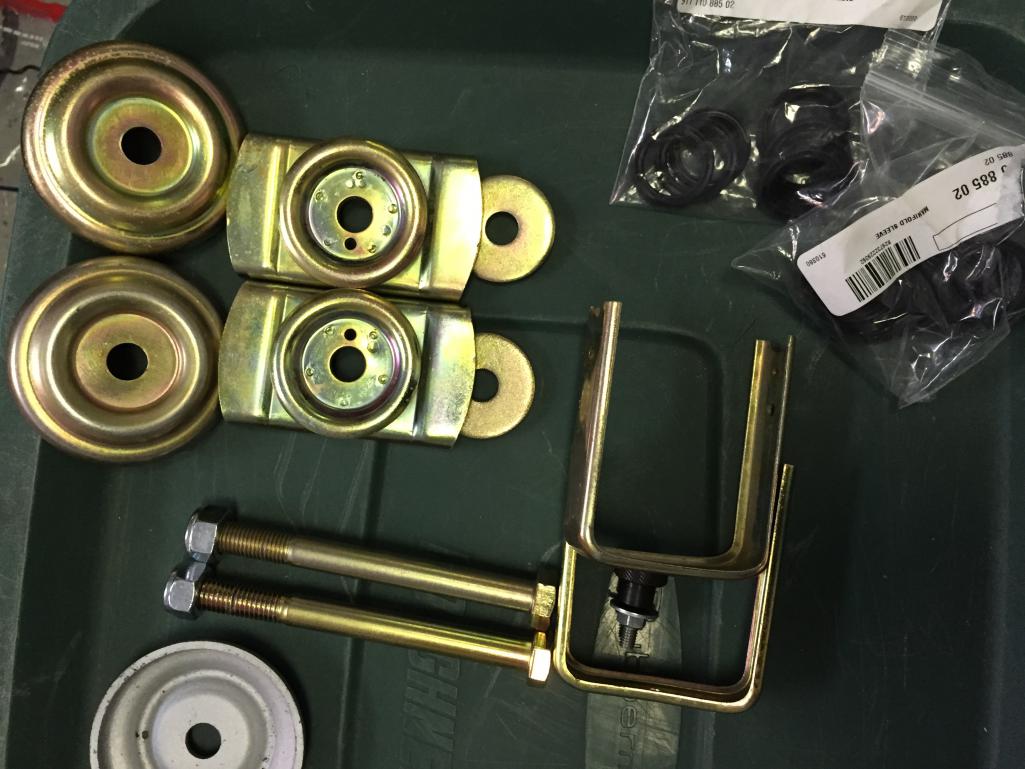
Posted by: Mblizzard Jun 28 2018, 09:16 AM
Your know Bruce is a great date provider! My cheap self would like to say he is not cheap but worth it. But he is very reasonable and very much worth it!
Posted by: Philip W. Jun 28 2018, 11:35 AM
Your know Bruce is a great date provider! My cheap self would like to say he is not cheap but worth it. But he is very reasonable and very much worth it!
yes worth it for sure! BTW 2 days to pick up the car! I have to do the other side tonight and put all the sheet metal back on, intakes , plenum, alternator etc and exhaust back on so that I can put the motor back in asap- but really I just got the SS fuel lines and those have to go in first, then motor , and the fresh air box has to get sorted before I put the tank in. good think I have all of next week off!! going to get most of it done if I can next week. I would like to get the 123 distributor installed and tested out well before we head out in September. - All new injectors, seals etc I am hoping will improve it, the weird occasional bucking I was getting had to either be distributor related or injection related - will find out.
Mike you ran one of these can you tell me what plug wires you used with the 123?
Phil
Posted by: Philip W. Jun 29 2018, 02:55 PM
might not see this from below when in the car but still wanted to clean and polish the top side of these
Attached thumbnail(s)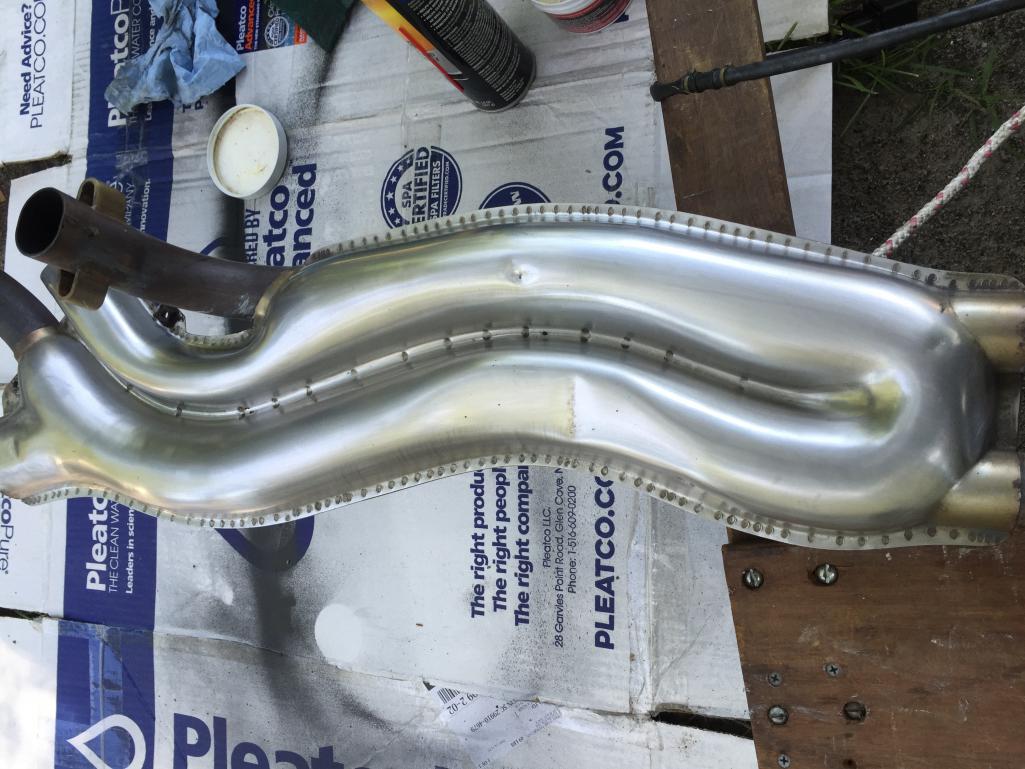
Posted by: Philip W. Jun 29 2018, 02:56 PM
before-- wasnt too bad for 5 years of use
Attached thumbnail(s)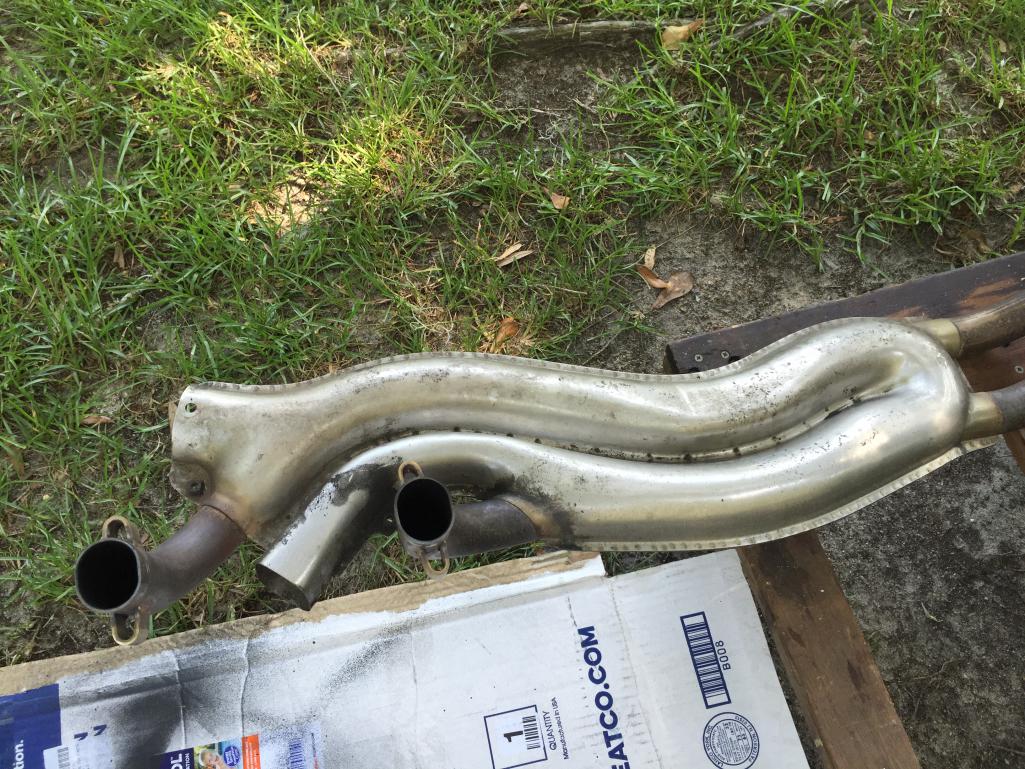
Posted by: Philip W. Jun 29 2018, 03:31 PM
and bottoms just as nice- SS is pretty easy to polish up- green scotch brite pad and some h2o then a bit of Mothers Mag and aluminum polish
Attached thumbnail(s)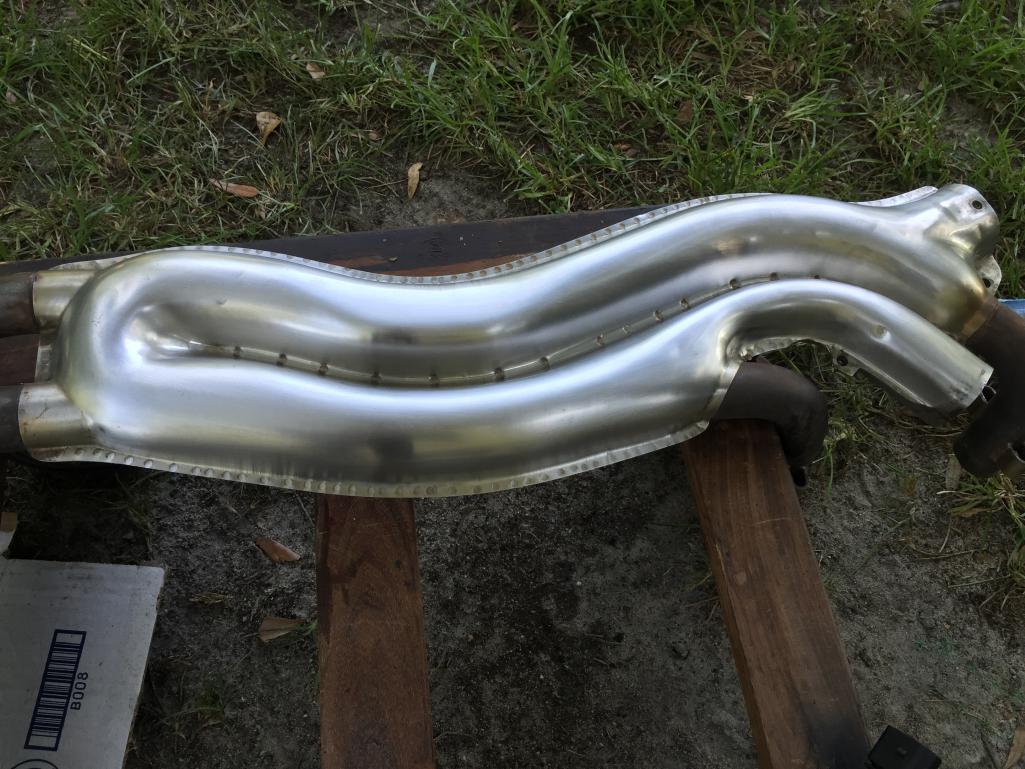
Posted by: Philip W. Jun 29 2018, 06:19 PM
VHT silver metallic paint on muffler- done, now off to put the tin back on the motor-
Attached thumbnail(s)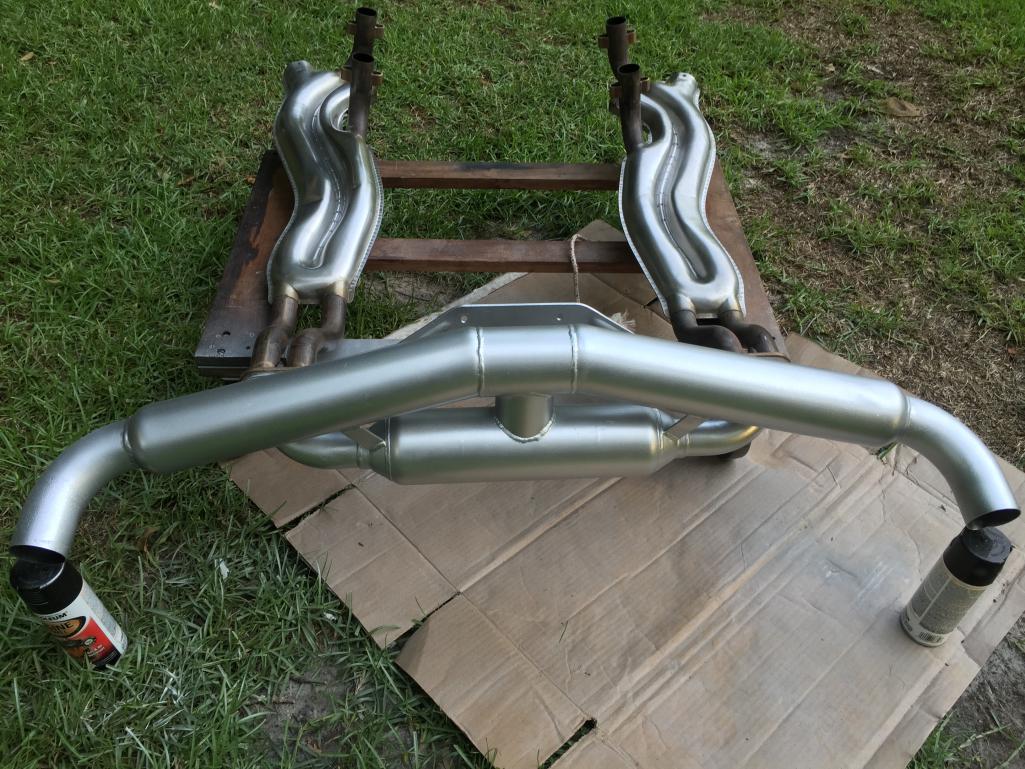
Posted by: Travis Neff Jun 30 2018, 03:19 PM
pics, pics, pics....
Posted by: Philip W. Jun 30 2018, 03:21 PM
pics, pics, pics....i know! Mike is not a big picture taker and i am picking it up monday so a few more days,
Posted by: Philip W. Jul 2 2018, 10:09 AM
motor tin going on---
Attached thumbnail(s)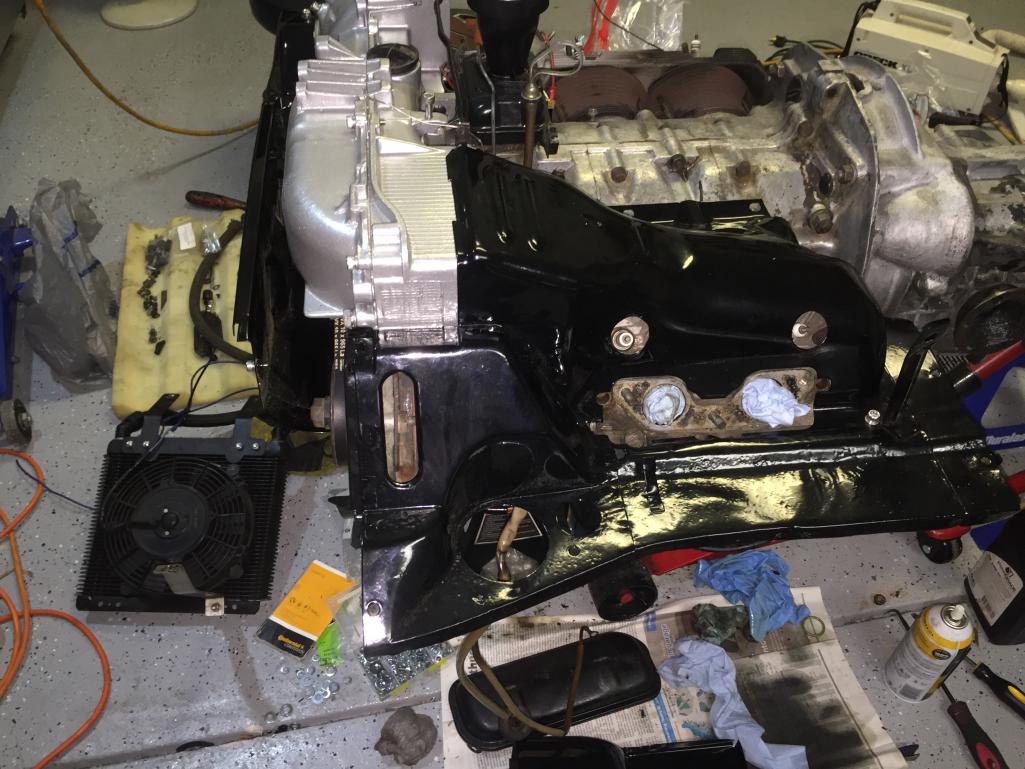
Posted by: Philip W. Jul 2 2018, 10:16 AM
another
Attached thumbnail(s)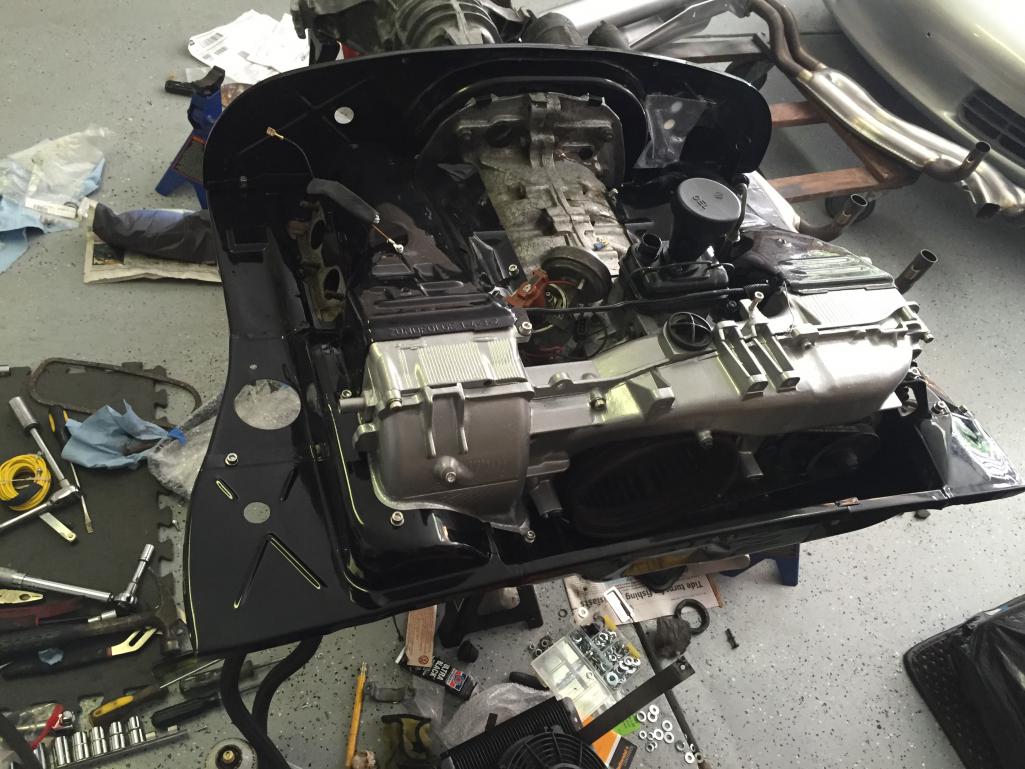
Posted by: Philip W. Jul 2 2018, 10:21 AM
so many months since i took it off and putting it all back on later and not fresh in my memory the order it came off- i had to take one side off 2x! i didnt put the alternator back in and forgot the plastic trim ring- i think i finally have it. back sides and front and all new tin and Hex top screws for all of it!
Attached thumbnail(s)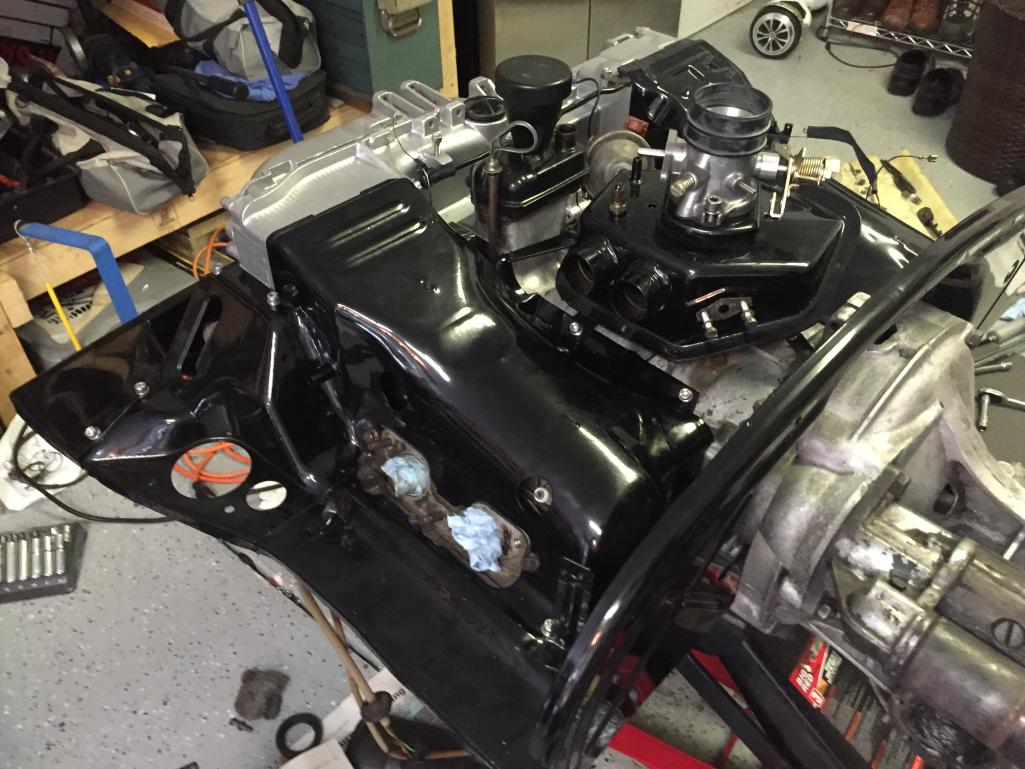
Posted by: Philip W. Jul 2 2018, 10:23 AM
and the plenum also is newly pwoder coated , and the intakes all were done by Mr 914 parts and powdercoater Bruce Stone!
Attached thumbnail(s)
Posted by: Philip W. Jul 2 2018, 10:29 AM
front piece was a bit tricky, and the lower small side pieces that cover side if cylinder heads, it all goes back on a certain way or it just wont fit correctly - while i was at it- already dis the front crank seal and now a new alternator belt, and today i put in the cylinder head temp gauge wire, that ill be added to my center console- ordered a dakota digital- Mike you can tell them i got one due to their sponsorship of 914 Okteenerfest-
Attached thumbnail(s)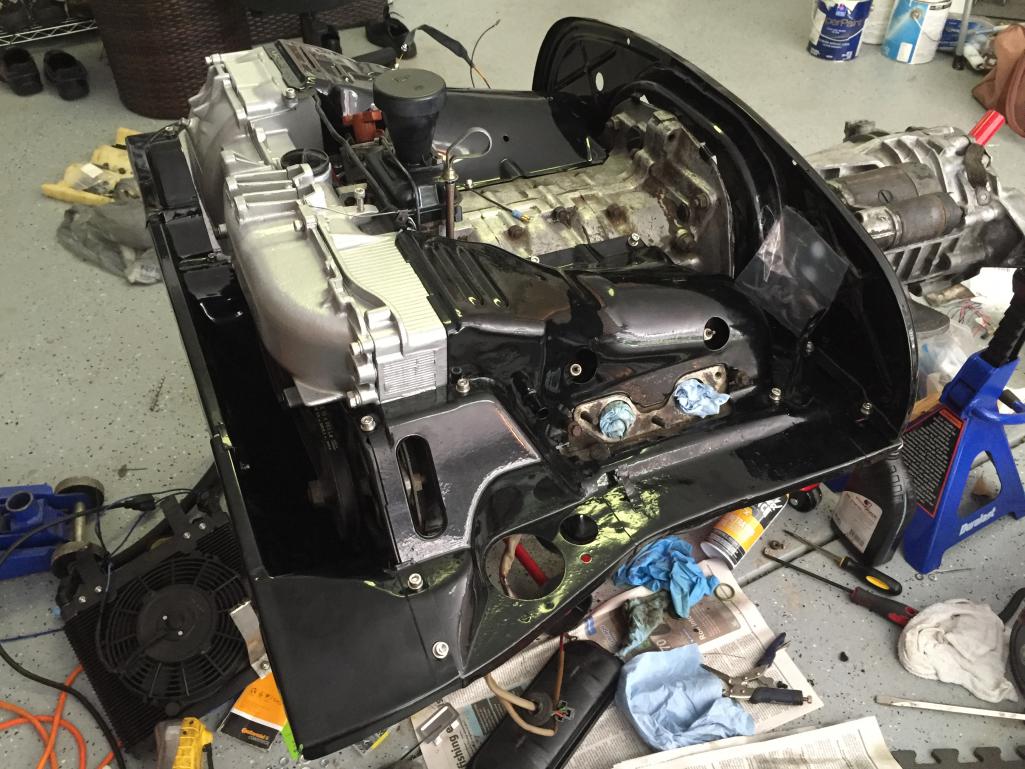
Posted by: Philip W. Jul 2 2018, 10:34 AM
last picture- kind of out of order- i will finish the other side later, lost one of the studs that backed out when took the intake runners off. After that i will hook up the new wires, and harness- i want it to be as clean and organized as i can- i also have a whole new set of Vac lines! orhers were not bad, but dirty after 9 years-
Attached thumbnail(s)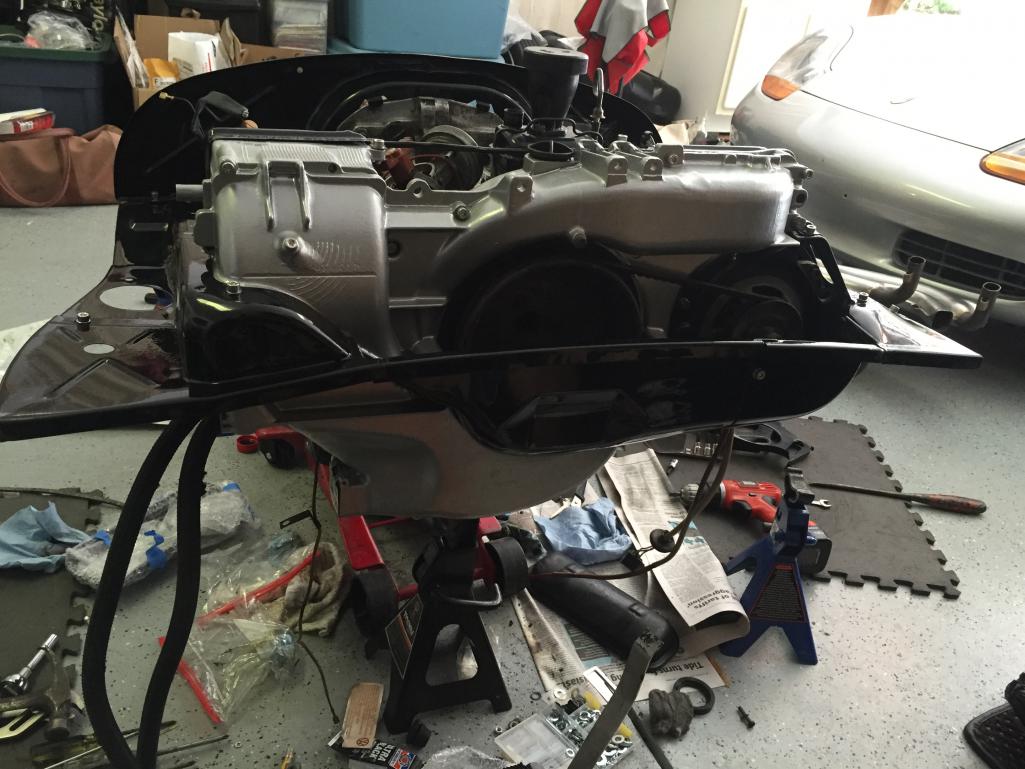
Posted by: Mblizzard Jul 2 2018, 11:45 AM
so many months since i took it off and putting it all back on later and not fresh in my memory the order it came off- i had to take one side off 2x! i didnt put the alternator back in and forgot the plastic trim ring- i think i finally have it. back sides and front and all new tin and Hex top screws for all of it!
Quick tip. Save your old intake gaskets. Put duct tape over one side and bolt back on to prevent items from getting inside intakes. Works much better than stuffing things in the opening.
Looking good!
Posted by: dr914@autoatlanta.com Jul 2 2018, 11:49 AM
does look great, to be politically correct, the intake runners should be gray zinc
Posted by: Mblizzard Jul 2 2018, 11:57 AM
does look great, to be politically correct, the intake runners should be gray zinc
You and your vast wealth of 914 knowledge! Sometimes it is hard for us that only have the limited knowledge base of mere mortals to even get them back together let alone paint them correctly.
To be clear, that was very tongue in cheek comment. I learn a little more each time you post a bit of info.
But that would be a cool kind of write up. Proper engine colors!
Posted by: Philip W. Jul 2 2018, 12:29 PM
does look great, to be politically correct, the intake runners should be gray zinc
yea, i know, but they get dirty so fast- i resisted temptation in a lot of areas but i am no longer 100% original, - color will be correct on car but i have 5 lug with 16" fuchs , LED dash gauges thanks Timothy!, but almost every thing is Porsche including the now back dates chrome bumpers- undortunately you know better than anyone George how in the past people stripped down cars that were good ans saveable- when i got this car some sucker had taken out the AP groups stuff the car came with, like my center console, Fog light bumpers and fog lights so i had to source all that to get it back and of course try finding an original center console in good shape!.
So this started 10 years ago and you Mark Whitesell and others have helped fill a lot og gaps since then. if not for Chris Foley doing the MPS rebuild kits i would have hd Bob Woodman put on a custom FI injection anlong time ago. so trying to stay very close to original as i can. - nothing that cannot be changed back including the bumpers.
If i had it to do over again though i would have just sourced some nice 2.0 Fuchs and stayed in the "Original class" for local, regional PCA and Okteenerfest.
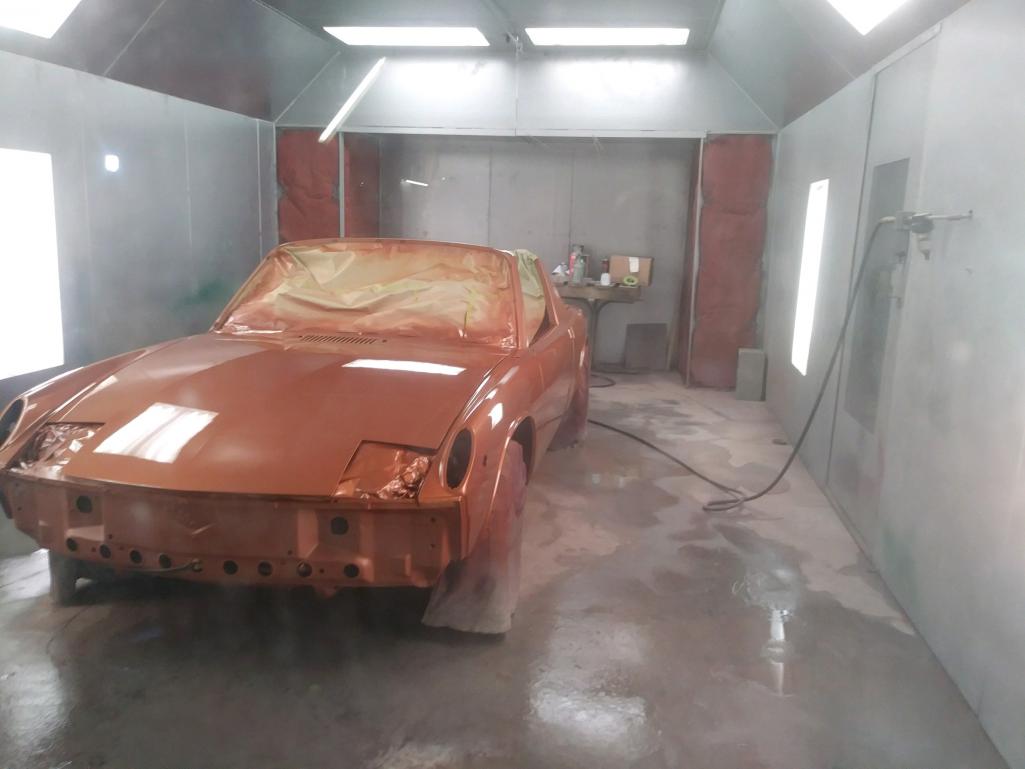
Posted by: Philip W. Jul 2 2018, 07:19 PM
color!!
Attached thumbnail(s)
Posted by: Travis Neff Jul 2 2018, 08:00 PM
![popcorn[1].gif](style_emoticons/default/popcorn[1].gif)
Posted by: Mblizzard Jul 2 2018, 08:54 PM
Looks good,
Posted by: Chris H. Jul 2 2018, 09:50 PM
That copper is going to look SO GOOD. I saw a freshly painted one several years back. Very rich color and the metallic really pops in the sunlight.
Posted by: Philip W. Jul 3 2018, 06:52 AM
its funny how the camera will show color differently in different lighting or angles- the one picture looks much closer to the correct copper color , the others look more red.
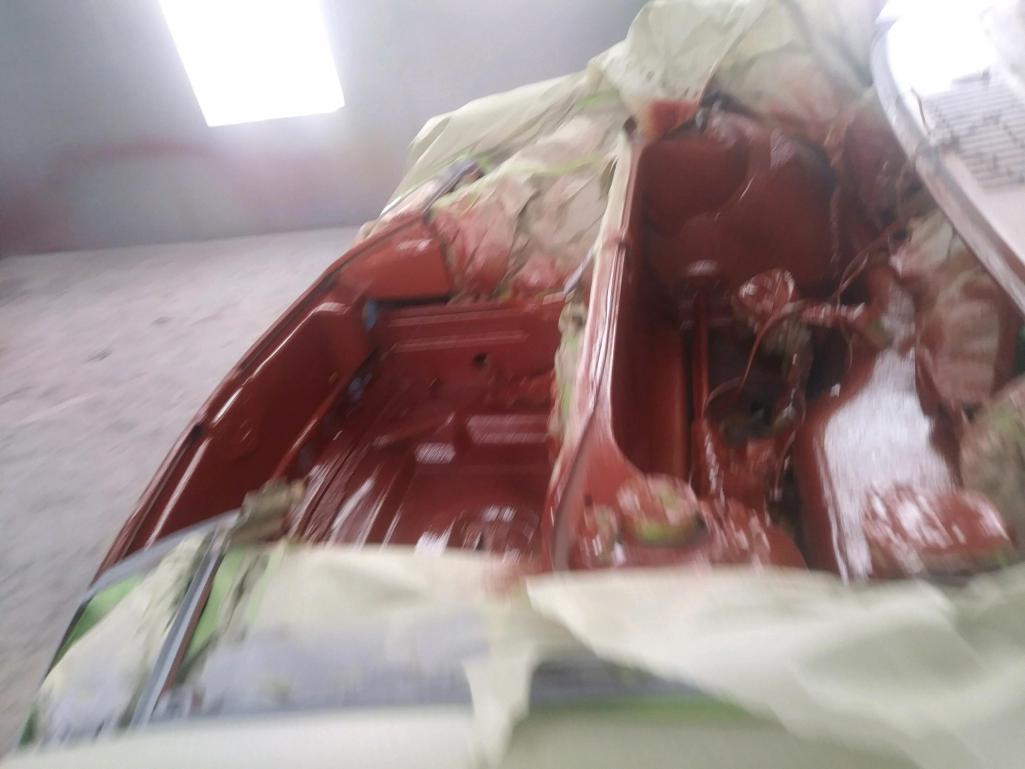
the firewall, floors and underside of floor pan and trunk are all being shot with a tinted coating. i am not sure even what its called, but on the floors and firewall it will add some sound deadening insulation and underside a lot more protection from the elements like road grime rocks etc.
I believe this was all yesterday, he will be shooting all the base and clear on all the outer panels the next couple days.
Attached thumbnail(s)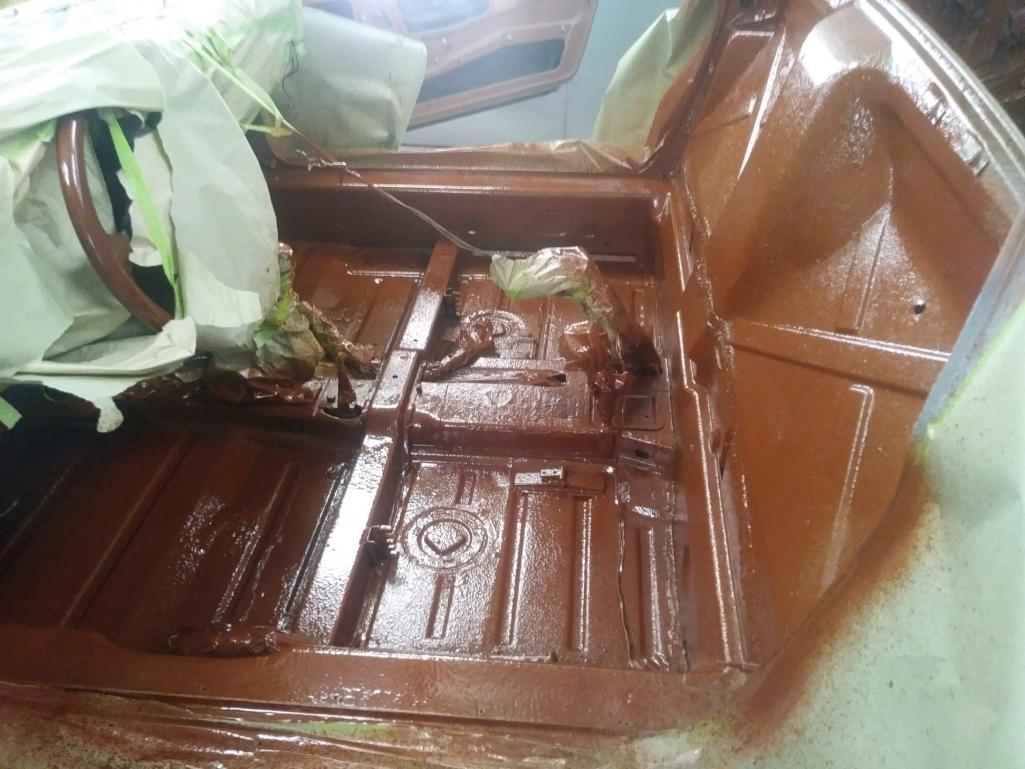
Posted by: Perry Kiehl Jul 3 2018, 11:47 AM
...I love the smell of fresh paint in the morning...
Posted by: Philip W. Jul 3 2018, 01:53 PM
...I love the smell of fresh paint in the morning...


Posted by: Cairo94507 Jul 3 2018, 02:02 PM
Is SirAndy taking those photos????? Seriously, nice color. Great step forward for sure.
Posted by: Philip W. Jul 6 2018, 04:44 PM
base on, clear on, Rock on!
Attached thumbnail(s)
Posted by: simonjb Jul 6 2018, 05:29 PM
Looks fantastic !
Posted by: Philip W. Jul 8 2018, 04:06 PM
true color
Attached thumbnail(s)
Posted by: Philip W. Jul 8 2018, 04:08 PM
this metallic is amazing
the guy in the picture is Mike, the paint and body guy
Attached thumbnail(s)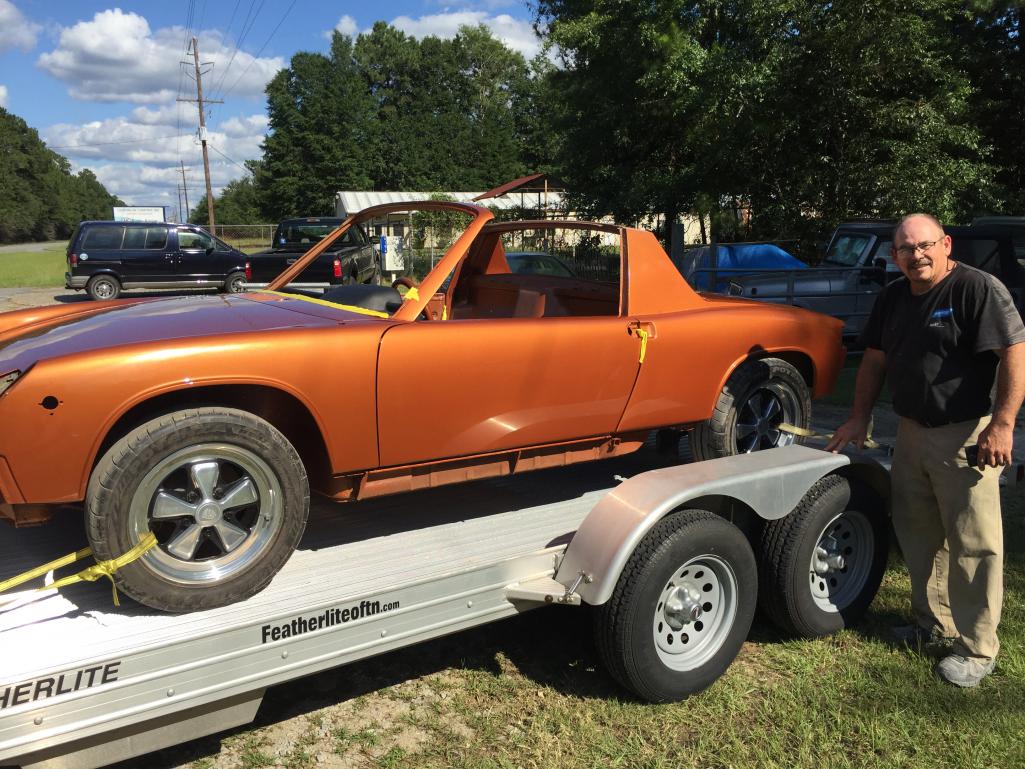
Posted by: Philip W. Jul 8 2018, 04:52 PM
one more
Attached thumbnail(s)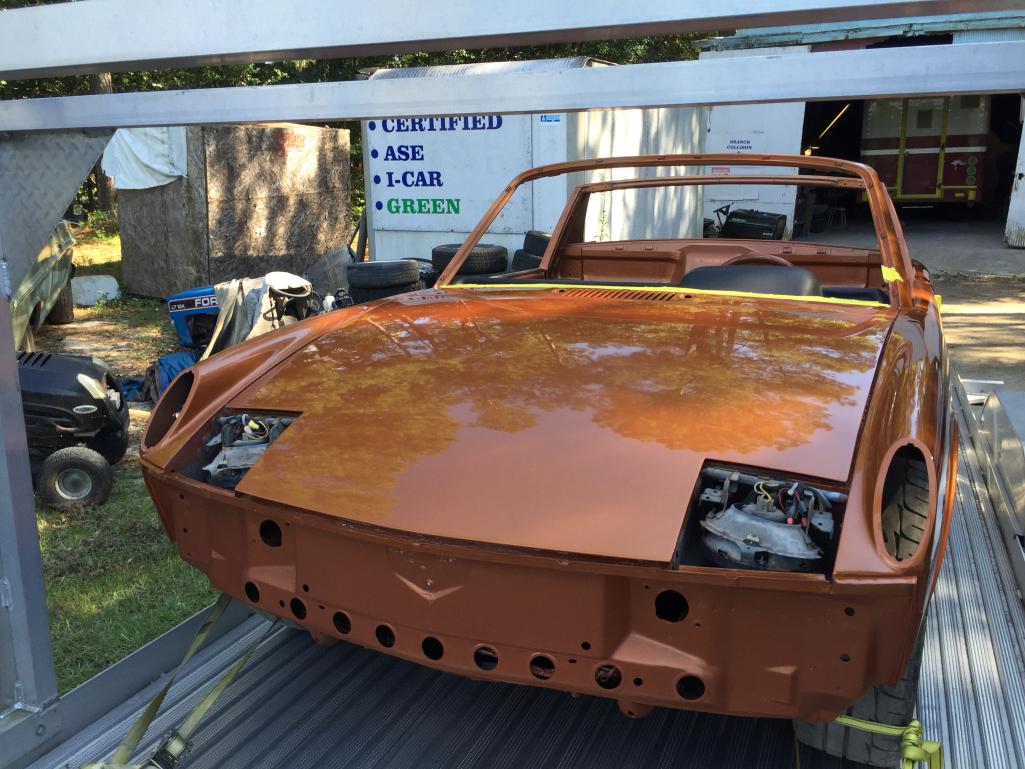
Posted by: ValcoOscar Jul 8 2018, 05:18 PM
this metallic is amazing
the guy in the picture is Mike, the paint and body guy
To Mike

Need you on the West Coast..SoCal specifically.
Oscar
Posted by: Travis Neff Jul 8 2018, 05:49 PM
That is some good looking paint amigo!
Posted by: billh1963 Jul 8 2018, 05:51 PM
Car will look amazing after you put it back together!
Posted by: Philip W. Jul 8 2018, 06:09 PM
does anyone remember what my rear wheel wells and fenders looked like? yes the 7" fuchs will fit no rubbing and these look stock but actually are about 3/4" more room than before- first work replacing the arch was Ed at Tangerine Racing when the did the floors and jack points, and they pounded them out quite a bit , all metal work, they just were not paint ready, Mike finished it all off and i am very pleased with the results!
this is the first 914 Mike has done, although last year there were 4 cars he did that were shown at the Hilton Head Island Concours de'elegance couple MG's etc. i hope to be in the car club jambore which shows off each car clubs pics for the year .
Attached thumbnail(s)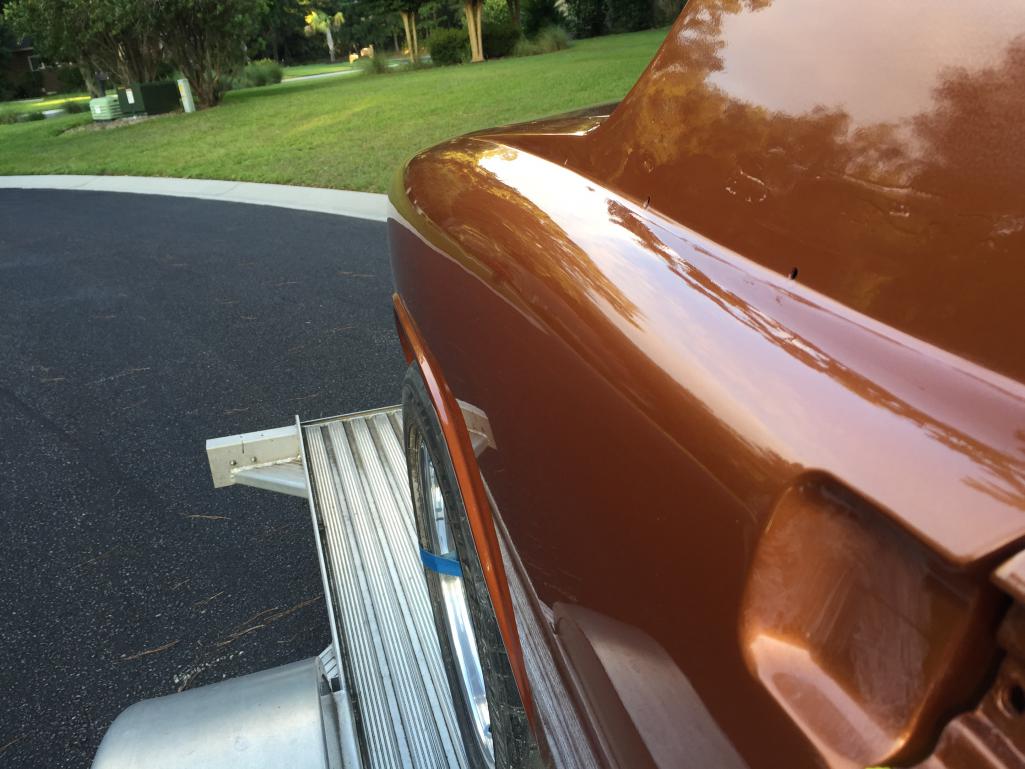
Posted by: Philip W. Jul 8 2018, 06:11 PM
and a big thanks to you Bill. Thanks for the referral to Mike!
here is a rear shot-
Attached thumbnail(s)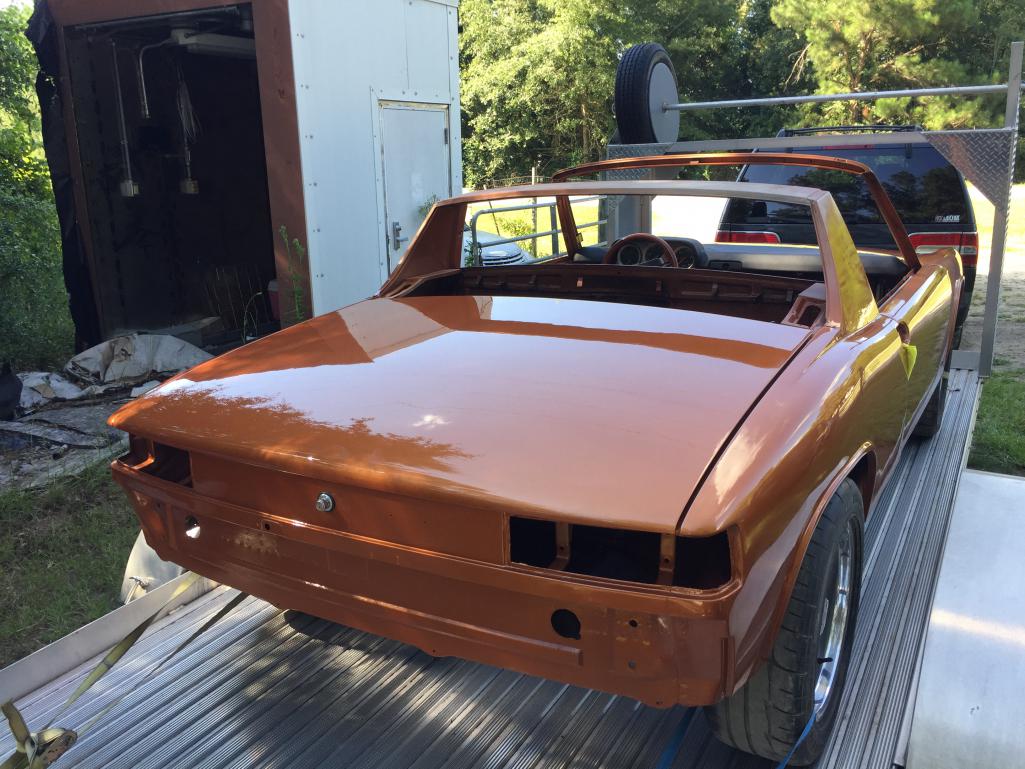
Posted by: billh1963 Jul 8 2018, 07:26 PM
Glad it worked out for you!
Posted by: Mblizzard Jul 8 2018, 07:37 PM
does anyone remember what my rear wheel wells and fenders looked like? yes the 7" fuchs will fit no rubbing and these look stock but actually are about 3/4" more room than before- first work replacing the arch was Ed at Tangerine Racing when the did the floors and jack points, and they pounded them out quite a bit , all metal work, they just were not paint ready, Mike finished it all off and i am very pleased with the results!
this is the first 914 Mike has done, although last year there were 4 cars he did that were shown at the Hilton Head Island Concours de'elegance couple MG's etc. i hope to be in the car club jambore which shows off each car clubs pics for the year .
While the previous grey primer had some flare, this is way better.
Posted by: Philip W. Jul 8 2018, 08:27 PM
some "flare"? didnt know you were into puns! - but i agree-
while not a full in and out top to bottom restoration, this is now a very nice car, or will be once reassmbled. i think it will show as nice as any 914 out there except for maybe those super nice all original or top upper end full rotisserie restorations, but still very nice- i think if we had finished this during the build off challange it would have been worthy of a top 5 finish.
i wanted a nice clean solid car with no major rust, and in almost perfect mechanical condition, which it is. and now with chrome bumper back dating, all new interior ans a few upgrades here and there( all new lights , signal buckets and lenses, front and rear, all new seals all around, almost al new hardware, there isnt much left. i still want to source some new chrome front window trim, and a few other zinc plated bits from Bruce Stone. The 123ignition distributor should add a touch of dependability and a bit smoother running motor.
I do like my reuppolstered tartan stock seats but would really like to have better side support in the bolsters, so i may eventually get some GTS Classic seats , or at least a drivers side. anyone have a perfect running restored fresh air box/blower??
Posted by: Shadowfax Jul 8 2018, 08:29 PM
Man, that paint looks terrific! Can’t wait to see it put back together.
Posted by: Philip W. Jul 8 2018, 08:46 PM
Man, that paint looks terrific! Can’t wait to see it put back together.
are you coming to the Okteenerfest?
Mike was like a little kid he could not wait for me to see it, and was like " wait until you see it in the sun! the color is amazing, " etc etc! so cool - he said he had to send the first batch back it was too brown. apparently PPG has a couple different lines or brands they own or sell under, same paint code but very different- this one was perfect right out of the can .
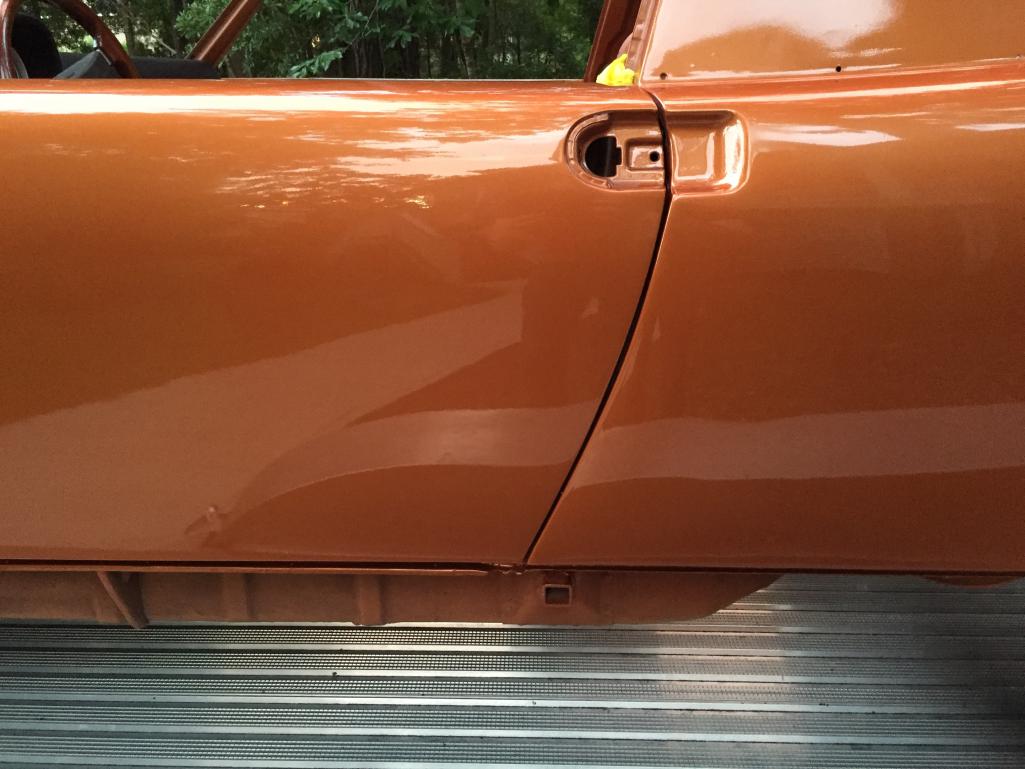
Posted by: Philip W. Jul 9 2018, 06:15 AM
door gaps look pretty good!drivers side
Attached thumbnail(s)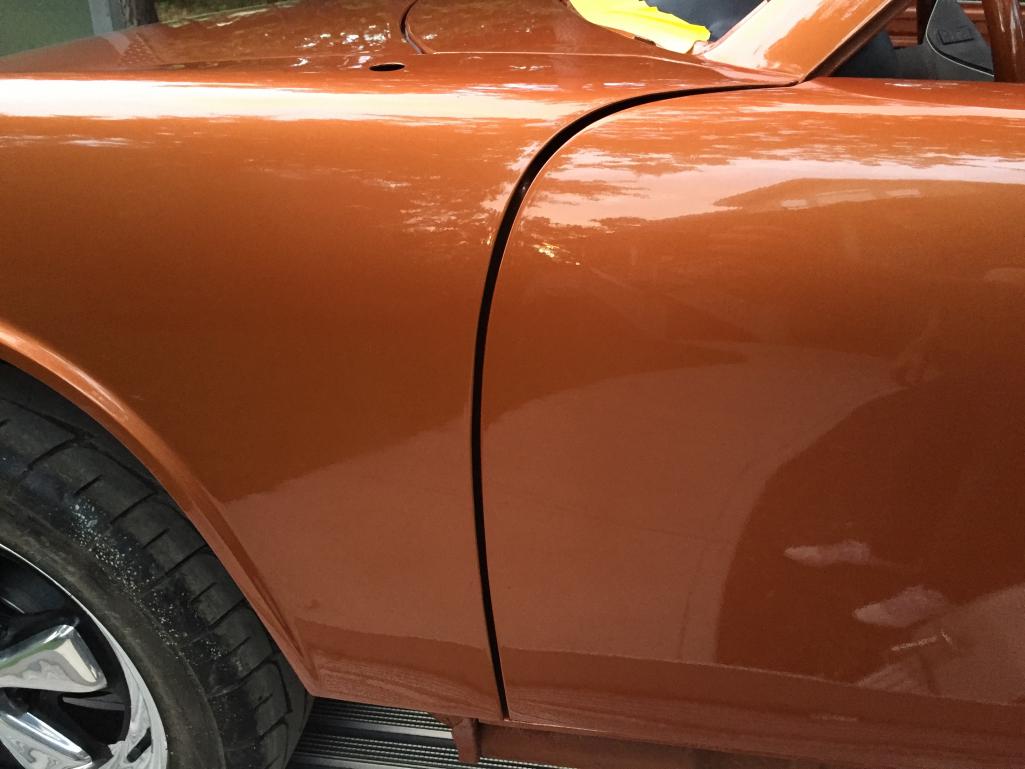
Posted by: Philip W. Jul 9 2018, 06:16 AM
passenger side
Attached thumbnail(s)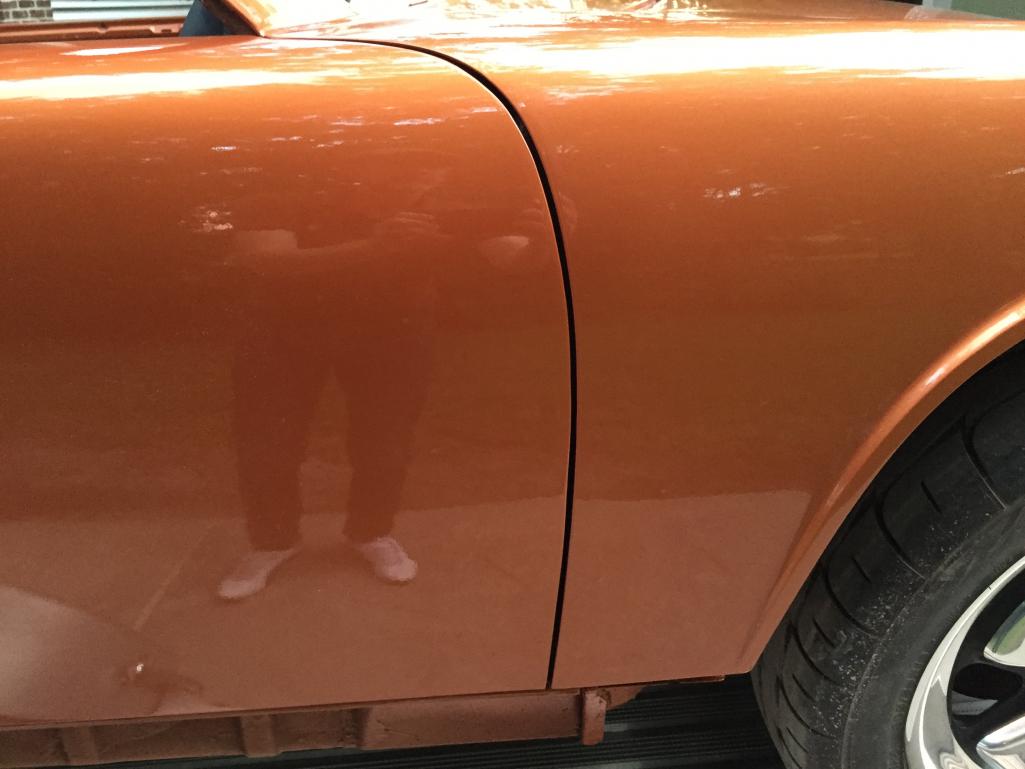
Posted by: Philip W. Jul 9 2018, 06:23 AM
30 days to cure so no cover , no wax, just light polish or buff. there are a few spots to buff up- I have to take it back next month for 2 days, there are a few spot to touch up and he didn't fully paint the under side of the targa bar, he missed this actually he thought it was covered like the top- like I said, he has done many cars, many classics, just not a 914, and I stripped most of it down so he didn't know - no biggie, it will get done- that part was still original paint and even the original plugs for the the rack mounts are still there too. in the mean time I can get all the rest of the stuff put back together, motor , etc etc. lights and electrical , get the wiring run for the head temp gauge. , get the front air box rebuilt and installed if I cant find one out there to save me the time- hello, anyone have one?
Posted by: jmitro Jul 9 2018, 06:44 AM
gorgeous!
Posted by: Shadowfax Jul 9 2018, 07:39 AM
Man, that paint looks terrific! Can’t wait to see it put back together.
are you coming to the Okteenerfest?
Mike was like a little kid he could not wait for me to see it, and was like " wait until you see it in the sun! the color is amazing, " etc etc! so cool - he said he had to send the first batch back it was too brown. apparently PPG has a couple different lines or brands they own or sell under, same paint code but very different- this one was perfect right out of the can .
Not gonna make it to Okteenerfest. Wish I could. That color really is pretty stunning.
Posted by: saigon71 Jul 9 2018, 08:24 AM
Your car looks awesome Phil!
Keep the pics rolling in....
Posted by: Chris H. Jul 9 2018, 08:28 AM
Did you spend most of the weekend just staring at/admiring the painted shell Phil? Pretty sure that's what I would have done. The base/clear will allow you to shine it up like a mirror.
Posted by: Mblizzard Jul 9 2018, 08:29 AM
This will be the car of the show for sure at Okteenerfest!
Posted by: Philip W. Jul 9 2018, 08:56 AM
This will be the car of the show for sure at Okteenerfest!
well, not sure about that but going to do my best - there were some very nice clean cars there last year for sure!
Posted by: Dion Jul 9 2018, 09:30 AM
That looks amazing! Boy that colour will really pop when the bumpers go on and all the
bright trim.
Posted by: Philip W. Jul 9 2018, 09:48 AM
do i dare put the PORSCHE script on the side again?
yes it was there before this, BUT .... not sure i want to do that....
i have brand new rockers and a set of nice redone ones that Mike painted, then need a sand down and one more coat, i could do either way, even thought about body color rockers but i like the look of the black rockers better.-
then also is the front valance- i have a LE style fiberglass one that was in Jim Hoylands car, but it was damaged in shipping , so i got a very nice stock metal pan that is repaintes black- SO Le was repaired and is in primer if i dont put it on i will resell it, ugh decisions!!
Attached thumbnail(s)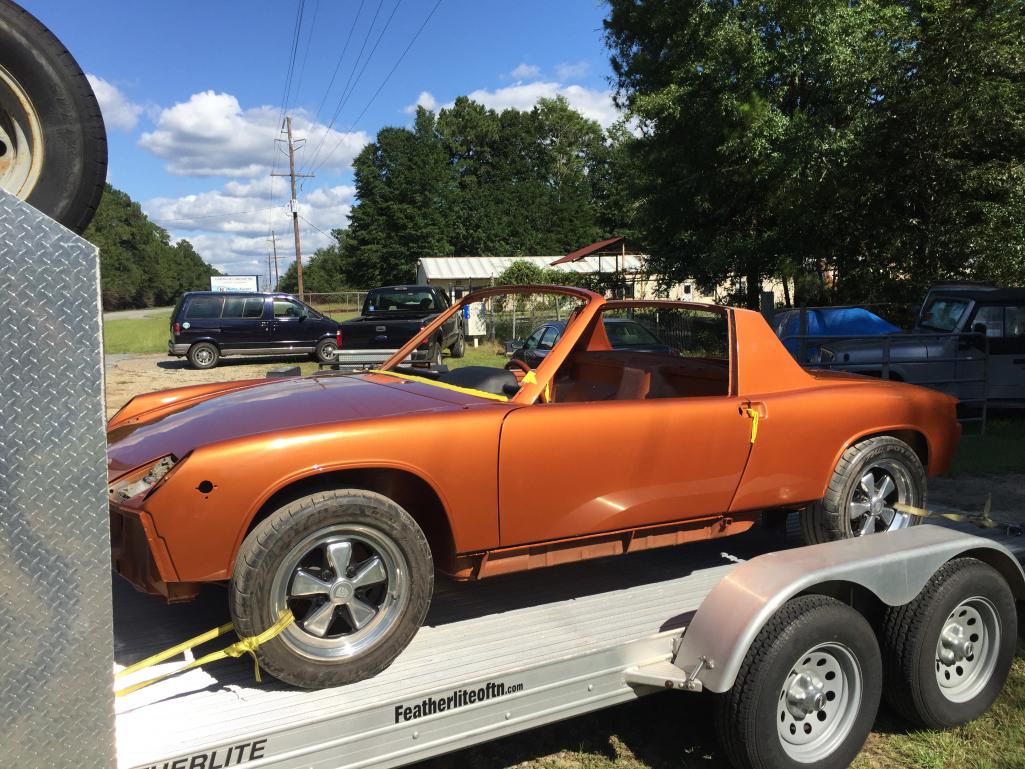
Posted by: Travis Neff Jul 9 2018, 10:02 AM
I would hold off on the side script, you don't wanna hide any of that beautiful paint! I keep coming back to this thread and looking at the headlight cover pic. 
Posted by: Philip W. Jul 9 2018, 08:52 PM
my front valence turned out pretty nice
Attached thumbnail(s)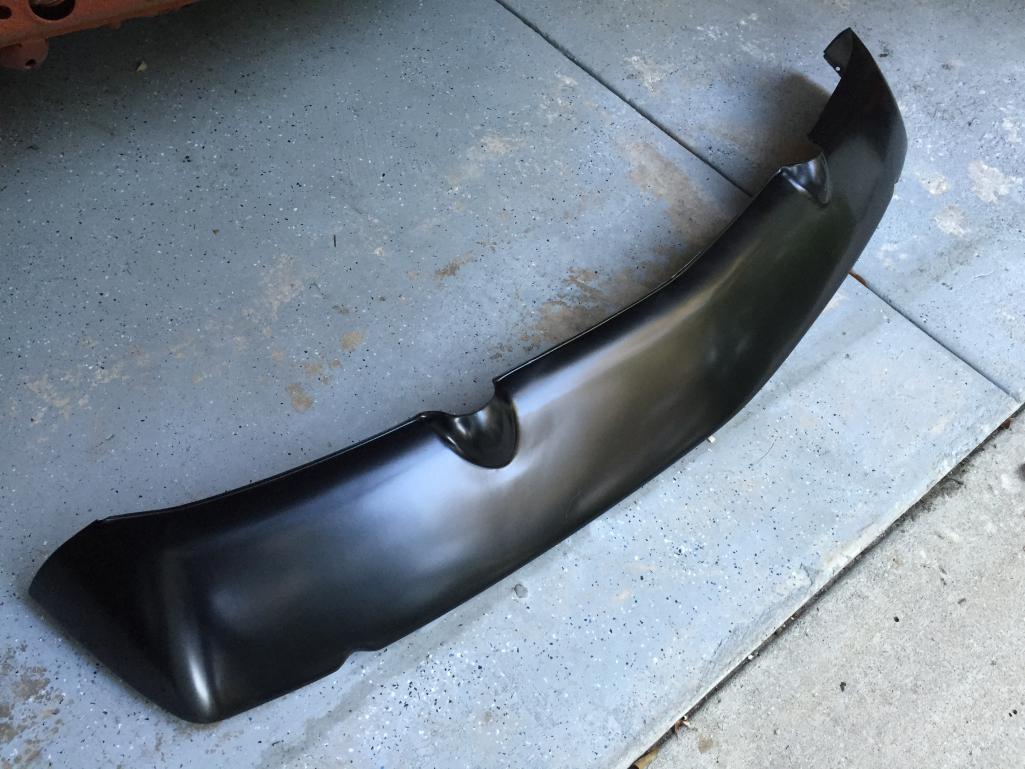
Posted by: Philip W. Jul 9 2018, 08:53 PM
and rear---
Attached thumbnail(s)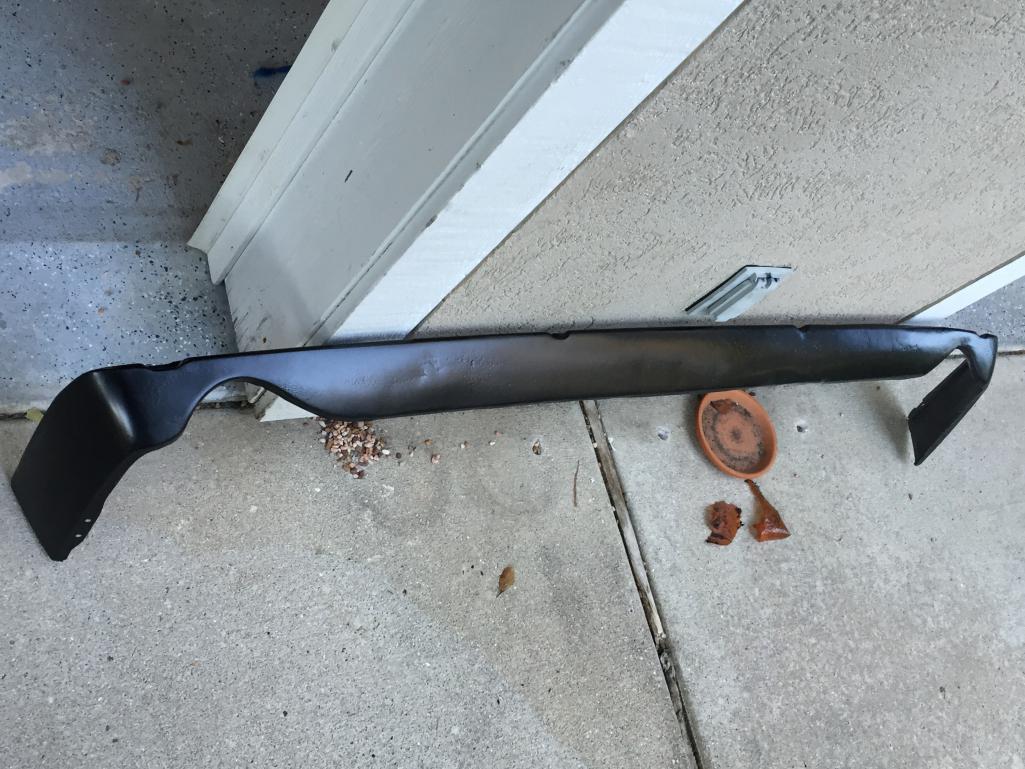
Posted by: Philip W. Jul 10 2018, 10:28 AM
repainted the rocker panels- these will be for sale-
back sides need to be cleaned up better but have had repair and were sanded professionally primed and painted but one more coat will make
them nice- will post in the classifieds section tonight.
Attached thumbnail(s)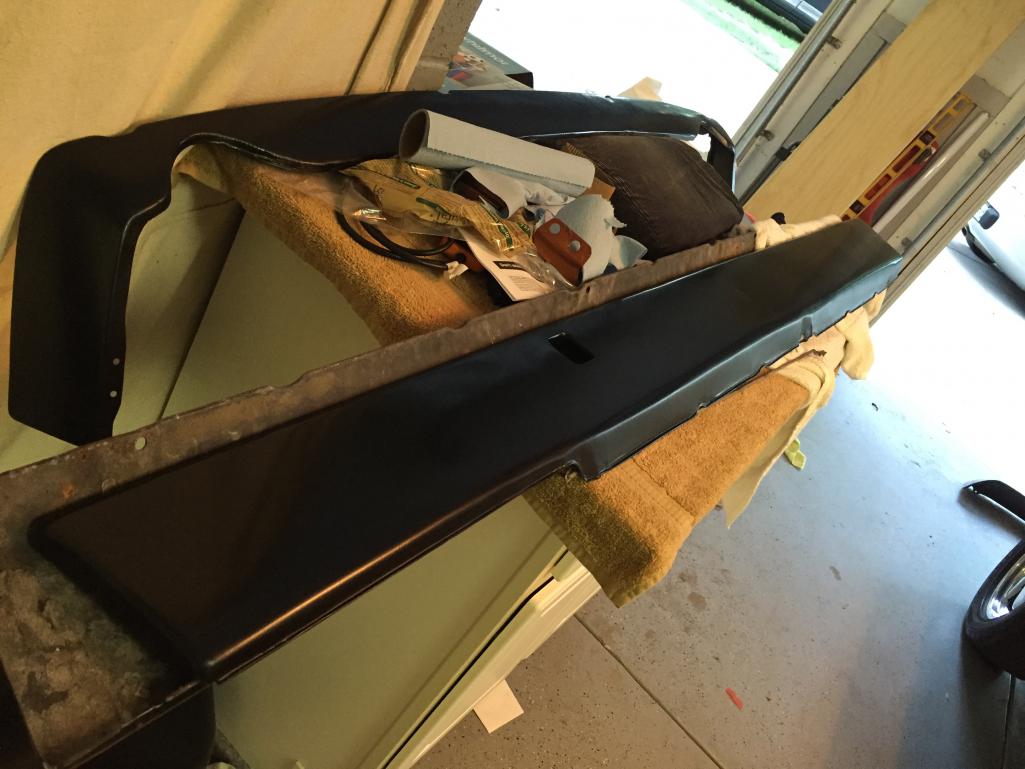
Posted by: burton73 Jul 10 2018, 10:41 AM
Car looks very sweet. Door gaps are super.
Very nice car.
Bob B 

Posted by: Philip W. Jul 10 2018, 10:53 AM
thanks! there were some previous repairs done incorrectly including the door jams and threshholds, bondo was removed, metal was fixed- i had to replace the drivers door, it was repaired with bondo as well, somehow there was a rust free door on the east coast- thanks to Bob Bishoff. saved a ton of time and $$ not having to fix that!
Posted by: Philip W. Jul 11 2018, 08:06 PM
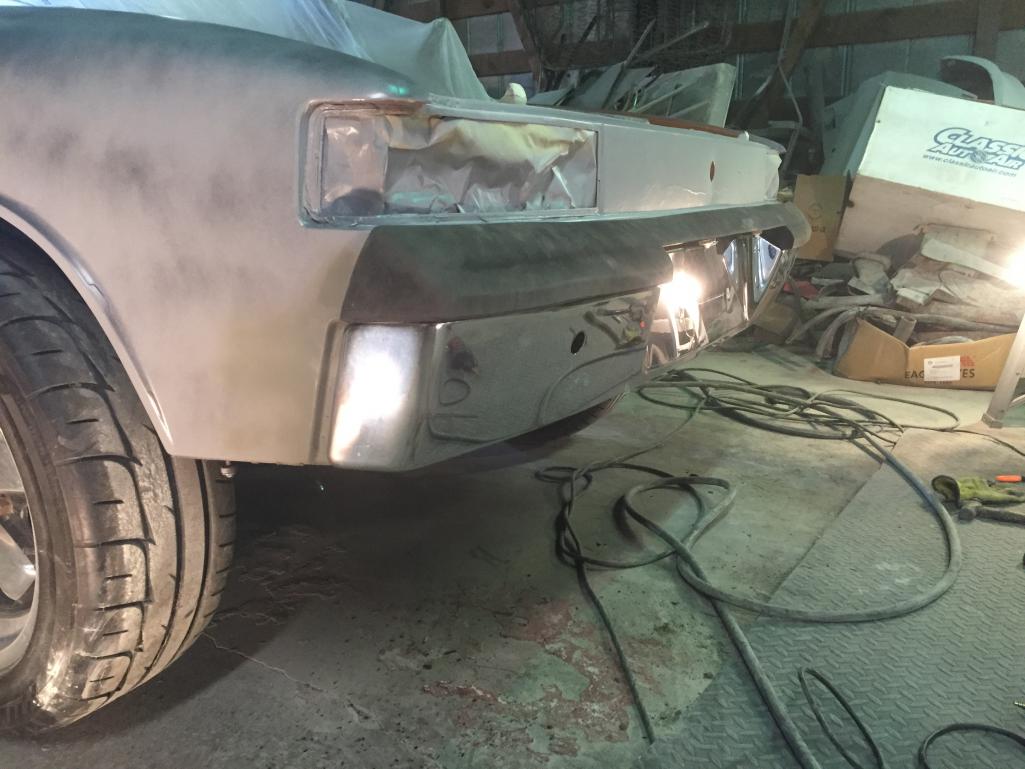
how does this look? i just wanted to get a look at it- has to come back off- to put the valance on and figure out how to mount the lights
Attached thumbnail(s)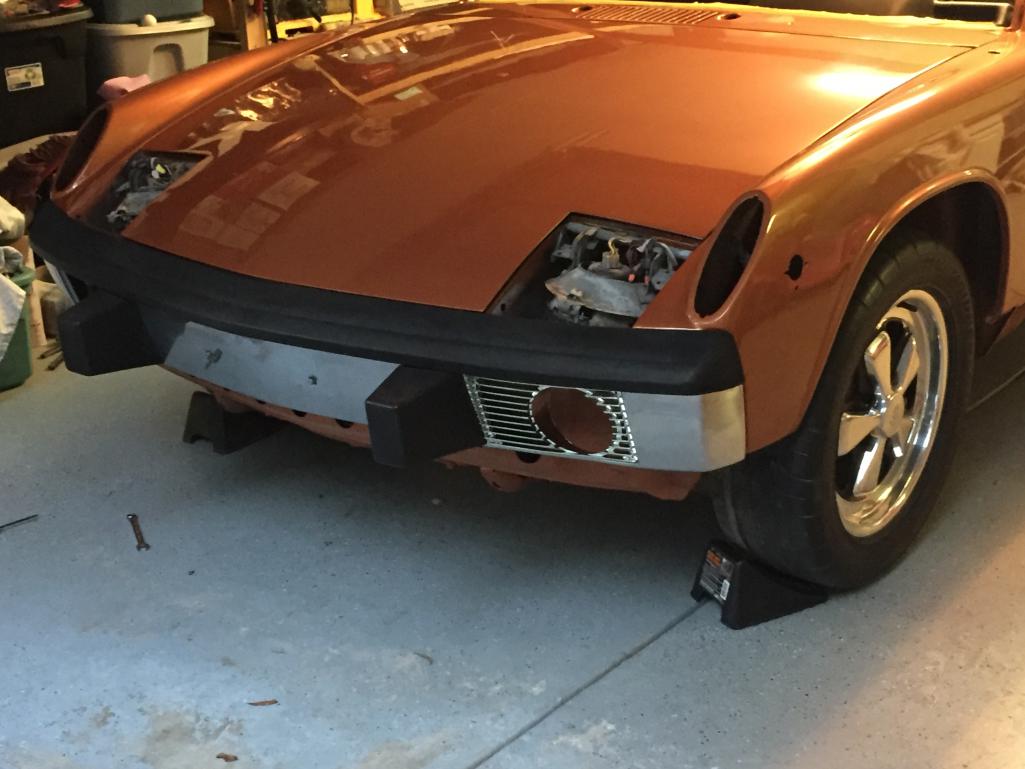
Posted by: Philip W. Jul 11 2018, 08:10 PM
and this looks good, i might want to leave the valance off when its actually mounted, so it still shows, seems a shame to hide it
Attached thumbnail(s)
Posted by: Mblizzard Jul 12 2018, 05:21 AM
and this looks good, i might want to leave the valance off when its actually mounted, so it still shows, seems a shame to hide it
That is awesome. But it is going to be too good of a car to leave parts off.
Posted by: Philip W. Jul 12 2018, 06:13 AM
and this looks good, i might want to leave the valance off when its actually mounted, so it still shows, seems a shame to hide it
That is awesome. But it is going to be too good of a car to leave parts off.
true, and as you see above my rear valance was cleaned up and repainted too so its going back on, and the lower half will stil show since this is not a deep valance-
going with a new windshield too- there goes another $500 smackaroos! as i was discussing with BillH, its hard to put old stuff back on a nice cleaned up car! I thought i had everything but still keep thinking of stuff- you know my interior was nice, but i have brand new german loop carpet going in and now i have to decide if i am going to leave the sport vinyl over fiberglass back pad back in or recover the original back pads. the foam on those is perfext but the vinyl was shot, i have yet another 914rubber order coming ans that will be added to it i guess, then i have a few parts i am getting from AA as the have the new targa trim pieces that URO is making AND i am going to break down ad get the new bumper pads from Rubber as well.
---- my wife is going to
 me! some of this may have to wait a bit
Posted by: Philip W. Jul 12 2018, 06:18 AM
i need advice on how to mount the fog lights on the early bumper conversions like this- i have super nice OEM NOS lights to put in- those grills came from 914rubber, and thr bumper came from Noel in CA, it really needs some hammering and a rechrome job, but i have that early one with no bumper guard holes which i lime the look of better but i think i need to keep the bumper guard one on for driving around with-- oh and another question, how. do you attach the fog light grill? 4 holes in corner, what size bolts/screws??
Posted by: rhodyguy Jul 12 2018, 07:17 AM
Skip the tits. Usually it's taps on the rear, not the front. Do the later cars have the dimples in the front fascia where the round fogs mount?
Posted by: Philip W. Jul 12 2018, 08:06 AM
Skip the tits. Usually it's taps on the rear, not the front. Do the later cars have the dimples in the front fascia where the round fogs mount?
I think so, if someone can take a picture of their body area under the bumper on an earlier car it would help - so it could be as easy as drilling the mount hole at that location or is there a tab that should be there? on the late ones it mounted directly to the bumper.
Posted by: rhodyguy Jul 12 2018, 08:10 AM
Just holes with nuts welded to the back side. Guys use captured nuts? in the new holes. Riv nuts?
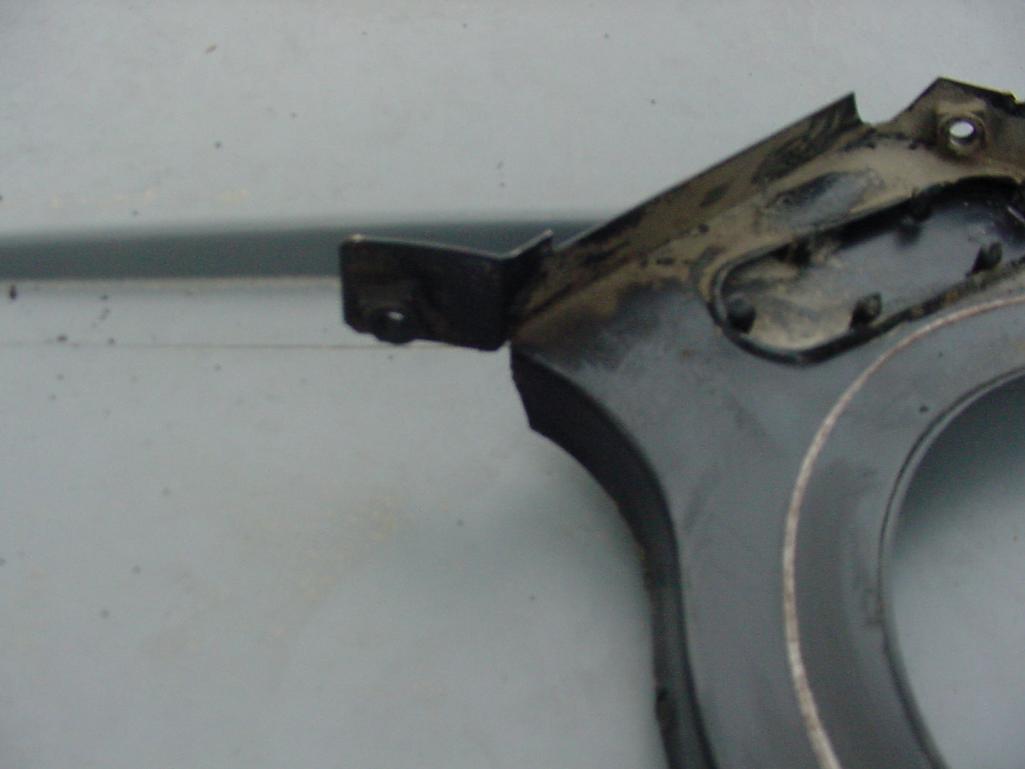
Posted by: Philip W. Jul 12 2018, 08:13 AM
where would the spot be ?
Attached image(s)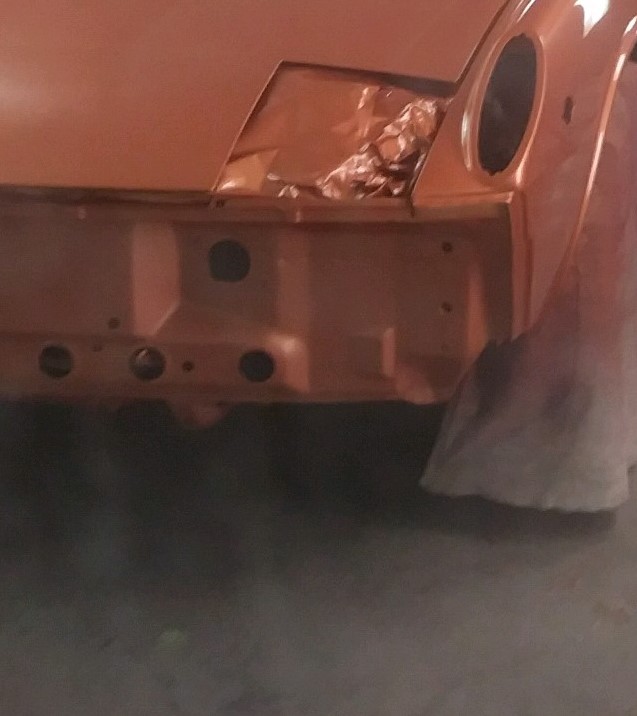
Posted by: Shadowfax Jul 12 2018, 09:30 AM
Phil - I’ve got my car apart and will take a pic of the front, specifically the fog light area, for you during my lunch break.
Looks like you and I are dealing with similar repaint issues. I too need a new windshield and saw your other post about buying dealer vs aftermarket. Think I’d better jump on that since there are only 6 left in the U.S.! Am kind of bummed that 914rubber is backordered on the windshield to dash seal as I’d like to replace that too. My targa trim looks decent enough to reuse but I think my windshield trim is too ratty to reuse. Maybe the glass shop can work their magic on it. If not, it’s just money, right?
Pedro
Posted by: Philip W. Jul 12 2018, 09:54 AM
Phil - I’ve got my car apart and will take a pic of the front, specifically the fog light area, for you during my lunch break.
Looks like you and I are dealing with similar repaint issues. I too need a new windshield and saw your other post about buying dealer vs aftermarket. Think I’d better jump on that since there are only 6 left in the U.S.! Am kind of bummed that 914rubber is backordered on the windshield to dash seal as I’d like to replace that too. My targa trim looks decent enough to reuse but I think my windshield trim is too ratty to reuse. Maybe the glass shop can work their magic on it. If not, it’s just money, right?
Pedro
I didn't know they were back ordered on that! I have a newer one I put in last year but took it out when I pulled the window, its only a year old so I will just reuse it, its mainly cosmetic and holds down the dash vinyl not really sealing anything otherwise, so you can put your glass in and put that in later if you need to -
I can clean up my window and re-use it , it is a Sekurit , but its old and it has small bubbles in the glass , which is weird. I am going to put this in next weekend if I can get it ordered and have it picked up by the installer that they use. Have to find out what the actual cost is for installation, might be worth having an experienced guy used to working on the classic Porsche models and butyl.
thanks for the help.
Phil
Posted by: mepstein Jul 12 2018, 10:03 AM
Even though they might only have 6 left in the us, when you order from Porsche, shipping from Germany is included so if they need to order more, it might be a bit of a wait but it’s the same cost. They bring in glass all the time so it’s not the last 6 in the world.
Posted by: Shadowfax Jul 12 2018, 10:57 AM
Here you go. Sorry for the bad pics. I’m a terrible photographer :
First one shows driver’s side, next is passenger side and last one shows the captive nut for the fog light bolt. The hole that sits higher and just above one of the body holes is for the horn. 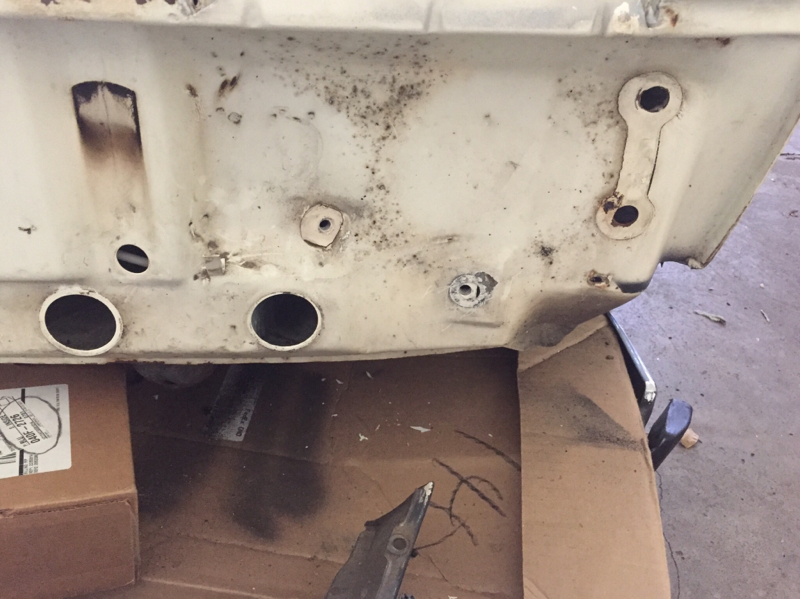
Posted by: Philip W. Jul 12 2018, 12:12 PM
looks like the spot that sticks out slightly is still there even though there are a few differences in the early Vs late panel, but I think I can do a mock up and see if that mounts up and aligns up, - my horn was on the under side on the 75, the mount bold rusted off on the driver side though so I will now mount it under the bumper just like you had on yours, I will just have to drill another hole ugh! wish I had done that when I did the bumper mount holes before the paint was applied.
Posted by: billh1963 Jul 16 2018, 03:59 AM
If anyone is wanting a copper car (after seeing Phil's) here's on in Sacramento
https://sacramento.craigslist.org/cto/d/porsche/6632071001.html
Posted by: Philip W. Jul 16 2018, 08:05 AM
If anyone is wanting a copper car (after seeing Phil's) here's on in Sacramento
https://sacramento.craigslist.org/cto/d/porsche/6632071001.html
I had those same wheels , EMPI on my car when I bought it 9 years ago. That car doesn't look too bad, missing the targa trim and the vinyl is lifting up but if the usual rust spots are good you can have a nice start to a rare color car!
One thing I have learned from this is that when you get going you realize that even if there isn't bad rust, 40+ years takes its toll on a lot of parts! My car might not be as complete in the restoration side as some here but I can tell you when you begin to dig in and replace stuff it really adds up. I mean, I really don't want to put back on the car old screws and trim etc etc. a few years ago I pulled all the suspension because when a caliper froze up and the MC went, I snapped a hard line and decisded it was time to sent the calipers, all 4, to Eric Shea, , then while at it I did the 5 lug conversion, the trailing arms went to Tangerine, new bushings and bearings front and rear, sourced new repowder coated front a-arms from Bruce stone with new bushings, and did the steering and turbo tie rod upgrade - etc etc.
People asked me when I took the car to Tangerine for the rust fix of the longs jack ponts and floors why I would drive the car that far(990 miles), but why not?? everything from a safety stand point, suspension brakes bushings from front to rear, hard lines and soft have all been replaced. I will bet you will have a hard time finding a car - I know there are a few, but very few, that are for sale or sold recently that have really had all this stuff replaced in the past 5 years or less. So while my car may not be perfect, and it was not a rotisserie restoration, when I look back and list out everything I have done all the parts that have been replaced, it is an amazingly long list! its been in several different threads, not all in the same one unfortunately. I should have probably done all this to a clean redone tub, but alas that is in the past, and I have a rare color that is a numbers matching car with original engine and transmission! also not as common as one might think. once back together I would not hesitate to drive it across the country if I wanted to.
and much of that stuff is now done I wont have to do it again as long as I own the car. knowing what you have and what you put into it is worth a whole lot.
- say all that because I probably now have about $15k into the project but look whats been done, - here is a car that is for sale for $13k and other than a 5 year old engine refresh, you basically have 40 year old everything else, so I would be a fool to sell mine now at this point. I think about it sometimes, something newer, more hp , etc etc, but then I look back at what ive done and what I have and realize that would be foolish.
Posted by: Perry Kiehl Jul 16 2018, 09:41 AM
Alex Buller and Barbara LaFargue had a copper 75 with a tan interior, which is an awesome combination
Posted by: Philip W. Jul 16 2018, 10:37 AM
i agree. mine was the same stock but when i went to do my interior which was the original interior when i bought it, it was so bad, there were no proper tan kits 10 years ago so i changed over to black- i love the cinnimon too but black looks nice.
Posted by: Philip W. Jul 16 2018, 07:16 PM
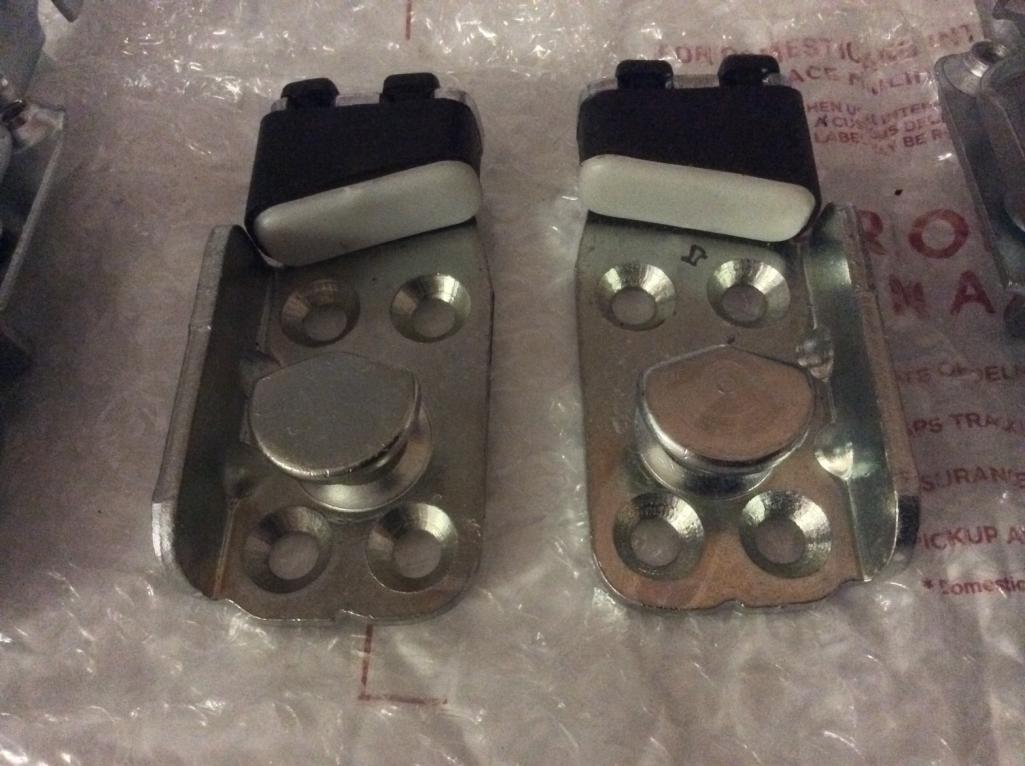
more stuff from Bruce! now i can get my doors put back together , will look and work like new! as luck would have it i won brand new outer door handles from Stoddard 2 years ago at the Okteenerfest! very excited to get at this stuff this weekend! New windshield scheduled to be delivered to Porsche tuesday! i am also getting the full door rebuild kit from 914rubber. door assembly will be interesting, it is nice to be able to put it all back in rust free doors!
Attached thumbnail(s)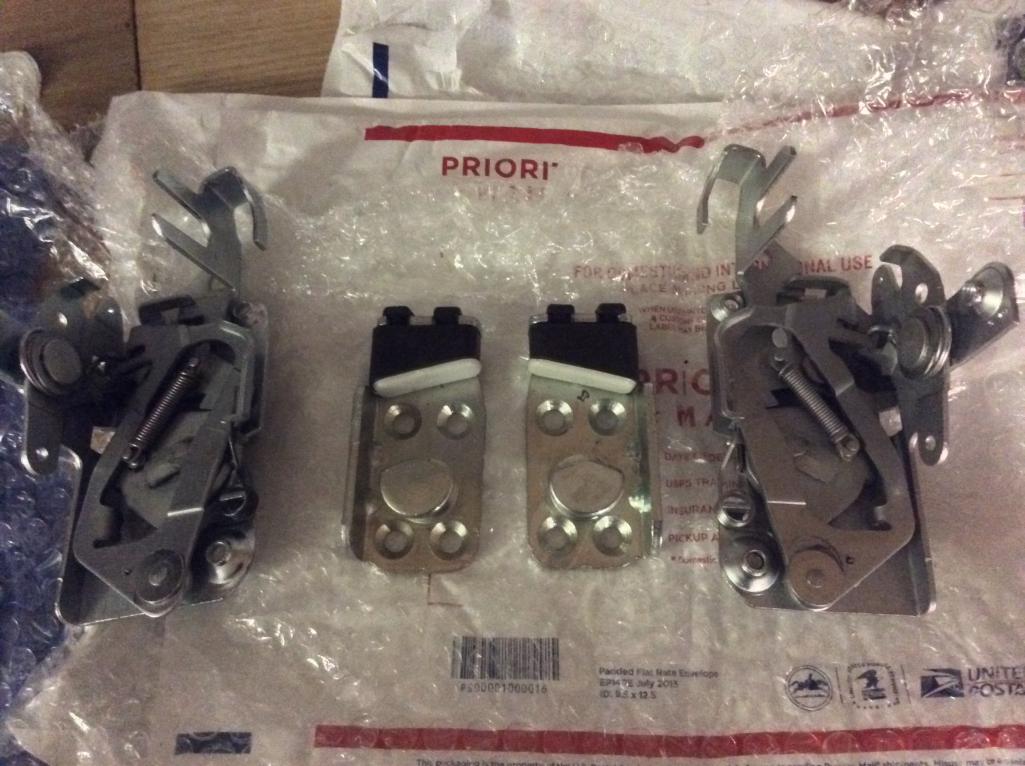
Posted by: Philip W. Jul 20 2018, 11:51 AM
New window in place, so as another member from Austrailia said of his the OEM Porsche supplied window is Pilkington, who bought out Sigla.
Attached thumbnail(s)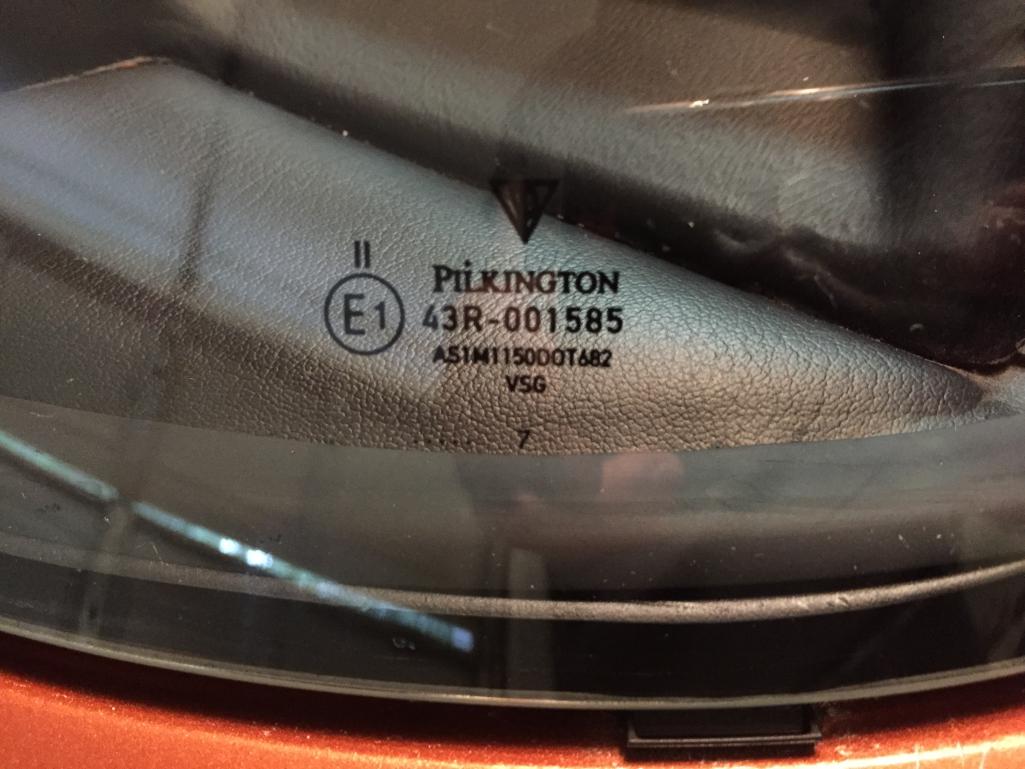
Posted by: Philip W. Jul 20 2018, 12:00 PM
so maybe hard to see with reflexions off glass from outside.
so i have to thank Mark Whitesell for having included a few extra trim retaining clips, because in the process of tapping them into place severl broke! There is a amall push pin that sticks out but is supposed to be tapped in after the back side retainer thing is popped into the hole. they dont go in easily, so i found if you pull the small pin out completely tap the clip into place into the hole and then tap the pin in which of course spreads out the thing in the hole and tightens it holding the clip in place. I broke 2 clips in half trying to tap them in place so be careful, and make sure you have a few extr just in case!
Attached thumbnail(s)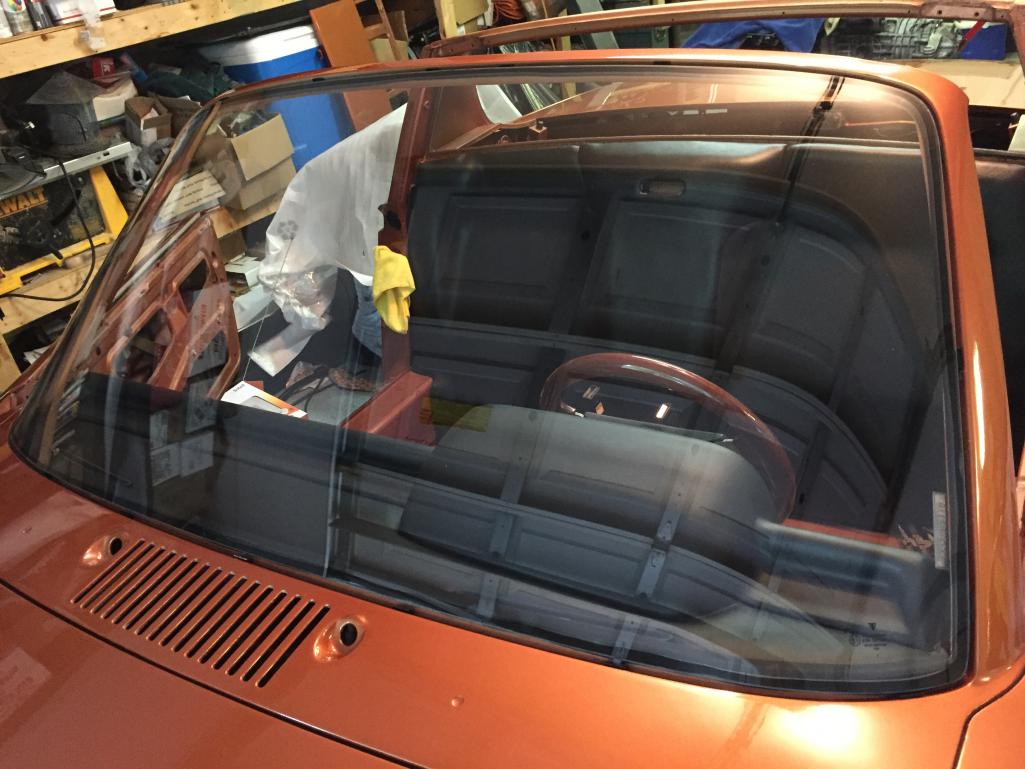
Posted by: Philip W. Jul 20 2018, 12:04 PM
oh and i pre ordered my butyl from 914rubber , its a good thing i did, because whe had a foam core butyl not solid rope. so we used mine. They only charged me $100 for installation but that also included pick up and delivery of the window from Porsche Hilton Head. $535 for glass, including tax etc and the PCA discount.
now i have to decide if i should get new outer trim or put my original back on....  $$$$$
$$$$$
Posted by: Philip W. Jul 21 2018, 10:06 PM
its time to get organized ! this is not even everything, i have new carpet kit, etc etc,
there is the LED gauge kit , the new never used outer door handles, all kinds of seals ans gromets and etc, all the heater tube parts, brackets and hinges and targa bar latches all thst black stuff and the zinc plated stuff you see are from Bruce Stone. Fuel line kit feom AA ans vac line kit too. it was overwelming me today and i didnt know quite where to start, so my friend Jim came over and we did the valve clearance then reinstalled the HE and exhaust. First time i did that myself. having someone with experience is helpful. i had 3 resources, my Tech Tips, the Haynes manual and Pelican parts tech article- this was so much easier with motor out and the HE stuff not in the way. ended up doing the pelican and Capt. Crusty’s way, pretty fast and easy.
After that i pulled out the old plastic lines, and installed the stainless -that job is not done due to the small lines not lining up with the late car clips, i am still waiting dor someone that has done this to post a pic or comment on how to get them in correct position  , still fairly productive day .
i had stuff in 8 different bins , and as i would order parts i tried to keep it together but i have extras from ordering stuff i forgot i had already.
Attached thumbnail(s)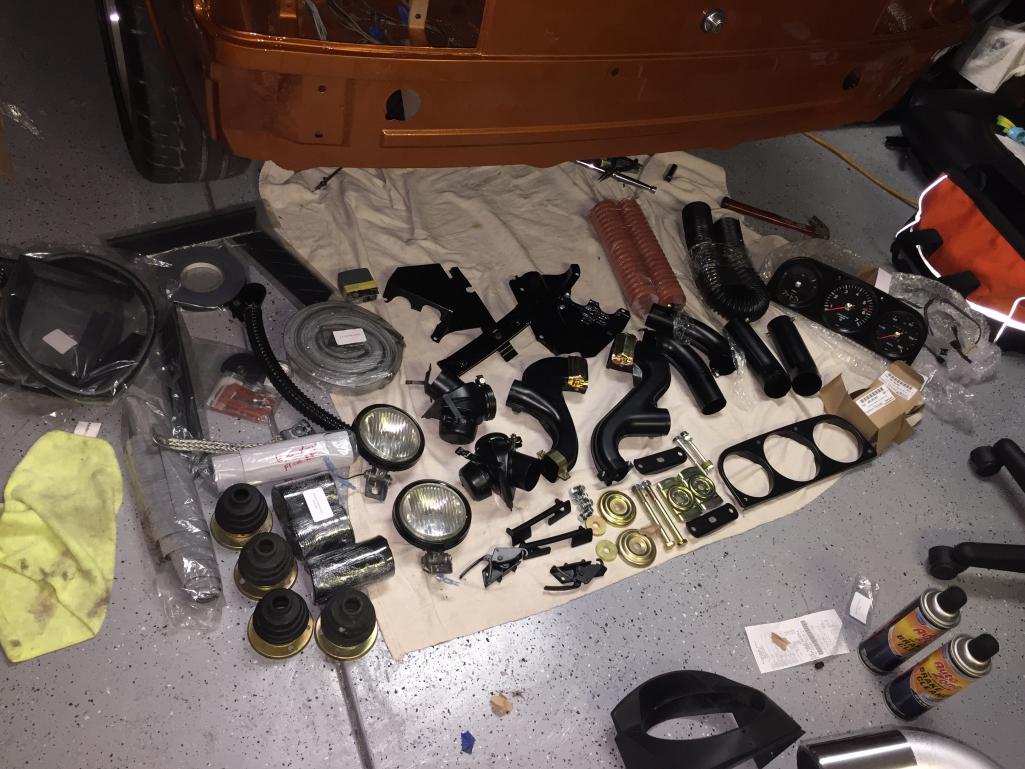
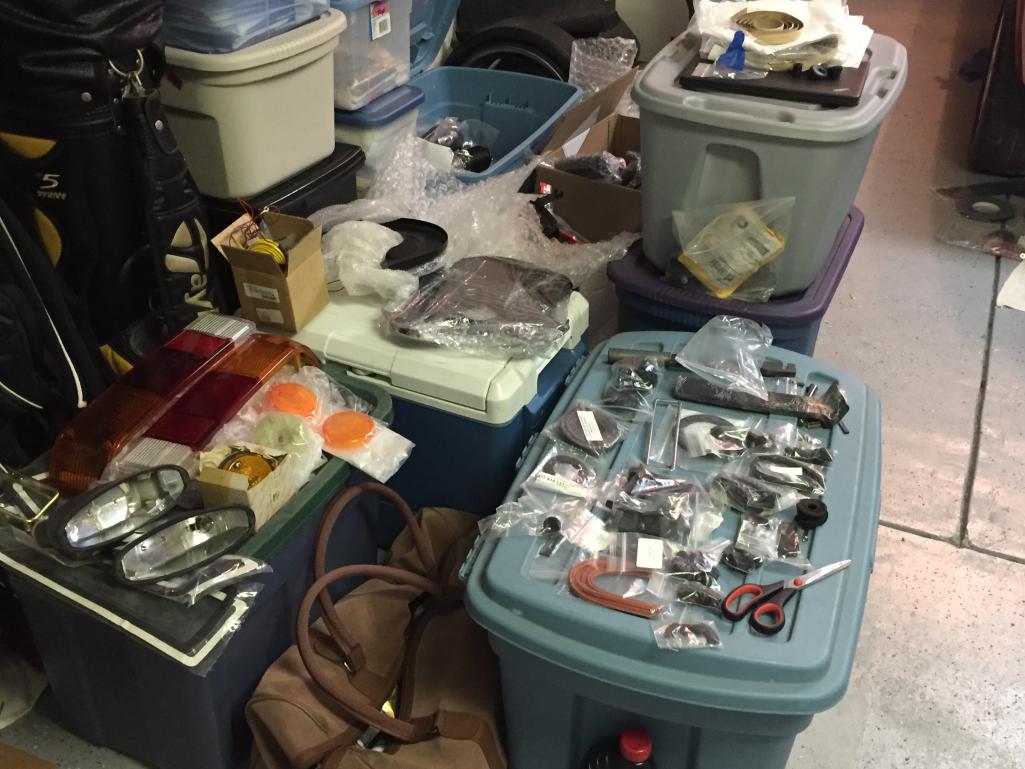
Posted by: Philip W. Jul 21 2018, 10:10 PM
lots of stuff ! the shiney new looking turn signal buckes are from Brad at 914ltd
Attached thumbnail(s)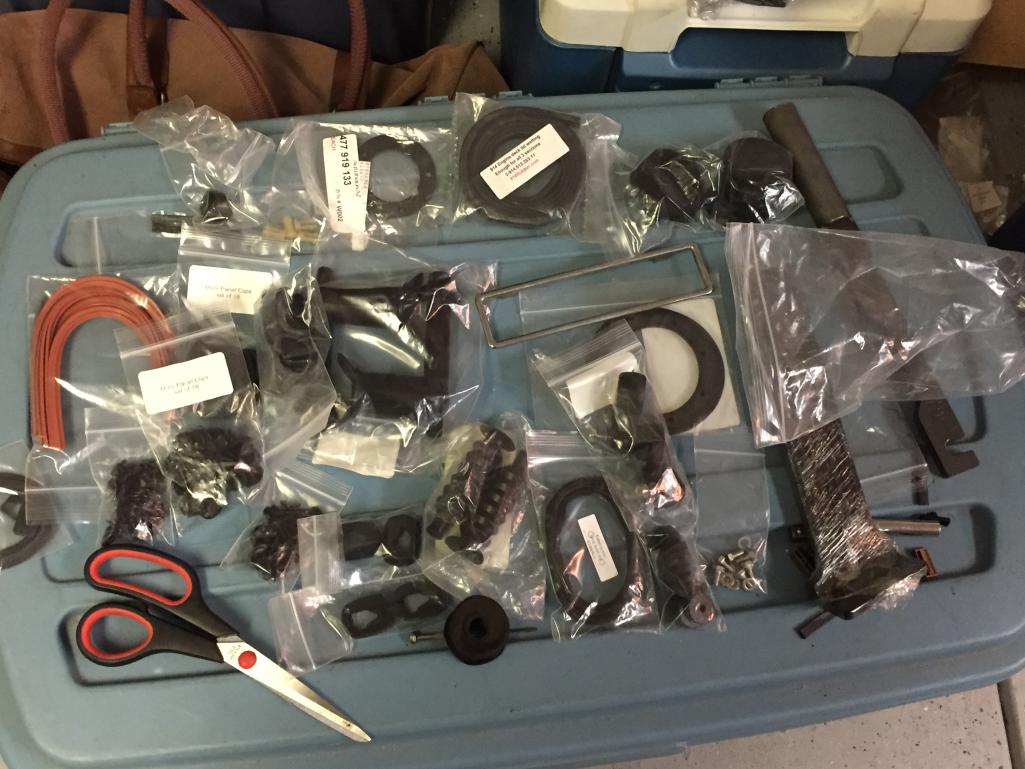
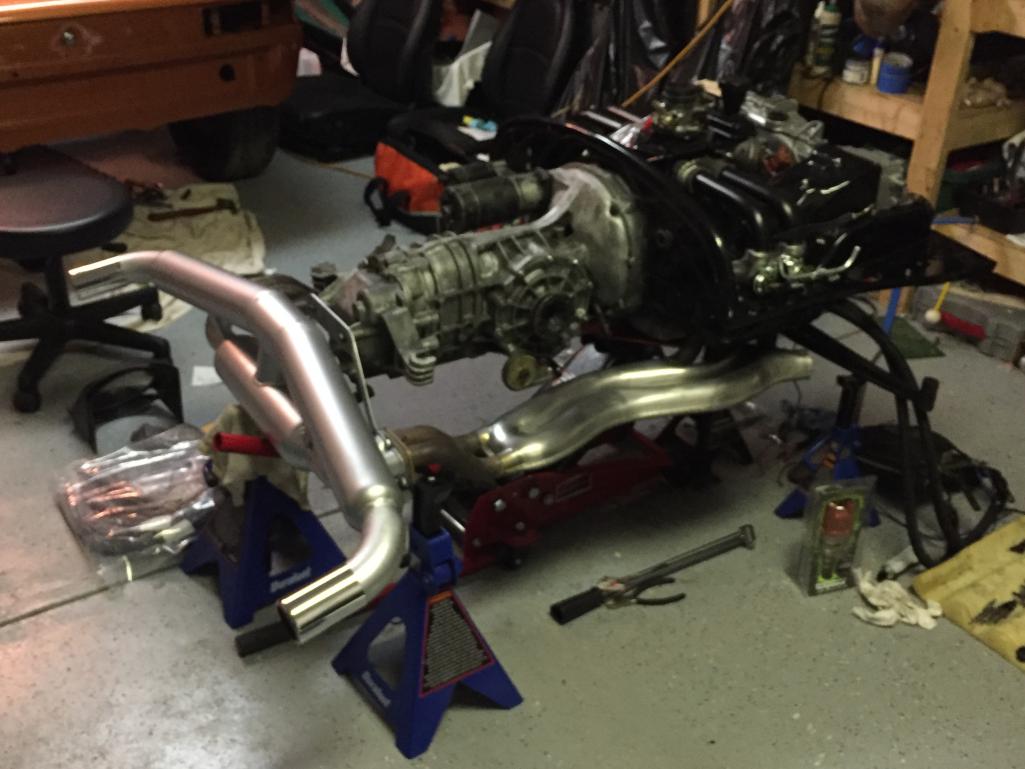
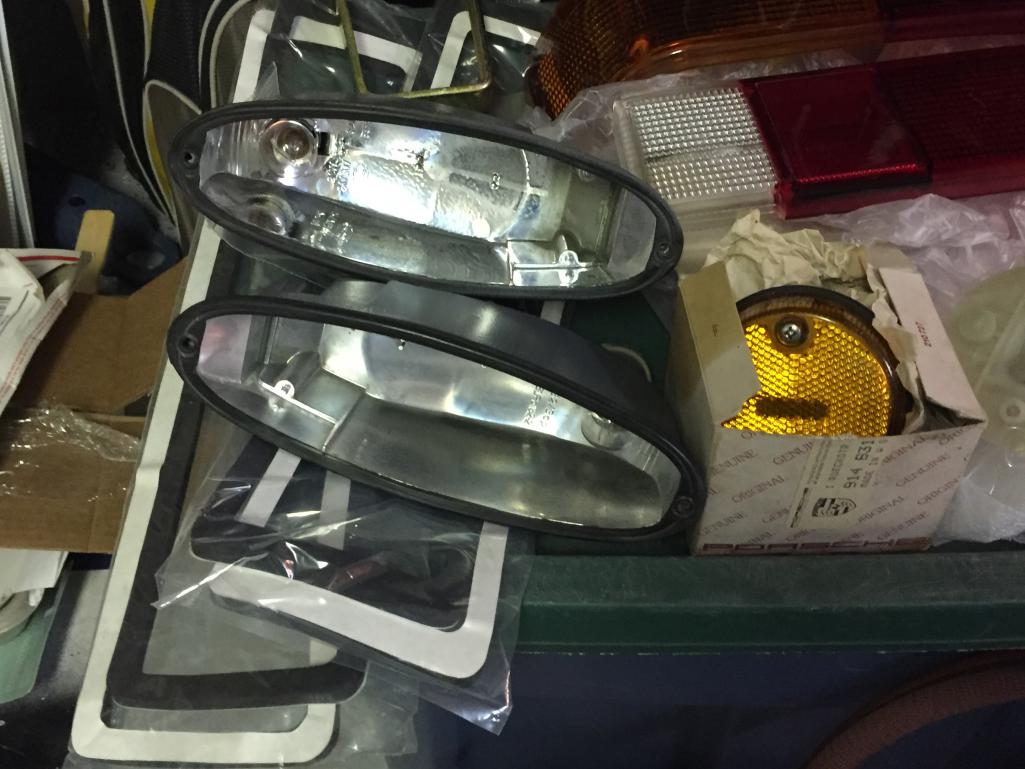
Posted by: Philip W. Jul 21 2018, 10:13 PM
i have a few needs yet-
1. i found a beautiful NOS Hela side marker assembly, and as nice as my repro 914rubber ones are, i would like to source another side marker lense to go with it .
Posted by: Philip W. Jul 22 2018, 09:29 PM
fog lights mounted today- had to do something today! had to locate where to place the mount, easy to do by mocking it up and making sure light is in the proper position and angle. i also had to modify the wiring due to the ‘75 ones usually were self grounding to the bumper. So wired, mounted and aligned. next up i have to mount the new Hela double horns. i am trying to decide if i ahould put them behind bumper sa the earlier cars had it or under where they were before with the bub’s.
Attached thumbnail(s)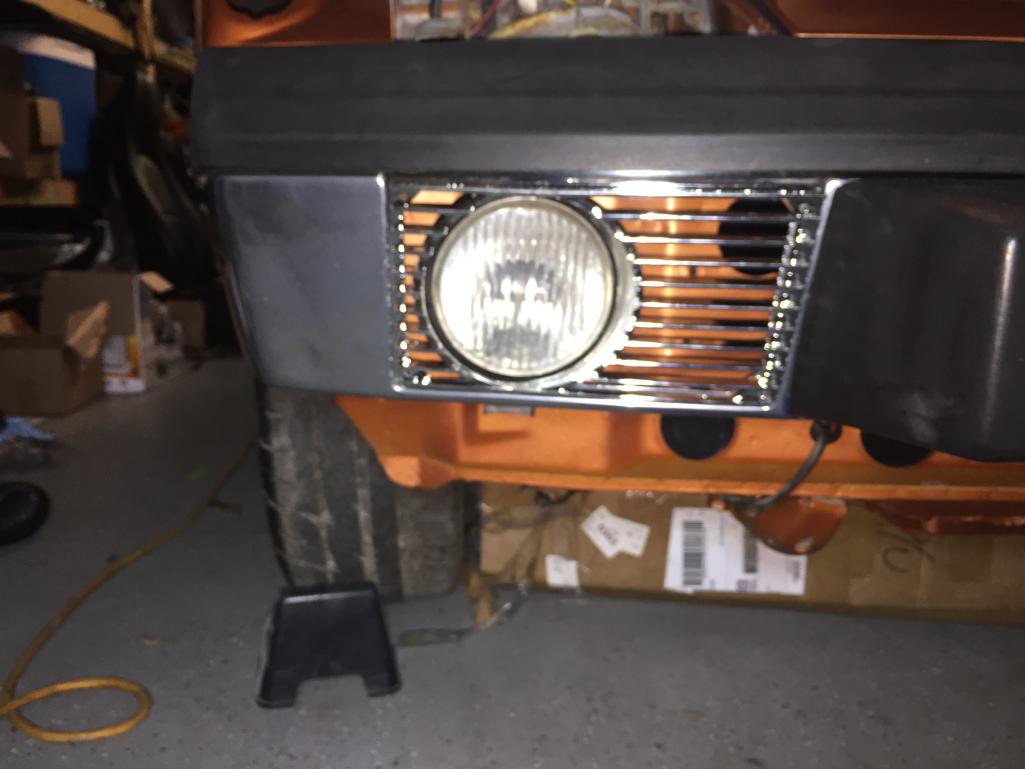
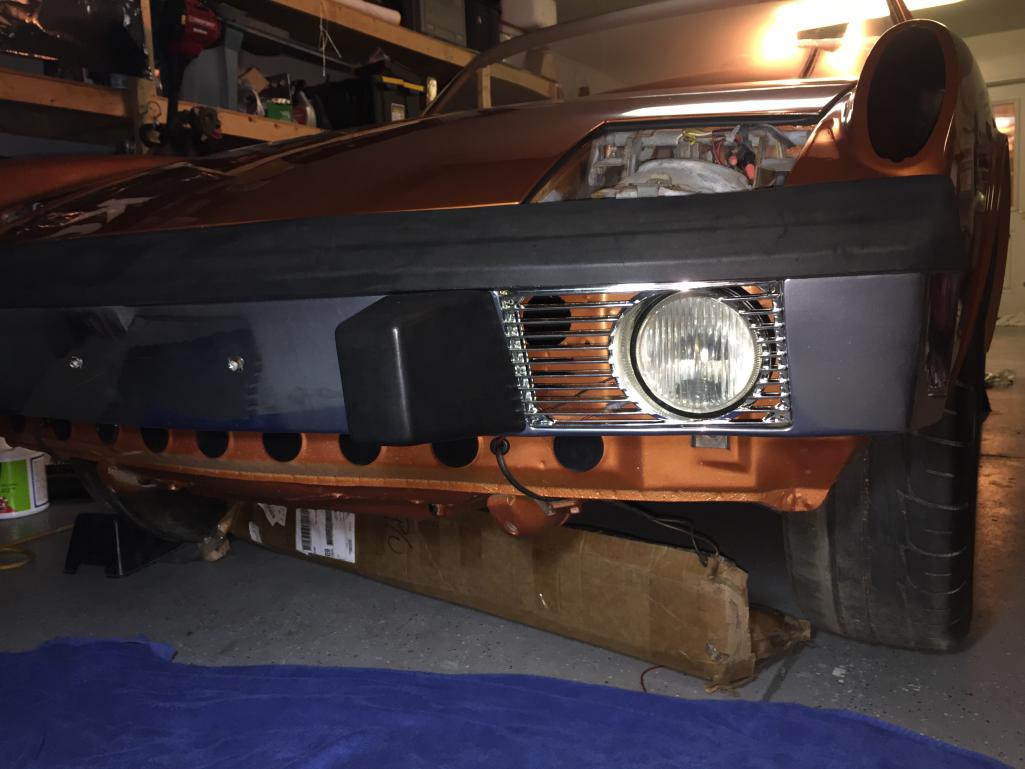
Posted by: Philip W. Jul 22 2018, 09:38 PM
also mounted the wiper mechanisms and the squirters.
Tomorrow my goal is to install the eye lids and lashes , then the side markers ans the flashers , fresh air box, hoses etc and then new gas lines, fuel filter and the tank.
If i can get that all done tomorrow, and the rear tail lights and rear bumper the next day, then i should be able to knock out the interior on friday , which i have off.
i need new front window trim!
Posted by: Cairo94507 Jul 23 2018, 07:17 AM
How cool to see all those parts laid out ready for installation.
Posted by: Philip W. Jul 23 2018, 09:02 AM
seems like such a small thing but it will be nice to have squirters that work
new door handles that have never been ised , won them at Okteenerfest in one of the drawings a couple years ago.
Attached thumbnail(s)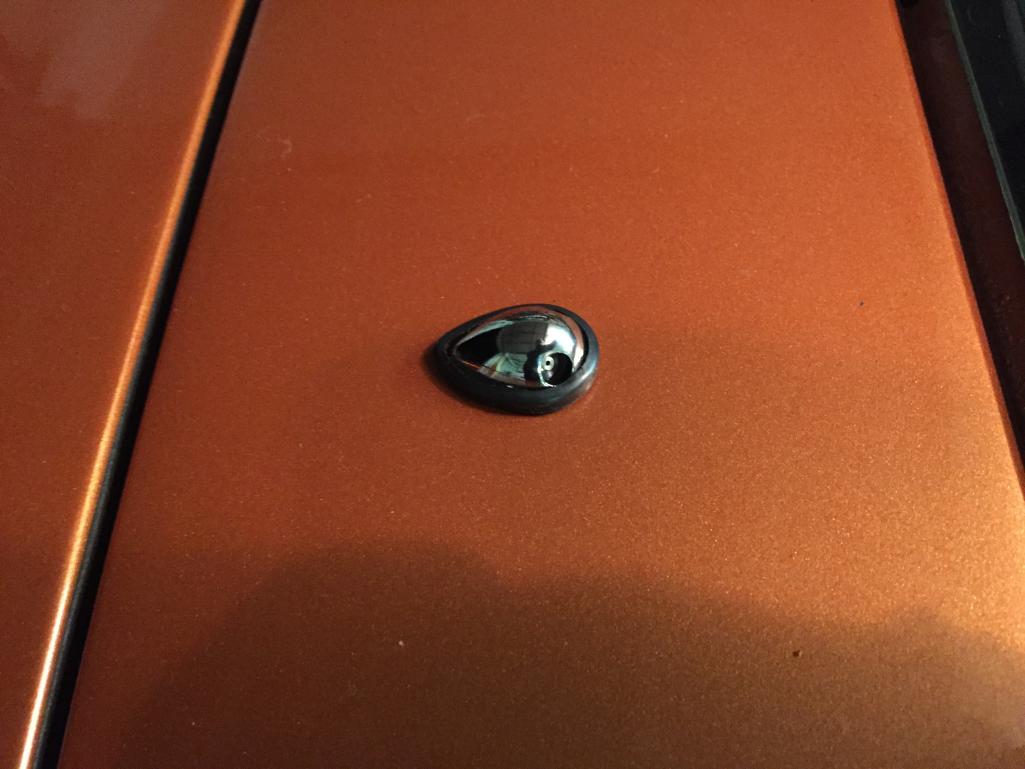
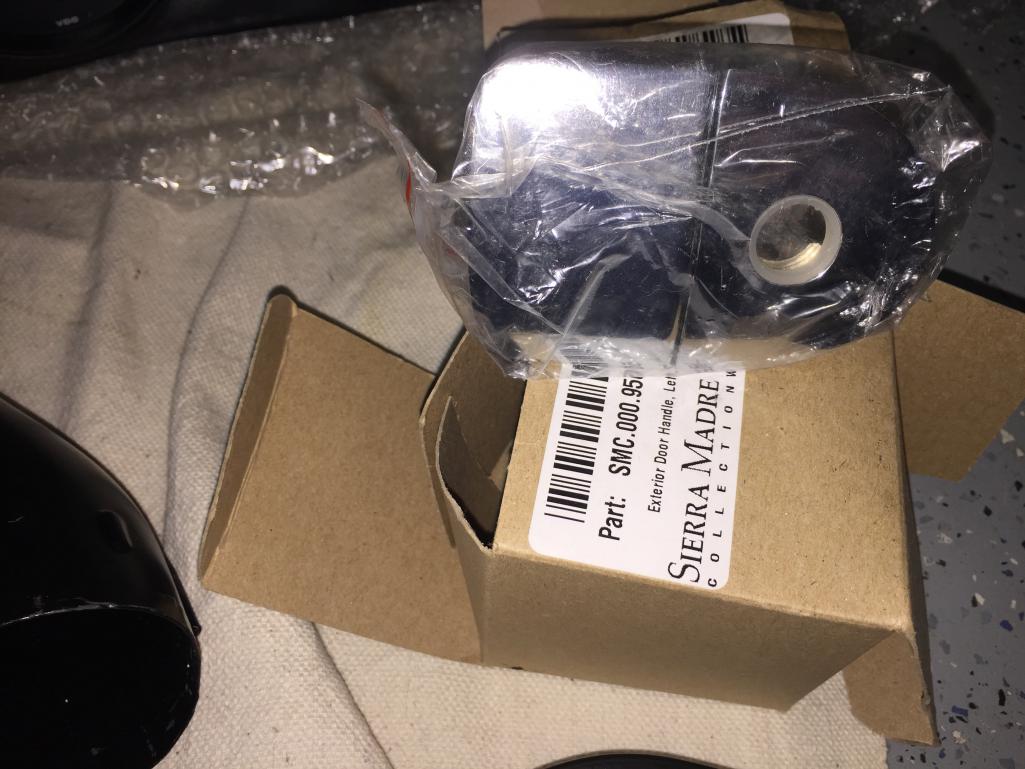
Posted by: Philip W. Jul 23 2018, 09:10 AM
led lighting conversion gauge cluster- now i hope to have this in before the trip but inwill leave it for last as it is not a necessity.
I sorted theu the brake line installation and will have to put a different fastener in to hold lines in place. close to being able to put the air box back in , i have to go get new warer hose for squirters and then i can put the fresh air box in - then tank and the lines -
Attached thumbnail(s)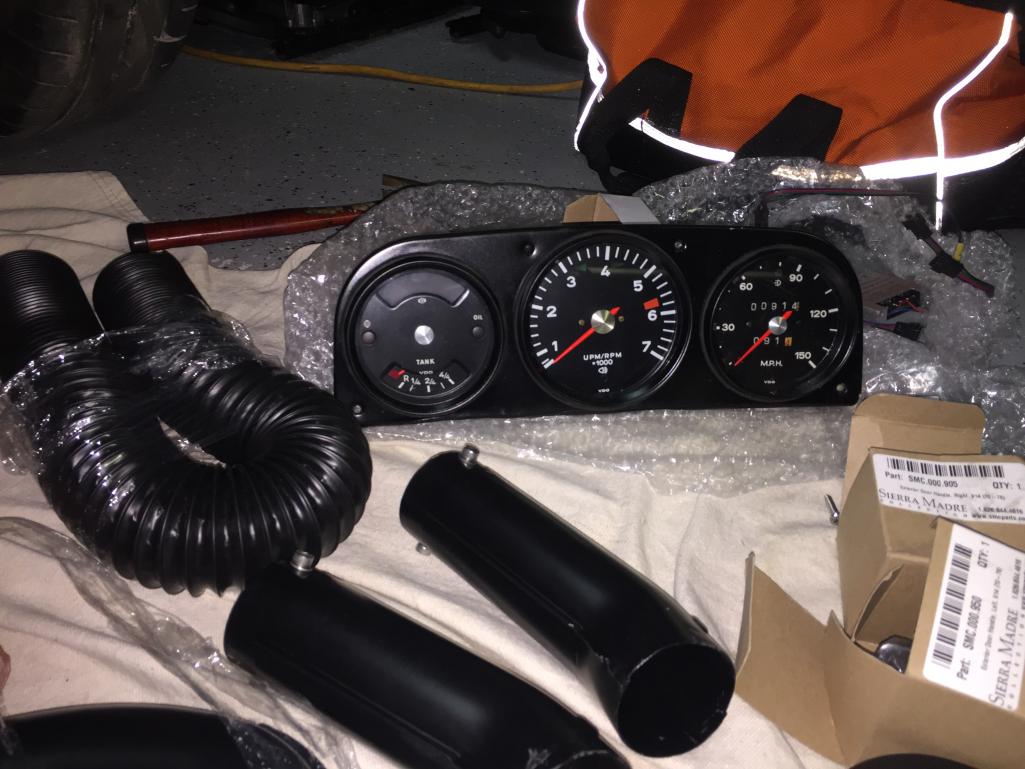
Posted by: Philip W. Jul 28 2018, 02:22 PM
took a break from the car for a few days and spent today putting some of the new heat wxchanger parts on. Mr. Stone had some S, & J tubes powdercoated , and the hardware zinc plates of course,
along with the flapper boxes. This was much easier than doing it under the car.
for some reason i cant find the engine tin grommets i ordered!
Also in the picture is new engine bar mounting hardware.
Attached thumbnail(s)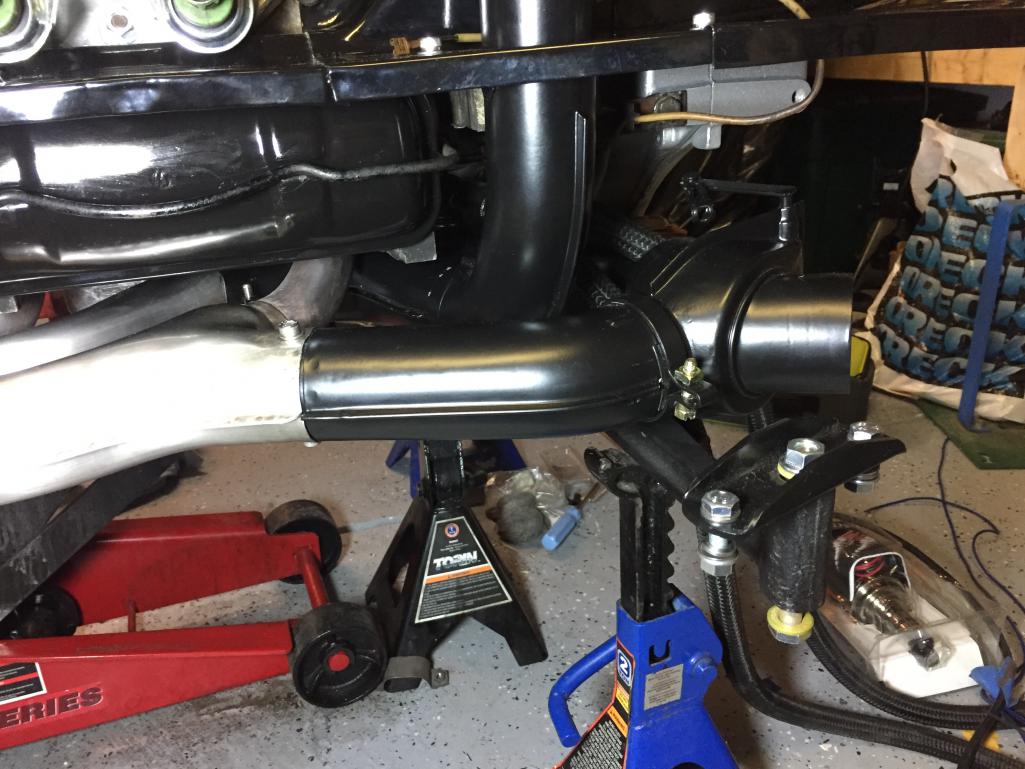
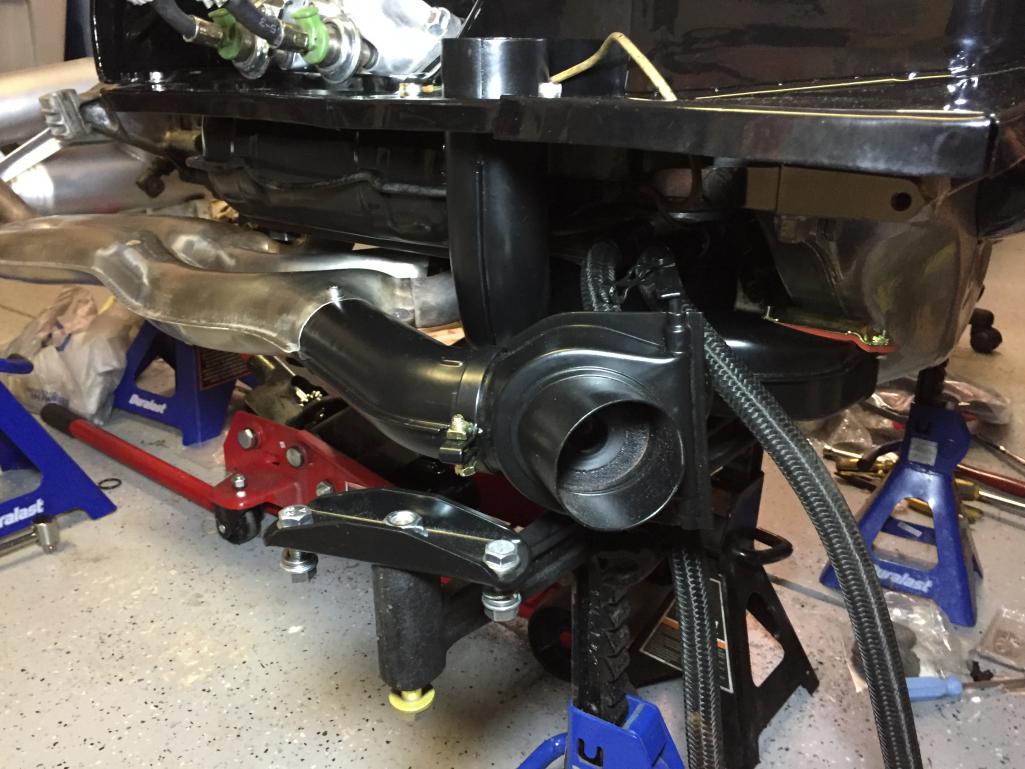
Posted by: billh1963 Jul 28 2018, 02:26 PM
Looking great, Phil!
Posted by: Philip W. Jul 28 2018, 02:31 PM
before the rain set in today i also put the final coat of paint on the rocker panels.
i will probably be for sale later in but will go on the car for now. I have not decided for sure, as i have a set of brand new reproduction ones from AA, and those will need prime and paint and i am not sure i will have time to tackle that in the next 6 weeks before Okteenerfest. These had some repair done but you would not know it , they look perfect.
Attached thumbnail(s)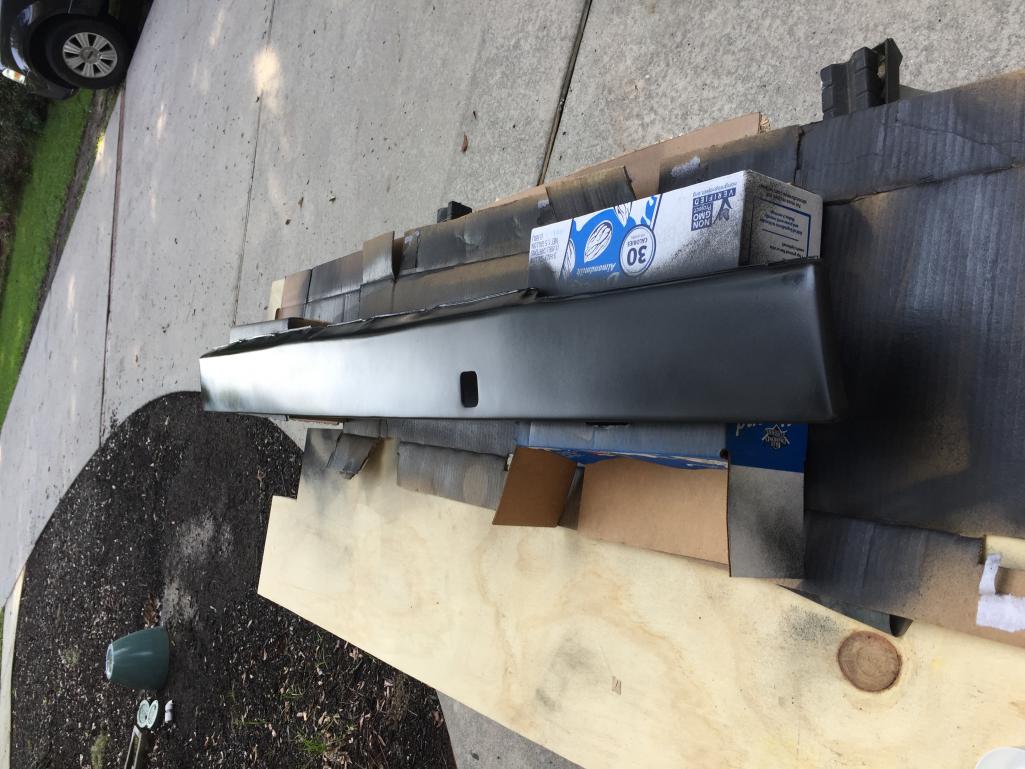
Posted by: Philip W. Jul 28 2018, 02:37 PM
Looking great, Phil!
thanks, getting closer, id like to get all this done today so that the motor is ready to go back in the car next weekend.- need to finish fuel lines and put the engine bay gaskets in, put the fresh air box in and the tank can go back in. All new FI hose too, not taking any chances. your car get picked up yet? (BB) I heard thst mark changed his mind and decided to keep it ! - maybe he will five you the 912 instead- there’s a car you dont have yet, Bill!
Posted by: Philip W. Jul 29 2018, 04:43 PM
drivers side heat tubes all in place , of course new screws and hardware and finally have all the proper shields too.
Attached thumbnail(s)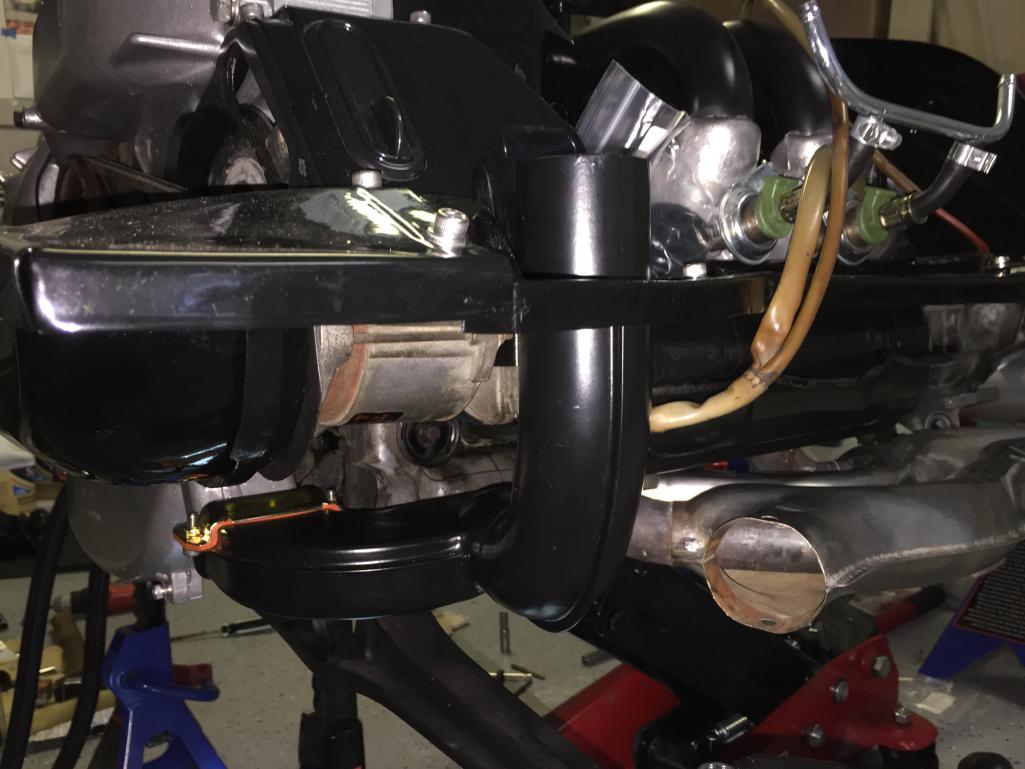
Posted by: Philip W. Jul 29 2018, 04:46 PM
one more - also cleaned up the head light plastic shrouds
Attached thumbnail(s)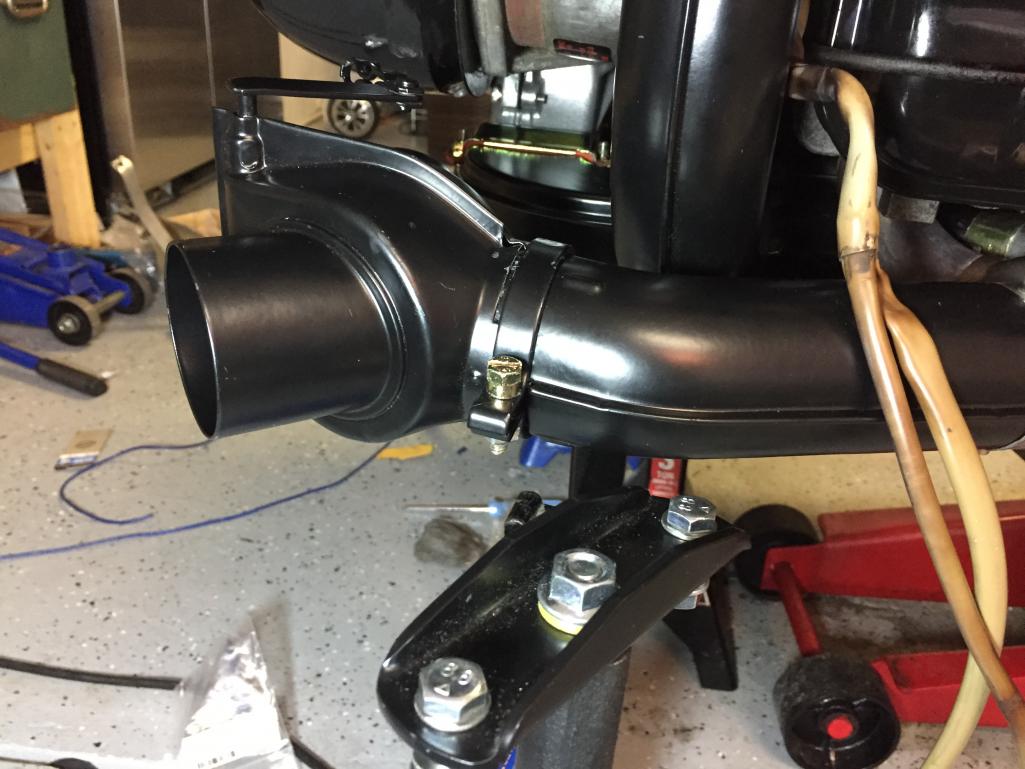
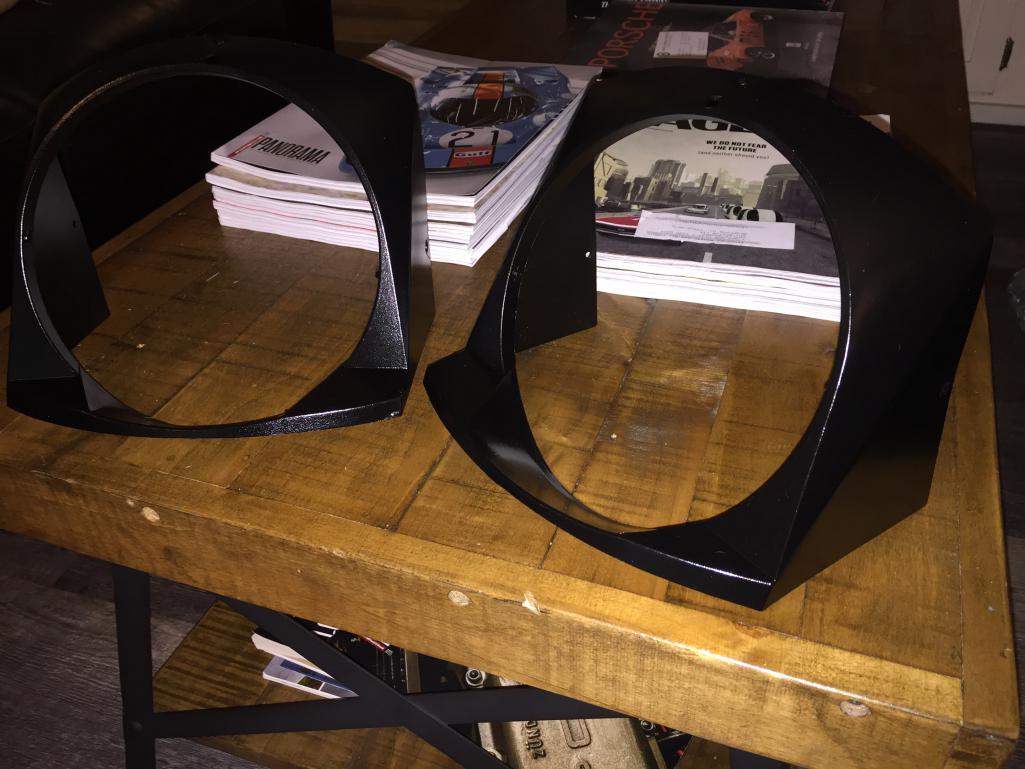
Posted by: Philip W. Aug 1 2018, 07:46 AM
Getting close, but lots still to do, and a few more parts to replace.
a few things I need:
-fresh air box fan assembly: mine is ok, but has never worked correctly. I took it apart completely this weekend to inspect and clean. The spring things on back side of plug(I think these are the 'resistors' that control the 3 speeds) look fine, so maybe its not the issue. Ebay has a fan and motor assembly that is OEM Behr, but its $280!!!!! - I called Porsche and its $380 just for the motor from them lol!!
I also found a nice clean blower on ebay it looks pretty nice and clean but again its like $280 for used with the housing.
I ordered the seal kit from 914 rubber for the flapper seal and top of the housing and between intake and blower assembly seal, but the one fan seal Mark said they do not make at this time- this is the seal that goes all the way around the fan.
- I just don't know if its worth the expense and the trouble to try and restore this stupid thing- has anyone put in a different type of fan/blower? I came across an idea: our local boat house and boating supply has several sizes of bilge fans. they go inline but could be modified , and the smaller one looks like it could be mounted up under the upper half box and then have a "T" out to blow into the cabin, onto the windshield- this would at least allow some way to have airflow to defog the window when driving in rain etc. Any other ideas on this??
- I will post a picture of the gasket on the outer rim of the fan - if someone has a used one in better shape that would be great. -
also I really need to sell some parts to help pay for the rest of what I have left- the wife is cutting me off lol!
- I have listed in classifieds a really nice rear bumper, very very nice Bosch fog lights for late cars, and I have a rust free front steel valence and rear valence( not listed yet but will sell for $150 each not restored fully yet, once I do that I will list them for $250 each).
I also have heater parts like J and S tubes etc that are decent shape, no rust.
-
The car is back up at paint shop getting some stuff touched up, I should have the whole drive train ready to go back in by the time it comes home this weekend.
end of short update, pics to follow.
Posted by: Perry Kiehl Aug 1 2018, 09:15 AM
Nice work Phil! My only observation is that while the engine is out, you might consider replacing the alternator harness. I see scorching on the jacket. It might be OK, but I'll bet inside of that the insulation on the wire could be sketchy
Posted by: Philip W. Aug 1 2018, 09:35 AM
Nice work Phil! My only observation is that while the engine is out, you might consider replacing the alternator harness. I see scorching on the jacket. It might be OK, but I'll bet inside of that the insulation on the wire could be sketchy
yea i saw that too, i guess i should - i really should get a new alt., found that this is a bus alt, 50 amp not 55, so someone swapped it at some point.
ok so iguess i need a new alr with new harness!! anyone??
Posted by: Philip W. Aug 1 2018, 09:39 AM
kok so this seel seems to be NLA and not made by 914rubber yet- anyone have a decent one? you can see that its a bit cracked and dried out.
Attached thumbnail(s)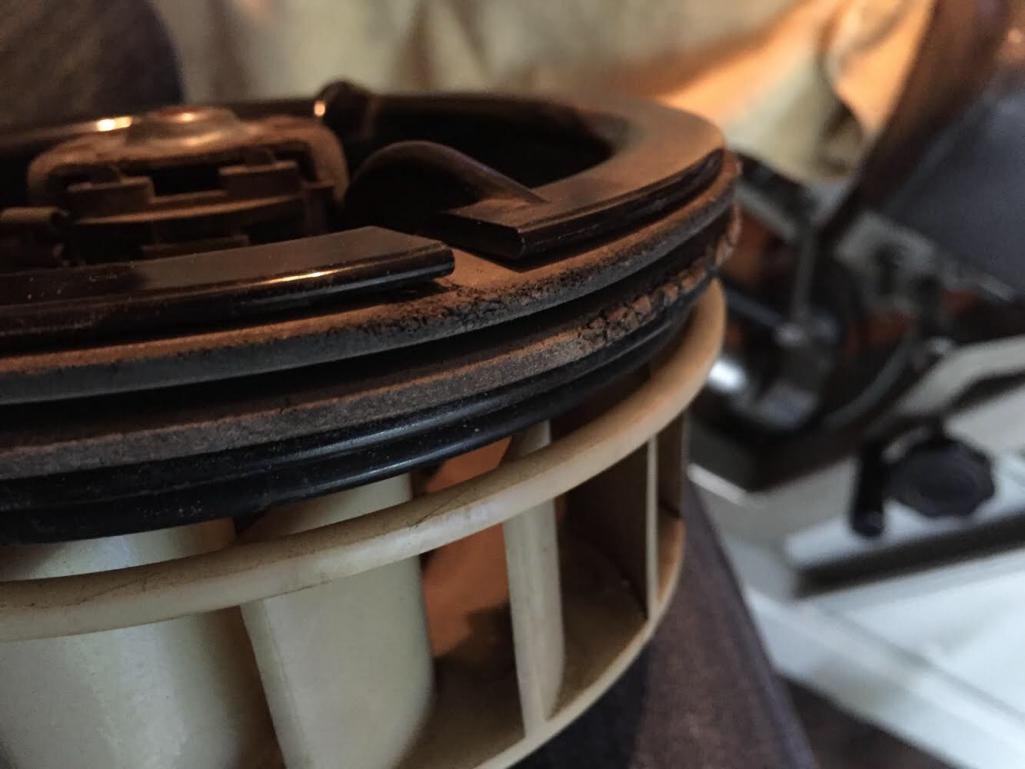
Posted by: Philip W. Aug 4 2018, 03:42 PM
been a long day already, drove 2 hours up to the shop and picked up the car again, took it up last week to get a few things soeted and touched up. got home and went to work! the front valence is on, next is the front bumper( this is my temporary one)
Attached thumbnail(s)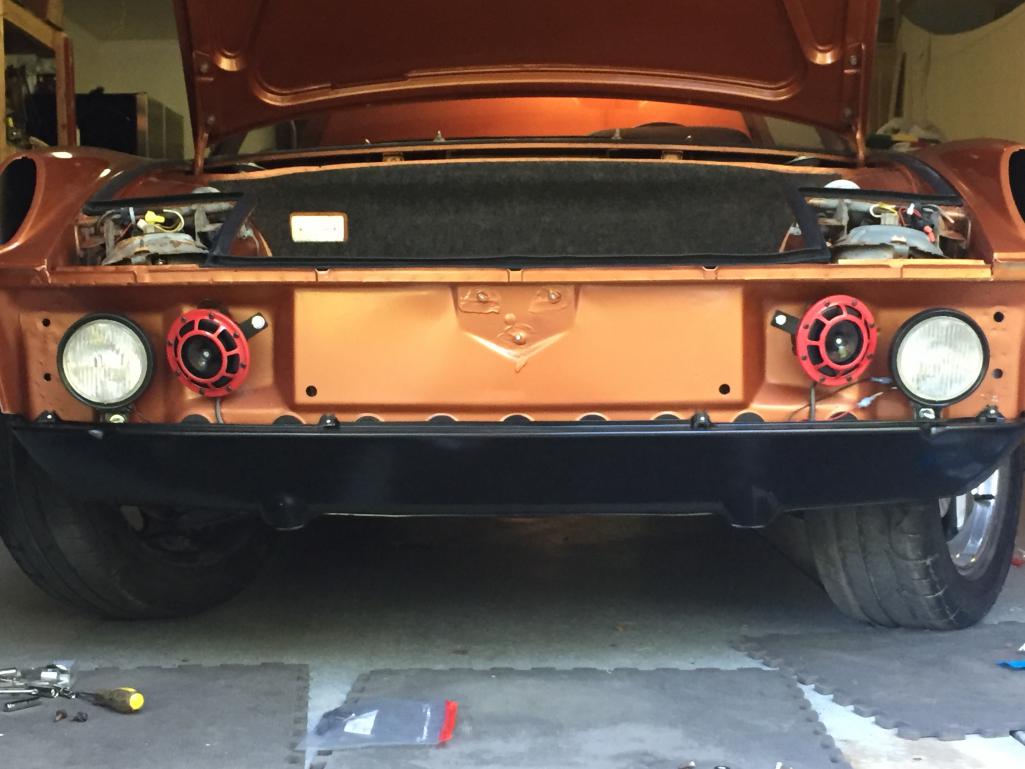
Posted by: Mblizzard Aug 4 2018, 05:16 PM
been a long day already, drove 2 hours up to the shop and picked up the car again, took it up last week to get a few things soeted and touched up. got home and went to work! the front valence is on, next is the front bumper( this is my temporary one)
What a car! If you get jammed for time for Okteenerfest my offer is still good. This car has to be there. I would leave mine at home to be sure everyone gets to see this!
Posted by: Philip W. Aug 5 2018, 11:25 AM
been a long day already, drove 2 hours up to the shop and picked up the car again, took it up last week to get a few things soeted and touched up. got home and went to work! the front valence is on, next is the front bumper( this is my temporary one)
What a car! If you get jammed for time for Okteenerfest my offer is still good. This car has to be there. I would leave mine at home to be sure everyone gets to see this!
thanks for the offer, we will se where i am in a couple weeks. i am going to start at the front and work my way back.
I need to figure out a solution on how to block the holes left behind from the old bumper shocks.
I am most overwelmed with the rebuilding of the doors- i have all new hardware and seals including door stay kit- well everything but the actuator/scissors mechanisms.
putting the drive train back in and getting all thst ready seems like an easier job since i have done that before
Posted by: Philip W. Aug 5 2018, 05:12 PM
today i had a couple hours after yard work to mount headlight covers, eyelids and lashes.
i still dont know if the front bumper will be done on time so i put the temp one on, so it can go like this if necessary- i am having a heck of a time ligning up the rubber buttons that hold the eyelash trims in( is that what they are called??)
anyway , they are in place - next up will be the side markers and the turnsignal buckets and connections. once those are in finish the fuel line install and put engine shelf seals in place,
Attached thumbnail(s)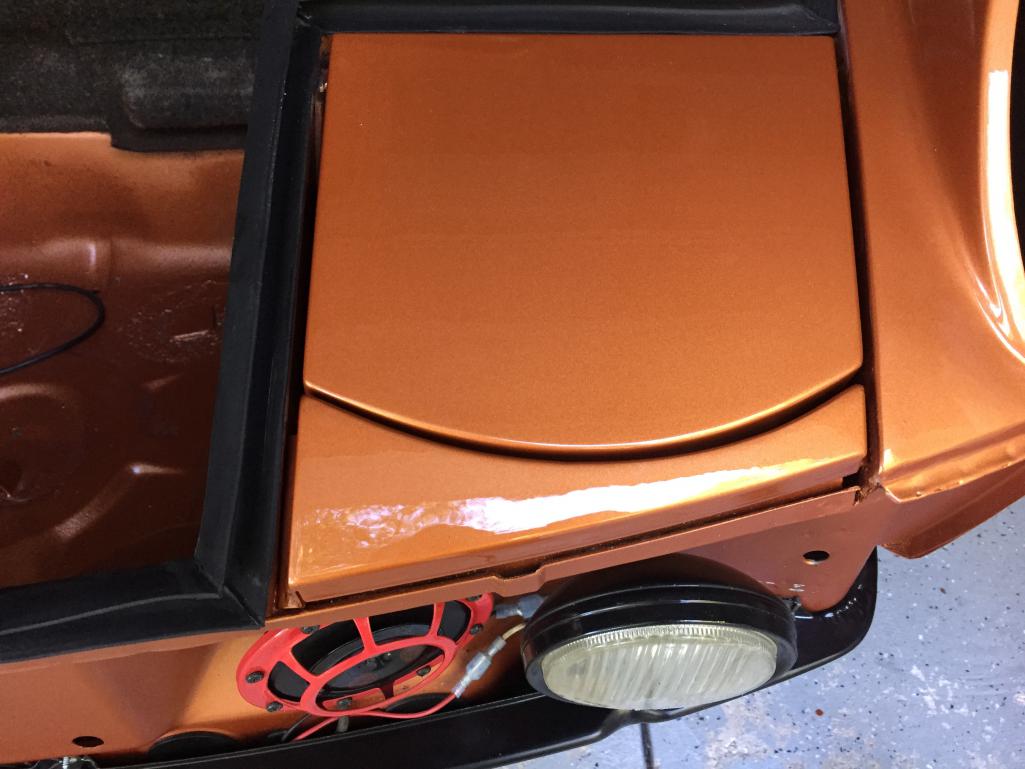
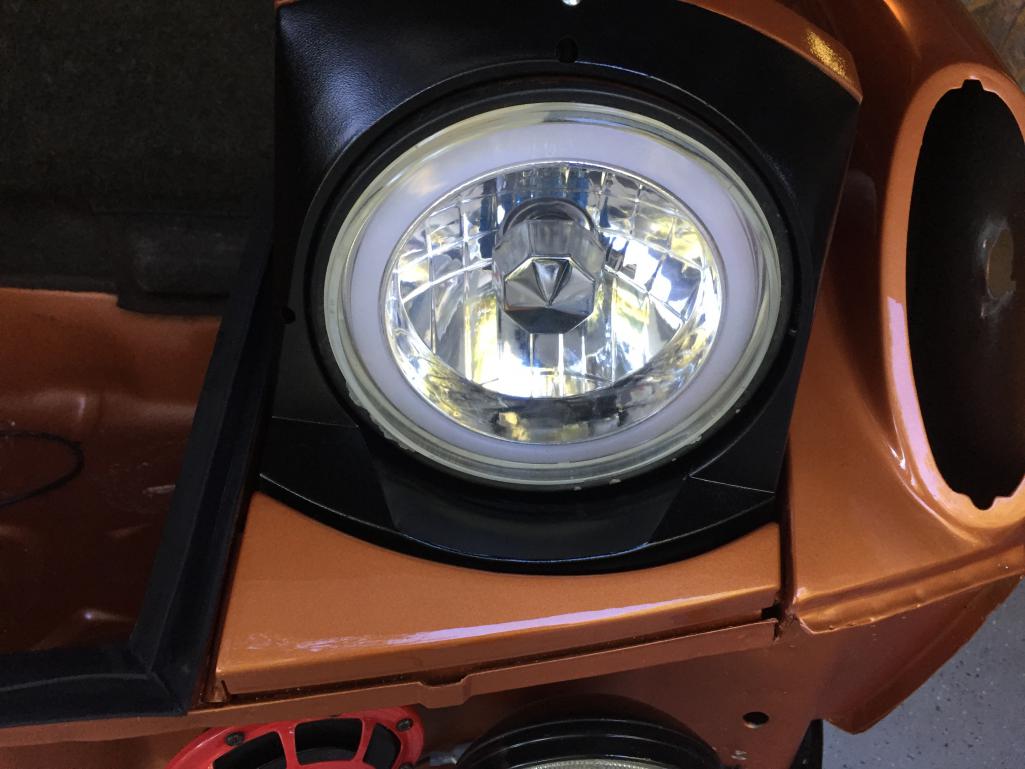
Posted by: Philip W. Aug 5 2018, 05:14 PM
right(passenger side)
Attached thumbnail(s)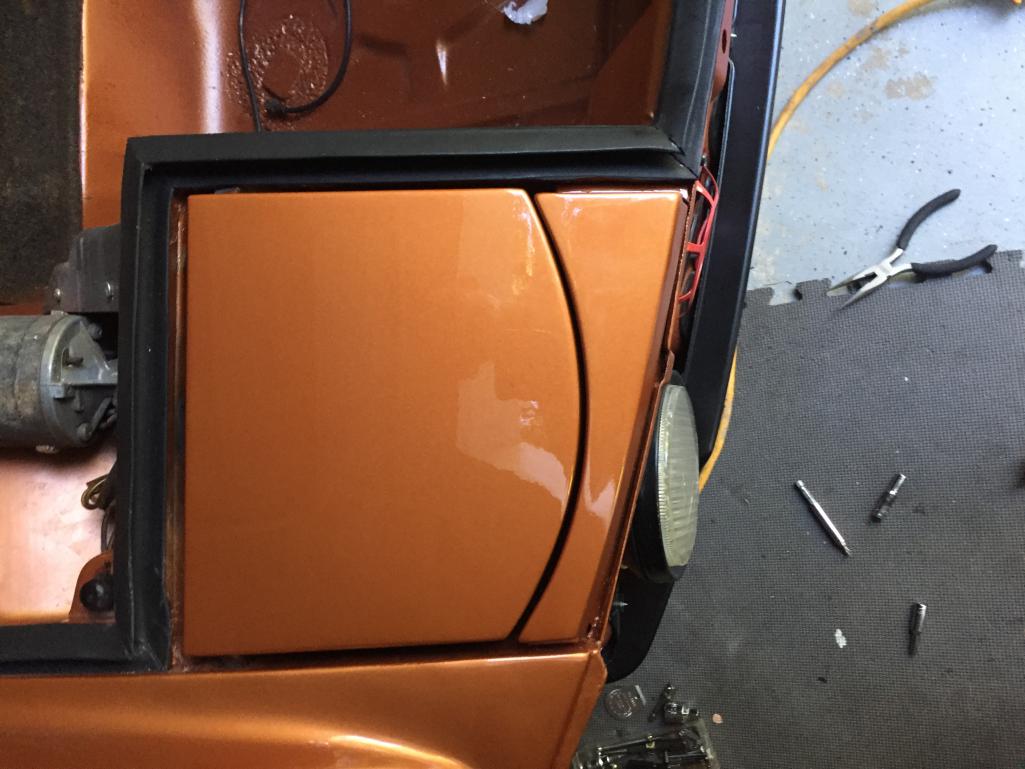
Posted by: Philip W. Aug 5 2018, 05:15 PM
open rt
Attached thumbnail(s)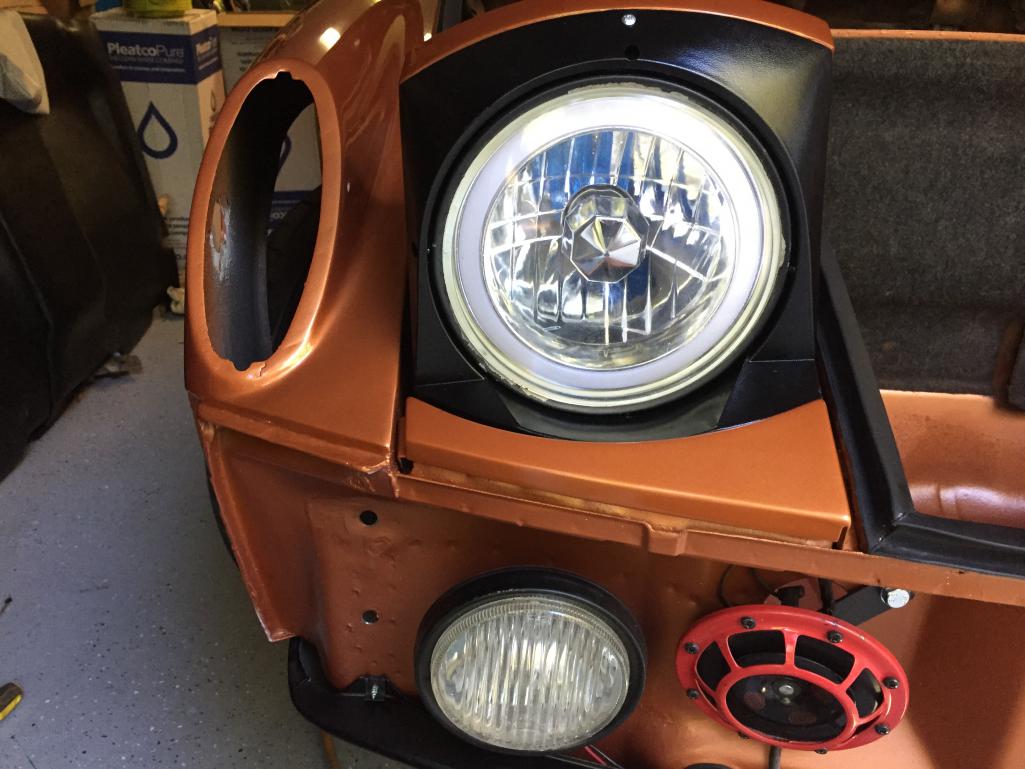
Posted by: Philip W. Aug 5 2018, 05:16 PM
front with bunper in
Attached thumbnail(s)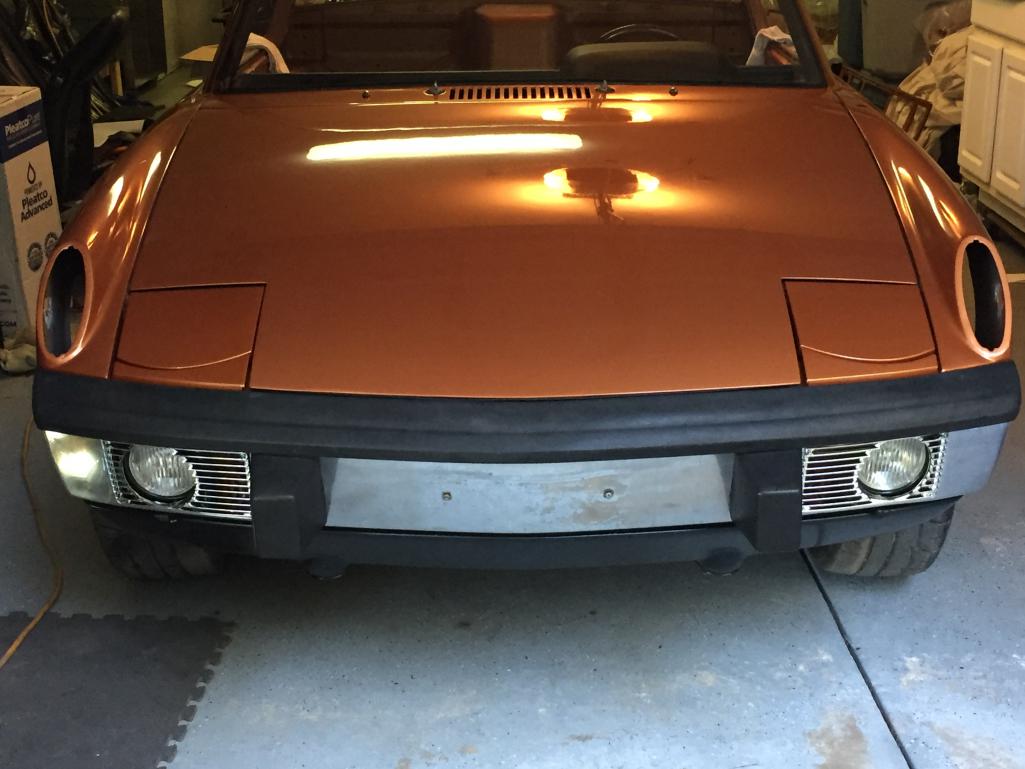
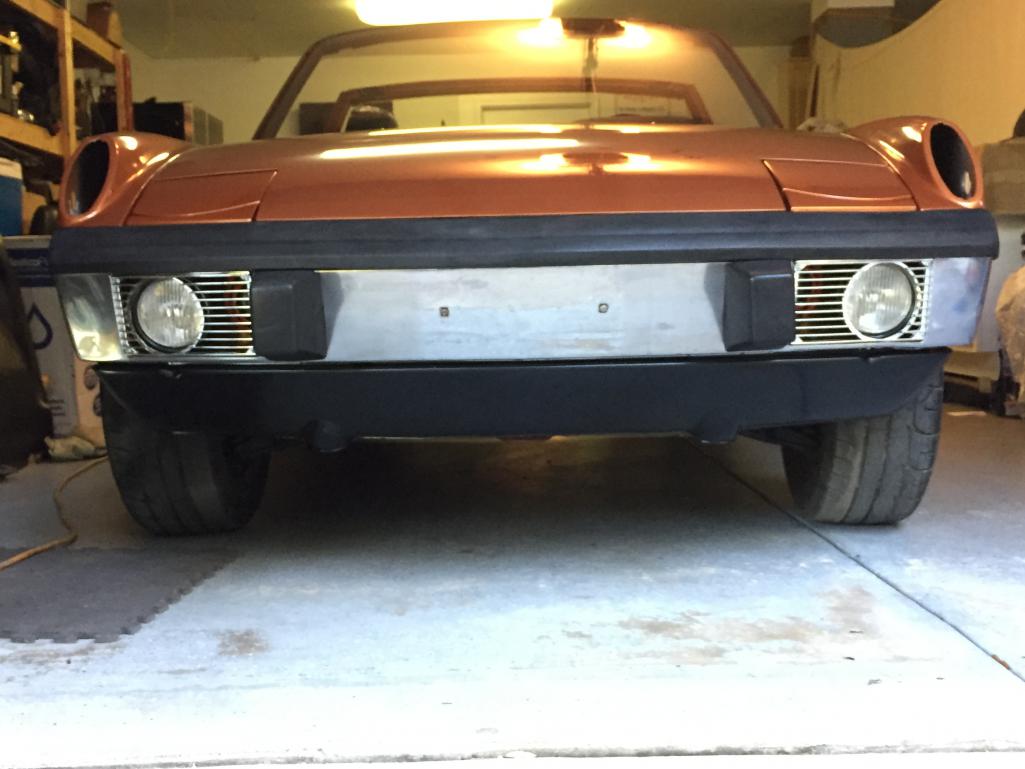
Posted by: billh1963 Aug 5 2018, 05:30 PM
Looks great, Phil!
Posted by: Philip W. Aug 5 2018, 05:46 PM
next up- new rubber wire covers for the light wiring-out with the old
Attached thumbnail(s)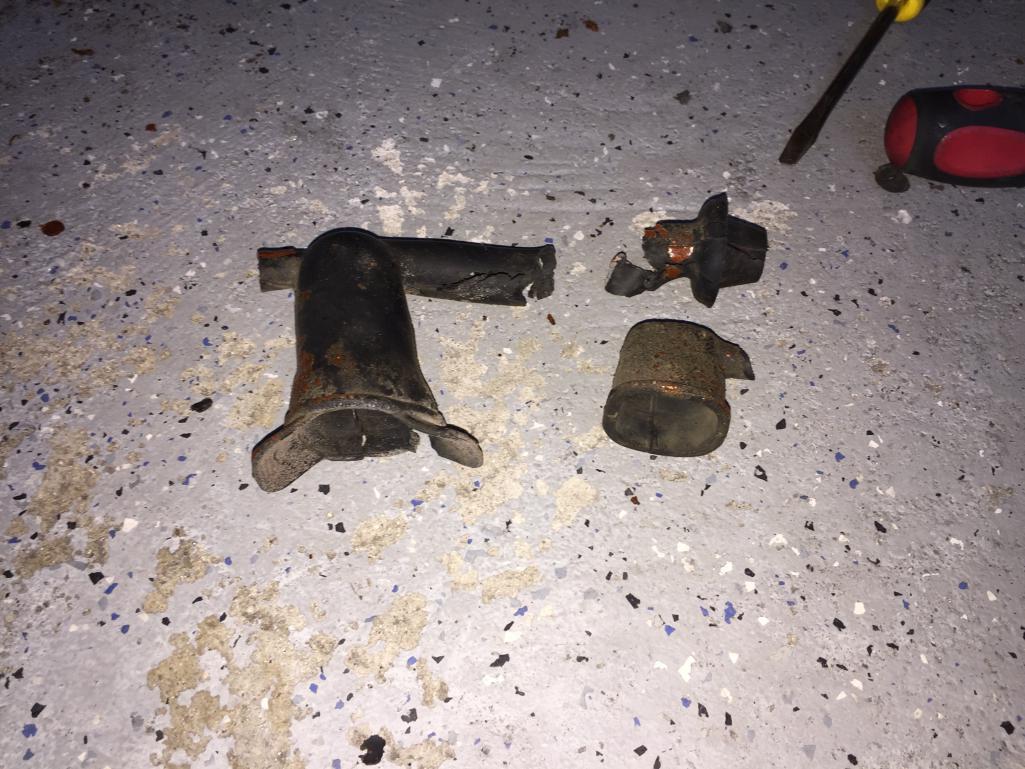
Posted by: Philip W. Aug 5 2018, 05:48 PM
in with the new
Attached thumbnail(s)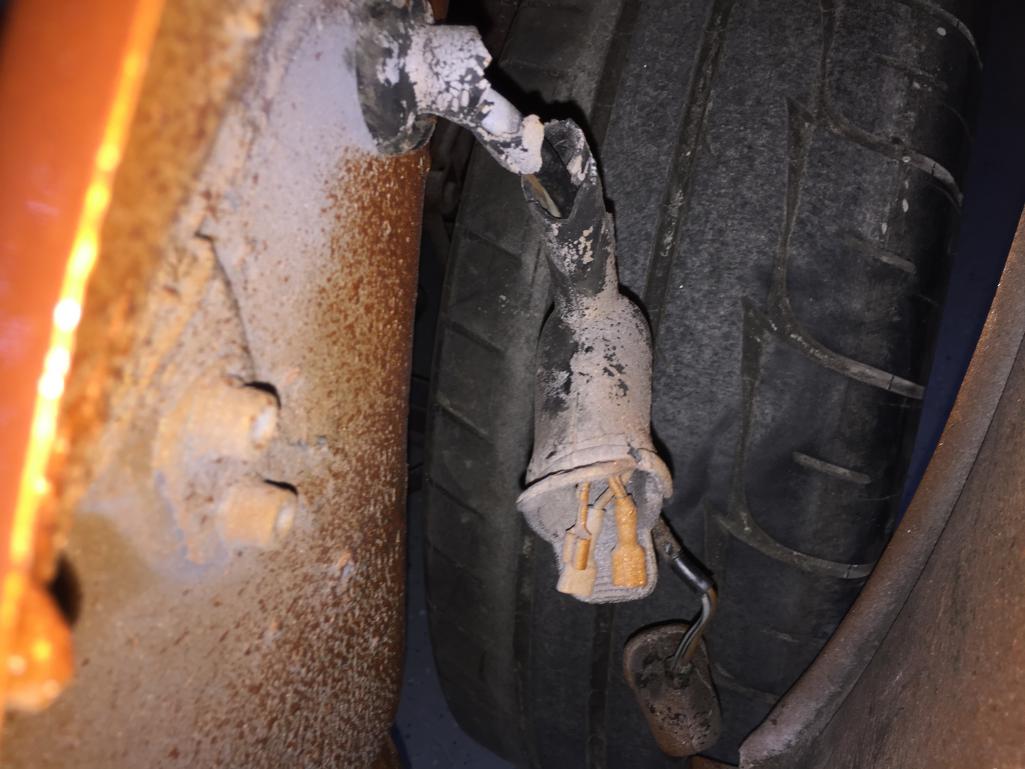
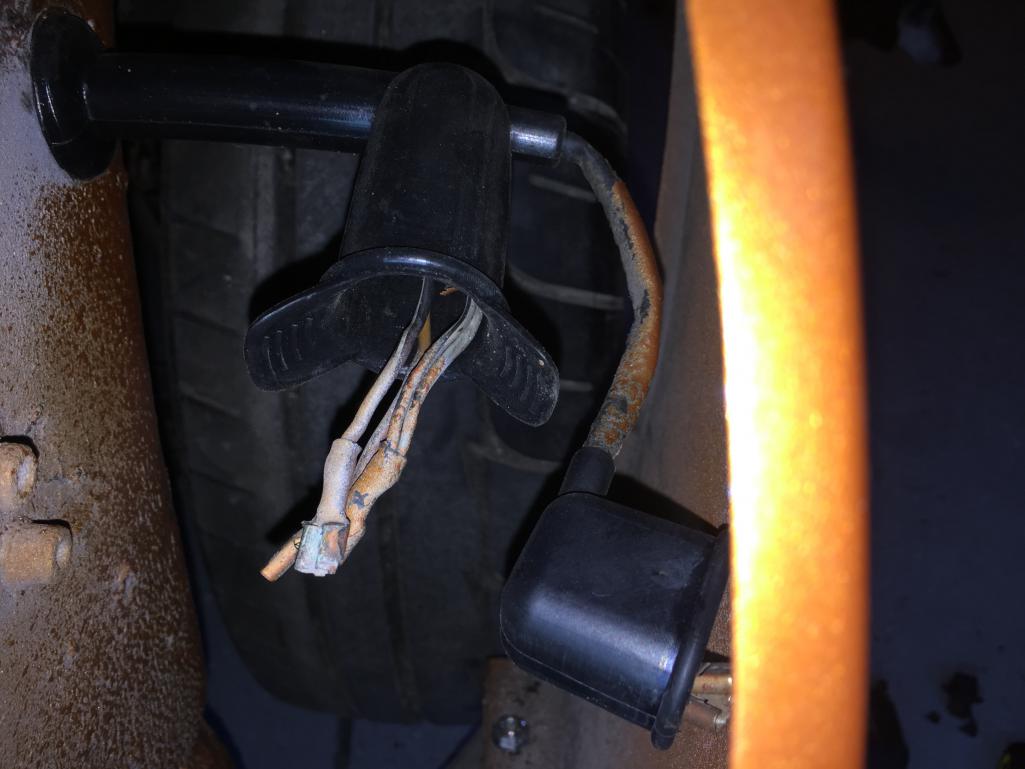
Posted by: Philip W. Aug 5 2018, 05:50 PM
anyone have a quick link to what wires go where on the tuen signal bucket ? and is there a right and left or does it matter?? i dont remember it was months ago
when i pulled this stuff.
Posted by: Philip W. Aug 5 2018, 05:51 PM
Looks great, Phil!
ive had some help with the hard to reach spots under the car —-

Attached thumbnail(s)
Posted by: Philip W. Aug 5 2018, 06:31 PM
hope its right- google search, link found to someones drawing of them labled etc and here we are , drivers side done!
inside with new boots from 914rubber of course!!
Attached thumbnail(s)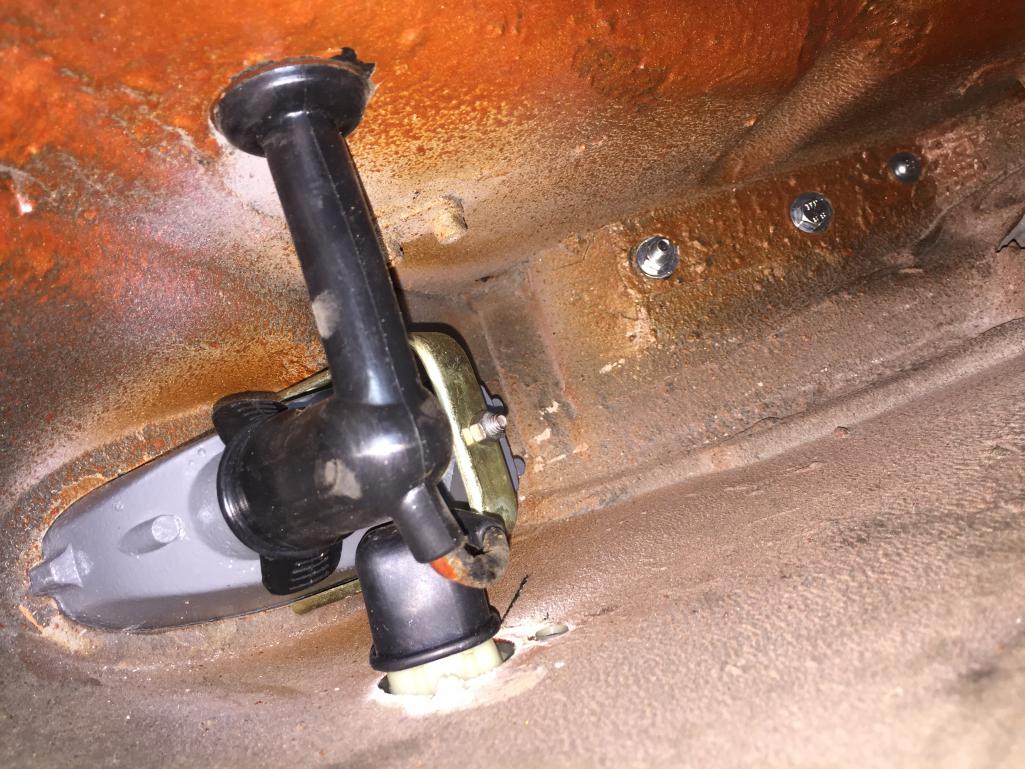
Posted by: Philip W. Aug 5 2018, 06:36 PM
ok so this is an NOS Hella side marker i bought from a member - i know someone here thought paying $100 or more was too high but have you seen any NOS perfect side marker lights lately?
freaking took over an hour to do that side!!!
oh and of course the beautiful turn signal bucket with nice shiny insides were feom Brad Meuyer from 914LTD in Peoria Illinois( the S is silent!)
Attached thumbnail(s)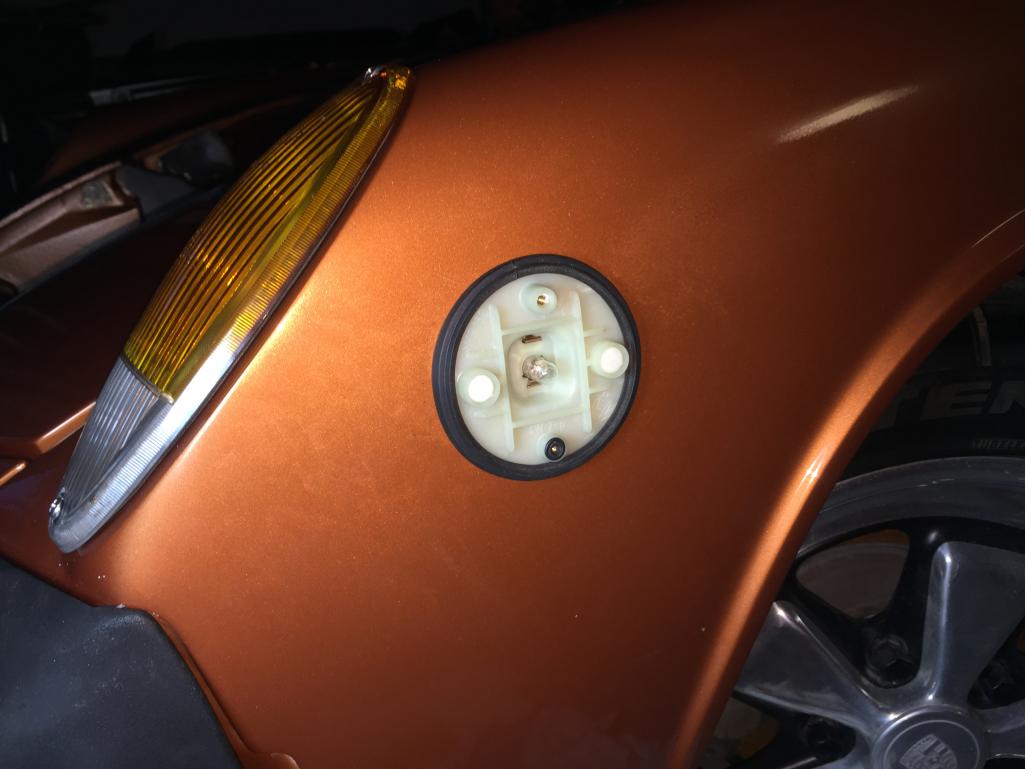
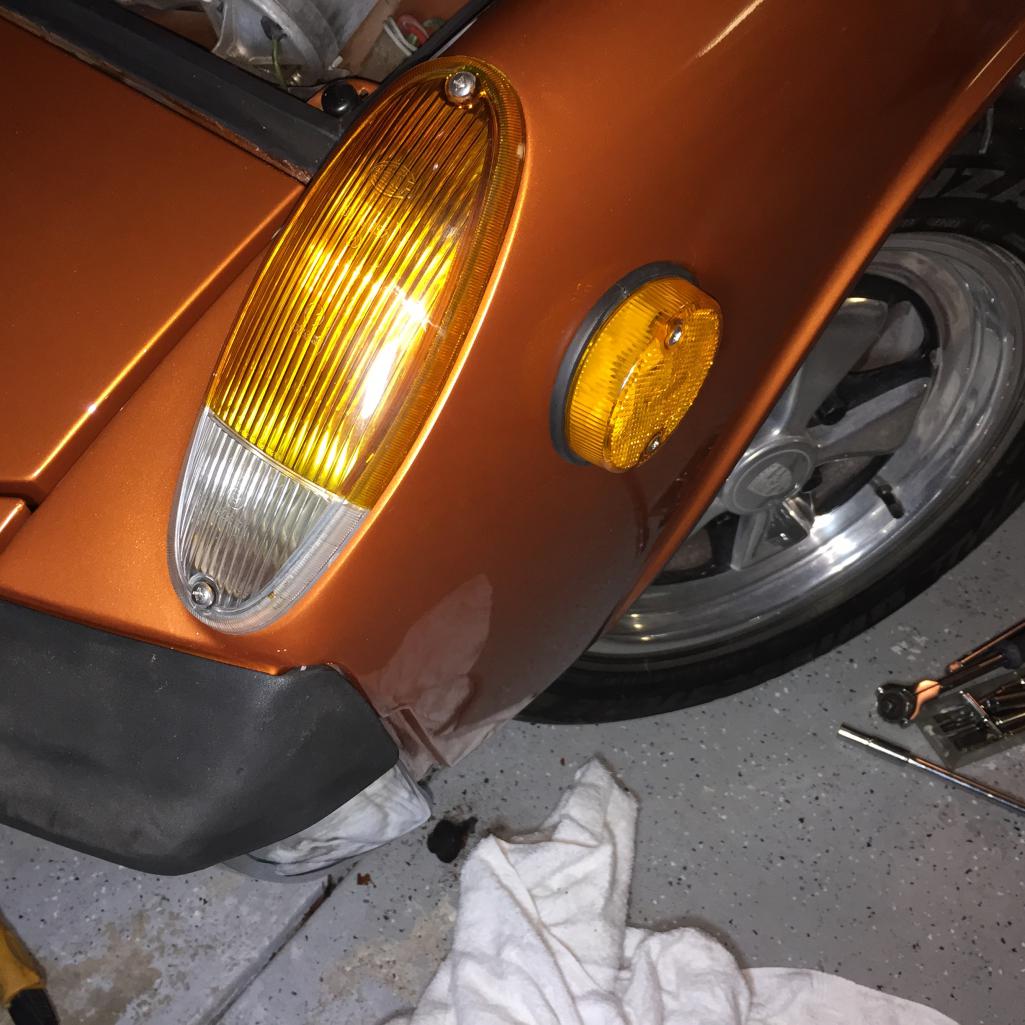
Posted by: Philip W. Aug 5 2018, 07:39 PM
right side took about half the time, side marker and the turn signal are in,
Attached thumbnail(s)
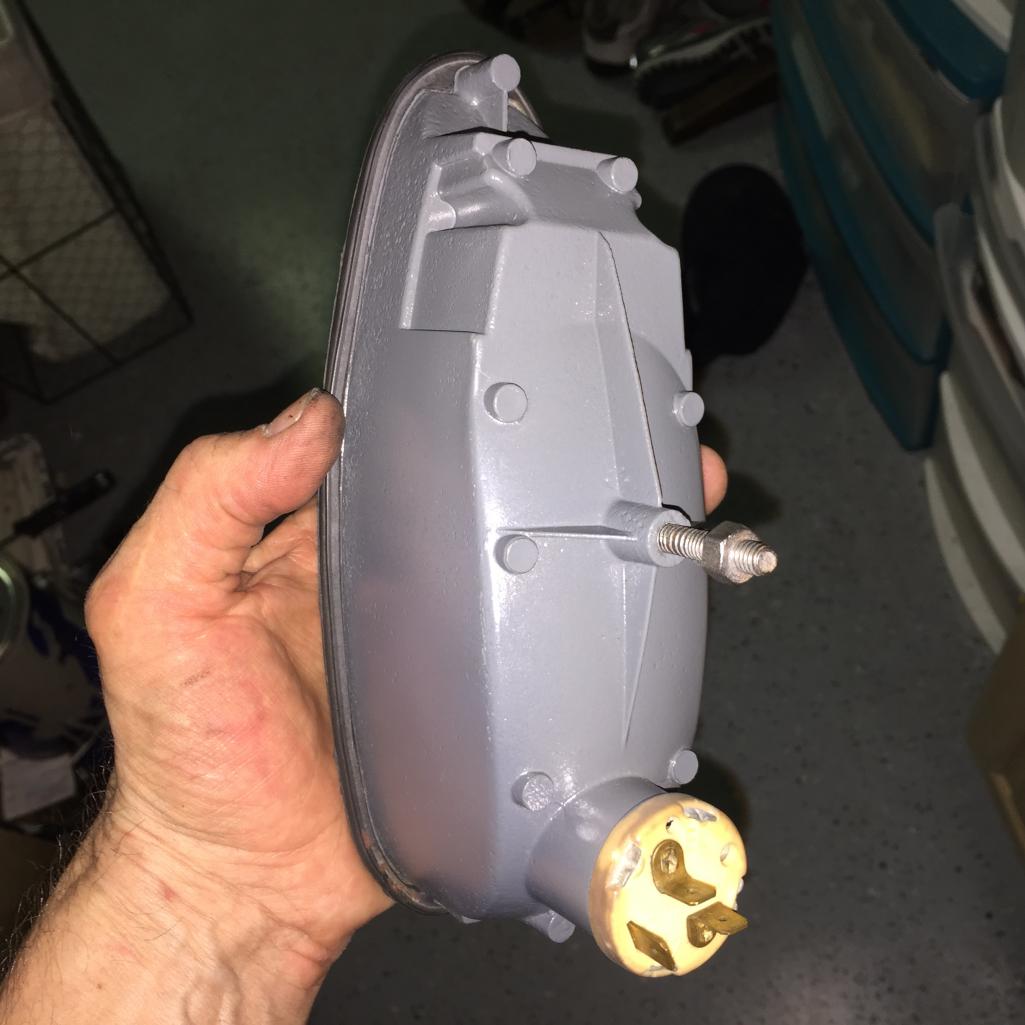
Posted by: Philip W. Aug 5 2018, 07:41 PM
so the spare and the trunk pad are in, going to call it done for tonight-
Attached thumbnail(s)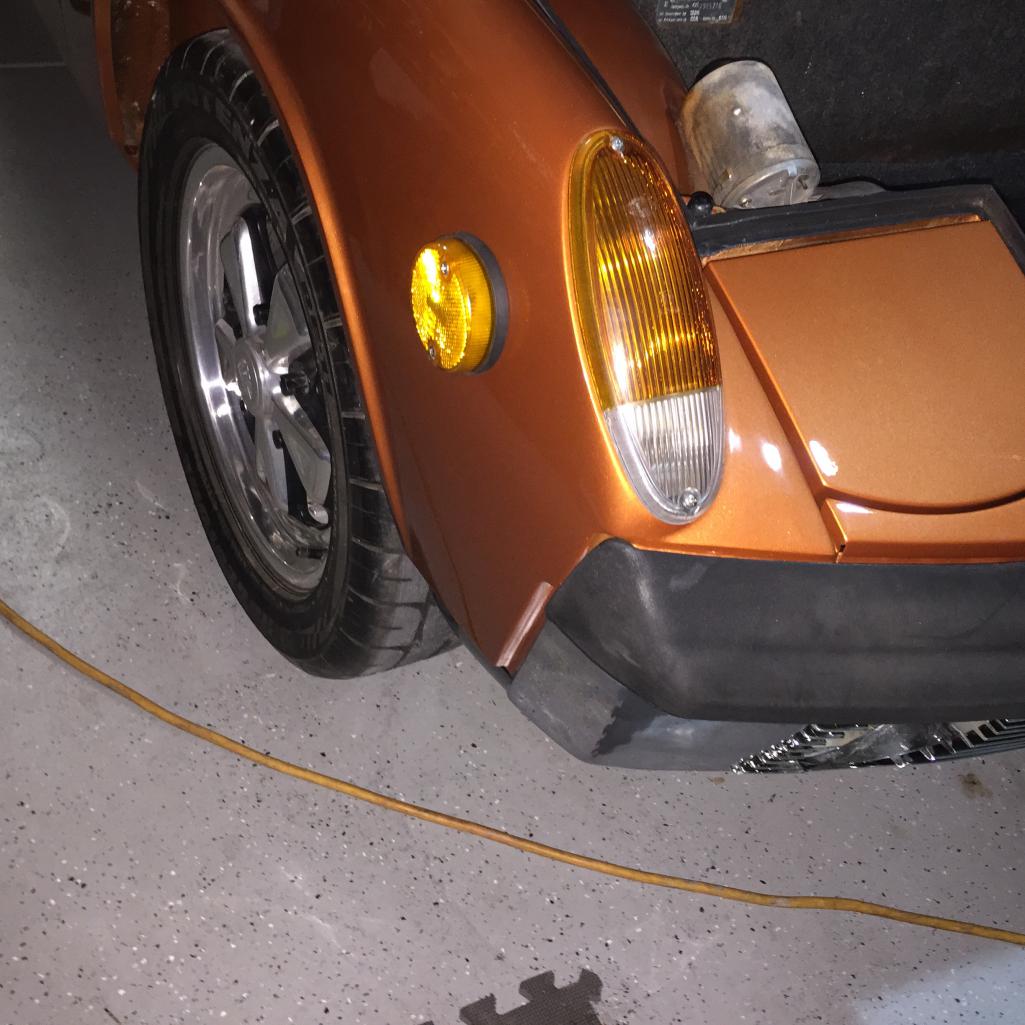
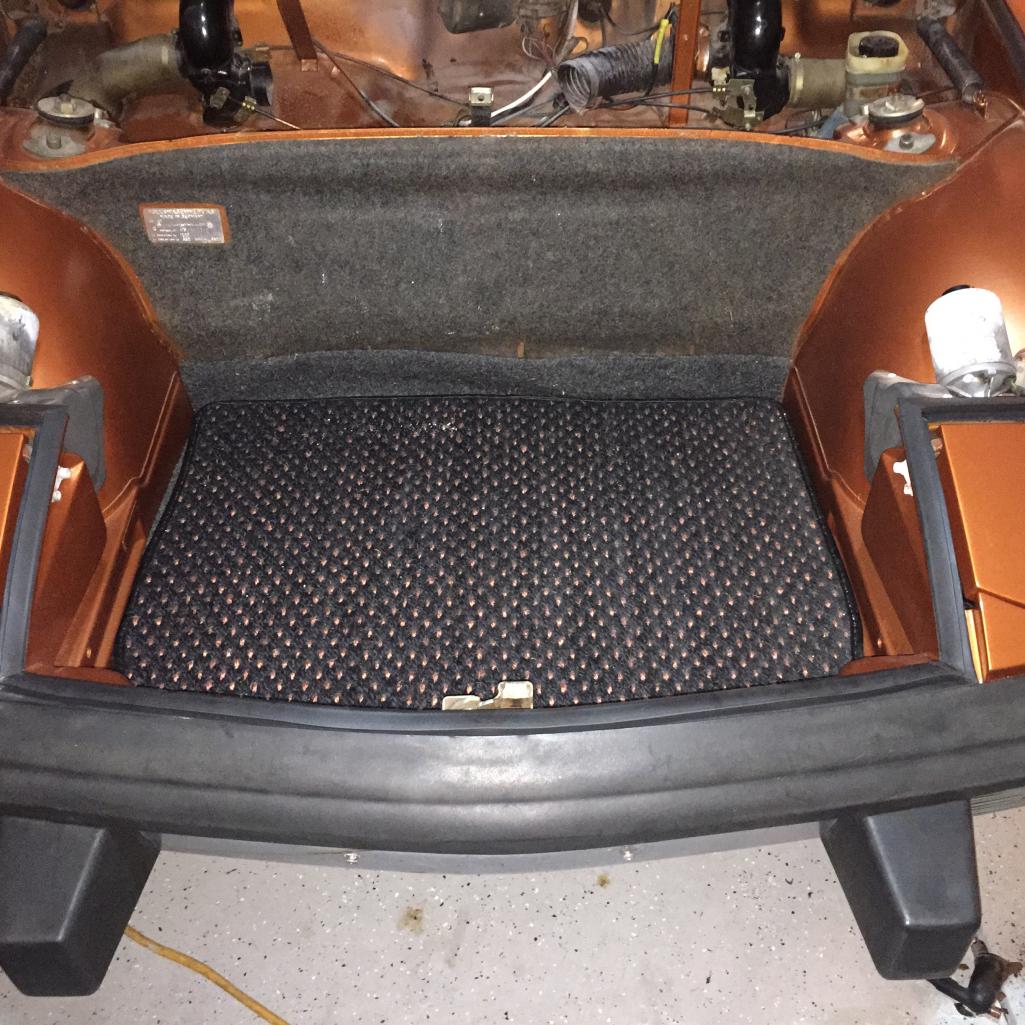
Posted by: Philip W. Aug 7 2018, 05:53 AM
refinished the top
Attached thumbnail(s)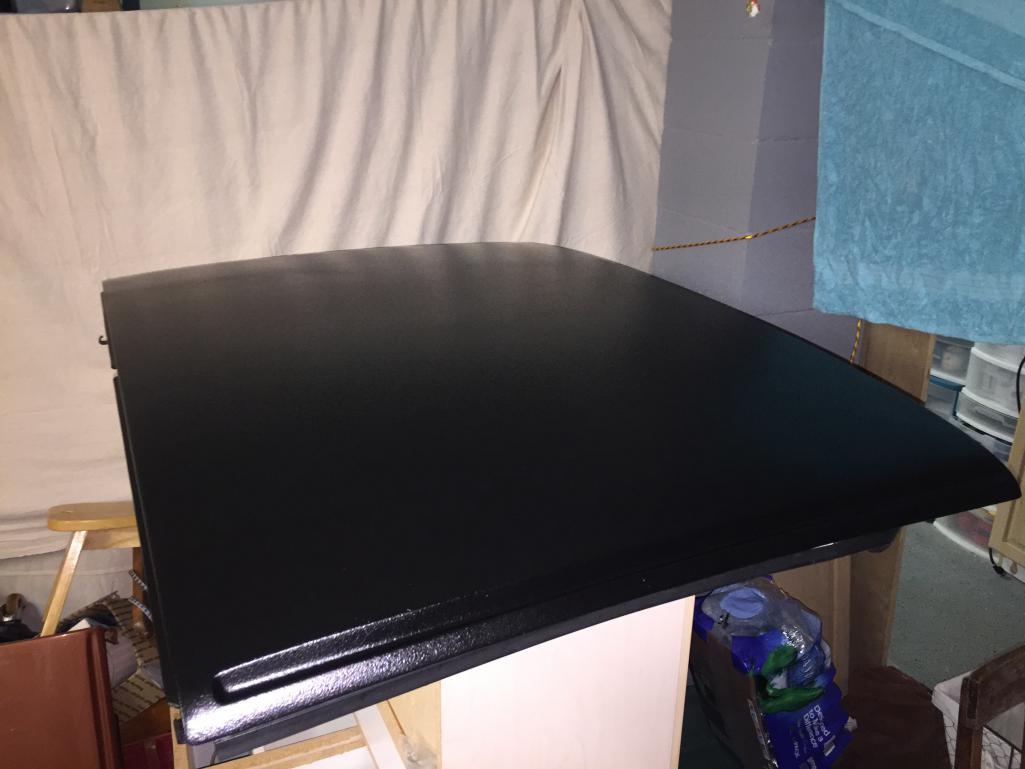
Posted by: Philip W. Aug 7 2018, 05:57 AM
i took the new 6” rims over and had the tires pulled from the 7” that were on the rear and put them on the new 6” i have had in a box for thr past year, mounted them with new chrome nuts
Attached thumbnail(s)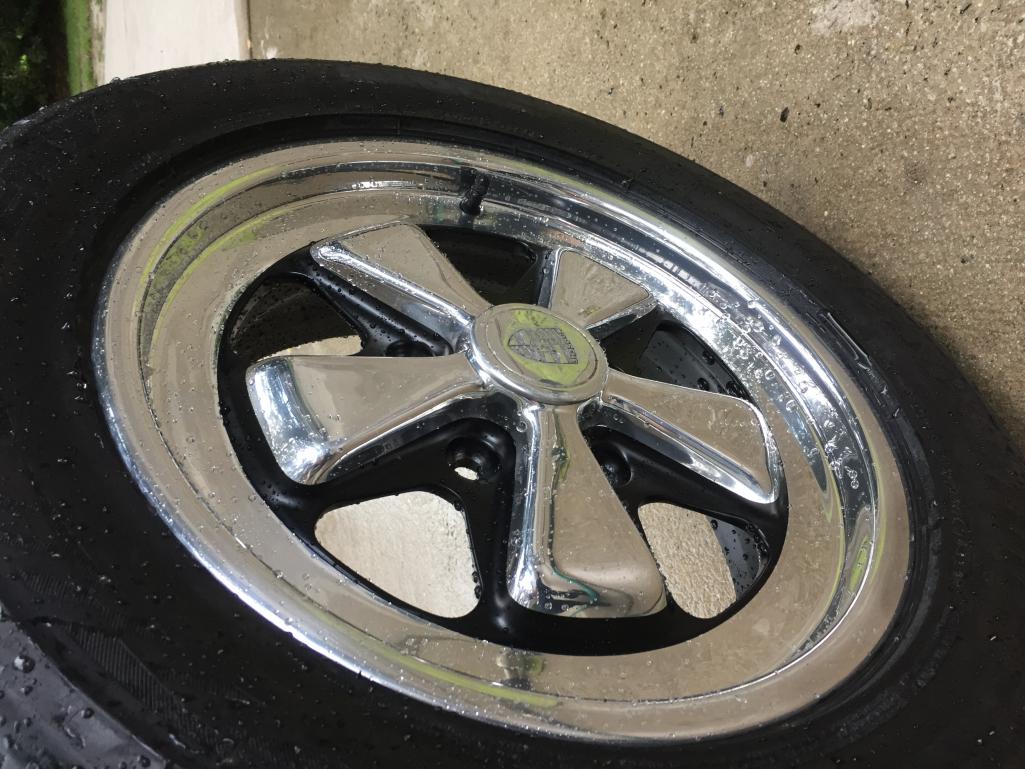
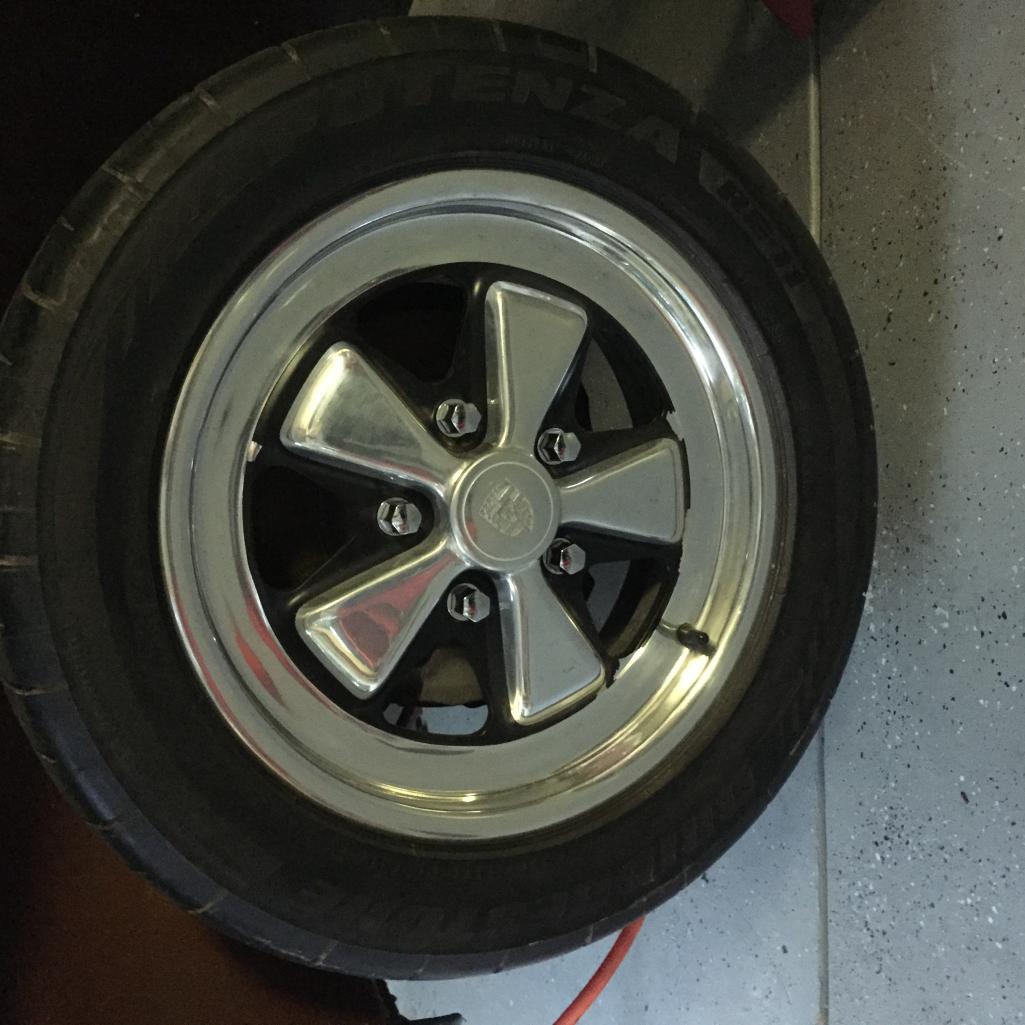
Posted by: Philip W. Aug 7 2018, 06:02 AM
finally got the fuel lines put in and finished up. had a heck of a time with them wanting to cross over and get stuck in the tunnel, then i could not get them thru the front geommet, so i enlisted the help of my 14 year old daughter and we got it done- i had them in 2 weeks ago but they were cossed over - got it right now. Does it matter which one you use for high pressure and which one you ise for low? so long as you keep it straight on both ends?
Attached thumbnail(s)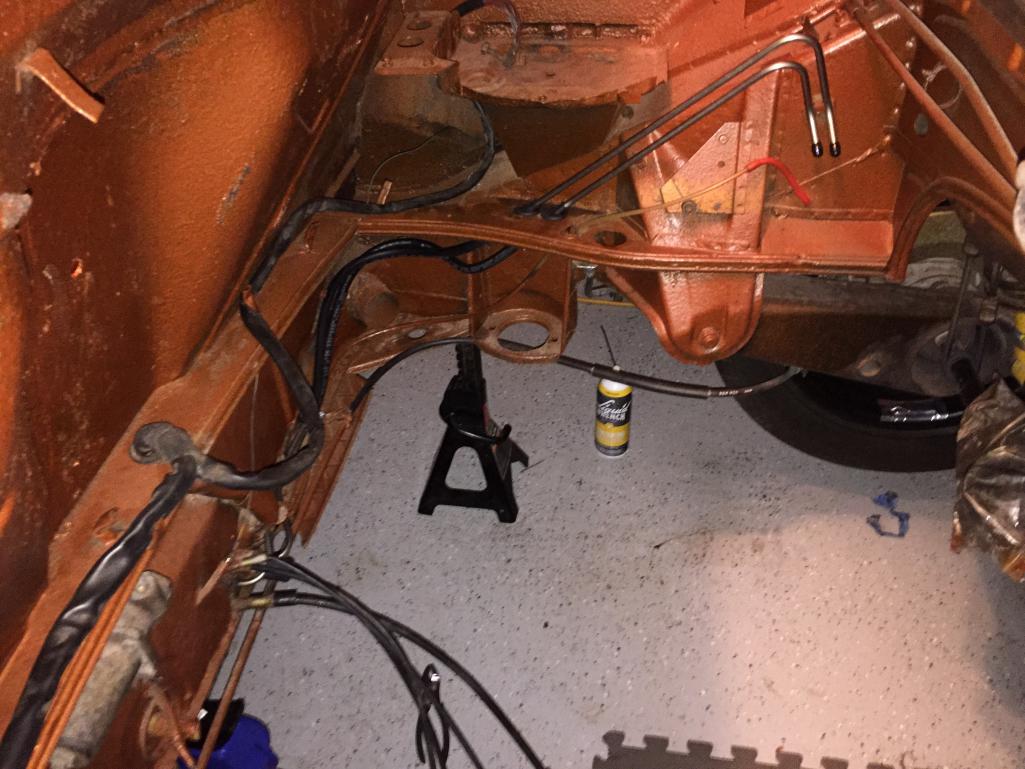
Posted by: Philip W. Aug 7 2018, 06:17 AM
not the proudest of the engine bay area. of course everything will have new seals and grommets and so on, but I did not strip down to metal the whole thing. I just didn't have the money to do a full rotisserie restoration- not a show car- no rust, the hell hole is clean and some areas were cleaned reprimed and painted, - in retrospect I wish I had soda blasted the whole area and stripped it all the way and repainted like now - but really not necessary - we did strip down and get off all of the undercoating from bottom of rear trunk and it was primed and painted, that was due to stripping out the whole trunk and fixing some rust spots at the rear bottom so it made sense to do that.
Got done with those lines last night about midnight!
Posted by: mepstein Aug 7 2018, 06:35 AM
not the proudest of the engine bay area. of course everything will have new seals and grommets and so on, but I did not strip down to metal the whole thing. I just didn't have the money to do a full rotisserie restoration- not a show car- no rust, the hell hole is clean and some areas were cleaned reprimed and painted, - in retrospect I wish I had soda blasted the whole area and stripped it all the way and repainted like now - but really not necessary - we did strip down and get off all of the undercoating from bottom of rear trunk and it was primed and painted, that was due to stripping out the whole trunk and fixing some rust spots at the rear bottom so it made sense to do that.
Got done with those lines last night about midnight!
Once everything goes in, engine, battery, firewall pad, etc, you will hardly see the so so spots. It's like obsessing on the floorpan just to cover it up with seats and carpet. The car will look great when done.
Posted by: Philip W. Aug 7 2018, 06:44 AM
lots I can do next but I think getting my front fresh air box rebuilt the rest of the way and new air tubing in place is the thing to get done next. I have to do that in order to then put the gas tank in- I am waiting for my new fuel filter to arrive. and sadly have waited a week for my new window trim to arrive. Once I have the new fan/motor assembly I will get that put back together with the new seals and install- this will probably not happen for another week- in the mean time I can go back to the trunk and get the wiring rewrapped and install the tail lights. at some point I have to get the targa vinyl on but I have yet to procure the new trim pieces- Spent a lot on stuff this month already with new windshield and windshield trim, and like 4 orders from 914rubber, waiting on my new bumper tops, alternator harness and other bits to be shipped out!(Scott and Mark, if you are listening I have not had a response from my email last week or yesterday!!!!!)
Posted by: Philip W. Aug 7 2018, 06:53 AM
not the proudest of the engine bay area. of course everything will have new seals and grommets and so on, but I did not strip down to metal the whole thing. I just didn't have the money to do a full rotisserie restoration- not a show car- no rust, the hell hole is clean and some areas were cleaned reprimed and painted, - in retrospect I wish I had soda blasted the whole area and stripped it all the way and repainted like now - but really not necessary - we did strip down and get off all of the undercoating from bottom of rear trunk and it was primed and painted, that was due to stripping out the whole trunk and fixing some rust spots at the rear bottom so it made sense to do that.
Got done with those lines last night about midnight!
Once everything goes in, engine, battery, firewall pad, etc, you will hardly see the so so spots. It's like obsessing on the floorpan just to cover it up with seats and carpet. The car will look great when done.
Yes I agree, kind of the feeling I have about that- I have new german carpet going in and the vinyl etc that will cover all the floor etc up, and then my nice tartan seats that I did 2 years ago will look super with the new carpet!. What I would like to do would be to finish off the interior by getting the recover kit for the back pad. my original back pad foam was find but the vinyl shot and dried up, so it needs it- its been boxed up for 5 years, I have the fiberglass back structure that was covered with thin foam and sport vinyl and it looks fine- I did that when I had the 993 seats in the car and need the extra room for those larger seats. But that project will not get done before next month.... I don't think.....
Posted by: Philip W. Aug 8 2018, 10:33 PM
last night i installed the rear window, tonight i cleaned up the dust in the trunk, and cleaned and re wrapped the wires, put in new targa top holders, installed the tail lights tonight, then engine compartment tin seals,
Attached thumbnail(s)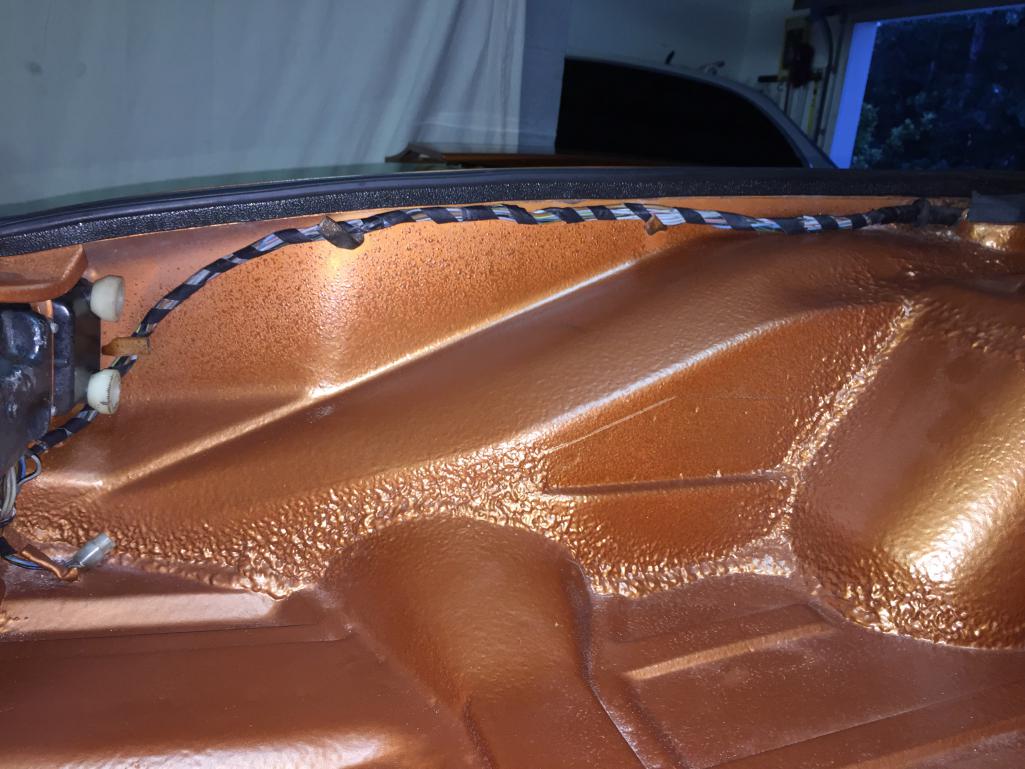
Posted by: Philip W. Aug 8 2018, 10:34 PM
refreshed
Attached thumbnail(s)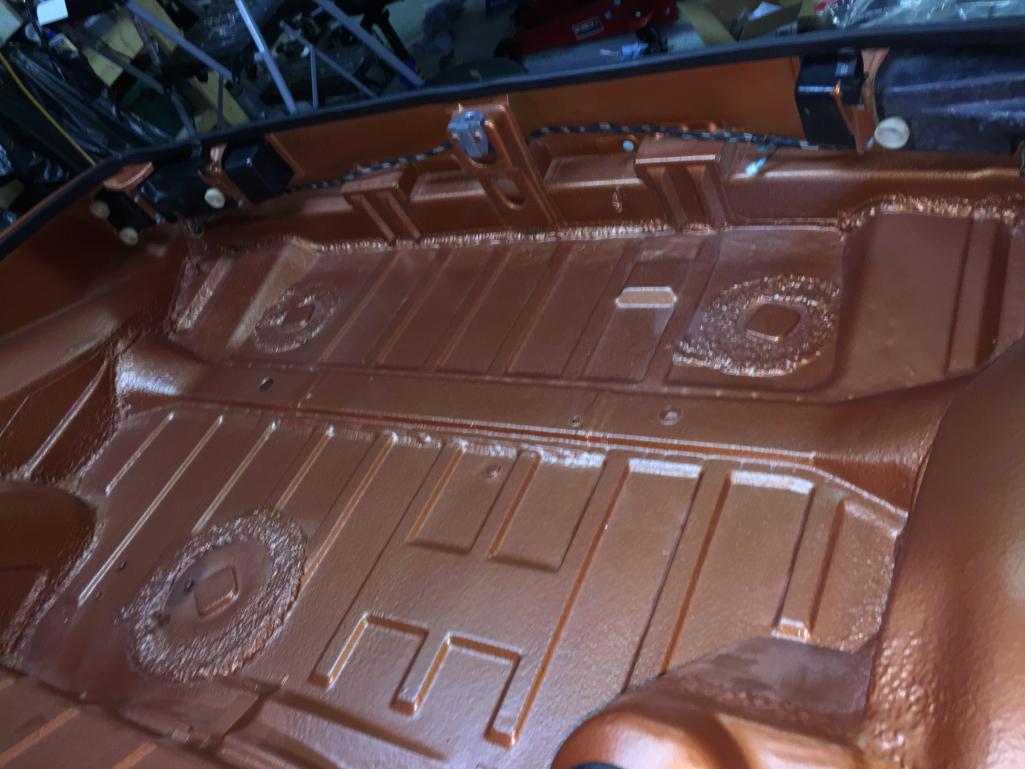
Posted by: Philip W. Aug 8 2018, 10:36 PM
originally i was not going to do the undersides of front and rear trunk lids but mike just did them anyway,
Attached thumbnail(s)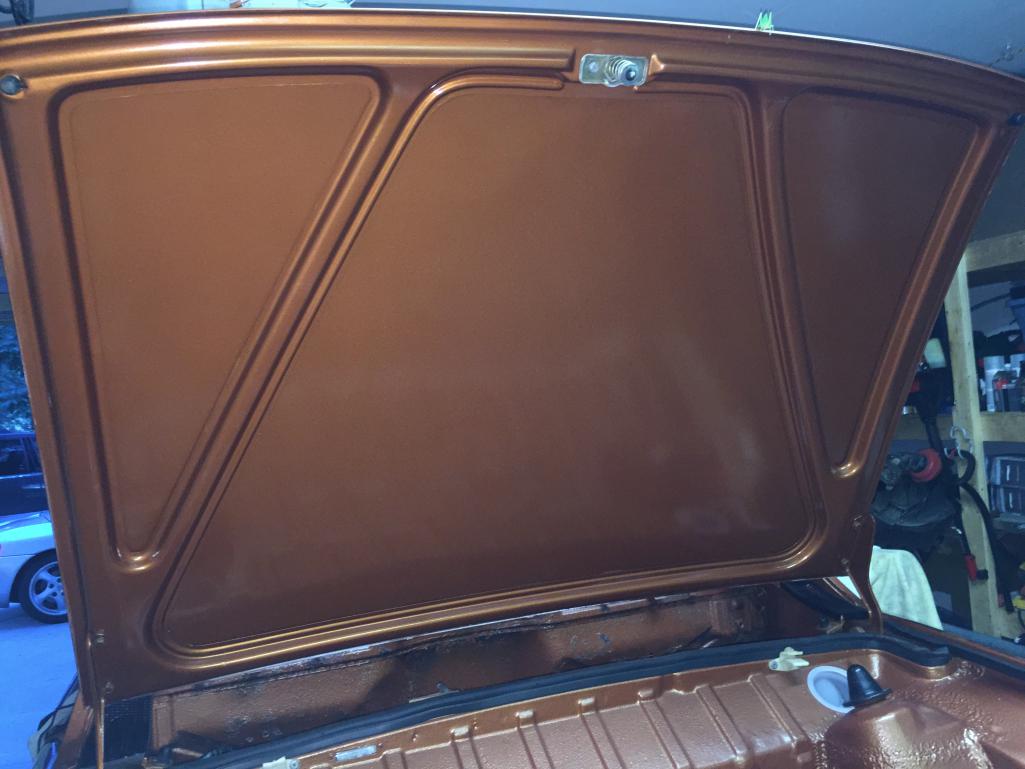
Posted by: Philip W. Aug 8 2018, 10:38 PM
inderside could havw been done better- but this is way better than it was.
i also installed new 914rubber air diverters on the rear floor pan ,
Attached thumbnail(s)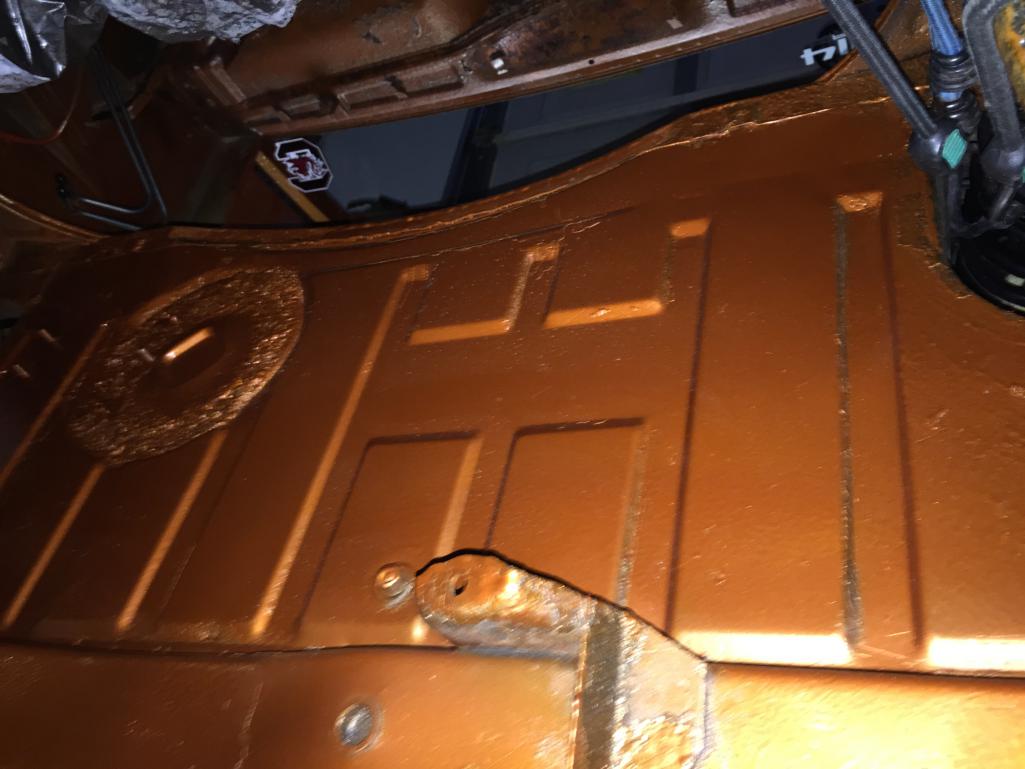
Posted by: Philip W. Aug 12 2018, 10:56 PM
issues with fitment in triangle seal and the adjustment screw rusted in place kept me from gettimg windows in, but new outer door handles and locks wer installed. Also on todays project list was engine lid, so new outside edge and gasket that goes between the mesh and the lid.
Attached thumbnail(s)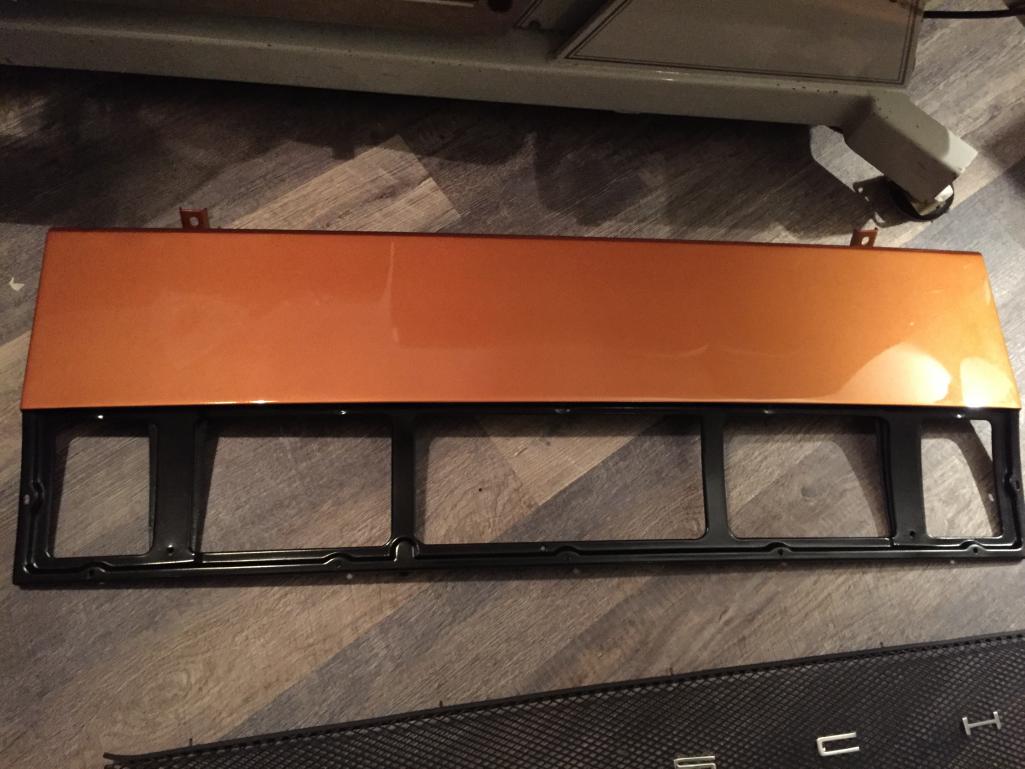
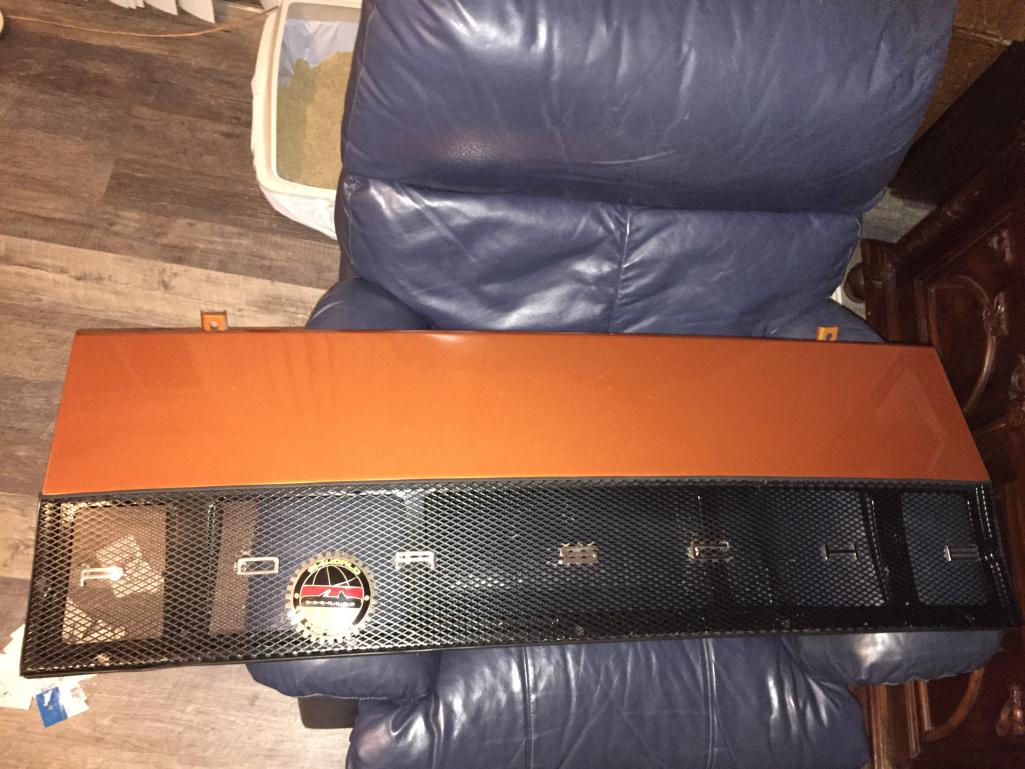
Posted by: Philip W. Aug 12 2018, 10:57 PM
new window trim arrived
Attached thumbnail(s)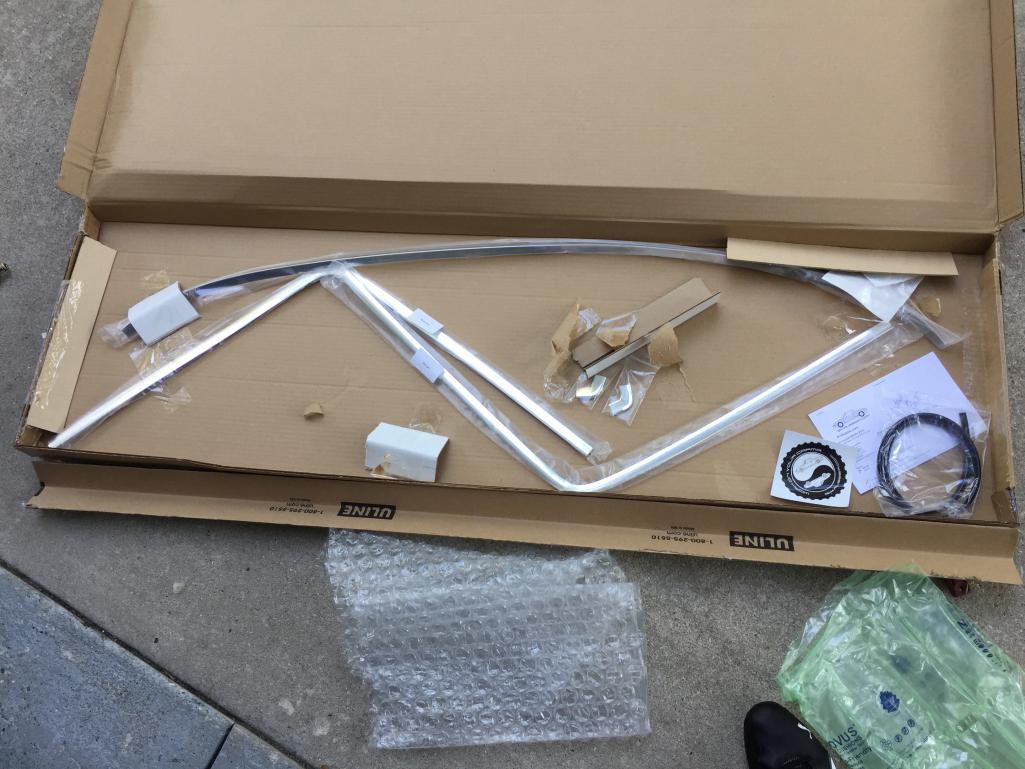
Posted by: Philip W. Aug 12 2018, 10:58 PM
tear valance intalled.
Attached thumbnail(s)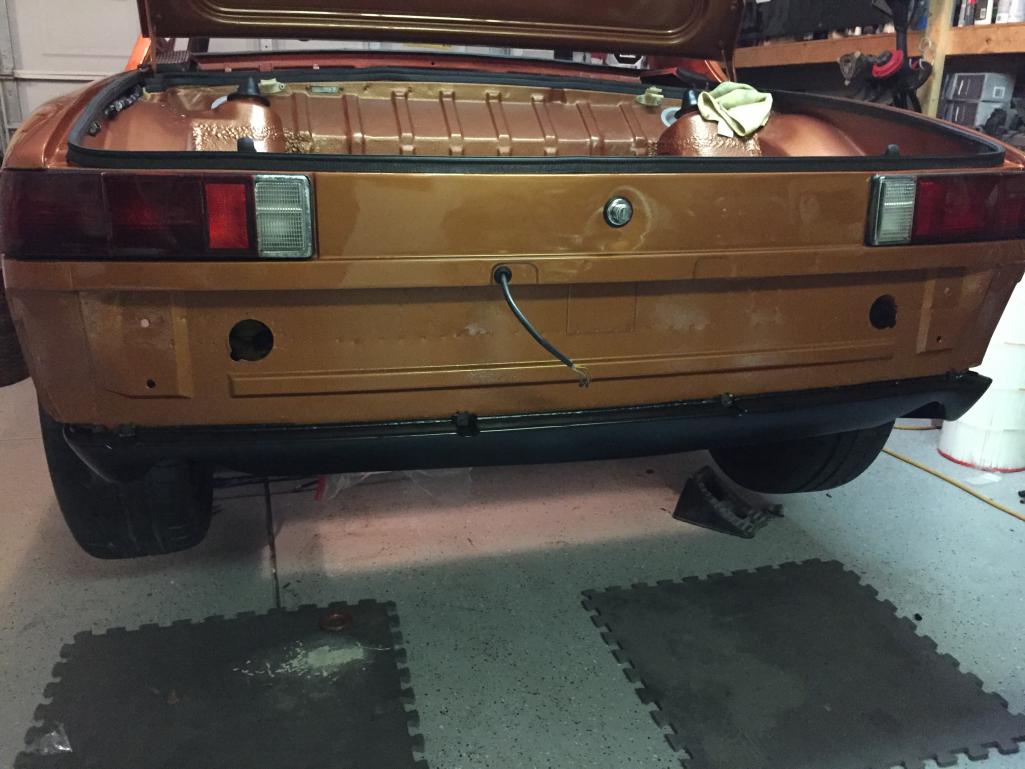
Posted by: Philip W. Aug 12 2018, 11:00 PM
new spare acquired today-
Attached thumbnail(s)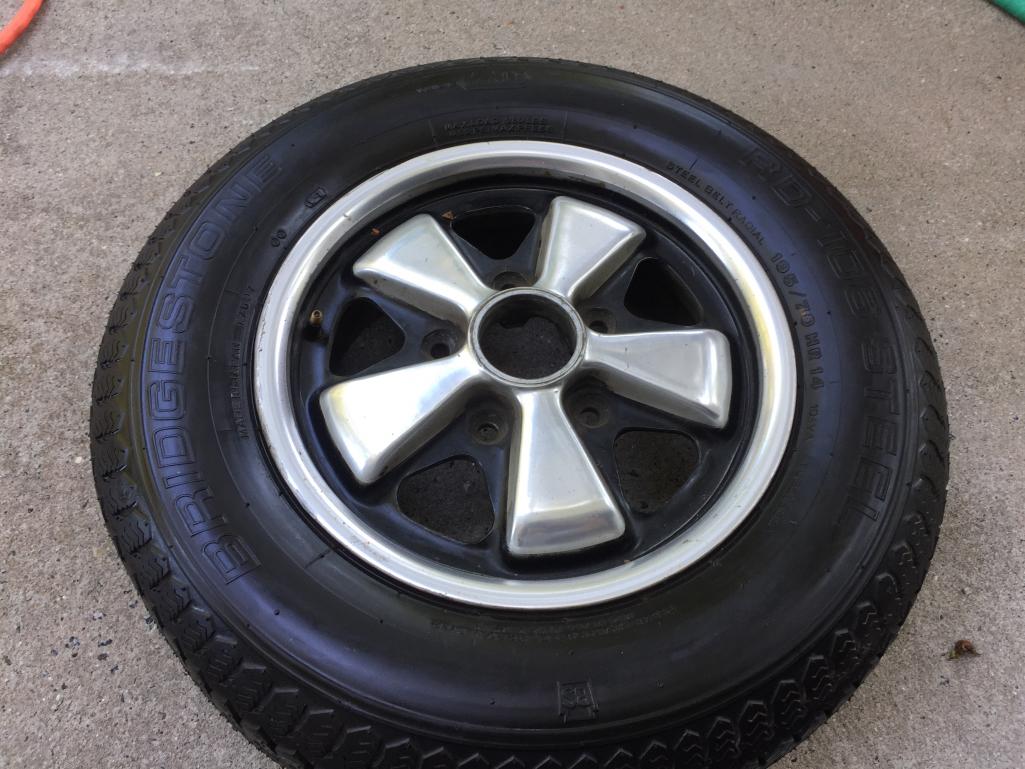
Posted by: Philip W. Aug 12 2018, 11:01 PM
new handles , acquired via Okteenerfest,
Attached thumbnail(s)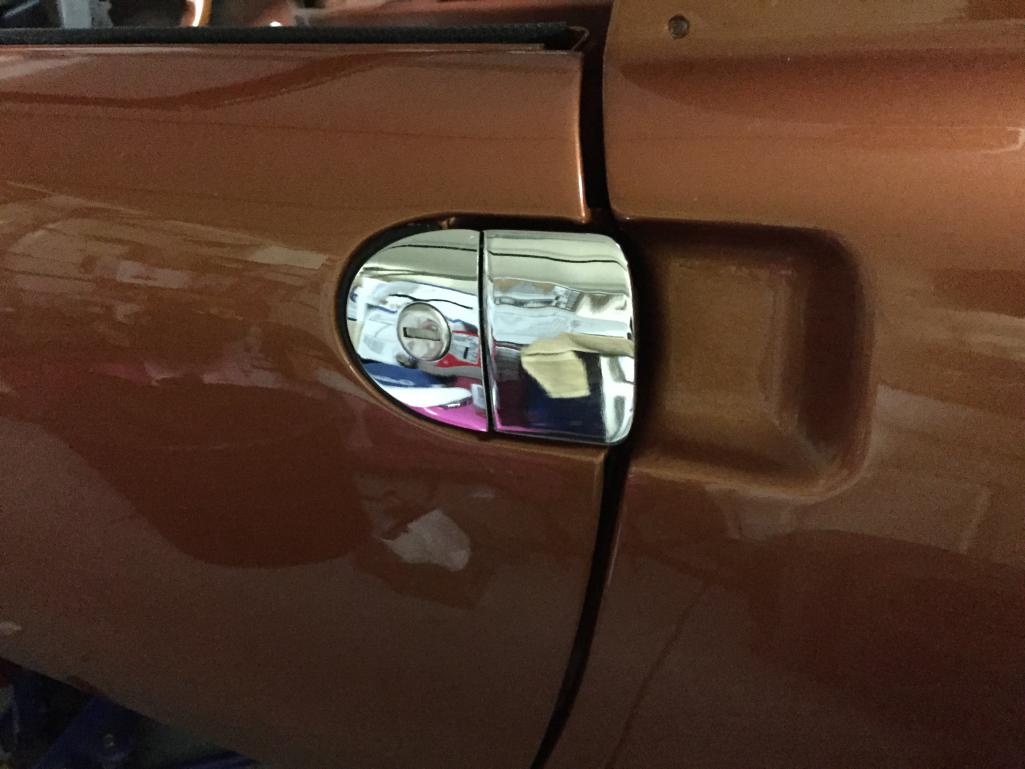
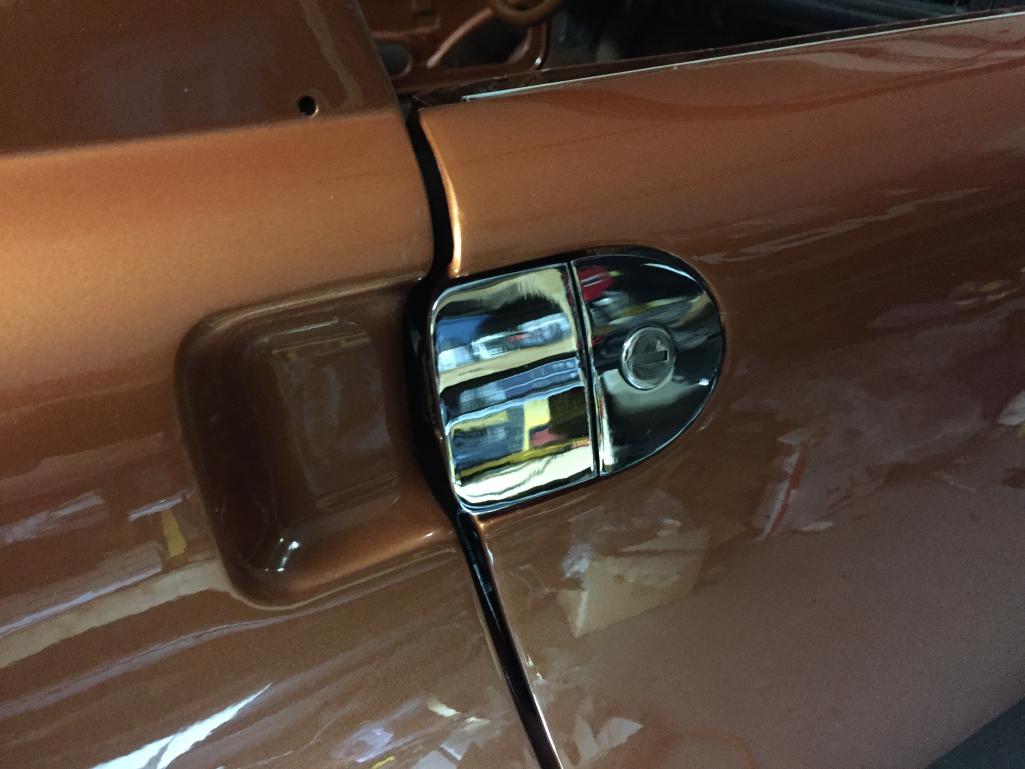
Posted by: Philip W. Aug 12 2018, 11:02 PM
old door stay pulled out
Attached thumbnail(s)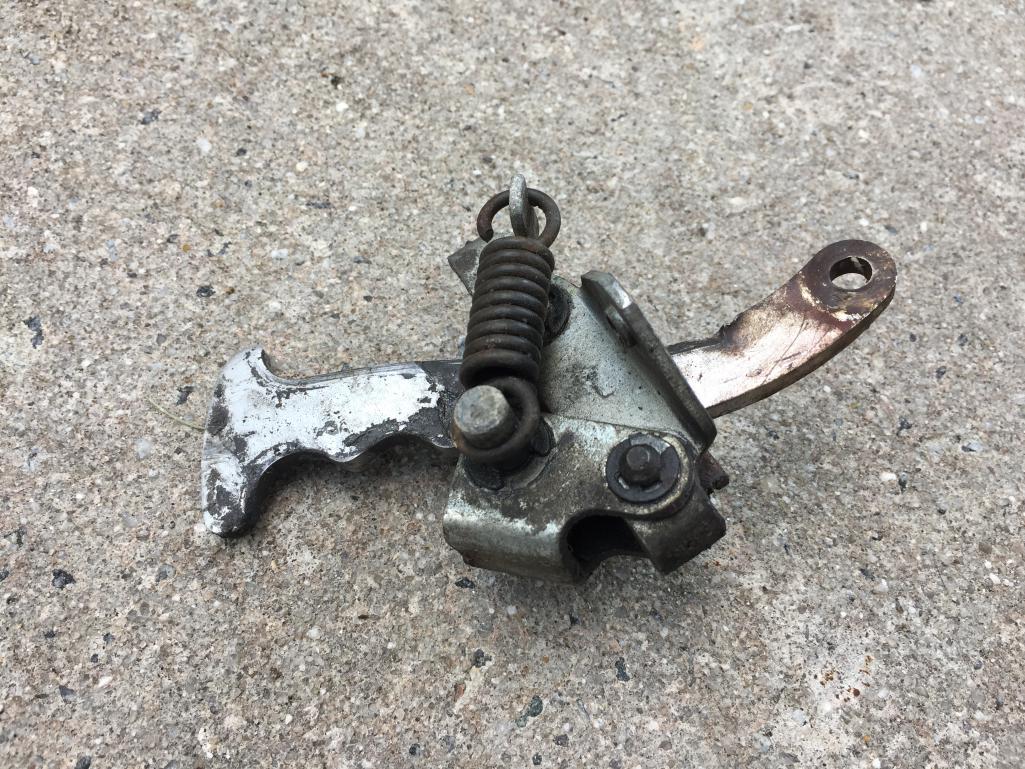
Posted by: Philip W. Aug 12 2018, 11:04 PM
new parts installed- new stay new bushings, and springs- the old one was missing the plastic roller,
Attached thumbnail(s)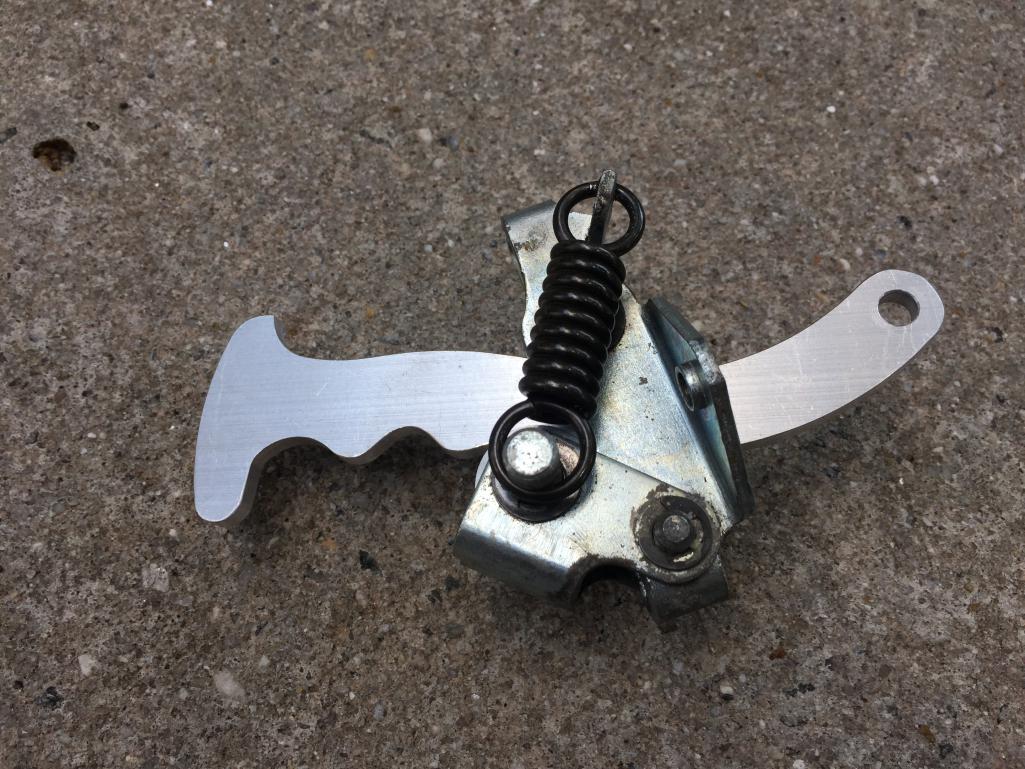
Posted by: Philip W. Aug 12 2018, 11:07 PM
this is what was left of the outer door fuzzy seal-
Attached thumbnail(s)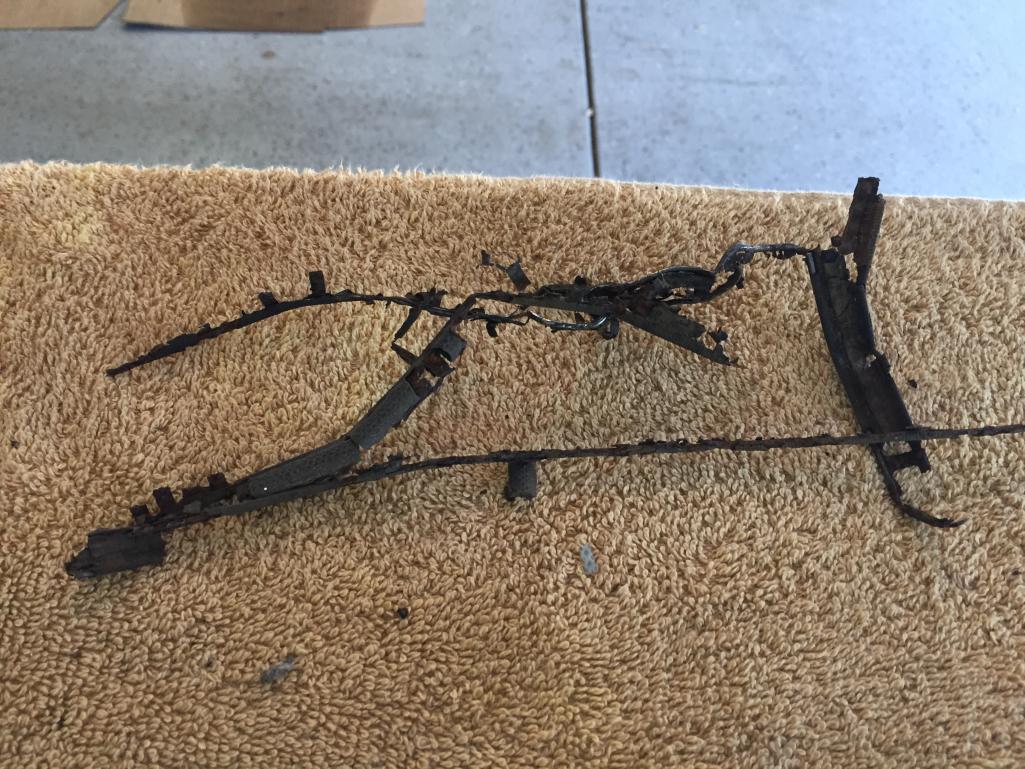
Posted by: Philip W. Aug 12 2018, 11:09 PM
engine bay seals are in,
Attached thumbnail(s)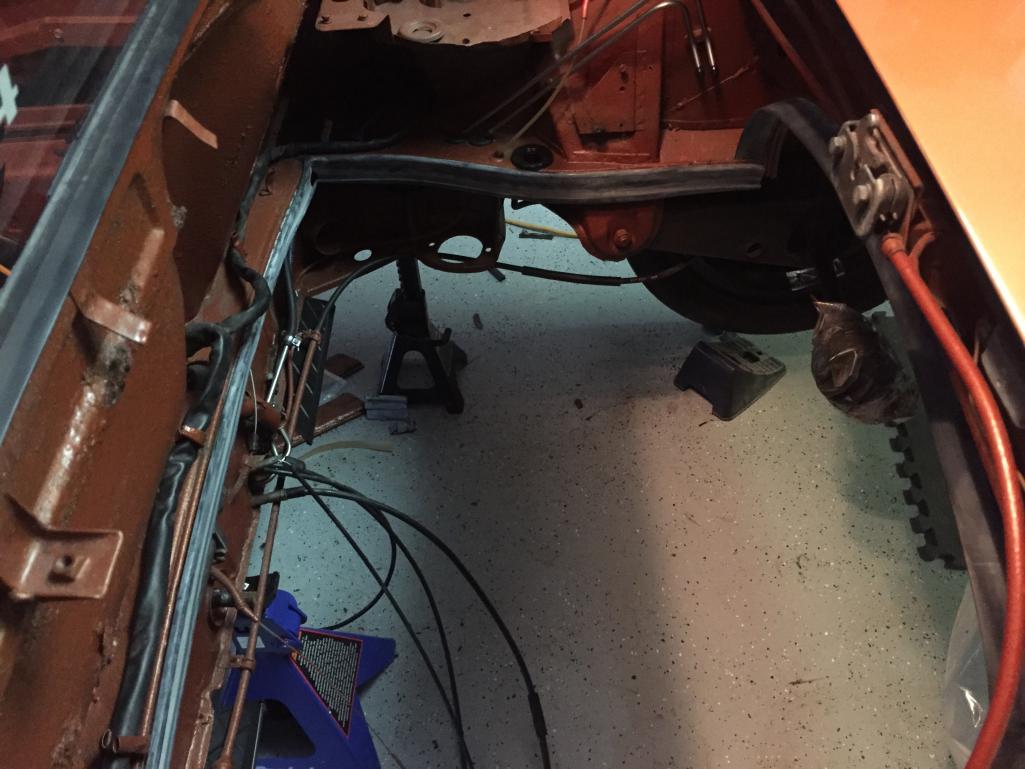
Posted by: Philip W. Aug 13 2018, 08:17 AM
making my final list of small stuff that need to be acquired to finish up( i'm sure other stuff will come up)
1. new accelerator cable - where can i get one fast?, new rear trunk insulation pad,
- engine compartment sound pad -
2. period correct radio - coming soon from 914sixer
3. front bumper- coming in from Chrome this week
4. install window triangle seal , ugh
5. run wires for the cylinder head tem gauge i bought
6. interior installation
7. figure out how to adjust drivers door striker to get door to line up, when latched its still out by 1/8" - passenger side is perfect.
8. Install motor!
what am i forgetting? - rear targa trim pieces- small upper side piece and the back curved trim part.
touch ups. ,
Posted by: billh1963 Aug 13 2018, 08:22 AM
making my final list of small stuff that need to be acquired to finish up( i'm sure other stuff will come up)
1. new accelerator cable - where can i get one fast?, new rear trunk insulation pad,
- engine compartment sound pad -
2. period correct radio - coming soon from 914sixer
3. front bumper- coming in from Chrome this week
4. install window triangle seal , ugh
5. run wires for the cylinder head tem gauge i bought
6. interior installation
7. figure out how to adjust drivers door striker to get door to line up, when latched its still out by 1/8" - passenger side is perfect.
8. Install motor!
what am i forgetting? - rear targa trim pieces- small upper side piece and the back curved trim part.
touch ups. ,
I can't wait to see the car at Okteenerest...it's going to look stunning!
Posted by: Philip W. Aug 13 2018, 08:32 AM
it took 2 days to pull the motor, interior and other trim and bits out, tank etc etc, and weeks to put back together! I wish i had more time. I will have to go back later and hit a few thinks like recover the original back pads, and insulate inside the doors, and touch up some areas like the door jams, but it will be 90% there( i hope)
I just hope the motor install goes smoothly. Its really close to being able to install it- i need to get the alternator harness this week and order a new accelerator cable- that was unexpected, but the outer sheath pulled out of the metal end at the firewall(other wise it is fine) and i don't know if i can get the end in it and re-crimp it.
I am really considering trailering it not driving this year- between road grime and bugs ugh- i didn't used to care about that ! I knew that would happen!- if i sell my Boxster this weekend, maybe i can find a driver project to beat around in -
Posted by: Philip W. Aug 14 2018, 09:17 PM
bumper mounted! not a perfect fit, but that will have to be adjusted later. new 914rubber bumper guard.
Attached thumbnail(s)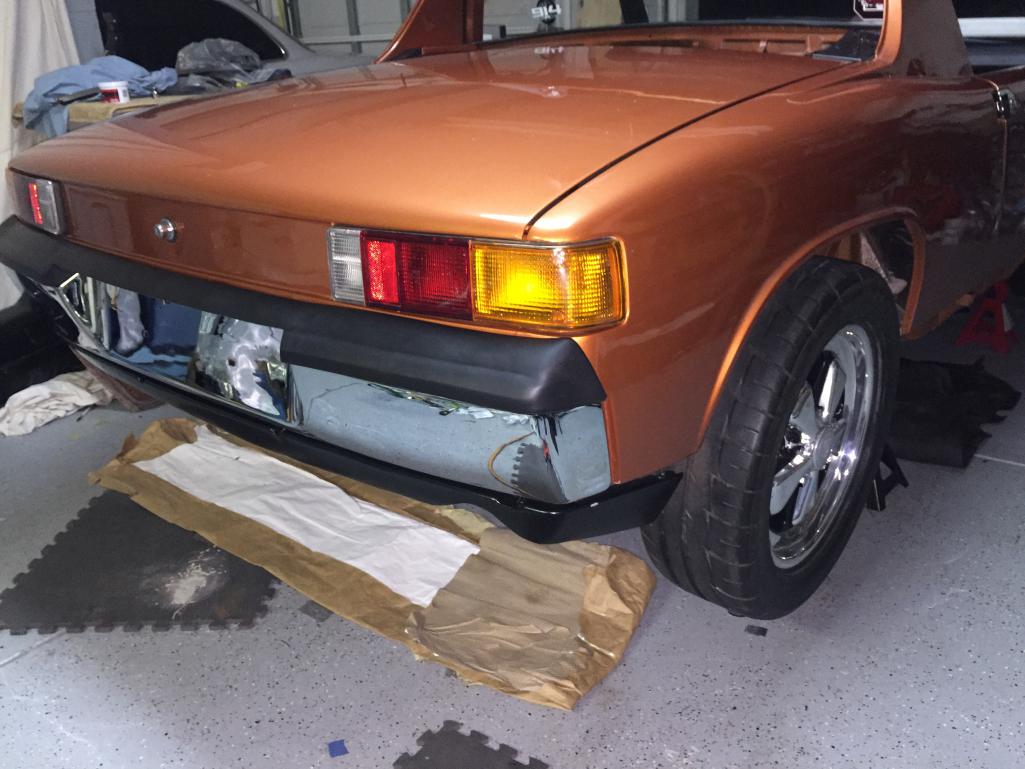
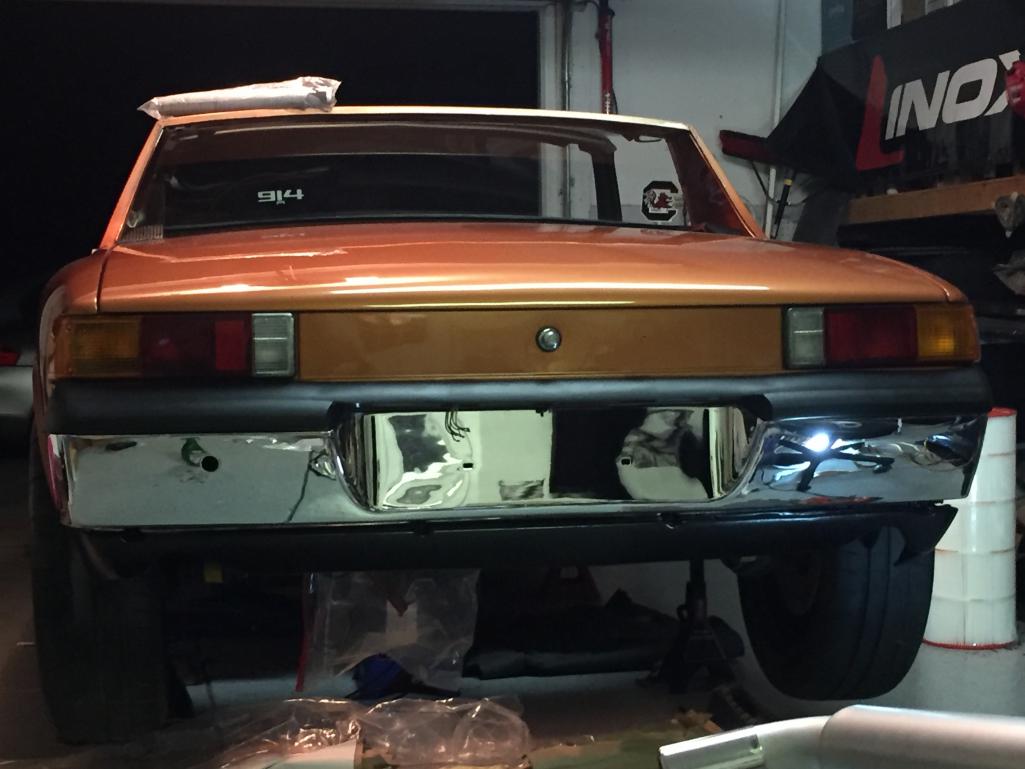
Posted by: Shadowfax Aug 14 2018, 09:37 PM
You’re making great progress! Car looks amazing so far. The new door handles make me a little envious
Rear bumper looks good. Did you use the rubber washers? I bought 10 from 914Rubber and am curious where they go. They weren’t present when I removed the old bumper tops.
Posted by: Philip W. Aug 14 2018, 09:53 PM
You’re making great progress! Car looks amazing so far. The new door handles make me a little envious
Rear bumper looks good. Did you use the rubber washers? I bought 10 from 914Rubber and am curious where they go. They weren’t present when I removed the old bumper tops.
i did not use those, not sure either. my adjustment later will be to adjust the mount holes, and move the bumper about a 1/8” to right. what is interesting is my other bumper fit perfect and didnt have to pull it in with the bolts to get it to line up properly like this one. for one thing 45 year old cars are not perfectly square or straight, have to live with that and make it work.
Posted by: Shadowfax Aug 14 2018, 10:09 PM
what is interesting is my other bumper fit perfect and didnt have to pull it in with the bolts to get it to line up properly like this one. for one thing 45 year old cars are not perfectly square or straight, have to live with that and make it work.
Yep. Fit and finish didn’t seem to be a priority back then.
Posted by: Philip W. Aug 14 2018, 10:56 PM
it took me a long time to decide about the bumper back dating , about 2 years, but now when i look at it there is no doubt it looks so much better!
i am in it for about an extra $2000
Posted by: Philip W. Aug 15 2018, 06:14 AM
what is interesting is my other bumper fit perfect and didnt have to pull it in with the bolts to get it to line up properly like this one. for one thing 45 year old cars are not perfectly square or straight, have to live with that and make it work.
Yep. Fit and finish didn’t seem to be a priority back then.
so Matt says the spacers are for helping fill in for irregularities in the top of the bumpers, some are not level or straight, have high or low spots so may need one or even 2 or 3 to level the topper- He sent me a few pics to show that- I didn't have to use any as my bumper is really straight and level . The only thing I have that is off a bit is the left side I have a larger gap between the bumper and the car than on the right. So either the car is not square(very possible ) or the bumper is not, it might have a slight twist? IDK, because the dogbone spacer is in there I have it bolted up tight. Another interesting issue here is that I have a different bumper that was going to be used. When the car was getting body work done and in primer I went up and test fitted that bumper and bolted it up and it was a perfect fit. This one when mounted up exactly the same way, is over to the left about 1/8", actually maybe 3/16" and that makes a big difference. The right side is tight to the body and the left side has a gap. If I was not on a time crunch here I would sell this bumper and sent off the one that was test fit in the first place and get it rechromed. I could put it on the car, it is an original never been redone with really nice finish , just a slight fade that you would expect in a 40 year old bumper, and a very small scratch not to metal but cant buff it out(and I have a buyer for it). So the other solution is to enlarge the mount holes to be able to move it over that 1/8'' , but even then the curve of this bumper on that side , the radius of it seems like its not as tight- cant decide. I think I will look at it and not be happy that its not the fit I want. I could modify the dog bone and trim it just a bit to let the bumper pull in a bit more on that side. suggestions are welcome here guys. For now it stays on, I don't have time to fool with it more. spent 3 hours last night trying to see what I could do to make it fit a bit more- as it was initinally the right side was so tight as I pulled it in it scraped some paint! SUCKS!! but that is covered up by the edge of the bumper but I will have to touch that up later. nothgin works like It should, well except my front bumper that was a perfect fit, but it needs to be redone as well. The look of the later chrome bumpers with the "tits" on is kind of growing on me - the other one I have had just rechromed is an early one and kind of looks bare with out those.
Well I didn't get the windows worked on last night, hope to tonight!! Mark and Matt have been helping me figure it out, I will try to detail what we do to get them to fit.
Posted by: Philip W. Aug 23 2018, 09:03 AM
no progress to report, posted the latest try on triangle window seal installation on the other thread, so far no go,
things that I need to do yet:
-window seals and window installation
- intall motor, gas tank front fresh air fan, alternator harness and new accerator cable, also the wiring for the new CHT gauge
- the whole interior
- targa bar vinyl and trim
-
I need a engine compartment back firewall sound pad-
running out of time!--------
Posted by: DRPHIL914 Aug 25 2018, 05:44 PM
Today:
installed a new accelerator cable, and did the outer CV joint boots, got theses NOS from 914Sixer! Thanks! 4 holes not 6 so no more grease slinging! all repacked with new grease . AND got the new front chrome trim on the window , BUT NOT with out producing choice words ans a few scratches on my new paint- and i found out yes, you can put new clips in even with a window in place! due to poorly bent trim, we were very careful but i hd 3 brand new clips break or snap in half- this should not happen! there is no way they should be this brittle- my OEM ones that were 40 years old didnt even break taking the trim off!
914rubber, i think you can do better, and that is all i am saying about that!!(Forest Gump)
no i didnt get the motor in- lots of corrosion in the old alternator. took it out to put in new harness( new harness is awesome! thanks 914rubber) , so i ordered a new reman 75 amp unit that should be in by wednesday. might as well put in a whole new unit. turns out the old one was a 50 amp bus unit anyway
Posted by: DRPHIL914 Aug 27 2018, 10:49 PM
new rear sway bar bushings yesterday,
tonight i went to work on the driver door again- first i decided to test a different seal. i pit the seal amd the wing vent glass on then lubed the track and slid it down from top, and then worked on gettimg that with it in the frame down into the door. this time i was able to get it in far enough that the glass did not hit the a-pillar and seal.
adjusted the height and angle of the glass, then installed the regulator mechanism and main glass. that was interesting, not as easy as it looks. but figured it out.
So the driver s door has seals and glass! now i await the targa trim chrome from Sunset Porsche. once this arrives i will do the new targa bar vinyl and trim. Layed out the carpet - tomorrow i will again fight the passenger door glass- i am waiting for the alternator and a few other bits before putting motor back in.
Attached thumbnail(s)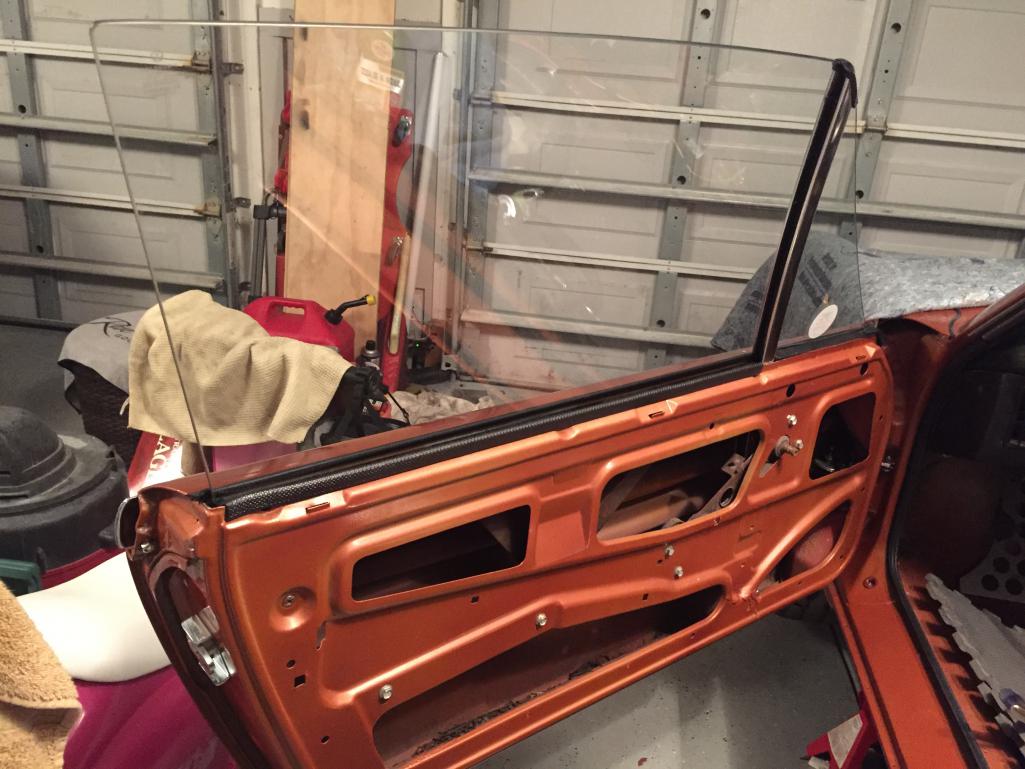
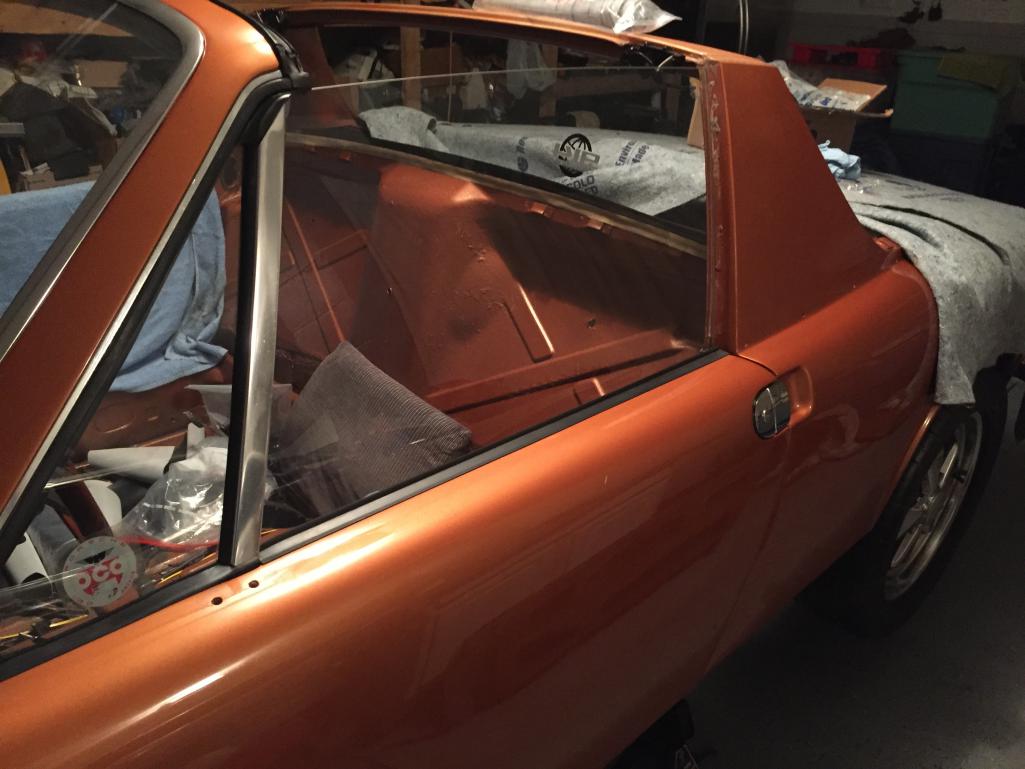
Posted by: Mblizzard Aug 28 2018, 06:02 AM
new rear sway bar bushings yesterday,
tonight i went to work on the driver door again- first i decided to test a different seal. i pit the seal amd the wing vent glass on then lubed the track and slid it down from top, and then worked on gettimg that with it in the frame down into the door. this time i was able to get it in far enough that the glass did not hit the a-pillar and seal.
adjusted the height and angle of the glass, then installed the regulator mechanism and main glass. that was interesting, not as easy as it looks. but figured it out.
So the driver s door has seals and glass! now i await the targa trim chrome from Sunset Porsche. once this arrives i will do the new targa bar vinyl and trim. Layed out the carpet - tomorrow i will again fight the passenger door glass- i am waiting for the alternator and a few other bits before putting motor back in.
That's a major victory!
Posted by: DRPHIL914 Aug 28 2018, 06:20 AM
new rear sway bar bushings yesterday,
tonight i went to work on the driver door again- first i decided to test a different seal. i pit the seal amd the wing vent glass on then lubed the track and slid it down from top, and then worked on gettimg that with it in the frame down into the door. this time i was able to get it in far enough that the glass did not hit the a-pillar and seal.
adjusted the height and angle of the glass, then installed the regulator mechanism and main glass. that was interesting, not as easy as it looks. but figured it out.
So the driver s door has seals and glass! now i await the targa trim chrome from Sunset Porsche. once this arrives i will do the new targa bar vinyl and trim. Layed out the carpet - tomorrow i will again fight the passenger door glass- i am waiting for the alternator and a few other bits before putting motor back in.
That's a major victory!
Mike, you have no idea!, well maybe you do, you have been working on that megasquirt experiment lol!! well I will actually post a different thread, how and why this finally fell into place. I tried 3 different seals, and I will elaborate later. The seal in the window currently is not perfect either, but I did not have to modify it to get it in, but its not as tight in the back part as it should be, so there is that issue. I promised a complete and fair assessment of this seal and its comparison to oem and the 914rubber one I was fighting with for the past 2 weeks. This one is the URO one, and there are definitely things to be learned from how each of them fit or don't fit, and probably how to improve installation. Either way I now have one door ready for final adjustment and then the door panel and handles can be installed on this side.
is your car now running and ready to go Mike?? I hope to get the motor in the car and running this weekend, well I should rephrase that - I HAVE TO get the motor in and running this weekend!! (my wife will be out of town so I have a 3 day weekend to do nothing but work on this car !)
I do home my order from Sunset Porsche comes, I also have more goodies coming from 914rubber to help finish up a few things, like the fresh air box rebuild.
I bought a electric washer pump, so I am hoping to get that installed before the air box and the gas tank.
any advice on replacing the front stock swaybar drop link bushings?
Posted by: billh1963 Aug 28 2018, 09:05 AM
Phil.....you changed your name. Why didn't you go for something unique like BACKCRACKER?
I almost didn't recognize you were posting
Posted by: Mblizzard Aug 28 2018, 09:16 AM
new rear sway bar bushings yesterday,
tonight i went to work on the driver door again- first i decided to test a different seal. i pit the seal amd the wing vent glass on then lubed the track and slid it down from top, and then worked on gettimg that with it in the frame down into the door. this time i was able to get it in far enough that the glass did not hit the a-pillar and seal.
adjusted the height and angle of the glass, then installed the regulator mechanism and main glass. that was interesting, not as easy as it looks. but figured it out.
So the driver s door has seals and glass! now i await the targa trim chrome from Sunset Porsche. once this arrives i will do the new targa bar vinyl and trim. Layed out the carpet - tomorrow i will again fight the passenger door glass- i am waiting for the alternator and a few other bits before putting motor back in.
That's a major victory!
Mike, you have no idea!, well maybe you do, you have been working on that megasquirt experiment lol!! well I will actually post a different thread, how and why this finally fell into place. I tried 3 different seals, and I will elaborate later. The seal in the window currently is not perfect either, but I did not have to modify it to get it in, but its not as tight in the back part as it should be, so there is that issue. I promised a complete and fair assessment of this seal and its comparison to oem and the 914rubber one I was fighting with for the past 2 weeks. This one is the URO one, and there are definitely things to be learned from how each of them fit or don't fit, and probably how to improve installation. Either way I now have one door ready for final adjustment and then the door panel and handles can be installed on this side.
is your car now running and ready to go Mike?? I hope to get the motor in the car and running this weekend, well I should rephrase that - I HAVE TO get the motor in and running this weekend!! (my wife will be out of town so I have a 3 day weekend to do nothing but work on this car !)
I do home my order from Sunset Porsche comes, I also have more goodies coming from 914rubber to help finish up a few things, like the fresh air box rebuild.
I bought a electric washer pump, so I am hoping to get that installed before the air box and the gas tank.
any advice on replacing the front stock swaybar drop link bushings?
The fronts are relatively easy. But for me, I have found that using a bit of grease and hand power and they go in easily.
If not, I recommend using a socket that you can rest the opening of the link on and inserting a bolt with a larger washer through the rubber bushing and the using a C clamp to force the bushing in. Something like this.
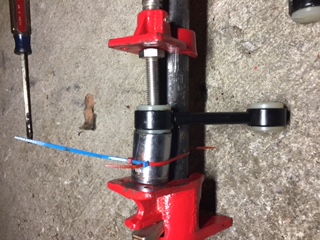
Struggled with my rear ones doing the heating and such but seems like brute force is the best way.
Posted by: DRPHIL914 Aug 28 2018, 09:34 AM
Phil.....you changed your name. Why didn't you go for something unique like BACKCRACKER?
I almost didn't recognize you were posting
too funny!! I could still change it , I just wanted to get rid of that space and then not have my name , - not very creative I know. - we already have "cracker" I guess that could be a double meaning, "backcracker"
Posted by: tomeric914 Aug 28 2018, 10:13 AM
The fronts are relatively easy. But for me, I have found that using a bit of grease and hand power and they go in easily.
If not, I recommend using a socket that you can rest the opening of the link on and inserting a bolt with a larger washer through the rubber bushing and the using a C clamp to force the bushing in. Something like this.
Struggled with my rear ones doing the heating and such but seems like brute force is the best way.
Irwin Quick-Grip is a little safer and easier IMHO. The one I use is capable of 300 lbs force.
Posted by: DRPHIL914 Aug 28 2018, 07:44 PM
this arrived today, but i have to wait for my new back plate to get this installed- i hope it comes soon!
Attached thumbnail(s)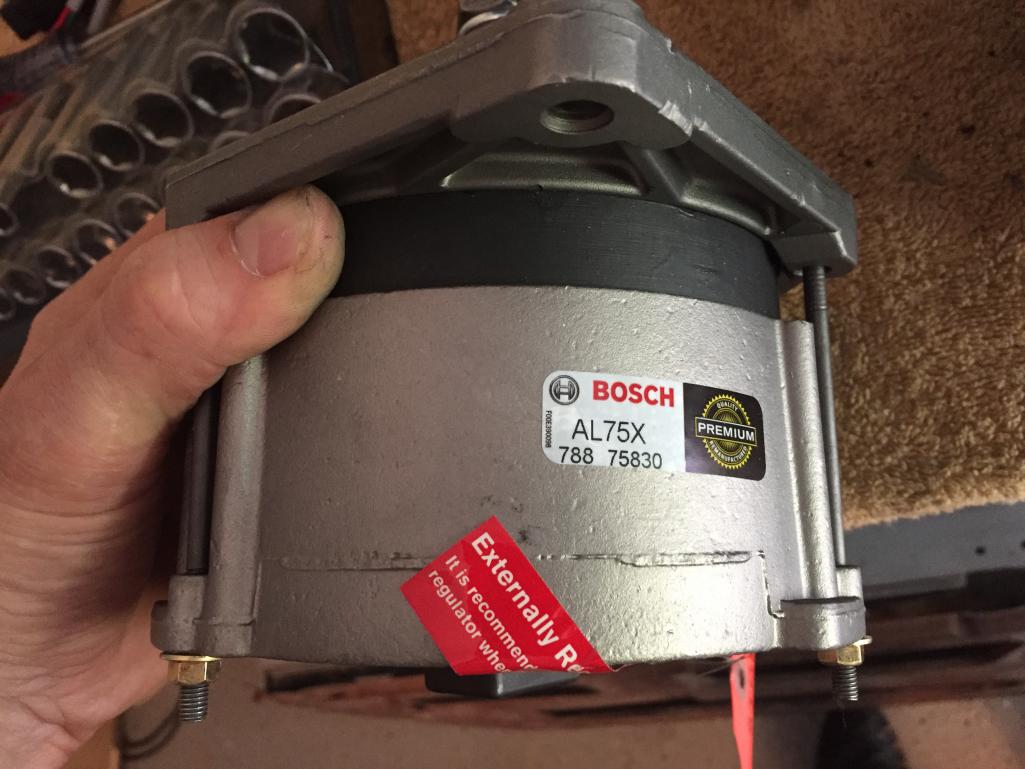
Posted by: DRPHIL914 Aug 28 2018, 07:57 PM
old vs new- upgrade from 50 amp to 75amp,
they recommend a new VR , is the NOS one i just got from 914sixer.com
Attached thumbnail(s)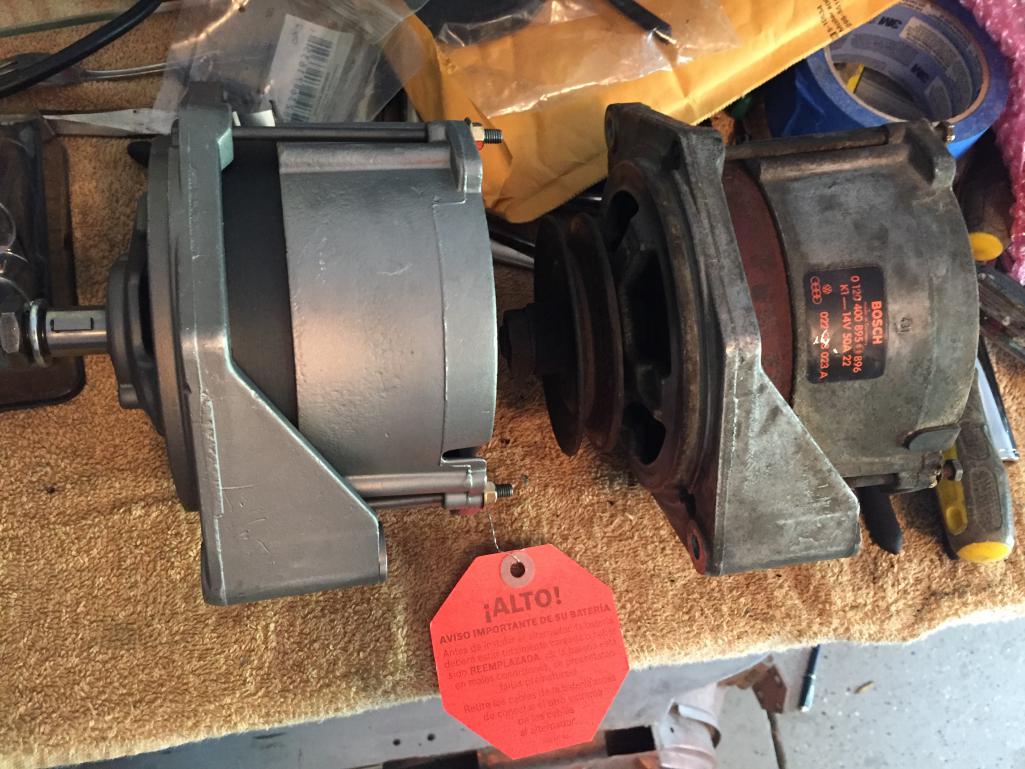
Posted by: simonjb Aug 28 2018, 08:37 PM
Looking really really nice !
Posted by: DRPHIL914 Aug 29 2018, 04:35 PM
carpets! getting ready to install after putting the vinyl in place
Attached thumbnail(s)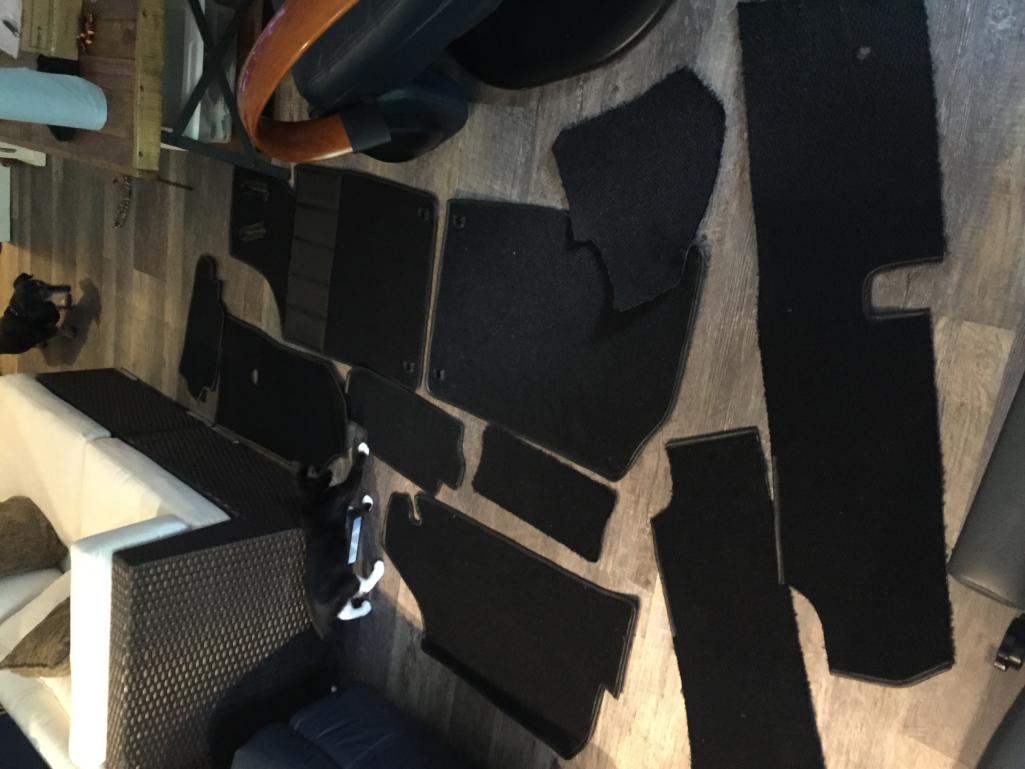

Posted by: DRPHIL914 Aug 29 2018, 05:50 PM
never run before 16x6”
Attached thumbnail(s)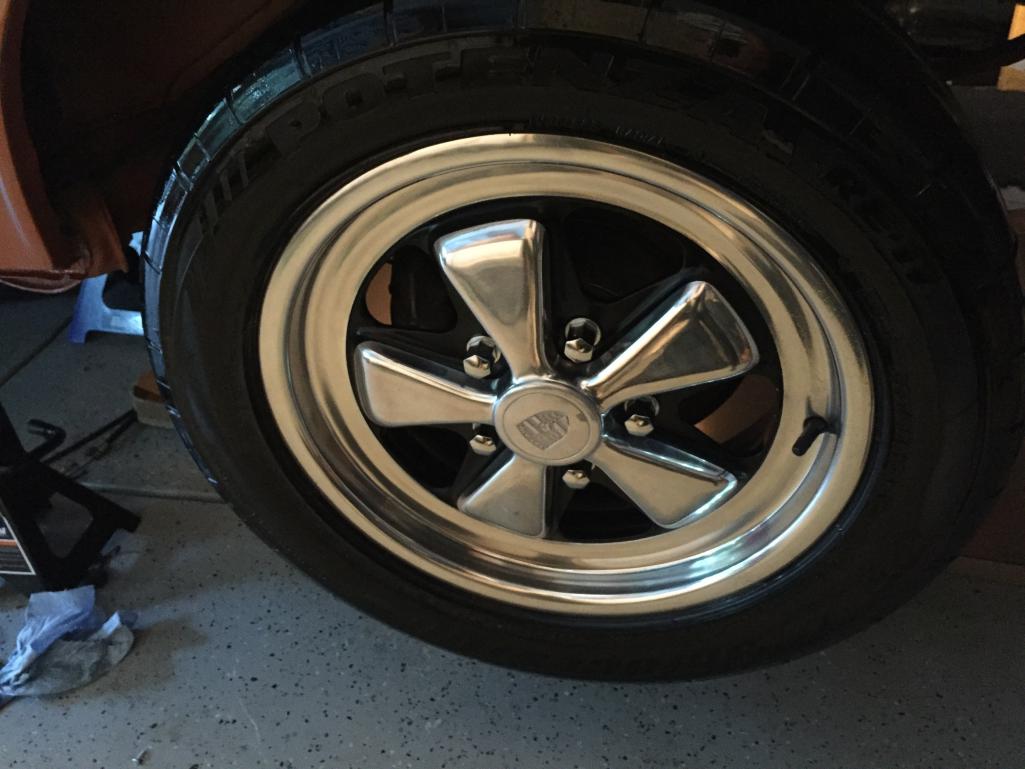
Posted by: 914_7T3 Aug 29 2018, 07:25 PM
do i dare put the PORSCHE script on the side again?
yes it was there before this, BUT .... not sure i want to do that....
i have brand new rockers and a set of nice redone ones that Mike painted, then need a sand down and one more coat, i could do either way, even thought about body color rockers but i like the look of the black rockers better.-
then also is the front valance- i have a LE style fiberglass one that was in Jim Hoylands car, but it was damaged in shipping , so i got a very nice stock metal pan that is repaintes black- SO Le was repaired and is in primer if i dont put it on i will resell it, ugh decisions!!
although we have been PMing regarding parts of late, not sure how I missed the part where the car came out of paint. She looks really great.
Posted by: DRPHIL914 Aug 29 2018, 09:43 PM
do i dare put the PORSCHE script on the side again?
yes it was there before this, BUT .... not sure i want to do that....
i have brand new rockers and a set of nice redone ones that Mike painted, then need a sand down and one more coat, i could do either way, even thought about body color rockers but i like the look of the black rockers better.-
then also is the front valance- i have a LE style fiberglass one that was in Jim Hoylands car, but it was damaged in shipping , so i got a very nice stock metal pan that is repaintes black- SO Le was repaired and is in primer if i dont put it on i will resell it, ugh decisions!!
although we have been PMing regarding parts of late, not sure how I missed the part where the car came out of paint. She looks really great.
yea, got her back in the garage about a month ago now (the second time)
and have been fighting the window seals and such. took your advice and sourced some onsale parts from Sunset Porsche, a few more from local dealer and i have one last order coming from 914rubber and one from Bruce Stone coming saturday. like you ive had a few things extra to do that i didnt plan on like new alternator. you will be glad you are doing those brakes! i did all of that stuff a couple yeara ago so i am glad that my brakes ans suspension are all sorted! one leas thing to worry about right now! i also just cleaned up my fresh air box, put in new seals , made sure circuits were good , resistors etc. that will go back in saturday too. keep posting , i enjoy watching some of the other builds like yours.
Attached thumbnail(s)
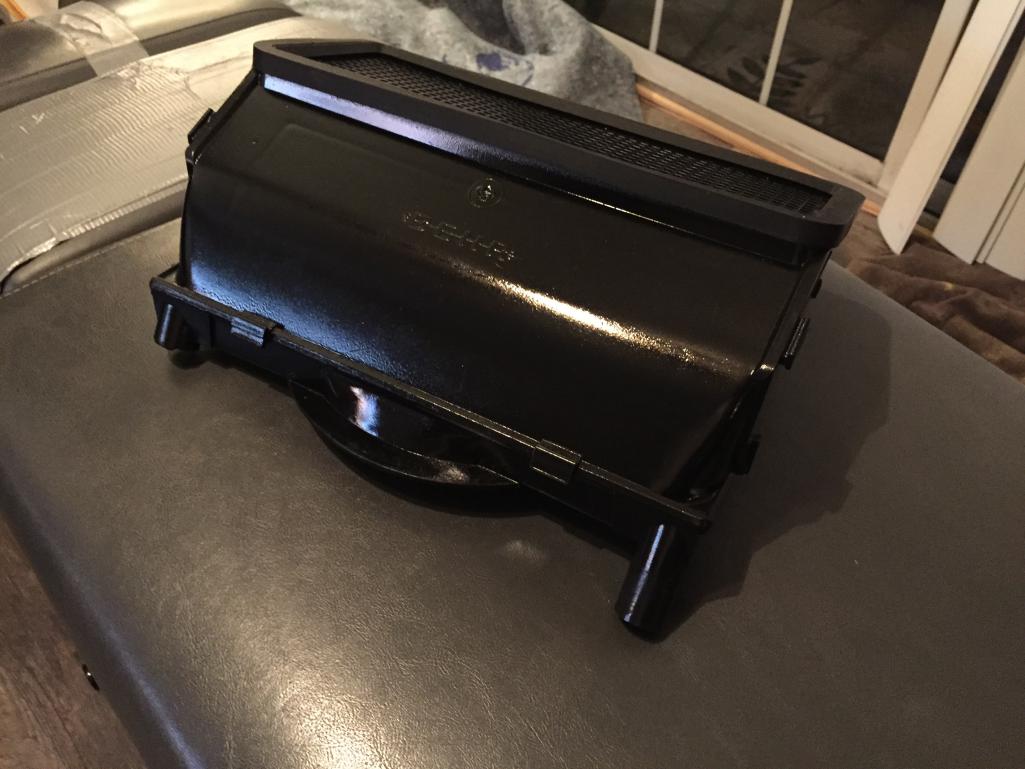
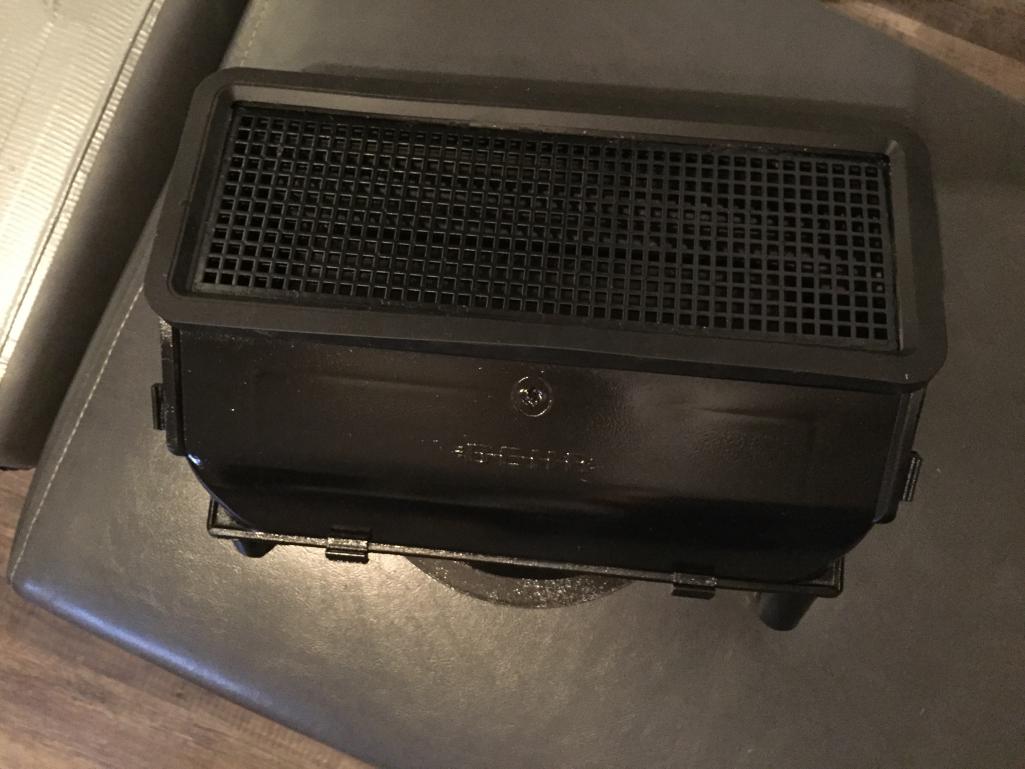
Posted by: DRPHIL914 Aug 29 2018, 09:51 PM
took a break from it on Saturday and went out with our friends to Hiltons Head to the Salty dog Cafe, and marina for a evening dinner and cruise out on the intercoastal . it was high tide and a beautiful sunset and the harvest moon(sturgeon moon i think). This is moon and reflexion off the water next to Harbor Town light house.
Attached thumbnail(s)
Posted by: DRPHIL914 Aug 29 2018, 10:03 PM
also arriving today were my oem Hella license plate lights from Kevin Powers , thanks Kevin!! and the turn signal euro conversion from Martin!!, and i picked up trim clips and the small top end targa bar trims from Hilton head porsche.
I still need a rear trunk insullation pad and a engine firewall sound pad!
Posted by: 914_7T3 Aug 29 2018, 10:27 PM
also arriving today were my oem Hella license plate lights from Kevin Powers , thanks Kevin!! and the turn signal euro conversion from Martin!!, and i picked up trim clips and the small top end targa bar trims from Hilton head porsche.
I still need a rear trunk insullation pad and a engine firewall sound pad!
Not sure that I want to mess up the engine bay by reinstalling my original firewall pad. Not sure what the solution is, but that will be for later.
Posted by: DRPHIL914 Aug 31 2018, 10:27 PM
new alternator with new wiring, new back plate
Attached thumbnail(s)
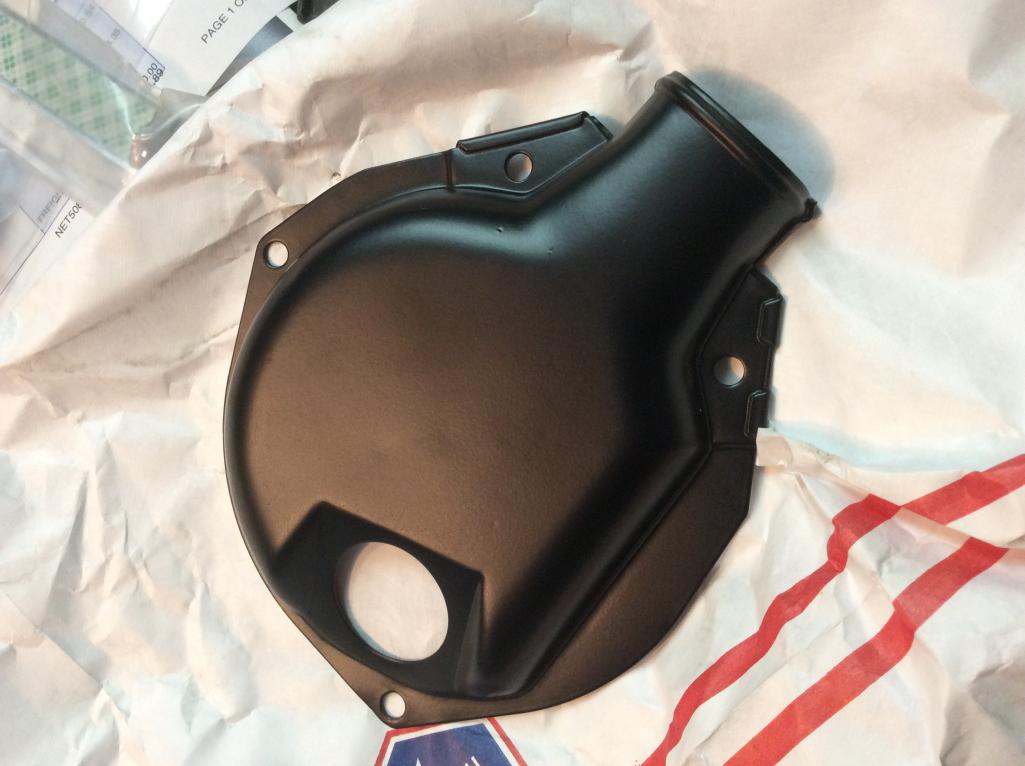
Posted by: DRPHIL914 Aug 31 2018, 10:31 PM
my newly powdercoated air box from Broce Stone came today, here is a test fit
Attached thumbnail(s)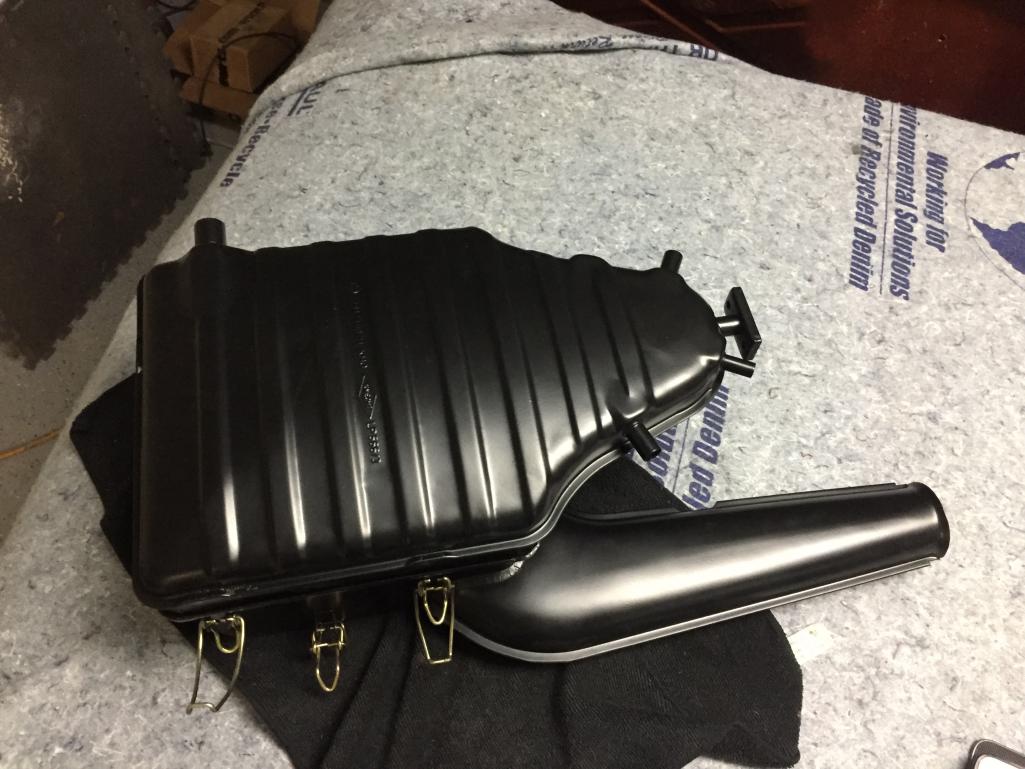
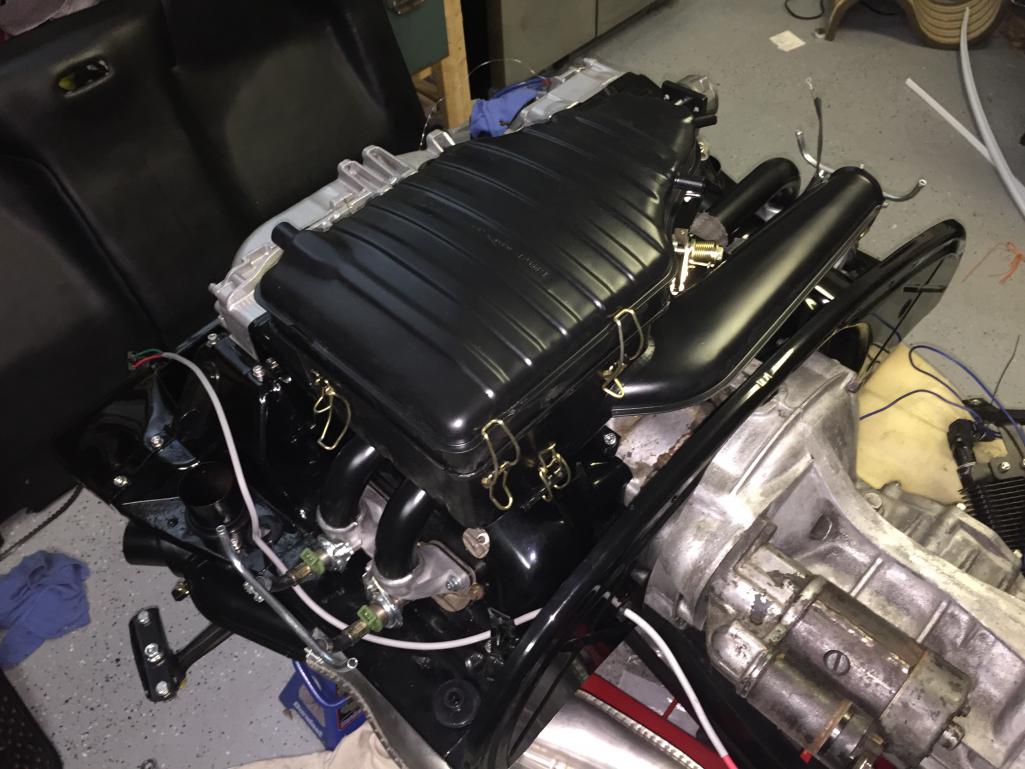
Posted by: Montreal914 Aug 31 2018, 10:33 PM
never run before 16x6”
Nice! What size tire is that?
Posted by: DRPHIL914 Aug 31 2018, 10:35 PM
what is this screw down in middle of the picture? looks like you would mount something there? am i missing something?
Attached thumbnail(s)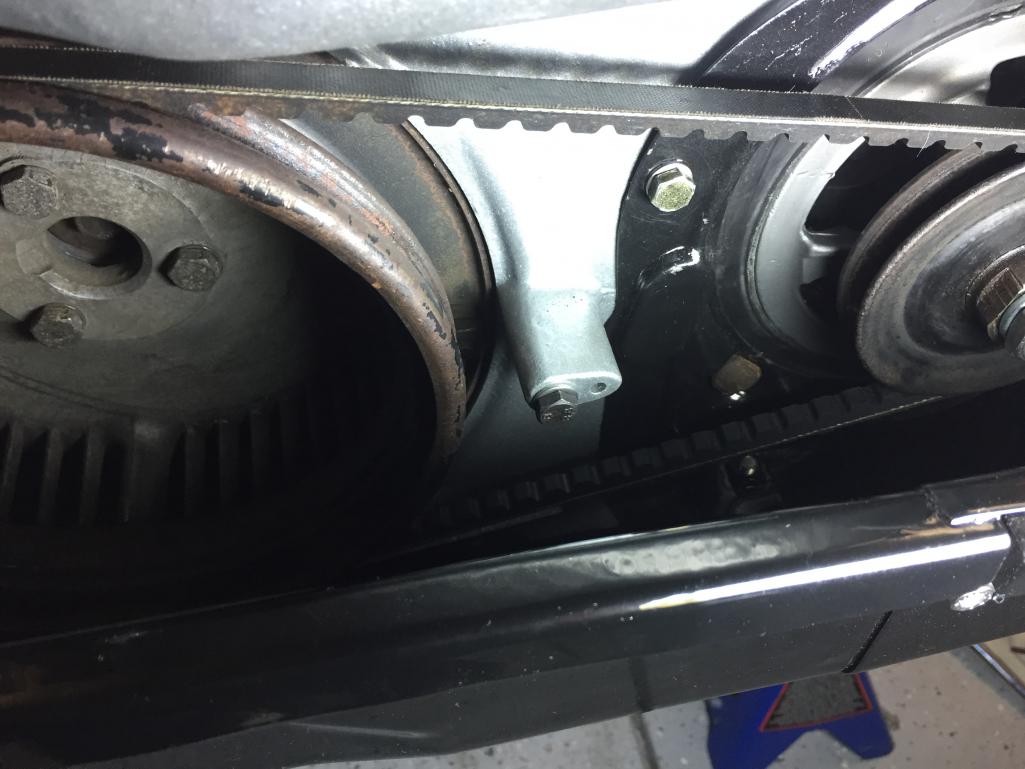
Posted by: DRPHIL914 Aug 31 2018, 10:37 PM
cleaned up after instal of the belt and tightening down the alternator.
how do i know if this belt is pulled tight enough??
Attached thumbnail(s)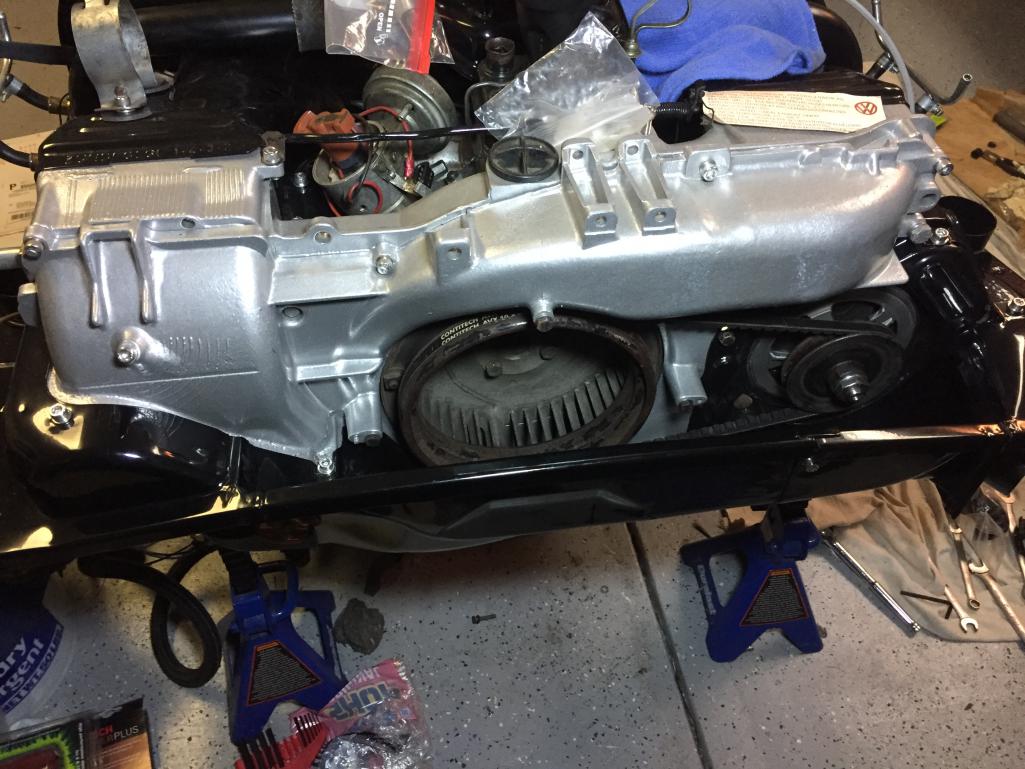
Posted by: DRPHIL914 Aug 31 2018, 10:41 PM
never run before 16x6”
Nice! What size tire is that?
these are Bridgesone Potenza 205/55 16, . they are a wide tire at about 8.5” wide - i had them on 7” rims but it was just too tight, so had the tires removed feomthe 7’a and put on these 6” rims ive had for a couple years still boxed up.
Posted by: Johny Blackstain Sep 1 2018, 07:46 AM
Wow Phil, looking great! 
Posted by: DRPHIL914 Sep 1 2018, 07:49 AM
Wow Phil, looking great!
thanks! getting close- hope to get the interior in today, maybe motor too, will see.
are you coming down from Va this year to Okteenerfest? have not seen you since Townsend TN- get that Six out of the garage and come on down!
Posted by: Johny Blackstain Sep 1 2018, 08:02 AM
Wow Phil, looking great!
thanks! getting close- hope to get the interior in today, maybe motor too, will see.
are you coming down from Va this year to Okteenerfest? have not seen you since Townsend TN- get that Six out of the garage and come on down!
Love to but I've got family coming up from Argentina to visit so maybe next year

Posted by: DRPHIL914 Sep 1 2018, 02:17 PM
bo help showed up for engine install so i went to work on the interior—-
Attached thumbnail(s)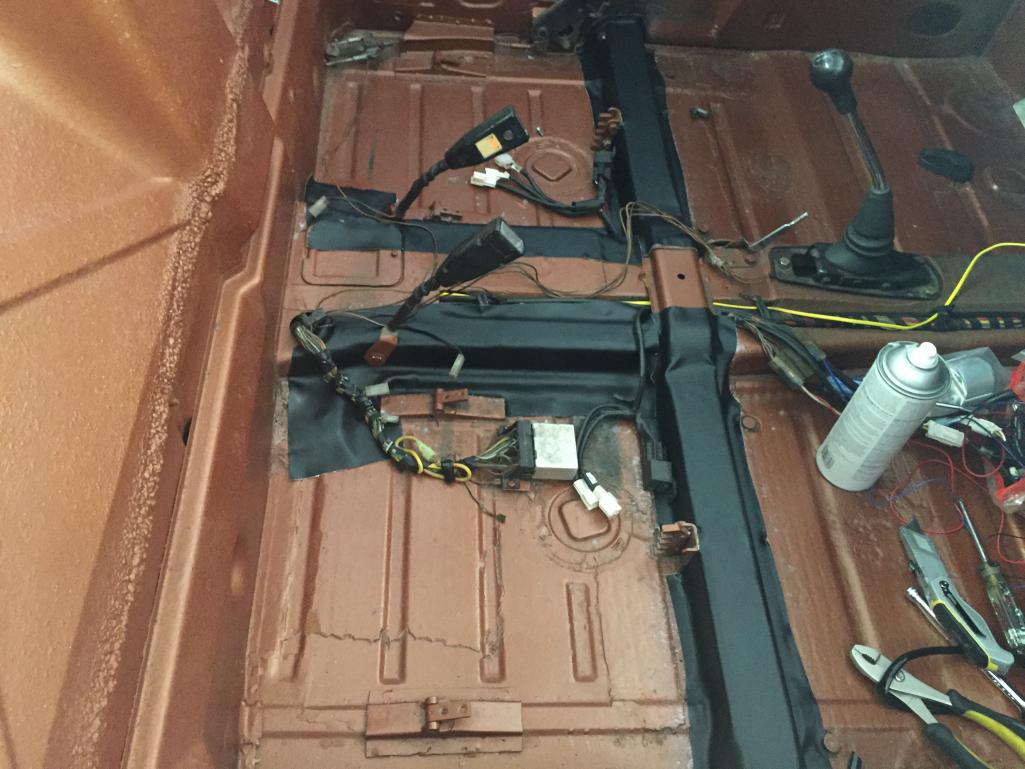
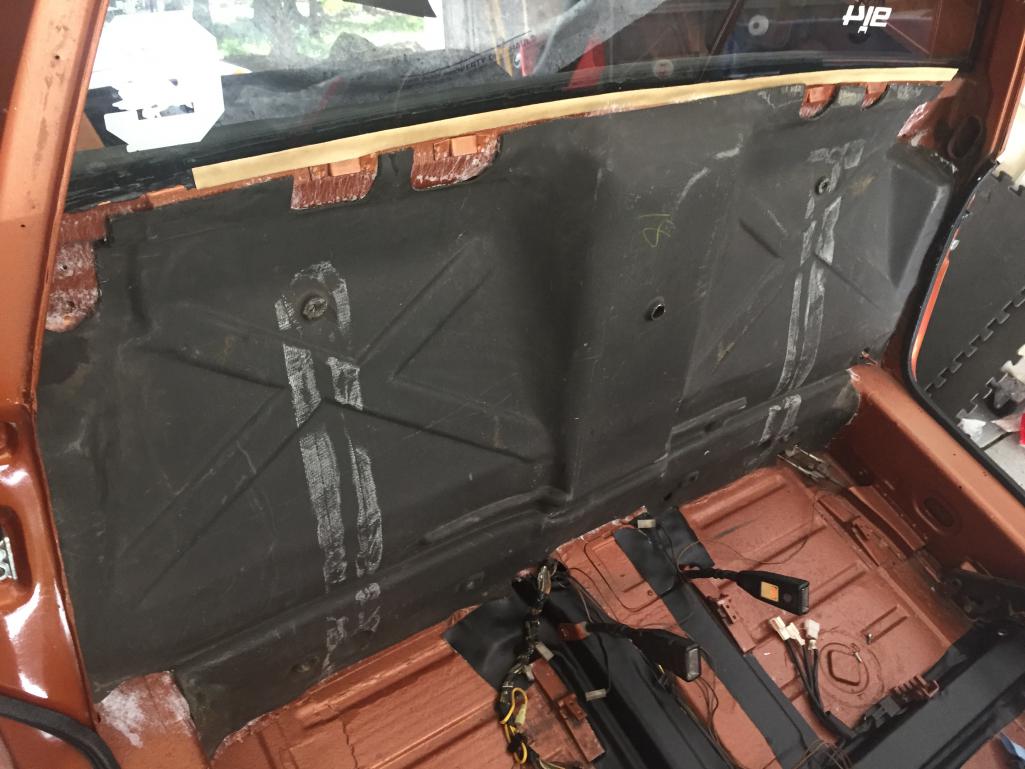
Posted by: DRPHIL914 Sep 1 2018, 02:18 PM
new german loop carpet, center console in, rugs in
Attached thumbnail(s)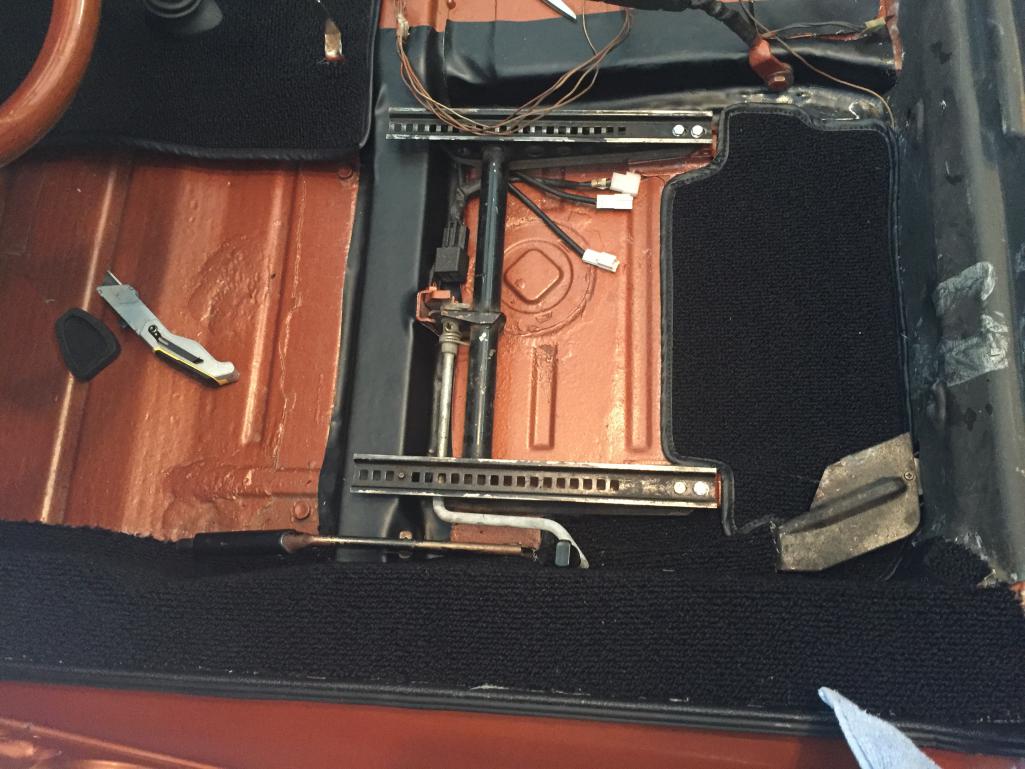
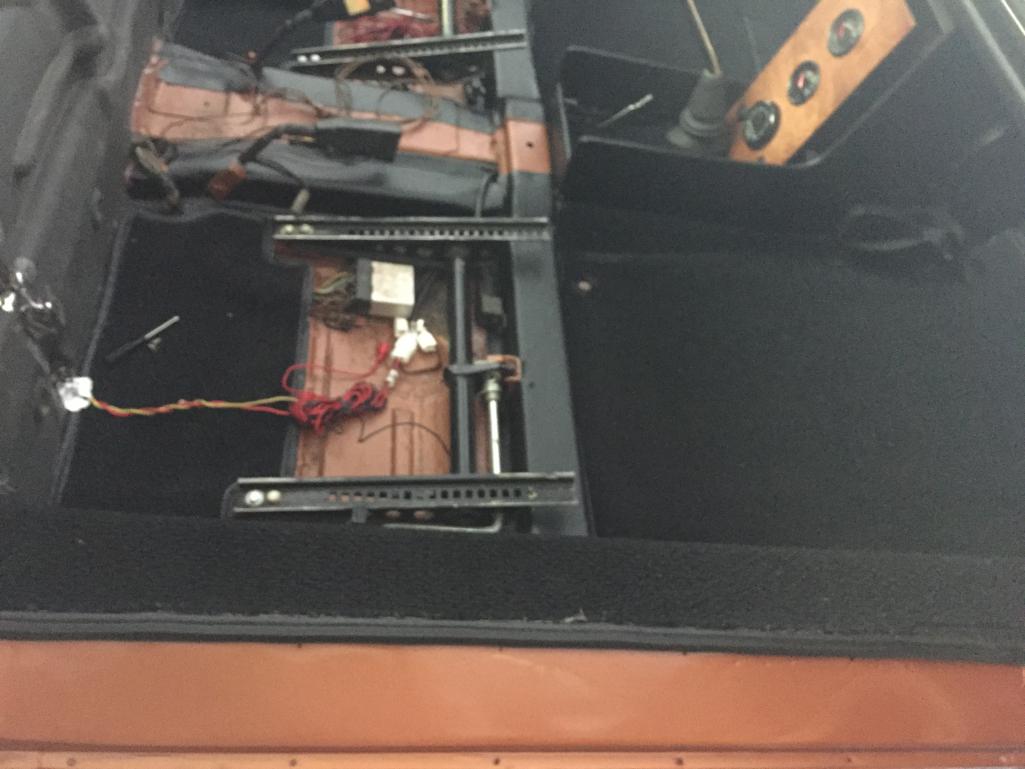
Posted by: DRPHIL914 Sep 1 2018, 02:20 PM
more
Attached thumbnail(s)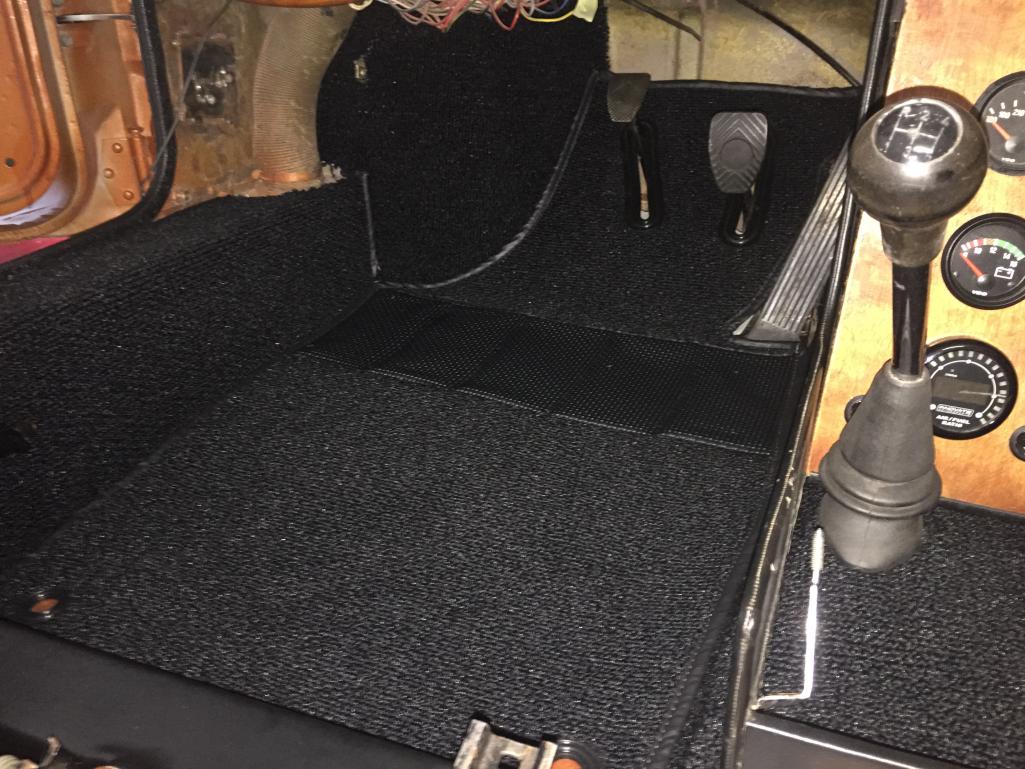
Posted by: DRPHIL914 Sep 1 2018, 02:22 PM
morerr
Attached thumbnail(s)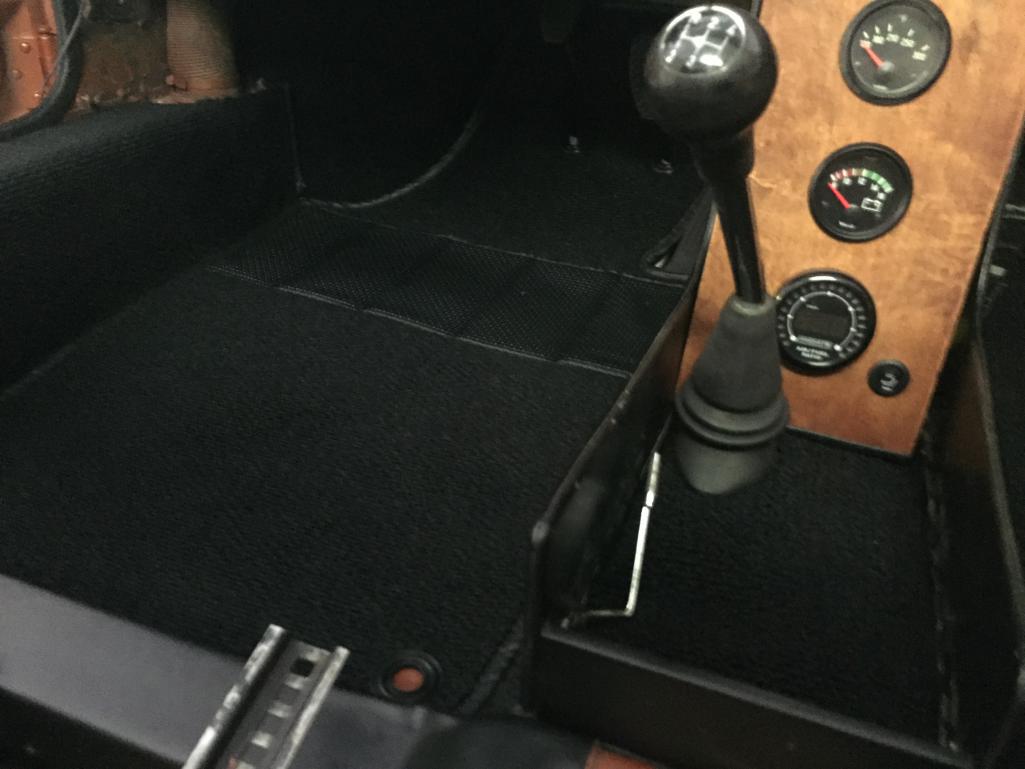
Posted by: DRPHIL914 Sep 1 2018, 02:26 PM
one more
Attached thumbnail(s)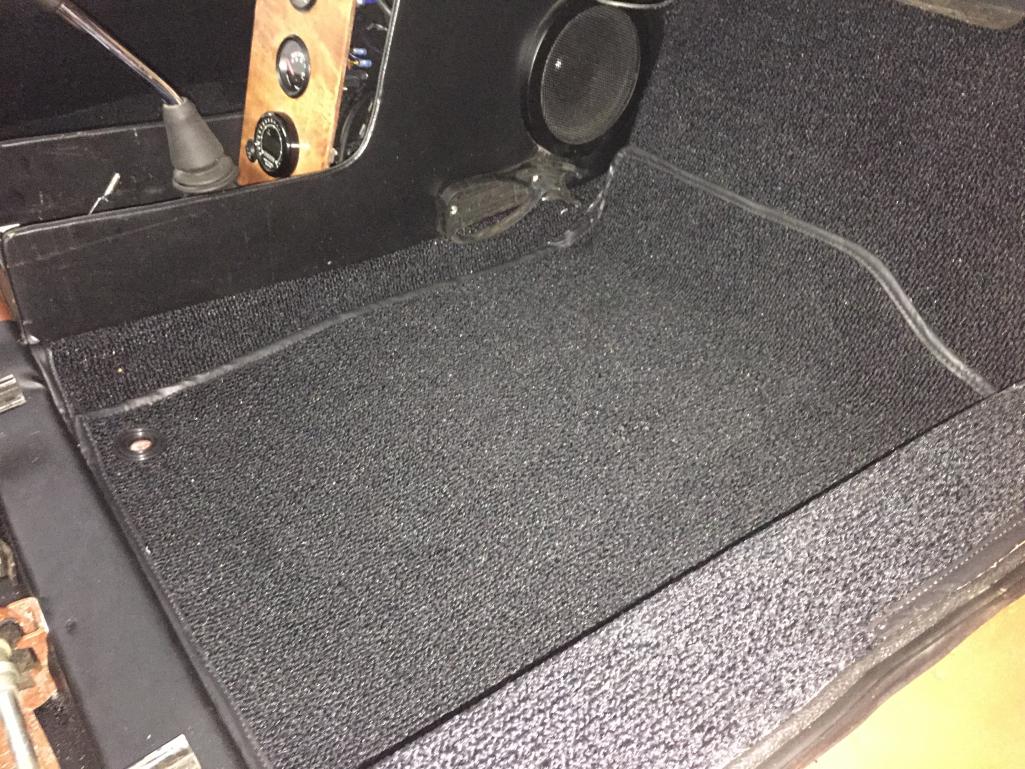
Posted by: DRPHIL914 Sep 1 2018, 03:05 PM
carpets fit pretty good, Mark did a good job- slight alteration on the drivers side around the e-brake area, but turned out fine. i used up a huge can of spray stuff heavy duty, have to go back and get the stuff for the sail panel trim- Auto Zone does not carry the 3M 90, so i have to check out Advanced-
Posted by: mepstein Sep 1 2018, 03:17 PM
carpets fit pretty good, Mark did a good job- slight alteration on the drivers side around the e-brake area, but turned out fine. i used up a huge can of spray stuff heavy duty, have to go back and get the stuff for the sail panel trim- Auto Zone does not carry the 3M 90, so i have to check out Advanced-
The big box hardware stores usually have it.
Posted by: DRPHIL914 Sep 1 2018, 05:51 PM
what order in reassembly do the targa bar pieces and interior trim fo in?
i have the seat belts back in, next is the side trim then back pad?
i have to put on the new sail panel teim and targa vinyl - so that first, then the bolster, anything else i am missing?
Posted by: raynekat Sep 2 2018, 02:26 AM
making my final list of small stuff that need to be acquired to finish up( i'm sure other stuff will come up)
1. new accelerator cable - where can i get one fast?, new rear trunk insulation pad,
- engine compartment sound pad -
2. period correct radio - coming soon from 914sixer
3. front bumper- coming in from Chrome this week
4. install window triangle seal , ugh
5. run wires for the cylinder head tem gauge i bought
6. interior installation
7. figure out how to adjust drivers door striker to get door to line up, when latched its still out by 1/8" - passenger side is perfect.
8. Install motor!
what am i forgetting? - rear targa trim pieces- small upper side piece and the back curved trim part.
touch ups. ,
Did you ever figure out your driver's door being out by 1/8" (your #7 on the list above)?
I had a "ah ha" moment when adjusting mine.
On the driver side, I had the same thing as you....couldn't get the door in far enough.
Although I had the receiver in the door jam moved as far to the inside as possible.
I went to the passenger side and it was perfect....WTH?
Then I started playing with how the latches work when you closed the door.
On the passenger side, I had two obvious clicks or detents.
On the driver side, I had only one.
I wasn't getting the door in far enough to reach the second detent on the driver side.
So the lightbulb finally went off.
My receiver was too far in to allow the latch to get to the 2nd detent.
So I moved the receiver out (instead of in) and voila!
I was able to get to the 2nd click or detent, and the driver's door was finally aligned and flush.
Crazy but sometimes ya gotta think outside of the box.
How are those side windows coming?
I spent all of yesterday swapping over all of the parts that get glued/bonded to the window onto a "new" side window I received in the mail.
Ready to finish out my doors in the morning.
Posted by: raynekat Sep 2 2018, 02:31 AM
what order in reassembly do the targa bar pieces and interior trim fo in?
i have the seat belts back in, next is the side trim then back pad?
i have to put on the new sail panel teim and targa vinyl - so that first, then the bolster, anything else i am missing?
Sounds like you pretty much have the correct order figured out.
Go slow on that sail panel/targa vinyl.
Measure twice cut once for sure.
On all this stuff including the carpeting, I used a contact spray adhesive vs a spray glue.
This contact adhesive really holds things down, but you get one chance to place it right.
So alignment aids (like tape) really help.
Also having an assistant for the long piece that goes across the top was essential for me.
The side sail pieces you can do yourself.
Place the trim beforehand so you can see where that side sail vinyl needs to go so that it's covered up by the trim.
Then take the trim off and get that vinyl in there.
Good luck.
Posted by: DRPHIL914 Sep 2 2018, 09:10 AM
making my final list of small stuff that need to be acquired to finish up( i'm sure other stuff will come up)
1. new accelerator cable - where can i get one fast?, new rear trunk insulation pad,
- engine compartment sound pad -
2. period correct radio - coming soon from 914sixer
3. front bumper- coming in from Chrome this week
4. install window triangle seal , ugh
5. run wires for the cylinder head tem gauge i bought
6. interior installation
7. figure out how to adjust drivers door striker to get door to line up, when latched its still out by 1/8" - passenger side is perfect.
8. Install motor!
what am i forgetting? - rear targa trim pieces- small upper side piece and the back curved trim part.
touch ups. ,
Did you ever figure out your driver's door being out by 1/8" (your #7 on the list above)?
I had a "ah ha" moment when adjusting mine.
On the driver side, I had the same thing as you....couldn't get the door in far enough.
Although I had the receiver in the door jam moved as far to the inside as possible.
I went to the passenger side and it was perfect....WTH?
Then I started playing with how the latches work when you closed the door.
On the passenger side, I had two obvious clicks or detents.
On the driver side, I had only one.
I wasn't getting the door in far enough to reach the second detent on the driver side.
So the lightbulb finally went off.
My receiver was too far in to allow the latch to get to the 2nd detent.
So I moved the receiver out (instead of in) and voila!
I was able to get to the 2nd click or detent, and the driver's door was finally aligned and flush.
Crazy but sometimes ya gotta think outside of the box.
How are those side windows coming?
I spent all of yesterday swapping over all of the parts that get glued/bonded to the window onto a "new" side window I received in the mail.
Ready to finish out my doors in the morning.
drivers side is all in and works but does not close flush, might try your method and check the 2 clicks,
going to fight the passenger side later today, once i get the air box and gas tank in first!
got the carpet in , close to getting my back pad and seats .
Posted by: DRPHIL914 Sep 2 2018, 04:24 PM
success! the air box is in
tested the fan works great but my controller may need to be replaced but not now, i took apart the blower and did new seals, cleaned it out and checked the resistors too, put it all back together and new seals between upper ans lower box, and at the top screen
Attached thumbnail(s)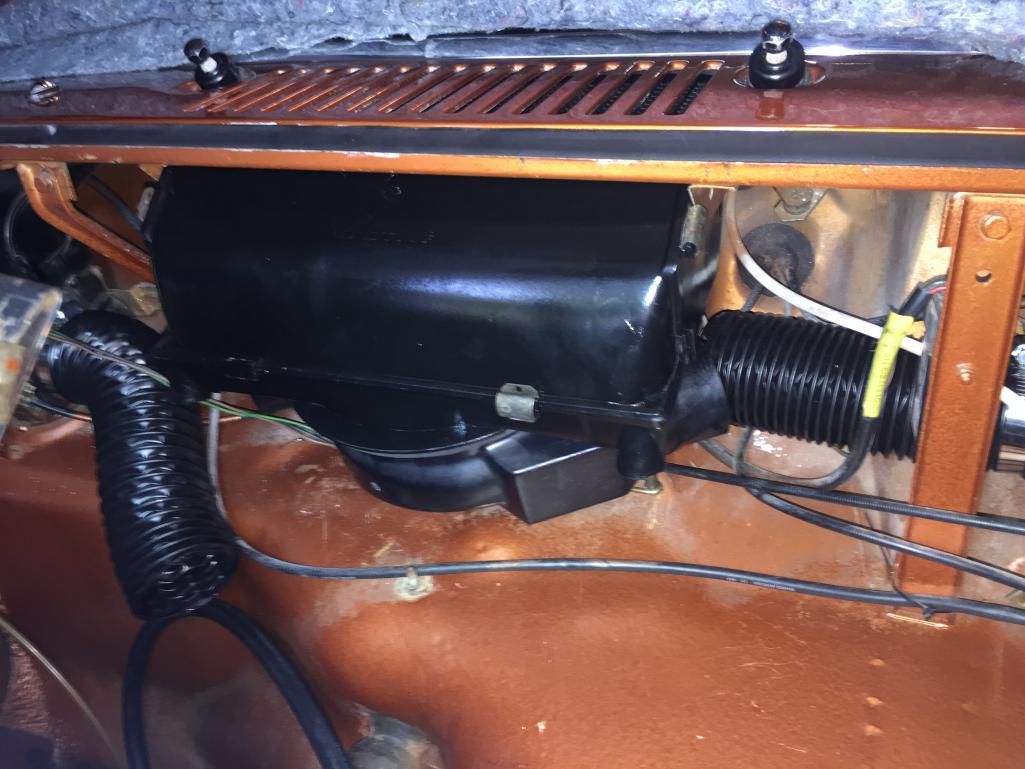
Posted by: DRPHIL914 Sep 2 2018, 04:26 PM
motor and transmission are in and CV’s hooked up! my friend Jim , the “way over-qualified UPS driver that is a certified air craft mechanic came over and helped and did the safety wire for me too!
Attached thumbnail(s)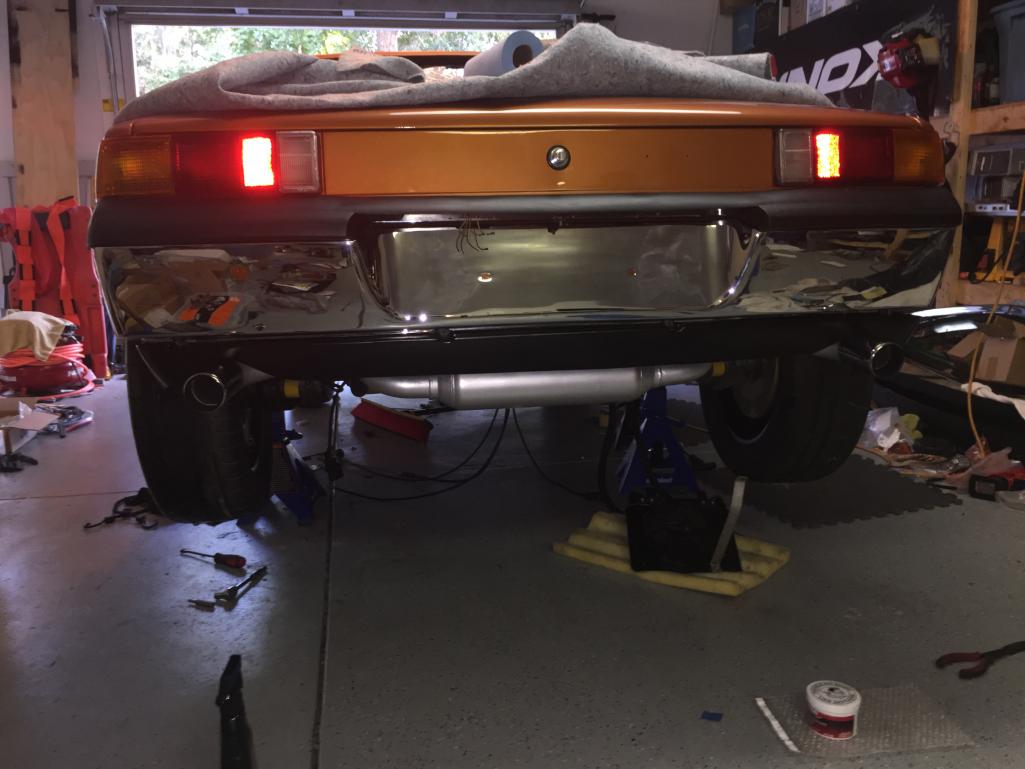
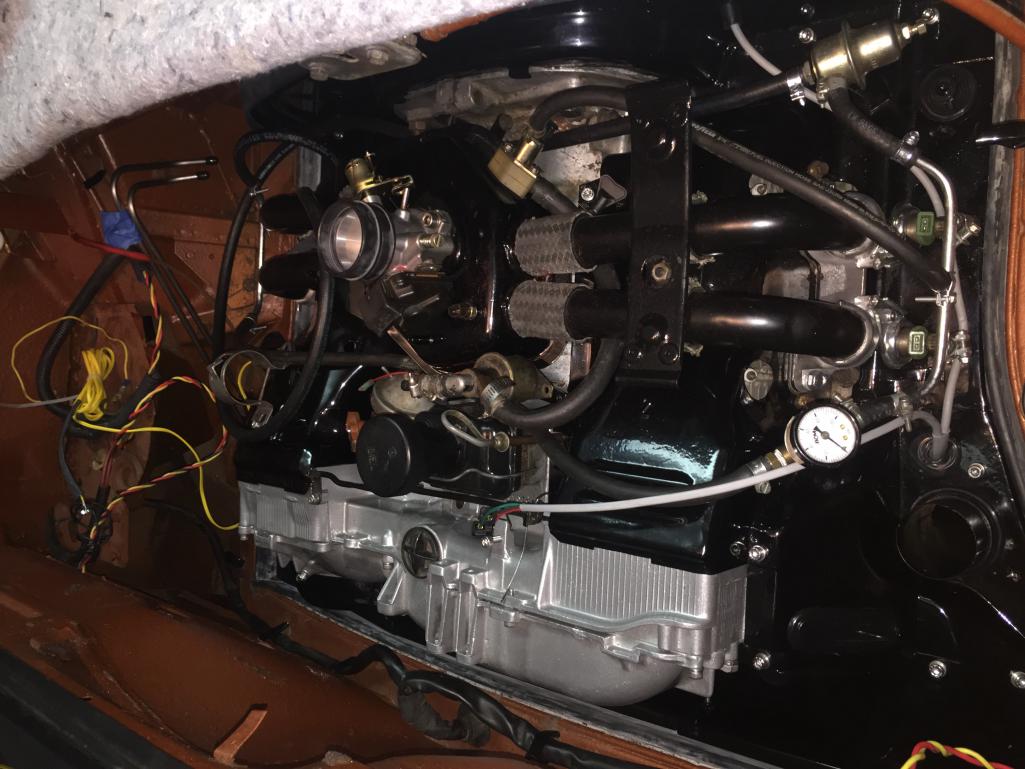
Posted by: DRPHIL914 Sep 2 2018, 04:29 PM
there is plenty to do yet but the goal is to finish off under the car now, so i can drop it down and tomorrow install all of the fuel and spark related stuff.
still waiting on some targa trim pieces, but i have plenty to do before that comes this week
Posted by: JRust Sep 2 2018, 05:29 PM
Looking good man. Nothing like a freshly dressed motor
Posted by: Johny Blackstain Sep 2 2018, 07:31 PM
Her "posterior" is gorgeous! Love the dual exhaust & retro bumper
Posted by: DRPHIL914 Sep 3 2018, 08:30 PM
3 day weekend , and about 30 hours working on the car!
some update since yesterday-
1. installed the seals on the passenger door- yea thats right! window installed, all the fuzzies etc.
2. gas tank installed! fuel lines finished,
3. ECU and fi put back in,
4. sail panel vinyl installed- 2 panels perfect,
one, not so much- will explain later-
i have the vacuum lines to install yet, and the battery - need to trouble shoot a few connections that i dont remember but the clutch, acelerator cable and the shift linkage are all back in.
Attached thumbnail(s)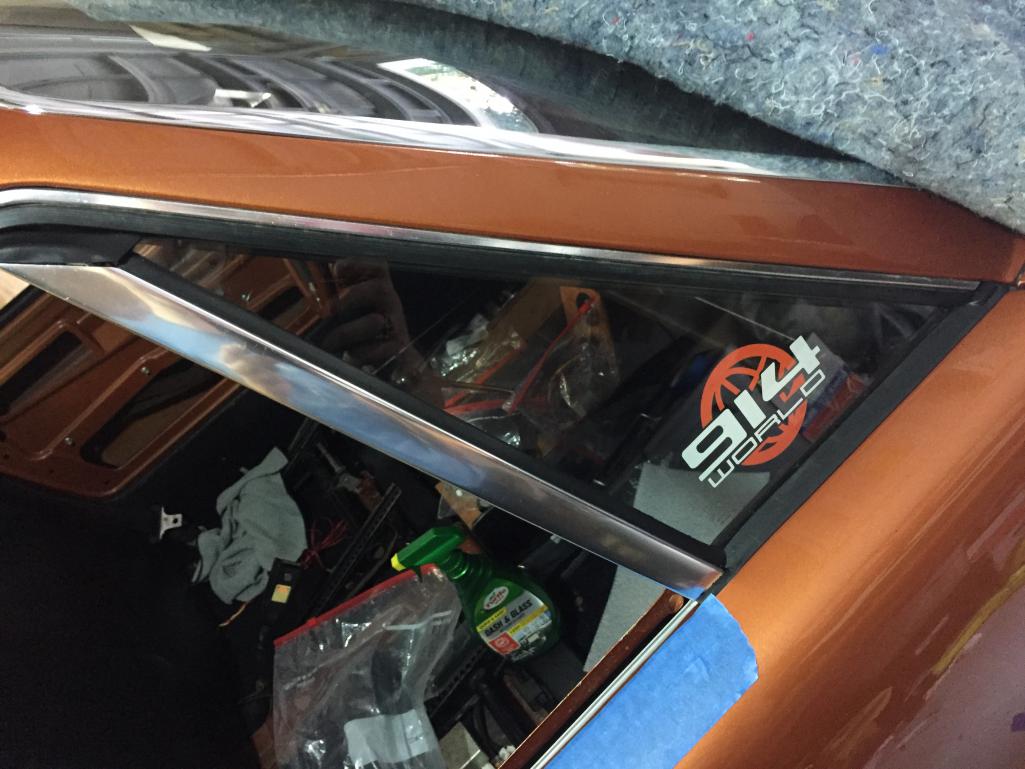
Posted by: DRPHIL914 Sep 3 2018, 08:32 PM
getting there
Attached thumbnail(s)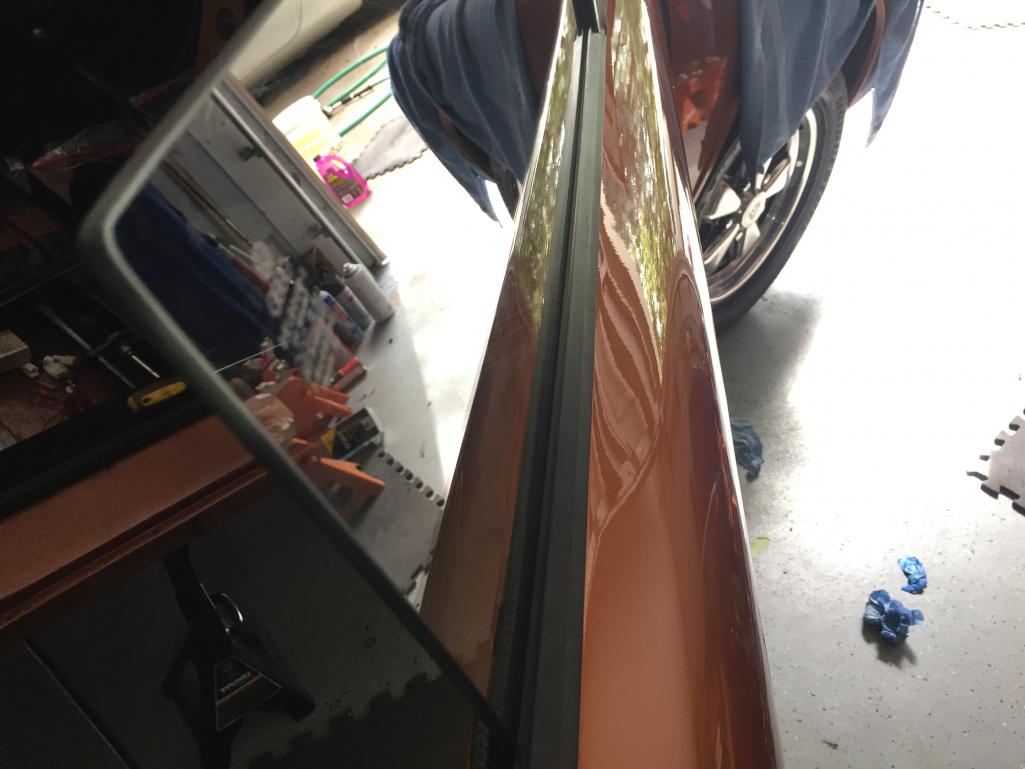
Posted by: DRPHIL914 Sep 3 2018, 08:34 PM
new seals for the tank
Attached thumbnail(s)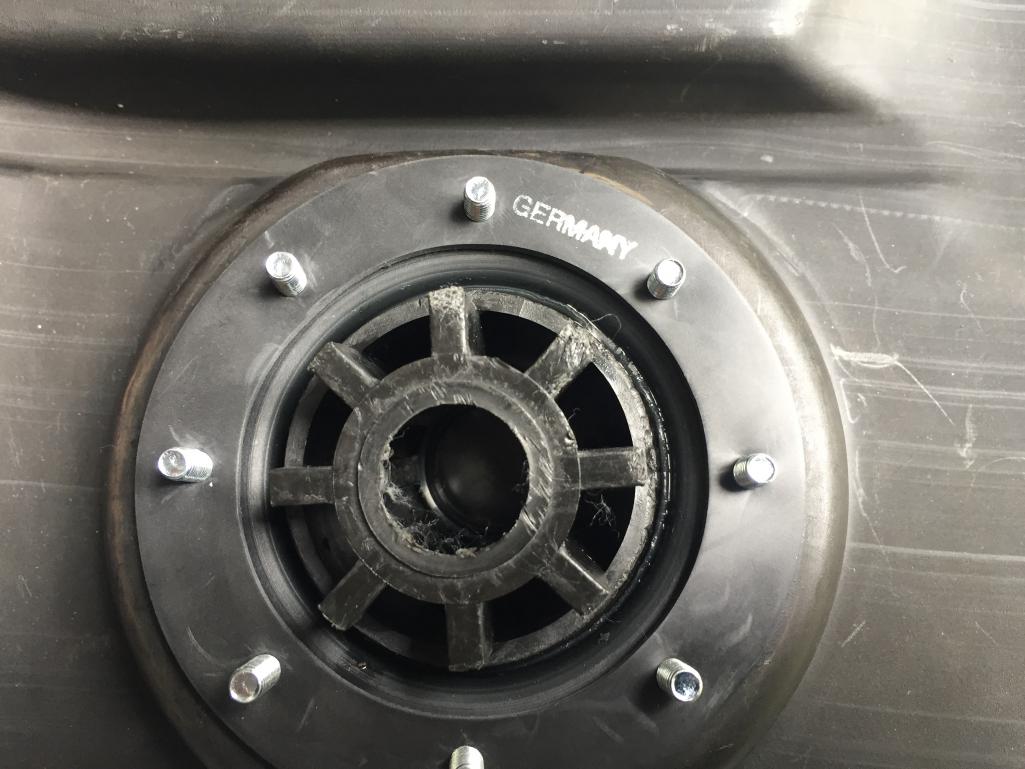
Posted by: DRPHIL914 Sep 3 2018, 08:35 PM
new felt on trunk wall
Attached thumbnail(s)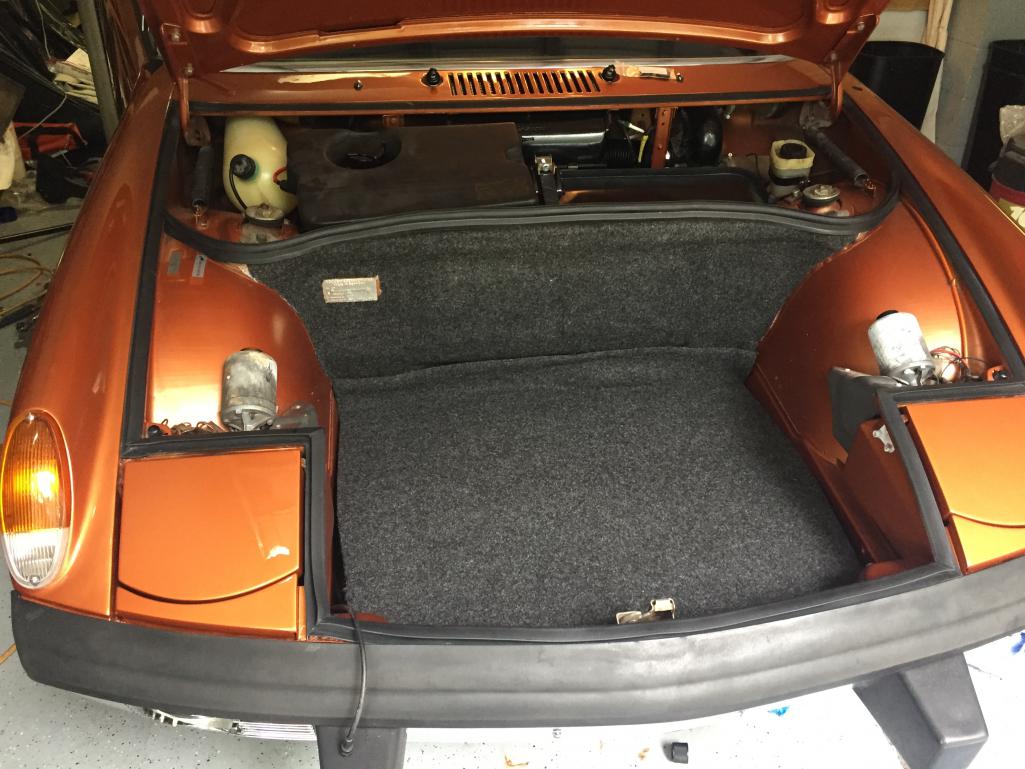
Posted by: DRPHIL914 Sep 3 2018, 08:37 PM
was some overspray on the old felt- also have a nice cocomat for front trunk
Attached thumbnail(s)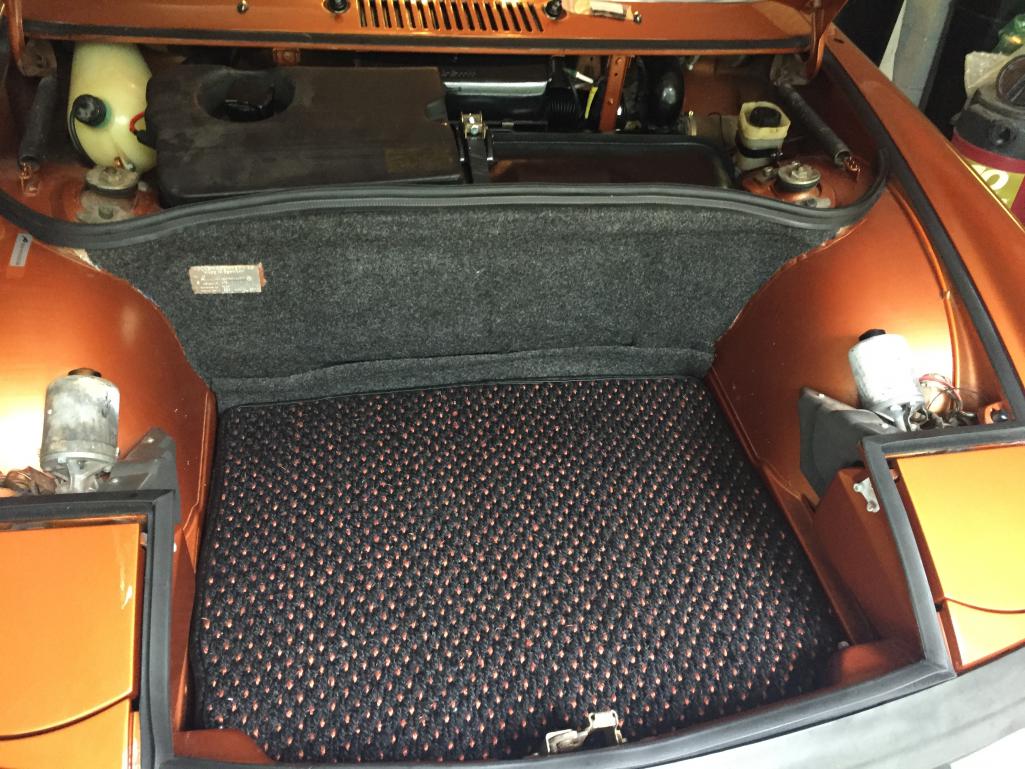
Posted by: DRPHIL914 Sep 3 2018, 08:39 PM
sailing away...
Attached thumbnail(s)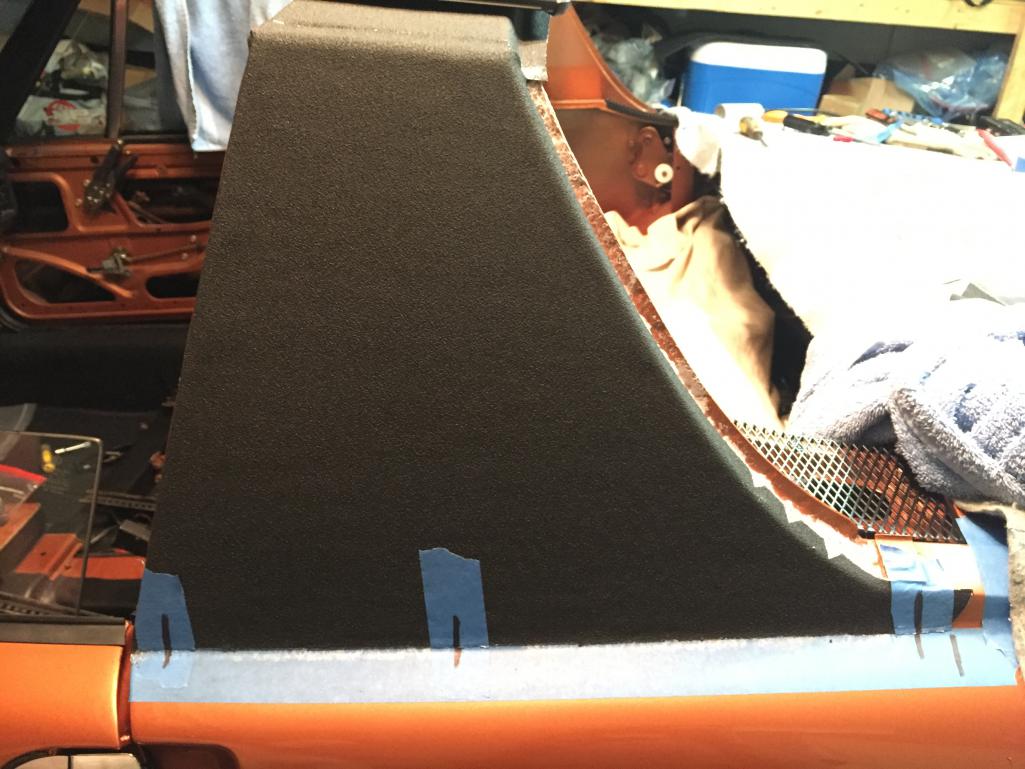
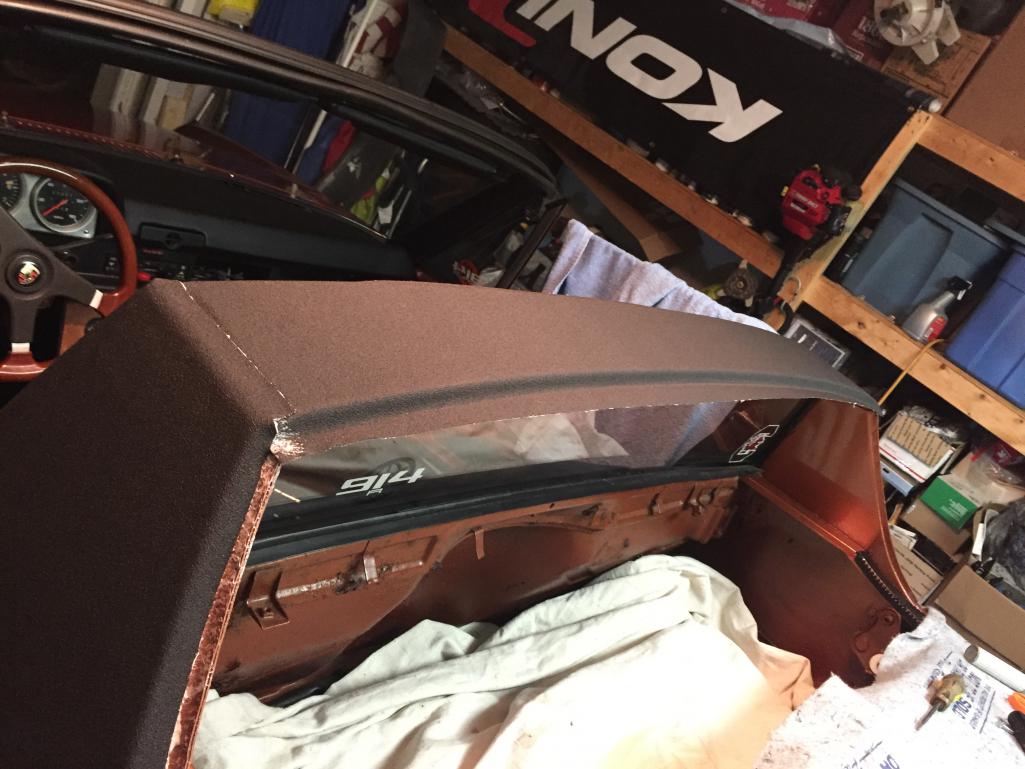
Posted by: DRPHIL914 Sep 3 2018, 08:40 PM
ready for trim-
Attached thumbnail(s)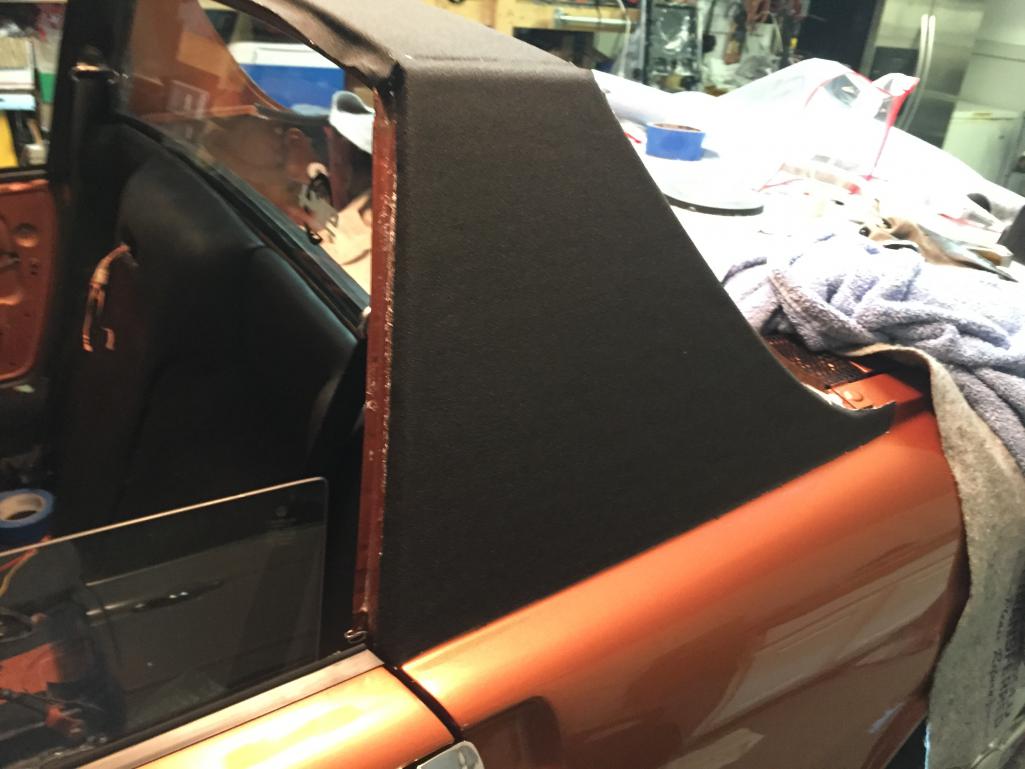
Posted by: DRPHIL914 Sep 3 2018, 08:51 PM
so, here is the story on the vinyl -
will probably have to re do the right side- I was a bit short on the cut and knew it might not fit, sure was tight , i think it would have been ok but no room for errors, well i had to pull it off and my mistake was trying to put it back on, cleaned up the panel, reglued it but it is now not smooth, a bit bumpy and that is not satisfactory so i have to reorder righr side sail vinyl- Calling Mark , hello 914rubber, i have a special request!
Attached thumbnail(s)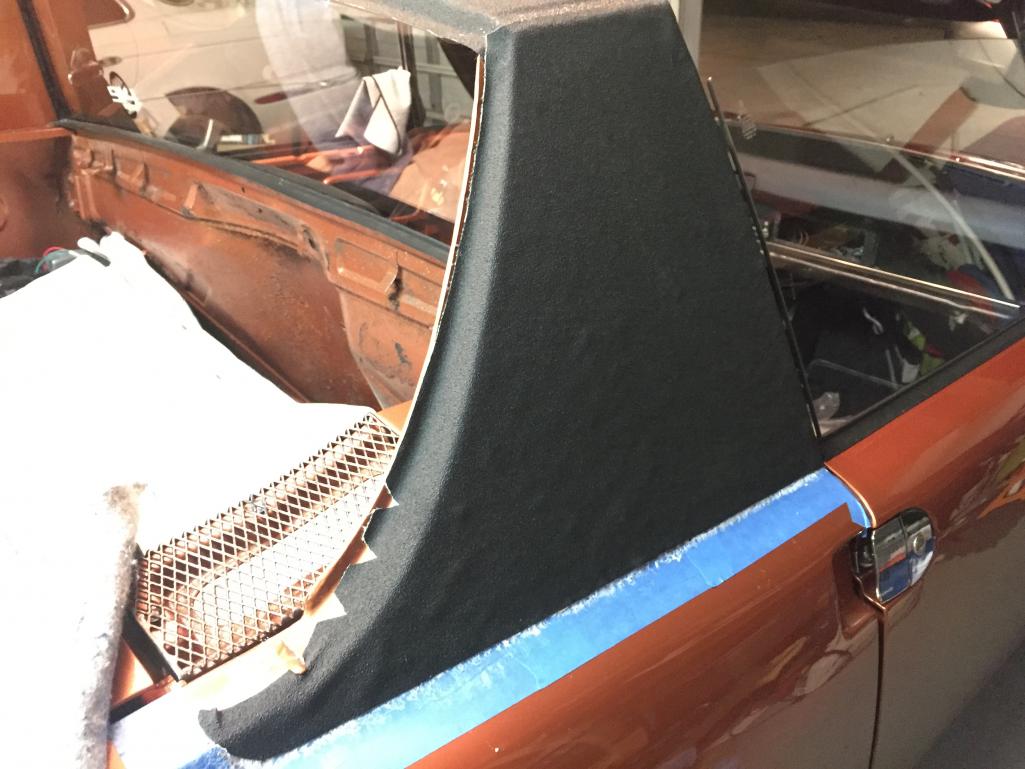
Posted by: DRPHIL914 Sep 3 2018, 08:55 PM
so these wires come off of the same harness that goes to the coil, one is white , other is green/red- where do they go?
Attached thumbnail(s)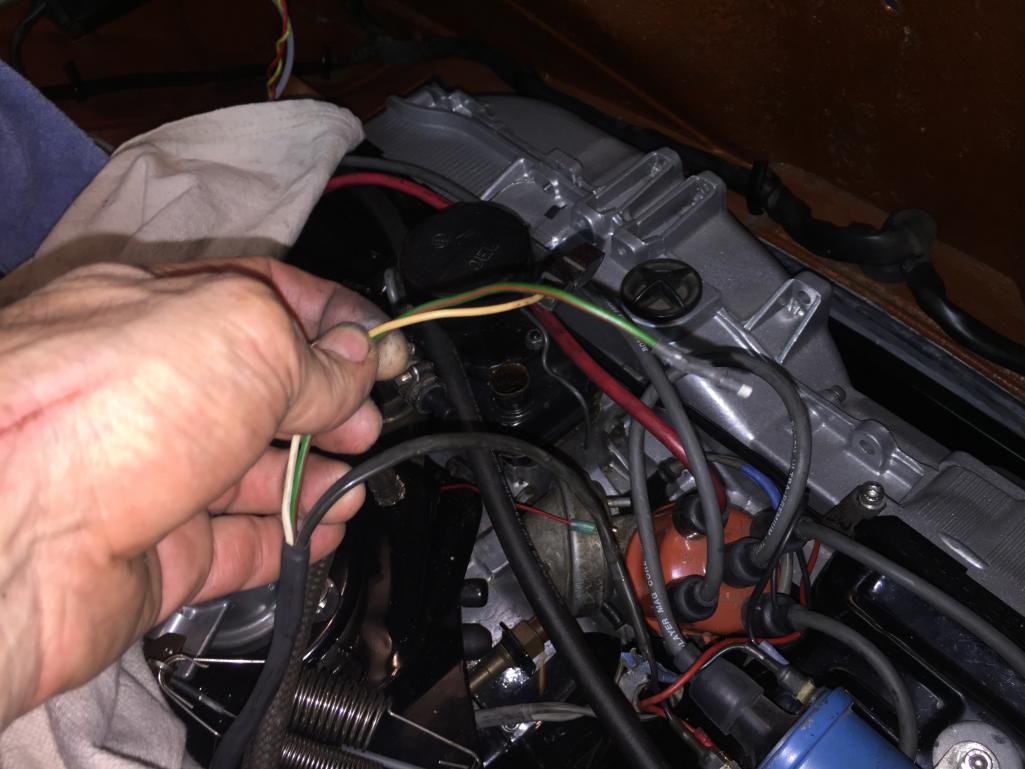
Posted by: DRPHIL914 Sep 3 2018, 09:30 PM
so these wires come off of the same harness that goes to the coil, one is white , other is green/red- where do they go?
- oil pressure switch and the aar, right?
Posted by: IronHillRestorations Sep 4 2018, 05:31 AM
so these wires come off of the same harness that goes to the coil, one is white , other is green/red- where do they go?
- oil pressure switch and the aar, right?
Yes
Posted by: DRPHIL914 Sep 4 2018, 09:49 PM
short list of things to do
to be able to start car-
-get oil cooler mounted back up in position
- vac lines hooked up
-battery
-gas into tank
-
i have an empty spot in the dash- i need a radio
Posted by: DRPHIL914 Sep 5 2018, 10:00 AM
found this diagram for the FI wiring with colors a labels , very helpful.
getting close, ready to add the vac lines!
Attached thumbnail(s)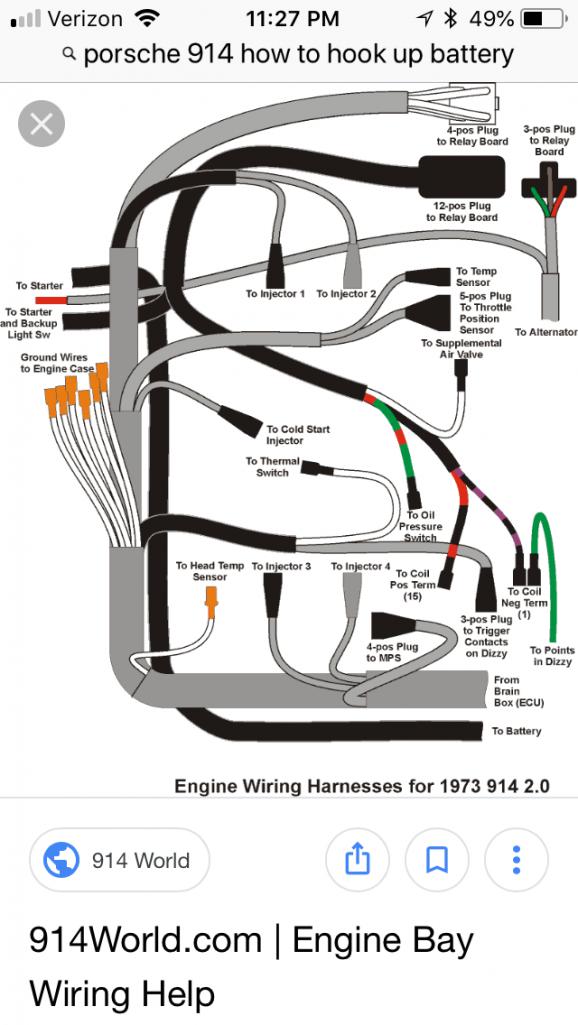
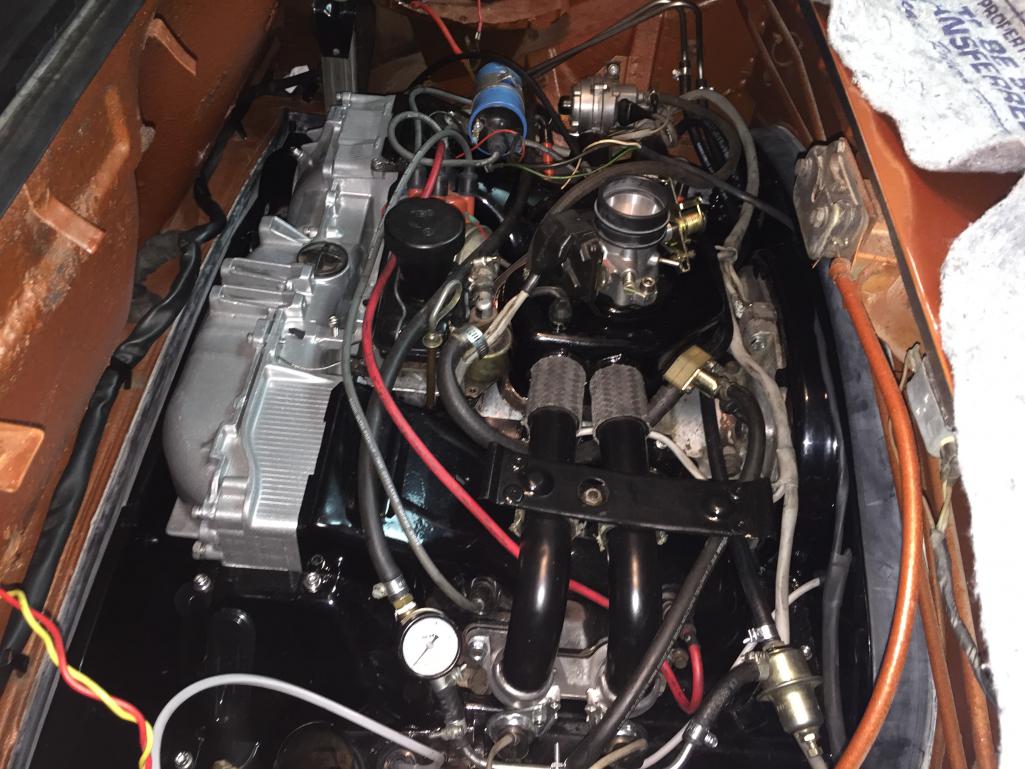
Posted by: DRPHIL914 Sep 5 2018, 10:03 AM
new CV boots, NOS from 914sixer, so now the 6 hole flange is gone, no more slinging grease all over! safety wire in place, also new retainer band on the shift linkage cover,
Attached thumbnail(s)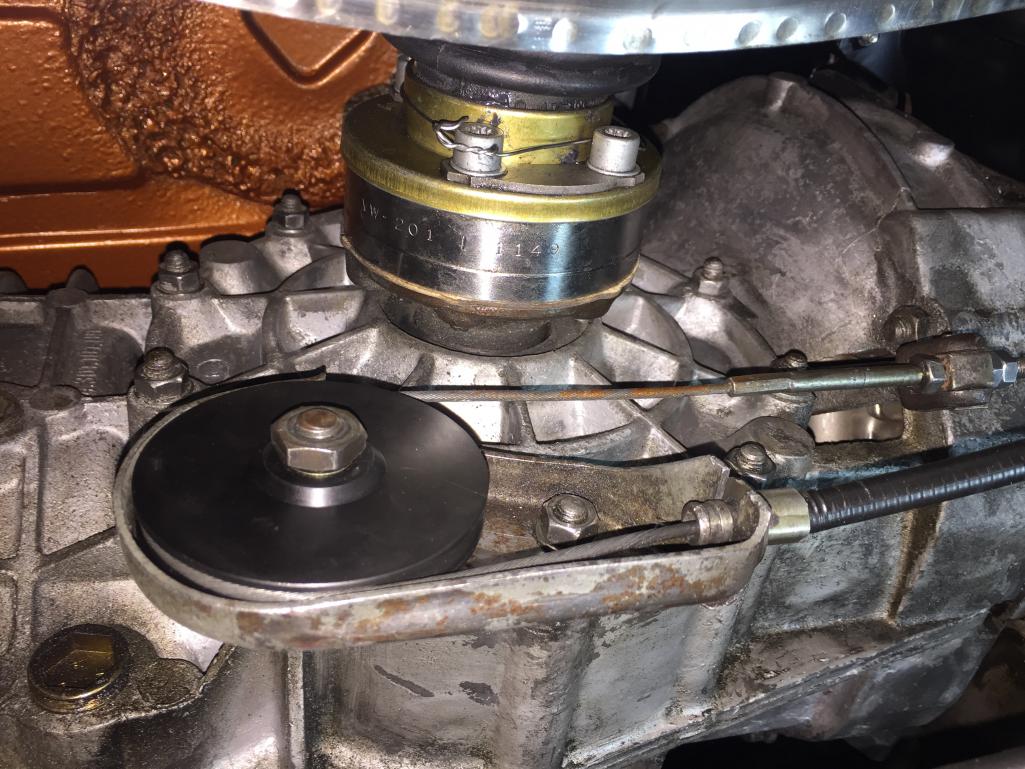
Posted by: DRPHIL914 Sep 5 2018, 10:06 AM
all the proper he parts for backdated sshe.
Posted by: Mblizzard Sep 5 2018, 10:07 AM
new CV boots, NOS from 914sixer, so now the 6 hole flange is gone, no more slinging grease all over! safety wire in place, also new retainer band on the shift linkage cover,
What is with that dirty case in a car like that?
Cant even imagine how tough it is to keep moving forward on things to try and make Okteenerfest!
Posted by: DRPHIL914 Sep 5 2018, 10:07 AM
all the proper he parts for backdated sshe.
Attached thumbnail(s)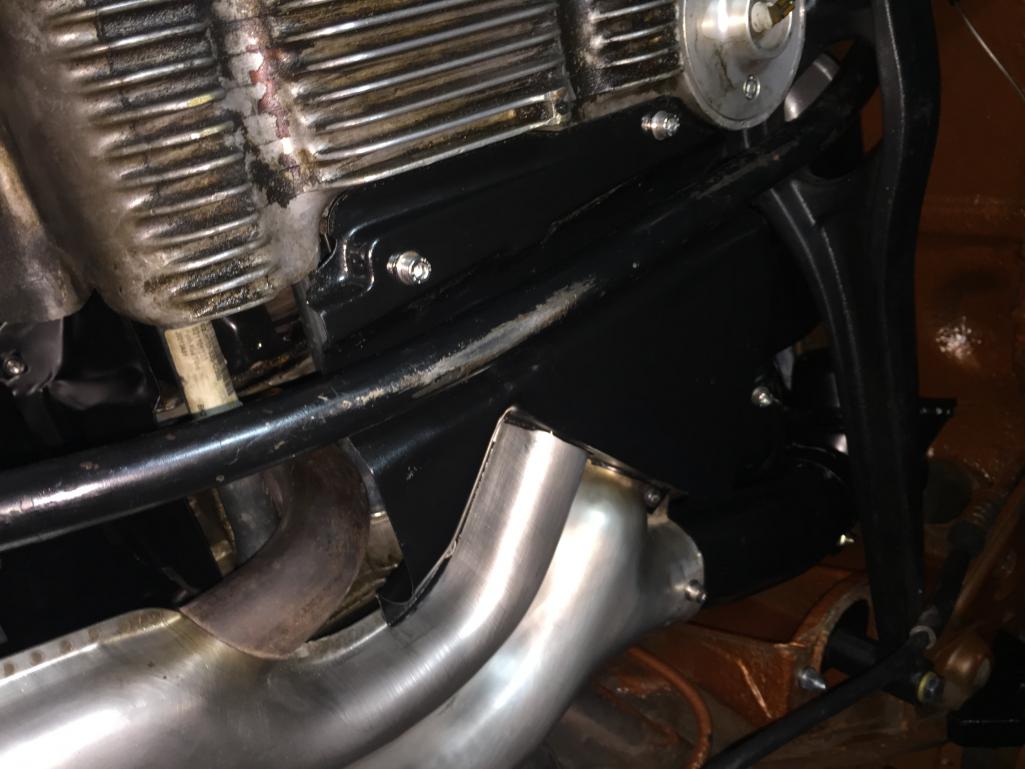
Posted by: DRPHIL914 Sep 5 2018, 10:23 AM
i was a bit tired, 3 days and more than 30 hours of work reassembling doors, seals, windows, targa stuff, tank, blower, motor and transmission, FI, and wiring in motor, shift linkage and clutch and accelerator cables, etc i was a bit tired by monday night! I was in need of an”cat nap” CAT and i took a break- my daughters’ 6 month old kitten decided to reast with me. more to post tonight,
i might even try and put some fuel in the system and fire it up tonight.
my sound pad for firewall is on the way from 914rubber.com along with a new rear targa pad/bolster, also a few things including the side trim piece for inner sail panel from kevin powers(rhodguy), and my new genuine Porsche sail panel trim feom Sunset Porsche Parts in Oregon! all headed this way and due in any day!
punch list gets smaller
- rocker panel installation
- threshholds
- finish turn signal bucket euro conversion,
- new front chrome bumper install,
inside installation of back pad and seats and trim and door cards,
IF i get car ready and running, my short list of stuff to do if there is time:
install the 123ignition distributor
wire the CHT gauge
install the TimothyND LED gauge cluster!
we will see—-
Attached thumbnail(s)
Posted by: jesse7flying Sep 5 2018, 01:58 PM
Great shot! My 18 year old cat used to do the same thing. She passed away last year. Still miss her.
Posted by: DRPHIL914 Sep 5 2018, 09:42 PM
18 years, thats a long life! My dachshund is 16 now, this kitten has become his buddy, she follows him around, they play, and we find her crashed out sleeping next to him in his bed. I think she keeps him from being lonely when we are all gone during the day.
Attached thumbnail(s)
Posted by: DRPHIL914 Sep 5 2018, 09:48 PM
tonight my rear targa bar came from 914rubber! so now my back pad is in too, ans the center console and seats!!
ready for the last trim pieces! sorry no pictures.... ...... ..... you have to come to Okteenerfest !
Posted by: DRPHIL914 Sep 5 2018, 09:52 PM
before installation
Attached thumbnail(s)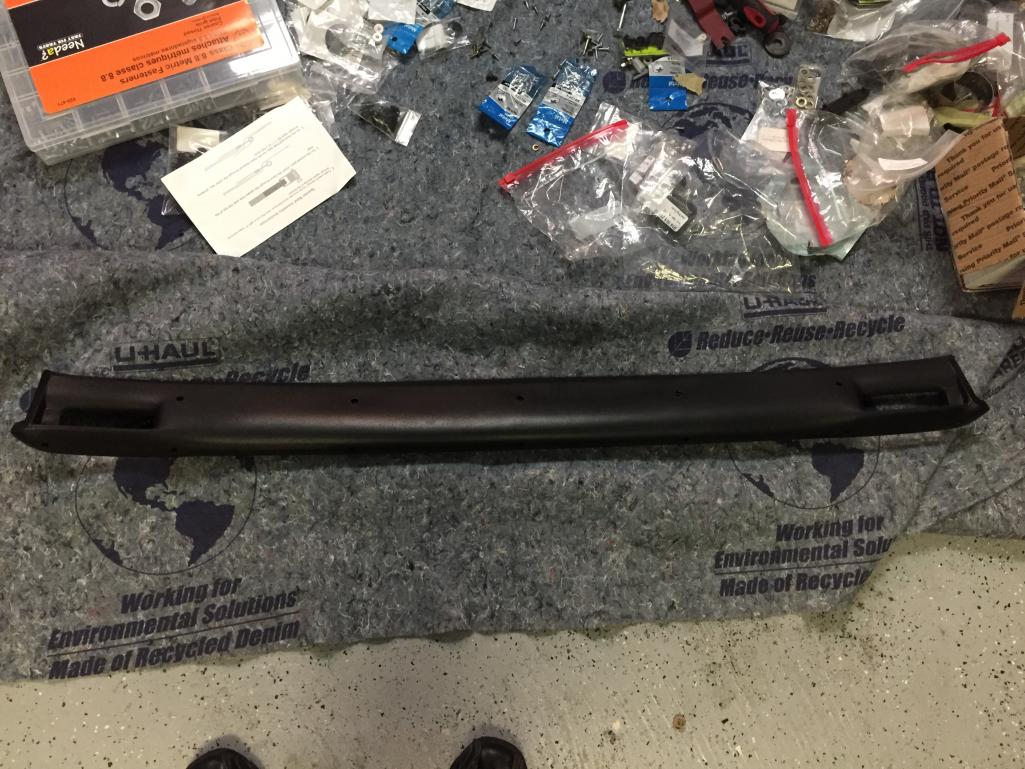
Posted by: DRPHIL914 Sep 6 2018, 06:50 AM
This rear targa bolster is the repro one being carried by 914rubber but i think has been made by AA - anyway the fit and finish is super and this will last a lifetime and not peel crack etc like the original ones. Yes, they can probably improve the grain to be more accurate for the concourse weenies but this is great for me and it really looks super, now for finishing off the rest of the trim around the targa bar/ sail panels. i have a few parts due in the next few days that i am excited about getting on the car to finish it up.
it looks like i am not going to get a radio in the dash for this trip so i would like to just put up a blank plate with the brick weave on it. -- Does anyone have such a thing i could acquire ASAP/?
Posted by: Mblizzard Sep 6 2018, 09:10 AM
This rear targa bolster is the repro one being carried by 914rubber but i think has been made by AA - anyway the fit and finish is super and this will last a lifetime and not peel crack etc like the original ones. Yes, they can probably improve the grain to be more accurate for the concourse weenies but this is great for me and it really looks super, now for finishing off the rest of the trim around the targa bar/ sail panels. i have a few parts due in the next few days that i am excited about getting on the car to finish it up.
it looks like i am not going to get a radio in the dash for this trip so i would like to just put up a blank plate with the brick weave on it. -- Does anyone have such a thing i could acquire ASAP/?
I think I have some extra black brick weave. could just do a quick double side tape and stick the weave to the back side of the hole.
I can check tonight.
If needed I can send or bring it with me.
Posted by: DRPHIL914 Sep 6 2018, 09:47 AM
could bring it that would be fine - i want to pick your brain about the 123distributor installation and setting, once i start car and have it running with current set up , i would like to put the 123 into it, but not yet as i don't want 10 variable issues when starting the car for the first time after a year, having replaced a few other items., I want to know about the preset curves and not running vac etc.
Phil
This rear targa bolster is the repro one being carried by 914rubber but i think has been made by AA - anyway the fit and finish is super and this will last a lifetime and not peel crack etc like the original ones. Yes, they can probably improve the grain to be more accurate for the concourse weenies but this is great for me and it really looks super, now for finishing off the rest of the trim around the targa bar/ sail panels. i have a few parts due in the next few days that i am excited about getting on the car to finish it up.
it looks like i am not going to get a radio in the dash for this trip so i would like to just put up a blank plate with the brick weave on it. -- Does anyone have such a thing i could acquire ASAP/?
I think I have some extra black brick weave. could just do a quick double side tape and stick the weave to the back side of the hole.
I can check tonight.
If needed I can send or bring it with me.
Posted by: Mblizzard Sep 6 2018, 09:58 AM
could bring it that would be fine - i want to pick your brain about the 123distributor installation and setting, once i start car and have it running with current set up , i would like to put the 123 into it, but not yet as i don't want 10 variable issues when starting the car for the first time after a year, having replaced a few other items., I want to know about the preset curves and not running vac etc.
Phil
This rear targa bolster is the repro one being carried by 914rubber but i think has been made by AA - anyway the fit and finish is super and this will last a lifetime and not peel crack etc like the original ones. Yes, they can probably improve the grain to be more accurate for the concourse weenies but this is great for me and it really looks super, now for finishing off the rest of the trim around the targa bar/ sail panels. i have a few parts due in the next few days that i am excited about getting on the car to finish it up.
it looks like i am not going to get a radio in the dash for this trip so i would like to just put up a blank plate with the brick weave on it. -- Does anyone have such a thing i could acquire ASAP/?
I think I have some extra black brick weave. could just do a quick double side tape and stick the weave to the back side of the hole.
I can check tonight.
If needed I can send or bring it with me.
I will PM you my number.
but the reality is that all you need to do is select the curve and time it just like the ordinal. If you got the programable advance one it is a bit more complex but not too hard.
Posted by: DRPHIL914 Sep 6 2018, 11:19 AM
My back pad is on its way, and i am close to being able to finish up the sail panels, interior is all back in the car! Grounds all wired, i still have to relocate my Oil cooler and then i can gas it up and see if she starts up!
edit - looks like the firewall sound/insulation pad I ordered Monday from 914rubber may not make it in time to be installed before leaving for the trip. Oh well! I can go with out that- but the sail panel trim is not something I can go with out. I can put my old rear trim on but I hope that AA can send this out today, they are carrying the aftermarket URO one and if they can ship it today I can get it by Wednesday.
I will put back on the old one if it doesn't. So it looks like the last few items to procure at the last minute is a radio from Mark Herd and the rear badging!! - SO who has the rear 914 and 2.0 badging for a '75??
Posted by: DRPHIL914 Sep 7 2018, 06:53 AM
any assembly instructions for the rear sail panel trim? what is the order of assembly?
also having issues with the adhesive we used for this the edges are coming up along back side of the targa bar. could it be the heat and humidity? thinking about hitting the edges that pulled up with contact cement and see if that will hold it down. both the permatex heavy duty and the 3M99 not holding well.
- it looks like the bottom edge trim, followed by the vertical trim and seal at front of the sail, and then the rear back targa bar trim followed last by the curved rear sail panel trim.
I hope that is right. We will try and get this done tomorrow along with getting the rest of the vacuum hose on and the oil cooler moved and remounted, then I should be able to put the oil and gas in and we will try and see if it will fire up.
Lots of new stuff on there, new alternator and belt, new front crank seals and oil cooler and seals, all new fuel lines and vac lines. about the only thing I didn't put on new is the starter is the same and the transmission was not removed, as it was rebuilt and resealed a few years ago at the Dr. Evil clinic in VA.
What I need- rear 914 and 2.0 lettering badge, rear trunk insulation pad(can wait if necessary)
short list of this weekends work in order of importance:
1. move oil cooler
2. put in vac lines , gas , oil,
3. start car and test car, tune.
IF all that goes well, then I can go to:
4. put on rocker panesl
5. finish sail panel trim
6. finish conversion of front euro light conversion
7. pull old ugly bumper and put on new chromed early front bumper
then ...
Posted by: Shadowfax Sep 7 2018, 08:40 AM
You are seeing the light at the end of the tunnel! Good job, Phil.
From what I remember, your order for the sail panel trim sounds correct. Try aasesales.com for your badges. I know they have several used sets. https://www.aasesales.com/collections/porsche-914-emblems
Posted by: DRPHIL914 Sep 7 2018, 08:08 PM
sail trim, vertical window seal, top trim and bottom in place on driver side
Attached thumbnail(s)
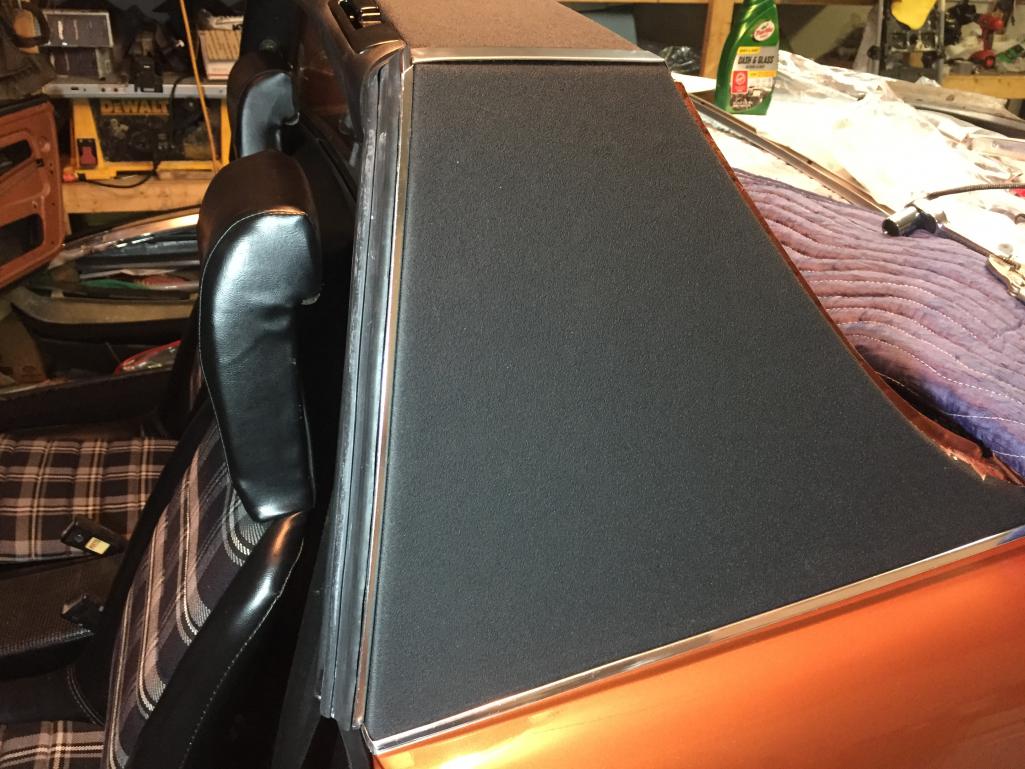
Posted by: DRPHIL914 Sep 7 2018, 08:10 PM
inners in with seat belts retractors , seats ,
Attached thumbnail(s)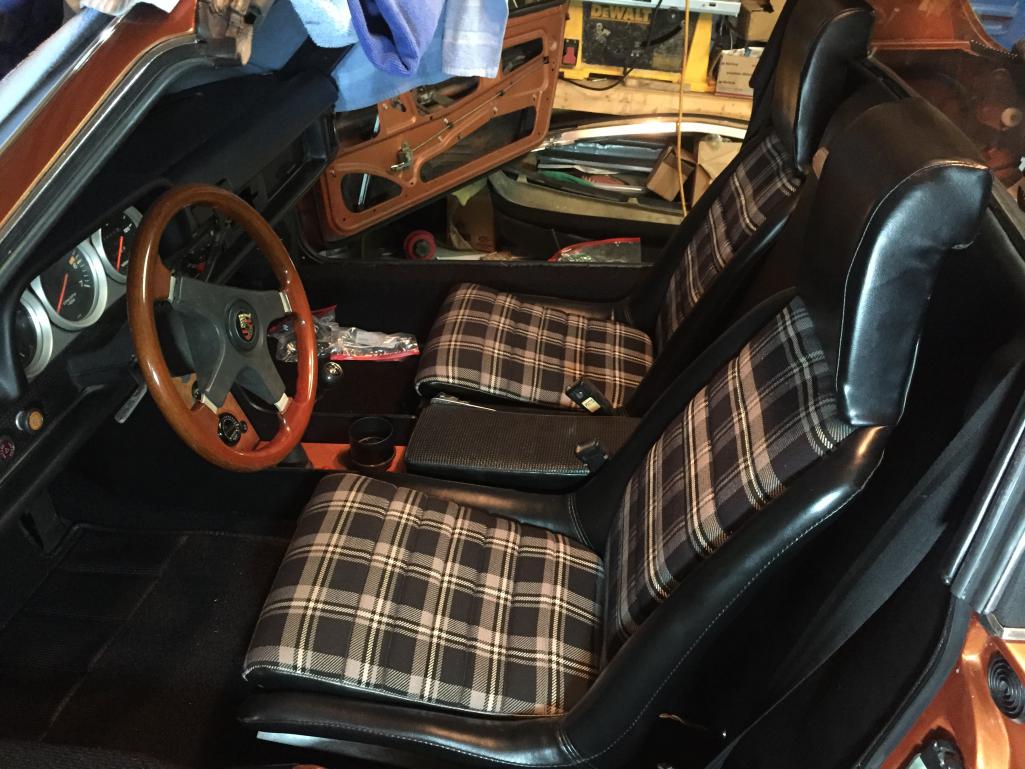
Posted by: DRPHIL914 Sep 7 2018, 08:13 PM
one side euro conversion done
Attached thumbnail(s)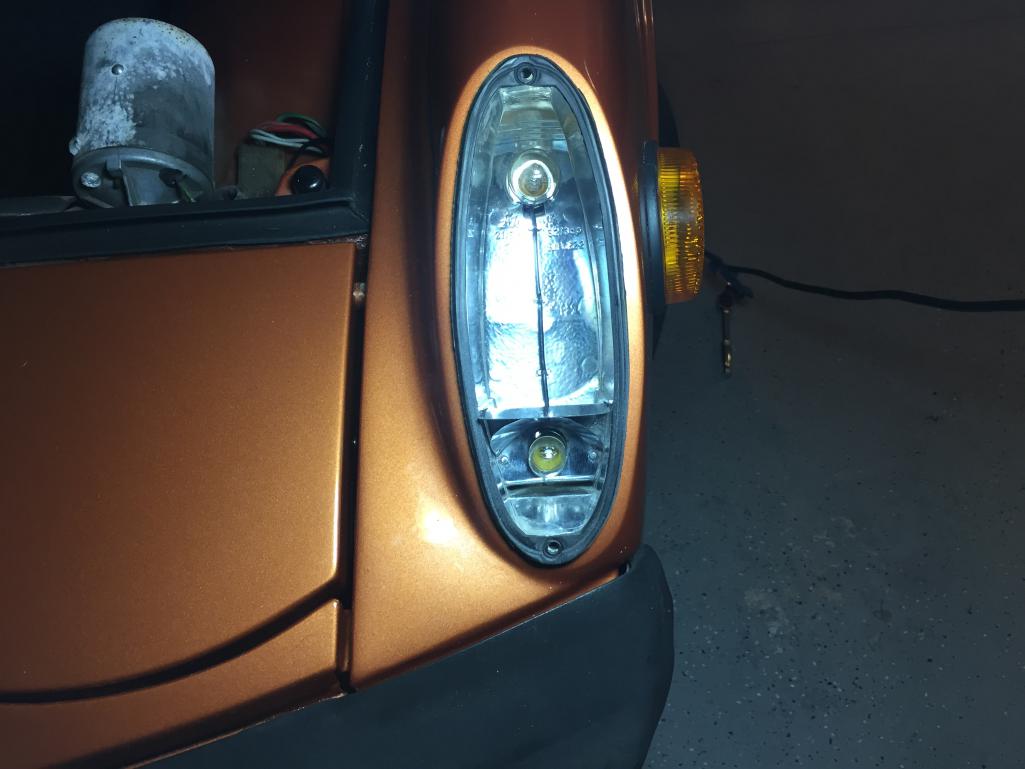

Posted by: mepstein Sep 7 2018, 08:16 PM
A lot of progress. Congrats!
Posted by: rhodyguy Sep 7 2018, 08:21 PM
WOW! Seats look super. Your car has turned out very nice.
Posted by: DRPHIL914 Sep 7 2018, 09:42 PM
thanks Kevin, thank you for the help and assistance parts wise too!
i just finished putting the early new rechromed bumper on, i will take better pictures in light tomorrow , new 914rubber topper on it as well.
Attached thumbnail(s)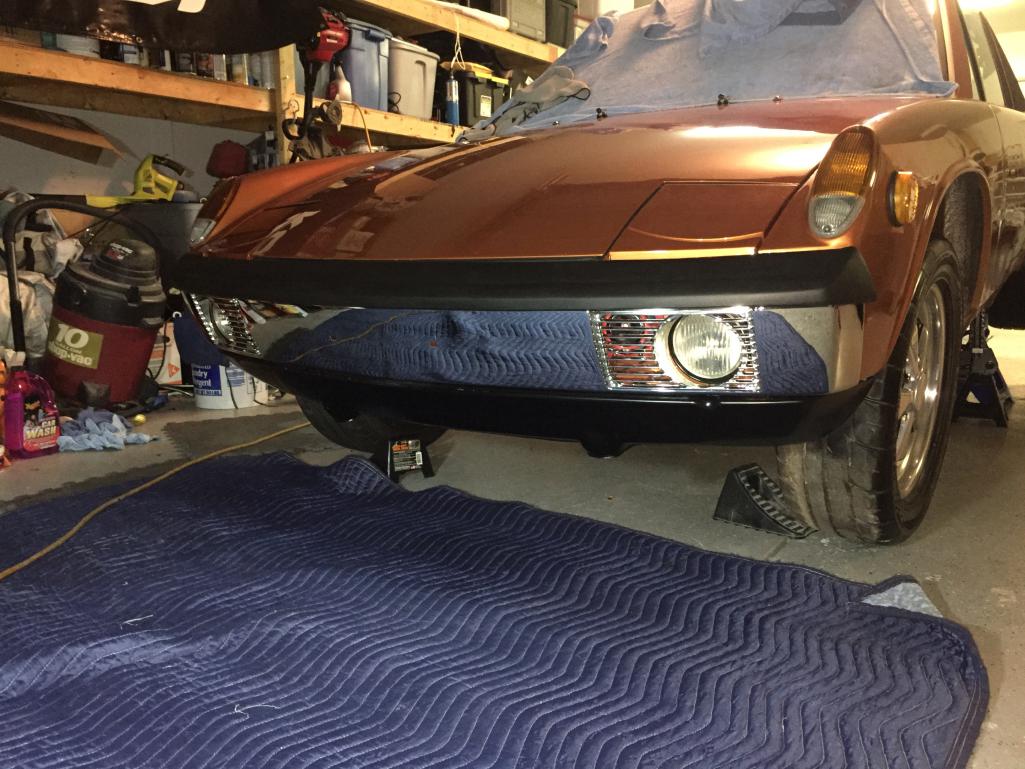
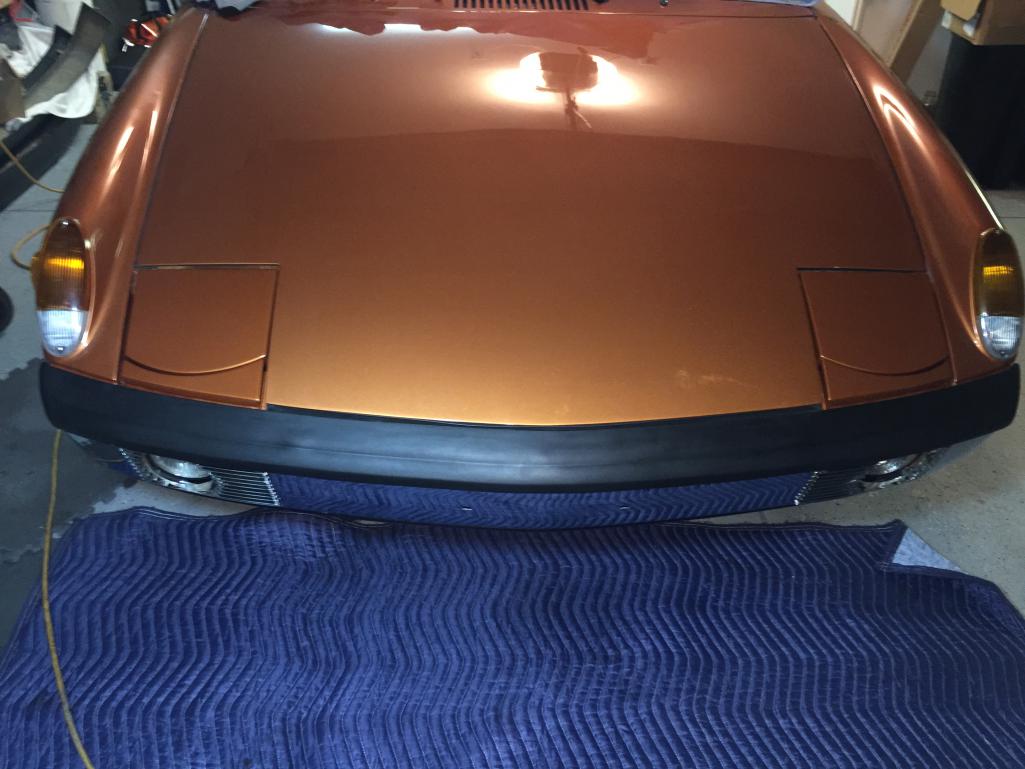
Posted by: raynekat Sep 8 2018, 12:09 AM
Everything is looking very nice.....er I mean great!
Well done.
You'll get there before you know it.
Lighter center piece going out in the mail in the morning.
Posted by: billh1963 Sep 8 2018, 04:07 AM
Is this some new record for assembly?
Posted by: Cairo94507 Sep 8 2018, 06:36 AM
Looking terrific.
Posted by: bbrock Sep 8 2018, 07:55 AM
SO fun to watch. Fantastic work! I can't imagine how tired you must be, and yet charging strong through the last mile.
Posted by: DRPHIL914 Sep 8 2018, 04:57 PM
what feels like a slow and frustrating day, i did finally get the oil lines moved after much work- lines are no longer kinked and now i can get back to business.
next up- put battery in, put gas in- i already topped off the oil,
I am wondering if there is a special proceedure to prime the pump snd get the oil pressure up before firing up the motor, i vaugly remember something about that.
- rear license plate lights, finish targa trim once the stuff comes( not hear yet, was supposed to be today) and prep for potential storm
Posted by: 914_7T3 Sep 8 2018, 05:37 PM
This rear targa bolster is the repro one being carried by 914rubber but i think has been made by AA - anyway the fit and finish is super and this will last a lifetime and not peel crack etc like the original ones. Yes, they can probably improve the grain to be more accurate for the concourse weenies but this is great for me and it really looks super, now for finishing off the rest of the trim around the targa bar/ sail panels. i have a few parts due in the next few days that i am excited about getting on the car to finish it up.
Don't you mean "Concours Weenie?" FWIW, I prefer the term "Originalist!"
Seriously, your progress is inspiring and the results, Amazing!
Posted by: DRPHIL914 Sep 8 2018, 05:42 PM
This rear targa bolster is the repro one being carried by 914rubber but i think has been made by AA - anyway the fit and finish is super and this will last a lifetime and not peel crack etc like the original ones. Yes, they can probably improve the grain to be more accurate for the concourse weenies but this is great for me and it really looks super, now for finishing off the rest of the trim around the targa bar/ sail panels. i have a few parts due in the next few days that i am excited about getting on the car to finish it up.
Don't you mean "Concours Weenie?" FWIW, I prefer the term "Originalist!"
Seriously, your progress is inspiring and the results, Amazing!
yep that too lol!
well motivation has been not to miss the Okteenrfest! but i have to say i was going to give ip today, really close due to the oil line issue, but i am so close. i may have to install some stuff whenni get there , that is if the rain stays away.
When you put in your sail panel trim, what adhesive did you use?
Posted by: DRPHIL914 Sep 9 2018, 04:44 PM
really close to a start. all vac lines except the decel valve.
Attached thumbnail(s)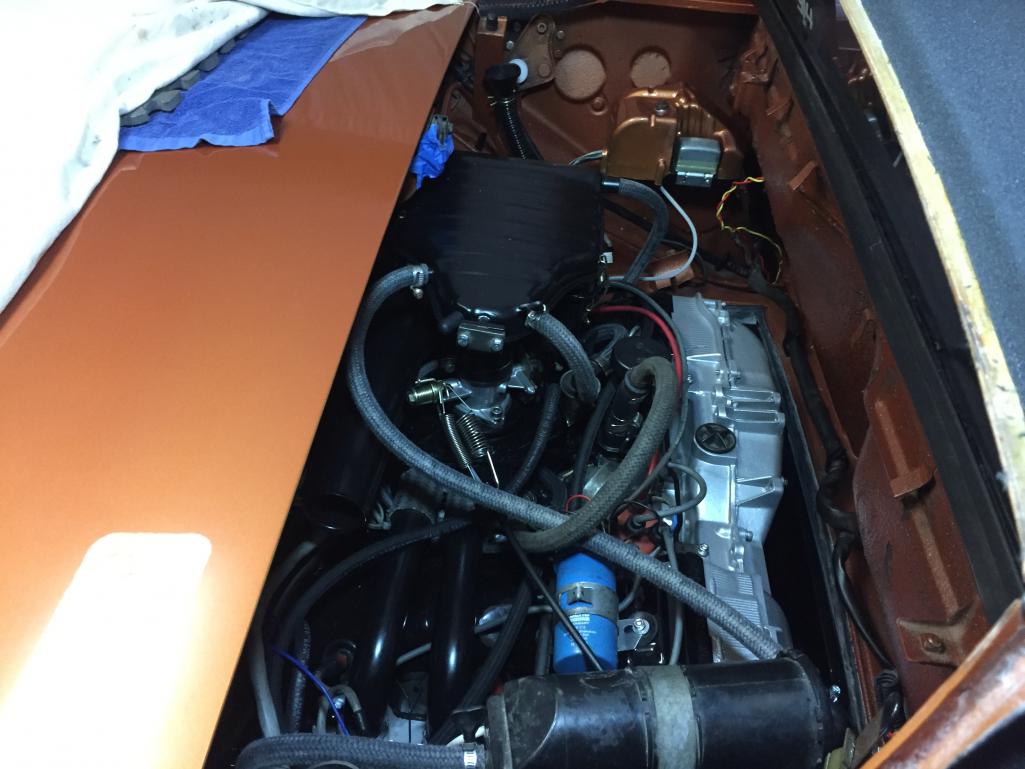
Posted by: DRPHIL914 Sep 9 2018, 04:46 PM
one door complete,
Attached thumbnail(s)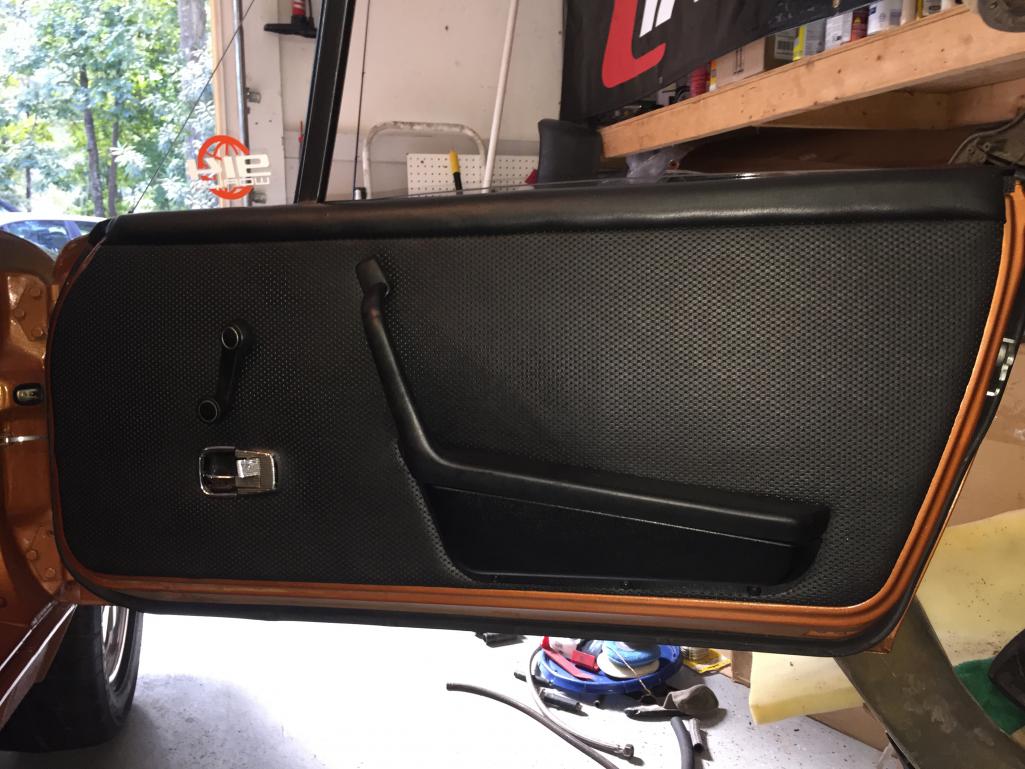
Posted by: DRPHIL914 Sep 9 2018, 05:43 PM
left rocker on!
boy those tires are still tight in the rear
Attached thumbnail(s)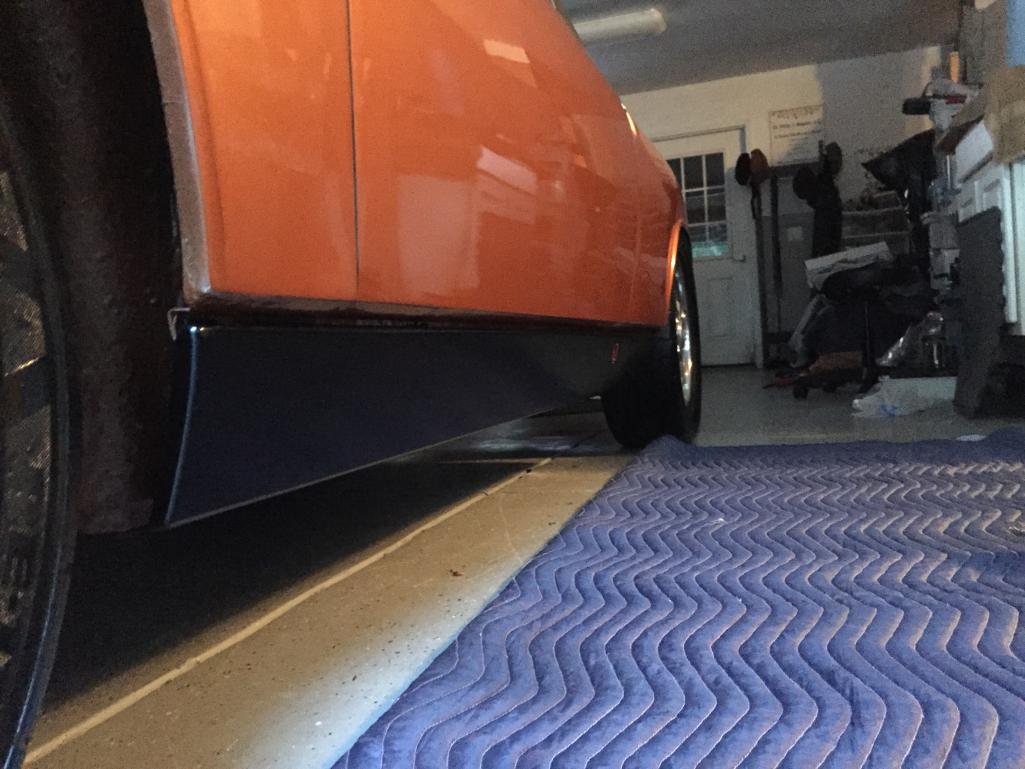
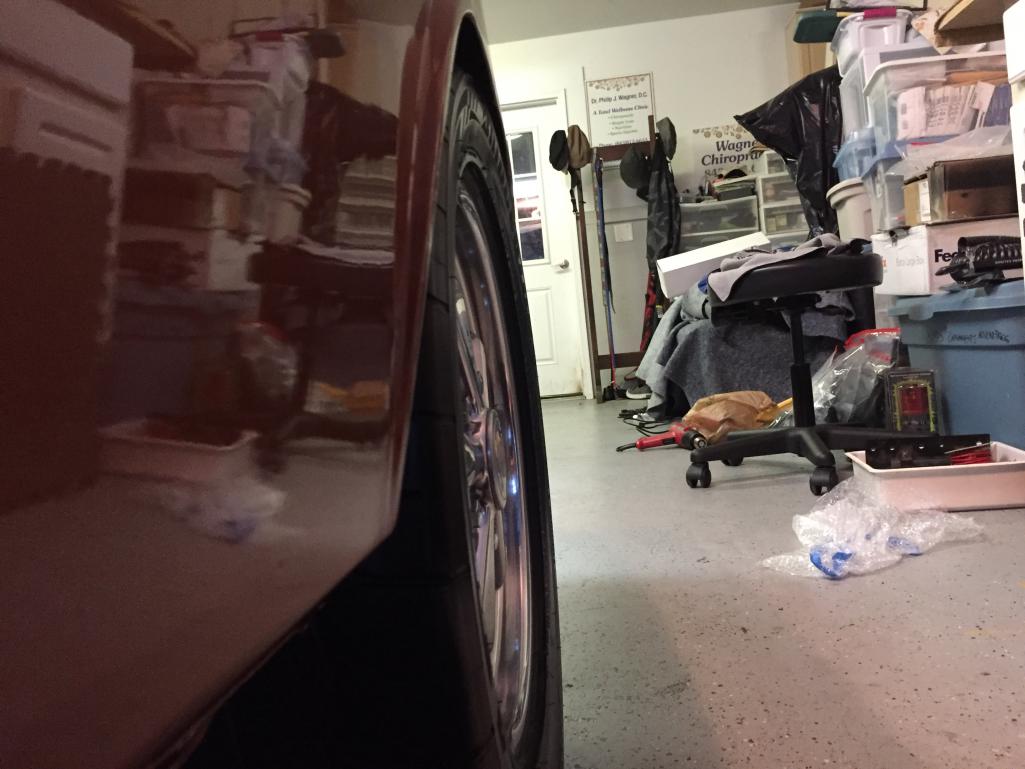
Posted by: DRPHIL914 Sep 11 2018, 05:37 PM
finally got the battery in and it was dead, even after 2 days in charger no charge-
i head over get new one- this was less than 2 years and sat for 9 months, get new battery in and yes the starter cranks, but no fuel pump sound,
crap, that is one thing i didnt replace. it was fine a year ago, it was probably only 5 years old. , but now its time for testing circuits. i cleaned all grounds and tripple checked connections. dang.
Posted by: IronHillRestorations Sep 11 2018, 06:38 PM
To prime the oil system, I pull the lead off the coil and crank the engine (in 15 sec run to 1 min rest) until the oil light goes out.
Posted by: TravisNeff Sep 11 2018, 07:54 PM
check the fuel pump relay and the board itself before thinking the fuel pump is dead.
Posted by: DRPHIL914 Sep 11 2018, 08:16 PM
in the morning i will check the power at the pump, then if there is not, i will go back to relay board.
When i started to get car ready for paint, it was running good but i noticed that the pump was becoming more noisy, so maybe a year of sitting did it in. i am hoping it is that easy. Tomorrow could be a long day!
#1. figure out fuel pump
#2. trouble shoot right rear tail light, left front euro conversion driving light is not working, but lights pop up all other lights seem to work.
its hard to tell what could be the issue when there are so many things i worked on- new alternator and harness, all new fuel lines, fuel filter etc but i didnt change out the pump, or relay board, and the dash and fuse box is exactly how it was before.
i have not yet wired the aux oil cooler fan, and it can wait.
a few more pics from work today
sail panel trim in!
Attached thumbnail(s)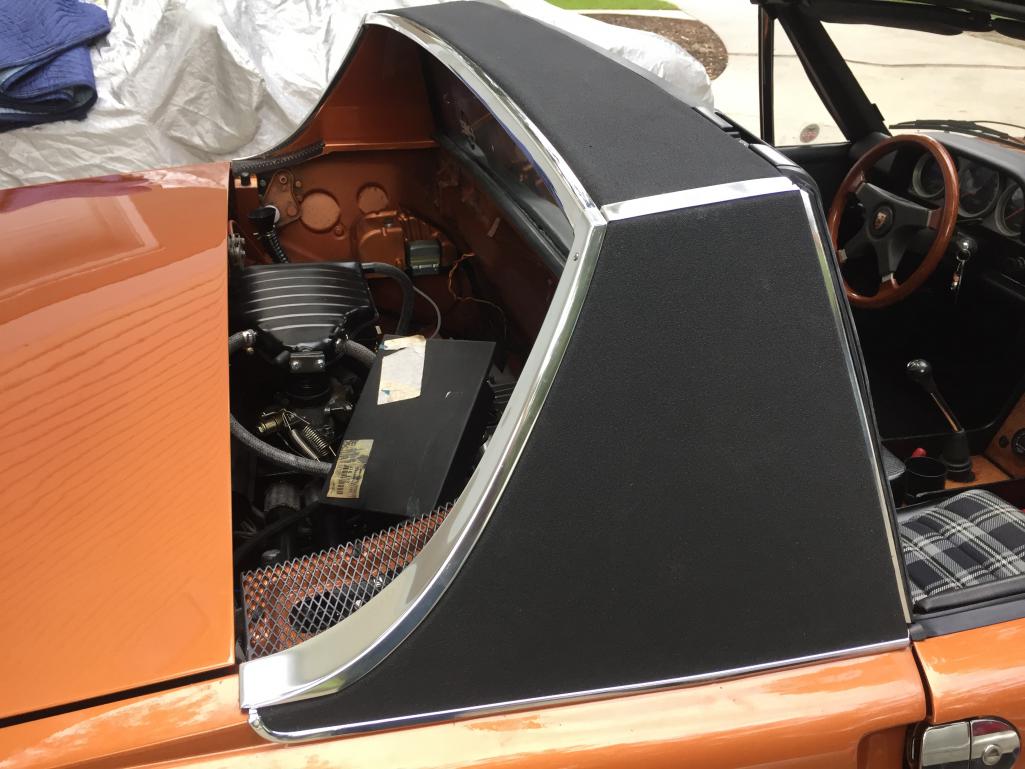
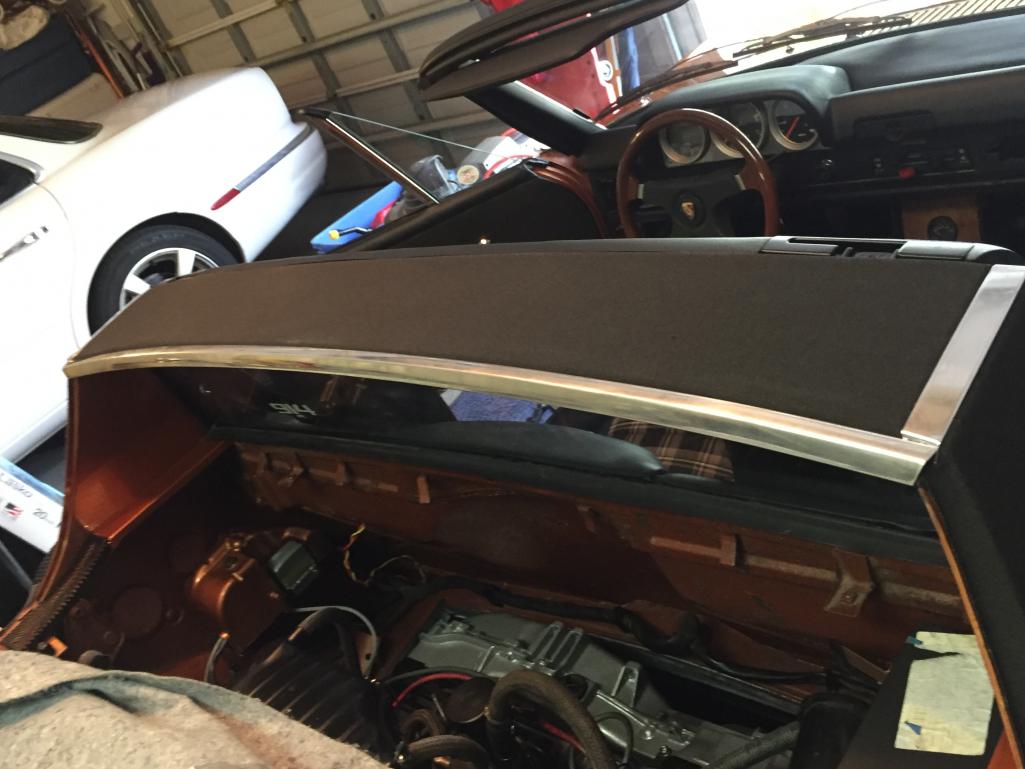
Posted by: DRPHIL914 Sep 11 2018, 08:22 PM
hm spent all day working on the sail panel trim installation and redoing the right sail vinyl, shiuld havw been doing the fuel pump . might not run but it looks good!
Attached thumbnail(s)
Posted by: DRPHIL914 Sep 12 2018, 10:32 AM
ok so i need a hand- i have no power to the fuel pump, but lights work, car cranks wirh new battery- i switched out relays, didnt help,
so i am going to try a different relay board- does the power go to pump from the 14 pin socket? - guys my electrical understanding is very basic i am not going to read a-schematic but if i see a picture of which pin is which i can trouble shoot- i looked and the step by step by jeff Bowlsby but thst is worthless. with out a diagram of which pin is what bla bla like a code with out a cypher
Posted by: 914_7T3 Sep 12 2018, 10:43 AM
hm spent all day working on the sail panel trim installation and redoing the right sail vinyl, shiuld havw been doing the fuel pump . might not run but it looks good!
Looks sooooooooooooooooooooooooo Good! Hopefully you can get the fuel pump sorted quickly!
Posted by: bbrock Sep 12 2018, 11:07 AM
I don't have a '75 schematic, but on a '73, it looks like power comes in at pin 14 to the relay board, then through the 25A fuse, then to pin 30 on the pump relay. Covering simple things, did you check the fuse? That is the circuit to power the pump. It looks like jumping between pin 13 and 14 should send power directly to your pump, bypassing the relay.
To energize the pump relay, it looks like the power supply relay also has to be energized so both relays need to be in place and working. It looks like that relay is getting power on the black wire on pin 8 of the 14-pin connector and grounding through pin 10.
Both of those relays require a ground through the ECU so that could be another demon to chase.
Posted by: DRPHIL914 Sep 12 2018, 11:15 AM
i tried a different relay board and still no power to the pump-
no one other strange thing - there is a black wire up above that is just haning there, and it is hot, has 12v constant with and with out key turned i have no idea what its for , it is out of the harness by where the antenna wire comes thru and the main harness- again its hot weird,
Attached thumbnail(s)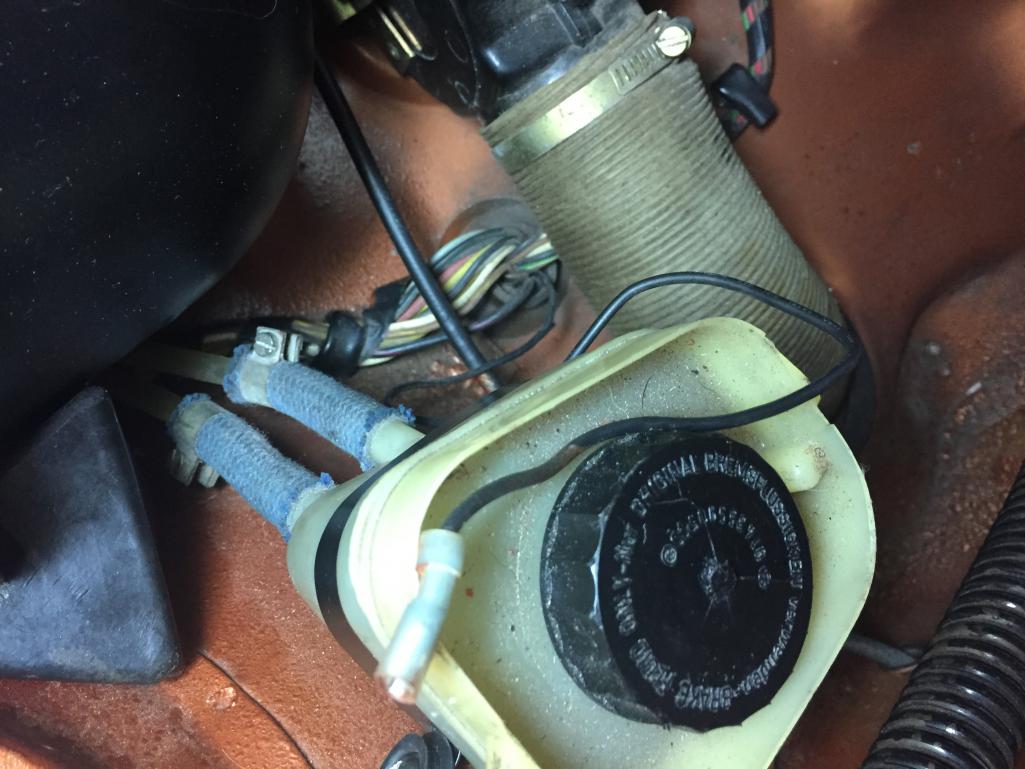
Posted by: DRPHIL914 Sep 12 2018, 11:17 AM
i could use it as a powet source for my fuel pump
Posted by: DRPHIL914 Sep 12 2018, 11:19 AM
I don't have a '75 schematic, but on a '73, it looks like power comes in at pin 14 to the relay board, then through the 25A fuse, then to pin 30 on the pump relay. Covering simple things, did you check the fuse? That is the circuit to power the pump. It looks like jumping between pin 13 and 14 should send power directly to your pump, bypassing the relay.
To energize the pump relay, it looks like the power supply relay also has to be energized so both relays need to be in place and working. It looks like that relay is getting power on the black wire on pin 8 of the 14-pin connector and grounding through pin 10.
Both of those relays require a ground through the ECU so that could be another demon to chase.
all thats great but i dont have a picture of where the. “14” pin is etc so i am not able to do thst with out a picture showing me which one is which
I think if i find thst i can get that figured out maybe
Posted by: Mblizzard Sep 12 2018, 11:22 AM
i could use it as a powet source for my fuel pump
I say get some power to the pump and make sure it runs!
Bottom line is that with all of the work done you could have broken a wire anywhere along the harness.
Worse comes to worse after confirming the pump and car runs, you can just run a temporary wire from a switched power point on the fuse block as a short term fix.
Posted by: Shadowfax Sep 12 2018, 11:23 AM
Lookin' good, Phil! Have you bypassed the seat belt interlock relay under the passenger seat? Might be worth a try.
Also, is that your E39 in the background? I have an '03 530i 5-speed with 107K on it. Love that car!
Posted by: bbrock Sep 12 2018, 11:45 AM
I don't have a '75 schematic, but on a '73, it looks like power comes in at pin 14 to the relay board, then through the 25A fuse, then to pin 30 on the pump relay. Covering simple things, did you check the fuse? That is the circuit to power the pump. It looks like jumping between pin 13 and 14 should send power directly to your pump, bypassing the relay.
To energize the pump relay, it looks like the power supply relay also has to be energized so both relays need to be in place and working. It looks like that relay is getting power on the black wire on pin 8 of the 14-pin connector and grounding through pin 10.
Both of those relays require a ground through the ECU so that could be another demon to chase.
all thats great but i dont have a picture of where the. “14” pin is etc so i am not able to do thst with out a picture showing me which one is which
I think if i find thst i can get that figured out maybe
Again, all I have is the '73 schematic. but here's a pic of where the relay board stuff goes. Agree with just getting power to the pump to make sure it runs, either jumping 13 and 14 at the board, or using that mystery wire. Also a good point about safety features on late models that I know nothing about.
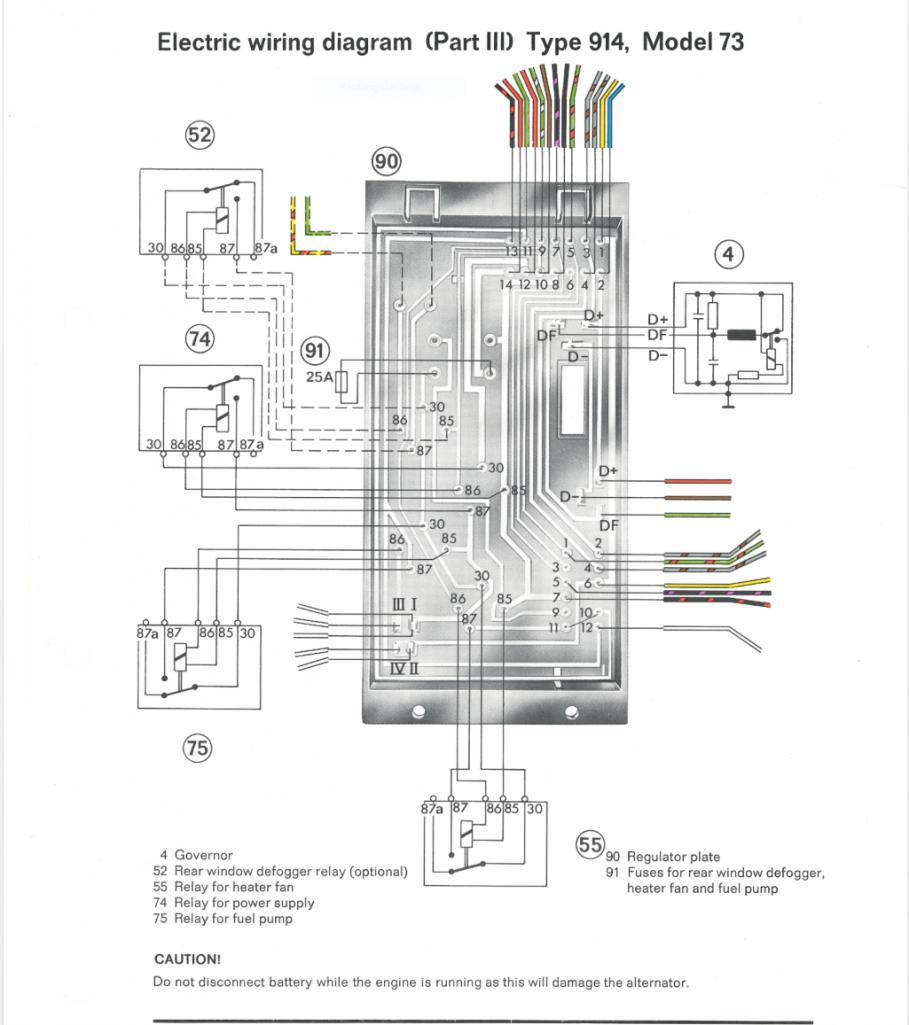
Posted by: DRPHIL914 Sep 12 2018, 03:02 PM
Lookin' good, Phil! Have you bypassed the seat belt interlock relay under the passenger seat? Might be worth a try.
Also, is that your E39 in the background? I have an '03 530i 5-speed with 107K on it. Love that car!
Yes the BMW is a 528i- 2000, with 280k miles!! awesome car , gave it to my daughter, with new throttle body and accel cable, new fuel pump it runs like a new car, one of the best cars i have ever owned-
so i can recheck under the passenger seat, i didnt mess wirh it , it had been bypassed before the body and paint work- so maybe that is where the issue is.
i will go out and get a picture of the wiring under there-
Posted by: DRPHIL914 Sep 12 2018, 03:17 PM
Lookin' good, Phil! Have you bypassed the seat belt interlock relay under the passenger seat? Might be worth a try.
Also, is that your E39 in the background? I have an '03 530i 5-speed with 107K on it. Love that car!
does this look right, should the brown wire shown here with a white stripe be loose?
Attached thumbnail(s)
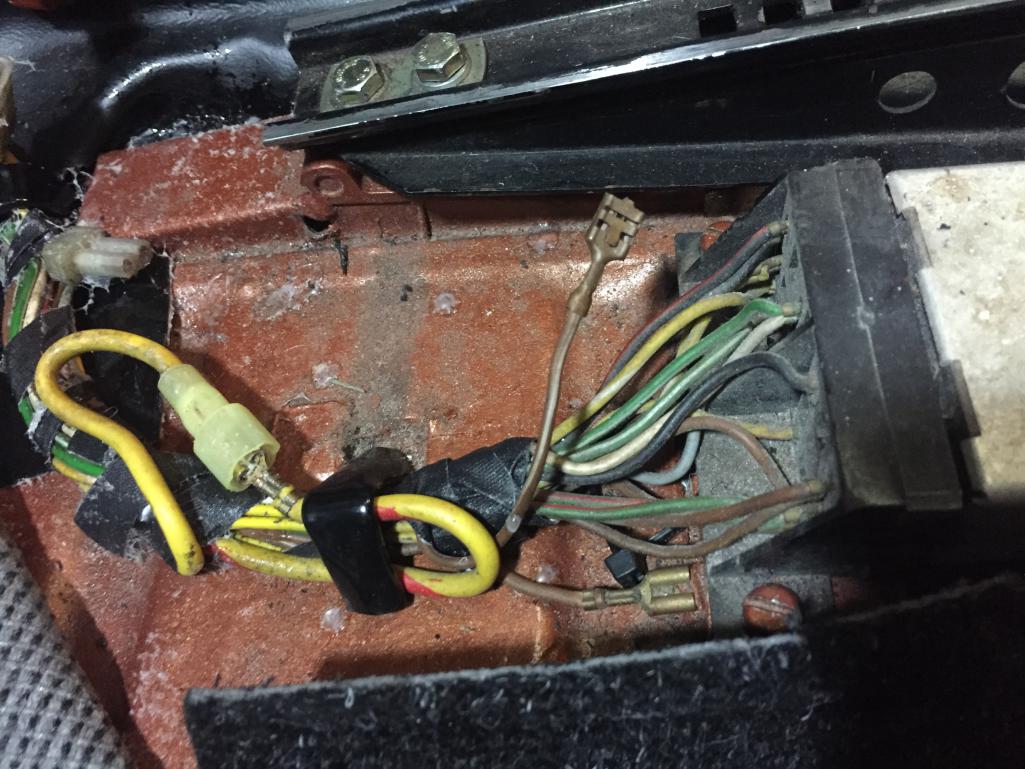
Posted by: Shadowfax Sep 12 2018, 04:26 PM
Should look like the pic in Post #10 http://ww.914world.com/bbs2/index.php?showtopic=272152.
I’d like to give the 5er to my daughter when she’s old enough to drive but she said she doesn’t want a manual. Crazy!
Posted by: DRPHIL914 Sep 12 2018, 09:07 PM
ok , spent a couple hours going thru the whole FI fuel pump trouble shooting guide from
Jeff Bowlsby, which checked out all connections to fi harness battery switched and unswitched etc,
lead us back to the pump- once we verified there wasnt continuity at the ground we connected a wire to a different place on body to give a different ground, i got the V to test for 1.5 sec, and pump primed- but i will not have time to fix that right tomorrow, and with the storm possibly coming this way not sure i will leave here tomorrow- if i do it will most likely be with out the 914. 
Posted by: DRPHIL914 Sep 13 2018, 10:51 AM
update: she’s alive!! no time to shake out bugs but she is on the trailer and i am leaving in 10 minutes!!! 6 hour drive- see you tonight!
Posted by: 914_7T3 Sep 13 2018, 11:27 AM
update: she’s alive!! no time to shake out bugs but she is on the trailer and i am leaving in 10 minutes!!! 6 hour drive- see you tonight!
Way to Go Phil!!! Hopefully all will be good. enjoy your weekend!
Posted by: bbrock Sep 13 2018, 12:41 PM
 !!!!
!!!!
I was really bummed when I read you might not be taking the 914 after the heroic effort. You deserve an award for this!
Posted by: DRPHIL914 Sep 13 2018, 01:14 PM
!!!!I was really bummed when I read you might not be taking the 914 after the heroic effort. You deserve an award for this!
thank you for the help it was an interesting learning experience working through all the contacts and all the instructions on troubleshooting from Jeff Bolsbys site in the end most obvious thing most simple thing what it ended up being which was the ground of the pump itself which I should’ve checked first before going through everything else but now I know I have a good really board with good relays and harness harness thanks for posting the schematic I look forward to seeing everyone. I don’t know about that award other than maybe just being the most stubborn which I guess is a trait that can be positive and someways. I still have some work I’d like to get done when I get there like install my radio and my firewall backpack came delivered today right before I left to see if 914 rubber,
Attached thumbnail(s)
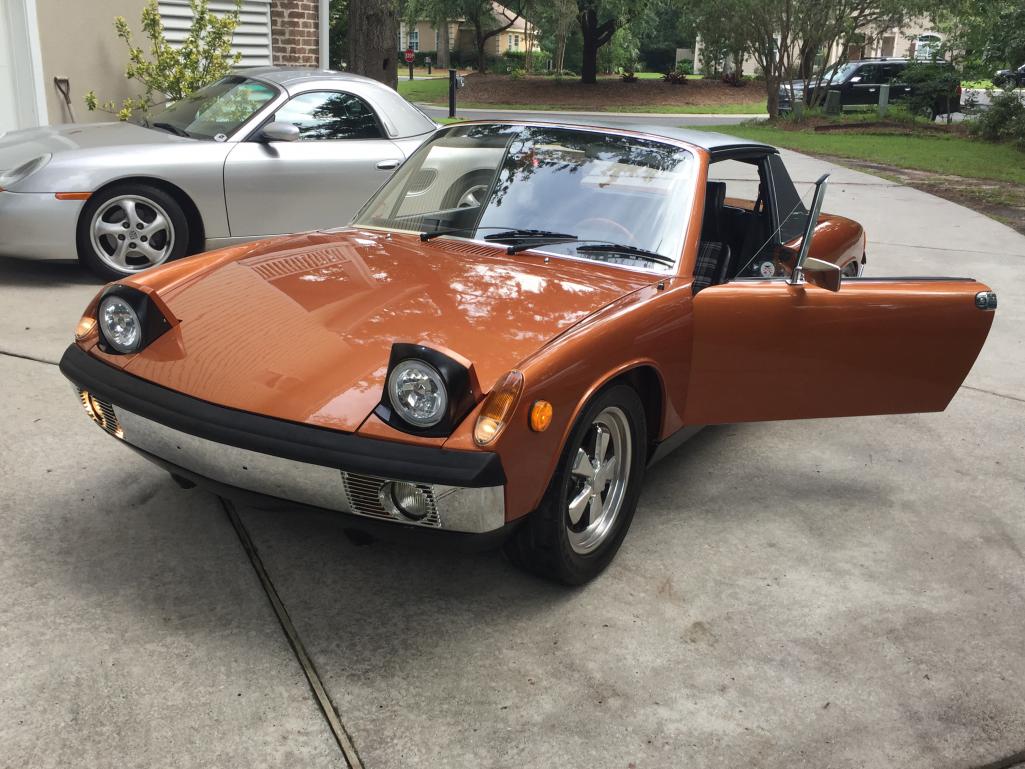
Posted by: DRPHIL914 Sep 16 2018, 09:49 PM
Small update- after getting pump to work andgetting car packed on trailer i was off to Helen Ga for the Okteenerfest- I almost gave up! thanks all for the encouragement! and thanks for all the super comments on the car while there at the weekend and show. The ultimate was being voted 1st place in our car show in the “custom” class!! this means more to me than a peoples choice at a local show or c and c , because it came from our community, other 914 owners who know and can truely appreciate the time and effort that goes into a rebuild and reassembly!! as nice as the car looks in the pictures its better in person, well mostly , it does have a few flaws,m. but i cant take credit for all that, i have to acknowledge Mike Branch, the man who stripped the old paint off and cleaned up the rest od the rust and smoothed out the rear fenders, and repainted the car. My car would not be on the road and be rust free and straight with out the work of Tangerine Racing, so thank you Ed and Chris for all the work you did 2 years ago on the fenders floors and longs!.
Also parts for so many things but every part that has a zinc plating or powder coated came from or thru Bruce Stone. All my Brake stuff , PMB of course!
Many many many parts from 914rubber.com, thank you Mark and Matt! even then day i left for the trip i had parts that came in from them. some time i will make a full and complete list. Also many hard to find parts ii was able to source from Auto Atlanta. And Mark Herd(914sixer) supplied me with some nice NOS CV parts and my period correct radio and other bits like nos VR! But i cant leave out Restoration Design! all my new replacement parts, floors jack points in the longs etc etc are from them!
And Bob Bishoff(Bigkat 73) supplied me wirh a rust free driver door and front valance, and set of partly restored outer rocker panels, thanks Bob!
And there are another half dozen or more other guys who sent me parts that were needed. almost all of it came from members ans member vendors. So glad it all came together finally, and i could not have done it with out all of you! Advice of how to or not to do things wow, its all right here! I am not completely done, i havs some stuff to clean up and finish to have it ready in November for the Hilton Jead Concours DelegNce car club showcase, so i am sure to have more issues more pictures, etc -
I hope someone can post some pictures from the car show saturday, i knly took a coupe of my own car! so here is to you World! Ein Prosit !:first:
Attached thumbnail(s)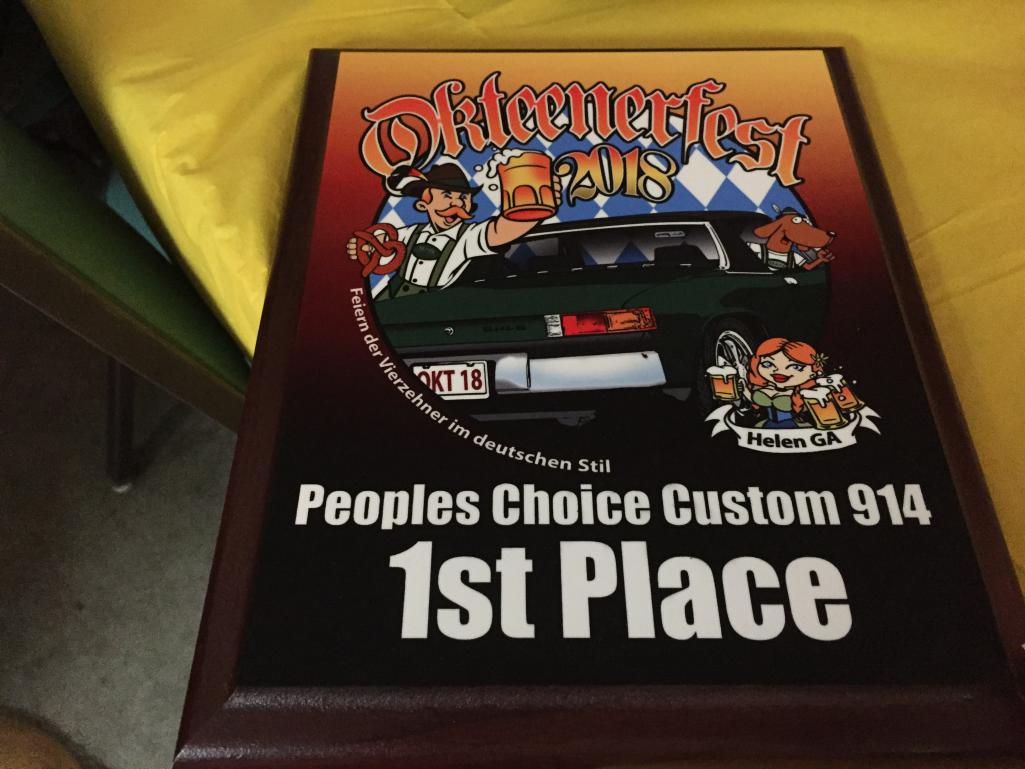
Posted by: AZBanks Sep 16 2018, 10:01 PM
Congrats!!! Well Deserved!
Posted by: DRPHIL914 Sep 20 2018, 07:02 AM
I guess I still have some stuff to do here and to really finish her up. I was rushed to get it on the road and on trailer to Okteenerfest and was good enough to go on the drive Friday, but really with high idle and not having time to really set proper timing and sort that out along with the aux oil cooler fan not being hooked up , I didn't really get to drive much. I spent more time prepping for the show on Saturday and fixing some wiring issues. Now that I am back I would like to finish up a punch list of things to be able to do a couple local shows and also Nov 3-4 the HHI Concours has a car club showcase, where 10 vehicles from each club are selected for display on the fairway on Saturday, and I have been selected to do this!! excited but I really want to make sure its ready. - I also want to get my 123ignition distributor in place as well.
I have some adjustments to the alignment of the rear trunk, and the drivers door so that it will close with better alignment. Also I need to get my new/Old Blaupunk radio installed correctly, so sourcing a proper trim plate etc is my next goal.
Is there any suggestions from those that saw the car last week? I have a new 914 badging to put on it, as seen at the awards banquet, it came from Pete at RD!
I also have brand new adonized thresholds that are silver and would love to trade them for Black adonized if anyone is interested!, So as I progress and make some changes and clean things up I will continue to upate progress!!
Thanks for all the help, but not done yet! - Man that was a crazy 6 weeks!!!!!
Posted by: DRPHIL914 Oct 16 2018, 10:06 AM
i have not posted in a while, but will be back at doing some clean up and getting ready for a couple of car shows here and the HHI Concours Nov 3-4.
One big thing is after motor has been back in car for a month + now , no leaks!!! no push rod tube leaks !! nice to not be dripping on garage floor anymore.
Items to sort out - I have a squeak I believe is the darn throw out bearing.
- Brake lights quit working, bulbs are find, this needs to be sorted
- redoing the right side sail panel vinyl,
- installing my remanufactured radio from 914sixer this week, I will need some information about the wiring, it was badly hacked by someone who put in an alpine unit back in the 90's. that radio failed and I wanted period correct, so if anyone knows what the different wires are? - yellow, red and black is what I see, other than the speaker wires that I can trace and figure out n my own. I will start a different trhread for that issue tonight.
otherwise I finally got the timing and idle issue figured out, but I get a bit of a miss here and there and I think its the fi triggers or the distributor. I will try the 123ignition one this weekend and see how that runs. Also I have a slight whining sound that I think is coming from the front alternator/belt area, and both are brand new so not sure whats causing that, but the 75 amp is charging good so I wll leav ethis alone for now.
I also want to adjust the front ride height slightly , down about 1" so I don't know but I will probably have to do an alignment on this after I make that adjustment.
and I wired up my oil cooler fan but it doesn't work so either the fan has failed or I have the thermostat wired up wrong, .
Like I said , nothing major but stuff you would like to have sorted. Cosmetically car is almost perfect. But I need brake lights!!!!
Posted by: DRPHIL914 Oct 16 2018, 08:55 PM
radio installed! and working. i tell you it has better sound than the much newer alpine i took out!
Thanks to Mark Herd(914sixer) for the radio and Perry Kiehl(ironhillrestorations) for the mounting kit!. now if i could figure out how to connect the speaker in the center console that would be nice. there are only 2 channels outging, right and left, so i am not sure how you would tap into those to add the center speaker
Attached thumbnail(s)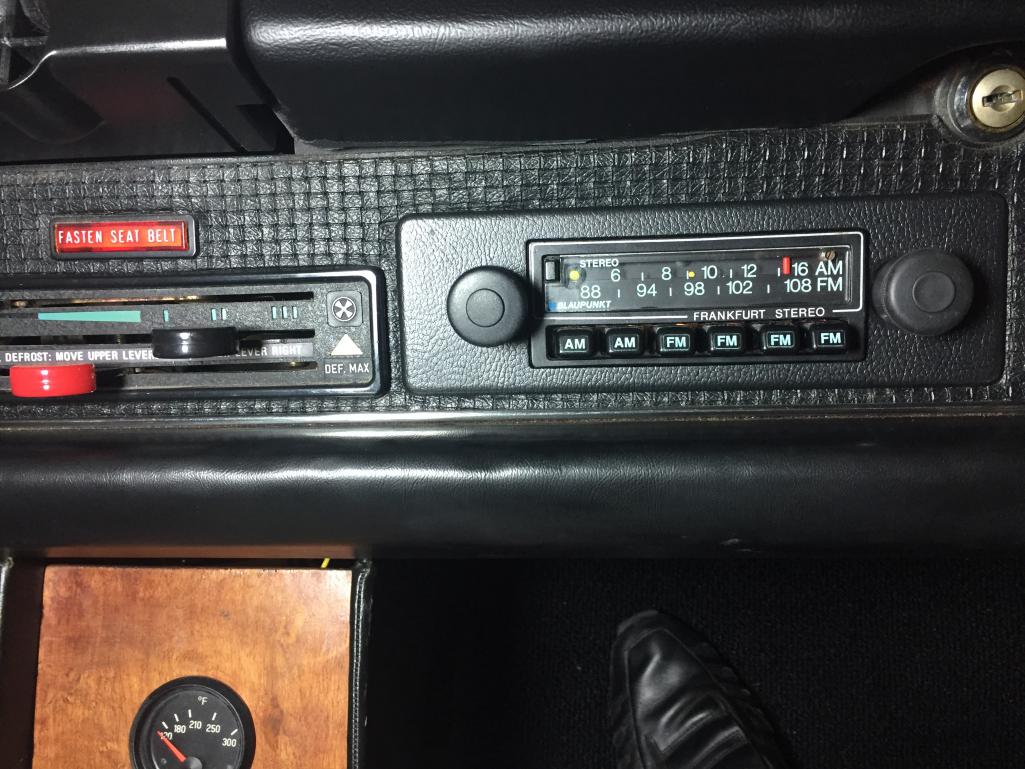
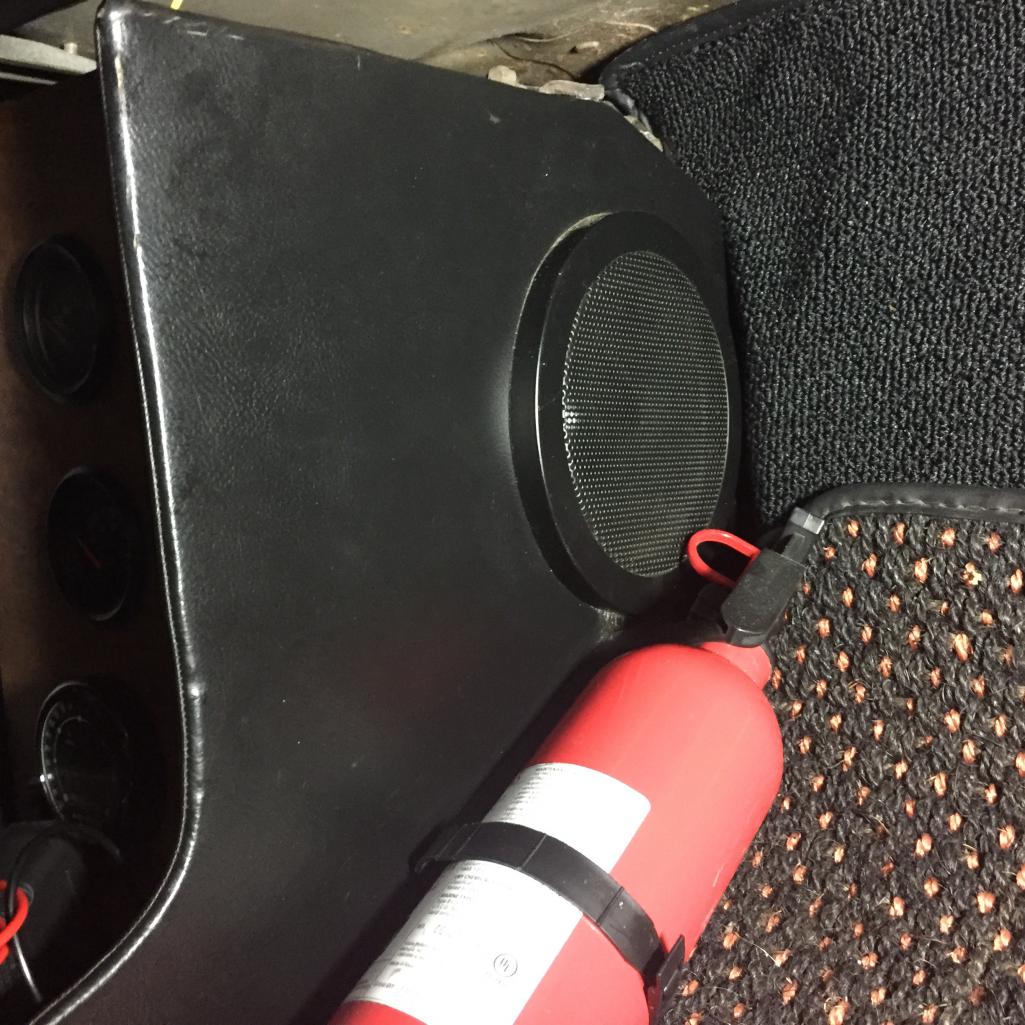
Posted by: DRPHIL914 Oct 18 2018, 05:39 AM
+ Brake light fixed!- bad switch replaced,
+ radio installation completed,
- still working on aux oil cooler fan wiring, might need new rheostat control,
should be working some polishing up and cleaning, detailing. Cars and coffee this Saturday, only 2 weeks until Concour in HHI. But next Saturday is the classic speed racing across river from Savannah at Hutchinsin Island, PCA has corral parking so I plan on hanging out there most of the day! should be fun, Any one know of a914 or 914's racing this year?
Phil
Posted by: DRPHIL914 Nov 8 2018, 01:18 PM
Took the car to the Hilton Head Island Concours last weekend , just the Saturday Showcase. Lots of attention indeed! I was able to finish up everything I needed to do except a few minor things. I wanted the engine compartment to look clean and neat so I left the aux heater fan out, no tubes hooked up, but I did get the wiring done for the headed seat inserts since the flapper boxes cables were not connected and it was 48 degrees Saturday morning on the way to get set up. Had a great time, enjoyed fielding questions about the car. Some very experienced Porsche rebuilders and restorers at the show including the R/M southerby's rep , most had never seen a Copper Metallic car before!
#1 Question was:; What color is that, and along with that then, was this the original color?
#2 question was, is that a Fiat?
#2 real question was : Is that a 6?? ( due to the 5 lug Fuchs and early front chrome bumper I think
#3 question was: What is an RS?
I was next to a very nice early 911, RGROUPPE Car, owned by Vic Rola our PCA Zone Rep. he gave me lots of great advice about showing the car and bringing it to the next show and having it judged. Not much I can do except clean up some overspray on the rear control arms etc. But of course I have to show it it a "Street Custom" class due to its not original, and its modified. so its not ''Preservation". But I don't really care about that. I did care enough to put original period correct dash, radio, trim, sail trim, etc etc in the car. Its all Porsche. but of course the 5 lug is not correct for a 75 and neither are the bumpers. I also have the Euro spec light lenses front and rear. -- but so did the 914/6 that was showing on Sunday! Owner didn't have a clue about that not being correct.
Next up is to decide if I can get the car to the SHADES presentation at PCNA with 000 Mag in 2 weeks in Atlanta(if accepted that is) I will probably go if they do accept it, I have a seminar for 12 hours that day uptown so will see how it works logistically.
Then a few local shows in December,
I still need to re do the sail panel vinyl, and a few touches here at there.
I installed the 123ignition distributor and its running better than ever, AND still no leaks from push rod tubes or anywhere else, so it looks like I finally got it right this time, thanks for the new seals Mark!(McMark). @http://www.914world.com/bbs2/index.php?showuser=419
looking for some pictures from the show, I will post them when I can get ahold of some, I neglected to take pictures ofmy own car!- phone died
Posted by: DRPHIL914 Aug 23 2019, 08:35 PM
Thought I would add a few updates photos to my build thread, been a while but last year after Okteenerfest I took car to Atlanta for Rare Shades 2 at PCNA headquarters
Attached thumbnail(s)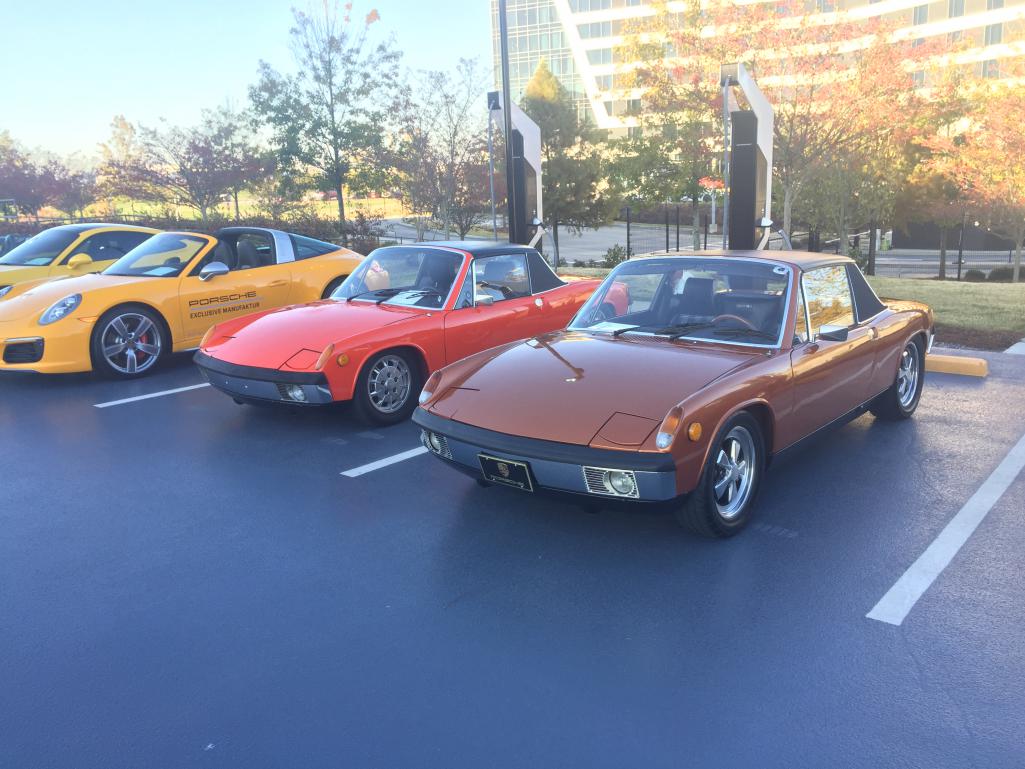
Posted by: DRPHIL914 Aug 23 2019, 08:44 PM
And went to Amelia Island , went to the Porsche-only gathering the day before,
Attached thumbnail(s)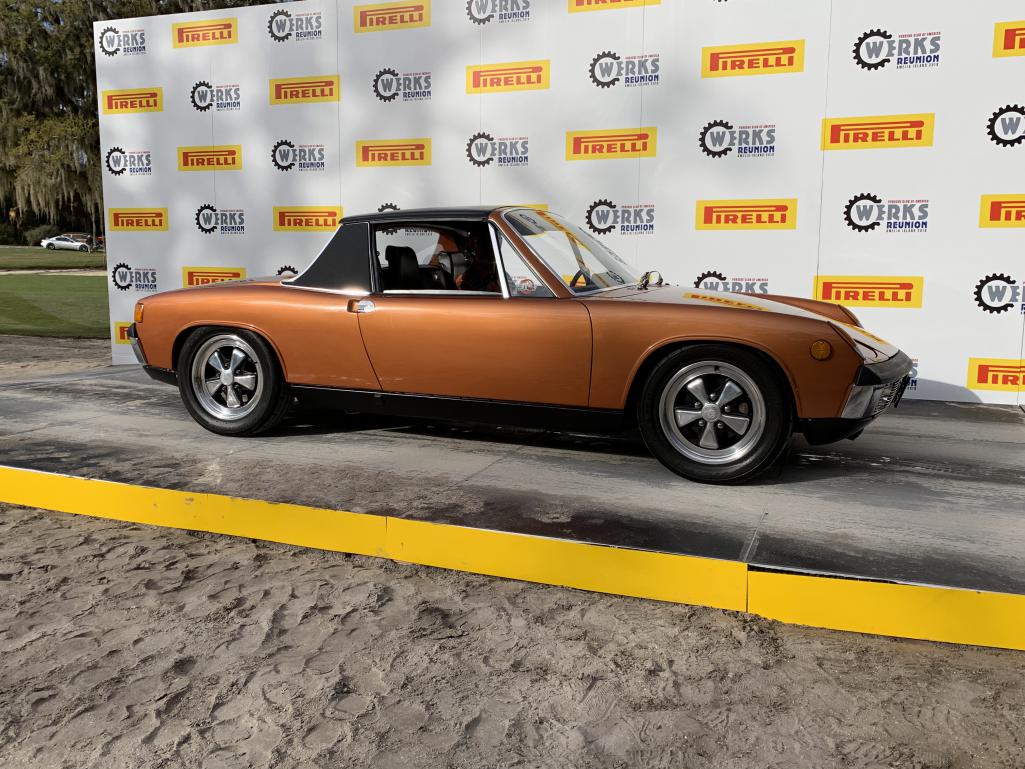
Posted by: DRPHIL914 Aug 23 2019, 09:12 PM
New window cranks
Attached thumbnail(s)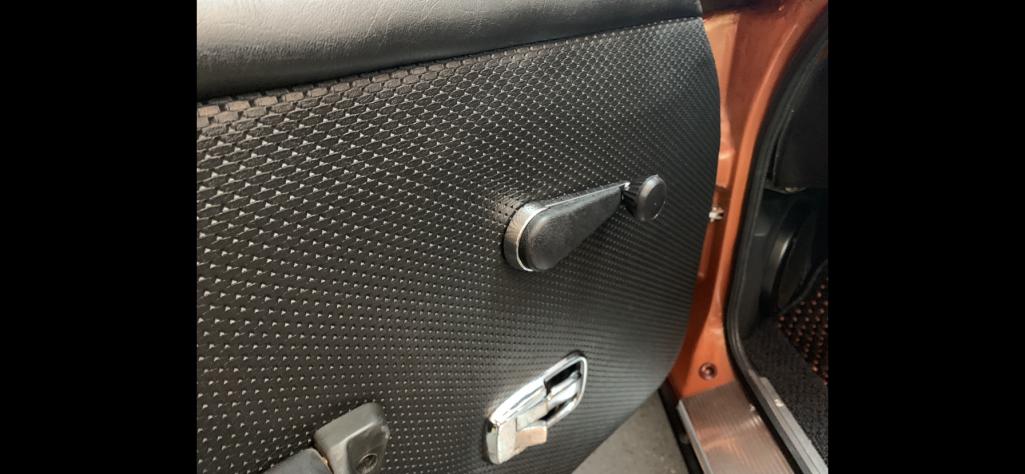
Posted by: DRPHIL914 Aug 23 2019, 09:14 PM
NEw gauges- LED’s from TimothyND
Attached thumbnail(s)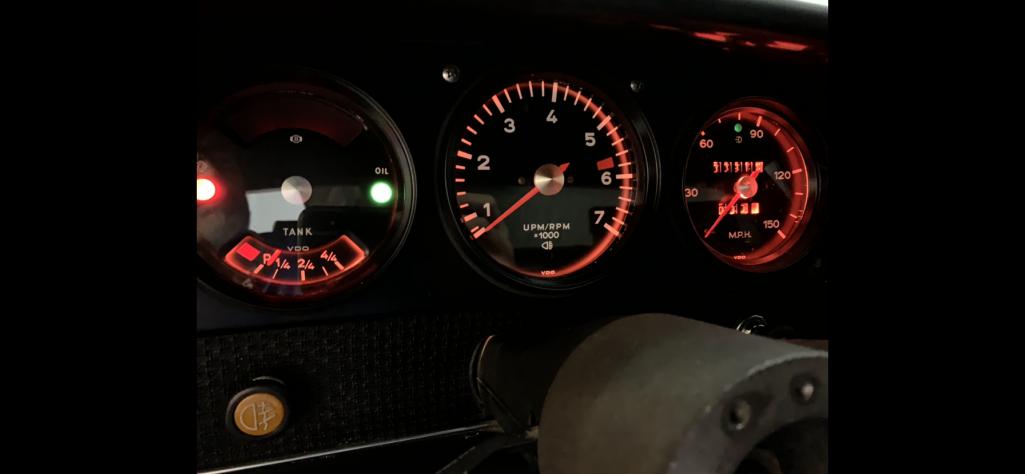
Posted by: DRPHIL914 Aug 23 2019, 09:16 PM
How many gallons of water will a 914 frunk hold?
Attached thumbnail(s)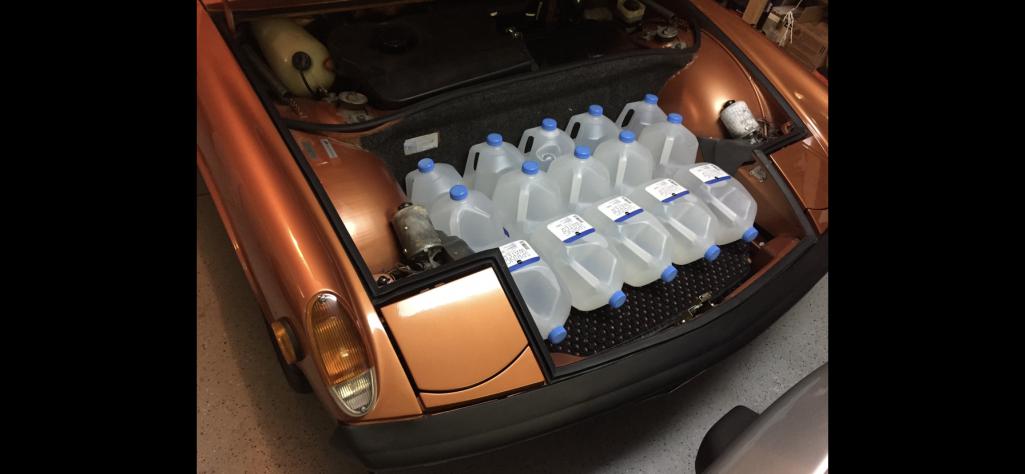
Posted by: DRPHIL914 Aug 23 2019, 09:17 PM
Local cars and coffee keeping company with a cousin
Attached thumbnail(s)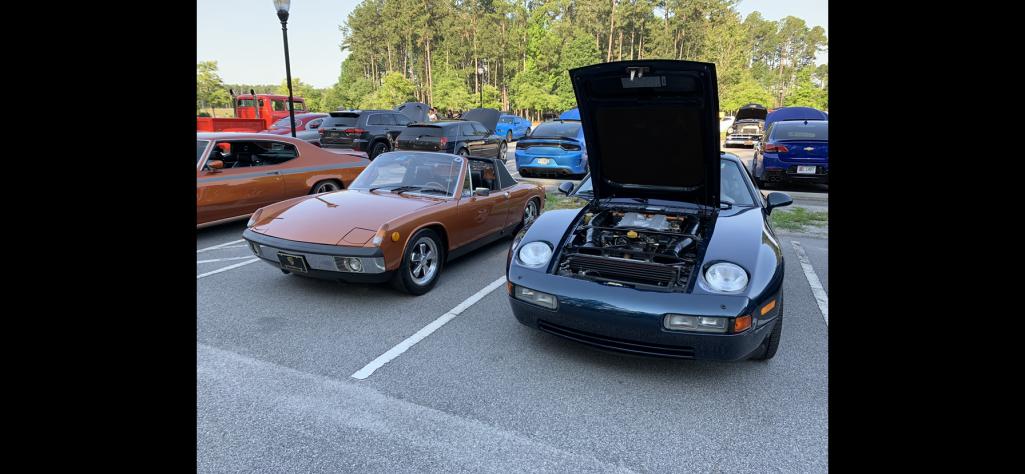
Posted by: DRPHIL914 Aug 23 2019, 09:18 PM
Rear trunk cleaned up nice , rewrapped
Wire harness
Attached thumbnail(s)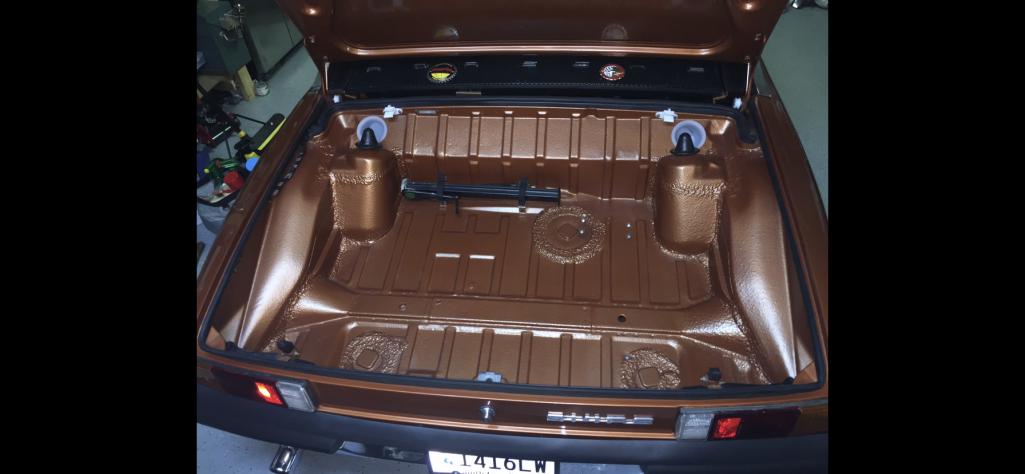
Posted by: DRPHIL914 Aug 23 2019, 09:20 PM
Original trunk carpet
Still looks like
New-
One thing I didn’t have to replace and you can’t find replacement or NOS.
Attached thumbnail(s)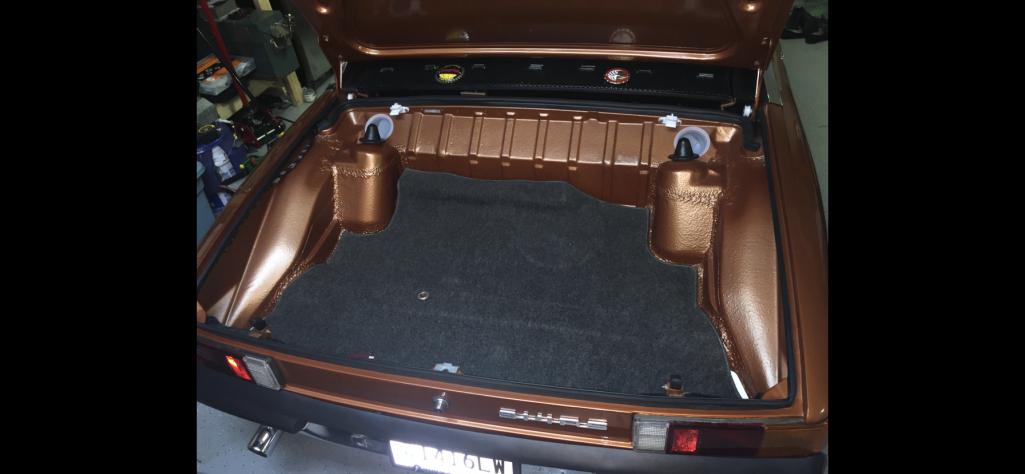
Posted by: DRPHIL914 Aug 23 2019, 09:23 PM
Clean underside, love my Triad exhaust, and still not one drip from the push rod tubes or anywhere after one year! Yes there is oil in there- they say if the 914 is not dripping oil it must be out, but not so in this case!
Attached thumbnail(s)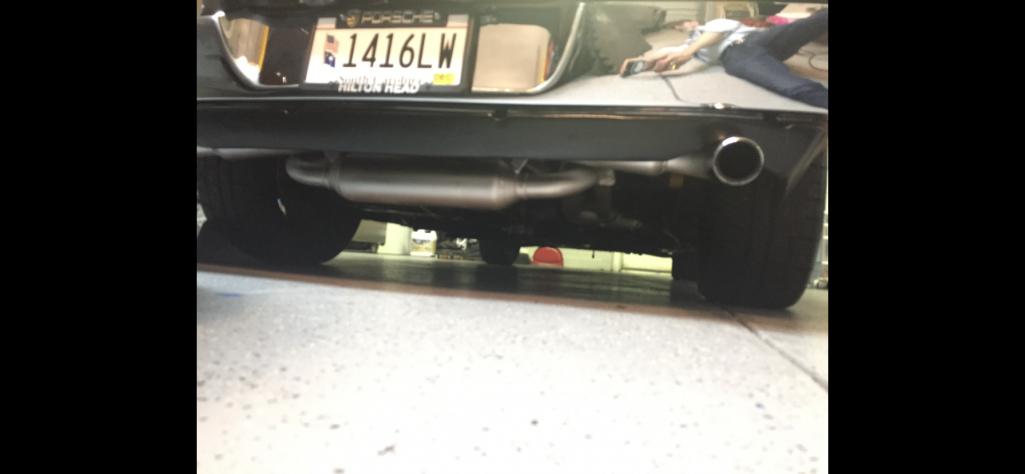
Posted by: DRPHIL914 Aug 23 2019, 09:25 PM
In backdating exhaust it was not easy to find all the proper tin in good condition, but World is awesome!
Attached thumbnail(s)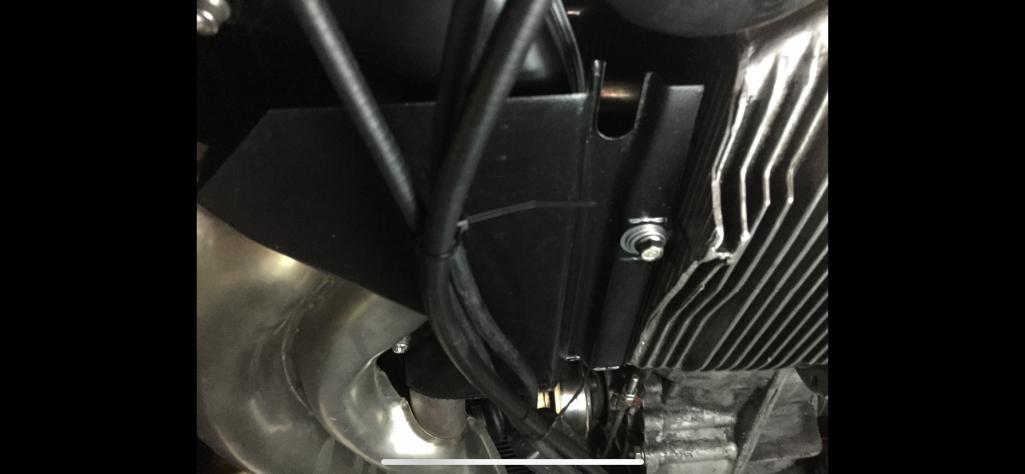
Posted by: DRPHIL914 Aug 23 2019, 09:27 PM
Love the Euro signals- funny but cars now in US have amber signals but not back in ‘75
Attached thumbnail(s)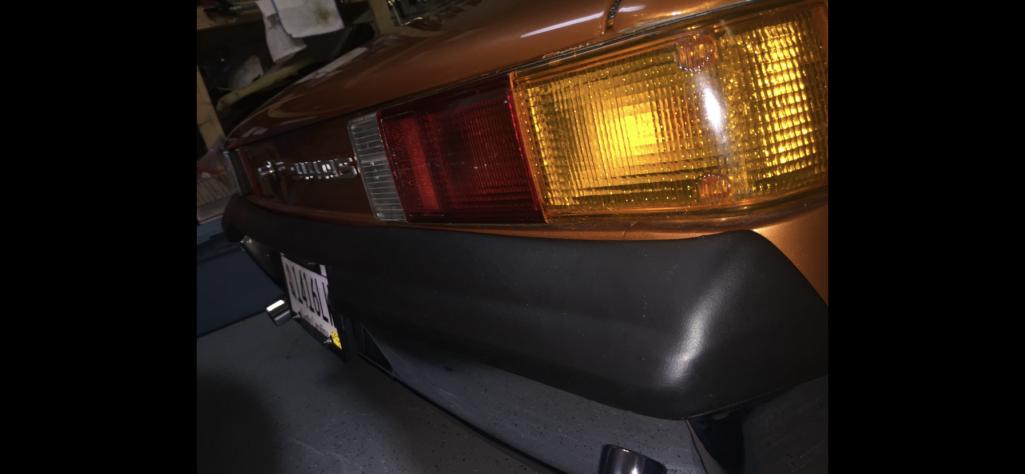
Posted by: DRPHIL914 Aug 23 2019, 09:29 PM
Thanks to Bruce stone all
my metal bits even door lock mechanism and strike plates
are like new, zinc plated
Attached thumbnail(s)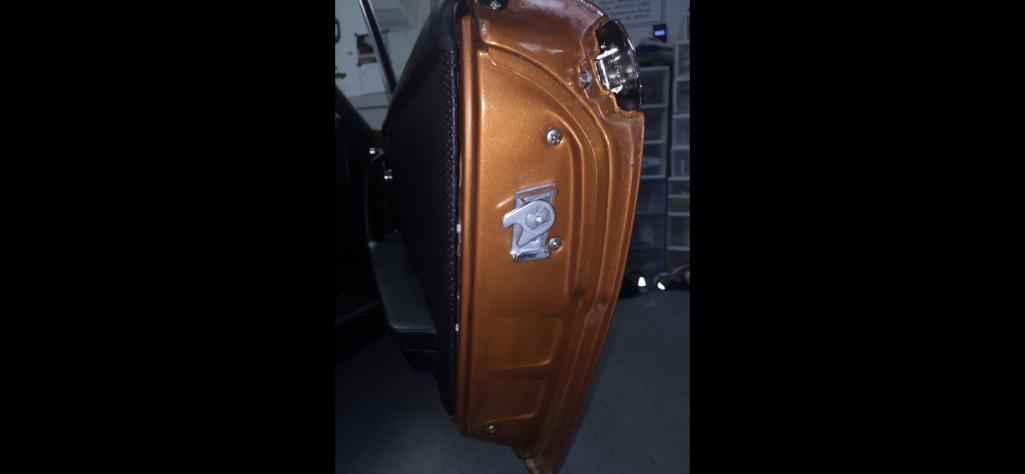
Posted by: DRPHIL914 Aug 23 2019, 09:31 PM
Love my 914rubber.com seat covers, carpets, dash top, etc etc- too much to list
Attached thumbnail(s)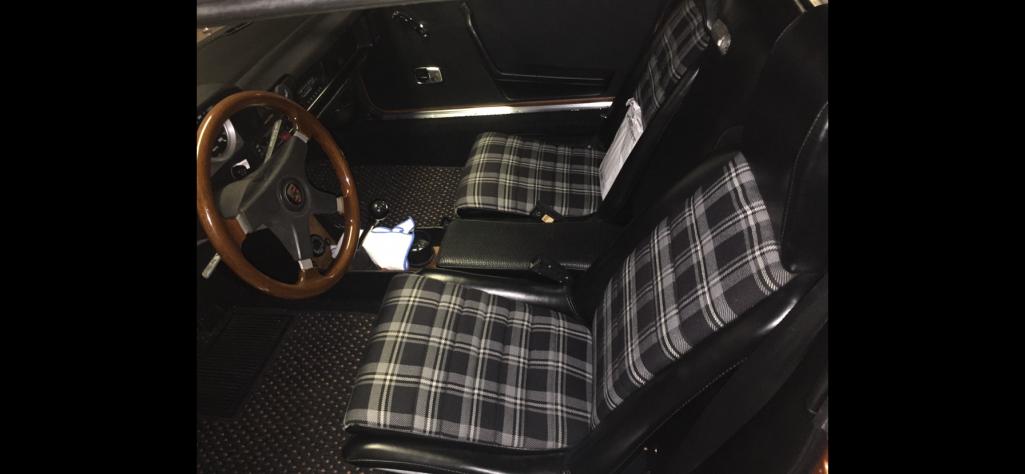
Posted by: DRPHIL914 Aug 23 2019, 09:33 PM
Just a few more- I was asked recently why I didn’t have more pictures of the car posted
So I figure this would be the best place to document the mostly finished product
Attached thumbnail(s)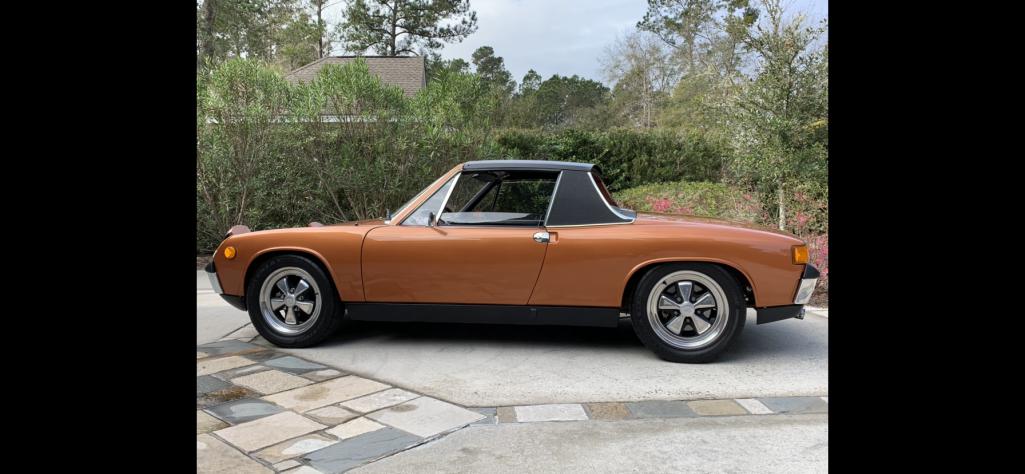
Posted by: DRPHIL914 Aug 23 2019, 09:34 PM
Love the copper metallic in sunlight!
Attached thumbnail(s)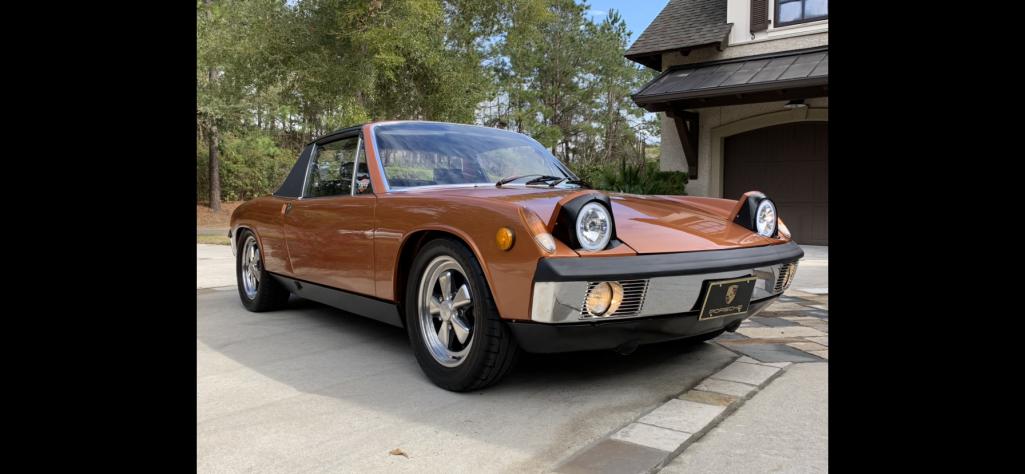
Posted by: DRPHIL914 Aug 23 2019, 09:37 PM
I still like the looks of new black sail panels, with new OEM trim of course!
Attached thumbnail(s)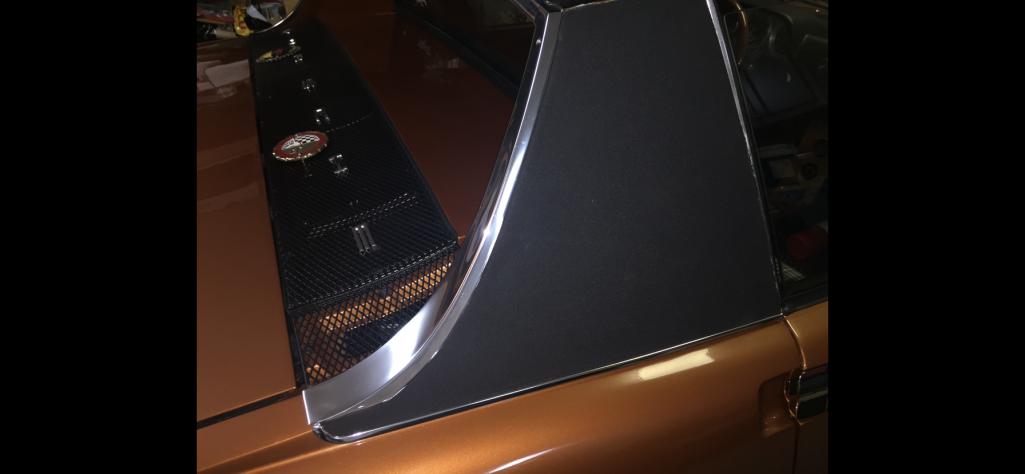
Posted by: DRPHIL914 Aug 23 2019, 09:40 PM
I am glad I decided to back date these bumpers, but the BUB’s really didn’t look bad, but mine live on , on Gatornapper’s car!
Attached thumbnail(s)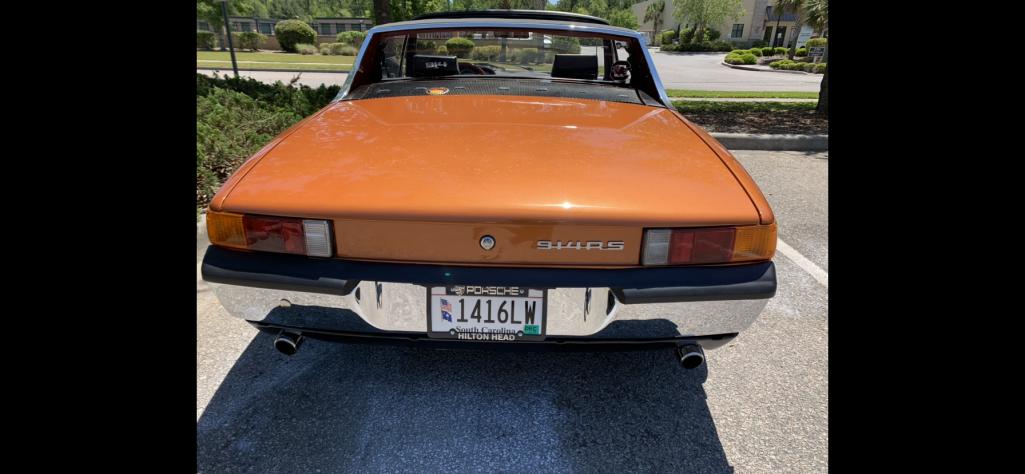
Posted by: ValcoOscar Aug 24 2019, 05:55 AM
Love the copper metallic in sunlight!
This is my favorite picture of your beautiful car.
Oscar
Posted by: tygaboy Aug 24 2019, 08:32 AM
Wow, beautiful! You must (and should be!) very proud of your results. Thanks for the pics.
Posted by: Gatornapper Aug 24 2019, 08:10 PM
Now, Phil.......I need to check with you.....if, in a few years, I decide to do what you did, and back-date my bumpers - will you be upset?????
If I do, I promise to pass them on for free just like you did for me!
But yours are so nice, I probably will let them live on on my car as long as she's running..... 
GN
I am glad I decided to back date these bumpers, but the BUB’s really didn’t look bad, but mine live on , on Gatornapper’s car!
Posted by: DRPHIL914 Aug 25 2019, 05:14 AM
Well if you do decide to back date at some point you can pass them on or sell them if you want they are yours, and mint late bumpers may end up being fairly rare and value could climb as it gets jarred to find them. But consider a few things before backdating-
*expense- going to cost a couple grad to do it right
*fog light mounting - is different so no you hav etc d those holes tat were it there, early cars have welded but on other side so you can just stew in the bold for mounting the lights
*on rear our later cars don’t have the tow hook mount, I didn’t know about that so I didn’t have it welded on while the body work was being done , and also the center rear bumper topper supports have to be added we don’t have those either. At some point my bumpers will come back off, those things will be added properly but right now I can’t crew in a rear tow hook loop due to the missing mount and I don’t have the support brackets in middle back that helps hold up the small thin center part of the bumper topper.
I got a great deal on an early perfect front bumper from a local 911 Restoration guy that bought a hoard of parts in a shipping container- I believe that it came from VA, and in there was some 914 stuff he didn’t want, and he sold me cheap most of the 914 stuff, like my interior door panels, they are mint, and the chrome bumpers. One was sent for new triple plating chrome, but no repair was necessary.
That was a stroke of luck.
Also I’ve had issues with getting my sail panel vinyl on right, it if at first you don’t succeed try try again! If I get time in the next 2 weeks it’s going to come off and be reapplied but will see if I get time with moving next weekend.
For now keep the BUB’s they look good- I will send the rear one soon, maybe this week so I don’t have to move it- if you don’t wNt the steel bumper frame it will probably be scrappas I won’t have room to store it.
Phil
Now, Phil.......I need to check with you.....if, in a few years, I decide to do what you did, and back-date my bumpers - will you be upset?????
If I do, I promise to pass them on for free just like you did for me!
But yours are so nice, I probably will let them live on on my car as long as she's running.....
GN
I am glad I decided to back date these bumpers, but the BUB’s really didn’t look bad, but mine live on , on Gatornapper’s car!
Posted by: Cairo94507 Aug 25 2019, 05:43 AM
DrPhil914 - You car is beautiful. I love the color and backdating the bumpers makes a hug difference in the look. Great job.
Posted by: Gatornapper Aug 25 2019, 06:43 AM
Phil -
Thank you. All the reasons I probably will never back-date mine.
Yes - your 914 is absolutely one of the most beautiful ones I've ever seen. I don't have plans or the funds to take mine anywhere close to yours - so I'll enjoy yours from a distance.
Kudos on a superb car.
Took mine to local C&C yesterday. I was early, so I framed it properly: parked it next to a new Porsche GT3, 2- McLaren F-1's, and a Ford GT. Your car would have fit right next to them a whole lot better than mine!
A hundred cars there I think, and surprised at all the interest in my old 914, as raggedy as it is....the only one there.
GN
Well if you do decide to back date at some point you can pass them on or sell them if you want they are yours, and mint late bumpers may end up being fairly rare and value could climb as it gets jarred to find them. But consider a few things before backdating-
*expense- going to cost a couple grad to do it right
*fog light mounting - is different so no you hav etc d those holes tat were it there, early cars have welded but on other side so you can just stew in the bold for mounting the lights
*on rear our later cars don’t have the tow hook mount, I didn’t know about that so I didn’t have it welded on while the body work was being done , and also the center rear bumper topper supports have to be added we don’t have those either. At some point my bumpers will come back off, those things will be added properly but right now I can’t crew in a rear tow hook loop due to the missing mount and I don’t have the support brackets in middle back that helps hold up the small thin center part of the bumper topper.
I got a great deal on an early perfect front bumper from a local 911 Restoration guy that bought a hoard of parts in a shipping container- I believe that it came from VA, and in there was some 914 stuff he didn’t want, and he sold me cheap most of the 914 stuff, like my interior door panels, they are mint, and the chrome bumpers. One was sent for new triple plating chrome, but no repair was necessary.
That was a stroke of luck.
Also I’ve had issues with getting my sail panel vinyl on right, it if at first you don’t succeed try try again! If I get time in the next 2 weeks it’s going to come off and be reapplied but will see if I get time with moving next weekend.
For now keep the BUB’s they look good- I will send the rear one soon, maybe this week so I don’t have to move it- if you don’t wNt the steel bumper frame it will probably be scrappas I won’t have room to store it.
Phil
Now, Phil.......I need to check with you.....if, in a few years, I decide to do what you did, and back-date my bumpers - will you be upset?????
If I do, I promise to pass them on for free just like you did for me!
But yours are so nice, I probably will let them live on on my car as long as she's running.....
GN
I am glad I decided to back date these bumpers, but the BUB’s really didn’t look bad, but mine live on , on Gatornapper’s car!
Posted by: mepstein Aug 25 2019, 06:57 AM
I went to one C & C in my stock 1.7. It got as much interest as any of the supercars there. People kept on coming up to me to tell me about there dad's 914 or one they had in college. A girl walked by and said "I like your car". Both me and the Ferrari owner parked next to me turned around and she was pointing to my car.
Phil -
Thank you. All the reasons I probably will never back-date mine.
Yes - your 914 is absolutely one of the most beautiful ones I've ever seen. I don't have plans or the funds to take mine anywhere close to yours - so I'll enjoy yours from a distance.
Kudos on a superb car.
Took mine to local C&C yesterday. I was early, so I framed it properly: parked it next to a new Porsche GT3, 2- McLaren F-1's, and a Ford GT. Your car would have fit right next to them a whole lot better than mine!
A hundred cars there I think, and surprised at all the interest in my old 914, as raggedy as it is....the only one there.
GN
Well if you do decide to back date at some point you can pass them on or sell them if you want they are yours, and mint late bumpers may end up being fairly rare and value could climb as it gets jarred to find them. But consider a few things before backdating-
*expense- going to cost a couple grad to do it right
*fog light mounting - is different so no you hav etc d those holes tat were it there, early cars have welded but on other side so you can just stew in the bold for mounting the lights
*on rear our later cars don’t have the tow hook mount, I didn’t know about that so I didn’t have it welded on while the body work was being done , and also the center rear bumper topper supports have to be added we don’t have those either. At some point my bumpers will come back off, those things will be added properly but right now I can’t crew in a rear tow hook loop due to the missing mount and I don’t have the support brackets in middle back that helps hold up the small thin center part of the bumper topper.
I got a great deal on an early perfect front bumper from a local 911 Restoration guy that bought a hoard of parts in a shipping container- I believe that it came from VA, and in there was some 914 stuff he didn’t want, and he sold me cheap most of the 914 stuff, like my interior door panels, they are mint, and the chrome bumpers. One was sent for new triple plating chrome, but no repair was necessary.
That was a stroke of luck.
Also I’ve had issues with getting my sail panel vinyl on right, it if at first you don’t succeed try try again! If I get time in the next 2 weeks it’s going to come off and be reapplied but will see if I get time with moving next weekend.
For now keep the BUB’s they look good- I will send the rear one soon, maybe this week so I don’t have to move it- if you don’t wNt the steel bumper frame it will probably be scrappas I won’t have room to store it.
Phil
Now, Phil.......I need to check with you.....if, in a few years, I decide to do what you did, and back-date my bumpers - will you be upset?????
If I do, I promise to pass them on for free just like you did for me!
But yours are so nice, I probably will let them live on on my car as long as she's running.....
GN
I am glad I decided to back date these bumpers, but the BUB’s really didn’t look bad, but mine live on , on Gatornapper’s car!
Posted by: Gatornapper Aug 25 2019, 07:06 AM
How cool is that?!?!
[quote name='mepstein' date='Aug 25 2019, 06:57 AM' post='2741438']
I went to one C & C in my stock 1.7. It got as much interest as any of the supercars there. People kept on coming up to me to tell me about there dad's 914 or one they had in college. A girl walked by and said "I like your car". Both me and the Ferrari owner parked next to me turned around and she was pointing to my car.
Posted by: DRPHIL914 Sep 9 2019, 08:59 PM
Back pad repaired and recovered! Now ready to put it in
Attached thumbnail(s)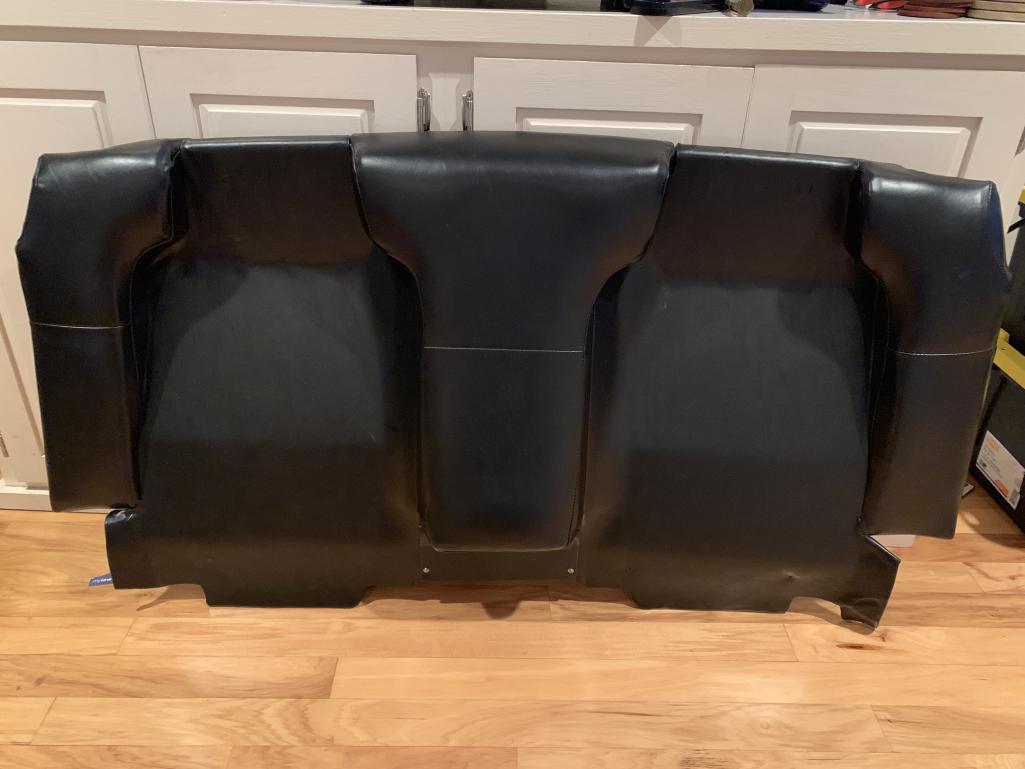
Posted by: DRPHIL914 Dec 10 2020, 09:11 AM
wow has it been that long since I posted on my own thread? I guess it's mostly been in the "what have you done" thread,
The back pad install was a year ago . Lots of little things since then!
I will have to post some pics of the new steering wheel and other stuff to consolidate but I have more stuff coming and might be in trouble--- kind of like this guy....
Attached thumbnail(s)
Posted by: jim_hoyland Dec 10 2020, 09:34 AM
Nice backed; interior light delete?
Posted by: DRPHIL914 Dec 10 2020, 09:39 AM
steering wheel update, newly wrapped by rix914parts thanks rick!
and updated the wiper switch for putting on electric pump i got from @http://www.914world.com/bbs2/index.php?showuser=3457 and the switch is from carmagic.com
Attached thumbnail(s)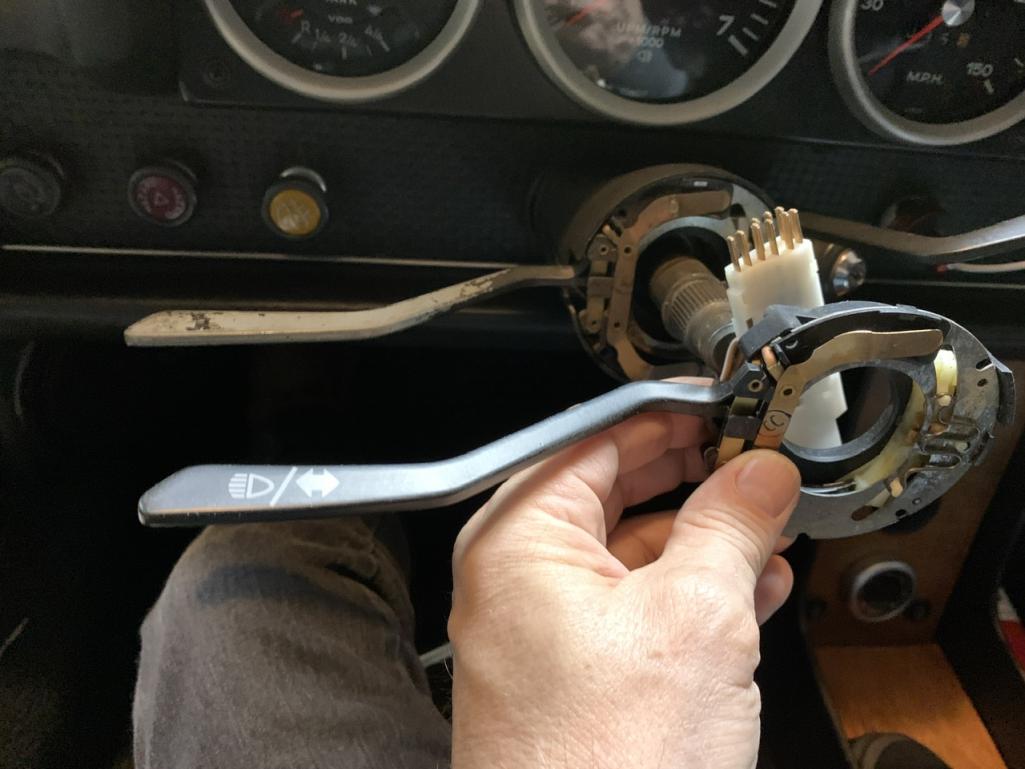
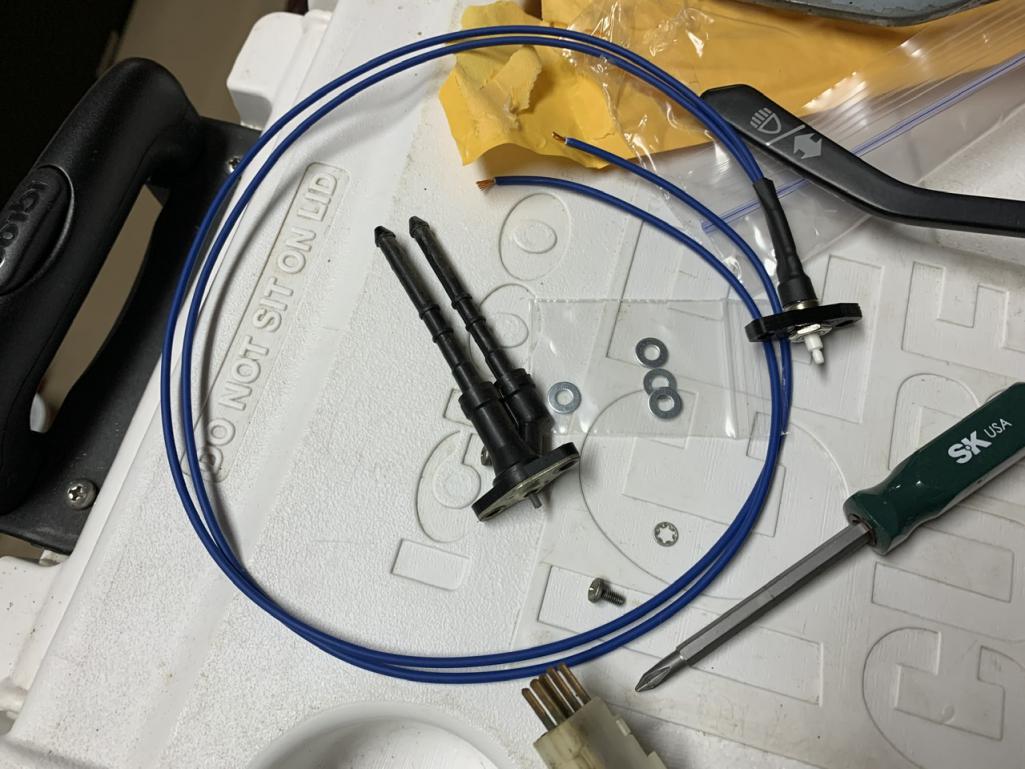
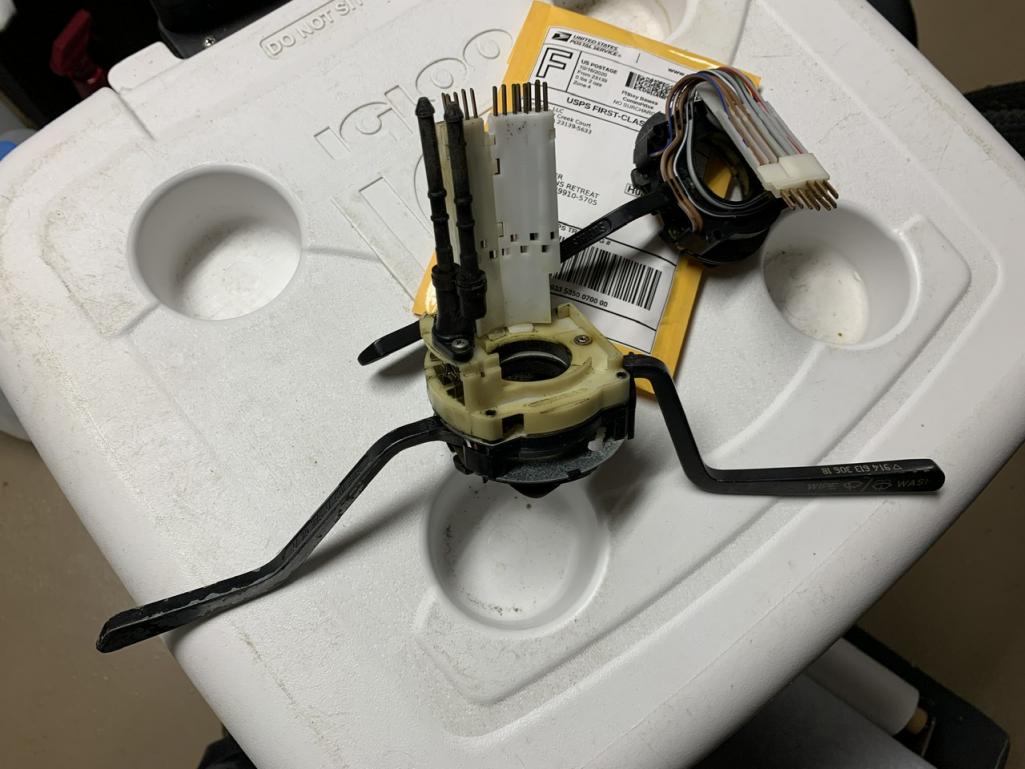
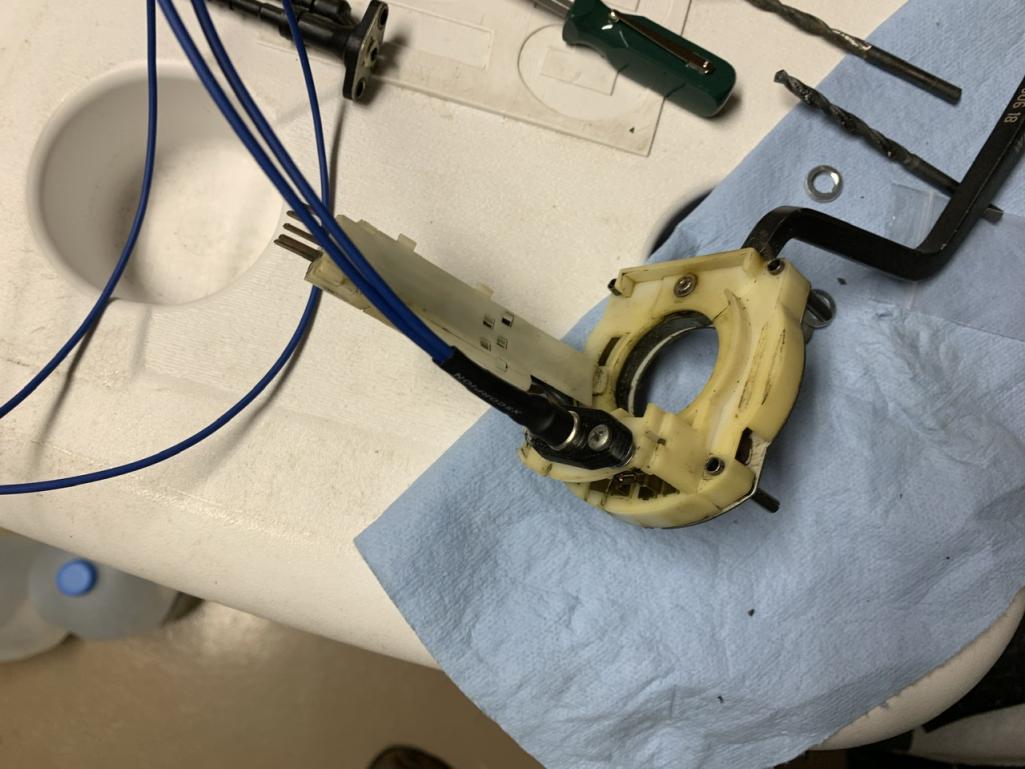
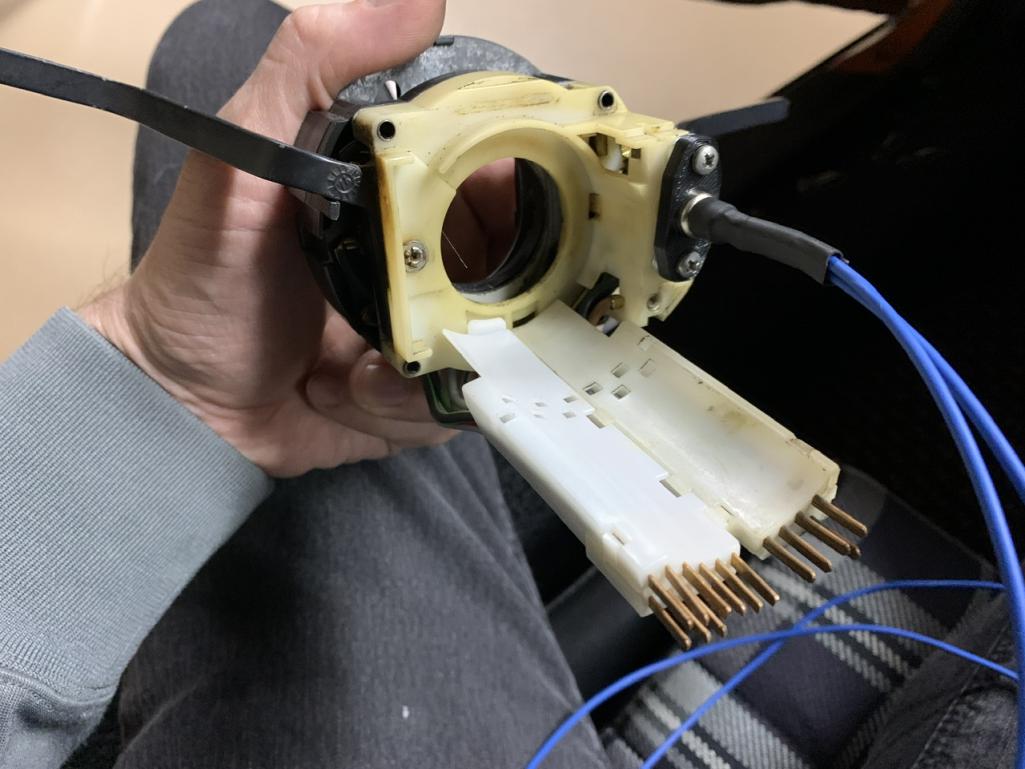
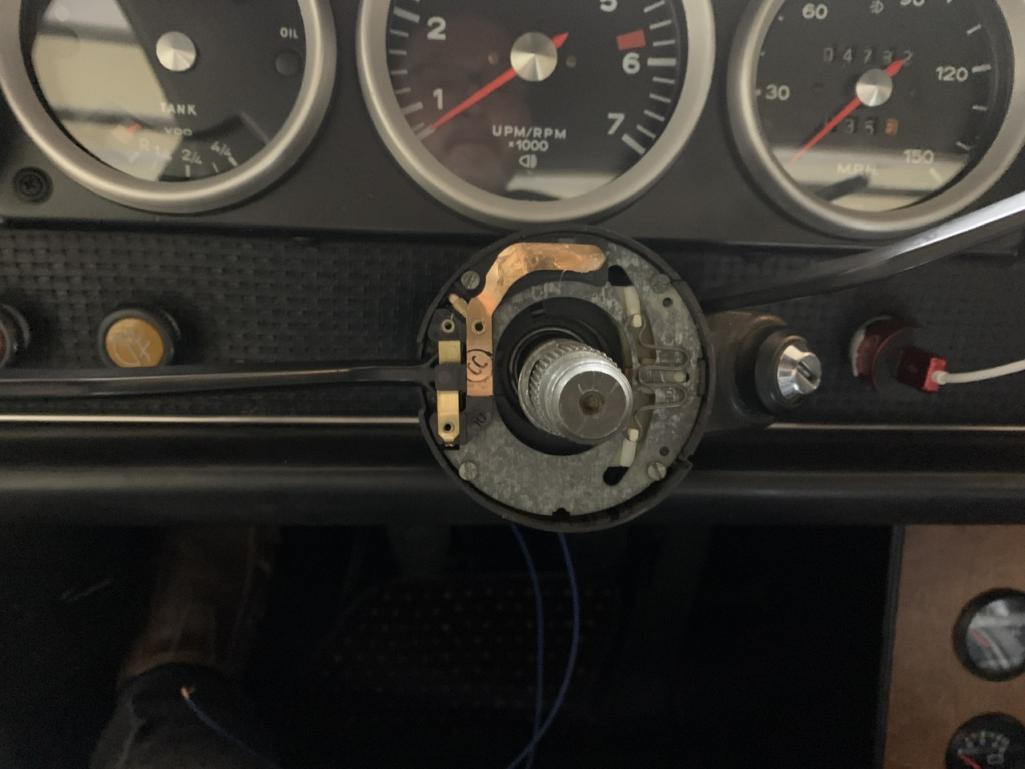
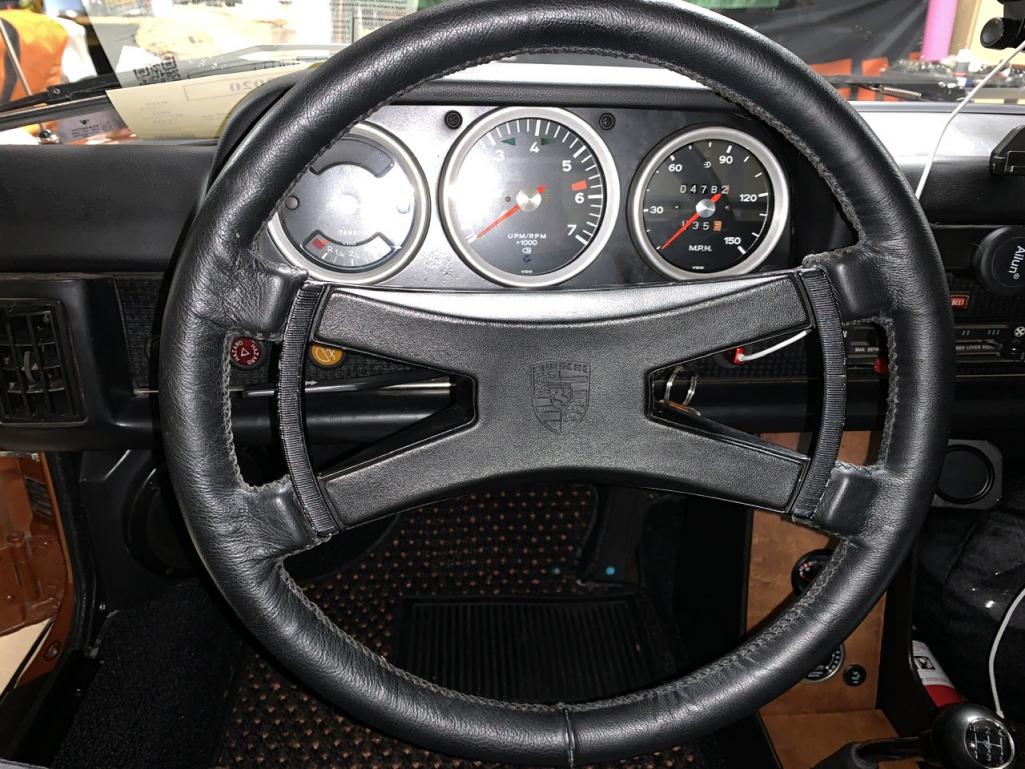
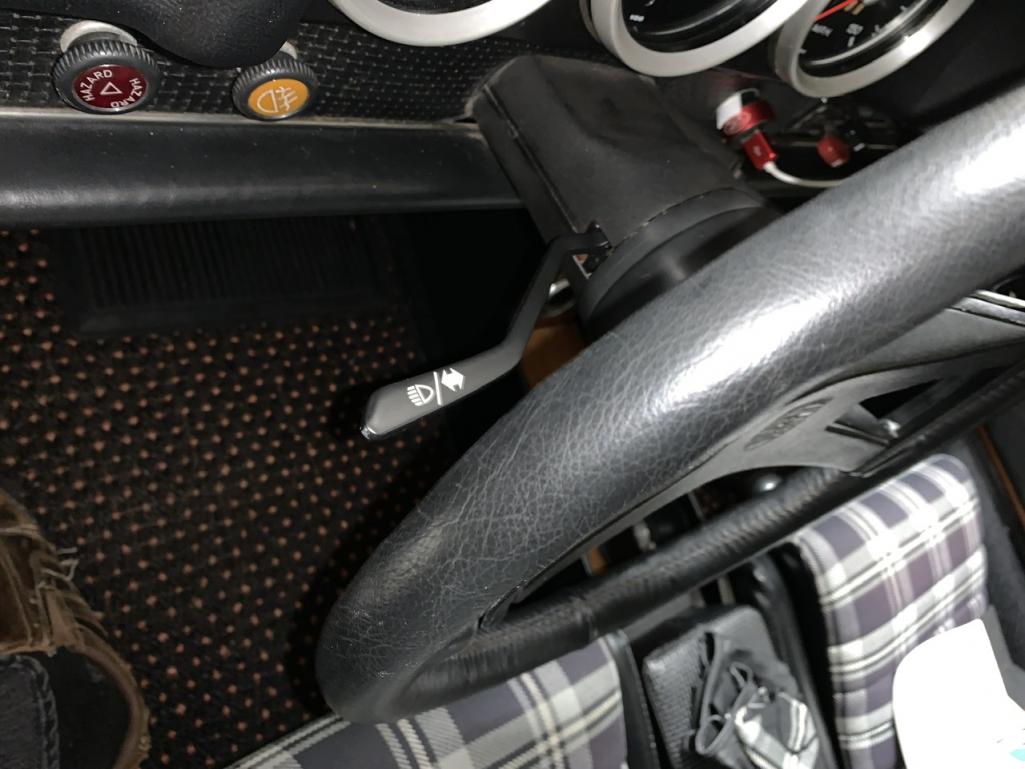
Posted by: DRPHIL914 Dec 10 2020, 09:44 AM
Nice backed; interior light delete?
back light was deleted for a while but i got a new one and now have it installed with new door switches too.
Attached thumbnail(s)
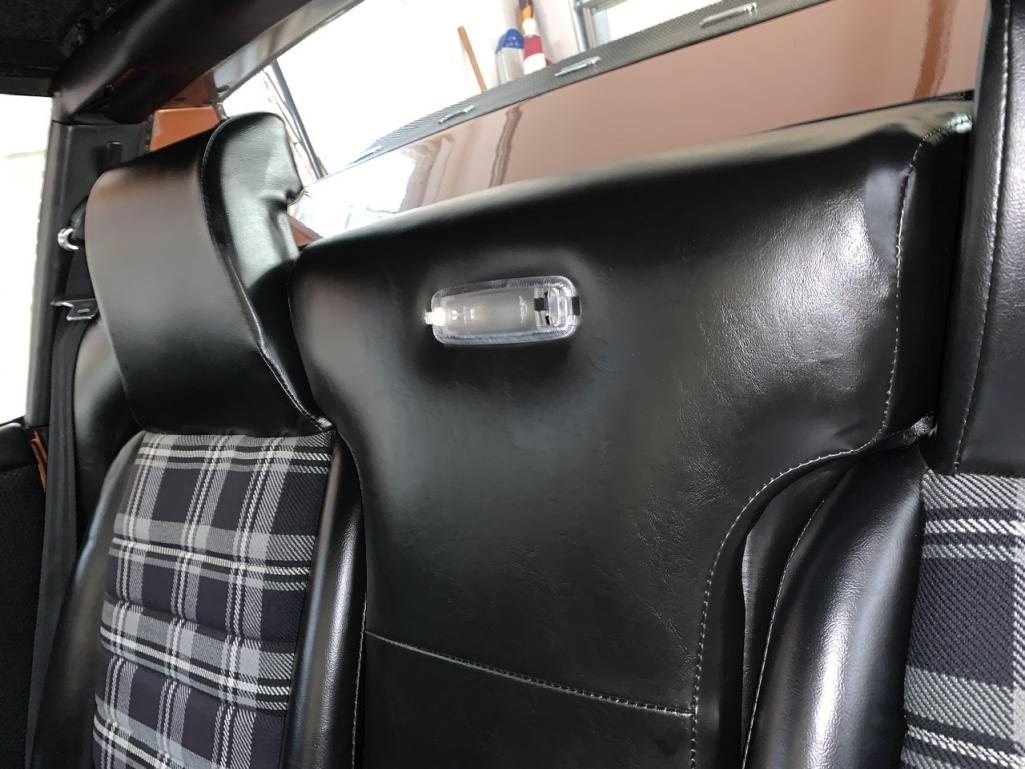

Posted by: DRPHIL914 Dec 10 2020, 09:50 AM
got some junk in the trunk—- had a wheelie good time with this project.
extra gas tank, stole this idea from a nice GT build at Werks reunion 2 years ago—-.
Attached thumbnail(s)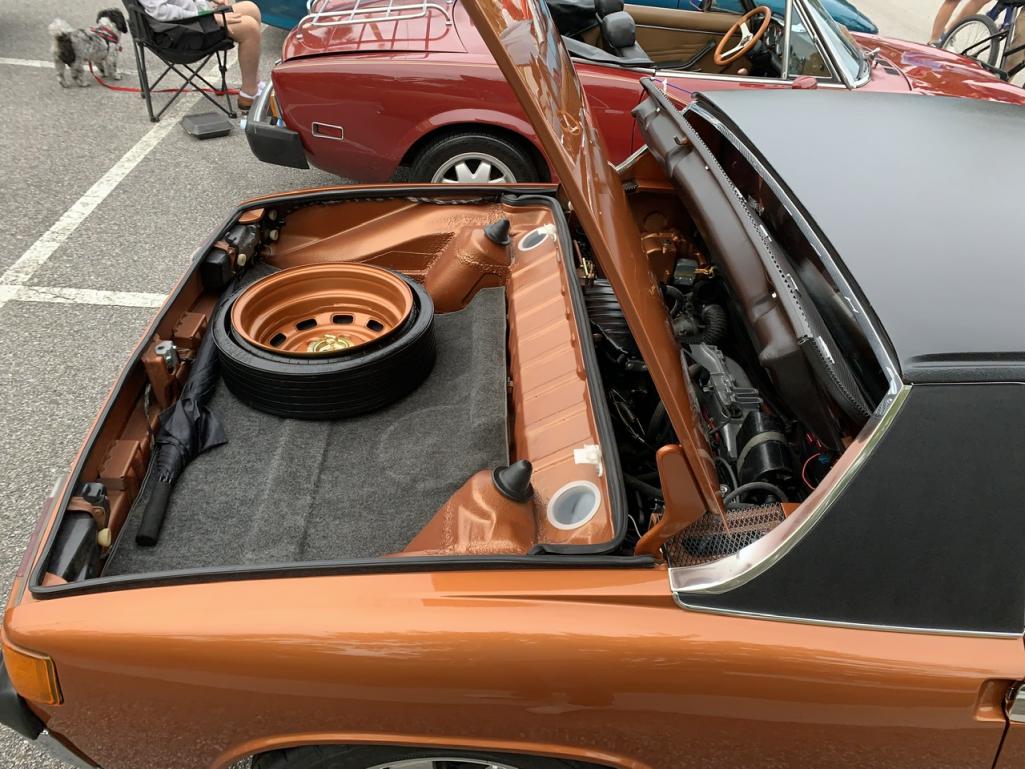
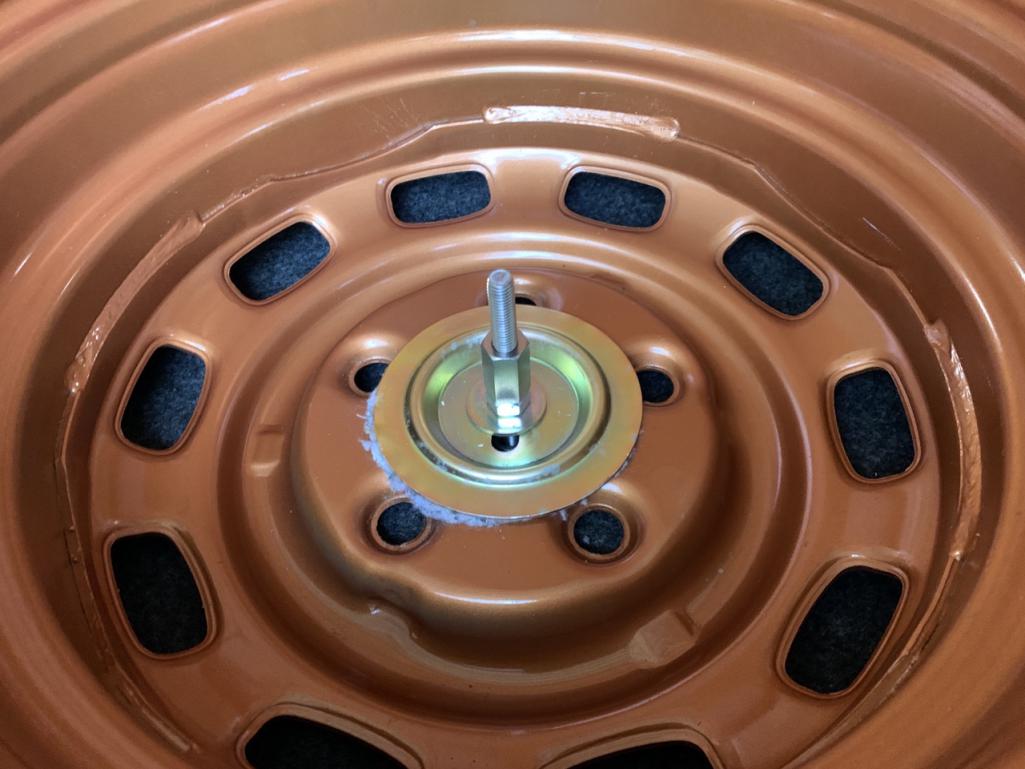
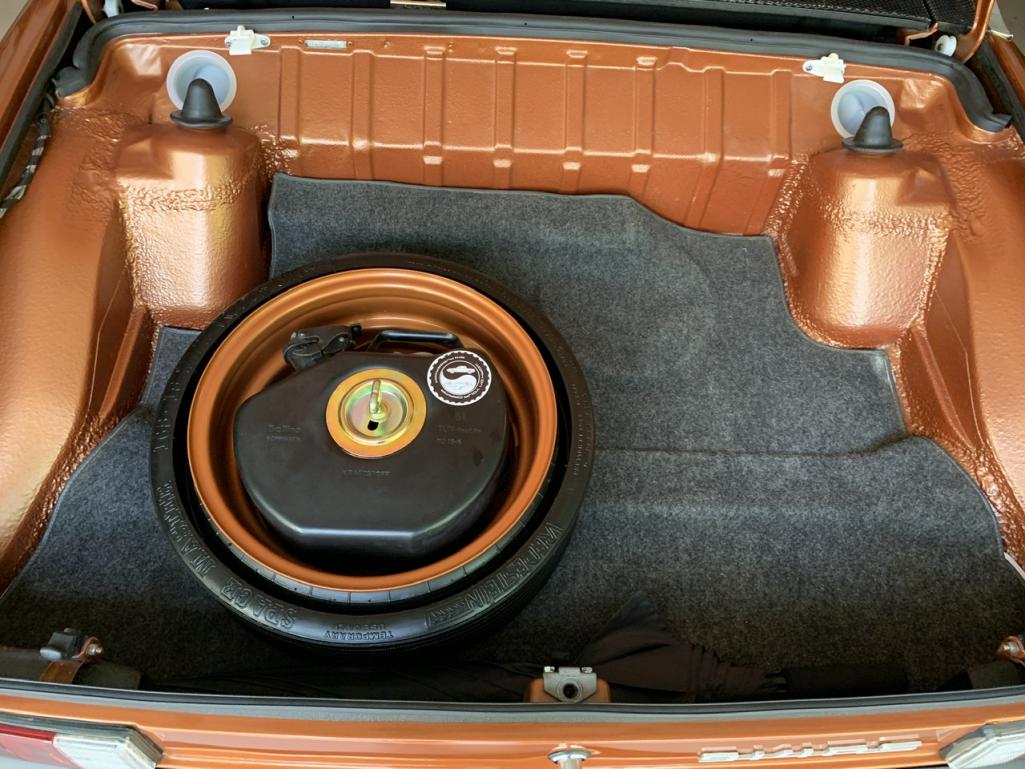
Posted by: ClayPerrine Dec 10 2020, 12:48 PM
I showed this to Betty. She laughed at it, then reminded me that she would say "You forgot to order the (fill in the blank) for my car."
Posted by: DRPHIL914 Dec 13 2020, 01:10 PM
an after pic for Clay-
Attached thumbnail(s)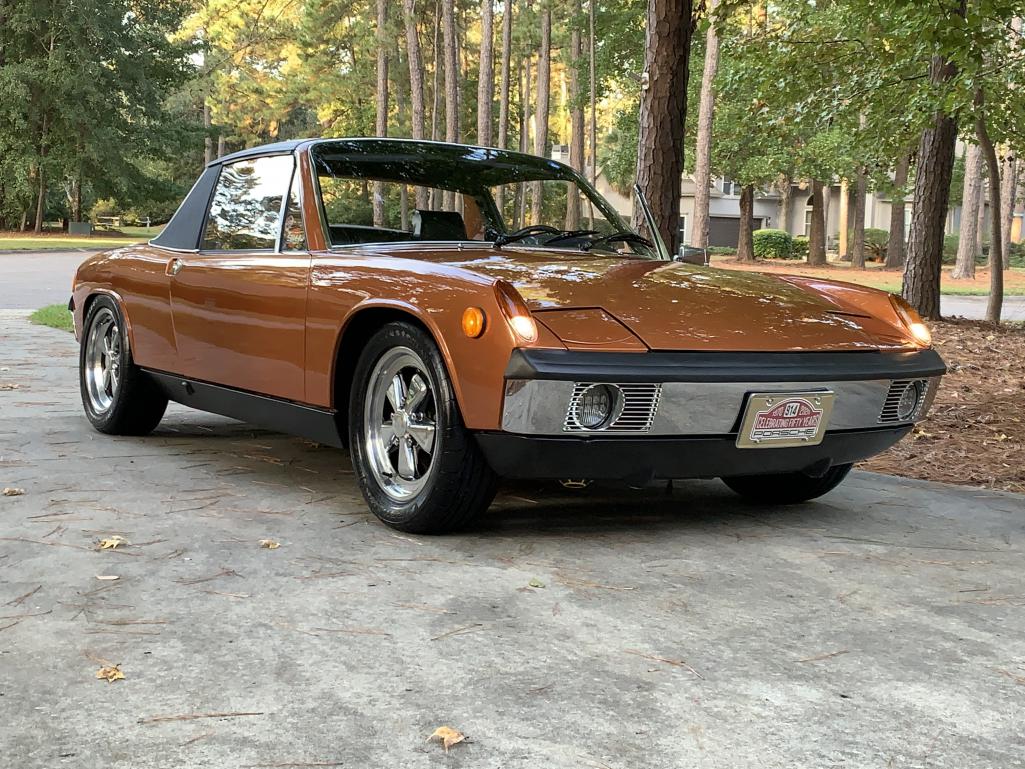
Posted by: DRPHIL914 Dec 13 2020, 01:21 PM
the new targa trim and sail vinyl
Attached thumbnail(s)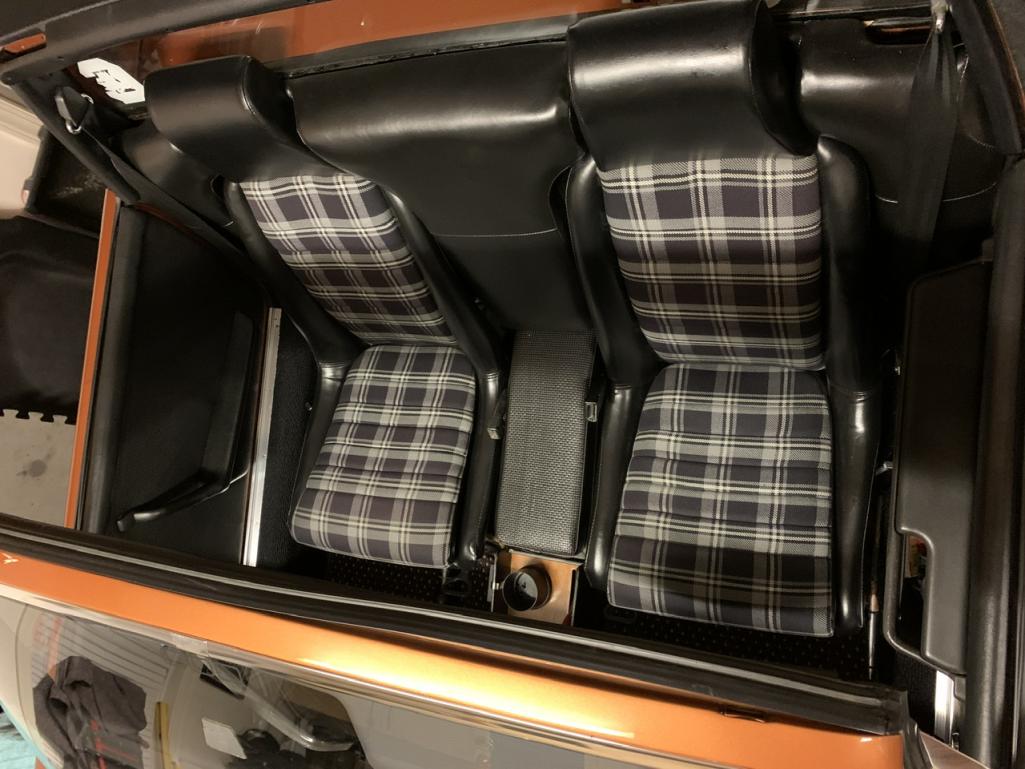
Posted by: DRPHIL914 Dec 13 2020, 01:25 PM
targa trim etc
Attached thumbnail(s)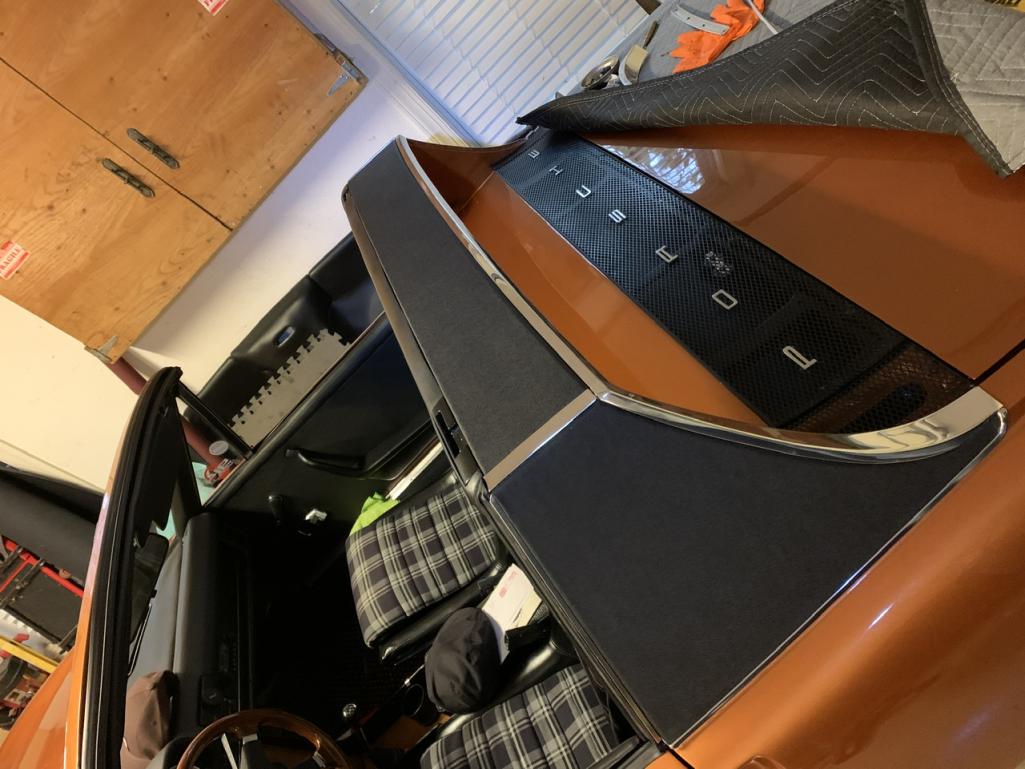
Posted by: DRPHIL914 Dec 13 2020, 01:38 PM
rust!!
Attached thumbnail(s)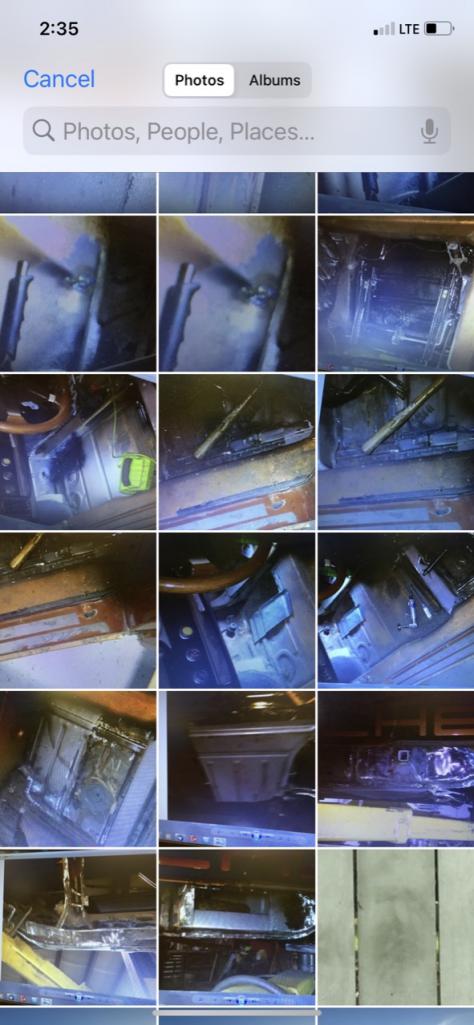
Posted by: DRPHIL914 May 10 2021, 08:27 AM
![]()
bump on the build thread to put some updated documentation of recent work.
i made a list of all the stuff ive done int he past year and of course filled up a whole page and then realized i had left out a few items like the re do of the targa bar and sail panel vinyl and trim and targa bar.
recently new exhaust from Ben. Ihave posted stuff in the "what have you done to your 914 today" thread but that gets burried in a sea of other posts. Most of my progress and work is on instagram, its fast and easy on that format to post pictures and progress.
- new Ben McFarland Sport GT muffler,
- new washer fluid pump to complete the carmagic switch and new lever from Mark Heard,
- new LED lighting under dash
- fixed lots of wiring issues, got that new fresh air fan installed after rebuild - it works!!!!
- pulled trans, re-did 4&5th gears, etc etc with new brass console bushing from 914Werks
- many more things-
Posted by: DRPHIL914 May 10 2021, 08:29 AM
a list of deed done in past year
Attached thumbnail(s)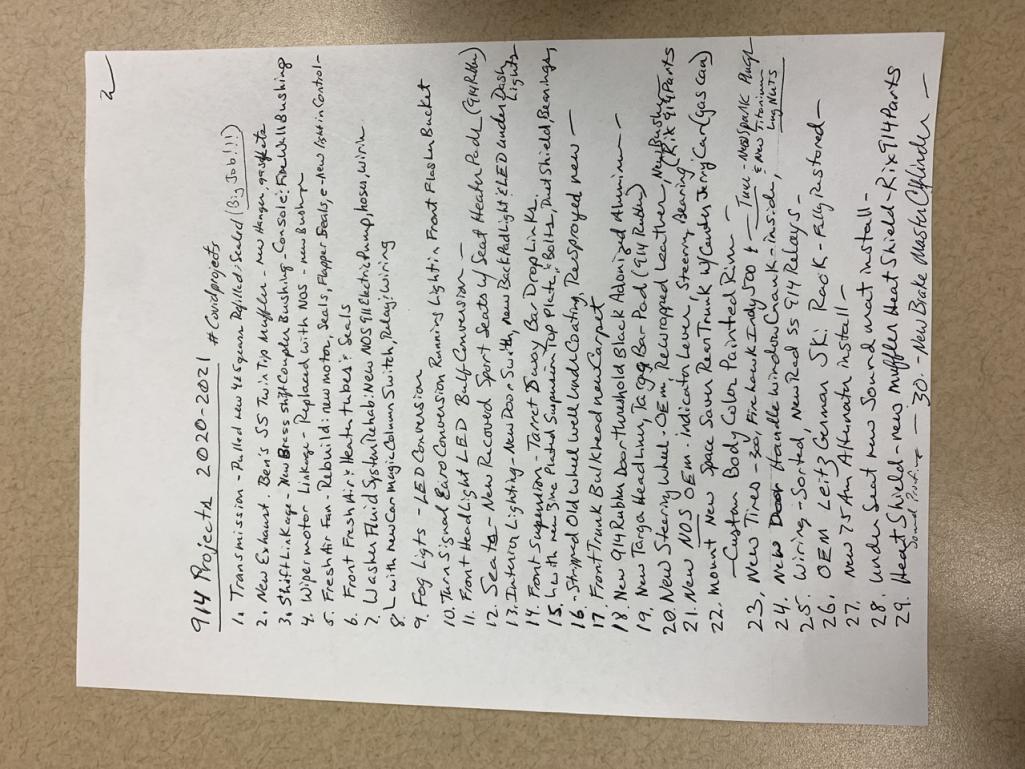
Posted by: DRPHIL914 May 10 2021, 08:32 AM
the new muffler
Ben McFarlands handiwork 914-Werkshop
Attached thumbnail(s)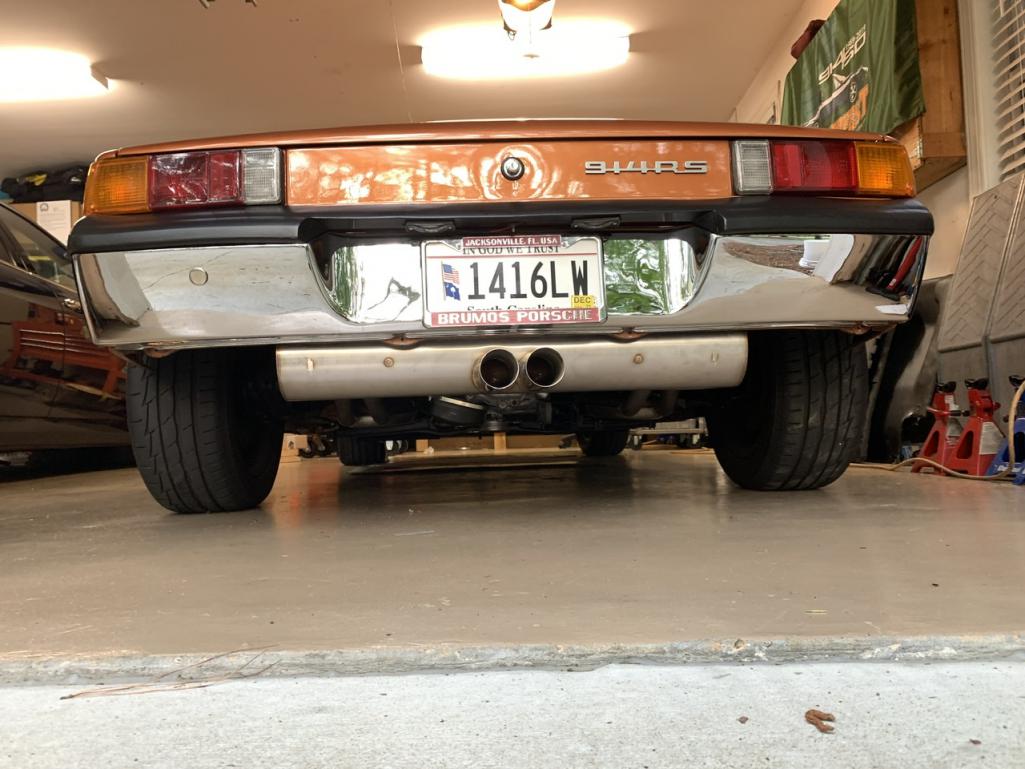
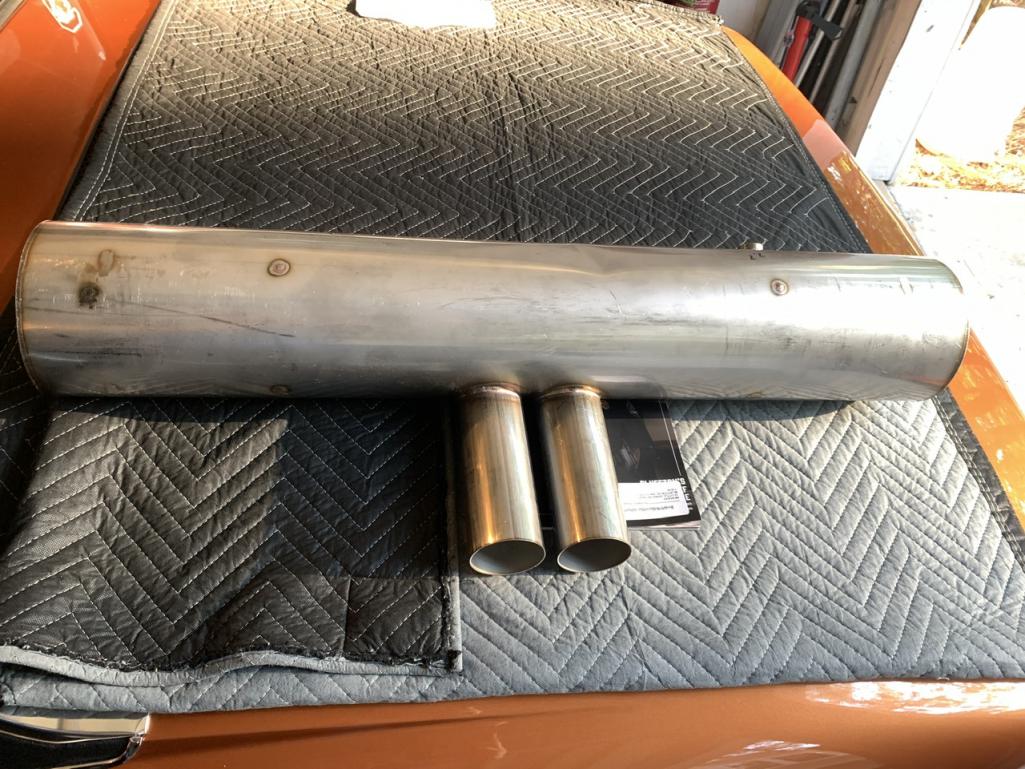
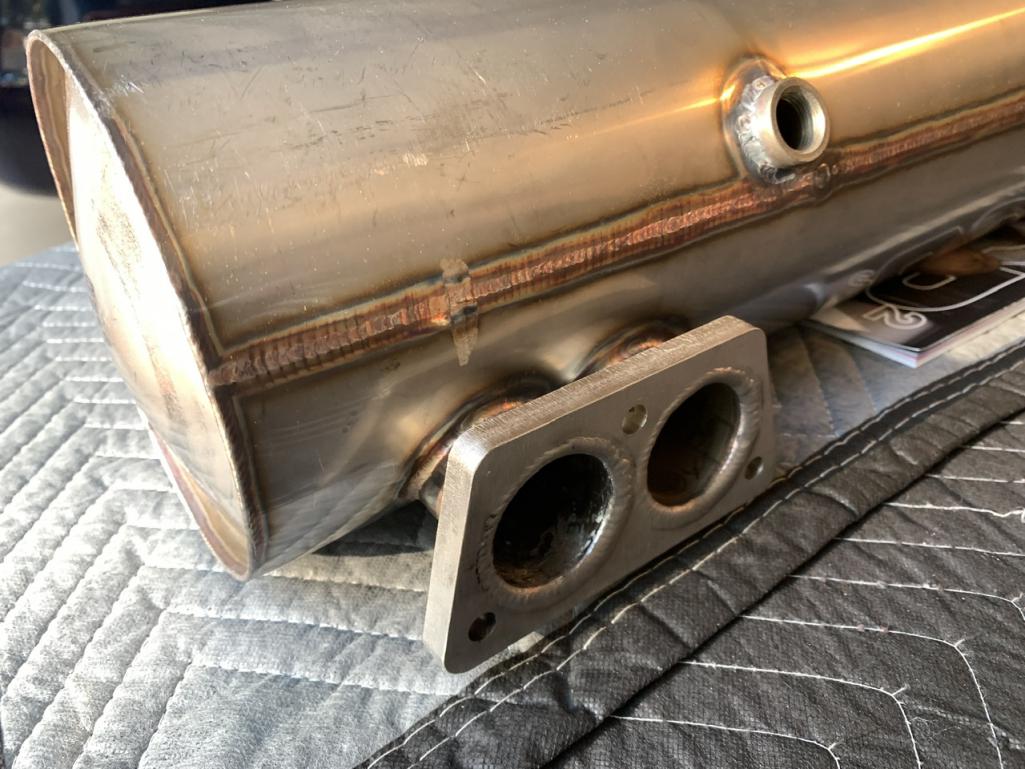
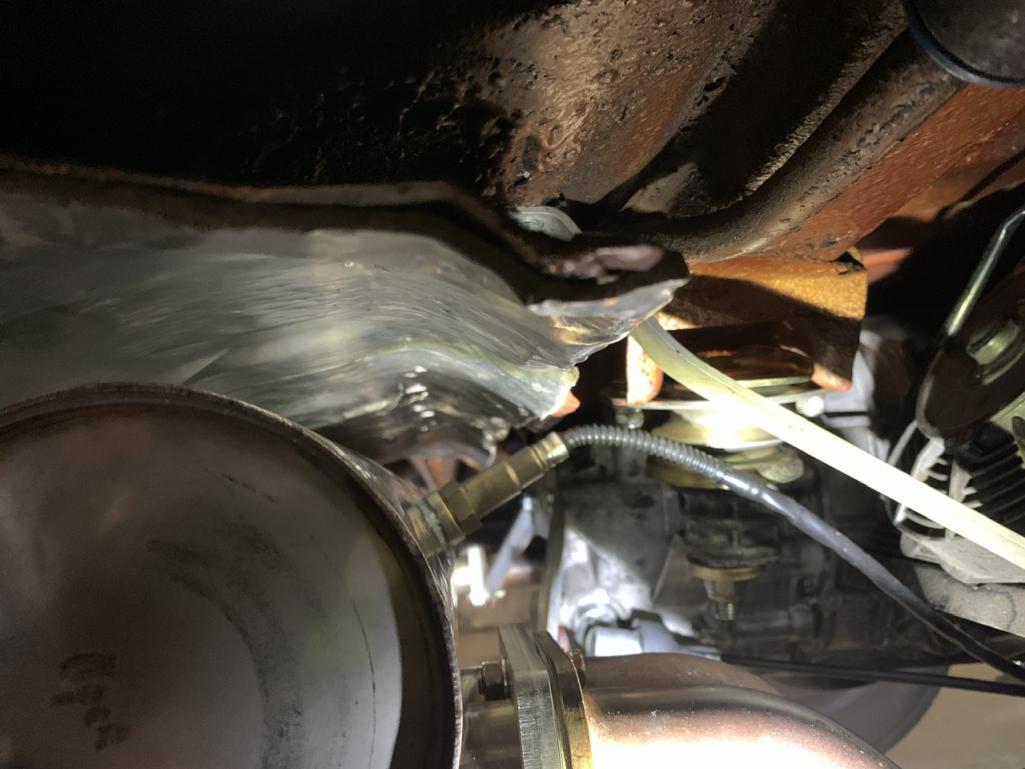
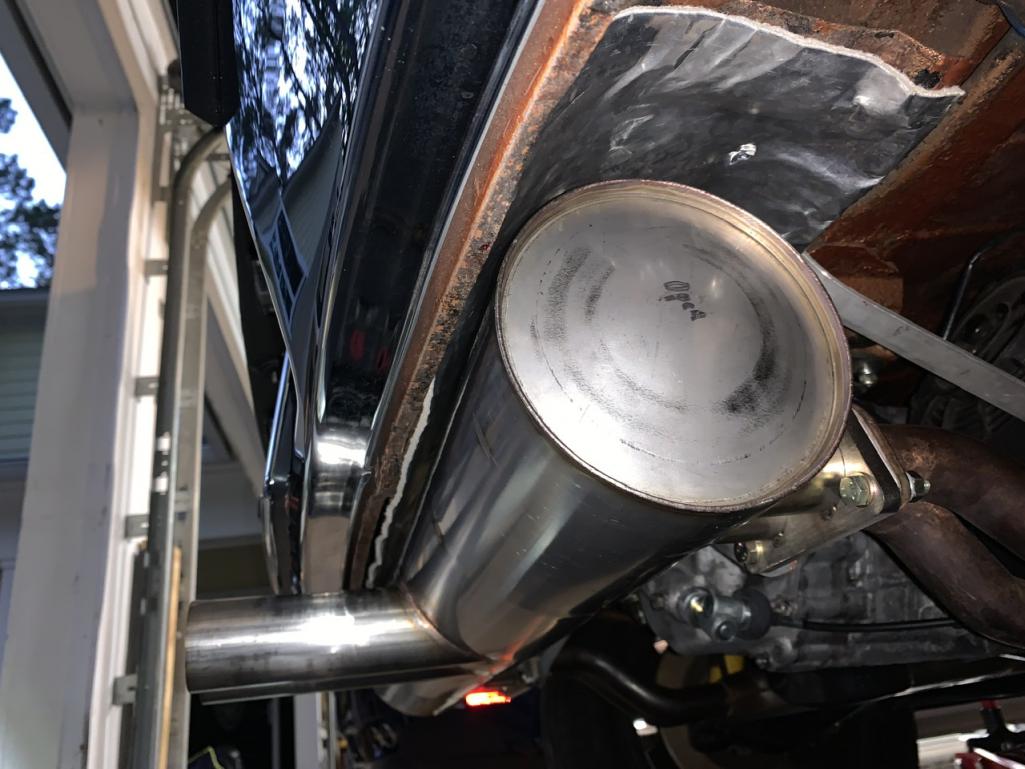
Posted by: DRPHIL914 May 10 2021, 08:33 AM
KilMat sound insulation on floors behind the cross support
Attached thumbnail(s)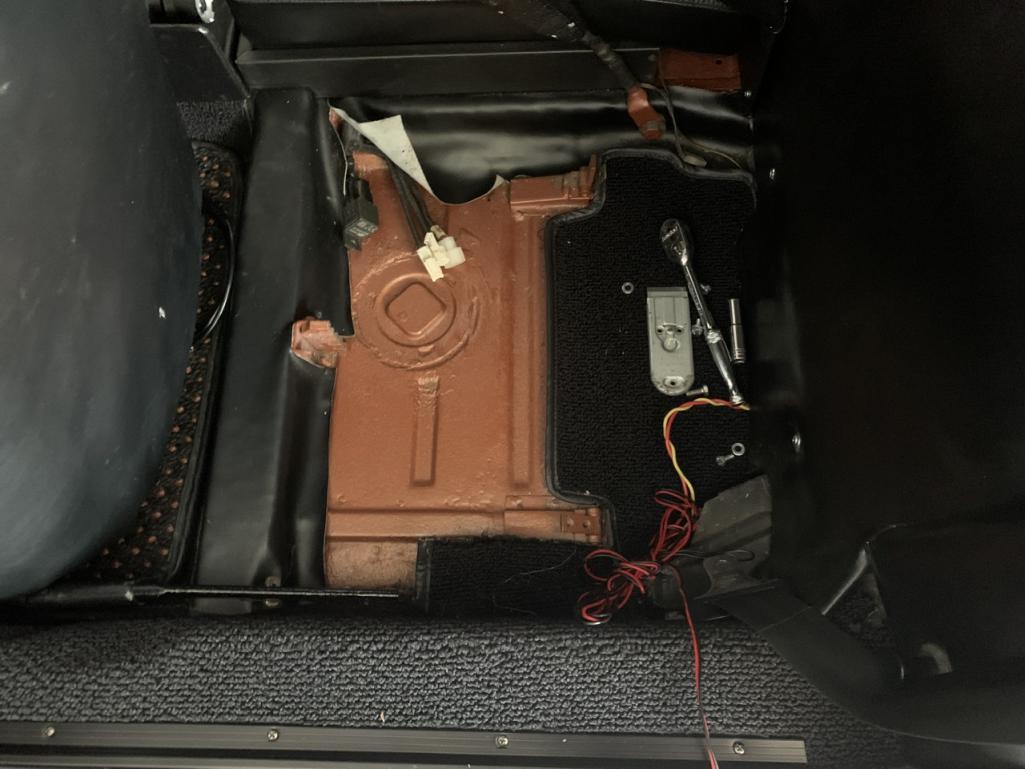
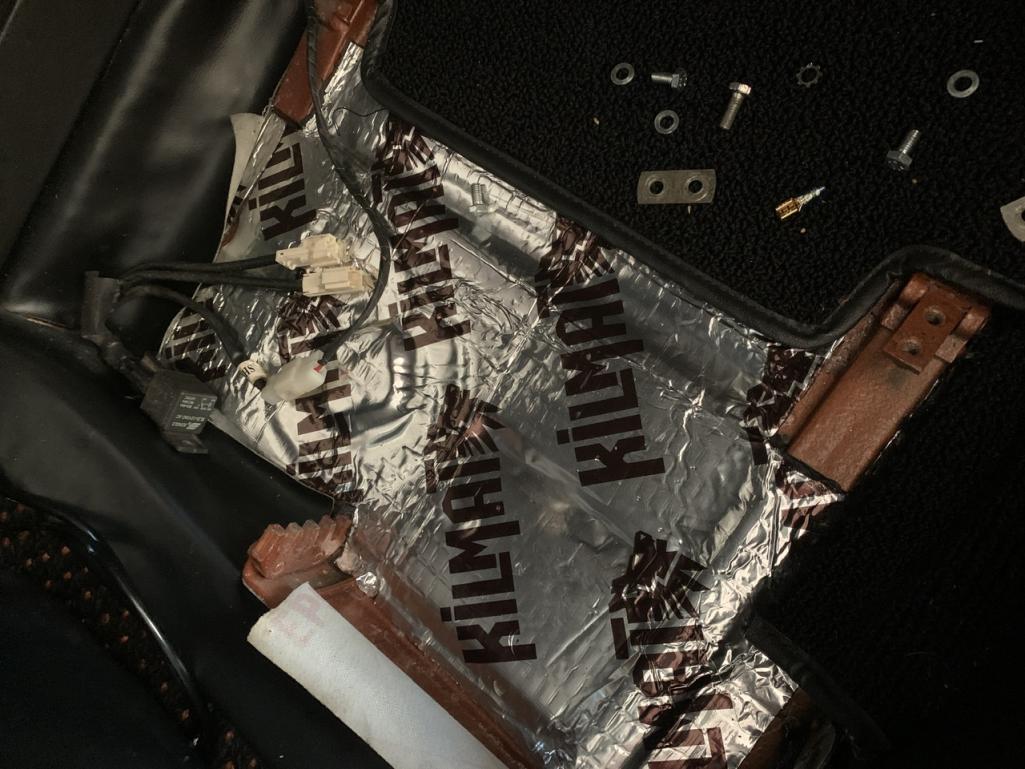
Posted by: DRPHIL914 May 10 2021, 08:34 AM
new Titanium lug nuts
Attached thumbnail(s)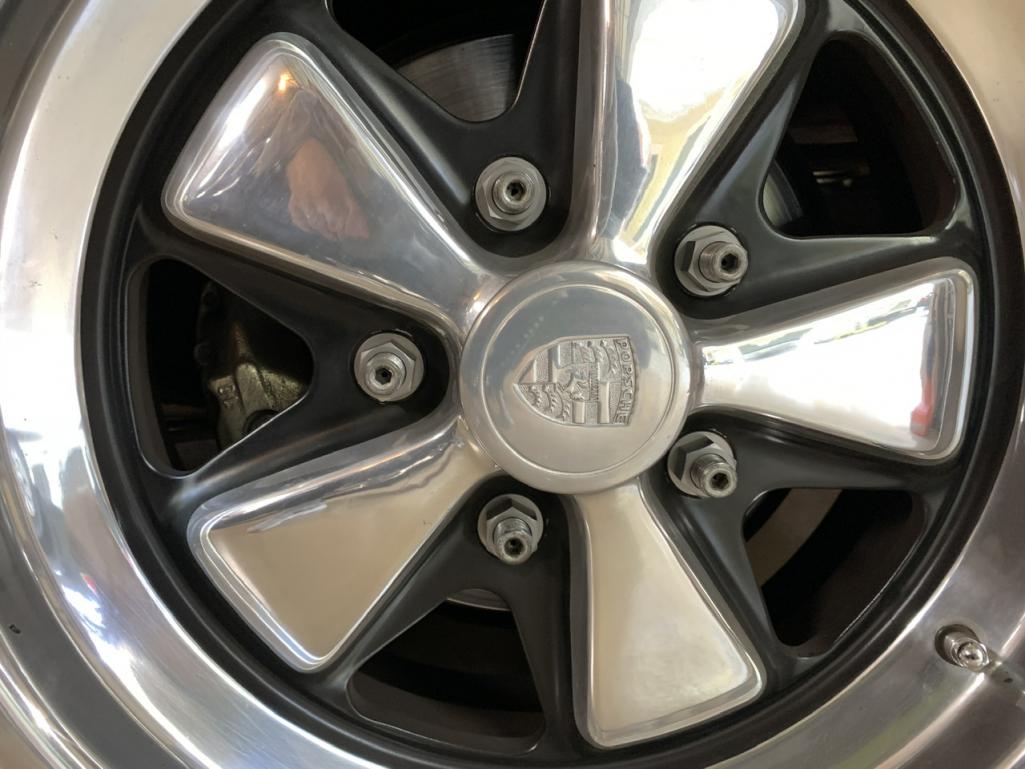
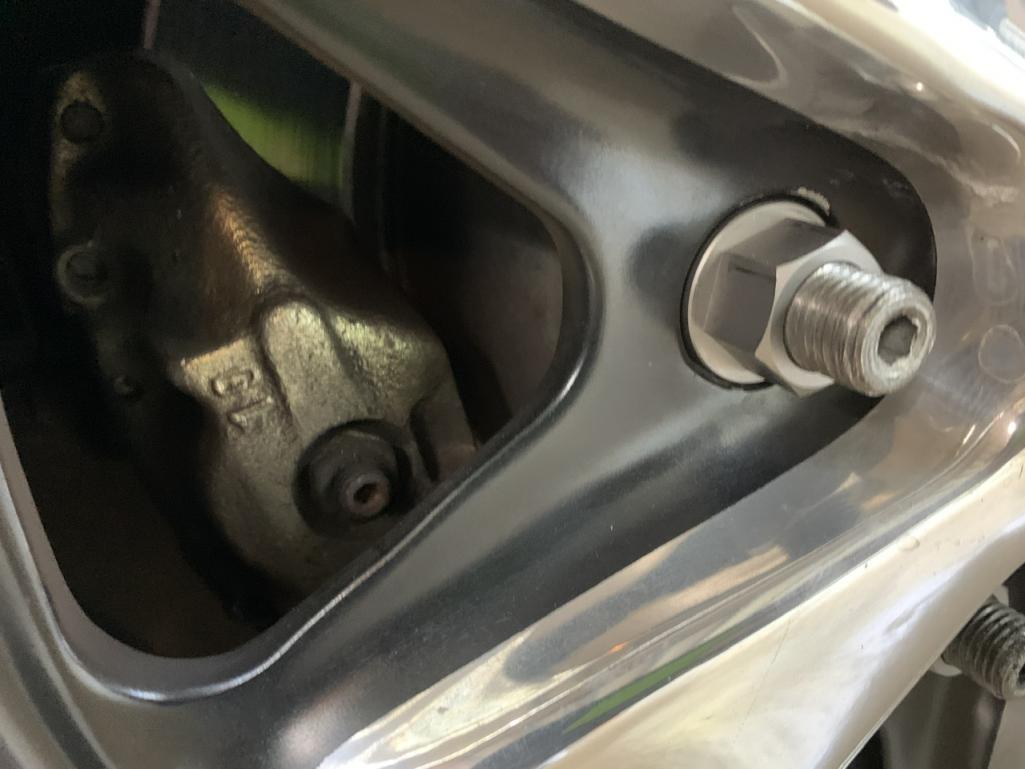
Posted by: DRPHIL914 May 10 2021, 08:35 AM
a reminder of what was....
Attached thumbnail(s)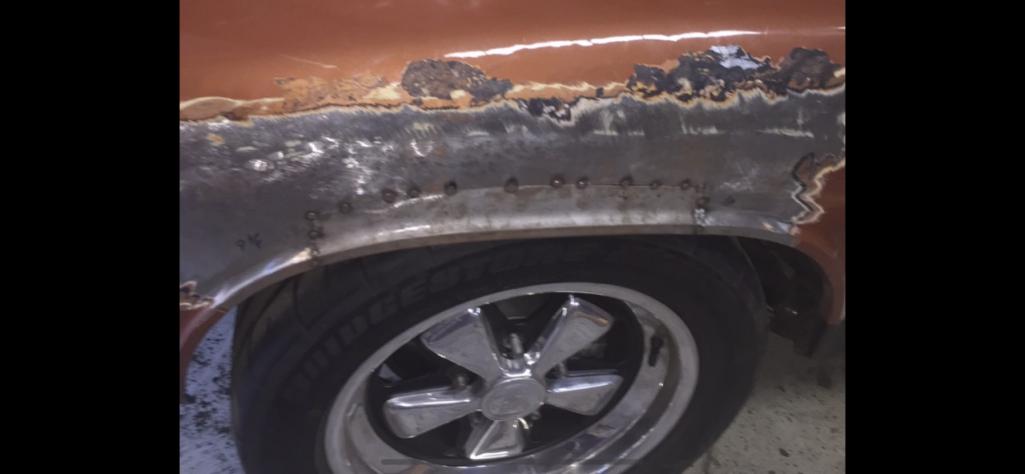
Posted by: DRPHIL914 May 10 2021, 08:38 AM
wiring the relay for the 911 electric washer pump...
washer bottle installed .Switch works,
Attached thumbnail(s)
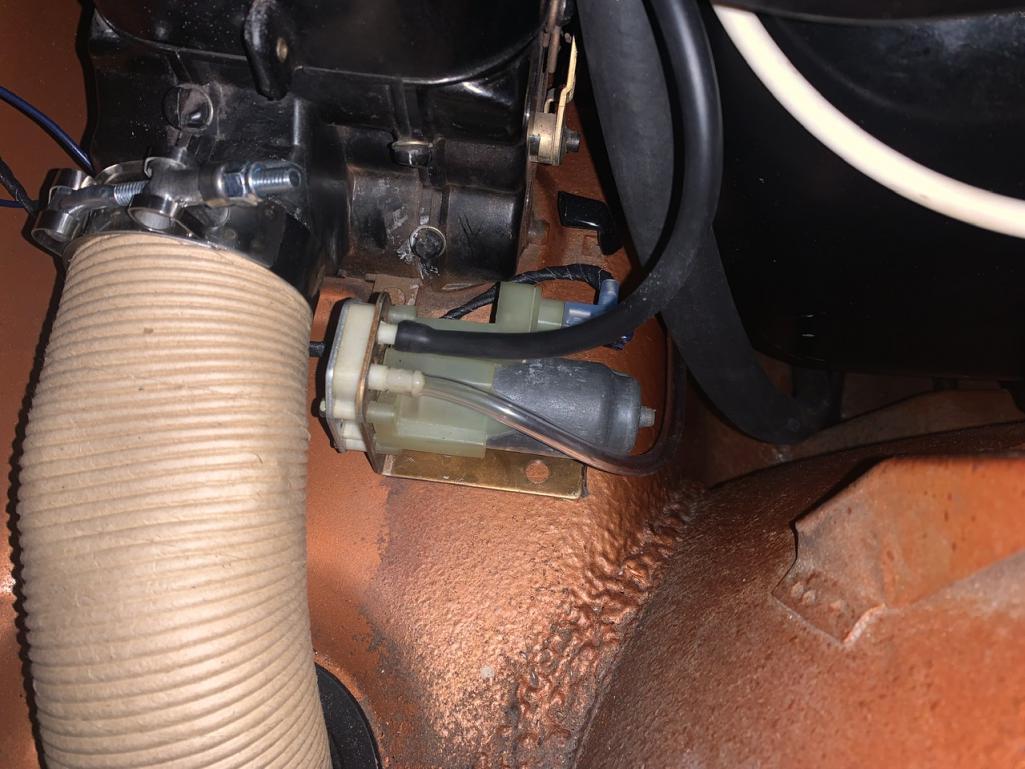
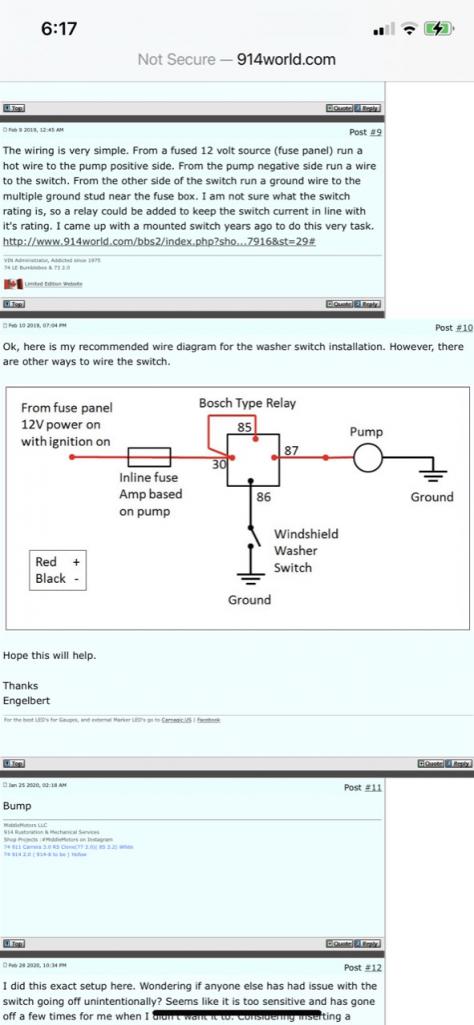
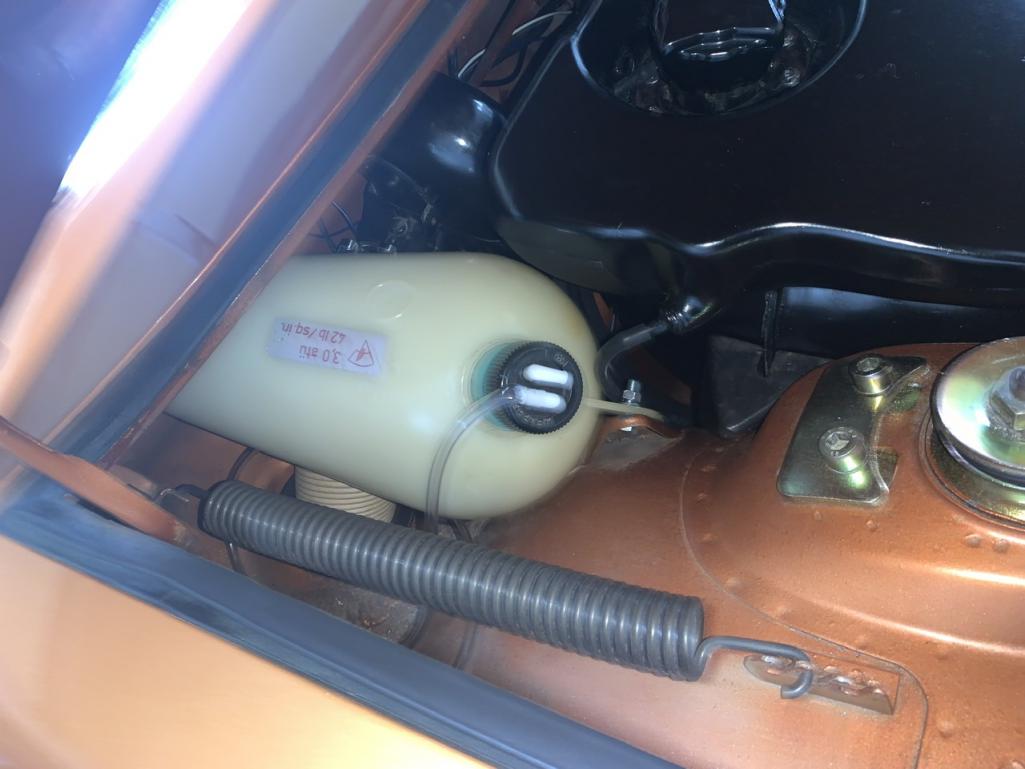
Posted by: BillJ May 10 2021, 08:46 AM
great progress and sweet car.
Posted by: DRPHIL914 May 10 2021, 08:46 AM
transmission pulled and rebuilt and new fluid with new seals repacked the CV, new throw out bearing, etc - it’s pretty clean
back to stock ;&5 gears but reused the good dog teeth and syncro bands,
watched Doc Evil video and had factory instructions, did this once before, 8 years ago —
bren it’s been on the road and shifting is now smooth , no noise front the bearing clutch adjustment feels right on.
How many of you have ventured into the trans rebuild solo, it’s quite and experience,, not hard but not for the faint of heart..
Attached thumbnail(s)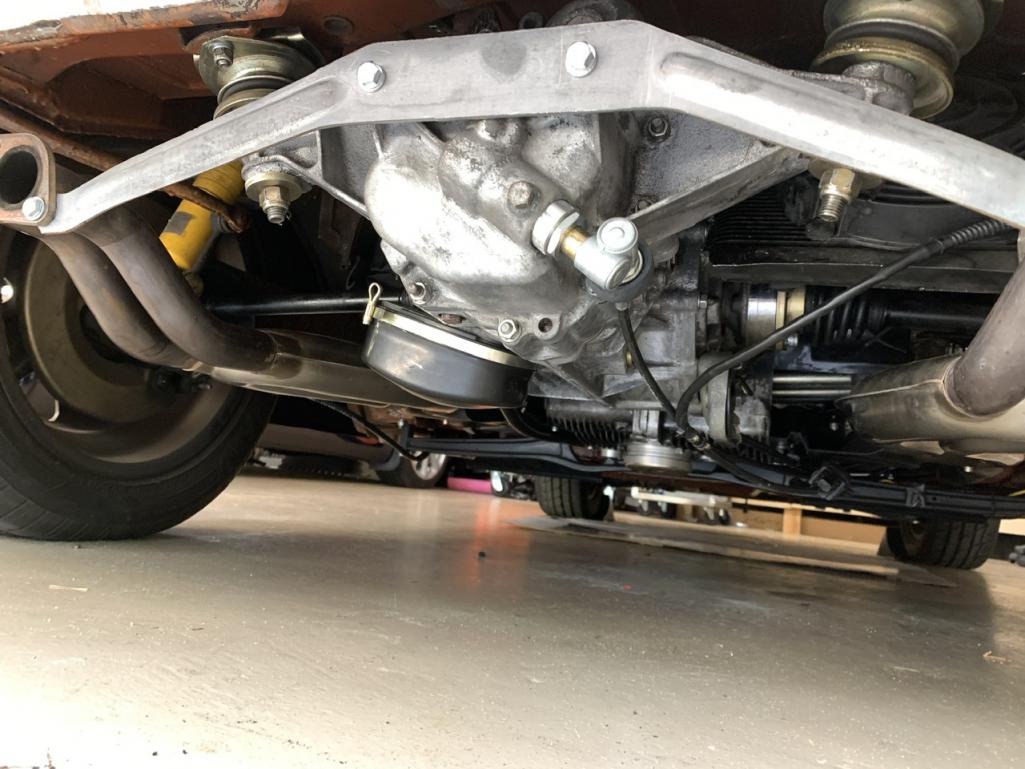
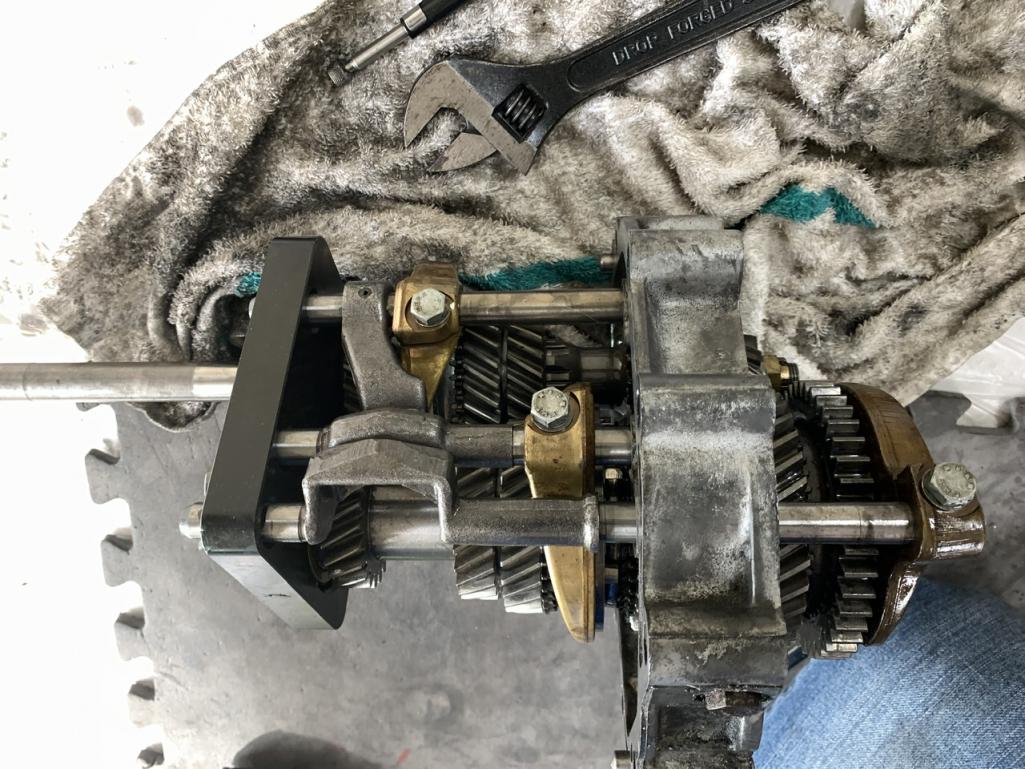
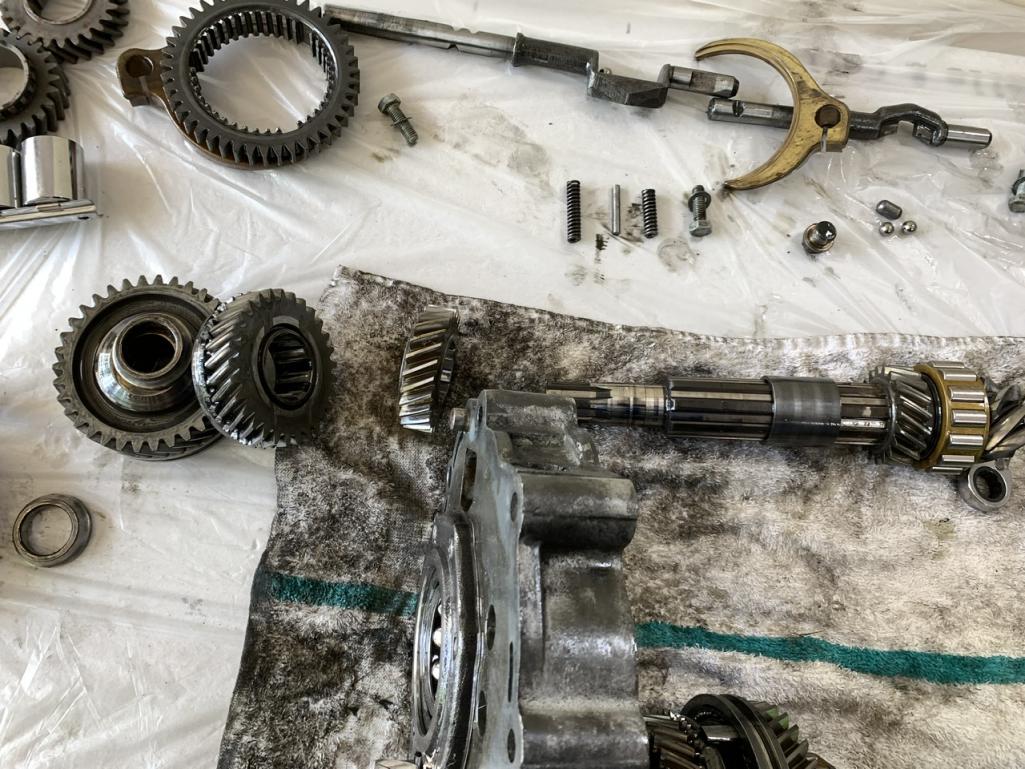
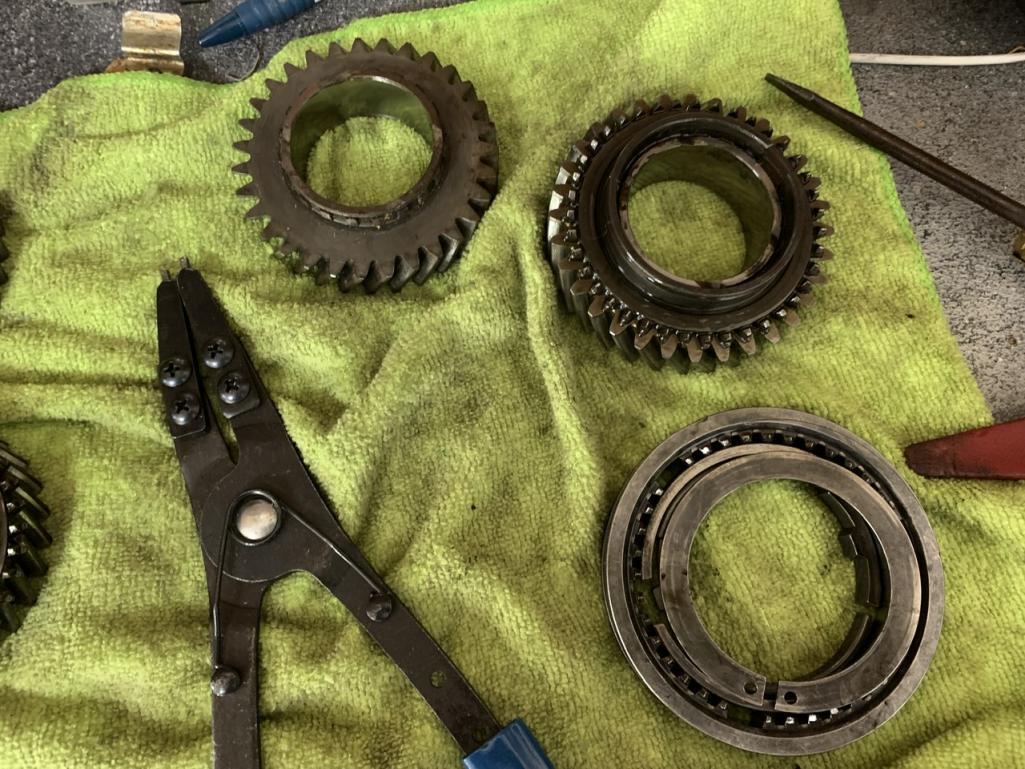
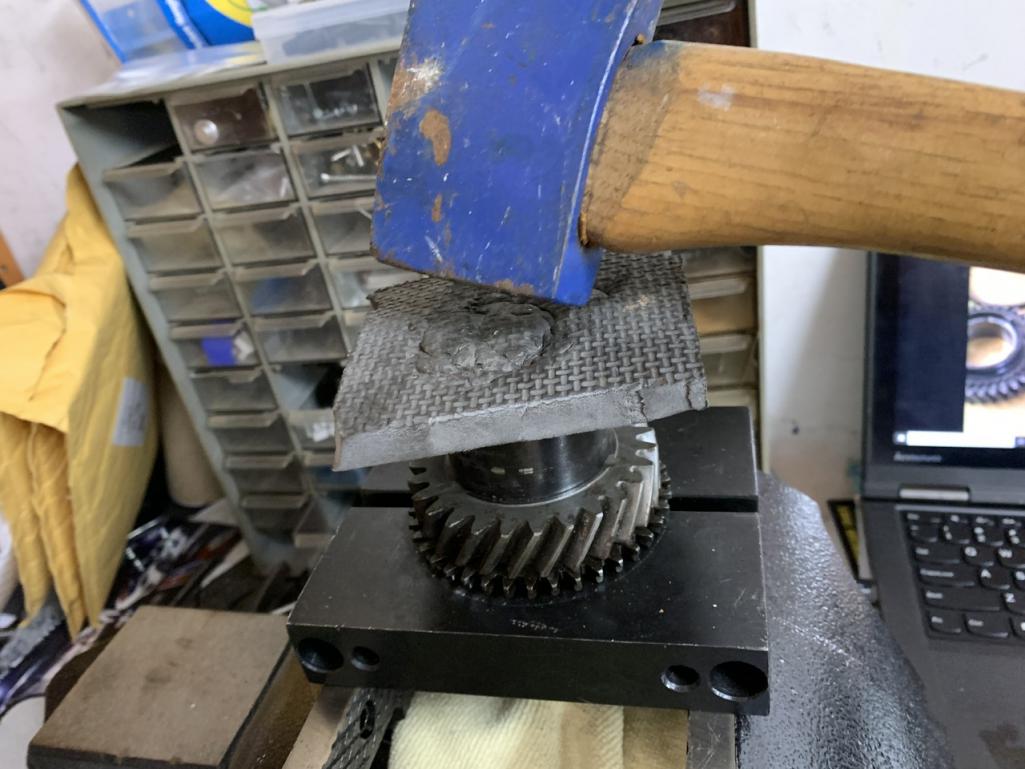
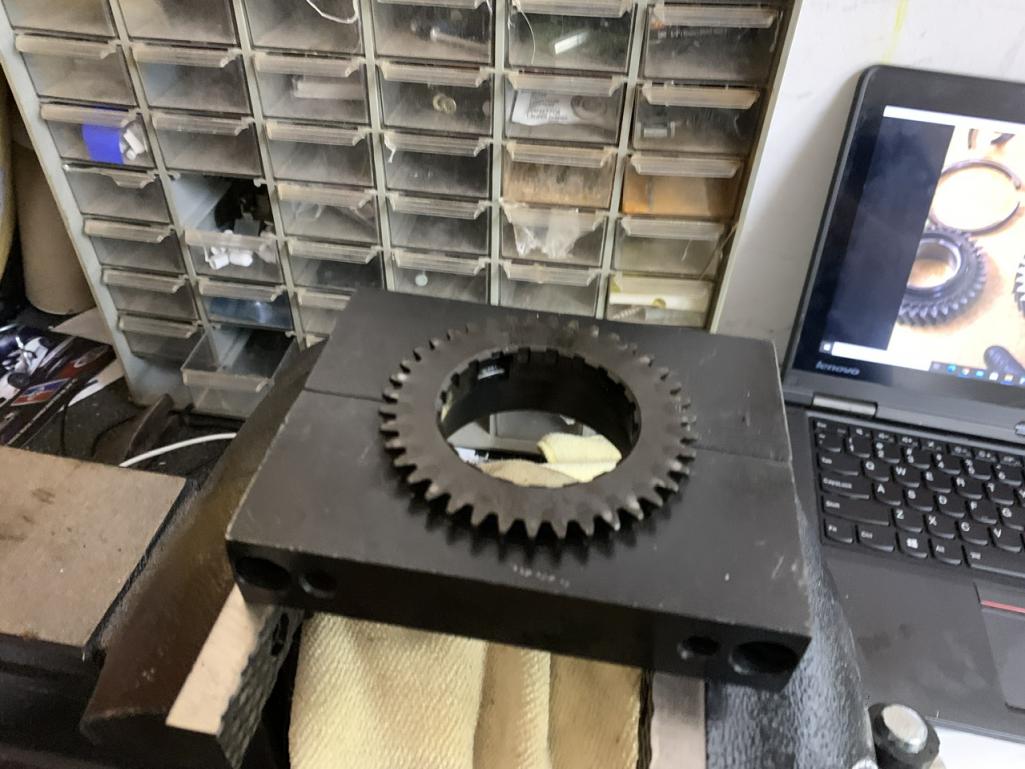
Posted by: DRPHIL914 May 10 2021, 08:57 AM
Let there be light- nice to see where you are putting your feet getting in the car at night when opening the door!
Attached thumbnail(s)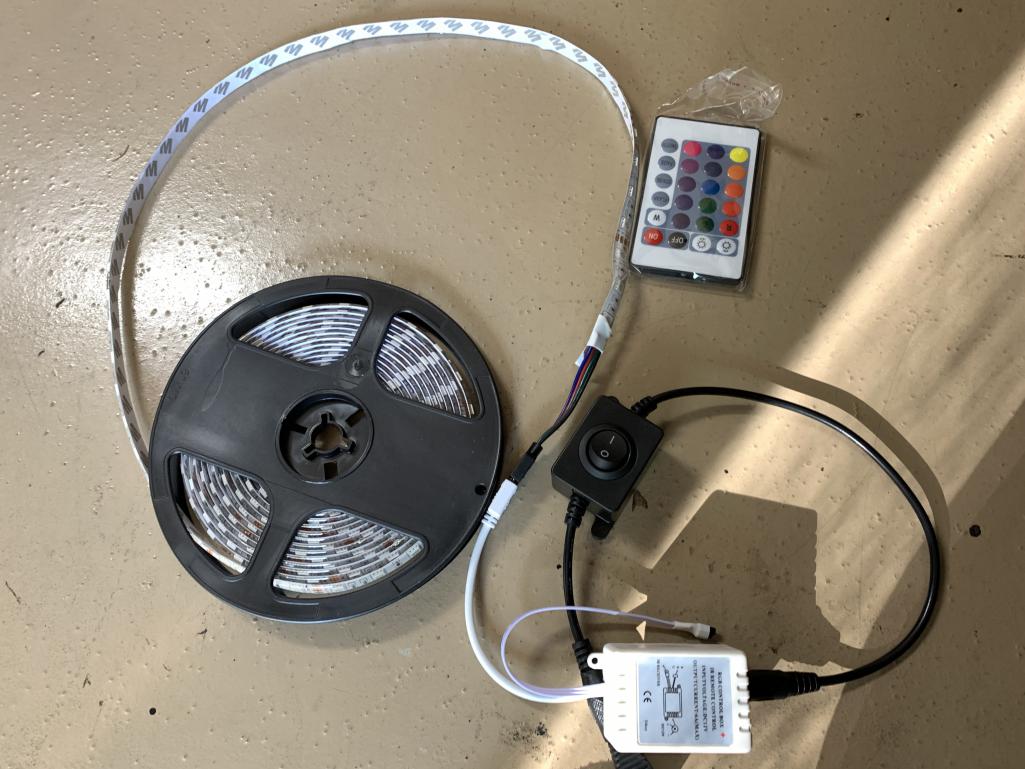
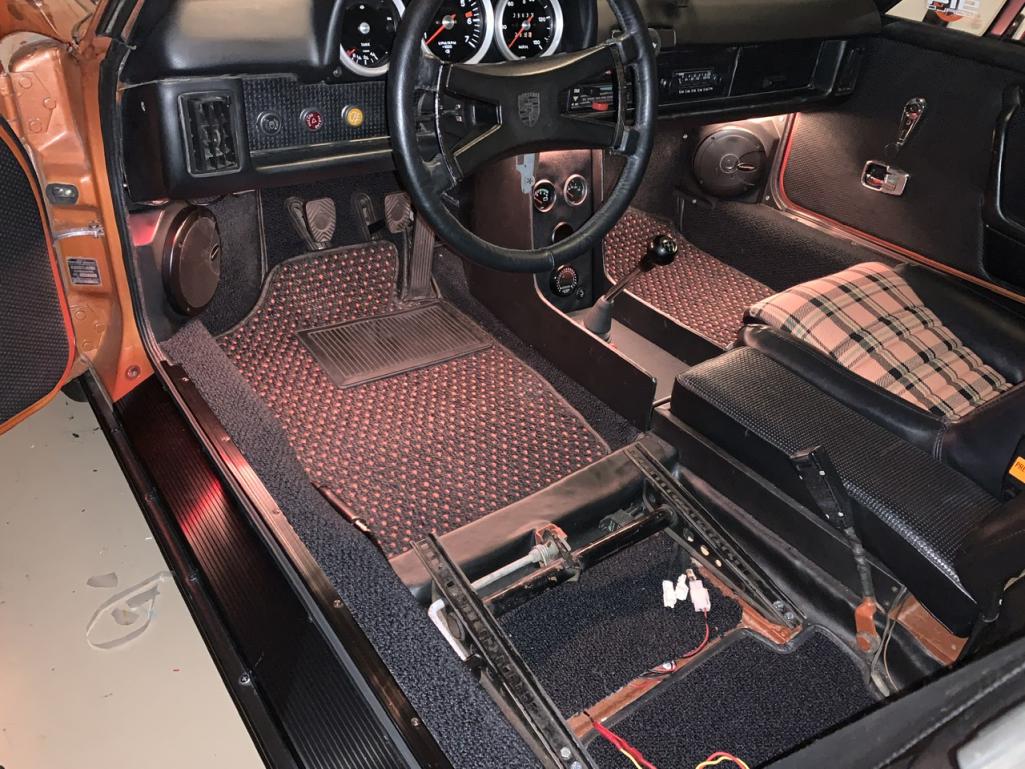
Posted by: Superhawk996 May 10 2021, 09:16 AM
How many of you have ventured into the trans rebuild solo, it’s quite and experience,, not hard but not for the faint of heart..
In the spirit of good fun, I see you have all the recommended tools.
Adjustable wrench -- Check
Ax or hatchet -- Check
P225 tool - Check.
Get Er' Done.
Good job. Car looks great. Like the LED lighting idea too!
Posted by: DRPHIL914 May 10 2021, 10:04 AM
How many of you have ventured into the trans rebuild solo, it’s quite and experience,, not hard but not for the faint of heart..
In the spirit of good fun, I see you have all the recommended tools.
Adjustable wrench -- Check
Ax or hatchet -- Check
P225 tool - Check.
Get Er' Done.
Good job. Car looks great. Like the LED lighting idea too!
yea, i couldnt find my rubber mallet at the moment, so that worked, like you said, get 're done!
I was able to borrow the other special tools from Al Meredith, and used the video but sometimes thats a pain and is easier use the factory digram and specs out of the workshop manual. But once i had it ready to go Bob , who has rebuilt and taken apart and put back together 1000's of 901 and 915 porsche transmissions, rechecked my shift fork alignment etc, made one tweek and then i put it all back together. at this point the only improvement might be to get the Tangerine racing rear shift console bearing upgrade. might have to do that some time soon if i decide to do more AX.
Posted by: DRPHIL914 May 11 2021, 05:40 AM
Ski rack arrived yesterday from Germany, thanks to Haul, who located, procured, prepared, packaged, shipped out.
once unpackaged i sorted thru the mounting hardware, cleaned up the tabs for front clamp, had to clean out the rear mount threads that had some rust and paint, hard to clean those threads, took about 2 hours to get that done to get the mount screws in. The rack came supplied with new rear mount pads, some new bolts and screws, and some nice straps too.
Attached thumbnail(s)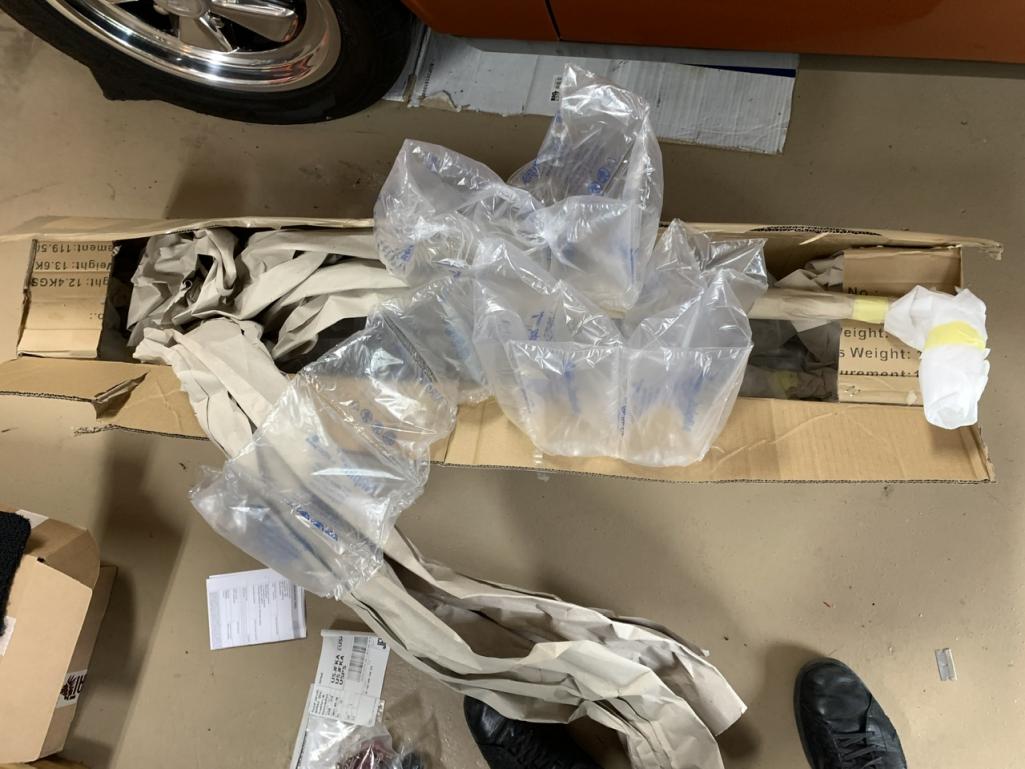

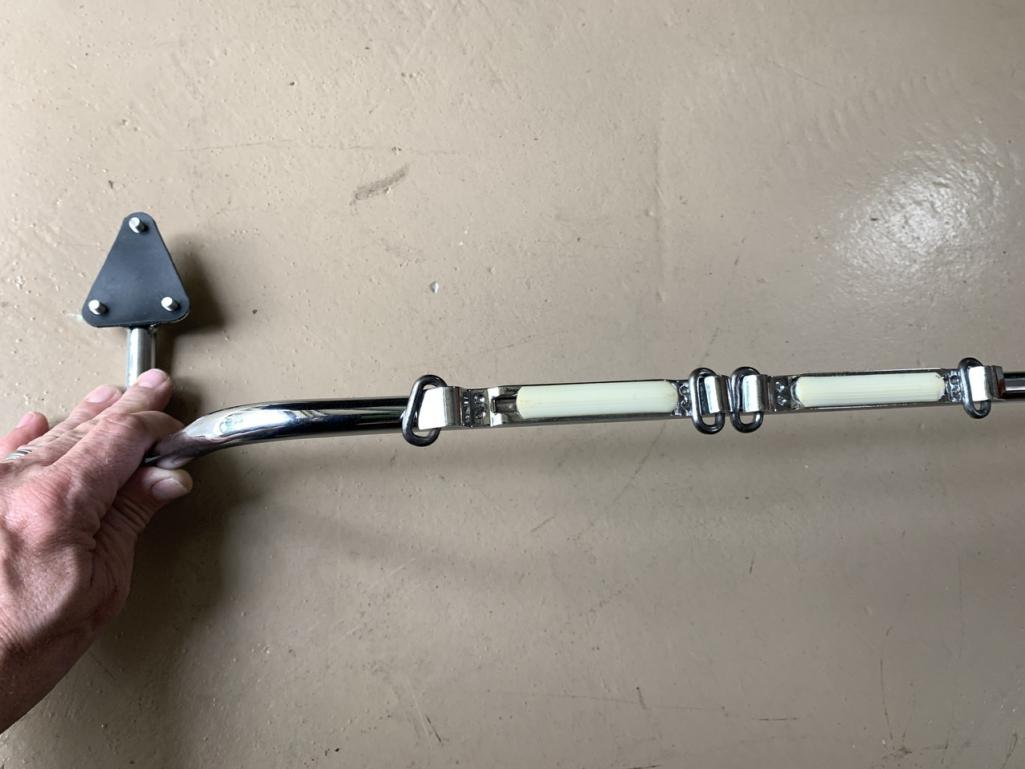
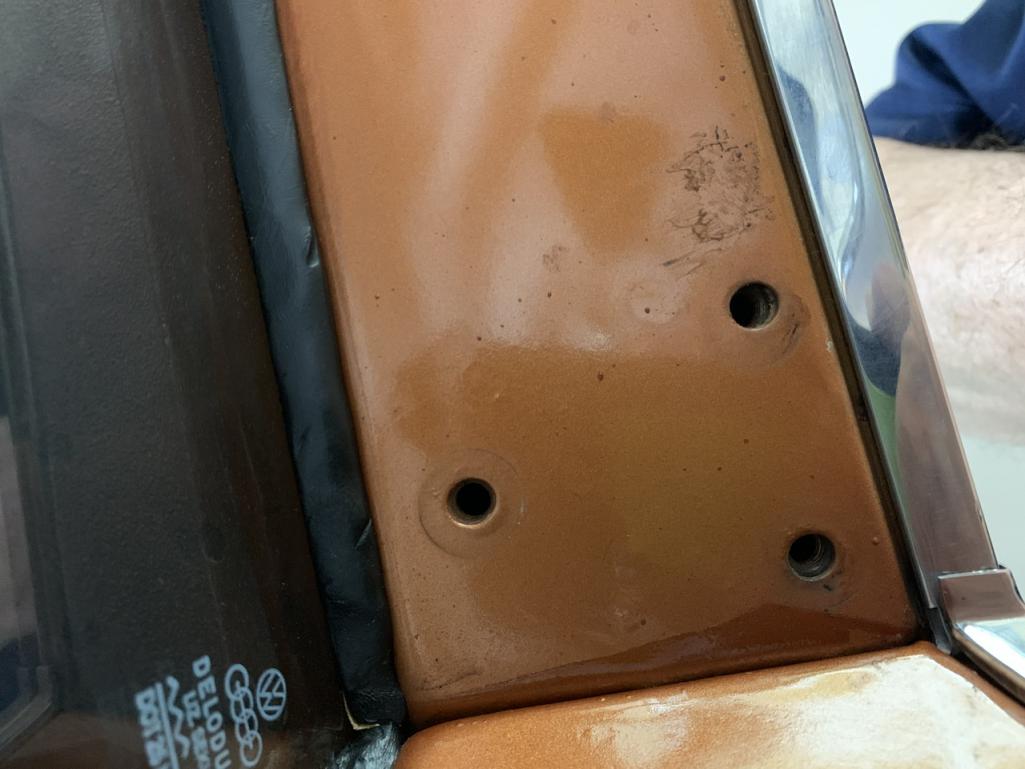
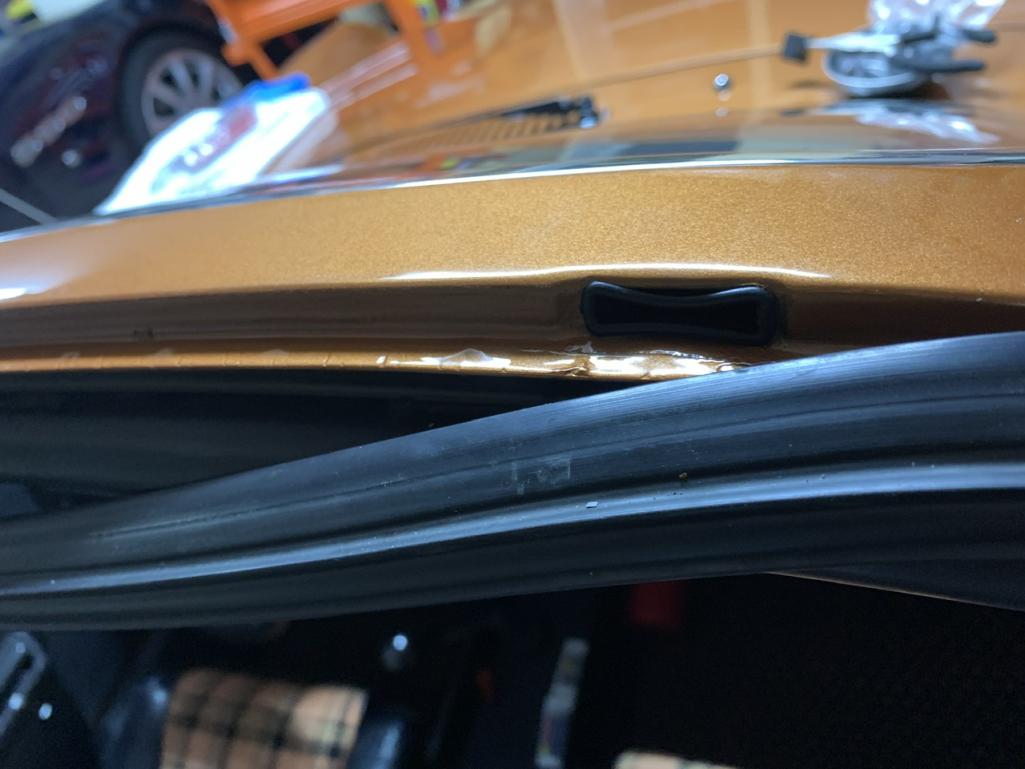
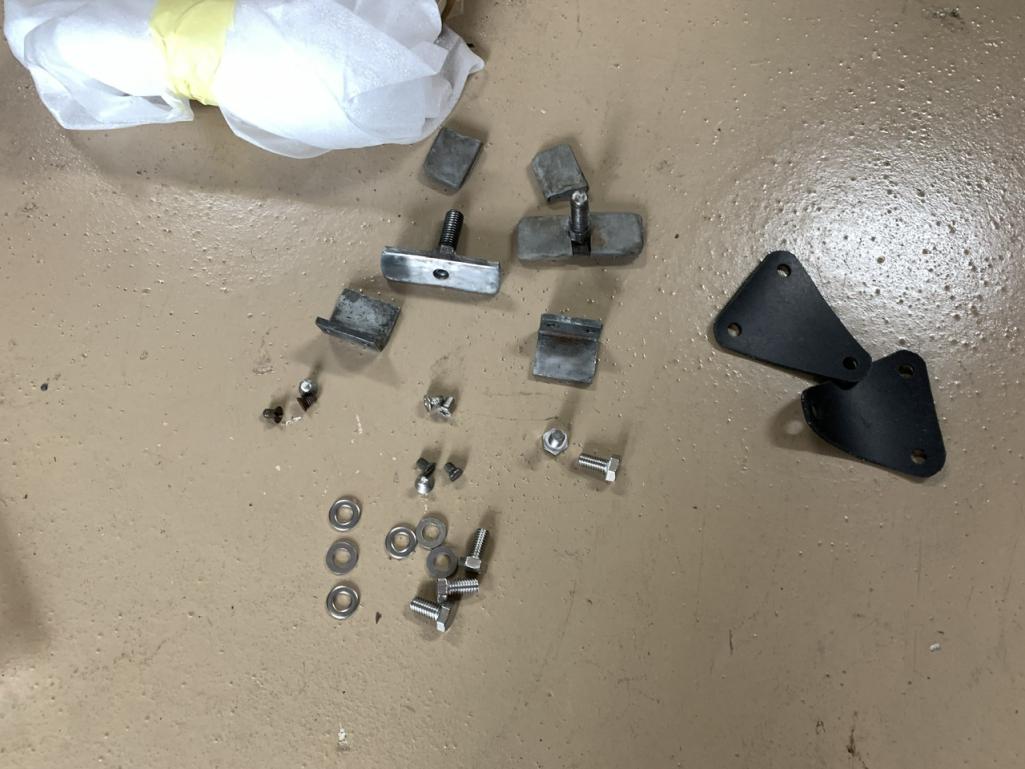
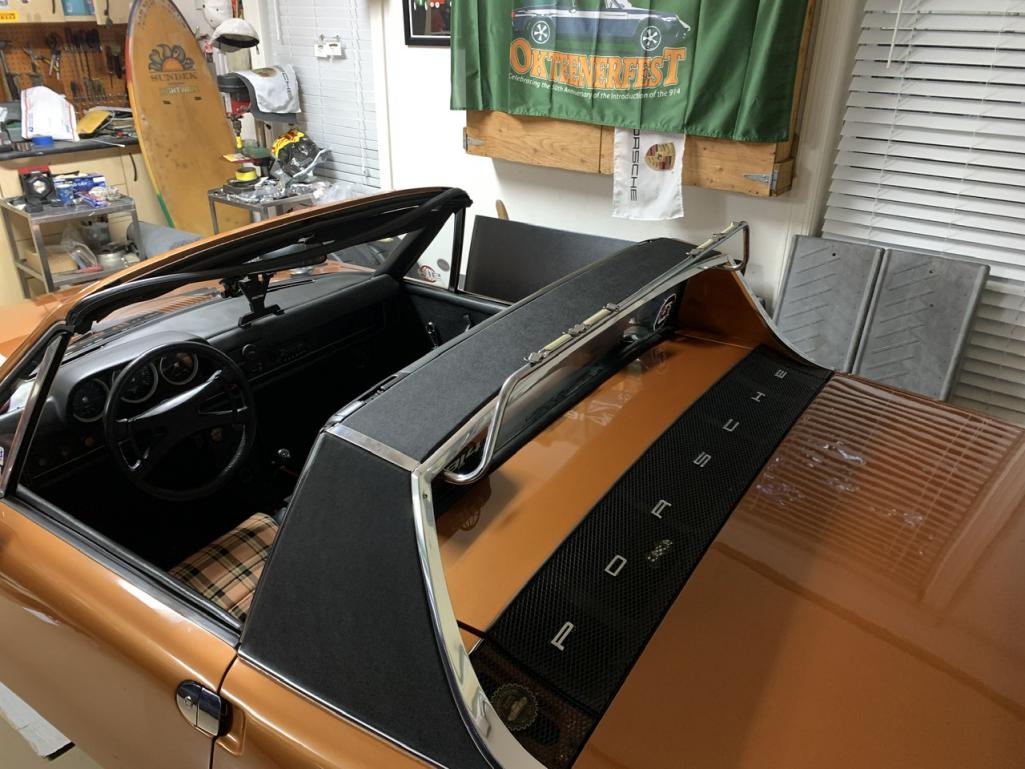
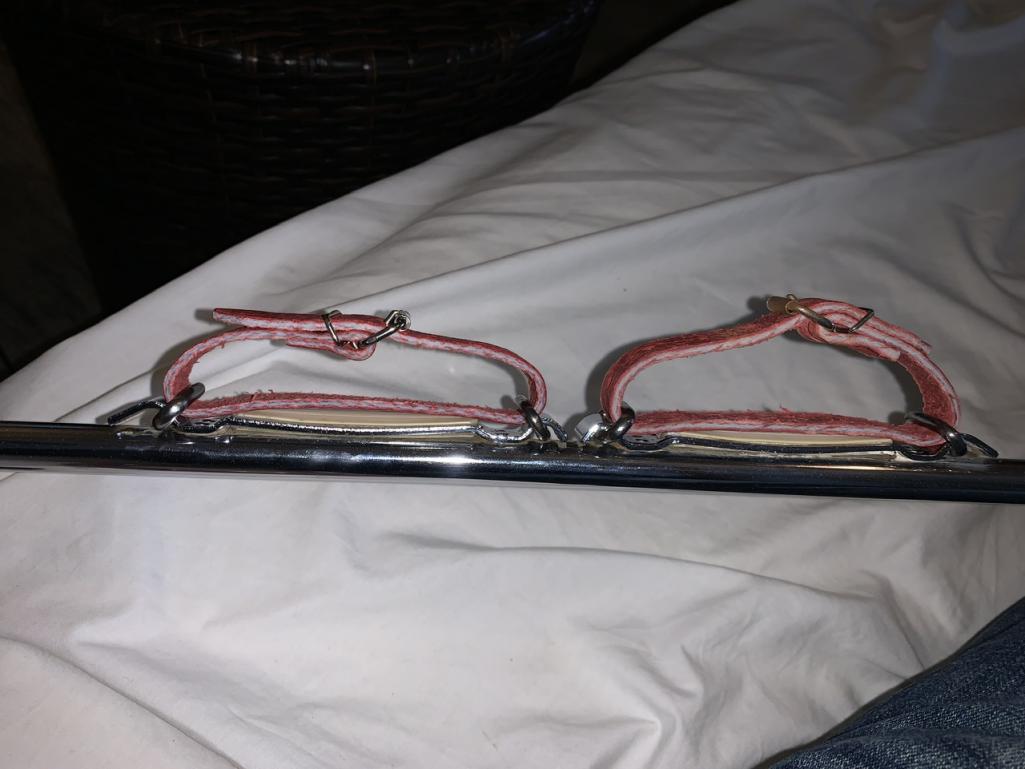
Posted by: DRPHIL914 May 11 2021, 05:46 AM
all mounted up, i believe this is how it works, the front clamps down once the bottom bracket is slid into the factory designed slot in to frame. now this pushes the seal out a bit, and i am not sure how well the top will mount with this in place, the front claps will probably have to be loosens to not pull the top too tight against the bracket, will have to see. seems that will potentially prevent the targa top from sealing tight. hm......
Attached thumbnail(s)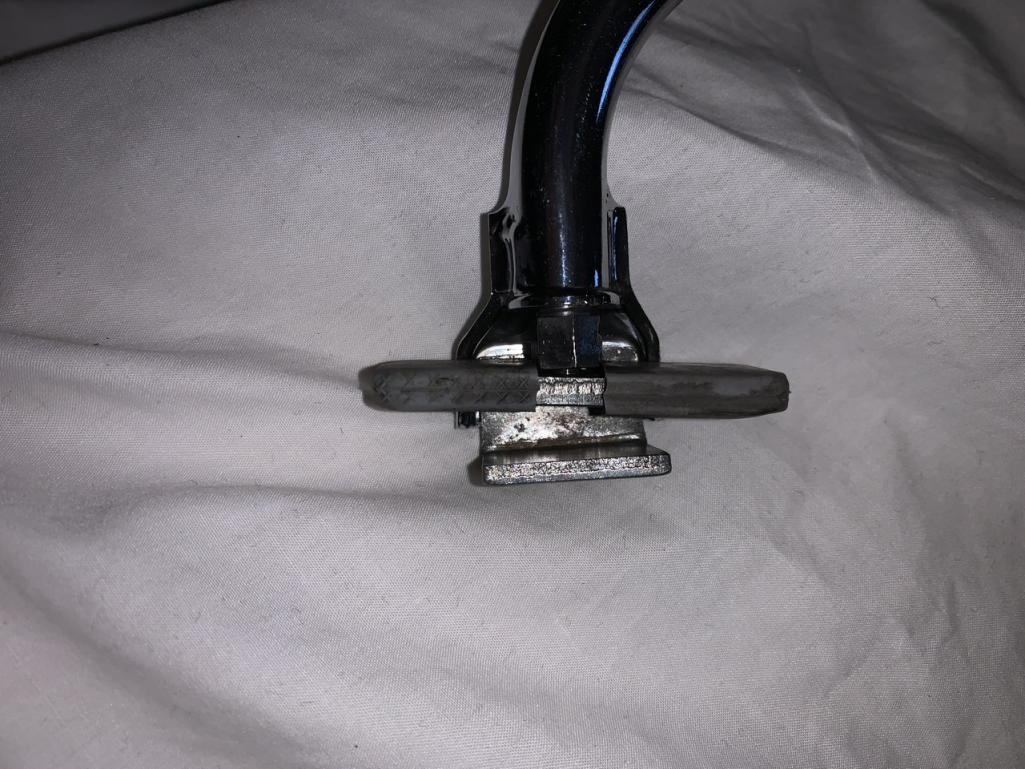

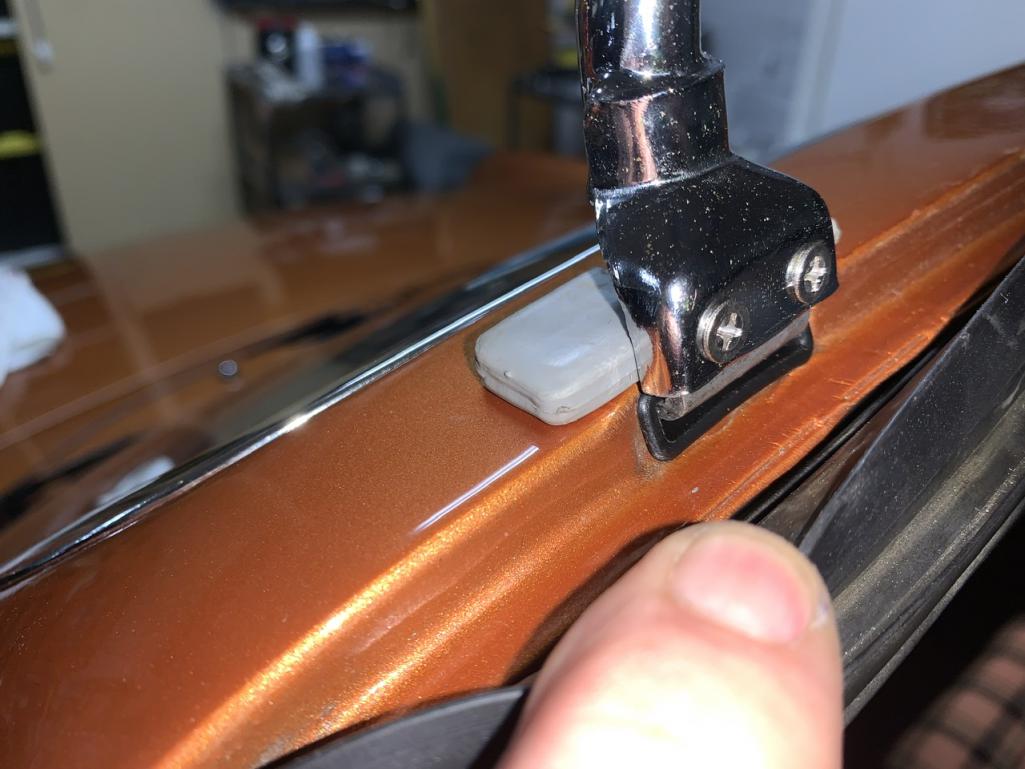
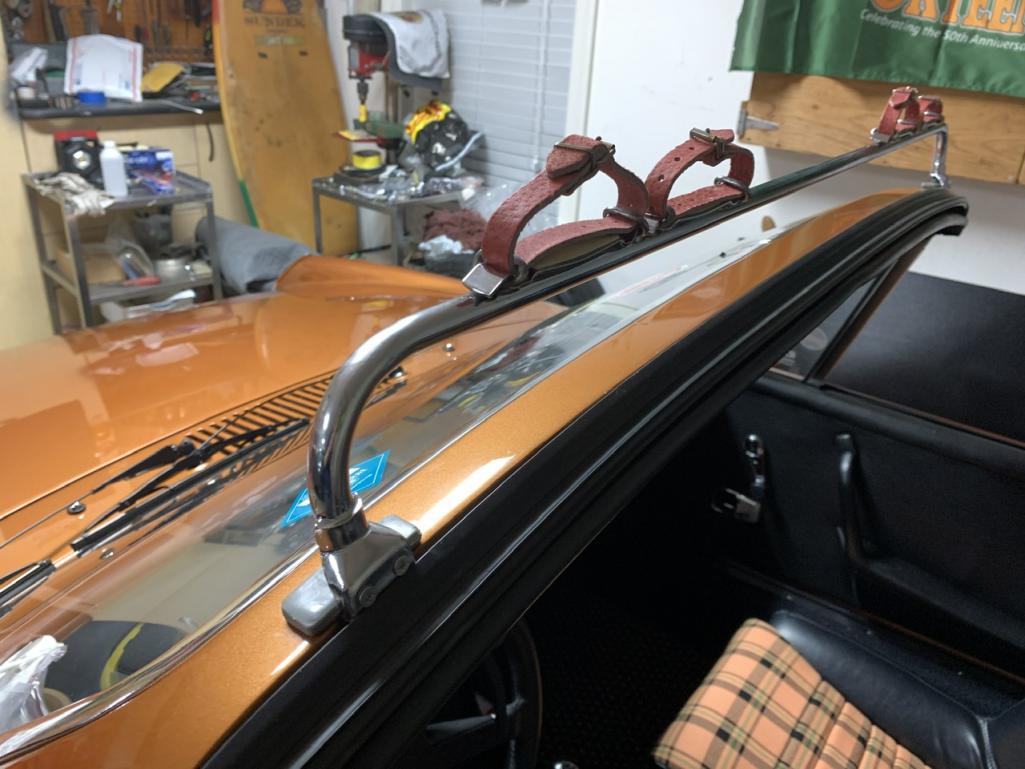
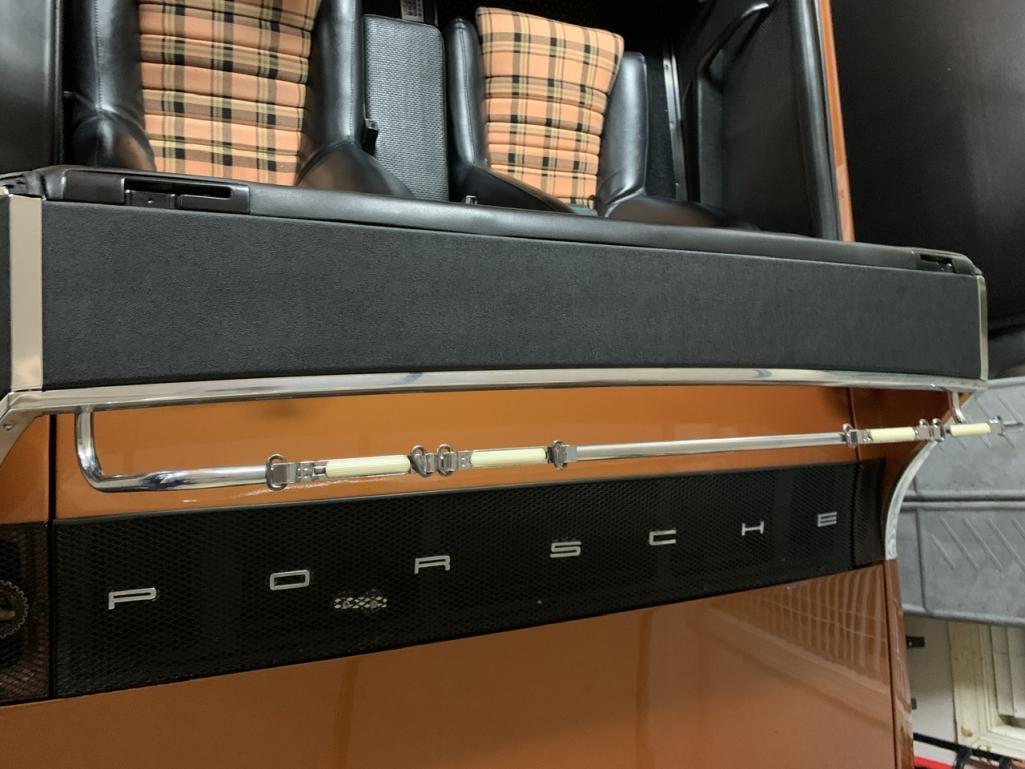
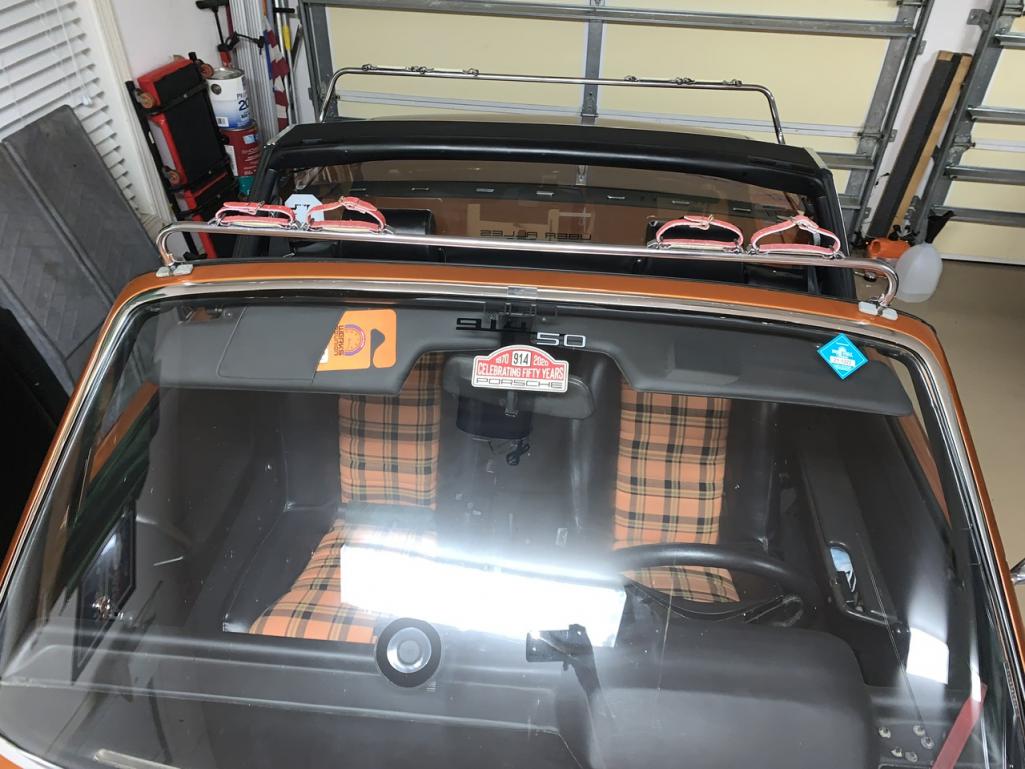
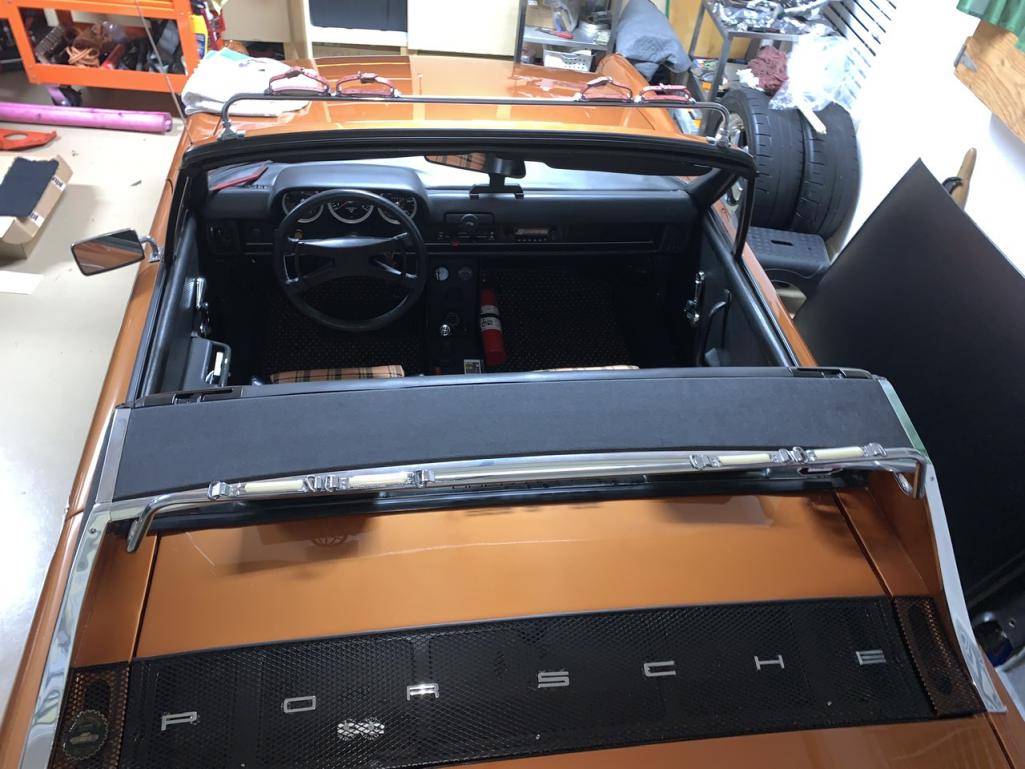
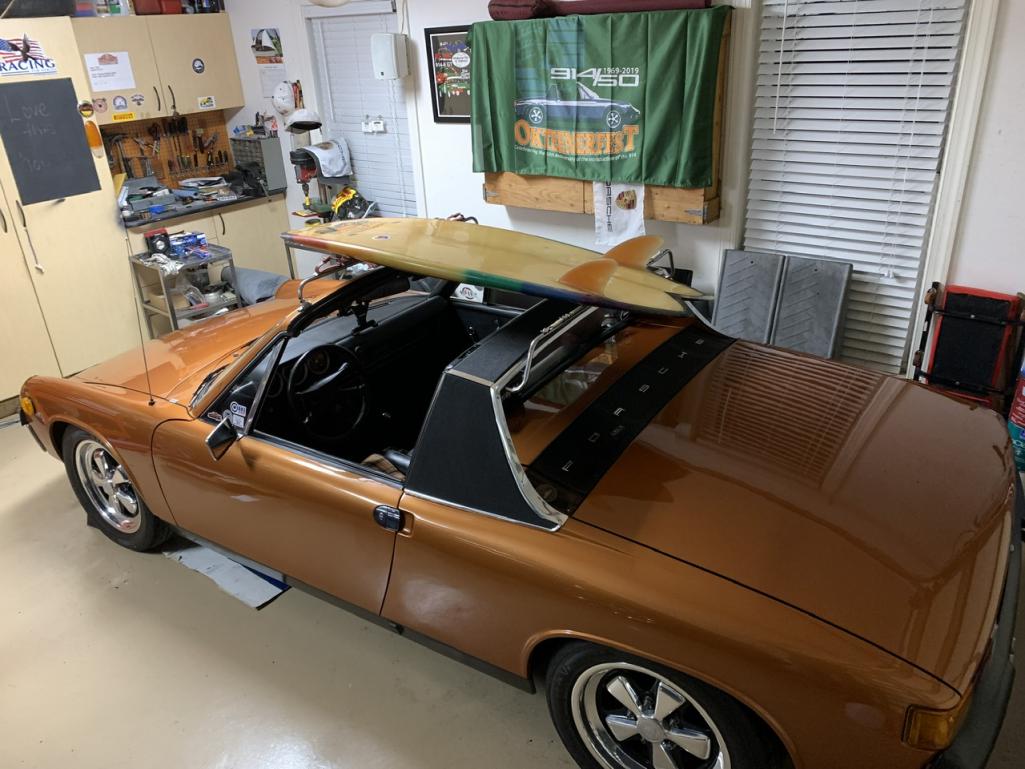
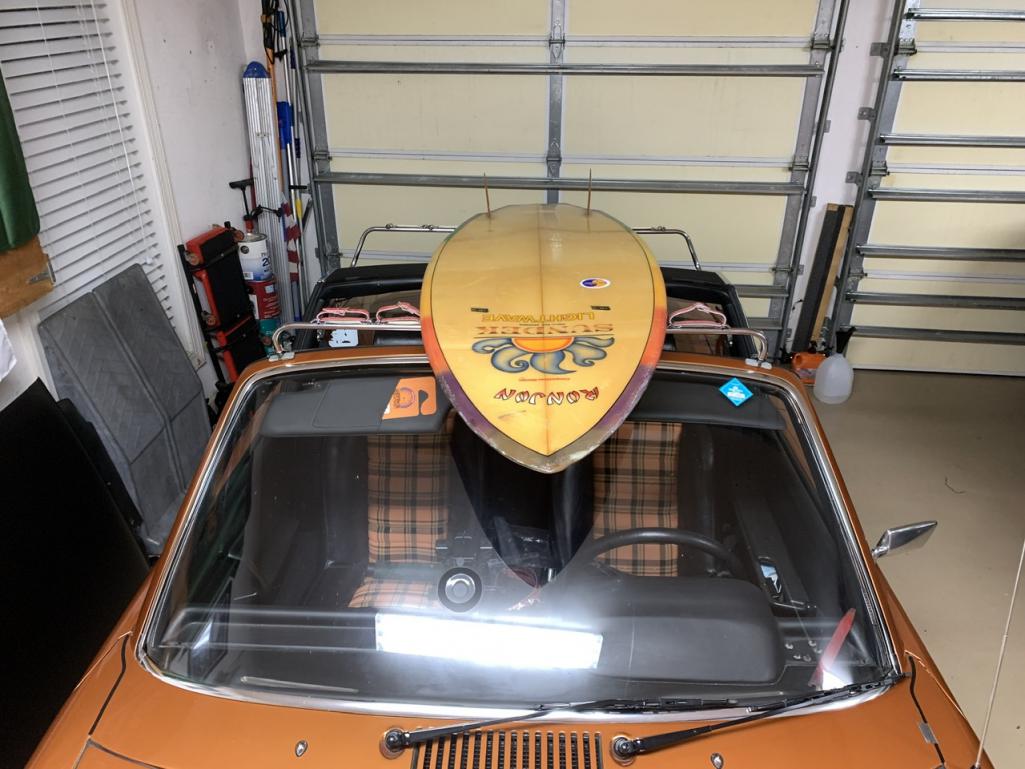
Posted by: Superhawk996 May 11 2021, 05:49 AM
Cool!
Posted by: ClayPerrine May 11 2021, 06:08 AM
I was going to ask why a guy in Florida would need a ski rack, but the last picture answered my question.
Posted by: DRPHIL914 May 11 2021, 06:36 AM
I was going to ask why a guy in Florida would need a ski rack, but the last picture answered my question.
@http://www.914world.com/bbs2/index.php?showuser=1143
Clay as you know we are only a few hours away from the mountains as well, , ala Banner Elk NC, which is a skiing area. but it was really more for having a cool rare accessory, it shows how cool and how much thought went into the design and building of the Porsche 914, thus the advertisements etc, it was aimed at the younger active buyer. Pretty cool.
Phil
Posted by: Shivers May 12 2021, 10:06 AM
Very cool
Posted by: DRPHIL914 Sep 4 2021, 08:12 AM
UPDATE: i have to add a bunch has happened in past couple months-
went to Jax for the Classics Grans opening at Porsche Jax ans got a ribbon at their show,
then lost compression on #3 intake exhaust, ended up being dropped valve seat. trailered
the car to Amelia for Werks Reunion 2021, got 1st place! took it home ans pulled the motor ans heads- just now got the whole assembled long block ready for clutch and transmission install last night , hope to have the motor back in monday for break in!!
will post some picture from the shows ans werks and current reinstall of the motor.
Attached thumbnail(s)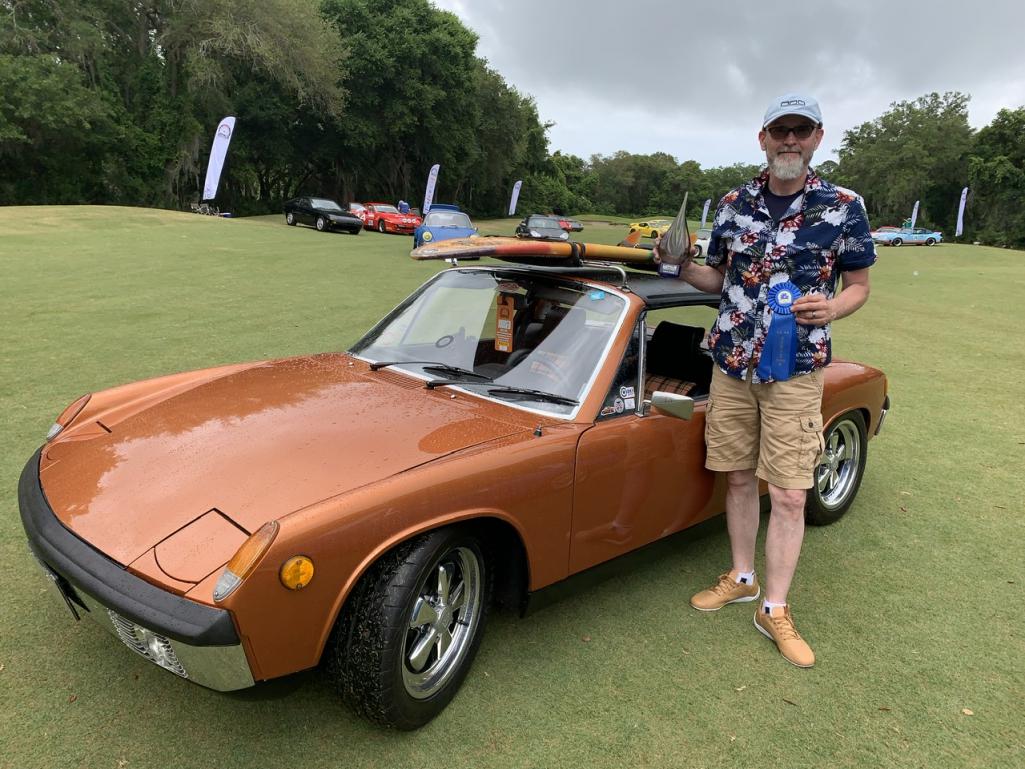
Attached image(s)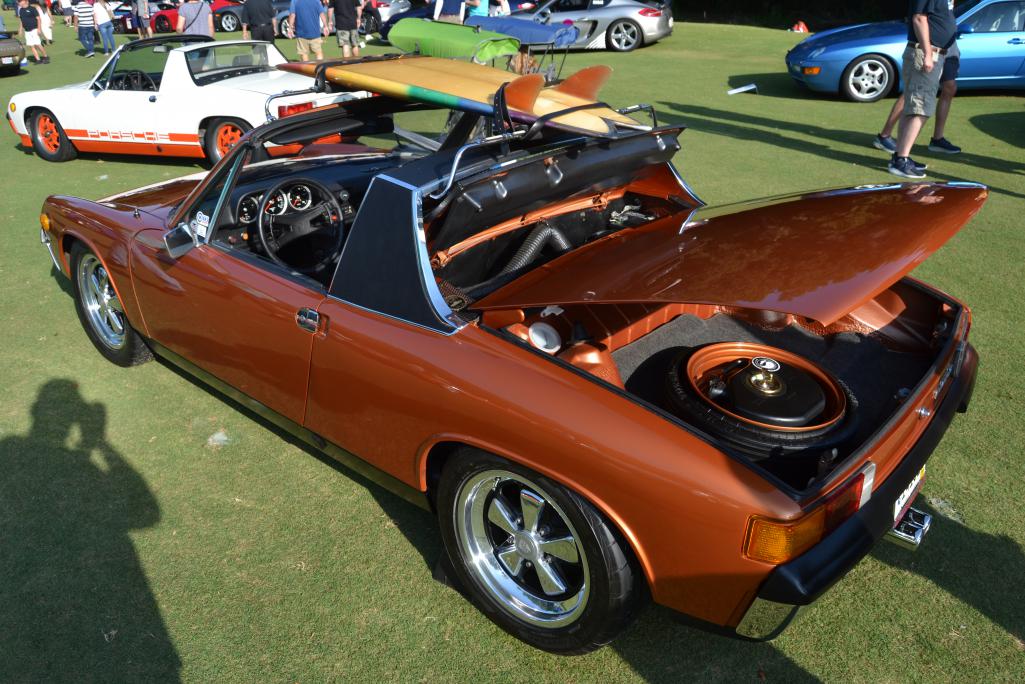
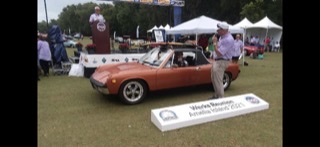
Posted by: DRPHIL914 Sep 4 2021, 08:16 AM
couple more, new valance for the new twin center out exhaust from Ben.
Attached thumbnail(s)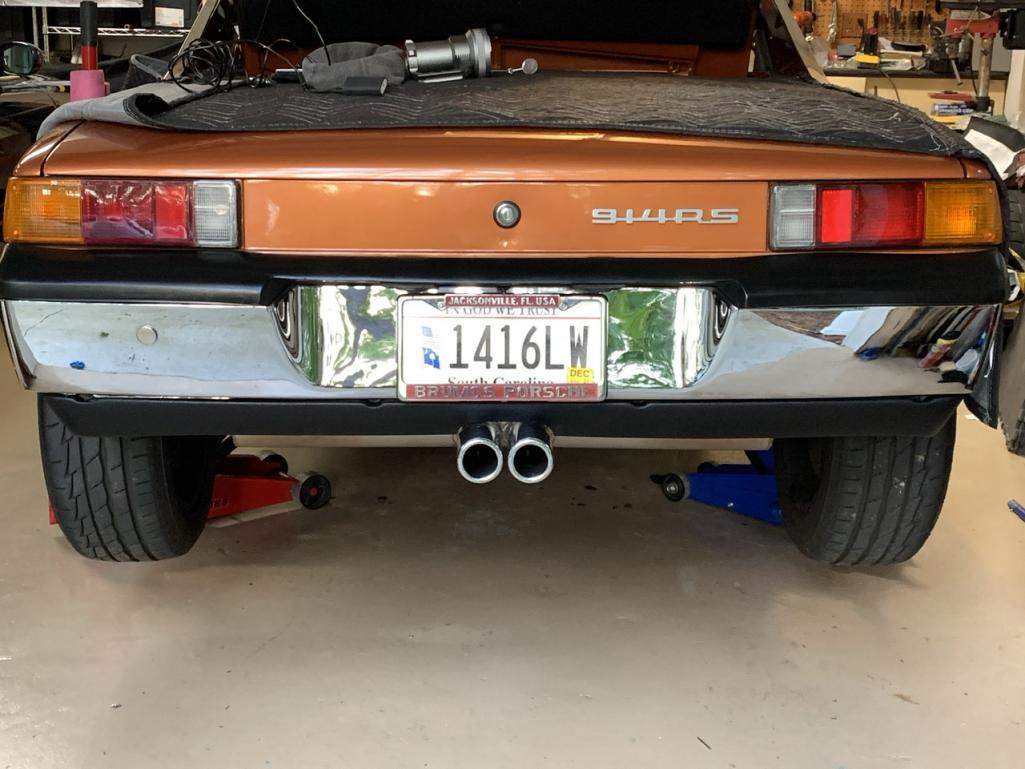
Attached image(s)
Posted by: DRPHIL914 Sep 4 2021, 08:23 AM
fan and fan housing , alternator are installed on the new long block-
btw long block is 96’s, brand new heads with port and polish, KB pistons hastings rings,
new counterbalanced crank and new cam all new bearings etc, sterlite valves, so in other words completely new long block assembly . i believe with this 2056 build how it’s set up on stock 71mm stroke, ans the CC should be about 8.6 compression.
Attached thumbnail(s)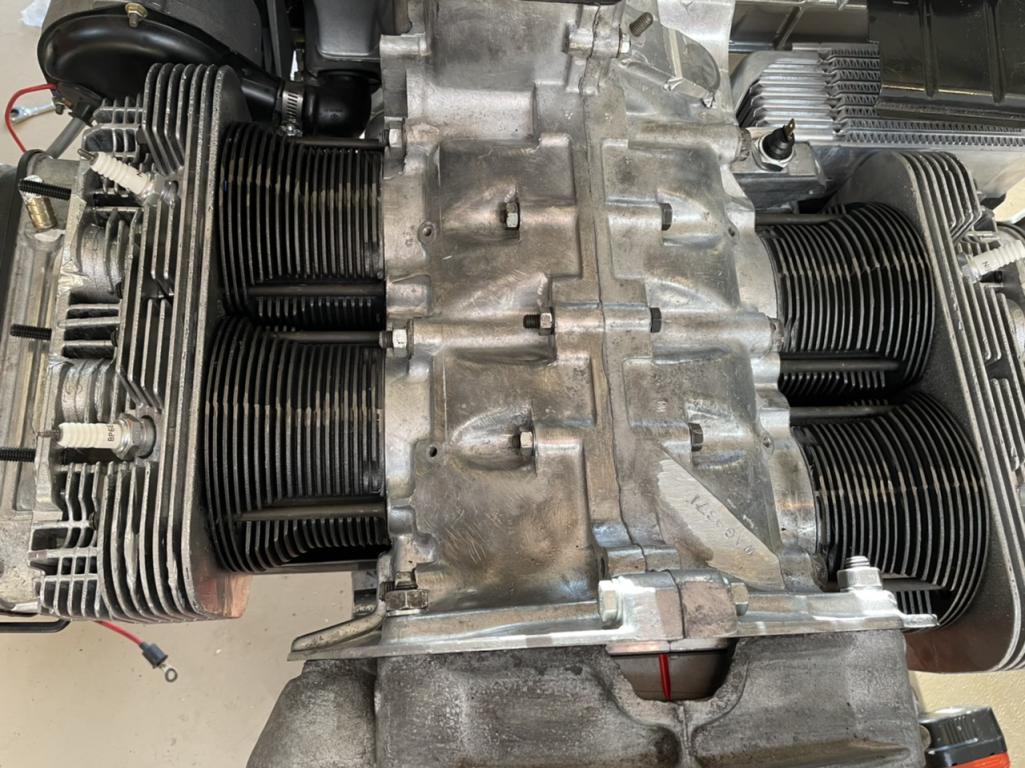
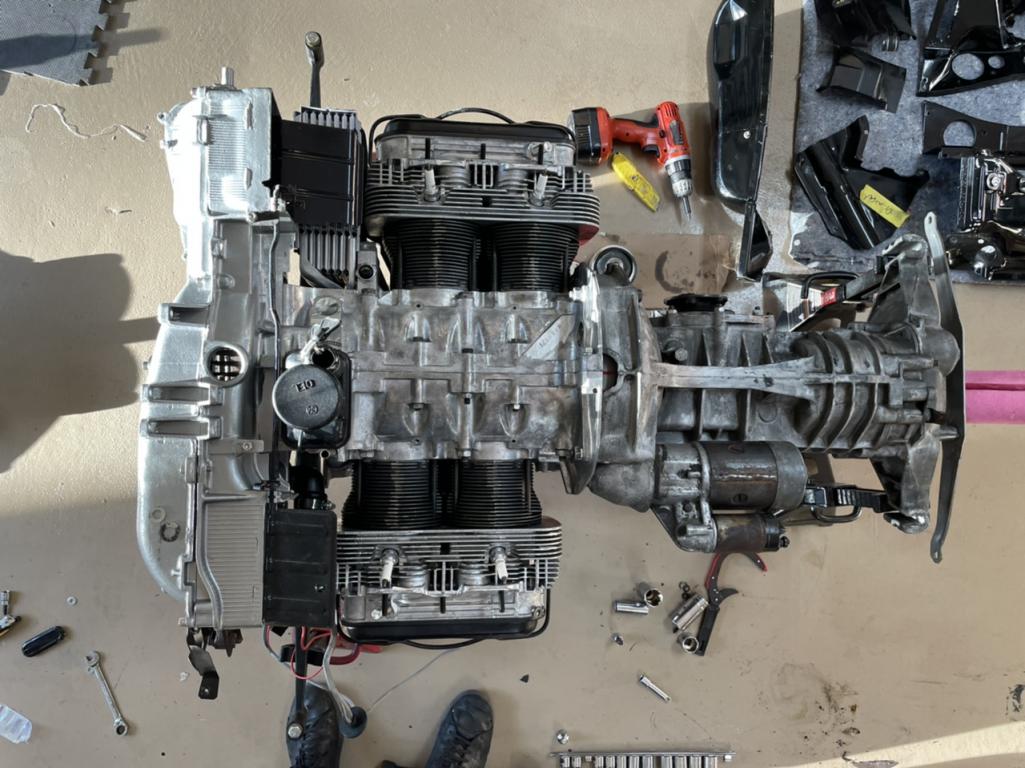
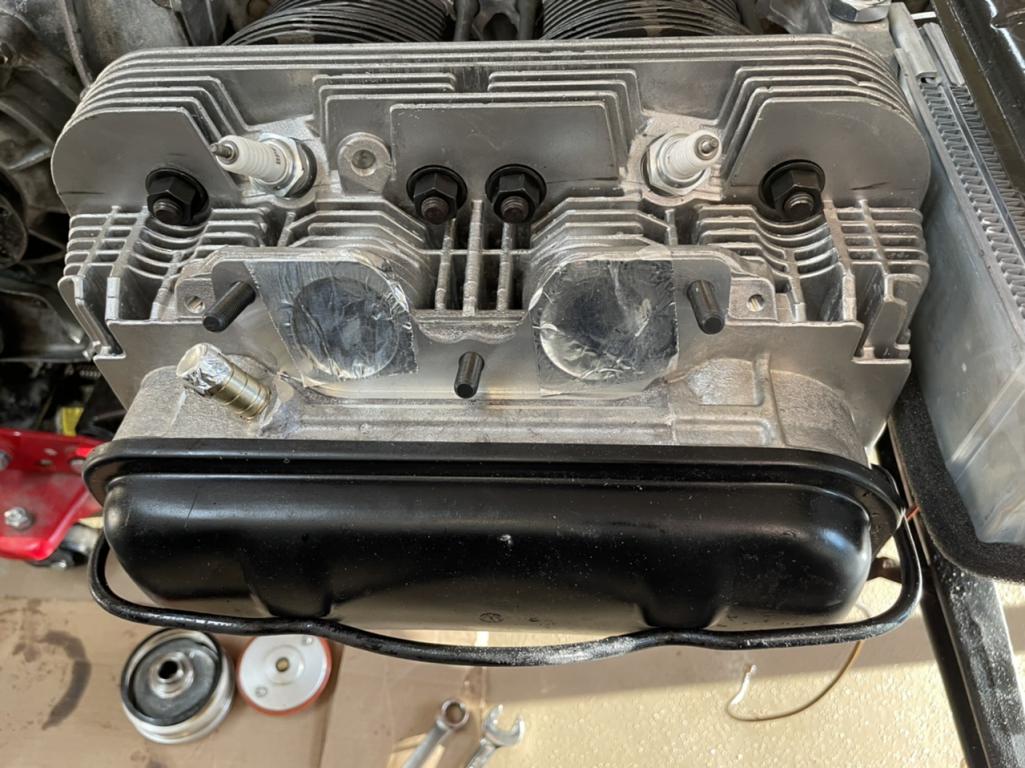
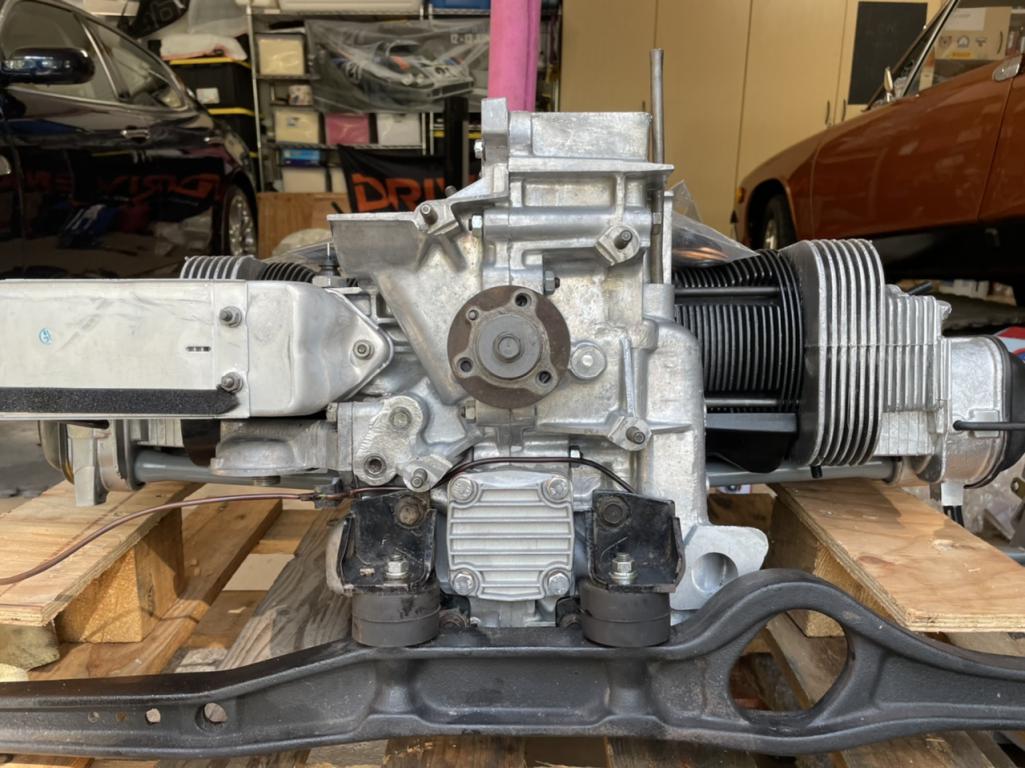
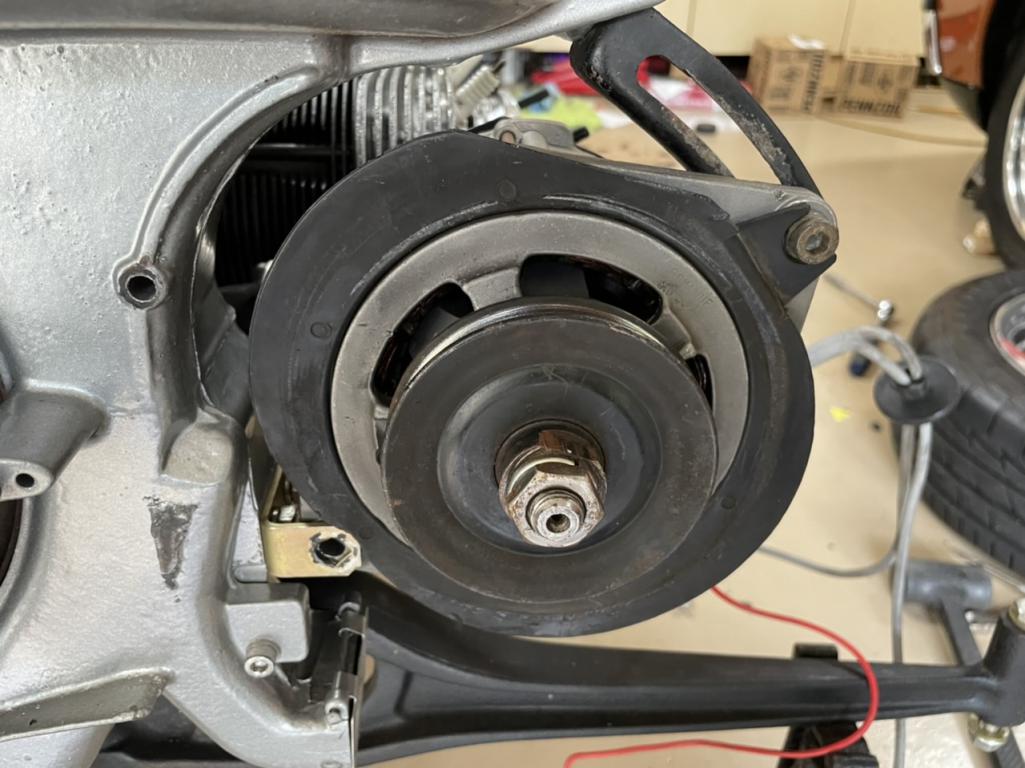
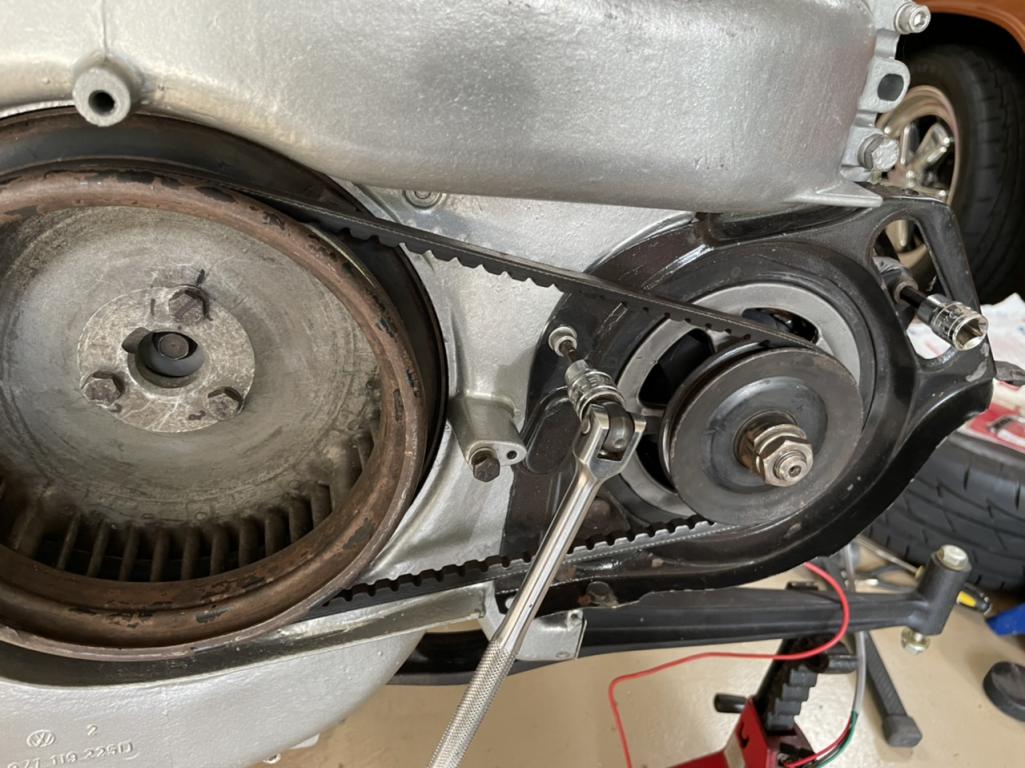
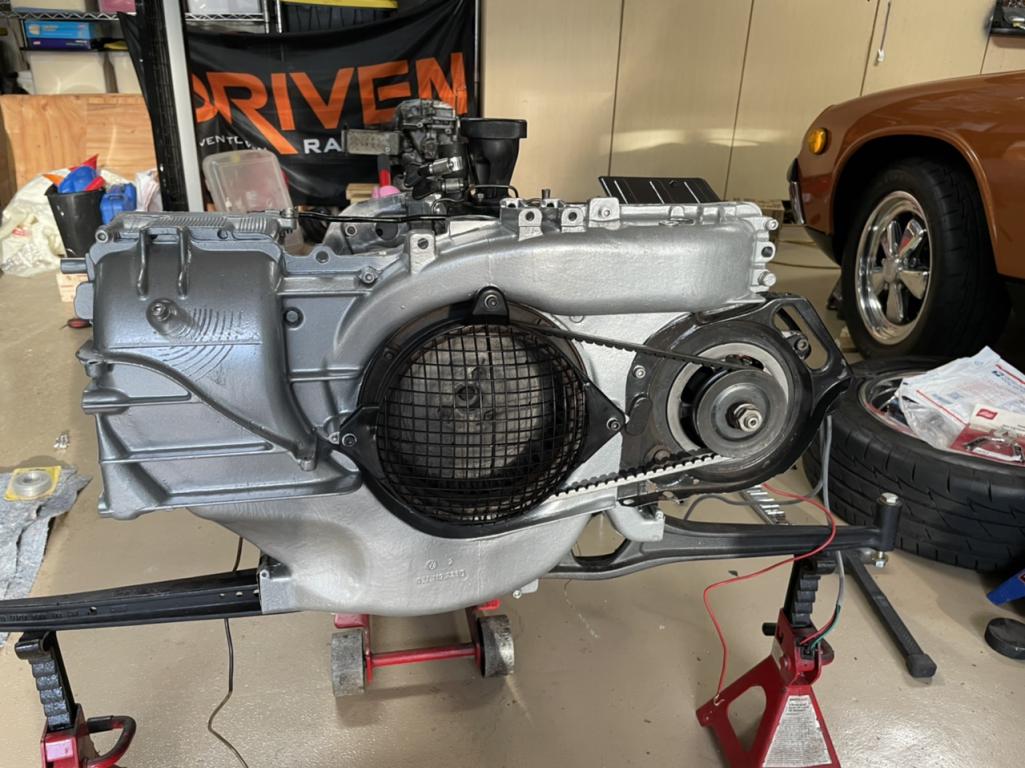
Posted by: DRPHIL914 Sep 4 2021, 08:29 AM
some pictures of the new clutch rigid clutch disc ans polished flywheel, new pressure plate etc. - ans a pic of the new cam before installed
Attached thumbnail(s)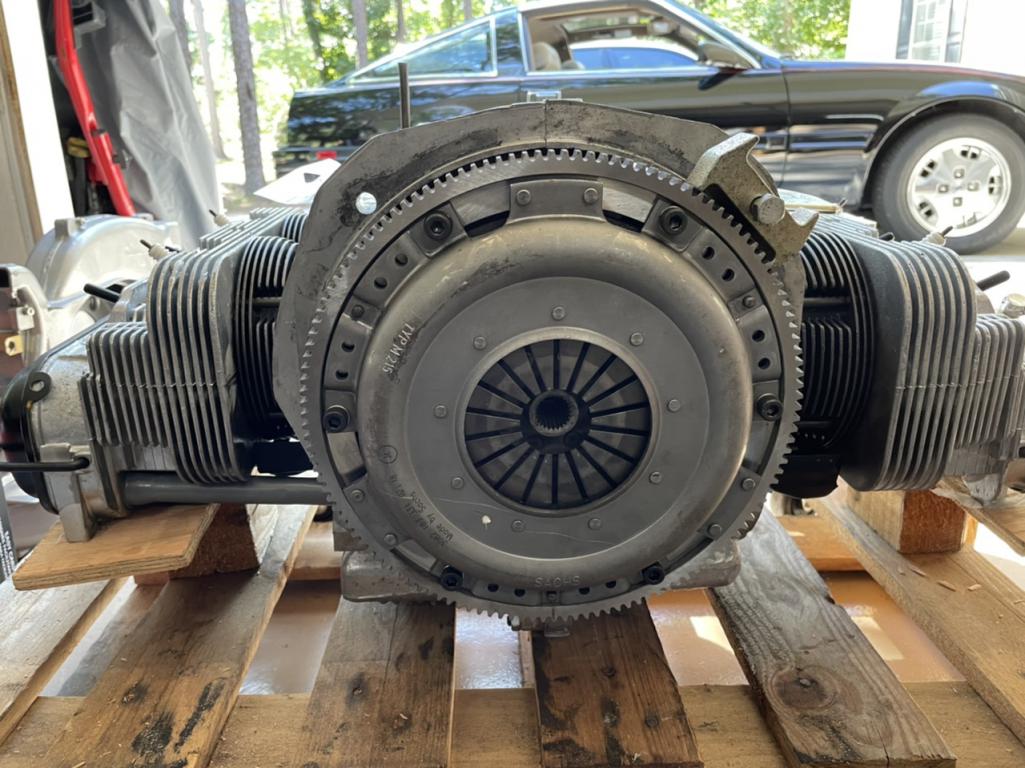
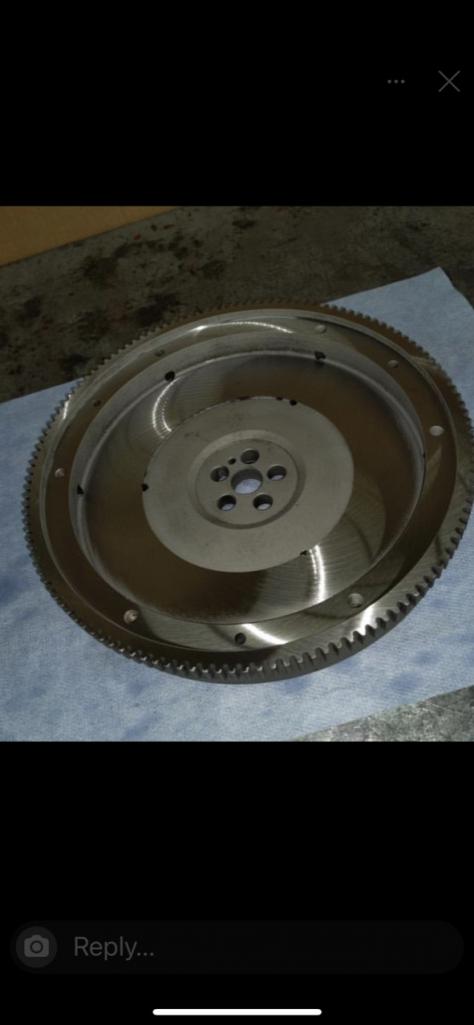
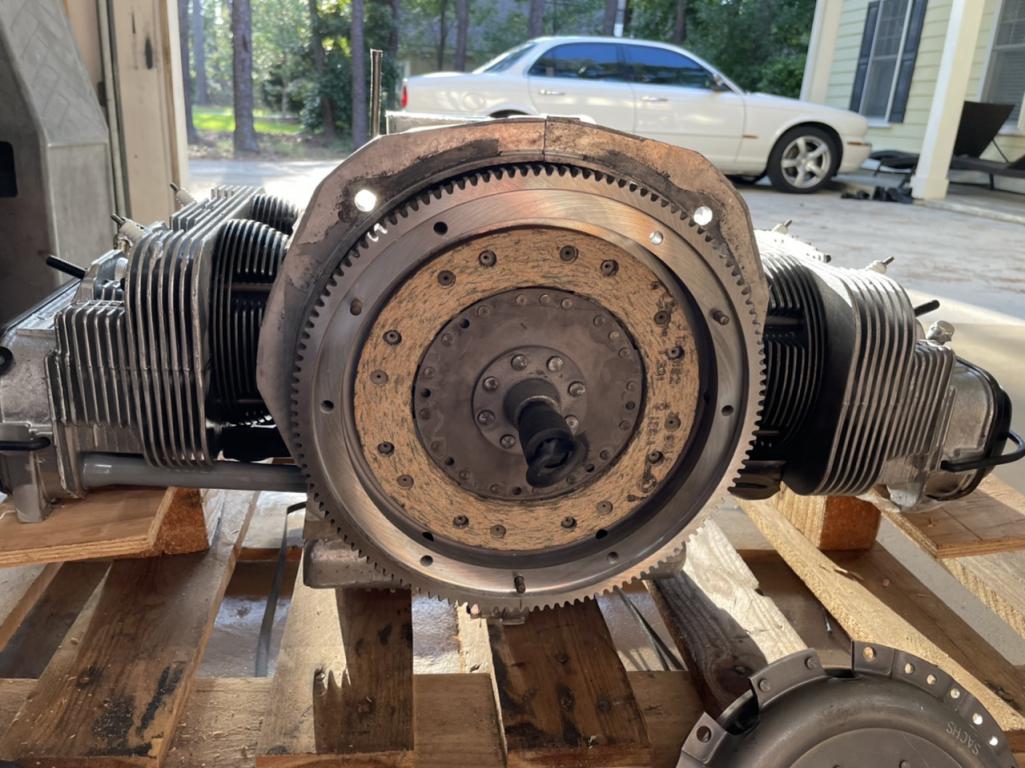
Attached image(s)
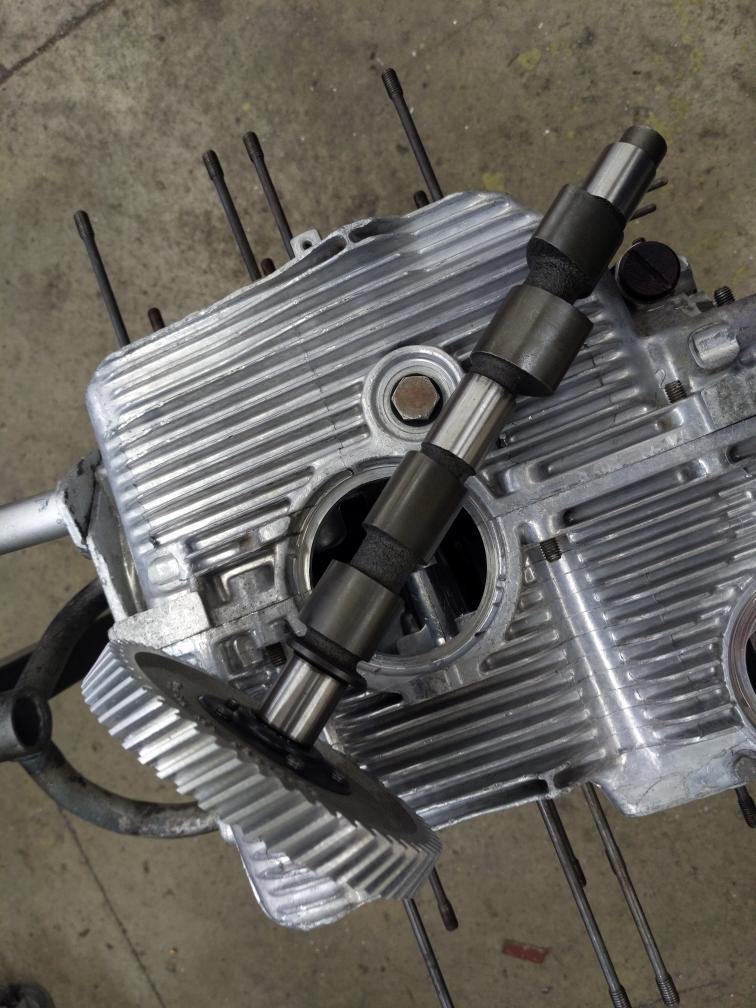
Posted by: mb911 Sep 4 2021, 09:00 AM
Phil what is a the benefit of a rigid clutch? I honestly don't think I ever have seen one before.
Posted by: rgalla9146 Sep 4 2021, 04:55 PM
Phil what is a the benefit of a rigid clutch? I honestly don't think I ever have seen one before.
+ 1 ? ..... never saw one either
Posted by: DRPHIL914 Sep 11 2021, 06:03 PM
Phil what is a the benefit of a rigid clutch? I honestly don't think I ever have seen one before.
+ 1 ? ..... never saw one either
supposed to be a bit tighter, less chance of failure with no springs but might not dampen vibration, so i’ve read. i’ll tell you how i like it , should be in the car running this week.
HE and muffler are installed, the units ready to go in the car.
Attached thumbnail(s)

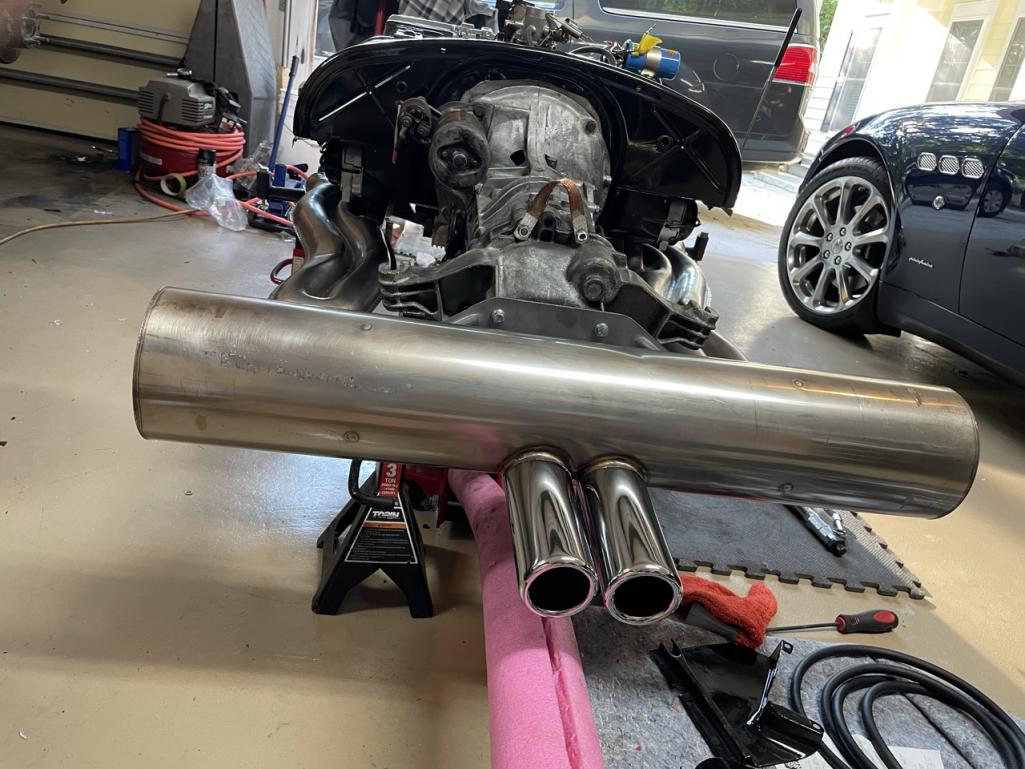
Posted by: sholman5 Sep 11 2021, 08:00 PM
When are you leaving to Pigeon Force? I'm driving mine up from Daytona on the 22nd splitting the trip into 2 days with a stop over about half way. Might stay in Agusta. Some highway some back roads.
Posted by: DRPHIL914 Sep 12 2021, 08:16 PM
When are you leaving to Pigeon Force? I'm driving mine up from Daytona on the 22nd splitting the trip into 2 days with a stop over about half way. Might stay in Agusta. Some highway some back roads.
probably leaving Thursday morning, but maybe wednesday evening,
not sure yet. I usually go up to Columbia Sc,
to Greenville, then up toward Ashville but cut thru near Waysville or Lake Junaluska i think it’s hwy411. been busy trying to get the motor in so i have not set down to plan out a route. there are some great back roads to take so keep in touch maybe we’ll meet up somewhere .
Posted by: DRPHIL914 Sep 12 2021, 08:21 PM
motor is in! hope to have enough time to install the engine harness and FI tomorrow.
list is getting shorter- finish the heater tubes ans air deflectors, then shift rod, CV’s to the trans, wiring harness ans rear fuse/ relay board, injectors and fuel lines, then start !
Attached thumbnail(s)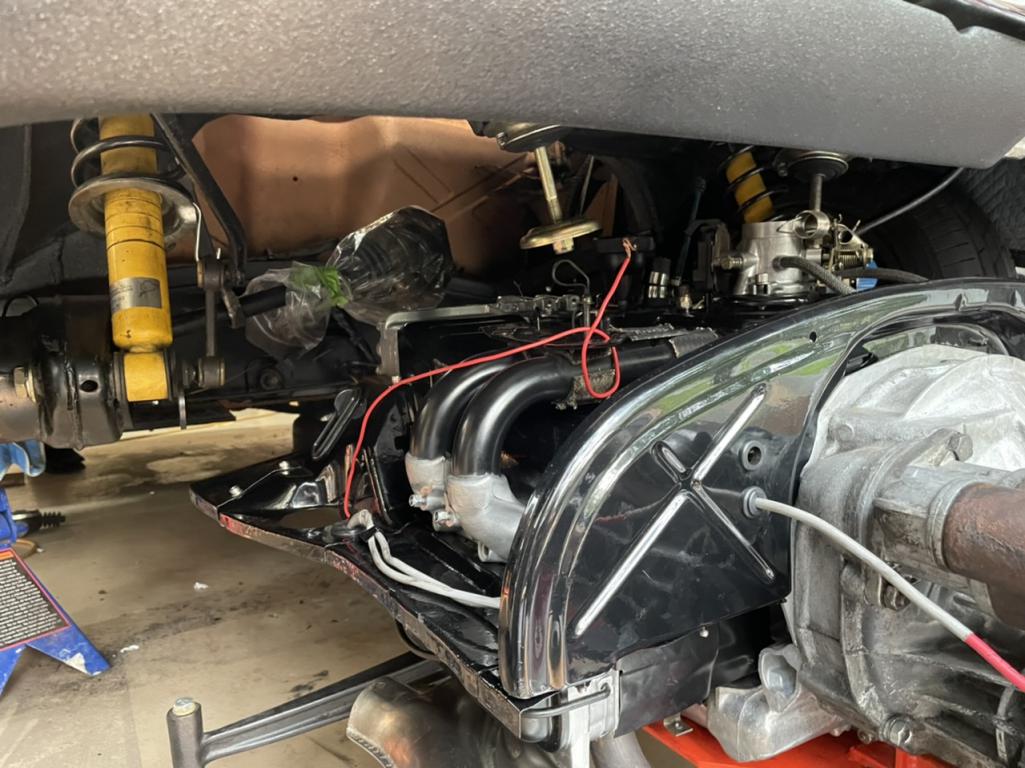
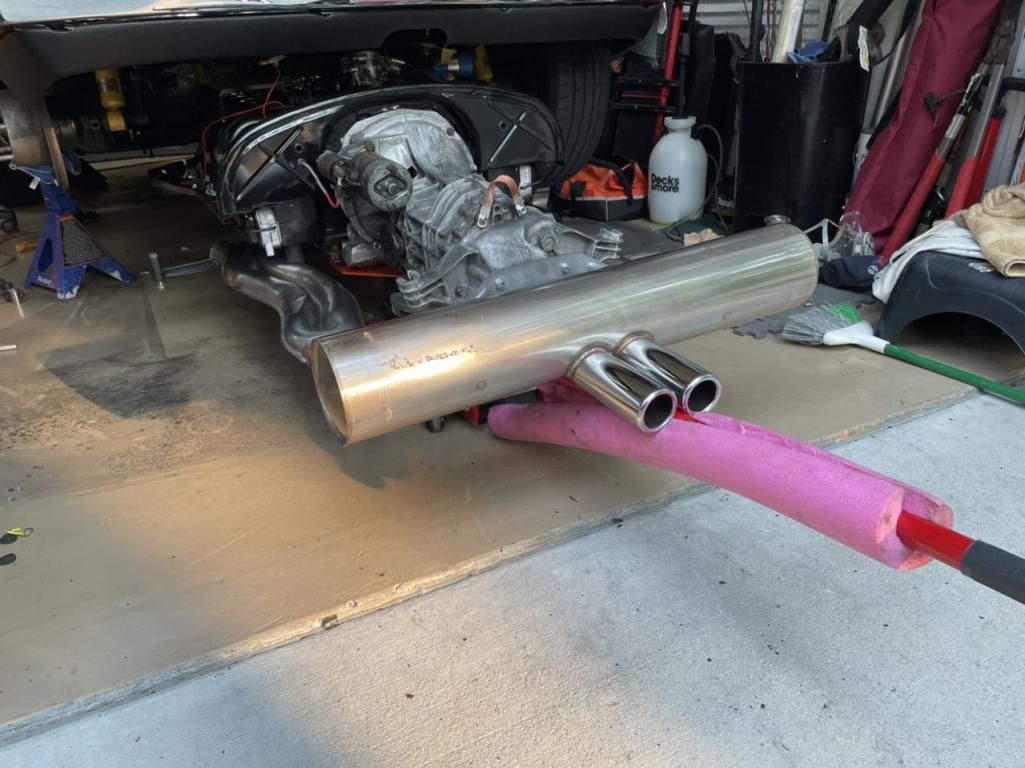
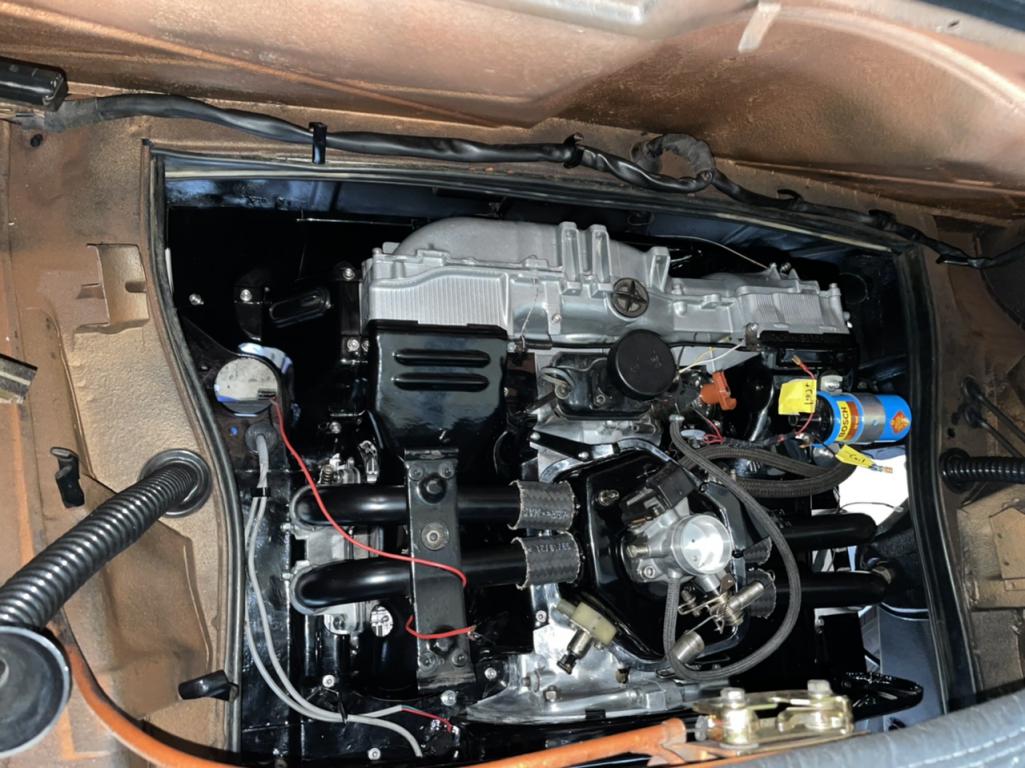
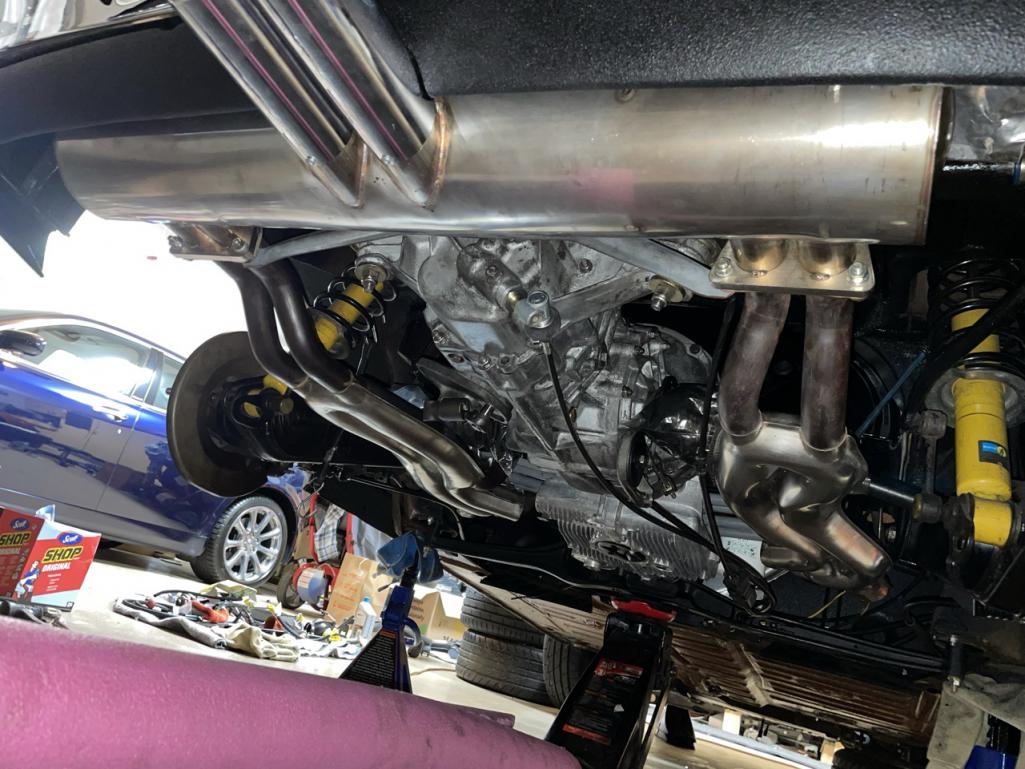
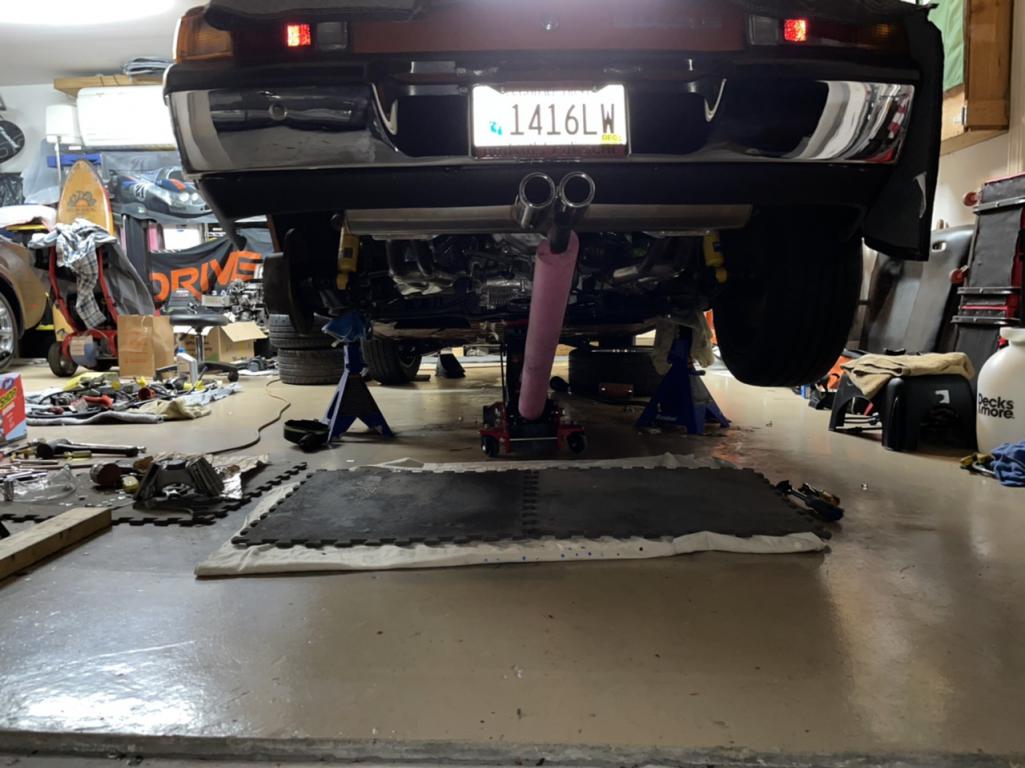
Posted by: Krieger Sep 12 2021, 10:46 PM
Looking good!
Posted by: adolimpio Sep 13 2021, 05:43 AM
Looking good!
Posted by: DRPHIL914 Sep 13 2021, 07:17 AM
new E-brake cables and boots, old ones were only about 10 years old but had paint and undercoat spray on them and the sheath of one was cut , now is a good time to clean this up and put in new.
Attached thumbnail(s)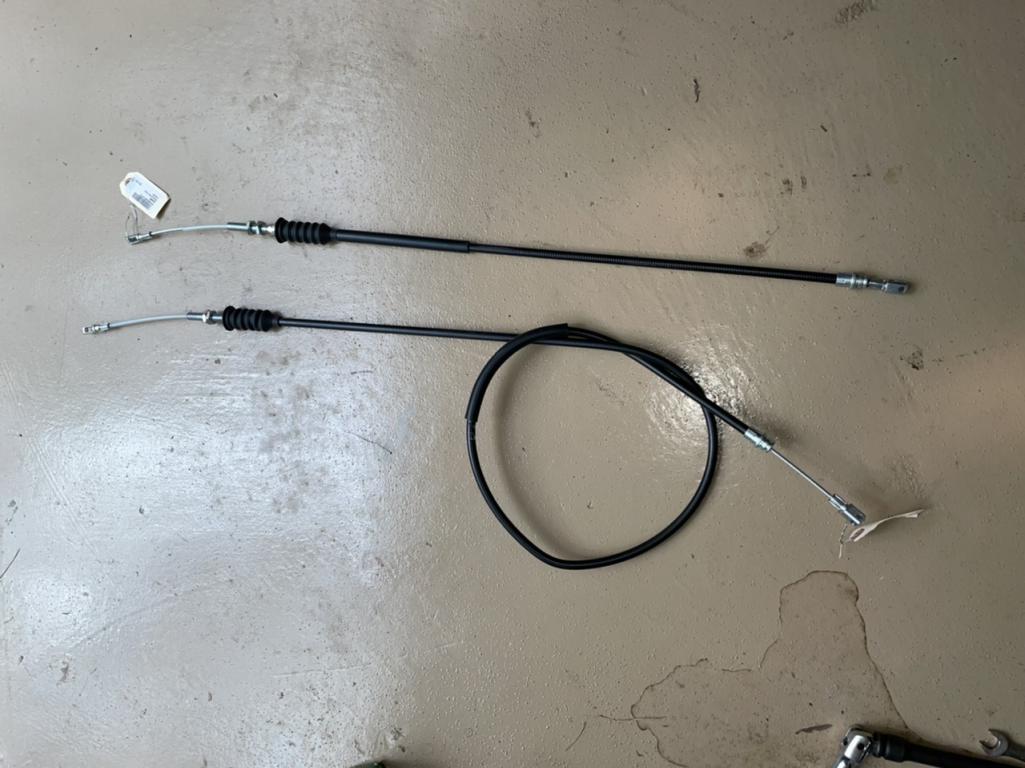
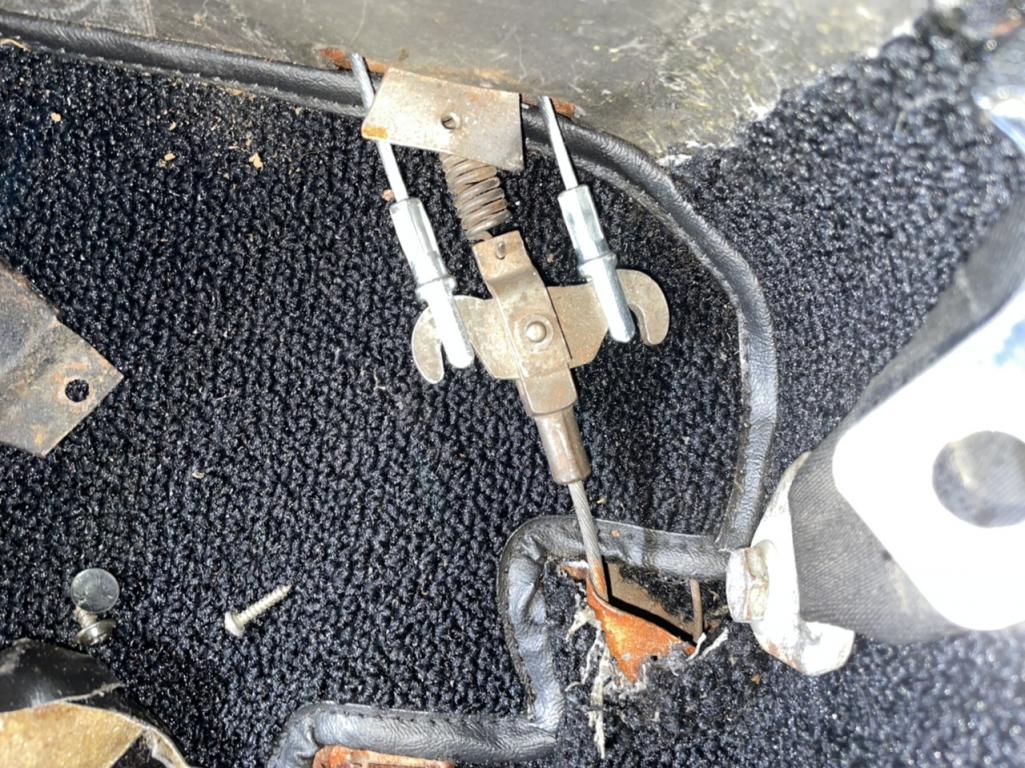

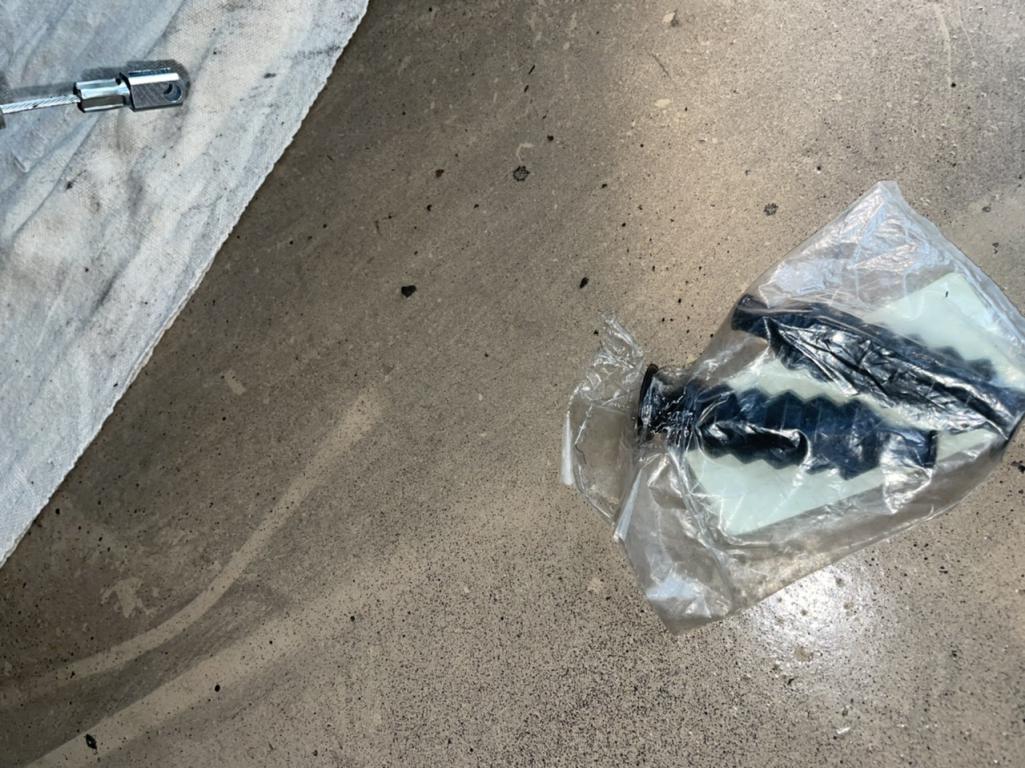
Posted by: DRPHIL914 Sep 20 2021, 07:01 AM
it’s been a week since my last post to update this ,
i jd the other thread about the CV issue, ans with that complete i was able to get the motor mounted in the car and wiring installed, also fuel lines etc. Saturday we primed it , fort oil pressure so hooked up the fuel lines and injectors and did the first start up.
It is now a running car! Sunday i did a run around the neighborhood, 2 20 minute runs for break in, and some tuning. idle is high and i think it’s an issue with vac hose hook up, this motor has head vents ans i was going off of factory diagram but several people suggested i hook up the head vent ans the oil filler vent to a breather box/catch can. any input on this would be appreciated- i will post a few pics but it’s installed per factory diagram from Jeff Bowlsby website.
Attached thumbnail(s)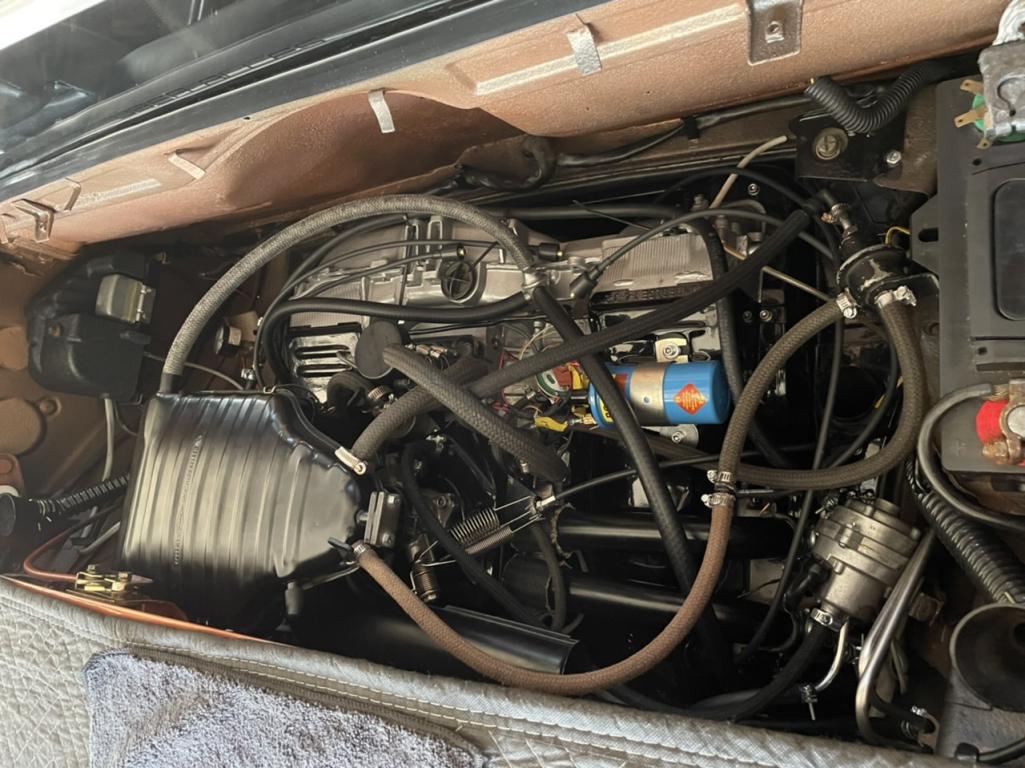
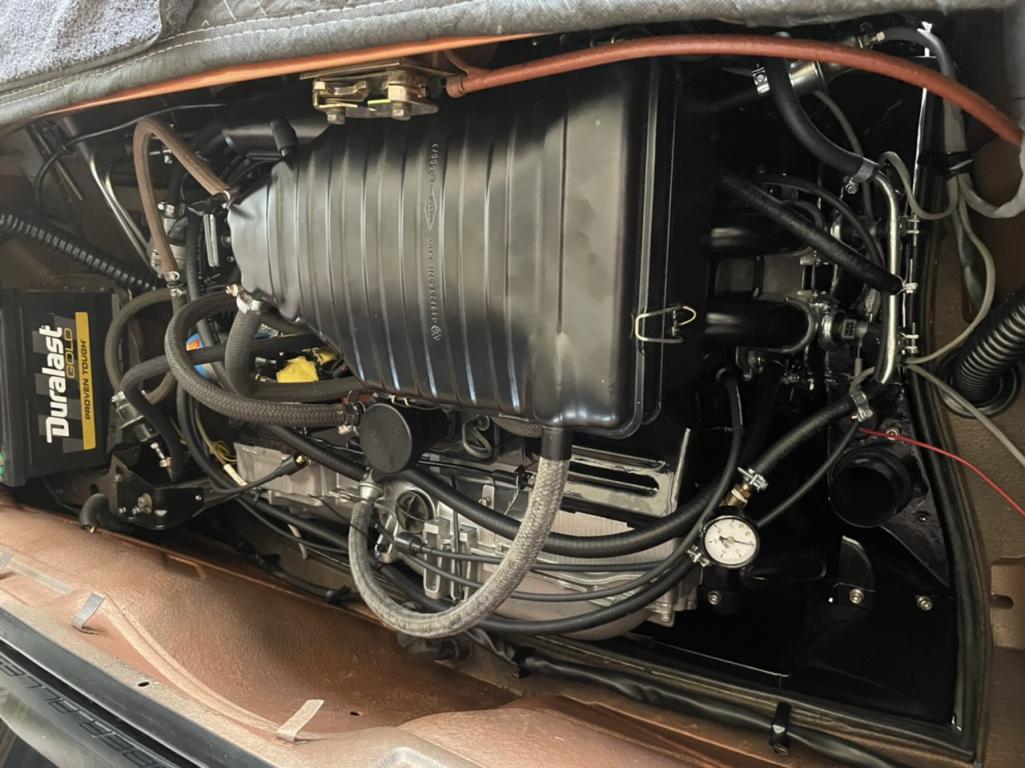
Posted by: nditiz1 Sep 20 2021, 07:25 AM
Nice work! I would go with that same idea. Mount a box to the firewall and have all 3 terminate at the breather. Cap off the one hole that would be used for the oil filler to the air box.
Where did you source your ebrake cables and boots? I need to redo both of mine.
Posted by: DRPHIL914 Sep 20 2021, 07:51 AM
Nice work! I would go with that same idea. Mount a box to the firewall and have all 3 terminate at the breather. Cap off the one hole that would be used for the oil filler to the air box.
Where did you source your ebrake cables and boots? I need to redo both of mine.
@http://www.914world.com/bbs2/index.php?showuser=18763 thanks for the input. yea, hooked up like this, the breather goes to the manifold/plenum which sucks a lot of air and is like a giant vac leak, before with original 75 motor that had the smog removed , no head vents the breather just went to the air box, not plenum. but like that its going to suck oil vapor and mess up the box and the hoses. I was told by an experienced VW and Porsche motor builder that doing it with the catch can box will balance the pressure, not suck those oil vapor into the box and decrease the carbon build up on the valves too. IDK but i am going to make that change and see how that does.
- also the E-brake cables came from E-bay, but the boots are either 914rubber or SMC i am not sure.
I have my other cables i had installed about 5 years ago, they are fine and just had a bit of overspray on them and a bit of rubbing on one of the sheaths. if you want them i can give them to you at Okteenerfest, let me know. i will bring them with, will trade for a bottle of Hendricks Gin or a nice Bourbon lol.
Phil
Posted by: barefoot Sep 20 2021, 08:05 AM
it’s been a week since my last post to update this ,
i jd the other thread about the CV issue, ans with that complete i was able to get the motor mounted in the car and wiring installed, also fuel lines etc. Saturday we primed it , fort oil pressure so hooked up the fuel lines and injectors and did the first start up.
It is now a running car! Sunday i did a run around the neighborhood, 2 20 minute runs for break in, and some tuning. idle is high and i think it’s an issue with vac hose hook up, this motor has head vents ans i was going off of factory diagram but several people suggested i hook up the head vent ans the oil filler vent to a breather box/catch can. any input on this would be appreciated- i will post a few pics but it’s installed per factory diagram from Jeff Bowlsby website.
I connected the head vents to themselves & a small breather catch can mounted high on firewall to vent the chimney to a carb inlet. NB I stuffed some open cell reticulated foam in the breather can. These hoses stay dry, no oil collection observed.
Not sure where with FI you would connect vent hose.
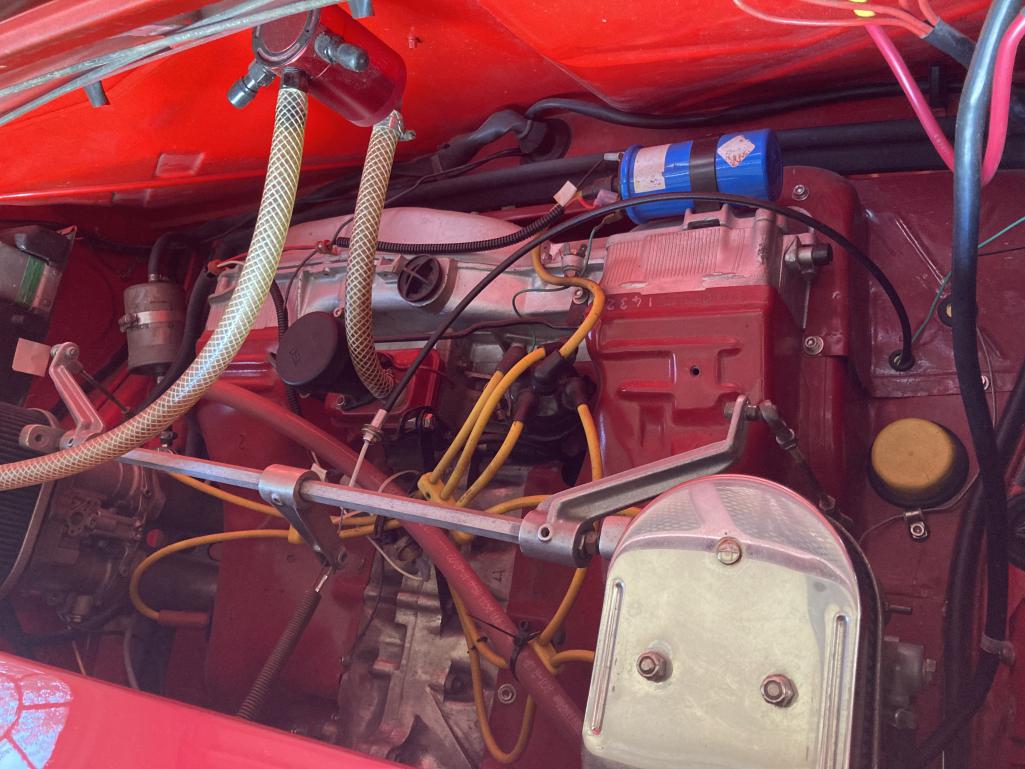
Posted by: DRPHIL914 Feb 17 2022, 10:49 AM
new skis on the rack, and some new door panels!
good chip damage repaired and repainted ans back on the car
Attached thumbnail(s)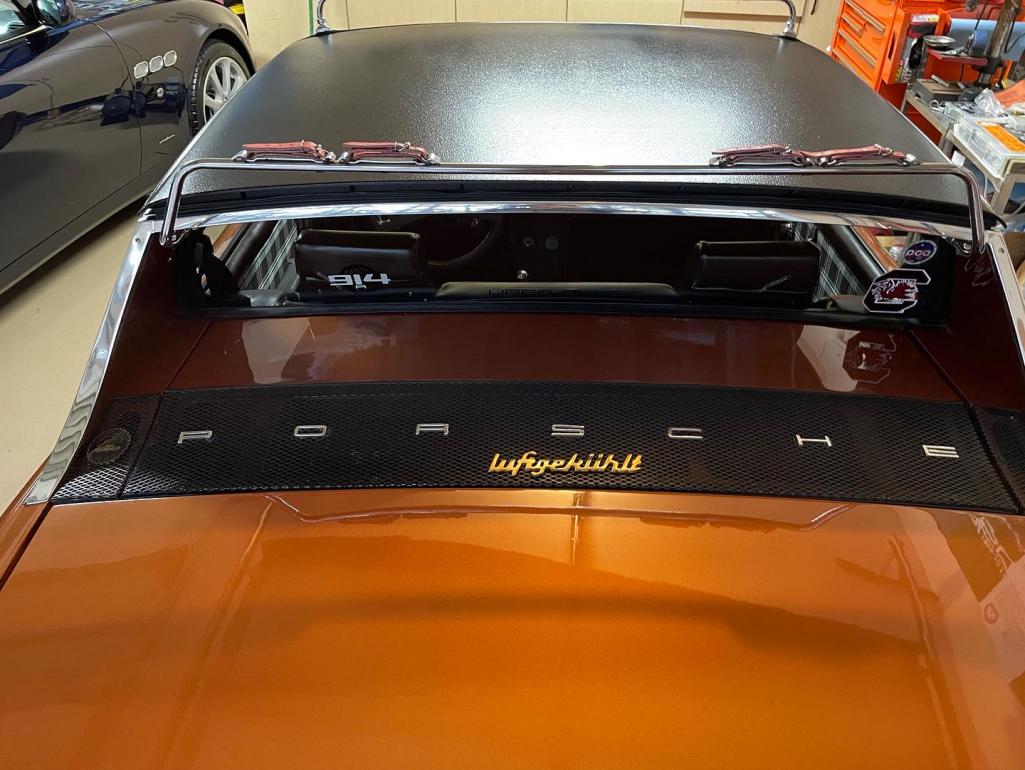
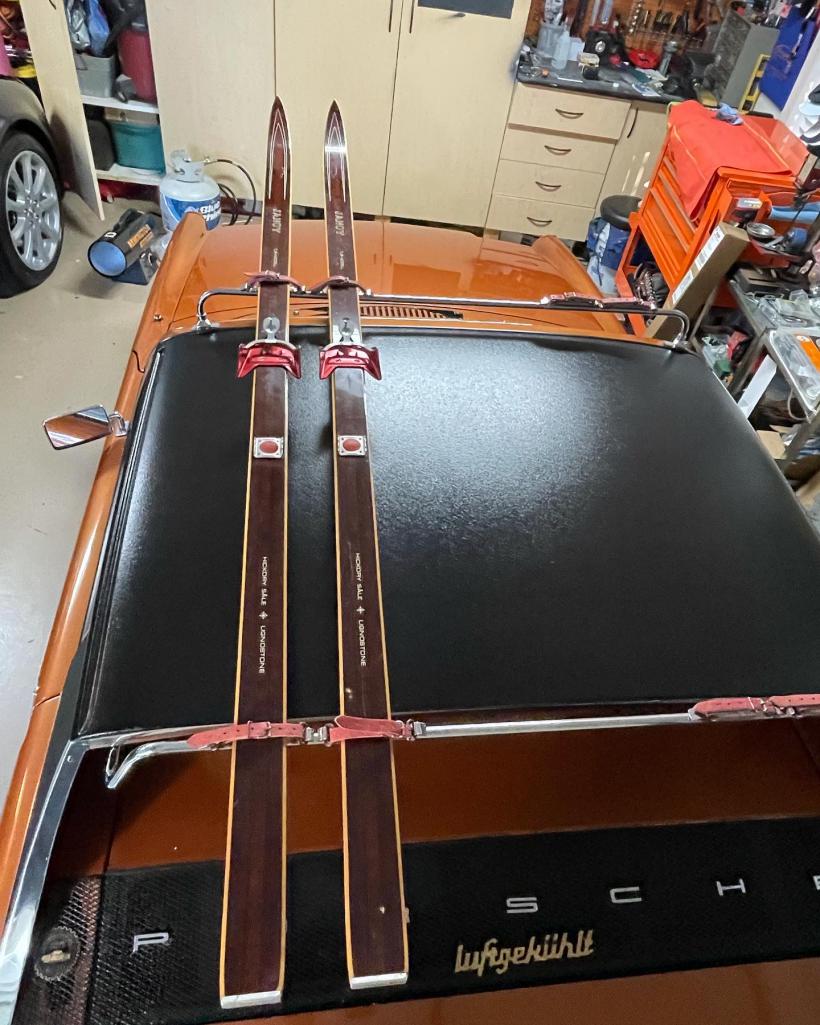
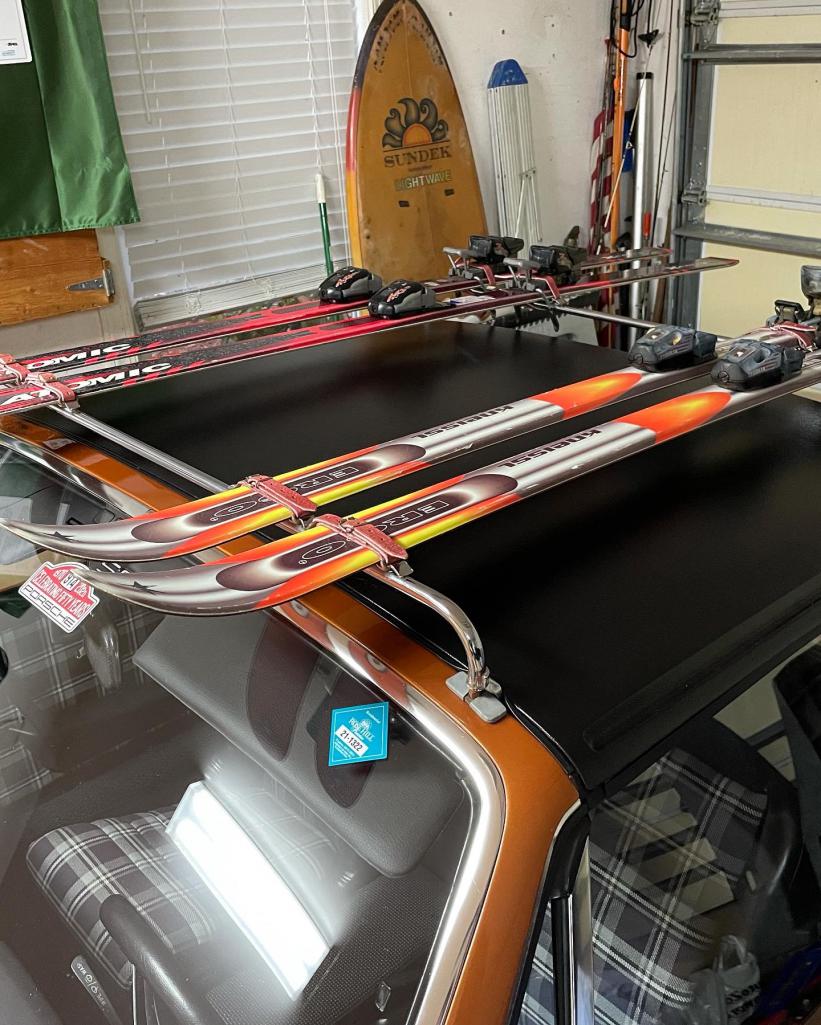
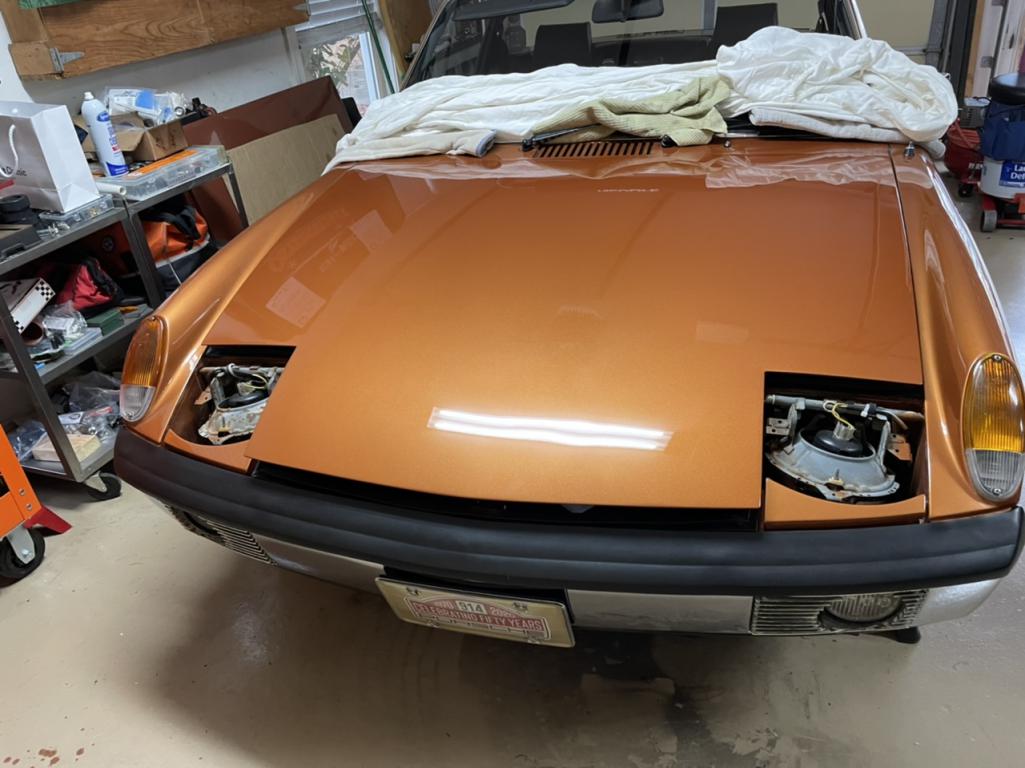
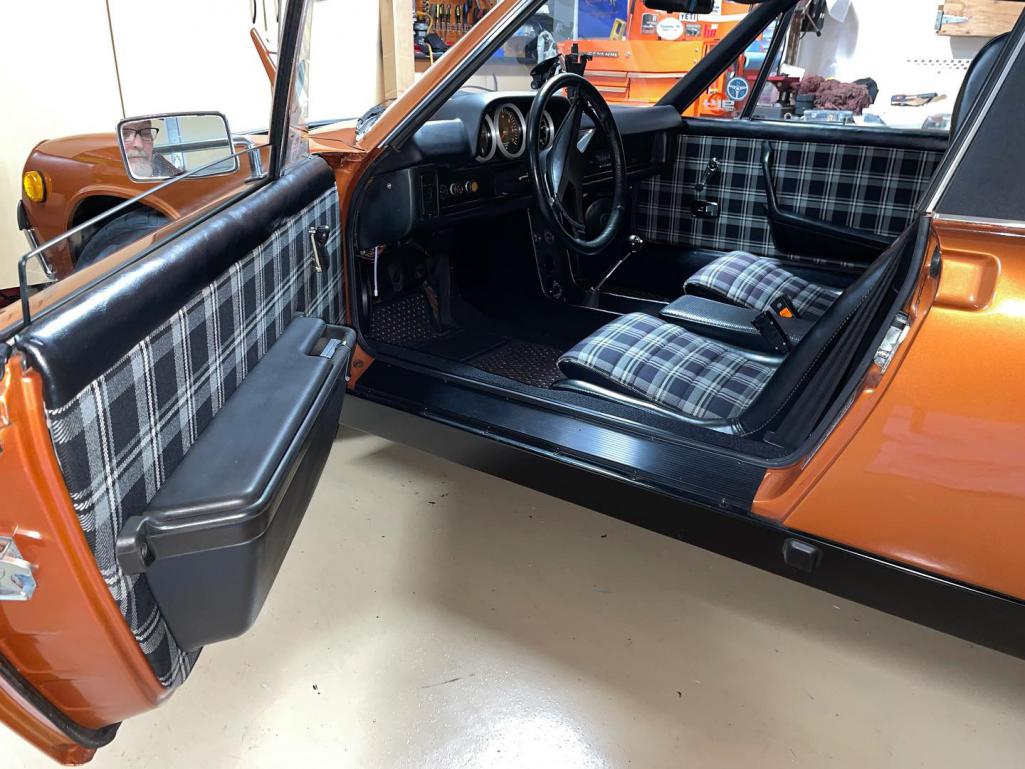
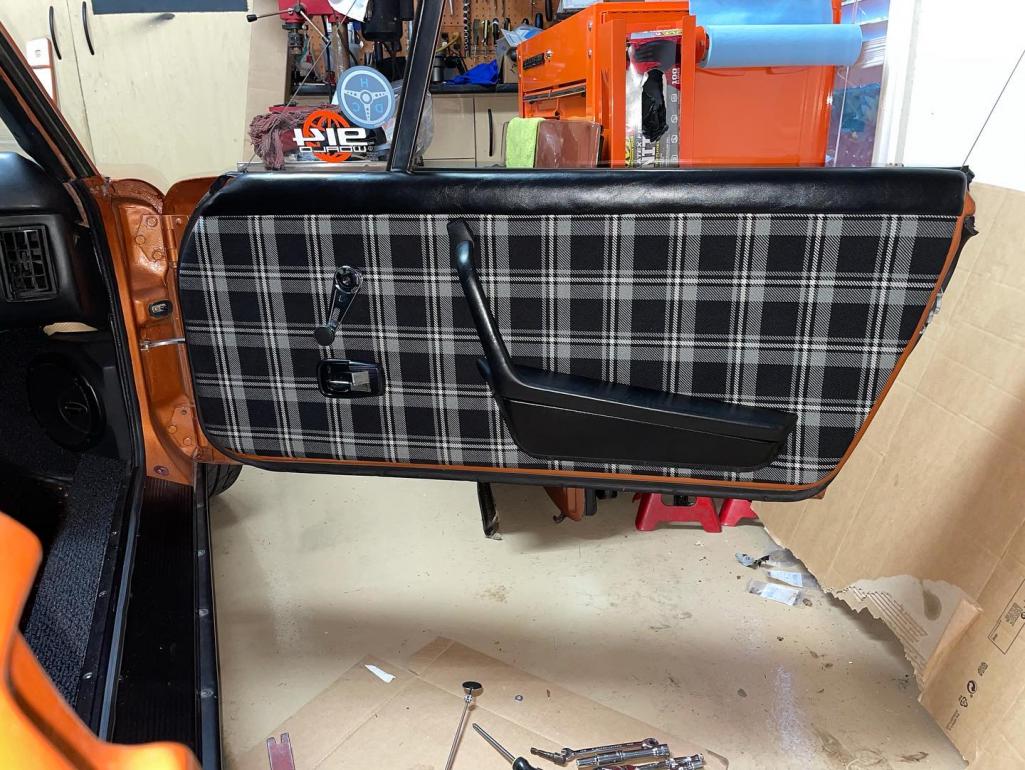
Posted by: DRPHIL914 Feb 17 2022, 10:53 AM
new front upper pad from 914rubber one installed
i like the extra vinyl left for wrapping it into the groove and under the seal but it took a while , extra hands would have helped.
Attached thumbnail(s)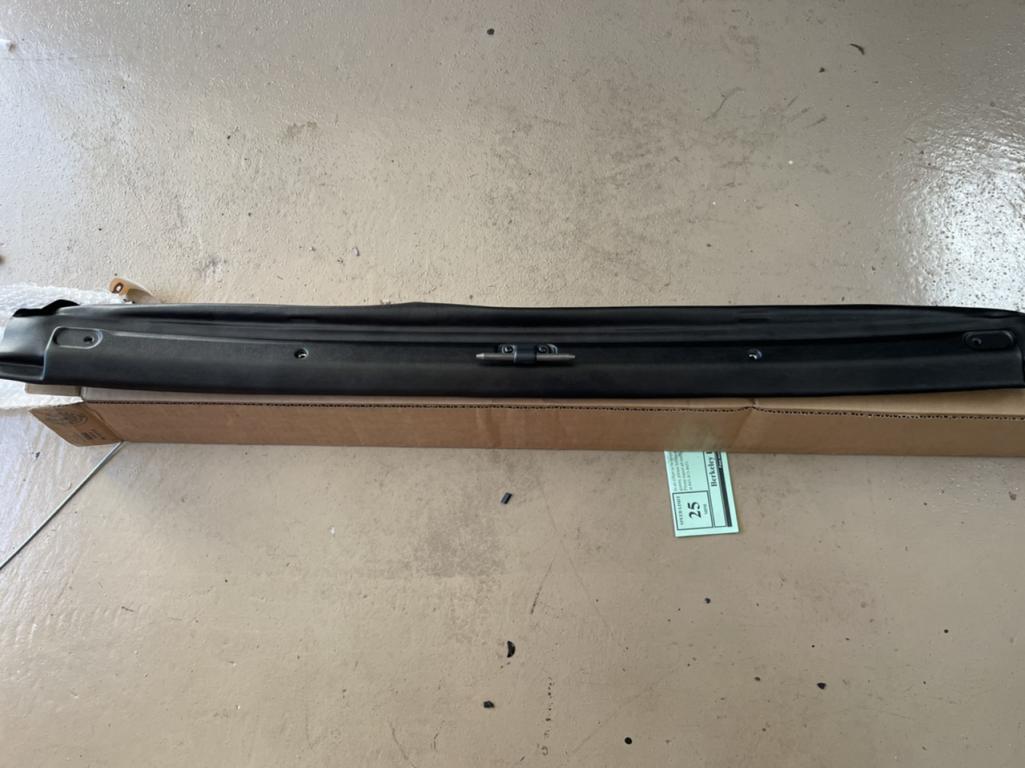
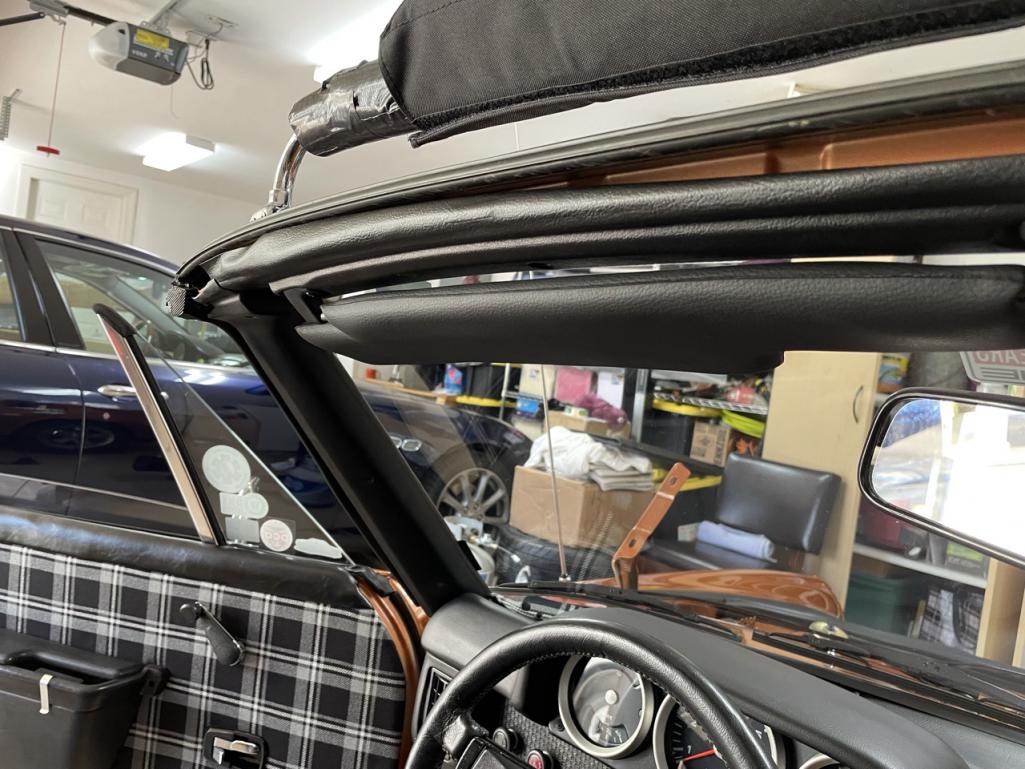
Posted by: DRPHIL914 Feb 17 2022, 10:58 AM
with the door panels. nice to have new vapor barrier, but the butyl is a bit thick or the clips a bit too tight so it’s hard to get them to grab by just pressing, end results is worth the work
Attached thumbnail(s)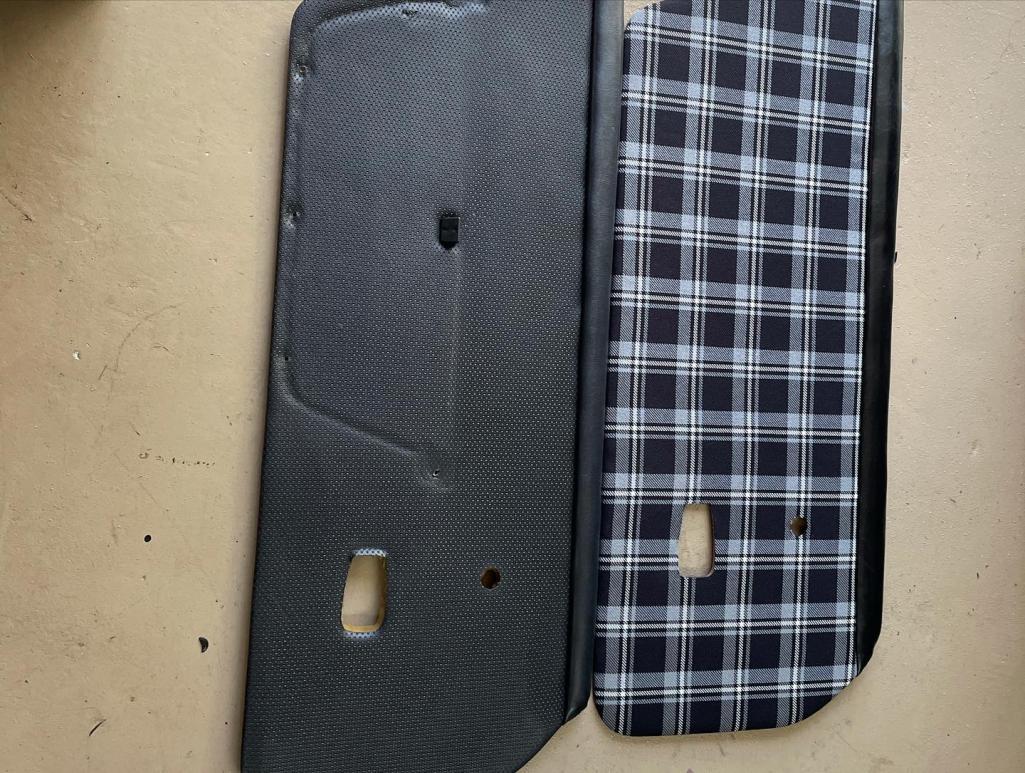
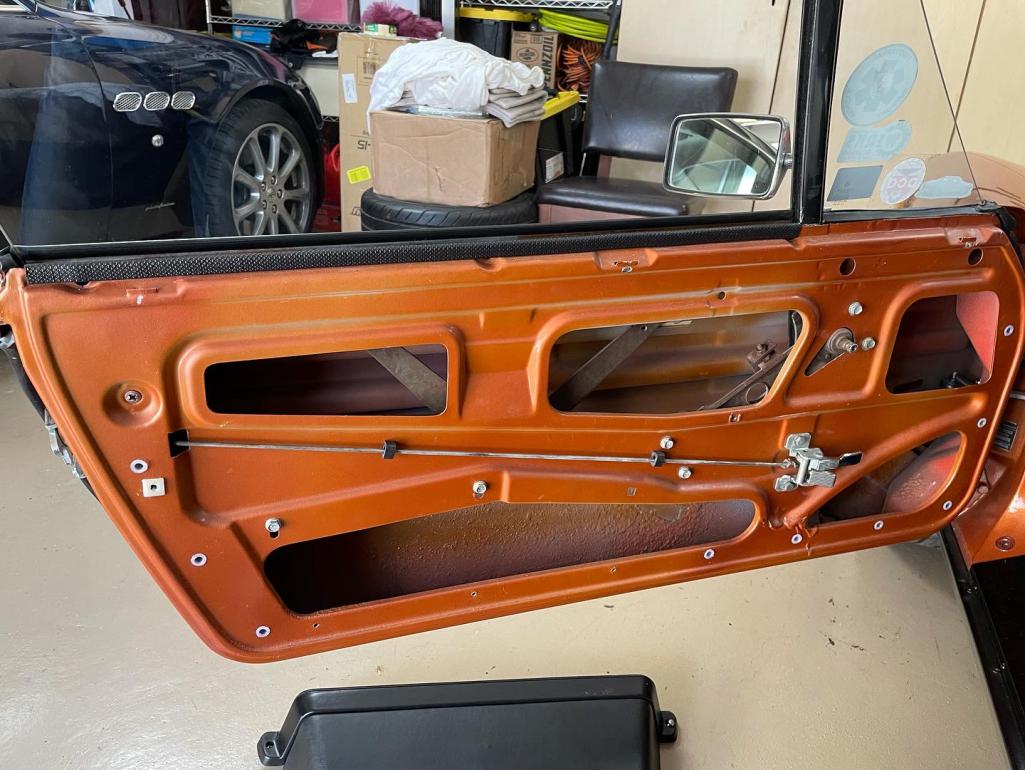
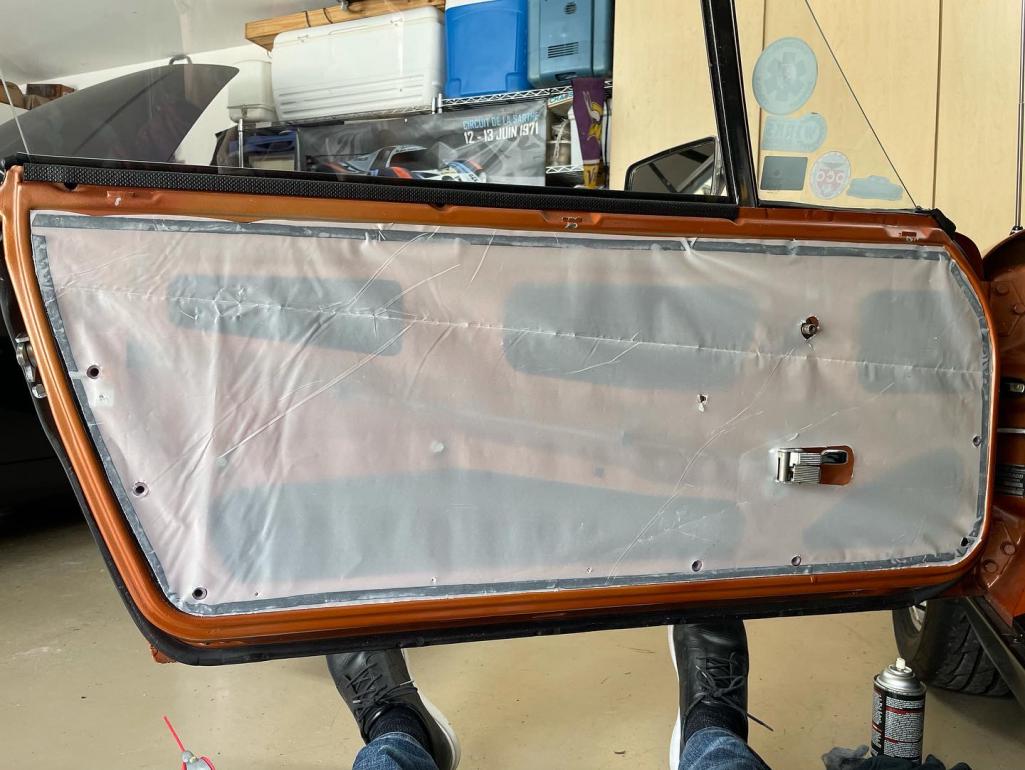
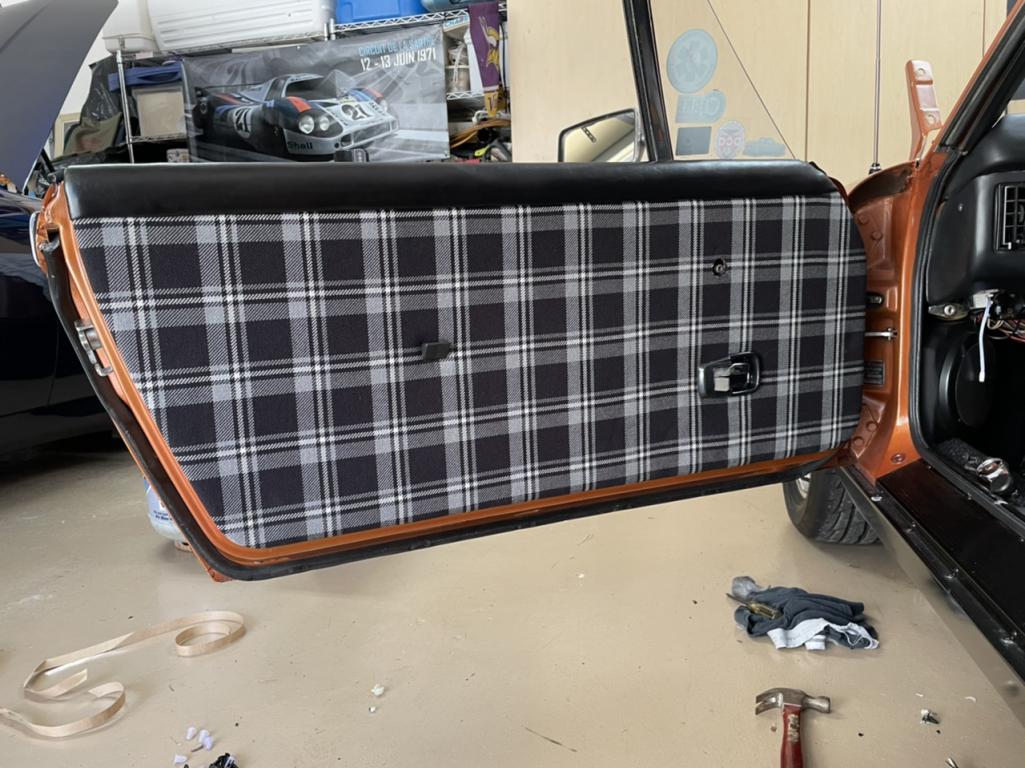
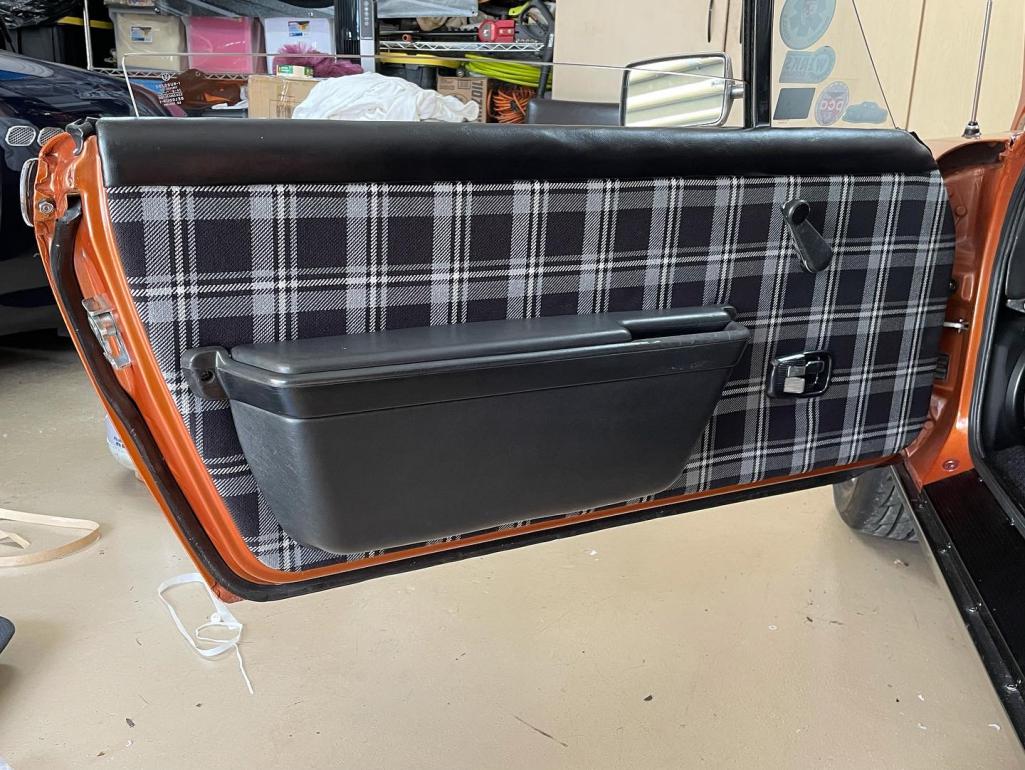
Posted by: DRPHIL914 Feb 17 2022, 11:06 AM
case vent routed to oil vapor catch can now, and new valve cover gaskets done to fix the leak i had after soing last valve clearance check at 1500 mile rebuild break in check .
and new heat shield pad from rix914parts,
Attached thumbnail(s)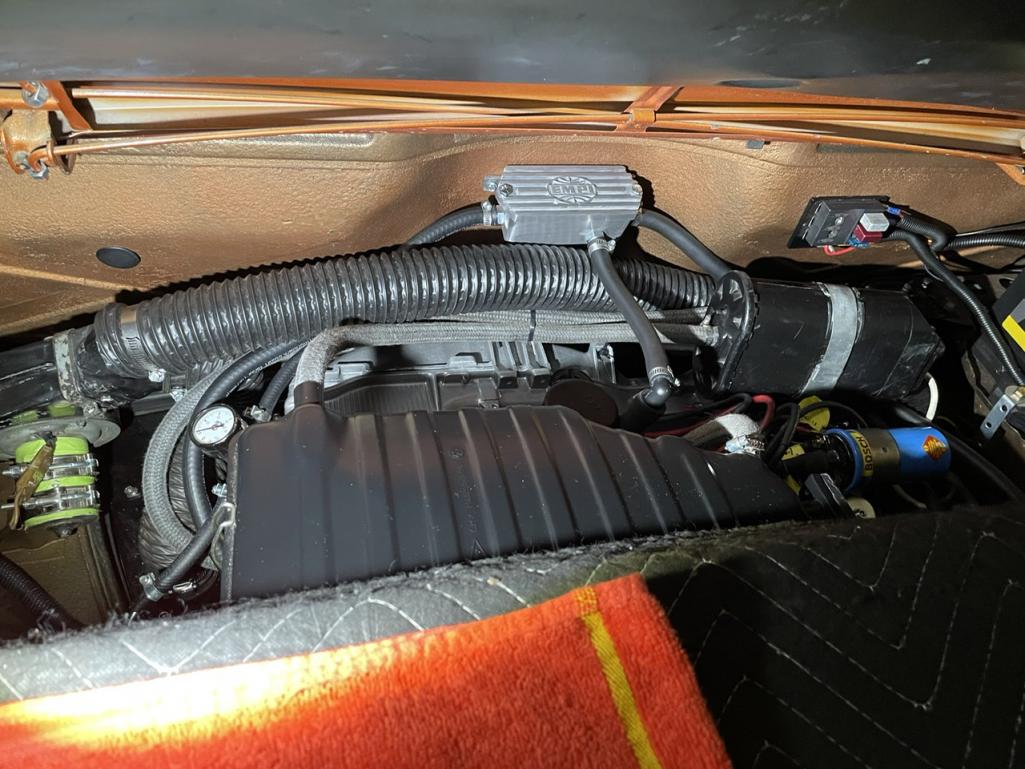
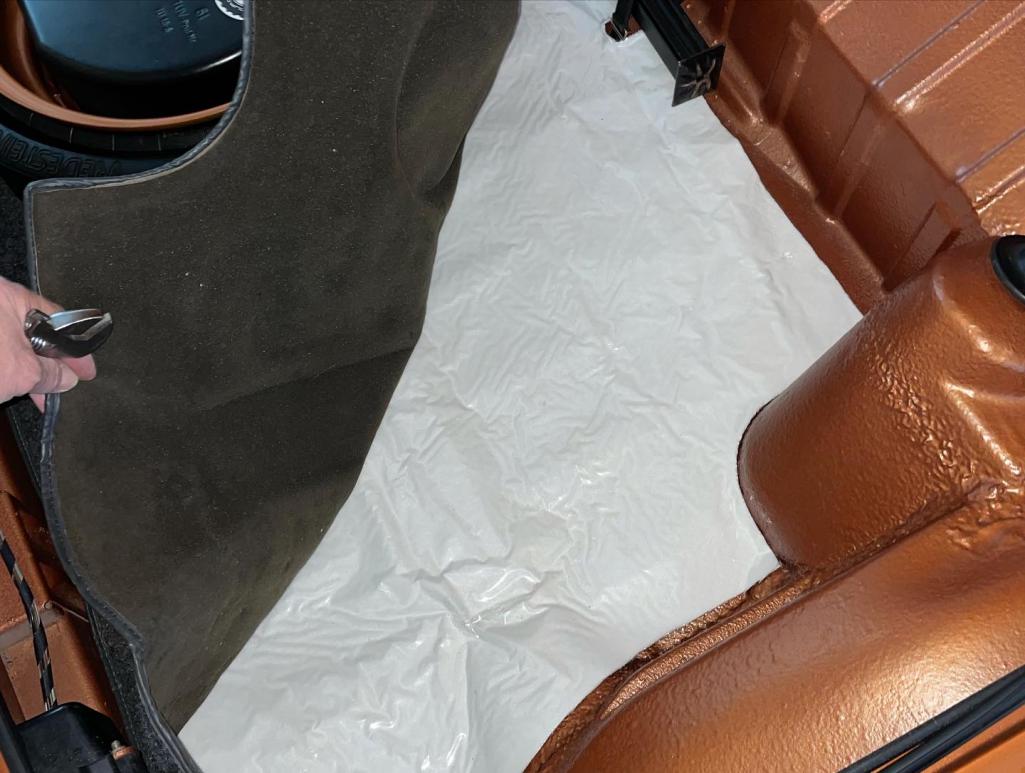
Posted by: DRPHIL914 Feb 17 2022, 11:09 AM
getting close to ready for Werks!!
Attached thumbnail(s)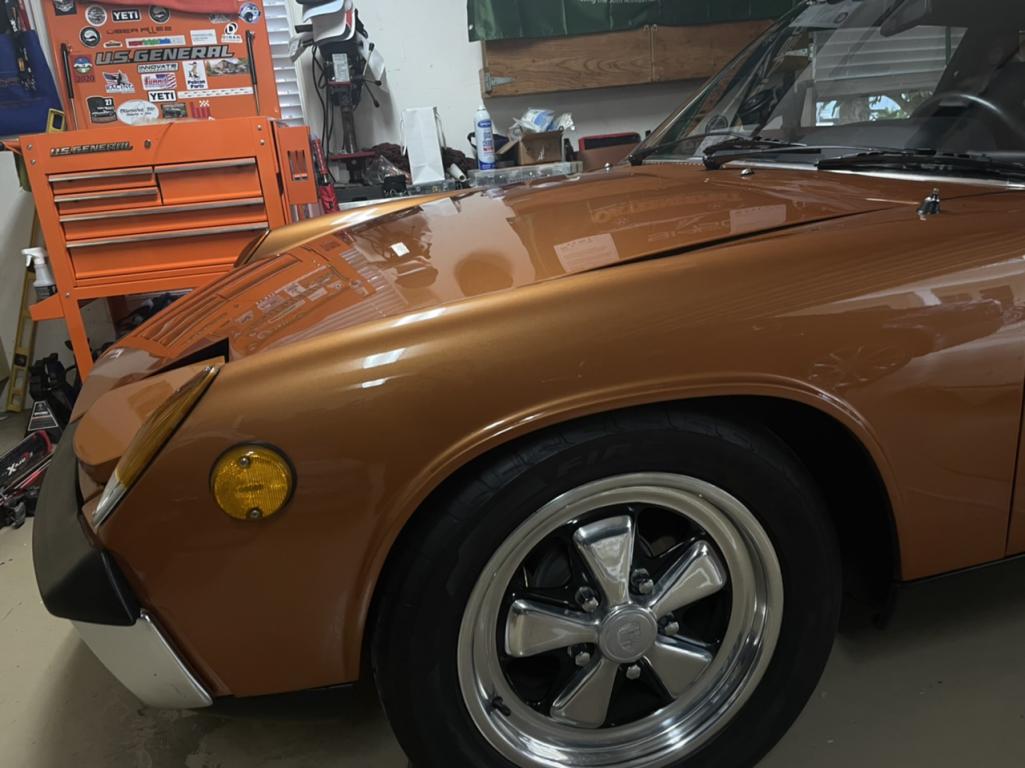
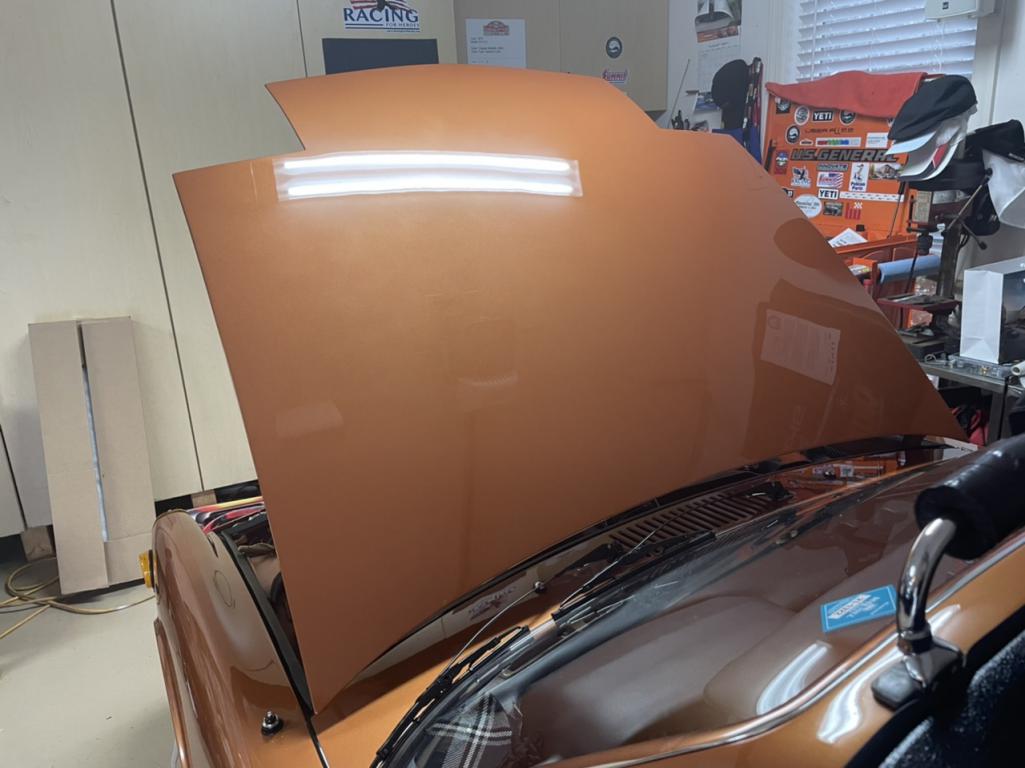
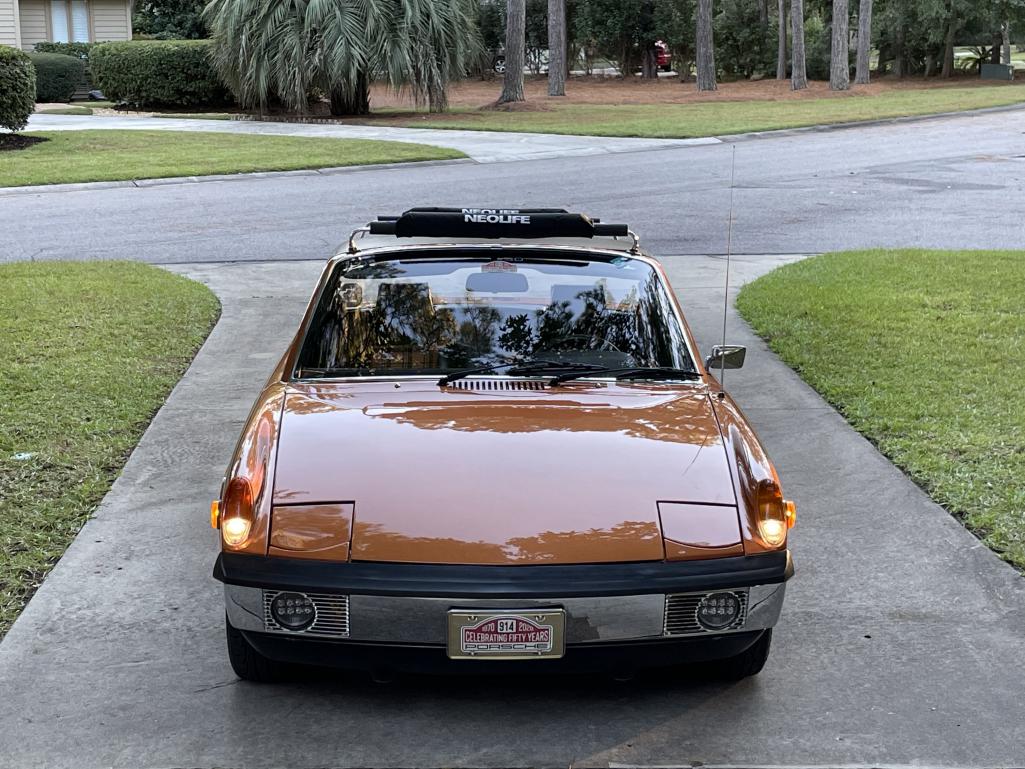
Posted by: DRPHIL914 Feb 17 2022, 11:17 AM
my hood repair and repaint was done by Sonderwerks in Cornelius NC
then had some nice cars in the shop while there including a 914/6 that was getting tuned , thet had been originally done by Patrick Motorsports but is now in NC.
Attached thumbnail(s)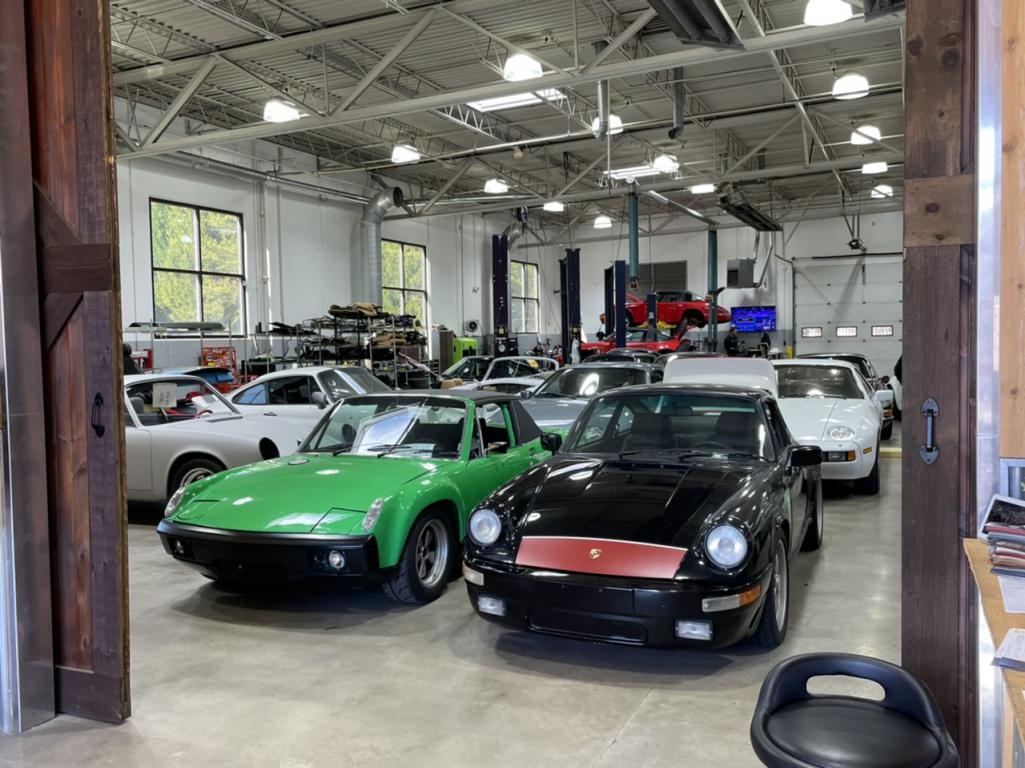
Posted by: DRPHIL914 Feb 17 2022, 11:55 AM
when the motor was out i cleaned detailed ans stripped off the back pad adhesive, sanded, primed and started painting the firewall and the lower half with stone guard first.
also stripped and repainted the rear wheel wells, but never documented that here on my thread . i guess i just put it on instagram.
new e-brake cables too
new sway bar bushings and brackets
stripped declared and painted underside of the trunk it was a lot of “werk” cleaning out and stripping off the original undercoating user the trunk ans in wheel wells ans on the firewall/bull gear in rear what a mess, i wish i had done that back when i had all the other body work and rust repair done with floor pans ans longs, that stuff got cleaned off and repainted but i didn’t to the engine compartment then or the wheel wells. it’s done now!
Attached thumbnail(s)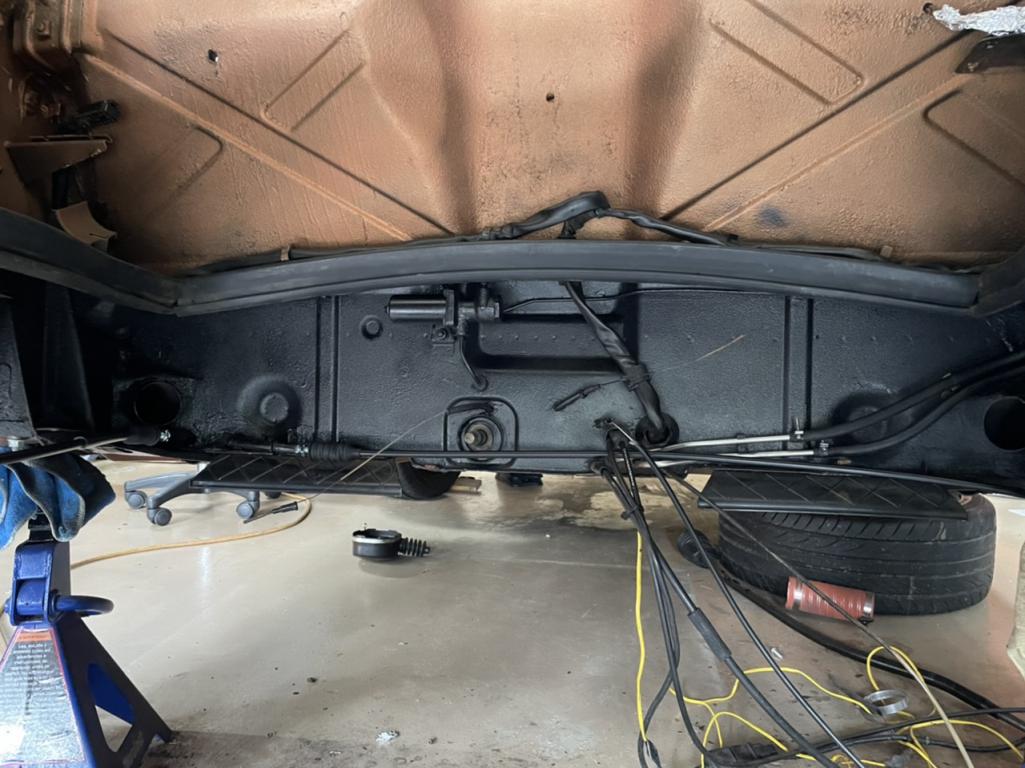
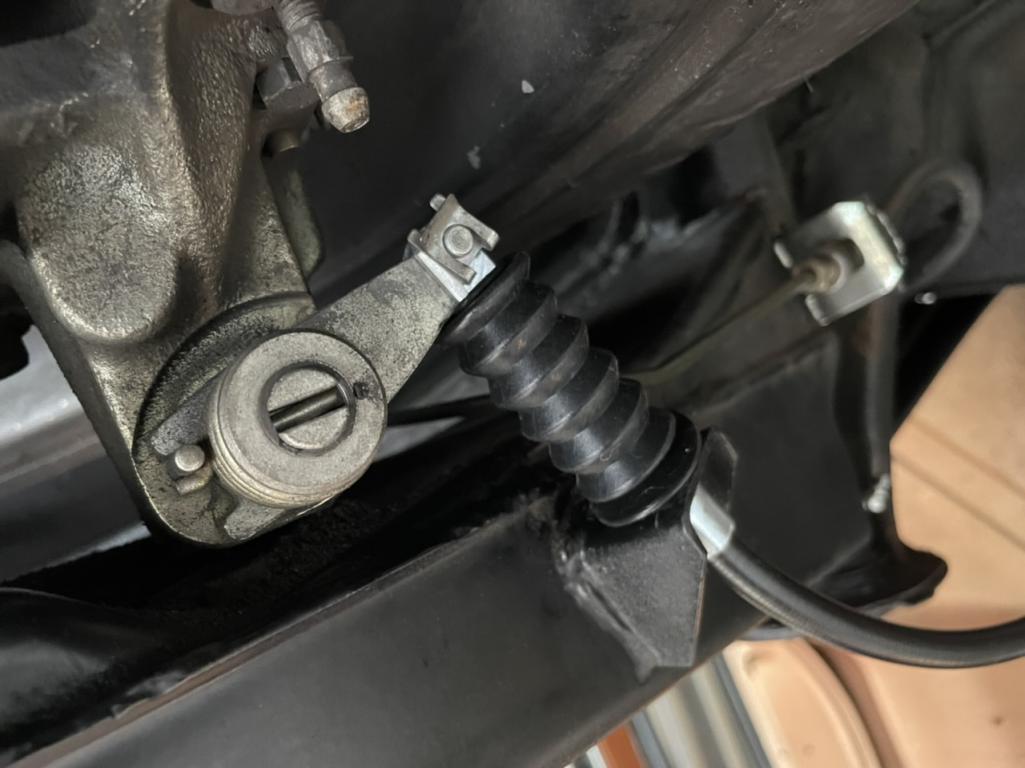
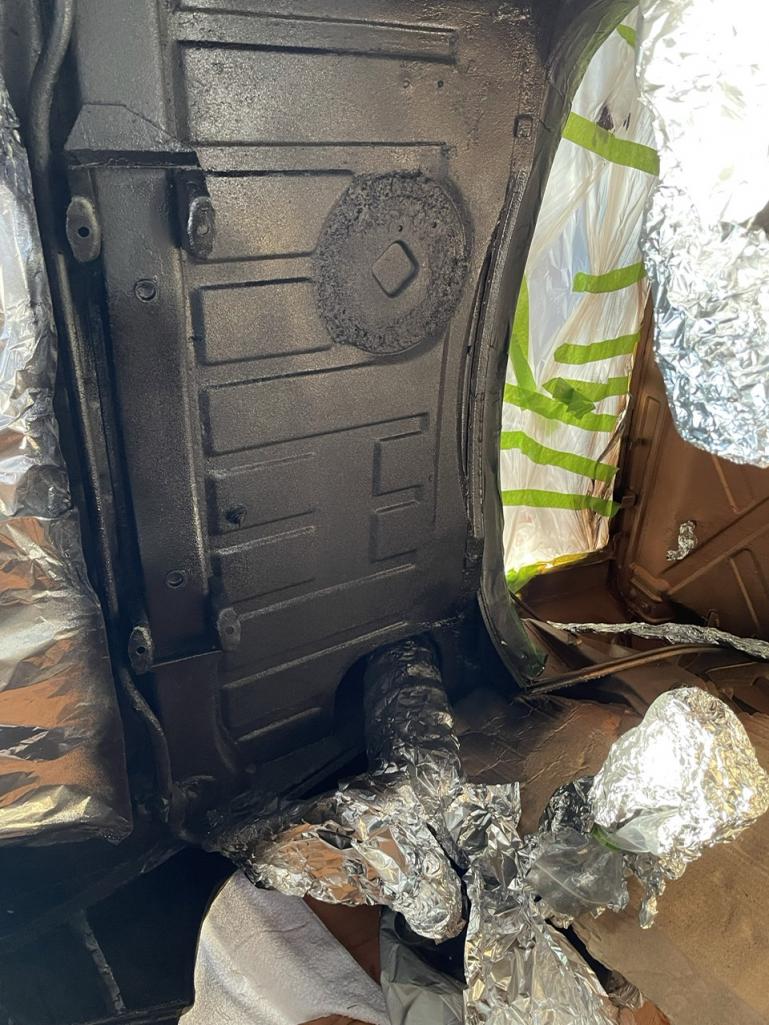
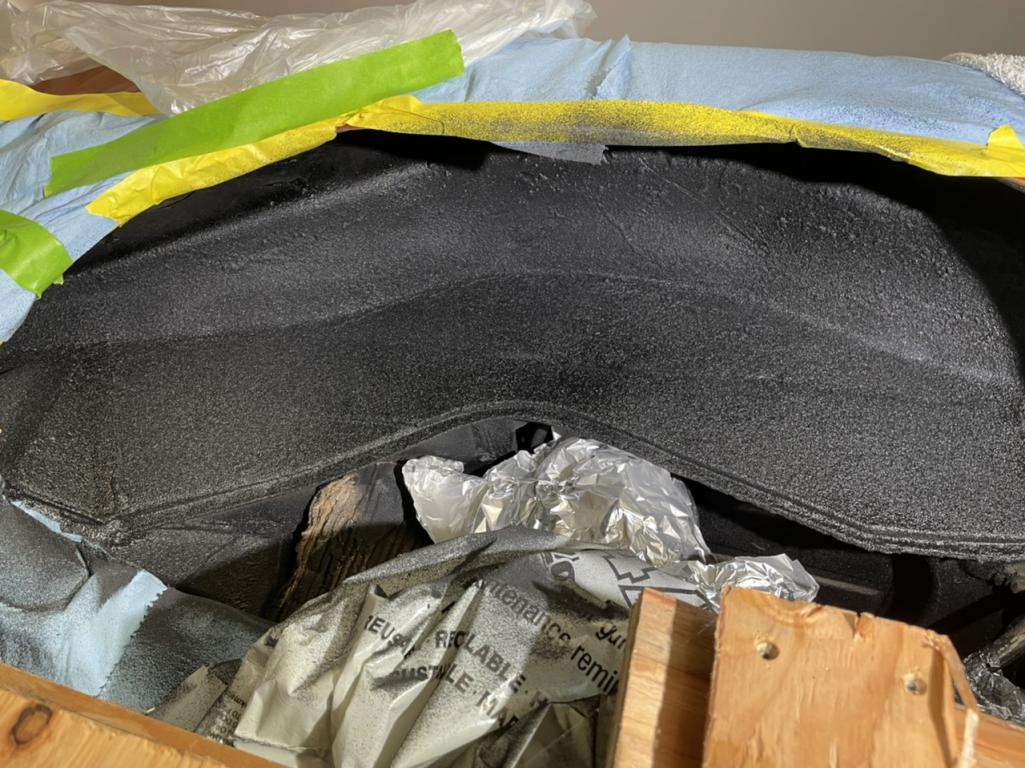
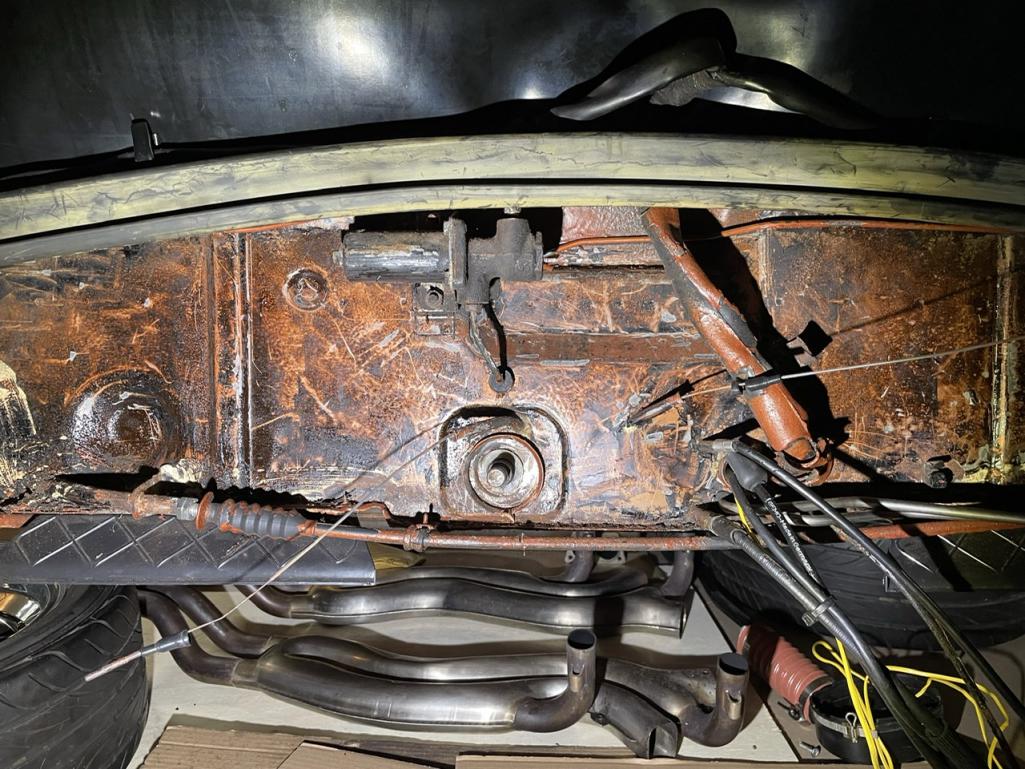
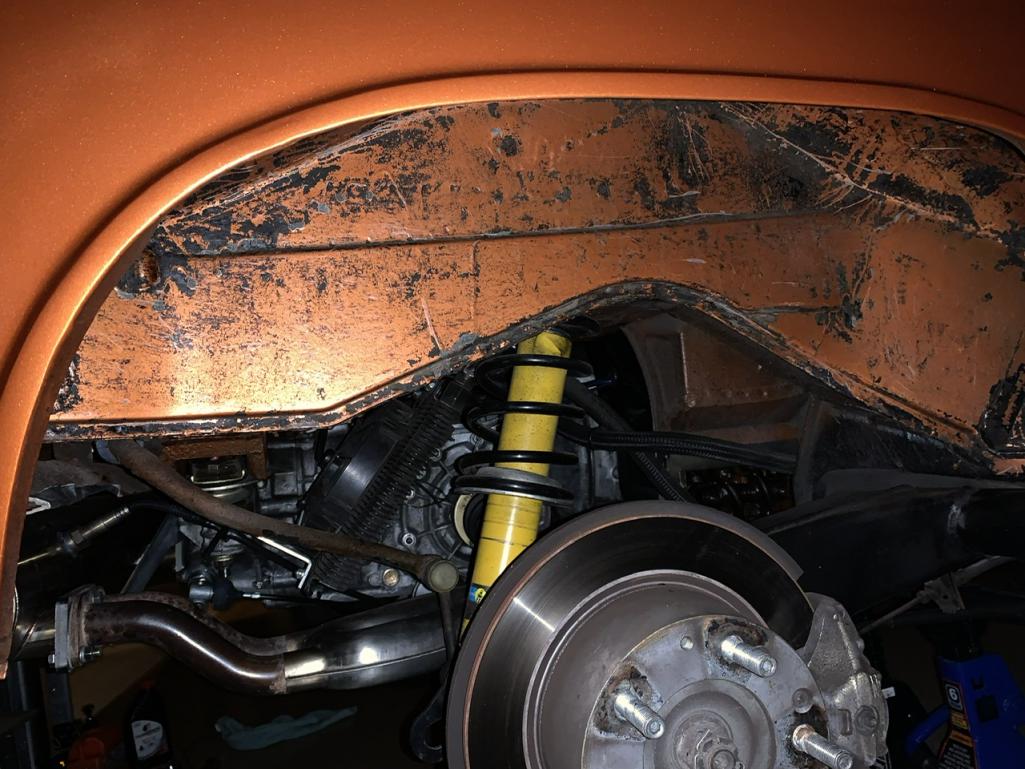
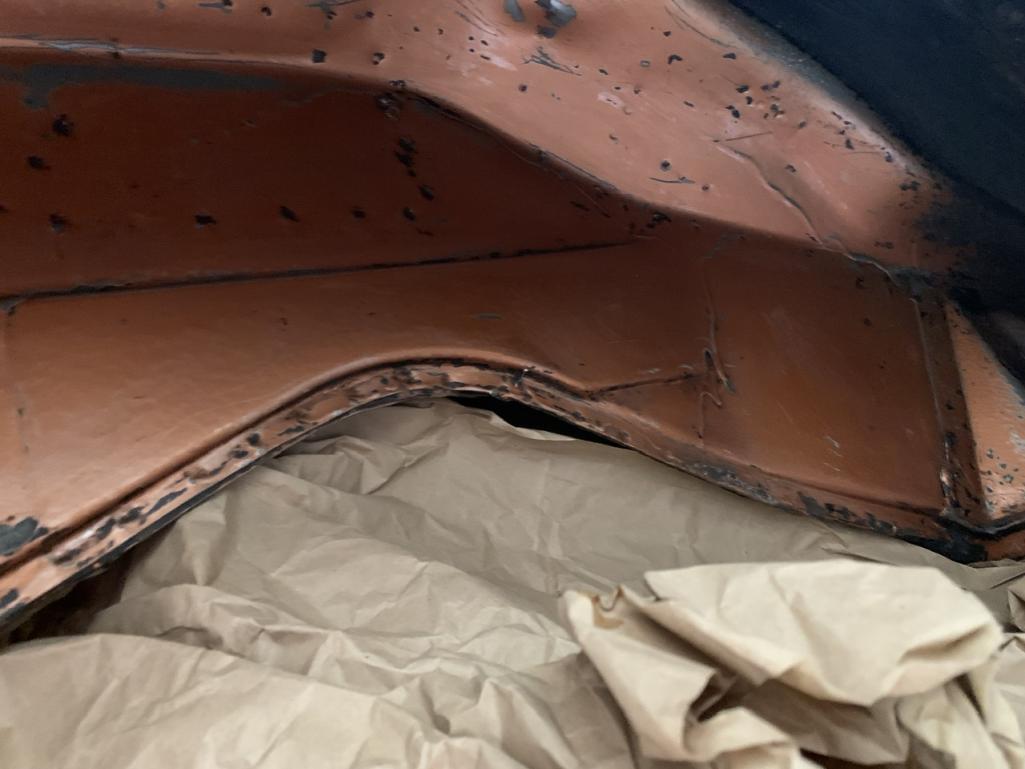
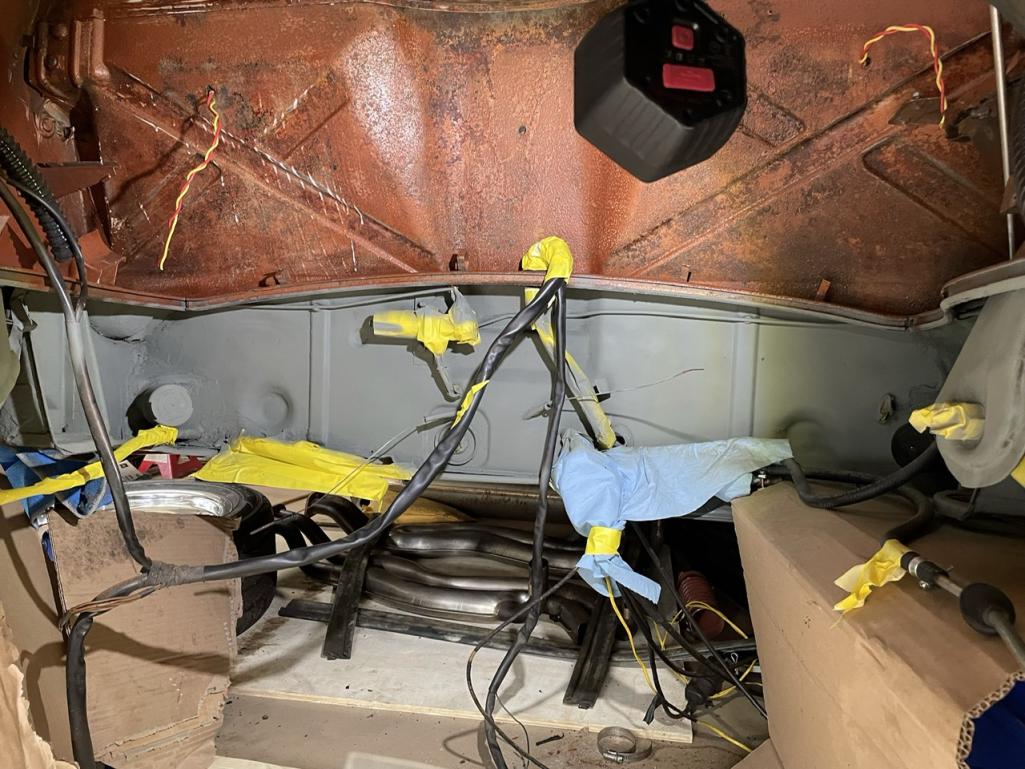
Attached image(s)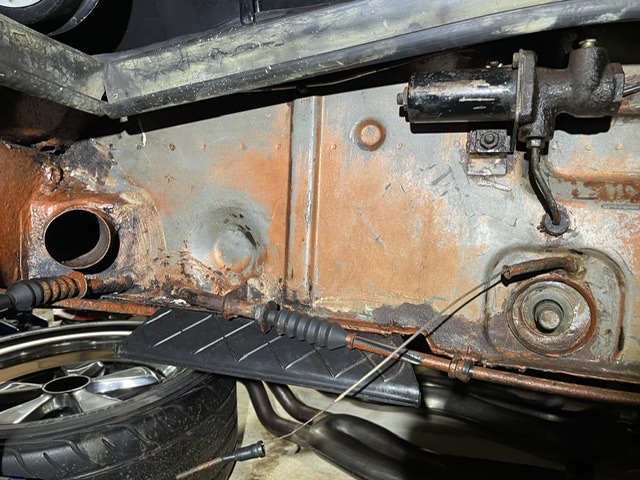

Posted by: DRPHIL914 Feb 17 2022, 12:03 PM
the fan rebuild is in a different thread but all new seals with new motor ans fan assembly so now fully functional fan, all 3 speeds no popping fuses!!
cleaned and polished in and out! as close to fully restored fresh air box as it gets
Attached thumbnail(s)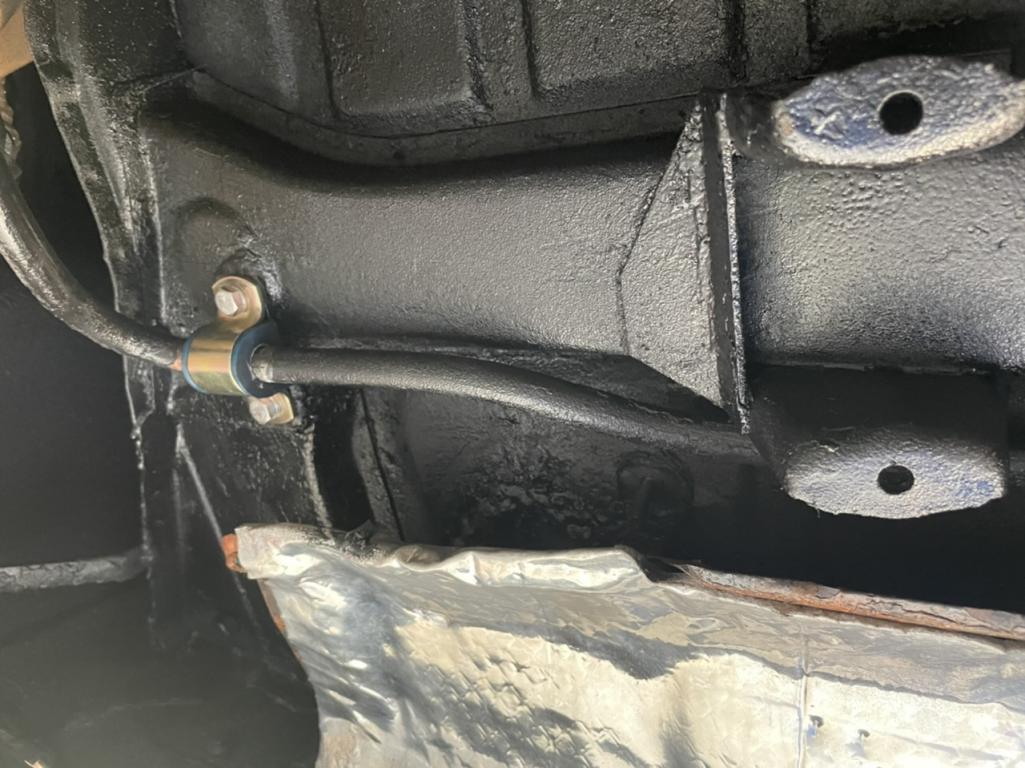
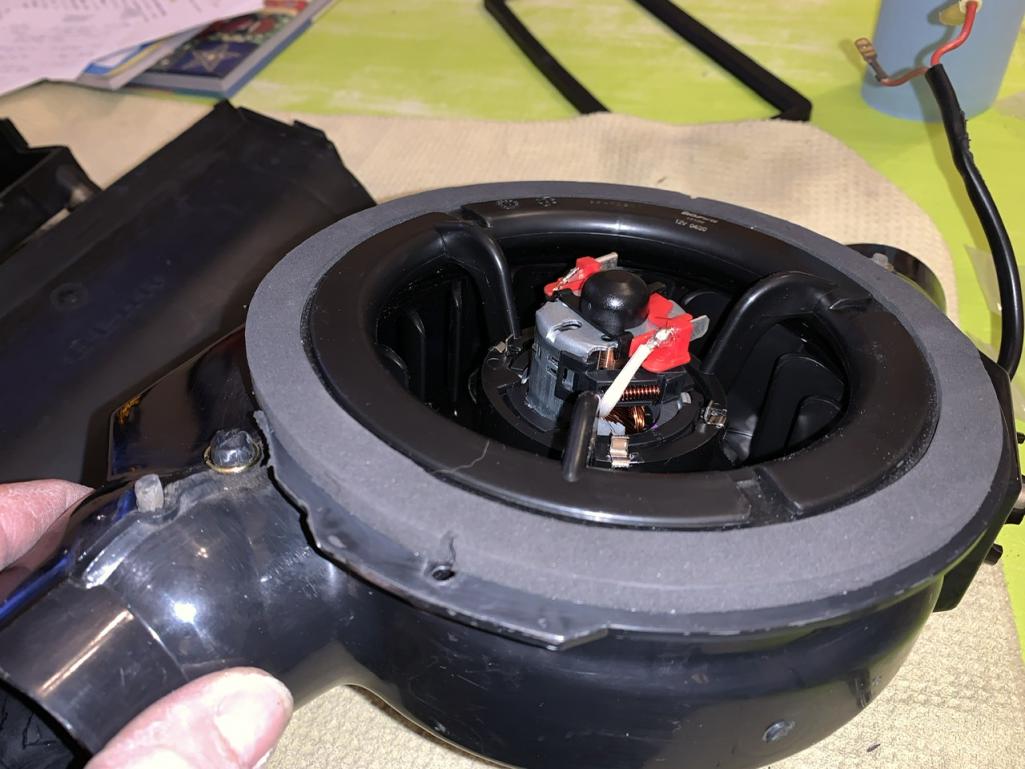
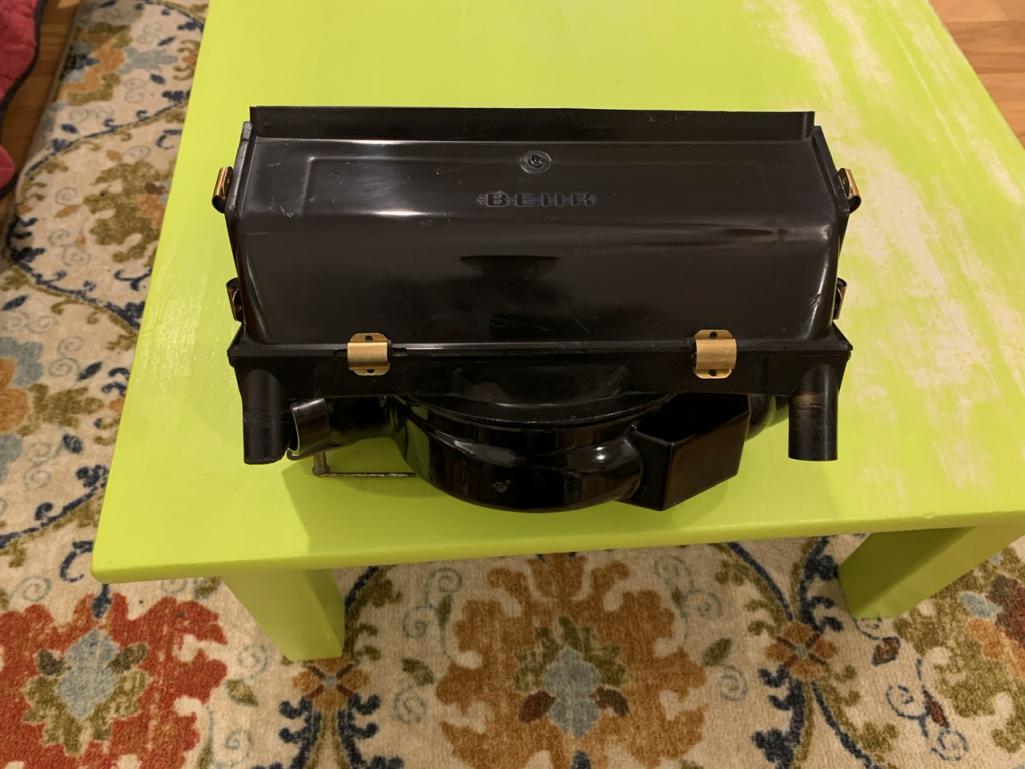
Posted by: Tincan365 Apr 7 2022, 10:00 PM
Wow, your car looks great! I just read all 23 pages start to finish and got super motivated. I just picked up a single owner, 75k (with proof), 75' 2.0 with zero hell hole or longs rust. It's got a bit of surface rust from rodent dropping, from when it sat in a garage since 1981. I just pulled out the entire interior looking for rust, cleaning and reassembling. I also picked up a full 5 lug, brake and suspension swap so I can fit my 7" wide cookie cutters. Everything that gets touched gets upgraded if possible.
I forgot to mention, It's also metallic copper!
Also, I got it for free.......
Keep up the good work!
Josh
Posted by: Root_Werks Apr 9 2022, 05:01 PM
Wow this turned out nice! Love the attention to detail, new small parts and such. Nicely done!
Posted by: DRPHIL914 Apr 11 2022, 07:57 AM
Wow, your car looks great! I just read all 23 pages start to finish and got super motivated. I just picked up a single owner, 75k (with proof), 75' 2.0 with zero hell hole or longs rust. It's got a bit of surface rust from rodent dropping, from when it sat in a garage since 1981. I just pulled out the entire interior looking for rust, cleaning and reassembling. I also picked up a full 5 lug, brake and suspension swap so I can fit my 7" wide cookie cutters. Everything that gets touched gets upgraded if possible.
I forgot to mention, It's also metallic copper!
Also, I got it for free.......
Keep up the good work!
Josh
Wow this turned out nice! Love the attention to detail, new small parts and such. Nicely done!
@http://www.914world.com/bbs2/index.php?showuser=26325
@http://www.914world.com/bbs2/index.php?showuser=2105
thanks guys! It seems like one is never done! We started out on this 12 years ago
and its been quite a journey. I should post some updated pictures since i recently had to pull the transmission to take care of a leaking output shaft seal and replace the clutch disc, and all the push rod tube seals. While that was getting done i again replaced the accelerator cable and the clutch cable, and wrapped them for extra protection . Nothing last for ever, its just a constant project. Next up is new front top and side seal. I put that seal in 8 or so years ago, time for a new one, then new soft brake lines, i have the new braded ones from PMB's recent group buy.
I will post some more pictures soon, most of them are on instragram at drphils914
Tincan post some pictures of that copper metallic!! not many were made, its good to hear another one survived and will be back on the road!! What color interior? mine was originally tan but was so bad from being out in the desert of CA that i just redid the whole thing and i liked the black and plaid so thats where i am now.
Posted by: DRPHIL914 Apr 11 2022, 08:31 AM
leaking trans seal made a mess , cleaned it all up and painted the trans while it was out,
cable separating and damaged from heat and age means all new cables and new wrap including reflective heat shield type wrap on the section where where the AF meter wire connector is close to exhaust header pipe, i had extra wire wrap so i put it on all the e-brake cables too, so extra protection from heat and road grime. after 2 drives no leaks at the trans or rms, or the push rod tube seals that were all replaced along with new rocker cover seals. hope now it can stay clean for a while!
of course the old disc got trans fluid on it so new disc with new rms ans pilot bearing too- that trans output shaft seal should have lasted more than a year , now i am wondering if i pu a new one in last year when i rebuilt the trans oh well.
also i added spacer to the transmission mount above the cup washer to drops it about 1/4” in rear so the muffler isn’t rubbing on the shield or the valance. now it’s perfect!
Attached thumbnail(s)
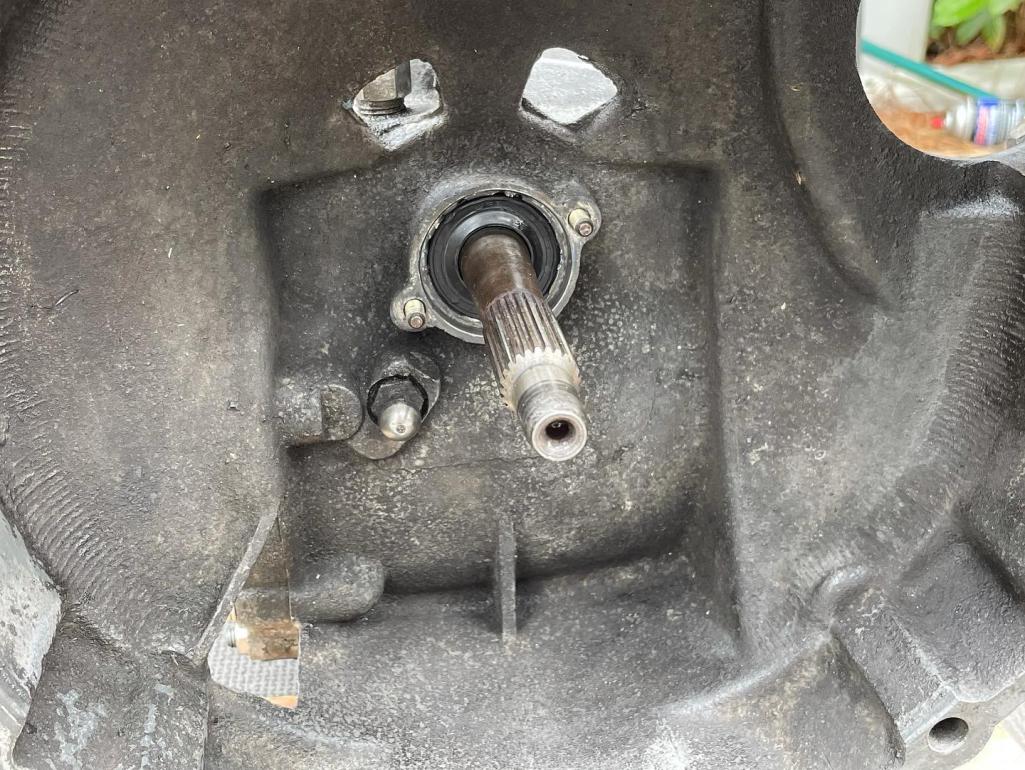

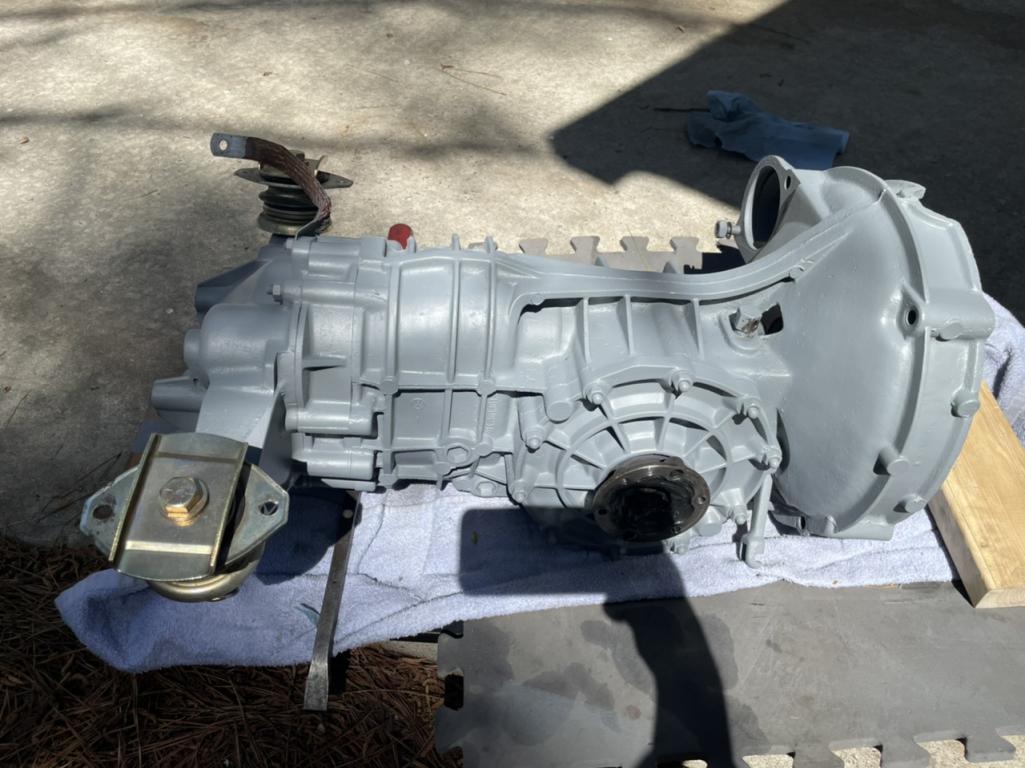
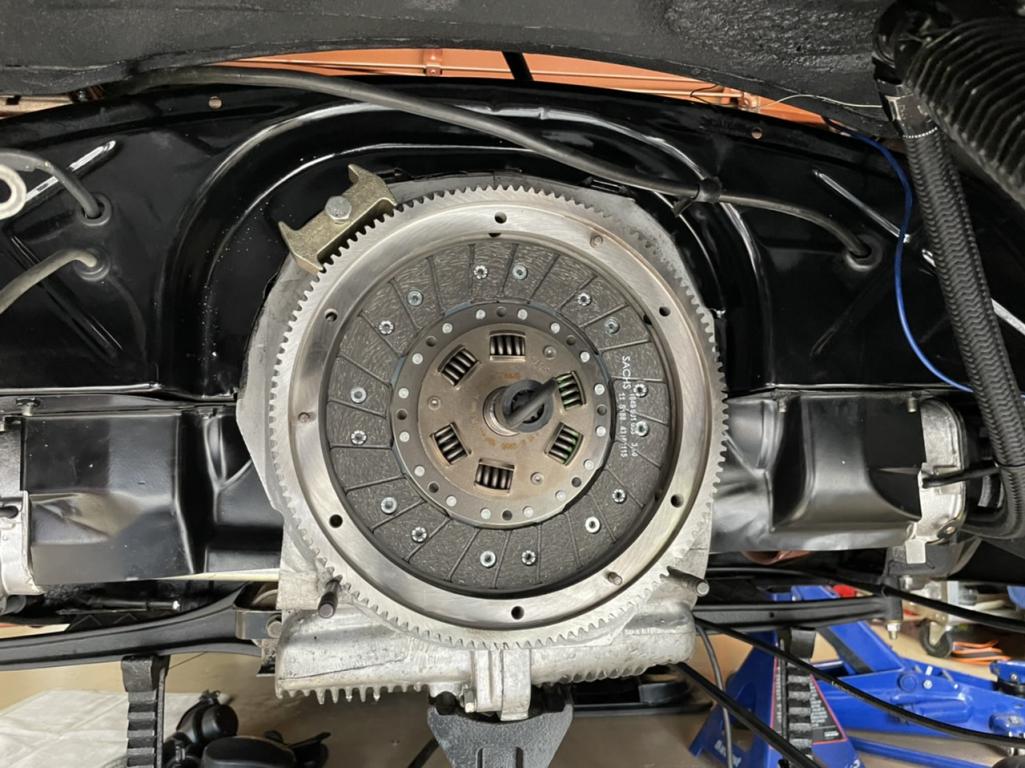
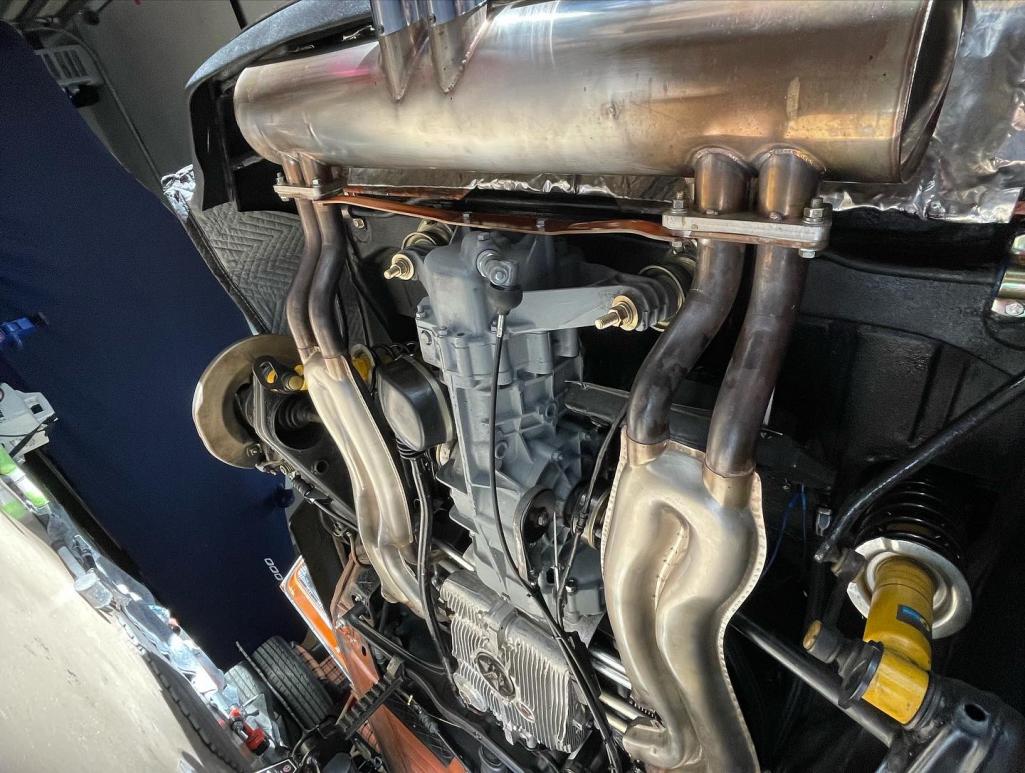
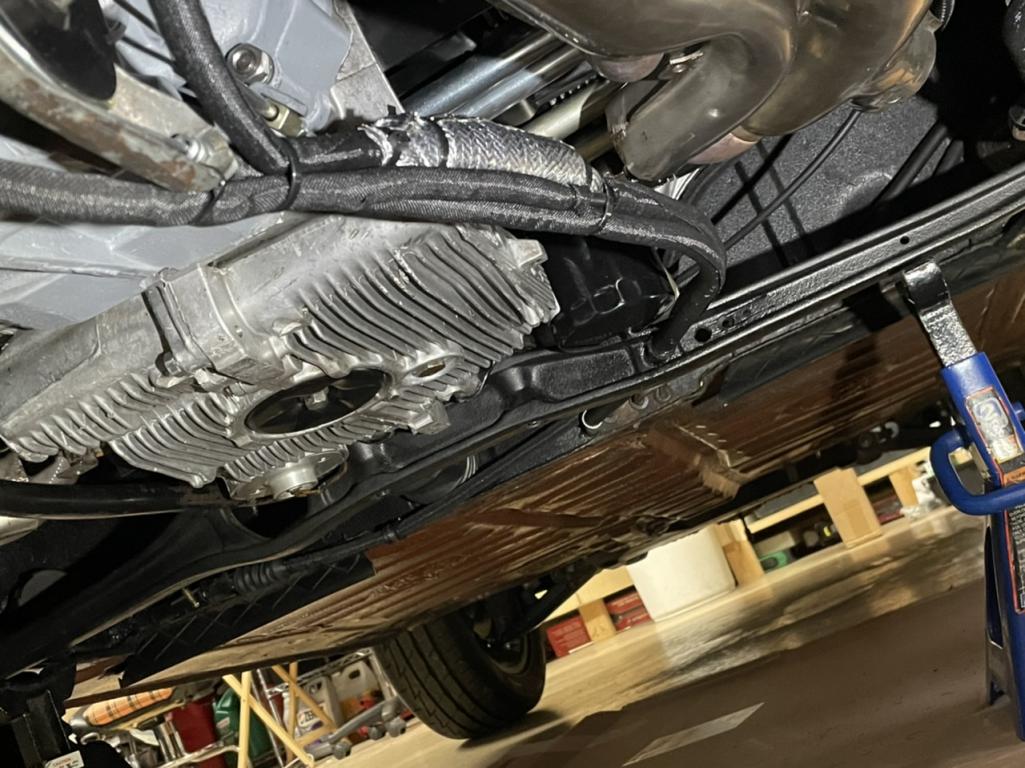
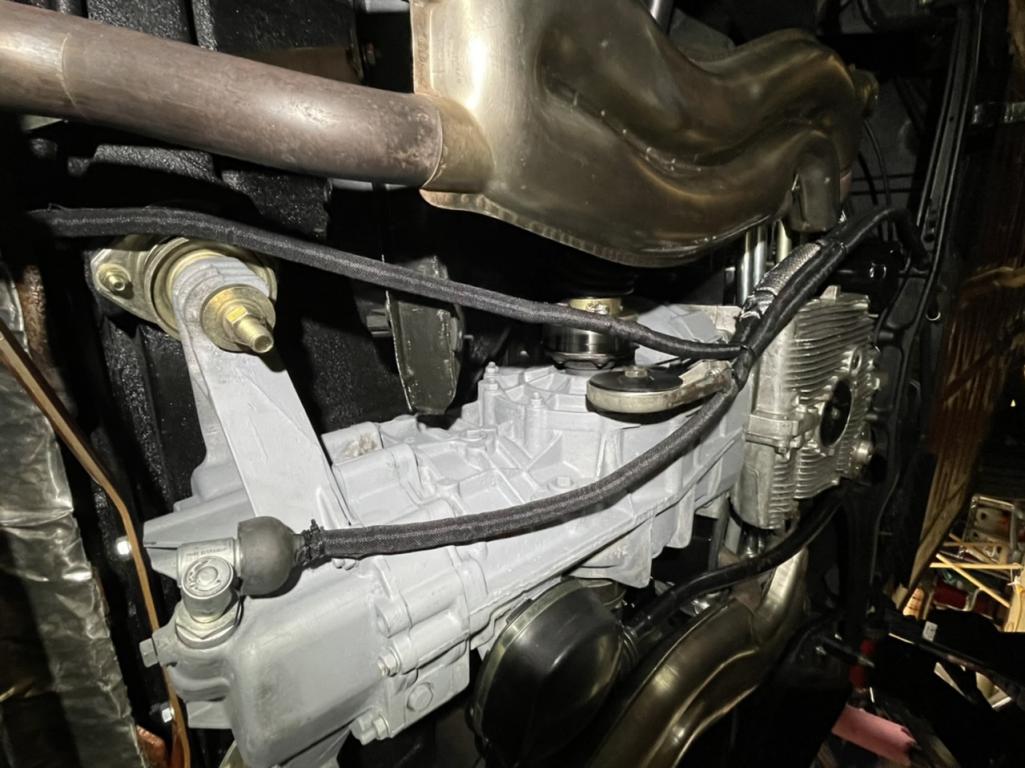
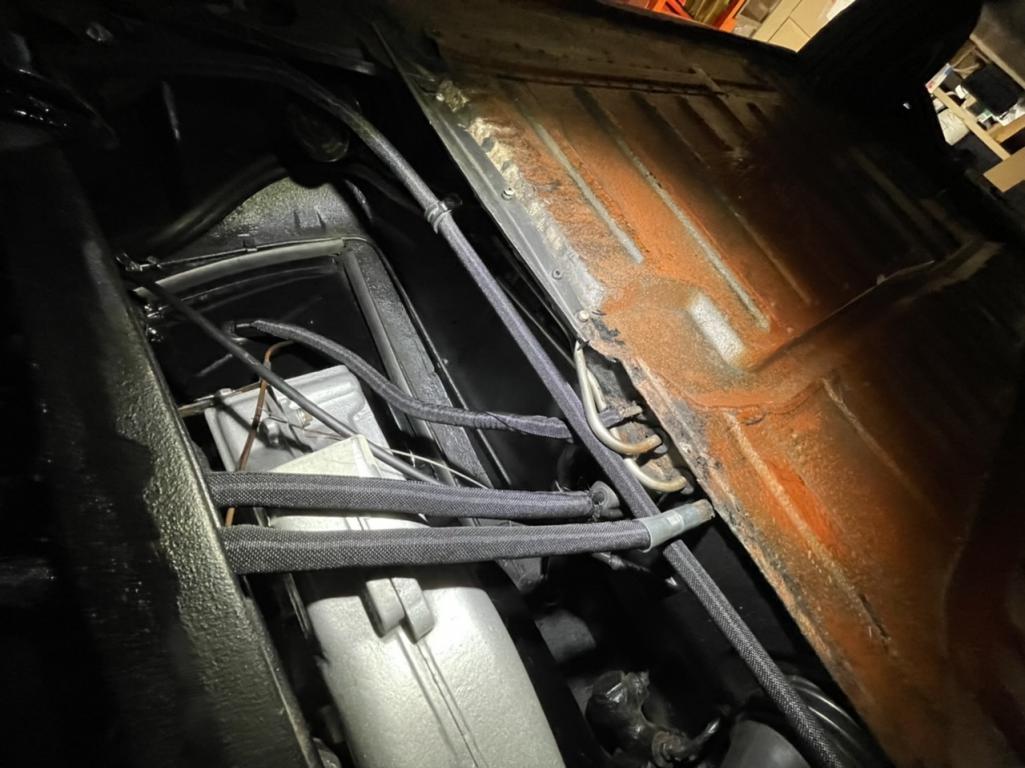
Attached image(s)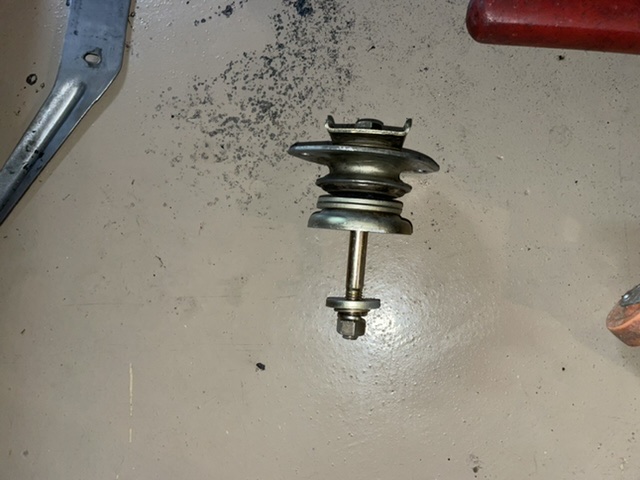
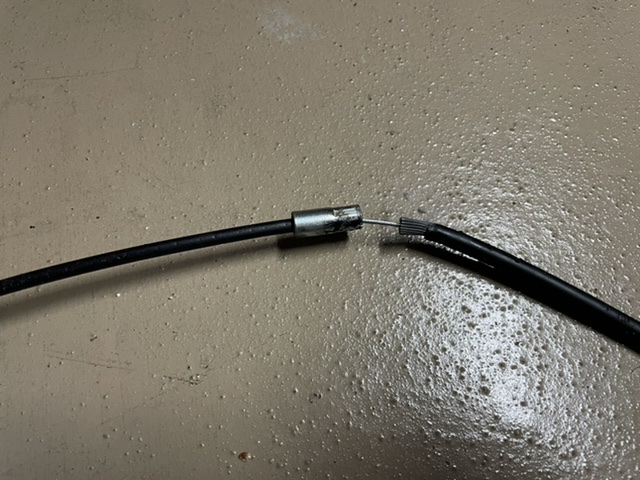
Posted by: DRPHIL914 Nov 28 2022, 11:56 AM
well now that we are back up and running (Thanks Sir Andy!!!!) thought i’d post on my recent showing at the HHI Concours, i may have done that on a different thread like “what did you do to your 914 today” but need to put it here too.
Order of Merit Award at the “Car Club Jamboree” 2 weeks back.
Attached thumbnail(s)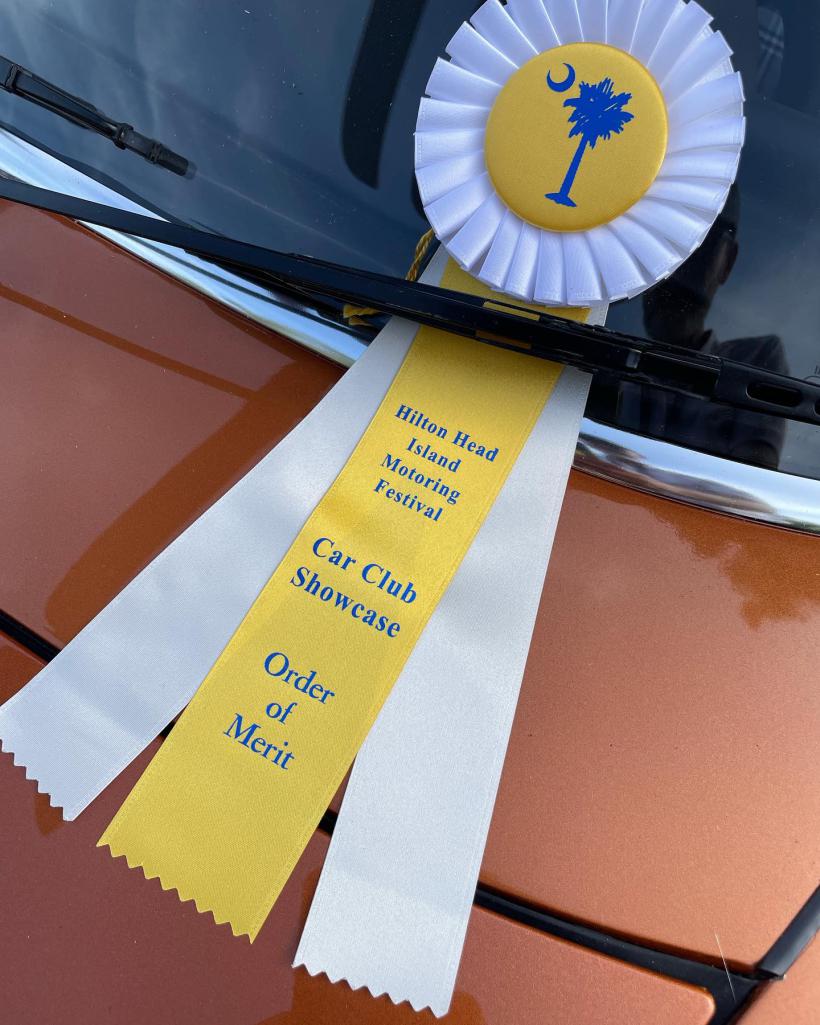
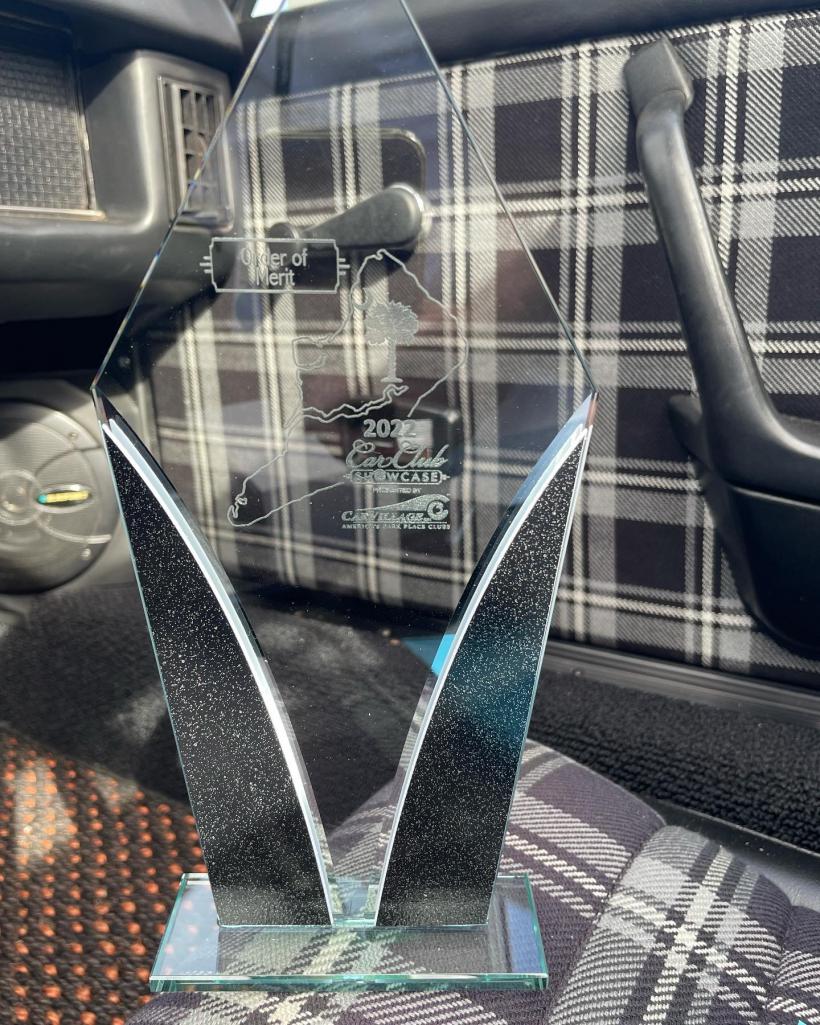
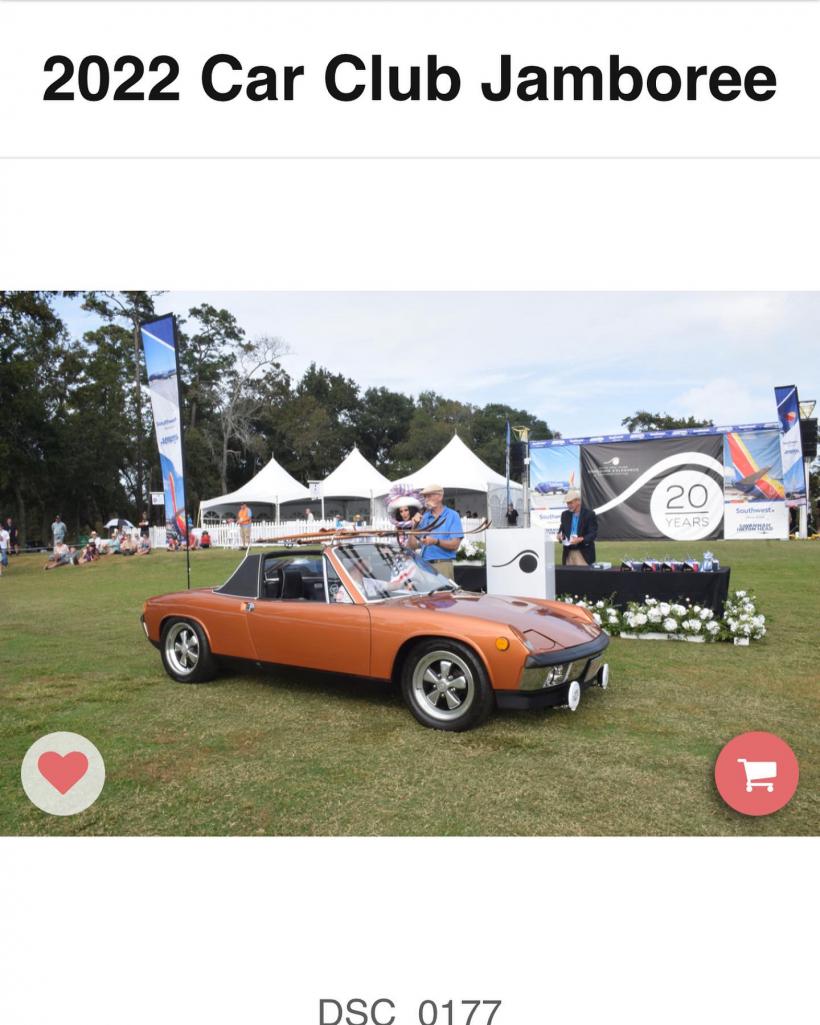
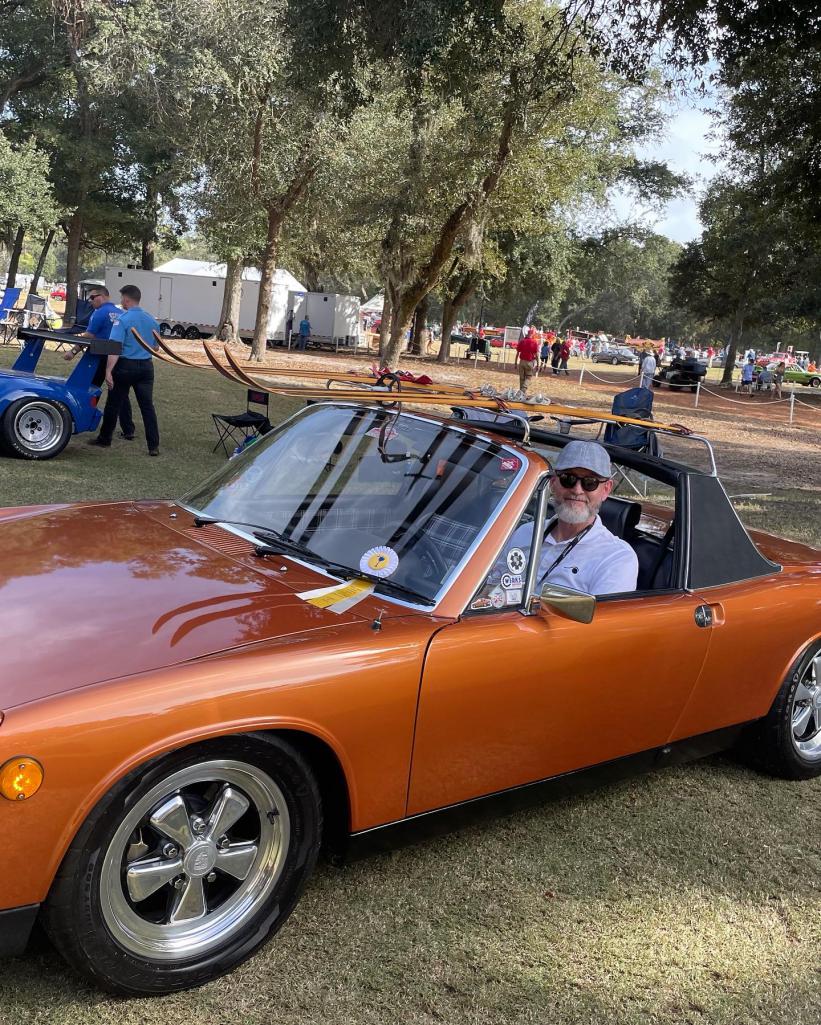

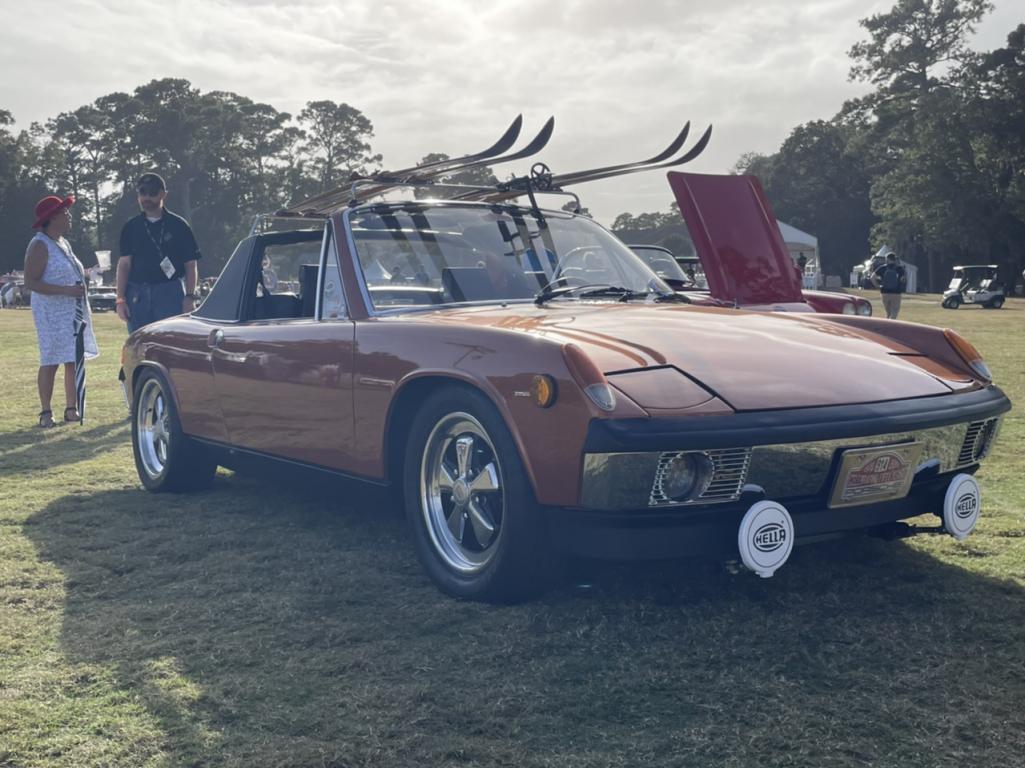
Posted by: DRPHIL914 Nov 28 2022, 12:02 PM
New custom leather shift boot, and the new tartan Scottish wool blanket from 914rubber , which is a awesome addition to coordinating with the interior and matching travel bags
Attached thumbnail(s)
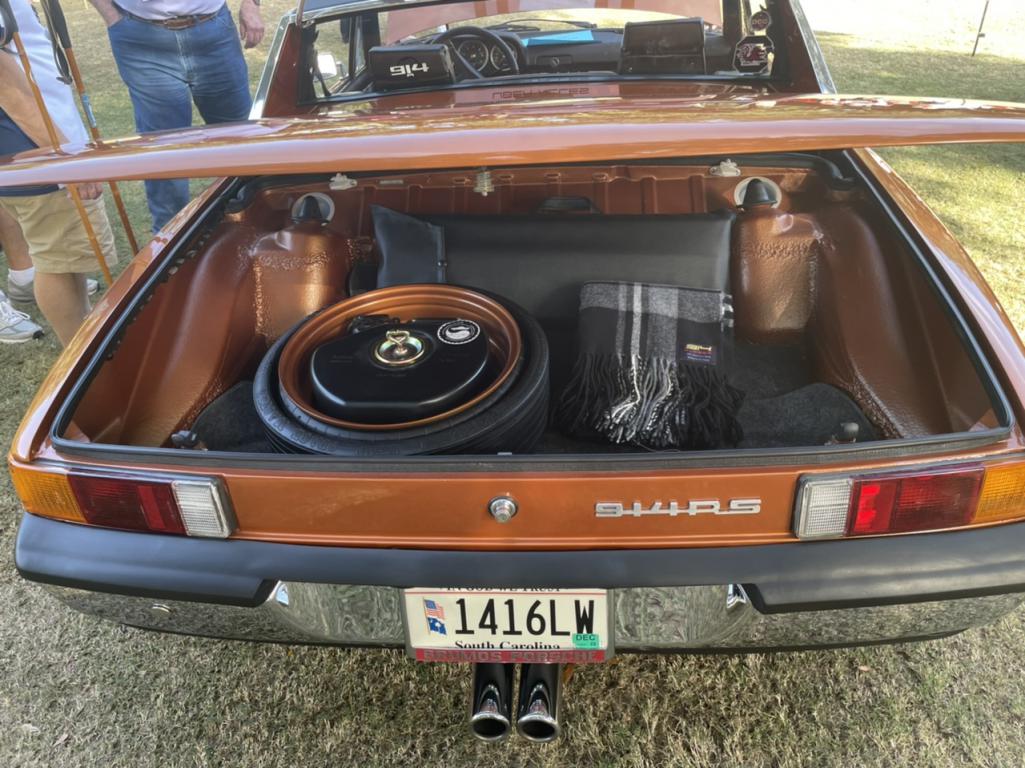
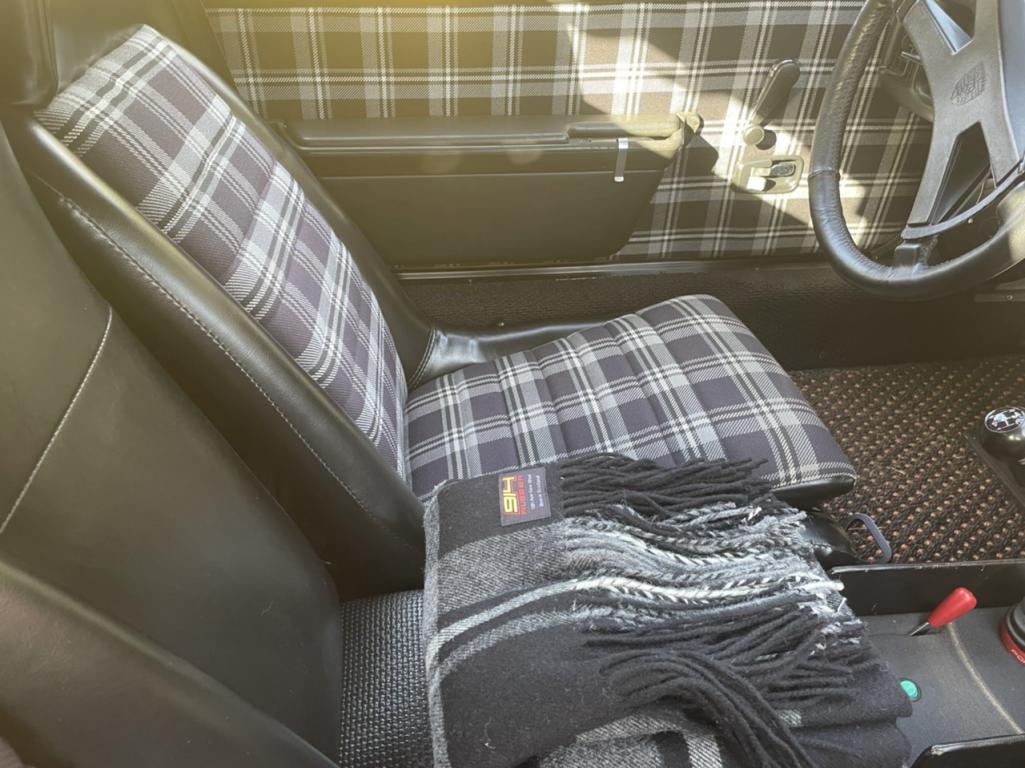
Posted by: billh1963 Nov 30 2022, 12:56 PM
well now that we are back up and running (Thanks Sir Andy!!!!) thought i’d post on my recent showing at the HHI Concours, i may have done that on a different thread like “what did you do to your 914 today” but need to put it here too.
Order of Merit Award at the “Car Club Jamboree” 2 weeks back.
You sure that you and Dennis Gage aren’t long lost brothers?
Posted by: DRPHIL914 Nov 30 2022, 03:30 PM
well now that we are back up and running (Thanks Sir Andy!!!!) thought i’d post on my recent showing at the HHI Concours, i may have done that on a different thread like “what did you do to your 914 today” but need to put it here too.
Order of Merit Award at the “Car Club Jamboree” 2 weeks back.
You sure that you and Dennis Gage aren’t long lost brothers?
 Ha! i dont think so, not sure where he's from. we've seen him on tv for a long time, nice guy, very approachable unlike some other personalities in that industry.
Posted by: DRPHIL914 Mar 20 2023, 07:41 AM
update to the thread as i try and keep some recent or current happenings to document the ongoing saga of 914 ownership!
since last november the Motor had to comeback out to again take care of a RMS leak, and having now driven it 500 miles since and been to Werks Reunion this month, so far so good so cheers to Ehrling RMS seals boo to VR,
Great trip met Magnus Walker etc
New additions to the car recently is a new to me OEM center console! the original one had been removed by a previous owner, and Roch from 914werke.com out west passes this on to me and it’s now in my car so the aftermarket repro one is gone!
also coming this week are new A-pillar trims from 914rubber and aalso new lower outer rocker panels in aluminum, from a 914 member here, so more pictures to come, but while motor was out it got new fuel lines, injectors, ans RMS with new purse rod tube seal and the motor got detailed and cleaned currently reads 11,200 miles so that is since the repaint ans body work almost 4 years ago, and 2500 since new motor build 2 years ago.
Attached thumbnail(s)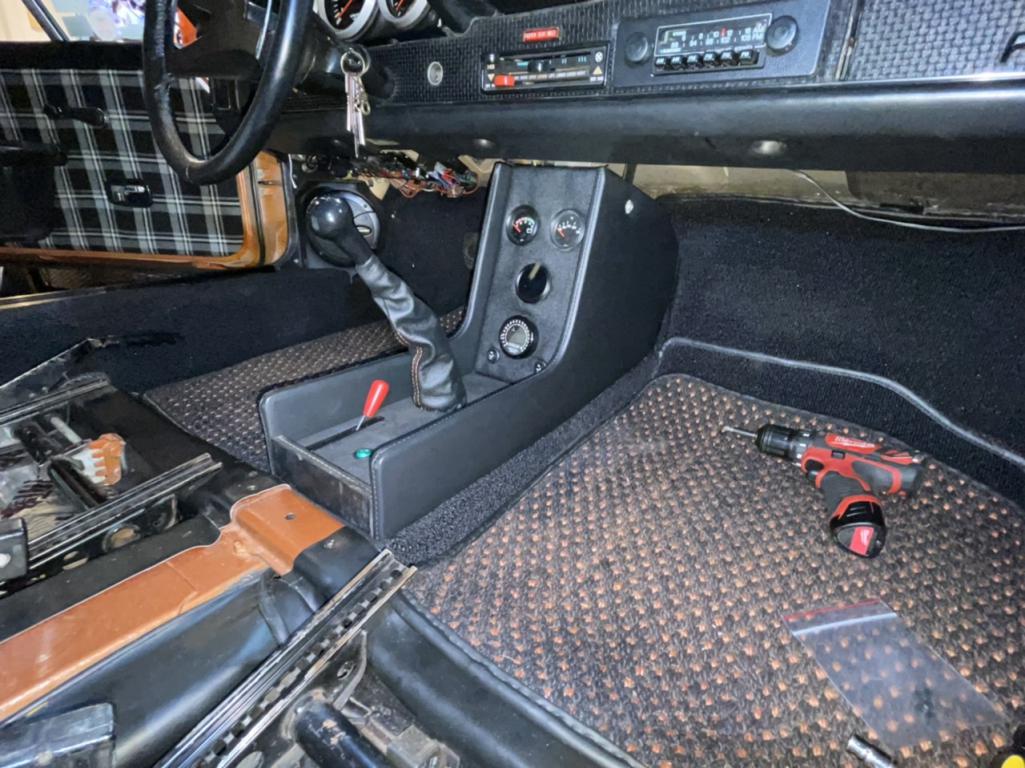
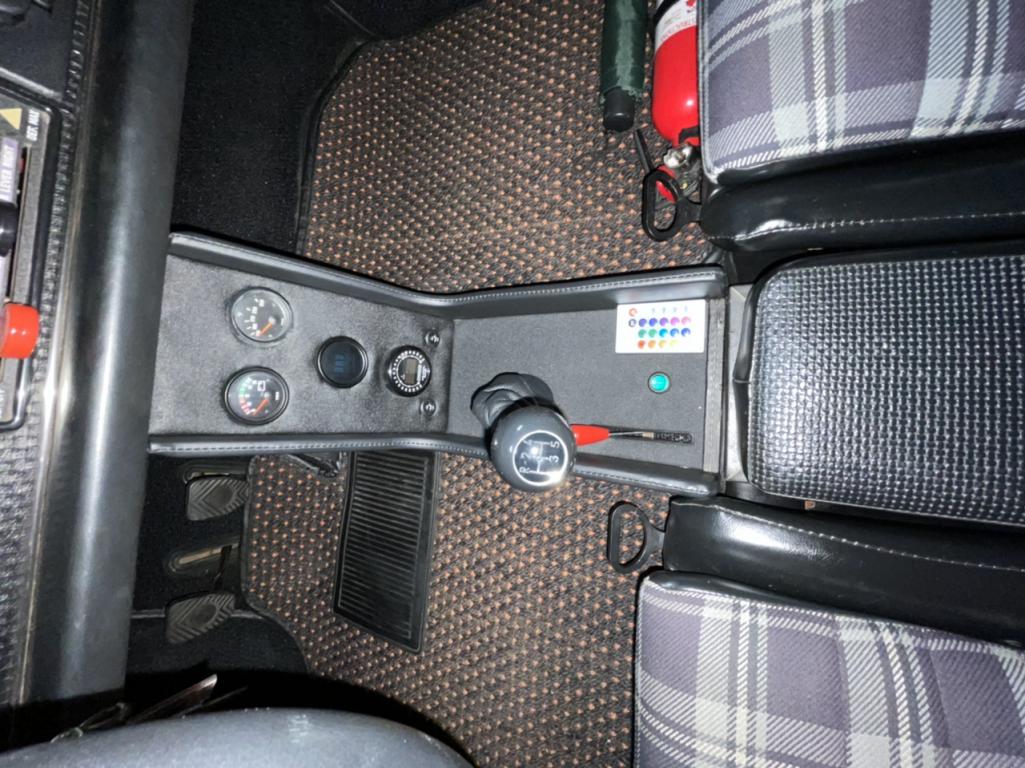
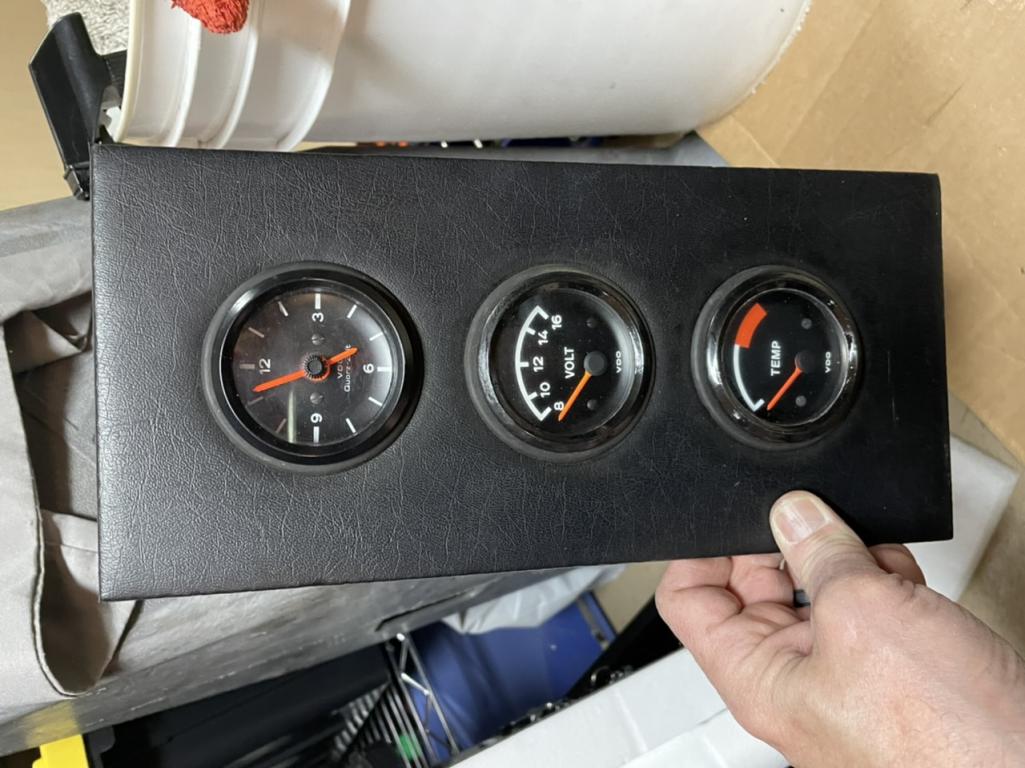
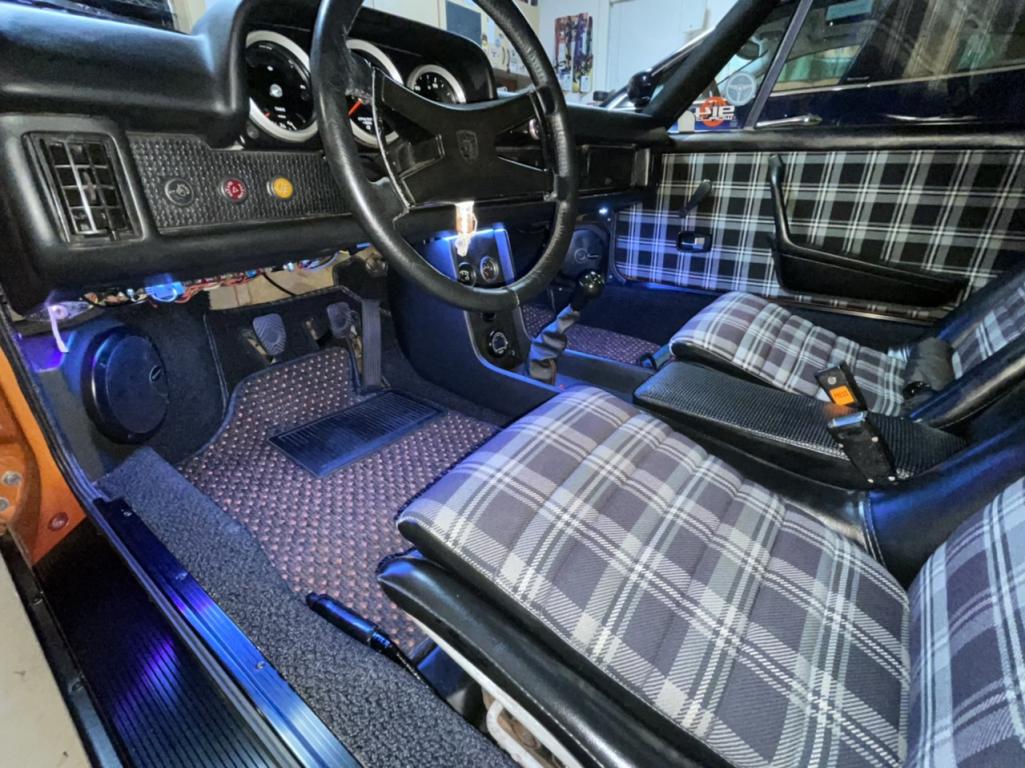
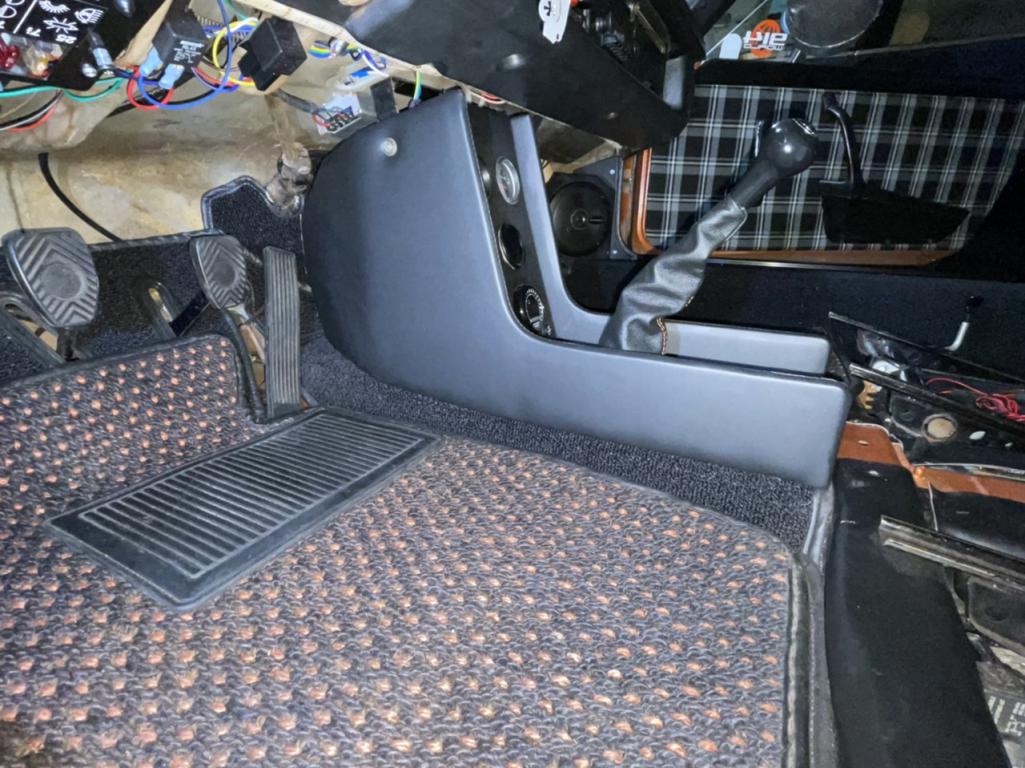
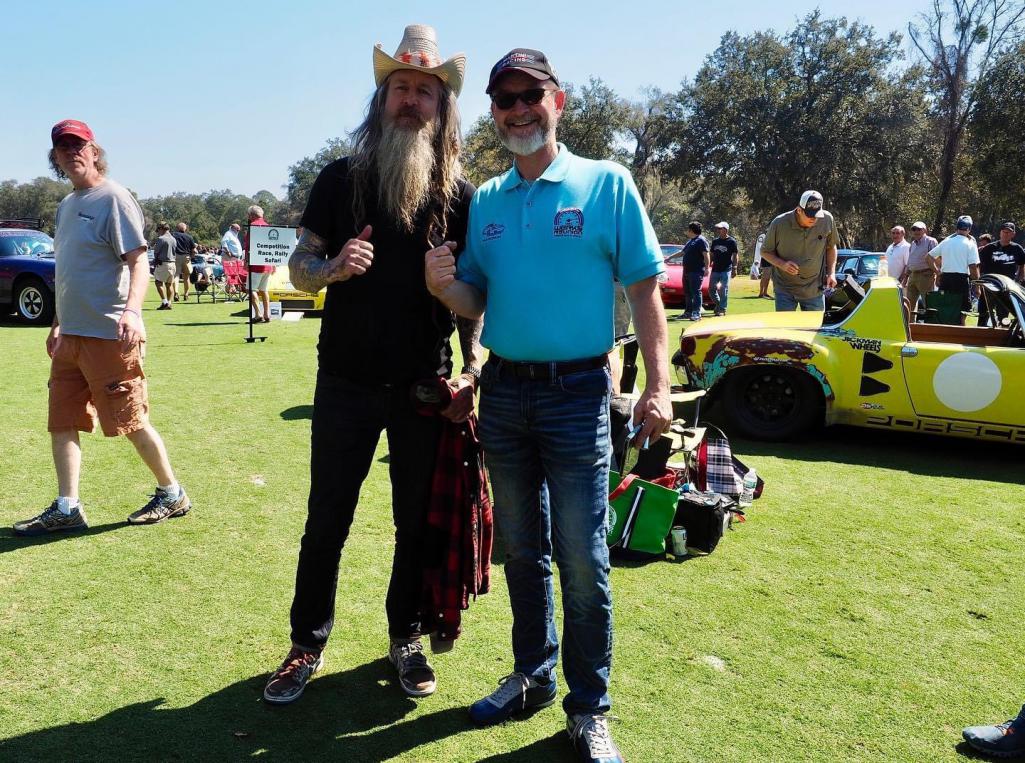

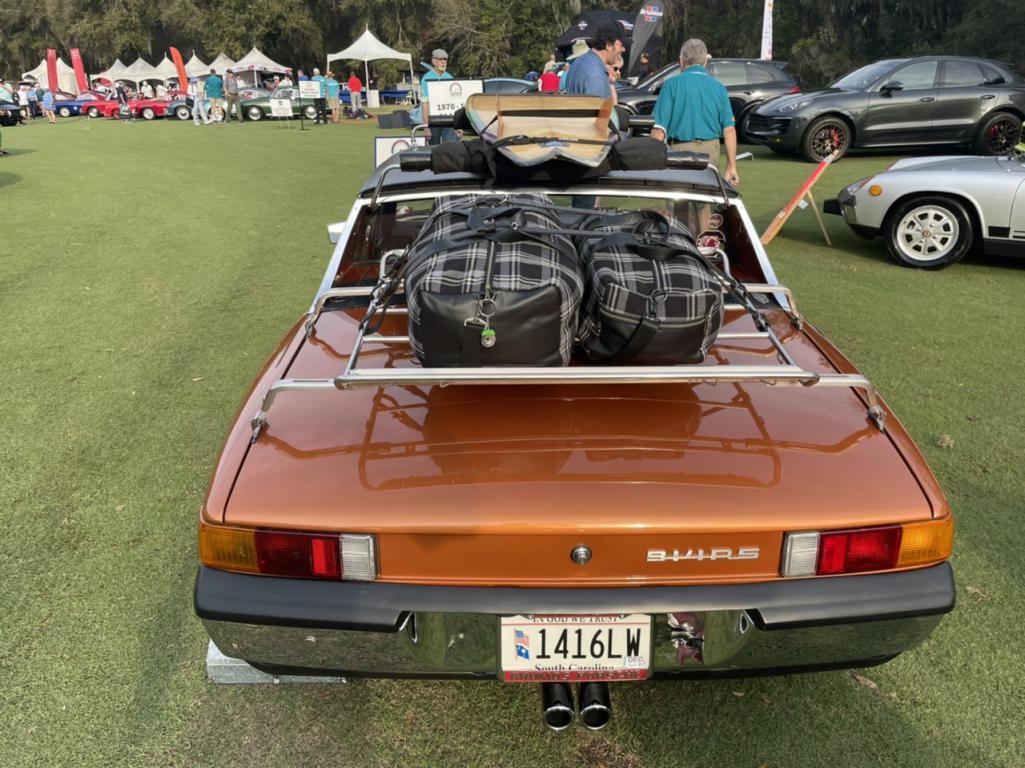
Posted by: DRPHIL914 Mar 20 2023, 07:45 AM
more pics …
Attached thumbnail(s)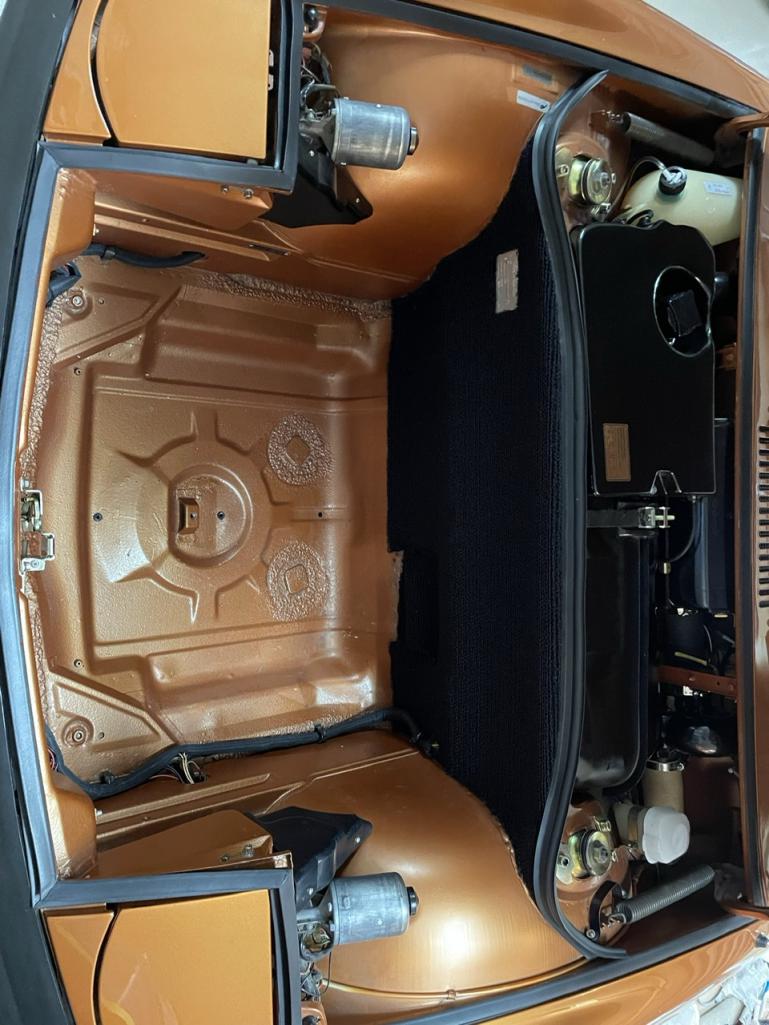
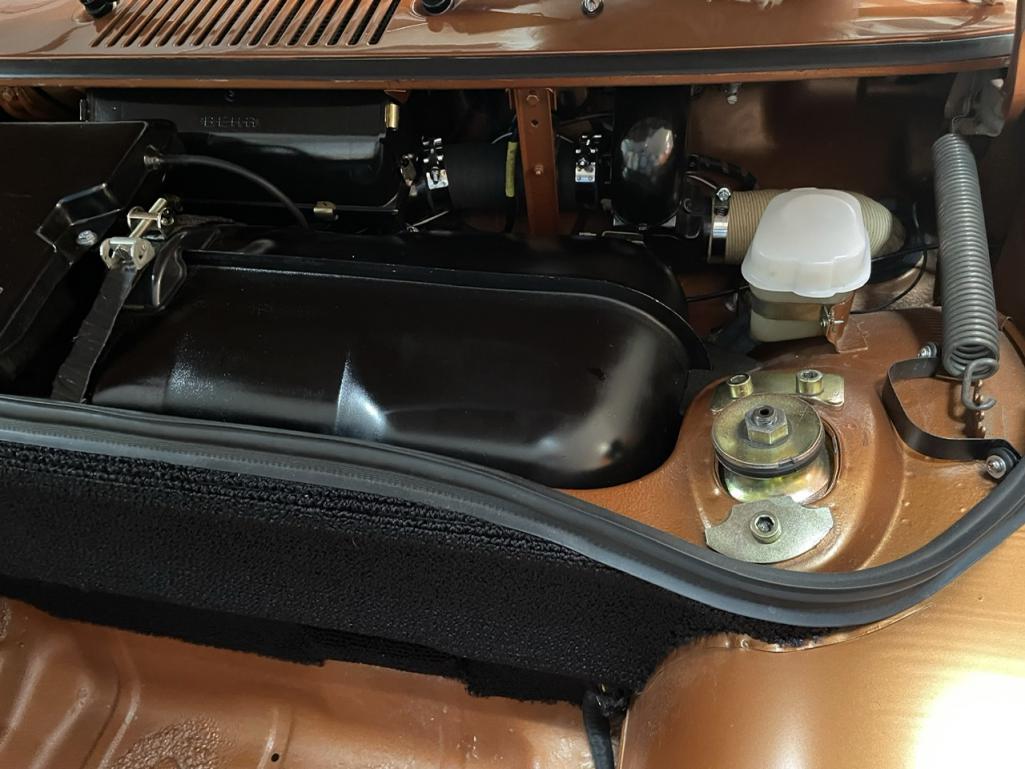
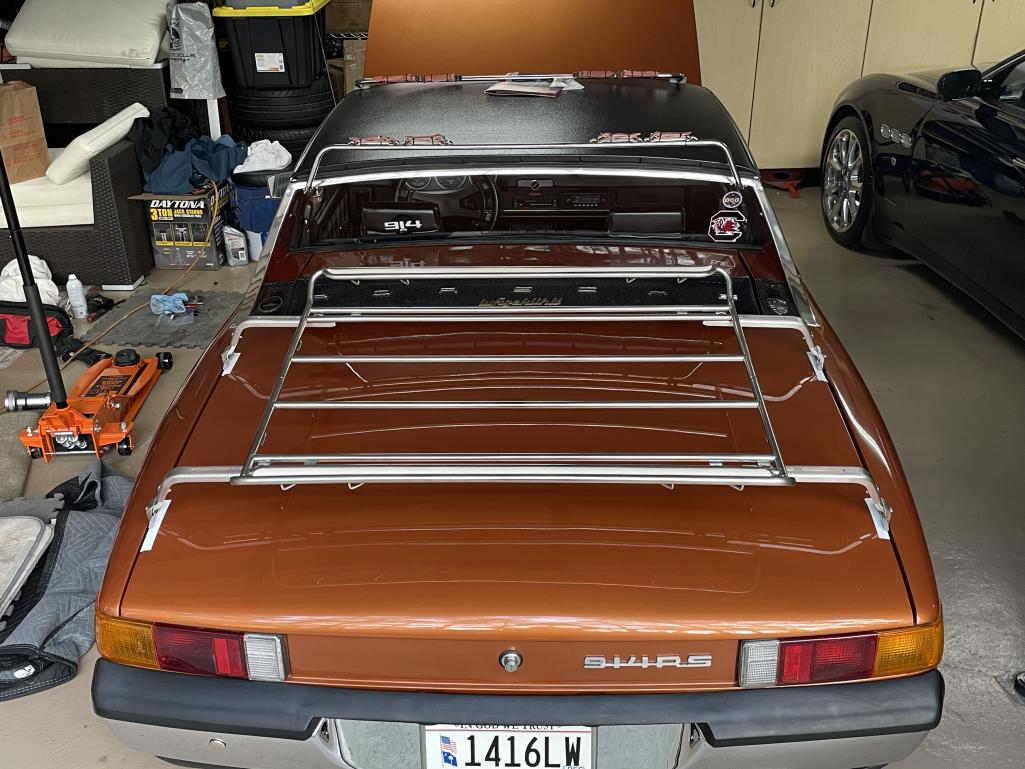
Posted by: DRPHIL914 Mar 20 2023, 07:52 AM
also had to install new fuel pump, old ones was probably 14 years old and the check valve in it was failing.
new pump, all cleaned up.
new clutch pully bracket from tangerine racing too
and new starter
Attached thumbnail(s)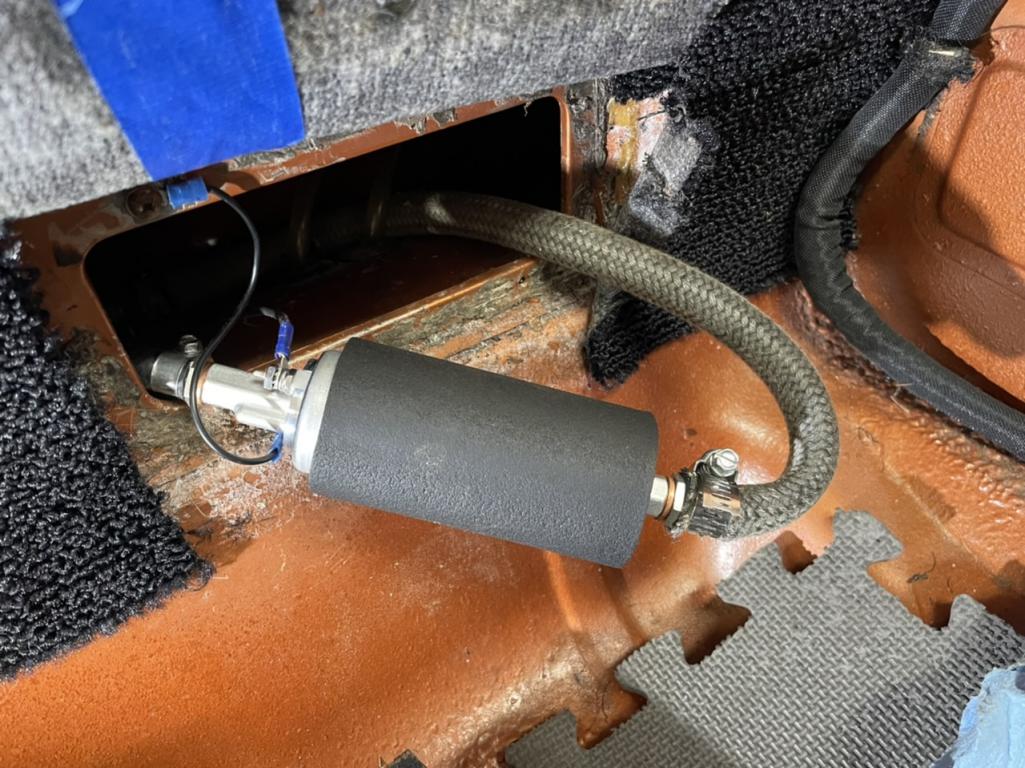
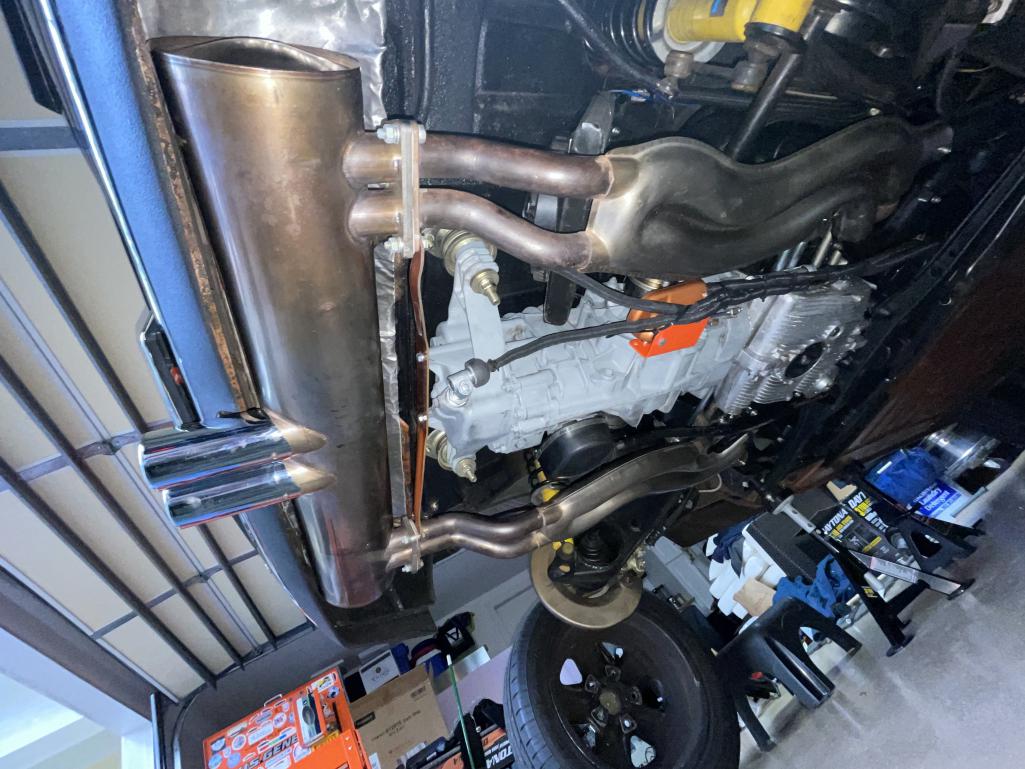
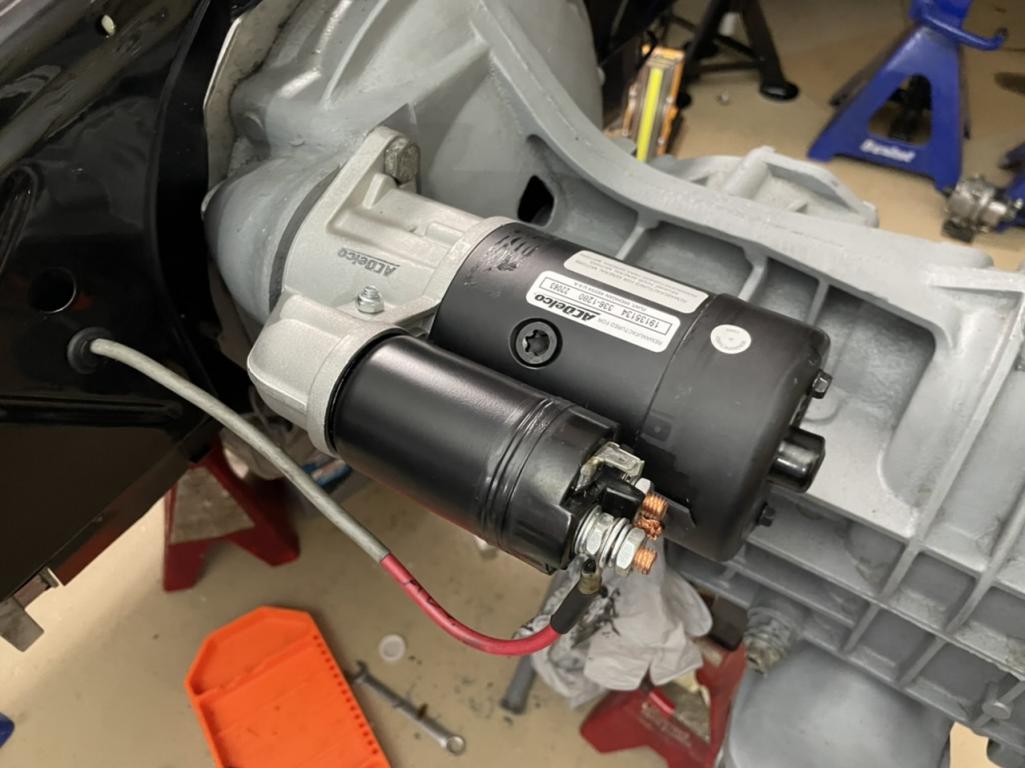
Posted by: DRPHIL914 Mar 20 2023, 08:25 AM
i also shortened the tailpipes about 1.5”, they stuck out further than i thought looked good.
looks good with a couple new pieces of freshly painted tin,
new fuel lines had to happen , might as well
forgot to mention as well new intake runners and hoses and seals the other intake runners were not stock color , i had several sets ans recently got these from Bruce Stone,
with new accelerator ans clutch cables as well as e-brake cables, things are pretty fresh. the left rear caliper had a seal leak so that was also replaced a few months ago so new beaded brake lines when on with the new caliper that PMB replaced free of charge under warranty!!! the lines were new 10 years ago so i figured might as well do them while i had it out and had to flush the system anyway
Attached thumbnail(s)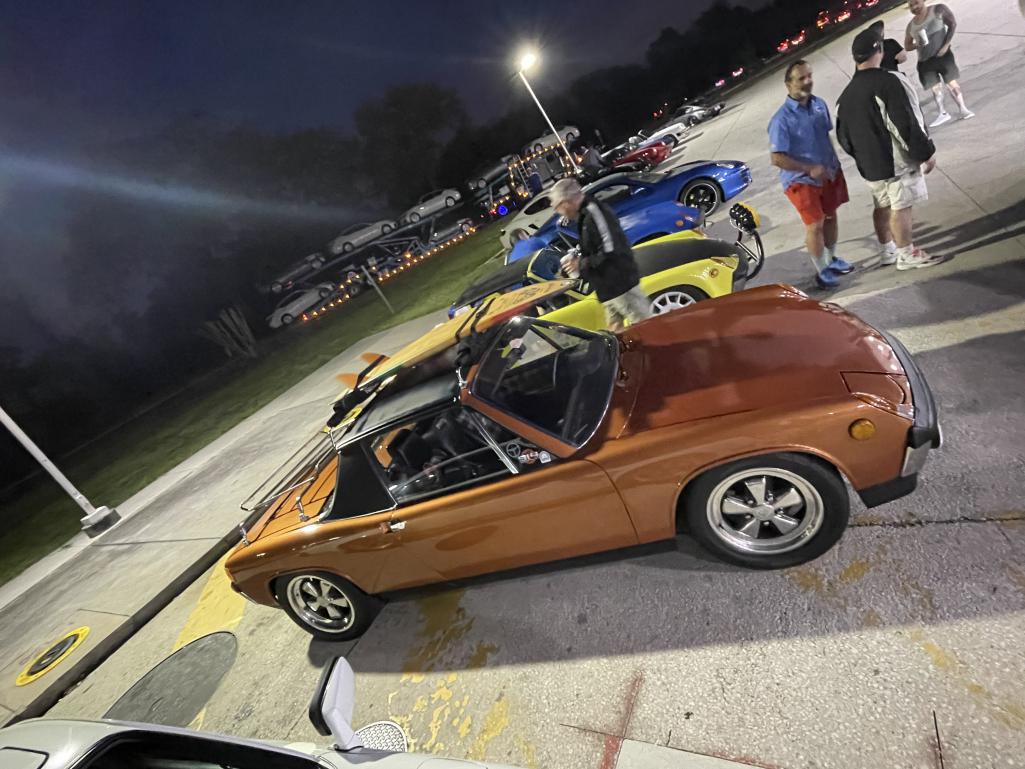
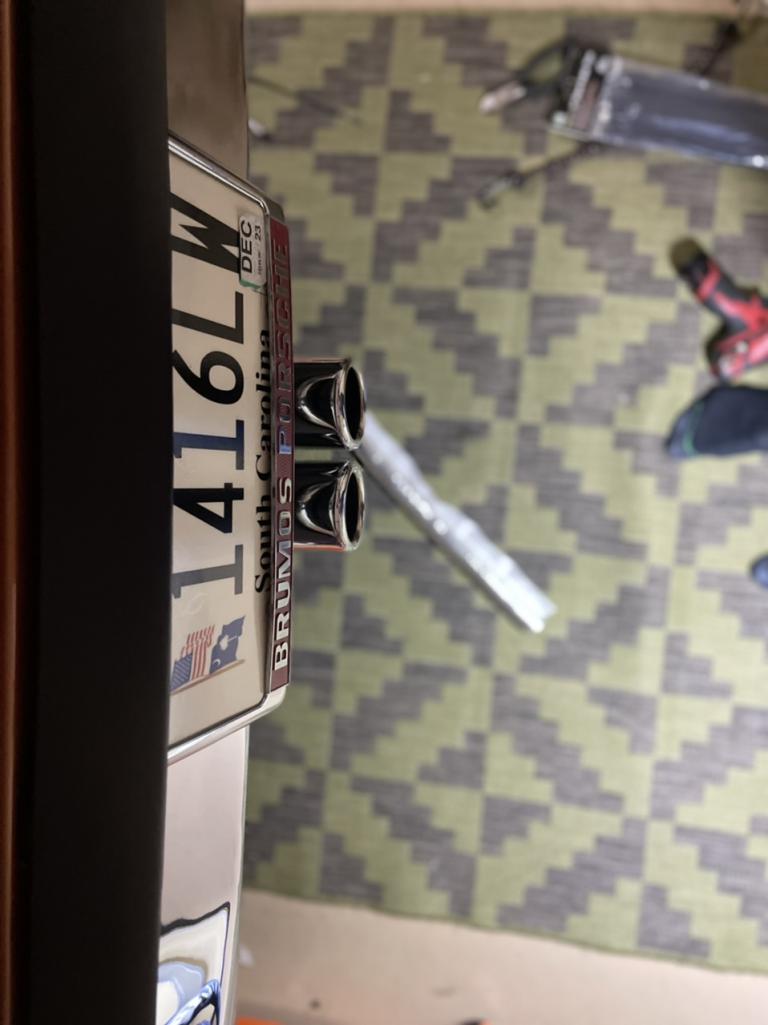
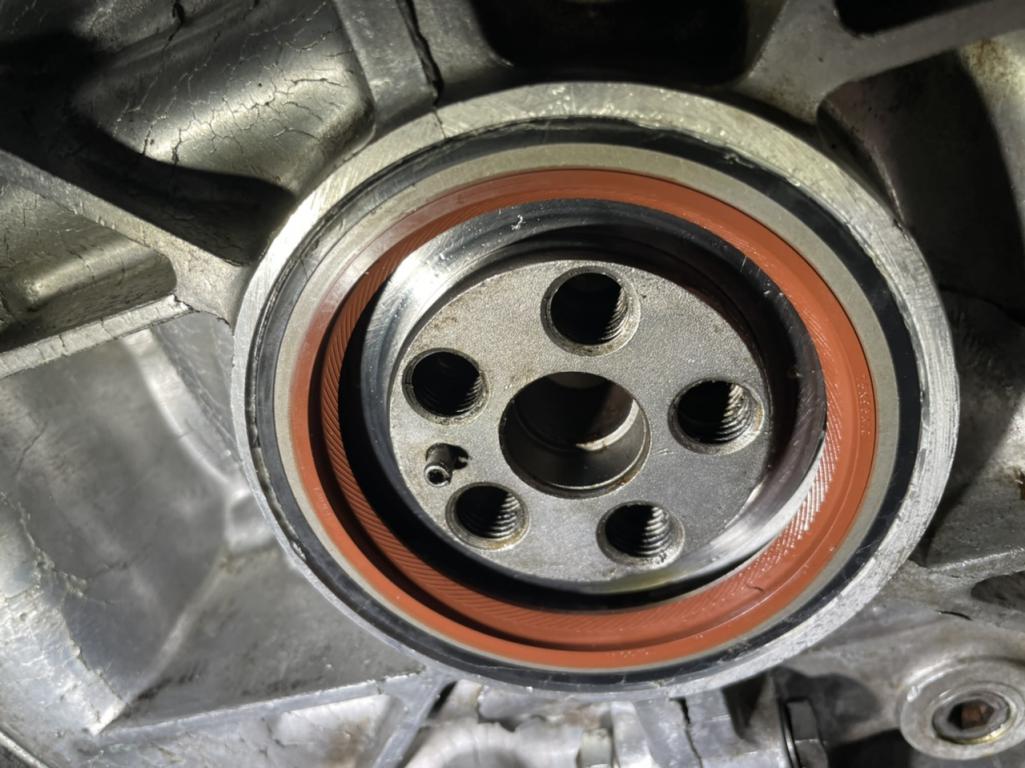
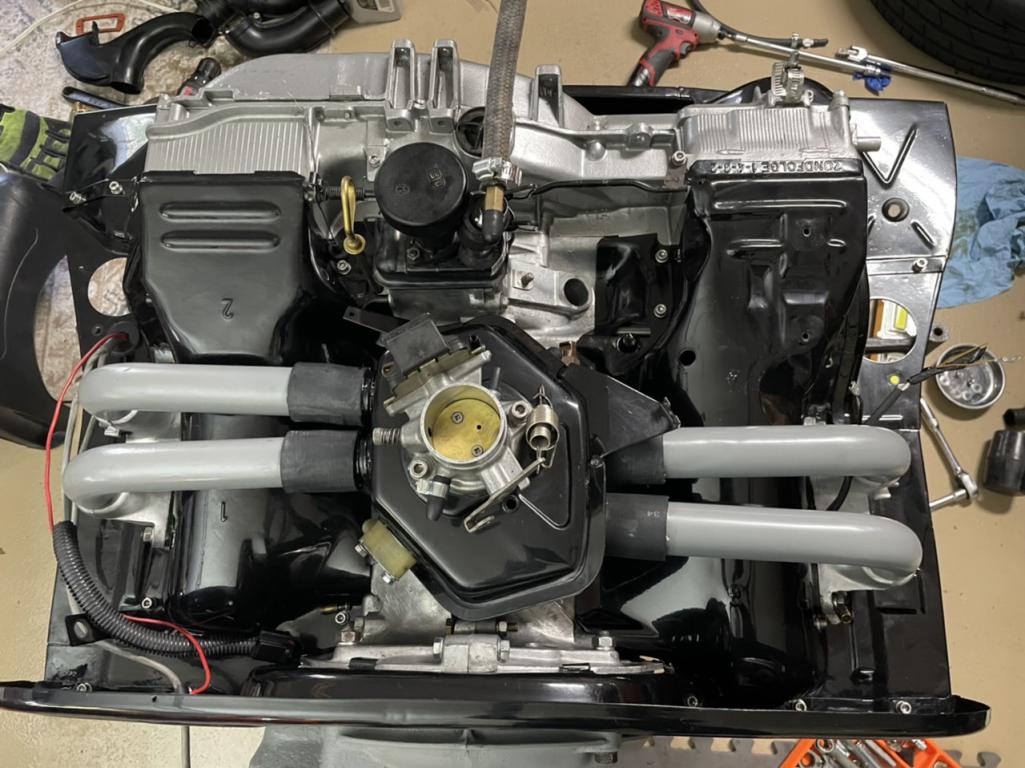
Posted by: DRPHIL914 Mar 20 2023, 08:37 AM
the new clutch cable adaptor from Tangerine Racing is nice , now it’s not lower than the rear of the motor.
i do like my cover king car cover..
Attached thumbnail(s)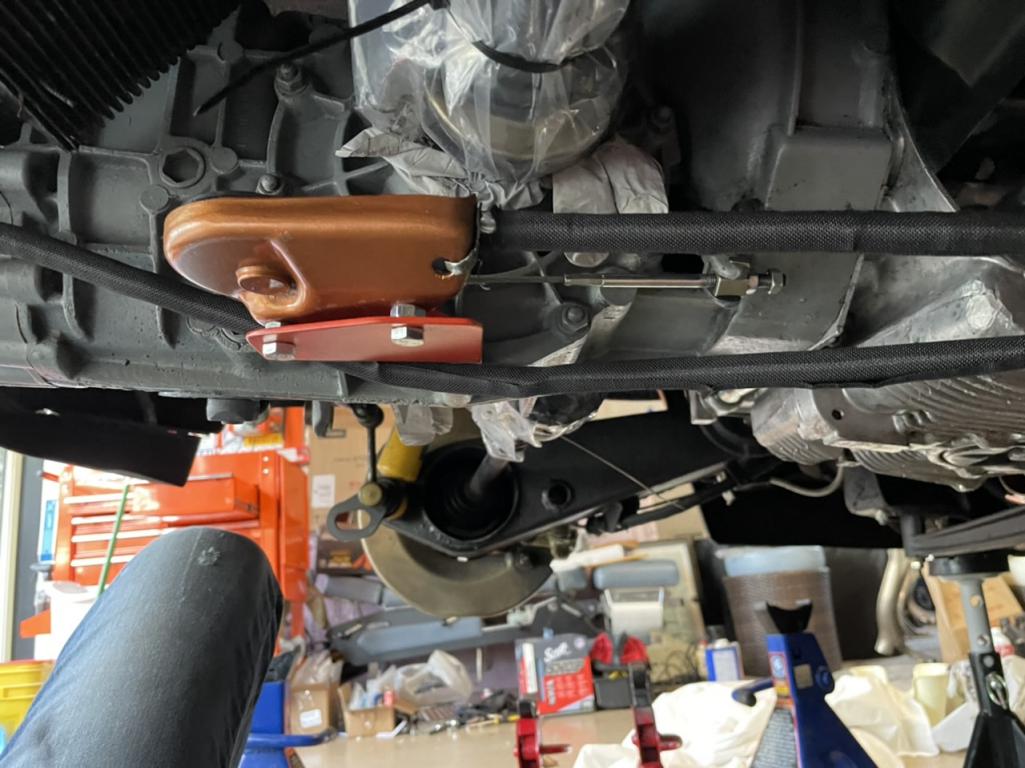
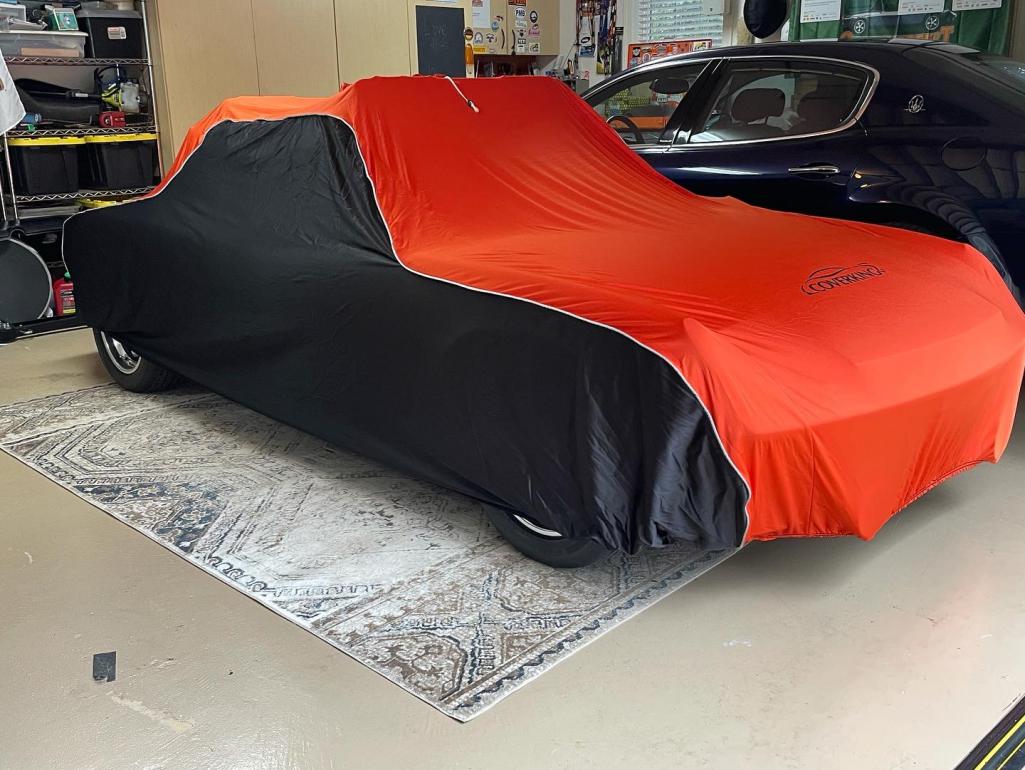
Posted by: DRPHIL914 Mar 20 2023, 08:42 AM
no picture of it but just making mention of it is a brand new restored rear relay board and cover, the board was redone by 914sixer and the covers are back in stock with Mark at 914rubber, they got those done for the late cars a month back or so. The relay board failed on me a year and ahalf ago and stranded me half way to Okteenerfest in 2021! only one i ever missed!.
- also new shift knob and new leather shift boot- i really should make anew list for 2022-2023 , but thats why i post it here to help remind myselft whats been done and when.
Posted by: Cairo94507 Mar 20 2023, 08:45 AM
Dr Phil - Very nice work. Your car looks terrific. I really like the new tailpipe length- looks great.
Posted by: Gatornapper Mar 21 2023, 12:08 AM
Double DITTO from Virginia, Phil.
GN
Dr Phil - Very nice work. Your car looks terrific. I really like the new tailpipe length- looks great.
Posted by: rick 918-S Mar 21 2023, 06:27 AM
One of the best colors. Very nice result. I like the interior.
Posted by: Dr Evil Mar 21 2023, 06:44 AM
Looking forward to seeing this one again at Okteenerfest. Last time for me was 2019 One of the best appointed 914s out there.
Posted by: DRPHIL914 Mar 21 2023, 07:02 AM
Looking forward to seeing this one again at Okteenerfest. Last time for me was 2019
One of the best appointed 914s out there.it will be good to see you , man yea this car has come a long way since back then! and wow, it has been a while! ii think the car just came back from pain in 2019, and i had not done the whole interior etc yet. I still remember the transmission clinic we did at Scotty B's ! man that has to be about 8-9 years ago. So last year, or was it 2 now?, i had to pull the transmission due to the output shaft seal leak, and i went ahead and put the stock #4 and 5 gears back in, it just was too tall for the mountains but i could not have done that with out my rebuild DVD's!!!! btw after doing it a few times it really helped understand how the 914 transmission works, but no leaks and shifts like butter! just wanted to say thanks again and see you in September !
Posted by: Jamie Mar 21 2023, 09:22 AM
Looking forward to seeing this one again at Okteenerfest. Last time for me was 2019
One of the best appointed 914s out there.it will be good to see you , man yea this car has come a long way since back then! and wow, it has been a while! ii think the car just came back from pain in 2019, and i had not done the whole interior etc yet. I still remember the transmission clinic we did at Scotty B's ! man that has to be about 8-9 years ago. So last year, or was it 2 now?, i had to pull the transmission due to the output shaft seal leak, and i went ahead and put the stock #4 and 5 gears back in, it just was too tall for the mountains but i could not have done that with out my rebuild DVD's!!!! btw after doing it a few times it really helped understand how the 914 transmission works, but no leaks and shifts like butter! just wanted to say thanks again and see you in September !
And there's a photo of your car in the new PCA Panorama magazine, well done trip to represent our teeners!
Posted by: DRPHIL914 Mar 22 2023, 05:25 PM
Looking forward to seeing this one again at Okteenerfest. Last time for me was 2019
One of the best appointed 914s out there.it will be good to see you , man yea this car has come a long way since back then! and wow, it has been a while! ii think the car just came back from pain in 2019, and i had not done the whole interior etc yet. I still remember the transmission clinic we did at Scotty B's ! man that has to be about 8-9 years ago. So last year, or was it 2 now?, i had to pull the transmission due to the output shaft seal leak, and i went ahead and put the stock #4 and 5 gears back in, it just was too tall for the mountains but i could not have done that with out my rebuild DVD's!!!! btw after doing it a few times it really helped understand how the 914 transmission works, but no leaks and shifts like butter! just wanted to say thanks again and see you in September !
And there's a photo of your car in the new PCA Panorama magazine, well done trip to represent our teeners!
thanks @http://www.914world.com/bbs2/index.php?showuser=2939
BTW there is also a nice video that Vu did at Werks featuring a few of the cars that caught his eye at Werks, the video can be found on youtube if you are a PCA member then you received an email with a link directly to the video.
https://www.youtube.com/watch?v=n1W75XKzn6s
i hope this link works or should i say "werks" ?
anyway of the 5 minutes he spent about 15-20 seconds showing the inside and out of my car. Vu is a 914 owner as well.
Enjoy!
Posted by: Jamie Mar 22 2023, 07:06 PM
Looking forward to seeing this one again at Okteenerfest. Last time for me was 2019
One of the best appointed 914s out there.it will be good to see you , man yea this car has come a long way since back then! and wow, it has been a while! ii think the car just came back from pain in 2019, and i had not done the whole interior etc yet. I still remember the transmission clinic we did at Scotty B's ! man that has to be about 8-9 years ago. So last year, or was it 2 now?, i had to pull the transmission due to the output shaft seal leak, and i went ahead and put the stock #4 and 5 gears back in, it just was too tall for the mountains but i could not have done that with out my rebuild DVD's!!!! btw after doing it a few times it really helped understand how the 914 transmission works, but no leaks and shifts like butter! just wanted to say thanks again and see you in September !
And there's a photo of your car in the new PCA Panorama magazine, well done trip to represent our teeners!
thanks @http://www.914world.com/bbs2/index.php?showuser=2939
BTW there is also a nice video that Vu did at Werks featuring a few of the cars that caught his eye at Werks, the video can be found on youtube if you are a PCA member then you received an email with a link directly to the video.
https://www.youtube.com/watch?v=n1W75XKzn6s
i hope this link works or should i say "werks" ?
anyway of the 5 minutes he spent about 15-20 seconds showing the inside and out of my car. Vu is a 914 owner as well.
Enjoy!
PCA Executives visited my Central KY Region several years ago, and Vu had just recently bought his 914, not running. I drove his wife for the tour in my 914, Vu wanted her to see that 914's were viable vehicles, and she did enjoy that 914s could actually be driven!
When I spoke with him last fall his teener was still not driveable after all these years?
Posted by: DRPHIL914 Apr 5 2023, 07:19 AM
@http://www.914world.com/bbs2/index.php?showuser=2939
yes Vu’s car is still incomplete
update: i am very happy to report my RMS is not leaking now, 2 months of driving following replacement. unfortunately somehow i didn’t get the left side rocker cover to seal well so it’s dripping on the heat exchanger on left side- SO i got new gaskets, ans will pull that this weekend and will use a gasket sealer i think maybe the cover might have distortion or warping not sure. that bottom edge has done that before, last time i had this issue too and it took a second try to get properly sealed. i am hoping that’s all it is and not a push rod tube again , i went thru a lot in february to pull so all new seals on those! other than that the motor is running great! problem is every time i want to get it out we have a major storm front come thru.
Posted by: DRPHIL914 Aug 8 2023, 05:31 AM
Oh sh!t moment last night! while installing my starter tray/ford solenoid i was cleaning up and checking stuff. never ever have i had a cv bold back out, i used new schnor washers, torqued to spec but here we are, a very close call! these will get driven on a day and then rechecked and then safety wired before Okteenerfest trip , that was a close call!!
Attached thumbnail(s)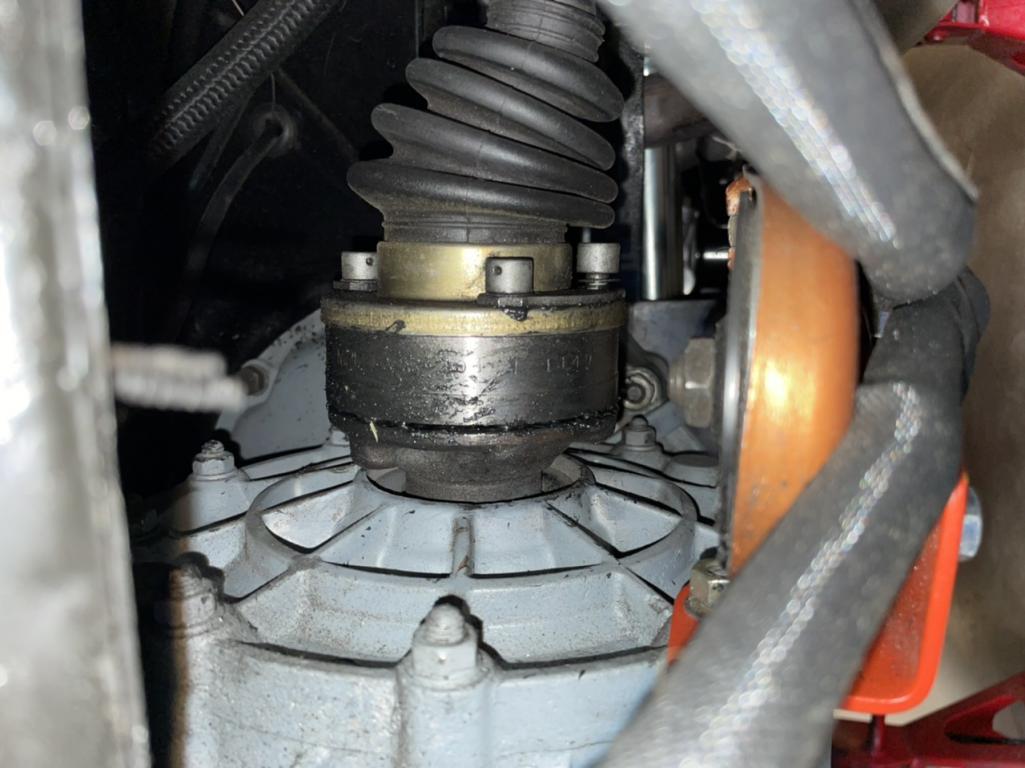
Posted by: DRPHIL914 Aug 8 2023, 06:12 AM
Ford Solenoid install-
look at post 446, you see there is a new starter, that got pulled the solenoid failed, in fact 2 of them in 6 months, so the old reliable went back in, and is now in the car as picutured but, i also want to clean up the wire connections specifically the red ones at the + post, these are looking a bit worn and could be an issue with getting the voltage needed as well, but so far with old reliable no issues now, but just in case, adding this ford solenoid as well.
Attached thumbnail(s)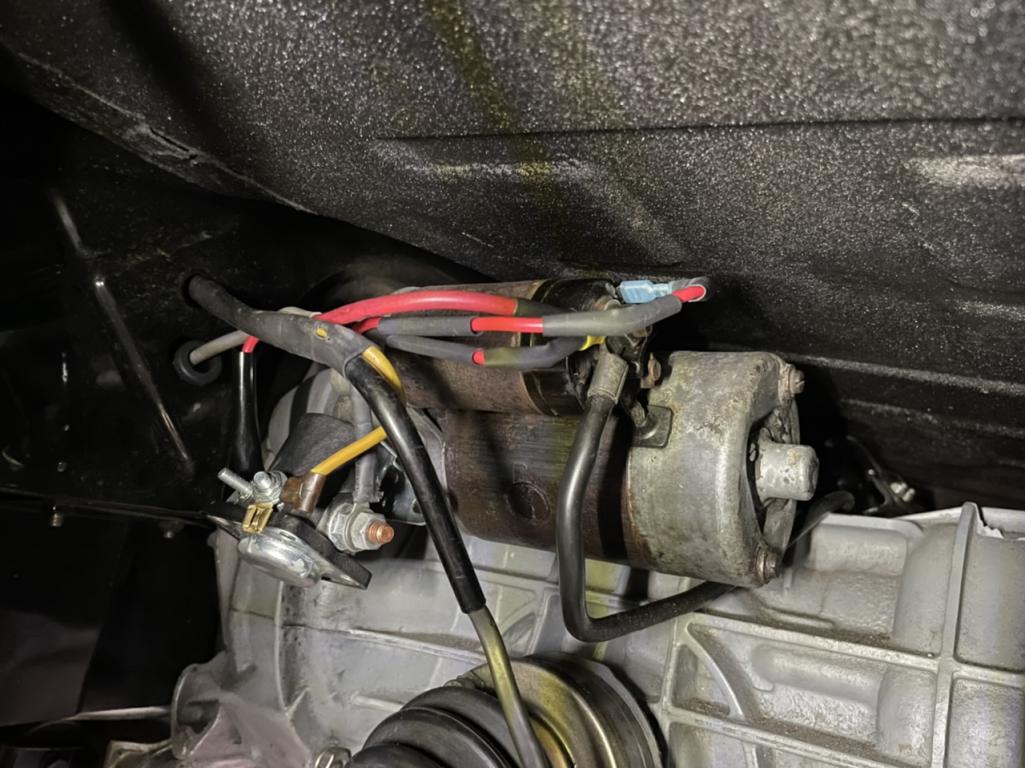
Posted by: Karl R Aug 8 2023, 06:05 PM
Are you missing the gasket between the CV joint and the transmission hub? 914.332.237.01.
Posted by: DRPHIL914 Aug 9 2023, 05:32 AM
Are you missing the gasket between the CV joint and the transmission hub? 914.332.237.01.
Karl,
Yes there is a gasket , its black not green so hard to see there, but there is a gasket. Got it torqued down , this must have worked loose on my last drive to C&C so caught it early , wasnt even that much grease slung too badly , not enought to want to repack them. I will get the bolts safety wired before driving again. That was lazy on my part on last install. It will be done,
Phil.
Posted by: Shivers Aug 9 2023, 08:26 AM
@http://www.914world.com/bbs2/index.php?showuser=11106 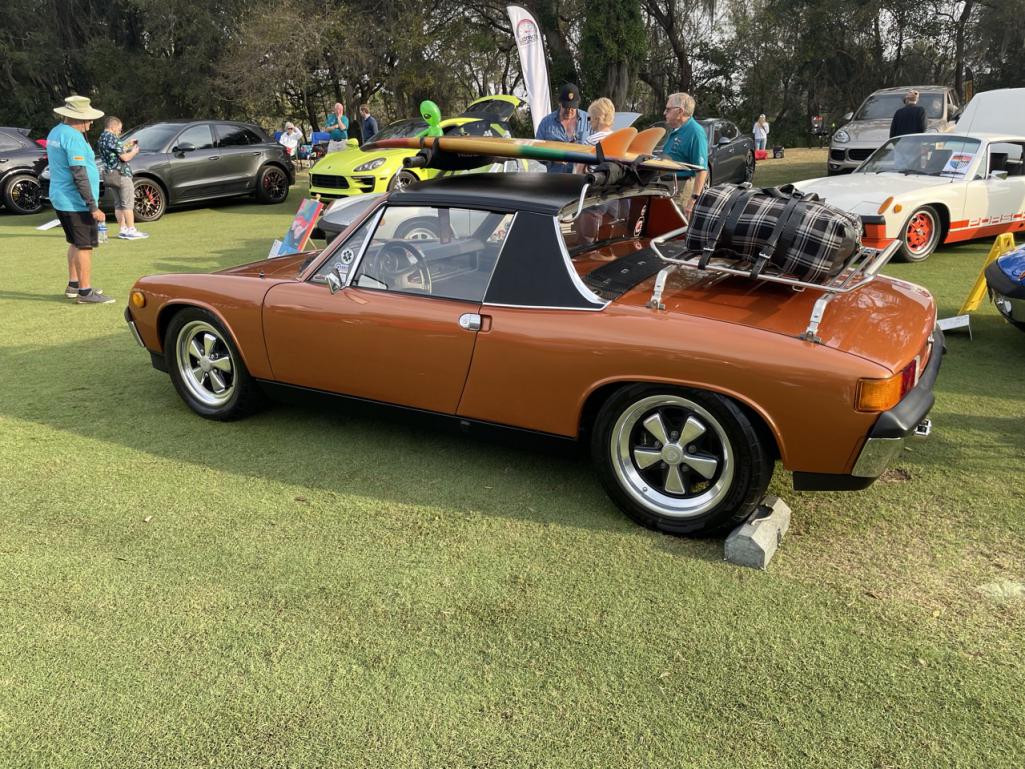
Bitchen!
Posted by: DRPHIL914 Aug 9 2023, 08:47 AM
@http://www.914world.com/bbs2/index.php?showuser=11106
Bitchen!
@http://www.914world.com/bbs2/index.php?showuser=24781
Thanks! that was a fun dayfor sure, BTW great picture! I like the rack but need to come up with a different way to mount it on the rear trunk the brackets are not the right angle and are made for a roof drip rail like on a 911, but for now i actually have thesuction cups from a bike rack bolted on, workse great but not classic looking.
Phil
Posted by: Shivers Aug 9 2023, 09:07 AM
@http://www.914world.com/bbs2/index.php?showuser=11106
Bitchen!
@http://www.914world.com/bbs2/index.php?showuser=24781
Thanks! that was a fun dayfor sure, BTW great picture! I like the rack but need to come up with a different way to mount it on the rear trunk the brackets are not the right angle and are made for a roof drip rail like on a 911, but for now i actually have thesuction cups from a bike rack bolted on, workse great but not classic looking.
Phil
https://www.classicluggageracks.com/the-american.html
Maybe these guy’s could make you the mounts you want and drop them in their chrome run. I’ve been dreaming about their classic trunk rack.
Posted by: DRPHIL914 Aug 9 2023, 11:55 AM
@http://www.914world.com/bbs2/index.php?showuser=11106
Bitchen!
@http://www.914world.com/bbs2/index.php?showuser=24781
Thanks! that was a fun dayfor sure, BTW great picture! I like the rack but need to come up with a different way to mount it on the rear trunk the brackets are not the right angle and are made for a roof drip rail like on a 911, but for now i actually have thesuction cups from a bike rack bolted on, workse great but not classic looking.
Phil
https://www.classicluggageracks.com/the-american.html
Maybe these guy’s could make you the mounts you want and drop them in their chrome run. I’ve been dreaming about their classic trunk rack.
nice find, that might be the way to go for you. If i had not already bought my Leitz rack that would be a way to go too. Originally i was going to see if i could mount the leitz rack to the ski rack but measurements are wrong and no way to really easily mount it. If i had a way to do some fabrication id make my own . I dont want to drill any holes in the trunk , but if the Leitz arms could be modified to grab onto the edgs of the trunk that would be perfect. for now if i want to use it i can use the suction cups.
Posted by: DRPHIL914 Aug 25 2023, 08:19 PM
Are you missing the gasket between the CV joint and the transmission hub? 914.332.237.01.
well i finally got around to putting new Schnor washers in the CV bolts and safety wiring them, but you were right, Karl, no gasket!! so now there is a proper gasket !
i will miles sure to check these after few drives but i think we’ll be ok now for trip to Townsend, TN next month!!
Phil
Attached thumbnail(s)
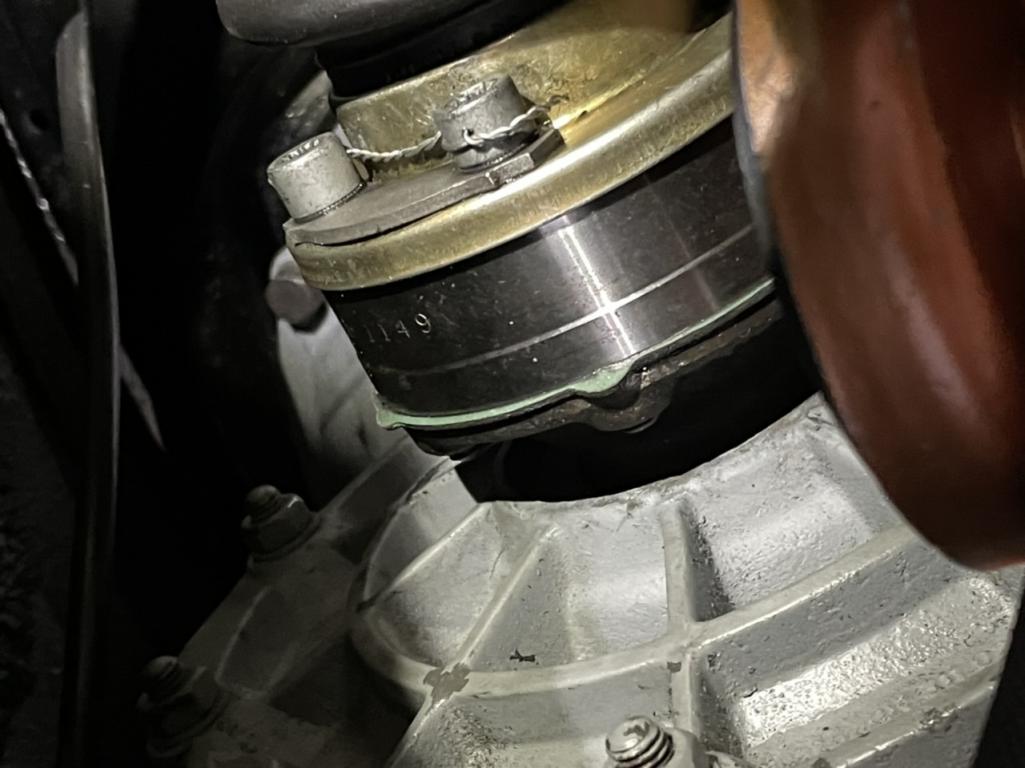
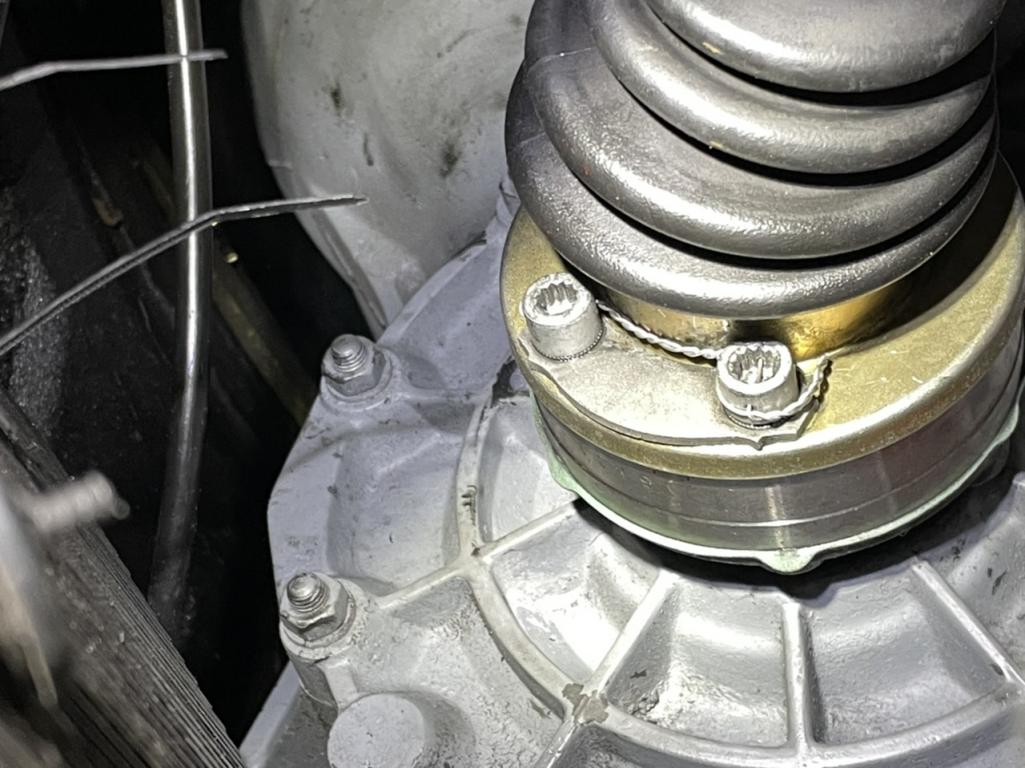
Posted by: 76-914 Aug 26 2023, 10:28 AM
Are you missing the gasket between the CV joint and the transmission hub? 914.332.237.01.
well i finally got around to putting new Schnor washers in the CV bolts and safety wiring them, but you were right, Karl, no gasket!! so now there is a proper gasket !
i will miles sure to check these after few drives but i think we’ll be ok now for trip to Townsend, TN next month!!
Phil
Hey Phil, that looks great and I'm not busting your chops but the next time you safety wire those bolts do it in a fashion that the wire limits the bolts travel so that it can only turn clockwise. About 35 years ago an old WW2 A&P chewed my ass out for that. Not as critical in automotive applications but.....You can also reuse those Schoor washers since the bolts are safety wired.
Posted by: DRPHIL914 Aug 28 2023, 01:04 PM
Are you missing the gasket between the CV joint and the transmission hub? 914.332.237.01.
well i finally got around to putting new Schnor washers in the CV bolts and safety wiring them, but you were right, Karl, no gasket!! so now there is a proper gasket !
i will miles sure to check these after few drives but i think we’ll be ok now for trip to Townsend, TN next month!!
Phil
Hey Phil, that looks great and I'm not busting your chops but the next time you safety wire those bolts do it in a fashion that the wire limits the bolts travel so that it can only turn clockwise. About 35 years ago an old WW2 A&P chewed my ass out for that. Not as critical in automotive applications but.....You can also reuse those Schoor washers since the bolts are safety wired.
you are right, i did the other one correctly but that one should have gone into the bolt on the other side so that if the lower one did loosen as it spins counter clockwise it would tighten, this would keep it from coming out completely but it could do a half turn. i realized that after it was done lol. but the other one on that side and the side are correct.
Good eye and i can always appreciate some constructive criticism!!!
So now the next thing i do has to be putting new engine lid brackets on. my original ones are cracked and the right one is really flexing bad!!! i have to find a welder that won’t charge me an arm and a leg!
Posted by: DRPHIL914 Oct 4 2023, 07:21 AM
Tail of the dragon Okteenerfest 2023-
new fuse board,
-awards!
Attached thumbnail(s)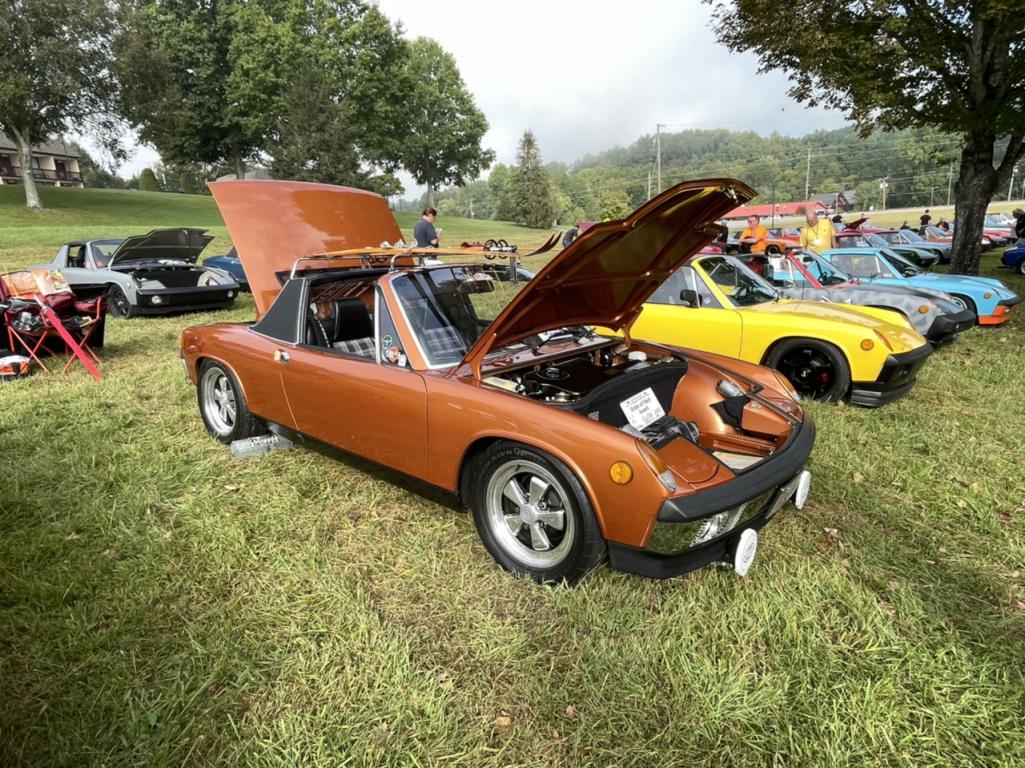
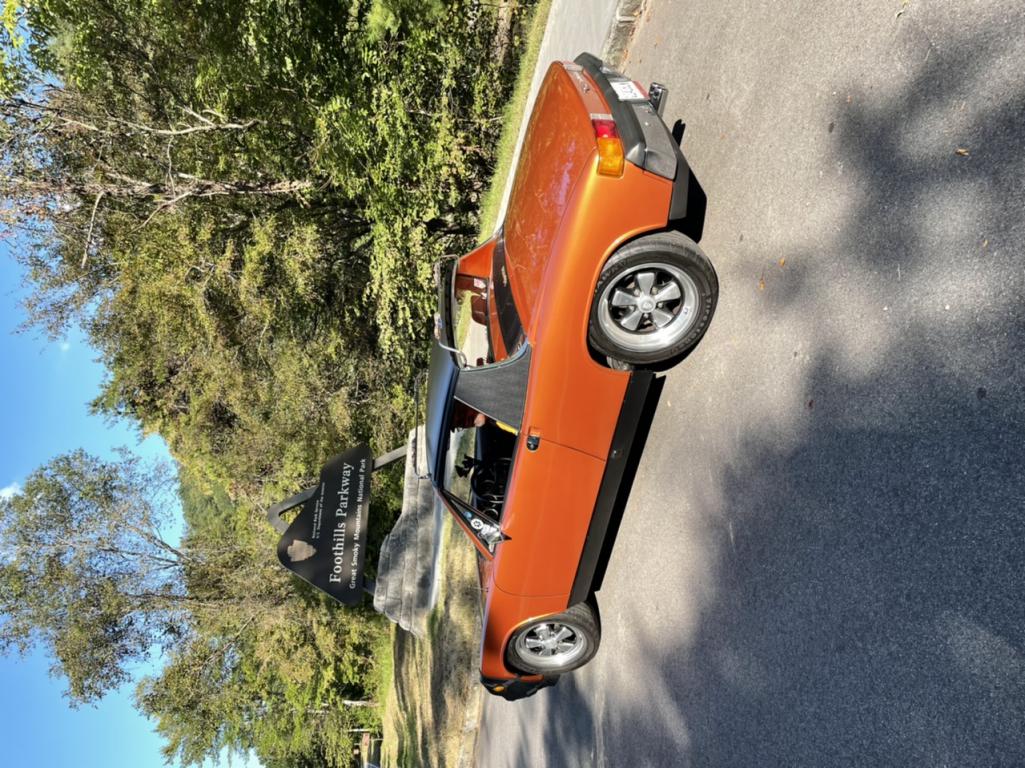

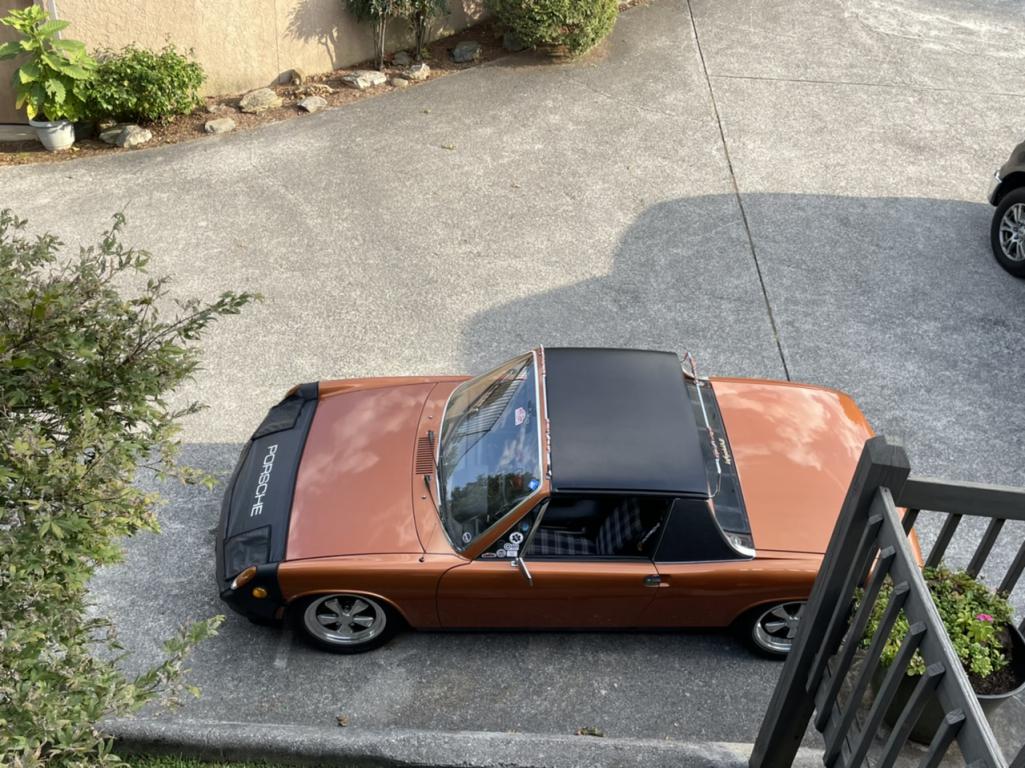
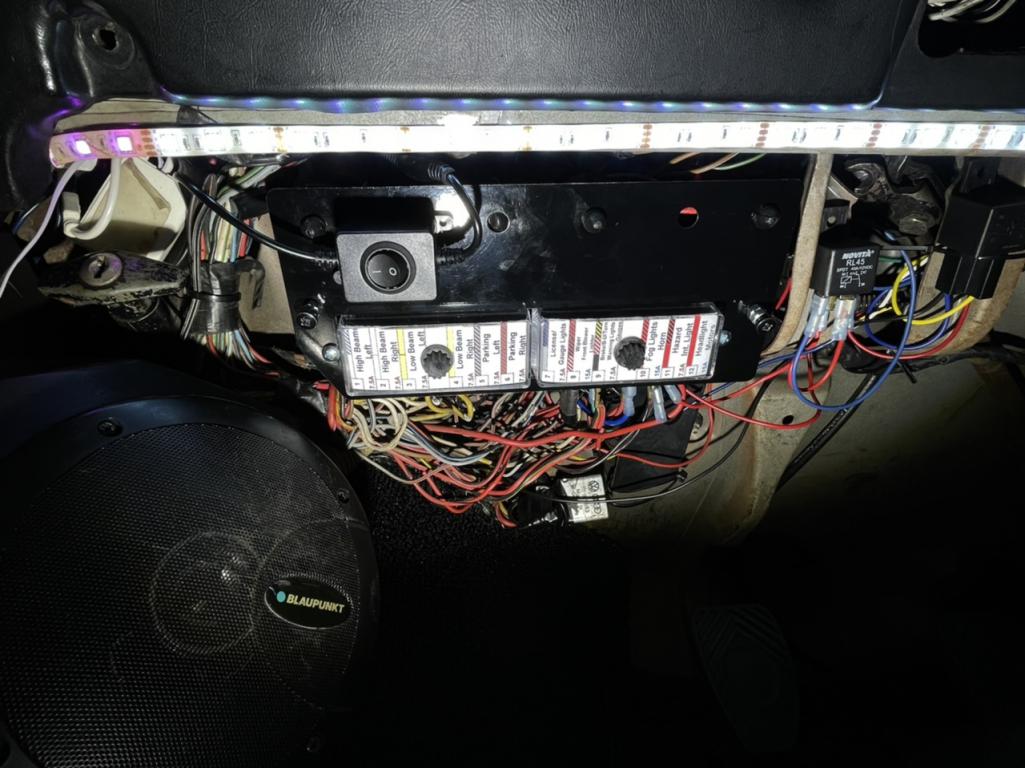
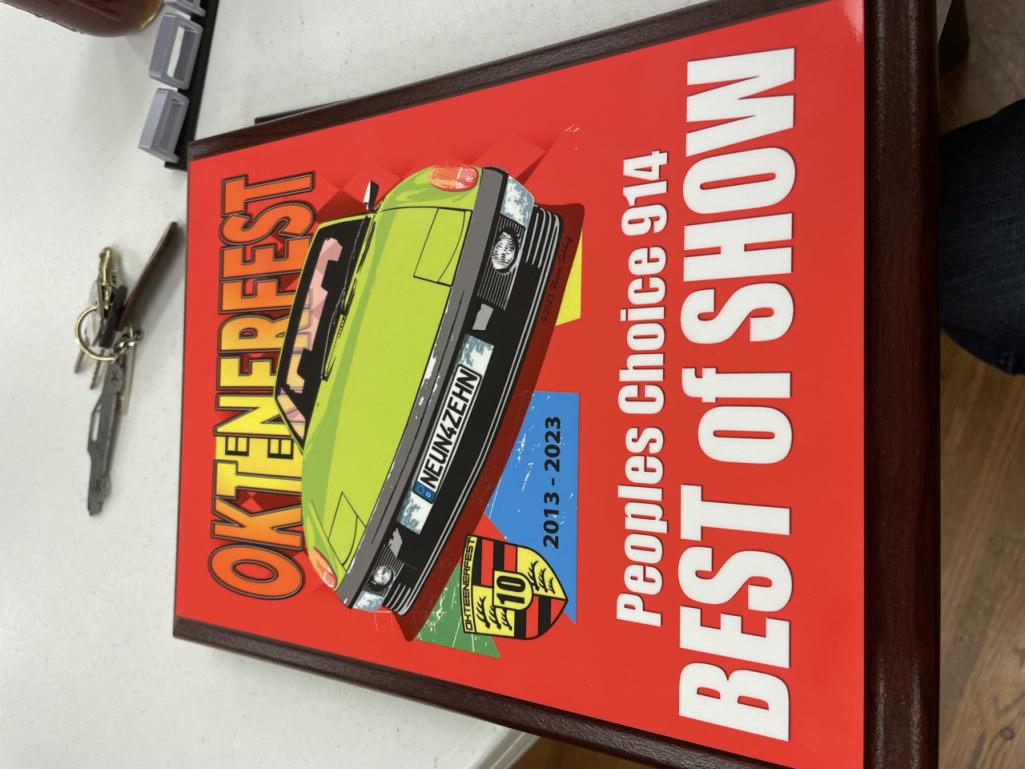
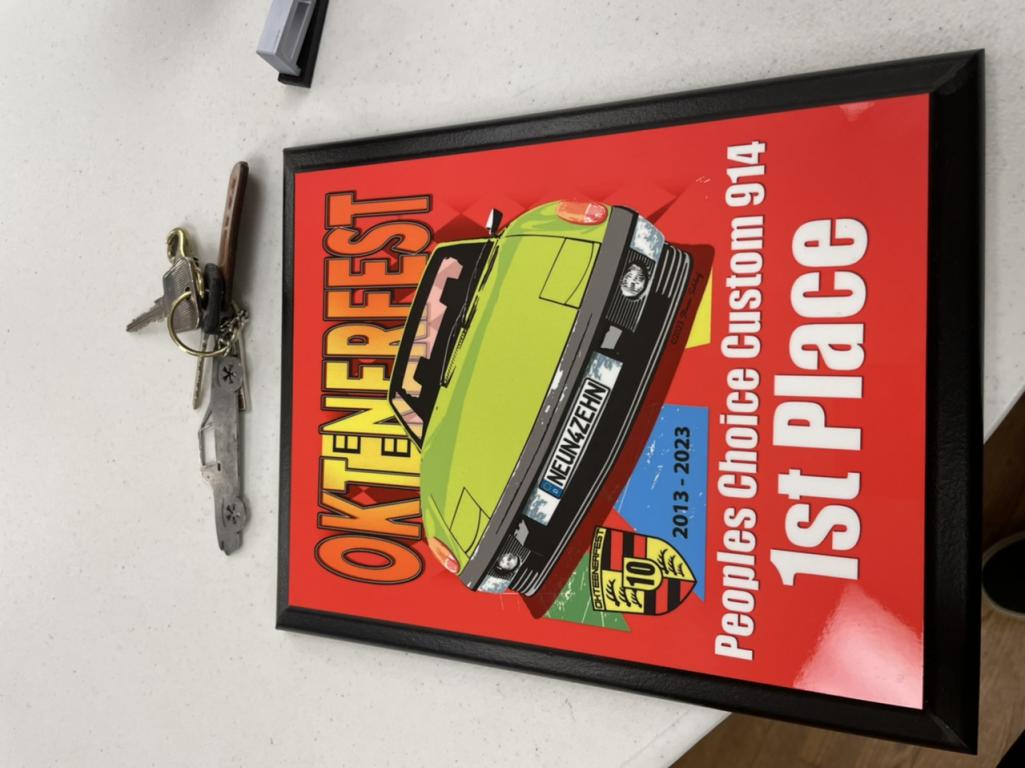
Attached image(s)
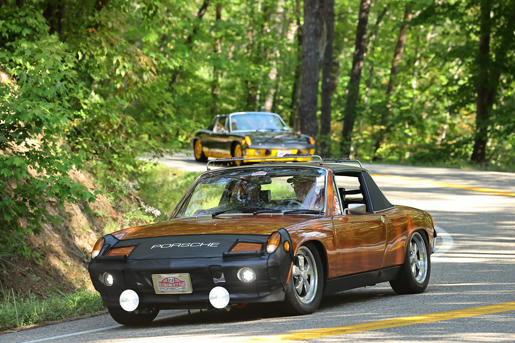
Posted by: DRPHIL914 Oct 4 2023, 07:26 AM
wrenching never stops
Attached thumbnail(s)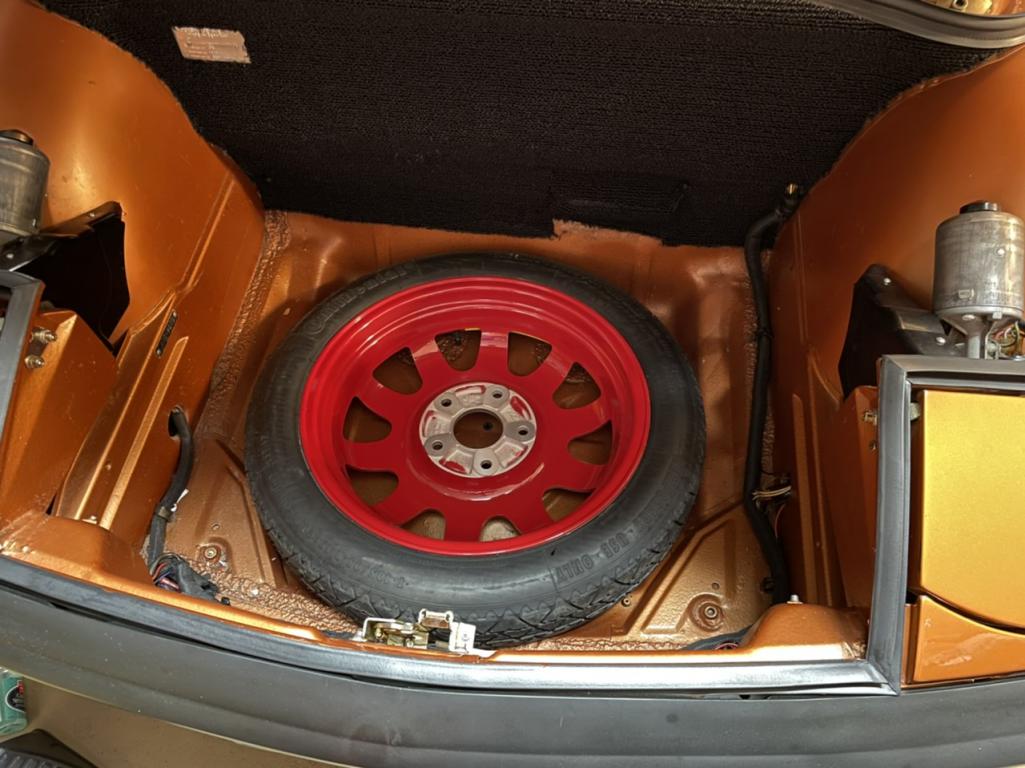
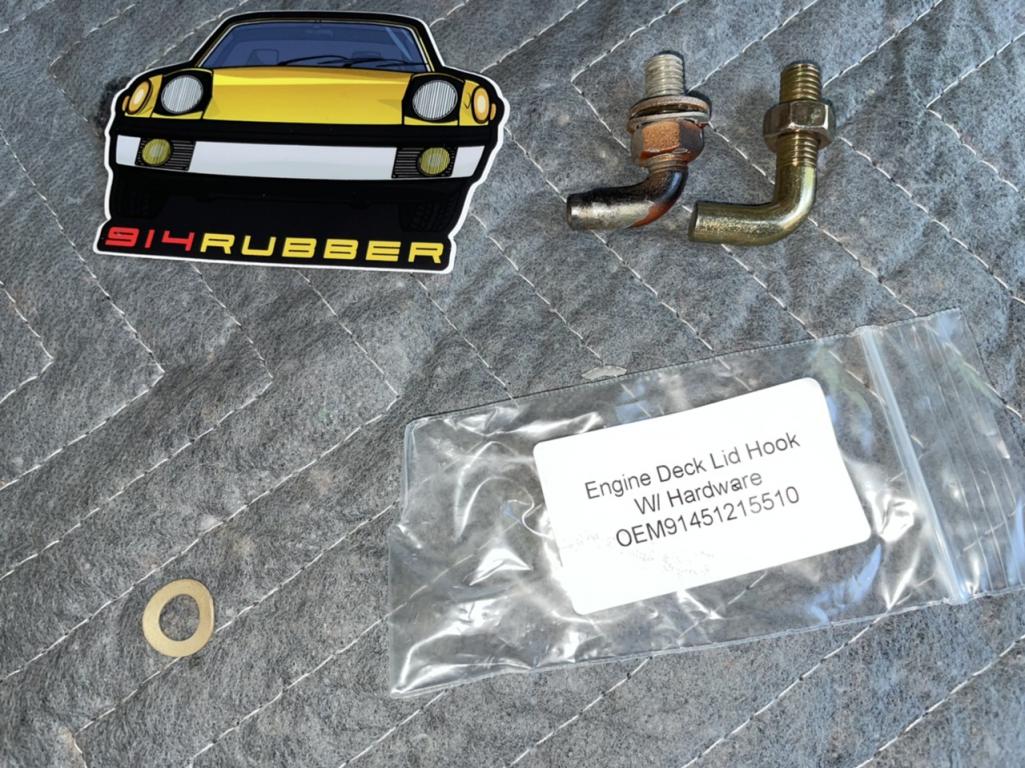
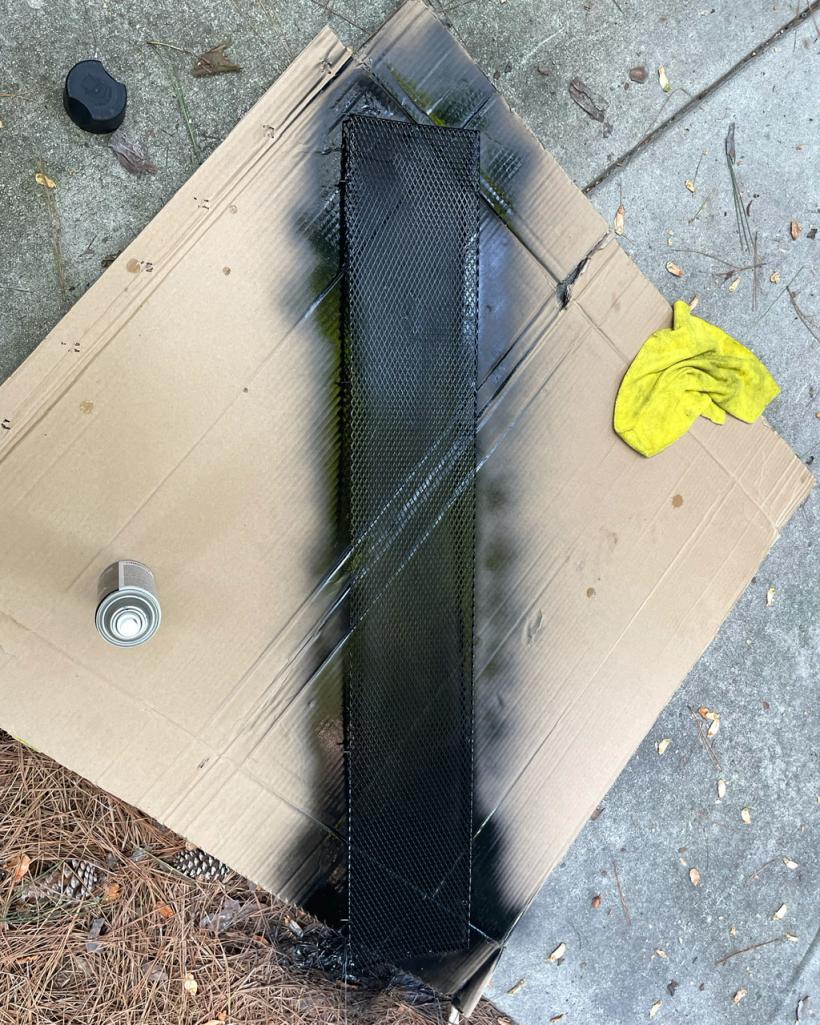
Posted by: DRPHIL914 Oct 4 2023, 07:28 AM
deck lid repair with all new seals, repainted , new stops , repainted mesh, new welting and edging, here it is scratched up pretty good, took the letters off and replaced the welting , the rubber stops, etc,
Attached thumbnail(s)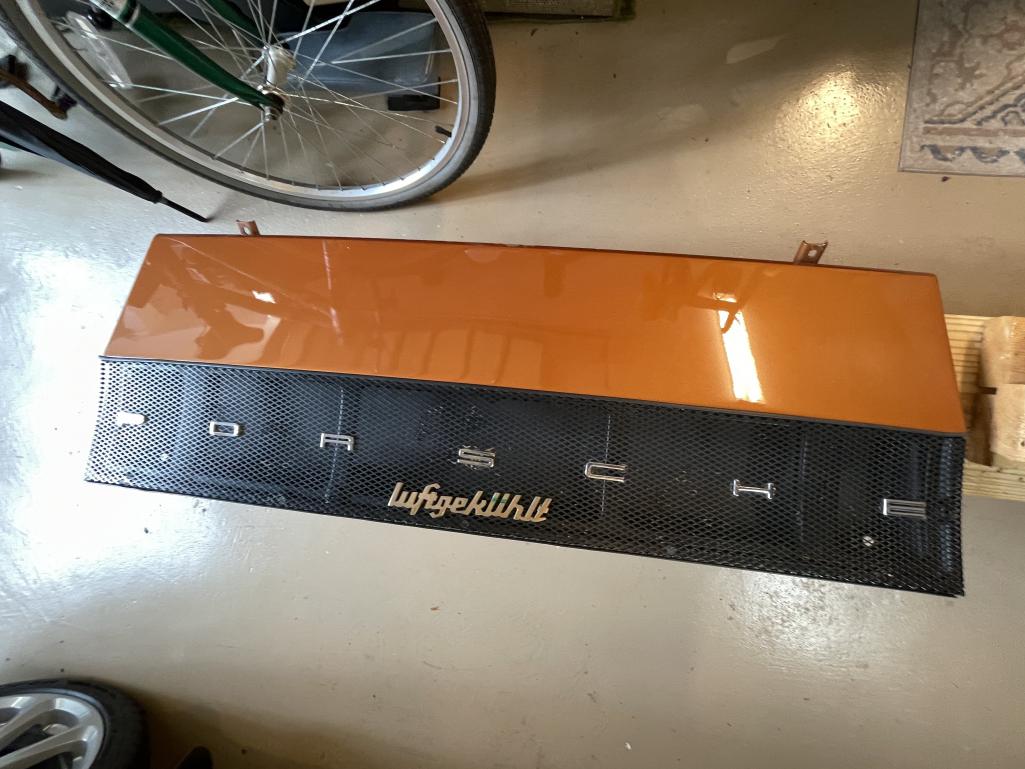
Posted by: DRPHIL914 Oct 4 2023, 07:38 AM
lid lined up and back in place,, still have to replace the hinge mounts on the firewall, will do this later.
also new cable, zinc plated latch, new pull button and escutcheon from 914rubber.
Attached thumbnail(s)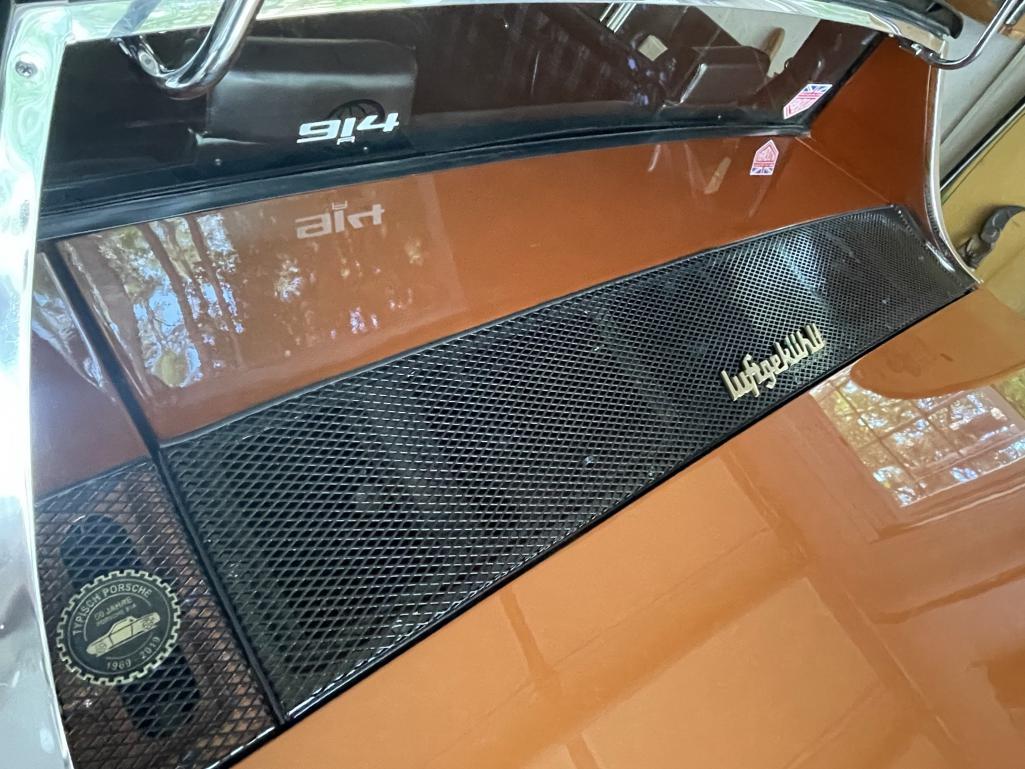

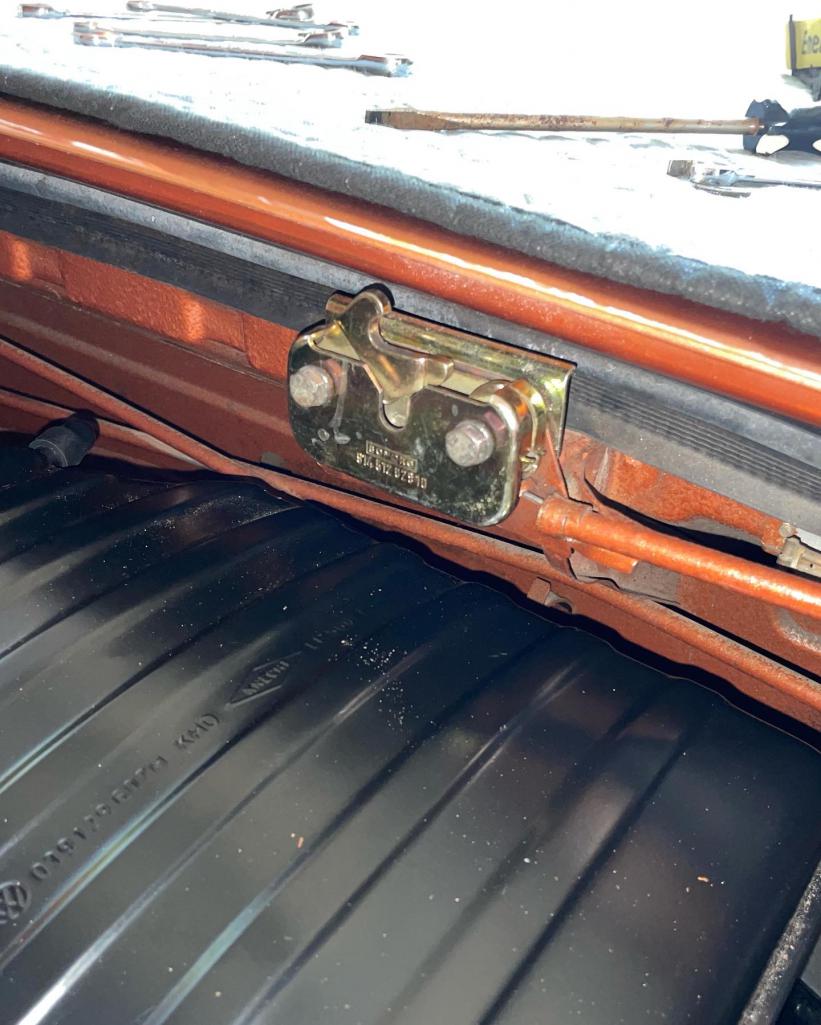
Posted by: DRPHIL914 Oct 4 2023, 07:40 AM
all cleaned up with new rear trunk seal! was ready to go to show.
Attached thumbnail(s)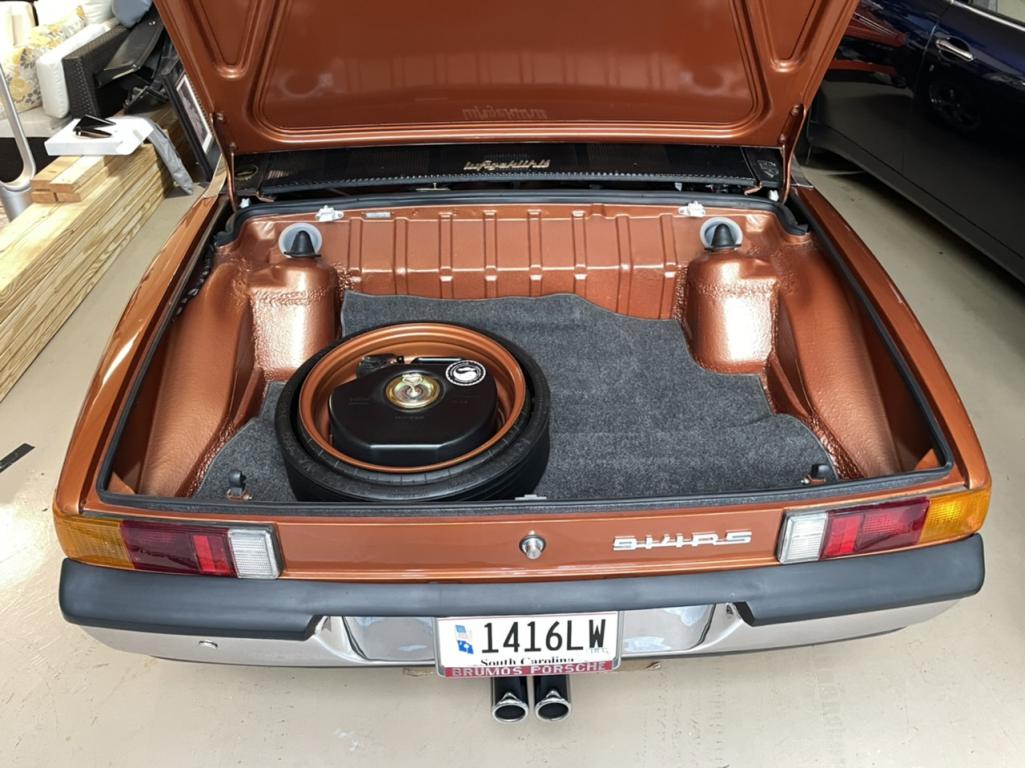
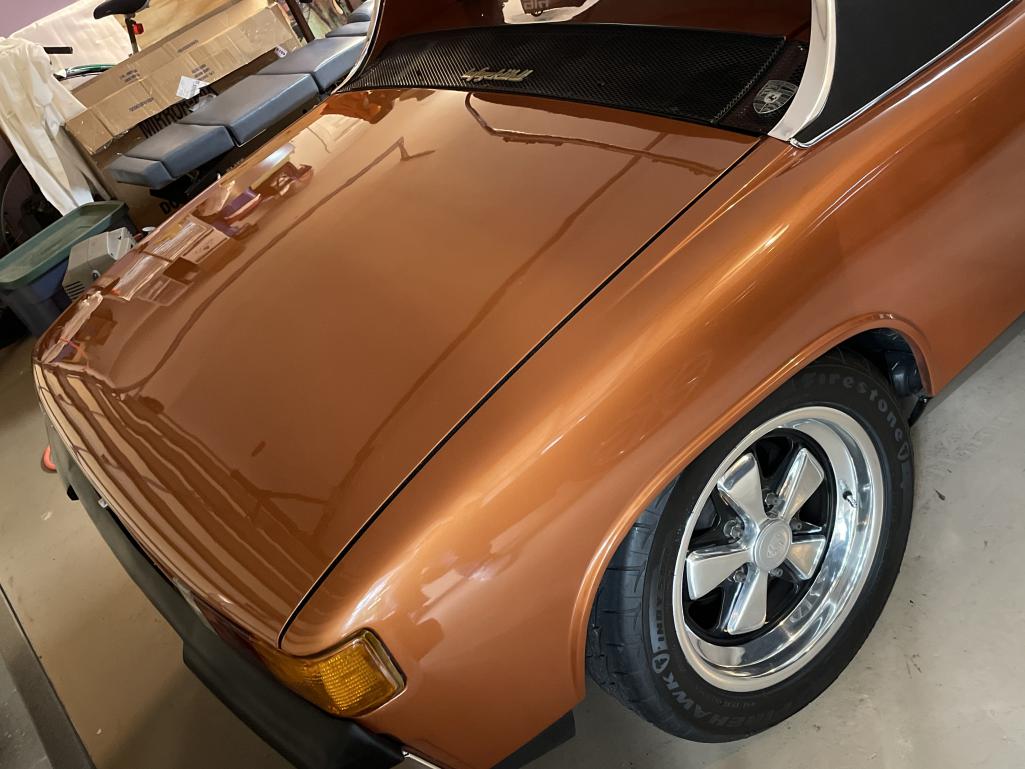
Posted by: DRPHIL914 Oct 4 2023, 07:43 AM
after installing the ford starter solenoid, new seals on the inner CV with safety wires CV bolts!
new door stay and hinge parts!
Attached thumbnail(s)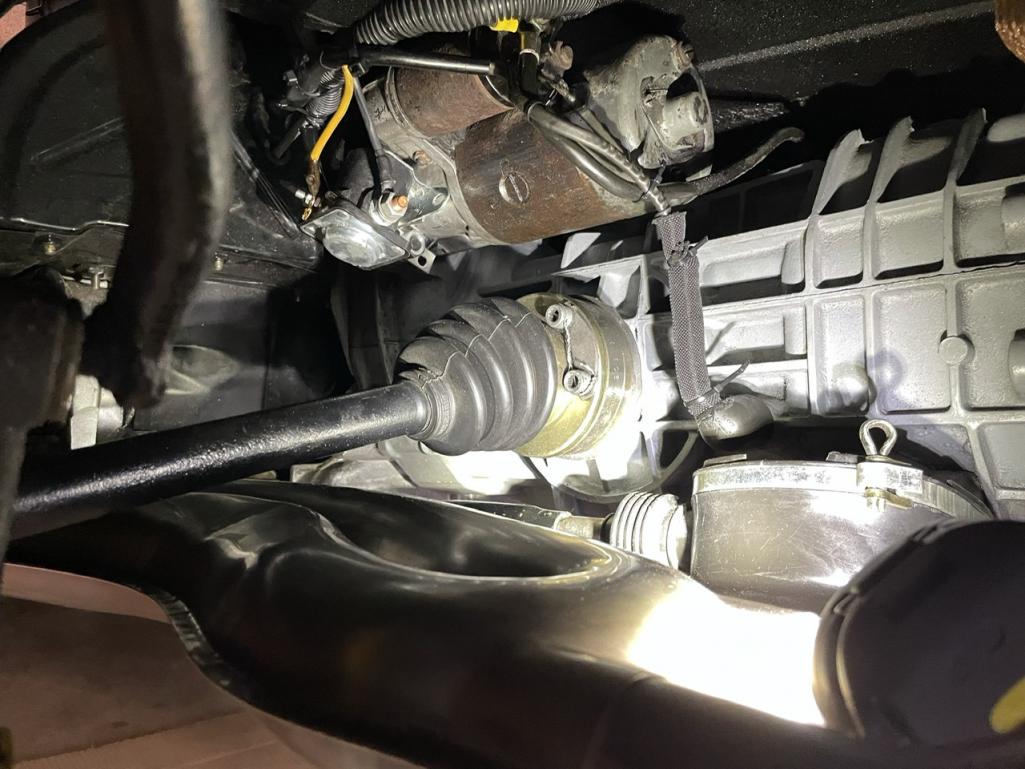
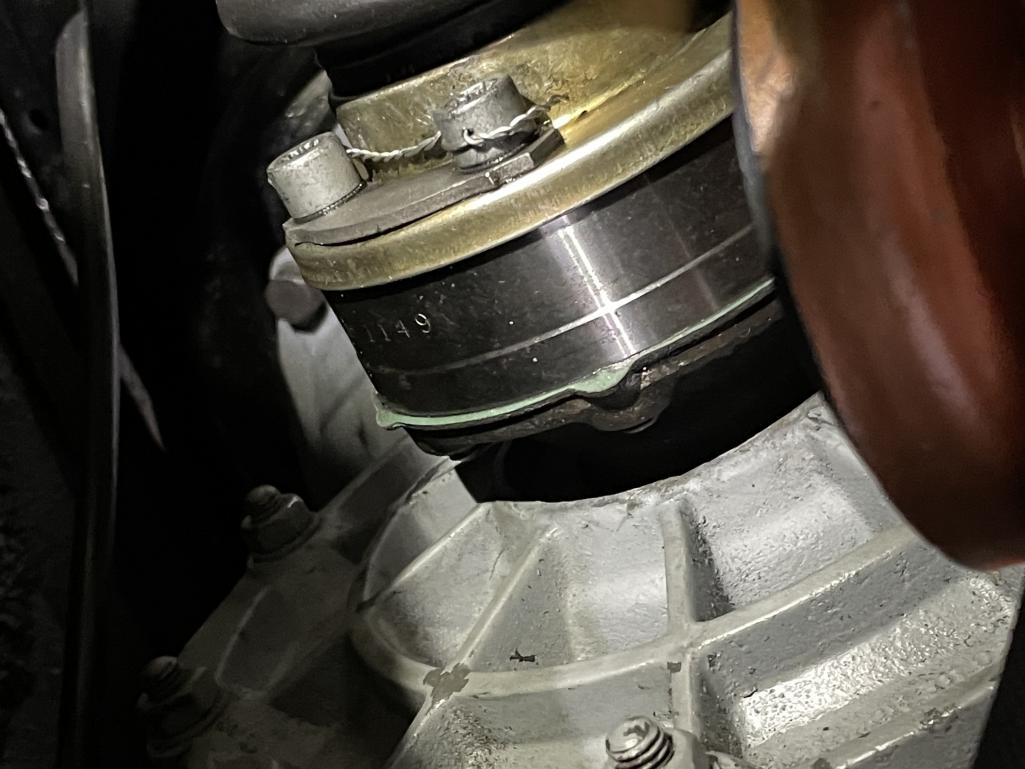
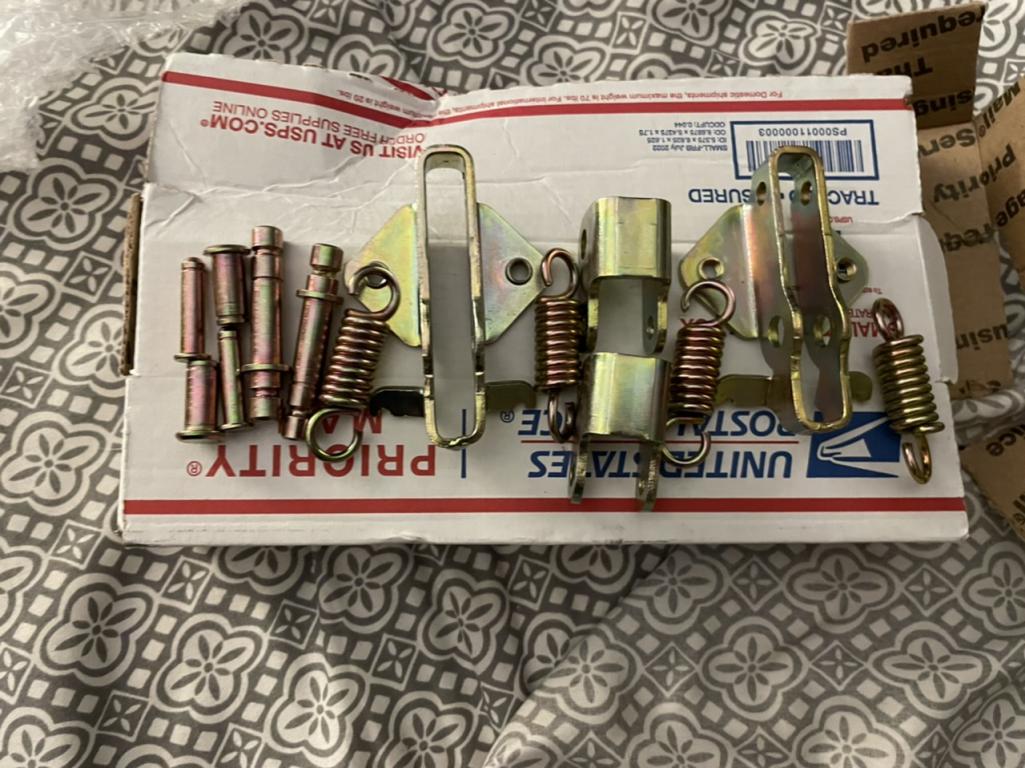
Posted by: Shivers Oct 4 2023, 08:02 AM
BLING!!!
So sick, nice work
Posted by: DRPHIL914 Oct 4 2023, 08:08 AM
the new J-west Fuse board was a must i had a short in the old one- melting parts lol, the extra relays seen , one is for thr 911 windshield washer pump, and the Hella driving lights.
inside of the old Egman board, the last 3 are connected together, it was shorting out, had some melted plastic in there, and i was loosing for lights ans dash lights as it would short out while driving!!! , well since new board was installed that is no more!!
Attached thumbnail(s)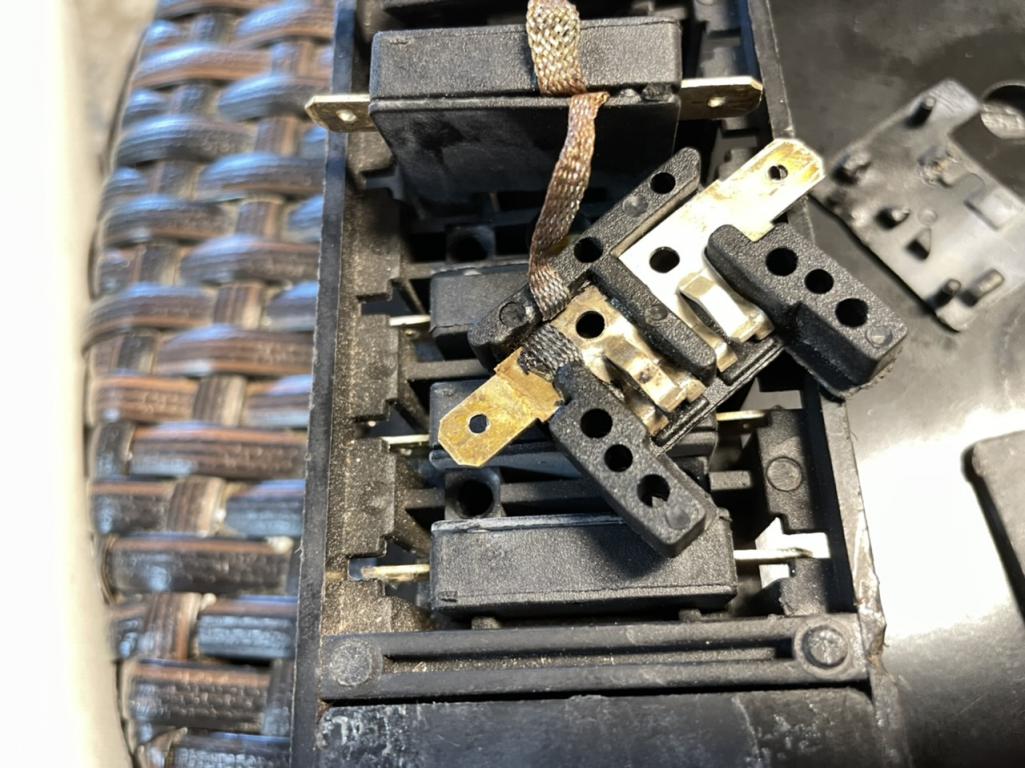
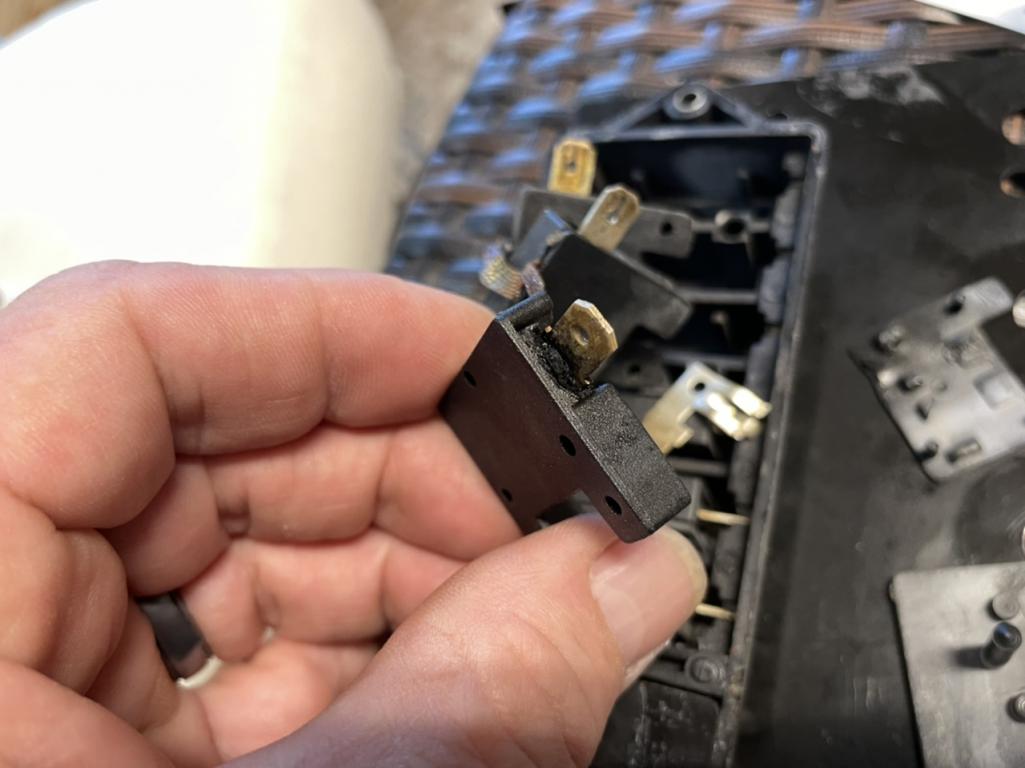
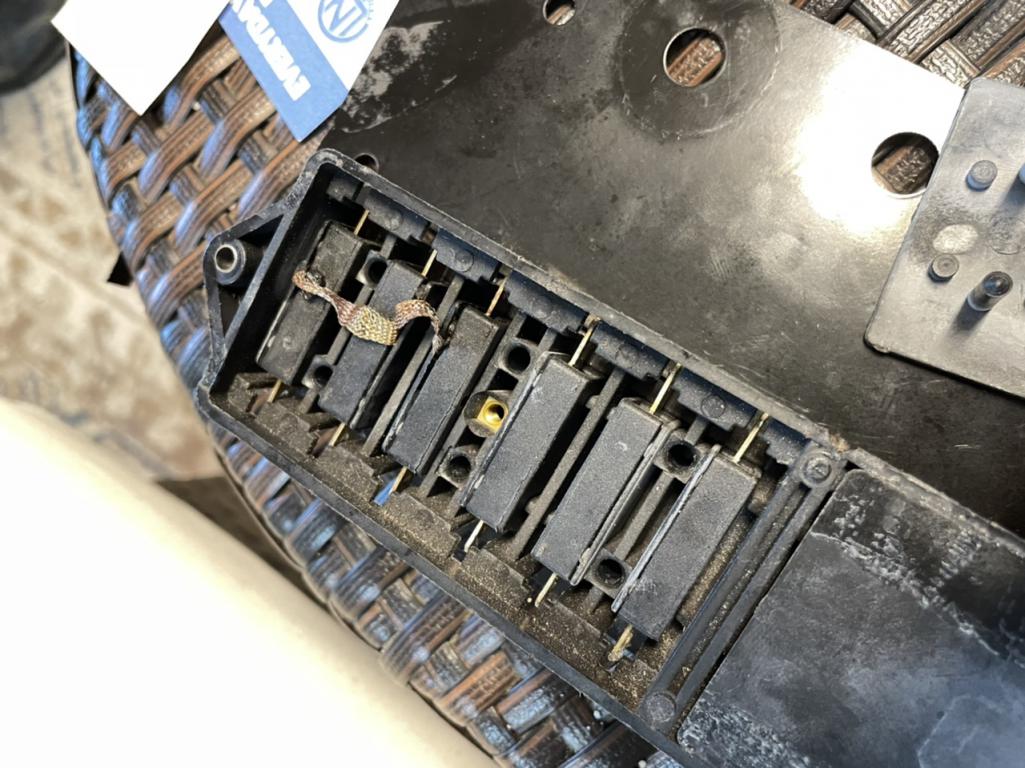
Posted by: DRPHIL914 Oct 4 2023, 08:19 AM
BLING!!!
So sick, nice work
@http://www.914world.com/bbs2/index.php?showuser=24781
the new door hinge parts came from member @http://www.914world.com/bbs2/index.php?showuser=3946 !!
i have the other parts with new rollers from 914rubber.
lots of stuff i did when i first got the car i am now finding after 10 years need to be done again, like some of the seals. Some parts were not available 10 or even 4 years ago following repaint, or i couldn't afford all of it and it wasn't necessary. , but as stuff comes up or becomes available ill get it done. i cant stand having crap done part ways!
its great that we have so many members that are supplying parts and service for our cars. so many classics dont have those resources! .
Phil
Posted by: Gatornapper Oct 6 2023, 07:38 AM
Dr Phil -
Maybe a stupid question: as the 914 is far from an aircraft, are the safety wires really needed?
Not a bit of overkill?
Nice touch for sure on a Concours level car like yours for sure.....
GN
after installing the ford starter solenoid, new seals on the inner CV with safety wires CV bolts!
new door stay and hinge parts!
Posted by: Shivers Oct 6 2023, 08:16 AM
Dr Phil -
Maybe a stupid question: as the 914 is far from an aircraft, are the safety wires really needed?
Not a bit of overkill?
Nice touch for sure on a Concours level car like yours for sure.....
GN
after installing the ford starter solenoid, new seals on the inner CV with safety wires CV bolts!
new door stay and hinge parts!
I’ve had them come loose, not dropping on to the driveway loose but still loose.
https://forums.pelicanparts.com/porsche-911-technical-forum/624763-cv-bolts-come-loose.html
Posted by: ClayPerrine Oct 6 2023, 08:48 AM
Dr Phil -
Maybe a stupid question: as the 914 is far from an aircraft, are the safety wires really needed?
Not a bit of overkill?
Nice touch for sure on a Concours level car like yours for sure.....
GN
after installing the ford starter solenoid, new seals on the inner CV with safety wires CV bolts!
new door stay and hinge parts!
I’ve had them come loose, not dropping on to the driveway loose but still loose.
https://forums.pelicanparts.com/porsche-911-technical-forum/624763-cv-bolts-come-loose.html
In my younger days I had them come loose to the point of releasing the CV joint. It cracked the transmission case.
That being said, safety wire is not necessary if the bolts are installed with new schnorr washers and properly torqued to the correct torque spec.
But safety wire is a good piece of mine for many people.
Posted by: DRPHIL914 Oct 14 2023, 09:00 PM
Spent the weekend in Chattanooga TN at the motoring festival and Luftgekuhlt outing friday. my 914 sure gathered a lot of attention,
and represented well, it was the only one in the PCA club area during car club showcase and also in the featured Luftgekuhlt lot! at one point i looked over and Wayne Carrini(chasing classic cars)was taking pictures of it!!! asked if it was mine and we visited for a bit, the pulled out his phone to show
me some of his cars and
a very special Ferrari Daytona Spyder he had just taken in that was in the very same Copper metallic, the only one in existence! pretty cool,
- i do have to say guys get your cars out there!!! i should not have been the only one here !
Attached thumbnail(s)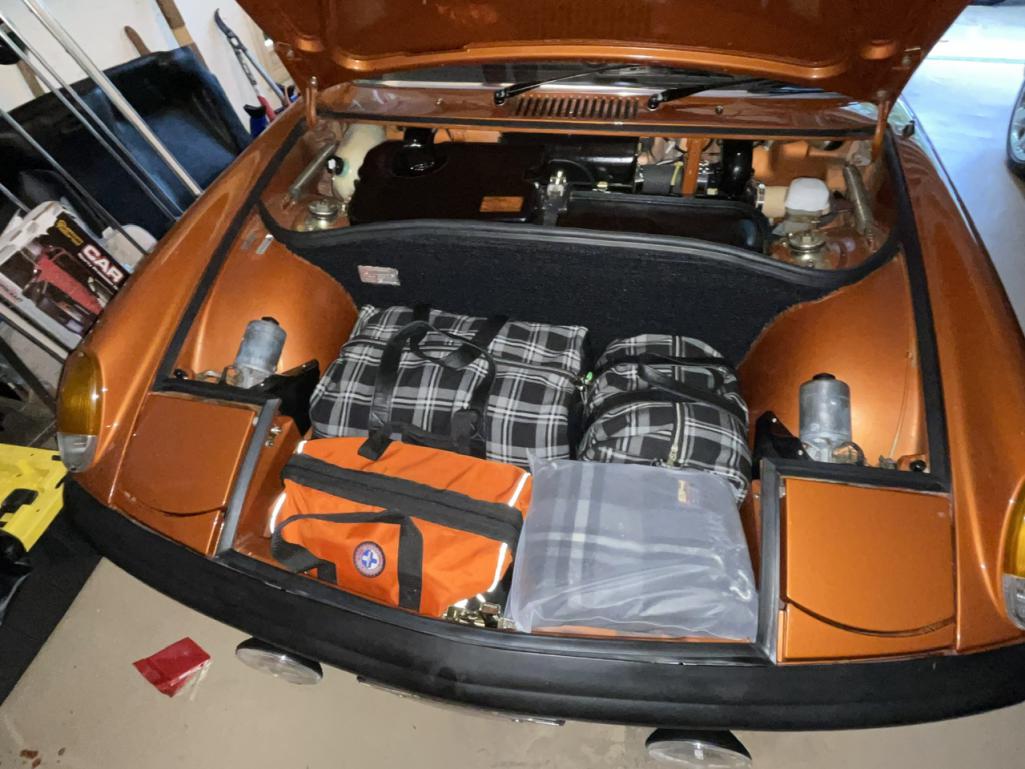
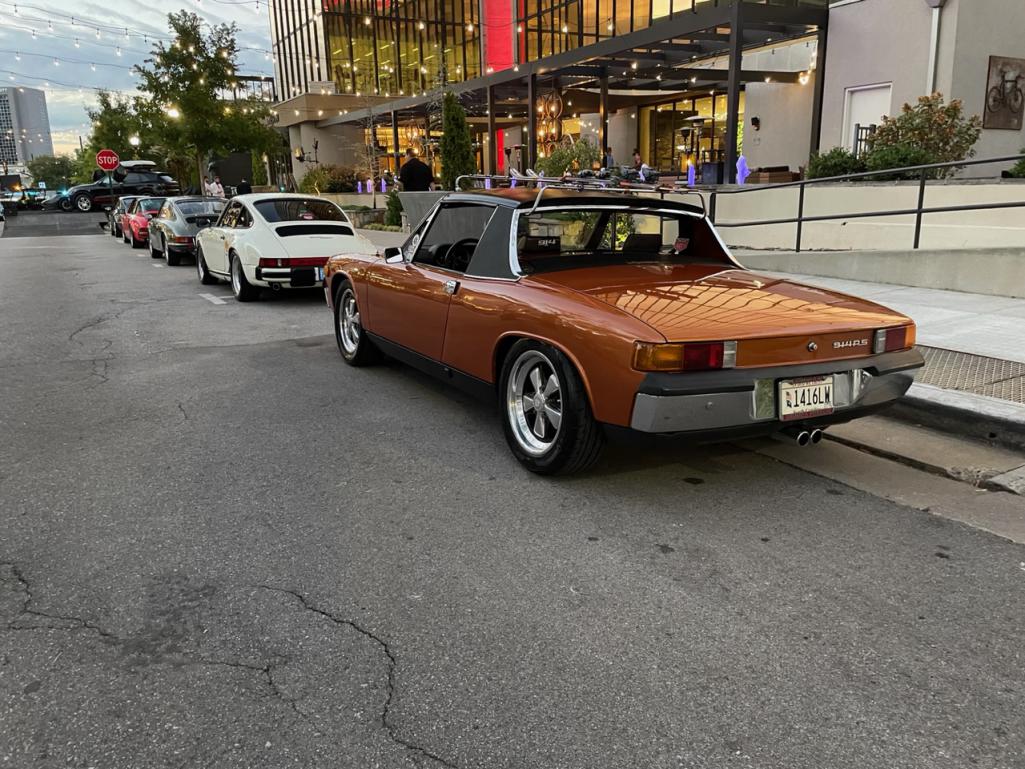
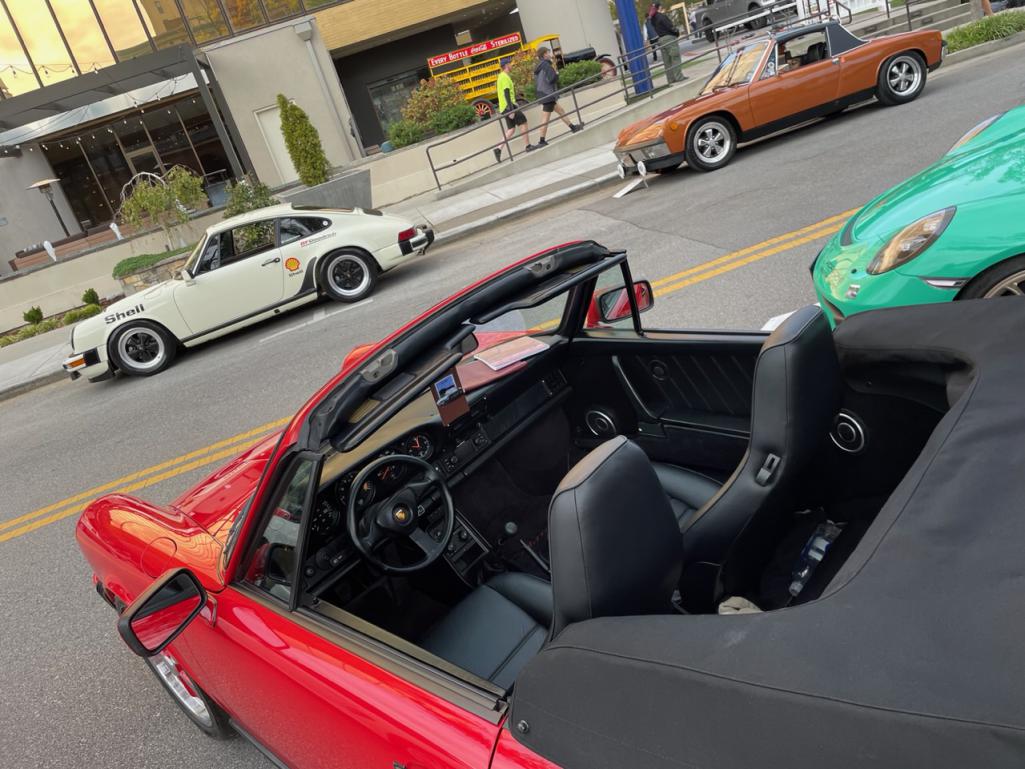
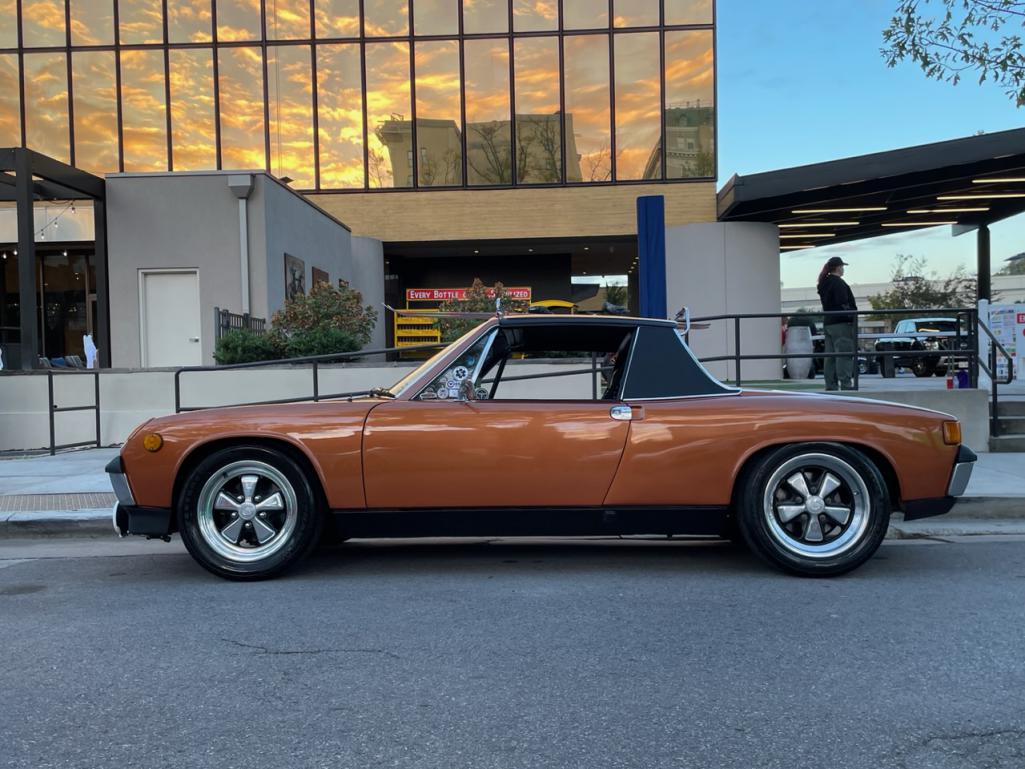
Posted by: BENBRO02 Oct 15 2023, 01:13 PM
Sorry I missed you, I checked out all the cars on Saturday and you may have already left. I was cool to see a 904, 906, 908, and 962 side by side to compare.
Posted by: r_towle Oct 15 2023, 01:28 PM
I have noticed that for many shows now it’s become an 80/20 or even 90/10 rule of water cooled versus aircooled
Posted by: scott_in_nh Oct 16 2023, 07:44 AM
I have noticed that for many shows now it’s become an 80/20 or even 90/10 rule of water cooled versus aircooled
@http://www.914world.com/bbs2/index.php?showuser=124
I found an exception to that at the "Vacationland Volkswagen Association" car show at the Acton Fairground, ME. (August 5-6). The car count was down 40-50% this year, but was still around 100 cars. I would say that 2/3 of the cars were air cooled, and the water-cooled count was only that high because of a decent number of cool Westphalia Vanagons that were there.
They have a class for 914s (air-cooled other), but none were there.
You can find them on facebook.
Posted by: scott_in_nh Oct 16 2023, 07:46 AM
Phil I recognized your car in Wayne Corini's post on Instagram - Congrats!
Posted by: DRPHIL914 Oct 16 2023, 08:02 AM
Phil I recognized your car in Wayne Corini's post on Instagram - Congrats!
@http://www.914world.com/bbs2/index.php?showuser=12471
i will have to take a look i talked with Wayne for about 10 minutes he stopped by during the Luft event while we were in the featured parking area of air cooled cars, we had about 100 aircooled porsche's there and he was taking pictures of my car, he showed me a picture he had of a Ferrari Daytona Spyder that he has in the shop right now that is Copper metallic, almost identical, he says it is the only one ordered in that color!!
Posted by: rick 918-S Oct 16 2023, 08:22 AM
Car looks Great!
Posted by: DRPHIL914 Oct 16 2023, 08:59 AM
#1- over by the railroad station cool mural i couldn’t pass up a photo opportunity
Coker Museum and Honost Charlie’s Speed Shop
Attached thumbnail(s)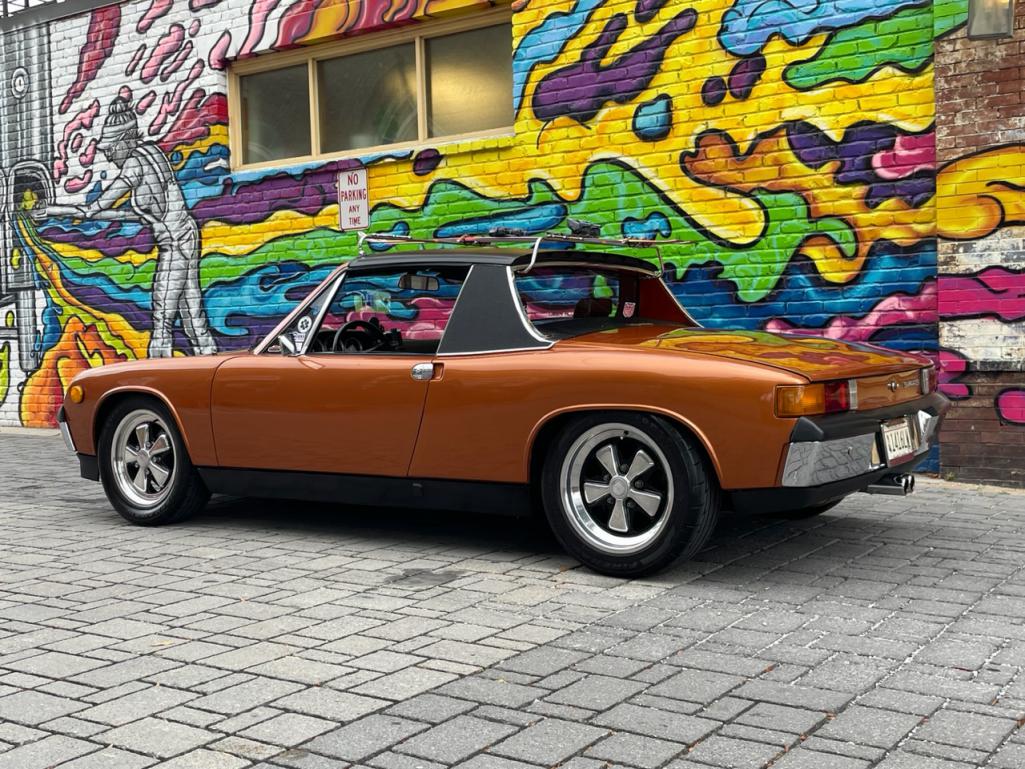
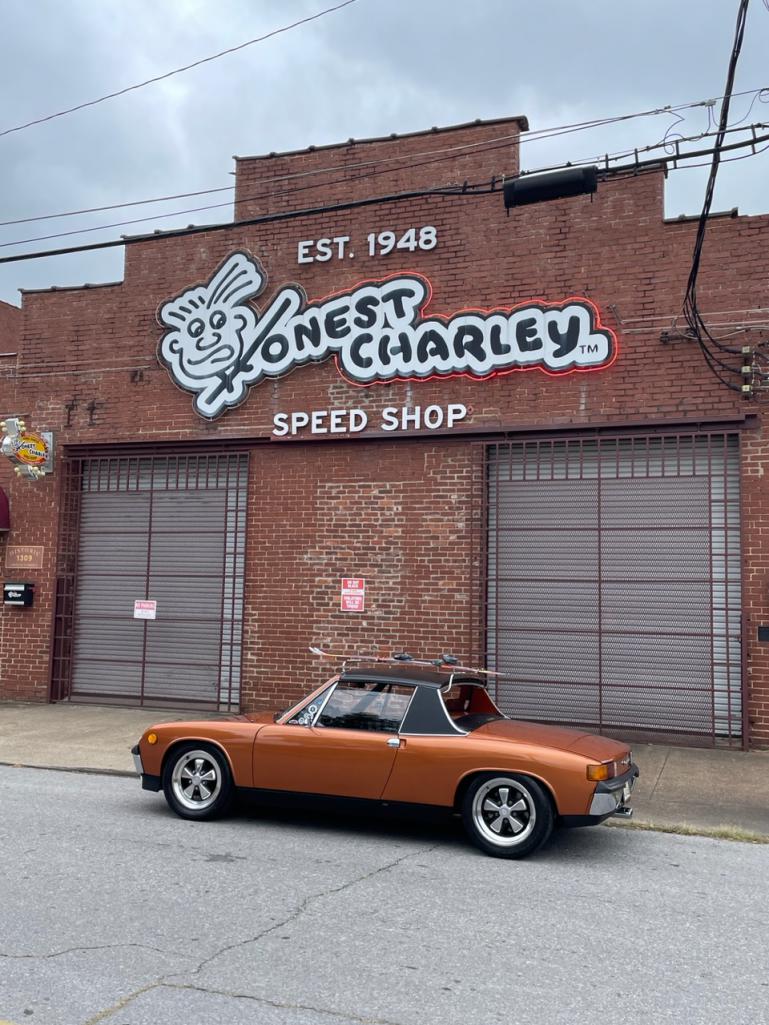
Posted by: scott_in_nh Oct 16 2023, 01:37 PM
Phil I recognized your car in Wayne Corini's post on Instagram - Congrats!
@http://www.914world.com/bbs2/index.php?showuser=12471
i will have to take a look i talked with Wayne for about 10 minutes he stopped by during the Luft event while we were in the featured parking area of air cooled cars, we had about 100 aircooled porsche's there and he was taking pictures of my car, he showed me a picture he had of a Ferrari Daytona Spyder that he has in the shop right now that is Copper metallic, almost identical, he says it is the only one ordered in that color!!
Attached thumbnail(s)
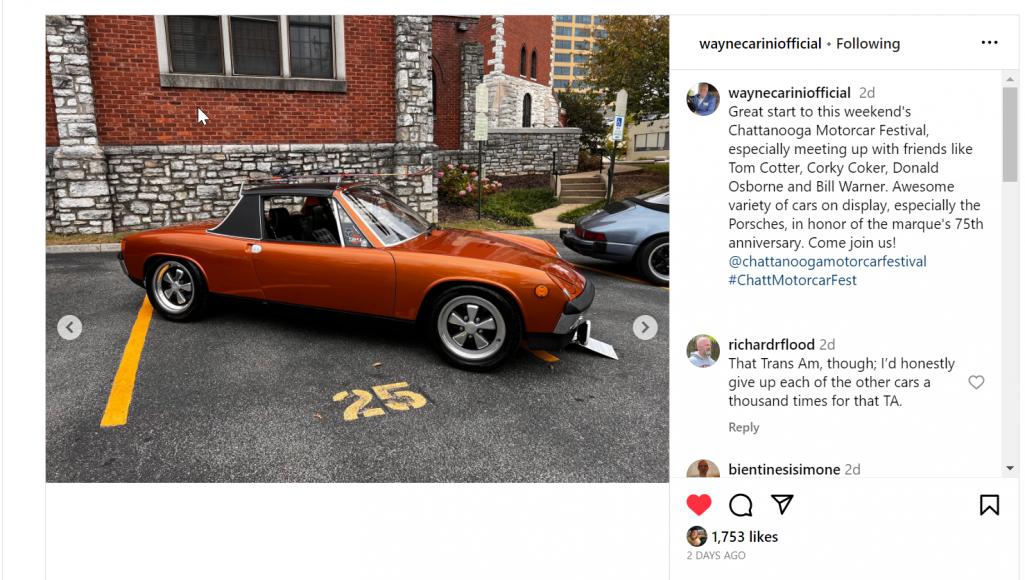
Posted by: DRPHIL914 Oct 18 2023, 07:24 AM
Car looks Great!thanks!!
I had an interesting issue come up while driving up , i had to stop and tighten my clutch cable(new 6 months ago, had been tightened 2x already) and now its perfect but there are only 2 threads left almost out of length to be able to tighten if it needs it again. my previous clutch cable lasted 10 years and i didnt have to tighten it every 6 months!!! WFT is the cable cheap and stretching?? SOMEONE( 914rubber??) needs to start making these and out of a better cable material!! that doesnt stretch out. luckily i got off the interstate at an exit that had an autozone and i could get at it in a safe location.
Phil
Posted by: krazykonrad Oct 20 2023, 11:04 AM
Really cool!  I really missed out by not going.
Posted by: Shivers Oct 20 2023, 11:07 AM
Car looks Great!thanks!!
I had an interesting issue come up while driving up , i had to stop and tighten my clutch cable(new 6 months ago, had been tightened 2x already) and now its perfect but there are only 2 threads left almost out of length to be able to tighten if it needs it again. my previous clutch cable lasted 10 years and i didnt have to tighten it every 6 months!!! WFT is the cable cheap and stretching?? SOMEONE( 914rubber??) needs to start making these and out of a better cable material!! that doesnt stretch out. luckily i got off the interstate at an exit that had an autozone and i could get at it in a safe location.
Phil
I remember suffering through a cable like that. Once the cable was stretched out I added a stack of washers under the nut. That gave me more threads for adjustment. I hunted down a good cable after that.
Posted by: worn Oct 20 2023, 05:48 PM
I want a video showing the car in the drive through of an A&W. I know it is copper colored, but the two colors go well together. Get ice cream to make it a float, and maybe get it inside: that car is way too pretty to spill in. Great 914.
Posted by: Camaro Mike Oct 20 2023, 07:26 PM
I went through the parking lot Friday night before the concert. The car looks great.
Posted by: DRPHIL914 Oct 21 2023, 10:03 PM
I want a video showing the car in the drive through of an A&W. I know it is copper colored, but the two colors go well together. Get ice cream to make it a float, and maybe get it inside: that car is way too pretty to spill in. Great 914.
ha! good idea but no A&W’s around here, we have sonic but that’s the wrong color!
along those lines i have a story from 52 years ago- i was 5, mom had a ‘65 Ford T-bird , electric windows etc, went to the A&W in town with grandmother ,
we get our order which is on the tray hung on the window like they did , grandma somehow hits the down button, and that was the a huge mess!
Posted by: DRPHIL914 Oct 21 2023, 10:04 PM
I went through the parking lot Friday night before the concert. The car looks great.
thanks! sorry we missed you! we were probably over eating at the taco shop!
Posted by: DRPHIL914 Oct 21 2023, 10:06 PM
Car looks Great!thanks!!
I had an interesting issue come up while driving up , i had to stop and tighten my clutch cable(new 6 months ago, had been tightened 2x already) and now its perfect but there are only 2 threads left almost out of length to be able to tighten if it needs it again. my previous clutch cable lasted 10 years and i didnt have to tighten it every 6 months!!! WFT is the cable cheap and stretching?? SOMEONE( 914rubber??) needs to start making these and out of a better cable material!! that doesnt stretch out. luckily i got off the interstate at an exit that had an autozone and i could get at it in a safe location.
Phil
I remember suffering through a cable like that. Once the cable was stretched out I added a stack of washers under the nut. That gave me more threads for adjustment. I hunted down a good cable after that.
good idea thanks for the tip! i have an extra new ca le in the trunk but it’s the same brand. someone needs to make new better cables! this is only 6 months old ans maybe 2500 miles of driving!
Posted by: euro911 Oct 22 2023, 02:29 PM
@http://www.914world.com/bbs2/index.php?showuser=11106
Love the Luftgekuhlt' script.
Where did you acquire it? ... Maddogs Motorsport?
https://maddogsmotorsports.com/shop/ols/products/luftgekuhlt-emblem-aluminum
Posted by: DRPHIL914 Oct 23 2023, 05:32 AM
@http://www.914world.com/bbs2/index.php?showuser=11106
Love the Luftgekuhlt' script.
Where did you acquire it? ... Maddogs Motorsport?
https://maddogsmotorsports.com/shop/ols/products/luftgekuhlt-emblem-aluminum
Mark,
i got mine from a guy on Pelican that also had advertised here on world, abouta year ago, they were made in europe i believe, it is solid brass so it will add some weight
Might check and see if he still has any listed for sale over on Pelican.
Phil
Posted by: DRPHIL914 Oct 23 2023, 05:44 AM
@http://www.914world.com/bbs2/index.php?showuser=11106
Love the Luftgekuhlt' script.
Where did you acquire it? ... Maddogs Motorsport?
https://maddogsmotorsports.com/shop/ols/products/luftgekuhlt-emblem-aluminum
Mark,
i got mine from a guy on Pelican that also had advertised here on world, abouta year ago, they were made in europe i believe, it is solid brass so it will add some weight
Might check and see if he still has any listed for sale over on Pelican.
Phil
@http://www.914world.com/bbs2/index.php?showuser=7300
i just saw that the guy on pelican sold them for $88, -- link here-https://forums.pelicanparts.com/porsche-911-used-parts-sale-wanted/1033259-luftgekuhlt-emblem.html
but PMB has them as well - $50 look to be same thing as the brass ones from pelican seller
Posted by: euro911 Oct 24 2023, 03:50 PM
but PMB has them as well - $50 look to be same thing as the brass ones from pelican seller
Cool - thanks, Doc. Just ordered one from PMB
Gonna go on my 912 though

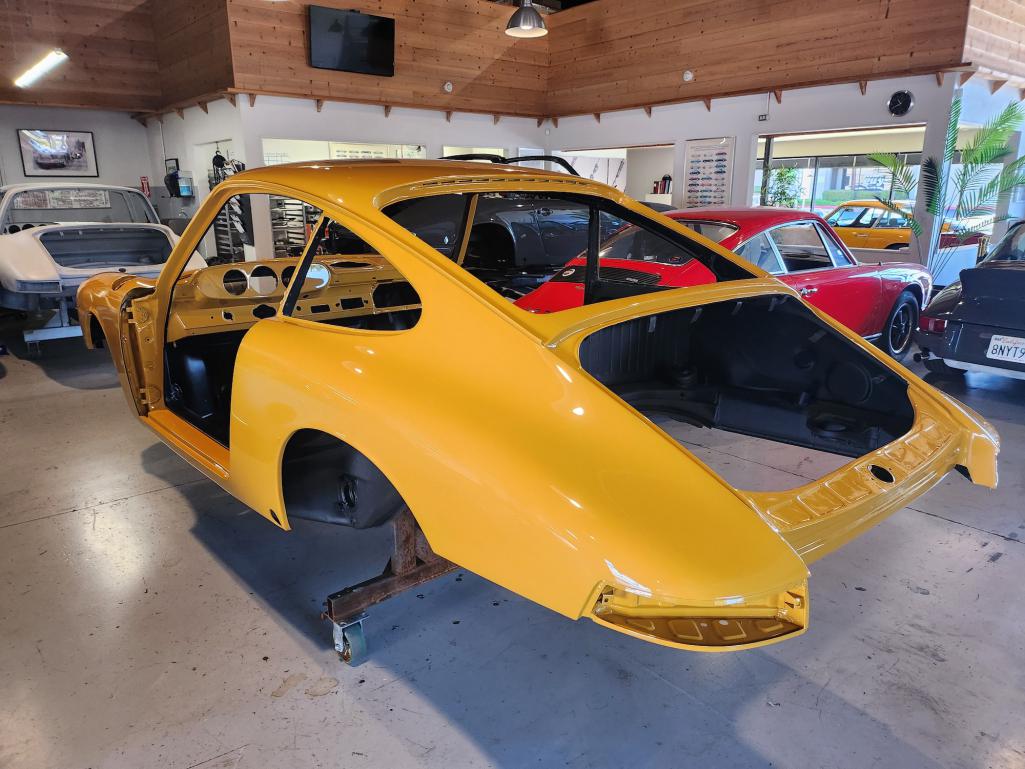
Posted by: DRPHIL914 Oct 26 2023, 11:04 AM
but PMB has them as well - $50 look to be same thing as the brass ones from pelican seller
Cool - thanks, Doc. Just ordered one from PMB
Gonna go on my 912 though
@http://www.914world.com/bbs2/index.php?showuser=7300
nice looking 912!!
Posted by: euro911 Nov 13 2023, 03:21 PM
Thanks, Doc. Found this little gem to stick on the grille next to the' Luftgekuhlt' script
... ...
.
Posted by: DRPHIL914 Jun 26 2025, 07:17 AM
this was last week right before final prep for paint
Been a hectic past year and spent 6 months without my car and inbetween but back now.
might hopefully see more posts , ive been fairly absent here for the past year - the BIG D suck

Posted by: Garland Jun 26 2025, 08:52 AM
Glad to see you back, recall the few times we spoke at Okteenerfest a few years back.
Posted by: mepstein Jun 26 2025, 10:09 AM
Hey Phil.
Posted by: jim_hoyland Jun 26 2025, 09:05 PM
 Hi Phil ….
Attached image(s)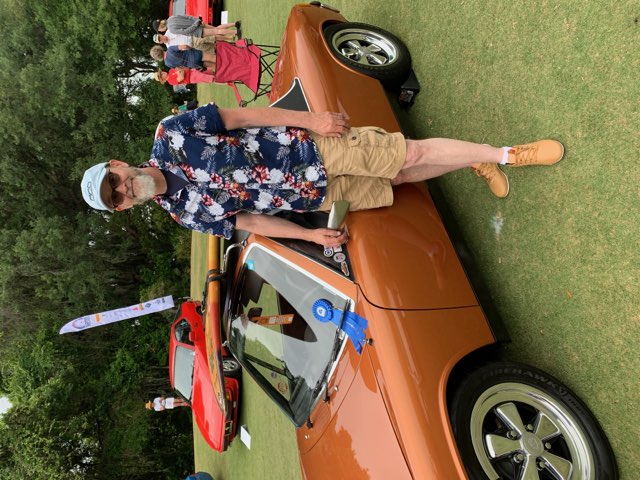
Posted by: DRPHIL914 Jun 27 2025, 11:09 AM
Hey Phil.
Mark!
Posted by: DRPHIL914 Jun 27 2025, 11:09 AM
Hi Phil …. that was a fun day! Posted by: DRPHIL914 Jun 27 2025, 11:13 AM
Glad to see you back, recall the few times we spoke at Okteenerfest a few years back.
yes i remember for sure! are you coming down from Pure Michigan again? I will not be at Okteenerfest this year as my daughter is graduating that same weekend,
unfortunately, but i cant miss her becoming a doctor!!!! 4th generation chiropractor!
Posted by: Shivers Jun 27 2025, 03:40 PM
Glad to see you back, recall the few times we spoke at Okteenerfest a few years back.
yes i remember for sure! are you coming down from Pure Michigan again? I will not be at Okteenerfest this year as my daughter is graduating that same weekend,
unfortunately, but i cant miss her becoming a doctor!!!! 4th generation chiropractor!
Congratulations!
Posted by: Gatornapper Jun 28 2025, 06:40 PM
Phil -
Have missed our chats and connecting. Hope you are well, "spirit, soul and body."
Ring me up sometime if you want.
Sold the Guards Red 928 you were interested in and the Lord above blessed me with a huge surprise - a Concours 928 S in colors I would order from the factory. About 50k miles and like new in every way and got it for only $5k more than I sold the '81 for. Already won 1st place Euro in a local car show at RIR.
Will post pic on main thread page...
Take care friend - and yes - congrats on your daughter! Acorn didn't fall far from the tree!
GN
Glad to see you back, recall the few times we spoke at Okteenerfest a few years back.
yes i remember for sure! are you coming down from Pure Michigan again? I will not be at Okteenerfest this year as my daughter is graduating that same weekend,
unfortunately, but i cant miss her becoming a doctor!!!! 4th generation chiropractor!
Posted by: DRPHIL914 Jun 29 2025, 11:42 AM
Phil -
Have missed our chats and connecting. Hope you are well, "spirit, soul and body."
Ring me up sometime if you want.
Sold the Guards Red 928 you were interested in and the Lord above blessed me with a huge surprise - a Concours 928 S in colors I would order from the factory. About 50k miles and like new in every way and got it for only $5k more than I sold the '81 for. Already won 1st place Euro in a local car show at RIR.
Will post pic on main thread page...
Take care friend - and yes - congrats on your daughter! Acorn didn't fall far from the tree!
GN
Glad to see you back, recall the few times we spoke at Okteenerfest a few years back.
yes i remember for sure! are you coming down from Pure Michigan again? I will not be at Okteenerfest this year as my daughter is graduating that same weekend,
unfortunately, but i cant miss her becoming a doctor!!!! 4th generation chiropractor!
I was sad not being able to connect with you on that deal as i didn’t sell the Maserati,
but that is awesome deal you go on the S!!! will chat soon, things settling down, but i’m house shopping now, so it might be a busy summer!
definitely give me a shout!!
Phil
Posted by: DRPHIL914 Jun 29 2025, 11:47 AM
beautiful day in Atlanta, some very nice cars at the C&C event, only a few classics and the copper 914 had a lot of attention, especially with the younger crowd!
Attached thumbnail(s)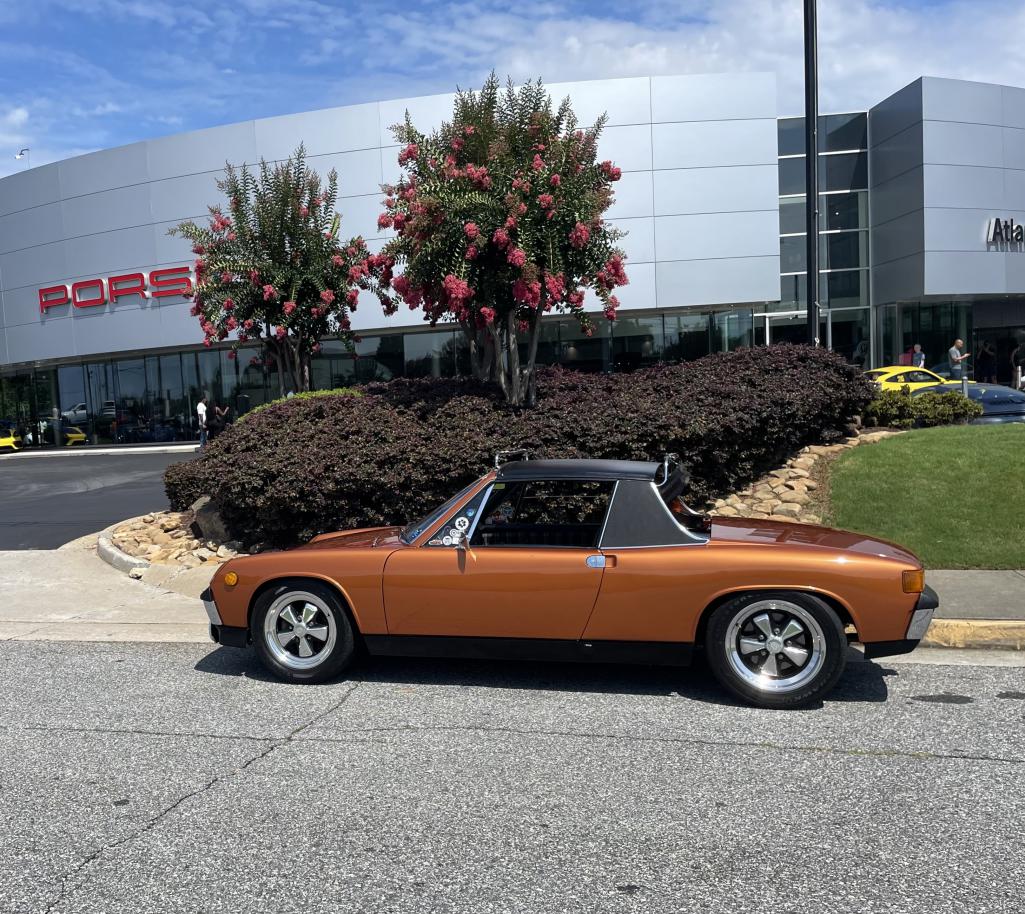
Powered by Invision Power Board (http://www.invisionboard.com)
© Invision Power Services (http://www.invisionpower.com)