Printable Version of Topic
Click here to view this topic in its original format
914World.com _ 914World Garage _ Just a little bit of progress
Posted by: Doug Leggins May 25 2005, 09:14 PM
I installed the trim and seals around the windshield frame last Sunday.
As I took apart the 72 parts car to help determine how to, and the best sequence to install the parts on the 73, I discovered a black painted area on the A-pillar that I had never noticed before. 
Attached image(s)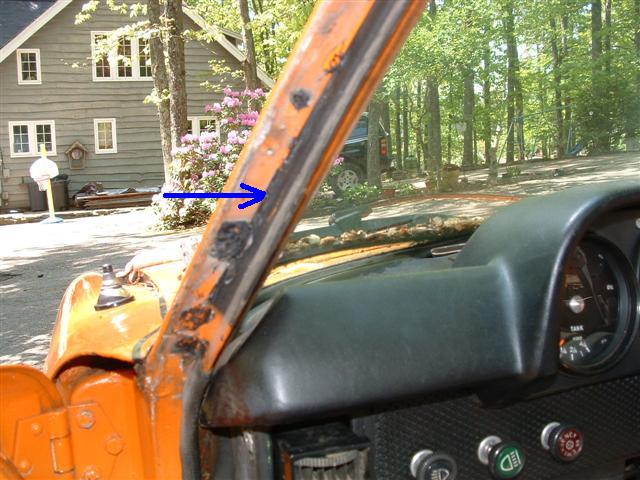
Posted by: Doug Leggins May 25 2005, 09:17 PM
Took a look at the parts for a minute and realized that without this black painted area there would be an orange strip that would show between the seal and the A-pillar interior cover.
So...another step needed.
Attached image(s)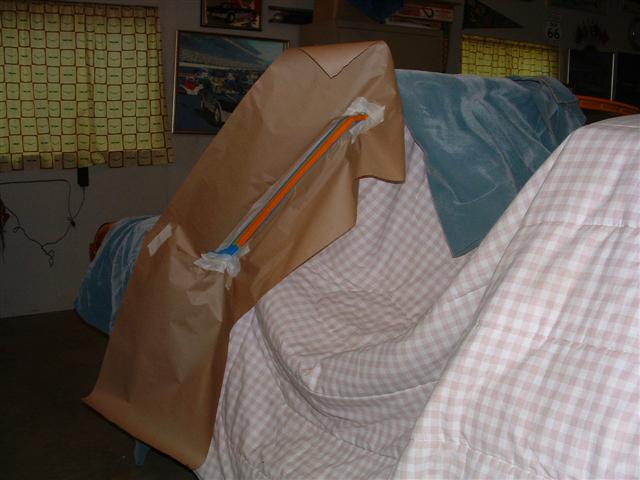
Posted by: Doug Leggins May 25 2005, 09:18 PM
And then the black stripe
Attached image(s)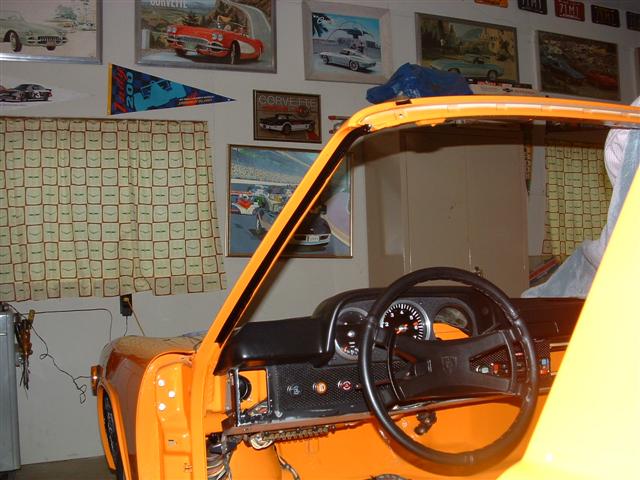
Posted by: Doug Leggins May 25 2005, 09:26 PM
I used a little of the black butyl tape that is used to install the windshield to creat a seal behind the chrome strip that is attached to the A-pillar. This stuff is STICKY!!! The best method i found to get close to the correct amount was to pull the material a little at a time (stretch it longer) to reduce the diameter.
Attached image(s)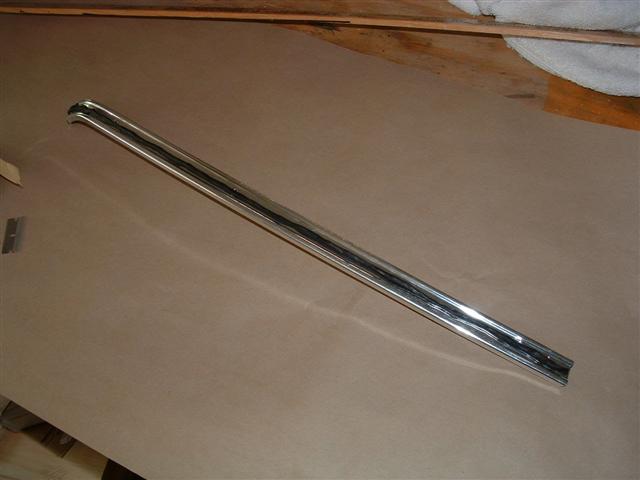
Posted by: Doug Leggins May 25 2005, 09:28 PM
I had a bit too much in a couple of areas. If i had kept the smaller diameter consistent along the entire length, it would have worked a little better. The larger diameter area of the butyl were nearly too much.
Attached image(s)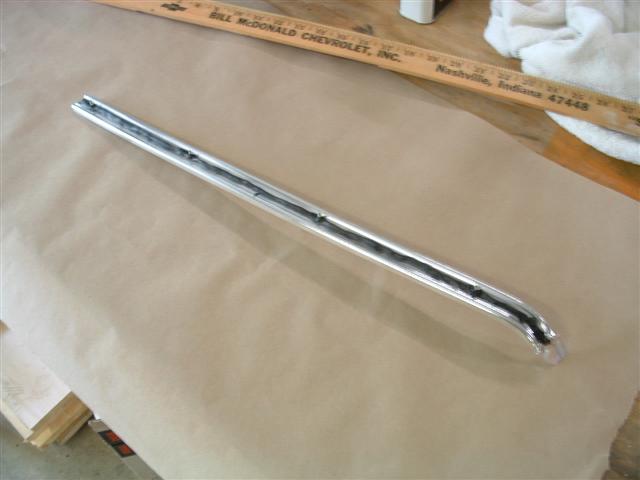
Posted by: Doug Leggins May 25 2005, 09:31 PM
Here's the finished driver's side. Orange paint would have been visible between the seal and the interior trim if the black paint step was not done.
Attached image(s)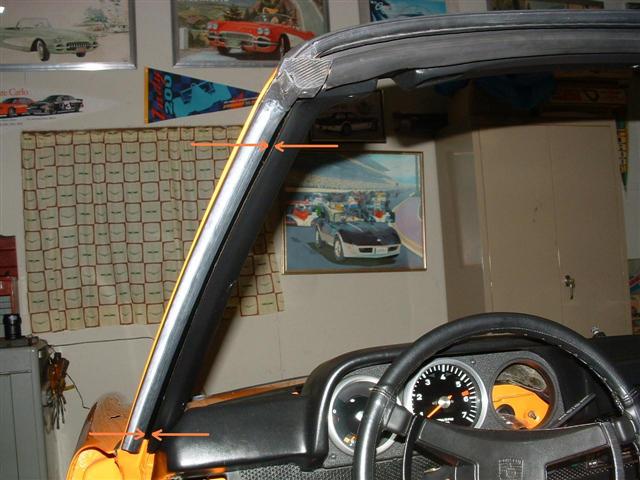
Posted by: Doug Leggins May 25 2005, 09:35 PM
pass side.
I installed the seal into the back side of the A-pillar chrome strip and then pushed slowly and carefully along the front side of the seal with a screwdriver to get it seated into the trim strip.
Posted by: Doug Leggins May 25 2005, 09:37 PM
forgot the pic showing where I used a screwdriver on the seal to get it in place.
Attached image(s)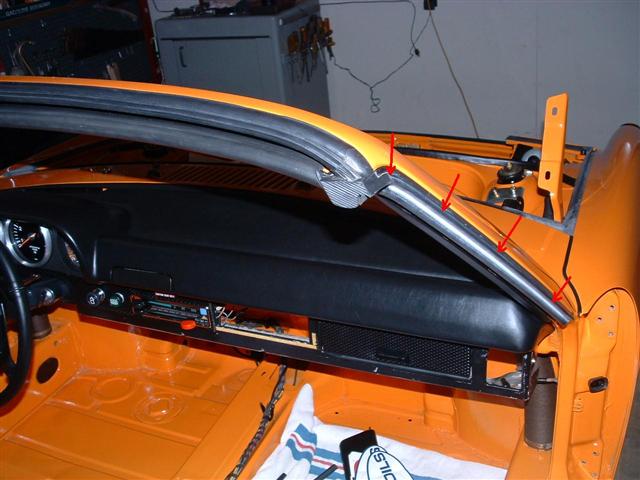
Posted by: Gint May 25 2005, 09:40 PM
Thanks Doug! I never realized that. I'll have to look at the cowl/ws hoop from my parts car. Of course it's still in UT at the moment.
Posted by: Doug Leggins May 25 2005, 09:48 PM
Here is the sequence that I used to get all of these pieces installed. It worked well for me.
1. VIN tag
2. A-pillar chrome trim with butyl
3. Seal that goes along the top of the windshield frame and down the A-pillars
4. Center alignment post for targa top (2 screws hold it in place)
5. Top interior trim picece that the visors mount to
6. A-pillar interior covers
7. lower seal that covers from a-pillar to a-pillar
It was a little challenging getting the small screws installed through the flap of vinyl that comes off of the top of the a-pillar covers and into the windshield frame. But the seal "corners" can be pulled back enough after it is completely installed to allow for access to drive the screws into the windshield frame.
Glad to have a few more parts installed 
Powered by Invision Power Board (http://www.invisionboard.com)
© Invision Power Services (http://www.invisionpower.com)