Printable Version of Topic
Click here to view this topic in its original format
914World.com _ 914World Garage _ Who has mounted Mikey’s Fender Liners?
Posted by: RickS Dec 2 2017, 10:28 PM
Just received the box with the liners. Instead of the stated “clips” for mounting they came with rivets. Clips suggest clipping the liners to the fenders or other attachment points rivets on the other hand... Am a bit hesitant to start drilling holes in my original sheet metal. No instructions were provided either.
Any one done this or have suggestions of the least invasive way they mounted these not using “clips”?
Posted by: cary Dec 2 2017, 11:24 PM
The rivets go into the fender liner, not the car. You reuse the end bolts on the rocker panel and the rear valence.
Here's a shot .............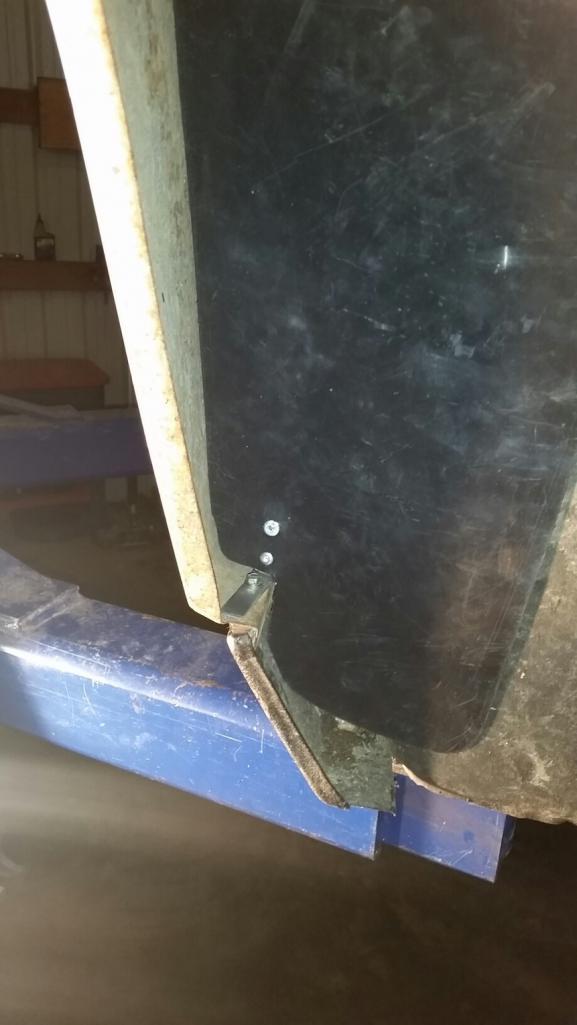
Posted by: RickS Dec 3 2017, 12:36 AM
Thanks Cary. That makes total sense. Still have everything in the shipping box since I just got back to town tonight.
Don’t think quick some instructions would be too much to ask but this is pretty much a DIY site.
Posted by: cary Dec 3 2017, 01:05 AM
Matt and I talked about it one night while putting his car together. But then we got busy.
Maybe I'll grab a set and install them on Doug's car for a demo. Black on primer should show up pretty well. Plus being on the rotisserie we'd be able get some great angles.
Posted by: Mark Henry Dec 3 2017, 08:15 AM
914rubber (and other member vendors) shouldn't have to included written instructions, but I'd suggest a web link addy to a how to thread here might be a good idea.
Posted by: RickS Dec 4 2017, 01:52 AM

914rubber (and other member vendors) shouldn't have to included written instructions
Please tell me, based on what? Or do you ASSUME that because one can access this site they magically have the knowledge to perform all tasks on their cars flawlessly?That is one hell of a big assumption. You seem to forget that one of the premise behind this site is people helping people since most don’t posses said magic.
You are correct that vendors shouldn’t HAVE to include anything but the part, however many reputable vendors do, including JWest. A vendor which goes the extra mile for their customers tend to be the most successful. Not rocket science. I do agree with you that providing instructions on non-intuitive installs on their websites would work.
I have been buying quality reasonably priced parts from Mickey ever since he opened shop so if you feel the need to defend him, you can save your breath. I can’t count how many items I have bought from him through the years. Whenever there was an issue he stepped right up and resolved it. I will continue to buy parts from him with or without instructions but it doesn’t mean there isn’t always room for improvement. But what do I know after being a consultant to successful businesses for the last 25 years on how to grow and increase profitability, i could be wrong.
Posted by: Mikey914 Dec 4 2017, 04:16 AM
We are actually taking more steps to document installations and provide more instruction.
I totally get it. Cary has also been working with us to document some if the items.
It's part of the transition to adding more infer structure and allow us to help you.
Let me know if you need any more info, but looks like Cary is gonna drop you the short version. We will finalize them shortly.
Mark
Posted by: Mark Henry Dec 4 2017, 07:30 AM
914rubber (and other member vendors) shouldn't have to included written instructions
Please tell me, based on what? Or do you ASSUME that because one can access this site they magically have the knowledge to perform all tasks on their cars flawlessly?That is one hell of a big assumption. You seem to forget that one of the premise behind this site is people helping people since most don’t posses said magic.
You are correct that vendors shouldn’t HAVE to include anything but the part, however many reputable vendors do, including JWest. A vendor which goes the extra mile for their customers tend to be the most successful. Not rocket science. I do agree with you that providing instructions on non-intuitive installs on their websites would work.
I have been buying quality reasonably priced parts from Mickey ever since he opened shop so if you feel the need to defend him, you can save your breath. I can’t count how many items I have bought from him through the years. Whenever there was an issue he stepped right up and resolved it. I will continue to buy parts from him with or without instructions but it doesn’t mean there isn’t always room for improvement. But what do I know after being a consultant to successful businesses for the last 25 years on how to grow and increase profitability, i could be wrong.
Did you read the rest? I said a vendor just needs a link to a "how to" thread on this site.
You only know about 914rubber through the net, most likely from this site. So to me a "how to" thread would often be more in depth than any instruction sheet.
Posted by: cary Dec 7 2017, 12:13 AM
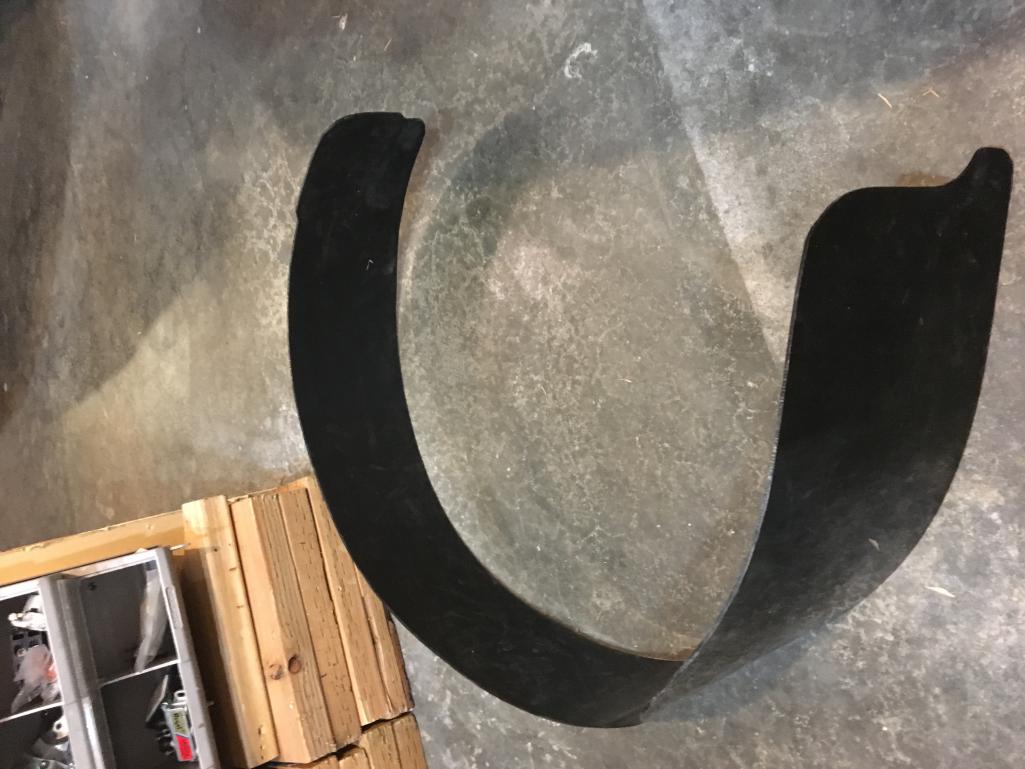
Crash Course : The wide one goes it the back.
Step one, attach the mounts. The front I had the liner flush with the fender lip. The rear I had back up tight against the inner fender.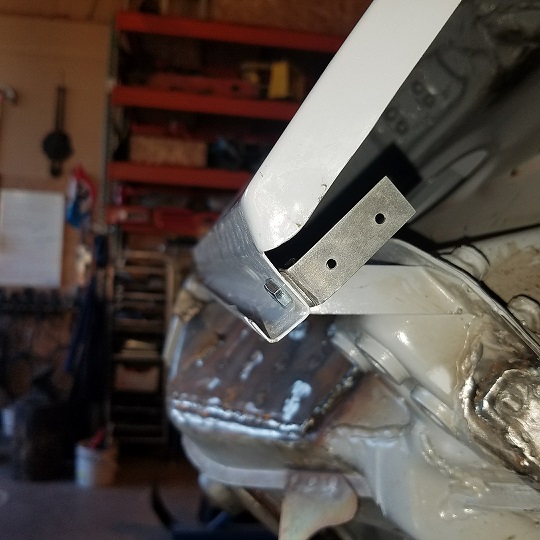
Now flex the liner into place.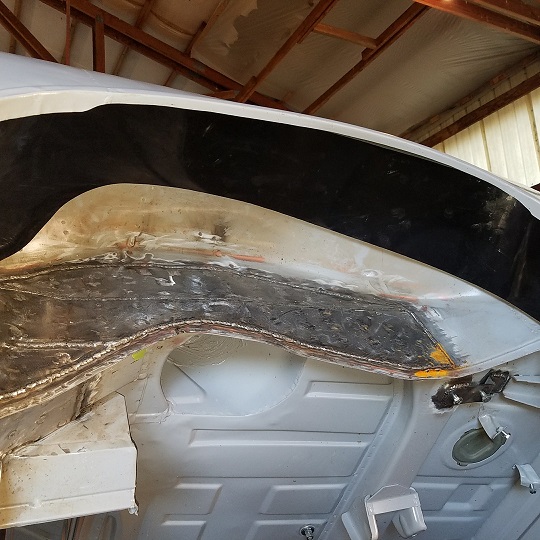
Then bow the liner behind the mount to allow you to drill the 1/8" holes. 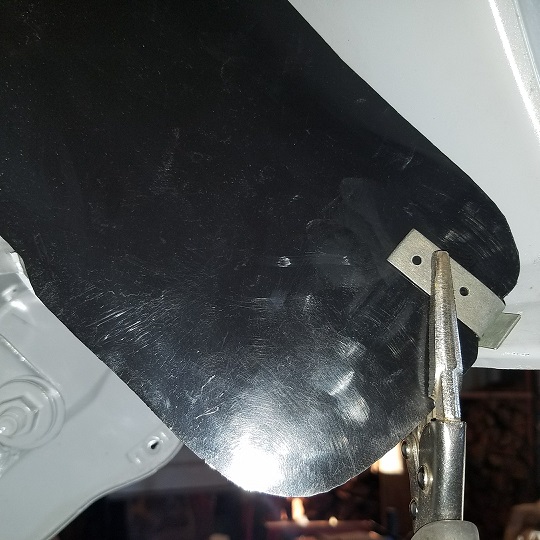
Posted by: cary Dec 7 2017, 12:32 AM
Pretty simple. Drill the holes and rivet it in. Keep an eye on the location of the liner in the arch. It wants to slide up, and you want to keep it tight and tidy against the fender.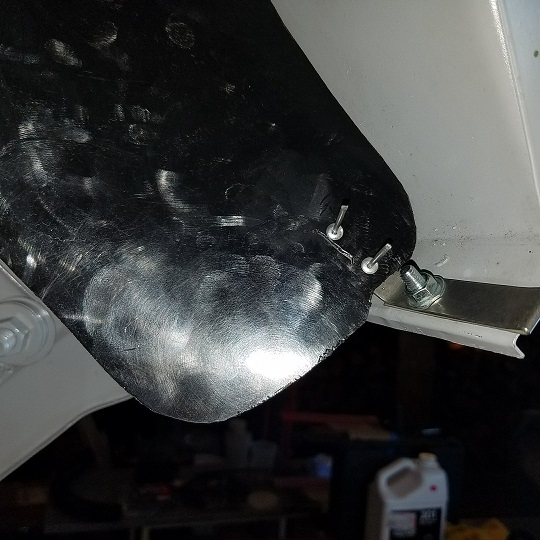
Front fender is more of the same.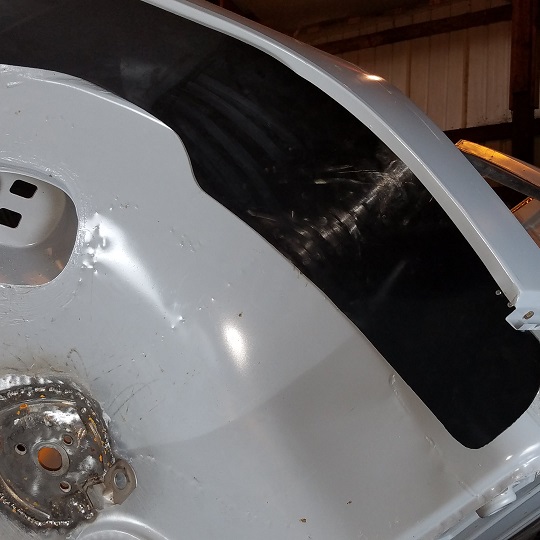
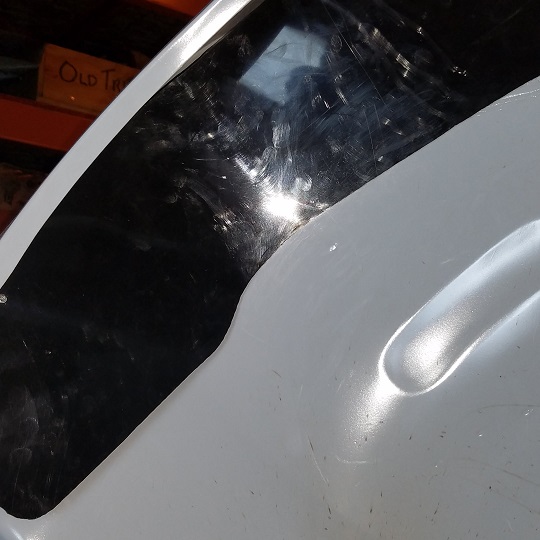
These were installed without any trimming or tuning of the liner.
Every 914 needs these. 1. Protects the front fender to cowl joint. 2. Protects the seam sealer behind the door latch plate. 3. Keeps debris from getting slung into the jack point. 4. Most important, keeps debris and moisture getting slung up into the poorly designed joint under the sail panel inside the rear fender.
Posted by: raynekat Dec 7 2017, 12:39 AM
Cary, guess you better sell me those liners.
Since they're set up for my car.

Posted by: cary Dec 7 2017, 12:42 AM
All boxed up and ready to go .................... LOL
Posted by: 914forme Dec 7 2017, 10:22 AM
Every 914 needs these. 1. Protects the front fender to cowl joint. 2. Protects the seam sealer behind the door latch plate. 3. Keeps debris from getting slung into the jack point. 4. Most important, keeps debris and moisture getting slung up into the poorly designed joint under the sail panel inside the rear fender.

And something else to purchase.

Posted by: RickS Dec 9 2017, 08:50 PM
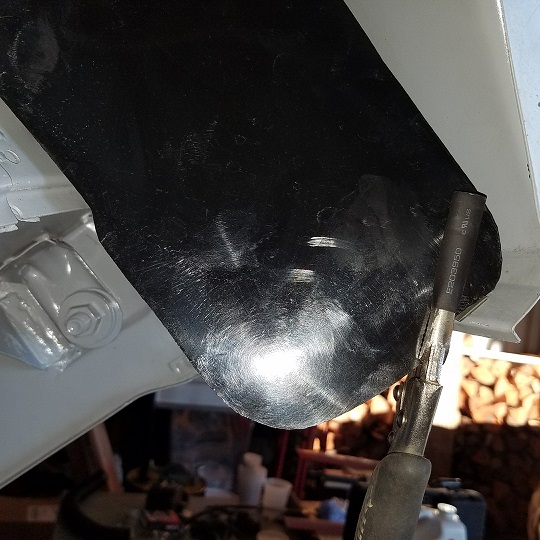
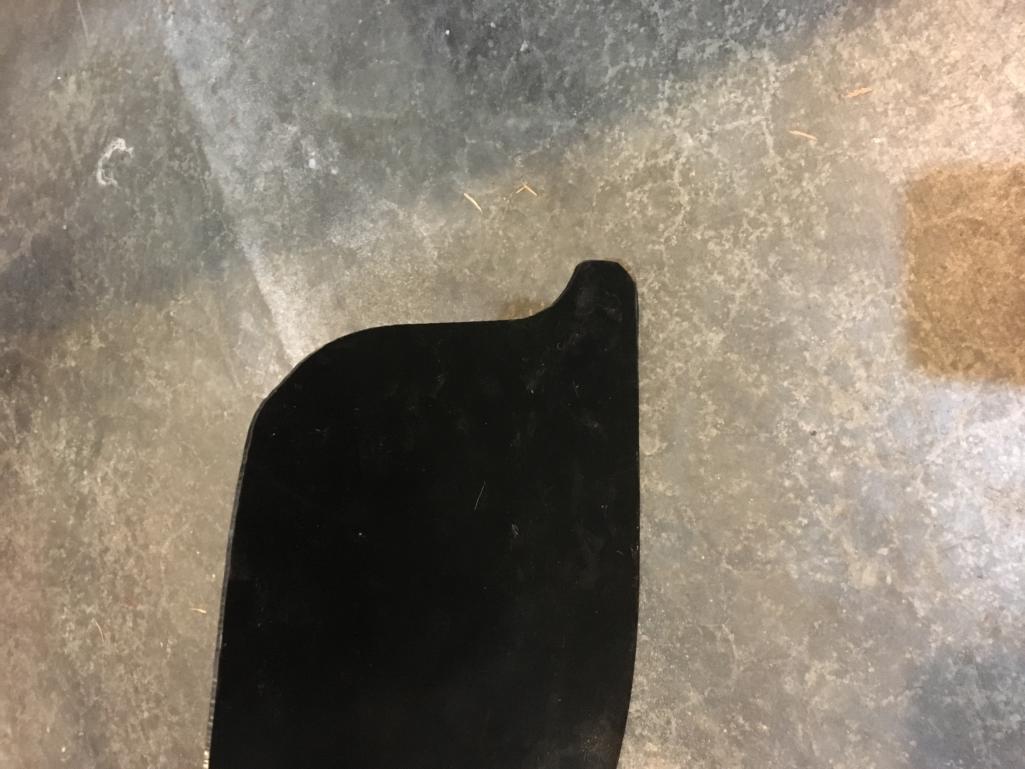
Thanks Cory for all the valuable info. Is this a front or rear? I am guessing it is a front, but where does that little tab on the end go? It seems to interfere wherever it goes. The front of that piece is slightly notched for the fender but the tab is a mystery.
Posted by: RickS Dec 9 2017, 09:03 PM
Here is my misguided attempt to try to make the piece which matches the one above fit in the back of the front wheel well. I notched it but it still won’t snug up to the fender. 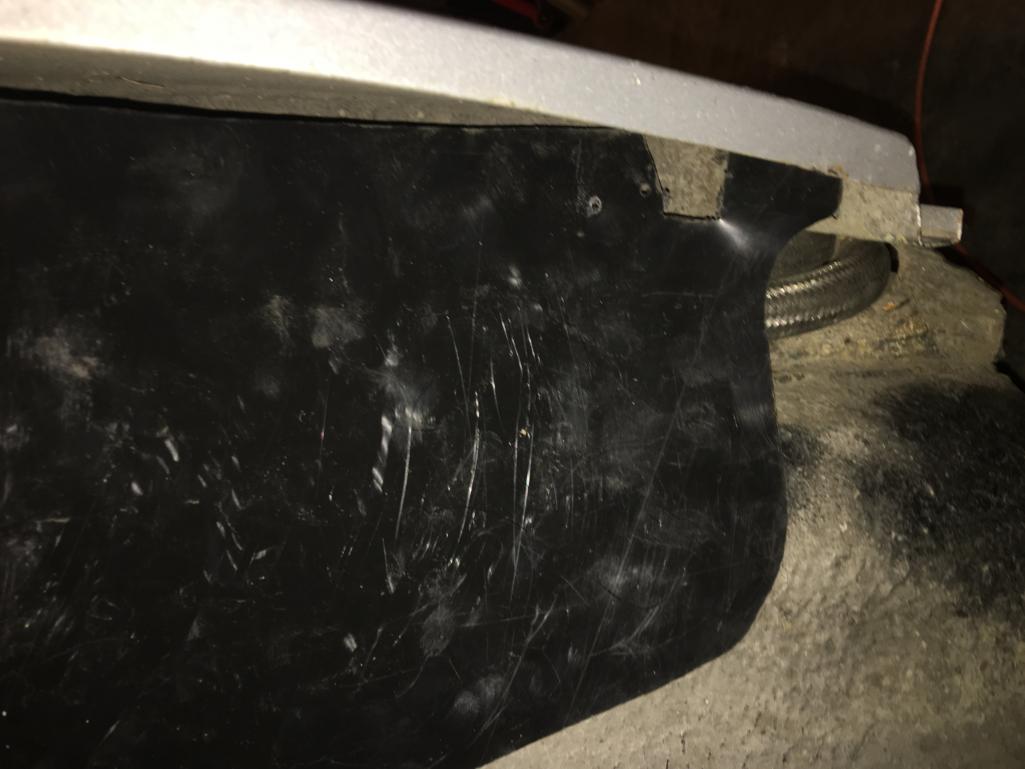
You can see the issue with that tongue piece.
When flush mounting the liners against the fender lips how can you access the bolts which mount the L brackets when you want to drop a valence or the rocker panel?
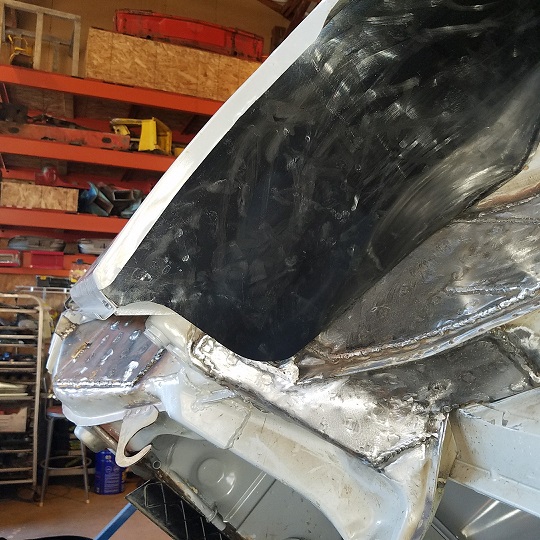
When trying to mount the driver rear piece, how did you work around the suspension pieces with the zirk fitting? Seemed to be a lot of interference due to the suspension.
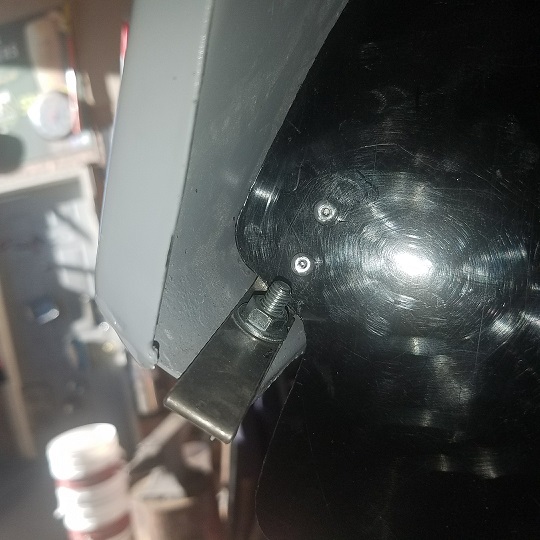
Posted by: RickS Dec 9 2017, 09:20 PM
Here is the clearance issue with mounting the rear There just doesn’t seem to be room to fit the liner with the bracket since it hits the suspension. Also how do you get to the zirk with the liner in place? 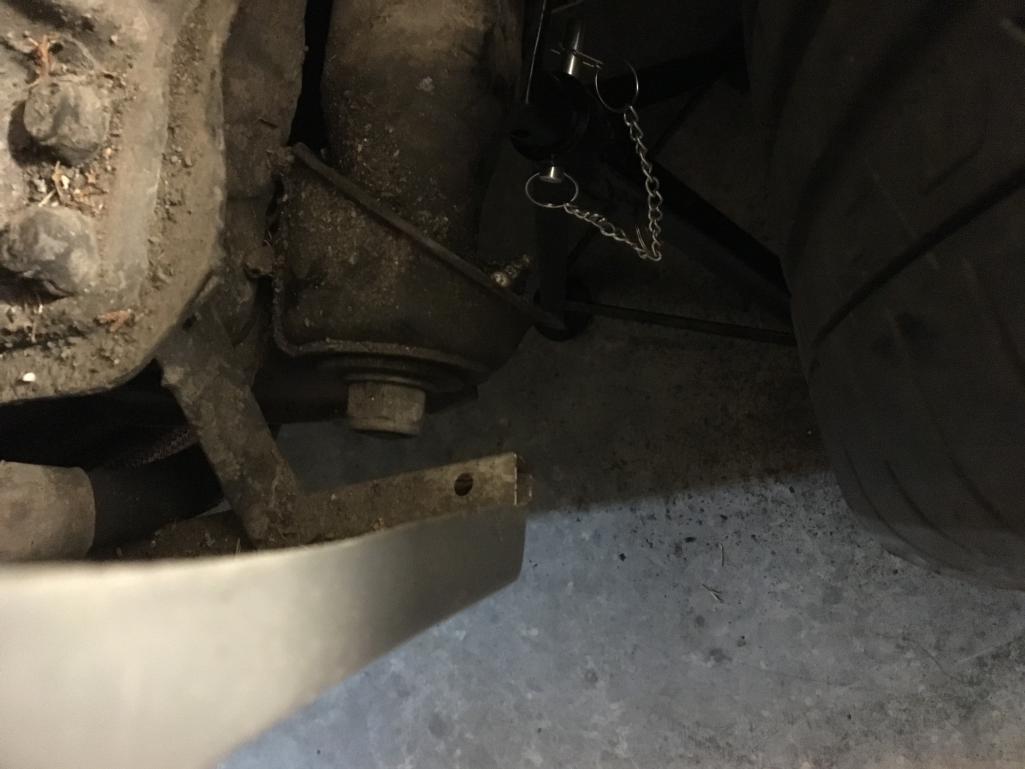
if the solution is to mount the L bracket on the inside, how do you access the bolt to remove the rocker without drilling out the rivers? I am repainting the rockers and was going to put them on last.
Posted by: cary Dec 9 2017, 11:50 PM
Thanks Cory for all the valuable info. Is this a front or rear? I am guessing it is a front, but where does that little tab on the end go? It seems to interfere wherever it goes. The front of that piece is slightly notched for the fender but the tab is a mystery.
That's the rear.
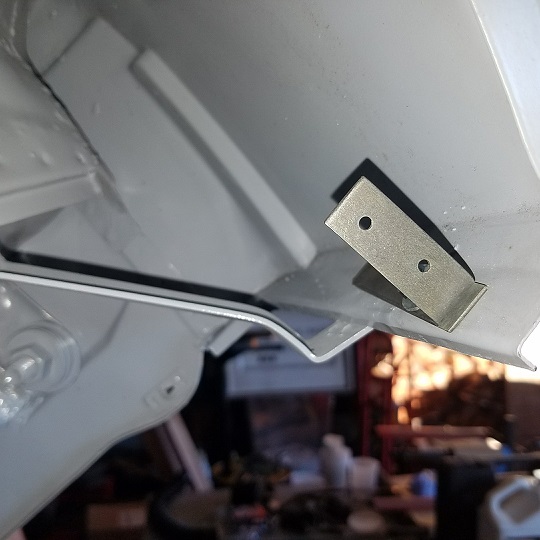
Posted by: cary Dec 9 2017, 11:57 PM
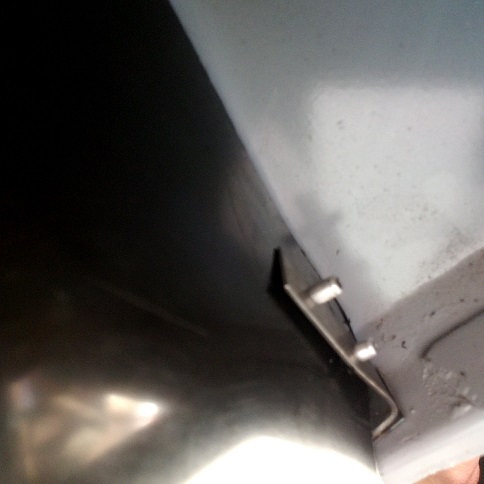
Here's the tab on the left rear. You can see the little tab / tongue right in front of the rear
trailing arm.
Posted by: cary Dec 10 2017, 12:06 AM
Here is the clearance issue with mounting the rear There just doesn’t seem to be room to fit the liner with the bracket since it hits the suspension. Also how do you get to the zirk with the liner in place?
if the solution is to mount the L bracket on the inside, how do you access the bolt to remove the rocker without drilling out the rivers? I am repainting the rockers and was going to put them on last.
Drilling out the rivets will always be the easiest way out. 1/8" drill bit and they pop right off. I've always had the advantage of having the car up on a lift. Giving me more access.
Posted by: RickS Dec 10 2017, 12:37 AM
Thank you sir. Got it completely back-asswards. Much appreciated
Posted by: mlindner Dec 10 2017, 06:08 AM
Nice job Cary, and those are some great looking liners. Mark
Posted by: Mikey914 Dec 10 2017, 10:45 AM
Thanks Cary for detailing this out. We will be doing up a more complete instruction set.
These are really needed to keep crap from winding up in the nooks and crannies. One of the reasons we see so much rust in these areas.
Posted by: RickS Dec 10 2017, 12:28 PM
Thanks to Cary, got the drivers side done. While the rockers were off lots of cleaning, rust treatment and painting. There was the usual old can of worms, but very surface tin worms.
One disappointment was was the reason why I bought the liners was to prevent mud and crud from building up behind the rocker by the jack point leading to rust and expensive repairs unless cleaned out religiously. Since I also have oil lines running through the rocker, it was another place to collect mud and rust. So... I decided to fab some lower blocking plates out of a heavy duty plastic. Did the cardboard template and then made the plate which is mounted ahead of the liner. 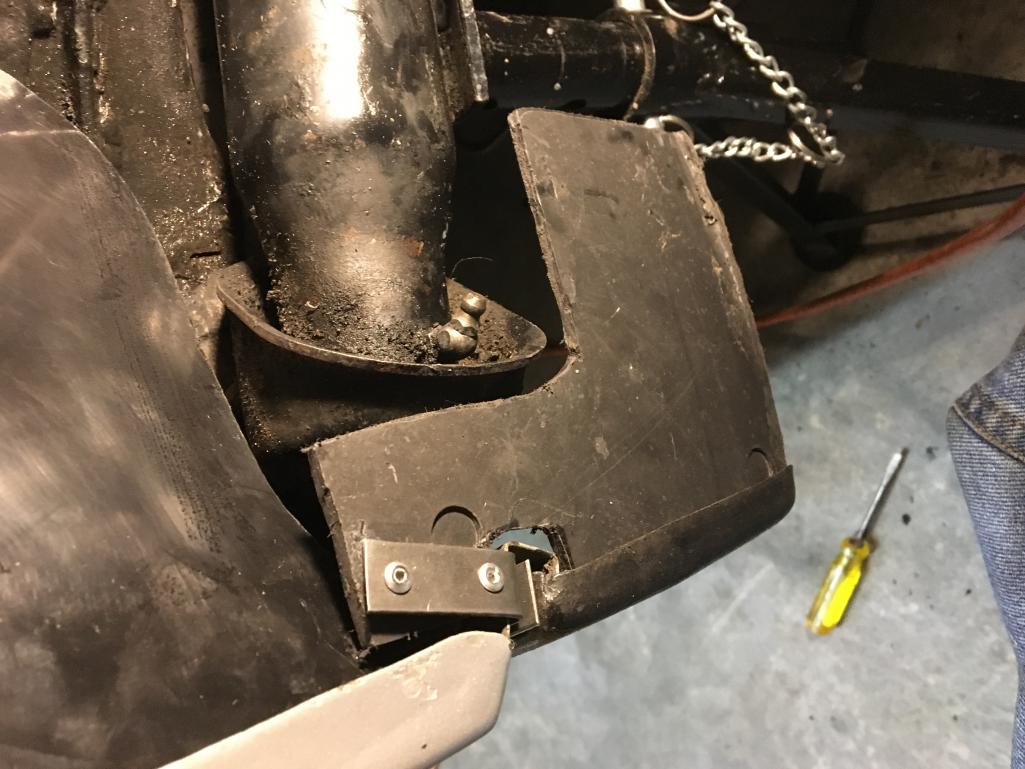
Posted by: cary Dec 10 2017, 12:38 PM
Hmmmm ....
Doug will have the same issue.
Posted by: Jamie Aug 31 2019, 02:14 PM
Thanks to Cary, got the drivers side done. While the rockers were off lots of cleaning, rust treatment and painting. There was the usual old can of worms, but very surface tin worms.
One disappointment was was the reason why I bought the liners was to prevent mud and crud from building up behind the rocker by the jack point leading to rust and expensive repairs unless cleaned out religiously. Since I also have oil lines running through the rocker, it was another place to collect mud and rust. So... I decided to fab some lower blocking plates out of a heavy duty plastic. Did the cardboard template and then made the plate which is mounted ahead of the liner.
Is that grease nipple stock? I've never noticed a fitting there, but then again I've never had a reason to look for one there!

Posted by: VaccaRabite Aug 31 2019, 03:04 PM
914 rubber needs to make these for a flared BMW 2002. Just saying. Its Something that someone might need.
I know I'm not the only person that has both...
Posted by: rhodyguy Aug 31 2019, 03:18 PM
The internet is handy but NOTHING beats paper.
Posted by: Mikey914 Aug 31 2019, 07:29 PM
Actually changed the mounts to make them a bit easier.
And yes we can make them.
PM sent
Posted by: SirAndy Aug 31 2019, 08:45 PM
Nope
Powered by Invision Power Board (http://www.invisionboard.com)
© Invision Power Services (http://www.invisionpower.com)