Printable Version of Topic
Click here to view this topic in its original format
914World.com _ 914World Garage _ Adding Heat to the Clown Car
Posted by: davebrossi Dec 13 2017, 10:05 AM
Apologies for going quiet for months, but I'd burnt out trying to solve the overheat issue on the clown car. Turns out at 5k miles, the fan belt was stretched/heat damaged. no more overheating. 
Now, in case you're wondering about the whole title/point of this thread, I have been bitten by the bug that whispers "what you really need is heating!" as I live in Idaho where they don't salt the roads, but where it's below freezing much of the year.
I'll be searching/educating myself in exactly what I need to do, but in the meantime I thought I'd offer a window/way for people to follow along in the adventure.
To recap; The Clown Car has a 3.2 from an 87 911, straight headers (which -will- be available once I'm done, hint hint) and it uses a custom engine mount/tin from Rich Johnson. I have opted to go for as close to a stock heat exchanger system as possible over an aux gas heater due to concerns over my ability to cause vehicles to catch fire (I lost an 81 Vanagon to fire.)
Based on what I've been able to piece together thus far, in addition to custom headers that mate up to the 3.2's larger diameter exhaust ports, I will need;
-flapper valves (I'm assuming the 'custom' part of the headers means I can utilize standard 914 flapper box assemblies.)
-aircraft grade fresh air ducting from flapper boxes to longitudinals
-the 'mystery manifold' that exits the bottom of the engine tin and goes to both exhaust headers, this part I'm still working through. 
On the other side of the engine tin the standard 3.2 has a 'port' of sorts on one side of the fan shroud (currently capped,) a duct that terminates on an aux blower (still have the wiring harness on the motor), then duct work from the aux blower to the engine tin terminating just next to the distributor cap. There should be some form of flange in the tin that mates the upper and lower together.
I know because the engine bay is not the 3.2's native land there will be'customization'  (to be fair I don't like customization, that's how you get terms like Mississippi'd or 'mickey mouse'd'
I hope to photograph the process here, and while advice is always appreciated, I -can- use the google search function too, so I'll be looking at everything else in the meantime.
Posted by: Justinp71 Dec 13 2017, 11:08 AM
![popcorn[1].gif](style_emoticons/default/popcorn[1].gif)
Cool project.
Where do you plan to get heat exchangers from? Heat would be nice this year in Ca, lots of cold days with no rain this year.
Also does your wife call your car a clown car too  ?
?
Posted by: mb911 Dec 13 2017, 11:28 AM
Dave,
Please feel free to follow up with a phone call.
The simplest way is the 911 hot air ducts on each side of the fan. use the Scat tubing to connect through the engine sheet metal, Ditch the 911 blower, and go into a set of heat exchangers. Obviously I make the correct size heat exchangers for this set up but you could opt for smaller if you have a line a set cheap?
Posted by: mepstein Dec 13 2017, 11:45 AM

Dave,
Please feel free to follow up with a phone call.
The simplest way is the 911 hot air ducts on each side of the fan. use the Scat tubing to connect through the engine sheet metal, Ditch the 911 blower, and go into a set of heat exchangers. Obviously I make the correct size heat exchangers for this set up but you could opt for smaller if you have a line a set cheap?
In the 911 world, they call it - backdating the heat. You just use the 3.2 engine fan to move the hot air through the heat exchangers, flapper valves, and into the cabin. Very simple and effective. Get a set of Ben's/MB911 heat exchangers if you want the best ones made for your 3.2
Posted by: davebrossi Dec 13 2017, 02:21 PM
Hi All,
I thought about backdating the fan shroud, but I was concerned that the level of heat would be inadequate to stay warm/defrost the glass. Standard 914 interior and duct work in the longitudinals. My reason for considering the 'standard' approach stems from my Van experience where the interior relied only on the motor's fan. The results were almost non-functional.
Posted by: mepstein Dec 13 2017, 03:20 PM
Hi All,
I thought about backdating the fan shroud, but I was concerned that the level of heat would be inadequate to stay warm/defrost the glass. Standard 914 interior and duct work in the longitudinals. My reason for considering the 'standard' approach stems from my Van experience where the interior relied only on the motor's fan. The results were almost non-functional.
Totally different for a 914. Ben’s headers are the right size for a 3.2 and his heater boxes (copy of the Porsche design) transmit plenty of heat. The 914 cabin is small in volume and it’s a pretty short path from the heat exchangers. The engine fan has plenty of volume and velocity. That’s why the backdate is popular on the 911’s.
I don’t use an auxiliary electric fan on either my 914-6 or 6. Both are too hot to leave on high, even during the coldest days.
There are some other makes of 914-6 heat exchangers but they are very heat deficient. Don’t bother unless you use the stock Porsche or Ben’s.
Posted by: porschetub Dec 13 2017, 03:25 PM
Hi All,
I thought about backdating the fan shroud, but I was concerned that the level of heat would be inadequate to stay warm/defrost the glass. Standard 914 interior and duct work in the longitudinals. My reason for considering the 'standard' approach stems from my Van experience where the interior relied only on the motor's fan. The results were almost non-functional.
A 911 motors moves a HUGE amount of air so no concerns there,do you already have heat exchangers to fit on ?.
Posted by: davehg Dec 13 2017, 04:41 PM
I just received Ben’s heat exchangers for my 2.7 and can attest to their being well made.
Posted by: mb911 Dec 13 2017, 05:18 PM
Making more heat exchangers next week and your in cue. Thanks everyone for the feedback..
Posted by: GeorgeRud Dec 13 2017, 05:42 PM
You’ll love the amount of heat you’ll get through the heat exchangers with the 3.2engine. Backdating to the older style heat ducts should move as much air as you want, and you can fry yourself from all the heat that flows through the exchangers. Ben does amazing work!
Posted by: davebrossi Dec 25 2017, 08:23 PM
You’ll love the amount of heat you’ll get through the heat exchangers with the 3.2engine. Backdating to the older style heat ducts should move as much air as you want, and you can fry yourself from all the heat that flows through the exchangers. Ben does amazing work!
I'm looking forward to it. I've purchased a set of Ben's custom headers, and in the meantime I've opted to backdate to the pre 73 set of 'snozzles' (Snozers? Snaussges? Warm air ducting) with warm air tubing through the engine tin. I've got part of the kit, planning on fitting the flapper valves to the heat exchangers from the comfort of my flat, I'm hoping someone's been camera friendly with their experience out there as getting that part in is new to me. More as I get bits and bobs in :-D
Posted by: Steve Dec 26 2017, 01:13 AM
My 3.2 runs much better with Bens heat exchangers than the factory ones, due to them being the correct size for the motor. The heat is also as good as the factory heat exchangers. If you want a stock looking lightweight quiet muffler, than Bens muffler is also a nice addition to the heat exchangers.
Posted by: mepstein Dec 26 2017, 08:27 AM
You’ll love the amount of heat you’ll get through the heat exchangers with the 3.2engine. Backdating to the older style heat ducts should move as much air as you want, and you can fry yourself from all the heat that flows through the exchangers. Ben does amazing work!
I'm looking forward to it. I've purchased a set of Ben's custom headers, and in the meantime I've opted to backdate to the pre 73 set of 'snozzles' (Snozers? Snaussges? Warm air ducting) with warm air tubing through the engine tin. I've got part of the kit, planning on fitting the flapper valves to the heat exchangers from the comfort of my flat, I'm hoping someone's been camera friendly with their experience out there as getting that part in is new to me. More as I get bits and bobs in :-D
I’m pretty sure you need a 914-6 heater cable. I believe it’s slightly longer than a 914-4 cable. 914rubber has them and the barrel nuts.
Posted by: GeorgeRud Dec 26 2017, 08:50 AM
Don’t know the differences, but there are three separate part numbers for the heater cables in 914s and 914-6s.
Posted by: davebrossi Dec 26 2017, 09:24 AM
I believe you’re right with the cable. Given I was a little concerned with the cable being original, I’ve ordered a 914-6 cable and new protective caps from 914 rubber. With my luck even if I managed to get the cable to ‘work’ it’d snap the first time :-)
Posted by: mb911 Dec 26 2017, 09:55 AM
Dave have you found a picture of the correct heat ducts off of the engine?
Posted by: mepstein Dec 26 2017, 11:01 AM
Homemade six flappper valve
Attached thumbnail(s)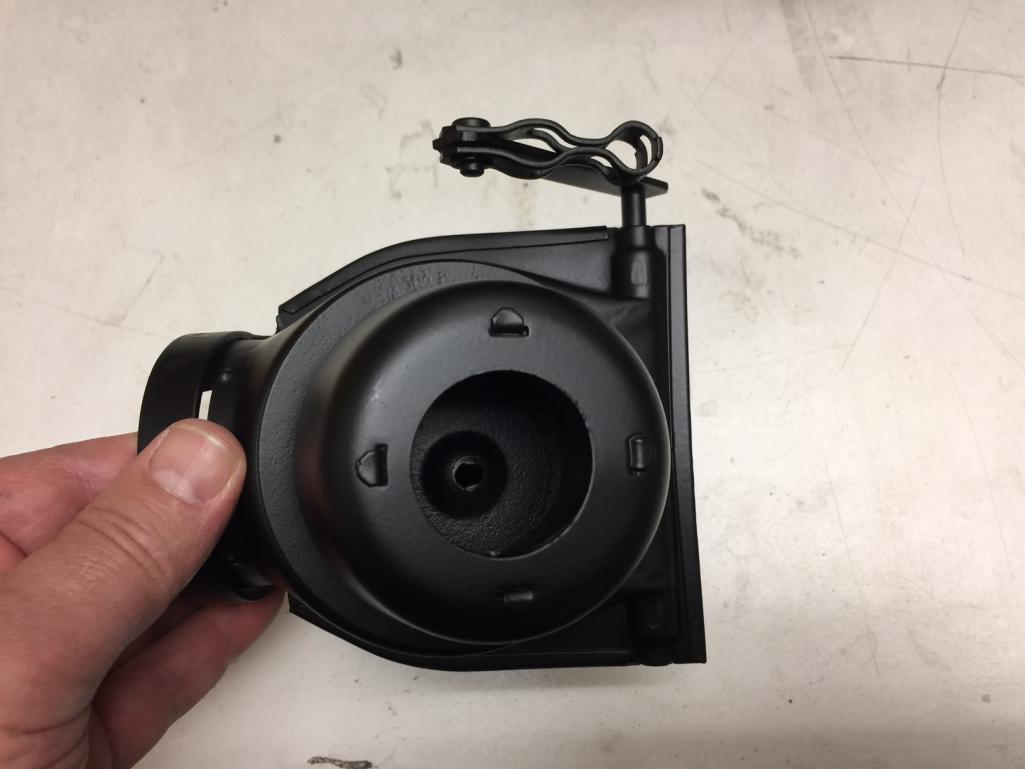
Posted by: mepstein Dec 26 2017, 11:04 AM
Dave have you found a picture of the correct heat ducts off of the engine?
Ben - I could be wrong but it sounds like the correct ducts are there but capped. I’m not sure If the OP realized there is not a “special” lower duct but you use the fan shroud ducts and run the hose through the side engine tin. Down to the he’s.
Posted by: Steve Dec 26 2017, 10:15 PM
Ive run the 4 banger flappers and cables for over 20 years. I did have to add bug pack throttle cable extenders. Some day I will replace the cables with six cables
Posted by: RickS Dec 27 2017, 08:44 PM
Have original 6 HEs on the 3.0 with backdated heat using flappers. If you go something similar, you will have so much heat that even when it is in the 30s you will only have the vents partially open. That system will poach your feet.
Posted by: davebrossi Jan 16 2018, 03:18 PM
So the OP is back, and I have finished the install! Some things to note that I learned along the way;
-studs on the heads can be changed. At some point they were replaced with longer studs meaning the barrel nuts I planned on using were useless. On the plus side, I have enough dexterity in my hands to reuse the original nuts.
-It would be a -really- cruel prank to dump a bunch of washers into a heat exchanger. I fished at least seven out with a magnet.
-at least in my instance I needed to lengthen the O2 sensor cable quite a bit.
-copper gasket compound does double duty in keeping the exhaust header gaskets in place while fitting up the manifolds to the heads. Just don't get it everywhere like I did.
-don't forget safety glasses when cutting into the engine tin
And now for the things I need to go back and fix;
-reroute the sparkplug wires/extend the wires (I know you can do so, but I'm not in a hurry.)
-go back and replace the studs on the heads with the correct length studs so I can actually put the headers on correctly and not via an elaborate dance
-Source the cause of the vaguely cooking rubber smell
-clean up the 5+ years of fluff, dust and everything else that blew into the cabin the first time I engaged the flapper valves
-replace pull cable and add protective rubber covers.
-drive it when it's really cold and feel accomplished.
Posted by: davebrossi Jan 16 2018, 03:21 PM
Also; when the headers arrived they were packed in with packing peanuts. it was worth the three dollars at the self cash wash to use pressurized water to clean out all the ways packing peanuts can enter. That and a nice dance around the office to shake any loose and convince my staff I'm more insane than usual. "good lord, dave's taken to trying to rock a 30 lbs piece of stainless steel to sleep like a baby... always knew he'd go one day..."
Posted by: mepstein Jan 16 2018, 03:32 PM
So the OP is back, and I have finished the install! Some things to note that I learned along the way;
-studs on the heads can be changed. At some point they were replaced with longer studs meaning the barrel nuts I planned on using were useless. On the plus side, I have enough dexterity in my hands to reuse the original nuts.
-It would be a -really- cruel prank to dump a bunch of washers into a heat exchanger. I fished at least seven out with a magnet.
-at least in my instance I needed to lengthen the O2 sensor cable quite a bit.
-copper gasket compound does double duty in keeping the exhaust header gaskets in place while fitting up the manifolds to the heads. Just don't get it everywhere like I did.
-don't forget safety glasses when cutting into the engine tin
And now for the things I need to go back and fix;
-reroute the sparkplug wires/extend the wires (I know you can do so, but I'm not in a hurry.)
-go back and replace the studs on the heads with the correct length studs so I can actually put the headers on correctly and not via an elaborate dance
-Source the cause of the vaguely cooking rubber smell
-clean up the 5+ years of fluff, dust and everything else that blew into the cabin the first time I engaged the flapper valves
-replace pull cable and add protective rubber covers.
-drive it when it's really cold and feel accomplished.
I have long exhaust studs on my 3.2 with Ben's heat exchangers. No way was I going to start unscrewing the studs. That's a recipe for broken studs. I just used some spacers. Once I had the heat exchanger placed on the stud, I slipped the spacer on and then the barrel nut. It's a little bit of a dance but not bad. You could also superglue the spacer on the heat exchanger before install. It will keep it in the right place while you tighten down the barrel nuts.
Snake a vacuum hose down the long. Its not an unusual place for mice to store stuff. At least its proof that the engine fan will move the hot air.
Posted by: GeorgeRud Jan 16 2018, 03:44 PM
Using the spacers might be a good idea if the studs are too long as everyone has trepidations when removing them. We’ll have to let Ben know that enclosing them in a heavy garbage bag before using the packing peanuts might make unpacking them a bit easier once they arrive. Now go an enjoy driving the car with heat!
Posted by: mepstein Jan 16 2018, 03:47 PM
Using the spacers might be a good idea if the studs are too long as everyone has trepidations when removing them. We’ll have to let Ben know that enclosing them in a heavy garbage bag before using the packing peanuts might make unpacking them a bit easier once they arrive. Now go an enjoy driving the car with heat!
A quick shot of air from the compressor will make sure every tube is peanut free.
Posted by: mb911 Jan 16 2018, 04:12 PM
Also; when the headers arrived they were packed in with packing peanuts. it was worth the three dollars at the self cash wash to use pressurized water to clean out all the ways packing peanuts can enter. That and a nice dance around the office to shake any loose and convince my staff I'm more insane than usual. "good lord, dave's taken to trying to rock a 30 lbs piece of stainless steel to sleep like a baby... always knew he'd go one day..."
Oh that was dumb on my behalf.. I typically use scrap shipping supplies from what is sent to me.. Brain fart on my behalf.. My apologies.
Posted by: davebrossi Jan 17 2018, 07:06 AM
washing out the interior of the headers upon receipt was something I planned to do anyhow. Not really about removing dust or anything, but the shipping world is filled with cases of "oh dear, I seem to have smashed this person's box. Quick! fill it with a bunch of detritus and tape it up, they're never notice!"
Posted by: 914forme Jan 17 2018, 03:16 PM
For future reference, you can also hook up a leaf blower to the ducts as the drop down from the heat defroster selector. And blast all the crap back towards the engine side, before you hook up the heat. This saves you from cleaning the interior. You then have to just hose off the engine compartment.
I need to remember to do that myself, before I get to far 
Enjoy the heat, glad it all worked out for you.
Posted by: burton73 Sep 22 2018, 04:25 PM
For future reference, you can also hook up a leaf blower to the ducts as the drop down from the heat defroster selector. And blast all the crap back towards the engine side, before you hook up the heat. This saves you from cleaning the interior. You then have to just hose off the engine compartment.
I need to remember to do that myself, before I get to far
Enjoy the heat, glad it all worked out for you.
Thanks for this great tip.
Bob B
Posted by: worn Sep 22 2018, 07:55 PM
For future reference, you can also hook up a leaf blower to the ducts as the drop down from the heat defroster selector. And blast all the crap back towards the engine side, before you hook up the heat. This saves you from cleaning the interior. You then have to just hose off the engine compartment.
I need to remember to do that myself, before I get to far
Enjoy the heat, glad it all worked out for you.
Thanks for this great tip.
Bob B
But is he really saying you can use a leaf blower as a defroster fan? Fall is in the air and the squirrels are storing walnuts in my car.
Posted by: burton73 Sep 23 2018, 11:05 AM
For future reference, you can also hook up a leaf blower to the ducts as the drop down from the heat defroster selector. And blast all the crap back towards the engine side, before you hook up the heat. This saves you from cleaning the interior. You then have to just hose off the engine compartment.
I need to remember to do that myself, before I get to far
Enjoy the heat, glad it all worked out for you.
Thanks for this great tip.
Bob B
That tip is from Stephen!

Bob B
Posted by: PanelBilly Sep 23 2018, 10:38 PM
I finely got my heat exchangers from Ben mounted and plumbed. Plenty of heat for our fall days. I’m not getting any heat to the windshield yet, but I haven’t tried to figure it out either. I know the correct placements for the controls, but I only get cool heat so far
Powered by Invision Power Board (http://www.invisionboard.com)
© Invision Power Services (http://www.invisionpower.com)