Printable Version of Topic
Click here to view this topic in its original format
914World.com _ 914World Garage _ Progress on the reassembly
Posted by: simonjb Dec 23 2017, 07:31 PM
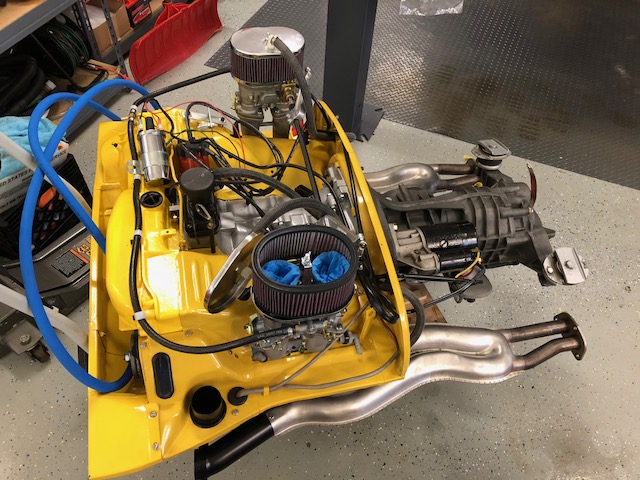
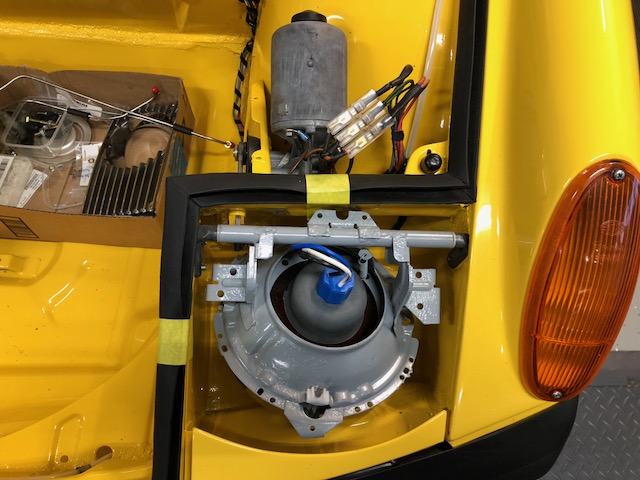
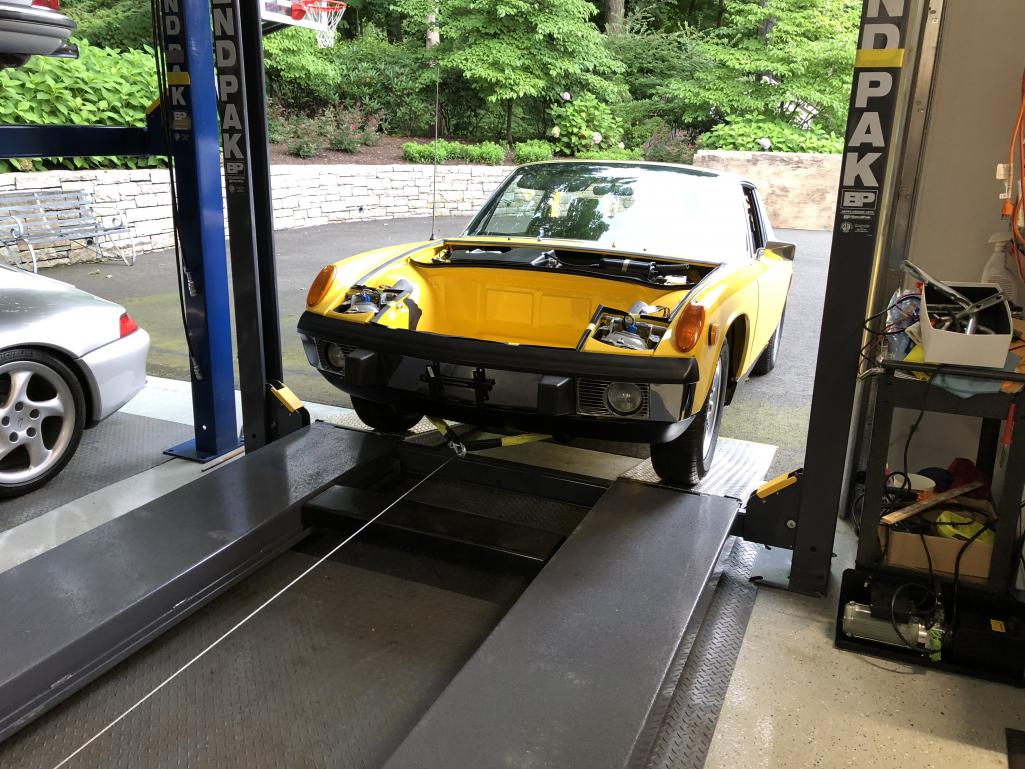
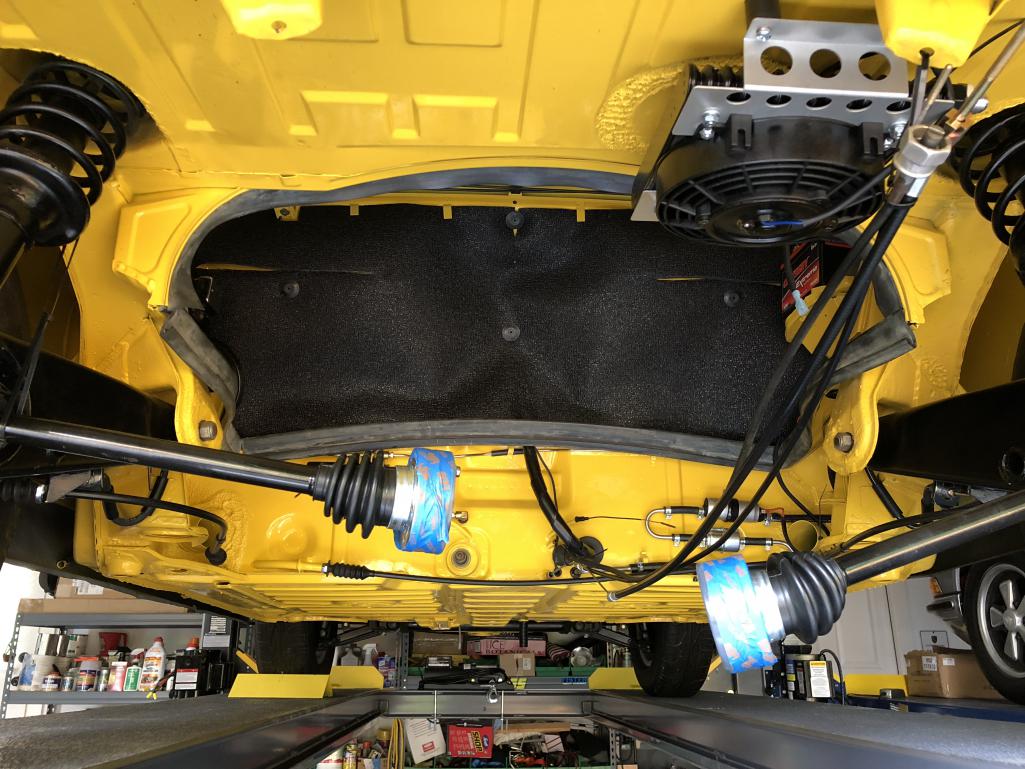
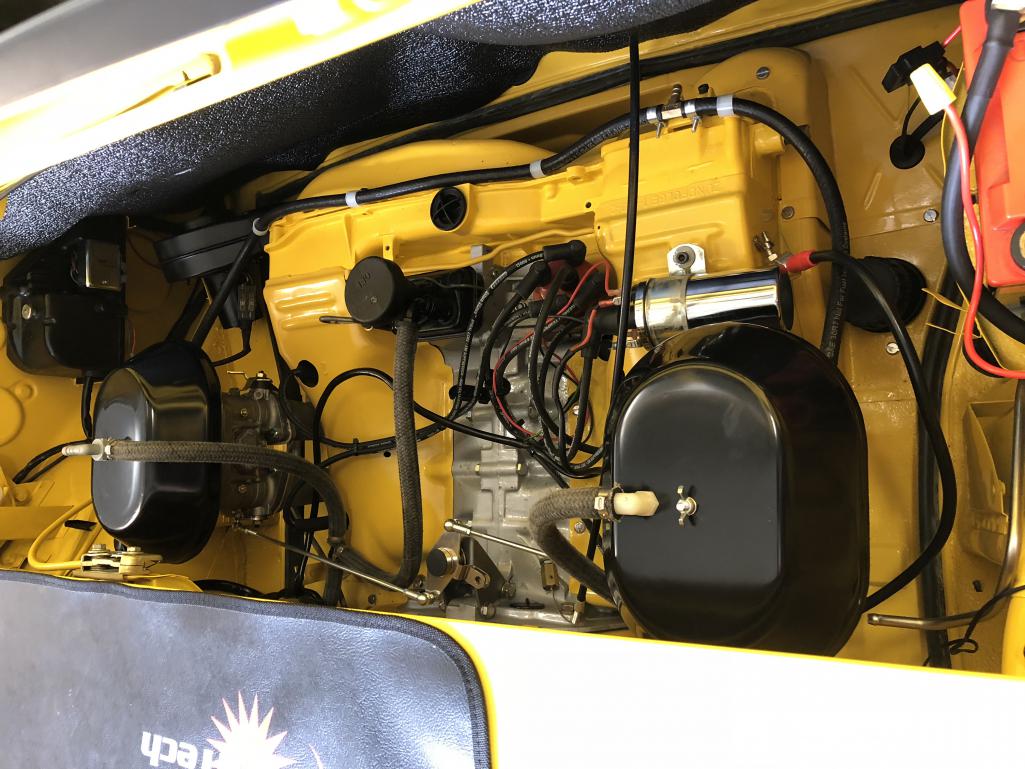
Had the car repainted and am now in the process of reassembling. I am surprised by the amount of time it takes to put everything back together...put new SS line and fuel pump for the 2.3.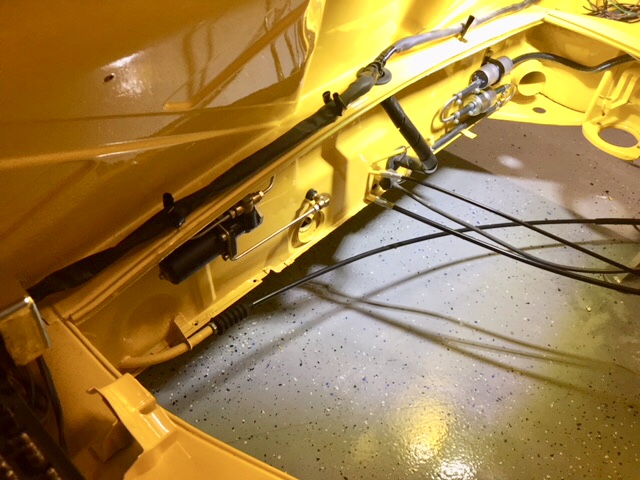
Posted by: mepstein Dec 23 2017, 07:47 PM
Looks great. Take your time and enjoy. 
Posted by: Lucky9146 Dec 23 2017, 07:59 PM

Had the car repainted and am now in the process of reassembling. I am surprised by the amount of time it takes to put everything back together...put new SS line and fuel pump for the 2.3.
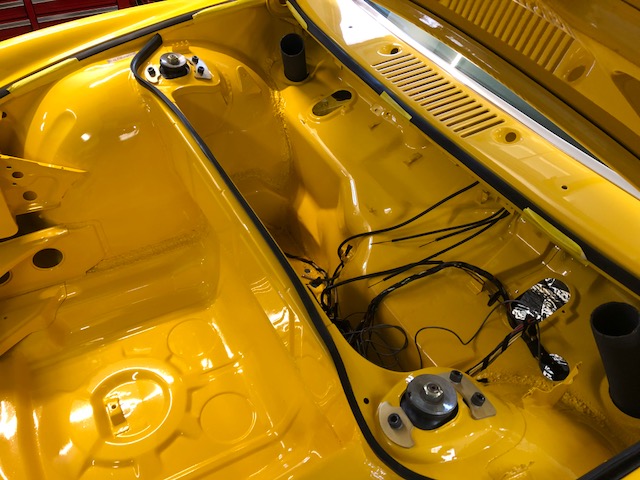
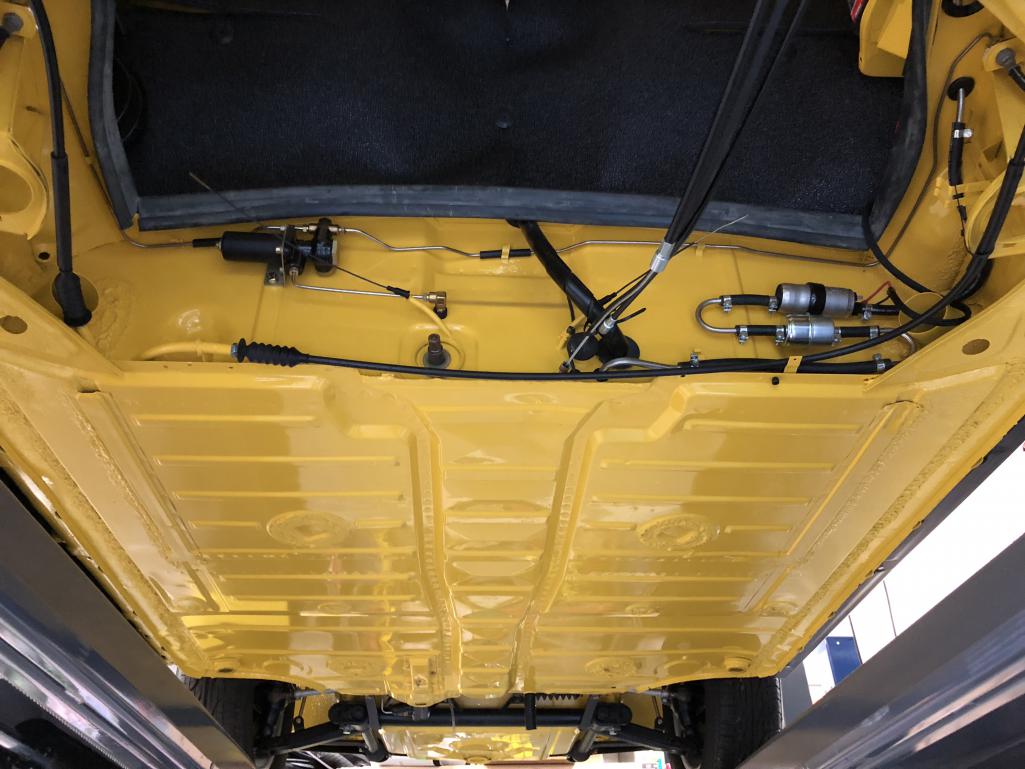
Always fun working with clean parts and an amazing looking paint job! Look at the finish on the back of that fire wall.
 Kinda jealous of the floor too....
  I want one.
Like Mark says enjoy!

Posted by: saigon71 Dec 24 2017, 12:24 PM
Beautiful work!
Complete agreement on the amount of time to reassemble.
You are approaching the finish line!
Posted by: simonjb Dec 31 2017, 01:13 PM
So- It doesnt look like much - but I spent hours going over the wiring harness cleaning and re-taping. But there is progress!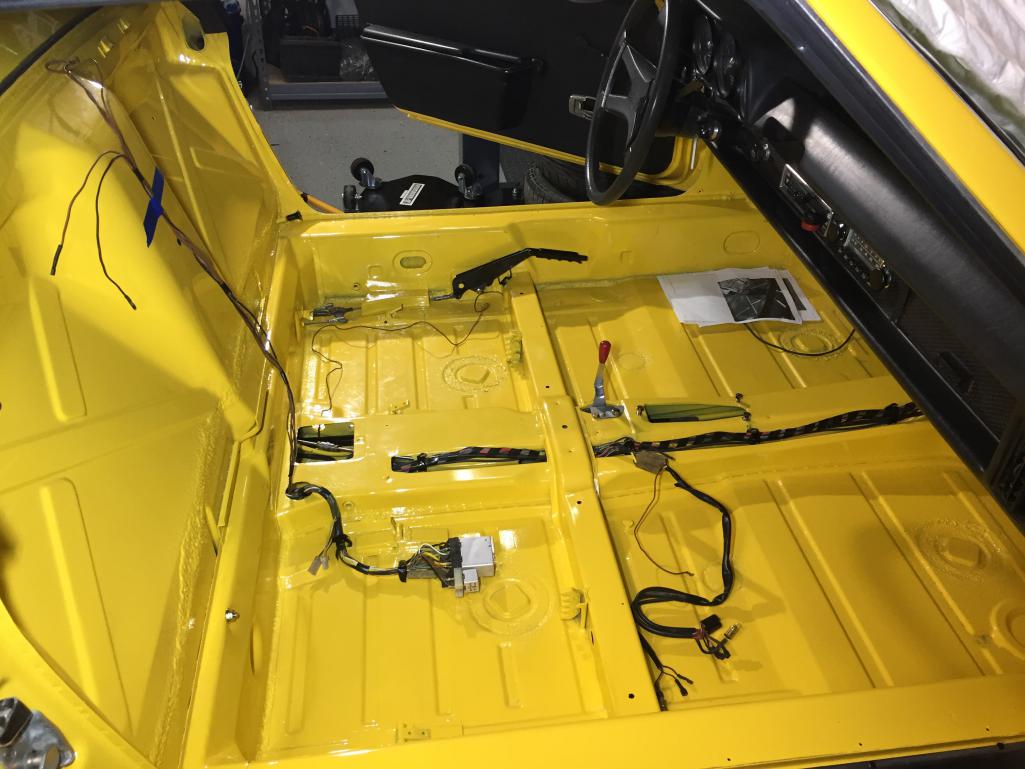
Posted by: 74ravenna Dec 31 2017, 02:03 PM
Wow, that looks great.
That is a lot of excellent work.
1) What are you going to put on the floorboards for insulation/sound deadening?
2) How did you clean and rust proof the inside of the center tunnel and inside the longs?
Thanks
Posted by: rgalla9146 Dec 31 2017, 02:03 PM
Outstanding plumbing.
Beautiful work.
I'm in North Jersey with a newly painted GT conversion chassis waiting for
my attention.
Keep up the good work !
Posted by: simonjb Dec 31 2017, 03:01 PM
Outstanding plumbing.
Beautiful work.
I'm in North Jersey with a newly painted GT conversion chassis waiting for
my attention.
Keep up the good work !
Thanks - looking forward to seeing your build
Posted by: Specracer Dec 31 2017, 04:39 PM
I see your in CT, so the weather here in the northeast will likely keep you from being able to drive it for several months, so you have some time.
Works looks great, enjoy it!
Posted by: simonjb Jan 1 2018, 12:53 PM
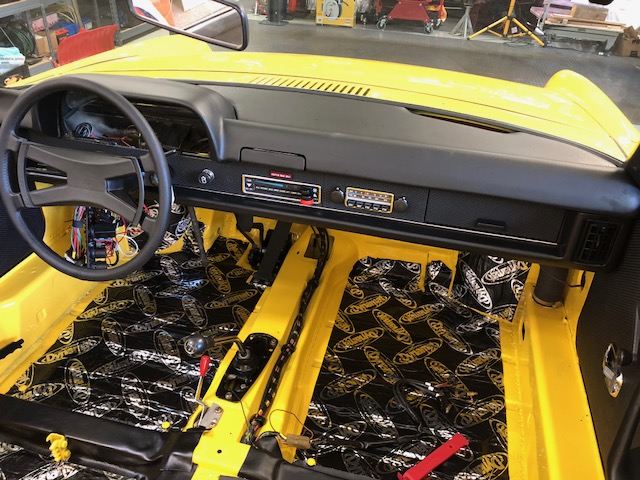
A little bit more progress = installed the pedal cluster and gear shift.
However, I have this small round flexible rubber bushing left over? near front of photo.... I thought it might be for the accelerator ? But can't seem to figure out where it goes?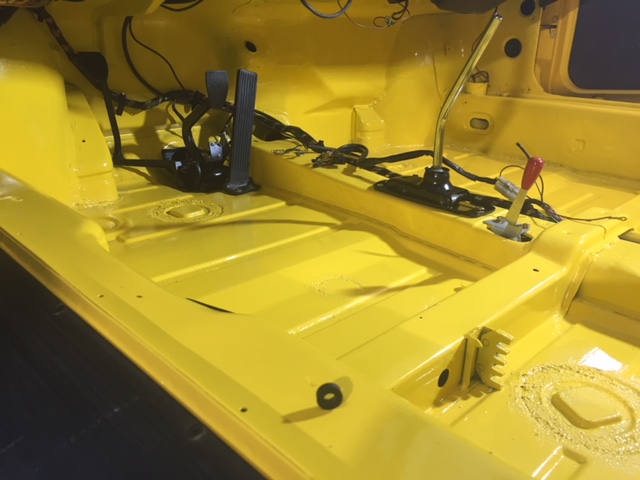
Posted by: Mikey914 Jan 2 2018, 02:30 AM
Wow nice work.
Posted by: simonjb Jan 2 2018, 08:23 AM
Wow nice work.
Thanks - But to be truthful - I owe a lot to many folks on this forum without whom I would still be trying to figure out where to start! The advice and help on here is outstanding.
Posted by: simonjb Jan 19 2018, 03:19 PM
So a small bit of progress - but even after being in my freezer for a week it took some serious effort!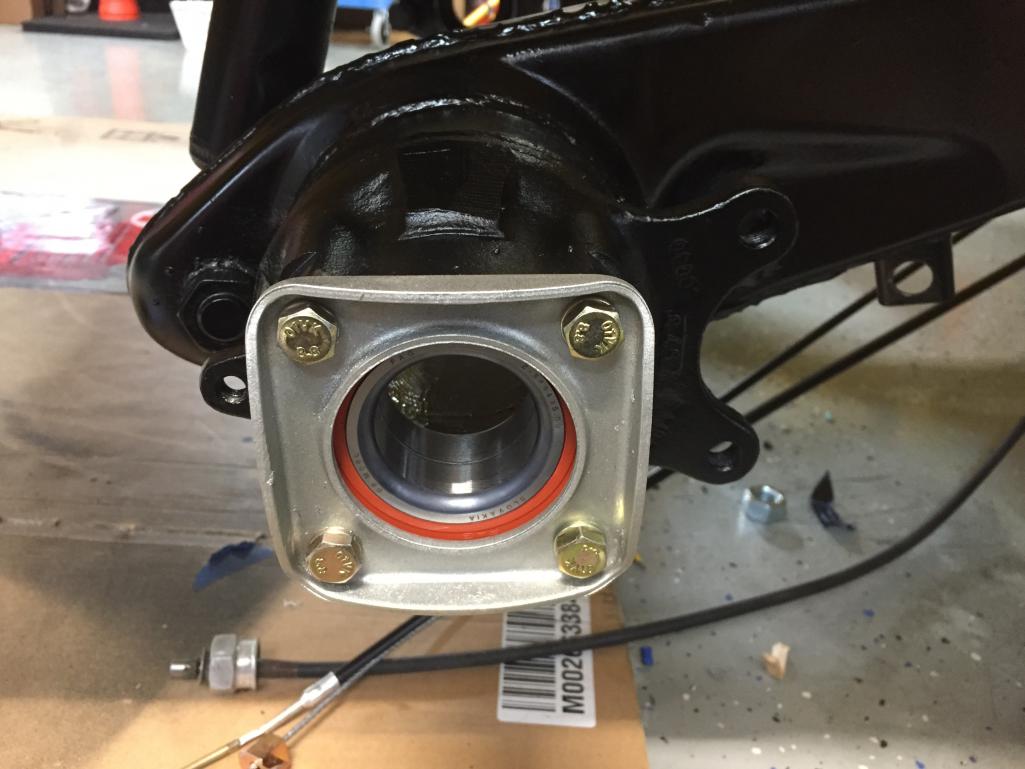
Posted by: simonjb Jan 27 2018, 01:02 PM
ok, a bit more progress - installed by refurbished PMB calipers ....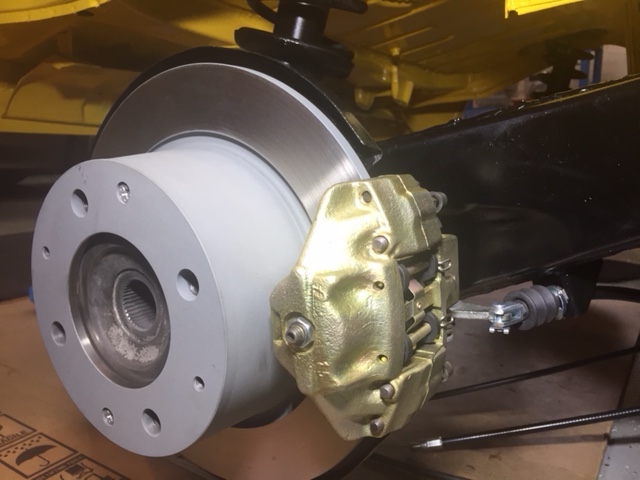
Posted by: mtndawg Jan 27 2018, 10:11 PM
Looks better than a new car.
Posted by: pete000 Jan 27 2018, 10:14 PM
NICE !
Posted by: burton73 Jan 27 2018, 11:08 PM
Sweet.
Posted by: Mueller Jan 27 2018, 11:22 PM
So nice and clean!
Posted by: aharder Jan 27 2018, 11:32 PM
Nice Job
Posted by: 76-914 Jan 28 2018, 09:40 AM
Is there an envy icon? 
Posted by: simonjb Jan 29 2018, 07:53 PM
I finally decided that I should replace the vinyl on the sail and roll bar. I debated leaving it - but given I’ve refreshed everything else, I decided to go ahead. Stage one was removal of the old vinyl...not bad underneath after 40 plus years!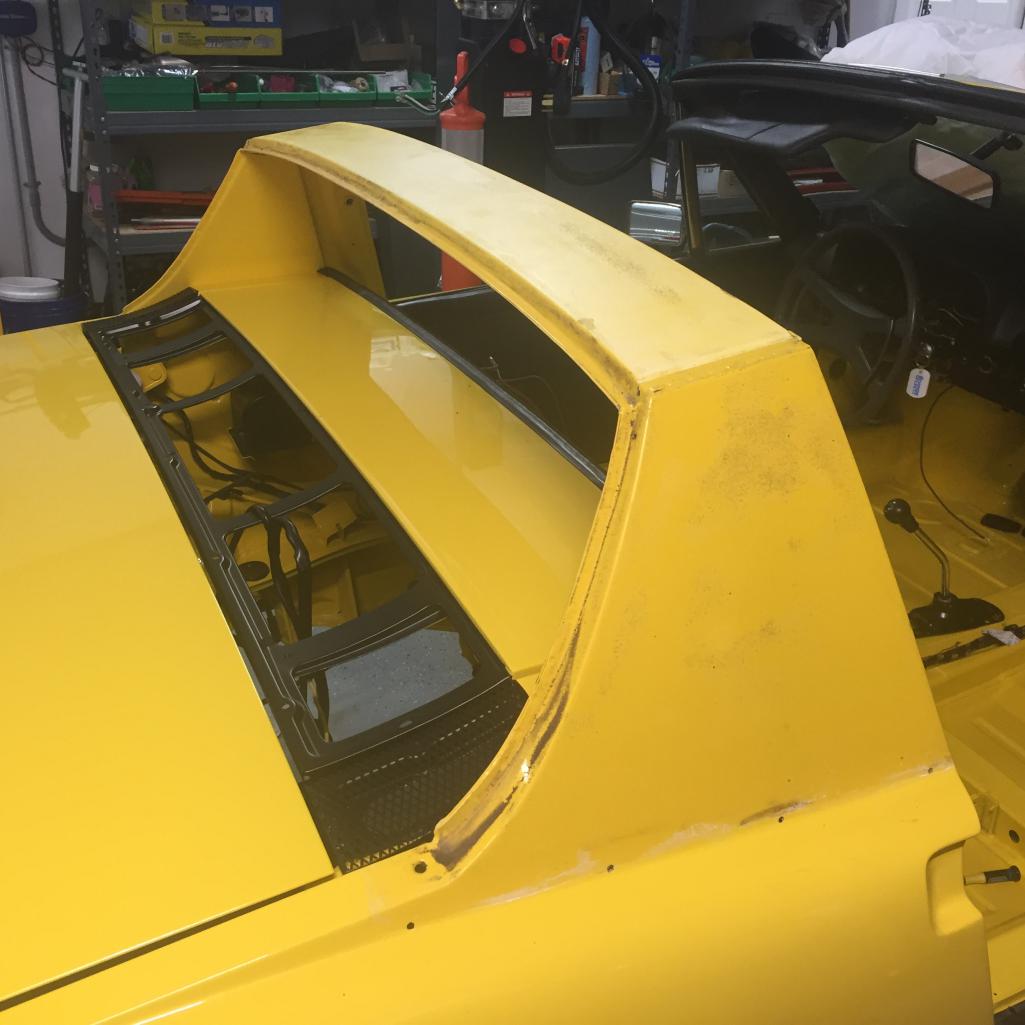
Posted by: simonjb Feb 3 2018, 03:33 PM
Ready to cement the new Sail and cross-beam from 914Rubber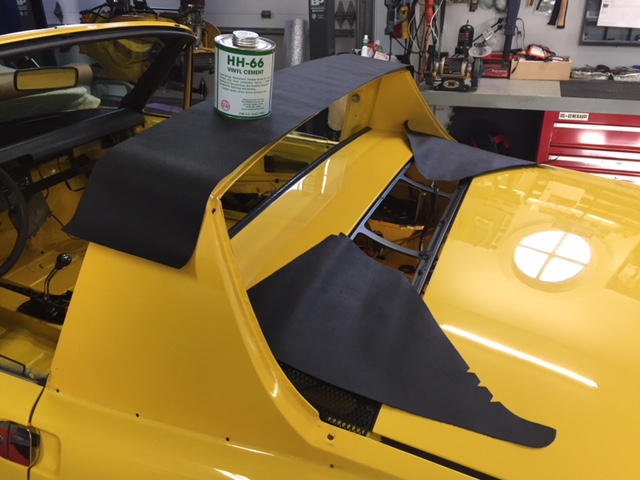
Posted by: aggiezig Feb 4 2018, 12:25 AM
Your progress is inspiring me to push forward. It must be so nice to work in a shiny, new, clean engine bay. I'm jealous!
Keep up the good work 
Posted by: defianty Feb 4 2018, 03:15 AM
Car is looking fantastic. I can't wait until this part in my build, I've got boxes stashed of new parts ready to install and a big order on its way from 914rubber right now.
Keep up the good work and looking forward to more updates.
Posted by: simonjb Feb 4 2018, 02:52 PM
Commenced work on the front bearings and brakes today...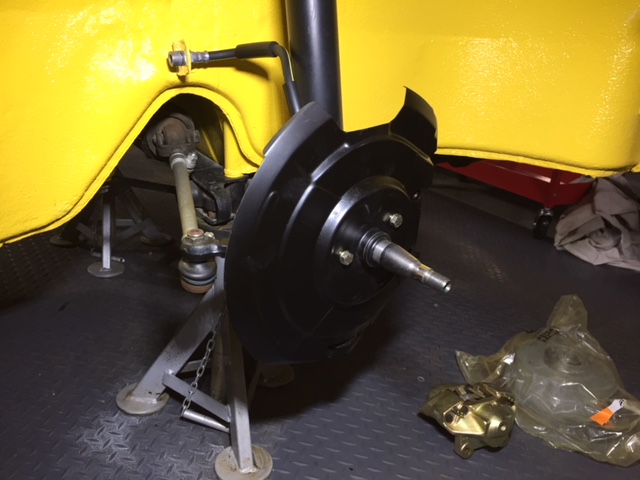
Posted by: gothspeed Feb 5 2018, 09:43 AM
Had the car repainted and am now in the process of reassembling. I am surprised by the amount of time it takes to put everything back together...put new SS line and fuel pump for the 2.3.
Nice fuel pump install! I was thinking to mount it in that general area. What did you use to mount the fuel pump? Threaded insert into panel? Does the filter have a 'mount' to firewall?
Posted by: simonjb Feb 5 2018, 11:42 AM
Had the car repainted and am now in the process of reassembling. I am surprised by the amount of time it takes to put everything back together...put new SS line and fuel pump for the 2.3.
Nice fuel pump install! I was thinking to mount it in that general area. What did you use to mount the fuel pump? Threaded insert into panel? Does the filter have a 'mount' to firewall?
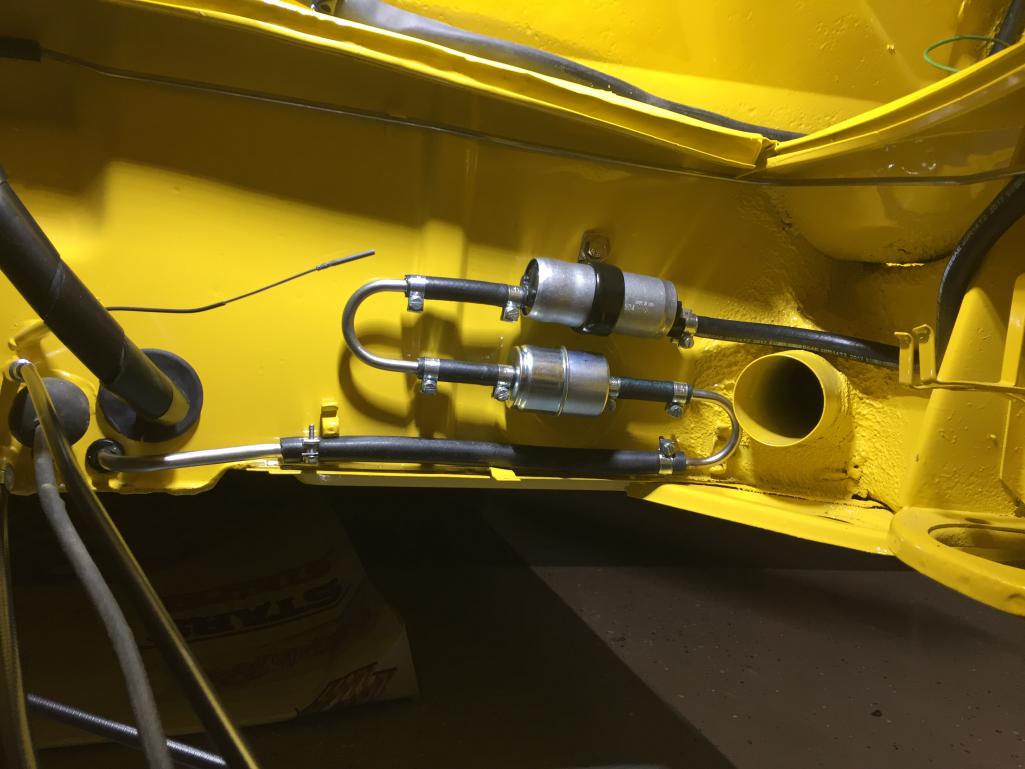
I must send out kudos to Chris at Tangerine[u]. He came up with the mounting and has the parts to make it all come together. I mounted the pump with a bolt and nut all the way through the firewall. The filter "hangs" , but its not going anywhere.
Posted by: simonjb Feb 5 2018, 11:49 AM
So, after fretting about how hard it could be to mount the front hubs, I managed to do both within an hour.
I removed old bearings and ground down the outer edges to use as a punch. Froze the races overnight and got all 4 of them seated nicely with some gentle guidance - made sure they all set perfectly. Placed the new well greased up bearings in and she went right on to the spindle! I was worried because the old ones were stuck on very tightly. Tightened the nut up and then slack off a 1/4 turn, then hand tight while rotating the wheel. Then new caps.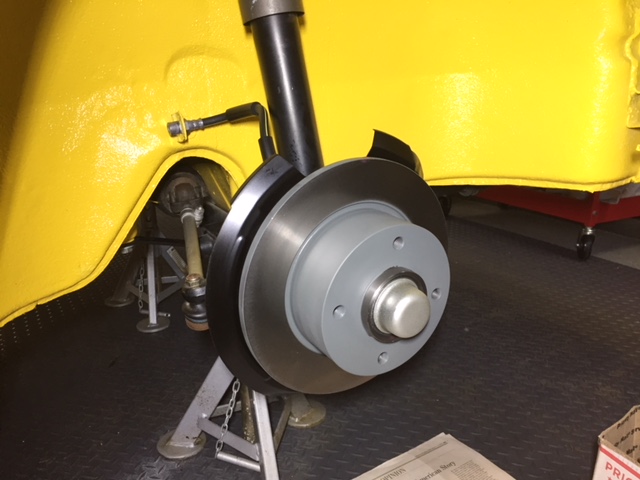
Posted by: simonjb Feb 5 2018, 04:29 PM
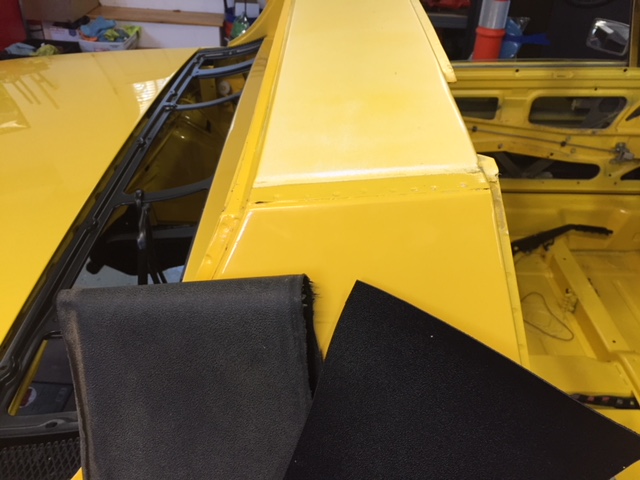
Started on re-doing the vinyl. It really takes some time to make sure you don't mess it up! Cutting the bottom of the sail was scary
Old vs New and partial install..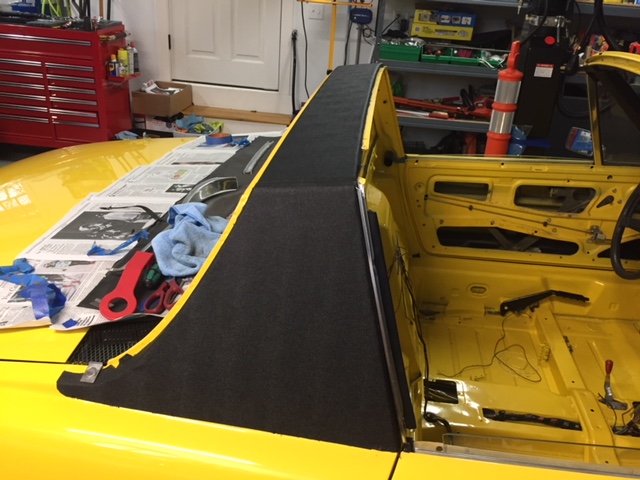
Posted by: gothspeed Feb 5 2018, 04:59 PM
Had the car repainted and am now in the process of reassembling. I am surprised by the amount of time it takes to put everything back together...put new SS line and fuel pump for the 2.3.
Nice fuel pump install! I was thinking to mount it in that general area. What did you use to mount the fuel pump? Threaded insert into panel? Does the filter have a 'mount' to firewall?
I must send out kudos to Chris at Tangerine[u]. He came up with the mounting and has the parts to make it all come together. I mounted the pump with a bolt and nut all the way through the firewall. The filter "hangs" , but its not going anywhere.
car looks great! thanks for the info on the fuel pump install

Posted by: simonjb Feb 10 2018, 12:59 PM
Finally managed to finish the new vinyl. Not a hard job, but finicky and time consuming.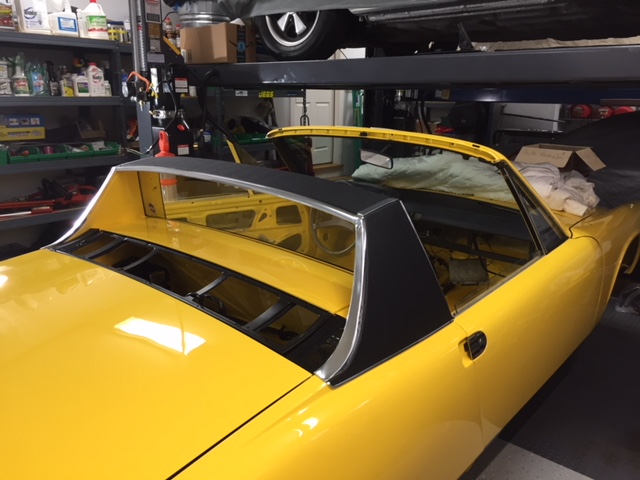
Posted by: simonjb Feb 19 2018, 10:23 AM
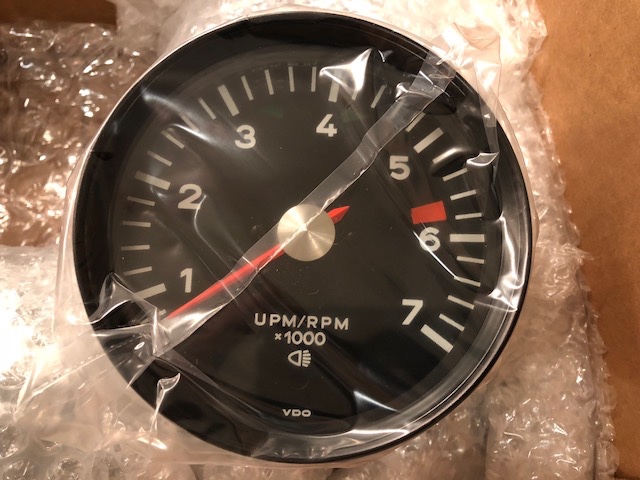
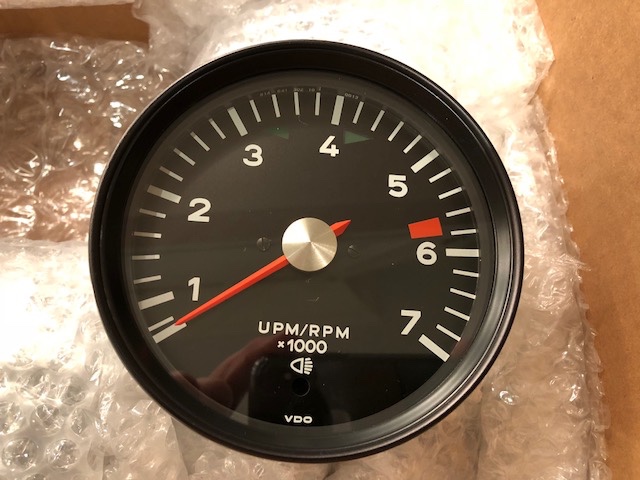
The dash is finally coming together. Gauges are at NH speedometer getting a renovation and should be back soon. I'll finish the wiring when I install the battery and make sure that all is ok.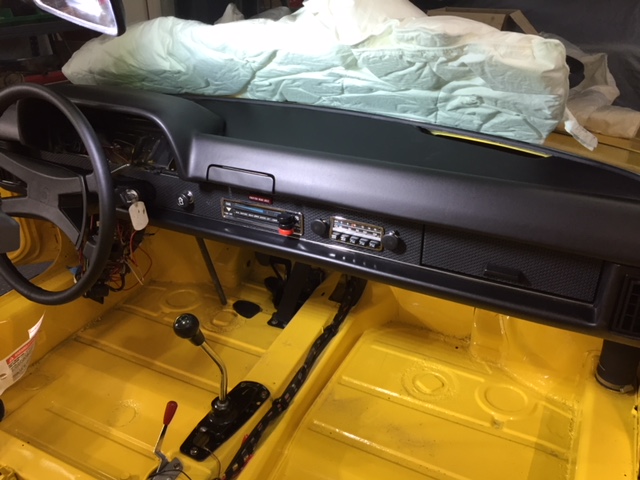
Posted by: defianty Feb 19 2018, 10:41 AM
Beautiful clean and top class work.
Posted by: Mikey914 Feb 19 2018, 10:46 AM
First class work.
That little rubber bushing is probably the e brake sleeve.
Posted by: simonjb Feb 19 2018, 11:42 AM
Thanks guys. Its time consuming, but very rewarding. Now I know why it costs so much to have it professionally done.
Posted by: mepstein Feb 19 2018, 12:34 PM
Thanks guys. Its time consuming, but very rewarding. Now I know why it costs so much to have it professionally done.
Looks great!
When we build from the ground up at the shop, it always seems like it should go together much faster but it doesn't.
Posted by: effutuo101 Feb 19 2018, 10:45 PM
There should be! 
Posted by: simonjb Feb 22 2018, 11:35 AM
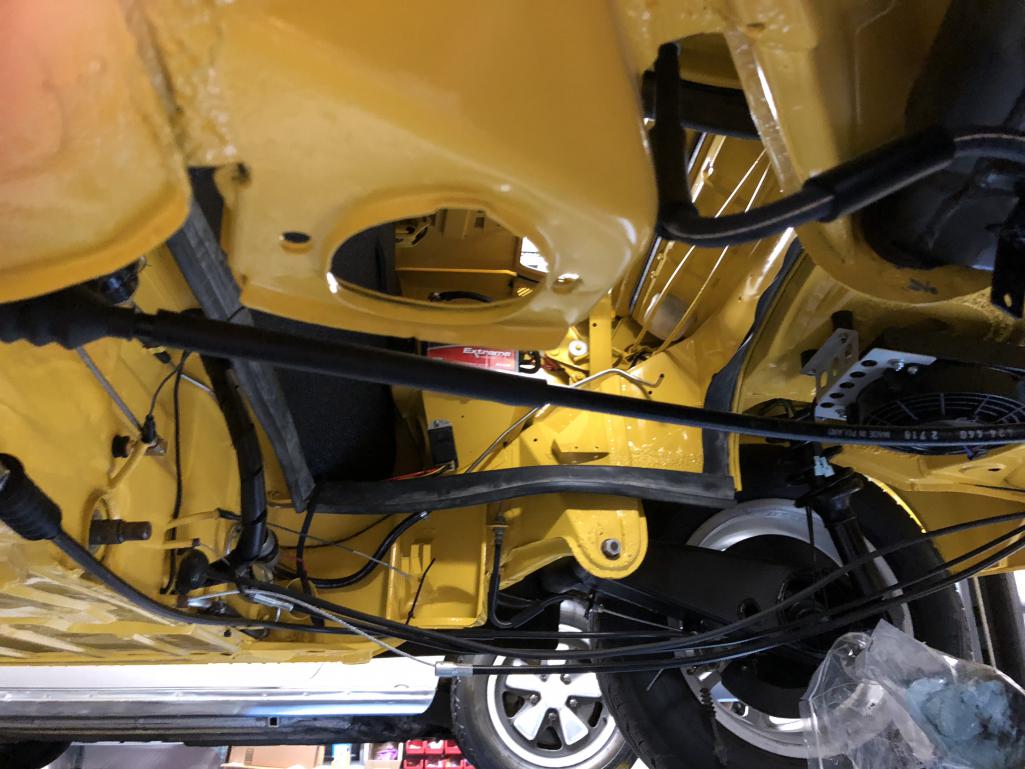
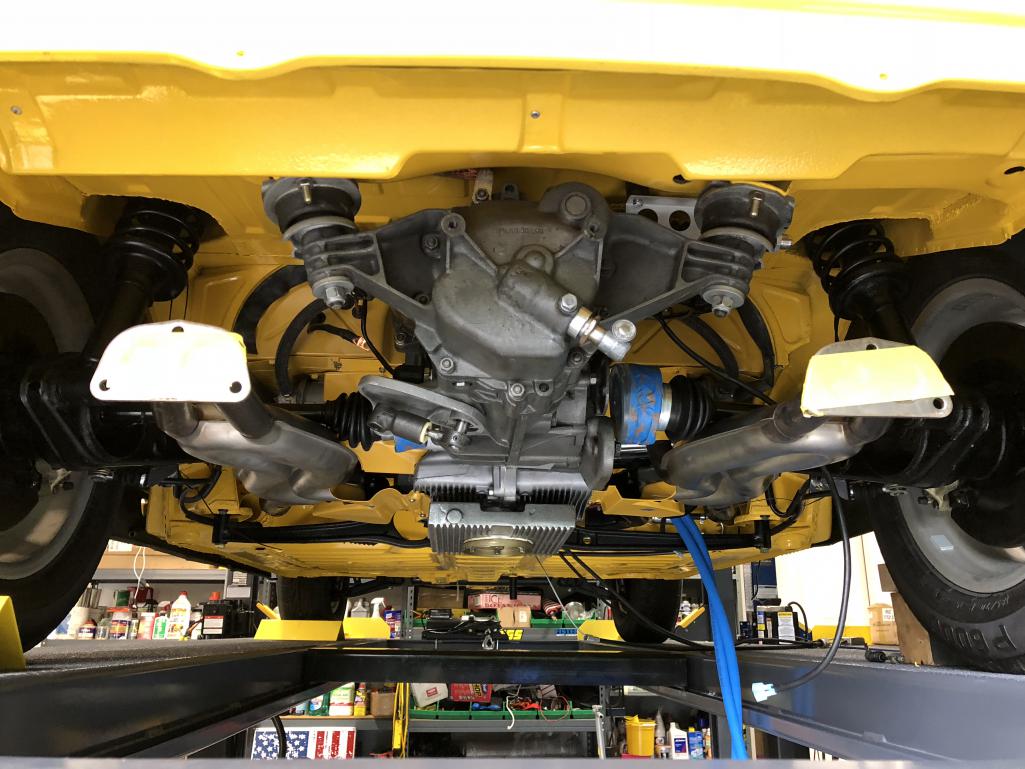
I have been slowly restoring my 1974 with about 38,000 miles on the clock. As you can see below, I've stripped it all the way down. I am also re-thinking if I should also replace the front and rear shocks? The rear ones are BOGE and look original. The car only has 38,000 miles, but it is over 40 years old...plus would it be easier now than latter?
Comments?
Posted by: barefoot Feb 22 2018, 12:39 PM
I have been slowly restoring my 1974 with about 38,000 miles on the clock. As you can see below, I've stripped it all the way down. I am also re-thinking if I should also replace the front and rear shocks? The rear ones are BOGE and look original. The car only has 38,000 miles, but it is over 40 years old...plus would it be easier now than latter?
Comments?
Easy enough to strip them down (borrow a spring compressor from your local FLAPS)
then clean & repaint you can test the shocks to see if still good then.
Posted by: n2j2ryan Feb 22 2018, 01:45 PM
Thanks for the Pics. I am a couple of months behind you so am storing some of your photos!!!
Is that a Tangerine Fuel kit?
Thanks
Neil
Posted by: simonjb Mar 2 2018, 12:13 PM
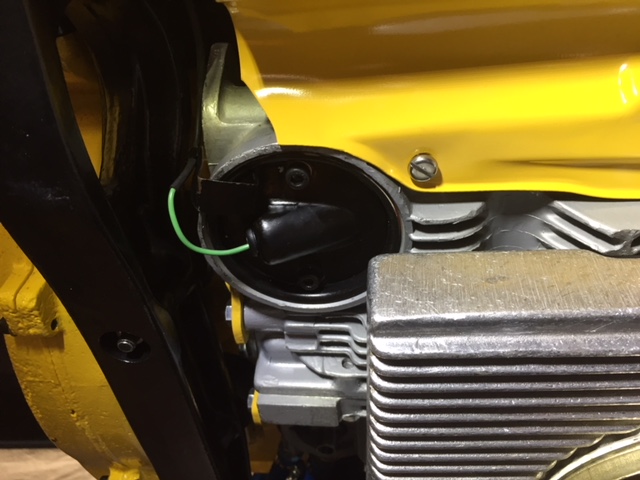
A bit more progress..Engine work..
Added the Taco plate cover and ran the wire
Added the red seals from 914 Rubber to the heater connections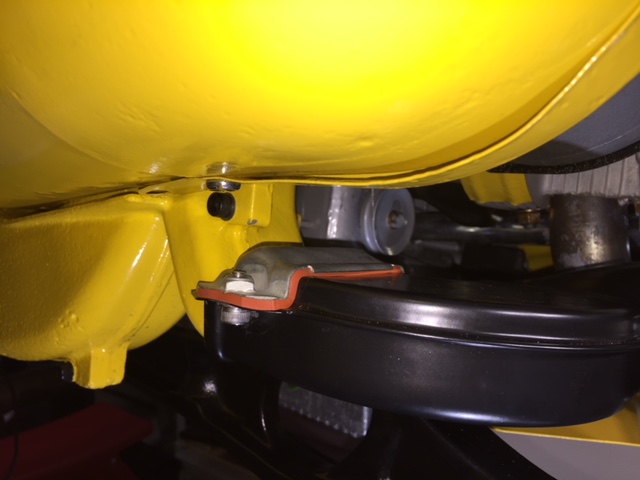

Posted by: rhodyguy Mar 2 2018, 12:16 PM
A+ on the duct gaskets. Every bit of sealing helps. AM seals elsewhere are cost prohibitive.
Posted by: simonjb Mar 27 2018, 06:18 PM
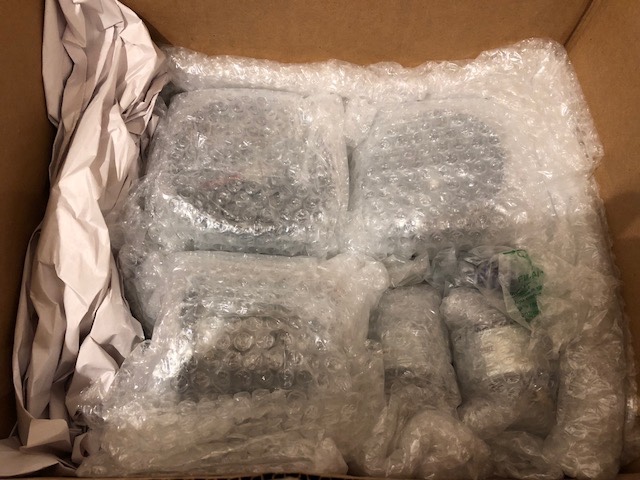
Nice delivery today! From NHS
 [attachmentid=644
418]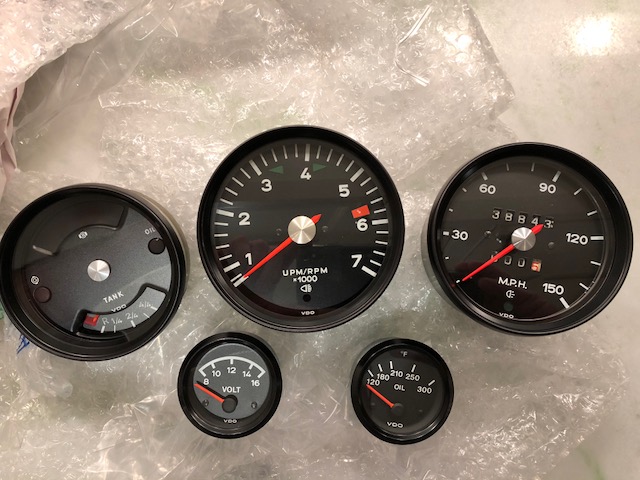
Posted by: simonjb Apr 21 2018, 01:27 PM
More progress - on its wheels!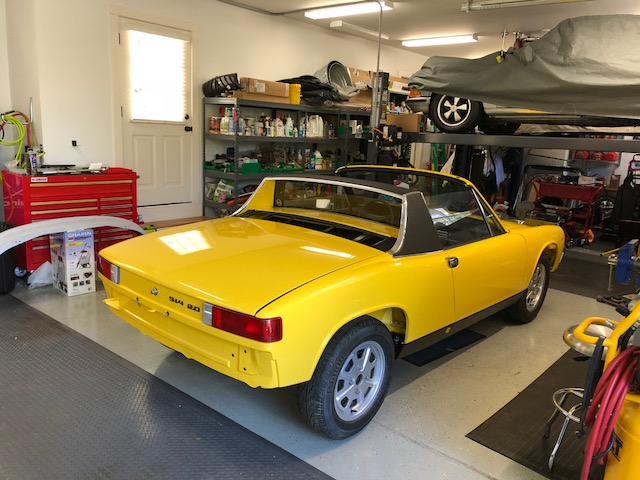
 [attachmentid=647
561]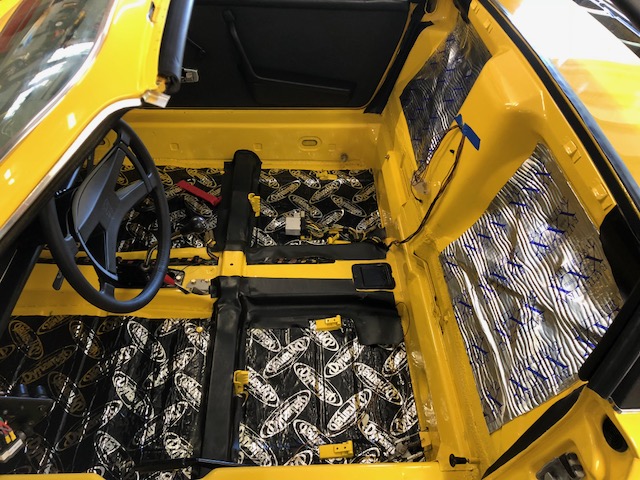
Attached image(s)
Posted by: raynekat Apr 21 2018, 05:42 PM
Really nice.
Everything looks great!
Posted by: simonjb Apr 21 2018, 05:50 PM
Thank you. Its rewarding.
Posted by: simonjb Apr 28 2018, 09:00 PM
So I made some more progress, but two steps forward and one back. The paint shop had reattached the front suspension and all was done nicely - that’s when I went to reinstall the lower part of the steering shaft and hockey puck. Well, as most of you know, that can’t be done unless you drop the front suspension. Ugh. So I had to do all of that, and then placed the dust cover and new bearing and seal over the shaft before i raised up the suspension and guided the shaft through the body into the rear of the dash area. In any case, a few hours later and the steering was all reconnected. 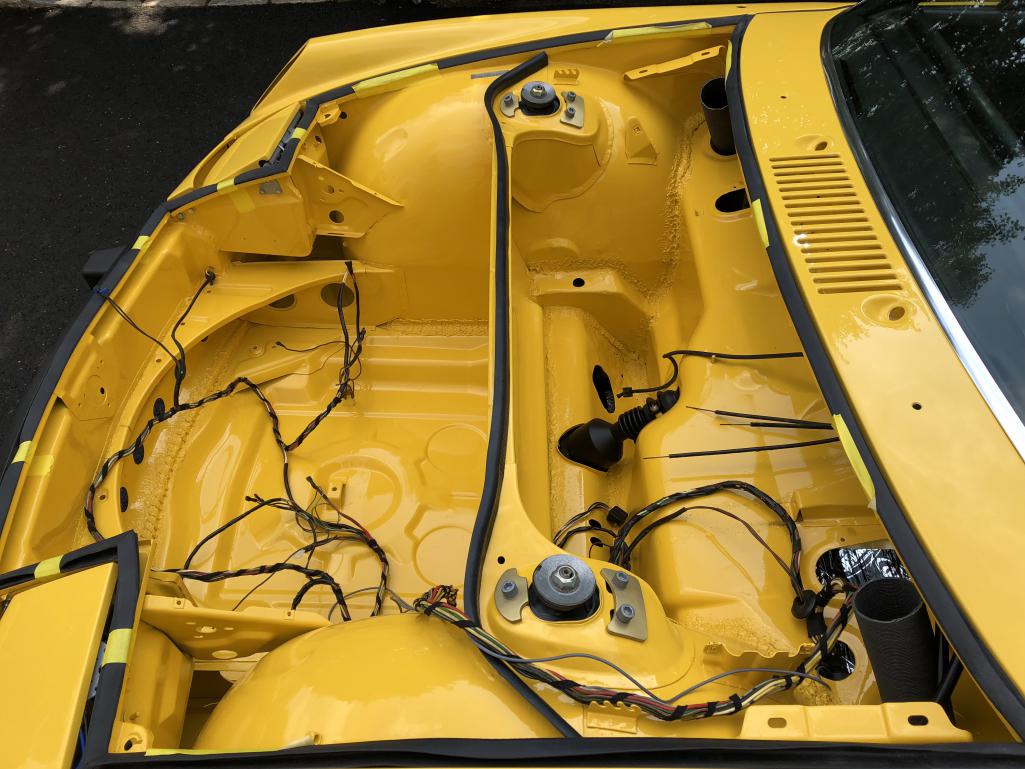
Posted by: porschetub Apr 28 2018, 09:12 PM
Wow that car is sharp ,nice work really,way more flash than mine .
Posted by: bobboinski Apr 28 2018, 10:27 PM
Your car is going to be beautiful. This is what I want to do when I really retire. Great work.
Posted by: bbrock Apr 29 2018, 09:04 AM
- that’s when I went to reinstall the lower part of the steering shaft and hockey puck. Well, as most of you know, that can’t be done unless you drop the front suspension. Ugh.
Maybe most know this, but not all, and you probably saved me from making that mistake when my car goes back together. I'm loving watching your showstopper go back together. Fantastic work!
Posted by: simonjb Apr 29 2018, 12:33 PM
Thanks for the positive comments guys
Posted by: Cairo94507 Apr 29 2018, 02:17 PM
Absolutely stunning. Very beautiful car.
Posted by: gothspeed Apr 30 2018, 10:01 AM
Looks fantastic!! 
Posted by: autopro Apr 30 2018, 11:29 AM
Wow beautiful, I love the clean work that you are doing.
Posted by: simonjb May 1 2018, 07:09 AM
I grew up in New Zealand where my uncle was a mechanic at a small gas station. He showed me from an early age how to work on cars and I have been hooked ever since.
This 1972 914 was a low mileage model (38,000 miles) - but needed some rust work and we decided on a full body respray. Tearing it down was fun, and didn't take too much time. However, I am continually amazed at how long the rebuild is taking. Now I understand why the restoration shop bills can add up so quickly. And as I am sure we all appreciate, if you want it done right you have to do it carefully and slowly. Even still, its fun to do and nice to get the feedback. Thanks.
On a separate point, a shout out to 914Rubber and Mike. I was having some real trouble with the front and side main seal that runs around the windscreen. Finally I received some advice that really worked, plus some of my own:
- I replaced the screws holding in the side trim with a lower profile screws
- Soaked the seal in hot soapy water
- Opened up one side of the channel a small amount with a flat blade (no twisting !)
- Applied some amount of lube
Then instead of pushing the seal in lengthwise, I inserted the inward side into the track and pushed the outside edge into the outside track using a flat screw driver. Was done in about 5 mins. Worked like a champ.
The best part was that the new seal from 914rubber fit and held perfectly all by itself along the top of the windscreen. Much improved!
Posted by: simonjb May 6 2018, 11:40 AM
Some more progress...Does anyone know what the unattached wire goes to? Its brown with black. Thanks for the comments!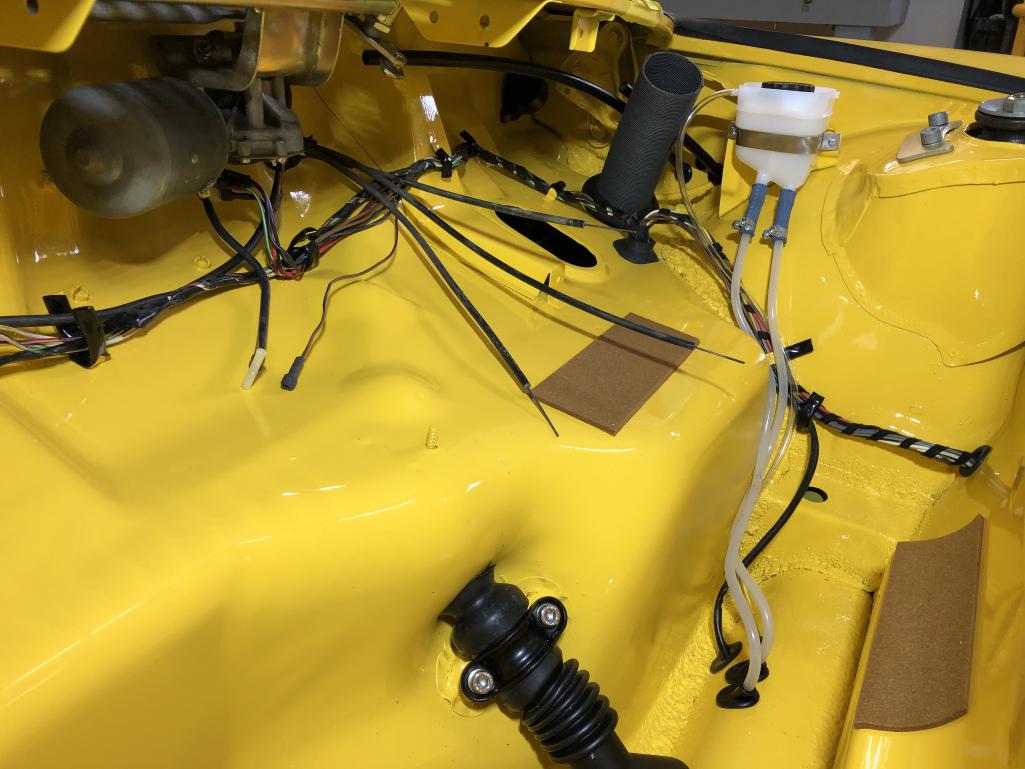
Posted by: Larmo63 May 6 2018, 11:47 AM
These builds (especially yours) are fun to watch. I feel like I'm looking at period factory construction photos.
Great work!!
I'm guessing the rogue wire is the gas tank sender wire????
Posted by: Lucky9146 May 6 2018, 11:56 AM
Dang! This is really looking good and agree, fun to watch! Great work!
Posted by: simonjb May 16 2018, 06:04 PM
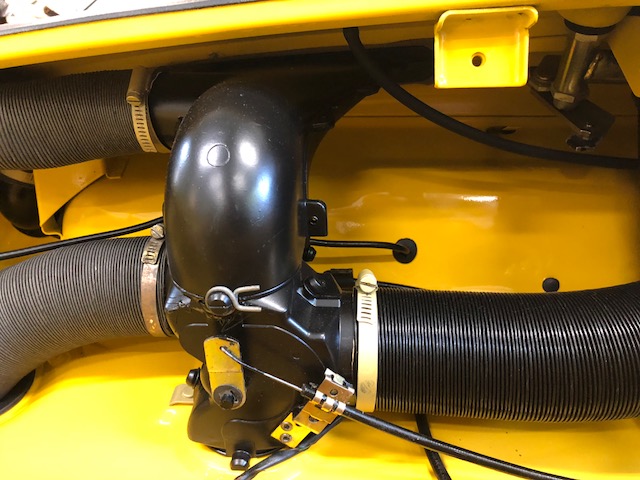
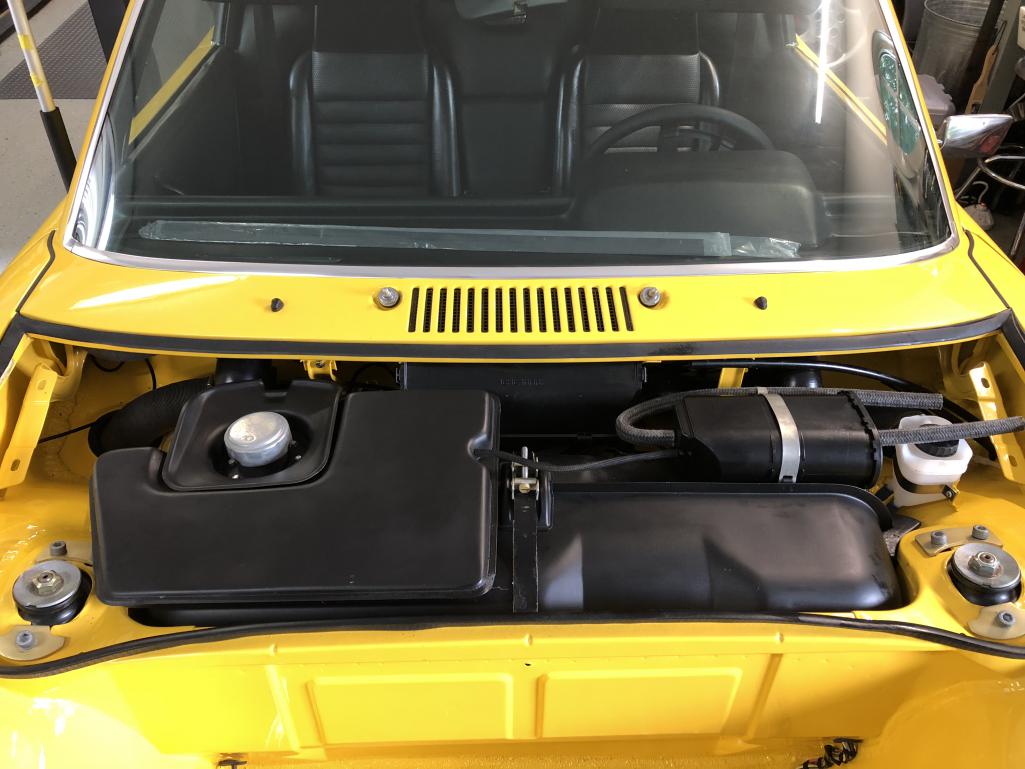
Well, the journey continues, albeit slowly. Doing it as right as I can takes time. The blower went in smoothly, so that was good. Thanks for looking!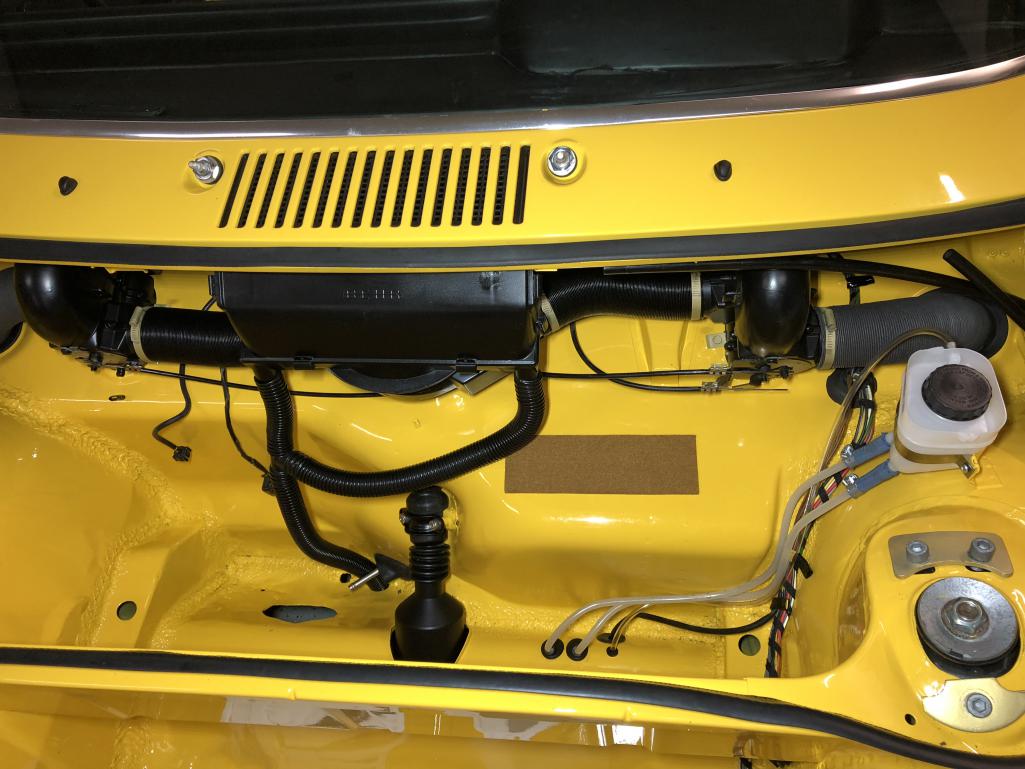
Posted by: bbrock May 16 2018, 06:24 PM
The blower went in smoothly, so that was good.
I did not know that was possible.

Thank you for posting your progress. This is going to be my official reassembly model if I ever make it that far.
Posted by: simonjb May 16 2018, 07:17 PM
Thanks. A couple of things.
The two side vent hoses from the mixer boxes are "bitches" to install. It can be easier if you attach the hoses (that run from the mixers) to the plastic side vent connector before the vent connector is bolted into the firewall.
Attach the long tubes to the inside longs after they have been connected to the mixer boxes and the rubber seal is inserted.
I installed the blower box following advice here. Glued the rubber down on the blower using super glue. Used a lubricating gel on the outside of the rubber and left the two steel cowl supports off. It slid in rather easily. Don't forget to attach that cable on the bottom of the blower box first and plug it in also.
The windscreen defrost vents and mixer boxes slid in fairly well. I just went slowly and didn't put too much pressure on them. I inserted the top into the inside vent gap and then slowly pushed the bottom of the mixer boxes front towards the firewall until it popped into the gap. Make sure the cable that connects to the rear of the drivers side mixer is connected before the mixer is installed.
Oh, and install the washer hoses before the blower box.
Posted by: simonjb May 19 2018, 12:12 PM
A few hours on the electrics and headlights...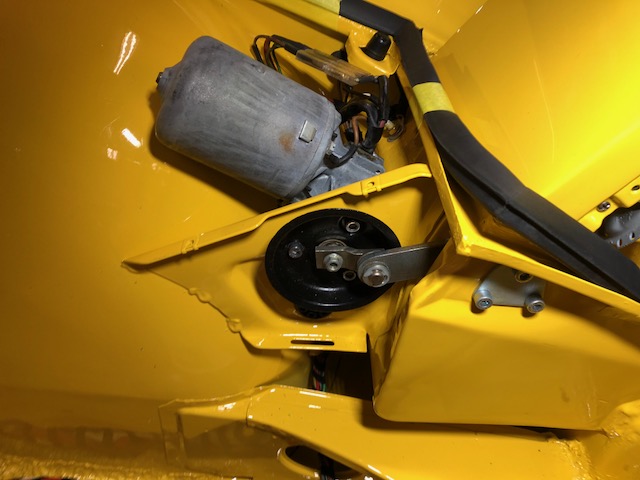
Posted by: simonjb May 20 2018, 08:16 PM
It lives !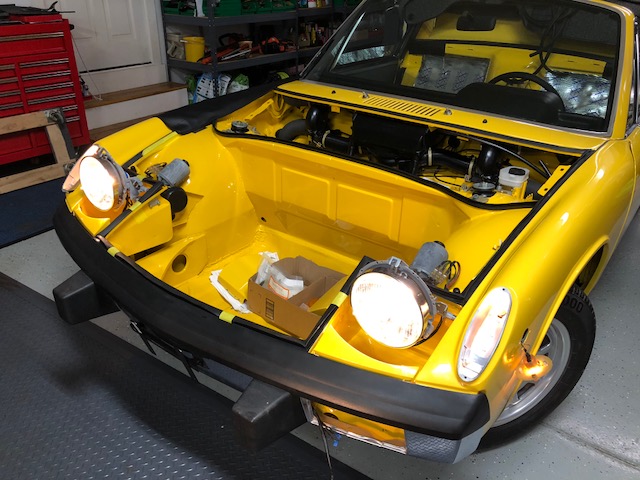
Posted by: Matty900 May 21 2018, 02:50 AM
You are doing a fantastic job! If you need any photos for th our re assembly. Feel free to send me a PM. I take way too many pictures putting my car back together.
Posted by: simonjb May 21 2018, 05:47 AM
You are doing a fantastic job! If you need any photos for th our re assembly. Feel free to send me a PM. I take way too many pictures putting my car back together.
Thank you very much. I may take you up on that!
Posted by: chandler1969 May 22 2018, 11:28 AM
Love the Yellow!! Especially for the engine tin. Keep up the good work and keep posting.
Posted by: autopro May 22 2018, 01:34 PM
Just awesome, I'll be referring to your thread once the time comes to put mine together. Thanks for sharing.
Posted by: LowBridge May 22 2018, 03:36 PM
just fantastic.. so clean
Posted by: simonjb May 26 2018, 07:05 PM
Manage to install the new oil cooler 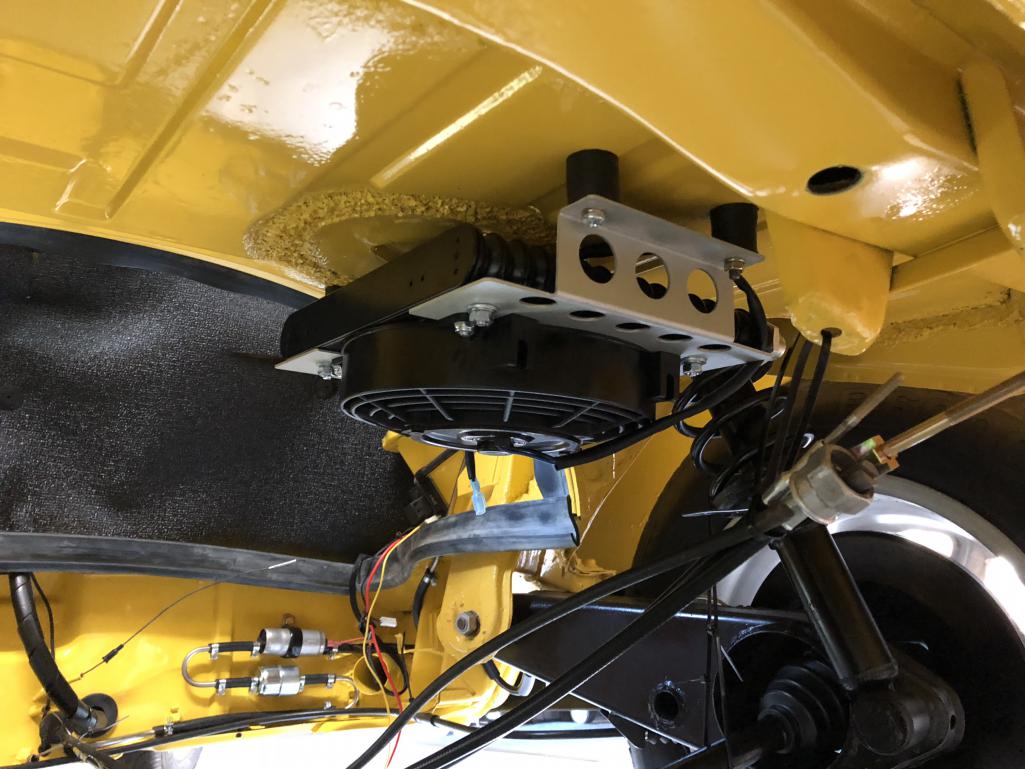
Posted by: simonjb Jun 3 2018, 05:45 PM
Carpet install...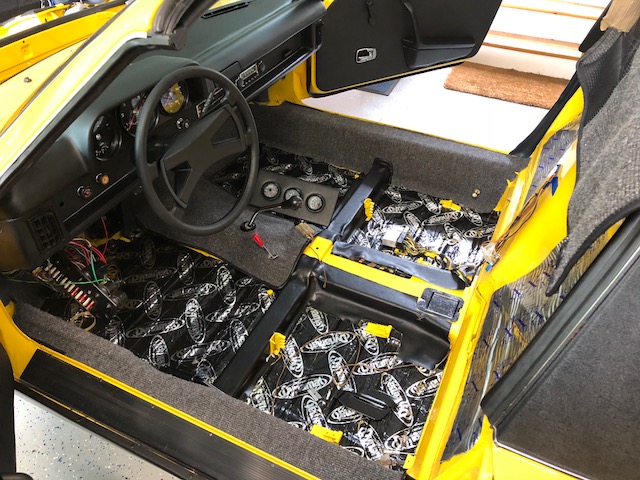
Posted by: simonjb Jun 4 2018, 06:08 PM
Back-Pad installed and partial seat belts...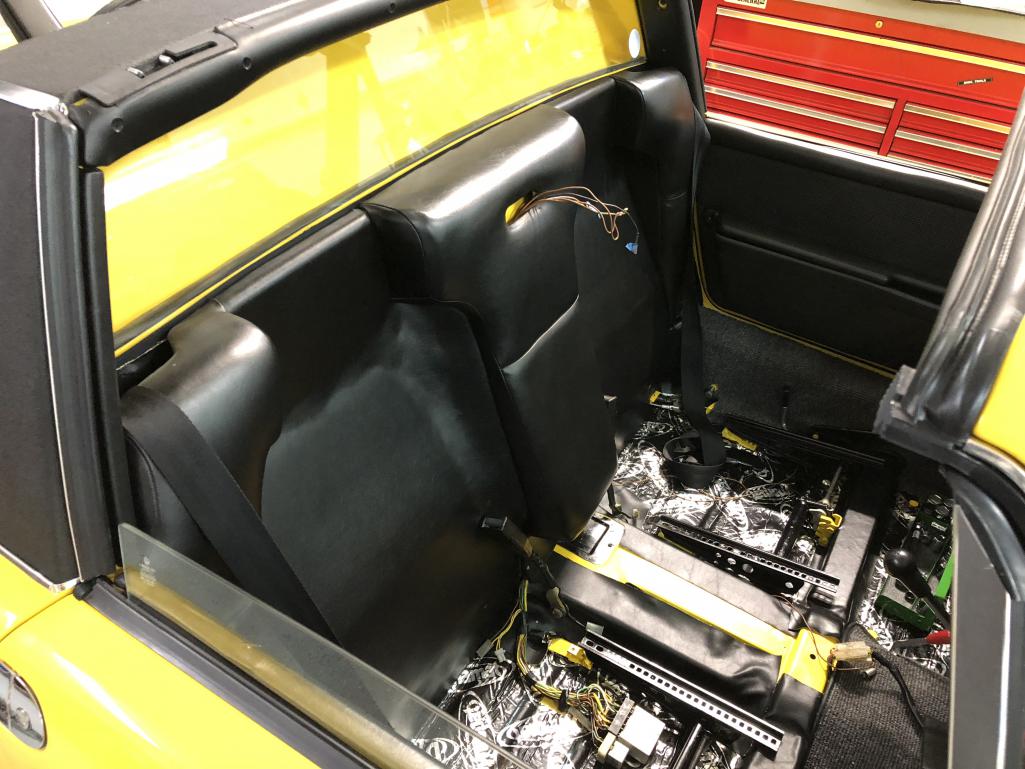
Posted by: Porschef Jun 4 2018, 06:10 PM
Wow, looks great. Beautiful car...
Posted by: simonjb Jun 4 2018, 06:42 PM
Thank -you. While I am fairly mechanical, having grown up with an Uncle who was a mechanic, I could not have got this far without all of you on here. This has given me the inspiration to complete this project and perhaps do the same to my 911T. This site is fantastic.
Posted by: porschetub Jun 4 2018, 10:17 PM
Really nice car it will be like new when finished,must be nerve racking not scratching that beautiful new paint ,following this one as it proceeds well done.
.
Posted by: simonjb Jun 11 2018, 06:53 PM
Finally got the front valance installed and the fog light grills and re-installed the bumper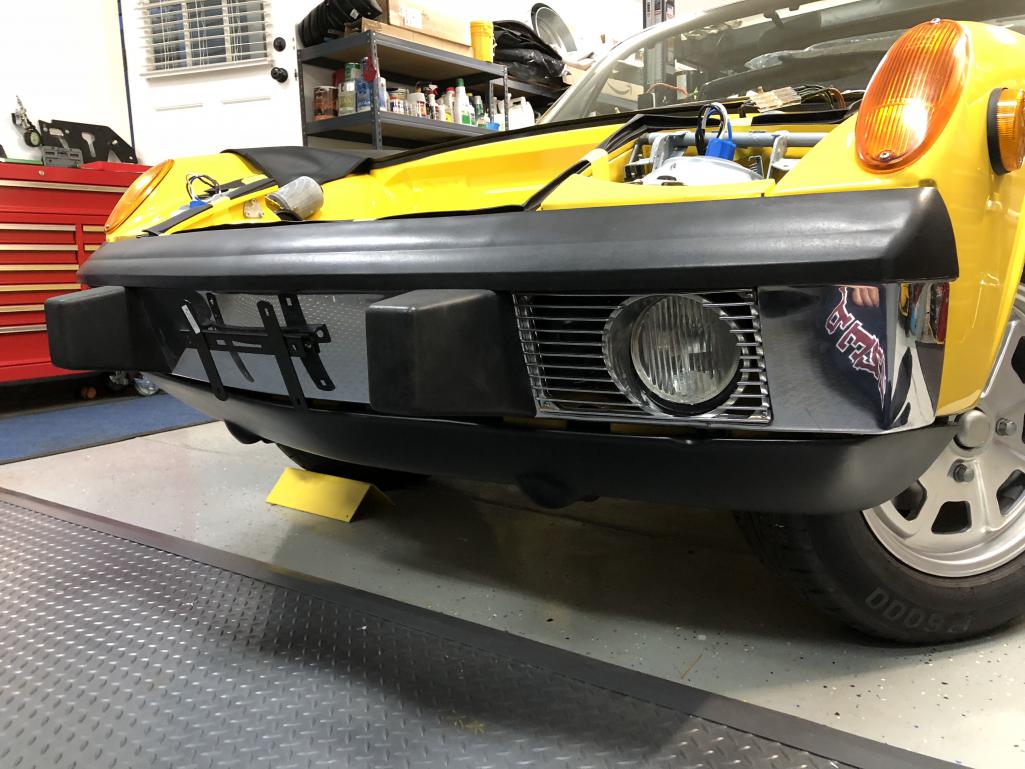
Posted by: simonjb Jun 11 2018, 06:56 PM
My helper wonders why it’s taking so long?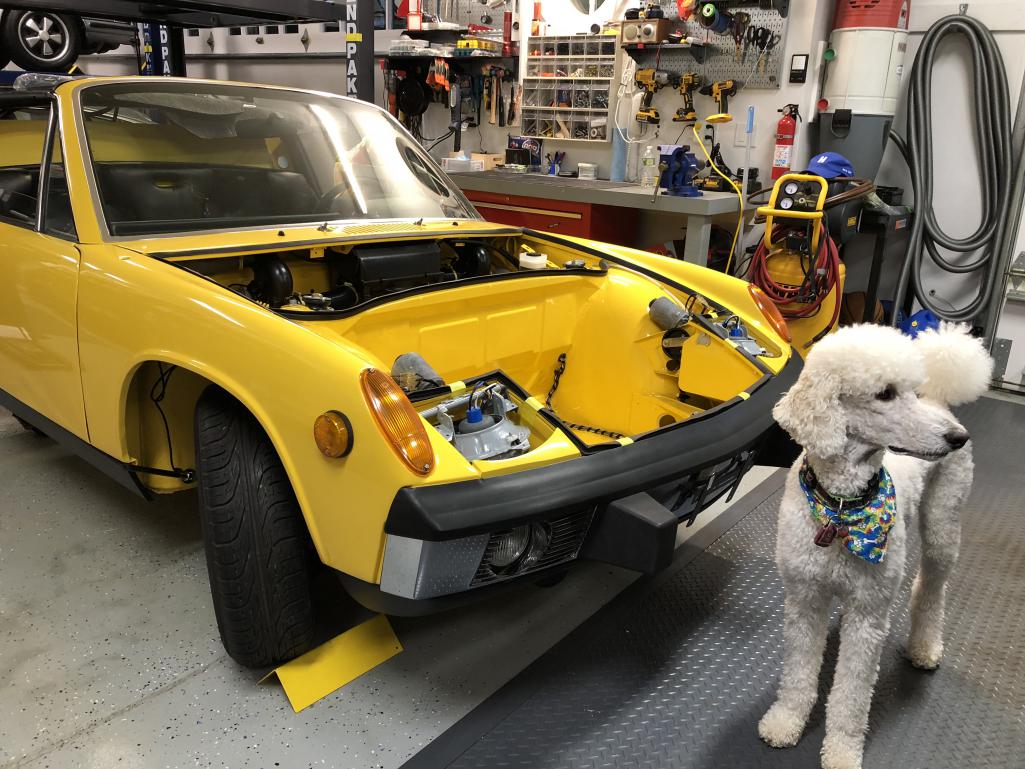
Posted by: 914 7T3 Jun 11 2018, 10:21 PM
Wow, what a great build. I have bookmarked this as a reference as I begin my reassembly!
Keep those pics coming!
Posted by: Porschef Jun 12 2018, 04:18 AM
JB, what are those tires you'll be running?
Posted by: jkb944t Jun 12 2018, 05:50 AM
Wow, awesome progress! Love the color too!
Jeff B
Posted by: JOEPROPER Jun 12 2018, 06:01 AM
Great assembly project! Thanks for sharing and good luck!
Posted by: simonjb Jun 12 2018, 06:46 AM
Thanks for all the encouragement !
I am running Pirelli p6000
Posted by: 914dave Jun 12 2018, 07:14 AM
Very nice detail work.
Posted by: Lucky9146 Jun 12 2018, 07:58 AM
My helper wonders why it’s taking so long?
It is taking so long because you are taking the time to do it right! Great looking car, marvelous detail!
Keep the progress pis coming Posted by: simonjb Jun 17 2018, 03:07 PM
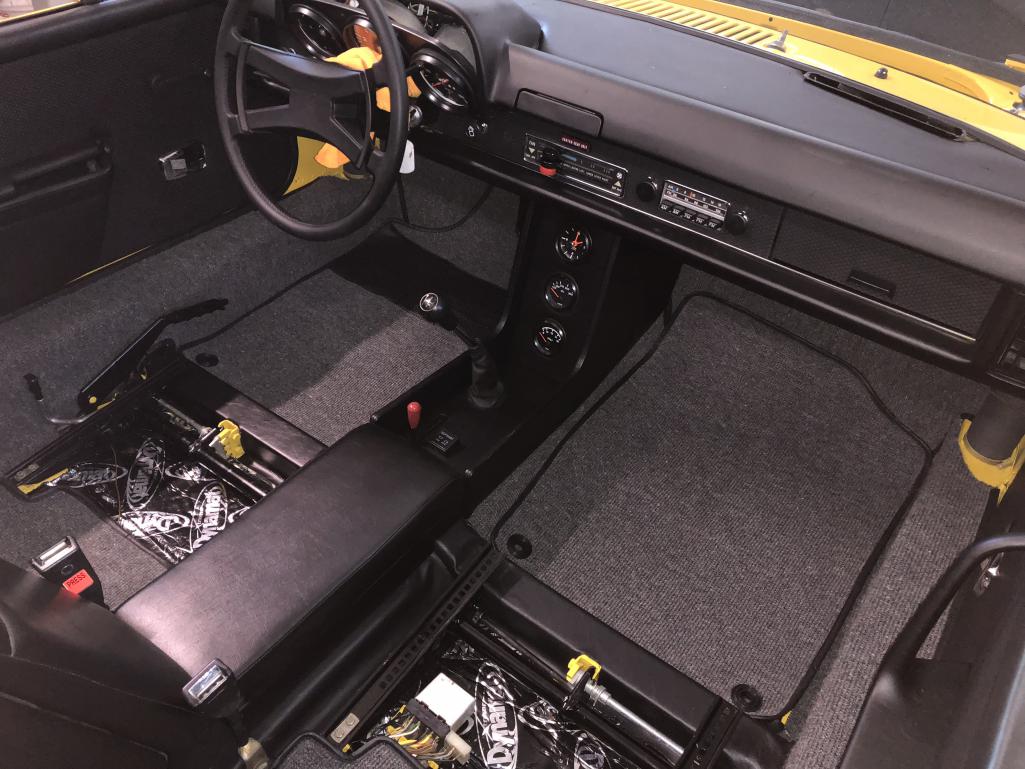
A few hours on father day after the local car show getting the inside done...interior light works!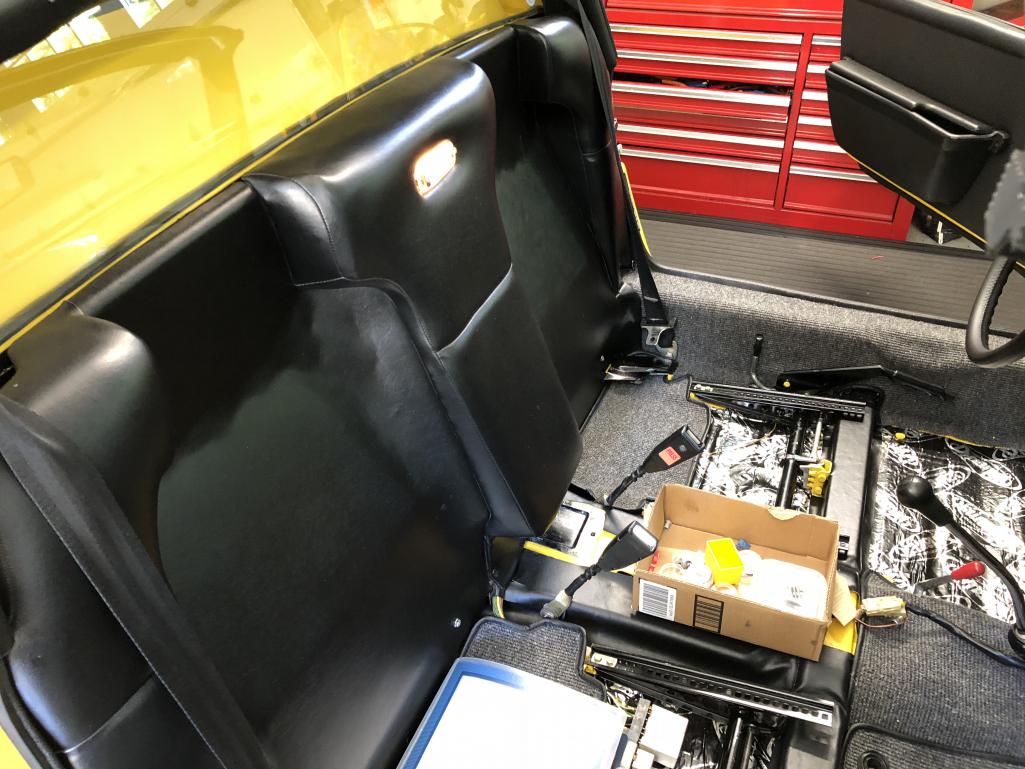
Posted by: simonjb Jun 17 2018, 03:09 PM
Install the center consol also, seat belts and door edge trim plus seat rails...
Posted by: simonjb Jun 17 2018, 03:14 PM
I’m trying to keep the car as original as possible (except I’ll be running the bigger engine - with the original all tucked away). I did however install a USB 
Posted by: simonjb Jun 18 2018, 06:38 PM
So I was a excited when I got home a bit early tonight and decided to install the center console with gauges. But why wouldn’t the console fit properly??? It wouldn’t line up correctly...so then I noticed I had installed the heater lever around the wrong way...with the bend facing towards the driver...so I had to rip it all out and then turn it around and re-push the steel wires back into the engine bay.. 
I managed to get that far and called it quits before I messed something up..I always know when I’m getting to that point.
Posted by: Porschef Jun 19 2018, 04:14 AM
Oh, that's a PITA delay of game. At least you got it done. Reinstalling the center console is no joy either, go slow.
If you've driven the car with the console and find that your right foot doesn't have enough room, consider replacing the back piece (closest to the frunk) with a narrower one. I did it and it made a great difference, much more comfortable to drive.
Car looks great. NE BBQ and tech on Saturday. A short drive for you...
Posted by: simonjb Jun 19 2018, 06:18 AM
Here are the specs from the Dyno run...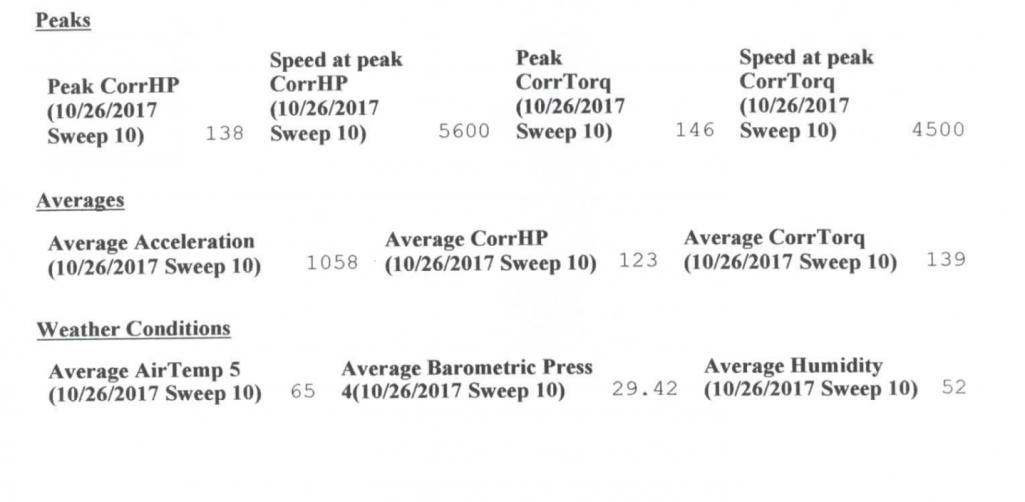
Posted by: Porschef Jun 19 2018, 10:03 AM
Well, that oughta go nicely...
Posted by: defianty Jun 19 2018, 10:47 AM
Fantastic job you're doing. Enjoying the updates.
Posted by: simonjb Jun 26 2018, 02:26 PM
Here are some updates on the inside. Yes, the Defrost light actually works!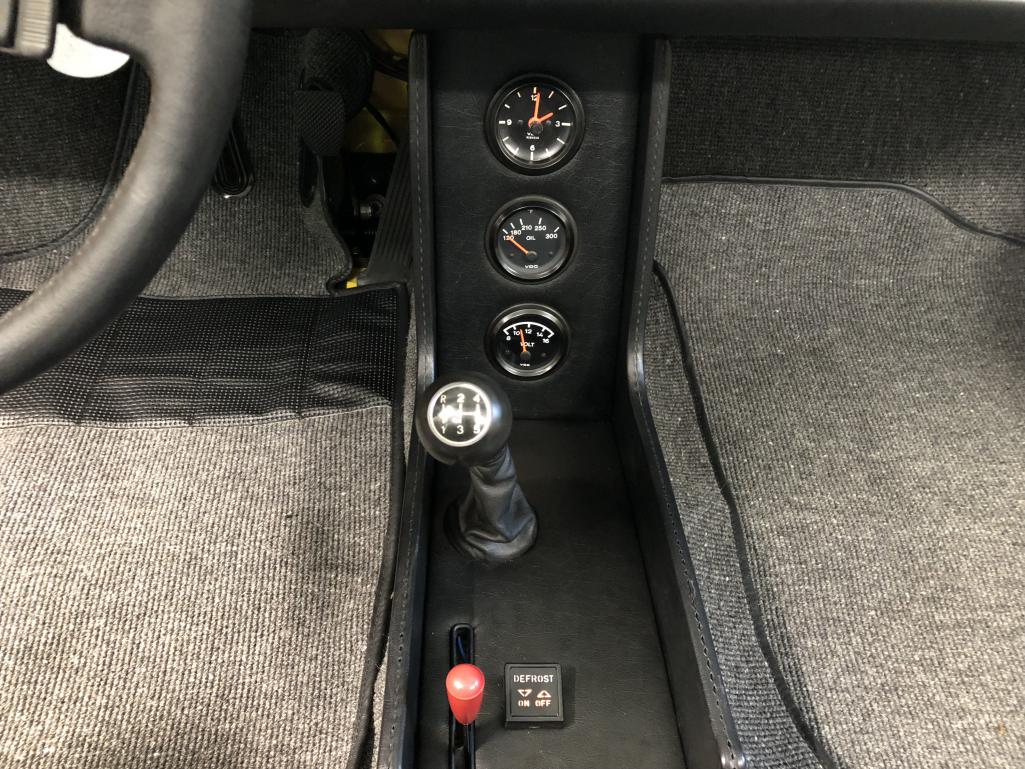
Posted by: simonjb Jun 26 2018, 02:28 PM

Posted by: simonjb Jun 26 2018, 02:28 PM
Posted by: simonjb Jun 26 2018, 02:29 PM
It Lives !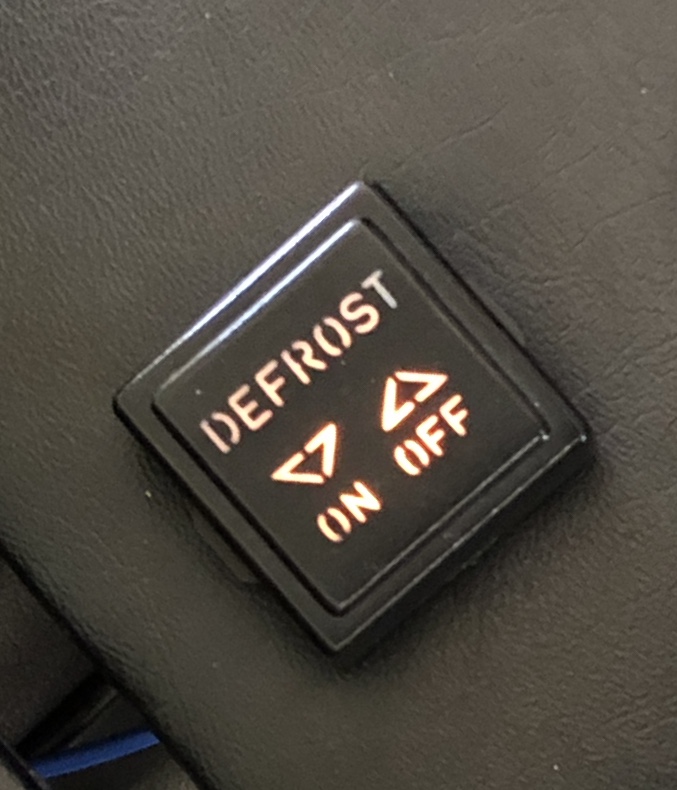
Posted by: simonjb Jun 30 2018, 08:07 PM
Seats are in ...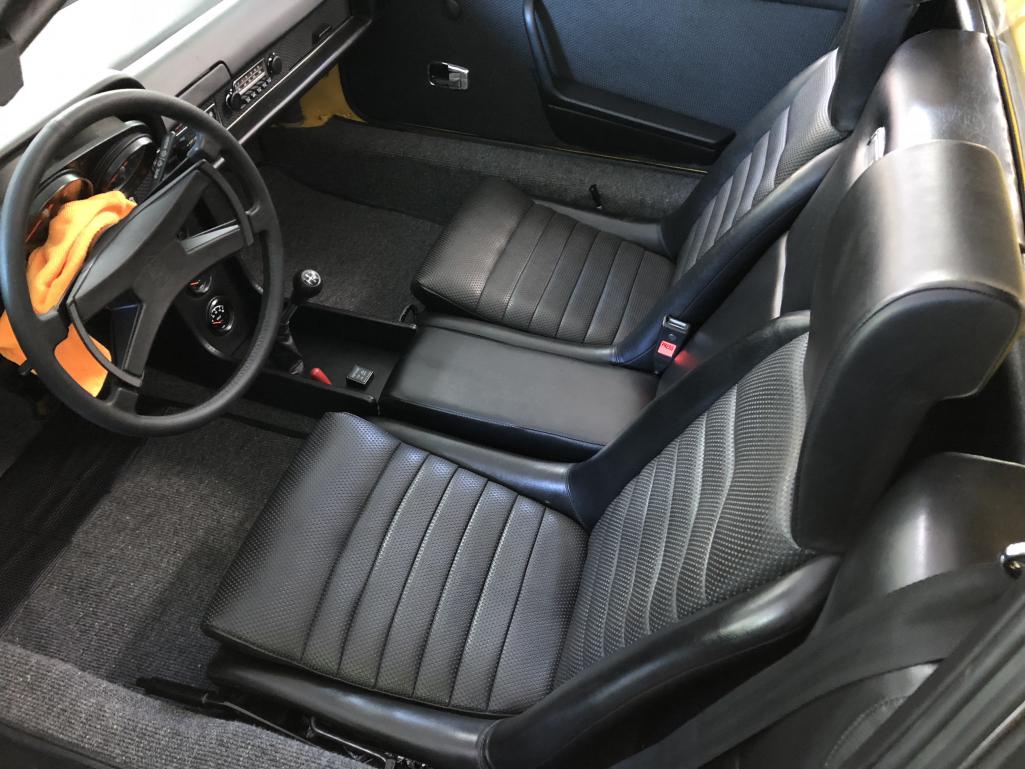
Posted by: xperu Jun 30 2018, 08:40 PM
A little bit more progress = installed the pedal cluster and gear shift.
However, I have this small round flexible rubber bushing left over? near front of photo.... I thought it might be for the accelerator ? But can't seem to figure out where it goes?
An when you finish your going to have a new 914.... What a beauty. Mike Kelly
Posted by: trojanhorsepower Jun 30 2018, 09:13 PM
Man that is fantastic! Now you just need to come put mine together.....
Posted by: Cairo94507 Jul 1 2018, 05:27 AM
Really coming together nicely.
Posted by: simonjb Jul 1 2018, 08:28 AM
Thanks for the kind remarks..as we all know, its a labor of love! But its been a real blast and has challenged this desk jockey to use different skills..Thanks for watching...
Posted by: raynekat Jul 1 2018, 12:35 PM
Super clean and my "go to" for how the bar is raised.
Posted by: simonjb Jul 1 2018, 02:05 PM
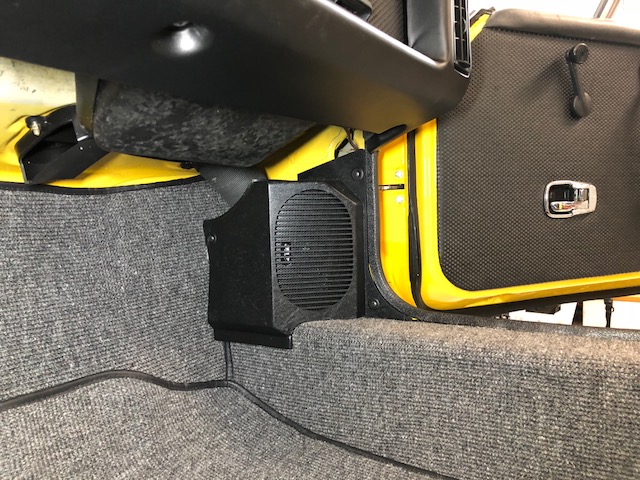
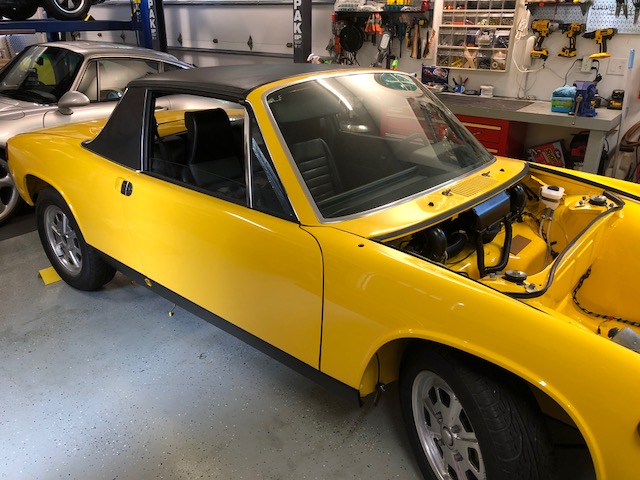
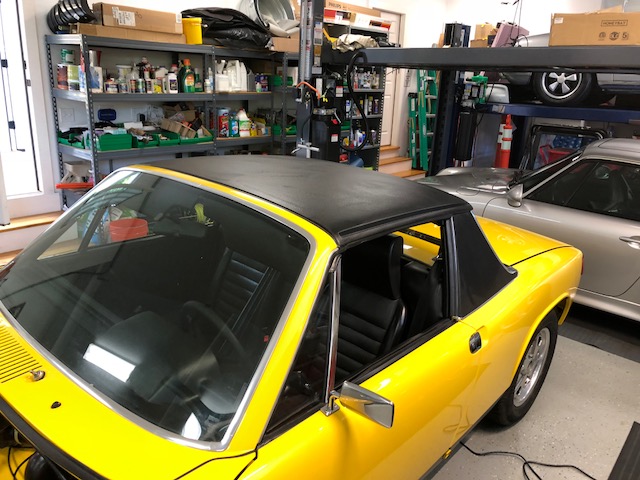
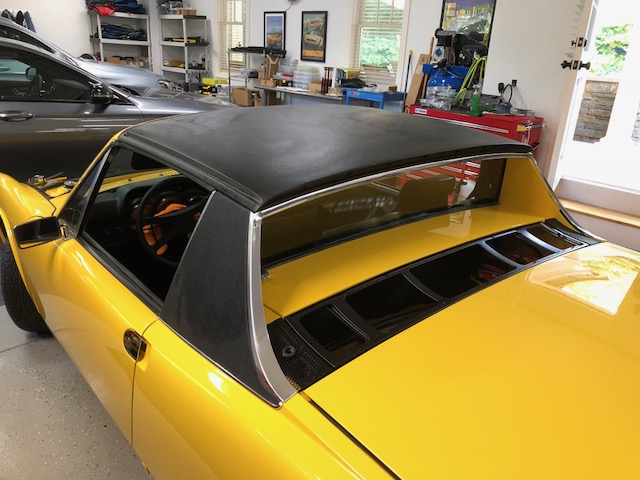
I managed to get the Sun Visors installed and the Speakers today, with new speaker inserts. Then I thought, lets see if the roof fits. Its great to see her with her roof on again...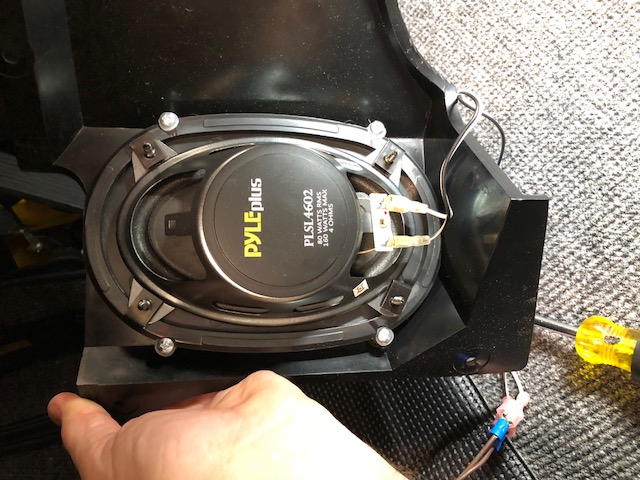
Posted by: simonjb Jul 1 2018, 02:09 PM
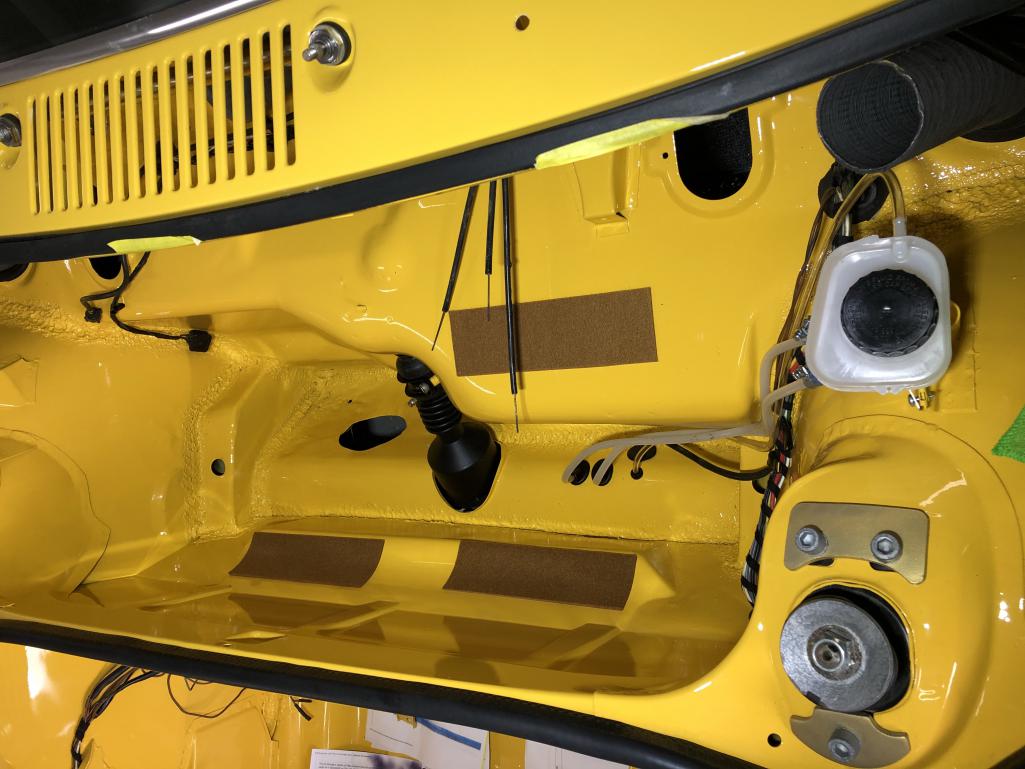
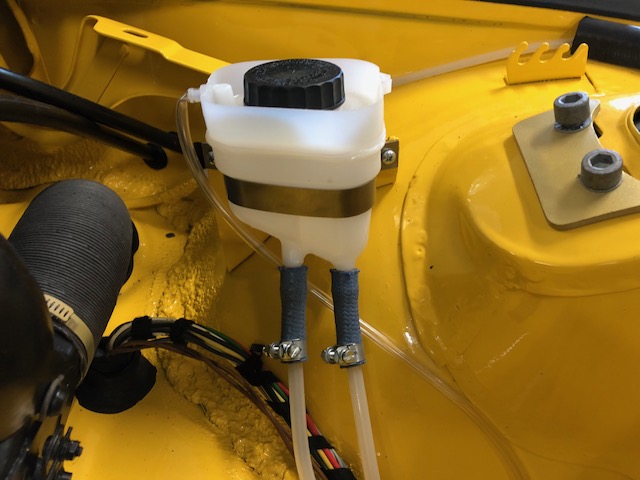
I decided to stay with the original fuse panel..If it ain't broke, don't change it. Also, a few pics of the brake reservoir and heater...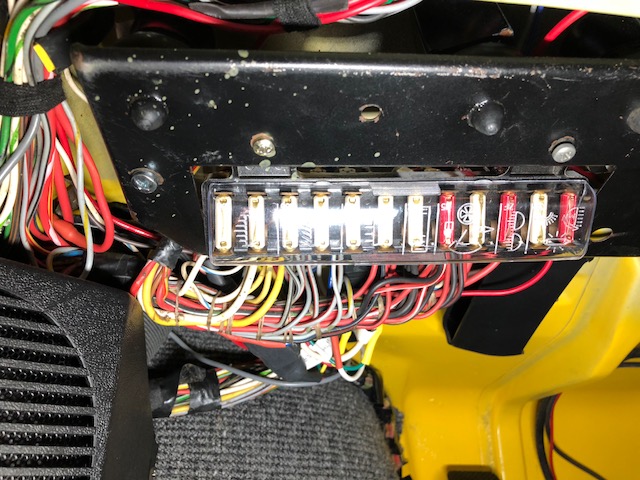
Posted by: simonjb Jul 4 2018, 10:33 AM
Starting to rebuild the engine lid with new letters...Now I have to find a Metric measuring tape...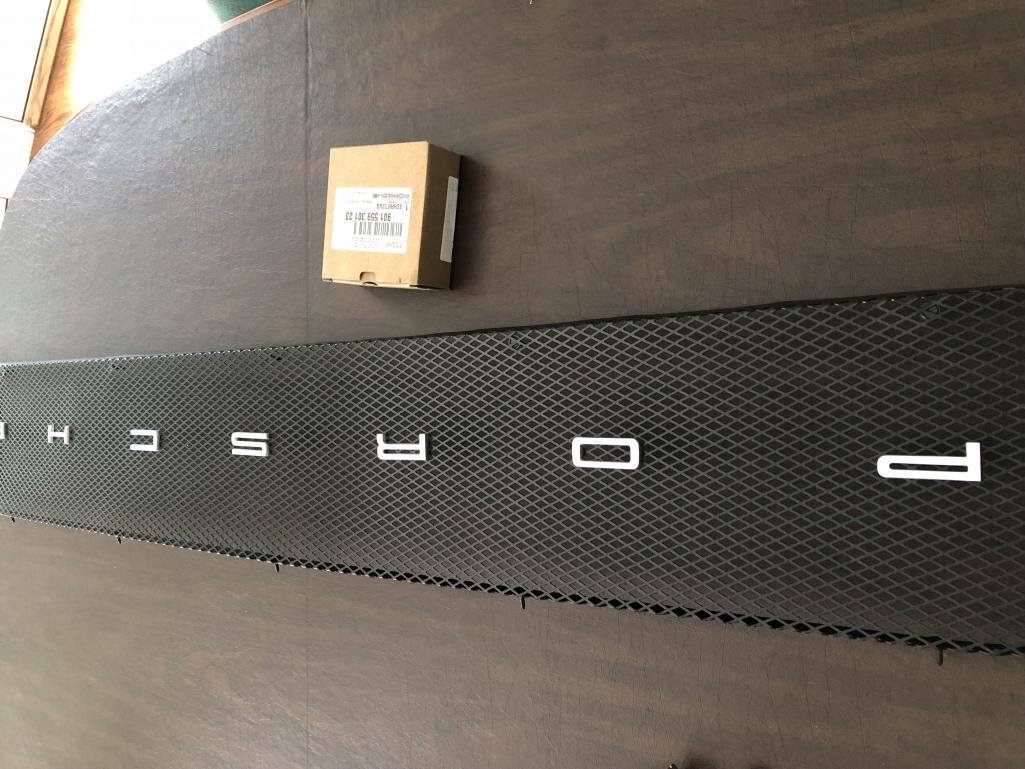
Posted by: Porschef Jul 4 2018, 10:47 AM
Damn, you're gittin' close...
Posted by: Travis Neff Jul 4 2018, 11:06 AM
Outstanding!
Posted by: bbrock Jul 4 2018, 09:56 PM
Boy this is fun to watch. You have no idea how many years I've fantasized about getting to this point with my car. Still living vicariously here!
Posted by: simonjb Jul 6 2018, 05:26 PM
A bit OT, but this is the first time my wife has ever sat in the car ! ...might be the last, so I snapped a pic as the pooch looks on.
Posted by: simonjb Jul 14 2018, 07:51 AM
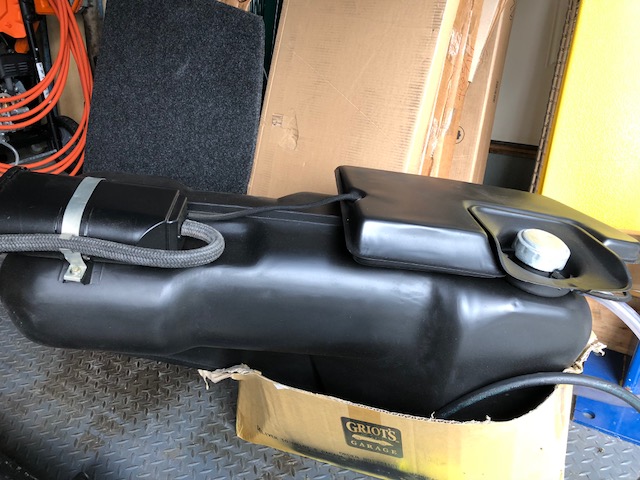
So things have been a bit slow as the nice weather has kept me out of the garage...but a few pics on the refurbished fuel tank (the return line is sealed with a small flat washer) and a cleaned up gearbox..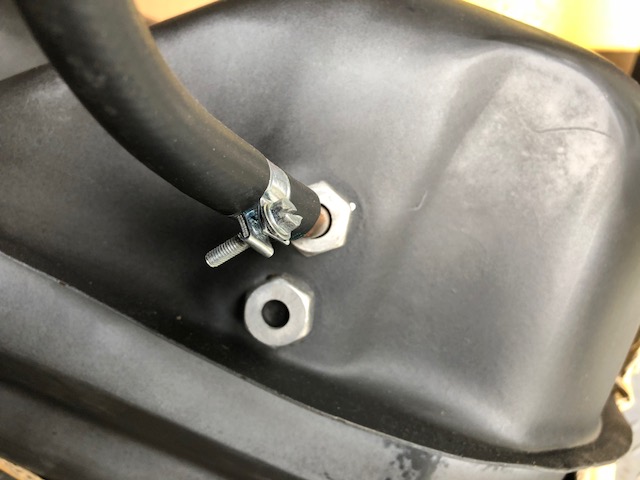

Posted by: simonjb Jul 14 2018, 08:12 AM
Off topic, but I just got a call from Tony at Autobaun Interiors that my Sports seats for my 72 911 are ready !! ya!
Before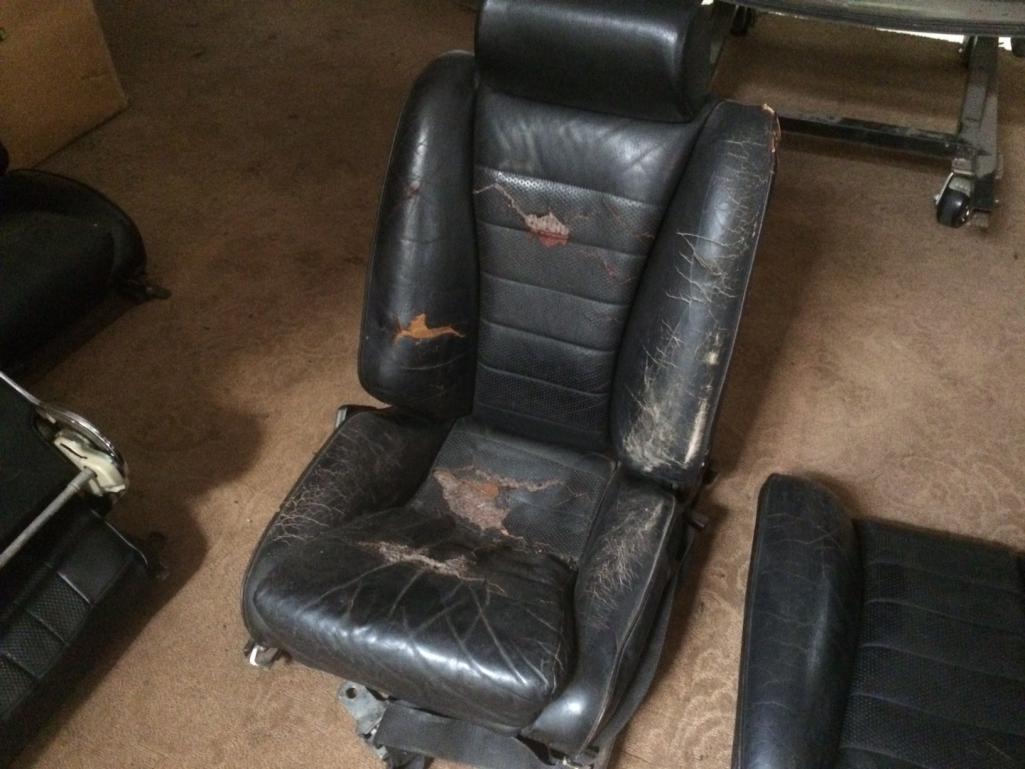
After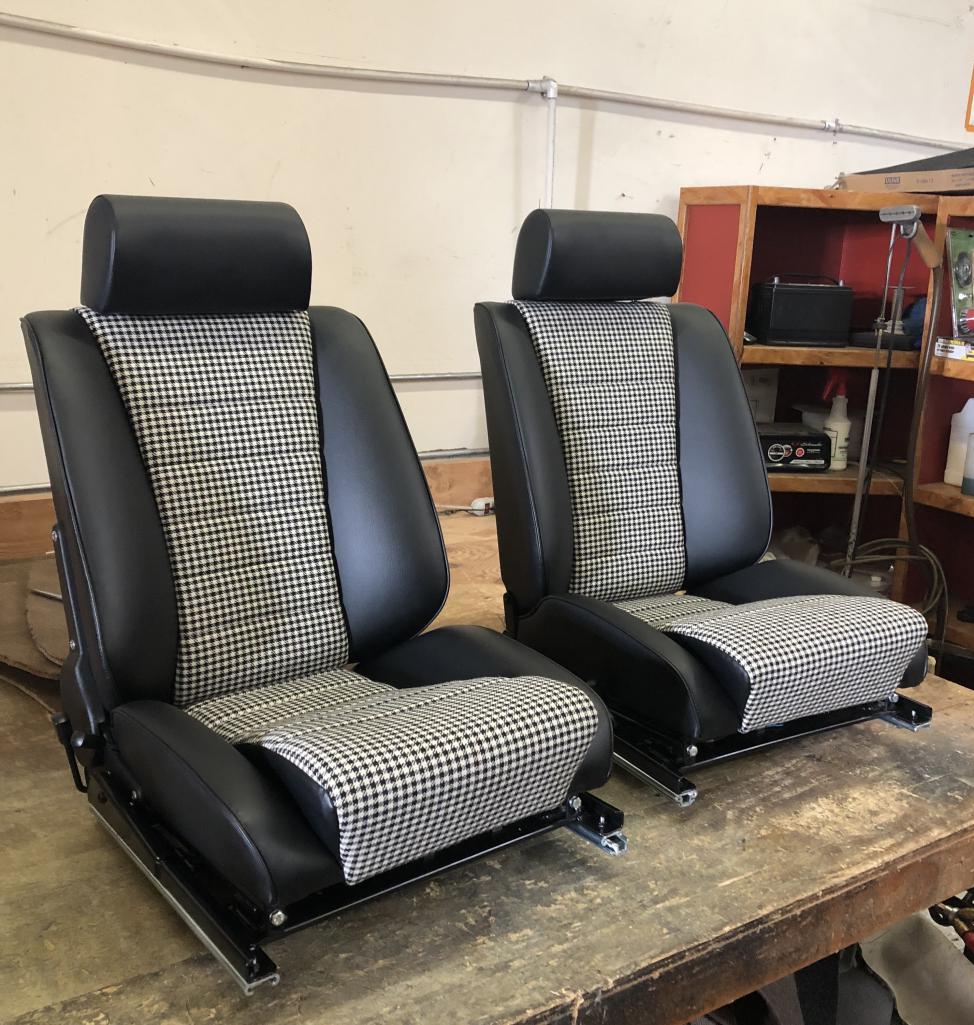
Posted by: simonjb Jul 22 2018, 05:00 PM
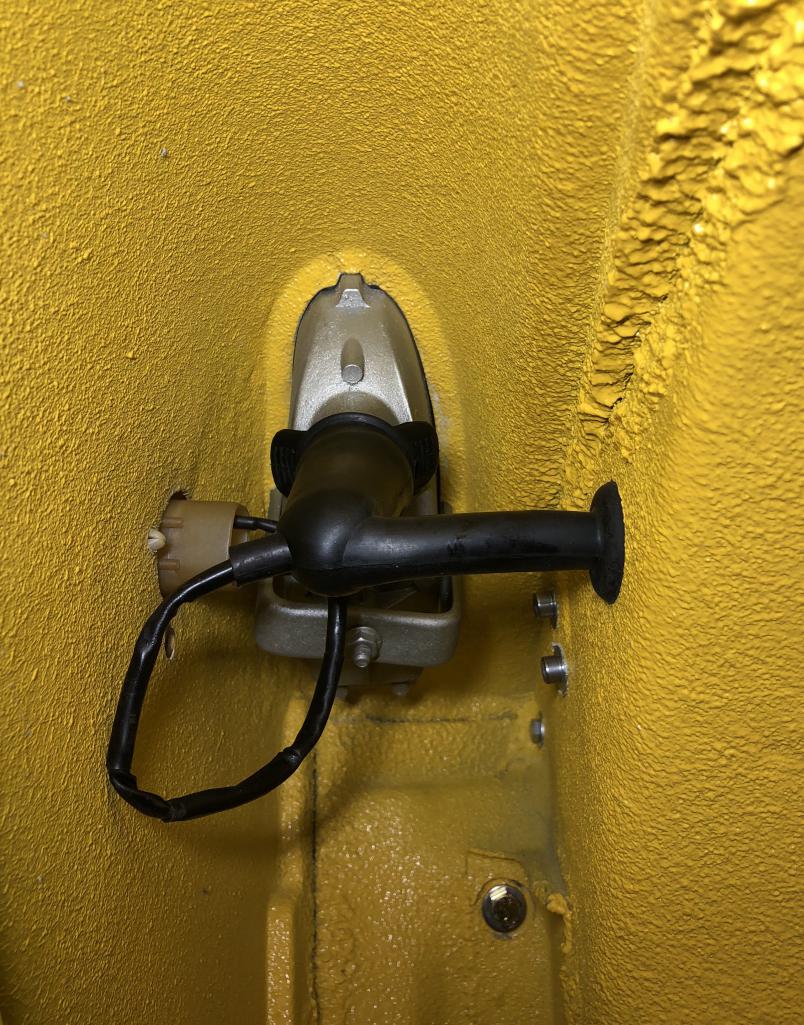
Finally managed to get the front brake lines and master all hooked up today...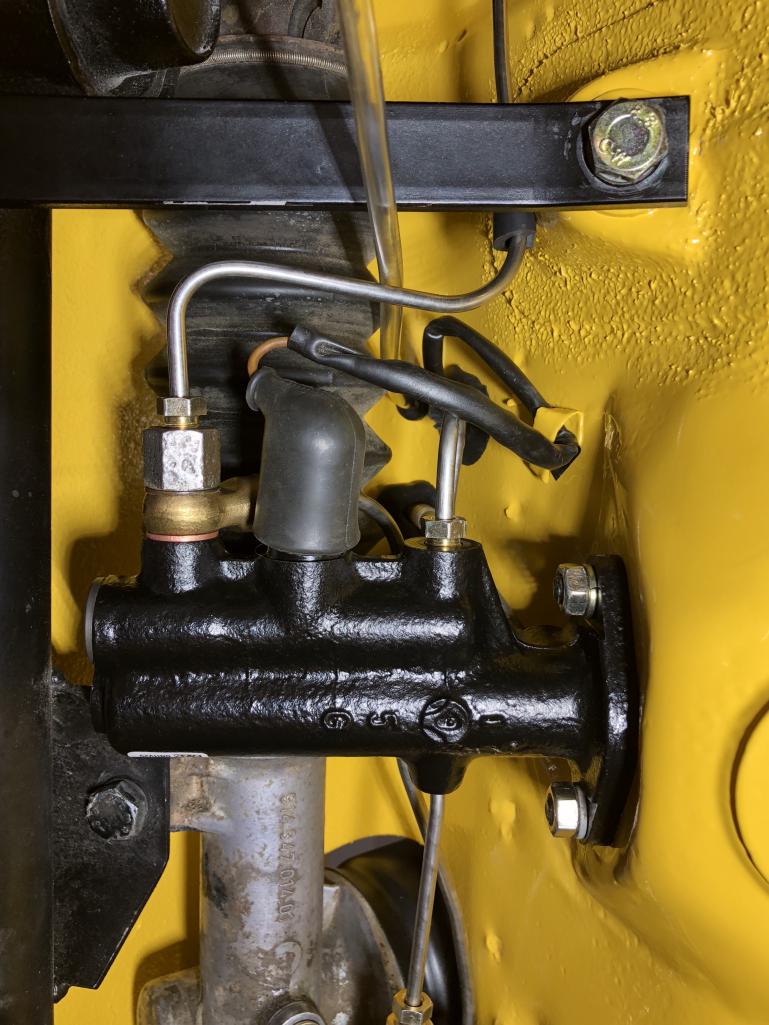
Posted by: bbrock Jul 23 2018, 10:54 AM
Looking good! If it were me, I'd try rotating that switch boot around so I could tuck the wire sheathing inside the boot to better protect that ground wire and make a better seal to keep gunk out of the boot. 
Posted by: simonjb Jul 23 2018, 12:54 PM
good idea - will do !
Posted by: mepstein Jul 23 2018, 01:40 PM
Off topic, but I just got a call from Tony at Autobaun Interiors that my Sports seats for my 72 911 are ready !! ya!
Before
After
They look great. I'd be excited too.
Posted by: simonjb Jul 23 2018, 06:30 PM
Getting ready to install the sway bar...below are plated parts ready to go along with items from 914Rubber and 914LTD - thanks guys!
Also, does anyone remember a recent thread that had a very detailed sway bar install documented? I know there is the video. Thanks 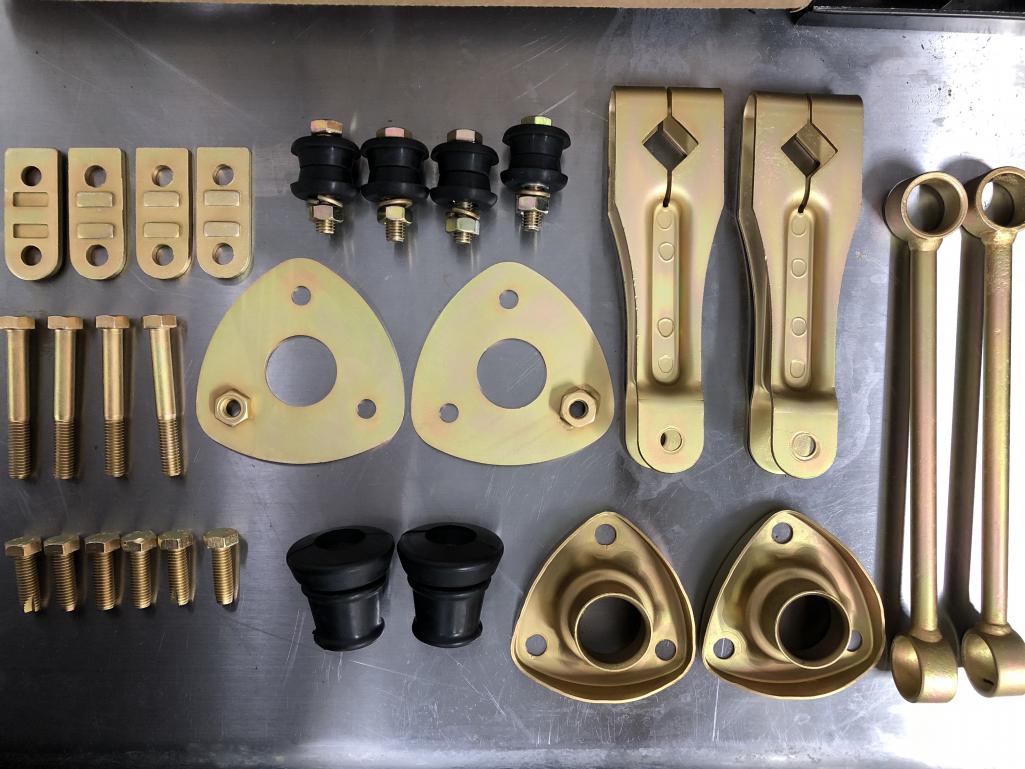
Posted by: Coastal6 Jul 23 2018, 11:36 PM
Just looking at your thread again and admiring the nice work.
Just one thought. On your very first photo you show a fuel filter and fuel pump mounted on the lower fire wall in the engine bay. That location is very close to the factory location for the fuel pump. The location is also prone to heat soak and possibly vapor lock which was fairly common. Since your pump, pumps better than it sucks you might want to consider moving it up front closer to the fuel tank like a lot of folks have done.
Just a thought
Posted by: simonjb Jul 24 2018, 06:24 AM
Good thought...will consider. Thanks !
Posted by: Cairo94507 Jul 24 2018, 06:48 AM
Great work and wonderful car.
Posted by: simonjb Aug 11 2018, 02:31 PM
Finally getting the tank in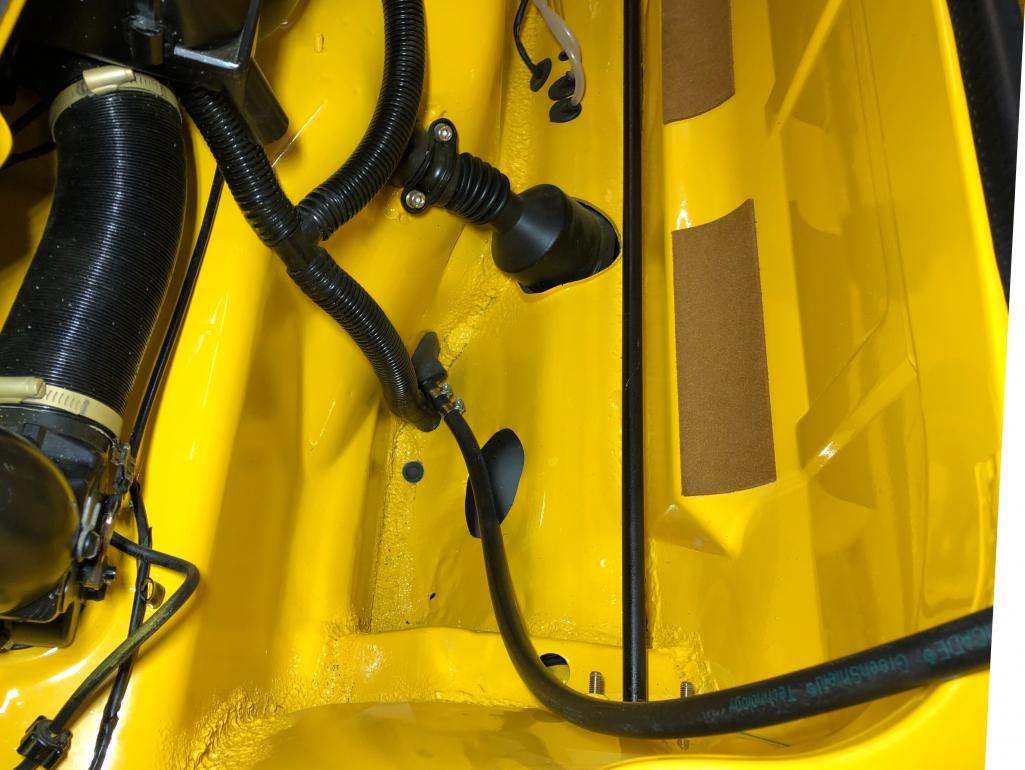
Posted by: simonjb Aug 11 2018, 02:34 PM
Posted by: bbrock Aug 11 2018, 10:31 PM
Holy smokes this is inspiration! Seems like you are getting close. 
Posted by: 914 7T3 Aug 12 2018, 04:10 PM
This is even more impressive when you are actually working in the same areas. Wow!
Just downloaded all the photos of the wire harness install as a reference, back into the garage for me.
Have to take advantage when its under 90 degrees to get some work done.
Posted by: buck toenges Aug 12 2018, 06:30 PM
This should be considered for classic thread. It really helps people that are redoing a 914's bits and pieces that take up a lot of time.
Buck
Posted by: simonjb Aug 12 2018, 08:13 PM
Finished up most of the front trunk and the lights. I think I will leave the car up on stands and do all the brake bleeding before I put the engine in.
Thanks for looking !! And the compliments. 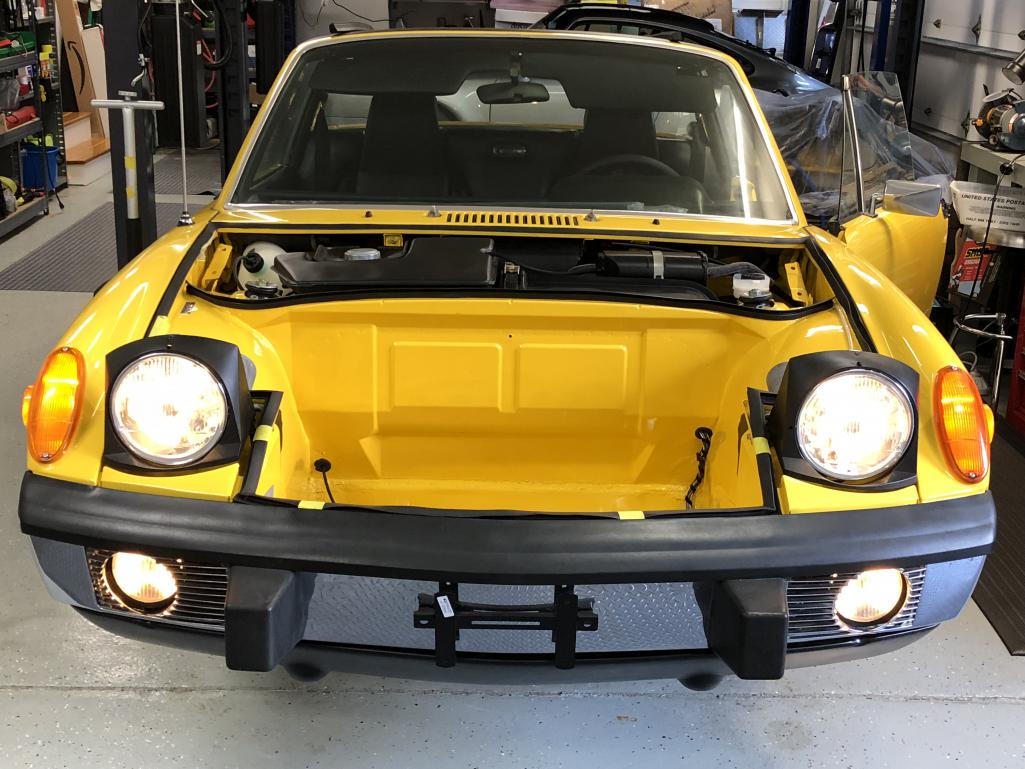
Posted by: simonjb Aug 12 2018, 08:15 PM
The engine awaits....
Posted by: simonjb Aug 13 2018, 10:45 AM

Posted by: simonjb Aug 13 2018, 10:46 AM
Posted by: simonjb Aug 14 2018, 02:59 PM
Sunshine for the first time in a while !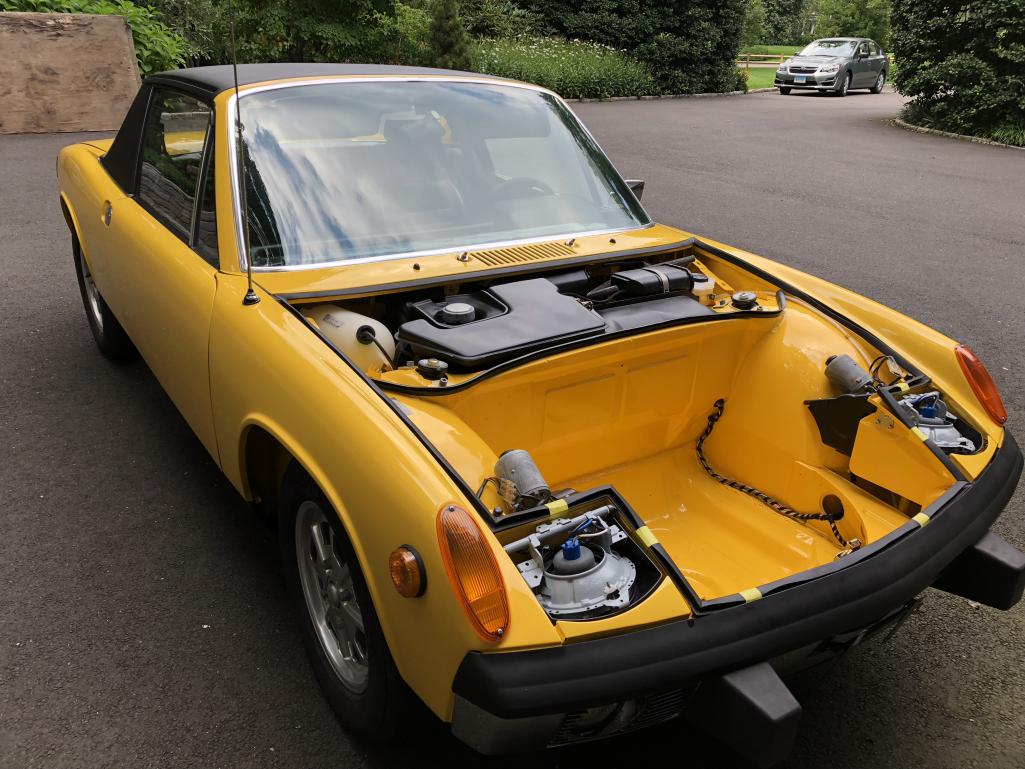
Posted by: simonjb Aug 14 2018, 03:01 PM
Posted by: simonjb Aug 14 2018, 03:02 PM
Like a one-arm paper-hanger...kids all away...so I’m on my own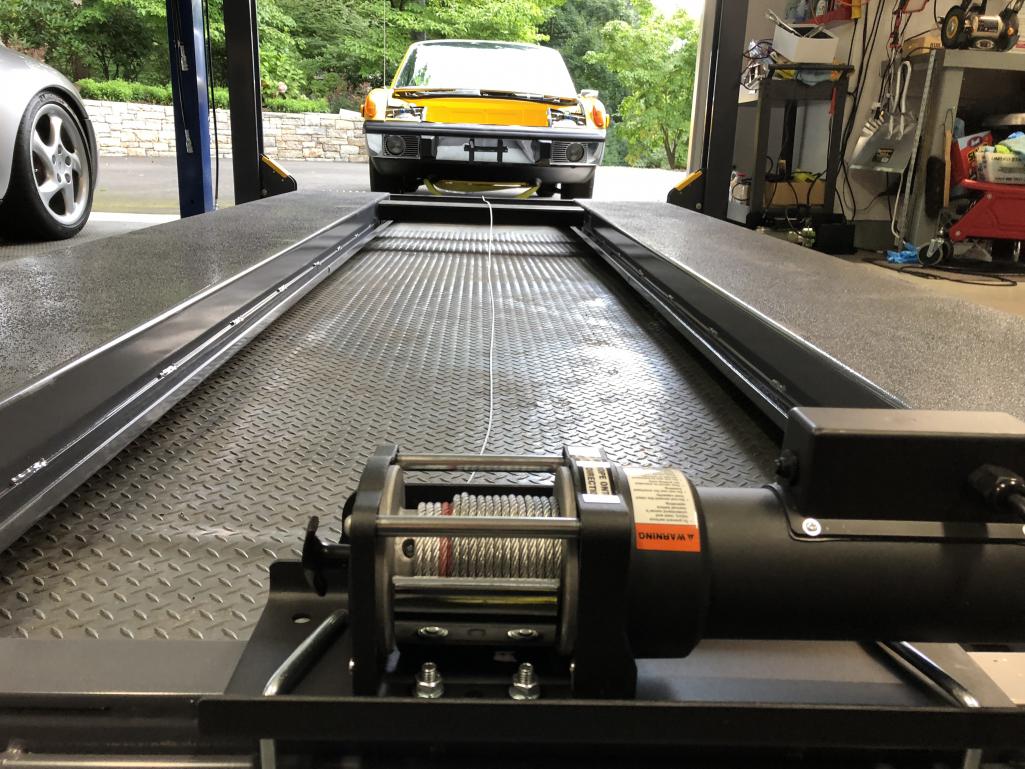
Posted by: simonjb Aug 14 2018, 03:03 PM
Posted by: simonjb Aug 14 2018, 03:06 PM
Posted by: simonjb Aug 14 2018, 03:08 PM
Ready for the engine 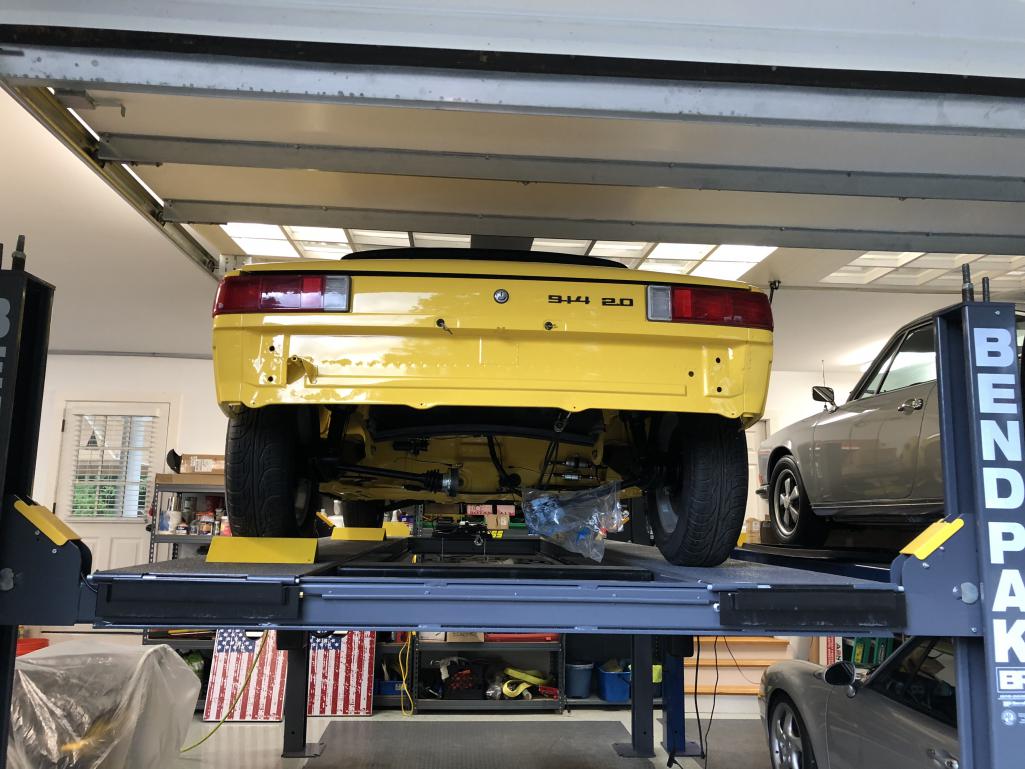
Posted by: simonjb Aug 14 2018, 03:09 PM
Posted by: nditiz1 Aug 15 2018, 05:04 AM
I  watching this build
Posted by: daytona Aug 15 2018, 06:00 AM
I just love the look of a car during the reassembly process.
There is something about the clean look and all the parts being assembled in a neat and methodical way. I feel this is definitely that it is more about the journey The completed car hides so much work.
The car is looking great. What are you going to do about the bottom of the car? Are you going to leave it clean? or are you going to protect it with some kind of undercoating?
Great Job simonjb.
Bill.
Posted by: Philip W. Aug 15 2018, 09:12 AM
this is an awesome build! looks super, definitely have to book mark this for reference on my own build. this is a 9.75/10 and concourse worthy, not sure if that is what you are after but could if you wanted. When are you installing the motor, this week?
Posted by: simonjb Aug 15 2018, 02:20 PM
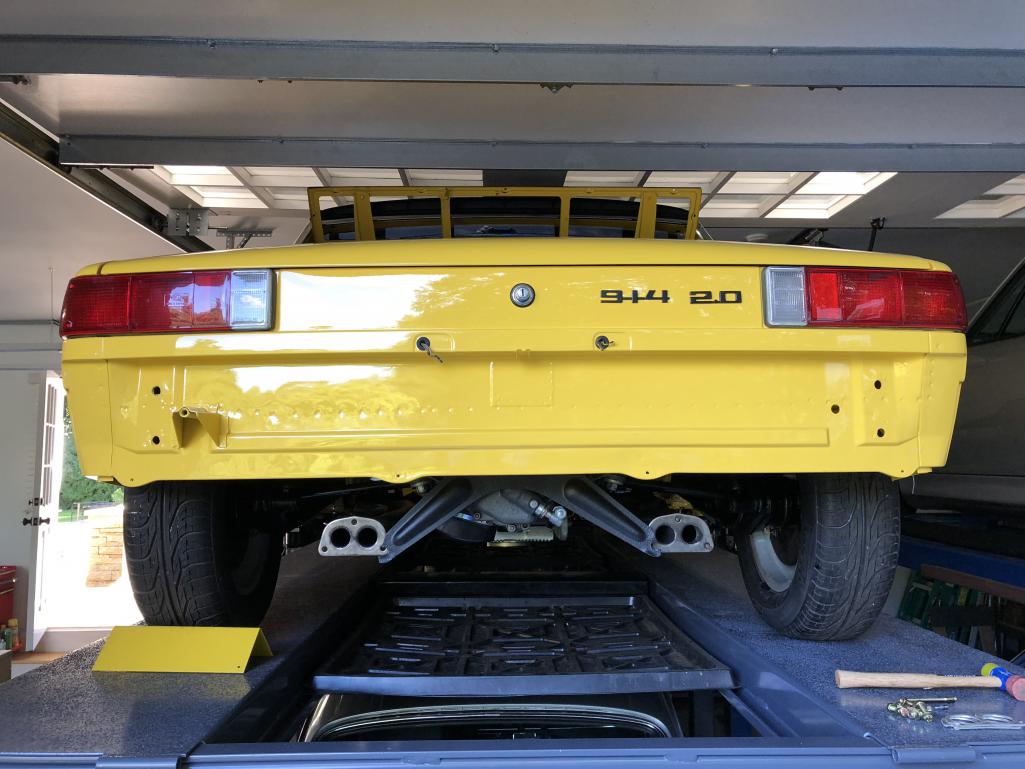
Thanks everyone. Somehow just getting it up on the lift and off the floor seems like a great big step forward. Looking up from underneath is so nice. I bled the brakes and now it’s ready for the engine. I’m not a concours person, but I am trying to keep it as stock as possible.
I need to find a thread on trying to align the front suspension as much as possible - my main question is how to set the front upright struts/shocks correctly?
It’s finally stopped raining here so I’m going to be doing yard work for a few days...
Posted by: simonjb Aug 17 2018, 06:17 PM
Posted by: simonjb Aug 17 2018, 06:18 PM
We are ready to go!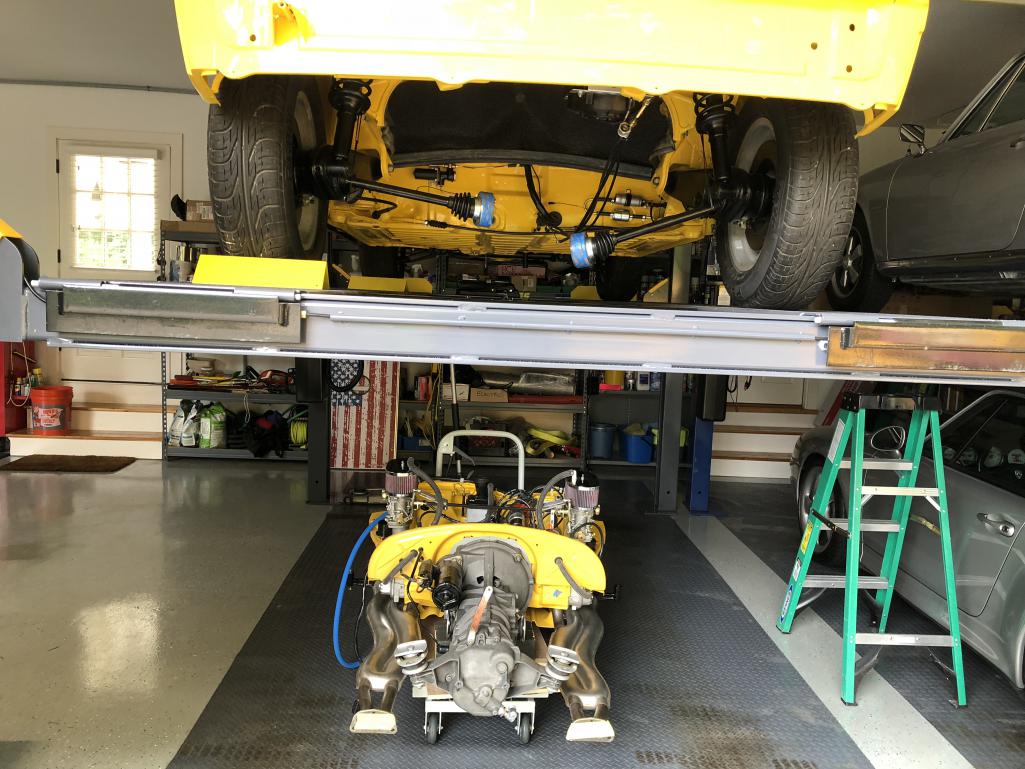
Posted by: 914 7T3 Aug 17 2018, 06:31 PM
Posted by: worn Aug 17 2018, 06:44 PM
Holy smokes this is inspiration! Seems like you are getting close.
Last time I read about a poodle and diabolically cool work was in Faust. And the poodle’s master was very capable. Gotta go dog shopping...
Posted by: JmuRiz Aug 17 2018, 08:25 PM
Amazing detail!
Looking great
Posted by: simonjb Aug 17 2018, 09:30 PM
Holy smokes this is inspiration! Seems like you are getting close.
Last time I read about a poodle and diabolically cool work was in Faust. And the poodle’s master was very capable. Gotta go dog shopping...
ha! Sometimes when the assembly isn’t going well I think of making a pact with the Devil.
Posted by: simonjb Aug 18 2018, 03:16 PM
So, my thoughts of a quick engine install was not to be - I got everything ready with the engine on a jack cart and the car up on a lift. Thought was to easily drop the car down on the engine. Then when I’m all ready, I finally realize that the engine bar and engine tin are too wide for the inside tracks of the lift
So two choices, take engine out from under the lift and then get car on the ground and do it the normal way or, remove the engine bar and one side of the engine tin and stick with original pla. Of course I chose the hard way and removed the bar and tin. Easy off, hard back on. In any case, it’s back together and engine is sitting in engine bay ready to finish up tomorrow. 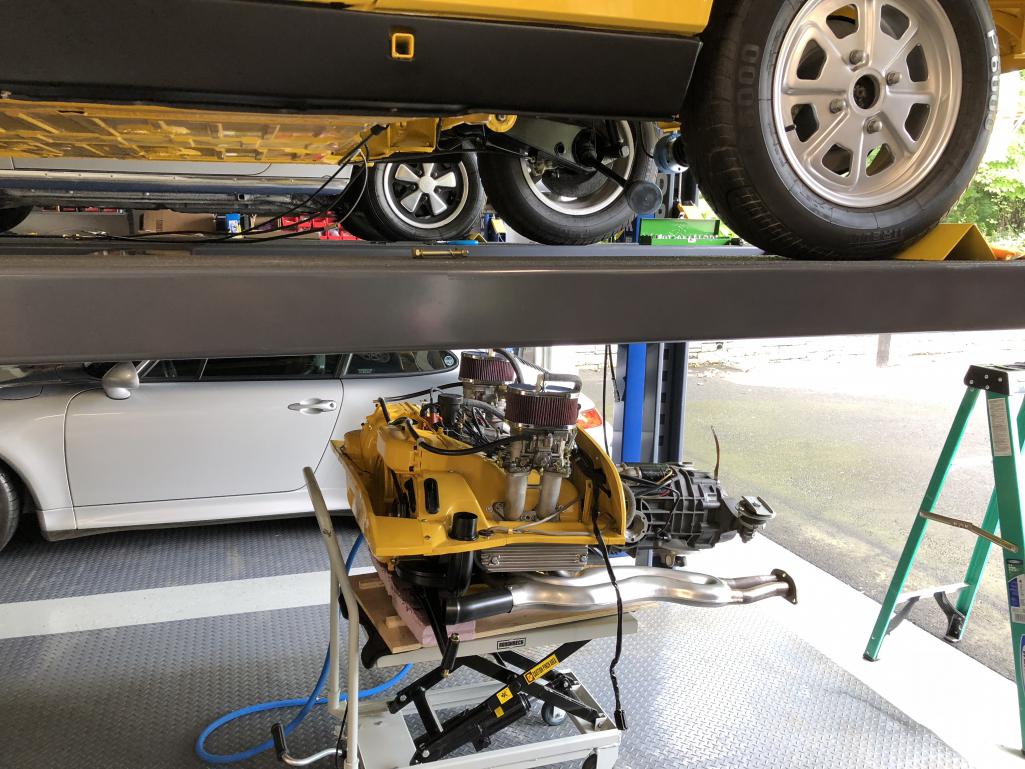
Posted by: simonjb Aug 18 2018, 03:17 PM
Posted by: simonjb Aug 18 2018, 03:19 PM

Posted by: raynekat Aug 18 2018, 07:27 PM
Super clean looking engine....super job!
Posted by: simonjb Aug 19 2018, 04:51 PM
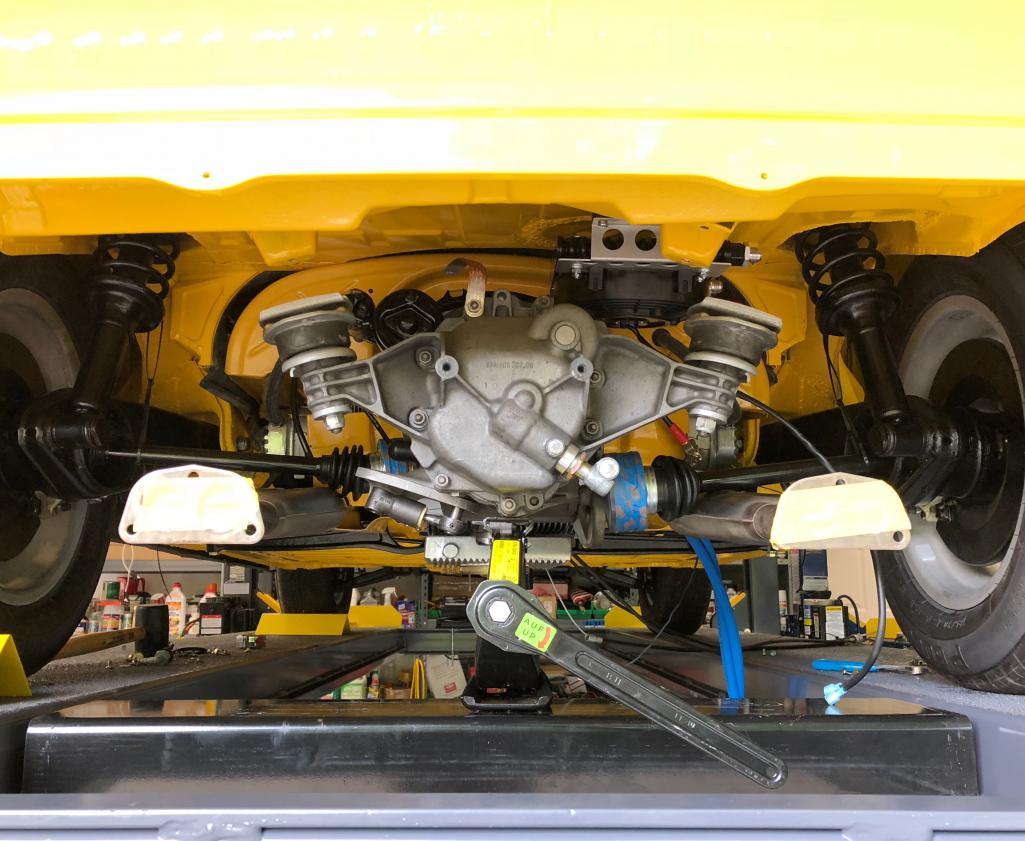
Engine now fully installed....connections up next.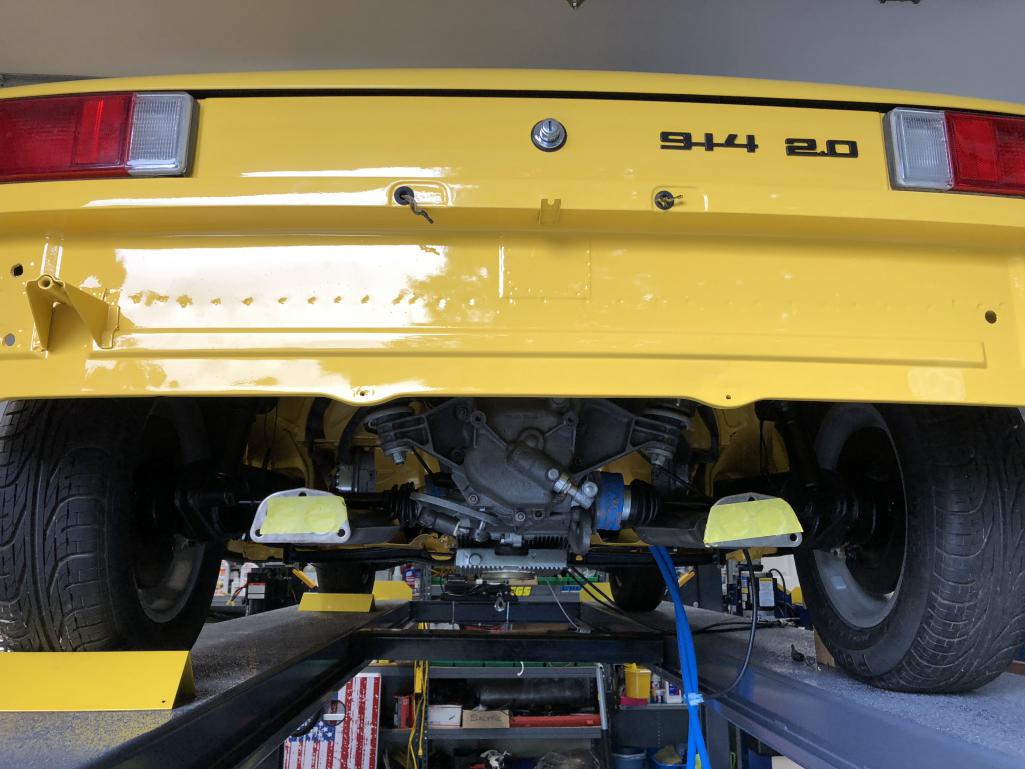
Posted by: simonjb Aug 19 2018, 04:51 PM
Posted by: Morph914 Aug 20 2018, 07:58 AM
Kudos to you for a fantastic build! I will be referring to it as I put mine back together. I will say that this is the perfect color to show off the detail of your great work. The contrast is great between the black and yellow, it would not have been the same on a darker color.
A couple of questions: are you running a return line to the the fuel tank? I didn't see one. Any issues with clearance on the oil cooler and engine? Will this be a fair weather car? I did not notice any undercoating. Forgive me if I have repeated any questions already asked, as I did not read all of the replies.
Cheers,
John
Posted by: simonjb Aug 20 2018, 05:08 PM
Kudos to you for a fantastic build! I will be referring to it as I put mine back together. I will say that this is the perfect color to show off the detail of your great work. The contrast is great between the black and yellow, it would not have been the same on a darker color.
A couple of questions: are you running a return line to the the fuel tank? I didn't see one. Any issues with clearance on the oil cooler and engine? Will this be a fair weather car? I did not notice any undercoating. Forgive me if I have repeated any questions already asked, as I did not read all of the replies.
Cheers,
John
Hi John,
It will be a fair weather car...hence I decided not to do any undercoating. Even though I measured 6 times, I managed to put the oil cooler such that a small part hits the edge of a nut on the transmission. So I'll have to move it slightly. Grrrr. No return line. I'll put one in if I re-install the original engine.
Thanks for the comments...
Posted by: simonjb Aug 22 2018, 02:32 PM
Hooked up the speedometer cable - was a bit short until I realized I needed to pull more through the tunnel 
Posted by: simonjb Aug 22 2018, 02:34 PM
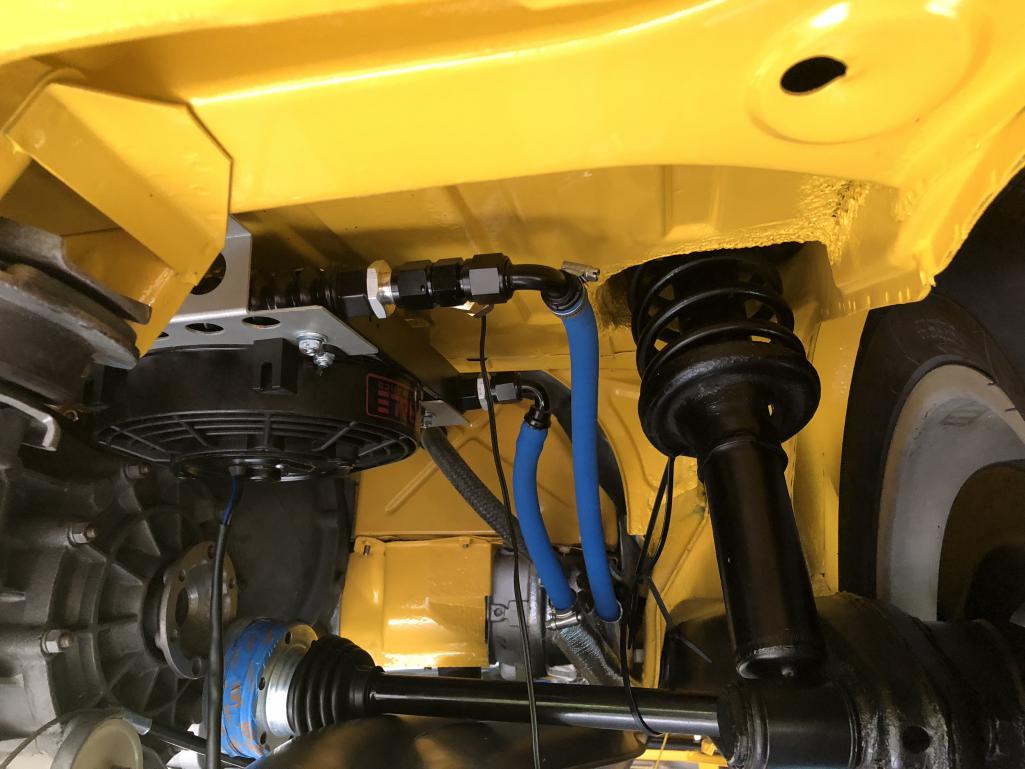
Ran the two blue lines for the oil cooler - any view on them resting on top of the heat exchangers? 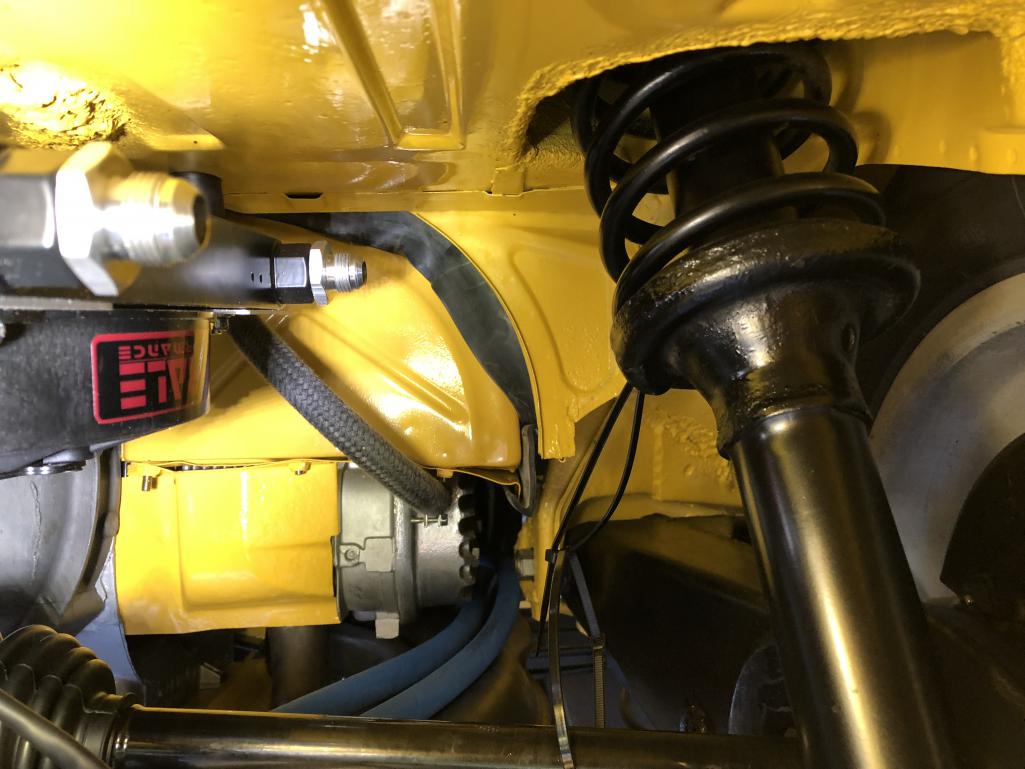
Posted by: simonjb Aug 22 2018, 02:36 PM
I think I’ve run all the wires and cables correctly. The throttle cable just runs up behind and through the rubber seal engine tin seal correct ?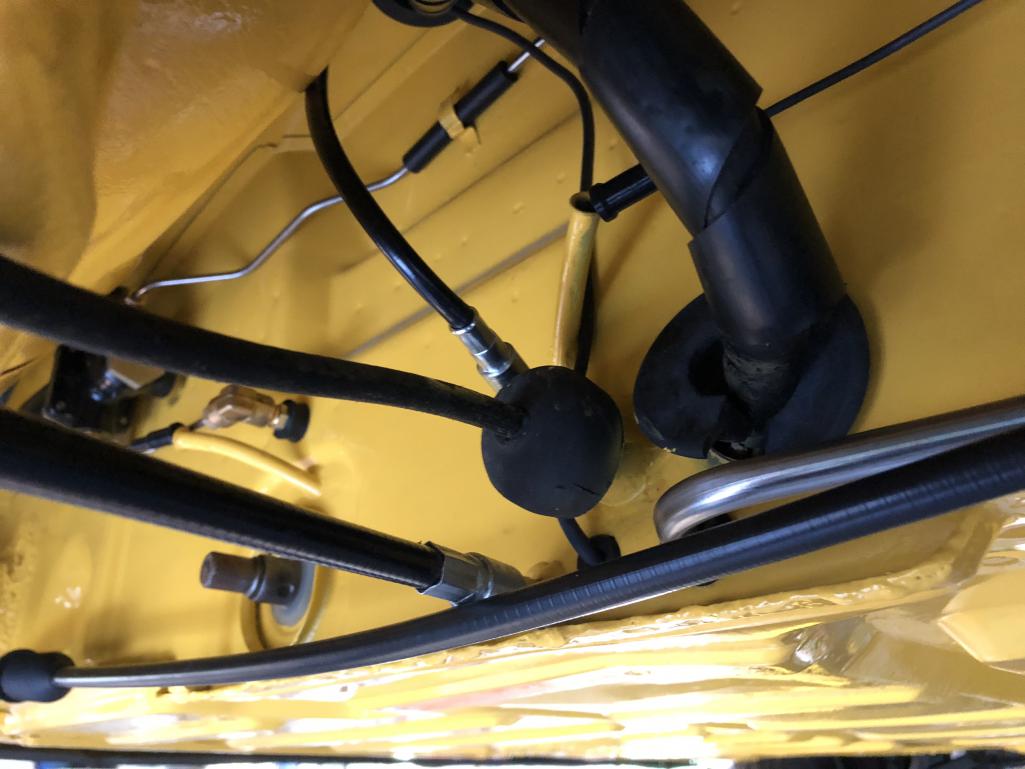
Posted by: simonjb Aug 22 2018, 02:38 PM
New taco plate installed and wired through to the connection.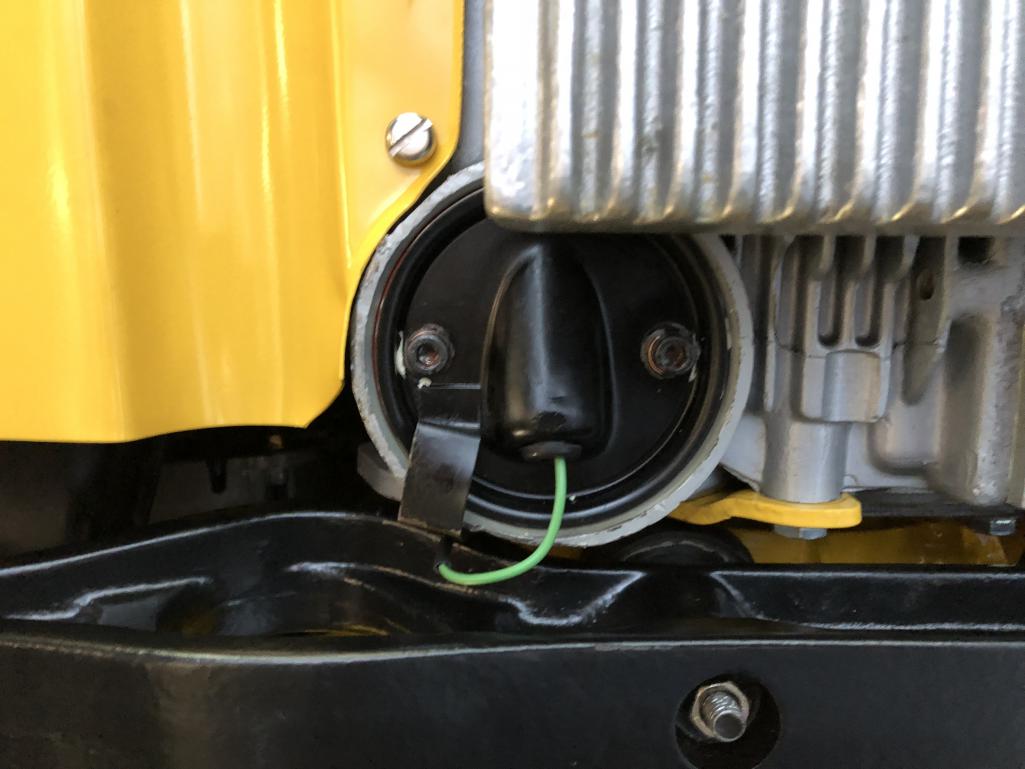
Posted by: defianty Aug 22 2018, 02:38 PM
All looking fantastic, such a great build.
If it were me I'd be looking to get those oil lines off of the heat exchangers, they do get hot.
Posted by: simonjb Aug 22 2018, 02:39 PM
Connected all the starter motor wires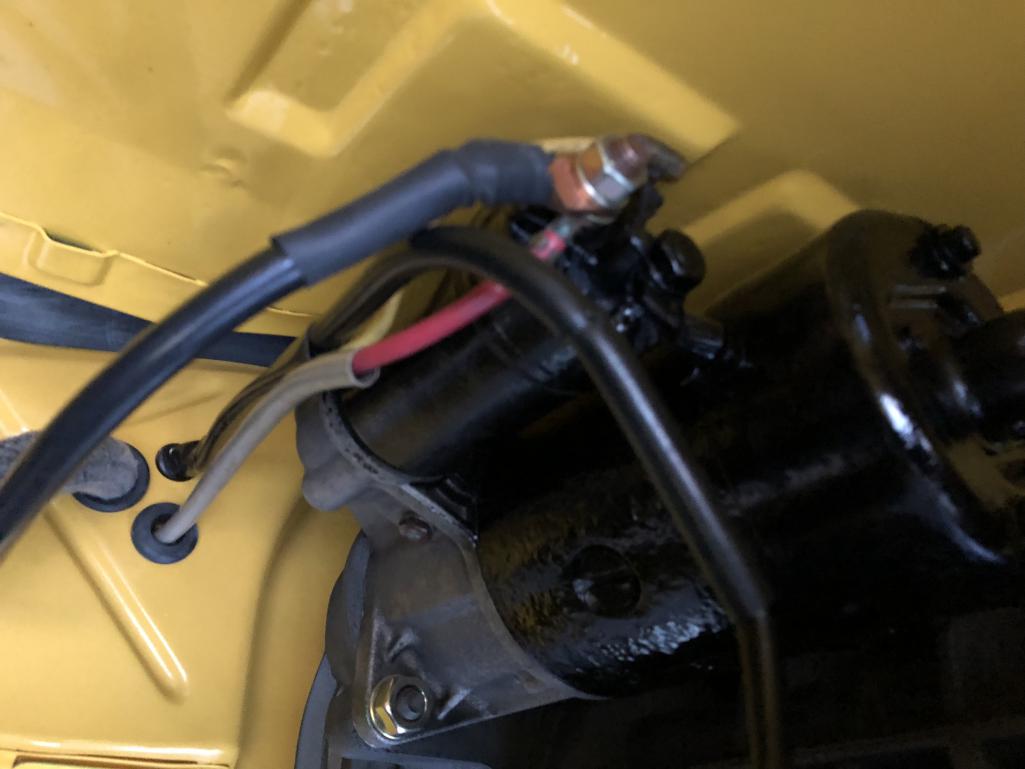
Posted by: simonjb Aug 22 2018, 02:41 PM
Engine oil and new filters ready for change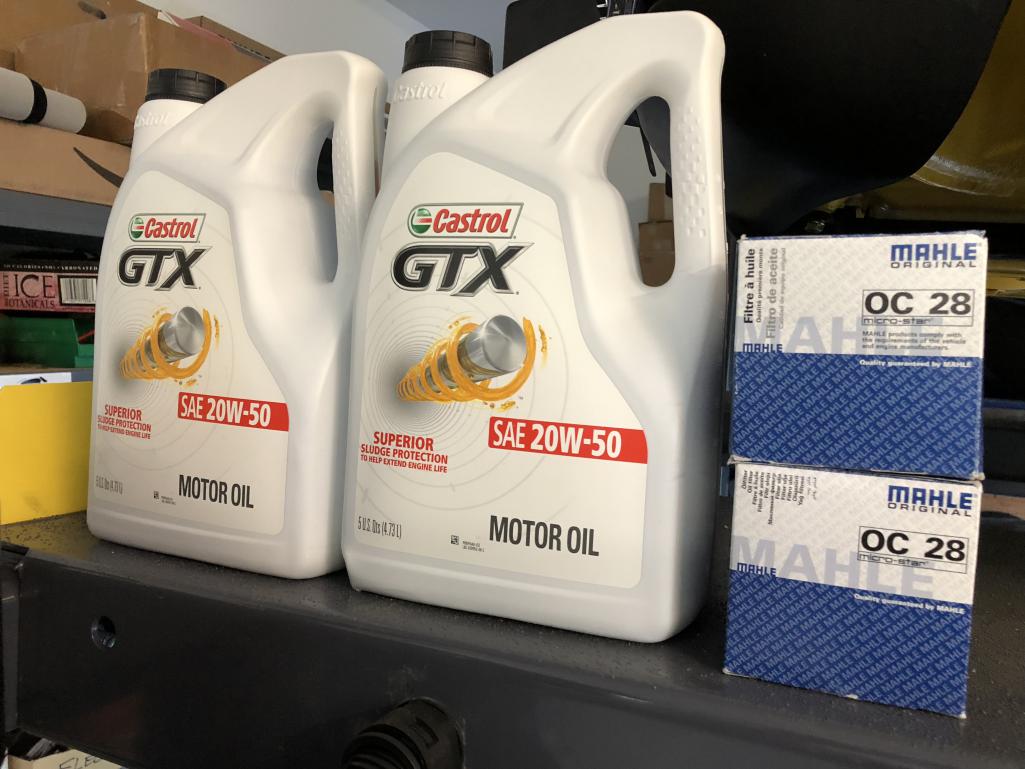
Posted by: bbrock Aug 22 2018, 03:38 PM
Connected all the starter motor wires
Finally caught you skimping on something!
 There is a rubber protector cap for the starter cable that is still available pretty cheap. Part # is 999-659-006-50. It will make your car run faster.
Looking great! Getting close to the big moment!
Posted by: Dion Aug 22 2018, 04:09 PM
Agree with Stephen. Get those oil lines off the exchangers.
I used a piece of scrap oil line cut open and tie wrapped that around the oil lines and found
a spot to suspend off exchanger. Again used stainless tie wraps.
I did this in my 2056 engine.
Car looks fantastic!
Posted by: simonjb Aug 22 2018, 07:54 PM
Connected all the starter motor wires
Finally caught you skimping on something!
There is a rubber protector cap for the starter cable that is still available pretty cheap. Part # is 999-659-006-50. It will make your car run faster. Looking great! Getting close to the big moment!
Ha! Yes, I actually have it and forgot to pull it out of the box and install. thanks !
Posted by: simonjb Aug 22 2018, 07:55 PM
Agree with Stephen. Get those oil lines off the exchangers.
I used a piece of scrap oil line cut open and tie wrapped that around the oil lines and found
a spot to suspend off exchanger. Again used stainless tie wraps.
I did this in my 2056 engine.
Car looks fantastic!
Good idea. Thanks guys
Posted by: simonjb Aug 23 2018, 03:08 PM
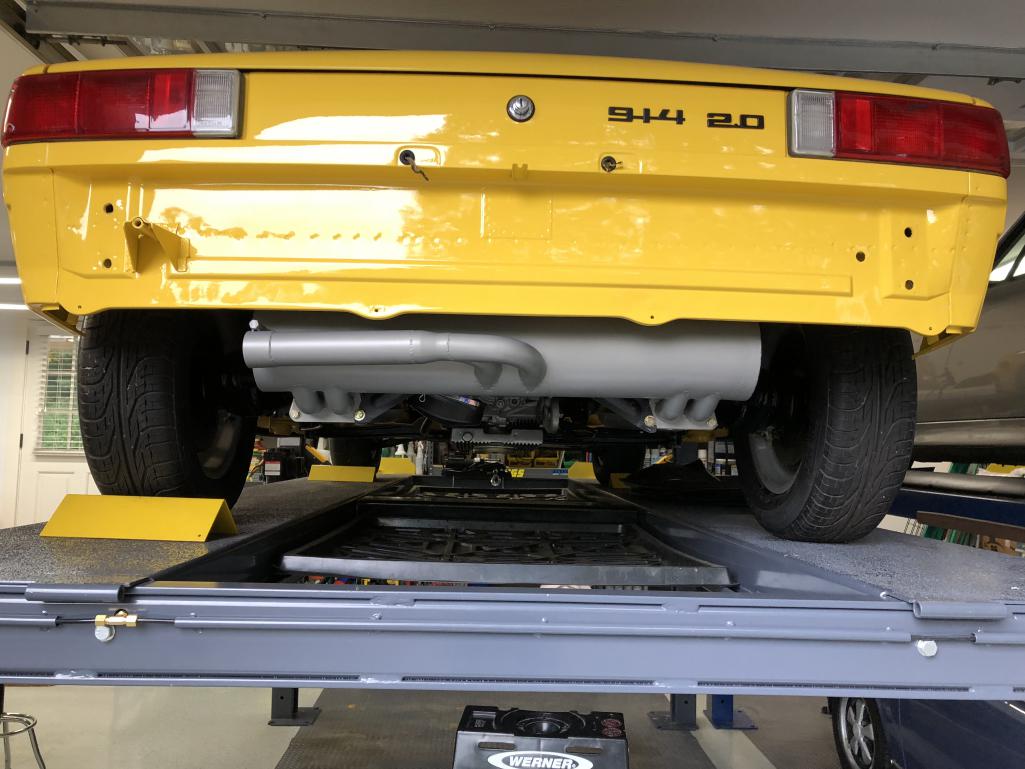
Getting ready to install the new Tangerine muffler !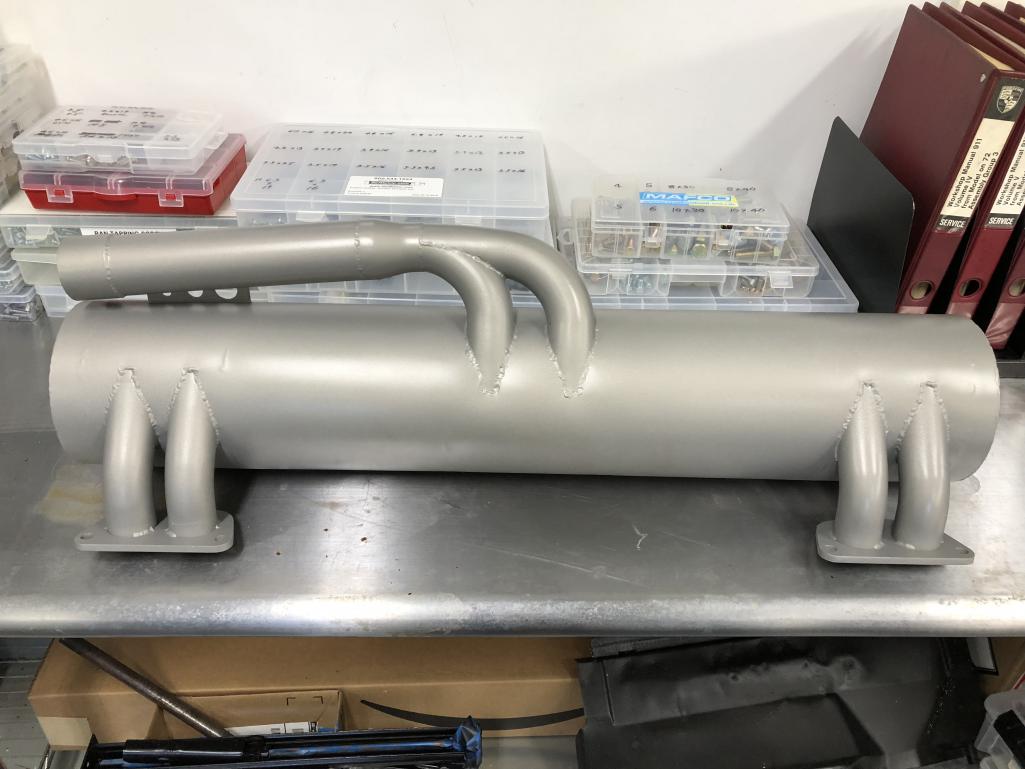
Posted by: simonjb Aug 26 2018, 06:11 PM
Almost finished the install of the oil cooler. A bit of work left.
.
Posted by: simonjb Aug 27 2018, 04:30 PM
So, after doing all the plumbing on the oil cooler I decided that the Blue color just didn't look right and converted it to black. I know this is one of the very few non original parts, but black just looked better. It just annoyed me. I also wrapped the hoses in heat shield material and tied them up off the exchangers with a metal clip. Now I just need to do the electrical hook ups. I put an inline temp unit that will send the temp to the controller.
Posted by: bbrock Aug 28 2018, 12:01 PM
So, after doing all the plumbing on the oil cooler I decided that the Blue color just didn't look right and converted it to black. I know this is one of the very few non original parts, but black just looked better. It just annoyed me. I also wrapped the hoses in heat shield material and tied them up off the exchangers with a metal clip. Now I just need to do the electrical hook ups. I put an inline temp unit that will send the temp to the controller.
I would have done the same. It looks like it belongs there now.
Posted by: Porschef Aug 28 2018, 06:05 PM
You are really going to like that exhaust...
Posted by: simonjb Aug 31 2018, 02:22 PM
Some more progress...CSP linkages and new Hats from914rubber...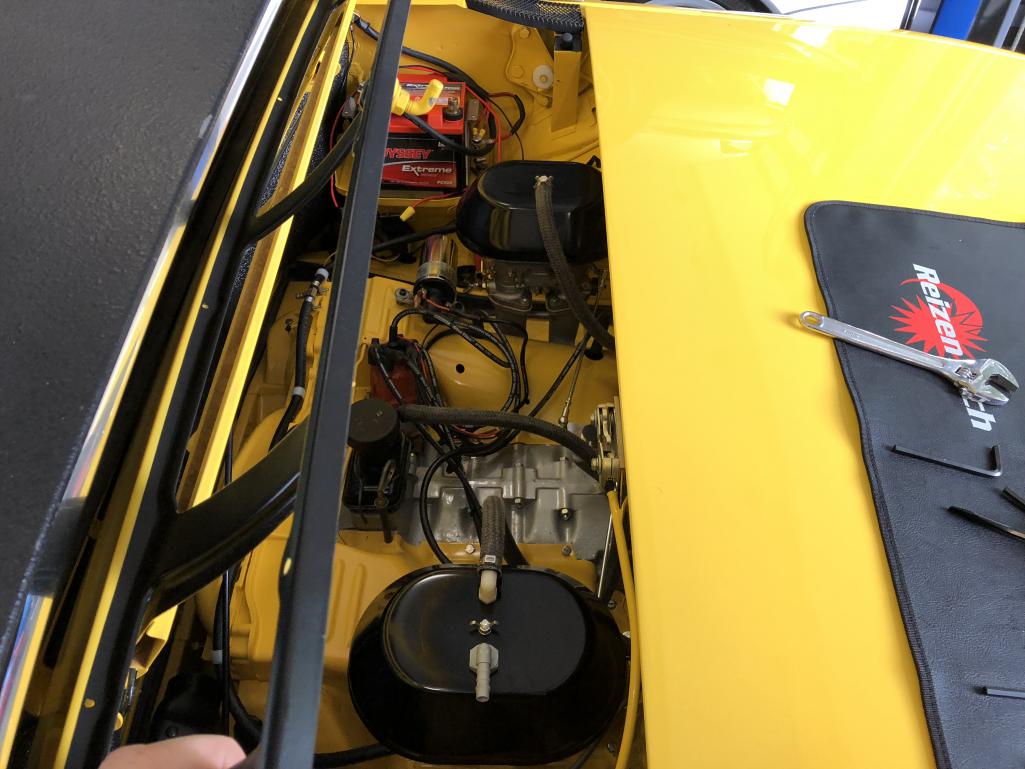
Posted by: simonjb Aug 31 2018, 02:24 PM
Posted by: simonjb Aug 31 2018, 02:26 PM
Connected up the CSP linkage 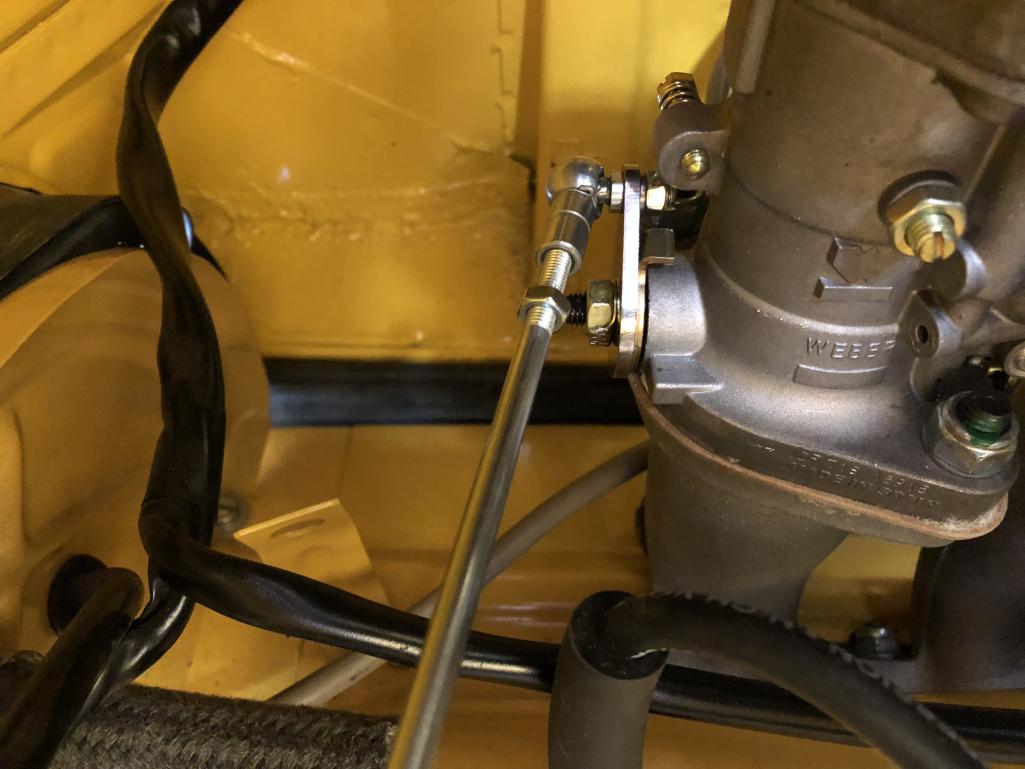
Posted by: raynekat Aug 31 2018, 03:43 PM
Very nice and clean and tidy.
Makes a huge difference when all the details are "detailed."
Looking great.
Posted by: simonjb Aug 31 2018, 05:47 PM
Very nice and clean and tidy.
Makes a huge difference when all the details are "detailed."
Looking great.
Thanks...not long before I fire her up...
Posted by: simonjb Sep 30 2018, 06:41 PM
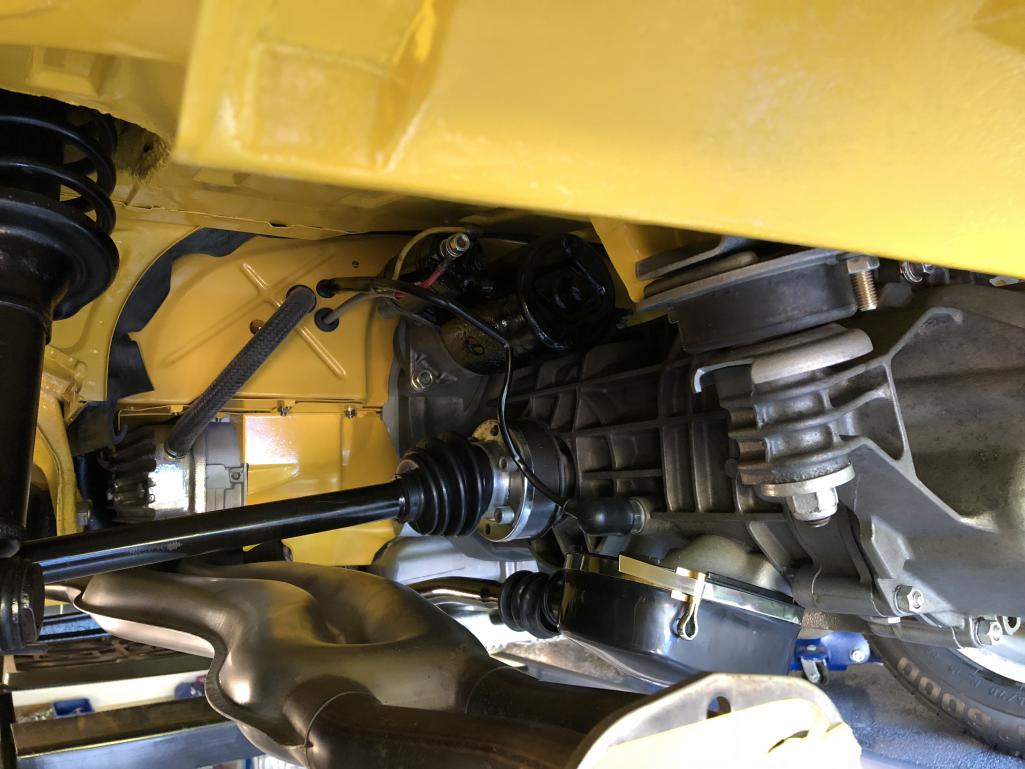
It’s been a bit slow as I’ve been working in the yard and enjoying the outside...but I got back into it today...clutch cable and shifter and connecting the drive shafts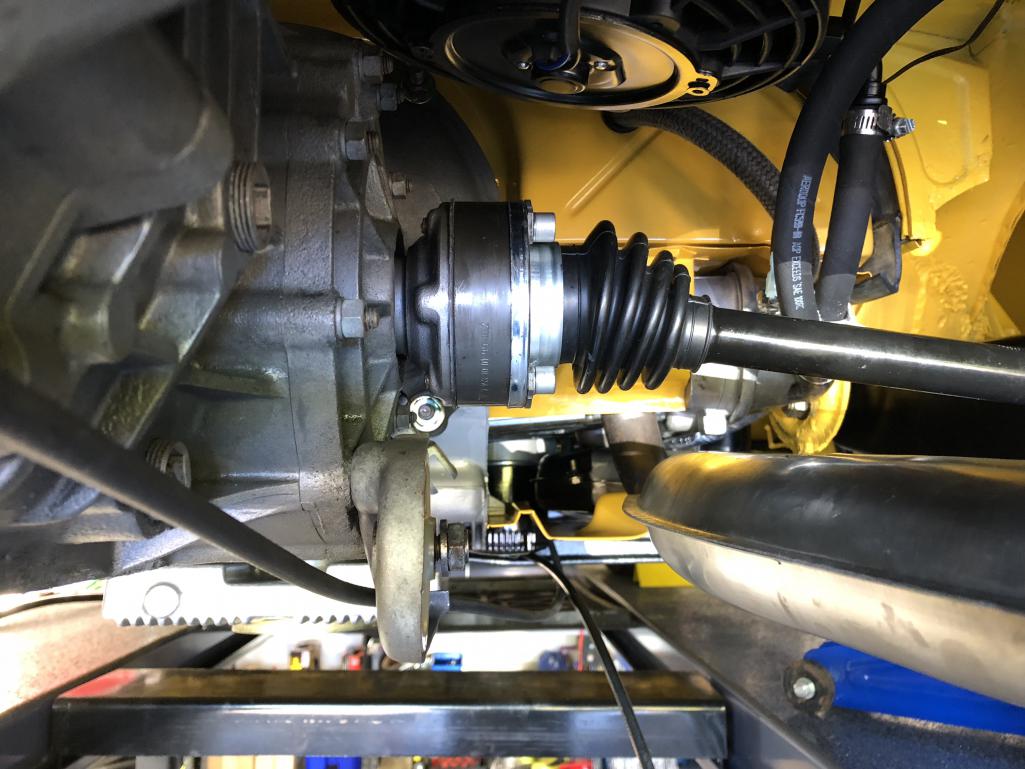
Posted by: simonjb Sep 30 2018, 06:43 PM

Posted by: simonjb Sep 30 2018, 06:44 PM
Posted by: simonjb Sep 30 2018, 06:44 PM
Posted by: simonjb Sep 30 2018, 06:47 PM
Contrasting styles....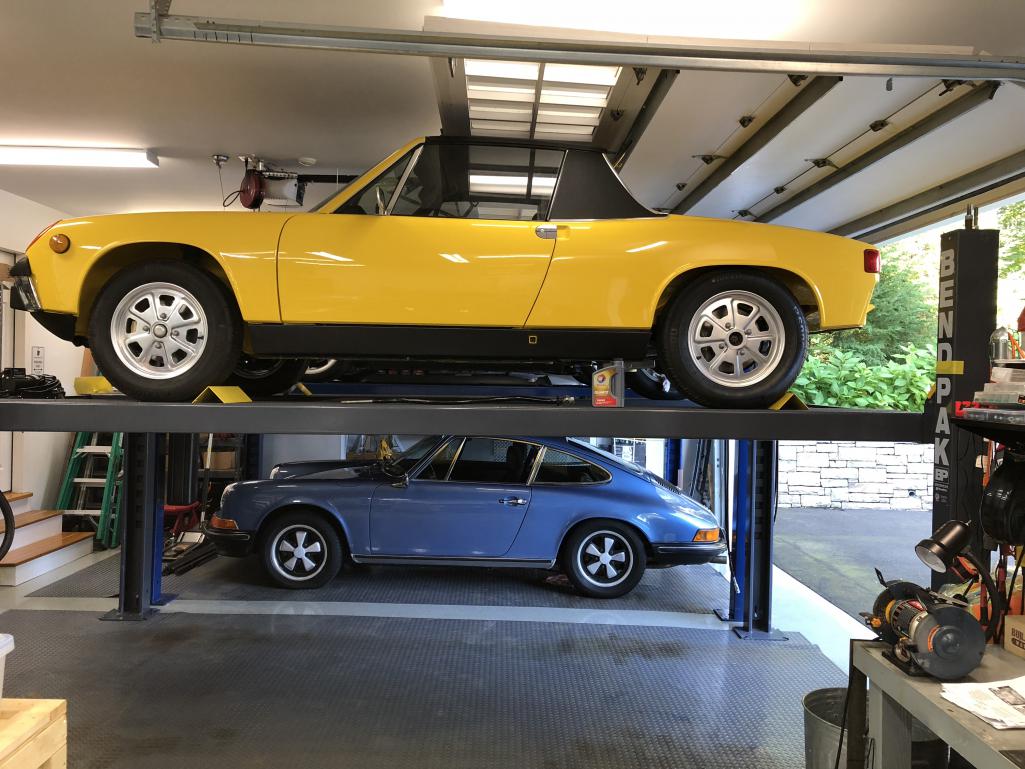
Posted by: cuddy_k Sep 30 2018, 06:59 PM
Looking great!
Posted by: DRPHIL914 Sep 30 2018, 07:43 PM
so clean, looking great!!
Posted by: simonjb Oct 6 2018, 01:50 PM
Posted by: trojanhorsepower Dec 19 2018, 05:30 PM
Boy, I needed this thread. Question: Did the clear lines for the master cylinder go all the way to the reservoir, or just well up into the rubber tubing? Also how did you shape the lines so they would keep those bends?
Thanks
Peter
Posted by: JOEPROPER Jan 16 2019, 03:29 PM
Wondering what happened next. ![popcorn[1].gif](style_emoticons/default/popcorn[1].gif)
Posted by: Cairo94507 Jan 16 2019, 05:02 PM
Seriously nice build.
Posted by: Freezin 914 Jan 16 2019, 05:24 PM
Like everyone, sooo very jealous! Keep up the inspiring work! Cheers!
Posted by: aggiezig Jan 18 2020, 11:28 AM
Is she roadworthy? You were so close in your last post, I have to assume so...
Posted by: Rikyrat Feb 10 2020, 03:54 PM
This is the watermark we should all be shooting for in the engine compartment.
I was amazed how long it took me to mask it all off. I discovered a neat trick for masking the all the wiring, and that was to use aluminum foil, it molds around the wire like nobody's biz.
I like the way you did the fuel pump and filter. I wondered if that would fit, along with the engine, so I am going to go out right now and install mine.
I am in the midst of installing a complete mega squirt injection system from the dub shop.
Thanks for the excellent post
Powered by Invision Power Board (http://www.invisionboard.com)
© Invision Power Services (http://www.invisionpower.com)