Printable Version of Topic
Click here to view this topic in its original format
914World.com _ 914World Garage _ triple progress
Posted by: worn Mar 28 2018, 10:47 AM
I was hoping to have this put together but had an argument with a bag of concrete mix and now I have either a herniated disc or a stress fracture. L4 - my favorite. So, it is all I can do to sit at the computer for a half hour. I still am hoping to do WCR, but that is 4,000 miles for me in a 914. Heal faster 
Anyway here is what we got:
Started with the dies from an earlier attempt. Smooth out the old and mill the new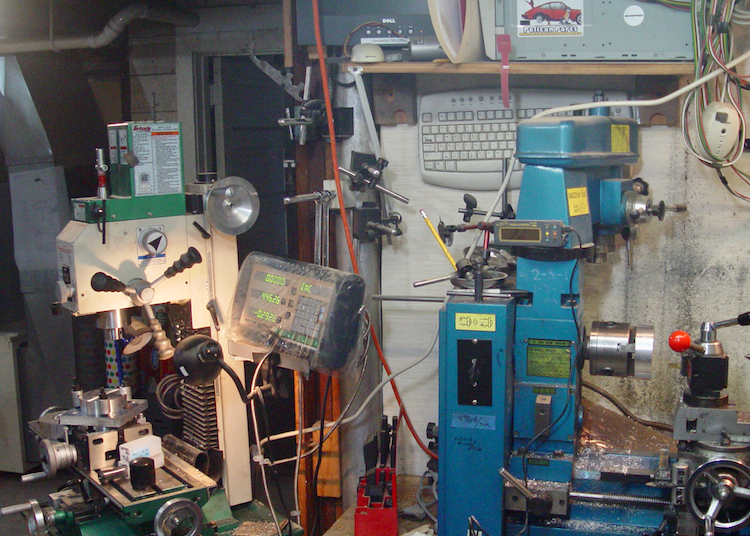
I bought a rotating table and the mill for this project. Well and other things too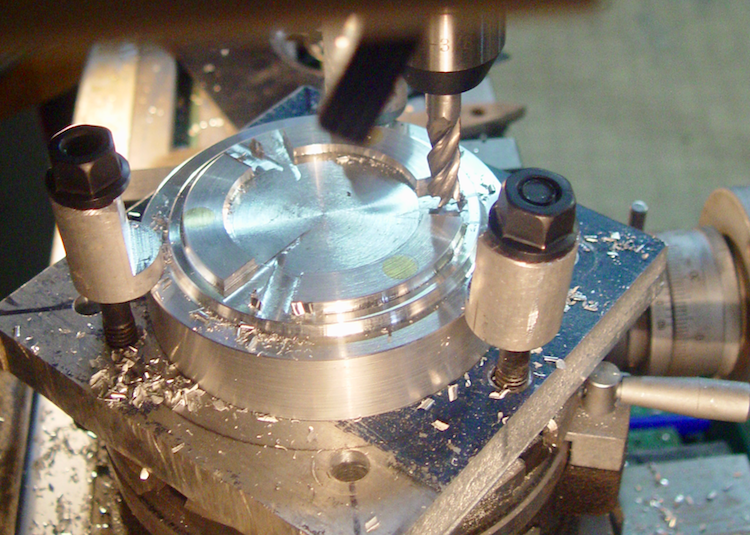
First step was making the clamps.
I also made a punch so the I can start with the holes for lights and maintain registration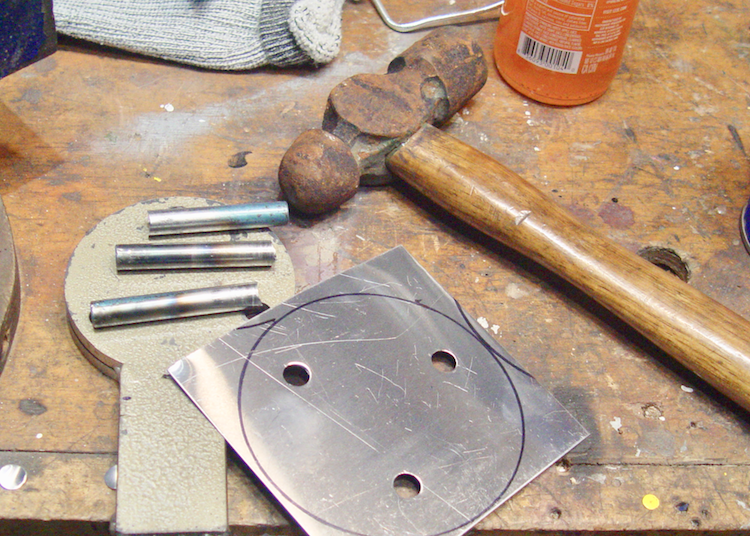
That gives me this: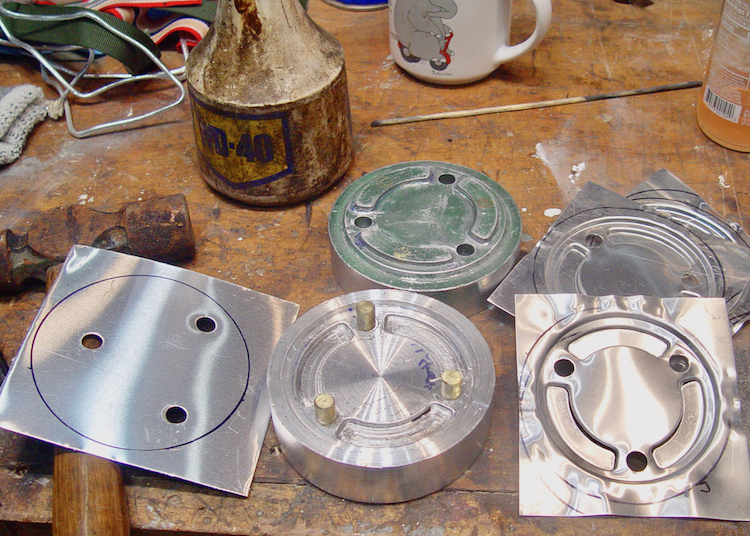
Ready to press. I spent a lot of time setting things up for a pin router to cut out the gauge windows, but that didn't work out. So I have the dies and the sheet ready to form.
Posted by: 914Sixer Mar 28 2018, 10:57 AM
Sweet !
Posted by: worn Mar 28 2018, 10:59 AM
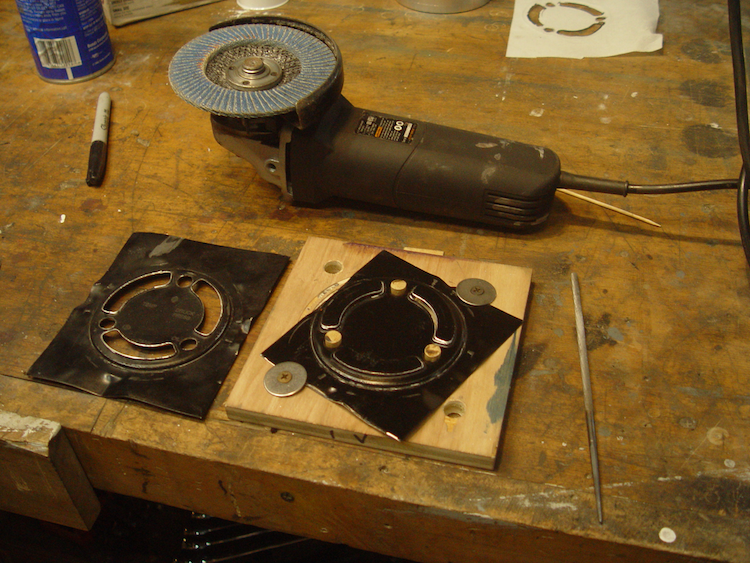
From there it is a matter of opening the window sectors so the gauges show through. As it turns out, the dies do a partial cut. That is a help, but it is a bit ragged, so I finished the job with an angle grinder. harbor Freight sold this to me for $10. I have always been spooked by that, but now I have close to a dozen so I don't have to change grinding wheels for different jobs. I digress.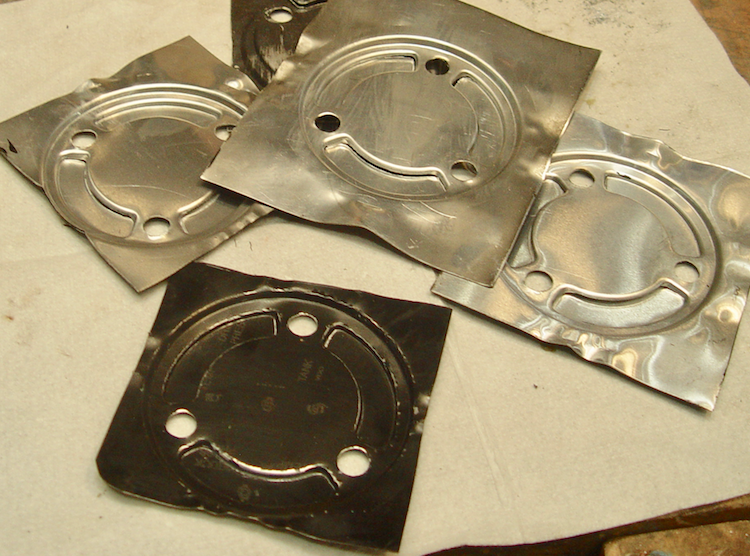
I spent several weeks trying to engrave through black paint with a laser. 2 and a half watts will set paper on fire, but don't do the job I wanted. BTW I hate Rustoleum. The master of lifting on the second coat.
Made back plates. Thanks Stephen! Also, this one uses the newer plug back fuel gauge, and I am going to use LED strip lighting, so the back is kind of different. Soldering on the light holders.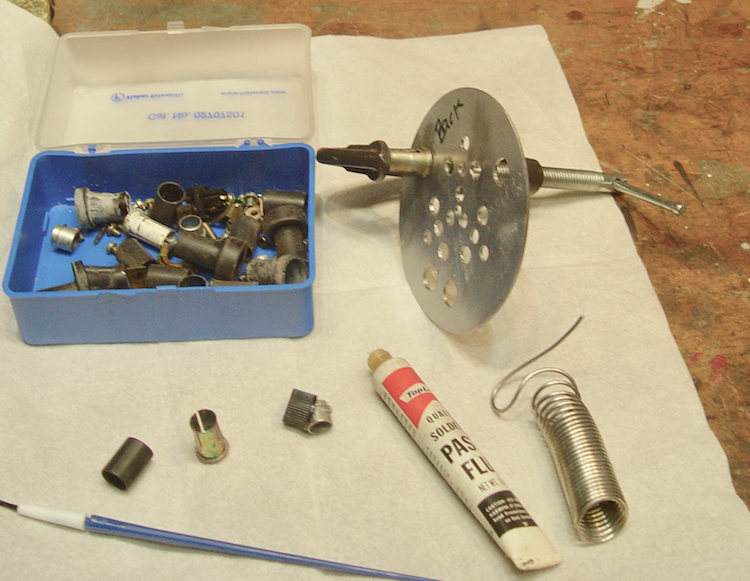
I wanted to match the old warning light look, so went with acrylic rod 10mm or 3/8 in. The light guides are carbon fiber tubes used for making model aircraft.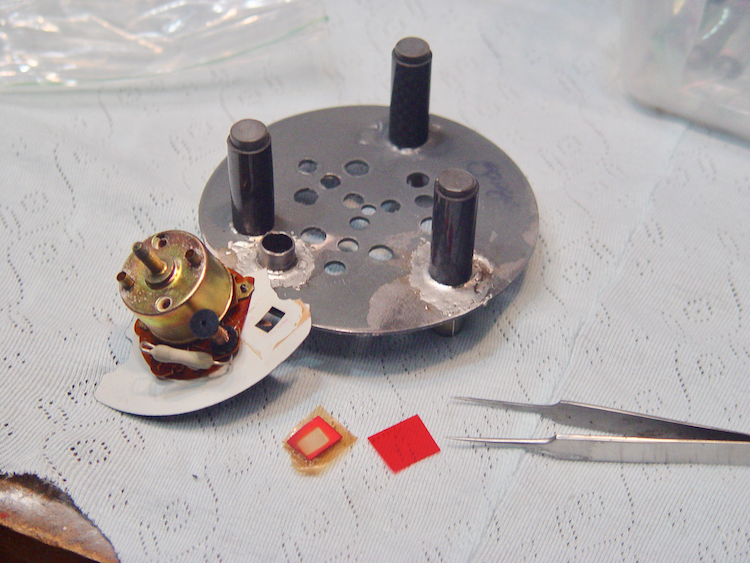
Carbon Fiber gauges!  such fun. Not really a cool factor, as cardboard would also do. I am going to use titanium white paint to seal the screws on the back. Whooo. Titanium.
Posted by: worn Mar 28 2018, 11:05 AM
So now it is a matter of assembly.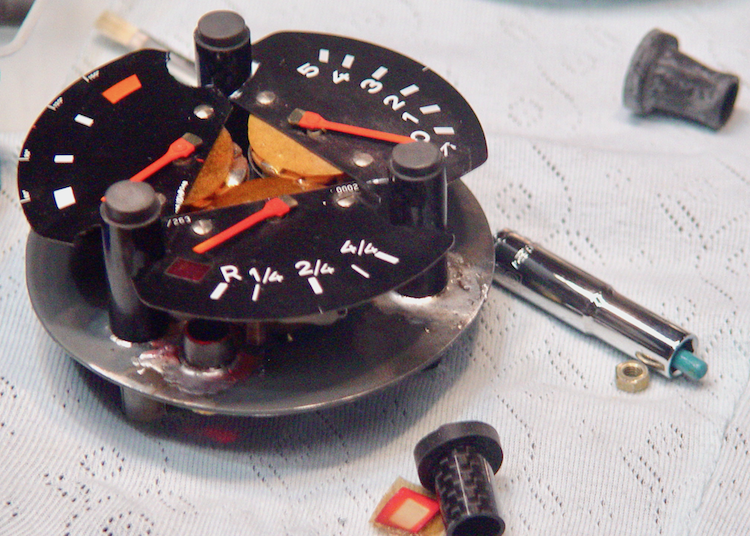
I decided to wrap the LED strip instead of attaching the strip to the can. I will report on that layer. I used a sheet of acetate film to insulate the back. Not shown here but it outgo handle any heat since it goes through the laser printer.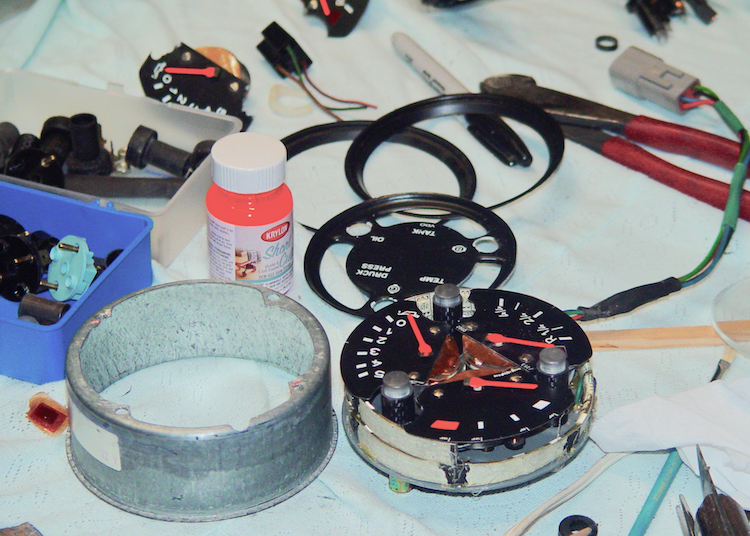
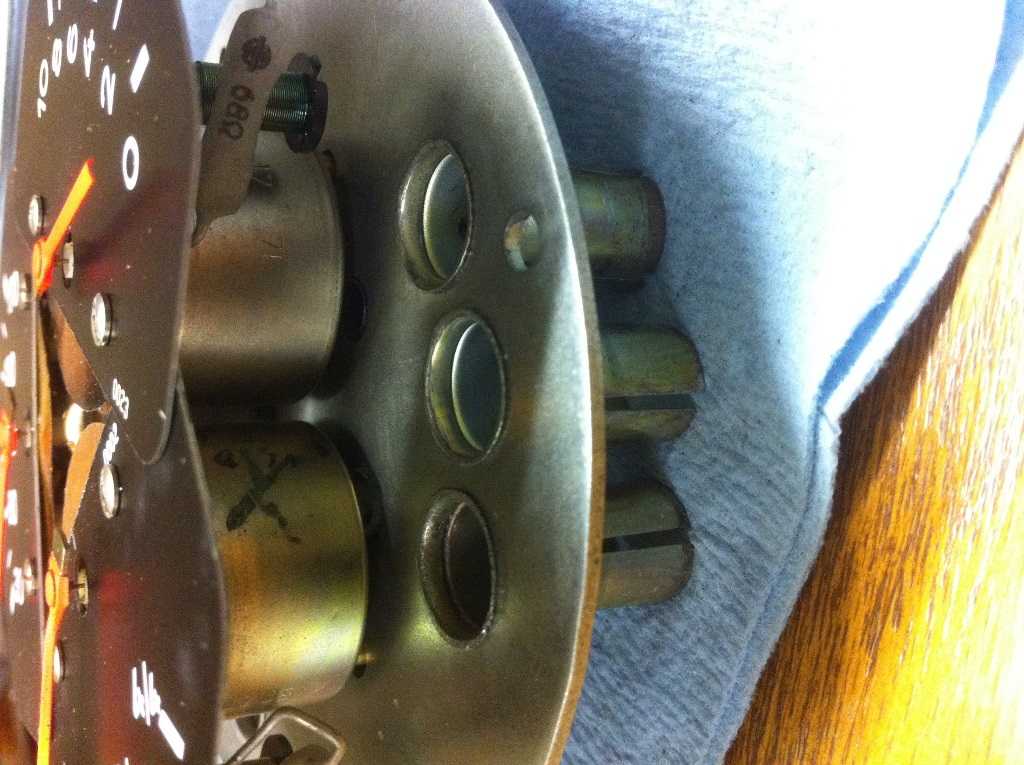
I cracked some of the paint on the face in the background above, so the next photo shows a blank face, and you can see that the warning lights look like the 914 style, but of course they could also be like the donor 911 gauge at right.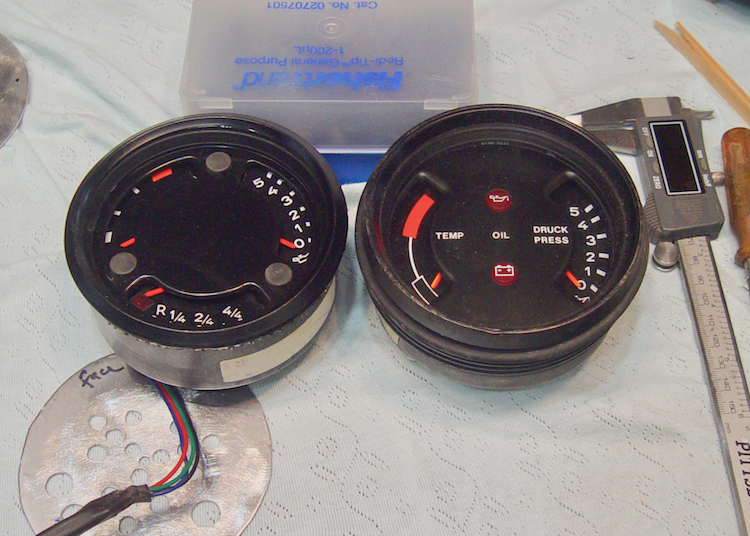
Posted by: worn Mar 28 2018, 11:40 AM
The light guides hold the face off the gauges, and the inner glass bezel holds the new face down against the light guides, so it is mechanically anchored. I decided to make the back plate slide into the can from above rather than screw on from the back. In the original the hole in the back is big enough to get the gauges out without opening the front. That works for two gauges, but not for three. There isn't enough room.
I have acquired enough gauge parts for say a half a dozen more of these. I have them safely on a shelf so that the hoarders cannot get them. I would like to make some of these for people to take advantage of the tooling and experience. Sort of a shame to make just one. But I don't need a business nor do I want to charge for my time. Not sure if anyone wants them either. Kinda of a specialty item. There are other sources. My idea was to make something that looks like it would have been made back then. Trying to explain to my wife that there is no real triple gauge for a 914. The real gauges would have looked out of place I think.
Posted by: gothspeed Mar 28 2018, 01:14 PM
Amazing work!! 
Posted by: mepstein Mar 28 2018, 01:47 PM
We used to call it a 904 gauge
Attached image(s)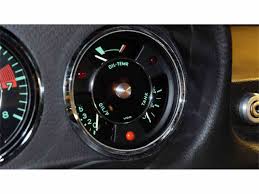
Posted by: 914forme Mar 28 2018, 03:40 PM
Your Welcome, sorry to hear about the back issues.
Posted by: worn Mar 28 2018, 03:52 PM

We used to call it a 904 gauge
That’s what I mean. Great if you have one, but it still doesn’t match the 914 gauges. I suppose with anything 904, you trade a car for the gauge in dollars. Or were they available at one time?
Posted by: worn Mar 28 2018, 03:54 PM
Your Welcome, sorry to hear about the back issues.
Thanks Stephen! I should have paid more attention to your signature line. Boring waiting to heal. But at least I expect to.
Posted by: John Mar 29 2018, 06:54 AM
Good progress!
I tried soldering the tubes onto the backplate, but I learned a way to remove donor light tubes and re-crimp them onto my modified backplate. They come out nice.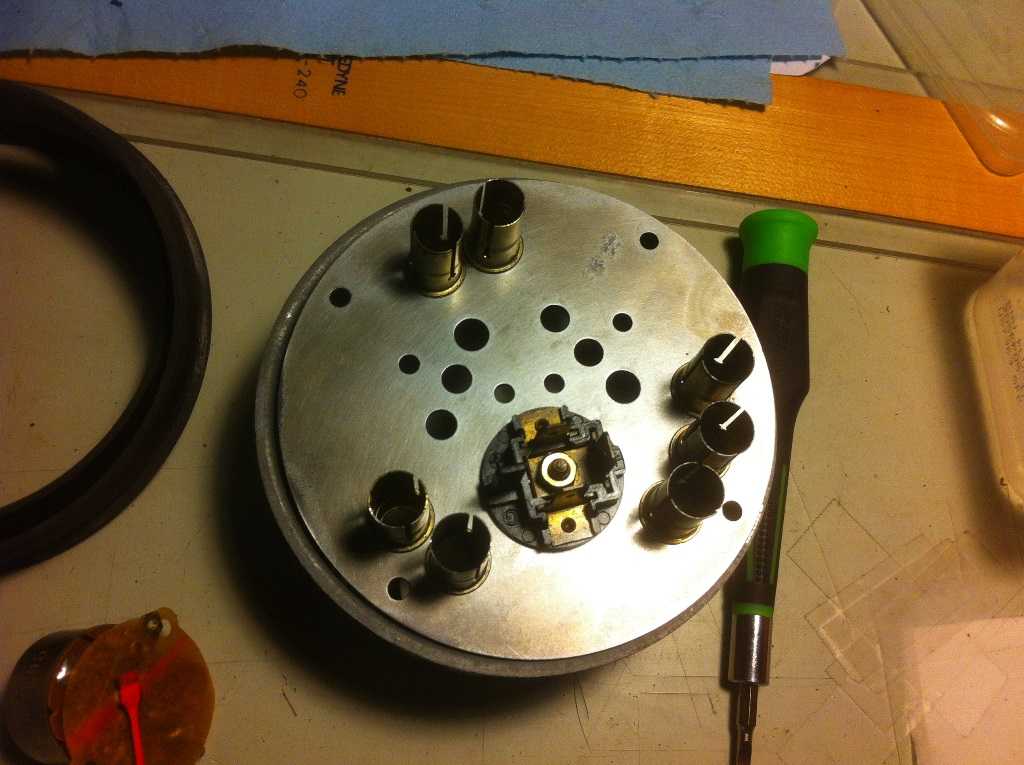
Posted by: worn Mar 29 2018, 09:43 AM
Good progress!
I tried soldering the tubes onto the backplate, but I learned a way to remove donor light tubes and re-crimp them onto my modified backplate. They come out nice.
They do look nice indeed! I have been using a chamfering bit to drill out some of the metal on the tubes and then pull them out. How do you do it? The solder should help if a ground is needed, but yours look really good. Also soldering makes it so you can't use aluminum for the back plate, but crimping would make that work fine.
Posted by: John Mar 29 2018, 10:23 AM
It takes a little more time to remove the bulb holders, but what I do is to cut the original baking plates close to the holders and then carefully break out the bulb holders. Once separated from the old destroyed backing plates, I insert a close fitting mandrel into the bulb holder and remove the original crimp from the bulb holders.
Then I simply insert the straightened out bulb holders into my new backing plates and re-crimp.
What I use for a crimp is a home made tubular mandrel that the main bodies of the bulb holders fit into, then I expand the tail of the bulb holder with an appropriately shaped tool like a small 1/4" socket. This re-creates the crimped bulb holder into the backing plate.
My backing plates are zinc plated steel similar in thickness to the original backing plates.
I know the time I save by not soldering the tubes makes up for the extra time it takes to harvest the bulb holders from the donor gauge backing plates.
I looked back at my timeline, and I guess I have been making my version of these things for close to 12 years. I never did inventory complete kits since everyone wants different things.
Posted by: worn Apr 3 2018, 10:02 AM
Well, closing in on the first one that will go into my six conversion car.
The light tubes are clear, so color filters are added. This allows more customization. Colored LEDs are possible for the brake and oil pressure lights, but the generator bulb must be at least 2 watts to get the alternator windings fields started.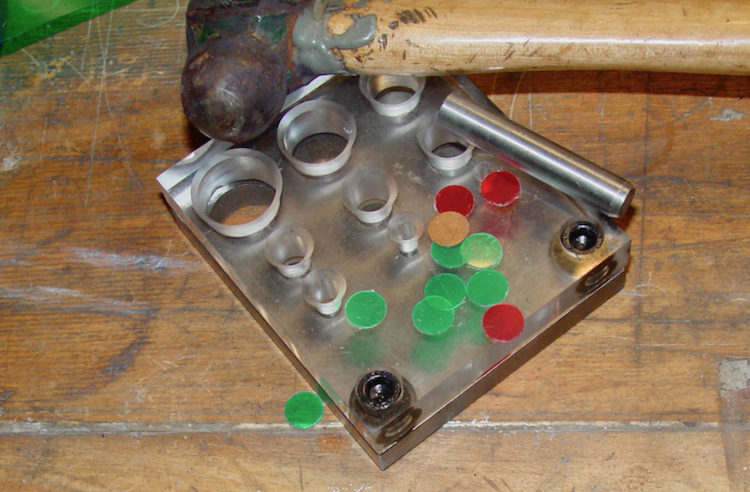
Then put together with a face that has lettering at last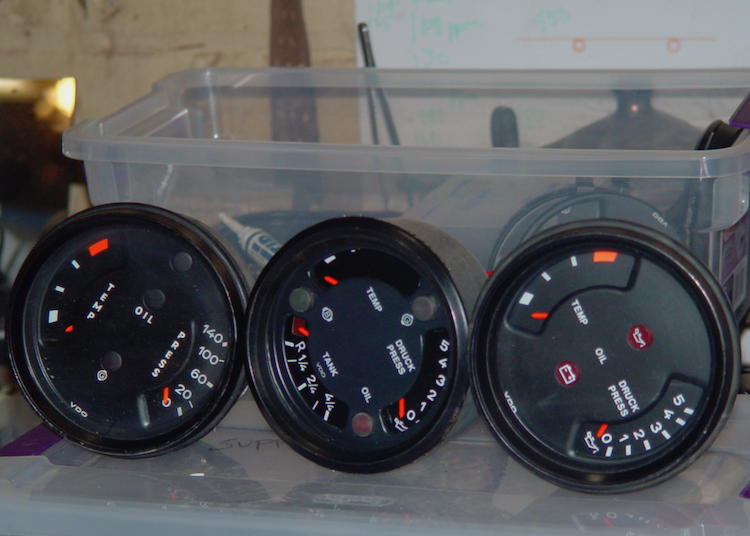
Note that on either side are original 911 gauges. The earlier ones had "Temp" and "Press" in vertical lettering, while the later style is what I copied. The earlier warning lights match what the 914s came with, so I am going with that style light, although mine are solid acrylic instead of the original thin color filters.
I am curious what people think. Which lettering style and which warning light style looks better.
Time to light them up. I made a mistake and put the green filter for the brake warning and the red for oil pressure.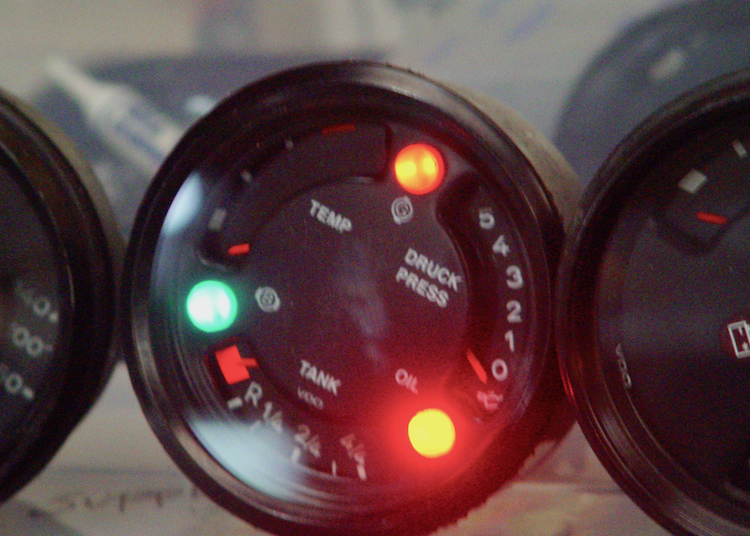
I decided to match the red filter with a red LED wedge bulb. That is why it is brighter. Also, I moved the oil pressure warning light to the right hand spot. I am average height, and for me that spot is the most visible, and catches the eye better. You see the other spots, but they are behind the steering wheel a lot of the time.
Here is how it looks with a flash photograph. In person they are all bright in daylight.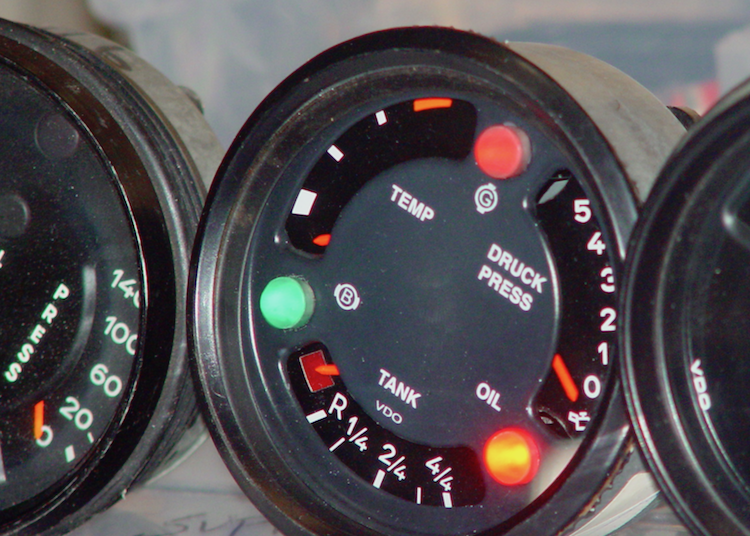
Posted by: gereed75 Apr 3 2018, 10:14 AM
Very well done! What did you ultimately use for lettering?
Posted by: Mueller Apr 3 2018, 11:23 AM
You sir are a genius! Great work....
Posted by: Dr Evil Apr 3 2018, 01:13 PM
Fantastic!
Posted by: mb911 Apr 3 2018, 03:29 PM
Wow I want one of those. Nice job.
Posted by: worn Apr 3 2018, 06:29 PM
Very well done! What did you ultimately use for lettering?
I used a system made by decal pro fx. Hard to learn the system, which hs numerous steps where one can fail. On the other hand I can make anything that comes out of a laser printer. That is one reason I am asking for which styles people like. Ultimately I would like to offer a kit for people who want it. All three of them.
Posted by: 914forme Apr 3 2018, 06:36 PM
Great Job, and you know I am on that list as it takes this gauge and completes it in my eyes. Does about everything I ever wanted and wished to do with the 904 gauges. LOL I am willing to build my own though, it is not like I don't have the skills.
And yes the Decal Fx stuff is a pain, once you have it down you can label about anything as long as you can design it and print it on the laser.
As far as style  Keep it with Druck, is that what your asking I also prefer the oil pressure in real numbers, and the temp in numbers. http://newvintageusallc.mybigcommerce.com/911-oil-temperature-pressure-module-overlays/
In the instructions I used to send out with the kit it had the faces done. Quality was a bit crappy but, you can use them as a template to get your design done.
Posted by: John Apr 4 2018, 12:24 PM
They do look nice with rotated numbers.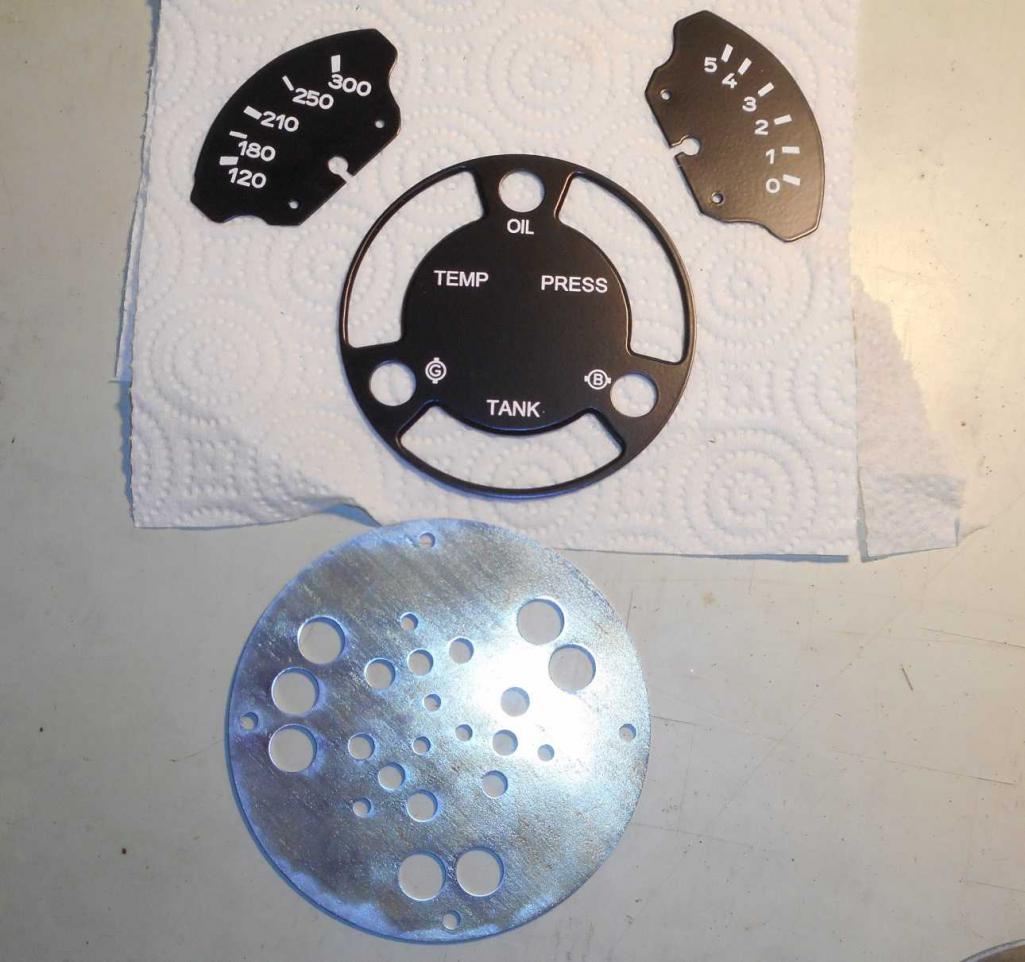
Posted by: worn Apr 4 2018, 04:46 PM
Great Job,
and you know I am on that list as it takes this gauge and completes it in my eyes. Does about everything I ever wanted and wished to do with the 904 gauges. LOL I am willing to build my own though, it is not like I don't have the skills.And yes the Decal Fx stuff is a pain, once you have it down you can label about anything as long as you can design it and print it on the laser.
As far as style
Keep it with Druck, is that what your asking I also prefer the oil pressure in real numbers, and the temp in numbers. http://newvintageusallc.mybigcommerce.com/911-oil-temperature-pressure-module-overlays/In the instructions I used to send out with the kit it had the faces done. Quality was a bit crappy but, you can use them as a template to get your design done.
Wow Stephen, you know everything. Yeah, I was asking folks whether they liked the druck or the vertical letters best, and whether they liked the old plain warning light style or the ones with the molded symbols. Most donor gauges would provide the red plastic dots.
Thanks for the link to New Vintage South. Good to know. Nice to see the oil pressure mount and stay there. I agree the numbers are nice.
Learned a bit more about DecalPro. It is easier to apply adhesive to the face than to the letters. For those who haven’t had the pleasure, the system has fantastic features and versatility. But imagine nailing a butterfly wing to the wall with a drywall screw trying not to damage wing or wall. Mylar sticking to everything because of static charge, etc. fortunately, I have two 914s, so I am used to frustrating work.
Posted by: worn Apr 4 2018, 04:48 PM
They do look nice with rotated numbers.
They do indeed. Kind of inspiring don’t you think.
Posted by: djway Apr 4 2018, 10:11 PM
Nice work.
Being able to machine metal sure opens up a world of possibilities.
In the past I made decals all the time using an ALPS printer and creating what I wanted in Photoshop or other programs. I built scale autos and made the graphics into decals.
They quit making the printer and the inks (white, gold and silver foil to name a few) and it became too difficult to continue but it was fun while it lasted.
I prefer the vertical lettering and numbers as it seems to follow the flow of the face plate.
I look forward to seeing the kit.
Posted by: RickS Apr 4 2018, 11:15 PM
You have mad skills sir. Very nice work.
Sorry to hear about your back. Hopefully you will get back some or most of your functionality. Screwed mine up two years ago and it very slowly gets better but you have to be patient and do your PT.
Posted by: worn Apr 13 2018, 09:51 AM
They do look nice with rotated numbers.
Yes they do. Thanks.
Posted by: worn Apr 13 2018, 10:02 AM
More progress - I am feeling better. Still not a really mobile person, but much better, thanks.
Lettering. this has been the most challenging. But I have it kind of figured out
Most of these faces have been painted at least twice to get the paint and letters right. Found a method to make it so I could get the letters off without destroying the paint, so that helped, cause a lot of times I had to do things over. One little spot where it didn't transfer can ruin things.
Cutting out back pieces in 16 gauge. Used the Beverly shear for that. From HF.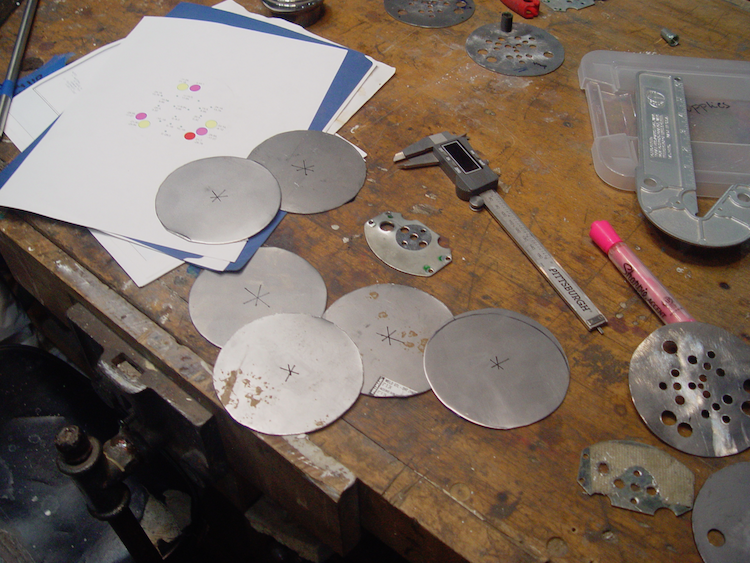
Now getting the holes right. Screwed up a set of six and working on another design. Illustrator for layout and that will tell me where the centers are.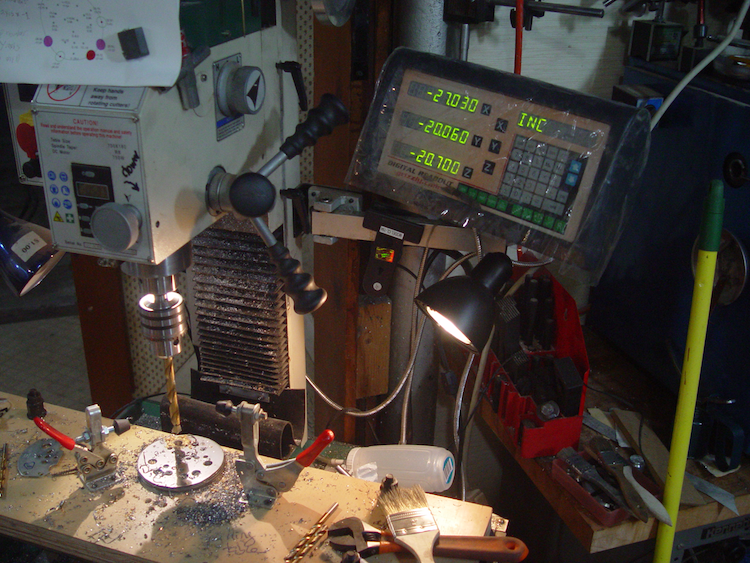
That's it for now. Going to Seattle to see my super-in-law, Dorothy. It will be her birthday soon.
Posted by: douglastic Apr 13 2018, 11:34 AM
If only I had a 914 to put one in!!

Posted by: daytona Apr 13 2018, 12:31 PM
Beautiful work.
I could definitely use one of these on my conversion.
Imagine that you are going to let us all know when you have some kits ready.
Bill.
Posted by: worn Apr 13 2018, 01:35 PM
Beautiful work.
I could definitely use one of these on my conversion.
Imagine that you are going to let us all know when you have some kits ready.
Bill.
Yep. I guess that is the way things are going. The assumption is that a kit user would not have obsessed over this like I have. I want to make sure that no one has to remake a bunch of parts to make such a kit work OK. That is why I want to assemble things a few times to make sure that I have everything smoothed out.
Along the way I have found that you can follow old threads to find people who will help you make one.
For some reason, these things are associated with conversion builds - perhaps in cases where a center console is absent. But I find myself looking at oil pressure with a 4 cylinder engine too.
Posted by: 914Sixer Apr 14 2018, 09:00 AM
I have a question. Why to two different scales. Oil temp is in degrees and oil pressure is in bars. Why not make the pressure 0-80 psi ? New Vintage USA makes them. $30
Attached image(s)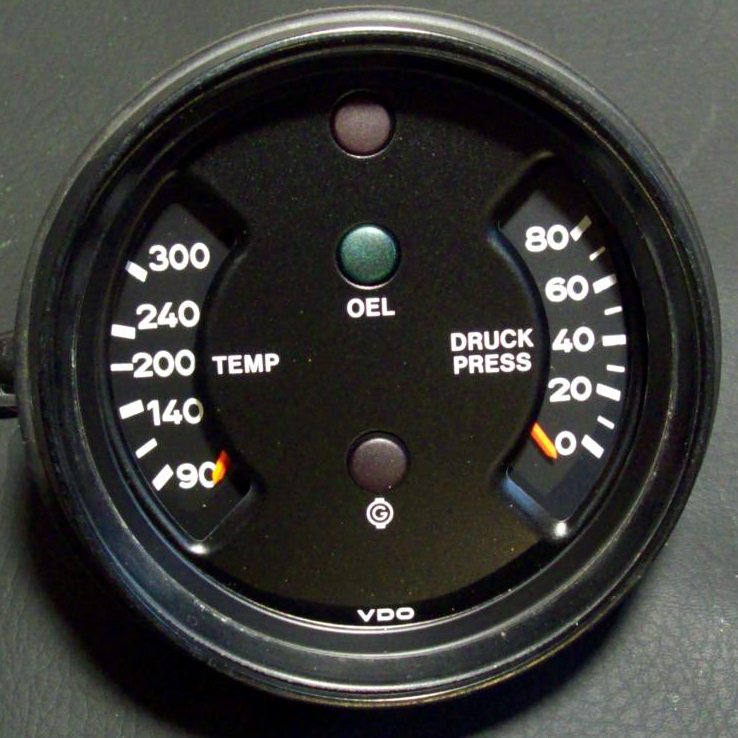
Posted by: worn Apr 14 2018, 10:48 AM
I have a question. Why to two different scales. Oil temp is in degrees and oil pressure is in bars. Why not make the pressure 0-80 psi ? New Vintage USA makes them. $30
I think that is great way to go. I used the gauges as they came from the donor 911 gauge. They are the same as in my 1980 911. I am used to units so I can mentally convert bars to psi by multiplying by 15. Not for everyone. I think the gauge faces you mention is a great idea. Not sure I want to duplicate what is already available.
Posted by: nditiz1 Apr 20 2018, 01:34 PM
In for 1! wait is this a GB 
Powered by Invision Power Board (http://www.invisionboard.com)
© Invision Power Services (http://www.invisionpower.com)