Printable Version of Topic
Click here to view this topic in its original format
914World.com _ 914World Garage _ shifter restoration?
Posted by: doug_b_928 Apr 13 2018, 09:01 AM
It's unseasonably cold here so no work on the car outside yet  . Figured maybe I'll work inside on the shifter this weekend. I didn't see a thread on restoring the shifter. Is this something that just requires a good cleaning, or should it be disassembled, cleaned, painted, and new grease added? Pics of mine below.
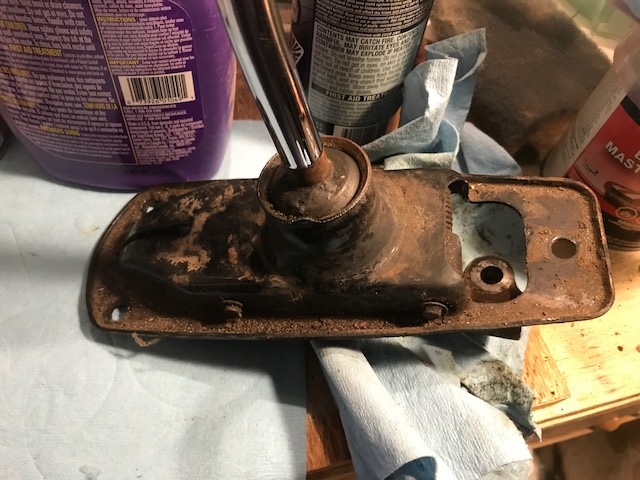
Posted by: mepstein Apr 13 2018, 10:02 AM
In for a penny, in for a pound. I would take it all apart, clean it, check for excessive wear, paint or powder coat, reassemble, and grease.
The spring is under a lot of tension so wear leather gloves and eye protection for removal and install. When installing the spring, use Phillips head screwdriver in place of the pin. Work the spring in place using vise grips to hold it and then push the screwdriver out by placing the pin back in place. The spring is too hard to muscle in with out vise grips and the screwdriver makes it easier to hold until replaced with the pin.
Posted by: Dr Evil Apr 13 2018, 10:42 AM
Order new bushings as well that go under the spring plate.
Posted by: doug_b_928 Apr 13 2018, 10:48 AM
Thanks, guys. Is anyone aware of a good thread on restoring this part? Eric’s thread was really helpful for the pedal cluster. Something like that out there somewhere?
Posted by: rhodyguy Apr 13 2018, 11:10 AM
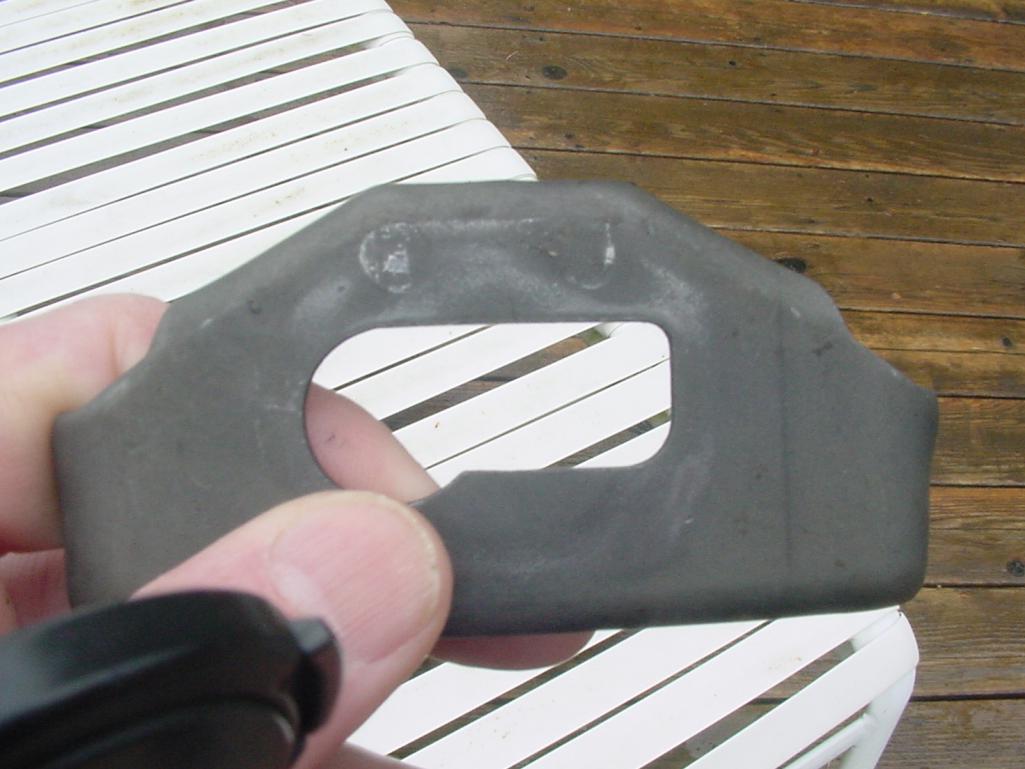
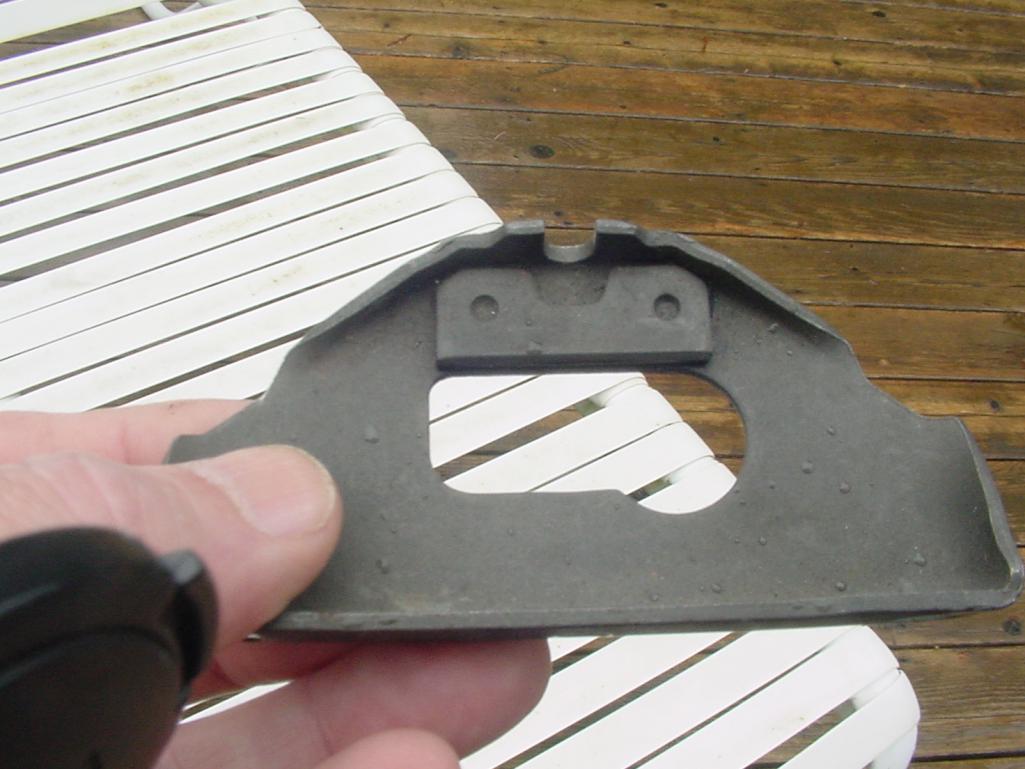
Put a vicegrip on a spring, remove the 4 circlips, push the 2 pins out and remove the springs. This method prevents the springs from flying across the garage. this is what the detention plate should look like. straight across the re-inforcing plate on the underside. as they wear, the center of the plate gets wallowed out and there usually is a gouge on the shift lever. adding the loss of material on the lever and a spent plate it is certainly is of no help setting the linkage.
The backing plate has slight bevel.
Attached thumbnail(s)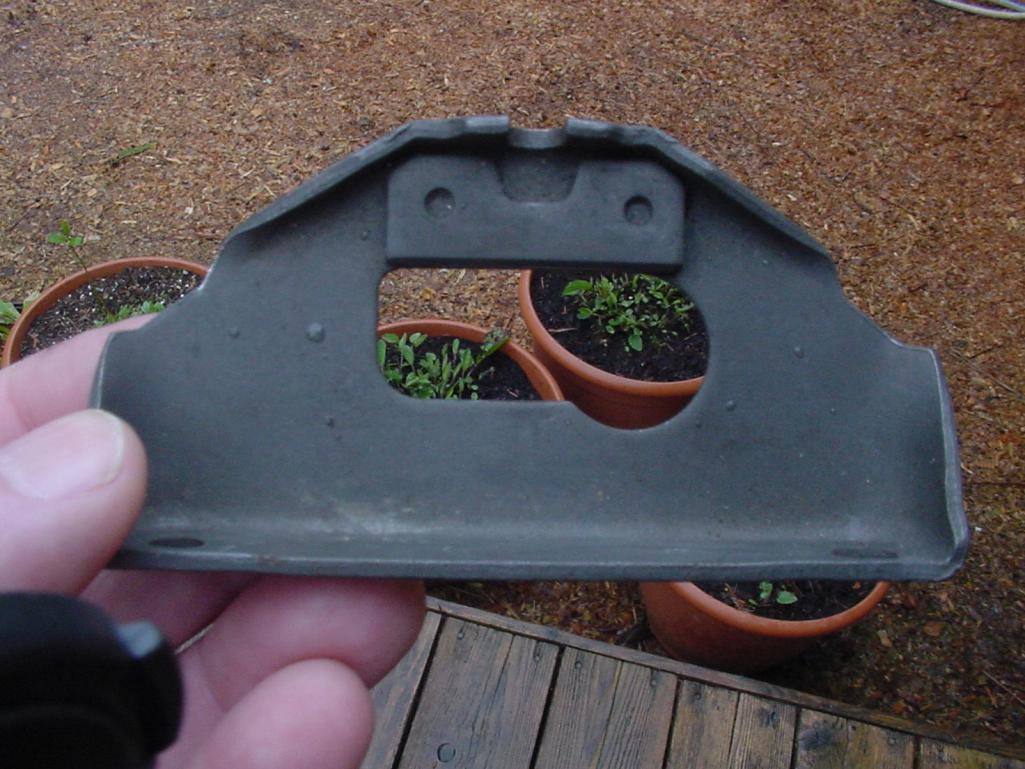
Posted by: doug_b_928 Apr 13 2018, 04:13 PM
Thanks again guys for your encouragement and assistance. I'm surprised at how easy it actually was to get it apart. Knowing what I know now, it's definitely 'an in for a pound' item. The detention plate looks good as does everything else to my eyes. But I do have some questions:
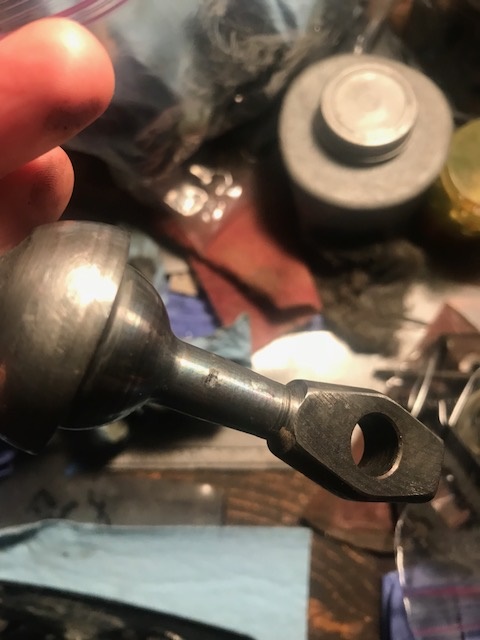
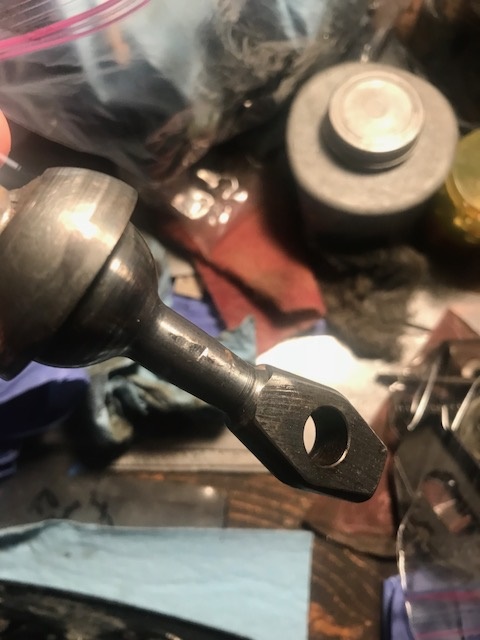
The shifter bracket has a small kink (pictured below). It didn't impede anything. Is it supposed to be like that?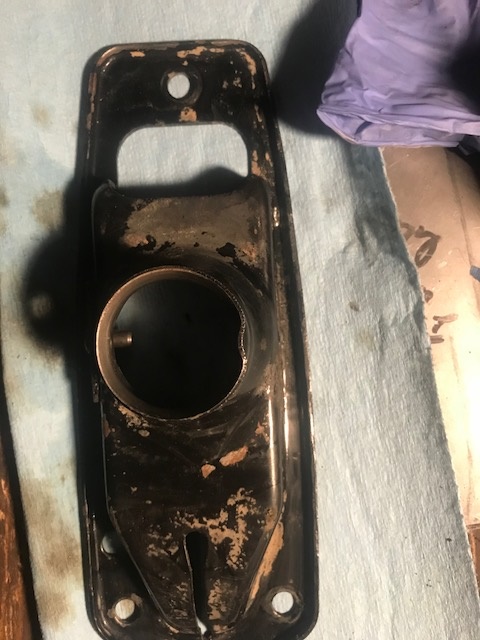
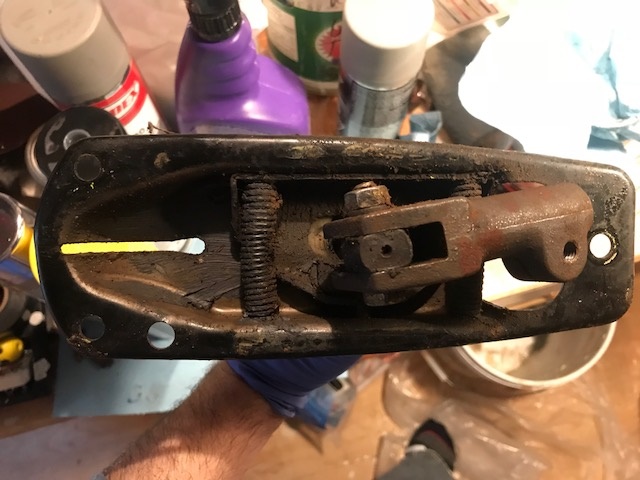
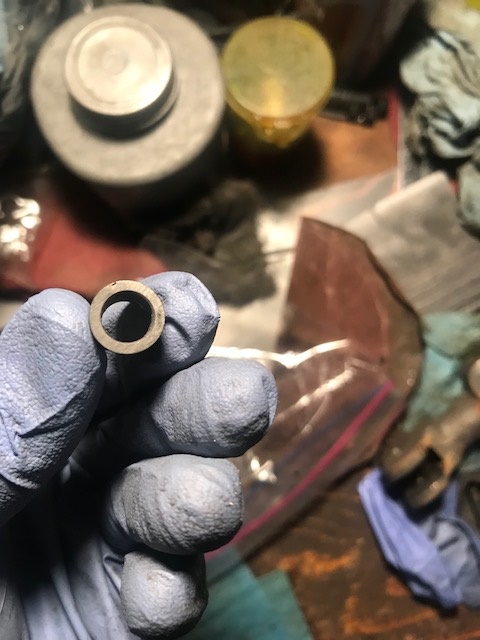
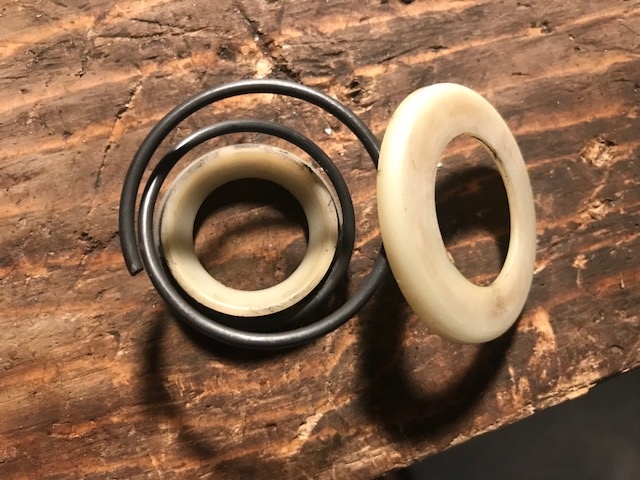
As this is a 73 there is not a ball cup. But there is a shifter spacer sleeve. It's metal. Mine looks good with some, what appears to me to be, very minor wear. I don't have a replacement. Is it fine to reuse this one or should it be replaced as a matter of course? Here are some pics: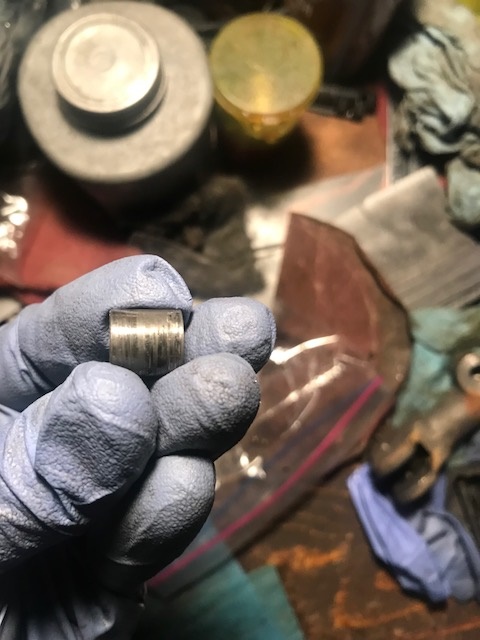
Attached image(s)
Posted by: doug_b_928 Apr 13 2018, 04:26 PM
After looking more closely at Rhodyguy's post, I could see where I should be looking so I re-inspected mine and there is wear on the plate and corresponding marks on the shifter. So, I guess another question is how bad is this?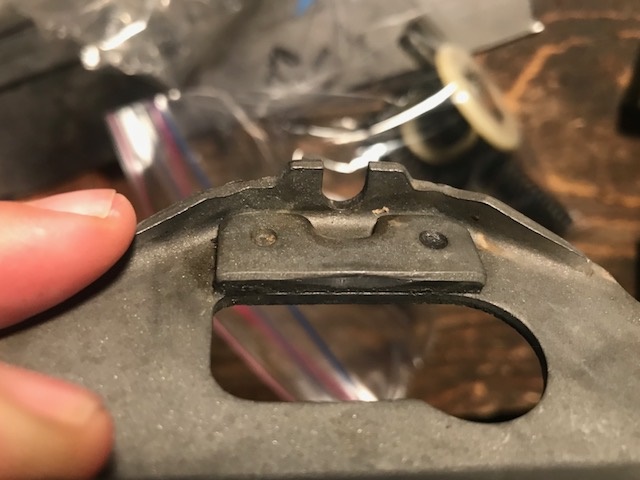
Posted by: RickS Apr 13 2018, 04:35 PM
You can certainly reuse the shifter sleeve. Be sure to lube it before reinstalling. I used white lithium grease.
Posted by: doug_b_928 Apr 13 2018, 06:59 PM
So I see that the 'Reverse Lockout Plate' is still available new. How do we assess the wear above to determine whether it needs replacing?
I'll use White Lithium for the sleeve (thanks Rick), but what is the correct grease for the shifter? There was grease everywhere but I assume I just put some on the 'ball' area of the shifter where it sits in the shifter plate, correct?
Posted by: rhodyguy Apr 14 2018, 06:17 AM
What kind of condition were the 2 plastic bushings (Haynes. P 89. #s 15&17) in?. Your springs were pretty gunked up too. I've seen the wear point on the lever much worse. Replacing the plate is your call. While you're in there....
Posted by: doug_b_928 Apr 14 2018, 06:24 AM
I’ll take some pics of the others and post in a bit.
Posted by: doug_b_928 Apr 14 2018, 06:56 AM
The small springs cleaned up nicely (didn't get a pic). Here are the bushings. I didn't separate the big spring from the bushing because it looks to be very well seated within it. 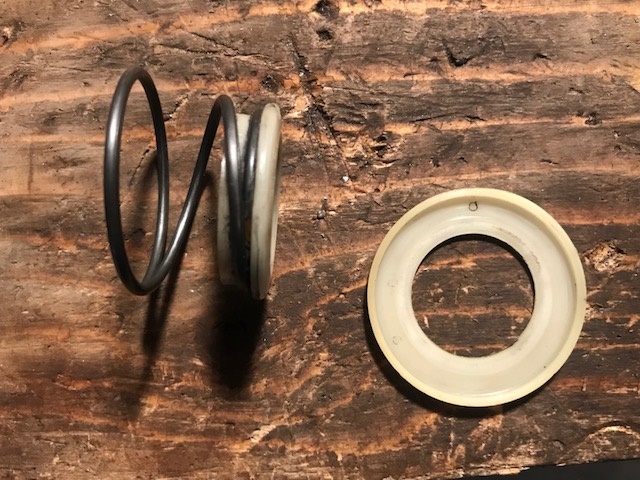
Posted by: Mikey914 Apr 14 2018, 07:29 AM
Hummm.......... I made the springs for the late, maybe I should look at making a kit??? Both early and late.
Posted by: rhodyguy Apr 14 2018, 07:33 AM
Yes.
Posted by: doug_b_928 Apr 14 2018, 07:56 AM
So what kind of grease is recommended and should it just be placed on the shifter ball area where it rides in the shifter plate?
Posted by: bdstone914 Apr 14 2018, 08:16 AM

So what kind of grease is recommended and should it just be placed on the shifter ball area where it rides in the shifter plate?
White Lithium, CV grease, does not really matter. That shift plate is fine to use. Insoect the round pin inside of the housing that can be seen in the image looking in from the top. The early shifters swear that pin badly into a D shape. Cant really tell on yours if it is worn.
Posted by: doug_b_928 Apr 14 2018, 09:28 AM
The round pin looks perfect, so good news for a change that I don't have to buy any parts  .
.
Posted by: rhodyguy Apr 14 2018, 09:36 AM
the reinforcing piece sits just shy of the leading edge of the plate on the one I posted. yours has worn beyond the leading edge and into the reinforcing piece.
Posted by: porschetub Apr 15 2018, 04:52 PM
The round pin looks perfect, so good news for a change that I don't have to buy any parts
.Noticed that bushing spring looks a bit distorted,is it level when sitting on a flat surface,if not might pay to replace it.
Yes the lookout plate can be bought new but is $77 anyone seen it cheaper genuine part anywhere ?
Is there any benefit in replace the two main springs....Bruce do you know ?.
doug b 928 thanks for this thread ,never had mine apart but plan to

Posted by: mepstein Apr 15 2018, 05:26 PM
Reuse the springs unless they are broken.
Posted by: rhodyguy Apr 16 2018, 06:47 AM
Not that long ago the plates were $40ish iirc.
Posted by: doug_b_928 Apr 17 2018, 06:22 PM
What's the technique for compressing the spring? I put the screwdriver in a bit, put the spring on the screwdriver, press it with my fingers to get some compression, then put vise grips to hold the spring against the plate, then I've tried all the techniques I can think of to compress the spring but no joy... I've tried channel locks, caliper spreaders, and even a pipe wrench... It's difficult to control the spring.
Posted by: mepstein Apr 17 2018, 06:56 PM
You start with the screwdriver about 1/4” in where the pin goes, put the spring on the screwdriver. Put the pin in the other end about 1/4”. Bend the end of the spring down so it’s held in on each side, screwdriver and pin. Grab the spring in the middle with the vise grips, lock them and push it down. Shove the pin through so it pushes the screwdriver out. It’s good to have the vise grips clamped down as you tension the spring so you have good control if the spring.
Leather gloves and eye protection.
Posted by: doug_b_928 Apr 17 2018, 07:01 PM
Okay, got it. That makes total sense. Will give that a go tomorrow and report back. Thanks so much, don't think I'd have figured that technique out without you!
Posted by: doug_b_928 Apr 18 2018, 05:11 PM
That was the ticket! 'mepstein', thanks again so much and thanks also to everyone for their helpful comments. I installed a new shifter plate and I'm glad I did if for no other reason than it reduces my chances of having to deal with those springs again in the future. But mepstein's technique works really well.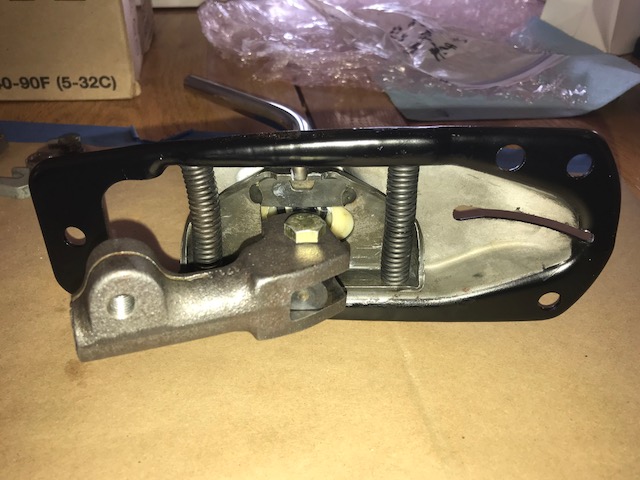
Posted by: rhodyguy Apr 19 2018, 07:10 AM
Nice work. Now you can forget the shifter assem for 40 years.
Posted by: maf914 Apr 19 2018, 11:26 AM
Back in the early 1990's I installed an Automotion Weltmeister 1st/reverse lockout spring kit, which basically added an additional pair of springs inside the existing pair, for a total of four springs, to increase the spring force pushing the shifter away from 1st/reverse. This was in the pre-internet days, so no online help resources. Getting those springs mounted was a nightmare. My fingers and hands were killing me. I wish I had had Mepstein's procedure then. I can see how helpful it would have been. Thanks for posting Mepstein!
Posted by: mepstein Apr 19 2018, 11:32 AM
Your welcome guys. I just sort of made it up one night after a frustrating attempt to put the springs back in. I would suggest to clamp the vise grips to the springs as you remove them. I spent an hour looking for one when it snapped out of the housing. They are under a lot of tension.
Posted by: doug_b_928 Apr 19 2018, 06:01 PM
In case anyone needs a visual reference in the future (I had to repaint after reassembly due to my failed attempts without mepstein's technique).
Powered by Invision Power Board (http://www.invisionboard.com)
© Invision Power Services (http://www.invisionpower.com)