Printable Version of Topic
Click here to view this topic in its original format
914World.com _ 914World Garage _ Projects on my new, to me. 1974 914-6
Posted by: jerhofer Jun 16 2018, 08:32 PM
Forty years ago this past April, I joined PCA with the Michiana (Michigan-Indiana at that time) region in the South Bend area. One of the first people I met was a fellow name George Scott, a true southern gentleman living in the north. Not long afterwards I met his son Ed who was all of twenty years old and still in college. George passed away some years ago but Ed and I have remained friends ever since.
At twenty years of age he had already owned his 1965 356SC for five years!! And still has it!! His father brought him up right! A few years ago Ed began having some problems with his legs. The diagnosis was a neurological disease that has affected his lower body. I had heard about his early issues some years ago but just before Christmas last year, I heard he was in a wheelchair.
So I called him to see how he was doing and discovered that his attitude towards life was still way on the positive side. As usual the conversation turned to cars where I discovered that he had recently sold the turbo-look 911 that he had inherited from his dad. He had also sold a real 914-6 to one of his best friends that he had worked with for many years.
But he had another 914-6, the one I bought from him. As you all know, being a 1974, it was a conversion. The motor began as a 3.0 euro Carrera motor that now is a 3.2 with PMO carbs. The car was built for John Swanson by Perry Kiehl. Perry added the reinforcement panels to the rear wheelwells and to the rockers. He also added the GT flares that were butt welded so well that you cannot feel a seam inside the wheelwell. They began with a car that was rust free.
While John was building the motor at Perry's shop, Perry built a box in the front trunk for the oil cooler. Brad Mayeur built the 901 tranny with a Quaife differential. Since John was moving to Texas, he had the interior done in a light gray so it would be cooler as AC was not in the plans.
All of this happened in 2001-02 ( I have tons of records). John was an avid autocrosser who trailered the car to events with his Cayenne. In 2005 John decided to retire. His wife wanted a more modern Porsche with an automatic so they bought a 996 with Tiptronic and put the 914 up for sale. Which is where my friend Ed came into the picture.
Ed likes to autocross as well as do track events so the car was perfect for him. Unfortunately, at the second track event in 2005, he broke the transmission. Out the motor and tranny came with the tranny sent back to Brad for a rebuild. This time he changed out the intermediate plate from magnesium to aluminum for additional strength and did some other tweaks. The motor and the freshly rebuilt tranny never made it back into the car.
Ed and his wife have lived in their Michigan house for over 30 years. Because it is a tri-level, they purchased a ranch so that Ed could get around better. They want to sell their old house but it was full of their lifelong belongings as well as various cars and car parts. The deal I made with Ed was to buy the car and to take all of his car parts as well, as a way of helping to clean out their garages. Among many other parts, I now have an additional twenty-three wheels w/old tires, a couple of racing seats, an extra transmission, etc.
In mid-May i traveled to Michigan from my North Carolina home to get everything ready so my son and I could come up a couple weeks later with a small moving truck and a car trailer. My good friend Dave drove over from South Bend, Indiana to help at that mid-May gathering. We spent about six hours going through everything and getting the wheels back on the car to get it off the jack stands where it had been setting for thirteen years.
http://s188.photobucket.com/user/jerhofer/media/1974%20Porsche%20914-6/5-19-18%20parts%20day%203_zpsgzhnp2ct.jpg.html
http://s188.photobucket.com/user/jerhofer/media/1974%20Porsche%20914-6/5-19-18%20parts%20day%202_zpsdyl0yyut.jpg.html
http://s188.photobucket.com/user/jerhofer/media/1974%20Porsche%20914-6/5-19-18%20parts%20day%208_zpszpugliah.jpg.html
http://s188.photobucket.com/user/jerhofer/media/1974%20Porsche%20914-6/6-1-18%20914%20pickup%208_zpsytrvkxij.jpg.html
http://s188.photobucket.com/user/jerhofer/media/1974%20Porsche%20914-6/5-19-18%20parts%20day%207_zpsykpnoc9d.jpg.html
Ed is an engineer as is my son. While they are about ten years apart in age, they have always had this friendship based on their mutual love of figuring out things. My son was very pleased to see Ed again. Because of Ed's condition, it takes him a while to get going so they gave us the key to the outbuilding and the garage door opener to their garage so we could begin the loading process. We began loading around 3:00 and finished up by 6:00. After a quick shower, we all met for dinner which was spent reminiscing about past PCA event as well as my son talking about some of his experiences with his job at Toyota Racing Development. It was a long, pleasant dinner and the perfect end to the day.
http://s188.photobucket.com/user/jerhofer/media/1974%20Porsche%20914-6/6-1-18%20914%20pickup%205_zpsheojkyen.jpg.html
http://s188.photobucket.com/user/jerhofer/media/1974%20Porsche%20914-6/6-1-18%20914%20pickup%204_zpsufuf9q2v.jpg.html
http://s188.photobucket.com/user/jerhofer/media/1974%20Porsche%20914-6/6-1-18%20914%20pickup%202_zpscborpwac.jpg.html
http://s188.photobucket.com/user/jerhofer/media/1974%20Porsche%20914-6/6-1-18%20914%20pickup_zps1tqsewm4.jpg.html
http://s188.photobucket.com/user/jerhofer/media/1974%20Porsche%20914-6/6-1-18%20914%20pickup%2013_zps1fgqg0zq.jpg.html
Now the car is in my garage, the parts have been stowed and I am ready to put it back together.
http://s188.photobucket.com/user/jerhofer/media/1974%20Porsche%20914-6/6-1-18%20914%20pickup%2010_zpsdnz6s9sy.jpg.html
http://s188.photobucket.com/user/jerhofer/media/1974%20Porsche%20914-6/6-1-18%20914%20pickup%2011_zpsiz1gyge2.jpg.html
The photos below were taken soon after Ed had bought the car, which will give an idea of what it will look like once it is back on the road.
http://s188.photobucket.com/user/jerhofer/media/1974%20Porsche%20914-6/DSC09126_zpsbvaw7bge.jpg.html
http://s188.photobucket.com/user/jerhofer/media/1974%20Porsche%20914-6/914-2005-1_zpsirgzxp4c.jpg.html
Posted by: JRust Jun 16 2018, 08:41 PM
Wow sweet ride & a great story. Congrats & sounds like it went to the right person
Posted by: Larmo63 Jun 16 2018, 08:50 PM
It looks like a solid build, great story too.
I vote for the Fuchs on the car, they look much better.
Posted by: Coondog Jun 16 2018, 09:24 PM
Enjoy your project. Great looking car.
Posted by: Maltese Falcon Jun 16 2018, 09:36 PM

Enjoy the ride 
Posted by: Cairo94507 Jun 16 2018, 09:44 PM
What a terrific story of friendship and the mutual love of our cars. I really like your car. Please post a lot of pictures as you assemble it and get it back on the road. Best wishes- 
Posted by: Garold Shaffer Jun 16 2018, 10:19 PM
I am glad to see that it going back together. I met Ed many years ago at some of the Michiana PCA events and other 914 gatherings. What a great guy. Looking forward to seeing his (your) 914 back on the road where it belongs.
Posted by: Blue6 Jun 16 2018, 10:36 PM
Congrats on your new acquisition, and your long friendship. Looks like a pretty special bumper on the rear of that beauty.
Posted by: jerhofer Jun 17 2018, 05:20 AM
BTW, Ed says the 2.0 on the rear badge stand for the version rather than the engine size!
Posted by: 914dave Jun 17 2018, 05:48 AM
Great looking car. Best of luck.
Posted by: jerhofer Jun 17 2018, 11:41 AM
One of the first things I did was clean up the engine bay. Ed said the engine was blowing some oil so there was a film everywhere. I will need to make sure I have the engine properly vented.
http://s188.photobucket.com/user/jerhofer/media/1974%20Porsche%20914-6/6-4-18%20engine%20bay%208_zpskvdfpmka.jpg.html
http://s188.photobucket.com/user/jerhofer/media/1974%20Porsche%20914-6/6-4-18%20bottom%2024_zpsmvylluxk.jpg.html
http://s188.photobucket.com/user/jerhofer/media/1974%20Porsche%20914-6/6-4-18%20bottom%2018_zps9csa3h8g.jpg.html
The engine bay cleaned up nicely.
http://s188.photobucket.com/user/jerhofer/media/1974%20Porsche%20914-6/6-5-18%20engine%20bay%205_zpstehzleor.jpg.html
http://s188.photobucket.com/user/jerhofer/media/1974%20Porsche%20914-6/6-5-18%20engine%20bay%203_zpsh3ywtxmq.jpg.html
http://s188.photobucket.com/user/jerhofer/media/1974%20Porsche%20914-6/6-5-18%20engine%20bay_zpsfhymiqlg.jpg.html
http://s188.photobucket.com/user/jerhofer/media/1974%20Porsche%20914-6/6-5-18%20engine%20bay%202_zpshkykcf1q.jpg.html
Posted by: jerhofer Jun 17 2018, 12:07 PM
Perry built in an oil cooler box in the front trunk and mounted a collapsible spare vertically.
http://s188.photobucket.com/user/jerhofer/media/1974%20Porsche%20914-6/6-4-18%20front%20trunk%209_zpsmetjbfxa.jpg.html
http://s188.photobucket.com/user/jerhofer/media/1974%20Porsche%20914-6/6-4-18%20front%20trunk%207_zpsxwdg8guy.jpg.html
http://s188.photobucket.com/user/jerhofer/media/1974%20Porsche%20914-6/6-4-18%20oil%20cooler%203_zpsazicxsib.jpg.html
http://s188.photobucket.com/user/jerhofer/media/1974%20Porsche%20914-6/6-4-18%20oil%20cooler%202_zpsjwgcjfgk.jpg.html
http://s188.photobucket.com/user/jerhofer/media/1974%20Porsche%20914-6/6-4-18%20oil%20cooler_zpspvjpdrxi.jpg.html
To make the front trunk more usable, I modified the stock carpeted board that normally lies on top of the stock spare tire. I traced the board on a piece of cardboard and then cut a notch out of that cardboard to allow for the vertical spare. After using that template to modify the original board, I found that the rear of the board was floating in air. To make it solid, I mounted some vertical 2 x 4's for support. I painted the back side and then installed original style carpet on the board.
http://s188.photobucket.com/user/jerhofer/media/1974%20Porsche%20914-6/6-14-18%20trunk%20board%2010_zpsujc4ituw.jpg.html
http://s188.photobucket.com/user/jerhofer/media/1974%20Porsche%20914-6/6-14-18%20trunk%20board%209_zpszpunxdux.jpg.html
http://s188.photobucket.com/user/jerhofer/media/1974%20Porsche%20914-6/6-14-18%20trunk%20board%208_zpst1baons1.jpg.html
http://s188.photobucket.com/user/jerhofer/media/1974%20Porsche%20914-6/6-14-18%20trunk%20board%207_zps1njabwcz.jpg.html
http://s188.photobucket.com/user/jerhofer/media/1974%20Porsche%20914-6/6-14-18%20trunk%20board%205_zpshbuoghny.jpg.html
http://s188.photobucket.com/user/jerhofer/media/1974%20Porsche%20914-6/6-14-18%20trunk%20board%204_zpsithaslij.jpg.html
http://s188.photobucket.com/user/jerhofer/media/1974%20Porsche%20914-6/6-14-18%20trunk%20board%202_zpsmnjyswll.jpg.html
http://s188.photobucket.com/user/jerhofer/media/1974%20Porsche%20914-6/6-16-18%20front%20trunk%20board%203_zpsdcpztsmz.jpg.html
http://s188.photobucket.com/user/jerhofer/media/1974%20Porsche%20914-6/6-16-18%20front%20trunk%20board%202_zpsynlzrtvm.jpg.html
Posted by: jerhofer Jun 17 2018, 12:22 PM
Ed was going to run 13" wheels on the car to get lower gearing for autocrossing. To that end, he was in the process of modifying the brake calipers so they would fit inside a 13" wheel. Part of that process was to use time certs where the rear brake calipers mount to the hub. Since I am going to use stock 914 rear calipers (It has 928 front calipers.), those time certs had to come out.
Time certs's website recommended using an "easy out" for removal. When the first one I tried refused to budge, I drilled it out some and tried the "easy out" again. This time a little less than half of it came out. I used a drill and a file to make the remaining time cert thin enough so I could tap the hole. Once I saw that Ed has used a thread locker on the time cert, I applied heat for about a minute to each one which made them easy to remove.
http://s188.photobucket.com/user/jerhofer/media/1974%20Porsche%20914-6/6-16-18%20time%20certs%205_zpsmezrjiqk.jpg.html
http://s188.photobucket.com/user/jerhofer/media/1974%20Porsche%20914-6/6-16-18%20time%20certs%203_zpsihzat0yq.jpg.html
http://s188.photobucket.com/user/jerhofer/media/1974%20Porsche%20914-6/6-16-18%20time%20certs%202_zpsdk5kuuqs.jpg.html
http://s188.photobucket.com/user/jerhofer/media/1974%20Porsche%20914-6/6-16-18%20time%20certs_zps9obc8w7a.jpg.html
Posted by: RickS Jun 17 2018, 12:56 PM
Wonderful story about some fantastic people. Glad to see that the car went to a good home and that you have such a great friendship.
Posted by: 914forme Jun 17 2018, 04:48 PM
Glad to see another one getting on the road 
Posted by: Chip Jun 17 2018, 09:13 PM
Cars don't last. Loved ones do.
Posted by: Perry Kiehl Jun 18 2018, 05:40 AM
I spoke with Ed several months ago to ask about the car. Ed's a great guy.
I'm glad to see it's going to an enthusiast!
Posted by: jerhofer Jun 18 2018, 06:47 AM

I spoke with Ed several months ago to ask about the car. Ed's a great guy.
I'm glad to see it's going to an enthusiast!
Ed mentioned that you had called about the car. You did a fantastic job on the car. I can't wait to get it back together and on the road. We have a motorhome and have a six week trip scheduled to begin in July so it will be at least late summer before I will have it on the road.
Since I not a big fan of carburetors, I have ordered a fuel injection kit using PMO throttle bodies from Richard Clewett. It is supposed to arrive this week. Figuring out how all that works will also take some time. To offset part of that cost, I will be selling the lightly used PMO carbs.
Among the many wheels that I got from Ed is a set of replica black center Fuchs in 15x7's and 9's. In looking for tires to fit those rims, I am having a difficult time finding anything other than either autocross or track tires. Anyone have any suggestions for a street tire that would fit those rims.? I would like to run 225's front and 245's rear.
Posted by: Perry Kiehl Jun 18 2018, 01:15 PM
Thanks, that was a fun project. Looks like it's held up pretty well, except for the transmission anyway.
That car was a black 2.0 with the Bilstein suspension package, Fuchs, tan interior, and dealer AC. How things have changed. Imagine using a well optioned '74 2.0 for all of this customization!
I encouraged both John Swanson, and Ed Scott (after he bought it) to drive the snot out of it at every opportunity. That's got either GE60 or GE80 cams in it, and would rev up in a heartbeat, and once you hit 4000 RPM's it felt like a 2 cycle motorcycle when you hit the the power band.
I was amazed at Ed's positive outlook when we spoke last winter, a very impressive guy.
Good to see it'll be back on the road soon.
Posted by: jerhofer Jun 18 2018, 03:11 PM
The sail panel trim and the long trim pieces across the back show some wear.
About six years ago I did a body off restoration on a 1964 Corvette. The original windshield trim had some dents in it, so I ordered some replacements. We could never get the repo trim to fit. I mentioned this one day to a Corvette vendor and he said the repo stuff never fits. He asked if I had the original trim. When I said I did, he gave me the name of Dell Metal Polishing in Hubbard, OH. He said this guy would make the original trim look like new. I sent my trim to Dell's and it looked better than new when I got it back.
I called Dell's recently and he said he could work on the 914 trim as well. Today I removed the trim pieces. First the vertical curved pieces have to be removed. There is an 8mm nut inside the wheelwell that must be removed. The right side was fairly easy but, since there is a 911 motor in this car, the dry sump oil tank is in the left side wheelwell, directly below this nut. I finally got a small ratchet wrench on it. With those nuts removed, the only remaining screw is a small phillips. With both sail panels off the car, I could remove the center trim piece. It is held in by three clips. Some gentle persuasion with a plastic pry tool broke it loose.
http://s188.photobucket.com/user/jerhofer/media/1974%20Porsche%20914-6/6-18-18%20sail%20panel%20trim%208_zpsssrooz84.jpg.html
http://s188.photobucket.com/user/jerhofer/media/1974%20Porsche%20914-6/6-18-18%20sail%20panel%20trim%204_zpsrezgbbzv.jpg.html
http://s188.photobucket.com/user/jerhofer/media/1974%20Porsche%20914-6/6-18-18%20sail%20panel%20trim%203_zpssiuy45ly.jpg.html
http://s188.photobucket.com/user/jerhofer/media/1974%20Porsche%20914-6/6-18-18%20sail%20panel%20trim%202_zpskbxkvuoz.jpg.html
http://s188.photobucket.com/user/jerhofer/media/1974%20Porsche%20914-6/6-18-18%20sail%20panel%20trim%205_zpskibzsdf4.jpg.html
http://s188.photobucket.com/user/jerhofer/media/1974%20Porsche%20914-6/6-18-18%20sail%20panel%20trim%206_zpsn1xlqean.jpg.html
http://s188.photobucket.com/user/jerhofer/media/1974%20Porsche%20914-6/6-18-18%20sail%20panel%20trim_zpsguhelbn1.jpg.html
Posted by: jerhofer Jun 18 2018, 03:23 PM
There was some surface rust in the battery tray. I don't understand why it was rusty as you can plainly see the outline of the Optima battery. I used a wire brush and some light sanding on the affected areas. I then applied a coat of POR15 to the area where the battery sits. This stuff dries as hard as a rock and is to be used directly over rusty areas to prevent further rust. I plan on using a sealed battery as well and this treatment should prevent future issues.
http://s188.photobucket.com/user/jerhofer/media/1974%20Porsche%20914-6/6-18-18%20battery%20tray%202_zps9ha0f1uz.jpg.html
http://s188.photobucket.com/user/jerhofer/media/1974%20Porsche%20914-6/6-18-18%20battery%20tray_zpswkpifqrg.jpg.html
With that done, I spent the remainder of the afternoon cleaning the engine. I removed the intake manifolds so I could do a better job of cleaning them separately. Looks better but I still have a ways to go. I need to order the seals for the "holy trinity" of oil leaks at the rear of the motor. Now is the time to make sure it doesn't leak. When I adjust the valves, I will be installing new seals on the valve covers.
http://s188.photobucket.com/user/jerhofer/media/1974%20Porsche%20914-6/6-18-18%20engine%206_zpsfsrjv7ka.jpg.html
http://s188.photobucket.com/user/jerhofer/media/1974%20Porsche%20914-6/6-18-18%20intakes%205_zpse7vz2zmm.jpg.html
http://s188.photobucket.com/user/jerhofer/media/1974%20Porsche%20914-6/6-18-18%20intakes_zpse6pix0ib.jpg.html
http://s188.photobucket.com/user/jerhofer/media/1974%20Porsche%20914-6/6-18-18%20engine%202_zpscbxnlnv8.jpg.html
http://s188.photobucket.com/user/jerhofer/media/1974%20Porsche%20914-6/6-18-18%20engine_zpshobryz9i.jpg.html
Posted by: Dion Jun 18 2018, 03:34 PM
That’s a beautiful 14! What colour is that?
It looks almost like Marathon blue but not quite.
Nice power plant as well. Having been in 914Daves car
this past weekend, wow that 3.2 has plenty of kick.
Enjoy! Really nice.
Posted by: jerhofer Jun 18 2018, 04:38 PM
That’s a beautiful 14! What colour is that?
It looks almost like Marathon blue but not quite.
Nice power plant as well. Having been in 914Daves car
this past weekend, wow that 3.2 has plenty of kick.
Enjoy! Really nice.
Thanks.
It is not marathon blue, but, as you say, it is close. It is a GM color.
Posted by: mepstein Jun 18 2018, 05:11 PM
Looking forward to the trim restore. It’s a weak point on a lot of our cars. New costs a fortune.
Posted by: jerhofer Jun 21 2018, 03:58 PM
I used my overhead hoist to lift the motor so I could get it on the engine stand. Lots easier to work on it at that height.
http://s188.photobucket.com/user/jerhofer/media/1974%20Porsche%20914-6/6-20-18%20engine%20hoist_zpsffyiphfv.jpg.html
http://s188.photobucket.com/user/jerhofer/media/1974%20Porsche%20914-6/6-21-18%20engine%20stand_zpsqunwehk6.jpg.html
I found an air compressor to inflate the spare tire on eBay.
http://s188.photobucket.com/user/jerhofer/media/1974%20Porsche%20914-6/6-20-18%20air%20compressor%203_zpskpy0lxcc.jpg.html
During the build back in 2002, Kool-Mat had been installed in the rear trunk. This is good stuff that I also used when I did the restoration of a 1964 Corvette a few years ago. However, it is not meant to be seen. I found a carpet to make the trunk look somewhat better.
http://s188.photobucket.com/user/jerhofer/media/1974%20Porsche%20914-6/6-20-18%20Kool%20Mat_zps7oddsxmv.jpg.html
http://s188.photobucket.com/user/jerhofer/media/1974%20Porsche%20914-6/6-20-18%20rear%20trunk%20carpet_zpse4o9bapx.jpg.html
The EFI kit arrived as well. Lots of wiring to do!!!
http://s188.photobucket.com/user/jerhofer/media/1974%20Porsche%20914-6/6-20-18%20EFI%204_zpsdwdkwqfl.jpg.html
http://s188.photobucket.com/user/jerhofer/media/1974%20Porsche%20914-6/6-20-18%20EFI%203_zpsxformptr.jpg.html
Since the EFI parts have arrived, it was time to clean up the PMO cars and get them ready to sell on eBay. I already have a bid.
http://s188.photobucket.com/user/jerhofer/media/1974%20Porsche%20914-6/6-21-18%20PMO%20carb%20one%205_zpslt2ozg0n.jpg.html
http://s188.photobucket.com/user/jerhofer/media/1974%20Porsche%20914-6/6-21-18%20PMO%20carb%20one_zpsjssccelg.jpg.html
http://s188.photobucket.com/user/jerhofer/media/1974%20Porsche%20914-6/6-21-18%20PMO%20carbs%203_zpsihomckyy.jpg.html
Posted by: jerhofer Jun 21 2018, 04:10 PM
To make the 9" wheels work on the rear, I needed to install longer wheel studs. First I had to remove them. I found a stud remover on eBay. It is huge but worked great.
Because it is so heavy duty, I could use my impact wrench.
http://s188.photobucket.com/user/jerhofer/media/1974%20Porsche%20914-6/6-21-18%20wheel%20studs%207_zpsibgfbtgy.jpg.html
http://s188.photobucket.com/user/jerhofer/media/1974%20Porsche%20914-6/6-21-18%20wheel%20studs%206_zps0ae5bdeu.jpg.html
http://s188.photobucket.com/user/jerhofer/media/1974%20Porsche%20914-6/6-21-18%20wheel%20studs%205_zpsci9eaia2.jpg.html
I found a tool at O'Reilly's for installing studs. It has a ball bearing that rests against the flange. This allows it to turn when you are tightening down the stud rather than have the nut dig into the flange or a washer. It also worked very well and could be used with the impact wrench.
http://s188.photobucket.com/user/jerhofer/media/1974%20Porsche%20914-6/6-21-18%20wheel%20studs%203_zpstsjzogy0.jpg.html
http://s188.photobucket.com/user/jerhofer/media/1974%20Porsche%20914-6/6-21-18%20wheel%20studs%204_zpsib5ftphp.jpg.html
http://s188.photobucket.com/user/jerhofer/media/1974%20Porsche%20914-6/6-21-18%20wheel%20studs%202_zpsiphntjgs.jpg.html
http://s188.photobucket.com/user/jerhofer/media/1974%20Porsche%20914-6/6-21-18%20wheel%20studs_zpshyp2af46.jpg.html
With the studs in place, I could install the new 914-6 rotors and the rebuilt 914 calipers. I am missing one hard brake line so I will have to do some digging through the tons of parts that I got with the car to see if it is there.
http://s188.photobucket.com/user/jerhofer/media/1974%20Porsche%20914-6/6-21-18%20rear%20brakes%202_zpsnwshnmq3.jpg.html
Posted by: jerhofer Jun 22 2018, 03:05 PM
I finished up the rear brakes by installing the pads and the hard brake lines.
http://s188.photobucket.com/user/jerhofer/media/1974%20Porsche%20914-6/6-22-18%20rear%20brakes%204_zpsrqhjkent.jpg.html
http://s188.photobucket.com/user/jerhofer/media/1974%20Porsche%20914-6/6-22-18%20rear%20brakes_zpsvai1zkmn.jpg.html
http://s188.photobucket.com/user/jerhofer/media/1974%20Porsche%20914-6/6-22-18%20rear%20brakes%203_zpswcdumtvd.jpg.html
Next up was hooking up the parking brake. I attached one side but I could not get the other side to extend far enough to reach rear brake caliper.
http://s188.photobucket.com/user/jerhofer/media/6-22-18%20e%20brake%206_zpsdlmm8lix.jpg.html
After consulting Ed and the internet, I discovered that removing the boot at the firewall where the brake cable tubes are, there were adjusting nuts. Just behind the parking brake lever inside the car, there is a plate which covers the cables. Each cable attaches to one side of the lever. As you can see in the photo below, the lever was at an angle which meant one parking brake would be applied earlier, and probably with more force, than the other side. By adjusting the cables at the firewall, I was able to hook up both cables and to make the lever straight across inside the car. Once I adjust the brake pads on the calipers, the parking brake should now apply equal pressure to both rear brakes.
http://s188.photobucket.com/user/jerhofer/media/1974%20Porsche%20914-6/6-22-18%20e%20brake%202_zpswtmzvfb0.jpg.html
http://s188.photobucket.com/user/jerhofer/media/1974%20Porsche%20914-6/6-22-18%20e%20brake%207_zps5pdpjewq.jpg.html
http://s188.photobucket.com/user/jerhofer/media/1974%20Porsche%20914-6/6-22-18%20e%20brake%205_zpsmbzupfp1.jpg.html
http://s188.photobucket.com/user/jerhofer/media/1974%20Porsche%20914-6/6-22-18%20e%20brake%203_zps0yknowmk.jpg.html
http://s188.photobucket.com/user/jerhofer/media/1974%20Porsche%20914-6/6-22-18%20e%20brake_zpsdxgysn6k.jpg.html
Now I have to try to convince my wife to help me bleed the brakes. Back when we were both doing track events, this was a regular routine prior to each event. It was a pain in the rear for her, but we never had our brakes go soft at the track.
Posted by: Mueller Jun 22 2018, 04:16 PM
Looking great, that motor is going to be fun!
Posted by: jerhofer Jun 25 2018, 03:13 PM
The wife spent a wonderful Sunday morning bleeding brakes...and she did a great job! We have brakes!!
http://s188.photobucket.com/user/jerhofer/media/1974%20Porsche%20914-6/6-24-18%20bleeding%20brakes%203_zpsjbv2apx3.jpg.html
http://s188.photobucket.com/user/jerhofer/media/1974%20Porsche%20914-6/6-24-18%20bleeding%20brakes_zpsngivem48.jpg.html
Now that the brakes were bled, I could adjust the brake pad clearance on the rear brakes. On the outside, I removed the plastic cover, loosened the lock nut and used a 4mm hex wrench to adjust the distance between the brake rotor and the brake pad to .008 or .2mm. With that done, I removed the nut on the rear through the access hole in the trailing arm and did the same adjustment there on the inside pad.
http://s188.photobucket.com/user/jerhofer/media/1974%20Porsche%20914-6/6-24-18%20rear%20brakes%209_zpscvglsjhw.jpg.html
http://s188.photobucket.com/user/jerhofer/media/1974%20Porsche%20914-6/6-24-18%20rear%20brakes%208_zpsp0s7w7fu.jpg.html
http://s188.photobucket.com/user/jerhofer/media/1974%20Porsche%20914-6/6-24-18%20rear%20brakes%207_zpsnkx2c0am.jpg.html
http://s188.photobucket.com/user/jerhofer/media/1974%20Porsche%20914-6/6-24-18%20rear%20brakes%206_zpslhafzn6z.jpg.html
http://s188.photobucket.com/user/jerhofer/media/1974%20Porsche%20914-6/6-24-18%20rear%20brakes%205_zpsazr36kch.jpg.html
http://s188.photobucket.com/user/jerhofer/media/1974%20Porsche%20914-6/6-24-18%20rear%20brakes%203_zpsnsazaroa.jpg.html
http://s188.photobucket.com/user/jerhofer/media/1974%20Porsche%20914-6/6-24-18%20rear%20brakes%202_zpsb2viocfa.jpg.html
http://s188.photobucket.com/user/jerhofer/media/1974%20Porsche%20914-6/6-24-18%20rear%20brakes_zpsvfz361r5.jpg.html
Posted by: Dave_Darling Jun 25 2018, 06:23 PM
I very strongly recommend that you use 0.004" clearance for the rear brake pads! The 0.008" number results in lousy pedal feel and a handbrake that doesn't hold very well.
I have often wondered if they were thinking of the total clearance (each side of the rotor) when they published the 0.008" figure?
--DD
Posted by: jerhofer Jun 25 2018, 07:31 PM
I very strongly recommend that you use 0.004" clearance for the rear brake pads! The 0.008" number results in lousy pedal feel and a handbrake that doesn't hold very well.
I have often wondered if they were thinking of the total clearance (each side of the rotor) when they published the 0.008" figure?
--DD
I had a couple of 914's back in the eighties but I did not work on them. So these things I am learning now are all new to me. These parking brakes are quite different from those on the 911's I have owned. I appreciate the heads up. This is one of the reasons I post my projects on cars on enthusiast forums. The feedback is invaluable.
My wife retired from teaching about 20 years ago and took up art. She does oil paintings and has a gallery in Salisbury, NC. About ten years ago I retired. Since then I have bought good cars and did my best to make them better. I enjoy the process and figuring out new things. Which is why I have not done the same car more than once. Below are links to some of the other project cars I have done. I have enjoyed all of them.
Neither my wife and I are content to sit around and do nothing. So, most days my wife goes to her gallery to paint and I go to the garage. Works for us!!
http://forums.pelicanparts.com/porsche-911-technical-forum/768180-projects-our-new-us-1967-912-6-a.html
http://forums.pelicanparts.com/porsche-944-turbo-turbo-s/892302-projects-our-new-us-1988-944-turbo.html
https://www.corvetteforum.com/forums/c1-and-c2-corvettes/3077598-will-be-doing-a-body-off-on-my-64-coupe.html
http://www.peachparts.com/shopforum/vintage-mercedes-forum/383515-projects-my-new-me-1973-280sel-4-5-a.html
And just to show the seed doesn't drop very far from the tree, here is a link to my son's project. His is much more adventurous than mine. We found a roller 1979 911SC into which he is installing a Tesla P85 motor. It will have a RSR body with very wide wheels and tires.
http://www.diyelectriccar.com/forums/showthread.php?t=192602
Posted by: jerhofer Aug 11 2018, 04:21 PM
We are back from our five week motorhome trip and I am ready to get back to working on the car. As I had written previously, I had sent the sail panel trim away to have it refinished. The pieces were here when we returned and they look better than new. I didn't have really good "before" photos but you can get an idea of the improvement with these images. The left side short piece was in the worst condition.
http://s188.photobucket.com/user/jerhofer/media/1974%20Porsche%20914-6/6-18-18%20sail%20panel%20trim%202_zpskbxkvuoz.jpg.html
http://s188.photobucket.com/user/jerhofer/media/1974%20Porsche%20914-6/6-18-18%20sail%20panel%20trim%204_zpsrezgbbzv.jpg.html
http://s188.photobucket.com/user/jerhofer/media/1974%20Porsche%20914-6/8-11-18%20sail%20panel%20trim%206_zpswjpocfv7.jpg.html
http://s188.photobucket.com/user/jerhofer/media/1974%20Porsche%20914-6/8-11-18%20sail%20panel%20trim%204_zps1giah1xb.jpg.html
http://s188.photobucket.com/user/jerhofer/media/1974%20Porsche%20914-6/8-11-18%20sail%20panel%20trim_zpsqtmve9xj.jpg.html
For those of you who may have some interest, here is a link to his website: https://www.dellmetalpolishing.com/index2.html
He charged me $160 for all three pieces.
Part of the stash of parts that came with the car were five Fuch's 15x6 deep dish heart wheels. I cleaned them up today and am trying to determine the build date. I took this photo of one of the inside spokes but I don't know what to look for to determine the date. I would like to know as I will be selling these.
http://s188.photobucket.com/user/jerhofer/media/1974%20Porsche%20914-6/8-11-18%20fuchs%20deep%20six%20wheel_zpsethy6npt.jpg.html
Posted by: mepstein Aug 11 2018, 04:30 PM
The date is on the inner ridge between the pedals but not on the pedals on the back of the wheel, near where the center cap sits. A set of 5 in good condition is $4-4,500.
I just sold a single one in fair condition for $750.
Attached thumbnail(s)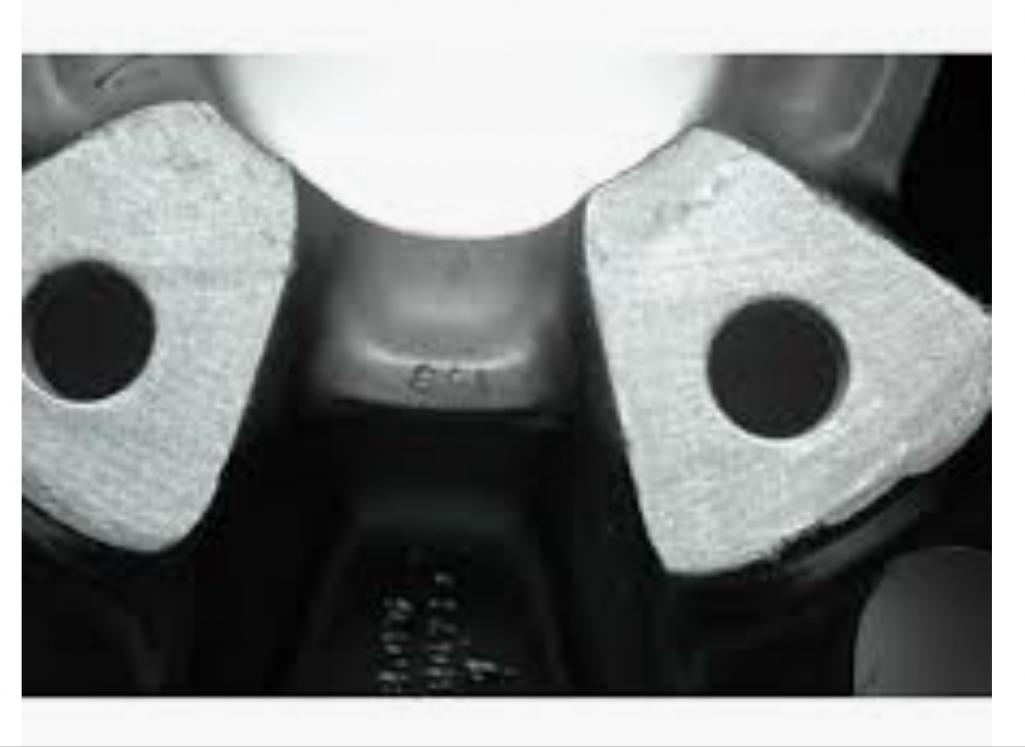
Posted by: pete000 Aug 11 2018, 04:44 PM
Ha! that's not rust ! Keep posting on the Fi conversion.
Posted by: jerhofer Aug 11 2018, 07:52 PM
The date is on the inner ridge between the pedals but not on the pedals on the back of the wheel, near where the center cap sits. A set of 5 in good condition is $4-4,500.
I just sold a single one in fair condition for $750.
Thanks for the info. I couldn't go to bed until I looked at the dates. They are all 1-70. The tires appear to be from the eighties. The other wheels are in similar condition to the one pictured here. The finish appears to be original.
http://s188.photobucket.com/user/jerhofer/media/1974%20Porsche%20914-6/8-11-18%20wheel%20date_zpsajc14mgu.jpg.html
http://s188.photobucket.com/user/jerhofer/media/1974%20Porsche%20914-6/8-11-18%20wheel%20date%202_zpshugdpwrq.jpg.html
http://s188.photobucket.com/user/jerhofer/media/1974%20Porsche%20914-6/8-11-18%20wheel%20date%203_zpsvsfqd28b.jpg.html
http://s188.photobucket.com/user/jerhofer/media/1974%20Porsche%20914-6/8-11-18%20wheel%20date%204_zpssamc67k0.jpg.html
http://s188.photobucket.com/user/jerhofer/media/1974%20Porsche%20914-6/8-11-18%20wheel%20date%205_zpslpgcbfxh.jpg.html
http://s188.photobucket.com/user/jerhofer/media/1974%20Porsche%20914-6/8-11-18%20Tire%20date%205_zpsxybpatcj.jpg.html
http://s188.photobucket.com/user/jerhofer/media/1974%20Porsche%20914-6/8-11-18%20Tire%20tread%202_zpsllh6n6md.jpg.html
http://s188.photobucket.com/user/jerhofer/media/1974%20Porsche%20914-6/8-11-18%20wheel_zpsqptxwzga.jpg.html
http://s188.photobucket.com/user/jerhofer/media/1974%20Porsche%20914-6/8-11-18%20wheel%20info_zpsvdfztoyd.jpg.html
http://s188.photobucket.com/user/jerhofer/media/1974%20Porsche%20914-6/8-11-18%20wheel%20info%202_zpscwvimoqj.jpg.html
Posted by: mepstein Aug 11 2018, 08:19 PM
I wouldn't let them go for less than $4K and I would start at $4,500 on early911sregistry and pelican.
Posted by: ClayPerrine Aug 11 2018, 09:06 PM
That car is absolutely beautiful. I can remember seeing it at a couple of the MUSR events with the previous owner.
I like the EFI conversion.
Posted by: jerhofer Aug 16 2018, 05:15 PM
I haven't had much time to work on the car since returning from our trip. Too much catching up to do after being gone for five weeks. The wire shelves in our motorhome refrigerator were showing some rust where the finish had failed. I bead blasted those (many, many hours as it is tedious to blast round things) and took them to a powder coater today. My powder coater is very reasonable and new shelves are very expensive. So it should be worth the time spent in the blast cabinet.
To free up some room, I did fine time to place ads for a few items on this forum. I have lots of other parts that came with the car if anybody has a need. I do have an extra 901 tranny. I asked the previous owner about its condition. He got it from a friend of his who had totaled his car many years ago. His recollection is that it was working fine at the time it was removed but he cannot remember how many miles were on it. Pm me if you need something and I will see if I have it.
Posted by: rgalla9146 Aug 16 2018, 07:12 PM
What a beautiful car ! Headed back on the road......enjoy the process.
The asymmetrical yoke that pulls the Ebrake cables is mounted upside down.
Turn it over so that 'OBEN' faces up. I think oben is German for UP !
Posted by: jerhofer Aug 16 2018, 08:24 PM
What a beautiful car ! Headed back on the road......enjoy the process.
The asymmetrical yoke that pulls the Ebrake cables is mounted upside down.
Turn it over so that 'OBEN' faces up. I think oben is German for UP !
Thanks for the info. I will try to remember to do that.
Posted by: mepstein Aug 18 2018, 12:14 PM
Looks like the wheels sold quickly.
Posted by: jerhofer Aug 18 2018, 12:25 PM
Looks like the wheels sold quickly.
A 911 restorer near Dallas bought them.
Posted by: jerhofer Aug 21 2018, 07:20 PM
I finally found a few hours to spend on the engine today. At the rear of a 911 engine is the "Holy Trinity", a place where oil leaks commonly occur. The three items are the oil pressure sender, the oil thermostat, and the breather. Since these would be very difficult to get to once the motor is back in the car, I removed all of them and re-sealed them. Being a little pro-active here.
http://s188.photobucket.com/user/jerhofer/media/1974%20Porsche%20914-6/8-21-18%20holy%20trinity%206_zpsay0tljcl.jpg.html
http://s188.photobucket.com/user/jerhofer/media/1974%20Porsche%20914-6/8-21-18%20holy%20trinity%204_zpsq4b7bjns.jpg.html
http://s188.photobucket.com/user/jerhofer/media/1974%20Porsche%20914-6/8-21-18%20holy%20trinity%202_zpskcpkakin.jpg.html
http://s188.photobucket.com/user/jerhofer/media/1974%20Porsche%20914-6/8-21-18%20holy%20trinity%203_zpsu6jt0stc.jpg.html
http://s188.photobucket.com/user/jerhofer/media/1974%20Porsche%20914-6/8-21-18%20holy%20trinity_zpsyr0nocay.jpg.html
Another potential oil leak can come from the engine oil cooler. There are three green seals that I replaced. I spent some time cleaning here as well.
http://s188.photobucket.com/user/jerhofer/media/1974%20Porsche%20914-6/8-21-18%20engine%20oil%20cooler%206_zpsshsw3eft.jpg.html
http://s188.photobucket.com/user/jerhofer/media/1974%20Porsche%20914-6/8-21-18%20engine%20oil%20cooler%205_zps3mve4xop.jpg.html
http://s188.photobucket.com/user/jerhofer/media/1974%20Porsche%20914-6/8-21-18%20engine%20oil%20cooler%204_zpsagxfnbzc.jpg.html
http://s188.photobucket.com/user/jerhofer/media/1974%20Porsche%20914-6/8-21-18%20engine%20oil%20cooler%203_zpsnflvb9e5.jpg.html
http://s188.photobucket.com/user/jerhofer/media/1974%20Porsche%20914-6/8-21-18%20engine%20oil%20cooler%202_zpstvd8sakh.jpg.html
http://s188.photobucket.com/user/jerhofer/media/1974%20Porsche%20914-6/8-21-18%20engine%20oil%20cooler_zps34hiz5ww.jpg.html
In anticipation of adjusting the valves, I removed the valve covers on one side before I ran out of time. To get the upper valve cover off, I had to loosen the oil line for the pressure fed chain tensioner. This allowed me to rotate it slightly to make clearance for the valve cover. I taped a note on it to remind me to tighten it once I replace the valve cover.
http://s188.photobucket.com/user/jerhofer/media/1974%20Porsche%20914-6/8-21-18%20engine%20heads_zpsyv9t11lo.jpg.html
Posted by: jerhofer Aug 27 2018, 08:08 PM
Before we left on our motorhome trip, I took the car to my favorite body shop to have a few things addressed. When I initially received the car there was a plastic covering on the leading edge of the rear flares. This plastic covered up a bunch of stone chips. I had both rear quarter panels painted.
http://s188.photobucket.com/user/jerhofer/media/1974%20Porsche%20914-6/6-4-18%20shield_zpsugf1hwlf.jpg.html
http://s188.photobucket.com/user/jerhofer/media/1974%20Porsche%20914-6/8-27-18%20rear%20flare_zpswqxtkmw1.jpg.html
Both the front and rear valances and the rocker panels also needed some help. All of these parts were removed from the car to be painted.
http://s188.photobucket.com/user/jerhofer/media/1974%20Porsche%20914-6/8-27-18%20rear%20valance_zpstsurlk6u.jpg.html
http://s188.photobucket.com/user/jerhofer/media/1974%20Porsche%20914-6/8-27-18%20front%20valance_zpsznglekwb.jpg.html
http://s188.photobucket.com/user/jerhofer/media/1974%20Porsche%20914-6/8-27-18%20rocker%20panel_zpspbzlh6hm.jpg.html
There was a dent from the bottom side on one of the rear quarter panels. They had been painted only so there was no protection from rocks being thrown up. The body shop applied German schutz underbody seal to the wheel wells. In this photo you can see the the inner fender enforcement kit that Perry Kiehl installed during the build.
http://s188.photobucket.com/user/jerhofer/media/1974%20Porsche%20914-6/8-27-18%20wheelwell_zpscg3qjecz.jpg.html
The bumper pads had some cracks so I ordered new ones. The body shop installed them.
http://s188.photobucket.com/user/jerhofer/media/1974%20Porsche%20914-6/6-4-18%20front%203_zpsxvnz78uz.jpg.html
http://s188.photobucket.com/user/jerhofer/media/1974%20Porsche%20914-6/8-27-18%20bumper%20pad%20front%202_zpsuc9ufvr3.jpg.html
http://s188.photobucket.com/user/jerhofer/media/1974%20Porsche%20914-6/8-27-18%20bumper%20pad%20rear_zpskwgc7urg.jpg.html
I decided I wasn't happy with the finish on the valve covers. I bead blasted two of them today and will do the other two tomorrow. Then they will make a trip to the powder coater.
http://s188.photobucket.com/user/jerhofer/media/1974%20Porsche%20914-6/8-27-18%20valve%20covers_zpsnh6gqyat.jpg.html
Posted by: jerhofer Aug 29 2018, 02:45 PM
When removing the valve covers, one stud came out with the nut as it was stripped. Had to install a new stud.
http://s188.photobucket.com/user/jerhofer/media/1974%20Porsche%20914-6/8-27-18%20valve%20cover%20stud_zpsrl3gdohs.jpg.html
I adjusted the valves. I discovered a pair of brand new turbo lower valve covers which I installed. While waiting for my upper valve covers to be powder coated, I used some cardboard to act as temporary covers.
http://s188.photobucket.com/user/jerhofer/media/1974%20Porsche%20914-6/8-28-18%20adjusting%20valves_zpst0xt3nvz.jpg.html
http://s188.photobucket.com/user/jerhofer/media/1974%20Porsche%20914-6/8-29-18%20valve%20cover%204_zpsrtphzaqc.jpg.html
http://s188.photobucket.com/user/jerhofer/media/1974%20Porsche%20914-6/8-29-18%20valve%20cover%203_zpszo09gkzv.jpg.html
http://s188.photobucket.com/user/jerhofer/media/1974%20Porsche%20914-6/8-29-18%20valve%20cover%202_zpsrmnwxe9r.jpg.html
http://s188.photobucket.com/user/jerhofer/media/1974%20Porsche%20914-6/8-29-18%20valve%20cover_zpslwfobrnu.jpg.html
Next I removed the old spark plugs. They showed the car had been running rich with the PMO carburetors. I installed the new plugs recommended for the EFI.
http://s188.photobucket.com/user/jerhofer/media/1974%20Porsche%20914-6/8-29-18%20spark%20plugs_zpslicnnnpn.jpg.html
http://s188.photobucket.com/user/jerhofer/media/1974%20Porsche%20914-6/8-29-18%20spark%20plugs%202_zpswc6cfepu.jpg.html
To install the crank fire pulley for the EfI, I first needed to remove the stock pulley. To do that I temporarily installed the flywheel so I could insert a flywheel lock.
http://s188.photobucket.com/user/jerhofer/media/1974%20Porsche%20914-6/8-29-18%20flywheel_zpssx735y5w.jpg.html
http://s188.photobucket.com/user/jerhofer/media/1974%20Porsche%20914-6/8-29-18%20flywheel%20lock_zps7onv6lyz.jpg.html
With the stock pulley removed, I was ready to install the crank fire pulley. However, at first, I could not get it to clear the fan housing. The gear on the crank fire pulley needs to be behind the fan housing. To get it into place I had to loosen the fan housing, raise it slightly and then install the crank fire pulley at an angle to clear the fan housing. Once that was done I could line up the pulley on the crankshaft and tighten everything. As you can see in the photo below, there is very little clearance between the fan housing and the pulley.
http://s188.photobucket.com/user/jerhofer/media/1974%20Porsche%20914-6/8-29-18%20crankfire%20pulley%202_zpszeva0j1z.jpg.html
http://s188.photobucket.com/user/jerhofer/media/1974%20Porsche%20914-6/8-29-18%20crankfire%20pulley_zpsc6xnvkwj.jpg.html
Removing the distributor and replacing it with the supplied plug was next on the list. With the plug in place, I could install the crank fire sensor holder.
http://s188.photobucket.com/user/jerhofer/media/1974%20Porsche%20914-6/8-29-18%20crankfire%20pulley%207_zps8ikrxdjl.jpg.html
http://s188.photobucket.com/user/jerhofer/media/1974%20Porsche%20914-6/8-29-18%20crankfire%20pulley%205_zpsghyf2pjq.jpg.html
http://s188.photobucket.com/user/jerhofer/media/1974%20Porsche%20914-6/8-29-18%20crankfire%20pulley%204_zps8wrpidv8.jpg.html
http://s188.photobucket.com/user/jerhofer/media/1974%20Porsche%20914-6/8-29-18%20crankfire%20pulley%203_zps9tw0gqz6.jpg.html
Posted by: mepstein Aug 29 2018, 03:02 PM
On a lot of cars, the turbo covers need the outer ribs milled down a bit (I think 3/8' does it, might be 5/8) in order to remove them while the engine is in the car.
Posted by: jerhofer Aug 29 2018, 04:48 PM
On a lot of cars, the turbo covers need the outer ribs milled down a bit (I think 3/8' does it, might be 5/8) in order to remove them while the engine is in the car.
I can't imagine adjusting the valves with the motor in the car. It's hard enough to do the upper valves in a 911 but, given the small access in a 914, I would need a couple extra double jointed arms, hands and fingers to even consider it. It would be easier to pull the motor.
Posted by: 914Timo Aug 30 2018, 10:30 AM
WOW !! Six bolt flywheel. Not an ordinary 3L crank.
Thanks for shearing pics and info. Very very nice car. Love it !!
Posted by: jerhofer Aug 30 2018, 02:26 PM
Had to take the dog to the groomer. I sold my 1999 Boxster and, in North Caroliana, you have to turn in your license plates before you can cancel your insurance. Cancel the insurance first and you will receive a nasty letter from the state. So to the DMV I went. After doing some other running around, I got back to the garage by late morning. Since I had to pick up the dog when she was done at the groomer's, I didn't want to start a big project.
During the night I was thinking about whether or not to paint the fan shroud before I begin to install the throttle bodies. It came to me that I might try some polish and wax to make it look better. That worked!! The first photo was taken earlier while the other photo was taken today after I had applied some elbow grease to the shroud.
http://s188.photobucket.com/user/jerhofer/media/1974%20Porsche%20914-6/6-18-18%20engine_zpsawyeccyx.jpg.html
http://s188.photobucket.com/user/jerhofer/media/1974%20Porsche%20914-6/8-30-18%20shroud_zpsw29prb9w.jpg.html
Charlotte has a Cars and Coffee every first Saturday. It is open to anyone who wants to attend and usually attracts at least 500 cars. Every third Sunday, Cars and Cappuccino happens. This is for European cars only and is by invitation. There were a couple McLaren 720S and a couple Ferrari's among the Porsche's and other makes.
One person there had a Euro 911 with Fuchs wheels. Since I was looking for wheels for the 914 I asked him if they were replicas. They were and I would have known that had I looked at the tire size. They were 17" Euromeister's. I had been considering these wheels and I quickly asked him if he was happy with them and did they balance well. The answer was yes to both questions. A little later another gentleman arrived with the same wheel package and was equally positive.
These wheels occasionally go on sale for very special pricing by Automotion. While i was waiting for the sale price, I began to consider what sizes I wanted to order. While the 17's looked great on both of those 911's, I wondered about the thin sidewall of a 17" tire. I finally decided to compromise and go with the 16" wheels, 8's in front and 9's in the rear. They arrived yesterday afternoon and today I mounted the wheels, sans tires, to see if there were any clearance issues. All seemed well so I called Tire Rack and ordered tires.
http://s188.photobucket.com/user/jerhofer/media/1974%20Porsche%20914-6/8-30-18%20euromeister%20wheels_zps0pjal14u.jpg.html
http://s188.photobucket.com/user/jerhofer/media/1974%20Porsche%20914-6/8-30-18%20euromeister%20wheels%202_zpsdasdsg0e.jpg.html
http://s188.photobucket.com/user/jerhofer/media/1974%20Porsche%20914-6/8-30-18%20euromeister%20wheels%205_zpsaqqefhtg.jpg.html
http://s188.photobucket.com/user/jerhofer/media/1974%20Porsche%20914-6/8-30-18%20euromeister%20wheels%204_zpsqjszkzdw.jpg.html
http://s188.photobucket.com/user/jerhofer/media/1974%20Porsche%20914-6/8-30-18%20euromeister%20wheels%206_zpstbegvuel.jpg.html
For tires I decided on 225/50's front and 245/50's rear. There were about ten options that offered a tire in both sizes. After reading Tire Rack's reviews, I called them to ask about the GENERAL G-MAX RS SL. This is a summer tire. The gentleman at Tire Rack said they had been very impressed with this tire's performance in their testing. General is now owned by Continental which may explain why they did well. A couple years ago I bought a set of General high performance all season tires for my Audi Allroad and was very pleased with them. I ordered the G-Max's and they should arrive at the installer tomorrow.
Gratuitous photos of the cutest and happiest dog in the world. But then I may be biased.
http://s188.photobucket.com/user/jerhofer/media/1974%20Porsche%20914-6/3-22-17%20piper_zpsj44fxoad.jpg.html
http://s188.photobucket.com/user/jerhofer/media/1974%20Porsche%20914-6/3-22-17%20piper%205_zpsdehzxt9i.jpg.html
Posted by: jerhofer Aug 30 2018, 04:04 PM
WOW !! Six bolt flywheel. Not an ordinary 3L crank.
Thanks for shearing pics and info. Very very nice car. Love it !!
The car came with this Kennedy Engineering flywheel & clutch.
Posted by: jerhofer Aug 31 2018, 07:47 PM
I worked all afternoon and accomplished quite a bit. First off I installed the crank position sensor in the holder. It called for a .035 gap. The tightening bolt called for 45 in/lb.
http://s188.photobucket.com/user/jerhofer/media/1974%20Porsche%20914-6/8-31-18%20crank%20fire%20sensor%205_zpshukrwwvx.jpg.html
http://s188.photobucket.com/user/jerhofer/media/1974%20Porsche%20914-6/8-31-18%20crank%20fire%20sensor%203_zpsmetiotjc.jpg.html
http://s188.photobucket.com/user/jerhofer/media/1974%20Porsche%20914-6/8-31-18%20crank%20fire%20sensor_zpsz7mdmum9.jpg.html
Time to work on the intake manifolds. The studs need to be installed as well as the bell crank. Next up was prepping the motor to accept the manifolds. An insulator is sandwiched between two gaskets for each cylinder.
http://s188.photobucket.com/user/jerhofer/media/1974%20Porsche%20914-6/8-31-18%20intake%20manifolds%206_zps2j8j6f2g.jpg.html
http://s188.photobucket.com/user/jerhofer/media/1974%20Porsche%20914-6/8-31-18%20intake%20manifolds%204_zps7et5oeci.jpg.html
http://s188.photobucket.com/user/jerhofer/media/1974%20Porsche%20914-6/8-31-18%20intake%20manifolds%208_zpslcjmcfgw.jpg.html
http://s188.photobucket.com/user/jerhofer/media/1974%20Porsche%20914-6/8-31-18%20intake%20manifolds%207_zpsblitpfba.jpg.html
http://s188.photobucket.com/user/jerhofer/media/1974%20Porsche%20914-6/8-31-18%20intake%20manifolds%203_zpspob72icz.jpg.html
Posted by: jerhofer Aug 31 2018, 07:59 PM
Now it was the throttle bodies turn. First up is installing a retaining clip on each fuel injector base. After oiling the "O" ring, i inserted the injector into the fuel rail. Once it is fully seated, the retaining clip is rotated to lock it in place.
http://s188.photobucket.com/user/jerhofer/media/1974%20Porsche%20914-6/8-31-18%20throttle%20bodies%2016_zpsvf4w3jbn.jpg.html
http://s188.photobucket.com/user/jerhofer/media/1974%20Porsche%20914-6/8-31-18%20throttle%20bodies%2015_zpsguse73fm.jpg.html
http://s188.photobucket.com/user/jerhofer/media/1974%20Porsche%20914-6/8-31-18%20throttle%20bodies%2011_zpsorbertzc.jpg.html
Once the injectors are secured to the fuel rail, the other end of the injectors is inserted into the throttle body. The fuel rail is secured to the throttle body with a bolt going through a spacer.
http://s188.photobucket.com/user/jerhofer/media/1974%20Porsche%20914-6/8-31-18%20throttle%20bodies%2014_zpsjpcjxvsq.jpg.html
http://s188.photobucket.com/user/jerhofer/media/1974%20Porsche%20914-6/8-31-18%20throttle%20bodies%2013_zpsf0eghbjm.jpg.html
http://s188.photobucket.com/user/jerhofer/media/1974%20Porsche%20914-6/8-31-18%20throttle%20bodies%2012_zpsgt31kdof.jpg.html
Next the AN fittings with "O" rings are fitted to each end of the fuel rails.
http://s188.photobucket.com/user/jerhofer/media/1974%20Porsche%20914-6/8-31-18%20throttle%20bodies%209_zpsycsl1o9l.jpg.html
The Throttle Position Sensor (TPS) in fitted to one end of the throttle shaft.
http://s188.photobucket.com/user/jerhofer/media/1974%20Porsche%20914-6/8-31-18%20throttle%20bodies%208_zpseo1bsrob.jpg.html
http://s188.photobucket.com/user/jerhofer/media/1974%20Porsche%20914-6/8-31-18%20throttle%20bodies%207_zpsmcjf4vej.jpg.html
Now each throttle body can be fitted to the intake manifolds.
http://s188.photobucket.com/user/jerhofer/media/1974%20Porsche%20914-6/8-31-18%20throttle%20bodies%202_zpscyfa0tng.jpg.html
Posted by: 914forme Sep 1 2018, 07:46 PM
Very nice work there. Making me reconsider the PMOs.
Posted by: jerhofer Sep 1 2018, 07:48 PM
Spent most of the morning getting the tires mounted. Tech said they balanced well. I had to use a 1/4" spacer on the rears to clear the inner fender. To simulate the drivetrain, I loaded 200lbs of salt in the very rear of the trunk. The car was only lowered about a 1/4" with all of that weight. Stiff suspension!! Lowering it reduced the rear wheel clearance. Since I have room on the outside, I will be using a larger spacer. Once I have the clearances where I want them to be, I can install the correct size wheel studs.
http://s188.photobucket.com/user/jerhofer/media/1974%20Porsche%20914-6/9-1-18%20wheels%20%20tires%208_zpsh7hscvcr.jpg.html
http://s188.photobucket.com/user/jerhofer/media/1974%20Porsche%20914-6/9-1-18%20wheels%20%20tires%207_zpsdaemzpnh.jpg.html
http://s188.photobucket.com/user/jerhofer/media/1974%20Porsche%20914-6/9-1-18%20wheels%20%20tires%205_zpshhenrara.jpg.html
To complete the Chinese wheel configuration, I installed the center caps I had purchased earlier this summer on eBay. They cost $118 for a set of four with free shipping from China. They are of surprisingly good quality. I should have taken a photo of the rear as they are anodized like the factory caps. And they fit perfectly.
http://s188.photobucket.com/user/jerhofer/media/1974%20Porsche%20914-6/9-1-18%20wheels%20%20tires%202_zpsrjktyana.jpg.html
http://s188.photobucket.com/user/jerhofer/media/1974%20Porsche%20914-6/9-1-18%20wheels%20%20tires_zpsjxqhnufx.jpg.html
I did get to spend a little time on the linkage. Richard's instructions recommend drilling a half inch hole in the right side mount for routing a vacuum hose to the port behind the mount. I also had to install the rod ends on the cross bar.
http://s188.photobucket.com/user/jerhofer/media/1974%20Porsche%20914-6/9-1-18%20linkage%205_zpspx1bmc7k.jpg.html
http://s188.photobucket.com/user/jerhofer/media/1974%20Porsche%20914-6/9-1-18%20linkage%204_zpsalhwl7y2.jpg.html
http://s188.photobucket.com/user/jerhofer/media/1974%20Porsche%20914-6/9-1-18%20linkage%203_zpsobjrriup.jpg.html
http://s188.photobucket.com/user/jerhofer/media/1974%20Porsche%20914-6/9-3-18%20linkage%203_zpsl1wuxvla.jpg.html
http://s188.photobucket.com/user/jerhofer/media/1974%20Porsche%20914-6/9-3-18%20linkage%204_zpsoykt68jm.jpg.html
Posted by: Larmo63 Sep 1 2018, 11:46 PM
Please don't think we aren't geeking out on your build. Your thread is well written & documented, and it's interesting.

Posted by: eric9144 Sep 2 2018, 10:05 PM
Please don't think we aren't geeking out on your build. Your thread is well written & documented, and it's interesting.


Posted by: jerhofer Sep 3 2018, 03:07 AM
Please don't think we aren't geeking out on your build. Your thread is well written & documented, and it's interesting.
Thanks for the compliments.
Posted by: RickS Sep 3 2018, 09:52 AM
Piling on. Outstanding thread and I applaud your build quality and attention to detail.
Posted by: jerhofer Sep 3 2018, 04:13 PM
I finished up the linkage today. The left side rod ends are attached to the rod and to the throttle shaft. One begins with the rod ends at their shortest length and then two turns are added to the length. Then the rod from the bell crank to the rod can be installed. I will have to adjust it once I have the throttle pedal hooked up. The right side rod ends are adjusted so the throttle remains on the stop.
http://s188.photobucket.com/user/jerhofer/media/1974%20Porsche%20914-6/9-3-18%20linkage%205_zpsvprmmo1a.jpg.html
http://s188.photobucket.com/user/jerhofer/media/1974%20Porsche%20914-6/9-3-18%20linkage_zpsp4ztar8g.jpg.html
http://s188.photobucket.com/user/jerhofer/media/1974%20Porsche%20914-6/9-3-18%20linkage%202_zpsdcxv1lij.jpg.html
http://s188.photobucket.com/user/jerhofer/media/1974%20Porsche%20914-6/9-3-18%20air%20cleaners%209_zpsbcknprtz.jpg.html
Next up was installing the air cleaners. The base plate is fastened first and then the hats.
http://s188.photobucket.com/user/jerhofer/media/1974%20Porsche%20914-6/9-3-18%20air%20cleaners%207_zpsw2z5obyy.jpg.html
http://s188.photobucket.com/user/jerhofer/media/1974%20Porsche%20914-6/9-3-18%20air%20cleaners%203_zpsokzombu9.jpg.html
http://s188.photobucket.com/user/jerhofer/media/1974%20Porsche%20914-6/9-3-18%20air%20cleaners%202_zpsmhevyd9n.jpg.html
Vacuum lines have to be run from each throttle body to the vacuum manifold. It is mounted by using the studs for the oil thermostat using extensions. Some spark plug wire separators worked perfectly to route the vacuum lines.
http://s188.photobucket.com/user/jerhofer/media/1974%20Porsche%20914-6/9-3-18%20vacuum%20lines_zpsyjgxybo8.jpg.html
http://s188.photobucket.com/user/jerhofer/media/1974%20Porsche%20914-6/9-3-18%20vacuum%20lines%208_zpsgsskruin.jpg.html
http://s188.photobucket.com/user/jerhofer/media/1974%20Porsche%20914-6/9-3-18%20vacuum%20lines%206_zpsmv006njj.jpg.html
Posted by: jerhofer Sep 4 2018, 07:31 PM
One more vacuum line needed to be run from the vacuum manifold. It went to the manifold absolute pressure (MAP) sensor. At first glance, I thought the holes would line up perfectly with the holes on the vacuum manifold. However, they were off by about an eighth of an inch. Since one bolt would be sufficient to mount the sensor, I used my Dremel to ground down the one leg on the bottom of the sensor so it would fit better on top of the vacuum manifold. Wiring to come later.
http://s188.photobucket.com/user/jerhofer/media/1974%20Porsche%20914-6/9-4-18%20MAP%20Sensor%208_zpshirywf5c.jpg.html
http://s188.photobucket.com/user/jerhofer/media/1974%20Porsche%20914-6/9-4-18%20MAP%20Sensor%207_zpsuu4u4ngy.jpg.html
http://s188.photobucket.com/user/jerhofer/media/1974%20Porsche%20914-6/9-4-18%20MAP%20Sensor%206_zpsz40hhlsx.jpg.html
http://s188.photobucket.com/user/jerhofer/media/1974%20Porsche%20914-6/9-4-18%20MAP%20Sensor%203_zpsti9b4zqe.jpg.html
http://s188.photobucket.com/user/jerhofer/media/1974%20Porsche%20914-6/9-4-18%20MAP%20Sensor%202_zpsnv8kmxj1.jpg.html
The manifold air temperature (MAT) sensor needed to be installed into the base of the air cleaner. After drilling a 7/8" hole and installing a grommet, the MAT sensor is screwed into the grommet. Sounds a little strange but it fits very securely.
http://s188.photobucket.com/user/jerhofer/media/1974%20Porsche%20914-6/9-4-18%20MAP%20Sensor%208_zpsalrkybru.jpg.html
http://s188.photobucket.com/user/jerhofer/media/1974%20Porsche%20914-6/9-4-18%20MAT%20Sensor%206_zpsybgky9b2.jpg.html
http://s188.photobucket.com/user/jerhofer/media/1974%20Porsche%20914-6/9-4-18%20MAT%20Sensor%205_zpspis06faq.jpg.html
http://s188.photobucket.com/user/jerhofer/media/1974%20Porsche%20914-6/9-4-18%20MAT%20Sensor%204_zpsxgl2wf97.jpg.html
http://s188.photobucket.com/user/jerhofer/media/1974%20Porsche%20914-6/9-4-18%20MAT%20Sensor_zpsed2zmkvo.jpg.html
Posted by: jerhofer Sep 4 2018, 08:13 PM
The instructions called for adding a second return spring on both throttle bodies. The recommended way was to drill a 1/8" hole into the air cleaner base. A 1/8" cotter pin is inserted from the bottom and spread out on the top of the air cleaner base. The excess metal on the cotter pin is cut away. The bottom of the cotter pin becomes the eye for the upper mount for the return spring.
http://s188.photobucket.com/user/jerhofer/media/1974%20Porsche%20914-6/9-4-18%20return%20spring%203_zpsoqtjczbc.jpg.html
http://s188.photobucket.com/user/jerhofer/media/1974%20Porsche%20914-6/9-4-18%20return%20spring_zpsmyze2jwf.jpg.html
http://s188.photobucket.com/user/jerhofer/media/1974%20Porsche%20914-6/9-4-18%20return%20spring%202_zpspmi9r8r7.jpg.html
Because I was concerned about the vacuum line on the left side being close to the throttle linkage, I decided to clamp it to the fan shroud.
http://s188.photobucket.com/user/jerhofer/media/1974%20Porsche%20914-6/9-4-18%20vacuum%20hose%20holder_zpsxg6zlqlr.jpg.html
To install the cam sync adapter, the plug on the end of the cam housing must be removed. As recommended, I used a dent puller for removal. I drilled a small hole off to one side, inserted a screw into the holder and screwed it into the plug. By pulling on the slide weight on the puller, the cap was easily removed. I placed some grease on the drill bit to catch most of the shavings.
http://s188.photobucket.com/user/jerhofer/media/1974%20Porsche%20914-6/9-4-18%20cam%20phase%20sensor%205_zps49rzcrl3.jpg.html
http://s188.photobucket.com/user/jerhofer/media/1974%20Porsche%20914-6/9-4-18%20cam%20phase%20sensor%204_zpshe4huyhn.jpg.html
http://s188.photobucket.com/user/jerhofer/media/1974%20Porsche%20914-6/9-4-18%20cam%20phase%20sensor%203_zpshe0gtrza.jpg.html
http://s188.photobucket.com/user/jerhofer/media/1974%20Porsche%20914-6/9-4-18%20cam%20phase%20sensor%202_zpsobksb5tz.jpg.html
http://s188.photobucket.com/user/jerhofer/media/1974%20Porsche%20914-6/9-4-18%20cam%20phase%20sensor_zpspakqf6dp.jpg.html
The next instruction said Rotate the engine through a cycle stopping 90 degrees before Z1 on the compression stroke." When I had installed the new fan pulley, I had the engine set at TDC. As I began to rotate the motor, I was interrupted. When I came back I realized that I didn't know where I was on the cycle. No problem. As I have done in the past, I would pull plug #1, insert a 1/4" wooden dowel, mark it and then see when it was pushed out the maximum at Z1. And this is when my day went sour. After cranking through a couple cylinders, the dowel was snagged by something and a piece was broken off. The broken off piece was about an inch long and about half the dowel width.
http://s188.photobucket.com/user/jerhofer/media/1974%20Porsche%20914-6/9-4-18%20dowel_zpsw3cpm0cr.jpg.html
I got a piece of clear hose and attached it to my shop vac and tried to suck it out. When that didn't work, I called Richard Clewett at Clewett Engineering, the guy who sold me the EFI kit. His first thought was to see if the #1 exhaust valve was open. If so, he recommended using air to blow it out. Since the exhaust was on, I removed it or else I wouldn't know if anything came out. The exhaust valve was open. Blowing air into it do not work. I have an engine camera scope. After inserting it through the plug hole, I could not see the piece of wood. I also looked up through the open valve and it was not visible there.
Since my skills stop at building motors, I will have to take the motor somewhere and have the head removed to see what is going on. Not the way I wanted to end the day but sometimes things happen. My son works with Todd Holbert (Al"s son) at Toyota Racing Development (TRD). My son texted him about shops that he would recommend. I will be contacting them tomorrow.
Posted by: jerhofer Sep 5 2018, 03:01 PM
Today was a better day. I removed the left side throttle bodies and manifolds so I could see in through the intake valve for cylinder #1. I rotated the engine so the valve was open. Using my camera scope I could see nothing. I checked again with the exhaust valve open and saw nothing again. With the piston recessed in the cylinder, I was able to look completely around it and nothing showed. I could see that there was nothing caught by the valves. So, I am convinced that there is nothing in that cylinder.
When I hooked up my shop vac yesterday, I used a clear tube to suck from the spark plug hole so I could see anything that might be vacuumed out. I was looking for a piece that was the size of the piece that was missing. However, the dowel is made from some really soft wood and it might have been crushed when it was caught by a valve. So there may have been fragments that were sucked out that I didn't see.
I rotated the motor through a complete cycle and double checked my valve clearances.
So I got back to doing the job that started all of this commotion yesterday...installing the cam sync adapter. The motor is to be in the position with Z1 at 90 degrees before TDC on the cam pulley.. Once I had that set, the next step is to mount the adapter without the gasket. It is recommended to add a witness mark at this time.
http://s188.photobucket.com/user/jerhofer/media/1974%20Porsche%20914-6/9-5-18%20cam%20sync%20adapter%209_zps4znxwotf.jpg.html
http://s188.photobucket.com/user/jerhofer/media/1974%20Porsche%20914-6/9-5-18%20cam%20sync%20adapter%208_zpsepv80auh.jpg.html
http://s188.photobucket.com/user/jerhofer/media/1974%20Porsche%20914-6/9-5-18%20cam%20sync%20adapter%207_zpswdqt5c8h.jpg.html
With it mounted, you insert the drill bushing using a 4.2mm drill bit. Since I couldn't find anyone handling metric drill bits, the next closest that fits into the drill bushing is 5/32. A little over 1/2" deep hole is drilled into the end of the cam. That hole is tapped with a M5-0.8 thread. The supplied bolt is then bolted into the hole with the head being flush with the cam surface using red loctite. The adapter is then mounted with the gasket. You then check the distance from the cam sensor mounting surface to the top of the M5 bolt. The distance should be 33.0-33.5mm (1.300-1.320). Mine was in that range. Now the cam sensor can be mounted to the adapter. It reads the bolt head as the cam rotates.
http://s188.photobucket.com/user/jerhofer/media/1974%20Porsche%20914-6/9-5-18%20cam%20sync%20adapter%206_zpsrne1krsu.jpg.html
http://s188.photobucket.com/user/jerhofer/media/1974%20Porsche%20914-6/9-5-18%20cam%20sync%20adapter%205_zpskmfiq4ft.jpg.html
http://s188.photobucket.com/user/jerhofer/media/1974%20Porsche%20914-6/9-5-18%20cam%20sync%20adapter%204_zpswan4buza.jpg.html
http://s188.photobucket.com/user/jerhofer/media/1974%20Porsche%20914-6/9-5-18%20cam%20sync%20adapter%203_zpsnjihcytf.jpg.html
http://s188.photobucket.com/user/jerhofer/media/1974%20Porsche%20914-6/9-5-18%20cam%20sync%20adapter%202_zpstp725w9y.jpg.html
http://s188.photobucket.com/user/jerhofer/media/1974%20Porsche%20914-6/9-5-18%20cam%20sync%20adapter_zpsp03ui6fc.jpg.html
Posted by: Dave_Darling Sep 5 2018, 10:16 PM
OK, I am officially stunned. It's been almost 8 hours, and nobody has chimed in with mention of the Infamous Chopstick???
--DD
Posted by: jerhofer Sep 6 2018, 01:37 PM
OK, I am officially stunned. It's been almost 8 hours, and nobody has chimed in with mention of the Infamous Chopstick???
--DD
A few years ago I bought a Ferrari 348 knowing that it needed to have the timing belt changed. It was critical here to have the motor at TDC. I used the very same dowel on that motor and it worked flawlessly. Since that was a V8 rather than a boxer motor, the spark plug hole was more vertical. I would guess that was why it worked better on that motor.
http://s188.photobucket.com/user/jerhofer/media/1990%20Ferrari%20348TS/11-24-13engineout2sm_zpsa9d3e386.jpg.html
http://s188.photobucket.com/user/jerhofer/media/1990%20Ferrari%20348TS/11-24-13engineout14sm_zpsae9d4fa1.jpg.html
http://s188.photobucket.com/user/jerhofer/media/1974%20Porsche%20914-6/12-8-13-main-pulley-off-sm_1812375_zpsvitvp076.jpg.html
http://s188.photobucket.com/user/jerhofer/media/1974%20Porsche%20914-6/12-7-13-wood-dowel-sm_1812370_zpsqkgbnjuc.jpg.html
I sold that car a couple years ago to a guy in California who I still am in touch with. He has put over 10K miles on it so I must have got it back together right. He has been very, very happy with the car. It was a fun car to drive but I could never get physically comfortable in it. Because it didn't have power steering or brakes and with the weight bias being about the same as a 911, driving it reminded me of the '80's 911's of my past. But prettier!!
http://s188.photobucket.com/user/jerhofer/media/1990%20Ferrari%20348ts%20for%20sale/10-31-13%20exterior%209%20sm_zpsev5cc71e.jpg.html
http://s188.photobucket.com/user/jerhofer/media/1990%20Ferrari%20348ts%20for%20sale/10-31-13interior2sm_zpsaf78a552.jpg.html
Posted by: jerhofer Sep 6 2018, 01:51 PM
Another day, another sensor for the engine. This time it was a head temperature sensor. It can be installed on either side on the front of the engine. There are two walls in this area and you are to drill only through the first wall. The shavings fall into a void so they will not enter the motor. That hole has to be tapped with a M10-1.0 tap. I have a pretty good selection of taps and dies but this one was not included. After a few calls, I found one at a local bolt and tool store. To get to this area, the chain tensioner pressure feed lines have to be unbolted. I was out of the crush washers for these banjo fittings which meant another trip to find them. I spent a good part of the day driving around!!
http://s188.photobucket.com/user/jerhofer/media/1974%20Porsche%20914-6/9-6-18%20taps%20%20dies_zpsdvxzp53f.jpg.html
http://s188.photobucket.com/user/jerhofer/media/1974%20Porsche%20914-6/9-6-18%20tap_zpsrq7oqfyw.jpg.html
http://s188.photobucket.com/user/jerhofer/media/1974%20Porsche%20914-6/9-6-18%20head%20temp%20sensor%203_zpskimujb3r.jpg.html
http://s188.photobucket.com/user/jerhofer/media/1974%20Porsche%20914-6/9-6-18%20head%20temp%20sensor%202_zpseoj8dp5x.jpg.html
The -6 AN fuel lines and fittings arrived today along with the crimper needed to do the many weather pack connectors required to make the computer happy. My son has an identical crimper but, since he is in the middle of installing the Tesla motor in the '79 911, he will be using his. Normally, I would have borrowed his.
http://s188.photobucket.com/user/jerhofer/media/1974%20Porsche%20914-6/9-6-18%20crimper_zpsccyswpzo.jpg.html
http://s188.photobucket.com/user/jerhofer/media/1974%20Porsche%20914-6/9-6-18%20crimper%202_zpsy8pv7a2o.jpg.html
Posted by: IronHillRestorations Sep 6 2018, 02:32 PM
You are taking that car to the next level!
Posted by: jerhofer Sep 7 2018, 02:04 PM
You are taking that car to the next level!
Thanks. That means a lot coming from you.
Posted by: jerhofer Sep 7 2018, 02:28 PM
When I retired ten years ago this November, I told my wife that, since she had cleaned the house for the first forty years of our marriage, I would take care of the next forty years. Which is a good deal for me as our chances of being married eighty years are pretty slim!!! So Friday morning is house cleaning day.
I did spend a very short time on running my first fuel lines. I plumbed in a fuel gauge so I can set the fuel pressure with the regulator. I also ran the line across the rear from carb to carb. My son has lots of experience running AN fuel lines. He told me to heavily wrap the area where I was going to cut a line so the end would not fray. That suggestion worked well.
http://s188.photobucket.com/user/jerhofer/media/1974%20Porsche%20914-6/9-7-18%20fuel%20line%207_zps3ufcrlmq.jpg.html
http://s188.photobucket.com/user/jerhofer/media/1974%20Porsche%20914-6/9-7-18%20fuel%20line%206_zpsmfxc9ztp.jpg.html
http://s188.photobucket.com/user/jerhofer/media/1974%20Porsche%20914-6/9-7-18%20fuel%20line%202_zpswwhh0vjq.jpg.html
http://s188.photobucket.com/user/jerhofer/media/1974%20Porsche%20914-6/9-7-18%20fuel%20line_zps21q2wugw.jpg.html
http://s188.photobucket.com/user/jerhofer/media/1974%20Porsche%20914-6/9-7-18%20fuel%20line%204_zpsej8etlhe.jpg.html
Tomorrow I am taking one of the exhaust's to my son's house to have an O2 sensor bung welded in. The instructions call for mounting the sensor at a 15 degree angle. Should be a good challenge for my son. I will be taking him away from working on his Tesla 911 project. Here are a few pics from last week.
http://s188.photobucket.com/user/jerhofer/media/IMG_3279_zpsgxf3w1zg.jpg.html
http://s188.photobucket.com/user/jerhofer/media/1974%20Porsche%20914-6/9-7-18%20matts%20car%202_zps8l9w4vot.jpg.html
http://s188.photobucket.com/user/jerhofer/media/1974%20Porsche%20914-6/IMG_3276_zpsotx0cny9.jpg.html
http://s188.photobucket.com/user/jerhofer/media/1974%20Porsche%20914-6/IMG_3271_zpsgmaklbyo.jpg.html
http://s188.photobucket.com/user/jerhofer/media/1974%20Porsche%20914-6/IMG_3269_zpshzgu0fwp.jpg.html
Posted by: jerhofer Sep 8 2018, 02:30 PM
One last sensor!! A wide band O2 sensor had to be installed. The car already had O2 sensors in both exhaust pipes for a gauge on the dash. However, the O2 sensor that came with the kit called for it to be installed at a 15 degree angle. My son had a spare sensor bung so I carted the right side exhaust to his house. He ground down the existing bung to get the correct angle. After test fitting the bung, he decided the bung might be too thick which would not allow the sensor to properly extend into the exhaust. So he put it on a vice and ground it down. Using an angle meter, he fine tuned the bung angle and began welding. Good to have a good son!!!
http://s188.photobucket.com/user/jerhofer/media/1974%20Porsche%20914-6/9-8-18%20O2%20sensor%206_zps2ouuipgx.jpg.html
http://s188.photobucket.com/user/jerhofer/media/1974%20Porsche%20914-6/9-8-18%20O2%20sensor%207_zpssbkxcgwe.jpg.html
http://s188.photobucket.com/user/jerhofer/media/1974%20Porsche%20914-6/9-8-18%20O2%20sensor%205_zpsbivu23fy.jpg.html
http://s188.photobucket.com/user/jerhofer/media/1974%20Porsche%20914-6/9-8-18%20O2%20sensor%204_zpsjbaqsh46.jpg.html
http://s188.photobucket.com/user/jerhofer/media/1974%20Porsche%20914-6/9-8-18%20O2%20sensor%203_zps2ldi7swj.jpg.html
http://s188.photobucket.com/user/jerhofer/media/1974%20Porsche%20914-6/9-8-18%20O2%20sensor%202_zpsa0mc0g05.jpg.html
http://s188.photobucket.com/user/jerhofer/media/1974%20Porsche%20914-6/9-8-18%20O2%20sensor%208_zps24qn1udq.jpg.html
To fit his wheels to his 911 Tesla project car, Matt had purchased a number of spacers and shims from Elephant Racing. I had mentioned to him that I needed to move the rear wheels out a bit for clearance on the inside. He gave he his spacers and shims. I liked the Elephant spacers better than the H & R spacers that came with my car. I used a 7mm spacer and a 2mm shim to get the clearance I wanted.
http://s188.photobucket.com/user/jerhofer/media/1974%20Porsche%20914-6/9-8-18%20wheel%20shim%204_zpshrfas78i.jpg.html
http://s188.photobucket.com/user/jerhofer/media/1974%20Porsche%20914-6/9-8-18%20wheel%20shim_zpswgtyuuyi.jpg.html
Posted by: jerhofer Sep 8 2018, 04:17 PM
To prepare for running the fuel lines, I removed the front pan to reveal the old fuel pump and lines. Happily, I discovered a fuel return line connector on the tank. After removing all of the old lines at both ends of the car, I can see that I will have to remove the tank to connect the new fuel lines. From what I could see at the rear, it appears there is a metal fuel line that runs in a tunnel from the fuel tank area to the rear of the car. Is that correct? Also, can anyone tell me how the factory ran the return line from the engine bay to the tank?
http://s188.photobucket.com/user/jerhofer/media/1974%20Porsche%20914-6/9-8-18%20front%20pan%202_zpskzg36kxh.jpg.html
http://s188.photobucket.com/user/jerhofer/media/1974%20Porsche%20914-6/9-8-18%20fuel%20lines%202_zpsvox8kijn.jpg.html
http://s188.photobucket.com/user/jerhofer/media/1974%20Porsche%20914-6/9-8-18%20fuel%20lines_zpsnxyr8bgu.jpg.html
http://s188.photobucket.com/user/jerhofer/media/1974%20Porsche%20914-6/9-8-18%20fuel%20lines%207_zpsalqo7x8r.jpg.html
http://s188.photobucket.com/user/jerhofer/media/1974%20Porsche%20914-6/9-8-18%20fuel%20lines%206_zpshgl7tmdj.jpg.html
http://s188.photobucket.com/user/jerhofer/media/1974%20Porsche%20914-6/9-8-18%20fuel%20lines%204_zpsgimikkrn.jpg.html
Posted by: 914forme Sep 8 2018, 05:22 PM
You can see them in the tunnel by opening up the rear access cover. it is under your the storage unit between the seats. Black cover single screw. Once you have it out, you can then look in there and see if you have an all metal line. Hopefully some previous own installed two SS lines for you. If not you can make them, or just get them from Tangerine, Chris will even weld a -6 bung on it for you.
this 914 looks wonderful, keep up the great work. And yes that GearWrench Tap and Die set has almost every die you need. I have a few that I had to pickup also. Shorter NPT dies, and stuff for left handed threads.
BTW, I keep an old set of sockets around for making extended die handles for just such and occasion. I see your using a wrench in the above picture. Impact sockets are pretty easy to cut and weld if you ever need to make a custom tool of some kind.
Posted by: jerhofer Sep 8 2018, 07:36 PM
You can see them in the tunnel by opening up the rear access cover. it is under your the storage unit between the seats. Black cover single screw. Once you have it out, you can then look in there and see if you have an all metal line. Hopefully some previous own installed two SS lines for you. If not you can make them, or just get them from Tangerine, Chris will even weld a -6 bung on it for you.
this 914 looks wonderful, keep up the great work. And yes that GearWrench Tap and Die set has almost every die you need. I have a few that I had to pickup also. Shorter NPT dies, and stuff for left handed threads.
BTW, I keep an old set of sockets around for making extended die handles for just such and occasion. I see your using a wrench in the above picture. Impact sockets are pretty easy to cut and weld if you ever need to make a custom tool of some kind.
Thanks for the info. I surely could have used an extension for that tap. It was a very tight area to get to.
I looked up Tangerine. After I look through that access cover and get the tank out, I'll see what I have to work with. I may be calling them.
As for locating the fuel pump, I would have a whole lot less line under high pressure if I located it in the engine compartment. But I have concerns about heat in that area. I would have to run power to the pump in the engine bay while the power is already there in the front. Have to think about all of this some more.
Posted by: jerhofer Sep 9 2018, 08:52 AM
My buddy came down this morning to help me remove both hoods. They ended up in my wife's bedroom.
http://s188.photobucket.com/user/jerhofer/media/1974%20Porsche%20914-6/9-9-18%20hoods%202_zpsaho6v1bk.jpg.html
http://s188.photobucket.com/user/jerhofer/media/1974%20Porsche%20914-6/9-9-18%20hoods%203_zpsnrt4s036.jpg.html
http://s188.photobucket.com/user/jerhofer/media/1974%20Porsche%20914-6/9-9-18%20hoods_zpstfadxrly.jpg.html
The wife's bedroom have been the repository for a number of hoods from project cars over the years.
1964 Corvette hood
http://s188.photobucket.com/user/jerhofer/media/1964%20Corvette%20Coupe/11-16-12hoodinSharonsbedroomsm.jpg.html
1977 Camaro Pro Touring car
http://s188.photobucket.com/user/jerhofer/media/1974%20Porsche%20914-6/8711hoodinbedroomsm-1_zpsz9pddnfu.jpg.html
Posted by: Dave_Darling Sep 9 2018, 08:19 PM
Here's a link to the original Chopstick thread:
http://www.914world.com/bbs2/index.php?showtopic=22782&hl=
Give it a read when you have some time, and need a laugh or six...
--DD
Posted by: jerhofer Sep 10 2018, 02:36 PM
Here's a link to the original Chopstick thread:
http://www.914world.com/bbs2/index.php?showtopic=22782&hl=
Give it a read when you have some time, and need a laugh or six...
--DD
That was entertaining. And I could surely empathize with the thread originator.
Posted by: jerhofer Sep 10 2018, 02:43 PM
I pulled the fuel tank this morning. First up was removing the filler neck and then the expansion tank.
http://s188.photobucket.com/user/jerhofer/media/1974%20Porsche%20914-6/9-10-18%20fuel%20tank%2011_zpssnqpdn2p.jpg.html
http://s188.photobucket.com/user/jerhofer/media/1974%20Porsche%20914-6/9-10-18%20fuel%20tank%2010_zpsfl5bg9dy.jpg.html
http://s188.photobucket.com/user/jerhofer/media/1974%20Porsche%20914-6/9-10-18%20fuel%20tank%209_zps4u2wmp02.jpg.html
http://s188.photobucket.com/user/jerhofer/media/1974%20Porsche%20914-6/9-10-18%20fuel%20tank%208_zpsmqcwhr8x.jpg.html
http://s188.photobucket.com/user/jerhofer/media/1974%20Porsche%20914-6/9-10-18%20fuel%20tank%206_zpsoqw9bj4z.jpg.html
http://s188.photobucket.com/user/jerhofer/media/1974%20Porsche%20914-6/9-10-18%20fuel%20tank%204_zps0atuy42f.jpg.html
http://s188.photobucket.com/user/jerhofer/media/1974%20Porsche%20914-6/9-10-18%20fuel%20tank%202_zpspk1olex8.jpg.html
Posted by: jerhofer Sep 10 2018, 02:54 PM
Before removing the tank, I looked inside to see its condition. The only rust I could see was in the area around the outlet and inlet. I will address that before re-installing the tank.
http://s188.photobucket.com/user/jerhofer/media/1974%20Porsche%20914-6/9-10-18%20fuel%20tank%2019_zps3hn4swk3.jpg.html
With the expansion tank removed, I could now remove the tank. I lifted up on it enough to put it from the rubber insulator blocks on each end and out it came.
http://s188.photobucket.com/user/jerhofer/media/1974%20Porsche%20914-6/9-10-18%20fuel%20tank%2018_zps5zrtg4gd.jpg.html
http://s188.photobucket.com/user/jerhofer/media/1974%20Porsche%20914-6/9-10-18%20fuel%20tank%2017_zpsfaebqnoa.jpg.html
http://s188.photobucket.com/user/jerhofer/media/1974%20Porsche%20914-6/9-10-18%20fuel%20tank%2016_zps8lggtih9.jpg.html
There were a couple of rusty areas on the tank. I will address these with POR15. There was a corresponding area of rust in the tank bay. That will be addressed as well.
http://s188.photobucket.com/user/jerhofer/media/1974%20Porsche%20914-6/9-10-18%20fuel%20tank%2015_zps8f633s5z.jpg.html
http://s188.photobucket.com/user/jerhofer/media/1974%20Porsche%20914-6/9-10-18%20fuel%20tank%20bay%206_zpsygvsgb4m.jpg.html
The tank bay appeared to be in good condition.
http://s188.photobucket.com/user/jerhofer/media/1974%20Porsche%20914-6/9-10-18%20fuel%20tank%20bay%208_zpszwhpyvnj.jpg.html
http://s188.photobucket.com/user/jerhofer/media/1974%20Porsche%20914-6/9-10-18%20fuel%20tank%20bay%209_zpshcsvzk3p.jpg.html
http://s188.photobucket.com/user/jerhofer/media/1974%20Porsche%20914-6/9-10-18%20fuel%20tank%20bay%205_zpsf2wok1cg.jpg.html
Posted by: porschetub Sep 10 2018, 03:03 PM
You can see them in the tunnel by opening up the rear access cover. it is under your the storage unit between the seats. Black cover single screw. Once you have it out, you can then look in there and see if you have an all metal line. Hopefully some previous own installed two SS lines for you. If not you can make them, or just get them from Tangerine, Chris will even weld a -6 bung on it for you.
this 914 looks wonderful, keep up the great work. And yes that GearWrench Tap and Die set has almost every die you need. I have a few that I had to pickup also. Shorter NPT dies, and stuff for left handed threads.
BTW, I keep an old set of sockets around for making extended die handles for just such and occasion. I see your using a wrench in the above picture. Impact sockets are pretty easy to cut and weld if you ever need to make a custom tool of some kind.
Thanks for the info. I surely could have used an extension for that tap. It was a very tight area to get to.
I looked up Tangerine. After I look through that access cover and get the tank out, I'll see what I have to work with. I may be calling them.
As for locating the fuel pump, I would have a whole lot less line under high pressure if I located it in the engine compartment. But I have concerns about heat in that area. I would have to run power to the pump in the engine bay while the power is already there in the front. Have to think about all of this some more.
You must retain the new pump up the front,most pumps prefer to push fuel from a close suction point rather than sucking from a distance,the location of the old pump is fine because the pump will always have a "head" of fuel on it...please don't use those type of screw hose clips again,safer to use FI clamps what ever system you have high or low pressure.
Buy the best quality HP fuel hose you can find ,even on carbs this is what I use,Richard will give a recommendation .
Really nice car ,good luck.
Posted by: jerhofer Sep 10 2018, 07:14 PM
Now I wanted to figure out what I was going to do with the fuel lines from the firewall to the tank bay. Since Perry Kiehl built the car, I figured he would know what line was in place. I placed a call and found Perry to be very, very helpful. He said the existing line was a one piece metal line that he had installed. He mentioned calling Chris Foley at Tangerine Racing for help with getting a feed line.
Chris was also very helpful. There are two holes on the firewall for fuel lines, one for the feed line and one for the return line. Upon seeing my thread, he noticed that the existing feed line was in the return line hole and that the fitting on the end was in front of the other hole.
As you experienced people know, the fuel lines normally run to the right side of the engine bay. However, I wanted to run the feed line to the left and mount the fuel regulator and fuel filter on the firewall high up on the left side for easy access. From there I would run a fuel line from the regulator to the left side throttle body. The plan then was to run the return line from the right side throttle body back to the return line in the firewall.
Chris said he could make custom make the line with AN fittings on both ends. So I could see what I had, I removed the existing line. I then used a line to test my plan of running the feed line to the left side. It appeared to work as I could run it through an existing hole in the engine mount. So the new line would go in the same hole as the existing line. I could then fit the old line in the right hole and use it for the return line.
http://s188.photobucket.com/user/jerhofer/media/1974%20Porsche%20914-6/9-10-18%20fuel%20line_zpsy0njsg7e.jpg.html
http://s188.photobucket.com/user/jerhofer/media/1974%20Porsche%20914-6/9-10-18%20Tunnel%20fuel%20lines%206_zpsvbtkyvfx.jpg.html
http://s188.photobucket.com/user/jerhofer/media/1974%20Porsche%20914-6/9-10-18%20Tunnel%20fuel%20lines%204_zpsgv7cadue.jpg.html
http://s188.photobucket.com/user/jerhofer/media/1974%20Porsche%20914-6/9-10-18%20Tunnel%20fuel%20lines%205_zpse5wnfmb3.jpg.html
http://s188.photobucket.com/user/jerhofer/media/1974%20Porsche%20914-6/9-10-18%20Tunnel%20fuel%20lines%203_zpsievc7huy.jpg.html
I spent the rest of the afternoon cleaning up the tank bay and the tank.
http://s188.photobucket.com/user/jerhofer/media/1974%20Porsche%20914-6/9-10-18%20fuel%20tank%20bay%2011_zps8aamwn7s.jpg.html
http://s188.photobucket.com/user/jerhofer/media/1974%20Porsche%20914-6/9-10-18%20fuel%20tank%2023_zpsq76sjemh.jpg.html
Posted by: jerhofer Sep 10 2018, 07:16 PM
You can see them in the tunnel by opening up the rear access cover. it is under your the storage unit between the seats. Black cover single screw. Once you have it out, you can then look in there and see if you have an all metal line. Hopefully some previous own installed two SS lines for you. If not you can make them, or just get them from Tangerine, Chris will even weld a -6 bung on it for you.
this 914 looks wonderful, keep up the great work. And yes that GearWrench Tap and Die set has almost every die you need. I have a few that I had to pickup also. Shorter NPT dies, and stuff for left handed threads.
BTW, I keep an old set of sockets around for making extended die handles for just such and occasion. I see your using a wrench in the above picture. Impact sockets are pretty easy to cut and weld if you ever need to make a custom tool of some kind.
Thanks for the info. I surely could have used an extension for that tap. It was a very tight area to get to.
I looked up Tangerine. After I look through that access cover and get the tank out, I'll see what I have to work with. I may be calling them.
As for locating the fuel pump, I would have a whole lot less line under high pressure if I located it in the engine compartment. But I have concerns about heat in that area. I would have to run power to the pump in the engine bay while the power is already there in the front. Have to think about all of this some more.
You must retain the new pump up the front,most pumps prefer to push fuel from a close suction point rather than sucking from a distance,the location of the old pump is fine because the pump will always have a "head" of fuel on it...please don't use those type of screw hose clips again,safer to use FI clamps what ever system you have high or low pressure.
Buy the best quality HP fuel hose you can find ,even on carbs this is what I use,Richard will give a recommendation .
Really nice car ,good luck.
Thanks for the suggestions. I am going to mount the pump in the front as today I resolved how to run the return and feed lines through the tunnel. I will look for those FI clamps.
Posted by: jerhofer Sep 13 2018, 07:17 PM
I spent some time on storm preparation this week since the big one is near. I have plenty of gas for the generator and I made sure the downspouts are draining properly. Looks like we will get some wind and lots of rain.
I will be using the brass fitting that had been on the old fuel pipe. It looked pretty nasty and a little metal polish went a long way.
http://s188.photobucket.com/user/jerhofer/media/1974%20Porsche%20914-6/9-12-18%20brass%20fitting_zpsq5vuuxss.jpg.html
Upon looking at the steering rack protective plate, I decided it needed to be re-finished. After blasting it, I took it to the powder coater.
http://s188.photobucket.com/user/jerhofer/media/1974%20Porsche%20914-6/9-10-18%20front%20shield_zpscmmnwymf.jpg.html
http://s188.photobucket.com/user/jerhofer/media/1974%20Porsche%20914-6/9-12-18%20rack%20shield_zpsgbc8h7jx.jpg.html
The powder coater had my upper valve covers ready. Now I could set about installing them. Since I am using coil on plugs, I have retaining rails that needed to be installed. They use two of the valve cover nuts. Because of the depth of the retainer, I had to install longer studs. With that done I now inserted the coil on plug connectors.
http://s188.photobucket.com/user/jerhofer/media/1974%20Porsche%20914-6/9-13-18%20coil%20on%20plug%205_zps7udlqony.jpg.html
http://s188.photobucket.com/user/jerhofer/media/1974%20Porsche%20914-6/9-13-18%20coil%20on%20plug%204_zpsxnnaq5fx.jpg.html
http://s188.photobucket.com/user/jerhofer/media/1974%20Porsche%20914-6/9-13-18%20coil%20on%20plug%203_zps38nw1fa7.jpg.html
http://s188.photobucket.com/user/jerhofer/media/1974%20Porsche%20914-6/6-20-18%20EFI%202_zpsd61wjdza.jpg.html
http://s188.photobucket.com/user/jerhofer/media/1974%20Porsche%20914-6/9-13-18%20coil%20on%20plug_zpshkvg6quj.jpg.html
Posted by: 914forme Sep 13 2018, 07:25 PM
COP nice, I am liking that kit more and more I see.
Hope you stay high and dry.
Posted by: jerhofer Sep 13 2018, 07:30 PM
While I cannot finish the plumbing for the fuel line, I was able to mount the fuel regulator and the filter today. I wanted to place them where they will be easily accessible. I chose to mount them on the firewall on the upper left side. I brought out the engine lid and it appears they should both work here. I fastened the fuel filter directly to the regulator to save room.
http://s188.photobucket.com/user/jerhofer/media/1974%20Porsche%20914-6/9-13-18%20reg%20%20filter%204_zpscy1fkoam.jpg.html
http://s188.photobucket.com/user/jerhofer/media/1974%20Porsche%20914-6/9-13-18%20reg%20%20filter%203_zpskp8lr99a.jpg.html
http://s188.photobucket.com/user/jerhofer/media/1974%20Porsche%20914-6/9-13-18%20reg%20%20filter%202_zpscgg5otld.jpg.html
The wiring sheath on the firewall is in poor condition. In preparation for wrapping my wiring harness, I bought some Tesa fabric tape specifically made for engine compartments. According to their website, German car manufacturers use this tape. It worked well and was plenty sticky. I liked the appearance it gave. It should make my wiring EFI harness look good.
http://s188.photobucket.com/user/jerhofer/media/1974%20Porsche%20914-6/9-13-18%20harness%20tape%206_zpsjlmrevbi.jpg.html
http://s188.photobucket.com/user/jerhofer/media/1974%20Porsche%20914-6/9-13-18%20harness%20tape%205_zpsebifxyxh.jpg.html
http://s188.photobucket.com/user/jerhofer/media/1974%20Porsche%20914-6/9-13-18%20harness%20tape%204_zpsihzuq6oa.jpg.html
http://s188.photobucket.com/user/jerhofer/media/1974%20Porsche%20914-6/9-13-18%20harness%20tape%203_zps9comxm8s.jpg.html
http://s188.photobucket.com/user/jerhofer/media/1974%20Porsche%20914-6/9-13-18%20harness%20tape%202_zpsmdp7g1wa.jpg.html
http://s188.photobucket.com/user/jerhofer/media/1974%20Porsche%20914-6/9-13-18%20harness%20tape_zpsmi1emvwe.jpg.html
Speaking of the EFI harness, I printed the ECU installation instructions. This should keep me busy for a bit.
http://s188.photobucket.com/user/jerhofer/media/1974%20Porsche%20914-6/9-13-18%20ecu%20manual%202_zpsfxfrz8ix.jpg.html
Posted by: jerhofer Sep 13 2018, 07:36 PM
COP nice, I am liking that kit more and more I see.
Hope you stay high and dry.
I am very pleased with the quality of the kit.
If we lose power, my generator will allow me to keep the refrigerator and pump going. I might have to shut everything else off so I can still run the AC and lights in the garage!!! After all, there are priorities!!!
Posted by: Cairo94507 Sep 14 2018, 06:17 AM
I hope you ride this storm out with no issues. Love the work on your car.
Posted by: jerhofer Sep 15 2018, 02:12 PM
Very light rain and winds so far today. The heavy rain and higher winds are supposed to start this evening.
I worked on installing the fuel pump today. The pump came standard with a check valve fitting. Richard Clewett says he replaces that fitting with a -6 AN male threads to 10mm x 1.0 Male as shown in the photo below. I could not find this one in black.
http://s188.photobucket.com/user/jerhofer/media/1974%20Porsche%20914-6/9-14-18%20fuel%20pump%202_zps2hfwibna.jpg.html
http://s188.photobucket.com/user/jerhofer/media/1974%20Porsche%20914-6/9-14-18%20fuel%20pump_zps4el6aksd.jpg.html
The old fuel pump had been installed across from the steering rack support but my new one is too long to fit there. I used the existing slot in the steering rack support. I widened the slot a bit, using my Dremel tool, so a bolt would fit through it. To reduce fuel pump noise I used some old bushings from one of my parts bins. To make the bolt length work, I had to cut the front side bushing in half to reduce its thickness. Looking in another parts bin, I found a curved piece of steel that would work to attach the hose clamp for mounting the fuel pump. As with most projects like this, much time was spent on finding and fiddling with various parts. I re-did the fuel pump wiring harness to make it both cleaner and more efficient. Since the steering rack cover is still at the powder coater, I won't know for sure if I have an clearance issues. If so, since I am using a slot, I can move everything up if necessary.
http://s188.photobucket.com/user/jerhofer/media/1974%20Porsche%20914-6/9-15-18%20fuel%20pump%207_zpsp0ugnxg3.jpg.html
http://s188.photobucket.com/user/jerhofer/media/1974%20Porsche%20914-6/9-15-18%20fuel%20pump%205_zpsdvhejsc5.jpg.html
http://s188.photobucket.com/user/jerhofer/media/1974%20Porsche%20914-6/9-15-18%20fuel%20pump%206_zpsfmbmx1af.jpg.html
http://s188.photobucket.com/user/jerhofer/media/1974%20Porsche%20914-6/9-15-18%20fuel%20pump%202_zpsvxhrsjdh.jpg.html
http://s188.photobucket.com/user/jerhofer/media/1974%20Porsche%20914-6/9-15-18%20fuel%20pump_zpslsamlnnp.jpg.html
http://s188.photobucket.com/user/jerhofer/media/1974%20Porsche%20914-6/9-15-18%20fuel%20pump%204_zpsca3l1b1t.jpg.html
http://s188.photobucket.com/user/jerhofer/media/1974%20Porsche%20914-6/9-15-18%20fuel%20pump%203_zpspaxvpa7j.jpg.html
Posted by: jerhofer Sep 16 2018, 01:30 PM
I wasn't happy with the front trunk junction box that was in the car when I got it. There was no cover for it and all of the leads were exposed. It would be easy to short it out.
http://s188.photobucket.com/user/jerhofer/media/1974%20Porsche%20914-6/6-4-18%20front%20trunk%208_zpsduitmumg.jpg.html
I found a unit at Summit Racing that had a cover and looked like it was a quality piece.
http://s188.photobucket.com/user/jerhofer/media/1974%20Porsche%20914-6/9-16-18%20junction%20box%208_zpsjplba4wl.jpg.html
When I installed the fuel pump yesterday, I wasted my time hooking up the wiring as it had been for the old fuel pump. Turns out there is a wiring harness that came with the ECU that has a built in fuse block and relays. This fuel pump draws a lot more amps than the old pump.
After installing the box, I used my Dremel to cut off the extra bolt length inside the fuel tank bay. Perry Kiehl had installed a windshield washer in the trunk. I wired it, and ran a ground and a power lead for the junction box. When I install the radio, I will use this box for power and fusing.
http://s188.photobucket.com/user/jerhofer/media/1974%20Porsche%20914-6/9-16-18%20junction%20box%207_zpsj3t2wudw.jpg.html
http://s188.photobucket.com/user/jerhofer/media/1974%20Porsche%20914-6/9-16-18%20junction%20box%206_zpspo9vjsg2.jpg.html
http://s188.photobucket.com/user/jerhofer/media/1974%20Porsche%20914-6/9-16-18%20junction%20box%205_zps0kbwgsuo.jpg.html
http://s188.photobucket.com/user/jerhofer/media/1974%20Porsche%20914-6/9-16-18%20junction%20box%204_zpsfeiu7duy.jpg.html
http://s188.photobucket.com/user/jerhofer/media/1974%20Porsche%20914-6/9-16-18%20junction%20box%203_zpsnorfqso4.jpg.html
http://s188.photobucket.com/user/jerhofer/media/1974%20Porsche%20914-6/9-16-18%20junction%20box_zpszoe1va00.jpg.html
Posted by: jerhofer Sep 24 2018, 02:31 PM
I didn't get much done on the car last week. After the storm there were lots of branches down in the yard. I have been waiting for the temperatures to moderate before I cleaned up the motorhome after our last trip. I finally gave up waiting for cooler temps. I spent a couple days preparing it for our next trip.
I cleaned up the wiring to the junction box in the front trunk. The wires had previously been run near the shock towers which made them visible. I decided to run them along the oil cooler lines. Since these lines become very warm, I cut up some old spark plug insulators and wrapped them around the oil lines to provide insulation for them wiring. I also ran two extra wires inside the harness for possible future use.
http://s188.photobucket.com/user/jerhofer/media/1974%20Porsche%20914-6/9-24-18%20insulators%202_zpse55fd5l0.jpg.html
http://s188.photobucket.com/user/jerhofer/media/1974%20Porsche%20914-6/9-24-18%20insulators_zpsmdbd5jz7.jpg.html
Upon closer inspection, I found some rust inside the fuel tank. I took it to a local guy to get an estimate for getting rid of the rust and sealing the tank. The cost was $325. Automobile Atlanta had a new tank for $335 shipped. The new tank arrived in a day. I removed the old hose line fittings a week ago. The screen and the crush washers were fused with the fittings. I have had them soaking in a solvent for the past week. Even after all that time, I had to do some friendly persuasion to get the old pieces off. Today I installed the fittings with the new screen and washers. I also transferred the fuel tank sender from the old tank to the new one.
http://s188.photobucket.com/user/jerhofer/media/1974%20Porsche%20914-6/9-24-18%20fuel%20tank%203_zpskbudxvhq.jpg.html
http://s188.photobucket.com/user/jerhofer/media/1974%20Porsche%20914-6/9-24-18%20fuel%20tank%202_zpsy4mnkxtn.jpg.html
http://s188.photobucket.com/user/jerhofer/media/1974%20Porsche%20914-6/9-24-18%20fuel%20tank_zpspvfmda7d.jpg.html
http://s188.photobucket.com/user/jerhofer/media/1974%20Porsche%20914-6/9-24-18%20fuel%20tank%205_zpsnrnonwbw.jpg.html
The EFI ECU was installed in the rear trunk along with the power module containing four fuses and a couple relays. Besides proving power to the ECU, this harness lets the ECU control turning on the fuel pump. Lots of wires to hook up!!!
http://s188.photobucket.com/user/jerhofer/media/1974%20Porsche%20914-6/9-24-18%20ECU%202_zpsszkejk7e.jpg.html
http://s188.photobucket.com/user/jerhofer/media/1974%20Porsche%20914-6/9-24-18%20ECU_zpsco3ebtud.jpg.html
My Optima battery arrived. I temporarily set it into place as I will need to hook it up to find my power sources. To make it fit, I had to cut off the extra pieces on each end.
http://s188.photobucket.com/user/jerhofer/media/1974%20Porsche%20914-6/9-24-18%20optima%20battery%202_zpsmdujn8ke.jpg.html
http://s188.photobucket.com/user/jerhofer/media/1974%20Porsche%20914-6/9-24-18%20optima%20battery_zpsfxvgnls5.jpg.html
Posted by: jerhofer Sep 25 2018, 02:20 PM
One should never aerate your lawn and add fertilizer, lime and grass seed a week before a hurricane dumps over 8" of rain on your lawn. Mowing must ensue!! Since formal exercising is not natural for me, I use a walk behind mower to make up for my lack of ambition. I also happen to like how the lawn looks when mowed in this manner. A beer never tastes better than drank when one is hot and sweaty after mowing a lawn!! A case could be made that the beer justifies the entire operation!!!
After sorting through my boxes of miscellaneous metal, I found a piece that I could modify to make a battery hold down bracket for the Optima battery. After much fiddling, I had a piece that would work. I couldn't make it symmetrical as the fastener is not centered in the battery tray. With the hold down in place, the battery is very secure. After cleaning it up, I blasted and painted it.
http://s188.photobucket.com/user/jerhofer/media/1974%20Porsche%20914-6/9-25-18%20battery%20holdown%204_zpsf4x5id0b.jpg.html
http://s188.photobucket.com/user/jerhofer/media/1974%20Porsche%20914-6/9-25-18%20battery%20holdown%203_zpsxhwblhmx.jpg.html
http://s188.photobucket.com/user/jerhofer/media/1974%20Porsche%20914-6/9-25-18%20battery%20holdown%202_zpsuupdyyfw.jpg.html
The seat tracks needed some attention as well. Blasting and painting them made them look better.
http://s188.photobucket.com/user/jerhofer/media/1974%20Porsche%20914-6/9-25-18%20seat%20tracks_zpsrornbh02.jpg.html
http://s188.photobucket.com/user/jerhofer/media/1974%20Porsche%20914-6/9-25-18%20painted%20items_zpseubvvbzv.jpg.html
Posted by: jerhofer Sep 26 2018, 06:40 PM
I worked on the power harness wiring for the EFI today. I found 12V ignition at the main engine plug. Since the battery is near, running the constant 12V and the ground was relatively easy.
http://s188.photobucket.com/user/jerhofer/media/1974%20Porsche%20914-6/9-26-18%2012V%20ignition%205_zpsu0aytksk.jpg.html
http://s188.photobucket.com/user/jerhofer/media/1974%20Porsche%20914-6/9-26-18%20battery%20ground_zpsvh0jzhut.jpg.html
http://s188.photobucket.com/user/jerhofer/media/1974%20Porsche%20914-6/9-26-18%2012V%20battery_zpsmmetjdrj.jpg.html
http://s188.photobucket.com/user/jerhofer/media/1974%20Porsche%20914-6/9-26-18%2012V%20ignition%204_zpsozvtumps.jpg.html
http://s188.photobucket.com/user/jerhofer/media/1974%20Porsche%20914-6/9-26-18%2012V%20ignition_zpsae64tf11.jpg.html
Since the power harness turns on the fuel pump, I had to run a line to the positive side of the fuel pump. To get into the tunnel, I pulled the main grommet out of the tunnel and drilled a small hole in it for the wire to run through. After feeding the wire through th grommet, I fed the wire forward through the tunnel and then out into the fuel tank bay. I ran out of time to finish it up so that will be first on tomorrow's agenda.
http://s188.photobucket.com/user/jerhofer/media/1974%20Porsche%20914-6/9-26-18%20fuel%20pump%20wiring%203_zpst2zgnomy.jpg.html
http://s188.photobucket.com/user/jerhofer/media/1974%20Porsche%20914-6/9-26-18%20fuel%20pump%20wiring%202_zpsthlpoxcb.jpg.html
http://s188.photobucket.com/user/jerhofer/media/1974%20Porsche%20914-6/9-26-18%20fuel%20pump%20wiring_zpsmjtkhjil.jpg.html
Posted by: jerhofer Sep 27 2018, 05:01 PM
First thing this morning I received a text message from my powder coater saying the steering rack shield was finished. I am $10 poorer but it looks great.
http://s188.photobucket.com/user/jerhofer/media/1974%20Porsche%20914-6/9-27-18%20steering%20rack%20shield_zpsijqedmeg.jpg.html
Now it was time to see if the fuel pump cleared it. It didn't. So I removed the pump and cut the rubber insulators and washers to allow for room to raise the pump in the slot on the steering rack. This worked and all was good.
http://s188.photobucket.com/user/jerhofer/media/1974%20Porsche%20914-6/9-27-18%20fuel%20pump%20wiring%2014_zpstq4czupq.jpg.html
http://s188.photobucket.com/user/jerhofer/media/1974%20Porsche%20914-6/9-27-18%20fuel%20pump%20wiring%2013_zpsfftjyinh.jpg.html
http://s188.photobucket.com/user/jerhofer/media/1974%20Porsche%20914-6/9-27-18%20fuel%20pump%20wiring%2012_zps9c2iav91.jpg.html
Posted by: jerhofer Sep 27 2018, 05:13 PM
Now I could finish up the fuel pump wiring. I used a ground on one of the bolts for the master cylinder and ran the plus wire out of the fuel tank bay to the pump.
http://s188.photobucket.com/user/jerhofer/media/1974%20Porsche%20914-6/9-27-18%20fuel%20pump%20wiring%209_zps5n9zlzdv.jpg.html
http://s188.photobucket.com/user/jerhofer/media/1974%20Porsche%20914-6/9-27-18%20fuel%20pump%20wiring%2010_zps8toddbqq.jpg.html
http://s188.photobucket.com/user/jerhofer/media/1974%20Porsche%20914-6/9-27-18%20fuel%20pump%20wiring%208_zpsiggtkxlr.jpg.html
At the other end of the car, I couldn't find a good way to get the wire up to the battery area and then back to the trunk. I finally decided to remove all of the fabric tape I had applied to the wiring harness and rout the wire up through the harness and then over to the right side of the engine bay. I used a wire to pull the wire up through the harness boot. After soldering the wire from the front of the car to the wire from the power harness and running it over to the negative lead for the battery, I re-applied the fabric tape to the wiring harness boot.
http://s188.photobucket.com/user/jerhofer/media/1974%20Porsche%20914-6/9-27-18%20fuel%20pump%20wiring%205_zpspe4gyu83.jpg.html
http://s188.photobucket.com/user/jerhofer/media/1974%20Porsche%20914-6/9-27-18%20fuel%20pump%20wiring%204_zpsv4hp8nyx.jpg.html
http://s188.photobucket.com/user/jerhofer/media/1974%20Porsche%20914-6/9-27-18%20fuel%20pump%20wiring%203_zpsxoww0hpp.jpg.html
http://s188.photobucket.com/user/jerhofer/media/1974%20Porsche%20914-6/9-27-18%20fuel%20pump%20wiring%202_zps3igytsmm.jpg.html
http://s188.photobucket.com/user/jerhofer/media/1974%20Porsche%20914-6/9-27-18%20fuel%20pump%20wiring_zpsc9saw5jk.jpg.html
Posted by: jerhofer Oct 2 2018, 02:55 PM
After being busy with other things the past few days, I got back to working on the car today. After installing the new wheels, the wheel studs for the rear were the right size but the front ones were too short. I did some measuring and ordered ten 56mm studs for the front wheels.
This afternoon I began wiring the harness for the fuel injectors. I have done quite a bit of wiring in my past but this is the first time I have worked with weatherpack connectors. So there is a learning curve. The fuel injector plug uses a GT-150 female terminal. The seal is built into the plug so it does not use a seal on the wire. Richard Clewett says he uses the weatherpack crimper with all of the connectors in his kit. After some trial and error, I figured out how that crimper worked with these terminals. But not until I had already used up the extra three terminals, and then some, that Richard had sent. I have more on the way.
There are pull through terminals which means the wire has to be run through the plug, the terminal crimped and then then the wire is pulled back to lock the terminal in place. With the terminals in place, i can re-insert the seal into the plug. At Automobile Atlanta, I found these fuel injector boots. They may not be necessary but add an OEM touch to the wiring.
The TEC GT-200 ECU is capable of running a number of different types of fuel injection. Richard's kit is set up for sequential fuel injection which explains the need for the cam sensor. There are six output channels from the ECU. Channel one goes to the first cylinder in the firing order, which on a 911 engine is cylinder one. Channel two goes to the next cylinder that fires, cylinder six in a 911 engine. It is critical that the output channels are wired to the corresponding injector.
The output channel wire goes to the left side terminal of the injector. The right side is connected to the purple/white wire in the power harness. The injectors in wired in parallel so every injector's right side terminal will be the wired to this same wire. I couldn't find a purple/white wire locally so this solid purple wire will have to suffice.
http://s188.photobucket.com/user/jerhofer/media/1974%20Porsche%20914-6/10-2-18%20injector%20wiring%203_zpsdpqtdi8z.jpg.html
http://s188.photobucket.com/user/jerhofer/media/1974%20Porsche%20914-6/10-2-18%20injector%20wiring%204_zpsmixdjukm.jpg.html
http://s188.photobucket.com/user/jerhofer/media/1974%20Porsche%20914-6/10-2-18%20injector%20wiring%2010_zpsgwto4jeo.jpg.html
http://s188.photobucket.com/user/jerhofer/media/1974%20Porsche%20914-6/10-2-18%20injector%20wiring%209_zpsioco1tyq.jpg.html
http://s188.photobucket.com/user/jerhofer/media/1974%20Porsche%20914-6/10-2-18%20injector%20wiring%208_zpsc8pwyymo.jpg.html
http://s188.photobucket.com/user/jerhofer/media/1974%20Porsche%20914-6/10-2-18%20injector%20wiring%207_zpsbckjss5h.jpg.html
http://s188.photobucket.com/user/jerhofer/media/1974%20Porsche%20914-6/10-2-18%20injector%20wiring%206_zpsxlpml2gs.jpg.html
http://s188.photobucket.com/user/jerhofer/media/1974%20Porsche%20914-6/10-2-18%20injector%20wiring%202_zpsqatzfrb3.jpg.html
http://s188.photobucket.com/user/jerhofer/media/1974%20Porsche%20914-6/10-2-18%20injector%20wiring_zpsov8thmth.jpg.html
Posted by: jerhofer Oct 3 2018, 02:16 PM
After making a Sam's run this morning, I finished up the wiring on the fuel injectors, save one where I had used up all of my terminals. The additional terminals are supposed to be here tomorrow.
I then moved on to the wiring for the Coil On Plug's (COP). The terminals for these plugs used the weatherpack seal on the end of the wire. Another learning curve happened here and I progressively became faster at doing the wiring as the afternoon wore on. However, it was time consuming making the crimps and then getting the terminal to seat in the plug. I can see why Richard charges $900 for a custom wiring harness.
There are four wires to each of the plugs. One is a ground to the engine. Another is a reference ground from the ECU. Another is a 12V source while the last one is the firing signal wire for cylinders. One wire fires cylinders 1 & 4, another fires cylinders 3 & 6 while the other one fires cylinders 2 & 5.
The COP's that came with the kit had a tab that prevented the plug from being attached. A call to Richard confirmed that those tabs needed to be cut off. He said he was having trouble getting the parts and that these COP's could be used with another plug as well as the ones that came with the kit. The tabs were easily removed.
http://s188.photobucket.com/user/jerhofer/media/1974%20Porsche%20914-6/10-3-18%20COP%20wiring%205_zps4jpkuus1.jpg.html
http://s188.photobucket.com/user/jerhofer/media/1974%20Porsche%20914-6/10-3-18%20COP%20wiring%204_zpso9lvpntb.jpg.html
http://s188.photobucket.com/user/jerhofer/media/1974%20Porsche%20914-6/10-3-18%20COP%20wiring%203_zpsbmwmw8ux.jpg.html
http://s188.photobucket.com/user/jerhofer/media/1974%20Porsche%20914-6/10-3-18%20COP%20wiring%202_zpskxfjslu2.jpg.html
http://s188.photobucket.com/user/jerhofer/media/1974%20Porsche%20914-6/10-3-18%20COP%20wiring_zpsgadg1ogg.jpg.html
Posted by: Lucky9146 Oct 3 2018, 03:09 PM
Nice detail work, keep at it!


Posted by: jerhofer Oct 4 2018, 02:41 PM
I finished up the COP plugs today. The terminals used on both the injector and COP plugs are called metripack. The MSD crimper die I have is for the weatherpack terminals. Richard says he uses the weatherpack crimper for all of the terminals. I struggled with that a bit as I had to do the crimp on the seal again to make it small enough to fit into the plug. That's one reason why it took me so long to do these crimps.
I was doing some studying on crimping when I came across someone saying that, for the weatherpack terminals, the OEM Delphi crimper works best. One advantage it has over the MSD crimper is that it has a guide for the terminals. You simply insert the terminal into the guide and it perfectly positions it. I ordered one and it came today. The MAP sensor is the first plug to use the weather pack terminals. The Delphi crimper made perfect crimps each time. It won't work with the other style of terminals. One advantage of the MSD crimper is that you can order different dies for different types of terminals. But they do not have one for metripack terminals. Now that I have it figured out, I can use the MSD tool with the weatherpack die to do the metripack terminals.
This is the MSD crimper with a terminal in place.
http://s188.photobucket.com/user/jerhofer/media/1974%20Porsche%20914-6/10-4-18%20MSD%20crimper_zpseh28qbia.jpg.html
http://s188.photobucket.com/user/jerhofer/media/1974%20Porsche%20914-6/10-4-18%20MSD%20crimper%202_zpsbydcxjxx.jpg.html
This is the Delphi crimper.
http://s188.photobucket.com/user/jerhofer/media/1974%20Porsche%20914-6/10-4-18%20Delphi%20crimper%207_zpsrxygrzf6.jpg.html
http://s188.photobucket.com/user/jerhofer/media/1974%20Porsche%20914-6/10-4-18%20Delphi%20crimper%204_zpsenaxcbjf.jpg.html
http://s188.photobucket.com/user/jerhofer/media/1974%20Porsche%20914-6/10-4-18%20Delphi%20crimper%205_zpsztxse8uo.jpg.html
http://s188.photobucket.com/user/jerhofer/media/1974%20Porsche%20914-6/10-4-18%20Delphi%20crimper%206_zpslwgpx7ut.jpg.html
http://s188.photobucket.com/user/jerhofer/media/1974%20Porsche%20914-6/10-4-18%20Delphi%20crimper%203_zpswfbxo5do.jpg.html
http://s188.photobucket.com/user/jerhofer/media/1974%20Porsche%20914-6/10-4-18%20Delphi%20crimper%202_zpsn7x0zyxo.jpg.html
http://s188.photobucket.com/user/jerhofer/media/1974%20Porsche%20914-6/10-4-18%20Delphi%20crimper_zpsfqevhu5c.jpg.html
Posted by: jerhofer Oct 4 2018, 02:48 PM
With the new crimper, it did not take long to do the three wires for the MAP plug.
http://s188.photobucket.com/user/jerhofer/media/1974%20Porsche%20914-6/10-4-18%20MAP%20sensor_zpsemtbtb6g.jpg.html
http://s188.photobucket.com/user/jerhofer/media/1974%20Porsche%20914-6/10-4-18%20MAP%20sensor%205_zpsxujfohzs.jpg.html
http://s188.photobucket.com/user/jerhofer/media/1974%20Porsche%20914-6/10-4-18%20MAP%20sensor%204_zpsobhk4bc7.jpg.html
http://s188.photobucket.com/user/jerhofer/media/1974%20Porsche%20914-6/10-4-18%20MAP%20sensor%202_zpsbrajcirs.jpg.html
I also spent some time pulling each wire that i have used so far out of the harness, cutting it to a length that will go from the ECU to the bulkhead plug that I will be using and labeling them. I then inserted each plug in place and tidied bunched up the wires in preparation for the final running of the wires.
http://s188.photobucket.com/user/jerhofer/media/1974%20Porsche%20914-6/10-4-18%20efi%20wiring%203_zpsiuofisan.jpg.html
http://s188.photobucket.com/user/jerhofer/media/1974%20Porsche%20914-6/10-4-18%20efi%20wiring%202_zpsiljna2nn.jpg.html
http://s188.photobucket.com/user/jerhofer/media/1974%20Porsche%20914-6/10-4-18%20efi%20wiring_zpsiv3e0dvw.jpg.html
Posted by: jerhofer Oct 8 2018, 02:44 PM
Usually my project cars move along a bit faster than this one. Other things that have to be done keep popping up. Such is life.
More wiring was completed today. The crank trigger cable is shielded and contains a red, black and bare wire. These are very small wires so I doubled up the stripped wire to have more wire to crimp to.
http://s188.photobucket.com/user/jerhofer/media/1974%20Porsche%20914-6/10-8-18%20crank%20trigger_zpsn8f71v3q.jpg.html
http://s188.photobucket.com/user/jerhofer/media/1974%20Porsche%20914-6/10-8-18%20crank%20trigger%203_zpsnwrfqdmd.jpg.html
http://s188.photobucket.com/user/jerhofer/media/1974%20Porsche%20914-6/10-8-18%20crank%20trigger%202_zpsrfu2hxyd.jpg.html
http://s188.photobucket.com/user/jerhofer/media/1974%20Porsche%20914-6/10-8-18%20crank%20trigger%204_zpsj0smkt5t.jpg.html
The cam sensor wiring was next.
http://s188.photobucket.com/user/jerhofer/media/1974%20Porsche%20914-6/10-8-18%20cam%20sensor%202_zps4ckirlzx.jpg.html
http://s188.photobucket.com/user/jerhofer/media/1974%20Porsche%20914-6/10-8-18%20cam%20sensor_zpsfofxv10s.jpg.html
Next up was the head temp sensor.
http://s188.photobucket.com/user/jerhofer/media/1974%20Porsche%20914-6/10-8-18%20head%20temp%20sensor_zps02puhgaz.jpg.html
And then came the air temp sensor.
http://s188.photobucket.com/user/jerhofer/media/1974%20Porsche%20914-6/10-8-18%20air%20temp%20sensor%202_zpsrhu9gkv6.jpg.html
http://s188.photobucket.com/user/jerhofer/media/1974%20Porsche%20914-6/10-8-18%20air%20temp%20sensor_zpsymaiviay.jpg.html
Posted by: mb911 Oct 8 2018, 03:03 PM
Looks very nice.. Did you find an inexpensive place to buy the battery from? They have gotten really expensive.
Posted by: jerhofer Oct 8 2018, 04:22 PM
Thanks. There was no cheap place to get the battery!
Posted by: jerhofer Oct 9 2018, 02:23 PM
One night last week when I couldn't go back to sleep, I began thinking about the fuel pressure gauge. I had initially installed it on the fuel line at the rear of the throttle bodies. That was before I installed the fuel pressure regulator and the filter on the firewall. It came to me that it would be better to have the gauge installed there as it would be easier to read and would not be subject to engine vibration. So, today, I moved it and then made a new line to connect the throttle bodies.
http://s188.photobucket.com/user/jerhofer/media/1974%20Porsche%20914-6/10-9-18%20fuel%20pressure%20gauge%202_zps990dsllr.jpg.html
http://s188.photobucket.com/user/jerhofer/media/1974%20Porsche%20914-6/10-9-18%20fuel%20pressure%20gauge_zpsto9clc1t.jpg.html
I spent the rest of the day finishing up the wiring on the left side. On the COP's, each one is individually grounded to the motor. I used one of the valve cover studs for that ground. The black/white wire and the red wire go to all of the COP's. I had to tap into the main red and black/white line at each unit. I also ran the wiring for the crank fire and the head temp sensor.
http://s188.photobucket.com/user/jerhofer/media/1974%20Porsche%20914-6/10-9-18%20wiring%206_zps1n5vcnbn.jpg.html
http://s188.photobucket.com/user/jerhofer/media/1974%20Porsche%20914-6/10-9-18%20wiring%204_zpsl9esfujp.jpg.html
http://s188.photobucket.com/user/jerhofer/media/1974%20Porsche%20914-6/10-9-18%20wiring_zpsmzyhauit.jpg.html
http://s188.photobucket.com/user/jerhofer/media/1974%20Porsche%20914-6/10-9-18%20wiring%205_zpsl4htguwi.jpg.html
Posted by: jerhofer Oct 10 2018, 02:38 PM
Between taking the dog to the groomer and picking her up, I got the right side done as well as beginning to run everything to the center. It is very time consuming figuring out what part of the wiring to apply the shrink tubing to, soldering the wire connections, installing the next pieces of shrink tubing, and then moving on to the next one.
I like running the wiring along the fuel line to keep everything away from the throttle linkage, but I am concerned about putting too much weight on the line. I think I will find a rod of some type to run between the two sides, attach the rod at each end and then attach the harness to that rod. From the center of that fuel line, I plan on taking all the wires up to a bulkhead connector.
http://s188.photobucket.com/user/jerhofer/media/1974%20Porsche%20914-6/10-10-18%20wiring%204_zpsumfks9mo.jpg.html
http://s188.photobucket.com/user/jerhofer/media/1974%20Porsche%20914-6/10-10-18%20wiring%202_zpsgpwpcyi4.jpg.html
Posted by: jerhofer Oct 11 2018, 02:18 PM
We had more wind today than during the previous hurricane. I had to remove this limb so my wife can get into the driveway. We had quite a bit of rain but everything passed through quickly.
http://s188.photobucket.com/user/jerhofer/media/1974%20Porsche%20914-6/10-11-18%20tree%20limb_zps60izyags.jpg.html
Yesterday I realized that I had to modify the engine tin around the cam sync adapter. Normally the engine tin here fits flush against the back of the block and there is a seal between the tin and the cam carrier. After measuring the diameter of the cam sync adapter, I needed to drill a three inch hole. I didn't have a hole saw that large but my buddy and neighbor did have one. He has every tool known to mankind!! I took the tin to him to show him what I needed to do. He took pity on me and proceeded to drill the hole in his garage. BTW, compared to his garage, my garage is filthy!!! After getting back to my garage, I drilled a hole and installed a grommet for the cam sync adapter harness.
http://s188.photobucket.com/user/jerhofer/media/1974%20Porsche%20914-6/10-11-18%20cam%20sync%20adapter%2012_zpspor8mhkf.jpg.html
http://s188.photobucket.com/user/jerhofer/media/1974%20Porsche%20914-6/10-11-18%20cam%20sync%20adapter%2011_zpsfx0wxmdd.jpg.html
http://s188.photobucket.com/user/jerhofer/media/1974%20Porsche%20914-6/10-11-18%20cam%20sync%20adapter%209_zps812my5xf.jpg.html
http://s188.photobucket.com/user/jerhofer/media/1974%20Porsche%20914-6/10-11-18%20cam%20sync%20adapter%208_zpstmuuiubg.jpg.html
http://s188.photobucket.com/user/jerhofer/media/1974%20Porsche%20914-6/10-11-18%20cam%20sync%20adapter%206_zps36o9eppj.jpg.html
http://s188.photobucket.com/user/jerhofer/media/1974%20Porsche%20914-6/10-11-18%20cam%20sync%20adapter%204_zpslghhl4vp.jpg.html
I also installed the rest of the engine tin except for the piece on the right rear. I can't install it until i remove the engine from the engine stand.
http://s188.photobucket.com/user/jerhofer/media/1974%20Porsche%20914-6/10-11-18%20engine%20tin_zpsgmdt2rp7.jpg.html
http://s188.photobucket.com/user/jerhofer/media/1974%20Porsche%20914-6/10-11-18%20engine%20tin%202_zpsiw9zdjoj.jpg.html
Posted by: jerhofer Oct 11 2018, 02:46 PM
As I mentioned yesterday, I felt I needed to install a rod of some kind along the fuel line for support. A quick rummage through my metal bin turned up a 1/4" rod. After cutting it to length, I covered it with 1/2" shrink tube so it would blend in and to reduce chafing.
http://s188.photobucket.com/user/jerhofer/media/1974%20Porsche%20914-6/10-11-18%20support%20rod%202_zpselvsioei.jpg.html
http://s188.photobucket.com/user/jerhofer/media/1974%20Porsche%20914-6/10-11-18%20support%20rod_zpsxsoxy5bv.jpg.html
http://s188.photobucket.com/user/jerhofer/media/1974%20Porsche%20914-6/10-11-18%20support%20rod%209_zpsjz1qvllc.jpg.html
http://s188.photobucket.com/user/jerhofer/media/1974%20Porsche%20914-6/10-11-18%20support%20rod%207_zpse8yfmbe2.jpg.html
http://s188.photobucket.com/user/jerhofer/media/1974%20Porsche%20914-6/10-11-18%20support%20rod%206_zpsnhjlultx.jpg.html
http://s188.photobucket.com/user/jerhofer/media/1974%20Porsche%20914-6/10-11-18%20support%20rod%205_zpstqvdb0qt.jpg.html
http://s188.photobucket.com/user/jerhofer/media/1974%20Porsche%20914-6/10-11-18%20support%20rod%204_zpsixoltsyt.jpg.html
Since I won't have any spark plug wires, I inserted rubber plugs in the holes in the tin and the fan shroud.
http://s188.photobucket.com/user/jerhofer/media/1974%20Porsche%20914-6/10-11-18%20hole%20plugs%205_zpsn7zwbymu.jpg.html
http://s188.photobucket.com/user/jerhofer/media/1974%20Porsche%20914-6/10-11-18%20hole%20plugs%203_zps4rt62w9a.jpg.html
http://s188.photobucket.com/user/jerhofer/media/1974%20Porsche%20914-6/10-11-18%20hole%20plugs%202_zpsusj6srvb.jpg.html
Posted by: jerhofer Oct 13 2018, 02:57 PM
Yesterday was spent cleaning up the yard after the latest hurricane and mowing the lawn! We are planning a motorhome trip for a year from now that will see us in Albuquerque for the balloon festival, as well as visiting other western destination points. To that end, I spent yesterday afternoon making reservations for that trip. There are so many RV travelers that, for some places and events, the reservations need to made this far in advance. A lady at a RV park in Moab, Utah said that she only had a few sites available that would accommodate our coach. September is their peak season.
I am at a standstill on the wiring, for a couple days, waiting for some terminals for the TPS sensor. MY 56mm wheel studs arrived yesterday so I installed them.
http://s188.photobucket.com/user/jerhofer/media/1974%20Porsche%20914-6/10-13-18%20wheel%20stud_zpslslunfgq.jpg.html
I had removed the left side exhaust when I was investigating the broken dowel a few weeks ago. My plan was to re-install it today. It then occurred to me that this would be the perfect time to clean the bottom of the motor while it was off. I proceeded to clean the entire bottom of the motor but ran out of time to install the exhaust. But a dirty job has been completed.
http://s188.photobucket.com/user/jerhofer/media/1974%20Porsche%20914-6/10-13-18%20engine%20bottom_zpsreft5aeh.jpg.html
Posted by: jerhofer Oct 13 2018, 03:43 PM
I have to toot my son's horn today. His project has been to install a Tesla motor into a 1979 911SC. His maiden voyage was today.
https://youtu.be/sQbKBapxK4U
https://www.diyelectriccar.com/forums/showthread.php?t=192602
http://s188.photobucket.com/user/jerhofer/media/1974%20Porsche%20914-6/matts%20wheels%203_zpsvyfwdpw5.jpg.html
http://s188.photobucket.com/user/jerhofer/media/1974%20Porsche%20914-6/matts%20wheels%202_zpstaa3jsxn.jpg.html
http://s188.photobucket.com/user/jerhofer/media/1974%20Porsche%20914-6/matts%20wheels%205_zpsyeneuj3h.jpg.html
Posted by: 914forme Oct 14 2018, 09:47 AM
Thanks for sharing your Son's progress 
Posted by: jerhofer Oct 15 2018, 02:13 PM
My wife curbed one of the wheels on her Fiat 500 Abarth on one of the granite curbs used in Salisbury, NC. After washing the car, I spent some time working on the curb rash to at least make it less noticeable.
The terminals for the TPS plug came today and were installed this afternoon.
http://s188.photobucket.com/user/jerhofer/media/1974%20Porsche%20914-6/10-15-18%20tps%202_zpsgltz7mws.jpg.html
http://s188.photobucket.com/user/jerhofer/media/1974%20Porsche%20914-6/10-15-18%20tps%203_zps51cbrusu.jpg.html
http://s188.photobucket.com/user/jerhofer/media/1974%20Porsche%20914-6/10-15-18%20tps_zps95ald0pu.jpg.html
Now that all of the sensors were wired, I could finish running the wiring harness. I ran everything to the center of the rear fuel line.
http://s188.photobucket.com/user/jerhofer/media/1974%20Porsche%20914-6/10-15-18%20wiring%206_zps6zgqmw58.jpg.html
http://s188.photobucket.com/user/jerhofer/media/1974%20Porsche%20914-6/10-15-18%20wiring%204_zpsskhmxhkr.jpg.html
http://s188.photobucket.com/user/jerhofer/media/1974%20Porsche%20914-6/10-15-18%20wiring%203_zpsnip50ord.jpg.html
I labeled all of the sensor wires. Now comes the tricky part. I am going to use a 47 pin bulkhead connector. It uses Deutsch terminals which are more compact. Making sure all of those connections on both the female and male connectors are correct will be critical.
http://s188.photobucket.com/user/jerhofer/media/1974%20Porsche%20914-6/10-15-18%20bulkhead%20connector%205_zpskee2af08.jpg.html
http://s188.photobucket.com/user/jerhofer/media/1974%20Porsche%20914-6/10-15-18%20bulkhead%20connector%204_zpsd2ei6tgu.jpg.html
http://s188.photobucket.com/user/jerhofer/media/1974%20Porsche%20914-6/10-15-18%20bulkhead%20connector%202_zps5xowjiny.jpg.html
http://s188.photobucket.com/user/jerhofer/media/1974%20Porsche%20914-6/10-15-18%20bulkhead%20connector_zpsp3owq6ki.jpg.html
Posted by: 914forme Oct 15 2018, 05:16 PM
Spent lots of days staring at them in my younger years. Military stuff was done in all white wires.  And you where lucky if they had numbered them on the one off stuff I was working on. Spent a lot of time with a Ohm meter and a sharpie.
BTW, you can print labels and the seal them with clear shrink wrap. Or get the printable stuff, but that can be $$$ I just print it on paper, or use a fine sharpie to label it or number it, then slip a piece of clear heat shrink over it. Makes it much easier to remember when you get into it at a latter date.
Then I will draw up the schematics and number or label the corresponding marks so I know what is what.
I guess we ordered so much wire it was easier to just stock a single color. I see now I can get it in any color I want, that would have given me back months of time.  Im sure I would have found some other way to waste it with my youth.
Posted by: jerhofer Oct 16 2018, 05:05 PM
Here is another video of my son's car.
https://www.youtube.com/watch?v=39_fRAmbzio&feature=youtu.be
Posted by: jerhofer Oct 17 2018, 03:28 PM
After voting this morning, I hooked up the tach wire I forgot yesterday. I had marked it when I removed it from the electronic ignition. It is connected to the main engine harness with a green wire. The TEC ECU uses a brown wire so I the green and brown together. I also routed the engine harness and tied it in place.
http://s188.photobucket.com/user/jerhofer/media/1974%20Porsche%20914-6/10-17-18%20tach%20wire_zps3q1uxdpj.jpg.html
http://s188.photobucket.com/user/jerhofer/media/1974%20Porsche%20914-6/10-17-18%20engine%20harness_zpssycren3n.jpg.html
http://s188.photobucket.com/user/jerhofer/media/1974%20Porsche%20914-6/10-17-18%20engine%20harness%202_zps2ip5qxka.jpg.html
In the rear trunk I drilled a 1 3/4" hole for the bulkead connector. I then installed shrink tube on the ECU harness in preparation for wiring the bulkhead connector.
http://s188.photobucket.com/user/jerhofer/media/1974%20Porsche%20914-6/10-17-18%20bulkhead%20connector%204_zpslji2bty4.jpg.html
http://s188.photobucket.com/user/jerhofer/media/1974%20Porsche%20914-6/10-17-18%20bulkhead%20connector%203_zpsex9nnwzf.jpg.html
http://s188.photobucket.com/user/jerhofer/media/1974%20Porsche%20914-6/10-17-18%20bulkhead%20connector%202_zps0dwm5zfz.jpg.html
http://s188.photobucket.com/user/jerhofer/media/1974%20Porsche%20914-6/10-17-18%20ECU%20harness_zpsbpjcbtuz.jpg.html
Posted by: jerhofer Oct 18 2018, 04:27 PM
Today was spent inserting the wires into the seal for the bulkhead connector. I did one at a time on both the female and male ends. Each wire was documented on my terminal wiring sheet. For reference sake, I marked the top of each seal so it corresponded with the blown up photo of the terminal numbers. It would be even more difficult to get these wires in the right holes without the blown up photo. It was still a painstaking process trying to make sure each wire was in the same place on both ends.
I did have time to crimp three of the female terminals. The female terminals are used on the male plug while the female plug uses the male terminals. To crimp the Deutsch terminals I had to change the dies on my crimper.
http://s188.photobucket.com/user/jerhofer/media/1974%20Porsche%20914-6/10-18-18%20terminal%20sheet_zpscmzv0fv4.jpg.html
http://s188.photobucket.com/user/jerhofer/media/1974%20Porsche%20914-6/10-18-18%20wire%20insulator%204_zpsmklrcudn.jpg.html
http://s188.photobucket.com/user/jerhofer/media/1974%20Porsche%20914-6/10-18-18%20wire%20insulator_zpssuwskgmf.jpg.html
http://s188.photobucket.com/user/jerhofer/media/1974%20Porsche%20914-6/10-18-18%20wire%20insulator%202_zps7aho4cxg.jpg.html
http://s188.photobucket.com/user/jerhofer/media/1974%20Porsche%20914-6/10-18-18%20deutsch%20dies_zpsjgsyhkbu.jpg.html
http://s188.photobucket.com/user/jerhofer/media/1974%20Porsche%20914-6/10-18-18%20deutsch%20female%20terminal%202_zpsnue719ac.jpg.html
http://s188.photobucket.com/user/jerhofer/media/1974%20Porsche%20914-6/10-18-18%20deutsch%20female%20terminal_zpsivqqyb0y.jpg.html
Posted by: jerhofer Oct 20 2018, 02:33 PM
I spent yesterday crimping the Deutsch terminals. I marked the top of the bulkhead connector and the wire seal to make sure I get the wires in the right hole. I inserted the larger wires first in the center of the connector all went well. However, when I tried to insert the other wires, I discovered that the terminals were too big at the crimp end to fit into the holes. After some research, I found that there are three sizes of terminals, 1.0mm. 1.6mm and 2.4mm. I had the 1.6mm terminals which fit into the five holes for larger wires but no 1.0mm terminals. I have them on order and, when they arrive, I get to crimp nearly all of the wires again! These connectors have been an ongoing learning process.
http://s188.photobucket.com/user/jerhofer/media/1974%20Porsche%20914-6/10-20-18%20bulkhead%20connector_zpsm2tghnfh.jpg.html
http://s188.photobucket.com/user/jerhofer/media/1974%20Porsche%20914-6/10-20-18%20bulkhead%20connector%202_zpsjm1ahtvj.jpg.html
http://s188.photobucket.com/user/jerhofer/media/1974%20Porsche%20914-6/10-20-18%20bulkhead%20connector%203_zpsupsvcraz.jpg.html
http://s188.photobucket.com/user/jerhofer/media/1974%20Porsche%20914-6/10-20-18%20bulkhead%20connector%204_zpsym8m3w3b.jpg.html
http://s188.photobucket.com/user/jerhofer/media/1974%20Porsche%20914-6/10-20-18%20bulkhead%20connector%205_zpse9itvgqi.jpg.html
My fuel line with the -6AN fittings arrived yesterday from Chris Foley at Tangerine Racing. Since I am at a standstill on the wiring, I decided to insert the feed and return lines through the tunnel. Chris's instructions say this is a two man job. I removed the shifter as per his instructions so I could access the line in the tunnel. After fighting the first line for an hour by myself, I called my buddy to see if he could help. It still took us a bit to get both lines ran but we were ultimately successful. To get Chris's line to work I had to hog out the hole on the firewall so the -6 AN fitting would pass through. Once both lines were in place, I slit the front grommet and then inserted it over the lines and into the hole. I had to slit the grommets at the rear as well. Now I can run some more fuel lines and re-install the fuel tank. I sent Chris a photograph showing how I was going to run the line on the firewall. He used a protractor on that photo to get the correct angle for the fitting. It turned out perfectly.
http://s188.photobucket.com/user/jerhofer/media/1974%20Porsche%20914-6/10-20-18%20fuel%20lines%208_zpscfik97ka.jpg.html
http://s188.photobucket.com/user/jerhofer/media/1974%20Porsche%20914-6/10-20-18%20fuel%20lines%206_zpsdsx9huoe.jpg.html
http://s188.photobucket.com/user/jerhofer/media/1974%20Porsche%20914-6/10-20-18%20fuel%20lines%204_zps4n2dckth.jpg.html
http://s188.photobucket.com/user/jerhofer/media/1974%20Porsche%20914-6/10-20-18%20fuel%20lines%203_zpsvekqsk62.jpg.html
http://s188.photobucket.com/user/jerhofer/media/1974%20Porsche%20914-6/10-20-18%20fuel%20lines%202_zpsub0p6cr2.jpg.html
Posted by: Cairo94507 Oct 20 2018, 08:55 PM
Just incredible work. Between your car and your son's Tesla powered 911 I am without words.
Posted by: jerhofer Oct 22 2018, 07:35 PM
Just incredible work. Between your car and your son's Tesla powered 911 I am without words.
Thanks.
I got up early Sunday morning to drive the Aston to Charlotte for Cars & Cappuccino. It is held every third Sunday from 9:00-11:00 for European cars only. Interesting cars are the norm here. I had a long discussion with a gentleman who is in the middle of building an "outlaw" 356. It should be a fun car.
http://s188.photobucket.com/user/jerhofer/media/1974%20Porsche%20914-6/10-20-18%20cars%20%20cap%207_zpsymwji2c1.jpg.html
http://s188.photobucket.com/user/jerhofer/media/1974%20Porsche%20914-6/10-20-18%20cars%20%20cap%209_zpsqmep0sxl.jpg.html
http://s188.photobucket.com/user/jerhofer/media/1974%20Porsche%20914-6/10-20-18%20cars%20%20cap%2010_zpsbx1i5nhm.jpg.html
http://s188.photobucket.com/user/jerhofer/media/1974%20Porsche%20914-6/10-20-18%20cars%20%20cap%2011_zpsmfgyzxjd.jpg.html
http://s188.photobucket.com/user/jerhofer/media/1974%20Porsche%20914-6/10-20-18%20cars%20%20cap%2013_zpsuxfwydoy.jpg.html
http://s188.photobucket.com/user/jerhofer/media/1974%20Porsche%20914-6/10-20-18%20cars%20%20cap%205_zpsn2fpi9j6.jpg.html
http://s188.photobucket.com/user/jerhofer/media/1974%20Porsche%20914-6/10-20-18%20cars%20%20cap%203_zpsgplqiwcq.jpg.html
http://s188.photobucket.com/user/jerhofer/media/1974%20Porsche%20914-6/10-20-18%20cars%20%20cap%202_zpstlurukfe.jpg.html
http://s188.photobucket.com/user/jerhofer/media/1974%20Porsche%20914-6/10-20-18%20cars%20%20cap_zpsn6gig8zq.jpg.html
http://s188.photobucket.com/user/jerhofer/media/1974%20Porsche%20914-6/10-20-18%20cars%20%20cap%208_zpshyf0an2c.jpg.html
Posted by: jerhofer Oct 22 2018, 07:49 PM
Yesterday, with the NASCAR race on in the background in the garage, I worked on installing the high pressure fuel line from Chris's new line to the fuel filter on the firewall.
http://s188.photobucket.com/user/jerhofer/media/1974%20Porsche%20914-6/10-21-18%20fuel%20lines%204_zpsz8wh7ufd.jpg.html
http://s188.photobucket.com/user/jerhofer/media/1974%20Porsche%20914-6/10-21-18%20fuel%20lines%203_zps8iszrgox.jpg.html
This morning I began by installing the return fuel line in the engine bay. The fitting on the end of the original line had 1/4 NPT thread. I could not find an adapter that went directly from NPT to -6 AN. I did find a 1/4 NPT female couple and I used an 1/4 NPT male to -6 AN male adapter. With that adapter in place, I ran the line over to the right and up through an existing hole to the battery area. From looking at photographs of 914-6 engine bays to see the relationship of the throttle bodies to the battery, I made an educated guess on the length.
http://s188.photobucket.com/user/jerhofer/media/1974%20Porsche%20914-6/10-21-18%20fuel%20lines%202_zps6rhbxhdc.jpg.html
http://s188.photobucket.com/user/jerhofer/media/1974%20Porsche%20914-6/10-22-18%20fuel%20lines%209_zpsy0jsd4mh.jpg.html
http://s188.photobucket.com/user/jerhofer/media/1974%20Porsche%20914-6/10-21-18%20fuel%20lines_zps3mbgakd8.jpg.html
http://s188.photobucket.com/user/jerhofer/media/1974%20Porsche%20914-6/10-22-18%20fuel%20lines%2012_zpsfg6qrhm7.jpg.html
http://s188.photobucket.com/user/jerhofer/media/1974%20Porsche%20914-6/10-22-18%20fuel%20lines%2011_zpstm0ibkoc.jpg.html
http://s188.photobucket.com/user/jerhofer/media/1974%20Porsche%20914-6/10-22-18%20fuel%20lines%2010_zpsd6izqghb.jpg.html
Posted by: jerhofer Oct 22 2018, 07:59 PM
This afternoon, I moved to the front of the car. I ran a-6 AN line from Chris's fuel line to the output side of the fuel tank. I then ran a short return line from the original fuel line to the access area for the fuel lines on the tank. After installing the tank, I ran a feed line from the fuel tank to the in side of the fuel pump. I had forgotten to order an inline filter for this line. It will be here shortly and I will install it above the fuel pump. To hook up the return line from the original fuel line back to the tank, I had to use an adapter to go from 3/8" fuel line to 1/4" fuel line.
http://s188.photobucket.com/user/jerhofer/media/1974%20Porsche%20914-6/10-22-18%20fuel%20lines%208_zpsowjv37or.jpg.html
http://s188.photobucket.com/user/jerhofer/media/1974%20Porsche%20914-6/10-22-18%20fuel%20lines%207_zpsna00oned.jpg.html
http://s188.photobucket.com/user/jerhofer/media/1974%20Porsche%20914-6/10-22-18%20fuel%20lines%206_zpsrskxjpmb.jpg.html
http://s188.photobucket.com/user/jerhofer/media/1974%20Porsche%20914-6/10-22-18%20fuel%20lines%204_zpsy9prp0hr.jpg.html
http://s188.photobucket.com/user/jerhofer/media/1974%20Porsche%20914-6/10-22-18%20fuel%20lines%203_zps5583wwhb.jpg.html
http://s188.photobucket.com/user/jerhofer/media/1974%20Porsche%20914-6/10-22-18%20fuel%20lines%202_zpsritl8kcz.jpg.html
Posted by: ChrisFoley Oct 24 2018, 06:56 AM
Be careful that rubber hose to the pump doesn't get a restriction in the 180. Modern fuel hose doesn't hold it's shape well and has a tendency to kink in tight radius bends.
If it's 3/8" ID hose, I have a coil spring which will fit over it to help it stay round.
Posted by: jerhofer Oct 24 2018, 08:37 AM
Be careful that rubber hose to the pump doesn't get a restriction in the 180. Modern fuel hose doesn't hold it's shape well and has a tendency to kink in tight radius bends.
If it's 3/8" ID hose, I have a coil spring which will fit over it to help it stay round.
I want one but I couldn’t find it on your website.
Posted by: ChrisFoley Oct 24 2018, 10:54 AM
Be careful that rubber hose to the pump doesn't get a restriction in the 180. Modern fuel hose doesn't hold it's shape well and has a tendency to kink in tight radius bends.
If it's 3/8" ID hose, I have a coil spring which will fit over it to help it stay round.
I want one but I couldn’t find it on your website.
It's not an inventoried product at this time. I'll send you an invoice.
Posted by: jerhofer Oct 25 2018, 02:38 PM
Since I am waiting for parts for the fuel lines and the wiring, I decided to address the interior. I wasn't happy with the way the fabric was bunched up on the left door pocket. After removing it, I could see that I would have to remove all of the staples, straighten the fabric and then re-staple it. Since I don't have that size of staples, I decided to replace the door pocket with an extra one that came with the car. It is finished in the factory black and has a couple of nicks on the rear end of it. I like the looks of the all black door pocket better as it breaks up all of that gray on the door panel.
http://s188.photobucket.com/user/jerhofer/media/1974%20Porsche%20914-6/10-24-18%20door%20panel%20L%205_zps5u0h6mri.jpg.html
http://s188.photobucket.com/user/jerhofer/media/1974%20Porsche%20914-6/10-24-18%20door%20panel%20L%204_zpsu0klhnc9.jpg.html
http://s188.photobucket.com/user/jerhofer/media/1974%20Porsche%20914-6/10-24-18%20door%20panel%20L%202_zpsxg14jxka.jpg.html
http://s188.photobucket.com/user/jerhofer/media/1974%20Porsche%20914-6/10-24-18%20door%20panel%20L_zpsqgogpqwb.jpg.html
Posted by: jerhofer Oct 25 2018, 03:44 PM
The right door panel needed a bit more attention as the fabric had come loose on the bottom and sides. To remove the door panel, I pulled back on the window crank cover to expose the screw. After removing the door handle screw to release that bezel and removing the arm rest, I popped the door panel off. Using some spray carpet adhesive, i re-attached everything. I haven't re-installed the panel yet as three of the clips were missing. They are on the way.
http://s188.photobucket.com/user/jerhofer/media/1974%20Porsche%20914-6/10-24-18%20door%20panel%20R%2010_zpspreq7gtg.jpg.html
http://s188.photobucket.com/user/jerhofer/media/1974%20Porsche%20914-6/10-24-18%20door%20panel%20R%209_zpsyq3muaz9.jpg.html
http://s188.photobucket.com/user/jerhofer/media/1974%20Porsche%20914-6/10-24-18%20door%20panel%20R%208_zpsjmhppdax.jpg.html
http://s188.photobucket.com/user/jerhofer/media/1974%20Porsche%20914-6/10-24-18%20door%20panel%20L%203_zpsjvjgsxgf.jpg.html
http://s188.photobucket.com/user/jerhofer/media/1974%20Porsche%20914-6/10-24-18%20door%20panel%20R%206_zpsisgunwxb.jpg.html
http://s188.photobucket.com/user/jerhofer/media/1974%20Porsche%20914-6/10-24-18%20door%20panel%20R%205_zpsqdndotbp.jpg.html
http://s188.photobucket.com/user/jerhofer/media/1974%20Porsche%20914-6/10-24-18%20door%20panel%20R%203_zpsxlcszin7.jpg.html
Posted by: jerhofer Oct 25 2018, 03:55 PM
The fabric was also loose on the firewall seat panel. To work on it I separated the two sides from the center piece by removing the screws. To totally fix it, I would have had to remove a bunch of staples. So I pulled the fabric back as far as I could from the center of each panel, doused the cardboard panel and the fabric with as much adhesive as I could, waited for the adhesive to become tacky and then used my hands to smooth out the wrinkles from the outside to the center. While it is not perfect, it looks way better than when I started. There was also some loose fabric on the ends of the panel that I re-attached.
http://s188.photobucket.com/user/jerhofer/media/1974%20Porsche%20914-6/10-25-18%20interior%20seat%20back%203_zps20wrrkxw.jpg.html
http://s188.photobucket.com/user/jerhofer/media/1974%20Porsche%20914-6/10-25-18%20interior%20seat%20back%202_zpsffdort68.jpg.html
http://s188.photobucket.com/user/jerhofer/media/1974%20Porsche%20914-6/10-25-18%20interior%20seat%20back_zpsqiggbt5t.jpg.html
http://s188.photobucket.com/user/jerhofer/media/1974%20Porsche%20914-6/10-25-18%20interior%20seat%20back%204_zpsbuwc7juc.jpg.html
http://s188.photobucket.com/user/jerhofer/media/1974%20Porsche%20914-6/10-25-18%20interior%20seat%20back%205_zpsv3oz97aq.jpg.html
http://s188.photobucket.com/user/jerhofer/media/1974%20Porsche%20914-6/10-25-18%20interior%20seat%20back%206_zpsxyzmmfmn.jpg.html
Posted by: raynekat Oct 25 2018, 04:05 PM
You've done a great job on this interior.
And I agree that a bit more black here and there helps to break up the light color.
Posted by: jerhofer Oct 25 2018, 04:05 PM
The plan is to replace the interior carpet. To that end, I removed the old carpet. On the driver's side, the parking brake lever has to be removed. It also needed some attention so I bead blasted it and the muffler mount. I will have the muffler mount powder coated to better handle the heat but the parking brake lever cannot be powder coated unless I could remove the plastic handle. So I painted it.
http://s188.photobucket.com/user/jerhofer/media/1974%20Porsche%20914-6/10-25-18%20bead%20blast_zpsif1gcqco.jpg.html
http://s188.photobucket.com/user/jerhofer/media/1974%20Porsche%20914-6/10-25-18%20parking%20brake%20lever_zps0u3zpphy.jpg.html
Once I had the old carpet out, I used a plastic scraper to remove any of the old carpet that was still adhered to the car. Everything is now cleaned up and I am ready to install the new carpet.
http://s188.photobucket.com/user/jerhofer/media/1974%20Porsche%20914-6/10-25-18%20carpet%2010_zpsmh9jc2ot.jpg.html
http://s188.photobucket.com/user/jerhofer/media/1974%20Porsche%20914-6/10-25-18%20carpet%209_zpsqtxumsfk.jpg.html
http://s188.photobucket.com/user/jerhofer/media/1974%20Porsche%20914-6/10-25-18%20carpet_zpszzgcbwj9.jpg.html
http://s188.photobucket.com/user/jerhofer/media/1974%20Porsche%20914-6/10-25-18%20carpet%202_zpsyogxxksi.jpg.html
http://s188.photobucket.com/user/jerhofer/media/1974%20Porsche%20914-6/10-25-18%20carpet%2016_zpszoppui4i.jpg.html
http://s188.photobucket.com/user/jerhofer/media/1974%20Porsche%20914-6/10-25-18%20carpet%2015_zpswnemqpha.jpg.html
http://s188.photobucket.com/user/jerhofer/media/1974%20Porsche%20914-6/10-25-18%20carpet%2014_zpsoabgtk3m.jpg.html
Posted by: jerhofer Oct 25 2018, 04:09 PM
You've done a great job on this interior.
And I agree that a bit more black here and there helps to break up the light color.
Thanks. I have the black lower piece for the right door panel as well. It is in perfect condition.
Posted by: jerhofer Oct 26 2018, 02:14 PM
I began laying out all of the carpet pieces to see how they fit and to decide in what order they should be installed. The carpet for the tunnel had a very small hole for the shifter and wasn't close to being large enough for the shifter that is in the car. To see how much the hole needed to be enlarged, I removed the shifter so I could slip the carpet over it. I cut four slits into the carpet and then slipped it over the shifter.
http://s188.photobucket.com/user/jerhofer/media/1974%20Porsche%20914-6/10-26-18%20shifter_zps4syivk2h.jpg.html
http://s188.photobucket.com/user/jerhofer/media/1974%20Porsche%20914-6/10-26-18%20carpet%2013_zpsplsp6uar.jpg.html
http://s188.photobucket.com/user/jerhofer/media/1974%20Porsche%20914-6/10-26-18%20carpet%2012_zpsd3t0mokj.jpg.html
Since bumping one's head on the steering wheel is never fun, I removed it. In the process I discovered that it had a nearly two inch spacer. Since I have short legs and relatively long arms, I will probably remove the spacer when I re-install the steering wheel.
http://s188.photobucket.com/user/jerhofer/media/1974%20Porsche%20914-6/10-26-18%20steering%20wheel_zpsroendrjt.jpg.html
There were a couple of relays that were dangling under the dash on the left side. In the process of tying them up, I discovered this switch. At first I couldn't figure out what it was for as it has "L" and "R" written on it. Then I realized that it was for the O2 sensor gauge. There was only one gauge but the previous owner had O2 sensors in each side of the exhaust. This switch would allow him to monitor each exhaust separately on one gauge. Pretty clever!!! I won't be using the gauge as the ECU will be monitoring the O2 sensor.
http://s188.photobucket.com/user/jerhofer/media/1974%20Porsche%20914-6/10-26-18%20switch_zpslunevpyz.jpg.html
Posted by: jerhofer Oct 26 2018, 02:23 PM
Using the old vinyl pieces as patterns, I cut new pieces to cover the frame and tunnel in the passenger compartment. I was doing some shopping in Wal-Mart yesterday morning and, as I was walking by the fabric department, i wondered if they would have some vinyl for these pieces. They did and I bought a yard of the material. After cutting out each piece, I test fitted it and then applied adhesive to the pieces and to the car.
http://s188.photobucket.com/user/jerhofer/media/1974%20Porsche%20914-6/10-26-18%20carpet%2011_zpsammpkc6y.jpg.html
http://s188.photobucket.com/user/jerhofer/media/1974%20Porsche%20914-6/10-26-18%20carpet%2010_zpspprrlzrq.jpg.html
http://s188.photobucket.com/user/jerhofer/media/1974%20Porsche%20914-6/10-26-18%20carpet%209_zpsty5kylfl.jpg.html
http://s188.photobucket.com/user/jerhofer/media/1974%20Porsche%20914-6/10-26-18%20carpet%208_zps3zxpndz7.jpg.html
http://s188.photobucket.com/user/jerhofer/media/1974%20Porsche%20914-6/10-26-18%20carpet%207_zpsaygtmo4r.jpg.html
The next job was installing the carpet pieces on the left side. After doing some fitting and trimming, adhesive was applied and the carpet was set in place.
http://s188.photobucket.com/user/jerhofer/media/1974%20Porsche%20914-6/10-26-18%20carpet%205_zps5hsumee3.jpg.html
http://s188.photobucket.com/user/jerhofer/media/1974%20Porsche%20914-6/10-26-18%20carpet%203_zpsclcxfeut.jpg.html
http://s188.photobucket.com/user/jerhofer/media/1974%20Porsche%20914-6/10-26-18%20carpet%202_zpsej7j0gex.jpg.html
http://s188.photobucket.com/user/jerhofer/media/1974%20Porsche%20914-6/10-26-18%20carpet_zpsddxekn95.jpg.html
Posted by: jerhofer Oct 27 2018, 02:23 PM
Before finishing up installing the carpet, I cleaned up the wiring under the dash and installed a different radio. I had this Blaupunkt Brisbane 230 installed in another car. It is very compact as it does not have a CD player. But it does have Bluetooth and both Aux and USB inputs.
http://s188.photobucket.com/user/jerhofer/media/1974%20Porsche%20914-6/10-27-18%20radio%204_zpsmblckxwy.jpg.html
http://s188.photobucket.com/user/jerhofer/media/1974%20Porsche%20914-6/10-27-18%20radio%203_zps8dstaoke.jpg.html
http://s188.photobucket.com/user/jerhofer/media/1974%20Porsche%20914-6/10-27-18%20radio%202_zpsaqtpxzps.jpg.html
With that out of the way, I finished the carpet installation. It was pretty straightforward. Compared to some other cars, the carpet install here was fairly easy and the carpet set from Auto Atlanta fit very well with very few adjustments needed. i did not glue the center sections as I may need access to the shifter and the rest of the tunnel. I am going to try fastening those pieces with Velcro.
http://s188.photobucket.com/user/jerhofer/media/1974%20Porsche%20914-6/10-27-18%20carpet%203_zpsffzizhdz.jpg.html
http://s188.photobucket.com/user/jerhofer/media/1974%20Porsche%20914-6/10-27-18%20carpet%204_zpsauqfraep.jpg.html
http://s188.photobucket.com/user/jerhofer/media/1974%20Porsche%20914-6/10-27-18%20carpet%202_zpsndguqug5.jpg.html
http://s188.photobucket.com/user/jerhofer/media/1974%20Porsche%20914-6/10-27-18%20carpet_zps4fododna.jpg.html
Posted by: raynekat Oct 28 2018, 02:01 PM
It all looks super great.
The only thing I might have changed was putting black vinyl at the very top of the door cards....but that's being very picky.
Nice work!
Posted by: jerhofer Oct 28 2018, 03:30 PM
It all looks super great.
The only thing I might have changed was putting black vinyl at the very top of the door cards....but that's being very picky.
Nice work!
I like that idea and will look into it.
Posted by: IronHillRestorations Oct 28 2018, 03:50 PM
It all looks super great.
The only thing I might have changed was putting black vinyl at the very top of the door cards....but that's being very picky.
Nice work!
I thought the same thing years ago when we did the gray interior. Adding the black adds nice contrast.
You're doing a bang up job on the interior!
Posted by: jerhofer Oct 28 2018, 07:18 PM
It all looks super great.
The only thing I might have changed was putting black vinyl at the very top of the door cards....but that's being very picky.
Nice work!
I thought the same thing years ago when we did the gray interior. Adding the black adds nice contrast.
You're doing a bang up job on the interior!
I looked at the rear of the panel and everything is stapled in place. Not sure I want to tackle that. However, I used some spray dye on the dash of the '64 Corvette that I restored and it turned out great. After masking off the rest of the panel, that may work. Have to think about that.
Thanks for the compliment.
Posted by: mepstein Oct 28 2018, 07:55 PM
It all looks super great.
The only thing I might have changed was putting black vinyl at the very top of the door cards....but that's being very picky.
Nice work!
I thought the same thing years ago when we did the gray interior. Adding the black adds nice contrast.
You're doing a bang up job on the interior!
I looked at the rear of the panel and everything is stapled in place. Not sure I want to tackle that. However, I used some spray dye on the dash of the '64 Corvette that I restored and it turned out great. After masking off the rest of the panel, that may work. Have to think about that.
Thanks for the compliment.
The bolster is only removable on the very early ('70) cars.
Attached image(s)
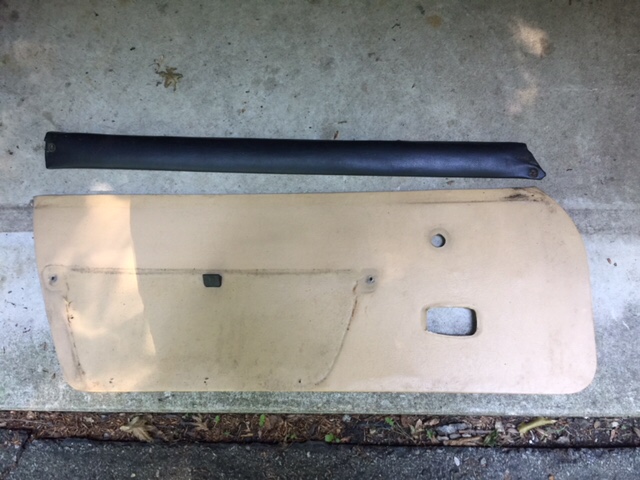
Posted by: jerhofer Oct 29 2018, 02:05 PM
I decided against painting the top bolster as I am afraid it would not hold up long term.
I did use Velcro to attach the tunnel carpets.
http://s188.photobucket.com/user/jerhofer/media/1974%20Porsche%20914-6/10-28-18%20interior%203_zps6ormgbqk.jpg.html
Yesterday, while the NASCAR race was on, I taped the wires for the dome light to the firewall pad and then installed the firewall trim pad. I also installed the seat belts and center armrest.
http://s188.photobucket.com/user/jerhofer/media/1974%20Porsche%20914-6/10-28-18%20interior%202_zps8oxo55kx.jpg.html
http://s188.photobucket.com/user/jerhofer/media/1974%20Porsche%20914-6/10-28-18%20interior_zps3w1thfo1.jpg.html
Today I installed the seats to complete the interior. I am still waiting for the clips for the passenger door panel. The seats appear to be white but are actually a very light gray.
http://s188.photobucket.com/user/jerhofer/media/1974%20Porsche%20914-6/10-29-18%20interior%202_zpsfjqzbojb.jpg.html
http://s188.photobucket.com/user/jerhofer/media/1974%20Porsche%20914-6/10-29-18%20carpet%20matts%203_zps9atdp7da.jpg.html
http://s188.photobucket.com/user/jerhofer/media/1974%20Porsche%20914-6/10-29-18%20interior%203_zpsdkbv0wsi.jpg.html
http://s188.photobucket.com/user/jerhofer/media/1974%20Porsche%20914-6/10-29-18%20interior%205_zpspbdtkju0.jpg.html
Months ago I found a slightly used set of Sisal floor mats on eBay.
http://s188.photobucket.com/user/jerhofer/media/1974%20Porsche%20914-6/10-29-18%20carpet%20matts%203_zps9atdp7da.jpg.html
Posted by: jerhofer Oct 29 2018, 02:11 PM
Chris Foley's spring for the fuel line and my inline fuel filter arrived Saturday. I cut the line, inserted the spring and fastened the fuel filter in place. The fuel filter is a billet piece that has a replaceable element.
http://s188.photobucket.com/user/jerhofer/media/1974%20Porsche%20914-6/10-29-18%20fuel%20filter%206_zpsob8z3wnt.jpg.html
http://s188.photobucket.com/user/jerhofer/media/1974%20Porsche%20914-6/10-29-18%20fuel%20filter%207_zpsriueqbsc.jpg.html
http://s188.photobucket.com/user/jerhofer/media/1974%20Porsche%20914-6/10-29-18%20fuel%20filter%205_zps7mgwlpte.jpg.html
http://s188.photobucket.com/user/jerhofer/media/1974%20Porsche%20914-6/10-29-18%20fuel%20filter_zps5lcq0eus.jpg.html
Posted by: jerhofer Oct 30 2018, 02:00 PM
I spent the morning crimping on the new terminals on the wiring harness. After lunch I replaced a leaky propane gas line on the motorhome. I also received a call from my powder coater telling me the boomerang was ready. For the princely sum of $5, it looks like new.
http://s188.photobucket.com/user/jerhofer/media/1974%20Porsche%20914-6/10-30-18%20boomerang_zps4wonamgz.jpg.html
My clips for the passenger door panel arrived in today's mail so I could re-install it. I used the black lower armrest part in place of the light gray one.
http://s188.photobucket.com/user/jerhofer/media/1974%20Porsche%20914-6/10-24-18%20door%20panel%20R%2010_zpspreq7gtg.jpg.html
http://s188.photobucket.com/user/jerhofer/media/1974%20Porsche%20914-6/10-30-18%20interior%202_zps6qsquvtm.jpg.html
http://s188.photobucket.com/user/jerhofer/media/1974%20Porsche%20914-6/10-30-18%20interior_zpscrejiax0.jpg.html
Posted by: mepstein Oct 30 2018, 02:05 PM
Car looks great!
Posted by: TravisNeff Oct 30 2018, 02:37 PM
Looking very nice. I admire your attention to detail.
Posted by: Dion Oct 30 2018, 03:12 PM
I like your interior trim colours. Very cool.
I’ll have to pm you about your fuel filter set up. Interested in that layout.
Keep up the great work
Posted by: jerhofer Oct 30 2018, 03:28 PM
I like your interior trim colours. Very cool.
I’ll have to pm you about your fuel filter set up. Interested in that layout.
Keep up the great work
The colors were somebody else's choice about 15 years ago but they are surely different than the normal blacks and browns.
Posted by: Dave_Darling Oct 31 2018, 12:09 PM
My clips for the passenger door panel arrived in today's mail so I could re-install it. I used the black lower armrest part in place of the light gray one.
I'm glad you did, that looks a whole lot better to me than the gray one did!! Especially when the driver's side door pocket is black already.
--DD
Posted by: jerhofer Nov 1 2018, 02:18 PM
I worked on installing the terminals into the bulkhead connectors yesterday. It is a very intense experience as the pins need to be placed in the same holes in both halves of the connector. I screwed up a couple by placing the wire in the hole before passing it through the seal. I had purchased a terminal removal tool, but, don't you know, I had the wrong size. The correct tool is on the way.
Since I am close to having the wiring finished, I decided it was time to remove the engine from the engine stand and place it on the hydraulic table that I will be using to put the motor into the car. I cut a piece of plywood to be the same width as the heat exchangers and mounted the board to the table with clamps. I also removed the handle on the one end as it would have been in the way.
http://s188.photobucket.com/user/jerhofer/media/1974%20Porsche%20914-6/11-1-18%20engine%208_zpsmimxnar9.jpg.html
http://s188.photobucket.com/user/jerhofer/media/1974%20Porsche%20914-6/11-1-18%20engine%207_zpsg5rzoxlo.jpg.html
http://s188.photobucket.com/user/jerhofer/media/1974%20Porsche%20914-6/11-1-18%20engine_zps7d1zapjq.jpg.html
With that done, I removed the tin at the front and rear of the motor as it would have been bent by the straps. I strapped it at both ends and, using my overhead hoist, I took the weight off of the engine stand and removed the mount. I then lowered the engine onto the hydraulic cart. Now I can install the flywheel, clutch, transmission, starter, etc. in preparation for putting the motor into the car.
http://s188.photobucket.com/user/jerhofer/media/1974%20Porsche%20914-6/11-1-18%20engine%206_zpslprwc5td.jpg.html
http://s188.photobucket.com/user/jerhofer/media/1974%20Porsche%20914-6/11-1-18%20engine%205_zpssghznc9g.jpg.html
http://s188.photobucket.com/user/jerhofer/media/1974%20Porsche%20914-6/11-1-18%20engine%204_zpsblglnlvj.jpg.html
http://s188.photobucket.com/user/jerhofer/media/1974%20Porsche%20914-6/11-1-18%20engine%203_zpslfuznc90.jpg.html
http://s188.photobucket.com/user/jerhofer/media/1974%20Porsche%20914-6/11-1-18%20engine%202_zpsar0fo3au.jpg.html
Posted by: jerhofer Nov 2 2018, 02:34 PM
The shorter screws for the Momo steering wheel arrived today. So I removed the 1 1/2" steering wheel spacer.
http://s188.photobucket.com/user/jerhofer/media/1974%20Porsche%20914-6/11-2-18%20momo%20spacer%206_zpsjycoq9dm.jpg.html
http://s188.photobucket.com/user/jerhofer/media/1974%20Porsche%20914-6/11-2-18%20momo%20spacer%205_zps9pswt48q.jpg.html
http://s188.photobucket.com/user/jerhofer/media/1974%20Porsche%20914-6/11-2-18%20momo%20spacer%202_zpsp3xrszho.jpg.html
The Blaupunkt radio I recently installed required an antenna adapter. It also arrived today and is now in the car. I have tunes!!
http://s188.photobucket.com/user/jerhofer/media/1974%20Porsche%20914-6/11-2-18%20antenna%20adapter_zpsjzywitt8.jpg.html
Next up was installing the flywheel. I torqued the bolts to 66 ft lbs.
http://s188.photobucket.com/user/jerhofer/media/1974%20Porsche%20914-6/11-2-18%20flywheel%202_zps78m4clxn.jpg.html
http://s188.photobucket.com/user/jerhofer/media/1974%20Porsche%20914-6/11-2-18%20flywheel_zpsx6obe0j9.jpg.html
I was going to install the clutch as well but, out of the eight or so clutch alignment tools that are in my drawer, there wasn't one that fit this clutch. It is on order.
I re-installed the sheet metal I removed yesterday as well as the rear sheet metal that I couldn't install while the engine was on the engine stand. I also installed the hoses on the front end.
http://s188.photobucket.com/user/jerhofer/media/1974%20Porsche%20914-6/11-2-18%20sheet%20metal%202_zpsics0btzb.jpg.html
http://s188.photobucket.com/user/jerhofer/media/1974%20Porsche%20914-6/11-2-18%20sheet%20metal_zpsin4lsues.jpg.html
Posted by: jerhofer Nov 4 2018, 01:51 PM
Not much happening on the car this weekend. Been busy with other things. One of those things was taking a ride and getting to drive my son's 911 T (for Tesla). The first time he floored it, my response was some four letter words. It is that fast!!! He has clocked 0-60, unofficially, at 2.0 seconds!!
We switched drivers and I got the chance to see what it could do. Holy #@$!!! My last track car was a 1982 911SC with a breathed on 1989 930 turbo motor that registered 330HP at the wheels. I had installed a G50 five speed which helped make that a very, very fast car. I also had a 2002 Z06 with a Magnacharger. It was over 500hp and was also very fast. Matt's car absolutely blows both of these cars away. And, there is no wheelspin. It was in the high forties this morning and there was still plenty of traction. IT Just Goes!!!
The drivability was also excellent. It was very easy to modulate the throttle with everything being very progressive. The only sound is that of the various coolant pumps and the rocks thrown up by the sticky tires. This is the description of the tires as it appears on Coker's web site.
"Michelin PB20 | Competition Tires
The incredible Michelin PB 20 is a VHC rally tire specifically designed for wet racing surfaces. The PB 20 is available in two popular 15 inch sizes to fit many applications. This tire features a specially designed compound and tread pattern for maximum grip in wet racing conditions. The Michelin PB 20 is classified as VHC Full Rain tire, and like other Michelin Classic competition tires is DOT and ECE approved for public road use."
The other new experience for me was the regenerative braking. Under normal driving, the physical brakes are rarely used. The regen brakes will bring the car to a complete stop. I stomped the throttle not too far before we had to turn into Matt's subdivision. I did have to use the physical brakes then and it stopped well, albeit with a fair amount of brake pedal pressure needed as there are no power brakes. He could add them later if needed by adding a vacuum pump.
Those wide tires and the extra weight on the nose did cause the steering to be somewhat heavier than a stock 911 at low speeds. It was fine in normal driving. There was a bit of hunting with those big tires but, again, nothing that was a big bother. The weight distribution is 61% rear and 39% front
All in all, I surprised at how civil it was. He is waiting for some door window seals so he can install the door glass and there is no insulation or interior trim in the car yet. Once the windows are in, it will be his daily driver in fair weather. He has an appointment with a body shop for paint in January. The plan is to drive it for the next month of so to sort any bugs, blow the car apart, have it bead blasted again, and the take it to the body shop.
http://s188.photobucket.com/user/jerhofer/media/1974%20Porsche%20914-6/michelin-tb15-29-61r15-10in_4_1_1_zpsqlggngft.png.html
http://s188.photobucket.com/user/jerhofer/media/1974%20Porsche%20914-6/11-4-18%20matts%20car_zpsl7jjbcri.jpg.html
http://s188.photobucket.com/user/jerhofer/media/1974%20Porsche%20914-6/11-4-18%20matts%20car%203_zpspaspuxtg.jpg.html
http://s188.photobucket.com/user/jerhofer/media/1974%20Porsche%20914-6/11-4-18%20matts%20car%202_zpsudhpr9wo.jpg.html
http://s188.photobucket.com/user/jerhofer/media/1974%20Porsche%20914-6/11-4-18%20matts%20car%204_zpsoxbjidny.jpg.html
Posted by: TravisNeff Nov 4 2018, 02:08 PM
66ft lbs for the flywheel? I think you need more torque than that.
1978-89 90Nm (66 ft-lbs) - 9 bolt flywheel
1965-77 150Nm (110 ft-lbs) - 6 bolt flywheel
Attached image(s)
Posted by: jerhofer Nov 4 2018, 02:22 PM
66ft lbs for the flywheel? I think you need more torque than that.
1978-89 90Nm (66 ft-lbs) - 9 bolt flywheel
1965-77 150Nm (110 ft-lbs) - 6 bolt flywheel
Thanks for the info. That is the reason I posted the torque settings and of the the main reasons I like to post project threads. There are always people out there who know more than me.
The site I looked at didn't show this higher setting.
Posted by: TravisNeff Nov 4 2018, 02:43 PM
No problem, if that flywheel lets loose you might end up having a bad day.
Posted by: jerhofer Nov 6 2018, 05:21 PM
I gave up on the bulkhead connector. The removal tools arrived and did not work. It is incredibly difficult to get the wires in the right holes. So I used seven weather pack connectors. It is so much easier to crimp the weather pack terminals. By having nor more than four wires per connector, it is easy to see if the wires are in the correct place. I was very concerned about getting the wires in the correct position on the bulkhead connector and afraid I would damage the ECU.
I made a list of the wires to each connector and will place that list in the ECU three ring binder for future reference. I used my labeler to label each of the connectors. When I installed a tire pressure monitoring system on my motorhome and my towed car, the instructions called for numbering each of he tire monitors with their supplied numbers. They also recommended applying clear finger nail polish on each number to protect them. That has worked well so I borrowed my wife's polish to do the same on these numbers.
I am disappointed that I could not make the bulkhead connector work as I liked the cleanliness of that type of installation. I called Richard Clewett, the supplier of the injection system, and nearly bit the bullet to have him make a harness as I was frustrated. He advised against that because of the cost and that I have done the hard work of wiring the engine. He is sending me a 2" grommet that he uses on his installations that I can use. He sent photos of the grommet and plates and it should work well.
Now that I have the connectors on the ECU harness, I can complete the wiring to that harness from the power harness. Then...I can work on getting that motor back into the car!!
http://s188.photobucket.com/user/jerhofer/media/1974%20Porsche%20914-6/11-6-18%20connectors%206_zpslzvcxaww.jpg.html
http://s188.photobucket.com/user/jerhofer/media/1974%20Porsche%20914-6/11-6-18%20connectors%202_zpsqd7im0jx.jpg.html
http://s188.photobucket.com/user/jerhofer/media/1974%20Porsche%20914-6/11-6-18%20connectors_zps943csrqp.jpg.html
http://s188.photobucket.com/user/jerhofer/media/1974%20Porsche%20914-6/11-6-18%20connectors%205_zpswuv3ynay.jpg.html
http://s188.photobucket.com/user/jerhofer/media/1974%20Porsche%20914-6/11-6-18%20connectors%203_zpse8nivlee.jpg.html
http://s188.photobucket.com/user/jerhofer/media/1974%20Porsche%20914-6/11-6-18%20connectors%204_zpsrq7k4hqc.jpg.html
Posted by: 914forme Nov 6 2018, 10:20 PM
To not get "messed up" with the bulk head connector the easy way is to color code a pin using of all things finger nail polish.
Or you can sharpie both sides of the connector when it is plugged in correctly, then you just add the wire. in the right spots on both sides. Big wires then smaller ones until done. Of course that was almost 30 years ago now, I could see, and had dexterity a classical pianists. 
Posted by: pete000 Nov 6 2018, 10:34 PM
Those tires are not cheap !!!!!
Posted by: jerhofer Nov 7 2018, 02:46 PM
Those tires are not cheap !!!!!
He wanted me to get a set of those for the 914!!!
Posted by: jerhofer Nov 7 2018, 02:58 PM
I worked on the trunk wiring today. The wide band O2 sensor is run through a small red box. I mounted this using double sided tape. This box is separately powered and one wire runs from it to the ECU. It has other functions that I will not be using. I used a piggy back fuse tap to get power and grounded it to the chassis. The purple wire from the ECU is wired into the lower right terminal of the connector.
http://s188.photobucket.com/user/jerhofer/media/1974%20Porsche%20914-6/11-7-18%20trunk%20wiring%2011_zps8y4vcsqz.jpg.html
http://s188.photobucket.com/user/jerhofer/media/1974%20Porsche%20914-6/11-7-18%20trunk%20wiring%2010_zpsrz1kgbro.jpg.html
http://s188.photobucket.com/user/jerhofer/media/1974%20Porsche%20914-6/11-7-18%20trunk%20wiring%205_zpsb2bwp0zk.jpg.html
http://s188.photobucket.com/user/jerhofer/media/1974%20Porsche%20914-6/11-7-18%20trunk%20wiring%202_zpsk4nztlm1.jpg.html
Three other wires from the ECU harness must be wired. Two go to the power harness and the other is the main ground for the ECU. All are now wired except the main ground. I will put the car on the lift to do that wiring. I fed all of the connectors through the hole and tied everything together. Richard's grommet for the main harness arrived late today and will be installed tomorrow. There are two connectors for hooking up the ECU to a computer, RGB and USB.
http://s188.photobucket.com/user/jerhofer/media/1974%20Porsche%20914-6/11-7-18%20trunk%20wiring%204_zpskgmb5efx.jpg.html
http://s188.photobucket.com/user/jerhofer/media/1974%20Porsche%20914-6/11-7-18%20trunk%20wiring%203_zpsjpeixsql.jpg.html
http://s188.photobucket.com/user/jerhofer/media/1974%20Porsche%20914-6/11-7-18%20trunk%20wiring_zpscb2qffjx.jpg.html
Posted by: jerhofer Nov 8 2018, 08:25 PM
THE EFI WIRING IS DONE!!
I ran the ECU ground wire to the battery and tidied up the wiring in the engine bay as well as the trunk. I decided to run the O2 sensor wiring into the engine bay. Once the engine is back in the car, I can run the harness from there back to the sensor. Richard's grommet kit worked well.
I have done a lot of wiring in my past but this was the first time I had used connectors and crimped terminals like I did here. There was a learning curve. Overall, installing the fuel injection system has been more difficult than I thought it would be. The good side is that I learned new things.
http://s188.photobucket.com/user/jerhofer/media/1974%20Porsche%20914-6/11-8-18%20trunk%20wiring%203_zps4z5llkdi.jpg.html
http://s188.photobucket.com/user/jerhofer/media/1974%20Porsche%20914-6/11-8-18%20trunk%20wiring_zpspd2p3mep.jpg.html
The engine bay had been covered with a fine oil film. Ed had told me that it was blowing oil from improper crankcase ventilation. The setup when I bought the car was that the hose that goes from the gas tank to the inlet on the motor came from the oil filler neck. The other vent from the oil tank had a K & N filter installed.
http://s188.photobucket.com/user/jerhofer/media/1974%20Porsche%20914-6/6-5-18%20engine%20bay%202_zpshkykcf1q.jpg.html
Last summer, Hendrick Porsche had a Porsche 70th birthday party and had a number of vintage cars on display in their new showroom. One of them was a 914-6. I noticed that this car was vented the reverse of mine. I asked him if he had any issues with oil blowing into the engine bay and he said he didn't.
Since I was working in the engine bay, I decided to address this venting issue. I had purchased new hose. To run the lines the way I wanted, I needed at least one extra elbow. The one elbow that was in the system was made out of plastic and was bulky. A trip to the local hardware store netted me some copper elbows that were compact. I ran a short piece of hose from the front tank vent to an elbow, ran that line to the rear of the car above the oil filler neck to another elbow and then ran the line over to the center of the car. I made the line plenty long and will cut it to size once the motor is in. I installed the K & N filter on the oil filler neck. Hopefully this works.
http://s188.photobucket.com/user/jerhofer/media/1974%20Porsche%20914-6/11-8-18%20crankcase%20hose_zpsazlnopih.jpg.html
http://s188.photobucket.com/user/jerhofer/media/1974%20Porsche%20914-6/11-8-18%20crankcase%20hose%205_zpsk9ad7zfp.jpg.html
http://s188.photobucket.com/user/jerhofer/media/1974%20Porsche%20914-6/11-8-18%20crankcase%20hose%206_zpsrdseahwi.jpg.html
http://s188.photobucket.com/user/jerhofer/media/1974%20Porsche%20914-6/11-8-18%20crankcase%20hose%204_zpsxsb1ut1d.jpg.html
http://s188.photobucket.com/user/jerhofer/media/1974%20Porsche%20914-6/11-8-18%20crankcase%20hose%203_zps7abjx5oy.jpg.html
http://s188.photobucket.com/user/jerhofer/media/1974%20Porsche%20914-6/11-8-18%20crankcase%20hose%202_zpswwgjdhh4.jpg.html
Posted by: jerhofer Nov 11 2018, 03:19 PM
I installed new engine bay seals.
http://s188.photobucket.com/user/jerhofer/media/1974%20Porsche%20914-6/11-10-18%20engine%20seals%203_zpsgj826evt.jpg.html
I had removed the charcoal canister from the engine bay. As I mentioned earlier, I had ordered a new gas tank in lieu of having the original one cleaned and sealed. However, when I tried to install the expansion tank on the new tank, the weld seam was taller than on the original tank which made the expansion tank sit too high. George at Automobile Atlanta is working on this issue with Dansk. I asked George if I needed the expansion tank since I was eliminating the charcoal canister and he said I did not need it as the early cars did not have one. They had a "Y" fitting that fit into the fuel tank overflow line. I ordered one of these from George. The fitting and the original line are about the same size and, since the old vent hose is stiff, I could not insert the fitting. I had some clear plastic tubing in my drawer that was just enough larger to fit over both the vent hose and the fitting. I cut everything to size and attached the small vent line from the fuel filler neck to the fitting. I have read that I may have gas odor issues with this setup. I'll deal with that issue if it occurs.
http://s188.photobucket.com/user/jerhofer/media/1974%20Porsche%20914-6/11-11-18%20gas%20tank%20vent%207_zpspnicnmve.jpg.html
http://s188.photobucket.com/user/jerhofer/media/1974%20Porsche%20914-6/11-11-18%20gas%20tank%20vent%205_zpspyjq7q8m.jpg.html
http://s188.photobucket.com/user/jerhofer/media/1974%20Porsche%20914-6/11-11-18%20gas%20tank%20vent%206_zpszll7gtvu.jpg.html
http://s188.photobucket.com/user/jerhofer/media/1974%20Porsche%20914-6/11-11-18%20gas%20tank%20vent%203_zpsufe7ssk7.jpg.html
http://s188.photobucket.com/user/jerhofer/media/1974%20Porsche%20914-6/11-11-18%20gas%20tank%20vent%209_zpsvwcexgqd.jpg.html
Since I will not be using the O2 sensor gauge that came in the car, I have been thinking about what gauge to place in that hole. Last Sunday while I was in the garage setting my clocks back for daylight savings, it occurred to me that there was no clock in the car. I found a VDO clock on eBay and installed it today.
http://s188.photobucket.com/user/jerhofer/media/1974%20Porsche%20914-6/11-11-18%20VDO%20clock%203_zps1ruxhwwh.jpg.html
http://s188.photobucket.com/user/jerhofer/media/1974%20Porsche%20914-6/11-11-18%20VDO%20clock%205_zpsoseupdq8.jpg.html
Posted by: jerhofer Nov 19 2018, 02:37 PM
Grunt work was done last week. I went through each of the bags of parts that were tagged as removed from the car when the engine was taken out. I cleaned up each of the parts and ordered new parts if necessary.
http://s188.photobucket.com/user/jerhofer/media/1974%20Porsche%20914-6/11-13-18%20transmission%20mount_zpsufyzau7h.jpg.html
I also took the transmission out of the bag is has been in for the past thirteen years since it was rebuilt.
http://s188.photobucket.com/user/jerhofer/media/1974%20Porsche%20914-6/11-13-18%20transmission_zpskbcmb7zf.jpg.html
Another item that came with the car is a brand new JWest side shift linkage kit. I don't know if I will install this. Anyone have any experience with this product?
http://s188.photobucket.com/user/jerhofer/media/1974%20Porsche%20914-6/11-19-18%20jwest%20shifter%207_zpsqfamarr1.jpg.html
http://s188.photobucket.com/user/jerhofer/media/1974%20Porsche%20914-6/11-19-18%20jwest%20shifter%208_zps56yhvt8y.jpg.html
http://s188.photobucket.com/user/jerhofer/media/1974%20Porsche%20914-6/11-19-18%20jwest%20shifter%206_zpsyxdrk2x8.jpg.html
http://s188.photobucket.com/user/jerhofer/media/1974%20Porsche%20914-6/11-19-18%20jwest%20shifter%205_zpscychtg0z.jpg.html
http://s188.photobucket.com/user/jerhofer/media/1974%20Porsche%20914-6/11-19-18%20jwest%20shifter_zpsahofdvvb.jpg.html
Posted by: TravisNeff Nov 19 2018, 02:47 PM
I wouldn't have a second thought about it and install it. I bought one from TangerineRacing, the design is very similar.
Posted by: jerhofer Nov 19 2018, 02:50 PM
We made a quick trip to icy Indiana late last week to visit my mother-in-law. We celebrated her 94th birthday at the assisted living center where she now lives. We were going to drive there on Thursday but left a day early upon seeing the weather forecast. And we were glad we did as we woke up to over a 1/4" of ice on our car Thursday morning. Another reason we moved south from Indiana!!!
I had to remove the seats to move the fuel regulator so I could access the rear of the bolts. In doing so, I accidentally snapped off one of the pot metal seat adjuster handles. I ordered a new pair of plastic ones and installed one of them today. To do so, the old rivets have to be drilled out and new rivets installed. The rivets had to be drilled out from the rear as well as the front. Once the pot metal piece was removed from the seat track, I mounted the new handle with a zip tie so I could drill the holes from the rear and then fastened it.
http://s188.photobucket.com/user/jerhofer/media/1974%20Porsche%20914-6/11-19-18%20seat%20handle%203_zpsegbbul0o.jpg.html
http://s188.photobucket.com/user/jerhofer/media/1974%20Porsche%20914-6/11-19-18%20seat%20handle_zpslqjavqvs.jpg.html
http://s188.photobucket.com/user/jerhofer/media/1974%20Porsche%20914-6/11-19-18%20seat%20handle%2017_zpsj57dd19i.jpg.html
http://s188.photobucket.com/user/jerhofer/media/1974%20Porsche%20914-6/11-19-18%20seat%20handle%2015_zpskuujztjd.jpg.html
http://s188.photobucket.com/user/jerhofer/media/1974%20Porsche%20914-6/11-19-18%20seat%20handle%2014_zpsnyd9dul3.jpg.html
http://s188.photobucket.com/user/jerhofer/media/1974%20Porsche%20914-6/11-19-18%20seat%20handle%2011_zpsemjtpfqd.jpg.html
http://s188.photobucket.com/user/jerhofer/media/1974%20Porsche%20914-6/11-19-18%20seat%20handle%207_zpsvsdcmxjl.jpg.html
http://s188.photobucket.com/user/jerhofer/media/1974%20Porsche%20914-6/11-19-18%20seat%20handle%205_zpsqbbyiadl.jpg.html
http://s188.photobucket.com/user/jerhofer/media/1974%20Porsche%20914-6/11-19-18%20seat%20handle%204_zpskrojeizl.jpg.html
Posted by: jerhofer Nov 19 2018, 03:05 PM
Wouldn’t these look great!!
https://bringatrailer.com/listing/porsche-rsr-rs-9-x-15/?utm_source=transactionalemail&utm_medium=email&utm_campaign=bat_tagged_comment#comment-2710926
Posted by: mepstein Nov 19 2018, 04:56 PM
Grunt work was done last week. I went through each of the bags of parts that were tagged as removed from the car when the engine was taken out. I cleaned up each of the parts and ordered new parts if necessary.
I also took the transmission out of the bag is has been in for the past thirteen years since it was rebuilt.
Another item that came with the car is a brand new JWest side shift linkage kit. I don't know if I will install this. Anyone have any experience with this product?
I have a Jwest kit on my 914-6 conversion and I just purchased a second, nos kit from TC. It takes shifting to a whole 'nother level. No slop and with a Rennshifter, feels more like a bolt action rifle. I can't imagine a better shift system.
Posted by: jerhofer Nov 19 2018, 05:23 PM
Grunt work was done last week. I went through each of the bags of parts that were tagged as removed from the car when the engine was taken out. I cleaned up each of the parts and ordered new parts if necessary.
I also took the transmission out of the bag is has been in for the past thirteen years since it was rebuilt.
Another item that came with the car is a brand new JWest side shift linkage kit. I don't know if I will install this. Anyone have any experience with this product?
I have a Jwest kit on my 914-6 conversion and I just purchased a second, nos kit from TC. It takes shifting to a whole 'nother level. No slop and with a Rennshifter, feels more like a bolt action rifle. I can't imagine a better shift system.
Such a ringing endorsement makes me feel like I don’t have a choice!!
Posted by: jerhofer Nov 19 2018, 06:03 PM
I did accomplish one other major goal. I mounted my 1974 North Carolina license plate!! If your car is at least thirty-five years old, you are allowed to run a vintage plate as long as you have your regular plate in the car to show an officer.
http://s188.photobucket.com/user/jerhofer/media/1974%20Porsche%20914-6/11-13-18%20license%20plate_zpsu98swrz5.jpg.html
Posted by: jerhofer Nov 21 2018, 05:11 PM
I have made some progress that past few days. It had been pointed out to me that I had used the wrong torque figure for the flywheel bolts. The 66ft lb figure was for a nine bolt flywheel while mine was a six bolt with torque figures of 110lb ft. I got out my trusty torque wrench, set it at 110 and had a problem. My socket was very old and worn and slipped out of the bolt head and jamming my hand. As I was afraid I had compromised the bolts, I ordered a new set and a new socket. Now I finally could set the torque where it should be.
My 12.9 bolts for the pressure plate arrived as well so the clutch could be installed. After installing the throw out bearing and clutch fork, I was ready to mate the transmission with the motor. I used the lift to lift the transmission into place. The starter was also installed as well as the fan belt.
https://s188.photobucket.com/user/jerhofer/media/1974%20Porsche%20914-6/11-20-18%20clutch_zpsjlelubpw.jpg.html
http://s188.photobucket.com/user/jerhofer/media/1974%20Porsche%20914-6/11-20-18%20clutch%20fork_zpsjldo7r0d.jpg.html
http://s188.photobucket.com/user/jerhofer/media/1974%20Porsche%20914-6/11-20-18%20engine%20%20tranny%205_zpsp1wkbbfw.jpg.html
http://s188.photobucket.com/user/jerhofer/media/1974%20Porsche%20914-6/11-20-18%20engine%20%20tranny%204_zpsy4ko8cwk.jpg.html
http://s188.photobucket.com/user/jerhofer/media/1974%20Porsche%20914-6/11-20-18%20engine%20%20tranny%203_zpskqtwlmx3.jpg.html
http://s188.photobucket.com/user/jerhofer/media/1974%20Porsche%20914-6/11-20-18%20engine%20%20tranny%202_zps60upwljk.jpg.html
http://s188.photobucket.com/user/jerhofer/media/1974%20Porsche%20914-6/11-20-18%20engine%20%20tranny_zpsyvtjkpad.jpg.html
Today I filled the transmission with gear lube, always a messy job. The engine and tranny are ready to go back into the car!!!
http://s188.photobucket.com/user/jerhofer/media/1974%20Porsche%20914-6/11-21-18%20gear%20lube%204_zpskrx4hfni.jpg.html
http://s188.photobucket.com/user/jerhofer/media/1974%20Porsche%20914-6/11-21-18%20gear%20lube%202_zpszanozwb6.jpg.html
http://s188.photobucket.com/user/jerhofer/media/1974%20Porsche%20914-6/11-21-18%20gear%20lube_zpssurw8nhf.jpg.html
Posted by: jerhofer Nov 21 2018, 05:23 PM
Based on the positive comment on the Jwest shift linkage, I decided to use it. I removed the shifter, undid the pinch bolt and removed the front shift rod through the firewall. The shift rod bushing at the firewall must also be removed.
http://s188.photobucket.com/user/jerhofer/media/1974%20Porsche%20914-6/11-20-18%20shift%20linkage%208_zpsaha7ibla.jpg.html
http://s188.photobucket.com/user/jerhofer/media/1974%20Porsche%20914-6/11-20-18%20shift%20linkage%207_zpsklnfcymj.jpg.html
http://s188.photobucket.com/user/jerhofer/media/1974%20Porsche%20914-6/11-20-18%20shift%20linkage%206_zpsfdwzjxzy.jpg.html
http://s188.photobucket.com/user/jerhofer/media/1974%20Porsche%20914-6/11-20-18%20shift%20linkage%205_zpsmtiqr2hg.jpg.html
http://s188.photobucket.com/user/jerhofer/media/1974%20Porsche%20914-6/11-20-18%20shift%20linkage%204_zpsqbl9ybqs.jpg.html
http://s188.photobucket.com/user/jerhofer/media/1974%20Porsche%20914-6/11-20-18%20shift%20linkage%202_zps364konsv.jpg.html
The splined end of the shift rod must be removed and then welded onto a new rod supplied in the kit. Since I don't weld, I took everything over to my son's house. He proceeded to ground off the existing welds and then weld the end to the new rod at the prescribed length. After cleaning up the welds at home, I painted the welded area to prevent corrosion.
http://s188.photobucket.com/user/jerhofer/media/1974%20Porsche%20914-6/11-21-18%20shift%20rod%204_zpsecemsgx6.jpg.html
http://s188.photobucket.com/user/jerhofer/media/1974%20Porsche%20914-6/11-21-18%20shift%20rod%203_zpszao0gb8c.jpg.html
http://s188.photobucket.com/user/jerhofer/media/1974%20Porsche%20914-6/11-21-18%20shift%20rod%202_zpsziynx70y.jpg.html
Posted by: jerhofer Nov 21 2018, 05:34 PM
The previous owner, Ed, had done a lot of research into upgrading the axles. He found six bolt flanges using M10 1.5 bolts that could be used with turbo axles. The car came with two brand new turbo axles still in the boxes.
http://s188.photobucket.com/user/jerhofer/media/1974%20Porsche%20914-6/11-20-18%20axle%202_zpsbmb3qs21.jpg.html
http://s188.photobucket.com/user/jerhofer/media/1974%20Porsche%20914-6/11-20-18%20axle_zpscdk2ikgd.jpg.html
http://s188.photobucket.com/user/jerhofer/media/1974%20Porsche%20914-6/11-20-18%20axle%203_zps3cesx7ag.jpg.html
The problem is that 911 axles are 3/4" shorter than 914 axles. To solve that issue, Ed had ordered a set of Sway-Away axles that are the proper length. To mount them, I would need to remove the CV joints from the turbo axles and install them on the Sway-Away axles. I removed the snap ring but could not get the CV to slide off the end of the axle. Since I was going to my son's house anyway, I took the axles along. My son has a small press and it did the trick. Since my son was busy finishing up his 911 Tesla, I took the press with me and will remove the other CV's and transfer them. It is good to have a son with lots of goodies and expertise!!!
http://s188.photobucket.com/user/jerhofer/media/1974%20Porsche%20914-6/11-21-18%20cv_zps2bujklcs.jpg.html
http://s188.photobucket.com/user/jerhofer/media/1974%20Porsche%20914-6/11-21-18%20cv%202_zpsjsjq7vxr.jpg.html
http://s188.photobucket.com/user/jerhofer/media/1974%20Porsche%20914-6/11-21-18%20press_zpspk2bvmqc.jpg.html
Posted by: jerhofer Nov 23 2018, 03:14 PM
After the house cleaning party this morning, I worked on installing the Jwest Side Shift Linkage. Installing the shifter bearing on the firewall was the task at hand. The hole that the shifter rod goes through is not centered in the round area in the firewall. Consequently, the bearing is offset to the driver's side and up. To help place the bearing support correctly, I slid the shift rod through the bearing. Once I had it correctly placed, I marked the holes for drilling.
The instructions called for using a magnet to place the bolts into the holes from the tunnel. To make sure they stayed in the holes, I placed some strip caulk below the head and pushed hard against the bolts once they were through the holes. This not only served to seal these bolts but they stayed well enough that I could completely tighten the nuts.
I then slid the shift rod through the bearing and slid it into the pinch clamp on the shifter. With the shifter then bolted back into place, I could install the boot over the shift rod at the firewall. It is secured with the supplied zip tie.
https://s188.photobucket.com/user/jerhofer/media/1974%20Porsche%20914-6/11-23-18%20jwest%20shift%20linkage%2010_zpsh8fcyns6.jpg.html
http://s188.photobucket.com/user/jerhofer/media/1974%20Porsche%20914-6/11-23-18%20jwest%20shift%20linkage%209_zpsyp3nn1jt.jpg.html
http://s188.photobucket.com/user/jerhofer/media/1974%20Porsche%20914-6/11-23-18%20jwest%20shift%20linkage%208_zpsenezwxiw.jpg.html
http://s188.photobucket.com/user/jerhofer/media/1974%20Porsche%20914-6/11-23-18%20jwest%20shift%20linkage%206_zpslua7kull.jpg.html
http://s188.photobucket.com/user/jerhofer/media/1974%20Porsche%20914-6/11-23-18%20jwest%20shift%20linkage%207_zpsqryuciez.jpg.html
http://s188.photobucket.com/user/jerhofer/media/1974%20Porsche%20914-6/11-23-18%20jwest%20shift%20linkage%205_zpsummdaqrq.jpg.html
http://s188.photobucket.com/user/jerhofer/media/1974%20Porsche%20914-6/11-23-18%20jwest%20shift%20linkage%203_zpsbnkboeg0.jpg.html
http://s188.photobucket.com/user/jerhofer/media/1974%20Porsche%20914-6/11-23-18%20jwest%20shift%20linkage%202_zpseymbmgme.jpg.html
http://s188.photobucket.com/user/jerhofer/media/1974%20Porsche%20914-6/11-23-18%20jwest%20shift%20linkage_zps0nugkkmf.jpg.html
Posted by: jerhofer Nov 23 2018, 03:19 PM
Grunt work was done last week. I went through each of the bags of parts that were tagged as removed from the car when the engine was taken out. I cleaned up each of the parts and ordered new parts if necessary.
I also took the transmission out of the bag is has been in for the past thirteen years since it was rebuilt.
Another item that came with the car is a brand new JWest side shift linkage kit. I don't know if I will install this. Anyone have any experience with this product?
I have a Jwest kit on my 914-6 conversion and I just purchased a second, nos kit from TC. It takes shifting to a whole 'nother level. No slop and with a Rennshifter, feels more like a bolt action rifle. I can't imagine a better shift system.
Do you happen to have any photos of the installation at the transmission? Also, would it be easier to install the parts at the transmission once the engine and tranny are back in the car?
Thanks.
Posted by: mepstein Nov 23 2018, 04:07 PM
Grunt work was done last week. I went through each of the bags of parts that were tagged as removed from the car when the engine was taken out. I cleaned up each of the parts and ordered new parts if necessary.
I also took the transmission out of the bag is has been in for the past thirteen years since it was rebuilt.
Another item that came with the car is a brand new JWest side shift linkage kit. I don't know if I will install this. Anyone have any experience with this product?
I have a Jwest kit on my 914-6 conversion and I just purchased a second, nos kit from TC. It takes shifting to a whole 'nother level. No slop and with a Rennshifter, feels more like a bolt action rifle. I can't imagine a better shift system.
Do you happen to have any photos of the installation at the transmission? Also, would it be easier to install the parts at the transmission once the engine and tranny are back in the car?
Thanks.
Mcmark has installation pictures on Sir Andy’s build thread. It is much easier to install the shifter bracket on the side shift console when the trans it out of the car and upside down on the ground.
Posted by: jerhofer Nov 23 2018, 05:07 PM
Do you happen to have any photos of the installation at the transmission? Also, would it be easier to install the parts at the transmission once the engine and tranny are back in the car?
Thanks.
[/quote]
Mcmark has installation pictures on Sir Andy’s build thread. It is much easier to install the shifter bracket on the side shift console when the trans it out of the car and upside down on the ground.
[/quote]
Found it! Thanks.
http://www.914world.com/bbs2/index.php?showtopic=72363
Posted by: jerhofer Nov 23 2018, 05:28 PM
Do you happen to have any photos of the installation at the transmission? Also, would it be easier to install the parts at the transmission once the engine and tranny are back in the car?
Thanks.
[/quote]
Mcmark has installation pictures on Sir Andy’s build thread. It is much easier to install the shifter bracket on the side shift console when the trans it out of the car and upside down on the ground.
[/quote]
After looking at those photos, I can see why it would be easier to have the transmission out of the car and upside down. However, since I just mated it to the motor and filled it with fluid, I will probably finish up the job once everything is in the car. I could raise the engine/transmission on the hydraulic table but I would have to lay on the floor to do the drilling. I think I would rather work on it when the engine is back in the car and the car is on my lift.
Posted by: jerhofer Nov 24 2018, 08:01 AM
Having never installed an engine in a 914, is it best to install it with the muffler attached?
Posted by: mepstein Nov 24 2018, 08:21 AM
Having never installed an engine in a 914, is it best to install it with the muffler attached?
I would do the muffler after. It will give you more room around the trans mounts. When you do install it, leave it a little loose until it’s on the ground and you can get it parallel to the car and floor.
Posted by: jerhofer Nov 24 2018, 08:35 AM
Having never installed an engine in a 914, is it best to install it with the muffler attached?
I would do the muffler after. It will give you more room around the trans mounts. When you do install it, leave it a little loose until it’s on the ground and you can get it parallel to the car and floor.
Thanks.
Posted by: Lucky9146 Nov 24 2018, 11:18 AM
Having never installed an engine in a 914, is it best to install it with the muffler attached?
I would do the muffler after. It will give you more room around the trans mounts. When you do install it, leave it a little loose until it’s on the ground and you can get it parallel to the car and floor.
Really enjoying your thread, re-read most all of it this morning and it is interesting to see how we've solved some of the same problems the same and differently, and there is a lot of really good useful information you have shared. I especially like your air fuel monitor and Many other things you have done.
I may revisit a few of them on my car.In addition to removing the muffler I might also suggest the throttle bodies as well, if it is not a total PITA to remove them, as it will give you more space up top too. I removed my Webers to give me the added room as some one here suggested at the time.
Keep up the good work! Very nice car!
Check out my thread page 12 for my engine install. http://www.914world.com/bbs2/index.php?showtopic=261197
Posted by: jerhofer Nov 24 2018, 12:06 PM
Having never installed an engine in a 914, is it best to install it with the muffler attached?
I would do the muffler after. It will give you more room around the trans mounts. When you do install it, leave it a little loose until it’s on the ground and you can get it parallel to the car and floor.
Really enjoying your thread, re-read most all of it this morning and it is interesting to see how we've solved some of the same problems the same and differently, and there is a lot of really good useful information you have shared. I especially like your air fuel monitor and Many other things you have done.
I may revisit a few of them on my car.In addition to removing the muffler I might also suggest the throttle bodies as well, if it is not a total PITA to remove them, as it will give you more space up top too. I removed my Webers to give me the added room as some one here suggested at the time.
Keep up the good work! Very nice car!
Check out my thread page 12 for my engine install. http://www.914world.com/bbs2/index.php?showtopic=261197
Thanks for the link to installing the engine. That really helps. In the past I have always put the motor into a car that I had removed it from. Much easier once you have seen how everything fits.
I will look into removing the throttle bodies but I would prefer to keep them in place, if possible.
Posted by: jerhofer Nov 24 2018, 02:59 PM
Do you bolt the transmission mounts in at the top prior to installing the engine and tranny and then use the big bolt to fasten the transmission in place?
Posted by: jerhofer Nov 24 2018, 03:06 PM
Another messy day of working with the CV's. There is a cap on the end of the CV joins that has to be removed. With this cap out of the way, the snap rings are exposed. After removing the snap rings, I detached the boot from the CV. At this point I removed all of the balls and the outer ring. Now I could place the axle assembly on the press to remove the rest of the CV.
https://s188.photobucket.com/user/jerhofer/media/1974%20Porsche%20914-6/11-24-18%20CV%207_zpss7ms9cax.jpg.html
http://s188.photobucket.com/user/jerhofer/media/1974%20Porsche%20914-6/11-24-18%20CV%206_zpsc0otbimm.jpg.html
http://s188.photobucket.com/user/jerhofer/media/1974%20Porsche%20914-6/11-24-18%20CV%205_zpsws9rob73.jpg.html
http://s188.photobucket.com/user/jerhofer/media/1974%20Porsche%20914-6/11-24-18%20CV%203_zpsi73nnlfp.jpg.html
http://s188.photobucket.com/user/jerhofer/media/1974%20Porsche%20914-6/11-24-18%20CV%208_zpsstzxkbz3.jpg.html
Now that I had everything apart, I cleaned the CV parts and re-installed the balls. I also cleaned up the metal boot mounts and installed seals on them.
http://s188.photobucket.com/user/jerhofer/media/1974%20Porsche%20914-6/11-24-18%20CV%2011_zpsdens8jef.jpg.html
http://s188.photobucket.com/user/jerhofer/media/1974%20Porsche%20914-6/11-24-18%20CV%2010_zpsknmgqvyv.jpg.html
http://s188.photobucket.com/user/jerhofer/media/1974%20Porsche%20914-6/11-24-18%20CV_zpskcpv9drb.jpg.html
Posted by: jerhofer Nov 24 2018, 03:15 PM
The Sway-Away axles are marked as left and right. According to their instructions, it doesn't matter which end goes to the transmission as long as the axles are used on the correct side of the car. As you can see, they have much longer splines and are designed to slide back and forth as needed. They are also quite a bit longer than the 911 axles.
http://s188.photobucket.com/user/jerhofer/media/1974%20Porsche%20914-6/11-24-18%20swayaway%204_zpsdjdnk00g.jpg.html
http://s188.photobucket.com/user/jerhofer/media/1974%20Porsche%20914-6/11-24-18%20CV%2012_zpsuagd1ggo.jpg.html
http://s188.photobucket.com/user/jerhofer/media/1974%20Porsche%20914-6/11-24-18%20swayaway%203_zpsjzvyzb2b.jpg.html
http://s188.photobucket.com/user/jerhofer/media/1974%20Porsche%20914-6/11-24-18%20swayaway%202_zpsa0j7hysj.jpg.html
http://s188.photobucket.com/user/jerhofer/media/1974%20Porsche%20914-6/11-24-18%20swayaway_zps9qqfhdfy.jpg.html
http://s188.photobucket.com/user/jerhofer/media/1974%20Porsche%20914-6/11-24-18%20CV%202_zpsijzlacqt.jpg.html
I am waiting for the CV bolts to arrive. Once they are here, I will pack the CV joints and mount everything to each axle. Then I can bolt the CV to the outer flange at the hub. Once that is done, I will be ready to put the engine back into the car.
Posted by: Lucky9146 Nov 24 2018, 03:29 PM
Do you bolt the transmission mounts in at the top prior to installing the engine and tranny and then use the big bolt to fasten the transmission in place?
Correct. If you look at my thread post 233 you will see the mounts installed in the first and last picture there. I am hesitant to post pictures of my install here on your thread so as not to confuse those watching your thread that it looks like you are installing your engine.
Feel free to reach out PM anytime and we can go from there or give me a shout out here if you want any pics posted.
I share with you that I had never installed an engine in a 914 until I did mine and like yours, the engine was not installed, so I did not get to remove it, also just like you. Thanks again for all you have posted on your thread.
Posted by: jerhofer Nov 26 2018, 03:50 PM
Yesterday morning, I spent some time on the throttle body linkage after reading Lucky9146's thread. Later in the day, I discovered that I had reversed the solid rod from the throttle to the transmission and had it upside down.
In anticipation of installing the engine, I installed the transmission mounts.
https://s188.photobucket.com/user/jerhofer/media/1974%20Porsche%20914-6/11-25-18%20transmission%20mount_zpsqaz55wja.jpg.html
http://s188.photobucket.com/user/jerhofer/media/1974%20Porsche%20914-6/11-25-18%20transmission%20mount%202_zpsruj5mqsl.jpg.html
I also used my rethreader kit to clean out the threads on the output flanges on the transmission.
http://s188.photobucket.com/user/jerhofer/media/1974%20Porsche%20914-6/11-25-18%20rethreader_zpsdnbzs9dc.jpg.html
http://s188.photobucket.com/user/jerhofer/media/1974%20Porsche%20914-6/11-25-18%20rethreader%203_zpsadcyzb2z.jpg.html
http://s188.photobucket.com/user/jerhofer/media/1974%20Porsche%20914-6/11-25-18%20rethreader%202_zpsibhnoq9e.jpg.html
I had removed the passenger seat so that I could get to the firewall when I moved the fuel regulator. I wasn't happy with how the seats slid back and forth so I spent some time making sure the tracks were properly aligned. I also had not been able to get the driver's seat to go all the way back. Today I figured out why.
There was a rectangular plate, about the thickness of a washer, with two bolt holes that fit into the track of the seat. I have seen these before on other Porsche's so I didn't think much about it. However, there were only two that came with the car and they were the only things different between the two seats. I removed them and, voila, the seat went all the way back. Amazing how such a small victory can be so satisfying!!
The only things keeping me from putting the engine back into the car are the CV bolts I have on order. My son was visiting yesterday (with his Tesla 911) and he mentioned that the local drive shaft shop may have those bolts. The made the axles and CV joints for his car. I will check that out tomorrow.
Two of my neighbors drove Matt's car yesterday and both were impressed with the acceleration and how civilized the car was to drive. My buddy Reese raved about how easy and smooth the car was to drive. He is a hot rodder and sees Matt's car as the future of hot rodding for the next generation. As with most of us baby boomers, the technology is beyond out skills but we can appreciate the work and craftsmanship that goes into doing an electric car. After driving Matt's car, I can more readily see my daily driver being an electric car.
Posted by: SirAndy Nov 26 2018, 04:00 PM
I think you have the upper brackets upside down, they should look like this:
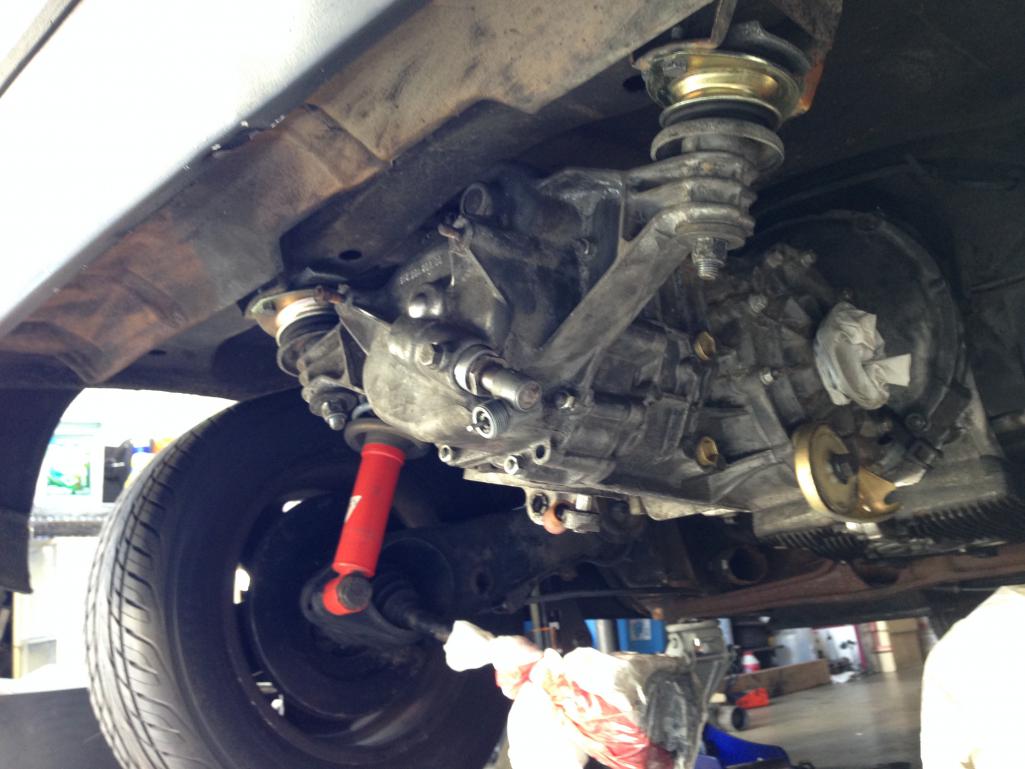
Posted by: jerhofer Nov 26 2018, 04:29 PM
I think you have the upper brackets upside down, they should look like this:
Thanks for the tip.
Posted by: jerhofer Nov 27 2018, 02:51 PM
With the help of a tip about the incorrect placement of the top part of the transmission mount, I rectified that today.
https://s188.photobucket.com/user/jerhofer/media/1974%20Porsche%20914-6/11-27-18%20transmission%20mount_zpscuypmj0e.jpg.html
My son was correct in that The Driveshaft Shop had the correct M10 1.5x50mm CV bolts. I picked them up this morning. This afternoon, I assembled the left axle. I began by removing the flange from the rear trailing arm. I then chased the threads and applied the gasket.
http://s188.photobucket.com/user/jerhofer/media/1974%20Porsche%20914-6/11-27-18%20left%20axle%209_zpszmgckvw7.jpg.html
After placing the boot on the axle, placing lots of grease in it and in the CV joint, I slid the joint on the axle. Instead of a snap ring at the end of the axle, this one used a type of ring that you basically spread out and then screw it onto the axle.
http://s188.photobucket.com/user/jerhofer/media/1974%20Porsche%20914-6/11-27-18%20left%20axle%208_zps6ezvjrde.jpg.html
http://s188.photobucket.com/user/jerhofer/media/1974%20Porsche%20914-6/11-27-18%20left%20axle%207_zps1ntascwg.jpg.html
http://s188.photobucket.com/user/jerhofer/media/1974%20Porsche%20914-6/11-27-18%20left%20axle%205_zpsm1kfpgzl.jpg.html
With that in place, I bolted the CV to the flange using the bolts with a schnoor washer. I had to insert the flange in the trailing arm and apply the parking brake so I could torque the bolts to 34ft lb.
http://s188.photobucket.com/user/jerhofer/media/1974%20Porsche%20914-6/11-27-18%20left%20axle%204_zpsqedwry3b.jpg.html
http://s188.photobucket.com/user/jerhofer/media/1974%20Porsche%20914-6/11-27-18%20left%20axle%203_zpshklzctdh.jpg.html
After removing the axle from the car, I assembled the CV joint on the other end. Since I had separated the boot from the flange, I had to re-install it using a crimp style hose clamp with a pinch crimper.
http://s188.photobucket.com/user/jerhofer/media/1974%20Porsche%20914-6/11-27-18%20clamp%20crimper%202_zpswxzi95ua.jpg.html
http://s188.photobucket.com/user/jerhofer/media/1974%20Porsche%20914-6/11-27-18%20clamp%20crimper_zpslmvg1mne.jpg.html
With everything installed, I cleaned up the axle and boots. Since these axles are marked left and right, I ran off a "Left" label and applied it to the axle. Again I robbed my wife's clear finger nail polish to permanently secure the label to the axle.
http://s188.photobucket.com/user/jerhofer/media/1974%20Porsche%20914-6/11-27-18%20left%20axle%202_zpsaewocdyq.jpg.html
Tomorrow I will assemble the right axle, install both of them in the car and get ready for the engine installation. Getting very close now!!
Posted by: 914forme Nov 28 2018, 01:44 PM
Nice job
I will let you know I have since upgraded all my CV Bolts to accept safety wire. I had a set of bolts back out once, and never want to make that mistake again. Over kill yes, now Murphy gets to mess with other areas of my cars.
Right now that would be the fact that I like taking them apart. 
Posted by: jerhofer Nov 28 2018, 02:18 PM
Nice job
I will let you know I have since upgraded all my CV Bolts to accept safety wire. I had a set of bolts back out once, and never want to make that mistake again. Over kill yes, now Murphy gets to mess with other areas of my cars.
Right now that would be the fact that I like taking them apart.
I need to make a reminder on my computer to check the bolts again after I have driven the car a bit.
Posted by: jerhofer Nov 28 2018, 02:41 PM
I finished up the right axle today. In Lucky9146's thread, I saw that he used a piece of conduit run from one shock to the other as a place to tie up the axles. I had a piece of threaded rod that was the right length and tied the axles to it.
http://s188.photobucket.com/user/jerhofer/media/1974%20Porsche%20914-6/11-27-18%20bar_zpst5vagemk.jpg.html
https://s188.photobucket.com/user/jerhofer/media/1974%20Porsche%20914-6/11-28-18%20axles%203_zpssygkricc.jpg.html
I found the courage to hook up the power to the ECU. Electromotive's software for the Wintec GT200 only works with Windows. I asked my son if I could borrow his laptop when the time came to plug into a computer. He told me about a program called Parallels that would allow me to install Windows on my MacPro. The program worked as he said it would. I fired up the program, plugged the USB cord, and turned on the ignition. And I was rewarded with the program finding the ECU!! That was a relief.
http://s188.photobucket.com/user/jerhofer/media/1974%20Porsche%20914-6/11-28-18%20computer%203_zps8jqygjiv.jpg.html
http://s188.photobucket.com/user/jerhofer/media/1974%20Porsche%20914-6/11-28-18%20computer%202_zpsgxyvl57o.jpg.html
http://s188.photobucket.com/user/jerhofer/media/1974%20Porsche%20914-6/11-28-18%20computer_zpssoxgepzo.jpg.html
I rolled the motor and tranny under the car. My buddy Reese will be here tomorrow at 9:00 and we will see about getting this bad boy into the car!!! Prayers would be appreciated!!
http://s188.photobucket.com/user/jerhofer/media/1974%20Porsche%20914-6/11-28-18%20engine%20ready%202_zpsvhan3hjb.jpg.html
http://s188.photobucket.com/user/jerhofer/media/1974%20Porsche%20914-6/11-28-18%20engine%20ready_zpsd05kso4m.jpg.html
Posted by: IronHillRestorations Nov 28 2018, 10:14 PM
Lock and Load!
Posted by: ChrisFoley Nov 28 2018, 10:19 PM
Question,
is there a recess for those CV gaskets so metal to metal contact is achieved when the bolts are tightened? If not, the gasket will squeeze out and allow the bolts to lose torque.
Posted by: jerhofer Nov 29 2018, 06:12 AM
Question,
is there a recess for those CV gaskets so metal to metal contact is achieved when the bolts are tightened? If not, the gasket will squeeze out and allow the bolts to lose torque.
There is no recess.
Posted by: jerhofer Nov 29 2018, 03:34 PM
The engine is in!!! Took the two of us a couple hours to finagle it into position. It was really close on each side at the upper shock bolt. The tin in those areas was bent previously in that area and now I know why. But the plus side is that we knew we had th engine centered in the engine bay as it was rubbing on both sides. I had to unplug the center COP connector for clearance. At the rear, we had to remove the transmission mounts and then re-mount it once we had the transmission closer to being in the proper place.
http://s188.photobucket.com/user/jerhofer/media/1974%20Porsche%20914-6/11-29-18%20engine%2017_zps8eox2ema.jpg.html
https://s188.photobucket.com/user/jerhofer/media/1974%20Porsche%20914-6/11-29-18%20engine%2015_zps0dojsp6q.jpg.html
http://s188.photobucket.com/user/jerhofer/media/1974%20Porsche%20914-6/11-29-18%20engine%2016_zpsinnweqdl.jpg.html
https://s188.photobucket.com/user/jerhofer/media/1974%20Porsche%20914-6/11-29-18%20engine%2018_zpsjbmatvws.jpg.html
https://s188.photobucket.com/user/jerhofer/media/1974%20Porsche%20914-6/11-29-18%20engine%2036_zpsjovxqnmg.jpg.html
https://s188.photobucket.com/user/jerhofer/media/1974%20Porsche%20914-6/11-29-18%20engine%2012_zpskunko6pf.jpg.html
https://s188.photobucket.com/user/jerhofer/media/1974%20Porsche%20914-6/11-29-18%20engine%202_zpskey9u6x3.jpg.html
Posted by: jerhofer Nov 29 2018, 05:17 PM
I worked this afternoon on hooking up things on the bottom of the motor. I did the oil lines, the heater hoses, and the cables for the accelerator, clutch and speedometer. Since I now had all of that weight on the rear of the car, I took the precaution of using one of my tall jack stands for safety's sake.
https://s188.photobucket.com/user/jerhofer/media/1974%20Porsche%20914-6/11-29-18%20engine%2021_zpso91gnsp4.jpg.html
https://s188.photobucket.com/user/jerhofer/media/1974%20Porsche%20914-6/11-29-18%20engine%2024_zpsi0evqe7f.jpg.html
http://s188.photobucket.com/user/jerhofer/media/1974%20Porsche%20914-6/11-29-18%20engine%2028_zps9flu1tdz.jpg.html
http://s188.photobucket.com/user/jerhofer/media/1974%20Porsche%20914-6/11-29-18%20engine%2027_zpskf1ct2w1.jpg.html
http://s188.photobucket.com/user/jerhofer/media/1974%20Porsche%20914-6/11-29-18%20engine%2026_zps3evdqups.jpg.html
http://s188.photobucket.com/user/jerhofer/media/1974%20Porsche%20914-6/11-29-18%20engine%2031_zpsbewciuvn.jpg.html
http://s188.photobucket.com/user/jerhofer/media/1974%20Porsche%20914-6/11-29-18%20engine%2033_zpsxk6kfv0b.jpg.html
Posted by: ndfrigi Nov 29 2018, 05:38 PM
I think you have the upper brackets upside down, they should look like this:
Thanks for the tip.
wait i know that tranny! hehehe my 75 1.8 after I installed that tranny. Well Stacey owned the car since last June 2017.
Your car is almost there to be driven! That is a fast project after you bought it from your family friend. I’m sure the previous owner would love to see it after your done with it.
Posted by: jerhofer Dec 1 2018, 03:28 PM
First thing yesterday I hooked up the heater cables.
https://s188.photobucket.com/user/jerhofer/media/1974%20Porsche%20914-6/11-30-18%20heater%20cables_zpslikuhusk.jpg.html
The day became more complicated once I began installing the axles. I had placed the axles in the trailing arms prior to installing the motor. I torqued the CV bolts and the main axle nut. Now I was ready to attach the CV's to the transmission flange. When I went to turn the hub to line up the CV bolt holes, it would not move. I checked to make sure the parking brake was off and it was. After considering things for a bit, I backed out the outer CV bolts and the hub would move. To test what bolt size would work, I placed some washers on the bolts to effectively make the bolts shorter. Even then, after trying different combinations of washers, I still was having an issue with everything locking up.
At this point I decided the axle had to come out of the trailing arm. There wasn't room to take the axle out with the CV joined to the flange so I separated them and pulled the axle out separately. With the axle out, I could see that there wasn't much clearance between the rear of the flange and the inside of the trailing arm and could see where the paint had been rubbed off when turning the flange with no axle attached. At this point I wasn't sure what to do. I wondered it I could shim the flange away from the inside of trailing arm.
To check on that, I called Chris Foley. He had never heard of someone having this issue before but, then again, he hadn't dealt with the axles and flanges that were being used here. He did not think it would be a good idea to shim the flange. He also reiterated his concern about using the CV gaskets. He said there were some applications that called for these gaskets but not with the CV's that I was using. I thanked him for his help and suggestions.
The end of yesterday saw me driving to The Driveshaft Shop to get twelve 45mm bolts to replace the 50mm bolts I was using. The 50mm bolts worked on the transmission flange as there was plenty of clearance on the rear of them. This morning I removed all of the gaskets. To give a bit more clearance on the rear of the flange, I broke out the die grinder and took a bit off the outer edge and at each threaded hole. I installed the outer flange and maneuvered the axle into place. To line up the holes, I used a small pick to find the hole. To raise the bottom of the CV a bit, I stuck a thin screwdriver between the flange and the trailing arm. Once I got that first bolt started, I used the pick to find the second hole opposite that first bolt. With that bolt started, it was a simple matter to start the rest of the bolts. I torqued the bolts to spec and torqued the axle nut and, voila, I was able to turn the hub. Success.
Now I could installed the CV on the transmission flange. I repeated this on the other side. This whole process took up my entire day. There were many trips and down my ladder to engage and dis-engage the parking brake. So I am a bit behind on getting the car ready to start but am relieved that I have a job completed that I knew was going to be an issue since everything here was modified. And, as anyone knows who works with CV joints, I spent a good bit of time cleaning up my counter, my tools and me!!
http://s188.photobucket.com/user/jerhofer/media/1974%20Porsche%20914-6/12-1-18%20axles%203_zpsokvsxgx6.jpg.html
http://s188.photobucket.com/user/jerhofer/media/1974%20Porsche%20914-6/12-1-18%20axles%204_zpsdh0j16fv.jpg.html
http://s188.photobucket.com/user/jerhofer/media/1974%20Porsche%20914-6/12-1-18%20axles_zpsniva53dy.jpg.html
Posted by: mepstein Dec 1 2018, 06:14 PM
Thanks for all the pics and commentary. Glad to see you are working things out.
This line looks a bit concerning but may be just the perspective.
Attached image(s)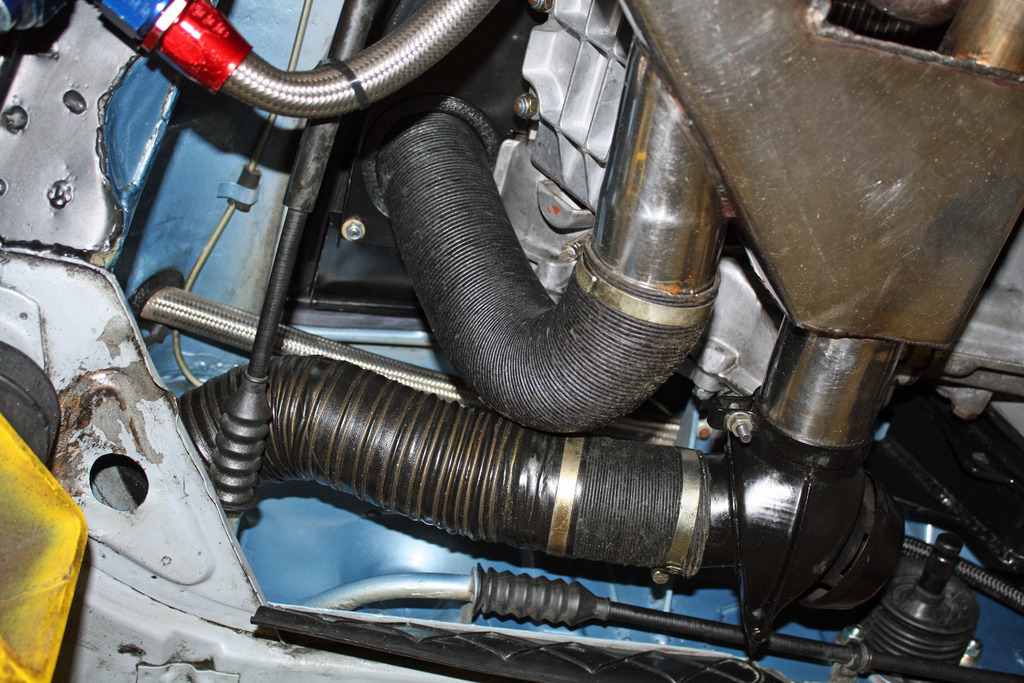
Posted by: Cairo94507 Dec 1 2018, 06:42 PM
Nice work. Speaking of oil lines, I really like the oil drain valve you installed in the line to make oil changes quick and simple without breaking loose the main line connection. I want to add something like that to my oil line as I remember well changing the oil on my other two sixes and having to break that main fitting loose to drain the oil. I would prefer not to have to disturb that connection once it is made and it does not leak.
Posted by: mepstein Dec 1 2018, 06:48 PM
I did that kind of fitting on my car. Our race car tech liked it but told me not to run it until I safety wire it.
Although it points straight down in this pic, I set it up so the exit on the T is parallel to the ground.
Attached image(s)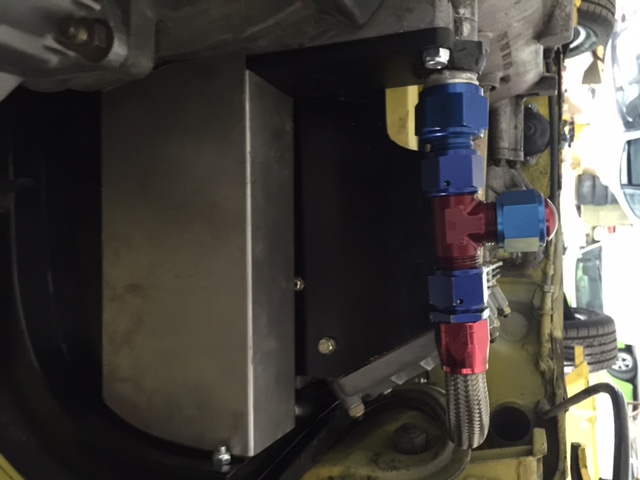
Posted by: Cairo94507 Dec 1 2018, 07:04 PM
The safety wire tip is a good one for sure.
Posted by: jerhofer Dec 1 2018, 08:27 PM
Nice work. Speaking of oil lines, I really like the oil drain valve you installed in the line to make oil changes quick and simple without breaking loose the main line connection. I want to add something like that to my oil line as I remember well changing the oil on my other two sixes and having to break that main fitting loose to drain the oil. I would prefer not to have to disturb that connection once it is made and it does not leak.
It was there when I bought the car. It is kind of hanging now. I need to make a bracket for it to secure it better.
Posted by: jerhofer Dec 1 2018, 08:32 PM
Thanks for all the pics and commentary. Glad to see you are working things out.
This line looks a bit concerning but may be just the perspective.
It is OK but like I said in the comment above, I do want to secure it better.
https://s188.photobucket.com/user/jerhofer/media/1974%20Porsche%20914-6/11-29-18%20engine%2024_zpsi0evqe7f.jpg.html
Posted by: 914forme Dec 1 2018, 08:48 PM
You can use all sorts of other methods, but safety wire is the king and is why it is still used and sanctioned by racing organizations. Just remember to make sure to wire it in the right direction.
Posted by: ChrisFoley Dec 2 2018, 07:05 AM
There were many trips and down my ladder to engage and dis-engage the parking brake.
Here's a tip to save some time - actuate the parking brake lever on the caliper with a vice grip clamp. Its easy to apply more braking force that way than with the cockpit lever.
Posted by: 914forme Dec 2 2018, 01:06 PM
Great Tip Chris. Thanks for sharing
Posted by: Biggles Dec 2 2018, 02:17 PM
Nice work. Speaking of oil lines, I really like the oil drain valve you installed in the line to make oil changes quick and simple without breaking loose the main line connection. I want to add something like that to my oil line as I remember well changing the oil on my other two sixes and having to break that main fitting loose to drain the oil. I would prefer not to have to disturb that connection once it is made and it does not leak.
I'd highly recommend doing this modification. Trying to undo the oil unions is a real pain as you'd know. This is my installation using a 3 way valve and removable handle.
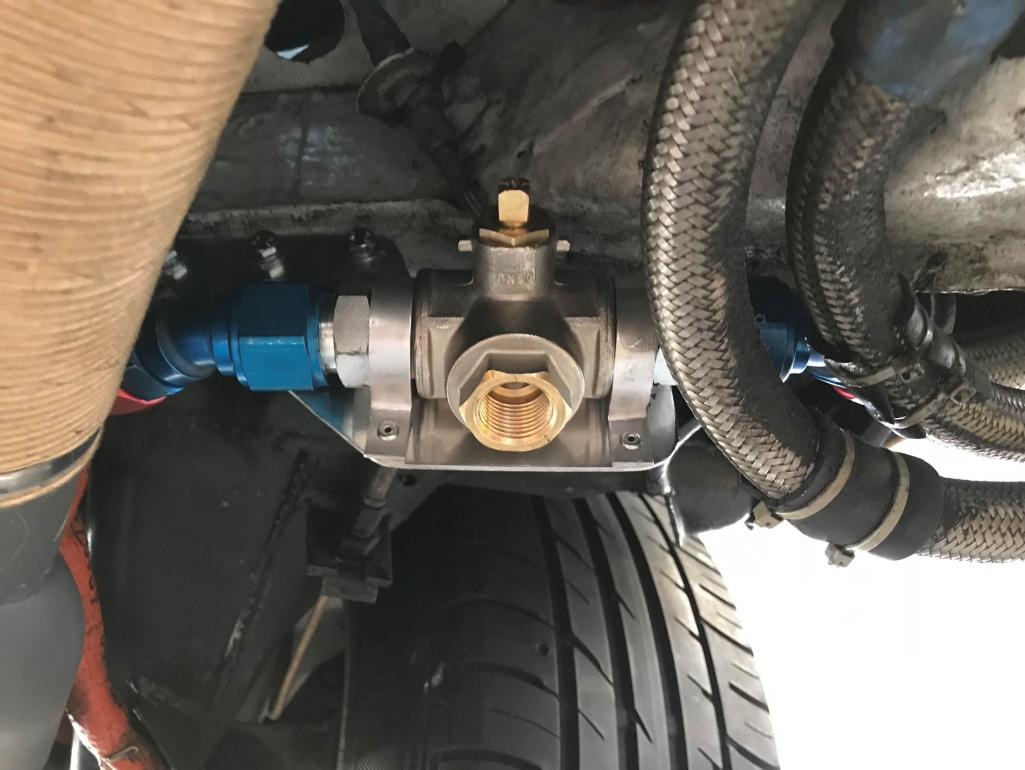
Posted by: jerhofer Dec 2 2018, 08:27 PM
Nice work. Speaking of oil lines, I really like the oil drain valve you installed in the line to make oil changes quick and simple without breaking loose the main line connection. I want to add something like that to my oil line as I remember well changing the oil on my other two sixes and having to break that main fitting loose to drain the oil. I would prefer not to have to disturb that connection once it is made and it does not leak.
I'd highly recommend doing this modification. Trying to undo the oil unions is a real pain as you'd know. This is my installation using a 3 way valve and removable handle.
Is that a 1" valve? Where did you find the adapters to go from this pipe fitting to AN?
Thanks.
Posted by: Biggles Dec 3 2018, 02:04 AM
Nice work. Speaking of oil lines, I really like the oil drain valve you installed in the line to make oil changes quick and simple without breaking loose the main line connection. I want to add something like that to my oil line as I remember well changing the oil on my other two sixes and having to break that main fitting loose to drain the oil. I would prefer not to have to disturb that connection once it is made and it does not leak.
I'd highly recommend doing this modification. Trying to undo the oil unions is a real pain as you'd know. This is my installation using a 3 way valve and removable handle.
Is that a 1" valve? Where did you find the adapters to go from this pipe fitting to AN?
Thanks.
I had a shop install it, but most likely NPT or metric. We have plenty of places to get something to fit a valve, sure you would too - Earls is a very good option
Posted by: jerhofer Dec 3 2018, 05:49 PM
Nice work. Speaking of oil lines, I really like the oil drain valve you installed in the line to make oil changes quick and simple without breaking loose the main line connection. I want to add something like that to my oil line as I remember well changing the oil on my other two sixes and having to break that main fitting loose to drain the oil. I would prefer not to have to disturb that connection once it is made and it does not leak.
I'd highly recommend doing this modification. Trying to undo the oil unions is a real pain as you'd know. This is my installation using a 3 way valve and removable handle.
Is that a 1" valve? Where did you find the adapters to go from this pipe fitting to AN?
Thanks.
I had a shop install it, but most likely NPT or metric. We have plenty of places to get something to fit a valve, sure you would too - Earls is a very good option
I have the parts on the way.
Posted by: jerhofer Dec 3 2018, 06:04 PM
Today I worked mainly on the Jwest side shift linkage at the transmission. After removing the stock plastic bushing from the shift console, I clamped the linkage support to the shift console. I marked the two holes and drilled them. Next up was installing the new ball cup bushing after applying lots of grease. I drilled a small hole in that bushing which makes it easier to install. With that in place, I then could mount the linkage support.
https://s188.photobucket.com/user/jerhofer/media/1974%20Porsche%20914-6/12-3-18%20Jwest%20linkage%2015_zpsqkeicqzy.jpg.html
http://s188.photobucket.com/user/jerhofer/media/1974%20Porsche%20914-6/12-3-18%20Jwest%20linkage%2013_zps8prvcn26.jpg.html
http://s188.photobucket.com/user/jerhofer/media/1974%20Porsche%20914-6/12-3-18%20Jwest%20linkage%2012_zpsxybr14mg.jpg.html
http://s188.photobucket.com/user/jerhofer/media/1974%20Porsche%20914-6/12-3-18%20Jwest%20linkage%2011_zpsqy98vy7a.jpg.html
http://s188.photobucket.com/user/jerhofer/media/1974%20Porsche%20914-6/12-3-18%20Jwest%20linkage%2010_zpsi78jousv.jpg.html
http://s188.photobucket.com/user/jerhofer/media/1974%20Porsche%20914-6/12-3-18%20Jwest%20linkage%209_zpsyi4ujusd.jpg.html
http://s188.photobucket.com/user/jerhofer/media/1974%20Porsche%20914-6/12-3-18%20Jwest%20linkage%208_zpsgw07shhd.jpg.html
http://s188.photobucket.com/user/jerhofer/media/1974%20Porsche%20914-6/12-3-18%20Jwest%20linkage%207_zpsf3j5khkp.jpg.html
http://s188.photobucket.com/user/jerhofer/media/1974%20Porsche%20914-6/12-3-18%20Jwest%20linkage%206_zpshyhgo97c.jpg.html
http://s188.photobucket.com/user/jerhofer/media/1974%20Porsche%20914-6/12-3-18%20Jwest%20linkage%205_zpszlkxje8w.jpg.html
Posted by: jerhofer Dec 3 2018, 08:26 PM
The next step was to install the rod through the shift cup as a test to make sure everything fit and to check for clearance issues.
http://s188.photobucket.com/user/jerhofer/media/1974%20Porsche%20914-6/12-3-18%20Jwest%20linkage%203_zps7cdt4adj.jpg.html
The rod had to be removed so the console cap could be installed. Once the cap was on, I could insert the shift rod through the shift cup and out the rear of the shift console after lubricating the bushings. There is a flat spot on the shift rod where an M8 bolt is used to secure the shift cup to the rod. Once all that is in place, the boots can be installed on both ends of the shift rod.
http://s188.photobucket.com/user/jerhofer/media/1974%20Porsche%20914-6/12-3-18%20Jwest%20linkage%2026_zpsn4hhlcui.jpg.html
http://s188.photobucket.com/user/jerhofer/media/1974%20Porsche%20914-6/12-3-18%20Jwest%20linkage%2024_zpsakms8kbi.jpg.html
http://s188.photobucket.com/user/jerhofer/media/1974%20Porsche%20914-6/12-3-18%20Jwest%20linkage%2023_zpstvthlrer.jpg.html
http://s188.photobucket.com/user/jerhofer/media/1974%20Porsche%20914-6/12-3-18%20Jwest%20linkage%2021_zpsttny3hs7.jpg.html
After installing the u-joints and the stub shafts on the shift rod and the front shift rod, a new center shift tube must be made. The stock center shift tubes are way to long for this application and there is no need for a kink in them. After pondering what I was going to use to make this rod, I thought of the stock front shift rod that we had cut one end off of. I dug it out and it was the close to being the correct length. At the rear, this rod slid over the stub shaft. At the front, the two stubs would need to be butt welded.
I called my son and he came over after work. To show him how I thought everything would work, I used a hose clamp to fasten the front stubs together. He thought my idea would work. We measured how long this rod would be once it is welded to both shift stubs. Once we had the measurement, we removed the shift stubs and he took everything with him to make the center shift tube.
http://s188.photobucket.com/user/jerhofer/media/1974%20Porsche%20914-6/11-19-18%20jwest%20shifter%203_zpsckywgyj2.jpg.html
http://s188.photobucket.com/user/jerhofer/media/1974%20Porsche%20914-6/12-3-18%20Jwest%20linkage%2017_zpstldzmb6u.jpg.html
http://s188.photobucket.com/user/jerhofer/media/1974%20Porsche%20914-6/12-3-18%20Jwest%20linkage%2019_zpsqogt5mcq.jpg.html
http://s188.photobucket.com/user/jerhofer/media/1974%20Porsche%20914-6/12-3-18%20Jwest%20linkage%2020_zpspx6pirar.jpg.html
http://s188.photobucket.com/user/jerhofer/media/1974%20Porsche%20914-6/12-3-18%20Jwest%20linkage%2018_zpsraohvlfg.jpg.html
Posted by: jerhofer Dec 3 2018, 08:37 PM
While I was waiting for my son to arrive, I installed the muffler. I had sanded it down and had it powder coated a metallic sliver. On my previous project, the '73 Mercedes 280SEL 4.5, I had the exhaust manifold heat shields powder coated using this same material. After many heat cycles, those shields looked the same as the day I put them on. This covering is supposed to be good for 450 degrees.
http://s188.photobucket.com/user/jerhofer/media/1974%20Porsche%20914-6/12-3-18%20muffler%203_zpsmynrzi7e.jpg.html
http://s188.photobucket.com/user/jerhofer/media/1974%20Porsche%20914-6/12-3-18%20muffler%202_zpsjzuqjhkv.jpg.html
http://s188.photobucket.com/user/jerhofer/media/1974%20Porsche%20914-6/12-3-18%20muffler_zpswb4reul1.jpg.html
I also had time to install the crankcase vent hose.
http://s188.photobucket.com/user/jerhofer/media/1974%20Porsche%20914-6/12-3-18%20vent%20hose_zpspavffqub.jpg.html
http://s188.photobucket.com/user/jerhofer/media/1974%20Porsche%20914-6/12-3-18%20vent%20hose%202_zpsyy1swas3.jpg.html
Posted by: jerhofer Dec 4 2018, 04:50 PM
My son texted me this morning saying the shift rod was at the front desk at TRD where he works. I picked it up and then called my powder coater. I asked when he was going to do satin black and he said next week. But he was doing gloss black today. I blasted the rod and took it to him for a coating. About an hour later, he texted me that it was done. Another $10 well spent but lots of running around today.
https://s188.photobucket.com/user/jerhofer/media/1974%20Porsche%20914-6/12-4-18%20shift%20linkage%204_zps5m3m3udp.jpg.html
http://s188.photobucket.com/user/jerhofer/media/1974%20Porsche%20914-6/12-4-18%20shift%20linkage%203_zpsd7blltsm.jpg.html
http://s188.photobucket.com/user/jerhofer/media/1974%20Porsche%20914-6/12-4-18%20shift%20linkage%202_zps1jysaotn.jpg.html
http://s188.photobucket.com/user/jerhofer/media/1974%20Porsche%20914-6/12-4-18%20shift%20linkage_zpszuek76yv.jpg.html
After mowing leaves (the grass is growing slowly but the leaves are still falling), i did have time to install the fuel hoses to the fuel rail.
http://s188.photobucket.com/user/jerhofer/media/1974%20Porsche%20914-6/12-4-18%20fuel%20lines%203_zpsa4mxdz6q.jpg.html
http://s188.photobucket.com/user/jerhofer/media/1974%20Porsche%20914-6/12-4-18%20fuel%20lines%202_zps6fkzsweg.jpg.html
With the shift rod installed, the bottom of the engine is nearly done. I have to install the O2 sensor, attach the ground from the transmission to the body, and run the cable from the battery to the starter.
http://s188.photobucket.com/user/jerhofer/media/1974%20Porsche%20914-6/12-4-18%20engine%20bottom%203_zpscez10a03.jpg.html
Posted by: TravisNeff Dec 4 2018, 05:04 PM
Great progress! What did you coat the gearbox with?
Posted by: pete000 Dec 4 2018, 07:57 PM
Nice upgrades !
Posted by: jerhofer Dec 4 2018, 08:05 PM
Great progress! What did you coat the gearbox with?
Thanks.
I don't know anything about the coating. The transmission came with the car and had this finish.
Posted by: jerhofer Dec 4 2018, 08:11 PM
Brad Mayeur re-built the transmission with the aluminum intermediate plate and a Quaife differential. It was rebuilt in 2006 and has been out of the car since then. So it is fresh.
Posted by: jerhofer Dec 5 2018, 03:38 PM
I worked on some odds and ends today. I adjusted the clutch cable so that I can pull the clutch pedal 3/4" towards the rear. I had done a preliminary adjustment of the throttle cable. I had my wife push the gas pedal to the floor so I could see if the butterflies were opening all the way. They were, which was a surprise. I accidentally happened to adjust it correctly.
I worked on the seal around the engine tin to get it into place. Then, I ran the wire from the battery to the starter and fastened the transmission ground strap.
https://s188.photobucket.com/user/jerhofer/media/1974%20Porsche%20914-6/12-5-18%20O2%20starter_zpsywwzutnb.jpg.html
http://s188.photobucket.com/user/jerhofer/media/1974%20Porsche%20914-6/12-5-18%20O2%20ground_zpshzcwbg2w.jpg.html
Next up was installing the O2 sensor. There was a ton of excess wire so I bunched it up and used a large shrink tube to secure it.
http://s188.photobucket.com/user/jerhofer/media/1974%20Porsche%20914-6/12-5-18%20O2%20sensor%202_zpsuphqhjsb.jpg.html
http://s188.photobucket.com/user/jerhofer/media/1974%20Porsche%20914-6/12-5-18%20O2%20sensor%204_zpslqqw3oem.jpg.html
http://s188.photobucket.com/user/jerhofer/media/1974%20Porsche%20914-6/12-5-18%20O2%20sensor%203_zpsqpeuqqte.jpg.html
http://s188.photobucket.com/user/jerhofer/media/1974%20Porsche%20914-6/12-5-18%20O2%20sensor_zpsn4q2uwh6.jpg.html
I also plugged in all of the ECU connectors.
http://s188.photobucket.com/user/jerhofer/media/1974%20Porsche%20914-6/12-5-18%20O2%20ecu%20plugs%202_zps70bltwsf.jpg.html
Oil was poured into the tank. I tried to add gas but, fortunately, after pouring a bit in, I stopped to check for leaks. And I had a big one!! After cleaning up the gas, I put the car back on the lift to see what happened. It appears to have come out of the overflow tube as it was still wet. All of my connections at the tank were dry. Not sure how this happened. It was the end of the day so I decided to look into that in the morning. I must not have had the filler from my gas can far enough down into the tank.
Once I get that resolved, I should be ready for the first startup. Hopefully tomorrow will see that happening.
Posted by: Tdskip Dec 5 2018, 05:50 PM
Fingers crossed - big moment.
Thanks for documenting your progress!
Posted by: pete000 Dec 5 2018, 05:51 PM
All those modern connectors and sensors look funny in a old 914...
Posted by: jerhofer Dec 5 2018, 07:54 PM
All those modern connectors and sensors look funny in a old 914...
Hopefully, they all work!!!
Posted by: jerhofer Dec 6 2018, 03:40 PM
No start-up today. My first job was to find out why I was leaking fuel. It was my fault. When I was redoing the overflow line, I lifted up the tank a bit so I could feed the line down to the hole. In doing that, I pulled the return line off at the tunnel. i pulled the tank, tightened up the clamp even more than I had before, put everything back together and added some fuel. No leak there.
However, at little bit later I smelled fuel. It was leaking at the return line at the firewall. There is that 90 degree brass fitting that I had rotated slightly to make it run parallel with the bottom of the car. In so doing, I had evidently loosened the fitting. Because I had to pull that line back towards the rear to get to the nut, I drained the tank and removed the tank again so I could unhook that line I had just fastened. After tightening everything using new clamps and re-installing the tank, I added gas and everything is finally dry. I did have some fuel in the tunnel so I removed the console, pulled back the carpet and opened the windows to let everything dry out.
All of this work was completed by 10:00AM so I could still have started the motor. Up to this point, I had not checked my clutch adjustment to make sure the clutch was working. I enlisted my wife, put the car in gear and had her push in the clutch. It didn't allow me to roll the car. I adjusted it even tighter, but to no avail. The last time she pushed the clutch in I watched from underneath and could see that the clutch fork was hitting against the rear part of the opening. I had not checked the clutch fork ball as this was the same transmission that had been in the car in the past.
I called Brad Mayeur to talk about this with him. He agreed that the ball needed to be shimmed if the clutch fork was hitting against the transmission. I also mentioned to him that the car now had a Kennedy Engineering flywheel and clutch. He said that changed everything. For one thing, on a Kennedy clutch, you do not adjust the clutch pedal so you can pull it back 3/4". Correctly adjusted, there will be no pullback as the throwout bearing places pressure on the pressure plate all the time. He said he has talked to Kennedy about this but they say there is no problem with their setup. Brad wonders about long term issues with that pressure.
My buddy Reese has a transmission jack that I have used more than he has. Since he lives just up the street, I walked up there and rolled it back to my shop. He also had a very thin wall 14mm deep socket that should work on removing the ball. Brad says that, after removing the muffler and unhooking everything, I should be able to move it back far enough with the axles still attached to get to the ball. He recommended beginning with a 1mm thick washer. He also mentioned that the threads have to be sealed as the ball threads open into the case.
http://s188.photobucket.com/user/jerhofer/media/1974%20Porsche%20914-6/12-6-18%20tranny%20jack_zpsbdsizwte.jpg.html
So I get to have even more fun on this project!!! The weather is supposed to be terrible here this weekend so I wouldn't be driving the car anyway.
I have a question about the starter. When Reese saw it recently, he wondered if there was a more compact starter that would work. Any suggestions?
Posted by: Larmo63 Dec 6 2018, 05:00 PM
Your project looks great and it's a fun read the way you are documenting this build.
One thing I did notice: I'd recommend some kind of burp tank off of the oil filler neck where you have the small air filter. I had a little K & N filter like yours and eventually it filled up with enough oil to get a bit messy. I used a 911 washer bottle that rides right below that area. It basically sits there, the braided hose holds it in place.
"The devil is in the details."
Carry on.
Posted by: jerhofer Dec 7 2018, 02:59 PM
Your project looks great and it's a fun read the way you are documenting this build.
One thing I did notice: I'd recommend some kind of burp tank off of the oil filler neck where you have the small air filter. I had a little K & N filter like yours and eventually it filled up with enough oil to get a bit messy. I used a 911 washer bottle that rides right below that area. It basically sits there, the braided hose holds it in place.
"The devil is in the details."
Carry on.
I will look into that. Thanks for the tip.
Posted by: jerhofer Dec 7 2018, 03:05 PM
We are supposed to get a bunch of snow this weekend so I spent the morning getting fuel for the generator and making a run to Sam's.
This afternoon, i removed the muffler and unhooked everything from the transmission. I also removed the starter. The support stands and the transmission jack are in place. Tomorrow I can separate the transmission and shim the clutch fork ball. Hopefully, I can just slide it back with the CV's in place as Brad suggested.
https://s188.photobucket.com/user/jerhofer/media/1974%20Porsche%20914-6/12-7-18%20transmission%203_zps9brvan41.jpg.html
http://s188.photobucket.com/user/jerhofer/media/1974%20Porsche%20914-6/12-7-18%20transmission%202_zpsmaq8wndn.jpg.html
http://s188.photobucket.com/user/jerhofer/media/1974%20Porsche%20914-6/12-7-18%20transmission_zps5xtpik6l.jpg.html
Posted by: mepstein Dec 7 2018, 03:18 PM
Looking good.
I have a son in NC and a daughter in Maine. The daughter doesn’t even mention snow unless it’s more than a couple feet. Son works from home if they see flurries.
Posted by: jerhofer Dec 7 2018, 03:26 PM
Looking good.
I have a son in NC and a daughter in Maine. The daughter doesn’t even mention snow unless it’s more than a couple feet. Son works from home if they see flurries.
We are originally from northern Indiana. It is hilarious how freaked out people here become by snow. We probably won't be able to watch normal programming on local TV as the weather people will take over and be in seventh heaven.
They are saying we could get 8" of snow and potentially lots of ice as well. That is a lot for the Charlotte area. We will be staying home if it snows that much as being on the road is not the place to be with the local drivers. It will be interesting to see how our dog deals with that much snow!!!
Posted by: jerhofer Dec 8 2018, 03:42 PM
No sacrifice is to great when doing a car project!!!
https://s188.photobucket.com/user/jerhofer/media/1974%20Porsche%20914-6/12-8-18%20head_zpsrkhtb08s.jpg.html
Separating the transmission from the engine went smoothly today. Brad's suggestion that I could slide the transmission rearward with the axles attached was correct. There is plenty of room to work on the clutch fork.
http://s188.photobucket.com/user/jerhofer/media/1974%20Porsche%20914-6/12-8-18%20transmission%202_zps0si0jo0z.jpg.html
http://s188.photobucket.com/user/jerhofer/media/1974%20Porsche%20914-6/12-8-18%20transmission_zpsdo0clhcw.jpg.html
http://s188.photobucket.com/user/jerhofer/media/1974%20Porsche%20914-6/12-8-18%20transmission%204_zpsprgtieol.jpg.html
Removing the ball is another story. My neighbor had a fairly thin 14mm deep well socket but it wasn't even close to fitting into the area around the ball.
http://s188.photobucket.com/user/jerhofer/media/1974%20Porsche%20914-6/12-8-18%20socket%202_zpsbkd6d3vw.jpg.html
http://s188.photobucket.com/user/jerhofer/media/1974%20Porsche%20914-6/12-8-18%20socket_zpssmypz9dq.jpg.html
I spent a couple hours using a skill knife to make that area around the ball larger.. to no avail. I can now get the socket in there but not far enough for it to catch. I was tired of scraping and called it a day.
http://s188.photobucket.com/user/jerhofer/media/1974%20Porsche%20914-6/12-8-18%20transmission%203_zpsfn7seblx.jpg.html
My next door neighbor is in charge of service for a large car dealership. I called him to see if any of his guys might have a thin wall 14mm socket. He is bringing a couple home for me to try. I have also ordered a new ball as this one already has the edges somewhat compromised.
Posted by: t collins Dec 8 2018, 09:31 PM
No sacrifice is to great when doing a car project!!!
https://s188.photobucket.com/user/jerhofer/media/1974%20Porsche%20914-6/12-8-18%20head_zpsrkhtb08s.jpg.html
Separating the transmission from the engine went smoothly today. Brad's suggestion that I could slide the transmission rearward with the axles attached was correct. There is plenty of room to work on the clutch fork.
http://s188.photobucket.com/user/jerhofer/media/1974%20Porsche%20914-6/12-8-18%20transmission%202_zps0si0jo0z.jpg.html
http://s188.photobucket.com/user/jerhofer/media/1974%20Porsche%20914-6/12-8-18%20transmission_zpsdo0clhcw.jpg.html
http://s188.photobucket.com/user/jerhofer/media/1974%20Porsche%20914-6/12-8-18%20transmission%204_zpsprgtieol.jpg.html
Removing the ball is another story. My neighbor had a fairly thin 14mm deep well socket but it wasn't even close to fitting into the area around the ball.
http://s188.photobucket.com/user/jerhofer/media/1974%20Porsche%20914-6/12-8-18%20socket%202_zpsbkd6d3vw.jpg.html
http://s188.photobucket.com/user/jerhofer/media/1974%20Porsche%20914-6/12-8-18%20socket_zpssmypz9dq.jpg.html
I spent a couple hours using a skill knife to make that area around the ball larger.. to no avail. I can now get the socket in there but not far enough for it to catch. I was tired of scraping and called it a day.
http://s188.photobucket.com/user/jerhofer/media/1974%20Porsche%20914-6/12-8-18%20transmission%203_zpsfn7seblx.jpg.html
My next door neighbor is in charge of service for a large car dealership. I called him to see if any of his guys might have a thin wall 14mm socket. He is bringing a couple home for me to try. I have also ordered a new ball as this one already has the edges somewhat compromised.
I took an old socket and turned the O.D. down on the lathe. You could do the same on the bench grinder if you're careful.
Posted by: jerhofer Dec 9 2018, 10:28 AM
[/quote]
I took an old socket and turned the O.D. down on the lathe. You could do the same on the bench grinder if you're careful.
[/quote]
Brad Mayeur suggested the same thing. I don't use a 14mm socket very often so I didn't have an extra one. Brad mentioned buying a cheap socket to grind. It worked. The helicoil came out with the pivot ball.
https://s188.photobucket.com/user/jerhofer/media/1974%20Porsche%20914-6/12-9-18%20pivot%20ball%208_zpsrukf9cwg.jpg.html
http://s188.photobucket.com/user/jerhofer/media/1974%20Porsche%20914-6/12-9-18%20pivot%20ball%207_zpsh0dxgijl.jpg.html
http://s188.photobucket.com/user/jerhofer/media/1974%20Porsche%20914-6/12-9-18%20pivot%20ball%209_zpsp5zfn1jy.jpg.html
http://s188.photobucket.com/user/jerhofer/media/1974%20Porsche%20914-6/12-9-18%20pivot%20ball%206_zpsjgkcvf5c.jpg.html
Brad suggested beginning with a 1mm shim, which, as you can see by the calipers, is not very much. He said a little makes a big difference. I found two thin washers that equaled 1.45mm. They also fit in the recessed area, although I don't think they would have without my enlarging the area yesterday.
http://s188.photobucket.com/user/jerhofer/media/1974%20Porsche%20914-6/12-9-18%20pivot%20ball%205_zpsk922ozip.jpg.html
http://s188.photobucket.com/user/jerhofer/media/1974%20Porsche%20914-6/12-9-18%20pivot%20ball%204_zpsvapgovyc.jpg.html
http://s188.photobucket.com/user/jerhofer/media/1974%20Porsche%20914-6/12-9-18%20pivot%20ball%203_zps9lrzhvdr.jpg.html
http://s188.photobucket.com/user/jerhofer/media/1974%20Porsche%20914-6/12-9-18%20pivot%20ball_zpsgkmxsth7.jpg.html
Posted by: jerhofer Dec 9 2018, 08:30 PM
The shims worked!!
Posted by: Larmo63 Dec 9 2018, 09:10 PM
Great news, just in time to drive it in the snow!!
Posted by: jerhofer Dec 10 2018, 05:54 PM
I had tried to install the sway bar links a couple days ago to no avail. After thinking about it, I decided to remove the shock absorber nut and slide the shaft out. In my "special tools" drawer, I found one that I thought would work by grabbing the rear of the shock mount. It worked well as I was able to press the link onto the ball.
http://s188.photobucket.com/user/jerhofer/media/1974%20Porsche%20914-6/12-10-18%20sway%20bar%205_zpsq59hagwc.jpg.html
http://s188.photobucket.com/user/jerhofer/media/1974%20Porsche%20914-6/12-10-18%20sway%20bar%202_zpseb7dq9ye.jpg.html
http://s188.photobucket.com/user/jerhofer/media/1974%20Porsche%20914-6/12-10-18%20sway%20bar%204_zps5d6c1n3l.jpg.html
http://s188.photobucket.com/user/jerhofer/media/1974%20Porsche%20914-6/12-10-18%20sway%20bar_zpsgvzzdei8.jpg.html
Since I had the throttle cable detached when I pulled the transmission, I wanted to make sure the butterflies were opening all the way. Since my wife wasn't in the garage with me, I decided to use my camera. I fastened the lens to the throttle body with a couple of zip ties. By snaking the monitor around inside the cab, I could see when the butterflies were open completely.
http://s188.photobucket.com/user/jerhofer/media/1974%20Porsche%20914-6/12-10-18%20butterfly_zpslzodpr60.jpg.html
http://s188.photobucket.com/user/jerhofer/media/1974%20Porsche%20914-6/12-10-18%20butterfly%202_zpsfro72xky.jpg.html
In anticipation of starting the car, I removed the tape on the throttle bodies and borrowed six of our dog's tennis balls. She is a ball playing fool and loves her tennis balls.
https://www.youtube.com/watch?v=MawbMOLwJis
http://s188.photobucket.com/user/jerhofer/media/1974%20Porsche%20914-6/12-10-18%20tennis%20%20balls_zpsjixg0ioq.jpg.html
Now I was ready to start the car. I put in a call to Richard Clewett. While I was waiting for his return call, I cleaned the floorpan.
http://s188.photobucket.com/user/jerhofer/media/1974%20Porsche%20914-6/12-10-18%20floorpan%203_zpsbafmpzhk.jpg.html
Richard returned my call just as I was finishing up cleaning the floorpan. I have a Mac Pro laptop. Since Electromotive's software is only Windows compatible, I had to download a program called Parallels that allows me to operate either out of Windows or IOS. I also had to download a program called TeamViewer so Richard could take over my computer to set the parameters for initial startup. I had him on speakerphone as he went from window to window inputting data.
http://s188.photobucket.com/user/jerhofer/media/1974%20Porsche%20914-6/12-10-18%20ecu_zpsfqmd4yed.jpg.html
I set the fuel pressure at 50psi and we were ready to start the engine. I turned the key and the starter went "clunk". I am not sure what the problem is but wonder if it is related to the Kennedy flywheel and clutch. I am going to pull the starter tomorrow to get to the ring gear. I want to see if I can turn the engine with a prybar. Richard asked if the engine was free and I said it was based on turning it to set the valve clearance. He asked if I had tried to turn the motor over once I had the transmission hooked up and I had not thought of doing this. I also wonder if the starter gear needs to be shimmed because of the Kennedy flywheel.
So no go today. We also discovered that all the sensors are reporting for duty except the Throttle Position Sensor (TPS). I will troubleshoot that tomorrow as well. I am disappointed that we could not start the motor but I understand that there are many variables in putting this thing back together.
Posted by: Cairo94507 Dec 11 2018, 07:52 AM
Man, you are so close. I would have a hard time sleeping knowing you are going to hear that beauty fire-up. I will keep my fingers crossed that the starter issue and TPS are just minor issues you quickly resolve.
Posted by: jerhofer Dec 11 2018, 03:18 PM
Not long after we got our first motorhome a little over four years ago, we began pulling a 2013 Fiat 500 Abarth behind it four wheels down. We loved that car and it was trouble free. After three years, we had put a number of miles on it, so we sold it and bought a low mileage certified 2017 in the same model. Because we bought the same car, all of my towing gear just needed to be transferred from one car to the other.
Not too long after I got the 2017 I noticed that it was using a lot more oil than the 2013 did. I began charting it and it was down to less than 700 miles before I had to add a quart. On the 2013 I usually added a quart between oil changes. I took it to the local Fiat dealer who couldn't find anything. So they marked the dipstick and told me to bring it back after driving it 600 miles as they evidently did not believe I knew how to count. I took it back with 600 miles and it was a quart low. So this morning I had to take it in where they will tear it down to see what the issue is. I have been told that I will probably be getting a new motor.
That trip combined with some Christmas shopping took up the morning. After getting into the garage after lunch, the first thing I did was to get out my troubleshooting camera. By looking into the clutch fork hole, I could see that the flywheel is very close. I also have a concern about the bolts I used on the pressure plate. I wanted to use 12.9 hardness bolts and the only ones I could fine were allen bolts with 8mm heads.
https://s188.photobucket.com/user/jerhofer/media/1974%20Porsche%20914-6/12-11-18%20flywheel%208_zps0vhbxubi.jpg.html
http://s188.photobucket.com/user/jerhofer/media/1974%20Porsche%20914-6/12-11-18%20flywheel%207_zpsybm5nvq0.jpg.html
I then pulled the starter. Here again I could see the ring gear was very close but it was clearing. The allen head bolt is visible here as well. I used the camera here as well. I put a pry bar on the ring gear and nothing moved.
http://s188.photobucket.com/user/jerhofer/media/1974%20Porsche%20914-6/12-11-18%20flywheel%206_zpspvlbu9ak.jpg.html
http://s188.photobucket.com/user/jerhofer/media/1974%20Porsche%20914-6/12-11-18%20flywheel%205_zpsgntdpw3y.jpg.html
http://s188.photobucket.com/user/jerhofer/media/1974%20Porsche%20914-6/12-11-18%20flywheel%204_zpswh3gbibc.jpg.html
http://s188.photobucket.com/user/jerhofer/media/1974%20Porsche%20914-6/12-11-18%20flywheel%203_zpsqdlh1we3.jpg.html
http://s188.photobucket.com/user/jerhofer/media/1974%20Porsche%20914-6/12-11-18%20flywheel%202_zpso4xrcxal.jpg.html
This is a Kennedy Engineering flywheel and pressure plate. I called them and they said the bolts could be the problem. The way to check that is to loosen the bolts and pull the transmission back a bit and see if I can turn the engine over. They did confirm that the stock starter works with their flywheel. I had the starter checked out prior to installing it and it passed with flying colors. Looks like it will come apart again!!
One other thing I have a question on. Can anyone tell me what this lead coming off the batter cable goes to?
http://s188.photobucket.com/user/jerhofer/media/1974%20Porsche%20914-6/12-11-18%20battery%20cable_zps0dkpxtad.jpg.html
Posted by: IronHillRestorations Dec 12 2018, 07:04 AM
That battery cable is a generic parts store cable that has that extra lead coming off, so it doesn't go to anything
Posted by: jerhofer Dec 12 2018, 07:21 AM
That battery cable is a generic parts store cable that has that extra lead coming off, so it doesn't go to anything
Thanks.
Posted by: jerhofer Dec 12 2018, 04:16 PM
I pulled the tranny again. I was able to turn the motor using a pry bar on the ring gear. Using a wood dowel ( I kept it out of the engine this time!!!), I did an approximate measurement of the position of the allen bolt head. There are three places in the casting where there is less clearance. As you can see in the photo below, clearing those areas with the allen bolt would be close.
I found some 10.9 hardened bolts at our local Ace hardware. As you can see in the photo below, the new bolt's head is almost half as thick as the allen bolt. While I was in there, I added another shim to the clutch fork ball as I was nearly out of adjustment to get it to work. These three shims placed the clutch fork almost exactly in the middle of the hole.
https://s188.photobucket.com/user/jerhofer/media/1974%20Porsche%20914-6/12-12-18%20bolts_zpska0y8qgh.jpg.html
http://s188.photobucket.com/user/jerhofer/media/1974%20Porsche%20914-6/12-12-18%20bolts%202_zpslyulquxv.jpg.html
http://s188.photobucket.com/user/jerhofer/media/1974%20Porsche%20914-6/12-12-18%20bolts%203_zpssdqfldap.jpg.html
I put everything back together, removed the positive lead from the fuel pump, and cranked the ignition. CLUNK!! I switched the wire that goes to one of the starter spades and tried it again. CLUNK!! That was disappointing.
The car came with two starters. Last summer, I took both of them to a local electrical shop and had them tested. They both passed. One was dirty and one was clean. I put the clean one in the car. Now I am thinking I may have a starter problem. I dug out the dirty one and cleaned it up. By the looks of it, I would assume it was the one that was on the car.
http://s188.photobucket.com/user/jerhofer/media/1974%20Porsche%20914-6/12-12-18%20alternator%202_zpsh1rzhbcg.jpg.html
http://s188.photobucket.com/user/jerhofer/media/1974%20Porsche%20914-6/12-12-18%20alternator_zpsc5qv4bdh.jpg.html
By this time, it was late in the day and I was tired of messing with the car. So tomorrow I will change out the starter. If it goes clunk again, I will want to tear out my hair, if I had any!! I do these projects to stay busy during my retirement so I should be happy that I am having problems. Somehow, that thought doesn't comfort me.
Posted by: pete000 Dec 12 2018, 07:29 PM
You can easily bench test the starter by mounting it in a vice and hitting the pole with a jumper cable. if you just jump the lug the starter will just spin, if you jump the spade and the lug the starter will extend and spin. I recently tested mine this way and it was working properly. There are a few crude YouTube videos on how to test a starter.
Also verify the battery is working properly as well.
Another long shot could be a broken ignition switch. They can crack causing starter problems. Common problem with 914 column ignitions.
Posted by: jerhofer Dec 12 2018, 08:55 PM
You can easily bench test the starter by mounting it in a vice and hitting the pole with a jumper cable. if you just jump the lug the starter will just spin, if you jump the spade and the lug the starter will extend and spin. I recently tested mine this way and it was working properly. There are a few crude YouTube videos on how to test a starter.
Also verify the battery is working properly as well.
Another long shot could be a broken ignition switch. They can crack causing starter problems. Common problem with 914 column ignitions.
Thanks for the tips. I will try test with both starters tomorrow. The battery is new and charged.
I have been having some strange issues with the ignition switch. For one, the wipers come on and make one pass when I turn the ignition on. Also, there is a red light on the dash that flashes continuously. I haven't tried to troubleshoot these issues earlier as I was waiting until I had everything plugged in in the engine bay. I talked with Ed yesterday and mentioned these two things to him. It has been thirteen years since he drove the car but he did not remember either of these two issues.
https://s188.photobucket.com/user/jerhofer/media/1974%20Porsche%20914-6/12-12-18%20flashing%20light_zps5cv7cfyv.jpg.html
Posted by: Larmo63 Dec 12 2018, 09:09 PM
Is the flashing red light your emergency brake light?
Mine flashes in the gauge when it's pulled.
Just a guess.
Posted by: Dave_Darling Dec 12 2018, 10:37 PM
The light in the image looks like a CAT or EGR light from a 75-76 car. Might be one re-used for a different purpose, or might just be a light in a similar spot.
What warning lights do you have in your gauges? What color wires connect to that light; do they look like authentic 40-year-old German wires?
--DD
Posted by: IronHillRestorations Dec 13 2018, 07:30 AM
The red light is a custom light for either low fuel or brake warning.
added: Red is parking brake, or low brake pressure; green means go get gas
Posted by: jerhofer Dec 13 2018, 08:59 PM
Still have a whole lot of clunking going on! The other starter gave the same results. I was able to get a wrench on the crank pulley. Before trying to rotate the engine, I decided to pull all of the spark plugs to make it easier. I couldn't get excellent leverage on that wrench but I had enough that the engine should rotate if it were free. It didn't budge a bit.
https://s188.photobucket.com/user/jerhofer/media/1974%20Porsche%20914-6/12-13-18%20cop_zpsulas46zf.jpg.html
http://s188.photobucket.com/user/jerhofer/media/1974%20Porsche%20914-6/12-13-18%20cop%202_zpsjxxcatrk.jpg.html
At this point I decided that the transmission needed to come completely out as I had a serious clutch problem. So off came the axles and, since I have had so much practice this week, soon it was resting on the transmission jack.
http://s188.photobucket.com/user/jerhofer/media/1974%20Porsche%20914-6/12-13-18%20transmission%203_zpsd2fzw8jb.jpg.html
http://s188.photobucket.com/user/jerhofer/media/1974%20Porsche%20914-6/12-13-18%20transmission_zpsppfnc3rh.jpg.html
http://s188.photobucket.com/user/jerhofer/media/1974%20Porsche%20914-6/12-13-18%20pressure%20plate%202_zpsahohwoxy.jpg.html
I dug out the pry bar and could easily rotate the motor via the ring gear. A call to Kennedy Engineering soon followed. I talked to Brett, the general manager, who is also their Porsche expert. After explaining the issue, has asked me to send him photos of the flywheel, the pressure plate, and the tranny. Photos is one thing I have in abundance!!
I also sent him photos of a number of measurements that I took with my calipers. After reviewing the photos, he wants me to remove the pressure plate and clutch, put the transmission back in place and then see if the motor will rotate. If it does, that eliminates the flywheel. If it does rotate, he want me to measure from the bolt up surface of the starter pocket down to the top of the ring gear. It should be around 1.43". So I get to put it together again.
Posted by: jerhofer Dec 14 2018, 08:50 PM
Another frustrating day. I removed the pressure plate and clutch as advised by Brett at Kennedy.
https://s188.photobucket.com/user/jerhofer/media/1974%20Porsche%20914-6/12-14-18%20pressure%20plate_zpsuglah2vc.jpg.html
http://s188.photobucket.com/user/jerhofer/media/1974%20Porsche%20914-6/12-14-18%20clutch%20disc_zpsaaf6gc93.jpg.html
http://s188.photobucket.com/user/jerhofer/media/1974%20Porsche%20914-6/12-14-18%20flywheel%202_zpsbzqx0tl5.jpg.html
As any of you know who have a 911 engine in your 914, getting to the crank pulley bolt is difficult. Once I got the 19mm wrench on the bolt, I wedged a small board in between the wrench and the tin to hold it in place. Since the wrench is short, to increase leverage, I used a box end wrench over the open end of the wrench. I climbed into the trunk and was able to get a good pull on it but the motor did not budge, even with the plugs out. I had the plugs in when I did the valve adjustment and the effort wasn't terrible, albeit with a longer wrench. With the plugs out, it should have moved.
http://s188.photobucket.com/user/jerhofer/media/1974%20Porsche%20914-6/12-14-18%20pulley%20bolt%202_zpstotddycb.jpg.html
I called Brett at Kennedy to let him know what had happened. He wanted photos. I got out my inspection camera. It has a feature I had never used. You can take photos or videos with it. I snapped a bunch of photos and sent them to Brett.
http://s188.photobucket.com/user/jerhofer/media/1974%20Porsche%20914-6/12-14-18%20flywheel%203_zpssnvffpue.jpg.html
After looking at the photos, he could not see a clearance issue. He then asked me to measure the depth from the ring gear to the surface where the starter is mounted. It should be exactly 1.43" Since I did not have a lot of room to get a ruler in that hole and be able to read it, I took a piece of dowel and marked 1.43" on it. I then stuck the dowel into the hole. That mark came out exactly to the surface so the ring gear was in the correct position. This also means the crank is in the correct position. He has seen the crank protrude a bit causing everything else to be off.
http://s188.photobucket.com/user/jerhofer/media/1974%20Porsche%20914-6/12-14-18%20dowel%202_zpspevtn6b8.jpg.html
Now we are wondering if the outside of the ring gear is hitting the transmission housing anywhere. The most likely places are the bosses at the bolt holes. Brett recommended placing clay at these positions and then see if they are disturbed when the transmission is in place. I didn't have any clay but I did have some strip putty. I placed it in these areas, slid the transmission in place and none of them were disturbed.
http://s188.photobucket.com/user/jerhofer/media/1974%20Porsche%20914-6/12-14-18%20putty%203_zpsyx5ofzpj.jpg.html
He then asked if the transmission shaft was bottoming out in the flywheel. I had taken a photo earlier of that area and it was apparent that it was not bottoming out. In fact I asked Brett if he thought it was engaged enough. He asked if it extended fully into the pilot bearing. With the transmission out, I could see a grease mark on the shaft. I measured that and it did extend fully into the pilot bearing.
http://s188.photobucket.com/user/jerhofer/media/1974%20Porsche%20914-6/12-14-18%20flywheel%2013_zpstkezhpw1.jpg.html
At this point, Brett can't understand why it is locking up. He said that, in the past they did have some issues with the backside of the flywheel hitting the bosses on the engine block. But since the flywheel turns freely with a pry bar when the transmission is not in place, that ruled out that issue. The last conversation we had was for me to remove the flywheel and see if anything does show up on the rear of it. He also said that if I sent the flywheel to him, he would check to make sure it in spec.
At this point, one thing I had not done was try the starter with no clutch in place. CLUNK!!
I had sent my son a link to this thread beginning last week to show him how much fun I was having. His response was to be thankful I had a furnace and a lift!!
I called him this evening to discuss this. He is coming over in the morning. He is a better troubleshooter than me and, at this point, another set of eyes can't hurt.
I can't imagine that it could be the solution, but I am going to look at the early photos I took of the engine with the wiring harness in place to see if I am missing a hookup somewhere that is causing some issue. As I was doing the original wiring, I could only see a 12v lead from the alternator, the power lead from the battery, and a yellow wire that I have been putting on one of the spades on the starter. Am I missing something?
Very frustrating week!!!
Posted by: jerhofer Dec 14 2018, 09:09 PM
Here are the photos I found of the wiring harness on the engine as it was when I first got it.
http://s188.photobucket.com/user/jerhofer/media/1974%20Porsche%20914-6/6-9-18%20engine%20tin%202_zpsamulbrbe.jpg.html
http://s188.photobucket.com/user/jerhofer/media/1974%20Porsche%20914-6/6-9-18%20engine%20tin%204_zpszbvhnyzv.jpg.html
https://s188.photobucket.com/user/jerhofer/media/1974%20Porsche%20914-6/6-9-18%20engine%20tin_zpsdyjzdwiy.jpg.html
Posted by: pete000 Dec 15 2018, 12:07 AM
Have you tried bypassing the cars electrical system altogether and just use a jumper cable and an extra battery on the starter to verify it still just clunks?
This would eliminate your possible wiring concerns.
I made a mistake once and forgot to hook up the main power to the starter once and it just went Clunk but would not spin, just as you describe.
Posted by: rick 918-S Dec 15 2018, 02:32 AM
Unless you have already done this: Try the Ed test: take a positive jumper cable from the battery to the battery post on the starter, then the negative cable from the battery directly to a bolt near the starter and try to crank the engine.
I had a stock positive cable that looked like new that was corroded inside the sheathing causing the same issue. I chased it for months. Push started the car more than I care to admit.  Worth a try.
Posted by: Cairo94507 Dec 15 2018, 07:37 AM
Oh man....what an experience to go through. I hope your son spots the issue and it is easily corrected after all of the investigative work you have gone through. 
Posted by: jerhofer Dec 15 2018, 03:08 PM
The first thing my son and I did was to use jumper cables from his car ( he drove his 700hp LS turbo motor 1979 El Camino) directly to the starter. CLUNK!! He said there were big sparks when I turned the ignition to start!!
Matt tried to turn the motor on the crank pulley and could not get it to move. But I could use the pry bar and make the motor rotate. However, Matt thought it did not move as freely as it should. So we removed the flywheel. A sign of what we would find was indicated by the fact that we did not have to use a flywheel lock to loosen the flywheel bolts.
We could see immediately see where the flywheel was hitting the lower boss on the engine block. We ground away some of the affected boss as well as the upper boss and put it back together. We could rotate the motor by hand by rotating the flywheel with our hands. Matt wanted to get back to working on his car, so, after he left, I mounted the transmission to the engine and installed the starter. I climbed into the cockpit, turned the key and the engine cranked HURRAH!!!!!!!!!!!!!!!!!!!!!!!!!!!!!!!!!!!!!!!!!!!!!!!!!!!!!!!!!!!!!!!!!!!!!!!!!!!!
https://s188.photobucket.com/user/jerhofer/media/1974%20Porsche%20914-6/12-15-18%20flywheel%204_zpsxwdx6dnc.jpg.html
http://s188.photobucket.com/user/jerhofer/media/1974%20Porsche%20914-6/12-15-18%20flywheel%206_zpsgjjffyra.jpg.html
http://s188.photobucket.com/user/jerhofer/media/1974%20Porsche%20914-6/12-15-18%20flywheel%205_zpsv4mn4crj.jpg.html
http://s188.photobucket.com/user/jerhofer/media/1974%20Porsche%20914-6/12-15-18%20flywheel%202_zps9xfcz68l.jpg.html
I spent the rest of the afternoon mounting the transmission and installing the axles. I need to hook up all the cables, the shifter, re-install the spark plugs, etc. Once I have all that in place, I can troubleshoot the TPS issue. Hopefully, I will be starting the engine next week. Sure feels good to have found the problem. Thanks to all for your suggestions.
Posted by: pete000 Dec 15 2018, 06:26 PM
So was the flywheel too thick causing the touch condition?
Posted by: pete000 Dec 15 2018, 06:26 PM
So was the flywheel too thick causing the touch condition?
Posted by: jerhofer Dec 15 2018, 09:43 PM
So was the flywheel too thick causing the touch condition?
I don't know. It is an aftermarket part made for many different iterations of a 911 engine. Evidently they had an issue with some of these flywheels. I let Brett know what i had found.
Posted by: Cairo94507 Dec 16 2018, 07:41 AM
I am glad to hear you figured this out and resolved it. I can't wait to see a clip of your engine running. Good job.
Posted by: ge9146 Dec 16 2018, 11:55 AM
Congratulations on your great detective work!!! 
What a pain in the flywheel. It was supposed to fit.
Looking forward to hearing about the start up.
Ed
Posted by: Tdskip Dec 16 2018, 12:06 PM
Press on!
Posted by: jerhofer Dec 18 2018, 04:24 PM
Since I was working on the car Friday and Saturday, my wife and I cleaned the house Sunday morning. After lunch, since it was such a beautiful day (sunny and low 60's), I decided to get the motorhome out of storage and begin loading it for our trip to Florida in a few weeks.
Yesterday morning, I received a message from my son asking if he could borrow some of our electrons for his 911 Tesla. He was heading our way and on over to a friend of mine, Tim, who has a body shop. Tim is going to be painting Matt's car. Since the car has had so little time on the road, Matt is being overly cautious on the range of the car. He has his Tesla charger now so it charges quite bit faster. I have a 220V plug in my garage that he used.
After about fifteen minutes of charging, we drove over to Tim's place. There was talk about how they were going to handle different things on the car. The plan is for Matt to take the car apart in January in preparation for Tim painting in in February. While we were there, he gave Tim a ride. Tim has a Vega drag car that does 6.3 in an eighth mile. So he is used to acceleration G's. But it is an all out race car. He was amazed at how the car laid him back in the seat. And soon it will be faster. Matt is planning on driving it to a Tesla tuner in HIckory, NC Tuesday to get an additional 50HP for a total of 500. For an extra $2,000 he could add 200 more HP.
I drove the car back to my house. It still drives like a 911 so it was very familiar. Once back out our house, Matt plugged in again. Once I got the clutch and throttle cables hooked up, Matt jumped into the car to press the pedals so I could do the adjusting under the car. We also re-installed the spark plugs.
Again, because of the complexity of the car, he was checking on the charging process continually. On one of those inspections, he saw that the charger had shut down. He had blown a 30 amp breaker. The draw is 50 amp and he assumed I had a 50 amp breaker on that line. To be able to continue charging, he adjusted the charger on the car so it would only draw 30 amp.
I had mentioned to Matt that the TPS wasn't alive on the car. Years ago Matt built a fuel injection system from scratch for his '69 Camaro. He sold this car this year to fund the Tesla project. He worked for Michelin for 12 years designing race tires. Michelin sent him to France for three years so he could learn the "Michelin Way". While he was over there, I stored his Camaro in my garage. He called me one day to ask if I would take some measurements under the hood.
He had bought a Hilborn intake manifold on eBay which he had shipped me. He was going to use motorcycle fuel injectors and other parts he scrounged to make this system. Part of the system was an air box he was going to make out of carbon fiber. He also made the intake horns from carbon fiber as well. He needed the under hood measurements and measurements of the intake to figure out the dimension fo the air box. After measuring the manifold I shipped it to a Michelin colleague who was going to France soon and would take the manifold with him in his suitcase. When Matt arrived back in the states with the air box, he only had to make one small cut to one the hood braces for clearance.
http://s188.photobucket.com/user/jerhofer/media/1969%20Camaro%20Rear%20End%20Project/12-18-11Camaro.jpg.html
http://s188.photobucket.com/user/jerhofer/media/1969%20Camaro/hilbornwidthbetweenstacks8.jpg.html
http://s188.photobucket.com/user/jerhofer/media/1969%20Camaro%20Rear%20End%20Project/11-22-11enginebay4sm.jpg.html
http://s188.photobucket.com/user/jerhofer/media/1969%20Camaro%20Rear%20End%20Project/11-22-11enginebaysm.jpg.html
Matt used an Electrtomotive's TEC ECU so he was familiar with the wiring. You can see it in this photo positioned on the hump.
http://s188.photobucket.com/user/jerhofer/media/1969%20Camaro%20Rear%20End%20Project/11-22-11interior2sm.jpg.html
It didn't take long for him to discover that I had voltage going to all of the black/white wires that were sensor grounds. Somewhere I have a black/white wire touching a gray/red wire. I had some other questions for Richard Clewett and he suggested that I unhook the plug for each sensor one at a time and then see when the voltage disappears. That will at least give me a general area to look. When I unhooked the cam sensor plug, the voltage dropped from 3.73 to .50. I had a doctor's appointment this afternoon so that search will have to wait until tomorrow.
Posted by: porschetub Dec 19 2018, 12:35 PM
The first thing my son and I did was to use jumper cables from his car ( he drove his 700hp LS turbo motor 1979 El Camino) directly to the starter. CLUNK!! He said there were big sparks when I turned the ignition to start!!
Matt tried to turn the motor on the crank pulley and could not get it to move. But I could use the pry bar and make the motor rotate. However, Matt thought it did not move as freely as it should. So we removed the flywheel. A sign of what we would find was indicated by the fact that we did not have to use a flywheel lock to loosen the flywheel bolts.
We could see immediately see where the flywheel was hitting the lower boss on the engine block. We ground away some of the affected boss as well as the upper boss and put it back together. We could rotate the motor by hand by rotating the flywheel with our hands. Matt wanted to get back to working on his car, so, after he left, I mounted the transmission to the engine and installed the starter. I climbed into the cockpit, turned the key and the engine cranked HURRAH!!!!!!!!!!!!!!!!!!!!!!!!!!!!!!!!!!!!!!!!!!!!!!!!!!!!!!!!!!!!!!!!!!!!!!!!!!!!
http://s188.photobucket.com/user/jerhofer/media/1974%20Porsche%20914-6/12-15-18%20flywheel%205_zpsv4mn4crj.jpg.html
Is that sealer on the crank and flywheel mating faces,not seen that done before,I wouldn't
.Certainly an clearance issue they need to address as yours won't be the only motor it will happen to
 .
.Posted by: raynekat Dec 19 2018, 03:07 PM
Loving the Camaro....have a soft spot for that 1st Gen. Want a 69 one day.
Posted by: jerhofer Dec 19 2018, 03:43 PM
http://s188.photobucket.com/user/jerhofer/media/1974%20Porsche%20914-6/12-15-18%20flywheel%205_zpsv4mn4crj.jpg.html
[/quote]
Is that sealer on the crank and flywheel mating faces,not seen that done before,I wouldn't .
Certainly an clearance issue they need to address as yours won't be the only motor it will happen to .
[/quote]
It is just residue from the grease and the red loctite. I cleaned that up before installing the clutch.
Kennedy had let me know that they had occasionally had this issue. The flywheel was purchased back in 2012 so I would assume they have corrected it by now.
Well I found a few things today electrically. I checked the TPS wiring and discovered that I had reversed two wires. However, it is still not responding like it should. Richard suggested I remove it and see if it is mechanically working correctly.
As for my problem of having voltage on the Black/White sensor ground wires, when I removed the sensor plugs, the voltage would drop some with each removal. But it never went to zero. I called my son seeking advice. He said he thought the issue was a grounding problem on the ECU. I had run the ground wire from the ECU plug and one from the power wiring harness directly to the battery. Matt suggested running a wire from the block to the black/white wires. I did that and the voltage went away.
Thinking that the battery was not getting a good enough ground, I ran a battery ground wire directly from the battery to the block. That did not help. I put a call into Richard and, after explaining what I had done, he recommended doing a continuity check from the black white wire to each wire in the harness. I had soldered about six black/white wires together from the various sensors and had that connection exposed.
I put my negative lead there and tried the plug for the black/white wire first as it also had the gray/red wire that was a 5V lead. As I was going from pin to pin in the plug I was surprised to find that I did not have continuity on the black/white wire. That lump of black/white wires was only two inches away so the reading should have gone to zero. I found my terminal removal tool, inserted it into the plug and pulled the black/white wire to remove it. The wire pulled out without the terminal. I evidently did a bad crimp on that terminal. I crimped on a new terminal, fired everything up and I had no voltage on the black/white wire. Happiness ensued!!
Tomorrow I will remove that TPS sensor to see what it going on with it. Once I get that resolved, I need to put the wiring harness back together and make sure everything is working correctly.
Posted by: porschetub Dec 19 2018, 10:34 PM
ok that's fine,a wee lick of Loctite on the bolts is ok as its very common practice these days on more modern cars.
Hope you get your EFI issues sorted sounds like you are in good hands .
Posted by: JmuRiz Dec 20 2018, 08:37 AM
WOAH, that Camaro intake is sweeeeet!
Posted by: jerhofer Dec 20 2018, 03:33 PM
First thing this morning, I removed the TPS sensor and it appears to be operating correctly. After yesterday's continuity issue, I decided to do the same test on the TPS wiring. As I was pulling my plug from the ECU to the engine bay apart, the blue wire for the TPS pulled out of the plug.
That was the tipping point for me. I have never felt comfortable with having connectors between the ECU and the engine. My original reasoning for wiring it with connectors was for ease of removal of the engine. Unhook the connectors and have the wiring harness remain on the motor. I also did this because I thought access to the engine would be limited once the engine was in the car. Had I known how much access there is once the rear trunk lid is removed, I would have wired everything with the engine in the car. Also, it is easy to unplug the FI connectors from the engine.
So today I cut off all of those plugs and began wiring it direct. In all of my years of working on electrical wiring, I have always felt most comfortable when I am soldering connections. While I have had crimps fail (as in two plugs here in two days), I have never had a soldered connection fail. I know there are those who worry about making the wires more brittle when soldering, but, as I said, I have never had a solder connection fail. I have most of the wires connected but I personally ran out of gas around 3:00. I will finish it up in the morning and see if everything checks out.
I don't know what Richard's schedule is for the holidays. I may or may not get the car started before I leave for Florida. Hopefully I will be calling him tomorrow to start the car.
Posted by: jerhofer Dec 25 2018, 08:35 PM
Merry Christmas to everyone!
Last Thursday I was ready to start the car. I called Richard and had everything ready. I turned the ignition to start and was rewarded with the sound normally associated with a dead battery. Whrr, whrr, whrr!
Except the battery wasn't dead. I had just charged it a couple days before. I changed the cable from the battery to the starter with a heavier gauge wire. Same result. I then bought a new battery just to make sure. Same result. I was able to return the battery. After talking with my son, we wondered if the fact that the transmission had been painted might be an issue with the starter not making a good ground. I cleaned off all of the paint. Same result. I then used a jumper cable to run a direct wire from the negative cable of the battery to one of the starter mounting bolts. Same result. I mounted the other starter to no avail.
Now I wonder if we had sufficient clearance on that flywheel. With the spark plugs out of the engine, we could turn the flywheel by hand, although we did not try to turn it 360 degrees. I suspect the transmission will have to come out when we return from Florida. Before I do that, I will buy a new starter just to make sure that the starter isn't the issue.
This has been the most frustrated I have ever been with a project car. Getting away from it for some time will not break my heart. When I get back I will try again to get it going. In the meantime, the car is on the ground and I will be getting the motorhome ready for our trip.
BTW, Fiat did replace the motor in our car. The problem was a defective cylinder wall casting that did not allow the rings to seal. It was an entirely new motor including the turbo. We picked the car up last Friday. Hendrick Fiat in Concord, NC did a fantastic job of getting the motor here and installed so we could tow it behind the motorhome to FL.
Posted by: ge9146 Jan 12 2019, 05:22 PM
Sorry to hear that the little blue car misbehaved so much that you had to give it a "Time Out". Perhaps we can arrange to give it some sort of a talking to while you are staying warm.
Hopefully it will have learned it's lesson and behave properly when you get back to it.
All the Best and Happy New Year.
Ed
Posted by: jerhofer Jan 14 2019, 08:41 PM
Sorry to hear that the little blue car misbehaved so much that you had to give it a "Time Out". Perhaps we can arrange to give it some sort of a talking to while you are staying warm.
Hopefully it will have learned it's lesson and behave properly when you get back to it.
All the Best and Happy New Year.
Ed
Happy New Year to you as well. We have had great weather so far. I have already attended two car shows. Jim and Judi are staying near here. The four of us toured the REVS Institute last week. This is the third time I have been there and it gets better every time. The first time was back in January 1990 not long after Collier's had acquired Brigg's Cunningham's collection. It was nearly all Porsche then but they now have a wonderful variety of racing and sports cars dating back to the twenties. Well worth the visit if anyone is in the Naples area.
Speaking of Naples, there is a big car show there next month that I am told is phenomenal. Looking forward to that. Also, there is a club race at Sebring the first weekend of February. I am planning on driving over there to spectate for a day. I drove in their DE group during the 1997 club race and am interested to see how the cars (and trappings) have escalated since then.
Matt is taking the 911Tesla apart to prepare it for painting next month. A friend of mine, who painted a couple of cars for me, is doing the work. I am sure he will do a great job.
Posted by: jerhofer Feb 28 2019, 08:38 PM
Finally back at working on the car. I had purchased a new ignition switch at the Fort Myers Porsche dealership. Today I installed it. First up was removing the steering wheel followed by removing the knee pad. The knee pad is fastened with a small screw on each end and five bolts on the bottom.
https://s188.photobucket.com/user/jerhofer/media/1974%20Porsche%20914-6/2-28-19%20kneepad_zpshpt0actj.jpg.html
After unplugging the wiper and turn signal switch plugs, i removed the four small screws and pulled the switch out of the steering column.
http://s188.photobucket.com/user/jerhofer/media/1974%20Porsche%20914-6/2-28-19%20wiper%20switch%205_zpshaz9yvss.jpg.html
http://s188.photobucket.com/user/jerhofer/media/1974%20Porsche%20914-6/2-28-19%20wiper%20switch%204_zpsjoqaxzcr.jpg.html
http://s188.photobucket.com/user/jerhofer/media/1974%20Porsche%20914-6/2-28-19%20wiper%20switch%202_zpslm9o3qwh.jpg.html
http://s188.photobucket.com/user/jerhofer/media/1974%20Porsche%20914-6/2-28-19%20wiper%20switch_zpsko2788uf.jpg.html
Now the two screws for the small housing that retains the ignition switch can be removed. There is a small spring that one has to be sure not to lose.
http://s188.photobucket.com/user/jerhofer/media/1974%20Porsche%20914-6/2-28-19%20Ignition%20switch%207_zpsqk6j9cyx.jpg.html
http://s188.photobucket.com/user/jerhofer/media/1974%20Porsche%20914-6/2-28-19%20Ignition%20switch%206_zpszdh7kcyo.jpg.html
After unplugging the ignition switch, the key can be used to remove the switch housing.
http://s188.photobucket.com/user/jerhofer/media/1974%20Porsche%20914-6/2-28-19%20Ignition%20switch%204_zpsvq9bxdt6.jpg.html
http://s188.photobucket.com/user/jerhofer/media/1974%20Porsche%20914-6/2-28-19%20Ignition%20switch%203_zpsfizxwjfl.jpg.html
http://s188.photobucket.com/user/jerhofer/media/1974%20Porsche%20914-6/2-28-19%20Ignition%20switch%202_zpsmvf3cuuf.jpg.html
Posted by: jerhofer Feb 28 2019, 09:03 PM
Now I could take the ignition switch housing to the bench to remove the switch. That is done by first removing the very small set screw. I did not see any obvious signs of faiure on the switch so I doubt installing the new switch will solve my problem.
https://s188.photobucket.com/user/jerhofer/media/1974%20Porsche%20914-6/2-28-19%20Ignition%20switch%2010_zpsqlmn5cla.jpg.html
http://s188.photobucket.com/user/jerhofer/media/1974%20Porsche%20914-6/2-28-19%20Ignition%20switch%2012_zpsy9mfplxc.jpg.html
http://s188.photobucket.com/user/jerhofer/media/1974%20Porsche%20914-6/2-28-19%20Ignition%20switch%2011_zpsgijxqozh.jpg.html
Before re-assembling everything, I decided that I had to clean the vents at each end fo the knee pad. After removing the vents from the knee pad, I removed the swivel part and then disassembled each of those. Now I could clean everything.
http://s188.photobucket.com/user/jerhofer/media/1974%20Porsche%20914-6/2-28-19%20kneepad%2010_zpsvvvze1bs.jpg.html
http://s188.photobucket.com/user/jerhofer/media/1974%20Porsche%20914-6/2-28-19%20kneepad%2014_zpsalic4kiv.jpg.html
http://s188.photobucket.com/user/jerhofer/media/1974%20Porsche%20914-6/2-28-19%20kneepad%2012_zpsde7icpho.jpg.html
http://s188.photobucket.com/user/jerhofer/media/1974%20Porsche%20914-6/2-28-19%20kneepad%208_zpsckgsp458.jpg.html
http://s188.photobucket.com/user/jerhofer/media/1974%20Porsche%20914-6/2-28-19%20kneepad%203_zps36sqynbv.jpg.html
http://s188.photobucket.com/user/jerhofer/media/1974%20Porsche%20914-6/2-28-19%20kneepad%2011_zps9uzmh2qv.jpg.html
http://s188.photobucket.com/user/jerhofer/media/1974%20Porsche%20914-6/2-28-19%20kneepad%202_zpsa7wxemg3.jpg.html
Last summer I had taken both of the starters that came with the car to a local electrical shop to have them checked out. They were both good. My son wondered if I had damaged the starters by trying to start the car when the flywheel was rubbing the block. So I took one of them back to the electrical shop to have it checked. I did buy a new Tilton high torque starter but I am leery of using it until I know why I am having this starting issue. I don't want to damage it. With this switch installed, I can put the car back on the lift and begin to troubleshoot some more.
Posted by: bbrock Mar 1 2019, 08:37 AM
Great tutorial on replacing that switch!
Posted by: jerhofer Mar 9 2019, 02:34 PM
Great tutorial on replacing that switch!
Thanks.
Posted by: jerhofer Mar 9 2019, 03:10 PM
The Sweet Sound of Success
https://youtu.be/QiGgNXFAq1I
This past Monday I traveled to Denver, NC to buy some parts from John Forbes of Black Forest Racing. John has been working on and racing 914's almost from the beginning. After buying the parts, I related to him the starting issue I was having. His best guess was that I still had a clearance issue.
He also told me that on 914's with 911 motor conversions with a 901 tranny, he has always used a stock flywheel and a clutch from Patrick Motorsports. Since I am so frustrated with the Kennedy Engineering flywheel, I decided to take John's advice and order the parts from Patrick. While I was waiting for the parts to arrive, I removed the transmission (again) and removed the flywheel. It was still rubbing on the engine block.
https://s188.photobucket.com/user/jerhofer/media/1974%20Porsche%20914-6/2-9-19%20KEP%20flywheel_zpsflcfchin.jpg.html
http://s188.photobucket.com/user/jerhofer/media/1974%20Porsche%20914-6/2-9-19%20KEP%20flywheel%202_zpswtchzcj7.jpg.html
While talking to Brett at Kennedy about this issue last December, he had told me that, if I sent the flywheel to him, he would make sure it was to spec and send it back, free of charge. The flywheel is on the way to him.
Meanwhile, the Patrick Motorsport parts arrived late yesterday. I installed everything today and the result is what you heard in the video above. That sound was created by the new Tilton high torque starter. I didn't have the fuel pump hooked up as I wasn't actually trying to start the motor. That will come on Monday once I get with Richard Clewett for the initial startup. But I am relieved to have the starter operating as it should.
https://s188.photobucket.com/user/jerhofer/media/1974%20Porsche%20914-6/2-9-19%20starter_zpszjrpukdt.jpg.html
http://s188.photobucket.com/user/jerhofer/media/1974%20Porsche%20914-6/2-9-19%20starter%202_zpscokhpheo.jpg.html
BTW, Patrick balance the entire flywheel and pressure plate assembly. The pressure plate had a "Made in Germany" on it. All I had to do was line up the yellow lines.
http://s188.photobucket.com/user/jerhofer/media/1974%20Porsche%20914-6/2-9-19%20pressure%20plate_zps0tq7repa.jpg.html
Earlier in the week I also addressed an oil leak. When I cleaned the bottom pan, I found oil in the left rear corner of the pan. I also found oil dripping on the arm of the lift. It was dripping off the rocker panel cover. When I looked up towards the tank, I could see oil on one of the fittings. In the photo below, you can also see a slight twist in the line.
http://s188.photobucket.com/user/jerhofer/media/1974%20Porsche%20914-6/2-6-19%20oil%20leak%208_zps3v1szepj.jpg.html
To get to that fitting, I had to remove the rocker cover. Even then, there was very little room to work. My best guess is that the line was installed to the tank prior to the tank installation. I was finally able to get the wrench on it but had to use a pry bar to apply pressure.
http://s188.photobucket.com/user/jerhofer/media/1974%20Porsche%20914-6/2-6-19%20oil%20leak%207_zpsh0dzwnpi.jpg.html
I wasn't very happy with how the lines ran to the engine as the entire assembly was just hanging there. I found a hose clamp that worked and then loosened all of the fittings to relieve that twist in the line.
http://s188.photobucket.com/user/jerhofer/media/1974%20Porsche%20914-6/2-6-19%20oil%20leak%205_zpsmcgw4zle.jpg.html
http://s188.photobucket.com/user/jerhofer/media/1974%20Porsche%20914-6/2-6-19%20oil%20leak%203_zpsrz8uuqnr.jpg.html
I also rotated the line up where it runs over the top of the heat exchanger as it was nearly touching the exchanger.
http://s188.photobucket.com/user/jerhofer/media/1974%20Porsche%20914-6/2-6-19%20oil%20leak%204_zpsqfqstwxi.jpg.html
Posted by: ge9146 Mar 9 2019, 08:37 PM
Hallelujah!!!! 
Great to hear of your progress!!!
Posted by: jerhofer Mar 11 2019, 08:46 PM
For the first time in thirteen and a half years, the engine ran today...but not well...yet! I called Richard Clewett and, after him hooking up to my computer, he told me to start it. It would not fire. He said there was a problem with the crank sensor signal. He then asked if I was using a high torque starter. Upon hearing that I was, he said that they don't have any noise suppression and that they muddy up the crank sensor signal to the point where the computer will act as if it in not getting any signal. Thus, the engine will not start.
So I hung up and installed the stock starter. I tried it just before I called him and it started!! After getting him back on the phone, I got it to start. It was idling roughly, but idling. He was looking at the readouts when I decided to give it some gas to see if it would smooth out. It died and then would not restart. His conclusion was that we still had an issue with something messing with the crank sensor signal. His solution was for me to install a 1K ohm-1/2 watt resistor between the red and black wires of the crank sensor.
I called around and could not find anyone local selling resistors. Times like this are when we miss Radio Shack!! So I called my son and asked him where he would go to get a resistor. A little later he texted me back that they had a 1K ohm-1/8 watt resistor there at TRD. Since the cranks sensor signal is very low voltage, he thought it would work. It just so happens that he was coming to the house after work so he brought two with him.
Last Saturday I dd a Craigslist search for some garage cabinets. I came across an ad for four cabinets. Three were 78" long, 30" high and 12" deep. Another cabinet was 52" long. They were taken out of a medical clinic and were in excellent condition. Best of all, they were free as they wanted them out of their sun room. On Sunday, I hooked up my little utility trailer to the Audi and we picked them up. I plan on using two of the 78" cabinets while I gave the other two to Matt. Which is why he was coming to the house.
https://s188.photobucket.com/user/jerhofer/media/1974%20Porsche%20914-6/3-11-19%20cabinets_zpsjhchvcsb.jpg.html
http://s188.photobucket.com/user/jerhofer/media/1974%20Porsche%20914-6/3-11-19%20cabinets%202_zpsp3ts3i66.jpg.html
Before we did anything with the cabinets, we began discussing the issue with the car. He told me that he could not see why a starter would dirty up a crank signal. I told him what had transpired earlier and, after a bit, he said, let's see it we can get it to start. I cranked it over and it started. Again the idle was very rough. Back in 2006 Matt had built a fuel injection system from scratch for his Camaro. He used an earlier version of the TEC ECU so he was familiar with the readouts. He did all of his own tuning on that car.
The Manifold Air Pressure (MAP) readings jumped out at him as he thought they were way too high and causing the computer to call for lots of fuel. We could tell it was running very rich. It was five o'clock here, but only two on the west coast. Richard was in and he and Matt were soon discussing the readings. He told Matt that the cams were too radical for the MAP sensor to work. He had Matt disconnect the main hose and plug it. He also wants me to remove all of the hoses that run to the throttle bodies and install a bolt in those places. The MAP will stay in the system but will become a barometer.
He wanted us to back out idle screws all the way and then screw them in 3/4 or a turn. And then we could work on the idle. I started the car and Matt went back and forth adjusting the idle but it did't seem to make any difference. It was idling at 500 rpm. He had me give it some more gas and then, when I let off, the idle went way up. We shut it down at this point and told Richard we would call him back once we had the idle set. After disconnecting the linkage, Matt started over and, again, it did not seem to make and difference where he set the idle screw. He then noticed it was running very lean. So he richened it up and the idle immediately went up quite a bit. Now, when he made an adjustment, something actually happened. This is where we left it for today. Tomorrow I am going to go through Richard's procedure for balancing the intakes with a sync meter. Once I have done that, I will be calling Richard back to have him make final adjustments.
I had a small drop of fuel near the fuel pump area that I need to look into. Also, that original oil leak is still there now that the oil was under pressure. I will see if I can figure out some way to tighten that line without removing the tank. Matt looked at it and said, "Good luck with that!"
Posted by: mepstein Mar 11 2019, 09:49 PM
I purchased a really expensive 32mm crowsfoot to try to tighten that line. No luck. I had to pull the tank.
Posted by: jerhofer Mar 13 2019, 01:37 PM
I purchased a really expensive 32mm crowsfoot to try to tighten that line. No luck. I had to pull the tank.
That's encouraging!!! I might buy a cheap wrench and grind it down to fit. On the other hand, is it a real 911 engine if it doesn't leak???
Posted by: jerhofer Mar 13 2019, 02:02 PM
Yesterday I removed all of the MAP hoses and the manifold. Sure cleaned up the engine bay.
http://s188.photobucket.com/user/jerhofer/media/1974%20Porsche%20914-6/11-29-18%20engine%2013_zpsj4yzubim.jpg.html
https://s188.photobucket.com/user/jerhofer/media/1974%20Porsche%20914-6/3-13-19%20MAP%20hoses%202_zpsxytvaitm.jpg.html
http://s188.photobucket.com/user/jerhofer/media/1974%20Porsche%20914-6/3-13-19%20MAP%20hoses_zpsmeo9mwun.jpg.html
Today I installed the resistor between the red and black wires for the crank fire trigger, as Richard suggested. I unplugged the main plug at the ECU and found the wires there.
http://s188.photobucket.com/user/jerhofer/media/1974%20Porsche%20914-6/3-13-19%20resistor_zpsiuk1nl8u.jpg.html
Richard has a great video on setting adjusting the idle and airflow on initial startup.
https://www.youtube.com/watch?v=LGjN3wrGi0g
Following these instructions I got the engine to idle and the air flow readings on the synchrometer to be even.
http://s188.photobucket.com/user/jerhofer/media/1974%20Porsche%20914-6/3-13-19%20synchromoter_zps1klkz28t.jpg.html
However, I was still not happy with the sound of the engine and the fact that is was spitting. I called Richard back and had him listen to the motor. It kind of sounds like an old tractor motor. After shutting it off, he asked if I had an infrared heat gun. I do have one and he suggested taking a reading on each of the exhaust ports. Cylinder one was about 50 degrees cooler than the other five. So we have an issue there. It was late enough in the day that I did not do any more work today.
I had double checked to make sure I had the correct wires run to each of the injectors and the COP's. First thing tomorrow I am going to open up the cylinder one plugs to make sure the leads are seated properly and that I do not have a broken wire. Assuming they are OK, I will pull the plug to see what i have there. I can then check for spark. My son has a tester for the fuel injector plugs but he is currently in Sebring, FL doing some track testing for TRD. He will be back late Friday. He has to do some last minute preparations on getting his car ready for the body shop, as they are going to pick up the car Sunday morning. If I haven't found anything by then, he is going to bring his tester over. He also has a leak down tester which we may use on cylinder one.
So, close, but no cigar yet!!!
Posted by: jerhofer Mar 14 2019, 02:18 PM
Before I began troubleshooting cylinder one, I worked on the two oil leaks. Both were at connections to lines. The one on the bottom was easy to get to, but I needed a 1/3/16 wrench for one side of the AN fittings. I didn't have a wrench that size. I was about to go uptown to buy one when I wondered if my old 911 oil line wrenches might work. I dug them out and, sure enough, the 27mm and 30mm wrenches fit perfectly. After tightening the center line, it was time to figure out how to get the 27mm wrench on that fitting under the tank. After grinding off a significant amount on the 27mm wrench, I was finally able to make it work. With it in place, I used the 30mm to tighten the line. I ran the motor later one while doing the troubleshooting and both lines were dry after I shut off the motor.
https://s188.photobucket.com/user/jerhofer/media/1974%20Porsche%20914-6/3-14-19%20oil%20line%20wrench%204_zpsqqxniq4m.jpg.html
http://s188.photobucket.com/user/jerhofer/media/1974%20Porsche%20914-6/3-14-19%20oil%20line%20wrench%203_zpss15jnp9n.jpg.html
http://s188.photobucket.com/user/jerhofer/media/1974%20Porsche%20914-6/3-14-19%20oil%20line%20wrench_zps70mhceev.jpg.html
http://s188.photobucket.com/user/jerhofer/media/1974%20Porsche%20914-6/3-14-19%20oil%20line%20wrench%202_zpsouln6kyl.jpg.html
On cylinder one, I pulled the injector and COP plugs. I could not see any obvious wiring issues. The terminals appeared to be seated properly and tugging on the wires did not reveal anything loose. I pulled the spark plug and it appeared to have been firing.
http://s188.photobucket.com/user/jerhofer/media/1974%20Porsche%20914-6/3-14-19%20spark%20plug_zpsvi1dgvkh.jpg.html
I checked the voltage on the COP plug and it was correct. My son has a test light for the injector plug but he told me I could make one by using a small wattage bulb. I soldered two leads on to the bulb. I tested the bulb to make sure it was working.
http://s188.photobucket.com/user/jerhofer/media/1974%20Porsche%20914-6/3-14-19%20test%20light%202_zpsl2dzecq9.jpg.html
http://s188.photobucket.com/user/jerhofer/media/1974%20Porsche%20914-6/3-14-19%20test%20light_zpsclvtkc7n.jpg.html
When I pulled the injector plug while the engine was running, the idle dropped. I inserted the test lamp leads and there was a faint flickering of light on and off. This is a very low voltage signal so I wasn't expecting the bulb to shine brightly. Based on that test and seeing the plug, I feel there is both fuel and spark in the cylinder.
I then called John Forbes at Black Forest Racing in Denver, NC, about 50 miles from here. After relating the issues, he recommended doing a compression test. My son has a tester and we will do that this Sunday. There is a definite knock on that side so I am afraid that there is something wrong internally. If we discover an issue with the compression test, I will be taking the car to John to have him work on it. Internal engine work is above my pay grade!!
I talked to Ed Scott about what exactly happened when the transmission broke at Grattan over thirteen years ago. He said it was a big non-event for the motor as he went from third to fourth and no one was home. There was no over rev on the motor. So the issue is a mystery.
On the plus side, near the end of our at least half hour conversation, I remarked to Ed that it was apparent that he was feeling better. I could tell a huge difference in his voice from the last time we talked. He reported that sometime in December of January, a turning point was reached and he began to have a lot more energy. He has been doing rehabilitation exercizes and his leg muscles have begun responding a bit. He's not sure what happened but is grateful for the extra energy. I told him that, based on how long it has taken me to get the car back together, he might be able to drive it once it is running well. Very good news on his health!!!
Posted by: jerhofer Mar 16 2019, 02:12 PM
To try to eliminate various items, I switched the coil packs on cylinder one and two with no difference. I then switched the spark plugs, again, with no difference. The cylinder two spark plug looked pretty much the same as cylinder one. I also noticed a new oil leak on the bottom of the number one jug.
https://s188.photobucket.com/user/jerhofer/media/1974%20Porsche%20914-6/3-16-19%20cyl%202%20plug_zpszpkt4uuo.jpg.html
http://s188.photobucket.com/user/jerhofer/media/1974%20Porsche%20914-6/3-16-19%20oil%20leak%202_zps9r927oz0.jpg.html
I talked to John Forbes yesterday and he can take the car anytime after Tuesday. He is going to call a guy he has used to haul cars and have him pick up the car. My buddy came down this morning and we installed the trunks and engine lids. I also installed the hats on the throttle bodies and the cover for the steering rack. It is ready to go. Everything is fixable...at a price!!!
http://s188.photobucket.com/user/jerhofer/media/1974%20Porsche%20914-6/3-16-19%20engine%20bay_zpsuuhlimrh.jpg.html
http://s188.photobucket.com/user/jerhofer/media/1974%20Porsche%20914-6/3-16-19%20front%20cover%202_zpsrnafq87y.jpg.html
https://s188.photobucket.com/user/jerhofer/media/1974%20Porsche%20914-6/3-16-19%20exterior%203_zpsss3i33cs.jpg.html
http://s188.photobucket.com/user/jerhofer/media/1974%20Porsche%20914-6/3-16-19%20exterior%202_zpsgr35rgvt.jpg.html
http://s188.photobucket.com/user/jerhofer/media/1974%20Porsche%20914-6/3-16-19%20exterior%205_zpswgqswdy3.jpg.html
Posted by: mepstein Mar 16 2019, 02:27 PM
Pretty car. I bet it looks great in the sun.
Posted by: jerhofer Mar 16 2019, 02:37 PM
Pretty car. I bet it looks great in the sun.
Thanks. It hasn’t seen much sun for the past nearly fourteen years!
Posted by: jerhofer Mar 29 2019, 07:58 PM
A BIG FAT DUNCE CAP FOR ME!!!
This past Tuesday, John Forbes and some friends picked up the car in an enclosed trailer and took it to his shop, Black Forest Racing, in Denver, NC. The next day he said he had found the problem and sent me this photo.
https://s188.photobucket.com/user/jerhofer/media/1974%20Porsche%20914-6/3-29-19%20Black%20Forest%2010_zpsllf5uory.jpg.html
At first I couldn't see what was wrong. And then it dawned on me. I had bolted the oil line for the chain tensioner to the boss rather than to the hole to the right which was the chain tensioner. Which explains the engine sounding like a tractor engine and making weird noises. I had removed that line so that I could drill the hole for the head temp sensor. What really galls me is that I really struggled installing the heater hose because that line was in the way. Bolting it to the boss made the line sit up higher causing the interference. Hence the dunce cap for me!!
I drove over to John's shop today. He had removed the timing chain cover and did not find any metal shavings are any indication of damage. However, since the tensioner was bouncing around, he is replacing it. He feels pretty good about that being the only issue but, once the car is back together, he is going to do a leak down test to make sure there isn't still a problem in cylinder one. He is also going to check the cam timing. I apologize for the photo below as I had to use my phone in a low light situation.
http://s188.photobucket.com/user/jerhofer/media/1974%20Porsche%20914-6/3-29-19%20Black%20Forest%204_zps1newsaun.jpg.html
http://s188.photobucket.com/user/jerhofer/media/1974%20Porsche%20914-6/3-29-19%20Black%20Forest%206_zpsjcmkfpww.jpg.html
John's son works with Richard Clewett regularly. Once they have everything fixed and the engine back in the car, they will consult with Richard while they run the car on their dyno.
John has been working on 914's since the beginning. Everywhere you looked you saw either 914 cars or parts. They had a beautiful 914 with a 3.2 Carrera motor with flares and finished in Gulf Blue and orange. Beautiful car.
http://s188.photobucket.com/user/jerhofer/media/1974%20Porsche%20914-6/3-29-19%20Black%20Forest%202_zpst3ntrwbs.jpg.html
http://s188.photobucket.com/user/jerhofer/media/1974%20Porsche%20914-6/3-29-19%20Black%20Forest%207_zpssiitalzo.jpg.html
http://s188.photobucket.com/user/jerhofer/media/1974%20Porsche%20914-6/3-29-19%20Black%20Forest%209_zpsegxw6juz.jpg.html
http://s188.photobucket.com/user/jerhofer/media/1974%20Porsche%20914-6/3-29-19%20Black%20Forest%205_zpsquhsix7t.jpg.html
http://s188.photobucket.com/user/jerhofer/media/1974%20Porsche%20914-6/3-29-19%20Black%20Forest%208_zpsmlfd4xem.jpg.html
Today I received the resurfaced flywheel back from Kennedy Engineering. He had told me that it would look radically different. See for yourself with the first photo being the rear of the flywheel after I removed it from the car and the bottom photo being the current configuration.
https://s188.photobucket.com/user/jerhofer/media/1974%20Porsche%20914-6/2-9-19%20KEP%20flywheel_zpsflcfchin.jpg.html
http://s188.photobucket.com/user/jerhofer/media/1974%20Porsche%20914-6/3-29-19%20KEP%20flywheel_zps6bmunqob.jpg.html
Posted by: jerhofer Apr 8 2019, 03:05 PM
Great news today. John Forbes, of Black Forest Racing, called me this afternoon to tell me the motor is running, and running well. He did a leak down test and it was 2% on all cylinders. According to John, the leak down test should be done on a warm motor. Since he wanted to know what he had before he put the motor back in the car, he did the test on a stone cold motor. He thinks the leak down percentages would be closer to zero had the engine been warm. He said the engine sounds great and is very responsive.
His son is the computer guy who runs the dyno. He is out of town this week so it will be next week before we can put it on the dyno.
After installing the shifter, it was really stiff. John noticed that as well and they fixed that. He said it now shifts well. Now that the motor is back in the car, John is having the State Police come to his shop to inspect it since it has an out of state title. Once he has that done, I will be driving there (about fifty miles) to pick up the paperwork and get it registered. And...to hear that motor run!!!
Posted by: ge9146 Apr 8 2019, 08:57 PM
Great News!!
Posted by: jerhofer Apr 12 2019, 02:50 PM
I visited John's shop today to give him some money and to, hopefully, drive the car. Since is was raining, we passed on the driving but I did take a couple videos of the engine running. It sounded great!!
https://www.youtube.com/watch?v=_gNGAkvWNtc
https://www.youtube.com/watch?v=H3OlT5zP8WI
John has been driving it as he is fine tuning the shifter adjustments. He says it is very strong as currently configured. Should be even stronger after some fine tuning. It is difficult to start when cold but John's son, Cody, says it needs to have the fuel enrichment increased when cold. Cody will be back next week to fine tune it and then do some dyno runs. He typically videos the dyno runs so I should have some more video next week. I may have to hook up the Go-Pro for the drive home!!
John commented that first and second gear are very close. Ed had the transmission geared this way for autocrossing. It effectively makes it a four speed as you can take off in second gear. Second, third, and fourth are very close while fifth is an overdrive gear.
Posted by: 914forme Apr 12 2019, 06:16 PM
Sounds like a blast to me. 2nd gear starts are great for auto-x
Cold enrichment is what makes a tune seem like an OEM tune, it is hard to get just right.
Glad to see it wrapping up and you getting the opportunity to soon.
Posted by: ge9146 Apr 12 2019, 07:45 PM
That really sounds sweet!!!!! It certainly has been a long and educational journey.
You might want to check your mirrors during your test runs for any potential flashing lights.
The dyno runs should be particularly interesting to compare with some results from Bruce Anderson's book. John Swanson, who originally built the engine used Bruce's advice when choosing the components. On paper it should be pretty stout.
Looking forward to great reports and big smiles! 
Posted by: jerhofer Apr 12 2019, 08:07 PM
That really sounds sweet!!!!! It certainly has been a long and educational journey.
You might want to check your mirrors during your test runs for any potential flashing lights.
The dyno runs should be particularly interesting to compare with some results from Bruce Anderson's book. John Swanson, who originally built the engine used Bruce's advice when choosing the components. On paper it should be pretty stout.
Looking forward to great reports and big smiles!
Our friend Harry has a similar engine with this injection in his race car. One difference is that he has 50mm throttle bodies compared to my 46’s. His dynoed at 236hp at the wheels.
Posted by: jerhofer May 1 2019, 02:33 PM
No car yet. John's son Cody returned from his trip and dyno tuned the engine last week. He did not make a power run which he is planning to do this week. While tuning it, he was having some issues with the left bank and right bank having different fuel mixtures. There is only one O2 sensor so he wasn't sure what the problem was. So he called Electromotive, the makers of the computer. They worked it out and now everything is as is should be.
There have been a couple other issues that John and Cody have worked on. One was the tach not working. Turns out I did wire it correctly but the signal put out by the computer was too weak to work with a factory tach. John has an amplifier adapter on the way to remedy that.
Before I took the car to John's shop, there was a small leak on the transmission. Running the car revealed an even larger leak on the left side around the output seal. John has fixed those as well. Brad Mayeur built that transmission back in 2006. I discussed the leaks with him and he said he was having a problem with the rear case leak at that time. He said he would pay for the repair. He was not having an issue with the output seals at that time but would talk to John about it. Not too many people would back up work they did 13 years ago!! Tells you a lot about Brad's character.
The temperature gauge was also not working and John is tracking that down.
The most vexing issue has been the shifter. John worked for days trying to get the aftermarket shifter to work. Despite many adjustment attempts, he could either have 2nd and 4th or 1st and 5th, but never all of them. After some discussions, we decided to try a completely stock shifter. Same results. John had never run into this situation before. So he shined a light down the tunnel and used a mirror to see if there were any obstructions. There was one. When I installed the right seat belt receptacle, I had used a bolt that was too long. It protruded into the tunnel just enough to keep the rod from moving far enough to the right to engage gears. In all of his time working on 914's, John had never run into this before. At out last discussion, he was going to adjust the stock shifter to make sure everything worked so he could give the car back to Cody to do the dyno runs. Once that is done, he will re-install the aftermarket shifter and see how that works.
Despite this has being an expensive exercise, I am glad I had to take the car to John. I would have gone crazy trying to figure out the shifter and the tach. Plus I now have the EFI properly tuned. I am excited about getting the car back. May not be this week as they are very busy there with race prep for their customers. Plus we are going the Outer Banks for a week in our motorhome and leaving this Sunday.
Posted by: mepstein May 1 2019, 03:20 PM
The seatbelt bolt is a pretty common issue. I don’t know why people change out the bolts but it happens often. Either that or a repaired clutch tube ends up interfering with the shift rod. Glad you and John got it figured out.
Posted by: jerhofer May 1 2019, 03:58 PM
The seatbelt bolt is a pretty common issue. I don’t know why people change out the bolts but it happens often. Either that or a repaired clutch tube ends up interfering with the shift rod. Glad you and John got it figured out.
I had all of the belts out when I replaced the carpet.
Posted by: jerhofer May 25 2019, 07:55 PM
And then there were more problems!
John works on the air cooled motors while son Cody works with modern electronics. Due to a miscommunication, John had told me that Cody had the issues worked out on the fuel injection. That wasn't the case. He was still having problems tuning it. It was not responding well to changes he made on the setup and it was till spitting back through the stacks on part throttle. At wide open throttle it was looking pretty good but there were issues with the transition on part throttle. Cody had spent quite a bit of time conversing with Richard Clewett about the issues but they could not get it to respond the way it should.
This prompted Cody and John to begin looking at the overall health of the motor. They had done a leakdown test prior to installing the motor and it was good. They decided they should do a compression test. Cody got about 120 and John read about 130 on each of their respective compression testers. As their gauges were far from new, they each decided to order a new compression tester from Snap-On so they could check it again. This was on Monday a week ago. The gauges were to come in on Wednesday.
The car had come with a large box of records which I had gone through nearly a year ago when I first got the car. John and Cody's issues with spitting and not having the power they thought the engine should have sounded familiar. I dug through the records and found some documents showing that the original builder of the motor had these very same issues. Below is a letter from him to Ed Mayo in Dallas concerning these issues along with a dyno report showing only 125hp at the wheels. Also below is the bill from Ed Mayo outlining some of the things he found. None of these were going to restore lots of power but, evidently, made it better.
https://s188.photobucket.com/user/jerhofer/media/1974%20Porsche%20914-6/5-24-19%20dyno%203_zpsmjgcv6cu.jpg.html
http://s188.photobucket.com/user/jerhofer/media/1974%20Porsche%20914-6/5-24-19%20dyno%202_zpsfaccvrtg.jpg.html
http://s188.photobucket.com/user/jerhofer/media/1974%20Porsche%20914-6/5-24-19%20dyno_zpswsqj3cb4.jpg.html
I had some business to take care of near John's shop so I headed there with these documents. Upon reading them, John thanked me for bringing them as there were going out of their minds trying to tune the car. Shortly, the Snap-On truck arrived and John immediately did a compression test. The new gauge showed 135. John commented that not only was it low but the way it moved the needle on the gauge was telling. Normally it jumps to the reading where here it was a somewhat gradual climb. He said it should be at least 150 and that his race motors will typically be 180.
John's best guess was that the car had the wrong pistons. I told him to do whatever he had to do to find out what was wrong. Cody and he were taking their 30's Ford roadster with a flathead V8 to a big car show in Maggie Valley, NC last weekend. so nothing happened on the motor until this week. John called me on Thursday to tell me that he was right about the pistons.
I drove over there Friday morning to give John some more money and to see what he had found. It is a little out of focus in the photo below but, when at top dead center, the piston is not flush with the top edge of the cylinder. It's not off my much but enough to make a big difference.
https://s188.photobucket.com/user/jerhofer/media/1974%20Porsche%20914-6/5-24-19%20engine%2013_zpsvq0tltse.jpg.html
The pistons are J&E marked 96P. They are in excellent shape as were the rings, which explains why the leakdown test was good.
http://s188.photobucket.com/user/jerhofer/media/1974%20Porsche%20914-6/5-24-19%20engine%205_zpszdveojaj.jpg.html
http://s188.photobucket.com/user/jerhofer/media/1974%20Porsche%20914-6/5-24-19%20engine%204_zpsrt3dmcs3.jpg.html
John talked to J&E about these pistons. The engine had been running very rich with the carburetors and they wanted to see one of the pistons cleaned up so they could check for numbers. There were no other numbers besides the 96P. One their current pistons there are numbers showing when it was made and other tracking information. Evidently they were not doing this back in 2002.
http://s188.photobucket.com/user/jerhofer/media/1974%20Porsche%20914-6/5-24-19%20engine%206_zpsjvels3e7.jpg.html
The cylinders looked great with the crosshatching still showing. The guy who had this car redone back in 2002 also built the motor. He had attended a class put on by Bruce Anderson and Jerry Woods and then built the motor. I believe it was his first attempt. John found some other disturbing items. One was the lack of a spacer on the chain sprocket at the chain tensioner on the right side. John had not had this side apart previously as my boo boo was on the other side. The first photo below shows what it looked like before they took it apart. The other photos show a spacer, from John's inventory, in place. John said that on the later cars the sprocket assembly was different with the part being built in such a way that no spacer was needed. John didn't recall this issue on the other side as would have noticed it.
http://s188.photobucket.com/user/jerhofer/media/1974%20Porsche%20914-6/5-24-19%20engine%2012_zpswbzu8xmb.jpg.html
http://s188.photobucket.com/user/jerhofer/media/1974%20Porsche%20914-6/5-24-19%20engine%2011_zpszo9gloj3.jpg.html
There was also an issue with the chain guides as there were five of one type and one of the other instead of them being evenly divided with uppers and lowers.
The rod bolts were stock but John said he would have used competition bolts and nuts on a motor putting out the power this one should. He also found the use of crush washers where wave washers should have been used. Because of all of these issues, he said the case should come apart so they can check everything. And that is where we are at today.
Posted by: jerhofer May 25 2019, 08:03 PM
While I was at the shop, I took the fan shroud with me. It has some paint issues that I had not addressed as I didn't want to tear down the motor to the extent needed to remove the shroud. I bought some very mild plastic bead for my bead blaster, turned down the air pressure and removed the old paint. After cleaning everything, I hit it with some primer. I will do a bit of sanding on that and then add the color coat.
http://s188.photobucket.com/user/jerhofer/media/1974%20Porsche%20914-6/5-24-19%20shroud%205_zpsacn07tqe.jpg.html
http://s188.photobucket.com/user/jerhofer/media/1974%20Porsche%20914-6/5-24-19%20shroud%204_zpsal90yvgd.jpg.html
http://s188.photobucket.com/user/jerhofer/media/1974%20Porsche%20914-6/5-24-19%20shroud%202_zpseiv6krpc.jpg.html
http://s188.photobucket.com/user/jerhofer/media/1974%20Porsche%20914-6/5-24-19%20shroud_zpslc1cdcyl.jpg.html
Posted by: mb911 May 25 2019, 08:20 PM
Sorry to hear about your troubles.. One note I thought I would point out is the chain ramps should be 5 of 1 type and 1 of the other.. So 5 black and 1 Brown..
Posted by: horizontally-opposed May 25 2019, 08:33 PM
http://s188.photobucket.com/user/jerhofer/media/1974%20Porsche%20914-6/3-16-19%20exterior%202_zpsgr35rgvt.jpg.html
http://s188.photobucket.com/user/jerhofer/media/1974%20Porsche%20914-6/3-16-19%20exterior%205_zpswgqswdy3.jpg.html
Man, this is a great-looking car. Color, flares, wheels, finishes, details...it all looks good.
Sorry to hear of your troubles—happens to more of these engines than people think, and your taking the time to document what happened may help many others. A friend had a 3.6 that wasn't making the power it should have...turned out a well-regarded engine builder got the cam timing very wrong. My six had to come back apart thanks to a high-tech oil breather that proved to be high tech but not so smart.
Hope you are back on the road, and with a healthy shove in the back, soon!
Posted by: mepstein May 25 2019, 08:55 PM
I'm no engine builder but the sprocket spacing is important. It has to be measured and adjusted until correct. And like John said, rarely do you use a stock rod bolt on a high performance engine. That engine should have 200+ rear wheel hp. I'm sure John will make it right.
Posted by: jerhofer May 25 2019, 08:55 PM
On the good news side, my son's car arrived at his house from the body shop. Adam, from Backyard Legends in Concord, NC, delivered it in his closed trailer. Adam has prepared cars for Amelia and does fantastic work. The paint quality cannot be seen in photos. It has to be seen in person. The complete bottom and the engine and trunk bays are painted with a matching color bedliner material.
Last summer Hendrick Porsche of Charlotte hosted a 70th birthday party for Porsche. Numerous cars were on display with one of them being a RSR that Adam had recently completed in a stunning orange.
http://s188.photobucket.com/user/jerhofer/media/1979%20Porsche%20911%20Tesla/orange%20RSR_zpszqhmnmx1.jpg.html
I struck up a conversation with Adam and told him about Matt's project putting the Tesla motor into a 1979 911. He was interested from the get go and said he wanted to be involved with the car. I put him and Matt together and the result is stunning. The first photo below shows the car as Matt bought it. It was a roller that had been flooded during Katrina. Matt had some rust repair to do before he could begin modifying it for the Tesla motor installation.
http://s188.photobucket.com/user/jerhofer/media/1979%20Porsche%20911%20Tesla/1979%20Porsche%20911%20roller_zpsdpv5w7gi.jpg.html
http://s188.photobucket.com/user/jerhofer/media/1979%20Porsche%20911%20Tesla/5-25-19%20matts%20car%2020_zps6hrl45px.jpg.html
http://s188.photobucket.com/user/jerhofer/media/1979%20Porsche%20911%20Tesla/5-25-19%20matts%20car%2019_zpsmiz078en.jpg.html
http://s188.photobucket.com/user/jerhofer/media/1979%20Porsche%20911%20Tesla/5-25-19%20matts%20car%2017_zpsq8iqoqew.jpg.html
http://s188.photobucket.com/user/jerhofer/media/1979%20Porsche%20911%20Tesla/5-25-19%20matts%20car%2015_zpsicovpyyx.jpg.html
http://s188.photobucket.com/user/jerhofer/media/1979%20Porsche%20911%20Tesla/5-25-19%20matts%20car%2013_zps8prw0k7m.jpg.html
http://s188.photobucket.com/user/jerhofer/media/1979%20Porsche%20911%20Tesla/5-25-19%20matts%20car%209_zpssgmul1cm.jpg.html
http://s188.photobucket.com/user/jerhofer/media/1979%20Porsche%20911%20Tesla/5-25-19%20matts%20car%208_zpswql8kzm2.jpg.html
http://s188.photobucket.com/user/jerhofer/media/1979%20Porsche%20911%20Tesla/5-25-19%20matts%20car%202_zpsgxtpdaxl.jpg.html
Posted by: jerhofer May 25 2019, 09:01 PM
Sorry to hear about your troubles.. One note I thought I would point out is the chain ramps should be 5 of 1 type and 1 of the other.. So 5 black and 1 Brown..
I may have misunderstood John and have what he told me reversed. I am surely no expert on building a 911 engine. That's why John has the car.
Posted by: ge9146 May 26 2019, 09:32 PM
Sorry to hear about more issues. I think you definitely have it at the right shop. I agree with upgrading the rod bolts, that is a good call.
While you have the fan shroud off, I suggest you have John take a look at the alternator. It seemed like there was always a whining noise near the fan and I was never sure if it might have been that the alternator bearings were an issue. It could have been noise from the fan since it is right behind you.
Matt's car looks fantastic.
Keep on keeping on. The blue car will indeed be a super car when you get it back on the road.
All the Best,
Ed
Posted by: jerhofer May 28 2019, 07:45 PM
Sorry to hear about more issues. I think you definitely have it at the right shop. I agree with upgrading the rod bolts, that is a good call.
While you have the fan shroud off, I suggest you have John take a look at the alternator. It seemed like there was always a whining noise near the fan and I was never sure if it might have been that the alternator bearings were an issue. It could have been noise from the fan since it is right behind you.
Matt's car looks fantastic.
Keep on keeping on. The blue car will indeed be a super car when you get it back on the road.
All the Best,
Ed
I passed your comment on to John and they will check it out. The good part about having John involved in building the motor, is that I feel confident it will be done correctly . Plus I will now know exactly what I have.
As I mentioned, Matt got the car back Saturday morning. We spent the afternoon seam sealing some of the panels he had added. I had to leave around four but a neighbor came over to visit that evening and helped Matt get the suspension on. He had Monday off for Memorial Day so he had two good days to work on it. Besides the suspension, the batteries, the motor and half the wring harness are now back in the car!!
https://s188.photobucket.com/user/jerhofer/media/1979%20Porsche%20911%20Tesla/IMG_1329_zpsmjxqmq6a.jpg.html
http://s188.photobucket.com/user/jerhofer/media/1979%20Porsche%20911%20Tesla/IMG_1328_zpsuhnmtwu0.jpg.html
Posted by: jerhofer Jun 12 2019, 03:19 PM
John's wife had surgery on her shoulder recently. Besides taking her in for surgery, he has had to take her in for rehabilitation. Also, his sister passed last week so he had a funeral to attend. I visited the shop today. John was gone with his wife but I did see the motor. It is nearly all the way apart. I left a message for him to call me when he gets a chance.
After working with the shroud, I decided it needed a fresh coat of gelcoat. I have it at a boat company to have that done. They are busy so I am at their mercy.
About seven years ago, I did a full body-off restoration on a '64 Corvette coupe. I did that entire project in nine months. And that was with me breaking my wrist about two months into the project resulting in my not being able to work on it for about six weeks. This 914 has been my most frustrating project to date. Everything is taking longer than I expected it to. One of these days it will be finished.
On the other hand, my son's 911 Tesla project is moving right along. He has it mostly complete. On Sunday the body shop guy came to Matt's house and we installed the doors, bumpers, hood, and deck lid. It looks fantastic!!
https://s188.photobucket.com/user/jerhofer/media/1979%20Porsche%20911%20Tesla/6-9-19%20911Tesla%20body%203_zpsc2ct2gq9.jpg.html
https://s188.photobucket.com/user/jerhofer/media/1979%20Porsche%20911%20Tesla/6-9-19%20911Tesla%20body%207_zpshrc2n6sz.jpg.html
https://s188.photobucket.com/user/jerhofer/media/1979%20Porsche%20911%20Tesla/6-9-19%20911Tesla%20body%2020_zpsrp1lrytm.jpg.html
Posted by: TravisNeff Jun 13 2019, 09:36 AM
I would wager a guess that those pistons are big bore for a 3.2, not a 3.0 the rod length (from the pauter site) indicates a 3.0 rod is 127mm and a 3.2 is 127.8mm so the piston pin height I would assume would be higher, making the piston sit lower in the cylinder. But that is just a guess, I am no engine builder.
Posted by: jerhofer Jul 21 2019, 02:16 PM
I am still waiting on the motor rebuild. John's other sister is dying as well. He recently spent a week in New Jersey with her and other family. Both his sister who passed and this ill sister were/are in their sixties and both were heavy smokers. It is hitting John hard. I visited with him this past week. He asked if I had seen some of the commercials that show people's faces distorted from cancer surgery. He said both of his sisters looked like those in the ads. Pretty tough. He said he was getting his head wrapped around all of this and was ready to get back to working on my motor. Not much I could say under the circumstances except to offer my condolences.
On the plus side, my son's car made its debut today at the Charlotte Cars and Cappuccino. And it was a huge hit. A local outlaw Porsche builder wanted to know if Matt would build more cars like his as this guy thinks he could sell them. The number he threw out was $150K. Some friends of mine were there and were duly impressed. I was a proud father. I actually talked to more people about the car than my son did as he is a reluctant public speaker. Having spent most of my career in sales, being a reluctant speaker is not one of my traits!!
https://s188.photobucket.com/user/jerhofer/media/1979%20Porsche%20911%20Tesla/7-21-19%20911%20Tesla%207_zpshfgemi4j.jpg.html
http://s188.photobucket.com/user/jerhofer/media/1979%20Porsche%20911%20Tesla/7-21-19%20911%20Tesla%205_zpsyxtms7ol.jpg.html
http://s188.photobucket.com/user/jerhofer/media/1979%20Porsche%20911%20Tesla/7-21-19%20911%20Tesla%203_zpsiqprgxcx.jpg.html
http://s188.photobucket.com/user/jerhofer/media/1979%20Porsche%20911%20Tesla/7-21-19%20911%20Tesla%206_zpsilx5lsgk.jpg.html
Posted by: mepstein Jul 21 2019, 02:35 PM
I'm sure it was a hit. It looks very "finished". Most electric cars don't. Congrats to both of you. I hope we can meet up next time I'm in Charlotte.
Posted by: jerhofer Jul 21 2019, 02:49 PM
I'm sure it was a hit. It looks very "finished". Most electric cars don't. Congrats to both of you. I hope we can meet up next time I'm in Charlotte.
It is a very finished car down to having AC. He used a 380V Tesla AC compressor that is mounted in the smuggler's hole in the front trunk. AC is almost a necessity in this part of the world, especially the past few days. It has good headlights, good brakes, and he had all of the stock 911 gauges re-programmed to work with the electric motor. The temp gauge shows the motor temp, the fuel tank gauge shows remaining charge, etc. He lives about 50 miles from the show site which was the longest drive for he car to date.
The body shop guy had the car this week to do a final polish on the paint, to have 3M invisible bra installed and the windows tinted. Matt picked the car up Friday and left his 700hp 1979 El Camino at the shop. Yesterday, he and his 18 year old son Garrett went to pick up the El Camino in the 911. On the way back, he let his son drive the Porsche. When they came up to a stop light, Garrett slotted the 911 into the opposite lane, and looked over at his dad with this huge grin on his face. Matt tried valiantly with the El Camino, but the 911 left the him in the dust.
Posted by: jerhofer Aug 5 2019, 07:54 PM
And the saga continues. Last week I visited John and found that nothing had been done on the engine. More excuses. Today I performed an intervention and brought everything home!! I hooked up my utility trailer to my Audi Allroad to haul the engine and transmission. Everything else went inside in various tubs. A call to AAA soon had a roll-back there to take the car to my house. The car had been at John's for five months!!!
https://s188.photobucket.com/user/jerhofer/media/1974%20Porsche%20914-6/8-5-19%20engine%207_zps4hc6nka2.jpg.html
http://s188.photobucket.com/user/jerhofer/media/1974%20Porsche%20914-6/8-5-19%20engine%208_zpsx9dyeite.jpg.html
http://s188.photobucket.com/user/jerhofer/media/1974%20Porsche%20914-6/8-5-19%20engine_zpsbrb9maue.jpg.html
http://s188.photobucket.com/user/jerhofer/media/1974%20Porsche%20914-6/8-5-19%20engine%203_zpsagdwwjwn.jpg.html
http://s188.photobucket.com/user/jerhofer/media/1974%20Porsche%20914-6/8-5-19%20engine%204_zpsmrp7twhz.jpg.html
http://s188.photobucket.com/user/jerhofer/media/1974%20Porsche%20914-6/8-5-19%20engine%205_zpseairsxcc.jpg.html
http://s188.photobucket.com/user/jerhofer/media/1974%20Porsche%20914-6/8-5-19%20engine%206_zps2iqj7ydj.jpg.html
http://s188.photobucket.com/user/jerhofer/media/1974%20Porsche%20914-6/8-5-19%20engine%202_zpsuo9wqhac.jpg.html
Once I decided that I wanted to do this I began thinking about where I was going to take the motor. Because of the fuel injection I wanted someone working on it who understands that system. The obvious choice would have been Richard Clewett but California is a long way from North Carolina.
Then I remembered talking with my 40 year plus buddy about his PCA race car while we were in Florida this past winter. He has basically this identical motor in his car with Richard's injection system. And it was built by a 30 plus year friend in Elkhart, Indiana. I called my friend with the race car to see if my other friend was still building motors. Turns out he had just rebuilt the race car motor this past spring. And I also discovered that my engine builder friend had built another engine with this configuration for another friend of mine.
So I called my engine builder friend. After some get acquainted talk, we got down to business. At one time he was the lead technician at the local Porsche dealership. That job was followed by him owning an independent Porsche repair shop. When I lived in Indiana, he used to come over to help me on projects and taught me much of what I know. In 1989, he built a 944 motor at my house that I ran in a track car for five years, followed by my son having that car for another four years. Never had a bit of trouble with that motor.
His path to working on cars began with the vocational school he attended while in high school. That vocational school had asked him for some advice and he ended up volunteering there while had he his independent business. One day the school asked if he would be interested in becoming an instructor. He wasn't making all that much money with his shop and the new job came with great benefits. He has been there for fourteen years now...and loves it.
He was more than willing to build the motor. And then he asked if I would be OK with him using the motor in his classroom. He has eight seniors this year who would be thrilled to work on a Porsche motor. My friend would be overseeing them to make sure everything was correct. I agreed. He is very excited about his kids working on the motor as it isn't likely they would be working on this type of motor in their future careers. They normally build a small block Chevy so this would be quite different.
I am taking the car and motor to him next Monday. We are leaving on a nearly two month motorhome trip just before Labor Day so they can work on it while I am gone. This won't be a quick turnaround but the motor will be with someone that I trust. While he is working on the motor, my other friend will be storing the car in one of his buildings. I just may get this thing back together!
Posted by: jerhofer Aug 7 2019, 01:33 PM
My boat guy who was going to apply new gelcoat to the fan shroud also did not work out. John owes me some money and, as partial payment, he gave me a fan shroud. I drilled out the rivets and painted the shroud and the metal part separately.
https://s188.photobucket.com/user/jerhofer/media/1974%20Porsche%20914-6/8-7-19%20fan%20shroud%202_zpsewnytysp.jpg.html
http://s188.photobucket.com/user/jerhofer/media/1974%20Porsche%20914-6/8-7-19%20fan%20shroud_zpsyl5vfng6.jpg.html
The carburetor hats had a few scratches before I took it to John. There were a few more when I got them back. Nothing terrible but enough that I blasted them and took them ot my powder coater yesterday. I picked them up today with a cost of $20.
http://s188.photobucket.com/user/jerhofer/media/1974%20Porsche%20914-6/8-7-19%20carb%20hats_zpsusfidwpw.jpg.html
The fins on the alternator housing were rusty. After doing some sanding, I painted them with a high temp paint.
http://s188.photobucket.com/user/jerhofer/media/1974%20Porsche%20914-6/8-7-19%20alternator%20fins_zpse4v3lje1.jpg.html
I did an inventory yesterday and found that the only part that was missing was the band that retains the fan. I drove over to John's this morning and got it. Now that it was apart, I blasted it and painted it gold.
http://s188.photobucket.com/user/jerhofer/media/1974%20Porsche%20914-6/8-7-19%20fan%20band_zps54ygs5aj.jpg.html
Now all I have to do is pack everything to prepare it for transporting in the truck next Monday.
Posted by: 914forme Aug 7 2019, 04:25 PM
Hope it works out for you, at least you pulled the trigger and got your stuff back.
BTW, who's cabinets did you use for your workbench.
Posted by: jerhofer Aug 7 2019, 07:18 PM
Hope it works out for you, at least you pulled the trigger and got your stuff back.
BTW, who's cabinets did you use for your workbench.
Those cabinets are from Harbor Freight. They have held up well. They have these on sale from time to time.
https://www.harborfreight.com/tool-storage-organization/tool-storage/56-in-double-bank-red-roller-cabinet-64165.html
Posted by: ge9146 Aug 9 2019, 06:06 PM
I am sure your new path will work well. Marty will do a great job!
Isn't it amazing how many miles this car has traveled without even being assembled.
Let me know when you plan to go for a test drive and maybe I can stop by and catch a quick ride to celebrate.
All the Best,
Ed
Posted by: jerhofer Dec 10 2019, 08:49 AM
I have an update. As a refresher, the engine came out of a Euro Carrera and began as a 3.0 liter. Marty told me to order a SC basic rebuild kit with standard bearings. I also ordered ARP studs and rod bolts. When Marty began to assemble the bottom end, he discovered the bearings were too small. This is the bearing that came in the kit.
https://s188.photobucket.com/user/jerhofer/media/1974%20Porsche%20914-6/KIMG0564_zps1ooy0pr4.jpg.html
This is the bearing that was in the motor.
https://s188.photobucket.com/user/jerhofer/media/1974%20Porsche%20914-6/KIMG0562_zpsjgmirfhh.jpg.html
http://s188.photobucket.com/user/jerhofer/media/1974%20Porsche%20914-6/KIMG0567_zpsmrjvsyj1.jpg.html
I bought the kit from Vertex. After getting together with Vertex's owner, he and Marty came to the conclusion that the engine, while a 3.0 liter, had 2.7 rods. Marty knew there were some differences between the Euro Carrera motor and a SC motor, but did not know about the rod issue. The Euro 3.0 has the aluminum case rather than the magnesium case of the 2.7. Marty now has the correct bearings.
When Marty inspected the pistons, he discovered one had bolt thread marks on the top of the piston where a bolt had been squeezed between the piston and the head. I did read where the guy who built the motor dropped a bolt into the engine and had to disassemble the part of the motor to get to it. Evidently the engine was hand cranked before the bolt was removed. Marty also noticed that it appeared the cylinders had been honed. He is concerned that the Nikasil lining had been compromised.
The pistons and cylinders were sent to EBS. This is their assessment.
"Just a quick note to let you know that we have received your pistons and cylinders. The JE pistons are very old. No job number stamped on the inside of the piston. Without the job number it's impossible to know exactly what they are. JE has significantly improved their 911 air cooled pistons and ring pack since then. I would recommend going with a new set of JE pistons 98mm 9.5:1CR. They will be correct for the application, a slight bump in compression ratio for a bit more performance, coated piston skirts and lightweight wrist pins. Cylinders have had something done to them. I would recommend plating the cylinders to make sure that everything is 100% correct. They might be within spec but I do not know what process they used to hone the cylinders. We can have them inspected and measured, cost is $100/set. Attached is a copy of your quote. Let me know if you have any questions. If you would like us to measure and inspect the cylinders allow 7-10 days."
I will be calling EBS later today to give them some money. And that is where I am at to this date.
Posted by: mepstein Dec 10 2019, 10:41 AM
Never give up.
Posted by: IronHillRestorations Dec 13 2019, 07:52 AM
Pretty sure those were 9.5 / 1 pistons. Funny thing is I'm pretty sure the pistons and the cylinder work was done by/through EBS, but that was all arranged by the customer. Unfortunately I don't have any records for that build.
Posted by: sixnotfour Dec 13 2019, 08:41 AM
early euro 3.0 used 2.7 crank and rods,,,Very desirable engine case for the guys who want to build short stroke engines , 66mm crank..direect fit...6 bolt flywheel aposed to the usa 78- 8 bolt ,
Posted by: mepstein Dec 13 2019, 08:50 AM
early euro 3.0 used 2.7 crank and rods,,,Very desirable engine case for the guys who want to build short stroke engines , 66mm crank..direect fit...6 bolt flywheel aposed to the usa 78- 8 bolt ,
I'm told the trick is to have good flywheel bolts and then over torque them so they stay tight.
Posted by: sixnotfour Dec 13 2019, 09:01 AM
all cylinders can be honed , but each type reguires a different method, hone marks in the cylinders , in nycasil is good ok....EBS is great but as you see they outshop the work
Posted by: mepstein Dec 13 2019, 09:14 AM
all cylinders can be honed , but each type reguires a different method, hone marks in the cylinders , in nycasil is good ok....EBS is great but as you see they outshop the work
I'm pretty sure they send it to US Chrome.
Posted by: jd74914 Dec 13 2019, 01:04 PM
all cylinders can be honed , but each type reguires a different method, hone marks in the cylinders , in nycasil is good ok....EBS is great but as you see they outshop the work
I'm pretty sure they send it to US Chrome.
I've always wondered if it was US Chrome or Millennium Tech. Interesting.
Posted by: sixnotfour Dec 14 2019, 02:01 PM
engine runs no power, odd vacum ..right cam was 180 out of time
Posted by: mb911 Dec 14 2019, 02:50 PM
engine runs no power, odd vacum ..right cam was 180 out of time
Btdt
Posted by: jerhofer Feb 6 2020, 02:07 PM
engine runs no power, odd vacum ..right cam was 180 out of time
When John had the car, he supposedly checked the cam timing and said it was correct.
I had a message from the engine builder that the main bearings were also different from a SC motor. The incorrect ones have been exchanged.
Posted by: sixnotfour Feb 7 2020, 05:08 AM
engine runs no power, odd vacum ..right cam was 180 out of time
When John had the car, he supposedly checked the cam timing and said it was correct.
I had a message from the engine builder that the main bearings were also different from a SC motor. The incorrect ones have been exchanged.
Yes,,, just 180 out....main bearings,, yes ,,early rare 3.0 case...
Posted by: jerhofer Aug 10 2020, 02:14 PM
Covid-19 update.
At least for now, the school where my friend works is having students back in class next week. The heads have been sent out to be redone. Once everything is back, the plan is to finish up the engine build. As part of their training, the class will install the motor and tranny. They now have a dyno at the school. Once it is back in the car and running , my friend will tune the car on the dyno.
As we all know with this pandemic, nothing is certain. If they have issues and transition to online learning, my friend will finish the build on the motor. I will probably head up there to help him install the drivetrain and we will put it on the dyno to tune it.
Posted by: IronHillRestorations Oct 8 2020, 06:49 PM
@http://www.914world.com/bbs2/index.php?showuser=22140 any updates?
Posted by: jerhofer Oct 9 2020, 01:50 PM
Covid-19 strikes again. About two months ago, Marty and I decided that we should have the heads ported to 46mm and have them done. To that end, we sent the heads to EBS. EBS uses a local machine shop that had a number of Covid-19 cases. Enough that they had to shut down to protect the rest of their employees. They were shut down for quite while and are now just getting back to work. They were already behind from an earlier state wide shutdown and are now further behind. Last week we were told it would be 4-6 weeks.
The good news is that Marty's school has been relatively Covid-19 free and they are attending classes. They are assembling as much of the motor as they can.
I have certainly learned patience with this car!!!
I did buy a one owner, 79K mile, 1989 944S2. As I have seen before with cars with long time ownership, some deteriorating items are not noticed as they deteriorate so slowly over time. I just finished installing new motor mounts and new struts and shocks. I also replaced the cam chain guides and the timing belt. And I have actually driven it!!!!
Posted by: jerhofer Mar 14 2021, 01:38 PM
There wasn't room to open the ports to 46MM. The max would have been 43mm. It would have cost about $1500 to open up the ports. Since I am not building a race motor, I asked Jon at EBS whether the gain in HP would be worth the additional cost. He didn't think it would, so we are leaving the ports at 40mm. We finally got the heads back the first part of January.
So Marty was all set to proceed. And then things turned around in a hurry. Marty's wife had a bout with cancer about five years ago. She was due for her annual checkup back in November but, due to COVID, that checkup did not happen. She was feeling poorly the first part of January with back issues. They saw a doctor who thought she had a slipped disc and was medicating for that. But her health deteriorated to a point that Marty took her to the emergency room last month. The cancer had come back and her kidneys were shutting down. Three days later she passed. As you can imagine, the last thing on Marty's mind is building a motor. And that is the last thing I am concerned about as well. I feel so sorry for Marty. He was devastated.
Better news is that my son has taken a new job. He has worked for Toyota Racing Development for the past 10 years with his latest promotion was to head of vehicle dynamics. About a year ago, he was approached by a head hunter. Great Wall Motors, located in Baoding, China, primarily builds SUV's and trucks. They want to get into racing and were looking for someone to build a racing program from scratch. Matt was their choice and, had it not been for COVID, he might have moved to China last spring. They are paying him big bucks and furnishing him with an apartment.
As it was, he flew out of Charlotte to LA on January 24th where he had to pass a COVID test before flying to a port city in China. He then was quarantined for 14 days in a government owned hotel. After he flew from that city to Baoding, he had to quarantine for another 21 days in another government owned hotel!!! They are super serious about COVID in China!
Last week was his first week of work!! He is very excited about the opportunity to build a race program from scratch. Long days as they go in at 8:30 and leave around 8:30 in the evening. However, they do have nap time in the afternoon. There are mats spread out and everyone lies down. He said it reminded him of kindergarten but it is refreshing. He says the people are super nice and very polite. So far, so good.
We visited with him just before he left and the told me that I was not to sell the 914 until I gave him a chance to buy it. He has always loved 914's and wants to own the car. His contract is for three years with renewal options, so it will be awhile before he is back. So no pressure to finish the car.
Posted by: Cairo94507 Mar 14 2021, 01:49 PM
Very sorry to hear about Marty's wife, may she rest in peace and hopefully he will take comfort that she is not suffering. Horrible way to go.
Great news re your son and his new job in China. Sounds like a dream job. He will hopefully be home before you know it- 3 years can fly.
Posted by: jerhofer Jul 19 2021, 08:11 PM
My good friend Dave and I both turned 75 abut three weeks apart this spring. One of Dave's two sons bought four tickets to the vintage races at Road America and rented a four bedroom house. They asked me to be the fourth person. As you can imagine, I said yes to that proposition. That all happened this past weekend and we had a great time. We also bumped into our old friend Ben whom we had not seen for some time.
After accepting, I called Marty to let him know I would be in Indiana and wondered how he was coming on the motor and if I could be of assistance while I am there. He said he was close on the motor and that I should bring work clothes.
This morning we picked up the car from my friend Harry's building and took it to the Elkhart Career Center. I hooked up the alternator and installed the other shroud wiring. Marty then did the cam timing. We are meeting tomorrow morning to button up the motor and may put it in the car if all goes well. Progress!!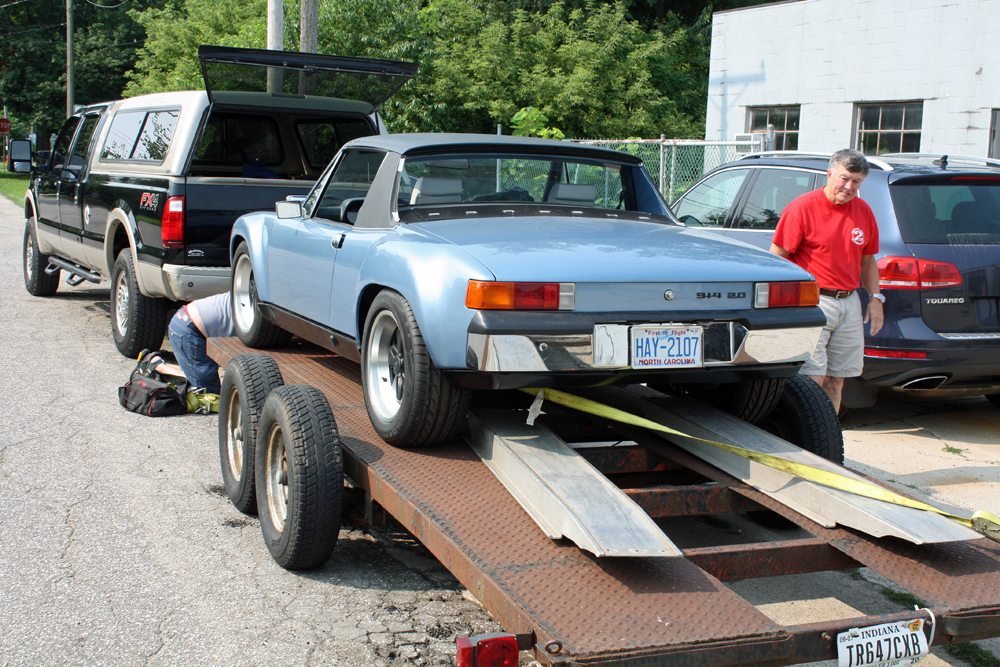
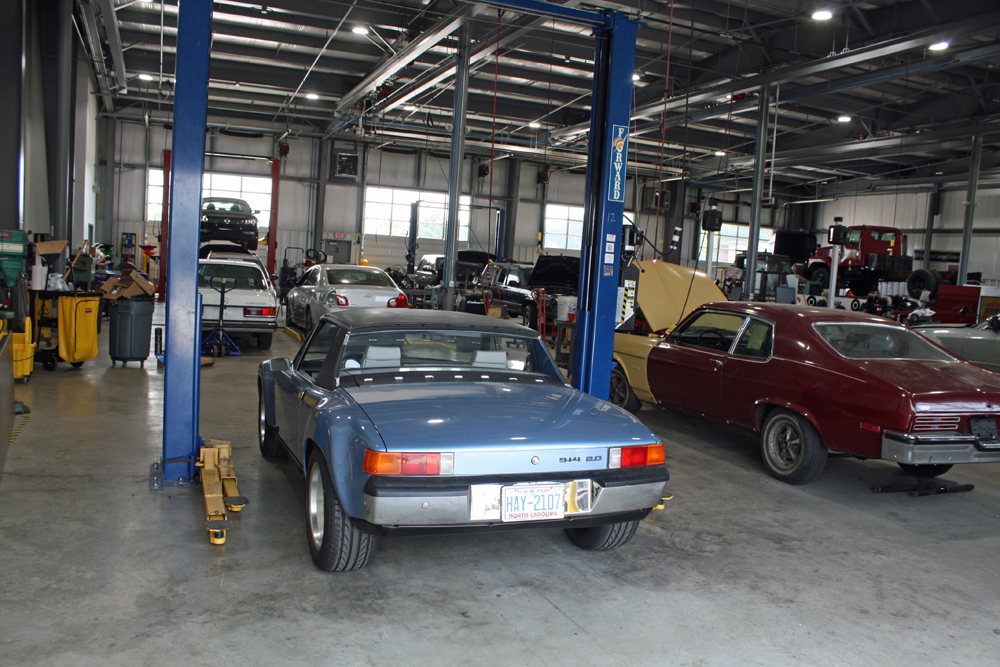
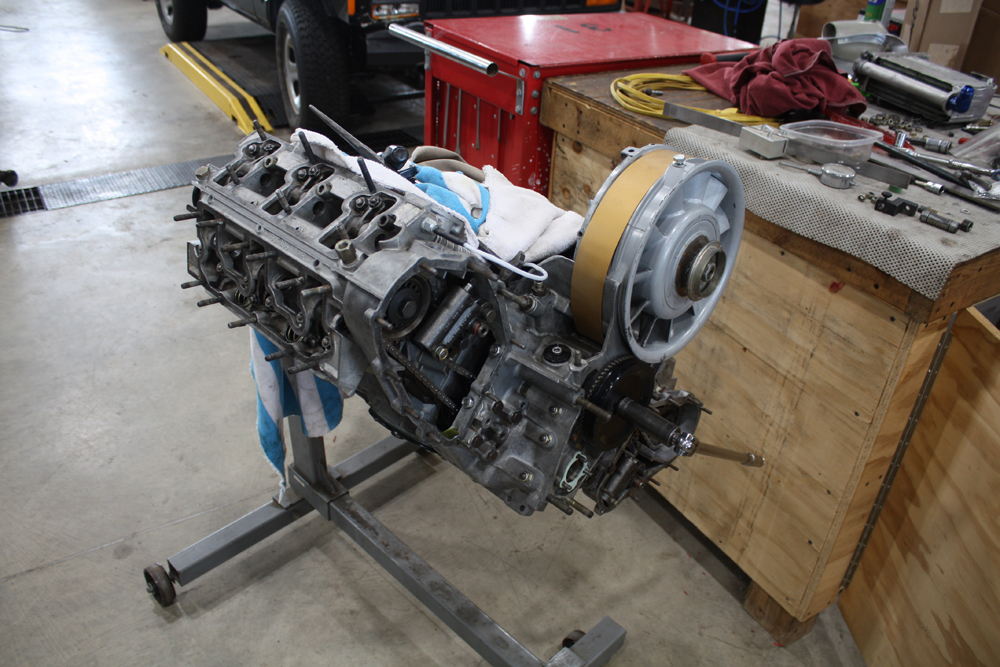
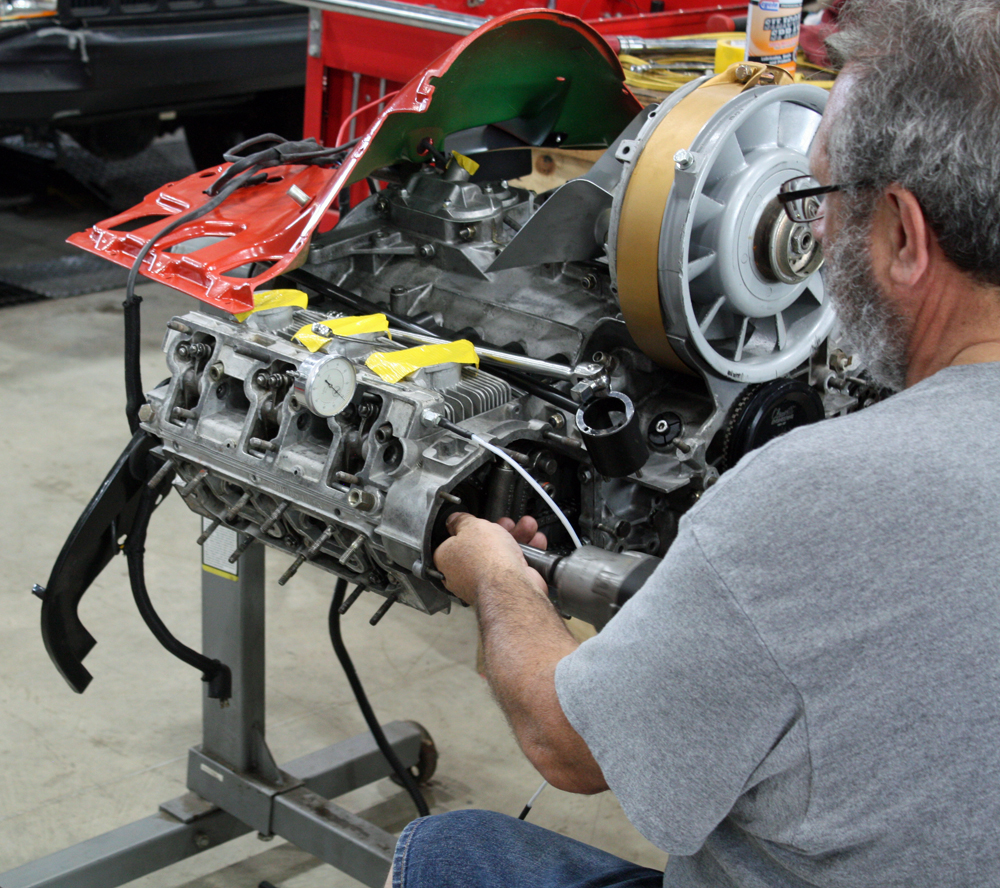
Posted by: jerhofer Jul 23 2021, 02:16 PM
We have the engine all buttoned up. We were about to remove it from the engine stand when we noticed the pilot bearing was missing from the flywheel. It must have been knocked out when the flywheel was removed at John's shop. I needed to get back to NC. Marty is ordering one. His students will be there in a couple weeks and he will have them help him with the grunt work of attaching the tranny and installing everything in the car.
My wife's mother passed last December and, because of Covid, we did not have a service. Sharon's sister has organized a memorial on Labor Day weekend. We will be traveling to Indiana in the motorhome so I will be able to check everything out then. Hopefully, it will be running. But, if the past three years have taught me anything, it is to not assume!!
These are some photos taken when the motor was apart by Marty.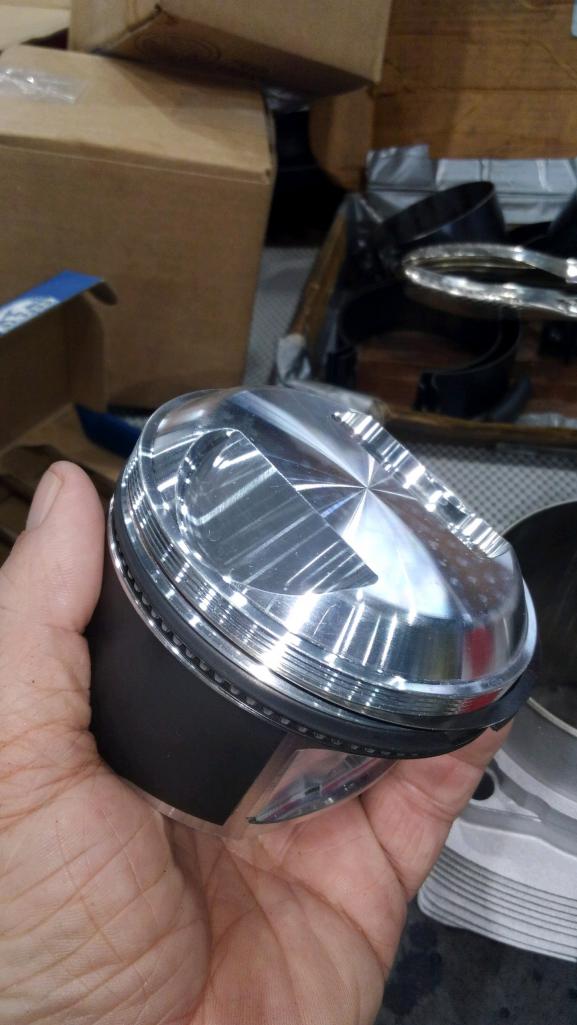
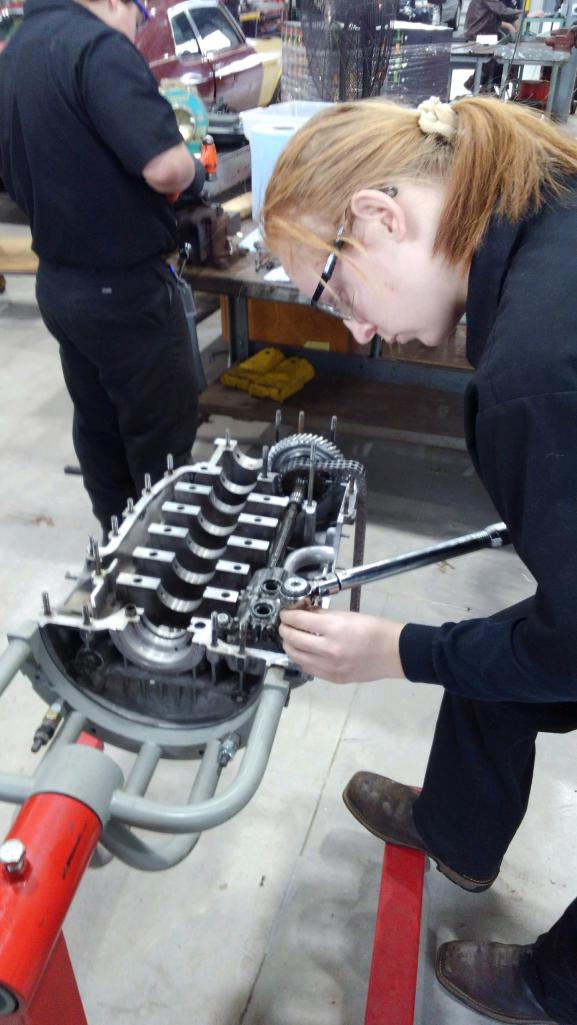
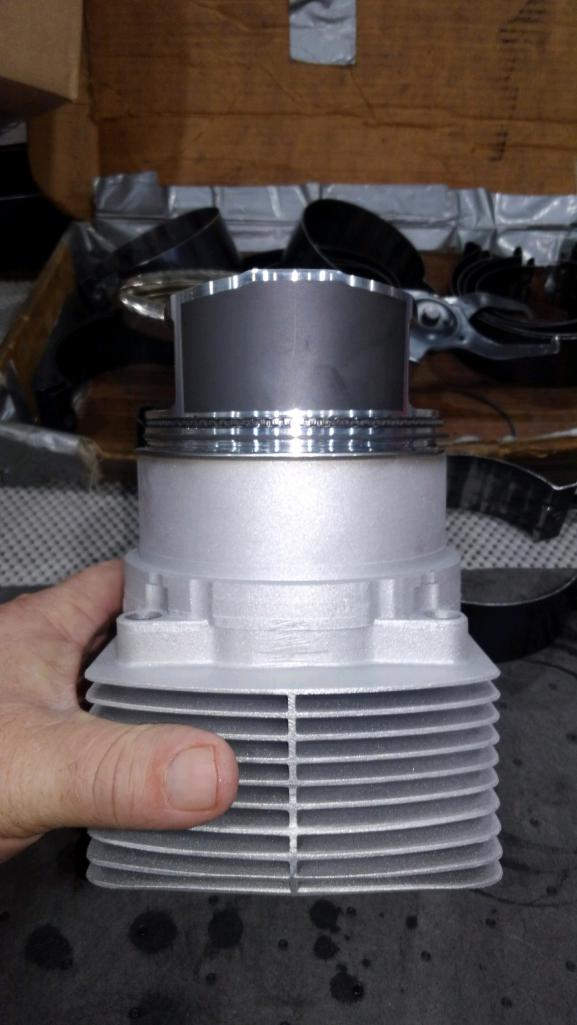
Posted by: Root_Werks Jul 23 2021, 03:20 PM
Since I've been absent since before this thread started, read through the whole thing. Wow! What a story!
Looks like a happy ending is in sight. Keep at it, so close!
Posted by: Cairo94507 Jul 23 2021, 06:45 PM
Man, I am so looking forward to seeing this car on the road and you with a huge smile on your face.
Posted by: jerhofer Jul 24 2021, 01:01 PM
As an aside, Marty has built one other motor for me. Way back in 1989, I bought a 1983 944 with the intent to make it a track car. It had 89,000 miles. After prepping the suspension and doing other things to make it track ready, my wife and I drove it that first year. At Blackhawk in Rockford, IL, one of the turns had a high curb on the outside. I got a little wide and straddled that curb. That resulted in wearing off some of the fins on the oil pan.
That winter I decided to replace the oil pan. However, the only way to get it off was to take out the motor. Marty helped me do that in my garage in MIddlebury, In. Since I did not have any records or much history on the car, once we pulled the pan, we did check out the bottom end. At this point, the while we have it out syndrome, hit. We decided to pull the head to check out the head gasket. One thing led to another and ultimately we decided to rebuild the motor.
I did the grunt work of removing the accessories and cleaning everything. It remained stock but Marty did make sure everything was exactly on spec during assembly and I did have the crank balanced and magna-fluxed. The result was a smooth, strong running 944. In fact it was strong enough to have someone question that it was stock.
In 1991, my friend Phil, who had a 928, and I decided to club race. This was the first year of club racing. The second club race was held at Summit Point. Neither of us had ever been there but we were game to race. I drove there pulling my 5x7 trailer with track tires, tools, fuel, lawn chairs, etc.
Come qualifying time, I was on the pole by 1.5 seconds for the class that the 944 ran in. As it was my first time racing, I predictably screwed up the start and finished third.
The next race was at Pocono. I had never been there either and would not go back as I did not like the course. However, i did again qualify on the pole for my class by 1.5 seconds. After qualifying, a fellow racer from Vermont, who was racing a 1987 or 1988 924S, approached where we were pitted and proceeded to accuse me of having a cheater motor. My wife was incensed at this accusation.
I asked him what made him think that I had a cheater motor. He replied that at both Summit Point and Pocono I was pulling him on the straight. So I asked him what, besides horsepower, determines the speed at the end of a straight. He answered correctly that it would be entry speed onto the straight. My reply to him was that, during practice when I was following him, I had to lift at both of those entry corners as he was going through them much slower than I was. So, I replied, before you accuse someone of having a cheater motor, you might want to learn how to drive your car better. (There might have been a four letter word in that reply!!)
While my wife never raced, she and I drove that car for five years at six or seven events per year. She was usually only a couple seconds slower than me so the car had a lot of fairly intense track time. When we were finished with it, my son drove the car for another four years. Due to time and money constraints (has had just graduated from college), he only did a couple track events but he drove it much harder on the street that I did. Neither of us ever had the first issue with that motor.
So I feel very confident that this will be a strong and durable motor in the 914.
Posted by: jerhofer Jul 24 2021, 01:08 PM
https://jerryforthofer.files.wordpress.com/2010/05/black-944-track-car-with-trailer.jpg
Posted by: jerhofer Nov 10 2021, 03:11 PM
Progress!!
I got this message from Marty this afternoon. Today was the first day on the dyno.
"The preliminary pulls so far are 252- 255 RWHP"
I am feeling good about those figures. Should be sufficient in a 2200 lb. car. He says if you jump on it in second gear, it will break the tires loose. He says it is quick!!
It's been a slow process this fall getting to this point. Marty was having a starting issue. The computer showed a crank fire fault. While Marty could not see anything physically wrong, he speculated that when the engine was pulled at John's shop, they may have forgotten to unhook the crank sensor. That could have damaged it internally. I called Richard Clewett to order one and discovered that this is another part affected by the general shortage of parts. He sent one as soon as he received one. This time it is a Hall Sensor so it had to be wired to a 12V ignition source as well as to the computer.
Since Marty is a teacher, teacher stuff also entered the equation. Like a week off for the kids, parent teacher conferences, etc. While the progress has been slow, I trust Marty and feel everything will be done correctly. They have a dyno at the career center, which is handy!! The guy who runs the dyno owed Marty a favor, which is why the car has been placed on it.
Marty has promised to take a video of a dyno run. I will share that when I have it.
Posted by: mb911 Nov 11 2021, 06:20 AM
Great to hear progress has been made. What a journey..
Posted by: jerhofer May 13 2022, 05:05 PM
Earlier in this thread, I mentioned that my son had taken a job in China to start a racing program from scratch. He had been there about fourteen months when he decided he did not feel comfortable being in China due to the current world situation. TRD, his previous employer, had been wooing him to come back, and that is what he decided to do. He had some issues getting out of China due to Covid lockdowns, but, with the help of one his Chinese employee, was able to make a run for it to a smaller airport where he could fly to Singapore and then home. He got back late last week.
Marty had been having starting issues with the 914, to the point that it would not start al all. Once I knew Matt was home, I arranged to have the car shipped to Matt's house, as he is buying the car. The transporter picked it up on this past Monday, it arrived at Matt's house on Tuesday and yesterday he sent me this video.
https://discord.com/channels/@me/670367722307059712/974403439910092890
As you can see, he got it running in a couple days.
Bad fuel was the main issue. He used his fuel injector tester to make sure all of he injectors were working properly. While doing that, he did not notice a strong fuel odor. I had only put about four or five gallons in it prior to taking it to Indiana. So that fuel was old and probably accumulated some water as well. Marty did add fuel to it but probably not enough to dilute the bad fuel. He also found one cylinder was cold. It was getting spark. He pulled the injector plug off and the idle did not change a bit. He put it back on and wiggled it and the revs increased. He pulled on the yellow wire and it came right out of the injector. He replaced the plug and it is now running on all six cylinders. Now he can begin tuning it.
Matt has always loved 914's so this is his dream car. Unlike me, he keeps his cars for very long times!
We are currently in Bryce Canyon, UT at the national park in our motorhome. We left on April 12th and will be home at the end of this month. I may actually get to drive it then!!
Posted by: jerhofer May 13 2022, 06:50 PM
That video link may not work unless you log in to Discord. This Youtube link should work.
https://youtube.com/shorts/Rzov319xQws?feature=share
Posted by: Cairo94507 May 14 2022, 07:21 AM
Sounds so sweet.
Posted by: jerhofer May 14 2022, 11:07 AM
Matt went over to our house today to pick up some 914 parts. I had the targa bar trim refinished but it won't go on until we are finished working in the engine bay. I also had a carburetor synchrometer that Matt is going to use to check that the throttle bodies are all the same. I had some custom heat shields made for the exhaust. He picked those up as well.
So progress is being made!!
Posted by: Maltese Falcon May 14 2022, 06:36 PM
That video link may not work unless you log in to Discord. This Youtube link should work.
https://youtube.com/shorts/Rzov319xQws?feature=share
 Loving that flat six sound
Posted by: jerhofer May 20 2022, 08:52 PM
Matt, with the help of son Garrett (who just graduated with his bachelor's in computer science), have been fine tuning the car. When I installed the jWest shifter and rods (three years ago, believe it or not), I was having a problem engaging all the gears. I could adjust it to get third but not fifth or I could get fifth but not third. John Forbes worked on this as well but he also had the same issues. So he yanked the jWest gear out and installed a stock shifter...and still had the same problem!! Upon further investigation, he discovered that I had used too long a seat belt bolt on the inner belt for the passenger seat. The shift rod was hitting the bolt, thus impeding the throw. The jWest shifter never made it back into the car at that time.
Fast forward to the past week when Matt has finally been able to drive the car. The shifter was beyond terrible. Matt discovered a defective bushing. When that helped but was still not what he was looking for, he went over to my house and picked up the jWest shifter assembly. After receiving one bushing that had gone missing, he got the shifter installed...and was still having the third/fifth gear issues. He solved it be taking some metal of the bottom of the shifter so he would have more throw. Now it is staying engaged in all gears and is shifting about as well as a 914 can shift!!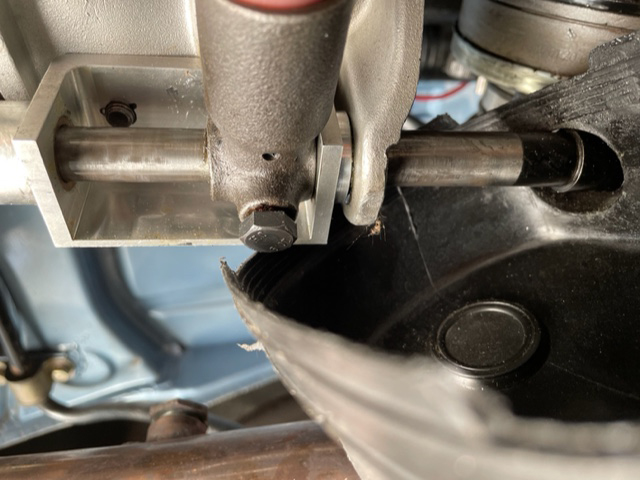
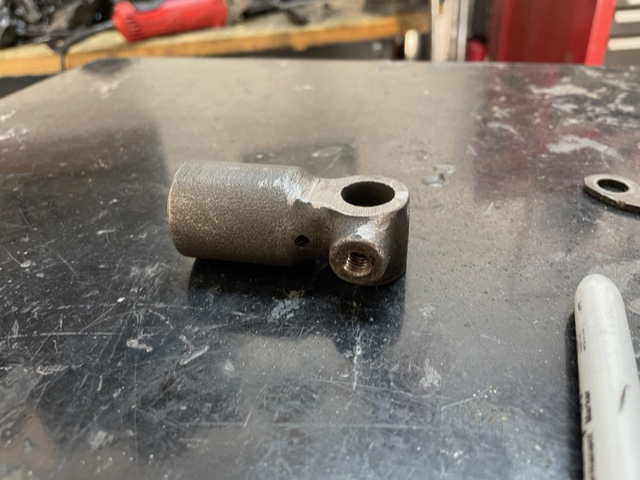
Now that he had the shifter working, Matt could get on with the process of tuning the motor with the computer. To that end, he and Garrett took drives with Matt running the engine in various RPM ranges while Garrett monitored the computer. Matt sent me this video. I apologize for the wind noise but you will get the idea.
https://drive.google.com/file/d/1sriFx7jmTTzVWnxWm81U5hq8HyOLRWGZ/view?usp=sharing
I will be home at the end of next week. Can't wait to drive it.
Posted by: jerhofer May 23 2022, 03:22 PM
Matt said the engine was getting some blow by so he installed a puke tank.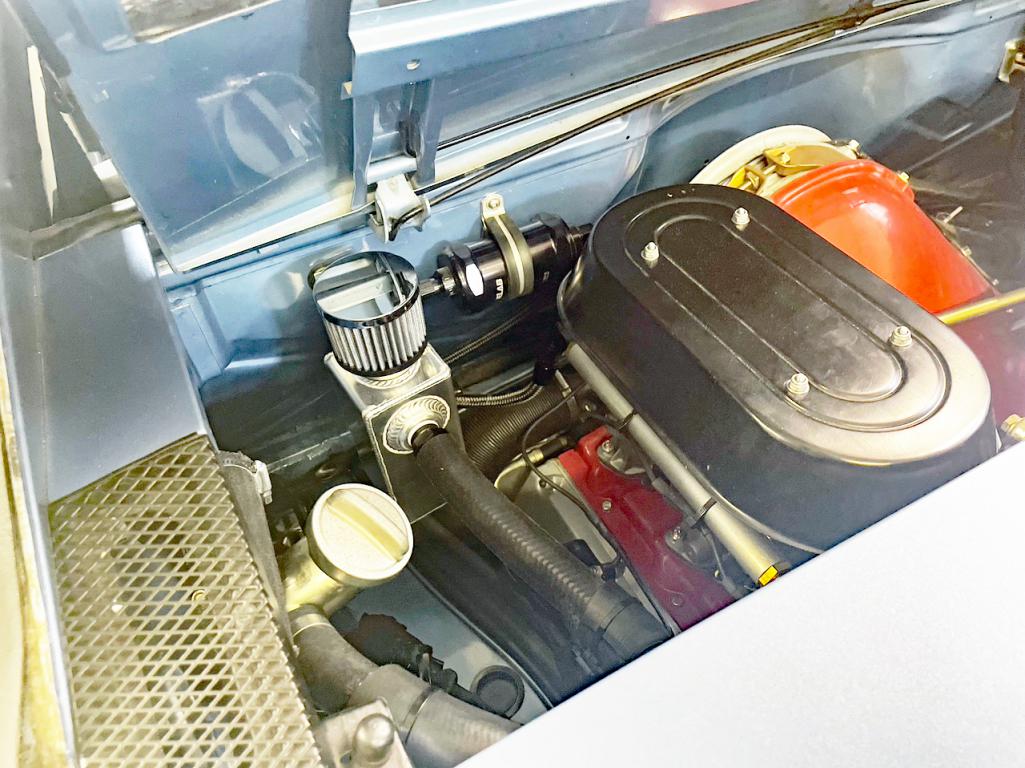
Posted by: Root_Werks May 23 2022, 03:31 PM
Sounds great! Love the sound of carbs.
Posted by: Dion May 23 2022, 04:09 PM
Nice to hear that engine scream. Quick.
Posted by: jerhofer May 25 2022, 03:55 PM
Sounds great! Love the sound of carbs.
It may look like carbs, but those are PMO throttle bodies with electronic fuel injection. The goal was to have it look like carbs when one looked into the engine bay.
Posted by: jerhofer May 25 2022, 04:02 PM
We will be home tomorrow but Matt has been steadily working on the car. Here are some of the comments that he recently sent me.
"Garrett and I tuned some more on the car. We found that the wide band ego sensor calibration was wrong. We fixed that and it is running better and better.
Garrett is a big fan of the car now since he drove it.
Targa bar chrome is on. We also replaced the left side header gaskets. The exhaust tick is gone!"
I had sent that trim out to have it re-finished. It looked better than new. 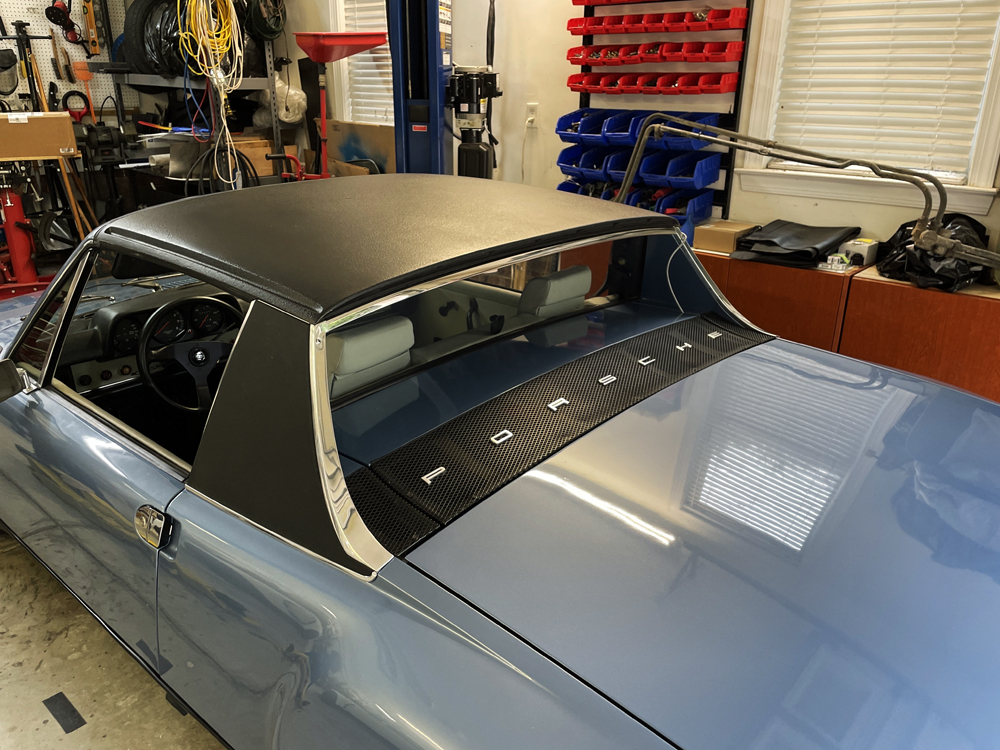
Posted by: mepstein May 25 2022, 05:40 PM
Car looks amazing!
Posted by: Cairo94507 May 26 2022, 06:10 AM
Indeed- that is a great shot.
Posted by: mate914 May 26 2022, 06:47 AM
Car of the month winner? Not a real 6 but looks nice.
Matt
Pro American energy.
Posted by: Root_Werks May 26 2022, 12:16 PM
I bought pretty much all new trim for my 914 after paint. It was a good investment. Your 914 looks amazing!
Posted by: jerhofer May 27 2022, 02:01 PM
After four long years, I finally got to drive the 914 today! It was fantastic. The motor runs strong and smoothly throughout the rev range. It handled well and rode surprisingly well. And it sounds fantastic with the BB exhaust!!
The only negative is the shifter, which may just be a 914 thing. It has been a long time since I last drove a 914. The jWest shifter isn't very sloppy but the engagement is tricky. It is a fresh transmission and it feels like the synchros are very tight. Maybe some use will free it up a bit. Ed had gears installed such that you can take off in second gear. His purpose was to reduce the stress on the weak first gear. I didn't drive it for a long distance, so some of the awkwardness might go away with familiarity.
Matt has some plans for the interior as he is not fond of the light gray. He is thinking some sort of brown leather with matching door panels. He was very satisfied with the work done on his 911 Tesla and will be taking the car to their shop to see what can be done.
I will be storing the car for Matt in the near future. He and his son are going to install a LS1 engine in Garrett's 1987 944. They are accumulating the necessary parts and he will need some room for assembly. They are coming over this weekend for a cookout and he may bring the car at that time.
Posted by: mepstein May 27 2022, 03:18 PM
I was told by our expert trans rebuilder that a fresh trans rebuild can take a couple hundred miles to smooth out.
Posted by: Cairo94507 May 28 2022, 06:15 AM
@http://www.914world.com/bbs2/index.php?showuser=22140 - First, your car looks amazing and I absolutely love it. I am so glad you got to drive it. There is nothing like the first drive.
I had the same issues with my RennShifter. I had a fresh transaxle rebuilt by Dr. Evil and the shifting was tight. Took effort to shift the car. Yes, I am old, but when Jim (Banananose) drove the car he said it was tight too. He suggested putting the stock shifter in it. Of course I would not hear of it. I believed it was just tight due to a fresh rebuild and would loosen up...
Over the next 6K miles I fought the shifter constantly. I had it adjusted by a RennShifter "Pro" recommended by JWest. It was a bit better but still tight. He had another completely fresh built car in his shop with a RennShifter and I sat in it and it shifted just like mine. He said, "That's how they shift".
The big change came when I had Hollerans Performance look at it and drive the car. John pulled the rear shift rod out of the car and made a new one from scratch, eliminating one joint. He then adjusted the mount on the transaxle to an ideal angle. Then he looked at the RennShifter and adjusted that- it was way off. Then he drove the car and declared it "done". It was so much better now that I considered calling it done too. However, in the back of my mind was Jim telling me to put the stock shifter in the car...
Fast forward about 2 months later and I had the stock shifter arm welded to a Weltmesiter short-shift (side-shifter) kit installed in the car and it is perfect. Added bonus, my hand throttle is back. Real bonus plus, it looks 100% stock.
If my car did not appear so stock I likely would have left the RennShifter in place as it did shift nicely once dialed in. The moral to the story, work through all of the linkage/bushings and look at the RennShifter rear mount on the transaxle to make sure it is at an ideal angle to eliminate any binding. Shifting should be enjoyable, not a chore.
Posted by: jerhofer May 28 2022, 01:51 PM
@http://www.914world.com/bbs2/index.php?showuser=22140 - First, your car looks amazing and I absolutely love it. I am so glad you got to drive it. There is nothing like the first drive.
I had the same issues with my RennShifter. I had a fresh transaxle rebuilt by Dr. Evil and the shifting was tight. Took effort to shift the car. Yes, I am old, but when Jim (Banananose) drove the car he said it was tight too. He suggested putting the stock shifter in it. Of course I would not hear of it. I believed it was just tight due to a fresh rebuild and would loosen up...
Over the next 6K miles I fought the shifter constantly. I had it adjusted by a RennShifter "Pro" recommended by JWest. It was a bit better but still tight. He had another completely fresh built car in his shop with a RennShifter and I sat in it and it shifted just like mine. He said, "That's how they shift".
The big change came when I had Hollerans Performance look at it and drive the car. John pulled the rear shift rod out of the car and made a new one from scratch, eliminating one joint. He then adjusted the mount on the transaxle to an ideal angle. Then he looked at the RennShifter and adjusted that- it was way off. Then he drove the car and declared it "done". It was so much better now that I considered calling it done too. However, in the back of my mind was Jim telling me to put the stock shifter in the car...
Fast forward about 2 months later and I had the stock shifter arm welded to a Weltmesiter short-shift (side-shifter) kit installed in the car and it is perfect. Added bonus, my hand throttle is back. Real bonus plus, it looks 100% stock.
If my car did not appear so stock I likely would have left the RennShifter in place as it did shift nicely once dialed in. The moral to the story, work through all of the linkage/bushings and look at the RennShifter rear mount on the transaxle to make sure it is at an ideal angle to eliminate any binding. Shifting should be enjoyable, not a chore.
I passed this on to my son. Thanks.
Posted by: Freezin 914 May 28 2022, 02:23 PM
This makes me happy! Enjoy!
Posted by: jerhofer May 30 2022, 01:12 PM
https://www.youtube.com/watch?v=2WuV0Gy11co
Posted by: stevesc_us May 30 2022, 06:25 PM
Sounds great! Love the sound of carbs.
It may look like carbs, but those are PMO throttle bodies with electronic fuel injection. The goal was to have it look like carbs when one looked into the engine bay.
I like the way you think! That's precisely why I chose the PMO ITB's when I did my EFI conversion on my early long hood as well.
Posted by: jerhofer May 30 2022, 06:28 PM
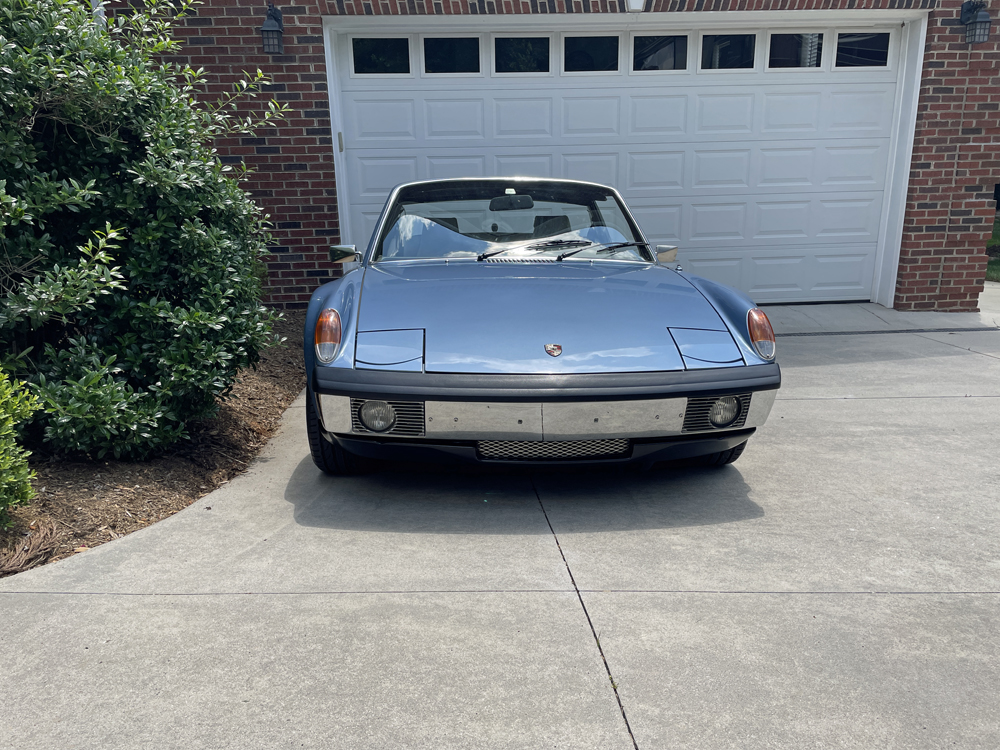
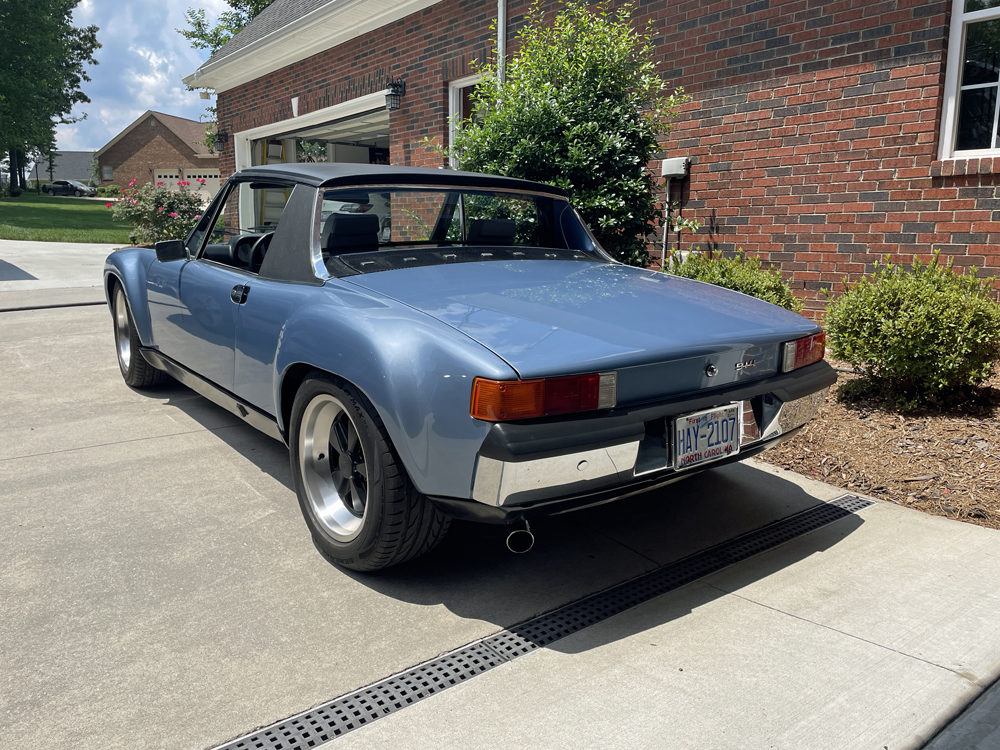
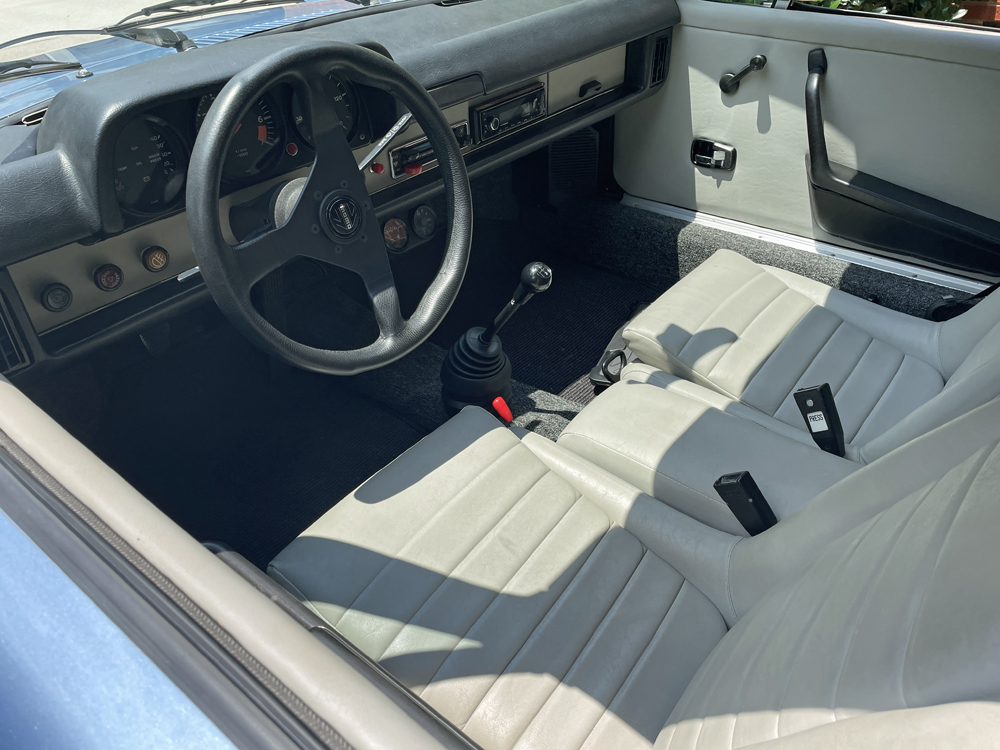
Posted by: autopro May 31 2022, 10:36 AM
Car looks and sounds great in the video, love the car
Posted by: IronHillRestorations May 31 2022, 02:11 PM
Hey that's a pretty nice 914! It would look awesome with a tan interior
Posted by: jerhofer May 31 2022, 06:59 PM
Hey that's a pretty nice 914! It would look awesome with a tan interior
Your restoration twenty years ago is the main reason it is as nice as it is. The paint still looks great after all of these years. And you did a very good job of preventing it from rusting. The reinforcements you installed have resulted in a pretty stiff 914. I was under the car earlier today and it still looks great.
There is a company in Cornelius, NC called Sonderwerks who, among other things, does a fantastic job with Porsche interiors. Matt will be taking the car to him soon to see what can be done. Dave does really good work. He has branched out into bodywork as well. The guy who runs his body shop is the same guy who painted Matt's 911 Tesla. Adam has painted cars to show at Amelia so he is very good. If the 914 ever needs some paintwork, Matt knows where to take it.
Matt is in full sorting mode, which is exactly what he enjoys doing. He would rather do that than actually drive the car. I told him yesterday when he was at the house, that, in some ways, I am surprised it ever ran. Converting the car to fuel injection was on the very edge of my capabilities. If I had read all of the instructions ahead of time, I wonder if I would have gone ahead. Drilling into the block and the end of a cam to install sensors was very scary, for me. Plus I had to make all of the wiring harness from scratch. So it is a minor miracle it actually runs.
Posted by: jerhofer Jun 7 2022, 04:58 PM
Matt installed a Rennshift shifter and really likes it. He particularly likes the reverse lockout as that is a worry, especially if someone else drives the car. He has been tuning on the engine some more and is very happy with its performance.
I had some custom heat shields made for the exhaust about three years ago. Matt installed those and can tell a difference in the amount of heat going into the trunk. A byproduct is that they quieted the exhaust a bit as well. My reason for getting the heat shields was to protect the CPU, which is mounted in the trunk.
Posted by: Root_Werks Jun 7 2022, 05:26 PM
Dang that looks nice!
Such a cool story behind this 914 as well.
Posted by: jerhofer Jul 23 2022, 01:45 PM
Matt had not been able to get the tach to work. He suspects that the CPU tach amplifier is not working. He called Richard Clewett about it and discovered that Electromotive is trying to sell their business and is not doing any service work on their equipment. So, getting the CPU fixed was not an option.
After doing some research, he ordered a Dakota Digital signal interface. He tapped into one of the coil wires that had a five volt output. Now the tach works perfectly.
We changed the oil today and then took a short ride. It is running great. Matt has a sport exhaust on order which will be the next project.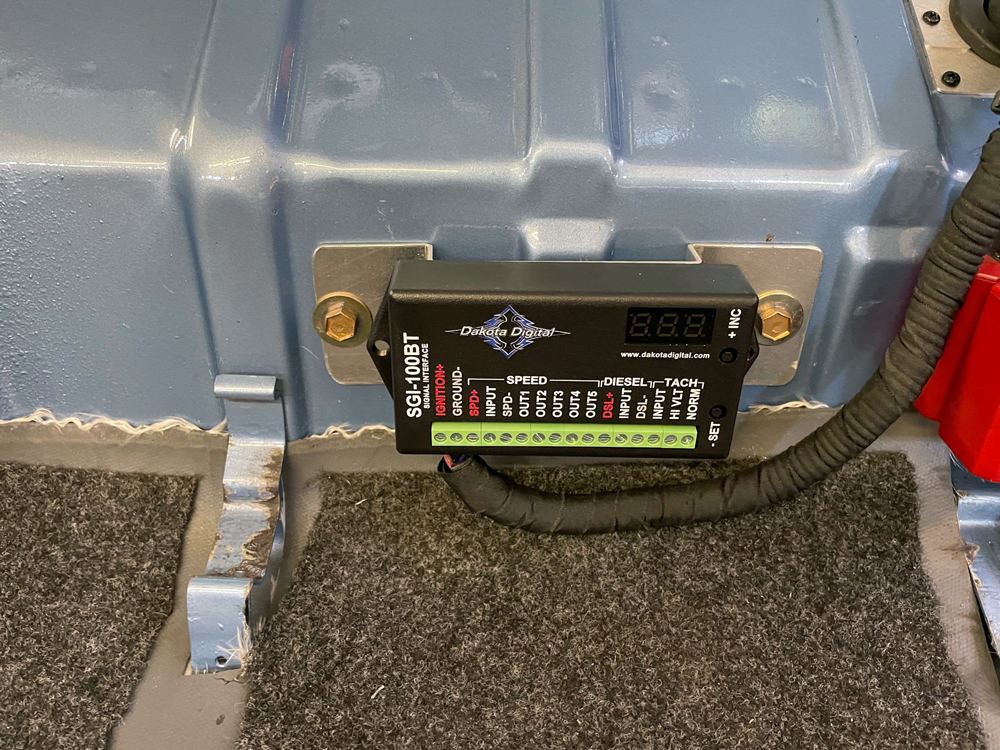
Posted by: Dion Jul 23 2022, 02:02 PM
Looks beautiful, runs beautiful. Enjoy !
Posted by: jerhofer Jul 31 2022, 06:59 AM
Like any old car, it is a work in progress. It has been very hot here and he has been driving the car to work. The oil temps were running around 220. He felt the line to the cooler and it was not warm. So he replaced the thermostat and now the temp stays are a steady 180.
Posted by: jerhofer Aug 3 2022, 07:24 PM
Matt was feeling some play in the rear suspension and discovered that the bushings were shot. He has installed the Elephant poly bronze bushings. 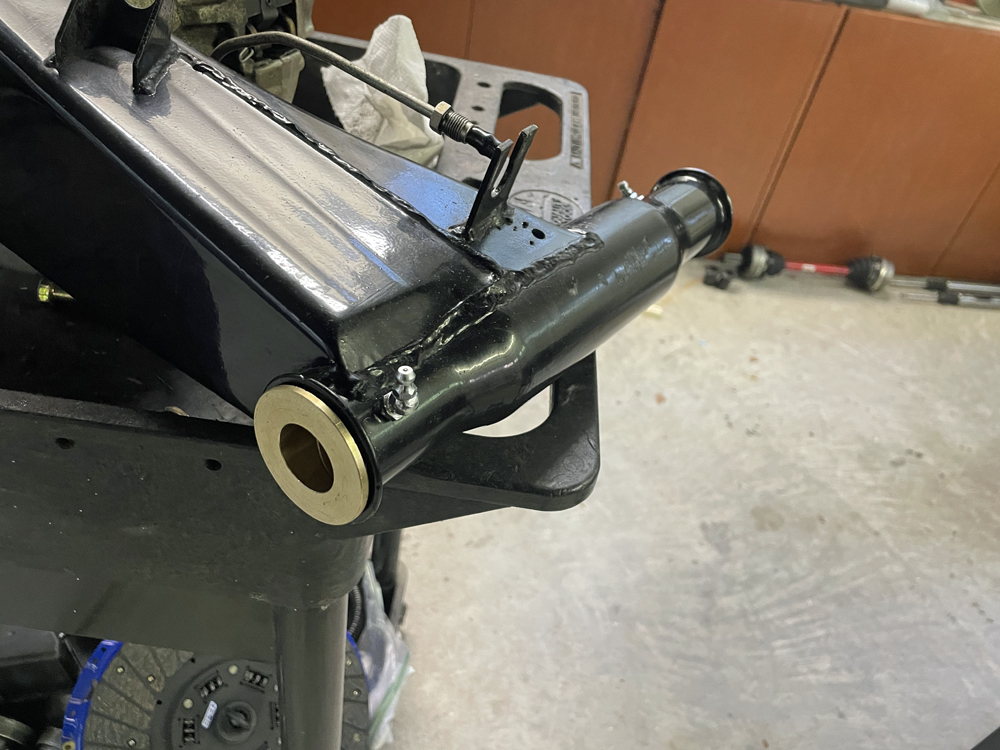
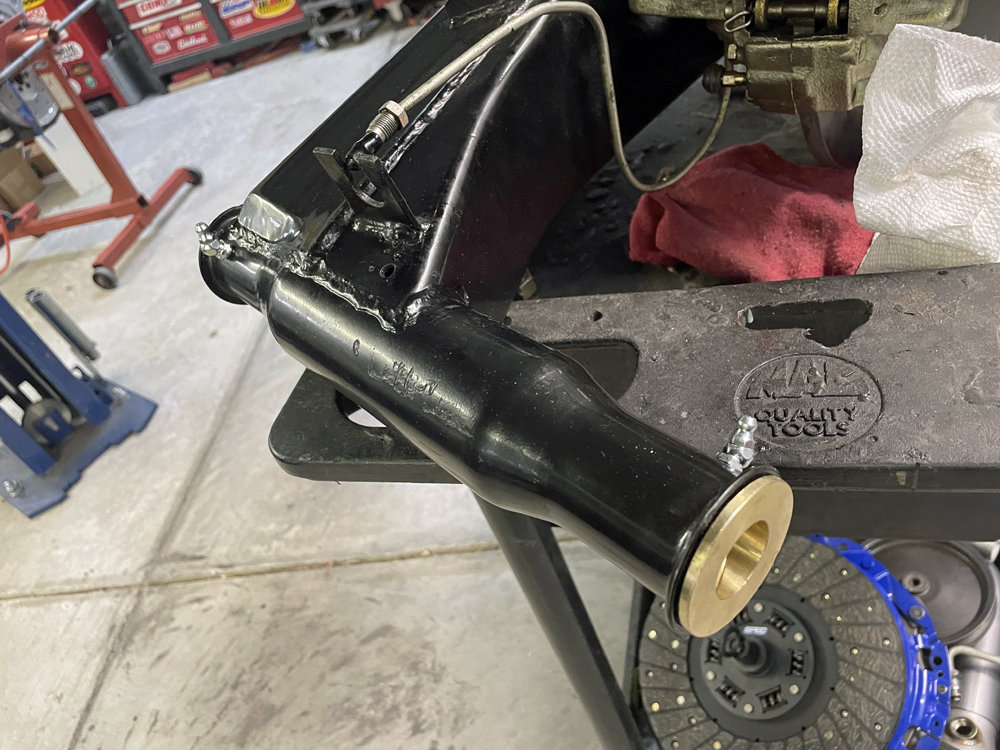
He didn't like having it still say 914 2.0 on the rear. So he had four of these GT tags cut from stainless steel and then polished one of them. 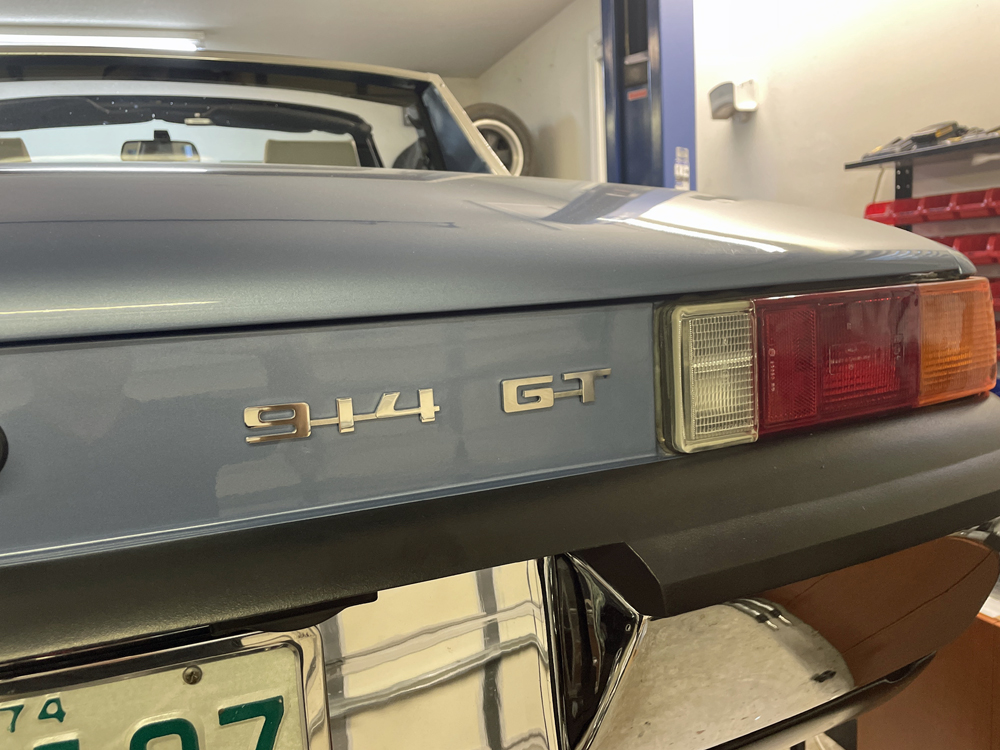
Posted by: Cairo94507 Aug 4 2022, 09:41 AM
Very nicely done.
Posted by: jerhofer Aug 4 2022, 07:08 PM
Matt installed the sport muffler this evening. Sounds great at full throttle but a little boomy at moderate throttle.
He said the rear end feels much more planted now that he has replaced the bushings.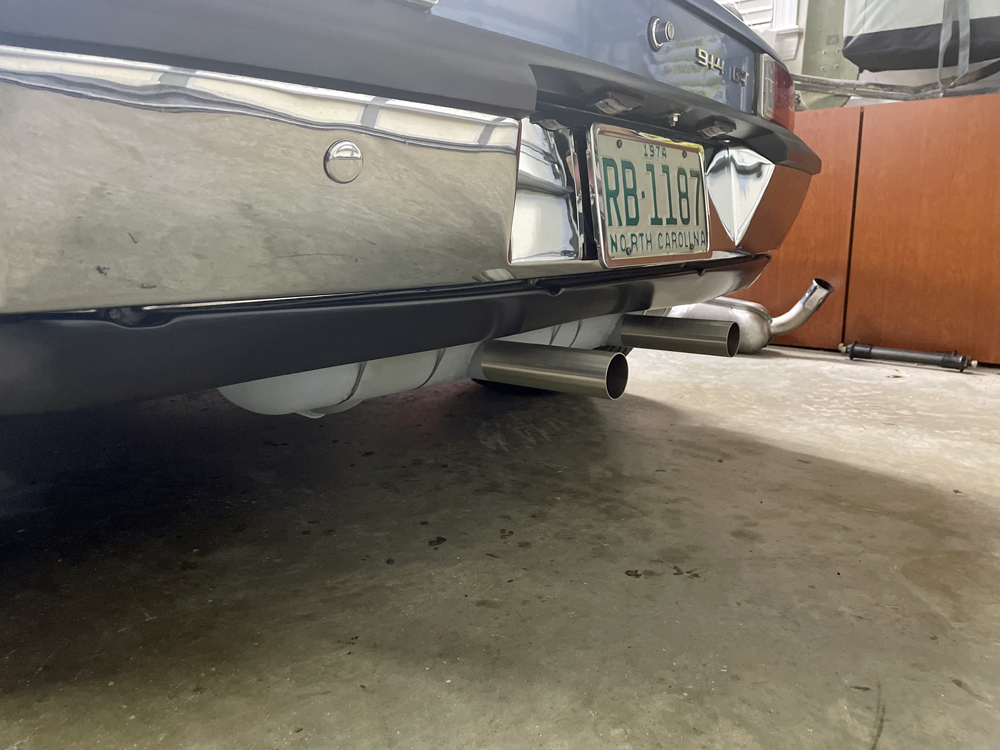
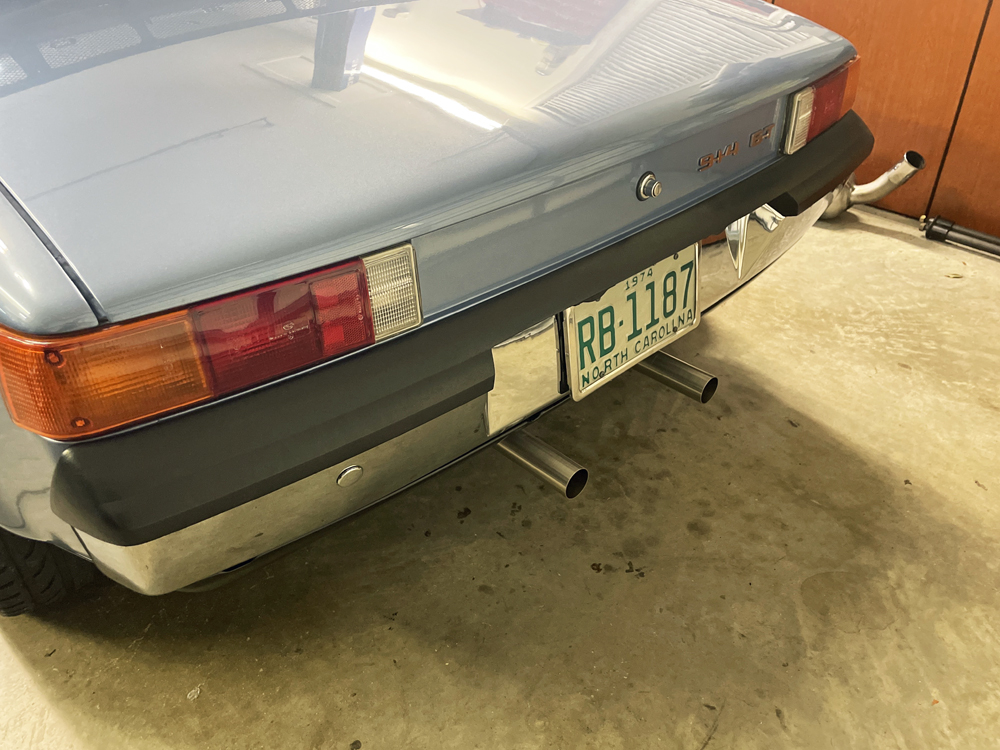
Posted by: jerhofer Aug 8 2022, 12:46 PM
Just got word that Ed Scott passed away this morning. Sad day.
For those of you who don't know who Ed Scott is, reading the first post in this thread will tell you.
Posted by: jerhofer Feb 3 2023, 04:12 PM
Matt had the interior done over at Sonderwerks in Cornelius, NC. They also changed the wheel centers to silver.
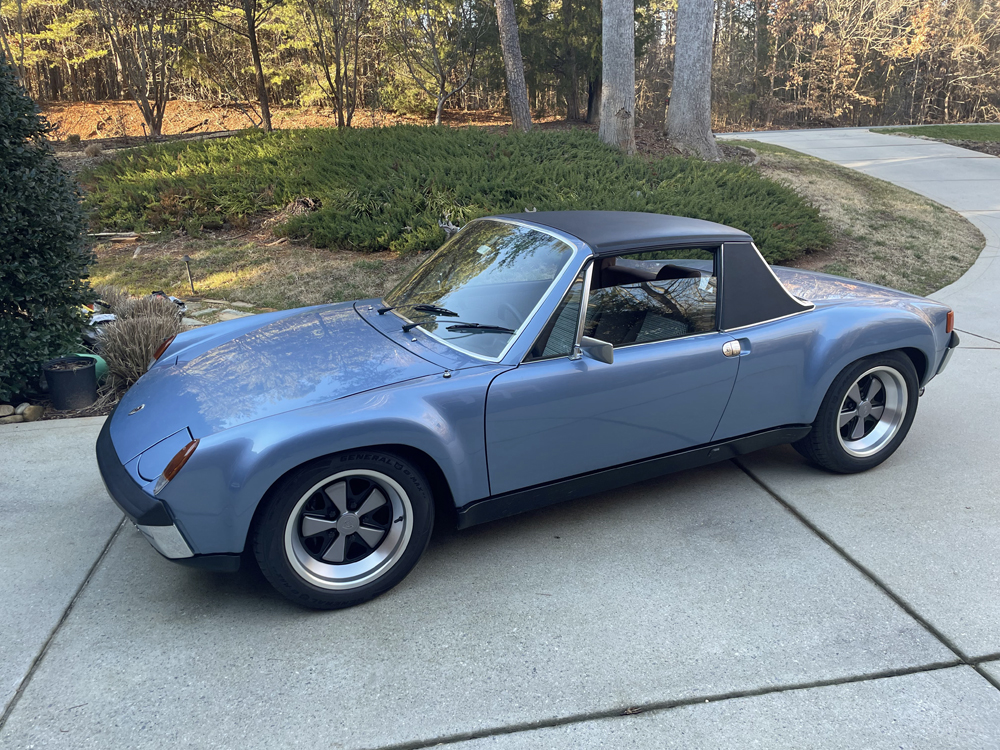
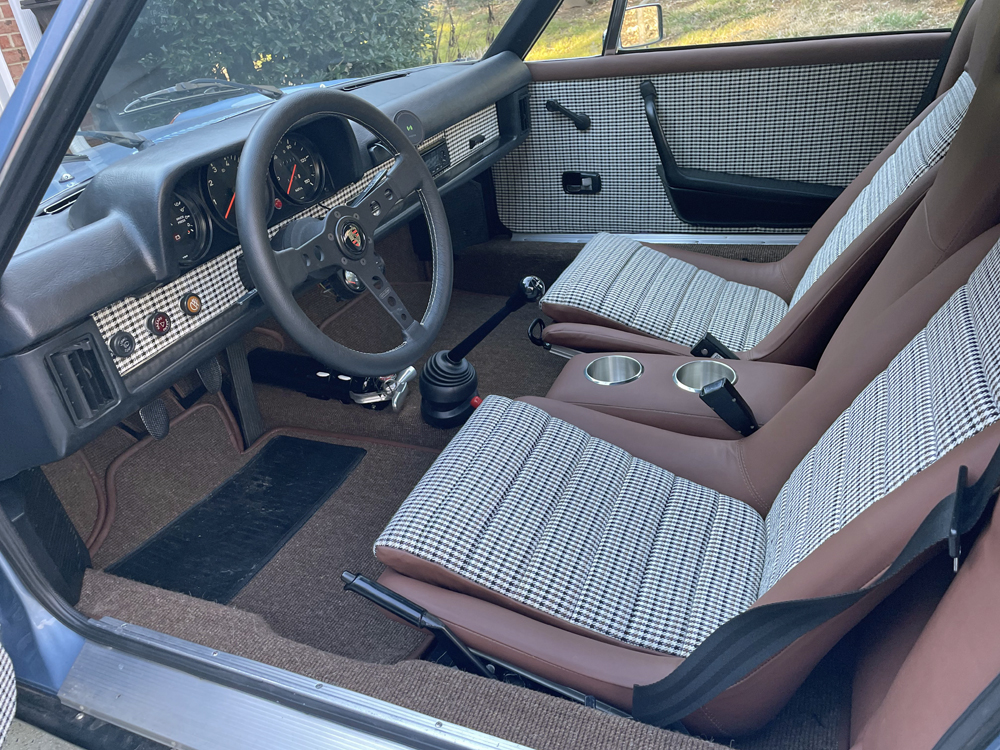
Posted by: mepstein Feb 3 2023, 04:22 PM
Beautiful
Posted by: Cairo94507 Feb 3 2023, 04:41 PM
I agree with Mark; a truly beautiful car and the interior takes it to the next level.
Posted by: BillJ Feb 3 2023, 05:05 PM
Saw your car the other day. It is super nice!
Posted by: jerhofer Feb 5 2023, 08:39 AM
Saw your car the other day. It is super nice!
Thanks.
Posted by: jerhofer Mar 7 2023, 05:10 PM
Hey that's a pretty nice 914! It would look awesome with a tan interior
A little shout out to Perry. My son is storing the 914 in my garage for a bit while he works on his other cars. While he was here, he told me that the people who did the interior told him that was the finest job of fitting flares that they had ever seen! And all they do is work on Porsche's.
Posted by: Cairo94507 Mar 8 2023, 09:31 AM
That is quite the compliment and acknowledgment of true craftsmanship.
Posted by: DRPHIL914 Mar 8 2023, 10:53 AM
Hey that's a pretty nice 914! It would look awesome with a tan interior
@jerhofer
A little shout out to Perry. My son is storing the 914 in my garage for a bit while he works on his other cars. While he was here, he told me that the people who did the interior told him that was the finest job of fitting flares that they had ever seen! And all they do is work on Porsche's.
i saw pictures from Sonderwerks of your car and interior. was your car at Sonderwerks last year? i had my hood up there for a repaint due to taking a tailpipe into the front hood, and i think your car was there when i came up to pick it up. I live down in Bluffton Sc but my son lives in Charlotte so we come up fairly often. I just read thru the whole thread today, hope to see that car in person sometime!
Phil.
beautiful car and awesome interior!!
Posted by: porschetub Mar 8 2023, 04:34 PM
Hey that's a pretty nice 914! It would look awesome with a tan interior
A little shout out to Perry. My son is storing the 914 in my garage for a bit while he works on his other cars. While he was here, he told me that the people who did the interior told him that was the finest job of fitting flares that they had ever seen! And all they do is work on Porsche's.
Stunning car after all you went thru ,well done
 .
.
Posted by: jerhofer Mar 9 2023, 06:21 AM
Hey that's a pretty nice 914! It would look awesome with a tan interior
@jerhofer
A little shout out to Perry. My son is storing the 914 in my garage for a bit while he works on his other cars. While he was here, he told me that the people who did the interior told him that was the finest job of fitting flares that they had ever seen! And all they do is work on Porsche's.
i saw pictures from Sonderwerks of your car and interior. was your car at Sonderwerks last year? i had my hood up there for a repaint due to taking a tailpipe into the front hood, and i think your car was there when i came up to pick it up. I live down in Bluffton Sc but my son lives in Charlotte so we come up fairly often. I just read thru the whole thread today, hope to see that car in person sometime!
Phil.
beautiful car and awesome interior!!
This car was at Sonderwerks last fall. My son now owns it and has been upgrading it.
Posted by: jerhofer Mar 10 2023, 03:08 PM
I realized I never had a chance to take photos of the bottom of the car since the engine was installed. I bought a set of heat shields for the exhaust system. Matt installed them. I was trying to keep some heat out of the trunk since we had the computer installed there.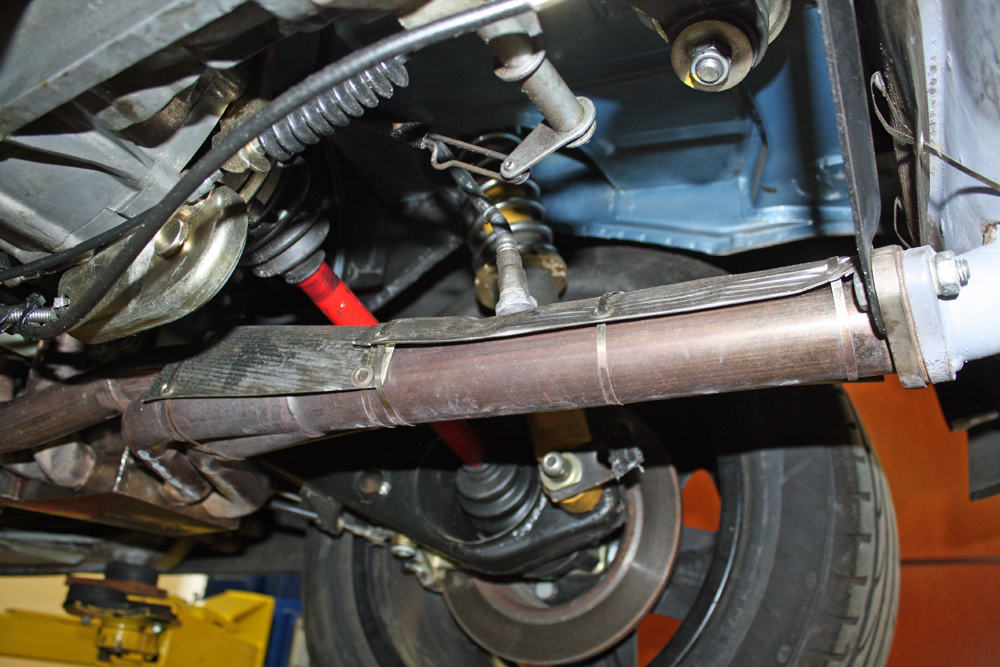
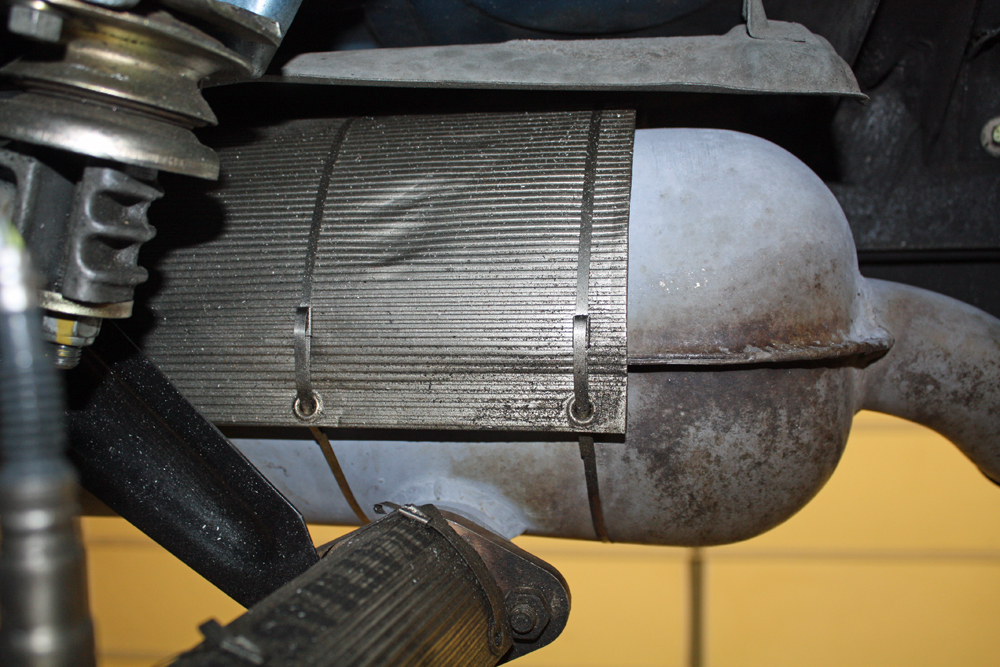

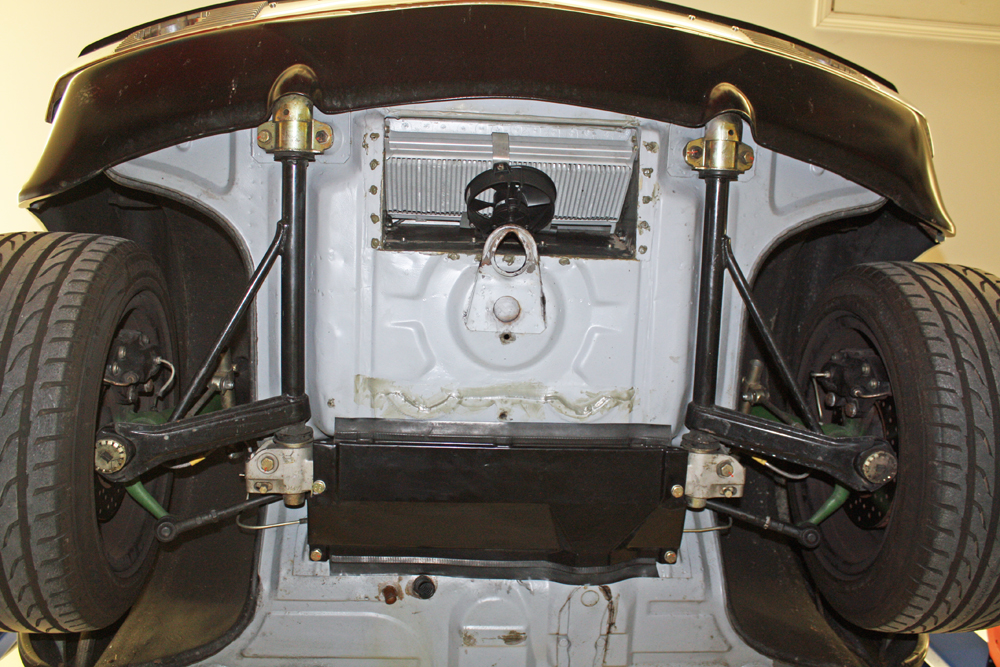
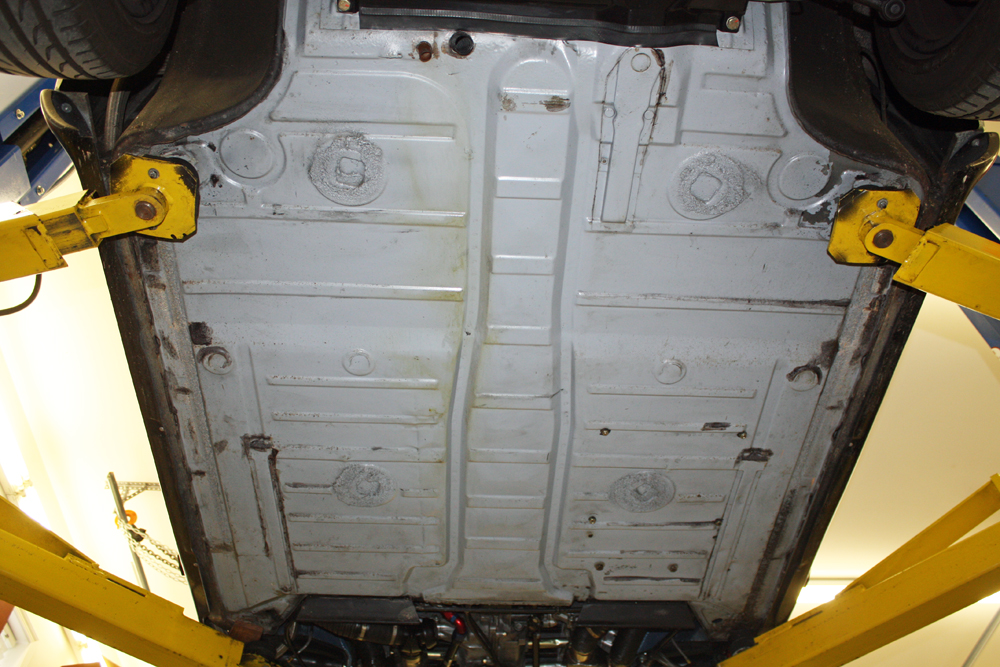
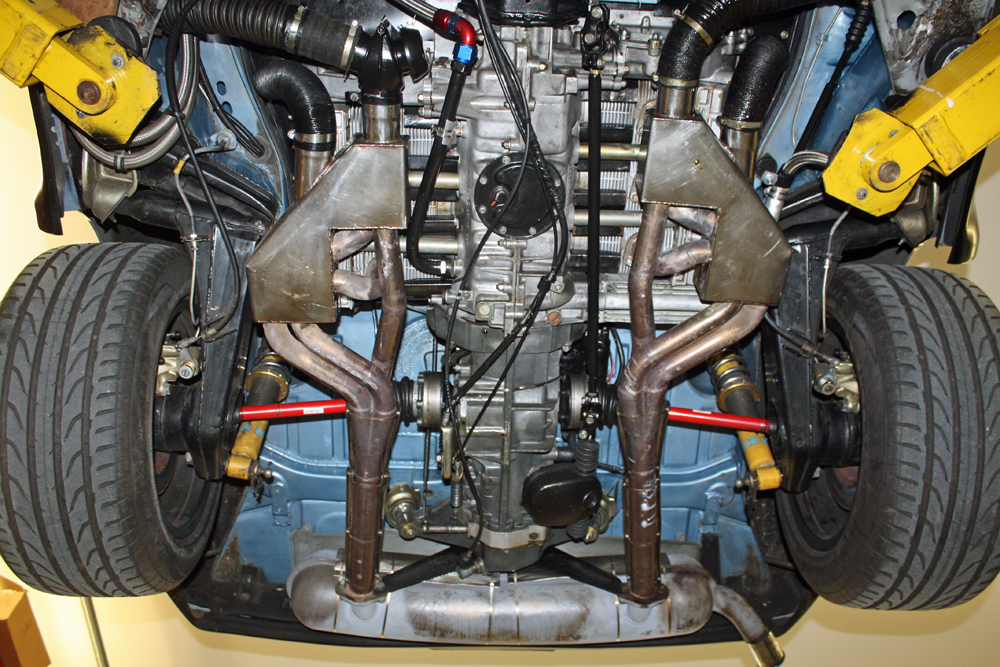
Powered by Invision Power Board (http://www.invisionboard.com)
© Invision Power Services (http://www.invisionpower.com)