Printable Version of Topic
Click here to view this topic in its original format
914World.com _ 914World Garage _ Widebody LS6 rebuild.
Posted by: dan10101 Jul 5 2018, 04:15 PM
I'm back in the 914 world after more than 35 years!

I am the lucky winner of The car known as the Screamcicle and probably several other names.
It was originally built by Bill who frequented this forum.
Then bought by Paul who also was a 914 world member improved and refined this 550hp monster.
Unfortunate events left the front end damaged and in need of extensive repair.
Paul didn't want the car parted out, rather he wanted it to be purchased by someone who would bring it back to it's most recent glorious state.
Enter me... I had just sold my hit rod El Camino and finally the timing was right. Andrew sent me a note as he knew I was looking for a project. And a Hot rod 914 fit the profile. A lightweight classic car that could be autocrossed, track driven, and maybe a trip to taco Bell.
My previous 914 was a 1971 1.7 with Monza exhaust, Weber carbs, and Rivera wheels. This will be a big change. Fortunately I will have been buffered into the outlaw world by Andyrew's build over the last 15+ years. Quite excited to have Son/Father outlaw widebodys.
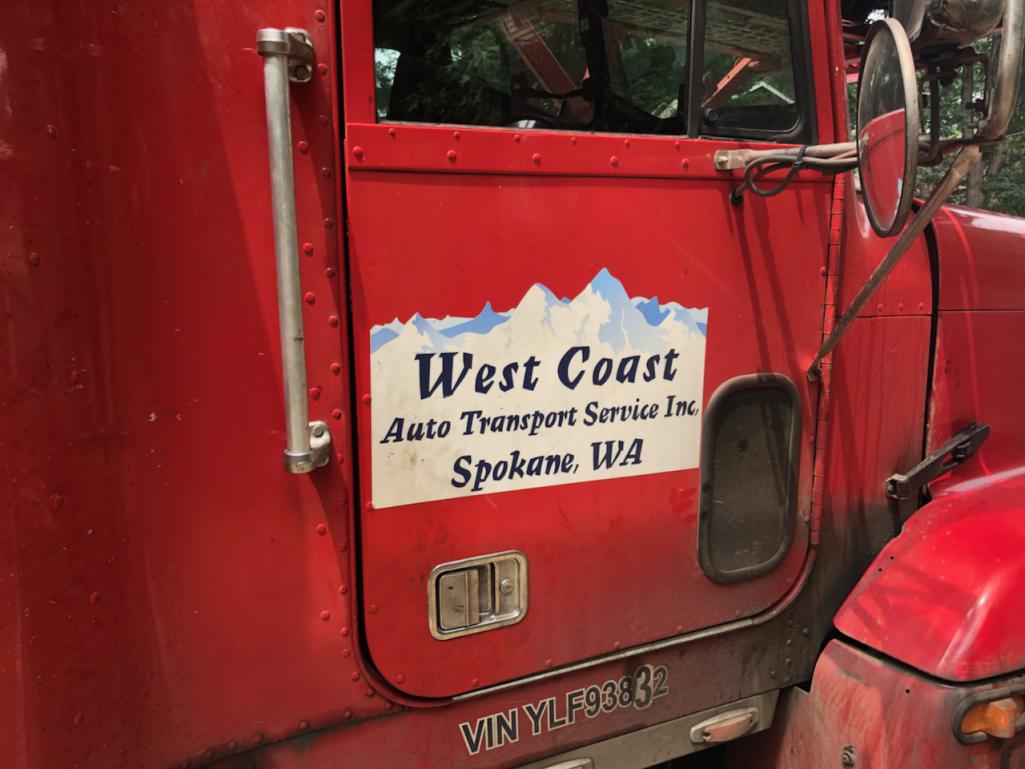
Many of you know that the car was on the east coast and I live on the west coast. It was picked up yesterday but the transportation company. Paul was a great help accommodateing the driver and reassuring that it would tranport just fine. I wish this company had tracking but at least this way I won't be watching it's every move as I wait the 7-10 days going coast to coast.
If you see a white 914 on a red auto transport truck. Please let me know!
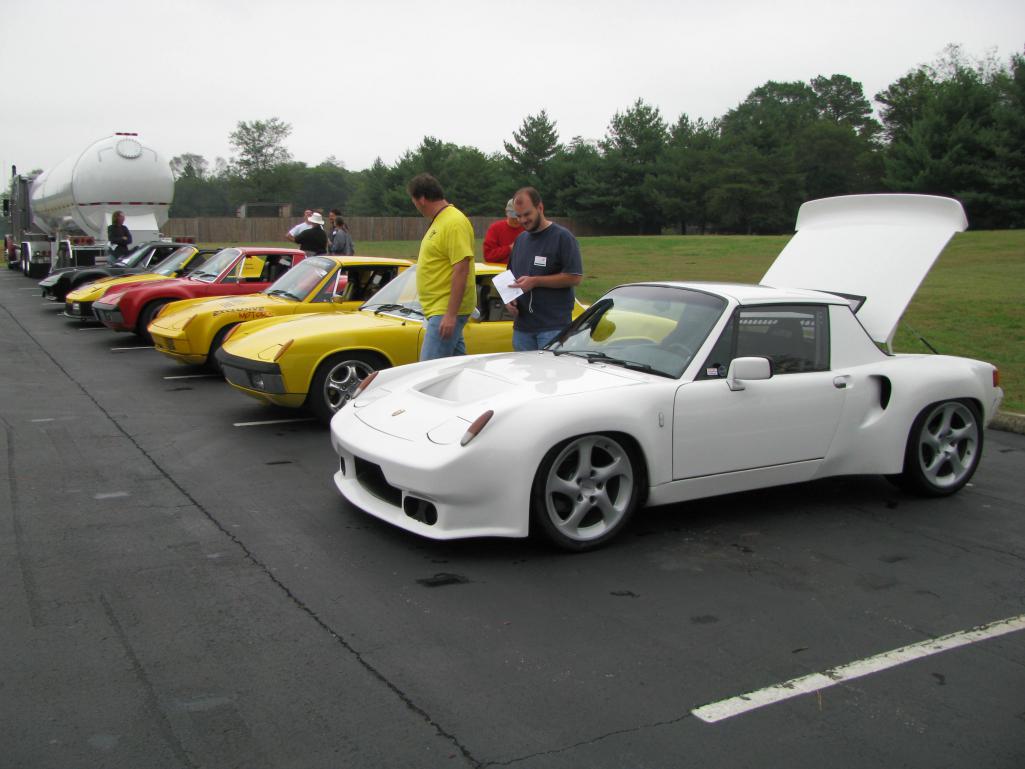
I'll ad to this thread more later,. But here's a teaser picture.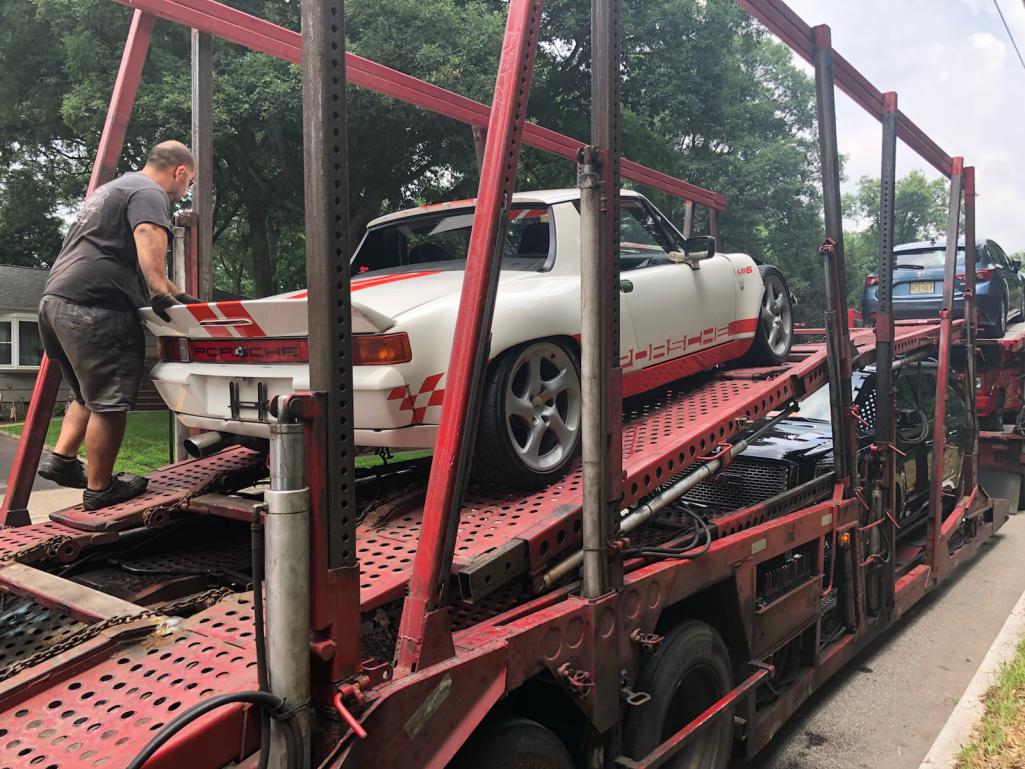
Posted by: Mueller Jul 5 2018, 04:17 PM
Congrats!
Posted by: dan10101 Jul 5 2018, 04:22 PM
Thanks Mike,. It'll be a challenge and I'll need help , but it'll get done.
Posted by: ClayPerrine Jul 5 2018, 04:55 PM
Saw this car at Hershey a few years ago. Hell of a nice car.
Congrats!

Posted by: burton73 Jul 5 2018, 04:59 PM
TORQUE-o-holic this car is.
Happy you got it
Enjoy the journey. Please keep us posted on the rebuild of it.
Bob B


Posted by: mgp4591 Jul 5 2018, 05:15 PM
That's great that you've got this monster in your hands now! And welcome back... Andrew and I talked a little over 3 years ago about our projects at the 2015 WCR. He's finished his while I went through some major setbacks but I'm still working on it. It'll be good to see your progress and will be a boost to my motivation as well. I'm looking forward to seeing these father/son Outlaws at the next WCR if that's what your goal is - She's in great hands! ![popcorn[1].gif](style_emoticons/default/popcorn[1].gif)
Posted by: rick 918-S Jul 5 2018, 06:28 PM
Bill and I ran down to the Rocket City Ramble. 
Posted by: Jeff Bowlsby Jul 5 2018, 07:06 PM
Hi Dan, congrats...this will be a great project. Is this a real 1974 LE car? Please post or PM me the VIN.
Posted by: Travis Neff Jul 5 2018, 07:26 PM
Great project, that is one seriously cool car.
Posted by: dan10101 Jul 5 2018, 07:28 PM
Clay,. Thanks,. That was one of my decision factors,. A lot of people saw it and liked it enough to give a people's award.
Bob, thanks, I will be posting updates.
MGP. Andrew and I will motivate each other as well. I definitely want to park / drive these side by side.
Rick,. I was reading the old posts and saw that. I d
Had and will have lots of time to do research.
Jeff. I think they are calling it a tribute car, but I'll get you the VIN anyways.
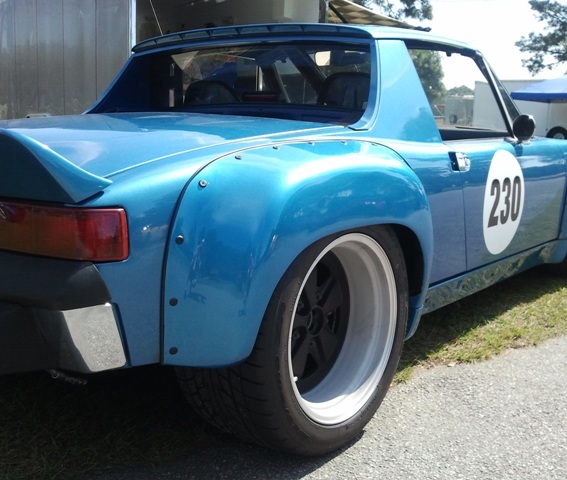
One more picture of what it looked like in it's prime then we'll get to the current situation.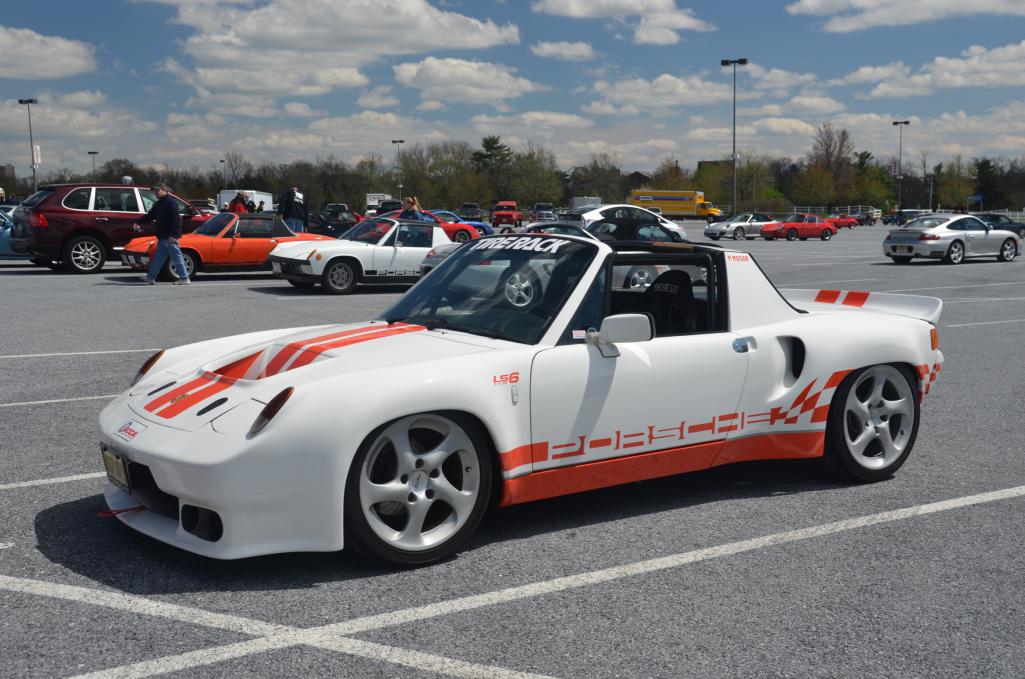
Posted by: campbellcj Jul 5 2018, 08:09 PM
Cool looking car - must be fairly frightening with that power/weight. Congrats and looking forward to your repair/build updates.
Posted by: Racer Chris Jul 5 2018, 08:21 PM
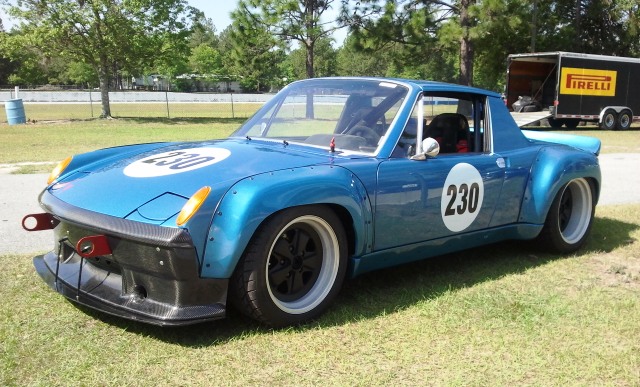
Here's a pic of Paul at the Meadowlands in 2011 on the day we co-drove the car in an autocross, right after Hershey I think.
I made some changes to the suspension for Paul based on the experience.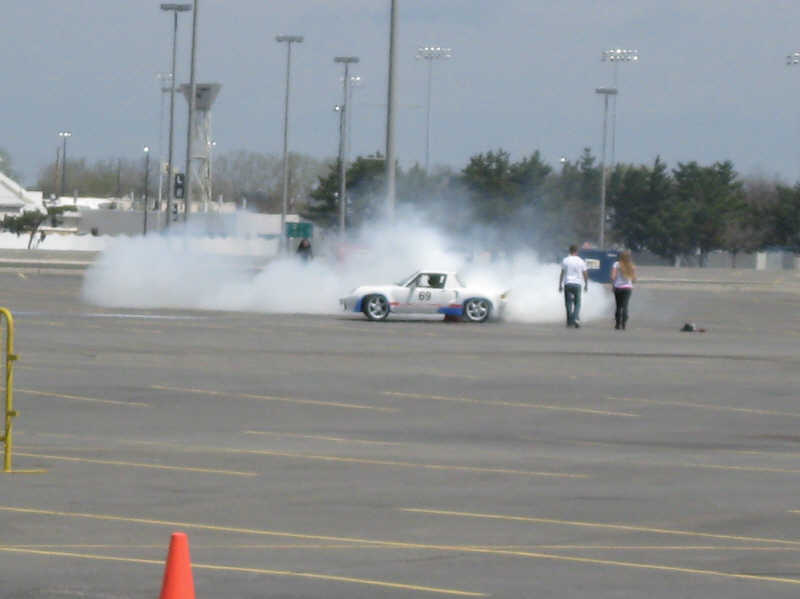
Posted by: Cairo94507 Jul 5 2018, 08:37 PM
Congratulations Dan. That is a terrific car ad I look forward to seeing it repaired and back on the road.
Posted by: JRust Jul 5 2018, 10:14 PM
Holy cow Dan! You are coming back in style my friend. That car is Bad ass. I hope you put it back just like it was. I LOVE the look of that car. Then the build is just awesome. Plus your even close enough for me to come check it out sometime. Can't wait to see your progress
Posted by: Edward Blume Jul 5 2018, 11:02 PM
Congrats! 
Posted by: dan10101 Jul 5 2018, 11:10 PM
Thanks guys .
Jamie and all, the plan is to go back with the Sheridan bodywork.
Andrew and I just spent some time taking measurements. I'll be able to see how far off the white one is compared to his orange one. Its far from exact but it will give me some idea.
Posted by: dan10101 Jul 5 2018, 11:12 PM
Chris,
Thanks for.the picture. I might try my had drifting
Posted by: Andyrew Jul 5 2018, 11:55 PM
To say I am excited is an understatement
We have been strategizing this for a while now and have a decent plan of attack. I'll let Dad post on that but how he does the repair will be VERY interesting to watch. Unfortunately I wont be able to help much due to location...
This is going to be a VERY long couple weeks waiting for it to show up 
Im already bench racing in my head... Loosing.... But still bench racing 
Posted by: Racer Chris Jul 6 2018, 05:06 AM

Chris,
Thanks for.the picture. I might try my had drifting
That day the car was way too loose, even for drifting.
He did a full 360, smoking the tires while trying to get the car going in the right direction again, after a spin on-course.
#fail

Posted by: tygaboy Jul 6 2018, 07:05 AM
Sounds like the next Workshop Day should be at Dan's? 
Looking forward to watching. Let me know if there's anything I can do to help out.
Posted by: dan10101 Jul 6 2018, 09:04 AM
Chris,
Thanks for.the picture. I might try my had drifting
That day the car was way too loose, even for drifting.
He did a full 360, smoking the tires while trying to get the car going in the right direction again, after a spin on-course.
#fail
I've been there before felt the smiles and the frowns


Posted by: dan10101 Jul 6 2018, 09:07 AM
Sounds like the next Workshop Day should be at Dan's?
Looking forward to watching. Let me know if there's anything I can do to help out.
Build partyat my house!
You bring all the tools I'll supply the mess.
Posted by: burton73 Jul 6 2018, 03:05 PM
What is your take on how to redo your car?
Transplant all the goodies in a new body or get a body shop to rework the body on this one?
Or are you a guy with mad skill sets like we have seen here?
Bob B


Posted by: Andyrew Jul 6 2018, 07:08 PM


That's my guess to how it's actually going to go down
Posted by: Philip W. Jul 6 2018, 08:02 PM
i think i saw this car at okteenerfest 4 years ago in Townsend TN, and he lost the clutch on the first day! 
really nice to see it reacquired by someone who can get her back on the road! good luck with the restoration/rehab.
Posted by: r_towle Jul 6 2018, 09:16 PM
Are there pics from the front?
A thread I missed?
Is Paul OK?
I hope the magic gas can survived!!!
Posted by: Andyrew Jul 6 2018, 10:47 PM
Are there pics from the front?
A thread I missed?
Is Paul OK?
I hope the magic gas can survived!!!
http://www.914world.com/bbs2/index.php?showtopic=327081
Here you go
Posted by: 914-300Hemi Jul 6 2018, 11:12 PM
Congrats on a great looking car. Looks like a fun project.
Posted by: 9144me2enjoy Jul 6 2018, 11:37 PM
Congratsulations on your purchase, I had just PM the previous owner about buying the engine, my loss I should of just bought the car! IF you loose interest in the rebuild let me know, I would love to take it off your hands!
Posted by: dan10101 Jul 7 2018, 12:06 AM
Congratsulations on your purchase, I had just PM the previous owner about buying the engine, my loss I should of just bought the car! IF you loose interest in the rebuild let me know, I would love to take it off your hands!
Thanks for the offer.
It's not likely that I would loose interest in my dream car. I've wanted one since Hot Rod Magazine did an article on Rod Simpsons red V8.
Yes I'll have earn it, so to speak, but all the better to earn a piece of it. This will make it back on the road.
You're pretty close to me relatively speaking. I'm in Eagle Point.
Posted by: dan10101 Jul 7 2018, 12:11 AM
That's my guess to how it's actually going to go down
Yep pretty much. I need to get my hands on it to put a plan together. I'm toying with a couple options. I'll post more pictures next week.
Posted by: mgp4591 Jul 7 2018, 01:10 AM
That's my guess to how it's actually going to go down
Sounds familiar!!

Posted by: Racer Chris Jul 7 2018, 02:44 PM
I remember standing next to this car when it was on a chassis dyno up the street from my shop right after a camshaft change (to de-tune it slightly) and new crank/rod bearings.
I watched the 180mph speedo get buried with the left rear wheel no more than 2 feet from my right leg.
Posted by: dan10101 Jul 7 2018, 05:50 PM
I remember standing next to this car when it was on a chassis dyno up the street from my shop right after a camshaft change (to de-tune it slightly) and new crank/rod bearings.
I watched the 180mph speedo get buried with the left rear wheel no more than 2 feet from my right leg.
That's crazy. Do you remember any numbers?
I've been trying to figure out which cam is in it.
It looks like a combination of 2 profiles.
Posted by: dan10101 Jul 7 2018, 06:50 PM
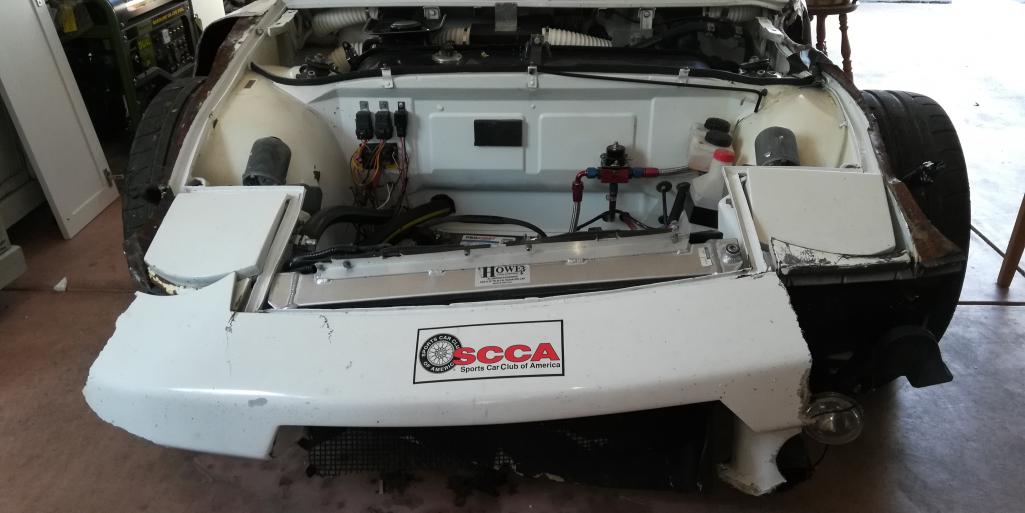
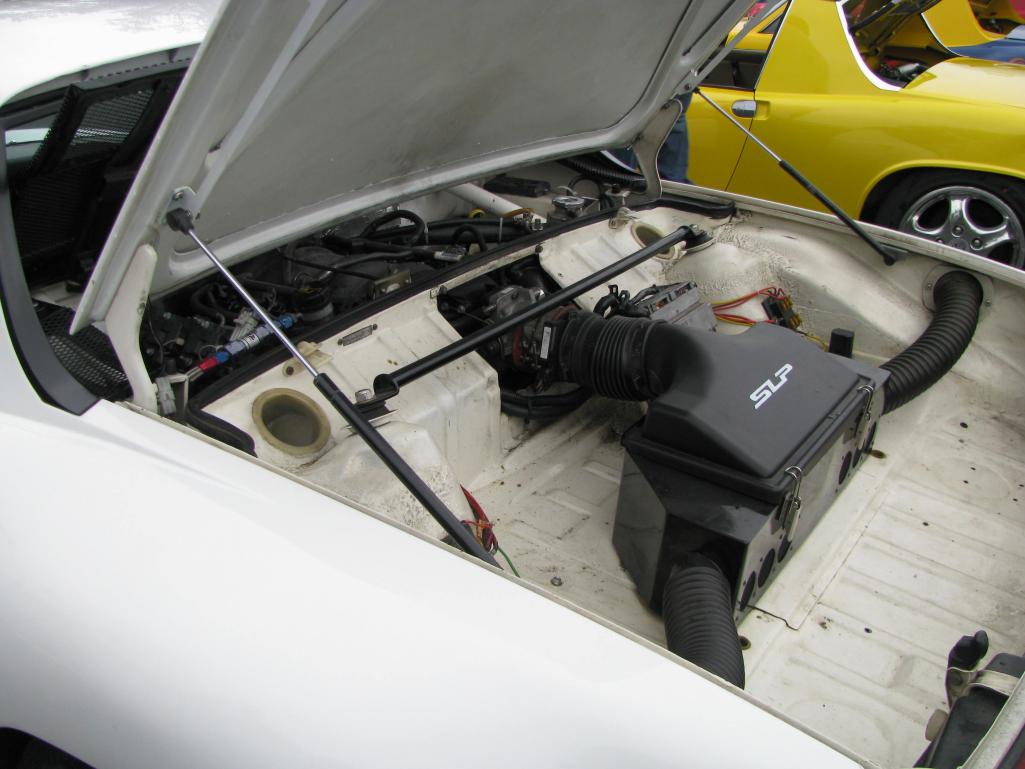
Here's a teaser of the current condition. Yes Paul is ok. Probably a bit heartbroken I know I was when I did similar work to my BMW.
The 914 sustained front end damage. But fortunately the really important stuff is fine. Even the radiator looks ok.
I'll post more when it's in my hands. Keep a look out for a red truck car carrier doing the cross country bit. Let me know if you see it!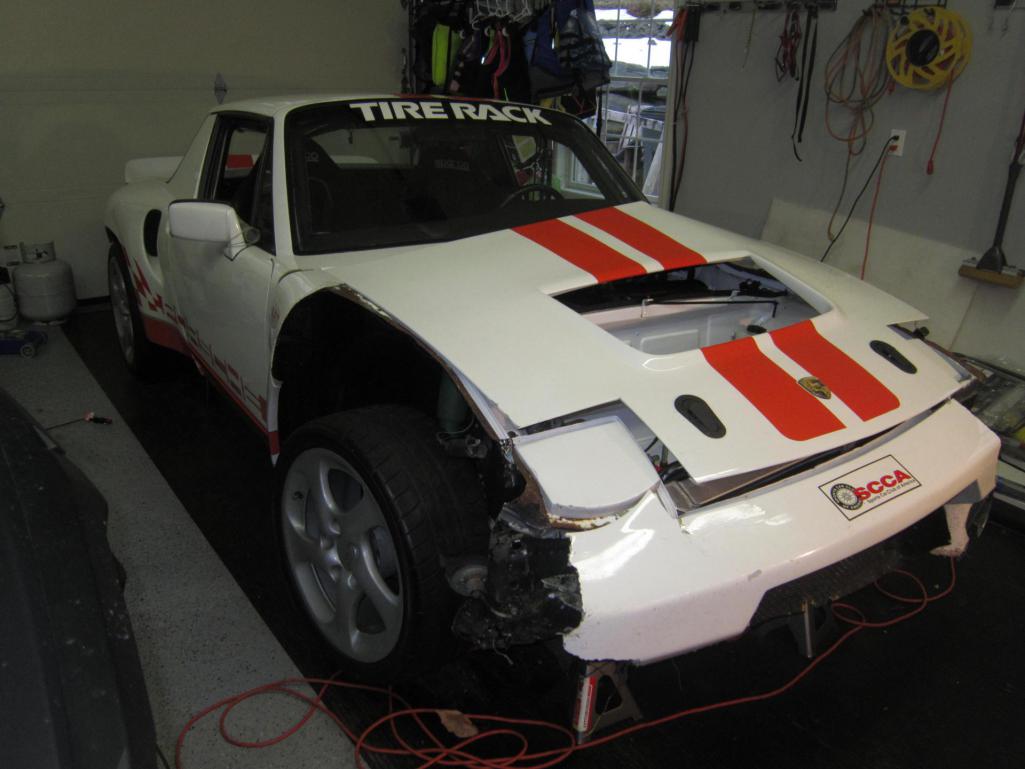
Posted by: Racer Chris Jul 8 2018, 12:53 PM
That's crazy. Do you remember any numbers?
I've been trying to figure out which cam is in it.
It looks like a combination of 2 profiles.
I want to say 425 at the wheels but that's not a certain memory. I don't think I have the dyno graph in my records.
The cam was ground for 1.8 ratio lifters IIRC, which were supplied with the camshaft. I don't remember the cam mfr & p/n but it was more conservative than the one Bill built the engine with.
Posted by: dan10101 Jul 8 2018, 07:11 PM
That's crazy. Do you remember any numbers?
I've been trying to figure out which cam is in it.
It looks like a combination of 2 profiles.
I want to say 425 at the wheels but that's not a certain memory. I don't think I have the dyno graph in my records.
The cam was ground for 1.8 ratio lifters IIRC, which were supplied with the camshaft. I don't remember the cam mfr & p/n but it was more conservative than the one Bill built the engine with.
That actually sounds pretty good. Thank
Posted by: whitetwinturbo Jul 9 2018, 08:16 PM
 ............ looks like it might by fast
Posted by: dan10101 Jul 9 2018, 10:57 PM
............ looks like it might by fast well, maybe. At least fast enough for me...
Posted by: 9144me2enjoy Jul 10 2018, 06:44 AM
Congratsulations on your purchase, I had just PM the previous owner about buying the engine, my loss I should of just bought the car! IF you loose interest in the rebuild let me know, I would love to take it off your hands!
Thanks for the offer.
It's not likely that I would loose interest in my dream car. I've wanted one since Hot Rod Magazine did an article on Rod Simpsons red V8.
Yes I'll have earn it, so to speak, but all the better to earn a piece of it. This will make it back on the road.
You're pretty close to me relatively speaking. I'm in Eagle Point.
Dan wishing you the best on the rebuild, its your dream now! Live it, treasure it, enjoy it! Beautiful car, hope to cross paths down the road. Roy
Posted by: dan10101 Jul 18 2018, 12:26 AM
It's HERE!!
longest 13 days of my life...
Posted by: dan10101 Jul 18 2018, 12:28 AM
It's HERE!!
longest 13 days of my life...
Posted by: bulitt Jul 18 2018, 02:54 AM
Thanks for saving this car!
Here is the link to Bills Thread...
http://www.914world.com/bbs2/index.php?showtopic=40674&st=0
And you can search for his other threads...
11.2 in the Qtr mile...
http://www.914world.com/bbs2/index.php?showtopic=87867&hl=
Posted by: dan10101 Jul 18 2018, 12:33 PM
Thanks for saving this car!
Here is the link to Bills Thread...
http://www.914world.com/bbs2/index.php?showtopic=40674&st=0
And you can search for his other threads...
11.2 in the Qtr mile...
http://www.914world.com/bbs2/index.php?showtopic=87867&hl=
EDIT. Somehow I missed that first thread. And it's always fun to read the 2nd. THANKS
I have. Thanks.
I needed to fill up 2 weeks of time..
Posted by: dan10101 Jul 18 2018, 06:56 PM
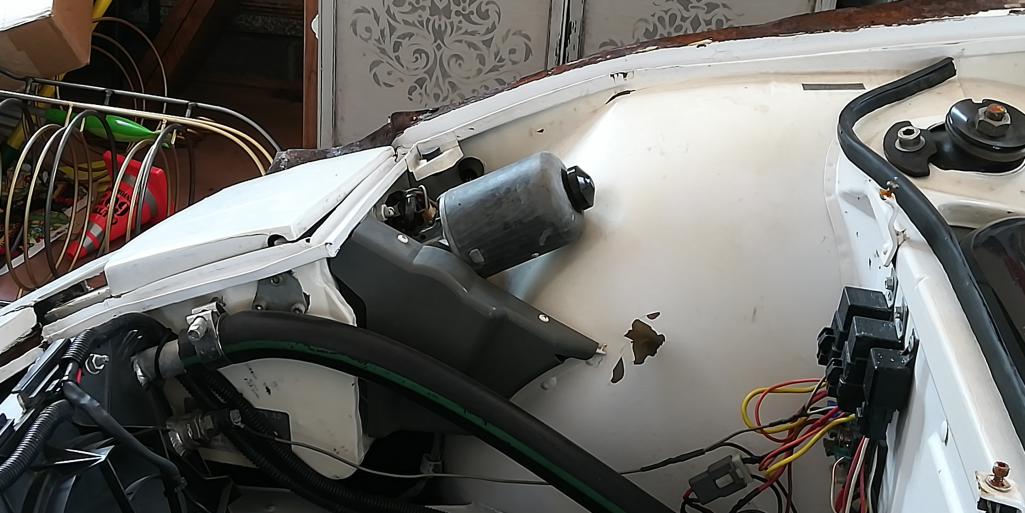
Well, I removed the torqued fiberglass front trunk lid and turned up the torsion bar on the drivers side which was completely backed off and suddenly it's not looking too bad. I think at this point it's actually driveable. Ok, maybe not very far... Yes, I'll need some sheet metal around the drivers A pillar that took a nice solid tree, and maybe some around the passenger headlight that got pushed down by another tree.
Big beefy brake calipers and rotors. Sway bar looks great, LCA are probably bent, but not much else underneath except for sheetmetal. I need to get it up on the rack to know for sure.
Posted by: JRust Jul 18 2018, 07:46 PM
So cool! Glad to see it made it okay. Always a worry with transport. Especially when it get's moved rig to rig a few times. Congrats on getting it finally. Now the fun really begins. Can't wait to see it come together Dan. As soon as my car is on the road I've got to come down to see it 
Posted by: dan10101 Jul 18 2018, 07:49 PM
So cool! Glad to see it made it okay. Always a worry with transport. Especially when it get's moved rig to rig a few times. Congrats on getting it finally. Now the fun really begins. Can't wait to see it come together Dan. As soon as my car is on the road I've got to come down to see it
I was hoping to have something to show you when you were cruising by. Give me a holler next time your in the vicinity. We also provide B&B for our weary traveling friends.
Posted by: Andyrew Jul 18 2018, 11:40 PM
Good candidate for getting a portapower.
Do you have a stud gun? I have your slide hammer here.
Do you have some heavy duty trees you can pull around or maybe build some pyramid structures out of heavy duty steel and bolt to the ground for anchor points for pulling the chassis out?
I have ideas we need to discuss
Pieces you 100% need:
Front hood (Fiberglass)
Front end (Sheridan, Do you have this on order?)
930 control arms (Or possibly 914 control arms with 914 torsion bars? http://914world.com/bbs2/lofiversion/index.php?t162853.html )
Driver side A pillar section.
Drivers side headlight bucket
Posted by: dan10101 Jul 19 2018, 12:07 AM
I placed my order in the 914 store. We'll see who can fill it, cheap...
http://www.914world.com/bbs2/index.php?showtopic=331775
The boss and I negotiated for a Sheridan order. I'm only holding off because I don't have anywhere to store it. I gotta get that BMW stripped and crushed.
I had some ideas for bending sheet metal. I have no shortage of trees, but I also was thinking we could use the lift. Either the posts for side to side or the arms for up and down. Maybe put some anchors in the concrete and reinforce the Ibeams for the lift a bit more solid. I think the bending might be minimal once the items that are heavily bent are replaced. (or just before they are replaced..) The measurements we took of Andrews car are pretty close other than the A-pillar pushed in and the passenger headlight bucket pushed down a couple inches. It's all fixable with flat sheet metal, but easier with some cheap (did I say cheap) replacement panels.
Posted by: ClayPerrine Jul 19 2018, 05:46 AM
I placed my order in the 914 store. We'll see who can fill it, cheap...
http://www.914world.com/bbs2/index.php?showtopic=331775
The boss and I negotiated for a Sheridan order. I'm only holding off because I don't have anywhere to store it. I gotta get that BMW stripped and crushed.
I had some ideas for bending sheet metal. I have no shortage of trees, but I also was thinking we could use the lift. Either the posts for side to side or the arms for up and down. Maybe put some anchors in the concrete and reinforce the Ibeams for the lift a bit more solid. I think the bending might be minimal once the items that are heavily bent are replaced. (or just before they are replaced..) The measurements we took of Andrews car are pretty close other than the A-pillar pushed in and the passenger headlight bucket pushed down a couple inches. It's all fixable with flat sheet metal, but easier with some cheap (did I say cheap) replacement panels.
I would not use the lift. It was designed with the stresses setup to support a car up in the air. Putting side loads on it changes the direction of the stress, possibly weakening it for holding a car up. Personally, I wouldn't get under a car on a lift that had been used like that.
I have pulled cars out using trees before. When my nephew got hit in his Datsun 510 years ago, I pulled it out by strapping it between 2 very large Oak trees and using a come along to pull the B-pillar out. That and 2 new doors got it back on the road.
Posted by: tygaboy Jul 19 2018, 07:20 AM
Dan -
Two words:
"tube chassis"

Posted by: dan10101 Jul 19 2018, 07:41 AM
I would not use the lift. It was designed with the stresses setup to support a car up in the air. Putting side loads on it changes the direction of the stress, possibly weakening it for holding a car up. Personally, I wouldn't get under a car on a lift that had been used like that.
I have pulled cars out using trees before. When my nephew got hit in his Datsun 510 years ago, I pulled it out by strapping it between 2 very large Oak trees and using a come along to pull the B-pillar out. That and 2 new doors got it back on the road.
Thanks Clay.
I really don't think a lot of bending will be needed once I replace the majorly bent pieces. The rest of the numbers are really close to Andrews measurements for the most part. less than 1/2" or so. I think before I spend a lot of time on how I will bend it, i need to figure out where I need to bend it.
I'll look for the trees that might do that. I might have a few that will do. Plus a Jeep with a 9000 lb winch doubled would be 18000. That should rip it apart if the button got stuck...
Posted by: dan10101 Jul 19 2018, 07:43 AM
Dan -
Two words:
"tube chassis"
This is our fallback. But actually. It's just not bad enough to warrant..
I know, you just want to come up here and build me a tube frame..
Posted by: ValcoOscar Jul 19 2018, 08:56 AM
Dan-
I met you at Tygaboys Fab day....
I was pleased to learn this past weekend that you brought this beast to the West Coast.
Once done, you and Andrew will have two of the nicest wide body 914's (w/engine swaps) around.
I'm looking forward to seeing them together in the future.


Oscar
Posted by: dan10101 Jul 19 2018, 06:41 PM
Dan-
I met you at Tygaboys Fab day....
I was pleased to learn this past weekend that you brought this beast to the West Coast.
Once done, you and Andrew will have two of the nicest wide body 914's (w/engine swaps) around.
I'm looking forward to seeing them together in the future.
Oscar
I'm sorry I couldn't be at the BBQ, but you know it was because I was expecting any day... I enjoy your stories!
In case you can't tell, we're both pretty stoked about the whole idea.
Posted by: dan10101 Jul 20 2018, 12:09 AM
I couldn't help myself, I had to take it for a quick little driveway action.
https://youtu.be/49nYweHKv28
Should be lots of fun...
Posted by: Andyrew Jul 20 2018, 10:05 AM
You can embed videos from youtube as noted below
http://www.914world.com/bbs2/index.php?showtopic=97052
Posted by: JRust Jul 20 2018, 10:14 AM
Awesome
Posted by: burton73 Jul 20 2018, 12:50 PM
Who says you cannot buy a thrill?
Laying a little rubber in a 914 V8 is great fun and you do not need to break any speed laws.
How is the radiator? No leaks?
Have fun.
Bob B
Posted by: sb914 Jul 20 2018, 12:55 PM
Do I hear a knock?
Posted by: Andyrew Jul 20 2018, 02:08 PM
Do I hear a knock?
To external for a rod knock. Sounds more like an exhaust leak. And it doesnt make that sound when on throttle.
There is however definitely valvetrain noise, but it hasnt been warmed up in a year so the lifters could need to get pumped up.
I think the engine just needs an Italian tune up
Posted by: burton73 Jul 20 2018, 02:35 PM
I ended up getting some Liqui-Moly oil flush and giving this italian tune up a try - I went for about 10 minutes on the highway at 4000RPM, red-lined it a few times, brought her back, flushed the oil, and the problem was fixed. No more lifter tick.
I had to look it up. Never heard of one. I thought it may be an age thing. My age not the car
Bob B
Posted by: dan10101 Jul 20 2018, 03:30 PM
I ended up getting some Liqui-Moly oil flush and giving this italian tune up a try - I went for about 10 minutes on the highway at 4000RPM, red-lined it a few times, brought her back, flushed the oil, and the problem was fixed. No more lifter tick.
I had to look it up. Never heard of one. I thought it may be an age thing. My age not the car
Bob B
Rislone is my oil additive of choice. I'll give it a try and see what happens.
No rod knock that I could hear. It's loading up on one cylinder like a dirty injector maybe more than one. Floor it and all that goes away. It's a mighty stallion and they get finicky at times. I'll throw some chemicals at it and see how it does.
But first... anyone have some sheet metal to sell?
Oh, the radiator seems fine, just crooked in it's mounting.
Posted by: sb914 Jul 20 2018, 04:01 PM
Dan!! What a lucky man!! that car! Can't wait to see it fixed.
Spray that monster "black on black" Andrew . Black out Everything!! Gold Fuchs!
Posted by: dan10101 Jul 20 2018, 04:09 PM
Dan!! What a lucky man!!
that car! Can't wait to see it fixed. Spray that monster "black on black" Andrew . Black out Everything!! Gold Fuchs!
Thanks, but Not a chance! I cant keep things clean.. Black would kill me.
Now RED, that's a color...
Posted by: sb914 Jul 20 2018, 04:11 PM
Dan!! What a lucky man!!
that car! Can't wait to see it fixed. Spray that monster "black on black" Andrew . Black out Everything!! Gold Fuchs!
Thanks, but Not a chance! I cant keep things clean.. Black would kill me.
Now RED, that's a color...
 Well,red is the fastest color!
Posted by: My 914 Jul 20 2018, 05:32 PM
as well.
yellow would be my second choice
Posted by: ClayPerrine Jul 20 2018, 08:46 PM
I would repaint it the same as it is now.
I LIKE the SCREAMSICLE name. If you repainted it, you couldn't use that name.
Posted by: dan10101 Jul 20 2018, 10:19 PM
I have a problem with Orange. But maybe a cherry flavored creamsicle
It would be a Blood Red Screamsicle...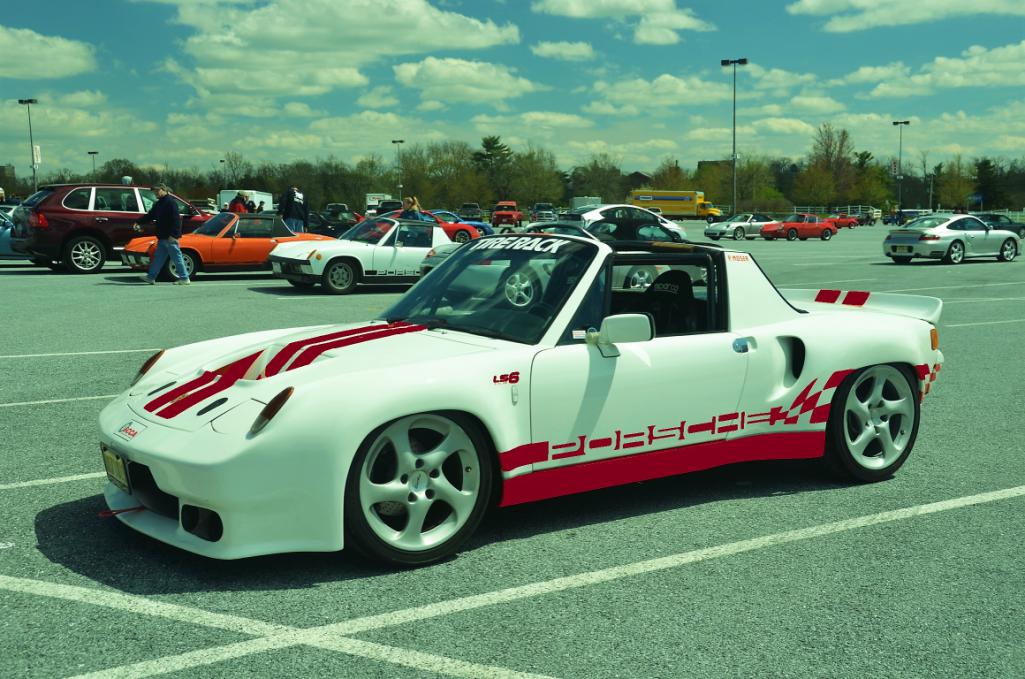
Posted by: Andyrew Jul 20 2018, 10:31 PM
I like the Cherry red! Obviously prefer the orange, but still.
Maybe a 914 specific Malga red? 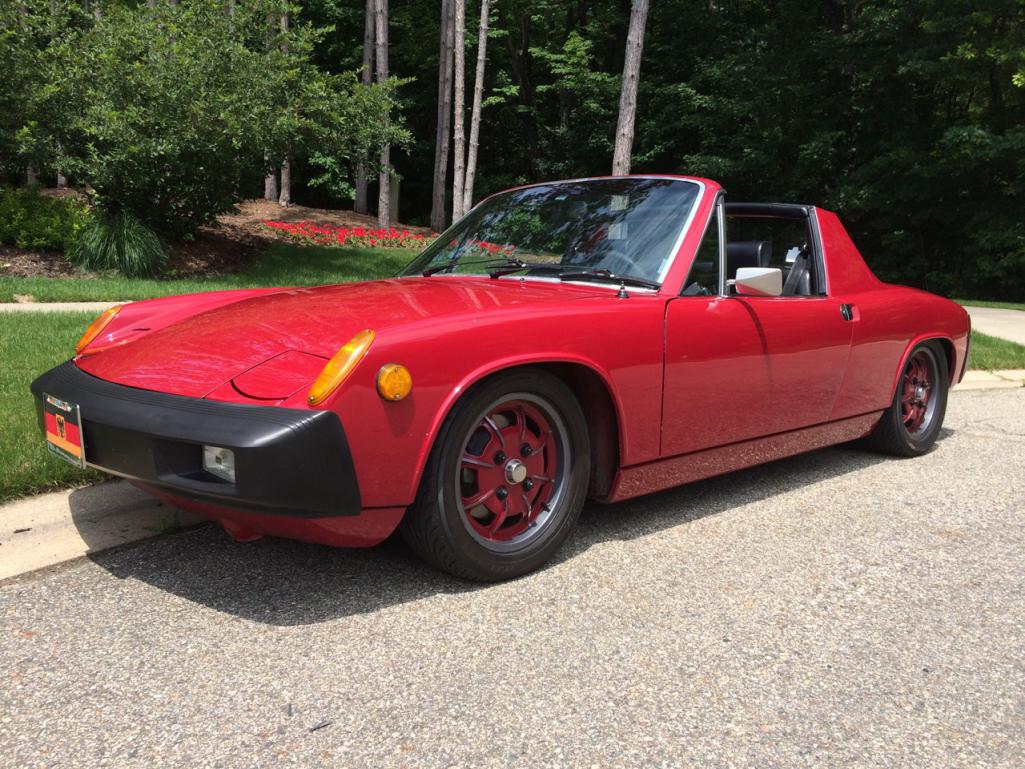
Posted by: Mike Bellis Jul 20 2018, 10:32 PM
I have a partial front clip you can have. I sawsalled it from the VIN tag forward. Includes front half of fenders and headlight buckets. A little rust here and there but free if you want it.
Posted by: dan10101 Jul 20 2018, 10:38 PM
Sure Mike, that will solve most of my problems.
i'd even make a donation to your beverage fund.
Posted by: Andyrew Jul 20 2018, 10:40 PM
I have a partial front clip you can have. I sawsalled it from the VIN tag forward. Includes front half of fenders and headlight buckets. A little rust here and there but free if you want it.

Now it makes sense to take the truck down, Save shipping and crating for the Sheridan front end, and get this front clip at the same time.
Winner Winner!
Posted by: Mike Bellis Jul 20 2018, 11:04 PM
I prefer Gin.
Just give me a heads up when you're on the way. It's sitting on the side of the house ready to go.
Posted by: dan10101 Jul 20 2018, 11:39 PM
Mike, The wheels are turning, but just not on the truck yet. It might be a couple weeks. We have other things that need attention down in Ca.
Gin is certainly doable. 
Posted by: bulitt Jul 21 2018, 06:13 AM
Some Reds from different manufacturers-
2006 Mustang Red (left) 2016 Stingray Red (right)
2003- Corvette Magnetic Red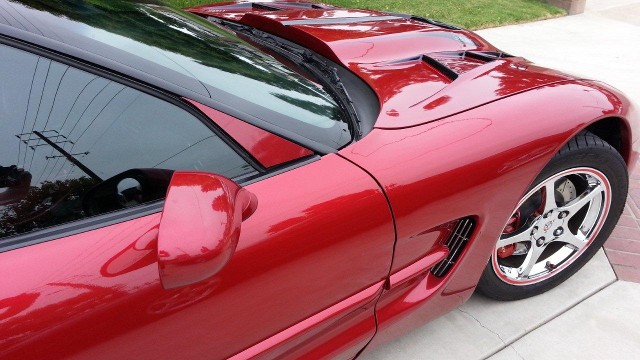
2008 Viper Venom Red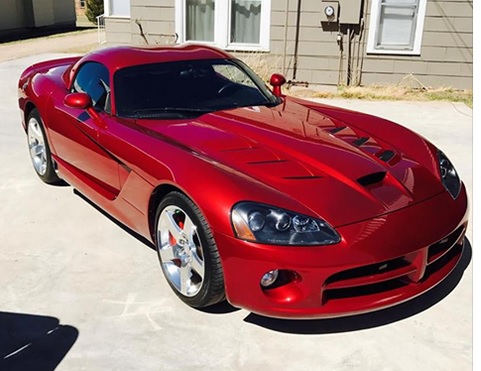
Hard to get good pics of cars with high metallic paint...They really pop in the sunlight.
Posted by: dan10101 Jul 21 2018, 08:45 AM
Some Reds from different manufacturers-
2006 Mustang Red (left) 2016 Stingray Red (right)
2003- Corvette Magnetic Red
2008 Viper Venom Red
Hard to get good pics of cars with high metallic paint...They really pop in the sunlight.

Posted by: My 914 Jul 21 2018, 10:31 AM
In some of the old posts, the car also looked great when it was all white.
Posted by: sb914 Jul 21 2018, 11:48 AM
In some of the old posts, the car also looked great when it was all white.
That car would like great in any color!
Posted by: Rand Jul 21 2018, 12:17 PM
Because of the history of this car, it would be cool to keep the same paint scheme. Changing the orange to any color Dan wants would still work and honor that. So stoked to see this car in good hands.
Posted by: dan10101 Jul 21 2018, 12:39 PM
So this is it in Red.
I like the Semi Metallic above, but I'm not that kind of painter. It will depend on budget.
The good news is my Wife is onboard. She wants it to be nice too.
The conversation went like this...
He: It costs about 600 for the hood.
But I can fix this one."
She: "well, we want it to look good..."
He: "oh my heart, this is the big one"
She: "that's just not your forte"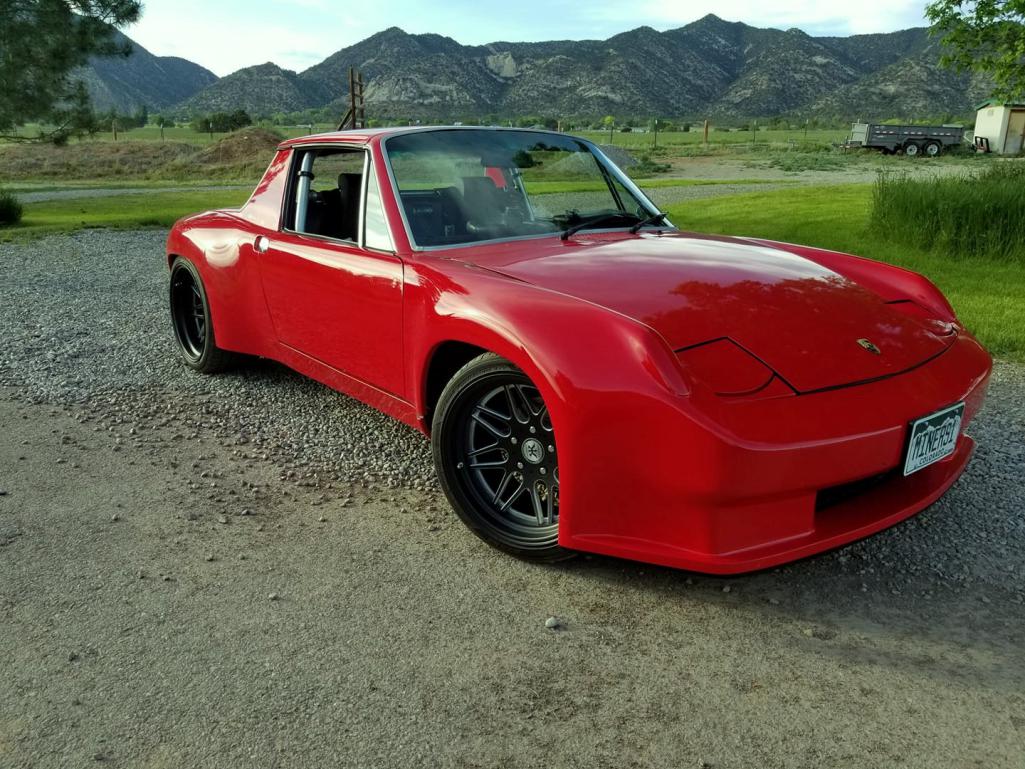
Posted by: Andyrew Jul 21 2018, 12:47 PM
That red one is another LS swap I'm pretty sure it has a boxster 6 speed in it.
I would reconsider painting it red
Posted by: dan10101 Jul 21 2018, 01:07 PM
That red one is another LS swap
I'm pretty sure it has a boxster 6 speed in it. I would reconsider painting it red
well right now everything is going thru my mind. So I'll be reconsidering just about everything.

Posted by: ConeDodger Jul 21 2018, 01:50 PM
Andrew, I didn't realize due to the cryptic screen name that this was your dad. This should go back to looking just the way it was. Red or orange, doesn't matter. That car is insane!
Posted by: ValcoOscar Jul 21 2018, 02:01 PM
Father like son...they love their HP.
Watching this rebuild closely.
Posted by: sixnotfour Jul 21 2018, 04:33 PM
vw paint
Attached image(s)
Posted by: horizontally-opposed Jul 21 2018, 05:51 PM
vw paint
My '73 is Tornado, and Tornado can look great—but for this car I would be sorely tempted to do Salsa Red from the (second?) New Beetle (also seen on Golfs and Jettas of the late 2000s and early 2010s, I think). Just a great, great red. Slightly darker/blood red that shreds Porsche's Carmine Red and GTS Red (as well as Ferrari's various darker reds). Every time I see one across the freeway, I stare. It registers as a red but an intensely rich one.
Love the idea of this car reincarnated in red. And that bodywork will definitely lend itself to red paint. I suspect Ultraviolet from the 991.1 GT3 RS might also be great, as would Aubergine. Not sure why, but there you go...
Posted by: dan10101 Jul 21 2018, 05:58 PM
I like lots of reds, I've had a few.
I particularly like this red, Victory Red a 2000s Corvette color.
https://youtu.be/p0WGnZveino
Posted by: mgp4591 Jul 21 2018, 09:32 PM
That red one is another LS swap
I'm pretty sure it has a boxster 6 speed in it. I would reconsider painting it red
Isn't that Christian Harra's car in Colorado? That thing is a monster!
Posted by: Andyrew Jul 21 2018, 11:31 PM
That red one is another LS swap
I'm pretty sure it has a boxster 6 speed in it. I would reconsider painting it red
Isn't that Christian Harra's car in Colorado? That thing is a monster!
Thats the one. I forgot what his name is.
Im pretty sure he's on here, but I know he's on the Facebook groups.
Posted by: 7275914911 Jul 22 2018, 07:54 AM
A few pic's from RCR '08. Hate to see Matty and Pauly leave the scene! Fuckin A, you can hand me that Gas Can!!
Good Luck with the Beast...
Posted by: dan10101 Jul 22 2018, 08:37 AM
Nice pictures.
Soooo, for us West Coast guys, what IS in that gas can...


Posted by: 7275914911 Jul 22 2018, 08:49 AM
Nice pictures.
Soooo, for us West Coast guys, what IS in that gas can...
Only the previous owner knows the answer to that...LOLI probably have an action pic from Hershey somewhere with that Red Can!!

Posted by: ClayPerrine Jul 22 2018, 09:26 AM
Nice pictures.
Soooo, for us West Coast guys, what IS in that gas can...
I don't know... but Betty seemed to like it when she tried it.
Posted by: My 914 Jul 22 2018, 11:47 AM
There it is in all white. Looks awesome!
Posted by: dan10101 Jul 22 2018, 02:01 PM
Nice pictures.
Soooo, for us West Coast guys, what IS in that gas can...
Only the previous owner knows the answer to that...LOLI probably have an action pic from Hershey somewhere with that Red Can!!
Let's see if this works... found this on a Hersey thread.
well, I guess you can't add attachments from other threads..
Just trying to save disk space Andy..

Posted by: JRust Jul 22 2018, 02:25 PM
I vote for Phoenix Red
Posted by: dan10101 Jul 22 2018, 03:12 PM
I vote for Phoenix Red
That's like "Soylent Green is PEOPLE!"
"Phoenix Red is ORANGE!" said everyone everywhere.
Posted by: sb914 Jul 22 2018, 03:35 PM
Here you go! Kinda like the red Ford Flex! if you seen one they
Really "Pop"in the sunlight.the pic does not due justice!
Attached image(s)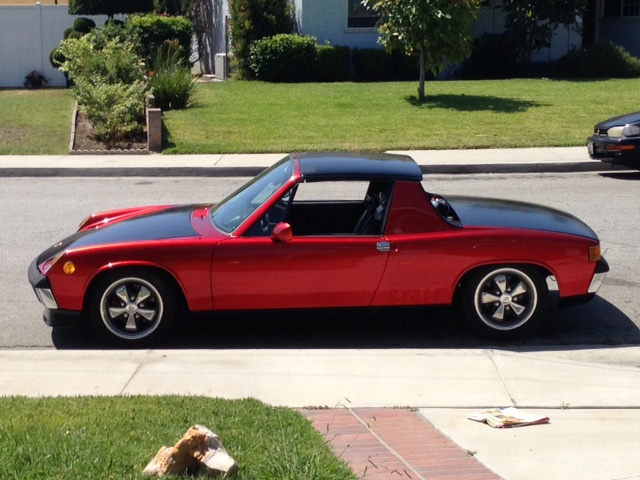
Posted by: Mike Bellis Jul 22 2018, 04:22 PM
My new vote is for drug dealer green metal flake. Heavy 1070's disco speed boat metal flake.
You will be unique and the only 914 ever painted this color.
Hell, put some 26" dubs on it too! 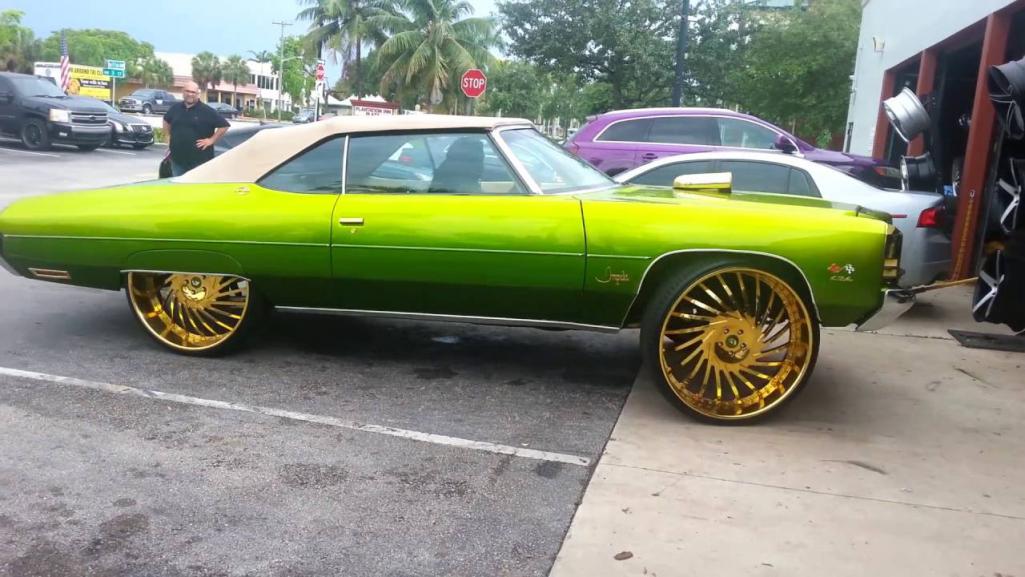
Posted by: dan10101 Jul 22 2018, 05:43 PM
My new vote is for drug dealer green metal flake. Heavy 1070's disco speed boat metal flake.
You will be unique and the only 914 ever painted this color.
Hell, put some 26" dubs on it too!
Mike, I like you, but I sense that you've gone off on the whole what color will it be discussion. Did you imbibe in some gin and tonics early this afternoon?
Posted by: Andyrew Jul 22 2018, 05:48 PM
I vote for Phoenix Red
That's like "Soylent Green is PEOPLE!"
"Phoenix Red is ORANGE!" said everyone everywhere.
It also happens to be the same color as my car. Or well at least what my Vin says it is (it's actually painted Hugger Orange)
For some reason dad has something against Orange for his cars and has this affinity towards RED.
So Dad, let's see what's been occupying your time and what the 914 is replacing? I know your just about to start working on it.
Posted by: Mike Bellis Jul 22 2018, 07:33 PM
My new vote is for drug dealer green metal flake. Heavy 1070's disco speed boat metal flake.
You will be unique and the only 914 ever painted this color.
Hell, put some 26" dubs on it too!
Mike, I like you, but I sense that you've gone off on the whole what color will it be discussion. Did you imbibe in some gin and tonics early this afternoon?
Actually, margaritas...
I get it. You're afraid if you go heavy metallic green you will get profiled as the old man king pin of the cartel. I understand...
Posted by: dan10101 Jul 22 2018, 09:12 PM
My new vote is for drug dealer green metal flake. Heavy 1070's disco speed boat metal flake.
You will be unique and the only 914 ever painted this color.
Hell, put some 26" dubs on it too!
Mike, I like you, but I sense that you've gone off on the whole what color will it be discussion. Did you imbibe in some gin and tonics early this afternoon?
Actually, margaritas...
I get it. You're afraid if you go heavy metallic green you will get profiled as the old man king pin of the cartel. I understand...
I'm probably the only person in the Rogue valley that isn't using his 4 acres growing weed. Well, i grow weeds, but not Weed.
Posted by: dan10101 Jul 22 2018, 09:20 PM
Ok here's the video you've all been waiting for. Well, a couple of you, ...at least one of you....
I finally got the BMW off the rack so i could put the Porsche on it and check it out from underneath.
https://youtu.be/5pAHh21VGpw
To answer Andrews question.
I'm replacing a 2001 BMW 330ci that once looked like this.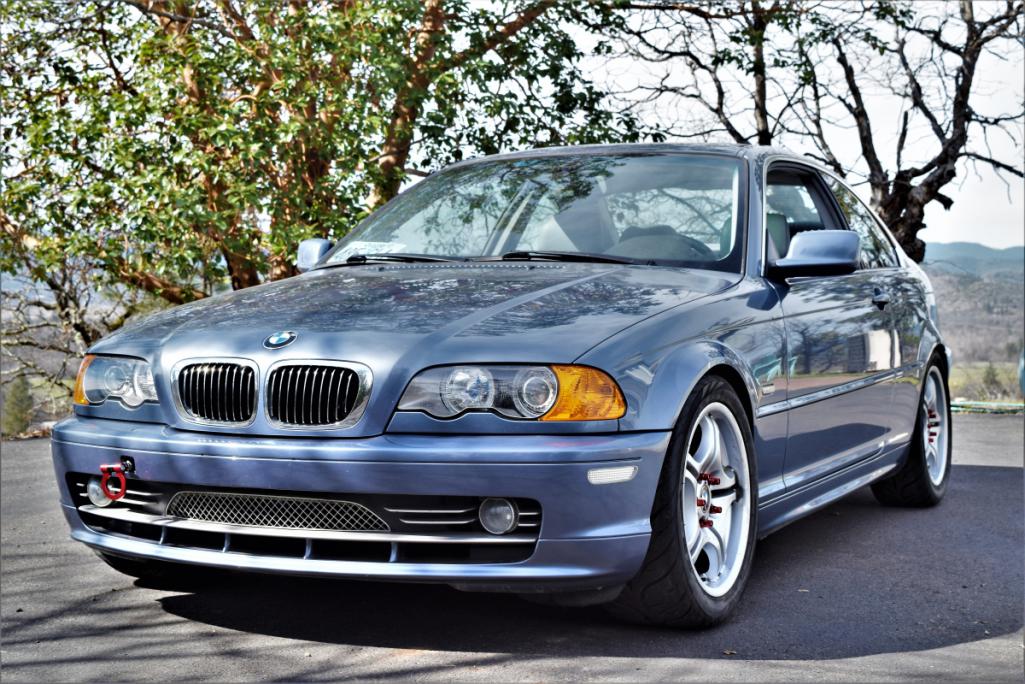
and now looks like this after going flipity flopety...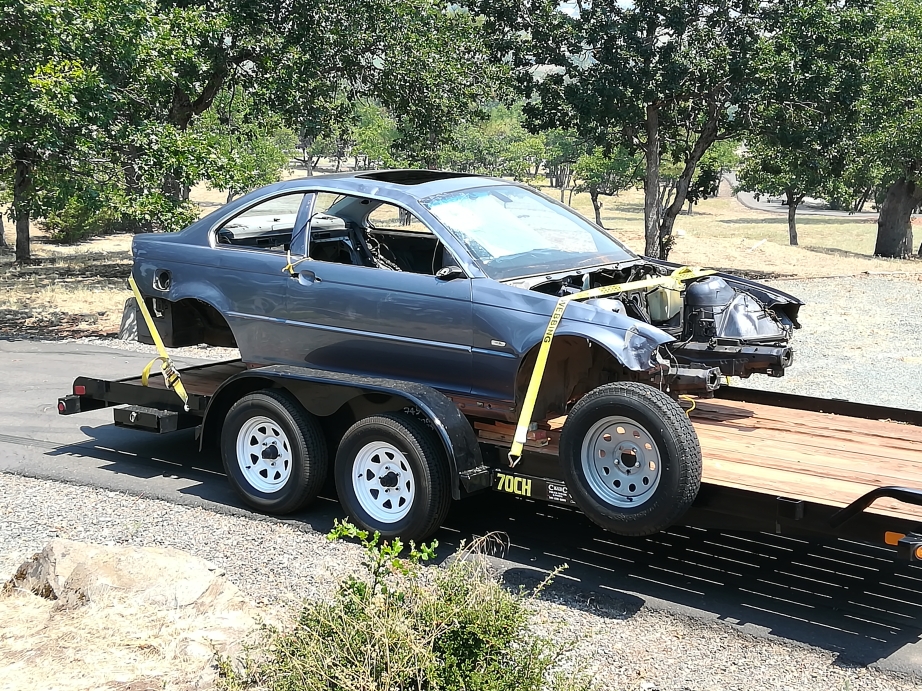
Posted by: Rand Jul 22 2018, 10:06 PM
Just another opinion that's worth nothing, but to keep this true to the OG and put your touch on it... Keep the paint scheme and replace the highlights with YOUR color. Don't do a full color change.
Posted by: Mike Bellis Jul 22 2018, 10:39 PM
Looking at the video. You should buy a new tub. It will be cheaper in the long run just to transfer the drivetrain over. Look like you may need to replace from the doors forward.
Cheaper and faster to transfer everything into a good body.
Posted by: dan10101 Jul 22 2018, 10:56 PM
Looking at the video. You should buy a new tub. It will be cheaper in the long run just to transfer the drivetrain over. Look like you may need to replace from the doors forward.
Cheaper and faster to transfer everything into a good body.
Unfortunately, this is on a budget that is likely to double before I even get started. The rear fenders are bonded to the tub. It would be near impossible to change those and too expensive start over. I'll make it work. My fall back is to go tube frame on the front and tie it into the roll cage.
Posted by: dan10101 Jul 22 2018, 11:27 PM
Just another opinion that's worth nothing, but to keep this true to the OG and put your touch on it... Keep the paint scheme and replace the highlights with YOUR color. Don't do a full color change.
Rand,
Honestly, I'm leaning that way. But with the new information tonight about additional bodywork needed, It may take a full repaint. If that happens all bets are off.
Posted by: Andyrew Jul 22 2018, 11:50 PM
That's about what I was expecting body wise. And one reason I keep saying we need to pull it out is to get that front end back into alignment and not just move sheet metal.
I see a straight donor chassis will leave you with not only good measurements to pull from but good steel.
Even if you cut everything off and replaced I still think it needs some pulls to bring the tension out of the chassis. And once you have a good few pulls out you might find that it's not so bad.
I'll give you a call tomorrow after work on my drive home.
Posted by: mgp4591 Jul 23 2018, 12:26 AM
My new vote is for drug dealer green metal flake. Heavy 1070's disco speed boat metal flake.
You will be unique and the only 914 ever painted this color.
Hell, put some 26" dubs on it too!
Mike, I like you, but I sense that you've gone off on the whole what color will it be discussion. Did you imbibe in some gin and tonics early this afternoon?
Actually, margaritas...
I get it. You're afraid if you go heavy metallic green you will get profiled as the old man king pin of the cartel. I understand...
I thought it was DOPE!! Or maybe they just deal dope.... I get those confused...

Posted by: Cracker Jul 23 2018, 06:53 AM
Congrats...welcome to the club.
Cracker
Posted by: dan10101 Jul 23 2018, 02:20 PM
Congrats...welcome to the club.
Cracker
Thanks
That's, hmm quite a stable you have there...
Posted by: Mike Bellis Jul 23 2018, 09:43 PM
Looking at the video. You should buy a new tub. It will be cheaper in the long run just to transfer the drivetrain over. Look like you may need to replace from the doors forward.
Cheaper and faster to transfer everything into a good body.
Unfortunately, this is on a budget that is likely to double before I even get started. The rear fenders are bonded to the tub. It would be near impossible to change those and too expensive start over. I'll make it work. My fall back is to go tube frame on the front and tie it into the roll cage.
Long term the cheaper route is a new tub. It's also faster to completion.
You can pull and push yourself but eventually it will need to go on a frame bench. To do that you have to remove all the suspension and drivetrain. You have to do this with a new tub as well. No loss in time or money yet. But the frame bench will cost you the same as a tub. Frame straight still needs a bunch of welding and patch panels. A good tub needs less work(=less money). Paint is the same cost. The sheridan body will cost you but you already need a front end. You would have to buy the rear stuff.
End result is a better chassis for about the same cost +/-...
Plus you could have the entire unibody slightly tweaked. Look for the thread when Sir Andy corner balanced his bent tub. One wheel was all jacked up in the air. All due to a slight bend in the unibody. He had to cut his cage out to fix it. Rapid deceleration (wreck) moves metal all over the place and you might not see it.
Think long term and not short term payouts. I know you are dying to carve corners in this thing but if it's unstable at speed because it's bent, it could be your last drive...
Posted by: dan10101 Jul 23 2018, 09:53 PM
Well, you're full of cheery thoughts...
Posted by: Mike Bellis Jul 23 2018, 11:38 PM
Well, you're full of cheery thoughts...
I'm a pragmatist. I've built a ton of cars and made plenty of bad choices...
I think both options is a close wash in cost. New tub gets you driving with less overall effort and disappointment.
Posted by: Cracker Jul 24 2018, 06:25 AM
Ha! Definitely too many (at once) with my space limitations!
Regarding your project - I too have some thoughts. I am not trying to be a "Debbie Downer" but I also would not want you to kill yourself in an ill-handling car!
I would encourage you to strongly consider all of your options before doing anything but parking your car in the garage at this point. For what its worth, which is probably not much, I am more than happy to discuss what I have learned over the years with you - PM me your contact info if interested.
My experience with adding substantial power to a teener and the challenge of making the package work properly leads me to believe a new chassis would be the best decision (at least to strongly consider).
From what I have seen over the years, your car was never finely tuned to adequately perform - not a poke - just reality. Repairing the chassis, as Mike has stated, would require a precise and enormous effort with no guarantees of the desired result. I realize all of these projects have "budgets" but to me - you essentially purchased a drivetrain - not so much a car.
If I were in your shoes, I would have budgeted for a newly prepped chassis with a cage that ties into the windshield frame (A-pillar). Once a 914 has over 400 hp (and more importantly torque), the benefit of further strengthening the very weak center section of the car is paramount. Night and day difference in my experience - I have gone both ways on a few different teener projects.
As a few can attest, a properly balanced build will pay huge dividends in the end. My car for instance, is remarkably tame and balanced with a good margin of increased power beyond your project. A teener can be built to be both a monster and pussy cat but it just doesn't happen throwing parts together.
Best wishes!
Cracker
That's, hmm quite a stable you have there...
Posted by: My 914 Jul 24 2018, 07:53 AM
I think this is some excellent advice.
Posted by: ValcoOscar Jul 24 2018, 08:15 AM
Having a V8 914 in the past, I also agree with Tony.
It's obvious that you have some solid feedback from some knowledgeable experienced members here. You have a lot of thinking to do.
I understand budget constraints but I have never finished a car within budget. Shit happens and Murphy rears his head at every opportunity.
In either case, you purchased a sweet project, just relax and enjoy the journey.
I'm looking forward to what you decide.
Oscar
Posted by: dan10101 Jul 24 2018, 10:15 AM
Thanks for all your thoughts, but enough talk about body swaps. You guys are really bringing me down.
There is so much work done to this body/chassis, I just don't want to start over.
This car is fixable. And it will be right when its done.
All that said, I am getting a donor car. And I've ordered my Sheridan front end.
Things could change as I get down the road a bit as the car itself will determine how the repair is done. I just need it to talk to me a bit, right now I think it's still in shock...
Posted by: Cracker Jul 24 2018, 08:10 PM
Dan - I certainly am not trying to bring you down...sorry it came across that way. I look forward to seeing you restore your car - enjoy the process. I know you will appreciate the end result.
Cracker
Posted by: 914forme Jul 24 2018, 08:34 PM
I would start buy building a nice solid level frame jig that at least marks all your suspension points. You would want to build this off a know good chassis. Even if that is using pieces from the donor car to build the jig. This will allow you to take the front and back sections and make them one with out much going wrong.
It can still go wrong but at least you have a solid base to measure off of and work from.
A few sticks of steel and you will be a much happier person doing this reconstruction project. Best of luck.
Jeff Hail's cart is a very nice one. I have a set of jigs from Tangerine Racing that I will also use to build one they pickup the rear suspension points. Use a steal cross bar for the front, and build the jigs from there to the front Arm points.
Or find a Bench and 914 fixtures.
I think it can be saved, I would just do the foundation work first.
Posted by: dan10101 Jul 24 2018, 10:26 PM
Dan - I certainly am not trying to bring you down...sorry it came across that way. I look forward to seeing you restore your car - enjoy the process. I know you will appreciate the end result.
Cracker
Not at all, That's all on my end. You all are just giving your best opinion and I do appreciate it.
I am enjoying this. Thanks
Posted by: dan10101 Jul 24 2018, 11:49 PM
Actually I will have a doner car that looks pretty solid. We planed on doing measurements, but a jig won't be hard to create and a lot more accurate. I think someone else mentioned this as well. Thanks for the tip. I'm already drawing it up as I write this. I've got a great scrap metal place a couple miles away.
Thanks
I would start buy building a nice solid level frame jig that at least marks all your suspension points. You would want to build this off a know good chassis. Even if that is using pieces from the donor car to build the jig. This will allow you to take the front and back sections and make them one with out much going wrong.
It can still go wrong but at least you have a solid base to measure off of and work from.
A few sticks of steel and you will be a much happier person doing this reconstruction project. Best of luck.
Jeff Hail's cart is a very nice one. I have a set of jigs from Tangerine Racing that I will also use to build one they pickup the rear suspension points. Use a steal cross bar for the front, and build the jigs from there to the front Arm points.
Or find a Bench and 914 fixtures.
I think it can be saved, I would just do the foundation work first.
Posted by: dan10101 Aug 6 2018, 10:39 AM
I'm a bit late in getting an update out. But at least I've been busy.
We made a 1800 mile trip to pickup a donor car in LA and stopped by Roger Sheridan's place in Paso Robles to pickup the fiberglass front end. Quite the trip, but except for smoke virtually everywhere along the way, and taking GPS routes the weren't always the smartest choice, the trip was uneventful. (the way I like it.) My wife decided I should not embark on this journey by myself, so she came along to keep me company. And aside from asking every couple of hours "Tell me again, Why are you getting this car??" She didn't see the beauty of a pristine body. I look at bodies all the time, I know a good one from a bad one. We'll this one is just what the dr ordered. So, I'm going to cut it up and fix mine. Yeah, I know, I'm a bad person.
So there is a method to my madness. The rear of the Screamcicle has a lot of work done to it. Custom work that I don't want to redo. The side vents don't come with Rogers kit. They are beautifully molded into the side. The firewall is custom and done to mm of the engine rotating components. the roll cage is custom incorporated into the front and rear sections as well as fit into the dash. The fiberglass work is bonded to the tub and worked in nicely to make it look like it's always been there. The rear deck lid has a custom spoiler that molds into the rear fenders.
Enough of my rationalizing.
Here's my plan of attack.
Corner balance check blue car - done, it looks to be what I expected from a stock car without drivetrain. No huge variances.
Inspect for previous damage - No damage whatsoever.. Ok, the paint is faded...
Put blue car on the rack and remove suspension - today I hope, (it's gonna be hot and smokey)
Build chassis jig - got the major parts to construct the jig. more on that
Bolt to front and rear bumper mounts, could be a challenge to unbolt, I need to work that out.
Add arms that locate the mounting points.
Check and adjust for gaps
Bolt together jig and blue car
Unbolt blue car
Put the suspension back on the blue car so I can roll it out.
Put white car on rack
Pull engine and trans
Unbolt suspension
Move chassis jig into place
Cut nose off white car leaving a couple inches for overlap
Measure and cut nose off blue car leaving a couple of inches for overlap
Mount nose to the jig and body leaving overlap
Connect both pieces are in place and mated using coleco connections
Measure and mark for cutting line
Plasma cut thru both pieces leaving a clean line on which to butt weld.
Possibly do this in sections leaving sections always connected. still working this out.
Once the nose is in place and the suspension point are where they should be, then I'll cut out the bad A pillar and do that repair.
I know I'm leaving things out, but you get the jist.
Oh, my wife had a great idea for the rear end. Make a tire trailer for it. The white car already has a receiver hitch. 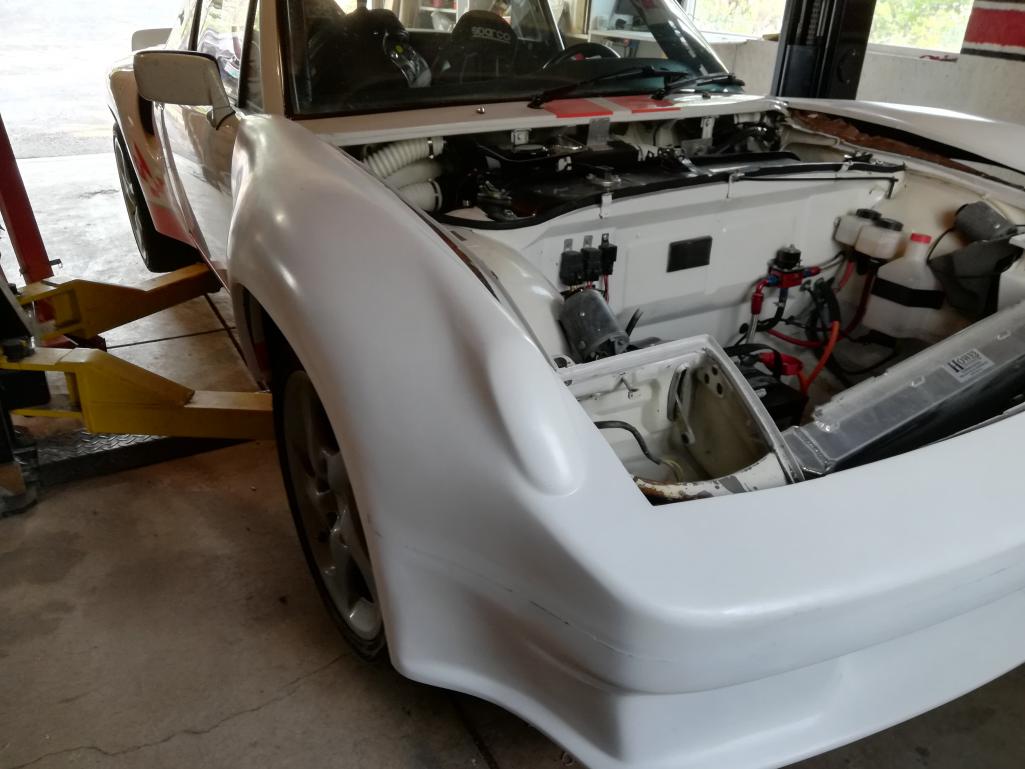
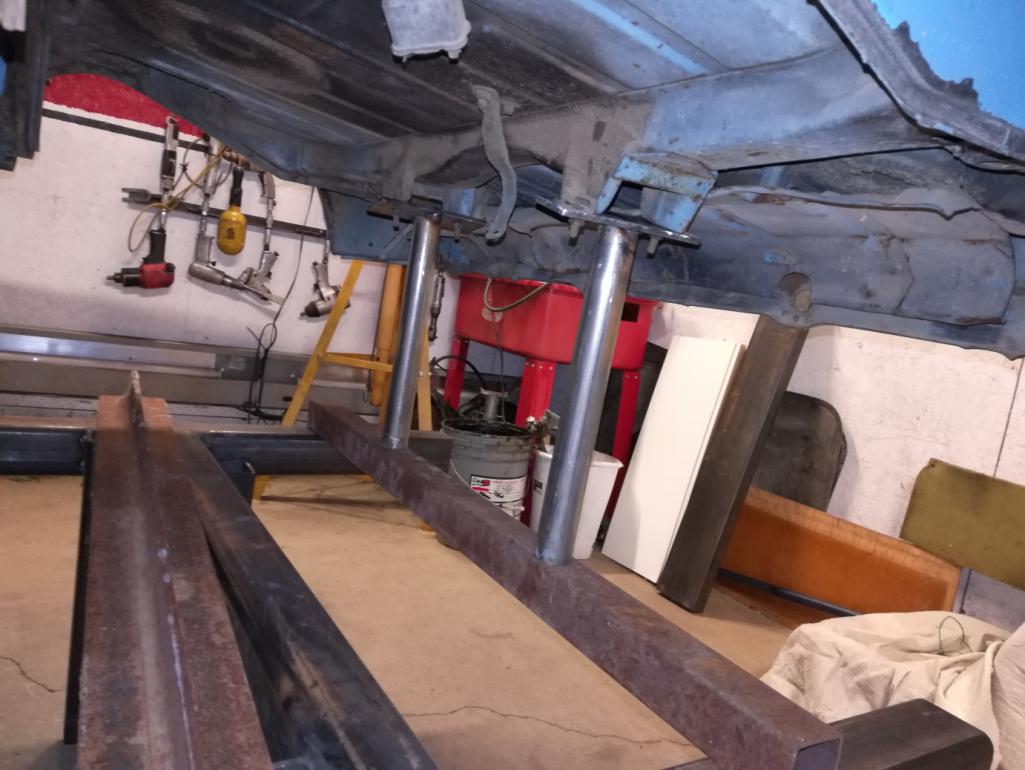
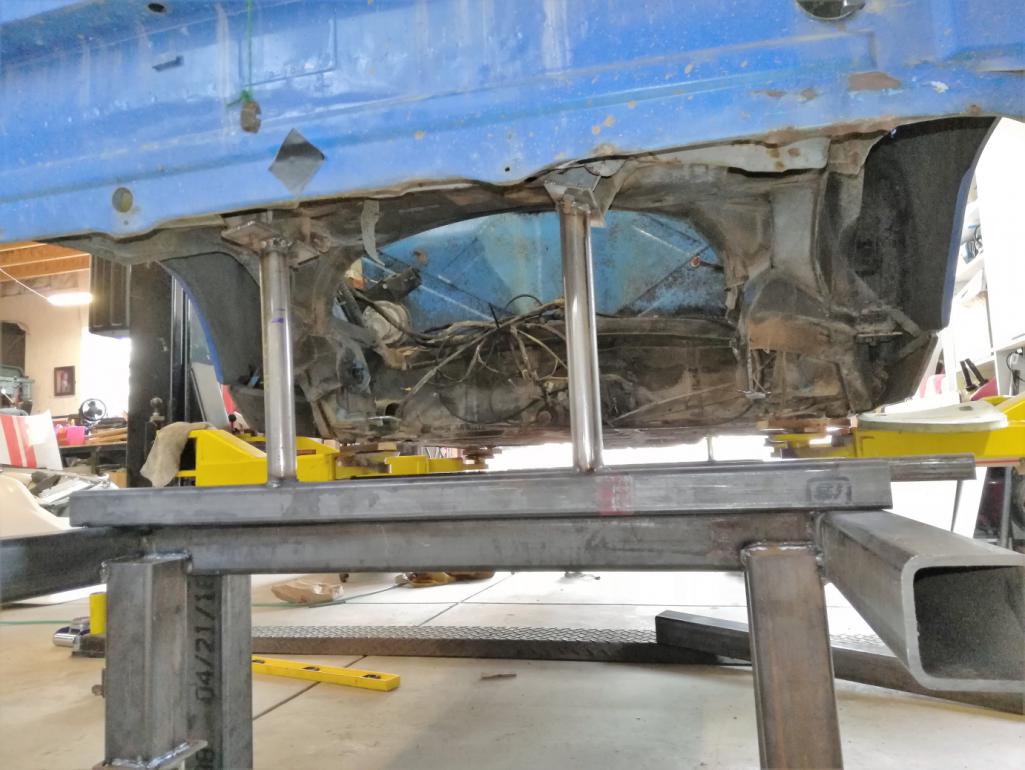
Posted by: dan10101 Aug 6 2018, 04:20 PM
Well it didn't take long to remove the suspension, brakes etc.
After doing some cleanup, I started working on the Jig or at least the frame.
And i need to do more research for removable or at least adjustable arms.
Posted by: Andyrew Aug 6 2018, 04:53 PM
PICS? 
Lets see your drawing for the jig your looking to make!
I think you should build the jig base, then have the pieces that will bolt to the 914 go straight up. You could do round tube arms with a center peg. Have about 6 inches of fixture that bolts to your welded bench arm. That way you can pull with it still if you need to.
This is the Celette fixtures for the 914... 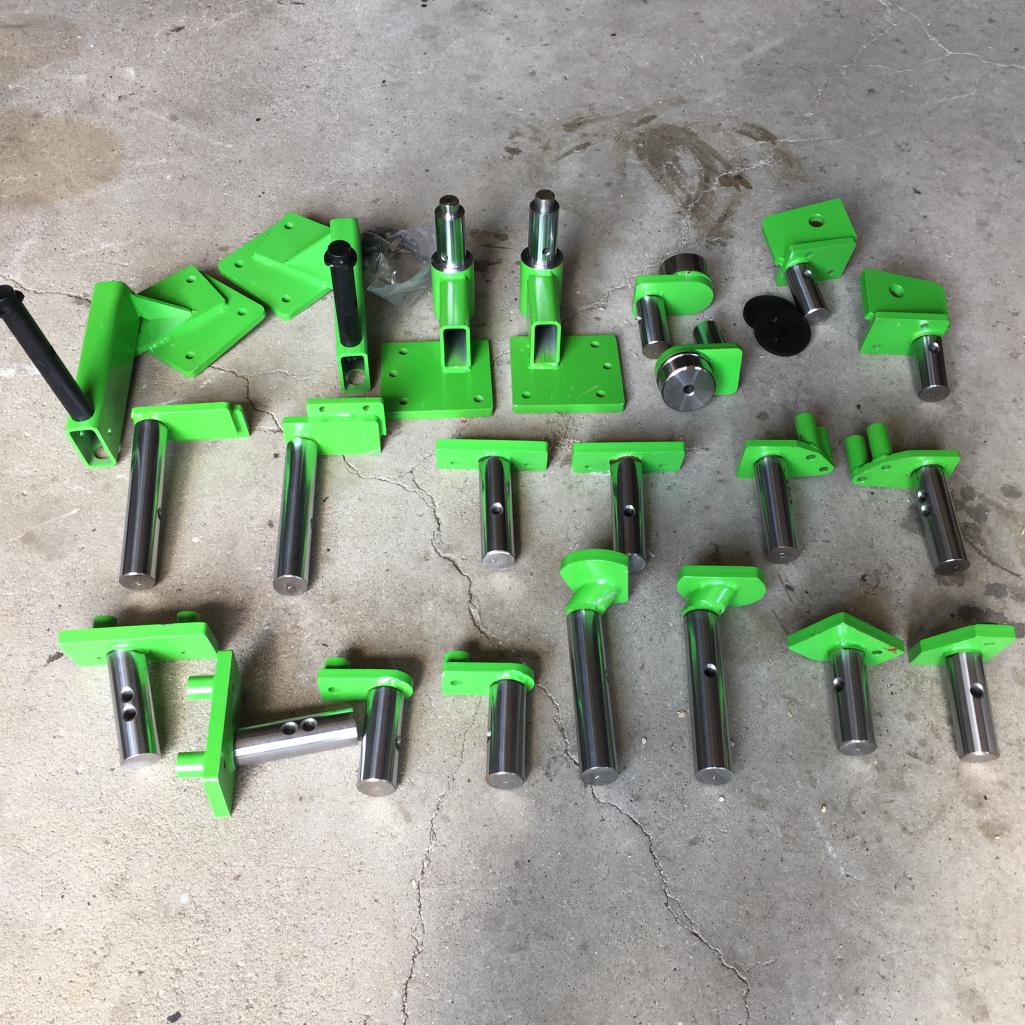
Posted by: dan10101 Aug 6 2018, 11:53 PM
Nag nag nag..
Ok, here's a picture.
Welded the 3" 1/4" square tube together. It's pretty square and flat.
note: welding thick metal is fun... 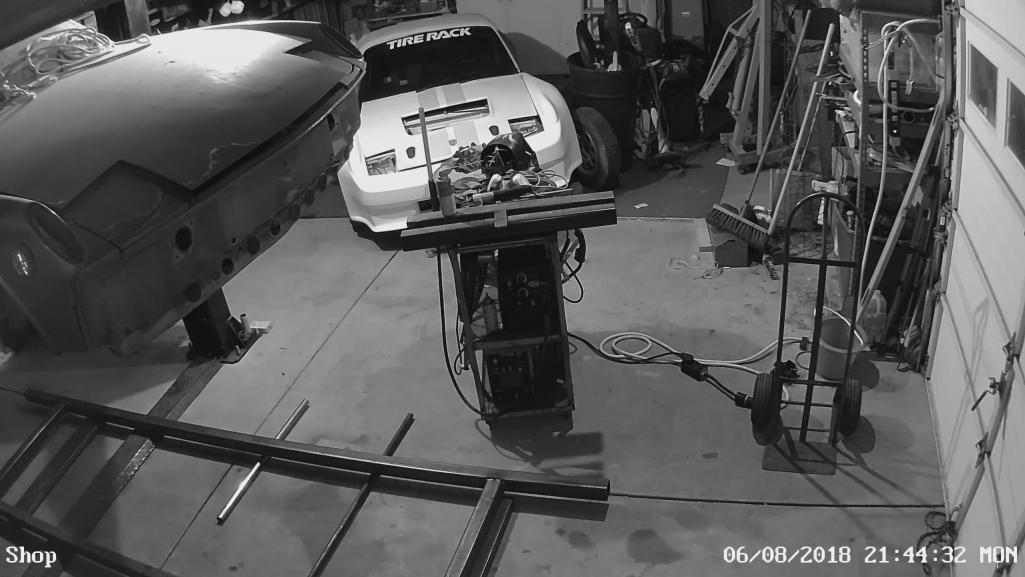
I'm thinking of this kind of leg with a fixed adjustable portion and another that will roll. I really am having trouble moving it around so it need to be easier.
not my picture but someone doing something similar.
Posted by: horizontally-opposed Aug 7 2018, 12:16 AM
There was a 996 GT2 near here years ago, that was clipped. Whole front end. Really nice job, and the car was great.
There was a 997 GT3 RS that came over the Corkscrew and t-boned a car that spun. Also clipped—from the fuel tank~ forward. A friend selling that car disclosed it, and the buyer's PPI guys called to say "Are you sure? Because we can't find ANY evidence."
It can be done well.
Posted by: dan10101 Aug 7 2018, 08:54 AM
There was a 996 GT2 near here years ago, that was clipped. Whole front end. Really nice job, and the car was great.
There was a 997 GT3 RS that came over the Corkscrew and t-boned a car that spun. Also clipped—from the fuel tank~ forward. A friend selling that car disclosed it, and the buyer's PPI guys called to say "Are you sure? Because we can't find ANY evidence."
It can be done well.
Thanks for the encouraging words.
The goal is to make it straight and strong.
Posted by: Chris H. Aug 7 2018, 09:27 AM
I remember a race prepped narrow body 914 that was re-clipped in the Chicago area. It was white with a Japanese flag on the hood in case anyone remembers it. The owner said something in the suspension gave way and he hit a wall straight on at fairly high speed. It was really smashed but had a cage in it. The bent stuff was cut off and the front clip was swapped out. He seemed happy with the repair and was still driving it and racing it years later.
Posted by: tazz9924 Aug 7 2018, 01:38 PM
How much did you get that whole fiberglass front clip for?
Posted by: dan10101 Aug 7 2018, 02:35 PM
I remember a race prepped narrow body 914 that was re-clipped in the Chicago area. It was white with a Japanese flag on the hood in case anyone remembers it. The owner said something in the suspension gave way and he hit a wall straight on at fairly high speed. It was really smashed but had a cage in it. The bent stuff was cut off and the front clip was swapped out. He seemed happy with the repair and was still driving it and racing it years later.
Love a happy ending.
Posted by: dan10101 Aug 7 2018, 02:38 PM
How much did you get that whole fiberglass front clip for?
It's a Sheridan nose. On their website for 1200.
http://sheridanmotorsports.com/porsche_parts_pricing.html
No shipping, I picked it up and saved several hundred.
It's just the nose, front bumper, and fenders. Hood is extra.
I'm going to try to make mine work, it's got a lot of custom work done to it as well.
Posted by: burton73 Aug 7 2018, 03:06 PM
Dan,
I feel very hopeful on the reworking of your car. We are all watching and in your corner.
The very best of luck on it.
Be safe my friend.
Bob B
Posted by: dan10101 Aug 7 2018, 06:11 PM
We are all watching
Eeekk
Well, I guess that's good. In case I do something really stupid.
Maybe I should share my shop camera. That way if I fall over someone can call 911.
Posted by: dan10101 Aug 7 2018, 08:52 PM
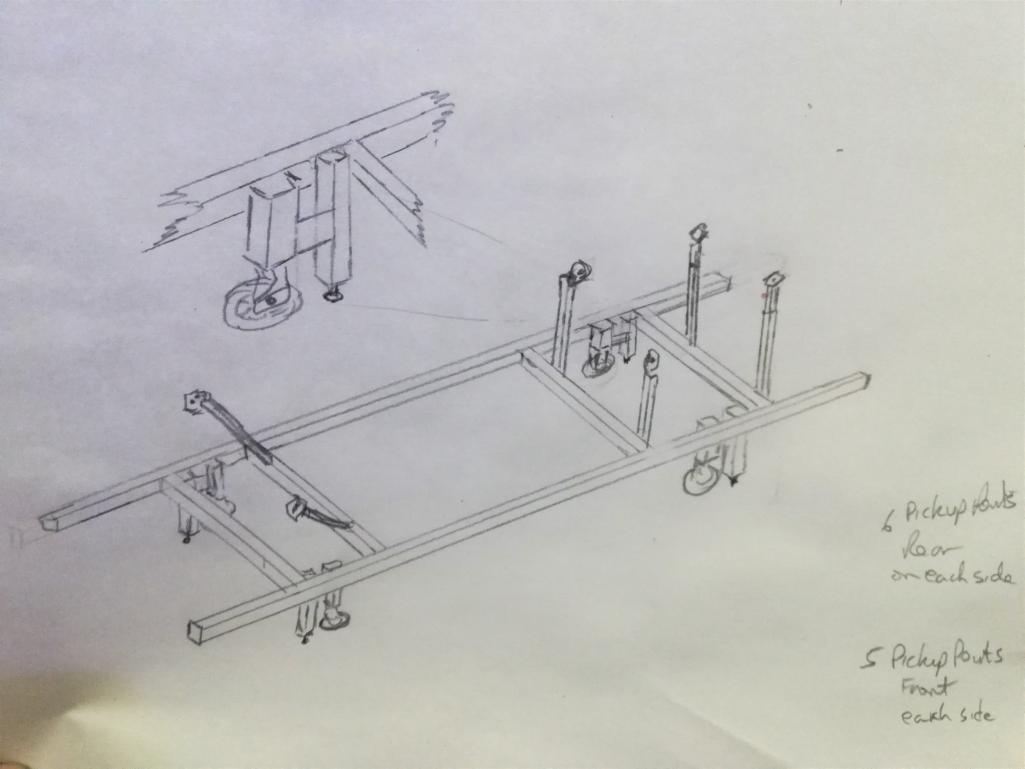
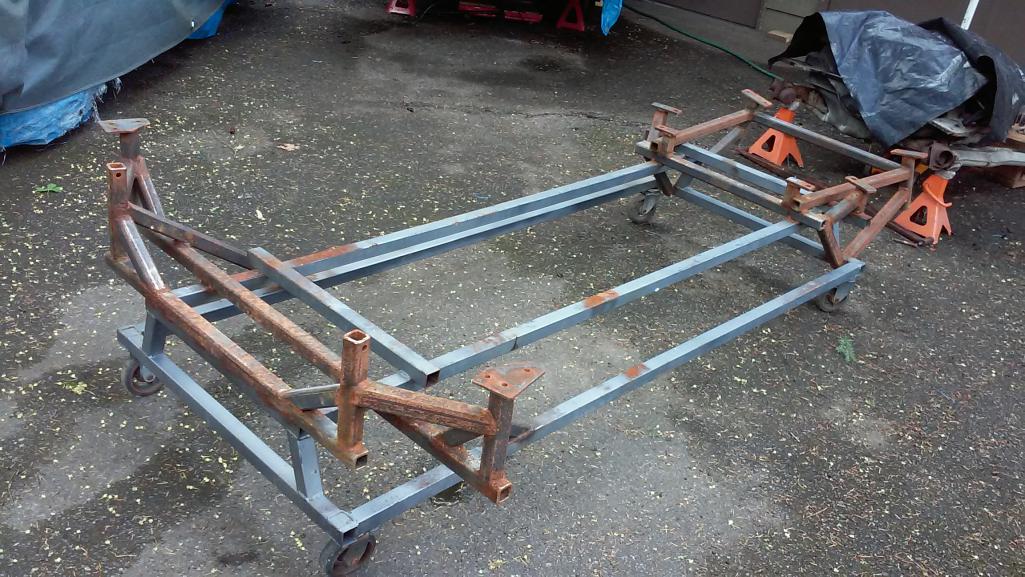
Ok, here is an updated drawing of the very homemade chassis jig I'm building.
Basically it's 3x3" 1/4" thick square tube.
13' long, but the working rectangle is 10' x 42"
in this drawing I've added a second set of 3' bracing. When I start adding arms I'll determine where those should ultimately go.
This is not designed to be multiple use. When I'm done, I'll probably cut the ends off it and turn it into a welding table. Unless someone else wants it for 914 jig use, then I might consider selling it.
I'm working on the legs right now. Making the plates that will insert and weld into the legs that will contain the 3/4" bolts that will allow leveling adjustments. They will raise it approx 15" off the concrete allowing me to get under it to make the initial connections.
Next to the fixed legs will be roller legs with bracing between the 2 for strength. Found some heavy duty rollers similar to the picture in the above post for a reasonable price. They should serve well. I may have to trailer it out of the shop, ( I don't have a flat parking area next to the shop)
The hard part will be getting the arms in place. I found some 1 1/2" square tubing and some 1 1/4 square tubing that slide into each other snugly. I'll begin by creating plates for each of the mounting areas, such as the rear bumper mounts, suspension pickup points, trans mounts. I want to keep those holes very snug to the bolts. Then do some initial tack welds to where the arms will connect to the jig. Depending on how sturdy the arms are, I may brace them somehow. To each other, or to the jig.
It will likely become a spaghetti nest of arms. There are 6 in the rear on each side, 5 in the front on each side. That's 22 arms sticking up all over the place. If I add the jacking points it becomes unruly. I welcome thoughts on that and anything else...
Posted by: Andyrew Aug 7 2018, 09:32 PM
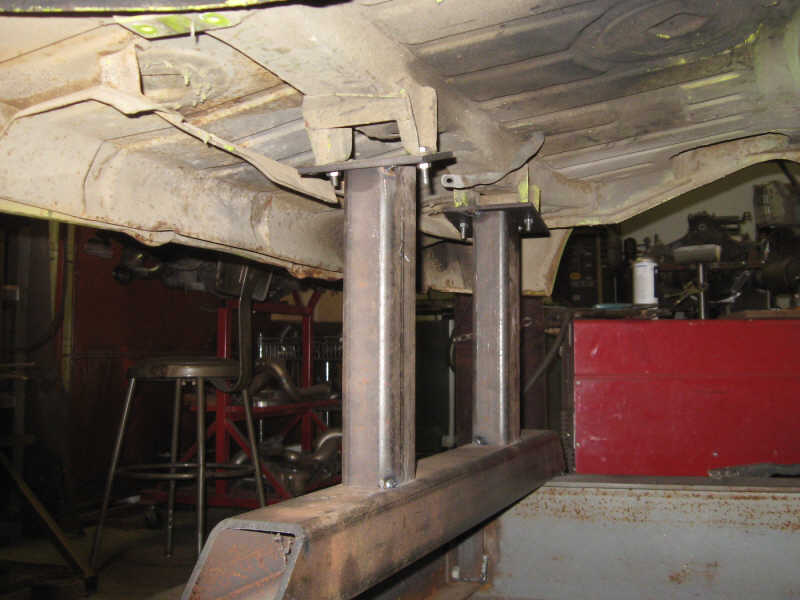
I think you need to at least pick up the transmission mount as well as the upper front suspension bolts.
You will essentially be holding the chassis in place with only the rear suspension when you cut off the front end so at least having a point for the pinch weld to rest in the front would be ideal. It would also be a good place to clamp the body while your welding to prevent the main chassis from moving.
The more you do the better, especially up front. You can always just leave the pieces off and put them on if you find you need to fit the chassis more precisely.
Posted by: dan10101 Aug 7 2018, 09:38 PM
I will be doing all the front pickup points. I'll try to do the rears as well. The engine mount is kinda a floating point. But I could make it fixed with a big tube of some sort to fill the hole rather than let it float around. Anyway, I'll try to do them all, we'll see.
Posted by: Racer Chris Aug 8 2018, 07:17 AM
I like the way you're doing it Dan.
There is so much custom work on the chassis that full replacement would be a much larger project.
Posted by: Racer Chris Aug 8 2018, 07:57 AM
Some pics of the attachment points on my frame table (Slutty Bench).
Each pair is connected with a heavy crossmember bolted to the main frame. (spot welds holding crossmember to frame were removed after construction)
The main frame is bolted together so it can be disassembled for long term storage.
I currently have the table anchored to the floor with large turnbuckles so some chassis pulling can be done without the frame twisting.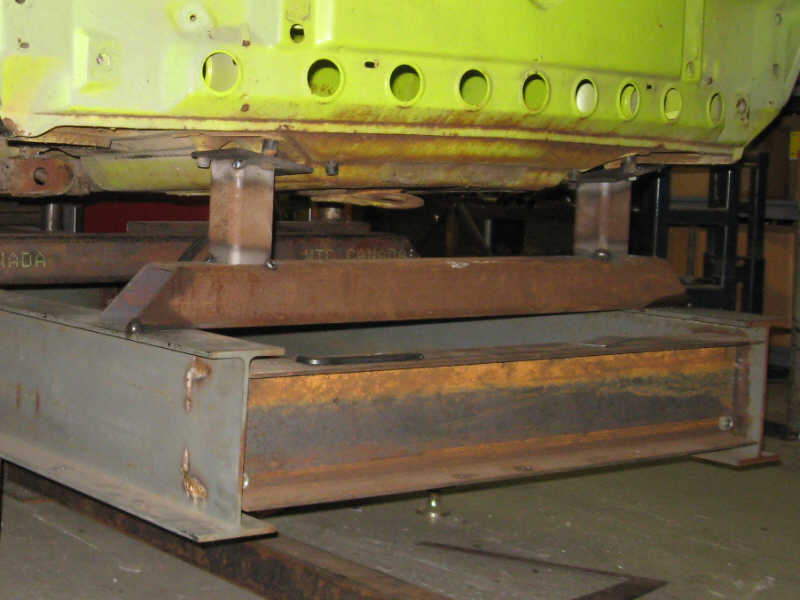
Posted by: dan10101 Aug 8 2018, 08:42 AM
Thanks Chris.
I forgot about your front swaybar when I was rationalizing on keeping the chassis. It would be an easy swap, but another thing to do.
I really like your frame pictures. Especially mounting both pickup points together then attaching to the main frame.
I'm going to do some more research before I start making arms. That way seems to be as solid as it gets.
Do you have any pictures of pulling in action? I'm curious how you attach on jig side. I'm assuming you bolt to the pickup points on the car side to pull.
I'm hoping not to need that, but I'm realistic.
Posted by: Racer Chris Aug 8 2018, 11:43 AM
Do you have any pictures of pulling in action? I'm curious how you attach on jig side. I'm assuming you bolt to the pickup points on the car side to pull.
Haven't done any hard pulls yet, but the chassis on the table is in need. We're too busy with other work to invest the time right now.
I'll need to make anchor points on the floor to do the pulling since the table isn't built to attach heavy duty cantilever structures.
Many years ago when I had to straighten my race car I took it to a shop that had a proper frame table. They let me do the work myself and just charged a small fee for the "rental".
Posted by: Racer Chris Aug 8 2018, 11:47 AM
I forgot about your front swaybar when I was rationalizing on keeping the chassis. It would be an easy swap, but another thing to do.
I don't remember installing one of my anti-swaybars but it makes sense. The car previously had a 911 non-adjustable underbody bar.
I did find pics from when we installed the de-cambered ball joints though.
Posted by: dan10101 Aug 8 2018, 09:50 PM
Chris, (or anyone) I would love to see any pictures you find of the Screamcicle.
One of my decisions is whether to repair the drivers side lower control arm or replace it. I know you made some changes to the ball joints and there are also elephant bushings I would like to save.
I see the bottom cover is off the passenger lower ball joint and can't tell if it's bad or just missing the cover. I'll have a better idea once I pull it apart.
The update for today is that I was able to mount the legs to the jig frame structure.
Working upside down, I mounted the fixed legs on the inside of the laterals. then it was obvious that I should put the wheeled legs on the outer side of the laterals. Then later I'll add a bracing between the 2 legs which should be plenty strong for whichever leg is in use. 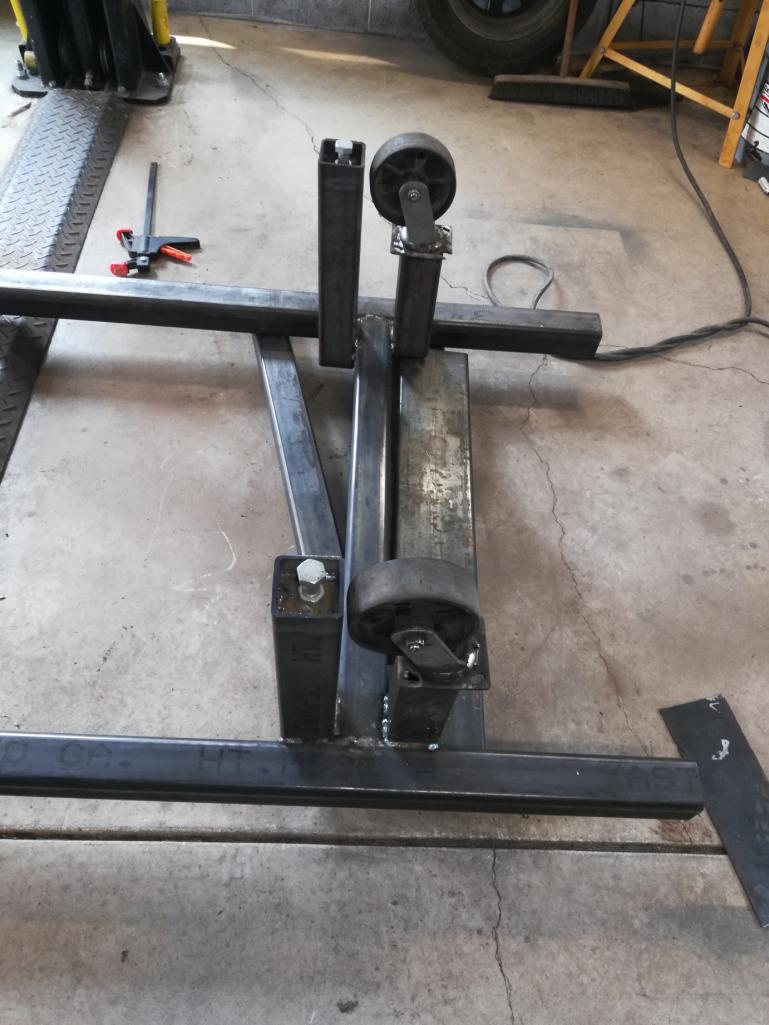
I also need to add some welds to the topside, now that it's flipped over and on it's feet. That was a challenge with to guys with bad backs. We were able to make it happen with jacks and leverage. 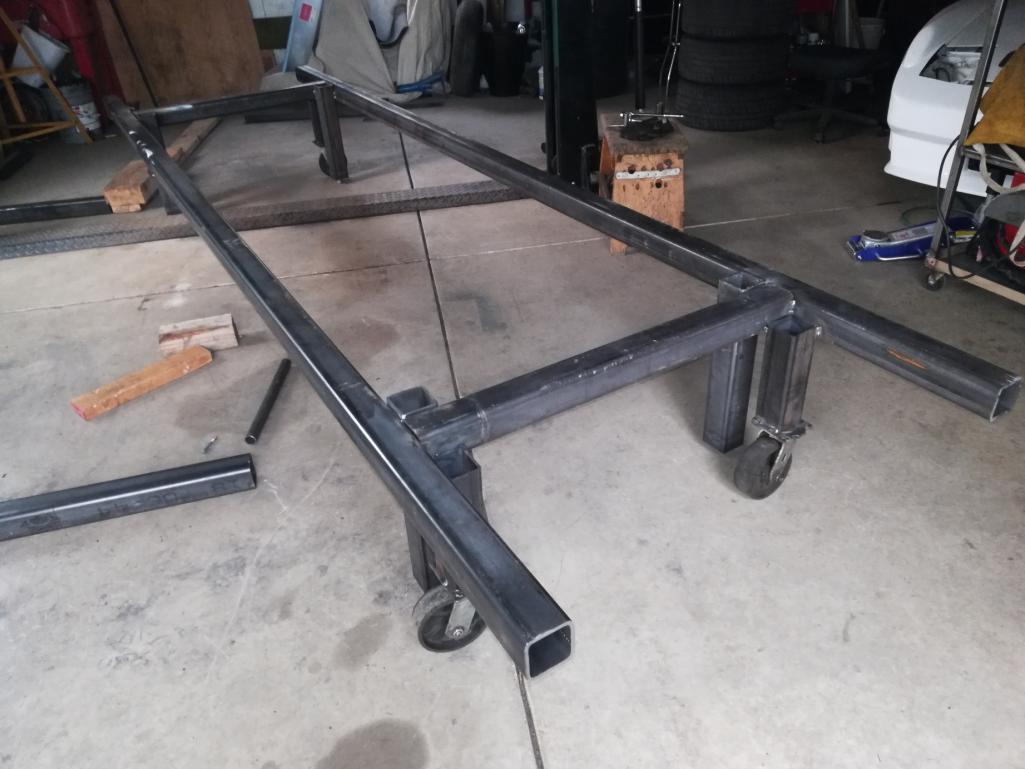
My cheap jig wheels from the metal scrap yard work excellent, All I had to do is cut the welds that kept them from turning 360 degrees. They even have zert fittings and do roll very smoothly.
Well, reducing the size fixed the picture upload. They were less than 4mb, but smaller fixed it.
Posted by: Andyrew Aug 8 2018, 10:02 PM
Photos have to be under 4mb. you'll need to resize them. I use Ifranview.
Resize to 1920x....
Posted by: dan10101 Aug 8 2018, 11:18 PM
Photos have to be under 4mb. you'll need to resize them. I use Ifranview.
Resize to 1920x....
Well, smaller fixed it. I was less than 4mb, but oh well, I'll resize. Thanks
Posted by: Andyrew Aug 9 2018, 07:24 AM
With the bracing you mentioned I think it'll be good. I do think that maybe a 1"square tube as a diagnal brace along the jig might help.
Also what about doing two more feet in the middle of the jig? I know it's heavy duty 1/4", but I still worry about sagging.
Posted by: Andyrew Aug 9 2018, 07:28 AM
Also how about a sliding "L" bracket that bolts to the leg and allows for the jig to be more stable? It could also be boolted to the floor. I worry about it toppling with the chassis on it or at least not being perfectly stable.
With this you could still level the jig with the feet, but then attach these L brackets after all is said and positioned.
Posted by: dan10101 Aug 9 2018, 09:13 AM
With the bracing you mentioned I think it'll be good. I do think that maybe a 1"square tube as a diagnal brace along the jig might help.
Also what about doing two more feet in the middle of the jig? I know it's heavy duty 1/4", but I still worry about sagging.
I'll think about the diag..
Another leg will be a problem when I roll it out of the shop. i may have to to drag it up the hill and 4 legs would make it much easier. Most of the attachment points will be right where the legs are, so the weight in the middle will be minimal.
Posted by: dan10101 Aug 9 2018, 09:20 AM
Also how about a sliding "L" bracket that bolts to the leg and allows for the jig to be more stable? It could also be bolted to the floor. I worry about it toppling with the chassis on it or at least not being perfectly stable.
With this you could still level the jig with the feet, but then attach these L brackets after all is said and positioned.
This is a good idea. Chris mentioned attaching it to the floor for pulling. I may just wait to see if I have to pull something. I could put stabilizers on it to prevent rolling over, but we'll see if that's even necessary.
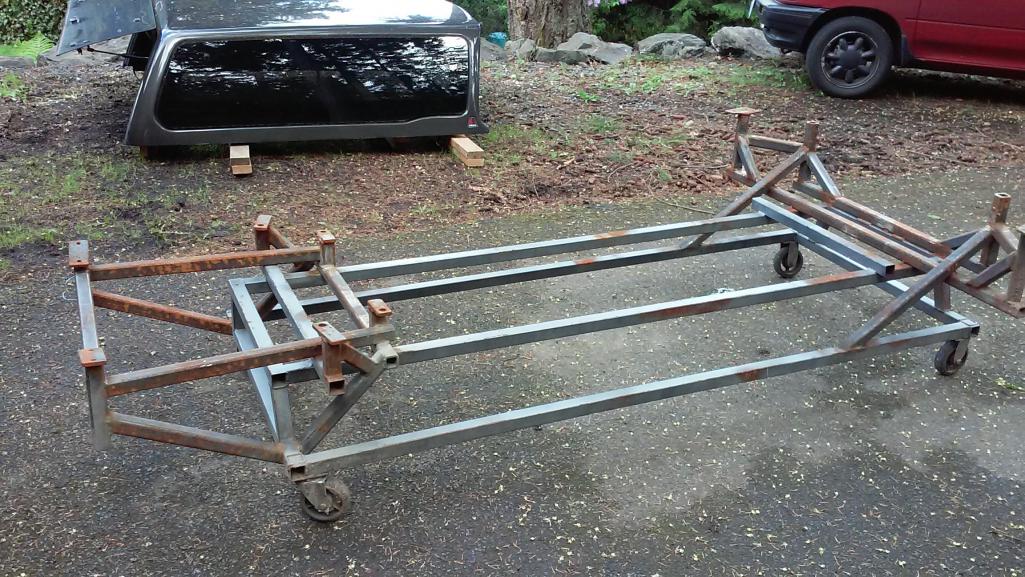
I found this one that someone made. I wish mine was this light. it looks like good bracing to make it strong enough to stay in shape.
Posted by: Andyrew Aug 9 2018, 01:47 PM
You could test deflection of the jig... Measure bottom of jig to bottom of floor. Place as much weight on the center of the jig as you can (Like 300lbs) and remeasure. That would give you an accurate deflection of your jig so you can determine if it needs extra help
Posted by: dan10101 Aug 9 2018, 05:13 PM
Today was a day of making templates for the mounting plates.
Making the templates was easy. Cutting them out not so much.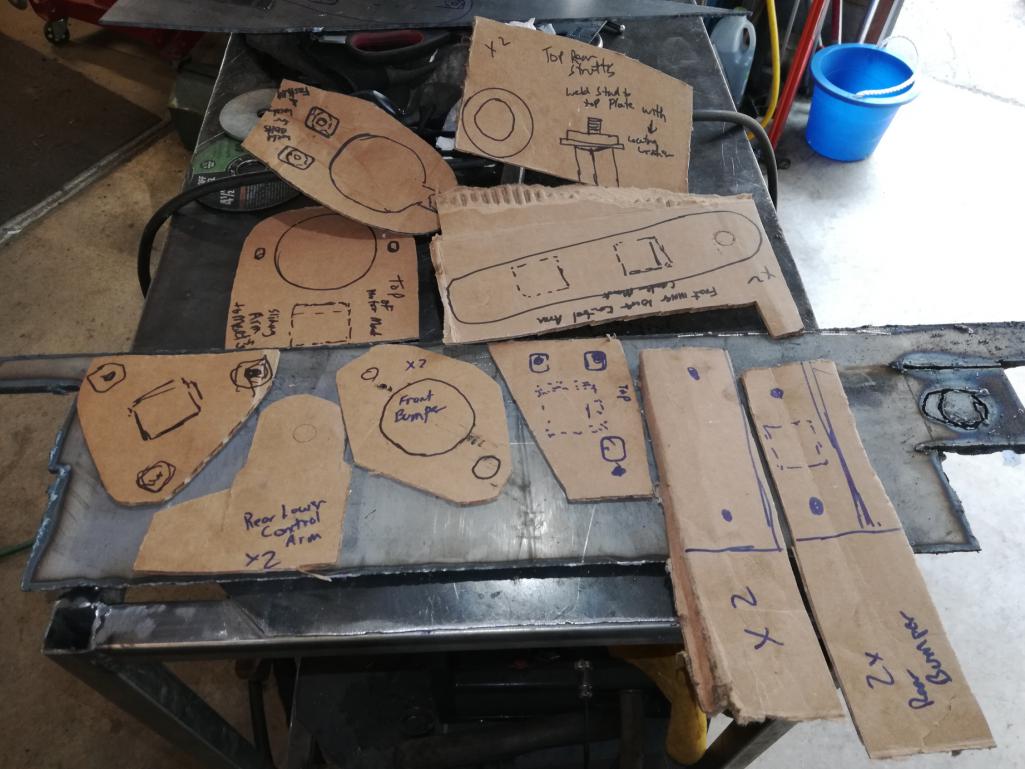
A plasma cutter certainly makes it easier to cut 1/4" plate. Probably didn't need to be that thick, but it's what I had leftover from a bumper build for my jeep.
Tomorrow I get to grind, shape, drill and that's probably as far as I get.
Also, found some angle iron and a 2x2" in my junk pile that I will be using for making cross bracing. I wasn't going to use the 1.5" x 1.5" square tubing but realizing how short they would be, I think they will be plenty strong. they are 1/8" thick. Plus some 1.25" square tubing that will slide into the 1.5" and fit snug. I can either bolt them or weld them to the distance I need.
That is all, I'm going to go put some Aloa Vera on my welding sunburn. 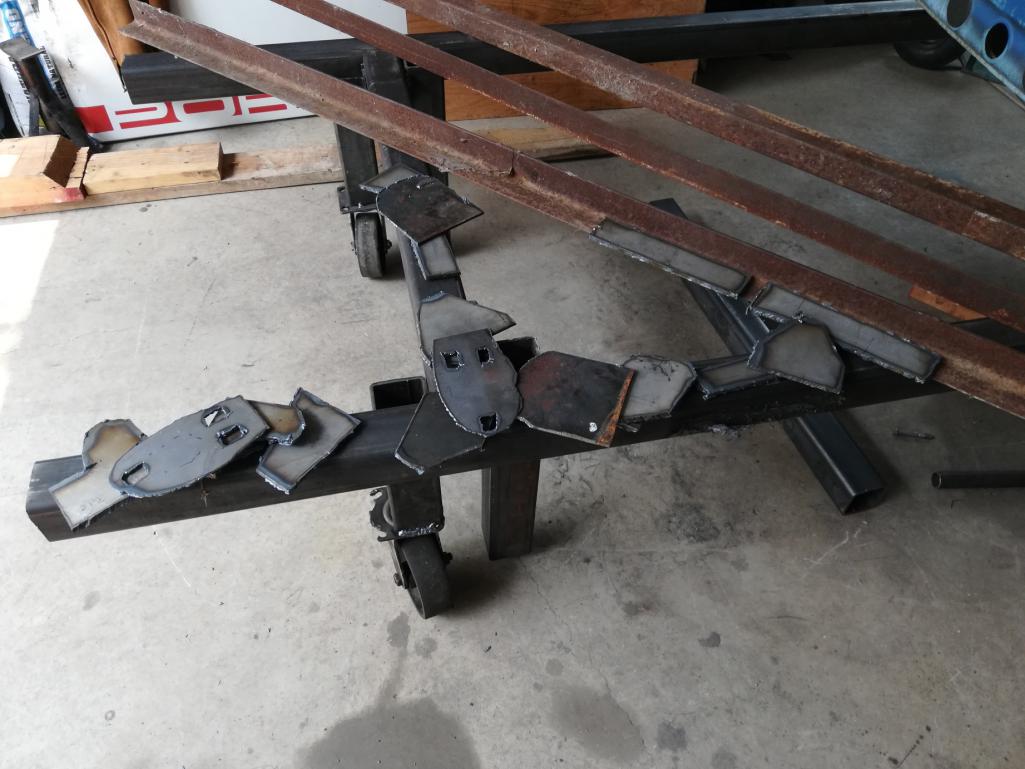
Posted by: tygaboy Aug 9 2018, 05:52 PM
Dan - It looks like I'm late to the party but going forward, if it's of any help, I'd be happy to cut stuff for you on the plasma table. All I need are the dimensions...
Best of luck with your project!
Posted by: dan10101 Aug 9 2018, 06:35 PM
Dan - It looks like I'm late to the party but going forward, if it's of any help, I'd be happy to cut stuff for you on the plasma table. All I need are the dimensions...
Best of luck with your project!
Thanks Chris, I'm more a seat of the pants type of designer. Cut the cardboard til if fits, then cut it out of plate, and then grind it till it fits like the cardboard did. I'll keep you in mind if something else comes up. Well, you're usually in the back of my mind when i'm working. "what would Chris do in this situation", then do it completely wrong..
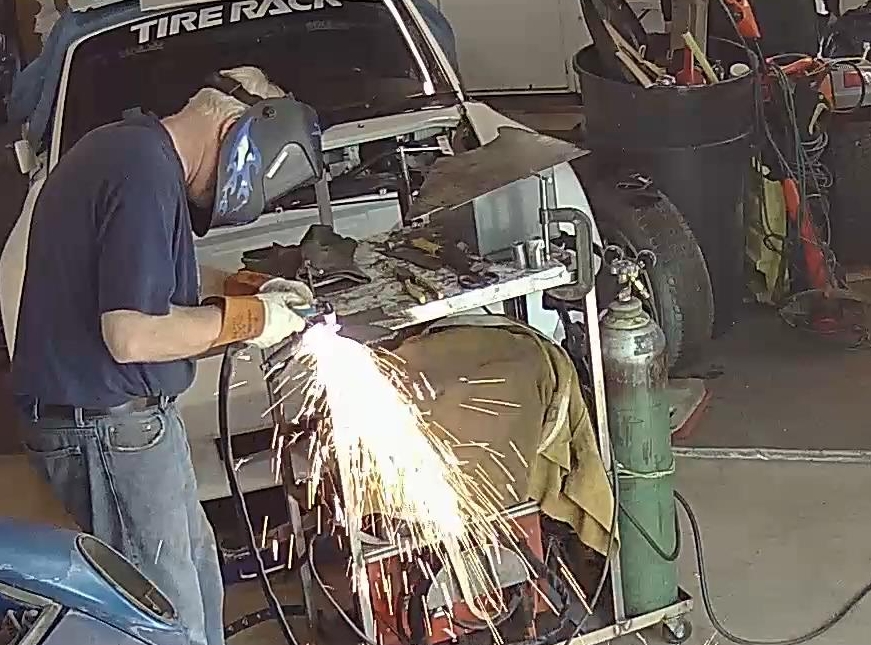
It was a bit funny watching me hose down the weeds outside the shop every 20 minutes just in case a stray spark flew out there. anything to cut metal using Fire..

I know they are rough, but I'll see what I can salvage. I do know I need to use long sleeves next time. need more aloa vera..
Posted by: sixnotfour Aug 10 2018, 01:47 PM
that jig in the above pics was made by my buddies body shop,When they started it was a body dolly and I added the other points to do a front clip, no pulling , just cut and weld it was supported in the center when in was in use , the body gaps came out perfect... and chassis square..
oh ya it was attached to a straight chassis during the building of..
Posted by: dan10101 Aug 10 2018, 03:19 PM
that jig in the above pics was made by my buddies body shop,When they started it was a body dolly and I added the other points to do a front clip, no pulling , just cut and weld it was supported in the center when in was in use , the body gaps came out perfect... and chassis square..
oh ya it was attached to a straight chassis during the building of..
Very cool
I'd love to hear more about how you mated the sheet metal together.
Posted by: sixnotfour Aug 10 2018, 08:37 PM
many cuts zig zagged and purposely.. factory spot welds intact.. there is a factory manual that shows factory front clip procedures ...I have it somewhere ..I moved 1300 miles... not pretty
Posted by: dan10101 Aug 10 2018, 09:51 PM
So did you butt weld it back together, or overlap and then weld together?
Can you tell why i'm so curious?
Posted by: dan10101 Aug 10 2018, 10:06 PM
Today's update is minor, but still somewhat significant my mind. I place an order to Eastwood for some sheet metal tools. Also visited my local Harbor Freight. Even got a little honey dues done.
But still I managed to attach 4 plates to the car. Needed some tools to do that which slowed the day down a bit.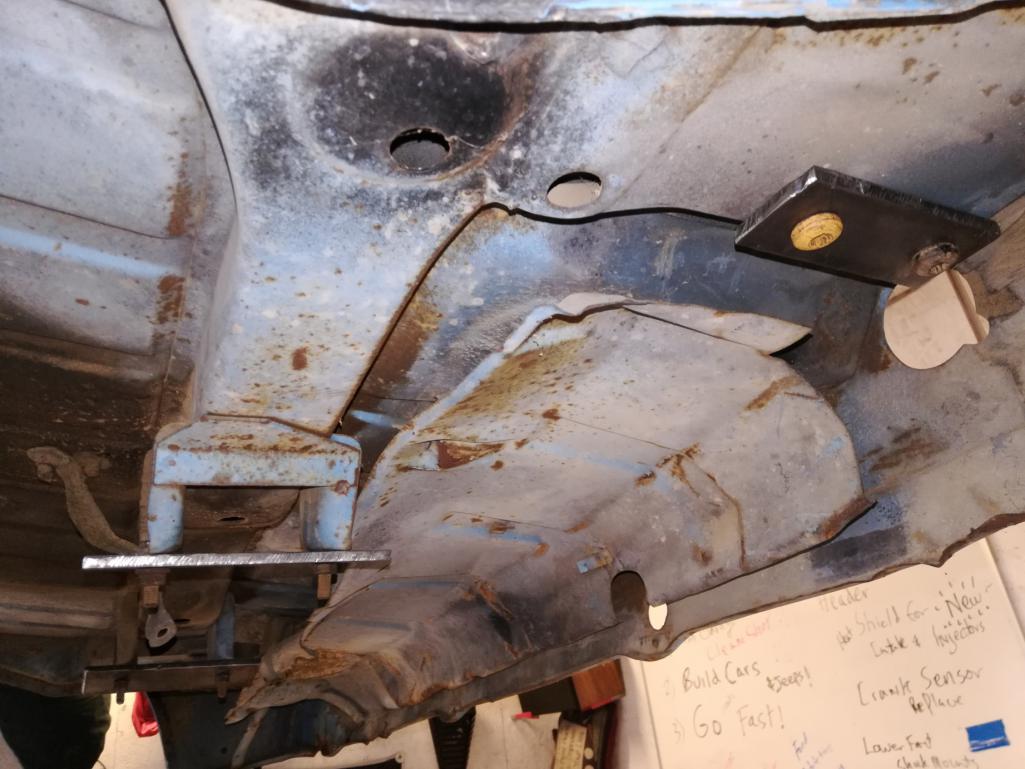
Posted by: Andyrew Aug 10 2018, 10:14 PM
The rear 2 plates won't be on the 74 chassis. That's for the big bumpers.
Posted by: dan10101 Aug 10 2018, 10:35 PM
The rear 2 plates won't be on the 74 chassis. That's for the big bumpers.

Never say that I don't learn things.. every single day....
Posted by: Andyrew Aug 11 2018, 01:12 AM
Im gonna guess you didnt have those big torx 45 drivers for those bolts and it probably killed 3 hrs of your day...
I should have mentioned to you that the bumpers front/rear would be slightly different for your 74 vs your 76 donor... Sorry..
Posted by: John Jentz Aug 11 2018, 06:28 AM
Nice pictures.
Soooo, for us West Coast guys, what IS in that gas can...
I remember it as tasting very much like a Manhattan. It was gooooodddddd!
Posted by: dan10101 Aug 11 2018, 09:09 AM
Im gonna guess you didnt have those big torx 45 drivers for those bolts and it probably killed 3 hrs of your day...
I should have mentioned to you that the bumpers front/rear would be slightly different for your 74 vs your 76 donor... Sorry..
Those were from the Bimmer. Yes, I did, and I was so proud that I found a set of 4 bolts and even had the torx bit for them. Oh well.
I was going to ask about the front bumper. I guess I'll just go with the chassis pickup points and call it good. It seems to work well for the jig that 6not4 built.
I don't need bumper mounts for the front, so it won't matter that they are different.
Posted by: dan10101 Aug 11 2018, 09:11 AM
Nice pictures.
Soooo, for us West Coast guys, what IS in that gas can...
I remember it as tasting very much like a Manhattan. It was gooooodddddd!
I've never had a Manhattan, I may have to expand my horizons...
Posted by: dan10101 Aug 16 2018, 12:43 AM
another update.
The weekend was a wash, but weekdays are for working so I got a bit done. I made the mounting plates for each of the chassis mounting points. (minus the bumper mounts, since apparently I assumed too much..)
So, now I'm working on cross members that will accept the arms that will weld to the plates. I have two mocked up, in the pictures below. I decided on round 1.5" tubing instead of square tube mostly due to being able to index the tube to get a nice perpendicular (isn't that a fun word) connection to the jig cross members..
I'm finding that I will probably need to finish weld at least 2 of them so that I can hang the Jig frame and get the exact measurements of the other arms. I'm thinking that I will go and get some more 2" square tube along with some 6" bolts to go thru the 3" + 2" square and mount them to the main Jig for consistency. Before I do that I will align and level the main Jig frame. (not that I think it matters but only because it may at some point down the road.) then I will trim and final weld the 2 end mounting points. (rear trans mount and front lower control arms mount). Then build and tack weld the remaining arms. if all looks good, finish weld and call it good. I may add some cross bracing that will reinforce the arm positioning. I'll have a better idea once I get that far. 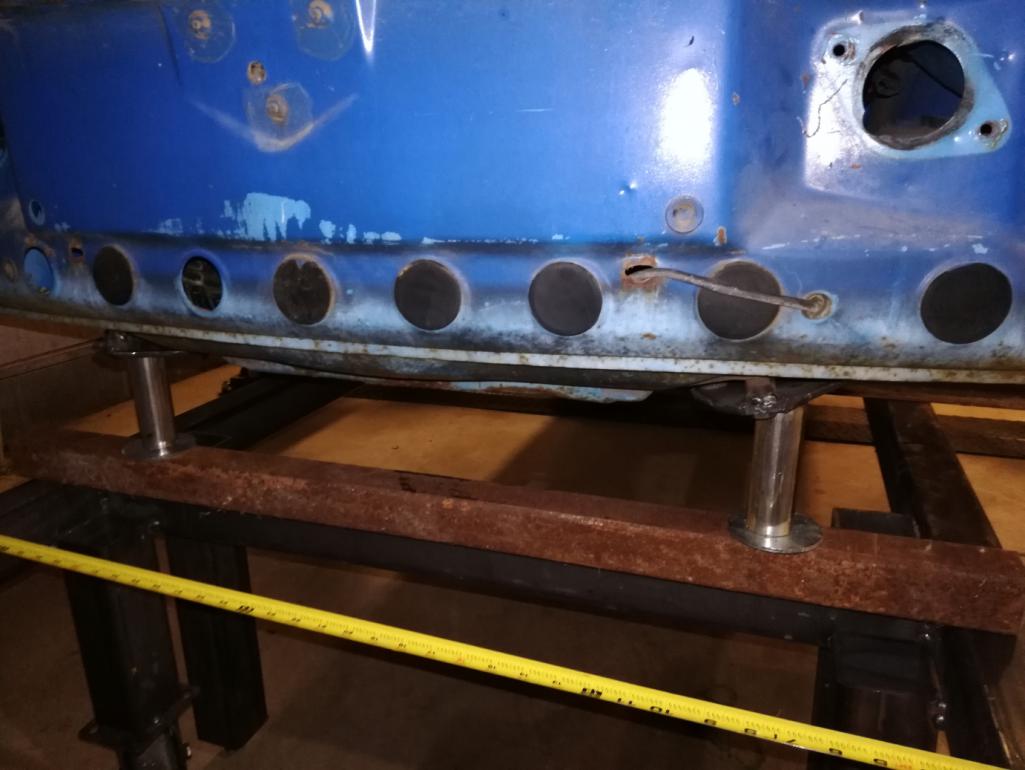
Posted by: dan10101 Aug 17 2018, 04:35 PM
Another update.
Now the front and rear arms are fixed
I moved the jig forward so there is about a 2" jig overhand on front and rear. Leaves more options down the road.
I remade one of the front arms that was too short. When working on a slanted plate, the arm length changes with positioning on the plate.
Then welded the front and rear arms to the the 2x2 cross bracing. (Also picked up some more 2x2 so I could be more consistent with the build)
Also picked up some 6" 3/8" bolts that will be used to locate and somewhat hold the cross arms. They will also be welded, but the bolts will allow them welds to be cut and still retain the mounting positions.
Since I now know the exact lengths of the other arms, (well somewhat). I can begin cutting them out and welding them to the cross braces.
I can't wait to start working on the white car.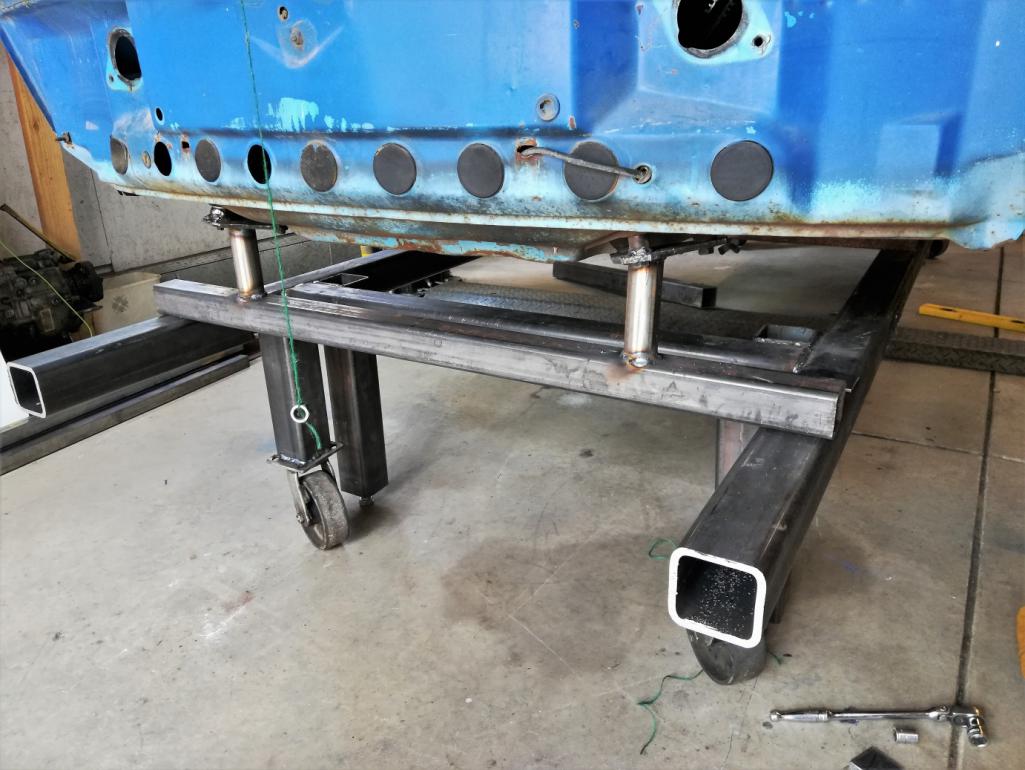
Posted by: Andyrew Aug 17 2018, 05:14 PM
Posted by: dan10101 Aug 20 2018, 12:09 AM
Continue to make progress on the Jig. A couple more arms to make and it will be ready to test. I say test, because it might be a challenge to unbolt and separate from the body. Ive already make some adjustments to the arms to allow it to drop down and away. I'll make the remaining arms and give it a try. 
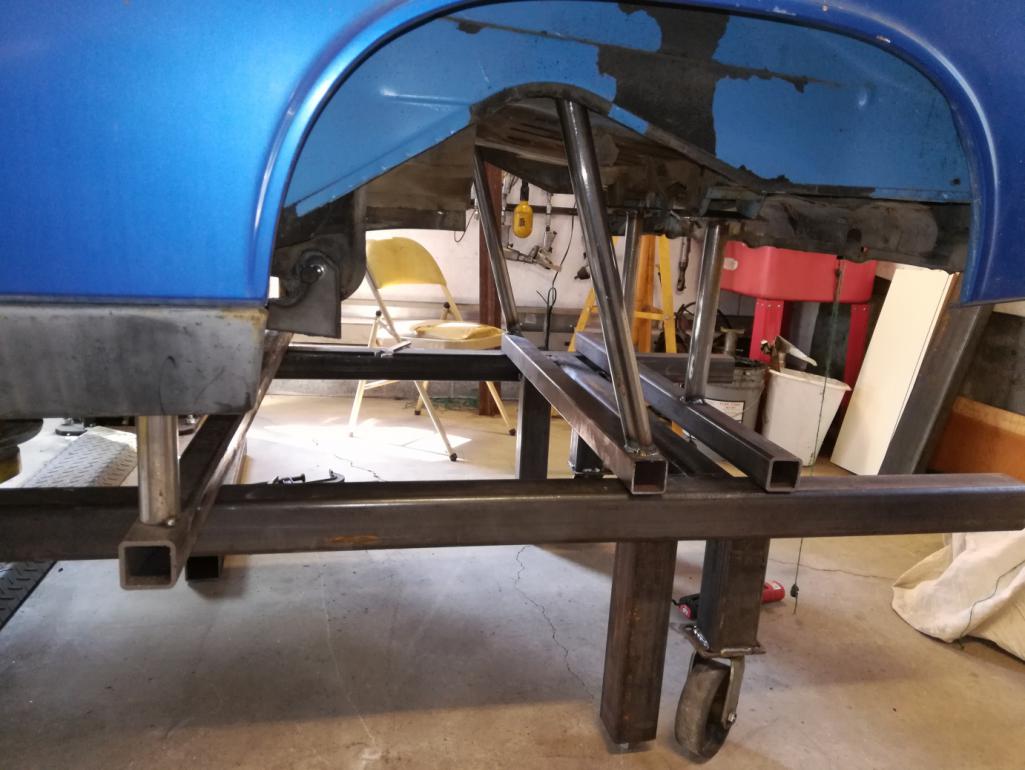
Posted by: Andyrew Aug 20 2018, 10:46 AM
If your concern is not being able to lift it straight up you could unbolt and separate the arms from the jig on the ones that look like they will bind.
I think it looks great. Did you get any body/seam clamps? I think doing one clamp on the front of the long would be a good idea. Give you something strong to hold the front of the body with while you separate the bad pieces.
Posted by: dan10101 Aug 20 2018, 02:12 PM
If your concern is not being able to lift it straight up you could unbolt and separate the arms from the jig on the ones that look like they will bind.
I think it looks great. Did you get any body/seam clamps? I think doing one clamp on the front of the long would be a good idea. Give you something strong to hold the front of the body with while you separate the bad pieces.
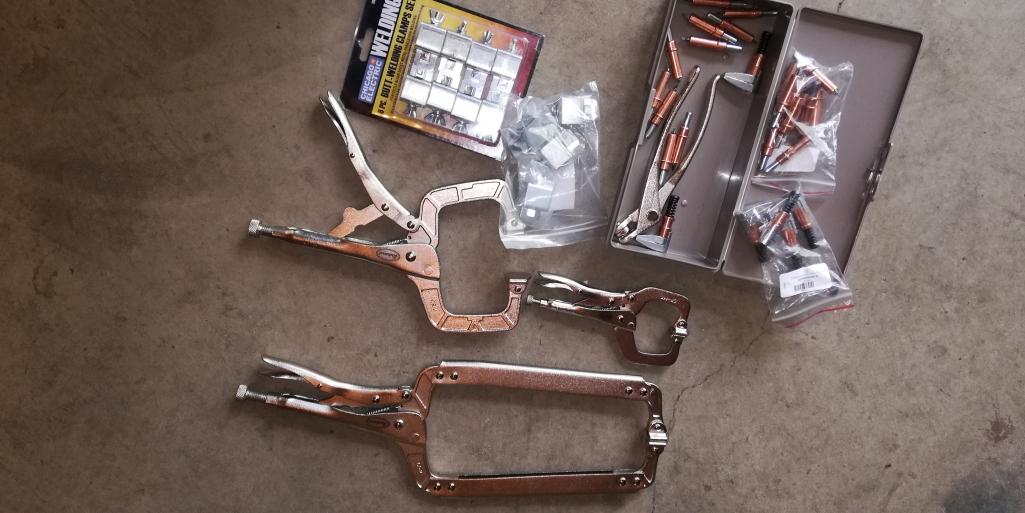
I'm not sure what you mean by seam clamps. Here is what I just purchased from Eastwood. BTW, the package of 8 is from Harbor Freight. 1/2 the price, 2x the clamps.
A mid day update. All the arms are built. I have to finish welding a couple on the front. Then shim the cross bracing where it lifted. Most are flush, but a couple I got to hot too soon and they shrunk.
I think I'm going to tac weld the cross bracing before I drill it. I can test the arms for clearance and so on, make sure they aren't in a bind.
When it's where I want it, I'll begin drilling positioning pins/mounting bolts. That will be a chore as most have to be done from the bottom. Then I might throw a couple more welds on the cross bracing. i don't intend to remove arms until I'm done with the project. Then the welds can be cut off and the positioning pins/bolts can be used to relocate for future use if need be.
Forgive my ugly welds.
It's hard to get in a good position and I always rush these things. I switched to square tubing on a couple on the back. It just made more sense. 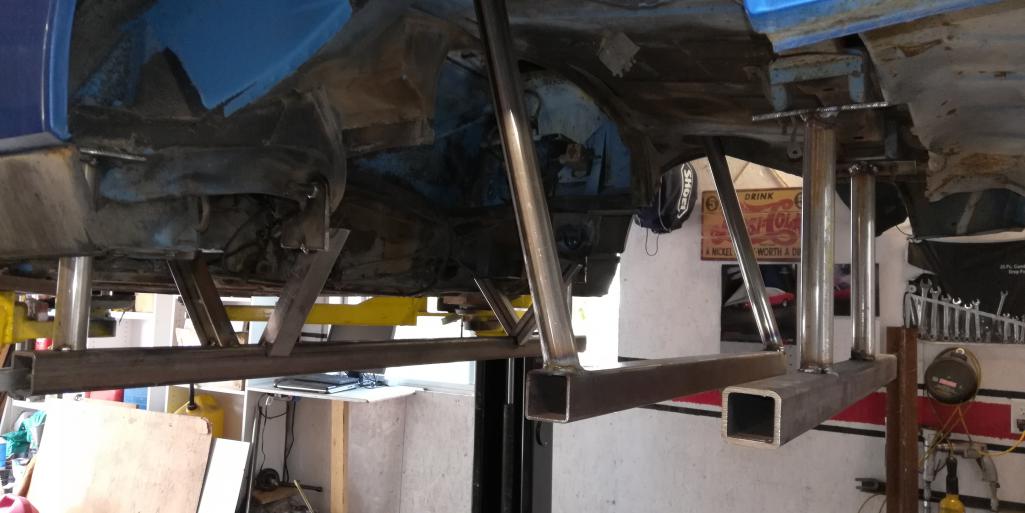
Posted by: dan10101 Aug 20 2018, 04:44 PM
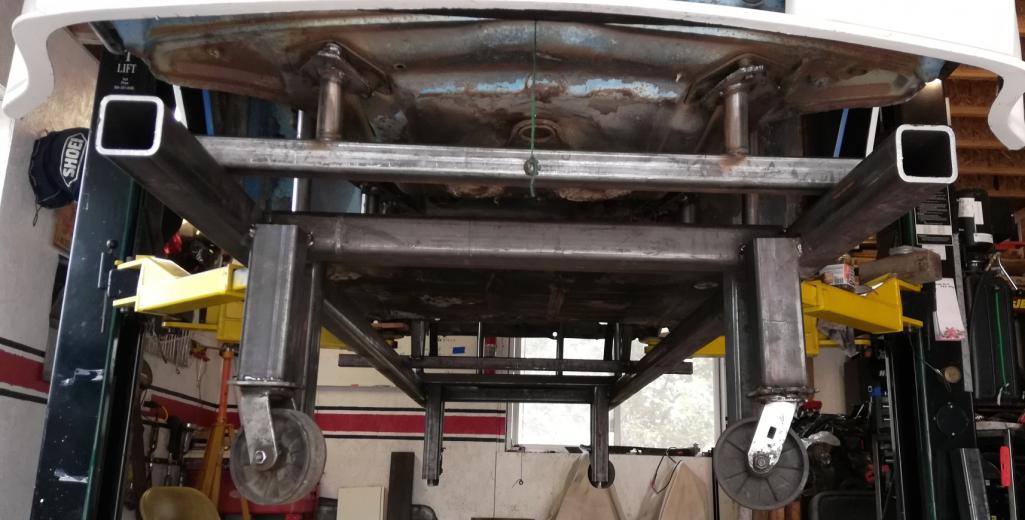
We have Liftoff!
It's only being held by spot welds. (well, heavy spot welds.)
I still need to drill alignment holes and add the bolts. Then I'll call it done.
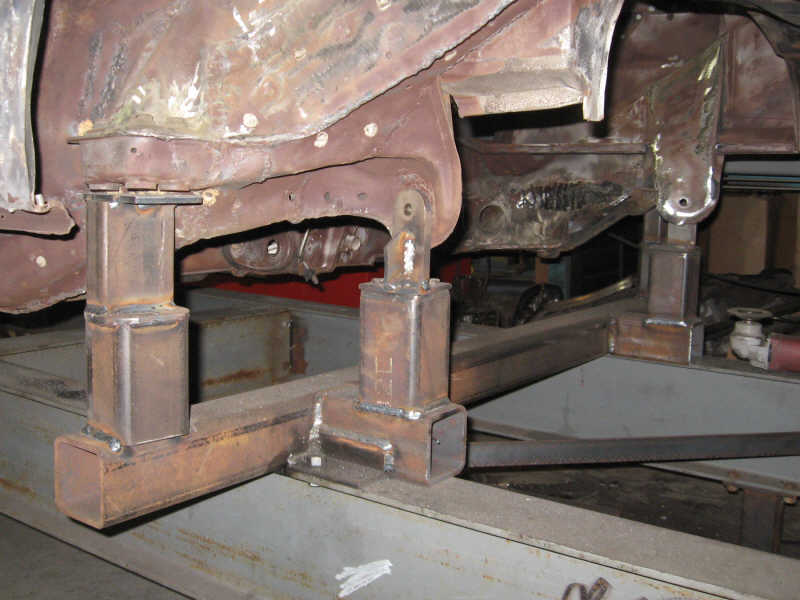
Posted by: dan10101 Aug 21 2018, 10:41 PM
Ok, this is more like liftoff.
The arms are made, they are solid. No bracing needed. They seem to be holding in place without heat warpage.
I did make a tactical error on the motor mount bracket. I put it on top of the mount since it was flat and easier to locate. Does make it very difficult to drop the frame. So I made a cut and bent it out of the way. i can put it back later if I want to once the jig is in place on the white car.
Next step is to put it back on the blue car. Make sure everything aligns. Then drill for alignment bolts. Then I can pull it off for good and reassemble the blue car suspension to make it a roller again.
Then the fun begins...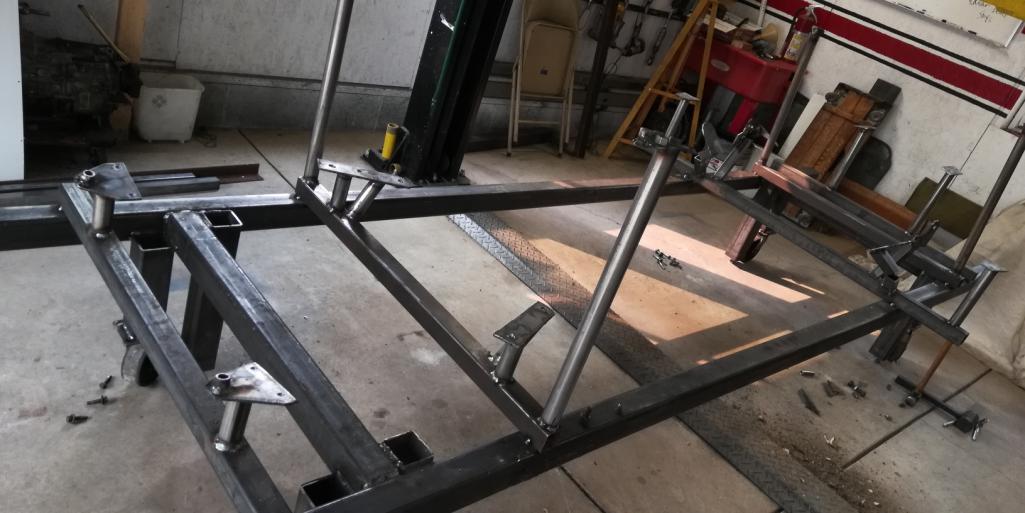
Posted by: Racer Chris Aug 22 2018, 05:35 AM
Looks great Dan!
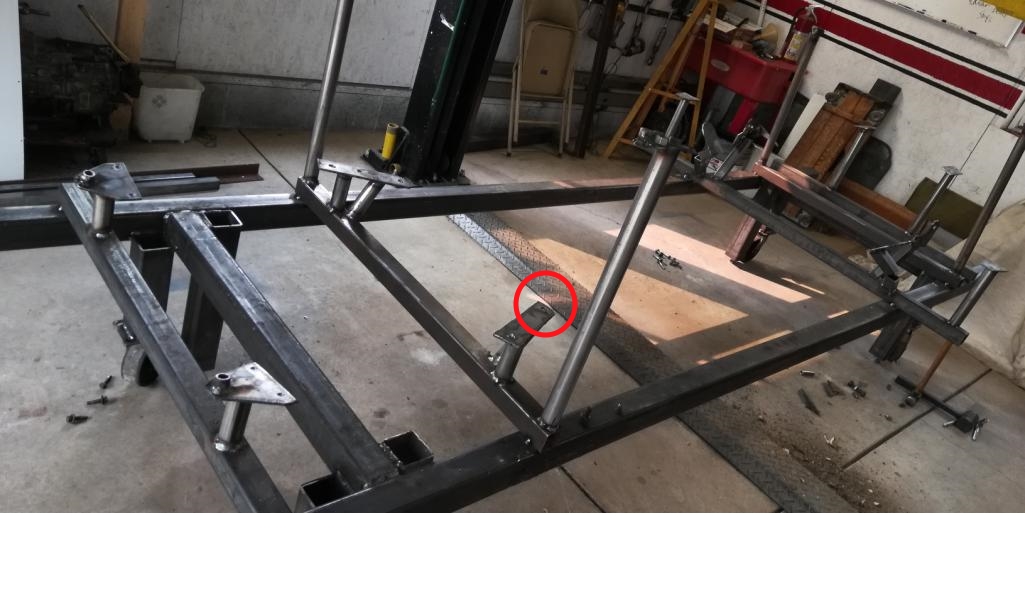
I'd be inclined to separate the strut tower pieces from the lower brackets though.
Posted by: dan10101 Aug 22 2018, 09:39 AM
Looks great Dan!
I'd be inclined to separate the strut tower pieces from the lower brackets though.
You bring up a good point. One of the questionable spots is the circled area under the drivers seat. I may need to do something different there if I have to pull it into position.
Posted by: ValcoOscar Aug 22 2018, 09:49 AM
Dan-
I am impressed with what you have accomplished in less than 2 months. It would have taken me 3X as long...congrats.
You're a man on a mission and it helps that experienced members are chiming in to offer their input.
No doubt this car found the right home
I can't wait to see it in person someday in the near future.
Oscar
Posted by: dan10101 Aug 22 2018, 10:22 AM
You're a man on a mission and it helps that experienced members are chiming in to offer their input.
Oscar
Thanks Oscar, It does most definitely help. 40 years ago, I struggled through repairs with books checked out from the library. it's a different world.
Posted by: dan10101 Aug 22 2018, 11:14 PM
A quick update.
I completed the reassembly of the chassis and Jig.
Only minor adjustments needed. YAY!
one more disassembly and it's done.
My Datsun friend came over and we assembled the suspension for the blue donor and rolled it out of the shop!
After some Laurel and Hardy efforts in getting the Z car in the shop, we were able to pull the engine on Z car and determine the cause of the 'ceased engine'. it was the flywheel rubbing on the trans bell housing.
a bit more work to do on the Z car and we'll be back to our regular program.
Posted by: dan10101 Aug 24 2018, 09:10 AM
The Z car is running.
https://www.youtube.com/watch?v=PNTN7Soy__4&feature=youtu.be
The BMW suspension is on deck. ![]()
Then back to our regular scheduled program.
In the meantime. I'm shopping for wheels.
I really want to go with something like this with a deep dish, but I can't find it anywhere. Anyone have any ideas?
I have 3" spacers I can remove and use that distance as dish...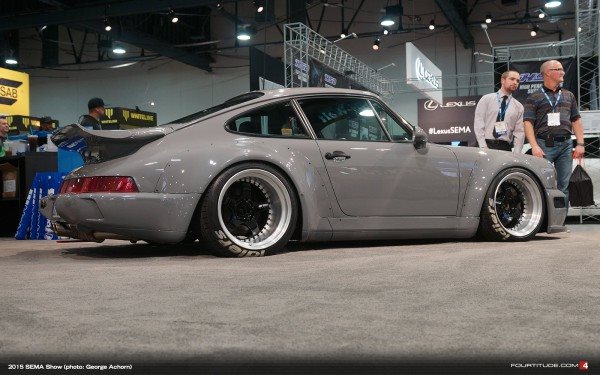
Posted by: Andyrew Aug 24 2018, 02:01 PM
What ET did you determine you need?
Posted by: sixnotfour Aug 24 2018, 02:24 PM
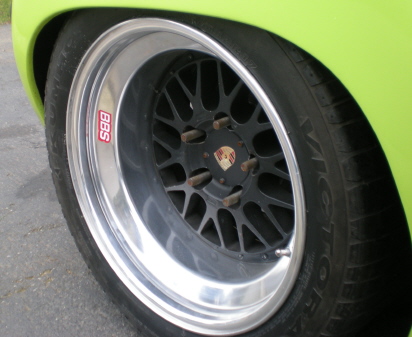
mag center 20bolt bbs 10x17 and 11x17
Attached image(s)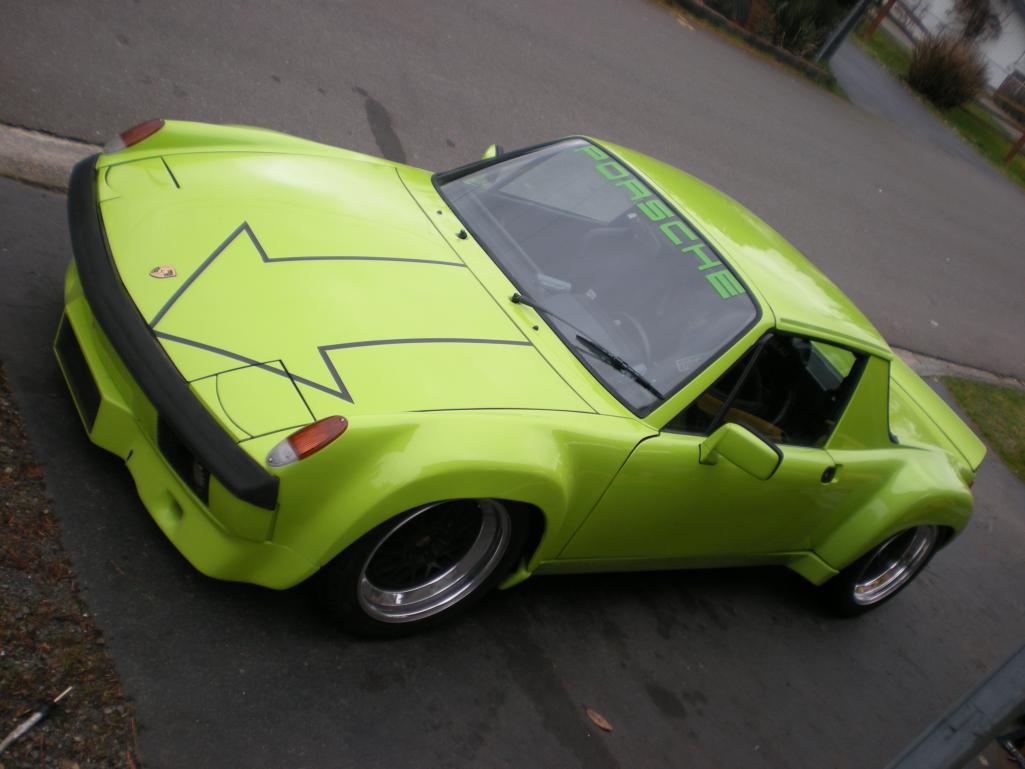
Posted by: dan10101 Aug 24 2018, 05:43 PM
What ET did you determine you need?
Math ug...
1"=25.5mm
It's 50mm et now.
plus 3" spacer 76.5mm
If i move it back to a 1" spacer and a 0et, I would be just outside the current location by .5mm
0 ET calculations.
-76.5mm + 50mm = 26.5mm
1" spacer = 25.5mm
leaving 1mm difference, ( can live with that but not much more)
-26.5mm ET calculations
-76.5mm + 50mm = -26.5mm
So, if you're still reading.
either 0mm ET
or -26ish ET
The deeper the better...
Posted by: dan10101 Aug 24 2018, 05:45 PM
mag center 20bolt bbs 10x17 and 11x17
Yes, this!
I'm at 8x18 and 11x18 right now.
I'm thinking 10x18 square for track tires. But we'll see what turns up..
Posted by: sixnotfour Aug 25 2018, 08:44 AM
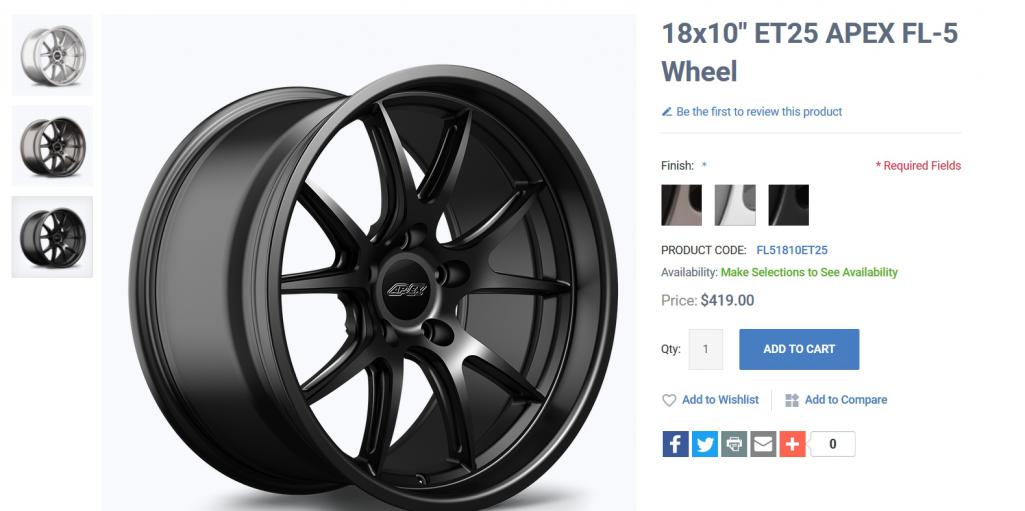
https://www.apexraceparts.com/wheels/fl-5-wheels/18x10-et25-apex-fl-5-wheel.html
https://www.augmentwheels.com/
Posted by: dan10101 Aug 25 2018, 09:27 AM
https://www.apexraceparts.com/wheels/fl-5-wheels/18x10-et25-apex-fl-5-wheel.html
I love those wheels! They are the right look. deep dish, choice of finish, and best of all not 1000+ each...
But.....
They are for BMW.
Why can't they make the exact wheel in 5x130....
Still, I'm going to call them...
Thanks for the find
Posted by: Cracker Aug 25 2018, 09:35 AM
Dan - There are "non-bimmer" options...my old car. These use the 16" Fuch centers and then are converted...Lindsey Racing I believe? AFAICR...
Cracker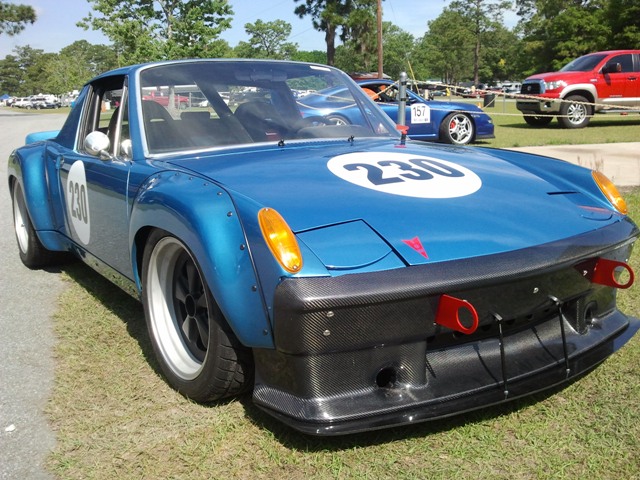
Posted by: sixnotfour Aug 25 2018, 09:52 AM
Lindsey's are 17'
here is 18's
https://braidusa.com/products/bz-series-wheels?variant=12204569296938
Posted by: ChrisFoley Aug 25 2018, 12:34 PM
Staggered wheel widths are better for handling with a big high powered engine in a 914.
Posted by: dan10101 Aug 25 2018, 03:19 PM
Dan - There are "non-bimmer" options...my old car. These use the 16" Fuch centers and then are converted...Lindsey Racing I believe? AFAICR...
Cracker
I like the look of your car, nice classic styling race car.
There are several I would go for, but I'll have to find them second hand.
Posted by: dan10101 Aug 25 2018, 03:23 PM
Lindsey's are 17'
here is 18's
https://braidusa.com/products/bz-series-wheels?variant=12204569296938
I like the wheels you are posting, but it's too rich for my blood.
I guess I need to monitor the used market for deals.
Posted by: dan10101 Aug 25 2018, 03:30 PM
Staggered wheel widths are better for handling with a big high powered engine in a 914.
My short term solution may be to get a couple "stockers" to replace the bent front wheels and keep my eyes open for a deal on some track wheels.
I really wanted to go with a square setup as a way to get the most out of my tires. Being the fastest at my autocross track isn't my goal. There are some blazing fast EMods out there. Track days would be the other big use of the car.
One of my biggest goals is to Not be 'that guy' that screams down the straight and then slows down for the corners and holds everyone up.
Posted by: Andyrew Aug 25 2018, 07:06 PM
One of my biggest goals is to Not be 'that guy' that screams down the straight and then slows down for the corners and holds everyone up.
Ahh you mean like me?
I'm pretty sure your skill will overcome that quickly once your used to the car..
I would say patience and lots of Craigslist/eBay watching will turn something up
You can always call them and see if they are interested in sponsorships..
Posted by: jim dorociak Aug 25 2018, 08:22 PM
The wheels you are looking for need to be custom built to fit your car. The only way to get what you need is a 3 piece wheel. Now for the bad news there are no used wheels available in your needed size and ET. Viable options would be BBS, or CMW used of course but do not be surprised you will still need to buy some new inner and outer rims as the sizes/ET is special for your car. I build Speedline wheels and make custom sizes for the 930/911 wide body, 965/964RSR, 993/TT/GT2 cars. I have a Techart Daytona centers available for a custom build. My sets are however around $4,000 using the Daytona centers. I am attaching a picture of a set I built.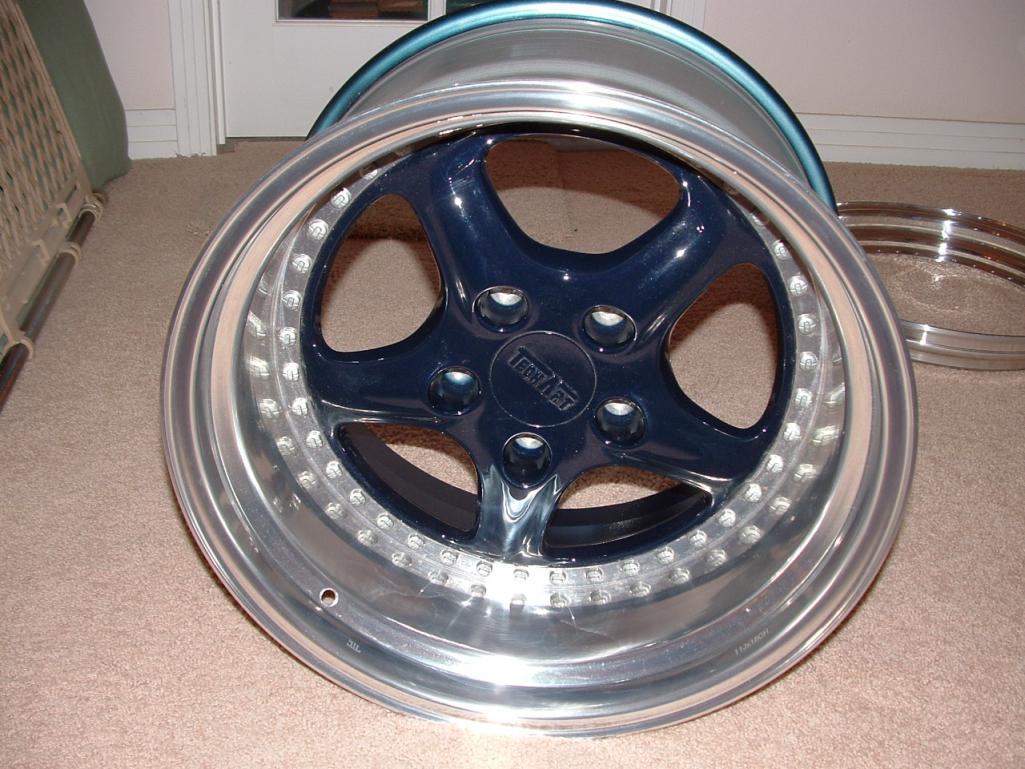
Posted by: My 914 Aug 25 2018, 08:35 PM
Those are nice!
Posted by: dan10101 Aug 25 2018, 10:05 PM
Those are nice!
Yes indeed. Just out of my price range.
Posted by: Andyrew Aug 26 2018, 01:43 AM
Not exactly what you want, but comes with tires, and a decent deal...
https://m.ebay.com/itm/PORSCHE-18-WHEELS-5x130-VOLK-RAYS-TE37-RACING-911-964-996-Cayman-Boxster/183388326715?hash=item2ab2cbcb3b:g:hJkAAOSwHk9bedvx
Edit: just noticed it's an auction. Will likely blow your budget.. those wheels are expensive....
Posted by: 914forme Aug 26 2018, 08:28 AM
but I would toss in a crazy price bid and see, if it goes over it goes over
Posted by: dan10101 Aug 26 2018, 10:15 AM
Those look nice, but I'm going to keep looking and try not to jump into anything to quickly. I have some time to be picky.
I installed the BMW suspension on my buddies car. He loved it. Low and tight. Tomorrow I get to lay hands on the Porsche.
Posted by: egon Aug 26 2018, 08:15 PM
Dan,
A big thank you for buying and rebuilding the Screamsicle. I helped Paul with the car for about 6 years. I am also the purveyor of the Gas Can.
I fixed many systems on the car but never got the chance to fully refine them. I'm a bit anal about certain things, i.e. how it looks or can it be simpler. A good example in the "octopus". Once we figured out all the issues with the old one, I build the one on the car from scratch that was stronger and simplified. If you keep the same basic setup around the clutch and brake masters, I'd be more that happy to make a version 2.0 of the carbon fibre mini skid.
Good lucky in the project and I can't wait to see the finished project. Feel free to reach out if you have any questions.
--Matt
Posted by: dan10101 Aug 28 2018, 03:48 PM
Dan,
A big thank you for buying and rebuilding the Screamsicle. I helped Paul with the car for about 6 years. I am also the purveyor of the Gas Can.
I fixed many systems on the car but never got the chance to fully refine them. I'm a bit anal about certain things, i.e. how it looks or can it be simpler. A good example in the "octopus". Once we figured out all the issues with the old one, I build the one on the car from scratch that was stronger and simplified. If you keep the same basic setup around the clutch and brake masters, I'd be more that happy to make a version 2.0 of the carbon fibre mini skid.
Good lucky in the project and I can't wait to see the finished project. Feel free to reach out if you have any questions.
--Matt
Thanks Matt. My earlier reply didn't get sent for some reason.
I really appreciate the craftsmanship that you put into your work. I was just looking at the Octopus about an hour ago and noticed the touches you put in the supports. Very high quality. I think I can save the skid. it's intact with two of the bolts ripped out in the impact. It's actually something I'm watching as I put it back together to make sure it fits the same.
Sooo, what is in that gas can??
Thanks,
Dan
Posted by: dan10101 Aug 28 2018, 04:39 PM
Update on Mondays progress...
Finally I was able to pull the car in and begin analysis. I spent the day going over the engine to determine what and if there is anything wrong with it. The lifter noise is bothersome but apparently it's a byproduct of aluminum block and heads, high lift cam, headers. My "fix" for this was to make some insulator panels from another project that fit and cover up the headers, leaving the top of the engine exposed. I started the engine and the noise was drastically reduced. I then pulled the panels out with the engine running and it was obvious that the noise was being transmitted thru the headers. I don't know if I can make something that will reduced the noise and still allow heat to dissipate. That is something to work on. Maybe some header wrap. I'll still be going thru the motions of pulling the valve covers, checking lifters, and ensuring all is well under the hood.
A couple of other things I found in my investigation.
The stethascope test revieled that non of the lifters were noiser that any others.
it also revieled that there is also a very noisy injector or 2 that I will be replacing.
1 cylinder (#5) is very weak when checking header temp cyl to cyl. Like 1/2 of the others. The compression test showed that cylinder to be one of the highest, so it's likely an injector, or coil/wire/plug.
All the cyls compression tested between 160 and 180.
There was one plug that was loose, (#4) the others very tight.
There was one plug wire (#1) that lost the end when I removed it. It might have been ok or not before I started messing with things.
The Bore-scope showed a nice pretty interior of the cylinders.
Apparently there is a known problem with the pickup tube getting an O-ring nick on installation that can cause oil pressure to give a false reading (mixing air and oil)
All this can cause the lifter tick in some cars. I need to replace the oil pan gasket, so Ill put that on my list for that job. I also want see if there is any additional baffling I can do 'while I'm in there'.
Today (Tuesday) was spent with the Datsun back in the shop. Some additional Weber tweaks, fixing the chokes and most importantly adding a return line back to the fuel tank helped it run way better. Still needs more work, but first he's going to put some mufflers on that monster.
Tomorrow is another day. hope to begin tear down!
Posted by: dan10101 Aug 28 2018, 08:39 PM
Here's a suspension question...
If I convert the 911 Bilstein struts over to coil overs...
https://www.rsrproducts.com/product-page/rebel-s-racing-rsr-products-front-coil-over-kit
Would I be able to use the 914 control arms from the other car and connect them to the 911 struts/tie rods/and aluminum center section. Just how interchangeable are the 914 and 911 lower control arms?
trying to kill to birds with one stone.
or leave it as is.. (still need to repair broken lower control arm, possibly RS lower ball joint.)
Porsche 930 Turbo (1988) front suspension complete with aluminum cross
member
• Tangerine Racing 32 mm thru body front sway bar kit with adjustable drop links
• Porsche 930 22 mm Torsion Bars
• Elephant Racing poly bronze control arm bushings
• Elephant Racing de-cambered ball joints
• Rear trailing arms boxed and strengthened
• Bump steer kit
• Steering rack limiter kit
• Bilstein front struts and rear coil-overs
• Eibach 250lb. rear springs, top hats modified with spring helper sleeve and
powder coated, strengthened double wall rear shock towers
Posted by: ChrisFoley Aug 29 2018, 07:10 AM
Apparently there is a known problem with the pickup tube getting an O-ring nick on installation that can cause oil pressure to give a false reading (mixing air and oil)
All this can cause the lifter tick in some cars. I need to replace the oil pan gasket, so Ill put that on my list for that job. I also want see if there is any additional baffling I can do 'while I'm in there'.
We replaced the oil pump when the crank was out for new rod bearings. I think that a nicked o-ring was the cause of the spun rod bearing. We were very careful not to allow that to happen during installation of the new pump.
The pistons were left in the cylinders with the rods hanging down while the crank was out.
Not sure if I have the lifter p/n that the GM performance shop used when they replaced the camshaft but I might have that info (in deep storage) somewhere in my old records. In my office I have a box containing the old (1.7 ratio aluminum) rocker arms. A couple have damaged rod cups but would otherwise be re-usable. The box they're in is a Comp Cams Roller Lifter box (p/n 839-16) but no idea if it is from the lifters used in that engine.
Posted by: ChrisFoley Aug 29 2018, 07:15 AM
Here's a suspension question...
If I convert the 911 Bilstein struts over to coil overs...
https://www.rsrproducts.com/product-page/rebel-s-racing-rsr-products-front-coil-over-kit
Would I be able to use the 914 control arms from the other car and connect them to the 911 struts/tie rods/and aluminum center section. Just how interchangeable are the 914 and 911 lower control arms?
...
The only substantial difference between 914-4 and 911 a-arms is the forward spline embedded in the torsion bar tube. Anti-sway bar mounts can be changed easily enough where necessary. There are no other meaningful differences afaik.
Posted by: 914forme Aug 29 2018, 02:26 PM
And the different in spline count on the 914-4 to 911 arms means different torsion bars are required. The -4 arms will work in the AL crossbar, just need to use the -4 adjuster caps instead of the 911 stuff.
Posted by: dan10101 Aug 29 2018, 10:17 PM
We replaced the oil pump when the crank was out for new rod bearings. I think that a nicked o-ring was the cause of the spun rod bearing. We were very careful not to allow that to happen during installation of the new pump.
The pistons were left in the cylinders with the rods hanging down while the crank was out.
Not sure if I have the lifter p/n that the GM performance shop used when they replaced the camshaft but I might have that info (in deep storage) somewhere in my old records. In my office I have a box containing the old (1.7 ratio aluminum) rocker arms. A couple have damaged rod cups but would otherwise be re-usable. The box they're in is a Comp Cams Roller Lifter box (p/n 839-16) but no idea if it is from the lifters used in that engine.
Well, knowing you were in there last makes me feel better. I'm not getting any foaming, so it may be just fine. The other thing I wanted to look at oil pan wise was the oil pan baffling for hard cornering. I suspect it's pretty good stock, but was wondering.
I thought the 1.8s were in there prior to the cam swap. But I guess it makes sense to put a smaller cam in and add the 1.8 rockers to get some of the lift back. Then you could just swap to 1.7s if it wasn't enough to solve the problem. I know it had a lot of problems with pulling studs out of the aluminum head so they went to shaft rockers. I think it's a good plan, I doubt I would ever go back to that nightmare again.
You don't happen to know the latest cam specs do you? from that literally 1 foot stack of papers, that seems to be missing. I guess I can go through them again.
I think I figured out the exhaust specs.
Exhaust only...
114 LSA I don't know if this changes with a 1.8 rocker.
.537 lift (measured on 1.7 rocker)
.565 lift (calculated of internet for 1.8 rocker)
224 duration
235 duration estimate with 1.8 rocker.
again this is exhaust only, but it gives an idea...
Had a little fun today. It's something I do anytime I get a chance. Open Headers.
The funny part is the 1/8" spacers falling off. I didn't know what it was so I shut it down. But, you get the point.
https://www.youtube.com/watch?v=6f-P6CaALPw&feature=youtu.be
Posted by: dan10101 Aug 29 2018, 10:36 PM
The only substantial difference between 914-4 and 911 a-arms is the forward spline embedded in the torsion bar tube. Anti-sway bar mounts can be changed easily enough where necessary. There are no other meaningful differences afaik.
And the different in spline count on the 914-4 to 911 arms means different torsion bars are required. The -4 arms will work in the AL crossbar, just need to use the -4 adjuster caps instead of the 911 stuff.
Ok, so I think I have 2 options.
My current setup is all 911.
If I use the control arms from the 914, I can use the front and rear connections to the 911 torsion bar and use the 914 control arm with my 22mm 911 torsion bar. My issue there is is already has Elephant racing bushings. I would need to replace the pressed on bushing onto the 914 control arm. (that is actually an issue with either solution. )
If I buy the coil over kit it doesn't matter which cap ends I use since I won't be using a torsion bar. But I still need a solution to the Elephant racing bushings that are on the bent/broken drivers control arm .
I guess I have a third option. To repair and reinforce the bent/broken drivers side control arm. Then I can keep the elephant racing bushings intact.
One other suspension issue is the cap missing from the passenger side lower ball joint. I'll look at that tomorrow and see if it's loose or not.
Oh, one success for today is all the suspension is off the car. Well, except for the sway bar and the aluminum cross bar on the front end. The fuel line went thru it, so I need to drain the fuel tank to remove it. Not a bad thing, just messy.
I have to say this car is a dream to work on. So clean, so well put together. I did a rusty old jeep a few months ago. Uggg......
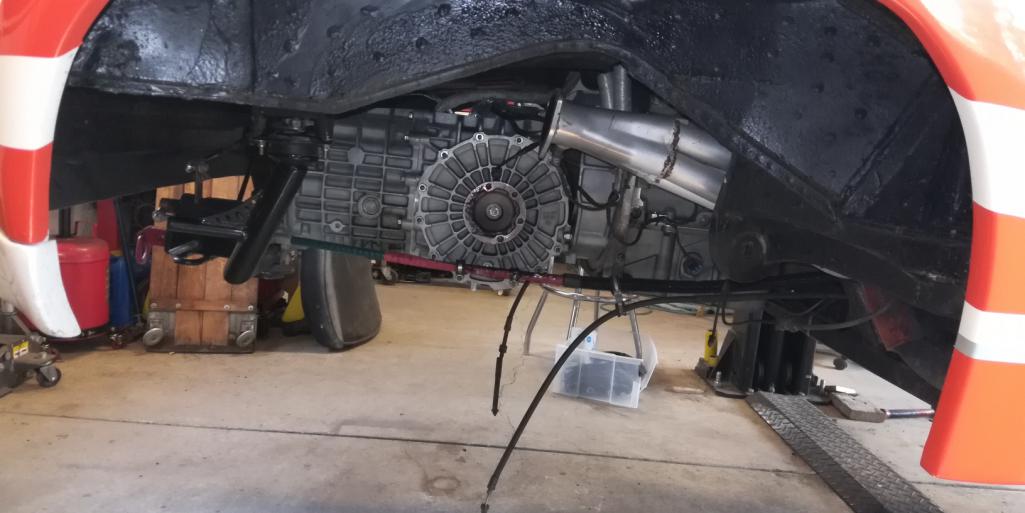
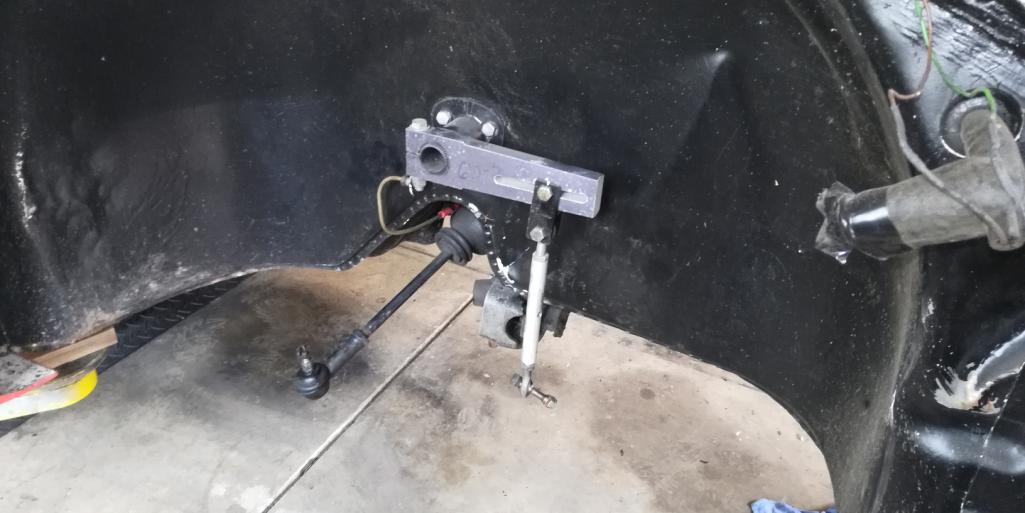
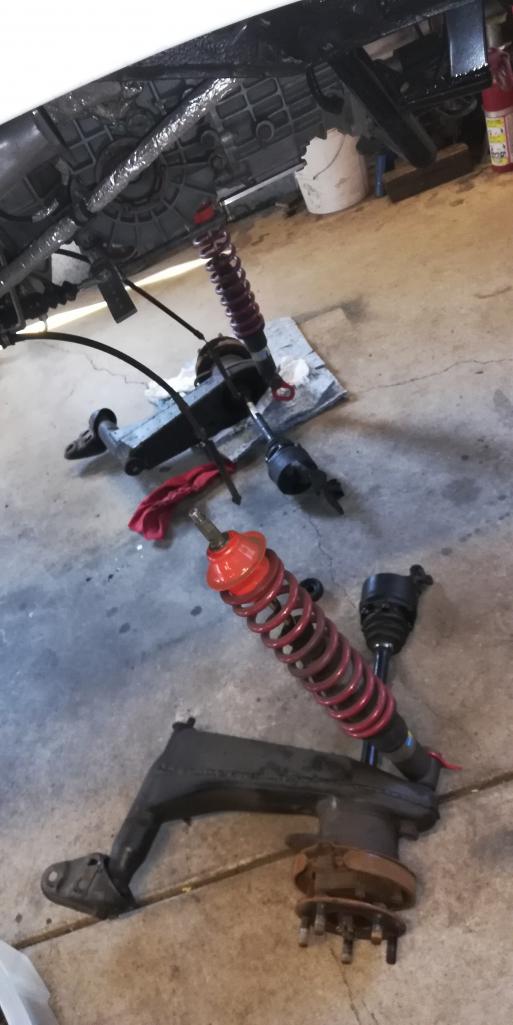
Posted by: dan10101 Aug 30 2018, 01:03 AM
What ET did you determine you need?
Math ug...
1"=25.5mm
It's 50mm et now.
plus 3" spacer 76.5mm
If i move it back to a 1" spacer and a 0et, I would be just outside the current location by .5mm
0 ET calculations.
-76.5mm + 50mm = 26.5mm
1" spacer = 25.5mm
leaving 1mm difference, ( can live with that but not much more)
-26.5mm ET calculations
-76.5mm + 50mm = -26.5mm
So, if you're still reading.
either 0mm ET
or -26ish ET
The deeper the better...
Ok, so the fronts are 3" the rears are 2". It's really tight for the rear tires. 11" with only supposed to fit 10". I think I'm going to repair the 2 front rims and go with what I have for right now. Then I can explore other options later.
Posted by: ChrisFoley Aug 30 2018, 07:42 AM
I found the 6/24/2010 invoice from J&M Motorsports with p/n info:
Comp Cams Camshaft LS1: 3114R/3753R 54-000-11
T&D 1.8 Ratio Rockers: PK-1.8 TD
LS1 Valve Spring Upgrade Kit: TFS-2500300
Valve Cover Spacers: 3060800
5/16 x .116 4130 7.300 Pushrods 5116-7300
Use 911 a-arms. You want those big torsion bars or you'll end up with oversteer again.
Posted by: dan10101 Aug 30 2018, 10:02 AM
I found the 6/24/2010 invoice from J&M Motorsports with p/n info:
Comp Cams Camshaft LS1: 3114R/3753R 54-000-11
T&D 1.8 Ratio Rockers: PK-1.8 TD
LS1 Valve Spring Upgrade Kit: TFS-2500300
Valve Cover Spacers: 3060800
5/16 x .116 4130 7.300 Pushrods 5116-7300
Use 911 a-arms. You want those big torsion bars or you'll end up with oversteer again.
Thanks Chris. I have that, but I did some more searching and finally found a Comp Cams PDF that shows their grind specs. I don't know why they don't refer you to that when you search their website. Those pushrod numbers may come in handy down the road a bit..
I meant to point out that the comp cam number 54-000-11 is a cam blank for custom grinds. But the PDF I found shows the specs on the grinds so we're good.
In English the advertised specs with 1.7 rockers are:
Intake .544 lift 281 duration
Exhaust .534 lift 278 duration
With 1.8 rockers
intake .576 lift 295 duration
exhaust .565 lift 291 duration
This is all more for me so I can find it later.
http://www.compcams.com/catalog/COMP2011/pdf/COMP_Catalog_2011_417-493.pdf
As far as the control arm question. Can you get elephant bushing sleeve that press onto the replacement control arm without having to order the whole set?
Posted by: dan10101 Aug 31 2018, 12:10 AM
Thursday update
I finished with removing the suspension and made an executive decision to not pull the engine. What can I say, I'm lazy and was only going to do it because I was curious. Well, I'm not that curious. So I decided to just pull the trans so i could connect the jig to the rear trans mounts. So the trans is now out and the next step is to connect the Jig to the body and see where we stand.
The initial try showed me ai need to trim some excess material around one of the plates in the back. Then it should drop down.
I did notice that a prior mod to mount the clutch and brake master cylinders eliminated one of the mounting points for the drivers front control arm. I'll need to see if that will be a problem keeping it from dropping down all the way. Or if I need to put it back or just eliminate it.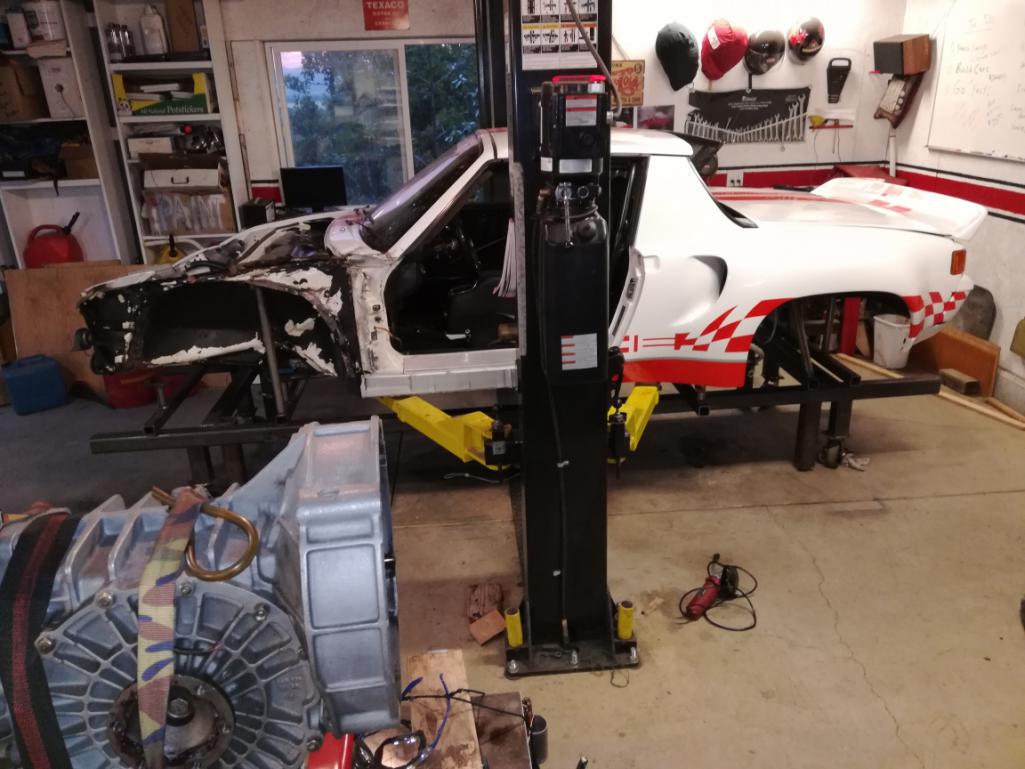
Posted by: 914forme Aug 31 2018, 07:55 AM
So the 911 Torsion bar will not fit the 914-4 arms.
If you go coil over torsion bars do not matter. I would get a plug for the end of the arm though.
Elephant Racing Bushings are nice, and for the poly bronze set I had, they sold me a set of the base sleeves front and rear when I swapped the control arms and rear arms. I would just contact them and see if they can provide sleeves for the arms. You could also have a set machined. And if they are not damaged the instructions say to install with a base of JB weld if required. JB weld can be neutralized with a bit of heat from a torch and they will pull off if reduced effort.
Posted by: burton73 Aug 31 2018, 12:31 PM
I want to point out that the suspension points is there on your car just the one piece shown was removed to fit the box for the peddles for brake and clutch master. My V8 car with 930 is the same. Bill that built your car was very kind to me and gave me the bent metal to fit these parts. The suspension is bolted to the front points and the point where the rack is. The under-sway bar point on the driver’s side is not there and our cars (mine and yours) need the over the top bar like you have. Now the cover will not have 4 points to bolt up. I am working that out
Bob B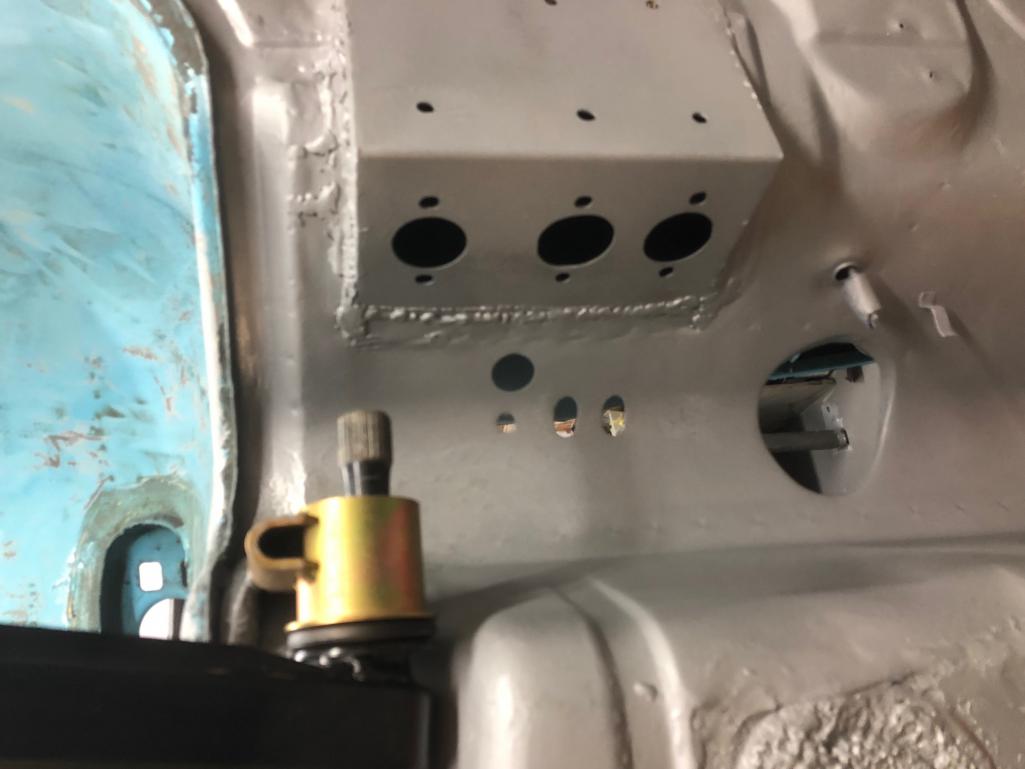

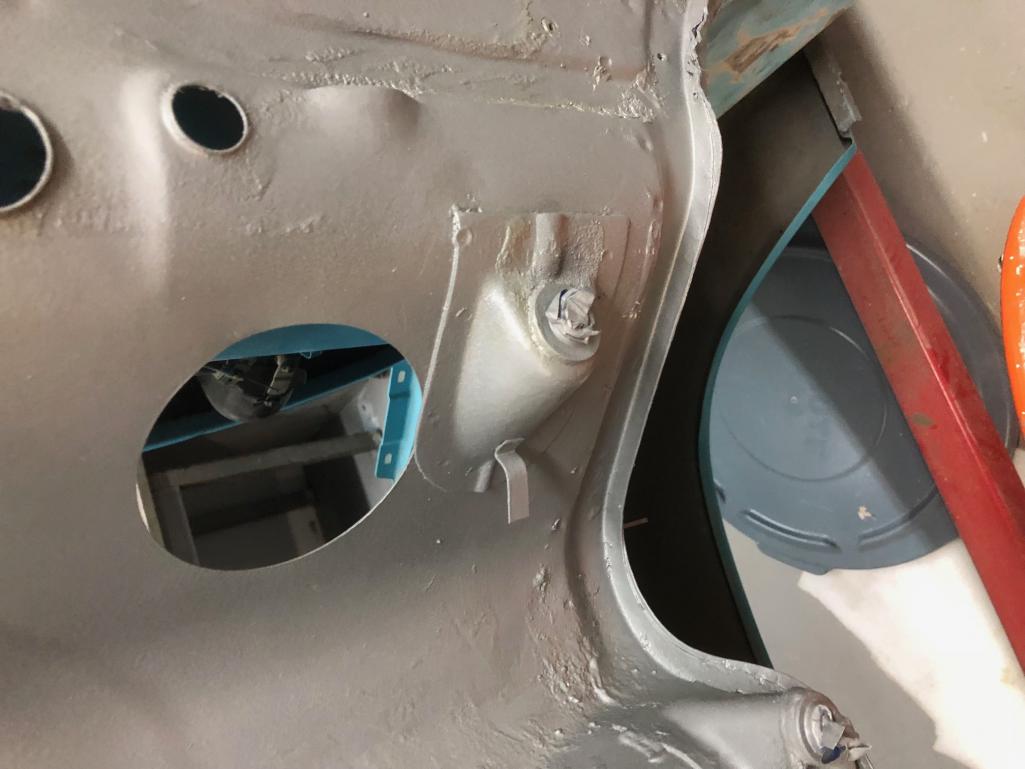
Posted by: 914forme Aug 31 2018, 03:54 PM
Bob and Dan, you don't need it as three points make a plane. I would just add a piece to keep the noise down from vibration and be done.
I have the same issue with my pedal box, I think I can replicate the threaded receiver for the under tray as it is in the same plane as the floor. So I have an early metal cross bar that I will use to make sure it is in the correct place. Also have a long stick to measure the distance back to the rear suspension console. And of course that measurement is documented off these points in the drawings I have. My MCs are all inside the car on my box as of right now, as I wanted to be able to adjust the pedals if need be.
Most likely another detail I over thought on that car.
Posted by: dan10101 Aug 31 2018, 07:11 PM
So the 911 Torsion bar will not fit the 914-4 arms.
If you go coil over torsion bars do not matter. I would get a plug for the end of the arm though.
Elephant Racing Bushings are nice, and for the poly bronze set I had, they sold me a set of the base sleeves front and rear when I swapped the control arms and rear arms. I would just contact them and see if they can provide sleeves for the arms. You could also have a set machined. And if they are not damaged the instructions say to install with a base of JB weld if required. JB weld can be neutralized with a bit of heat from a torch and they will pull off if reduced effort.
I'll see if they will come off easily. If not and I can get sleeves from ER, I'll do that. Good to know you were able to do that.
I probably will just get another new 911 A-Arm. I don't want it to be weird down the road with 1 914 and 1 911. Then I can start with the existing 22mm torsion bars and then later I can change to coil overs.
Posted by: dan10101 Aug 31 2018, 07:19 PM
I want to point out that the suspension points is there on your car just the one piece shown was removed to fit the box for the peddles for brake and clutch master. My V8 car with 930 is the same. Bill that built your car was very kind to me and gave me the bent metal to fit these parts. The suspension is bolted to the front points and the point where the rack is. The under-sway bar point on the driver’s side is not there and our cars (mine and yours) need the over the top bar like you have. Now the cover will not have 4 points to bolt up. I am working that out
Bob B
Looks like a nice build. How long ago was that?
I don't see the cover as structural. Although the original strap seemed to be. Here's what happened to this one in the wreck.

Posted by: dan10101 Aug 31 2018, 07:27 PM
Bob and Dan, you don't need it as three points make a plane. I would just add a piece to keep the noise down from vibration and be done.
I have the same issue with my pedal box, I think I can replicate the threaded receiver for the under tray as it is in the same plane as the floor. So I have an early metal cross bar that I will use to make sure it is in the correct place. Also have a long stick to measure the distance back to the rear suspension console. And of course that measurement is documented off these points in the drawings I have. My MCs are all inside the car on my box as of right now, as I wanted to be able to adjust the pedals if need be.
Most likely another detail I over thought on that car.
I like the carbon fiber cover to protect the master cylinders. But I may move them over to the drivers left a bit. I feel like I'm twisting myself to reach the pedals. And my not so big feet feel really big. I also plan to lower and turn the drivers seat a degree or 2 to put the steering wheel in front of the driver.
I will probably run a tube from the strut tower to the front of the lower control arm. probably overkill, but i don't want any question of the strength.
Posted by: dan10101 Aug 31 2018, 07:44 PM
Friday Update
In trying to lower the car onto the jig I ran into a few spots that needed work.
trimming the front of the rear lower control arm.
eliminating the motor mounts
eliminating the point where the master and clutch cylinder are located, ( as just discussed)
And unfortunately eliminating the rear trans mounts. Apparently they are modified and my pickups were too long. However, they were located in the right position forward to back. That at least told me it should have been correct. Also they removed the slant. I tried to do the same, but they are still to long. so I just hacked them off. the other pickup points in the rear started easily with finger threading the bolts. So i'm confident the rear section is in the right location.
The pictures below are where the front pickup points differ from the Jig. that will soon be 'fixed'.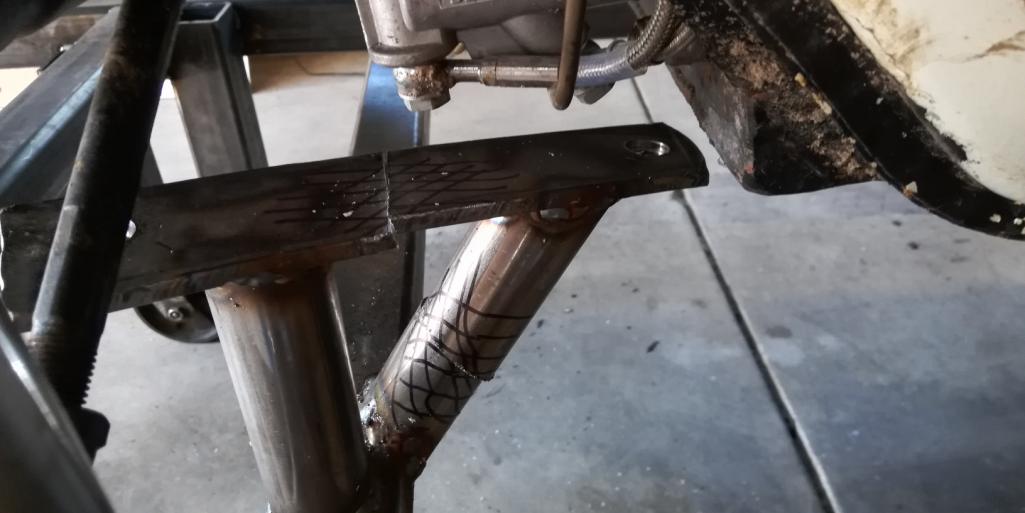

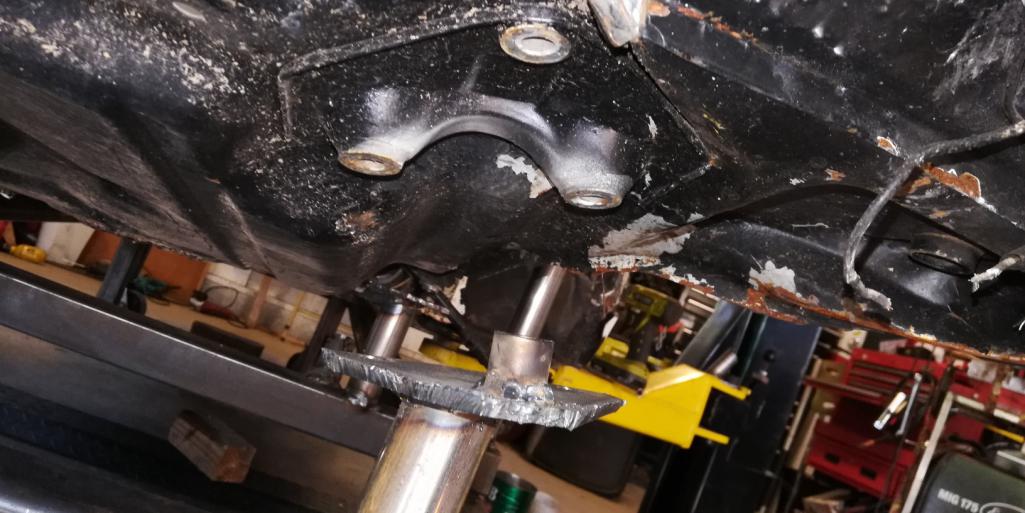
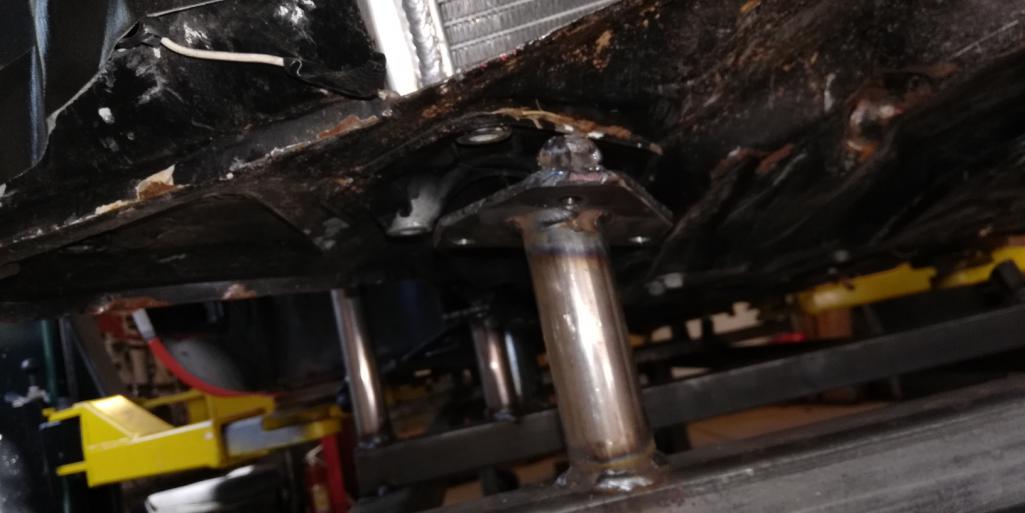
Posted by: burton73 Aug 31 2018, 08:21 PM
I want to point out that the suspension points is there on your car just the one piece shown was removed to fit the box for the peddles for brake and clutch master. My V8 car with 930 is the same. Bill that built your car was very kind to me and gave me the bent metal to fit these parts. The suspension is bolted to the front points and the point where the rack is. The under-sway bar point on the driver’s side is not there and our cars (mine and yours) need the over the top bar like you have. Now the cover will not have 4 points to bolt up. I am working that out
Bob B
Looks like a nice build. How long ago was that?
I don't see the cover as structural. Although the original strap seemed to be. Here's what happened to this one in the wreck.
Shot today!
Bob B
Posted by: 914forme Sep 1 2018, 10:21 AM
Oh I thought you where replacing both sides.
Yes keep them the same otherwise down the road it would get confusing.
As for the lower cover I like the idea of laying up a carbon fiber cover, which I did not think about, but will be stealing that idea for my build.
Posted by: dan10101 Sep 7 2018, 11:18 PM
Finally another update
I haven’t been resting on my laurels, whatever those are…
After connecting the white car to the Jig I made a half-assed attempt at a pull to see what that would look like. I quickly determined that the front jig arms need to be removed in order to make the pulls.
I should take a step back and say that I decided to try to pull the front end back into the proper location. I’ll still be replacing much of the front end, but this will make a better starting point.
So the week has been a bunch of background work, drilling holes for the cross braces so they could be relocated into the correct position once I was ready to check the pulls or begin attaching the new front end sheet metal. Then I cut off the cross bracing taking off the front suspension point arms with them. I did actually reattach the trans mounts to the Jig. Just another strength point more than anything else.
I ordered a set of pulling rams from Harbor Freight. 25% off helps.
I’m still experimenting with bracing, and how to lock down the chassis to make the pulls. I found a nearby tree that may come in handy. The problem is the pulls need to be down and the tree is ….up the hill.
I also made a tool to measure different points from one chassis to the other. I know that’s what the jig is for, but this is for double checking.
All that and some more Datsun tuning.
That's about all for now..
Thanks for listening to my babbling..
Posted by: Andyrew Sep 8 2018, 02:41 AM
Why don't you pull down on your jig? Reinforce the base some more so it can't move/twist with pulling and pull on it after anchoring it to the floor?
Those construction grade expansion bolts have really high tinsel strength, like 2k lbs each for a 3/8" bolt. Plenty to keep the jig in place while making pulls.
Posted by: dan10101 Sep 8 2018, 09:07 AM
Why don't you pull down on your jig? Reinforce the base some more so it can't move/twist with pulling and pull on it after anchoring it to the floor?
Those construction grade expansion bolts have really high tinsel strength, like 2k lbs each for a 3/8" bolt. Plenty to keep the jig in place while making pulls.
I actually bought anchor bolts yesterday. 3/4" because I already have a good hammer drill bit in that size. I still plan to build arms to pull from, but if I can get at least one maybe 2 pulls done without building a contraption, I'll be ahead of the game. The pull point would need to be about 2-3 feet away from the jig if I build something. It's these little side projects that take up so much time.
Car show weekend. Cars and Coffee, Jacksonville Car show, and 4x4 truck show.
Posted by: ChrisFoley Sep 8 2018, 09:59 AM
Rather than anchor my platform directly to my floor I set screw anchors in the floor a short distance outboard of the corners, and then threaded forged eyebolts into them.
I welded short angle irons to the beams of the platform with a hole in the protruding leg and used heavy turnbuckles to attach between the angle irons and the eyebolts.
That way I can easily remove them when I'm done and the floor won't have anything sticking out.
Posted by: Cracker Sep 8 2018, 10:09 AM
Posted by: dan10101 Sep 8 2018, 10:26 AM
... I set screw anchors in the floor a short distance outboard of the corners, and then threaded forged eyebolts into them.
I don't quite get this part.
Is this kinda what you're talking about?
https://www.ebay.com/itm/Shield-Anchor-Eye-Bolt-M8-Bolt-M12-Shield-By-65mm-Length-Yzp-Pack-Of-12/362209513029?hash=item54555e8e45:g:zWUAAOSwQN5aVfYm
Not shipping to the US..
https://www.amazon.co.uk/M12-Eye-Bolt-Shield-Anchor/dp/B01BYG3F8C/ref=sr_1_4?ie=UTF8&qid=1536423531&sr=8-4&keywords=eye+bolt+m12
Any good hardware resources online?
Posted by: ChrisFoley Sep 8 2018, 11:57 AM
Not quite. Eyebolts like that won't handle the loads.
These are what I used:
https://www.mcmaster.com/97083a330
https://www.mcmaster.com/3014t491
https://www.mcmaster.com/3001t54
Posted by: dan10101 Sep 8 2018, 09:44 PM
Not quite. Eyebolts like that won't handle the loads.
These are what I used:
https://www.mcmaster.com/97083a330
https://www.mcmaster.com/3014t491
https://www.mcmaster.com/3001t54
Thanks for the quick reply. I happened to be in Lowes at the time and was able to find the female screw anchors there. No eyebolts, but I'll order or make something. I also picked up some turnbuckles.
Still exploring options for pulling. I anticipate making a contraption to make the main pull. Then we'll go from there.
Thanks again everyone for pitching in with suggestions.
Posted by: 914forme Sep 9 2018, 07:57 AM
Forged Turnbuckels, the cheapies found in most box hardware stores will bust open with shrapnel flying if your unlucky. If lucky they stretch and snap, lots of potential energy built up in the turn buckle.
Be safe man, don't skimp on the basic hardware.
Chris's suggestions are great.
Posted by: dan10101 Sep 9 2018, 08:53 AM
Forged Turnbuckels, the cheapies found in most box hardware stores will bust open with shrapnel flying if your unlucky. If lucky they stretch and snap, lots of potential energy built up in the turn buckle.
Be safe man, don't skimp on the basic hardware.
Chris's suggestions are great.
The ones I got were from Coastal. 2200# like the ones Chris posted.
But good point. Weak links and all that... I'll try not to use them just take up slack in other ways.
Posted by: dan10101 Sep 10 2018, 10:30 PM
Today's update:
I decided to try to remove the Elephant bushings (races) from the broken lower control arm. I heated it up with a torch to break the JB weld that is supposed to be holding them on. I did get it to move, but not without making a mess of the bushing/race. So I made a call to Elephant and found they do indeed sell just the races. $50 and they'll be here in a couple days.
Next was to remove the decambered ball joint. I spent way too long modifying another tool to fit the ball joint. But alas, it was too much for me and after almost sending myself to the hospital (no I'm fine) I went to plan B. No worries, the control arm is toast so I just cut a notch in it and popped it with a chisel. Came out easy doing that and no damage to the threads or ball joint. Why didn't I think of that in the first place...
Ordered a new ball joint nut and 911 control arm.
Should be good to go in a few days.
Having two good control arms in hand will make the next steps easier.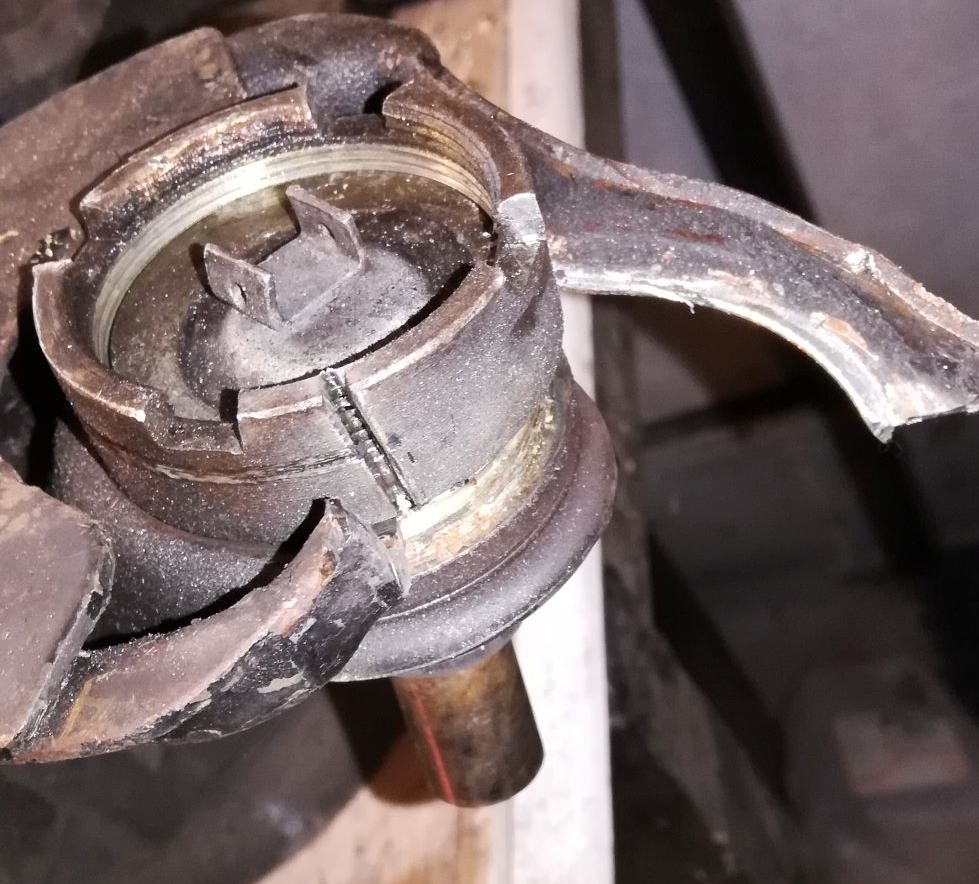
Posted by: dan10101 Sep 14 2018, 08:54 PM
Happy 914 Day!
Posted by: Andyrew Sep 15 2018, 12:30 PM
Happy 914 Day!
Posted by: dan10101 Sep 21 2018, 04:18 PM
A bit overdue for an update. But the biggest one is I'm still waiting on the pump for the rams. The original one I ordered will do fine as a replacement pump for my engine hoist jack. So I reordered the correct hand pump 10ton.
in the meantime. I've gathered most of the parts I needed for suspension repair. i picked up a new lower control arm. New Elephant Racing 'races' for the same. New ball joint rings and a new tie rod end to replace the bent one. I put together the new control arm and it's ready to go. The pass side lower ball joint was missing the plug on the bottom. Remember these are cambered ball joints that go for 380 a pair. They are both very tight and in great condition. Well the pass side took some downward force that popped the Epoxied plug out of the bottom. I was able to easily push it back into place with just the right amount of force. I made a replacement plug and epoxied it back in place. I just need to steal a good boot off the blue car and hope it fits, then the control arms will be ready to go. 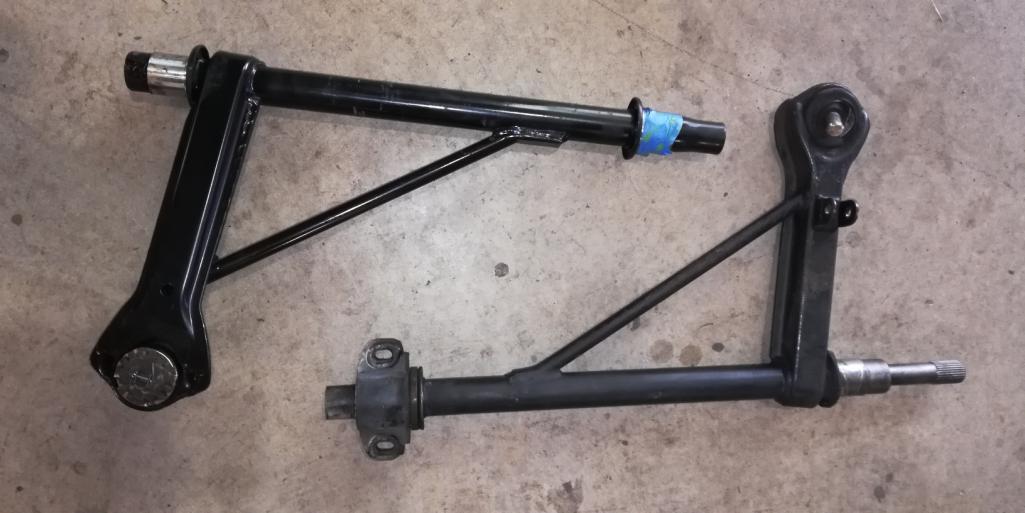
i installed the inner and outer tie rod ends on the Drivers side of the rack. The only problem there was not having a skinny wrench to remove and install the inner end. i was proud of my shade tree invention to make my fat wrench work. 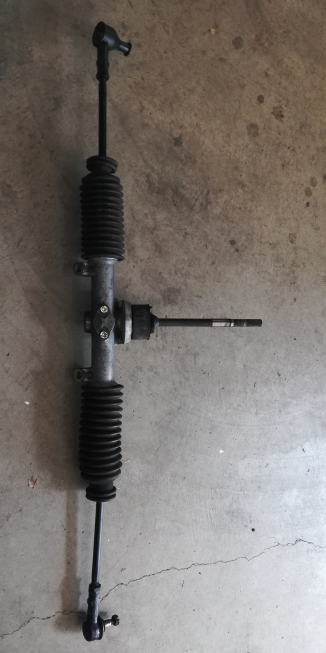
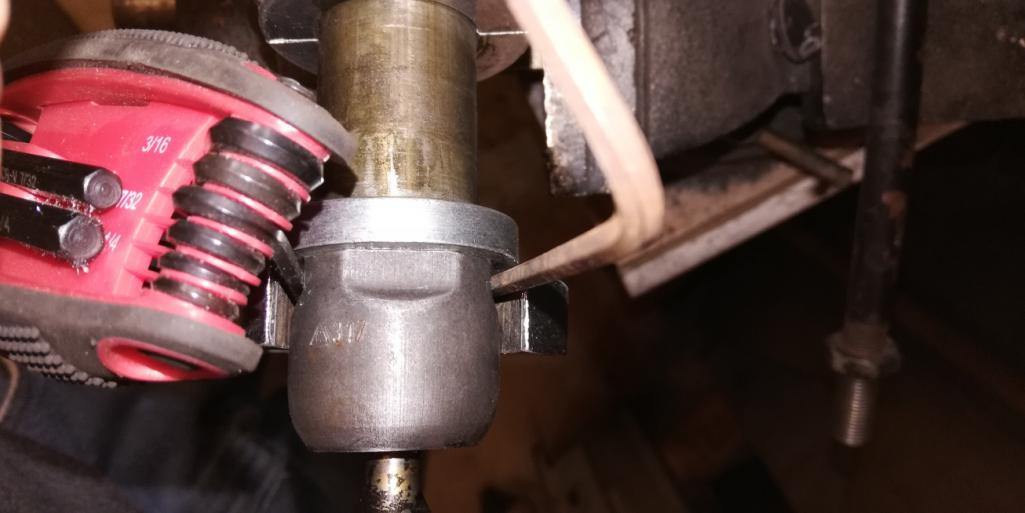
i need to pick up a needle greaser since none of this has zert fittings. Well the Elephant racing bushings do. yay!
I did some sanding on the hood to make it ready for some fiberglass repair. I put my WCC 914 hoodie to good use to keep me from itching all day. 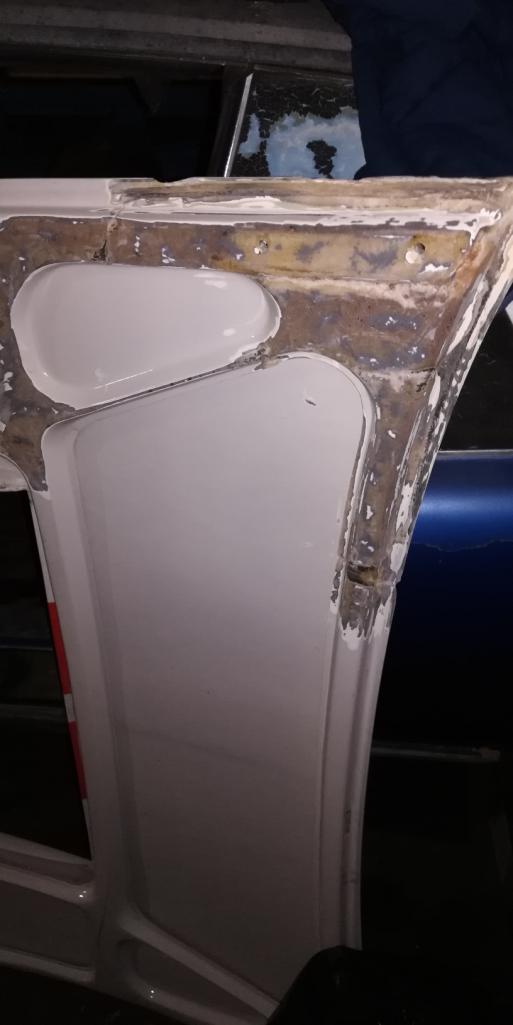
I was able to find the concrete anchors that Chris and others recommended. It works much better than having bolts sticking up. I was able to anchor the car on 4 sides and it's not going anywhere.
Probably the best thing that happened over the last week or 2 is that a good friend from church is a former bodyman. He's done many of these types of repairs. And from the pictures they were done very well. He even built an all steel 914 gt race car body. I invited him over to see and analyze the damage from an experts point of view and since he's retired and bored, he jumped at the chance.
He came up with several options of where to cut, how to pull, types of stitching, etc. Fortunately for me one of my favorite options was one of his options. We still haven't decided on the where to cut part, but we will once the pulls are made and it's somewhat straight.
On to actual repairing of the car! Since I don't have a proper puller, I started using the 8k come-along and pulling out the driver door hinge area. it's pretty close. looking at the donor/blue car hinge area, it actually has a tear and rust near the bolts, so I may be piecing two of these together.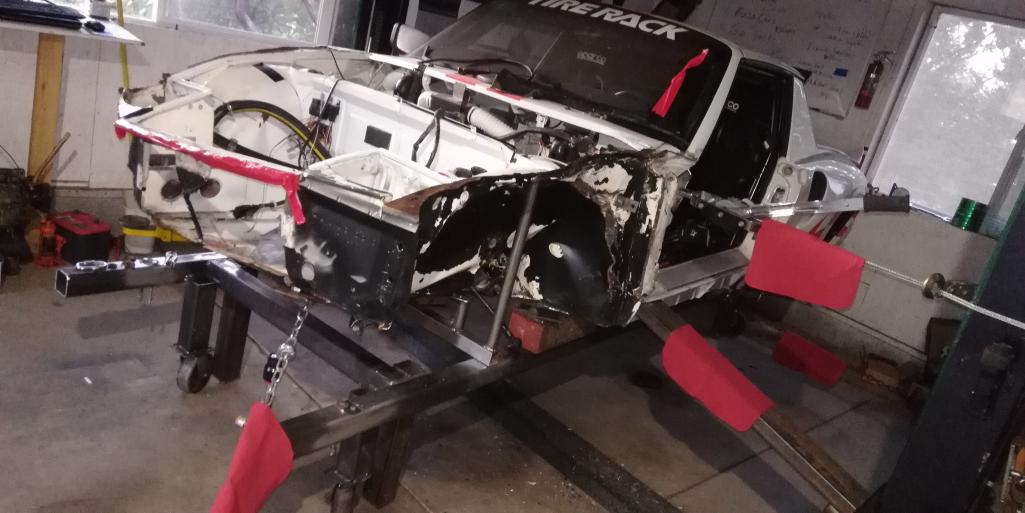
Posted by: Andyrew Sep 22 2018, 11:03 AM
You should post a picture of the bracing you did to the lift
Great progress!!!
That hood will be easier to repair than you think I bet
Posted by: dan10101 Sep 22 2018, 11:24 AM
You should post a picture of the bracing you did to the lift
Great progress!!!
That hood will be easier to repair than you think I bet
This is what Andrew was talking about. I put a brace across the top to keep the top ridged. It in there tight. The bolts are just to keep it from falling on my head.
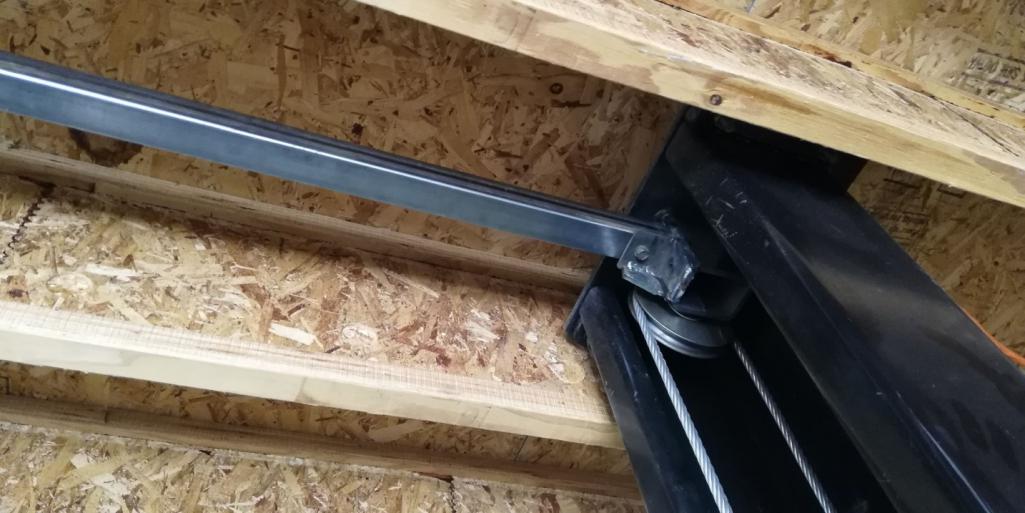
I don't mind fiberglass work, i just hate the sanding. So far that hasn't been so bad. I need to do some reinforcement where the bad cracks, now holes are. But even my body man friend (Michael) said that won't be a problem.
Posted by: dan10101 Oct 4 2018, 10:48 PM
We finished with pulling the body prior to cutting the front end off. The intention here was not to make it straight, but to move the body back into position so when we attach the new pieces they will line up.
This week (and most of last week) is all about replenishing the empty bankbook. I'm taking 21 bins of auto parts to The Medford (Swap) Meet. Also, lots of stuff that won't fit in bins. Eventually there will even be some 914 parts but not this trip. I keep everything until I'm sure I don't need it. (yes, that's why I have 21 bins...)
Hey, any other swap meets around? I'm thinking I need another one before I unload all the leftovers...
before pulls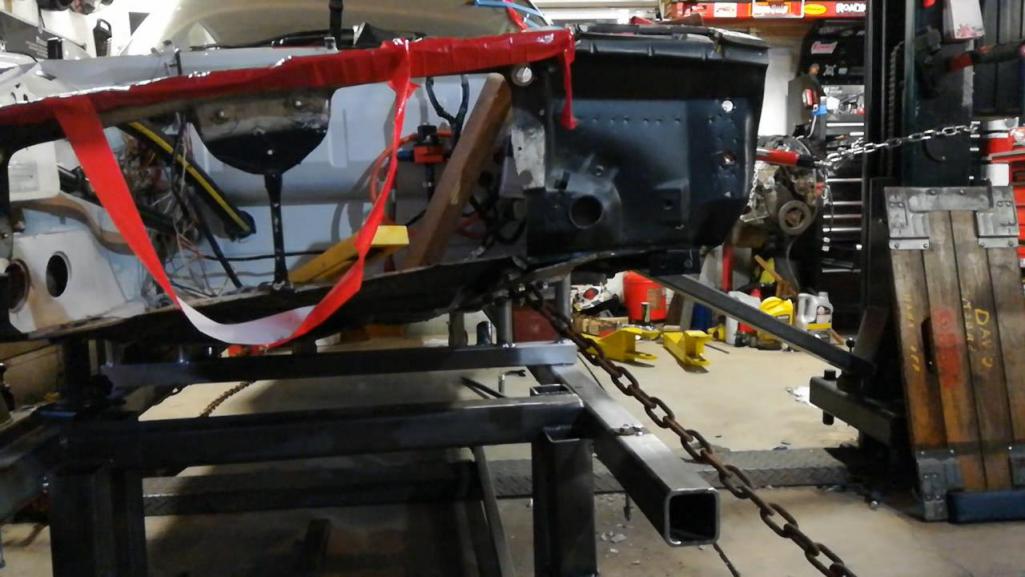
after pulls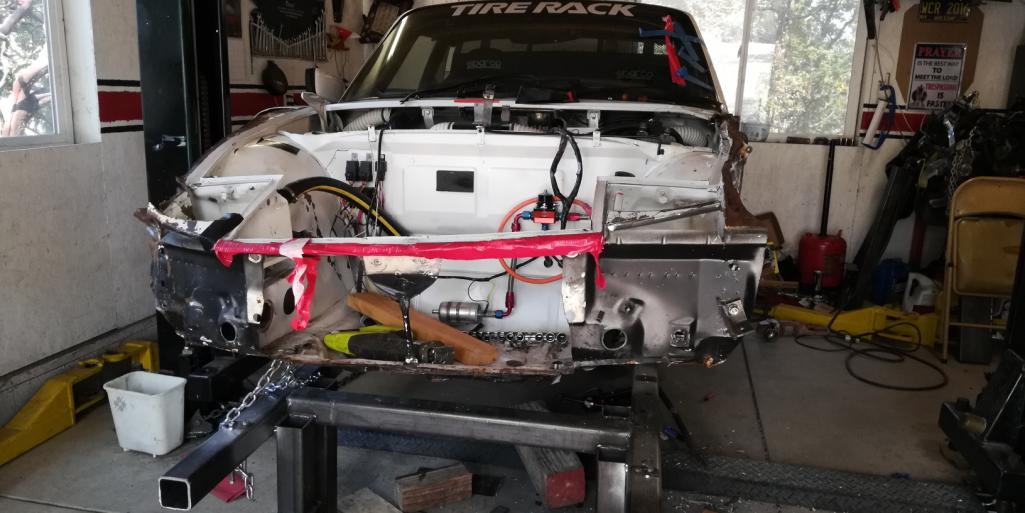
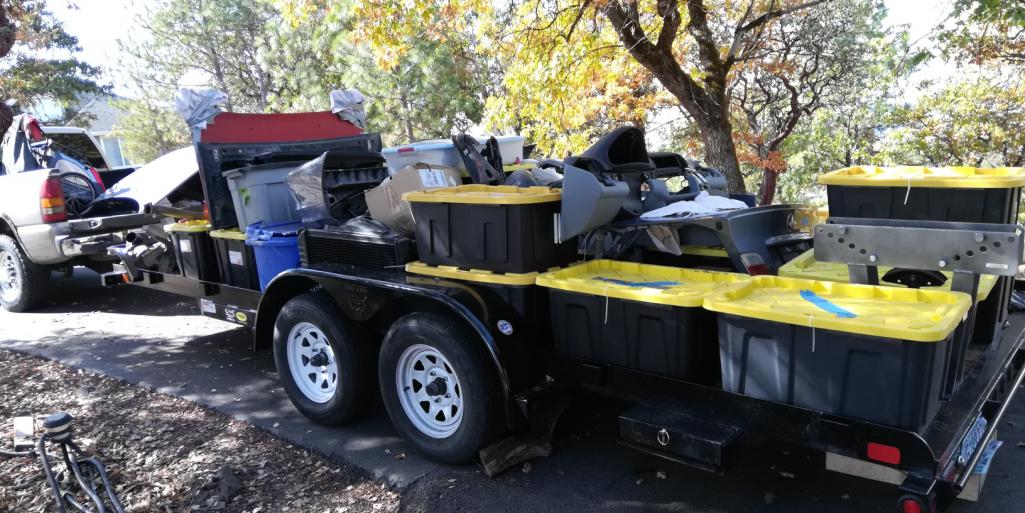
Posted by: dan10101 Oct 18 2018, 04:02 PM
Update for 10-18-18
We gave it a BOB!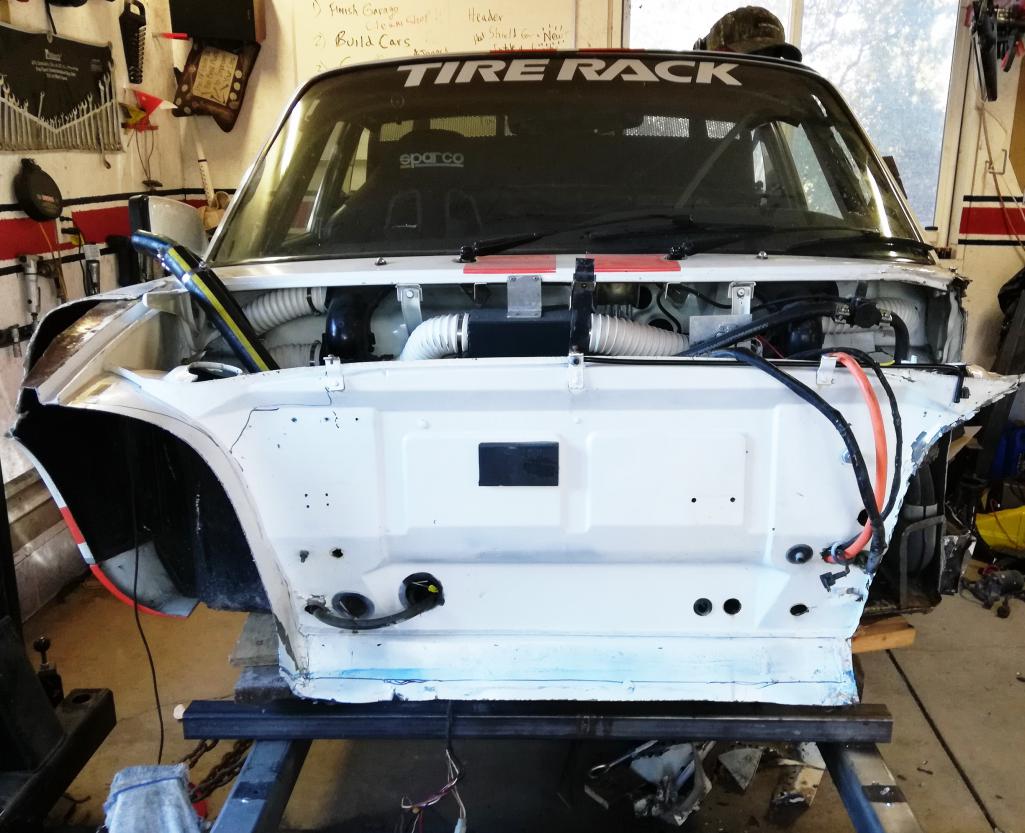
Ok, stepping back a bit. The swap meet was a financial success, but I ended up with about the same amount of parts left over. Still it was worth it to keep the project moving.
Getting back to the car.
I removed all the parts and accessories from the front end and after careful consideration (and going back and forth a bit) Michael (my bodyman friend and advisor) and I determined where the first cuts would be.
Then we went for it! Off with its nose!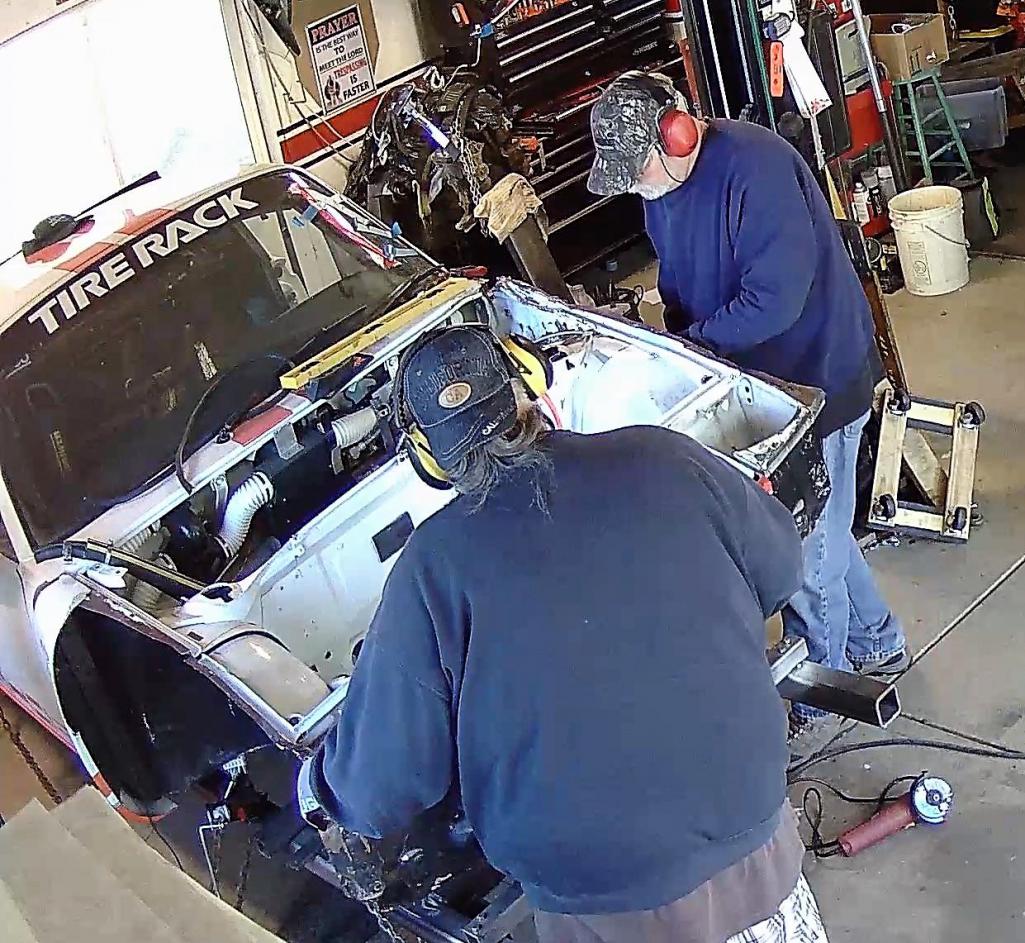

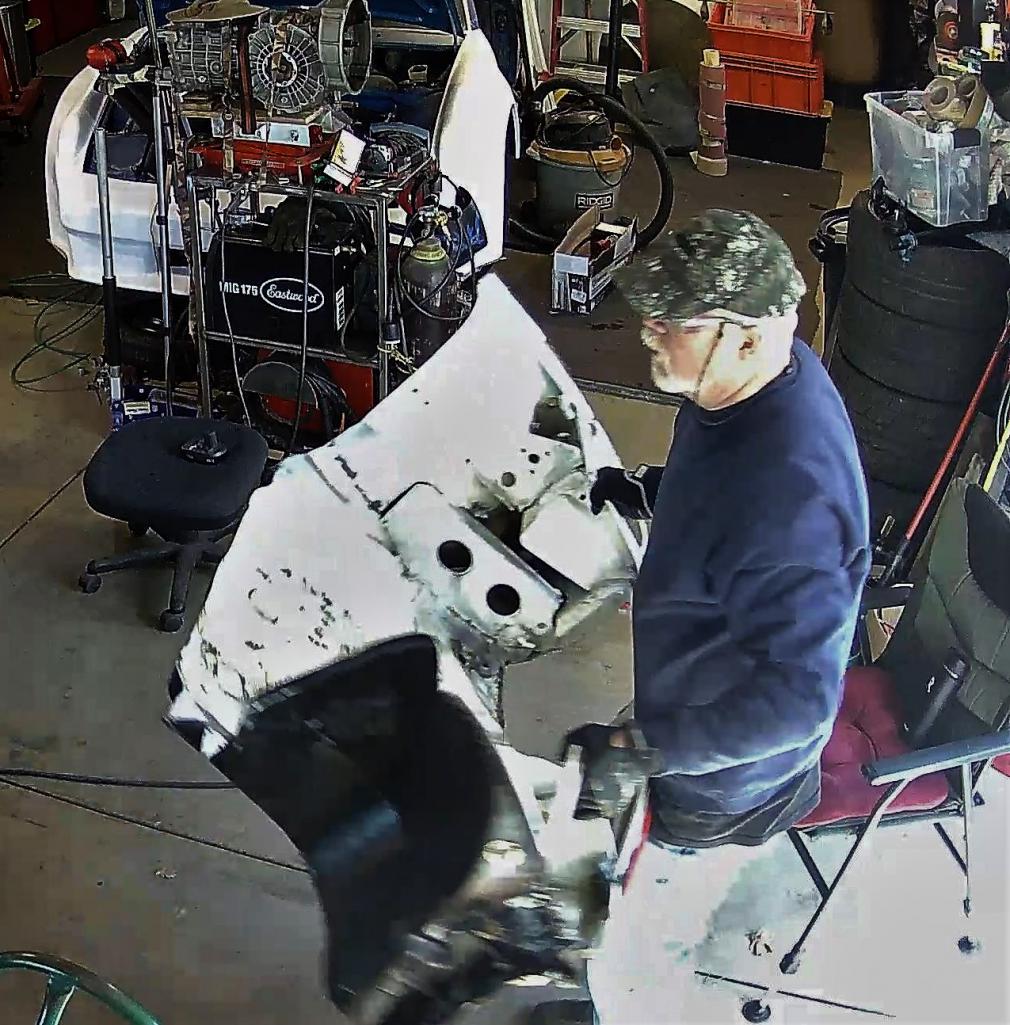
I then started drilling out spot welds for the driver’s side damage using a nice tool that Michael brought over. I spent the next 2 days peeling off the sheet metal between the door jam and the tower. I’ll have a bit of cleanup to do where the spot welds were, but it will be stronger and fully welded when it’s back together. 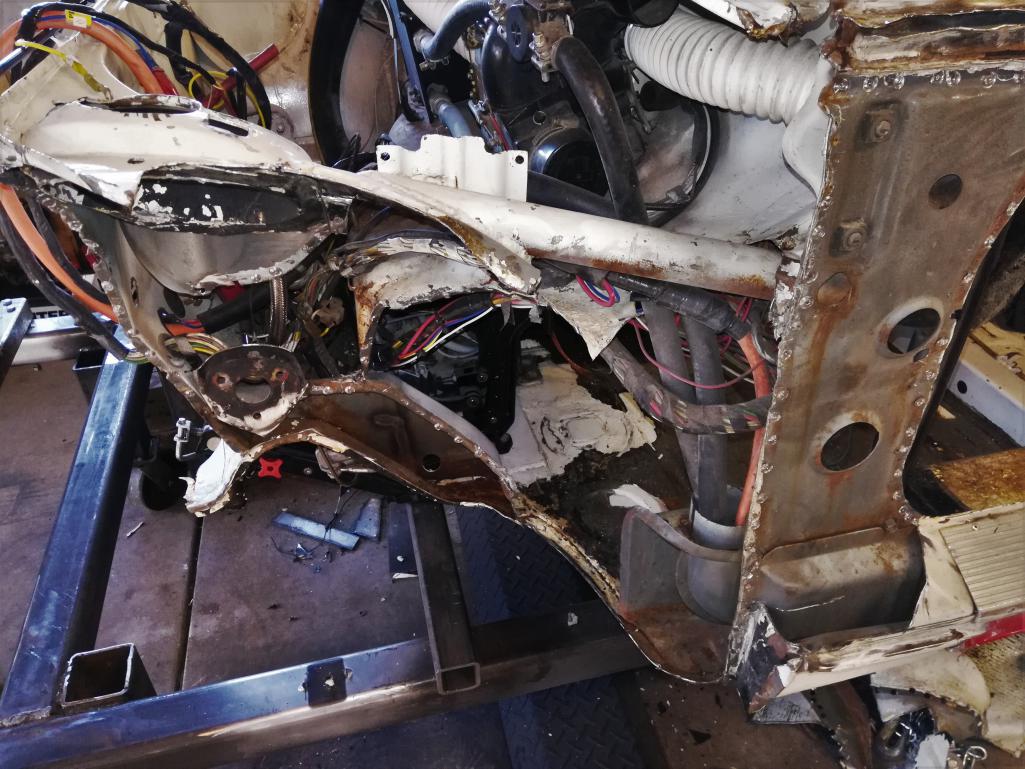
Next up is more measuring and documenting on the blue car. Then we’ll begin spot weld drilling on the blue car.
Posted by: dan10101 Oct 18 2018, 04:07 PM
Once the inner fender was removed, I saw an opportunity to increase the foot pedal space by removing a boxed section. It’s already been reinforced with the pedal mount and I’ll add more to it by tying it into the long. I may even sacrifice some more inner fender to gain foot space. The tire can’t reach that section and its one area that I want to improve. 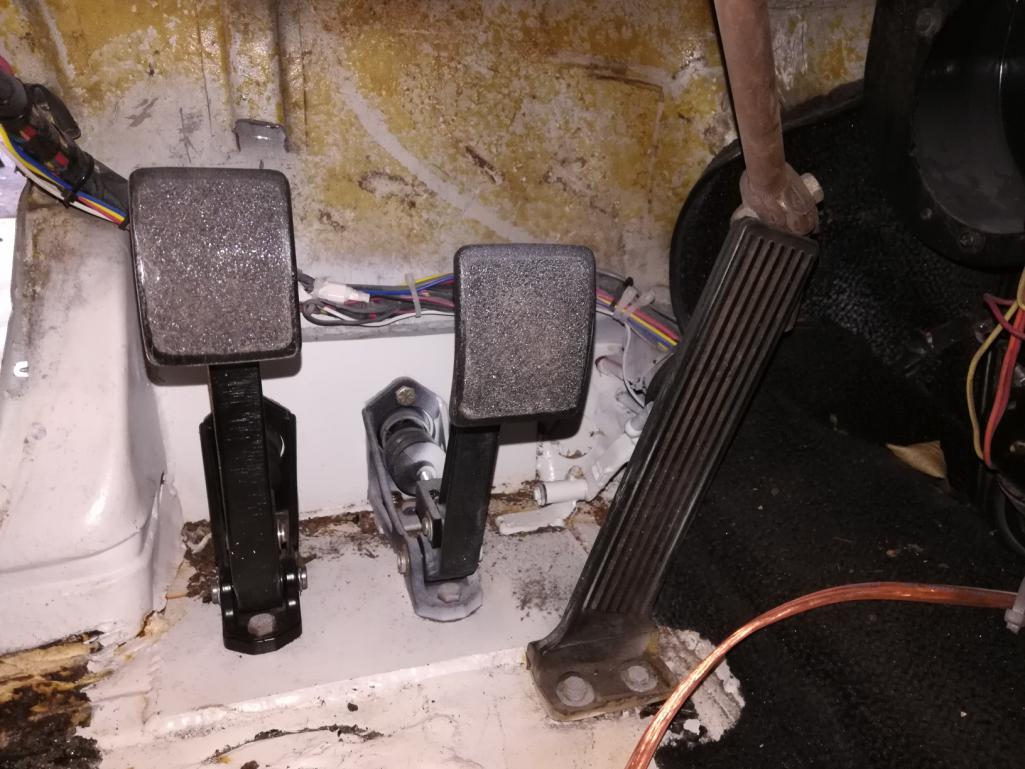
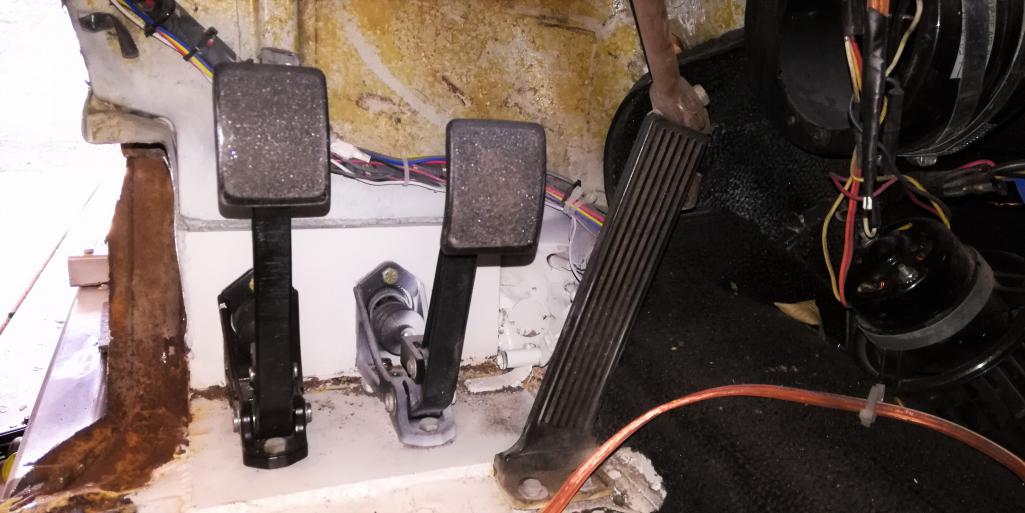
Posted by: Andyrew Oct 18 2018, 10:47 PM
Once the inner fender was removed, I saw an opportunity to increase the foot pedal space by removing a boxed section. It’s already been reinforced with the pedal mount and I’ll add more to it by tying it into the long. I may even sacrifice some more inner fender to gain foot space. The tire can’t reach that section and its one area that I want to improve.
I can't say I've seen this before but it shouldn't be an issue for your caged end result. Plus I'm sure you'll box it in appropriately when everything else is done
I like the progress on cutting it all out! Spot welds will make things easy to reweld.
Posted by: dan10101 Oct 18 2018, 11:20 PM
Once the inner fender was removed, I saw an opportunity to increase the foot pedal space by removing a boxed section. It’s already been reinforced with the pedal mount and I’ll add more to it by tying it into the long. I may even sacrifice some more inner fender to gain foot space. The tire can’t reach that section and its one area that I want to improve.
I can't say I've seen this before but it shouldn't be an issue for your caged end result. Plus I'm sure you'll box it in appropriately when everything else is done
Yeah, it would probably be fine, but I'll probably add some reinforcement to this section between the long and the inner fender. I'm surprised that factory left the inner top portion of the long unattached to the inner fender.
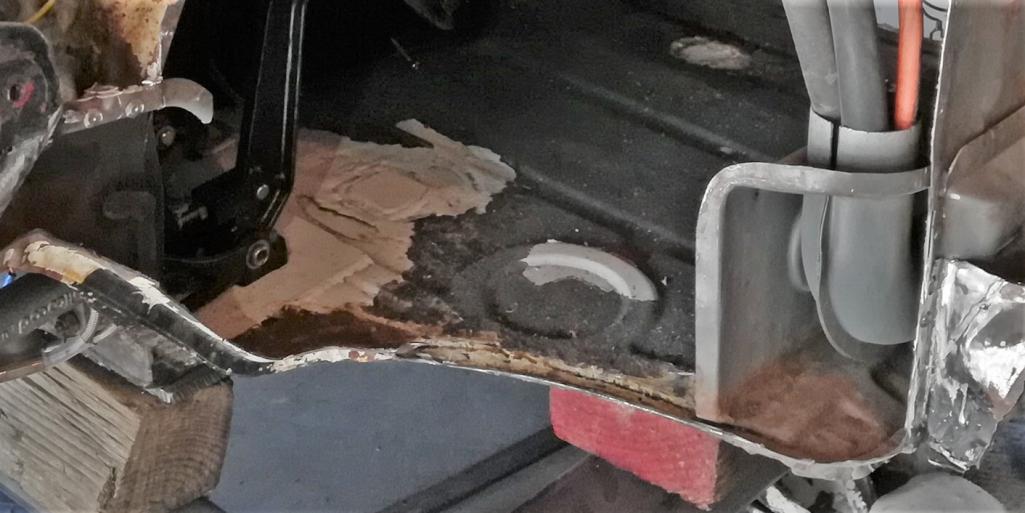
Posted by: ChrisFoley Oct 19 2018, 05:13 AM
Looks good Dan!
Posted by: tygaboy Oct 19 2018, 08:32 AM
NICE work! That has to be a bit nerve wracking to slice off that much of your baby. Crunched up, but still... good on you.
Keep up the great progress!
Posted by: Zippy69 Oct 19 2018, 10:14 AM
Wow Amazing dissection Dan! I am actually seeing some parts of the car that I have never seen before. Just when I thought I have seen every inch.
Incredible amount of progress in 3 short months. You have been very busy. It is clear this car landed in the right persons hands! Keep up the good work and updates.
Thx,
Previous owner (and guy who wrecked it) Paul
Posted by: dan10101 Oct 19 2018, 10:33 AM
Thanks everyone.
I know there are those that could do it better, but I have a good mentor looking over my shoulder keeping me honest. I probably wouldn't have taken it down this far, but I'm glad I did. Yeah, it was tough cutting it up, but I had plenty of time to prepare myself for it.
Eye on the prize..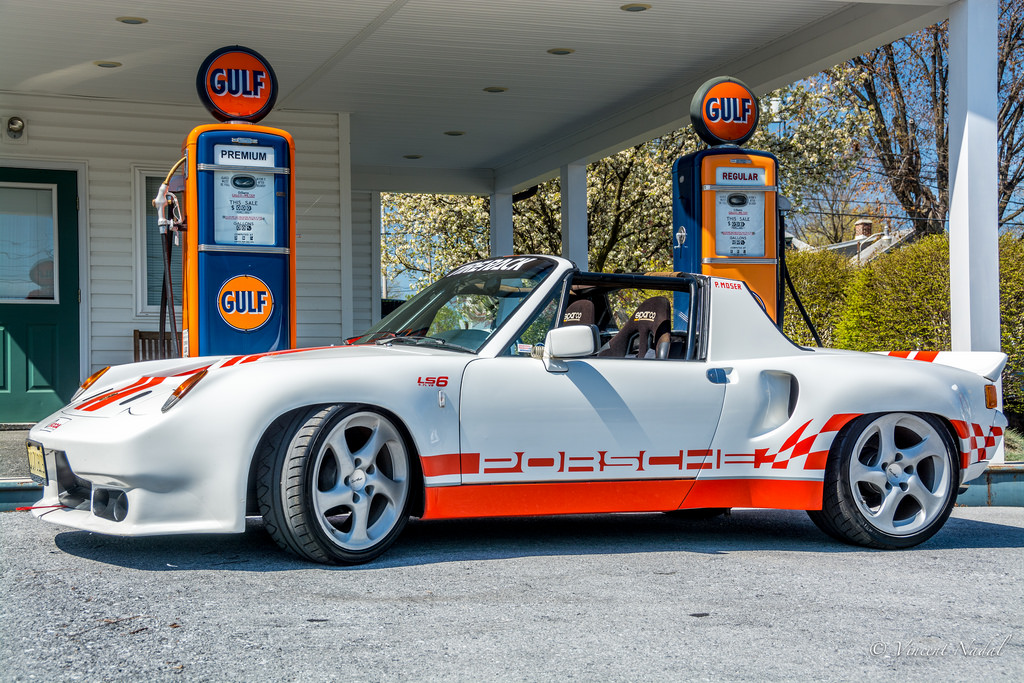
Posted by: dan10101 Nov 3 2018, 09:24 AM
Ok, at least I feel like I'm making some progress.. Believe it or not I've been working almost every day. My days aren't as long as others, but as long as I don't stop, it will eventually get done.
I still have a bunch of cleanup work. Drilling spot welds, trimming different sections. figuring out the strut tower. 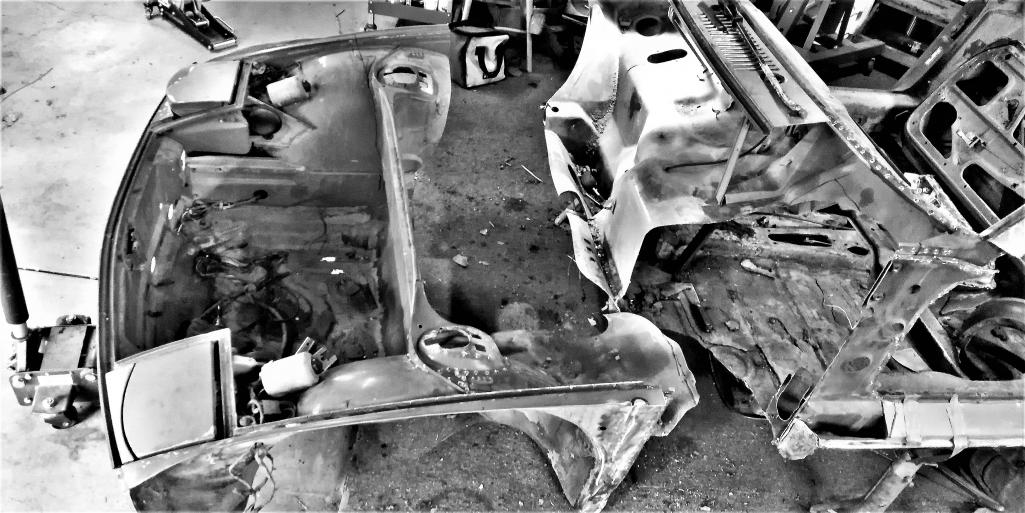
Posted by: My 914 Nov 3 2018, 10:49 AM
I admire your patience in working on this project.
Posted by: tygaboy Nov 3 2018, 10:51 AM
GREAT shot! Makes me feel like I'm sitting in an operating theater, privileged to be observing MAJOR surgery! Wait.... I am!
Keep up the awesome work, Dan. As you said, continual progress, little though it may be at some times, and all of a sudden, it'll be done! Thanks for taking us on this journey.
Posted by: dan10101 Nov 3 2018, 01:40 PM
I admire your patience in working on this project.
my patience is driving by body man mentor crazy. He keeps telling me it would be done by now if he was doing it. I will admit to changing directions several times.
Posted by: dan10101 Nov 3 2018, 01:43 PM
GREAT shot! Makes me feel like I'm sitting in an operating theater, privileged to be observing MAJOR surgery! Wait.... I am!
Keep up the awesome work, Dan. As you said, continual progress, little though it may be at some times, and all of a sudden, it'll be done! Thanks for taking us on this journey.
Right back at you Chris.
However,
I feel like I'm doing this build for the rest of us mier mortals.
Posted by: tygaboy Nov 4 2018, 08:47 AM
I admire your patience in working on this project.
my patience is driving by body an mentor crazy. He keeps telling me it would be done by now if he was doing it. I will admit to changing directions several times.
I hear you on the changing direction thing!


Posted by: KELTY360 Nov 4 2018, 09:33 AM
I admire your patience in working on this project.
my patience is driving by body an mentor crazy. He keeps telling me it would be done by now if he was doing it. I will admit to changing directions several times.
I hear you on the changing direction thing!
Isn't the best thing about the 914 is the ability to change direction?
Posted by: sixnotfour Nov 4 2018, 11:04 AM
I admire your patience in working on this project.
my patience is driving by body an mentor crazy. He keeps telling me it would be done by now if he was doing it. I will admit to changing directions several times.
I hear you on the changing direction thing!
Isn't the best thing about the 914 is the ability to change direction?

Posted by: My 914 Nov 4 2018, 12:33 PM
I admire your patience in working on this project.
my patience is driving by body an mentor crazy. He keeps telling me it would be done by now if he was doing it. I will admit to changing directions several times.
I hear you on the changing direction thing!
Isn't the best thing about the 914 is the ability to change direction?
It's also one of the best things about life.
Posted by: dan10101 Nov 4 2018, 02:29 PM
I admire your patience in working on this project.
my patience is driving by body an mentor crazy. He keeps telling me it would be done by now if he was doing it. I will admit to changing directions several times.
I hear you on the changing direction thing!
Isn't the best thing about the 914 is the ability to change direction?
It's also one of the best things about life.
Yep, nothing like a good directional change to get the adrenaline flowing.
Posted by: dan10101 Nov 7 2018, 08:17 PM
Progress is being made. Yay!
So I trimmed off the excess metal bracketry and removed the strut towers. So the areas where the ‘spot welds are just about ready. What’s left is to determine where the metal to metal connections will be made. The area in question will be just ahead of the vin on the RF inner fender. So about 12” of fine metal work should hide the seam. The rest can be not so fine, but will be plenty strong.
At this time I realized I had a lot of paint prep to do. I chose the easy way out and took it to my local media blaster. They did a fine job of cleaning up the pieces. The big one and a few smaller ones. 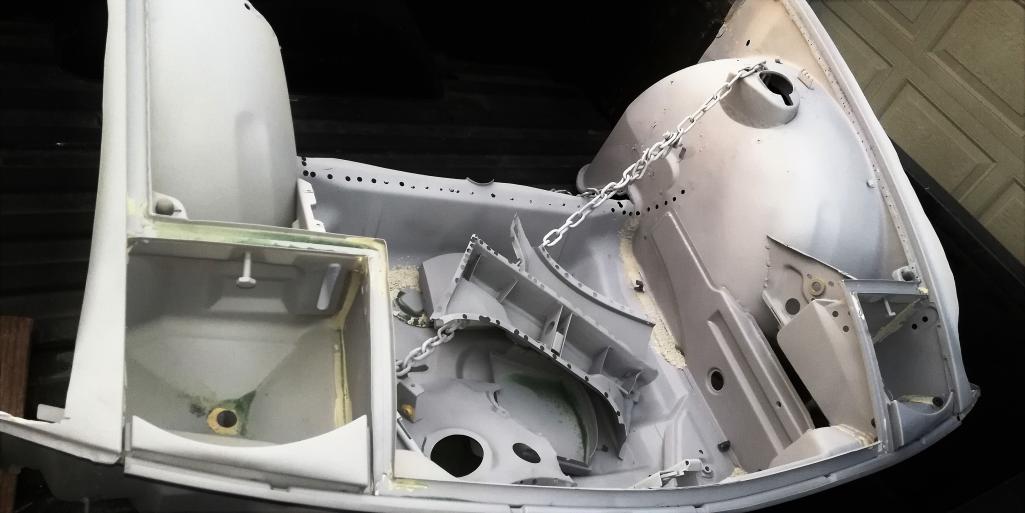
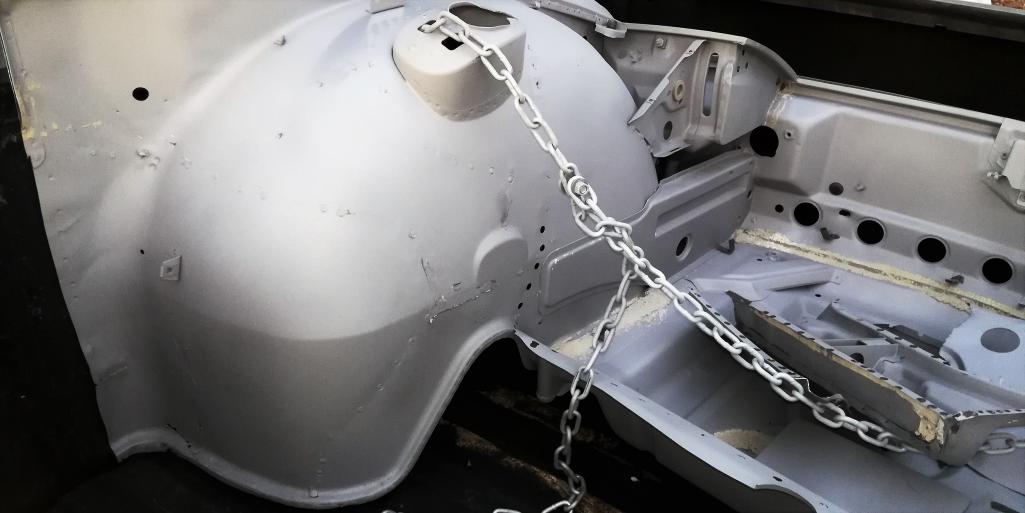
The next step is to dust off my paint gun and give priming a whirl. I'll have to get creative and put some heat into the job to get it to dry. At least we have some sunshine during the days. I'll close off a bit of the garage and turn up the space heaters.
I know there are other ways to do this, but I had to stop thinking about it and just do it. (as Michael would say)
Side note: I met a guy with a 914-6 tube frame race car as I was at Napa buying paint. This was in White City, OR, anyone know someone in the area? We had a nice conversation but did exchange names.
Posted by: Andyrew Nov 8 2018, 11:05 AM
Put space heaters on the metal about an hour before your painting. Take them off when the panels are about 90deg consistently, right before you spray. Should cool down quickly to about 70 so you will want to mix your primer before removing the heaters. I imagine you'll have about a 10 min window. Unless you can get the garage to about 70deg..
Posted by: dan10101 Nov 8 2018, 11:37 AM
Put space heaters on the metal about an hour before your painting. Take them off when the panels are about 90deg consistently, right before you spray. Should cool down quickly to about 70 so you will want to mix your primer before removing the heaters. I imagine you'll have about a 10 min window. Unless you can get the garage to about 70deg..
I have 2 good space heaters. Have my heavy plastic to make walls to confine the heat and the overspray. I was going to do it outside, but it's likely to be 50-55 when I shoot. I forgot to have them blast the door, so I'll likely do that by hand.
I'm glad I picked it up last night. It would have been sitting outside in the dew and the frost. Safe in my shop. Nothing seems to rust in there.
Posted by: dan10101 Nov 12 2018, 08:00 PM
For those that missed the 'door' thread here's what I've been working on.
Trying to get the doors ready so I can prime them at the same time I do the rest.
(I hate cleaning guns and such)
http://www.914world.com/bbs2/index.php?showtopic=334383
So I took a timeout from the doors and helped my buddy install a 6" lift on his Jeep.
But back at it today.
I trimmed a bit of sheet metal off the white car, and while cleaning it up to get ready for welding with the wire grinder I caught a lip and spun it into my stomach. Fortunately it ate my new T-shirt and ended up with only a minor rash on my tummy. But, also twisted my thumb. It could have been much worse. I think taking it easy for a couple days and I'll be back full speed.
So it looks like the rust is holding off on the bare metal. Should I prime it anyway, or just get it connected to the car and finish the welding then prime the whole assembly?
I expect some rain in the next few weeks and colder weather. Maybe that's my answer, do it while the weather is 1/2 way decent.
Posted by: djway Nov 12 2018, 09:10 PM
I always spray with phosphoric acid diluted to the proper strength. It can remain rust free for quite some time after that. No need to prime
Posted by: Andyrew Nov 12 2018, 09:42 PM
Now is the best time to prime it. The oils in your hands will cause for issues with rusting as well as surface prep. I would lightly scuff the metal with a pad and wax and grease it then prime it. Thin it really well like I spoke and just give it two or three thin coats.
Posted by: dan10101 Nov 12 2018, 10:54 PM
I always spray with phosphoric acid diluted to the proper strength. It can remain rust free for quite some time after that. No need to prime
If I was doing this in spring thru summer, I would try it. Kevin Tetz from Trucks talked about something like this.
I really wanted to wait a bit, but I'm pushing a timeline against colder weather. It's going to be harder and harder to get this kind of weather for spraying. Plus I'll need another slot to get the color on it. At least the inside part so I can put it back together. I'll wait for the outer panels until it warms up.
Anyway it gives me a reason to push...
Posted by: dan10101 Nov 12 2018, 11:31 PM
Now is the best time to prime it. The oils in your hands will cause for issues with rusting as well as surface prep. I would lightly scuff the metal with a pad and wax and grease it then prime it. Thin it really well like I spoke and just give it two or three thin coats.
I thought about that as well. It's so pristine, any fingerprint or glove print leaves a mark. (I need some clean gloves). I'll get this done in the next few days.
Here I am cleaning the welding areas under the car, It will be a pain working underneath hot sparks, but probably less painful than bending over the fender to do it from above. And it will look better...
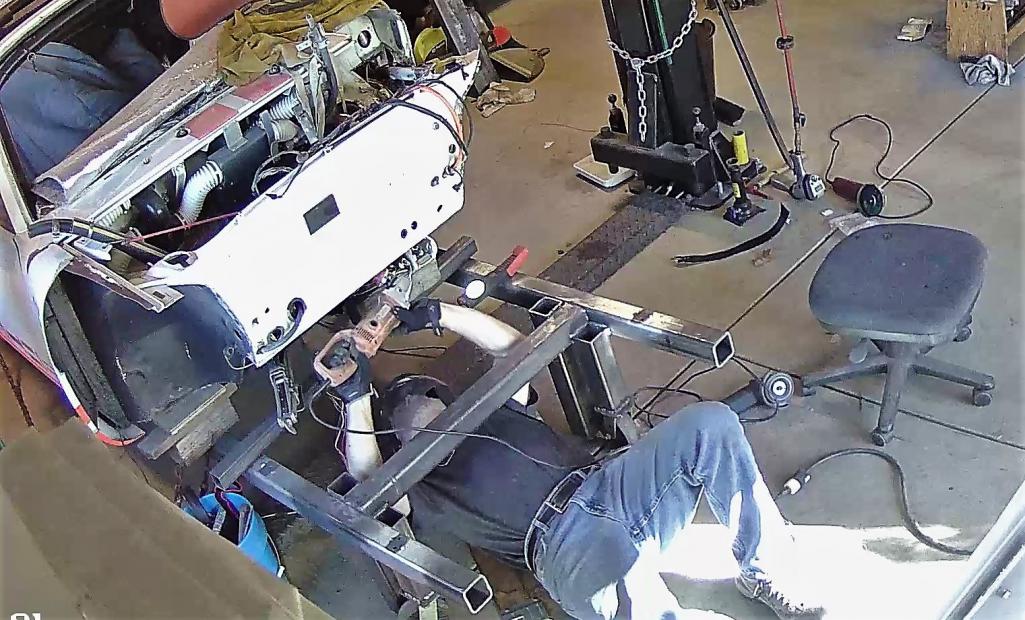
Here's me with the wire wheel accident. It just jumped into my shirt and dug in. I'll be putting a second handle on that grinder if I use it again.
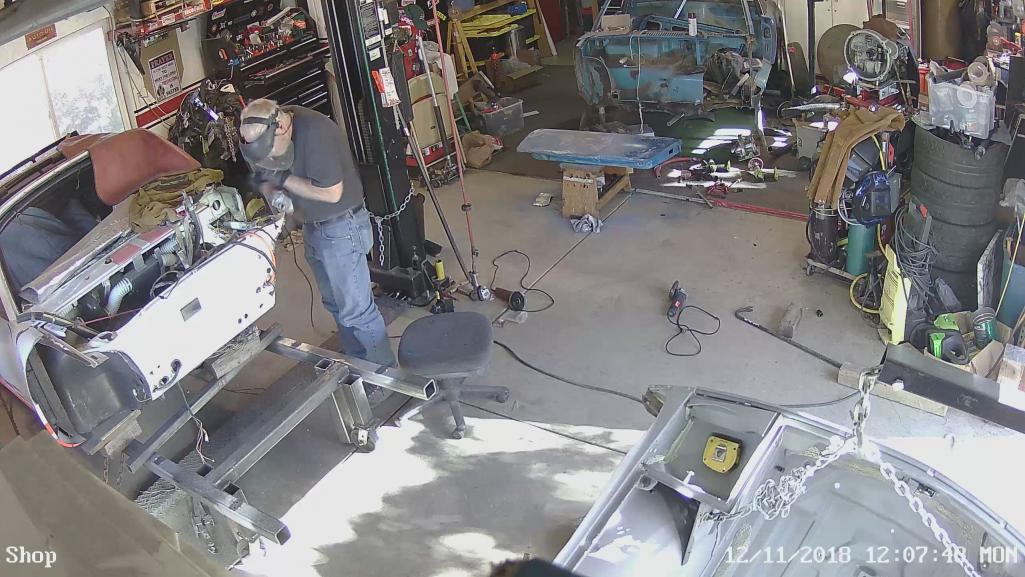
Posted by: djway Nov 13 2018, 12:31 AM
Even if you prime the finger touch will still be the same problem.
You always clean, clean, clean before you lay paint.
Posted by: dan10101 Nov 13 2018, 01:01 AM
Even if you prime the finger touch will still be the same problem.
You always clean, clean, clean before you lay paint.
Good point. Been there done that sold the car, but have the pictures to remind me of that booboo...
Posted by: 914forme Nov 13 2018, 08:42 AM
Don't forget to increase your gas flow if you can. Welding upside down with MIG or TIG can give you all sorts of fits as the shield gas is heavier that air, so your loosing the protection of the weld puddle.
Ben can go into way more details than I can on this one. You didn't happen to make the frame jig so you could lay it over on its side did you?
for my build
Also your work is looking great, way to stay after it.
Posted by: dan10101 Nov 13 2018, 09:26 AM
Don't forget to increase your gas flow if you can. Welding upside down with MIG or TIG can give you all sorts of fits as the shield gas is heavier that air, so your loosing the protection of the weld puddle.
Ben can go into way more details than I can on this one. You didn't happen to make the frame jig so you could lay it over on its side did you?
for my buildAlso your work is looking great, way to stay after it.
Good tip on the gas flow.
No I didn't make it to go upside down. (I've had enough of that this year..)
I'm using an Eastwood 175 MIG. If anyone has any welding tips or settings, I would appreciate it. I got a taste of welding thin sheetmetal on the door but I'll need more practice before I go in for the kill.
Posted by: Mike Bellis Nov 13 2018, 09:32 PM
Wear a dust mask to cut down on metallic boogers. Not good to breath all that shite.
Posted by: dan10101 Nov 13 2018, 09:53 PM
Sneak Peak...
It's not quite there yet, but it's close...
Posted by: dan10101 Nov 13 2018, 09:55 PM
Wear a dust mask to cut down on metallic boogers. Not good to breath all that shite.
Yeah, after a hat, glasses, ear muffs, long sleeves, I tend to forget that part. Welding is even worse with that big old helmet.
Posted by: dan10101 Nov 16 2018, 12:09 AM
I put some primer on the replacement pieces.
Like the ‘this page is blank purposely’, there are a few spots that I didn’t prime, or left a bit sparse so that I could weld those spots without spending hours undoing today's work. I did previously put some weld thru primer on those spots.
Not actually a big deal to many, but for me, it’s the first time I did this on my own. Normally Andrew has his hands in this type of work. I’m feeling pretty accomplished for this mundane task. Prepping, building a ‘booth’, venting with a good fan, mixing paint (I got this wrong the first time), adjusting the gun and the compressor, laying down the wet stuff, finally cleaning up. It turned out pretty good. I’m just glad it’s all hidden by outer layers. 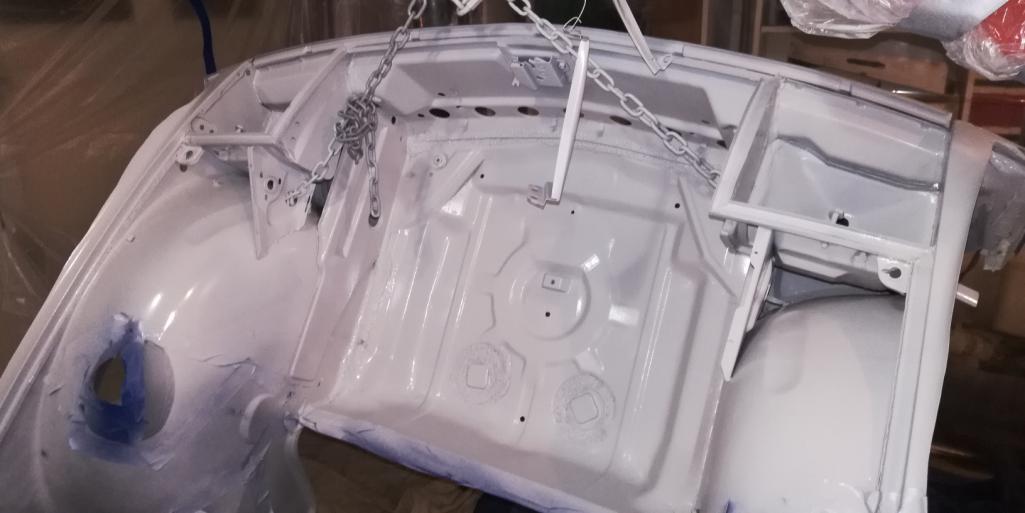
Posted by: Tbrown4x4 Nov 16 2018, 03:37 AM
Wear a dust mask to cut down on metallic boogers. Not good to breath all that shite.
Second that. My son's old boss (long time welder/shop owner) started getting random nose bleeds. When he finally went to the doctor, they found a large tumor in his nasal cavity. They are still trying to figure out how bad it is.
Wear your protective gear!
PS. Great work! Lots of fun to watch this process.
Posted by: dan10101 Nov 27 2018, 04:23 PM
Can someone tell me what gauge metal I'm working with? When I measure it each piece seems inconsistent. I would think they would all be the same except for maybe structure.
Getting closer to welding and I need some practice.
Posted by: Andyrew Nov 27 2018, 04:30 PM
Can someone tell me what gauge metal I'm working with? When I measure it each piece seems inconsistent. I would think they would all be the same except for maybe structure.
Getting closer to welding and I need some practice.
20-18ga
Posted by: 914forme Nov 28 2018, 01:39 PM
I use https://www.amazon.com/gp/product/B000P0KG0E/ref=oh_aui_search_detailpage?ie=UTF8&psc=1 when I don't have the fume extractors running. how dirty they get
https://www.amazon.com/3M-MASK-RESPIRATOR-ASSEMBLY-MEDIUM/dp/B0082LIZYM/ref=pd_sim_469_2?_encoding=UTF8&pd_rd_i=B0082LIZYM&pd_rd_r=067fec89-f345-11e8-bed5-7dcfcd74da26&pd_rd_w=J6Jqc&pd_rd_wg=aPkEa&pf_rd_i=desktop-dp-sims&pf_rd_m=ATVPDKIKX0DER&pf_rd_p=18bb0b78-4200-49b9-ac91-f141d61a1780&pf_rd_r=HGCYCQ69CJY7J3FN7GFQ&pf_rd_s=desktop-dp-sims&pf_rd_t=40701&psc=1&refRID=HGCYCQ69CJY7J3FN7GFQ
Posted by: dan10101 Nov 28 2018, 07:08 PM
I use https://www.amazon.com/gp/product/B000P0KG0E/ref=oh_aui_search_detailpage?ie=UTF8&psc=1 when I don't have the fume extractors running.
how dirty they gethttps://www.amazon.com/3M-MASK-RESPIRATOR-ASSEMBLY-MEDIUM/dp/B0082LIZYM/ref=pd_sim_469_2?_encoding=UTF8&pd_rd_i=B0082LIZYM&pd_rd_r=067fec89-f345-11e8-bed5-7dcfcd74da26&pd_rd_w=J6Jqc&pd_rd_wg=aPkEa&pf_rd_i=desktop-dp-sims&pf_rd_m=ATVPDKIKX0DER&pf_rd_p=18bb0b78-4200-49b9-ac91-f141d61a1780&pf_rd_r=HGCYCQ69CJY7J3FN7GFQ&pf_rd_s=desktop-dp-sims&pf_rd_t=40701&psc=1&refRID=HGCYCQ69CJY7J3FN7GFQ
I normally use one of these to deal with my 45 year old beard.
https://www.amazon.com/dp/B01M67SJ0S/ref=sspa_dk_detail_2?psc=1&pd_rd_i=B01M67SJ0S&pf_rd_m=ATVPDKIKX0DER&pf_rd_p=21517efd-b385-405b-a405-9a37af61b5b4&pd_rd_wg=JC2cT&pf_rd_r=E6NZSMD0JWJHY9HJ3DRY&pf_rd_s=desktop-dp-sims&pf_rd_t=40701&pd_rd_w=cXq1e&pf_rd_i=desktop-dp-sims&pd_rd_r=461b2ccd-f371-11e8-9fce-e3b457f31c52
I have one of these somewhere, It would fit under the helmet better.
https://www.amazon.com/dp/B07DX4LCD5/ref=sspa_dk_detail_0?psc=1&pd_rd_i=B07DX4LCD5&pf_rd_m=ATVPDKIKX0DER&pf_rd_p=21517efd-b385-405b-a405-9a37af61b5b4&pd_rd_wg=f5ohZ&pf_rd_r=2BP9FZ4CEXX3WD6HTE2M&pf_rd_s=desktop-dp-sims&pf_rd_t=40701&pd_rd_w=ZOM4i&pf_rd_i=desktop-dp-sims&pd_rd_r=de6752ad-f370-11e8-b188-2fb63616cf11
Posted by: dan10101 Nov 28 2018, 07:26 PM
update:
Still working on trimming and fitting.
I took many measurements of the before and after. Before on the blue car. After on the white/blue car. I'm within 1/4 inch now and hoping to get it a bit closer. Michael says it's good at 1/8". For me it depends on where that 1/8" lies. He actually was impressed with my work so far.
Right now I have it apart and working a few items as I expect this to be the last time I take it apart before putting some welds on it.
Moving the clutch pedal over 1". Maybe the brake too, but we'll see. that mounting board is hard as heck... pardon my language  , dulled 3 drill bits so far.
also turning it back rightside up. it was upside down before due to fitment.
Then some of the structure around the inner fender needs some work. So I'll do it "while I'm in there" and before I close it up.
I'll cut and fit the cowl piece but not final weld it until the 2 pieces come together.
Teaser Picture. Michael and I both wanted to see it with the front end on...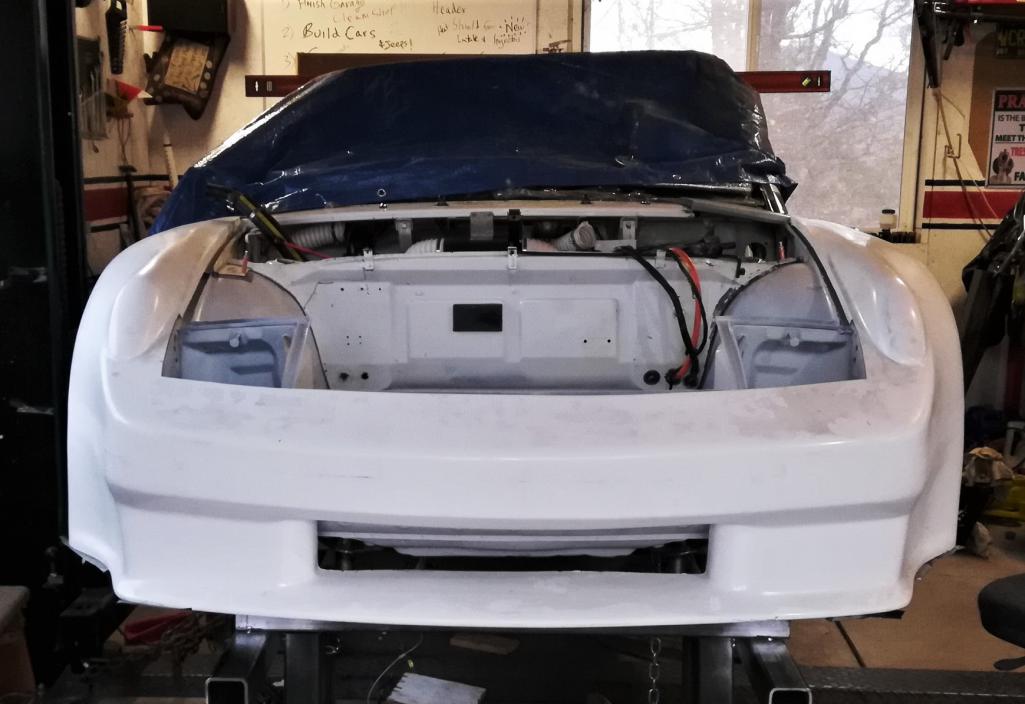
Posted by: ChrisFoley Nov 28 2018, 10:23 PM
Can someone tell me what gauge metal I'm working with?
1mm
19 ga.
Posted by: djway Nov 28 2018, 10:33 PM
I use https://www.amazon.com/gp/product/B000P0KG0E/ref=oh_aui_search_detailpage?ie=UTF8&psc=1 when I don't have the fume extractors running.
how dirty they gethttps://www.amazon.com/3M-MASK-RESPIRATOR-ASSEMBLY-MEDIUM/dp/B0082LIZYM/ref=pd_sim_469_2?_encoding=UTF8&pd_rd_i=B0082LIZYM&pd_rd_r=067fec89-f345-11e8-bed5-7dcfcd74da26&pd_rd_w=J6Jqc&pd_rd_wg=aPkEa&pf_rd_i=desktop-dp-sims&pf_rd_m=ATVPDKIKX0DER&pf_rd_p=18bb0b78-4200-49b9-ac91-f141d61a1780&pf_rd_r=HGCYCQ69CJY7J3FN7GFQ&pf_rd_s=desktop-dp-sims&pf_rd_t=40701&psc=1&refRID=HGCYCQ69CJY7J3FN7GFQ
The simple mask let it junk all around the edges. Go for the better tighter fit.
Posted by: Andyrew Nov 29 2018, 12:11 AM
Looking really good!!! I can see why the PO did the bumper mod for the radiator inlet.
Quick thought, Its possible the firewall from the white car is still off that 1/4" due to being pushed on the Dr side. You might look for ripples in the firewall and try hammer/dollying them flat. That might gain you that extra 1/8" your looking for.
Posted by: seanery Nov 29 2018, 12:17 AM
Looking good, Dan!
Hey man, when this whole Club/World thing started, didn't you have some really sweet car? I vaguely remember remembering, but I just can't quite put my finger on it.
Posted by: dan10101 Nov 29 2018, 12:21 AM
Can someone tell me what gauge metal I'm working with?
1mm
19 ga.
Thanks Chris, I didn't even know there was such a thing.
Posted by: dan10101 Nov 29 2018, 12:29 AM
Looking good, Dan!
Hey man, when this whole Club/World thing started, didn't you have some really sweet car? I vaguely remember remembering, but I just can't quite put my finger on it.
No, My 914 life started in 1980 when I maried my wife and ended that stream in mid 80s when we didn't have a seat for Andyrew.
I had an 86 944 turbo that I had from 2000 til I sold it to the same Andrew.
But he helped (sic) me out by finding this project. Once it's done all will be well with the automotive world again. But, I probably have the record for the longest lurker...
Posted by: seanery Nov 29 2018, 12:33 AM
that's what it was...my 1st 951 caught fire about the time club started, so I had 951 envy! LOL
Posted by: Andyrew Nov 29 2018, 12:40 AM
You also had the el camino SS that was pretty sweet
Attached thumbnail(s)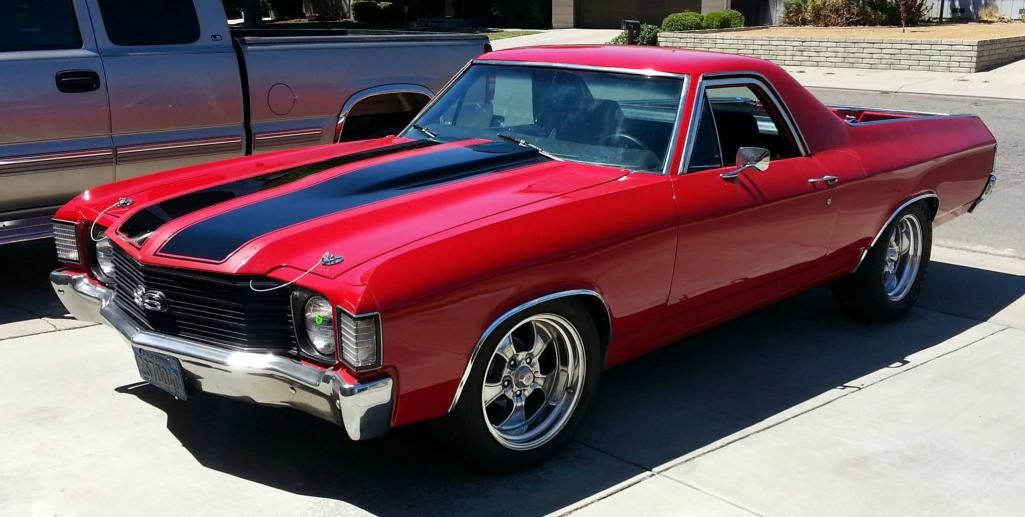
Posted by: dan10101 Nov 29 2018, 12:44 AM
Looking really good!!! I can see why the PO did the bumper mod for the radiator inlet.
Quick thought, Its possible the firewall from the white car is still off that 1/4" due to being pushed on the Dr side. You might look for ripples in the firewall and try hammer/dollying them flat. That might gain you that extra 1/8" your looking for.
The bumper mod is a summer project.
We looked for something. Did find a couple small ones and took care of them. Otherwise it all looks straight.
The main thing to me is that the suspension points are in the right position. If the numbers are square and close I'm happy. That said I haven't given up on getting it perfect, time will tell.
Posted by: dan10101 Nov 29 2018, 12:48 AM
You also had the el camino SS that was pretty sweet
Yeah, it was pretty sweet, but I had to give it up to get something fast...
https://www.youtube.com/watch?v=p0WGnZveino
Posted by: seanery Nov 29 2018, 03:06 AM
This is nice!
You also had the el camino SS that was pretty sweet
Posted by: Zippy69 Nov 29 2018, 10:41 AM
update:
Still working on trimming and fitting.
I took many measurements of the before and after. Before on the blue car. After on the white/blue car. I'm within 1/4 inch now and hoping to get it a bit closer. Michael says it's good at 1/8". For me it depends on where that 1/8" lies. He actually was impressed with my work so far.
Right now I have it apart and working a few items as I expect this to be the last time I take it apart before putting some welds on it.
Moving the clutch pedal over 1". Maybe the brake too, but we'll see. that mounting board is hard as heck... pardon my language
, dulled 3 drill bits so far.also turning it back rightside up. it was upside down before due to fitment.
Then some of the structure around the inner fender needs some work. So I'll do it "while I'm in there" and before I close it up.
I'll cut and fit the cowl piece but not final weld it until the 2 pieces come together.
Teaser Picture. Michael and I both wanted to see it with the front end on...
Here is what the front bumper mod looked like with air intake ducts for front brakes
fog lights and a wing nut removable front license plate bracket
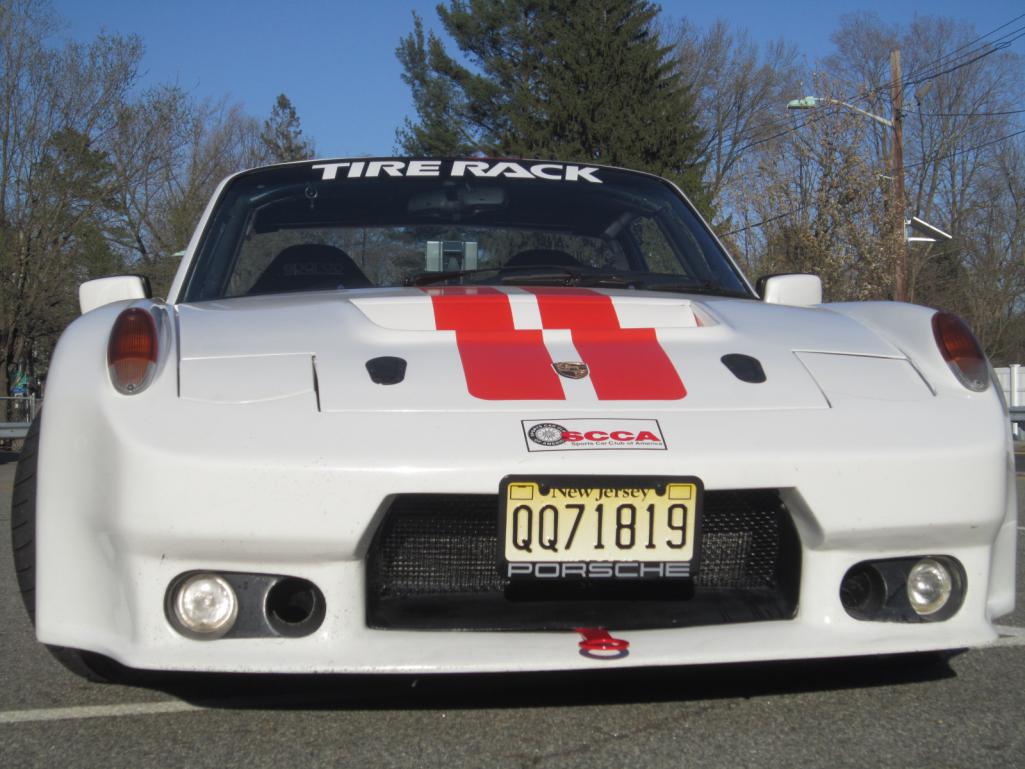
Posted by: dan10101 Nov 29 2018, 07:37 PM
Here is what the front bumper mod looked like with air intake ducts for front brakes
fog lights and a wing nut removable front license plate bracket
Thanks Paul.
I'll save this for round 2..
It's a good close up picture..
Posted by: rick 918-S Dec 1 2018, 07:27 AM
update:
Still working on trimming and fitting.
I took many measurements of the before and after. Before on the blue car. After on the white/blue car. I'm within 1/4 inch now and hoping to get it a bit closer. Michael says it's good at 1/8". For me it depends on where that 1/8" lies. He actually was impressed with my work so far.
Right now I have it apart and working a few items as I expect this to be the last time I take it apart before putting some welds on it.
Moving the clutch pedal over 1". Maybe the brake too, but we'll see. that mounting board is hard as heck... pardon my language
, dulled 3 drill bits so far.also turning it back rightside up. it was upside down before due to fitment.
Then some of the structure around the inner fender needs some work. So I'll do it "while I'm in there" and before I close it up.
I'll cut and fit the cowl piece but not final weld it until the 2 pieces come together.
Teaser Picture. Michael and I both wanted to see it with the front end on...
Great to see Bill's car being saved. Shoot for 3mm max ( 3 dimes) from the factory specs and you will be good to go.
Posted by: dan10101 Dec 1 2018, 11:22 AM
Great to see Bill's car being saved. Shoot for 3mm max ( 3 dimes) from the factory specs and you will be good to go.
Thanks for the confirmation Rick. .118 is close enough to .125 (1/8") which is what I was shooting for.
Thanks again for reminding me that I need to check against factory measurements and not just rely on my doner measurements as the be all end all.
Posted by: dan10101 Dec 6 2018, 06:25 PM
Finally I think I’m ready to weld this sucker up. Well, tack weld it up. The plan is to make it solid enough to drive, but not so solid that I can’t take it back apart again. I want to install the suspension, add some weight and put it on the ground. Do the best corner balance/alignment that I can do it home and see how it goes, then if need be take it to a pro to do the same.
Here are a couple photos of the connections. Things are looking good.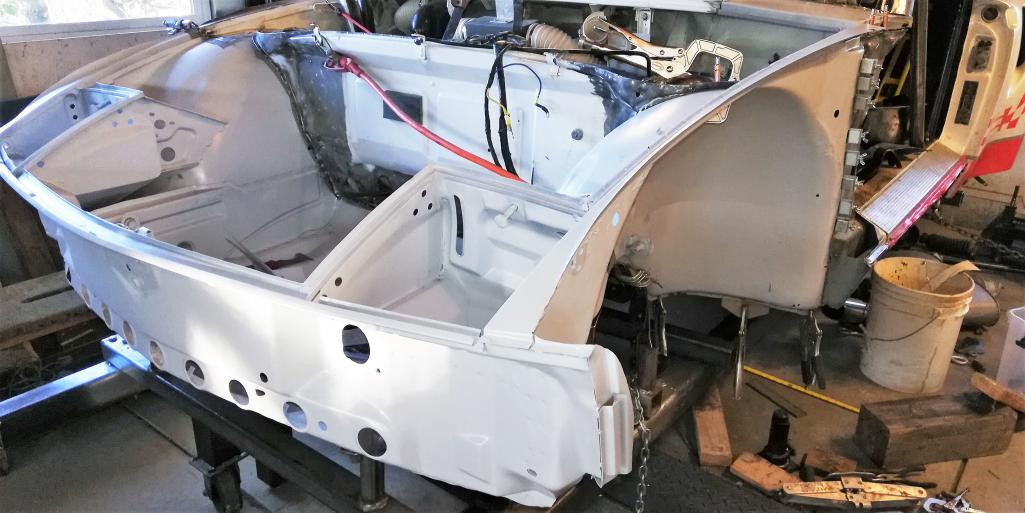
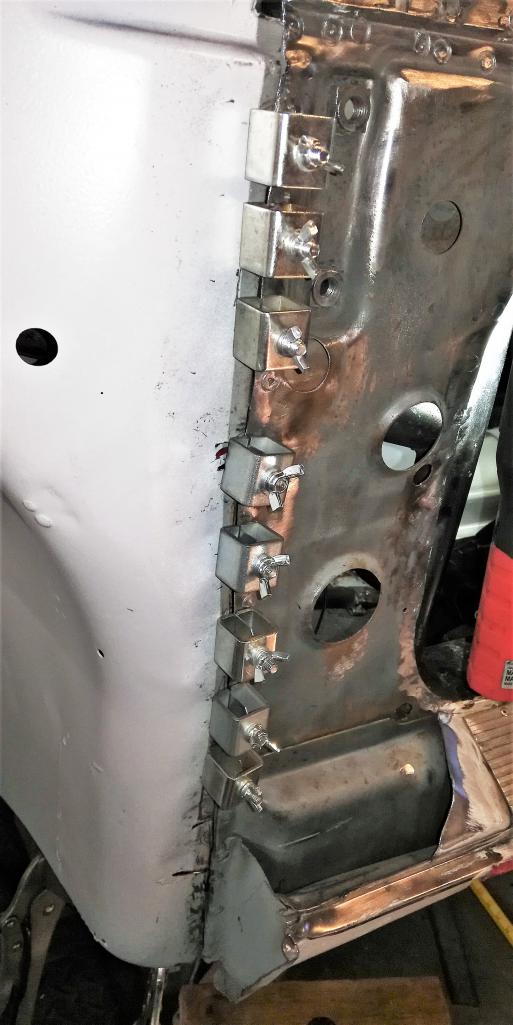
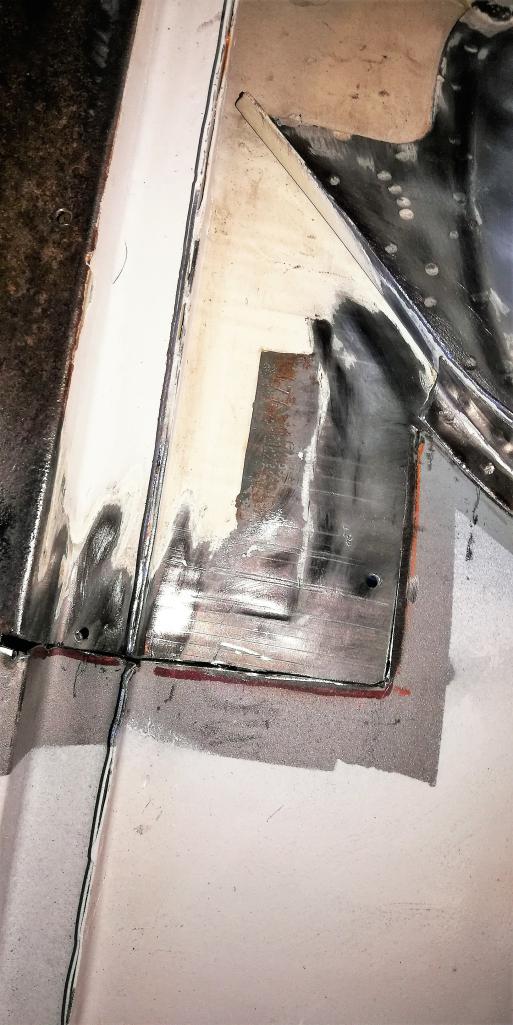
Posted by: burton73 Dec 6 2018, 06:53 PM
I would think you are ready to go. Take it very slow so it can cool down and not warp. I have seen strong steel warp from too much heat when it cools down.
Slow and easy does it.
You got it!
Bob B
NO 
Posted by: dan10101 Dec 6 2018, 07:18 PM
I would think you are ready to go. Take it very slow so it can cool down and not warp. I have seen strong steel warp from too much heat when it cools down.
Slow and easy does it.
You got it!
Bob B
NO
Yes, my concern as well. The first welds will be every 6" or so and jumping around a bit. Just to get it held in place, then assembly the suspension and see how it aligns. Then put some heat to it. That will be the time to get worried about warpage. Slow and steady wins the race. (well, at least this one..)
Posted by: Andyrew Dec 6 2018, 10:25 PM
Posted by: sixnotfour Dec 6 2018, 10:28 PM
Posted by: dan10101 Dec 17 2018, 10:45 PM
Well, I wish I had an update for you, but unfortunately, my welder broke. Fortunately, Eastwood is sending out a new one. (yes a whole new welder). The drive roller quit turning, I tried to get them to troubleshoot it with me to see what I did wrong, but they just said it's a replacement situation. So, that was over a week ago. Still waiting. Wrong time of year to want something shipped quickly.
So in the meantime, I've been practicing my TIG welding with my cheap 3 in one Chinese welder. I have a long way to go before I choose TIG over MIG. FYI, the Eastwood is 10 times the quality, but the Lotos works. I usually use it for plasma cutting, but it also works as a TIG and Stick welder.
Anyway, Merry Christmas to all and remember the Reason for the Season!
Posted by: Andyrew Dec 17 2018, 11:51 PM
Get a tank of pure argon yet for Tig welding aluminum?
Posted by: dan10101 Dec 18 2018, 12:05 AM
Get a tank of pure argon yet for Tig welding aluminum?
Yes, My TIG uses pure argon. but I also have the option to use the Eastwood spool gun to weld aluminum. Also pure argon. Well, i do if I get my welder back.
The TIG is DC only, so it's limited.
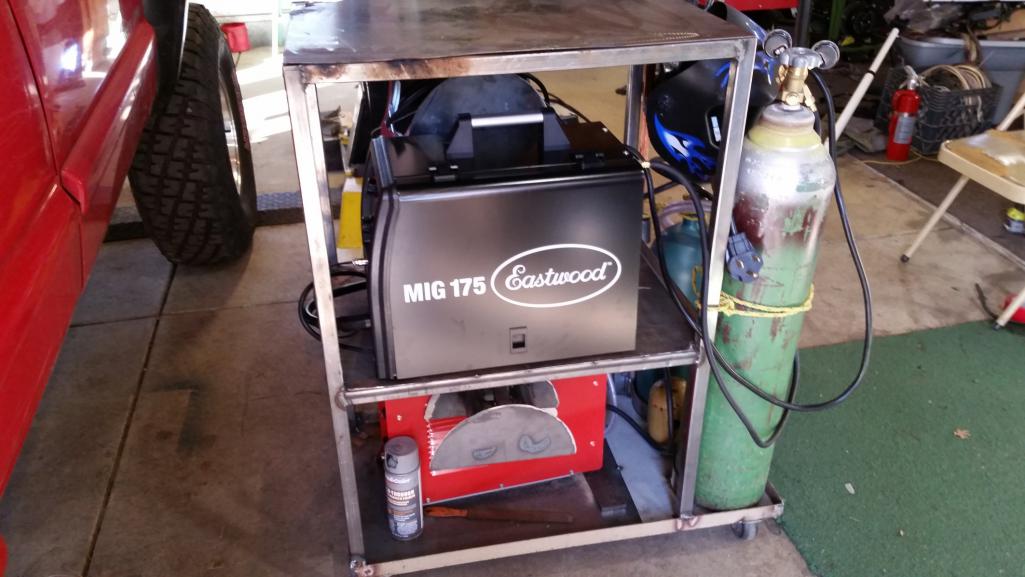
Posted by: dan10101 Dec 24 2018, 06:55 PM
Back in Business!
I probably should just finish welding it, but I wanted to just get it solid enough to get it in a rolling state. I'm now at that point. The new welder is doing well, I'm dealing with my inadequacies in welding enough to correct my mistakes. I have a few more stitch welds to do and then I'll call it good enough to roll.
I hope to have 4 tires on the ground by the new year. Yeah, I'll have to pull it back apart to finish welding it, but at least then I can be up in the air and not on my back to do the underneath stuff. the rest will be the same if I were to do it now or later.
Doing it this way I can get an idea of the alignment and corner balance before I lock it in permanently. 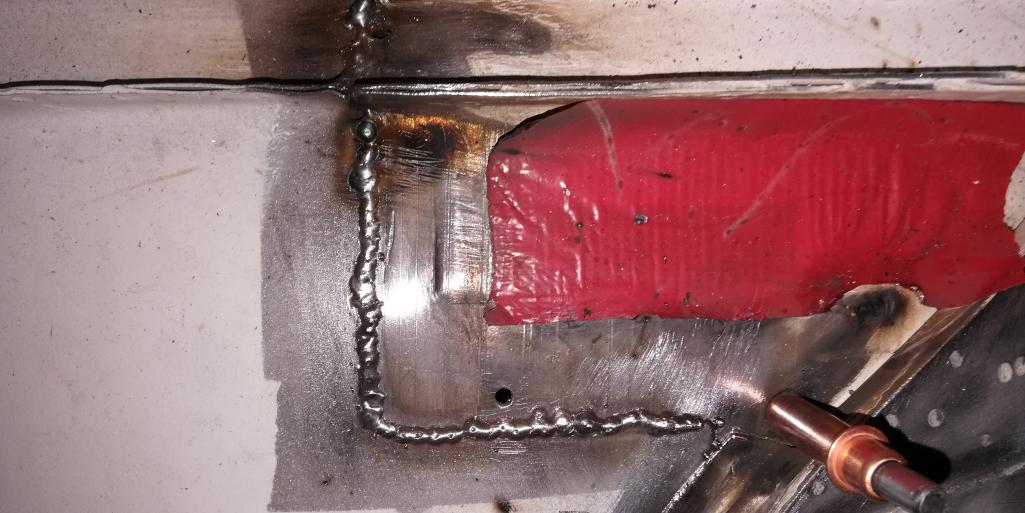
Wishing everyone the merriest of Christmases... 
Posted by: Rand Dec 24 2018, 08:17 PM
I love this build. Respect respect. But the welds are making me cringe. Learn circles and how everything melts. Pooping along a line does not make a weld. Please don't take offense, I mean none.
Posted by: dan10101 Dec 24 2018, 10:22 PM
I love this build. Respect respect. But the welds are making me cringe. Learn circles and how everything melts. Pooping along a line does not make a weld. Please don't take offense, I mean none.
They are sitting a bit proud. I'll check for penetration next time I get out there. It is my best effort at a stitch weld so no C's but still I need to find a way to get more heat in it without burning thru. I used a copper backer and it seems to keep it from burning thru maybe I can turn up the heat a bit or let it sit a bit longer. I'm open to suggestions. I'll get the test metal out and try a few things. On this particular section I can run a bead or on the backside and now it should take more heat with the lumps I have there.
Anyway always open to suggestions.
Posted by: Andyrew Dec 25 2018, 02:14 AM
Thin metal with high penetration = lots of little tacks. Timing your tacks to allow for slight cooling of the metal. IE zap. Zap. Zap. The "." Is a slight pause. Probably just enough to move the wand and an extra 10th. That pause will be determined by your blow through. IE a few tests. The less the pause the higher the penetration the lower the higher the pause the more prone to failure the metal will be due to the heat cycling of the metal.
Focus on having an angle to your stick (45deg to the material) as well as timing. You want the tack to be full enough to cause full penetration but not to create too much material. Overlap the tacks 33% for a nice looking bead and to allow you to put more heat in the next tack.
If you can run quarter inch lines then great but thin sheet metal or thinned metal from grinding can de difficult and butt welding makes that more difficult. This technique can be easily learned and slowly progressed into tiny C's with slight timing spacing for heat. (Or a longer C arch to allowed for slight cooling of material).
It's one of those things thats difficult to explain unless I'm doing it. You just sort of figure out what the metal needs at that moment and adjust the settings and your technique accordingly.
The pics you sent me looked like a great end result. I wouldn't spent too much time worrying about the technique. It's obvious your getting good penetration and your going to get into lots of spots very shortly where you'll be extremely limited on the technique you'll be able to do due to space and angle and positioning.
Posted by: Andyrew Dec 25 2018, 02:17 AM
If you find your building too much material and not enough penetration on the tacks then turn up your heat.
Posted by: sixnotfour Dec 25 2018, 03:49 AM
the backside tells the story..
Posted by: djway Dec 25 2018, 03:52 AM
I find when I cant see the puddle that I wind up laying on too much material. When I can see well the welds are much better.
My helmet always goes to dark.
Volts
Wire speed
Motion of torch
find the right combo and you are golden.
Posted by: dan10101 Dec 25 2018, 11:22 AM
Thanks for the tips guys. I'll break out the test metal and work it over some more.
Posted by: Rand Dec 25 2018, 11:29 AM
Dan. Thank you for posting every step. This is what helps all of us learn, and this project is epic. Merry Christmas.
Posted by: dan10101 Dec 25 2018, 10:22 PM
Dan. Thank you for posting every step. This is what helps all of us learn, and this project is epic. Merry Christmas.
I hope someone gets something out of it besides me.
It's actually kinda funny that I've gotten help from myself with something I posted 15+ years later. Or something I asked and someone else posted the answer. But then again, I have a very short memory, so that could have been last year, (or last week).
My thoughts are rambling, I should stop...
Posted by: dan10101 Dec 31 2018, 07:49 PM
I set a goal to get it on 4 wheels by the end of the year.
I'm happy to say it's rolling.
The main goal at this point is to make sure it is straight. That the corner balance is good and and that it will align. Initial checks look good, but that's for the new year.
So, Everyone celebrate the new year!
Make good decisions, eat better, exercise more, finish your project, be adventurous, love your family and friends and strangers!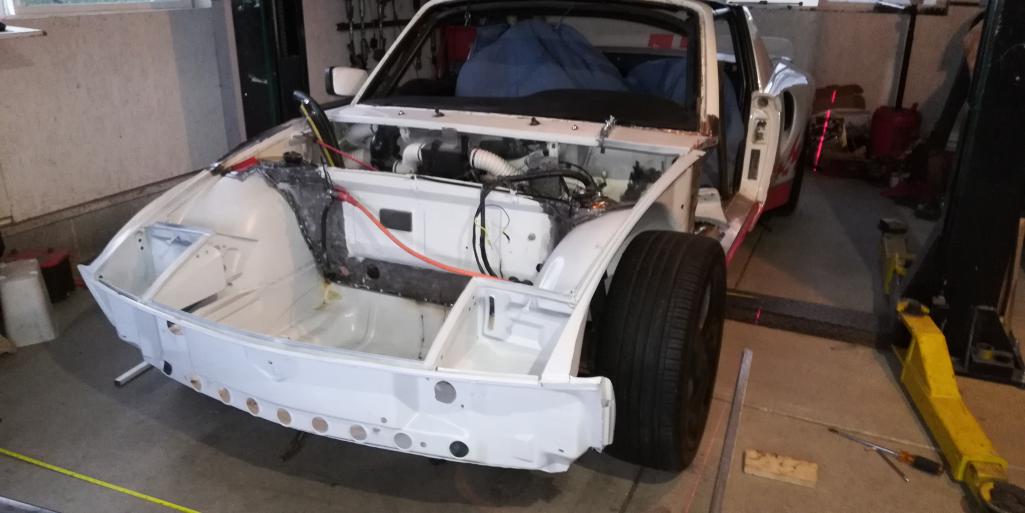
Posted by: tomeric914 Dec 31 2018, 08:11 PM
I tack about 2" apart, then go back and tack halfway between the two spot welds and keep repeating until the gap is filled. It takes patience and practice, but prevents warpage and assures excellent penetration.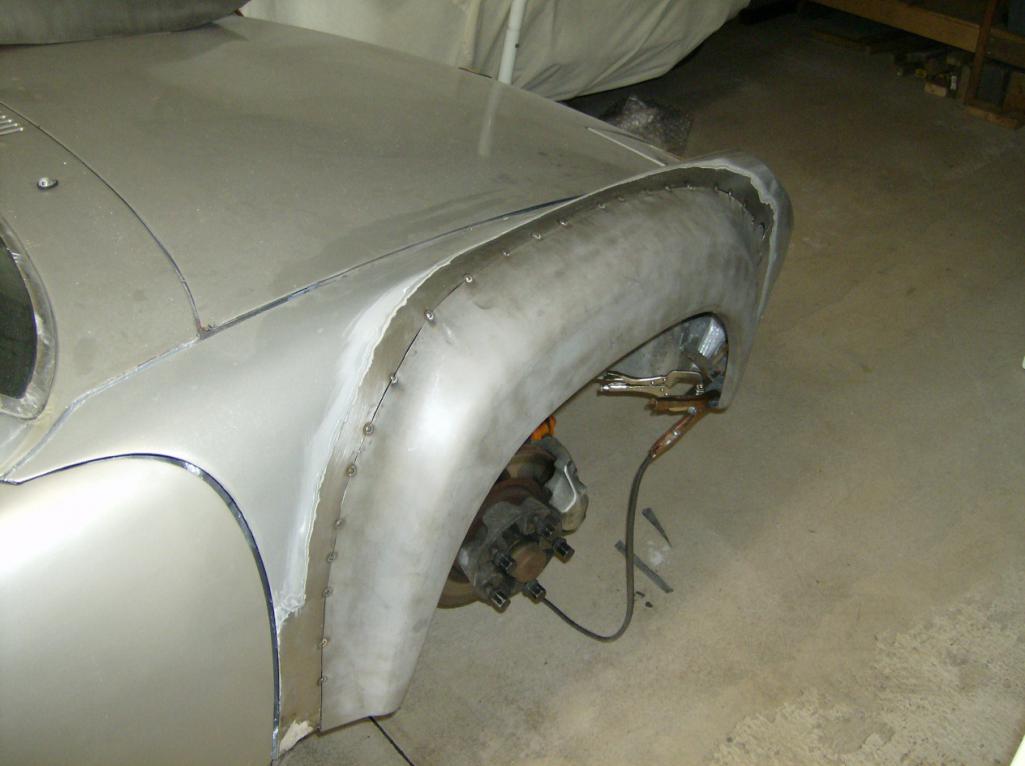
Posted by: Rand Dec 31 2018, 08:39 PM
I tack about 2" apart, then go back and tack halfway between the two spot welds and keep repeating until the gap is filled. It takes patience and practice, but prevents warpage and assures excellent penetration
Yes! It's hard sometimes because you want to keep running that beautiful circular bead weld all day. But with sheet metal, gotta spread the tacks or it will warp hard.
Posted by: dan10101 Dec 31 2018, 10:01 PM
I tack about 2" apart, then go back and tack halfway between the two spot welds and keep repeating until the gap is filled. It takes patience and practice, but prevents warpage and assures excellent penetration.
I have plenty of welding to go back to once I've done my suspension 'test'.
Fortunately, most of my sheetmetal work won't show under all the fiberglass, but I'll give your suggestion a try. I don't want warping either way...
Posted by: sixnotfour Jan 1 2019, 12:14 AM
Make good decisions, eat better, exercise more, finish your project, be adventurous, love your family and friends and strangers!
Posted by: My 914 Jan 1 2019, 07:25 AM
I agree! Peace. Happy New Year!
Posted by: dan10101 Jan 9 2019, 01:21 AM
Happy 2019!
Starting out the New Year with some good news.
The alignment looks good. I used the String Alignment theory to create my own version of a laser alignment using floor tile lasers. I stopped short of completing a perfect alignment but it’s there. 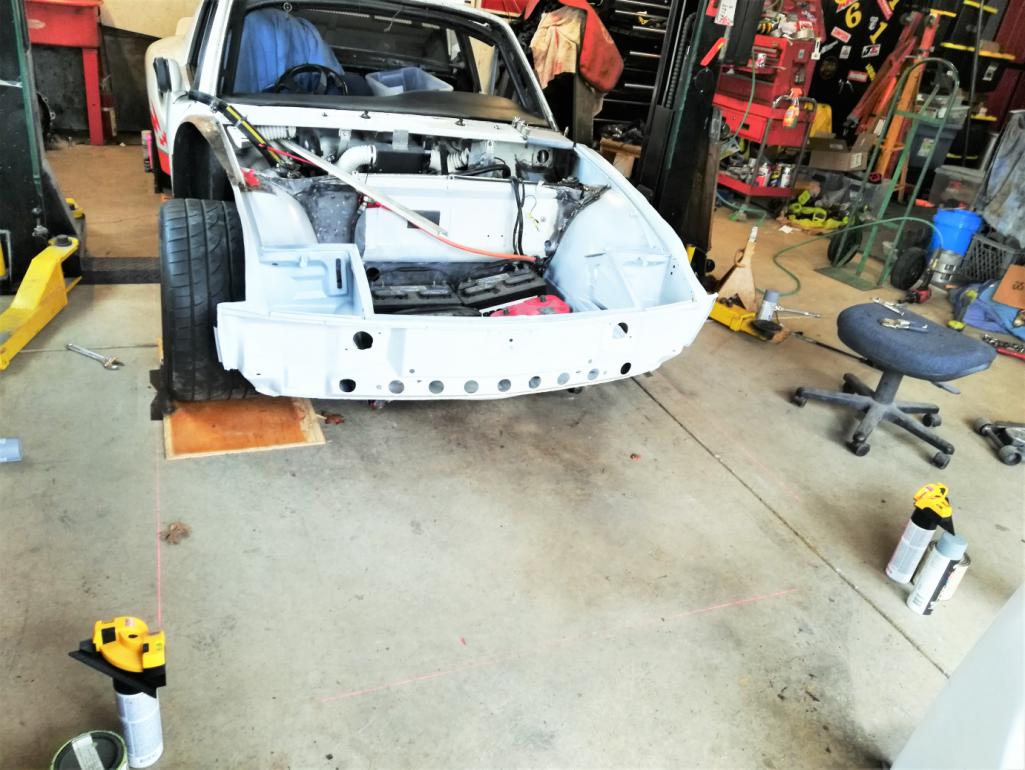
I also did the ride height and corner balance. Height looks good while maintaining a good balance.
I’m at 50.6% LRxRF 49.4% RRxLF and 42% front 58% rear 50.1% RS and 49.9% LS and just over 2500# total weight with my weight in the drivers seat. That may change slightly once I get everything back in the car but it’s close enough that I can work with it. 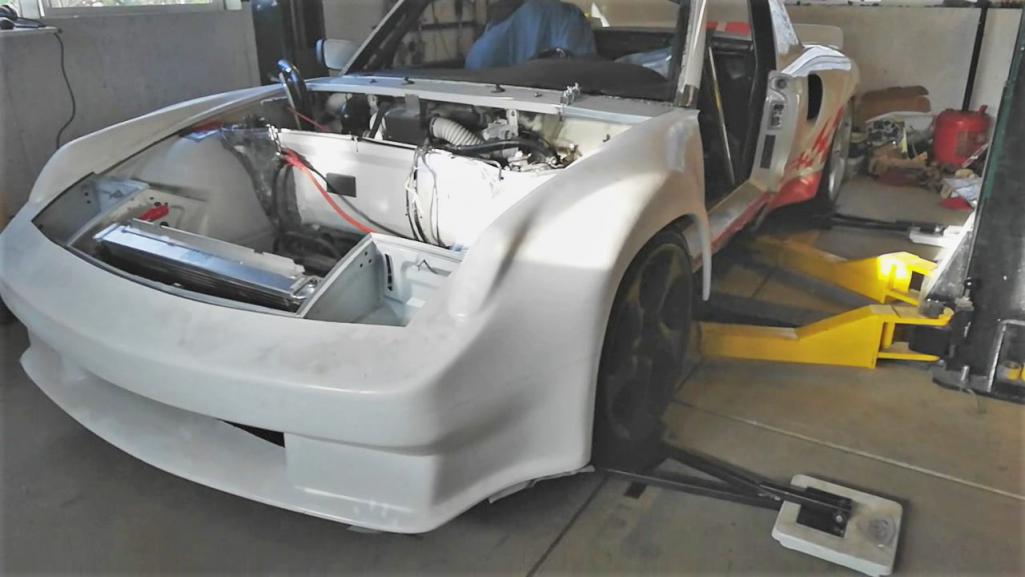
My next step was to take the suspension back off and complete welding. So that’s where I am now.
I’ll have a list of items to do so I need to get it going so I can be ready for the first SSCC event in March.
I had to get the jig out of my way so I put some paint on it and taped it up as best I could and rolled it up the hill and out of the shop. If someone is in need of something like this, hit me up. I could be persuaded to part with it for my costs. If not, it will become my new work bench. 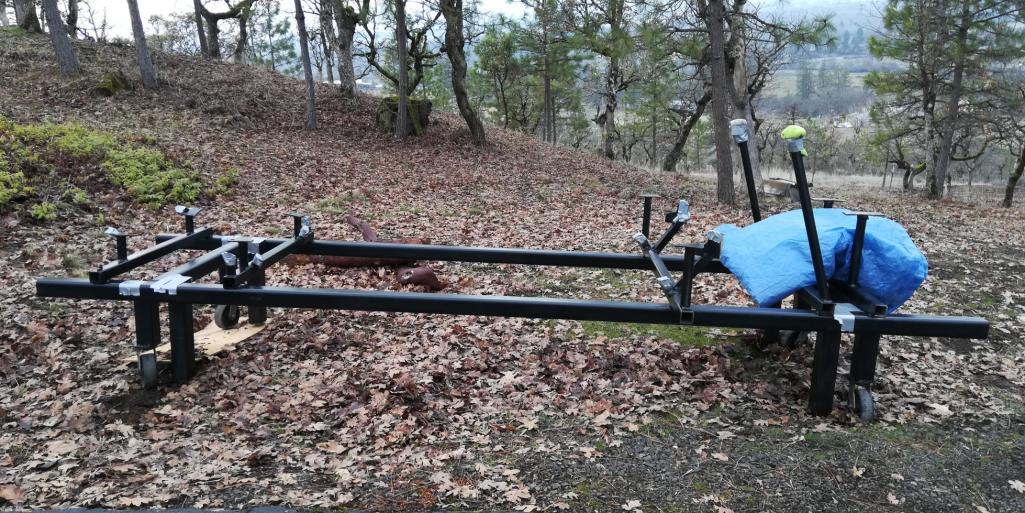
Posted by: djway Jan 9 2019, 03:01 AM
Any picts of the corner weight rig?
Did you try moving those scales around and get an average? You could be closer than you think.
Posted by: Andyrew Jan 9 2019, 09:46 AM
Any picts of the corner weight rig?
Did you try moving those scales around and get an average? You could be closer than you think.
You can see the scales and the metal arms. Its a multiplying rig with standard bathroom scales.
Measurements look great and so does the car!!
Posted by: rick 918-S Jan 9 2019, 10:06 AM
Good work 
Posted by: dan10101 Jan 9 2019, 10:20 AM
Any picts of the corner weight rig?
Did you try moving those scales around and get an average? You could be closer than you think.
They're called Ruggles scales. They used to sell them on ebay.

Given that I don't have the weight where it's supposed to be, I'm not ready to be that precise. But it's a cheap set of scales, so it makes sense to move them to make sure I don't have one or 2 out of wack. It told me what I needed to know, that the car CAN be corner balanced and aligned. When I do the end corner balance, I'll do your suggestion and move them around to see how the weight changes.
The scales are 4 to 1. The numbers in orange are the actual scale weights. The numbers in blue are x4. So if I'm off 1# the spreadsheet moves 4# of weight around. Not ideal, but better than nuttin...
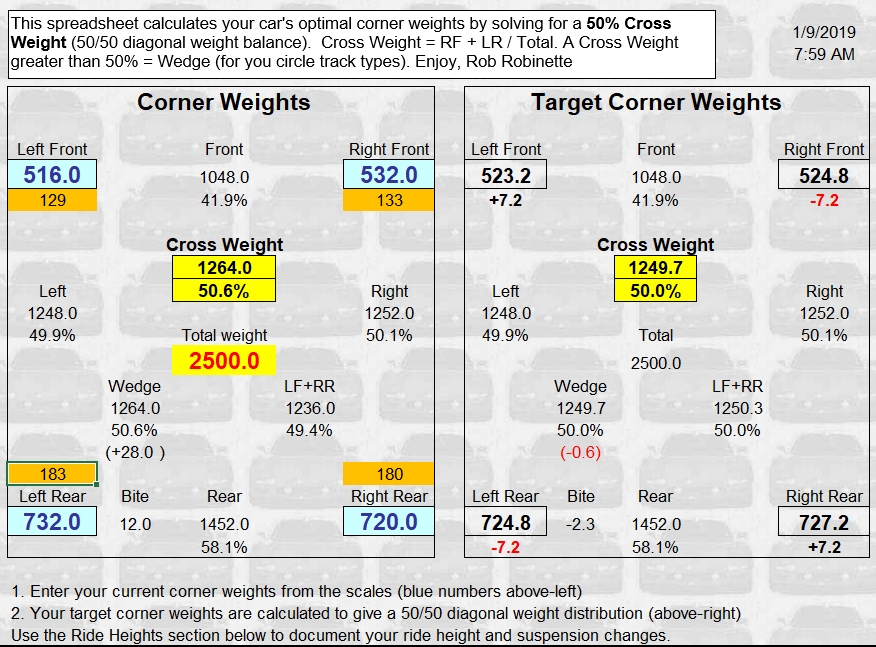
Posted by: Zippy69 Jan 9 2019, 10:58 AM
Any picts of the corner weight rig?
Did you try moving those scales around and get an average? You could be closer than you think.
They're called Ruggles scales. They used to sell them on ebay.
Given that I don't have the weight where it's supposed to be, I'm not ready to be that precise. But it's a cheap set of scales, so it makes sense to move them to make sure I don't have one or 2 out of wack. It told me what I needed to know, that the car CAN be corner balanced and aligned. When I do the end corner balance, I'll do your suggestion and move them around to see how the weight changes.
The scales are 4 to 1. The numbers in orange are the actual scale weights. The numbers in blue are x4. So if I'm off 1# the spreadsheet moves 4# of weight around. Not ideal, but better than nuttin...
Last time the car was corner balanced in May 2011 this is what we had
Porsche Weight
Weighed on Longacre Corner Weight Scales at NE Motorsports on 5/10/11.
With ¼ tank of fuel, Floor mat carpets out.
No Top
Total Weight: 2557 lbs.
LF 522 RF 573
LR 760 RR 702
Top in Trunk
Total Weight: 2581 lbs.
LF 520 RF 570
LR 774 RR 717
Top in Trunk /Me In Car (231 lbs.)
Total Weight: 2812 lbs.
LF 600 RF 601
LR 861 RR 750
Posted by: dan10101 Jan 9 2019, 11:24 AM
That's funny, I have that document sitting on my desk along with a bunch of others I'll be scanning into the computer for future reference. BTW, You did provide over the top documentation.
I was doing a WAG on the weights. I thru 4 batteries in the front trunk, 210# in the passenger seat. No top, No mufflers, No gas tank or gas, no coolant, etc etc..
I'll put it together and get some real readings. If my weights are way off of those previous readings, I'll get a second opinion.. Right now, it's just me..
If I get bored, I'll do a scale comparison, that would make me feel better...
meanwhile, back to burning wire...
Posted by: dan10101 Jan 26 2019, 09:19 PM
Here is your Rolex 24 hr update https://imsatv.imsa.com/
The Screamsicle non-entry is still in the pits. Some delay due to family events but progress to resume shortly.
Prior to the shutdown I was able to pull the oil pan and happy to report that nothing out of the ordinary was found. In fact it looks like the engine was just rebuilt, (which I guess is actually true even though it's been 10+ years). So back together it goes, I'll run it as is and if it blows, it blows. 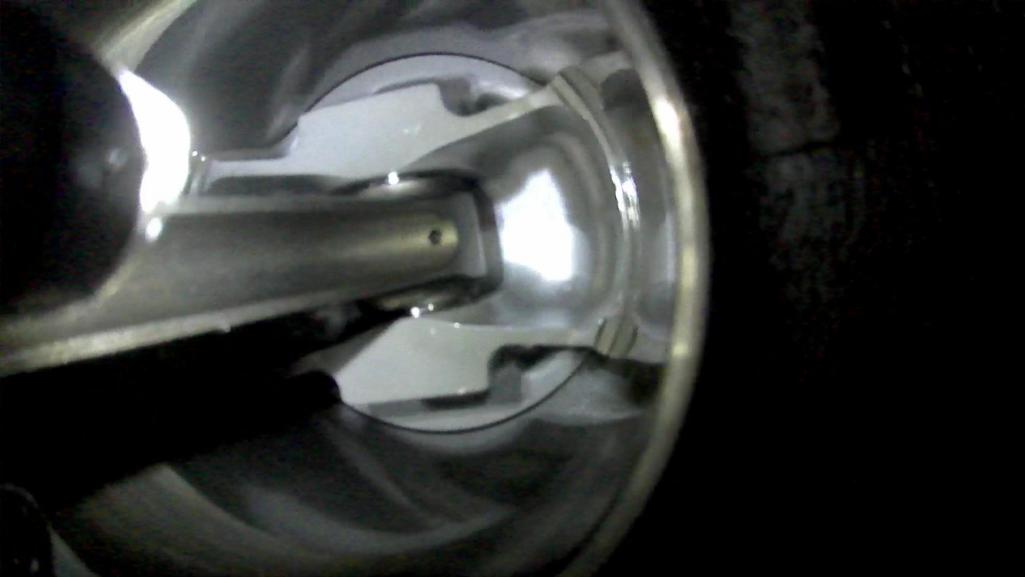
On the welding front, I'm making progress, I still have to cram my big body under the dash and do some overhead spots, but the easy stuff is done. . I hope to be done with the welding by next weekend. (goals are good). Then I'll tackle some priming and maybe even some final coat for the parts unseen.
Posted by: dan10101 Feb 6 2019, 11:36 PM
Welding update…. It’s DONE! (well mostly, I’m sure I’ll find more to do if I look hard enough)
I spent some time cleaning up the areas that won’t be accessible after I get it assembled. So I put some primer and paint in the areas around the firewall and gas tank as well as under where the suspension will be mounted. Since the underside was previously painted black, I finished it off with a black matte.
My next step was to attach the front suspension.
Easier said than done.
First I needed to mount the clutch master cyl. But, I wanted to mount it in the proper position not upside down as it was.. I found out quickly that they did it for a reason, because the master and the steering rack wants to occupy the same space. I’m sure a couple of you already told me that, but I had to try. So that means I had to bleed the clutch master right side up before mounting it upside down. That also means I had to connect the clutch slave, and the clutch slave bracket, but that means I had to reassemble the oil pickup tube and oil pan. Having done all that I realized that the clutch throwout lever wasn’t engaging properly so I had to pull the trans back and reengage it correctly. I had previously pulled the transaxle out but not put it back in correctly. (There are no books on this)
Ok, where was I (are you still following this?) Can you see why this is taking so long?
Now the transaxle is back in, correctly engaging the throwout bearing. The gearshift cables are re-connected. The slave cylinder is connected, and guess what. It didn’t need bleeding. It works great.
So now I need to flip the slave cyl over to gain room for the steering rack and then…
mount the wildwood brackets and pedals,
mount the front suspension,
run the fuel line, fuel pump, filters, fuel tank, etc
cut out the opening for the radiator, fab up radiator mounting brackets, etc. run the hoses.
Reassemble the heater, vent hoses, and water lines to the heater core.
Cut out turn signal light openings in the fiberglass fenders. Then mount those lights.
I also have to do the one part that is still 914. That is assemble the headlight buckets.
Now comes the fun part. Wiring it all back up. I labeled it all and marked it down on paper and lots of photos. But it will still be ‘fun’.
I left out an important part. That is mounting the fiberglass fender and front bumper assembly. So I’ll probably insert that in to the mix where appropriate. Oh and the windshield install. And the door. And a tune-up. And the seat mod, and roll bar mods. And some day I’ll get to paint…
So, there are a few bits to accomplish in the next month before the first autocross.
Posted by: Andyrew Feb 7 2019, 12:47 AM
Month???
That would be 3 years for me...
Great work so far!!! I've seen the pictures you guys haven't and it looks fantastic
Posted by: djway Feb 7 2019, 02:07 AM
Congrats on another stage conquered.
What is the heater setup like?
That is one part I have not settled on yet.
Posted by: tygaboy Feb 7 2019, 08:20 AM
Go Dan GO!
And pics... we need the pics!
Posted by: dan10101 Feb 7 2019, 10:00 AM
Congrats on another stage conquered.
What is the heater setup like?
That is one part I have not settled on yet.
Basically the heater is a standard water heater core fed by 2 heater hoses coming from the v8. They feed down the driver’s side long and up into the front above the driver’s feet. They feed the custom box shown, (maybe a hot rod product?). That feeds what I believe are standard 914 air distribution valves. Here are a couple pictures before I molested it...
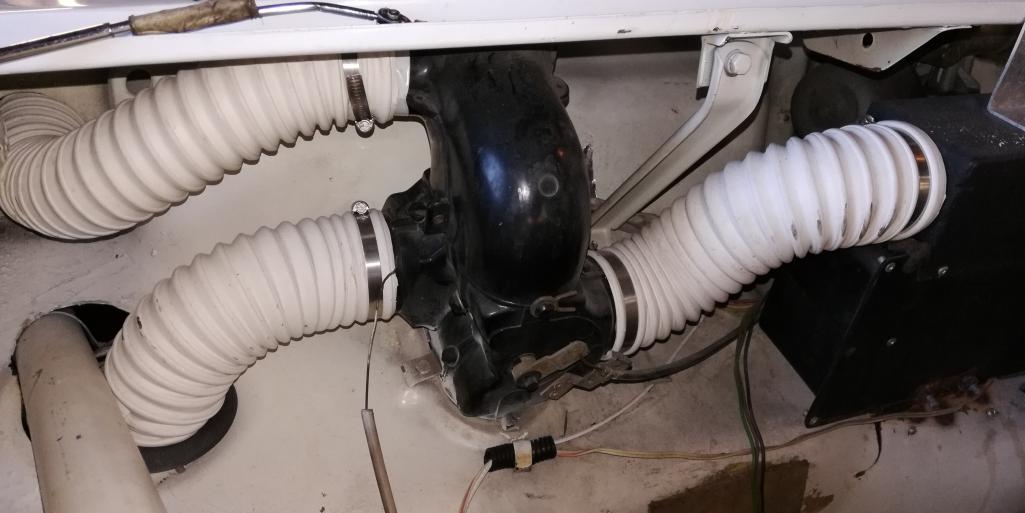
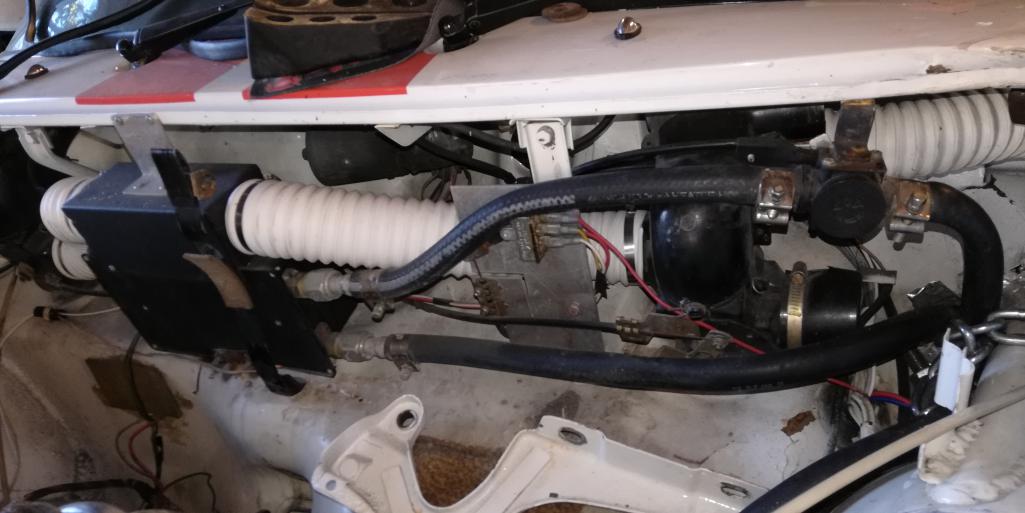
Posted by: dan10101 Feb 7 2019, 10:23 AM
Go Dan GO!
And pics... we need the pics!
I need to take a few more pictures. And edit them so they fit on the website.
But here are some teasers.
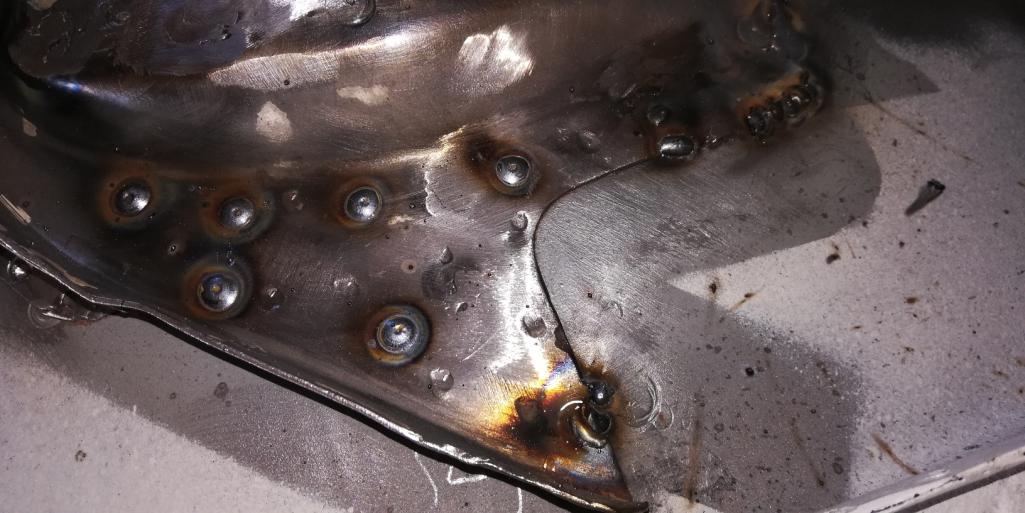
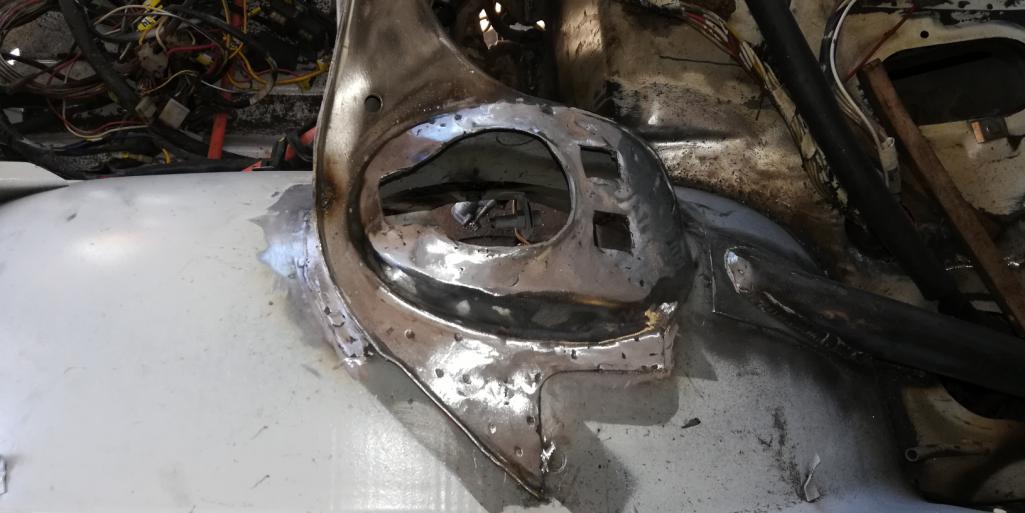
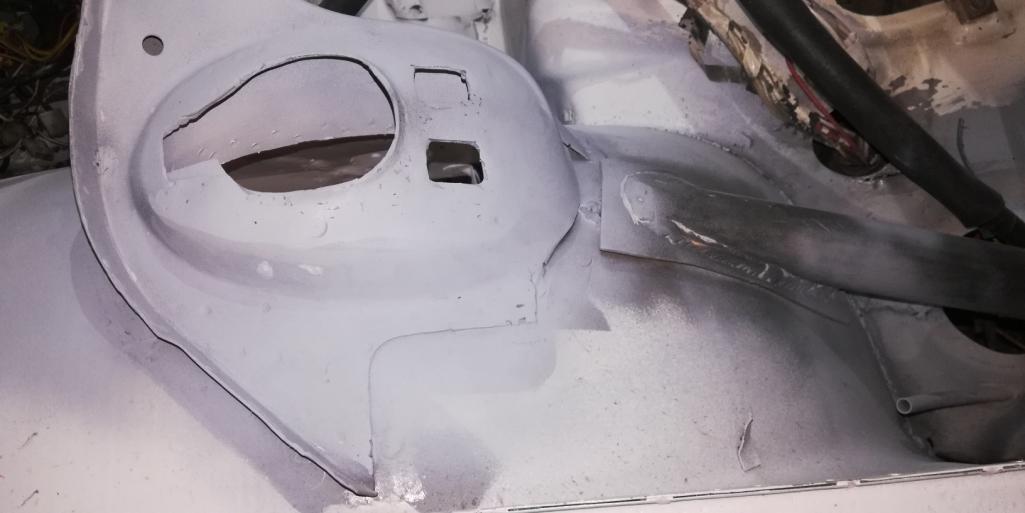
Posted by: Zippy69 Feb 7 2019, 03:05 PM
Welding update…. It’s DONE! (well mostly, I’m sure I’ll find more to do if I look hard enough)
I spent some time cleaning up the areas that won’t be accessible after I get it assembled. So I put some primer and paint in the areas around the firewall and gas tank as well as under where the suspension will be mounted. Since the underside was previously painted black, I finished it off with a black matte.
My next step was to attach the front suspension.
Easier said than done.
First I needed to mount the clutch master cyl. But, I wanted to mount it in the proper position not upside down as it was.. I found out quickly that they did it for a reason, because the master and the steering rack wants to occupy the same space. I’m sure a couple of you already told me that, but I had to try. So that means I had to bleed the clutch master right side up before mounting it upside down. That also means I had to connect the clutch slave, and the clutch slave bracket, but that means I had to reassemble the oil pickup tube and oil pan. Having done all that I realized that the clutch throwout lever wasn’t engaging properly so I had to pull the trans back and reengage it correctly. I had previously pulled the transaxle out but not put it back in correctly. (There are no books on this)
Ok, where was I (are you still following this?) Can you see why this is taking so long?
Now the transaxle is back in, correctly engaging the throwout bearing. The gearshift cables are re-connected. The slave cylinder is connected, and guess what. It didn’t need bleeding. It works great.
So now I need to flip the slave cyl over to gain room for the steering rack and then…
mount the wildwood brackets and pedals,
mount the front suspension,
run the fuel line, fuel pump, filters, fuel tank, etc
cut out the opening for the radiator, fab up radiator mounting brackets, etc. run the hoses.
Reassemble the heater, vent hoses, and water lines to the heater core.
Cut out turn signal light openings in the fiberglass fenders. Then mount those lights.
I also have to do the one part that is still 914. That is assemble the headlight buckets.
Now comes the fun part. Wiring it all back up. I labeled it all and marked it down on paper and lots of photos. But it will still be ‘fun’.
I left out an important part. That is mounting the fiberglass fender and front bumper assembly. So I’ll probably insert that in to the mix where appropriate. Oh and the windshield install. And the door. And a tune-up. And the seat mod, and roll bar mods. And some day I’ll get to paint…
So, there are a few bits to accomplish in the next month before the first autocross.
Good work Dan!
Been there done that regarding clutch lever! LOL That's why we put those really nice studs on the engine so it is easier to properly install the transaxle and specifically the fork.
Re the master cylinder ...we re-enforced and fabbed up that floor mounting area with the wrong stroke master (Couldn't get enough throw with 1 1/8" so went to 1.4") and when we purchased the 1.4" master we realized the mounting bolts were opposite! I will never know WHY Wilwood in their infinite wisdom did that! After contemplating changes and a few beers later we decided the easiest solution was to mount it upside down after bleeding! (Reservoir/Low pressure side comes in from bottom instead of top). It works fine as long as no air gets in system. Make sure system adjusted correctly as you will have just enough throw to properly engage or disengage the clutch. Ask me how I know this... LOL
Best,
Paul
Posted by: dan10101 Feb 7 2019, 03:24 PM
Good work Dan!
Been there done that regarding clutch lever! LOL That's why we put those really nice studs on the engine so it is easier to properly install the transaxle and specifically the fork.
Re the master cylinder ...we re-enforced and fabbed up that floor mounting area with the wrong stroke master (Couldn't get enough throw with 1 1/8" so went to 1.4") and when we purchased the 1.4" master we realized the mounting bolts were opposite! I will never know WHY Wilwood in their infinite wisdom did that! After contemplating changes and a few beers later we decided the easiest solution was to mount it upside down after bleeding! (Reservoir/Low pressure side comes in from bottom instead of top). It works fine as long as no air gets in system. Make sure system adjusted correctly as you will have just enough throw to properly engage or disengage the clutch. Ask me how I know this... LOL
Best,
Paul
Those studs are the best! That was the easiest part of the work. Allowed me to move the trans in bit by bit until it bit the throwout bearing.
I'm not too worried about the clutch master. But thanks for the encouragement.
I am thinking about doing dual brake masters, I really like the idea of dual fluid containment systems. I'll put it together with the single for now, but was wondering if you had considered this?
Posted by: Zippy69 Feb 7 2019, 03:48 PM
Good work Dan!
Been there done that regarding clutch lever! LOL That's why we put those really nice studs on the engine so it is easier to properly install the transaxle and specifically the fork.
Re the master cylinder ...we re-enforced and fabbed up that floor mounting area with the wrong stroke master (Couldn't get enough throw with 1 1/8" so went to 1.4") and when we purchased the 1.4" master we realized the mounting bolts were opposite! I will never know WHY Wilwood in their infinite wisdom did that! After contemplating changes and a few beers later we decided the easiest solution was to mount it upside down after bleeding! (Reservoir/Low pressure side comes in from bottom instead of top). It works fine as long as no air gets in system. Make sure system adjusted correctly as you will have just enough throw to properly engage or disengage the clutch. Ask me how I know this... LOL
Best,
Paul
Those studs are the best! That was the easiest part of the work. Allowed me to move the trans in bit by bit until it bit the throwout bearing.
I'm not too worried about the clutch master. But thanks for the encouragement.
I am thinking about doing dual brake masters, I really like the idea of dual fluid containment systems. I'll put it together with the single for now, but was wondering if you had considered this?
Probably a good idea re dual brake. My list of repairs/customizations/modifications was very long as you can see by all of the documentation that I provided. Never made it that far down the list as it was in the optional category.
One thing comes to mind as you are assembling the wiring in front of car. We paid less attention to most of the wiring in that area so double check and make sure grommets are used on all wiring thru firewalls while it is apart. We did some, it was on my list to look at but never got to it.
Lastly did you ever determine source of the ticking sound in top of the motor. Sounds like a stuck lifter to me? This only appeared after the car sat for some time. Might be worth exploring?
Posted by: dan10101 Feb 7 2019, 06:23 PM
Probably a good idea re dual brake. My list of repairs/customizations/modifications was very long as you can see by all of the documentation that I provided. Never made it that far down the list as it was in the optional category.
One thing comes to mind as you are assembling the wiring in front of car. We paid less attention to most of the wiring in that area so double check and make sure grommets are used on all wiring thru firewalls while it is apart. We did some, it was on my list to look at but never got to it.
Lastly did you ever determine source of the ticking sound in top of the motor. Sounds like a stuck lifter to me? This only appeared after the car sat for some time. Might be worth exploring?
I'll be updating the wiring as I go. I should do the whole thing. But, the wires seem to be fine, I'll add some wire looms and I think it will be ok. Yes and grommets.
I haven't pulled the valve covers, but I didn't hear any excessive noise using a stethoscope. They were all consistently the same. My noise test involved many things, but the one that gave me the biggest clue is insulating the headers using sound deadening material. I have a video showing a dramatic difference in sound isolating the bottom end, with and without the material. I did pull the oil pan but found nothing other than the oil pickup tube o-ring was black instead of orange. That could be the difference in manufacturers, but the new one seems fatter. There was no foaming indication that that was the problem, but we'll see. I put it back together and I'll let it warm up and see what noise I get.
Posted by: djway Feb 7 2019, 10:11 PM
Congrats on another stage conquered.
What is the heater setup like?
That is one part I have not settled on yet.
Basically the heater is a standard water heater core fed by 2 heater hoses coming from the v8. They feed down the driver’s side long and up into the front above the driver’s feet. They feed the custom box shown, (maybe a hot rod product?). That feeds what I believe are standard 914 air distribution valves. Here are a couple pictures before I molested it...
Thanks for the pictures. So the hot water comes from the rear? I wonder if there’s any way to come from the front by the radiator?
Posted by: dan10101 Feb 7 2019, 10:26 PM
Thanks for the pictures. So the hot water comes from the rear? I wonder if there’s any way to come from the front by the radiator?
Just brainstorming here...
I wonder if there would be a way to take the hot side hose and run it thru the heater core. You would either need to split it so that it could flow more and either put a flapper valve to allow excess pressure to go directly to the radiator. But at the same time you would probably need to be able to shut off flow thru the heater core when it gets too warm in the cab.
Another thought.. pull heat directly from the radiator. Hmm. like above you would need to come up with a way to completly shut off hot air going into the passenger compartment, but I think this would be an easier solution to implement.
Posted by: Andyrew Feb 7 2019, 10:30 PM
Congrats on another stage conquered.
What is the heater setup like?
That is one part I have not settled on yet.
Basically the heater is a standard water heater core fed by 2 heater hoses coming from the v8. They feed down the driver’s side long and up into the front above the driver’s feet. They feed the custom box shown, (maybe a hot rod product?). That feeds what I believe are standard 914 air distribution valves. Here are a couple pictures before I molested it...
Thanks for the pictures. So the hot water comes from the rear? I wonder if there’s any way to come from the front by the radiator?
Generally cars get heat to the heater core before the radiator so it heats up the passengers first. Also with the thermostat opening at 160-200+ degrees that could take significant time before air starts blowing hot. Thus these systems take hot air directly from the engine and feed it back into the system between the thermostat and the block.
There are 914 guys who have taken the easy route of pulling the heat closer to the radiator and I remember hearing that complaint.
Posted by: djway Feb 7 2019, 10:45 PM
Congrats on another stage conquered.
What is the heater setup like?
That is one part I have not settled on yet.
Basically the heater is a standard water heater core fed by 2 heater hoses coming from the v8. They feed down the driver’s side long and up into the front above the driver’s feet. They feed the custom box shown, (maybe a hot rod product?). That feeds what I believe are standard 914 air distribution valves. Here are a couple pictures before I molested it...
Thanks for the pictures. So the hot water comes from the rear? I wonder if there’s any way to come from the front by the radiator?
Generally cars get heat to the heater core before the radiator so it heats up the passengers first. Also with the thermostat opening at 160-200+ degrees that could take significant time before air starts blowing hot. Thus these systems take hot air directly from the engine and feed it back into the system between the thermostat and the block.
There are 914 guys who have taken the easy route of pulling the heat closer to the radiator and I remember hearing that complaint.
Thanks for the information. I have never worked with water before
So run from the back it is. Unless, running an electric water pump changes things as I believe the heater core was fed off a section of the water pump. I'm confused LOL
Posted by: burton73 Feb 8 2019, 10:53 AM
Good work Dan!
Been there done that regarding clutch lever! LOL That's why we put those really nice studs on the engine so it is easier to properly install the transaxle and specifically the fork.
Re the master cylinder ...we re-enforced and fabbed up that floor mounting area with the wrong stroke master (Couldn't get enough throw with 1 1/8" so went to 1.4") and when we purchased the 1.4" master we realized the mounting bolts were opposite! I will never know WHY Wilwood in their infinite wisdom did that! After contemplating changes and a few beers later we decided the easiest solution was to mount it upside down after bleeding! (Reservoir/Low pressure side comes in from bottom instead of top). It works fine as long as no air gets in system. Make sure system adjusted correctly as you will have just enough throw to properly engage or disengage the clutch. Ask me how I know this... LOL
Best,
Paul
Those studs are the best! That was the easiest part of the work. Allowed me to move the trans in bit by bit until it bit the throwout bearing.
I'm not too worried about the clutch master. But thanks for the encouragement.
I am thinking about doing dual brake masters, I really like the idea of dual fluid containment systems. I'll put it together with the single for now, but was wondering if you had considered this?
Probably a good idea re dual brake. My list of repairs/customizations/modifications was very long as you can see by all of the documentation that I provided. Never made it that far down the list as it was in the optional category.
One thing comes to mind as you are assembling the wiring in front of car. We paid less attention to most of the wiring in that area so double check and make sure grommets are used on all wiring thru firewalls while it is apart. We did some, it was on my list to look at but never got to it.
Lastly did you ever determine source of the ticking sound in top of the motor. Sounds like a stuck lifter to me? This only appeared after the car sat for some time. Might be worth exploring?
Hi Dan,
I want to point out one more time that Bill, that built you car offered me the pre-drilled, bent metal plate for the duel brake masters and the clutch. You can see it in my photo.
I got the shorter Willwood masters and it clears the Carrera rack. It tight but it clears the rubber bellows and all. You have a drive by wire throttle that makes it very nice. Maybe Bill bent the metal just in case he wanted to go with 3 masters.
Bob B
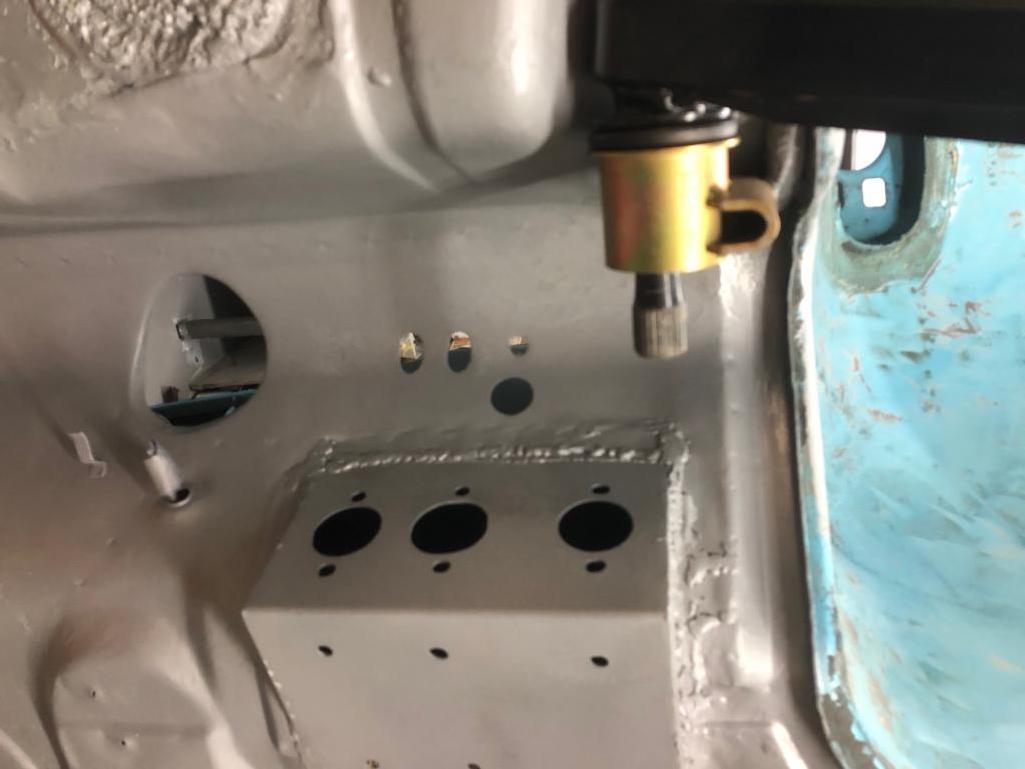
Posted by: dan10101 Feb 8 2019, 12:55 PM
Hi Dan,
I want to point out one more time that Bill, that built you car offered me the pre-drilled, bent metal plate for the duel brake masters and the clutch. You can see it in my photo.
I got the shorter Willwood masters and it clears the Carrera rack. It tight but it clears the rubber bellows and all. You have a drive by wire throttle that makes it very nice. Maybe Bill bent the metal just in case he wanted to go with 3 masters.
Bob B
I already moved the clutch master over about 1.5" or so. I think there's room for 2 masters, it looks similar to your photo in size. I also have the shorter Wilwood Masters and should clear, just the clutch master points up and encroaches on the steering rack area if it's not upside down.
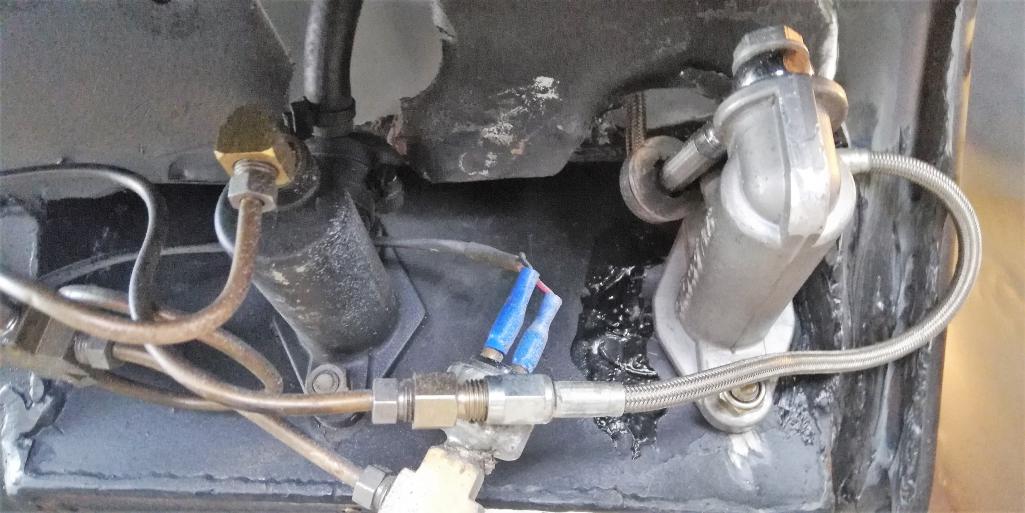
Posted by: sixnotfour Feb 8 2019, 01:07 PM
Dan, I took this out of my 914, gave it to a buddy, he went fancy pedals, still has this whole set up....its in sandeigo if your interested...
@http://www.914world.com/bbs2/index.php?showuser=3914 has them..
Attached image(s)

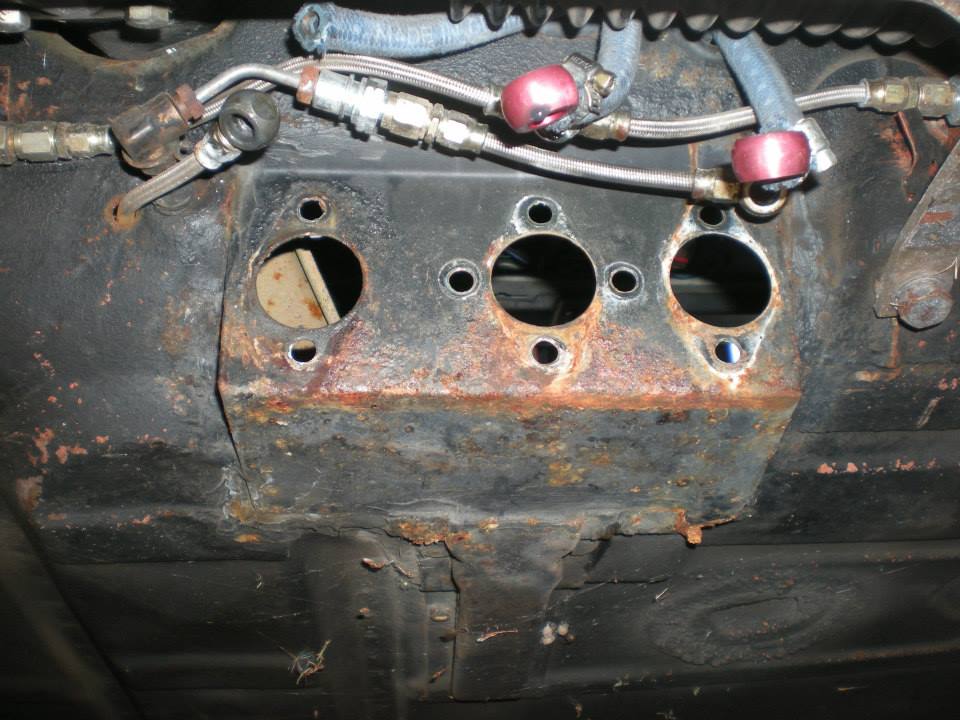
Posted by: dan10101 Feb 8 2019, 01:26 PM
Dan, I took this out of my 914, gave it to a buddy, he went fancy pedals, still has this whole set up....its in sandeigo if your interested...
@http://www.914world.com/bbs2/index.php?showuser=3914
I just checked the price on a dual master pedal from Wilwood.
I would be interested. A couple rebuild kits would be way less option.
Posted by: sixnotfour Feb 8 2019, 01:37 PM
Dan, I took this out of my 914, gave it to a buddy, he went fancy pedals, still has this whole set up....its in sandeigo if your interested...
@http://www.914world.com/bbs2/index.php?showuser=3914
I just checked the price on a dual master pedal from Wilwood.
I would be interested. A couple rebuild kits would be way less option.
I know the clutch master was bad , brakes where good x2
get ahold of Chris...its cheep..I think... @http://www.914world.com/bbs2/index.php?showuser=3914
single master like you have is just plain dangerous...
Posted by: effutuo101 Feb 8 2019, 05:33 PM
Here is what I have. The MC’s couldn’t be rebuilt (parts NLA and new ones in your choice of size are about $50.
Attached thumbnail(s)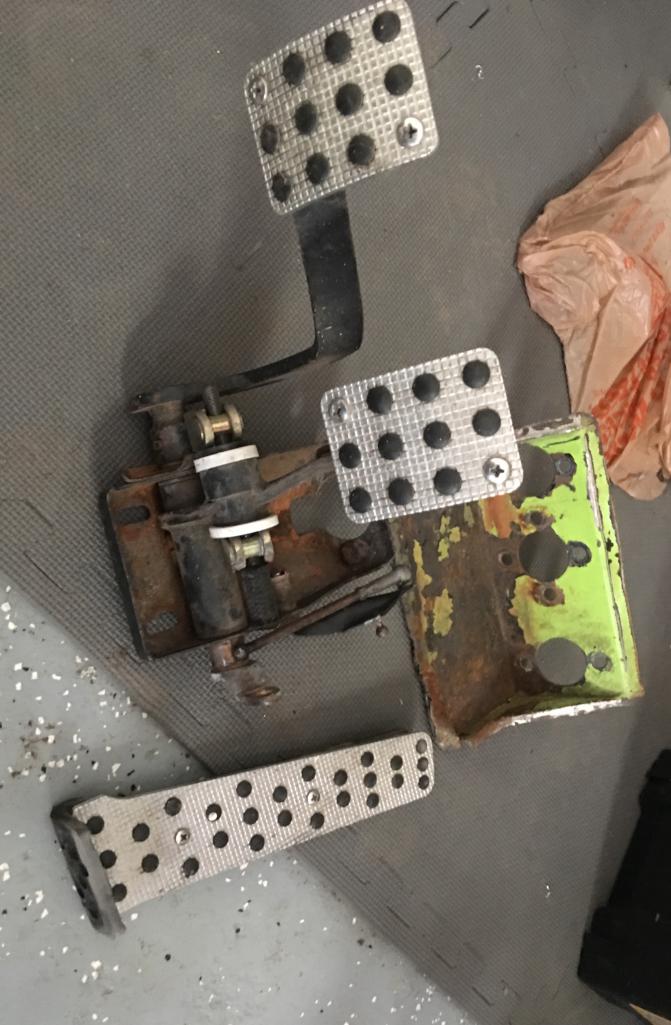
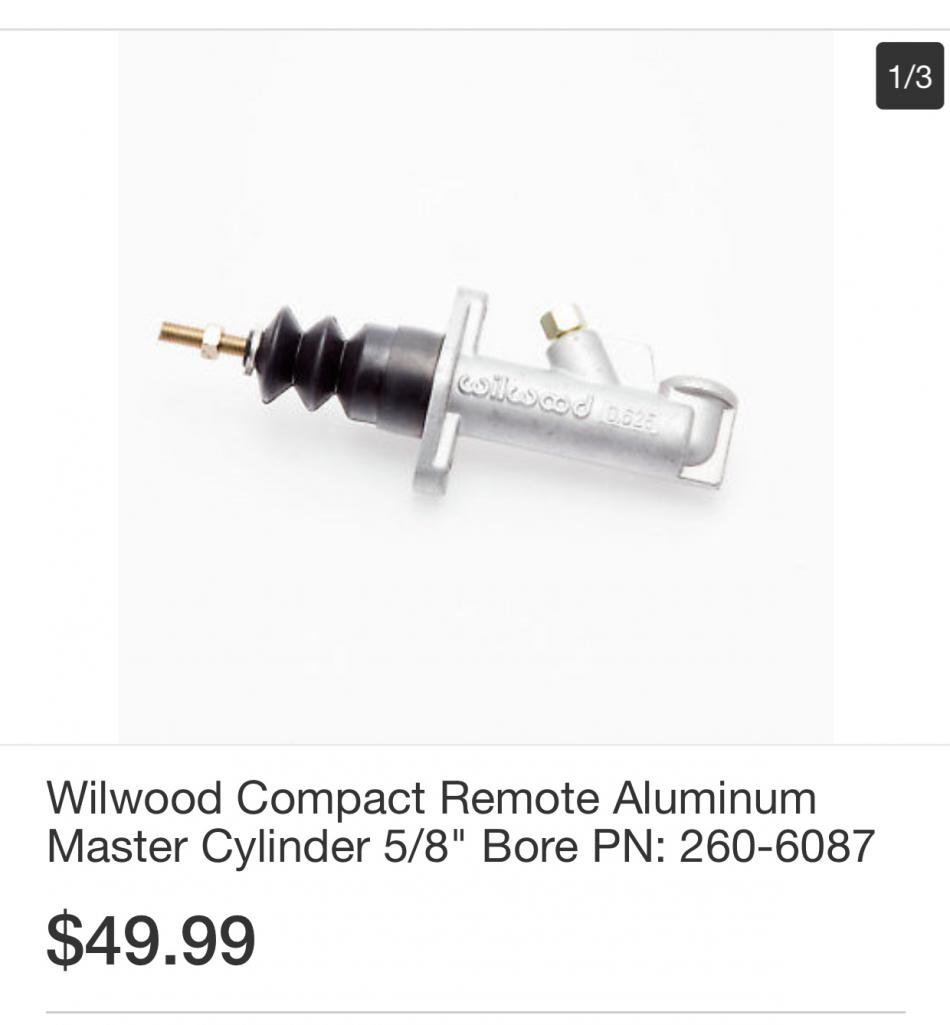
Posted by: sixnotfour Feb 10 2019, 11:58 AM
Dan, just want you to be safe... good news you have an E brake.
Attached image(s)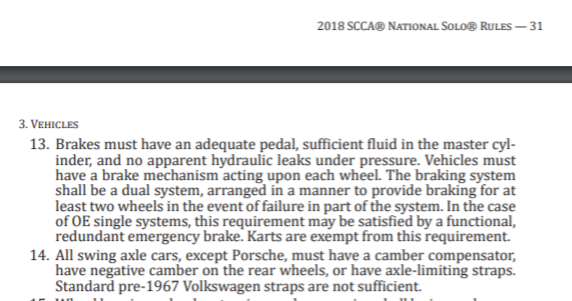
Posted by: sixnotfour Feb 10 2019, 01:37 PM
or this option;
http://www.914world.com/bbs2/index.php?showtopic=312451
Posted by: dan10101 Feb 10 2019, 02:35 PM
Dan, just want you to be safe... good news you have an E brake.
Thanks! You're preaching to the choir brother!
When I saw that I started thinking the original system was a single. But further investigation revealed otherwise.
effutuo101 is going to send me his pedal cluster, (your old pedals). I should be able to make that work. If not I'm definitely going to look into the second link you posted. Things are tight and if that fits then I'll give that a try. 3rd option is to play the safety card with my wife and get the house budget to fund a full on brake cluster. The bottom line is, I'm not going 150mph down the front straight with a single point of failure and I think she'll agree with me. She wants me around for a while longer.


Posted by: sixnotfour Feb 10 2019, 02:49 PM
I know, the option comment , set me in motion... 
Posted by: dan10101 Feb 10 2019, 03:05 PM
I know, the option comment , set me in motion... She wants me to do it right. (but on a budget...)
It kinda woke her up a bit when I rolled the last one...
Posted by: Andyrew Feb 10 2019, 03:14 PM
3rd option is to play the safety card with my wife and get the house budget to fund a full on brake cluster
Didn't you do that with the front end?
I mean I'm all down for it
Posted by: Cracker Feb 10 2019, 03:32 PM
I am ok with skimping where you can as long as it does impact safety. However, I would categorize the pedal cluster (especially on a conversion to hydraulic clutch) with enlarged brakes a no-go and increased performance. The cost both in financial and fabrication terms to install a dedicated aftermarket, high quality pedal system is not so much that it out-weighs the risk. Think this one through before you cobble masters onto a teeners pedal assembly. Please.
T
Posted by: sixnotfour Feb 10 2019, 06:04 PM
Tony you are correct ,,but if you look at rsr pedal assembly you will see its no mystery..the pedal assy. I have shown was done by a well known fabricator in AZ...its no cobbled together piece...but your right write a check...the skies the limit...maybe you should have chimed in earlier....just saying..race on
btw it worked great for 2 other owners,,my son is a foot taller . so I made an adjustable pedal assy...
Posted by: Cracker Feb 10 2019, 06:14 PM
Dan has a project on his hands...its not too late. Correct, I have not been here for awhile and have missed the "happenings" over the last 8-12 months. Obviously, no matter who is modifying and re-defining a pedal system - it still is piece used in different manner. My suggestions is simply to use a "system" that is manufactured for a singular purpose - a race style pedal system. Other than than the steering wheel and equally important - a driver has more interface with the controls than anything else. Kind of important...eh?
T
Posted by: sixnotfour Feb 10 2019, 06:19 PM
true that, but if you dont know you dont know...check pelican rsr pedals ...the assy shown are not 914
i loved the issue of vw porsche ..check book Chuck..,
the reality is dual master cylinders save lives..more than a single..since 1968..this 914 should have never passed scca insp. with a single cyl....the end
Posted by: dan10101 Feb 10 2019, 06:25 PM
Tony you are correct ,,but if you look at rsr pedal assembly you will see its no mystery..the pedal assy. I have shown was done by a well known fabricator in AZ...its no cobbled together piece...but your right write a check...the skies the limit...maybe you should have chimed in earlier....just saying..race on
btw it worked great for 2 other owners,,my son is a foot taller . so I made an adjustable pedal assy...
I like that pedal assembly. It places the clutch further left allowing me to spread my legs a bit. Cause, apparently you have to have big jewels to drive these cars. I hope to find out some day...
Posted by: burton73 Feb 11 2019, 01:34 PM
Dan has a project on his hands...its not too late. Correct, I have not been here for awhile and have missed the "happenings" over the last 8-12 months. Obviously, no matter who is modifying and re-defining a pedal system - it still is piece used in different manner. My suggestions is simply to use a "system" that is manufactured for a singular purpose - a race style pedal system. Other than than the steering wheel and equally important - a driver has more interface with the controls than anything else. Kind of important...eh?
T
Dan,
Pictures of set up. Tony says get the reservoir with the AN fitting.
Bob B
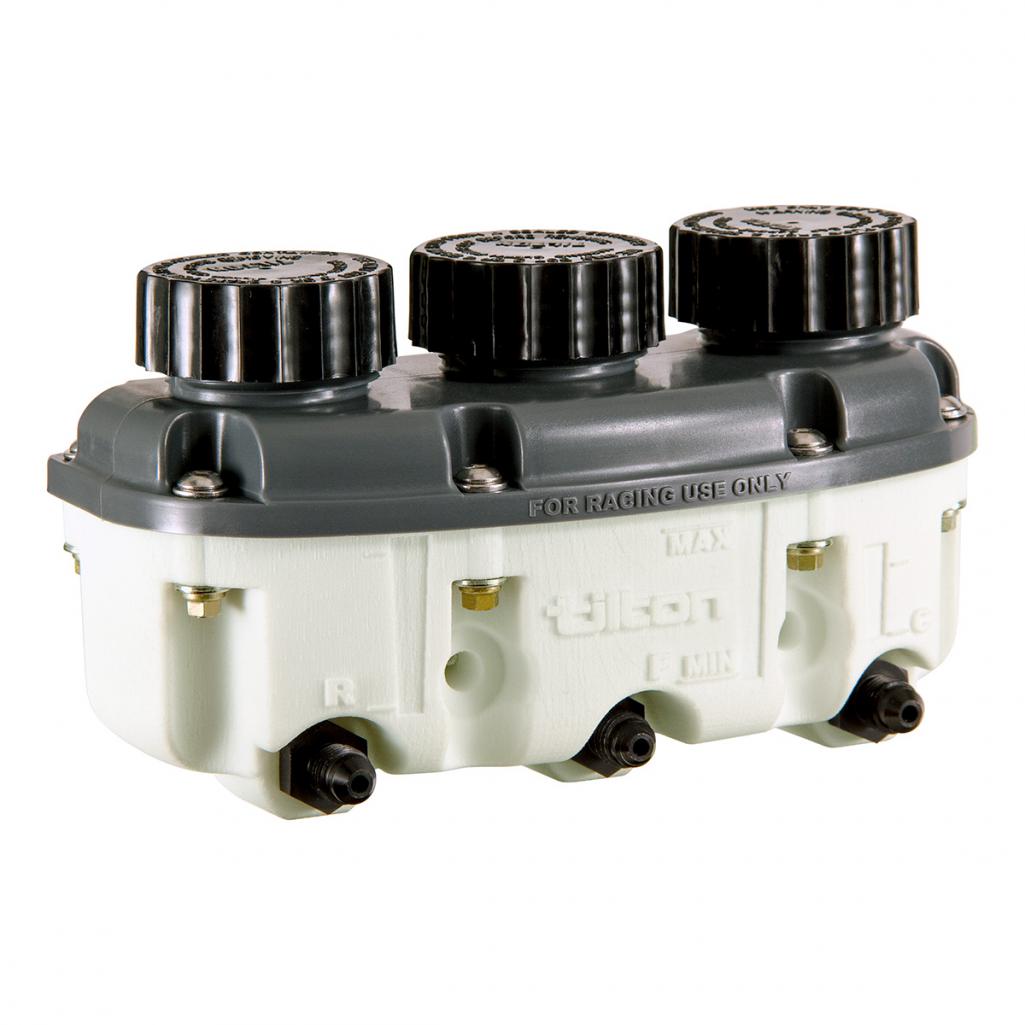
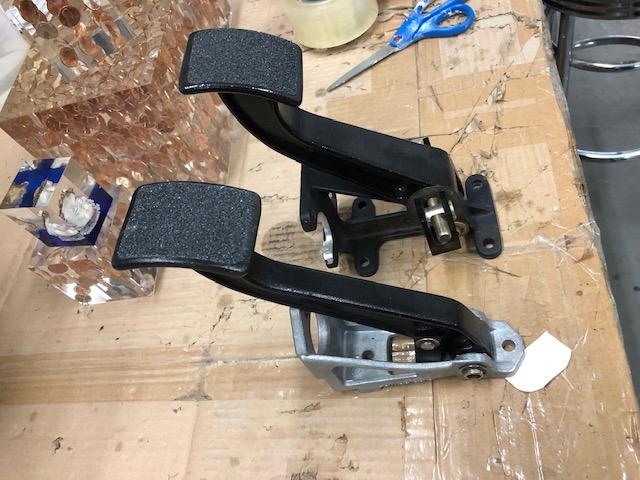
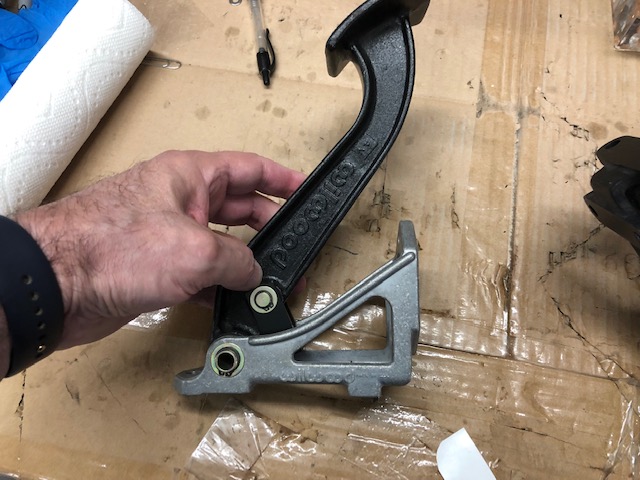
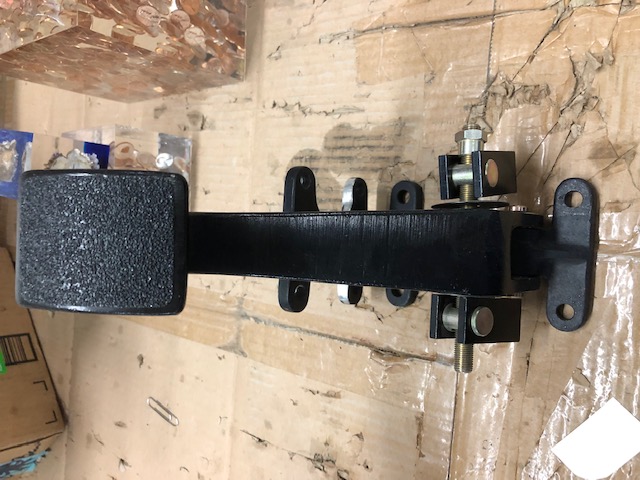
Posted by: Cracker Feb 11 2019, 03:48 PM
You are correct...! I believe I was telling Chris/Tygaboy once upon a time.
T
Pictures of set up. Tony says get the reservoir with the AN fittings.
Posted by: burton73 Feb 11 2019, 06:03 PM
You are correct...! I believe I was telling Chris/Tygaboy once upon a time.
T
Pictures of set up. Tony says get the reservoir with the AN fittings.
You were telling me. Thank for that info. AM fittings = no leak
Bob B
Posted by: Cracker Feb 11 2019, 06:23 PM
Indeed. It is one of the retrofits I need to do on my car...!
T
You are correct...! I believe I was telling Chris/Tygaboy once upon a time.
T
Pictures of set up. Tony says get the reservoir with the AN fittings.
You were telling me. Thank for that info. AM fittings = no leak
Bob B
Posted by: sixnotfour Feb 11 2019, 06:34 PM
No disagreement...Dan's and the previous owner was ..ya it was on my Option list....Me , I love my tilton pedal assembley... But talk of budget and down the road Is my main Concern...For Dan..therefore the before mentioned options..that are not cobbled together...his most cost effective is to buy the 22 0r 23 masters... but budget allowing the single pedal mount with dual cylinders is best... $$
Posted by: Zippy69 Feb 11 2019, 08:30 PM
Dan,
The main reason I switched out the cobbeled together/modified 914 pedal assembly that was in the car in the first place for a Wilwood 2 pedal assembly was because it wasn't allowing enough throw for the clutch. Hydraulic ratios were wrong in master and slave. 930 release arm parts were worn out. Clutch disc was wrong. Slave cylinder mounting was wrong allowing side loading... All of this and more resulted in pedal effort being maxed out so the builders answer was to weld on a huge brake pedal to the clutch pedal arm and triangulate the clutch pedal assembly in efforts to take the load. This just served to crack the floor allowing for more slop into the system. The builder car went thru many clutches as a result of the clutch not entirely disengaging. I went thru a few iterations myself prior to totally re-engineering the entire clutch system. Just be careful whatever pedal system that you decide on that the clutch will have enough throw and is adjusted properly. Any slop in the clutch will not allow it to do it's job.
BTW As mentioned in my previous post...I am in agreement for safety dual masters on brake system is a very good idea. The reason it was on my "optional" list (probably a bad choice of words) is because we were concentrating on rebuilding many other systems in the car to get it running properly and I just never got to it. Safety is why we chose Wilwood pedal and compact master assembly, routed hydraulic brake lines inside the car in the tunnel instead of under the floor like it was originally routed by the builder. Additionally we re redid all brake fittings/lines and capped this with a carbon skid plate that did it's job protecting the brake system in the accident.
Cheers,
Paul
Posted by: Cracker Feb 11 2019, 08:55 PM
I should've used a different word...I didn't mean to insult. I like your alternate description Paul - modified.
T
Posted by: dan10101 Feb 12 2019, 01:47 AM
Dan,
The main reason I switched out the cobbeled together/modified 914 pedal assembly that was in the car in the first place for a Wilwood 2 pedal assembly was because it wasn't allowing enough throw for the clutch. Hydraulic ratios were wrong in master and slave. 930 release arm parts were worn out. Clutch disc was wrong. Slave cylinder mounting was wrong allowing side loading... All of this and more resulted in pedal effort being maxed out so the builders answer was to weld on a huge brake pedal to the clutch pedal arm and triangulate the clutch pedal assembly in efforts to take the load. This just served to crack the floor allowing for more slop into the system. The builder car went thru many clutches as a result of the clutch not entirely disengaging. I went thru a few iterations myself prior to totally re-engineering the entire clutch system. Just be careful whatever pedal system that you decide on that the clutch will have enough throw and is adjusted properly. Any slop in the clutch will not allow it to do it's job.
BTW As mentioned in my previous post...I am in agreement for safety dual masters on brake system is a very good idea. The reason it was on my "optional" list (probably a bad choice of words) is because we were concentrating on rebuilding many other systems in the car to get it running properly and I just never got to it. Safety is why we chose Wilwood pedal and compact master assembly, routed hydraulic brake lines inside the car in the tunnel instead of under the floor like it was originally routed by the builder. Additionally we re redid all brake fittings/lines and capped this with a carbon skid plate that did it's job protecting the brake system in the accident.
Cheers,
Paul
Thanks Paul.
I will pay close attention the the clutch in whatever solution I end up with.
A safe brake system is a must.
Posted by: Zippy69 Feb 12 2019, 11:31 AM
I should've used a different word...I didn't mean to insult. I like your alternate description Paul - modified.
T
No Offense taken.
I prefer to call this pedal assembly cobbled together lol
Attached thumbnail(s)
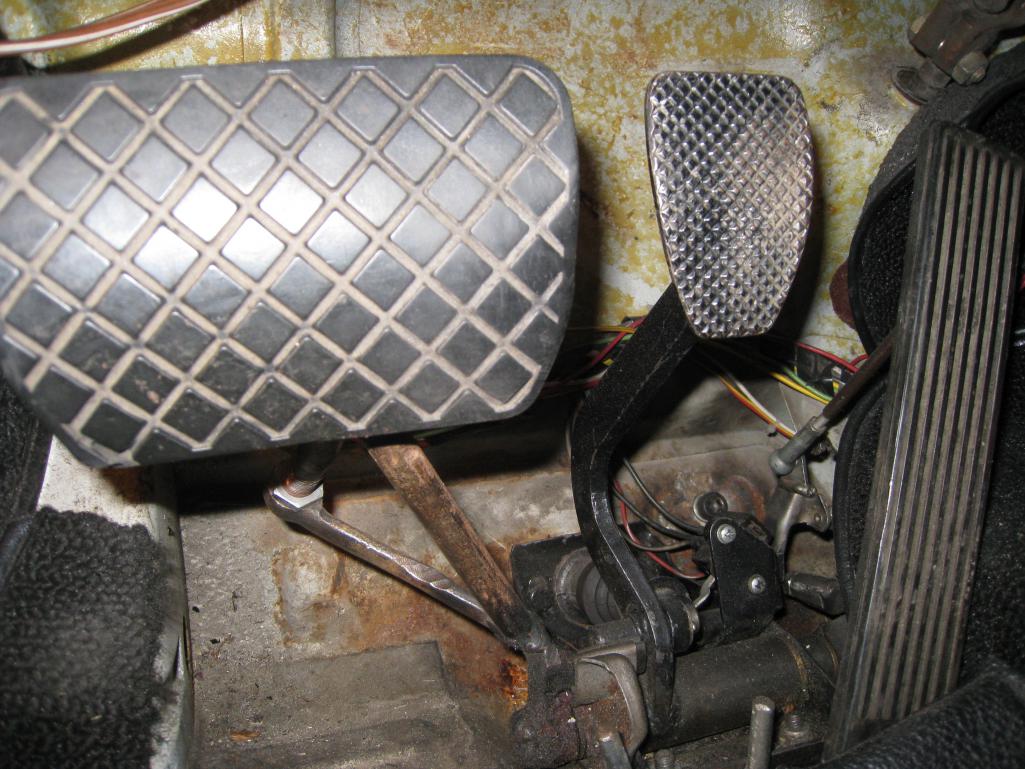
Posted by: dan10101 Feb 15 2019, 10:57 PM
I promised more pictures.
So here is the inner fenders. One has a seam down the front side of the sway bar bushing. The other has some connecting welds, but is basically one solid piece. I choose to not grind them down perfectly as it would weaken the already thin sheetmetal. I made several decisions for strength rather than concours perfection. (plus I'm lazy)... 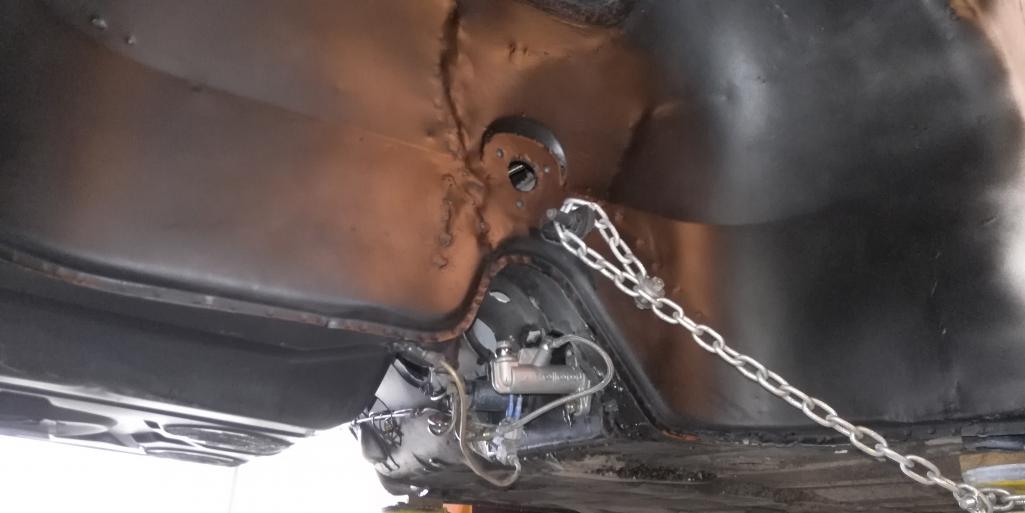
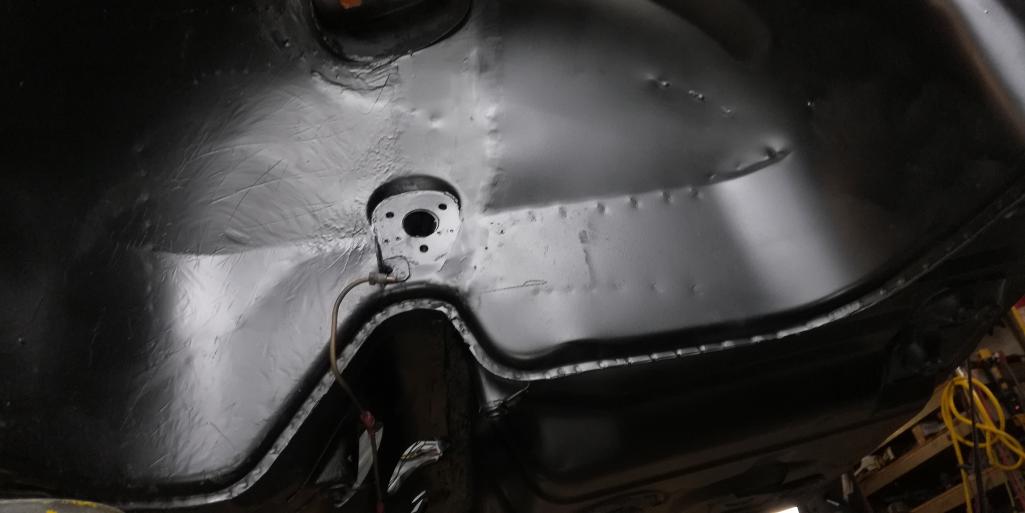
Prior to assembly I decided to paint the frunk prior to assembly like normal people. For some sily reason I thought I was going to paint the whole front end altogether. But, that would require fully disassembling the many bits in the frunk. (again, I'm lazy.)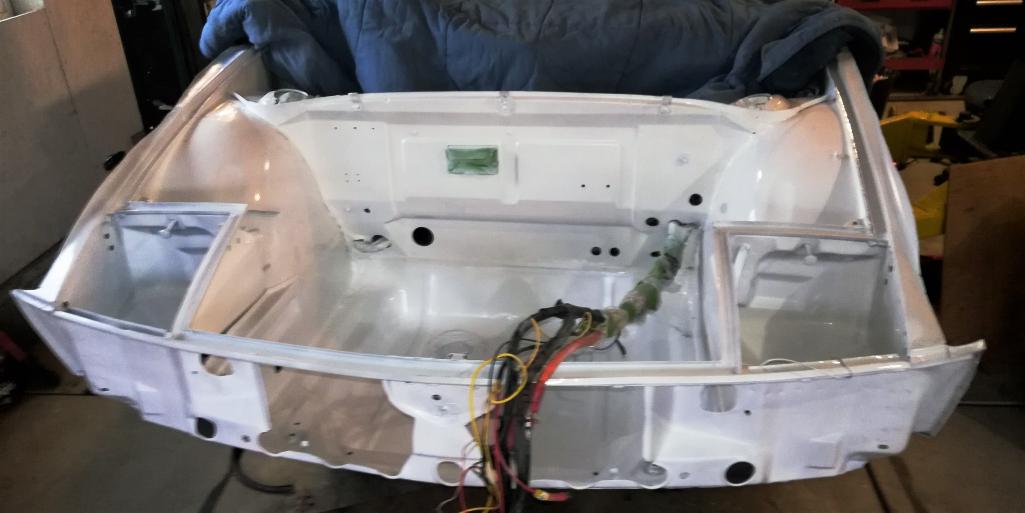
See the next post for more pictures..
Posted by: djway Feb 15 2019, 11:13 PM
Spray with heavy coats of truck bedliner. This will protect the wheel well from chipping, will quiet the car, and it will help hide the seams.
Posted by: dan10101 Feb 15 2019, 11:17 PM
Part 2
I began reassembly!!!
The front section is almost ready. (these pictures are a few hours behind)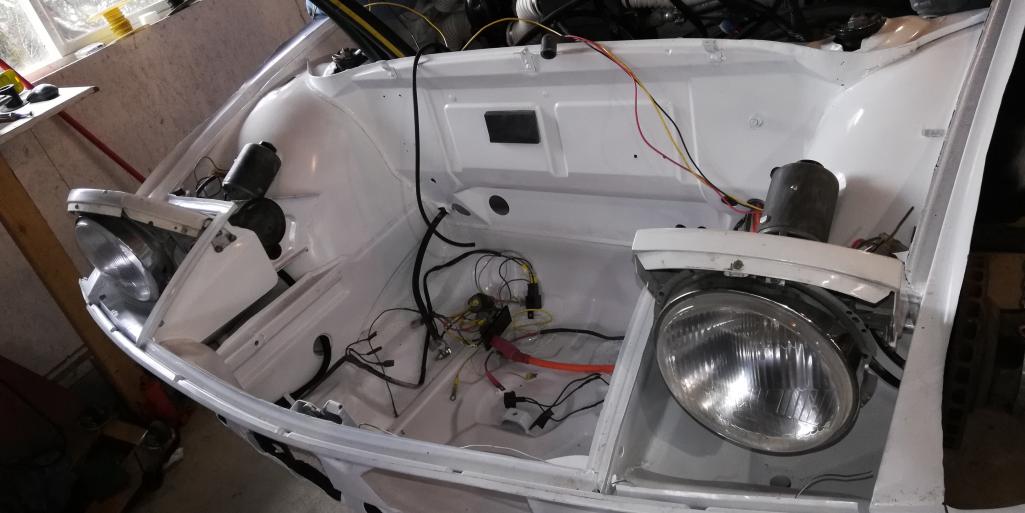
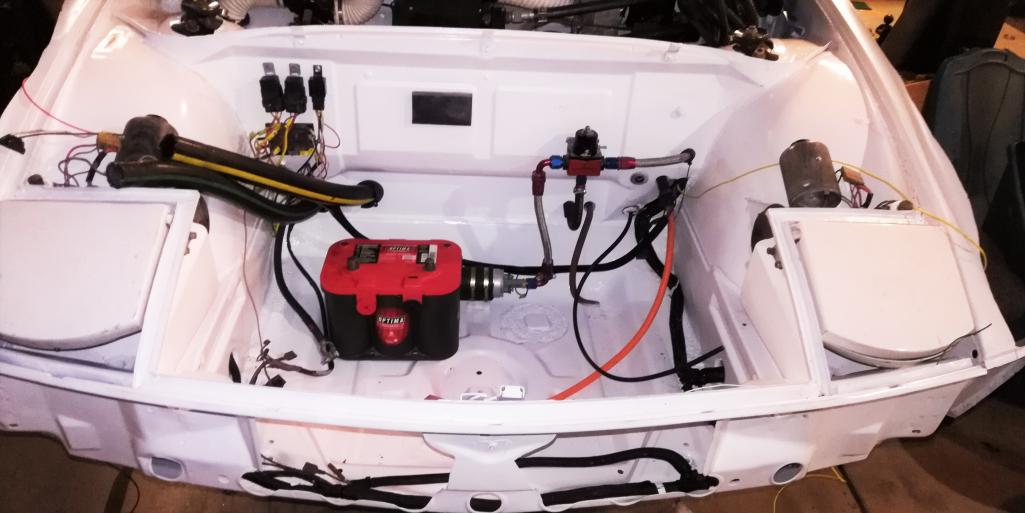
I finished up the rear end, starter, wiring, drive shafts, parking brake cable(that was fun). Rear calipers. I didn't install the mufflers, I have to decide if runing it without the mufflers is more important than being able to hear to motor should something go wrong. I still need to tune it up, but that is actually minor stuff. 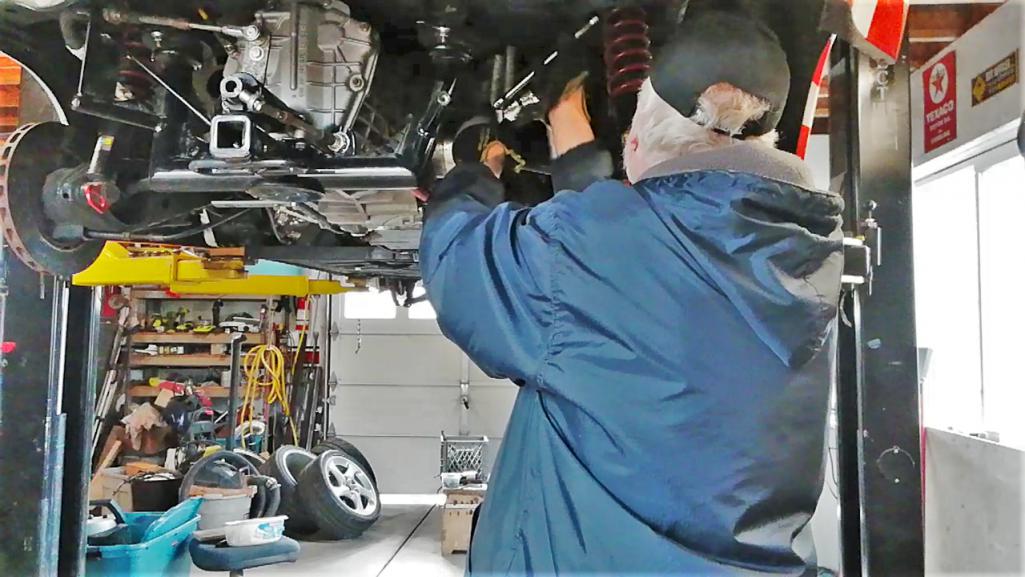
I also removed the back half of the vinyl graphics. I'll likely remove the right side as well and just leave the stripes for now. I started using an eraser wheel on a drill, but took a suggestion from a friend and used a heat gun. It worked well, but it's very fine line between too hot and not hot enough. 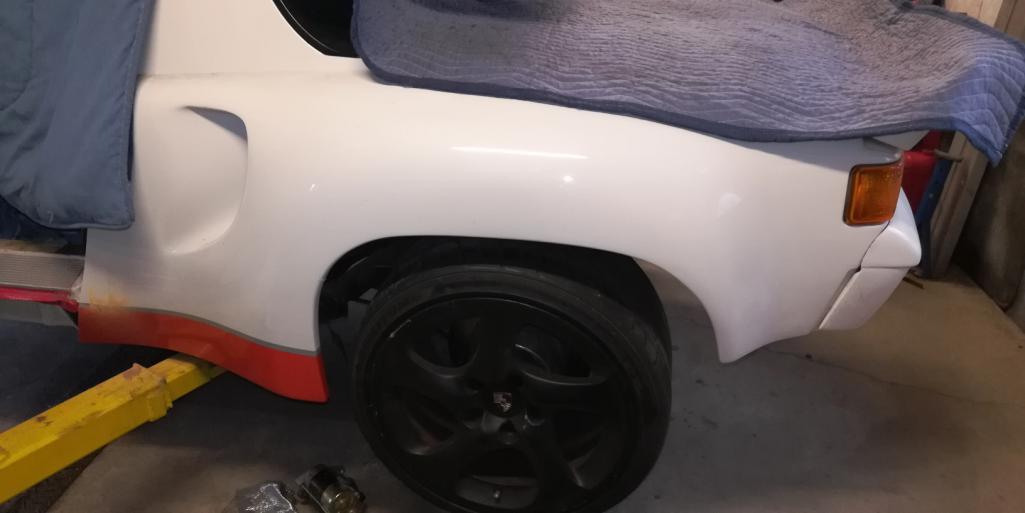
I picked up the repaired radiator today, (it was bent up a bit)
So I'll drill some mounting holes and work on placement along with the GT40 air exit ramp.
Posted by: dan10101 Feb 15 2019, 11:32 PM
Spray with heavy coats of truck bedliner. This will protect the wheel well from chipping, will quiet the car, and it will help hide the seams.
I'm pretty sure that's what was on there before. I was actually thinking of doing the undercarriage in white, But Papa Smurf's thread made much more sense to do it in black to hide the true purpose.
Posted by: djway Feb 16 2019, 01:25 AM
Spray with heavy coats of truck bedliner. This will protect the wheel well from chipping, will quiet the car, and it will help hide the seams.
I'm pretty sure that's what was on there before. I was actually thinking of doing the undercarriage in white, But Papa Smurf's thread made much more sense to do it in black to hide the true purpose.
You can get Upol Raptor in white which what I used
Posted by: Andyrew Feb 16 2019, 04:03 PM
Love the progress!!
Posted by: My 914 Feb 16 2019, 04:47 PM
Spray with heavy coats of truck bedliner. This will protect the wheel well from chipping, will quiet the car, and it will help hide the seams.
I'm pretty sure that's what was on there before. I was actually thinking of doing the undercarriage in white, But Papa Smurf's thread made much more sense to do it in black to hide the true purpose.
I think black will look good under a white car.
Posted by: dan10101 Feb 16 2019, 07:33 PM
Love the progress!!
Me too!
I installed the radiator and fans today. I also test fit the GT scoop. I'll need to fab up some trim pieces to funnel the air thru the radiator. Also I need to test fit the hood to make sure it clears. The gas tank is in I'll need to make sure the hoses are playing nice under it all.
Progress is good...
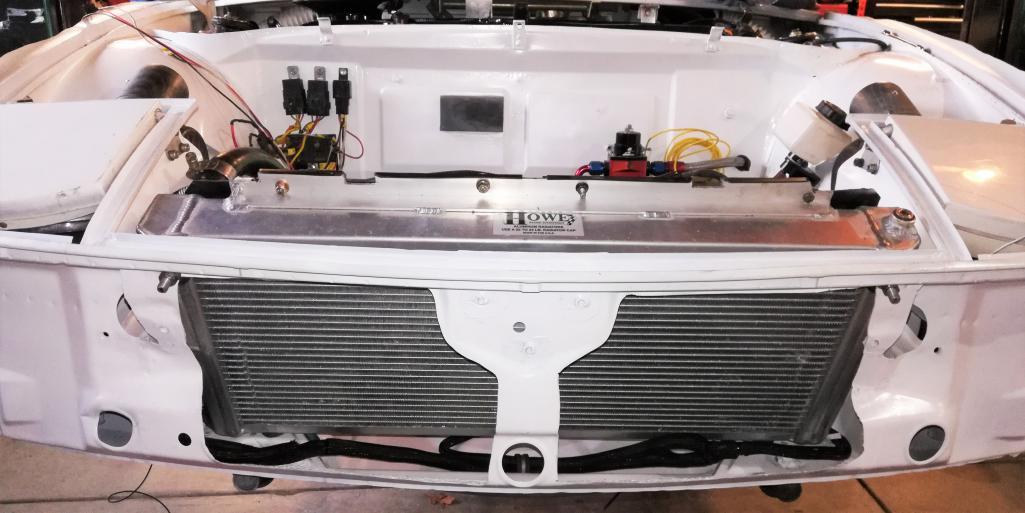
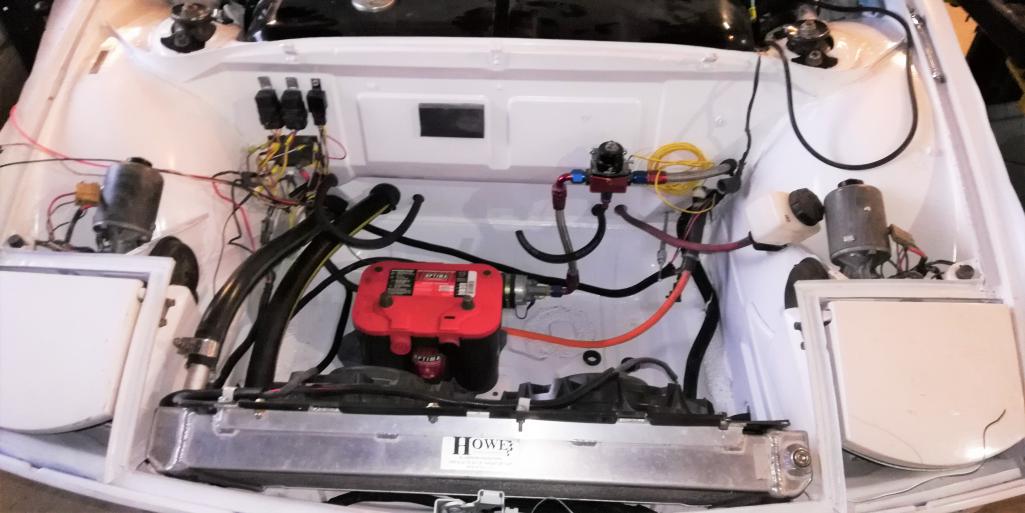
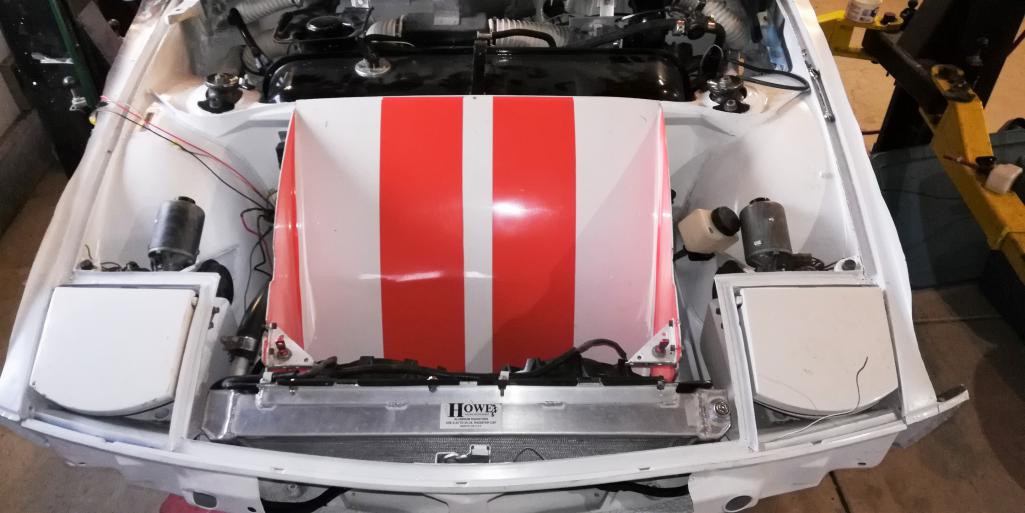
Posted by: sixnotfour Feb 16 2019, 11:47 PM
Posted by: burton73 Feb 17 2019, 11:32 AM
Great progress with your car. May she run straight and true for you. Nice work!!
Bob B
Posted by: JRust Feb 18 2019, 02:15 PM
Wow Dan that radiator has a nice profile. Has to be pretty short to fit between the buckets upright like that? What are its dimensions? That would save me a good 6-8" of space. I'd actually have a front trunk I could use a bit that way . I picked up another radiator I will play with some. Still waiting to get my car back so can't do much with it now. Just sitting on the shelf in a box
Posted by: mepstein Feb 18 2019, 02:44 PM
Nice work. Looks good.
Yea, If you don't mind posting the radiator info, it would be appreciated. Thanks
Posted by: dan10101 Feb 18 2019, 06:33 PM
Radiator is custom from Howe Racing Enterprises. So you can see why I chose to repair rather than replace. Plus it reportedly does a great job.
It's 12.25 tall. 30" wide. The core is 2.5" wide and the tanks are a bit over 3" . It is a dual pass radiator with the start and finish on the pass side. It could possibly be up to 2" wider but not necessary.
I need to fab up some air block off plates to keep the air going only thru the radiator. The GT40 scoop seems to fit well and still give lots of room for the battery and other accessories.
Posted by: Cracker Feb 19 2019, 10:34 AM
Looking good Dan!
Regarding "cooling" and line sizing...since the radiator is on-topic. I run 1" OD supply/return; run wide open for extended time and run sufficiently adequate temps. Just a little info for others doing conversions...
T
Posted by: dan10101 Feb 19 2019, 12:00 PM
Looking good Dan!
Regarding "cooling" and line sizing...since the radiator is on-topic. I run 1" OD supply/return; run wide open for extended time and run sufficiently adequate temps. Just a little info for others doing conversions...
T
Thanks Tony. That's what this is all about.
Hey, do you have pictures of your seat mod for more headroom?
I think I have enough by mounting the seat directly to the floor, but I like to explore options.
Posted by: Cracker Feb 19 2019, 06:58 PM
Hey, do you have pictures of your seat mod for more headroom?
I think I have enough by mounting the seat directly to the floor, but I like to explore options.
Dan,
All we did was notch the floor-pan on three sides leaving the front intact. It was slightly larger than the width of the seat. I then sat in the seat with helmet and targa top on and bent the floor pan down until I achieved the ideal height. A panel (wedge-like) was then welded in to take up the gap between the floorpan section. Make sense?
I then mounted to seat in three places (none to the floor); on the console and rocker on the front of the seat and to the roll-bar on the rear. Rough as it is...you can see the notch and outer seat mount in the picture below. It doesn't take much to lower the seat significantly...at 6'5" the 1" drop at the deepest point made a huge difference! Its hard to see in the second picture but I have about 2"-3" between my helmet and the roof - a gob of room for someone of my height in a teener! Mepstein can barely see over the dash...as I recall! LOL.
Feel free to message me if there is anything I can help with...
T
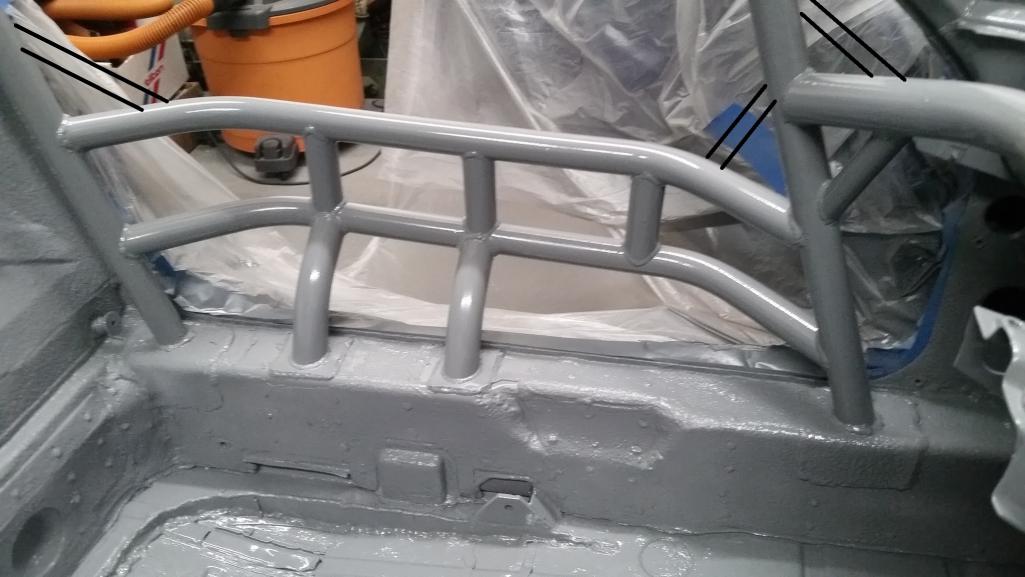
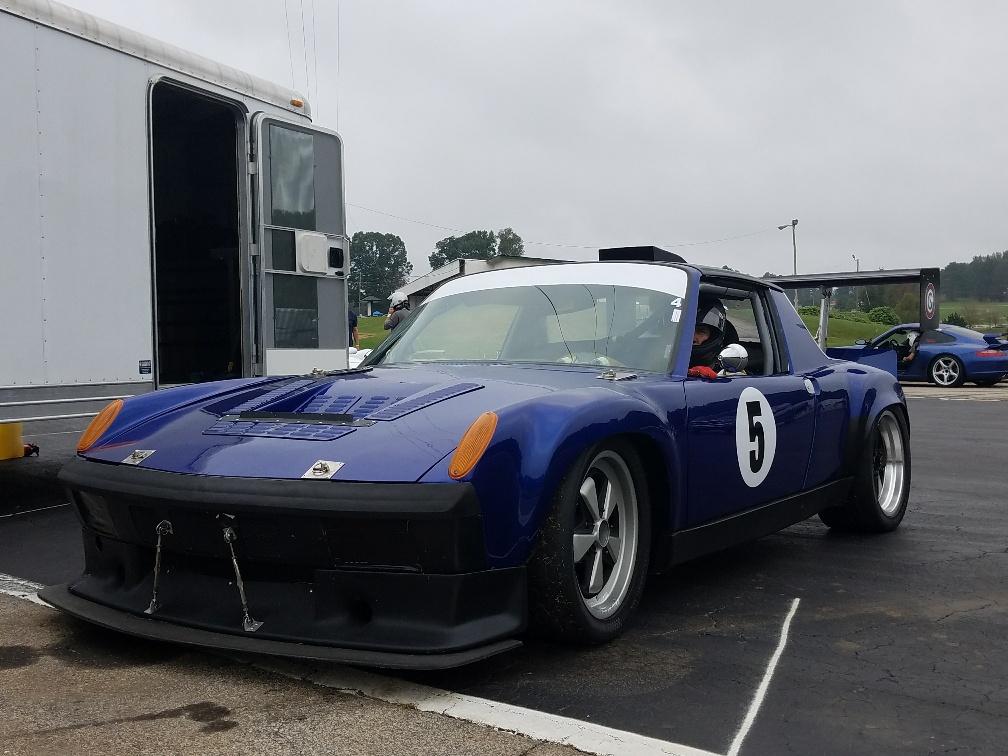
Posted by: dan10101 Feb 19 2019, 07:41 PM
Hey, do you have pictures of your seat mod for more headroom?
I think I have enough by mounting the seat directly to the floor, but I like to explore options.
Dan,
All we did was notch the floor-pan on three sides leaving the front intact. It was slightly larger than the width of the seat. I then sat in the seat with helmet and targa top on and bent the floor pan down until I achieved the ideal height. A panel (wedge-like) was then welded in to take up the gap between the floorpan section. Make sense?
I then mounted to seat in three places (none to the floor); on the console and rocker on the front of the seat and to the roll-bar on the rear. Rough as it is...you can see the notch and outer seat mount in the picture below. It doesn't take much to lower the seat significantly...at 6'5" the 1" drop at the deepest point made a huge difference! Its hard to see in the second picture but I have about 2"-3" between my helmet and the roof - a gob of room for someone of my height in a teener! Mepstein can barely see over the dash...as I recall! LOL.
Feel free to message me if there is anything I can help with...
T
Thanks for the reply.
Did you mount on factory sliders or directly to the floor?
I was thinking the same thoughts.
I actually finished my direct to floor mounts today. That puts me plenty low, but no sliders. I may go with this for now and then decide if I'm going to raise the main roll bar. That's another can of worms I'm not ready to tackle right now.
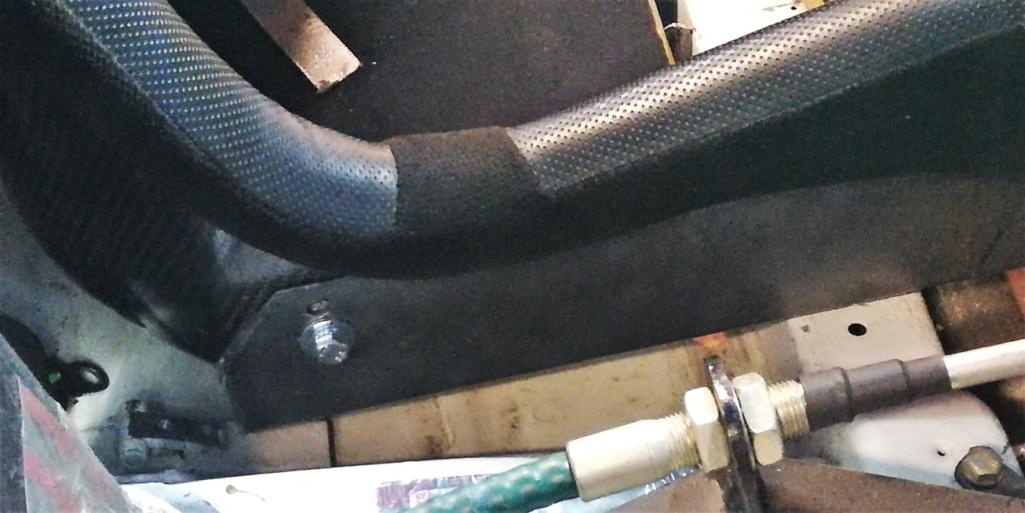
Posted by: Cracker Feb 19 2019, 07:53 PM
[quote name='dan10101' date='Feb 19 2019, 08:41 PM' post='2690622']
[/quote]
Did you mount on factory sliders or directly to the floor?
[/quote]
Umm, people may "sit" in my car but nobody else drives it - the seat is fixed.
T
Posted by: mepstein Feb 19 2019, 08:36 PM
[quote name='Cracker' date='Feb 19 2019, 08:53 PM' post='2690625']
[quote name='dan10101' date='Feb 19 2019, 08:41 PM' post='2690622']
[/quote]
Did you mount on factory sliders or directly to the floor?
[/quote]
Umm, people may "sit" in my car but nobody else drives it - the seat is fixed.
T
[/quote]
I sat in it but felt like a little kid trying to see over the dash.
Posted by: dan10101 Feb 19 2019, 08:48 PM
I sat in it but felt like a little kid trying to see over the dash.
I think I'm at that point, So it must be low enough.
Posted by: Andyrew Feb 19 2019, 10:35 PM
I sat in it but felt like a little kid trying to see over the dash.
I think I'm at that point, So it must be low enough.
I'll carry a small pillow with me
Posted by: dan10101 Feb 19 2019, 11:10 PM
I'll carry a small pillow with me
Well, that's without the seat pad. But. you might still want the pillow.
Besides Andrew, the only other person I would let drive my car would be my wife, but then I would be putting about a 1/4 throttle stop on the car and a boatload of pillows.
Posted by: Zippy69 Feb 20 2019, 10:02 AM
Dan,
I spray glued a 1/4" foam pad under seat cushion that you may want to remove if you didn't notice it.
Paul
Posted by: Zippy69 Feb 20 2019, 10:38 AM
Radiator is custom from Howe Racing Enterprises. So you can see why I chose to repair rather than replace. Plus it reportedly does a great job.
It's 12.25 tall. 30" wide. The core is 2.5" wide and the tanks are a bit over 3" . It is a dual pass radiator with the start and finish on the pass side. It could possibly be up to 2" wider but not necessary.
I need to fab up some air block off plates to keep the air going only thru the radiator. The GT40 scoop seems to fit well and still give lots of room for the battery and other accessories.
Here are a few thing that come to mind...
This Howe dual pass radiator works great! Engine never runs hot even on the hottest of days. Of course I had block off plates around the radiator, the front bumper was cut out to allow for more airflow. Additionally the radiator fans are thermostatically controlled. There is also a fan override switch to keep them on constantly in front of the center console. I used this when racing. Probably not necessary but they are there as an extra precaution.
Heat in the car is another story as it is a very hot place to sit. The hot air from the fans on the radiator rotors over the windshield into the cabin with the targa top off. Heat comes up into the cabin from hot radiator hoses in the rockers. Heat comes directly from engine thru firewall even with the heat shielding that I installed. I laughed any time someone asked me if the heat in the car works! Oh yeah it works. I put some hose vents outside by rear view mirrors in an attempt to get some air to driver and passenger. They did ok at speed but needed a better mounting solution. AC would be great but would require a lot of work. Perhaps a better blower fan and cool air inlets could be fabricated to help? Of course if the primary use of this car is as a race car then comfort in the cabin is less of a concern.
As far as the GT40 scoop is concerned... It fits well and has plenty of room underneath in fact the previous owner had a donut spare ratchet tied under it over the battery on an angle with the top of the tire resting on the rectangle foam pad on the firewall in front of the gas tank. The only thing that I was going to change on the scoop is the three mounting screws and brackets. I feel that could be attached cleaner with dzus fasteners? Another thing that was on my optional list that never got done.
Hope these observations help.
Paul
Posted by: dan10101 Feb 20 2019, 11:10 AM
Radiator is custom from Howe Racing Enterprises. So you can see why I chose to repair rather than replace. Plus it reportedly does a great job.
It's 12.25 tall. 30" wide. The core is 2.5" wide and the tanks are a bit over 3" . It is a dual pass radiator with the start and finish on the pass side. It could possibly be up to 2" wider but not necessary.
I need to fab up some air block off plates to keep the air going only thru the radiator. The GT40 scoop seems to fit well and still give lots of room for the battery and other accessories.
Here are a few thing that come to mind...
This Howe dual pass radiator works great! Engine never runs hot even on the hottest of days. Of course I had block off plates around the radiator, the front bumper was cut out to allow for more airflow. Additionally the radiator fans are thermostatically controlled. There is also a fan override switch to keep them on constantly in front of the center console. I used this when racing. Probably not necessary but they are there as an extra precaution.
Heat in the car is another story as it is a very hot place to sit. The hot air from the fans on the radiator rotors over the windshield into the cabin with the targa top off. Heat comes up into the cabin from hot radiator hoses in the rockers. Heat comes directly from engine thru firewall even with the heat shielding that I installed. I laughed any time someone asked me if the heat in the car works! Oh yeah it works. I put some hose vents outside by rear view mirrors in an attempt to get some air to driver and passenger. They did ok at speed but needed a better mounting solution. AC would be great but would require a lot of work. Perhaps a better blower fan and cool air inlets could be fabricated to help? Of course if the primary use of this car is as a race car then comfort in the cabin is less of a concern.
As far as the GT40 scoop is concerned... It fits well and has plenty of room underneath in fact the previous owner had a donut spare ratchet tied under it over the battery on an angle with the top of the tire resting on the rectangle foam pad on the firewall in front of the gas tank. The only thing that I was going to change on the scoop is the three mounting screws and brackets. I feel that could be attached cleaner with dzus fasteners? Another thing that was on my optional list that never got done.
Hope these observations help.
Paul
This is good info. Thanks.
I was wondering what that green button was for. It was on my "ask Paul list".
I was also wondering what the black momentary button on the right side of the steering wheel was for. Well actually it's been so long that I've owned 914 I don't know what the orange buttons are for. I'm guessing the left side is for fog lights. but I don't know what the one next to the lighter plug does.
I'll have to pay attention to air flow and sealing it best as I can.
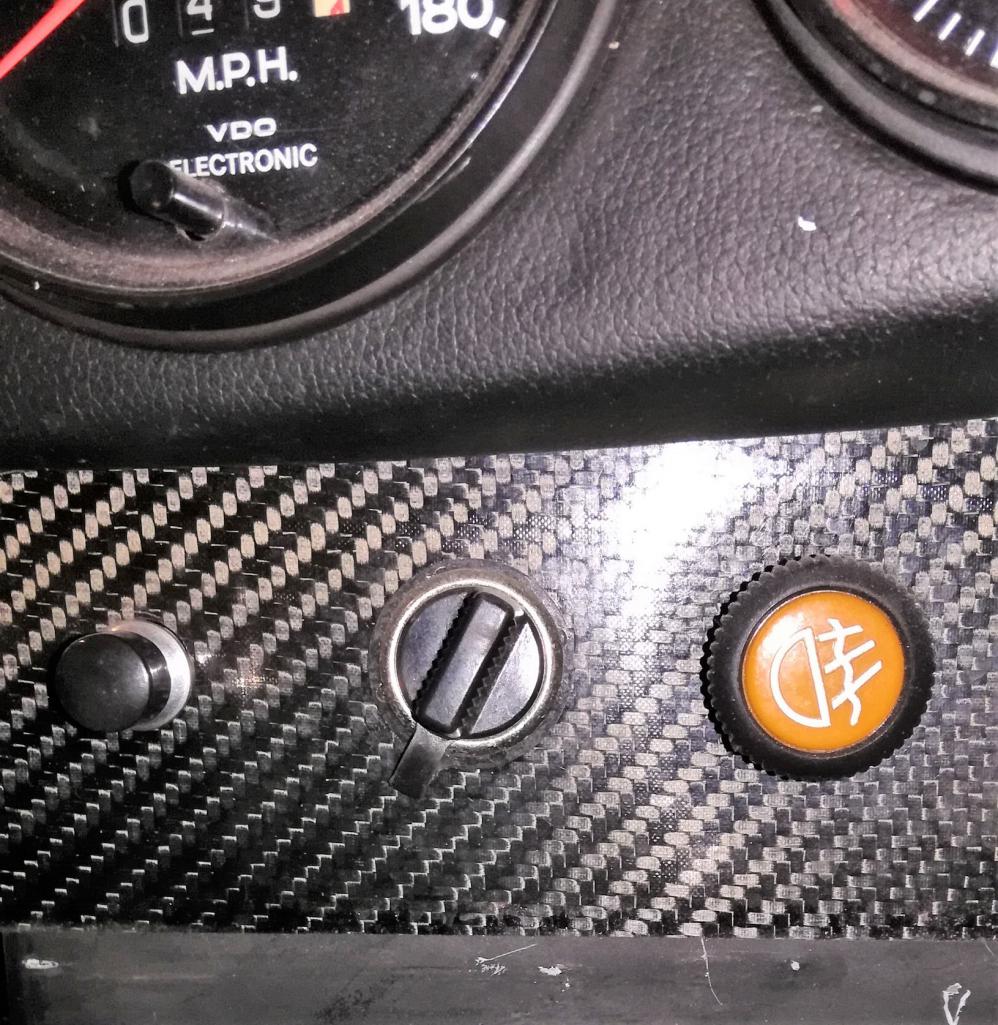
Posted by: Zippy69 Feb 20 2019, 01:45 PM
Radiator is custom from Howe Racing Enterprises. So you can see why I chose to repair rather than replace. Plus it reportedly does a great job.
It's 12.25 tall. 30" wide. The core is 2.5" wide and the tanks are a bit over 3" . It is a dual pass radiator with the start and finish on the pass side. It could possibly be up to 2" wider but not necessary.
I need to fab up some air block off plates to keep the air going only thru the radiator. The GT40 scoop seems to fit well and still give lots of room for the battery and other accessories.
Here are a few thing that come to mind...
This Howe dual pass radiator works great! Engine never runs hot even on the hottest of days. Of course I had block off plates around the radiator, the front bumper was cut out to allow for more airflow. Additionally the radiator fans are thermostatically controlled. There is also a fan override switch to keep them on constantly in front of the center console. I used this when racing. Probably not necessary but they are there as an extra precaution.
Heat in the car is another story as it is a very hot place to sit. The hot air from the fans on the radiator rotors over the windshield into the cabin with the targa top off. Heat comes up into the cabin from hot radiator hoses in the rockers. Heat comes directly from engine thru firewall even with the heat shielding that I installed. I laughed any time someone asked me if the heat in the car works! Oh yeah it works. I put some hose vents outside by rear view mirrors in an attempt to get some air to driver and passenger. They did ok at speed but needed a better mounting solution. AC would be great but would require a lot of work. Perhaps a better blower fan and cool air inlets could be fabricated to help? Of course if the primary use of this car is as a race car then comfort in the cabin is less of a concern.
As far as the GT40 scoop is concerned... It fits well and has plenty of room underneath in fact the previous owner had a donut spare ratchet tied under it over the battery on an angle with the top of the tire resting on the rectangle foam pad on the firewall in front of the gas tank. The only thing that I was going to change on the scoop is the three mounting screws and brackets. I feel that could be attached cleaner with dzus fasteners? Another thing that was on my optional list that never got done.
Hope these observations help.
Paul
This is good info. Thanks.
I was wondering what that green button was for. It was on my "ask Paul list".
I was also wondering what the black momentary button on the right side of the steering wheel was for. Well actually it's been so long that I've owned 914 I don't know what the orange buttons are for. I'm guessing the left side is for fog lights. but I don't know what the one next to the lighter plug does.
I'll have to pay attention to air flow and sealing it best as I can.
No Green push button is horn. (Weird spot I know)
Fan over ride is a pull switch in front of center console.
Yellow button in pic is Fog lights.
Black Button to left of Lighter I believe is Instrument lights?
Posted by: Zippy69 Feb 20 2019, 01:58 PM
See air scoop in middle of hood tunnel. My plan one day was to modify the hood tunnel and add a scoop for fresh cabin air just like the Ford GT see pic
Attached image(s)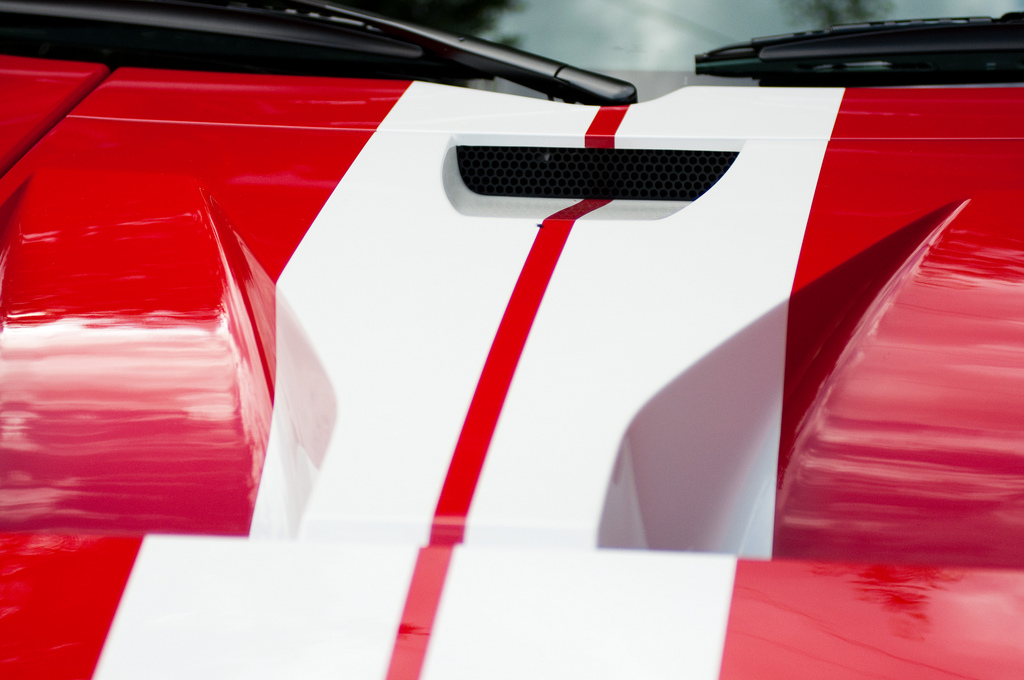
Posted by: dan10101 Feb 21 2019, 12:40 AM
i pulled the center console to give me some room to work on the drivers seat.
I made seat brackets and mounted the driver seat to the floor. I did remove that extra pad. Doing this will allow me to run with the stock seat pad and still not make contact with the roll bar under normal driving. For helmeted driving I'll remove the stock pad.
I also positioned the stock looking custom pedal cluster that I received from Chris W.
It does several things for me.
It moves the clutch and brake pedals closer to their original positions give or take an inch which moves me a step closer to having the steering wheel and pedals in front of the drivers seat and not off to the right.
It allows me to use dual brake master cylinders for redundancy.
It allows me to move the clutch master cylinder from the left side to the right side of the cluster similar to this custom unit. http://www.901shop.com/main/CustomProducts/BrakePedalAssys/tabid/65/Default.aspx
The biggest part of moving the clutch master is that at full droop the tie rod end contacts the clutch master when I tried to move it over further left in an earlier post.
The 2nd part of aligning the driving position is turning the seat slightly to face the steering wheel. It's still not perfect but it feels a lot better. The 3rd part will be to adjusting the mounting of the steering wheel to move it over a bit. I'll drive it first and see how it feels.
Does anyone else have this problem? 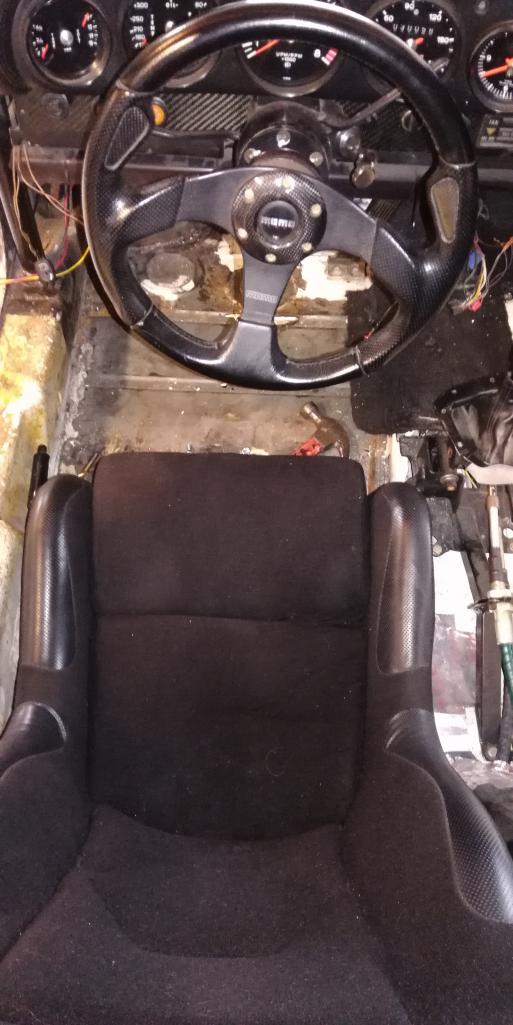
Posted by: ConeDodger Feb 21 2019, 01:02 AM
I'll carry a small pillow with me
Well, that's without the seat pad. But. you might still want the pillow.
Besides Andrew, the only other person I would let drive my car would be my wife, but then I would be putting about a 1/4 throttle stop on the car and a boatload of pillows.
It wouldn’t be the first 914 “possessed by the devil” that Andrew has driven!

Posted by: effutuo101 Feb 21 2019, 01:05 AM
I actually needed up angling both seats slightly towards the tunnel. My steering rack is a custome one off from Jeff H.
Posted by: dan10101 Feb 21 2019, 01:45 AM
I actually needed up angling both seats slightly towards the tunnel. My steering rack is a custome one off from Jeff H.
I would be interested in hearing more about the steering rack. I know Andrew would be too.
I don't think my angle is as far off as it looks in that picture, But if it is, I need to twist my seat more, or do something with the steering.
Posted by: Cracker Feb 21 2019, 07:16 AM
Yep, same here Dan...I came to the conclusion that how VW designed the interior - that was the best they could do. I'd rather have my seating position square with road than square with the steering wheel. I haven't crashed...yet.
T
Posted by: dan10101 Feb 21 2019, 09:40 AM
Yep, same here Dan...I came to the conclusion that how VW designed the interior - that was the best they could do. I'd rather have my seating position square with road than square with the steering wheel. I haven't crashed...yet.
T
I'm guessing when you don't have fitted seats, it's not as evident.
It's certainly crossed my mind too when I'm adjusting the seat. i didn't move it much, I can always change it later.
Posted by: sixnotfour Feb 21 2019, 10:25 AM
fixed seat, with lots of mini move options, no rear pivot mount.. kids these days
Attached image(s)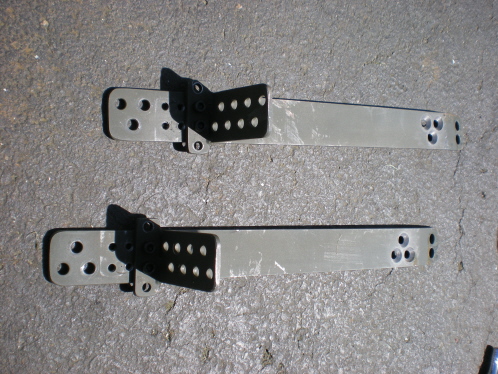
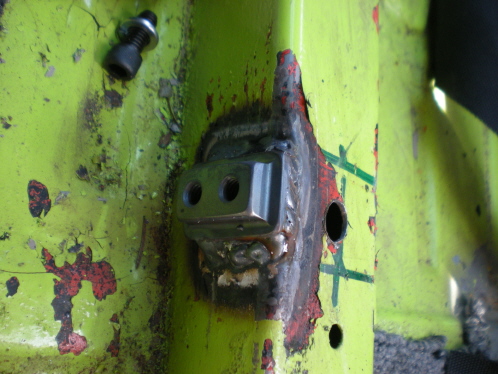
Posted by: dan10101 Feb 21 2019, 03:10 PM
fixed seat, with lots of mini move options, no rear pivot mount.. kids these days
That looks like it would be relatively easy to get in and out.
So it eliminates the rear pivot mount and bolts further back directly to the floorboard?
Makes it easier to start the bolts. Front mount too. I may be remaking my seat mounts...
Posted by: sixnotfour Feb 21 2019, 03:21 PM
fixed seat, with lots of mini move options, no rear pivot mount.. kids these days
That looks like it would be relatively easy to get in and out.
So it eliminates the rear pivot mount and bolts further back directly to the floorboard?
Makes it easier to start the bolts. Front mount too. I may be remaking my seat mounts...
yes there is a threaded flat bar welded across the back..to the floor
Posted by: dan10101 Mar 5 2019, 01:13 AM
A lot has happened.
Finished up the seats, pedals and master cylinders. Made new brake hard lines to plumb in 2 master cylinders. Bled front and back brakes.
I finished the prep work to make ready to attach the fiberglass front end. Fabbed up a mounting piece near the drivers door hinge using the stock fender piece. Then I cleaned off what I thought was fiberglass pieces on the passenger side same piece. However it was combination of the remainder of the fiberglass fender graduating to bondo to meet he fender edge. I'll be putting it back together with DTUZ fasteners initially. After a bit of time I'll determine if I want to bond it on permanently. 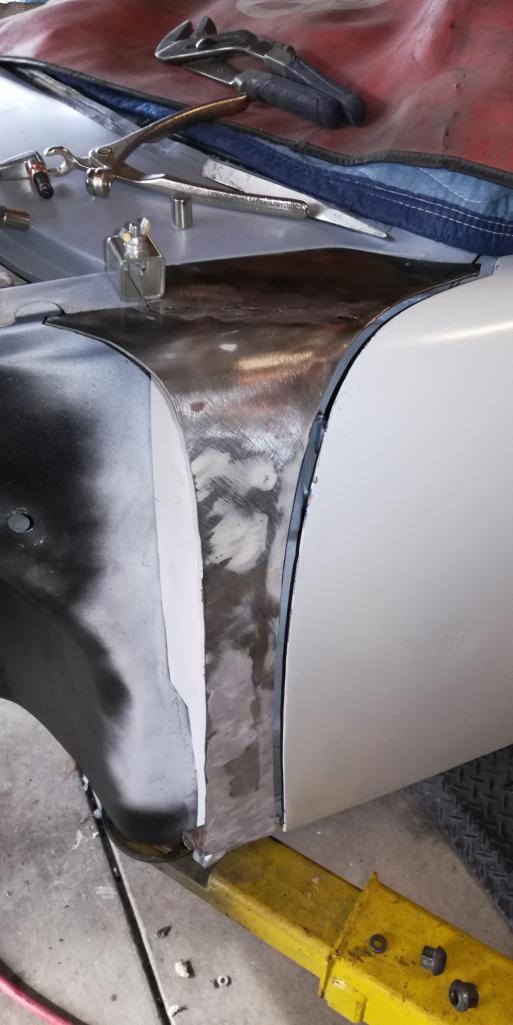
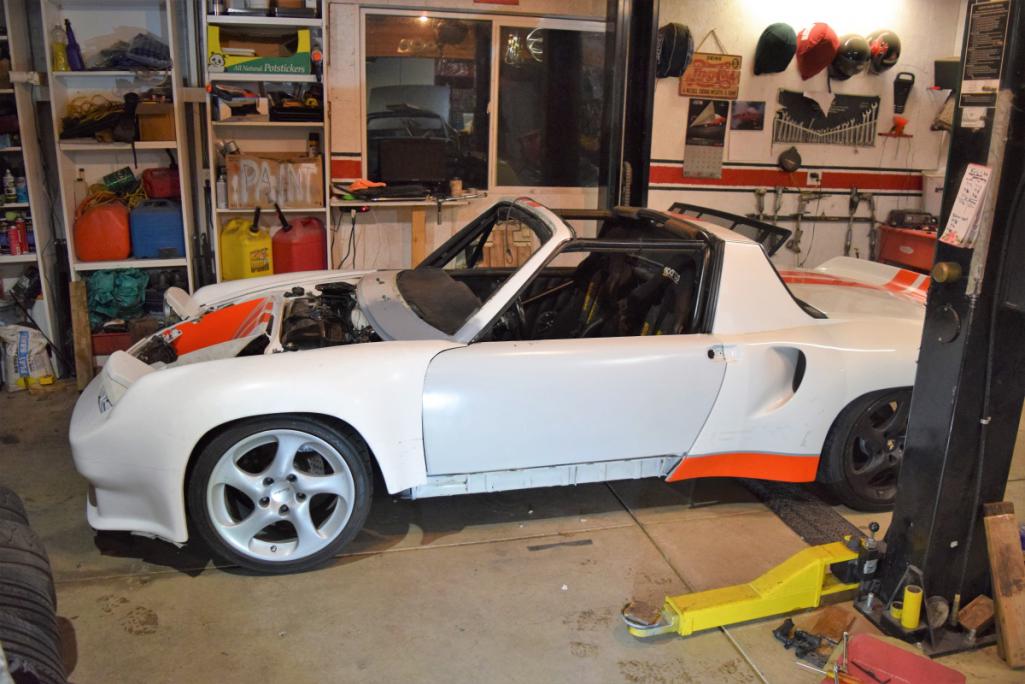
Did a bit of body work on the cowl to ready for the next step.
Primed the windshield seat and a buddy and I dropped the used windshield into place.
I plumbed the radiator, fuel tank and pump and wired the frunk. Still more wiring troubleshooting to do. The headlights always want to pop up with power applied. Plus I need to wire in the turn signals.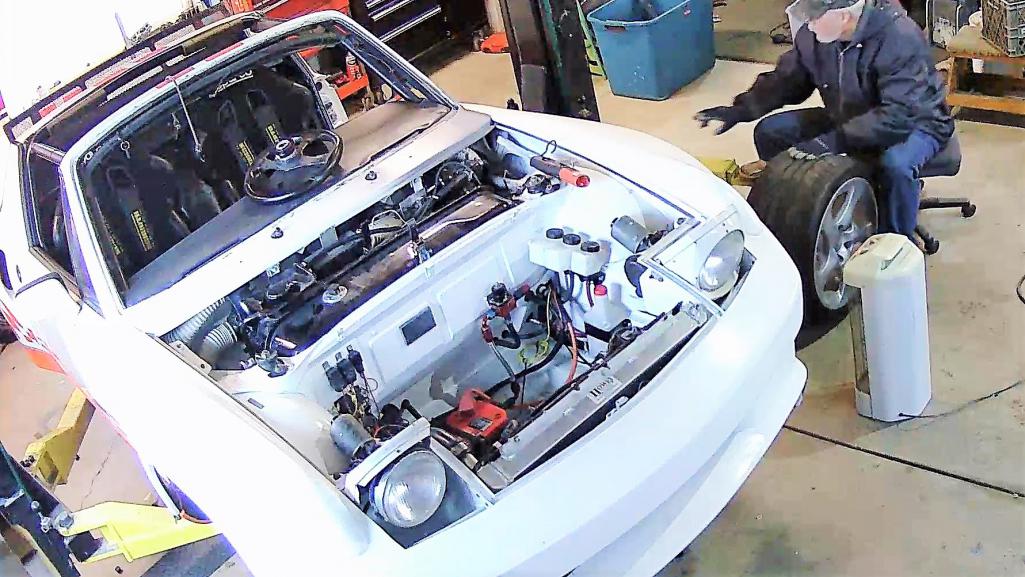
I re-positioned the radiator mounting so that the GT40 scoop would sit correctly. It's now mounted in place and the hood closes with the stock latch as well as the 2 Aux latches.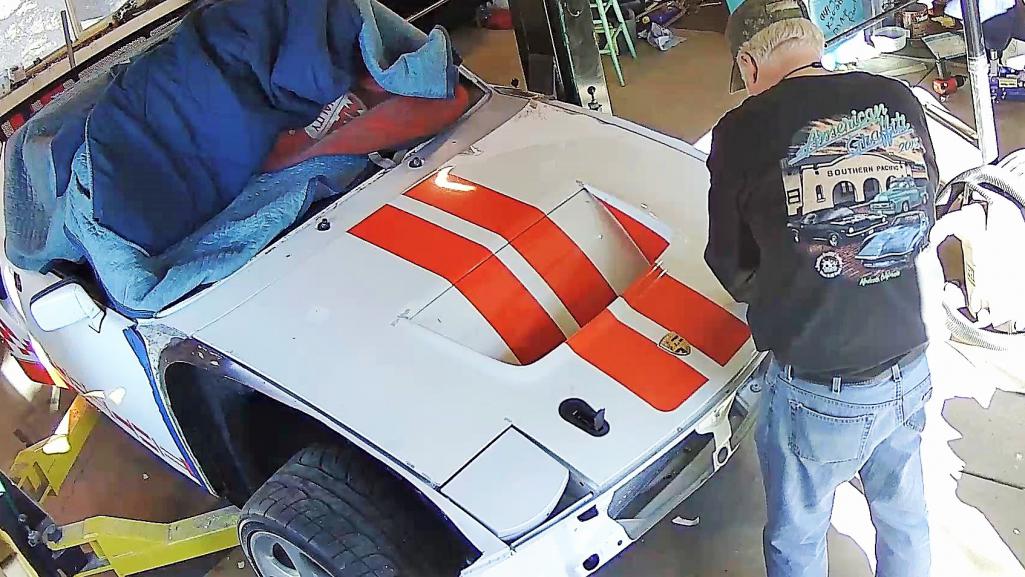
After Andrew got his 914 outlaw running this weekend, I got excited to try mine.
Today I added coolant and oil and gave the key a try. it would have started but I forgot gas... hmmm Oh, and connecting up the computer after all the welding I was doing. After that, VarOOOOOMMMMM. (no mufflers...)
Things to do... (there's still lots to do, but this is what I need to do to drive it..)
Cut out signal light openings in the fiberglass fender.
Wire in turn signals with quick disconnects.
Mount the fiberglass fender and bumper assembly
Take it to DMV for VIN inspection and hope they don't say WTF!!
1st race March 29th.
It's getting close...
Posted by: tygaboy Mar 5 2019, 09:14 AM
"VarOOOOOMMMMM"
Posted by: bbrock Mar 5 2019, 09:40 AM
Amazing amount of work in record time. Looks fantastic!
Posted by: Zippy69 Mar 6 2019, 10:49 AM
Starting to look like a car again! I am very happy to see the progress.
2 Quick Thoughts:
1. Mufflers - You might want to put the mufflers back on before bringing to DMV!lol. Before you put mufflers back on take a look inside the flex pipes to be sure they haven't constricted down to a much smaller inside diameter. I have heard of this happening from another 914 v8 guy but never witnessed it on your car to date. If you are planning on running mufflers (and I can't imagine running the car without them) you may want to look into purchasing some new High temp muffler grommets for mounting them to the octopus as they tend to deteriorate over time? Note: I put the flex pipes and muffler grommets on at the same time after cracking the header collector because of no flex in the system. Of course I found out the motor mounts were loose and replaced hardware on those at the same time. This was probably the main cause of cracking the header collector.
2. Seats/Seatbelts - Not sure how strict the racetrack you go to is but the Schroth Racing harnesses are old and may be out of date for some racing venues or organizations? Also... I cut holes in the seats to feed seatbelts thru 1st time I failed inspection at Pocono Raceway but never put any rubber protective molding around the bare holes in the fiberglass/carbon. Might want to look at?
Best,
Paul
Posted by: dan10101 Mar 6 2019, 11:12 AM
1. Mufflers -
2. Seats/Seatbelts -
Best,
Paul
It's quite loud without mufflers, But I love it! then again, I don't know anywhere I could run it unless it's at the drag strip. but even they require mufflers for street car days.
Thanks for the tip on the seat. I'm planning on belts, but I'll look at some trim around the holes. I'm sure if I was to race it I would need to change the seats as well.
For now it's a Track Toy...
Posted by: burton73 Mar 6 2019, 03:11 PM
Hi Dan,
You have been moving right along with this monster. Great focus and pushing through on it shows. I hope you pass smog and have great luck with whatever you want to do with it.
So good health and good luck to you sir,
Bob B
Posted by: dan10101 Mar 6 2019, 07:57 PM
Thanks guys. It's fun to make progress.
No smog for me!
I only have to do a Vin inspection. But who knows what scrutiny I'll get for the race car looks.
So today I finished up the turn signal install, wiring for that and figuring out why the headlights would go down when turned on but stay up when turned off. Also installed the wipers and horn. If you look closely it still has the appearance of a street car.
Now I need to figure out Dzus fasteners. Can't have the fenders falling off...
Posted by: Mike Bellis Mar 7 2019, 11:05 PM
Amazing progress!
Posted by: dan10101 Mar 8 2019, 12:26 AM
Amazing progress!
Thanks Mike,
A bit of a back track today. Turns out the Dzus fasteners i bought were for aluminum or steel panels not fiberglass. Tried to buy them locally, but ended up ordering the correct ones online.
I did manage to get the tie down hooks installed so can trailer it to the DMV. (I'm sure I could have done it without them, but hey...) Also got the muffler installed. Anything to make it look streetable.
And a bit of shop cleanup.. That always helps things go faster in the long run.
Posted by: Zippy69 Mar 8 2019, 07:59 AM
I got the car registered at DMV in NJ as a historic. Did not require inspection or smog test. In fact they only needed 2 pictures of the car from front and back. The challenge was explaining the fore and aft sections of the 8 point roll cage at the top of the door windows in the cabin. I explained to the lady at DMV that is not a roll bar that they are stiffening members and very common on old/historic cars with targa tops for structural integrity. Passed with that explanation but apparently would have failed if I called it a roll cage!
LOL
Posted by: dan10101 Mar 9 2019, 09:22 PM
I got the car registered at DMV in NJ as a historic. Did not require inspection or smog test. In fact they only needed 2 pictures of the car from front and back. The challenge was explaining the fore and aft sections of the 8 point roll cage at the top of the door windows in the cabin. I explained to the lady at DMV that is not a roll bar that they are stiffening members and very common on old/historic cars with targa tops for structural integrity. Passed with that explanation but apparently would have failed if I called it a roll cage!
LOL
Here in Oregon we have Historic vehicles, but by my calculation it needs to be 1959 or older. We also have a racing vesicle class, but it's mostly for tube frame and open wheel type cars. I could be wrong, or maybe that the next build...
. I'm hoping for a standard registration. they are only supposed to be looking at the VIN numbers, but we'll see. Last option is specialty vehicle since it is older than 25 years.
If push comes to shove, I'll cut out the roll bar and go back and try again.
Posted by: dan10101 Mar 9 2019, 09:51 PM
So a new picture and a new view. Does anyone know what that means???
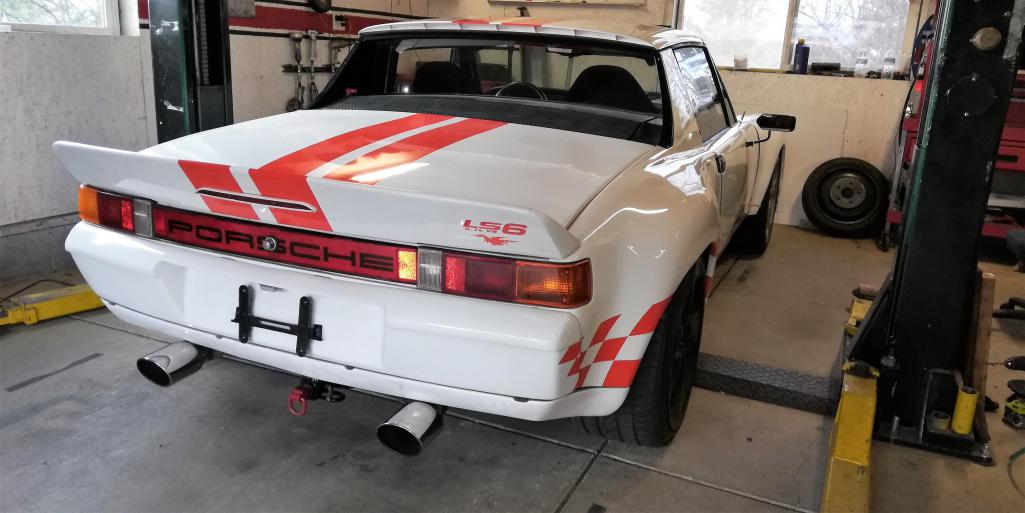
Yes, it's running and driving under it's own power! Made it up and down the driveway with no real issues!
Oh, I colecoed the front fiberglass fenders and bumper. I'll redo it in Dzus fasteners when they arrive next week. By then I should be ready to haul it down to the DMV.
I did a tuneup changed the plugs and wires, and a coil, wrapped the headers to knock down some of the engine noise. it did help.
I also installed some rear view mirrors. Much smaller and lighter than the flag mirrors. Not everyone will like these, but they'll work for now.
I tried to order some tires for the 'other' set of wheels, but the ebay seller must have woke up and he canceled the order when he realized that he was selling for $100 less than the going price. I did find a used race tire dealer that might work for me.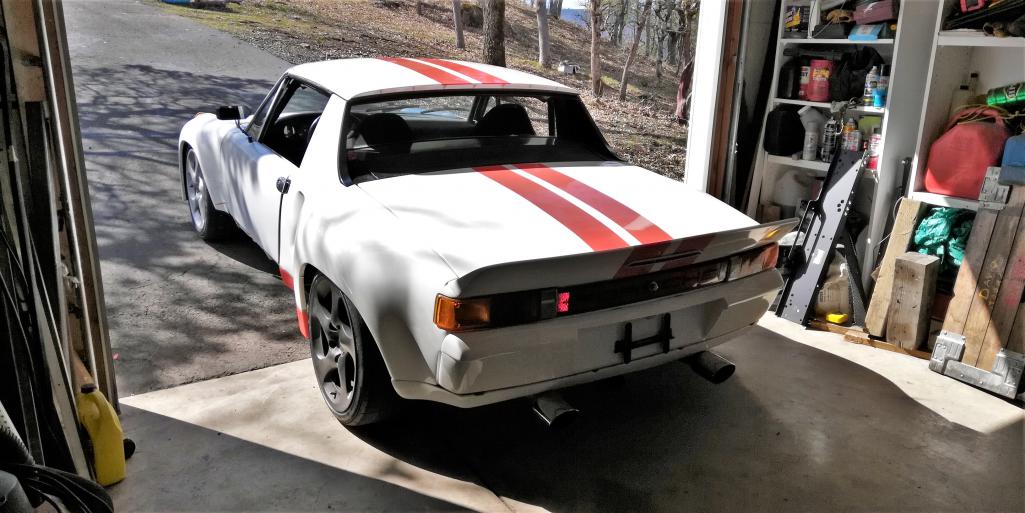
Posted by: JRust Mar 10 2019, 12:06 AM
So awesome to see it back on the road. Great work Dan! You have on sweet ride there
Posted by: Cracker Mar 10 2019, 06:05 AM
Congratulations Dan! Be careful...you don't want to repeat this process!
T
Posted by: tygaboy Mar 10 2019, 08:44 AM
Awesome! And GREAT JOB! You've much to be proud of.
(and now that you're, ahem, "done", you can come down and help me! )
Posted by: dan10101 Mar 10 2019, 09:20 AM
Thanks guys.
I'll be careful... 
"done" LOL!
Posted by: Zippy69 Mar 10 2019, 11:42 AM
Lookin Good Dan!
Yes I agree with be careful comment! Car spins easily I would recommend doing it a few times in a parking lot so you can feel where the limit is and getting a feel for the very narrow window of being able to catch it is.
What tires and wheels will be the race set up?
Posted by: dan10101 Mar 10 2019, 02:39 PM
Lookin Good Dan!
Yes I agree with be careful comment! Car spins easily I would recommend doing it a few times in a parking lot so you can feel where the limit is and getting a feel for the very narrow window of being able to catch it is.
What tires and wheels will be the race set up?
I'm pretty lucky to have an autocross track local to me. Practice laps are unlimited except for time. It has a great sweeper for checking oversteer/understeer limits.
I'll be starting out with 295s and 245s. Get a feel for the car and make sure everything is working. The second set of wheels allow me to mix and match. Currently I have 295s on the front and 285s on the rear. I'll set everything up for the biggest tire I might want to run and then go from there.
The 2 front 8" wheels are tweaked, so I'm having the tires removed and put on the other front 8" wheels. Once the wheels are straightened and I have some track time on the car, I'll decide if I want 11s/8s with race rubber or 11s/11s whatever is left will have street tire/rain tire setup.
Posted by: Mueller Mar 10 2019, 03:44 PM
Crazy to see how quickly you have this back together and running.
Posted by: dan10101 Mar 11 2019, 12:37 AM
Crazy to see how quickly you have this back together and running.
It helps that I retired just so I could get my hands dirty a few more times.
Posted by: Zippy69 Mar 11 2019, 10:31 AM
Lookin Good Dan!
Yes I agree with be careful comment! Car spins easily I would recommend doing it a few times in a parking lot so you can feel where the limit is and getting a feel for the very narrow window of being able to catch it is.
What tires and wheels will be the race set up?
I'm pretty lucky to have an autocross track local to me. Practice laps are unlimited except for time. It has a great sweeper for checking oversteer/understeer limits.
I'll be starting out with 295s and 245s. Get a feel for the car and make sure everything is working. The second set of wheels allow me to mix and match. Currently I have 295s on the front and 285s on the rear. I'll set everything up for the biggest tire I might want to run and then go from there.
The 2 front 8" wheels are tweaked, so I'm having the tires removed and put on the other front 8" wheels. Once the wheels are straightened and I have some track time on the car, I'll decide if I want 11s/8s with race rubber or 11s/11s whatever is left will have street tire/rain tire setup.
I was running Hoosier A6 285/30/18 on turbo twist 10" wheels Rears , 255/35/18 on 8" fronts. The 11" hollow spoke turbo twist wheels that are on the car are good for 295 street tires but I found with A6 295 Rubber they were too close for comfort so went with a 10" rim and 285 instead.
Posted by: dan10101 Mar 14 2019, 11:29 PM
it was a big day today. I finally felt confident enough that I could take the car to DMV and pass it off as a street machine. All my worries were for not, as the pretty lady barely even noticed my car on the wait to the VIN locations. She found what she wanted, finished the paperwork and handed me my license plates. It was an answer to prayer.
When I got home I attached the rear license plate and went for my first ride on the open road.
I need to work on the clutch and see if I can get the shifting a bit smoother. I might have a bind in one of the cables.
It doesn't turn very tight to the left. Maybe right too. It has a limiter kit in it, I may adjust looser if the tires don't rub.
Overall the ride went without any bad events. I even got a bit of a burnout when I got home. 
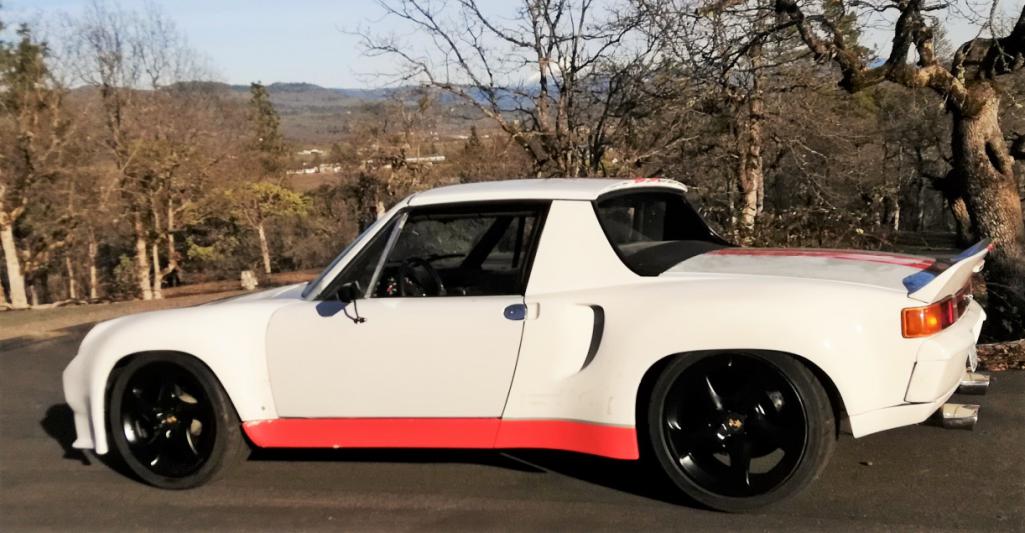
Posted by: djway Mar 14 2019, 11:37 PM
Posted by: My 914 Mar 15 2019, 05:12 AM
A bit of burnout is great!
Posted by: sb914 Mar 15 2019, 07:21 AM
Looks fantastic! Nice job.
Posted by: tygaboy Mar 15 2019, 08:36 AM
Dan - Way to go! I can only imagine how pleased you must be. Congrats!
Posted by: ValcoOscar Mar 15 2019, 09:17 AM
Dan-
Your hard work and determination is paying off. Love this thread.
I'm nobody, but for what it's worth...super proud of you!!!
And your son is up there as well.
Congrats,
Oscar
Posted by: burton73 Mar 15 2019, 09:53 AM
A bit of burnout is great!
With the 930 and I take it the 930 stub axles and CVs this should work without killing the trans.
Way to go.
Bob B
Posted by: dan10101 Mar 15 2019, 09:36 PM
Lookin Good Dan!
Yes I agree with be careful comment! Car spins easily I would recommend doing it a few times in a parking lot so you can feel where the limit is and getting a feel for the very narrow window of being able to catch it is.
What tires and wheels will be the race set up?
I'm pretty lucky to have an autocross track local to me. Practice laps are unlimited except for time. It has a great sweeper for checking oversteer/understeer limits.
I'll be starting out with 295s and 245s. Get a feel for the car and make sure everything is working. The second set of wheels allow me to mix and match. Currently I have 295s on the front and 285s on the rear. I'll set everything up for the biggest tire I might want to run and then go from there.
The 2 front 8" wheels are tweaked, so I'm having the tires removed and put on the other front 8" wheels. Once the wheels are straightened and I have some track time on the car, I'll decide if I want 11s/8s with race rubber or 11s/11s whatever is left will have street tire/rain tire setup.
I was running Hoosier A6 285/30/18 on turbo twist 10" wheels Rears , 255/35/18 on 8" fronts. The 11" hollow spoke turbo twist wheels that are on the car are good for 295 street tires but I found with A6 295 Rubber they were too close for comfort so went with a 10" rim and 285 instead.
Thanks Paul, I'll keep that in mind when I'm looking for tires. I'm also looking for 10" rims. It opens up more tire possibilities.
Posted by: dan10101 Mar 15 2019, 09:43 PM
Thanks for the kind words guys.
Yep 930 trans and axles.
Posted by: 914forme Mar 16 2019, 07:33 PM
Wow, way to get this car back on the road and redone, I looked at it several times, and was not going to rebuild it each time I looked at it. the price was just to tempting, if it had a Boxster S transaxle I would have pulled the trigger. So glad you came along and where up to the challenge.
Posted by: ajracer Mar 17 2019, 06:33 PM
Hi Dan:
Congrats, very nice job; only tracked some of your posts, but have admired this beast. I also drive LS6 914 which I will say compared to most sports cars this is a real BEAST. Should handle more like a formula car with the mid-engine yet the torque of a muscle car, real challenge will be high speed driving that an autocross won't provide; but with a well sorted car and as you learn to "keep your foot in", just hang on as you enjoy the labour of love from the rebuild. Happy Motoring. Allan 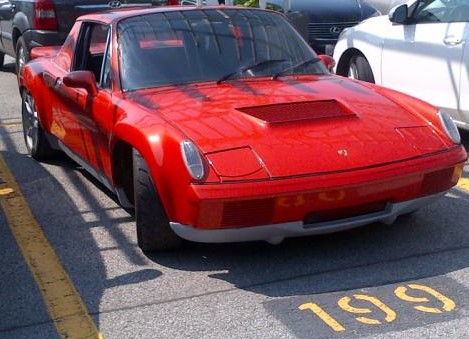
Posted by: dan10101 Mar 17 2019, 08:38 PM
Thanks Stephen
And Allan, very nice car. I'm still torn on red or not. Right now it's white.
Should be fun, but I have to work out some bugs.
Posted by: My 914 Mar 18 2019, 04:50 AM
I think it would look great in red.
Posted by: dan10101 Mar 18 2019, 03:07 PM
I think it would look great in red.
I've been a Visualizing...
But, my wife is voting for white with stripes.
My issue is if it goes to red, every time I have a stone nick I'll show white thru the red. And for a 75% track car, it will be a lot of nicks.
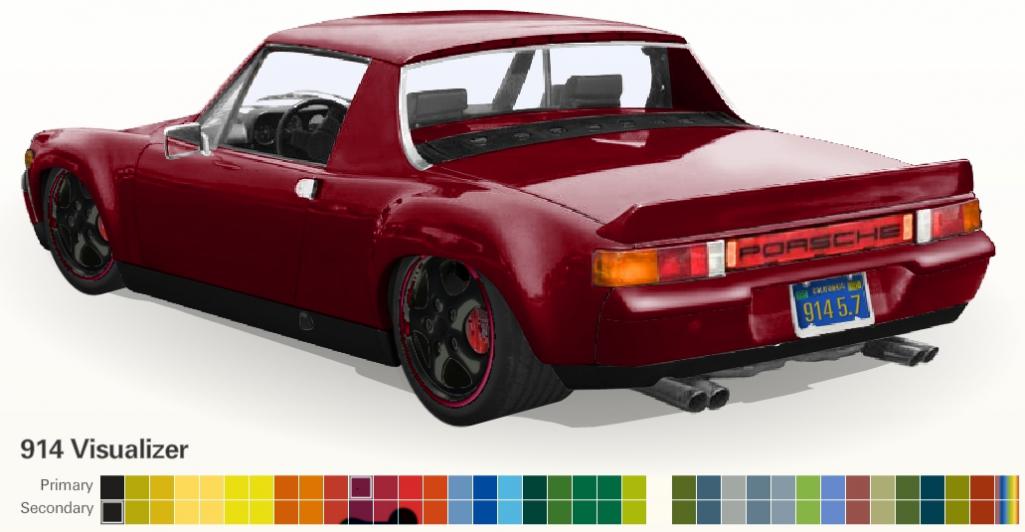
Posted by: tygaboy Mar 18 2019, 04:49 PM
Stone chips are just "life's little scars" for cars. It shows they been places and probably have some interesting stories they could tell.
I say paint it red, drive the hell out of it (safely) and "let the chips fall where they may!"
Posted by: dan10101 Mar 18 2019, 05:12 PM
Stone chips are just "life's little scars" for cars. It shows they been places and probably have some interesting stories they could tell.
I say paint it red, drive the hell out of it (safely) and "let the chips fall where they may!"
I like the way you think. But I still think you'd be out there with the touch up paint every time you see a nick. (and I would be too.)
Posted by: JRust Mar 18 2019, 09:42 PM
Stone chips are just "life's little scars" for cars. It shows they been places and probably have some interesting stories they could tell.
I say paint it red, drive the hell out of it (safely) and "let the chips fall where they may!"
I like the way you think. But I still think you'd be out there with the touch up paint every time you see a nick. (and I would be too.)
You could always vinyl wrap it
I loved the Screamsicle look personally but I know that isn't your bag
Posted by: get off my lawn Mar 19 2019, 02:10 PM
Yellow Porsches are faster.
Just sayin.
Posted by: burton73 Mar 19 2019, 09:46 PM
Stone chips are just "life's little scars" for cars. It shows they been places and probably have some interesting stories they could tell.
I say paint it red, drive the hell out of it (safely) and "let the chips fall where they may!"
I like the way you think. But I still think you'd be out there with the touch up paint every time you see a nick. (and I would be too.)
You could always vinyl wrap it
I loved the Screamsicle look personally but I know that isn't your bag
You could wrap it yourself. You have the skillset and just look on UTube for the hot tips. If it gets a little screwed up just rewrap a fender or door. When you get the UTube tips it is just not that hard and it does not cost that much.
Bob B
Posted by: dan10101 Mar 19 2019, 09:52 PM
Stone chips are just "life's little scars" for cars. It shows they been places and probably have some interesting stories they could tell.
I say paint it red, drive the hell out of it (safely) and "let the chips fall where they may!"
I like the way you think. But I still think you'd be out there with the touch up paint every time you see a nick. (and I would be too.)
You could always vinyl wrap it
I loved the Screamsicle look personally but I know that isn't your bag
The orange is all vinyl, probably once I get it all removed, I'll be done with vinyl. But, you never know. What would be be called with the same graphics in red? Cherysicle? HotPepper? TheRedPill?
Posted by: dan10101 Mar 19 2019, 09:56 PM
Yellow Porsches are faster.
Just sayin.
I know a few yellow Porsches with 1/2 the horsepower that I wouldn't want to challenge.
At some point, it may be a fast car, but i just want to have fun, and hope to not embarrass myself too much.
Posted by: sixnotfour Mar 19 2019, 09:58 PM
At some point, it may be a fast car, but i just want to have fun, and hope to not embarrass myself too much.
Posted by: dan10101 Mar 19 2019, 10:00 PM
Stone chips are just "life's little scars" for cars. It shows they been places and probably have some interesting stories they could tell.
I say paint it red, drive the hell out of it (safely) and "let the chips fall where they may!"
I like the way you think. But I still think you'd be out there with the touch up paint every time you see a nick. (and I would be too.)
You could always vinyl wrap it
I loved the Screamsicle look personally but I know that isn't your bag
You could wrap it yourself. You have the skillset and just look on UTube for the hot tips. If it gets a little screwed up just rewrap a fender or door. When you get the UTube tips it is just not that hard and it does not cost that much.
Bob B
That's me! Youtube Master! I'd be 6 months behind schedule without Youtube (and 914world).
Posted by: My 914 Mar 20 2019, 06:12 AM
I think it would look great in red.
I've been a Visualizing...
But, my wife is voting for white with stripes.
My issue is if it goes to red, every time I have a stone nick I'll show white thru the red. And for a 75% track car, it will be a lot of nicks.
Since your wife was supportive, I think her vote counts a lot.
Posted by: Cracker Mar 20 2019, 06:33 AM
The right shade of orange looks great on teeners...another option!
T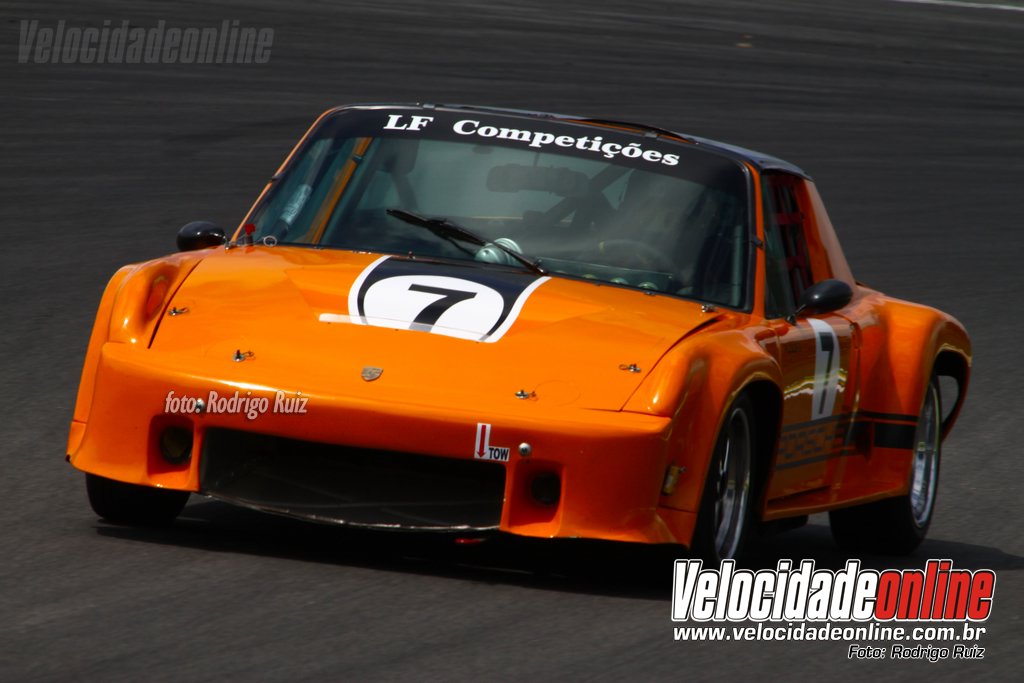
Posted by: Andyrew Mar 20 2019, 09:26 AM
The right shade of orange looks great on teeners...another option!
T
If I know my dad, I know what color he wont paint it
(Orange/yellow)His head is like this.
59% Red (Because, thats what color sports cars should be)
30% White (Because thats easy, its a familiar color to the car, and racecar)
10% Silver/blue/black (Because there are some cool options out there)
1% Primer (Because thats the way it'll stay for a while and he may never paint it)
Posted by: dan10101 Mar 20 2019, 05:52 PM
If I know my dad, I know what color he wont paint it
(Orange/yellow)His head is like this.
59% Red (Because, thats what color sports cars should be)
30% White (Because thats easy, its a familiar color to the car, and racecar)
10% Silver/blue/black (Because there are some cool options out there)
1% Primer (Because thats the way it'll stay for a while and he may never paint it)
Or a very close second.
There is another option.
A very light grey (almost white) with black accents. I'm not normally a fan of 'non colors'. But this appeals to me
I would put this one at about 25%. So I guess I would have to take 25% from Red and use Red accents wherever I can.
34% Red (Because, thats what color sports cars should be)
30% White with Red or Black accents(Because thats easy, its a familiar color to the car, and racecar)
25% Light Grey
10% Silver/blue/black (Because there are some cool options out there)
1% Primer (Because thats the way it'll stay for a while and he may never paint it)
If it's primer, it's White Primer... (because I have a gallon of it...)
I had to wash out this picture to get the grey close. It's still a bit to dark but pretty close.
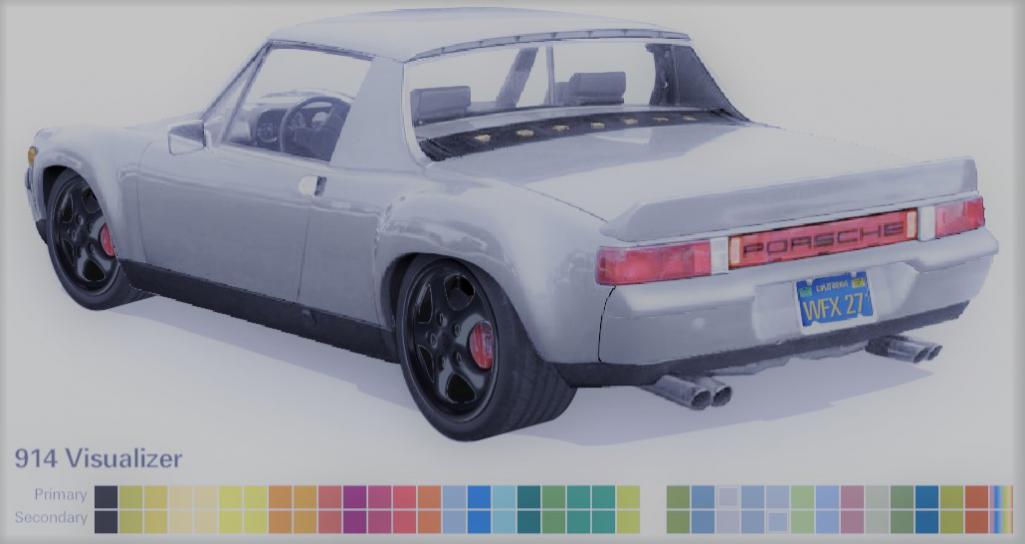
Posted by: dan10101 Mar 20 2019, 06:13 PM
Dumb things I did today..
Fixed the not broken brake lights.. Can anyone guess?
It only took me 4 hours.. Yes, the key was off.
Made duct work for the radiator so all the air wouldn’t go under the car.
Still a bit of cleanup work, (and a lot of shop cleanup), but it’s functional.
Yesterday I fixed the alternator. The moroso cutoff relay was killing the voltage for some reason. So it’s bypassed for now.
The list is getting smaller. I'll drive it a bit tomorrow and get some gas, see if anything else crops up. Only 9 days until it's debut autocross. The great thing about our autocross's is that we get practice. And for the Spring Enduro and Fall Enduro you get several hours of practice as you see fit. 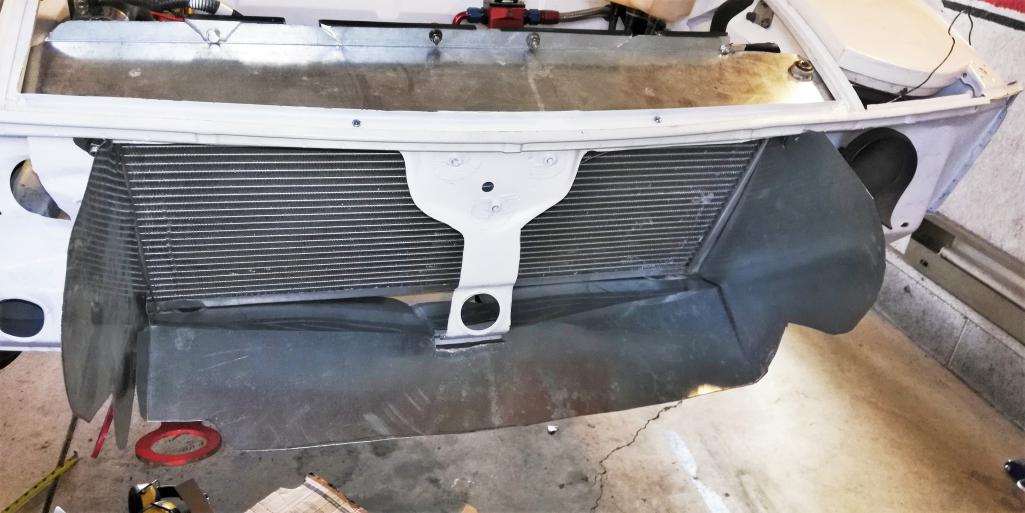
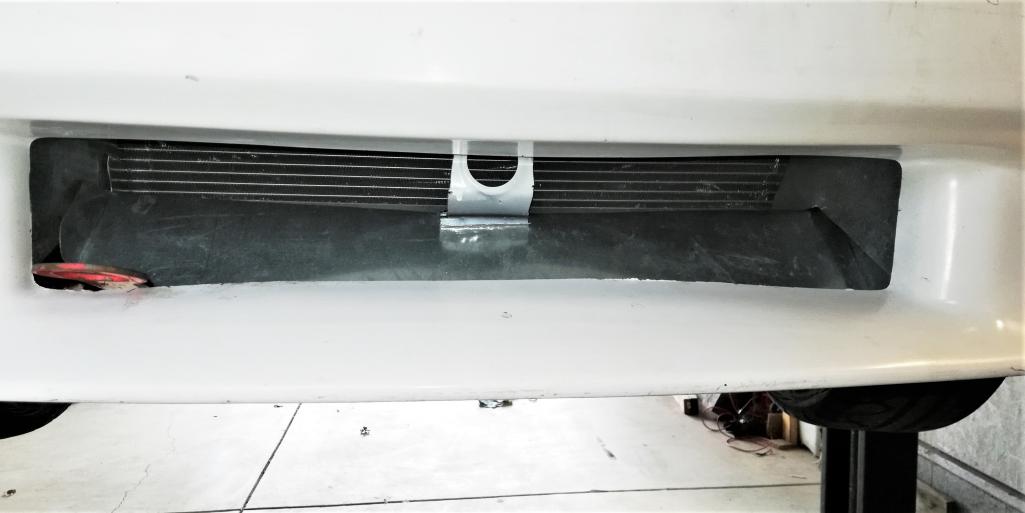
Posted by: dan10101 Mar 21 2019, 05:00 PM
Question for those running 930 axles. I seem to be missing 2 of the 6 bolts on both sides connecting to the hubs. It doesn't seem to be random. 2 bolts, missing 1, 2 more bolts missing 1. Same on both sides.
Is this the way they work?
Thanks.
Dan
Posted by: tygaboy Mar 21 2019, 08:22 PM
Are there missing roll pins? I don't know the 930 set up...
Posted by: dan10101 Mar 21 2019, 08:29 PM
Are there missing roll pins? I don't know the 930 set up...
Not sure, I don't have it apart.
I know 944s have problems with the allen bolts backing out. I just think it's odd that it's so uniform.
Maybe Paul will chime in if he knows.
Posted by: bbrock Mar 21 2019, 08:40 PM
I suspect roll pins too, but also don't know 930s. Just seems too coincidental.
Posted by: Andyrew Mar 21 2019, 08:49 PM
@http://www.914world.com/bbs2/index.php?showuser=1351Maybe Mike knows? I know he runs 930 cvs
Posted by: dan10101 Mar 21 2019, 09:39 PM
Despite the question on the drive axles. Today was a great day!
I finally was able to put some miles on the car. 20 or so.
With gas in the tank and the brakes and steering working well, I was confident to apply some power.
This thing is going to be a blast!
The video is still a bit long, but thought you might want to see it (well mostly hear it) in action.
https://youtu.be/JDSI2vp1PCM
Posted by: dan10101 Mar 22 2019, 08:53 AM
I suspect roll pins too, but also don't know 930s. Just seems too coincidental.
It looks like you and Chris are right. In my searching I found this. I guess I could look for 6 bolt hubs if it becomes a problem. But I think 10mm and Tight is right should keep it going.
http://www.914world.com/bbs2/index.php?s=&showtopic=91963&view=findpost&p=1888769
Posted by: Cracker Mar 22 2019, 09:10 AM
Dan,
I had my machine shop drill those out so I could have six bolts...they also made my spacers as well. I highly doubt you will have an issue. Make sure you routinely torque them to spec though - they will loosen up. Safety wire or bend a washer up on one side wouldn't be the worst idea either...
Keep it shiny side up!
Tony
Posted by: dan10101 Mar 22 2019, 10:06 AM
Dan,
I had my machine shop drill those out so I could have six bolts...they also made my spacers as well. I highly doubt you will have an issue. Make sure you routinely torque them to spec though - they will loosen up. Safety wire or bend a washer up on one side wouldn't be the worst idea either...
Keep it shiny side up!
Tony
Thanks, that is an option..
The more I think about it, I'll probably just leave it until it becomes a problem. Yes checking them regularly for tightness.
The pins themselves seem pretty stout and tighter than the bolts. As long at the bolts are tight it should work well.
Posted by: Zippy69 Mar 22 2019, 01:37 PM
Despite the question on the drive axles. Today was a great day!
I finally was able to put some miles on the car. 20 or so.
With gas in the tank and the brakes and steering working well, I was confident to apply some power.
This thing is going to be a blast!
The video is still a bit long, but thought you might want to see it (well mostly hear it) in action.
https://youtu.be/JDSI2vp1PCM
Your wife is very brave. Mine didn't like riding in the car. I see the heat still works lol
Posted by: Zippy69 Mar 22 2019, 01:40 PM
If I know my dad, I know what color he wont paint it
(Orange/yellow)His head is like this.
59% Red (Because, thats what color sports cars should be)
30% White (Because thats easy, its a familiar color to the car, and racecar)
10% Silver/blue/black (Because there are some cool options out there)
1% Primer (Because thats the way it'll stay for a while and he may never paint it)
Or a very close second.
There is another option.
A very light grey (almost white) with black accents. I'm not normally a fan of 'non colors'. But this appeals to me
I would put this one at about 25%. So I guess I would have to take 25% from Red and use Red accents wherever I can.
34% Red (Because, thats what color sports cars should be)
30% White with Red or Black accents(Because thats easy, its a familiar color to the car, and racecar)
25% Light Grey
10% Silver/blue/black (Because there are some cool options out there)
1% Primer (Because thats the way it'll stay for a while and he may never paint it)
If it's primer, it's White Primer... (because I have a gallon of it...)
I had to wash out this picture to get the grey close. It's still a bit to dark but pretty close.
White would be easiest. Could do white with green accents and turn into the mythical grasshopper?
http://www.914world.com/bbs2/uploads/post-2-1107608203.jpg
Posted by: Zippy69 Mar 22 2019, 01:41 PM
Dan,
I had my machine shop drill those out so I could have six bolts...they also made my spacers as well. I highly doubt you will have an issue. Make sure you routinely torque them to spec though - they will loosen up. Safety wire or bend a washer up on one side wouldn't be the worst idea either...
Keep it shiny side up!
Tony
Thanks, that is an option..
The more I think about it, I'll probably just leave it until it becomes a problem. Yes checking them regularly for tightness.
The pins themselves seem pretty stout and tighter than the bolts. As long at the bolts are tight it should work well.
Bolts never backed off in my experience.
Posted by: Zippy69 Mar 22 2019, 01:47 PM
I think it would look great in red.
I've been a Visualizing...
But, my wife is voting for white with stripes.
My issue is if it goes to red, every time I have a stone nick I'll show white thru the red. And for a 75% track car, it will be a lot of nicks.
Since your wife was supportive, I think her vote counts a lot.
+1 for stripes as an homage to the Ford GT outlining the hood tunnel!
Posted by: dan10101 Mar 22 2019, 02:06 PM
White would be easiest. Could do white with green accents and turn into the mythical grasshopper?
My wife was the first in this family to get a 914. We were dating at the time and as the story goes, I married the girl to get the car. The car is long gone but the Girl is till here 38 years later. I took her on Thunderhill racetrack a couple years back. Looking at us in the car you would think we were tooling around in the foothills. The only difference is she wasn't telling me to slow down.
Her car started out green. We were never a fan of green. It's funny that when she bought the first one it was wrecked in the front end too. But she immediately had it fixed and painted Burgandy. Probably cost her all of $600.
No, White is likely to be the choice out of practicality. She mentioned after the ride that we needed to get it painted and finished right. It's still a bit on the rough side for her. I am falling in love with the graphics. I wonder if the company where you bought the orange stripes and lettering is still in business. I would have them redo them in a nice red.
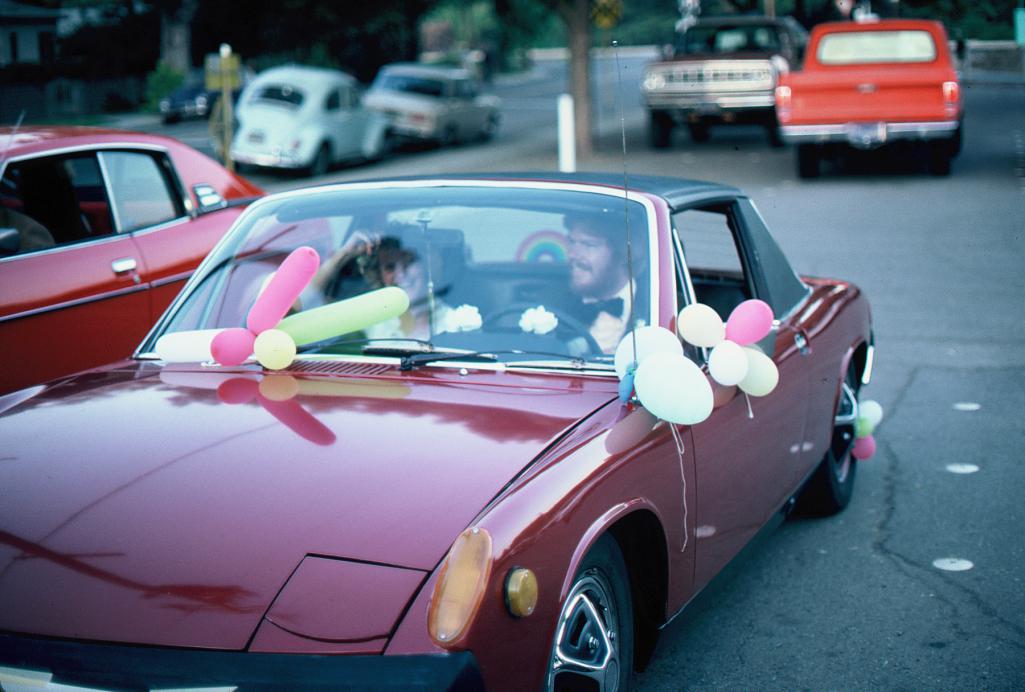
Posted by: sb914 Mar 22 2019, 02:19 PM
I had that Same sticker on my first 914 rear window.It’s a Hawaii sticker btw.
Posted by: Andyrew Mar 22 2019, 07:13 PM
I am falling in love with the graphics. I wonder if the company where you bought the orange stripes and lettering is still in business. I would have them redo them in a nice red.
I really like the side graphics on the car as well. Really brings together the lines of the car.
Posted by: dan10101 Mar 29 2019, 11:46 PM
I made it!
My 1st goal was to finish the car well enough to drive in the SSCC Enduro. Practice was today and the car did well. 5 practice runs over 2 min each. Granted Sunday is the timed run, but things look good.
Overall, it ran well, didn't overhead, started every time. I drove it to and from the event rather than trailering. No tools were taken out of the bag. Accelerated well, stopped well (or so I thought) and turned without major oversteer or understeer.
Rode hard and put away wet. Well, most of the day was dry, and the wipers work!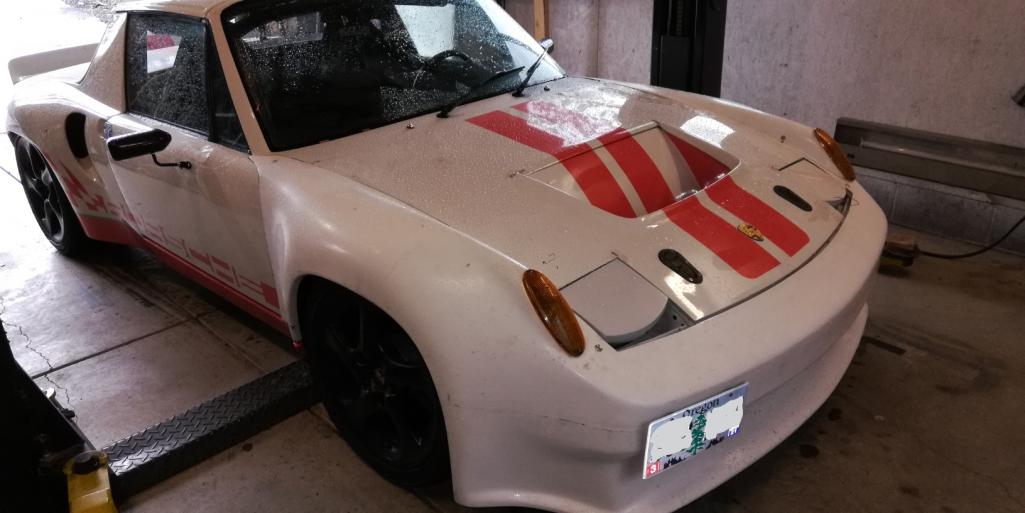
Posted by: ValcoOscar Mar 30 2019, 03:58 AM
Wow...very exciting to see such success. Congratulations on your accomplishments in getting this beast back on the road.
I hope see your car in person one day.
Oscar
Posted by: dan10101 Apr 1 2019, 06:02 PM
Well, the enduro is in the books. Lap times were an embarrassment, but I don't care, it was a rush driving the car finally. 
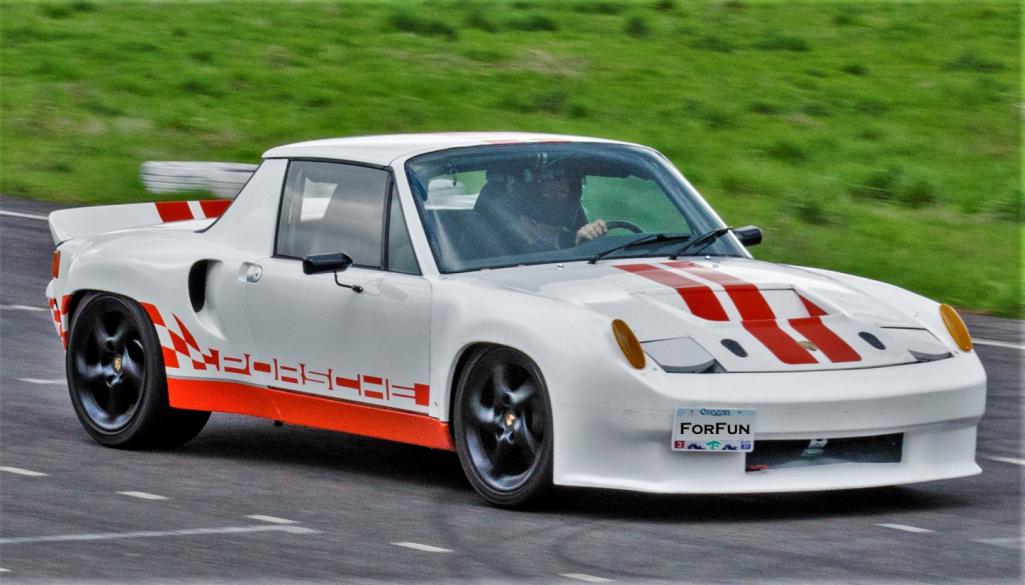
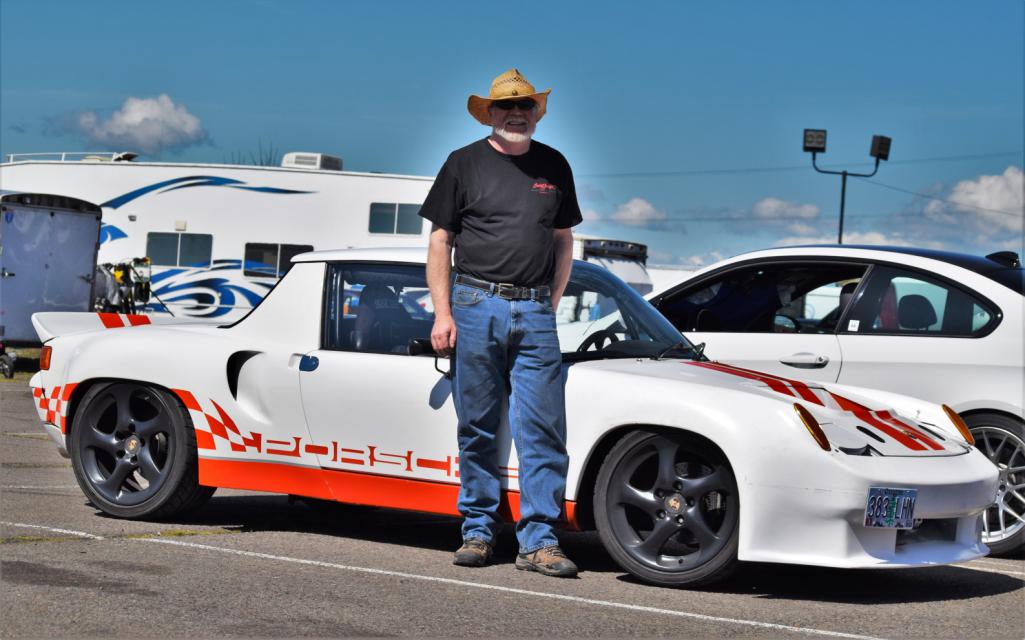
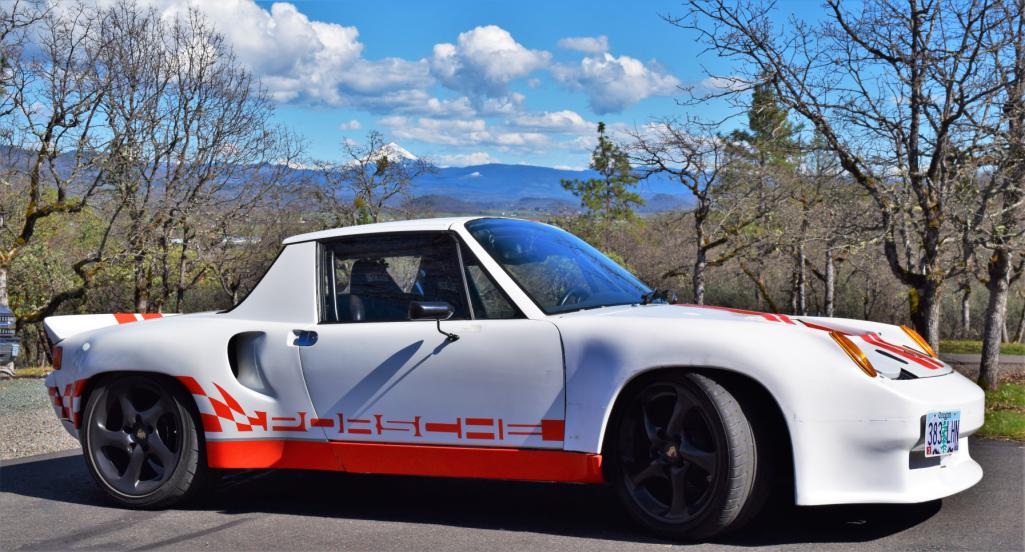
Well, back to work. I have a long list before the next event!
Posted by: Andyrew Apr 1 2019, 07:20 PM
Woot!!!
Posted by: JRust Apr 1 2019, 09:59 PM
I love the rear valance on that car! Hell I love damn near everything about that car. So great to see you driving it Dan. Especially on the track
Posted by: JeffBowlsby Apr 1 2019, 10:22 PM
Thought about freshening up the graphics? One conceptual solution...extending the center stripe(s) into the bumpers to tie it all together.
Attached image(s)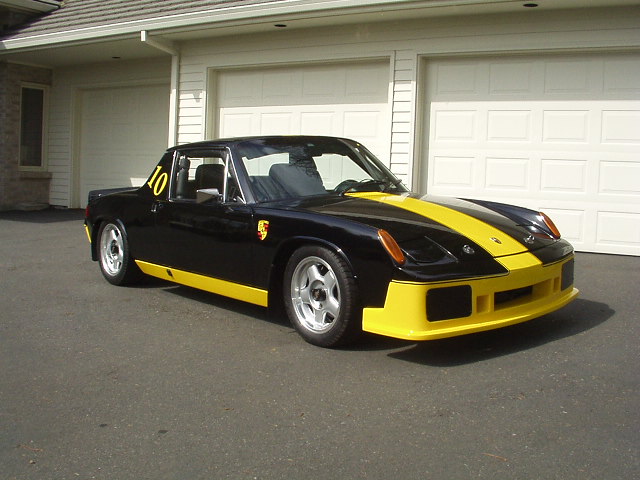
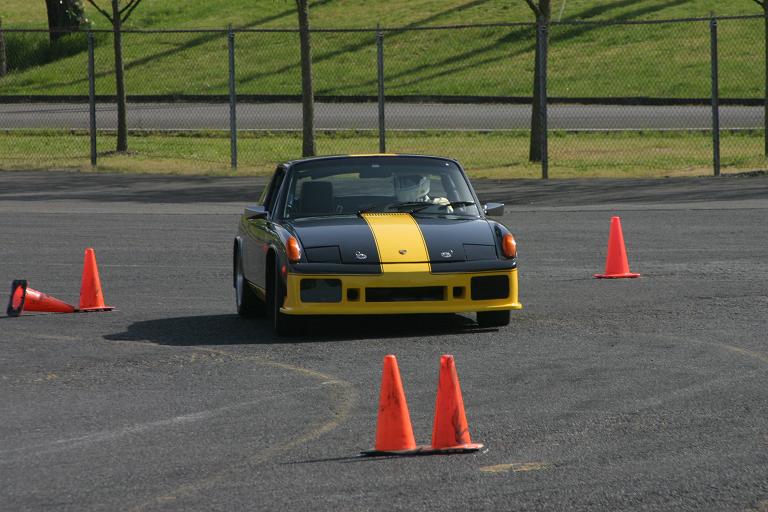
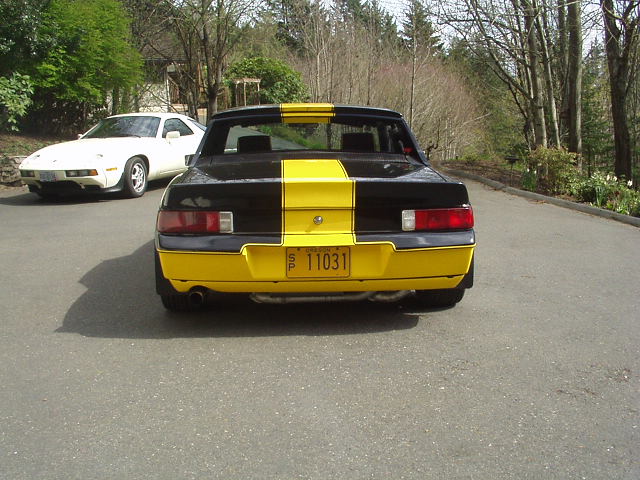
Posted by: dan10101 Apr 1 2019, 10:44 PM
Thought about freshening up the graphics? One conceptual solution...extending the center stripe(s) into the bumpers to tie it all together.
I really like the graphics on the car now. When I look at the one side then the other, it's night and day. Plain white won't do it. Maybe a solid color. (no white isn't a color, it's the absence of all color)
Posted by: bbrock Apr 1 2019, 11:02 PM
It's hard for me to wrap my brain around how much work you've done in such a short time. You should be very proud!
I also love the graphics on your car. It's beautiful.
Posted by: Zippy69 Apr 2 2019, 10:02 AM
Great to see the car back on track!
Congrats Dan!
Posted by: Cairo94507 Apr 2 2019, 10:21 AM
Very happy to see this car back on the road. Incredible machine and I am glad you got it together and got to take it on the track. Job well done.
Posted by: mbseto Apr 2 2019, 02:46 PM
Beautiful car! Nice to see 'em driven in earnest.
Posted by: dan10101 Apr 2 2019, 03:26 PM
Thanks guys I appreciate the kind thoughts.
Knowing that I'm just a cog in the belt on this one.
Sure is fun to have horsepower.
I'm getting ready to tear into it again to do the lifters.
And I'm not happy with the alignment. I'm pretty certain the front struts are bent, one in and one out. Not bad, and it does align, but could be better. So I have those coming soon.
I adjusted the brake balance bar and they are working better.
I also played with the shifter and it's working better too.
I need to work on the drivers door and get the window functional. Since it's gutted I'll probably do lexan with a strap.
Then I want to make swing out door bars for the cage. Know one I know can negotiate regular door bars.
Still looking for some used wheels and tires. Something in the 18x10 with a deep offset. Even 17x10 might work if I can get tires.
Of course I still need to finish up the body work. Fix some cracks, hood, valance, etc.
About a dozen little things left to do. But, if it was finished, I'd be bored. (not really I'm sure my wife has projects.)
Posted by: dan10101 Apr 20 2019, 11:43 PM
I'm overdue for an update.
I pulled the engine apart looking for a reason for the noise. I did find a couple problems, but nothing serious. I changed the lifters and put it back together.
A very short sentence describing more than a weeks worth of work. the bottom line is that I'm confident that things are good inside. It is quieter, but not completely. I think now it's to the point that others have described as 'normal'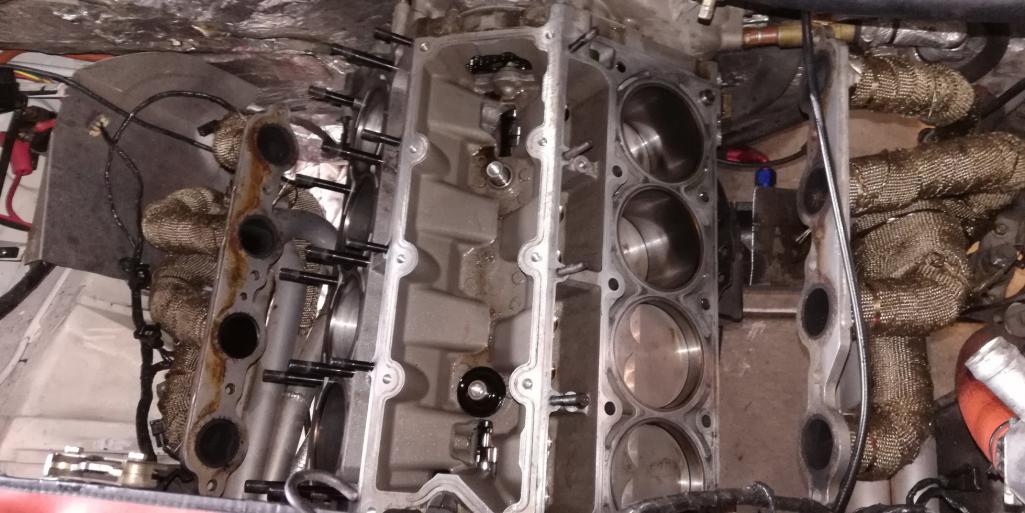
I did my second autocross today. Other than finding the limits of old tires the car did fine.
Next week strut housings and another alignment.
and the search for wheels goes on...
Attached thumbnail(s)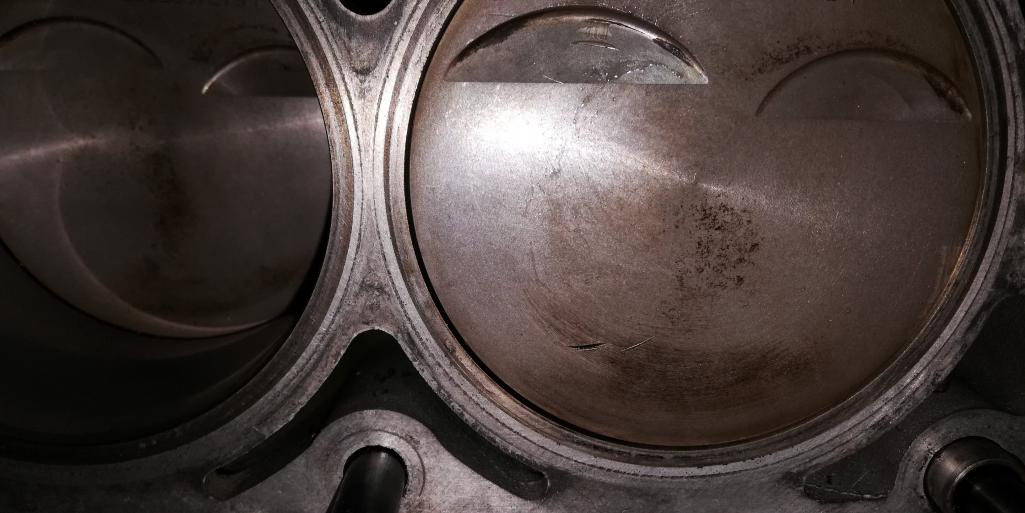
Posted by: Mueller Apr 20 2019, 11:50 PM
So great to see you driving the car! Must be a blast with all that torque!
Posted by: billium01 Apr 21 2019, 05:53 PM
Car looks awesome! May I ask what kind of performance figures you get? 0-60 time, 1/4 mile?
Posted by: dan10101 Apr 21 2019, 08:00 PM
Car looks awesome! May I ask what kind of performance figures you get? 0-60 time, 1/4 mile?
I can only tell you what the original builder achieved for times. With very old tires, all I get so far is spinning tires. Even punching it at 50 causes the tires to spin in 2nd. Tires are next on my list.
R/T .041
60 1.723
330 4.919
1/8 7.410
MPH 97.93
1000 9.537
1/4 11.289
MPH 131.42
from this thread
http://www.914world.com/bbs2/index.php?showtopic=87867&hl=
disclaimer. The engine is now detuned slightly with a smaller cam. It reduced it by about ~35hp. It still is around 500 crank hp.
0-60 was somewhere around 3.5 sec.
With the rev limit changed and slightly taller tires, it could do it in 1st gear.
Posted by: billium01 Apr 21 2019, 08:03 PM
Car looks awesome! May I ask what kind of performance figures you get? 0-60 time, 1/4 mile?
I can only tell you what the original builder achieved for times. With very old tires, all I get so far is spinning tires. Even punching it at 50 causes the tires to spin in 2nd. Tires are next on my list.
R/T .041
60 1.723
330 4.919
1/8 7.410
MPH 97.93
1000 9.537
1/4 11.289
MPH 131.42
from this thread
http://www.914world.com/bbs2/index.php?showtopic=87867&hl=
disclaimer. The engine is now detuned slightly with a smaller cam. It reduced it by about ~35hp. It still is around 500 crank hp.
0-60 was somewhere around 3.5 sec.
With the rev limit changed and slightly taller tires, it could do it in 1st gear.
Nice! That's a beast!
Posted by: Zippy69 May 1 2019, 06:10 AM
Car looks awesome! May I ask what kind of performance figures you get? 0-60 time, 1/4 mile?
I can only tell you what the original builder achieved for times. With very old tires, all I get so far is spinning tires. Even punching it at 50 causes the tires to spin in 2nd. Tires are next on my list.
R/T .041
60 1.723
330 4.919
1/8 7.410
MPH 97.93
1000 9.537
1/4 11.289
MPH 131.42
from this thread
http://www.914world.com/bbs2/index.php?showtopic=87867&hl=
disclaimer. The engine is now detuned slightly with a smaller cam. It reduced it by about ~35hp. It still is around 500 crank hp.
0-60 was somewhere around 3.5 sec.
With the rev limit changed and slightly taller tires, it could do it in 1st gear.
Nice! That's a beast!
While the cam change lowered the HP by between 25 - 35 HP there are some substantial improvements since these 1/4 mile numbers were posted. The motor wasn't running right when these numbers were posted. Since then the mass air flow meter was removed and a speed density tune was performed, and tune up was done. PCV system was rerouted with filter added for additional crankcase ventilation. Substantial improvements were made to entire clutch and shifter system so car now shifts way better. Additionally the numbers wee posted with street tires.
With trap speeds close to 132 MPH the car should be in the high 10 sec range now in the 1/4 mile with the right tires. I always wanted to bring the car to a standing mile race as I believe it would do very well in it's class.

When I owned the car the nickname I had for it was THE BEAST.
Posted by: dan10101 May 1 2019, 08:53 AM
While the cam change lowered the HP by between 25 - 35 HP there are some substantial improvements since these 1/4 mile numbers were posted. The motor wasn't running right when these numbers were posted. Since then the mass air flow meter was removed and a speed density tune was performed, and tune up was done. PCV system was rerouted with filter added for additional crankcase ventilation. Substantial improvements were made to entire clutch and shifter system so car now shifts way better. Additionally the numbers wee posted with street tires.
With trap speeds close to 132 MPH the car should be in the high 10 sec range now in the 1/4 mile with the right tires. I always wanted to bring the car to a standing mile race as I believe it would do very well in it's class.
When I owned the car the nickname I had for it was THE BEAST.
The local dragstrip has a roll racing date set. That might be fun.
It does seem to be putting the power to the ground. Maybe when I get my sticky tires it will hold better.
The engine is running great, It's shifting well, I'm waiting on some new brake pads and maybe a trip to the drag strip is in order.
When I got my Jeep running, my Wife called it The Beast. I renamed it "Vincent".
I haven't come up with a name for the 914. I actually have about 50, Here are a couple..
Morpheus
Phoenix
Anastasia
Prometheus
Pandora
Serenity
Christine
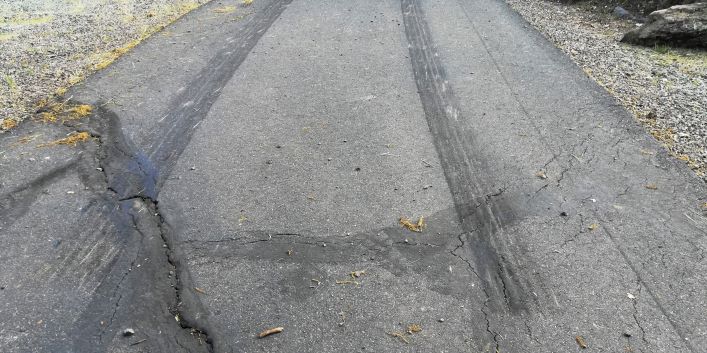
Posted by: Zippy69 May 1 2019, 09:05 AM
While the cam change lowered the HP by between 25 - 35 HP there are some substantial improvements since these 1/4 mile numbers were posted. The motor wasn't running right when these numbers were posted. Since then the mass air flow meter was removed and a speed density tune was performed, and tune up was done. PCV system was rerouted with filter added for additional crankcase ventilation. Substantial improvements were made to entire clutch and shifter system so car now shifts way better. Additionally the numbers wee posted with street tires.
With trap speeds close to 132 MPH the car should be in the high 10 sec range now in the 1/4 mile with the right tires. I always wanted to bring the car to a standing mile race as I believe it would do very well in it's class.
When I owned the car the nickname I had for it was THE BEAST.
The local dragstrip has a roll racing date set. That might be fun.
It does seem to be putting the power to the ground. Maybe when I get my sticky tires it will hold better.
The engine is running great, It's shifting well, I'm waiting on some new brake pads and maybe a trip to the drag strip is in order.
When I got my Jeep running, my Wife called it The Beast. I renamed it "Vincent".
I haven't come up with a name for the 914. I actually have about 50, Here are a couple..
Morpheus
Phoenix
Anastasia
Prometheus
Pandora
Serenity
Christine
Some called it THE SCREAMSICLE
Of course would require same paint scheme!
Posted by: djway May 2 2019, 11:23 PM
Is your wifes name Catherine?
You could call it Neo as it has come back to life anew
Posted by: KELTY360 May 2 2019, 11:45 PM
Judging from the pic of the pavement, you might want to call it....Stripes.
Posted by: Andyrew May 3 2019, 09:20 AM
Is your wifes name Catherine?
You could call it Neo as it has come back to life anew
Ohhh OOohhh Idea!
https://en.wikipedia.org/wiki/Rebecca_(1940_film)

Read the plot, watch the trailer.
His wife (my mother)'s name is Rebecca but she hates the name and goes by Becky..
Posted by: dan10101 May 3 2019, 10:53 AM
Is your wifes name Catherine?
You could call it Neo as it has come back to life anew
Ohhh OOohhh Idea!
https://en.wikipedia.org/wiki/Rebecca_(1940_film)
Read the plot, watch the trailer.
His wife (my mother)'s name is Rebecca but she hates the name and goes by Becky..
Wow what a plot. Back when movies were Movies...
Lets see how that would work in a wild 914
Bill (as Rebecca's Dad) creates Rebecca and her early years and she is a wild one.
She finds Paul (Maxim). She gets fixed again and again. She's still wild and unfettered, not ready to play nice.
Well, I think Rebecca (as the early Screamsicle) was was a curvy character that flaunts her stuff drawing in other Men and then casting them aside. She was a wild woman that plays with life in her own way until an accident takes her life.
She comes back wearing the same outfit that she had in the past. That didn't go over well. So "Caroline" is reintroduced as the new main character.
So, Maxim, (now played by Dan) is the male character is there with this cute girl now played by Caroline. She's takes on a new look treating her Man as a woman should. Going this distance for many years to come!
(or something like that)
Posted by: Andyrew May 3 2019, 11:41 AM
Posted by: horizontally-opposed May 3 2019, 01:35 PM
Wow. What a saga—and what a great result! Love seeing that car covered in rain drops.
As to color/graphics, I keep seeing this car in very dark blue—like Meerblau—with no graphics at all. Not sure what wheels with that, maybe even Meerblau also?
What are your plans for the headlight covers? Have always wanted to see a 914 with the "brows" removed, even if that means the aero ain't good when they're up. Have to think it might look great with the Ultimate 914 body, which is one of the best ever figured out for the 914.
Whatever you do from here, you've already won. This was a cool car before, and now it's even cooler as it's story has a new turn. Nice work!!
Posted by: horizontally-opposed May 3 2019, 01:40 PM
This car is always the one I go back to....
Attached image(s)
Posted by: dan10101 May 3 2019, 01:50 PM
Wow. What a saga—and what a great result! Love seeing that car covered in rain drops.
As to color/graphics, I keep seeing this car in very dark blue—like Meerblau—with no graphics at all. Not sure what wheels with that, maybe even Meerblau also?
What are your plans for the headlight covers? Have always wanted to see a 914 with the "brows" removed, even if that means the aero ain't good when they're up. Have to think it might look great with the Ultimate 914 body, which is one of the best ever figured out for the 914.
Whatever you do from here, you've already won. This was a cool car before, and now it's even cooler as it's story has a new turn. Nice work!!
Thanks Pete.
I'm just lazy with the brows. I need to put in on the list so I get to it. I thought about adding some fiberglass to the nose and make it once piece.
In fact future plans include moving the headlights into the turn signal housings.
I like Blue. The meerblau looks good. But if it's a solid color it will be Red. I agree on graphics, Solid color needs none or very little. But white needs the accents and looks good with them.
Posted by: Maltese Falcon May 4 2019, 10:35 PM
This car is always the one I go back to....
The details on this car are amazing, first time I saw it was Monterey Historics 1998, in the Kinesis Wheel tent. Something about sinister dark (looked black in the tent) exterior and the red anodized wheels
Posted by: sixnotfour May 5 2019, 09:30 AM
1998 epic
Posted by: dan10101 May 10 2019, 08:41 PM
Well @http://www.914world.com/bbs2/index.php?showuser=172 is going gangbusters. I figured I'd do an update on mine.
So I've been working on the yard more then the car lately. But I did get some stuff done.
I needed to make it somewhat less beastly for my Wife to ride any amount of time.
Plus I wanted to make it able to lock the car properly. So I reassembled the disassembled (gutted) drivers door. Now the window rolls up and down. Door card in place handles etc all work. Speaker reinstalled. I also installed the speaker in the passenger door. I used the JVC head unit from my BMW. The 4 speakers and the receiver work well together and put out a nice sound. Most of the time I'll be listening to the motor, but if I have to put in some highway miles, a Stereo is nice.
I also rigged up a horn button. Rather than diagnose why the existing one didn't work.
The taillights didn't flash the right color. One side did, the other didn't.
So I pulled them all off and swapped them around then ended up putting them back on the same posts and it worked. (I swear, really, they are on the same posts and now it works. )
I hardwired the rear view mirror, (and camera). eliminating another wire going to the cig lighter. There was already wiring there going to the old 993 mirror that I was able to reuse.
I removed the passenger side door bar so nobody throws their back out getting in the passenger seat. Both sides will end up getting removable door bars once the new roll bar hoop is installed.
I installed the dash knee pad to get it the more finished look it deserves.
Going back a ways I'm not sure what I've told the group. So some of this may be repeats.
At the last autocross it was a bit embarrassing that the brakes were outrageously loud. Some of that was the track pads, but the ebrake shoes were lifting off the seat and rubbing on the rotor causing an ugly noise. A shim to strengthen the spring seems to have fixed it. I also orders some compromise brake pads (Stoptech Street Performance) that seem to stop well and not squeak. Also the rear brakes were not working. Probably why it didn't stop at the last autocross when the front tires got wet. I adjusted the balance bar and double checked the brake bias knob. Now I'm finally getting heat into the rear brakes.
The clutch was slipping, So I made an adjustment and it seems to be working correctly.
The battery drains if I don't flip the switch at night. So I bought one of those pocket jumper boxes. I wouldn't work with the battery dead dead. But hopefully it will work with just a low battery. I'll need to do some troubleshooting and see what is causing that.
I finally put the eyebrows in for the headlights. That will need to be redone, but it's better than none.
Sorry, internet is so slow that a small picture takes an hour or more. Not much to show anyway.
Posted by: Andyrew May 10 2019, 10:30 PM
Progress!
Posted by: infraredcalvin May 11 2019, 09:19 PM
Wow, great work, thanks for sharing all of this! Read through it all last night and finished off this morning. It gave me a little motivation to clean up the shop a bit and get a little work on my car today.
Posted by: dan10101 May 12 2019, 12:15 AM
Wow, great work, thanks for sharing all of this! Read through it all last night and finished off this morning. It gave me a little motivation to clean up the shop a bit and get a little work on my car today.
I'm glad it help you in some way.
We all need a little motivation sometime.
Hmm, clean up the shop... Yeah, that'd be good.
Posted by: dan10101 May 22 2019, 11:52 PM
Another milestone today.
I had the car professionally aligned. I say professionally because pros get paid and have nicer tools. That's something I haven't had done in probably 15 years. I guess it's a pride thing.
The best thing is that it confirms that the car is square. Yeah, I don't get enough neg camber up front, but that seems to be pretty common. I have some ideas on that. 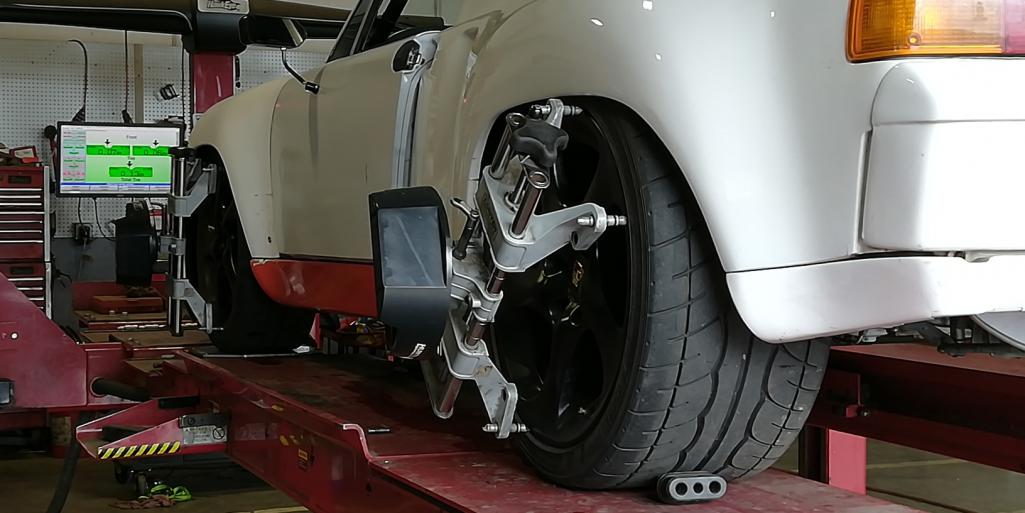
Posted by: Cairo94507 May 23 2019, 07:21 AM
I love this car and was so glad to see it back on the road.
Posted by: dan10101 May 23 2019, 10:13 PM
I love this car and was so glad to see it back on the road.
Thank you, that's the plan!
Actually I updated my signature to that effect.
Come and see the car (unfinished as it is) and me at WCR 2019
Buy my parts! I'll bring them to WCR. (Oh, nevermind, I just realized who you are. My parts aren't worthy of your awesome build)
but the rest of you,,, Buy my parts!
Yeah, I'm trailering. I can't convince my wife to go 20 miles in the 914 much less 1400.
Posted by: whitetwinturbo May 29 2019, 08:10 PM
............what an effort!
Posted by: dan10101 Jun 13 2019, 08:31 PM
Well another major goal accomplished.
Unless you were living under a rock (or had a life), you know that WCR was last weekend. Although I didn't drive the car 1400 miles to attend, I did trailer it and drive it on a couple of the mountain drives. It performed very well with the exception of a slipping clutch which only held back the speed exhibitions. Not entirely a bad thing.
I met lots of great people, saw some old friends and some amazing cars.
I went early to help Andrew cram to get his car ready. (it's the Orange 1.8t Audi motor) His car did well too and he made great progress getting it ready for lots of future road use.
This week is Medford Cruise week. Which means lots of weeknight shows and the weekend show and cruise. Last night I took it to the Sports Car show. I parked next to a sweet 65 356. The last of an era. I had a great time talking to numerous people that wanted to know all about the car. Medford is a low population area so the car count is pretty low. (Modesto Graffiti had 1400 cars last weekend) Anyway, there were some great ones and lots of variety. The Judges came around and were talking it up quite a bit. I imagine if I had the paint done I could have won something that night. But the finished cars won the night. I also parked next to a young guy with a grey suby. I loved his paint job and trim, but it turns out he wrapped it. And did a fantastic job. 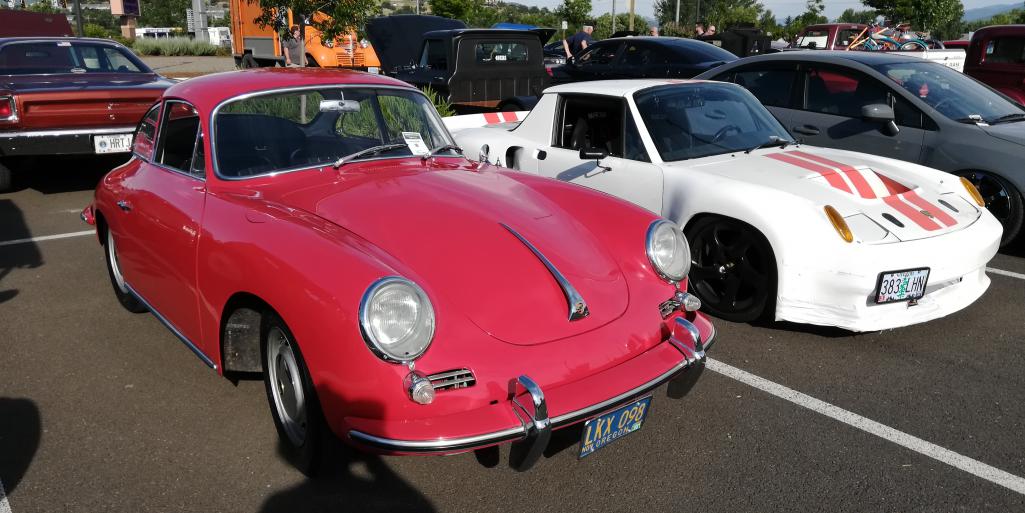
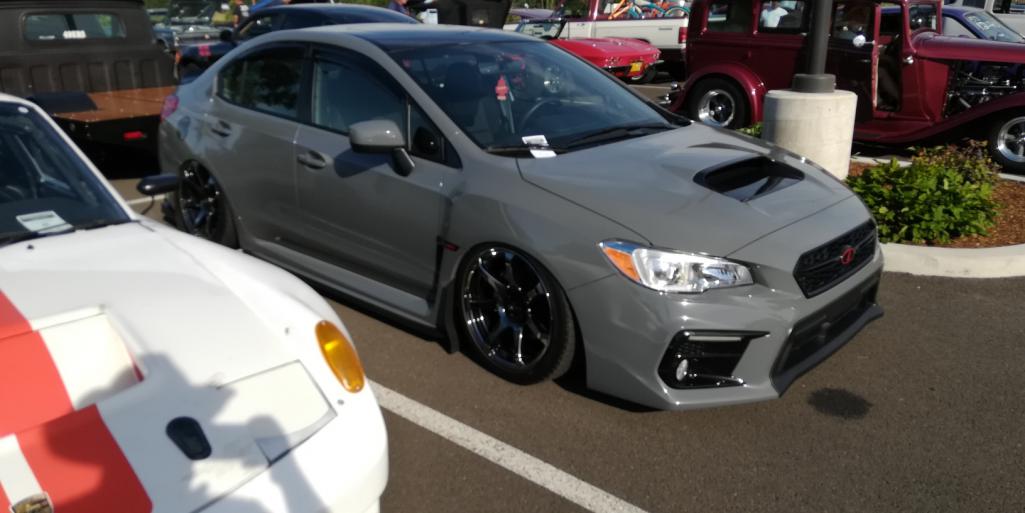
Sat night is the midnight drags for the cruise people. So I got to work on the clutch. I pulled the trans out and inspected the clutch. It all looked fine. I called Kennedy and they recommended the stage 1 clutch that came loose with the car for better clamping force with 500hp. And also pay better attention to the clutch adjustment. If I can get it to hold in second and third I may try to run it down the ¼ mile.
Many thanks to my Son @http://www.914world.com/bbs2/index.php?showuser=172 for his hard work in getting his ready for WCR. And also to his wife Jerika for allowing this to trump other activities. It was a great week for Becky and I.
Posted by: dan10101 Jun 13 2019, 08:58 PM
A couple more of WCR. I kinda glazed over it and it was actually a big deal for us. They gave me the Best Debut trophy and Andrew the Best DIY. (cool trophys BTW!)
Having both our cars there and mostly finished was a momentous task and felt really good. I have to say his sounds really good. There are 2 WCR threads and lots of pictures and videos there.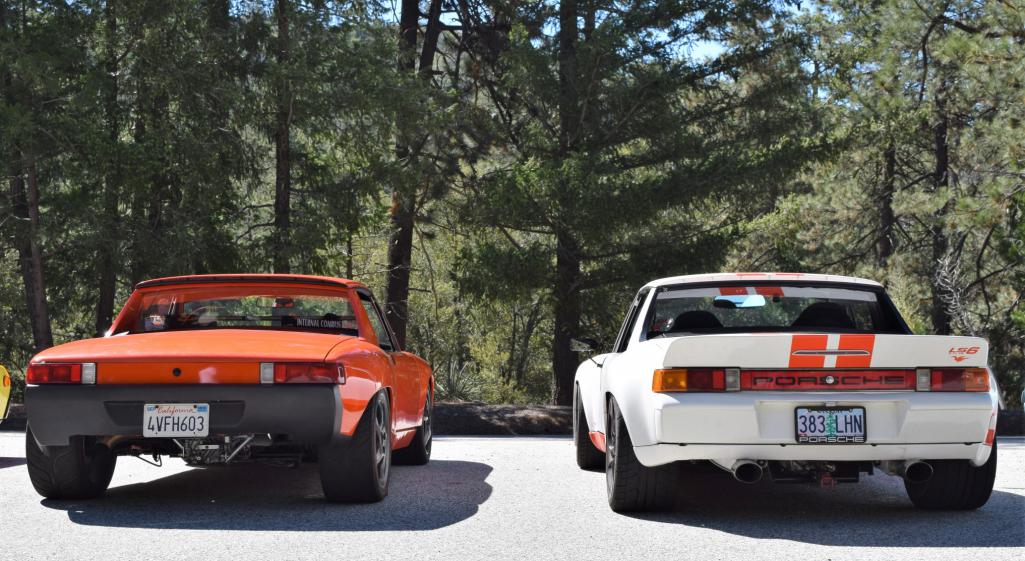
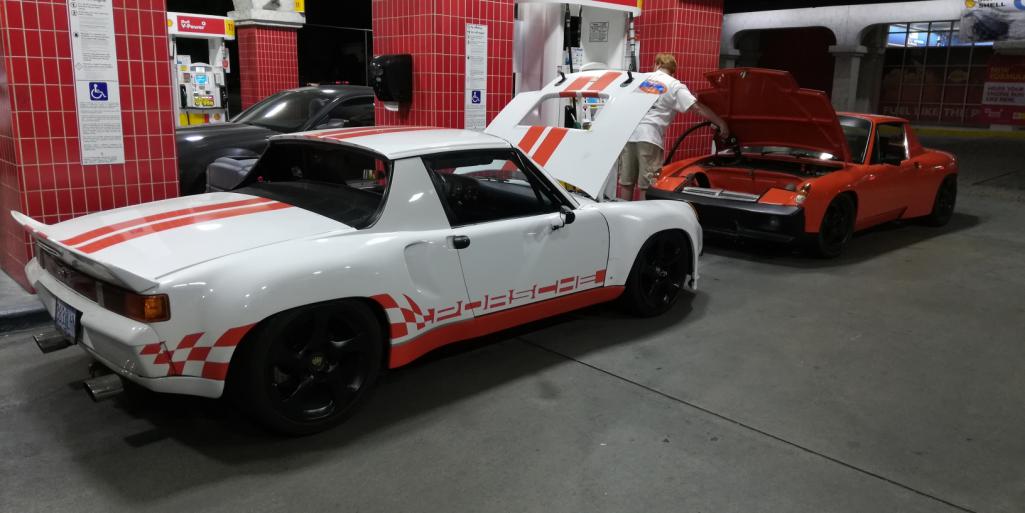
This video doesn't do either of our cars justice, but his sound and my visual. It was a great week.
https://www.youtube.com/watch?v=Rlm-4iVpzXI
Posted by: tygaboy Jun 13 2019, 09:50 PM
An all time great "Father & Son"! I'm so happy for you both - what a great trip this must have been for you and Andrew.
Congrats on your builds and thanks for sharing.
Posted by: Mark Henry Jun 14 2019, 05:31 AM
Looking good!
Both father and son have fat asses
Posted by: dan10101 Jun 14 2019, 05:41 AM
Looking good!
Both father and son have fat asses
Wider is better...
Posted by: Cairo94507 Jun 14 2019, 06:49 AM
Both cars are incredible and it was a pleasure to be able to see both.
Posted by: Mueller Jun 14 2019, 08:21 AM
Great pics of both yours and Andrews car.
Posted by: 2mAn Jun 14 2019, 04:40 PM
Just finishing going through the entire thread... amazing restoration. I too was one of the many dreamers when this was in the classifieds. Seems it made its way to the absolute correct person.
I love it. Enjoy the fruits of your labor
Posted by: sb914 Jun 14 2019, 05:42 PM
A couple more of WCR. I kinda glazed over it and it was actually a big deal for us. They gave me the Best Debut trophy and Andrew the Best DIY. (cool trophys BTW!)
Having both our cars there and mostly finished was a momentous task and felt really good. I have to say his sounds really good. There are 2 WCR threads and lots of pictures and videos there.
This video doesn't do either of our cars justice, but his sound and my visual. It was a great week.
https://www.youtube.com/watch?v=Rlm-4iVpzXI
I had the pleasure to see both cars.Well deserved and there couldn’t be more perfect winners for each catagory. Can’t wait to see the finished product,although there never ever finished. Congrats!
Posted by: dan10101 Jun 14 2019, 06:00 PM
Thanks everyone for the kind words. We hope to do much more of this in the future once they get dialed in.
Posted by: JRust Jun 14 2019, 11:43 PM
Thanks for the ride Dan. I know the clutch was slipping but I know the potential there. Sweet sound to be sure. Tough to beat the growl of a v8 when your on the throttle. Was great to ride in both yours & Andrews. Saturday was a Dalen limo day. LOL!
Posted by: Zippy69 Jun 18 2019, 04:22 PM
Well another major goal accomplished.
Unless you were living under a rock (or had a life), you know that WCR was last weekend. Although I didn't drive the car 1400 miles to attend, I did trailer it and drive it on a couple of the mountain drives. It performed very well with the exception of a slipping clutch which only held back the speed exhibitions. Not entirely a bad thing.
I met lots of great people, saw some old friends and some amazing cars.
I went early to help Andrew cram to get his car ready. (it's the Orange 1.8t Audi motor) His car did well too and he made great progress getting it ready for lots of future road use.
This week is Medford Cruise week. Which means lots of weeknight shows and the weekend show and cruise. Last night I took it to the Sports Car show. I parked next to a sweet 65 356. The last of an era. I had a great time talking to numerous people that wanted to know all about the car. Medford is a low population area so the car count is pretty low. (Modesto Graffiti had 1400 cars last weekend) Anyway, there were some great ones and lots of variety. The Judges came around and were talking it up quite a bit. I imagine if I had the paint done I could have won something that night. But the finished cars won the night. I also parked next to a young guy with a grey suby. I loved his paint job and trim, but it turns out he wrapped it. And did a fantastic job.
Sat night is the midnight drags for the cruise people. So I got to work on the clutch. I pulled the trans out and inspected the clutch. It all looked fine. I called Kennedy and they recommended the stage 1 clutch that came loose with the car for better clamping force with 500hp. And also pay better attention to the clutch adjustment. If I can get it to hold in second and third I may try to run it down the ¼ mile.
Many thanks to my Son @http://www.914world.com/bbs2/index.php?showuser=172 for his hard work in getting his ready for WCR. And also to his wife Jerika for allowing this to trump other activities. It was a great week for Becky and I.
Dan,
I believe the stage 1 clutch will cause extreme pedal effort. We reverse engineered the clutch system and went with the lightest clutch that will handle the torque and hp the car makes. I would be very careful about changing the clutch to a stage 1.
Posted by: sixnotfour Jun 18 2019, 04:59 PM
something to read ,,clutch experiences.....double disk
https://shoptalkforums.com/viewtopic.php?t=139906
Posted by: dan10101 Jun 18 2019, 06:12 PM
Dan,
I believe the stage 1 clutch will cause extreme pedal effort. We reverse engineered the clutch system and went with the lightest clutch that will handle the torque and hp the car makes. I would be very careful about changing the clutch to a stage 1.
Actually I was able to try it and it seems ok. In the link that 6not4 posted it stated that it released quickly. That might actually help. I will be able to move the slave cylinder out on the arm a bit to make give it better leverage and lengthen the release time.
Anyway, I ordered a new throwout bearing and was a spectator for the drags. Still a lot of fun with street outlaws racing and jet car.
We'll give this a try and if it doesn't work we'll try something else. The dual disk sounds interesting if they make it for the 930..
Posted by: Zippy69 Jun 19 2019, 08:57 AM
Dan,
I believe the stage 1 clutch will cause extreme pedal effort. We reverse engineered the clutch system and went with the lightest clutch that will handle the torque and hp the car makes. I would be very careful about changing the clutch to a stage 1.
Actually I was able to try it and it seems ok. In the link that 6not4 posted it stated that it released quickly. That might actually help. I will be able to move the slave cylinder out on the arm a bit to make give it better leverage and lengthen the release time.
Anyway, I ordered a new throwout bearing and was a spectator for the drags. Still a lot of fun with street outlaws racing and jet car.
We'll give this a try and if it doesn't work we'll try something else. The dual disk sounds interesting if they make it for the 930..
Not sure you will get the throw you need to fully engage or disengage the clutch if you move the slave mounting point out on the arm? We tested many configurations with different strength pressure plates, discs, arm lengths and hydraulic ratios. We asked Kennedy how many pounds of pressure to release the KEP Lite pressure plate vs Stage 1. A. "Don't know as no one has ever asked us this question before ???" LOL
Then asked what is the lightest set up that can take the torque and HP? Settled on Lite Pressure Plate and KEP 240 Thick Rag style disc.
Good luck with it. Happy to discuss.
Posted by: dan10101 Jul 5 2019, 06:00 PM
Wow, I 6th paged it... but now a days there is less news.
Ok the clutch is in. Initial tests was it doesn't want to fully release even at the shortest throw on the lever. I can get it into revers with some finagling, but I may still have air in the lines. But I had to drive it to see if it would slip. Nope. no slipping, at all... I'm now getting a taste of what this car will really do.
I decided to surface the flywheel so it wouldn't be a factor in clutch chatter. 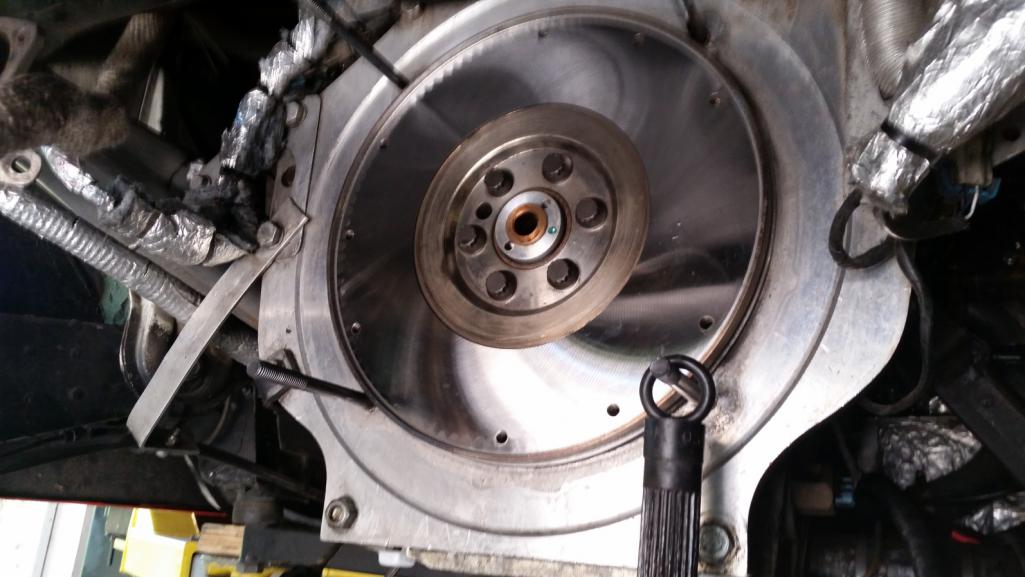
New disk even though the old one was probably fine.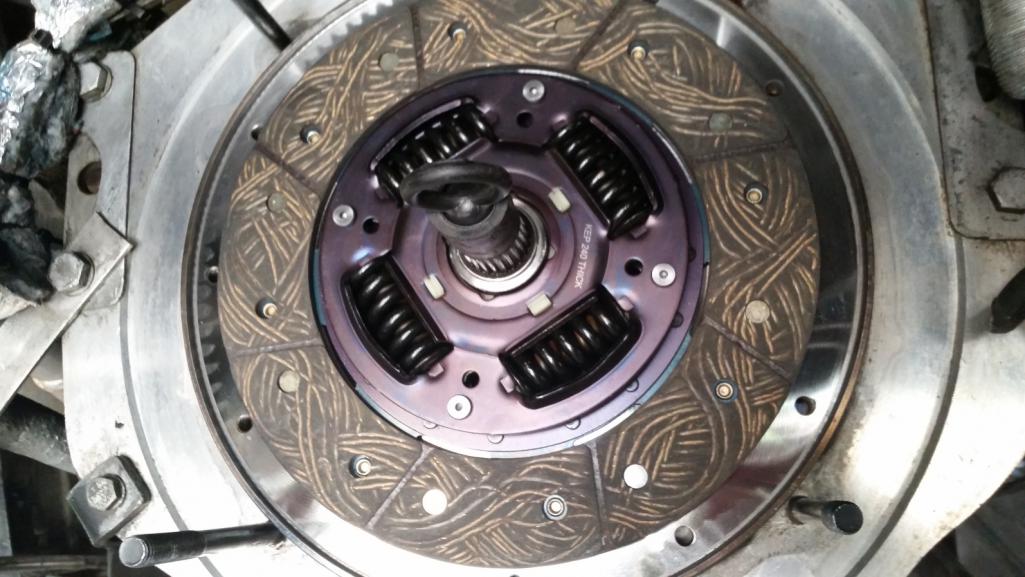
The stage 1 clutch itself didn't have much spring left in it. Thus it not working at all in 2nd. The new one would barely start the threads. And has considerably more pedal pressure as well as effort. Still not bad but we'll see in the first bumper to bumper action. 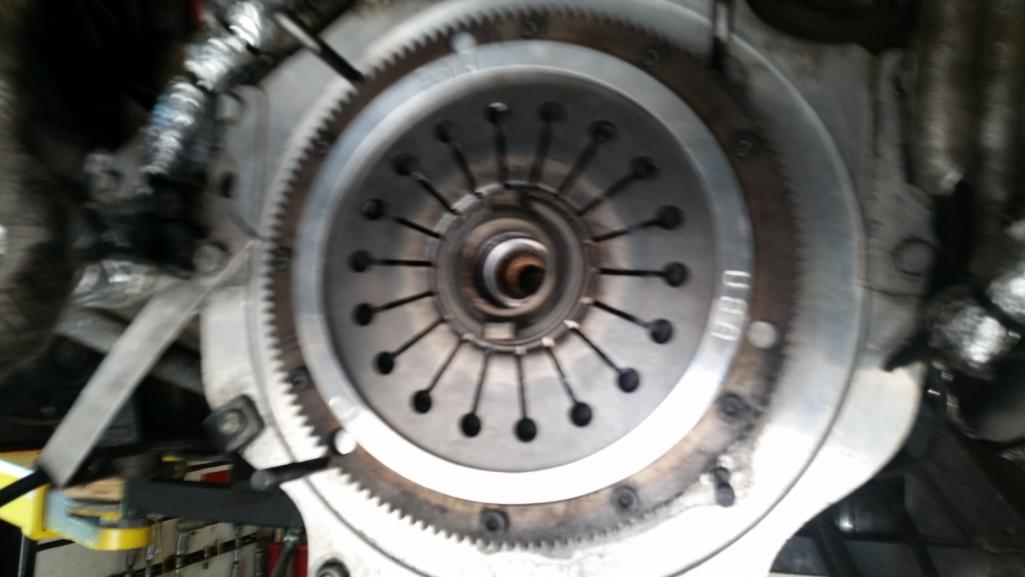
with the addition of these 2 parts and the flywheel surface, I also bought a new throwout bearing. (not a great design I must say). They probably don't last long.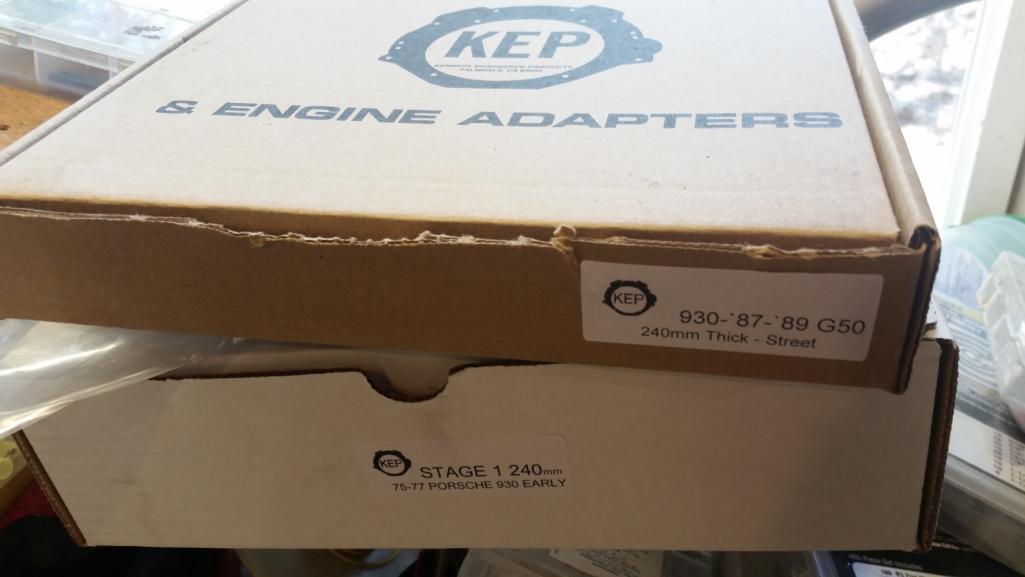
I just need to drive it a bit and break it in. It's still really grippy starting out in first, other shifts are fine.
Posted by: dan10101 Jul 5 2019, 06:42 PM
Wow, 2 posts in 1 day..
So my next project is getting the steering better to my liking. It seems really light at higher speeds and not enough camber.
If you remember back a few pages I installed 40mm drop spindles. I think that and not enough bump steer correction is causing me some issues. 1st of all. I can’t drop the car anymore and it caused me to lose some camber. It’s almost like I raised my car up.
So I decided to experiment on my stock spindles and drop them 19mm (3/4”). Then lower the torsion bars a bit and gain some camber. Right or wrong here is my adventure in raising spindles on Bilstein struts.
Start by locating the ¾” weld hole on the back of the spindle/strut.
I drilled a small starter hole then the largest bit I had to remove as much metal as I could with a drill bit without going thru the strut housing. 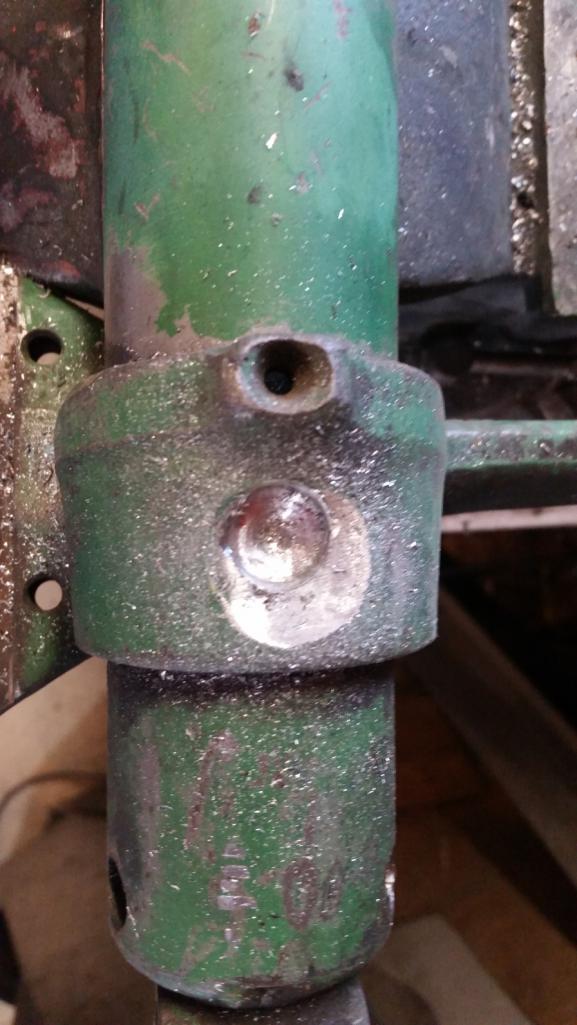
Then I took a dremel and rasp bit and ground the rest of the ¾ inch hole. I’m sure there are easier ways, but this is what I came up with. 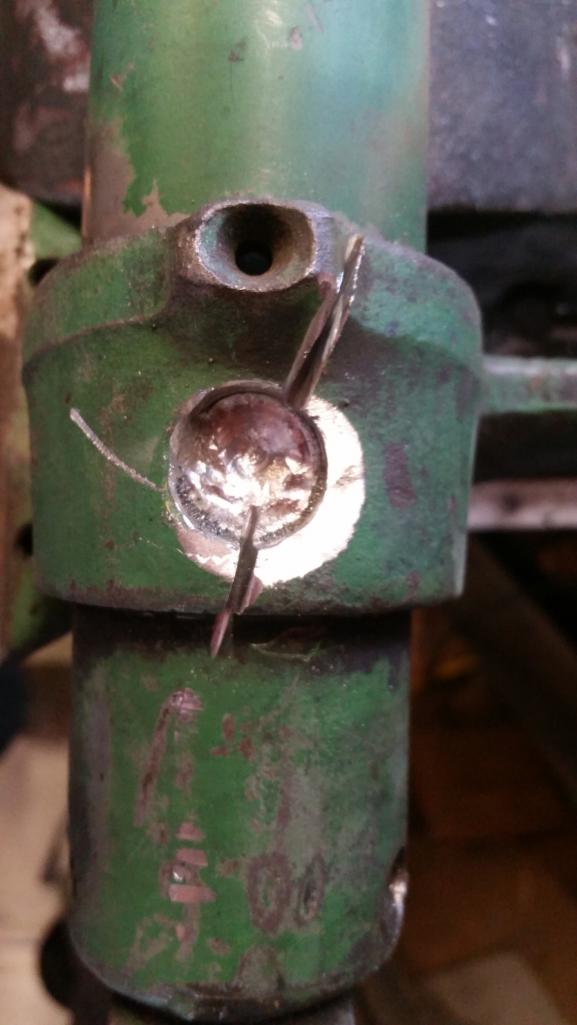
You can’t really get it all, so the next step is to cut a slot in the top and bottom, (see pict). Then tap a chisel or ground down screwdriver in there to separate it. It breaks the rest of the weld free. You may need to grind a bit more to break it all free. 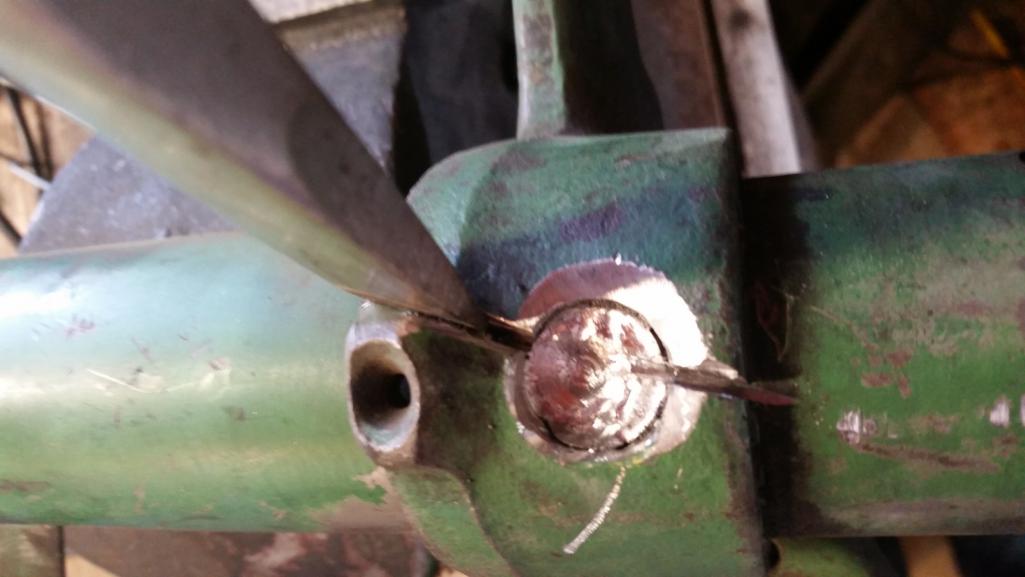
After it starts to move you can see where the high spots are and grind them down until you can drive the spindle down to the bottom. It’s tapered slightly so it easier to go down first. 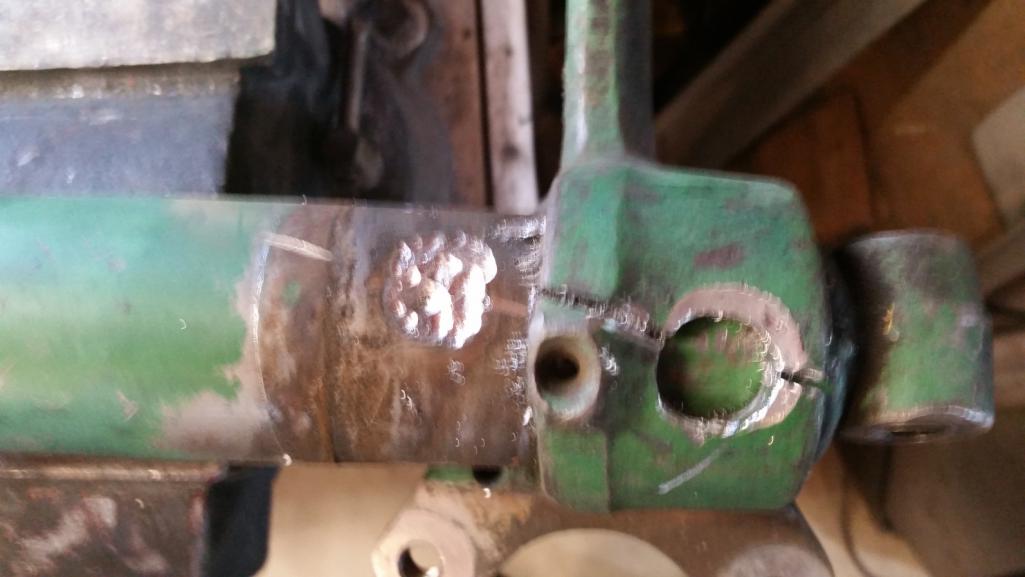
Then clean up the old weld spot and take the paint off the strut housing to make it easier to slide up however much you want to raise the spindle.
Now is the tricky part. Since I only wanted to raise it 19mm, it wasn’t a problem for me to tap a chisel in the slot and knock the spindle up 19mm higher than before. But going higher the taper becomes a problem. I imagine some heat or I think I read that others removed the spindle entirely and removed material from the inside would allow you to go higher. ( I’m speculating here, my 40mm were already done when I got them).
Once it’s at the height you want it, then it’s a matter of cleaning the paint off and welding it in place. 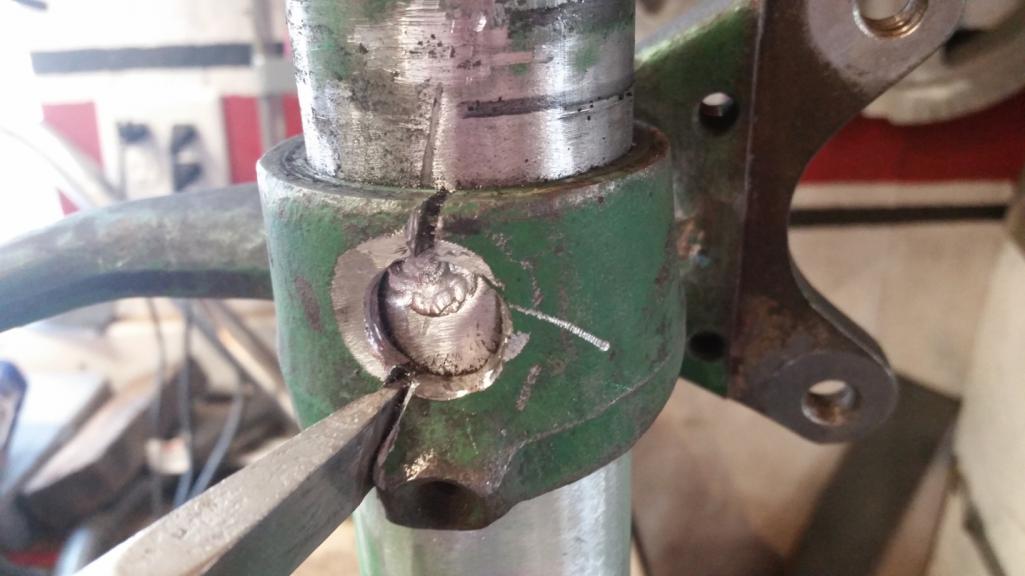
Note: I’ll be taking care to keeping my spindle to strut angle to 12degrees or less. One of mine was 9 degrees and the other 13 degrees. Moving it up the strut seems to have put them right at 11 or 12 degrees where I want.
Posted by: Krieger Jul 5 2019, 11:10 PM
Posted by: dan10101 Jul 22 2019, 06:24 PM
"If everything seems under control, you're not going fast enough. "
Mario Andretti
What a great day on the autocross course with SSCC. Siskiyou Sports Car Club.
No, I wasn't anywhere near the experienced drivers, but I had a blast. The car worked great. No slipping clutch meant getting the power to the ground. And also meant that the old tires tried their best, but just not enough. Still thrilling moments will keep me coming back for more.
You probably can't see all the times where there are traction issues. But I'm using that as a learning experience before I get on the big track.
Take a ride with me.
https://www.youtube.com/watch?v=fbQlmIz4_do&t=103s
One more comparing my last 2 runs. Still not better than my run with Dillon. Funny how that is.
https://www.youtube.com/watch?v=tagV6tGYEt0
Posted by: dan10101 Sep 18 2019, 08:54 PM
Happy 918 Day!
Lot's been happening, Wow, it's been 2 months, sorry this will be a long post.
My last couple of weeks…
I spent some time getting back to the art of fiberglass work. My little experience with the trailer caused some damage and needed repair to the front splitter. I started by calicoing the pieces back together and determining a way to hold things together while things dried. I worked from the front first so I could make sure the 2 halves lined up. I used angle hair to glue them together, clamped them and let it get hard. Then applied some layers of matt to provide strength and to fill in the gaps. (yes, big gaps.) I worked the front a bit and then removed the front end, (hey, that’s kinda handy). Working from the back side I applied several layers to get the strength back where I wanted it. Then I moved back to the front where I could get it at least close. 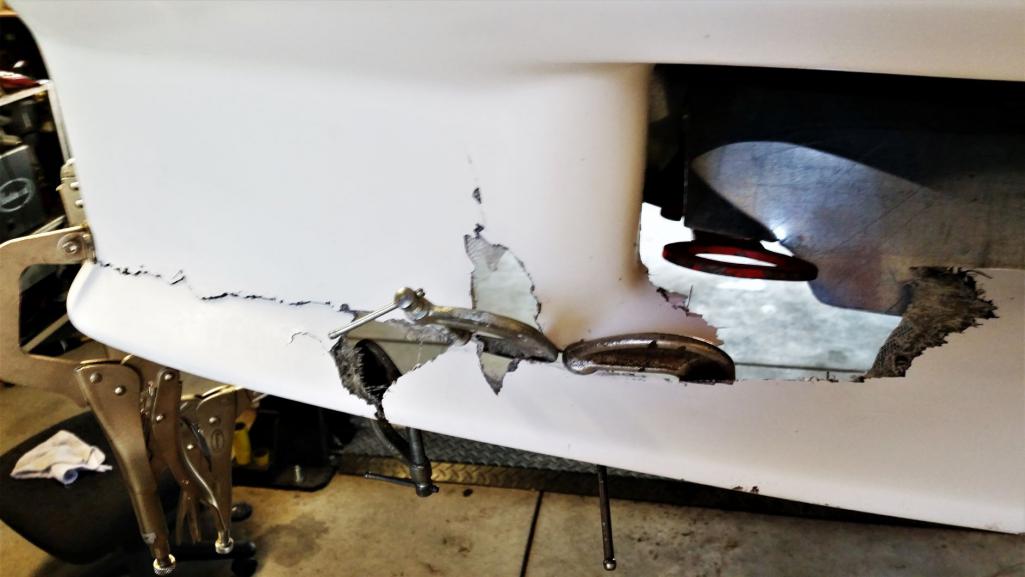
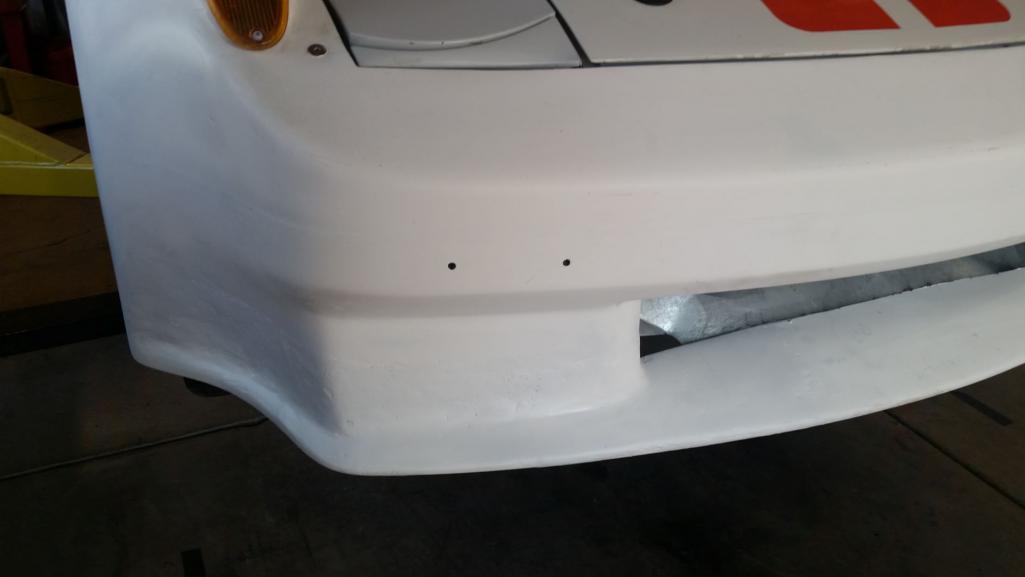
Broke the shop laptop. Couldn’t get ancient laptop with broken monitor and broken keyboard to switch to the exterior monitor. So I ordered a new monitor cable, tore it all apart and managed to get it back together again… and bam, now I have 2 monitors and an external keyboard.
Swapped my Press’ 12 ton jack to my Affordable Tubing bender that came with an 8 ton jack. That took a bit of fab work, but it worked out fab! It is said to allow bending of .120 wall tubing.
I promptly used the new/downsized press to install some bearings for a friends rear end rebuild for his Jeep. Yay, it still works!
Finally back to the 914.. I’ve had problems from time to time with the fuel pump not working. I previously had wired in an alternate route so I wouldn’t be stranded. Well it came in handy the other day when my friend came by and wanted a ride. So this week I did some tracing and found a connection to the fuse block (aftermarket) had gotten hot and was crusty. I cleaned up the terminal, put some dialectic grease on it and the new fitting and I think that’s going to take care of that. I’ll leave my bypass in place, just in case.
Still haven’t found wheels that I like and can afford. So I decided to take a chance at straightening the 8” wheels. A visual inspection would have said they were fine. I could still feel they were off just driving on the driveway. Note: This work is minus the tires of course. This way I can have a race tire set and street tire set. Currently only 6 wheels are straight. 4 – 18x11” and 2 of the 18x8”. I was successful in straightening one of the wheels before my setup bent on the 2nd. I'll send it to a pro but in the meantime I picked up another 8" wheel and that makes 2 full sets. Then I started searching for affordable tires.
I've been working on the ECU trying to get something I could tune. The existing one is tunerlocked by a shop in NJ that is now closed. I picked up a couple spare ECUs at the wrecking yard and started learning. Decided to purchase HPTuners. It's a learning curve, but I think it will work to get my redline back where it should be.
Lately the project is installing a wide band to help with tuning. I'll be setting it up to log data with the laptop using the scanner app in HpTuners.
2 days of autocross earlier this month.
https://www.youtube.com/watch?v=PFXOVJmNi3k
Another comparison run of the 2nd day. Exciting day for me as my normally dominate competition had a backup car they were going to do a champ style endurance race so it wasn't quite up to the horsepower and suspension tuning of their normal LS powered RX7. So I actually had a chance. I was behind them on Saturday, but managed a class win on Sunday.
https://www.youtube.com/watch?v=0m08hQtTxWs
These will help get a bit closer to the competition. I found the Hoosiers I was looking for at John Burget Tire out of the east coast. 580 for all 4 shipped to my door. Not new, but close enough for me. 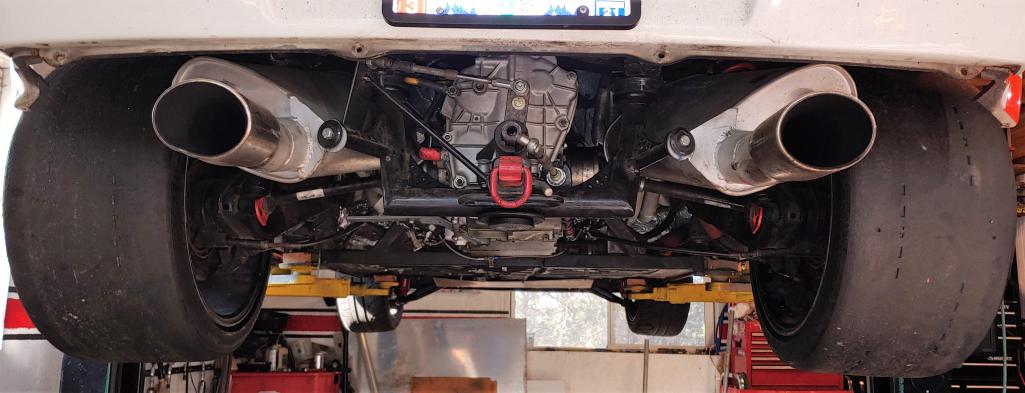
Well, if you've read this far. Thanks for listening to my dribble..
Posted by: tygaboy Sep 18 2019, 09:15 PM
Dan - Congrats on the class win! Nice repair on the fiberglass, too.
Posted by: dan10101 Oct 7 2019, 10:33 PM
3 weeks later and the last event of the season is in the books. No records were threatened but lots of fun was had. I fixed an oil leak last week, but developed a lifter tick during the run. Yeah, I sent it anyway. Made it home just fine. I have 5 months to fix it.
The Hoosiers started to hook up on the 2nd lap. Fun, but I was disappointed that I didn't adjust my driving to take advantage of the traction. Lots to learn. I'll be looking for some AX tires...
Here's my get to the track solution. It works for short excursions. 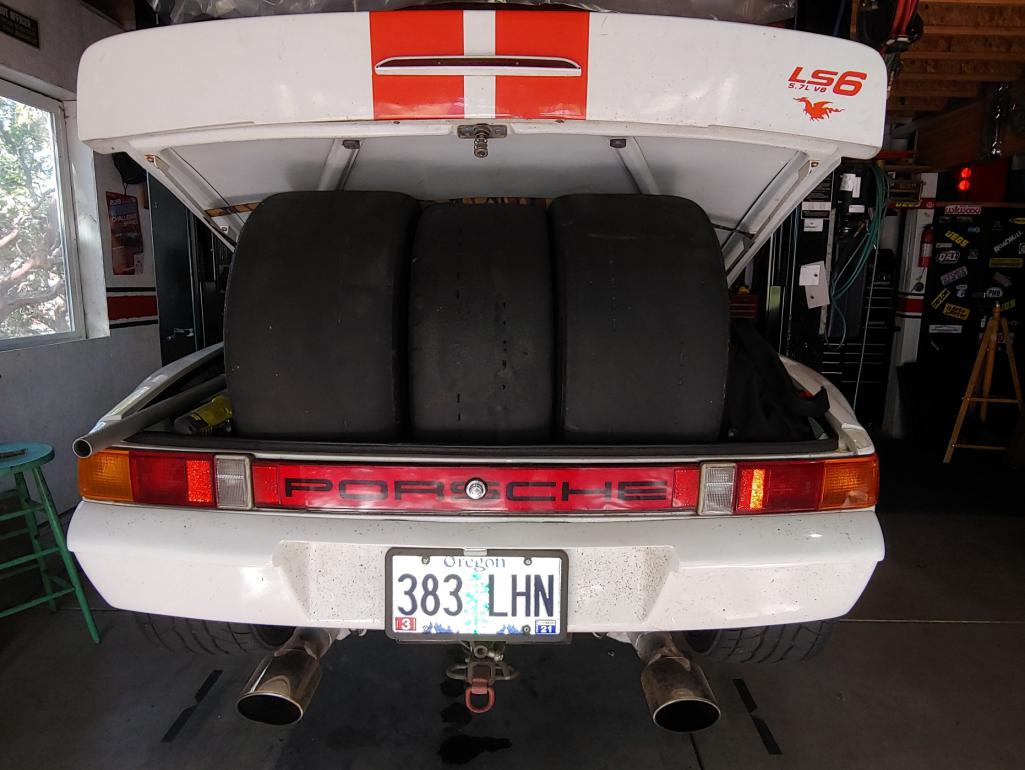
Here the long video if you're interested.
https://www.youtube.com/watch?v=DcBzrdm7ANc
Posted by: sb914 Oct 8 2019, 07:23 AM
I’d love to see your car on a “big track” to awaken the beast !
Posted by: dan10101 Oct 8 2019, 10:03 AM
I’d love to see your car on a “big track” to awaken the beast !
I have that same yearning...
Things happen so fast on the short track, I just react most of the time. At least on the big track you have a few seconds to collect your thoughts for the next series of turns.
Have you taken your car out on the big track?
Posted by: JRust Oct 8 2019, 12:33 PM
I’d love to see your car on a “big track” to awaken the beast !
I have that same yearning...
Things happen so fast on the short track, I just react most of the time. At least on the big track you have a few seconds to collect your thoughts for the next series of turns.
Have you taken your car out on the big track?
We did streets of willow one year for WCR. We had 20 minute runs on the track & could do 3. It was 100 plus out there. It was awesome for about 10 minutes. The second 10 kicked my ass. I got done with that first one & took about 2 seconds to decide I was skipping my second session. By the time I had lunch I had decided I was just going to load my car up & be glad I made it through WCR without my car breaking down. That heat just takes it out of you man. I was also amazed at how much energy 20 minutes on the track took. Granted a lot was the heat but there is something about being in track shape
 .
.
Posted by: andys Oct 8 2019, 02:41 PM
I’d love to see your car on a “big track” to awaken the beast !
I have that same yearning...
Things happen so fast on the short track, I just react most of the time. At least on the big track you have a few seconds to collect your thoughts for the next series of turns.
Have you taken your car out on the big track?
Please keep in mind that you will carry a lot of speed at Big Willow (914 LS6), and if something goes wrong, or you miss-judge, you can get seriously hurt. The Streets, OTOH, is relatively safe because of the lower speeds. Cage, fire system, gear, and ambulance/EMT for the big track. IMHO.
Andys
Posted by: dan10101 Oct 8 2019, 02:45 PM
We did streets of willow one year for WCR. We had 20 minute runs on the track & could do 3. It was 100 plus out there. It was awesome for about 10 minutes. The second 10 kicked my ass. I got done with that first one & took about 2 seconds to decide I was skipping my second session. By the time I had lunch I had decided I was just going to load my car up & be glad I made it through WCR without my car breaking down. That heat just takes it out of you man. I was also amazed at how much energy 20 minutes on the track took. Granted a lot was the heat but there is something about being in track shape
.Andrew and I co-drove his V8 914 at that WCR. Streets of Willow is a great track for a "middle size" track. Thunderhill West is another. Top speeds of around 100 vs 140+ make it likely the place I start. We've done several tracks and look forward to getting out there again soon. Top speed at the kart track is about 75 for me, (unless I drive it deeper...) It feels good at that speed, so I'm ready for the next step.
I actually like the larger tracks. 20 min sessions is just about right. But the best part is you can pull off and take another session later. After about 4 sessions a lot will skip the last session. 5 12 min sessions would still be a lot of track time vs AX.
Posted by: dan10101 Oct 8 2019, 02:50 PM
I’d love to see your car on a “big track” to awaken the beast !
I have that same yearning...
Things happen so fast on the short track, I just react most of the time. At least on the big track you have a few seconds to collect your thoughts for the next series of turns.
Have you taken your car out on the big track?
Please keep in mind that you will carry a lot of speed at Big Willow (914 LS6), and if something goes wrong, or you miss-judge, you can get seriously hurt. The Streets, OTOH, is relatively safe because of the lower speeds. Cage, fire system, gear, and ambulance/EMT for the big track. IMHO.
Andys
Andys, I fully agree, I was writing my last post as you sent this one. I've done several track days at Thunderhill east with my 944T. I do like that run but I'll start with the smaller west track then if everything feels good I'll do east again. Big Willow will probably down the bottom of the bucket list.
Posted by: dan10101 Oct 12 2019, 05:34 PM
Fun Dyno Day!
Ok, I just saw this last minute. $100 for several pulls.
So after Cars and Coffee this morning I headed over to a dyno day.
Not the HP number I was looking for, but close to what I expected. 362 at the rear wheels. Anyway it's not about the number (so they say...) So more tuning needed. Plus I don't know if the computer is pulling timing. A/F look pretty good.
I ran the first several pulls in 3rd, because his dyno maxed out at 154mph. The last pull was in 4th to see what difference it would make. It stopped at 5500rpm.
enjoy...
https://www.youtube.com/watch?v=-XOZfDj5FEI&feature=youtu.be&fbclid=IwAR3WX_zlNsbrGntxbKONO-2-j180099q4qxKQ7YZkCXRa-g--VPR14eLhK4
Posted by: Andyrew Oct 13 2019, 11:21 PM
Juuust keep it at 360whp. No need to have any more than that....
Posted by: dan10101 Oct 14 2019, 12:36 AM
Juuust keep it at 360whp. No need to have any more than that....
Sorry, no can do. I need NOZ, 2 bottles, big ones!
Posted by: Zippy69 Oct 17 2019, 12:13 PM
3 weeks later and the last event of the season is in the books. No records were threatened but lots of fun was had. I fixed an oil leak last week, but developed a lifter tick during the run. Yeah, I sent it anyway. Made it home just fine. I have 5 months to fix it.
The Hoosiers started to hook up on the 2nd lap. Fun, but I was disappointed that I didn't adjust my driving to take advantage of the traction. Lots to learn. I'll be looking for some AX tires...
Here's my get to the track solution. It works for short excursions.
Here the long video if you're interested.
https://www.youtube.com/watch?v=DcBzrdm7ANc
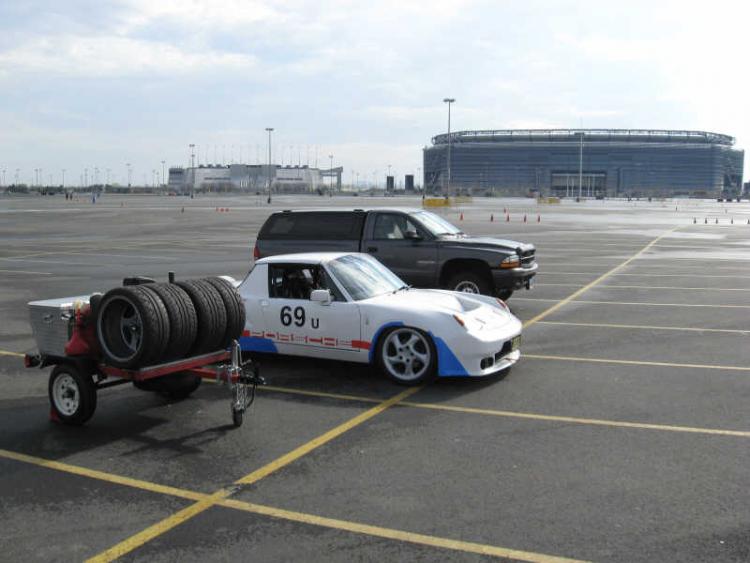
Time to build a tire trailer?
Posted by: Zippy69 Oct 17 2019, 12:31 PM
Fun Dyno Day!
Ok, I just saw this last minute. $100 for several pulls.
So after Cars and Coffee this morning I headed over to a dyno day.
Not the HP number I was looking for, but close to what I expected. 362 at the rear wheels. Anyway it's not about the number (so they say...) So more tuning needed. Plus I don't know if the computer is pulling timing. A/F look pretty good.
I ran the first several pulls in 3rd, because his dyno maxed out at 154mph. The last pull was in 4th to see what difference it would make. It stopped at 5500rpm.
enjoy...
https://www.youtube.com/watch?v=-XOZfDj5FEI&feature=youtu.be&fbclid=IwAR3WX_zlNsbrGntxbKONO-2-j180099q4qxKQ7YZkCXRa-g--VPR14eLhK4
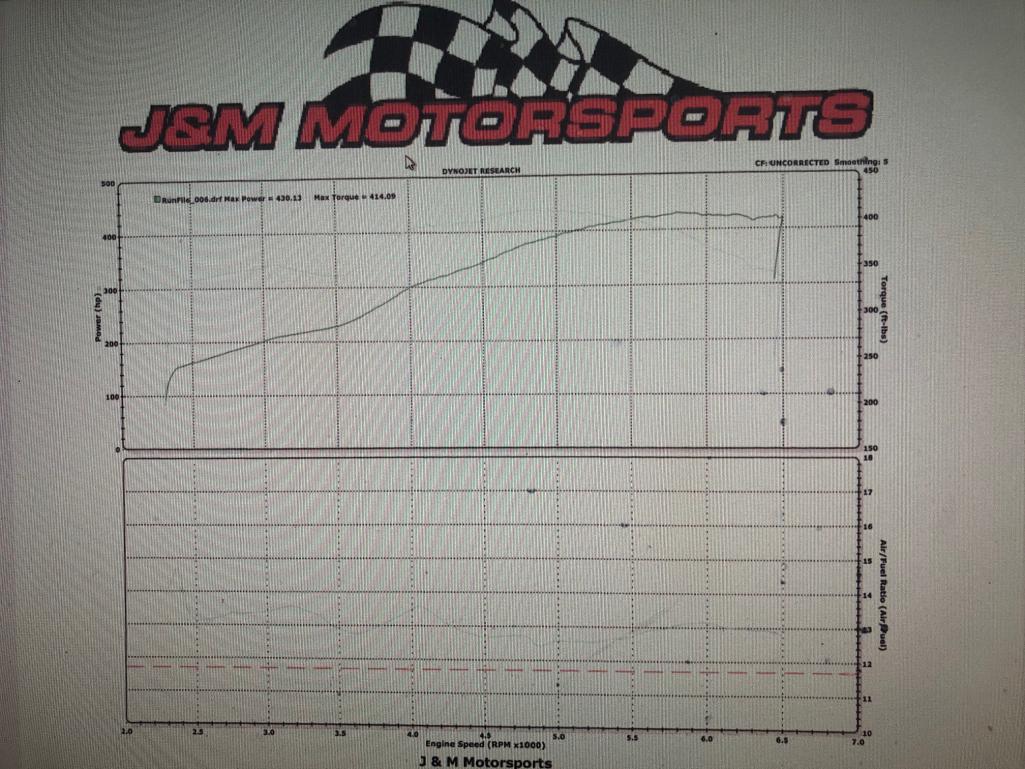
Dyno figures that you are getting seem kind of low? Last time I had the motor tuned and dynoed on a Dynojet I got 430 WHP
Posted by: dan10101 Oct 17 2019, 12:31 PM
3 weeks later and the last event of the season is in the books. No records were threatened but lots of fun was had. I fixed an oil leak last week, but developed a lifter tick during the run. Yeah, I sent it anyway. Made it home just fine. I have 5 months to fix it.
The Hoosiers started to hook up on the 2nd lap. Fun, but I was disappointed that I didn't adjust my driving to take advantage of the traction. Lots to learn. I'll be looking for some AX tires...
Here's my get to the track solution. It works for short excursions.
Here the long video if you're interested.
https://www.youtube.com/watch?v=DcBzrdm7ANc
Time to build a tire trailer?
It's in the works!
Posted by: Charles Freeborn Dec 4 2019, 11:38 PM
Wow. Just Wow... From you part of the state our tracks are a bit of a haul, but would be worth it. Check out ORP. Very technical - well suited to a nimble car with some hp. Can run either clockwise or counter. Big fun. I instruct with HOD out there.
Then there's PIR. Flat & fast. I instruct there with a couple of different clubs, including HOD.
Even more of a haul, up in Shelton WA is The Ridge. Another technical track with elevation changes and a bit of everything.
And lastly, east of Seattle is Pacific Raceways. Old school. Kind of scary with not much run off and things to hit if you do go off... maybe get some seat time at the others before you try that one.
Posted by: dan10101 Dec 5 2019, 12:57 AM
Thanks for the invite, I typically go south to Thunderhill to hook up with my son and his outlaw 914, but he's not always available so a trip north is a big possibility. And 2 of my bucket list items is PRi and ORP.
AND and instructor would definitely reduce the learning curve!
Posted by: rhodyguy Dec 5 2019, 08:03 AM
Another new track to be built in WA. Adjacent to the drag strip where PCA AXs are held near Bremerton.
Posted by: Charles Freeborn Dec 5 2019, 10:20 AM
Thanks for the invite, I typically go south to Thunderhill to hook up with my son and his outlaw 914, but he's not always available so a trip north is a big possibility. And 2 of my bucket list items is PRi and ORP.
AND and instructor would definitely reduce the learning curve!
The Ridge was designed by the same person / group as Thunderhill. Very similar. ORP and PIR are both a blast - very different but lots of fun. Give a yell if you head up this way. Bring your son - we'd have 3 914's out!
Posted by: dan10101 Dec 6 2019, 07:40 PM
I look forward to heading north sometime.
Actually, I'm having track withdraws...
Thanks
Posted by: rhodyguy Dec 7 2019, 08:39 AM
Look into a track day at the old S.I.R now P.R.I. pretty long track with lots of elevation changes. The main straight will allow you push the top end speed. Was a location for Trans-AM racing back in the day.
Posted by: dan10101 Dec 7 2019, 11:39 AM
Look into a track day at the old S.I.R now P.R.I. pretty long track with lots of elevation changes. The main straight will allow you push the top end speed. Was a location for Trans-AM racing back in the day.
I was just checking out the PIR website. Nice looking setup. Maybe there is something good about Portland afterall .
Posted by: rhodyguy Dec 7 2019, 12:16 PM
Wrong one. Pacific Raceways. Was SIR for decades. About 20 miles east of Seattle. The SOVERN historic races are held there during the summer.
Posted by: dan10101 Dec 7 2019, 01:28 PM
Well, I never met a track I didn't like.
A dream bucket list would be to hit all the tracks or at least the major ones.
Posted by: burton73 Dec 7 2019, 02:04 PM
Dan,
Are you enjoying you 930 turbo trans 4 speed in your car?
Thanks,
Bob B
Posted by: dan10101 Dec 7 2019, 05:07 PM
Dan,
Are you enjoying you 930 turbo trans 4 speed in your car?
Thanks,
Bob B
After cleaning and lubing the exposed shifter mechanism at the back of the trans it's shifting much smoother. It tends to pickup dirt so I'll have to pay attention. The new clutch is holding the power well. It's smoothed out a bit on the starts, used to be grabby. In general I love the idea that it should hold 700+ hp. So I'm not afraid to flog it. The downsides are the spacy gears. 1st is 0-55, 2nd goes to about 90, I've only seen 3rd on the dyno at about 135ish and 4th pegged the dyno at 155, (the dyno couldn't take any more).
I think I'll find that on the big track I'll wish I had a couple more gears. I know we can always say the big V8 has torque all over, but the truth is being in the power band can't be beat. On the autocross course where things happen really fast, it's kinda nice to be able to just use 1 or 2 gears. (mostly 1).
Posted by: sixnotfour Dec 7 2019, 05:33 PM
For Rohdy guy
probably wont raise enough capitol, just like this one..
https://www.opb.org/news/article/boardman-race-track-construction-good-start/
plenty to do..
Portland International, west ore
Grass valley, east regon
Pacific Raceway, The Ridge, west wa
https://www.spokanecountyraceway.com/road-course ,,east wa
ya that gearing doesnt sound optimal....momoney..there is a great trany guy,,used to work t Gamroth, he probbly has gears laying around...
Cary prob. knows his name, , I might Remeber...
Posted by: rhodyguy Dec 7 2019, 05:48 PM
Construction set to start next year. Old Clifton Rd will be a nightmare for the locals. This isn't like the NASCAR fiasco. Sorry for the OT.
Posted by: sixnotfour Dec 7 2019, 09:12 PM
Construction set to start next year. Old Clifton Rd will be a nightmare for the locals. This isn't like the NASCAR fiasco. Sorry for the OT.
bet is 10 bucks..been in the hopper forever...
OT out...
Posted by: sixnotfour Dec 8 2019, 10:16 AM
Trans. guy in Portland, Gordon Ledbetter
911S reg. ID
gled49 gled49 is offline
Member #226 R Gruppe Life Member #147
Join Date
Feb 2009
Location
Portland, Oregon
Posts
1,649
Posted by: dan10101 Dec 8 2019, 10:32 AM
Trans guy in Portland..
Can we reword this??
Anyway, my transaxle is gonna have to do until I sell a boatload of parts..
Here's a current shop picture. Cleaning up and adding needed lighting. Bodywork is coming soon.
I gotta get back to work...
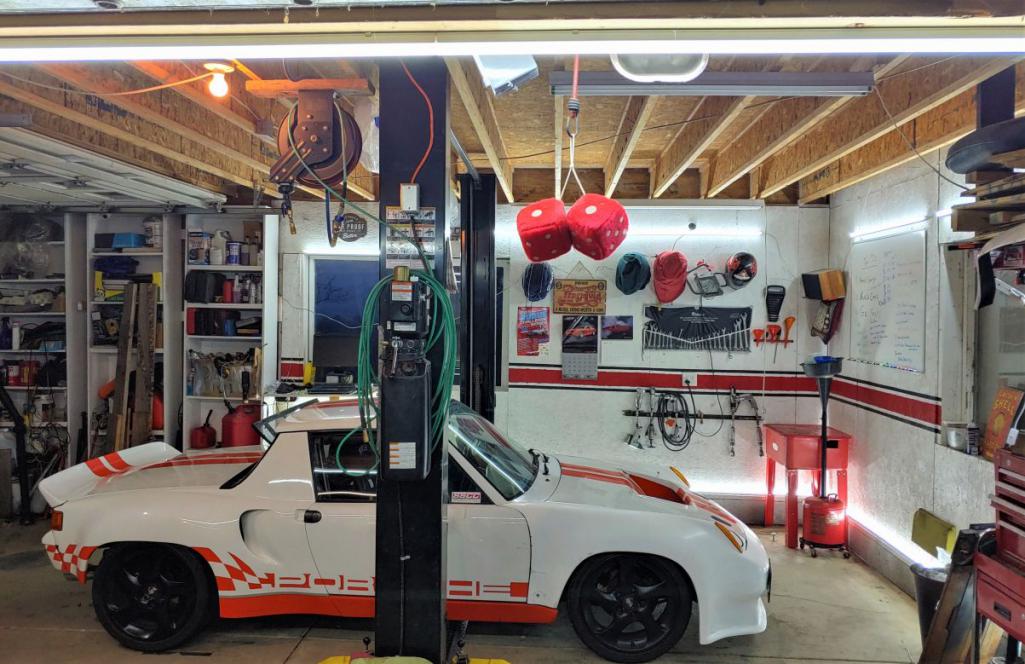
Posted by: dan10101 Jan 10 2020, 05:04 PM
2020 Update!
No, I don't see any clearer. but whatever..
I've finally started uploading build videos to Youtube. Andrew and I decided to used a new channel for this and his build videos. I remixed some of the ones I've already posted and they now reside on Budget Outlaws. I have a bunch more to edit and uploaded so stay tuned.
In the mean time, you can click on the Budget Outlaws channel and see the 5 that I uploaded so far. I'm working on the Jig build video and I'll send that up Monday hopefully. We have a lot of work to do on production. I'm no Youtube Razzle Dazzle guy, just someone who wants to have something to watch in 20 years when I can't build cars any longer.
https://www.youtube.com/channel/UCEargr6MQuJaClviv8nxfKA/videos?view_as=subscriber
(same as the signature link below in case that gets deleted sometime in the distant future)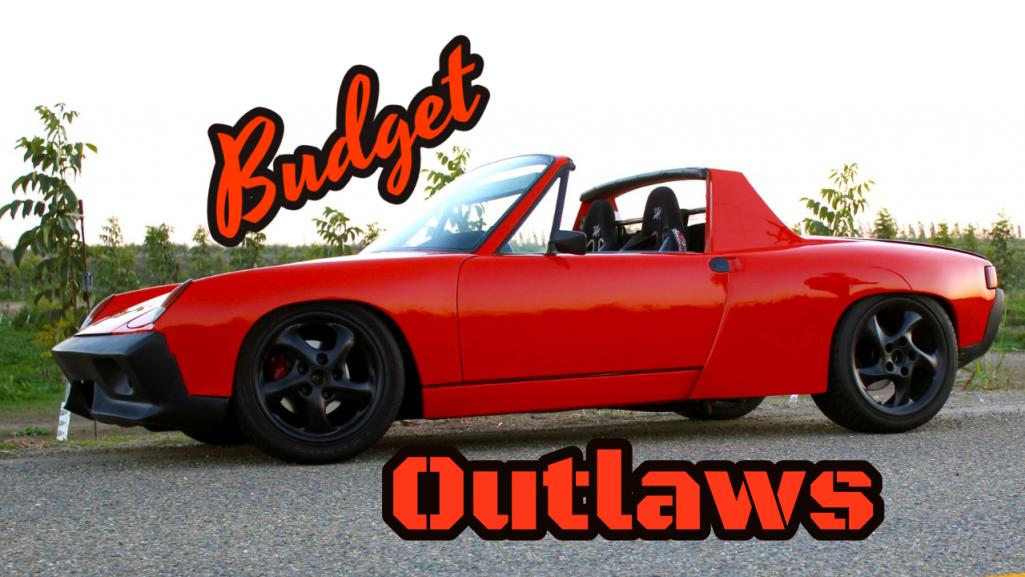
Posted by: dan10101 Jan 16 2020, 02:07 PM
I'm working on putting out a video a week for this build. We'll also be doing a second video a week on other builds/events, such as Andyrews 914.
I did post a new video earlier this week about making the Chassis Jig.
https://www.youtube.com/watch?v=T5vkjZCWEJs&t=183s
Andrew posted this in a separate thread, but I wanted to keep everything here for future searches. http://www.914world.com/bbs2/index.php?showtopic=342752
If you subscribe to the youtube channel and click the bell, you'll get notified whenever we post a video. See sig below, or post above.
The next video I post will be on how I measured before and after.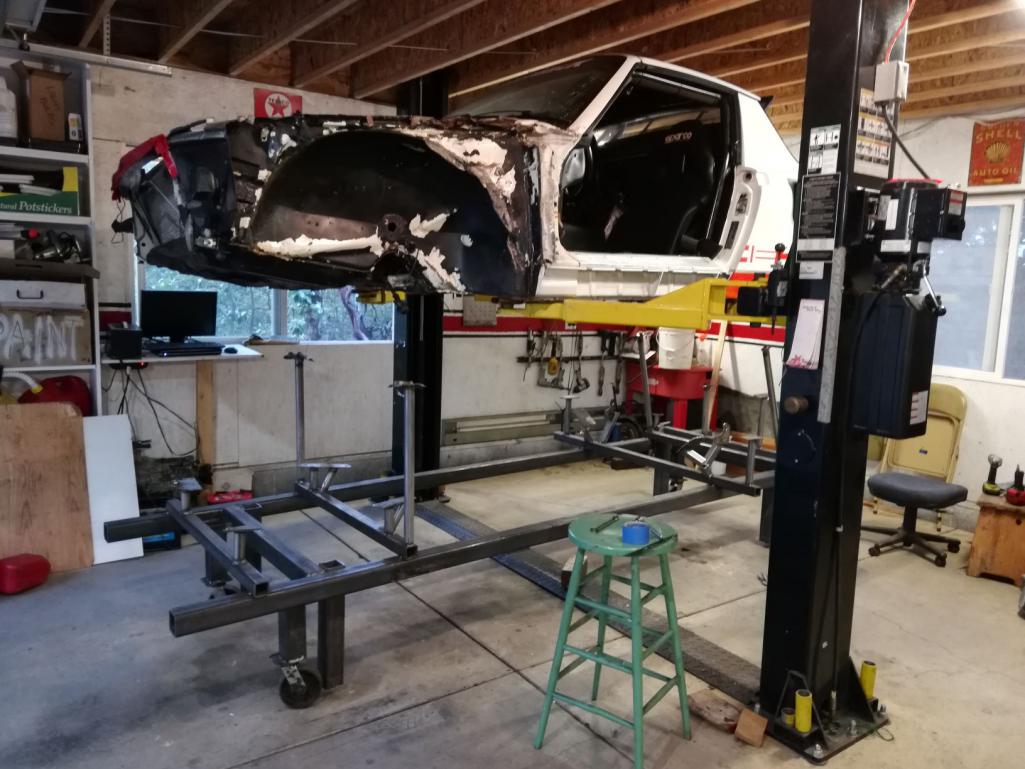
Posted by: tygaboy Jan 16 2020, 03:12 PM
So cool that this is captured for posterity and available for others to use as reference material. Good on you, Dan!
Posted by: ChrisFoley Jan 16 2020, 03:53 PM
and 4th pegged the dyno at 155, (the dyno couldn't take any more).
...
[/quote]
When it was on the dyno out here we pegged the 180mph speedometer.
Posted by: dan10101 Jan 16 2020, 04:56 PM
[quote name='ChrisFoley' date='Jan 16 2020, 01:53 PM' post='2778111']
and 4th pegged the dyno at 155, (the dyno couldn't take any more).
...
[/quote]
When it was on the dyno out here we pegged the 180mph speedometer.
[/quote]
Thanks Chris,
Yeah, I have a line on a better dyno.

Posted by: Cracker Jan 16 2020, 05:59 PM
Dan: What is the height of the rear tires and what are you running it out to on the dyno? You should be using 3rd gear for pulls...
Tony
Posted by: dan10101 Jan 16 2020, 06:53 PM
Dan: What is the height of the rear tires and what are you running it out to on the dyno? You should be using 3rd gear for pulls...
Tony
They are 25" give or take 1/4".
I ran most of my pulls in 3rd. Mostly because it wouldn't run out to redline in 4th.
I did make one run "just because" hoping for a higher number. Didn't happen.
I have the 4 speed 930 with about 410/420 final drive.
4th gear would be like running a 2.74 rear gear.
According to the dyno guys that should have made more HP. again, it didn't.
Posted by: Cracker Jan 16 2020, 06:59 PM
What RPM are you pulling to? The guys are wrong...if you are running a 930 box 4th gear is a MASSIVE overdrive ratio (.656). That doesn't even make any sense. I ran my LS2 back in the day out in 4th gear to 6750 and the speed was about 180. Sounds like Mr. Foley was on track...
T
Posted by: dan10101 Jan 16 2020, 08:02 PM
What RPM are you pulling to? The guys are wrong...if you are running a 930 box 4th gear is a MASSIVE overdrive ratio (.656). That doesn't even make any sense. I ran my LS2 back in the day out in 4th gear to 6750 and the speed was about 180. Sounds like Mr. Foley was on track...
T
I'm sure your right, in fact when I showed up and he asked me what gear I would run in, I figured I was in trouble. I told him 3rd BTW.
We'll see what the next dyno guy says, if that ever happens. I can see on HP tuners how much torque/hp I'm making with given changes. That's all that really matters.
Posted by: Cracker Jan 16 2020, 09:02 PM
Dyno's lie all the time so there is little stock given to the result BUT what did it make? If you posted it I am sorry...at what rpm did peak hp occur? Just curious...
T
Posted by: dan10101 Jan 16 2020, 09:58 PM
Dyno's lie all the time so there is little stock given to the result BUT what did it make? If you posted it I am sorry...at what rpm did peak hp occur? Just curious...
T
Well this one has a new computer and a new tuner tuning it, so it didn't make what it's supposed to. It made 430RWHP when Paul had it tuned in this configuration. On a different day, different tuner, different ECU it made 363. I'll be taking it to a pro to check my tune and see if he can make more. Then I'll take it to another dyno and see if it can make the advertised hp. Next time I'll bring the old ecu and see if it will do better with that tune. But I think it's too lean and it's a locked ECU, so I had to start over.
Yes I brag about the higher number... Until I know otherwise..
Posted by: Cracker Jan 16 2020, 10:05 PM
Got it...its an LS6 if I remember correctly. I had a very potent 6 that was on the borderline of streetability, bad manners, surging in the lower gears - just not very pleasant short of full throttle. It made 452 - you don't want that...trust me!
T
Posted by: dan10101 Jan 16 2020, 10:40 PM
Got it...its an LS6 if I remember correctly. I had a very potent 6 that was on the borderline of streetability, bad manners, surging in the lower gears - just not very pleasant short of full throttle. It made 452 - you don't want that...trust me!
T
It's pretty mild mannered. The 2nd cam that Paul installed was detuned to make it manageable and reduce the rocker arm problems. I know lots of guys are taking box stock 6.0l and adding a big cam and getting similar results. For now, reliable and running beats monster hp.
Oh, for those wondering about the 500hp claim. It's crank hp calculating drivetrain loss.
510chp * .85 = 433 whp.
It's all pretty much guesswork including the 85% calculation. But, it goes fast, so that's what I care about.
Posted by: dan10101 Jan 21 2020, 11:47 AM
I've posted another video on the repair.
This time it's on measuring the cars, good and bad.
I'm trying to do this in order, it's so much more fun to skip ahead to the fun stuff, and maybe we'll do some of that.
Thanks Dave Darling for the documents that I used in this video. I didn't give you proper credit in the video. It is in the description, but not everyone looks at that.
https://www.youtube.com/watch?v=RYXILAHer2Y&feature=youtu.be
Posted by: dan10101 Jan 26 2020, 10:26 AM
Another video for the Morpheus series is up.
This one is on Pulling. Using a porta power to straighten the body, somewhat.
I don't know if it was necessary, but it was fun.
https://www.youtube.com/watch?v=ORfQN20IpIg
Next up will be Cutting that's when it gets real...
Andrew posted a couple Videos of his build as well.
There's another post with a running thread with all the videos.
http://www.914world.com/bbs2/index.php?showtopic=342752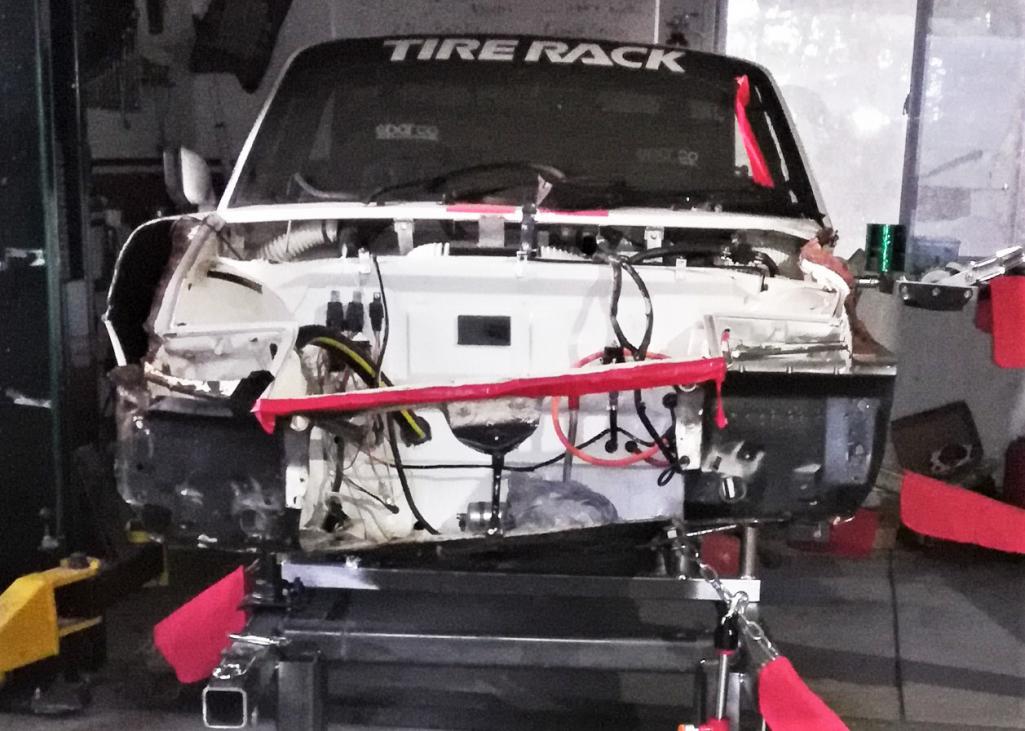
Posted by: dan10101 Feb 8 2020, 10:24 AM
A couple new videos up on the YouTube channel
First is Cutting up the Cars! AAAAHHHHH
https://youtu.be/nXb4BBBK-xM
It was actually a lot of fun.
Next is a new build we just acquired. This is a Porsche 944 Barn Find.
An amazing car we've been following for many years came up for sale at a price that couldn't be passed up.
Here's the intro video on that one.
https://youtu.be/R3PeMJkv_TM
Posted by: dan10101 Feb 21 2020, 11:03 AM
I'm still cranking out Videos.
I think they are getting better, but I'm biased.
This one is on the LS6 engine noise problem. We go into a tear down of the engine and inspection.
https://youtu.be/1A-SSUnTK3I
I also did another video on the 1984 944 NA. That is an inspection video as well, but this time we used a borescope instead of a tear down. After being parked for 20 years it needed a thorough inspection.
https://youtu.be/zTIwPCMMVyY
Posted by: FL 000 Feb 21 2020, 08:21 PM
Good job with the videos. I am sure the time to edit them is not insignificant. Sounds like you got pretty lucky with the loose rocker nut and lifter clip not causing damage
Posted by: dan10101 Feb 21 2020, 08:38 PM
Good job with the videos. I am sure the time to edit them is not insignificant. Sounds like you got pretty lucky with the loose rocker nut and lifter clip not causing damage
Thanks. Yes, it takes a while to make these. Plus we're trying to do 2 per week. I'm hoping at some point we can go back to 1 per week. it's like coming out of retirement.
In retrospect, I probably should have done the tear down before the 1st 'race', but I got lucky the fell into a safe spot.
Posted by: Andyrew Feb 22 2020, 12:55 AM
I want to point out that Dad edits ALL the videos including the ones on my car. The amount of time he invests in these is staggering.
Gathering the materials, combing through the hours of footage and hundreds of videos for good content, writing a script, composing audio, editing, sending it to me knowing full well I'm going to pick it apart and have him redo something 3 times, coming up with appropriate thumbnails and titles, again knowing I'm going to criticize his thumbnail and change the title after he posts it....
It's a damn good thing he loves me
Posted by: tygaboy Feb 22 2020, 08:55 AM
It's a damn good thing he loves me
@http://www.914world.com/bbs2/index.php?showuser=1608 and Super-In-Law
@http://www.914world.com/bbs2/index.php?showuser=172 and @http://www.914world.com/bbs2/index.php?showuser=626
The love comes through so clearly. Hold it dear, hold it dear...
Posted by: dan10101 Feb 22 2020, 10:26 AM
There's a lot of love in the car world, not just for metal and fiberglass.
And the videos would be pretty lame if you didn't fix all my great ideas.
Posted by: dan10101 Mar 22 2020, 05:01 PM
So my opening event (the enduro) was cancelled. Just like everyone else's.
But I needed to do the brakes because the rear ebrakes were dragging. I had all the parts and did the rear brakes, (i was still hoping for event to happen) But within a week everything was cancelled.
Well, the ebrake shoes didn't have the pins in them, so No ebrakes. I'll have to find some that work. I have a very steep driveway. Speaking of that......
Yes! Another Video! Enjoy your quarantine lockdown!
https://www.youtube.com/watch?v=g7KAW_YlgJk
Posted by: dan10101 May 29 2020, 08:13 PM
Finally another update.
Tomorrow is our first Autocross of the 2020 season. Well, unless there is a thunderstorm. But Sunday looks good.
In preparation for the "season" i updated the brakes, installed new harnesses, and a few other bits.
https://www.youtube.com/watch?v=0YY91bJsAzU&t=79s
Posted by: dan10101 Jun 28 2020, 01:37 PM
Finally we're rolling in 2020!
2 Track day videos
One Autocross
and
One at the Quarter Mile!
Here's the SSCC opener for 2020. The first day ended in a downpour and thunderstorms, but Sunday was nice.
https://youtu.be/xE5KdQYzSvM
Here's the quarter mile run. I need to work on a couple things to make this go like it should. But I'll take 12s to start with.
https://youtu.be/ExosMZTI45w
Posted by: dan10101 Jun 29 2020, 09:36 PM
Can anyone recommend a replacement throttle pedal assembly that will work with the stock brake pedal assembly?
The thought of having the throttle stick at 112mph kinda got me thinking I should replace it. Besides i want a better heal toe setup.
Thanks.
Posted by: burton73 Jul 10 2020, 03:23 PM
Didn’t your car have a Corvette drive by wire set up from when your car was first built by Bill?
Bob B
Posted by: dan10101 Jul 10 2020, 10:55 PM
Didn’t your car have a Corvette drive by wire set up from when your car was first built by Bill?
Bob B
I don't think so, I don't remember hearing that. I think it's always been drive by cable.
I sent a reply to your email.
Dan
Posted by: eric9144 Jul 13 2020, 09:12 AM
Can anyone recommend a replacement throttle pedal assembly that will work with the stock brake pedal assembly?
The thought of having the throttle stick at 112mph kinda got me thinking I should replace it. Besides i want a better heal toe setup.
Thanks.
Just did the rennline gas pedal, it's not cheap, something similar could be fabbed up as the concept itself is not rocket science. If you wait long enough they go on sale but still way too much $$ IMHO. I had a gift certificate so it wasn't too bad and I got it when they were 20 or 25% off.
That being said, night and day difference on pedal alignment for heel toe, which on a big HP car makes a huge difference on driver control
The big dollar option, super adjustable with extensions:
https://www.rennline.com/Rennline-Rev2-Gas-Pedal-Porsche/productinfo/A12.2/
The middle option
https://www.rennline.com/Rennline-Aluminum-Gas-Pedal-Rubber-Grip-Porsche/productinfo/P70/BLACK/
The low cost options is the lifter plate:
https://www.rennline.com/Rennline-Adjustable-Lifter-Plate-Porsche/productinfo/PA70/
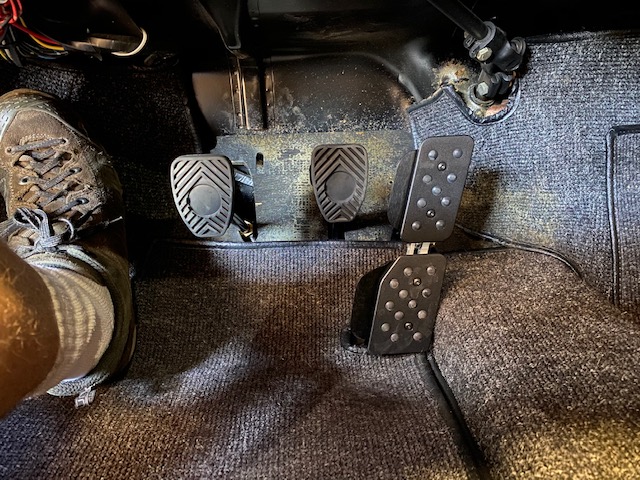
Posted by: dan10101 Jul 13 2020, 09:22 AM
Can anyone recommend a replacement throttle pedal assembly that will work with the stock brake pedal assembly?
The thought of having the throttle stick at 112mph kinda got me thinking I should replace it. Besides i want a better heal toe setup.
Thanks.
Just did the rennline gas pedal, it's not cheap, something similar could be fabbed up as the concept itself is not rocket science. If you wait long enough they go on sale but still way too much $$ IMHO. I had a gift certificate so it wasn't too bad and I got it when they were 20 or 25% off.
That being said, night and day difference on pedal alignment for heel toe, which on a big HP car makes a huge difference on driver control
The big dollar option, super adjustable with extensions:
https://www.rennline.com/Rennline-Rev2-Gas-Pedal-Porsche/productinfo/A12.2/
The middle option
https://www.rennline.com/Rennline-Aluminum-Gas-Pedal-Rubber-Grip-Porsche/productinfo/P70/BLACK/
The low cost options is the lifter plate:
https://www.rennline.com/Rennline-Adjustable-Lifter-Plate-Porsche/productinfo/PA70/
That's really nice. I wouldn't mind spending the money to get it right. But I may take a stab at doing it myself first. I like the wings, but I'm not sure why they didn't just make the pedal wider. Aesthetics probably, they wanted to pedal to look normal from a glance.
I like how they made it adjustable for height or depth depending on how you look at it. Thanks for showing me this. I'll keep an eye out for sales.
Posted by: eric9144 Jul 13 2020, 12:41 PM
The side wing things are adjustable up/down in/out. I just have them butted in square as a starting point. I get a way better "foot cover" over brake and gas now... I have to take it out for a road test to really get a feel for it but it hit 102* yesterday when I put it in so...when it cools down a bit
Posted by: ri914 Sep 9 2020, 06:46 AM
Can anyone recommend a replacement throttle pedal assembly that will work with the stock brake pedal assembly?
The thought of having the throttle stick at 112mph kinda got me thinking I should replace it. Besides i want a better heal toe setup.
Thanks.
My LS6 has the DBW (drive by wire) probably a 200$ swap if you need one. pedals , dbw box and cable to wiring harness. seems like your staying "wire cable" but if you need part numbers or how to convert it let me know.
Posted by: burton73 Sep 9 2020, 11:20 AM
http://www.914world.com/bbs2/index.php?showtopic=90342
This is the info on your drive by wire on your car when it started out. I belive this is your car when it was built by Bill or William
Bob B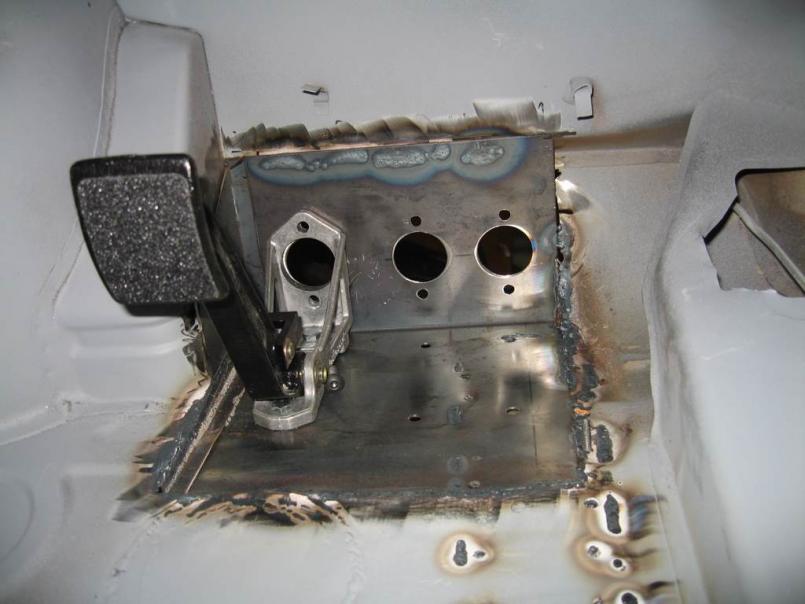
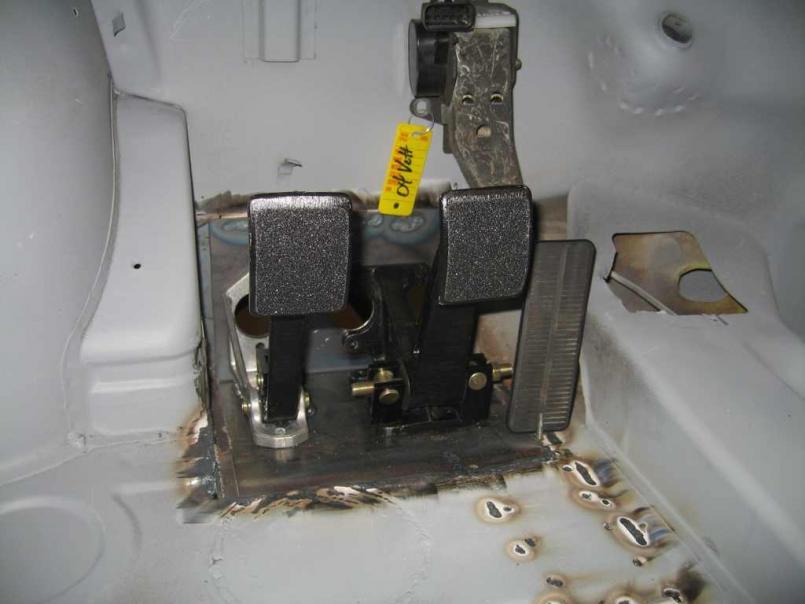
Posted by: dan10101 Sep 9 2020, 12:21 PM
http://www.914world.com/bbs2/index.php?showtopic=90342
This is the info on your drive by wire on your car when it started out. I belive this is your car when it was built by Bill or William
Bob B
Thanks Bob!
That's a great thread!
I would be fine with the original setup but it had a single point of failure. I'll check it out and see what great options I have.
Powered by Invision Power Board (http://www.invisionboard.com)
© Invision Power Services (http://www.invisionpower.com)