Printable Version of Topic
Click here to view this topic in its original format
914World.com _ 914World Garage _ my adventures in painting the car thread
Posted by: 914 RZ-1 Jul 11 2018, 09:55 PM
So I painted my car. Got some orange peel, thought I'd see if anyone had ideas for getting rid of/minimizing it.
After painting: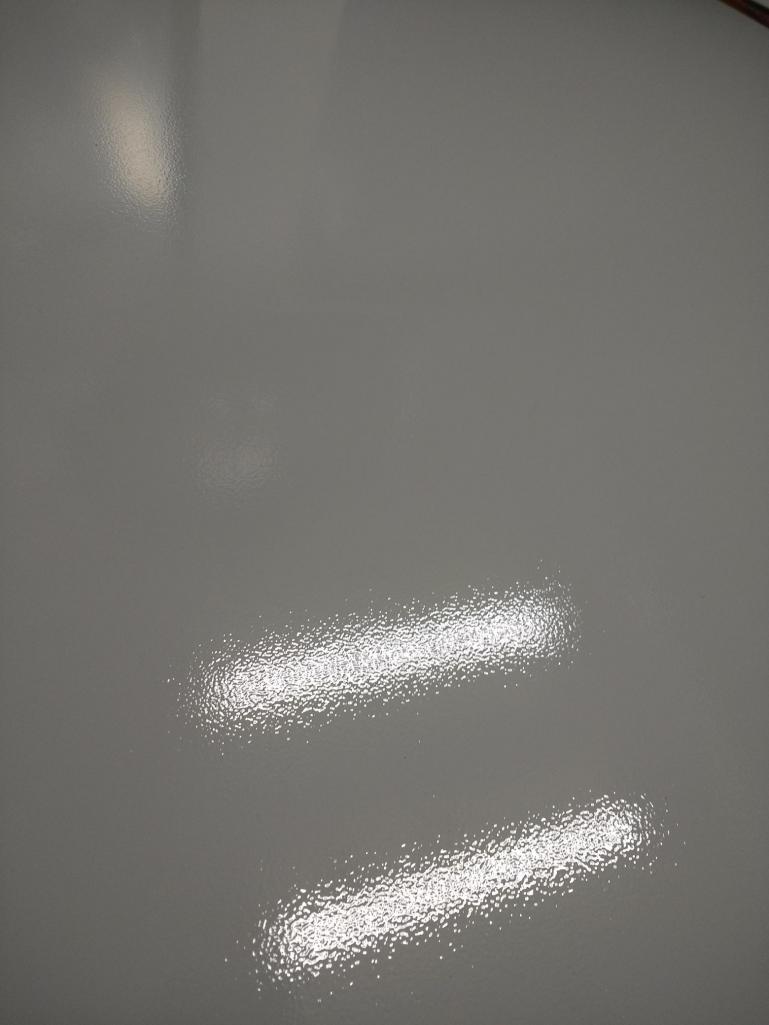
After sanding with 1000 grit. The lighter areas are where I sanded, the darker areas are the lower points of the orange peel: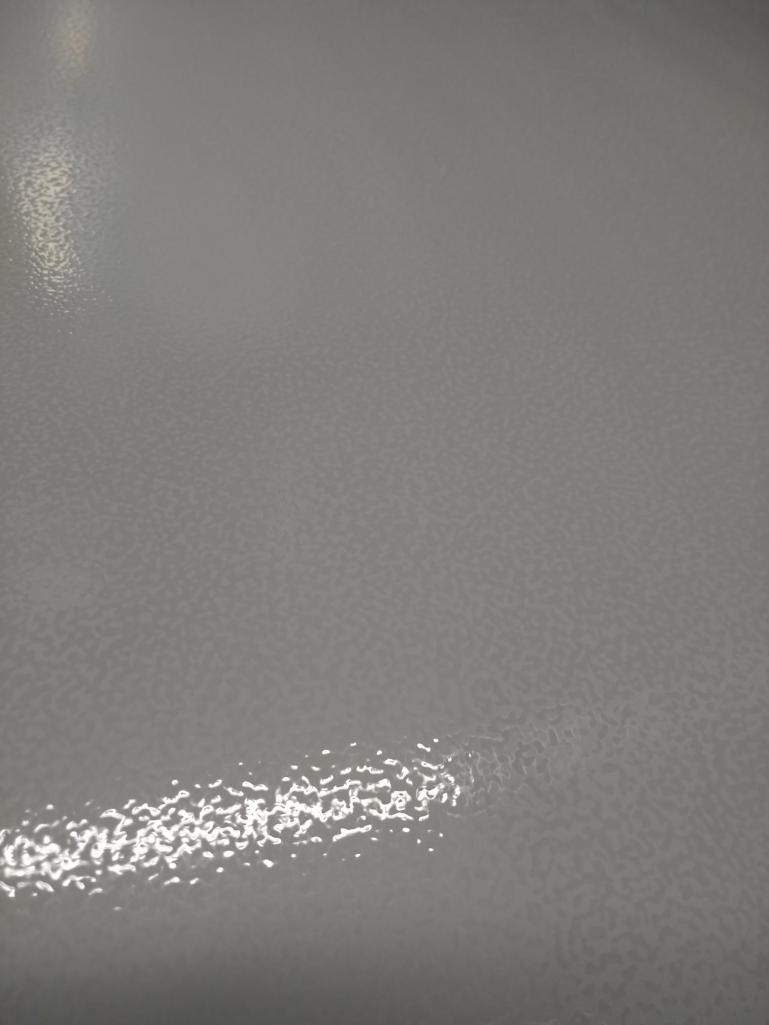
Option 1:
I'm thinking I need to go to 800 grit, then 1000, 1500, 2000, then polish. Before I do I thought I'd see if anyone else thinks this is a good idea based on what they may have done.
Option 2:
I can re-paint it. I'm thinking I will sand with 400 grit to rough up the surface and then re-spray.
Option 3:
I can polish it more, but the orange peel is still noticeable on the smaller pieces I've tried. I used a Torq X polisher, white pad, Chemical Guys V32 polish. I thought it might get smoother as I polished it with finer and finer pads/compounds, but I don't want to burn thru the paint. I put 3 coats of paint on.
Posted by: porschetub Jul 11 2018, 11:30 PM
Oh dear,let it dry and start again,your paint is too thick ...not enough reducer ,or you are possibly running low air pressure,with single pack I run 35-40 PSI,on the top clearcoat I run same pressure and a bit more thinners,from mermory I go 1:2 ratio basecoat then 1:5 ratio on clear ,then I go piss thin on the last clearcoat.
I'am a DIY car painter have done lots of cars but I forget details cause it's such a PITA to do,love painting but the prep makes me want to  .
.
Posted by: Front yard mechanic Jul 12 2018, 07:30 AM
Option 2 my vote
Posted by: Cairo94507 Jul 12 2018, 07:38 AM
That's a bit of orange peel for sure. I would tape all the edges on one panel (don't want to sand or burn through) and wet sand it some more to see if you can get 90% of that flattened out and then try polishing. Just take your time. Good luck. 
Posted by: burton73 Jul 12 2018, 10:24 AM
You are going to need to go through the grits by starting with a heavier grit. Very easy so you do not go through it. Think of it as mountains and valleys. You need to sand the mountains down to the valleys. Tape the edges as someone said so you do not go to fare on them with the color sanding.
You need to CK it all the time so you do not remove too much.
Do not sand with that much pressure. You will get it. The worst you can do is need to repaint so give it a shot. It takes an eye. When it is flat all over go to finer grit. Remember when you have it flat all you need to do is remove the last scratch and put the finer scratch in. I go in a different direction and when the scratches are going in the new direction go finer till you are sure you are at a fine scratch where you can buff from.
Bob B
Posted by: Andyrew Jul 12 2018, 11:05 AM
Single stage? What paint are you using?
Go 30% more reducer than you were using. Change your air pressure at gun regulator to 30psi, Adjust your spray to 6-8" of surface.
Spray test piece with another 3 coats after 400grit wetsand and clean up with wax/grease remover.
Show us what you've got. Be careful with runs.
If you plan to wetsand always do 4+ coats. or 2+ coats after full coverage. I did 7 on mine. it took 3 to get full coverage. I wet sanded out 1-2 coats and have 5 coats on the car and can wetsand the car again 2 times to eliminate imperfections down the line.
Posted by: Andyrew Jul 12 2018, 11:06 AM
What temp reducer are you using? and how hot was it in the booth at spray? Its really hot out and normal reducer is designed to be sprayed at about 70deg.
Posted by: mb911 Jul 12 2018, 11:08 AM
I would wet sand again.. Then see what you have left to buff. Anyone that's painted before has run into this before at least once.
Posted by: jmitro Jul 12 2018, 11:33 AM
definitely need to wet sand with finer and finer grits; don't wet sand with anything finer than 1000 unless you want to just paint the panel again. or be sanding from now until 2020. Trust me, it takes a lot of sanding to get the panel flawless;
no reason to use polish until you've got to at least 1500 if not 2000 grit.
change the sandpaper frequently; it gets loaded quickly
Posted by: 914 RZ-1 Jul 12 2018, 06:53 PM
Thanks to all. I appreciate you input.
I'm using single stage paint by R-M. Mix ratio: 4:1:1 (paint, reducer, hardener). It was in the 80's when I painted. I probably should have used reducer for higher temps. I painted the car body and used high temp reducer and it looks much better.
Gun is set at about 10-15 psi where the airline enters the gun. I can't see the readout very well anymore because the plastic cover on the gauge got fogged up when I tried to clean it with acetone.
I may have the paint amount too high as well (2.5 turns in from when the threads engage), so I'll try adjusting that.
I practiced, but it was a few months ago, so the conditions are different now. I only have 1.5 quarts of paint left. I could get more but I'm concerned about matching batches.
Posted by: Olympic 914 Jul 12 2018, 07:20 PM
many years ago I clipped the front end of my teener and only had about a mayonnaise jar of paint left. and the mix of the new paint was off. So we used the off-mix paint to build up and just put the old paint on for the last coat or two. perfect match that way.
Posted by: 914 RZ-1 Jul 13 2018, 12:32 PM
Here is the result after wet-sanding with 800-1000-1500 then polishing with V32 and then V36 polish (Chemical Guys).
They are still some depressions from the orange peel that look like dots and there are some scratches. I thought I got these out; they appeared after I polished.
I'm thinking I need to paint one, maybe two, more coats so I have enough material to sand off.
Should I use a machine sander (DA), or keep doing it by hand?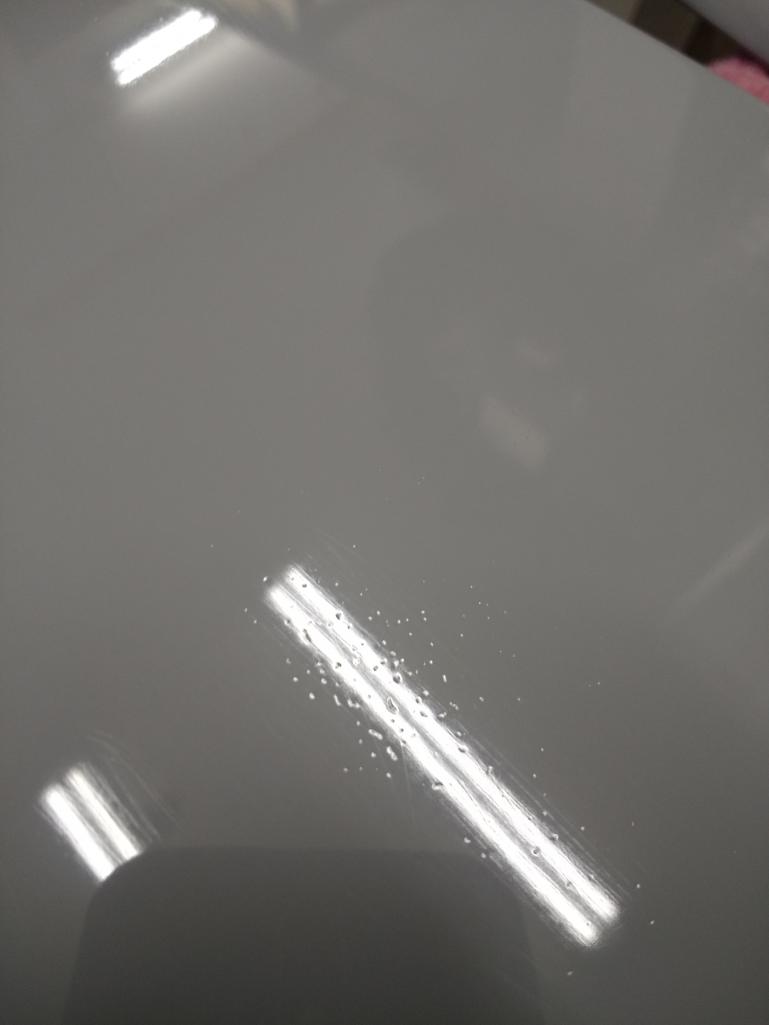
Posted by: mb911 Jul 13 2018, 03:20 PM

Here is the result after wet-sanding with 800-1000-1500 then polishing with V32 and then V36 polish (Chemical Guys).
They are still some depressions from the orange peel that look like dots and there are some scratches. I thought I got these out; they appeared after I polished.
I'm thinking I need to paint one, maybe two, more coats so I have enough material to sand off.
Should I use a machine sander (DA), or keep doing it by hand?
I would wet sand with 400, clean, prime and repaint.
Posted by: mepstein Jul 13 2018, 03:30 PM
Here is the result after wet-sanding with 800-1000-1500 then polishing with V32 and then V36 polish (Chemical Guys).
They are still some depressions from the orange peel that look like dots and there are some scratches. I thought I got these out; they appeared after I polished.
I'm thinking I need to paint one, maybe two, more coats so I have enough material to sand off.
Should I use a machine sander (DA), or keep doing it by hand?
I would wet sand with 400, clean, prime and repaint.
 that’s what our shop would do. You don’t want to machine sand unless you really know what you are doing.
Posted by: ValcoOscar Jul 13 2018, 03:31 PM
Yeah Jeff...I kinda think you need more paint also.
Using a DA for prep is fine but I wouldn't recommend for color sanding.
Good going and keep posting updates!
BTW...check your mail tomorrow, I sent you something.
Oscar
Posted by: ConeDodger Jul 13 2018, 06:45 PM
Option 4: peel it and eat it. 
Posted by: Andyrew Jul 13 2018, 07:55 PM
Hand sand only. No DA sanding for color sanding.
Posted by: 914GT Jul 13 2018, 08:46 PM
Also, use a guide coat to show missed sanding scratches and low spots. A dry guide coat applies evenly and will show you when you have sanded it enough. There is a white guide coat available for darker paints and primers.
Posted by: 914 RZ-1 Jul 16 2018, 10:23 AM
Here's the latest. I sanded with 400, cleaned with a red Scotch pad and something called "prep and wash" from R-M. I mixed the paint with a little extra reducer (4:1:1.5). The engine lid turned out decent: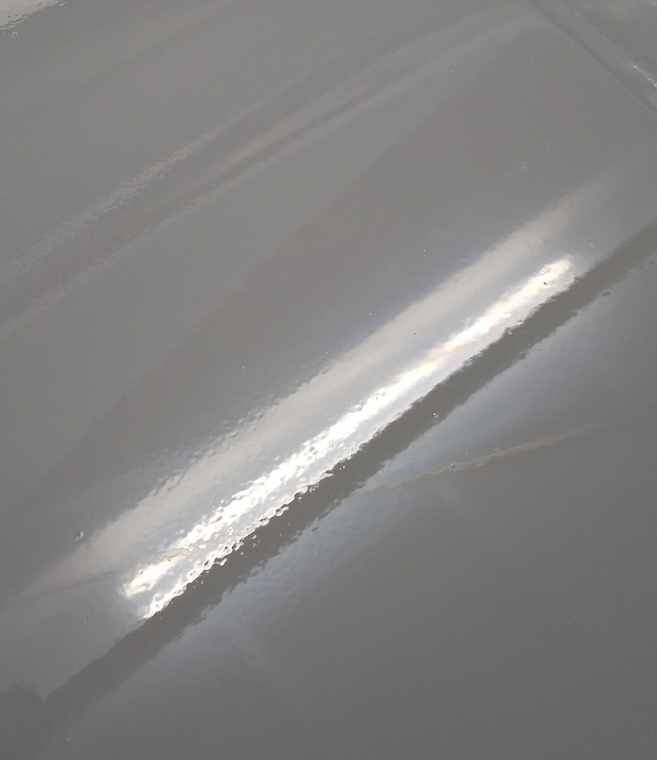
The doors still got some orange peel. Not quite as bad as before, but still not what I was hoping for:
I turned down the amount of paint (1-2 turns) and sprayed at about 10-15psi at the gun.
It was 81 degrees and about 40-50% relative humidity. The first coat went on well, then I waited 15 minutes for the paint the flash, then did a second coat. The second coat seemed to have more orange peel.
When I paint, should I just paint a first coat then paint a second coat right away? In other words, go over the surface twice on the first coat?
Attached image(s)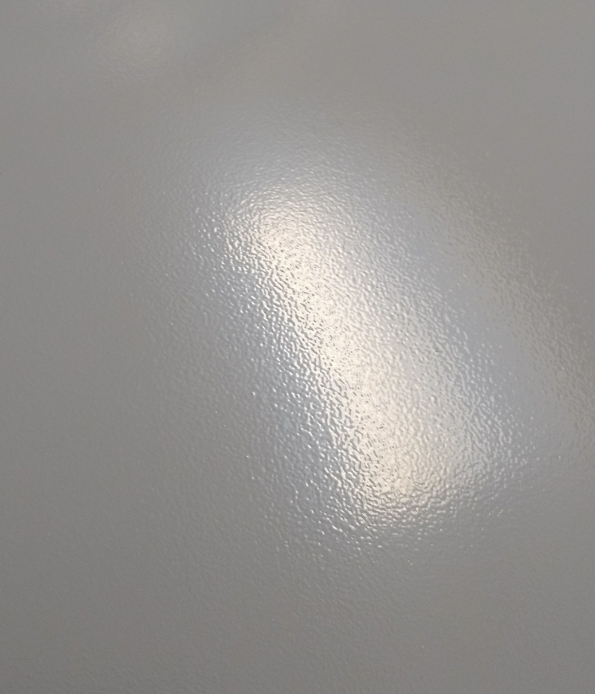
Posted by: Spoke Jul 16 2018, 11:08 AM
It was in the 80's when I painted. I probably should have used reducer for higher temps.
I ran into the same issue with 70F reducer when it was about 90F. The paint dried so fast the orange peel never settled down to a sheen. Instead of getting the correct temp reducer I used a lot of reducer to thin out the paint. It went on better but still got some orange peel.
Posted by: Andyrew Jul 16 2018, 12:19 PM
Flash time starts from when the paint first leaves the gun. If it takes 10 mins to get around the car that's 5 mins to wait for a 15 min flash time.
Typically just enough time to prep the gun for another coat and maybe step out for fresh air.
Posted by: 914 RZ-1 Jul 16 2018, 02:44 PM
I just to-read this and noticed that some people told me to go 30psi at the gun. The engine lid turned out really well because I think I had the gun pressure turned up. I can't remember, though. 
I have the hoods to repaint so I will try increasing the pressure for one of those and see how it turns out. Stay tuned!
In the meantime I have sanded the car body down with 400 grit and "prep and wash". I sanded the "mountains" down a bit, but not all the way. I want to leave me some paint for sanding later. I figure I'll fill in the "valleys" (and make the "mountains" taller), but that will give me some material to sand off. Thoughts on this?
I'm hoping the paint will go on smoother and I will only have to sand with 1000 grit and up.
Posted by: Dougster Jul 16 2018, 04:00 PM
As far as the paint mix, only do what the tech sheets call for, for your particular paint on the air psi and mix ratios. Well meaning people will tell you what works for them but they're probably using a different brand etc, so it's not necessarily pertinent info.
I recently painted my '71 Volvo 1800E with single stage.. and started wet sanding with 1000, didn't work so I (somewhat fearfully) dropped to 800grit as my starting paper - and all turned out just fine. Just antidotal but if there's enough paint laid down, shouldn't be a problem.
Posted by: Andyrew Jul 16 2018, 04:00 PM
I think I spray at 20-25psi. With the nozzle a stretched hands width (pinkie to thumb) from the surface. Fan the spray pattern for a consistent spray with 12-18" coverage. Moving at a slow walking pace, if I spray a whole side I walk leg over leg facing the panel and keep my body loose but my arm semi rigid trying to keep a horizontal line over the panel and the depth consistent.
You want to sand the body perfectly flat with 400. You dont want any valleys or else they will transfer to the final finish. The smoother it is prior to final paint the smoother your final spray is.
Posted by: burton73 Jul 16 2018, 08:21 PM
I think I spray at 20-25psi. With the nozzle a stretched hands width (pinkie to thumb) from the surface. Fan the spray pattern for a consistent spray with 12-18" coverage. Moving at a slow walking pace, if I spray a whole side I walk leg over leg facing the panel and keep my body loose but my arm semi rigid trying to keep a horizontal line over the panel and the depth consistent.
You want to sand the body perfectly flat with 400. You dont want any valleys or else they will transfer to the final finish. The smoother it is prior to final paint the smoother your final spray is.
but you need to get it right at your house. Everone and each set up is different Air flow at you house may be different than my house
Bob B
You want to sand the body perfectly flat with 400. You dont want any valleys or else they will transfer to the final finish. The smoother it is prior to final paint the smoother your final spray is.
Hear this over and over
But you need to get it right at your house. Everyone and each set up is different Air flow at you house may be different than my house
Posted by: 914 RZ-1 Jul 16 2018, 10:11 PM
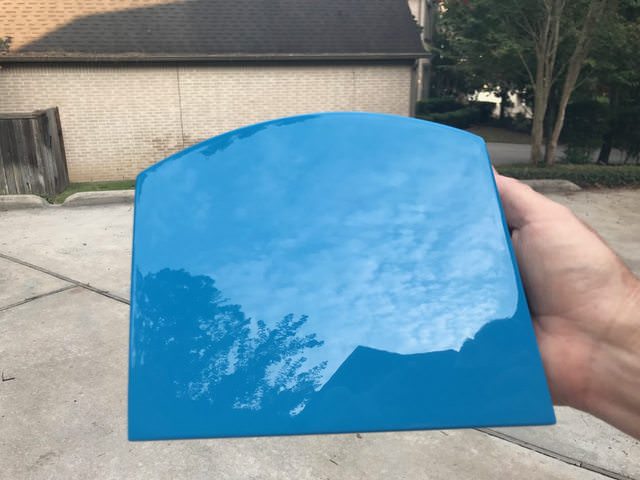
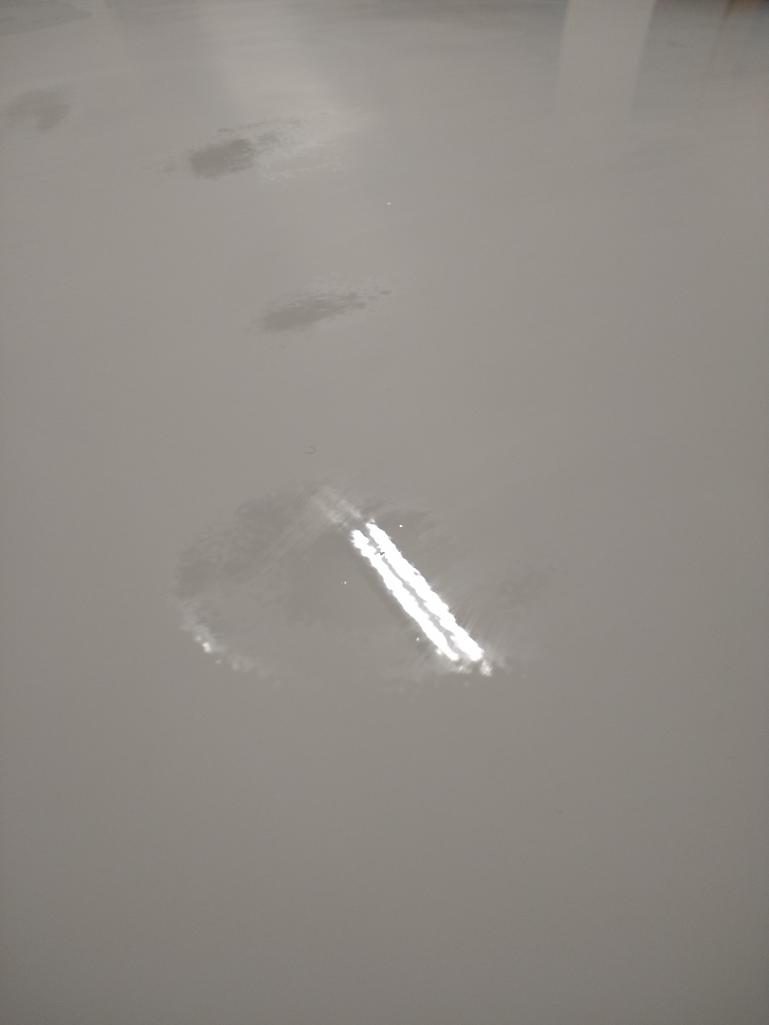
Here's the latest: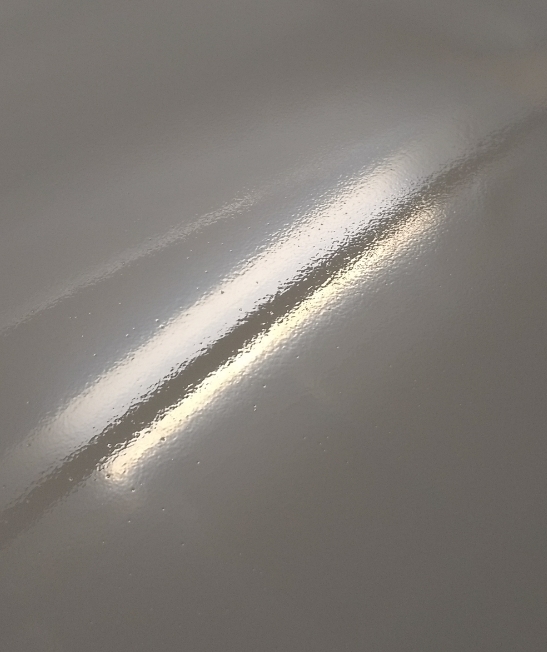
Still a bit of orange peel. However I think I figured it out this time. I would test the gun with a quick burst and the gauge would read 30psi. However, when I pressed and held it the pressure would drop. I re-adjusted the air flow knob. The air flow got quieter and sounded different. I discovered this while cleaning the gun. I really thought I had this dialed in before but apparently not! What's interesting is the parts I sprayed quickly were turning out pretty good, like this headlight cover. It has a nice, smooth coat. That was because the pressure was higher: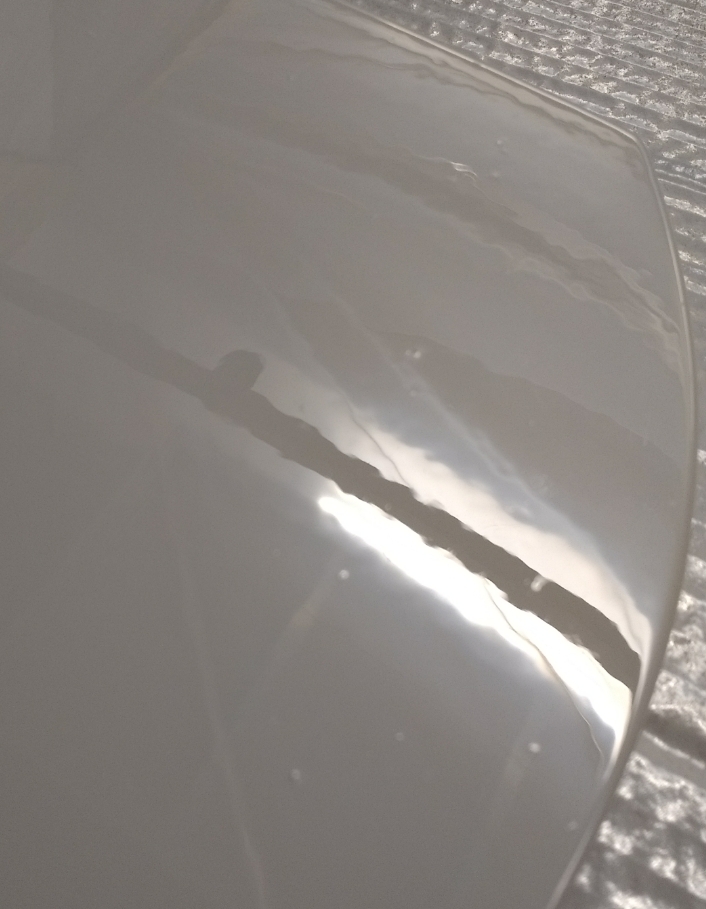
The good news is the body is ready to be re-sprayed, so I can apply what I've learned. The bad news is I need to sand and re-spray the hoods and doors. At least they will have lots of paint on them! It will also give me a chance to make sure I've got it this time. I only have a little less than a quart of paint left, too.
Posted by: 914 RZ-1 Jul 16 2018, 10:34 PM
One other thing: how long are the face mask filters supposed to last? I get about 2 sessions, and on the 2nd or 3rd one start to smell and taste paint. It never fails to happen as I'm starting to paint. Any way to tell when they are about to go bad? Maybe I should have an extra set standing by.
I'm using 3M 60923 (organic vapor/acid gas cartridge/P100) filters.
Posted by: Andyrew Jul 16 2018, 11:02 PM
Primer about 20 sessions. Not much VOC in the air. Paint, I buy a new harbor freight dual cartrage mask for every full spray session. If I'm just spraying a hood I'll reuse an old one.
Posted by: porschetub Jul 17 2018, 12:58 AM
Brave move going to that system for DIY newbie,currently repainting a Golf in PPG Alpine white,prep work is 95% and after that just lay it on ..if it go's wrong just block it back and go again,sand your final basecoat and lay plenty of clear over the top,even if a bit orange peel it will sand and buff out,easy system.
I always lay down a thin basecoat,and see if I have any solvent pop or unfilled stone chips ...there always is some work with spot putty.
IMO leave the clever paints to the pro's or people with garage paint sheds ,fans,spray suits,expensive resporators and folks that don't live too close  .
.
DIY myself but have done many cars and boats.
Posted by: 914 RZ-1 Jul 25 2018, 06:33 PM
So my a-hole neighbor called the HOA, the city and the AQMD. He didn't even talk to me first! Part of my "paint booth" (really just a cover to keep paint off the stuff in the garage and dust off the car) was in the driveway for about 2-3 days. It looked like crap, but I wanted to make sure I was done before I dismantled it. I received a letter from the HOA to clean it up. The neighbor also evidently complained about some plants and me working on my car in the driveway. I took care of all that (my driveway is sloped, so I don't work on them in the driveway). The city just told me to get rid of the wood and plastic structure in my driveway. The inspector said he just saw debris, but no painting. He told me I can paint in garage. He also told me the AQMD was called. We cleaned it up and all is cool. I looked up the AQMD rules and it appears HVLP spayers are exempt and I can spray up to 3 gallons a day. Take that, a-hole neighbor! I have yet to hear from the AQMD, probably because I'm exempt.
If you decide to do what I did, just be aware. Talk to your neighbors. All my other neighbors are cool with what I'm doing. I just have one, maybe 2, coats left them I'm done.
Posted by: bbrock Jul 25 2018, 06:53 PM
That right there is why I live in the boonies, but even 20 acres doesn't make you immune. I have a neighbor who repairs and restores cars (was working on a Model T last time I was over there). A couple years ago, another neighbor who lives at least a mile away got a bur up his ass about all the junk cars on my neighbor's lot. He did have a lot of them, but the only way you could tell was by looking on Google Earth, or climbing to the very top of my property which looks down on his. So said neighbor starts emailing around trying to convince all everyone in the area that the junk cars will illegal and encouraging everyone to file a complaint. Then he threw in that because the guy had a restoration shop, that he must be dumping paint and other chemicals into the creek behind his shop. Ridiculous. I'm the only one with a view of his shop and never saw such a thing. Plus, the guy is a bit of an environmentalist. As for the junk cars, I looked up the rules and despite him having about 40 cars on his lot, he was in full compliance with the law (which mainly just states they can't be near a stream or visible from a public road. He was in the process of getting rid of most of them anyway. However, my single 914 that had been rotting in clear view of the road was definitely in violation! Anyway, despite protests from all of the neighbors who live nearby, enough complaints were made that the DEQ sent a guy out. He found no violations and the whole thing died down. But boy what a way to sour neighbor relations!
I'm glad you got squared away.
Posted by: 914 RZ-1 Jul 31 2018, 04:17 PM
So, I'm still getting some orange peel. I thought I could sand it out. I'm not sure what I'm doing wrong.
QUESTION 1:
In theory, I paint the 1st coat with orange peel. Then the 2nd coat goes on. It fills the "valleys" in addition to adding to the "mountains". I should be able to sand the taller mountains down and get a smooth finish, correct?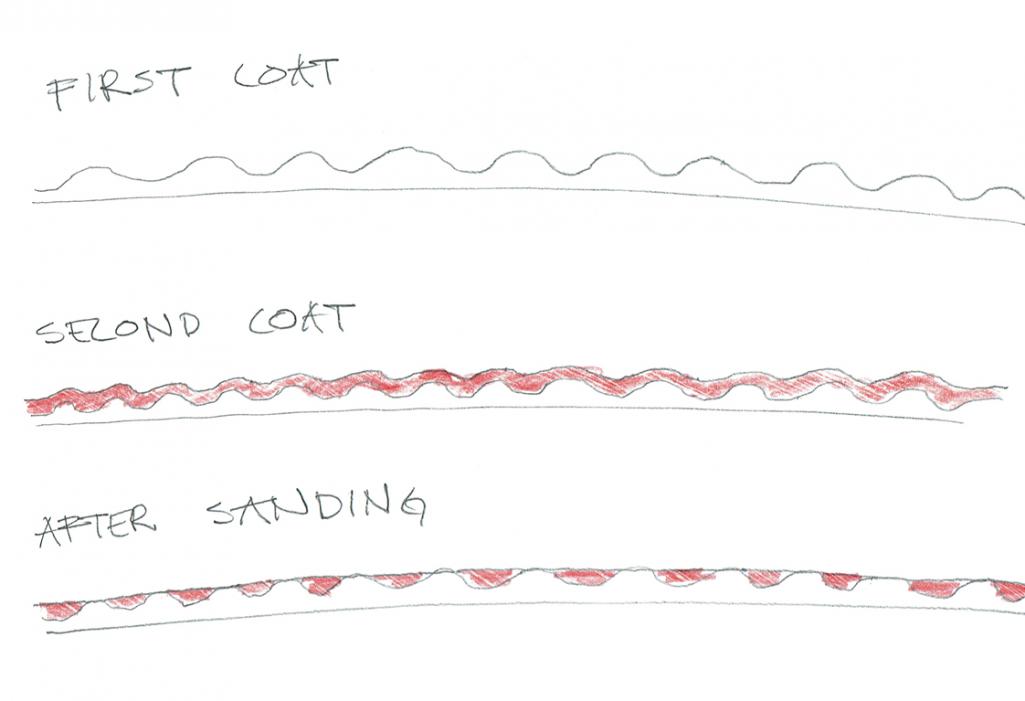
QUESTION 2:
This is probably related to question 1. I'm getting small pinholes in a really shiny field of smoothness after I sand with 800-1000, then polish. I'm guessing these are the bottoms of the "valleys". I'm thinking I'm not sanding down far enough or not using the right grit sandpaper (I start with 800 or 1000 and wetsand it) or I'm not polishing it enough. I use Chemical Guys V32, then V-36 with a Torq X. I let the polisher spin and don't press hard (it doesn't spin if I do).
QUESTION 3:
Spraygun at 30psi at the handle gauge, right? How much pressure drop is there to the tip? The tip says 10 psi max. Compressor is set for 90 at the outlet. Is there a range of psi that could work? In other words, does 5 psi make a huge difference?
Any tips, help, etc, would be appreciated. I'm getting tired of sanding out my screwups! I'm also running out of time (and paint!); I start back up at work soon and I also want to be done before my neighbor complains again.
Posted by: burton73 Jul 31 2018, 04:29 PM
How long are you letting it sit before you color sand it?
There can be fish eyes that can be like craters.
I learned to paint on motorcycle tanks in the late 60s.
Look up these things on UTube and learn.
Bob B
Posted by: Andyrew Jul 31 2018, 04:30 PM
1. Yes.
2. Pinholes are typically from something called solvent pop and is a real PITA to get prevent on some paint. I would talk to your paint supplier and describe the issues your having. Make sure you have good filtration of water and that you have adequate ventilation of the materials. What's happening is little bubbles are coming from the first layer and trying to escape but not able to.
3. This should help
https://www.learnautobodyandpaint.com/spray-gun-air-pressure-settings/
Posted by: burton73 Jul 31 2018, 04:33 PM
After you color sand, wipe it clean and look at it under a bright light. Any low area will show as shiny. That can be a valley that you did not bring up to the mountain top.
Bob B
Posted by: ValcoOscar Jul 31 2018, 04:41 PM
Jeff-
Keep in mind, our current HOT weather pattern is not helping

I can't spray certain paint by midday. We paint at night right now.
Brutally hot as of late.
Oscar
Posted by: Perry Kiehl Jul 31 2018, 05:09 PM
If you have a contaminant on the surface no amount of paint will fix that, you'll only be making it worse by adding more paint on top.
Practice on something else besides your 914 
Posted by: 914 RZ-1 Jul 31 2018, 05:14 PM
Thanks all. Here are my responses:
I'm letting it sit for a week before sanding. The paint supplier told me to wait that long.
I didn't think it was solvent pop causing the pinholes, thanks for pointing that out. I wait 15 minutes between coats; maybe I should just spray one coat, or wait longer.
I wipe the surface down with surface prep (Prepall) right before I spray. My paint area isn't perfectly clean, and I've got a few bugs that have landed in the wet paint. They just sand out. But, for the most part, there doesn't appear to be any evidence of contaminants. One thing I heard over and over was "CLEAN the surface, then clean it again!".
I looked on youtube and elsewhere to learn. I thought I had this down. I painted a hood a few months ago and it looked great. I think I need more specific help pertaining to my situation (the weather, psi, equipment, paint type, etc.). I thought some of you might have some insight, so thanks!
I think Oscar is right-the weather is not helping. I'm even using high temp reducer and hardener (for 85-100 degree conditions). It was about 85-90 degrees (50% humidity) in the garage when I painted at about 10 am.
I can paint at night, but I think it pisses off my neighbor. I'll try one more coat (early in the morning) on a door at higher psi and see what that does. I'm going to dial this in on the doors and hoods before I do the car body!
Posted by: worn Jul 31 2018, 05:23 PM
If you have a contaminant on the surface no amount of paint will fix that, you'll only be making it worse by adding more paint on top.
Practice on something else besides your 914
With paint so pricey, I have to practice on my car. Or perhaps I should say experiment. I am having the same problem as the OP has described, only my conclusion is solvent pop more than orange peal (also potentially OP). I think some of us reason like I do, thinking if I get enough paint on I can just color sand to what I want. Good plan except for when you lay down Swiss cheese for paint.
Also, a supplied air system is very much worth considering. It is an extra hose to drag around, but the paint chemicals are hard on the body. One alternative that looks like a winner is a scuba tank and regulator. eBay or Craig’s should be a help there.
Posted by: 914GT Jul 31 2018, 05:39 PM
Don’t overlook the quality of your compressed air if you’re having flaws in your finish. A filter/regulator mounted right at the compressor tank with a hose to your spray gun is likely not enough to eliminate moisture and oil that can spit out and cause fisheyes or what might be blamed on solvent pop. I don’t know what you have for a compressed air system but it’s important to trap the water and oil that can really screw up an otherwise nice paint job.
Posted by: mb911 Jul 31 2018, 05:54 PM
Prepsol should be allowed to dry /evaporate before spraying anything over it. I wait a good 15 minutes but apply wet then dry with 2 separate rags and then allow the 15 minute air dry.
Posted by: 914 RZ-1 Jul 31 2018, 06:03 PM
Don’t overlook the quality of your compressed air if you’re having flaws in your finish. A filter/regulator mounted right at the compressor tank with a hose to your spray gun is likely not enough to eliminate moisture and oil that can spit out and cause fisheyes or what might be blamed on solvent pop. I don’t know what you have for a compressed air system but it’s important to trap the water and oil that can really screw up an otherwise nice paint job.
I've got a 25' coiled hose from the tank to 2 moisture filters on the wall. It then goes out to a coiled 50' hose. I got a "pumpkin" filter at the gun.
Interestingly, whenever I purge the moisture filters on the wall, no fluid comes out. When I purge the tank, I do get a bunch of orange water.
Compressor is 8.6/6.4 cfm @40/90 psi. 2 (running, not peak!) HP, 33 gallon.
Posted by: 914 RZ-1 Aug 1 2018, 10:06 AM
Here's the latest:
I painted both doors. I put on 2 coats, one right after the other while it was still wet. They both look pretty good except for some orange peel in a few places. It doesn't seem as bad as before. I'll try sanding it out. It looked really good when I first sprayed it, then as it dried the orange peel appeared.
The gun was intermittently not spraying paint, but otherwise it went well.
It was 85-90 degrees, 45% humidity at 9 am.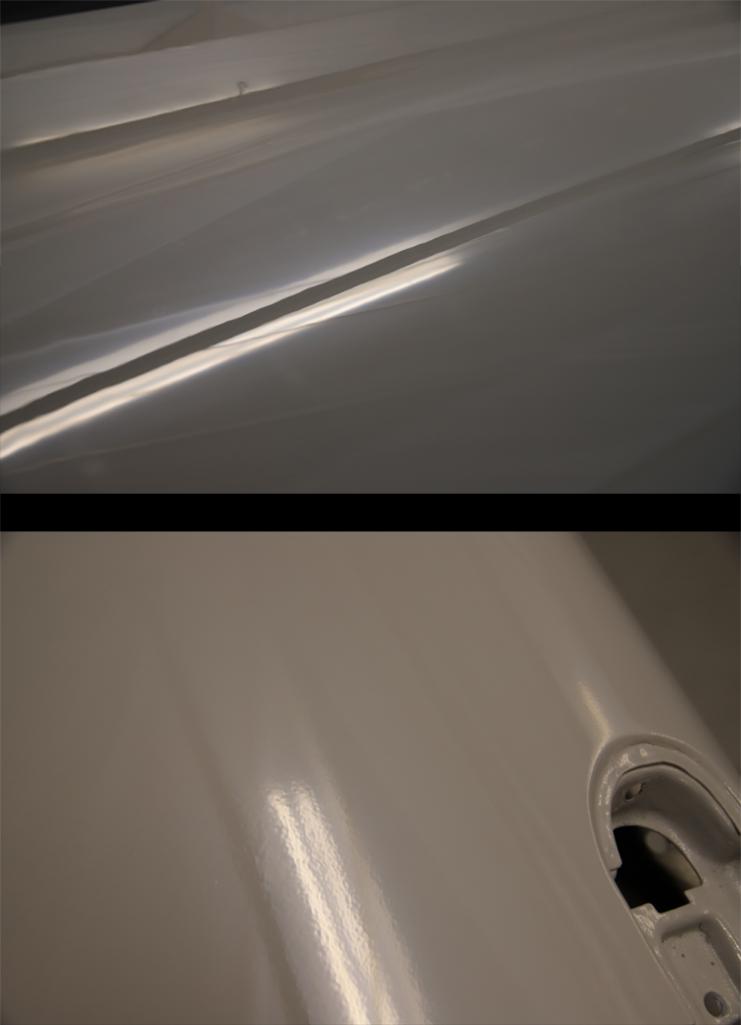
Posted by: Andyrew Aug 1 2018, 11:04 AM
What kind of gun with what size tip are you spraying with?
Posted by: Andyrew Aug 1 2018, 11:09 AM
Don’t overlook the quality of your compressed air if you’re having flaws in your finish. A filter/regulator mounted right at the compressor tank with a hose to your spray gun is likely not enough to eliminate moisture and oil that can spit out and cause fisheyes or what might be blamed on solvent pop. I don’t know what you have for a compressed air system but it’s important to trap the water and oil that can really screw up an otherwise nice paint job.
I've got a 25' coiled hose from the tank to 2 moisture filters on the wall. It then goes out to a coiled 50' hose. I got a "pumpkin" filter at the gun.
Interestingly, whenever I purge the moisture filters on the wall, no fluid comes out. When I purge the tank, I do get a bunch of orange water.
Compressor is 8.6/6.4 cfm @40/90 psi. 2 (running, not peak!) HP, 33 gallon.
I always buy a new filter from HF whenever spraying. This type. It will grab all moisture. I have used JUST this filter before without issue for minor work. I replace it after the media starts to change color.
https://www.harborfreight.com/inline-desiccant-dryerfilter-68215.html
Posted by: Costa05 Aug 1 2018, 12:22 PM
I thought I read in one of your posts that you were running 10 to 15 psi at the gun which is real low. 25 to 30 psi is better. From what I have learned from the net is 10 psi is at the tip of the gun but is unmeasursble. The pressure must be sustained obviously and with small compressors that can be difficult to do. Thus small parts its ok. A good test is release just air out of gun, set the pressure, and continue releasing while watching the gauge see just how fast it drops off on you. I had a 20 gal compressor once that gave maybe enough time for one coat on a small fender at the required pressure. It got way better with my 60 gallon.
Posted by: 914 RZ-1 Aug 1 2018, 12:52 PM
What kind of gun with what size tip are you spraying with?
This one, with a 1.4 tip:
https://www.harborfreight.com/20-oz-professional-hvlp-gravity-feed-air-spray-gun-68843.html
I thought I would try a cheap gun first, then buy a nicer one, but this one seems to work fine. Everything I read said it's really the technique, not just the gun, that makes for a good spray job.
Posted by: 914 RZ-1 Aug 1 2018, 12:54 PM
Don’t overlook the quality of your compressed air if you’re having flaws in your finish. A filter/regulator mounted right at the compressor tank with a hose to your spray gun is likely not enough to eliminate moisture and oil that can spit out and cause fisheyes or what might be blamed on solvent pop. I don’t know what you have for a compressed air system but it’s important to trap the water and oil that can really screw up an otherwise nice paint job.
I've got a 25' coiled hose from the tank to 2 moisture filters on the wall. It then goes out to a coiled 50' hose. I got a "pumpkin" filter at the gun.
Interestingly, whenever I purge the moisture filters on the wall, no fluid comes out. When I purge the tank, I do get a bunch of orange water.
Compressor is 8.6/6.4 cfm @40/90 psi. 2 (running, not peak!) HP, 33 gallon.
I always buy a new filter from HF whenever spraying. This type. It will grab all moisture. I have used JUST this filter before without issue for minor work. I replace it after the media starts to change color.
https://www.harborfreight.com/inline-desiccant-dryerfilter-68215.html
Thanks, I'll look at this one. I think I need a new filter anyway. I was using the red "pumpkin" filters.
Posted by: 914 RZ-1 Aug 1 2018, 12:59 PM
I thought I read in one of your posts that you were running 10 to 15 psi at the gun which is real low. 25 to 30 psi is better. From what I have learned from the net is 10 psi is at the tip of the gun but is unmeasursble. The pressure must be sustained obviously and with small compressors that can be difficult to do. Thus small parts its ok. A good test is release just air out of gun, set the pressure, and continue releasing while watching the gauge see just how fast it drops off on you. I had a 20 gal compressor once that gave maybe enough time for one coat on a small fender at the required pressure. It got way better with my 60 gallon.
Yeah, I was spraying at that before I learned my lesson. I upped the psi at the gun to 30 and got much better results. I didn't realize how much pressure drop there was. The air even sounds different.
I did just what you suggest: I pressed and held the trigger to see what the pressure was staying at. Before, I just pressed and released and got about 30 psi, but that was just a burst. It would go down to 10 or so when I held the trigger for spraying. My gauge was covered with paint, then when I cleaned it with acetone, the plastic got fogged up. I sanded with 2000 and polished it up so I could see it again.
I don't get as much paint on anything, like I did before, so I've been able to see the gauge while spraying.
Posted by: Andyrew Aug 1 2018, 01:08 PM
What kind of gun with what size tip are you spraying with?
This one, with a 1.4 tip:
https://www.harborfreight.com/20-oz-professional-hvlp-gravity-feed-air-spray-gun-68843.html
I thought I would try a cheap gun first, then buy a nicer one, but this one seems to work fine. Everything I read said it's really the technique, not just the gun, that makes for a good spray job.
Thats certainly a good enough gun. The purple $15 guns are junk, but that one is good enough. My $600 gun works only a hair better than my $80 gun.
Posted by: aggiezig Aug 1 2018, 02:25 PM
You already have a ton of great feedback on this thread but I thought I would add my $0.02 as well from my introductory painting experience.
First off, I am not a fan of HF guns for spraying topcoats. Some of the more experienced guys can make this work but I just don't think those guns have enough adjustment and do a good job of atomizing paint. That's just my opinion. I bought a devilbiss starting line gun kit. Two guns and accessories for under $200.
It sounds like you are using the right temp reducer, but when in doubt always choose the slower (higher temp) reducer and just allow more flash time between coats to avoid solvent pop.
PSI at the gun should be 35-40 with the trigger depressed. Make sure you are setting this pressure correctly, it can greatly affect your outcome. As others have mentioned, make sure your air is clean.
Make sure you are applying medium wet coats with a good 50% overlap. If you aren't getting enough paint on the panel, it will never get a chance to flow out. A lot of times I have to remind myself to slow down when spraying.
After spraying 3-4 coats of color, give the paint a full 24 hours to shrink up and flash before assessing orange peel and other conditions. It takes time for the paint to reach it's final appearance state but it's 80-90% of the way there about a day afterwords.
When wet-sanding, start around 1000-1200 and work up in stages. 1000 - 1500 - 2000, etc. You will need either rotary buffer (dangerous to novice users) or a dual action with enough throw and aggressive pads to get ALL of the sanding marks out. I can general get around 95-98% correction with my dual action using a microfiber cutting pad and meguiars M105 cutting compound. Tape off your edges when sanding!
I'm sure there are other tips I can think of but that's a fair amount of information for now. Your last efforts look much better than when you started. This isn't an easy trade to master, but with a lot of practice and perseverance you can get pretty good at spraying paint as a hobbyist.
Posted by: Costa05 Aug 1 2018, 02:27 PM
I thought I read in one of your posts that you were running 10 to 15 psi at the gun which is real low. 25 to 30 psi is better. From what I have learned from the net is 10 psi is at the tip of the gun but is unmeasursble. The pressure must be sustained obviously and with small compressors that can be difficult to do. Thus small parts its ok. A good test is release just air out of gun, set the pressure, and continue releasing while watching the gauge see just how fast it drops off on you. I had a 20 gal compressor once that gave maybe enough time for one coat on a small fender at the required pressure. It got way better with my 60 gallon.
Yeah, I was spraying at that before I learned my lesson. I upped the psi at the gun to 30 and got much better results. I didn't realize how much pressure drop there was. The air even sounds different.
I did just what you suggest: I pressed and held the trigger to see what the pressure was staying at. Before, I just pressed and released and got about 30 psi, but that was just a burst. It would go down to 10 or so when I held the trigger for spraying. My gauge was covered with paint, then when I cleaned it with acetone, the plastic got fogged up. I sanded with 2000 and polished it up so I could see it again.
I don't get as much paint on anything, like I did before, so I've been able to see the gauge while spraying.
Thats great. Check out the Eastwood videos on youtube. I think the guys name is Kevin Tetz. He is pretty good at teaching how to paint. Also good you mounted gauge right at your gun. Even if it clouded over due to solvent.
Posted by: aggiezig Aug 1 2018, 02:28 PM
Thats great. Check out the Eastwood videos on youtube. I think the guys name is Kevin Tetz. He is pretty good at teaching how to paint. Also good you mounted gauge right at your gun. Even if it clouded over due to solvent.
+1 for Kevin Tetz videos. The guy is extremely talented, down to earth and does a great job of explaining basics. I've watched probably hours of the eastwood videos on youtube before jumping off the cliff.
Posted by: bbrock Aug 1 2018, 02:42 PM
Thats great. Check out the Eastwood videos on youtube. I think the guys name is Kevin Tetz. He is pretty good at teaching how to paint. Also good you mounted gauge right at your gun. Even if it clouded over due to solvent.
+1 for Kevin Tetz videos. The guy is extremely talented, down to earth and does a great job of explaining basics. I've watched probably hours of the eastwood videos on youtube before jumping off the cliff.
+2 on Tetz. Kinda hooked on his vids.
Posted by: 914 RZ-1 Aug 1 2018, 08:30 PM
What kind of gun with what size tip are you spraying with?
This one, with a 1.4 tip:
https://www.harborfreight.com/20-oz-professional-hvlp-gravity-feed-air-spray-gun-68843.html
I thought I would try a cheap gun first, then buy a nicer one, but this one seems to work fine. Everything I read said it's really the technique, not just the gun, that makes for a good spray job.
Thats certainly a good enough gun. The purple $15 guns are junk, but that one is good enough. My $600 gun works only a hair better than my $80 gun.
I actually used a purple gun to spray catalyzed paint (basically spray-on fiberglass) on my targa top. I sanded thru it and needed to fix it and this was the best way. I figured I'd ruin a cheap gun. It actually worked pretty good.
I read in several places about how the cheap guns can spray as good as the expensive ones.
Posted by: 914 RZ-1 Aug 1 2018, 08:37 PM
You already have a ton of great feedback on this thread but I thought I would add my $0.02 as well from my introductory painting experience.
First off, I am not a fan of HF guns for spraying topcoats. Some of the more experienced guys can make this work but I just don't think those guns have enough adjustment and do a good job of atomizing paint. That's just my opinion. I bought a devilbiss starting line gun kit. Two guns and accessories for under $200.
It sounds like you are using the right temp reducer, but when in doubt always choose the slower (higher temp) reducer and just allow more flash time between coats to avoid solvent pop.
PSI at the gun should be 35-40 with the trigger depressed. Make sure you are setting this pressure correctly, it can greatly affect your outcome. As others have mentioned, make sure your air is clean.
Make sure you are applying medium wet coats with a good 50% overlap. If you aren't getting enough paint on the panel, it will never get a chance to flow out. A lot of times I have to remind myself to slow down when spraying.
After spraying 3-4 coats of color, give the paint a full 24 hours to shrink up and flash before assessing orange peel and other conditions. It takes time for the paint to reach it's final appearance state but it's 80-90% of the way there about a day afterwords.
When wet-sanding, start around 1000-1200 and work up in stages. 1000 - 1500 - 2000, etc. You will need either rotary buffer (dangerous to novice users) or a dual action with enough throw and aggressive pads to get ALL of the sanding marks out. I can general get around 95-98% correction with my dual action using a microfiber cutting pad and meguiars M105 cutting compound. Tape off your edges when sanding!
I'm sure there are other tips I can think of but that's a fair amount of information for now. Your last efforts look much better than when you started. This isn't an easy trade to master, but with a lot of practice and perseverance you can get pretty good at spraying paint as a hobbyist.
Thanks for the advice. Always appreciated!
Where were you a few months ago! 
Yeah, I use the slower reducer. I can wait.
I noticed the psi has a huge effect. I'm just an idiot and didn't do this right the first few times. I now check the psi with the trigger depressed.
I never did find any good advice on how fast to move the gun. I tend to go too fast on the big panels. I noticed on the small pieces I was getting a good finish; I was going fast over them.
I sand by hand unless I'm re-painting a panel. I've burned thru the paint too easily. I've even sanded thru it by hand, especially on the edges. Once I get a good finish, I will tape the edges.
I should have practiced more!
Posted by: 914 RZ-1 Aug 1 2018, 08:41 PM
+3 on Kevin Tetz. I learned most of this from his videos. I also bought some sanding supplies and tools from Eastwood. I just wish they had 800, 1000, 1500 and 2000 grit for the long Durablocks. Their house brand sandpaper is pretty good. I'm using 3M and it works, but clogs and wears out fast, even though I'm using water.
Posted by: mbseto Aug 1 2018, 10:06 PM
Man this is a clinic. Almost makes me want to try to paint my own car.
Posted by: Perry Kiehl Aug 2 2018, 07:18 AM
FWIW, I have separate air hoses for only paint use.
Posted by: mepstein Aug 2 2018, 07:29 AM
+3 on Kevin Tetz. I learned most of this from his videos. I also bought some sanding supplies and tools from Eastwood. I just wish they had 800, 1000, 1500 and 2000 grit for the long Durablocks. Their house brand sandpaper is pretty good. I'm using 3M and it works, but clogs and wears out fast, even though I'm using water.
We buy all our supplies from a local automotive paint shop. It's worth getting the high quality stuff. Much more selection and we can pick up stuff as we need it. Actually, they deliver for free twice a day.
Posted by: Olympic 914 Aug 2 2018, 09:00 AM
+3 on Kevin Tetz. I learned most of this from his videos. I also bought some sanding supplies and tools from Eastwood. I just wish they had 800, 1000, 1500 and 2000 grit for the long Durablocks. Their house brand sandpaper is pretty good. I'm using 3M and it works, but clogs and wears out fast, even though I'm using water.
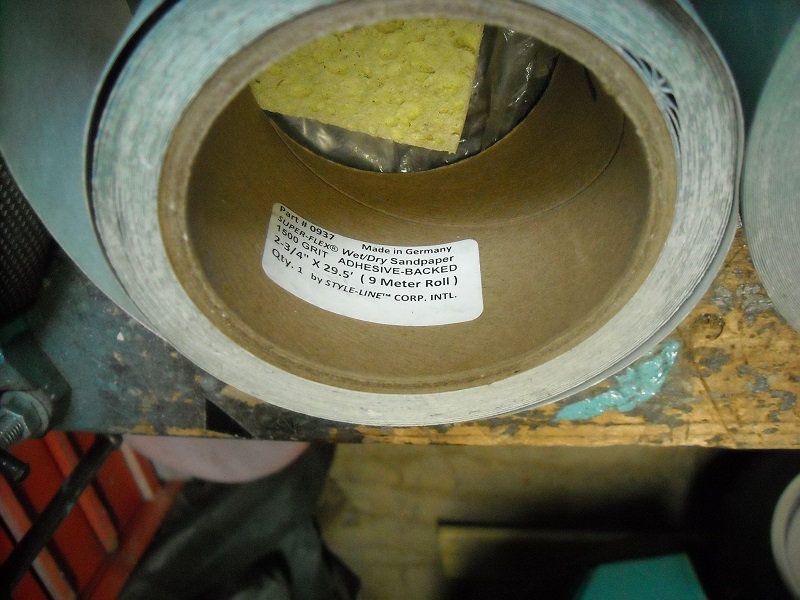
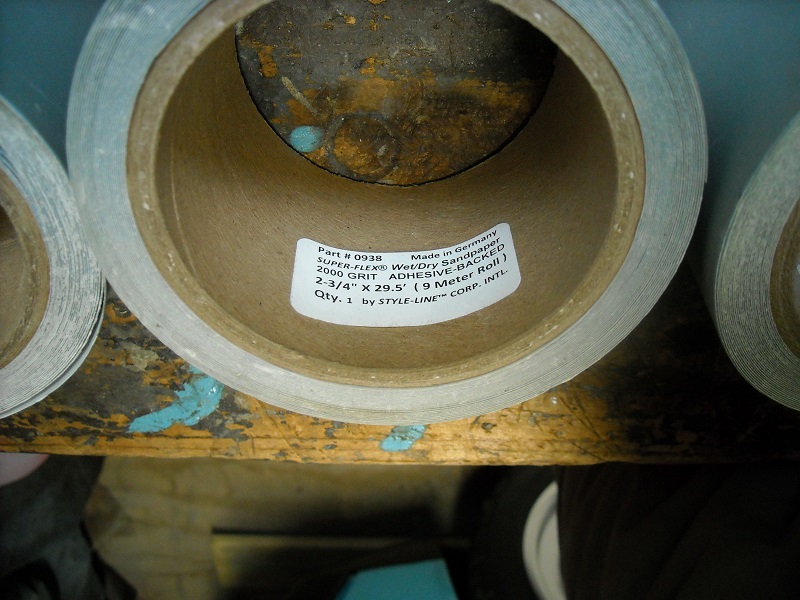
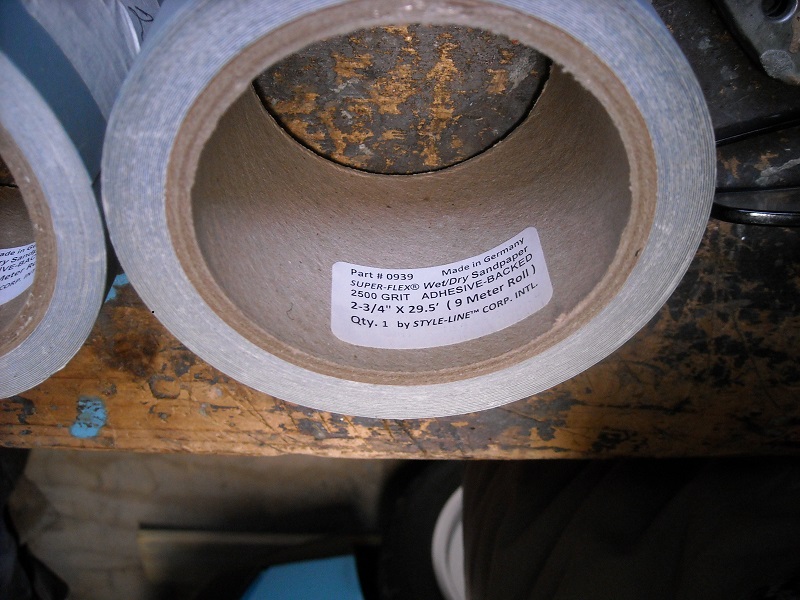
I don't remember where I bought it but you can get the finer grits in adhesive backed rolls for the longboards.
maybe these pics will help. 1500,2000,2500. I think I also have some 800 and 1000
AND Made in Germany...
Posted by: Rav914 Aug 2 2018, 09:17 AM
Man this is a clinic. Almost makes me want to try to paint my own car.
Jump in and do it. I'm on my second car; bare metal repaint in the original color. This is after two coats of single stage. Still 2-3 more coats to apply. Once you learn how to do it, you'll look at car purchases differently. It's an enormous of work, the most I've had to do, but super rewarding and saves a TON of money.
Attached image(s)
Posted by: 914 RZ-1 Aug 2 2018, 06:17 PM
I found it! Thanks!
https://www.shop.softsanders.com/Super-Flex-Wet-Dry-Sandpaper_c8.htm
Eastwood also has it, but they are out of 800 grit. They were a bit cheaper on the shipping, but not by much.
Posted by: 914 RZ-1 Aug 2 2018, 06:23 PM
Man this is a clinic. Almost makes me want to try to paint my own car.
DO IT! I didn't know much about spray-painting cars. It isn't rocket science. I did it to save money. The cheapest quote I got was $4000 and I heard that $6000 to $8000 was more realistic for a decent job. So far I've spent less than $2000, but it has taken me several months of practice and prep. Will mine be as good? Probably not, but I won't be freaking out when I drive it and get a rock chip in it.
I got this car to work on, so I'd like to be able to say, "Yeah, I did that", about everything on it.
Posted by: aggiezig Aug 2 2018, 08:39 PM
I think that with enough trial/error & practice you can do a pretty bang up job yourself. You just have to be realistic with your expectations and also be willing to work at it for hours and hours. I think all said and done I will have between $2,500 and $3,000 invested in my paint job. That includes paint guns, sanders, primers, good quality paint, undercoating, fillers, supplies, etc.
Prior to my current project, I had zero experience. I am learning as I go and pleased with my results.
This is using PPG DCC Concept single stage acrylic urethane in Mexico Blue. After a cut with 2000 and compound with M105.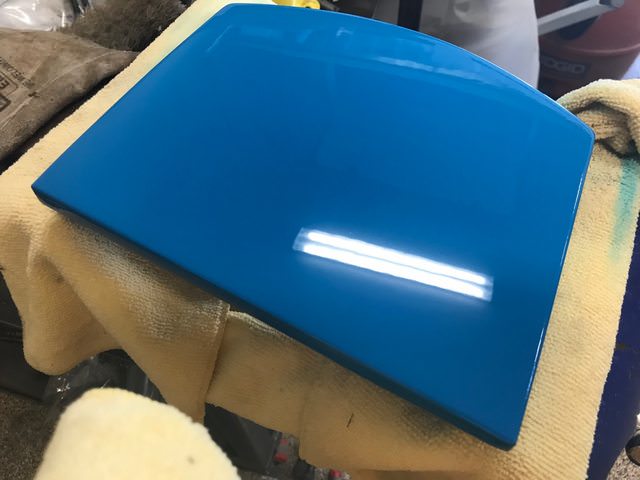
Posted by: 914dave Aug 4 2018, 07:34 AM
I had the same wrapped up in my paint. Tools included. Very rewarding when it’s done.
Keep it up. Nice job!
Posted by: 914 RZ-1 Aug 8 2018, 12:15 PM
So I got the suggested filter:
https://www.harborfreight.com/inline-desiccant-dryerfilter-68215.html
However, it doesn't seem to allow enough pressure thru. I have the hose going into the filter, then the pressure regulator, then the gun. With the pumpkin filter and the gauge set at 30psi, I get plenty of air. But, with the filter above and the gauge set at 30psi, I get far less air, the spray pattern is smaller. I tried it with two different air pressure gauges.
Not sure what's causing this. None of my usual sources addresses this.
I painted the hoods and am still getting a bit of orange peel. The gun also sprays intermittently, but only when painting; it works fine when I spray acetone thru it.
Posted by: 914 RZ-1 Aug 8 2018, 12:18 PM
Nice job! Yeah, it's taking me lots of practice. I'm using the hoods to dial it in since they are easy to sand and re-paint.
I think that with enough trial/error & practice you can do a pretty bang up job yourself. You just have to be realistic with your expectations and also be willing to work at it for hours and hours. I think all said and done I will have between $2,500 and $3,000 invested in my paint job. That includes paint guns, sanders, primers, good quality paint, undercoating, fillers, supplies, etc.
Prior to my current project, I had zero experience. I am learning as I go and pleased with my results.
This is using PPG DCC Concept single stage acrylic urethane in Mexico Blue. After a cut with 2000 and compound with M105.
Posted by: Andyrew Aug 8 2018, 12:42 PM
So I got the suggested filter:
https://www.harborfreight.com/inline-desiccant-dryerfilter-68215.html
However, it doesn't seem to allow enough pressure thru. I have the hose going into the filter, then the pressure regulator, then the gun. With the pumpkin filter and the gauge set at 30psi, I get plenty of air. But, with the filter above and the gauge set at 30psi, I get far less air, the spray pattern is smaller. I tried it with two different air pressure gauges.
Not sure what's causing this. None of my usual sources addresses this.
I painted the hoods and am still getting a bit of orange peel. The gun also sprays intermittently, but only when painting; it works fine when I spray acetone thru it.
You need to put your regulator after the filter. Your air tank should be at say 90psi.
The desiccant filter certainly takes a bit more air pressure to push through but it shouldnt be that bad.
Posted by: 914 RZ-1 Aug 8 2018, 05:57 PM
You need to put your regulator after the filter. Your air tank should be at say 90psi.
The desiccant filter certainly takes a bit more air pressure to push through but it shouldnt be that bad.
I did that: air hose from tank>filter>regulator>gun.
Tank is set about 80-90 psi. The difference is really noticable. I thought it odd that the gauge read the same with both filters, but the air coming out of the gun is clearly different. I tried two different gauges, too. The filter had two caps, which I took out. Did I miss something else that could be blocking airflow?
Posted by: 914GT Aug 8 2018, 07:05 PM
You are setting your pressure at the gun with the gun trigger pulled, right? Just setting the static pressure to 30 or whatever your gun requires will not give you correct pressure when spraying. I use the regulator on the wall to set my max gun pressure to 25 or so then use the valve at the gun to reduce it further as necessary.
Posted by: 914 RZ-1 Aug 9 2018, 01:54 PM
You are setting your pressure at the gun with the gun trigger pulled, right? Just setting the static pressure to 30 or whatever your gun requires will not give you correct pressure when spraying. I use the regulator on the wall to set my max gun pressure to 25 or so then use the valve at the gun to reduce it further as necessary.
Yes, I am setting the pressure with the trigger pulled.
Posted by: Andyrew Aug 9 2018, 02:01 PM
Thinking back, I do remember having this issue once. I think I ended up going with a different filter for that particular job or not using one alltogether.
looking back over my paint thread, I notice this picture
You can see the filter near the tank. I wonder if moving it farther away from the gun and before the regulator could help?
You can see its not on my gun in this pic of me spraying the car. 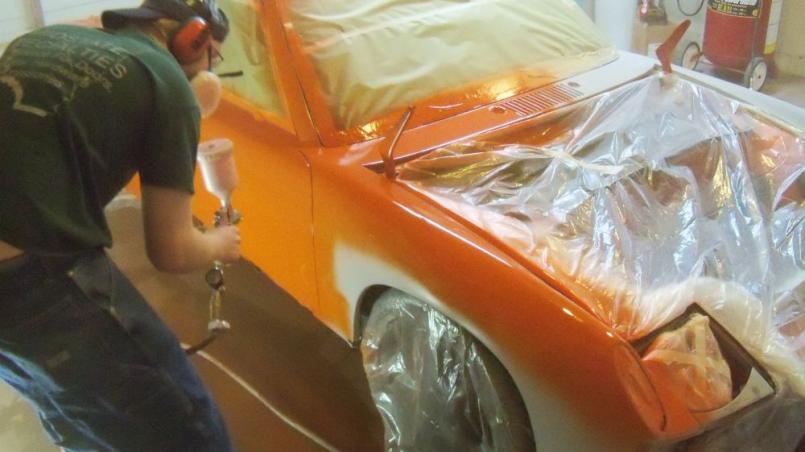
Posted by: Andyrew Aug 9 2018, 02:03 PM
Note. Spray the body side in one go, Not panel by panel as shown. Walk the body.
This was only the 2nd car I sprayed at the time and I was still learning. Doing it the method shown will cause for runs near the body seams.
Posted by: Andyrew Aug 9 2018, 02:05 PM
Also noticed this review online.
"We reviewed dryer for in-house use. Air must be in contact with media for 750 msec(3/4 sec) to remove water from 90% humidity to 40% ( 1.25 sec for 20%). The air flow is restricted by small orifice so that 90 psi inlet to 0 psi outlet reduces to 40% RH. This flow is not sufficient to run most tools, it is ok for painting. DO NOT install dryer directly in-line with tool. You must use a buffer tank( we found 5 gal tank to work ok for sanders, wrenches). Run hose from compressor to dryer, then from dryer to buffer tank. From tank to tool. Remember that average air flow must be handled by buffer or not exceed 3.5 CFM or you will get very low working pressures. Do not drill out the orifice as was mentioned in other reviews. This will indeed increase the air flow and downstream pressure; but the air will pass too quickly through the dryer media and will not be dryed(defeating the purpose of the dryer). To get greater air flow, use several dryers in parallel. We actually use 3 dryers side by side, leading to buffer tank."
That plays in line with running it before the line. and far away from the tool.
Posted by: 914 RZ-1 Aug 9 2018, 05:19 PM
I've got similar orange peel on my hoods; were you able to color sand and buff that out?
I've got two filters in addition to the one at the gun.
It goes like this: compressor>25' coiled air hose>2 moisture removing filters> small hose to reel>50' hose (might be 25') on reel>pumpkin filter>regulator>gun
Maybe I'll put the filter closer as you suggest. Thanks for the input!
Posted by: 914 RZ-1 Aug 9 2018, 05:21 PM
Wish I'd bothered to read the reviews. Maybe I can take it back if relocating it doesn't work. The pumpkin filter seems to work just fine. Introducing another variable just makes the learning curve steeper, so maybe I'll stick with what has worked so far.
Also noticed this review online.
"We reviewed dryer for in-house use. Air must be in contact with media for 750 msec(3/4 sec) to remove water from 90% humidity to 40% ( 1.25 sec for 20%). The air flow is restricted by small orifice so that 90 psi inlet to 0 psi outlet reduces to 40% RH. This flow is not sufficient to run most tools, it is ok for painting. DO NOT install dryer directly in-line with tool. You must use a buffer tank( we found 5 gal tank to work ok for sanders, wrenches). Run hose from compressor to dryer, then from dryer to buffer tank. From tank to tool. Remember that average air flow must be handled by buffer or not exceed 3.5 CFM or you will get very low working pressures. Do not drill out the orifice as was mentioned in other reviews. This will indeed increase the air flow and downstream pressure; but the air will pass too quickly through the dryer media and will not be dryed(defeating the purpose of the dryer). To get greater air flow, use several dryers in parallel. We actually use 3 dryers side by side, leading to buffer tank."
That plays in line with running it before the line. and far away from the tool.
Posted by: 914 RZ-1 Aug 9 2018, 05:24 PM
Yeah, that's what I'm doing. I actually have the doors off, so it's not really an issue. At this point, I'm trying to dial in the technique on the hoods so I can spray the body one more time and be done.
When I'm done, this car will have LOTS of coats of paint.
Note. Spray the body side in one go, Not panel by panel as shown. Walk the body.
This was only the 2nd car I sprayed at the time and I was still learning. Doing it the method shown will cause for runs near the body seams.
Posted by: 914 RZ-1 Aug 19 2018, 05:46 PM
I'm STILL getting orange peel.
To review, here's the set-up:
1. 33 gallon compressor (8.6/6.4 CFM @ 40/90 psi, 2 running HP)>25' coiled hose>2 moisture filters>25' 3/8" hose reel>"pumpkin"-style filter>regulator>gun.
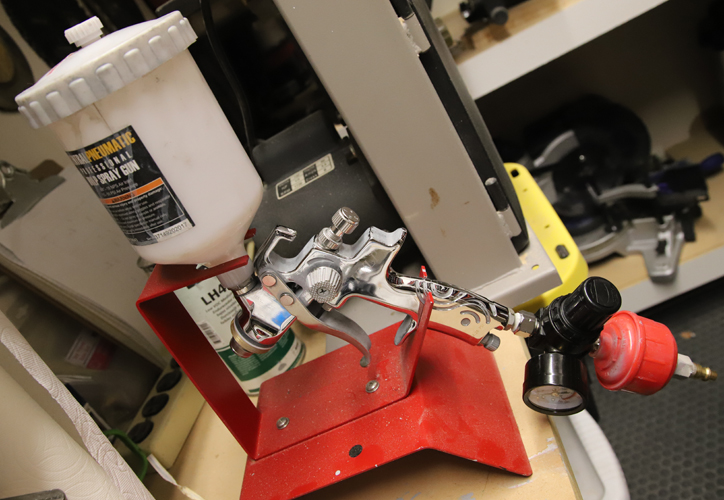
2. Gun: the $70 Harbor Freight one. I clean the gun thoroughly after use, by the way. All the important parts look new when I'm done.
3. Spraying single stage paint (R-M brand) at 30 psi (at the regulator). Using high temp reducer. I use mid-temp hardener. I mix the paint well to the proper proportions. I'm wondering if the paint is not going on wet enough? How do I tell, other than the obvious "it looks wet"?
4. 80-90 degree weather, 40-50% humidity in the garage. I made a makeshift vented "booth" to keep the dust and wind out.
5. I'm about 6-8" away. I'm not sure of spraying speed; maybe 12 inches per second?
6. I'm getting orange peel that will not easily sand out. I'm starting with 800 and using a long block. There are still shiny spots. How much orange peel is acceptable and sands out with 800 or 100 grit? The images I've found have way less than I'm getting.
7. Does the gun really matter? Should I get a better gun? The one I have seems to spray just fine; I think I am the problem! I've heard that better guns atomize better, but I've also heard that the painting conditions matter, too. Is there a price point at which the quality of the gun actually shows up/makes a difference? In other words, are guns below say, $100 all pretty much the same and I gotta spend at least $200 or whatever to get better quality that will actually matter?
I know it's as art, but I thought I've done everything "right", but I'm still not getting good results.
Posted by: 914 RZ-1 Aug 19 2018, 05:54 PM
A picture after wet-sanding with 800 for your viewing pleasure: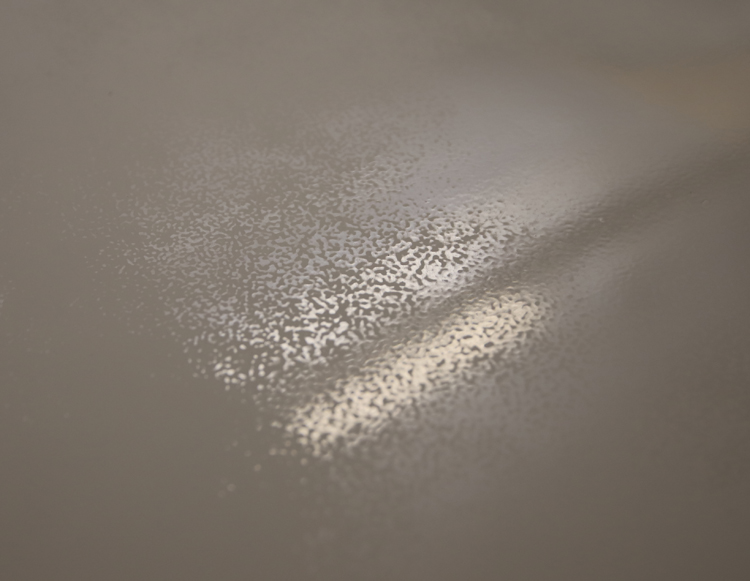
Posted by: dakotaewing Aug 19 2018, 06:01 PM
Please show pictures of your compressor, hoses and filter set up, and Gun.
Most likely you suffer from a variety of issues contributing to the problem,
rather than just one. It all starts at the compressor,
amount of air volume, and how hard the compressor has to work to keep up.
It then goes to the hoses, filter and gun.
Then you need to take into account the temp and humidity.
I have never sprayed anything but primer,
but I would never consider spraying my car in the current Texas heat.
You have so many things going against you as a newbie (painter),
that I would want to spray my car when the temp
is as close to 70 degrees as possible.
For me that means October or mid March.
Posted by: Andyrew Aug 19 2018, 06:26 PM
A picture after wet-sanding with 800 for your viewing pleasure:
Sand down more
I always sand down till its just barely showing any shiny spots and then start hitting the finer grits.
How many coats beyond full coverage do you have on it now?
Posted by: 914 RZ-1 Aug 19 2018, 06:31 PM
Please show pictures of your compressor, hoses and filter set up, and Gun.
Most likely you suffer from a variety of issues contributing to the problem,
rather than just one. It all starts at the compressor,
amount of air volume, and how hard the compressor has to work to keep up.
It then goes to the hoses, filter and gun.
Then you need to take into account the temp and humidity.
I have never sprayed anything but primer,
but I would never consider spraying my car in the current Texas heat.
You have so many things going against you as a newbie (painter),
that I would want to spray my car when the temp
is as close to 70 degrees as possible.
For me that means October or mid March.
For your viewing pleasure:
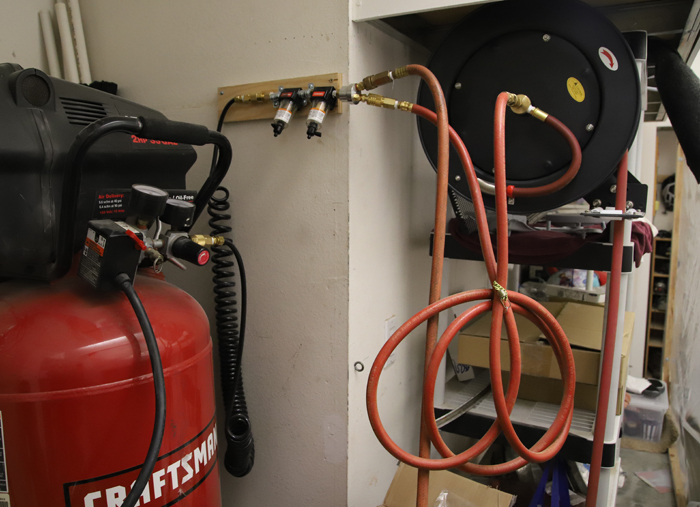
The second hose is used for cleaning the gun outside.
Posted by: 914 RZ-1 Aug 19 2018, 06:32 PM
A picture after wet-sanding with 800 for your viewing pleasure:
Sand down more
I always sand down till its just barely showing any shiny spots and then start hitting the finer grits.
How many coats beyond full coverage do you have on it now?
Ha! Yeah, I thought the same, but I'm sanding thru to primer/bare metal in some places. I thought I had about 3-5 coats on this, but apparently I'm not covering evenly or enough.
Posted by: Andyrew Aug 19 2018, 06:55 PM
Ya, I put 7 coats on mine when I did it. Took 3 for full coverage, so I had 4 to work with.
If your getting down to the primer then my suggestion is adjust the thickness.
Orange peal is easier to work with than runs, but its OK if you only have a run or two to deal with. I would say add another 25% reducer to your paint. Give it less flash time by a couple minutes if you can and try again on a vertical panel.
I think your really close. Some orange peal is inevitable.
Posted by: Andyrew Aug 19 2018, 07:01 PM
And I agree with temp. If your starting to spray at 80 deg and it gets to 95 by the time your done then you need to start earlier or spray on a different day. I prefer to paint in the dead of night or way way early in the morning as there are fewer bugs and the temps are cooler in the summer.
Posted by: dakotaewing Aug 19 2018, 07:54 PM
Upon initial review, it would appear that part of your problem is that you have condensation building up in your air lines,
which is also a direct result of working in hotter temps,
and that condensation is being blown through the airlines and mixed with your paint. Please see the attached link to the video for a water trap,
where the water is able to collect, without your pressurized air blowing through it.
I can't say that this would solve all your problems,
but would certainly help -
Again, I am a novice painter, with no real world experience outside of primer -
https://www.youtube.com/watch?v=IdxdbgeUUKA
Attached image(s)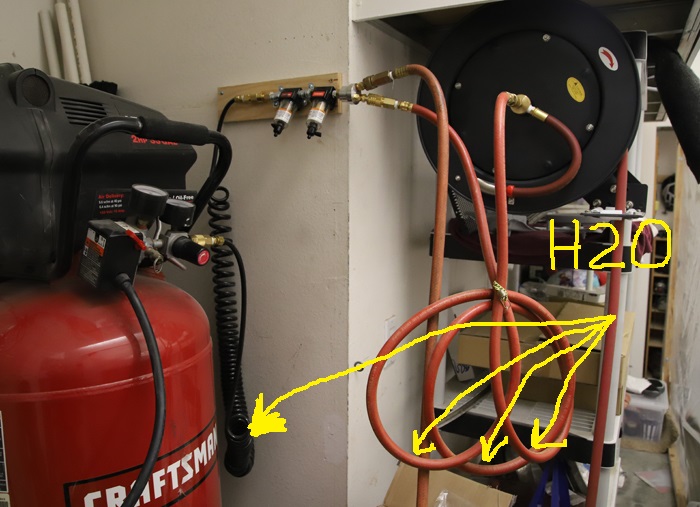
Posted by: 914 RZ-1 Aug 19 2018, 08:54 PM
Upon initial review, it would appear that part of your problem is that you have condensation building up in your air lines,
which is also a direct result of working in hotter temps,
and that condensation is being blown through the airlines and mixed with your paint. Please see the attached link to the video for a water trap,
where the water is able to collect, without your pressurized air blowing through it.
I can't say that this would solve all your problems,
but would certainly help -
Again, I am a novice painter, with no real world experience outside of primer -
https://www.youtube.com/watch?v=IdxdbgeUUKA
Good call!  I think you are right! I didn't really think of this until you pointed it out. I have the 2 water filters at the top, but I think I need to lower them so they are at the bottom of the line. Whenever I open them, there is no water. That seems odd, but I figure it's really dry here so no biggie.
Is there a way to determine if water is in the lines, like spraying just air out of the gun and looking/feeling for moisture?
Posted by: dakotaewing Aug 19 2018, 09:35 PM
The water trap on the wall will only catch a small percentage of the condensation due to it's size, and proximity...
What is the normal humidity level when it is not raining there? Its 50-60% here -
I would also get rid (change) of the line between the tank and the water trap on the wall with something that has a larger interior diameter,
as that small line is limiting your air volume to the gun -
Posted by: Atech Aug 20 2018, 01:40 AM
Upon initial review, it would appear that part of your problem is that you have condensation building up in your air lines,
which is also a direct result of working in hotter temps,
and that condensation is being blown through the airlines and mixed with your paint. Please see the attached link to the video for a water trap,
where the water is able to collect, without your pressurized air blowing through it.
I can't say that this would solve all your problems,
but would certainly help -
Again, I am a novice painter, with no real world experience outside of primer -
https://www.youtube.com/watch?v=IdxdbgeUUKA
Good call!
I think you are right! I didn't really think of this until you pointed it out. I have the 2 water filters at the top, but I think I need to lower them so they are at the bottom of the line. Whenever I open them, there is no water. That seems odd, but I figure it's really dry here so no biggie. Is there a way to determine if water is in the lines, like spraying just air out of the gun and looking/feeling for moisture?
Add a toilet paper filter https://www.tooltopia.com/_img/JLM/JLMM30.jpg
Posted by: Atech Aug 20 2018, 01:52 AM
Upon initial review, it would appear that part of your problem is that you have condensation building up in your air lines,
which is also a direct result of working in hotter temps,
and that condensation is being blown through the airlines and mixed with your paint. Please see the attached link to the video for a water trap,
where the water is able to collect, without your pressurized air blowing through it.
I can't say that this would solve all your problems,
but would certainly help -
Again, I am a novice painter, with no real world experience outside of primer -
https://www.youtube.com/watch?v=IdxdbgeUUKA
Good call!
I think you are right! I didn't really think of this until you pointed it out. I have the 2 water filters at the top, but I think I need to lower them so they are at the bottom of the line. Whenever I open them, there is no water. That seems odd, but I figure it's really dry here so no biggie. Is there a way to determine if water is in the lines, like spraying just air out of the gun and looking/feeling for moisture?
Add a toilet paper filter https://www.tooltopia.com/_img/JLM/JLMM30.jpg
Also that's a hvlp gun meant to spray at lower pressure (high volume low pressure) keep pressure on the lower side and reduce paint volume
Posted by: aggiezig Aug 20 2018, 08:22 AM
Lots of good tips about air and what not, but based on some info you gave us I think we're missing the bigger problem.
If you're standing through to primer with 800 after 3-5 coats and not through the orange peel, then your coats are way too dry. Make sure you're laying it on wet. Better to have runs (can be fixed later) than dry spot.
I would stay no more than 6" from the panel and really get some paint on there. Slow it down and practice on a piece of masking paper or something first. Tetz has a really good example about taping a paint brush to the side of the gun 6" out so you can feel exactly how far that is. Hint: it's closer than you think.
Also, try dropping your PSI at the gun some and see if it helps. I just sprayed my car and lowered the inlet pressure to around 25. I laid it on pretty wet and it sprayed like a dream.
Lastly, make sure to use compatible temp hardener and reducer. You mentioned using medium with slow. Try and use slow for both so there is no possible mix-match.
I know that you are been overloaded with info from all of us. My suggestion is to try one new thing at a time and see if it improves on a test panel. Too many changes at once and you'll have no idea what made it better or worse.
Posted by: 914 RZ-1 Aug 26 2018, 02:54 PM
I have been told that compressed air can be very hot and that might be yet another issue I need to address. I'm going to run the compressor and some air tools for 20-30 minutes and see how hot the air gets.
I'm thinking I will place the first hose in a bucket of ice and see what that does. Air coolers are available but they are not cheap.
Posted by: mb911 Aug 26 2018, 03:17 PM
I have been told that compressed air can be very hot and that might be yet another issue I need to address. I'm going to run the compressor and some air tools for 20-30 minutes and see how hot the air gets.
I'm thinking I will place the first hose in a bucket of ice and see what that does. Air coolers are available but they are not cheap.
Your coats are not laying wet enough.. Simple as that.. Your chasing problems that just simply a wild goose chase. Not trying to be difficult and note I am not expert but have used my sanborn 80 gallon air compressor with a simple air dryer and painted about 5 cars with it over about 10 year period.
I have a simple sata hvlp spray gun that is 10 years old. Attached is the results of my job. I would really suggest yoy spray out some parts that may either not be seen or a fender from the junk yard to get a feel for it..
Posted by: ConeDodger Aug 26 2018, 04:03 PM
Get rid of that first length of hose of the compressor. That curly-Q shit is just asking for condensation. Have a length of hose just long enough to get from the compressor to the dryer manifold made at AirGas. Use a dryer at the gun if you’re not. Avoid low spots in your hose.
Wetter. You’re avoiding runs, yes but you have to lay down some paint. I’ve watched the Eastwood Kevin Tetz videos a thousand times. Best I’ve ever seen.
Posted by: IronHillRestorations Aug 26 2018, 04:39 PM
I'll 2nd Ben's opinion. I think you probably are using the wrong reducer, so your paint isn't laying down well, you're gun pressure/paint flow isn't correct, and your technique isn't there yet. Additionally you do probably have water in your air supply problems too.
If learning how to paint your car is part of the process, then you need enough paint supplies and practice surfaces to develop your skills.
I see this with new welders. A guy (who's never welded before) goes and buys a new MIG welder (to make it worse it's often flux core), makes three practice beads on 1/4" angle iron, and heads off to fix his hell hole.
Practice does make perfect, and don't practice on a critical surface.
Posted by: porschetub Aug 26 2018, 05:37 PM
I have been told that compressed air can be very hot and that might be yet another issue I need to address. I'm going to run the compressor and some air tools for 20-30 minutes and see how hot the air gets.
I'm thinking I will place the first hose in a bucket of ice and see what that does. Air coolers are available but they are not cheap.
Your coats are not laying wet enough.. Simple as that.. Your chasing problems that just simply a wild goose chase. Not trying to be difficult and note I am not expert but have used my sanborn 80 gallon air compressor with a simple air dryer and painted about 5 cars with it over about 10 year period.
I have a simple sata hvlp spray gun that is 10 years old. Attached is the results of my job. I would really suggest yoy spray out some parts that may either not be seen or a fender from the junk yard to get a feel for it..
done heaps of DIY garage resprays,don't spray dry as you will need to sand between coats for that reason and you shouldn't have to unless the basecoat has been on too long,dry spray feels like sandpaper and shows up really dull,if you are painting single stage expect to have orange peel....that's normal.If you put orange peel over orange peel you still have the same,way this paint is.
Lay down the right amount of basecoat to paint makers specs for reducer and you will be fine,keep the gun moving the right distance away and stop and look what you have done and adjust what you are doing as required.
Reason for chiming in as I'am currently respraying our GTI golf,I have no spray tent,or flash system of any kind,just gear I have used for years that works like Ben said and getting a great "off the gun" finish,spray @ the coolest part of the day and reduce moisture in the system as much as possibly with a water separator.
Good luck ok ?.
Posted by: IronHillRestorations Aug 26 2018, 08:30 PM
I've had more than one painter tell me that early in the morning is a good time to paint outdoors.
Posted by: porschetub Aug 27 2018, 12:22 AM
Get rid of that first length of hose of the compressor. That curly-Q shit is just asking for condensation. Have a length of hose just long enough to get from the compressor to the dryer manifold made at AirGas. Use a dryer at the gun if you’re not. Avoid low spots in your hose.
Wetter. You’re avoiding runs, yes but you have to lay down some paint. I’ve watched the Eastwood Kevin Tetz videos a thousand times. Best I’ve ever seen.
Any flexible hose is a moisture maker the only hose you should have is from a filtered regulated supply and as short as possible,not difficult to hard pipe everything before that,I don't like a regulator and filter on the gun its just clumsy and not needed.
Posted by: gereed75 Aug 27 2018, 07:26 AM
Lots of great info here. Don’t get overwhelmed. I had a really good painter review my first efforts. His comment was “if you don’t want orange peal, never spray orange peal”.
In other words never spray anything that tends towards “dry”. That is the game - Putting down coats that are close to running, but don’t run. I found moving the gun slower to be key for me.
Runs can be fixed, dry coats can not!
Posted by: IronHillRestorations Aug 27 2018, 08:11 AM
+1 on wet coats. Too dry can cause adhesion problems
Posted by: 914 RZ-1 Sep 10 2018, 08:54 AM
Here's the latest results at 72 degrees and about 50% humidity. I got a little bit closer and went a little bit faster. This was taken about 15 minutes after I painted. I have not done any sanding or polishing: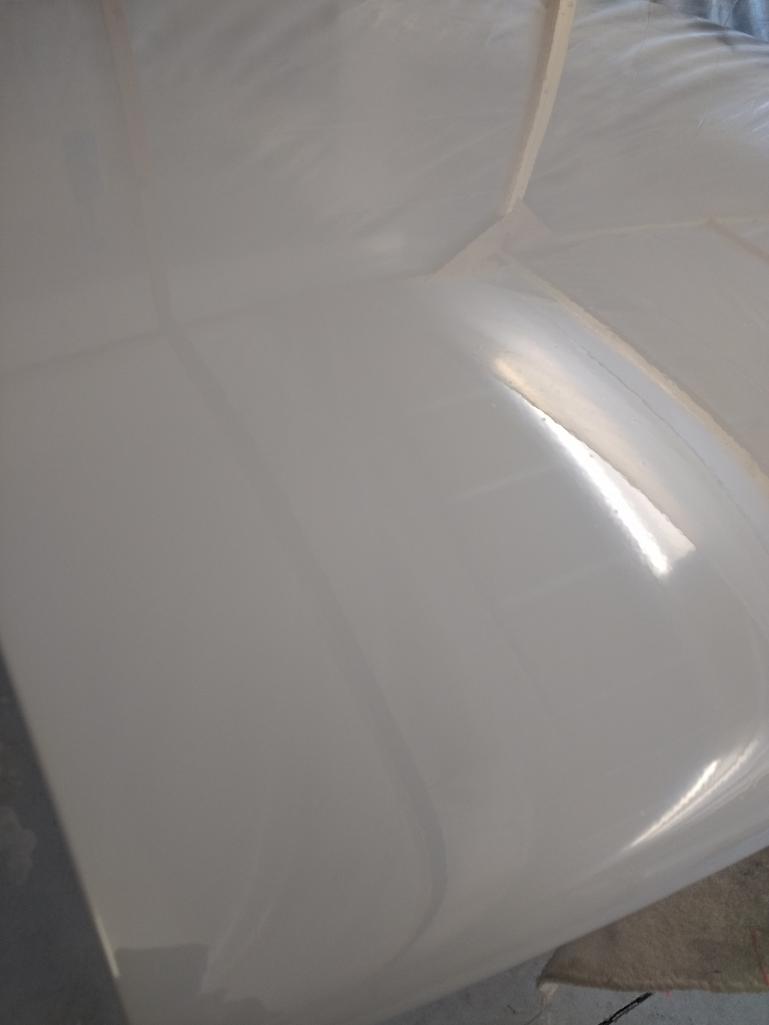
Posted by: jd74914 Sep 10 2018, 08:56 AM
Much better!!
Tough to tell in this light, but it looks like it should sand nicely.
Posted by: Cairo94507 Sep 10 2018, 08:58 AM
Looks much better; persistence pays off.
Posted by: Localboy808 Sep 10 2018, 11:20 AM
How many coats did you do? Makes a difference. Hopefully you have enough paint on there. I'm no expert but I like to shoot at least 3 semi heavy coats to feel comfortable cutting and buffing it. If you have at least 3 coats on there I like starting with 800. Just goes faster if you have heavy peel.
Posted by: Andyrew Sep 10 2018, 11:47 AM
I wish the humidity was lower, but temps are good!
Very smooth painting! Now you just have to be very careful with the runs
Posted by: aggiezig Sep 10 2018, 01:38 PM
Wow, night and day. Much better! Looks like you have your rhythm down now.
Posted by: 914 RZ-1 Sep 19 2018, 12:15 PM
Here's the latest. I did the front hood. I was waiting for a morning I could paint. It was 65 degrees and about 55% humidity.
I put on 3 coats for those of you who are counting. 

I'm not sure where the little "bumps" are coming from. While my hillbilly painting "booth" is not exactly NASA airtight, it's not full of dirt. I strain the paint and use a filter on the gun. I've sanded these out before.
Posted by: Andyrew Sep 19 2018, 02:00 PM
Here's the latest. I did the front hood. I was waiting for a morning I could paint. It was 65 degrees and about 55% humidity.
I put on 3 coats for those of you who are counting.
I'm not sure where the little "bumps" are coming from. While my hillbilly painting "booth" is not exactly NASA airtight, it's not full of dirt. I strain the paint and use a filter on the gun. I've sanded these out before.
Dust settles. Without an updraft booth your just not going to be able to prevent this. Wet sanding should always be factored into a garage paint job.
Also note I typically leave my fans on for 12 hours after the last application of paint.
Posted by: aggiezig Sep 19 2018, 03:05 PM
Dust settles. Without an updraft booth your just not going to be able to prevent this. Wet sanding should always be factored into a garage paint job.
Also note I typically leave my fans on for 12 hours after the last application of paint.
Posted by: 914 RZ-1 Oct 19 2018, 12:26 PM
I'm now painting the body. Here's the latest. Looks like there's a little orange peel in places :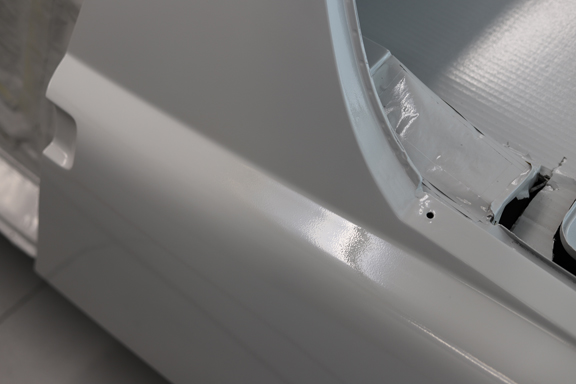
This is the front by the window. Not bad, got a little dust on it.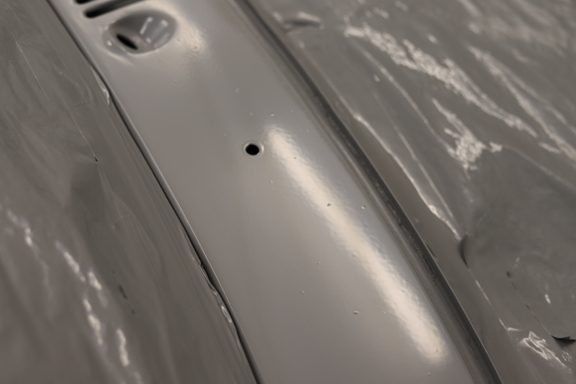
Posted by: 914 RZ-1 Oct 19 2018, 12:44 PM
So I've started sanding and polishing the hood. I used 800-1000-1500-2000 and used a spray bottle to keep the surface wet. I then polished with Chemical Guys V32. I can see small scratches in the finish. I'm wondering what I did wrong?
I've watched plenty of videos, but they don't really go over sanding in enough detail. I'm thinking I might not be pressing hard enough, using enough water or just not doing it long enough.
I go in and "X" pattern, not a swirl. The scratches match that.
I started with 1000 in another spot and the finish is better, but there are still scratches.
I used the polisher until the compound turned clear. Didn't press really hard, the pad was spinning (I have marks on it to see that) and moved the machine about 1" per second, maybe a little faster.
Here's a picture, but I'm not sure you can see the scratches: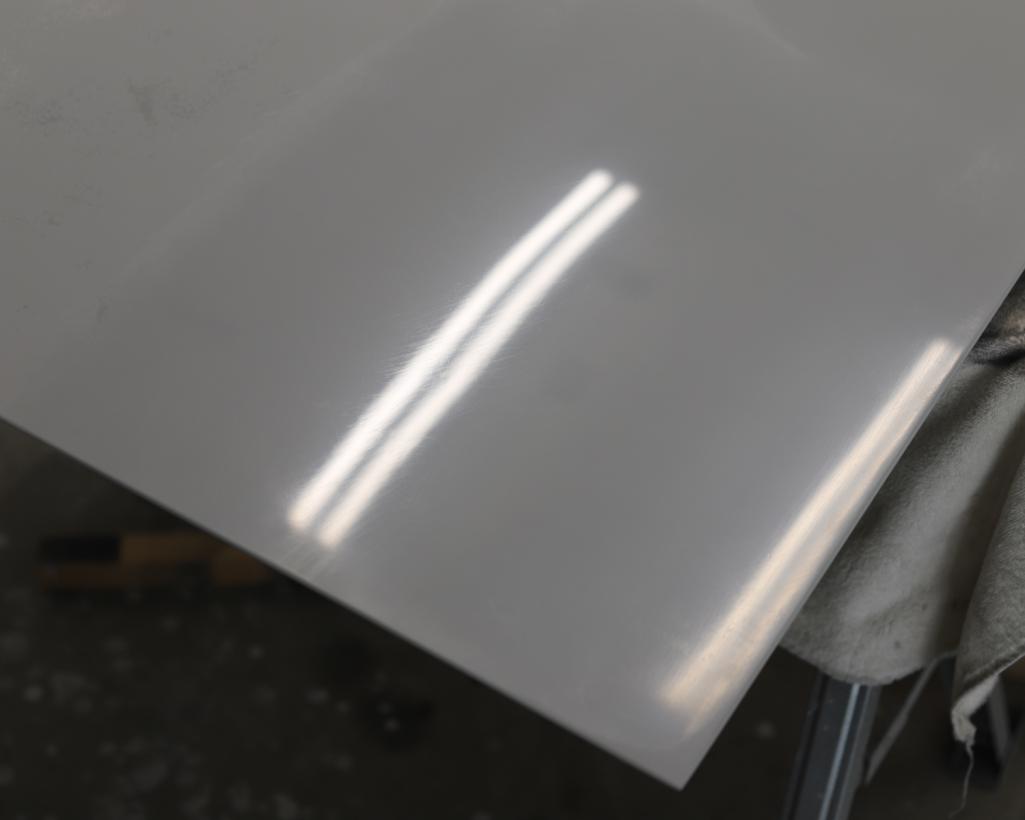
Posted by: Andyrew Oct 19 2018, 07:38 PM
Can you describe how much time your spending on each step?
Your probably seeing 800 grit scratches. I would resand an area with 1k grit, then double the time with 1500 grit and the same time with 2k grit.
Add a little soap to your water (a drop or two) and make sure it's always soaking wet and clean. Sand till it starts to milk up then spray, wipe, spray the paper, sand and repeat.
Posted by: ValcoOscar Oct 19 2018, 07:45 PM
Can you describe how much time your spending on each step?
Your probably seeing 800 grit scratches. I would resand an area with 1k grit, then double the time with 1500 grit and the same time with 2k grit.
Add a little soap to your water (a drop or two) and make sure it's always soaking wet and clean. Sand till it starts to milk up then spray, wipe, spray the paper, sand and repeat.
and stay away from edges during color sanding. Best of luck Jeff
Oscar
Posted by: 914 RZ-1 Oct 19 2018, 09:09 PM
Can you describe how much time your spending on each step?
Your probably seeing 800 grit scratches. I would resand an area with 1k grit, then double the time with 1500 grit and the same time with 2k grit.
Add a little soap to your water (a drop or two) and make sure it's always soaking wet and clean. Sand till it starts to milk up then spray, wipe, spray the paper, sand and repeat.
I go over it with each grit about twice. Takes about 15-20 minutes for each grit, maybe less. I sand until I have a soup of what appears to be paint and grit, then wipe it down with water and a Harbor Freight microfiber towel (the freebie ones). If I let it dry I can see the places I missed. I use a 16" long Durablock. I think I'm going to get a smaller one.
When I polish I think I'm going over it too fast. I re-watched the Chemical Guys videos and they go a lot slower than I did. They use the same pad and compound I did, but it was on nicer cars than mine.
Sounds like I need to sand with 1000, then do it with 1500 but take twice as long, then do it with 2000 and take twice as long as that (4X the time it took for the 1000 grit), correct? So, for example, 15-20 minutes, then 30-40 then 60-80.
I think I might need to let it dry more between grits and look for scratches. I also bought a more aggressive pad that I will try.
Thanks for all your help, I really appreciate it!
Posted by: 914 RZ-1 Oct 19 2018, 09:10 PM
Can you describe how much time your spending on each step?
Your probably seeing 800 grit scratches. I would resand an area with 1k grit, then double the time with 1500 grit and the same time with 2k grit.
Add a little soap to your water (a drop or two) and make sure it's always soaking wet and clean. Sand till it starts to milk up then spray, wipe, spray the paper, sand and repeat.
and stay away from edges during color sanding.
Best of luck Jeff
Oscar
Thanks Oscar! Always appreciate your comments!  I think using a smaller block might help me stay away from edges. That, and being careful!
Posted by: Andyrew Oct 20 2018, 01:16 AM
Couple things.
I color sand with a 6" flat rubber block ONLY. Anything larger than that and you probably won't get all the scratches without sanding too deep. Your not using heavy aggressive grits anymore so your not going to cause waves in your paint.
Keep your paper wet!!! I keep a bucket next to me and dunk it in every minute or so. When the paper loads up or about 30 minutes go by I get another piece. One that has been soaking in the water bucket the whole time.
Let's take a 12" square section as an example.
3 minutes with 800 grit (Or until all the material is evenly dull and the orange peel and any imperfections are gone)
6 minutes with 1k grit.
6 minutes with 1500
6 minutes with 2k.
Compound 1-3 minutes. (10 passes, slow pace, slowest speed with your orbital that will allow rotation of the psd)
These numbers seem a bit high in my head but let's just say they are right.
Posted by: 914 RZ-1 Oct 24 2018, 06:08 PM
So here's the latest. I sanded with 1000. Got a few low spots (shiny in the pictures). Should I just keep sanding with 1500 then 2000, then polish these areas? Or should I fix these areas? I don't want to repaint if possible. Seems like they will polish out and not be noticable. I'm going for the "daily driver 10 foot" paint job. This is a hobby, not a concourse car. Thoughts?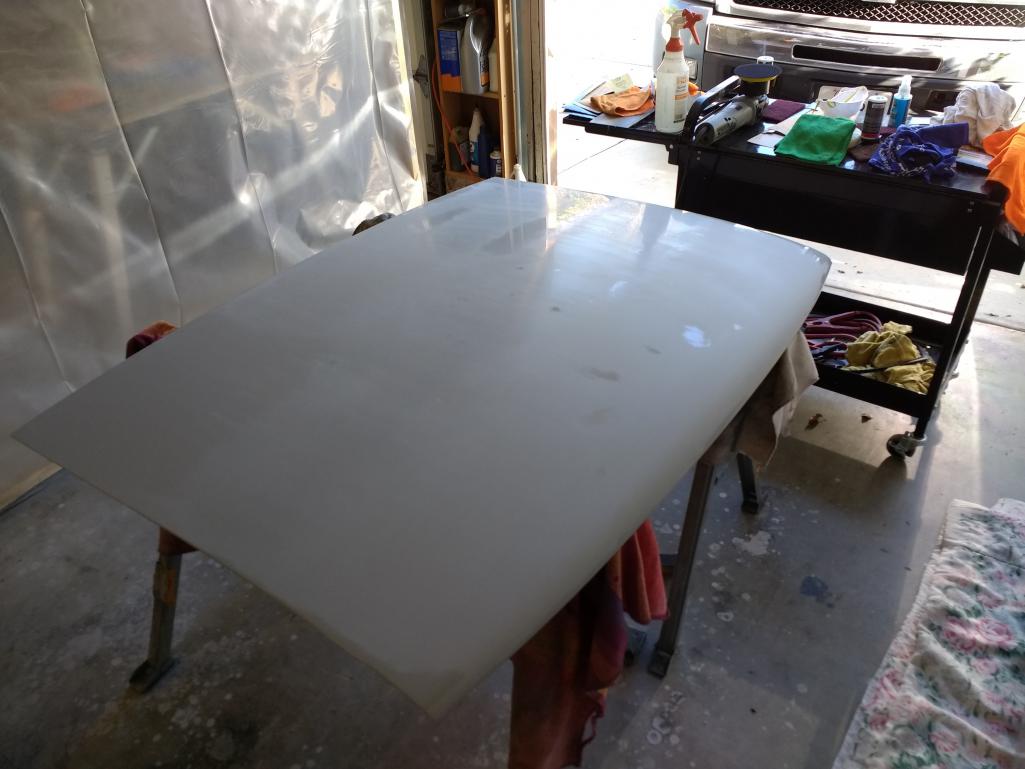
Posted by: Andyrew Oct 24 2018, 06:31 PM
Close-up of the shiny spot please?
You've taken the rest of it down that far I would hate for the orange peel to be uneven...
Posted by: 914 RZ-1 Oct 24 2018, 09:09 PM
Close-up of the shiny spot please?
You've taken the rest of it down that far I would hate for the orange peel to be uneven...
Here you go:
I bought a yellow hex logic pad, which is a little rougher and I plan on using that to see how it works.
Posted by: Andyrew Oct 25 2018, 06:58 AM
Looks like some low spots you didn't build up right in primer. Happens.
I'm not seeing a lot of orange peal nor imperfections in that area. I would just grab the 1500 grit on a 6" and knock those low spots down a hair or just grab the paper by hand and use your fingers. At this point those spots will show some orange peel. As always keep the paper wet.
Once those spots are decently hazy or the orange peal has been knocked down some then wet sand the rest of the trunk with 1500 than 2k.
Remember the 2k is just to make the rubbing compound step that much easier.
You can polish out the 1500 scratches which is why I said to use those low spots by hand with 1500 as you'll never find them again if you knock them down all the way.
Posted by: dakotaewing Oct 25 2018, 01:24 PM
What are you using to pull air out of the booth when you are spraying???
Pictures please...
Posted by: 914 RZ-1 Oct 28 2018, 03:50 PM
Here's the latest.
SANDING
I sanded 1000-1500-2000. Divided up the hood into 9 parts. Sanded with 1000 grit for about 3 minutes per area, then sanded with 1500 for about 2 minutes then sanded with 2000 for about 1-2 minutes.
POLISHING
Polished with Chemical Guys Hexlogic yellow pad (the roughest one) and V32 compound. Again, divided the hood into 9 areas. Went over each area 3X, taking about 2-3 minutes per area. In the demo videos, they went over the area once, maybe twice.
I had to re-polish a few low spots, since they are hard to see until all the compound is wiped off.
BTW, what is the best way to remove all the compound? I just wiped it with a clean microfiber towel. There seems to be a bit left.
A picture for your viewing pleasure: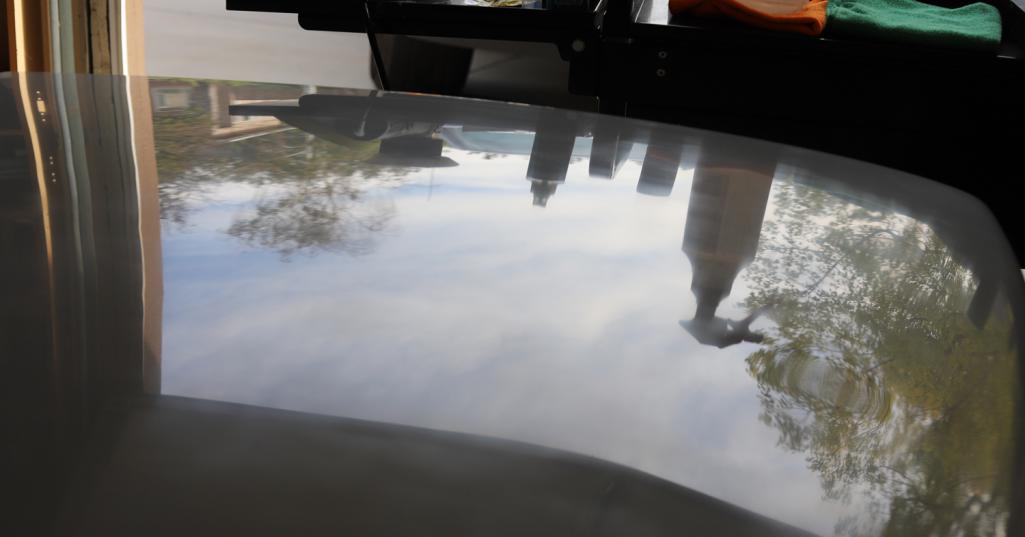
Posted by: 914 RZ-1 Oct 28 2018, 03:55 PM
What are you using to pull air out of the booth when you are spraying???
Pictures please...
I made a "booth" out of 2x3's and plastic. I use 4 household fans to pull air out. I have furnace filters at the opposite end. It's mostly to keep the big chunks o' dust off and the paint overspray off of all the stuff in the garage. I forgot to cover the floor, so my floor is now a lovely gray . I will be scraping it off at some point.
I'll post pictures at some point. Do you just want to see it, or are you looking for ideas of how to make one?
Posted by: 914 RZ-1 Nov 18 2018, 09:50 PM
UPDATE:
I noticed while wet-sanding that the sounds of the paper over the surface changes when the orange peel is mostly gone. It goes from sounding like I'm going over rough bumps (a deeper, louder "buzz") to just the sound of the sandpaper and grit ( a higher, quieter "scratching/gritty" noise). Hard to describe, but I'm wondering if I'm hearing this correctly or not.
I've also noticed the sanding block/paper glides over the rough spots easier. When I get it smooth, it resists more.
I've sanded and polished the hoods. I went 1000-1500-2000-V32-V34-V36. Got them pretty shiny from 5-10 feet. I can still see some scratches when I get up close, though.
I'm currently working on the rear driver's quarter panel. It's taking me about 1 hour per grit, plus about 1 hour for all 3 polishes to do an area this big. I think I got about 25 more hours. I can do this for about an hour or so a day (maybe 2 if I do some in the morning and some in the evening), then I'm done. I'm hoping to get this done by the end of the year.
Posted by: Andyrew Nov 19 2018, 09:25 AM
UPDATE:
I noticed while wet-sanding that the sounds of the paper over the surface changes when the orange peel is mostly gone. It goes from sounding like I'm going over rough bumps (a deeper, louder "buzz") to just the sound of the sandpaper and grit ( a higher, quieter "scratching/gritty" noise). Hard to describe, but I'm wondering if I'm hearing this correctly or not.
I've also noticed the sanding block/paper glides over the rough spots easier. When I get it smooth, it resists more.
I've sanded and polished the hoods. I went 1000-1500-2000-V32-V34-V36. Got them pretty shiny from 5-10 feet. I can still see some scratches when I get up close, though.
I'm currently working on the rear driver's quarter panel. It's taking me about 1 hour per grit, plus about 1 hour for all 3 polishes to do an area this big. I think I got about 25 more hours. I can do this for about an hour or so a day (maybe 2 if I do some in the morning and some in the evening), then I'm done. I'm hoping to get this done by the end of the year.
That sound and feel your feeling is correct, Be sure to dunk your block often so your not aggravating scratches.
Timing sounds about right. I've found that I had to use some water (Spray bottle) in the compound step to get the shine out. Not sure why, but it also makes the compound considerably more aggressive. I wouldnt recommend it as its SUPER easy to get deep scratches as your buffing pad gums up quick. .
Posted by: 914 RZ-1 Nov 21 2018, 11:30 AM
I sanded off the paint in a small area about 1/4" diameter in size. I'm planning on doing the touch up as follows:
1. Sand the area with 400 grit.
2. Mask off the area around, leaving about a square inch exposed.
3. Turn the amount of paint coming out of the gun way down and spray a few coats on the area.
4. Let it cure for about a week.
5. Remove the masking and wet sand with 1500-2000. I'm hoping it will blend in.
So far I've only done this in this small area. I'll probably do it again and want to make sure I'm repairing it correctly.
Does this sound correct?
Posted by: 914 RZ-1 Mar 8 2019, 08:02 PM
I'm done! I hired a guy to polish the car since I needed it done and just didn't have the time or patience to do it all myself. It took him about 20 hours to polish it.
They are some flaws and areas where the paint was too thin, but it looks good overall.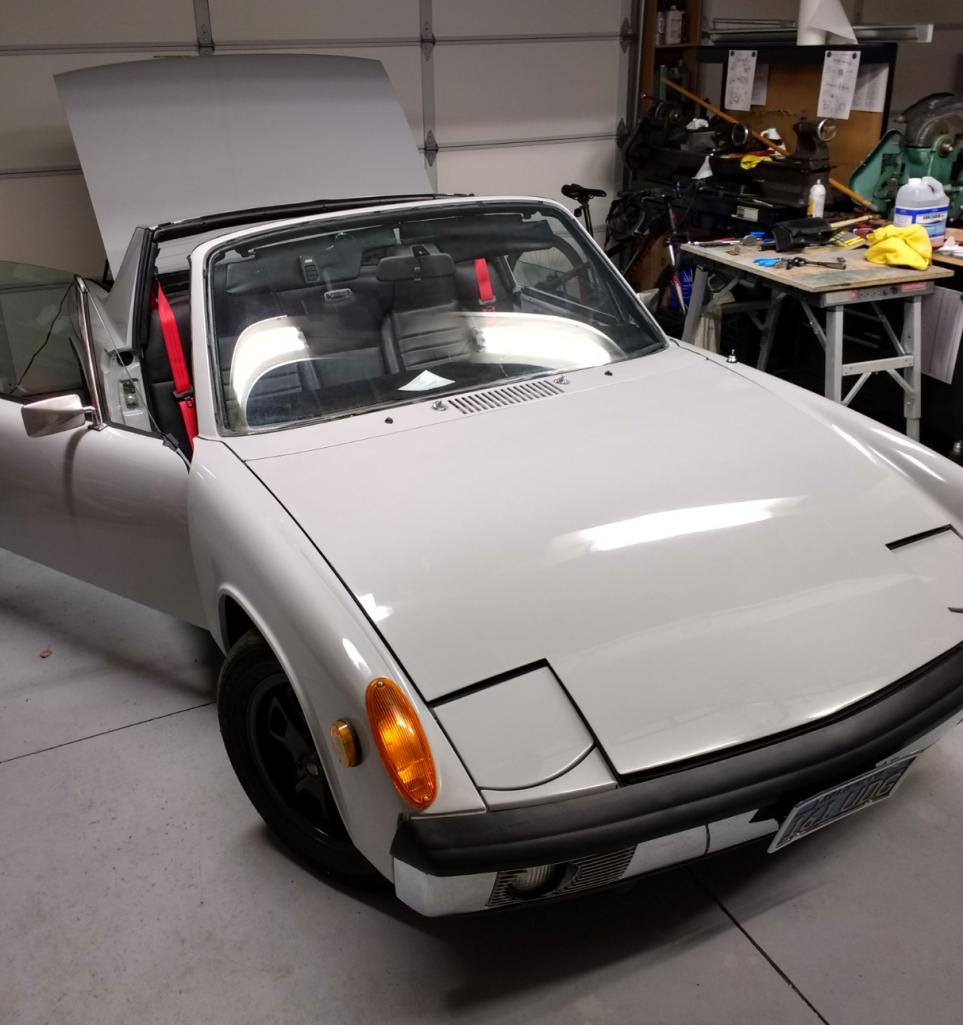
Posted by: 914 RZ-1 Mar 8 2019, 08:05 PM
Oscar: here is a picture of the A pillar VIN tag. I made it a bit long to account for any future trim.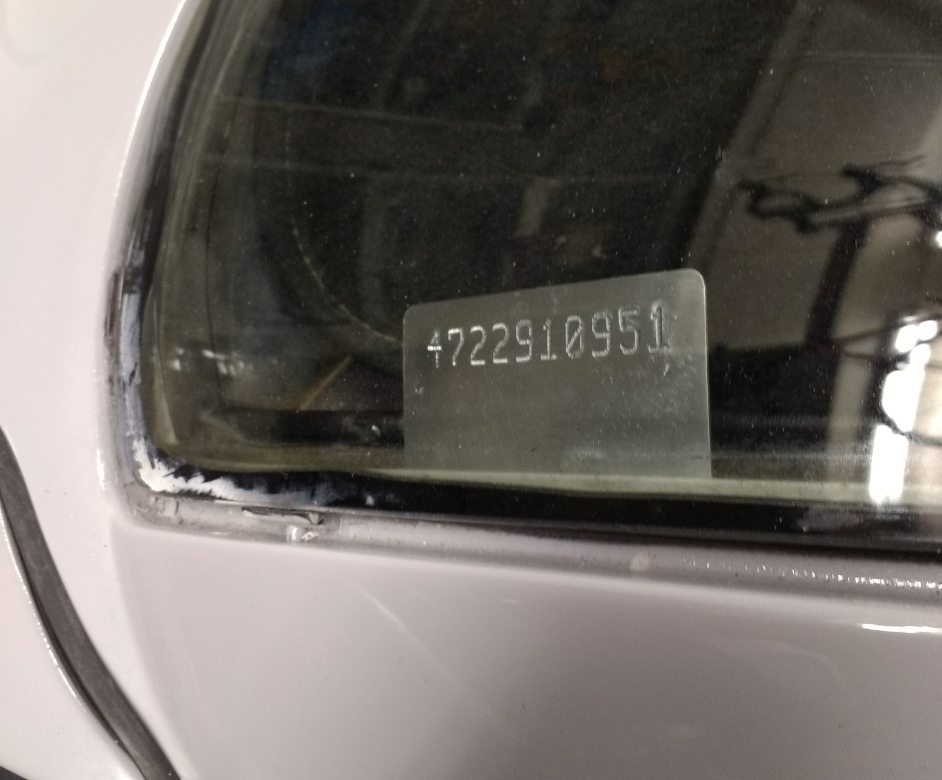
Thank you again for making this I really appreciate it.
Posted by: Andyrew Mar 9 2019, 10:13 AM
Wooy woot!!! Looks fantastic!!!!!
I can't tell you how happy it was for me to tell people I painted my car myself. Even 7 years later with all it's flaws it's still something I'm proud of.
You should be as well! The best part is you now have the confidence and experience to fix something should something happen.
Posted by: 76-914 Mar 9 2019, 10:22 AM
It looks great. You should be proud of your accomplishment. The more I paint the more I realize how much I do not know about painting.
Posted by: Olympic 914 Mar 9 2019, 12:48 PM
Good job.
I still haven't done a cut and buff on mine, too busy driving and working on other things. Also worried about sanding through.
One of these days though I will start...…
Congrats.
Posted by: 914 RZ-1 Mar 26 2019, 09:50 AM
Now that I've finished, here are some final thoughts:
THANKS
First of all, thanks to all who commented, helped and encouraged me, I really appreciate it.
PAINT BOOTH
Here are some pictures of my paint booth. This is a smaller version I'm using to paint a roof and some other non-914 items, but it is built the same way.
I pulled air in thru furnace filters with box fans I got at Home Depot. The wood is 1-3/8" square stock. The corners are 1/4" plywood. I attached them with wood screws and heavy staples. I used 1/4-20 screws and wingnuts to attach all the panels to each other. I made 8' x 8' panels and covered each one with heavy plastic. I used staples to attach the plastic.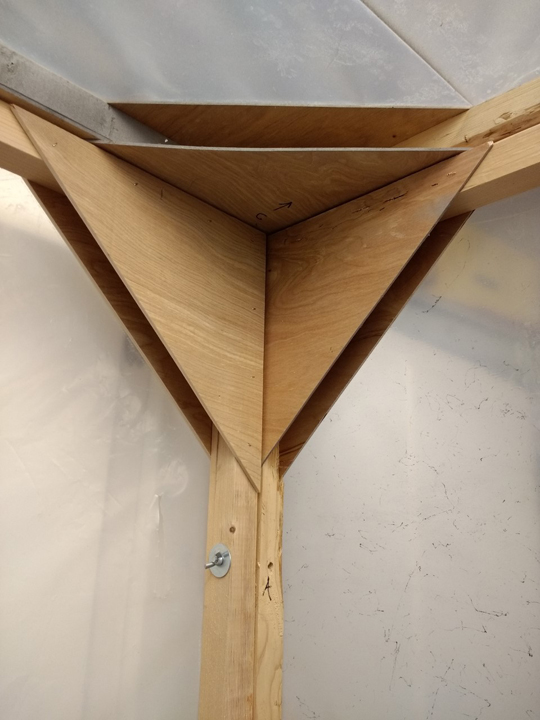
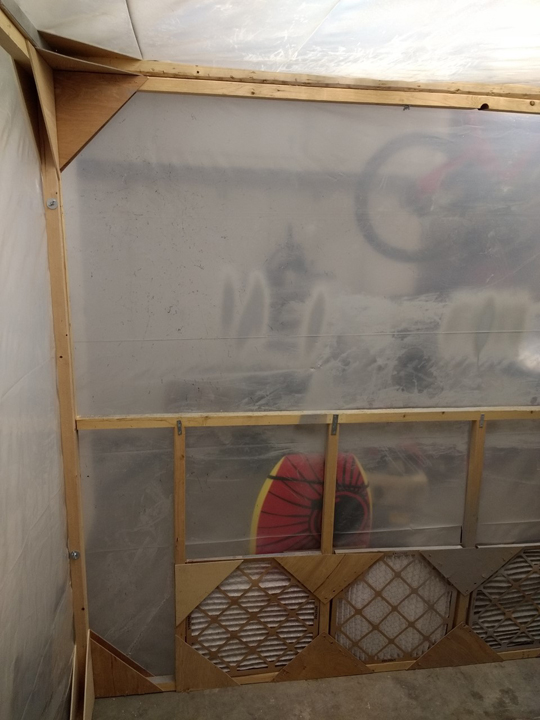
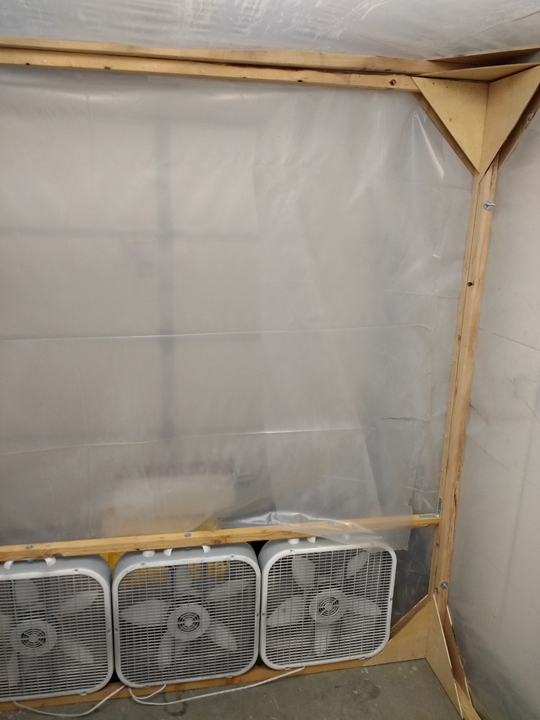
I should have put paper of the floor. It didn't keep out all the dust, but it was good enough.
COMPRESSOR
I have a Craftsman 33 gal, 150 PSI, 2HP 8.6SCFM@40psi/6.4SCFM@90psi compressor. It worked fine for the painting. It was on most of the time while I was using the air tools. The SCFM rating is the most important spec, so keep that in mind.
SPRAYGUN
I used a HF spraygun (the $69 one). It worked, but I would buy a better one if I was doing this again. The HF gun felt like it was wearing faster. I have no real proof, but it just seemed that the parts were wearing out. Keep in mind, I took the gun apart every time I used it, and I did this a lot! The constant screwing and unscrewing, wiping, pulling the trigger, etc seemed to take a toll.
However, everything I researched indicated that technique is more important that the equipment. In other words, a beginner with an $800 SATA gun could screw up the paint, whereas a pro with a cheap HF gun could do a really good job.
SPRAYGUN SET UP
I had a coiled 25' hose from the tank to 2 moisture filters to a 25' hose reel to a "pumpkin" moisture filter mounted on the inlet on the spraygun.
I think I might get a better moisture filter, but I had no issues when spraying once I got everything dialed in. Read the previous posts to see what I did, it was quite the adventure!
Spray at about 70-74 degrees F, 20-25 PSI, with proper technique. I used slow reducer (the kind most people use on hot days), because it gave the paint time to settle out. It just took longer to dry.
SPRAY TECHNIQUE
Practice and figure out what works for you. I watched lots of YouTube videos. I liked the Kevin Tetz ones. Pressure, distance from the surface, speed all matter. What worked for me was a little different than what some of the videos stated: I got closer and went a bit faster. I practiced on a hood with the actual paint I was going to use. It was more expensive, but gave me better insights into what worked.
SURFACE PREP
This is the most important part. When I was done, I had a few low and high spots that, had I fixed these beforehand, would not have shown up in the final cut and polish. I would spray a final primer coat on the car to enable me to see all the flaws and fix them before I went to final paint.
I used a air DA sander, electric sander and sanding blocks (Dura-Block) for the initial sanding and body work.
I used the Dura-Blocks and Soft Sanders (by Style-Line) and bought rolls of adhesive-backed sandpaper for color sanding.
I used a TorqX polisher with Chemical Guys polishes. They have a YouTube channel that was helpful.
I bought most everything at a local autobody supply place. They didn't have much on the shelf, but I discovered I had to ask and they had it in the back.
COST
Booth: $200
Paint gun and related (included compressor accessories, fittings, etc): $400
Paint and sanding (paper, paint, sanding blocks, etc): $1,500
Total cost: $2,100
Being able to say "Yeah, I painted my car myself.": Priceless
Posted by: Cairo94507 Mar 26 2019, 10:41 AM
Congratulations on a job well done. Now enjoy it and drive the heck out of it. 
Posted by: Coondog Mar 26 2019, 10:55 AM
Nice paint booth, just don’t let the Fire Dept, Building Dept, Code Enforcement, Air pollution District, State Water Board, OSHA, EPA, Fish and Game, DTSC and the other 50 regulatory agencies we have here in Calif find out.........
Posted by: Andyrew Mar 26 2019, 11:12 AM
Congrats!!!
Posted by: mbseto Mar 26 2019, 02:40 PM
This thread should go in the library - as I said earlier, it's a clinic on how to paint. Great job, man!
Powered by Invision Power Board (http://www.invisionboard.com)
© Invision Power Services (http://www.invisionpower.com)