Printable Version of Topic
Click here to view this topic in its original format
914World.com _ 914World Garage _ Roger's 914 thread.
Posted by: Dr. Roger Jun 16 2005, 12:44 AM
In summary:
Found the car on Craigslist. Low mile, low rust, straight body. No holes in the hell hole. Longs are clean. A small miracle. 
After seeing Rick's "Alien" build, Felix's "Neo 914", and meeting "JLo", Andyrew, Sir Andy and other's rides.... I just gotta' get'er done!
Posted by: neo914-6 Jun 16 2005, 01:02 AM
Kick it! Lethargy is a killer...
Posted by: Dr. Roger Jun 16 2005, 01:03 AM
Thanks Felix,
Of course seeing your beauty coming together played a part.
\BTW, where'd you have those 3" spacers made?
Posted by: neo914-6 Jun 16 2005, 01:13 AM
The Neo914 flares are awesome in person but now it sits under a cover until the V8 is back on the road. I thought this was a weekend bolt in but as Renegade says "these are hand built cars, you gotta MAKE things fit"... 
Wheel adapters are from Ernie's Alloys, Inc. who sells on eBay. They actually sent me a second set by accident since I had them ship to WA, not my address here. My honesty got the better of me and I sent the extra set back... 
Posted by: Dr. Roger Jun 18 2005, 11:04 AM
.....
Attached image(s)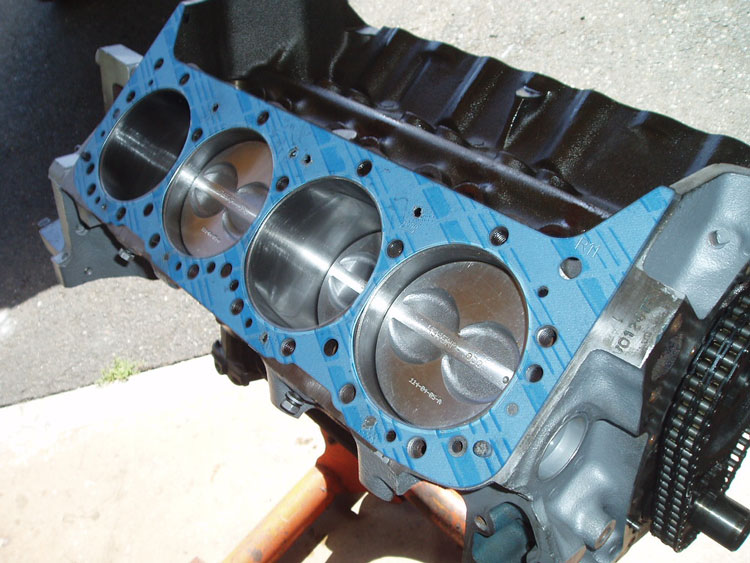
Posted by: Dr. Roger Jun 18 2005, 11:04 AM
.....
Attached image(s)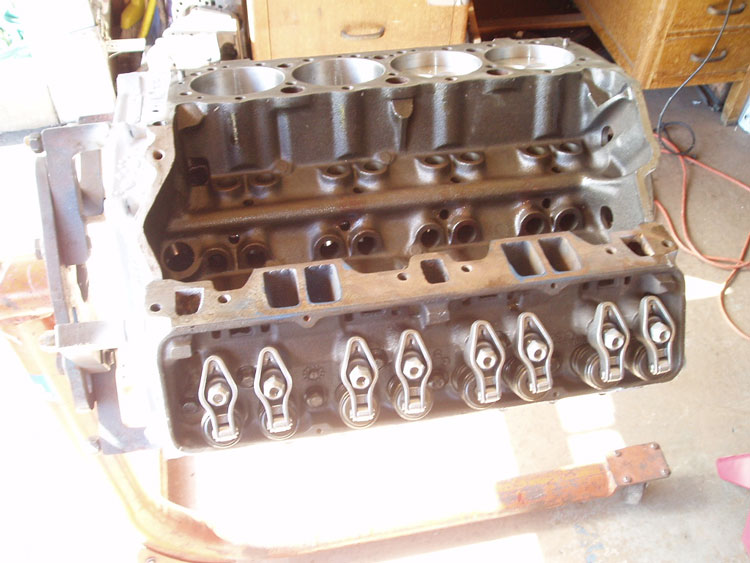
Posted by: Dr. Roger Jun 18 2005, 11:06 AM
....Heads assembled.
Newly rebuilt "Otto's" 901 w/H gear. First gear removed.
Attached image(s)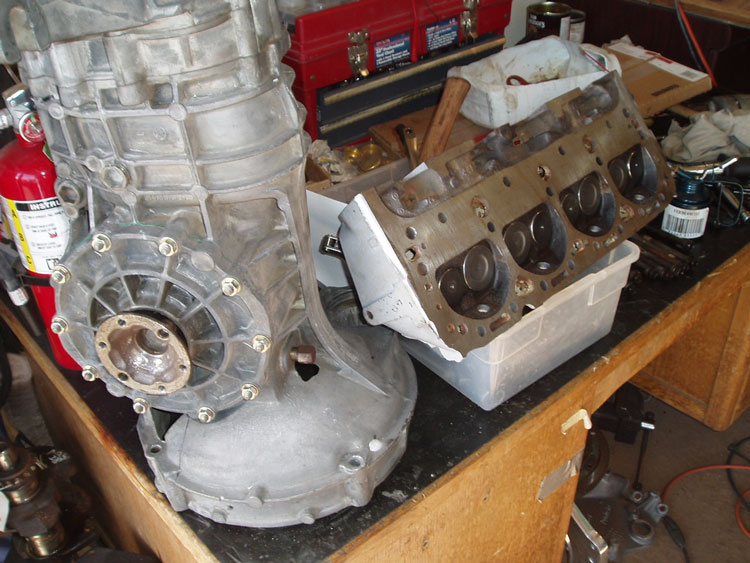
Posted by: Dr. Roger Jun 18 2005, 11:07 AM
....
Attached image(s)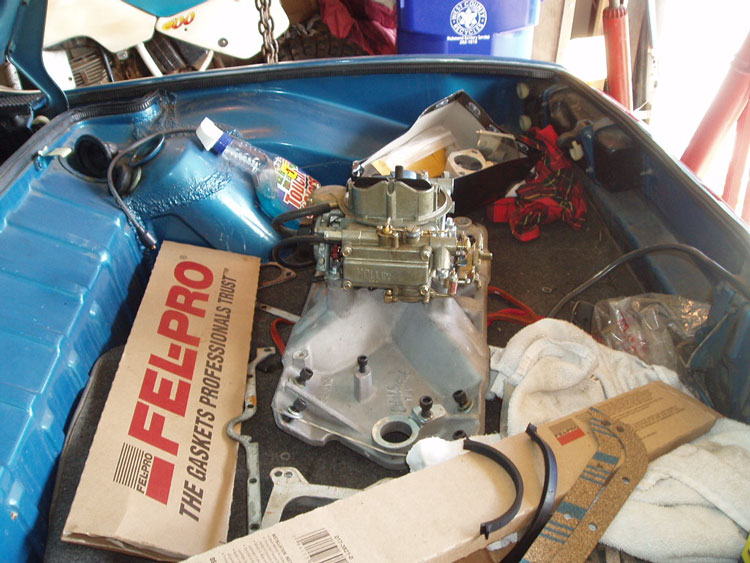
Posted by: Dr. Roger Jun 18 2005, 11:07 AM
....
Attached image(s)
Posted by: redshift Jun 18 2005, 11:08 AM
Your intake manifold has more bhp than my motor.
M
Posted by: Dr. Roger Jun 18 2005, 11:08 AM
...
Attached image(s)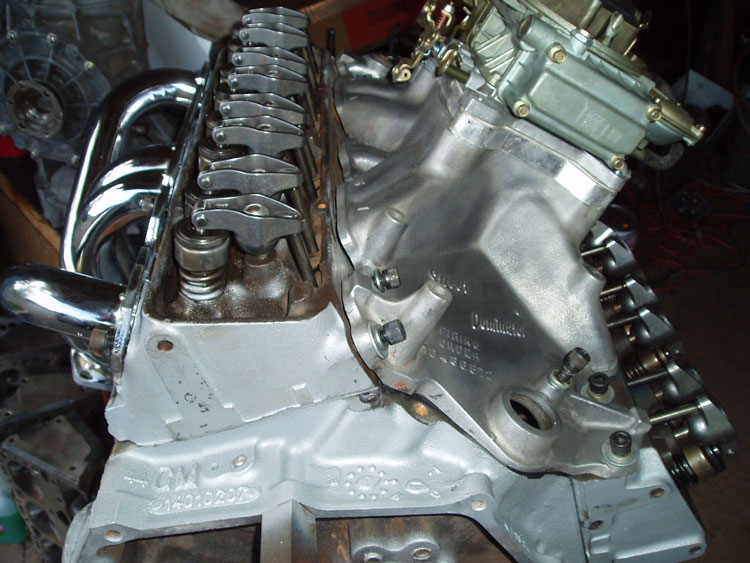
Posted by: Dr. Roger Jun 18 2005, 11:08 AM
test fit, test fit, test fit....... all good.
Attached image(s)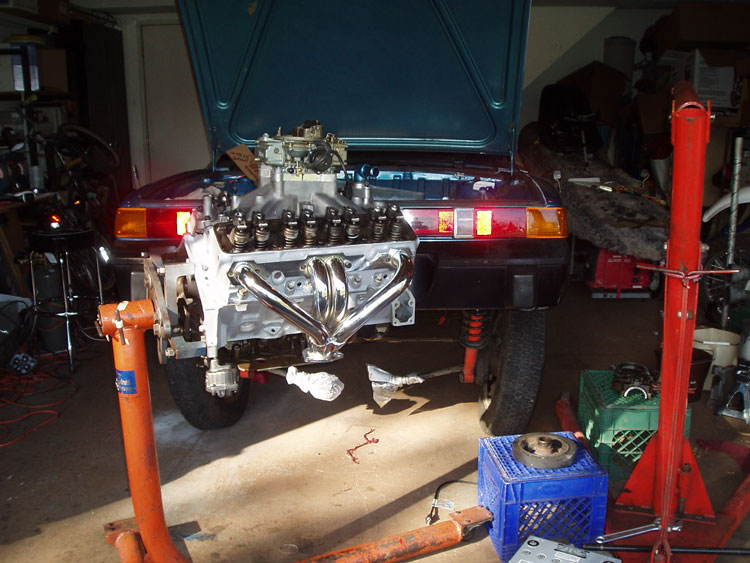
Posted by: Dr. Roger Jun 18 2005, 11:08 AM
....
Attached image(s)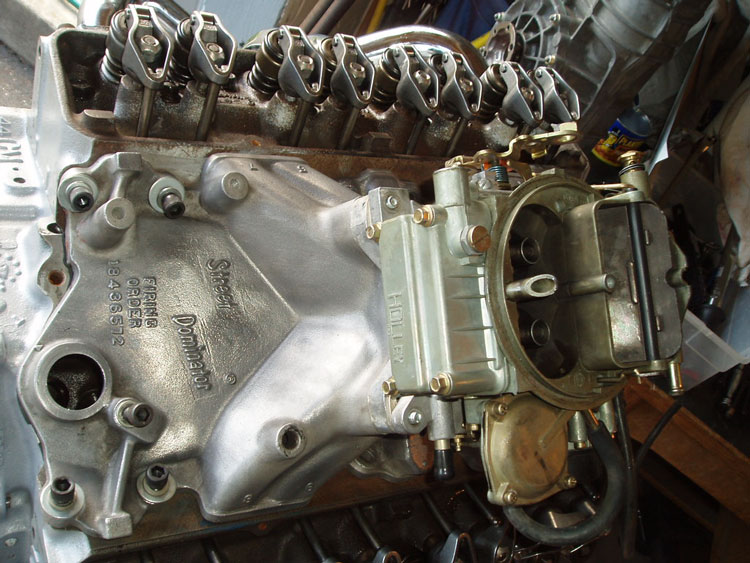
Posted by: Dr. Roger Jun 18 2005, 11:47 AM
Miles,

Posted by: ewdysar Jun 20 2005, 06:04 PM
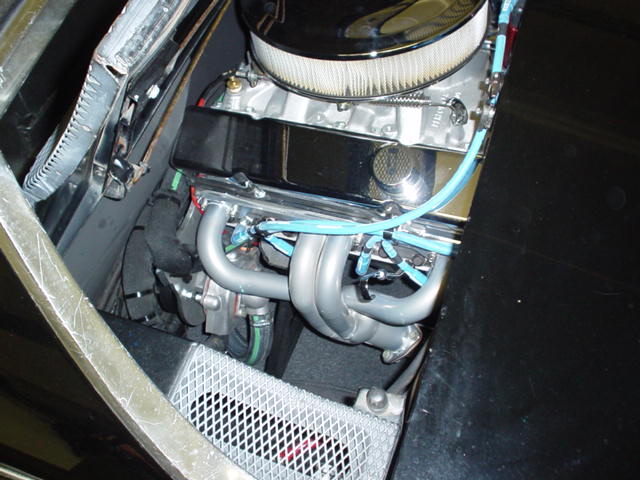
Your manifold looks a little tall. You may run into trouble finding an air cleaner that will fit under the hood. Looks like you're making good progress... 
Eric
Posted by: Dr. Roger Jun 20 2005, 06:31 PM
Yes Eric,
There will be a clearance issue.
I'm going to install a cold air intake from parts from a few intake systems. Obviously the first thing is a fairly shallow rubber duct to the carb. Pulling air from I don't know exactly where yet... 
Posted by: Travis Neff Jun 20 2005, 07:00 PM
Looking good Roger!
Posted by: 914GT Jun 20 2005, 07:57 PM
A few suggestions ...
- With those headers make sure you'll be able to route your exhaust on the left side to clear your shifter bar.
- Don't use the front and back rubber intake manifold gaskets and instead use a thick bead of Permatex on the rails.
- Get a one-piece oil pan gasket, much better than the 4-piece sets. Worth the extra cost.
- Use a double-roller timing set with a 3-keyway crank sprocket so you can advance the cam. With the cam I'm using I've found a 4 degree advance makes a big difference in performance.
Posted by: Dr. Roger Jun 20 2005, 11:38 PM
| QUOTE (914GT @ Jun 20 2005, 05:57 PM) |
| A few suggestions ... - With those headers make sure you'll be able to route your exhaust on the left side to clear your shifter bar. - Don't use the front and back rubber intake manifold gaskets and instead use a thick bead of Permatex on the rails. - Get a one-piece oil pan gasket, much better than the 4-piece sets. Worth the extra cost. - Use a double-roller timing set with a 3-keyway crank sprocket so you can advance the cam. With the cam I'm using I've found a 4 degree advance makes a big difference in performance. |
Hmm, i didn't know the made a one piece pan gasket. I'll check that out.
Permatex? What color/type??
Which cam are you using????
I'm using the Comp Cams Extreme Energy hydraulic 294. Dyno stats below.
Dyno Results
Camshaft Part # 12-443-8 Designation XR294HR-10
Duration @ 0.006" 294 / 300 Duration @ 0.050" 242 / 248
Max Lift w/ 1.5RR .540 / .562 Lobe Separation 110
Lobe ID#'s 3317 / 3318 Intake Centerline 106
Engine Type Chevrolet 350 Small Block
Bore 4.040" Stroke 3.480"
Displacement 356 Compression 9.25:1
Heads Dart Sportsman II Intake Edelbrock Victor Jr.
Carburetor Holley 750 dbl. pmp. Exhaust 1 3/4" Headers
Max Torque 380 ft*lbs @ 4100 RPM Max Power 420 HP @ 6100 RPM
My engine setup is almost identical to the compcams stats above except i'm using mildly ported Chevy small combustion chamber heads (9.5:1), 355cid, and i'll be breaking in the motor w/a 600 holley and street dominator intake.
Posted by: 914GT Jun 21 2005, 10:13 AM
I use the orange Permatex but the other 'flavors' should work fine.
I'm using a Speed Pro # CS1013R 288/298 duration .050", .443/.465 lift 112 lobe sep
Your cam looks to have higher lift but shorter duration. I'd be interested in how it idles.
Posted by: Dr. Roger Jun 21 2005, 10:26 AM
Yea', i'm lookin' for some "cam lope" at idle. =-)
That type of cam will give me less torque at low RPM and will bring it in the higher RPM range. Hey, I ride a 500cc 2 stroke dirt bike.... LOL =-) I'm used to that type of power band.
Posted by: redshift Jun 21 2005, 11:19 AM
Start off in third, and just burn the cluth.
M
Posted by: ajracer Jun 21 2005, 08:38 PM
Roger:
I know it has been mentioned about the "height" of your intake set-up.
You might want ot consider another set-up (using the Holley) that will
allow you to be a couple inches lower. Also do you really need the two
adapter flanges which increase the overall height.
The idea of fabricating and running another type of air filter (possible side
mounted like a K&N late model Camaro) is a possiblity. But from very recent
experience with my V8 project car going together as I write this I would
say there is very, very little clearence on MOST 914 V8's and yours may not
even have enought for a air inlet to the top of the carb!
BTW I personally am planning phase 2 of my project whereby I will be converting
the V8 to late model (1995) Corevete Fuel Injection system and custom FI
controller (fully programable) for which I have already concluded "a Side Mounted"
air filter system will be needed and custom fabricated using some GM Fuel injection
components.
Another option IF you want or need too, would be to install an older style
Hot Rod air scoop on the engine hood/cover and facing towards the rear
of the teener. It would work but may not be your personal taste from appearance
stamdpoint. Just my $ 0.02 worth
The engine looks great and enjoy the journey.
Allan
Posted by: 914GT Jun 21 2005, 09:31 PM
| QUOTE (rogergrubb @ Jun 21 2005, 09:26 AM) |
| Yea', i'm lookin' for some "cam lope" at idle. =-) That type of cam will give me less torque at low RPM and will bring it in the higher RPM range. Hey, I ride a 500cc 2 stroke dirt bike.... LOL =-) I'm used to that type of power band. |
The cam I chose has a power band of 2000 - 4500 rpm and provides a good idle. Advancing the cam timing makes a very noticeable difference in the low end torque and makes it much more fun to drive. You might want to consider trying this since the cam you chose will want the rpm's kept up but it might not have that 'seat of the pants' torque that makes the V8 such a fun ride.
Posted by: rick 918-S Jun 21 2005, 09:45 PM
We are 
 Glad the Alien was an inspiration. Keep posting pics as the progress. We expect it. Because you know.....

Posted by: Dr. Roger Jun 21 2005, 10:40 PM
I'm going to do a no no. and not resize the pics. lazy? yes.
Mike M. Will 18's really fit under here?????
Attached thumbnail(s)
Posted by: Dr. Roger Jun 21 2005, 10:43 PM
Oh and the best part... A little present from Renegade............ =-))))))))))))))))))
Motor mounts and alt brackets.
Attached thumbnail(s)
Posted by: neo914-6 Jun 21 2005, 10:56 PM
Roger,
What Alt did you get? I plan to buy new to replace my 20 yr old but there are so many choices in Summit. I'm thinking a 100 amp coated one. Beware the Renegade alt bracket doesn't fit all alt fans. Scott said to clearance the bracket or trim the alt fan. I'm told by another local builder that the bracket itself may need to be machined.
Posted by: Dr. Roger Jun 21 2005, 11:22 PM
whoa, good to know. i was just looking at summit's online for alternators and a last minute water pump...
dang, i didn't even note if the fans vary.
Oh and my big progress for the evening.... an oil pickup... =-)
Hey i promised myself every night i'd do SOMETHING... LOL
Attached thumbnail(s)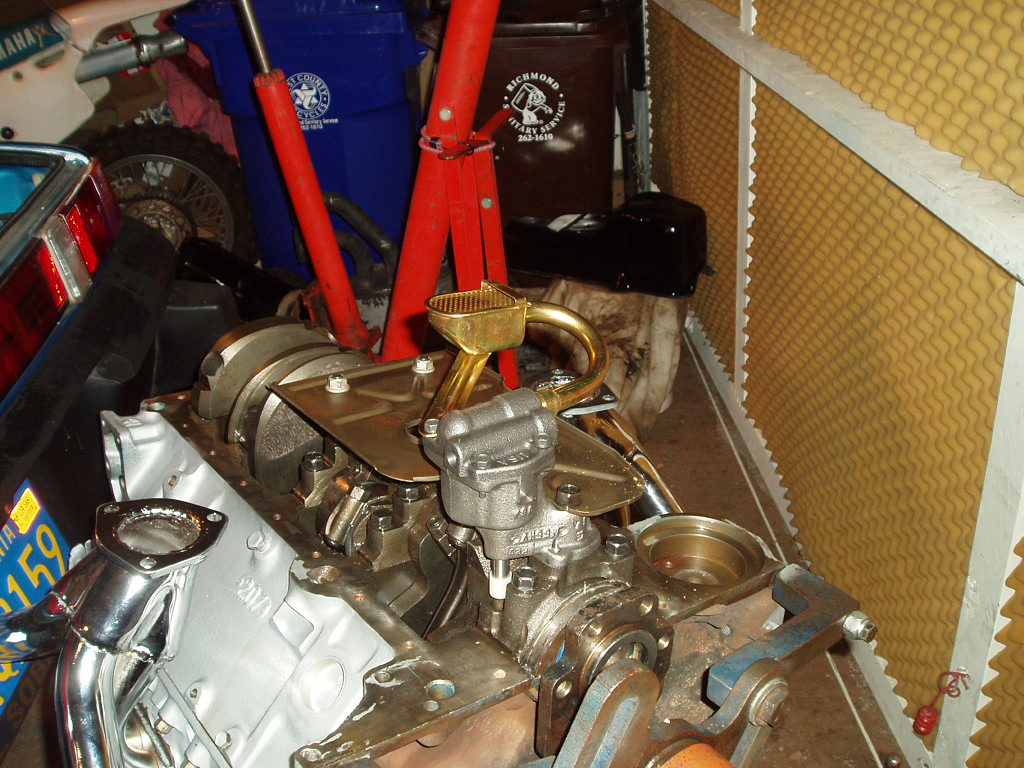
Posted by: Dr. Roger Jun 23 2005, 10:26 AM
Dang it.
I cannot find the last shorty head bolt and one stock push rod....
Anyone got an extra of each???
I just might fire this thing up this weekend being I have friday off....... on the garage floor.....
Mueller, U gunna' be around?????
Posted by: 914GT Jun 23 2005, 10:32 AM
Recommend a Melling oil pump drive shaft and not use the plastic coupling.
Posted by: Dr. Roger Jun 25 2005, 12:16 AM
Update pics for today. Friday. Enjoy.
No plastic oil pump coupling installed... =-))))
Attached thumbnail(s)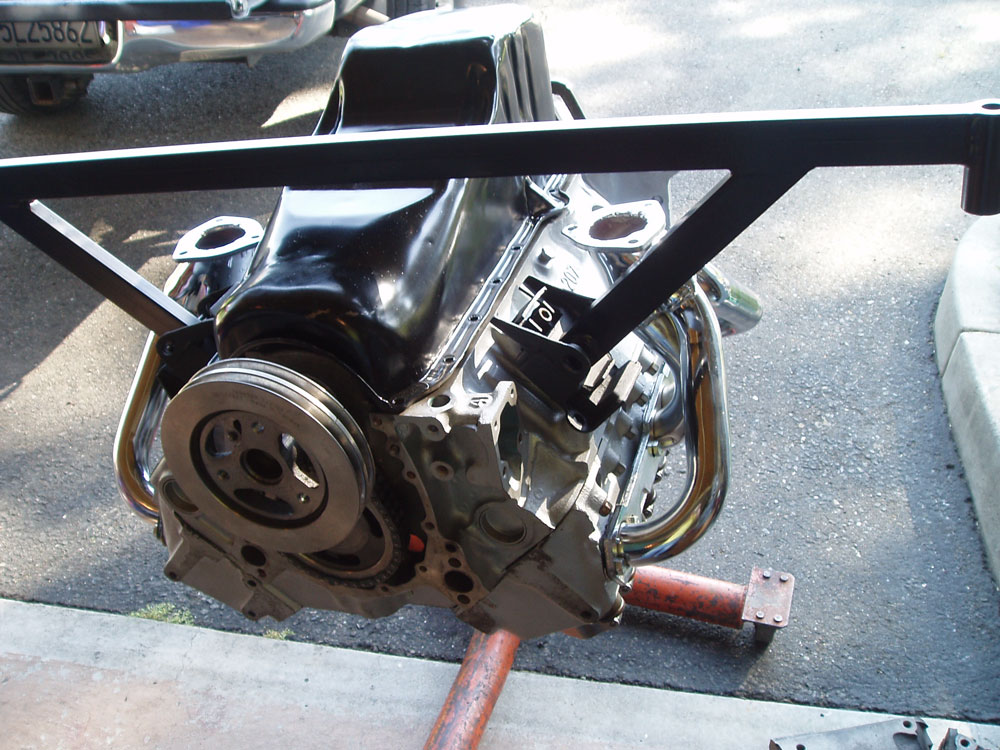
Posted by: Dr. Roger Jun 25 2005, 12:16 AM
11
Attached thumbnail(s)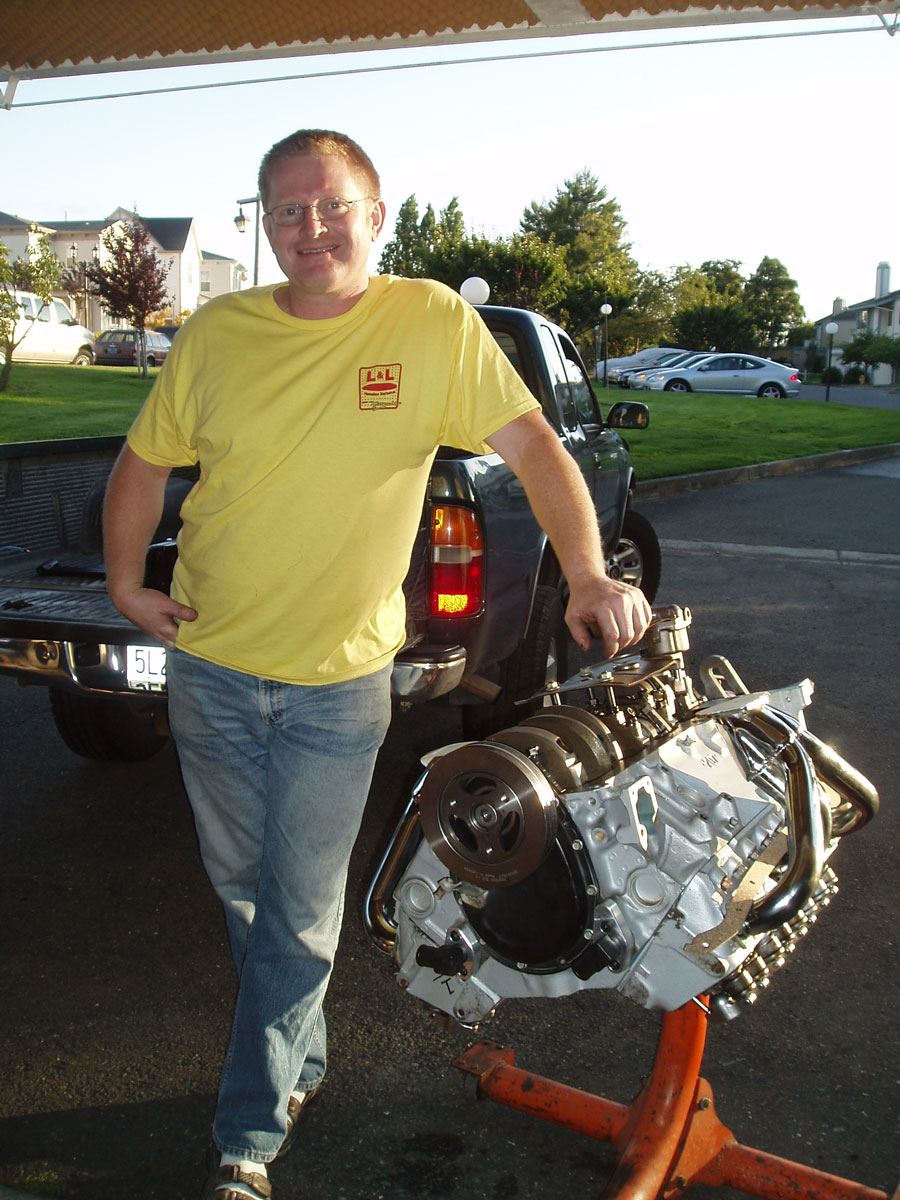
Posted by: Dr. Roger Jun 25 2005, 12:17 AM
This is about where I ended up today.
Attached thumbnail(s)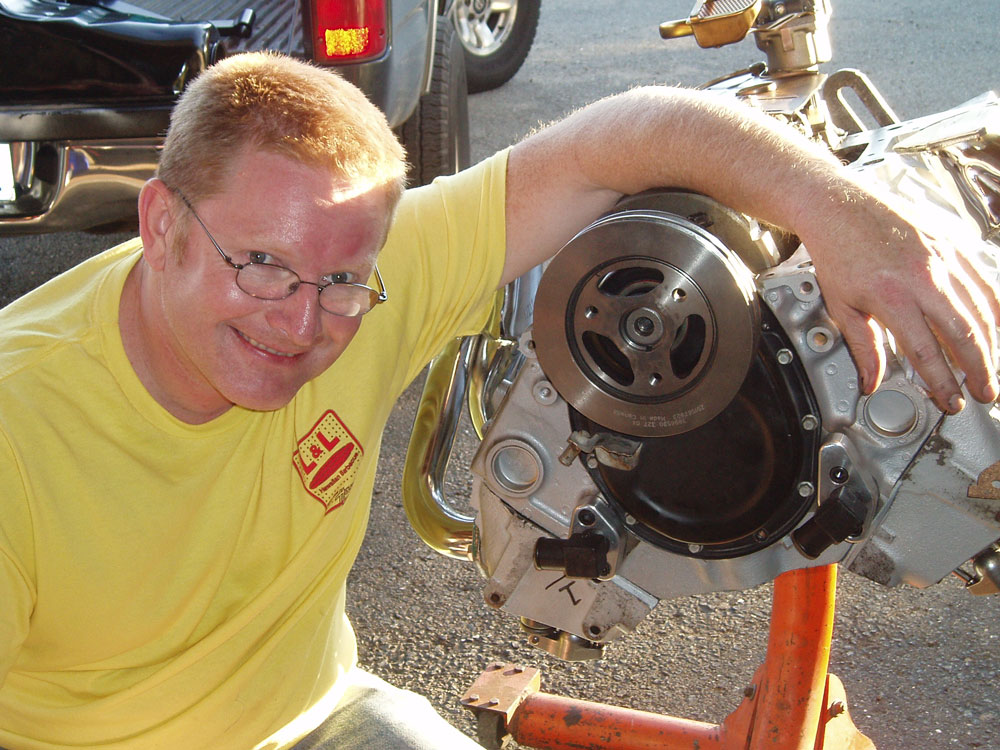
Posted by: Dr. Roger Jun 25 2005, 12:18 AM
Pulley spacer in and front cover on.
Attached thumbnail(s)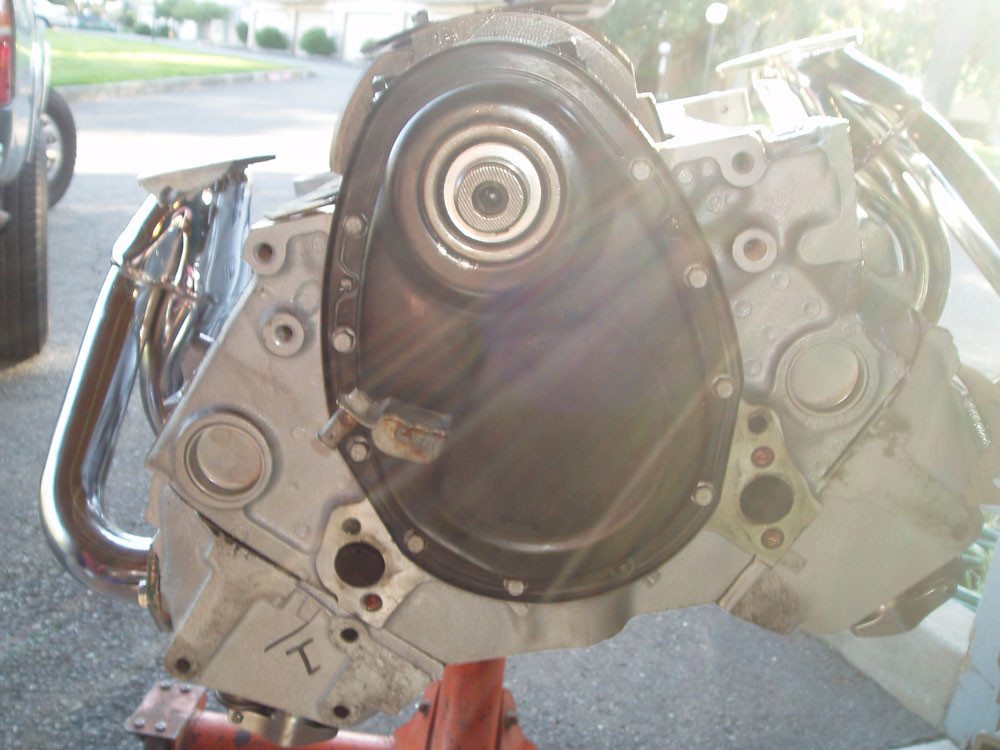
Posted by: Dr. Roger Jun 25 2005, 12:18 AM
6666
Attached thumbnail(s)
Posted by: Dr. Roger Jun 25 2005, 12:20 AM
New/used dust cover.
Attached thumbnail(s)
Posted by: Dr. Roger Jun 25 2005, 12:20 AM
Got a little sumpthin' at "Easy" today. 911 motor mounts. Yes!
Great place. Great people. Very helpful. John is the man. =-)
Attached thumbnail(s)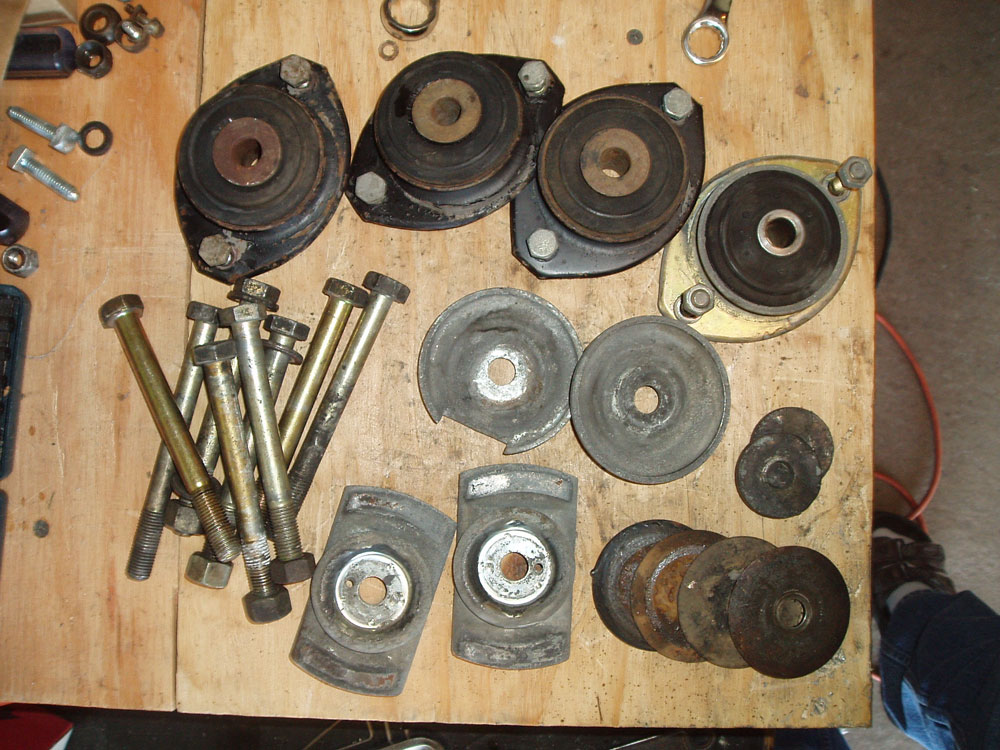
Posted by: Dr. Roger Jun 25 2005, 12:21 AM
qqqqqqqqqqqqq
Attached thumbnail(s)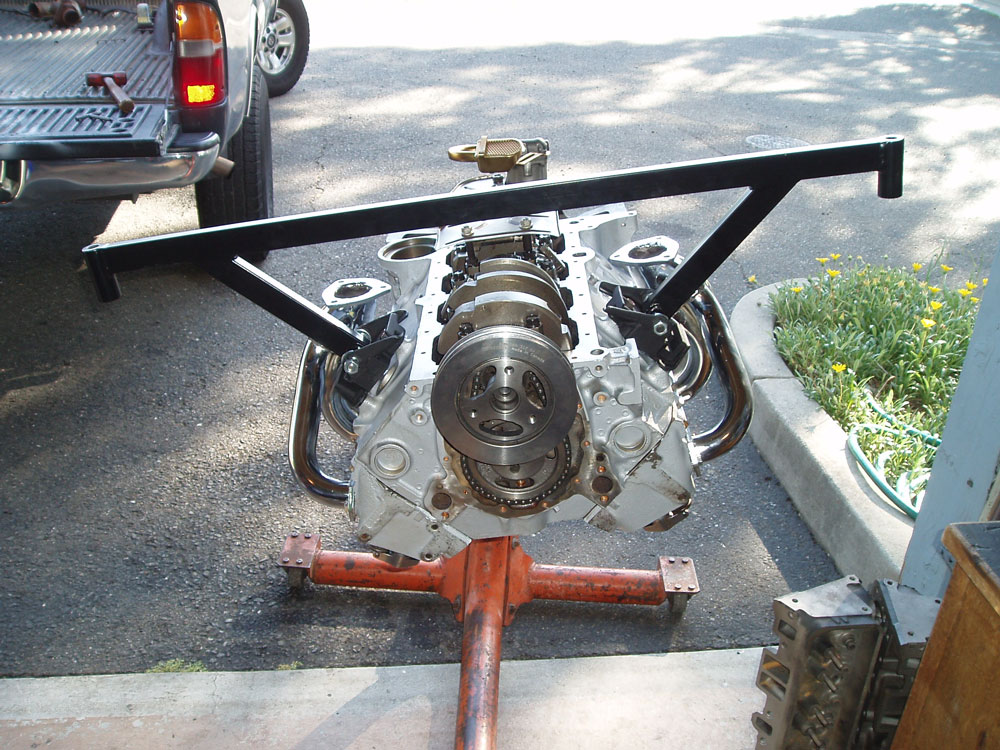
Posted by: Dr. Roger Jun 25 2005, 12:22 AM
hhhhhhhh
Attached thumbnail(s)
Posted by: Dr. Roger Jun 25 2005, 12:22 AM
4444444444
Attached thumbnail(s)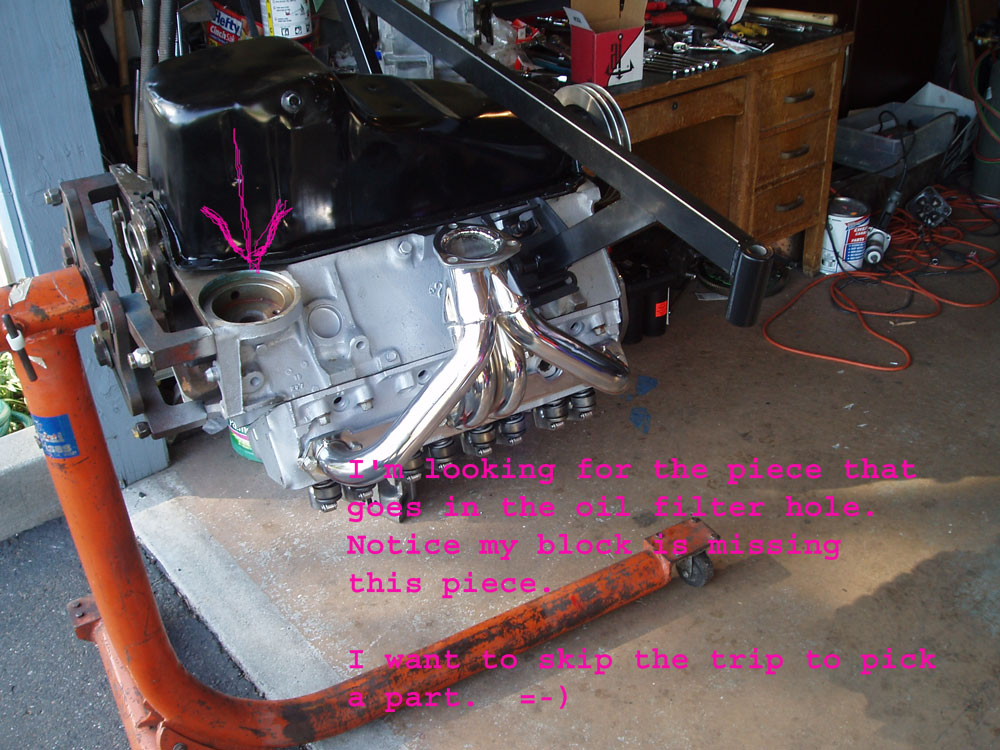
Posted by: Dr. Roger Jun 25 2005, 01:01 PM
bump ![]()
Posted by: 914GT Jun 25 2005, 01:30 PM
Sorry, checked my parts pile and I don't have one. I'll be visiting my machine shop probably early next week, I'm sure he's got one laying around. I think places like Summit have the pieces to bolt on to remote mount the filter or for oil cooler, but not the the stock spin-on filter.
Posted by: Dr. Roger Jun 25 2005, 01:40 PM
Yep, according to my spin-on conversion kit, this piece is called a "By-pass valve assembly".
My new adaptor bolts to it. It then accepts the spin on filter.
I checked the local parts store and their external oil coolers all need this bypass assembly also.
Posted by: Dr. Roger Jun 25 2005, 01:46 PM
bypass valve assembly pic. 2 bolts hold it in. Adaptor goes on top of it.
Doesn't anyone have one of these just sitting around???? 
Attached thumbnail(s)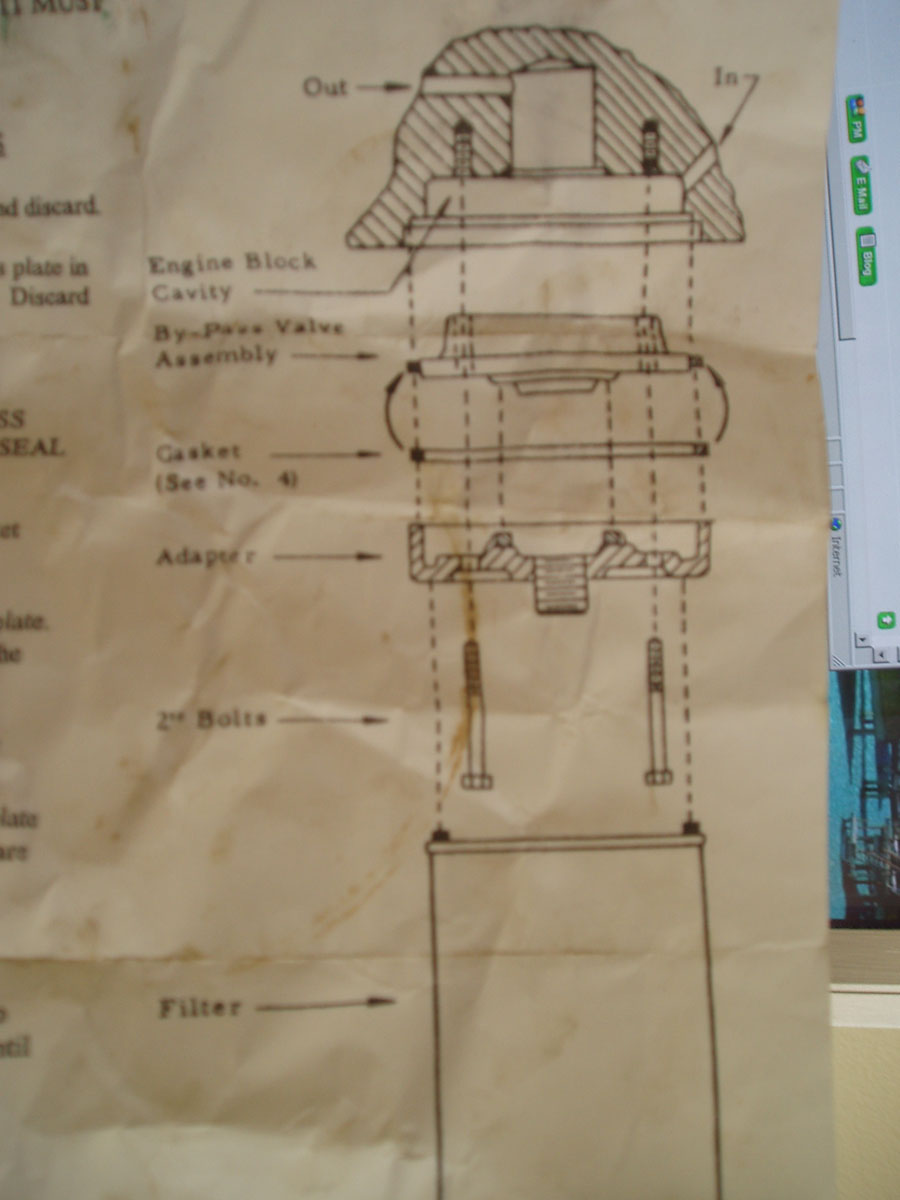
Posted by: Dr. Roger Jun 26 2005, 11:14 PM
Cool. As tonight the bottom end is buttoned up as well as front. Tomorrow the intake system goes on. Then it's off to the drivetrain.
I can't hardly believe it's coming together.... No, really.
Posted by: Dr. Roger Jun 26 2005, 11:41 PM
Welcome to my lab, and let's see what's on the slab....
Attached thumbnail(s)
Posted by: Dr. Roger Jun 27 2005, 01:52 AM
great deal on a QUIET fuel pump. =-)
Part of the secret of a quiet fuel pump is to keep it isolated from the body of the car. HUGE difference. I ended up suspending mine with heavy duty zip ties... Very quiet.
Attached thumbnail(s)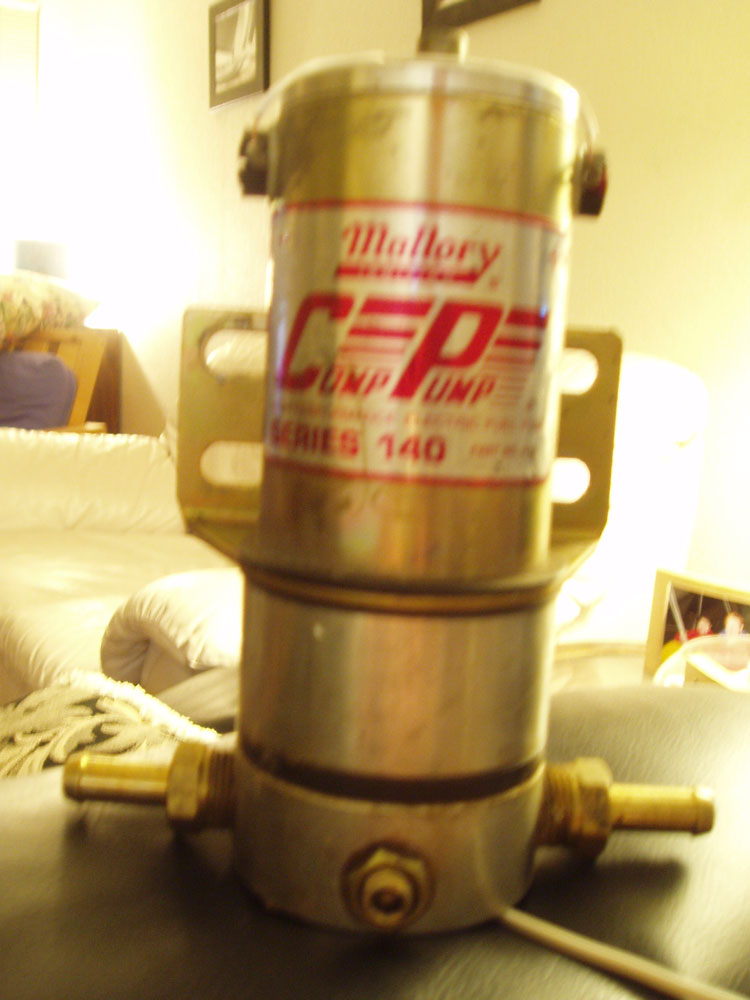
Posted by: ewdysar Jun 28 2005, 01:28 PM
Ha, I have one of those pumps on the shelf. It was pretty noisy, though. I've got my fuel pump mounted right behind the driver on the engine compartment sidewall, there are probably better locations to mount it.
I replaced the Mallory with a Carter, it's only a little quieter, but it's better.
Eric
Posted by: lybones Jun 28 2005, 02:35 PM
I need that exact same part for my H.O crate motor. I need the one for 69 or later models.
This guy on ebay has it for 15.00 compared to the 25.00 bucks at the chevy dealer.
http://cgi.ebay.com/ebaymotors/ws/eBayISAPI.dll?ViewItem&rd=1&item=7983680171&category=33613&sspagename=WDVW
Posted by: Dr. Roger Jun 29 2005, 01:01 AM
This evenings updates.
Got the radiator via UPS. Looks like the fans will fit well on it with a shroud.
Got intake and carb on. Dizzy on. Front motor mount on.
Previous pics were test fits. =-)
Oh yea', and finally found a cheap bypass valve online... What a pain in the arse.
Attached image(s)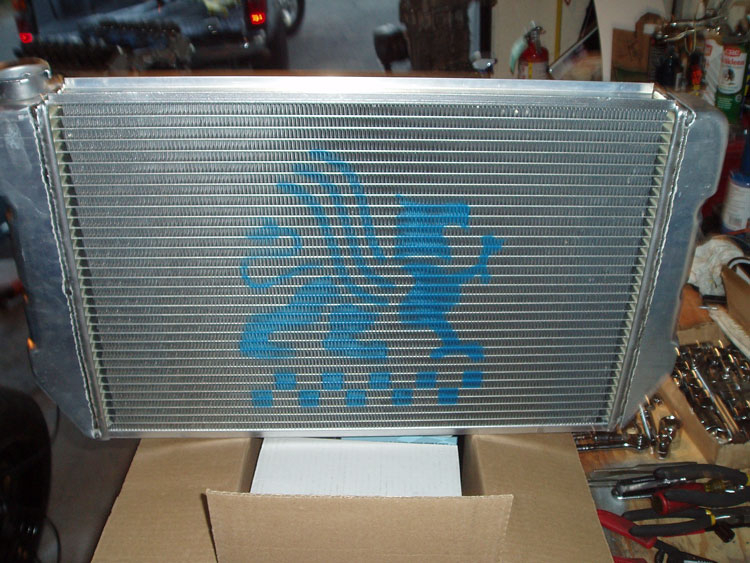
Posted by: Dr. Roger Jun 29 2005, 01:03 AM
With fans roughly in place.
Anyone have a V8 and keep their spare tire too????
Attached thumbnail(s)
Posted by: Dr. Roger Jun 29 2005, 01:05 AM
engine tonight
Attached image(s)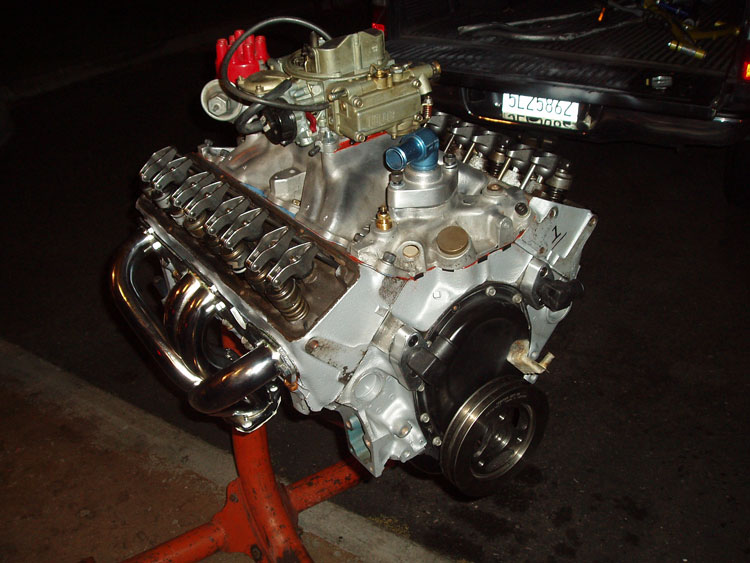
Posted by: Dr. Roger Jun 30 2005, 12:12 AM
With the first cuts in the front trunk, I kinda' feel like I'm deflowering my 14.
I'll get over it quick. =-)
Damn it, I told myself "no more toes in any pics"....
Attached thumbnail(s)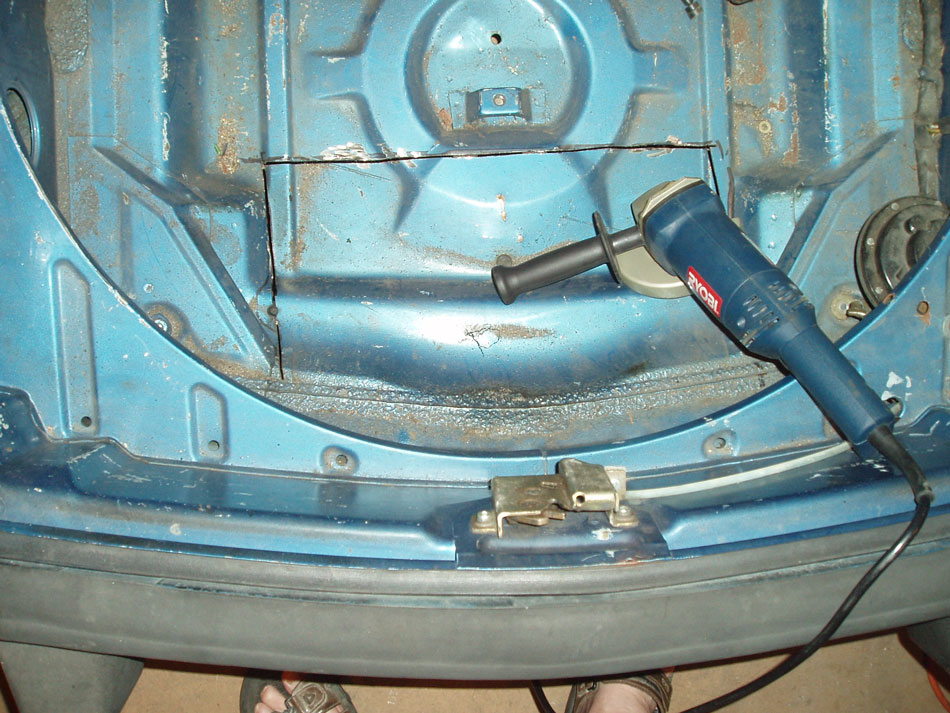
Posted by: Eric Taylor Jun 30 2005, 12:56 AM
Looks good man  . How are you going to mount that radiator?
Eric
Posted by: Andyrew Jun 30 2005, 01:11 AM
So.... Why did you cut that area for the inlet?
You realize that that area is normally left to guide the air from the front bumper... Since the front bumper gets much more airflow than the bottom of the car (unless properly "scooped")
Curious... What research let you to decide to cut there?
Everything else looks really good!
Andrew

Posted by: Dr. Roger Jun 30 2005, 10:03 AM
Andy,
I think it was 914GT's pics where I got the idea for the opening. 105 degree Arizona heat test can't be bad.
I understand the Ram effect and scooping air up into the radiator and now that you mention it I may put some of the floor back in to amplify the scooping effect.
Highway cruising is not what I was worried about. It is the commute driving and having maximum air flow into the system at low to no speed.
Posted by: Dr. Roger Jun 30 2005, 06:21 PM
Whoops, sorry Eric for lagging....
I'm going to weld-up some "slide in" type of brakcets. So I can just disconnect hoses and wires and slide it out. Top view might look kinda like ([ ]) .
Posted by: Dr. Roger Jul 3 2005, 01:08 PM
Little update.
Picked up 2 pieces approx. 1 1/4" X 6' conduit. Water lines up to and back from the radiator.
Also picked up some radiator protection stuff. Thick screen door material. Strong and let's the air through nicely.
The plan is to use 250 degree epoxy to fasten fittings to the ends of the conduit for hose connectivity.
Routing under the rockers is appealing except I think that the front of the pipe has to go through the front wheel well. Has anyone done anything different to route that puppy?
I apreciate all of your thoughts and would rather hear it from you now than hear it from you later... LOL
Posted by: 914GT Jul 3 2005, 01:18 PM
Roger, you sure you want to trust epoxy for that? I don't know but your operating temps are not too far below the epoxy's rating and it's under pressure. Sure hate for you to blow a hose off when hot and under pressure. What kind of conduit did you go with?
Posted by: Dr. Roger Jul 3 2005, 01:24 PM
What kind? Regular old galvanized. =-)
I've done radiator repairs with "this" epoxy on aluminum. It really works well under pressure and with the right epoxy, does well at temperatures.
Posted by: John2kx Jul 3 2005, 05:26 PM
Roger,
I recommend the well tested hose and routing method used by Renegade. It easy to install and will not cause problems in the event you encounter a speed bump.
If worried about your hoses making contact with a speed bump, wait until you see how low the engine mount is located when it's all buttoned up.
Proper cooling of engine will be your biggest challenge once you get up and running. Renegade has the best track record and I'd follow their procedures for all parts (hoses, barbed fittings, expansion tank, thermostat, fill port etc.)
Regards,
John
Posted by: John2kx Jul 3 2005, 05:37 PM
Renegades' green strip hose secured with conduit clamps.
Attached image(s)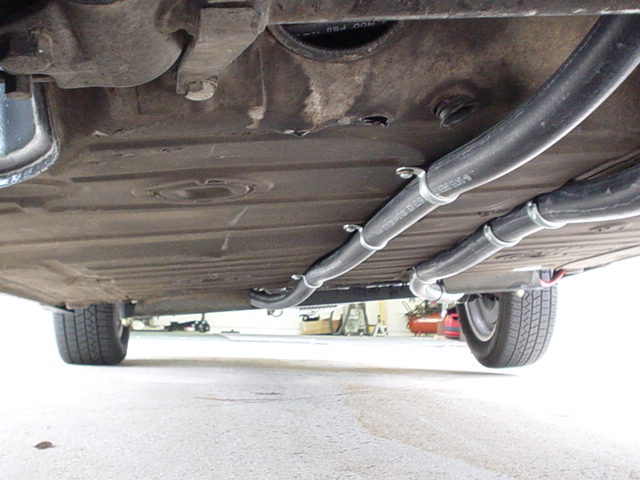
Posted by: John2kx Jul 3 2005, 05:37 PM
plenty of room for speed bumps or "off track" events : )
Attached image(s)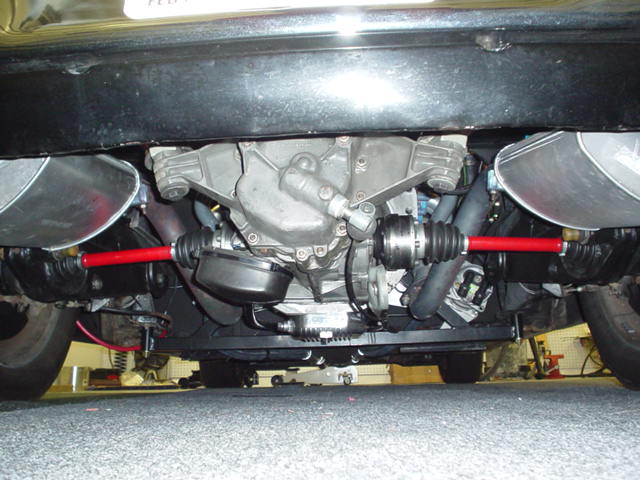
Posted by: Dr. Roger Jul 6 2005, 01:26 AM
Yes John2K, that looks great.
Tonights update pics...
Attached thumbnail(s)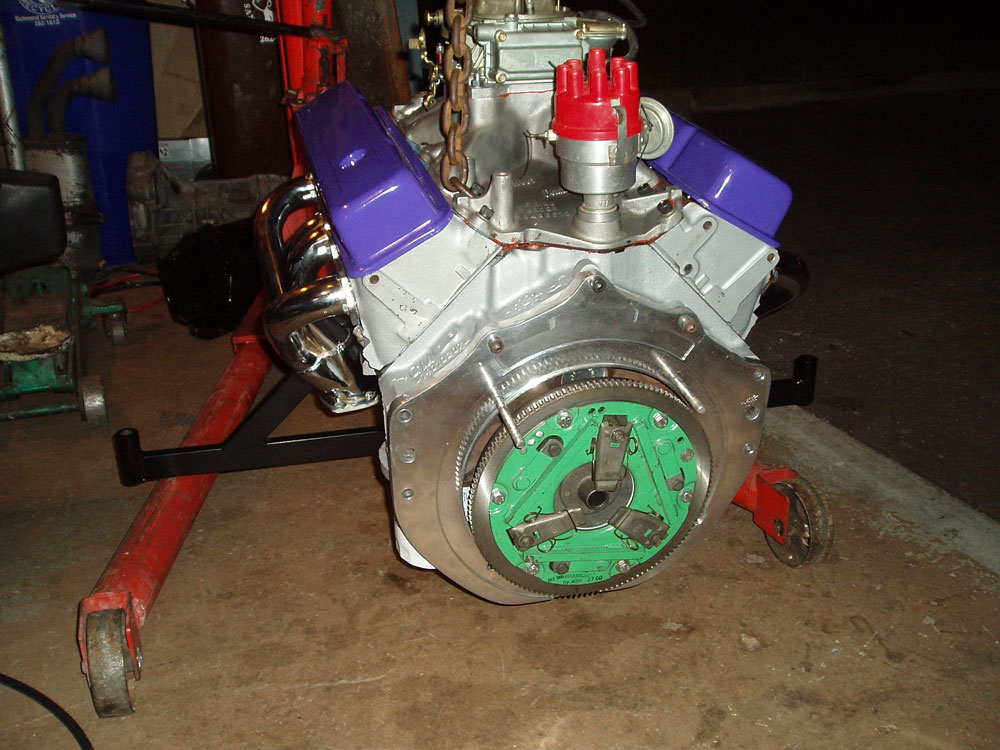
Posted by: Dr. Roger Jul 6 2005, 01:28 AM
kkkkkkkkkkkkkkkkkkkkkkkkk
Attached thumbnail(s)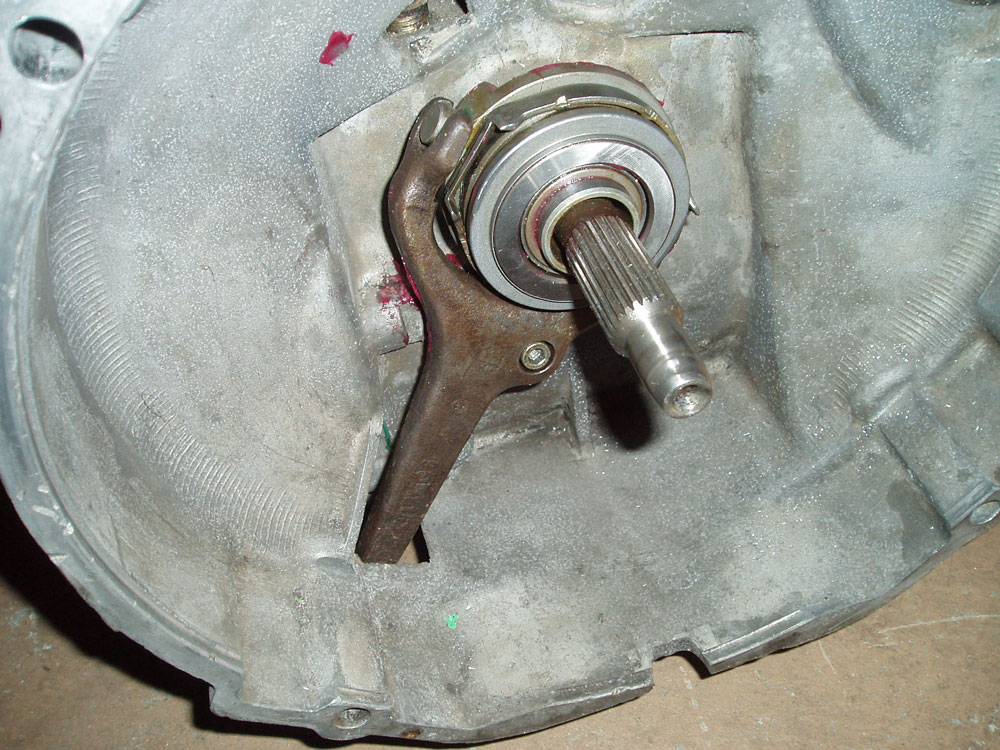
Posted by: Dr. Roger Jul 6 2005, 01:39 AM
jjjjjjjj
Attached thumbnail(s)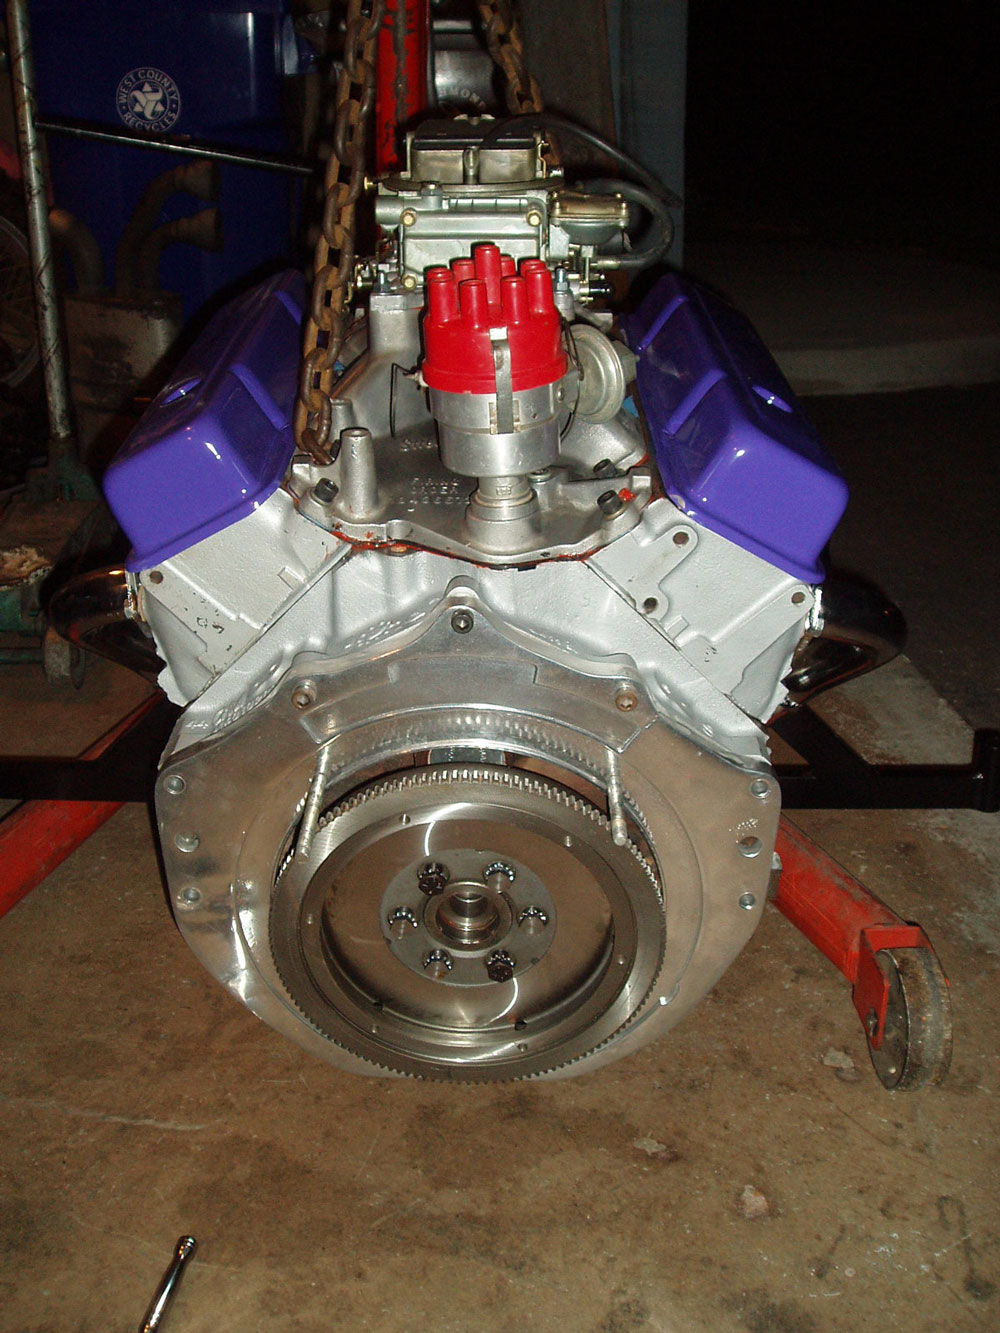
Posted by: neo914-6 Jul 6 2005, 01:43 AM
Did you light it? 
Did you paint those valve covers?
Posted by: redshift Jul 6 2005, 01:45 AM
I painted my airbox that same terrible color!
Then I painted it silver!
M
Posted by: Dr. Roger Jul 6 2005, 01:56 AM
I didn't light it tonight.
Here's why....
I got my bypass valve installed and oil filter on.
Now I can't get the tranny on.
Seems the throw out bearing is keeping the tranny from sliding in all the way...
Is there an adjustment either on the "ball" inside the trans, or should I bend the fork? I saw that as a solution on another V8 thread.
Felix, that disgusting color on the valve covers is a Summit powder coating optional color. I love 'em! But i'm a sick bastard anyways.
Posted by: Dr. Roger Jul 6 2005, 01:59 AM
I can always count on you Miles for words of wisdom....
Or not.
Posted by: neo914-6 Jul 6 2005, 03:30 AM
| QUOTE (rogergrubb @ Jul 5 2005, 11:56 PM) |
| I didn't light it tonight. Here's why.... I got my bypass valve installed and oil filter on. Now I can't get the tranny on. Seems the throw out bearing is keeping the tranny from sliding in all the way... Is there an adjustment either on the "ball" inside the trans, or should I bend the fork? I saw that as a solution on another V8 thread. Felix, that disgusting color on the valve covers is Summit powder coting specials. I love 'em! But i'm a sick bastard anyways. |
Check the disc alignment, I don't think you can mount it upside down.
Did you check the ID of the pilot bearing vs the OD of the input shaft?
Sometimes the TO bearing gets ahead of the fork during install, I've struggled with that ~1" a few times.
It shouldn't be the arm keeping the tranny from sliding on. Those arm mods help the arm to engage and release the clutch with a longer movement.
Everything else looks good...
I don't mind the valve cover color if you had other components color match.
Posted by: Dr. Roger Jul 6 2005, 09:28 AM
| QUOTE (Neo914 @ Jul 6 2005, 01:30 AM) |
| [QUOTE=rogergrubb,Jul 5 2005, 11:56 PM] Check the disc alignment, I don't think you can mount it upside down. Did you check the ID of the pilot bearing vs the OD of the input shaft? Sometimes the TO bearing gets ahead of the fork during install, I've struggled with that ~1" a few times. It shouldn't be the arm keeping the tranny from sliding on. Those arm mods help the arm to engage and release the clutch with a longer movement. Everything else looks good... I don't mind the valve cover color if you had other components color match. |
Felix,
The clutch plate only goes in one way. If I were to flip it the center of the clutch disk would hit the pilot bearing. So that's not it.
Did you check the ID of the pilot bearing vs the OD of the input shaft?
Yes. I pre-slid on the pilot bearing onto the input shaft of the tranny. No problems there.
Sometimes the TO bearing gets ahead of the fork during install, I've struggled with that ~1" a few times.
The tranny has about 1" of space to make contact with the engine block. I prefit the TO bearing and fork and checked the movement and it looked normal. When I pressed the tranny towards the block, I could move the clutch fork back and forth and the tranny would move back and forth from the block. So it's definately being held back from the block by the TO bearing.
Posted by: John2kx Jul 6 2005, 05:31 PM
Roger,
Many have run into this problem and the cause is most often a mismatch of parts. Did you obtain the clutch/pp/tob as a package? If so, you could start a process of elimination by:
1. removing the t/o bearing from fork and check for fit. It it still won't go, your fork may be contacting pressure plate. I've seen this several times but usually happens with engine/transaxle mated closer than the 1" gap your seeing.
2. remove all washers installed behind "ball" and check for fit. IIRC, every washer installed pushes the t/o bearing forward about 1/4" inch.
3. a couple of the bolts securing flywheel to crankshaft appear to be sticking out about 1". That's either just the angle of the pic or you took it before securing all bolts?
John
Posted by: Dr. Roger Jul 6 2005, 07:06 PM
John,
The pic is with the bolts not torqued down yet. =-) No clearance issues there.
I didn't know about the washers behind the pivot ball. I will check that as soon as I get home. I will also check to see if removing the TO bearing makes a difference. I'm sure it will.. =-)
Last night I was really trying to see exactly where the point of resistance was and I believe it was the TO bearing.
Probably a simple pivot ball adjustment ... Update will be posted tonight.
Thanks again John. This is a real learning experience. LOL
Posted by: Dr. Roger Jul 6 2005, 11:59 PM
Yep, tonight was a learning experience.
I learned that the tranny will not go on all the way unless the pressure plate is torqued down. Me= dumb shit... I was getting ready to perform surgery on the fork... LOL
Tomorrow I pick up some fuel line, hose clamps, distributor clamp down thing, and permatex. Then it's "Fire it up" time!!!!!!!
Attached thumbnail(s)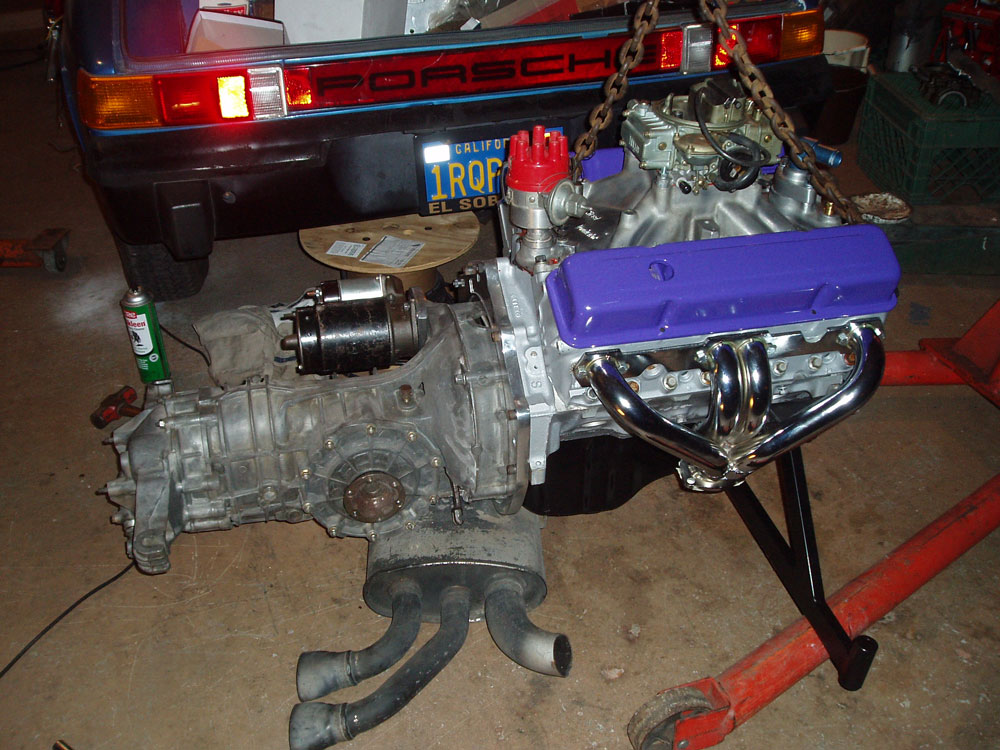
Posted by: JmuRiz Jul 7 2005, 09:23 AM
| QUOTE (rogergrubb @ Jun 28 2005, 11:03 PM) |
| With fans roughly in place. Anyone have a V8 and keep their spare tire too???? |
Could always put the spare tire in the rear-trunk tire-mount location. That'd be an easy way to do it, if you didn't like it up front behind the radiator.
Posted by: Dr. Roger Jul 13 2005, 10:05 AM
This is where I left off last night.
Fired the engine for the first time. It's peppy, to say the least. =-))))
Tonight I figure out how the Renegade rear mounts work. I was checking out 914GT's progress pics and I couldn't see a good side shot to know for sure how they go. I guess I could call Scott at Renegade....
Workey workey time. Later.
Attached thumbnail(s)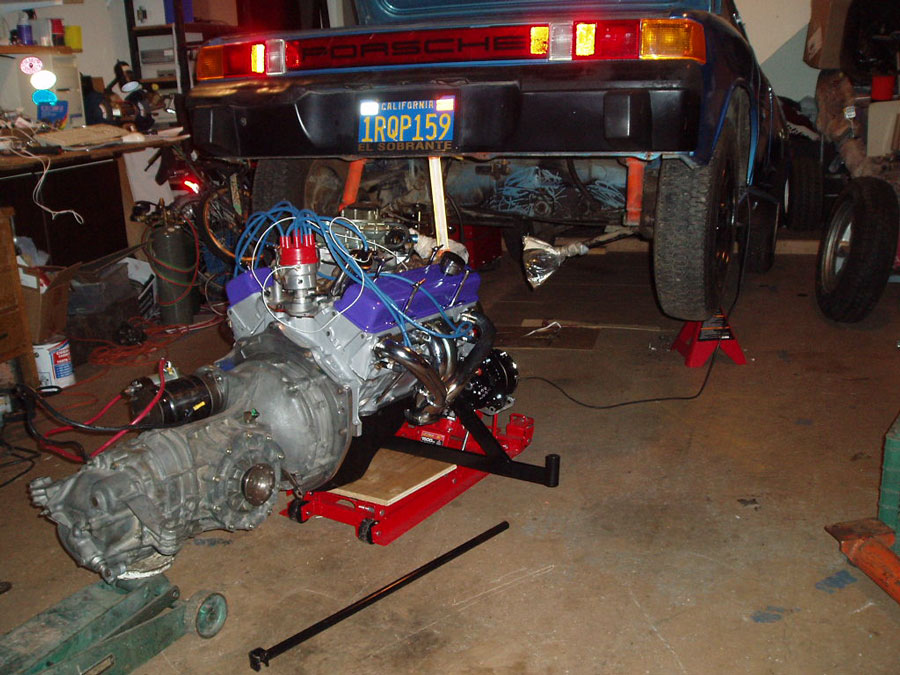
Posted by: sean_v8_914 Jul 13 2005, 02:05 PM
you might want to remove teh cap and rotor before you stick that in
Posted by: John2kx Jul 13 2005, 02:29 PM
This is how I installed the Renegade rear mount. Large mushroom shaped washer was notched to fit around RH piece. I'm also using 911 sport mounts here.
John
Attached image(s)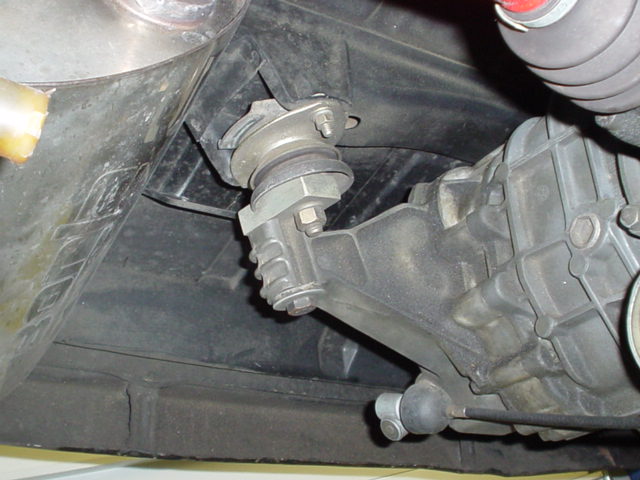
Posted by: John2kx Jul 13 2005, 02:31 PM
another angle
Attached image(s)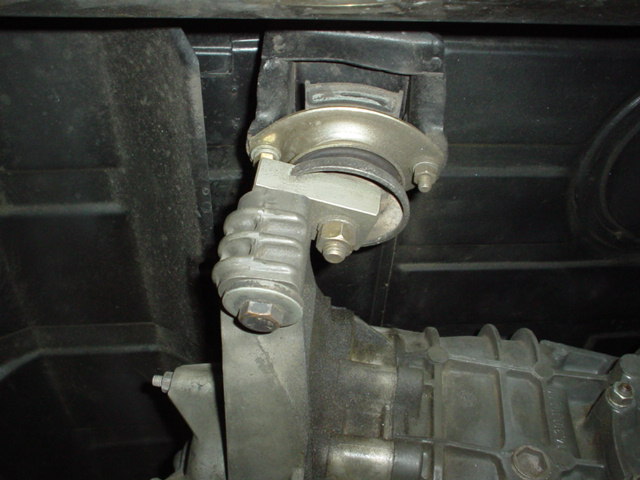
Posted by: Dr. Roger Jul 13 2005, 03:15 PM
Yes! John Thanks so much.
I have the exact parts U have. Now I know how they go together.
BTW, did U like the Borlas U used or would U have done it differently?????
Tonight is going to be so great. I'm STOKED, man. 
Posted by: John2kx Jul 13 2005, 03:53 PM
| QUOTE (rogergrubb @ Jul 13 2005, 01:15 PM) |
| BTW, did U like the Borlas U used or would U have done it differently????? |
Actually, I tried three different mufflers. Borla, Walker and Flowmaster 40. The Borla was my favorite. One of the best things about the 914 v8 conversion is the mufflers can be changed out in about 20 minutes. Just choose the same size mufflers from the start, ie inlet outlet size, offset(s) and total length. Of the three that I used, these dimensions were all the same, making the swap between quiet to mild or loud a easy process.
John
Posted by: Dr. Roger Jul 13 2005, 05:00 PM
As it is, i'm going to try to stuff some 'Vette C6 mufflers under there. Andyrew says they're too big but Im' a stubborn *uck sometimes.
Posted by: BIGKAT_83 Jul 13 2005, 06:46 PM
Remove the muffler heat shield from the 914 and this opens up alot more room and those C6 mufflers will fit with no problem. Get some mandrel bent U bends and start welding.
Do you plan to mount them with all 4 tips in the center?
Bob
Posted by: Dr. Roger Jul 13 2005, 07:00 PM
| QUOTE (BIGKAT_83 @ Jul 13 2005, 04:46 PM) |
| Remove the muffler heat shield from the 914 and this opens up alot more room and those C6 will fit with no problem. Get some mandrel bent U bends and start welding. Do you plan to mount them with all 4 tips in the center? Bob |
4 tips in the center????
Oh hell yea', baby!!!
It'll look like this if I have my way with her.... { OOOO }
Posted by: Dr. Roger Jul 15 2005, 12:21 PM
I'm so glad I'm taking all of you guy's advice. It's really making a difference on how things go together. THANK YOU!!!
Engine went in.
Engine came out. Front clearance. Had to trim lip that protrudes at the level of the water inlets. Quick job with a 6" angle grinder and a cutting wheel. =-)
Today I run all water lines off the engine, figure out any wiring that should be connected before engine goes in again, and charging wires.
After that, it's fuel, shifting, throttle systems.... and after that it's......... Drive it!!!!!!! 


A few pics.
My buddy Mikey is the bald dude. I suggest that anyone doing this get a friend. If for nothing else, moral support. This is not easy.
Attached image(s)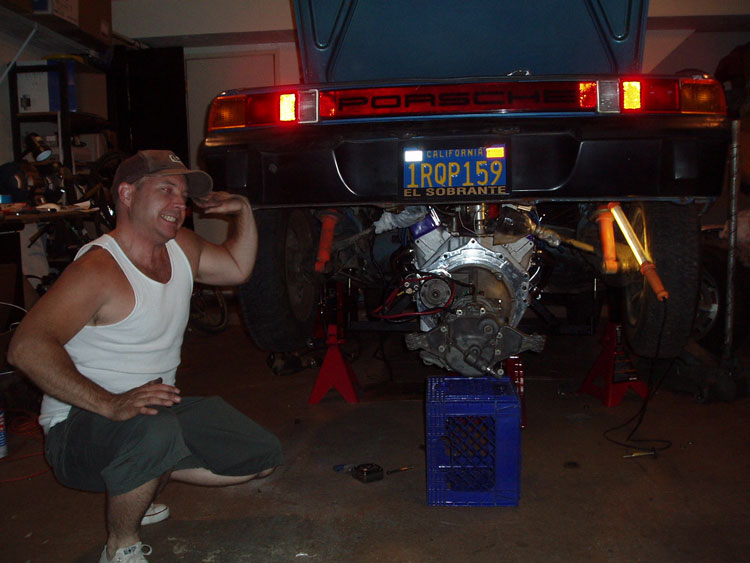
Posted by: Dr. Roger Jul 15 2005, 12:25 PM
Sure it'll fit. =-) )))))))
Attached thumbnail(s)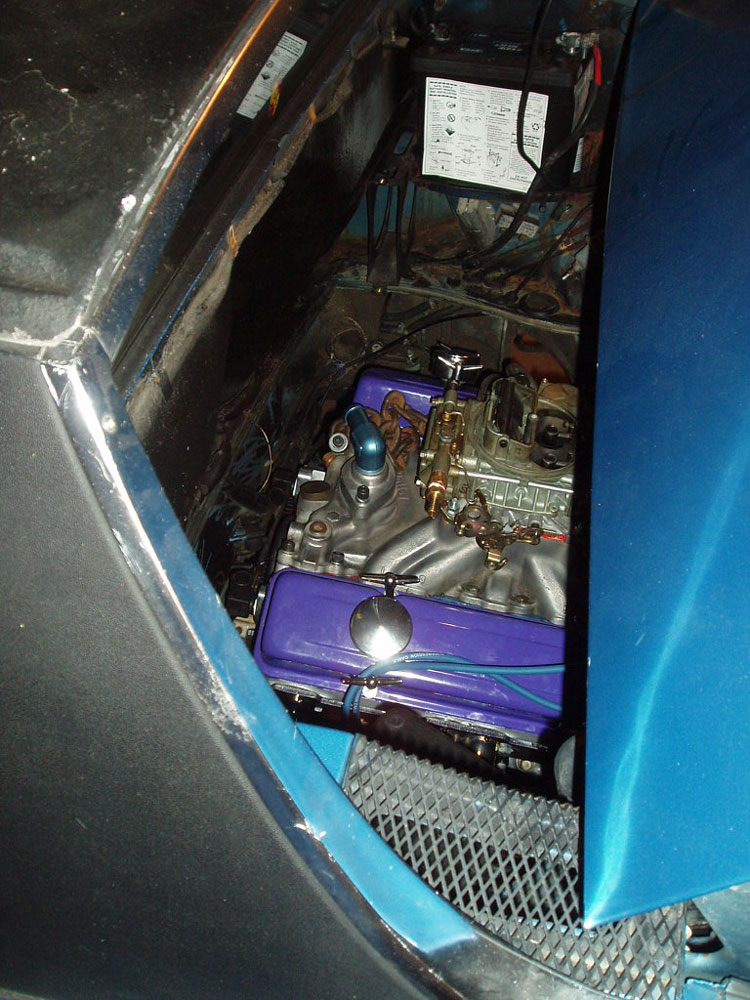
Posted by: John2kx Jul 15 2005, 12:50 PM
Roger,
A couple of us here in Ga. were wondering how it was going. Glad to see your making progress. The R&R gets easier each time.
Removing the rear wheels/tires and using a furniture dolly would really cut your install time down as it provides more room and easier movement of drivetrain as it mates with chassis. I've done it that way by myself several times.
Sound clips tomorrow? : )
John
Posted by: MJHanna Jul 15 2005, 02:02 PM
I'm impressed with your progress. keep up the good work.
Posted by: Dr. Roger Jul 20 2005, 11:18 PM
Good progress the last few days.
Got the engine in. Then out. then made some "clearance" adjustments... =-) Now ready to go back in.
Figured out some electronic stuff. Running wires and starter, water pump, alternator, ... ignition. Nothing very important.
Then fabricated the fan shroud out of stainless steel. Came out pretty good considering I've never done this kind of thing before. Just watched the fellas' at the OCC. LOL
Attached thumbnail(s)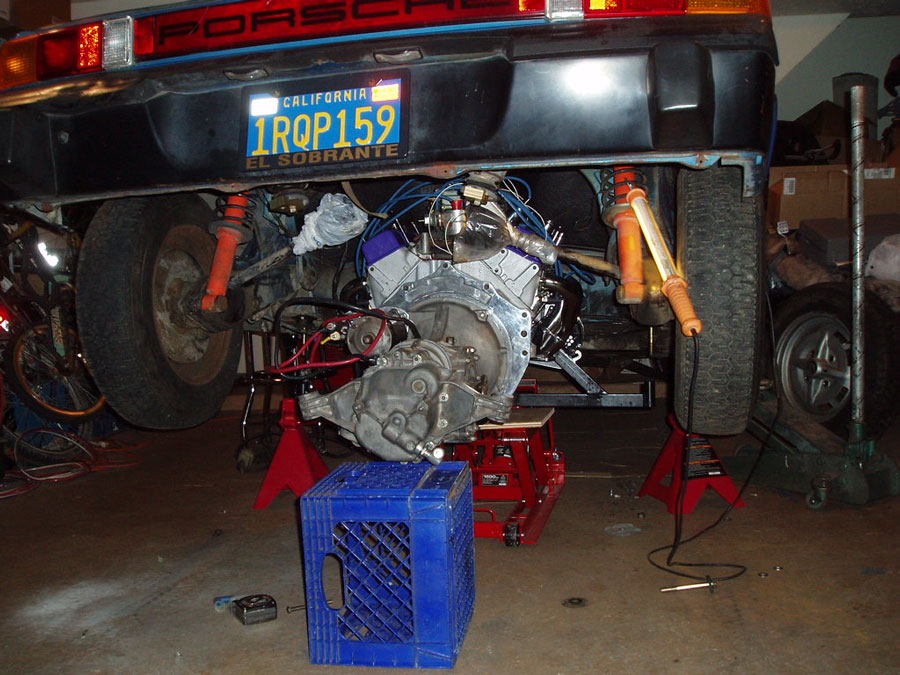
Posted by: Dr. Roger Jul 20 2005, 11:27 PM
111
Attached image(s)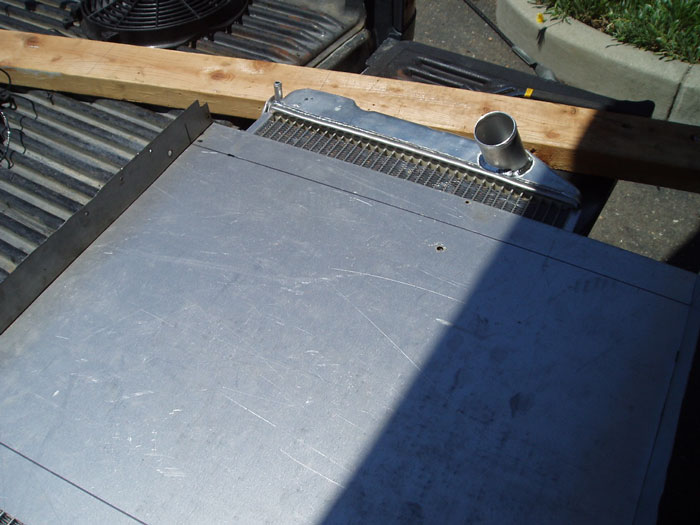
Posted by: Dr. Roger Jul 20 2005, 11:29 PM
69696969 =-)
Attached image(s)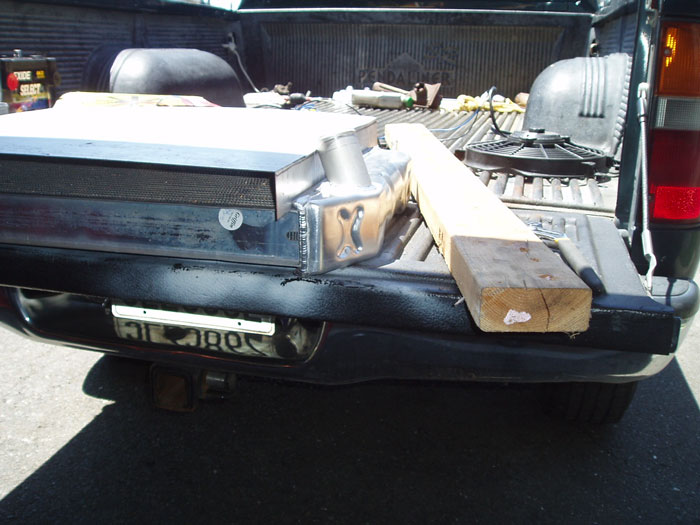
Posted by: Dr. Roger Jul 20 2005, 11:32 PM
6969696969 =-)
Attached image(s)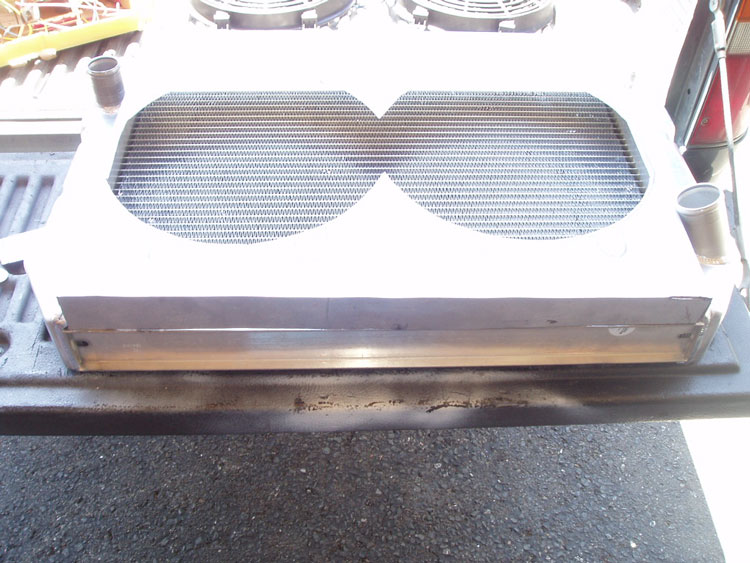
Posted by: Dr. Roger Jul 20 2005, 11:37 PM
Tracing for the openings.
So I see this man wearing this Teeshirt. And it say's, "It's not going to suck itself"....
His G-friend had one that said, "It's not going to lick itself"...
Leave it to Berkeley....
Attached image(s)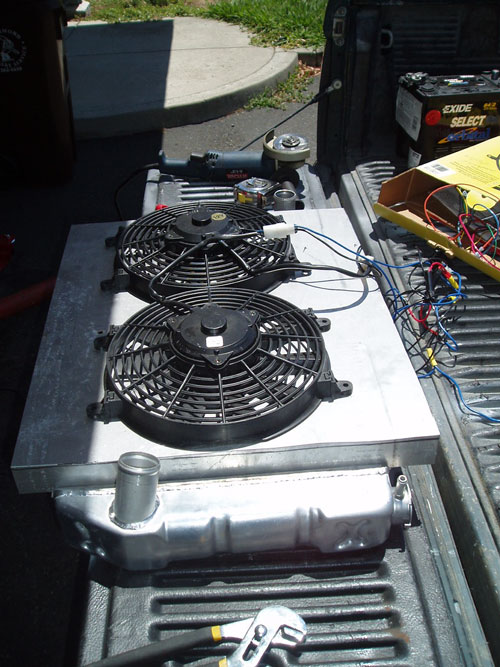
Posted by: Dr. Roger Jul 20 2005, 11:45 PM
Finished product. Whoooo hooooo!
Check that off the list.
Attached image(s)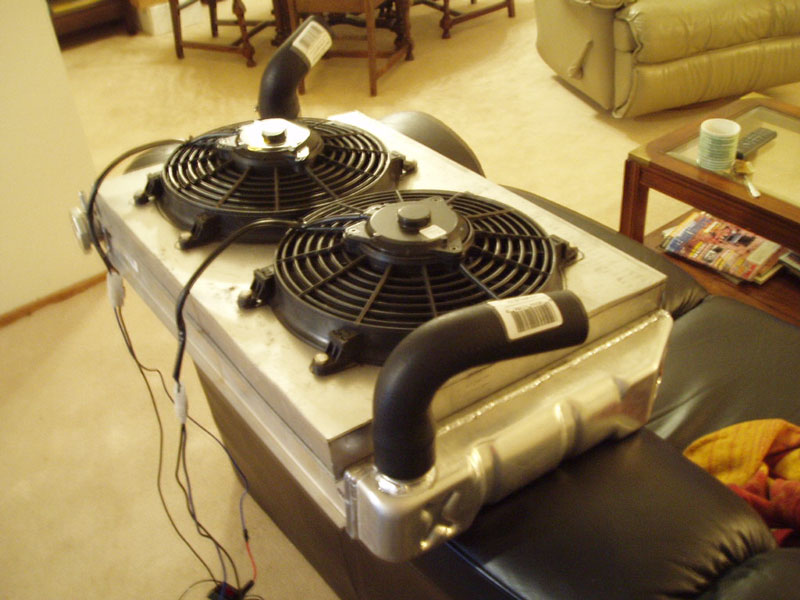
Posted by: Dr. Roger Jul 23 2005, 11:07 AM
Now it's in.
We'll see how long that lasts.....
Attached thumbnail(s)
Posted by: John2kx Jul 23 2005, 11:53 AM
Congradulations!!!! It looks like that carb just might fit under engine lid too.
John
Posted by: redshift Jul 23 2005, 01:25 PM
WOOHOO! Go Rog!
M
Posted by: neo914-6 Jul 23 2005, 05:19 PM
36 days to "the" meet. 
One of the best parts of the Great Mall meet was firing up everyone's engines.
Posted by: Dr. Roger Jul 23 2005, 11:40 PM
Yea' thanks guys.
I'm really looking forward to startin' them up together too.
I tried to get those Vette' C5 mufflers crammed up in there but I think it's not going to happen. Their friggin' huge.
I will bring them to a professional shop and maybe they have an idea or two about how to make them fit.
My cabinet maker friend was saying, "no way in hell, man". I would like to disagree but..... =-)))) LOL....
I'm might end up paying someone for that part of the project.... Unless someone needs some welding practice.....
Posted by: Dr. Roger Jul 24 2005, 01:16 PM
| QUOTE (John2kx @ Jul 23 2005, 09:53 AM) |
| Congradulations!!!! It looks like that carb just might fit under engine lid too. John |
Hey John,
Yes, I believe the carb will just clear the boot. That means I can actually do my low rise solutino for a cool air intake. That's not going to happen until she's on the road and shaken down. Ya know what I mean?
It looks so pretty in there I'm now thinking of vented plexi glasss like the new Farrari's engine hatch's. KIDDING>>>>>>>>> =-)
A few nights ago I got the water pump tapped, fittings taped and installed, and temporarily placed where it needs to go for proper hose fitment and mounting.
Look, I said, "Mounting".......
hehhehehheheeSorry, last few nights have been great....

Posted by: Dr. Roger Jul 27 2005, 02:11 PM
Yesterday I picked most of the fittings/parts for plumbing the cooling system.
Tomorrow night I begin cutting for, and hanging, water lines under the car.
So if I understand correctly...
1. I pop the plate off under the rack and pinion
2. Estimate where the pipes need to come through the front of the trunk
3. Cut hole in trunk for pipes.
(Arghhhhh. More cutting. I hate cutting perfectly good metal away. )
4. Get over it.
Posted by: tat2dphreak Jul 27 2005, 02:16 PM
looks great man!!
Posted by: John2kx Jul 27 2005, 02:29 PM
Roger,
You've got the procedure right. Here's a pic that may help. I recommend drilling a small pilot hole for each hose and checking from under the car to ensure no issues.
I cut my holes 1/4" larger that the hose used and installed a grommet to prevent chaffing.
If your using two different size hoses (I did), think about which size goes in which hole for proper routing to/from radiator.
John
Attached image(s)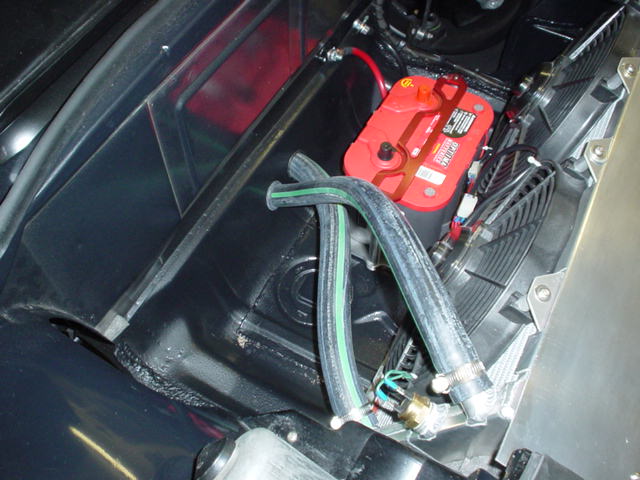
Posted by: Dr. Roger Jul 27 2005, 02:39 PM
Dang John,
That is the prettiest front trunk.
Great idea using pilot holes. Will do.
Where did you get grommets that large?
Posted by: John2kx Jul 27 2005, 04:32 PM
| QUOTE (rogergrubb @ Jul 27 2005, 12:39 PM) |
| Dang John, That is the prettiest front trunk. Great idea using pilot holes. Will do. Where did you get grommets that large? |
Thanks for the kudos. I made the trip to Vegas and took many pics of Scott's car which helped in just about every area of the conversion.
I picked up my grommets at Lowe's in the electrical section. Could not find the exact size I needed so ended up cutting the largest size they had, spreading the opening on the underside of hose and filling the remaining section with another piece of same size grommet.......if that made any sense.
If you've got your drivetrain installed and radiator mounted, the hose routing is about the easiest part of installation.
I'll attach a few more pics to give you some ideas. The clamps used to secure hose to chassis are also from Lowe's. If I had a nickel for every trip made there during the conversion.
John
Attached image(s)

Posted by: John2kx Jul 27 2005, 04:34 PM
dfgfdg
Attached image(s)
Posted by: John2kx Jul 27 2005, 04:36 PM
sdfgsd
Attached image(s)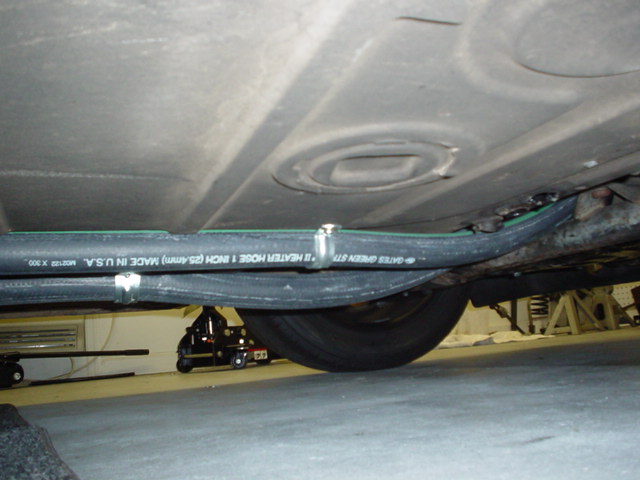
Posted by: John2kx Jul 27 2005, 04:40 PM
This is my best front trunk shot. Krylon rattle can in fact......just take your time doing the prep work. It started off looking just as bad as the majority in the beginning.
Attached image(s)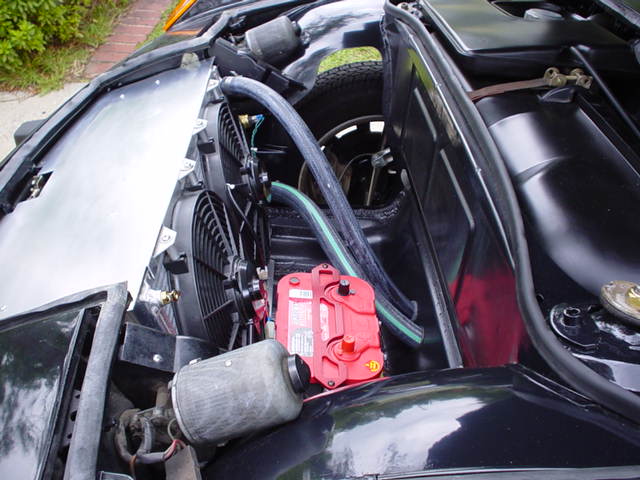
Posted by: Andyrew Jul 27 2005, 04:40 PM
Roger, I strongly suggest picking up a set of Magnaflows.
The C6's will not fit by any means
And magnaflows just sound awesome...
I know you've heard em.. but here are some clips of them with shorty headers.
2.5 in.
http://members.rennlist.com/dan10101/v8%20sound%20check.mpg
http://www.teamgracer.com/cars/videos/scca91605.wmv
Posted by: John2kx Jul 27 2005, 04:43 PM
Picked up a digital camera during the middle of the front trunk job and this is one of the few taken during that process. As you can see, I had to weld in a new piece to cover the hole left by dealer installed a/c.
Attached image(s)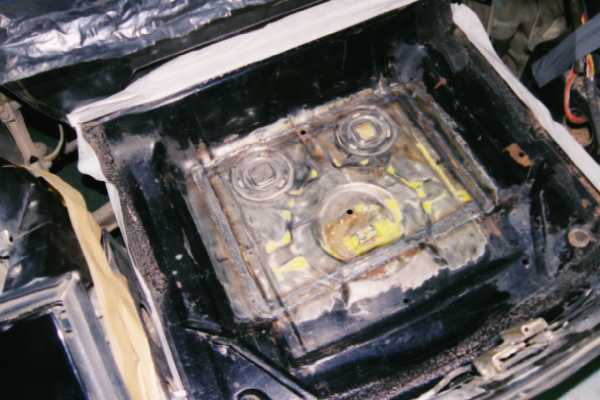
Posted by: John2kx Jul 27 2005, 04:47 PM
Last one.........after about 3 weekends of sanding, having filler piece added, painting, only to have to paint again for not waiting the prescribed time before adding additional coats @#$%. Note to self: follow the instructions provided.
Hope some of these help. Keep us posted on your progress and feel free to post progress pictures. Believe me, you'll regret not taking pictures down the road.
John
Attached image(s)
Posted by: kgb Jul 29 2005, 12:25 AM
Thought that I would add my .02 with this thread after reading it all when I built my exhaust for my V8 I used a dual in dual out Flowmaster fit great behind the tranny and had to cut the heat sheild but it looked like it was soposto be there and it had the Flowmaster sound. I'd have a picture but I sold the car and am forever looking for another.
Edit Found another picture you can see the exhaust tip thats about it
Attached image(s)
Posted by: Dr. Roger Jul 29 2005, 01:07 AM
Hey KGB,,,
Yea', KGB.... Brings back many good memories.....
Are we talking about the same KGB???
Heck yea', I like those exhaust tips and I really like those wheels!!
Where can I pick up some like those???
I want to flare my 914 but my fenders are so nice as they are. I'm afraid another club member might slap me for screwing with some already good fenders.
Maybe I should try to swap some aftermarket flaired fenders for these good steel stock fenders.... I just do not like the GT flairs... I do like those Roger whatzhisnames flairs.
Thanks for the advice on mufflers Andy and KGB. Love the videos as always. =-)))
Andy, so if you were the one screaming like a school girl in the video who was driving? LOL KIDDING....... =-)
I just remembered... How am I supossed to do the throttle linkage? There was none with the car. I bought a stock 914 cable to replace the cut off one but now I'm not getting how it's routed...
Posted by: kgb Jul 29 2005, 01:15 AM
Don't know what KGB your refering to, its my initials so thats why I use it
the wheels were on it when I bought it and they are very high dollar extremly expensive, VW Baja rims
Posted by: Dr. Roger Jul 29 2005, 01:39 AM
Oh sorry. That used to be our secret acronym for "killer green bud". Guess it's no secret now....
VW Baja rims. Right on. Thanks. =-)))
Posted by: kgb Jul 29 2005, 01:42 AM
Yeah I once owned a shirt that had that on it but I liked it cause it was my initials.
Posted by: ewdysar Jul 29 2005, 02:14 AM
Rog,
Don't worry about your fenders, the rest of what you've done will get you slapped by those who would care about the fenders.
Isn't weird, I'm still woried about making my car "right", as close to stock as possible, except the SBC, the 911 front suspension, power windows, 911 style gauges, flared fenders, 5 lug Fuchs rims, 911 flag mirrors, suspension upgrades, chassis stiffening, etc. etc. I look at some stuff and think I wouldn't do that to a 914... 
Eric
Posted by: John2kx Jul 29 2005, 06:42 AM
| QUOTE (rogergrubb @ Jul 28 2005, 11:07 PM) |
| I just remembered... How am I supossed to do the throttle linkage? There was none with the car. I bought a stock 914 cable to replace the cut off one but now I'm not getting how it's routed... |
Roger,
I routed my stock throttle linkage between front of engine and engine compartment bulkhead in this manner: My throttle cable is the one covered with a extra "red" sheath in pic.......this is to sheild heat from headers.
Where it exits the stock location at bottom of bulkhead, allow cable to run straight until it is past all belts (water pump, alt. etc.). From here you can start routing it up toward intake manifold. I attached cable with a few tie wraps to some of the other cables (speedometer, clutch) where it makes the 90 degree turn at bottom to prevent it from getting caught up in belts/pulleys.
Then start routing toward drivers side and "behind" the mounting bracket for the accessory you have on this side (water pump or alternator). Again, this is to prevent any interferance with pulleys and throttle cable.
From here it's a pretty straight shot to carb. I used one of the brackets supplied with my new holley carb to secure cable to engine. I believe the bracket I used is part of the kickdown bracket on some cars. The bracket needed a 90 degree twist to work in my application. Note in pics, bracket is attached to one side of thermostat housing.
Attachment at carb was also made by using a piece supplied with new carb. I would have preferred a better clevis for this connection but its what I had at the moment and worked fine.
If I were to do this again, I'd buy a longer throttle cable and route back to where engine/transaxle meet, and start my upward path to engine compartment from here. Reason for this new path is more room to work and fewer obstacles to avoid.
Hope the pics help.
John
Attached image(s)
Posted by: John2kx Jul 29 2005, 06:42 AM
asfsd
Attached image(s)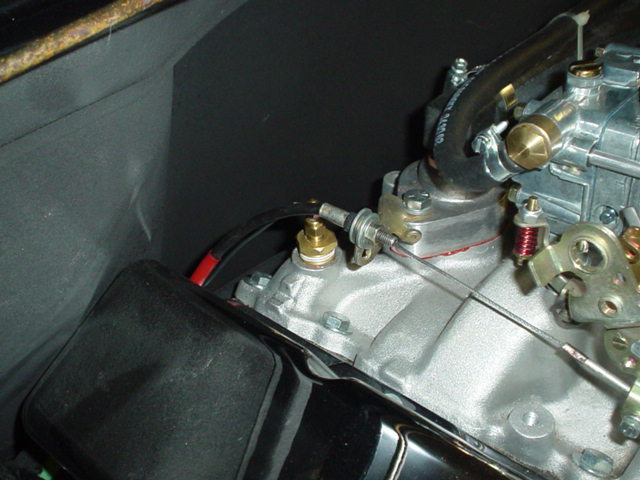
Posted by: John2kx Jul 29 2005, 06:46 AM
zxccv
Attached image(s)
Posted by: Dr. Roger Jul 29 2005, 01:29 PM
Man John,
These pics are very helpful man. Muchas gracias'!
I'm printing the pics out now and since i've got today off it's garage playtime.. =-))))))
What was your biggest reason for wanting another V8 914?
Posted by: John2kx Jul 29 2005, 04:41 PM
| QUOTE (rogergrubb @ Jul 29 2005, 11:29 AM) |
| What was your biggest reason for wanting another V8 914? |
I sold the black 914 you see in the pics about a year ago and really miss it. Watching the recent threads of other conversions going together has giving me the bug again.
And, what can one say about not having the rush of running a v8 powered 914 through its paces.
Pictures were hard to come by when I built mine two years ago and the reason for taking so many when making progress on my car. If you need clarification on something, just ask. I'm no expert but did learn allot here and on the Bird site over time.
John
Posted by: Dr. Roger Jul 29 2005, 08:13 PM
Thanks so much, again, for your help.
Tonight is great. I learned an engine can be adjusted to clear both the dizzy and the left valve cover. Mallory dual point BTW... =-) It fits perfectly now. Didn't have to cut out the trunk for the dizzy... and if anything happens with the dizzy, unlike any other HEI or electronic solution, I will know how to troubleshoot it in the middle of the night 1,000 miles from no where... LOL.
Heck, I eye-balled the points gap AND the timing and it started right up. YEA BABY!
Posted by: 914GT Jul 29 2005, 09:24 PM
Can you pull the distributor out with the engine in the car?
Posted by: Dr. Roger Jul 30 2005, 11:33 PM
FYI, EASY closes at 1pm on Saturdays... Damn it. LOL.....
I need to pick up that thing that goes on the end of the clutch cable to connect to the fork.
Q:
Can you pull the distributor out with the engine in the car?
Good question.... I'll try tomorrow... =-) ...
Posted by: neo914-6 Jul 31 2005, 12:19 AM
| QUOTE (rogergrubb @ Jul 30 2005, 09:33 PM) |
| Q: Can you pull the distributor out with the engine in the car? Good question.... I'll try tomorrow... =-) ... |
Have fresh saw blades ready.
Posted by: Andyrew Jul 31 2005, 12:39 AM
Do you have an hei or a standard dizzy?
YOu cant get an hei to fit without cutting... lol
Posted by: John2kx Jul 31 2005, 06:56 AM
| QUOTE (rogergrubb @ Jul 30 2005, 09:33 PM) |
| Q: Can you pull the distributor out with the engine in the car? Good question.... I'll try tomorrow... =-) ... |
Distributor and passenger side valve cover can be pulled in some cases without actual removal of engine. For the tall valve cover on passenger side, you can remove two bolts securing transaxle to chassis and lower rear of drivetrain a couple of inches to make needed clearance. However, some tall valve covers will allow removal on passenger side without having to lower front of engine.
You could take the same approach with the distributor by removing two securing bolts for engine bar and lowering front of drivetrain. Another approach would be to remove all 4 securing bolts holding drivetrain and shifting forward 2-3"........my point here is to avoid completely pulling drivetrain if at all possible. If you can get the dist. cap on and off without disturbing anything, I would not pull dist. if you already have it running right. Note: make sure your plug wires have the 90 degree fitting on dist. end. You'll need the added clearance when closing engine lid and trunk.
While your working on the ignition fitment, have you decided what type of coil your going to use and where to mount? In my case, I purchased a coil that would only allow a vertical mounting but wanted a horizontal positioning in car. Since this was a mail order purchase, I ended up with two coils before getting it right.
Once you get your throttle connected, get someone else to push throttle to floor while you check for WOT. This ususally needs adjustment the first time and you have some adjustment of the stop under throttle pedal.
Have you lengthed your shift rod 3/4" yet? This will require some welding. Let me know if you need pics.
CV bolts need special attention as well and you should be nearing that part of installation. If you have not reviewed this potential problem area, let us know.
John
Posted by: redshift Jul 31 2005, 07:26 AM
This stuff makes me horny.

Posted by: John2kx Jul 31 2005, 07:35 AM
| QUOTE (redshift @ Jul 31 2005, 05:26 AM) |
| This stuff makes me horny. |
After reading my post again, I see your where your coming from. Will read it again before going to bed tonight : )
John
Posted by: Dr. Roger Jul 31 2005, 12:32 PM
HAhhahhahaaaa!
You guys crack me up.
Yep, I'm kinda' getting wood thinking about that throttle linkage myself... Sick puppy that I am.
I have not addressed the shift linkage yet. Pics would be huge. Thanks John!
Tonight: Fine tuning the throttle linkage. Start looking at the CV's... I might be missing some bolts for those.... Grrrrrr. PO had no organizational skills and I got this car w/ no engine or trans. And one box of bolts. All cables cut at the cockpit exit. I'm glad he didn't cut brake lines.
I read somewhere that the CV's need gaskets???? At the mating surfaces? No?
I tried one side already and the two steel alignment holes fit tightly.
Whoops, here comes wood again.
Posted by: redshift Jul 31 2005, 01:01 PM
| QUOTE (John2kx @ Jul 31 2005, 09:35 AM) | ||
After reading my post again, I see your where your coming from. Will read it again before going to bed tonight : ) John |
lol..
I just took a nap, and I had a dream that you pulled up in Roger's drive, in a 6-speed 454 914 station wagon...
When you got out, and went around back, you come out with this glowing orb, that weighs 38 grams...
 and say, "Here Roger, it's my latest sub-neutronic particle smasher, about 12,000 bhp at the tire.." Roger looks all giddy and we stand there gawking at it's bright gold glowing...
... then we broke off a little piece of it
 and smoked it..
This is how all my nice dreams go..

M
Posted by: John2kx Jul 31 2005, 01:42 PM
| QUOTE (rogergrubb @ Jul 31 2005, 10:32 AM) |
| I have not addressed the shift linkage yet. Pics would be huge. Thanks John! |
Roger,
This pic should give you the location of where to insert sleeve (3/4" O.D. steel tubing). 1-1/4" is the amount you want to lengthen it.
Scribe a line at the location you want to make cut of shift rod. Cut your shift rod, insert new piece and use scribed line to line rod back up before welding.
John
Attached image(s)
Posted by: Dr. Roger Aug 2 2005, 02:43 PM
Installed the new throttle cable minus attachment to carb.
Installed new clutch cable minus attachment to fork.
Mad the pilgrimage to "Easy" this morning and picked up some little bits.
Throttle cable screw holder thing that attaches cable to throttle linkage.
Clutch cable end thing that goes inbetween cable and clutch fork.
CV bolts.
Played with the Easy dog. Got slobber on my work pants.
All in all, a very good visit.
Forgot to ask them if they had put together SirAndy's axle solution yet... =-)
Posted by: 914GT Aug 2 2005, 02:55 PM
Hi Roger
You're using rubber mounts where the engine bar bolts up? I mount the bar solid to the body.
Posted by: John2kx Aug 2 2005, 02:57 PM
Roger,
If you get a chance, add a pic of the washers your talking about. I am not getting a visual of the problem you suffered from.
John
Posted by: Dr. Roger Aug 2 2005, 03:00 PM
Holy crap.
That's probably why I've noticed my engine sitting lower in the engine compartment.... (extra clearance)
I wonder if this will throw off geometry of the rear wheels?
I like the extra clearance but it makes sense that everyone else seems to not have the throttle cable coming out directly into the crank pulley issue that I had...
Posted by: Dr. Roger Aug 2 2005, 03:03 PM
| QUOTE (John2kx @ Aug 2 2005, 12:57 PM) |
| Roger, If you get a chance, add a pic of the washers your talking about. I am not getting a visual of the problem you suffered from. John |
I'll get that pic tonight.
They came with the 911 motor mounts. They are larger and cupped. Not particularly thick.
Large enough to entirely cover the rubber from above.
Posted by: Lou W Aug 2 2005, 03:10 PM
| QUOTE |
| rogergrubb Posted on Aug 2 2005, 02:00 PM -------------------------------------------------------------------------------- Holy crap. That's probably why I've noticed my engine sitting lower in the engine compartment.... (extra clearance) I wonder if this will throw off geometry of the rear wheels? I like the extra clearance but it makes sense that everyone else seems to not have the throttle cable coming out directly into the crank pulley issue that I had... |
There goes your distributer clearance.
Posted by: John2kx Aug 2 2005, 09:01 PM
Roger,
This is the best picture I have of this area and only shows the bottom area were talking about. As previously mentioned, the motor mount "bar" is mounted solid at the outboard locations. The only place 911 sport mounts are used are in the rear to secure trans. to chassis and I believe you already have that part figured out.
If your taking pics tonight, shoot both areas to make sure were comparing apples to apples.
John
Attached image(s)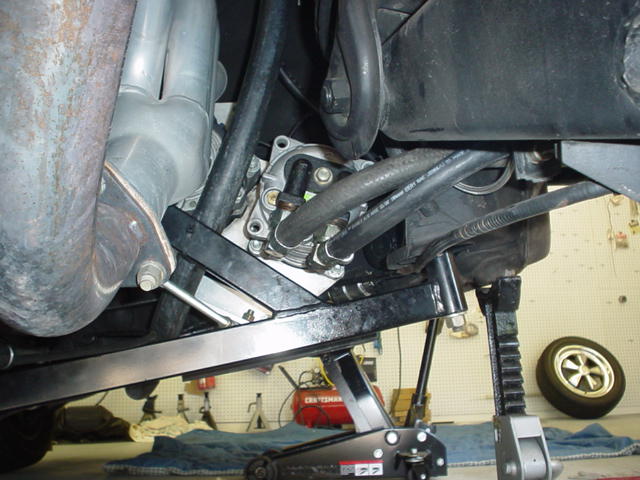
Posted by: Dr. Roger Aug 2 2005, 11:00 PM
It's funny when I was at Easy I asked for 911 motormounts and they gave me 4 of them.
I naturally assumed that I needed 4. LOL
While the motor is lowered i'm going to now clearance the firewall for the engines higher resting place.....
John, do youuse that huge moulded washer for on top of the motor mount? Above the body?
No, I cannot remove the dizzy. I couldn't before. =-)
No, an HEI wil not fit without the use of an angle grinder or sawzall.
An old school Mallory dual point will fit very nicely and does.
Yes, i'm a little pissed at myself. Oh well, tomorrow is a new, great day.
Running by this weekend??? Maybe.....
Attached image(s)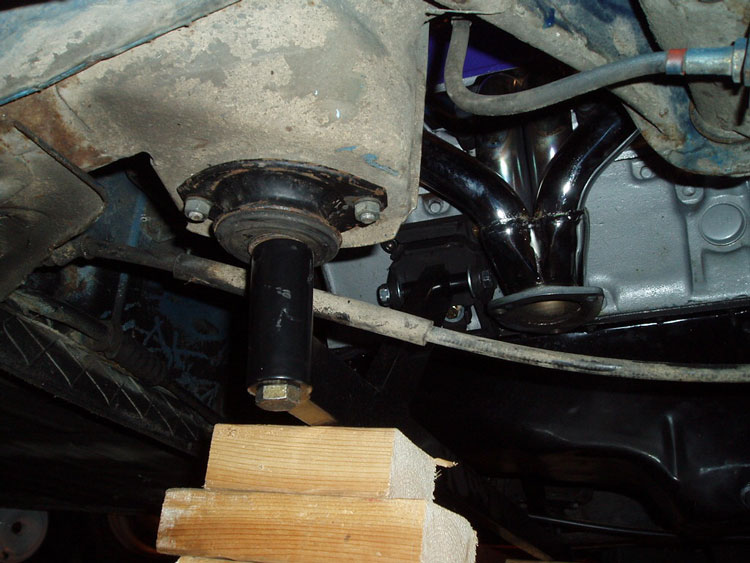
Posted by: John2kx Aug 3 2005, 05:23 AM
For the mounting of transaxle, this is how I mounted mine using 911 sport mounts.
Attached image(s)
Posted by: John2kx Aug 3 2005, 07:32 AM
Here's a little better picture of what the motor mount bar bolts to. What you can't see in this picture, because of the cable in the way, is where your bolt goes through rectangular piece.
Attached image(s)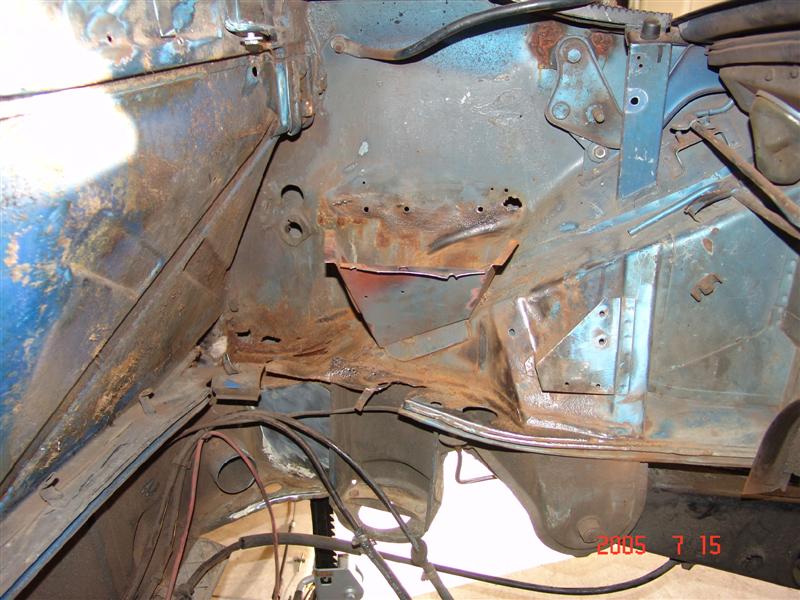
Posted by: Dr. Roger Aug 3 2005, 08:54 AM
John,
As you may have read, I got this car without engine or trans and a box of bolts. That's it. =-)))
Since i've never put one of these things together i'm having to figure out most of the assembly with the clubs members help.
This is what was included in the box...
I think maybe the pair of brackets will be OK. What do you think?
Attached image(s)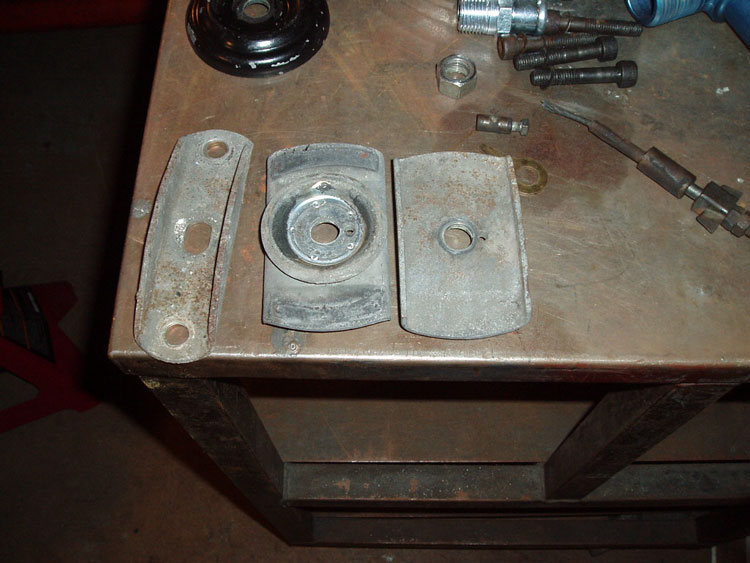
Posted by: John2kx Aug 3 2005, 09:48 AM
The one on the left is for the motor mount/bar and is what your bar will bolt directly to. Hopefully you have another to match.
The other two will be used in conjuntion with the 911 sport mount to secure transaxle. You'll see them at the very top of stack in the pic I attached. These could be replaced with large flat washers and only serve to prevent bolt from pulling through rubber on sport mount. You will notice the large flat mushroom shaped piece at bottom of stack. This is part of the original trans. mount and required a notch be cut to fit around trans. adaptor provided with conversion kit. This one also could be replaced with a large, thick flat washer if you don't have these available.
John
Posted by: Dr. Roger Aug 12 2005, 12:06 PM
Hey John,
Thanks for the PM! As a matter of fact I've been playing "Tour guide" for my g-friends mother who is visiting from Mexico City for the past two weeks. It's been fun. However there's this itch which has not been getting it's scratches....
NO not THAT one... The 914.
We send her off on Sunday but i've got this afternoon to myself so i'll be brief here.]]
Just appreciated your support and yes, she is moving forward.
Without the 911 front motormounts on the 914 the engine will need clearancing. Dammit....
I've switched from "make it look pretty" mode, to "make her driveable" mode.
Posted by: neo914-6 Aug 13 2005, 12:27 AM
| QUOTE (rogergrubb @ Aug 12 2005, 10:06 AM) |
| Without the 911 front motormounts on the 914 the engine will need clearancing. Dammit.... I've switched from "make it look pretty" mode, to "make her driveable" mode. |
Roger,
Is that hammer the firewall AND cut the trunk wall? My 283 had short valve covers so I'm afraid I will have to do some
for the 358I'm to the point of just getting the V-8 running. I have to get it out of the garage so I can fit the engine in Neo914...
Posted by: Dr. Roger Aug 13 2005, 10:25 AM
| QUOTE (Neo914-6 @ Aug 12 2005, 10:27 PM) | ||
Roger, Is that hammer the firewall AND cut the trunk wall? My 283 had short valve covers so I'm afraid I will have to do some for the 358I'm to the point of just getting the V-8 running. I have to get it out of the garage so I can fit the engine in Neo914... |
Good morning Felix,
Yes, I would just plan on getting the engine in place, marking where the drivers side valve cover touches the firewall, and dropping the engine to "adjust" the firewall w/ a BFH.
A few touches w/ a BFH does wonders for so many things. =-)
358? What is that? 350 bored .040 over???
After doing the math on mine... a 350 bored .030 = 355 cid..
Posted by: Dr. Roger Aug 19 2005, 04:23 PM
Progress!!!!
Only thing left on cooling system is to wire water pump and mount radiator. All is plumbed including burp locations.
Fuel pump is mounted and wires run to old relay board.
Need to figure out what wires leading to relay board are for. Desperately. The plan is to NOT use the old relay board. I will do something more up to date.
I already disassembled wiring plug and labeled pin numbers. Now just need to know what they're all for.
Mandatory foot shot is included...
Attached image(s)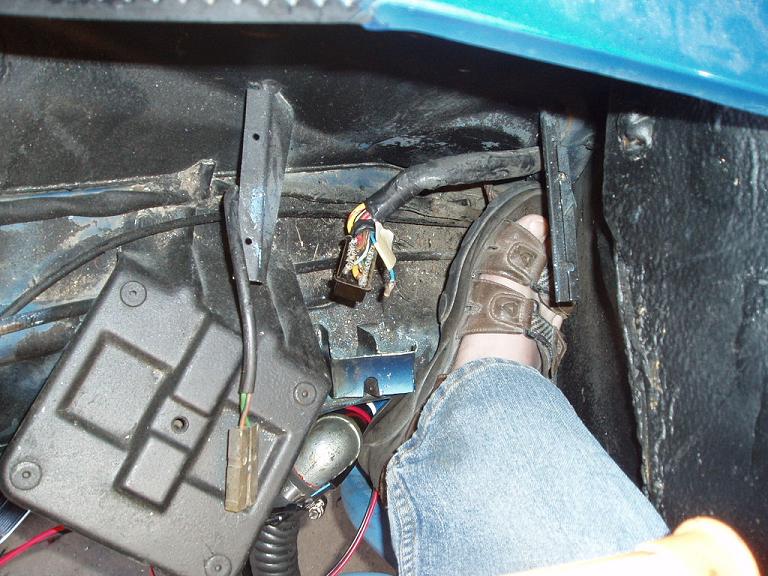
Posted by: neo914-6 Aug 19 2005, 07:38 PM
| QUOTE (rogergrubb @ Aug 13 2005, 08:25 AM) |
| Good morning Felix, Yes, I would just plan on getting the engine in place, marking where the drivers side valve cover touches the firewall, and dropping the engine to "adjust" the firewall w/ a BFH. A few touches w/ a BFH does wonders for so many things. =-) 358? What is that? 350 bored .040 over??? After doing the math on mine... a 350 bored .030 = 355 cid.. |
Got the cid from the PO, here's the specs
I guess you have to factor in the stroke as well:
358 cid - 30 over
Ross Racing Pistons
Eagle H Beam connecting rods – 6 inch
Edelbrock Aluminum Heads – 2.02 – 1.60
Forged crankshaft
Milodon gear drive
Cam – Edelbrock Hydraulic Flat Tappet – 134 – 244 @ 50 .488 - .510 gross
Compression 10:1
1.5 Aluminum Roller Rockers
High Volume oil pump
Two dyno measurements:
418 hp @ rear wheels
402 hp @ rear wheels
~440-460 hp @ motor
Posted by: John2kx Aug 19 2005, 08:18 PM
Roger,
See if you can find what you need here:
http://www.pelicanparts.com/914/914_electrical_diagrams.htm
If I still had my Renegade wiring harness diagram, I could simpify. Maybe Aircooledboy still has these and will chime in.
John
Posted by: Dr. Roger Aug 21 2005, 12:31 AM
| QUOTE (Neo914-6 @ Aug 19 2005, 05:38 PM) |
| Two dyno measurements: 418 hp @ rear wheels 402 hp @ rear wheels ~440-460 hp @ motor |
Pi R squared is volume.
R squared= 4.0602
*3.1416=12.7556
*3.5= 44.6446
*8= 357.1568 cid.
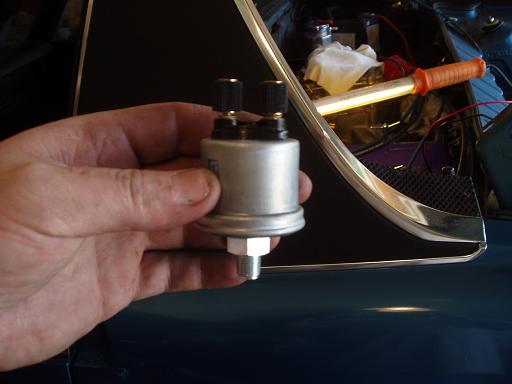
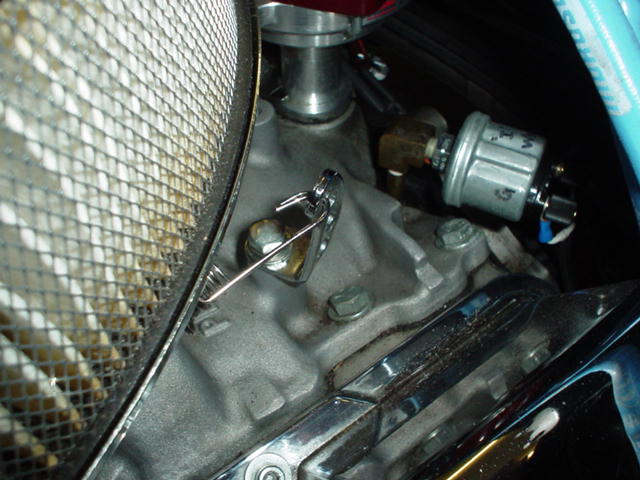
Dang I thought I did this calc before... 2 extra cubic inches is not a bad thing....BTW, what's this sender and where does it go?
Attached image(s)
Posted by: Dr. Roger Aug 21 2005, 12:38 AM
Oh yea', this evenings update....
Ignition is done.
Water pump wiring is done.
Fuel system and wiring is done.
Gas in tank. =-)))
Starter is wired.
Re-ran plug wires and ballast resistor.
Got a blinking red light in the oil pressure warning area of the gauges and I don't know how to fix that.
I did have to cut some of the trunk... not much...
Attached image(s)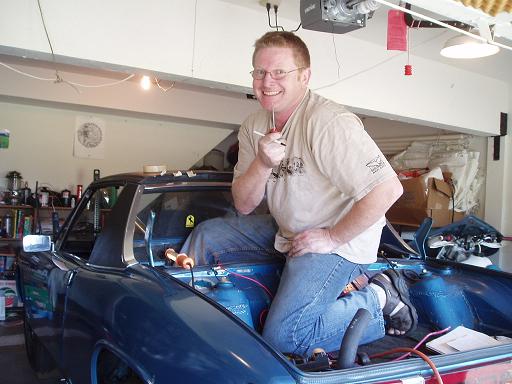
Posted by: aircooledboy Aug 21 2005, 07:44 AM
Nice progress Roger.
I'm not sure if you were serious, but that sender is your oil pressure sender. If you've got a flashing oil light on the dash, you have got some wiring errors. I will see if I can track down the Renegade wiring cheat sheet if you still need it.
Chris
Posted by: John2kx Aug 21 2005, 08:22 AM
| QUOTE (rogergrubb @ Aug 20 2005, 10:38 PM) |
| Oh yea', this evenings update.... Ignition is done. Water pump wiring is done. Fuel system and wiring is done. Gas in tank. =-))) Starter is wired. Re-ran plug wires and ballast resistor. Got a blinking red light in the oil pressure warning area of the gauges and I don't know how to fix that. I did have to cut some of the trunk... not much... |
Roger,
As Chris mentioned, that is your oil sender and screws into block, left side of distributor. Sender is capable of supplying signal for stock idiot light as well as optional pressure gage. There is a mark on each side of sender (i think a G and II) but can't remember off the top of my head which side is for idiot light. Normal operation of oil pressure light is to turn on "solid" with ignition switch on (engine off) and go out when engine is running with normal oil pressure, ie above 8-10 psi.
Note: you'll need a short piece of 1/8" pipe threaded brass (1-1/2"-2") and a 90 degree elbow for clearance. See attached pic.
John
Attached image(s)
Posted by: BIGKAT_83 Aug 21 2005, 08:27 AM
| QUOTE (rogergrubb @ Aug 21 2005, 02:31 AM) |
| R squared= 4.0602 *3.1416=12.7556 *3.5= 44.6446 *8= 357.1568 cid. Dang I thought I did this calc before... 2 extra cubic inches is not a bad thing....BTW, what's this sender and where does it go? |
Hate to take those 2 inches away from you but a stock 350 crankshaft is 3.48 inches not 3.5
Bob
Posted by: John2kx Aug 21 2005, 12:08 PM
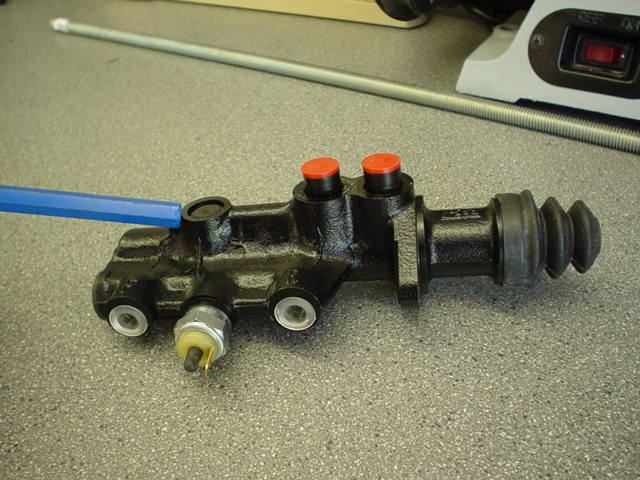
You mentioned a red flashing light in "oil pressure gage area". Parking brake will give red light if activated and is located at top of this gage. You can also get a brake warning light caused by faulty master cylinder. MC has a reset switch on side. Let me know if you need a pic.
John
Posted by: Dr. Roger Aug 24 2005, 07:43 PM
Big thanks to John, Bob, and Mc Mark, for a floor jack. =-)
Hey John, I looked on the Master Cyl and saw little on the side. One electric clip and that's about it. If you have a pic handy that would be great. =-))
Today i'm extending the shift rod and setting up a custom gas pedal hinge.... ala door hinge. (no comments from the peanut gallery please.... )
I straightened the shift rod and it's about 1" short. I cut at the appropriate spot, welded in a 1" piece, and cannot get it in now.
So now i[m going to keep it in half and figure soem sort of disconnect device. easier for an oil change.
Chopped off a Vette muffeler and found that I can snub the end off and it will fit.....
Gotta go. Hot date with a 914... 
Attached image(s)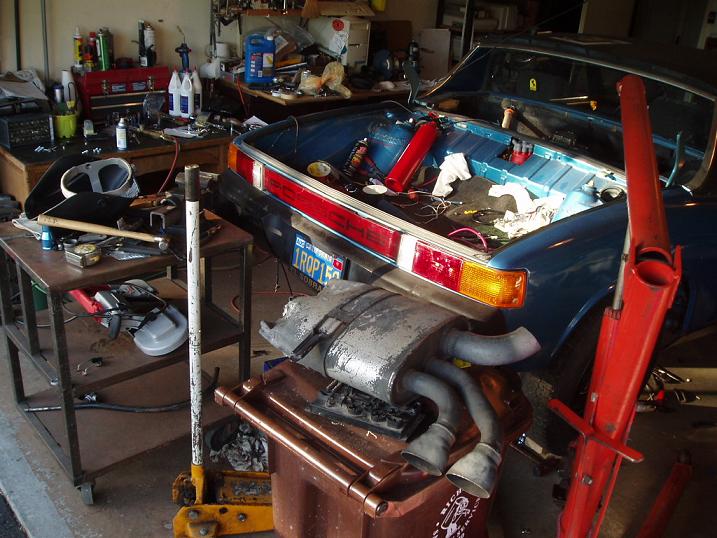
Posted by: ! Aug 24 2005, 08:02 PM
That's an oil sender....
BTW...sent ya PM on the Supertrapps....
Posted by: Dr. Roger Aug 24 2005, 08:11 PM
| QUOTE (SEEMORE BUTZ @ Aug 24 2005, 07:02 PM) |
| That's an oil sender.... BTW...sent ya PM on the Supertrapps.... |
Hey Seymore, =-)
I checked out Summit for some Super Trapps and if I go that route it looks like I can get similar ones for less, new. Thanks though. Best of luck on sellin' 'em. =-)
Posted by: ! Aug 24 2005, 08:20 PM
Last I checked they were 200 EACH...I'm asking 200 for the PAIR....
Posted by: Dr. Roger Aug 24 2005, 10:21 PM
dasdasdasd
Posted by: Dr. Roger Aug 24 2005, 10:22 PM
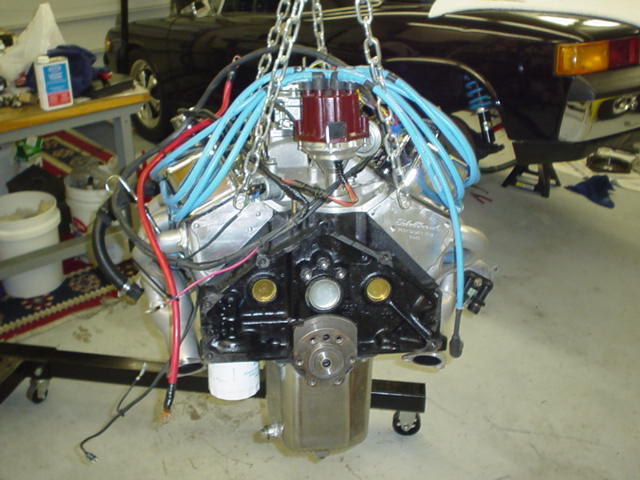
Engine DONE!
Attached image(s)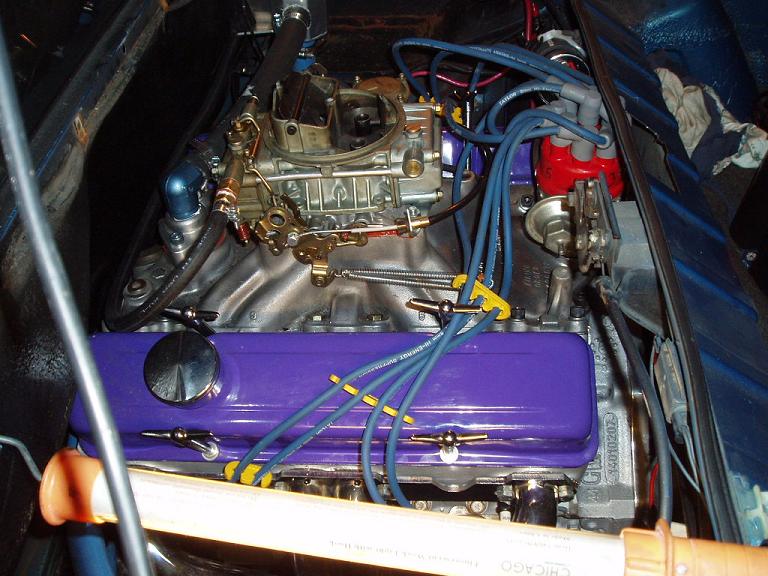
Posted by: Dr. Roger Aug 24 2005, 10:24 PM
Pedal fix.
Tomorrow my buddy John is dropping by to start her up and stand by with a couple of fire extinguishers.....
More to come.
Attached image(s)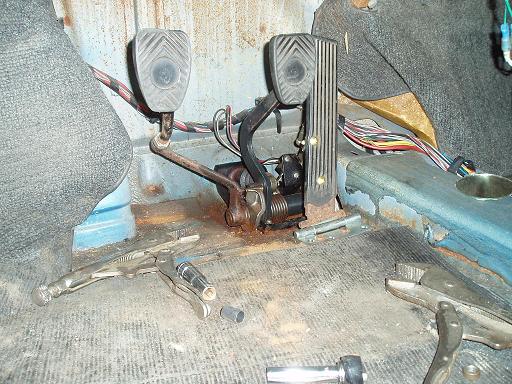
Posted by: Rand Aug 24 2005, 10:34 PM
Keep it up Roger. You're getting close man! I'll avoid the comment about the rod working when it's extended... and just look forward to your next progress report!
Posted by: Dr. Roger Aug 24 2005, 10:57 PM
Hey Mr. Z,
Do you have any close-ups of those SuperTrapps??? =-) (rethinking muffler options)
Rand, i appreciate your comments. And "yes" my rod will be extended fully from now on, 24/7.
I must be forgetting something...
Fuel
Water
Throttle
Clutch
Ignition system
Brakes
Oh yea, I have to wire the cooling fans...... Grrrrrrr...... Well almost done.
Keep ya entertained with a pic of me and Mom at the kite festival in Berkeley...
Attached image(s)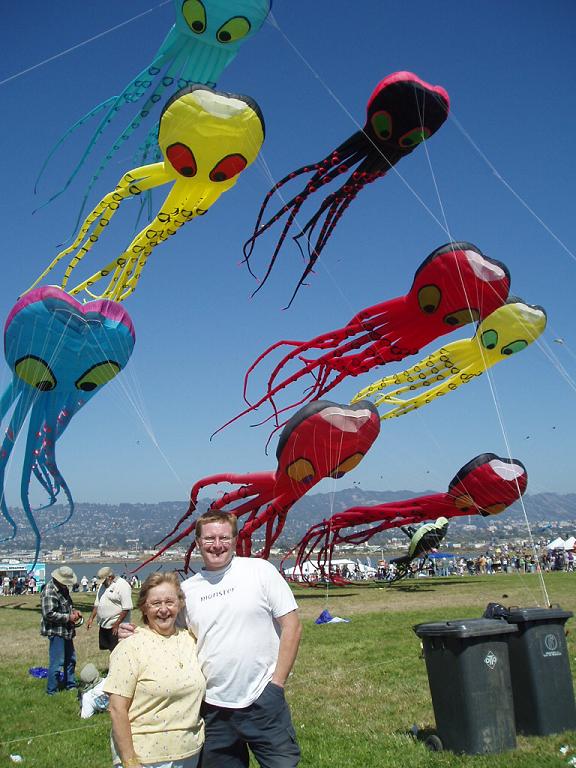
Posted by: redshift Aug 24 2005, 11:01 PM
be very still... and run when i say.. there is an army of flying octopusseses behind you... ok... NOW! GO!!! RUN AWAY!
m
Posted by: Rand Aug 25 2005, 12:16 AM
MILES, you never cease to crack me up..... Ghs342 23 3 432 35 543 4 42...... Yess, 42, after all. Phtblfthphht. Phtff. Ffft. Pht. 42.
Roger... Don't choke your V8 with SuperCrapps. Magnaflows would be nice.
I hope you'll get that manly beast to WCC06!!! Can't wait to see it first hand!
Posted by: John2kx Aug 25 2005, 07:46 AM
| QUOTE (rogergrubb @ Aug 24 2005, 05:43 PM) |
| Hey John, I looked on the Master Cyl and saw little on the side. One electric clip and that's about it. If you have a pic handy that would be great. =-)) |
Roger,
Your close. Push the black button right next to the electrical clip that you located. Note: not the one being pointed out with blue tool in attached pic.
John
Attached image(s)
Posted by: John2kx Aug 25 2005, 08:04 AM
| QUOTE (rogergrubb @ Aug 24 2005, 05:43 PM) |
| I straightened the shift rod and it's about 1" short. I cut at the appropriate spot, welded in a 1" piece, and cannot get it in now. So now i[m going to keep it in half and figure soem sort of disconnect device. easier for an oil change. |
Straighening the shift rod is not required and may be causing you the problem described. I recommend finding another, lengthening it as mentioned earlier and install. Another connection point would be my last choice. Note: shift rod should be made 1-1/4" longer than stock.
Shift rod can contact oil filter if you use one of the taller filters and will prevent install/removal of filter with shift rod installed......BTDT, just use one of the short GM oil filters to eliminate this problem (pic attached)
John
Attached image(s)
Posted by: John2kx Aug 25 2005, 09:08 AM
| QUOTE (rogergrubb @ Aug 24 2005, 08:57 PM) |
| I must be forgetting something... Fuel Water Throttle Clutch Ignition system Brakes |
Roger,
Sounds like your getting close. A few things that come to mind:
Tach: some means of monitoring engine rpm during break in period. The stock tach won't work without modification connected to a v8.
Water temp/oil pressure gages: you mentioned having a oil pressure sender and assume you have that worked out. Water temp. monitoring is crutial to this project.....good gage installed?
Air removal from cooling system: I'd leave fill cap off to allow air removal until your ready to fire it up. You will notice the level drop over several hours. Continue to fill (cup size) until that time comes.
Cooling Fans: in addition to wiring them up for normal operation, I'd have a way figured out (ahead of time) to jumper the fans, providing constant running during the break in of engine. This will eliminate cooling system from playing catchup during this crutial time and prevent you from turning off engine (due to high water temp.) during break in.
Cooling system overflow tank: I don't see one installed in pics and advise using if not already in place. Add a couple of inches of water to tank prior to intial start.
misc.: battery @ full charge?
Posted by: maf914 Aug 25 2005, 11:14 AM
| QUOTE (John2kx @ Aug 25 2005, 07:08 AM) |
| Tach: some means of monitoring engine rpm during break in period. The stock tach won't work without modification connected to a v8. |
I am just reading along and learning as Roger tells the story and John and everbody's offers advise.
I thought I'd suggest a dwell/tach meter if you need a temporary tachometer. You probably have or can borrow one.
Posted by: John2kx Aug 25 2005, 12:23 PM
When you are assured you have all your installation done, this is how I start a new v8 in a 914 (assuming you have a friend there to help):
-Fill port to cooling system open. Extra water available as well as radiator cap.
-Helper starts engine and keeps running until you can set idle to 2200-2500 at carb for 20 minutes.
-Helper bypass fans to run continiously
-Monitor fill port to cooling system. You should observe air bubbles forming and escaping from open port. Add water if you see the level drop. In about 3-4 minutes, water temperature will rise to about 160F, causing it to expand. At this point, install radiator cap. The object here is to allow as much trapped air as possible to excape before closing system up. Caution: Do not vary engine rpm during this procedure. Any drasitic changes in rpm will cause a big mess caused by coolant ejecting from fill port.
-Helper should monitor for leaks, fire, water temp, oil pressure.
-If you made it this far without any problems, turn engine off and burp air from top of radiator when temperature drops to about 170F. When a steady stream of water is visable at petcock, close it off........your now ready to hit the streets.
-I change oil and filter after intial break in or shortly after.
-If your running a kevlar clutch, you'll need to be very carefull for the first 100 miles.
-Between 50-100 miles, retorque ALL your cv axle bolts. This is critical as they will loosen initially with the v8 installed.
-Burping of cooling system: for the first several outings, burp the system by ensuring you have some level of water in recovery tank, open fill port while engine is cool (as in overnight) and start engine and allow to idle. Observe for air bubbles as engine temperature rises, add water if necessary. Heat soak engine by driving at least 20 miles in traffic as well as highway type driving at a minimum. When you get back home, turn off engine and allow air to escape from petcock at top of radiator when engine cools to 170F. During the overnight cool down (minimum of 4-6 hrs.), vacuum from cooling system will draw water from expansion tank back into cooling system.
At this point you should have air removed from sytem and should be able to establish a normal level in expansion tank, ie the same level when completely cooled. If your losing water in expansion tank, you've got a problem.
Have helper keep beer cold or make beer runs as necessary.
Good luck,
John
Posted by: 914GT Aug 25 2005, 12:41 PM
I'd recommend opening the radiator bleeder petcock while you are initially filling the system. Leave it open until a stream of coolant comes out then close it. Normally I never have to touch it again.
Posted by: Dr. Roger Aug 25 2005, 07:54 PM
C5 'Vette muffler getting "shortened" so it'll actually fit.......
Attached thumbnail(s)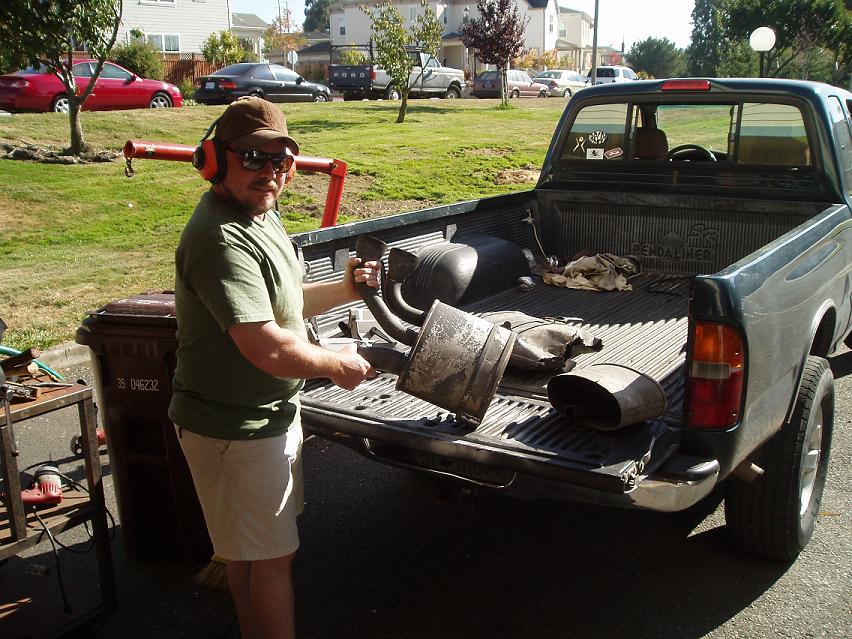
Posted by: Dr. Roger Aug 25 2005, 07:56 PM
Vette muff before gutting a little bit.
Attached thumbnail(s)
Posted by: Dr. Roger Aug 25 2005, 07:58 PM
Getting gutted.
For that "non-factory" sound.........
Attached image(s)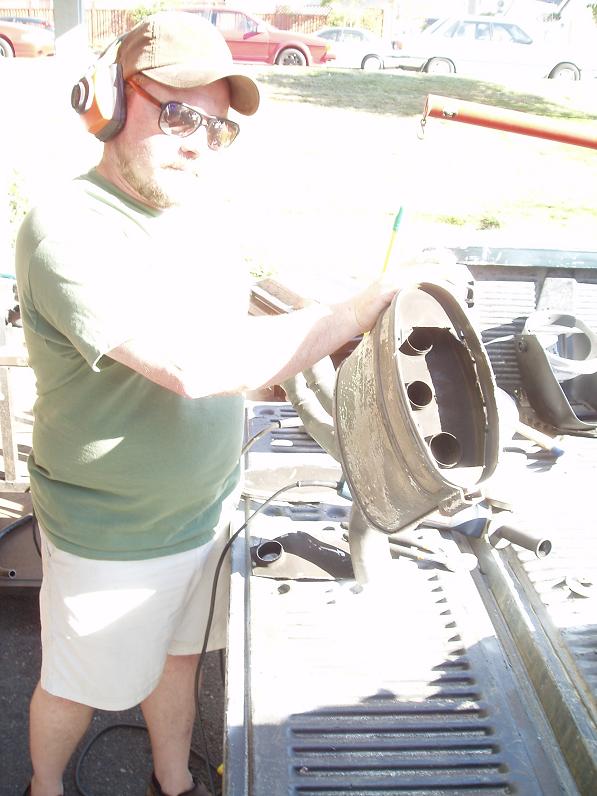
Posted by: Dr. Roger Aug 25 2005, 08:00 PM
Dumping towards the outsides.
Attached image(s)
Posted by: Dr. Roger Aug 25 2005, 08:01 PM
or dumping towards the center?????
I think the center... =-)
Attached image(s)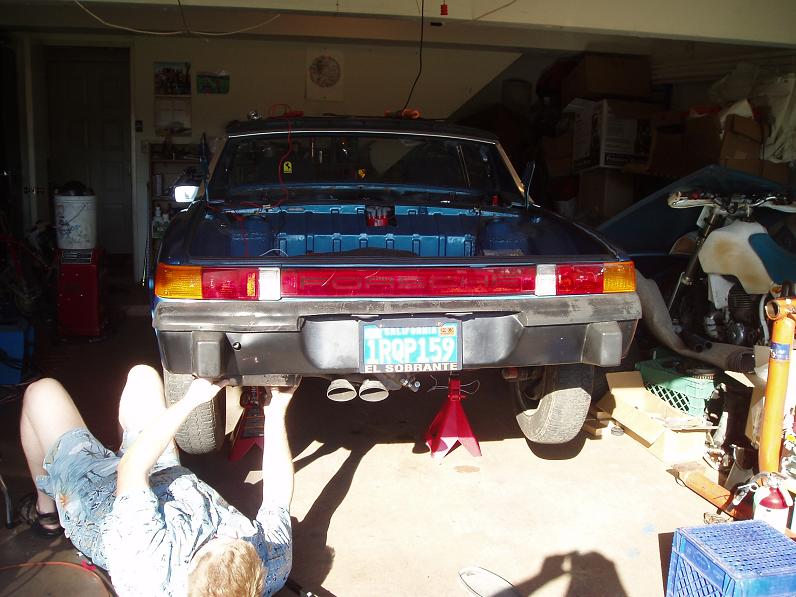
Posted by: Dr. Roger Aug 25 2005, 08:29 PM
Oh yea', forgot to add....
Fired her up today. First time started in the car.
Cooling system got burped and then it worked fine.
At first there was an air pocket in the waterpump which allowed for ZERO pumping................
Started warming up the motor and pouring water in and squeezing the hoses and venting the air bleeds and "Walla". Water started to circulate. Yahooooo.
After tonights welding party and tomorrows exhaust pipe purchase... Bebe should be ready for Hooters in Dublin on Sat afternoon with the rest of the V8 914's....
Corvette "over axle" pipes. With mufflers found on Craigslist $35.00 =-)
Attached image(s)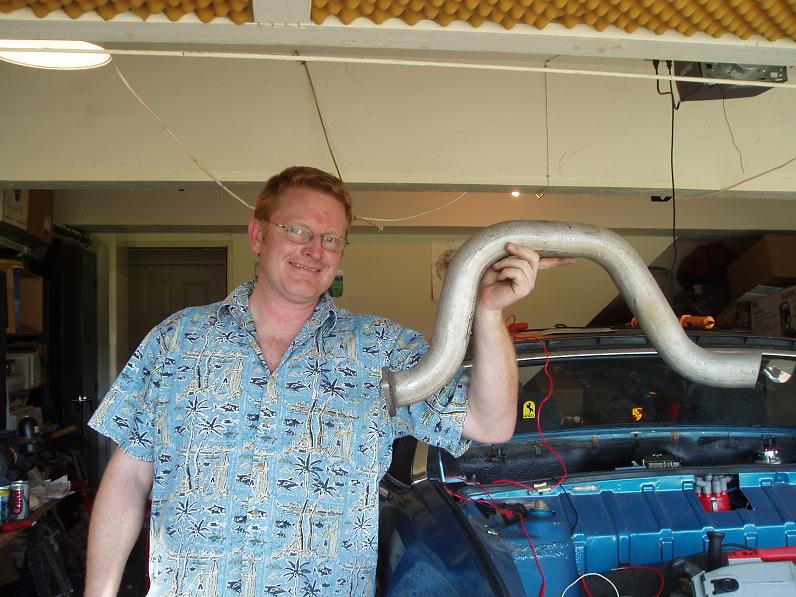
Posted by: Dr. Roger Aug 29 2005, 06:42 PM
OK, my official consensus is that "I suck". My idea of using the C5 muffs was a good idea but require too much modification for my skill set.
And NO muff shop will touch them... Even after I told them I would sign a hold harmless agreement.... Whatever....
So now i'm looking at a set of Flowmaster 40's.
2 1/2" in/out. Any thoughts on them??
P/N FLO-42543
http://store.summitracing.com/default.asp?target=partdetail.asp&autofilter=1&Ntt=muffler&N=0&part=FLO%2D42543&autoview=sku&Ntk=KeywordSearch
Posted by: John2kx Aug 30 2005, 05:33 AM
The flowmaster 40 sounds good outside of car but may get on your nerves due to the noise in cabin.
No mater which muffler you get, I recommend a offset inlet and outlet for ease of mounting and adjustment.
John
Posted by: SteveSr Aug 30 2005, 08:53 AM
Roger,the project looks great!....just curious,do you weld  with shorts and sandals on???
SteveSr
Posted by: skline Aug 30 2005, 09:26 AM
Hey Roger, I just read through your whole thread here, I will attach a picture of my muffler setup for you to look at, it is using a single dual inlet, dual outlet Walker muffler for a Camaro/Trans Am. The sound is nice, quiet on the inside and not really loud outside. Most people like the way it sounds. I know I do. Here are the pictures.
Attached thumbnail(s)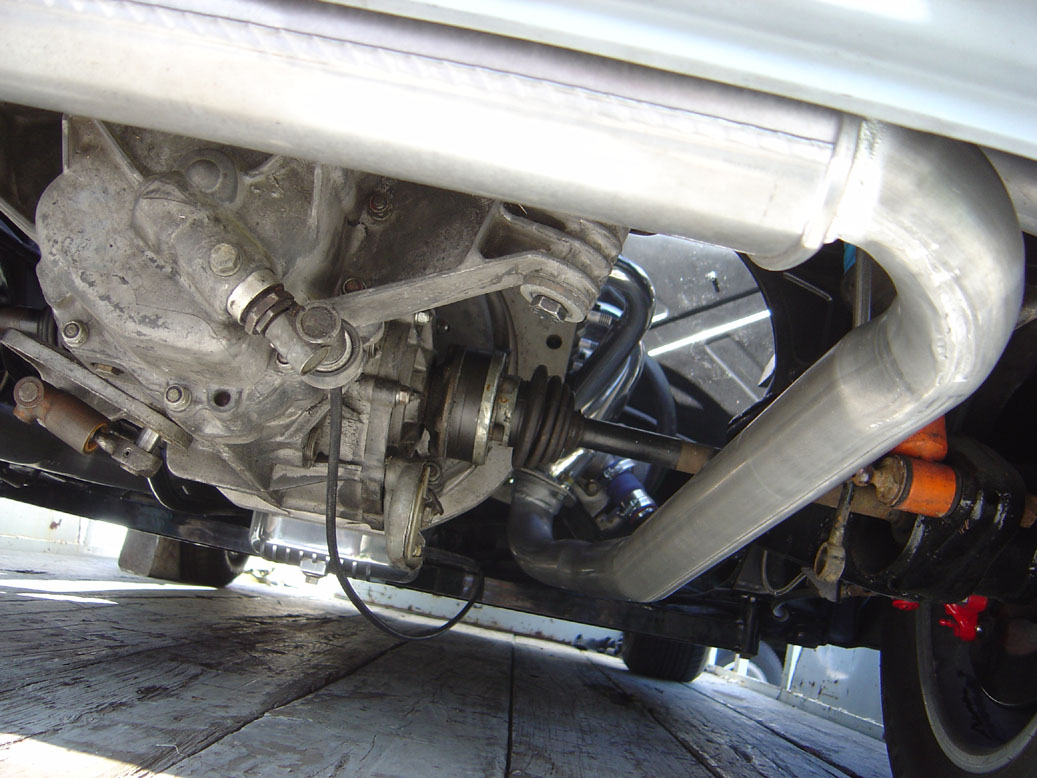
Posted by: skline Aug 30 2005, 09:27 AM
Next
Attached thumbnail(s)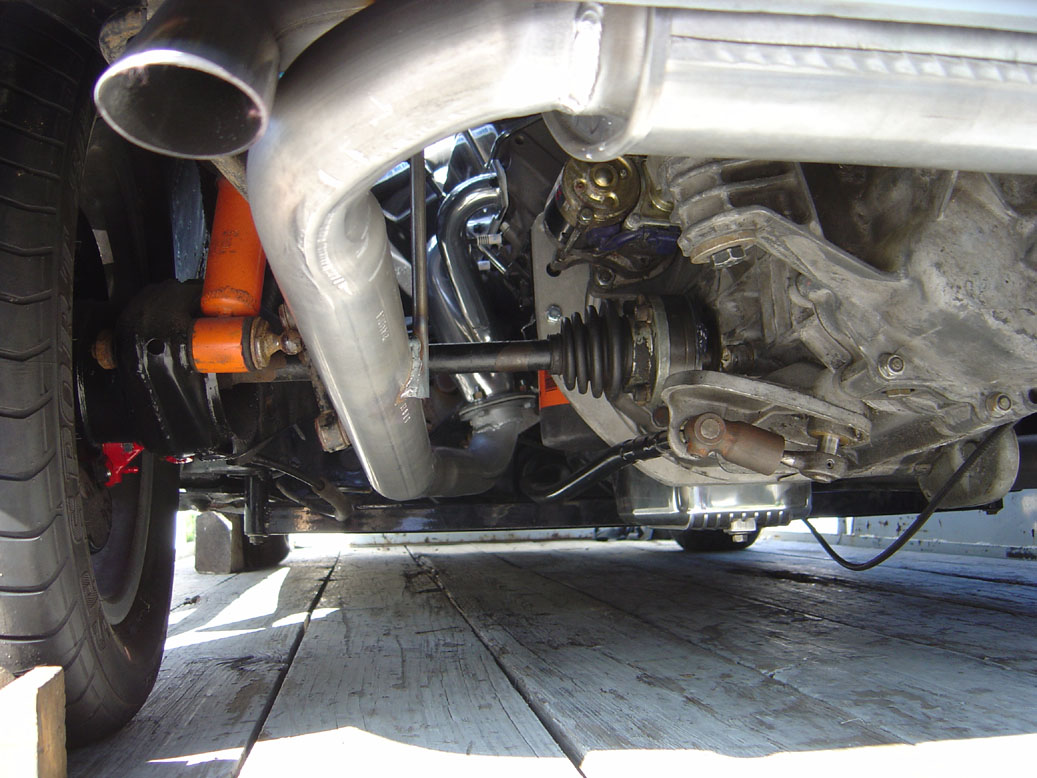
Posted by: skline Aug 30 2005, 09:28 AM
The whole system out of the car.
Attached thumbnail(s)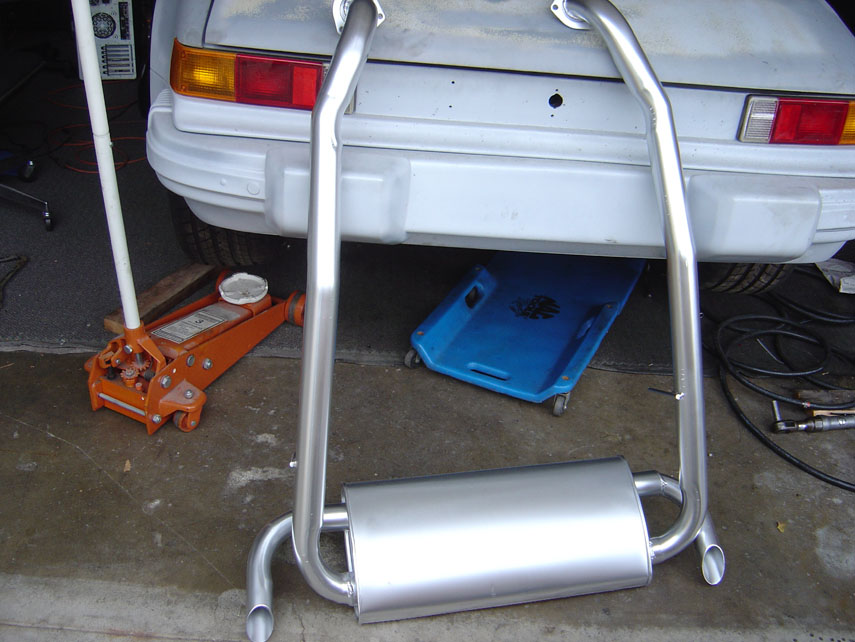
Posted by: skline Aug 30 2005, 09:29 AM
And this is what it looks like from behind
Attached thumbnail(s)
Posted by: andys Aug 30 2005, 11:11 AM
Scott,
That is exactly the muffler I am considering.....I have seen them before, but didn't know the specific application. What year(s) Camaro/Trans-Am is it form?
Looks very nice.
Andy
Posted by: skline Aug 30 2005, 11:15 AM
I think they are from 82 to 92 but I could be mistaken. I had a 93 Trans Am and it was similar so they could have been the same. I know the 80's cars used this muffler.
Posted by: Dr. Roger Aug 30 2005, 11:22 AM
John,
Wow, it's amazing how things change in one day...
First i'm thinking these C5 muffs can be shortened and installed.
Then i'm thinking no one wil help install them.
Tehn I think Flowmaster 40's.
Then I go by a friend of a friends muff shop this morning as a last ditch effort and he say's no problemo' on the Vette muffs.
This mornings turned out to be a great morning!
Yesterday a new Edelbrock 750 double pumper went on and got a nice tune. (Not under load yet) but it idles real SICK (good). I love the easy access to primary air screws and the secondaries even have an easy adjustment also.
I feel like i got my cake and eat it too.
Today i get to actually weld the shift rod, attach the axles, and add a ground strap from the tranny to the body (little starting issue and i'm guessint this will fix it.).
Cheers to everyone! Only a week and a half of vacation left...
Anyone need a hand on their teeners while i'm off???
Attached thumbnail(s)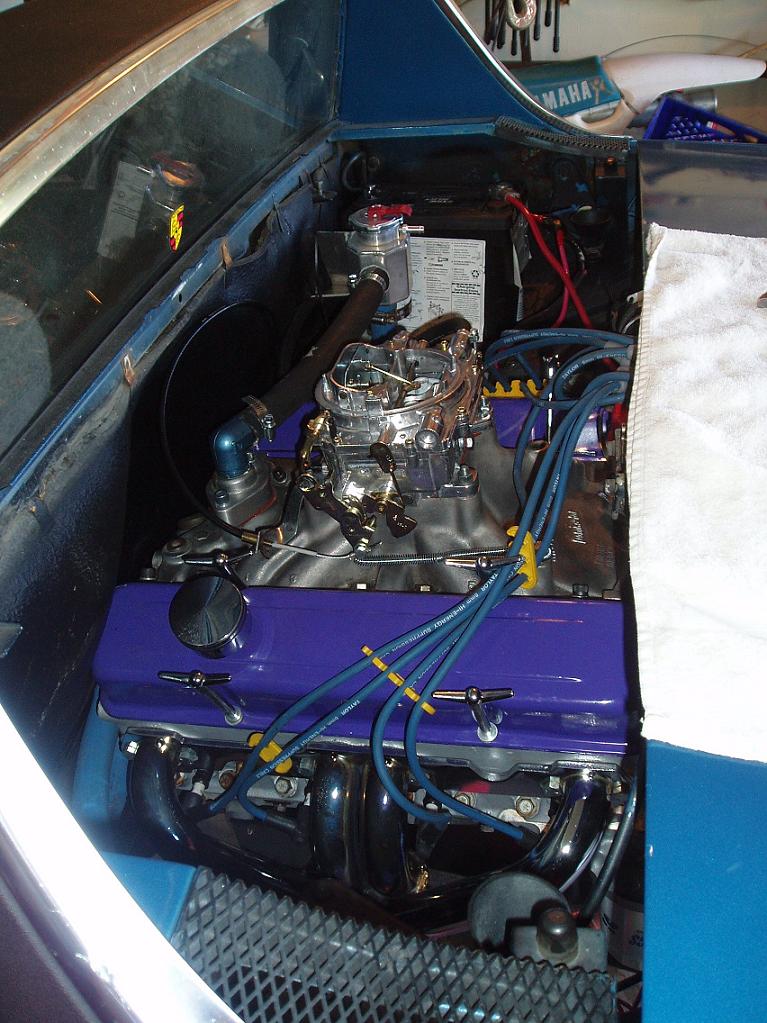
Posted by: skline Aug 30 2005, 11:29 AM
Roger, dont worry about everyone elses teeners, get yours done, you are so close to driving it. Just make sure you double check everything before you romp on it. If your trans is stock, dont romp too hard, they are not as strong as we are led to believe. Ask me how I know. Watch your CV bolts also, check them after driving it 100 miles or so and continue to do so every so often. The trans and the CV's are your weakest links.
Oh, and despite what anyone says, these cars flex under power, I have cracks all over the car to prove it. Places you would not expect like the top of the sail panels. The power really twists these cars. I even installed the chassis stiffening kit in the rear and the boxed trailing arms. I am going to install the Engman inner long kit and hope that will make a difference.
Posted by: Dr. Roger Aug 30 2005, 11:39 AM
| QUOTE (SteveSr @ Aug 30 2005, 07:53 AM) |
| Roger,the project looks great!....just curious,do you weld with shorts and sandals on??? SteveSr |
Just in case anyone (Steve Sr.) wants to know if i weld with shorts and sandals on.........
Yes.
Like J. Mellencamp says, "Hurts soooo good".
Posted by: Dr. Roger Aug 30 2005, 11:40 AM
| QUOTE (skline @ Aug 30 2005, 10:29 AM) |
| Roger, dont worry about everyone elses teeners, get yours done, you are so close to driving it. Just make sure you double check everything before you romp on it. If your trans is stock, dont romp too hard, they are not as strong as we are led to believe. Ask me how I know. Watch your CV bolts also, check them after driving it 100 miles or so and continue to do so every so often. The trans and the CV's are your weakest links. Oh, and despite what anyone says, these cars flex under power, I have cracks all over the car to prove it. Places you would not expect like the top of the sail panels. The power really twists these cars. I even installed the chassis stiffening kit in the rear and the boxed trailing arms. I am going to install the Engman inner long kit and hope that will make a difference. |
Scott, how did you blow your tranny? What's the story behing it?
Posted by: neo914-6 Aug 30 2005, 01:13 PM
| QUOTE (rogergrubb @ Aug 30 2005, 09:22 AM) |
| add a ground strap from the tranny to the body (little starting issue and i'm guessint this will fix it.). Cheers to everyone! Only a week and a half of vacation left... Anyone need a hand on their teeners while i'm off??? |
BTDT, I had a choke cable that was grounding the drivetrain until I re-connected the strap!
Good progress, drive it to my place and finish mine
Posted by: Dr. Roger Aug 30 2005, 02:45 PM
Shift rod is welded and adjusted. Sweeeeeet!
Noted 4 disconnected wires near the shift boot.
Should I be concerned?
Some before and after pics.
Thanks again Aaron. =-)
Attached thumbnail(s)
Posted by: Dr. Roger Aug 30 2005, 02:48 PM
Wires disconnected.....
Wuzup wit dat?
Attached thumbnail(s)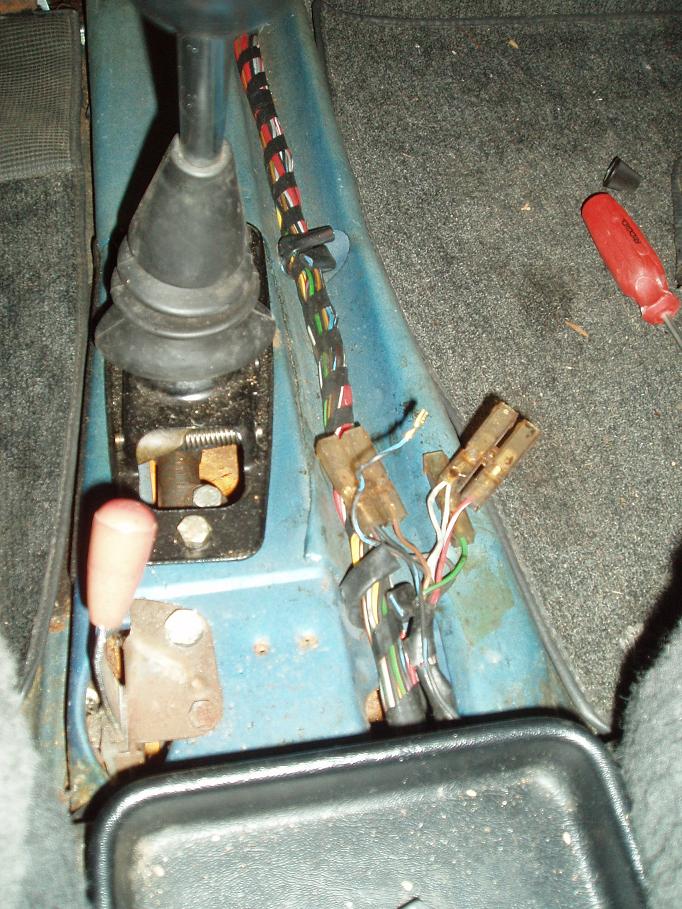
Posted by: Dr. Roger Aug 30 2005, 02:50 PM
Shifter adjusted and lookin good. Feels good. =-)
AAA picks up the car in the morning for her little journey to the muff shop.
Then it's off to the races.. so to speak.
Attached thumbnail(s)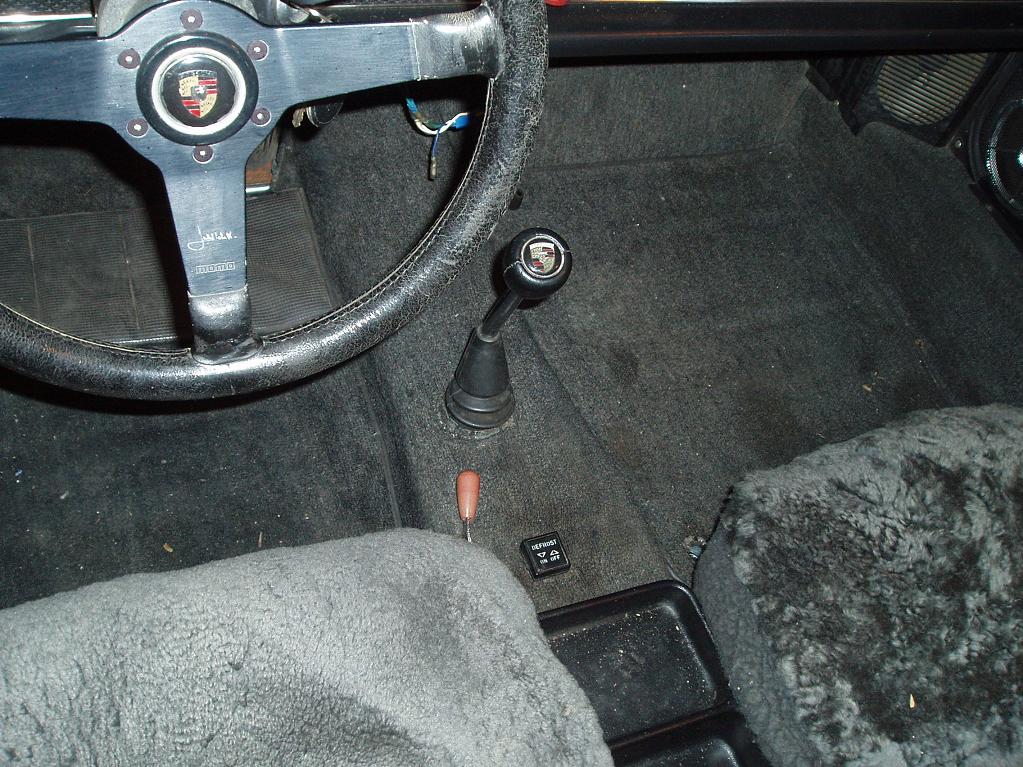
Posted by: Aaron Cox Aug 30 2005, 02:54 PM
disconnected wires are for your center console roger
AA
Posted by: John2kx Aug 30 2005, 04:12 PM
Roger,
Looks like your getting really close. The only thing I noticed was lack of a recovery tank.
Wish I were closer.......would really like to see your progress in person.
John
Posted by: Andyrew Aug 30 2005, 04:34 PM
Interesting thing your doing with the mufflers.
btw, I wouldnt worry about breakin anything with the trani or cv's with those tires under there....
That should prove to be quite the burnout mobile.... lol
Posted by: Dr. Roger Aug 31 2005, 10:30 PM
OK guys and gals....
It's running. And how???
Like CRAZY fast!
The Corvette muffs are in and look and sound fantastic.
I could have not done it without all of your help.
Including Miles, ... Baaaaah. That's "thank you" in goat talk.
\
Now my sweetie pie, who knows this car may break down at any minute, wants to go driving on little getaways or day trips.
I can't wait.
Attached thumbnail(s)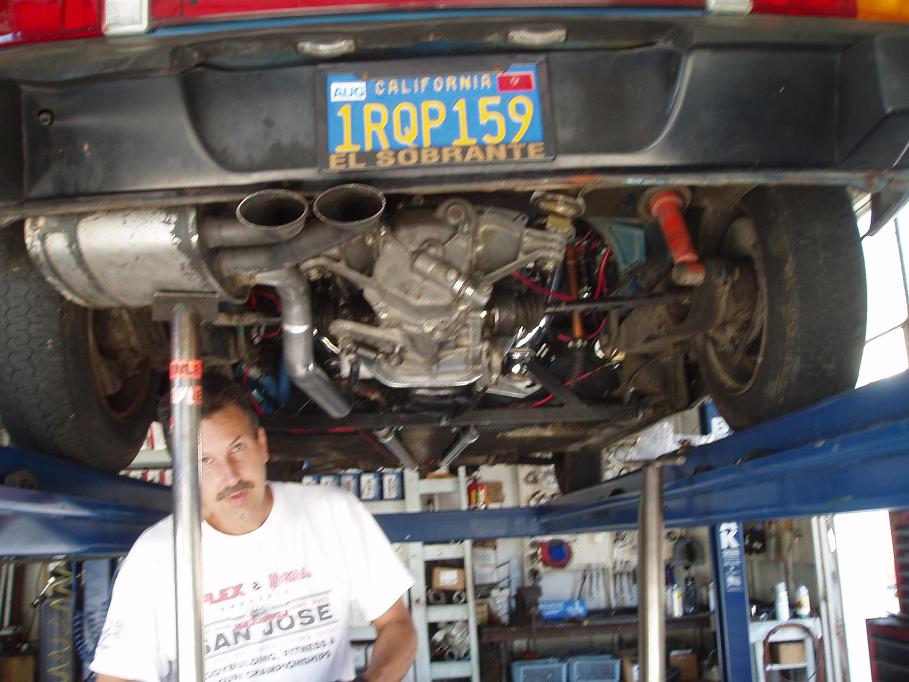
Posted by: Andyrew Sep 1 2005, 01:24 AM
How could those 165's hook up?
GIve us an exhaust vid!!!!
I wana know what it sounds like!
Posted by: redshift Sep 1 2005, 01:32 AM
OH NO! First New York! Then New Orleans... now.. Right e'ffin' here is in trouble!
Speedy..
M
Posted by: Dr. Roger Sep 2 2005, 12:08 AM
| QUOTE (Andyrew @ Sep 1 2005, 12:24 AM) |
| How could those 165's hook up? GIve us an exhaust vid!!!! I wana know what it sounds like! |
Amazingly those 165's do well in a straight line. I'm not shock loading the drivetrain right now. Heck the engine is barely broke in. I'm running it a little conservatively but as i develop more confidence i'm sure there will be more postings from me regarding wider rubber. =-)
I've never owned a car that handled so well. thats not saying much though.
Alritey then. Upon request, the exhaust video Andy.
http://home.comcast.net/~rogergrubb/newexhaustsystem.wmv
Attached image(s)

Posted by: neo914-6 Sep 2 2005, 12:35 AM
That ear to ear grin, priceless! 


Posted by: John2kx Sep 2 2005, 07:15 AM
Roger,
Looks like all the hard work paid off!! Engine sounds great too.
Be carefull passing large trucks over 100 mph with those skinny tires. BTDT.......it was not pretty and I feel lucky to be here now. I'm sure you have already experienced, it takes very little to reach 100 mph now.
John
Posted by: Andyrew Sep 2 2005, 11:56 AM
Sounds great!!!!
Glad you got yours running!!
Sounds like you have a little tuning to do, A dyno will fix that right up.
We'll have have a little heads up on the freeway (50-80 or sumtin)
I wana know what your engine does compared to mine. (yours will obviously be faster when tuned, I dont have heads yet)
Andrew
feels good, dont it?!
Posted by: Aaron Cox Sep 2 2005, 12:04 PM
nice rumble. too cool.
get some meaty tires before you kill yourself
Posted by: Dr. Roger Sep 2 2005, 12:22 PM
| QUOTE (Andyrew @ Sep 2 2005, 10:56 AM) |
| Sounds great!!!! Glad you got yours running!! Sounds like you have a little tuning to do, A dyno will fix that right up. We'll have have a little heads up on the freeway (50-80 or sumtin) I wana know what your engine does compared to mine. (yours will obviously be faster when tuned, I dont have heads yet) Andrew feels good, dont it?! |
=-))))))))
Andyrew, You gotta' deal. =-))
As it is, the timing is a little retarded. It's already a handful as it is though. 8 more degrees advance will produce a heck of a lot more torque.
I'm kinda scared of it. I was shaking for a half an hour after driving it last night.
Today Patricia and I are going to cruise it up in the hills to just shake it down for troubles before going on the "dream drive" up the coast.
I have 2 more uses on the AAA card before the end of the year. We'll post pics of our afternoons adventures this evening.
Posted by: Andyrew Sep 2 2005, 01:08 PM
NIce!
But please...
spend the 200 bucks and buy some new tires.
Dont kill yourself with something stupid.. lol
(do you have diff rims yet? or are you running those rims??)
http://www.tirerack.com/tires/tires.jsp?tireMake=Kumho&tireModel=HP4+716&vehicleSearch=false&partnum=06HR5HP4716&fromCompare1=yes&place=0
http://www.tirerack.com/tires/tires.jsp?tireMake=Kumho&tireModel=HP4+716&vehicleSearch=false&partnum=06HR5HP4716&fromCompare1=yes&place=0
http://www.tirerack.com/tires/Compare1.jsp?resultsNumberSelected=Y&displayResults=10&width=195%2F&diameter=15&ratio=65&startIndex=0&search=true&pagelen=20&pagenum=1&pagemark=1&RunFlat=All&shipquote=N&model=&sortCode=&sortValue=0
GL!!!!
Posted by: Dr. Roger Sep 2 2005, 02:02 PM
| QUOTE (Andyrew @ Sep 2 2005, 12:08 PM) |
| NIce! But please... spend the 200 bucks and buy some new tires. Dont kill yourself with something stupid.. lol (do you have diff rims yet? or are you running those rims??) http://www.tirerack.com/tires/tires.jsp?tireMake=Kumho&tireModel=HP4+716&vehicleSearch=false&partnum=06HR5HP4716&fromCompare1=yes&place=0 http://www.tirerack.com/tires/tires.jsp?tireMake=Kumho&tireModel=HP4+716&vehicleSearch=false&partnum=06HR5HP4716&fromCompare1=yes&place=0 http://www.tirerack.com/tires/Compare1.jsp?resultsNumberSelected=Y&displayResults=10&width=195%2F&diameter=15&ratio=65&startIndex=0&search=true&pagelen=20&pagenum=1&pagemark=1&RunFlat=All&shipquote=N&model=&sortCode=&sortValue=0 GL!!!! |
Andy and everyone,
I am in the market for a wheel/tire upgrade. On a budget. =-)
I want to stay 4 bolt for now because I can't afford the Carrera front end/brakes that I need soon.
If I was smart I'd do the Carrera front ASAP and put some temporary 5 bolt wheels on her until I can affford some wheels/tires I really like.
Easy is saying a Carrera front end will run me about $800........
Any suggestions????
Posted by: Rand Sep 2 2005, 02:41 PM
First, relax and enjoy your new ride a little. Take it easy, break it in, keep the ear to ear grins flowing.
Posted by: Dr. Roger Sep 3 2005, 12:53 AM
Todays shakedown cruise went something like this...
Took off for Berkeley Marina. Noted temps very slowly climbing.
I have the fans on a manual switch and they were on.
At the marina she topped out at 200 degrees.
Posted by: Dr. Roger Sep 3 2005, 12:54 AM
Bebe and her owner.
Attached image(s)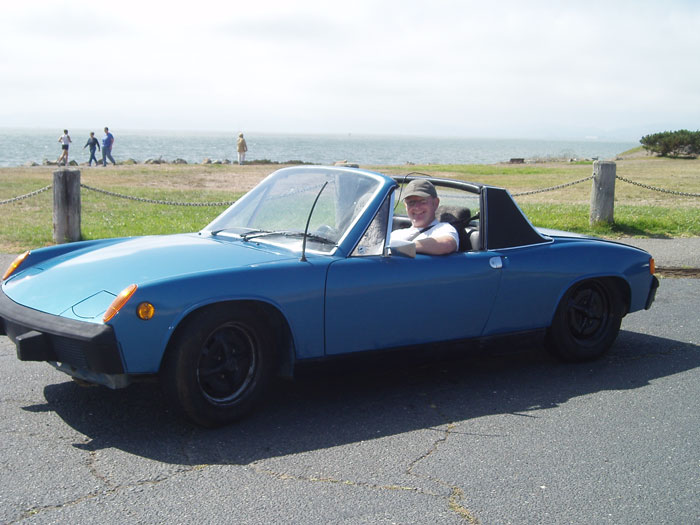
Posted by: Dr. Roger Sep 3 2005, 12:57 AM
Then we cruised up University Ave in gridlock traffic. Temps continued to climb. I got out of stop and go, took surface streets up to Spruce for a light climb up into the hills.
That's where the temps got too high. Had to shut her down.
One use left on AAA card...... for the year.
Now I really feel like a 914 owner.
Attached image(s)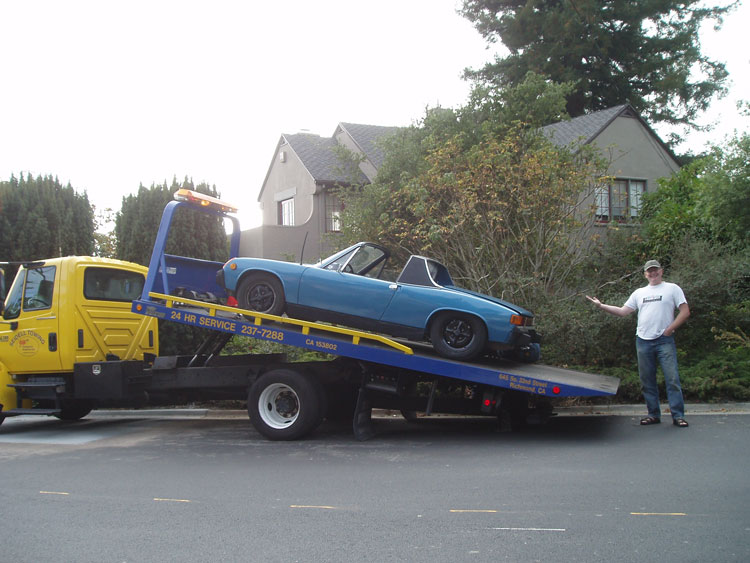
Posted by: McMark Sep 3 2005, 01:06 AM
I have some steel five lug wheels you can borrow for as long as you want.
Posted by: Dr. Roger Sep 3 2005, 01:37 AM
| QUOTE (McMark @ Sep 3 2005, 12:06 AM) |
| I have some steel five lug wheels you can borrow for as long as you want. |
Mark, Dude.
I will definately keep that in mind. Seriously.
Now I need that winning lotto ticket for the front end... Seriously also.
Posted by: Dr. Roger Sep 3 2005, 01:47 AM
So here's what I think is the overheating culprit.
It does not have an enclosed shroud for cool air so warm air can recirculate. I think.
But I was also thinking that a well burped sealed system would still be fine as it is.
Guess not.
For the seasoned V8 guys, is this fan shroud OK? Modification suggestions?
Attached image(s)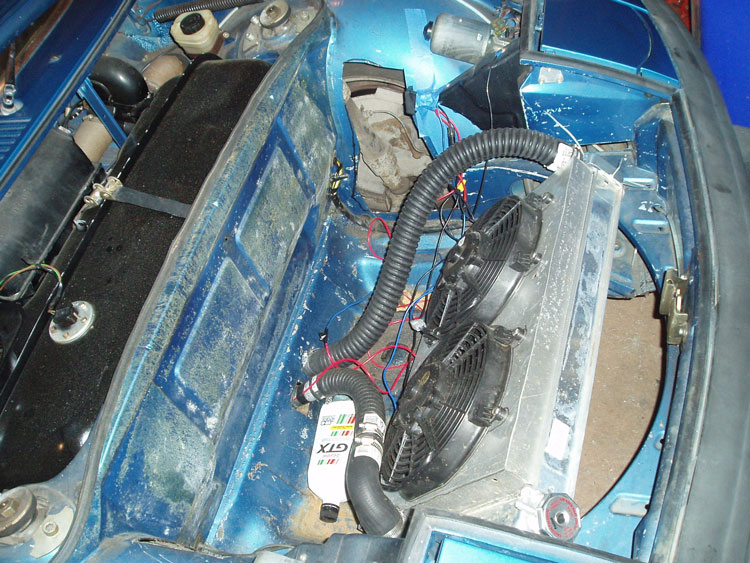
Posted by: Dr. Roger Sep 3 2005, 01:49 AM
Exhaust wheel well holes big enough?
(note: only the finest zip ties were used to hold this radiator in place.)
Attached image(s)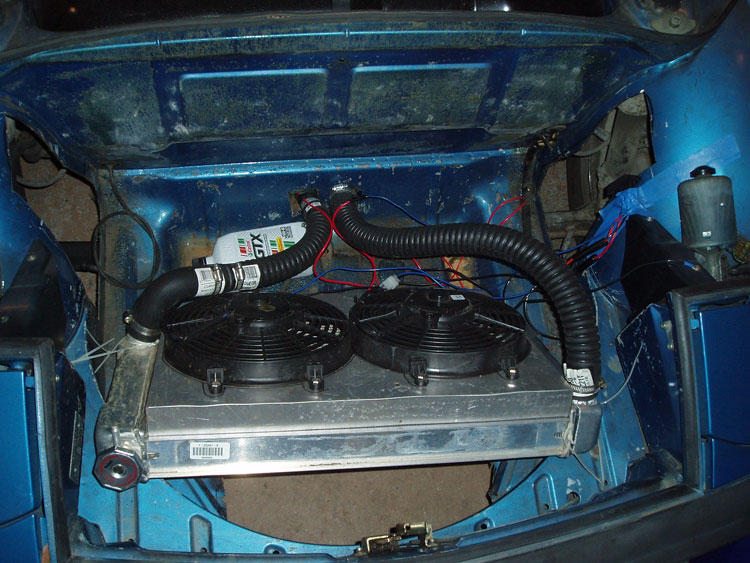
Posted by: turbo914v8 Sep 3 2005, 09:33 AM
The fans you have should work well. Your problem is that you MUST build a shroud that encloses the fresh air intake for the rad. Air will travel the path that offers the least amount of resistance. In your case the path of least resistance is over the rad. The shroud will make the air pass through the rad. I am surprised that you did not over heat sooner.
Posted by: 914GT Sep 3 2005, 09:49 AM
Paul is right. And at low speeds a barrier between the intake and exhaust sides of the radiator is required to prevent recirculation. What you have now lets the heated air get pulled back through the radiator and that will severely reduce the cooling efficiency.
Posted by: John2kx Sep 3 2005, 06:29 PM
Roger,
I see two radiator caps installed (one front and back) with no recovery/expansion tanks to collect coolant. If your running your setup as shown in pics, your sucking air back into cooling system everytime you cycle from hot to cold in addition to loosing water.
My two quart expansion tank would easily increase level by over one quart during a heat cycle in summer weather. Without the expansion tank, this coolant is being pushed overboard.
Your fender cutout size is fine.
Shroud the front of rad. as already mentioned.
Do you have a additional opening in front of car other than what you cut out in trunk floor?
One other IMPORTANT thing..........unless you crossed your radiator hoses somewhere between the front of car and water pump, your plumbed up backwards, ie sucking out the top of radiator instead of bottom.
John
Posted by: Dr. Roger Sep 3 2005, 07:42 PM
John,
YOU get the grand prize for my secret mistake.... Yes the water pump is plumbed backwards..... to the radiator.
I'm going to switch the hoses up front tomorrow.
i'm thinking of going with a fiberglass setup up front to route cool air.
with what little experience i have, i should be able to do a decent job.
more updates to come.
i'm off the next 5 days for vacation. let's see if it gets done.... 
Posted by: John2kx Sep 4 2005, 09:48 AM
Roger,
Don't forget the expansion tank! With your "2" radiator cap installation, you should pick one to feed and receive from expansion tank. I recommend the higher point in your engine bay. For this to work you need to have the radiator cap in front to have a higher pressure relief or plug the overflow line. RH recommends a 16lb. cap with their cooling system. You could also go with a 20lb. cap in front and the 16lb. at your fill port and get the same results.
Connecting the radiator to pump correctly and installation of expansion tank may work without the front ducting but I doubt it. It wouldn't hurt to give it a try, just don't veer too far from home.
You could use cardboard, foam and duct tape to temporarily fab up a duct to see if the sizing and path work prior to spending several days with fiberglass.
Your system has got to be full of air given the plumbing error and lack of exp. tank. I recommend going back through the burping procedure outlined earlier to remove as much air as possible prior to hitting the road again.
John
Posted by: Dr. Roger Sep 5 2005, 12:29 AM
Just in case there's anyone lurking, who has never driven a V8 914, and is wondering what it's lke to drive one...
Well let's just say, my hands were shaking for a half an hour after going to get a video 2 miles away. I never.........
This car is sooooo dang fast and fun to drive. I've been riding "go fast" bikes mostly, and lately, off road trail riding/moto-X.
I can't picture many fu-fu drivers behind the wheel of this beast.
Everything happens fast except the braking..... 
Manual steering (albeit, light and responsive)
Clutch is light and consistent.
Throttle is very responsive but watch out for too much throttle... especially 'round turns. Simple left or right turns can become reverse lock turns at will.
Even starting out in third gear is almost effortless. Not for the clutch, obviously.
Bebe is my first 914 and I have no regrets doing this project.
Next: Buy stock in AAA. =-)
There is lots of work still to be done.
There are some issues with engine heat and shimming the starter just right.
Those issues will be addressed immediately.
Other than that she's a driver.
Thanks again all.
Bebe tucked in for the night.
Attached thumbnail(s)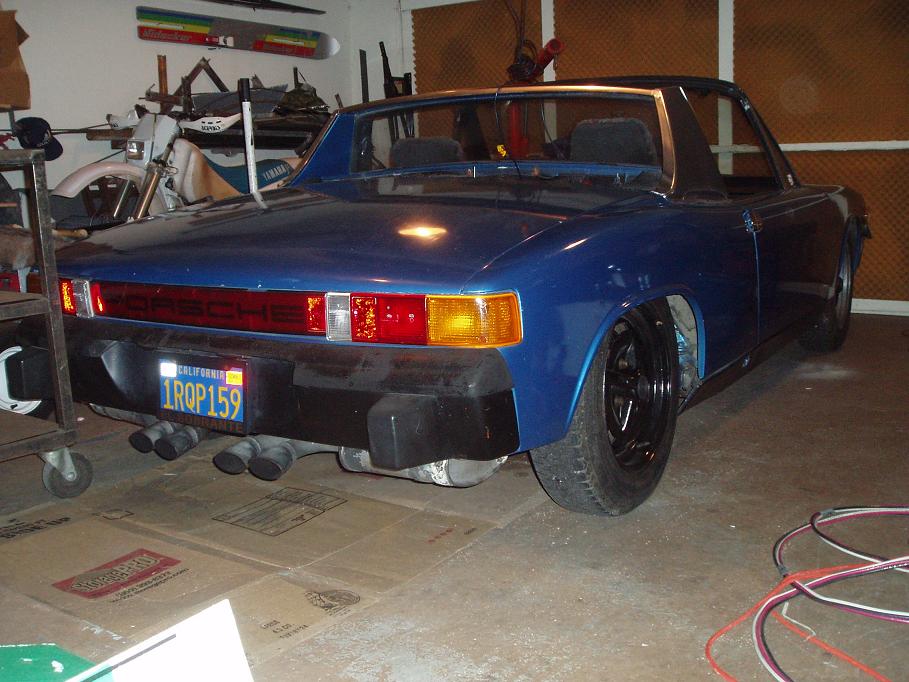
Posted by: Andyrew Sep 5 2005, 12:47 AM
Yes, get brakes...
At least invest 200 bucks and get STICKY pads.
Oh, and 50 bucks in sheet metal and pop rivets.
OH ya, if you have a little nipple thing on the radiator fill.. you HAVE to either plug it off, or have an expansion tank on it.
Andrew
Posted by: Dr. Roger Sep 5 2005, 01:03 AM
| QUOTE (Andyrew @ Sep 4 2005, 11:47 PM) |
| Yes, get brakes... At least invest 200 bucks and get STICKY pads. Oh, and 50 bucks in sheet metal and pop rivets. OH ya, if you have a little nipple thing on the radiator fill.. you HAVE to either plug it off, or have an expansion tank on it. Andrew |
WaddaUmean? Sheet metal and pop rivets???
Did someone say I wanted to flare Bebe? (secretly i really do)
it's just a money thing.
Posted by: Andyrew Sep 5 2005, 01:16 AM
Sheet metal... and pop rivets... for a radiator shroud.
Posted by: Andyrew Sep 5 2005, 01:18 AM
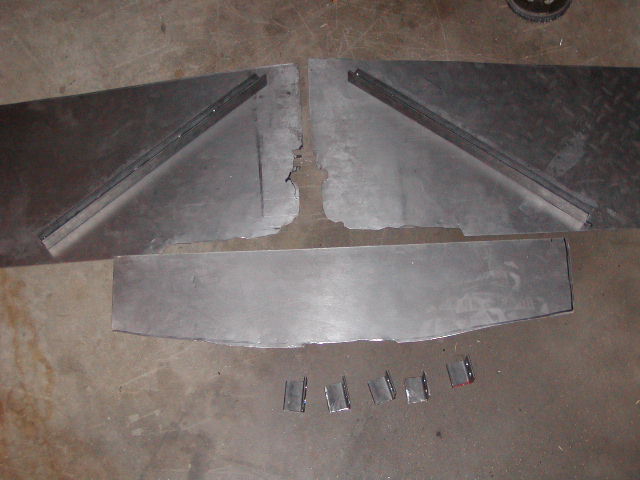
Posted by: Dr. Roger Sep 5 2005, 11:07 PM
Well I must say, today was so crazy.
I had to give three friends rides and man, that was fun.... starting to push it a little harder. had another reverse lock turn. i planned it though.
took it over to visit with some friends and then it got dark.
started her and turned the lights on and nothing happened.
then i noticed no lights worked on the entire car. except the green oil light.
everything worked yesterday...
took a chance and drive it home and as i was pulling into the garage, "Poof".
a flame was seen shining through where the ignition steering column goes through the dash. See pic. and red arrow.. OH SHIT< NOt in my f-ing garage.
I gave it a blast with the extinguisher and that was that.
electrical in nature as it stunk to high heaven. whatever that smells like .
upon furthur inspection i noted that the PO had sone some custoom wiring to the stereo and left other wires just exposed under the dash...
Attached image(s)
Posted by: Dr. Roger Sep 5 2005, 11:09 PM
my last day of vacation will be figuring out this wiring thing now... 


Attached image(s)
Posted by: John2kx Sep 6 2005, 06:07 AM
Don't feel like the lone ranger and I'm glad she did not burn to the ground. Hope you don't have to go this far............
John
Attached image(s)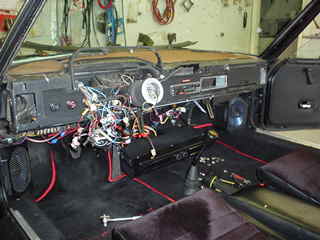
Posted by: Dr. Roger Sep 23 2005, 11:45 PM
starting fiberglass air ducting.
Attached image(s)
Posted by: Dr. Roger Sep 24 2005, 12:01 AM
And the details of the electrical fire....
red arrow points to where the harness was cut by steel support bracket for the steering column.
aparrently shorted a non-fused wire resulting in a little fire. fire exstinguisher is always by my side....... I strongly suggest everyone do the same.
Attached image(s)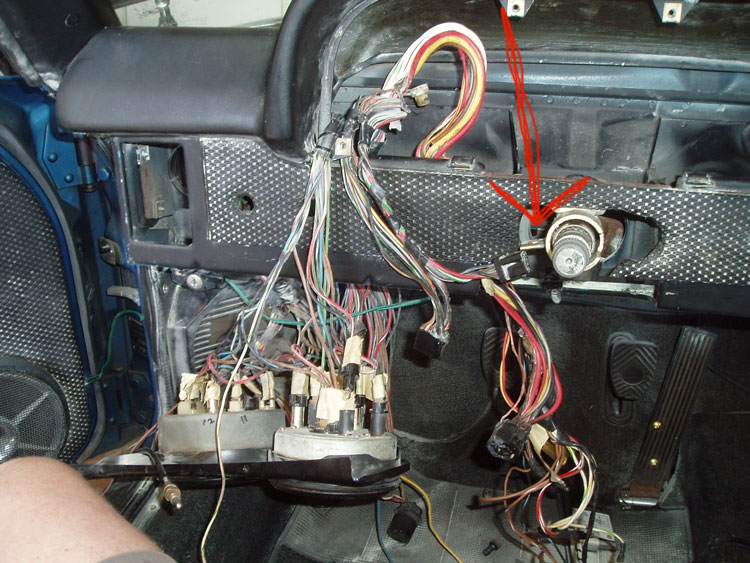
Posted by: Andyrew Sep 24 2005, 02:32 AM
That ducting is a little low...
You might find yourself cursing every time you go over a bump..
I guess we'll see it tomorrow!!
Posted by: Dr. Roger Sep 24 2005, 09:38 AM
yea, i figure it's easier to take some off than add... bebe is still down with wiring issue so you'll see her next time. sorry.
Posted by: Dr. Roger Sep 29 2005, 09:52 PM
I was so inspired by the electrical fire, that I had to add some flames to the car. I don't know if it looks good or bad but it's better than the plain fiberglass that was going to go on there. =-)
No more blow-by or recirculating air.
Attached thumbnail(s)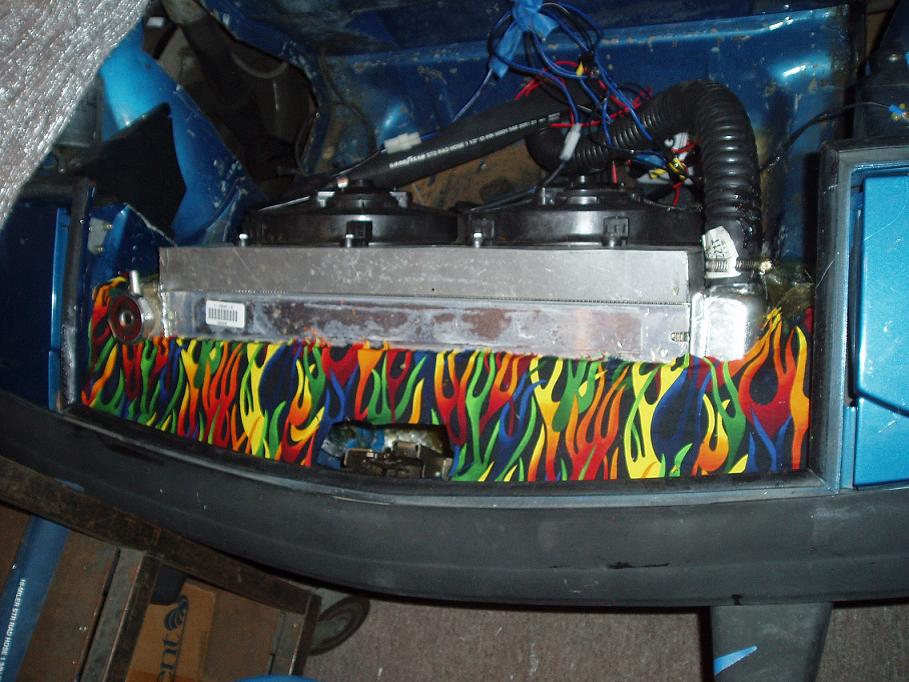
Posted by: Rand Sep 29 2005, 10:53 PM
Burning Man special!
Way to go Roger. That will help keep her cool.
Posted by: Andyrew Sep 29 2005, 11:01 PM
wow...
How did you paint it?
shrouding looks good.
Posted by: redshift Sep 29 2005, 11:20 PM
Looks great dood! I love it.
M
Posted by: Dr. Roger Sep 29 2005, 11:40 PM
| QUOTE |
| wow... How did you paint it? |
hehhehhee.
clearance rack at the local fabric shop.
I used the same stuff on the back of my Burning Man Art Car/fur covered surf board seat, and the hat i wear when driving the board. =-)))
you don't HAVE to use fibered glass for the fabric. You can use many kinds of fiber if it's not too structural of an application. AKA eye candy.
Attached image(s)
Posted by: Dr. Roger Oct 3 2005, 11:52 PM
OK, back to work.
Figuring out how to get rid of them 31 year old wires and switches. It's coming along very slowly probably due to the fact that i'm no electronics wiz. Hey, one step at a time. Right?
One thing I do need to figure out is how to wire a relay. Like the blinkers and emergency flashers. And what's the purpose of the rest of the relays? Are they really needed? =-)
Got a call today and the new fuse box is in. P/U tomorrow. Yes!
Attached thumbnail(s)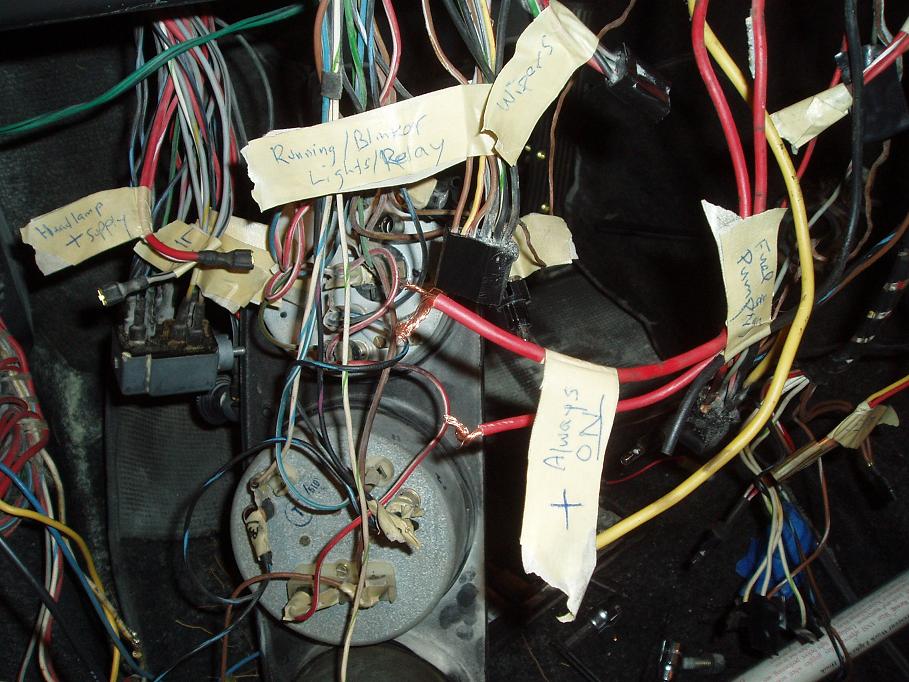
Posted by: Dr. Roger Oct 11 2005, 10:43 PM
Don't let this happen to you.
Attached image(s)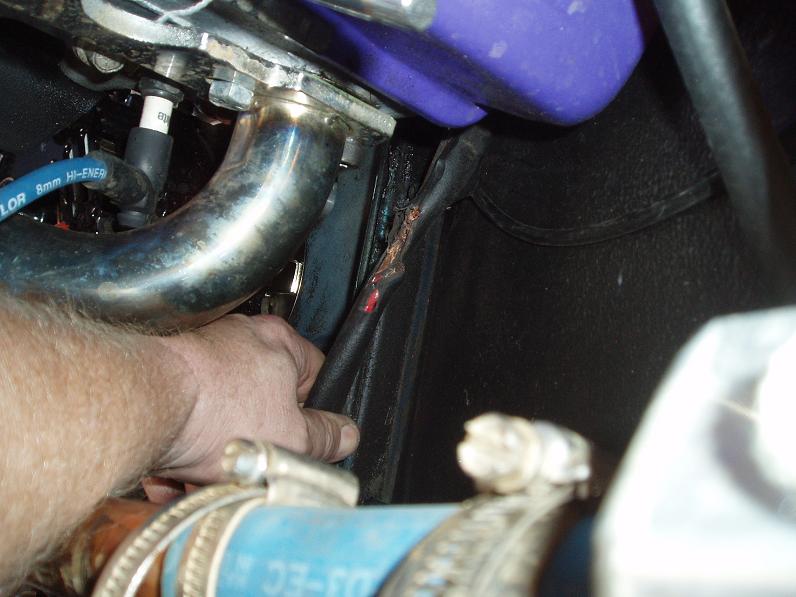
Posted by: Dr. Roger Oct 11 2005, 10:46 PM
New fuse box just got in.
Nice clear front.
Expecting the marine grade rocker switches this week. They come with push button breakers but i'll just use the fused system.
Attached image(s)
Posted by: Dr. Roger Oct 11 2005, 10:49 PM
And from my Summit friends tonight...
Now the air cleaner will not clear the lid... oh well.
Shameful progress. I know.
Attached image(s)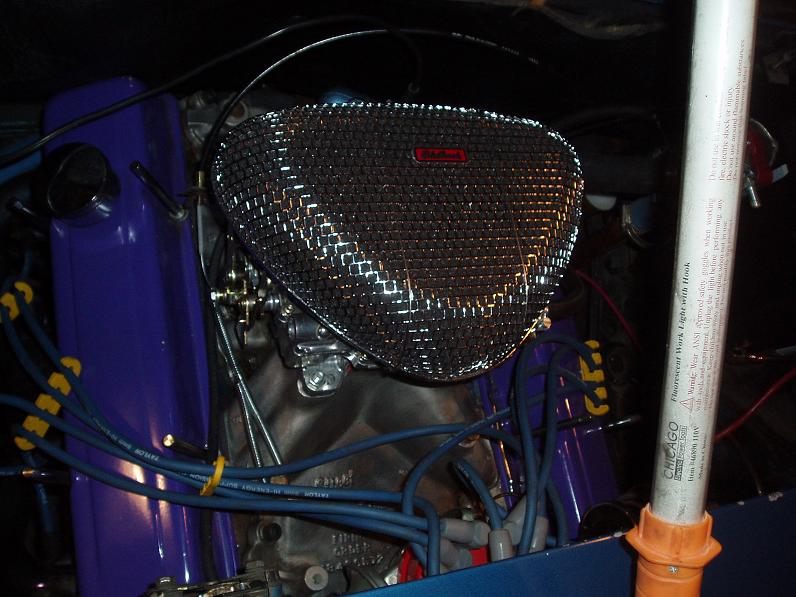
Posted by: Dr. Roger Oct 21 2005, 05:40 PM
Little update.
Just received the Marine rocker switches.
Picked up some heavy gauge wire and spade connectors.
Main power shut off.
Feeling overwhelmed. Gunna' take a brake from this project.
Roger
Posted by: neo914-6 Oct 21 2005, 06:32 PM
call me, if you're for hire...
Posted by: Dr. Roger Dec 18 2005, 04:11 AM
This whole, "being sick" thing is really getting me bored into action again. I mean on Bebe.
After the little electrical fire incident...
Tonights little project.
It works so sweeeeet.
Waterproof/Marine Main power switch.
Attached image(s)
Posted by: TonyAKAVW Dec 18 2005, 01:50 PM
That fuse box is really nice. Where did you get it?
-Tony
Posted by: Dr. Roger Dec 18 2005, 02:05 PM
| QUOTE (TonyAKAVW @ Dec 18 2005, 12:50 PM) |
| That fuse box is really nice. Where did you get it? -Tony |
i got the fuse block at west marine. you can get it online http://www.westmarine.com/webapp/wcs/stores/servlet/ProductDisplay?storeId=10001&langId=-1&catalogId=10001&classNum=295&subdeptNum=124&storeNum=9&productId=91545
i like 'em because they have a built-in pos/neg attachment block to run higher current from.
Picture courtesy of west marine...

Posted by: Dr. Roger Dec 20 2005, 01:11 AM
Yahoo,
the gotti's are on their way from Fla.
and after christmas the sheridan flares will be too.
Oh forgot to include that i picked up a 911 front end with over rack sway bar. fresh rotors/calipers. now i need a rear 5 bolt solution.... Mar7ck... how much U want for yours again?????
Attached image(s)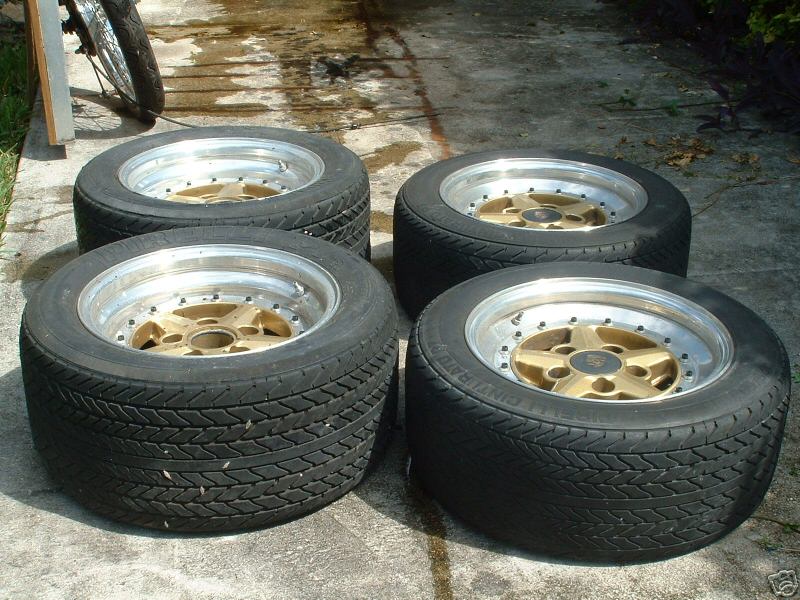
Posted by: Dr. Roger Dec 20 2005, 01:12 AM
dfdfdfdfdf
Attached image(s)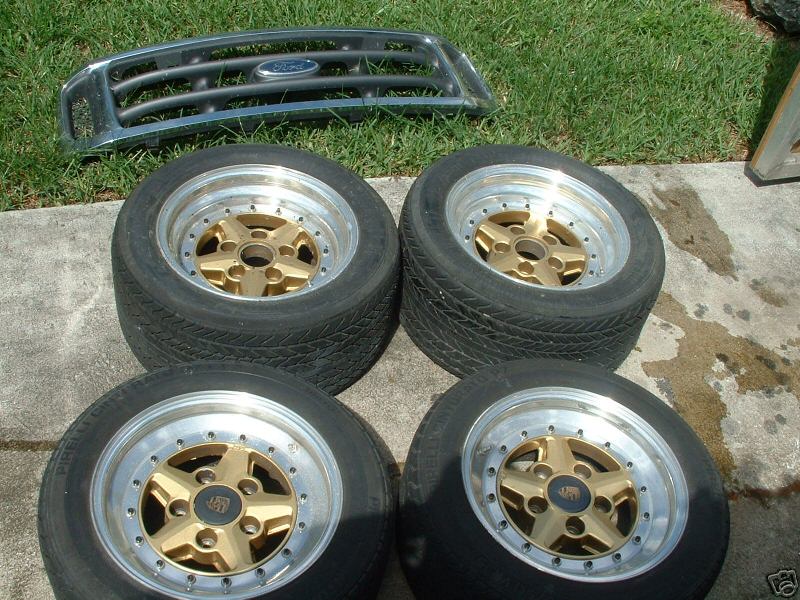
Posted by: Dr. Roger Dec 20 2005, 01:15 AM
sheridan1
Attached image(s)
Posted by: Dr. Roger Dec 20 2005, 01:16 AM
2222222
Mommy.
Attached image(s)
Posted by: Andyrew Dec 20 2005, 01:33 AM
Good boy!
I suggest Eric for the rear solution... Not a bad price either..
Look in the part resources.
Andrew
Posted by: Dr. Roger Dec 20 2005, 01:39 AM
still got to figure the coolest wheel inner color..... gold anodized has got to go. it's bit too 70's for me.
Posted by: Andyrew Dec 20 2005, 02:53 AM
What color you painting the car?
Posted by: Mar7ck Dec 20 2005, 10:26 AM
Hey Roger,
I' like 350.00. I think that is what I think I mentioned in the last email. If you remember differently email me.
Calipers(rebuilt,spaced for 911 rotors), rotors (cut down to 914 diameter) and 71 hubs w/bosses (they need to be drilled).
Enjoy
Oh yeah, Roger, I am your one stop Porsche shop.
Great job on the calender.
Mar7ck
Posted by: Dr. Roger Dec 24 2005, 07:37 PM
Thanks Mar7ck!!!!
Little update.
Just got back from Mar7ck's house.
Now I have new upgraded 5 bolt, vented, cross drilled rotors, front AND rear WITH E-brakes. =-)))
After Breaking Bebe in and going through the experiencing of faded stock brakes at high speed.. ![shocked[1].gif](http://www.914world.com/bbs2/html/emoticons/shocked[1].gif) .. Hopefully that'll never happen again...
.. Hopefully that'll never happen again...
Hope everyoneis having a happy holiday season.... 
Posted by: Dr. Roger Dec 30 2005, 12:16 AM
hey,
big thanks to leo imperial and mike mueller. thanks guys.
i got the front suspension off, then leo helped me put the new suspension on, then mike came and helped me get the rear hubs and bearings off/out. what a bee@tch! but they did come off.
all that work and no lug nuts. but you dont care about that anyway.
u want pics... yea', i know.... so here ya' go.
this ones of the old suspension. in great shape BTW... new bearings and ball joints feel right on the money. FSBO. anyone need one?
Attached image(s)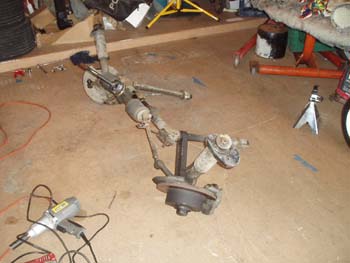
Posted by: Dr. Roger Dec 30 2005, 12:18 AM
5 bolt w/newer rack and pinion and fresh rotors and pads.
Attached image(s)
Posted by: Dr. Roger Dec 30 2005, 12:21 AM
coolant lines dropped and suspension off
Attached image(s)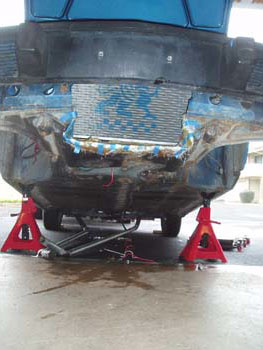
Posted by: Dr. Roger Dec 30 2005, 12:23 AM
leo with the new suspension and new wheel. yea baby!!!!
Attached image(s)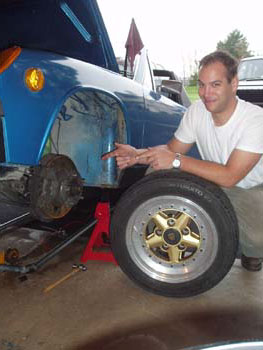
Posted by: Dr. Roger Dec 30 2005, 12:25 AM
mikey workin' his magic.
work it, work it, work it.
Attached image(s)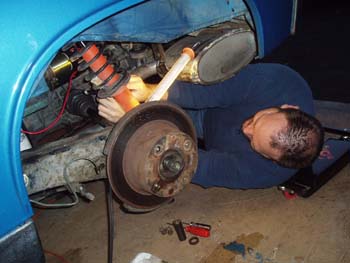
Posted by: Dr. Roger Dec 30 2005, 12:26 AM
8" wheels.
Attached image(s)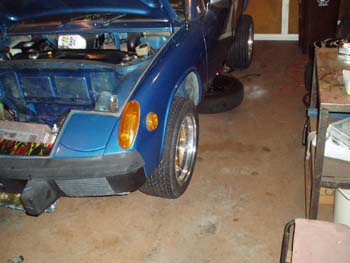
Posted by: Dr. Roger Dec 30 2005, 12:28 AM
and 10" ers.
OK, so the 10's go on the rear but i had to see how they fit on the front just for the fun of it.
very nice.
once again, big thanks to leo and mike mueller for the help and guidance. i learned lots of little tricks to get 'er done right. =-)
and i got to exercise my pizza making skills. mike does not like anchovies...
Attached image(s)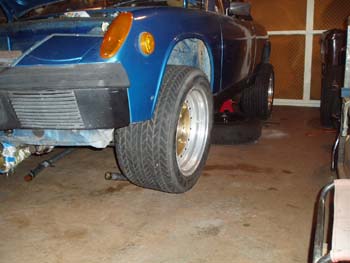
Posted by: Mueller Dec 30 2005, 03:14 PM
Hey Roger...thanks for dinner and the grease under my fingernails, hahahha
make sure you buy the correct brake line wrenches
Attached image(s)
Posted by: Dr. Roger Jan 9 2006, 09:29 PM
I scored some Koni adjustables w/Coleman perch's and 140# Hypercoils. May need to go up on the spring rates later but until then.... also picked up the Sheridan rear flares today. they're so dang light!!!! the lady at greyhound asked me if i wold pick them up because they looked so big and heavy. i reached over and picked them up together with two fingers.
this thing is going to be so bitchin'....
also going to pickup new CV boots for the 930 axles and expect the axle adaptors tomorrow or the day after.
i hope i can get to sleep tonight.....
BTW.... everything you see here.... $200.00
Attached image(s)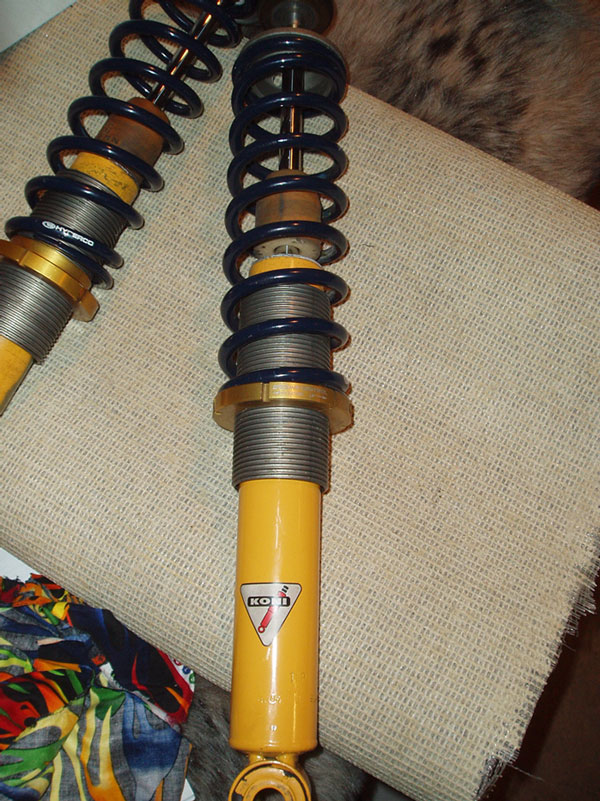
Posted by: turbo914v8 Jan 10 2006, 12:36 PM
HOLD ON HERE! I missed something. When did you get the 930 axels? Where did you get them from and how much did you pay for them? 930 adaptors, who supplied those for you, and what are you adapting them to? Sorry for all the questions but I have been following your great build and these are things that I could likely use on my re-build up.
Posted by: Dr. Roger Jan 10 2006, 01:46 PM
hey paul,
craigslist.com is where i got the axles with good CV's and stubs. $40.00. patience paid off once again.
before i started the 914 project i did lots of searching on this site for solutions to upgrading the weak links. although i don't see many people using the 930 axles. i don't know why. price? i think the 930 axles/CV's are more expensive unless you can find a deal. BTW, 110mm CV's will just barely fit thru the 914 arms.
the entire rear drivetrain assembly is now going to be a fresh flipped H gear 901, going into Patrick Motorsport axle adaptors, to 930 axles, CV's, and stubs, thru 914 swing arms, 5 bolt hubs, thru 911 vented/cross drilled/milled rotors, and "spaced" 914 calipers to retain the emergency brake.
just waiting on the PMS adaptors and bearings to put it all together!!!! Yea' baby!!!
Posted by: Leo Imperial Jan 10 2006, 02:08 PM
Let me know when your ready.
Just so everyone who reads this knows.
Roger let me use his rear bearings so I could get my car back on the road
and now he is waiting for another set to do his car.
Thanks Roger, without your help I would still be on jackstands. 
Posted by: Dr. Roger Jan 10 2006, 02:23 PM
| QUOTE (Leo Imperial @ Jan 10 2006, 01:08 PM) |
| Let me know when your ready. Just so everyone who reads this knows. Roger let me use his rear bearings so I could get my car back on the road and now he is waiting for another set to do his car. Thanks Roger, without your help I would still be on jackstands. |
hey leo,
it was good to see your car back on the road. those cookie cutters and sticky yokohama's are off the hook.
and a big thanks for letting me take her for a spin an feel what a 2.0 can really do!
watch out you guys next time you see leo at a AX event....

geez, now you've got 911 front end, 180# springs in rear, stickies up front, and a sway bars.
now ya' just need to sell that range rover to finance the 3.6 upgrade....
Posted by: turbo914v8 Jan 10 2006, 02:39 PM
Thanks for the great information. I am enjoying your progress. Keep up the great work.
Posted by: Leo Imperial Jan 10 2006, 03:39 PM
 1991 Range Rover for sale
Attached image(s)
Posted by: Dr. Roger Jan 13 2006, 12:47 PM
more progress.
CV adaptors.
Attached image(s)
Posted by: Dr. Roger Jan 13 2006, 12:49 PM
adaptors installed with threadlock.
Attached image(s)
Posted by: Dr. Roger Jan 13 2006, 12:54 PM
this rotor, part#901.352.041.14, needs to me machined down to 11.25" across to clear the spaced 914 calipers. 11.20" would be even better. =-)
Attached image(s)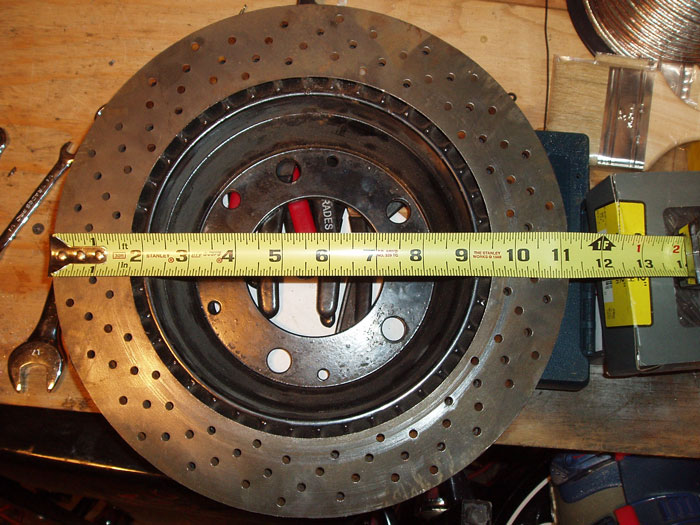
Posted by: Dr. Roger Jan 13 2006, 01:03 PM
tire and wheel temporarily installed.
maybe just roll the fenders??? NOT!
Attached image(s)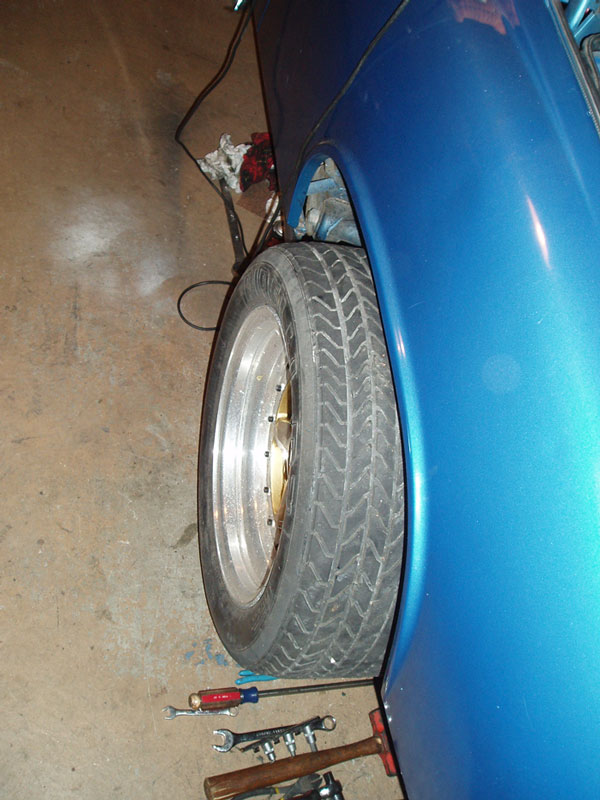
Posted by: Dr. Roger Jan 13 2006, 01:18 PM
a few people were asking about width and back spacing.
the tires measure 10.5 inches sidewall to sidewall.
backspacing is 5.5 inches.
they protrude a lot and will require a 2" to 3" flared fender. no spacers.
Attached thumbnail(s)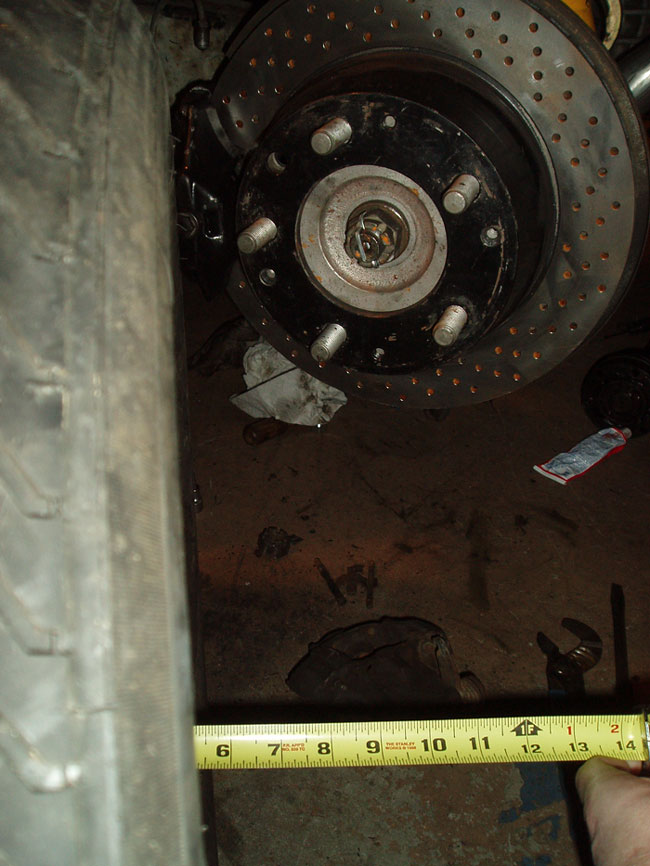
Posted by: mikeyb33 Jan 13 2006, 03:00 PM
Hi,
congrats on an outstanding conversion job! I just went through your entire thread - it was great to see the progress/ progression from start to finish. You should be proud of the work you did. (Motor/exhaust sounds really sexy too, BTW )
I've started reading the V8 conversion threads in here as I stumble across them, as I have a small-block chevy V8 (old, iron, though) languishing in my garage & was starting to think about doing a 914-8 conversion with it (..as if my 914-6/3.0 wasn't fun enough.. )
anyway I had a question on your conversion:
In all the pics I looked at, I did not see an alternator. Where & how did you install it?
curious,
mike
Posted by: Dr. Roger Jan 13 2006, 04:01 PM
| QUOTE (mikeyb33 @ Jan 13 2006, 02:00 PM) |
| Hi, congrats on an outstanding conversion job! I just went through your entire thread - it was great to see the progress/ progression from start to finish. You should be proud of the work you did. (Motor/exhaust sounds really sexy too, BTW )I've started reading the V8 conversion threads in here as I stumble across them, as I have a small-block chevy V8 (old, iron, though) languishing in my garage & was starting to think about doing a 914-8 conversion with it (..as if my 914-6/3.0 wasn't fun enough.. )anyway I had a question on your conversion: In all the pics I looked at, I did not see an alternator. Where & how did you install it? curious, mike |
mike,
i used the renegade alternator brackets.
i used a new EBay single wire 100A alternator (<$100 shipped). generic body. the renegade brackets required a little massaging to get the alternator to allow for belt adjustment.
you could easily fab your own if your handy and have a decent shop.
Attached image(s)
Posted by: Dr. Roger Jan 19 2006, 03:58 AM
geeez,
taped on the sheridan flares and they stick out furthur than i expected. dunno if i want to space the wheels to meet the fenders or chop the fenders to meet the tires (mostly because i've never chopped FG fenders to mate with steel stock fenders).
now i'm thinking of not using the flares and just doing a little surgery on the stock fenders.
to cut or not to cut? that is the question...
Attached image(s)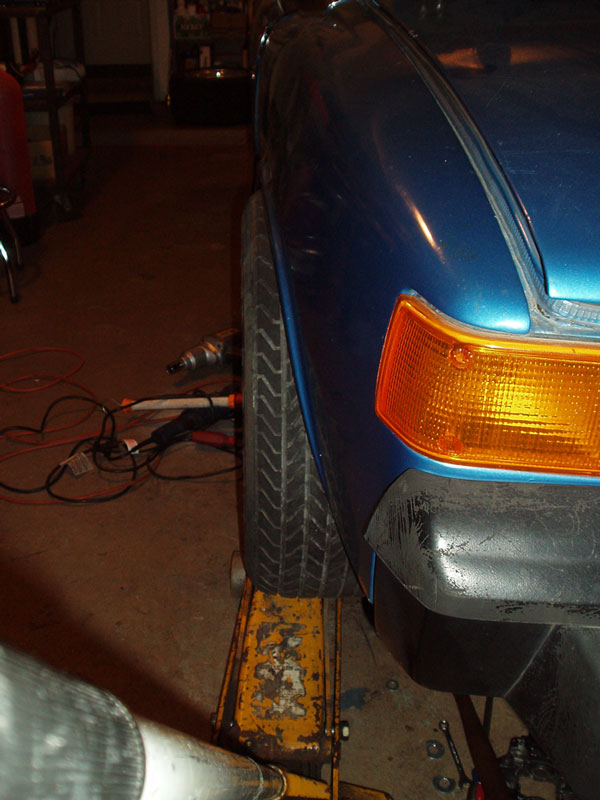
Posted by: McMark Jan 19 2006, 04:14 AM
Roger, if you wanna do a panel beating tech session I can host it at the shop and lend what knowledge I gained doing Felix's flares. Flaring your steel wouldn't take much.
Posted by: reedhmb Jan 19 2006, 07:53 AM
From your last picture I would say the Sheridan flairs are overkill. But if needed, I have (4) each 2” wheel spacers you can have. What size (width) tires are you using? It’s hard to tell from the pictures.
Mark
Posted by: Dr. Roger Jan 22 2006, 07:29 PM
Geeeeeez, I guess I should check my progress thread every once in a while.
Mark, that is a very gracious offer. I will give it some serious thought while i'm finishing up the rear suspension/brakes and get back to you.
Is the "proper" way to beat it out and maintain the lip or trim the lip off?
I was atctually thinking of using my angle grinder to cut off the lip of the fenders using a thin cutting wheel, then beat out the fender, then welding the lip back on to keep the stock lipped look. =-)
What are your thought on that?
AND "reedhmb" the other Mark...
I will measure what the spacing is with whees on and fenders temporarily attached and if the spacers are close i'll take you up on that.
Posted by: redshift Jan 22 2006, 07:32 PM
Yeah dood... slicing the lip first and putting it back looks best.
WTG!
M
Posted by: Dr. Roger Jan 23 2006, 01:38 AM
| QUOTE (reedhmb @ Jan 19 2006, 06:53 AM) |
| From your last picture I would say the Sheridan flairs are overkill. But if needed, I have (4) each 2” wheel spacers you can have. What size (width) tires are you using? It’s hard to tell from the pictures. Mark |
the rears are 285/40/15's.
sidewall to sidewall they are 11" wide. 10.5" wheels.
Posted by: Dr. Roger Jan 25 2006, 07:40 PM
i'm putting this here for my own reference.
i always forget what does what when it comes to shocks, springs, and sways...
OVERSTEER / UNDERSTEER CORRECTIONS
Understeer Corrections Oversteer Corrections.
Push, plowing, front tires slide out first. Loose, rear tires slide out first.
Usually slight understeer is safer. Oversteer can be dangerous, especially at high speeds.
Raise front tire pressure. Lower front tire pressure.
Lower rear tire pressure. Raise rear tire pressure.
Soften front shocks. Stiffen Bump. Stiffen front shocks.
Stiffen rear shocks. Soften rear shocks.
Lower front end. Raise front end.
Raise rear end. Lower rear end.
Widen front track. Reduce rear track.
Install shorter front tires. Install taller front tires.
Install taller rear tires. Install shorter rear tires.
Install wider front tires. Install narrower front tires.
Install narrower rear tires. Install wider rear tires.
Soften front sway bar. Stiffen front sway bar.
Stiffen rear sway bar. Soften rear sway bar.
More front toe out. More front toe in.
Reduce rear toe in slightly. Increase rear toe in.
Increase front negative camber. Reduce front negative camber.
Increase positive caster. Reduce positive caster.
Soften front springs. Stiffen front springs.
Stiffen rear springs. Soften rear springs.
May need more front suspension travel. May need more rear suspension travel.
Install wider front wheels. Install wider rear wheels.
Use softer front compound if possible. Use harder front compound if possible.
Use harder rear compound if possible. Use softer rear compound if possible.
Remove weight from front of vehicle. Add weight to front of vehicle.
Add weight to rear of vehicle. Remove weight from rear of vehicle.
Drive a different line. Driver may be going in too deep.
Use weight transfer to your advantage. Driver may be getting on the throttle to early.
High Speed. Increase front wing downforce. High Speed. Increase rear wing downforce.
Too much front brake. Too much rear brake.
Vehicle is TWITCHY at limit and hard to keep Vehicle slides and is easy to drive
ahead of in the steering department. at limit but does not corner to full potential.
Lower front and rear tire pressures slightly. Raise front and rear tire pressures slightly.
Suspension may be too stiff. Suspension may be too soft.
Shocks may be set too firm. Shocks may be too soft.
Tires may be old or hard. Roll centers may be too high.
Vehicle may not have enough suspension travel. Lower vehicle.
Vehicle may have a toe problem front or rear. Tires may be too hard.
Increase negative camber front and rear if possible. Widen track front & rear.
A properly set up vehicle will usually push slightly on corner entry, be fairly neutral at the apex (STEADY STATE) and exhibit slight power oversteer on corner exit. Tight courses may require more oversteer, fast tracks understeer.
Items needed: Accurate tire pyrometer, tire gauge, notebook and tape measure. Suspension information books.
Note: This is a sample of the methods used to correct various handling problems. Books have been written on this subject. Not every correction will always work as expected. Stiffer front sway bars will, in many cases, decrease understeer because of reduced body roll and better camber control. The best rule is to change only one thing at a time and keep notes.
Follow these suggestions at your own risk, we listed them to make your racing safer.
Posted by: Dr. Roger Jan 28 2006, 08:38 PM
Alas! One new rear corner is complete.
914 caliper with spacer and E brake.
911 vented/drilled rotor, milled/diameter to fit within caliper.
914 pads.
911 brake pad pins, clips, and springs.
Washer/spacers to bring caliper inward "just a little bit".
911 hub and stub.
Turbo carrera axle, CV, and adaptor.
Calipers E brake is adjusted.
SWEET!
Attached image(s)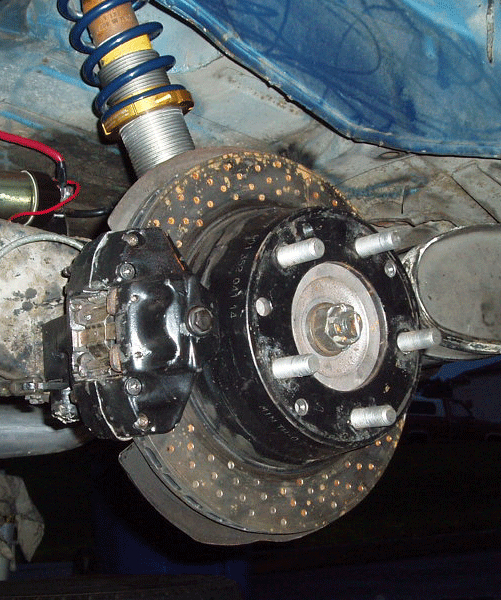
Posted by: Dr. Roger Feb 3 2006, 04:40 PM
Well I measured the Sheridan fenders for spacers. Looks like 3 1/2" is needed. That would give me about 3/4" to play with.
3 1/2" is a little too big for my comfort so I think i'm going to go the steel fender flaring route. Save the Sheridans for when this car gets turned to a 100% sick street car.
Roger
Attached image(s)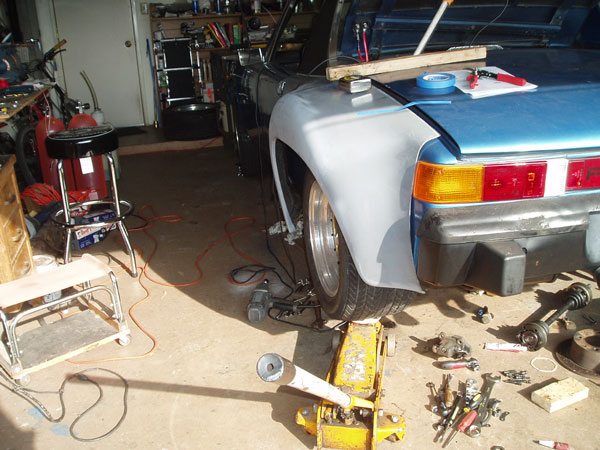
Posted by: tat2dphreak Feb 3 2006, 04:42 PM
run some 11" rims with a different offset... and some fat ass tyres
Posted by: Aaron Cox Feb 3 2006, 04:45 PM
those are fuchin massive........
Posted by: Dr. Roger Feb 3 2006, 04:49 PM
Too wide or not too wide?
That is the question.
Attached image(s)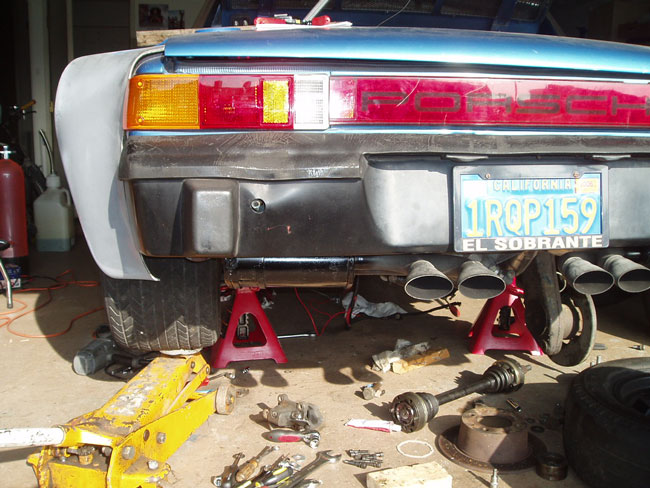
Posted by: Dr. Roger Feb 3 2006, 04:51 PM
No problemo'.
Attached image(s)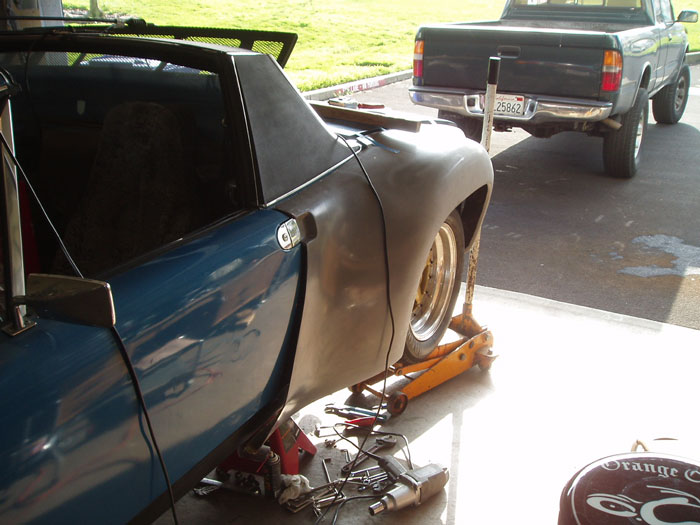
Posted by: ! Feb 3 2006, 05:39 PM
Just so happens I have a set 3 inch spacers.....4 sale like.....
Posted by: Dr. Roger Feb 17 2006, 04:55 PM
Alritey then,
I didn't want to start the flaring project until i locked on to a set of at least 17" wheels.
This so I can build out the fenders to meet the wheels/tires and have perfect fitment.
The "catch of the day"...
Description:
Porsche 911 Turbo Twist 2 Hollow Spoke Wheels Rims with Tires
Condition: Used. Item is in Very Good condition.
Fits: 96-04 Turbo, C4S or C2S
Part Number: 996.362.136.04 18x8 ET50
996.362.142.11 18x11 ET40
these come with 3K mile Pilot Sports.
So the next question is does anyone have a set of at least 3" spacers? NO, not the ones that are selling on Ebay for >$250... =-)
Once again, taking the 914club brain-trust advice and not going over 8" in the front is going to be a good idea.... THANKS!!
Isn't there going to be a north bay get together soon? My ride won't be there but i'd like hook anyways for the fun of it.
Posted by: Andyrew Feb 17 2006, 06:06 PM
I would go with 18x10's. unless you already got a deal on the set..
You dont want to go to wide here...
Oh, and your gona need 2in spacers.. at least
I think with your welding skill you should do the "cut and fit" fender flares.
Cut a line on the top, and cut from the middle of the flare up to that line.
Bring your wheels in, and drop them down. Get a hammer and dolly and get the metal to about how you want it, and fill it all in with more steel...
Andrew..
Posted by: Dr. Roger Feb 22 2006, 11:26 PM
Say it isn't so..... =-)
(the 10" gotti's bolted right on. these 11"ers will need substantial spacers.)
Attached image(s)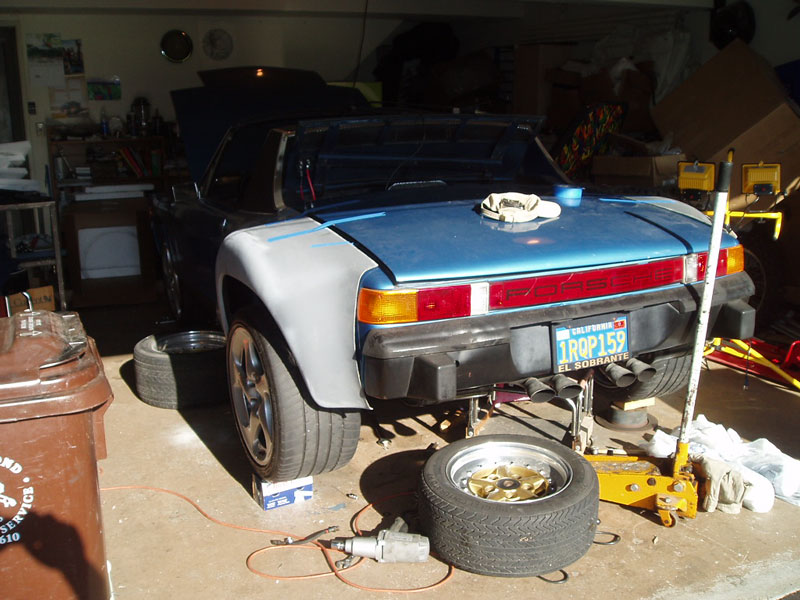
Posted by: Dr. Roger Feb 22 2006, 11:27 PM
thank you sir, may I have another?
Attached thumbnail(s)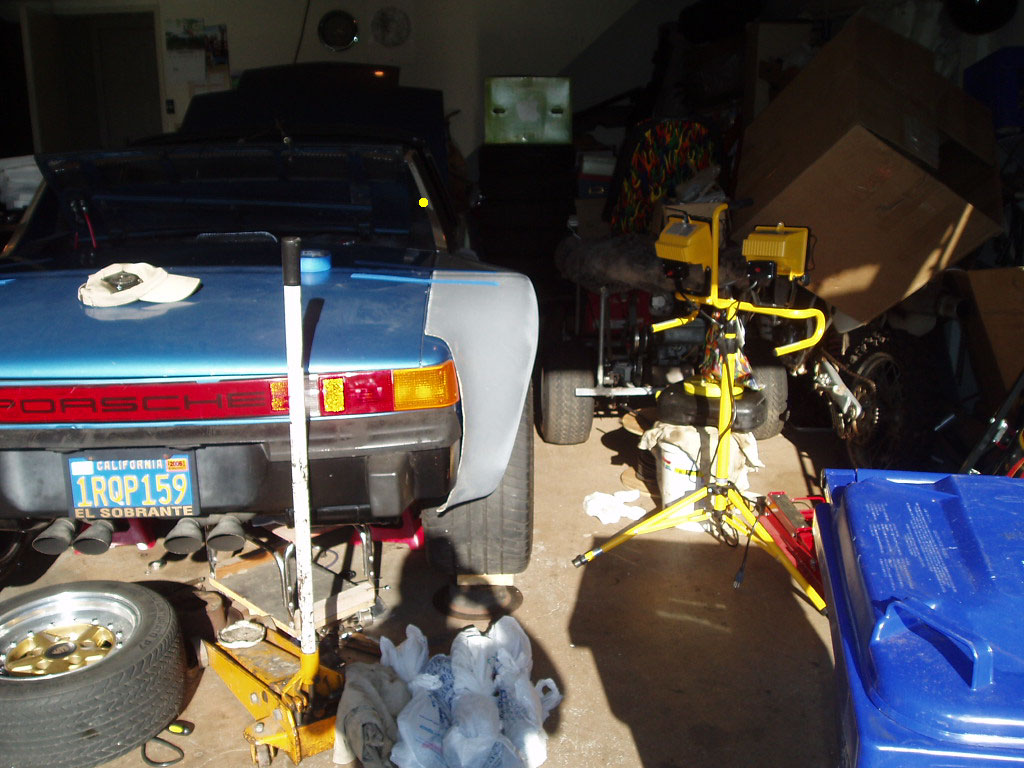
Posted by: Dr. Roger Feb 22 2006, 11:28 PM
it hurts so good. may i have another one mistress?
Jen will like this post....
Attached image(s)
Posted by: Dr. Roger Feb 22 2006, 11:29 PM
enough.
Attached thumbnail(s)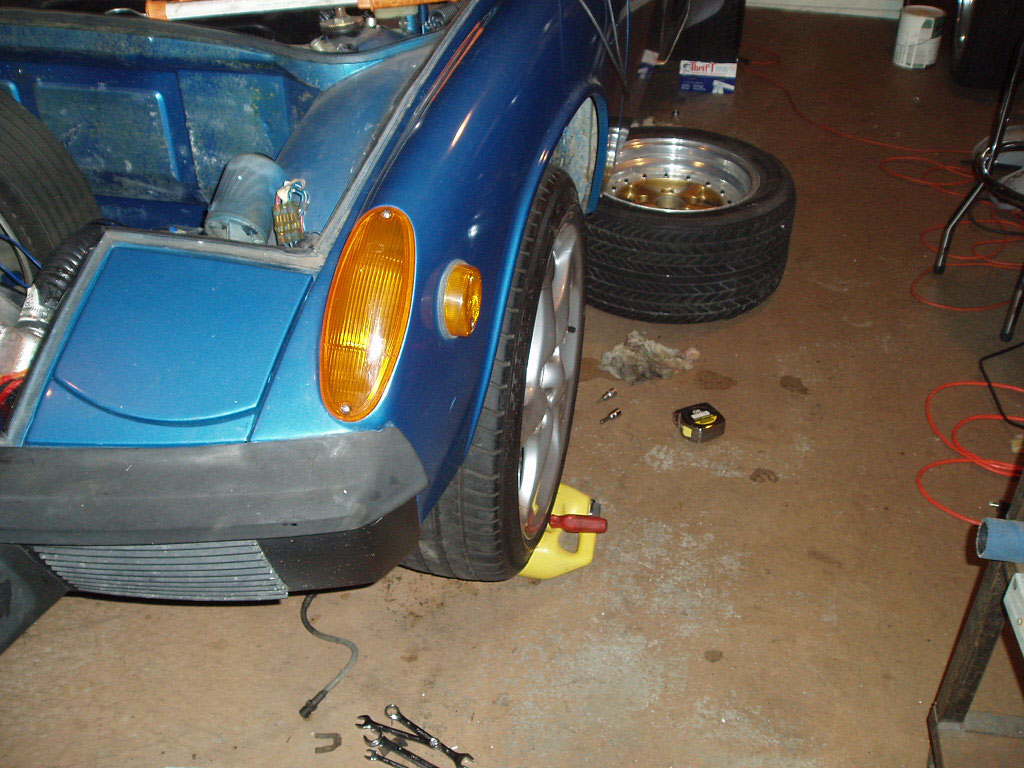
Posted by: Dr. Roger Feb 22 2006, 11:45 PM
do you think it makes my ass look big????
Posted by: Andyrew Feb 23 2006, 01:48 AM
Thats a nice ass there!
I like em big!
Posted by: Andyrew Feb 23 2006, 01:53 AM
btw, you'll need a 1in spacer to bolt em up..( maybe even a 1.5, dont know that offset..)
add that to your 3.5...
Cut your flares, just cut them on the back about 2 inches. cut the tops of the flares at a taper towards the top front, see if thats enough.. If not, do another inch. , secton out the 2 inches that you cut, and on the inside and outside of the pannel fiberglass it back..
get the look you want without having to kill them bearings..
Posted by: Dr. Roger Feb 23 2006, 09:36 AM
| QUOTE (Andyrew @ Feb 23 2006, 12:53 AM) |
| btw, you'll need a 1in spacer to bolt em up..( maybe even a 1.5, dont know that offset..) add that to your 3.5... Cut your flares, just cut them on the back about 2 inches. cut the tops of the flares at a taper towards the top front, see if thats enough.. If not, do another inch. , secton out the 2 inches that you cut, and on the inside and outside of the pannel fiberglass it back.. get the look you want without having to kill them bearings.. |
Andy, so your suggesting that I dont space-out the wheels to the fender?
rather, space the wheels just enough to fit the arms, and bring the fenders IN to the wheels?
this idea sounds much better as I don't want to over stress the bearings and it does look a bit WIDE.
Posted by: JOHNMAN Feb 23 2006, 09:48 AM
| QUOTE |
| 914 caliper with spacer and E brake. 911 vented/drilled rotor, milled/diameter to fit within caliper. 914 pads. 911 brake pad pins, clips, and springs. Washer/spacers to bring caliper inward "just a little bit". |
Are those 914/6 rear calipers????
Posted by: Dr. Roger Feb 23 2006, 10:31 AM
| QUOTE (JOHNMAN @ Feb 23 2006, 08:48 AM) | ||
Are those 914/6 rear calipers???? |
technically speaking thay are not 914-6 calipers.
they are spaced 914 calipers with 911 rotors. Which are similar to a 914-6 setup.
"pro's":
i get to keep the E brake and there is MUCH more thermal reserve to the rear braking system.
Posted by: JOHNMAN Feb 23 2006, 11:01 AM
| QUOTE |
| technically speaking thay are not 914-6 calipers. they are spaced 914 calipers with 911 rotors. Which are similar to a 914-6 setup. "pro's": i get to keep the E brake and there is MUCH more thermal reserve to the rear braking system. |
They take 914/4 rear pads? The pads look bigger to me for some reason. They almost look like front 914/4 pads (which would make them 914/6 calipers that have been spaced for vented rotors)
914/6 cars had solid rear rotors but larger pads (same as 914/4 front pads).
I'm just wondering which pads fit your calipers in the rear.
Posted by: Dr. Roger Feb 23 2006, 11:30 AM
the pads you see in the new spaced calipers are 914-4 rear pads.
madder of fact i'm temporarily using the old 914-4 rear pads out of the old calipers.
Posted by: Andyrew Feb 23 2006, 12:55 PM
| QUOTE (rogergrubb @ Feb 23 2006, 08:36 AM) | ||
Andy, so your suggesting that I dont space-out the wheels to the fender? rather, space the wheels just enough to fit the arms, and bring the fenders IN to the wheels? this idea sounds much better as I don't want to over stress the bearings and it does look a bit WIDE. |
Yes, Yes... and
yes...
You want almost 5inches of spacer on that thing?
No...
But you do want it to be really darn close to the lip so the tires look bigger.. and fill out the flares.
actually, take a tape measurer and measure the distance between your hub and the wheel mount (were the wheel would sit on the hub) with the wheel as close to the inside edge of the fender as possible.
Thats how much spacers you need.
I'll be running 2 1/4 on the back. and I think thats streching it.
Making the flares to fit would allow you to get it as close as possible to the inside edge of the fender.
Posted by: JOHNMAN Feb 23 2006, 01:03 PM
| QUOTE |
| the pads you see in the new spaced calipers are 914-4 rear pads. madder of fact i'm temporarily using the old 914-4 rear pads out of the old calipers. |
Thanks
Got me thinking about this again. I need to turn the rear rotors down to 11.2" OD, space out the calipers, spacer between caliper and mount ear, 911 rear spreader and pins...
If you don't mind, which 911 rear spreaders and pins? Thanks a bunch. (I know how to get longer bolts)
Posted by: Dr. Roger Feb 23 2006, 01:37 PM
| QUOTE (JOHNMAN @ Feb 23 2006, 12:03 PM) | ||
Thanks Got me thinking about this again. I need to turn the rear rotors down to 11.2" OD, space out the calipers, spacer between caliper and mount ear, 911 rear spreader and pins... If you don't mind, which 911 rear spreaders and pins? Thanks a bunch. (I know how to get longer bolts) |
actually i'm pretty sure the 911 caliper spacers are incompatible. I'm only guessing as i've heard no one talking about doing that.
the ones on my calipers are custom made.
the pins, clips,springs are from a 911.
914's need a wide entry hole on the caliper and a narrow hole at the tip of the pin. 911 pins vary.
there is a guy who made custom pins for spaced 914 calipers. he details the thickness's at the ends and the center.
The easiest way to find which ones work is to find your favorite Porsche dismantler and go through their pile 'o calipers.... I would have except for a fine member/non-member of 914world.com offered to send me his, FREE! =-) WITH springs/clips.
It really pays to make friends here as I find the people are so very helpful and generally have lots of heart.
When I first came here I was just doing research for my project.
After I found a 914, I had a pile of parts I didn't need, and promptly gave them all away.
Not caring to make money from anyone. Just doing good deeds as so many people here have done me.
I can get you the spacer width if that will help. Just let me know.
Roger
Posted by: JOHNMAN Feb 23 2006, 01:53 PM
Roger,
I am mainly interested in the Pad Pins, the springs and the clips.
The spacers I have under control.
I can get the calipers wide enough and centered on the rotor. I can turn pins to whatever shape is required, the clips should be able to be stock 914/4 clips. Inserted in holes in fabricated pins.
The spreader springs are my primary hangup. I don't think they would retract correctly if I didn't use any. I suppose they could be frankensteined from 911 parts and 914 parts.
I believe the pin spacing between 911 rear and 914/4 rear calipers is different.
| QUOTE |
| 914 caliper with spacer and E brake. 911 vented/drilled rotor, milled/diameter to fit within caliper. 914 pads. 911 brake pad pins, clips, and springs. Washer/spacers to bring caliper inward "just a little bit". |
When I saw that I got excited that there may be stock springs......
Posted by: Dr. Roger Feb 23 2006, 03:36 PM
springs and clips are different. big time. much wider due to the wider rotor.
Attached image(s)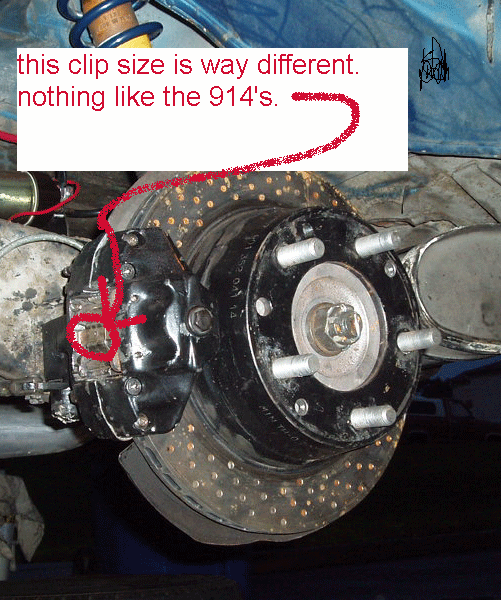
Posted by: McMark Feb 23 2006, 09:28 PM
Roger, what are your front brakes?
Posted by: Eric_Shea Feb 23 2006, 11:25 PM
I think he mentioned in another thread A-Calipers.
| QUOTE |
| Got me thinking about this again. I need to turn the rear rotors down to 11.2" OD, space out the calipers, spacer between caliper and mount ear, 911 rear spreader and pins... |
Pins are custom. Springs are too.
Springs are simple. Use the 911 spreader and the 914 wings that go under the pins. They're riveted from the factory so just drill them out and POP rivet in the new ones.
Pins need to be machined. I have sets available that we use in our v-caliper kits.
Posted by: McMark Feb 23 2006, 11:29 PM
Well, I would think that those small stock 4 brakes with huge meats would warrant ditching the proportioning valve. I wonder if the stock brakes could even lock up 11" wheels. Eric?
Posted by: Eric_Shea Feb 23 2006, 11:36 PM
I'd say the p-valve is a gonner. Send it to Ray Mital.
Those rears don't have a chance with that much meat.
Here's the pins.
We machined off the 'humps' because none of the rear pads come with the larger hole in one side anymore. You can still see the butt is wider on that pin though.
Attached image(s)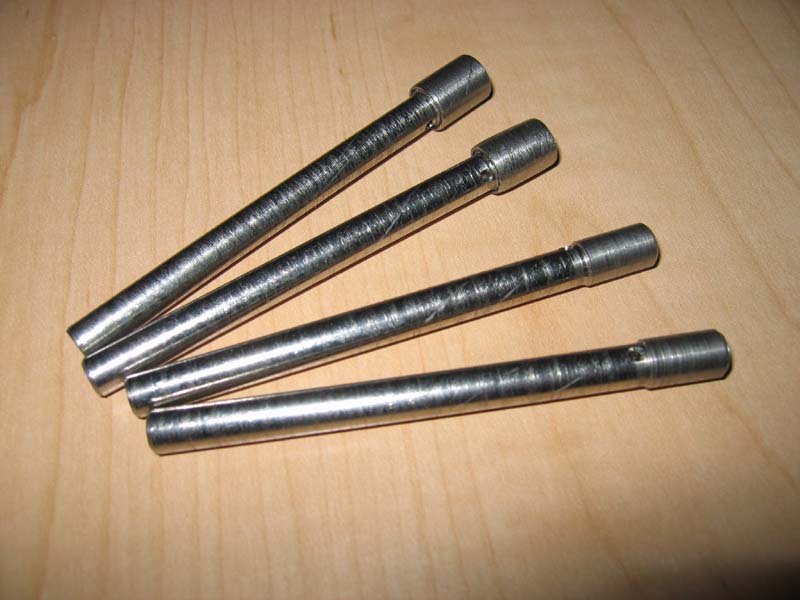
Posted by: Dr. Roger Feb 24 2006, 12:37 AM
| QUOTE (McMark @ Feb 23 2006, 10:29 PM) |
| Well, I would think that those small stock 4 brakes with huge meats would warrant ditching the proportioning valve. I wonder if the stock brakes could even lock up 11" wheels. :o Eric? |
yes sir. A calipers. and i've got a set of cross drilled rotors ready to replace the existing ones if i start looking for ways to procrastinate the wiring project again...
actually the pins and springs are straight 911. not custom. unless you think custom means having to bend the 2 springs (too wide and long) to make then fit correctly within the caliper. one pair of needlenose pliers and 5 minutes later. done. custom.
hmmm, don't they make a proportioning valve bypass line?
Posted by: Eric_Shea Feb 24 2006, 08:22 AM
| QUOTE |
| actually the pins and springs are straight 911. not custom. unless you think custom means having to bend the 2 springs (too wide and long) to make then fit correctly within the caliper. |
Actually... I think 'custom' means quite the opposite. More like it actually fits w/o bending anything

Regarding the pins, straight 911 wouldn't have the one pin larger than the other and wouldn't fit tightly in the hole. Expect your pads to move around back there and some bizaarr wear patterns if not broken stuff.
You really need to ditch those calipers in favor of some 911 units and a handbrake solution. Right now... as you sleep your wheels and tires are laughing at your calipers and calling them all sorts of names.
 It's not a pretty sight.
Posted by: Eric_Shea Feb 24 2006, 08:24 AM
| QUOTE |
| hmmm, don't they make a proportioning valve bypass line? |
http://www2.cip1.com/ProductDetails.asp?ProductCode=VWC%2D803%2D611%2D755
Posted by: JOHNMAN Feb 24 2006, 10:47 AM
Roger,
How wide are the caliper spacers (8mm, 10mm ???) and how wide are the rotors?
I drew up the spacer (now I need a thickness), and am having quotes for them sent out.
I'll make pins like eric showed when I find out how wide to space the caliper halves.
Thanks
Posted by: Dr. Roger Feb 24 2006, 12:15 PM
Eric:
| QUOTE |
| Actually... I think 'custom' means quite the opposite. More like it actually fits w/o bending anything |
well i know i'm very far away from being a real 914 pro however...
the pin spacing is smaller on a 914 than the 911. Hence having to "adjust" the spring inwards to support the pins in their closer position while maintaining the proper anti-rattle characteristics.
the PIN retainer clips ARE interchangeable.
I checked the fit of the pins through the pads and there is very little play. i don't know, perhaps we have different pins? mine fit perfectly through the calipers with zero play. if there's any measurable play it's pin to pad play... but is acceptable in my book. i'll look at that again and measure the play and get your opinion if there's too much play.
Geez, a 911 E brake solution? i'm a CSOB remember???
Johnman:
I'll be working down in the garage today so i'll be sure to take that measurement for you.
Posted by: JOHNMAN Feb 24 2006, 01:33 PM
Thanks,
I'm guessing that they are 10mm thick. I believe SC rear rotors are 20mm thick, and that 914 rear rotors are 10mm thick, so the spacers should account for the extra 10mm.
Posted by: joefri187 Feb 24 2006, 02:46 PM
An alternative to the fender flare issue.....
http://www.914conversions.com/html/fischer_part_2.html
Posted by: Dr. Roger Feb 24 2006, 05:59 PM
Mar7ck.
Here's the offsets.
Attached image(s)
Posted by: Dr. Roger Feb 24 2006, 06:00 PM
and the rear size and offset.
Attached image(s)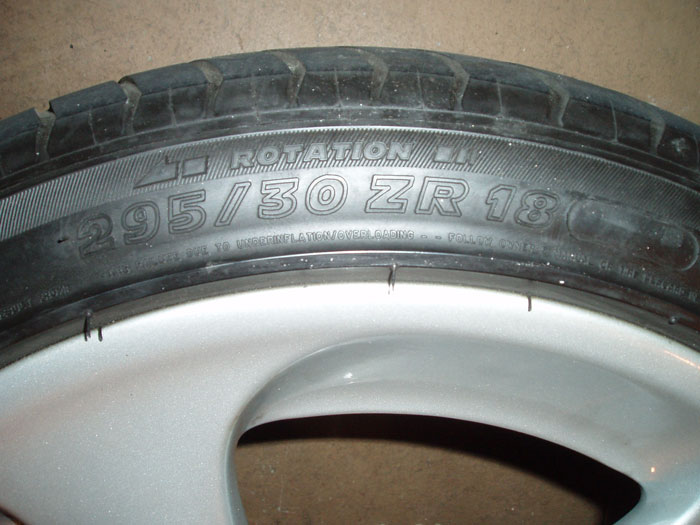
Posted by: Dr. Roger Feb 24 2006, 06:01 PM
11" 45mm offset.
Attached image(s)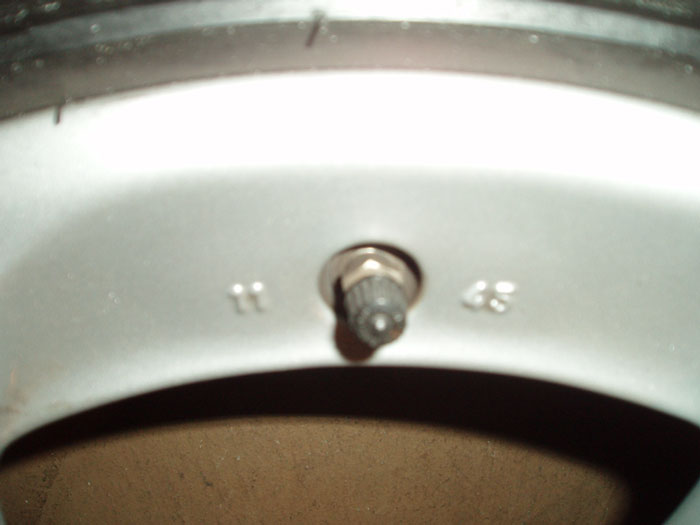
Posted by: Dr. Roger Feb 24 2006, 06:26 PM
| QUOTE (JOHNMAN @ Feb 24 2006, 12:33 PM) |
| Thanks, I'm guessing that they are 10mm thick. I believe SC rear rotors are 20mm thick, and that 914 rear rotors are 10mm thick, so the spacers should account for the extra 10mm. |
interestingly enough the spacers are 9mm thick.
if you go 9mm, the calipers have to be right on the offset adjustment. i actually had to do a little filing on the inner body of the calipers to have the rotor fitting perfectly. NOT on the pucks. =-)
if you go 10mm you will get a bit more leeway to play with the offset.
Go for it. The worst that can happen is you will learn a lot and maybe take an extra run to the parts house. No worries brother.
pic of of the 911 pins using 911 spring with 914 caliper. 911 spring is "adjusted" to shorter distance between pins.
Attached thumbnail(s)

Posted by: Aaron Cox Feb 24 2006, 06:28 PM
andy come over and shoot that pic for ya?
use the macro function
Posted by: bd1308 Feb 24 2006, 06:36 PM
on my cameras, it looks like a flower icon.
b
Posted by: Dr. Roger Feb 24 2006, 06:36 PM
sometimes even "doctor roger" 'effs up a pic or two.
oh, BTW, i think this is going to be my new avater name. one of my g-friends just gave it to me this morining....
New Avater name:
Doctor Roger
Is there an admin in the house???? Pretty please?????
Posted by: Dr. Roger Feb 24 2006, 06:37 PM
| QUOTE (bd1308 @ Feb 24 2006, 05:36 PM) |
| on my cameras, it looks like a flower icon. b |
Ohhhhhh, that's what that flower is for......... duhhhhhhhhhh.
Posted by: Eric_Shea Feb 24 2006, 06:42 PM
| QUOTE |
| Geez, a 911 E brake solution? i'm a CSOB remember??? |
I just don't want you to be a DSOB
Posted by: Dr. Roger Feb 24 2006, 07:07 PM
hey eric, i read everything you write.
i know you speak from real 914 experience and i appreciate that.
Posted by: Dr. Roger Feb 24 2006, 08:40 PM
| QUOTE (JOHNMAN @ Feb 24 2006, 12:33 PM) |
| Thanks, I'm guessing that they are 10mm thick. I believe SC rear rotors are 20mm thick, and that 914 rear rotors are 10mm thick, so the spacers should account for the extra 10mm. |
johnman,
just an fyi...
if your are purely interested in the larger rotors eric shea has the stuff already figured out http://www.914world.com/bbs2/index.php?act=ST&f=4&t=40951
no brainer and no heaches.
i'm a bit sadistic and wanted to get turbo axles, bigger rotors, 5 bolt conversion, and E brake all in one swipe.
you may just want a 5 bolt and larger rotors with spaced calipers....
Posted by: JOHNMAN Feb 24 2006, 10:39 PM
| QUOTE |
| Go for it. The worst that can happen is you will learn a lot and maybe take an extra run to the parts house. No worries brother. beerchug.gif pic of of the 911 pins using 911 spring with 914 caliper. 911 spring is "adjusted" to shorter distance between pins. |
| QUOTE |
| if your are purely interested in the larger rotors eric shea has the stuff already figured out |
No offense, but I can fab my own for much much less than that.
Yeah, I figured that out after studying the pic and comparing your casting numbers to ones I have. What really threw me off was that you have the older style rear calipers (with the ribe heads). Most of mine are later model. mine are not through bolted, but the outer half is threaded and the bolt simply screws into the outer half.
I also figured out about the bent 911 pad springs (bent for the closer spacing between pins).
I am going to try this out on a set of extra rear calipers that I have laying around. I priced out doing this conversion (myself) and buying new 914-6 rear rotors and it is almost exactly the same cost. I'm going with new 911sc rear rotors. I think I know how to avoid having the rotors machined, but it will be extra work to move things 4mm. This way I won't change the balance of the new rotors and I won't have to do this in the future either.
Posted by: Dr. Roger Feb 25 2006, 09:12 AM
john,
i don't know if you've read this article but it gives some more examples of what is a direct replacement regarding rear rotors. IE 911SC and 930's....
maybe a little "adjusting". =-)
http://ncr-pca.org/tech/upgrading_porsche_brakes2.htm
Posted by: Dr. Roger Mar 12 2006, 01:03 AM
Rear spacers are in. Holy crap dayz nice. =-))))
Attached image(s)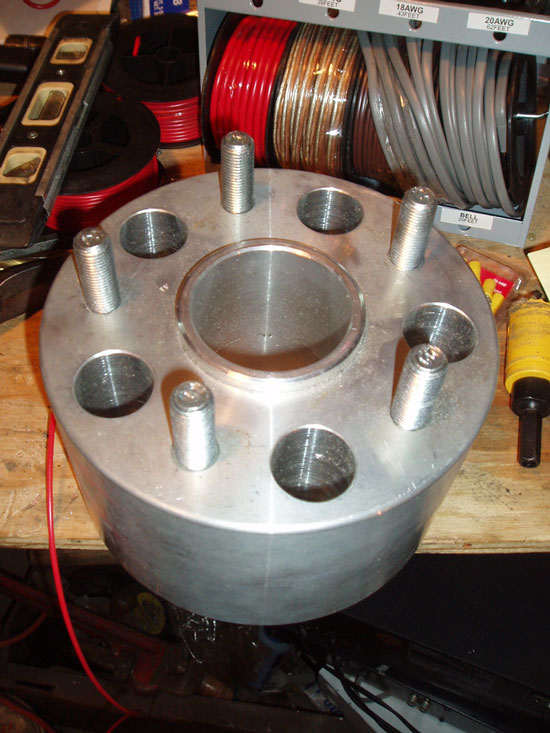
Posted by: Mueller Mar 12 2006, 01:11 AM
| QUOTE (Dr. Roger @ Mar 12 2006, 12:03 AM) |
| Rear spacers are in. Holy crap dayz nice. =-)))) |
wow, that sure took a lot of recycled Coors cans to make those
Posted by: Dr. Roger Mar 12 2006, 01:35 AM
| QUOTE (Mueller @ Mar 12 2006, 12:11 AM) | ||
wow, that sure took a lot of recycled Coors cans to make those |
yea', either that or blown aluminum 901 cases.
Posted by: JOHNMAN Mar 12 2006, 01:49 AM
MAN!!!
Those rear wheel bearings don't stand a chance.
Posted by: Dr. Roger Mar 14 2006, 09:07 PM
you might think that, but when considering that the 11"s wheels have a 45mm offset, it's negligible.
think how many HPH and Sheridan flared 914's you've seen.....
they are ALL running their rubber out to the full width of the fenders.
i'm no different.
the offset and spacer combos may be different on the flared 914's, but the wider the wheel, the less leverage is placed on the bearing.
Posted by: Dr. Roger Mar 17 2006, 08:02 PM
OMG! What have I done???
Attached image(s)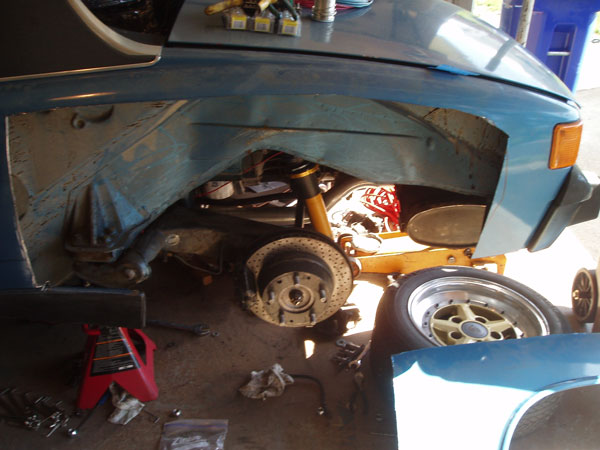
Posted by: Dr. Roger Mar 17 2006, 08:03 PM
Hmmm, maybe this wasn't such a bad idea... =-)
Attached image(s)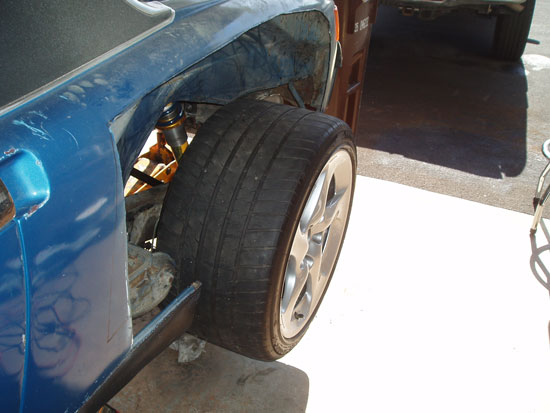
Posted by: Dr. Roger Mar 17 2006, 08:04 PM
Nope. this was a good idea.
Attached image(s)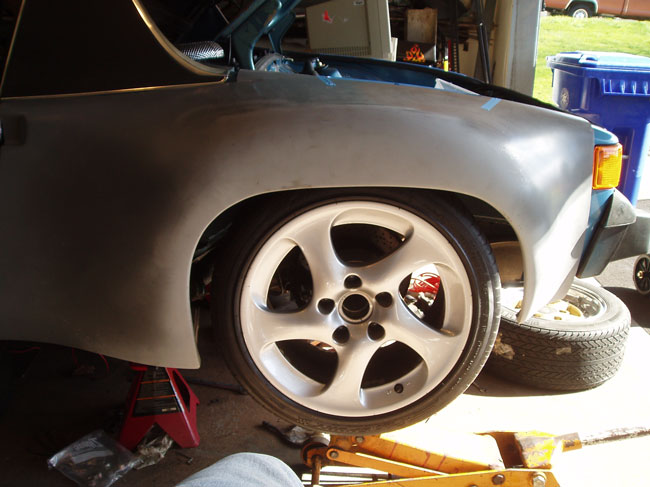
Posted by: Dr. Roger Mar 17 2006, 08:05 PM
I'm currently testing a couple of different structural adhesives for tomorrows glueing session.
Attached image(s)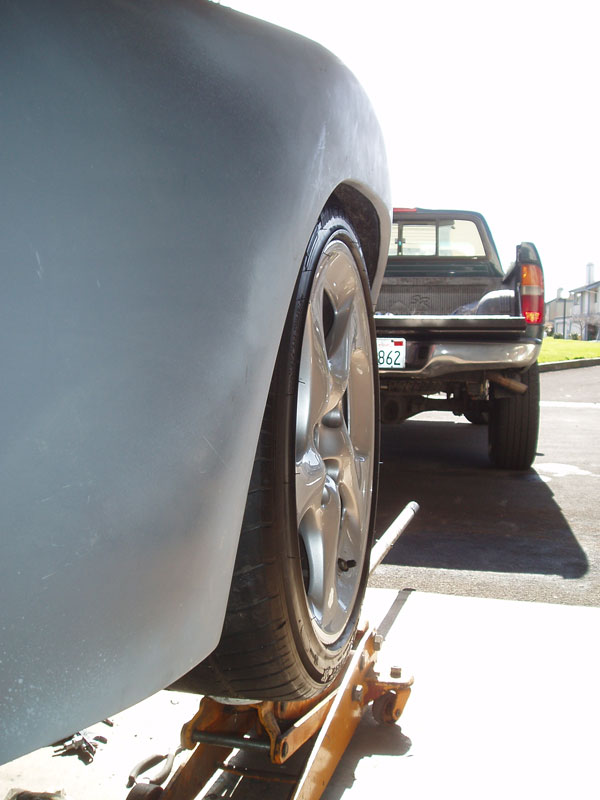
Posted by: Dr. Roger Mar 17 2006, 08:07 PM
and lastly, the front wheel with 2" spacer.
Attached image(s)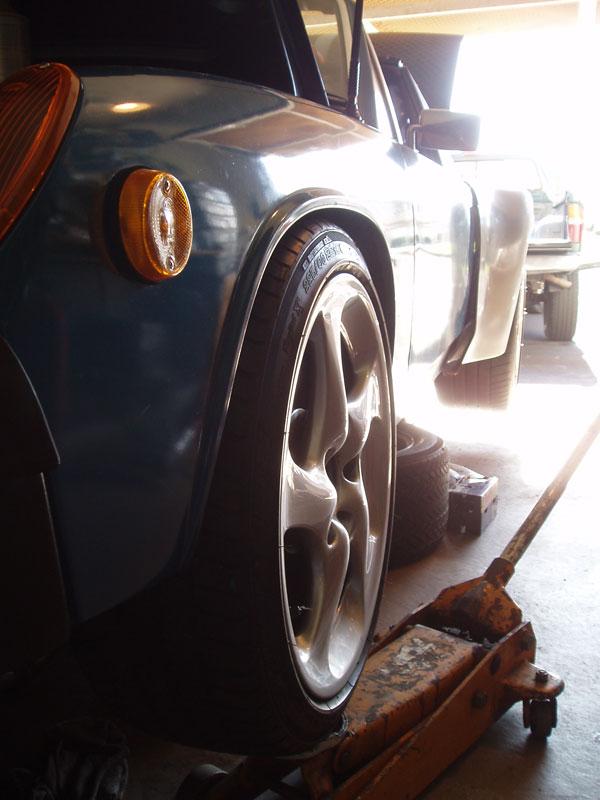
Posted by: Aaron Cox Mar 17 2006, 08:26 PM
front didnt need 2" more like 1"...
looks good. i hope you know how to do body work on the rear
Posted by: Dr. Roger Mar 18 2006, 12:45 AM
| QUOTE |
| front didnt need 2" more like 1"... |
true.
but in the spirit of trying to keep the front and rear widths closer rather than farther apart i thought it prudent.
when leo imperial and i did his fenders he had one of those hydraulic expando thingies. and just like it happens sometimes, harbor freight has them on sale this week so the front fenders will get a little widening the same we we did his.
i just love the look of tires/wheels that come right out to the inner fenders without touching.
if i make it to the breakfast next weekend and you happen to see a FG fender laying in the street, it'll probably be mine. as i have ZERO body experience.
wish me luck.
Posted by: Andyrew Mar 18 2006, 03:38 AM
If you want em extra strong, and you dont trust your fiberglass work.
Do everything you were originally going to do.. but when it comes time to haveing everything glued down, make sure you have your holed pre drilled (obviously), and grind down the fiberglass on the hole for room for pop rivits to be countersunk.
Pop rivets themselfts are plenty to hold it, and glue is also plenty to hold it, doing both, your just peachy.
Also this will help so that when the glue is set Instead of undrilling your screws (and having your glue around the screws crack ) you just ruff up the rivets and apply resin/fiberglass/bondo/kittyhair (your choice.. I did all in different area's)
Your were I was 2 months ago... But I figured it out finally on the last fender
GL dude.
Posted by: Dr. Roger Mar 18 2006, 10:13 PM
i'm going to take your advice andyrew and do both methods.
Attached image(s)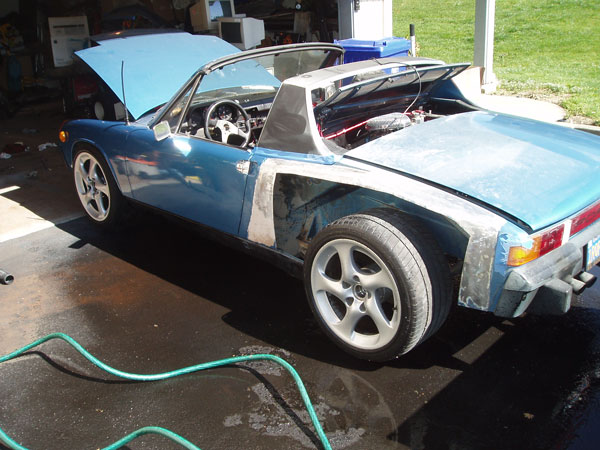
Posted by: Dr. Roger Mar 18 2006, 10:15 PM
not a slimming effect.
Attached image(s)
Posted by: J P Stein Mar 18 2006, 10:46 PM
When hacking away at fenders, think radiused corners.
.......just my .02 of course. There's still extra metal there.
Attached thumbnail(s)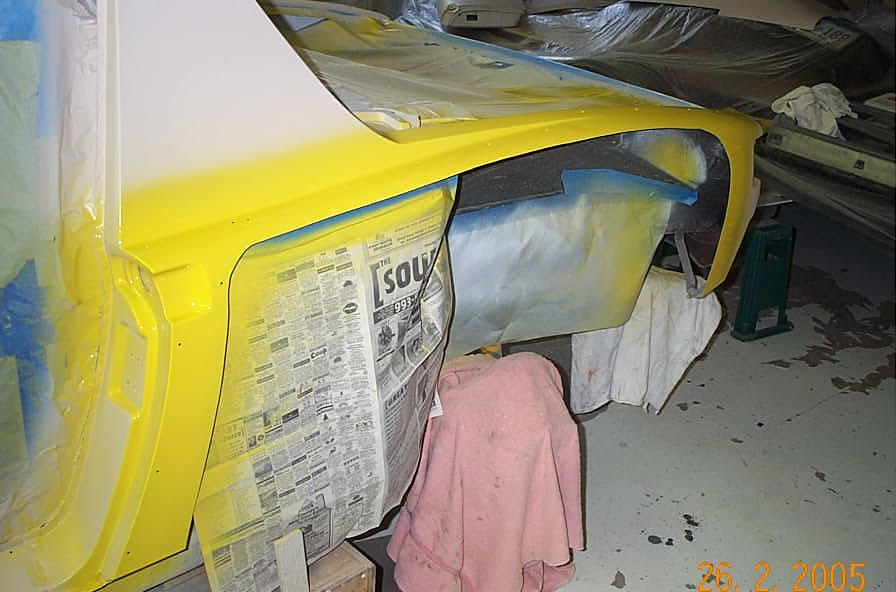
Posted by: rick 918-S Mar 18 2006, 10:48 PM
Don't leave the rivets in after the flares are bonded. They will expand and contract at different rates than the glass and read through the finish. Grind the unside of the steel Quarter panel and grind the inside of the flare and glas the inside as well as the outside. My flares have been bonded for over 10 years without a crack.
edit; are you installing them like JP's? If so, disregard my post.
Posted by: turboman808 Mar 18 2006, 11:02 PM
Whats size is that in front?
Will it work with 1 inch spacers. Looks really good.!
But anyways can you post up the front a rear info. I couldn't find it all by going back. Thanks
these are cool
http://cgi.ebay.com/ebaymotors/18-Factory-porsche-996TT-wheels-Porsche-Hollow-spokes_W0QQitemZ8046756007QQcategoryZ66484QQrdZ1QQcmdZViewItem
Posted by: Dr. Roger Mar 18 2006, 11:04 PM
| QUOTE (rick 918-S @ Mar 18 2006, 09:48 PM) |
| Don't leave the rivets in after the flares are bonded. They will expand and contract at different rates than the glass and read through the finish. Grind the unside of the steel Quarter panel and grind the inside of the flare and glas the inside as well as the outside. My flares have been bonded for over 10 years without a crack. edit; are you installing them like JP's? If so, disregard my post. |
JP, yes, asthetics are me weak point but im' sure radiusing probably helps reduce stress cracks also. good idea. I'll do it.
rick, i was planning on just bonding the fenders to the steel.
then temporarily using self tapping screws to hold the FG fenders tight to the steel until the adhesive cures.
i like the idea of making holes and having the adhesive actually reaching thru the steel to "anchor" from the back side.
i'll definately do that.
is that what you meant?
Posted by: Dr. Roger Mar 18 2006, 11:10 PM
| QUOTE (turboman808 @ Mar 18 2006, 10:02 PM) |
| Whats size is that in front? Will it work with 1 inch spacers. Looks really good.! But anyways can you post up the front a rear info. I couldn't find it all by going back. Thanks these are cool http://cgi.ebay.com/ebaymotors/18-Factory-porsche-996TT-wheels-Porsche-Hollow-spokes_W0QQitemZ8046756007QQcategoryZ66484QQrdZ1QQcmdZViewItem |
what size wheels??? tires?
spacers?
Posted by: Dr. Roger Mar 18 2006, 11:16 PM
oh, missed th ebay link.....
mine are 225's and 295's. 8" and 11" wide. almost like those on ebay but my rubber is like new and michelin pilot sports. hollow spokes.
good deal IMHO.
Posted by: Aaron Cox Mar 18 2006, 11:17 PM
ask JP about your new scrub radius
looks like fun
Posted by: turboman808 Mar 18 2006, 11:18 PM
Sorry
Well I guess all of them.
Mainly the tires and wheels. Those 18x8 are gonna work on the front with no problems?
yeah I am in the middel of finalizing everything with the 914. I should have it in my possesion next weekend.
Posted by: Dr. Roger Mar 18 2006, 11:24 PM
| QUOTE (Aaron Cox @ Mar 18 2006, 10:17 PM) |
| ask JP about your new scrub radius looks like fun |
hmmm scrub radius.... yes, way different.
i'm not looking forward to close quarters tight turns.
JP, what's your experience here?
once again, i'm hoping that there are so many people that have widened their front width that it shouldn't be THAT bad. right?
the 1" spacers would have been fine but i wanted to give my fenders a little push out to match the rear width a little closer.
Posted by: J P Stein Mar 18 2006, 11:25 PM
225s up front aren't too bad......workable.
It's better to suck the tiars in as close to the
struts as you can get em' tho.
Posted by: Aaron Cox Mar 18 2006, 11:26 PM
| QUOTE (Dr. Roger @ Mar 18 2006, 10:24 PM) | ||
hmmm scrub radius.... yes, way different. i'm not looking forward to close quarters tight turns. JP, what's your experience here? once again, i'm hoping that there are so many people that have widened their front width that it shouldn't be THAT bad. right? the 1" spacers would have been fine but i wanted to give my fenders a little push out to match the rear width a little closer. |
IIRC - JP is going to smaller width wheels cuz he cant turn em without powersteering
Posted by: Dr. Roger Mar 18 2006, 11:29 PM
| QUOTE (turboman808 @ Mar 18 2006, 10:18 PM) |
| Sorry Well I guess all of them. Mainly the tires and wheels. Those 18x8 are gonna work on the front with no problems? yeah I am in the middel of finalizing everything with the 914. I should have it in my possesion next weekend. |
with the 8X50mm offset of my rims, a 1" spacer is probably just right.
your ebay rims are a 57mm offset so you might not need a spacer.
i prefer my wheels to be right out almost touching the inner fenders.
it's easier IMHO to but spacers and stretch the fenders to get the clearances just right.
914 fenders are not identical on each side as you will quickly find out. =-)
Posted by: Aaron Cox Mar 18 2006, 11:31 PM
| QUOTE (Dr. Roger @ Mar 18 2006, 10:29 PM) | ||
with the 8X50mm offset of my rims, a 1" spacer is probably just right. your ebay rims are a 57mm offset so you might not need a spacer. i prefer my wheels to be right out almost touching the inner fenders. it's easier IMHO to but spacers and stretch the fenders to get the clearances just right. 914 fenders are not identical on each side as you will quickly find out. =-) |
et 57 will require a spacer no matter what.....
typical offsets are 23 (7" fuchs) 36's, etc.....
Posted by: J P Stein Mar 18 2006, 11:39 PM
| QUOTE (Dr. Roger @ Mar 18 2006, 09:24 PM) |
| once again, i'm hoping that there are so many people that have widened their front width that it shouldn't be THAT bad. right? |
One would think, eh?
Frankly, there are only a few folks here that understand suspension set-ups (IMO).....I have just scratched the surface of the 914's......so I ain't one of them.
Throwing 10 inch wide wheels & tires up front taught me about scrub radius....and it weren't pretty.
Lengthening the A-arms to gain room for more negative wheel offset has been suggested. I'd give that more serious consideration were it not for the side load problems I'm experiencing on the struts at present. A greater angle on the strut would increase this problem......not to mention the tie rods would be too short...
I going with a narrower W/T set up....similar to Rodger's. KISS.
Posted by: turboman808 Mar 18 2006, 11:40 PM
| QUOTE (Dr. Roger @ Mar 18 2006, 09:29 PM) |
| i prefer my wheels to be right out almost touching the inner fenders. it's easier IMHO to but spacers and stretch the fenders to get the clearances just right. |
Well Yeah I am used to rolling fenders to get tires to fit
Definetly looks like you will have to to get that to work.
Since you have to paint your car it's not a big deal to roll it. I will try to use the same wheels and hopefully not have to roll anything. Car has new paint so I don't want to tweak it if I can help it.
Posted by: Dr. Roger Mar 18 2006, 11:51 PM
thank you JP,
i thought 8's up front were just fine.
well, i'm out for tonight.
thanks again all for your input. 
Posted by: Dr. Roger Mar 23 2006, 02:05 AM
well that wasn't sooo bad.. LOL.
screwed and glued.
PC7 2 part epoxy.
Attached image(s)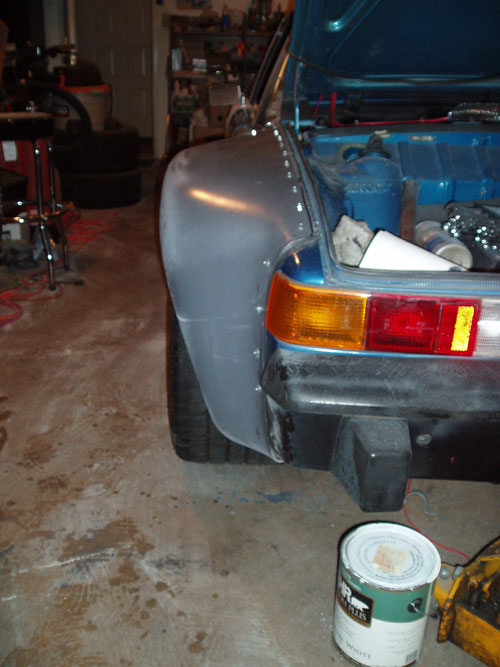
Posted by: Dr. Roger Mar 23 2006, 02:06 AM
now i need to do the other side fender, get the wiring temporarily up, reconnect the cooling lines, and give her a quick alignment. then it's off to emeryville saturday.
Attached image(s)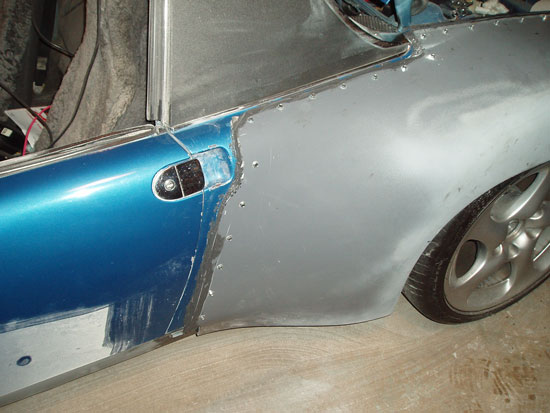
Posted by: Leo Imperial Mar 23 2006, 07:43 PM
Sweet dude!
I wish I could have been there to watch you make that first cut 
Bet that make your ass pucker.
No stop treating that thing like a garage queen and lets see some pictures of that beast on the road.
Posted by: Andyrew Mar 23 2006, 10:05 PM
Sh#t dude..
thats fing wide....
Gota say those lines are more bad ass than my hph flares...
Thats a good thing and a bad thing... lol
Posted by: Dr. Roger Mar 28 2006, 01:47 AM
thanks andy. =-)
hey leo, WuzuuuuuuuuuuuuuuuuP????
how's right coast livin' treatin you and yours? how's the bun in the oven???
Bebe is looking more and more like she does steroids...
Attached image(s)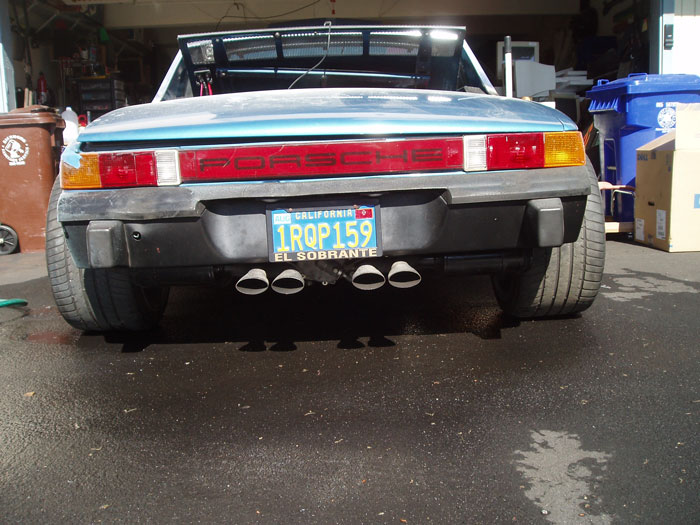
Posted by: Andyrew Mar 28 2006, 04:38 AM
oh snap.
I just got wood
that is a phat ass.
Posted by: Leo Imperial Mar 28 2006, 08:31 PM
WAAAAAAAAAASSSSSSSSSSU
I love the frame - EL SOBRANTE - Translation El mucho grande asso!
I've got ass envy. I feel like a skinny white chic.
BTW - Bun #2 is another boy
Attached image(s)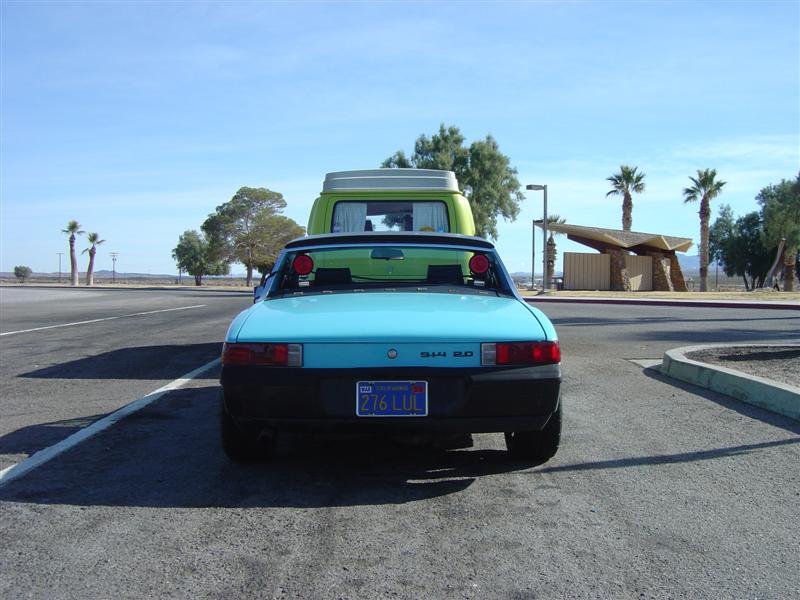
Posted by: Dr. Roger Mar 29 2006, 02:26 AM
plate idea.... from the "curvy" sheridan flares...
Attached image(s)
Posted by: Dr. Roger Mar 29 2006, 02:31 AM
or the other idea is...
v8. get it? =-)
Attached image(s)
Posted by: Andyrew Mar 29 2006, 02:58 AM
IEAT VPR is the one I like..
but dad wont let me
Posted by: Leo Imperial Mar 29 2006, 09:14 AM
Thats like where the name Mangusta came from.
Mongoose - Cobra eater.
Of course the Mangusta never did catch the Cobra.
Posted by: Dr. Roger Mar 29 2006, 11:04 AM
how about
V8 DV8 (deviate)
or DEVI8 1
or DEVE8 1
or is that too vague?
deviate: swerve, curve,
Posted by: Leo Imperial Mar 29 2006, 08:28 PM
Whats another word for pirate treasure?
I say its BOOTY.
I would focus on that big ass. Not whats inside.
Look at the size of her ass.
ILKBGBTZ 
Posted by: Dr. Roger Mar 29 2006, 09:30 PM
available:
ILKBGBT
WYDBACK
KLRKURV
oh, and my favorite...
ASSSET
Posted by: Dr. Roger Mar 29 2006, 09:34 PM
oh leo, "I(heart)booty" is already taken......
but "I(heart)butay" is not.
God knows i'm an "ass man"....
Posted by: Dr. Roger Apr 6 2006, 11:53 PM
installed smaller diameter cooling hoses today and tested.
3/4" I.D. to rad
7/8" I.D. from rad.
Mark Jones, I owe you now.
brought engine temp up to 185 then turned fans on.
engine temp came down to 165 and held steady there for half and hour.
Success! =-) I was kinda worried about the reduced I.D. hoses compared to what i was running... 1 1/2" LOL...
Attached image(s)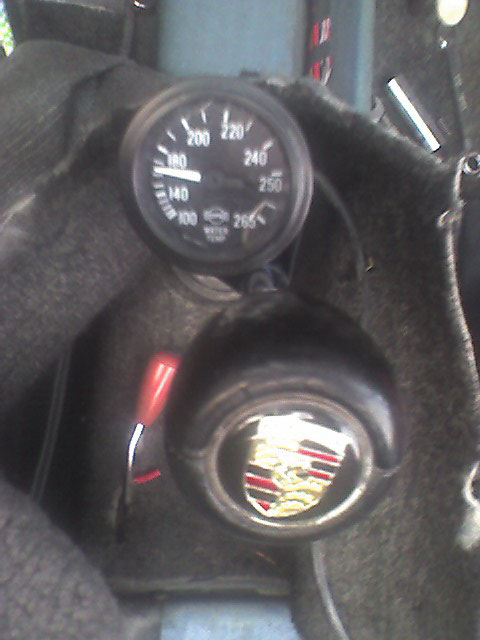
Posted by: Dr. Roger Apr 6 2006, 11:57 PM
then i painted the other rear fender. Rustoleum white, to accent the other black fender.
at least now i know those fenders look more like patio furniture than ever before. uber trend-setting.
(note: this is where roger breaks out into song... McCartney's "ebony and ivory"... )
Attached image(s)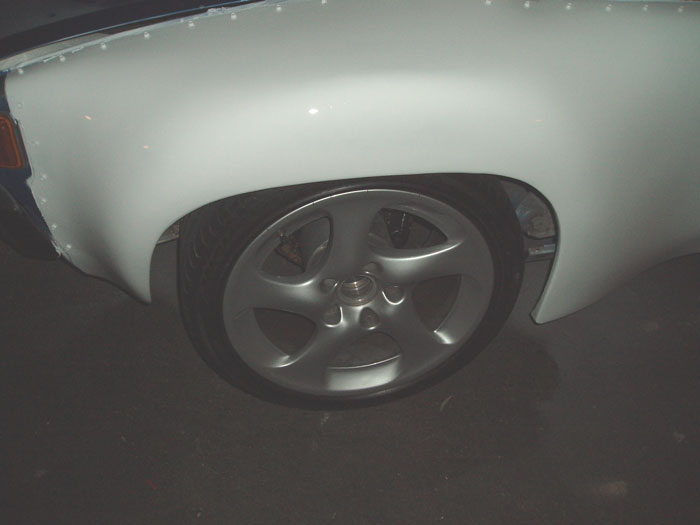
Posted by: Dr. Roger Apr 7 2006, 12:08 AM
black or white?
Attached image(s)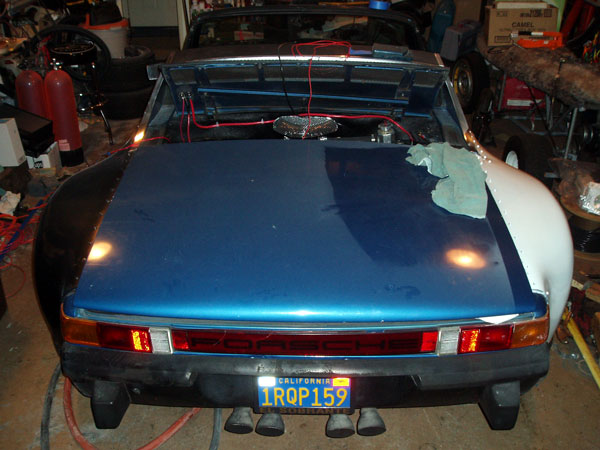
Posted by: Aaron Cox Apr 7 2006, 12:33 AM
are you bodyworking them in?
or are you just leaving it riveted on?
Posted by: Dr. Roger Apr 7 2006, 10:48 AM
the big plan is to bodywork them in.
i know 2 part epoxy is great stuff but i'm still going to put at least 1K miles on her before backing out the the self tapping screws.
my artist friend says whenever i'm ready to paint, he'll be ready so it's a matter of getting my butt in gear which isn't going t happen unless there is a serious paradigm change. (which includes $$$ i don't have right now)
black is beautiful, baby.
Attached image(s)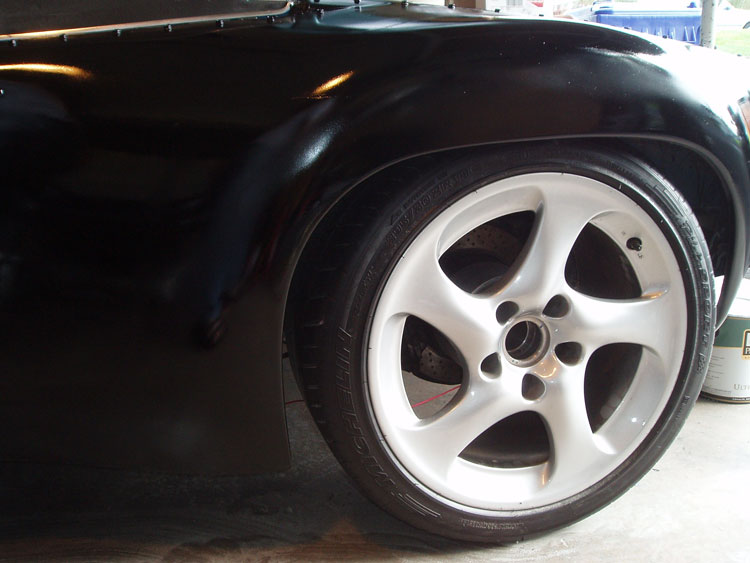
Posted by: Andyrew Apr 7 2006, 04:00 PM
lol black/white fenders with silver wheels...
Copy cat! My wheels were black on one side, and silver on the other
Keep that theme through the car, and we'll call it two face!
Posted by: Dr. Roger Apr 9 2006, 12:53 AM
dang man. i'm scared of my car.
took her out for the first time with the new front suspension/brakes, tires/wheels, and vac advance attached.
the dizzy advance springs were setup for use with the vac advance which i had not attached last fall. big difference when attached and semi-timed. it pulls soooo hard now. zero wheel spin. next i need to spring for a good timing light.
wiring is still in progress but just enough to run a few laps around the neighborhood and piss off a few neighbors.
My old friend Rod joined me and said it accelerated like a drag boat. whatever that's like...
brakes are excellent but i will be keeping my eye out for a 19mm MC as i prefer a more firm feel. perhaps i will install the porterfield pads before buying the 19mm MC as i'm sure they will make a big difference.
lastly, i need to adjust the clutch and shift linkage. had trouble getting her into first gear. (second gear on most people's 5 speed)
if anyone is looking for a way to reduce their car insurance, ask about antique car insurance. my insurance guy just hooked me up for $180/yr with full coverage and small deductibles, and $10,000 stated value. 
Posted by: Dr. Roger Jun 13 2006, 11:18 PM
she running, rested and almost ready for the road.
got the alighment pretty close/tolerable and clutch/shifter linkage are now non-issues.
just need to wire the lights and yahooooooo!
yes, that's the rustomeum white.... LOL
Attached image(s)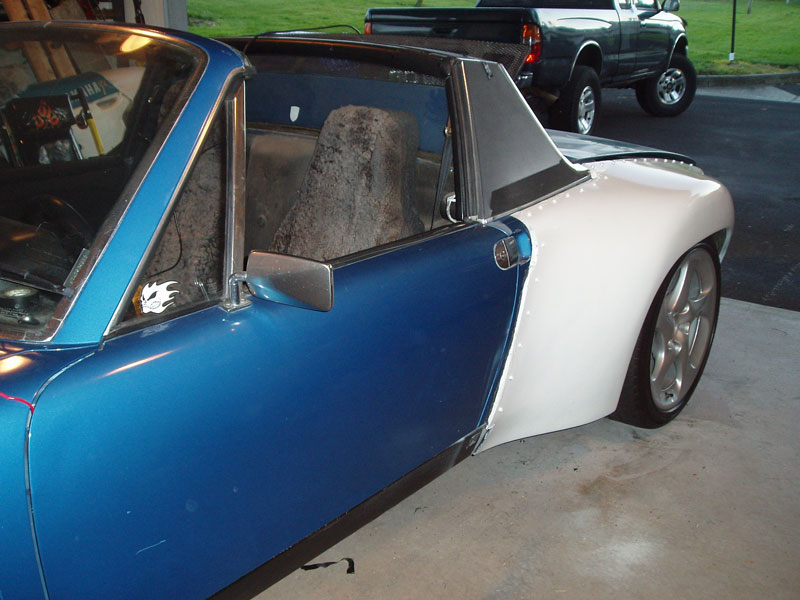
Posted by: Andyrew Jun 13 2006, 11:25 PM
Car looks good!!
What rubber did you get?
Posted by: Dr. Roger Jun 14 2006, 12:55 AM
michelin Pilot Sports....
i wish they were the Pilot Sport Cup's.... =-))))
these will be toast fast enough... LOL
i'll have to start a seperate savings account for tires now...
Attached thumbnail(s)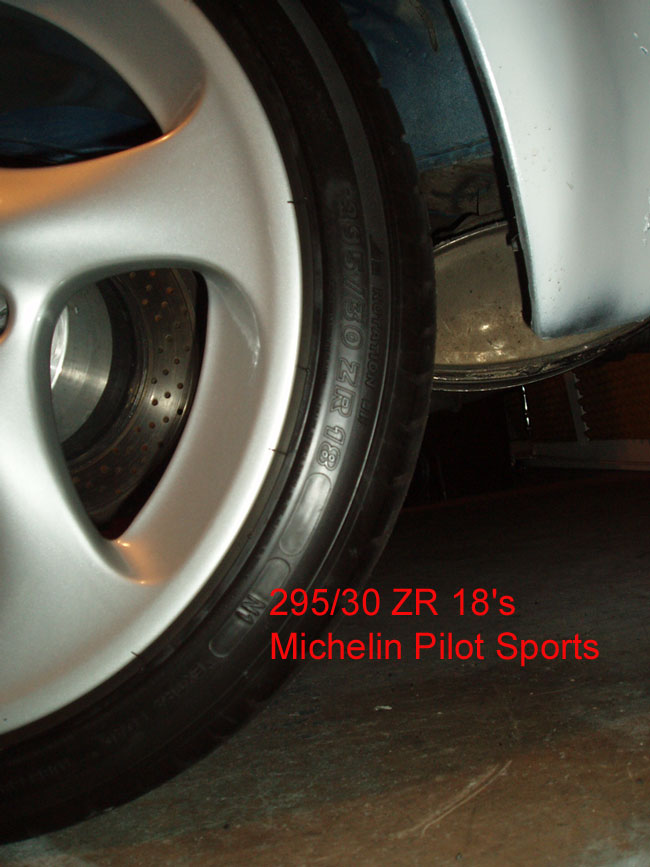
Attached image(s)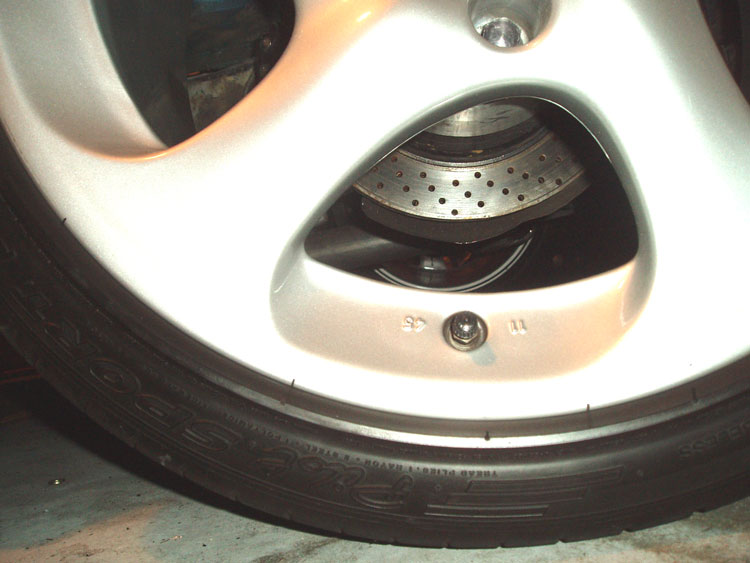
Posted by: 914-8 Jun 14 2006, 01:51 PM

the big plan is to bodywork them in.
i know 2 part epoxy is great stuff but i'm still going to put at least 1K miles on her before backing out the the self tapping screws.
my artist friend says whenever i'm ready to paint, he'll be ready so it's a matter of getting my butt in gear which isn't going t happen unless there is a serious paradigm change. (which includes $$$ i don't have right now)

black is beautiful, baby.

Roger, from what I can tell from your pictures as to where the seams lines are (the joints between FG and steel), I think you may have a real problem bodyworking those panels in.
It's not so much an issue of the strength of the epoxy, but a flexibility issue.
Every car in the world has some flex, the 914 more than most. ESP. when coupled with a V8 and huge tires. It doesn't take a whole lot of flex for cracks to start cracking the paint at those joints.
Before you go through the time and expense of bodyworking those panels in, smoothing it out, and putting paint over it, I'd get an opinion or two from some really experienced body men. My guess is that they'll tell you you will have cracks all over the place in 6 months if you try to bodywork those panels in.
Posted by: Dr. Roger Jun 14 2006, 07:03 PM
i have chatted with several V8 guys regarding bonding, as well as other attachment solutions, and most of the guys currently driving their V8's have had no problems with torque induced cracking.
at the same time, just to be safe,i will put a coat of crap paint on her for a month or so and we'll see if there is much flex at the bond points.
now you've got me thinking.... again. LOL
Bill's got a LS6 in his and bonded flares. zero cracks. i tried to emulate his solution.
naw, i think we're cool in this department... =-)
i do apreciate your concern, nonetheless. 
cheers!

Posted by: 914-8 Jun 14 2006, 08:04 PM
i'd be most concerned about the areas on the fender right under the targa bar, and the rearmost area where the fg fender is bonded to the car (the vertical seam that is a few inches in front of the rear taillights).
hopefully it works out - it would look sweet bodyworked in!
Posted by: banksyinoz Jun 18 2006, 04:11 AM
goddamn roger ur the man holy crap ur allready there
i know uve probably allready posted it but ive  toooo many
how much the sheridan rears
p l e a s eee
imust know  it would fix all my problems
well nearly 
Posted by: Dr. Roger Jun 18 2006, 10:39 AM
Hey Glenn,
IMHO the Sheridan body kit is #1 for aerodynamics and looks. If I had the time and $$$ I would have gone the custom fabricated steel fendered route but....
You can get the Sheridan fenders directly from the source or, if you have the time to shop around, you can start posting "WTB" (want to buy) ads everywhere online. Including right HERE, as this is where I found mine. ($250.00 for the rears)
You'll love Roger Sheridans website.... =-) Make sure you've got some Kleenex handy so yo don't soil yourself. LOL
http://ultimate914.com
Posted by: banksyinoz Jun 18 2006, 04:17 PM
thanks roger its appreciated cheers
Posted by: Dr. Roger Jun 20 2006, 08:40 AM
quick progress update.
the high torque mini starter works like a champ! it doesn't require the adaptor plate the chevy starter uses which makes for a very nice fit and engagement.
then i received Mar7ck's wiper/blinker switches in the mail a few days ago so now i'm working through how to get that part of the wiring complete.
so far i've figured out how to make the gas gague, blinkers, running lights and headlights work but can't get the brake lights to work yet.... the MC is hooked up but it got late last night. i'll pick it up again tonight.
Posted by: Dr. Roger Jun 21 2006, 12:04 PM
quick question:
how do i get the wire connectors from the blinkers and wipers through the ignition/steering column housing?
those two connectors are shaped to go around the steering shaft but the housing is narrow enough so that i cannot just slide them through the housing.
yes the connectors are snapped together.
yes i've tried a little flat blade screwdriver to persuade them in.
i have not tried spit and some nice words....
help, pleeeease....
Posted by: Dr. Roger Jun 22 2006, 01:00 AM
it's amazing what you can do with an angle grinder....
the opening in the steering column housing was definately too small probably due to different year connectors/blinker/wiper switches soooooo. angle grinder. =-) no more problem.
i figure everyone likes to see a good horror flick so here's mine... 
one little short in the right blinker and she's all good. 
Attached image(s)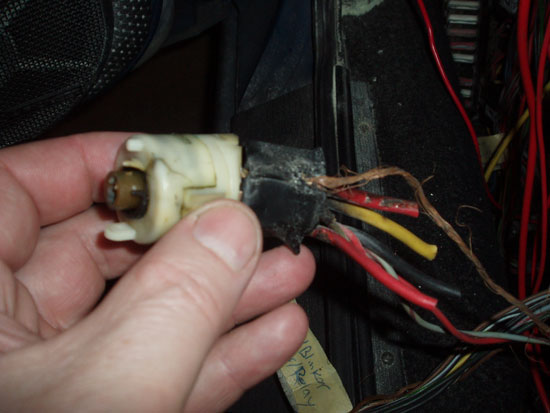
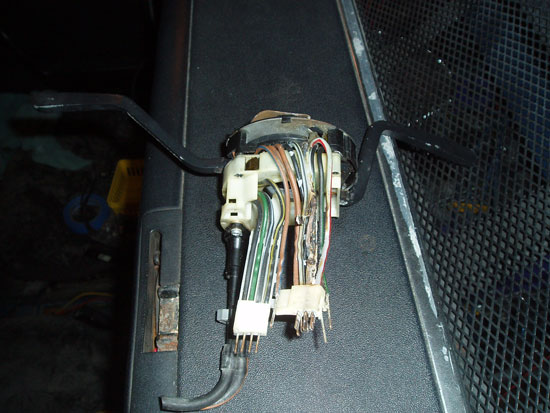
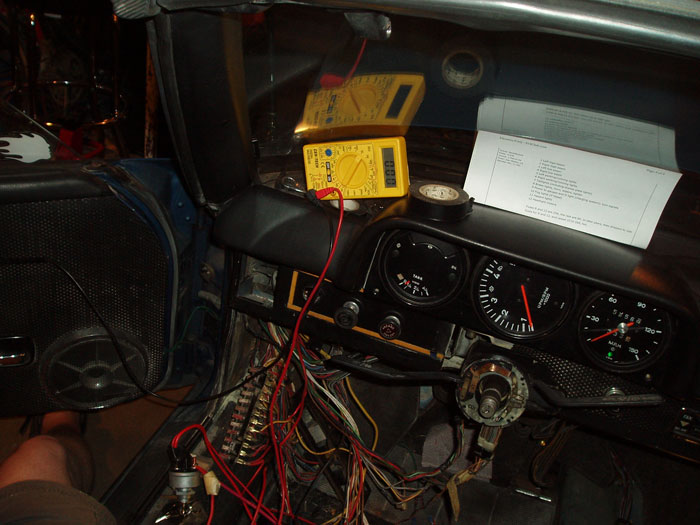

Posted by: Dr. Roger Jun 23 2006, 02:16 AM
little update.
all electronics work now except the right blinker. that right blinker shorts out and blows the blinker/brake light circuit/fuse. i think the short is in the column switch.
i don't know how to go about solving that mystery but after i button it up tomorrow she'll be a driver.
when i started this project i thought it might take 3-4 months.
15 months later....
mueller, ya' going to be around??? =-)
Posted by: Dr. Roger Nov 14 2006, 12:18 AM
Nuther little update.
I started prepping the fiberglass and sheet metal.
Ever since someone said you can't paint a car with rustoleum I've been experimenting with it to see what results I get.
Here's one result.
Attached image(s)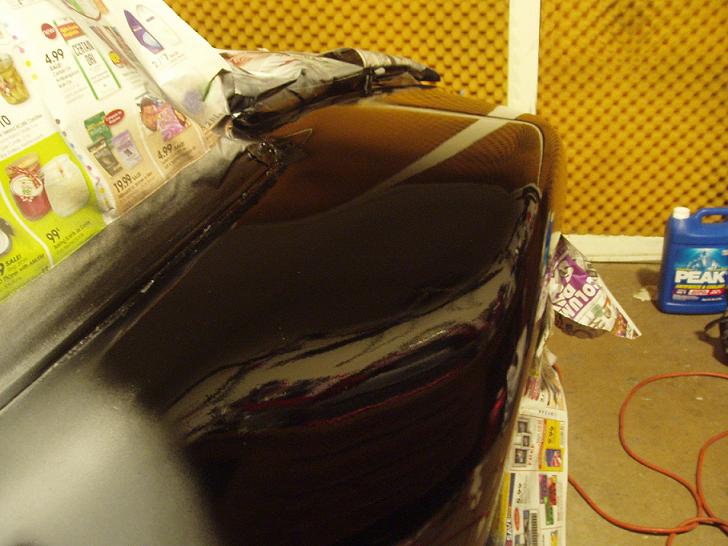
Posted by: Andyrew Nov 14 2006, 12:24 AM
Looks good! What did you use?
Posted by: Mar7ck Nov 14 2006, 09:20 AM
Now that you have painted it sand it with 2000 grit paper, then paint it again cut it with polishing compound followed by waxing. This will result in a mirror like shine from a rattle can.
Mar7ck
Posted by: Dr. Roger Dec 7 2006, 01:06 AM
nuther little update.
i can't have you guys thinking i'm doing nothing on my car... can I?
i just can't decide on paint scheme.
i made the mistake of watching discovery channel highlights on SEMA and it started me thinking... black is great but what if i ... (add any hair-brained ideas you may have here).
so i'm just prepping the car with the hope that i'll get committed to one color/scheme.
Yes Marck, she'll be glossy one way or another. LOL
Attached image(s)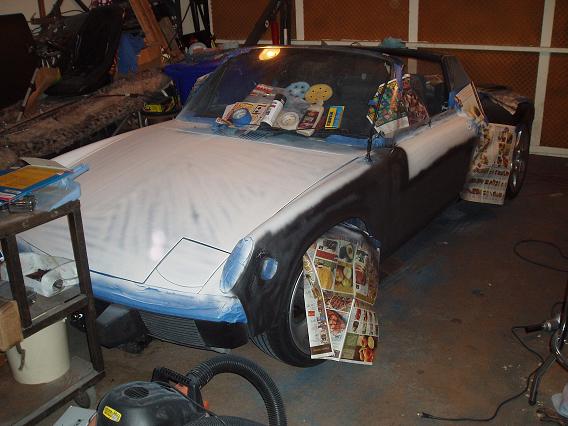
Posted by: Dr. Roger Jan 23 2007, 11:55 PM
Another quarter panel done.
I'm starting to get the hang of it.
=-)
Attached image(s)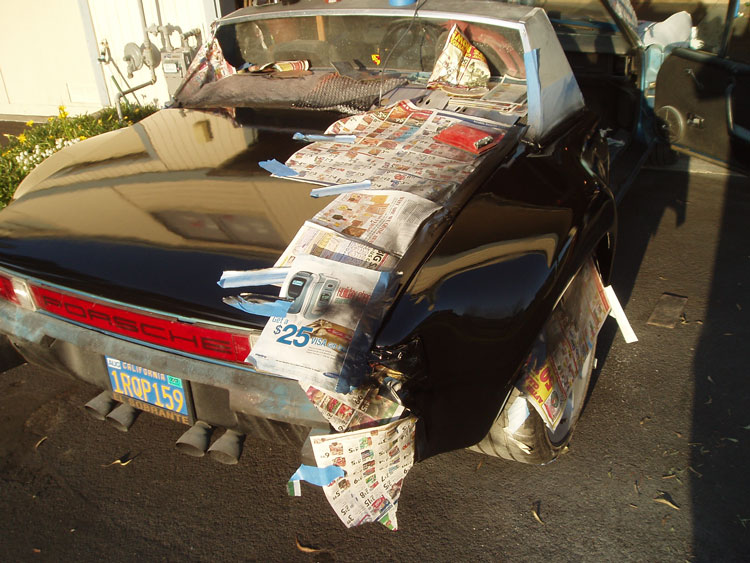
Posted by: Dr. Roger Mar 3 2007, 04:09 PM
A Rustoleum rattle-can special.
It really makes the rockers, bumpers, and sail-panels look bad now.
Those are now added to my "to do" list.
Enjoy.
Attached image(s)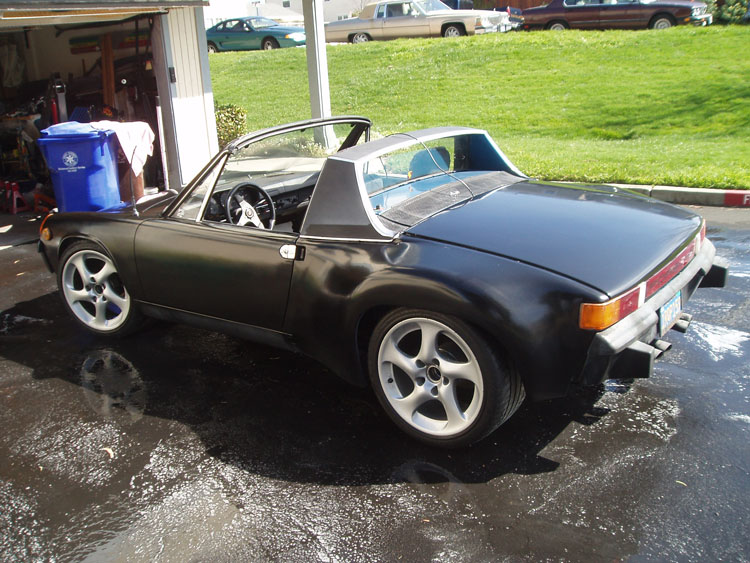

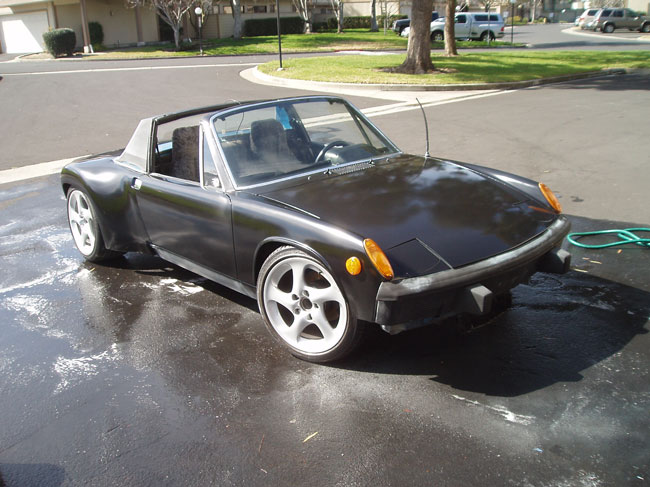
Posted by: Andyrew Mar 3 2007, 04:32 PM
Looking great!!
Your farther than I am.. lol
Posted by: Dr. Roger Mar 3 2007, 04:40 PM
yes, but remember...
your only a rattle can away! LOL =-)
btw, i haven't seen pics of your ride with the flares on... yet. =-)
Posted by: Andyrew Mar 3 2007, 09:40 PM
Oh.. there around.. somewhere..
hmm.
Ya, Im solid black now.. but its flat black, and I took a painting class for a reason.. lol
lemme look.
Andrew
Posted by: Andyrew Mar 3 2007, 09:47 PM
There all in http://www.914world.com/bbs2/index.php?automodule=blog&blogid=205&
before...
after.. 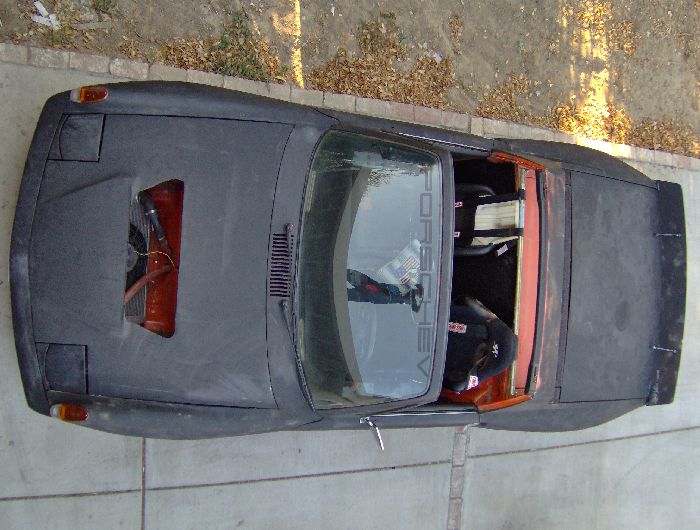
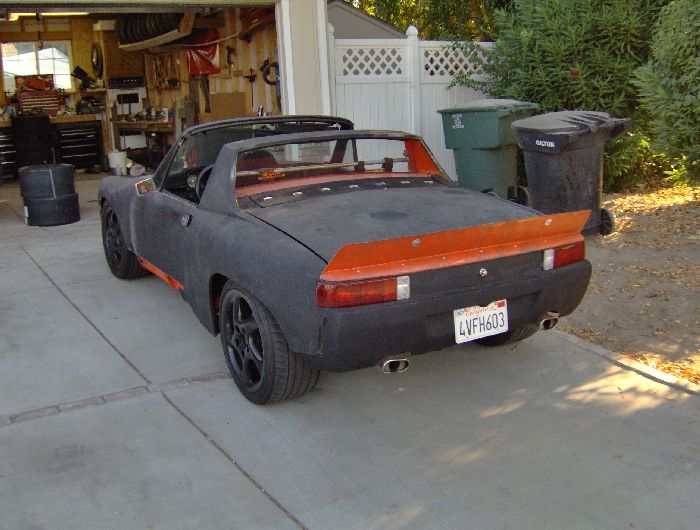
check out my blog... chu can see tha big slicks... muahahhaha
Posted by: Dr. Roger Nov 26 2007, 09:51 PM
Wow, it's been a while since my last update.
I had Eric rebuild my spaced rear calipers.
Here they are installed.
Purdy... 
Tomorrow I flip the car around and pull the motor. Dang I hate doing this solo.
Anyone free and in the area tomorrow? Can supply beverages and burgers. =)
![popcorn[1].gif](style_emoticons/default/popcorn[1].gif)
Attached image(s)
Posted by: Dr. Roger Dec 21 2007, 03:03 AM
My builder buddy told me I had too much cam and too much of a high rise intake for the compression I was running which is 9:1.
So I've brought the cam down one notch and also matched it with a more modern medium rise, split plenum intake good from 1800 to 6000RPM's. It will be very streetable now.
Too much torque buy waaaay more manageable than before. I baby her anyways. 
Operating Range: 1800-6000 RPM
Duration Advertised: 274° Intake / 286° Exhaust
Duration @ .050'' Lift: 230° Intake / 236° Exhaust
Valve Lift w/1.5 Rockers: .490'' Intake / .490'' Exhaust
Lobe Separation Angle: 110°
Attached image(s)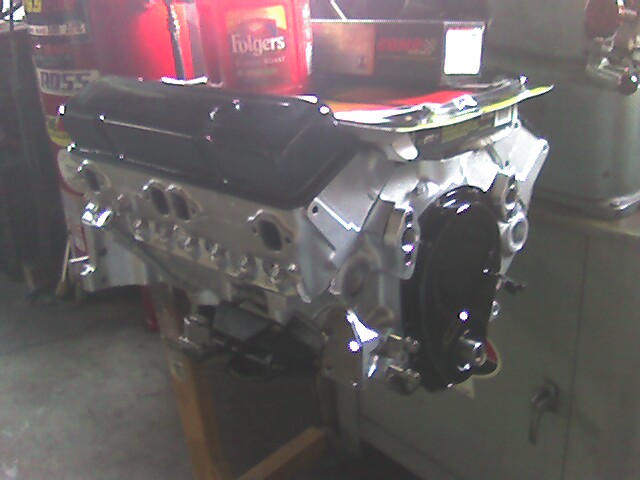
Posted by: neo914-6 Jul 28 2008, 05:24 PM
Wow, it's been a while since my last update.
I had Eric rebuild my spaced rear calipers.
Here they are installed.
Purdy...
Tomorrow I flip the car around and pull the motor. Dang I hate doing this solo.
Anyone free and in the area tomorrow? Can supply beverages and burgers. =)
Watsup Rog? I have those dinky Shea v-calipers in my 11's with 3" spacers too!
Posted by: Dr. Roger Feb 13 2009, 12:40 AM
Wow, it's been a while since my last update.
I had Eric rebuild my spaced rear calipers.
Here they are installed.
Purdy...
Tomorrow I flip the car around and pull the motor. Dang I hate doing this solo.
Anyone free and in the area tomorrow? Can supply beverages and burgers. =)
Watsup Rog? I have those dinky Shea v-calipers in my 11's with 3" spacers too!
Hey Felix,
With the sticky Porterfield pads, they do a fine job on the track.

Posted by: Dr. Roger Mar 4 2009, 11:34 AM
per request bump....
![]()
Powered by Invision Power Board (http://www.invisionboard.com)
© Invision Power Services (http://www.invisionpower.com)