Printable Version of Topic
Click here to view this topic in its original format
914World.com _ 914World Garage _ LE 15322
Posted by: rstover Sep 11 2018, 04:39 PM
I was not going to start thread until the car was home, but it is getting close and I want to share some pictures of the car and the progress. IMG_2173.mov ( 3.24mb )
Number of downloads: 1030
IMG_2173.mov ( 3.24mb )
Number of downloads: 1030
Posted by: mepstein Sep 11 2018, 04:42 PM
Congrats. 
Posted by: rgalla9146 Sep 11 2018, 04:50 PM
WOW ! 
Posted by: 914_7T3 Sep 11 2018, 05:18 PM
Wow, Its like a mirror! Will you be painting inside the trunks and engine bay as well? 
Posted by: poorsche914 Sep 11 2018, 05:18 PM


Posted by: rstover Sep 11 2018, 06:41 PM
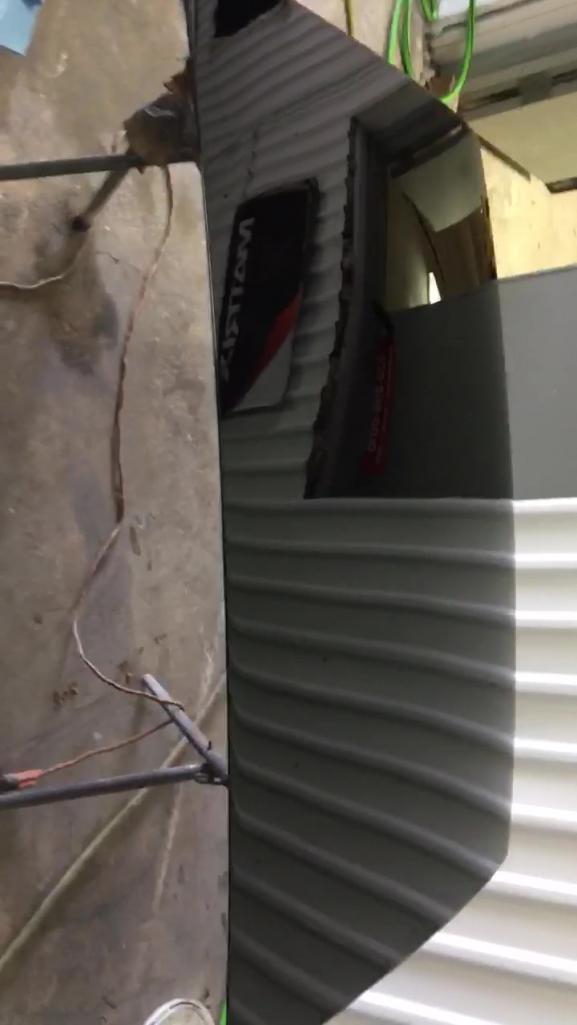
My favorite section of a 914 is the rear deck. The simple line and immense flat area sets it apart from all others. I received this from the painter today and it made my day. He thought it was good. I thought it was crazy good. Some guy named Jeff told me to get it painted in single stage. I hope he approves.
Posted by: 914Sixer Sep 11 2018, 09:18 PM
I know the restoration on this car. I can't wait to see the paint in person.
Posted by: rhodyguy Sep 11 2018, 09:21 PM
It took me a second to figure out the picture. Quite the reflection.
Posted by: billh1963 Sep 12 2018, 07:41 AM
That reflection in the movie is awesome!
Posted by: EdwardBlume Sep 12 2018, 08:10 AM
Posted by: rstover Sep 12 2018, 04:57 PM
Wow, Its like a mirror! Will you be painting inside the trunks and engine bay as well?
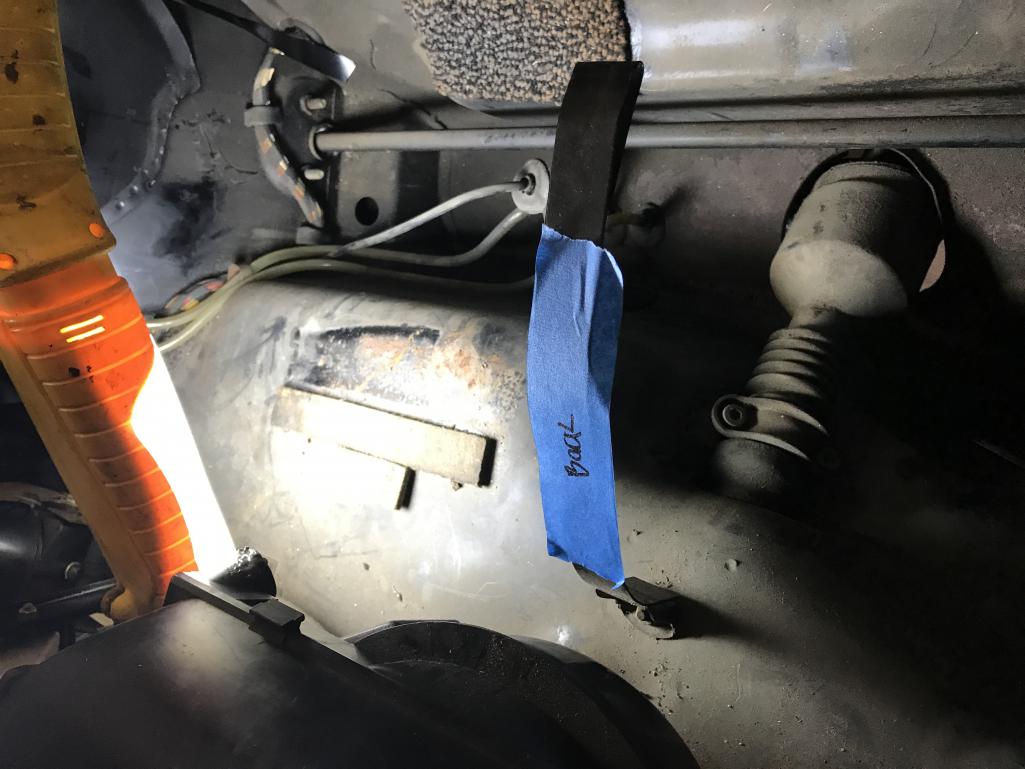
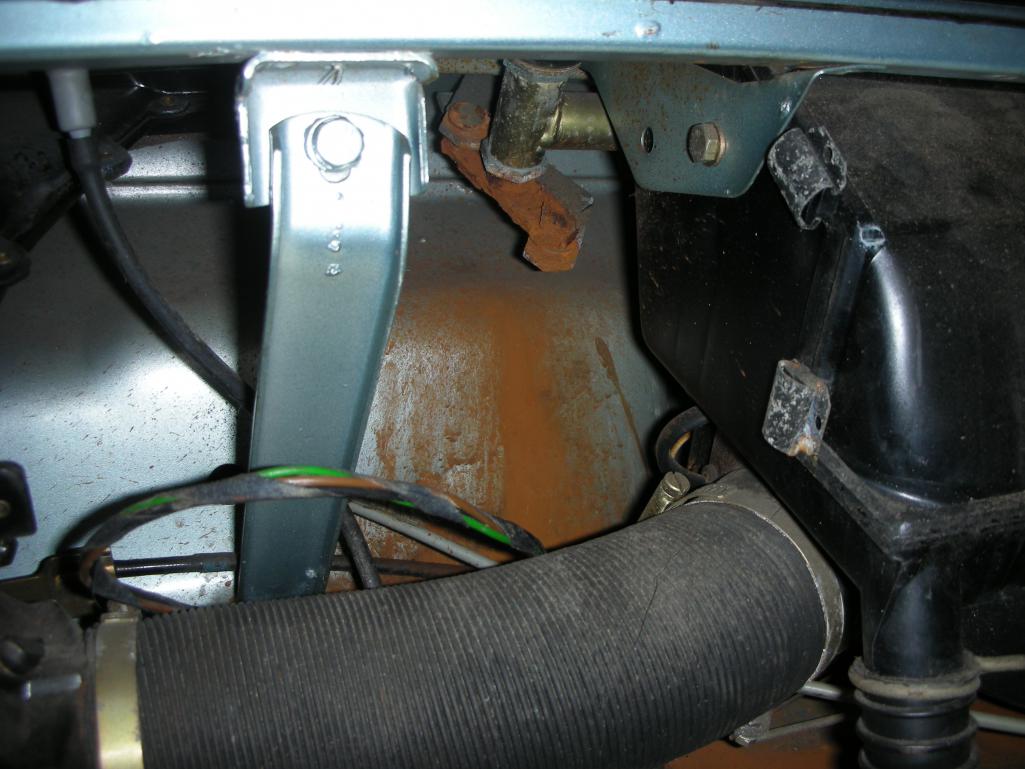
At this time I have painted the front trunk only where needed. The area to the front of the gas tank is very nice. The headlight buckets will need a little attention. There is no deep rust in them. The area up under the cowl was good and all it needs is a good cleaning. Where the gas tank sits there was a spot of rust that had pitted a bit. You can see in the picture where it was. I sanded this out and just painted this small area. There was surface rust in the area below the gas tank which you can also see. I used various wire wheels on a drill and sanded it to get all the rust removed. The area was then sprayed with Permatex rust treatment. After a day or so I wipe off the excess and use a etching primer and then paint.
There were three types of material used as gas tank pads when I removed the tank. To the front on the tank were the two carpet pads. There was no problem under those pads. On the flat part of the tank to the rear of the tank was a strip which I think was a furniture protection felt strip. It was long and narrow and it caused no problem. The other piece I think was a piece of leather. This is where the rust was.
Posted by: rstover Sep 12 2018, 04:59 PM
Wow, Its like a mirror! Will you be painting inside the trunks and engine bay as well?
Posted by: 914_7T3 Sep 13 2018, 03:51 PM
Wow, Its like a mirror! Will you be painting inside the trunks and engine bay as well?
At this time I have painted the front trunk only where needed. The area to the front of the gas tank is very nice. The headlight buckets will need a little attention. There is no deep rust in them. The area up under the cowl was good and all it needs is a good cleaning. Where the gas tank sits there was a spot of rust that had pitted a bit. You can see in the picture where it was. I sanded this out and just painted this small area. There was surface rust in the area below the gas tank which you can also see. I used various wire wheels on a drill and sanded it to get all the rust removed. The area was then sprayed with Permatex rust treatment. After a day or so I wipe off the excess and use a etching primer and then paint.
There were three types of material used as gas tank pads when I removed the tank. To the front on the tank were the two carpet pads. There was no problem under those pads. On the flat part of the tank to the rear of the tank was a strip which I think was a furniture protection felt strip. It was long and narrow and it caused no problem. The other piece I think was a piece of leather. This is where the rust was.
I know exactly what you mean!
Posted by: euro911 Sep 13 2018, 04:04 PM
Wow ... looks great, Roger. Now I can see why you desired the nicest trim pieces available to finish it off. Glad to hear the upper windshield trim made the trip OK, and that it met with your expectations. Looking forward to the progression to completion.
Posted by: rstover Sep 13 2018, 05:55 PM
Wow, Its like a mirror! Will you be painting inside the trunks and engine bay as well?
At this time I have painted the front trunk only where needed. The area to the front of the gas tank is very nice. The headlight buckets will need a little attention. There is no deep rust in them. The area up under the cowl was good and all it needs is a good cleaning. Where the gas tank sits there was a spot of rust that had pitted a bit. You can see in the picture where it was. I sanded this out and just painted this small area. There was surface rust in the area below the gas tank which you can also see. I used various wire wheels on a drill and sanded it to get all the rust removed. The area was then sprayed with Permatex rust treatment. After a day or so I wipe off the excess and use a etching primer and then paint.
There were three types of material used as gas tank pads when I removed the tank. To the front on the tank were the two carpet pads. There was no problem under those pads. On the flat part of the tank to the rear of the tank was a strip which I think was a furniture protection felt strip. It was long and narrow and it caused no problem. The other piece I think was a piece of leather. This is where the rust was.
I know exactly what you mean!
The pad on the flat part looks familiar. What kind of material do you think it is?
Posted by: rstover Sep 13 2018, 06:00 PM

The pad on the right was the one that caused a problem on my car.
Posted by: aggiezig Sep 13 2018, 08:04 PM
your reflections are stunning!!!
Posted by: 914_7T3 Sep 13 2018, 11:01 PM
The pad on the right was the one that caused a problem on my car.
That was the original pad from the factory and they retain moisture. I will be replacing with adhesive backed rubber!
Posted by: rstover Nov 5 2018, 06:55 PM
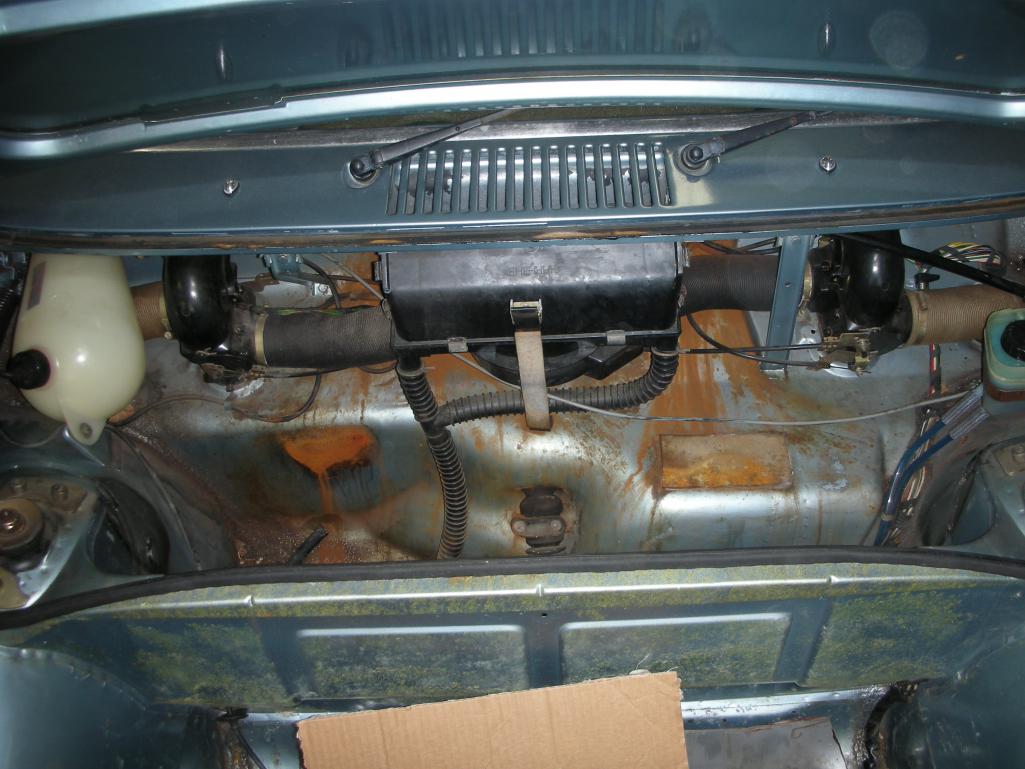
The air box is in. I was very apprehensive about getting it back in place and really did not have a plan. I don't read all the post, but I had not seen one that said it was easy.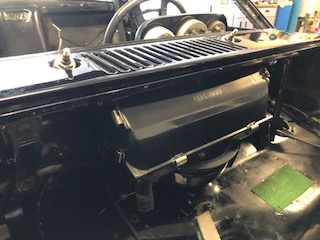
I had a few starts and stops and a few redos. I seperated box from fan then installed the box. With the box in I didn't have room to attach the control wire.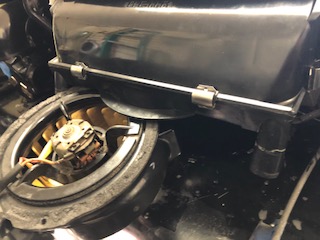

Start over. Removed air box to allow room to attach control wire. Even with the box removed this was the most difficult task. I had marked the spot where the wire was attached so I knew where it needed to be. With the washers and a tight fit this gave me a fit. I ended up putting in the bolt with the small hole in and then the near washer and used a little super glue to hold them in place. After the nut secured the wire in place I attached the outer rubber cable. With the wire control in place the fan will set flat and there is room to insert air box. It slid up easily and tightened the box in place.
I hooked up electric wire before attaching fan.
Getting the fan bolted to box was a challenge. I had to get some longer 5 mm bolts to align it then hold it in place while I got the short bolts in.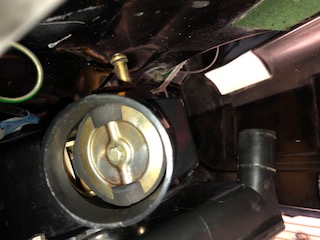
I don't know if valve is supposed to be completely close, but it wont be on this car.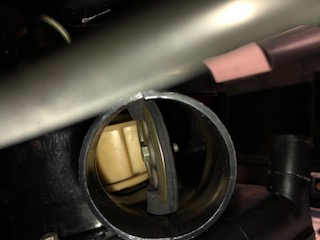
At this position the fan was blowing full and flat was wide open. I don't know if this is perfect , but I don't want to start over.
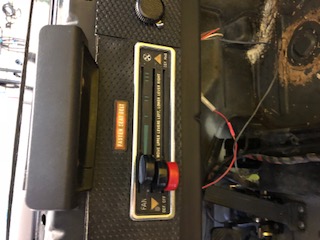
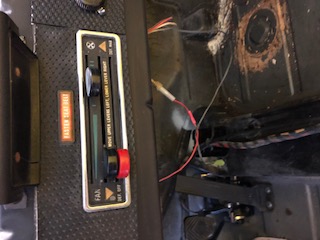
Posted by: rstover Nov 17 2018, 04:44 PM
Finished the dash today. It was another one of the items to do that was completely new to me. Thanks to all 914 world members that have shared information and my wife the project was finished and I was happy with the result.
Posted by: TravisNeff Nov 17 2018, 04:48 PM
That paint job is sensational!
Posted by: rstover Nov 17 2018, 04:57 PM
Before the air box was installed I replaced the windshield wiper hoses. I used this 356 part which appeared the same as what was in the car.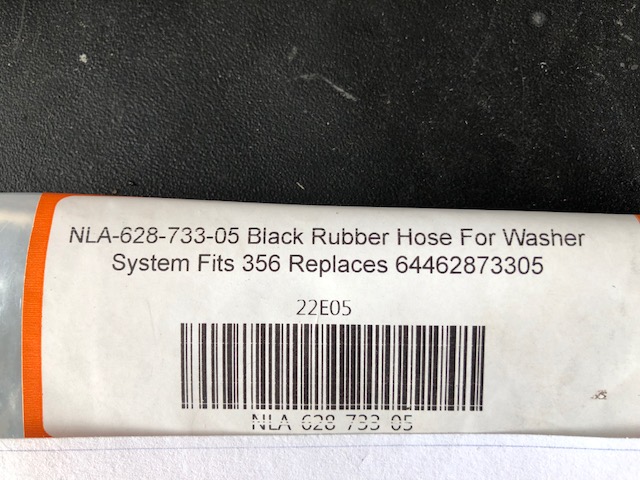
Posted by: 914 Ranch Nov 17 2018, 11:28 PM
There was once a thread about how difficult a task was from 1 to 10. Fresh air box ratted a 10, so just getting it working is a major feat. I feel it is the absolute worst task in the car but it needs to be done first upon reassemble.
NICE PAINT...
Posted by: Porschef Nov 18 2018, 06:57 AM
Really is a pain. Getting the control cable to snap back in underneath caused me to utter, then yell a lot of bad words. I came within one last attempt to remove the hood when it popped into place.
I'd rather remove and install a dash pad. 
Posted by: rstover Nov 20 2018, 08:35 PM
This rear sail panel trim was cerakoted. I don't know what was original, but it is my understanding that it was supposed painted satin black. Before being redone there was a difference in the shade and texture between the long horizontal bar and the curved vertical pieces and had no idea what had been done previously. I originally thought that I would get it black anodized but this proved impractical. A gun store told me about this new cerakote operation which was only about 25 miles away and they ended up doing it. I just was not sure about paint holding up.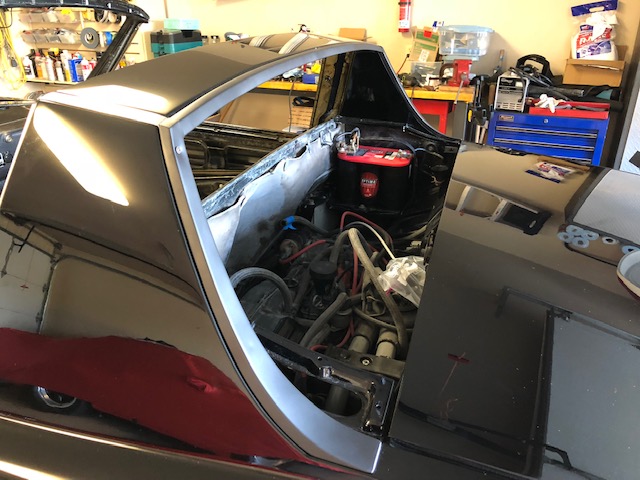
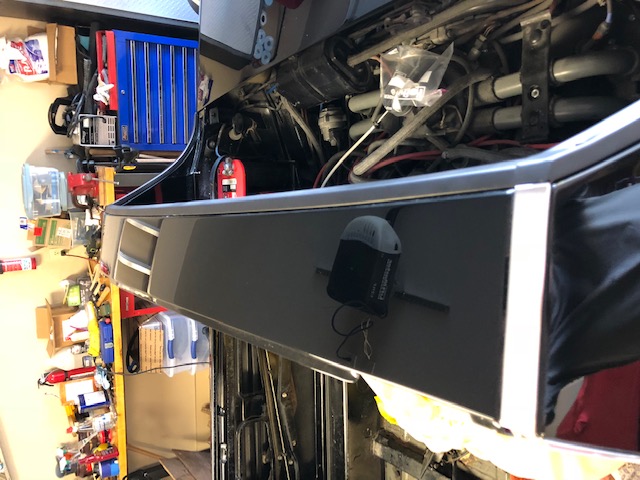
I spent about two hours Saturday trying to clean up the fan housing and got a spot about 3x5 inches looking sorta good. Today I took it to the cerakote place and it took him about 10 seconds to clean a 3x5 spot. They had very nice blasting cabinet and I think he said he was using aluminum oxide. I am using the color that is close to the spot that was blasted clean. It is always a struggle for me between trying to b original and practical. I think this is a case where it will look original but better. It maybe just sales info, but when I asked him about heat, he said that cerakote would not hold heat as powder coating. Hopefully I will have some pictures to share in two weeks.
Posted by: mepstein Nov 20 2018, 08:38 PM
cerakote is good stuff
Posted by: euro911 Nov 20 2018, 09:06 PM

I think a pint ($70.) of this would be more than enough, but not sure if the 4 oz. 'tester' ($35.) would be enough to do all three pieces

https://www.cerakoteguncoatings.com/finishes/C-102Q/graphite-black/
Posted by: rstover Nov 21 2018, 05:01 PM
Today i connected the defrost vents to the air box valves with those nasty circle clips. I didn't put my eye out, but it was possible. The first one was a front one and it went flying a couple of times when I was using a large needle nose pliers. Probably spent 45 minutes on it. 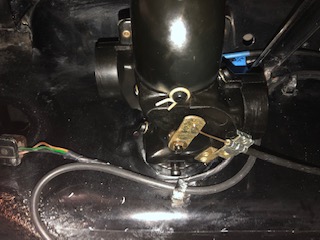
The last one was the back right clip. It took about 3 minutes. I put the clip in the vise pinched it together and put a quarter inch short extension over the end. Then was able to push it on and pull the extension off. It would have helped if I would have had a extension that I was willing to grind flatter on one side.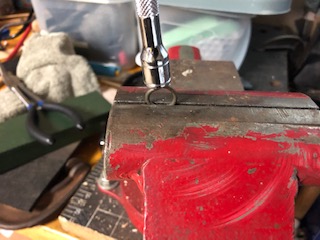
Posted by: rstover Dec 10 2018, 05:58 PM
I have been very lazy about posting. Here is a picture of the stabilizer that was refurbished by Bruce. It had been parked under the desk to long and now it is where it belongs.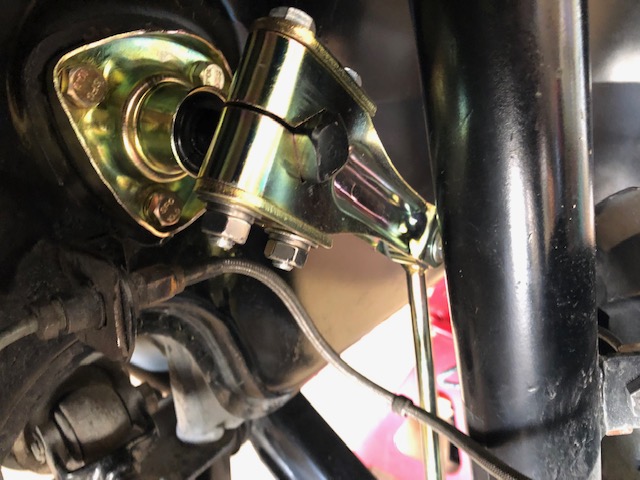
Posted by: rick 918-S Dec 11 2018, 04:56 AM
Very nice
Posted by: rstover Dec 11 2018, 06:26 PM
I completed getting the lights in a few weeks ago. When I disassembled the lights I wasn't sure that I would get them back in and pointing in the same direction. It was a matter of turning the lights on and then disconnecting the power. When installing did the same.and then put the parts back together. This was one of those rare instances when it worked the first time.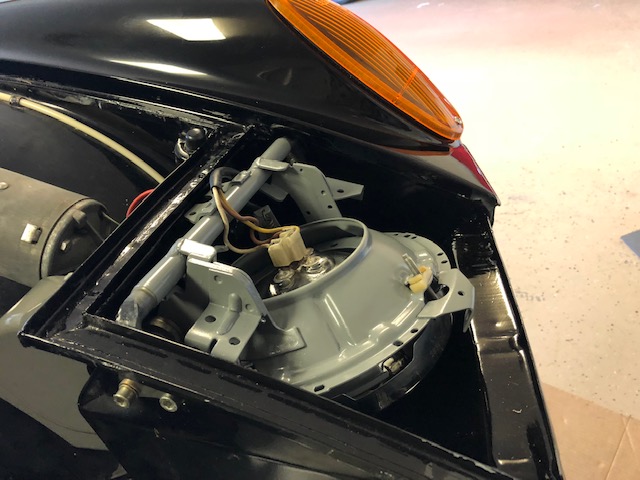

Posted by: bbrock Dec 11 2018, 06:41 PM
Insanely beautiful! Every time I open this thread, I can't get over the reflection in that paint.
Posted by: rstover Mar 10 2019, 05:53 PM
With my neighbors help we got the windshield and trim in. Again it is a learning process. This was second attempt. The first time we had problem with dash to windshield seal. The second seal was better. Paint thinner works well for cleaning butyl tape. The windshield needs to be set pretty precisely. We made setting blocks and also used masking tape guides. Also reviewed all the post on 914 world. 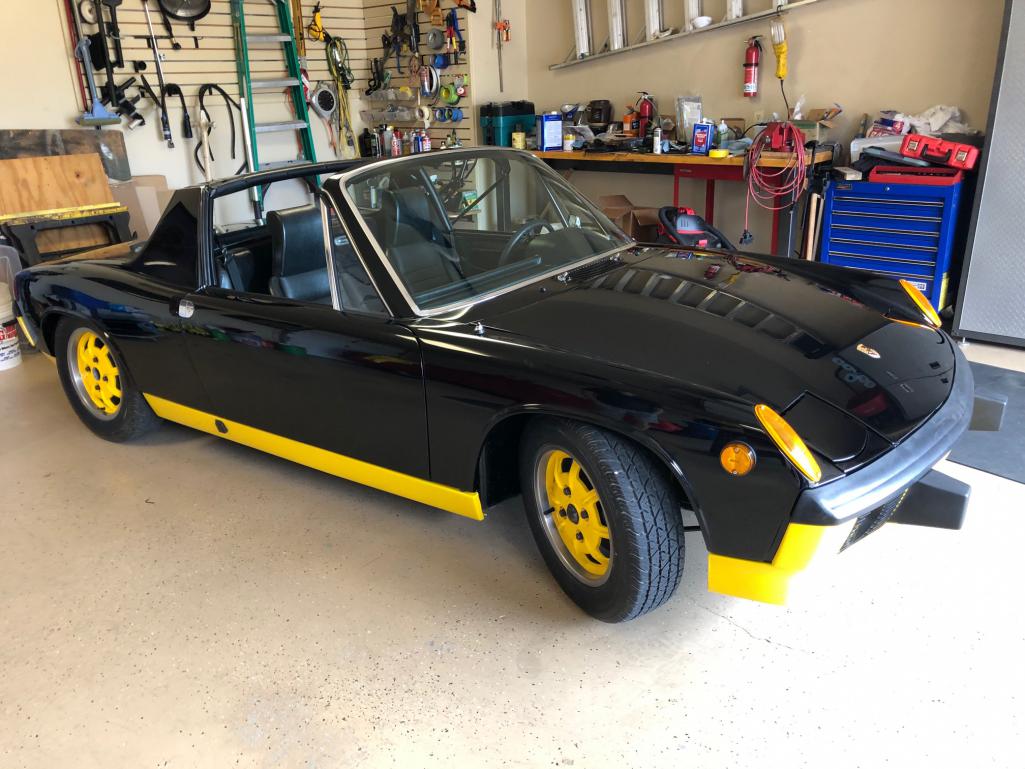
Some will recall that I had a little engine pannick when it came back from paint. Thanks for the 914 world support I was able to sort this out. Nothing was broken, but I did take the engine out remove all hoses, tin, wiring to clean it everything. Like most everything on the car I would do it different and have the second time. It would have been much easier to remove the the engine prior to paint. There was much more dust everywhere than I would have thought possible. The good side of this was that I learned a lot about the engine components. I want to thank Jeff for his clear and easy diagrams on wiring and hoses. I got stumped a couple of times a Mark cleared it up for me. He also stopped by for support a couple of weeks ago. I had glitches here and there. When I put the intake manifolds back on I didn't notice the wave washers which were left between the gasket and manifold. When the engine was rebuilt they put some wave washers on one side for some reason. When I removed the manifolds I put the nuts and washers back on the studs and I didn't notice the washers when I put the manifold back on. I can now assure you that a vacuum leak on F.I. will cause a fast idle. It was about 4000 with a broken gasket. Everything seem to be working now,but have not had any longer shake downs. Again thanks to all for for helpful post.
Posted by: 914Sixer Mar 11 2019, 07:49 AM
I stopped by earlier in the month to see Roger and the car. Clean beyond belief. Going to be a 100 point restoration in my opinion. The yellow is spot on. Roger had the original valance and rockers to compare the color match.
Posted by: dr914@autoatlanta.com Mar 11 2019, 07:54 AM
all of that beautiful perfect work and a hood badge???????????
Posted by: rstover Mar 11 2019, 09:52 AM
all of that beautiful perfect work and a hood badge???????????
The hood badge was on when I bought the car. I had to decide to keep it or weld holes shut, which would have required to paint underside of hood. When the decisions are to hard I defer to the boss she really liked the badge
Posted by: Creamsicle New Zealand Mar 11 2019, 01:13 PM
all of that beautiful perfect work and a hood badge???????????
The hood badge was on when I bought the car. I had to decide to keep it or weld holes shut, which would have required to paint underside of hood. When the decisions are to hard I defer to the boss she really liked the badge
Great looking work. From your reply to George have you not painted underside of hood?
Posted by: rstover Mar 11 2019, 01:47 PM
all of that beautiful perfect work and a hood badge???????????
The hood badge was on when I bought the car. I had to decide to keep it or weld holes shut, which would have required to paint underside of hood. When the decisions are to hard I defer to the boss she really liked the badge
Great looking work. From your reply to George have you not painted underside of hood?
Neither hood was painted on underside.
Posted by: rstover Mar 25 2019, 07:53 PM
The local sign shop finished the negative stripe last Friday. We attended the Hill country rallye with 2 other Bumble Bees. There were over a hundred cars to admire and great owners to visit with. The car is mostly where I want it ,but will have to work on a couple of, what I think are minor electrical issue. Parking brake light stays on and it must be grounding behind dash. I Have check it to tunnel. I have driven it about 50 miles and everything seem to be behaving.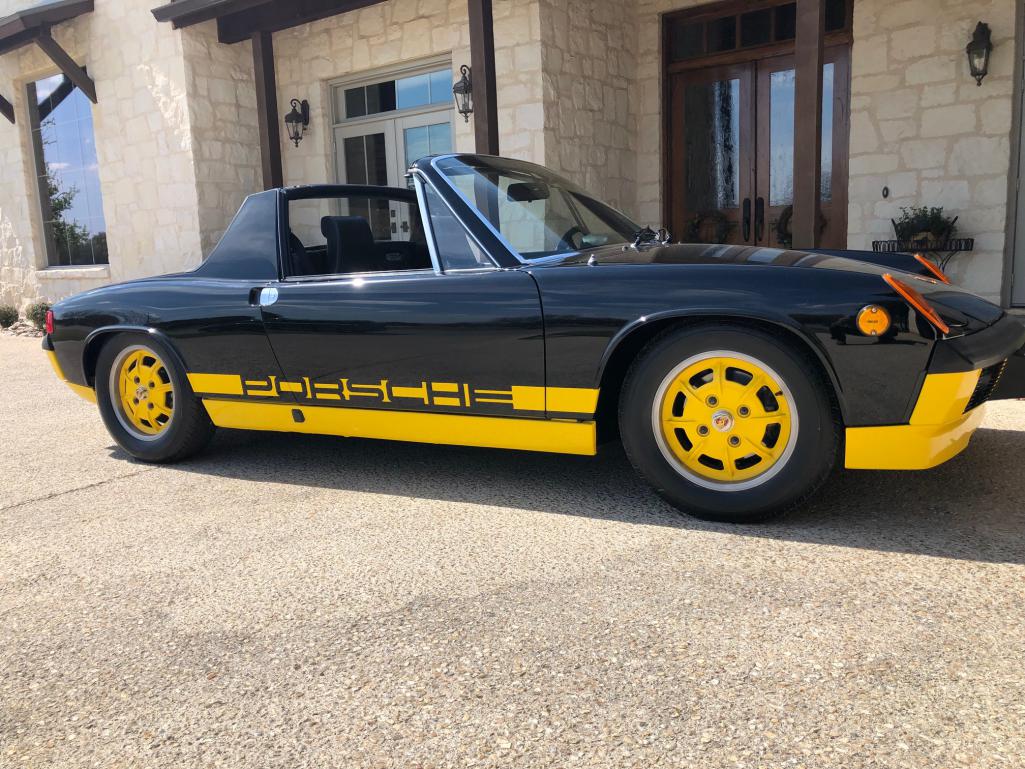
Posted by: JeffBowlsby Mar 25 2019, 10:34 PM
Wow...That punches! Congrats Roger.
Posted by: Cairo94507 Mar 26 2019, 06:53 AM
Your Bumble Bee looks perfect.
Posted by: PanelBilly Mar 26 2019, 07:37 AM
Sweet.
Posted by: scallyk9 Mar 26 2019, 09:04 AM
Gorgeous! Beautiful work.
Posted by: Creamsicle New Zealand Mar 26 2019, 12:56 PM
Great job 
Posted by: defianty Mar 26 2019, 01:00 PM
Great looking car, nice work.
Posted by: euro911 Mar 26 2019, 02:26 PM
Absolutely stunning example. Great job 
Posted by: Crudbud Apr 6 2019, 12:46 PM
Awesome paint! What brand did you use?
Posted by: rstover Apr 7 2019, 07:12 PM
Awesome paint! What brand did you use?
Axalta I believe it was imron
Powered by Invision Power Board (http://www.invisionboard.com)
© Invision Power Services (http://www.invisionpower.com)