Printable Version of Topic
Click here to view this topic in its original format
914World.com _ 914World Garage _ Ice Green 1.8 Rescue
Posted by: Chris914n6 Sep 18 2018, 11:34 PM
Back story: Car was dropped off at Carl's Cool Cars in Las Vegas based on high recommendations. Their VW specialist rebuilt the motor, bolted it back into the car, then quit. Then Carl splits with the rent money leaving all the cars to be impounded. Owner Eric posts on the 914 FB page he needs a 914 mechanic, @http://www.914world.com/bbs2/index.php?showuser=1580 says she knows a guy, and now it sits in my driveway 
My job is to get it to good Daily Driver condition, which involves figuring out the mess left over (particularly the 1.8L FI) and the usual old car fixes. This is my first time working with 914 Ljet so I'm sure I'll be asking questions, plus we'll need some parts that were lost.
Parts needed: (will get longer as the days go by)
-stock 1.8 banana muffler, gaskets, nuts & bolts.
Custom Adds:
There are a few goodies on the list...
-914Rubber top dash pad
-RennShift shifter
-Tangerine SS lines
Problems needing solved:
Time keeps on ticking into the future....
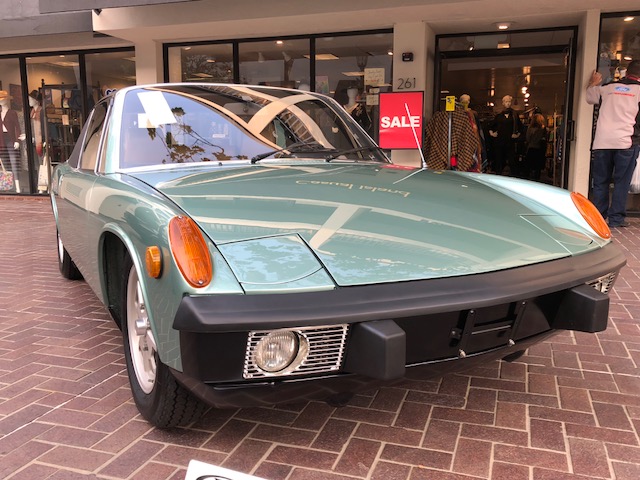
Hello good look'n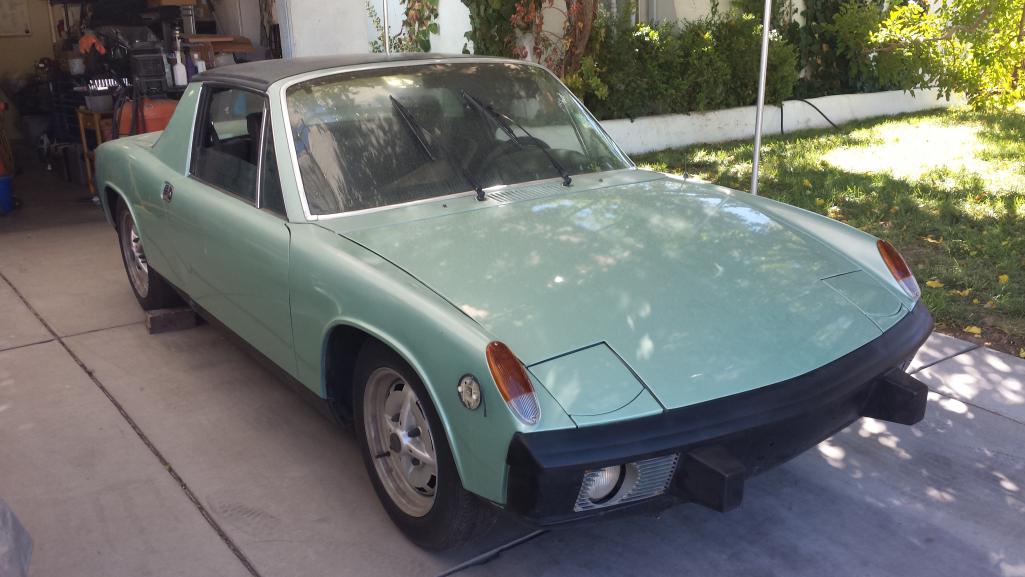
Posted by: Chris914n6 Sep 18 2018, 11:35 PM
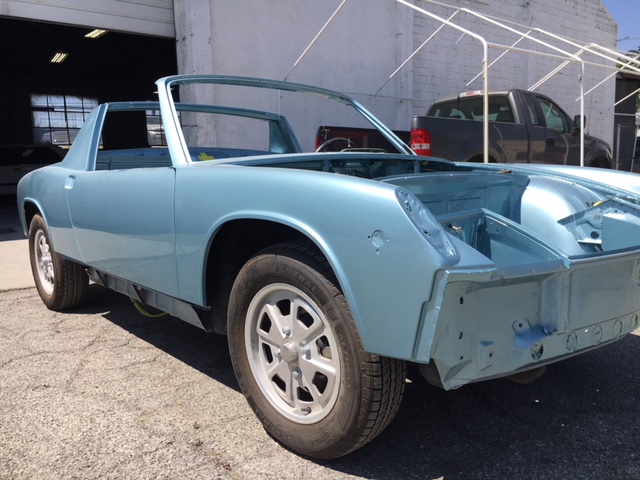
Day1: Took inventory, made a long todo list, and a quick bath.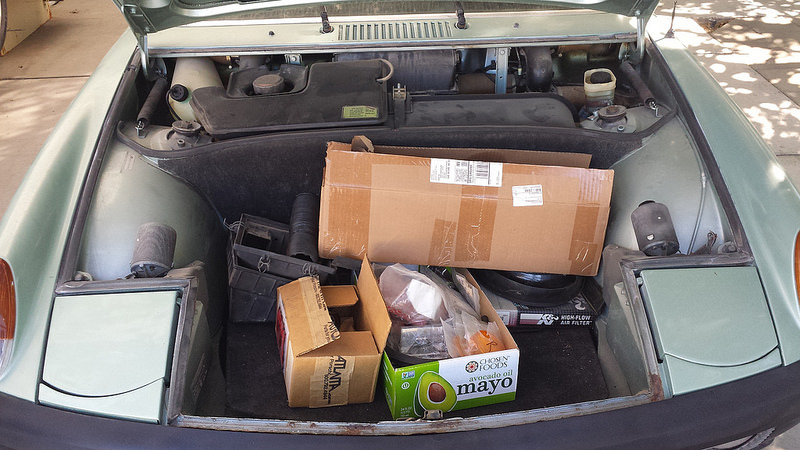
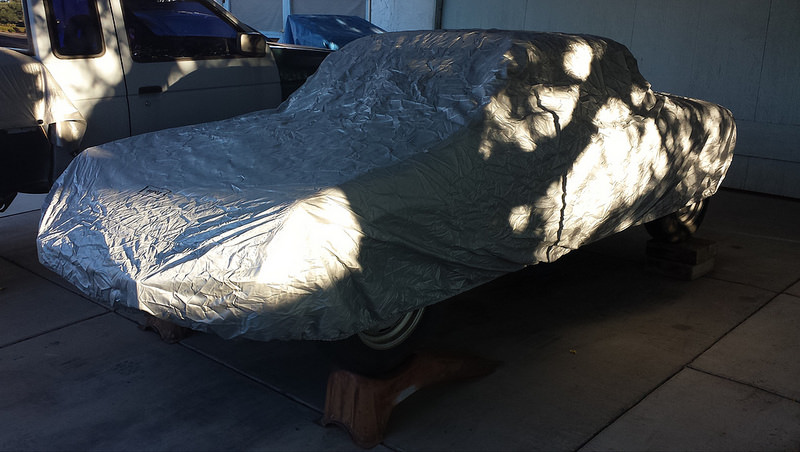
Goodnight sleep tight.
/Day1
Posted by: 914_7T3 Sep 18 2018, 11:43 PM
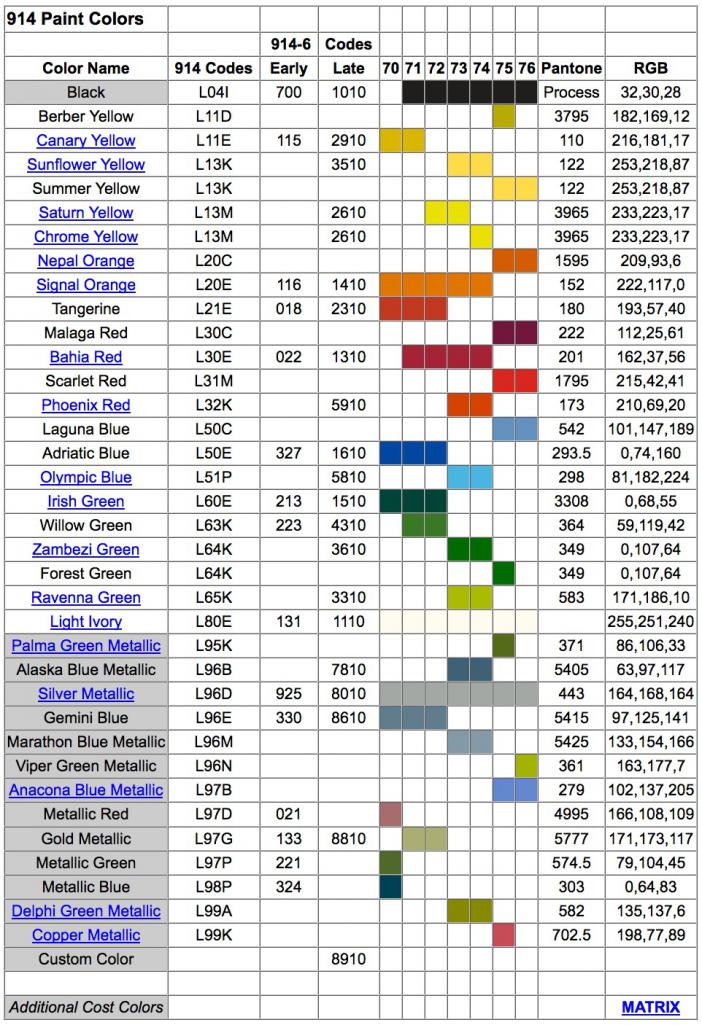
The photos look like ice green metallic!
Posted by: Chris914n6 Sep 19 2018, 12:11 AM

The photos look like ice green metallic!
Whew. We weren't sure of the name but the stamped paint code is L96M. 3 votes = title changed.

Posted by: euro911 Sep 19 2018, 12:22 AM

Posted by: djway Sep 19 2018, 12:41 AM
L Jet is actually pretty simple. There are online trouble shooting manuals from Bosch that take you step by step. Most of the parts you can test yourself other than the brain.
Have fun.
Posted by: euro911 Sep 19 2018, 01:32 AM
Yeah, everything you'll need to know is on Jeff Bowlsby's 'Tech Notebook' site ... http://bowlsby.net/914/Classic/TechNotebook.htm
Posted by: rick 918-S Sep 19 2018, 03:51 AM
Great color. Makes me smile 
Posted by: Chris H. Sep 19 2018, 08:50 AM
L96M (original color) is Marathon Blue. Also a great color!
Posted by: 914_7T3 Sep 19 2018, 09:07 AM
L96M (original color) is Marathon Blue. Also a great color!

L96M is Marathon Blue, however your car appears to have been resprayed in Ice Green Metallic. Mystery Solved!
Posted by: 76-914 Sep 19 2018, 09:27 AM
Ooooh, she's cute and looks unmolested. Can you bring her over one summer! 

Posted by: whitetwinturbo Sep 19 2018, 10:17 PM
 = leaves with rent money = Loser
What a pretty car!

Posted by: Chris914n6 Sep 19 2018, 11:01 PM
Day2: Short and messy
I picked something easy and practical for the short first work day... replace the broken pass outer door handle with the key matching set and clean & re-lube the latch.
Did you know the stud could break loose and spin? Well it does and it makes removing the lock nut impossible  I started with drilling it like I do a rivet head - stopped making progress when it decided to just spin. Plan B was to slot it with a cut off wheel but wasn't enough meat to hold against the lock nut. So ended up braking off the cast aluminum bits and the stud just fell out.
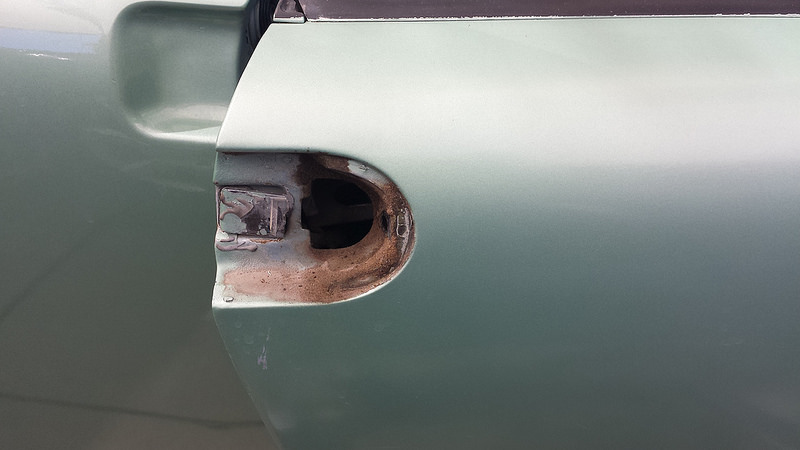
Now the messy part. The whole inside of the door is covered in a honey like goo. At first I thought is was spray glue for the plastic barrier but it's soft and not so sticky. You can see it covered in dirt on both the latch and the outer handle area. Purple degreaser barely touched it.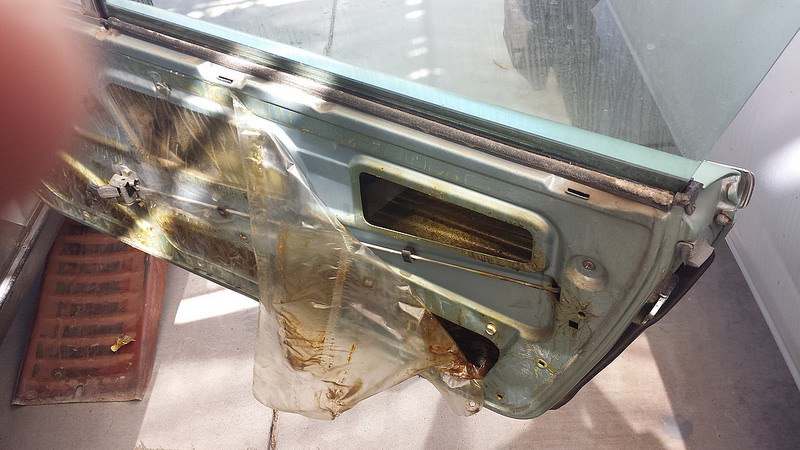
Gummed up latches, the leading cause of broken door handles.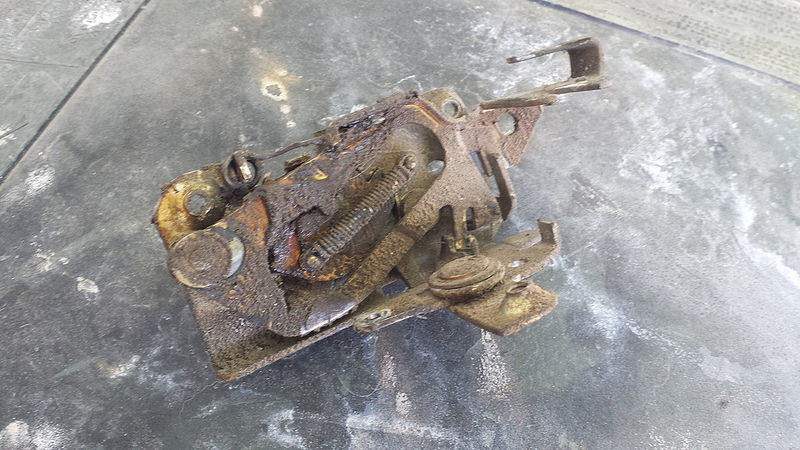
So fellow Fourteeners, when you're told to take your time estimate and double it, this is why.
1 line item done. Adding clean out door drains to the list 
/Day2
Posted by: billh1963 Sep 20 2018, 04:28 AM
Is the gooey stuff some sort of rustproofing?
Posted by: 76-914 Sep 20 2018, 09:20 AM
![popcorn[1].gif](style_emoticons/default/popcorn[1].gif)
Posted by: pete000 Sep 20 2018, 11:08 AM
Nice color ! worth the effort to save it for sure !
Posted by: DRPHIL914 Sep 20 2018, 11:18 AM
Day2: Short and messy
I picked something easy and practical for the short first work day... replace the broken pass outer door handle with the key matching set and clean & re-lube the latch.
Did you know the stud could break loose and spin? Well it does and it makes removing the lock nut impossible
I started with drilling it like I do a rivet head - stopped making progress when it decided to just spin. Plan B was to slot it with a cut off wheel but wasn't enough meat to hold against the lock nut. So ended up braking off the cast aluminum bits and the stud just fell out.Now the messy part. The whole inside of the door is covered in a honey like goo. At first I thought is was spray glue for the plastic barrier but it's soft and not so sticky. You can see it covered in dirt on both the latch and the outer handle area. Purple degreaser barely touched it.
Gummed up latches, the leading cause of broken door handles.
So fellow Fourteeners, when you're told to take your time estimate and double it, this is why.
1 line item done. Adding clean out door drains to the list
/Day2
Brake cleaner works great on cleaning off all that gunked up grease on the lock mechanisms,
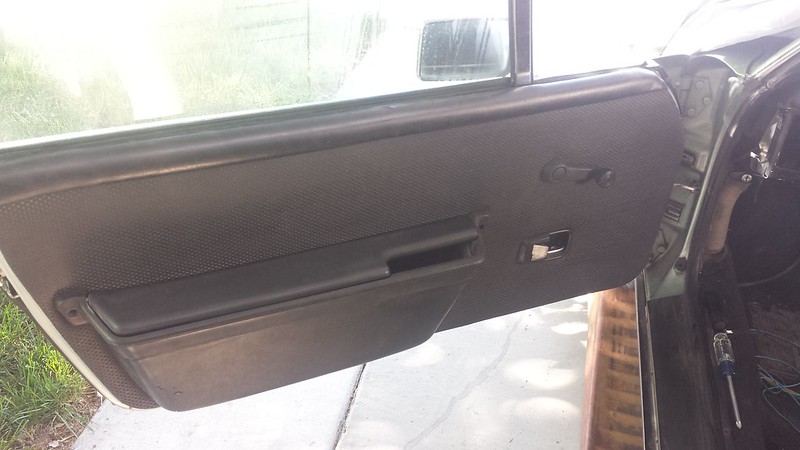
Do you see evidence of a color change? from the looks of the door it looks like ice green is the original color.
goop is most likely a rust proofing spray breaking down. if so there will be plugged holes used to spray in there andseal it back up, mine had that and the door was full of rust!,
Phil
Posted by: mepstein Sep 20 2018, 11:26 AM
Day2: Short and messy
I picked something easy and practical for the short first work day... replace the broken pass outer door handle with the key matching set and clean & re-lube the latch.
Did you know the stud could break loose and spin? Well it does and it makes removing the lock nut impossible
I started with drilling it like I do a rivet head - stopped making progress when it decided to just spin. Plan B was to slot it with a cut off wheel but wasn't enough meat to hold against the lock nut. So ended up braking off the cast aluminum bits and the stud just fell out.Now the messy part. The whole inside of the door is covered in a honey like goo. At first I thought is was spray glue for the plastic barrier but it's soft and not so sticky. You can see it covered in dirt on both the latch and the outer handle area. Purple degreaser barely touched it.
Gummed up latches, the leading cause of broken door handles.
So fellow Fourteeners, when you're told to take your time estimate and double it, this is why.
1 line item done. Adding clean out door drains to the list
/Day2
Brake cleaner works great on cleaning off all that gunked up grease on the lock mechanisms,
Do you see evidence of a color change? from the looks of the door it looks like ice green is the original color.
goop is most likely a rust proofing spray breaking down. if so there will be plugged holes used to spray in there andseal it back up, mine had that and the door was full of rust!,
Phil
they used to drill tons of holes and spray the Zeibart crap everywhere. What a mess.
Posted by: euro911 Sep 20 2018, 12:33 PM
Chris, are you sure of the original color (L96M)? Is the color on the interior of the doors blue?
Any telltale signs under the cowl area?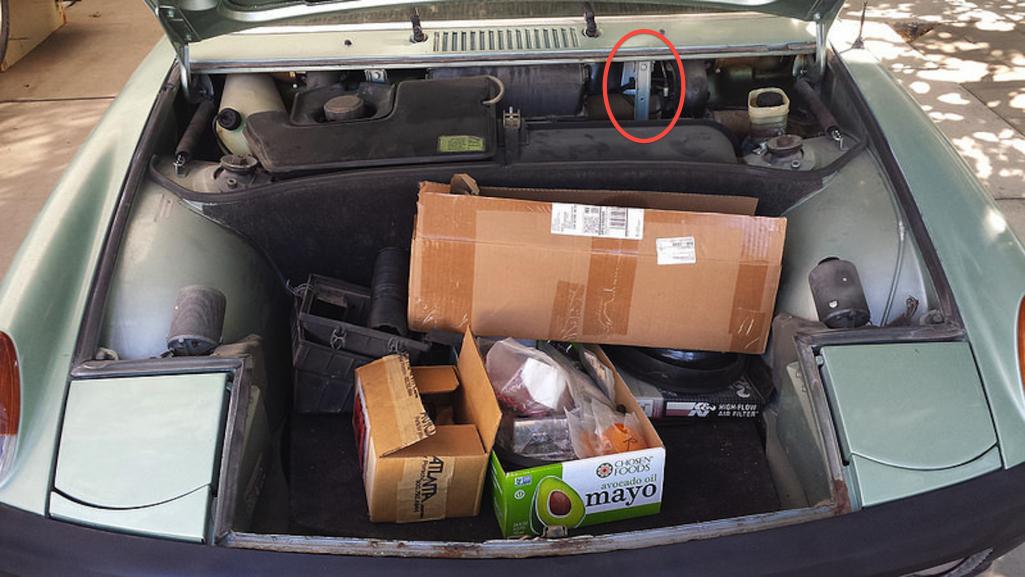
At one point in time, (years ago), I thought I'd like to paint my '66 912 Ice Green.
Posted by: dr914@autoatlanta.com Sep 20 2018, 12:43 PM
marathon is a great color on a 914 especially with chrome bumpers and Fuchs alloy wheels
Posted by: douglastic Sep 20 2018, 12:52 PM
I think the colors are similar enough to be tricking some of you in photos.
I see 2 colors on this car.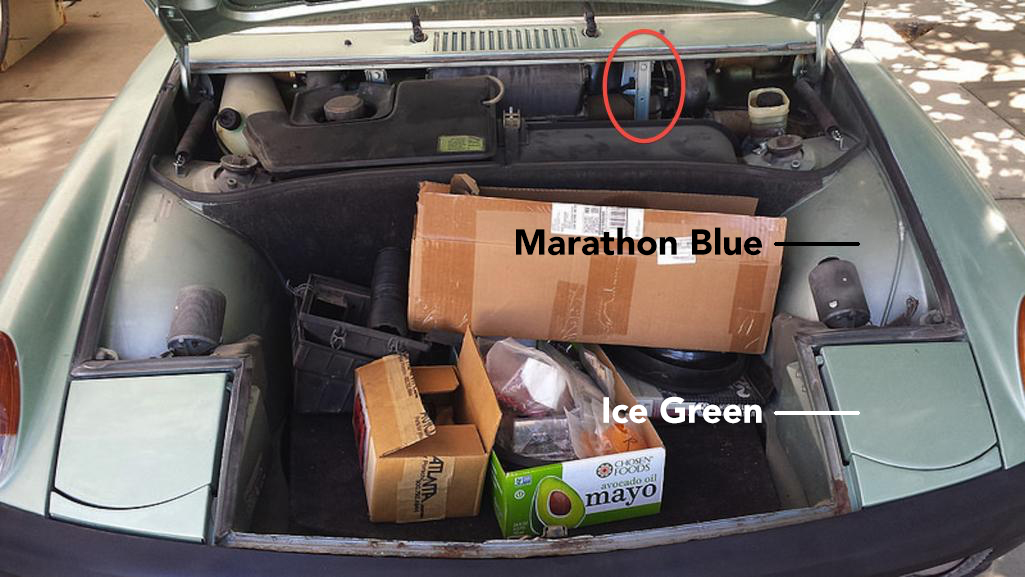
Any telltale signs under the cowl area?
Posted by: ClayPerrine Sep 20 2018, 01:38 PM
If you need help on the L-Jet, I would be happy to assist. I have worked on lots of L-Jet cars, and I have kept a 74 L-Jet car alive for 33 years.
I have boxes of L-Jet parts as well.
Posted by: mgp4591 Sep 20 2018, 06:42 PM
So far that looks to be in great shape Chris! Nice color and a good project car.... now see if you can get that one running sooner than your Porschissan! And I'll get off my slacker butt too...
Posted by: Chris914n6 Sep 20 2018, 11:17 PM
I think the colors are similar enough to be tricking some of you in photos.
I see 2 colors on this car.
Any telltale signs under the cowl area?
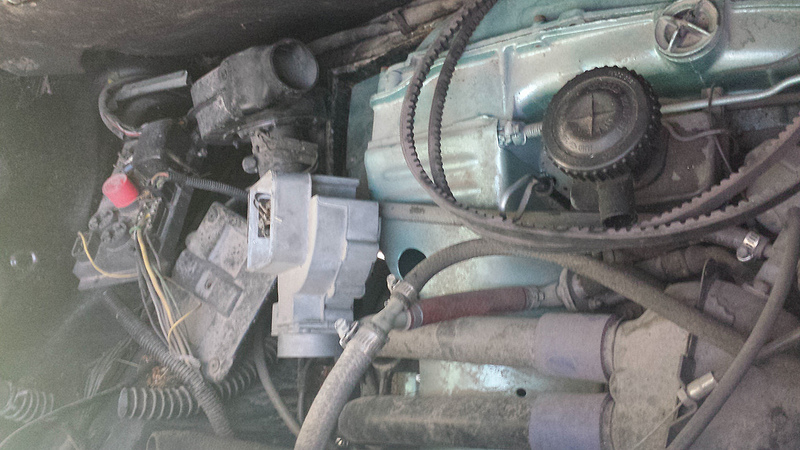
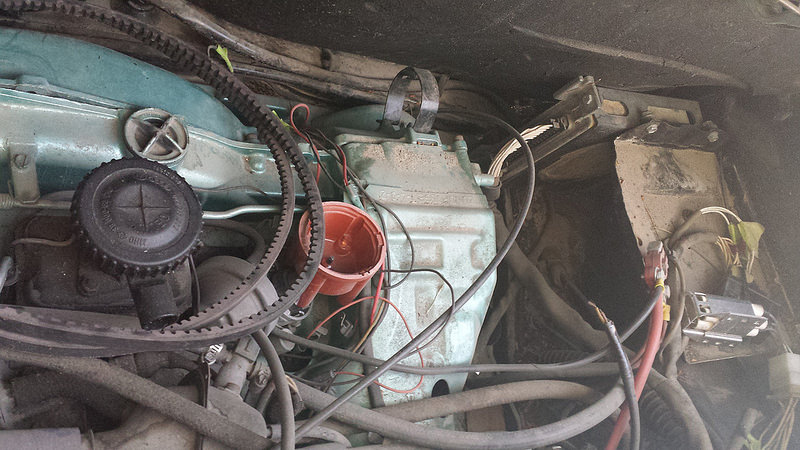
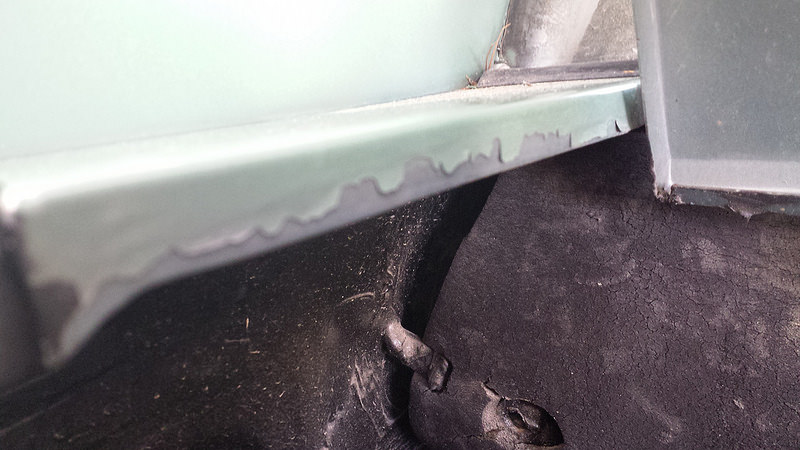
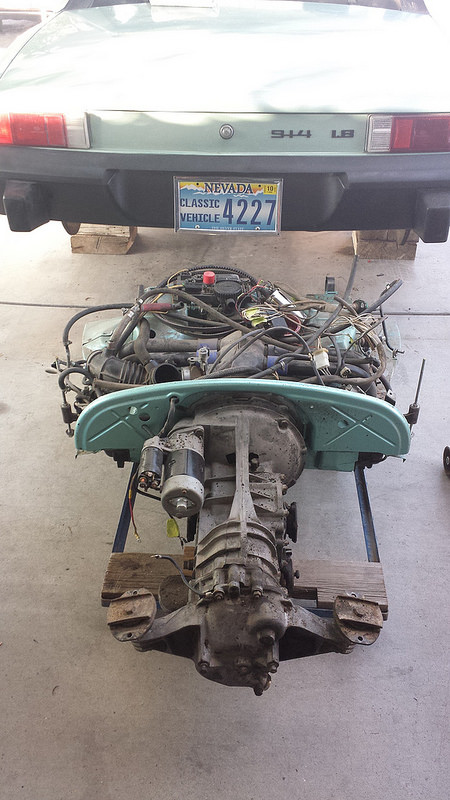
Almost the whole car is resprayed. The air box wasn't removed but most of everything else was to change colors.
Contrast visible here.
If you need help on the L-Jet, I would be happy to assist. I have worked on lots of L-Jet cars, and I have kept a 74 L-Jet car alive for 33 years.
I have boxes of L-Jet parts as well.
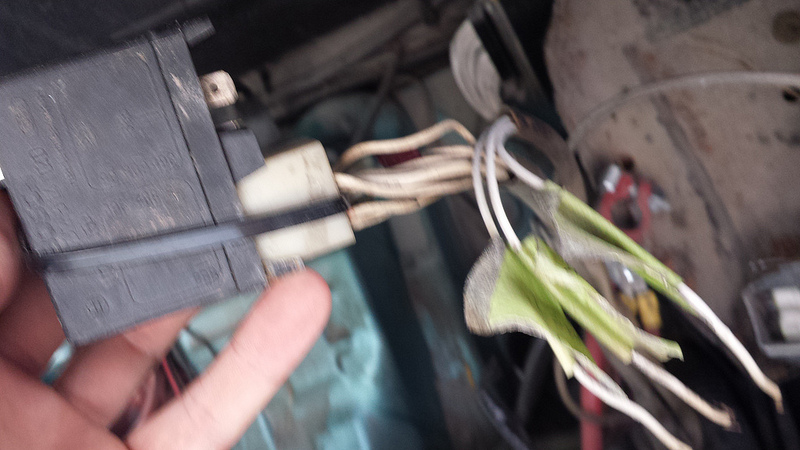
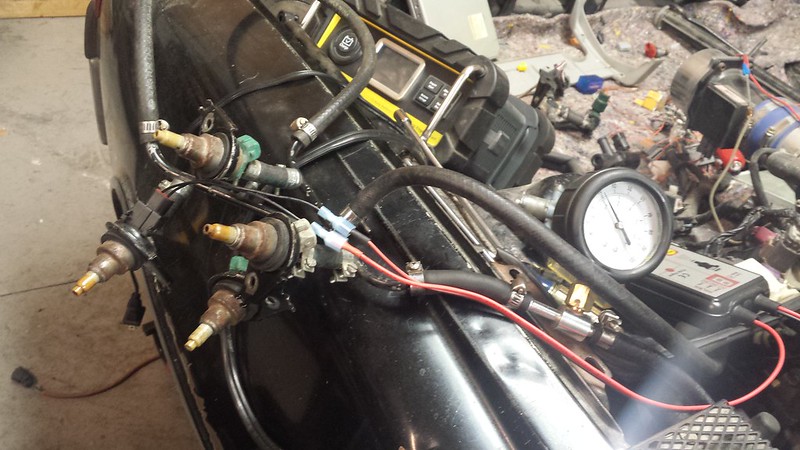
Thanks a ton. Between the wiring diagrams and tags and lose wires and odd part substitutes I'm under the assumption they were trying to fix a difficult problem. Owner drove it from Albuquerque to Vegas just fine, so I don't know the reason for the "trouble
Pics of a complete installed system would be good, with components mounted where they are supposed to be and such. Also part testing specs.
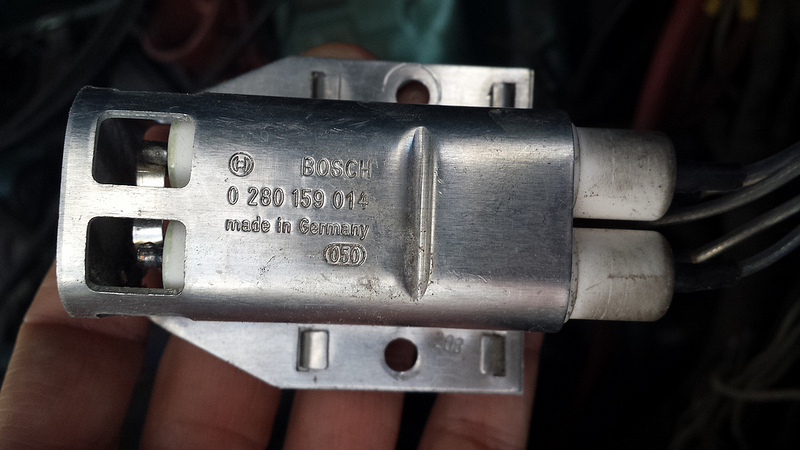
Here is a glimpse of what I'm starting with.
So far that looks to be in great shape Chris! Nice color and a good project car.... now see if you can get that one running sooner than your Porschissan! And I'll get off my slacker butt too...
Now that the temps are out of the teens... any day now

Posted by: euro911 Sep 21 2018, 01:36 PM

Posted by: 914_7T3 Sep 21 2018, 02:45 PM
I think the colors are similar enough to be tricking some of you in photos.
I see 2 colors on this car.
Here is a side by side comparo of the two colors!
Posted by: Tdskip Sep 22 2018, 06:09 AM
Enough on the colors already (  ) let's get her running!
I do love the current color, nice find.
Posted by: Chris914n6 Sep 22 2018, 11:52 PM
Day3: Tales of the DPO
Before I buttoned up the pass door I did testing with my collection of stinky clear fluids in tins and Acetone won as best goop cleaner. Good news is the drivers door latch didn't need much cleanup. Need an unbroken door stopper but I think I have one in my stash. Also aligned the window guide. So far every bolt I've touched in the doors has been just past finger tight. 
Had a "since I was there" moment and.... well.... this is how 5 mins saves you 5 geez.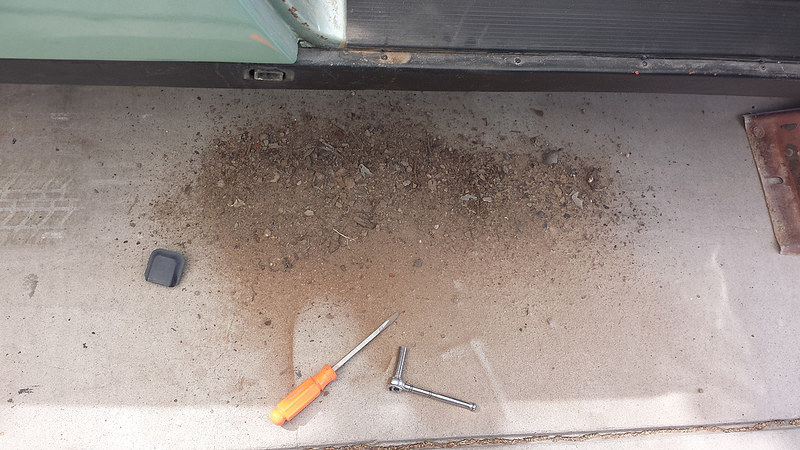
So the pass seat was stuck forward and the handle on the wrong side. No biggie. Then I decided while I was there......
....I might as well put the drivers seat on the drivers side 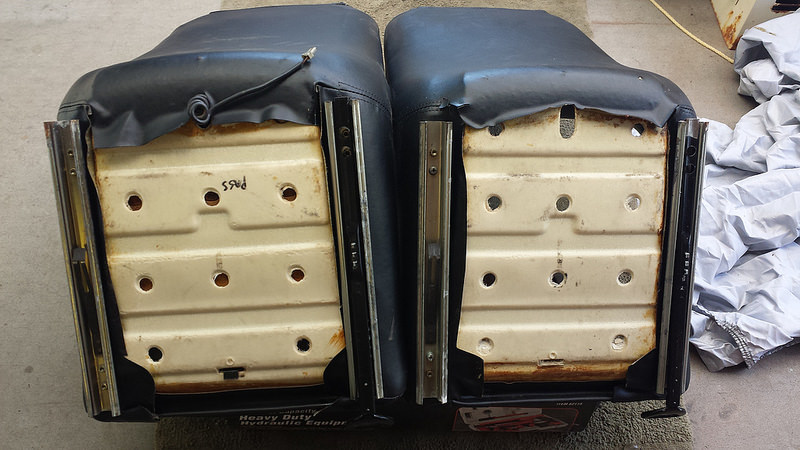
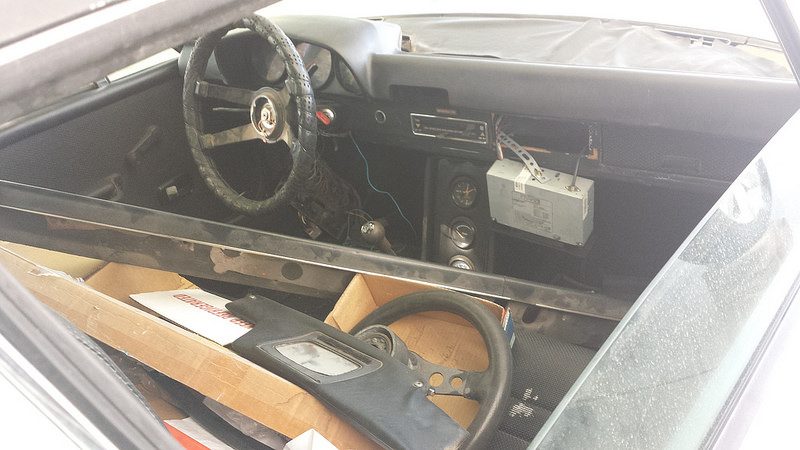
Got a bunch of stuff to do with the dash. Found another half ass moment. Vinyl yanked on til it tore and the middle 2 nuts for the dash frame removed, but the crunchy windshield seal still in place = no progress. Frame really needs to be popped free to wrap the vinyl so I made progress towards that until I got hungry. 
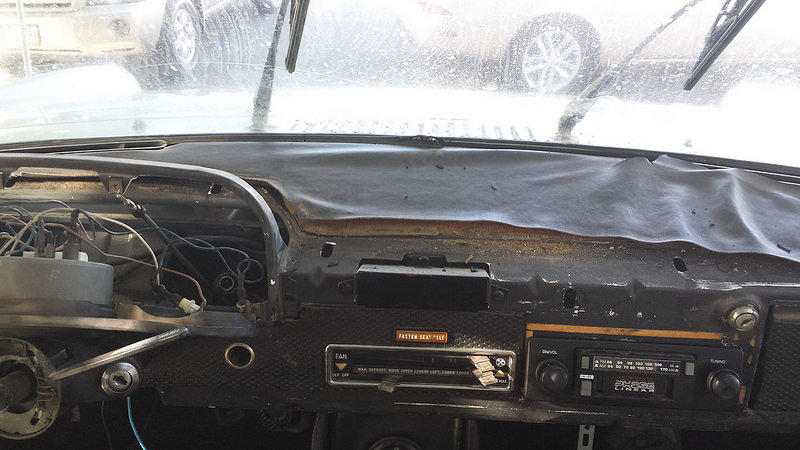
Stereo for sale, period correct for a Chalon
Wiring actually looks good - except for that one green jumper bridging power.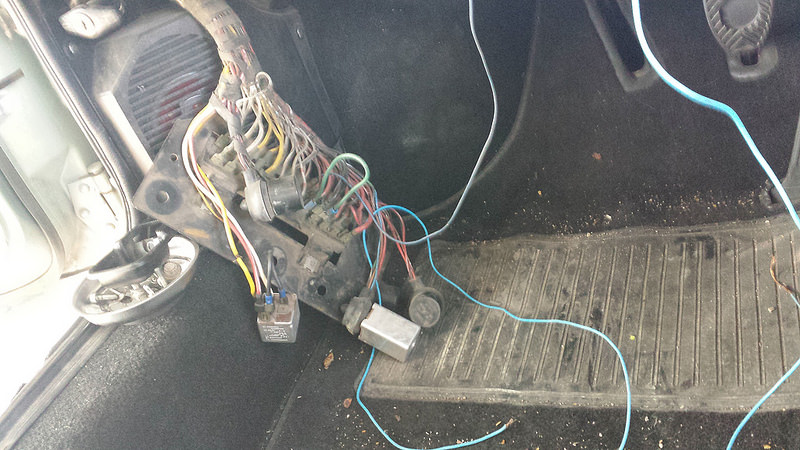
pwnd 
/Day3
Posted by: ottox914 Sep 23 2018, 08:38 AM
Send them weekly updates. And invoices. It might be awhile.
Good on you for bringing another one back.
Posted by: Chris914n6 Sep 24 2018, 10:05 PM
Day 4: 5 out of 6 locks agree...
... that Ice Green 914 is the place to be. The trunk lock turned into a can of worms and will depend on if I have any hours left in the budget.
Not much interesting today. Got the dash frame free. 3 more locks changed out. Plugged in a battery and dived into the wiring, particularly the funny acting console gauges.
Found my bag of door stoppers - all broken, which makes sense that I would keep the working ones in the doors. (need one)
I have a feeling I've entered virgin territory
Foam piece between the shaft and lock cylinder. First one I've seen.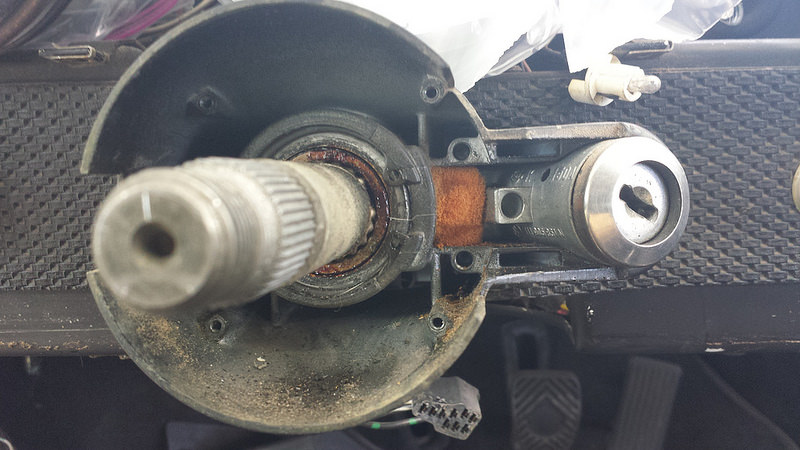
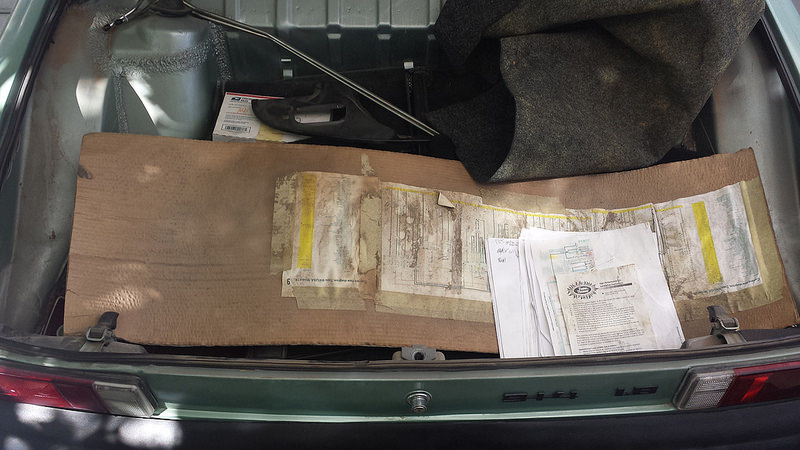
Not sure if this is correct. I thought the pad went between the strap and the tank to prevent rubbing a hole?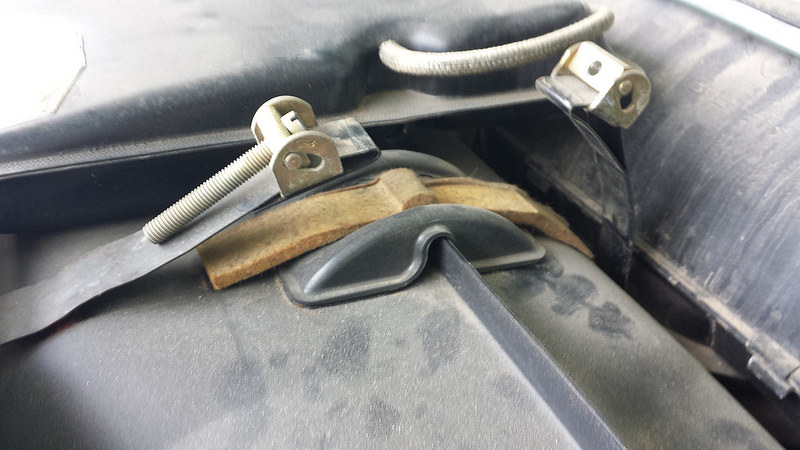
The spring was half hanging, so if you've never seen it, this is how it goes so that it doesn't bind. Do the top first, then the bottom one can be worked in with just fingers. 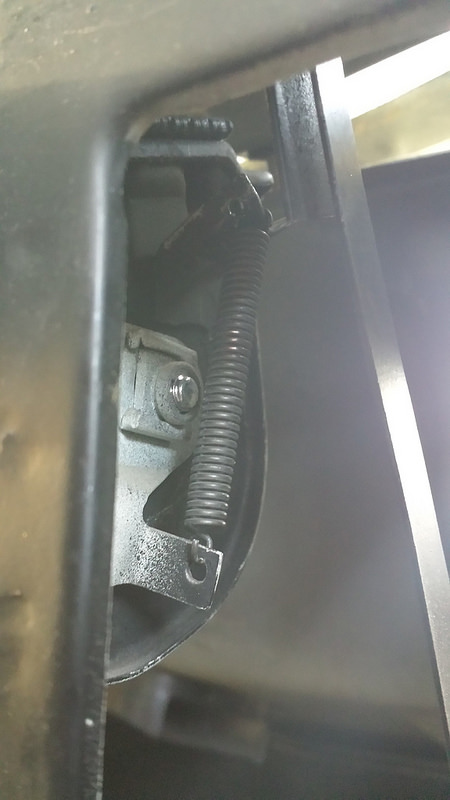
Tomorrow I'm going to that place where things stand still to get my picture put on a new piece of plastic, then running errands after, so not likely to get anything done.
/Day 4
Posted by: Chris914n6 Sep 26 2018, 11:24 PM
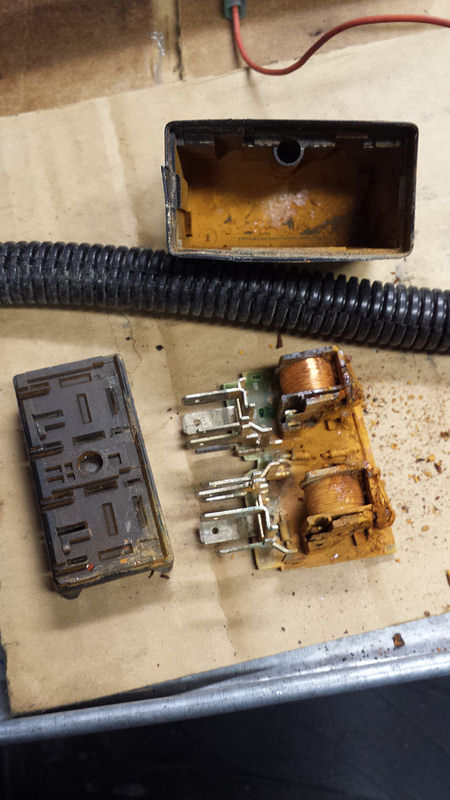
Day 5: Gremlins a go go
Traced the gremlins back to a burned out blower relay and headlight switch, and a loose wire on the wiper motor.
Since HL switches are NLA I elected to fit this one. The nub that powers the headlight relay wore off (no light) so I soldered a new nub then swapped that contact plate with a single spring to lessen the wear. Should be good for a while. Also got the console gauges sorted.
I was so pleased it didn't take long to remedy the chassis wiring that I did a happy dance then some overdue yard work.
Top left if you can see it. Hole where a nub used to be.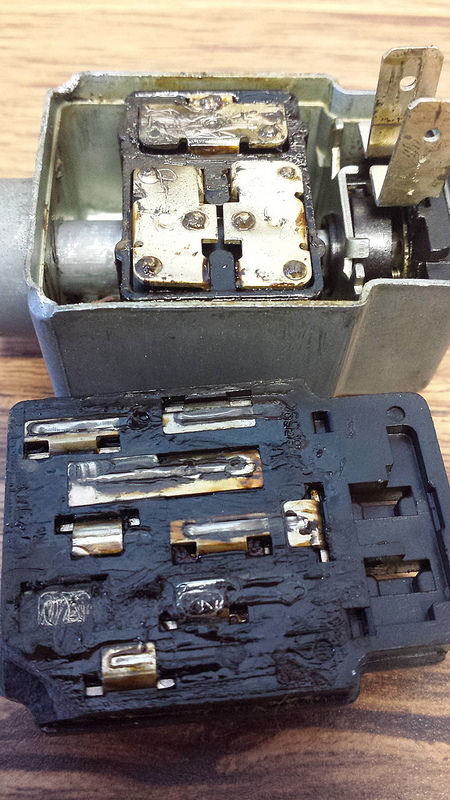
/Day 5
Posted by: Chris914n6 Oct 10 2018, 08:49 PM
Day 6+: You Look Dashing
Had a few weather delays and a rainy day house project interrupt progress.
Definitely easier to fit and glue the dash vinyl with the frame fully removed but it got done in car. Didn't want to mess with the blower controls which of course prohibits the frame from moving too much.
New 914Rubber dash pad. Had to make a mod. The plastic retainers are much longer than the originals, which made installation in car impossible. 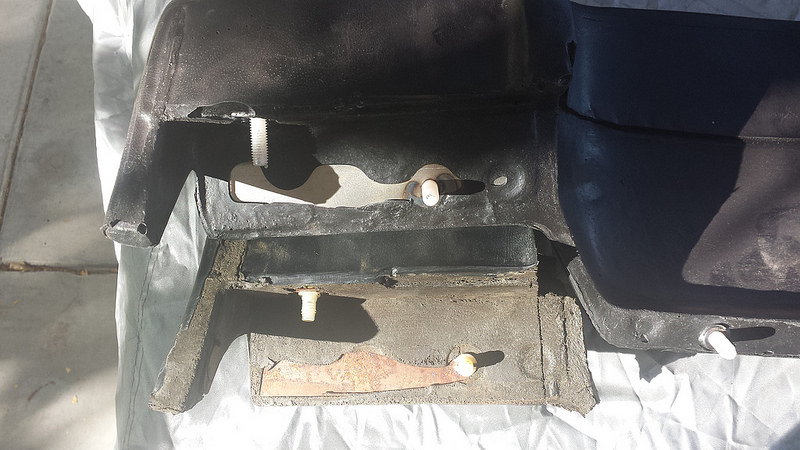
Easily remedied by cutting all the fronts and the 2 behind the gauges to 2 nuts or ~13mm. Now I can insert top first then slide the front back into place. 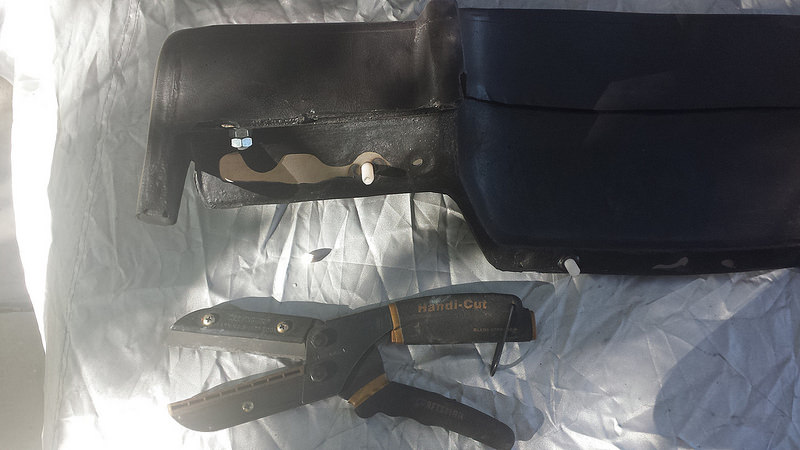
You will notice the gauge shroud 'peaks'. This is likely because the pad was sitting on top of the steering wheel for an unknown amount of time before I got it. It's deformed but I'm hoping it will flatten out on it's own in time. 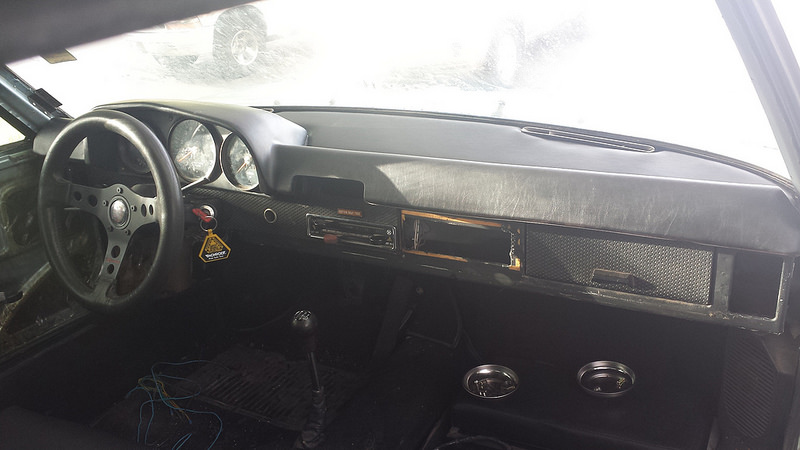
Plus a few things not pic worthy, unless you want to see the new wart 
/Day6+
Pretty much done with Phase 1
Phase 2 - Drivetrain
Posted by: second wind Oct 10 2018, 09:30 PM
That is a bitchin' color but it ain't L96M......just sayin'......
gg
Posted by: Chris914n6 Oct 21 2018, 12:31 AM
Day 7: Roll me under (Pretty sure that's a song lyric stuck in my head) 
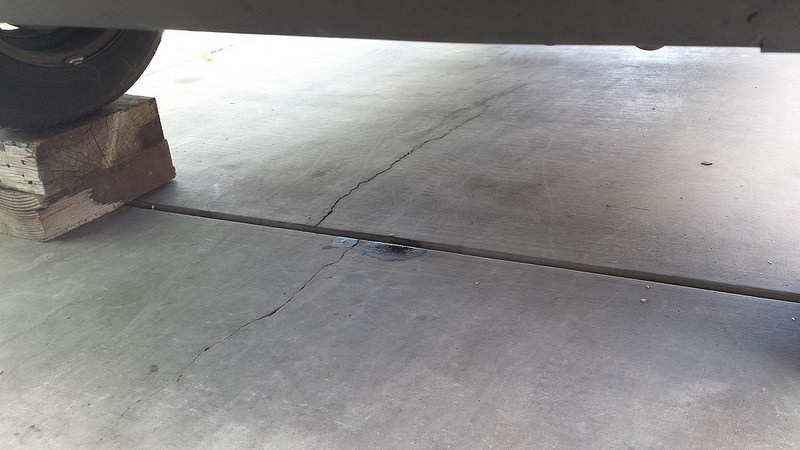
Pressure washed the underside. Unfortunately that did a number on my neck and I had to take a few off. But I did get the drivetrain out today and blew off a years worth of desert dust. Found the 2 missing connector covers
Way too many finger tight bolts
One of my 'tricks'. The all thread keeps it from going down hill on the sloped driveway and keeps it lined up during install. Also makes it possible to R&R with just one jack though it's slow. 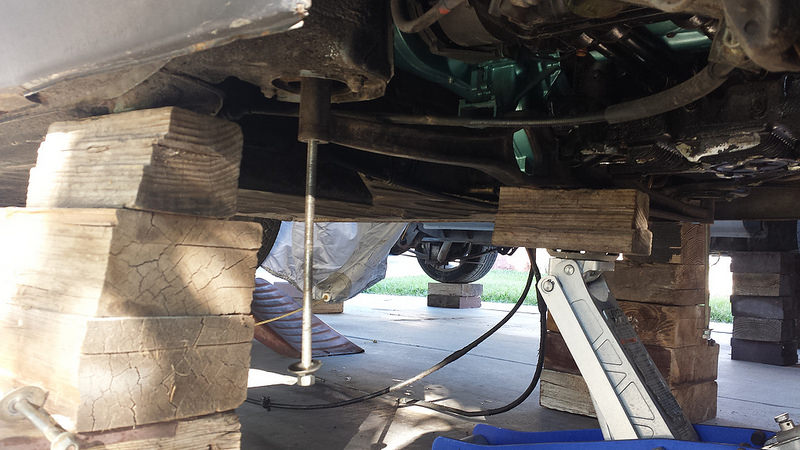
/Day 7
Posted by: Dave_Darling Oct 21 2018, 11:11 PM
Pics of a complete installed ... [L-jet] system would be good, with components mounted where they are supposed to be and such. Also part testing specs.
The Haynes manual has specs and layout of an early 1.8, believe it or not. The specs are a bit scattered throughout the FI chapter, though.
--DD
Posted by: Chris914n6 Oct 25 2018, 06:11 PM
Day 8: Testing One Two Three Fuch
Did a pin-by-pin check of the ECU harness and it's all good. Just need to tie off the bare ends to the Altitude Compensator.
Component checking is mixed.
AAR - had a reading then nothing. Haven't power tested it yet. Failed.
AFM - Left 2 pins on/off. Middle 2 pins 400 ohm fixed. Right 2 pins 160-400 ohm but erratic. Shouldn't something be progressive as the flap moves?
Dual Relay - full of water at some point. First will clean then power test.
Injectors - Still need to clean and flow test.
All the rest test good.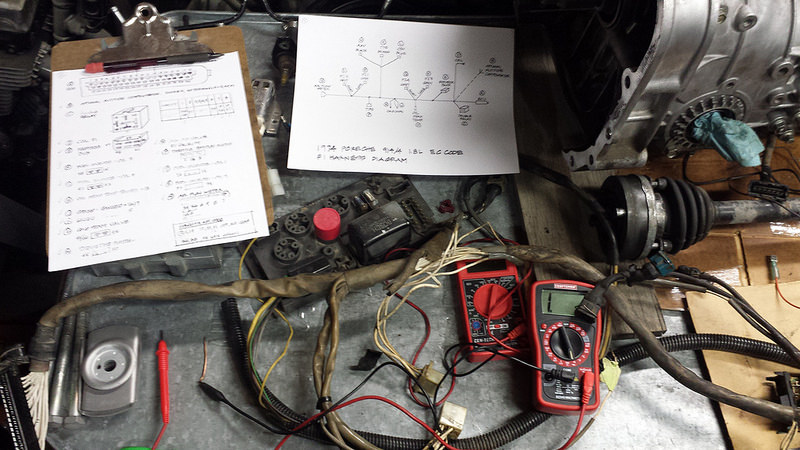
Day 8 not over yet.
Posted by: Chris914n6 Apr 24 2019, 10:43 PM
Winter was an unusually crappy weather period. Then I got roped into refurbing a 2005 New Beetle.... longest list of repairs I have ever made. Also wins the award for cheapest built POS I have worked on.
Day 9ish, actually from Nov to a few days ago....
Did nasty things to a dirty tranny. No hole untouched. That will be the last time it marks a driveway for a while.
/Day9
----------
Day 10: Back in the game
Organized a big box of new parts for the coming weeks. I agreed to a hard due date of WCR19 

Cleaned and rebuilt the drivers side door stay with a 914rubber arm and got the door back together. Had to rethread the captured nuts and did a little goop cleanup.
Then wire-brushed crud from the engine bay in prep for a bunch of new goodies. 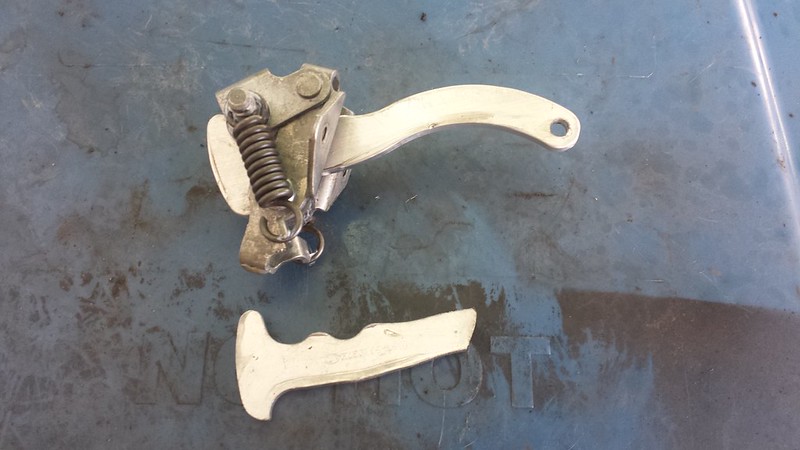
/Day10
Posted by: buck toenges Apr 25 2019, 11:49 AM
Ice green metallic was a color of rabbits in the late 70's. Was it ever a color for the 914?
Buck
Posted by: SteveL Apr 25 2019, 12:20 PM
PM me your direct email address and I will send you the L-Jet Guide that Cap Krusty sent me 5 years ago.
Posted by: euro911 Apr 25 2019, 02:16 PM
Buck
Posted by: Chris914n6 May 3 2019, 07:38 PM
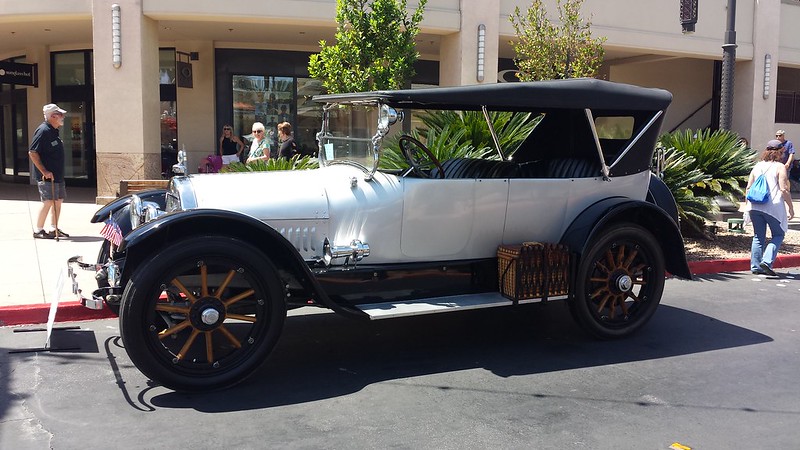
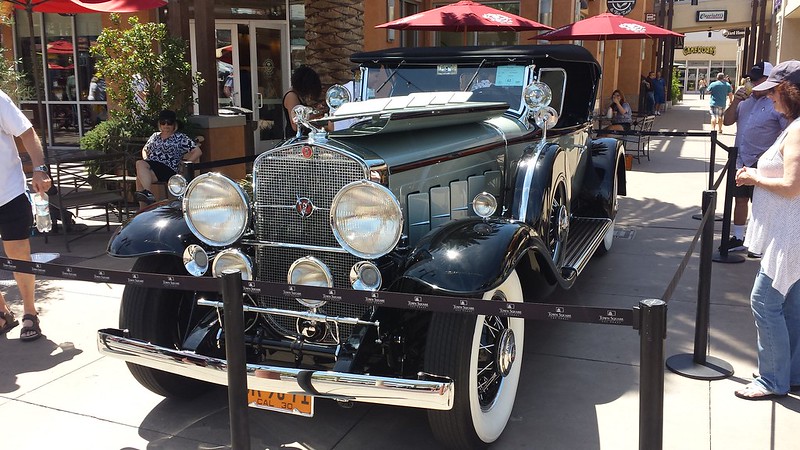
Sunday Funday:
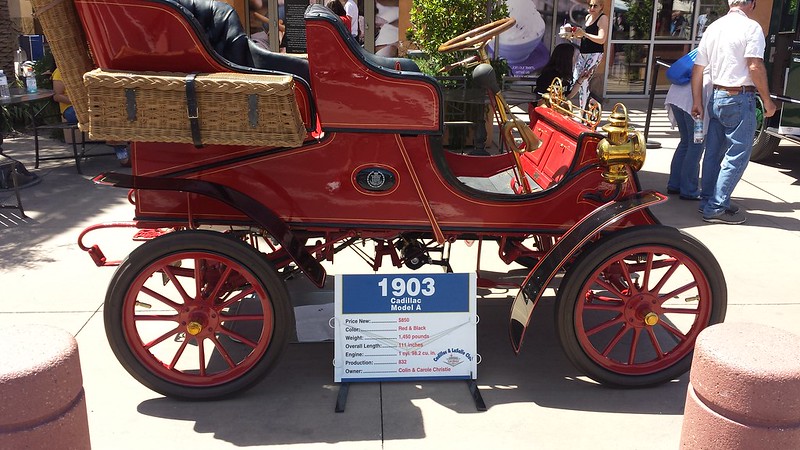
Went to a local Cadillac show. Some really nice centenarians on display.
And a cousin from the other side of the tracks 
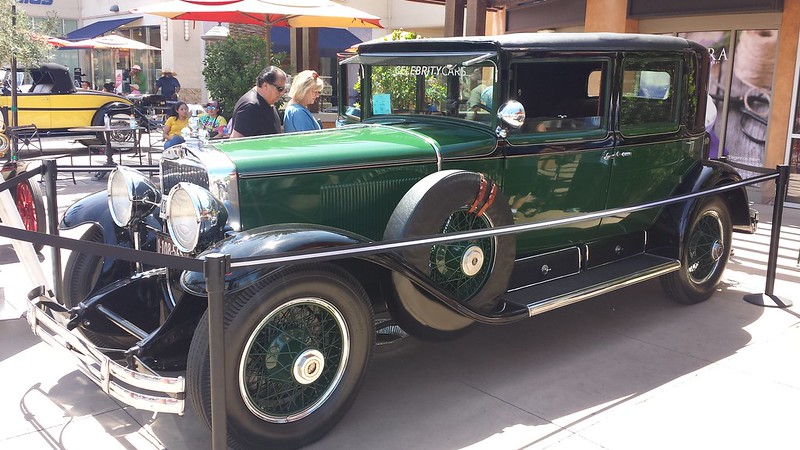
Karate car?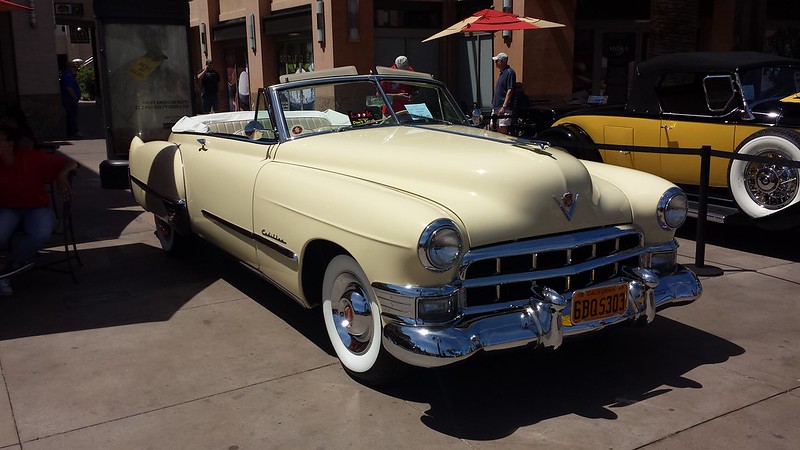
The End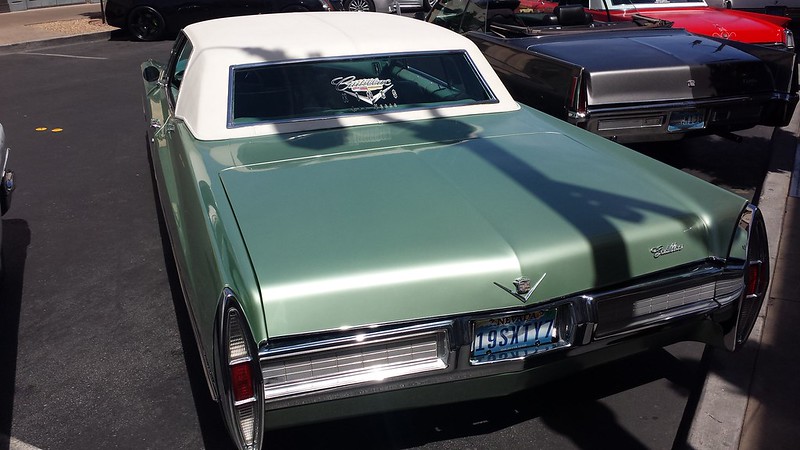
Posted by: euro911 May 3 2019, 08:59 PM
'Karate Kid' - Mr. Miyagi's car was a '48 Ford. That's a '49 Cadillac
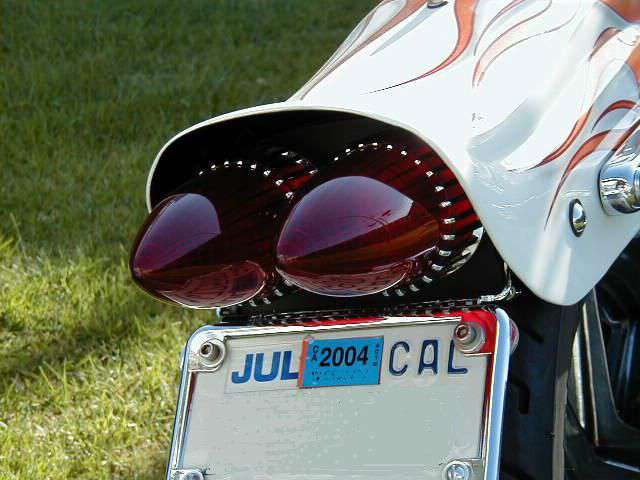
I like Caddy's too ... have '59 tail lights on my Dyna 
Posted by: Chris914n6 May 16 2019, 12:06 AM
^^ those tail lights look freaking awesome.
Just a bunch of little things getting done, like installing all these little things from 914rubber, Pelican Parts, and AutoAtlanta....
Took the time to make sure all 5 injectors sprayed appropriately. My 914 was the best candidate for supplying fuel, just had to fix a gas tank leak and unstick the pressure regulator first. My car has been 1 hour away from running for like 10 hours now 
Injectors -- 2 white lite grey & 2 green teal. Right ones for a stock 1.8L? (edit) Looks like 112 & 105, which would be good to go.
Posted by: euro911 May 16 2019, 02:30 AM
Greenies are for 2.0L ... 1.7L are yellow. I have no idea what color the 1.8L injectors are ... the only 1.8L motors I've had were all carb'd.
Posted by: Dave_Darling May 16 2019, 05:00 PM
They could be blue or purple, IIRC. Look for part numbers on them.
--DD
Posted by: Chi-town May 16 2019, 06:21 PM
All the 1.8 I have are blue
Posted by: SirAndy May 16 2019, 06:37 PM
http://www.914world.com/bbs2/index.php?act=colors
Posted by: Chris914n6 May 25 2019, 12:19 AM
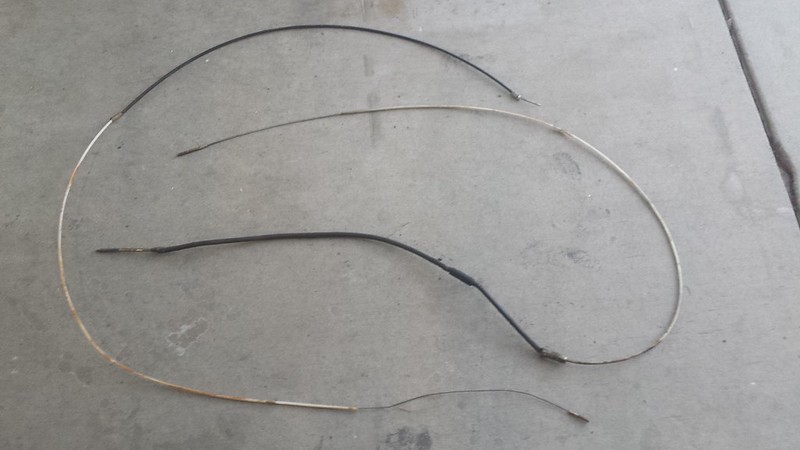
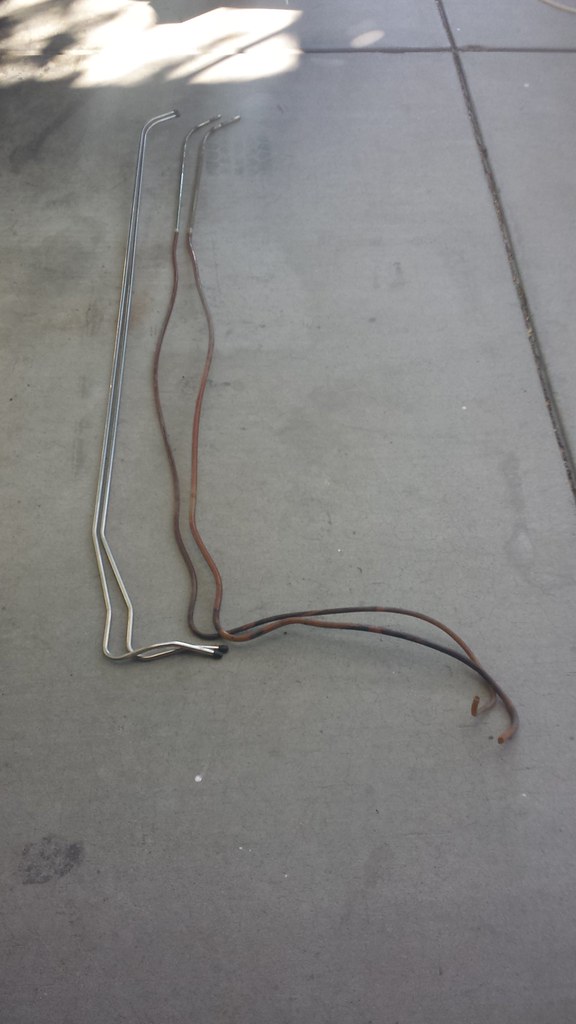
Out with the kinky, in with the virgins.
Clutch, accelerator and heater cables replaced, and some rubber stuffs. Pedal area back to normal. 
@http://www.914world.com/bbs2/index.php?showuser=3348 seems to have a shrinkage problem....
Engine tin heater hose seals easily pop out, and I couldn't get 8mm hard lines to slide thru the FI hose 45* grommets. 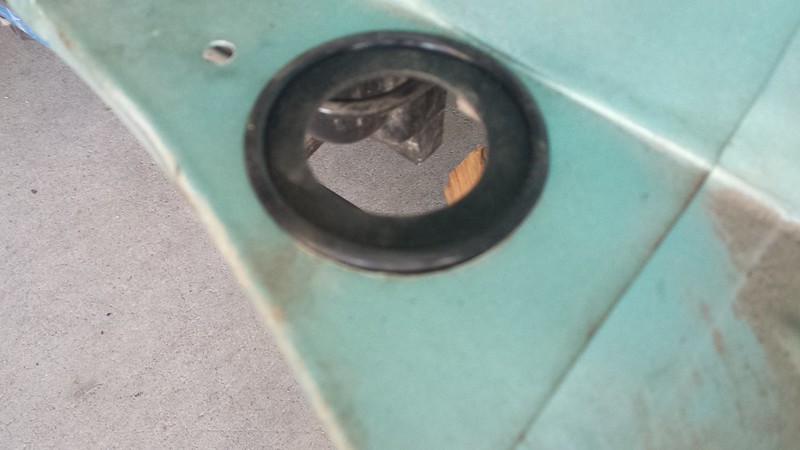
Forgot I need to acquire a few trans parts. The dished pieces between the trans ears and the mounts, the 2 fat washers & matching nuts, (car came with 2 sizes) and the doohickey that mounts on shift rod to move trans ball end rod. I have these but will need replacements when I get around to doing car #3 - can pickup at WCR...
also a stock banana muffler for a 1.8L.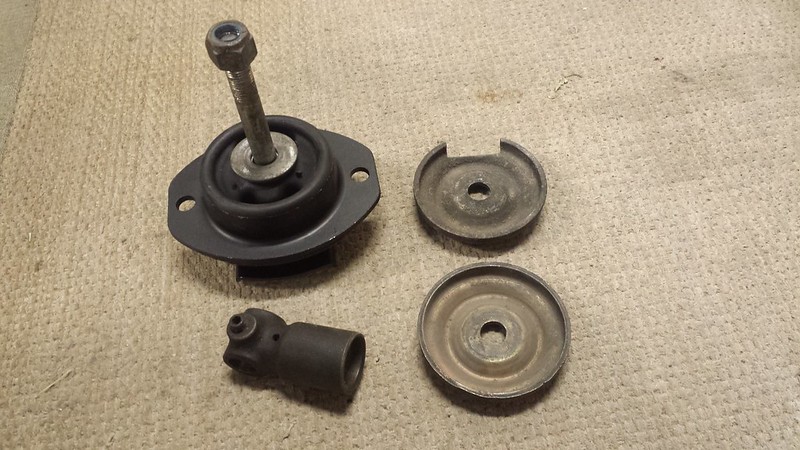
Posted by: Chris914n6 May 25 2019, 10:24 PM
Renn-Shifting Gears without Aaron Kaufman.
One of the aftermarket goodies getting installed.
I could make a joke about the POs knob being so firm that no matter how hard I wacked it I couldn't get it off, but I figure some of you would come unglued, unlike the knob...
But I did get to lay my hands on a nice piece. Took only an hour with a COMPLETELY NORMAL amount of fondling 
 I get excited for fine engineering
One of the key features is the ability to clock the knob away from your knee if you are over 6 foot three. 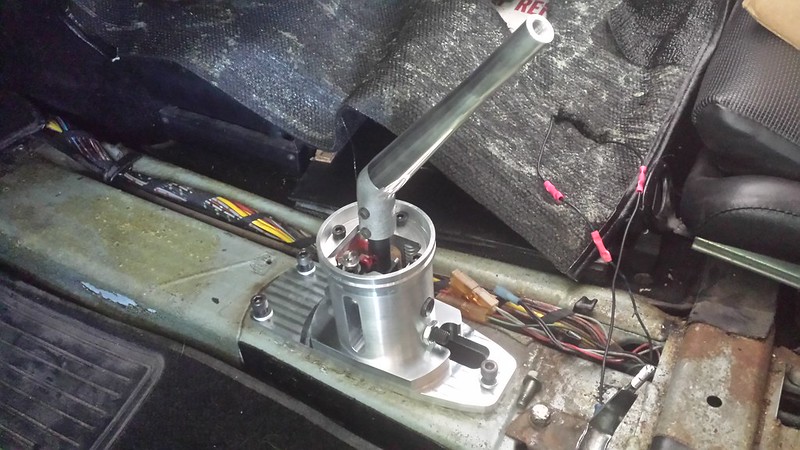
Posted by: Chris914n6 Oct 28 2019, 01:19 PM
I know.... it's been awhile. Got sidetracked with trying to get my 914N6 to WCR19. Then a small injury to my tool hand and then had to play catch up.
First up, Chi-town came through with the trans mounts we needed 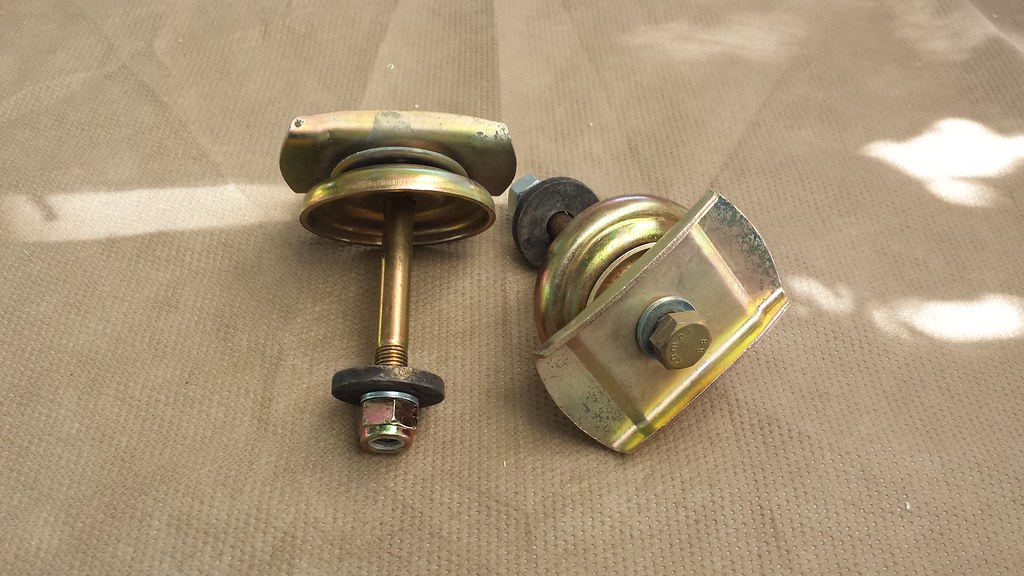
The black overspray finally got to me, so while I had the polisher out doing the Dung Beetle, I hit it real quick. Not just clean but BLING!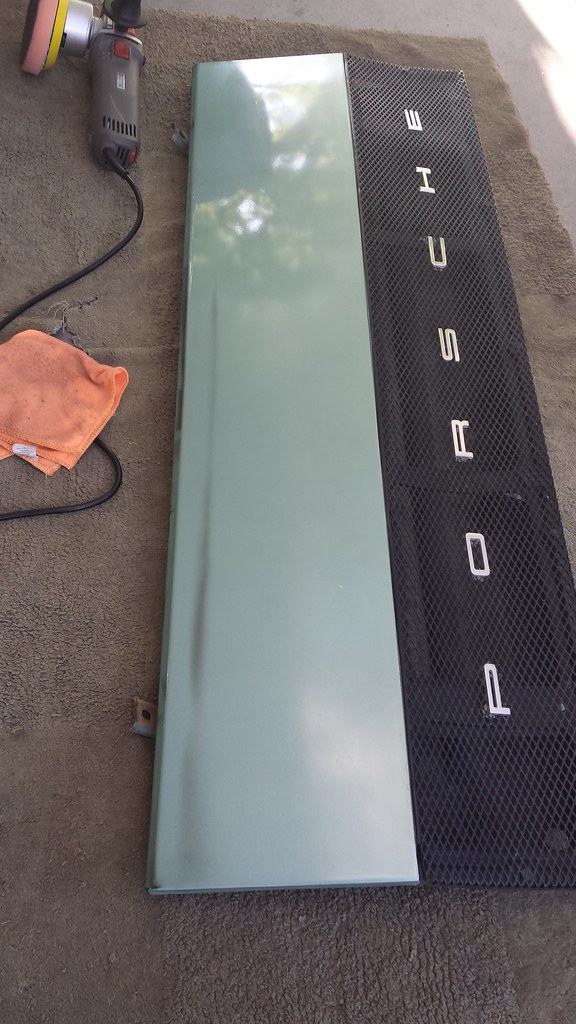
Back to the todo list... tried a few techniques but what worked best was to cut to length then sand the 45* edge in and a touch up after it was installed. 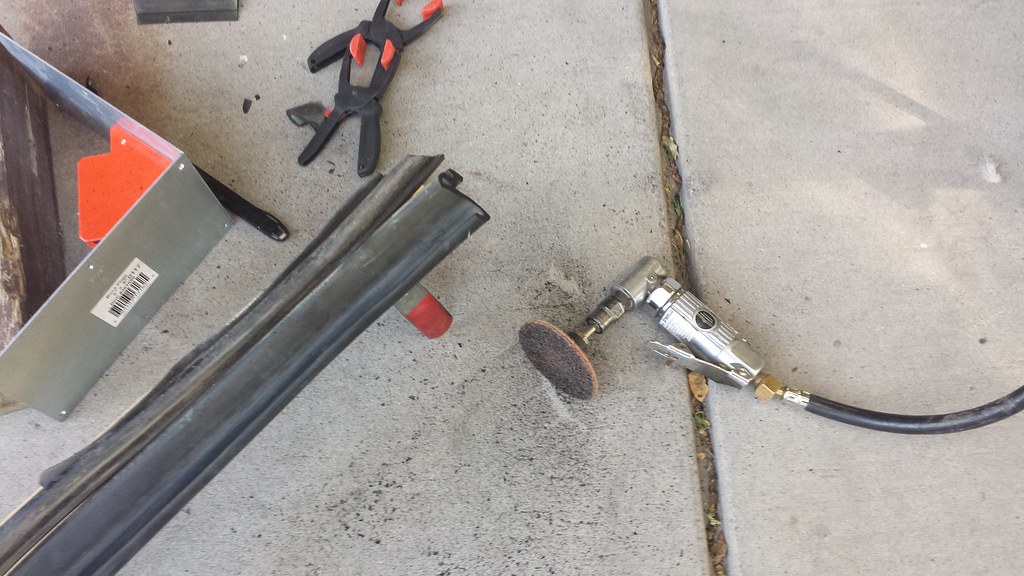
Popped right in with silicone spray (ArmorAll) and a flat blade.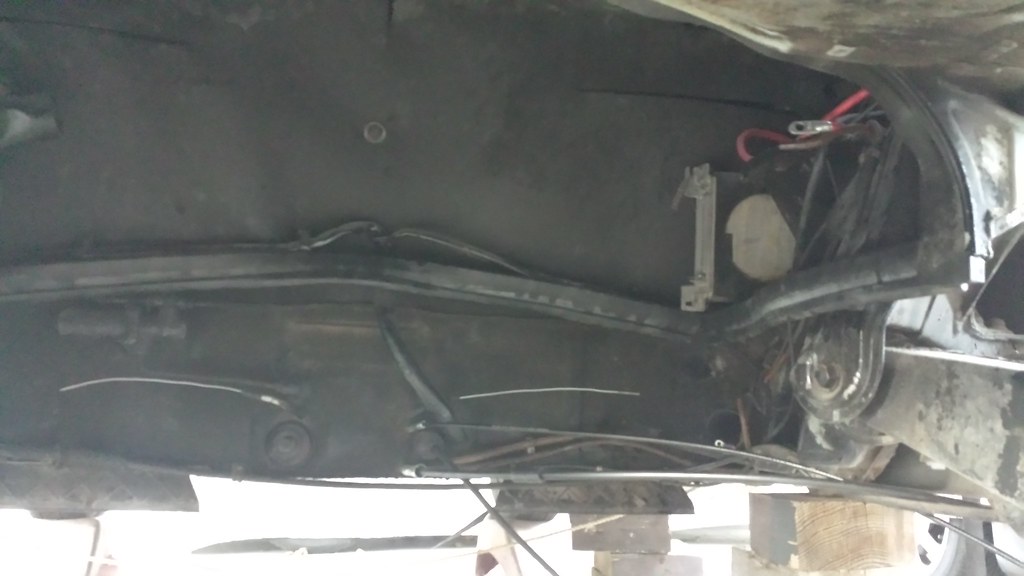
Posted by: euro911 Oct 28 2019, 01:35 PM
Chris, is this a customer's car - or do you own it now?
Nice color
Posted by: Chris914n6 Oct 28 2019, 01:36 PM
Wait, there's more
Ripped out the gas tank, literally 
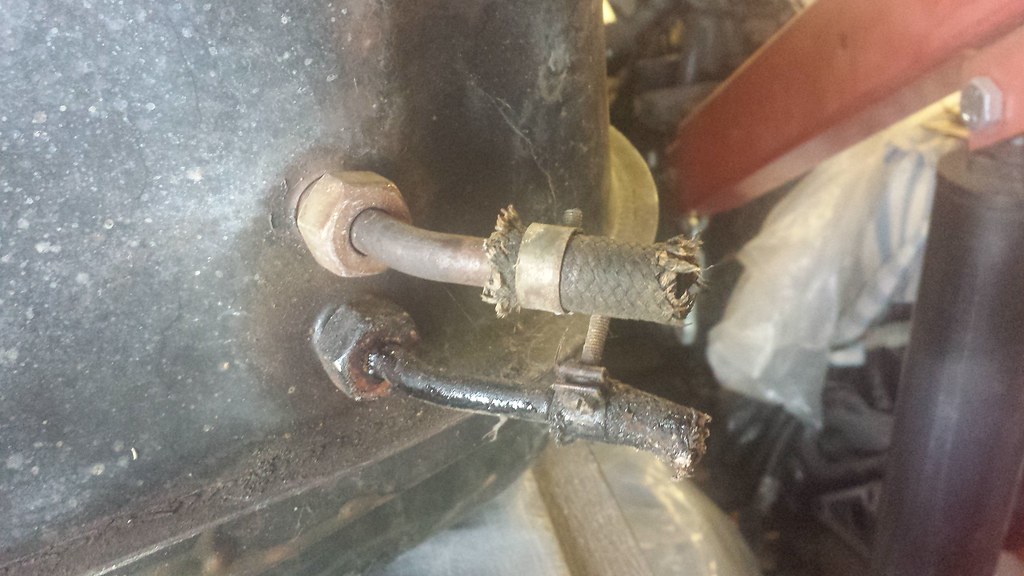
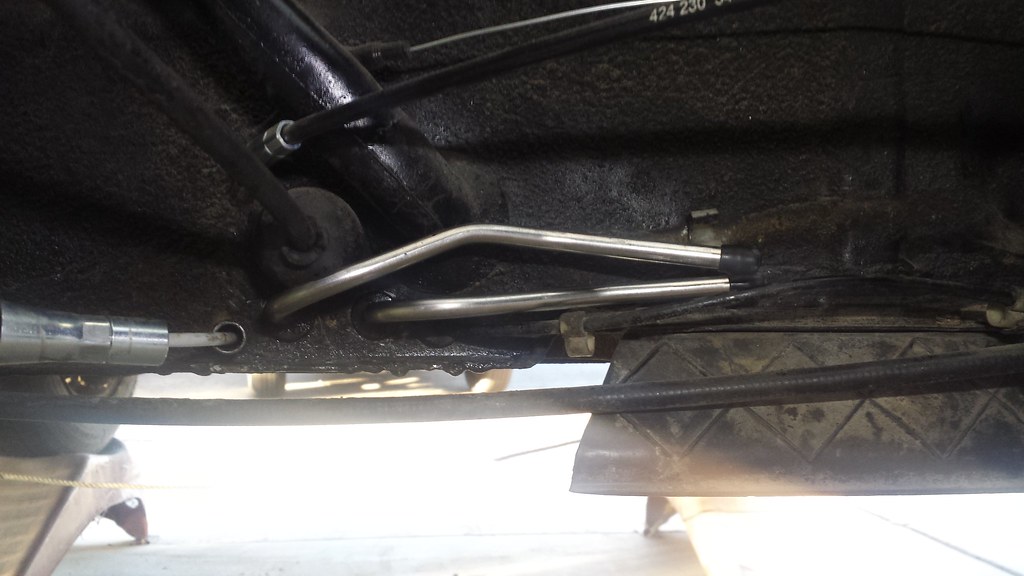
...to install Tangerine SS lines 
There is a sweet spot for sliding them in. In other words....it took a few tries. I also added sliced hose to the center tunnel clamps to prevent rub thru and rattles. 
Then to finish off the day I did a little metal shaping to the dinged up front channel so the seal fit appropriately.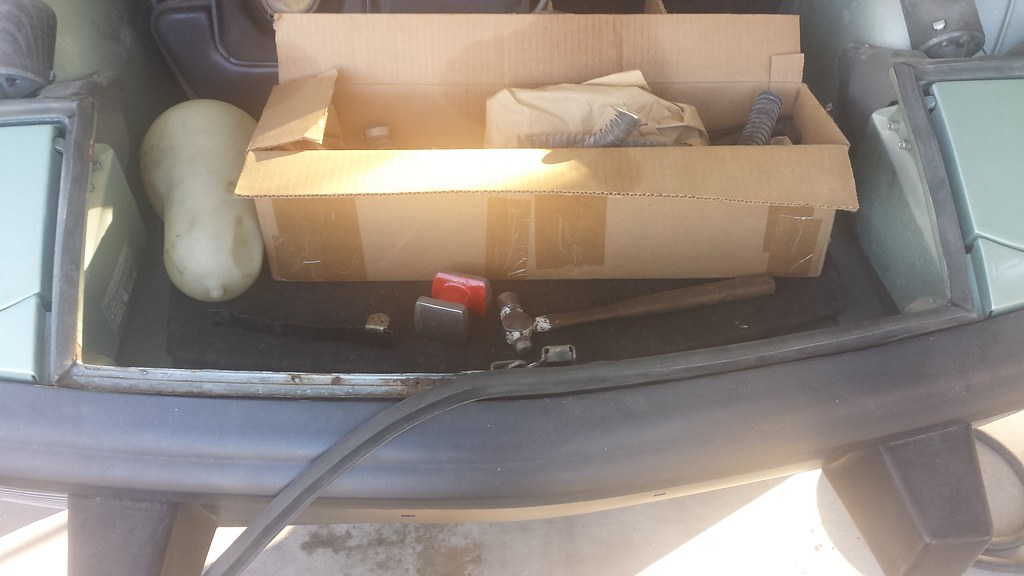
Powered by Invision Power Board (http://www.invisionboard.com)
© Invision Power Services (http://www.invisionpower.com)