Printable Version of Topic
Click here to view this topic in its original format
914World.com _ 914World Garage _ Replacing trunk hinge
Posted by: Olympic 914 Dec 4 2018, 02:38 PM
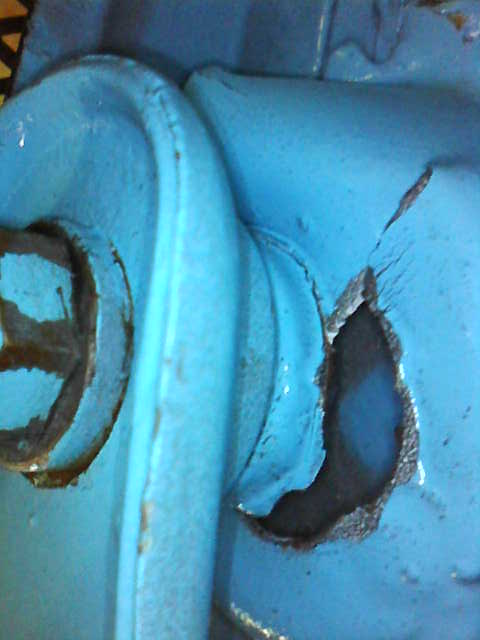
Going to have to repair/replace the trunk hinge on the car this winter. It was repaired before.... but it failed in a different spot. I wonder if the trunk lid gasket was too tight and caused this failure?
I am planning on taking the engine out to make it easier to get in there and position it correctly and do a good job welding.
How many of you have done this repair leaving the engine in? 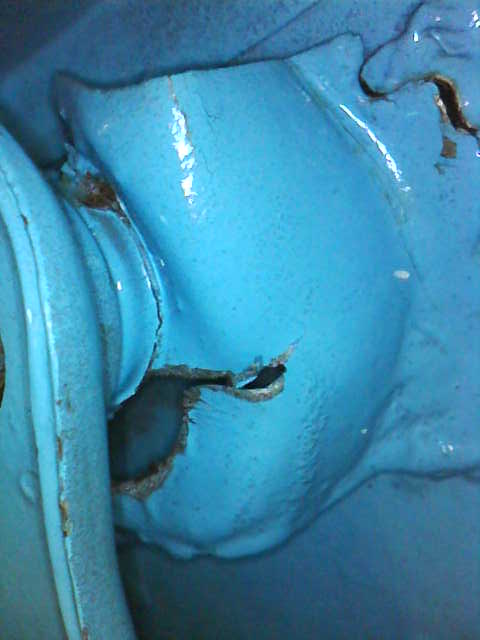
I am not an experienced welder and trying to weld it while bent over the fender and trying to even get the mig in there seems too hard.
I have already had the engine out twice since last Oct. so I am getting quite good at it.
Posted by: mepstein Dec 4 2018, 02:40 PM
If you don’t need it to be original, Jwest makes a bolt in trunk hinge kit.
Posted by: dr914@autoatlanta.com Dec 4 2018, 05:14 PM
engine in easy if you can spot weld, and now with McMark'd trunk hinge tool, can be retensioned easily

Going to have to repair/replace the trunk hinge on the car this winter. It was repaired before.... but it failed in a different spot. I wonder if the trunk lid gasket was too tight and caused this failure?
I am planning on taking the engine out to make it easier to get in there and position it correctly and do a good job welding.
How many of you have done this repair leaving the engine in?
I am not an experienced welder and trying to weld it while bent over the fender and trying to even get the mig in there seems too hard.
I have already had the engine out twice since last Oct. so I am getting quite good at it.
Posted by: dr914@autoatlanta.com Dec 4 2018, 05:15 PM
by the way in the back of the tech tips 700 is the procedure and placement diagram
engine in easy if you can spot weld, and now with McMark'd trunk hinge tool, can be retensioned easily
Going to have to repair/replace the trunk hinge on the car this winter. It was repaired before.... but it failed in a different spot. I wonder if the trunk lid gasket was too tight and caused this failure?
I am planning on taking the engine out to make it easier to get in there and position it correctly and do a good job welding.
How many of you have done this repair leaving the engine in?
I am not an experienced welder and trying to weld it while bent over the fender and trying to even get the mig in there seems too hard.
I have already had the engine out twice since last Oct. so I am getting quite good at it.
Posted by: Olympic 914 Dec 4 2018, 05:59 PM
by the way in the back of the tech tips 700 is the procedure and placement diagram
Just checked my copy of the 700 Tech tips and was unable to find the placement diagram.....

Posted by: jcd914 Dec 4 2018, 06:10 PM
If you don’t need it to be original, Jwest makes a bolt in trunk hinge kit.

This was the method I chose.
They come with backing plates so the sheet metal is clamped and the load spread out over more metal than the welded bracket.
I also like that the pivot is adjustable to help fine tune the trunk lid position.
Definitely not for the 'originality crowd' but a good functional solution.
Jim
Posted by: 914werke Dec 4 2018, 06:34 PM
The failure mode isn't tension, but rust. Or more precisely lack of lubrication that leads to rust. Once the shoulder bolt wears out its lube, its the beginning of the end.
Posted by: 914_teener Dec 4 2018, 06:54 PM
The failure mode isn't tension, but rust. Or more precisely lack of lubrication that leads to rust. Once the shoulder bolt wears out its lube, its the beginning of the end.
Looks like shear to me.
Posted by: amfab Dec 5 2018, 02:58 PM
+2 for the JWest system.
Hardest part was getting the old hinge bits off
Posted by: dr914@autoatlanta.com Dec 5 2018, 03:22 PM
the bottom of page 132
by the way in the back of the tech tips 700 is the procedure and placement diagram
Just checked my copy of the 700 Tech tips and was unable to find the placement diagram.....
Posted by: Olympic 914 Dec 5 2018, 06:05 PM
Damn.... My copy only goes to pg 125. 

the bottom of page 132
by the way in the back of the tech tips 700 is the procedure and placement diagram
Just checked my copy of the 700 Tech tips and was unable to find the placement diagram.....
Posted by: rgalla9146 Dec 5 2018, 08:10 PM
See current thread...'Replacing bracket for hinge pillar'
Posted by: Tdskip Dec 6 2018, 08:16 AM
I haven't done it (yet) but I believe the JWest set up is an engine-in job.
Posted by: Olympic 914 Jan 26 2019, 03:00 PM
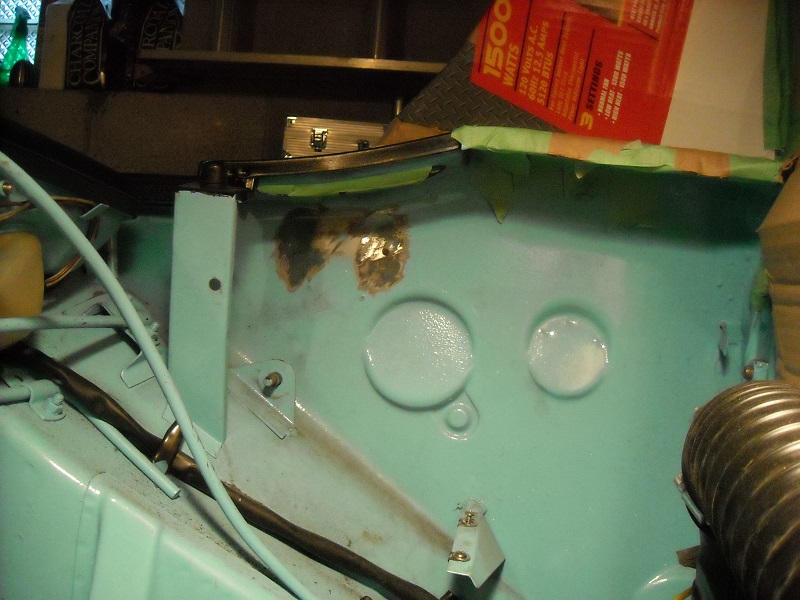
OK, decided to pull the engine to do this job.
Taped cardboard all around to protect the paint from grinding and welding spatter.
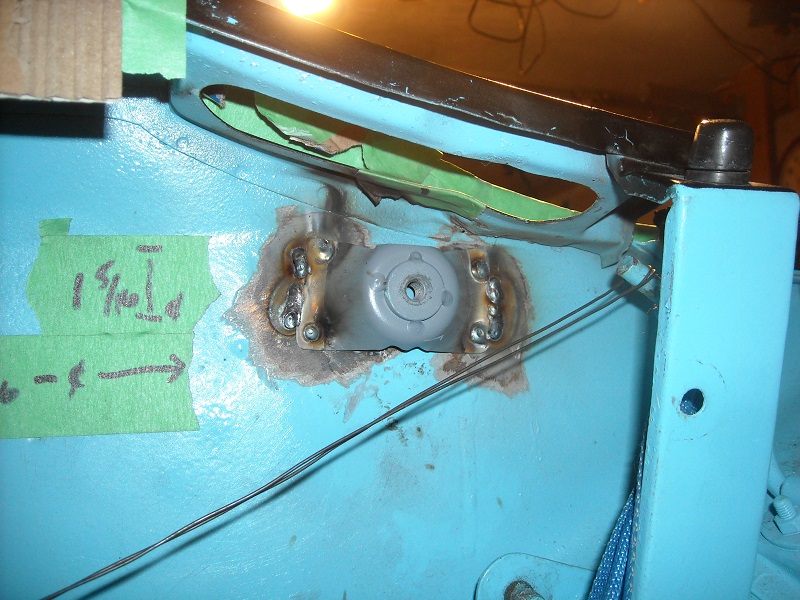
Cut the old ones out. the best way to locate the position is to mount the hinges to the trunk lid, put it in place lining up the trunk and then put a couple spot welds on it to hold things. take it back apart and then weld it up right.
After getting in there I didn't like the looks of the other hinge, So I cut them both out. and ordered new mounts form RD
Got the old ones cut out.
New mounts welded in. much easier without the engine in. you can just sit on a little stool and weld away... 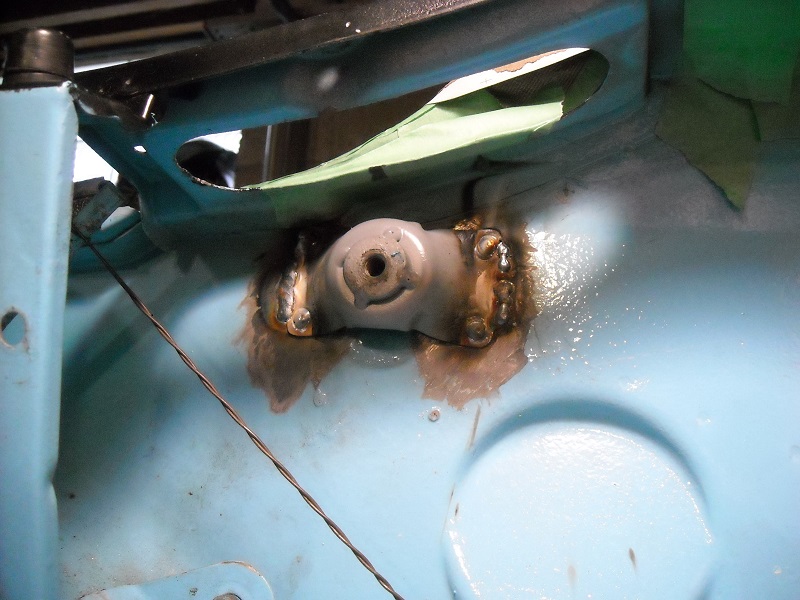
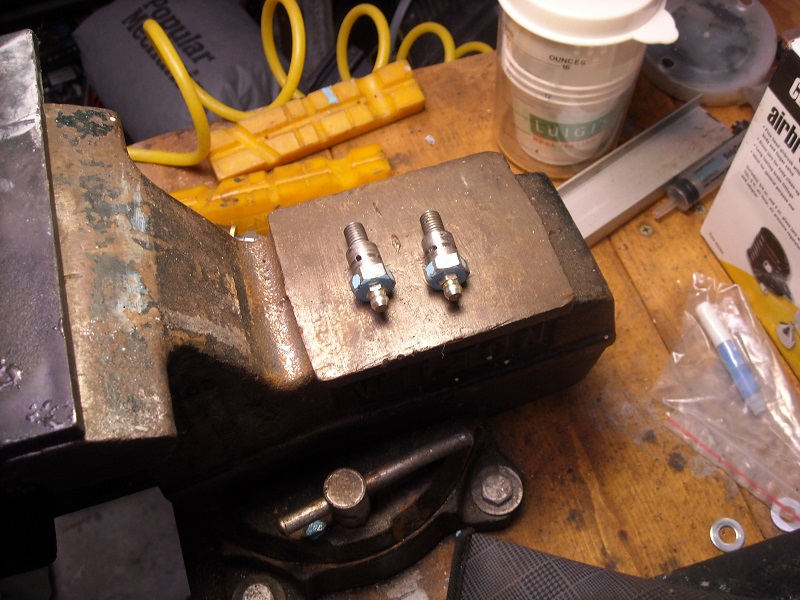
Didn't want this happening again, and someone else had mentioned doing a grease fitting mod to the bolts. so over the lathe for a bit to cut a grease groove, then drilled and tapped for a fitting.
I also polished off all the paint on the mating surfaces with a wire wheel in the Dremel 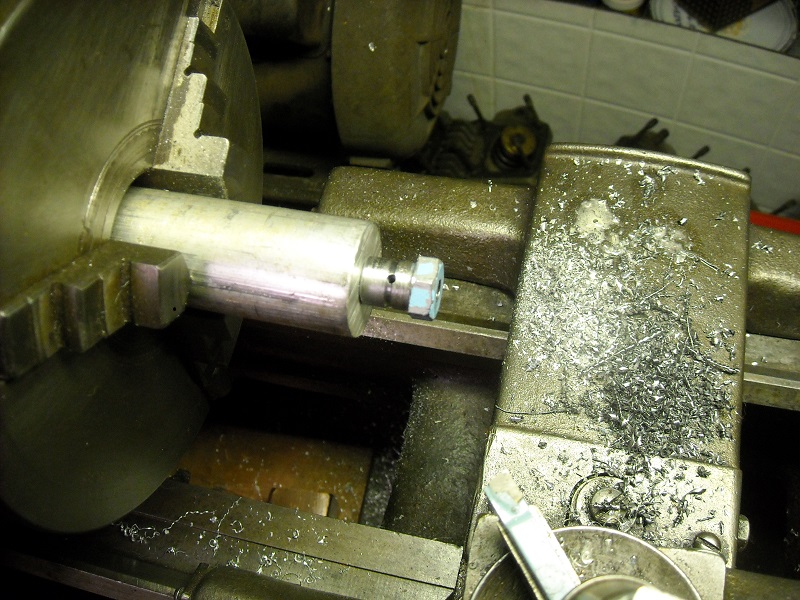
Easy to get a grease gun in there and put a couple squirts in to keep things moving smoothly. 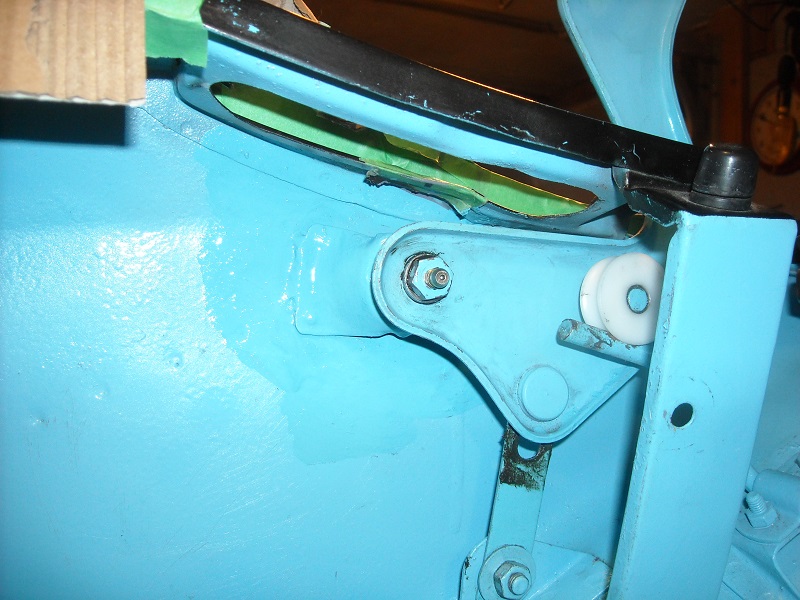
Kind of looks like it should be this way.
Posted by: 914forme Jan 26 2019, 06:12 PM
They look great, that trick was published in Pano a long time ago.
One quick question just for curiosity sake. I see you mounted the shoulder bolt in a what I am thinking was a piece of solid round that you threaded for the shoulder bolt to seat in. So not to ruin the the bolt threads by putting them in your chuck. Am I correct?
Posted by: Olympic 914 Jan 26 2019, 08:45 PM
They look great, that trick was published in Pano a long time ago.One quick question just for curiosity sake. I see you mounted the shoulder bolt in a what I am thinking was a piece of solid round that you threaded for the shoulder bolt to seat in. So not to ruin the the bolt threads by putting them in your chuck. Am I correct?
Yes, That, and giving me extra space so I didn't have to worry about crashing into the chuck. and I was able to use the same piece to cross drill the bolt with the drill press.
Posted by: IronHillRestorations Jan 26 2019, 09:04 PM
Bingo! That's what I call the "Upfixen" mod.
Posted by: 914forme Jan 26 2019, 11:04 PM
They look great, that trick was published in Pano a long time ago.One quick question just for curiosity sake. I see you mounted the shoulder bolt in a what I am thinking was a piece of solid round that you threaded for the shoulder bolt to seat in. So not to ruin the the bolt threads by putting them in your chuck. Am I correct?
Yes, That, and giving me extra space so I didn't have to worry about crashing into the chuck. and I was able to use the same piece to cross drill the bolt with the drill press.
I bought my Lathe and Mill used, and the last owner, not only ran into the chuck, but also expanded the 3 jaw to the point it hit the bed, and cross slide.  I could never get the chuck to center properly. New 4 Jaw solved the issue. Tonight I was thinking about a new bed, and cross slide.
Posted by: windforfun Jan 27 2019, 11:23 AM
I replaced my plastic rollers with metal ones. I think I got them from AA. FYI. Nice work BTW.
Posted by: second wind Jan 27 2019, 01:44 PM
OK, decided to pull the engine to do this job.
Taped cardboard all around to protect the paint from grinding and welding spatter.
Cut the old ones out. the best way to locate the position is to mount the hinges to the trunk lid, put it in place lining up the trunk and then put a couple spot welds on it to hold things. take it back apart and then weld it up right.
After getting in there I didn't like the looks of the other hinge, So I cut them both out. and ordered new mounts form RD
Got the old ones cut out.
New mounts welded in. much easier without the engine in. you can just sit on a little stool and weld away...
So.....any chance you could make a batch of those nifty bolts and bless us other guys? Thank you. gg
Didn't want this happening again, and someone else had mentioned doing a grease fitting mod to the bolts. so over the lathe for a bit to cut a grease groove, then drilled and tapped for a fitting.
I also polished off all the paint on the mating surfaces with a wire wheel in the Dremel
Easy to get a grease gun in there and put a couple squirts in to keep things moving smoothly.
Kind of looks like it should be this way.
Posted by: second wind Jan 27 2019, 01:47 PM
So......any chance of making a bunch of those nifty bolts and blessing us other guys?? Sure would be nice to know I've got grease in my hinges. Thank you. gg
Powered by Invision Power Board (http://www.invisionboard.com)
© Invision Power Services (http://www.invisionpower.com)