Printable Version of Topic
Click here to view this topic in its original format
914World.com _ 914World Garage _ Ivory 1970 914/6 Build
Posted by: gms Jan 15 2019, 09:06 PM
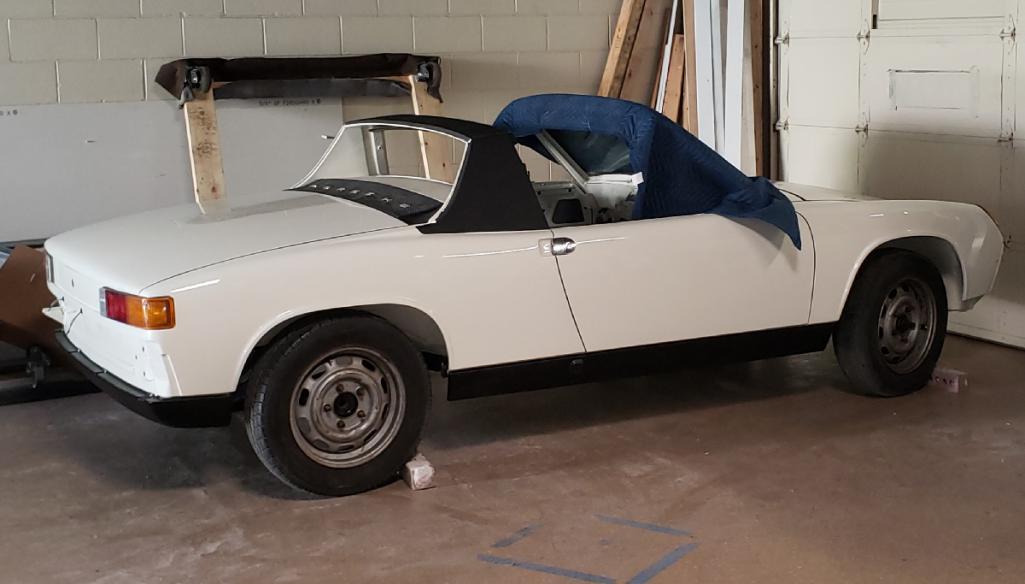
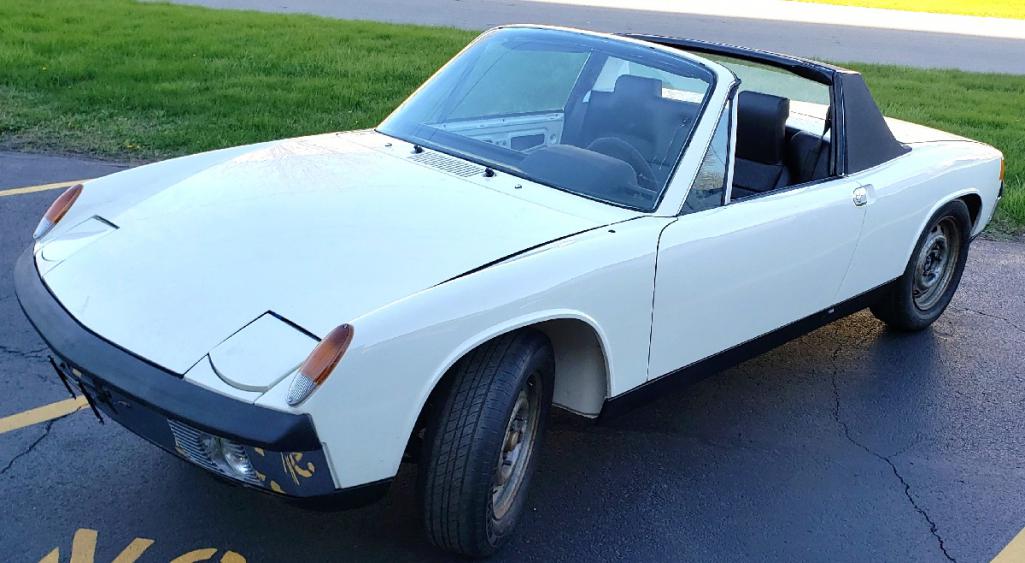
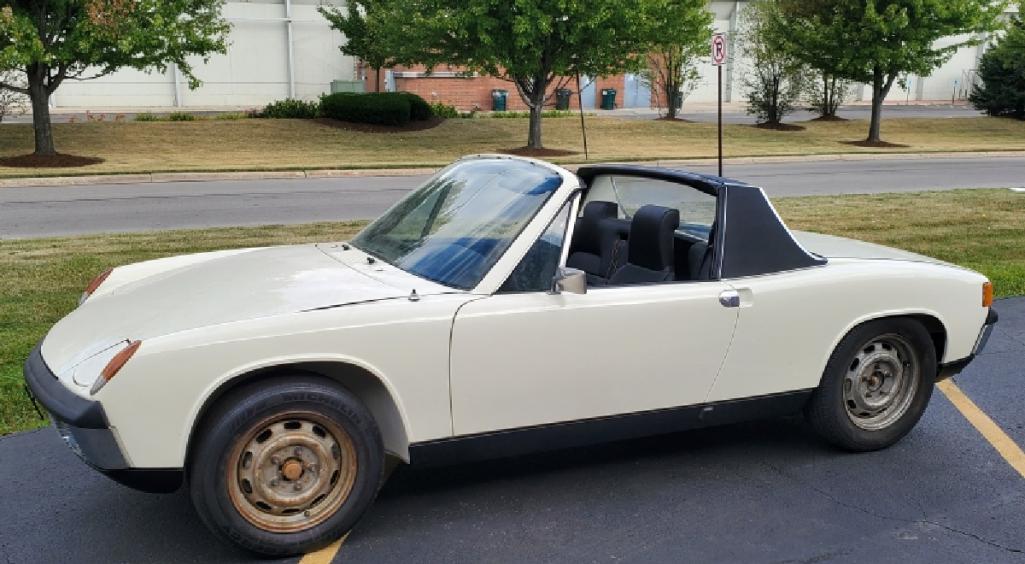
This will be the official build thread for this light ivory 1970 914/6.
after http://www.914world.com/bbs2/index.php?showtopic=253366&hl=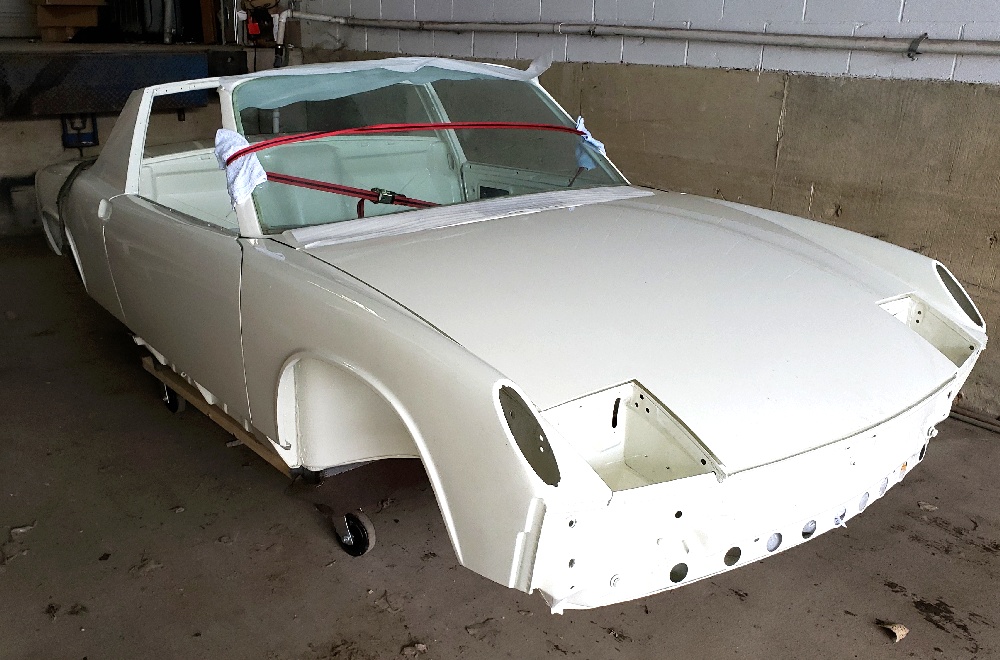
Posted by: gms Jan 15 2019, 09:10 PM
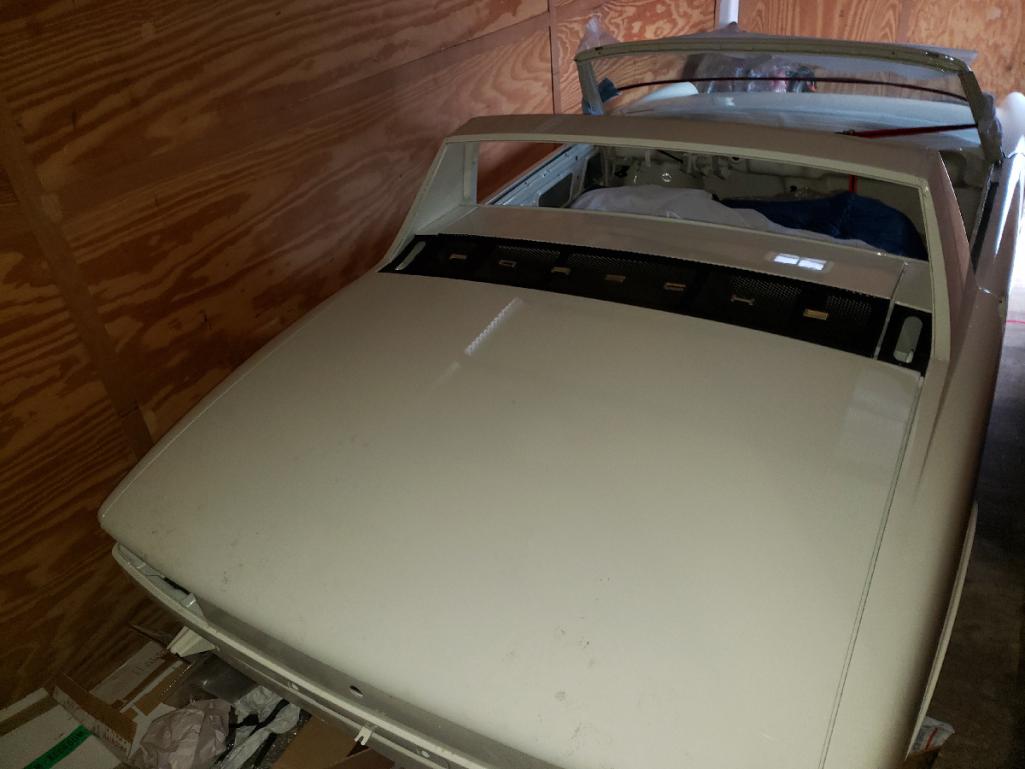
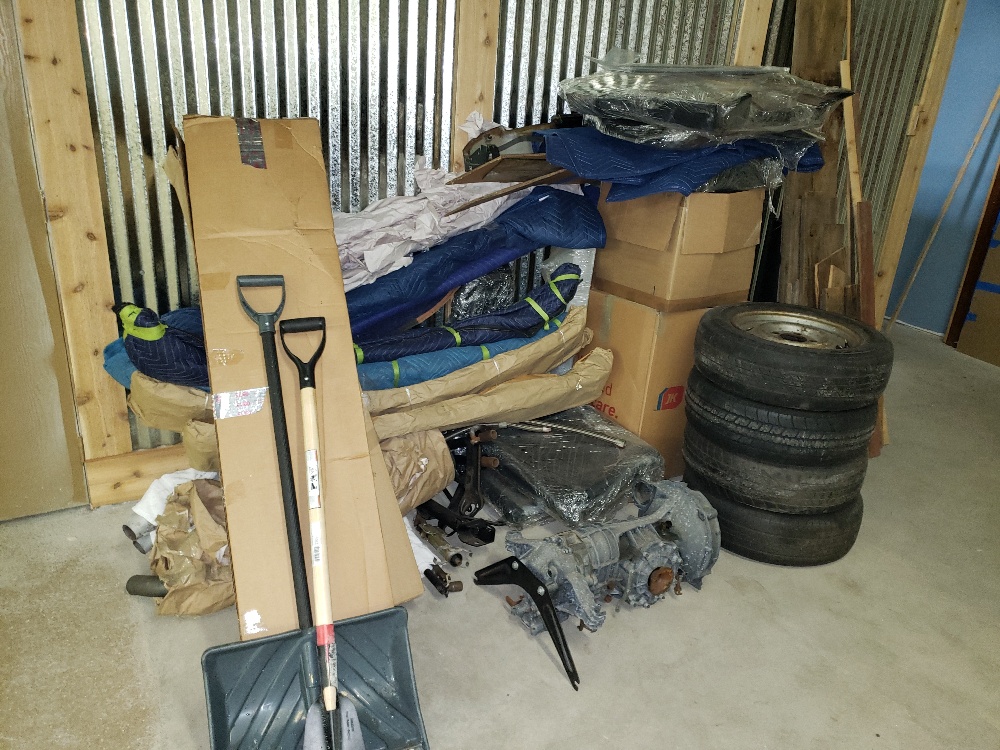
@http://www.914world.com/bbs2/index.php?showuser=865 delivered this gem for the owner late last month, I have a bunch of sorting to do!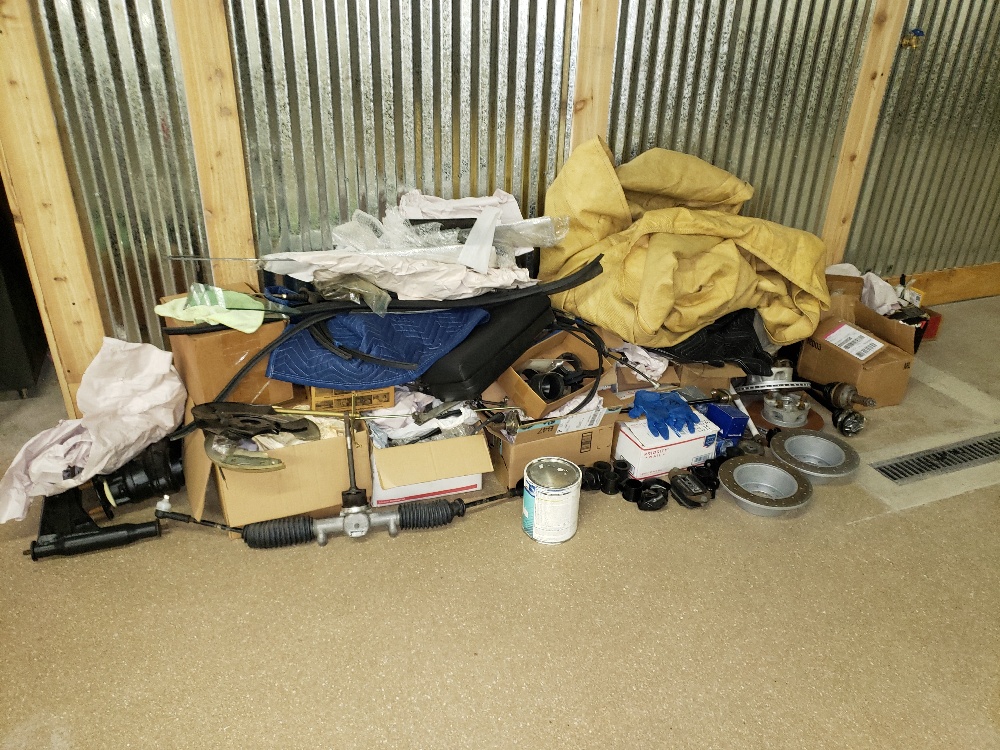
Posted by: GaroldShaffer Jan 15 2019, 09:17 PM
You're welcome.  Like a life size jig saw puzzle.
Posted by: sixnotfour Jan 15 2019, 09:23 PM


![popcorn[1].gif](style_emoticons/default/popcorn[1].gif)
Posted by: ValcoOscar Jan 15 2019, 09:46 PM
Can't wait to hear all about this build...

You care to share VIN to start 
Oscar
Posted by: johnhora Jan 15 2019, 10:12 PM
Garold...I see you were kind enough to also supply Glen with a snow shovel to scoop up the parts
It will be fun to watch the build..
Posted by: Cairo94507 Jan 15 2019, 10:14 PM
Excellent- I look forward to watching this one come together.
Posted by: whitetwinturbo Jan 15 2019, 10:50 PM

Posted by: rgalla9146 Jan 16 2019, 06:04 AM
Light Ivory is the new black !
Posted by: defianty Jan 16 2019, 07:12 AM
Fantastic, looking forward to updates.
Posted by: IronHillRestorations Jan 16 2019, 11:12 AM
Build??? That car will probably get mothballed in Stazak's secret basement, which is kinda like Silence of the Lambs, but only with rare 914-6 parts
Posted by: Stoddy Jan 16 2019, 11:28 AM

This will be the official build thread for this light ivory 1970 914/6.
I've just started stripping mine, so could you wait a few months please? Then I can just copy and paste what you do when you re build!?
Good luck with it, I'll be taking notes!
Regards,
Stoddy
Posted by: Targa70 Jan 16 2019, 11:45 PM
For the record, when the car left Williamsburg, VA the factory engine was in there somewhere. Given the IL winters @http://www.914world.com/bbs2/index.php?showuser=865 got a good trade for those snow shovels.
I picked this car up in 2003 from the original owner out of San Diego and drove it for probably 2 years before discovering cancer. Body work and paint finished up in 2015 after almost a decade in the shop and I put it in storage while I was in Africa. The stock engine was built by Wayne Baker, long ago, to be a 2.5 with an oil cooler in the rear fender. Although I stripped it down and had every intention of assembling it myself, and still work on parts of it today, other animate objects are wanton of me as well.
To say that I am happy to have Glen at the helm of this assembly is an understatement. Glen was at the top of my list to ask who he would suggest do my car. And as luck would have it I called someone else first and they said "Well, Glen of course".
Thank you to the World, whose members I have followed and grown to know as well as anyone can via digital media. In learning about cars I have also learned about people and about persons. I do not subscribe or visit any other 914 sites, or any social media site for that matter, but I agree with the folks on here that praise the World for the generosity of its members.
thanks,
Bill
Posted by: rgalla9146 Jan 17 2019, 06:03 AM
Hello Bill
Welcome to the world of an empty chassis build !
Everyone's time frame is personal. Some are fast, many are slower.
The dream and the time is what keeps us vibrant and enthusiastic.
You're in good hands.....Glenn is one of the originals from way back and
knows our cars thoroughly.
Enjoy the process.
Rory
......Light Ivory
Posted by: GaroldShaffer Jan 17 2019, 07:37 PM
For the record, when the car left Williamsburg, VA the factory engine was in there somewhere. Given the IL winters @http://www.914world.com/bbs2/index.php?showuser=865 got a good trade for those snow shovels.
I picked this car up in 2003 from the original owner out of San Diego and drove it for probably 2 years before discovering cancer. Body work and paint finished up in 2015 after almost a decade in the shop and I put it in storage while I was in Africa. The stock engine was built by Wayne Baker, long ago, to be a 2.5 with an oil cooler in the rear fender. Although I stripped it down and had every intention of assembling it myself, and still work on parts of it today, other animate objects are wanton of me as well.
To say that I am happy to have Glen at the helm of this assembly is an understatement. Glen was at the top of my list to ask who he would suggest do my car. And as luck would have it I called someone else first and they said "Well, Glen of course".
Thank you to the World, whose members I have followed and grown to know as well as anyone can via digital media. In learning about cars I have also learned about people and about persons. I do not subscribe or visit any other 914 sites, or any social media site for that matter, but I agree with the folks on here that praise the World for the generosity of its members.
thanks,
Bill
 Yep, got a great deal on the snow shovels. This is going to be a fun build to watch. The pick up and delivery to Glenn was adventure for sure between, two flat tires on the trailer during the trip and ever so lovely traffic mess in Washington.
Your car is in good hands.
Posted by: GeorgeRud Jan 18 2019, 09:40 AM
Glenn, Brad, and Garold are great resources for those of us cursed to live in the midwest snow belt, where all 914s are sleeping for those long winter nights.
Posted by: gms Jan 24 2019, 11:30 PM
All the parts have been sorted, time to prepare for the main body wiring harness installation.
I use 8mm heat shrink on the wire holder tabs...makes for a snug fit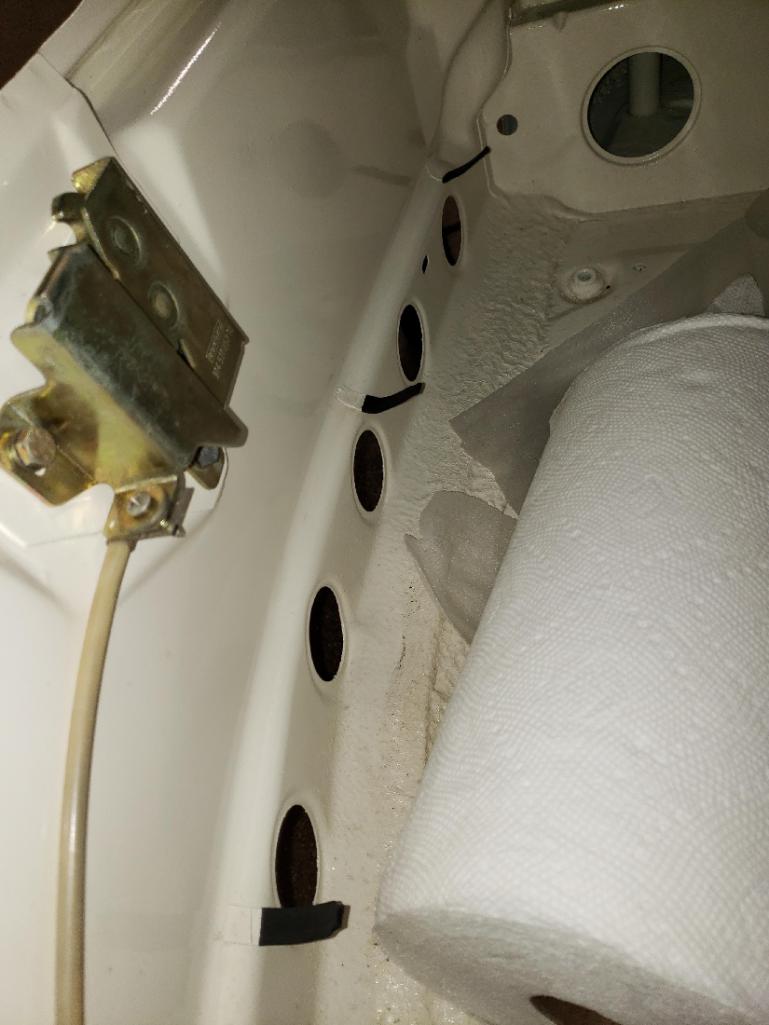
Posted by: second wind Jan 25 2019, 12:24 AM
Dear GMS.....all the best to you!!! You are living my dream and I would bet other's dreams as well. Thank you for your post! Trying to hold back on the exclamation marks but building a 6 from ground up with awesome color to boot....sounds really fun___.
Enjoy your experience and thank you for sharing it with us ....
gg
Posted by: Targa70 Jan 25 2019, 06:36 AM
I so look forward to seeing that Kroon harness make it back in the car.
Posted by: rick 918-S Jan 25 2019, 08:07 AM
Wow!  Another Ivory 6 surfaces.
Posted by: gms Jan 29 2019, 10:38 PM
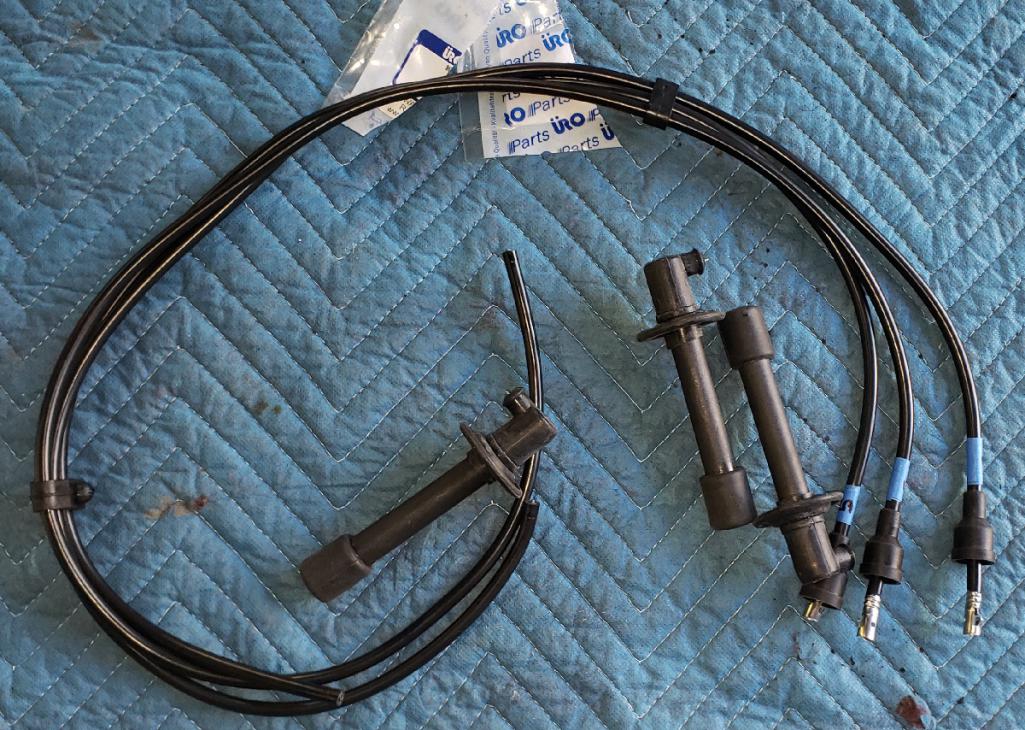
As Bill mentioned he has a https://www.kroonwireharnesses.com/ wire harness. I place the Kroon harness next to my NOS factory harness and the only difference that really stood out was the wrap of the cloth tape on the Kroon was tighter.
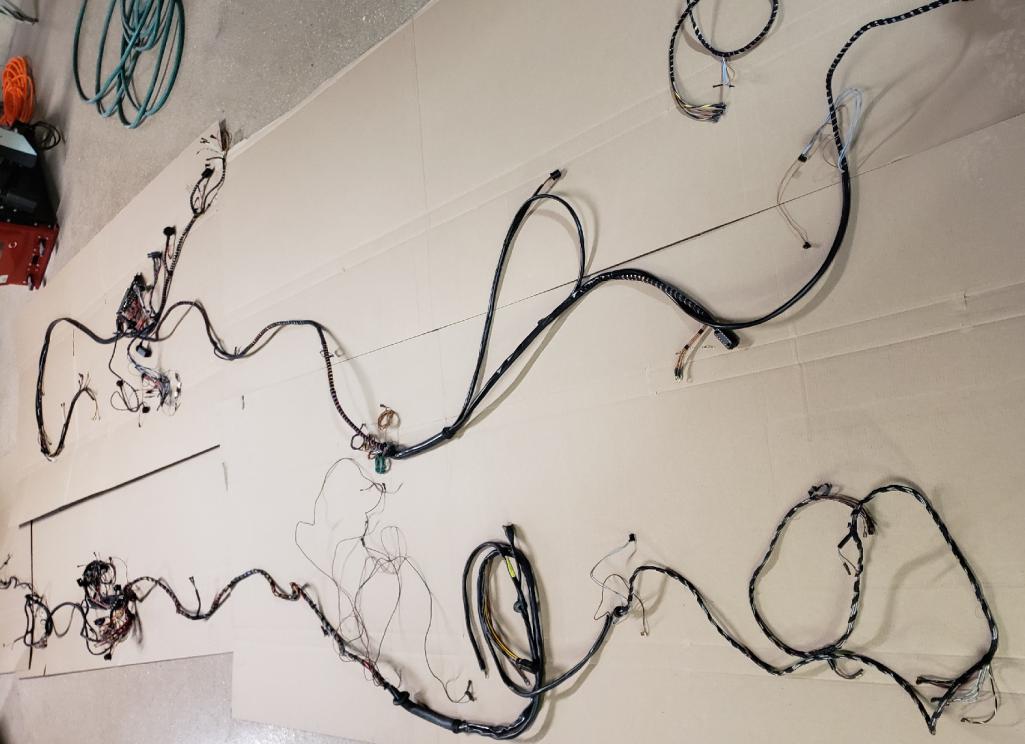
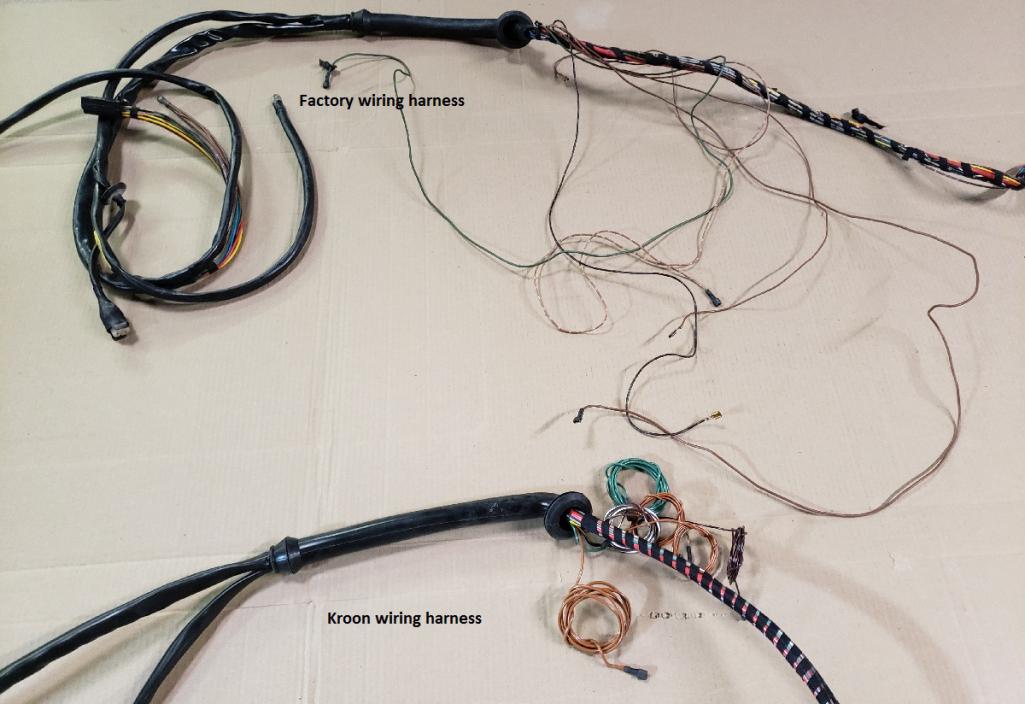
this is just a closeup of the dash/cabin part of the Kroon harness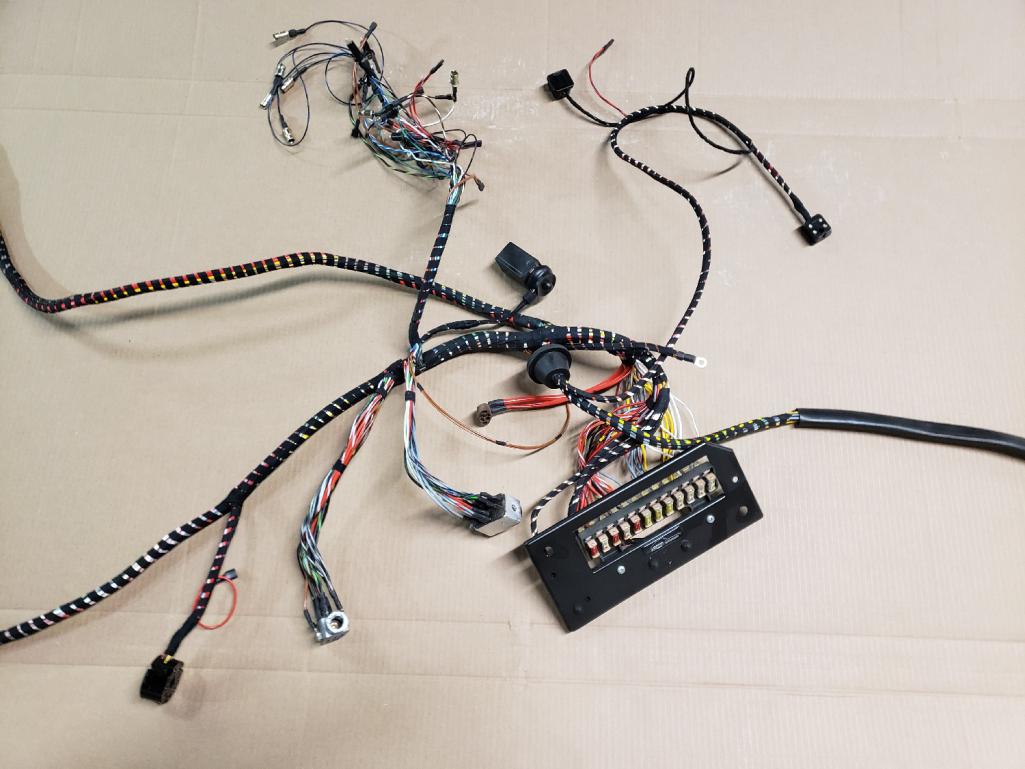
Posted by: campbellcj Jan 30 2019, 06:42 AM
Hmmm. I'm thinking I need to rewire my car. Sounds like quite an undertaking however.
Posted by: altitude411 Jan 30 2019, 06:48 AM
Did the Kroon harness come with a snorkel or is that the 914Rubber product? It looks longer than the NOS.
Thank you for this thread. Fantastic, really looking forward to watching this car come together.
Posted by: Targa70 Jan 30 2019, 08:36 AM
Yes. Unbeknownst to me, the harness would come with the snorkel on it. And so I know have a new or NOS one floating around either here or in IL. story of my life. 
Posted by: gms Feb 20 2019, 10:48 PM
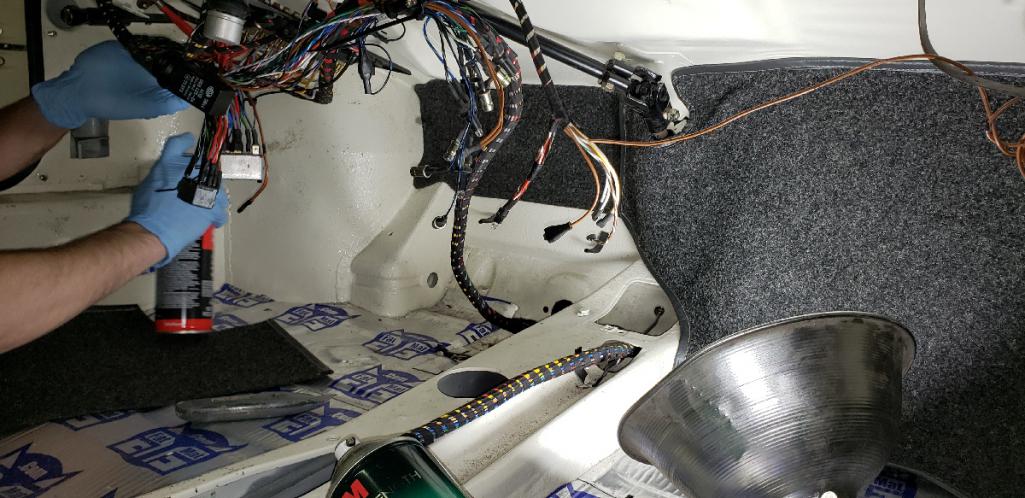
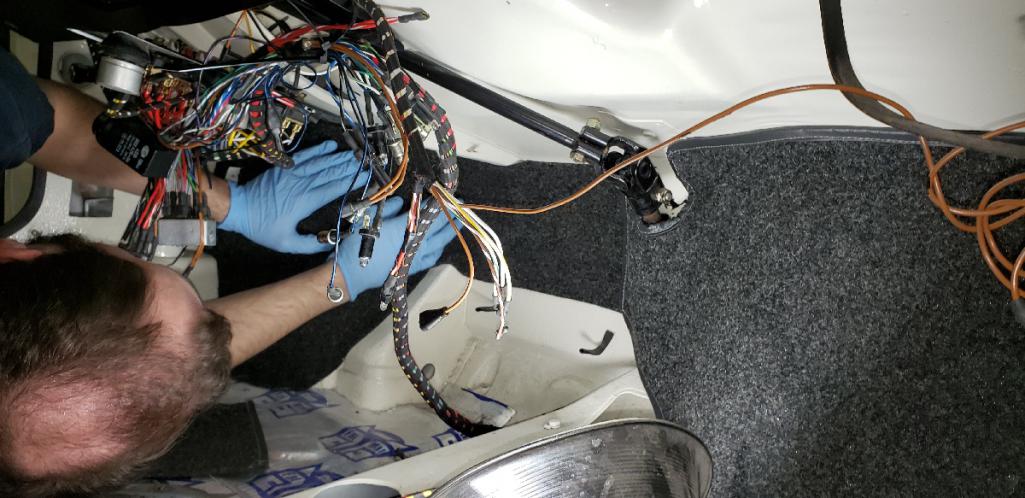
I took some pix of the process getting the wiring harness in 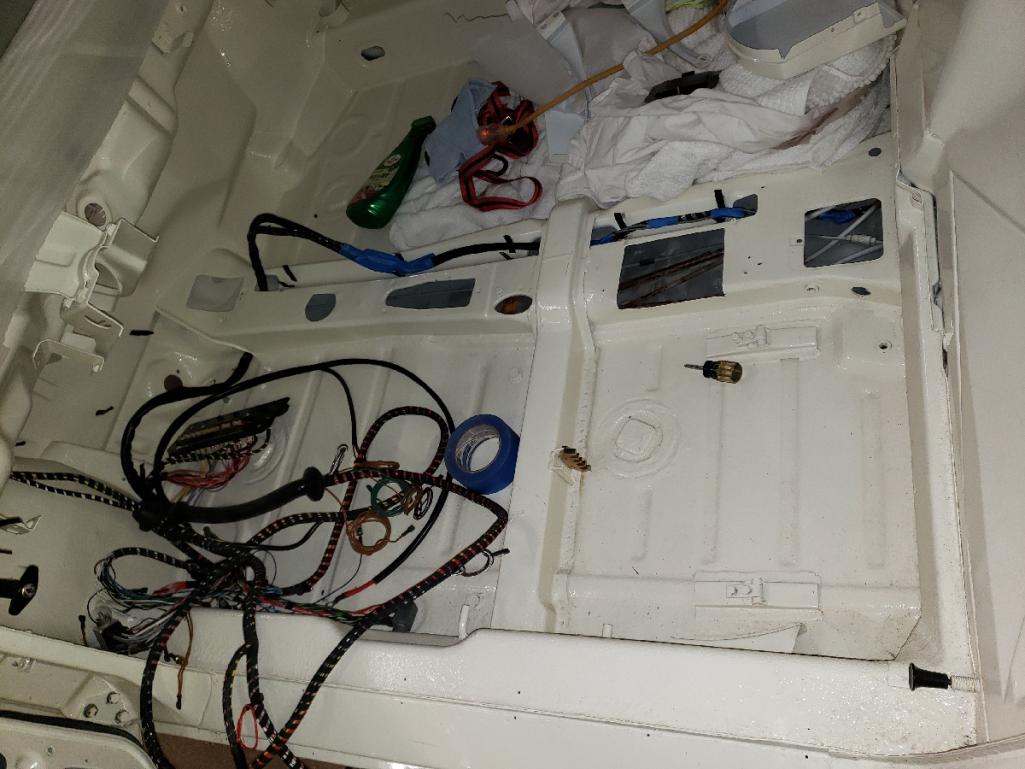
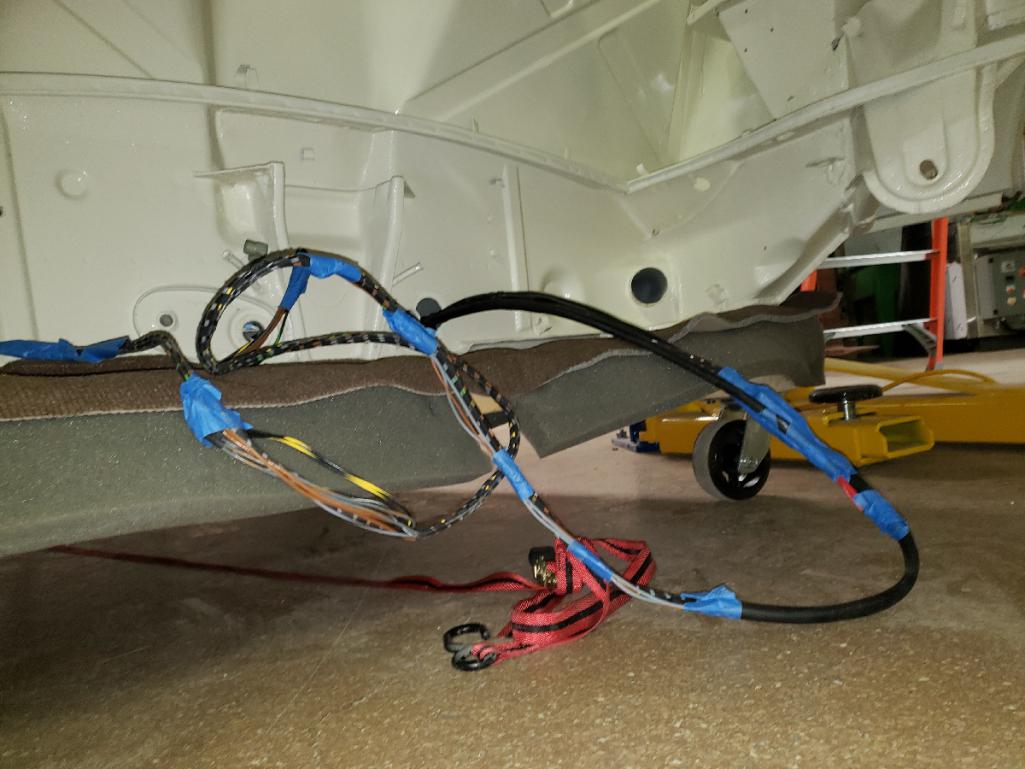
Posted by: gms Feb 20 2019, 10:50 PM
pulled thru the tunnel, like a snake swallowing a mouse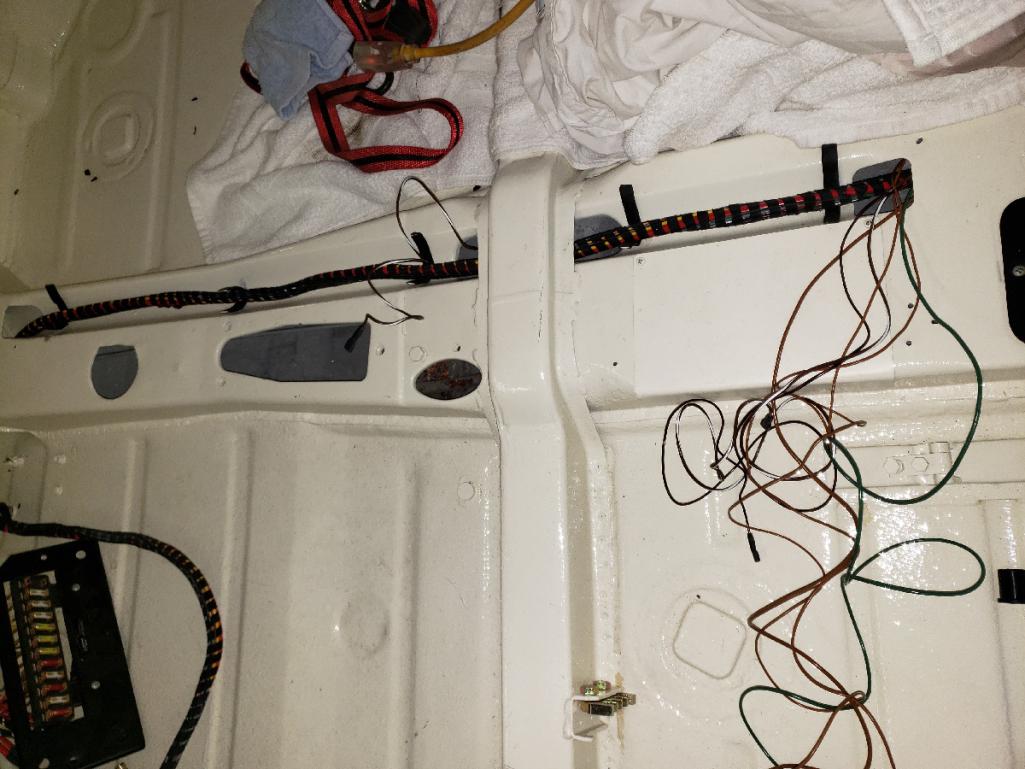
Posted by: AHudson Feb 21 2019, 08:45 AM
Congratulations on the purchase, decision to restore/build, and your grateful kudos to World contributors. Sounds like a great mission all around!
The car is going to be fantastic. Color, current condition, and choice of builder team will make it fun and educational to watch also. Thanks for sharing.
As a newish 914-6 owner (bought mine in July '18) I'm 'reclaiming' an older but quite thorough restoration. It went through what you are now going through - and went on to win Parade class 2 years in a row - and I can tell that now, 15 years or so later, the 'old' restoration still shows its integrity, level of care, and ease of my current job. So hats off to you for the job you're doing now and for the future.
Looking forward to following along!
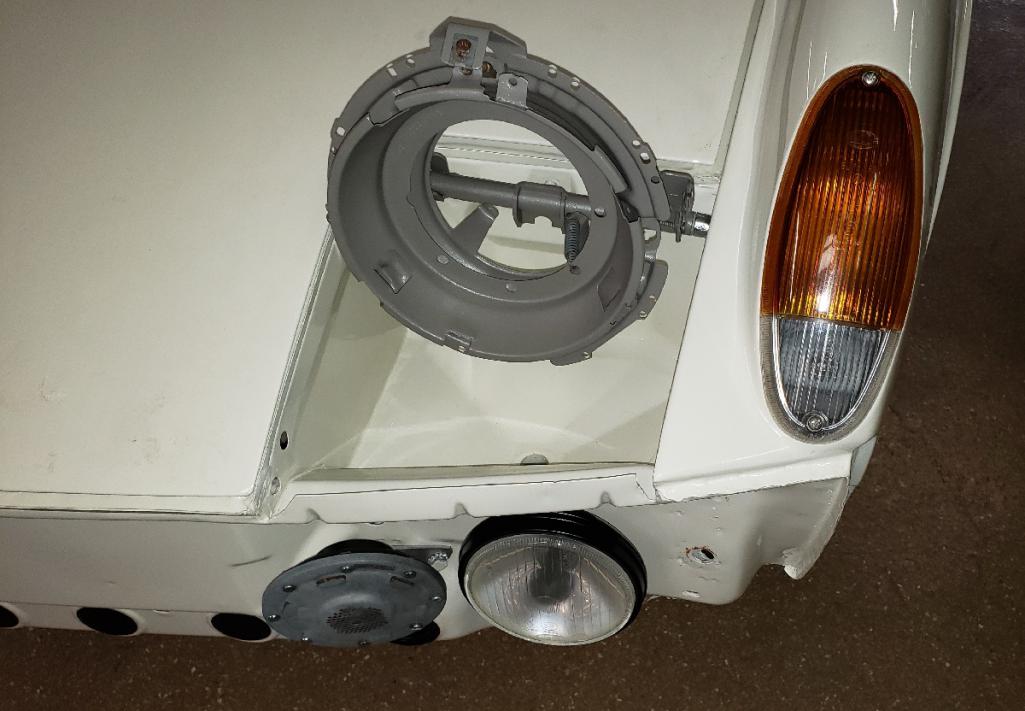
Posted by: gms Mar 27 2019, 03:01 PM
@http://www.914world.com/bbs2/index.php?showuser=15683 dropped off some parts and visited his car a couple weeks ago.
I put the euro fogs on and they look great!
we are running a little slow right now as I try and get hardware plated and acquire missing parts.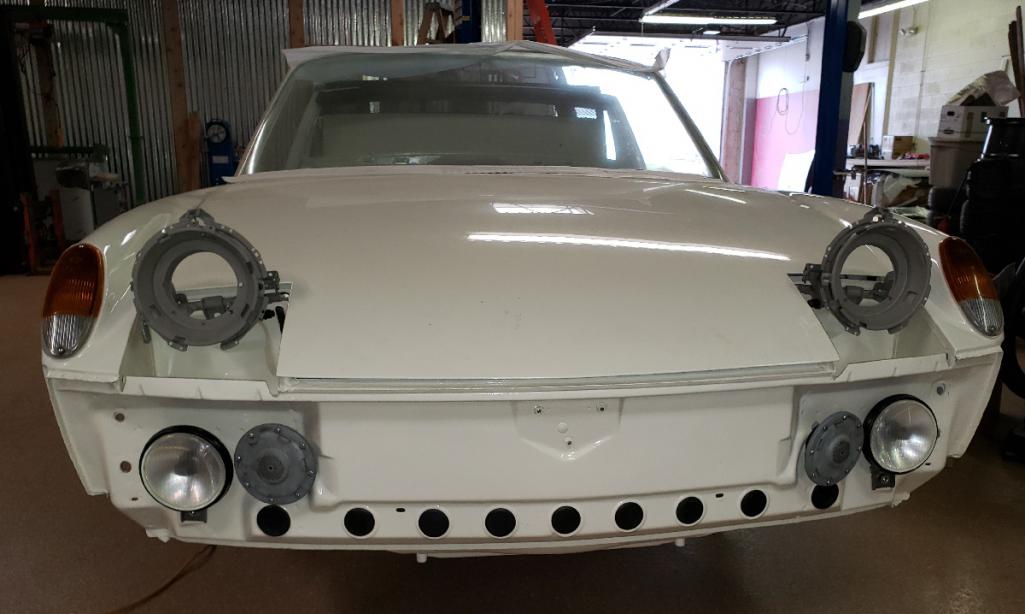
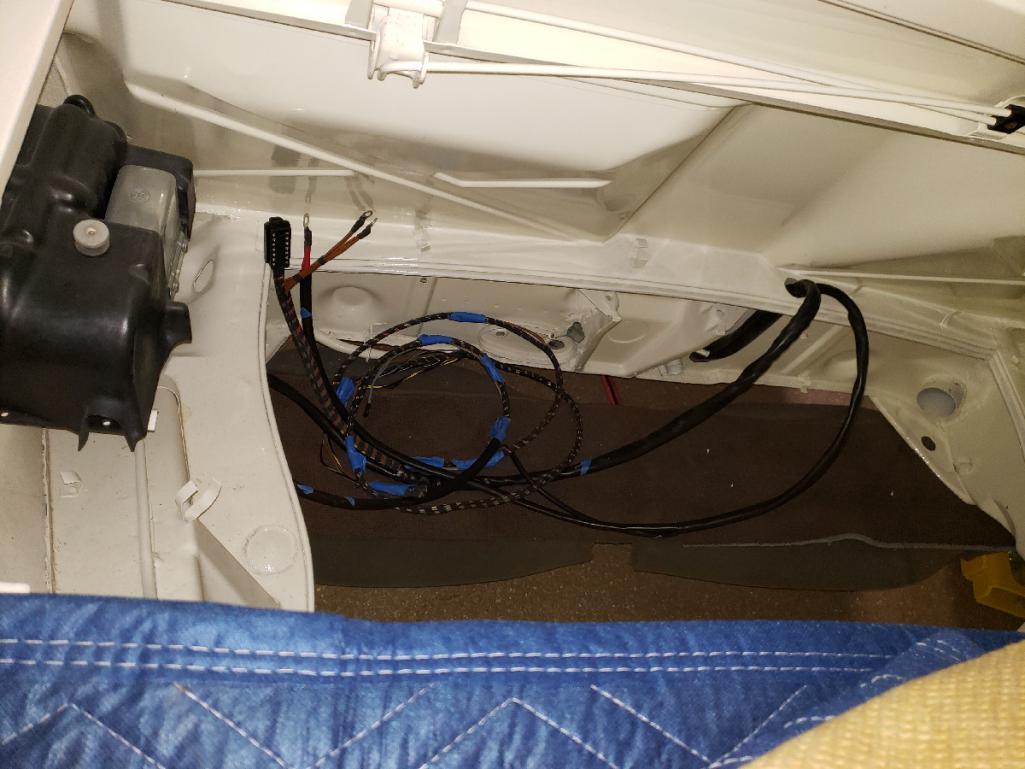
Posted by: gms Mar 27 2019, 08:40 PM
headlight motor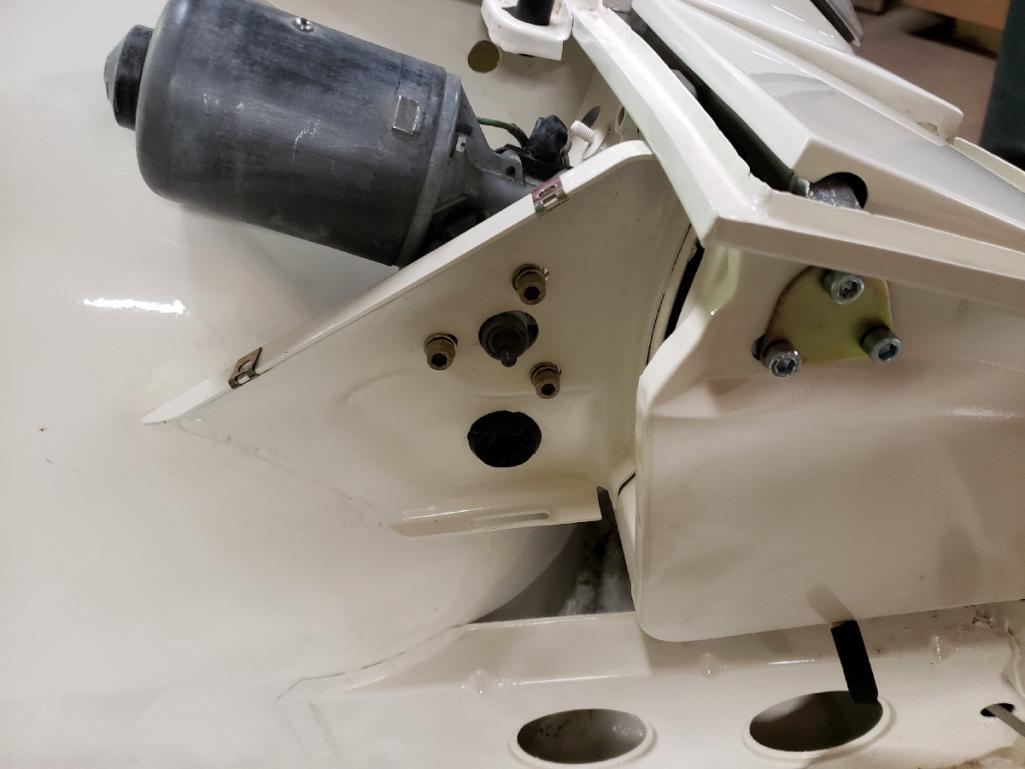
Posted by: gms Mar 27 2019, 08:42 PM
The steering wheel with new leather cover
and http://www.914world.com/bbs2/index.php?showtopic=334915&hl=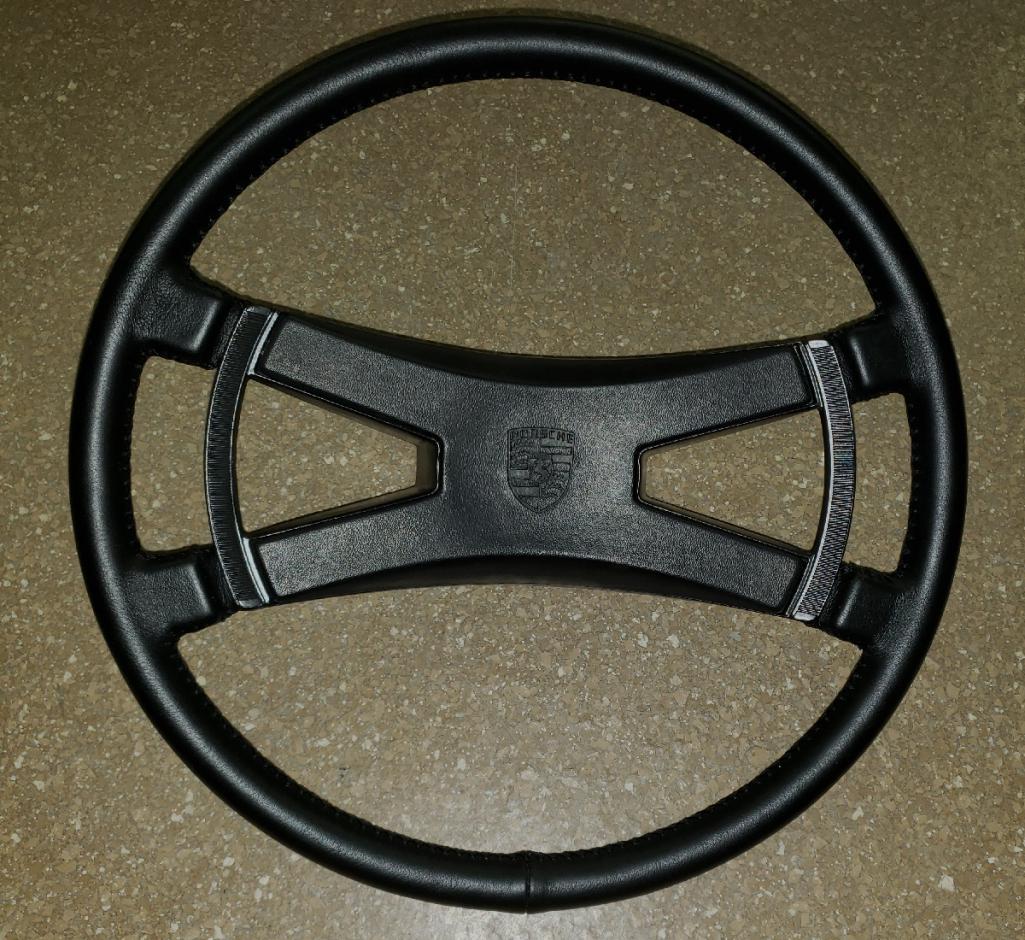
Posted by: gms Mar 27 2019, 08:43 PM
some NOS headlight lift linkage brushes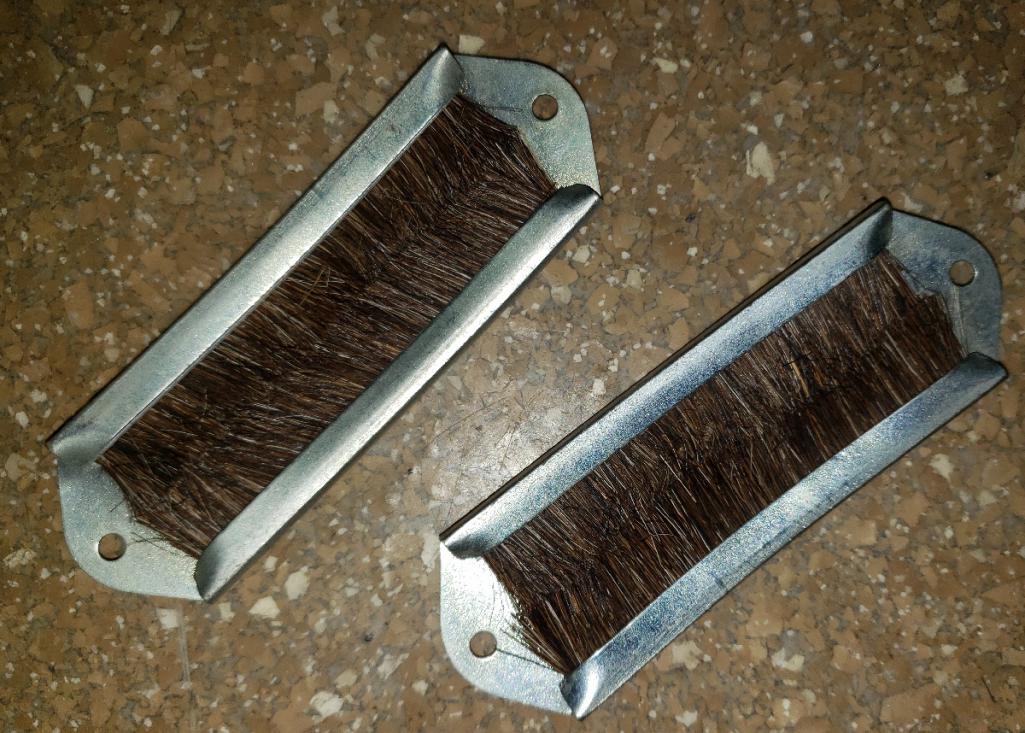
Posted by: sixnotfour Mar 27 2019, 09:12 PM
some NOS headlight lift linkage brushes
have anymore ??
Posted by: gms Mar 27 2019, 09:33 PM
some NOS headlight lift linkage brushes
have anymore ??
I wish I had some for myself
Posted by: Targa70 Mar 28 2019, 09:23 AM
Looking good Glenn. Your craftsmanship is top notch and thanks for the updates.
Posted by: Luke M Mar 28 2019, 09:36 AM
some NOS headlight lift linkage brushes
have anymore ??
I wish I had some for myself
I thought 914rubber makes these brushes now?
I need a set for my 6 as well.
Glenn, on the Kroon wire harness did you notice if the wire diameter was different then the factory ? I'm sending a harness off to Kroon to have redone for my 6.
In emailing with Gerard, he mentioned only difference would be in some connectors.
Did you happen to notice any difference ?
Keep up the updates...
Posted by: gms Mar 29 2019, 12:02 PM
I thought 914rubber makes these brushes now?
I need a set for my 6 as well.
I did not notice them on the website, anyone see them?
Glenn, on the Kroon wire harness did you notice if the wire diameter was different then the factory ? I'm sending a harness off to Kroon to have redone for my 6.
In emailing with Gerard, he mentioned only difference would be in some connectors.
Did you happen to notice any difference ?
Keep up the updates...
I will check
Posted by: dr914@autoatlanta.com Mar 29 2019, 12:16 PM
we up to several years ago had literally hundreds, sold them all!
some NOS headlight lift linkage brushes
have anymore ??
I wish I had some for myself
I thought 914rubber makes these brushes now?
I need a set for my 6 as well.
Glenn, on the Kroon wire harness did you notice if the wire diameter was different then the factory ? I'm sending a harness off to Kroon to have redone for my 6.
In emailing with Gerard, he mentioned only difference would be in some connectors.
Did you happen to notice any difference ?
Keep up the updates...
Posted by: gms Mar 29 2019, 12:41 PM
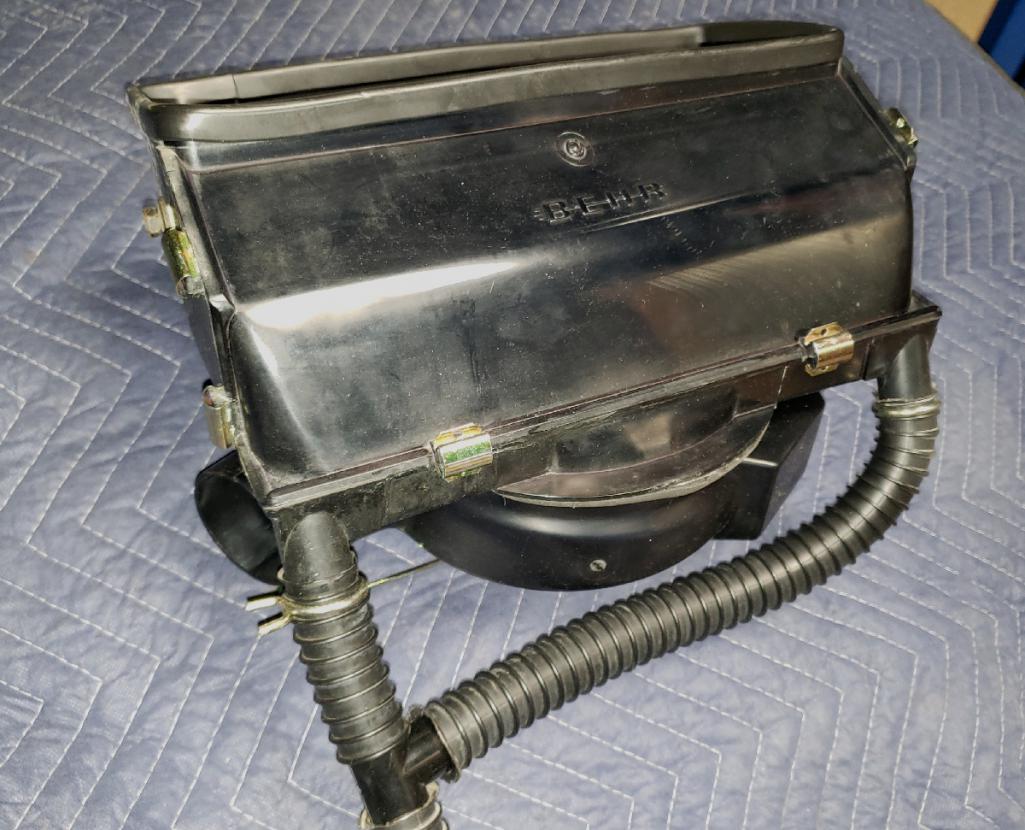
Unpacked the fresh air/vent/heating parts, they were beautifullyhttp://www.914world.com/bbs2/index.php?showtopic=334256&hl=

Posted by: altitude411 Mar 29 2019, 12:52 PM
I thought 914rubber makes these brushes now?
I did not notice them on the website, anyone see them?
Glenn, 914Rubber shows them on the early headlight rebuild kit but I don't see them sold separately.

https://900designs-container.zoeysite.com/early-headlight-rebuild-kit
@http://www.914world.com/bbs2/index.php?showuser=3348
Posted by: Mikey914 Mar 30 2019, 01:46 AM
We did sell as a kit but Yes I'm sure we can sell alone. Also we are about to do a revisit on the surrounds as a Group Buy. They were supposed to be available alone for much less.
Posted by: mepstein Mar 30 2019, 06:35 AM
The steering wheel with new leather cover
and http://www.914world.com/bbs2/index.php?showtopic=334915&hl=
Glenn - Who did the new leather? Looks excellent.
@http://www.914world.com/bbs2/index.php?showuser=1785
Posted by: Targa70 Mar 30 2019, 07:54 AM
That is a Dallas Custom job on the rim. I cerakoted the butterfly and remounted the rubber pad.
Posted by: mepstein Mar 30 2019, 07:59 AM
That is a Dallas Custom job on the rim. I cerakoted the butterfly and remounted the rubber pad.
That’s who I use for thick grip wheels. Very happy with their work. They did a good job making it look stock.
Posted by: Targa70 May 27 2019, 07:26 PM
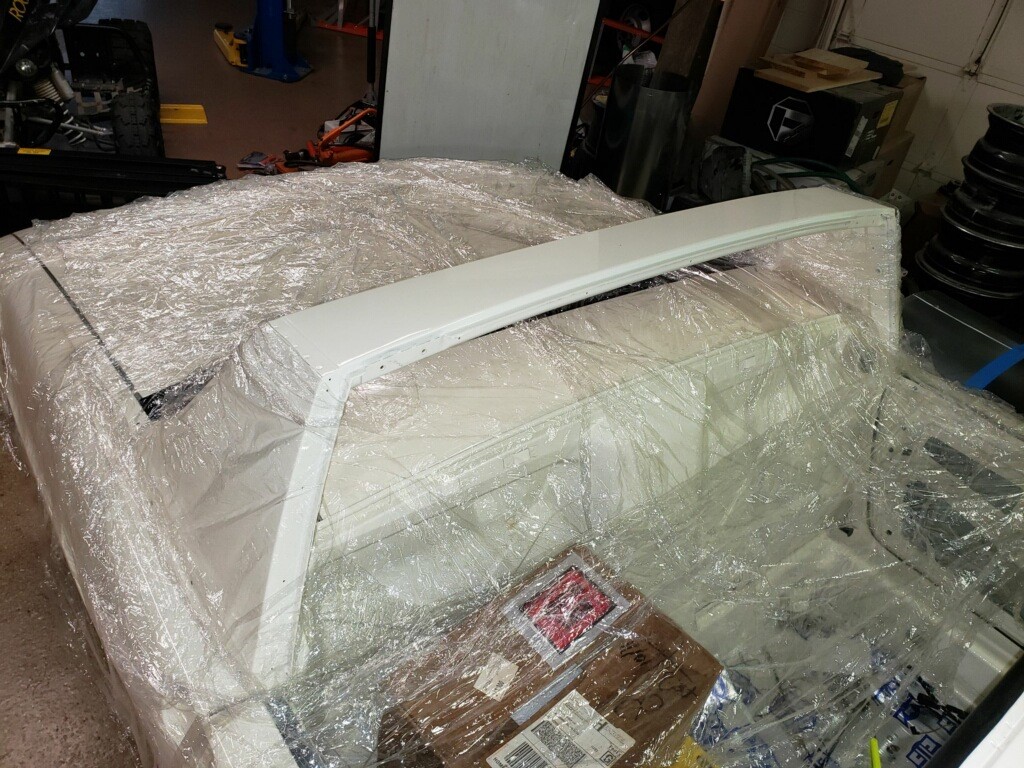
It has been a few weeks since an update, but Glen has been plugging away. Went with the Fat Mat instead of trying to put the factory soundproofing in. in 2019 a man can ignore the benefit of modern technology only so long. 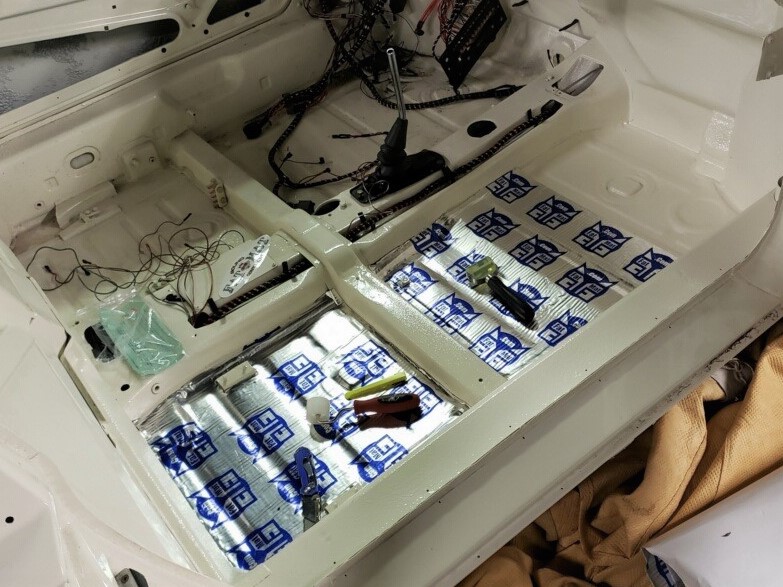
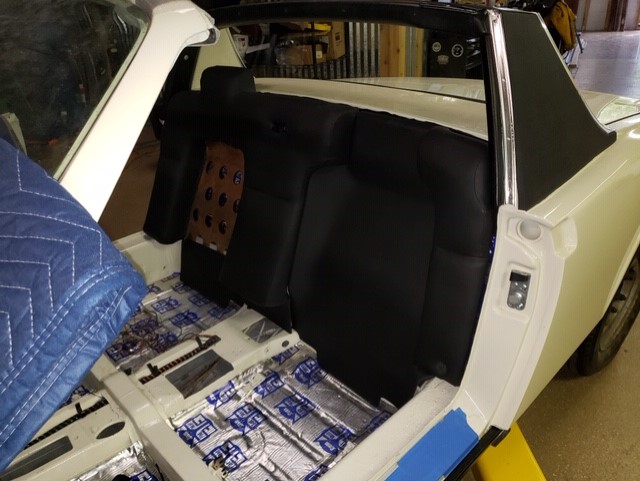
Posted by: Targa70 May 27 2019, 07:34 PM
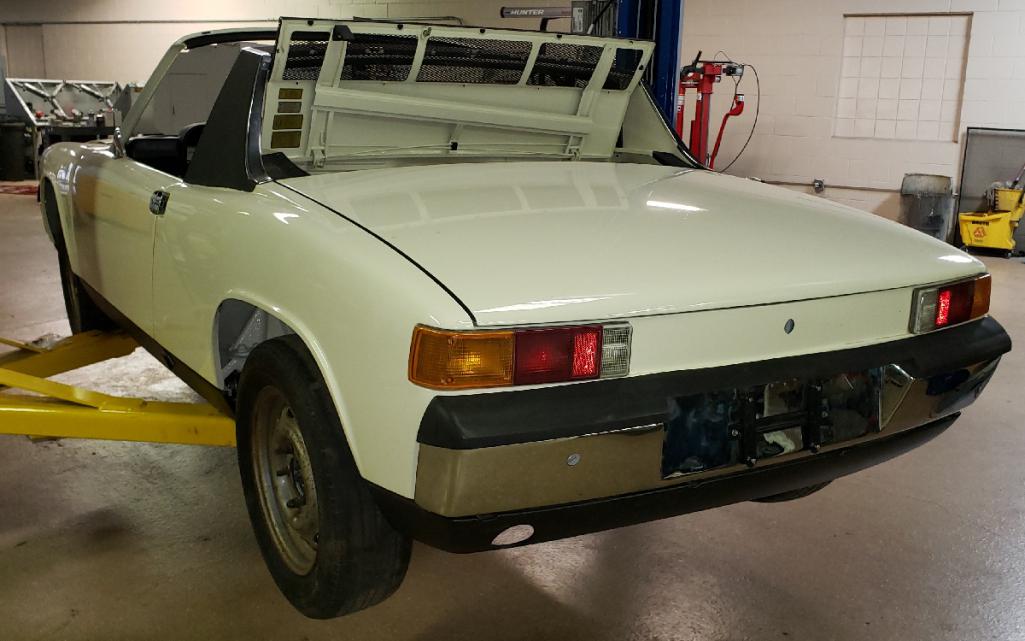
Here is the back end, and a snap of the targa mounting plastic and cups.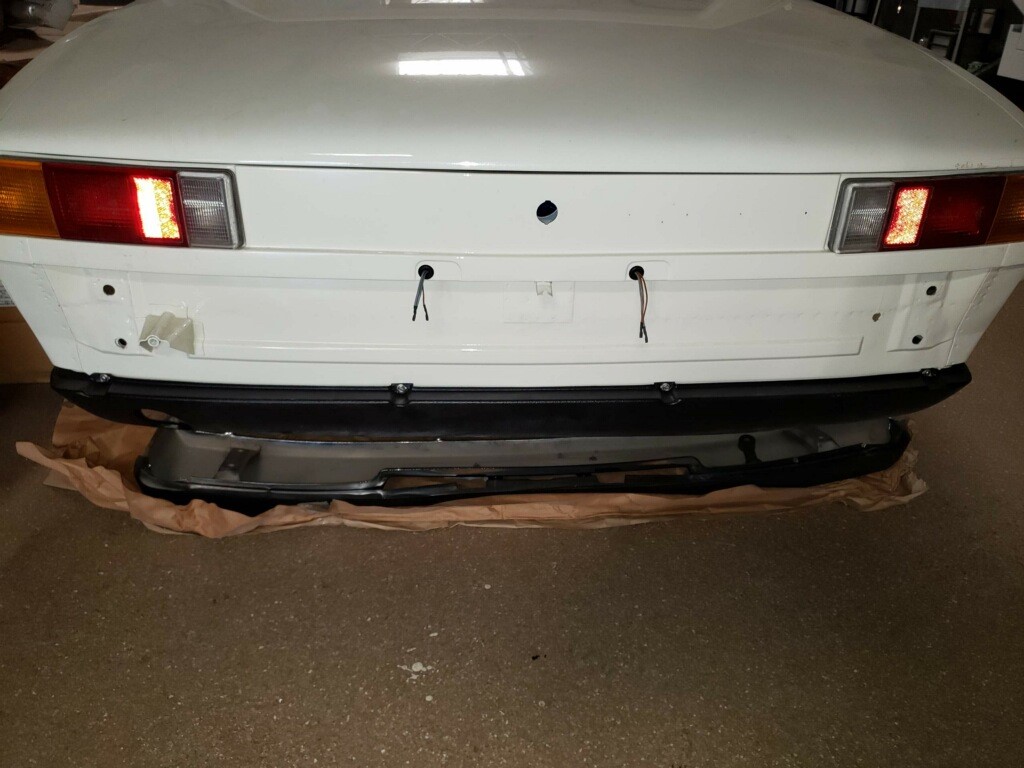
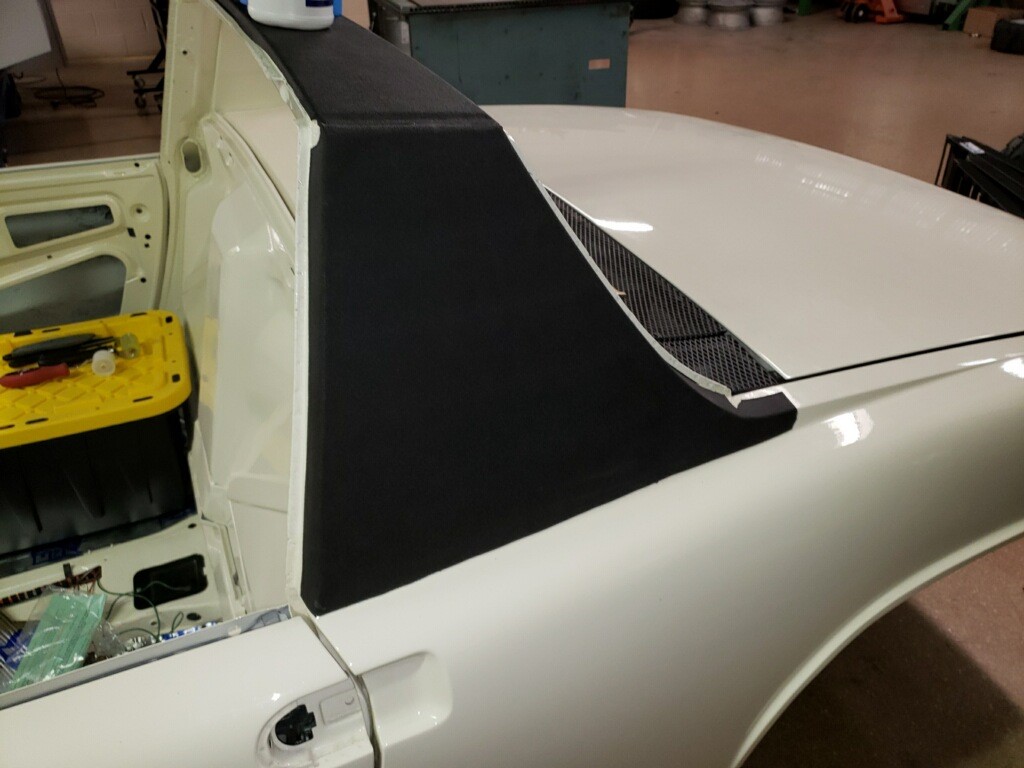
Posted by: Targa70 May 27 2019, 07:47 PM
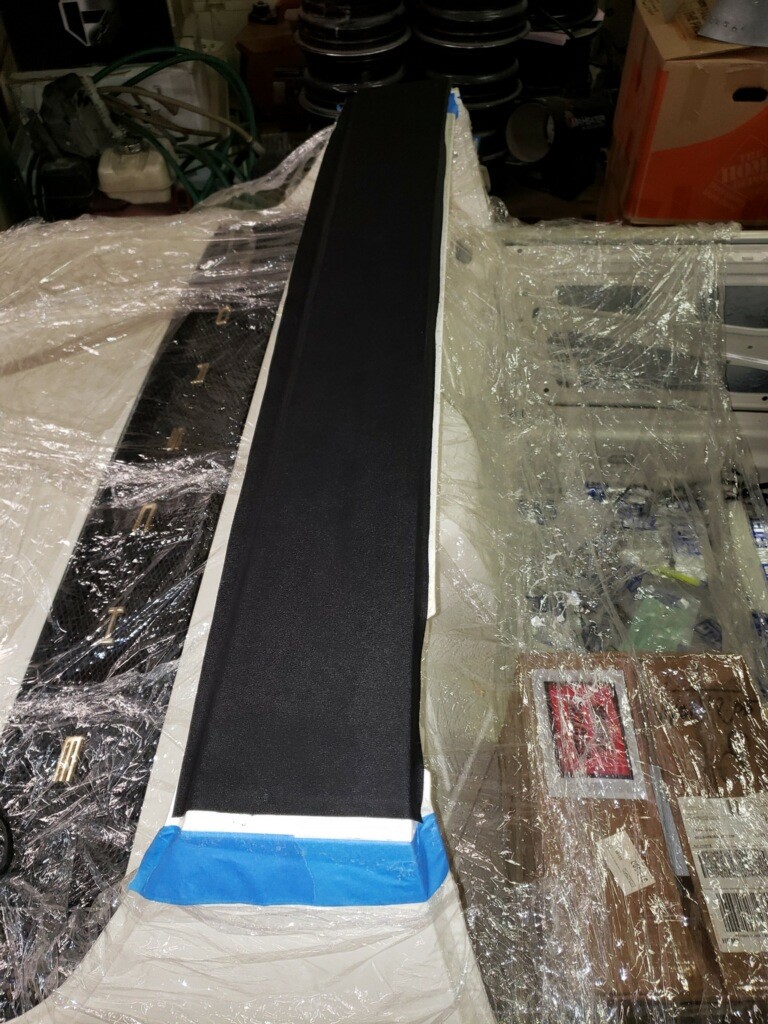
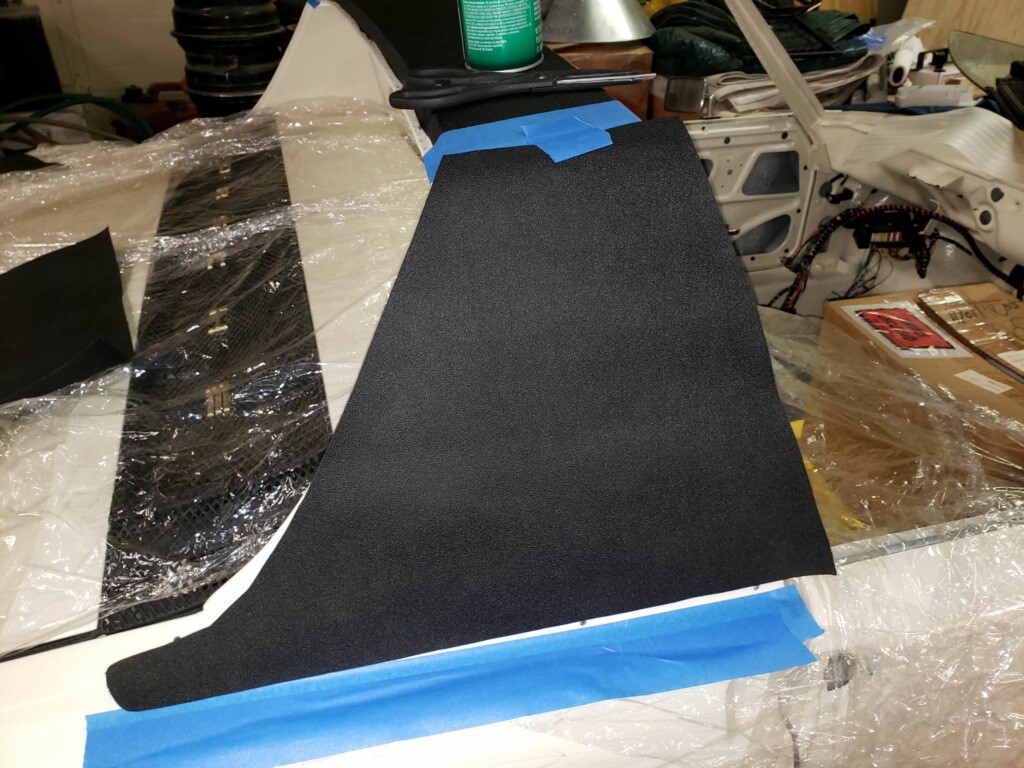
I feel like when the sail trip vinyl goes on, it is a big deal. Here is a series of Glen's work, from drilling the trim holes to laying out the top and side pieces. Along with the gratuitous photo of the trim still in its package. I am really liking the way @http://www.914world.com/bbs2/index.php?showuser=1785 works and I hope you enjoy the build as much as I do. 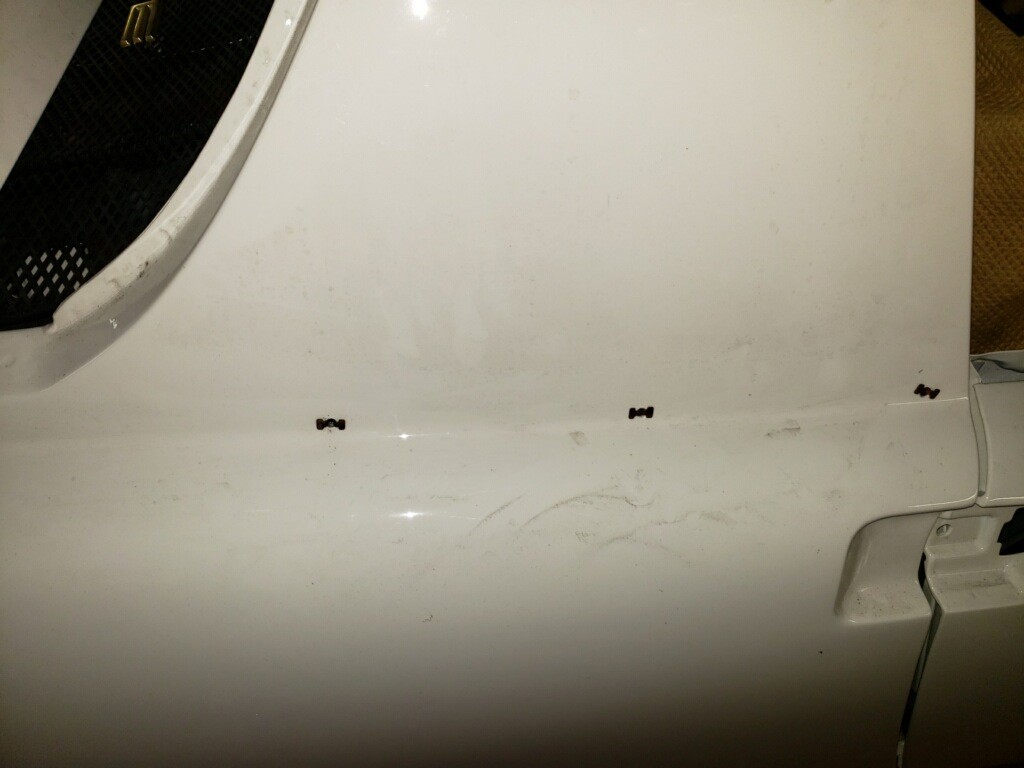

 [attachmentid=699
202]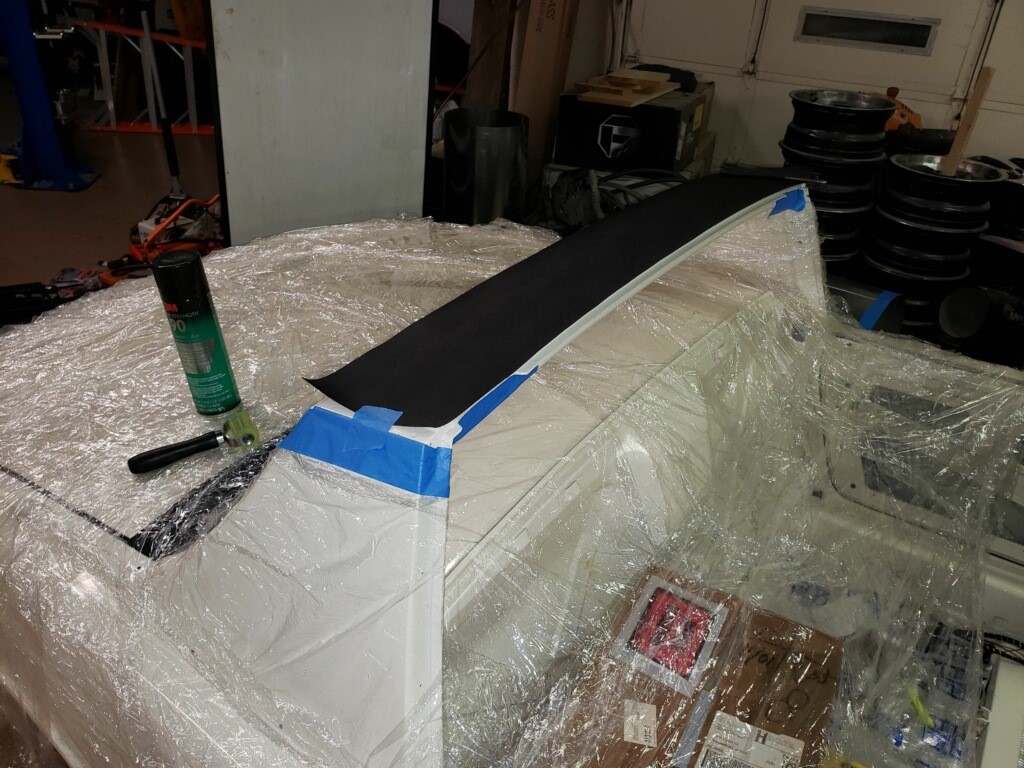
 [attachmentid
=699207]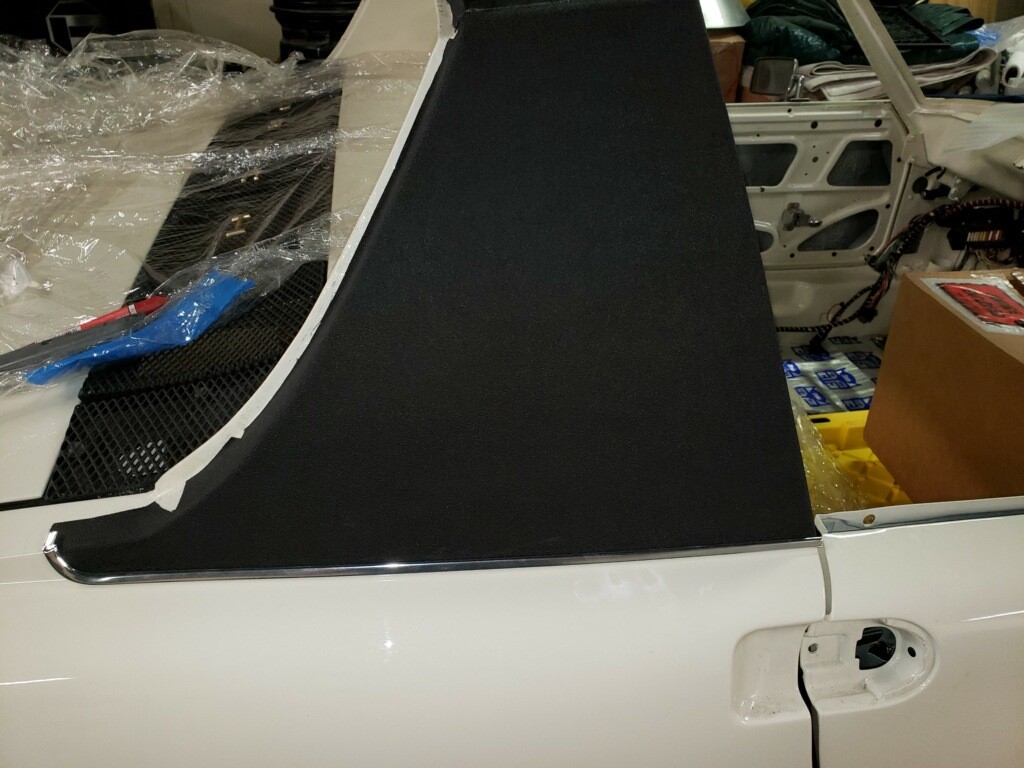
Attached image(s)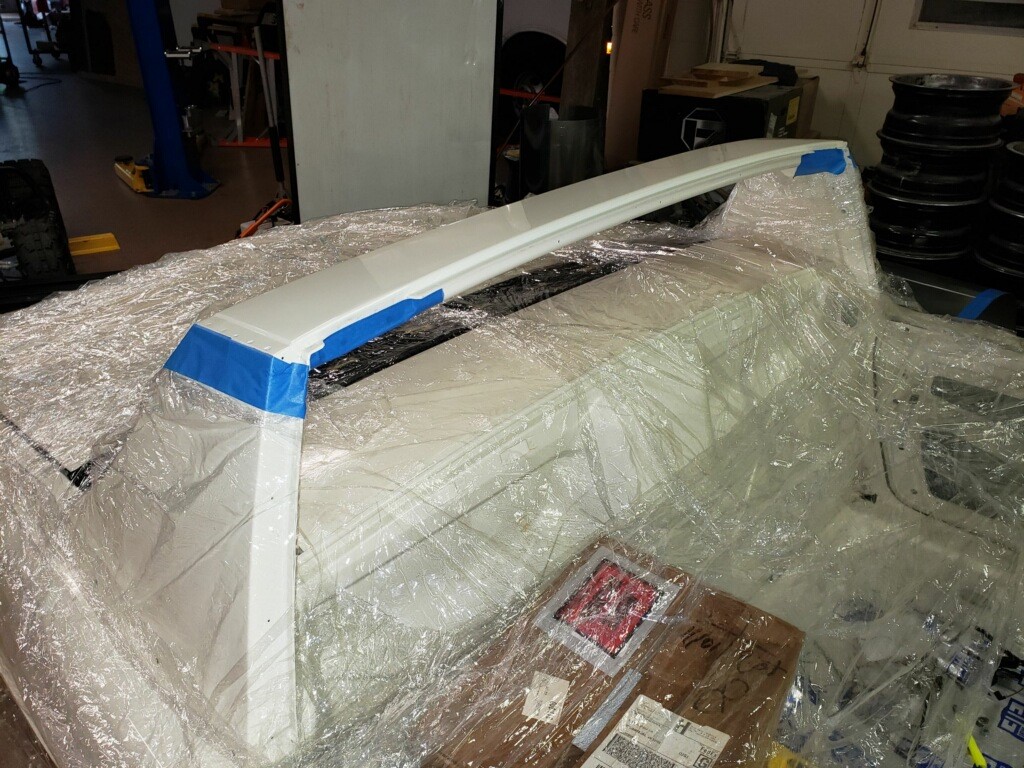
Posted by: Cairo94507 May 28 2019, 07:01 AM
Really changes the look of the car. In my little pea brain, a 914 needs the black vinyl to look proper. Yeah, yeah, I know- a lot of 914's came from the factory w/o the vinyl.
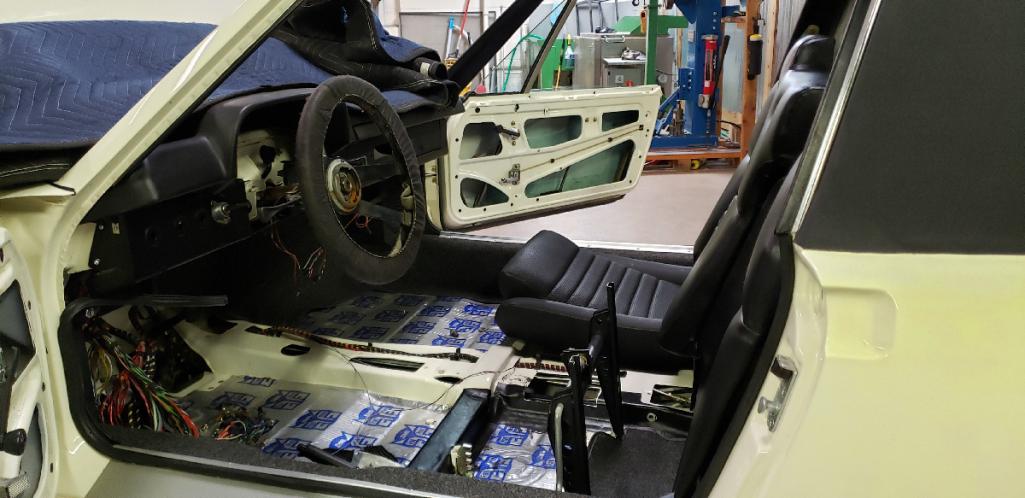
Posted by: gms May 28 2019, 08:39 AM
Sorry I have not posted as much as I would like to. Here is the interior that Bill had done...very well done!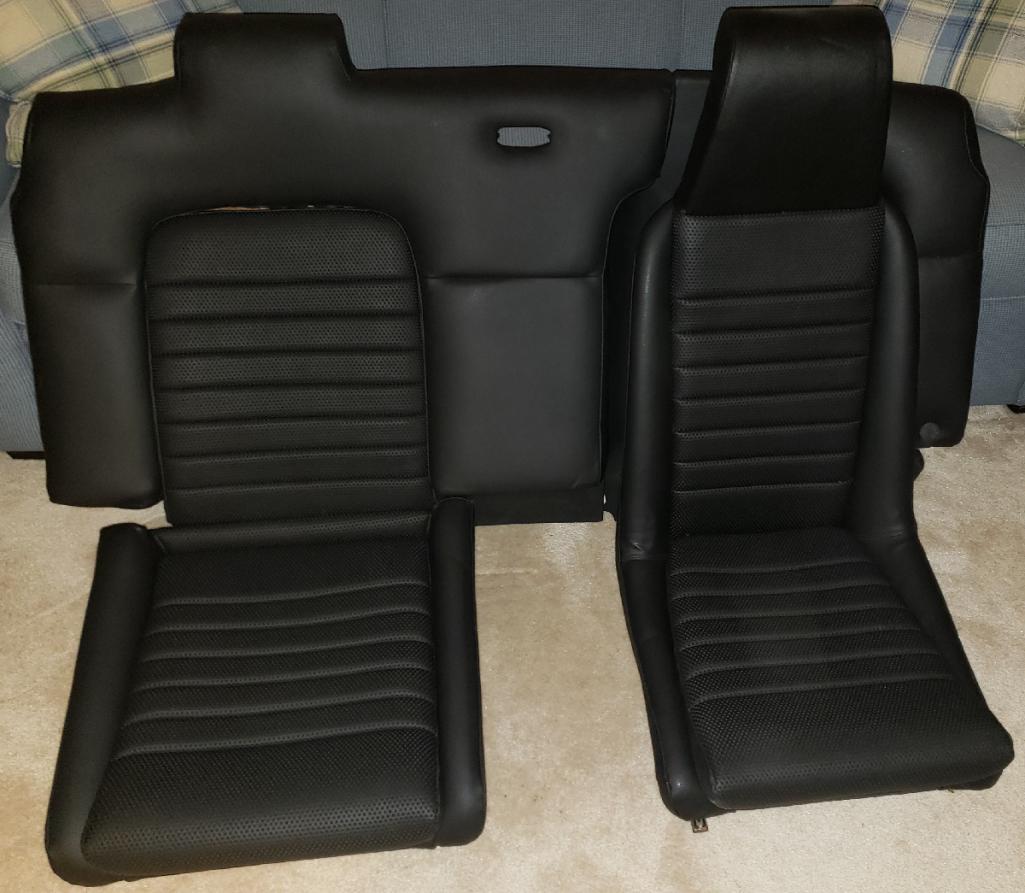
Posted by: gms May 28 2019, 08:41 AM
Artsy pic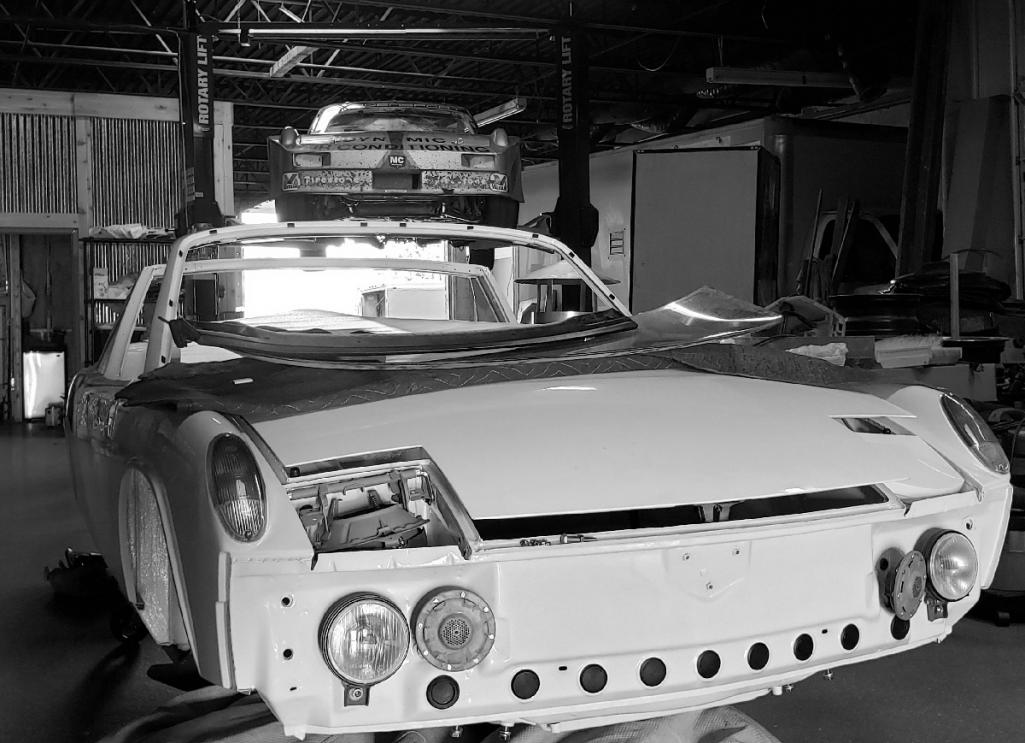
Posted by: gms May 28 2019, 08:47 AM
The very well built Tangerine Racing stainless steel fuel lines ( @http://www.914world.com/bbs2/index.php?showuser=209 ) will be used.
Attached thumbnail(s)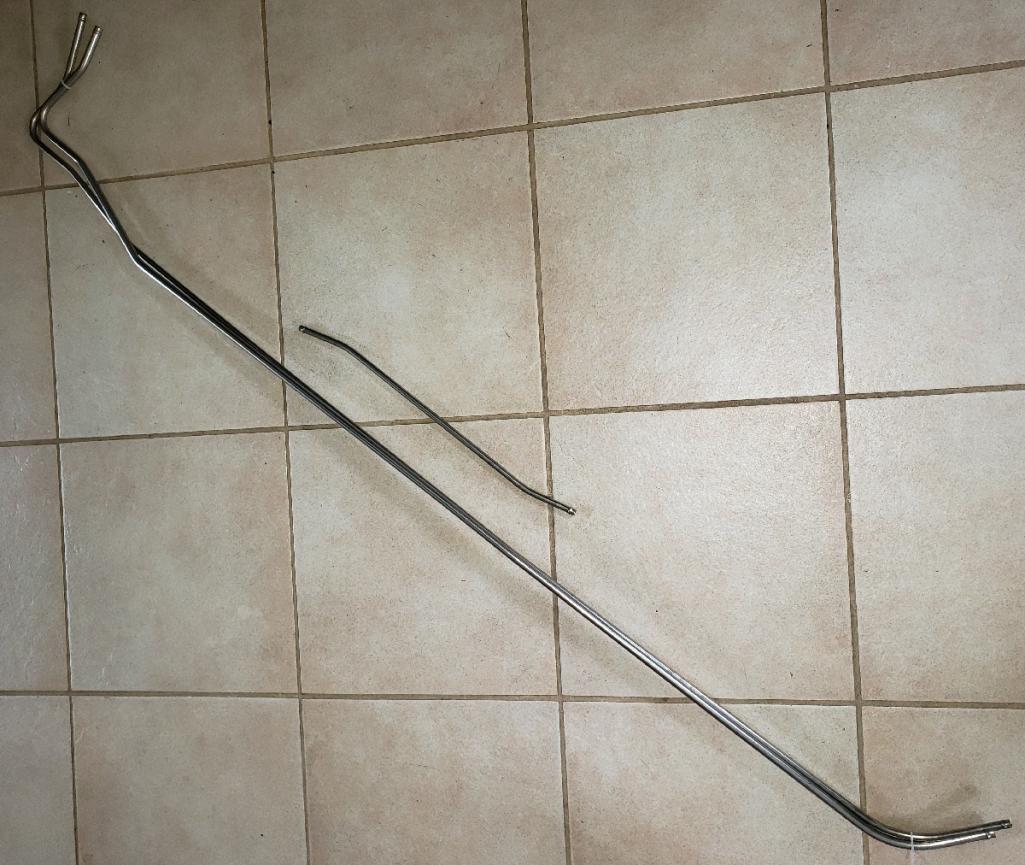
Posted by: gms May 28 2019, 08:54 AM
The Carburetors were prepared by the best in the business Paul Abbott at http://www.performanceoriented.com/
Posted by: GeorgeRud May 28 2019, 07:30 PM
Looks like you’re using the best in this build! Keep going, it’ll be great.
Posted by: Targa70 May 29 2019, 06:28 PM
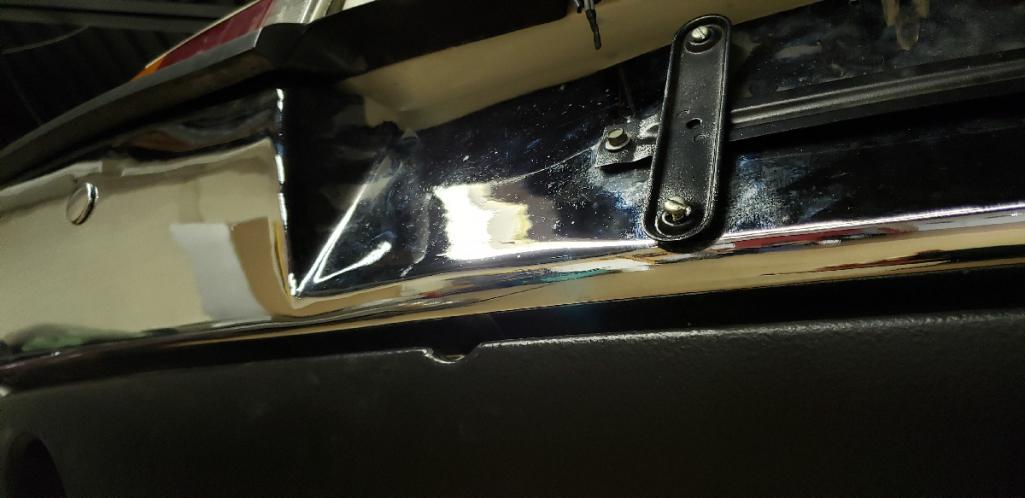
Almost immediately, after looking the car over, Glen ID'd an issue which neither I nor my body man noticed......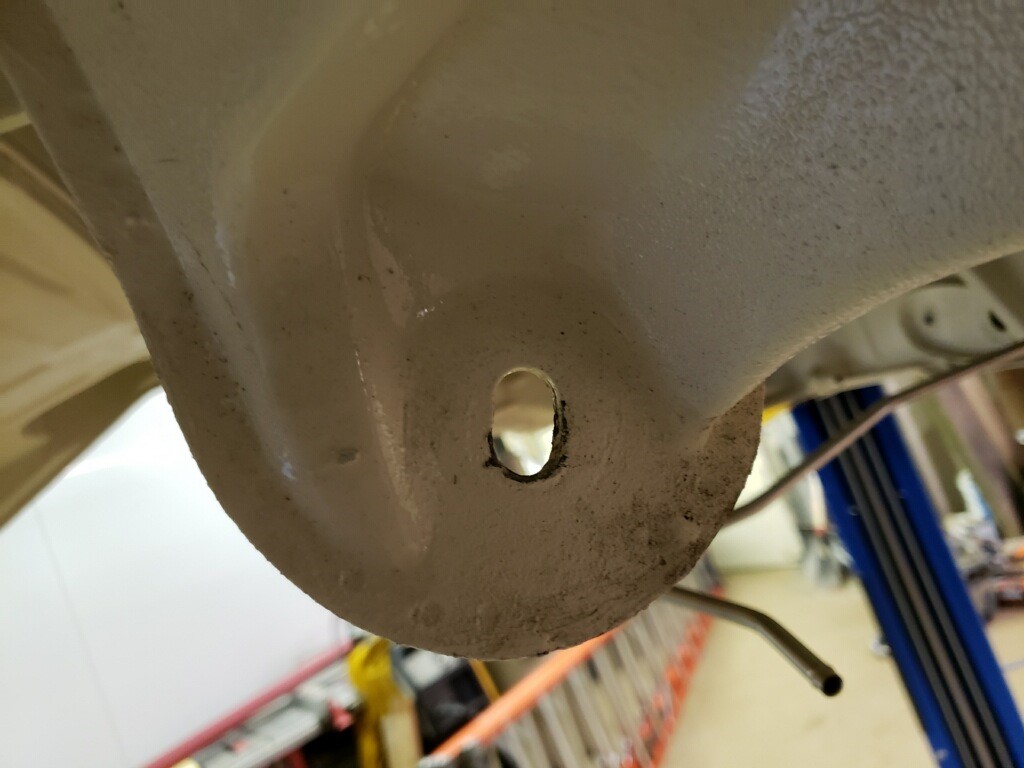
Posted by: Targa70 May 29 2019, 06:29 PM
And he promptly repaired it.....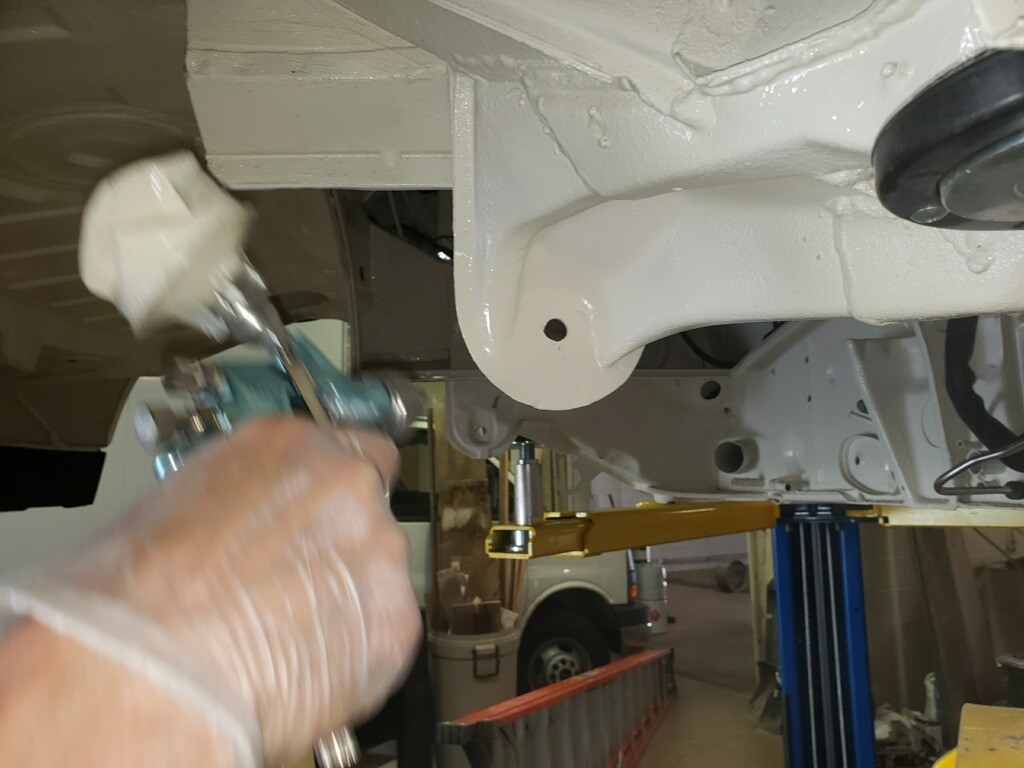
Posted by: siverson May 29 2019, 07:16 PM
Really changes the look of the car. In my little pea brain, a 914 needs the black vinyl to look proper. Yeah, yeah, I know- a lot of 914's came from the factory w/o the vinyl.
I agree!
And nice build!
Posted by: worn May 29 2019, 07:31 PM
And he promptly repaired it.....
You guys really rock. I know it is more work than it looks but when you show an oval led hole disappear into ivory white roundness. Well, it looks really sharp.
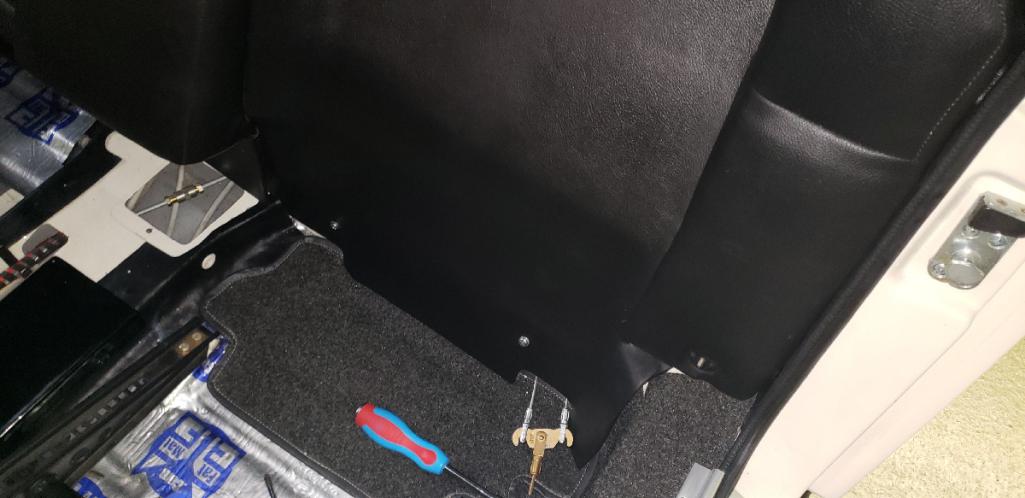
Posted by: gms May 31 2019, 10:41 AM
New emergency brake cables are in!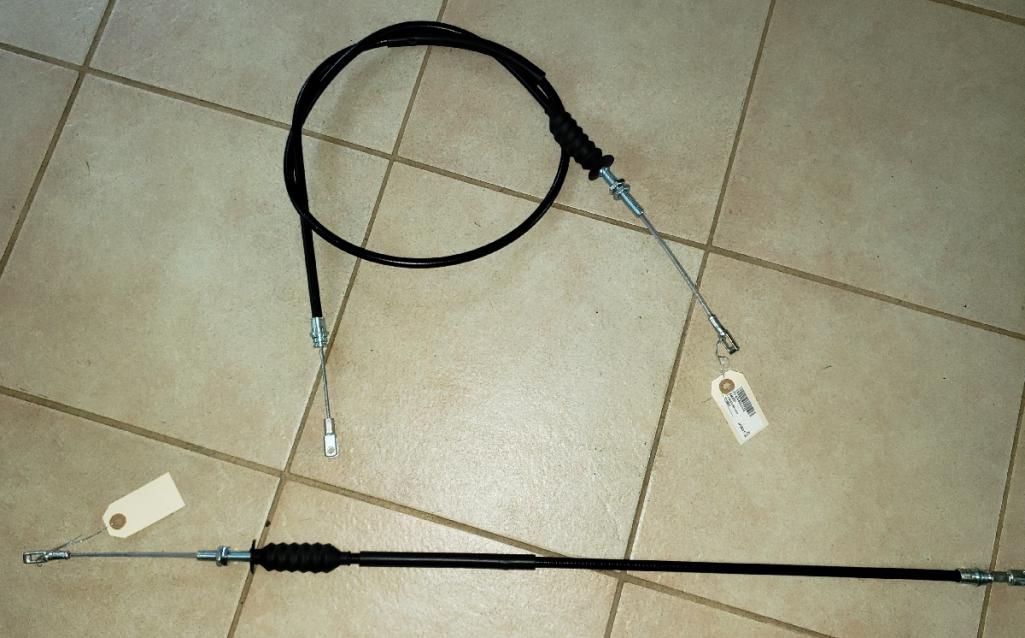
Posted by: gms May 31 2019, 11:06 AM
Bill had the belts re-webbed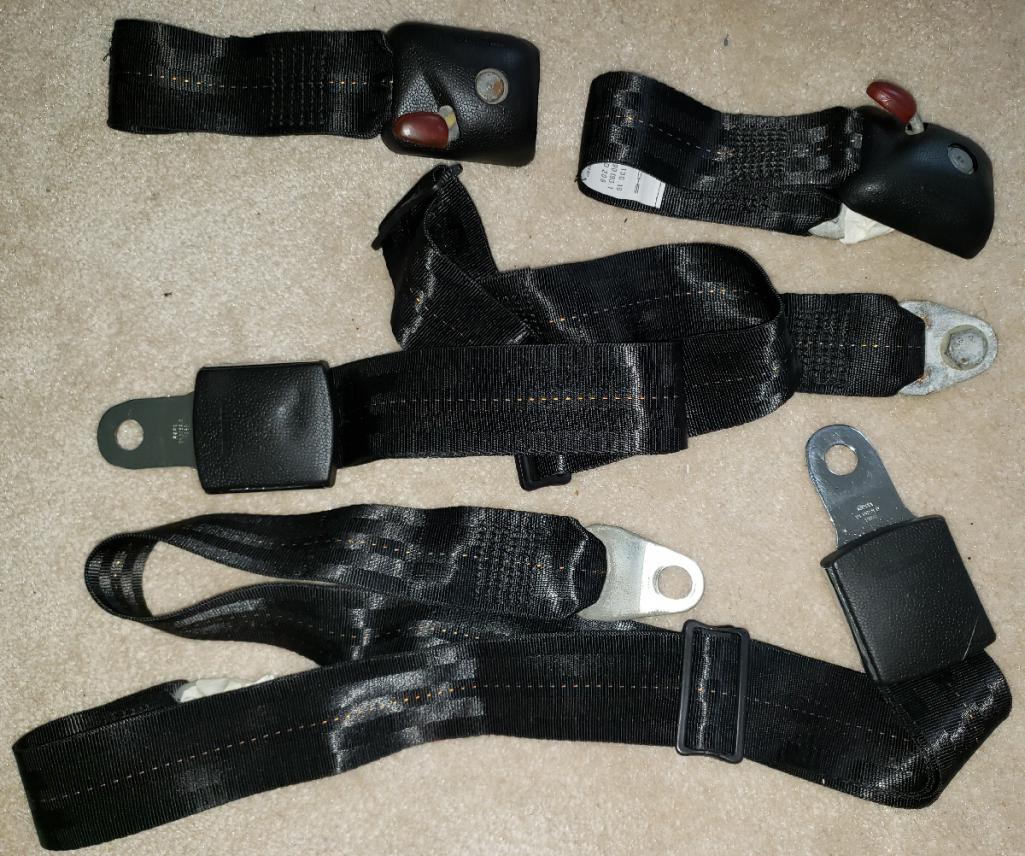
Even has new new belt labels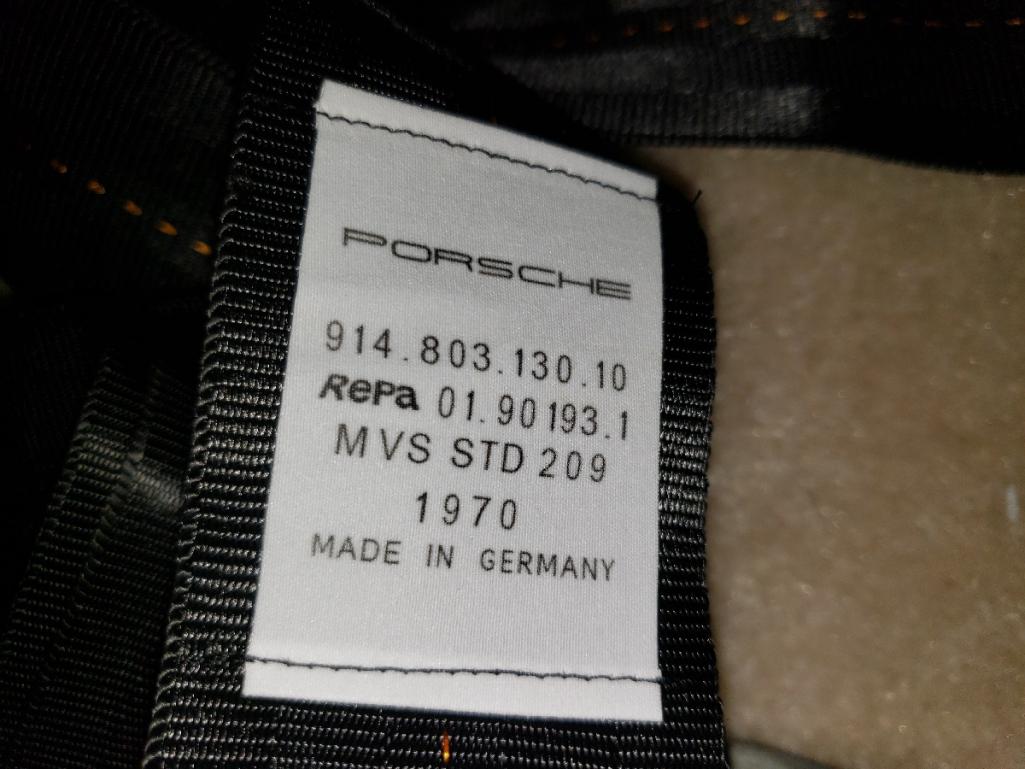
Posted by: gms May 31 2019, 01:53 PM
keeping with the European theme
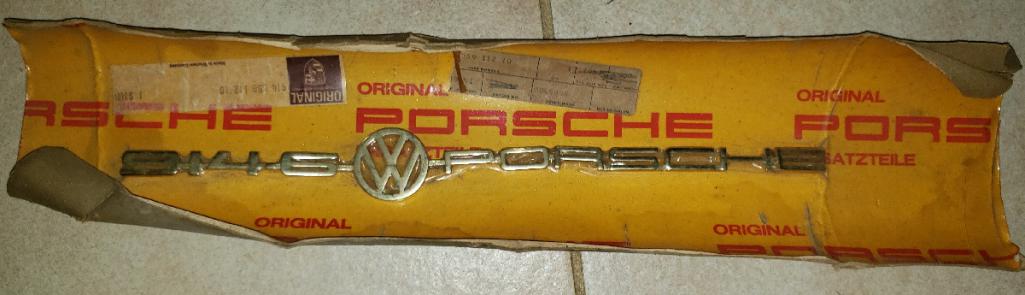
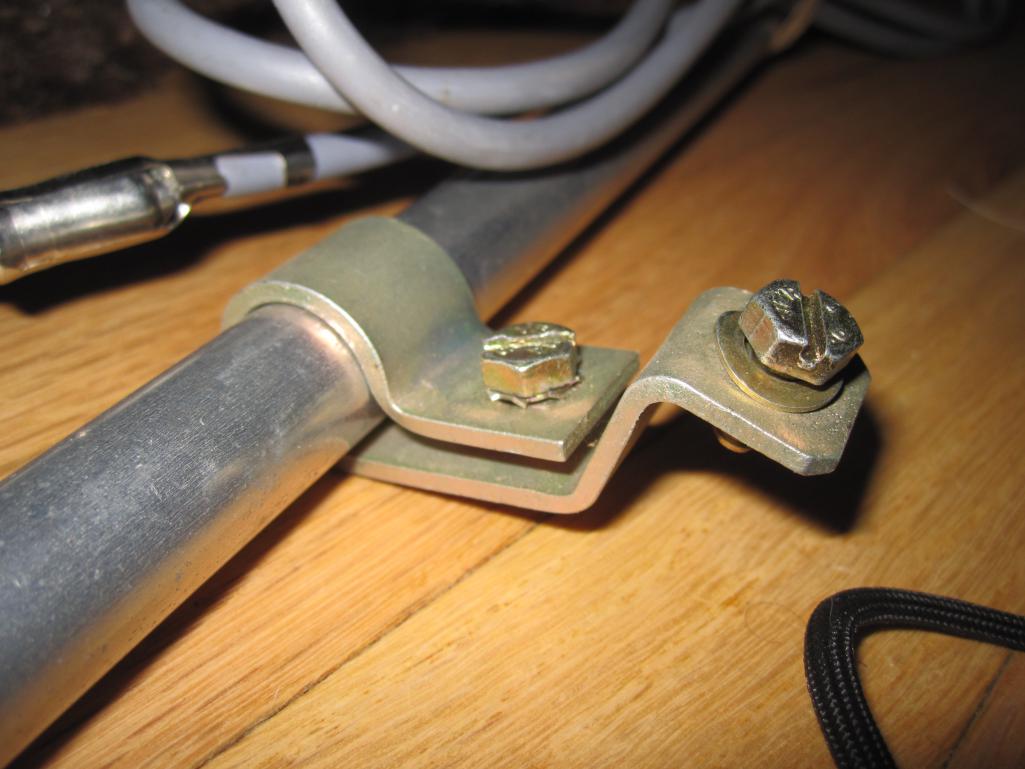
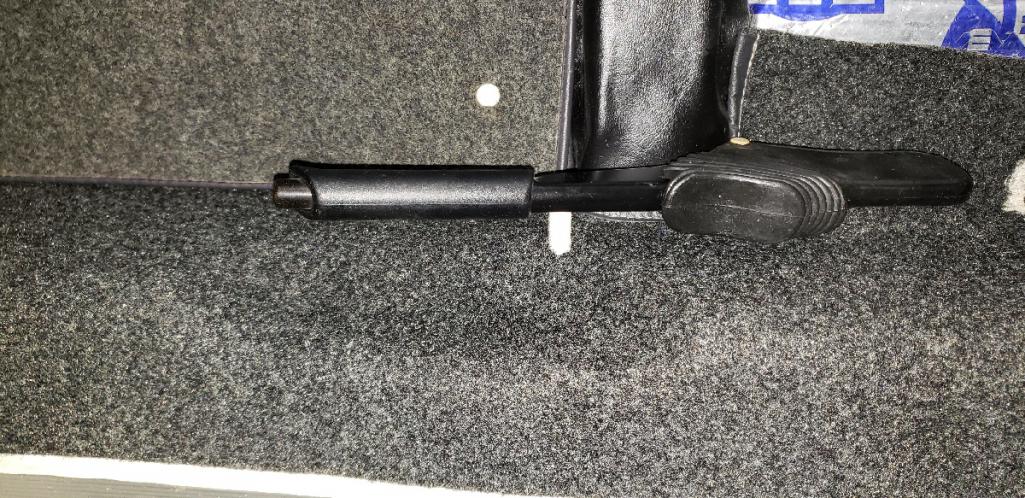
Posted by: gms May 31 2019, 01:56 PM
the original Hirschmann antenna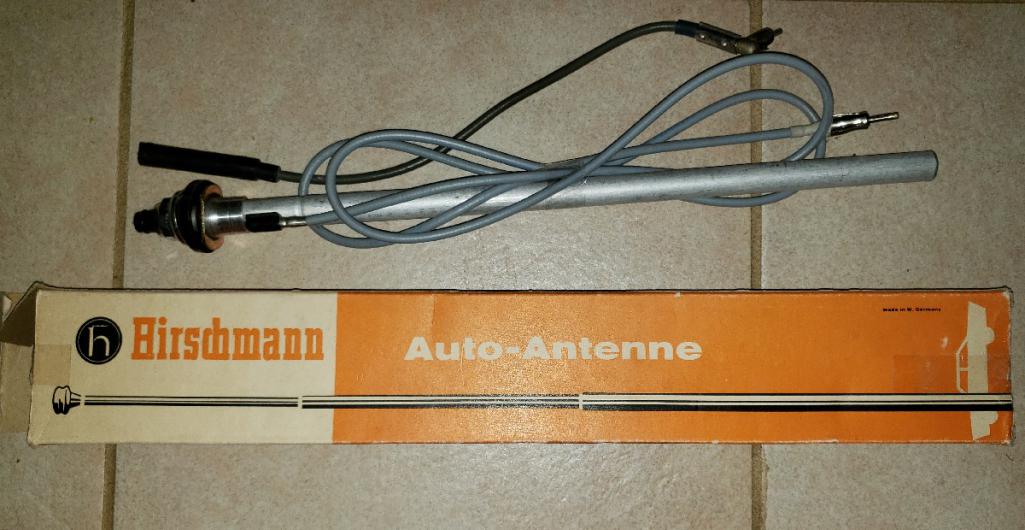
Posted by: sbsix May 31 2019, 04:14 PM
Glenn can you comment on where Bill had his belts and the new labels made. They look fantastic.
Posted by: Targa70 May 31 2019, 07:59 PM
I got the actual webbing from @http://www.914world.com/bbs2/index.php?showuser=13687 but Snake Oyl did the labels and the rest of the work. In hind sight, I should have had the mounting hardware re-plated; but as Glenn said “you will only notice when you vacuum behind the seats.”
Posted by: gms Jun 3 2019, 09:01 PM
Engine sheet metal seal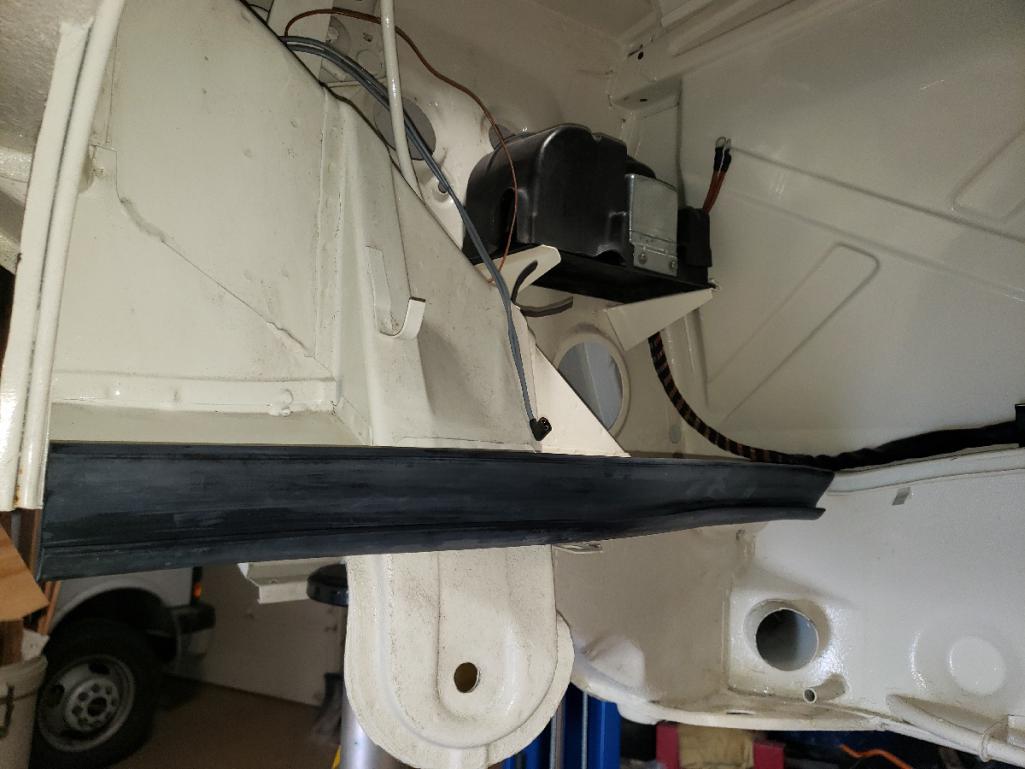
Posted by: IronHillRestorations Jun 3 2019, 09:49 PM
Listen Mr! Those side seals better have a miter cut at the front!!
Nice work Glennnn!
Lots of nice goodies going into this one. Sweeeeet!!
Posted by: rgalla9146 Jun 4 2019, 06:53 AM
Listen Mr! Those side seals better have a miter cut at the front!!
Nice work Glennnn!
Lots of nice goodies going into this one. Sweeeeet!!
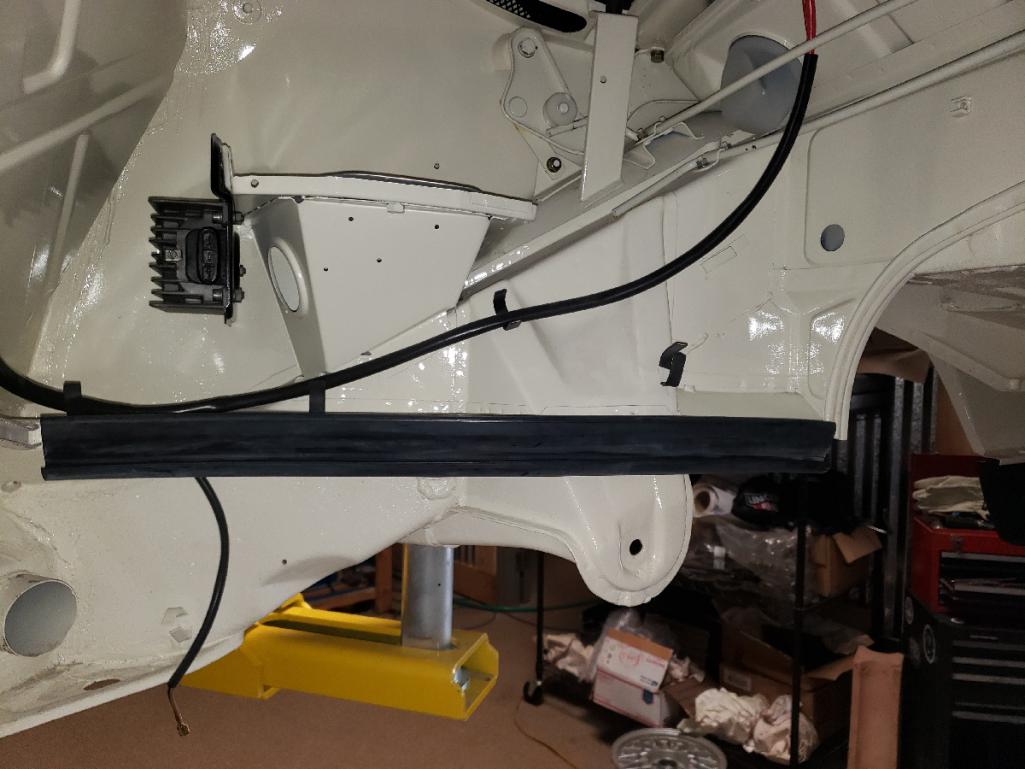
A hog ring below, and a wad of dum dum on top at the front corners too !
Glenn I don't have a spare but I have an original antenna bracket that attaches to
the factory hole on the pinch weld of the drivers inner fender.
You might want to copy ?
Attached thumbnail(s)
Posted by: gms Jun 6 2019, 02:50 PM
Listen Mr! Those side seals better have a miter cut at the front!!
Nice work Glennnn!
Lots of nice goodies going into this one. Sweeeeet!!
Tuff crowd
Posted by: gms Jun 6 2019, 02:53 PM
Listen Mr! Those side seals better have a miter cut at the front!!
Nice work Glennnn!
Lots of nice goodies going into this one. Sweeeeet!!
A hog ring below, and a wad of dum dum on top at the front corners too !
Glenn I don't have a spare but I have an original antenna bracket that attaches to
the factory hole on the pinch weld of the drivers inner fender.
You might want to copy ?
He had 1 in the box
Posted by: Targa70 Jun 13 2019, 08:09 PM
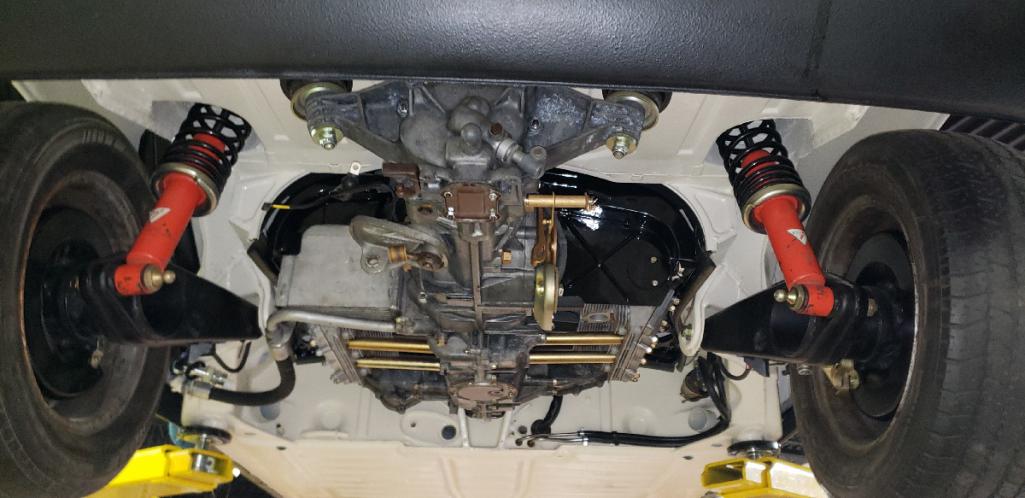
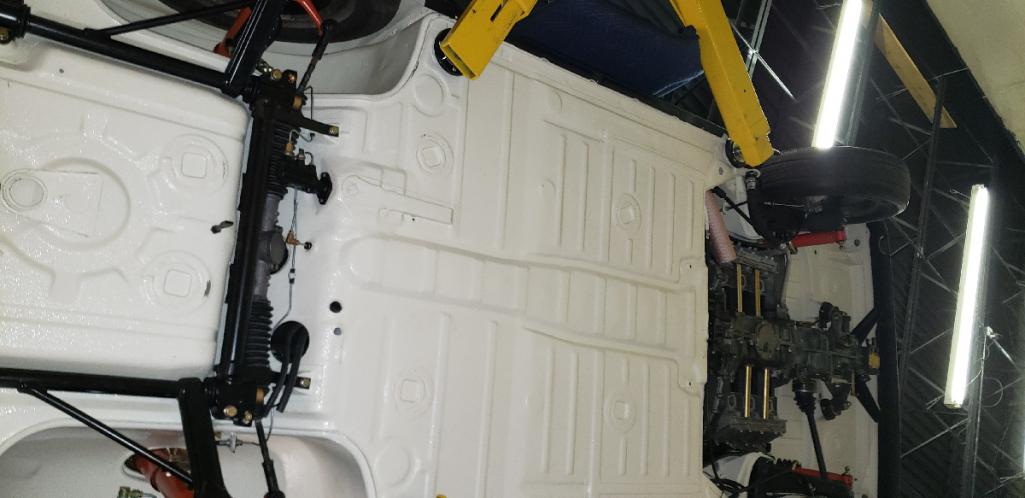
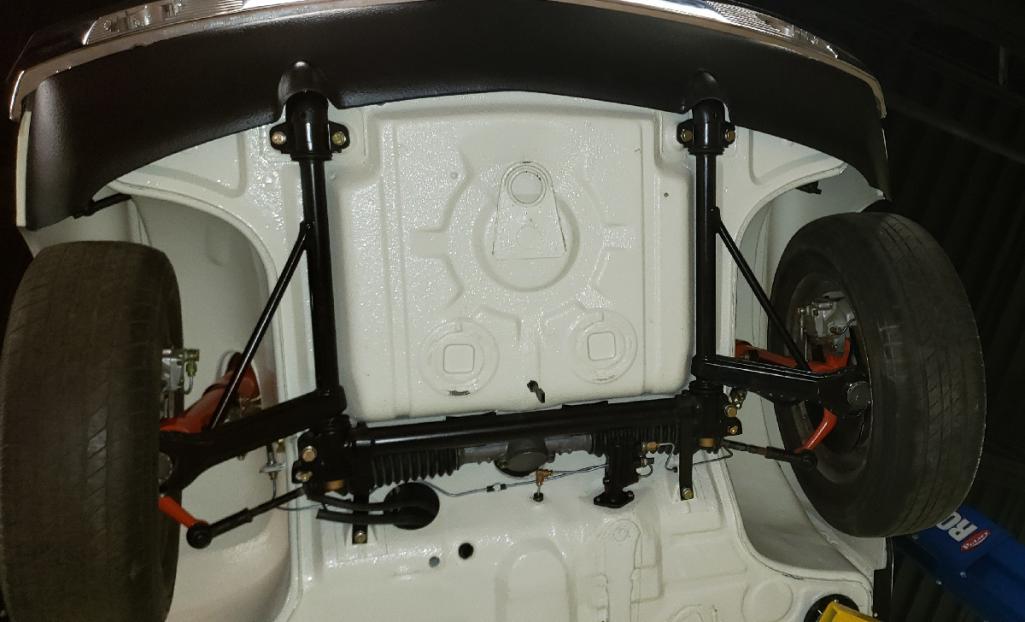
Glenn sent me some progress pics of the rear suspension starting to be installed. I am digging the white black contrast. Makes me glad we choose not to do a dark undercoat on the wheel wells and the floorpan bottom. I may regret that decision on wash days.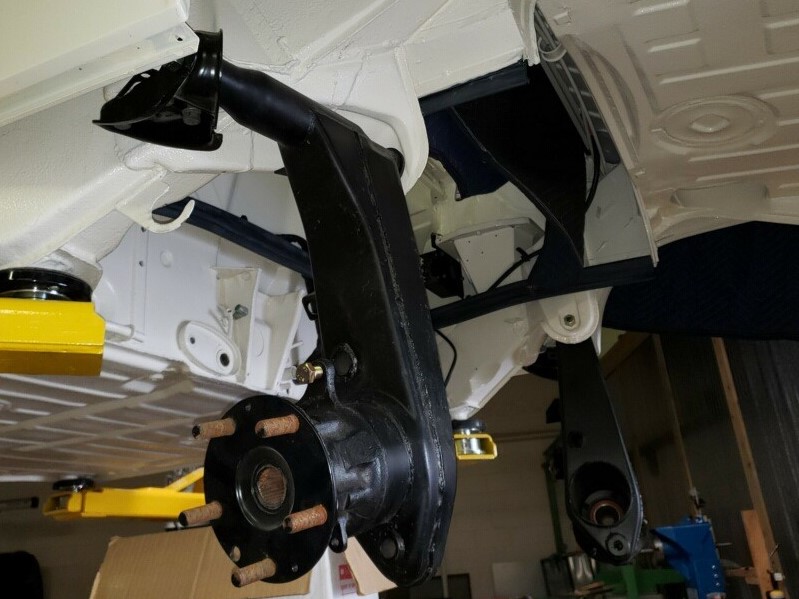
Posted by: Targa70 Jun 13 2019, 08:15 PM
Swing arm with shock and rocker cover.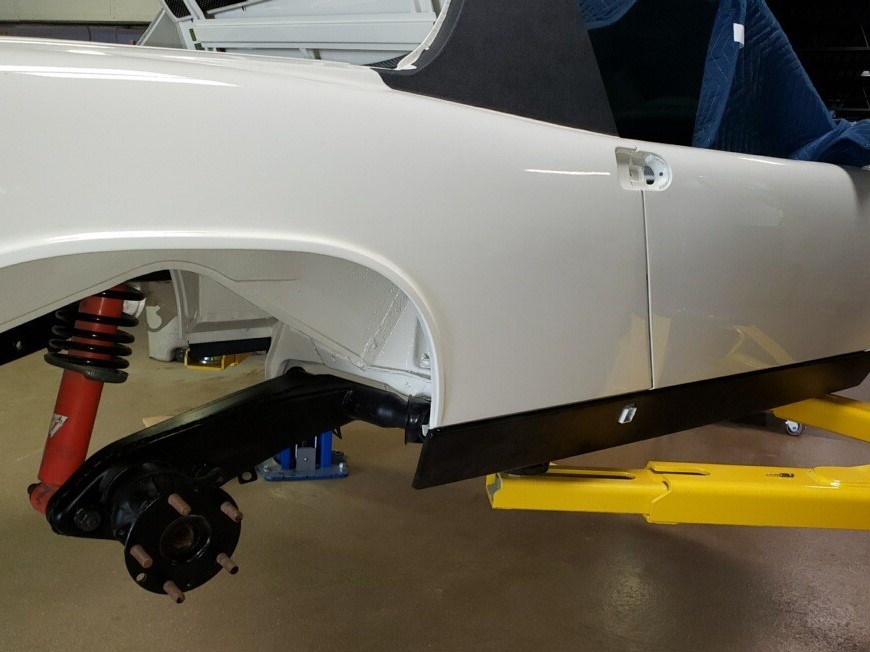
Posted by: Cairo94507 Jun 13 2019, 08:48 PM
I like the underside with the body color- like the factory did them.
Posted by: rgalla9146 Jun 13 2019, 09:22 PM
White with black is very beautiful
A very fine choice.
My compliments.
Posted by: gms Jun 13 2019, 10:43 PM
it is a joy working on a clean car!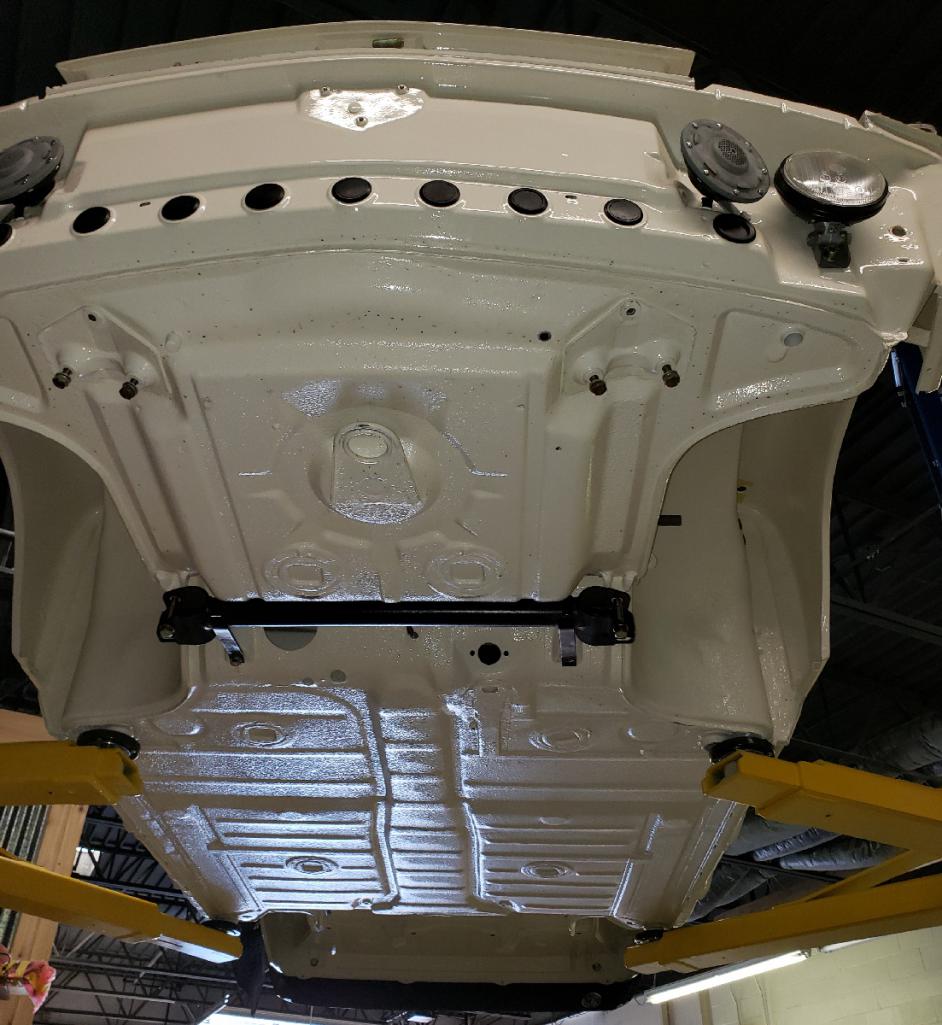
Posted by: gms Jun 13 2019, 10:45 PM
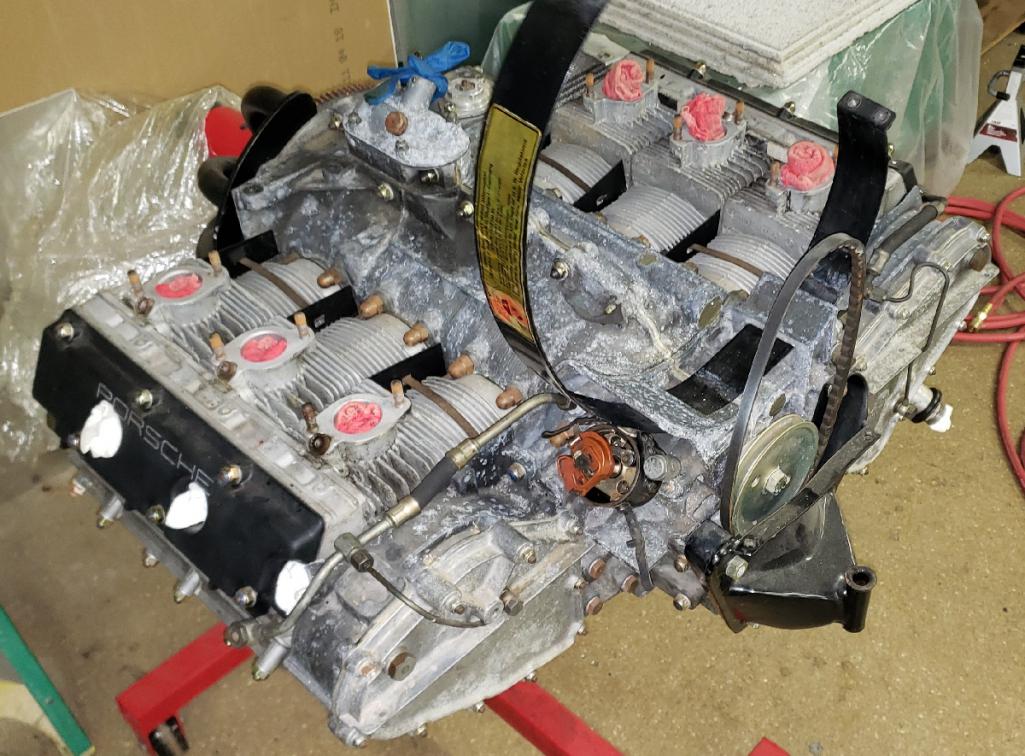
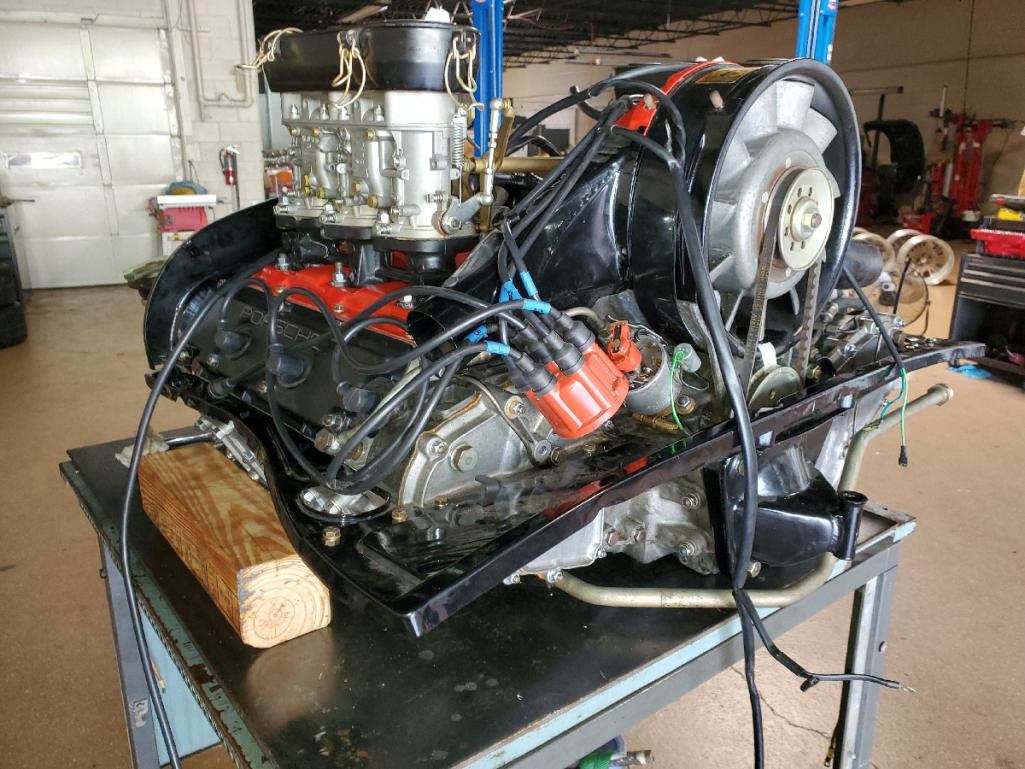
Getting the engine unpacked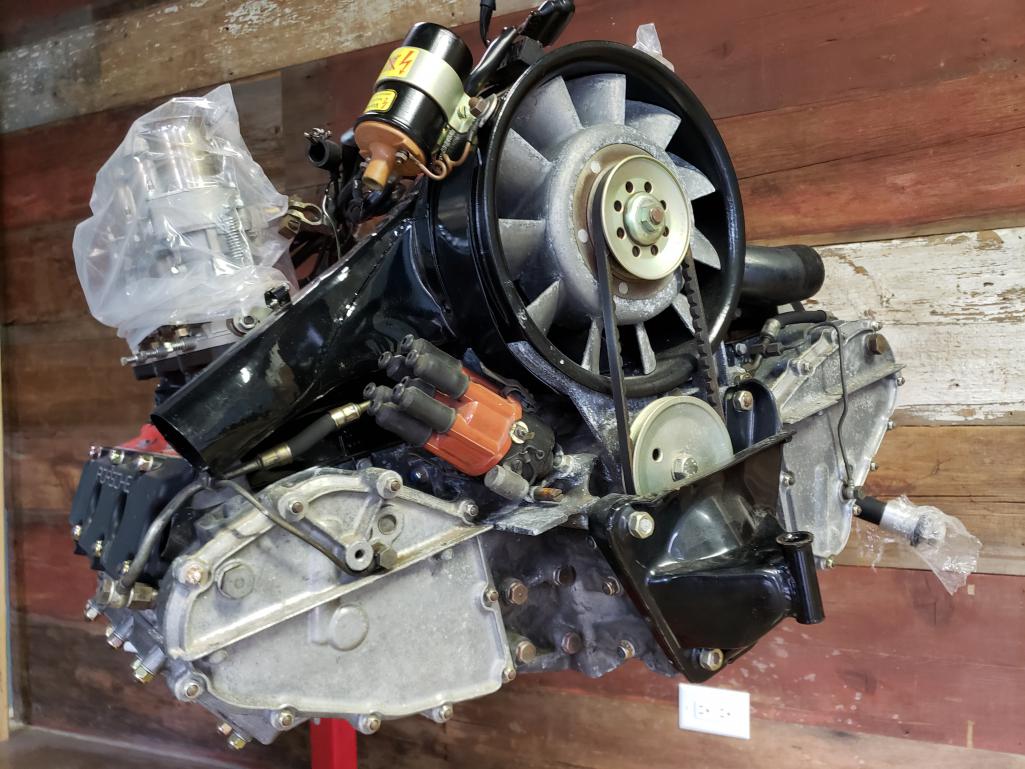
Posted by: gms Jun 13 2019, 10:56 PM
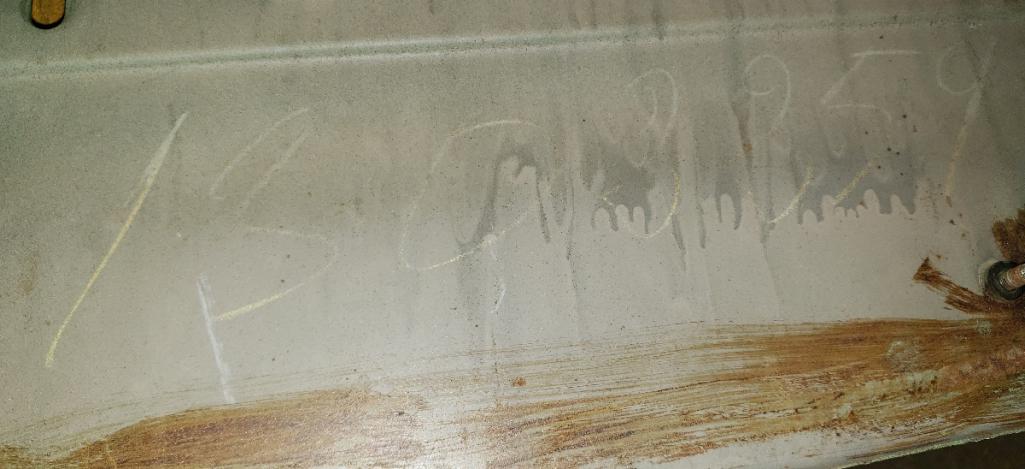
I am also working on the dash, I want to make it a nice consistent black coat while preserving the production number on the back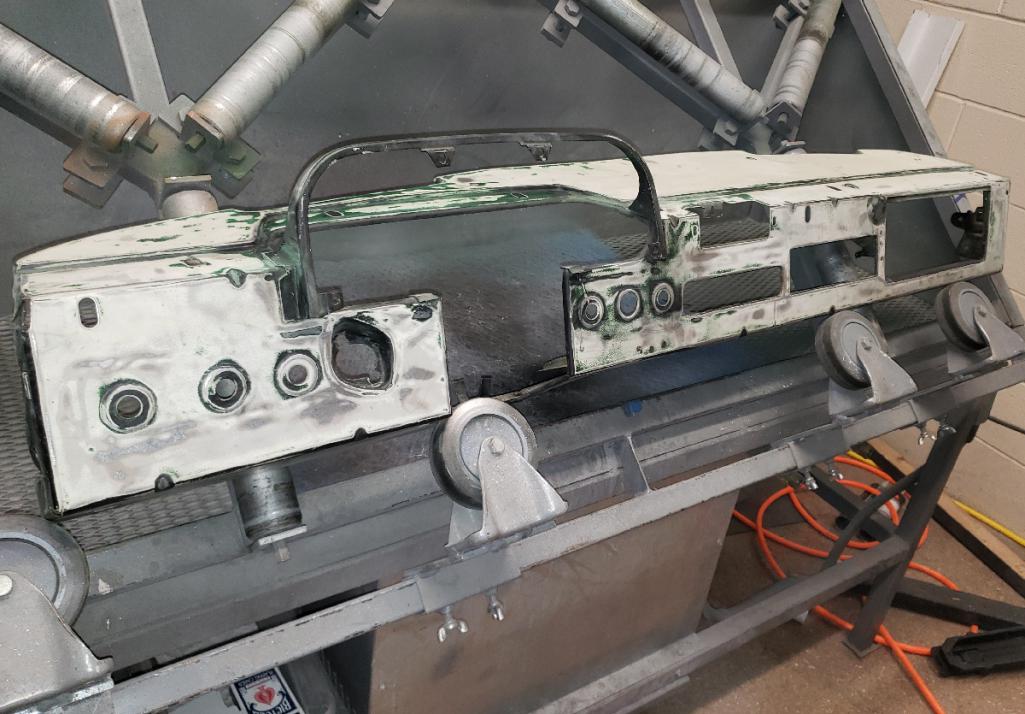
Posted by: rgalla9146 Jun 14 2019, 06:32 AM
I am also working on the dash, I want to make it a nice consistent black coat while preserving the production number on the back
Glenn is that the chassis number of the car ?
Posted by: gms Jun 14 2019, 09:35 AM
yes but it does not match as with most sixes I have seen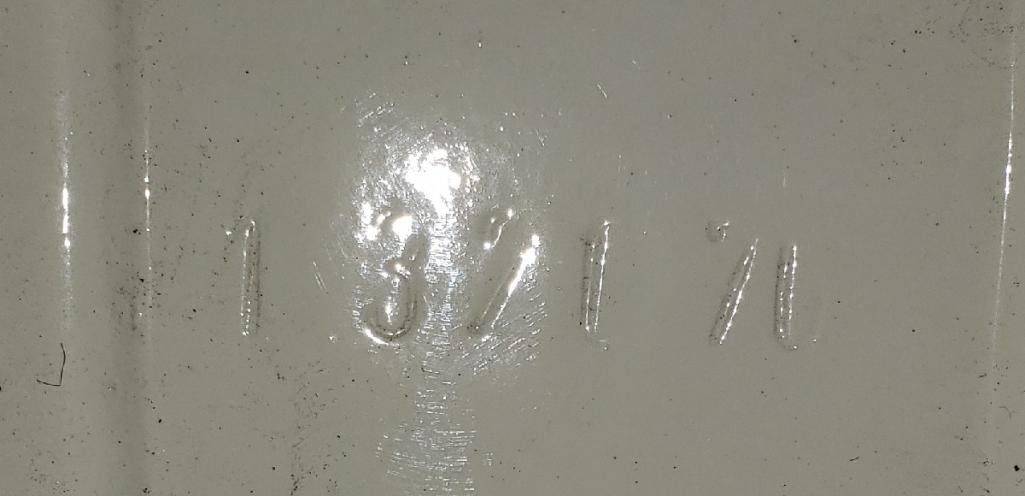
Posted by: gms Jun 15 2019, 09:34 AM
Passenger door threshold is in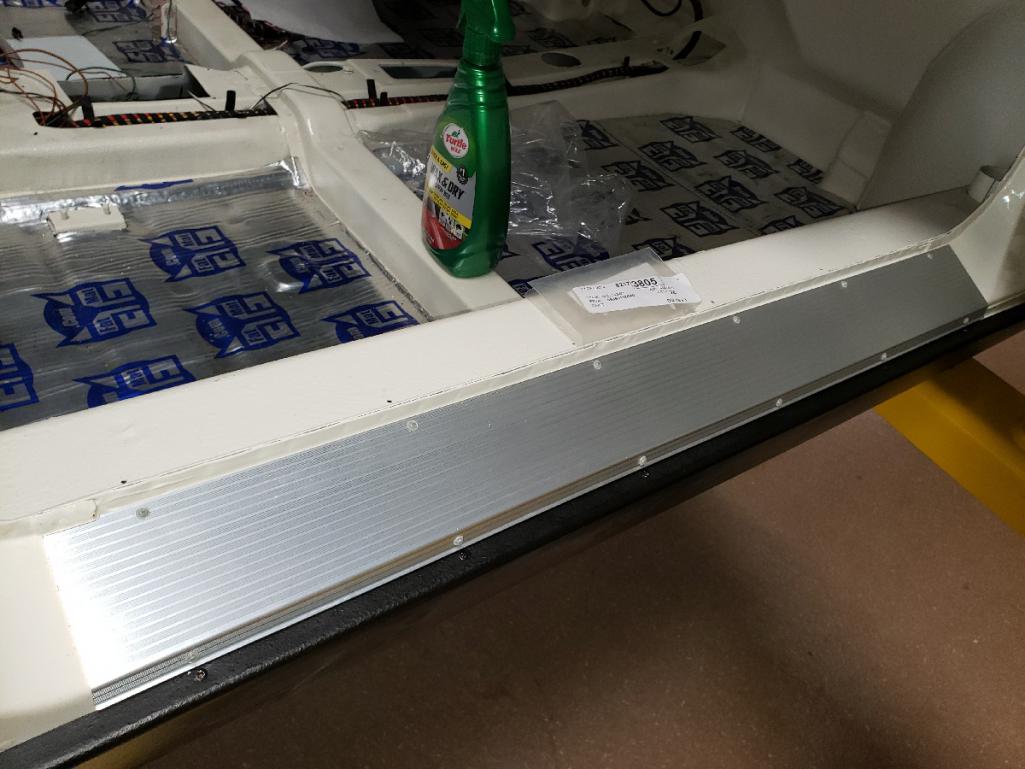
Posted by: gms Jun 16 2019, 10:21 AM
replaced the A-Arm bushings today. 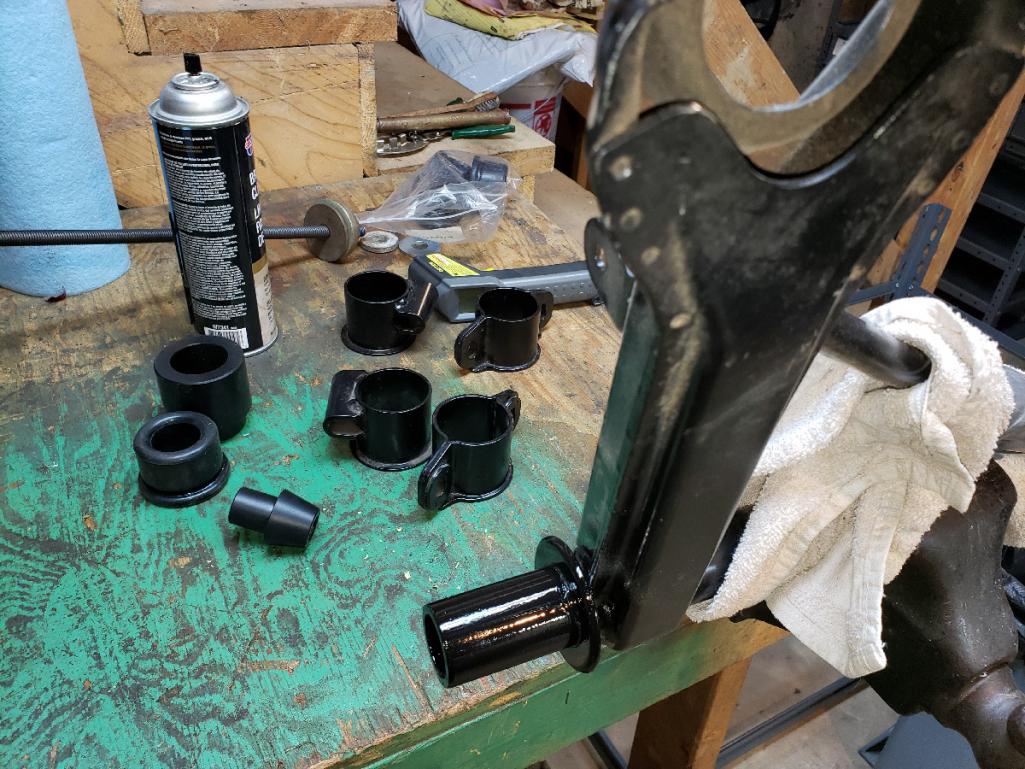
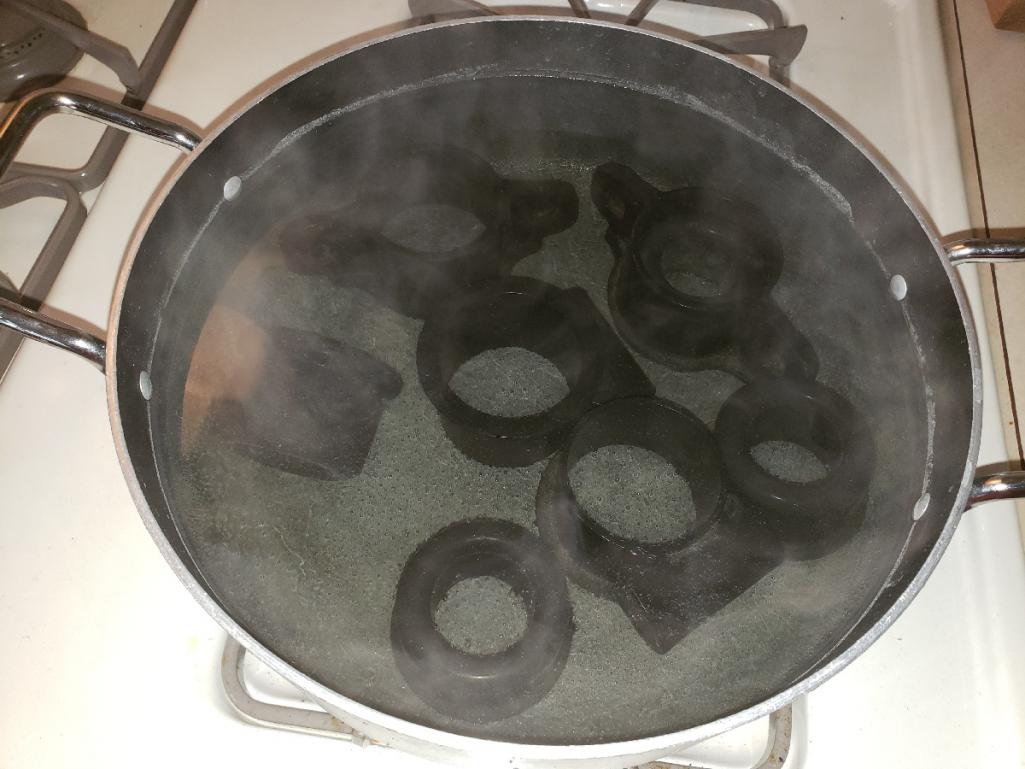
Posted by: gms Jun 16 2019, 10:22 AM
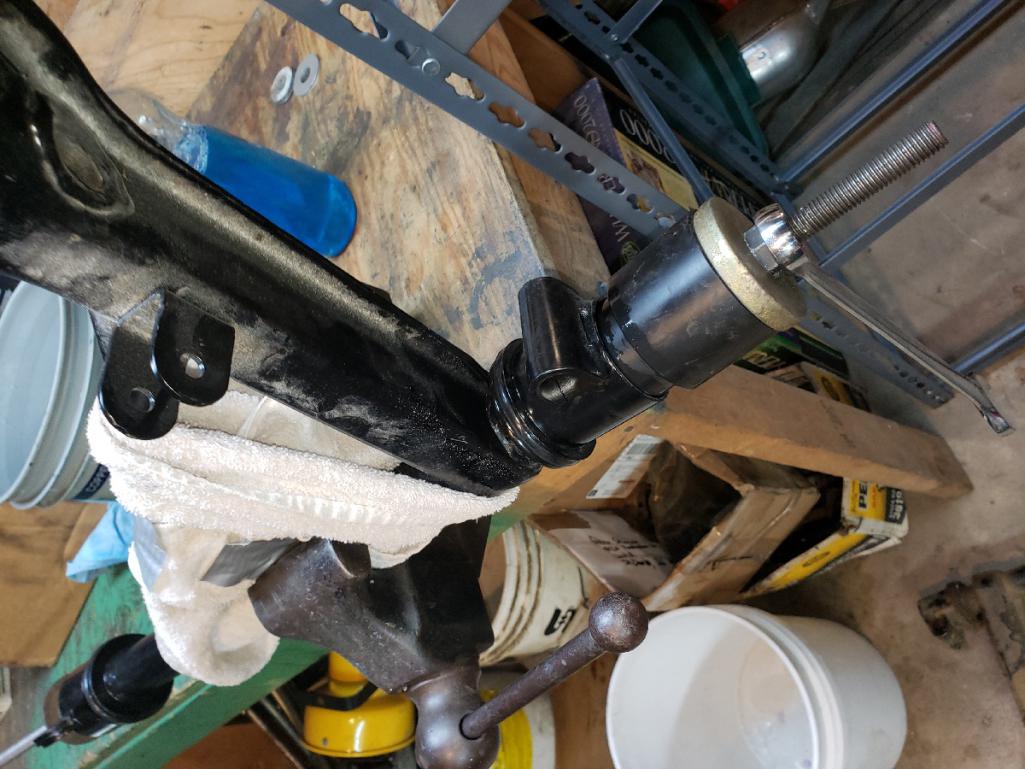
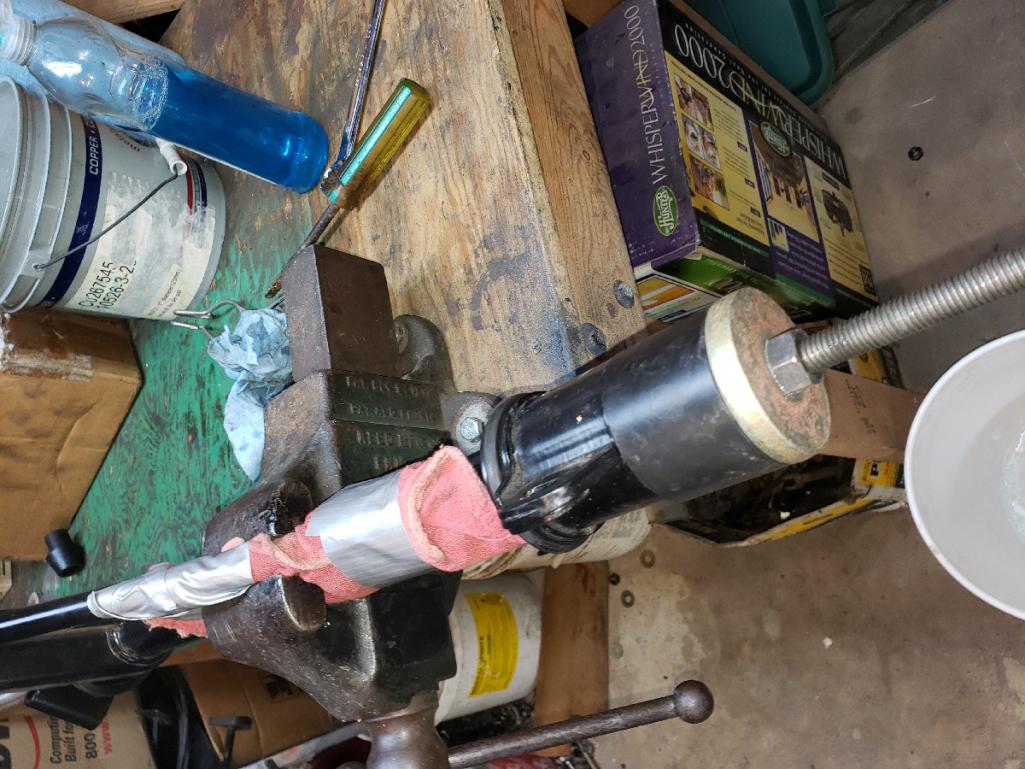
Posted by: gms Jun 16 2019, 10:23 AM
Success!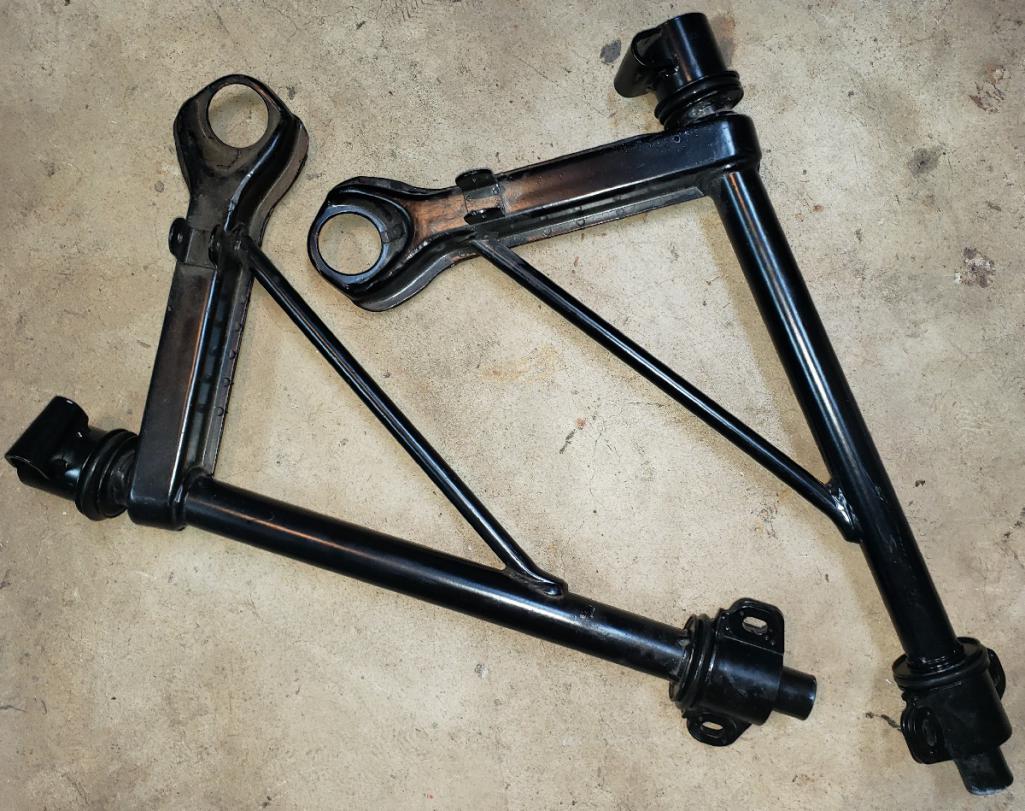
Posted by: SirAndy Jun 16 2019, 10:24 AM
I take it your wife isn't home?
Posted by: gms Jun 16 2019, 10:24 AM
I take it your wife isn't home?
Not for 27 years now
Posted by: SirAndy Jun 16 2019, 10:25 AM
I take it your wife isn't home?
Not for 27 years now
Oops, sorry about that. Foot, meet mouth ...

Posted by: gms Jun 16 2019, 10:26 AM
I take it your wife isn't home?
Not for 27 years now
Oops, sorry about that. Foot, meet mouth ...
It's all good
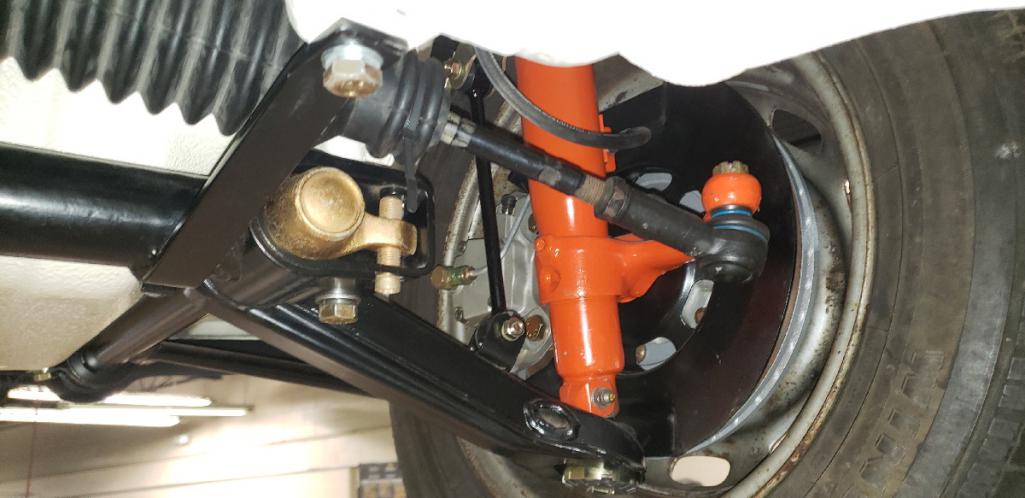
Posted by: gms Jun 19 2019, 07:21 PM
suspension is installed, I set here back on the ground yesterday!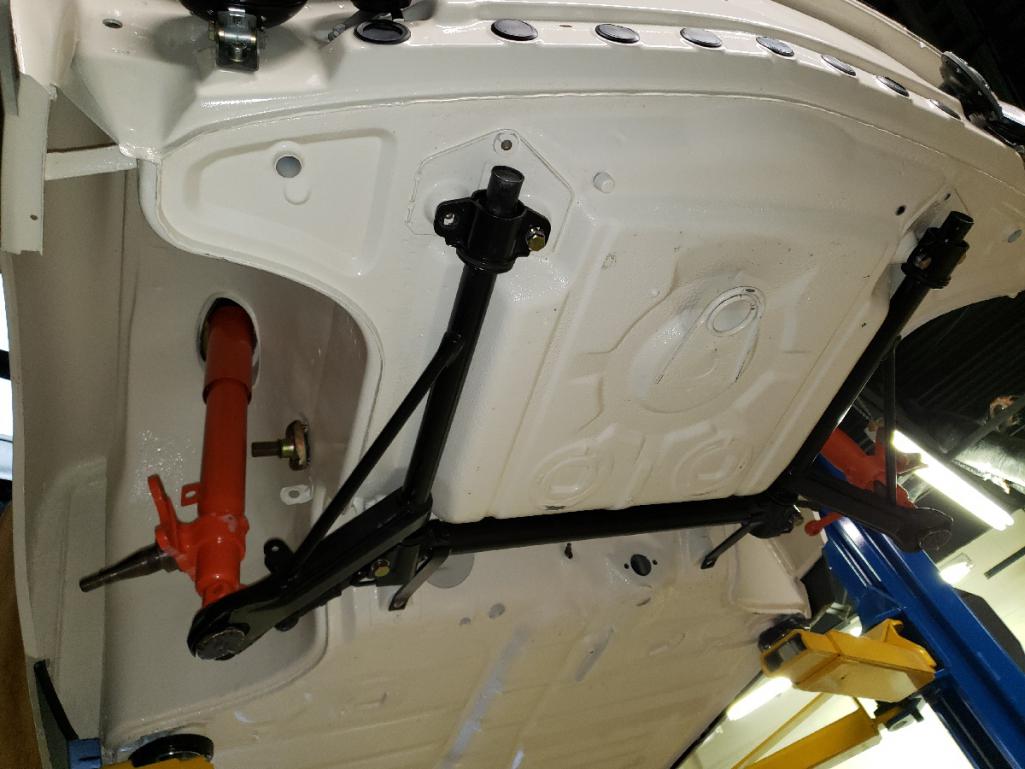
Posted by: gms Jun 20 2019, 02:08 PM
Powder coating some item for the car.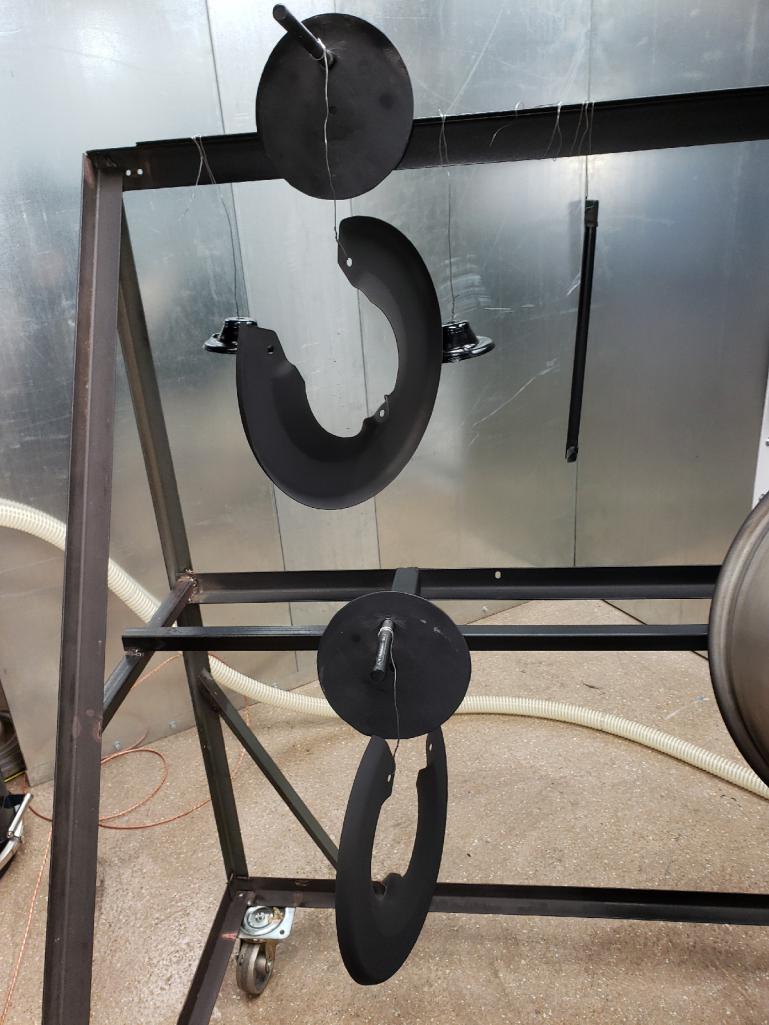
Posted by: gms Jun 20 2019, 08:38 PM
all baked
Posted by: bbrock Jun 21 2019, 07:42 AM
Nice work! That is a nerve wracking job for sure.
Posted by: dr914@autoatlanta.com Jun 21 2019, 09:00 AM
isn't the slot in the rear suspension console to adjust the suspension height? (LOL)
Almost immediately, after looking the car over, Glen ID'd an issue which neither I nor my body man noticed......
Posted by: gms Jun 22 2019, 02:40 PM
isn't the slot in the rear suspension console to adjust the suspension height? (LOL)
Almost immediately, after looking the car over, Glen ID'd an issue which neither I nor my body man noticed......
I'm afraid you are probably right
Posted by: gms Jun 24 2019, 07:28 PM
nice plated and powder coated assembly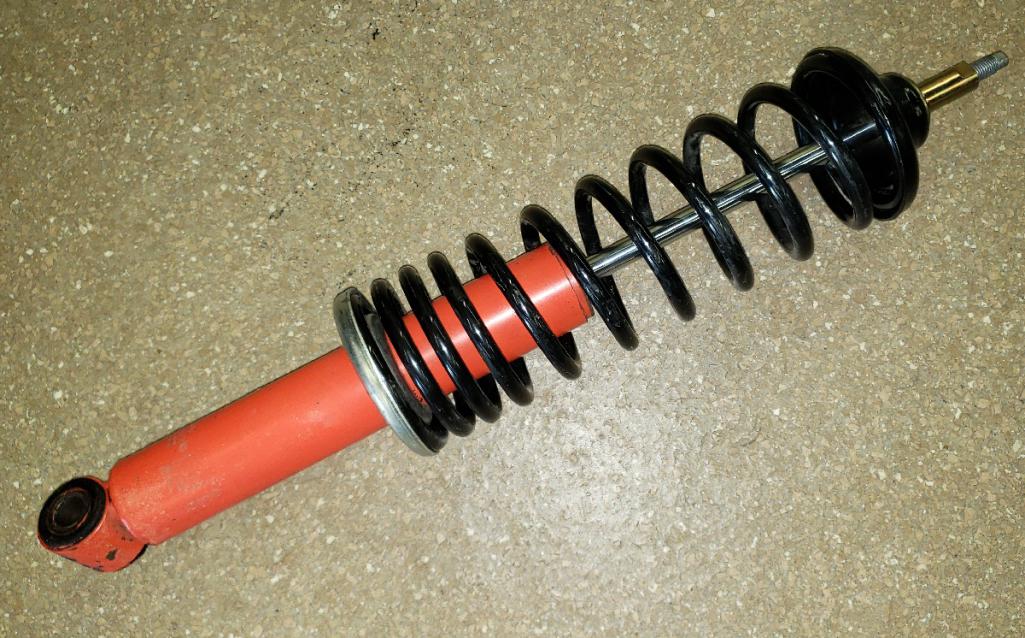

Posted by: gms Jun 25 2019, 07:25 AM
The brake line kit is in from PMB Performance, looks great @http://www.914world.com/bbs2/index.php?showuser=1110 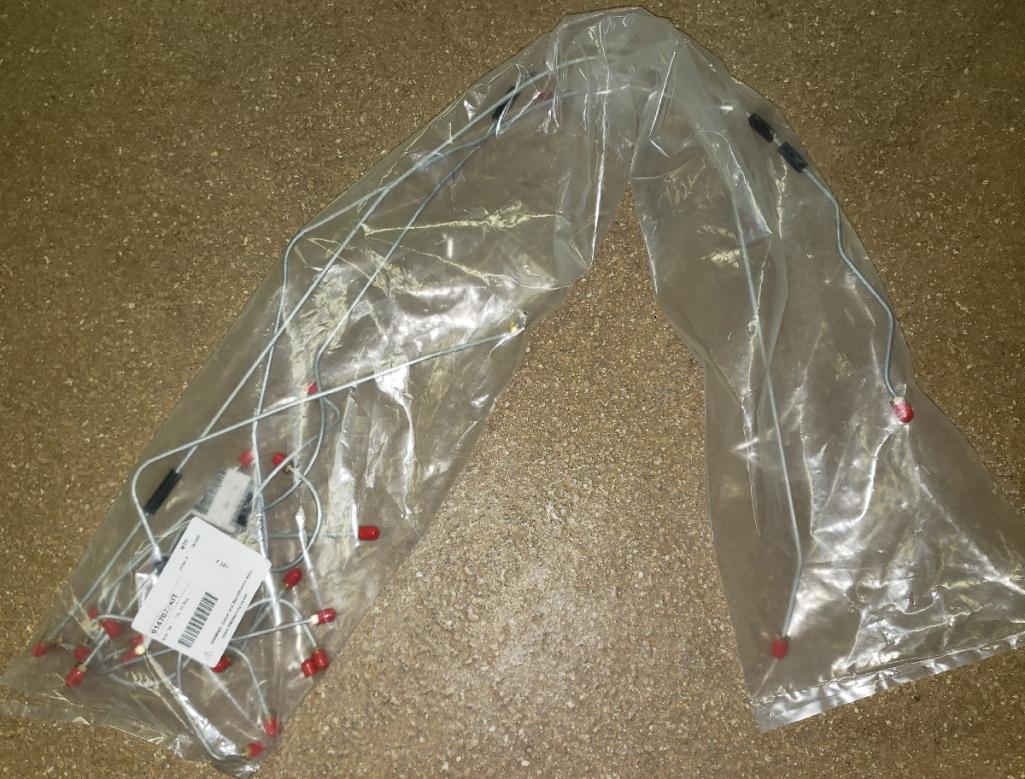
Posted by: gms Jun 25 2019, 07:28 AM
Bill had the calipers done by PMB Performance as well.
(yes I know those calipers have a spacer for vented rotors)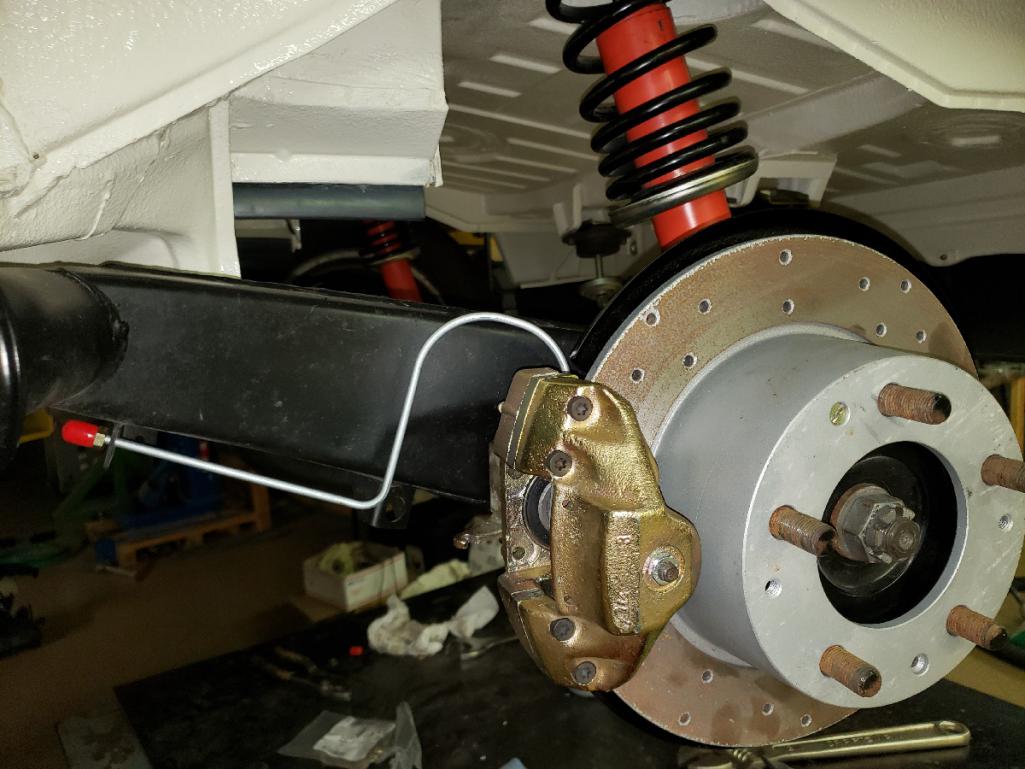
Posted by: Eric_Shea Jun 26 2019, 10:18 AM
Posted by: Targa70 Jun 26 2019, 06:22 PM
Bill had the calipers done by PMB Performance as well.
(yes I know those calipers have a spacer for vented rotors)
What a nice looking set of wheels Glenn is putting together.
Posted by: gms Jul 10 2019, 07:18 PM
I am sure this will cause some flames but I prefer to make my own judgements about products available for our 914s. I spoke with @http://www.914world.com/bbs2/index.php?showuser=19288 (Drew) about their 914/6 HD engine mount, he went on talking about some of their other offerings. Long story short Drew send a box of parts and I must say I was impressed. The fit and finish of the parts I have installed is very nice. The speaker grill and bright work pieces were the most impressive. 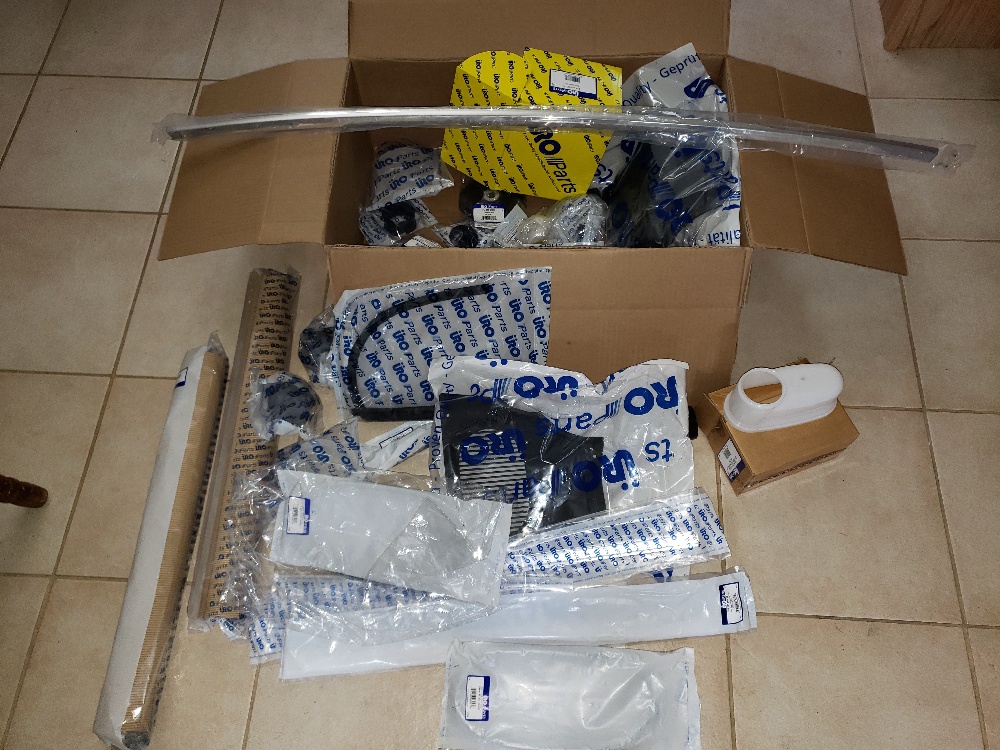
Posted by: gms Jul 10 2019, 07:21 PM
Here is the speaker grill comparison
Fresh air tube
rear targa bar bright work comparison to OEM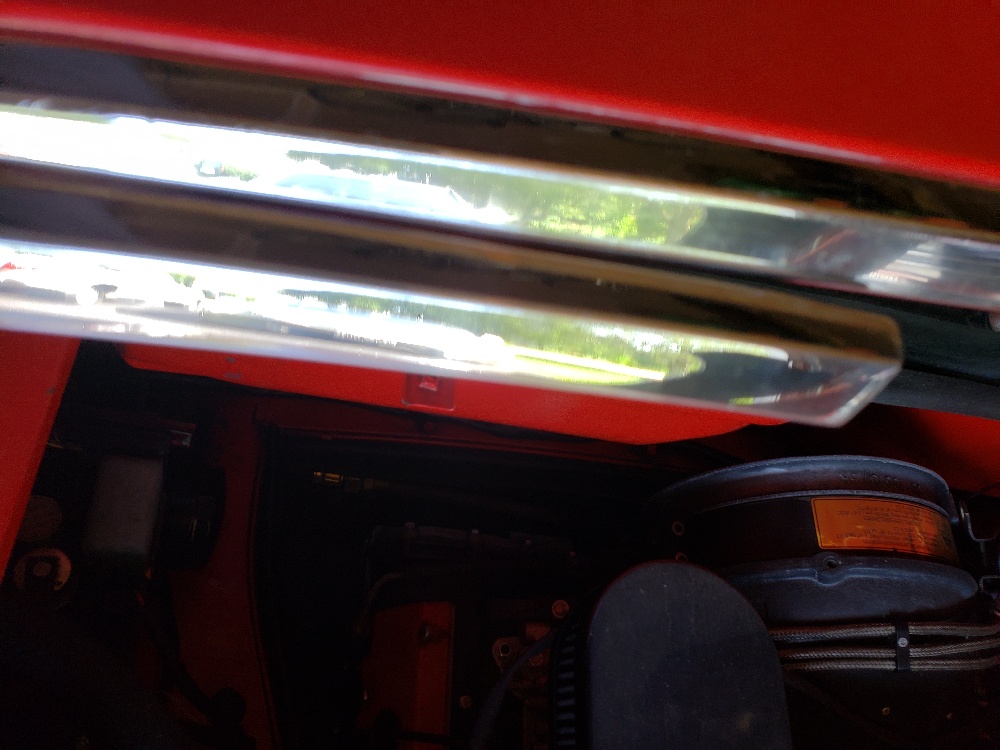
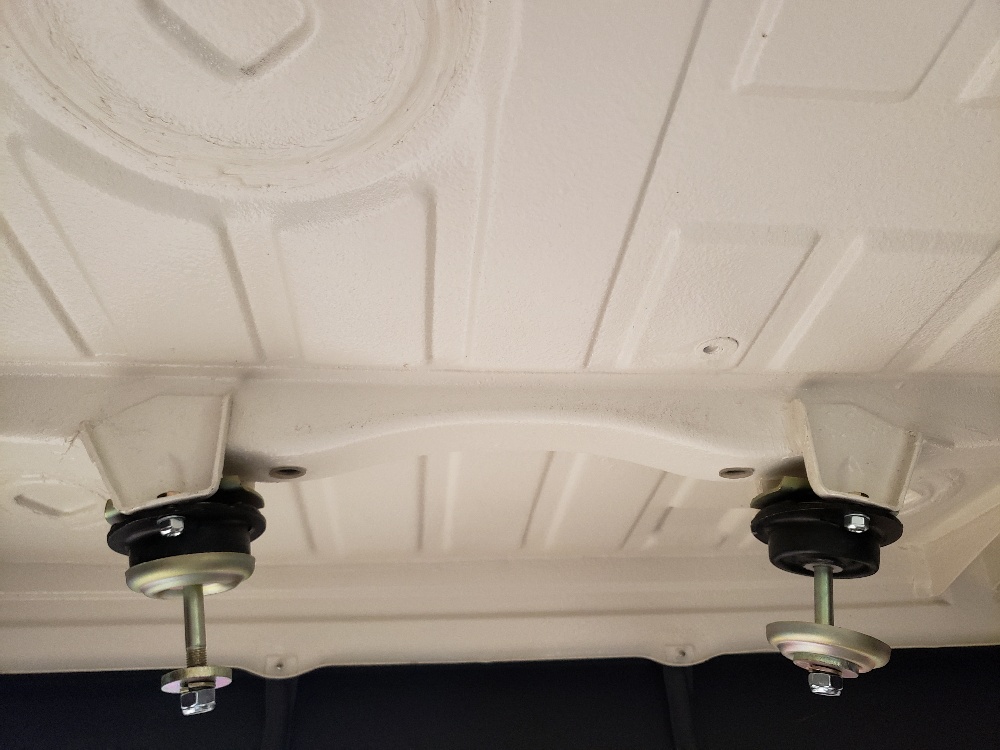
Posted by: gms Jul 10 2019, 07:23 PM
Here are the 914/6 (solid) trans mounts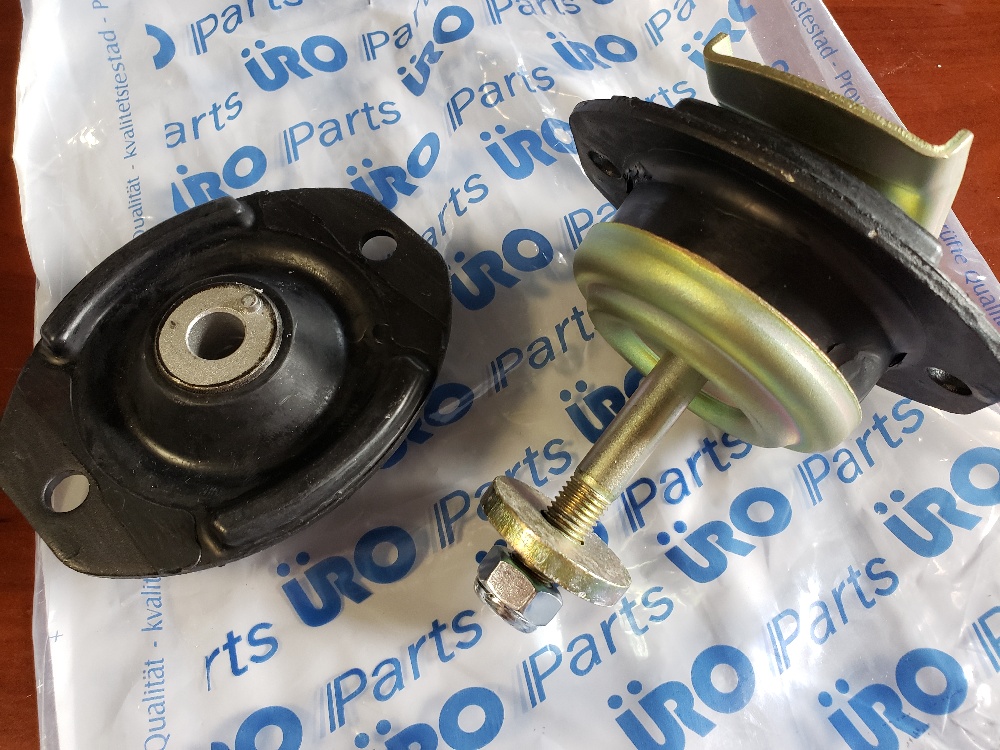
Posted by: AHudson Jul 10 2019, 08:54 PM
Here are the 914/6 (solid) trans mounts
Your entire build is looking great. Attention to detail and regular progress; two great traits.
I remember being at the exact stage you're at on the solid mounts. (Except yours looks nicer!) You might want to 'depaint' the area for the trans ground strap when that step comes. Easily overlooked, but I get the impression you knew this already!
Keep up the great work. It's an inspiration for sure.
Posted by: gms Jul 10 2019, 09:57 PM
...Keep up the great work. It's an inspiration for sure.
Thanks!
Posted by: gms Jul 10 2019, 10:08 PM
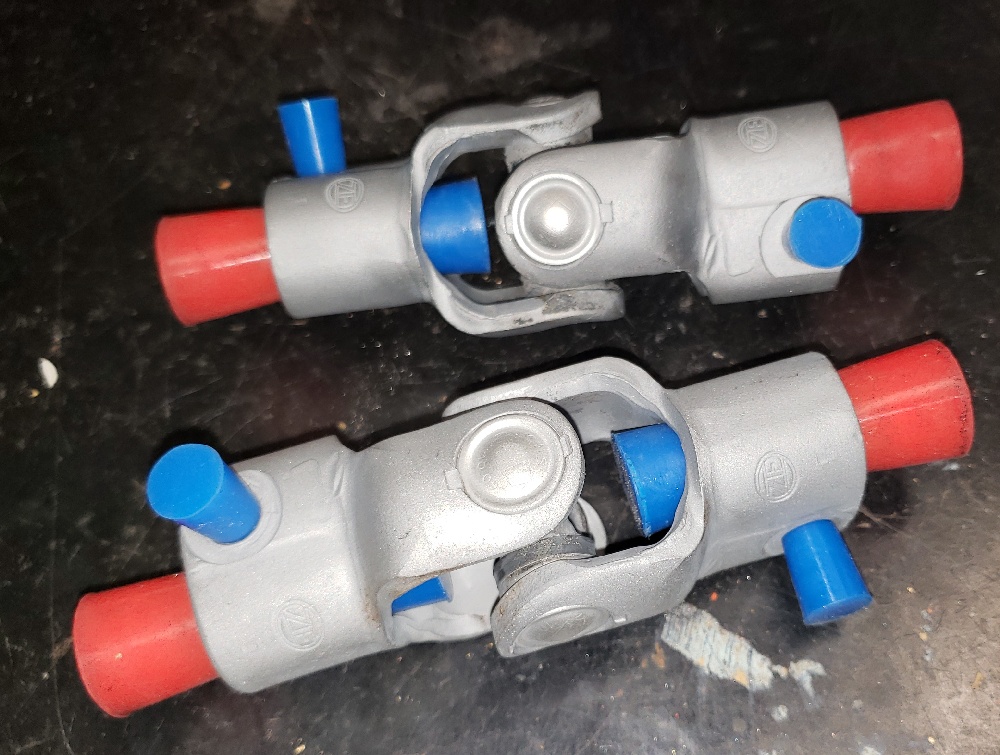
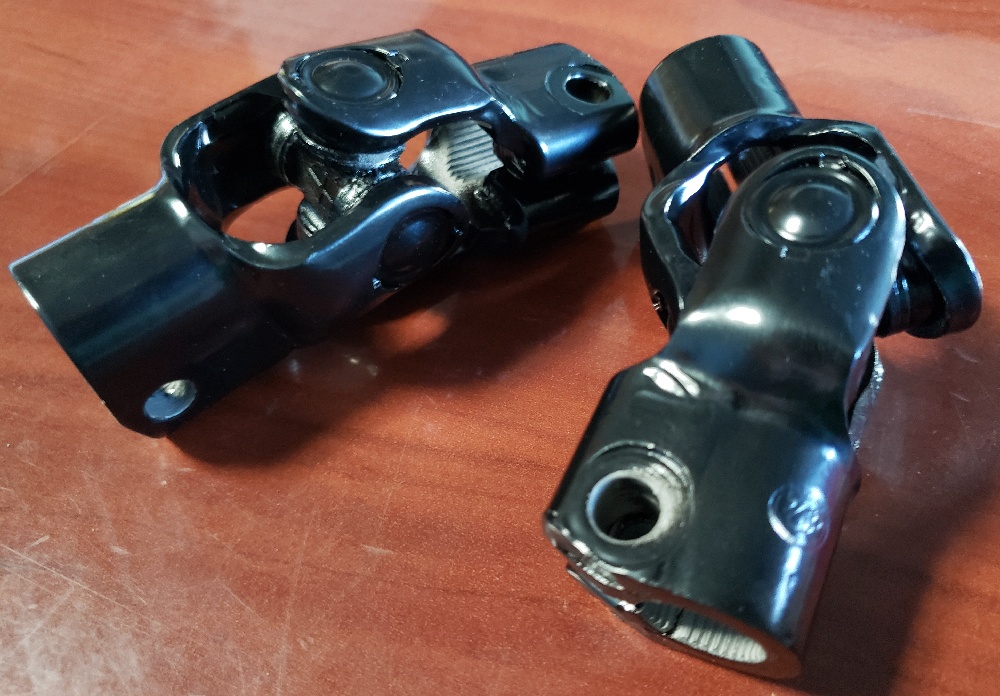
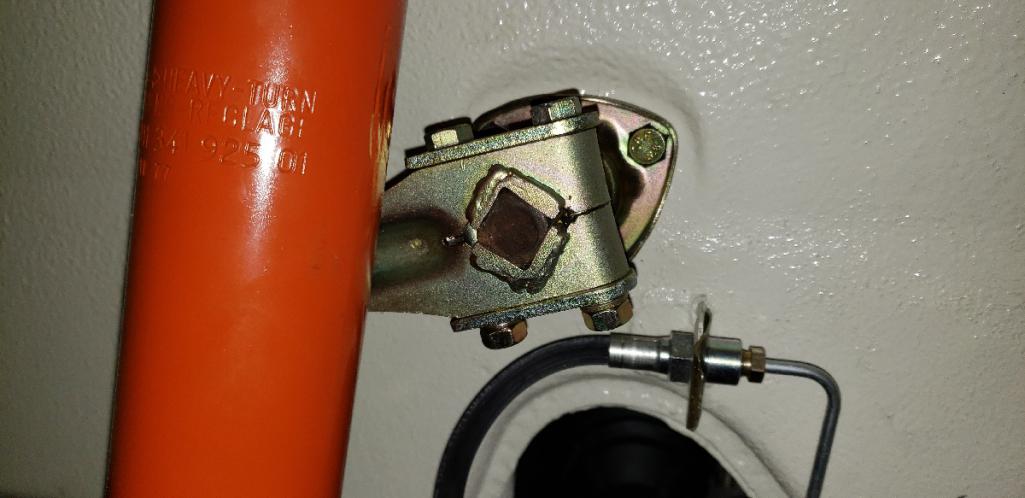
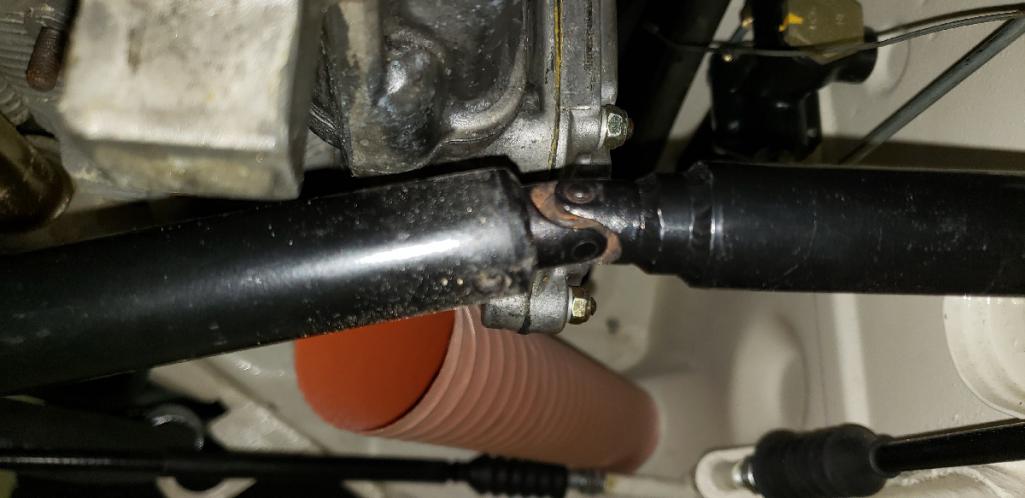
started on the u-joints for the steering column,will powder coat tomorrow.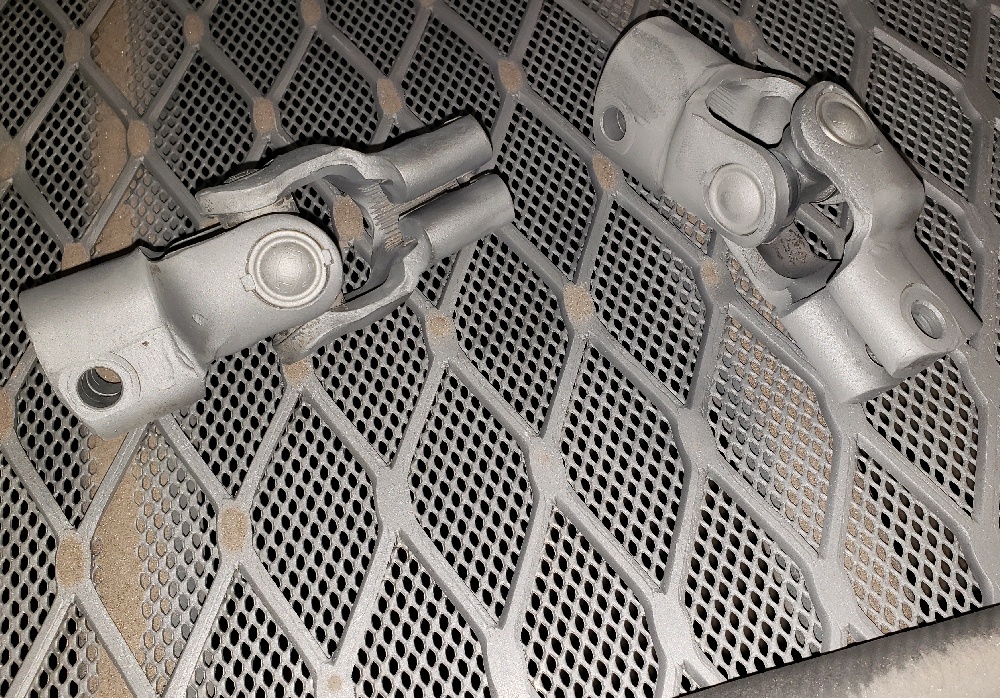
Posted by: IronHillRestorations Jul 11 2019, 05:34 AM
I've never had one of those apart, what kind of bearings/bushings are in those?
Posted by: mepstein Jul 11 2019, 05:55 AM
started on the u-joints for the steering column,will powder coat tomorrow.
I wanted to clean up a couple of these but wasn't sure the best way to clean them up. I like your method.
Posted by: gms Jul 11 2019, 08:31 AM
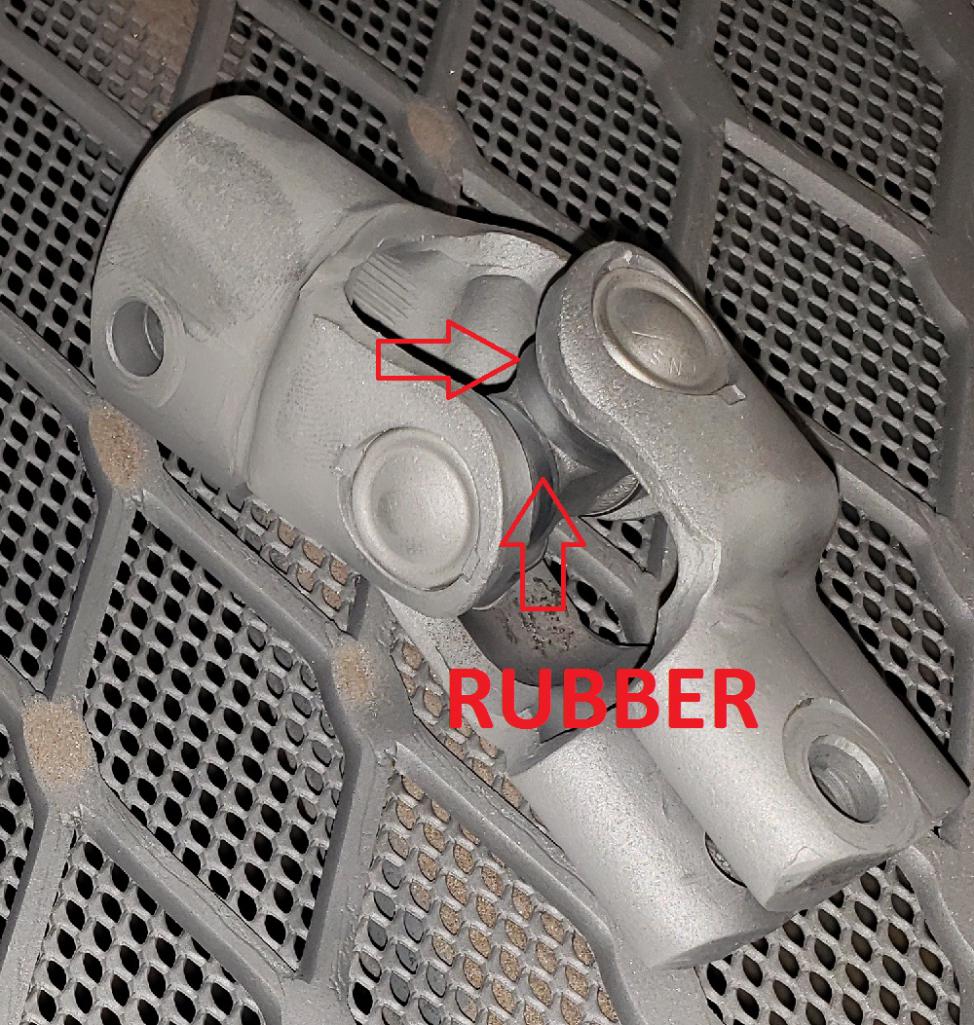
I've never had one of those apart, what kind of bearings/bushings are in those?
They have rubber bushings, tested at 400 degrees
Posted by: UROpartsman Jul 11 2019, 09:57 AM
Haven't disassembled that particular joint either, but might the rubber parts on the "cross journal" be seals? http://repairguide.autozone.com/znetrgs/repair_guide_content/en_us/images/0900c152/80/05/2d/19/large/0900c15280052d19.gif
Posted by: gms Jul 11 2019, 12:06 PM
Haven't disassembled that particular joint either, but might the rubber parts on the "cross journal" be seals? http://repairguide.autozone.com/znetrgs/repair_guide_content/en_us/images/0900c152/80/05/2d/19/large/0900c15280052d19.gif
Good point probably roller bearings inside
I will have to cut one open
Posted by: bbrock Jul 11 2019, 12:20 PM
Haven't disassembled that particular joint either, but might the rubber parts on the "cross journal" be seals? http://repairguide.autozone.com/znetrgs/repair_guide_content/en_us/images/0900c152/80/05/2d/19/large/0900c15280052d19.gif
Yep. They are basic U-joints with needle bearing inside. Everything you wanted to know in this vid. You should check out the other stuff this guy is doing. It's wild and much is applicable to our cars.
https://www.youtube.com/watch?v=pe1rPkbdYjI
Posted by: UROpartsman Jul 11 2019, 12:31 PM
The 911 bearing caps in the video have retainer clips, but the 914 caps appear to be staked in place with a punch. Surprising that the needle bearing grease didn't melt out during baking for the powdercoat.
Posted by: bbrock Jul 11 2019, 12:45 PM
The 911 bearing caps in the video have retainer clips, but the 914 caps appear to be staked in place with a punch. Surprising that the needle bearing grease didn't melt out during baking for the powdercoat.
This is interesting. I just looked up the P/N for the 914 joints: 930 347 025 00 for all years. Isn't that a 930 part number? How could there be a 930 part on a 1970 MY car?
Posted by: UROpartsman Jul 11 2019, 12:56 PM
Could be design supersessions over the years, or minor differences between OE, OEM, and aftermarket joints. Will check into it and report back.
Posted by: Targa70 Jul 12 2019, 05:58 AM
I hate that much of what we on this forum find impressive and like to stare at, or are actually in awe of, gets "hidden" in the assembly.
Posted by: FourBlades Jul 13 2019, 10:10 AM
Great restoration guys!
That will be one nice /6.
Sure you don't want to make an IMSA 914 clone out of it?
John
Posted by: gms Aug 26 2019, 10:25 PM
It has been a while since I updated this thread. I will start with the completion of the wiring in the front of the car. 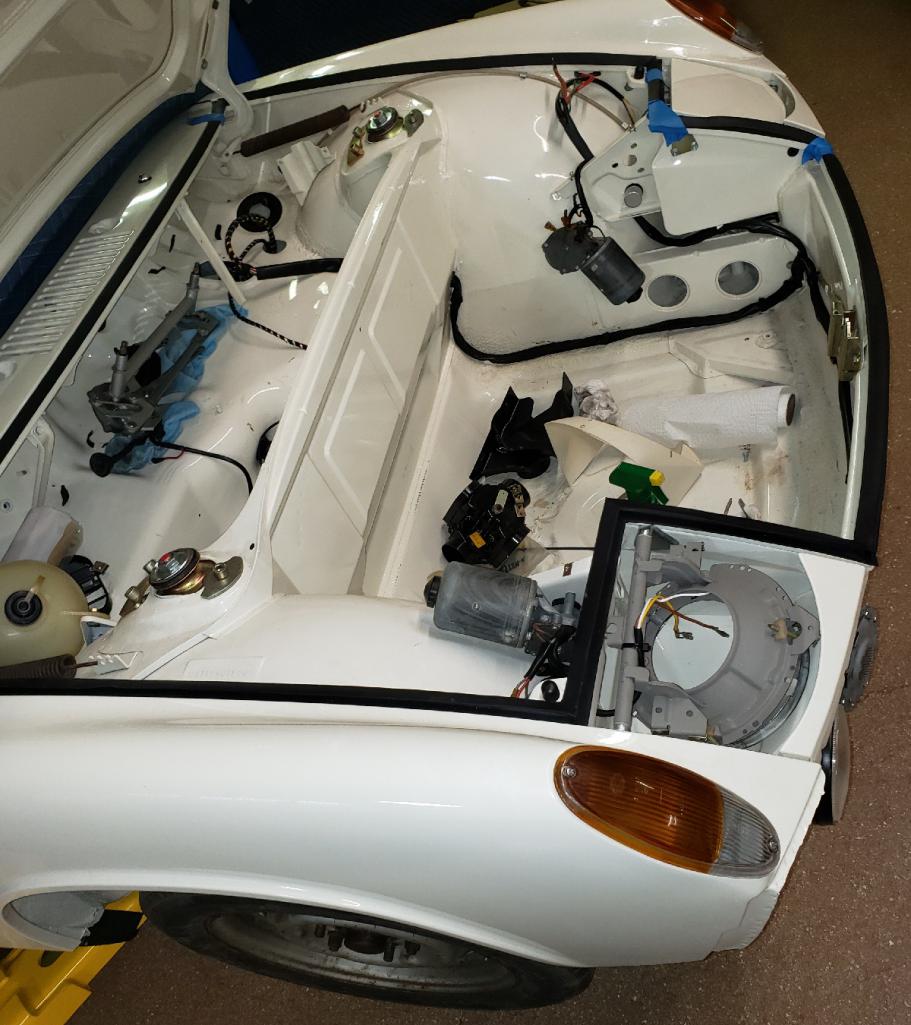
Posted by: gms Aug 26 2019, 10:30 PM
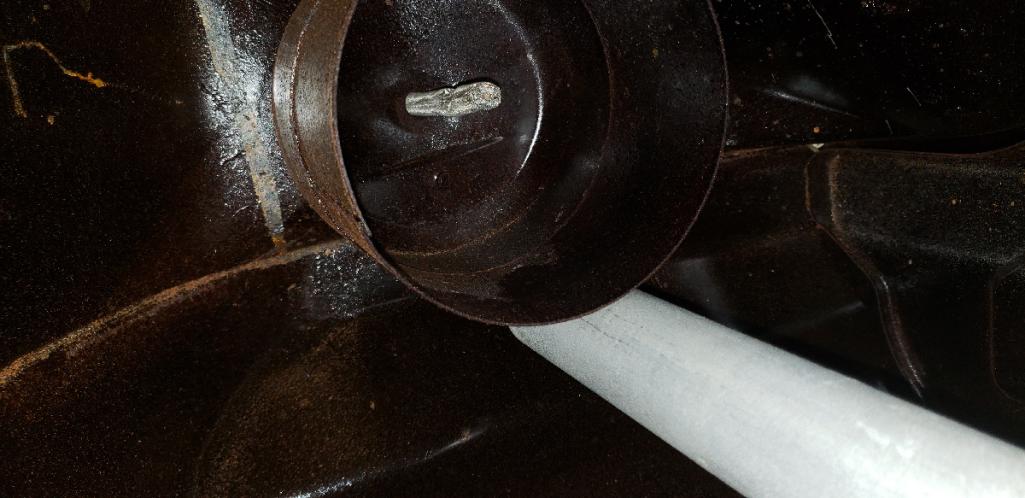
Always remember to run a die over the grounding studs on the car.
This will avoid intermittent and difficult to track wiring issues.
this was what the stud by the headlight motors looked like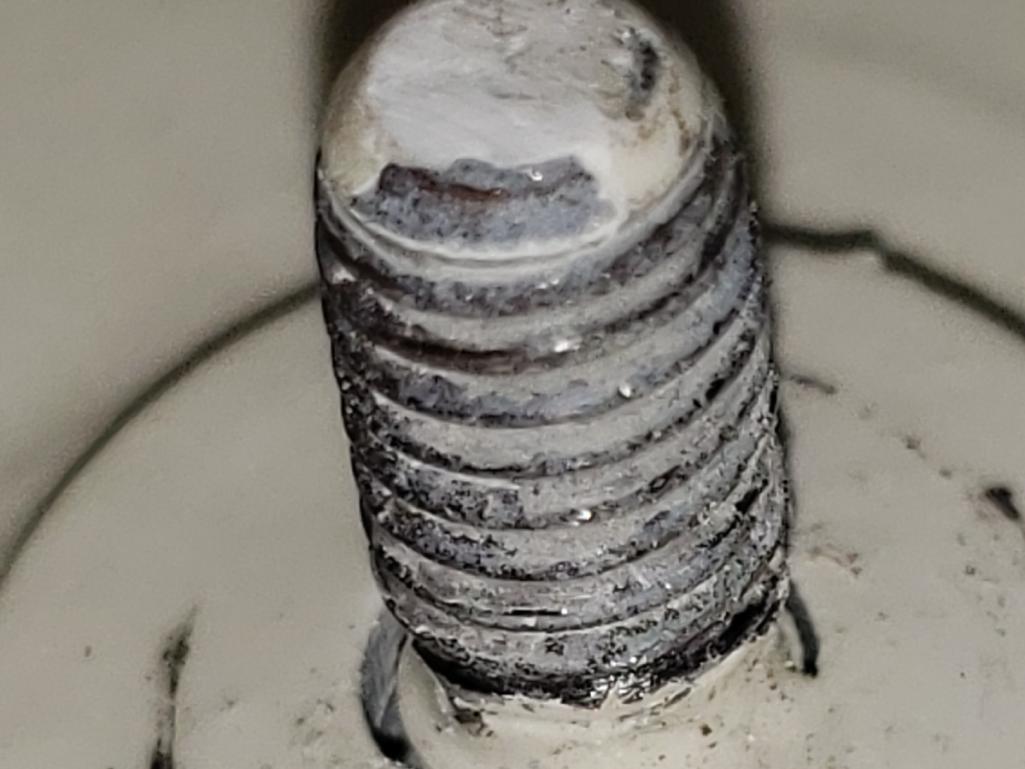
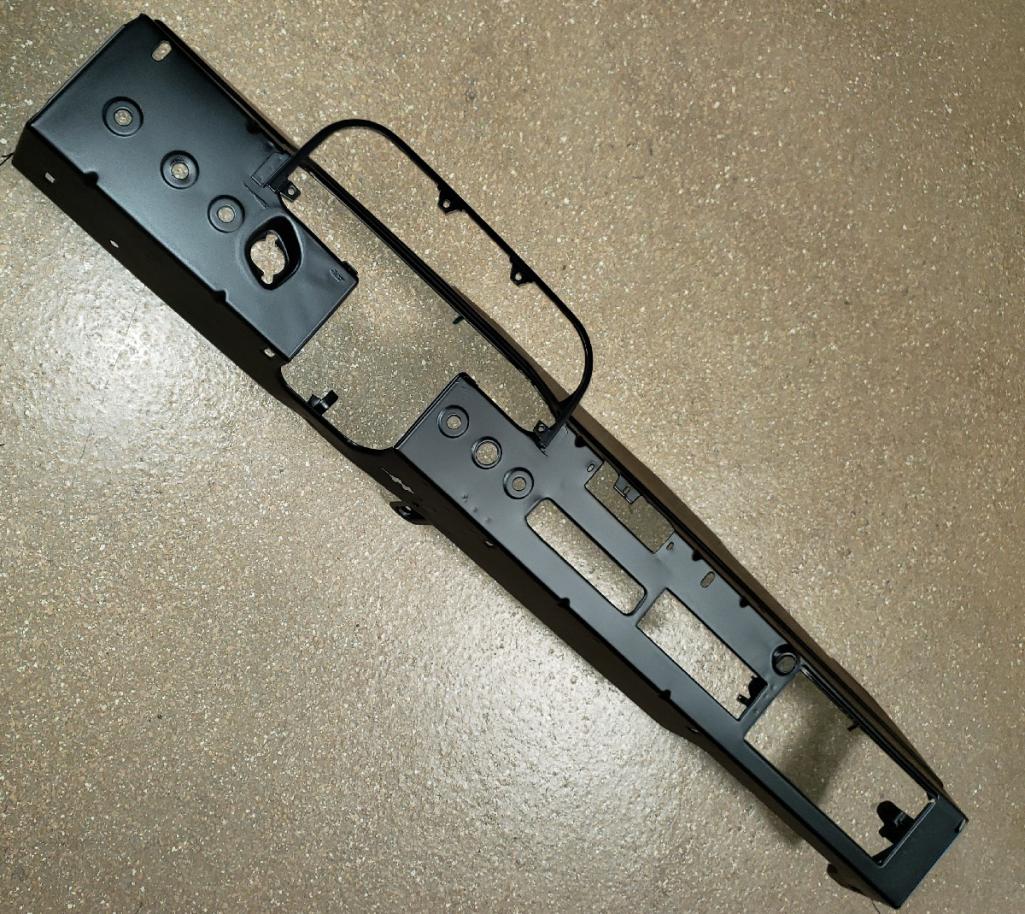
Posted by: gms Aug 26 2019, 10:33 PM
I did some more powder coating after I sand blasted the dash panels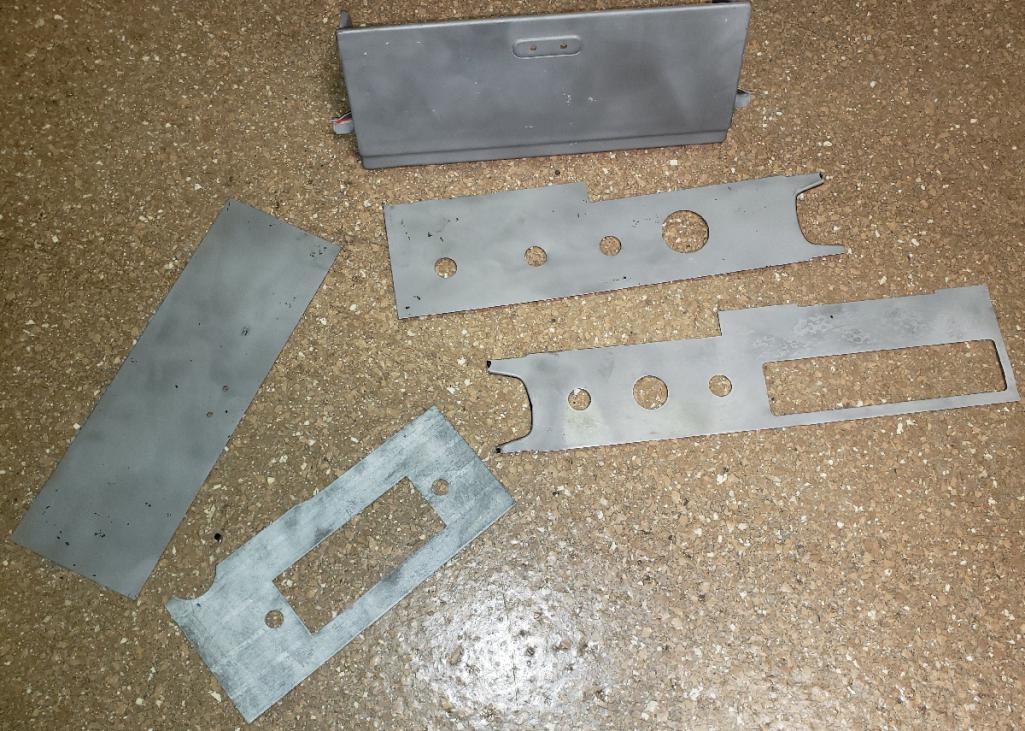
Posted by: porschetub Aug 27 2019, 01:19 AM
Something about white cars ,a colour that IMO works SO well with a 914,great work
Posted by: Cairo94507 Aug 27 2019, 06:59 AM
Sweet! Coming along nicely.
Posted by: Targa70 Oct 4 2019, 11:53 AM
Couple of more pics of the skilled work of @http://www.914world.com/bbs2/index.php?showuser=1785 .
He had to spend some time on the vinyl, to make it worth of his fresh powder-coating job.
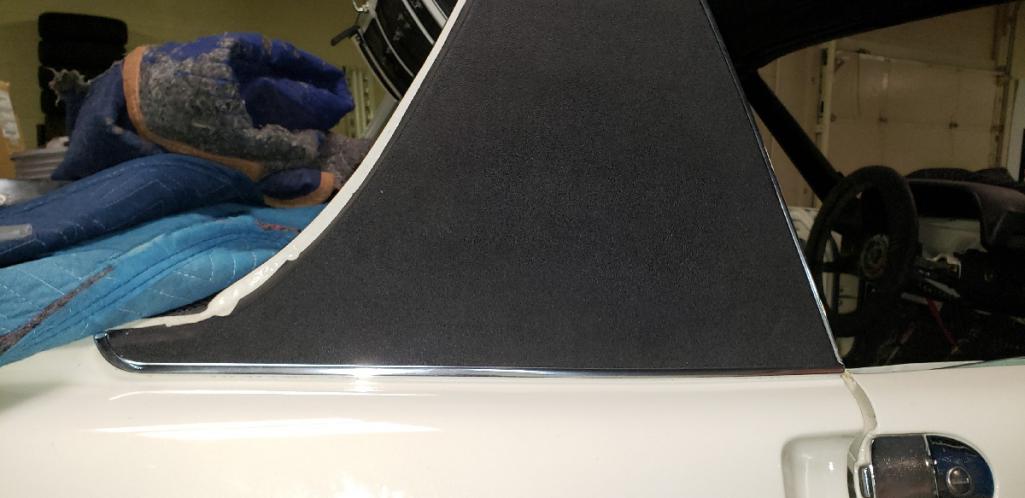
Posted by: Targa70 Oct 4 2019, 11:55 AM
And now in its final position, tied in well.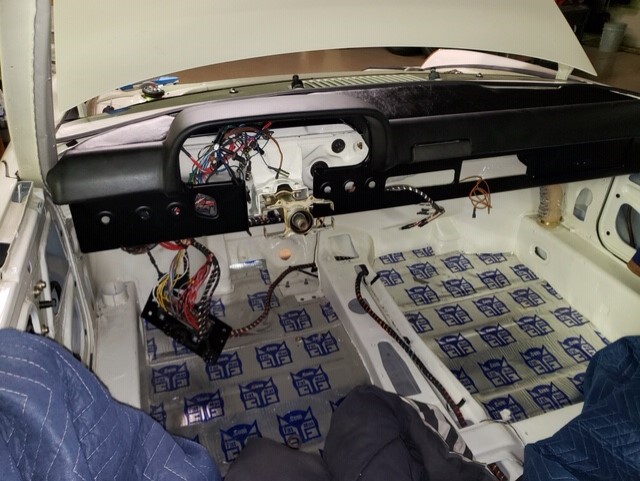
Posted by: Targa70 Oct 4 2019, 11:57 AM
Steering wheel included.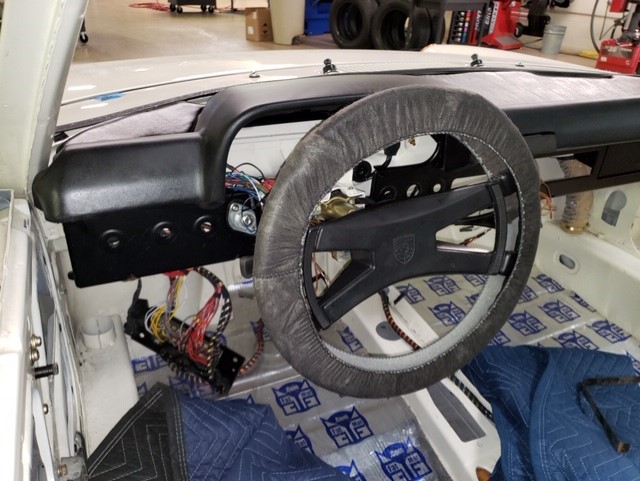
Posted by: Targa70 Oct 4 2019, 12:22 PM
And because we all like photos, a couple of more images showing the black contrast on the fresh white.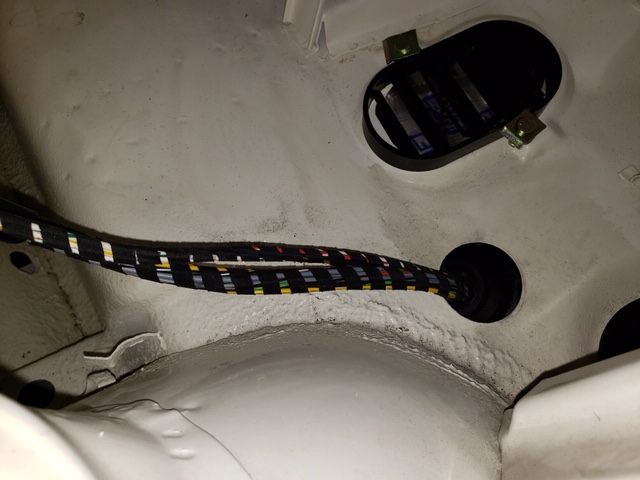
Posted by: burton73 Oct 4 2019, 01:50 PM
Very nice and fast work.
Bob B
Posted by: bbrock Oct 4 2019, 08:01 PM
Looking good! Nice work.
Posted by: rgalla9146 Oct 5 2019, 06:25 AM
Beautiful work Glenn. Great progress.
Maybe a Light Ivory meet-up at Hershey ?
Real and stock vs. Fake and modified ?
Posted by: mepstein Oct 5 2019, 07:11 AM
Beautiful work Glenn. Great progress.
Maybe a Light Ivory meet-up at Hershey ?
Real and stock vs. Fake and modified ?
Rory-fake is a Fuchs look wheel cover. Your car is achieving its potential.
Posted by: gms Oct 7 2019, 11:38 AM
Thanks everyone!
I will get more detail pix up when I get time
Posted by: gms Oct 9 2019, 02:55 PM
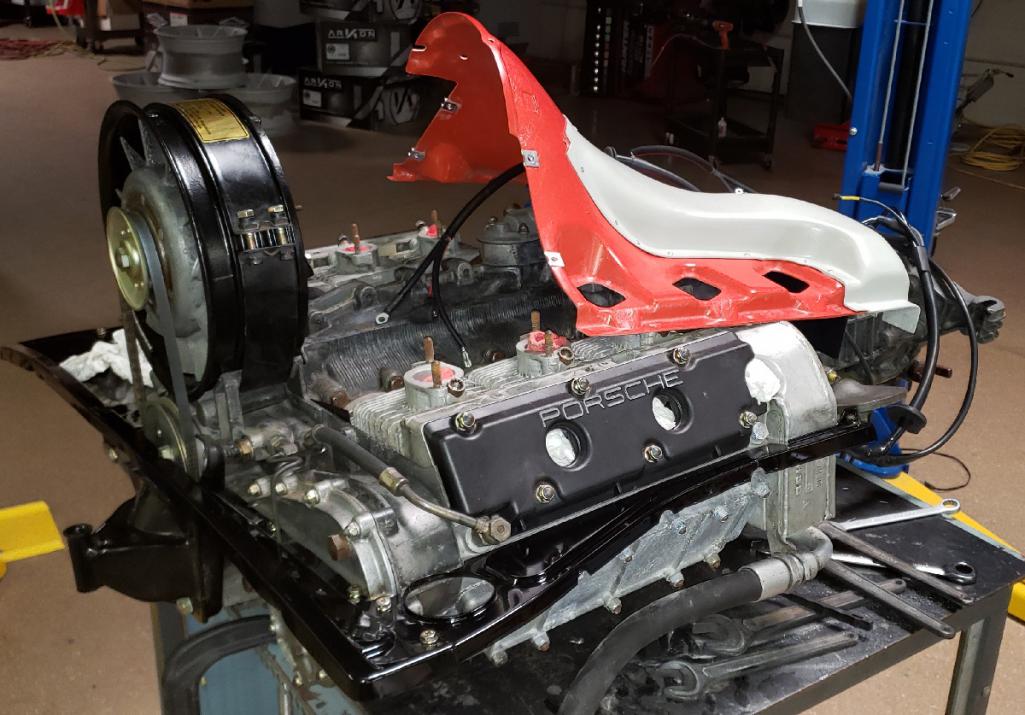
I just received the engine fan shroud and as you can see it is amazing!
This is the 911S look with cutouts for carburetors
Thanks to Damon at http://www.series900.com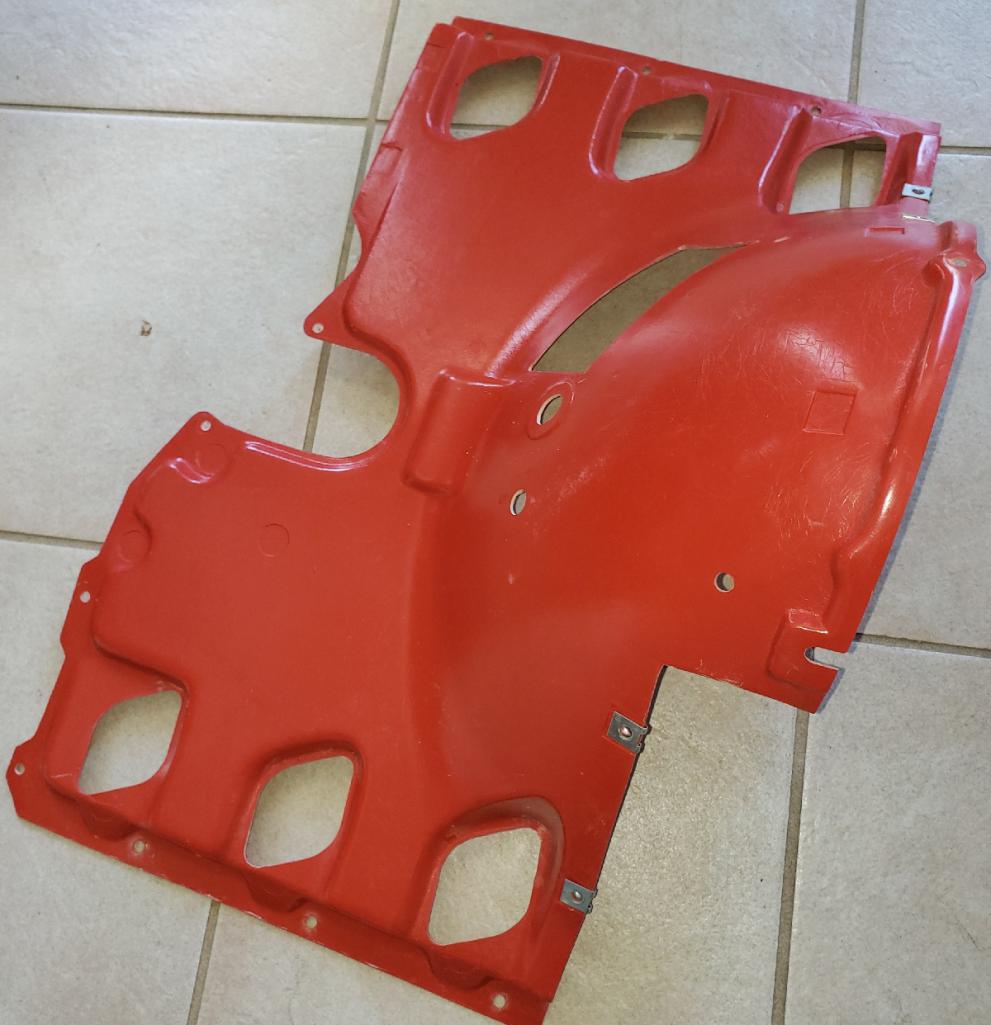
Posted by: PanelBilly Oct 9 2019, 03:04 PM
Check the fit for the intake manifold. I needed to enlarge the holes in the shroud in a few places to make them fit.
Posted by: gms Oct 9 2019, 03:15 PM
Check the fit for the intake manifold. I needed to enlarge the holes in the shroud in a few places to make them fit.
I will report back
Posted by: gms Oct 9 2019, 08:14 PM
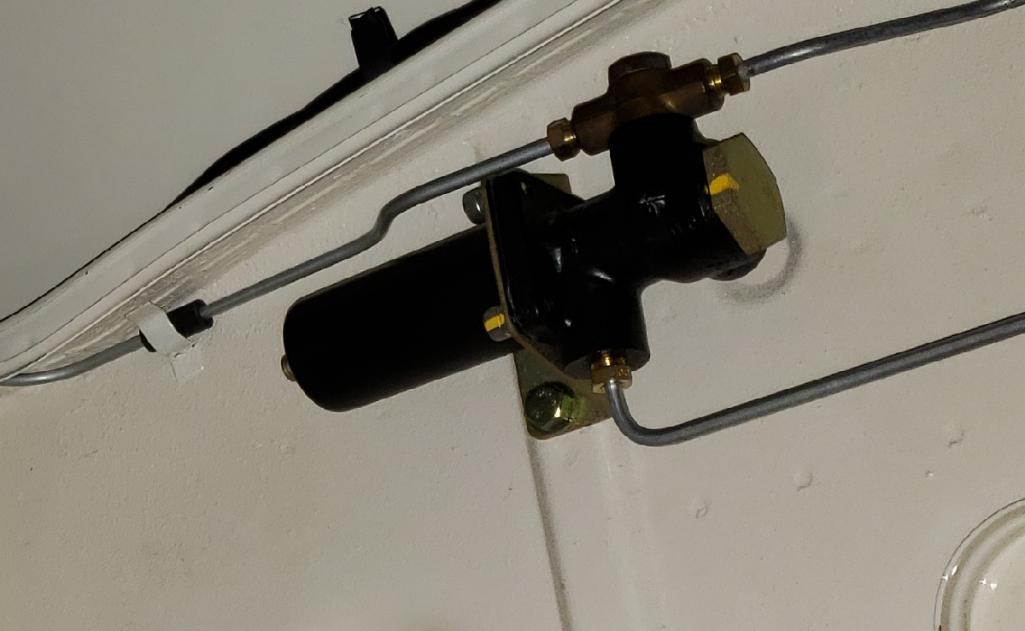
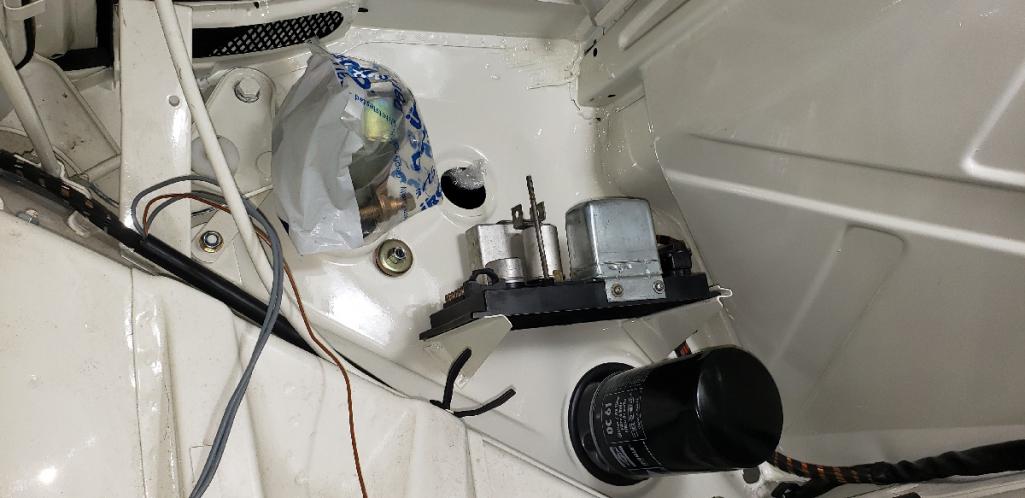
Once again we utilized the services of PMB Performance to restore the brake pressure regulator, looks great @http://www.914world.com/bbs2/index.php?showuser=1110 
Posted by: gms Oct 9 2019, 08:15 PM
another shot of the steering column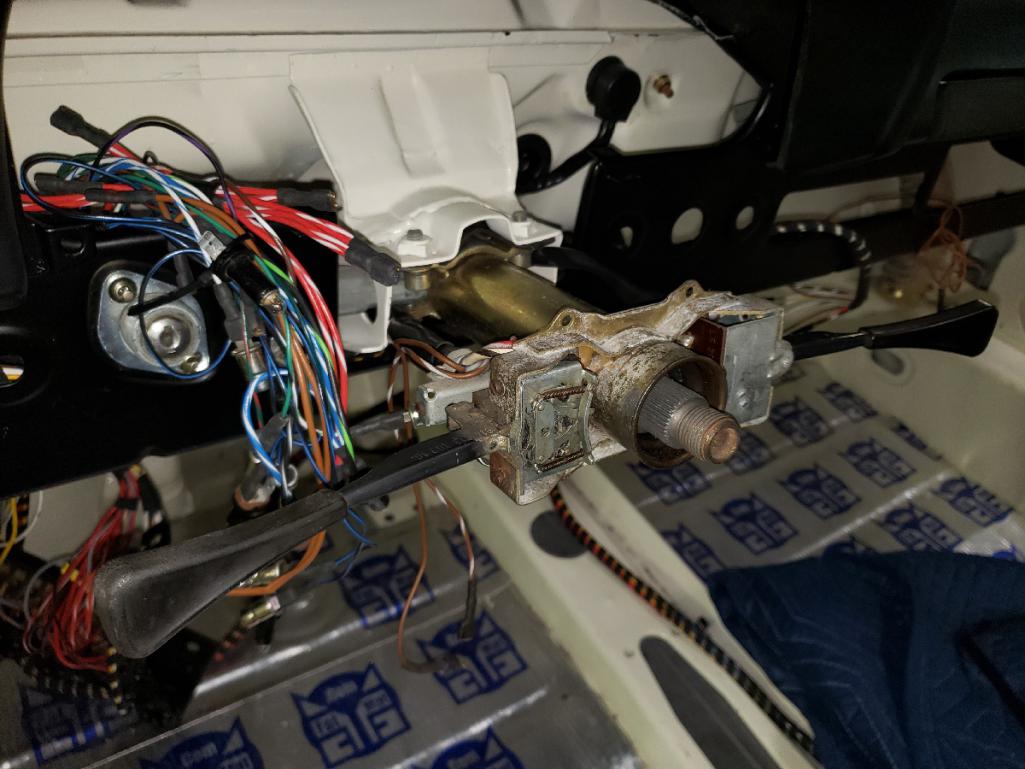
Posted by: gms Oct 9 2019, 08:16 PM
wiper rack installed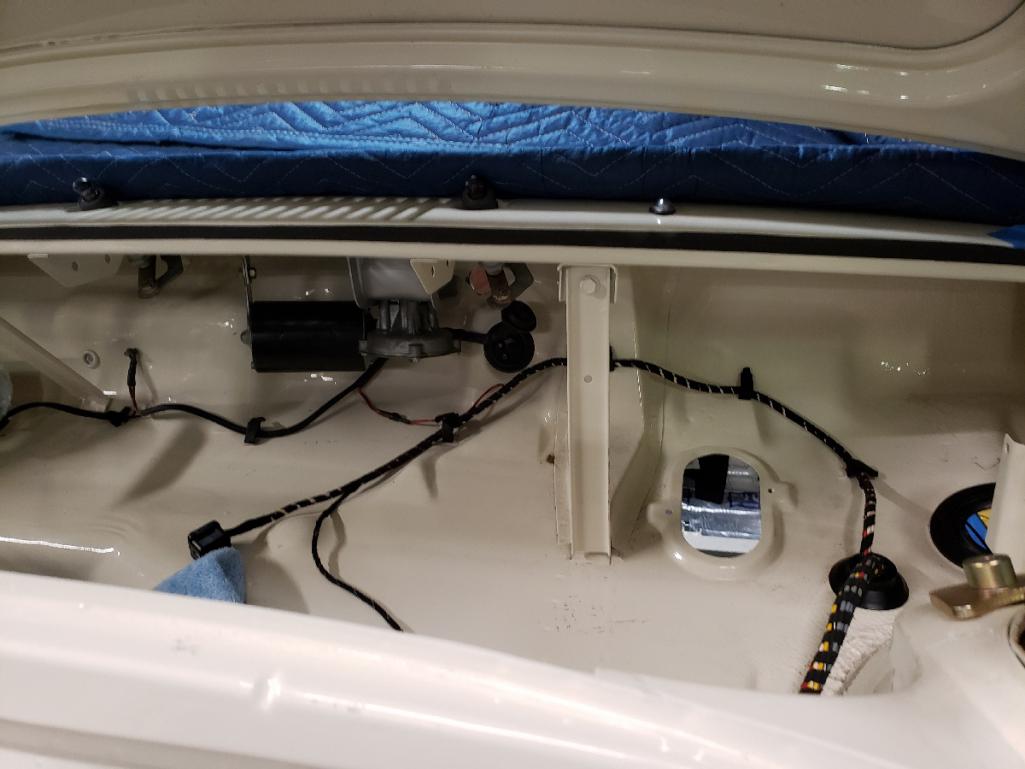
Posted by: gms Oct 9 2019, 08:22 PM
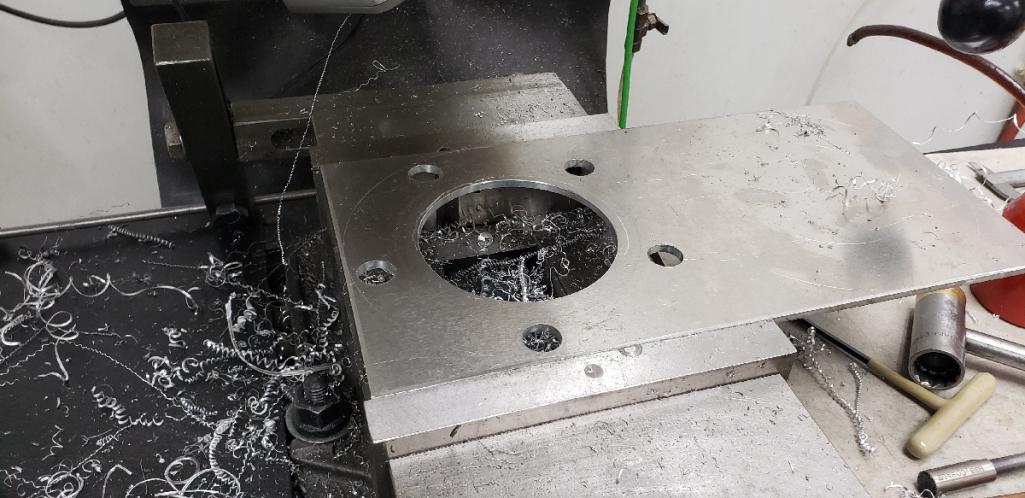
A while back I was out at Mark Kinnaman's shop (Bartlett 914), he cut the rear brake disk spacer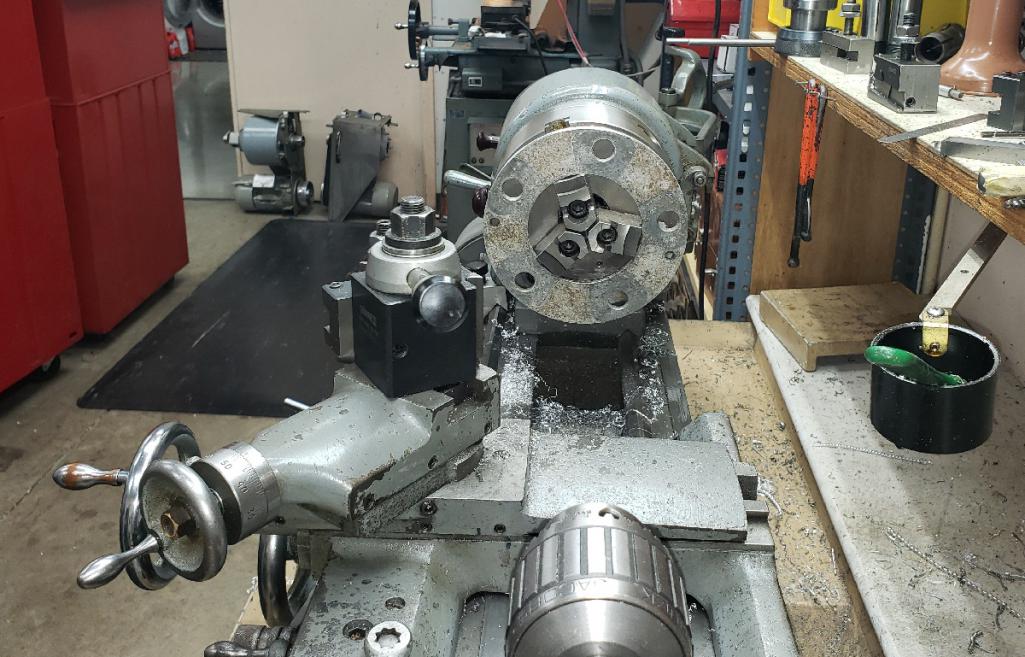

Posted by: gms Oct 9 2019, 08:27 PM
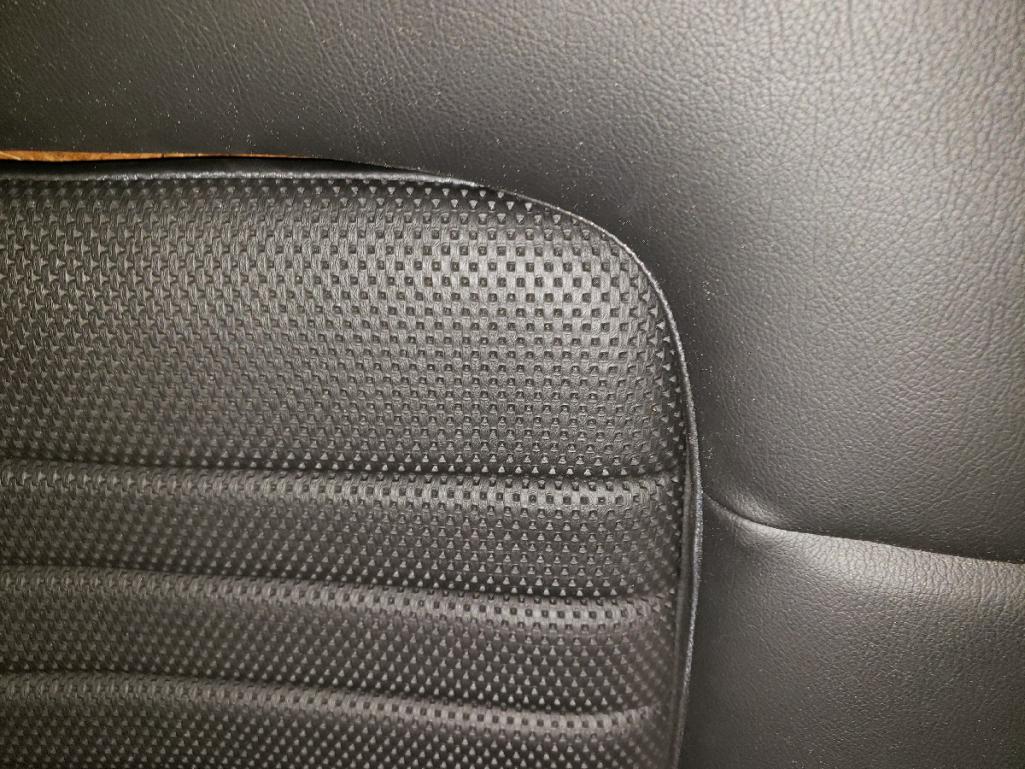
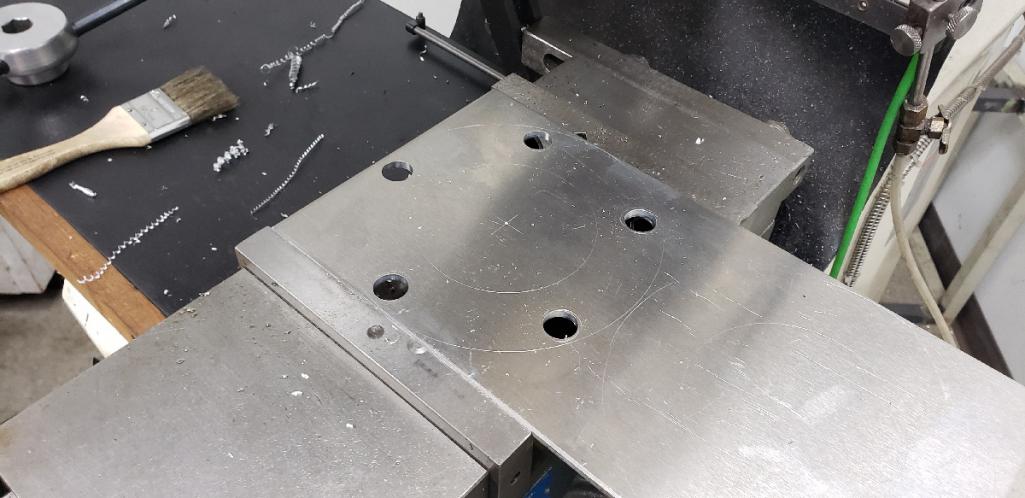
using the hole punch to make basket weave dash covers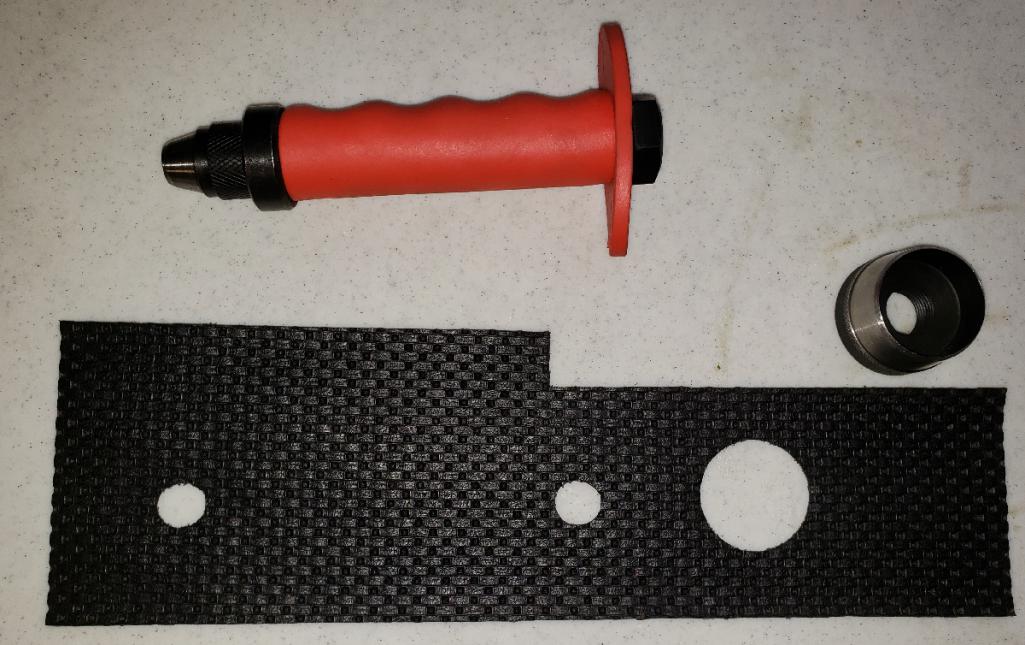
Posted by: Eric_Shea Oct 14 2019, 10:46 AM
Once again we utilized the services of PMB Performance to restore the brake pressure regulator, looks great @http://www.914world.com/bbs2/index.php?showuser=1110
Happy to be a part of this build.
Posted by: gms Oct 29 2019, 08:18 PM
I started to fit the carpet and vinyl kits.
Bill acquired NOS driver and passenger floormats so I laid them out next to the aftermarket carpet and the match is not bad.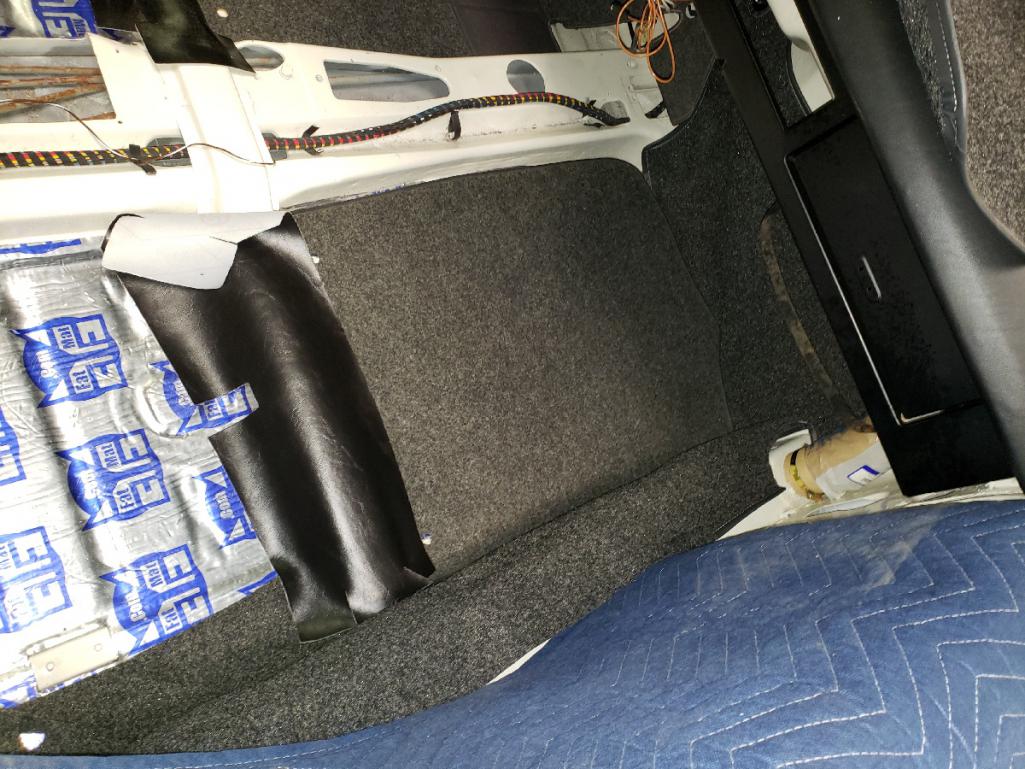
Posted by: gms Oct 29 2019, 08:20 PM
1 of the 8 vinyl pieces in place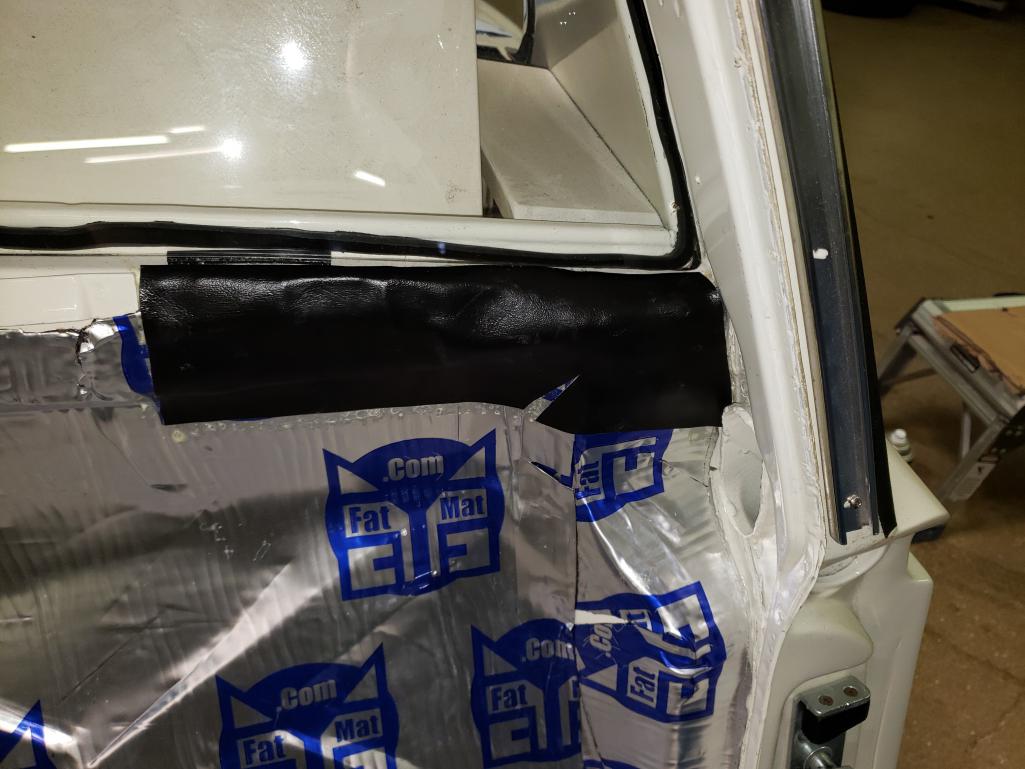
Posted by: gms Nov 3 2019, 05:39 PM
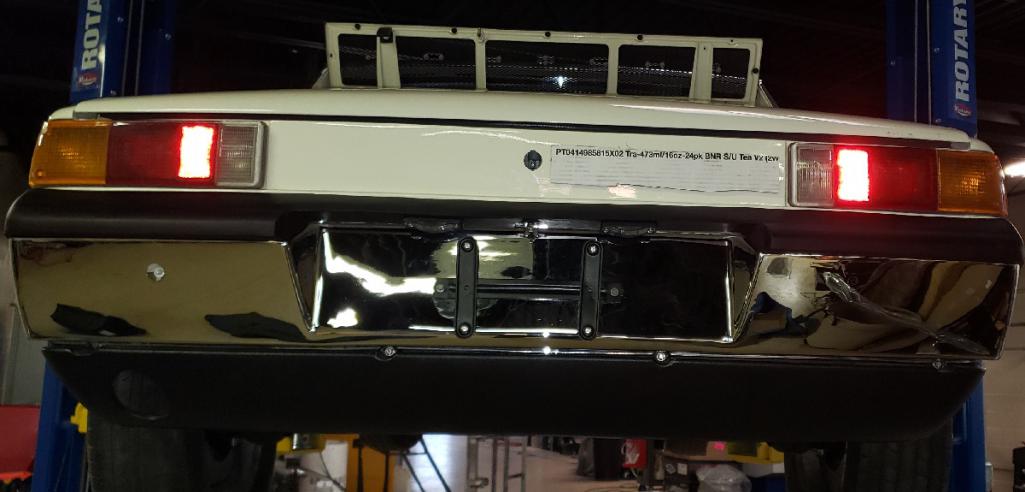
bumpers fitted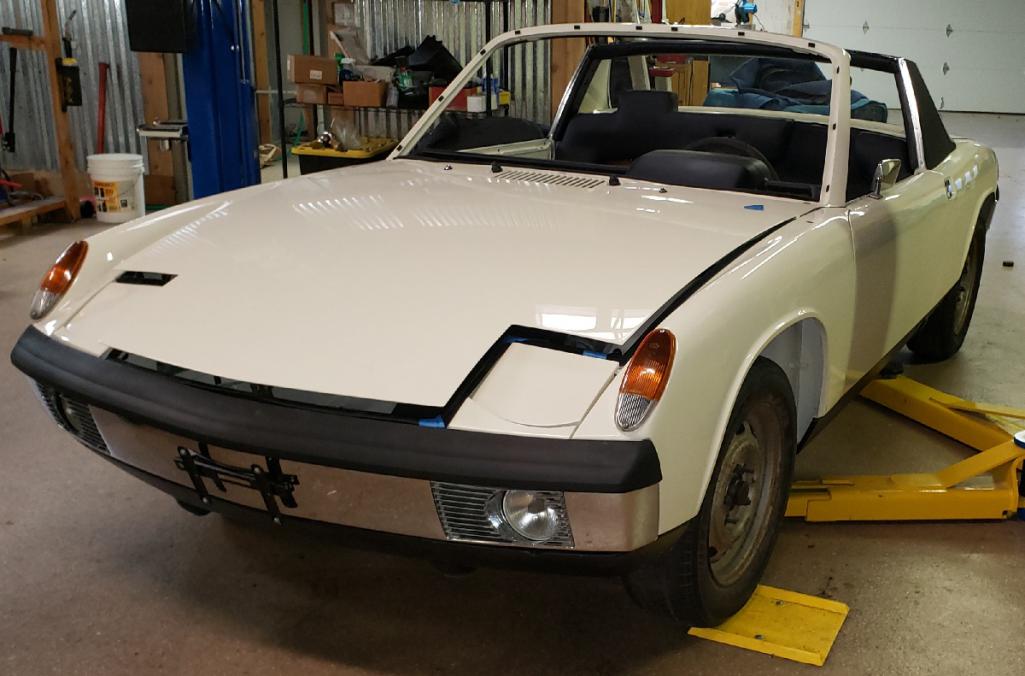
Posted by: gms Nov 26 2019, 09:43 AM
restored door stays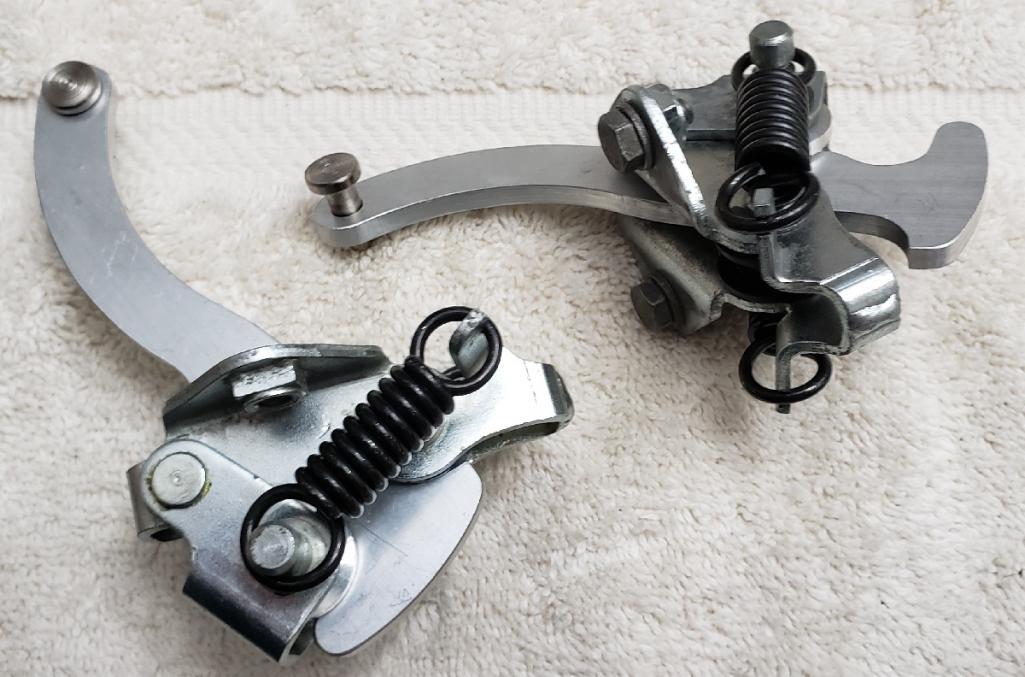
Posted by: gms Jan 14 2020, 10:05 PM
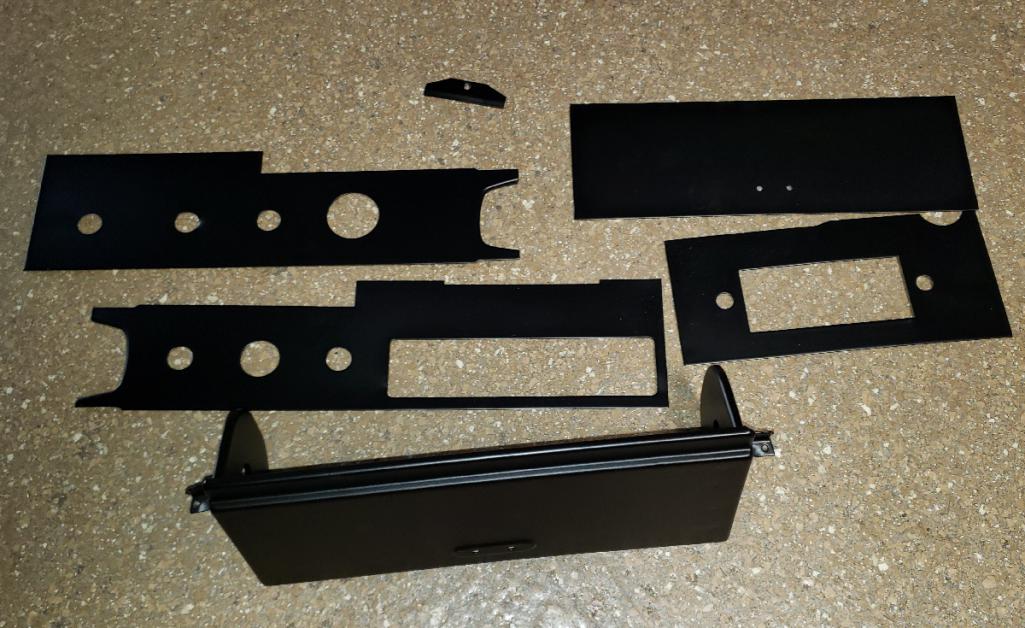
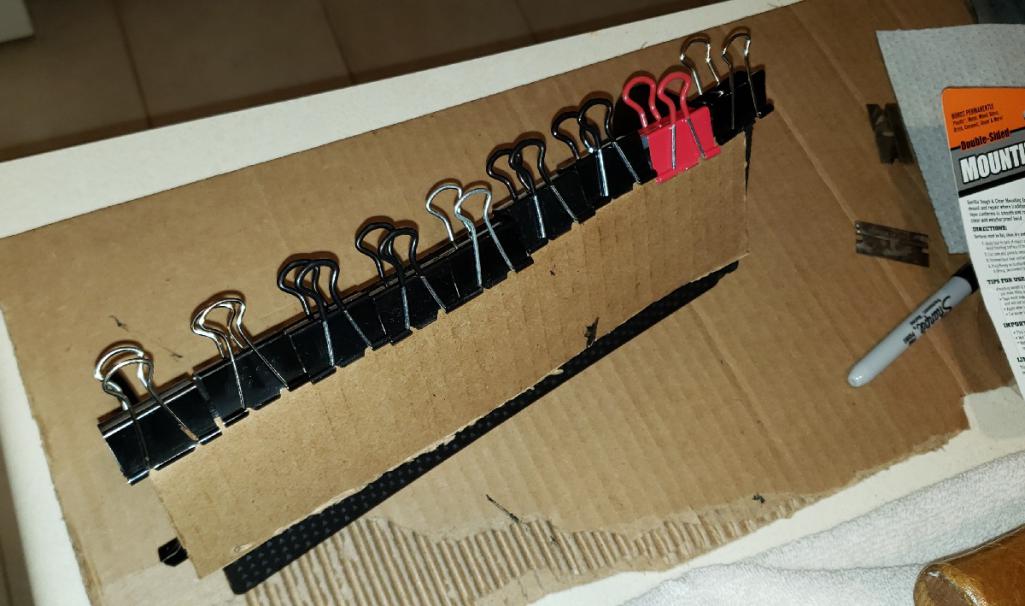
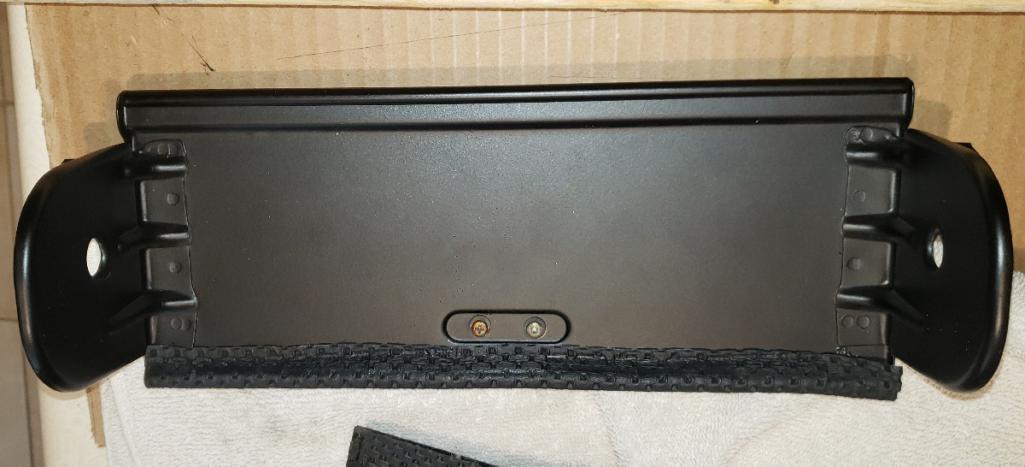
More detail on the glovebox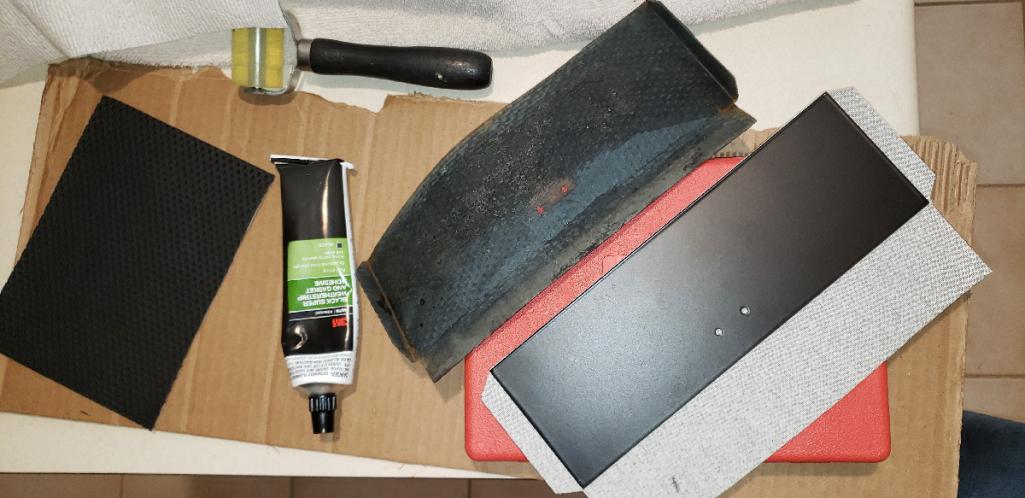
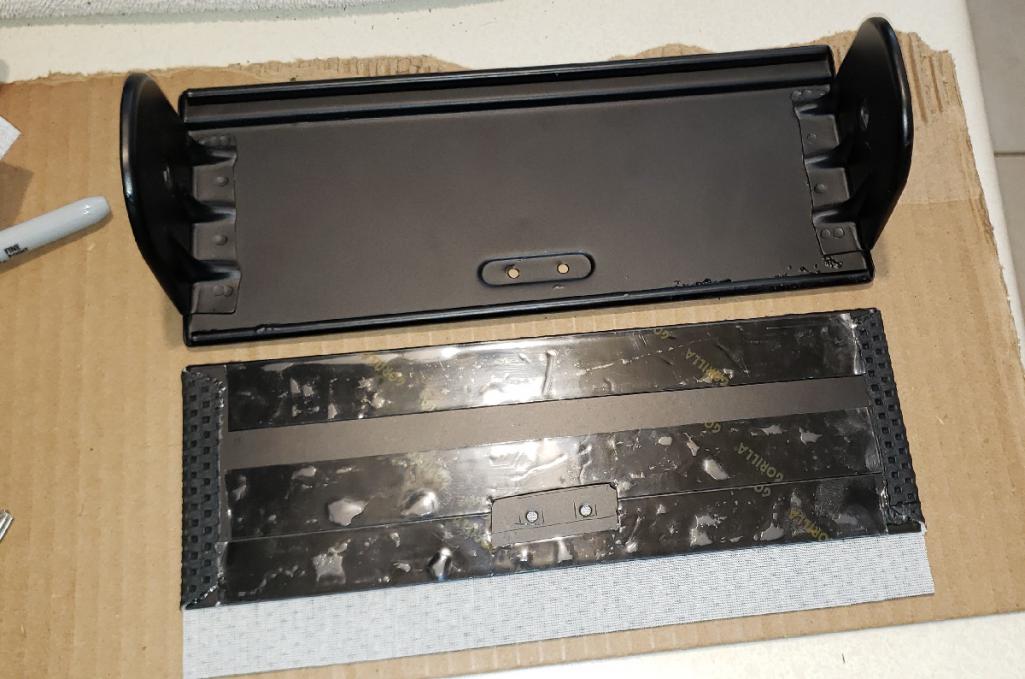

Posted by: gms Jan 14 2020, 10:16 PM
basketweave dash material on the radio plate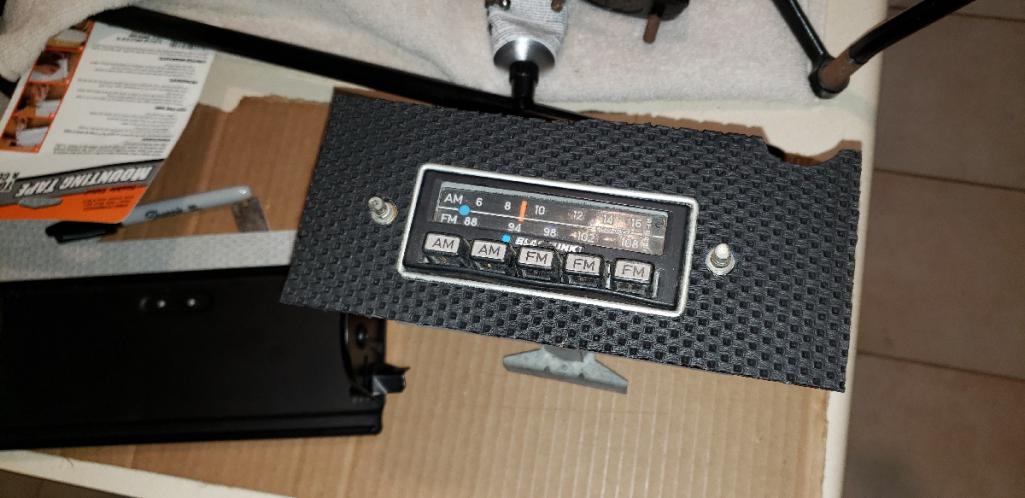
fitting up the completed dash plates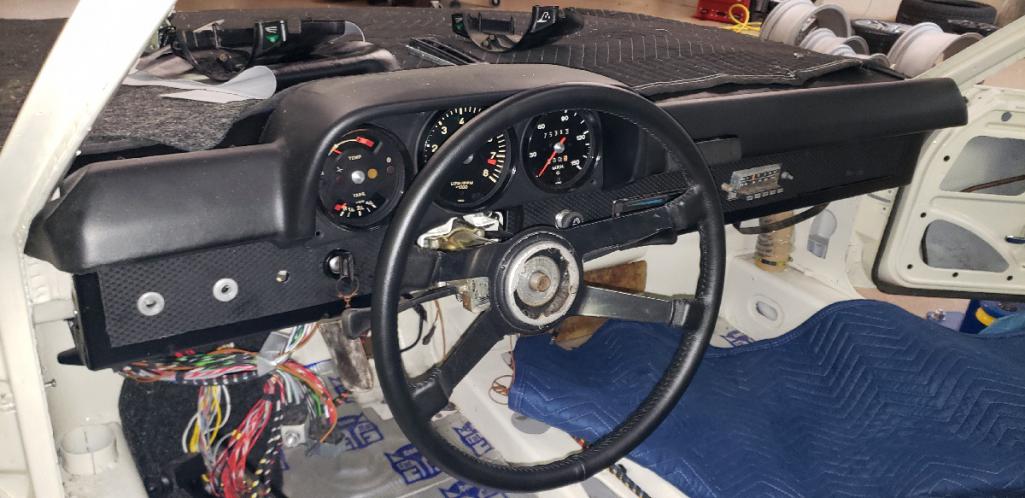
Posted by: gms Jan 14 2020, 10:18 PM
finished up more of the plated parts on the suspension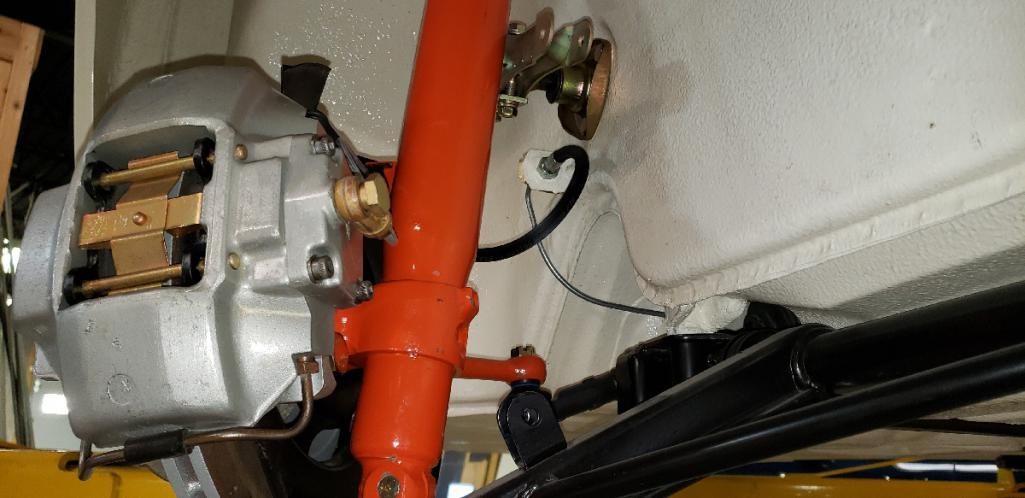
Posted by: gms Jan 14 2020, 10:20 PM
stainless steel fuel lines are installed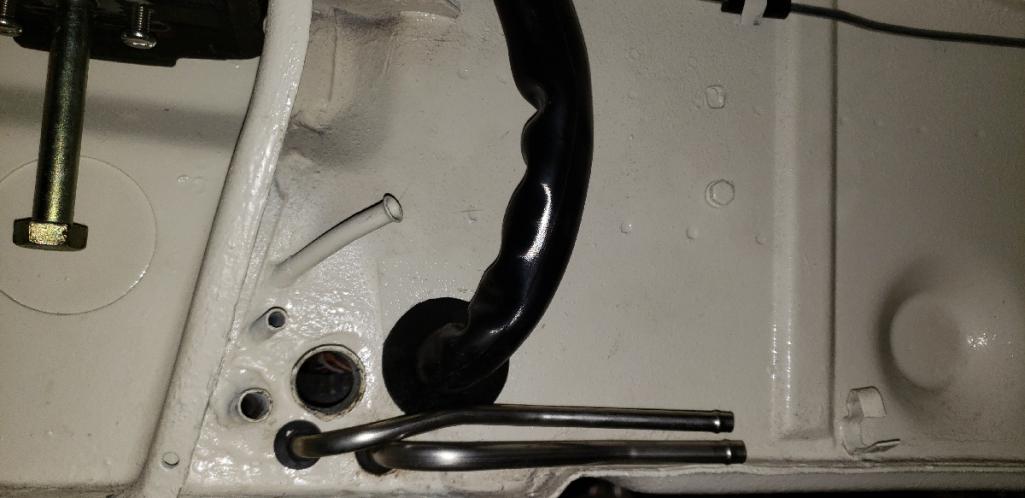
Posted by: gms Jan 14 2020, 10:28 PM
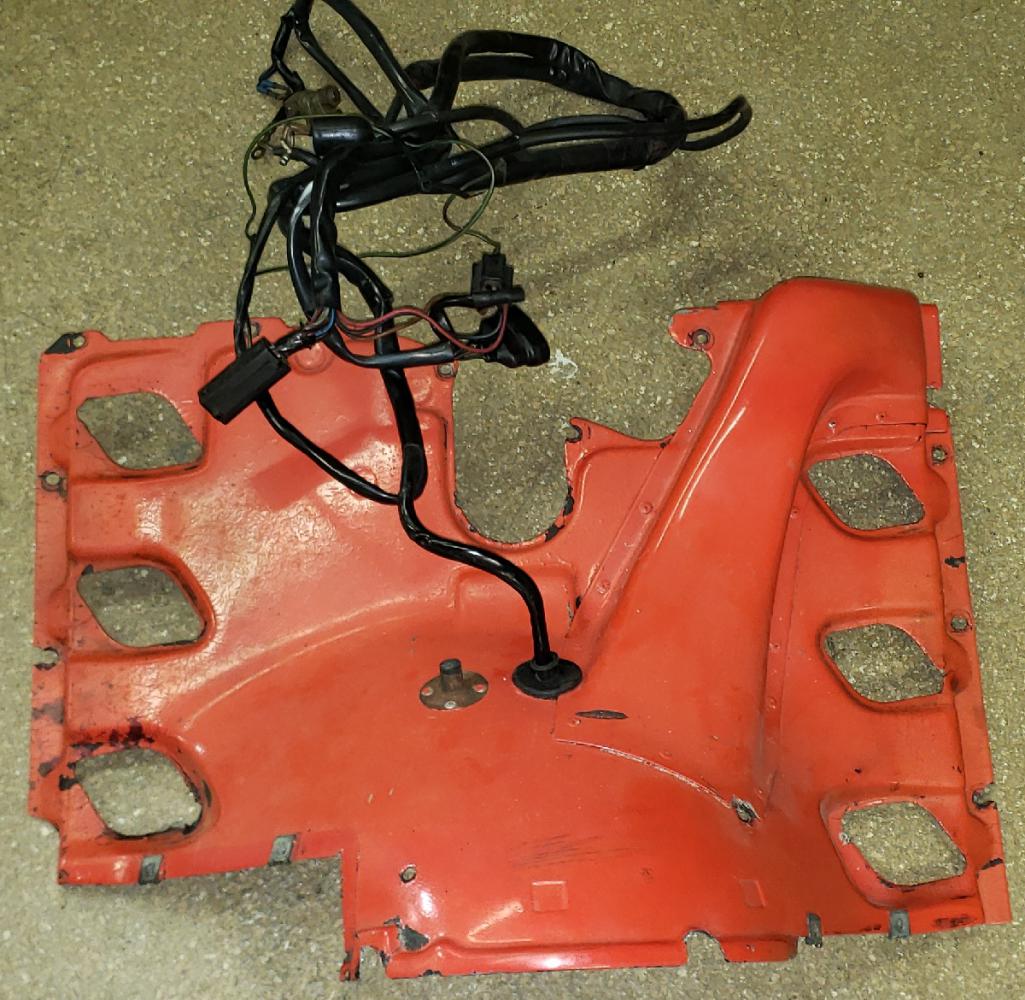
Bill and I decided we couldn't live with the old engine cover or the engine wiring harness...now removed
@http://www.914world.com/bbs2/index.php?showuser=439 will be providing the new engine wiring harness!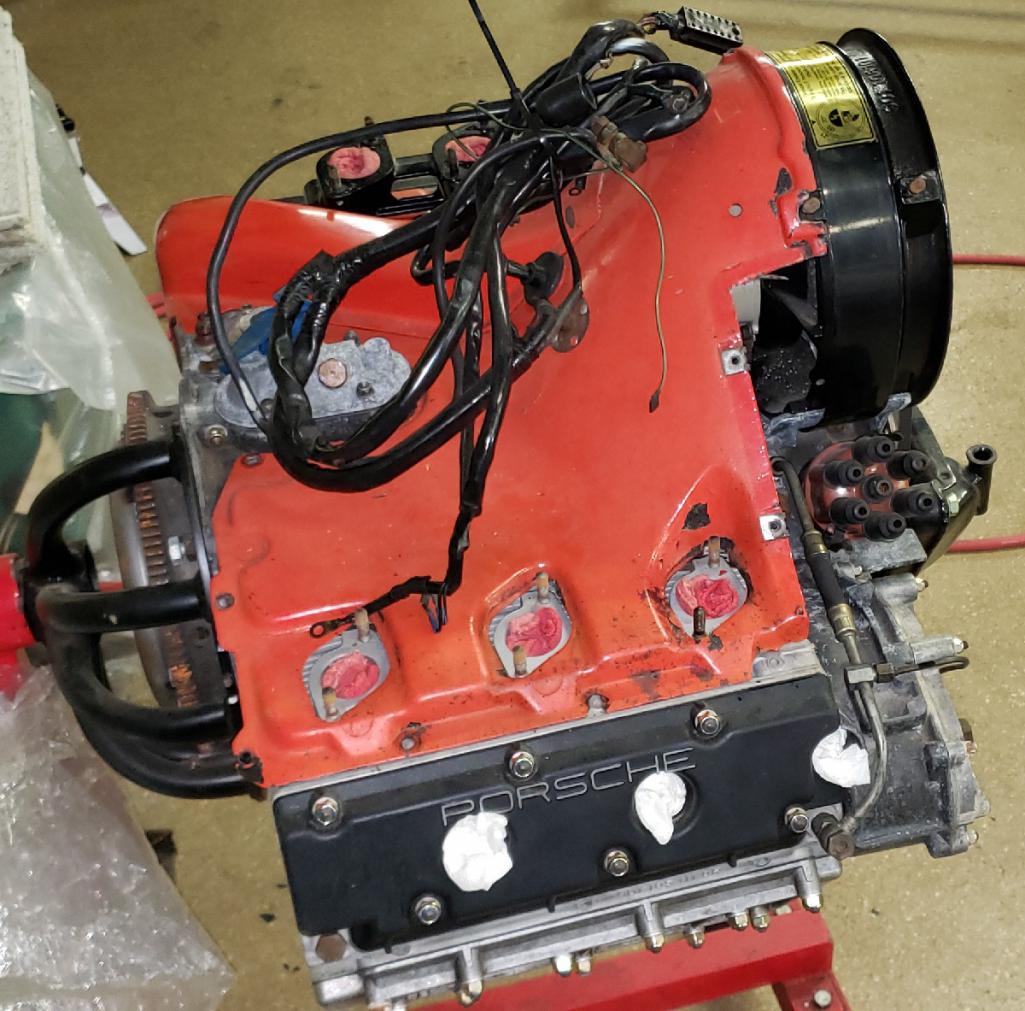
Posted by: porschetub Jan 14 2020, 10:39 PM
Great work and looks real nice ,love my silver car but these cars tend to pop when painted white...
Posted by: gms Jan 14 2020, 10:45 PM
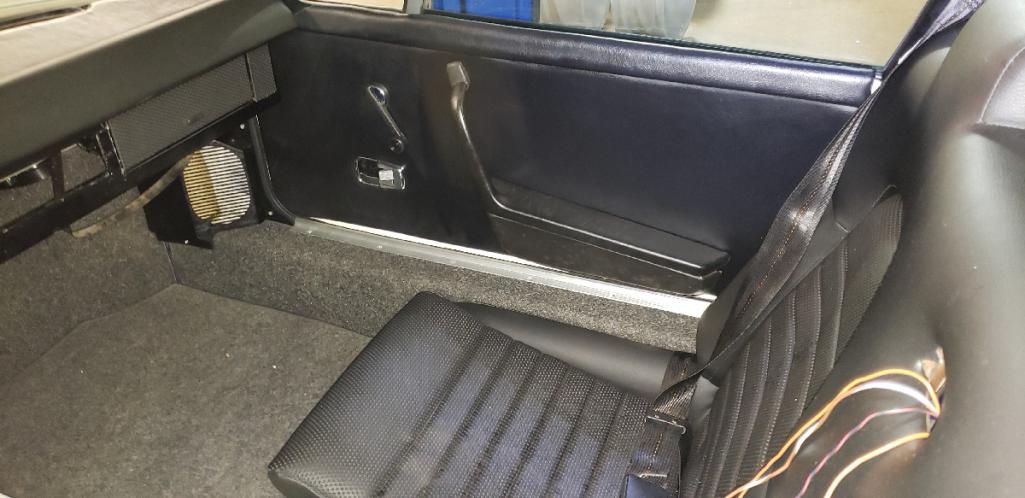
vinyl for side of tunnel by seat belt mounts.
top is original bottom is repro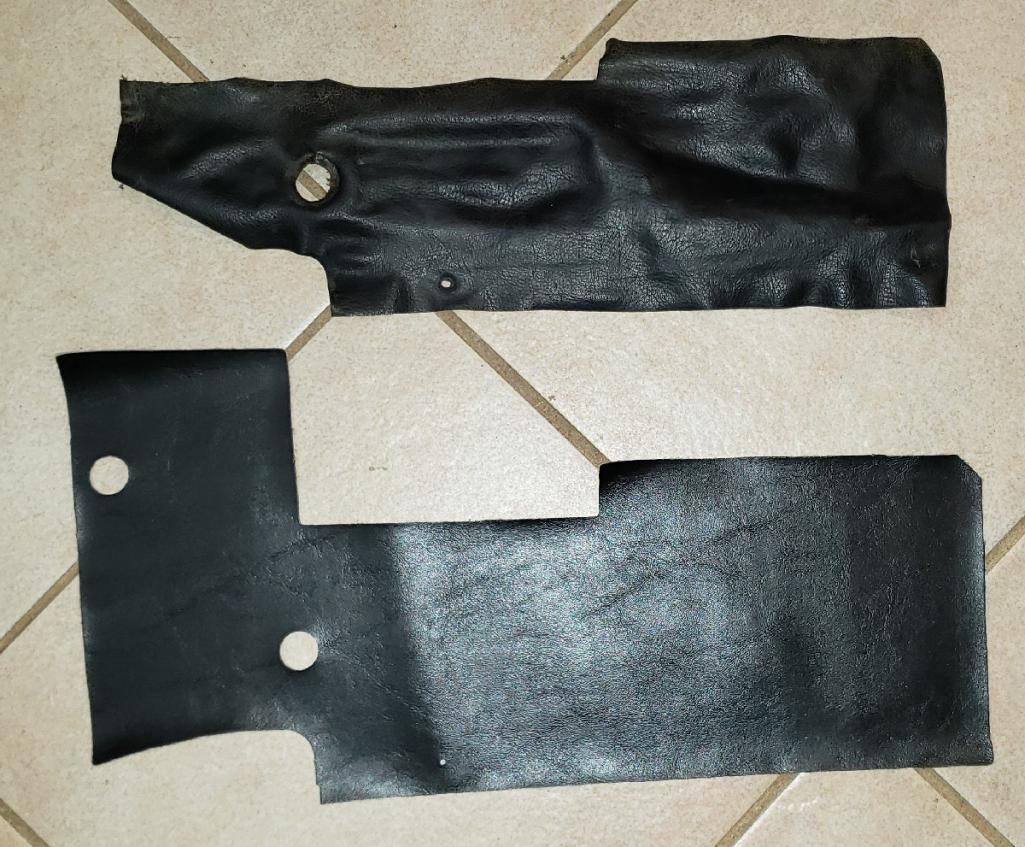
now they look correct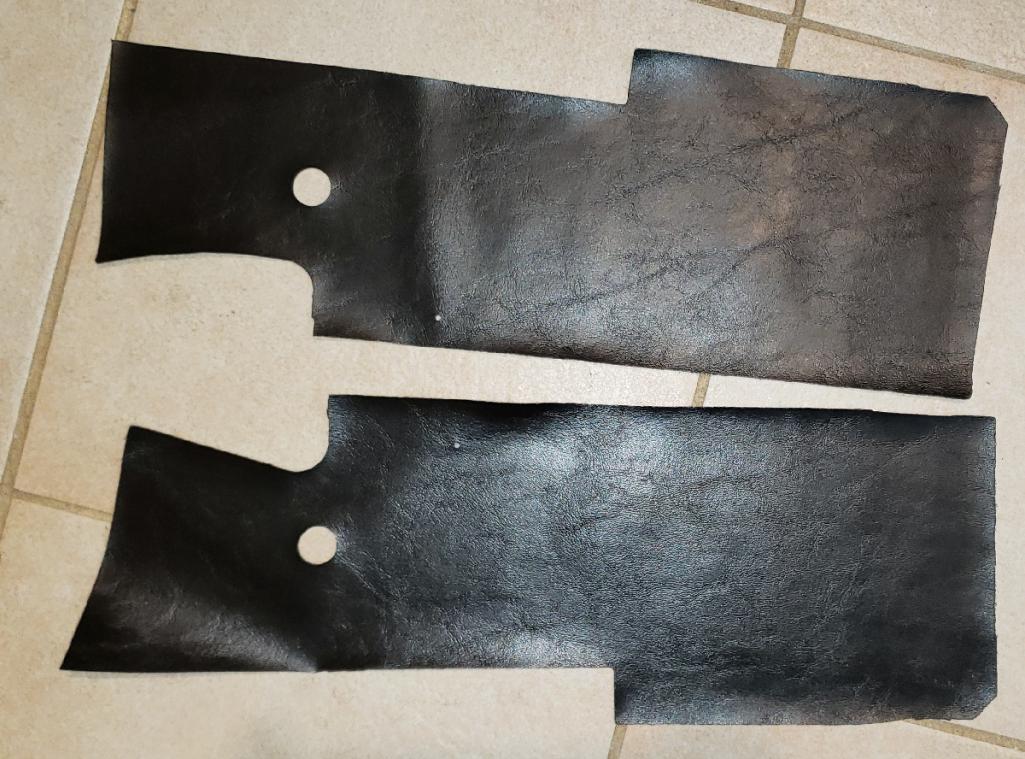
Posted by: gms Jan 14 2020, 10:46 PM
Great work and looks real nice ,love my silver car but these cars tend to pop when painted white...
thanks
the contrast of the white black and gold looks awesome
Posted by: gms Jan 14 2020, 10:49 PM
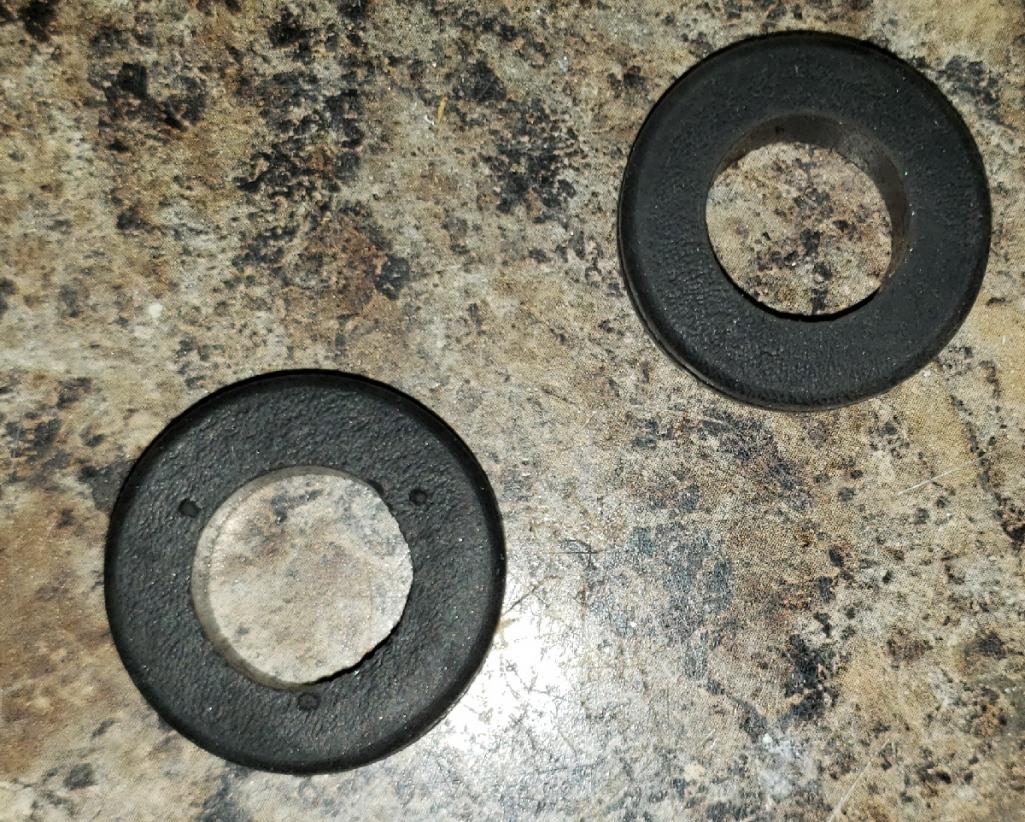
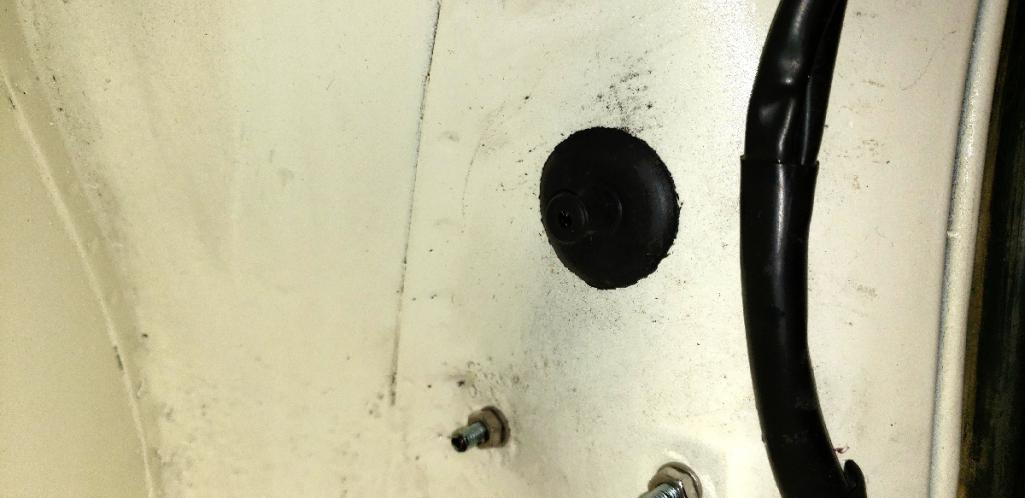
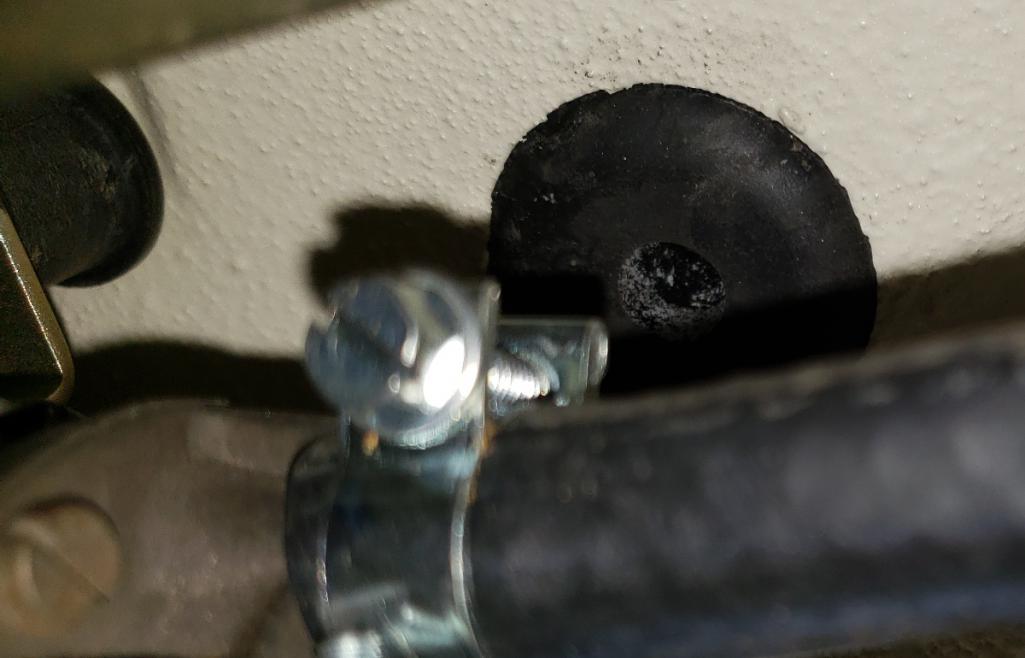
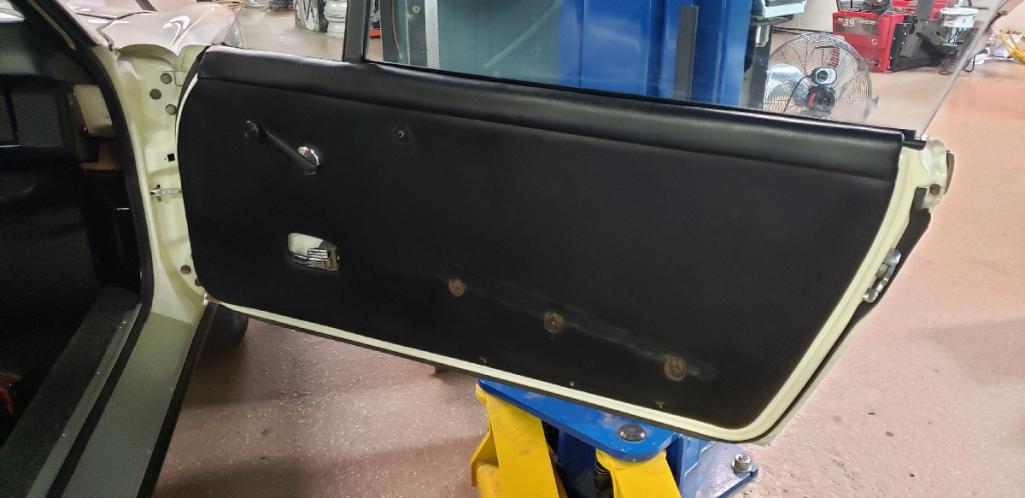
the door guts are in place just need to polish the aluminum door posts and the glass can go in.
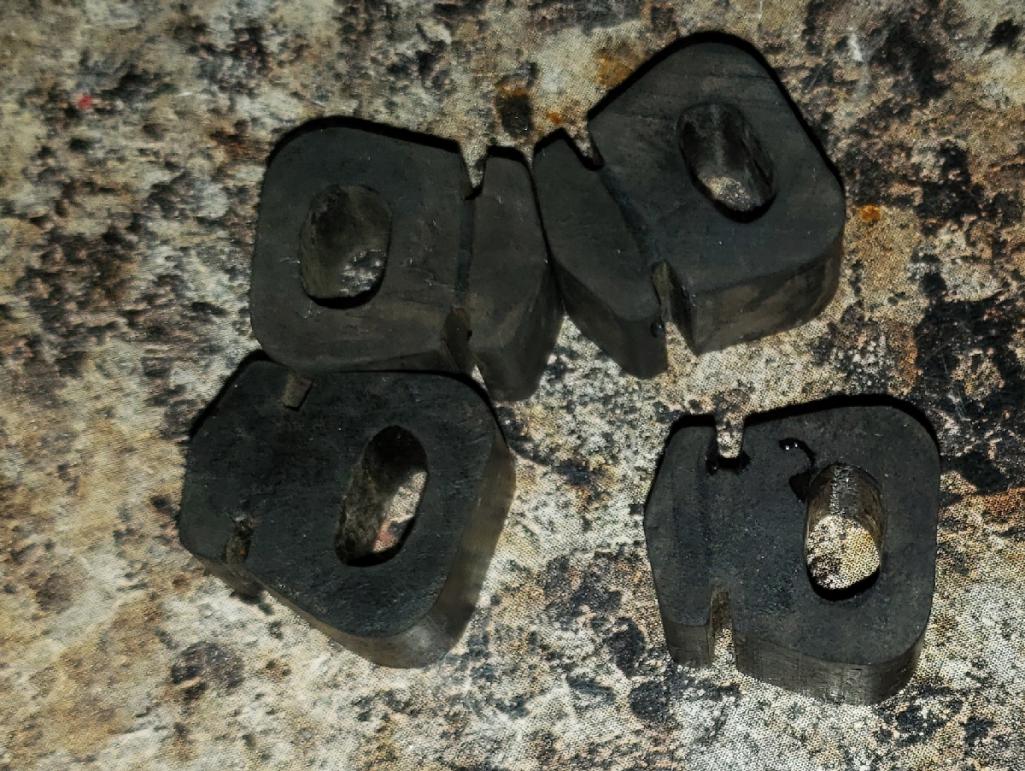
replaced grommets for door lift mechanism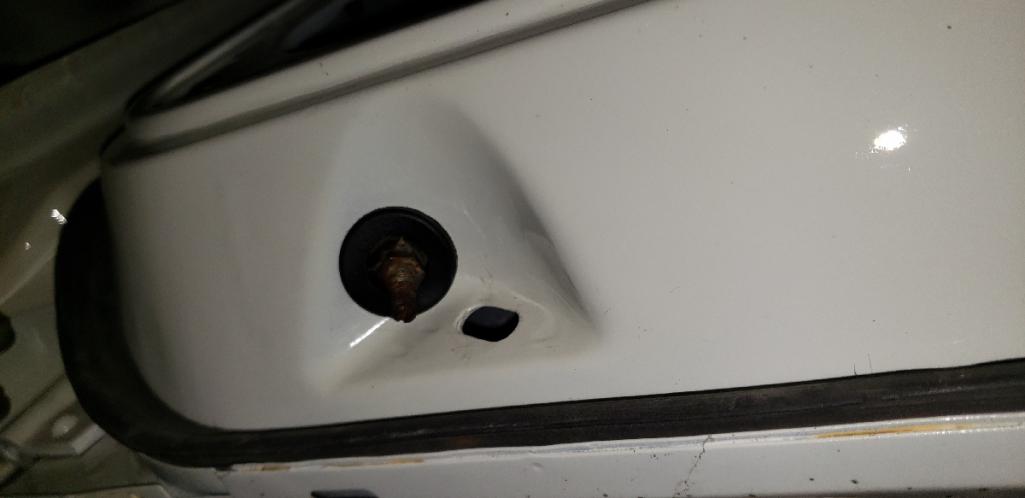
Posted by: gms Jan 14 2020, 10:58 PM
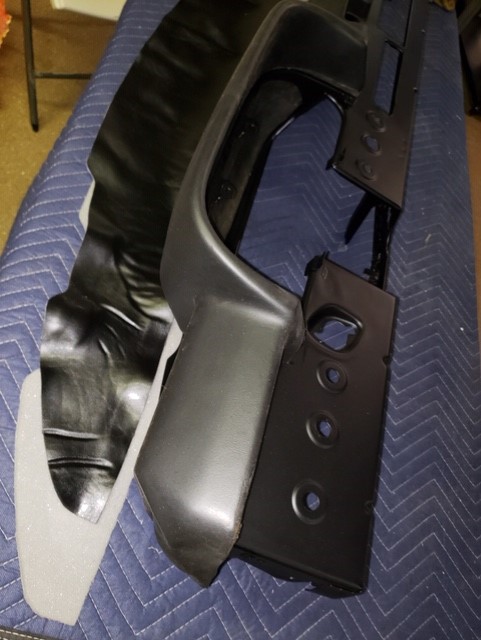
the rear bumper was just not up to the standard of this car so it will be replaced.
@http://www.914world.com/bbs2/index.php?showuser=10825 will be supplying the replacement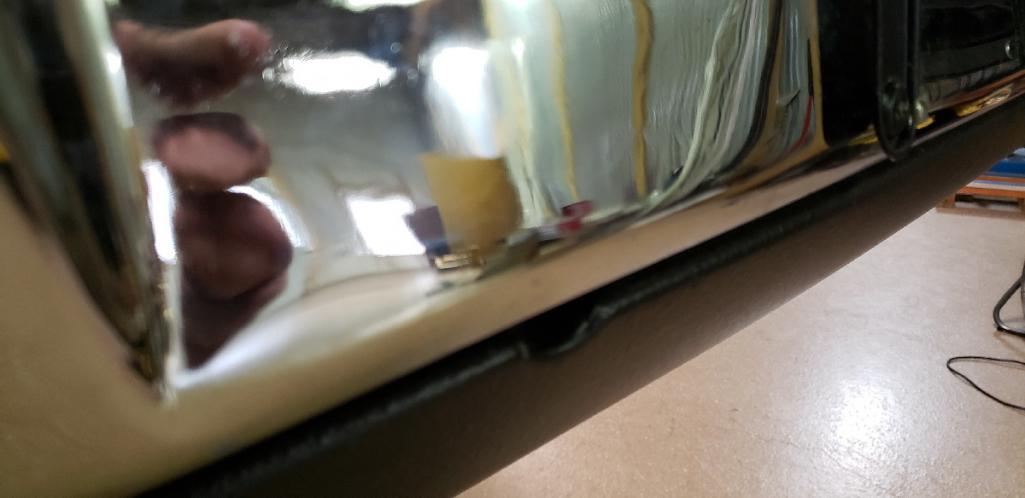
Posted by: mepstein Jan 14 2020, 11:00 PM
the rear bumper was just not up to the standard of this car so it will be replaced.
@http://www.914world.com/bbs2/index.php?showuser=10825 will be supplying the replacement
Yes, I just got home from Maine and was going to work on packing it up. I think you will be pleased.
I usually just ship bumpers in a cardboard snowboard box but that won't cut it for this one. I have to find a reinforced box or make something.
Posted by: gms Jan 14 2020, 11:05 PM
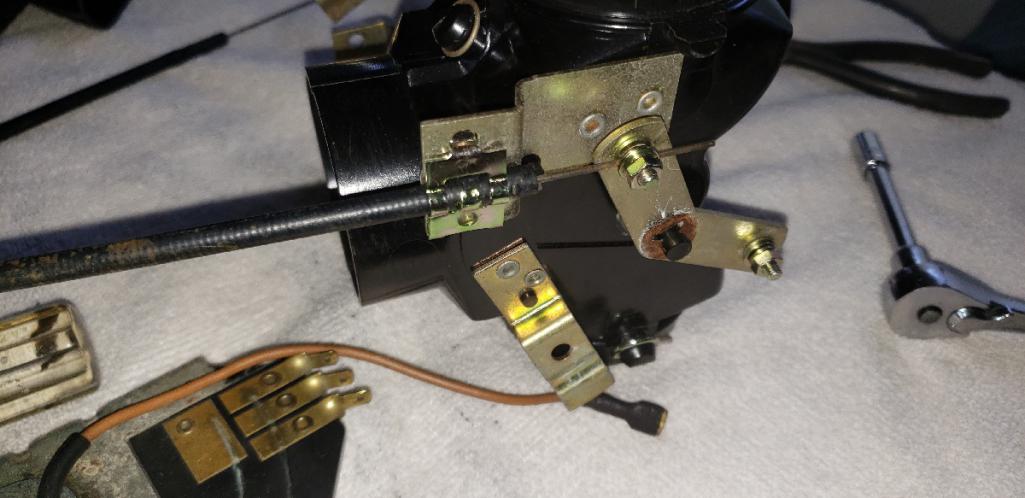
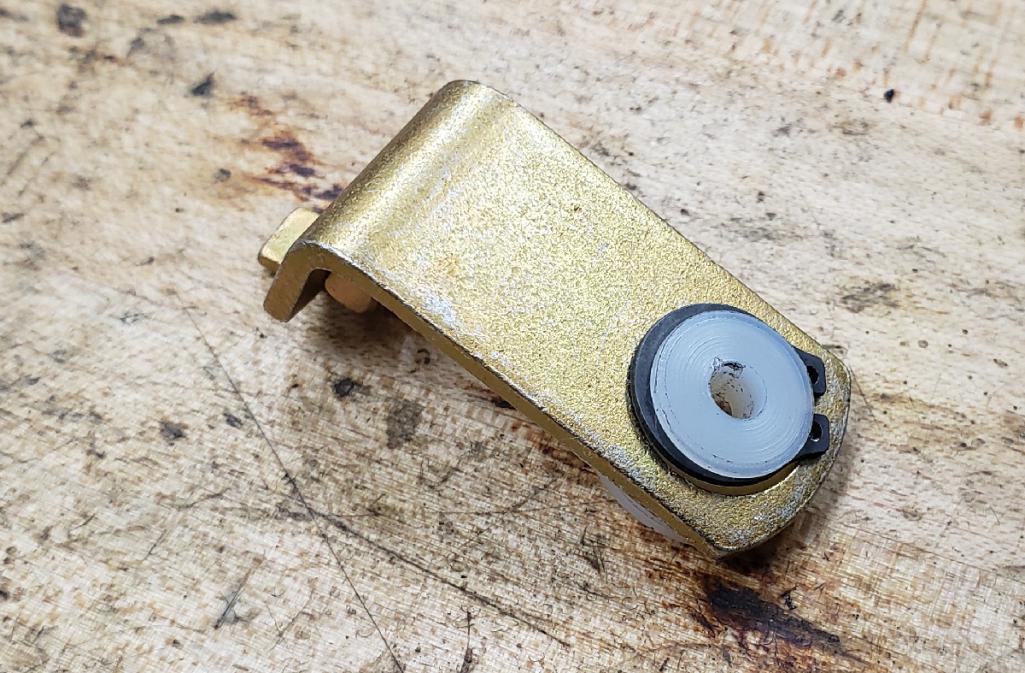
The transaxle was stripped down to replate the faded items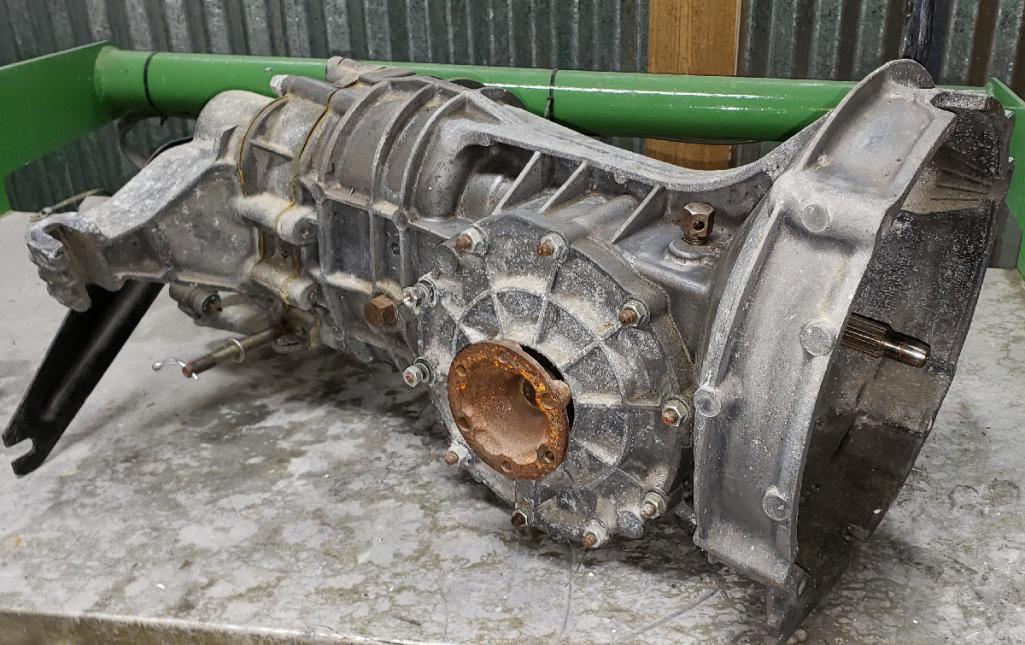
Bell crank need plating and new bushings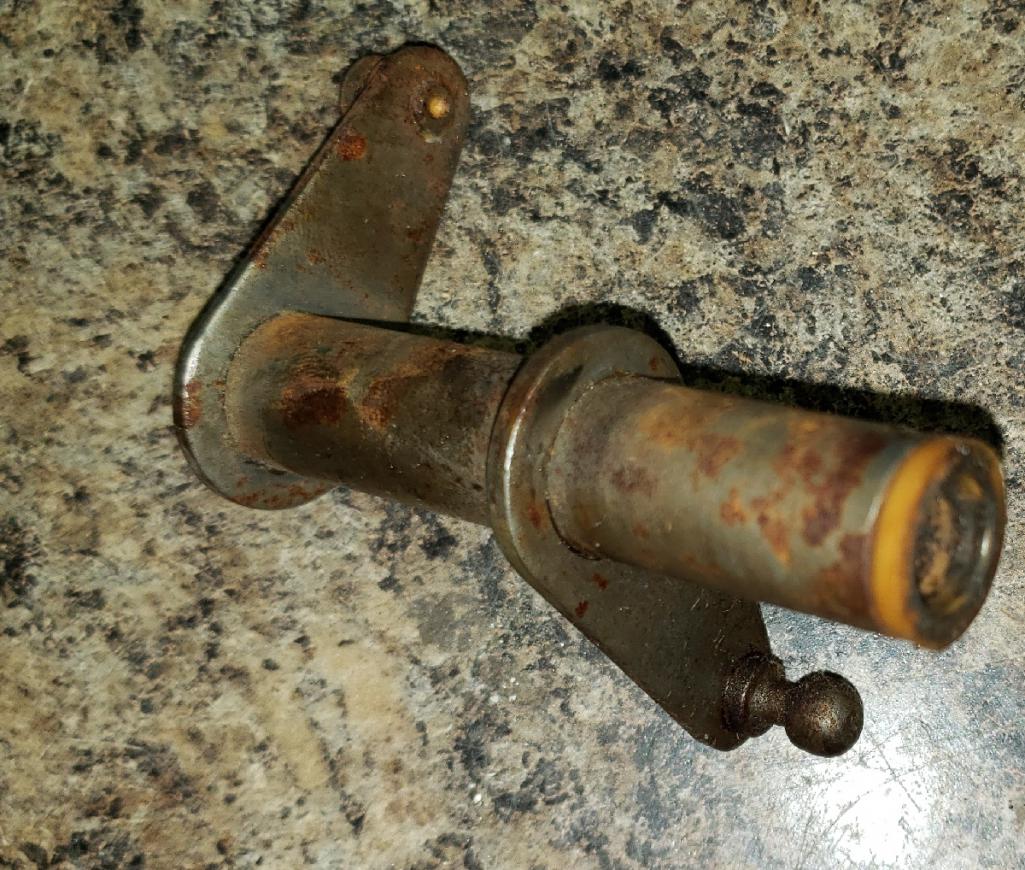
Posted by: gms Jan 14 2020, 11:09 PM
Hawk ceramic compound brake pads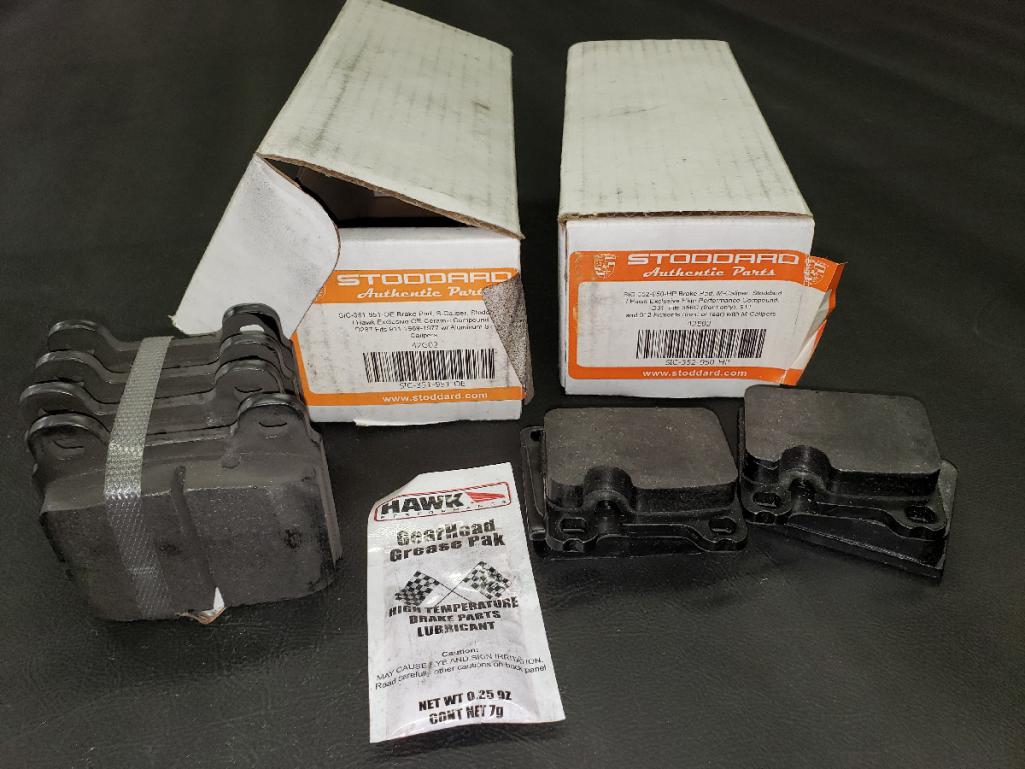
Posted by: Matteo Jan 15 2020, 07:14 AM
Great Great job.
congratulation
Posted by: Cairo94507 Jan 15 2020, 08:27 AM
Posted by: Targa70 Jan 15 2020, 11:25 AM
Fantastic job Glen. I’m in total awe.
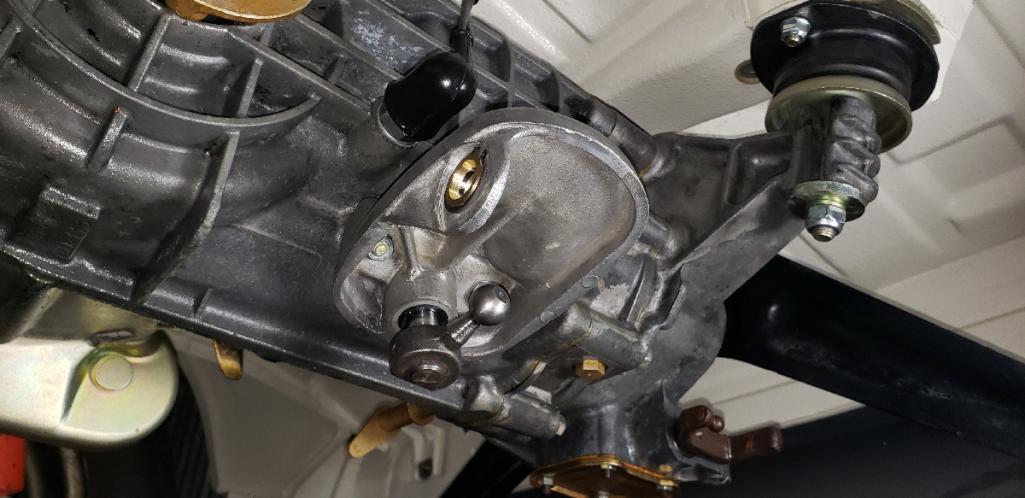
Posted by: gms Jan 15 2020, 08:14 PM
Thanks everyone!
I put some Gibbs oil and the trans looks much better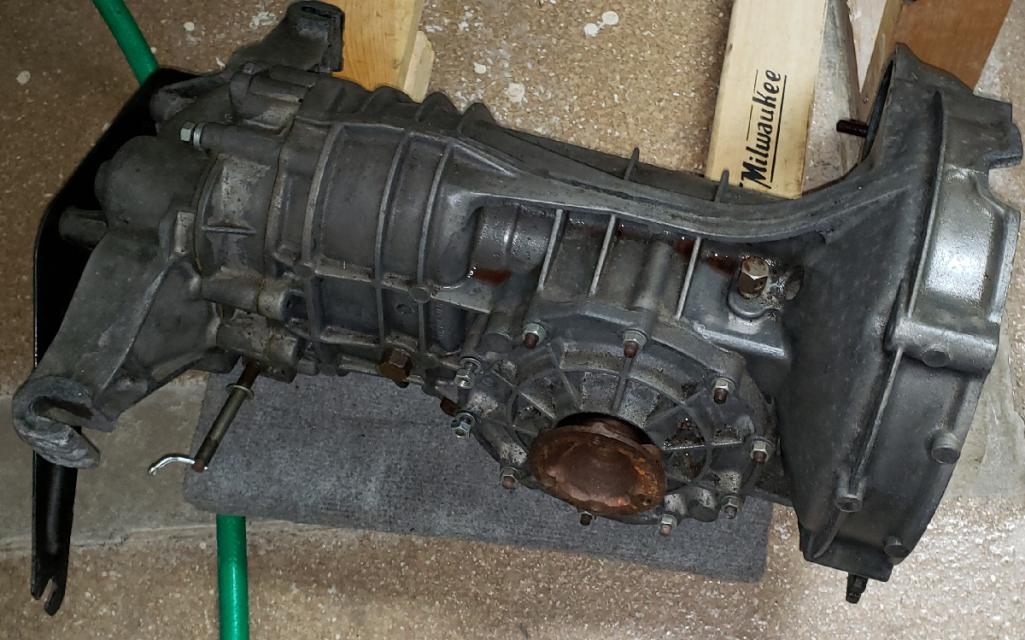
new bell crank rod and other plated items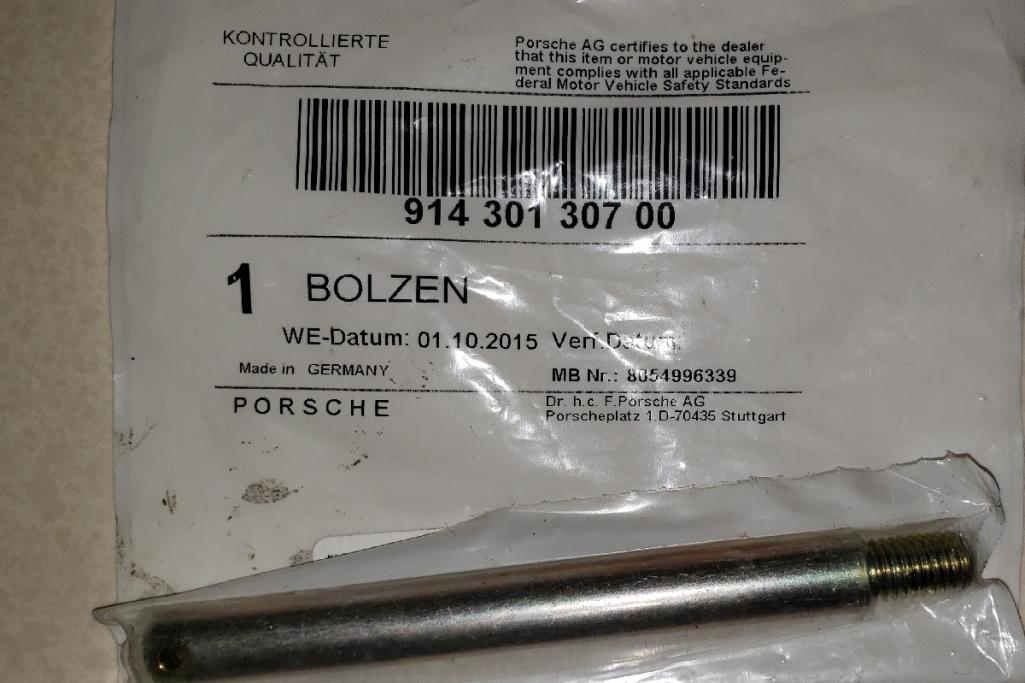
Posted by: bbrock Jan 15 2020, 09:24 PM
I'm loving this build. Great work!
Posted by: gms Jan 21 2020, 08:20 PM
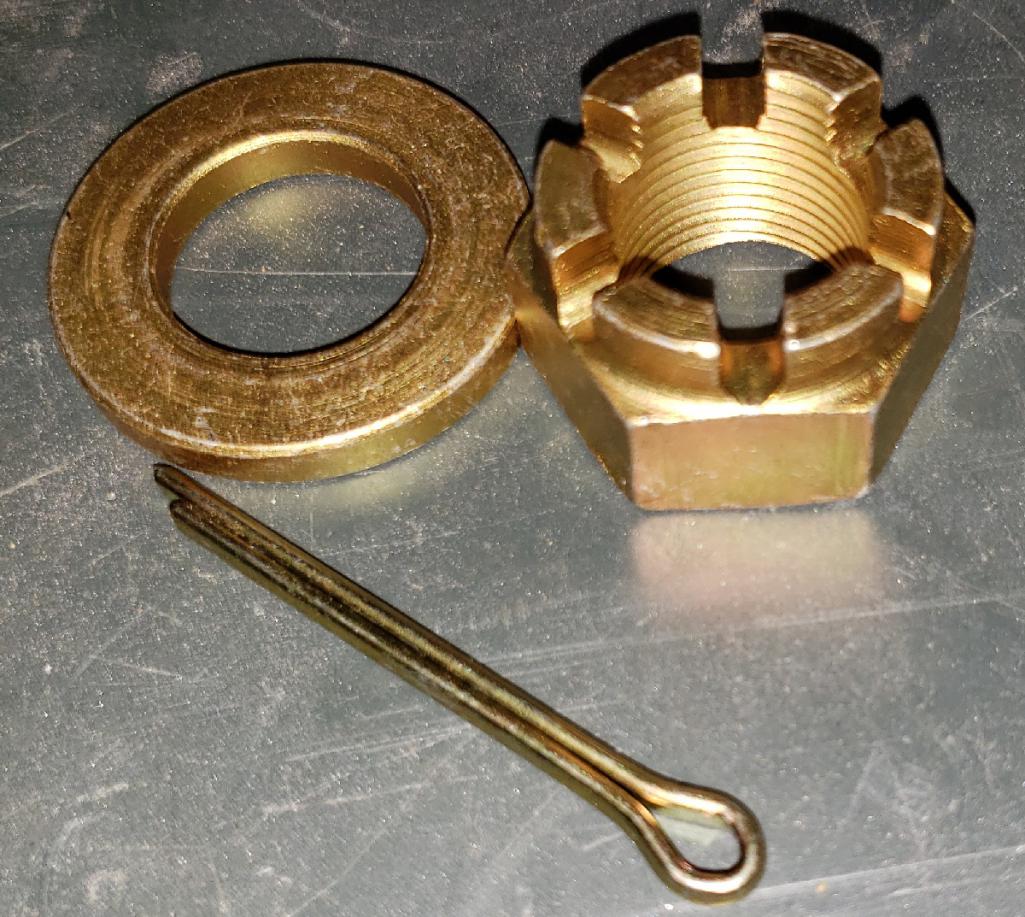
found the rear vented rotor brake hardware kit on Amazon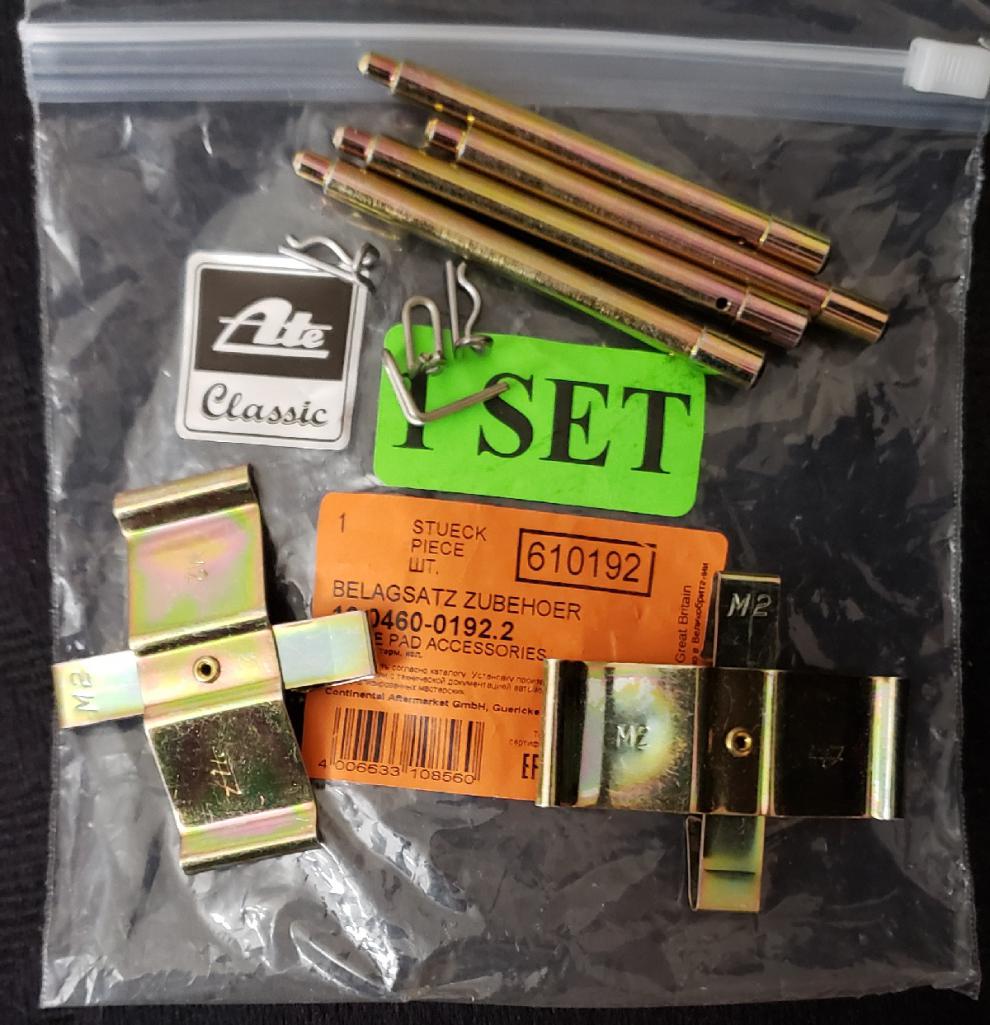
Posted by: gms Jan 21 2020, 08:23 PM
The bumper came in from @mepstein...what a world of difference
well packed!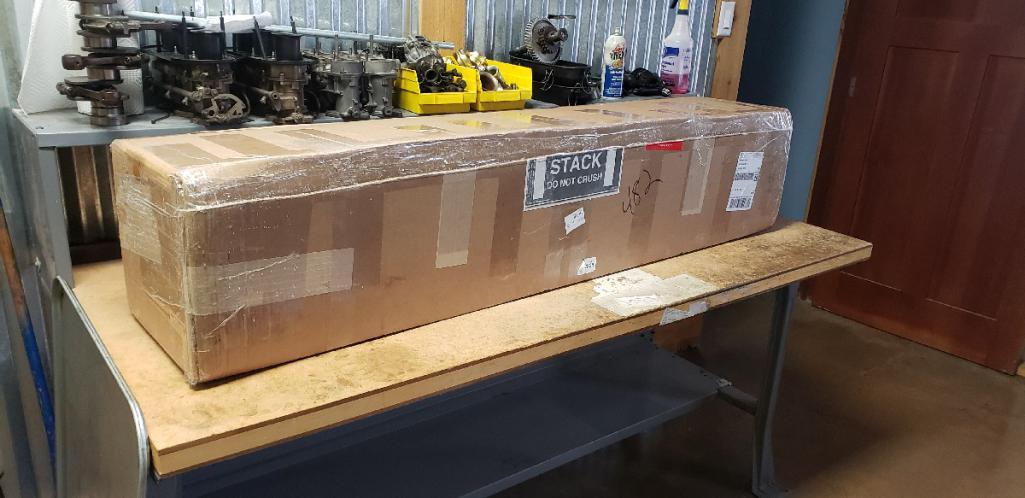
Posted by: gms Jan 21 2020, 08:27 PM
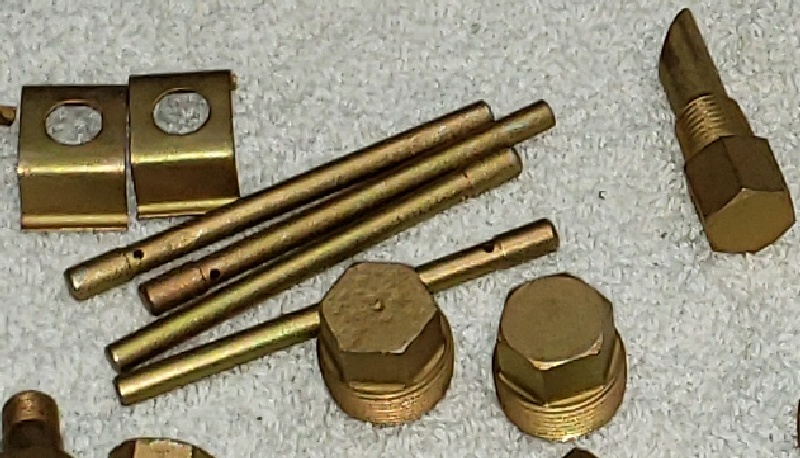
more powder coated parts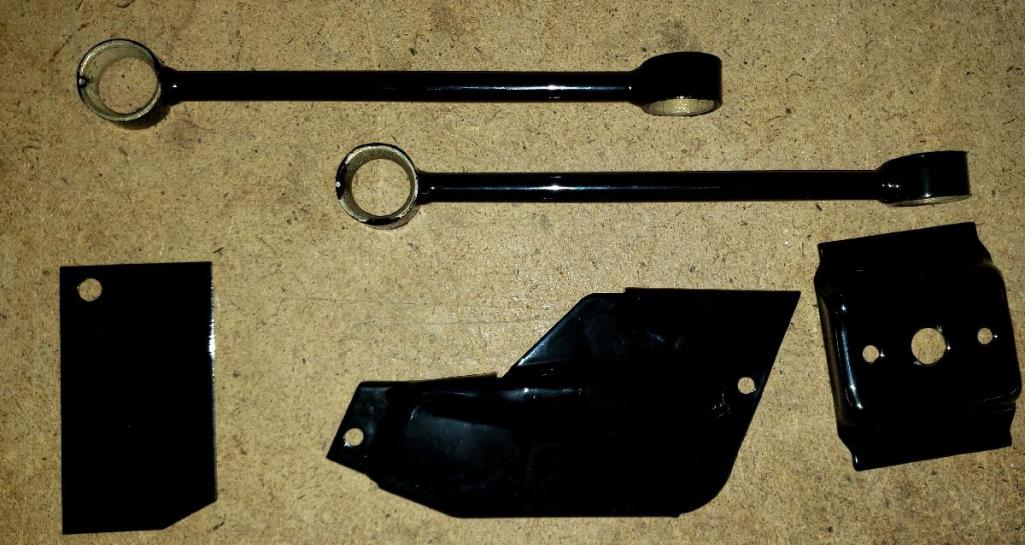
Posted by: rgalla9146 Jan 22 2020, 08:46 AM
more powder coated parts
Great job Glenn.
What is the lower left piece with the hole in it ?
Posted by: gms Jan 22 2020, 11:19 AM
What is the lower left piece with the hole in it ?
Dash plate far right side
Posted by: UROpartsman Jan 24 2020, 03:49 PM
finished up more of the plated parts on the suspension
Yours are already refinished so you wouldn't need them, but we do offer those Stabilizer Guide Plates (for the front stabilizer lever bolts, p/n 901 343 763 00-PRM) in stainless steel, which are then gold cad plated for proper appearance. It's a nice upgrade for anyone with rusted or corroded factory plates.
Posted by: gms Jan 24 2020, 06:40 PM
finished up more of the plated parts on the suspension
Yours are already refinished so you wouldn't need them, but we do offer those Stabilizer Guide Plates (for the front stabilizer lever bolts, p/n 901 343 763 00-PRM) in stainless steel, which are then gold cad plated for proper appearance. It's a nice upgrade for anyone with rusted or corroded factory plates.
Sounds nice, will try that out on the next restoration!
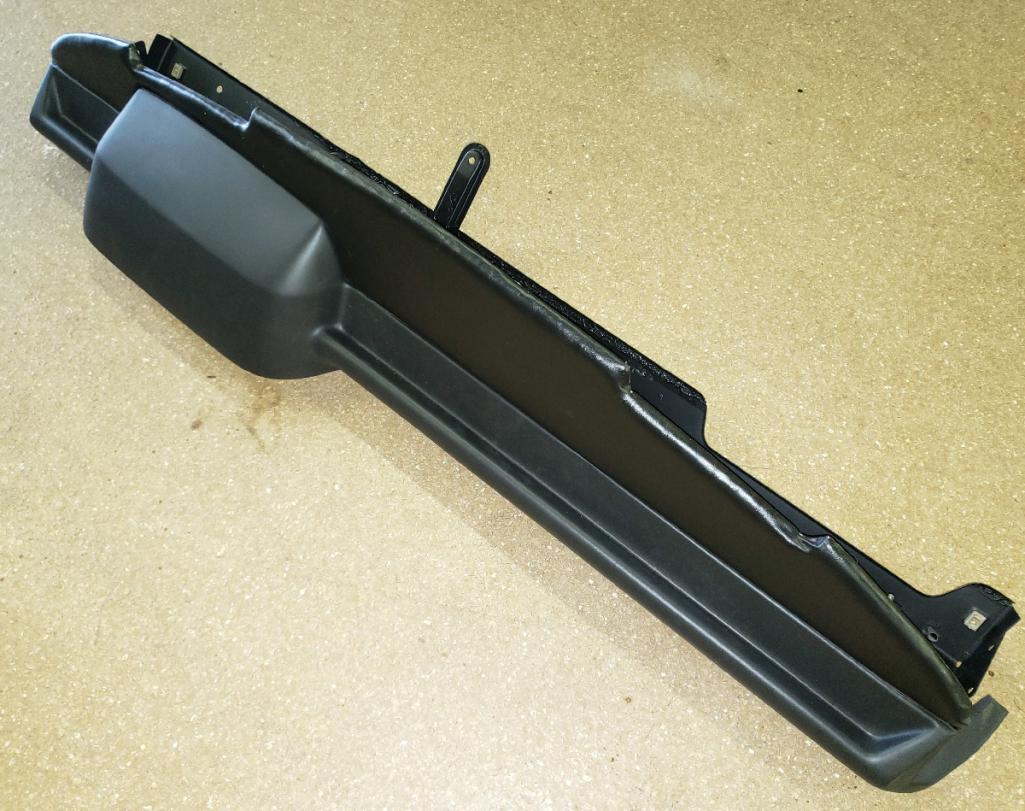
Posted by: gms Jan 31 2020, 02:48 PM
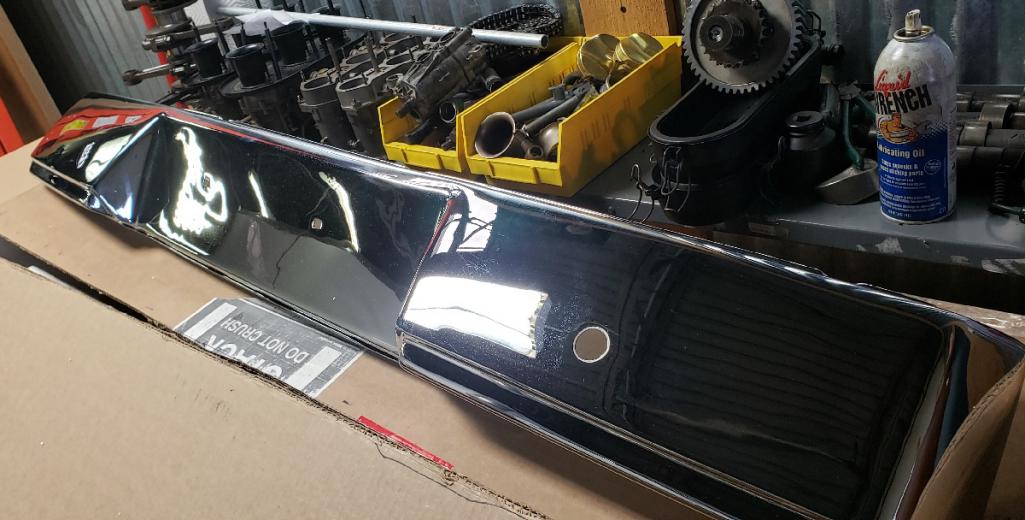
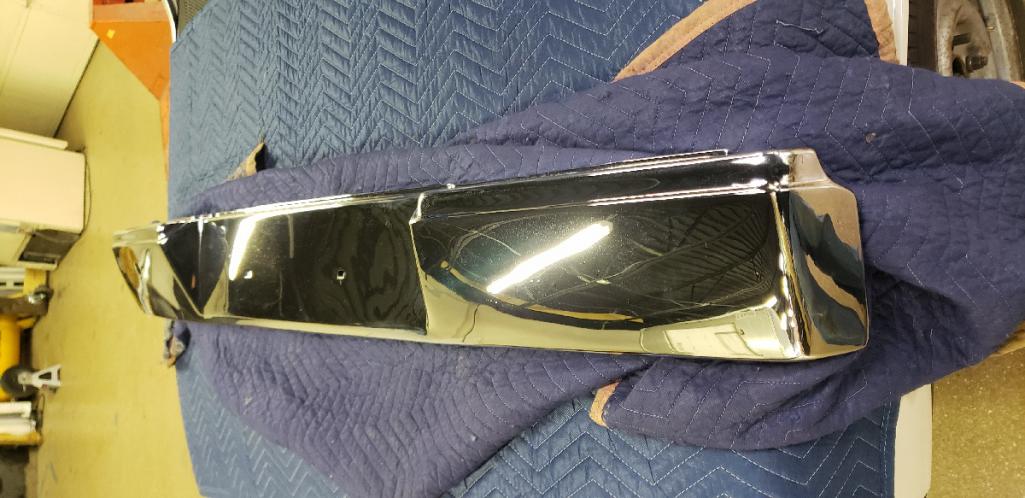
New bumper came in and it is much nicer than the last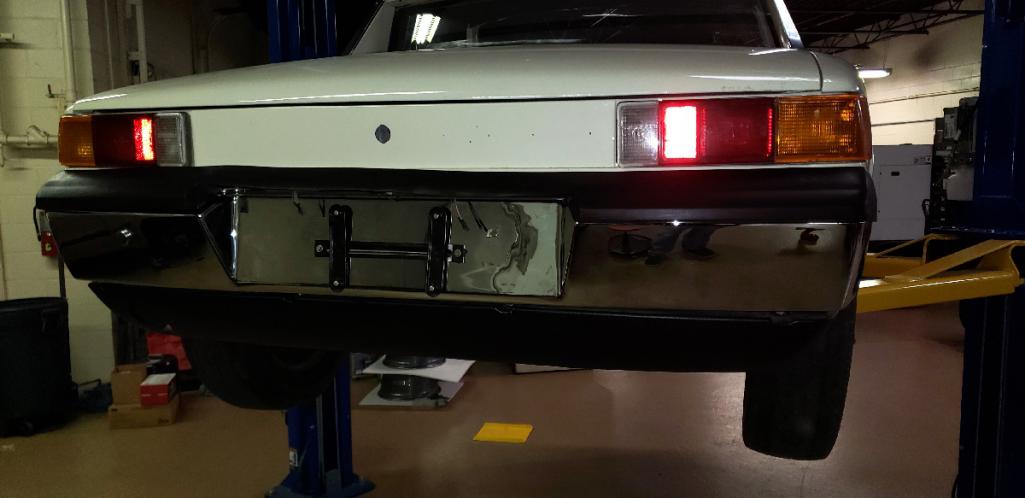
Posted by: gms Jan 31 2020, 02:54 PM
Fitted up the engine sheet metal, just need a new harness from Perry and the engine goes into the car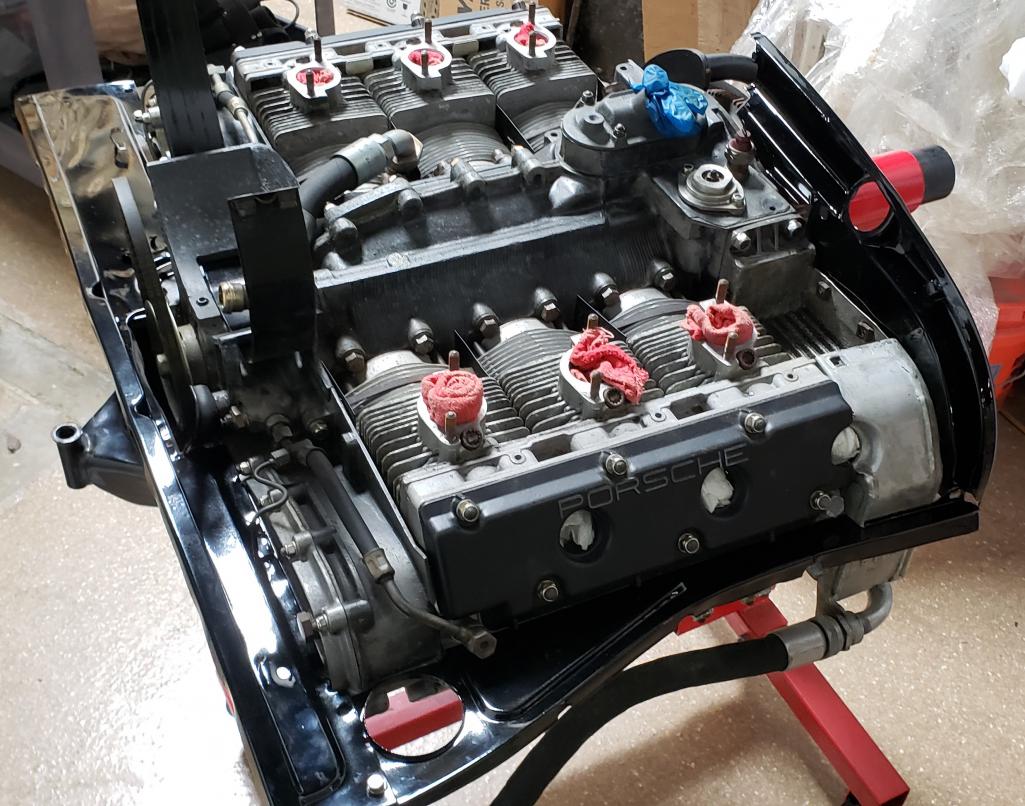
Posted by: gms Feb 1 2020, 07:33 PM
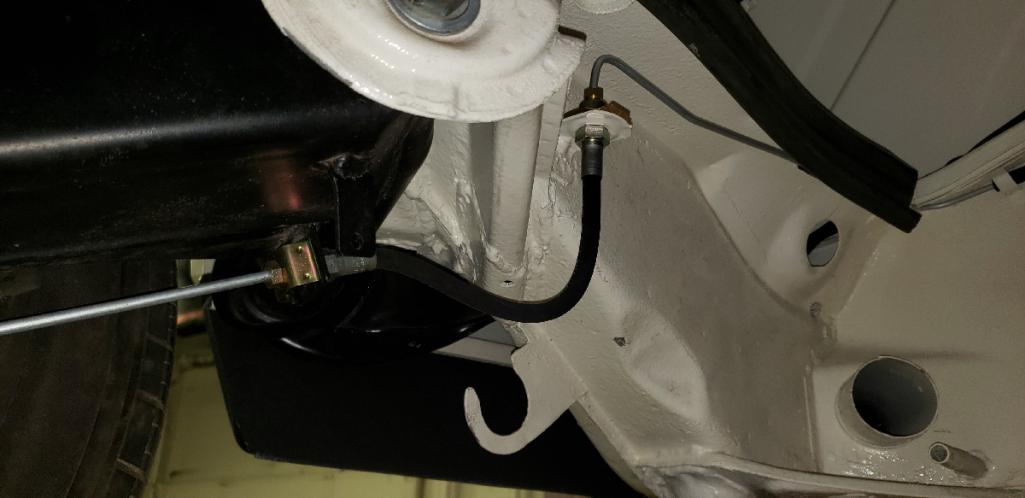
New hose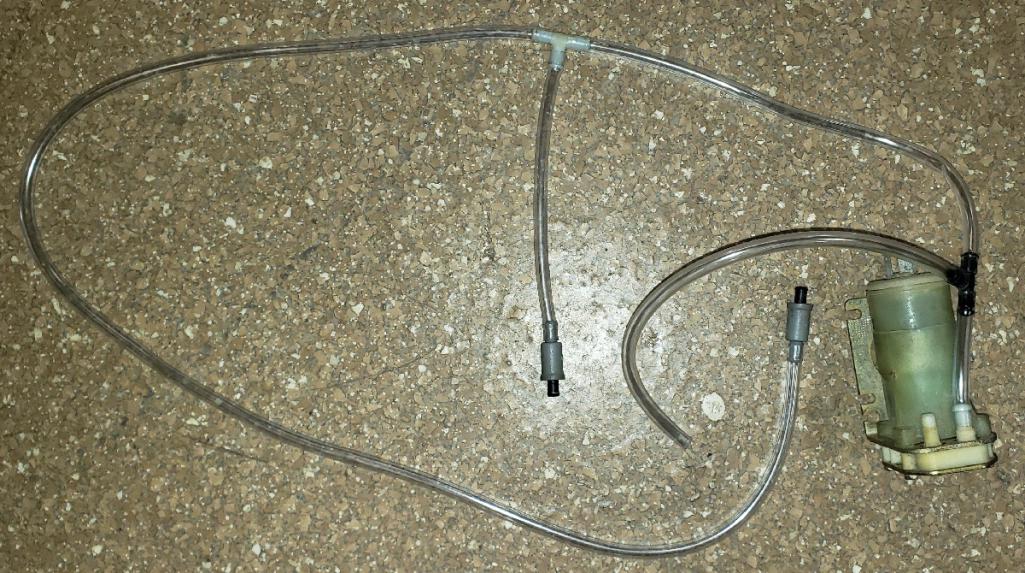
Posted by: gms Feb 1 2020, 07:34 PM
Euro badge fitted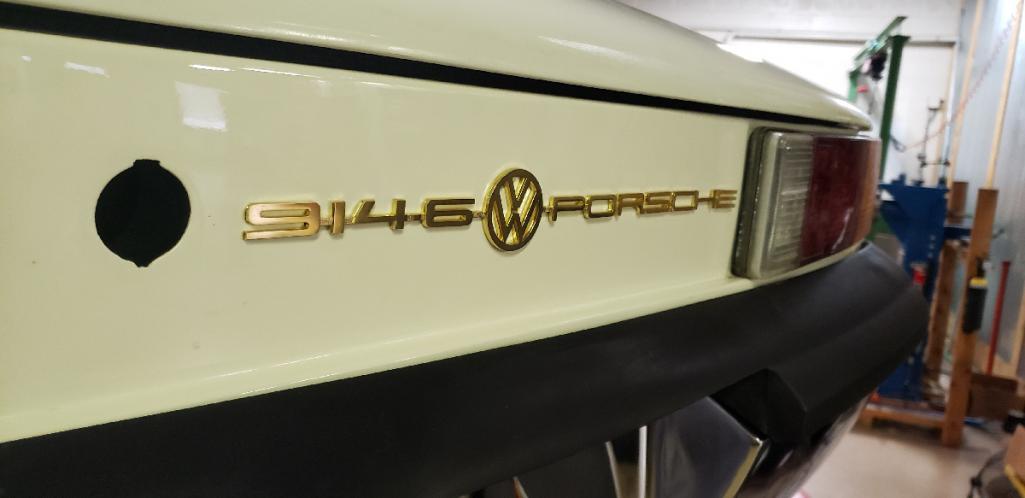
Posted by: gms Feb 1 2020, 07:35 PM
fuel pump ready to connect to fuel lines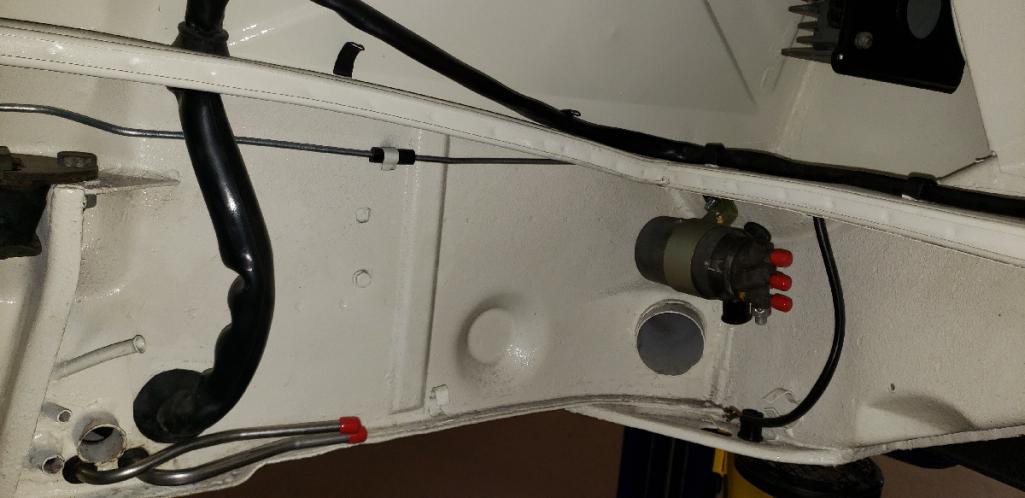
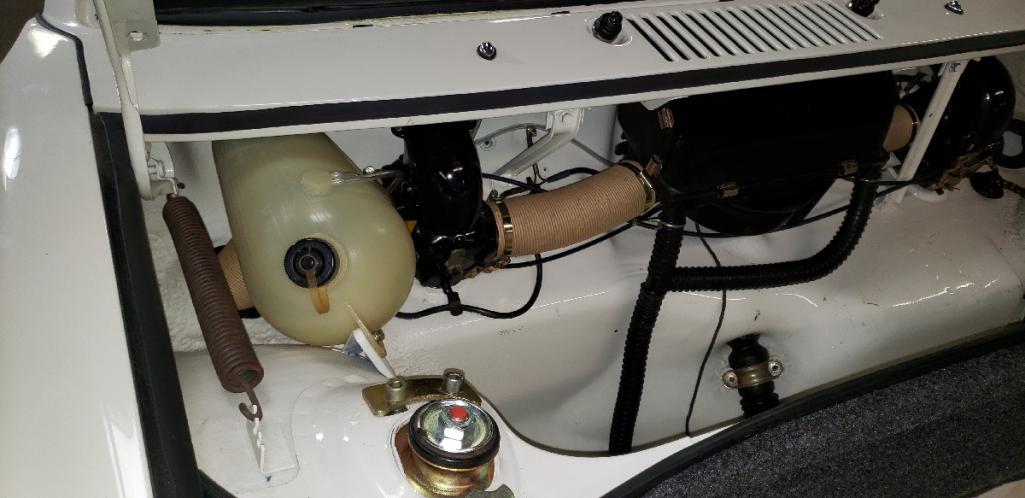
Posted by: gms Feb 16 2020, 09:12 PM
fuel lines in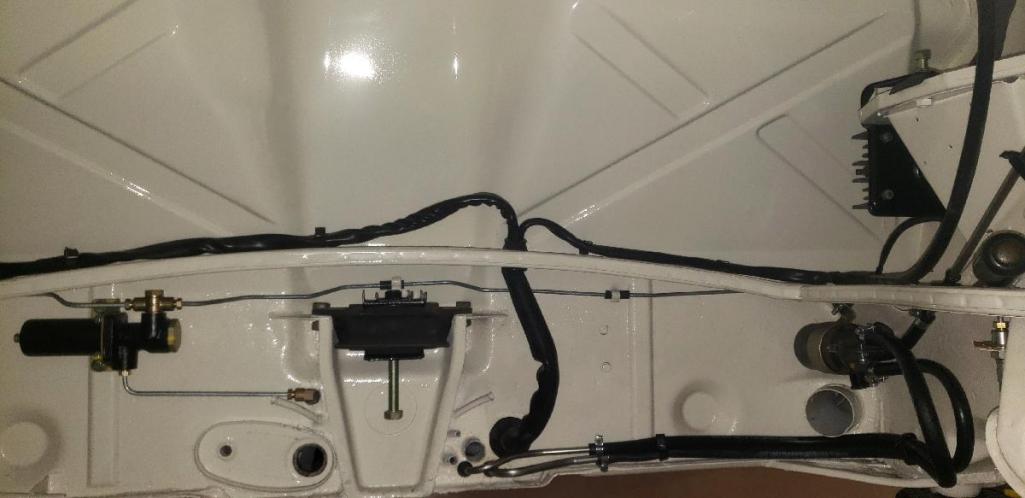
Posted by: gms Feb 16 2020, 09:14 PM
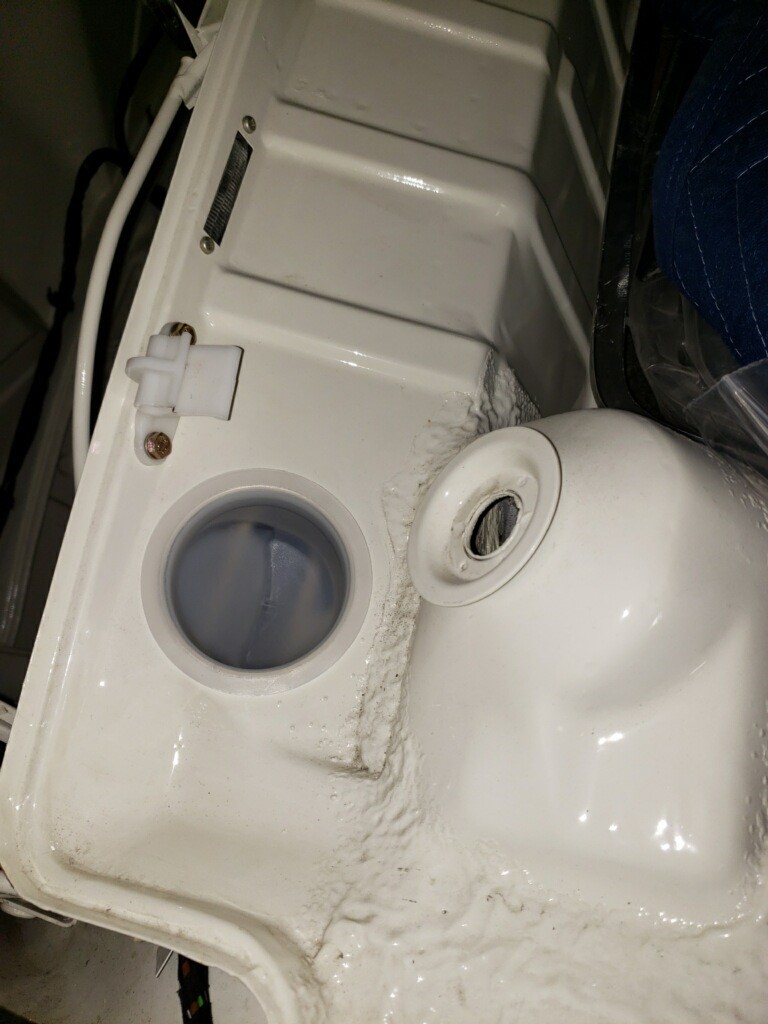
installed oil tank today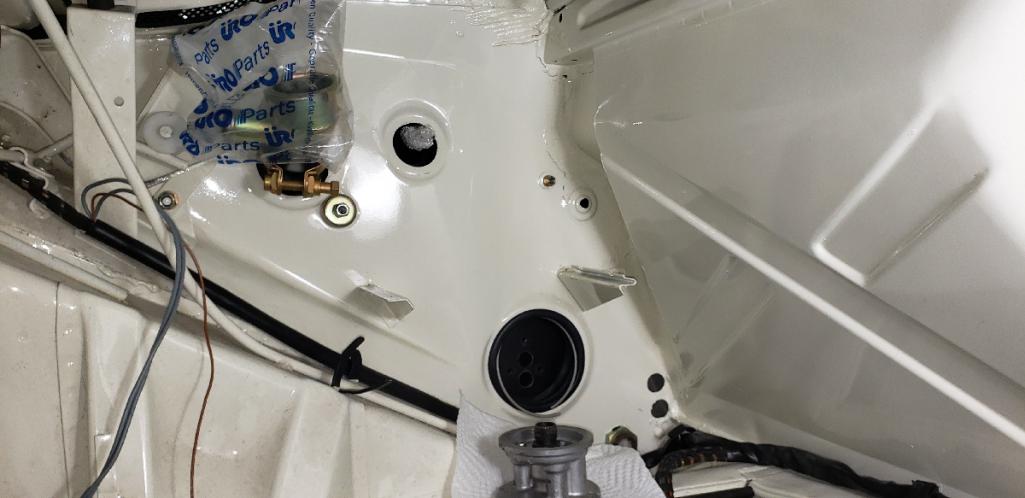
Posted by: gms Feb 16 2020, 09:46 PM
back targa bar trim, this is another nice Uro repro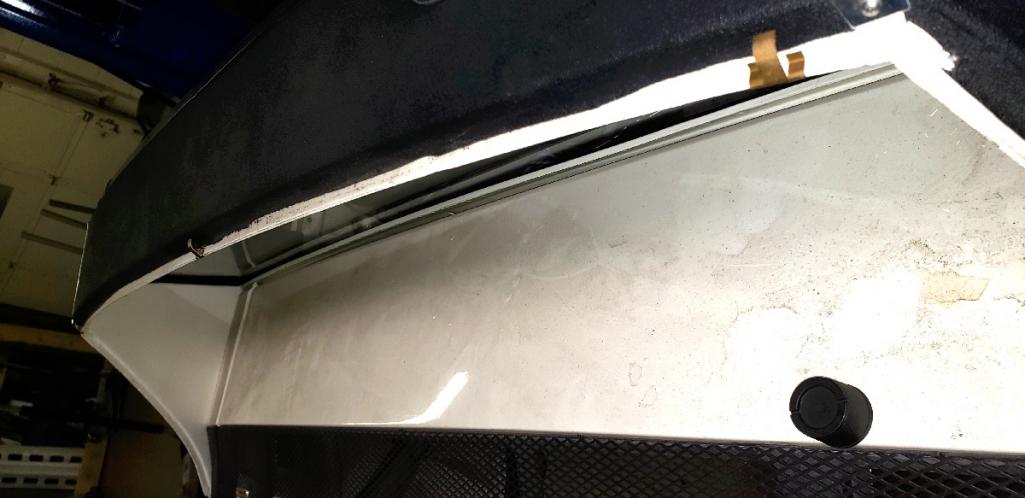
side view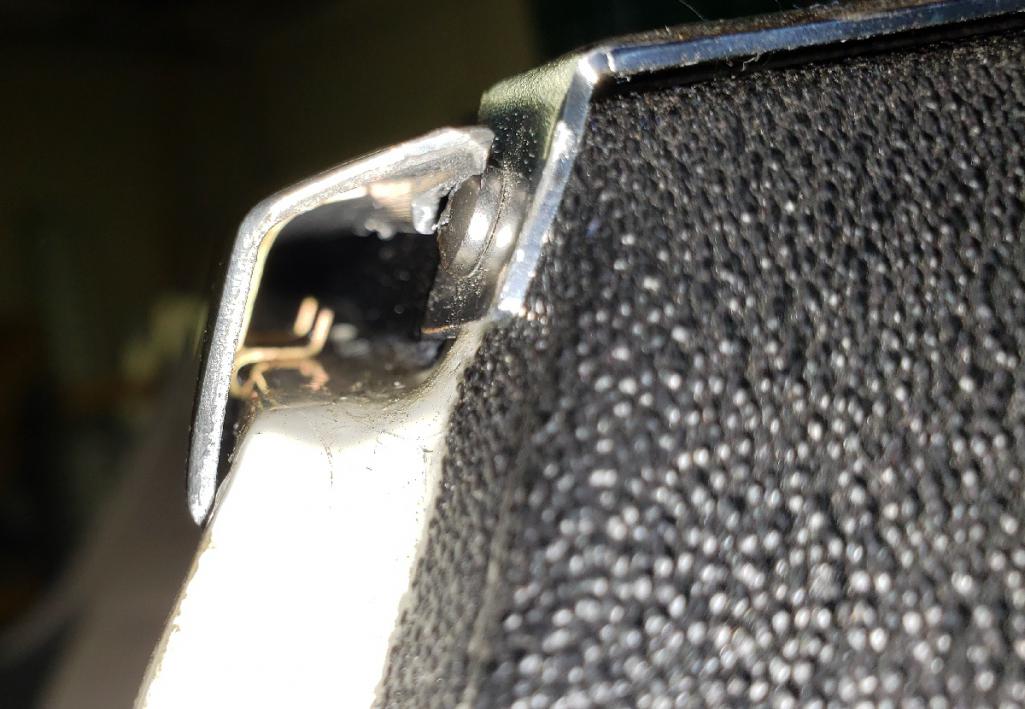
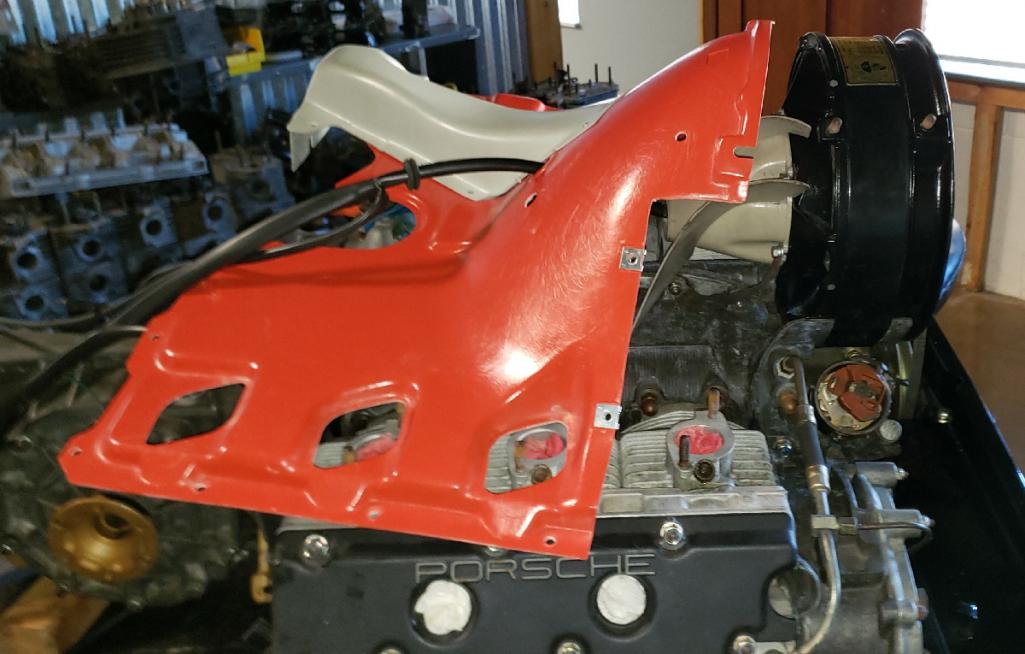
Posted by: gms Feb 20 2020, 10:51 AM
fitting and assembling engine shroud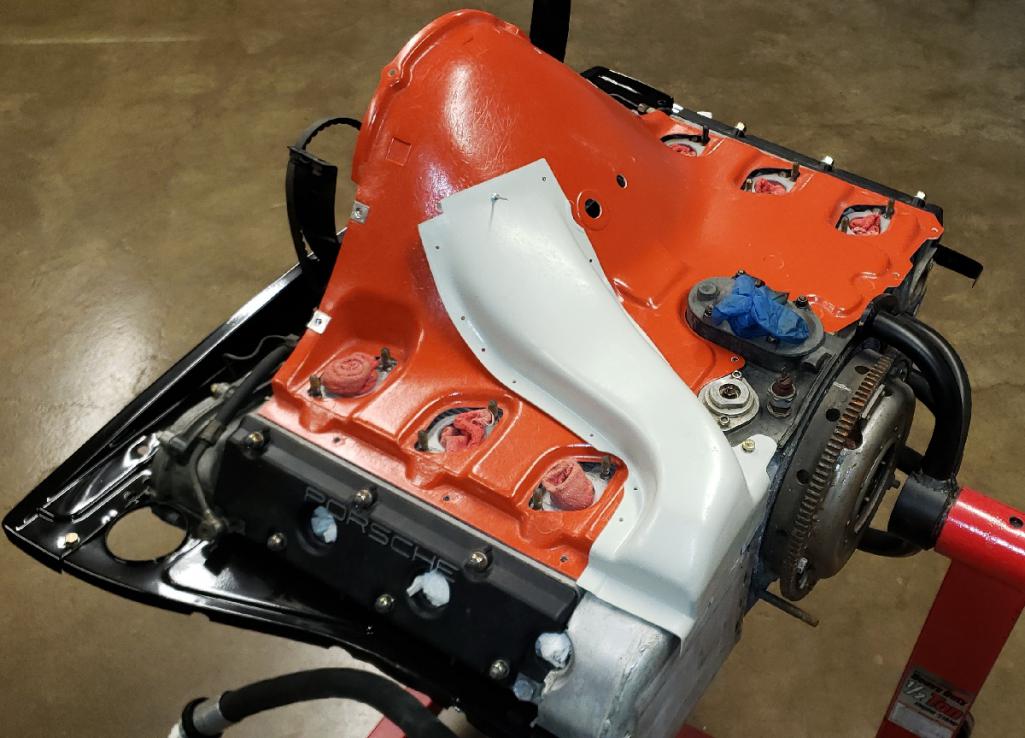
Posted by: gms Feb 23 2020, 06:04 PM
@http://www.914world.com/bbs2/index.php?showuser=439 /6 engine wiring harness!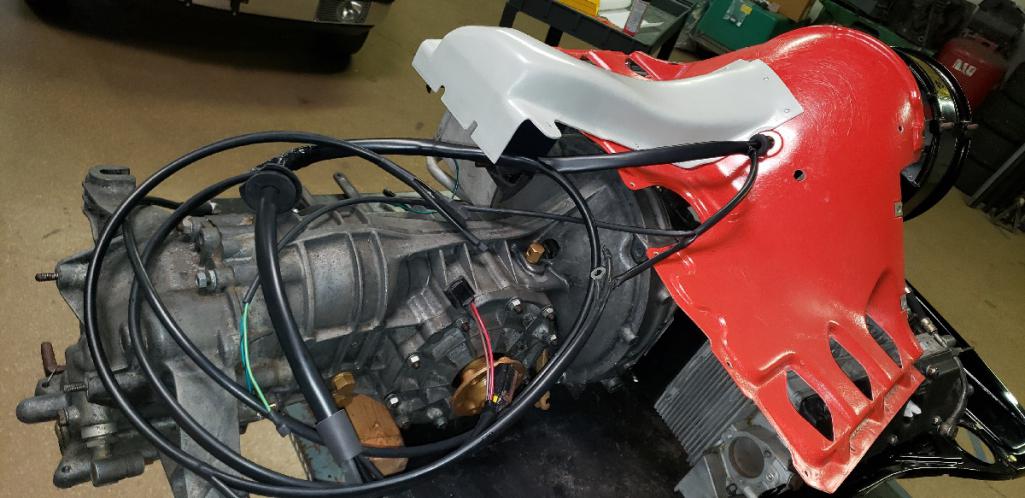
Posted by: Jamie Feb 23 2020, 07:40 PM
fuel pump ready to connect to fuel lines
I'm curious why you didn't relocate the fuel pump to the front while you had the option to avoid any future potential vapor locking from engine compartment heat soak?.
Posted by: gms Feb 23 2020, 11:38 PM
fuel pump ready to connect to fuel lines
I'm curious why you didn't relocate the fuel pump to the front while you had the option to avoid any future potential vapor locking from engine compartment heat soak?.
First originality and second it is not and issue with carburetors lower pressure
Posted by: flyer86d Feb 23 2020, 11:39 PM
@http://www.914world.com/bbs2/index.php?showuser=439 /6 engine wiring harness!
What is the engine spec?
Charlie
Posted by: gms Feb 23 2020, 11:40 PM
getting close to engine install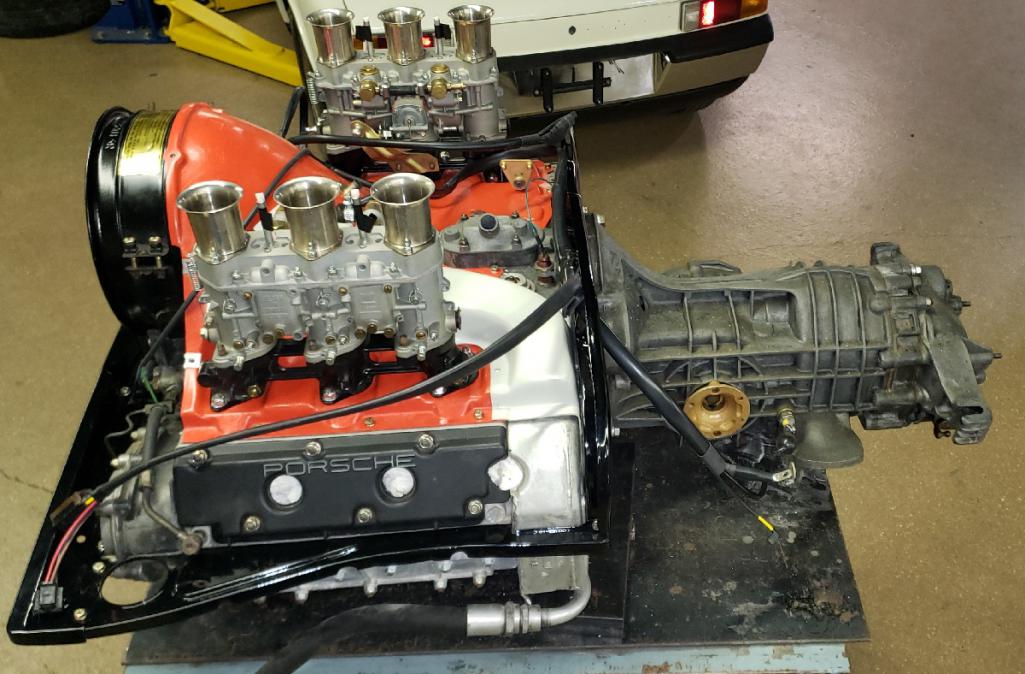
Posted by: gms Feb 23 2020, 11:47 PM
What is the engine spec?
Charlie
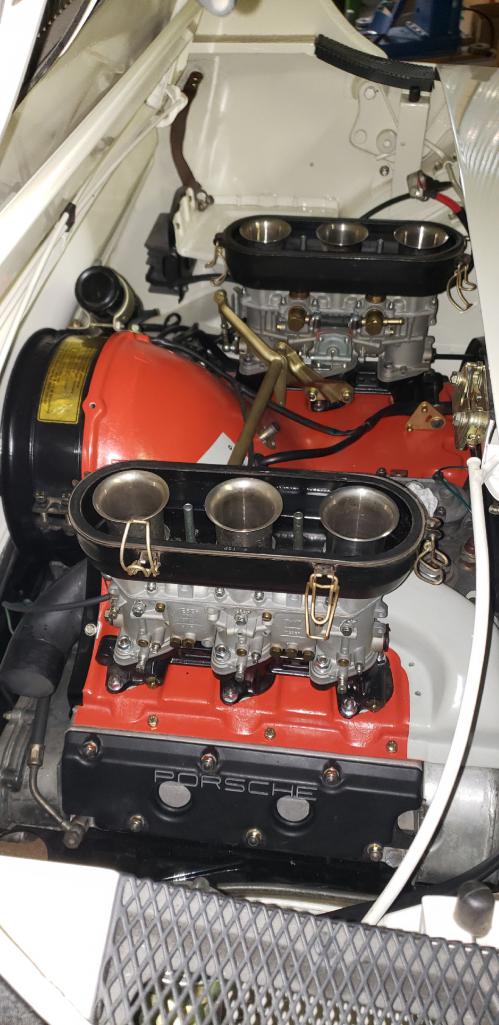
2.5 Liter, I know it has "S" heads but I am not sure what cams where used in the build.
Posted by: Targa70 Feb 24 2020, 01:19 PM
It may be a decision that I regret, but I traded out the Solex cams for E cams. I was shooting for drivability over HP.
Posted by: randyt914 Feb 24 2020, 01:42 PM
Build??? That car will probably get mothballed in Stazak's secret basement, which is kinda like Silence of the Lambs, but only with rare 914-6 parts
"
 put the CALIPERS IN THE BASKET"
Posted by: flyer86d Feb 24 2020, 06:24 PM
It may be a decision that I regret, but I traded out the Solex cams for E cams. I was shooting for drivability over HP.
Truth be told, they make great power when the Solex and S cams are trying to decide what to do. I like them.
Charlie
Posted by: gms Mar 6 2020, 08:59 PM
more engine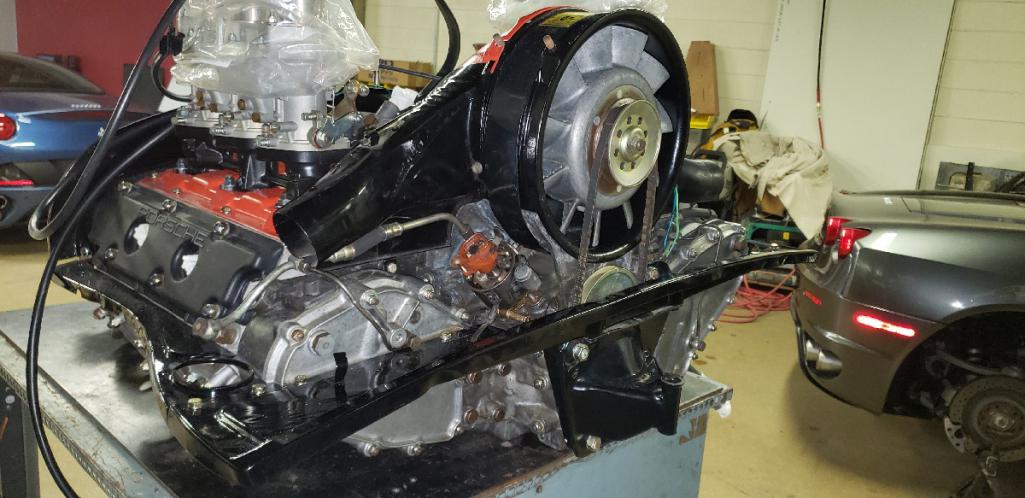
Posted by: gms Mar 6 2020, 09:02 PM
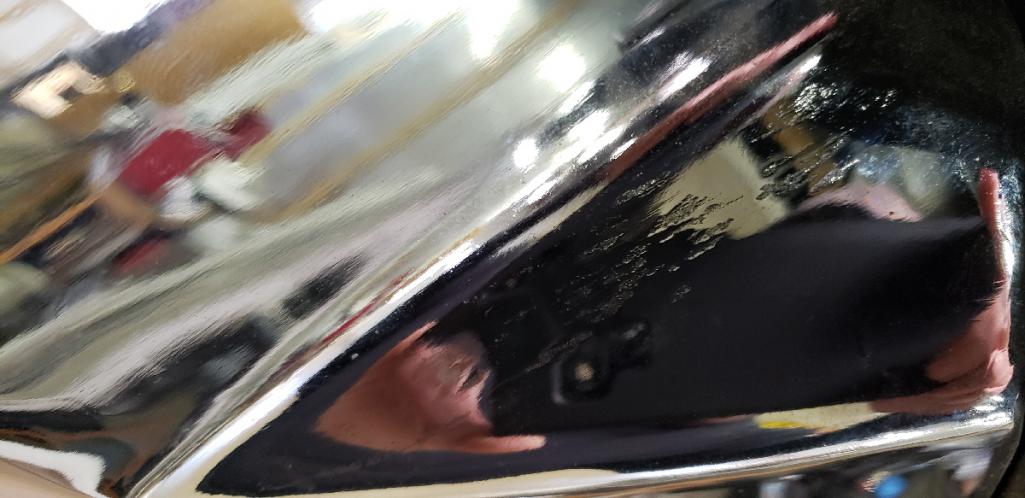
I used a chrome powder coat on the door post, turned out pretty well.
unfortunately the camera does not capture the finish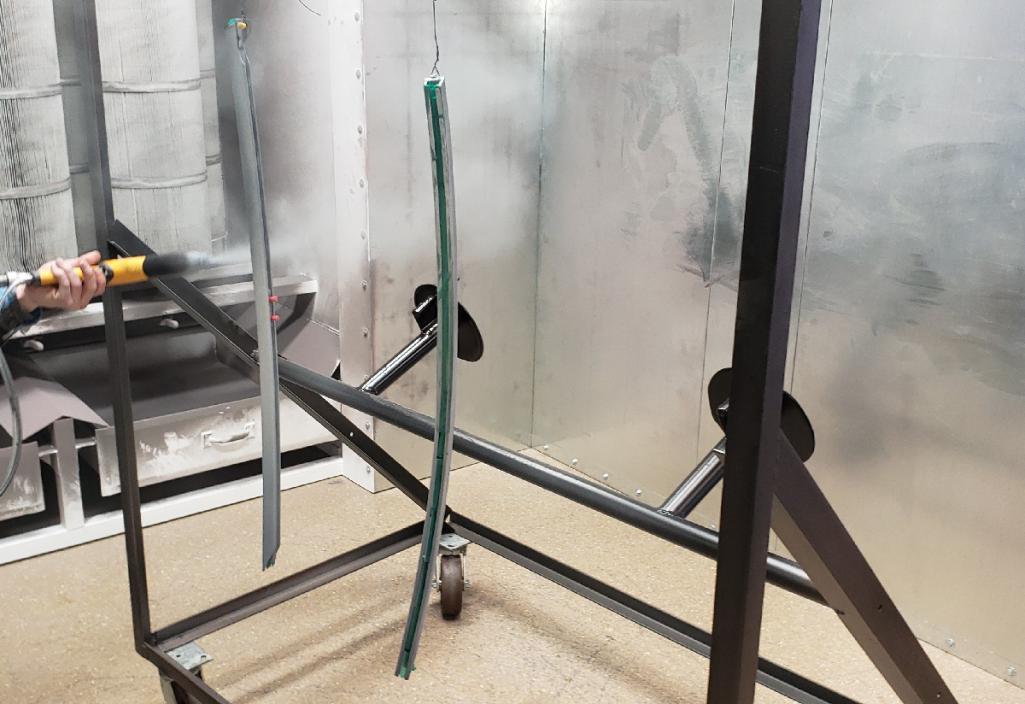
Posted by: gms Mar 6 2020, 09:13 PM
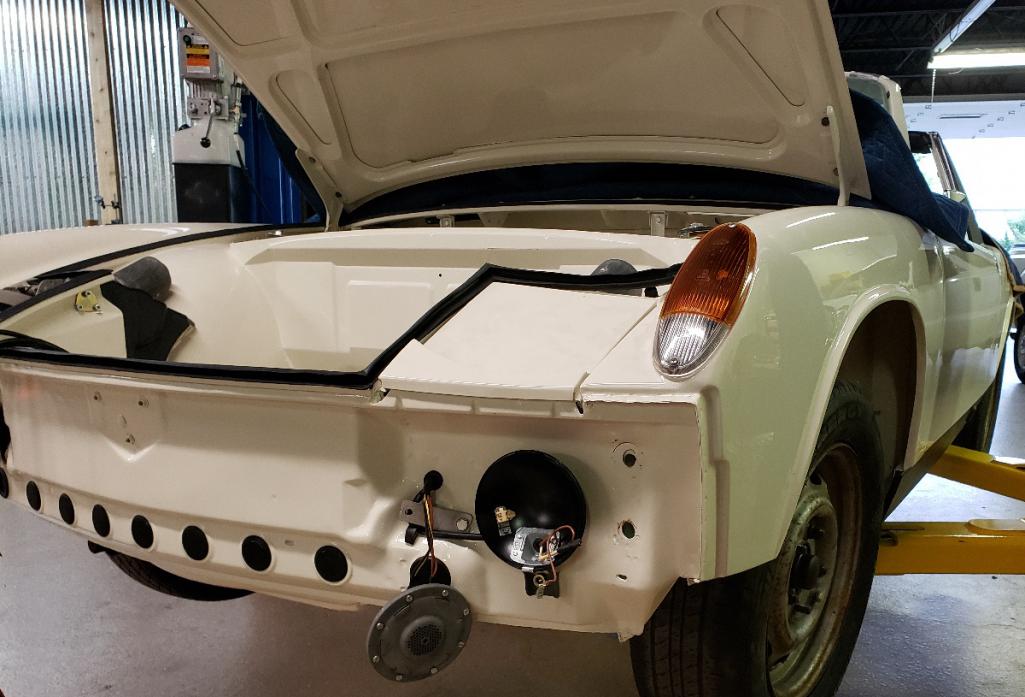
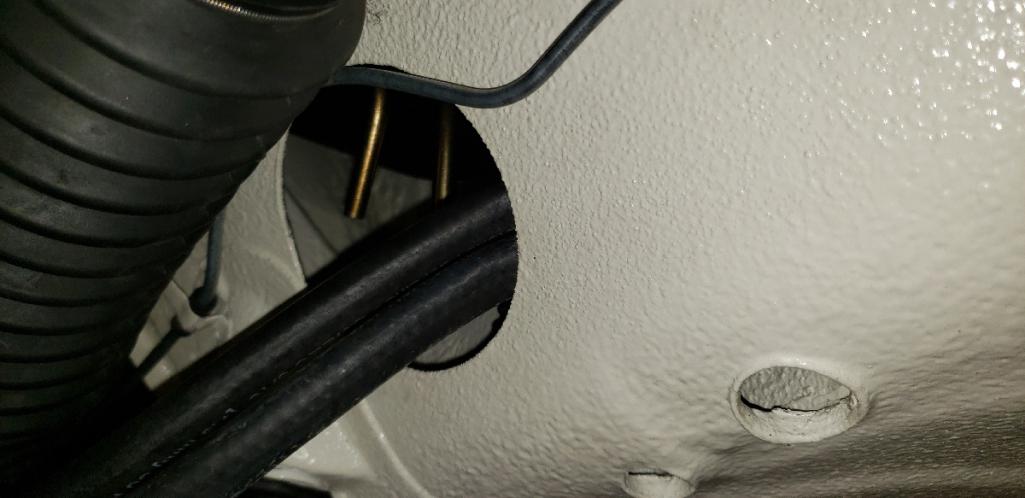
I found the Fuel Pump Wire Grommet that fits in this hole (28mm)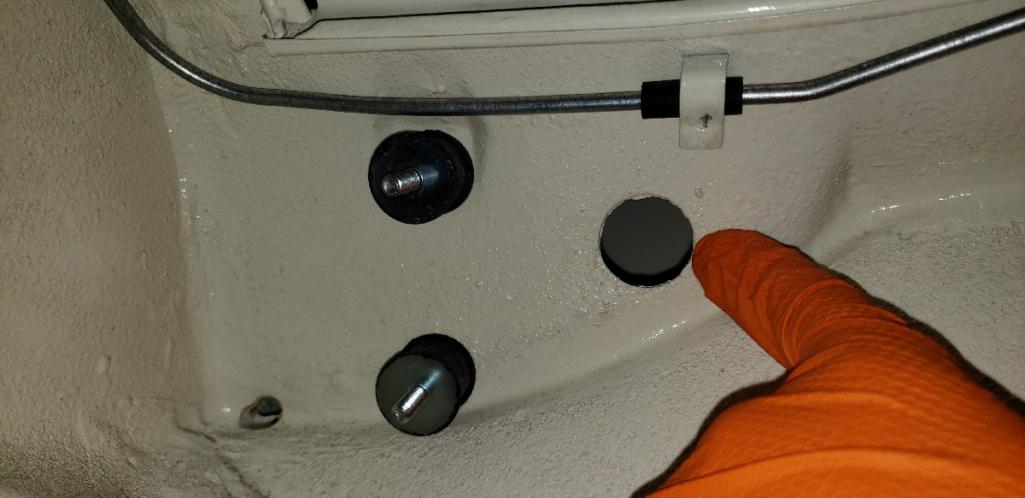
@http://www.914world.com/bbs2/index.php?showuser=1608 suggested 999 702 065 50 and it is the correct parts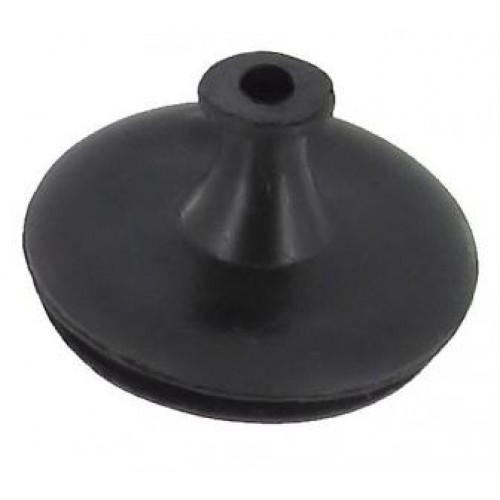
Posted by: gms Mar 6 2020, 09:23 PM
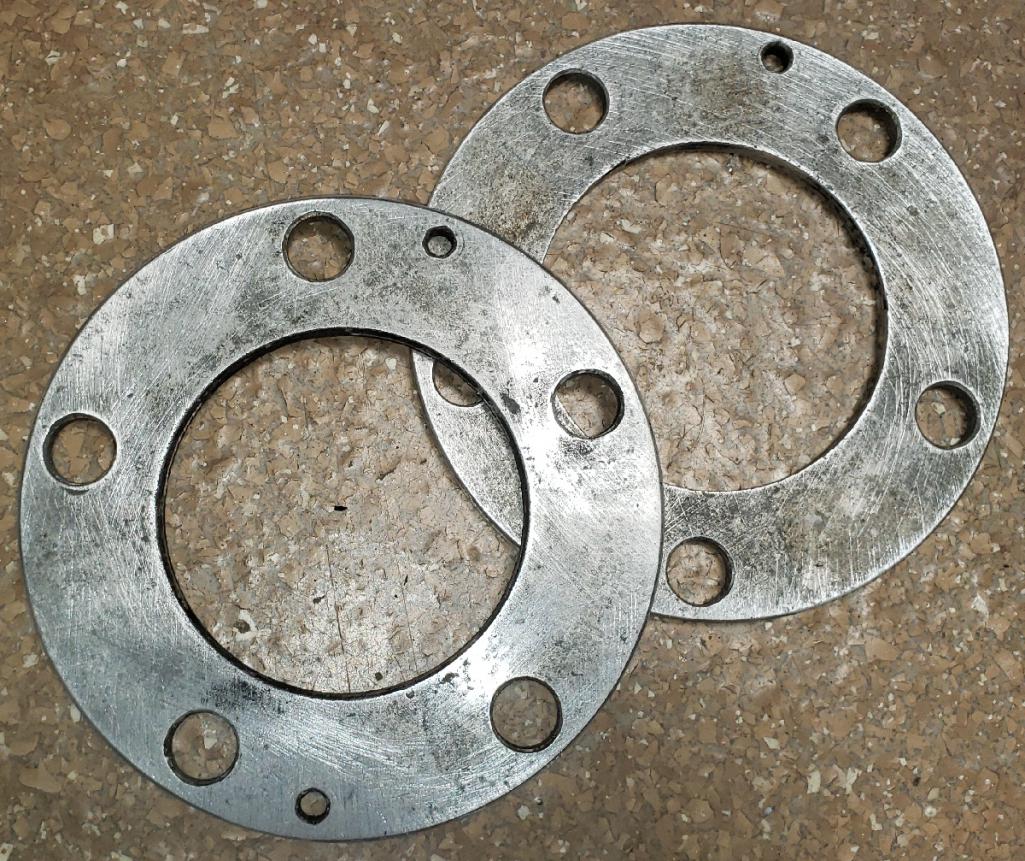
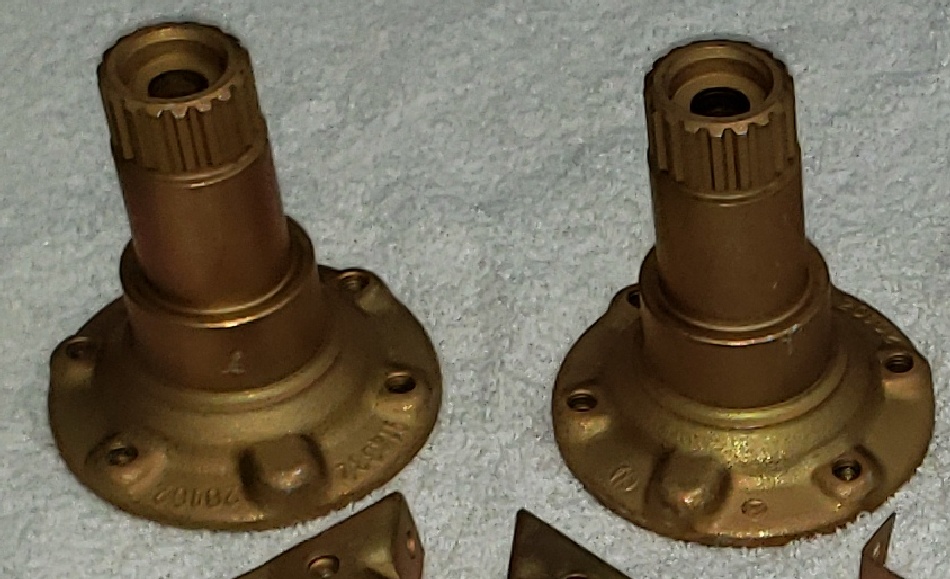
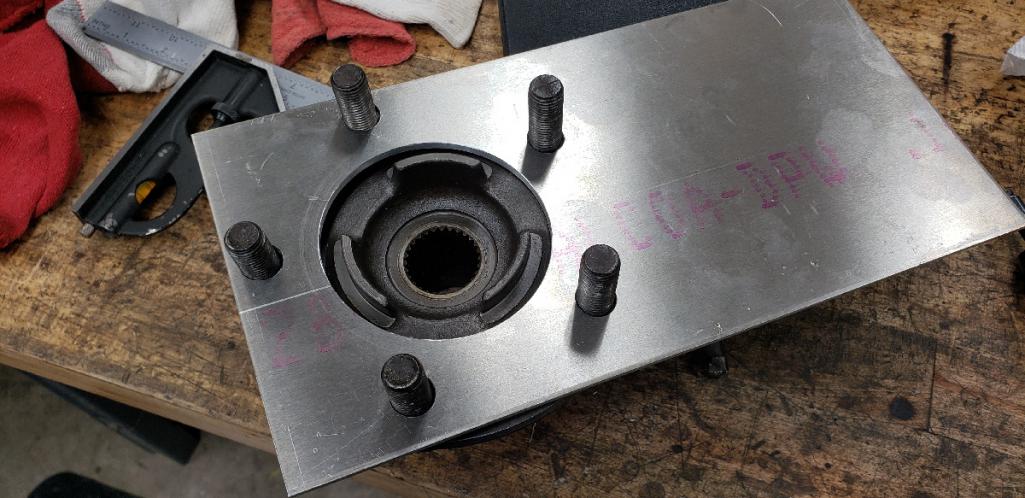
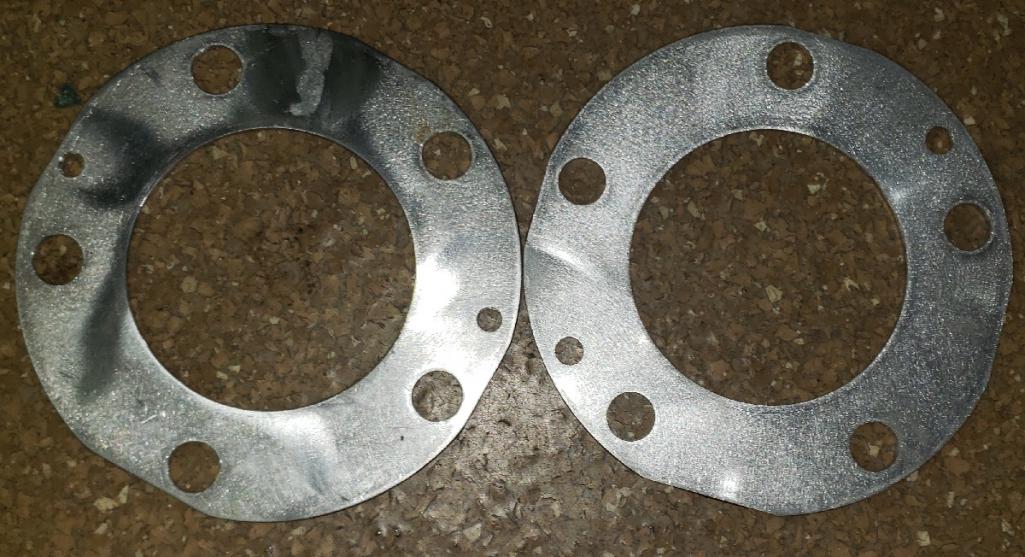
@http://www.914world.com/bbs2/index.php?showuser=4707 made the rear spacers from scratch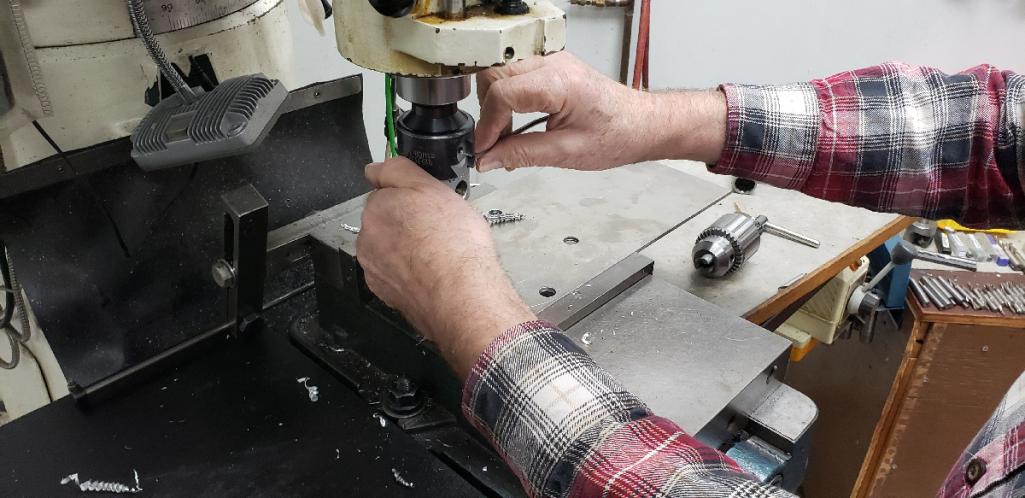
Posted by: gms Mar 8 2020, 07:55 PM
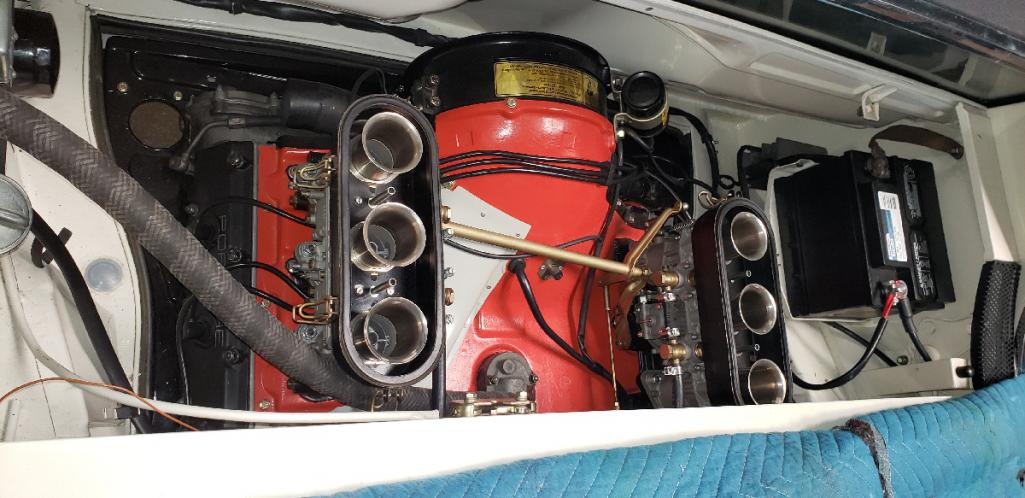
Engine installation day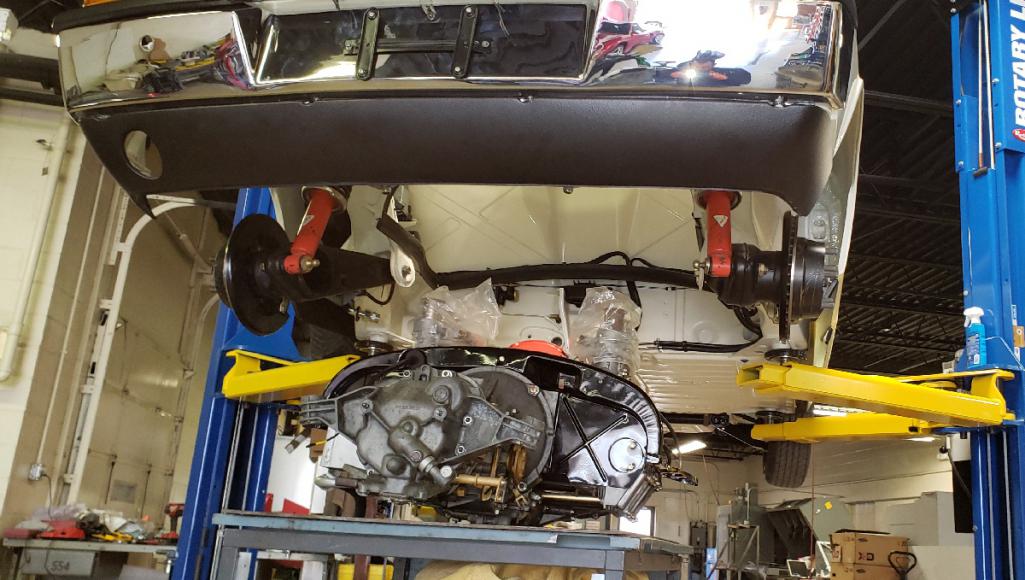
Posted by: gms Mar 8 2020, 07:57 PM
top side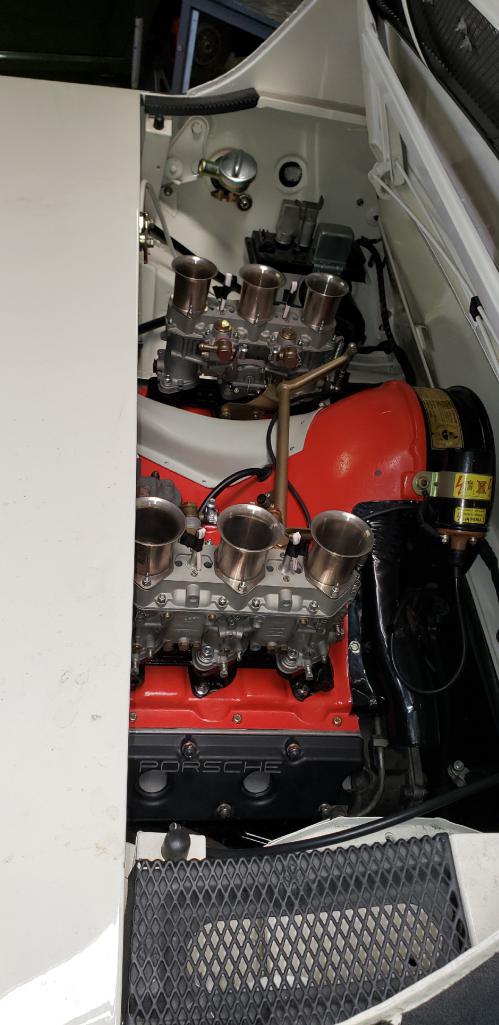
Posted by: gms Mar 8 2020, 07:58 PM
from drivers side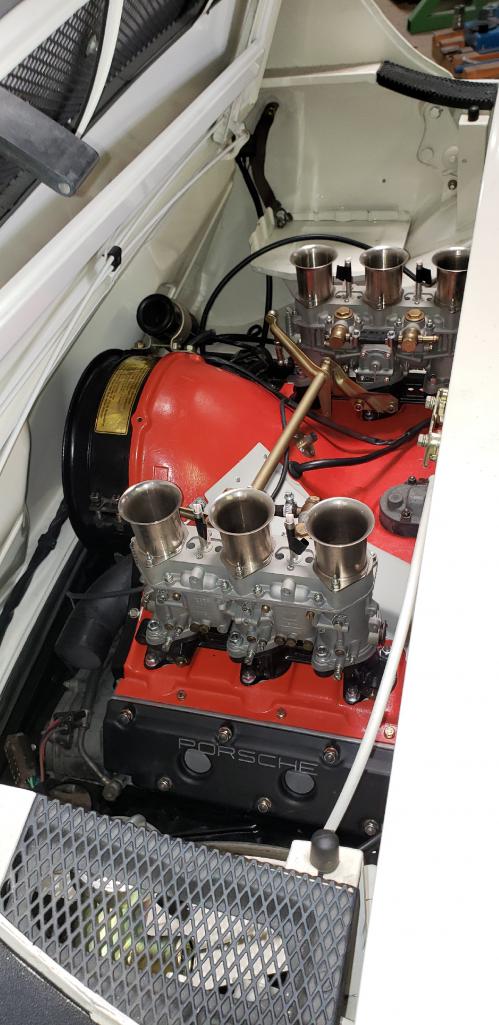
Posted by: raynekat Mar 8 2020, 09:22 PM
That looks incredible in there!
Posted by: gms Mar 8 2020, 09:27 PM
That looks incredible in there!
Thanks
Posted by: KELTY360 Mar 8 2020, 09:37 PM
The white engine bay makes it look like an operating room. Pristine.
Posted by: Targa70 Mar 9 2020, 04:47 AM
Wow Glenn, that looks great.
Posted by: gms Mar 9 2020, 11:09 AM
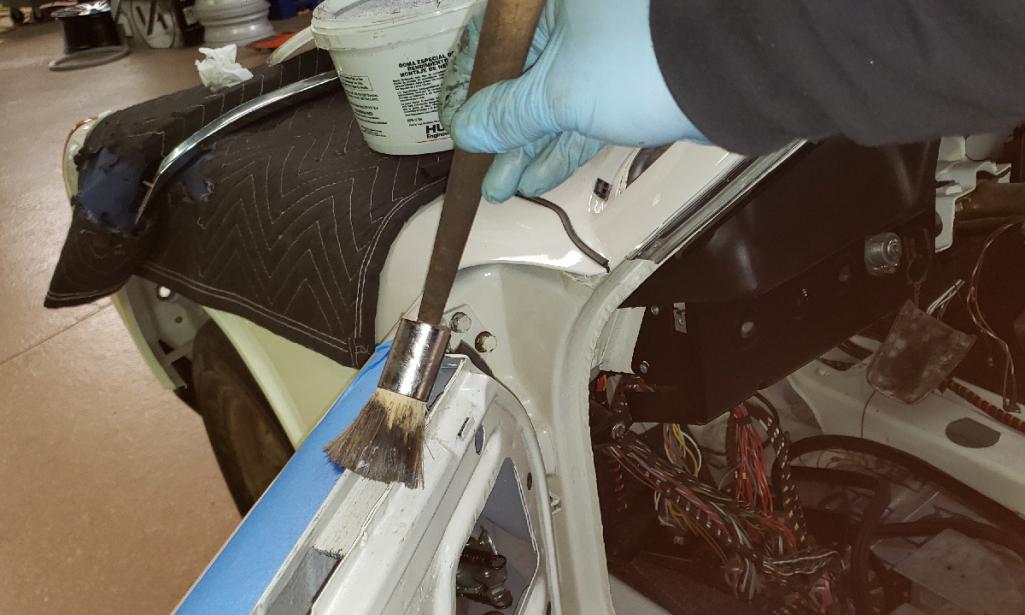
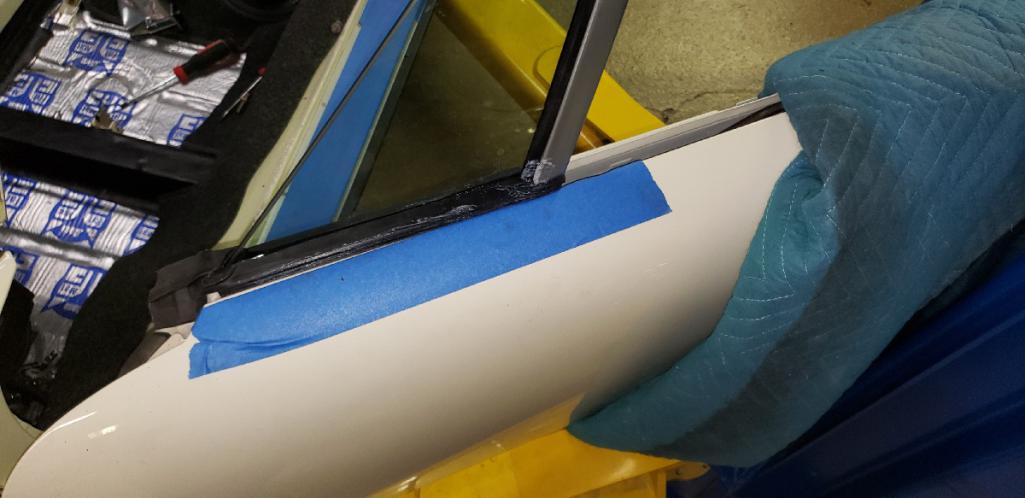
assembly of the wing window and door post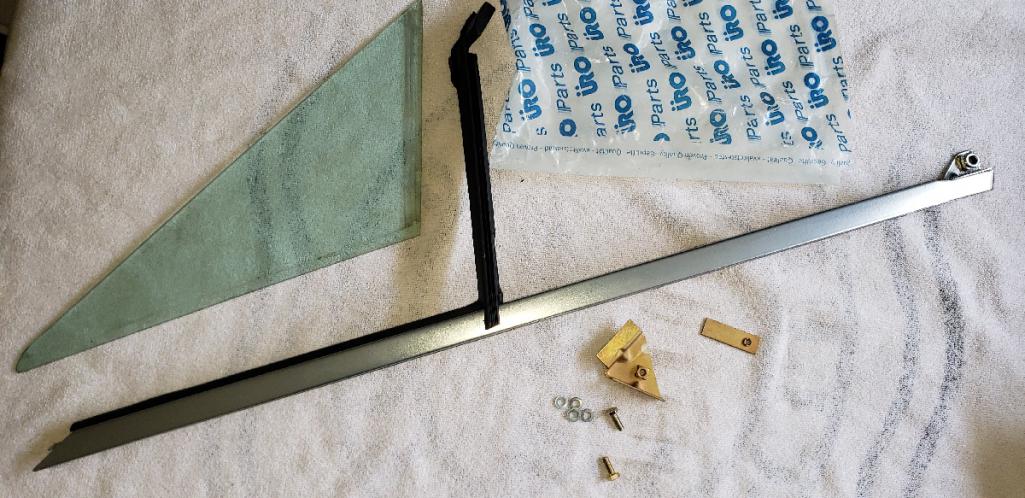
Posted by: gms Mar 9 2020, 04:57 PM
we used the AA targa pad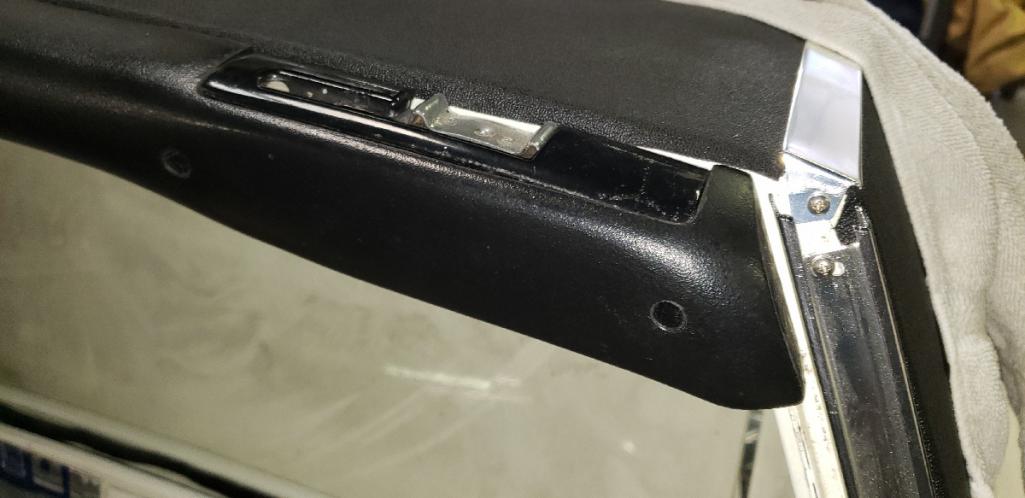
Posted by: mepstein Mar 9 2020, 06:48 PM
we used the AA targa pad
How does it look compared to the rest of the vinyl padding?
I picked the wrong year to miss Hershey

Posted by: gms Mar 9 2020, 06:56 PM
we used the AA targa pad
How does it look compared to the rest of the vinyl padding?
If you didn't know what the original looked like you would be perfectly happy.
the fit is pretty good but the 2 side interior pieces don't fit now
I picked the wrong year to miss Hershey
Bummer
Posted by: Dion Mar 10 2020, 05:20 PM
Mmmmmm
Excellent Glenn.
Attached image(s)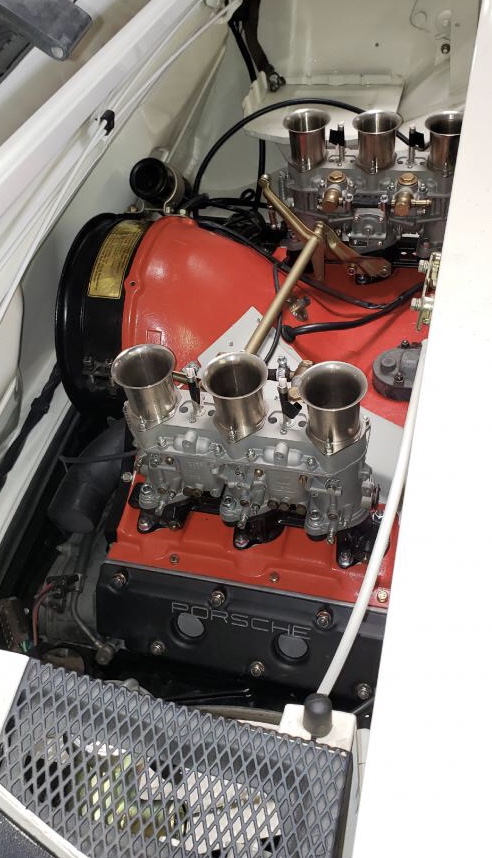
Posted by: gms Mar 11 2020, 09:50 PM
Mmmmmm
Excellent Glenn.
Thanks Dion
Posted by: gms Mar 11 2020, 09:52 PM
wing window in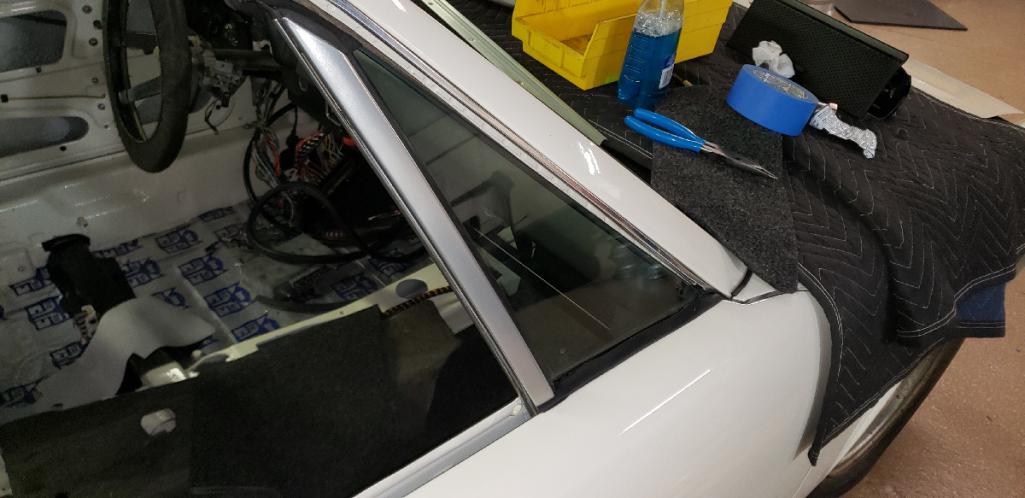
Posted by: gms Mar 12 2020, 04:50 PM
Driver's side ready to install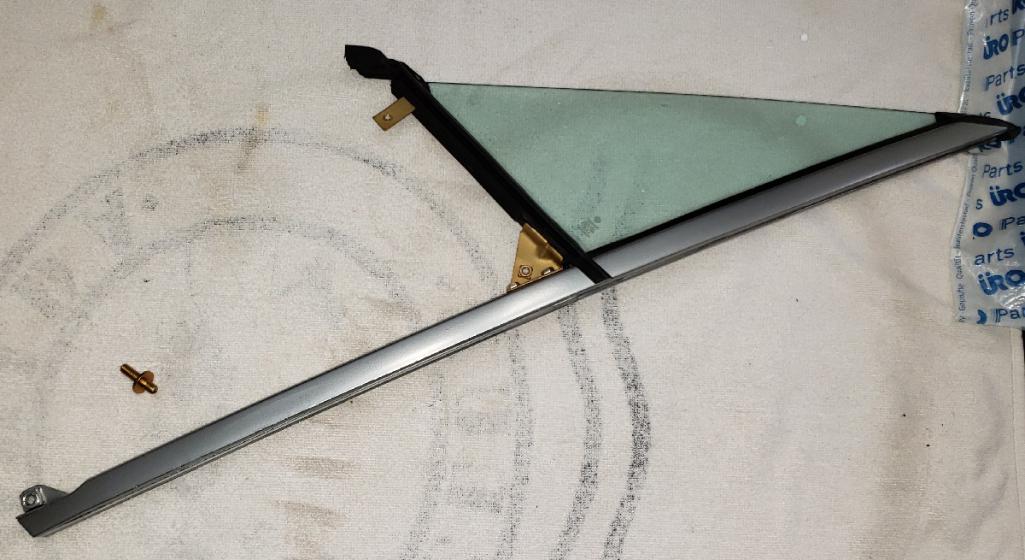
Posted by: FourBlades Mar 12 2020, 07:57 PM
What a great looking car! 
Nice work as always.
John
Posted by: raynekat Mar 12 2020, 09:48 PM
Driver's side ready to install
Have fun with these.
Mine were tough to get right....still working on fine tuning the fit.
Hopefully yours will just pop in with little adjustment.
Posted by: gms Mar 12 2020, 10:00 PM
I use tire lube on the seal and it pops right in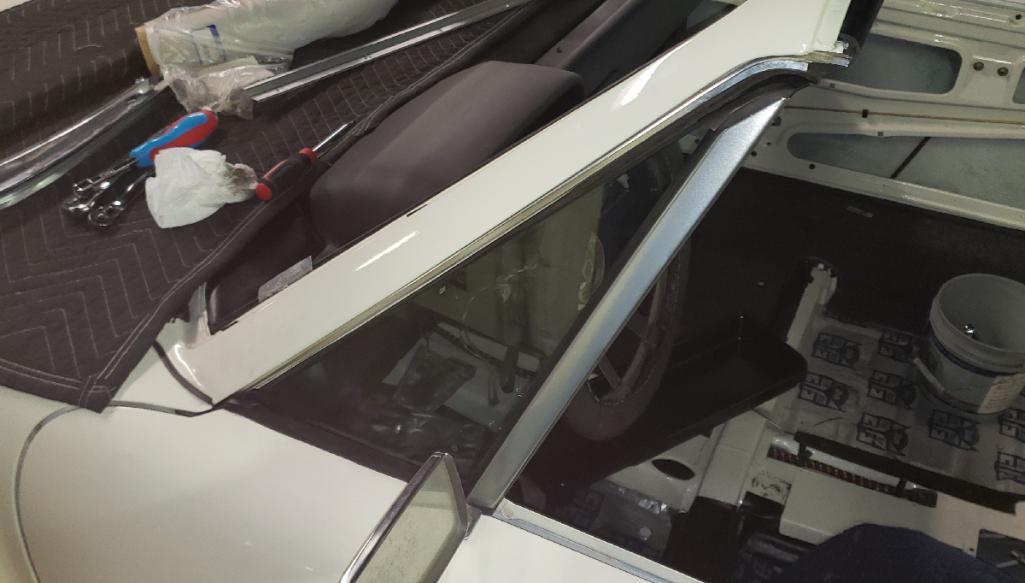
fuzzy rail counter sunk screw hole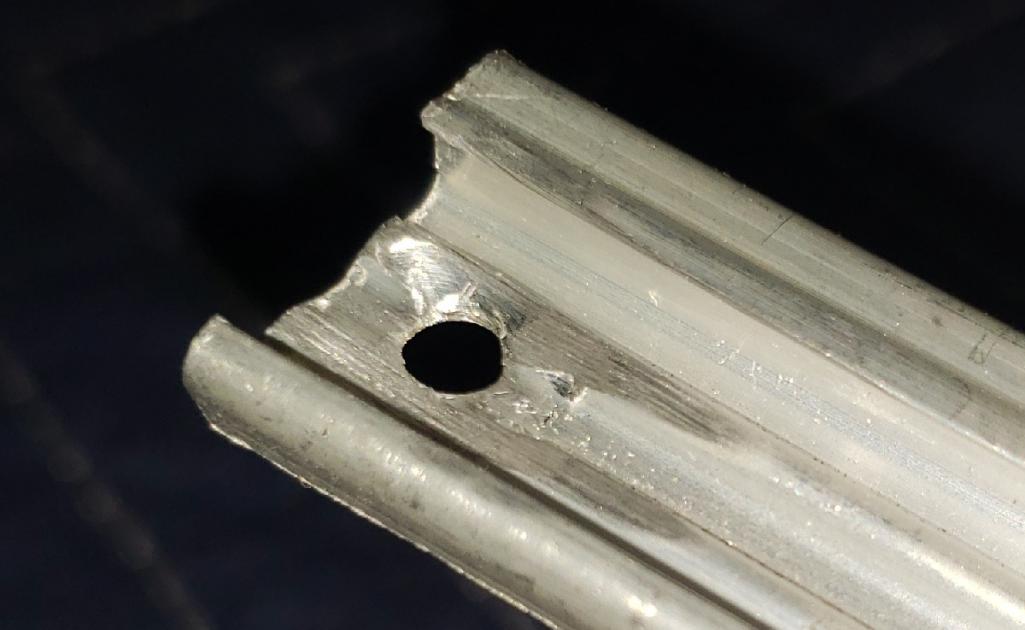
screws site deep enough to install fuzzy strip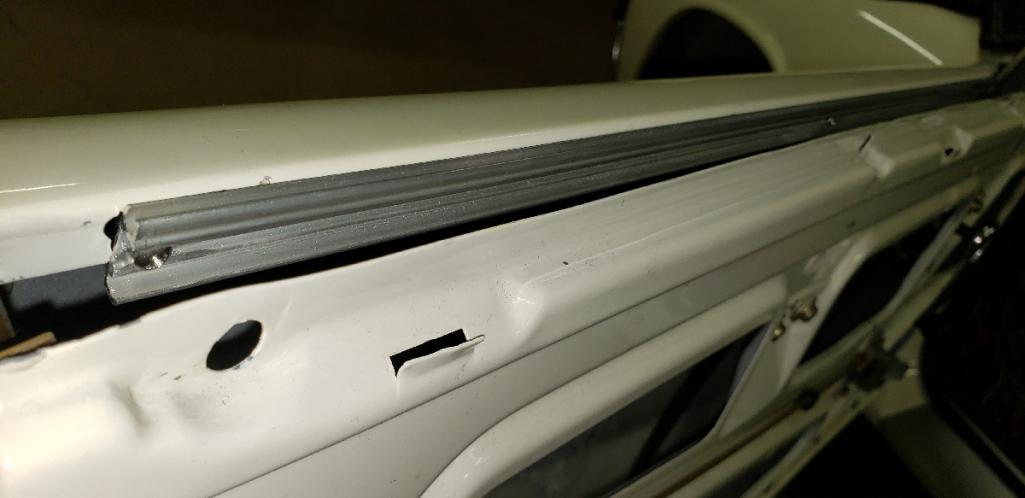
Posted by: gms Mar 12 2020, 10:01 PM
snap can installed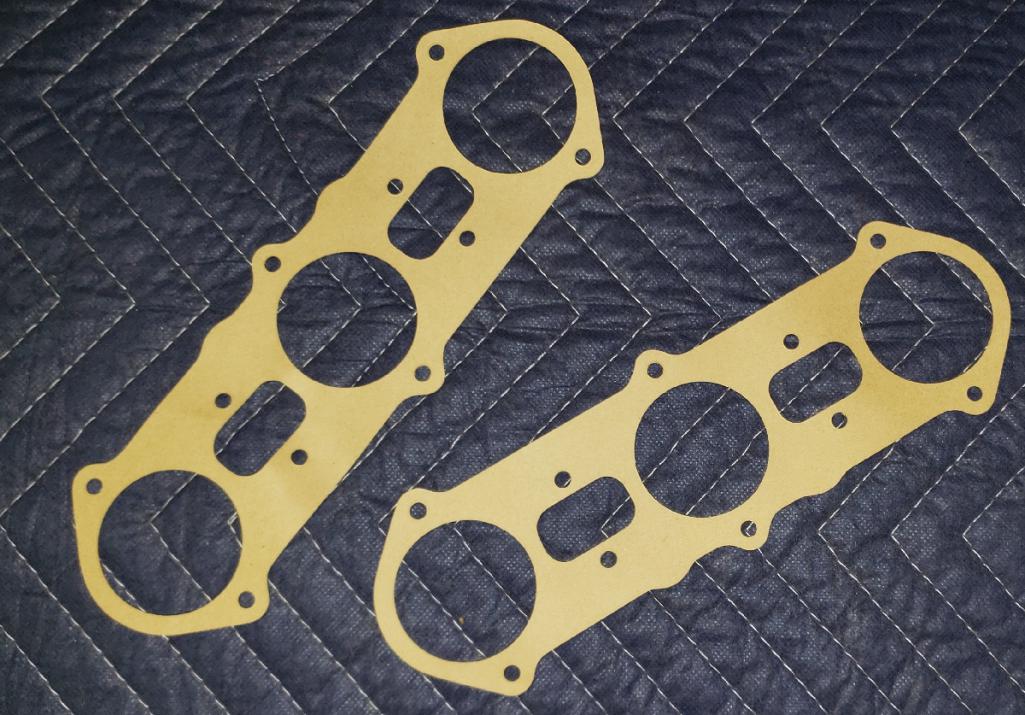
Posted by: gms Mar 12 2020, 10:05 PM
What a great looking car!
Nice work as always.
John
Thanks John!
Posted by: horizontally-opposed Mar 12 2020, 10:28 PM
snap can installed
^ Looks great, Glenn!
Posted by: gms Mar 13 2020, 09:00 AM
snap can installed
^ Looks great, Glenn!
Thanks Pete
Posted by: Targa70 Mar 13 2020, 09:14 AM
Ill second and third that. Glenn you are doing great work.
Posted by: Cairo94507 Mar 13 2020, 10:03 AM
Posted by: gms Mar 14 2020, 07:16 PM
threshold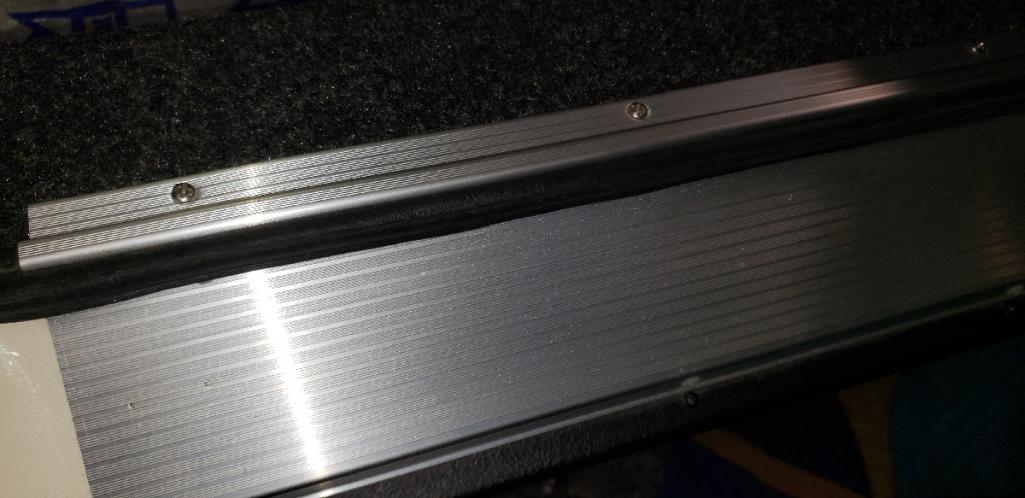
Posted by: gms Mar 15 2020, 07:46 PM
Since Bill bought a nicer rear bumper he decided to go with some new bumper tops (front & rear)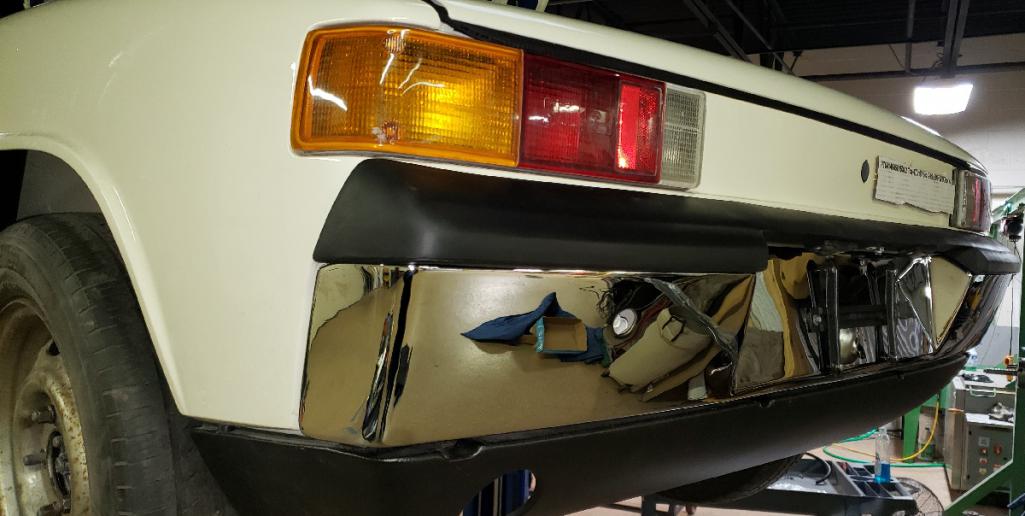
Posted by: gms Mar 15 2020, 07:51 PM
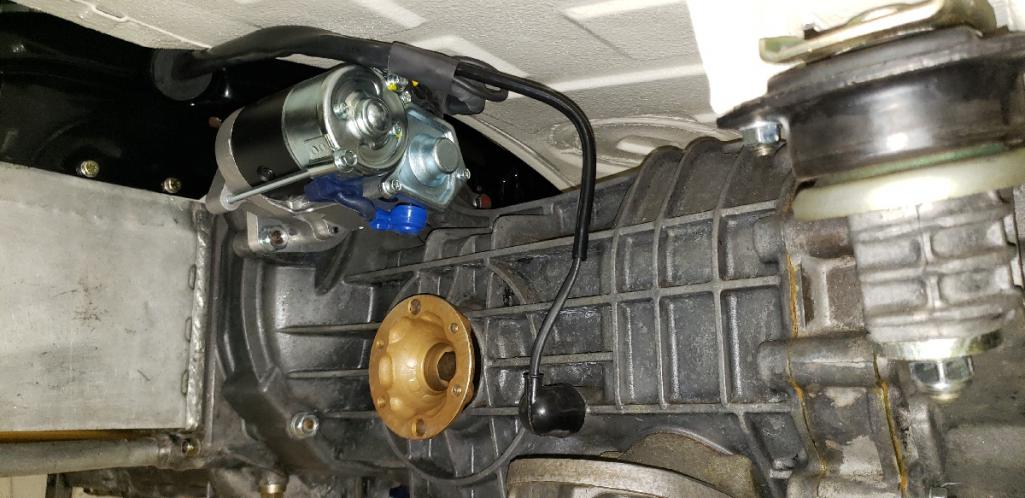
New hi-torque starter installed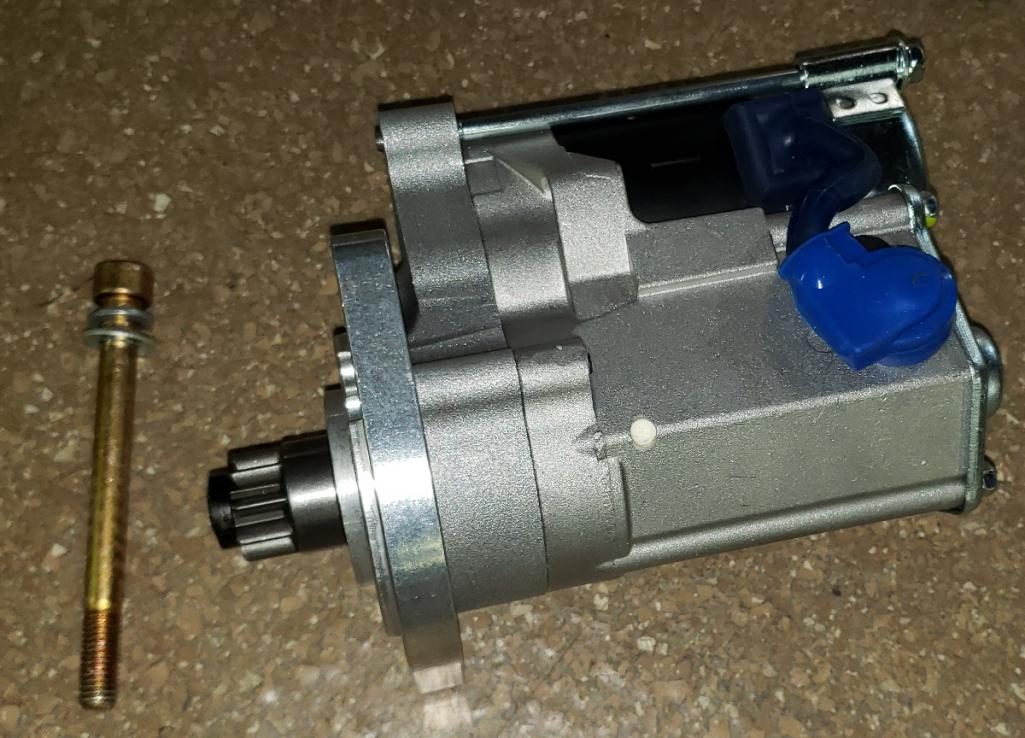
Posted by: Olympic 914 Mar 15 2020, 07:58 PM
That starter looks a lot like the one on the Harley.
Posted by: gms Mar 15 2020, 08:08 PM
That starter looks a lot like the one on the Harley.
I think they are Mitsubishi guts with custom nose to fit on Porsches
Posted by: gms Mar 17 2020, 02:41 PM
E-Brake parts
We Need:
914.424.567.00 - plate
914.424.545.00 - return spring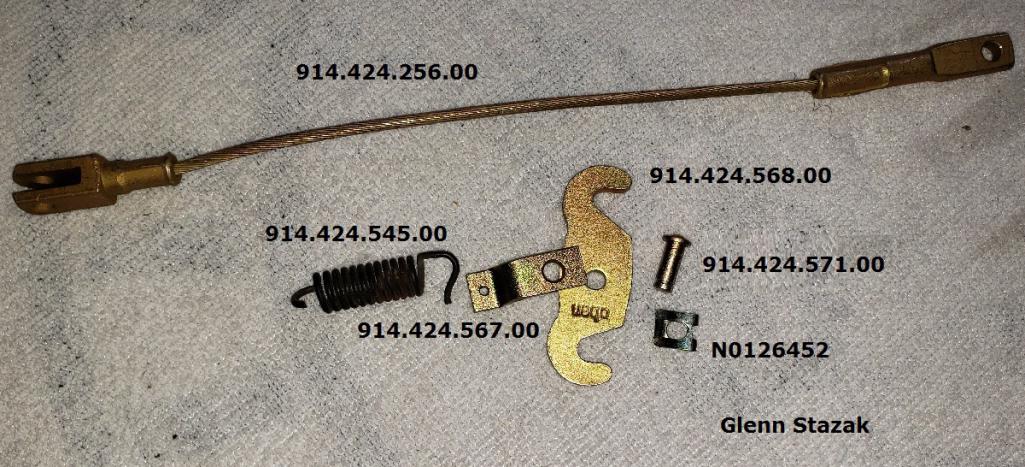
Posted by: Luke M Mar 18 2020, 07:00 AM
E-Brake parts
We Need:
914.424.567.00 - plate
914.424.545.00 - return spring
Hi Glenn,
I'll see if I have any spares here. Get back to you later today.
Posted by: gms Mar 18 2020, 08:57 AM
E-Brake parts
We Need:
914.424.567.00 - plate
914.424.545.00 - return spring
Hi Glenn,
I'll see if I have any spares here. Get back to you later today.
Thanks Luke!
Posted by: gms Mar 18 2020, 02:16 PM
rear lock tumbler ready to install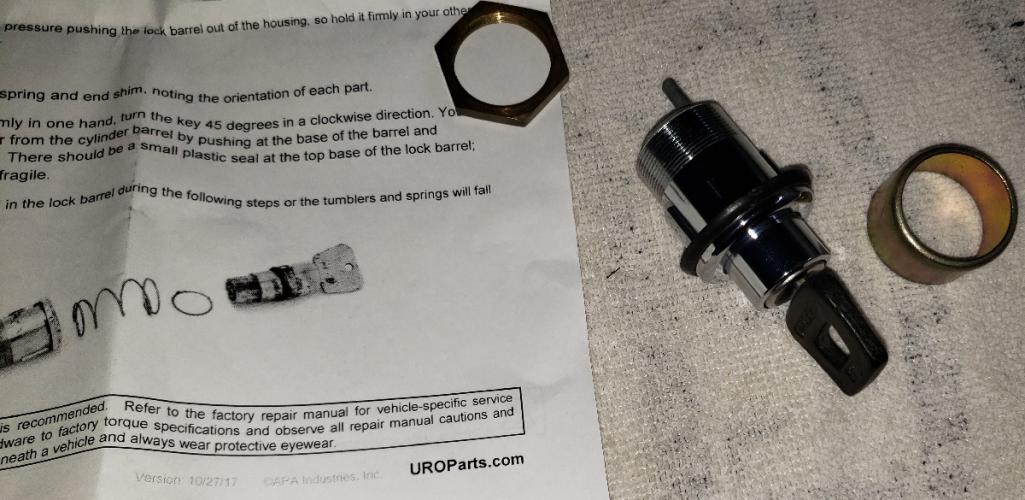
Posted by: sixnotfour Mar 18 2020, 03:20 PM
Give us a review of the URO Part...
Posted by: gms Mar 18 2020, 03:56 PM
Give us a review of the URO Part...
I am very pleased with the fit and finish of everything I have received.
The bright work aluminum parts are indistinguishable from OEM.
I have one of their HD 914/6 engine mounts on my race car and it has held up perfectly for a season now.
Posted by: gms Mar 18 2020, 09:51 PM
put last couple rivets in threshold and installed seal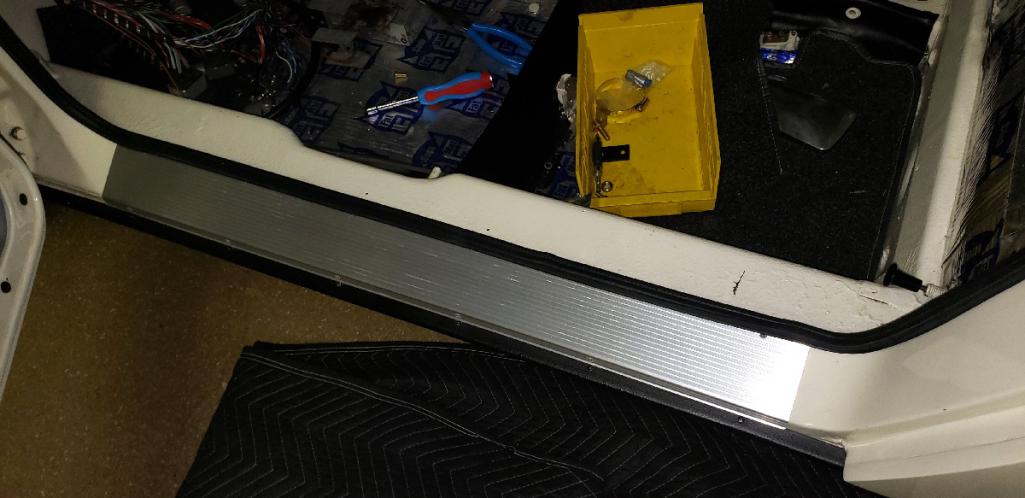
did some paint touch-up on the holes I had to enlarge for the badge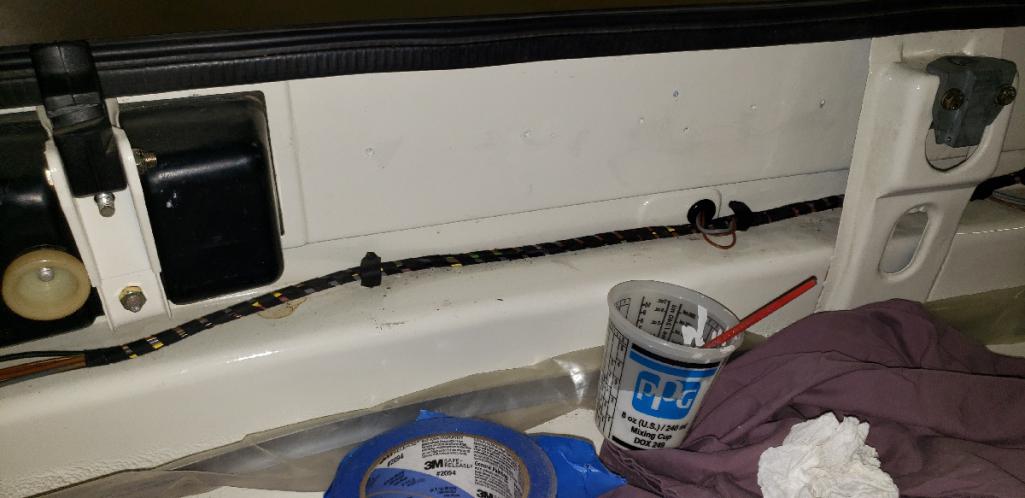
Posted by: gms Mar 18 2020, 09:57 PM
finished up some fuel lines to the carbs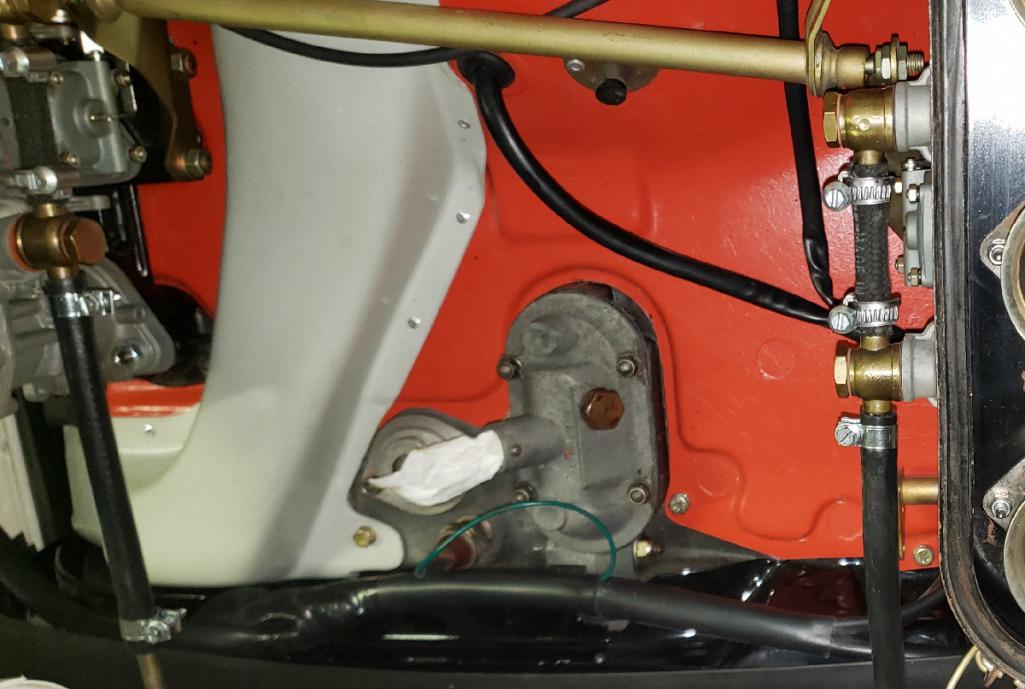
Posted by: Targa70 Mar 19 2020, 12:01 PM
Glenn, you are the man. Your work is top notch as you breath life into a 50 year old beast.
Posted by: Luke M Mar 19 2020, 04:39 PM
E-Brake parts
We Need:
914.424.567.00 - plate
914.424.545.00 - return spring
Hi Glenn,
I'll see if I have any spares here. Get back to you later today.
Hi Glenn,
I checked my stash and only have a set for my 6.. Sorry buddy.
You check with Bruce Stone?
Posted by: gms Mar 19 2020, 09:07 PM
E-Brake parts
We Need:
914.424.567.00 - plate
914.424.545.00 - return spring
Hi Glenn,
I'll see if I have any spares here. Get back to you later today.
Hi Glenn,
I checked my stash and only have a set for my 6.. Sorry buddy.
You check with Bruce Stone?
Thanks for taking a look Luke!
Posted by: gms Mar 19 2020, 09:11 PM
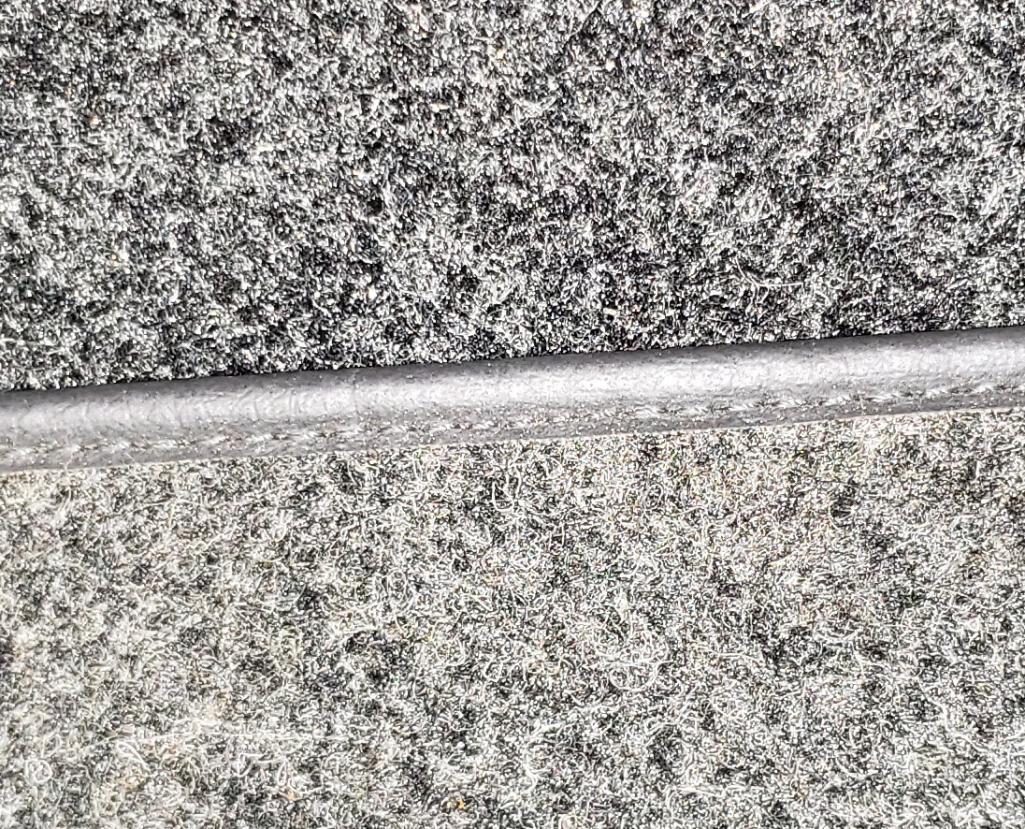
tonight I was able to get the carpet finished with the help of my friend Matt.
I should say that I assisted Matt, he is very talented at this type of work.
starting with the firewall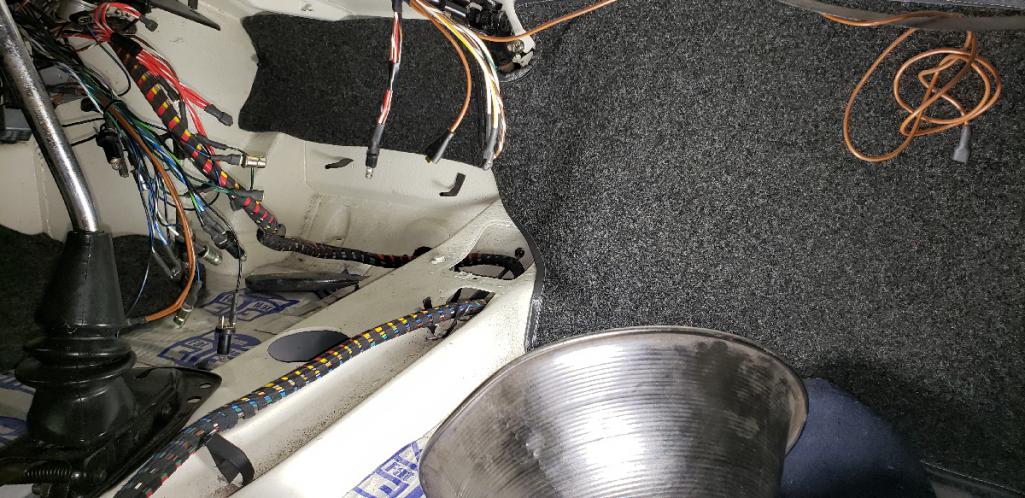
Posted by: gms Mar 19 2020, 09:15 PM
Then we moved on to the longitudinal. Lots of obstacles on this side of the car
spray on the 3M 90
Matt used these sticks to keeps the carpet from sticking where it was not massaged into place. This was a learning experience for me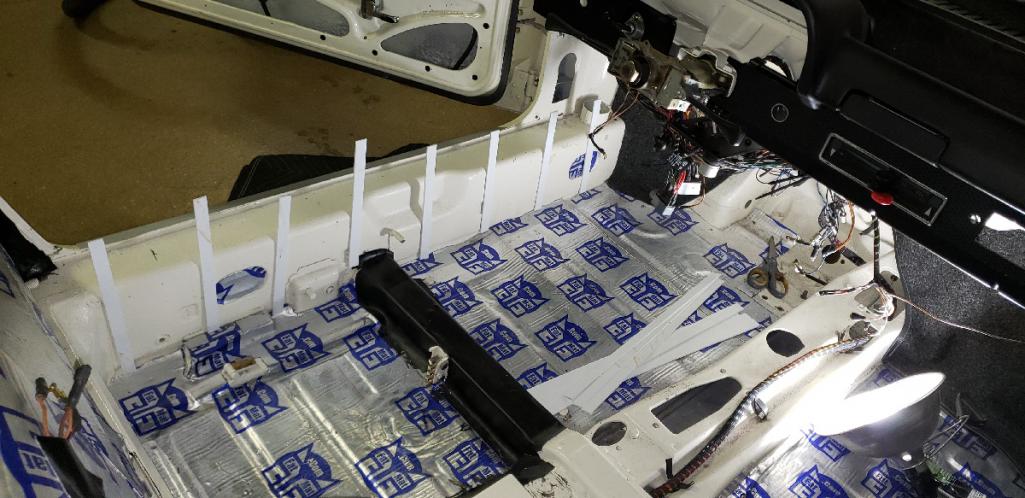
Posted by: gms Mar 19 2020, 09:18 PM
Finally after some cutting, pulling and messaging it was formed perfectly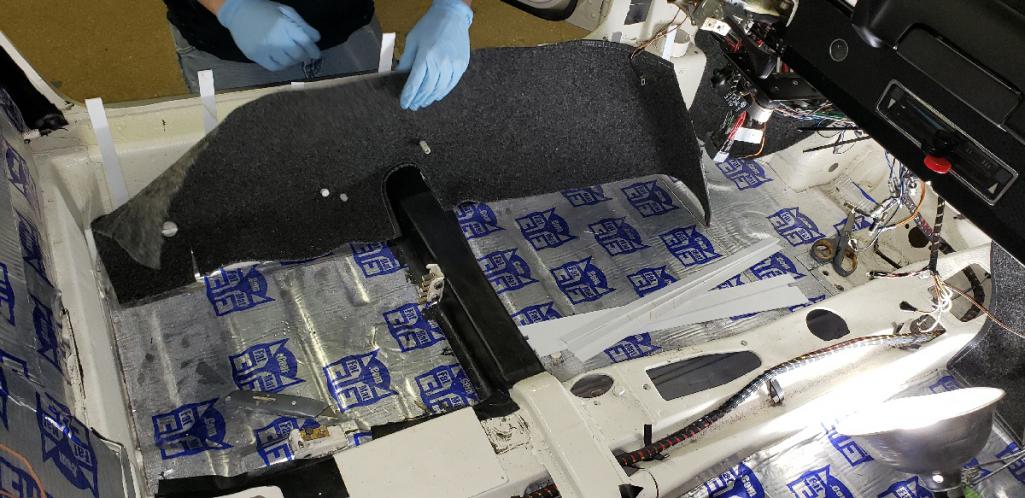
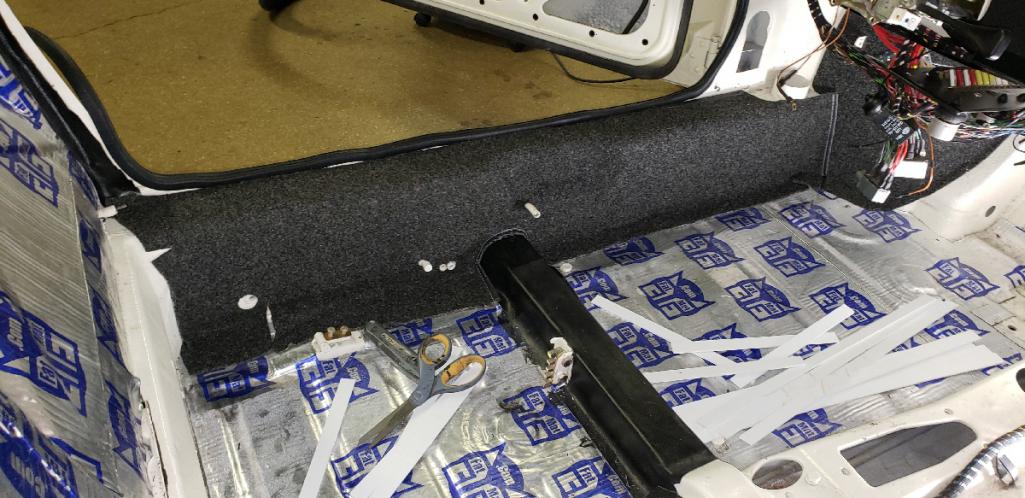
Posted by: gms Mar 19 2020, 09:20 PM
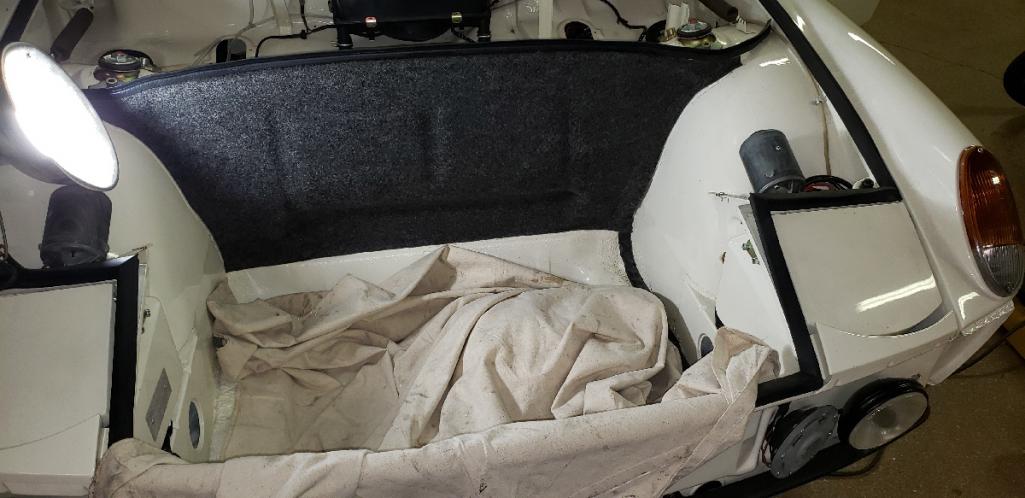
Then into the front trunk, this carpet required steam to fit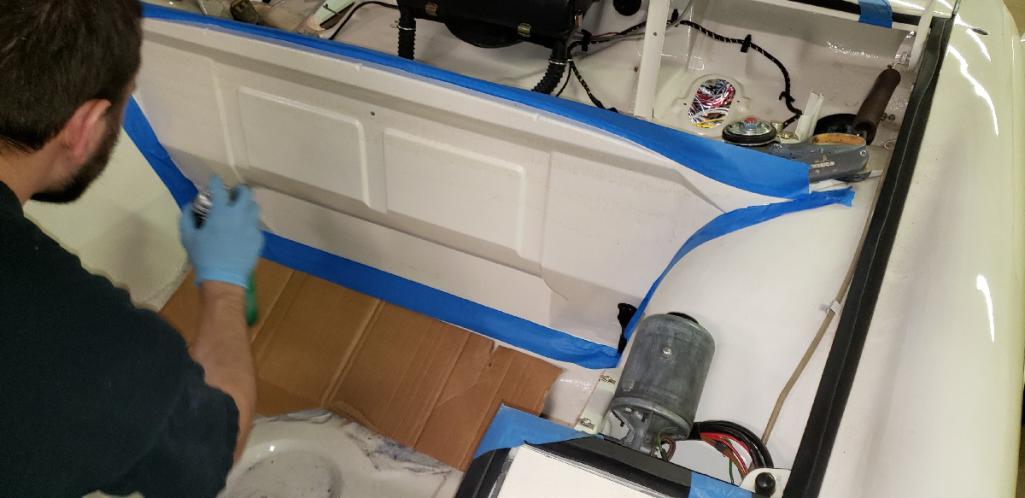
Posted by: gms Mar 19 2020, 09:28 PM
The carpet looks good with the NOS driver and passenger mats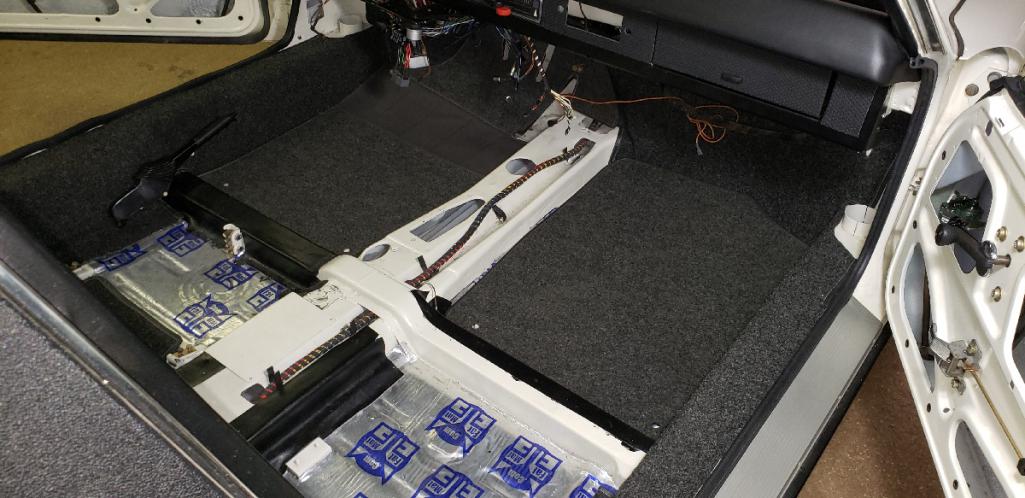
Posted by: Mueller Mar 19 2020, 09:47 PM
Great work, that is going to be a sweet car.
Posted by: gms Mar 19 2020, 09:53 PM
Great work, that is going to be a sweet car.
Thanks Mike
Posted by: Bartlett 914 Mar 20 2020, 12:10 PM
That looks great. It looks like Matt was a great help
Posted by: Cairo94507 Mar 20 2020, 01:53 PM
That looks perfect Glenn.
Posted by: gms Mar 20 2020, 03:39 PM
That looks perfect Glenn.
Thanks Michael
Posted by: gms Mar 20 2020, 04:07 PM
The correct Headlight and Emergency Flasher bezels arrived today!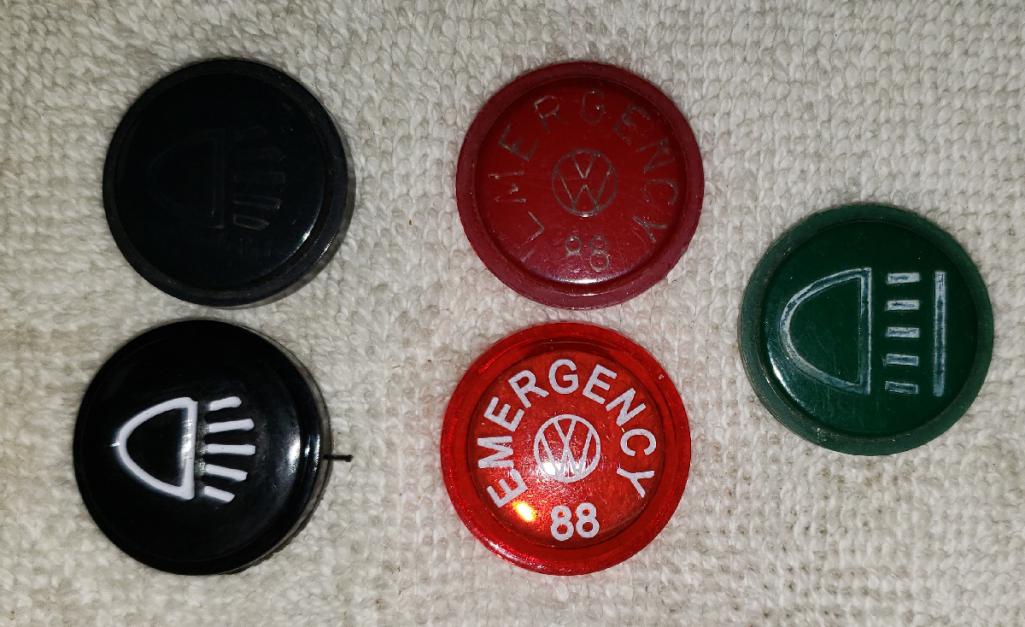
Posted by: rgalla9146 Mar 20 2020, 08:55 PM
Fantastic! looks beautiful Glenn.
Isn't this perfect ?
We finally can park next to each other with our Light Ivory cars and for the first time ever our target event is cancelled.
What a bummer.
Wash your hands.
Posted by: gms Mar 20 2020, 09:07 PM
Fantastic! looks beautiful Glenn.
Isn't this perfect ?
We finally can park next to each other with our Light Ivory cars and for the first time ever our target event is cancelled.
What a bummer.
Wash your hands.
Thanks Rory hope to see you next year!
stay safe
Posted by: Maltese Falcon Mar 20 2020, 09:57 PM
Light ivory car looking really good Glenn
Posted by: gms Mar 21 2020, 09:15 AM
Light ivory car looking really good Glenn
Thanks Marty!
Posted by: gms Mar 21 2020, 09:38 AM
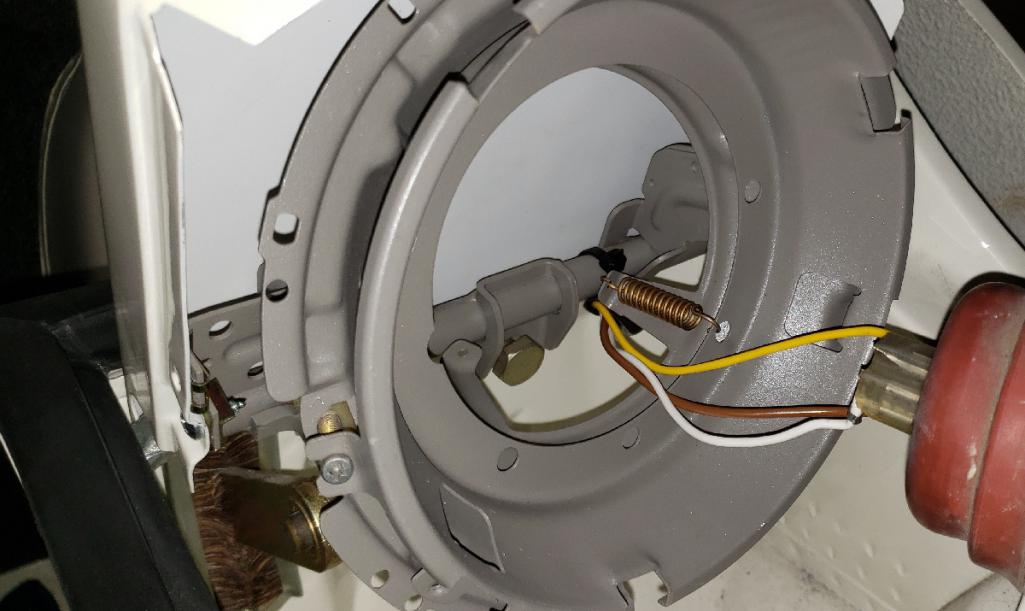
I was doing a little research on the emergency brake system and as it turns out the 1970 914/6s that I looked at do not have a spring. This must have been a later modification.
this is a 1972 with the spring hole and the plate for cover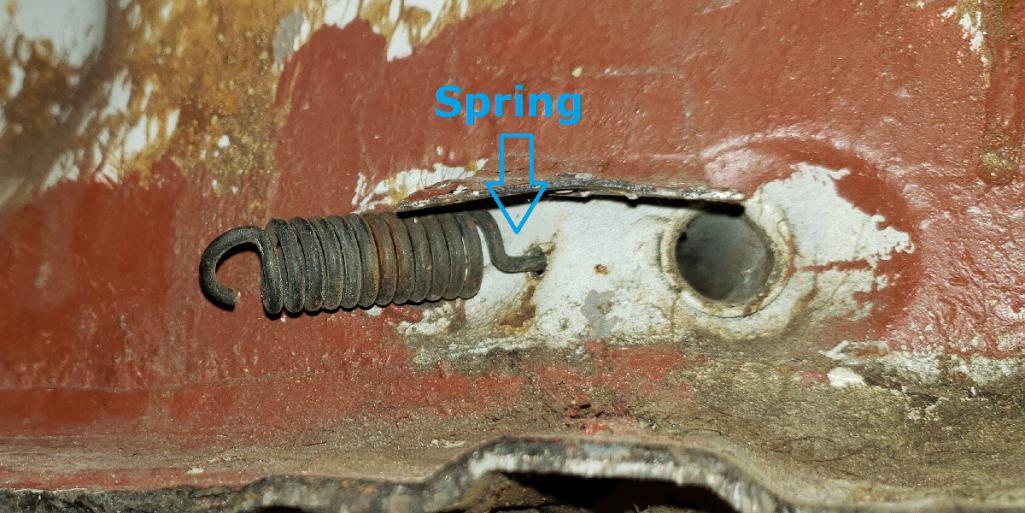
914.043.0630 (no hole)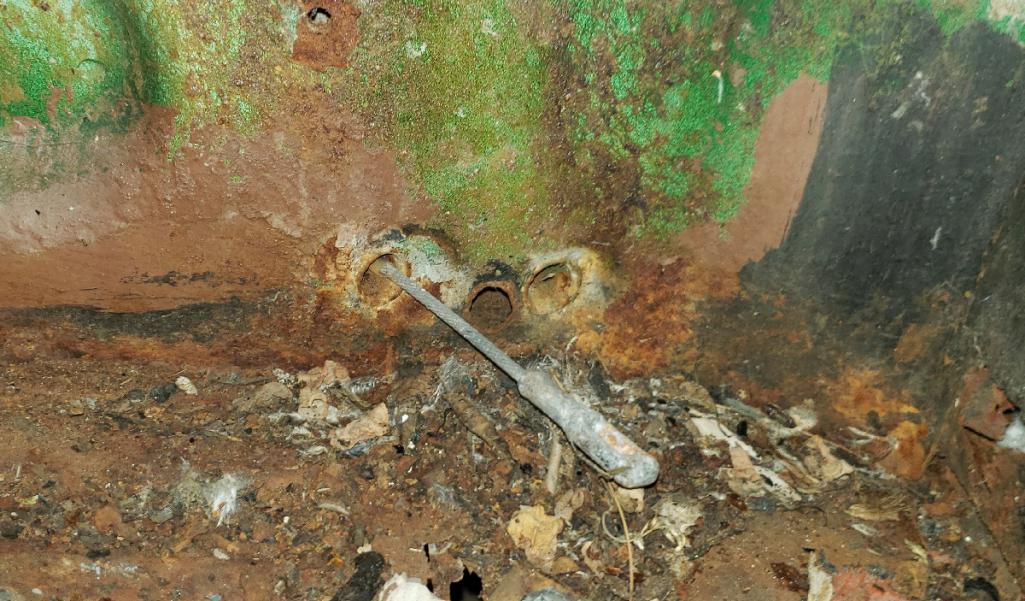
914.043.1277 (no hole)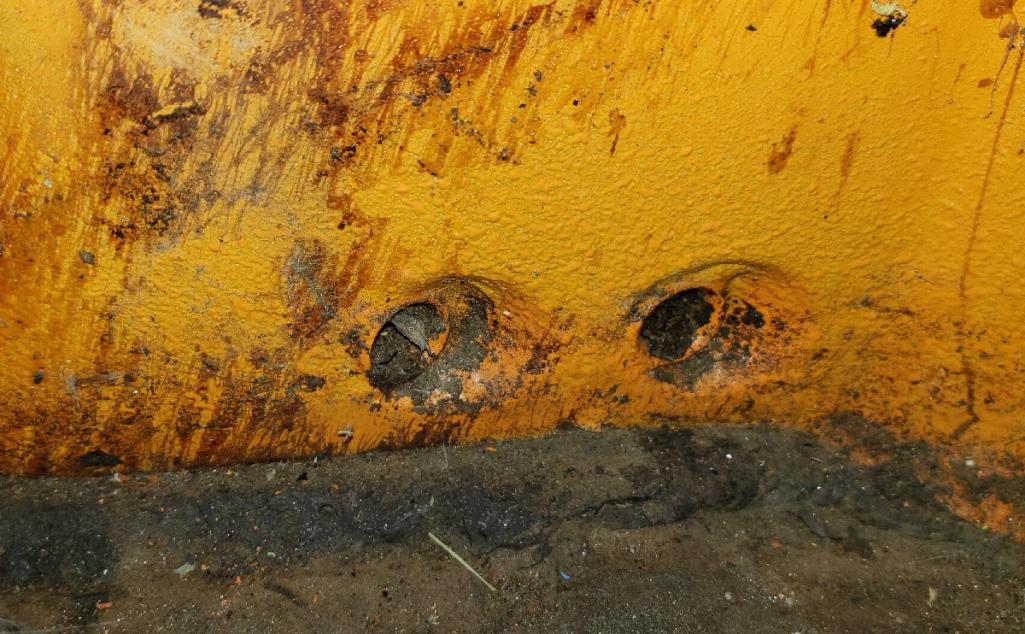
Posted by: mepstein Mar 21 2020, 09:43 AM
I was wondering why you were going with a spring for a six but it's not my car. No metal cover either on the early cars.
Posted by: gms Mar 21 2020, 09:52 AM
I was wondering why you were going with a spring for a six but it's not my car. No metal cover either on the early cars.
one of my sixes has been modified (spring added), so the spring must give a more positive pull (release) of the e-brake.
Posted by: mepstein Mar 21 2020, 10:29 AM
I was wondering why you were going with a spring for a six but it's not my car. No metal cover either on the early cars.
one of my sixes has been modified (spring added), so the spring must give a more positive pull (release) of the e-brake.
I'm sure you are right. It's worth dripping or spraying dry lube in each of the cables before installation. Makes everything work smoother and easier.
Posted by: gms Mar 22 2020, 11:17 AM
back pad cleaned on more time before installation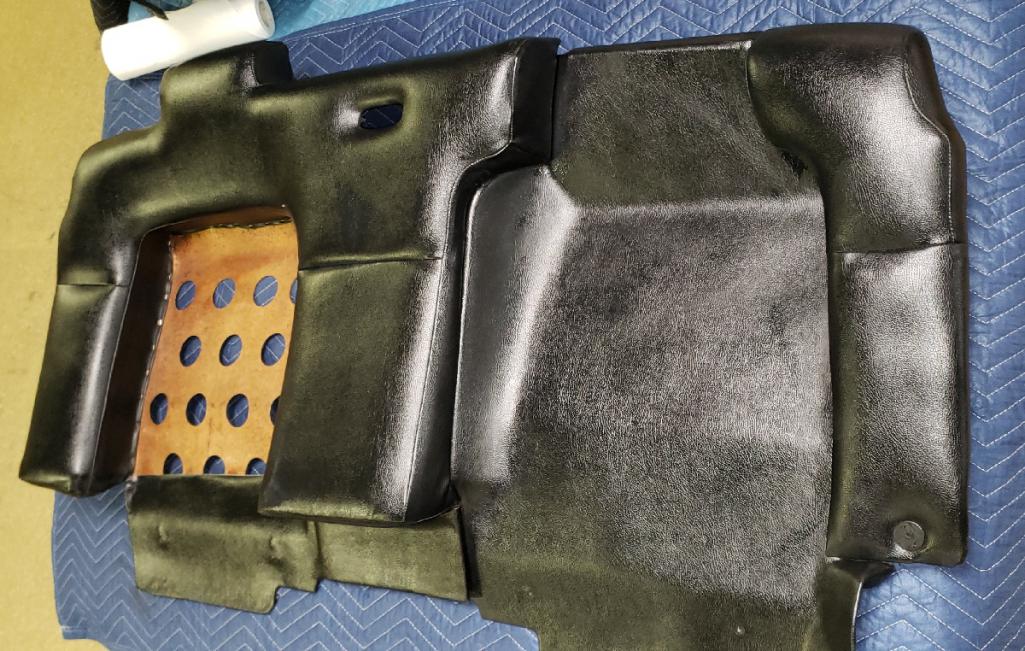
Posted by: gms Mar 22 2020, 04:38 PM
I put the heat control lever and choke lever in oxalic acid to take the small rust spots off of the chrome. Already to wax now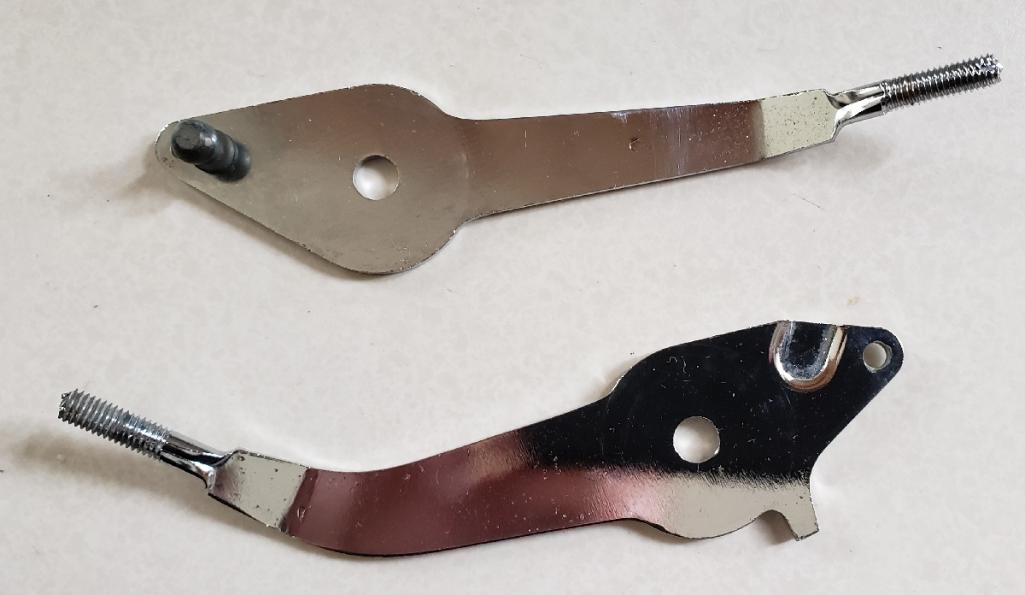
Posted by: gms Mar 25 2020, 10:51 AM
a box full of goodies arrived thanks @http://www.914world.com/bbs2/index.php?showuser=19288 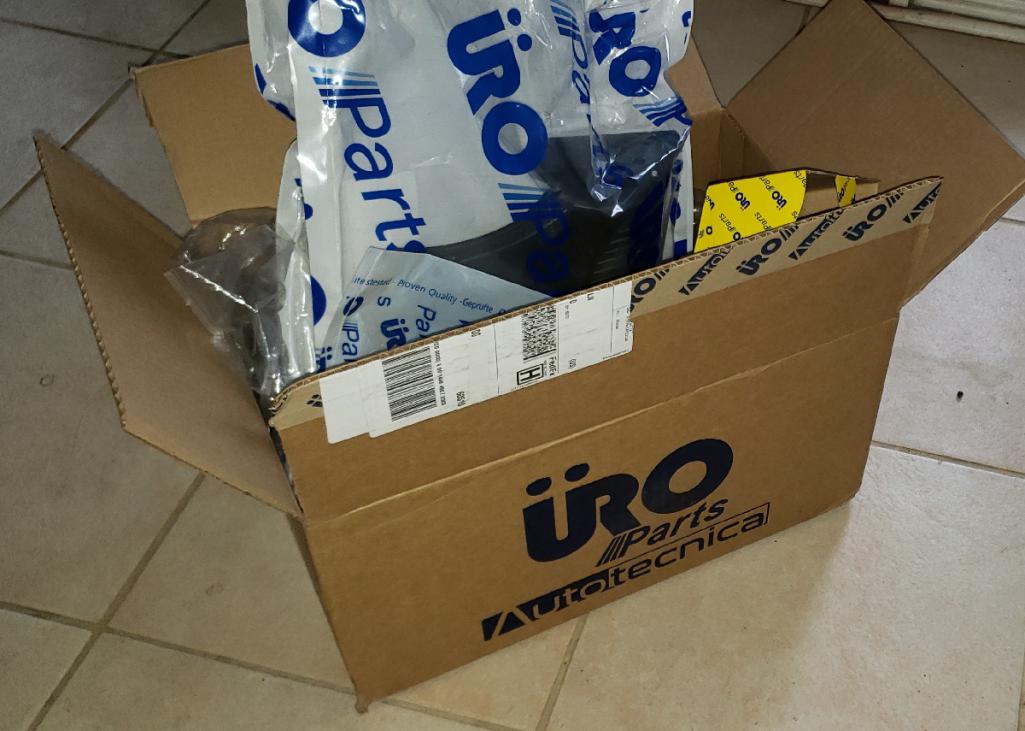
Posted by: gms Mar 25 2020, 10:54 AM
working on the fine details on the interior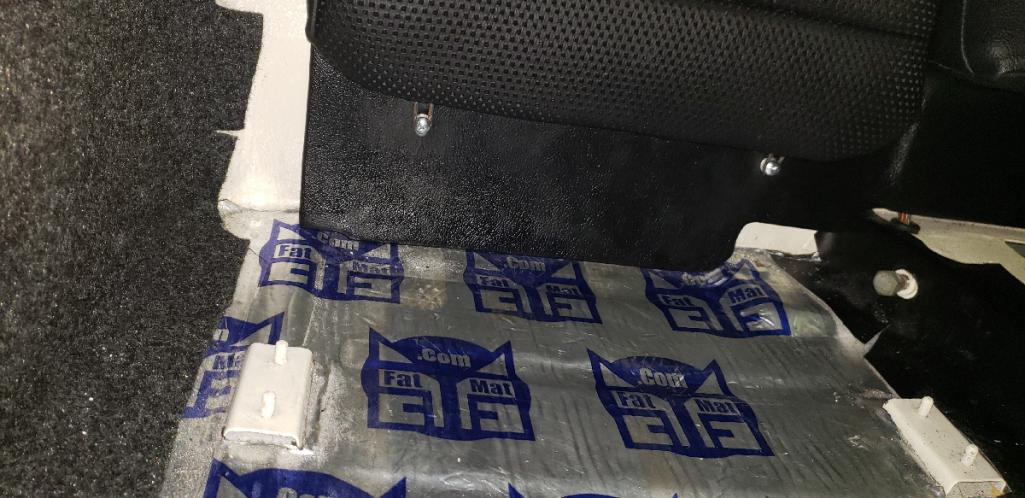
Posted by: gms Mar 25 2020, 11:01 AM
roll bar vinyl cut for trim pieces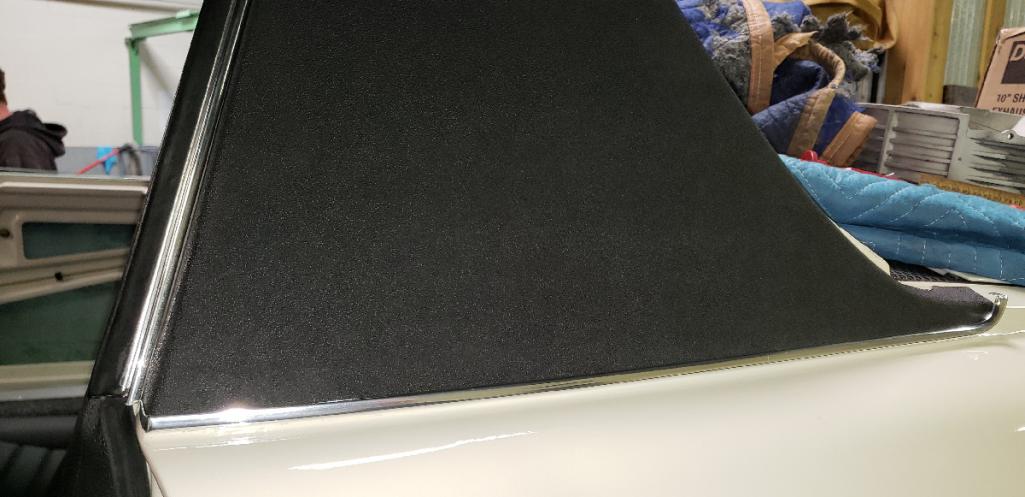
Posted by: Cairo94507 Mar 25 2020, 03:07 PM
I know people either love or hate the roll bar vinyl, but for me a 914 has to have it. It's a signature piece.
Posted by: gms Mar 25 2020, 03:28 PM
I know people either love or hate the roll bar vinyl, but for me a 914 has to have it. It's a signature piece.
With this white car it really looks nice, the black and white contrast is stunning IMHO
Posted by: gms Mar 26 2020, 01:05 PM
@http://www.914world.com/bbs2/index.php?showuser=4707 dropped by with the new custom firewall bushing he made!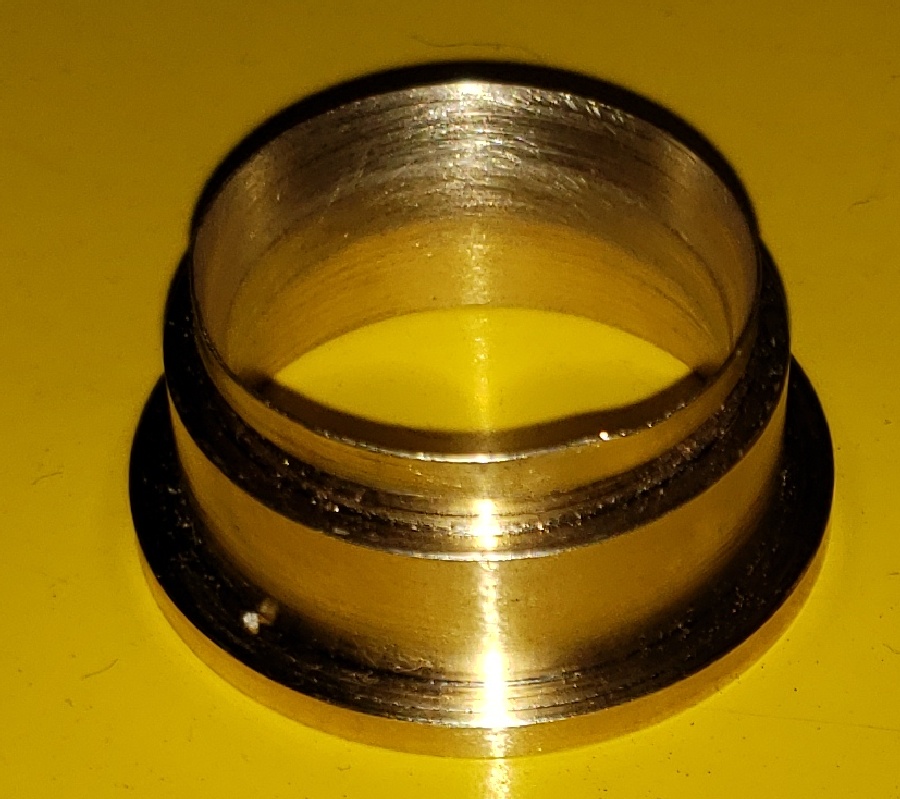
Posted by: gms Mar 28 2020, 08:21 PM
seat belts are in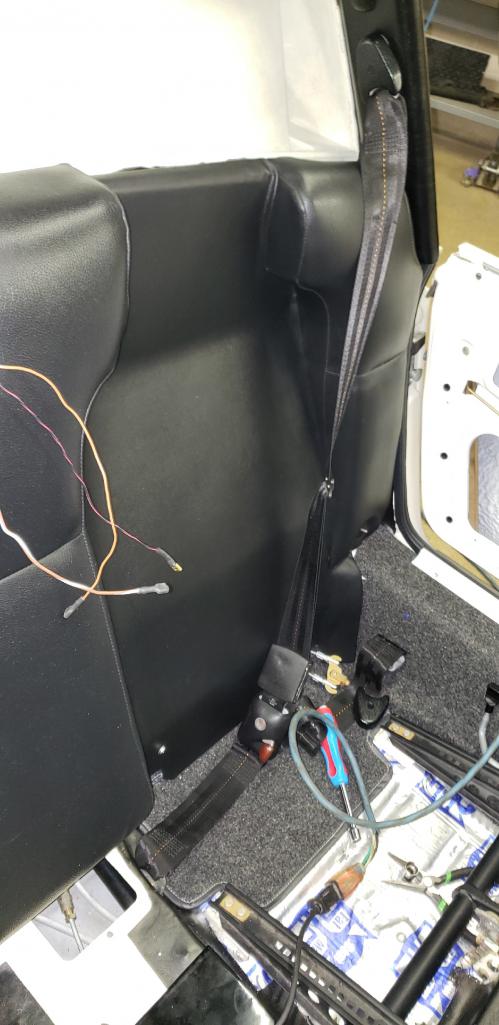
Posted by: gms Mar 28 2020, 08:33 PM
We received these great extra long visor end mountings. They are all metal so they should not loosen up like the stock units.
Posted by: mepstein Mar 28 2020, 08:34 PM
We received these great extra long visor end mountings. They are all metal so they should not loosen up like the stock units.
Who sells them?
Posted by: gms Mar 28 2020, 08:49 PM
We received these great extra long visor end mountings. They are all metal so they should not loosen up like the stock units.
Who sells them?
Uro
964 731 320 40-PRM / URO-009426
964 731 319 40-PRM / URO-009425
Posted by: P313591 Mar 29 2020, 01:29 AM
suspension is installed, I set here back on the ground yesterday!
Very nice job. Congratulations from Germany. It seems she comes back to life. Nice color!! Love to see the history back on the roads.
Posted by: gms Mar 29 2020, 07:00 PM
suspension is installed, I set here back on the ground yesterday!
Very nice job. Congratulations from Germany. It seems she comes back to life. Nice color!! Love to see the history back on the roads.
thanks!
Posted by: gms Mar 29 2020, 07:01 PM
visors in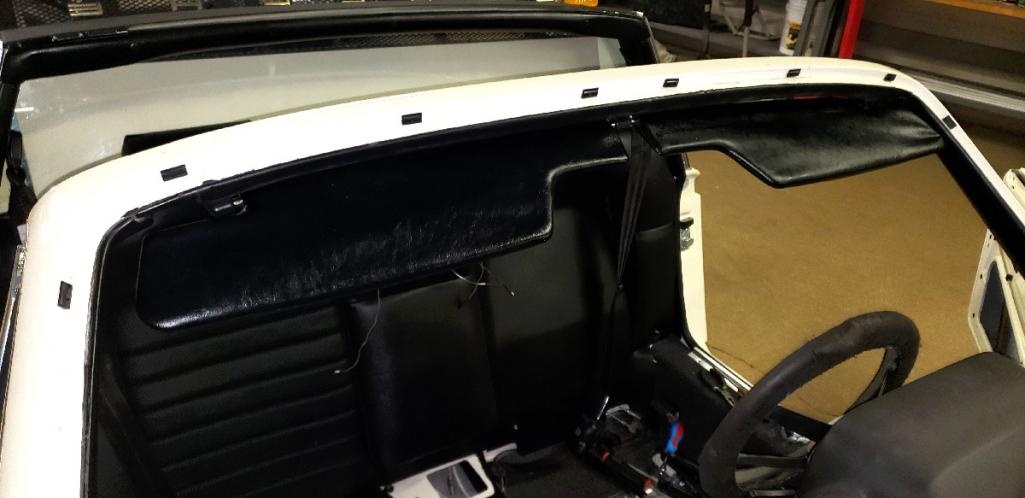
Posted by: gms Apr 2 2020, 12:41 PM
starting to assemble cables on air system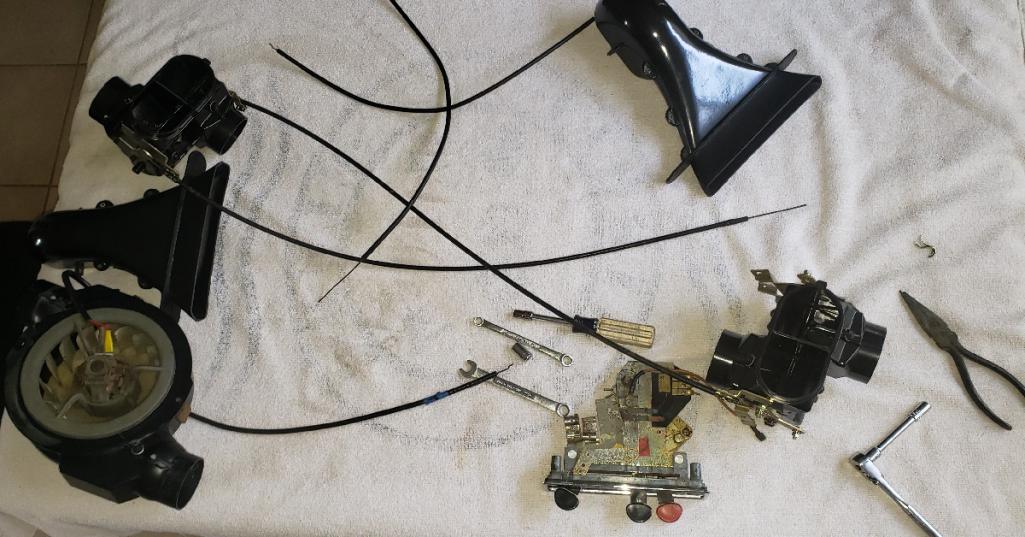

Posted by: gms Apr 4 2020, 10:30 AM
@http://www.914world.com/bbs2/index.php?showuser=4707 dropped off the new custom rear shift bushing he made!
Bill's car is converted to a side shifter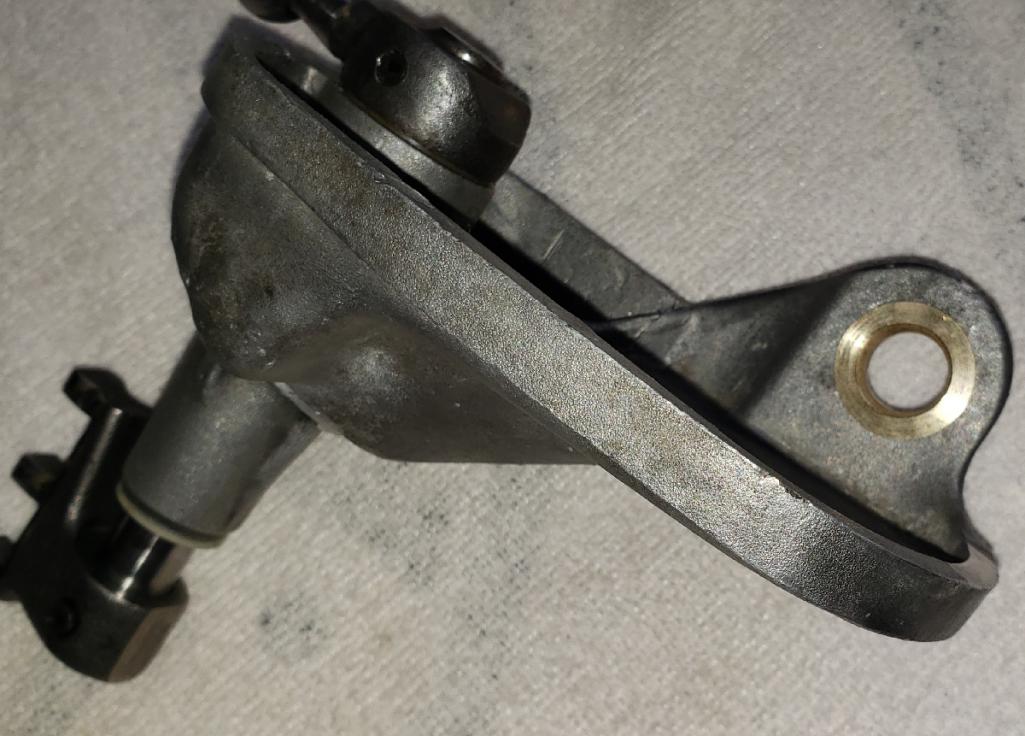
Posted by: gms Apr 6 2020, 09:22 AM
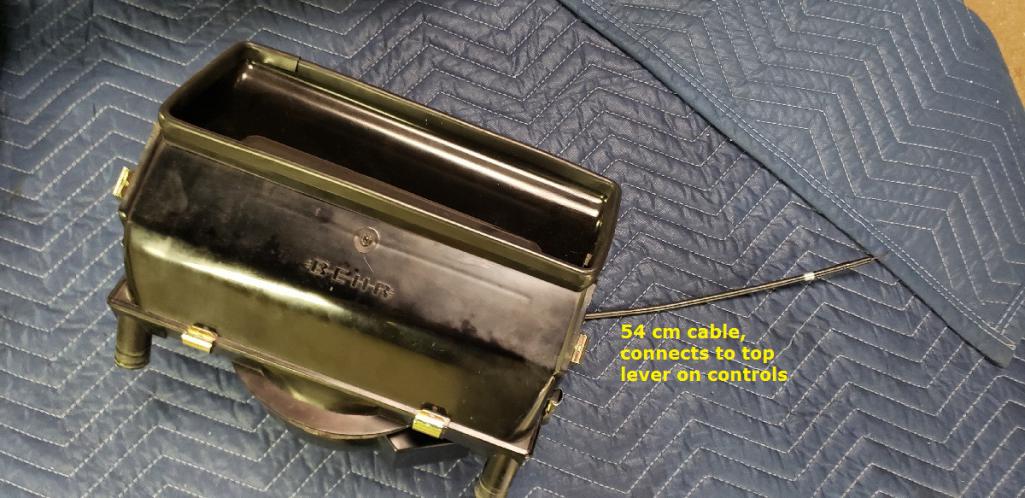
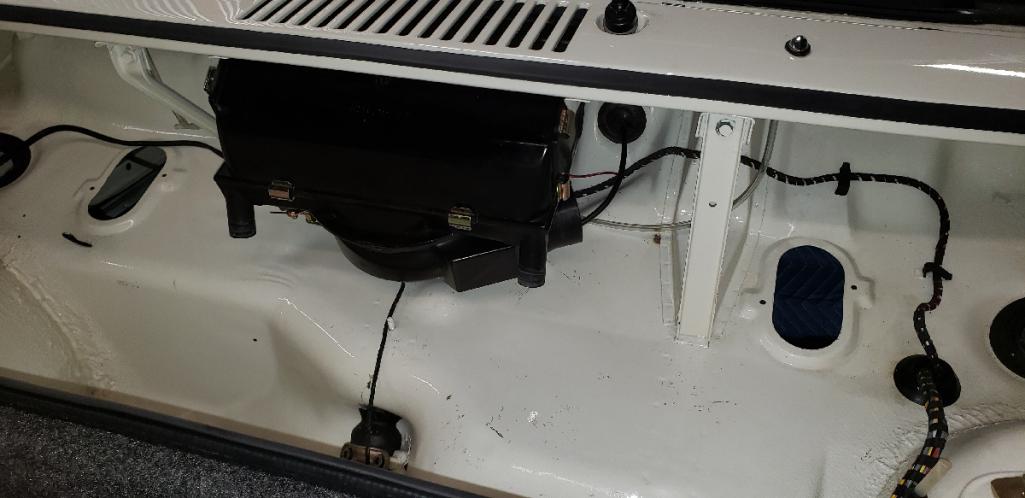
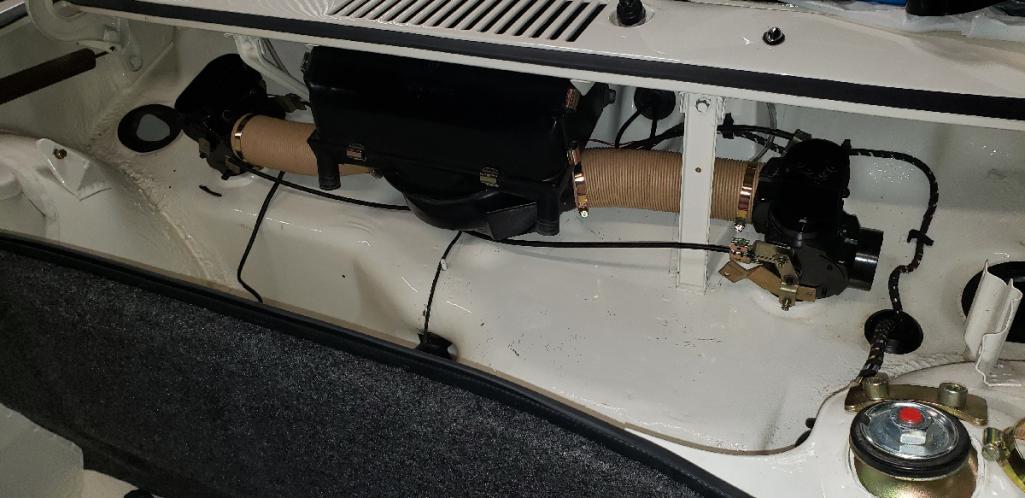
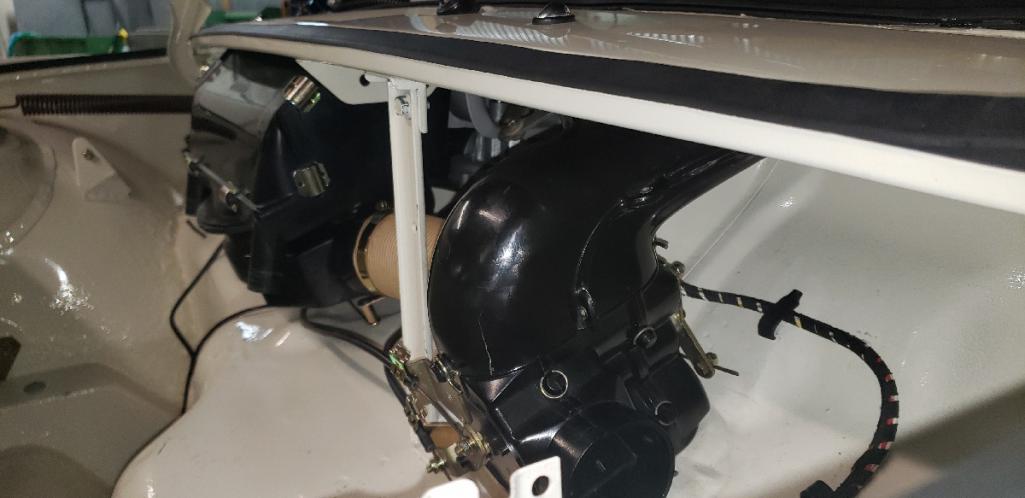
Installing the air system starts with the fresh air intake box and fan assembly. I lay down a sheet of duct tape to protect the paint, also helps fan linkage to slide in.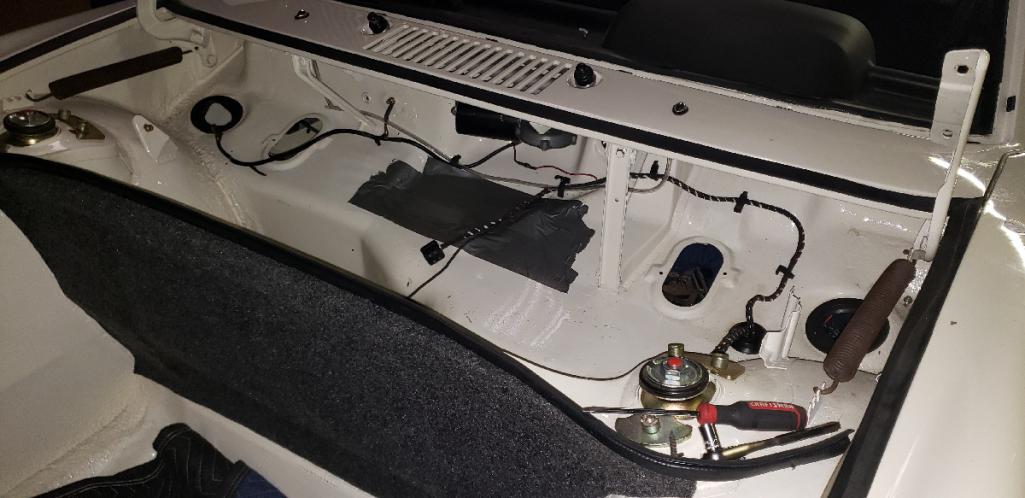
Posted by: gms Apr 6 2020, 09:27 AM
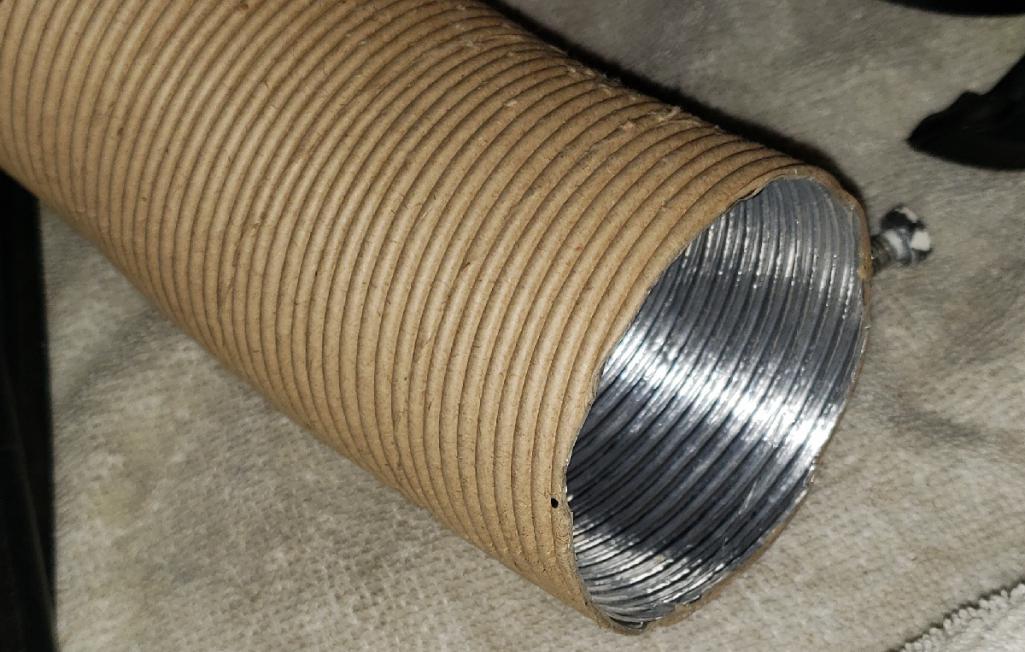
The foil lined air hose is cut to fit and installed between fan and flapper boxes.
Then the defrost nozzles installed. 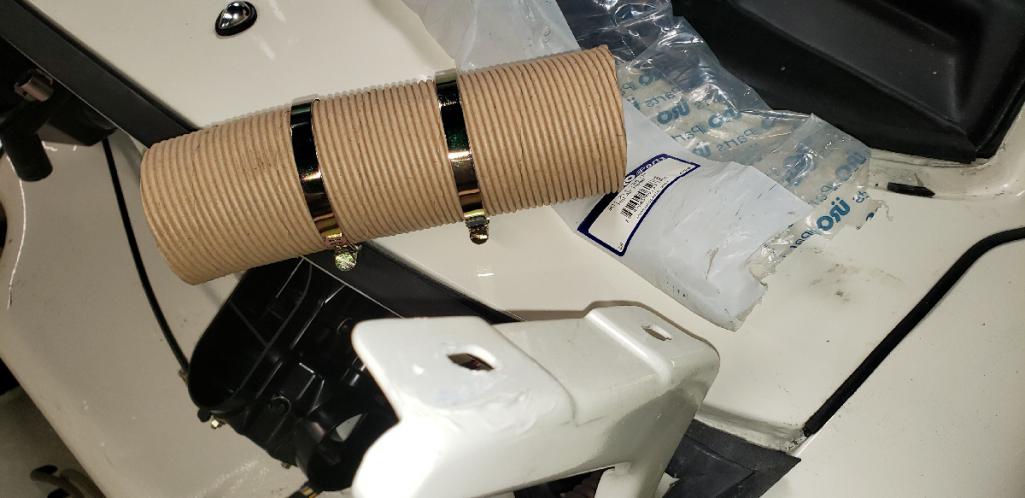
Posted by: gms Apr 6 2020, 09:31 AM
The cables that drive the flapper boxes and fan are then connected to the control levers in the cabin.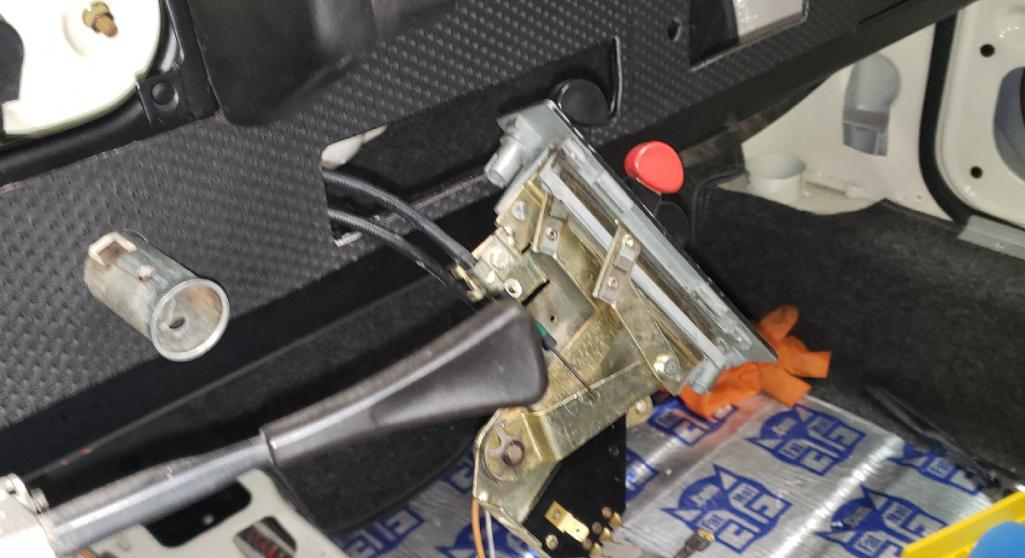
Posted by: bbrock Apr 6 2020, 09:33 AM
Good idea protecting the paint with duct tape. Looking great!
Posted by: gms Apr 6 2020, 09:35 AM
Good idea protecting the paint with duct tape. Looking great!
Thanks, getting the box in can be a challenge.
Posted by: IronHillRestorations Apr 6 2020, 11:36 AM
Nice work, as always Glenn!
Posted by: FlacaProductions Apr 6 2020, 12:44 PM
I may have missed this but have you done hood gaps yet - specifically the adjustment of the hinge relative to the hood height where it meets the cowl?
Posted by: gms Apr 6 2020, 01:42 PM
Nice work, as always Glenn!
Thanks PK
Posted by: gms Apr 6 2020, 01:45 PM
I may have missed this but have you done hood gaps yet - specifically the adjustment of the hinge relative to the hood height where it meets the cowl?
I believe the body shop did the hood, lids and door installation.
@http://www.914world.com/bbs2/index.php?showuser=15683 can you answer that?
Posted by: Targa70 Apr 6 2020, 04:22 PM
Yes, Eurofinish of Virginia Beach mounted all kids and doors after completing the paint.
Posted by: gms Apr 8 2020, 08:39 PM
wiper pump
Posted by: gms Apr 9 2020, 07:57 PM
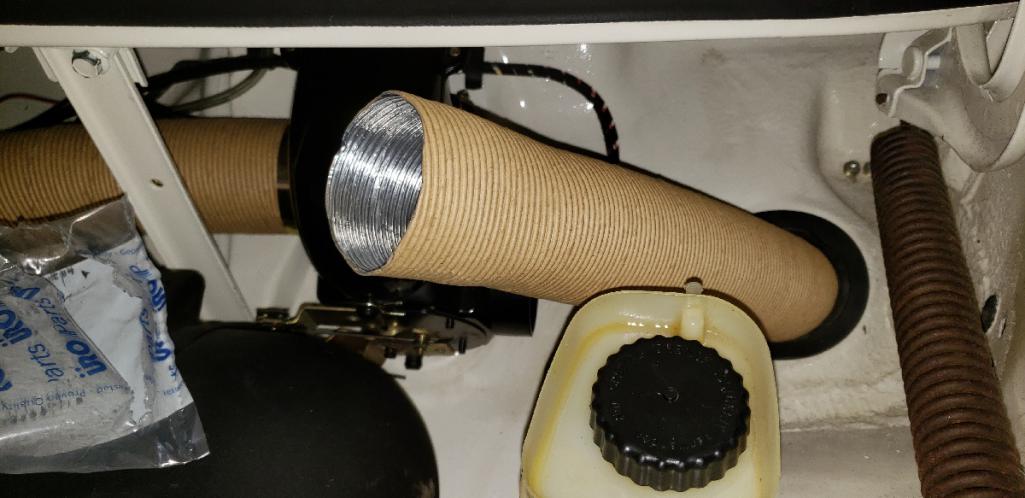
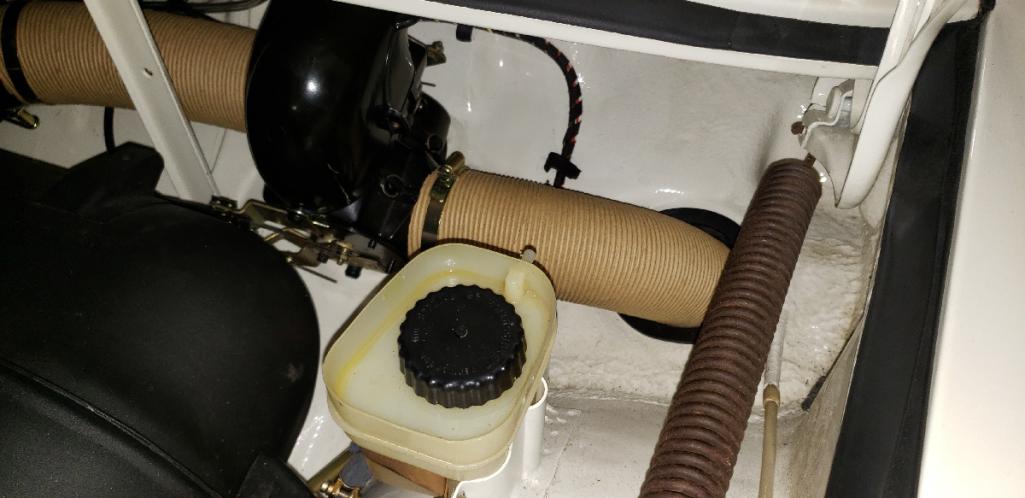
finishing installation of the heater tubes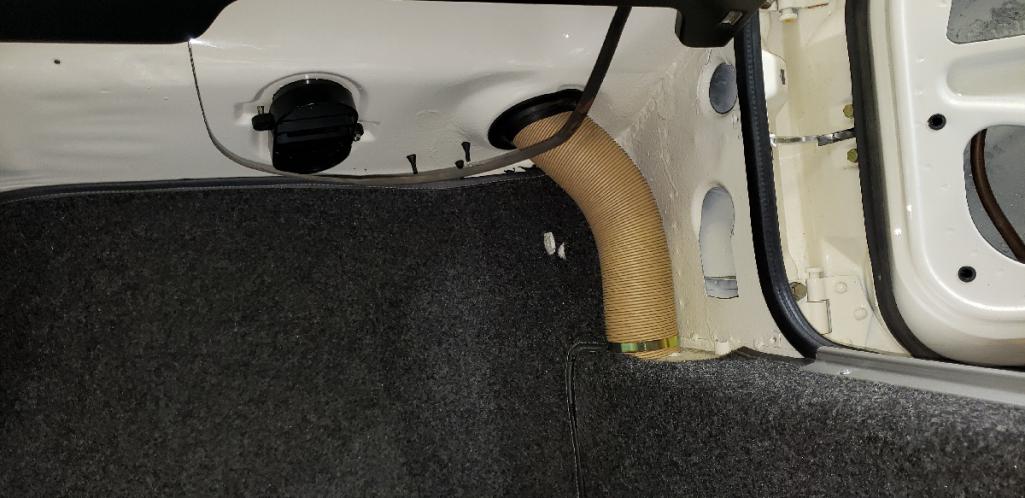
Posted by: gms Apr 9 2020, 08:01 PM
painter could take a minute and tape the seat studs 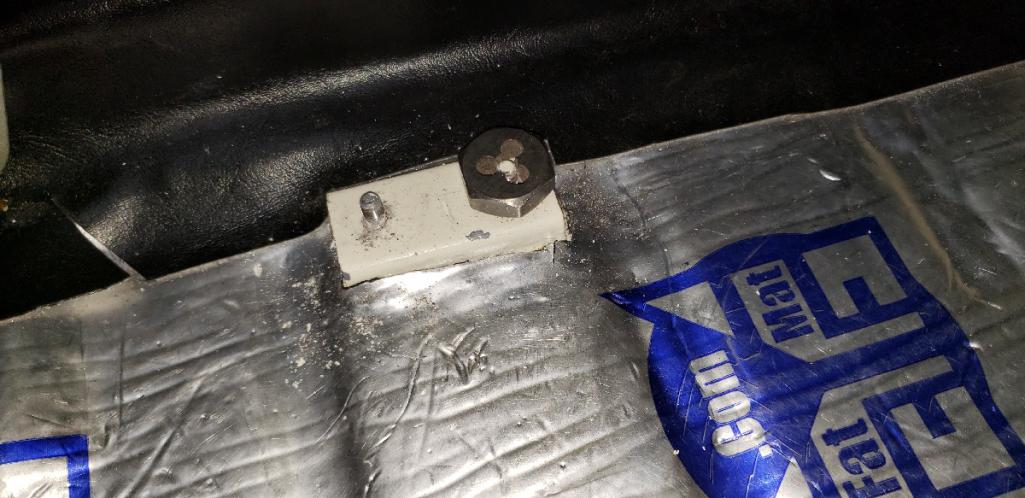
Posted by: gms Apr 9 2020, 08:02 PM
seat belts are all in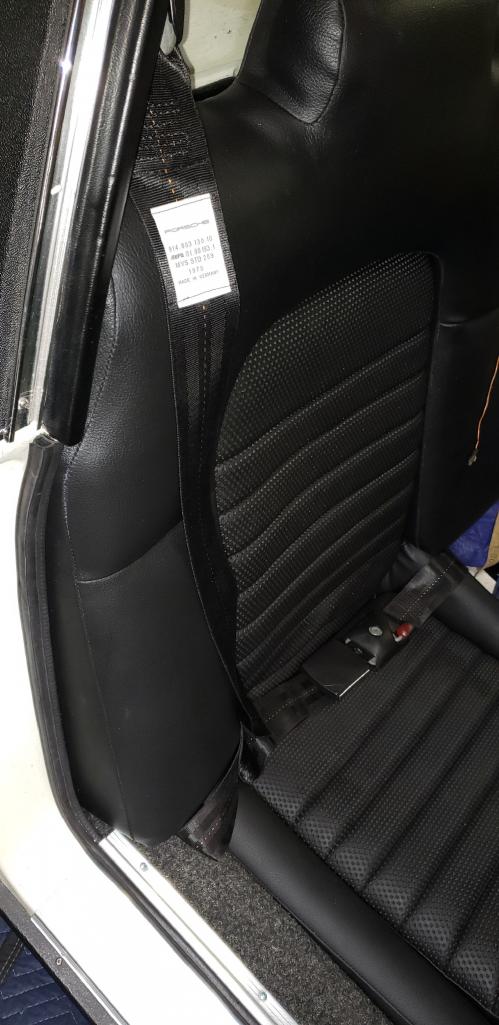
Posted by: gms Apr 9 2020, 08:13 PM
@http://www.914world.com/bbs2/index.php?showuser=11316 this has become one of the most useful tools i have...Thanks again 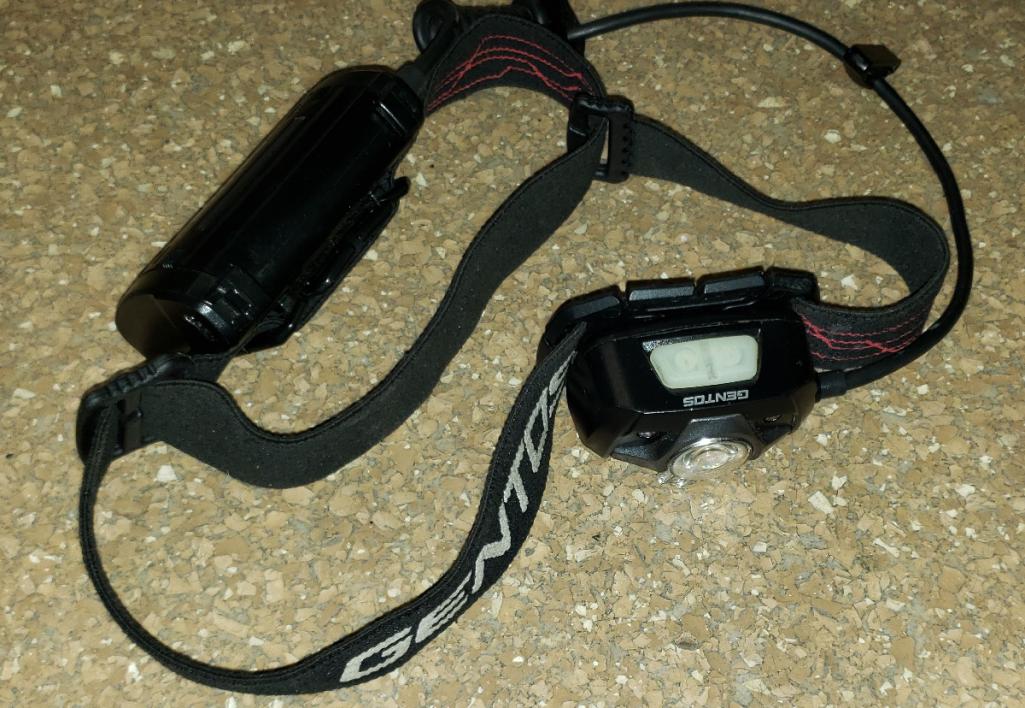
Posted by: rgalla9146 Apr 10 2020, 07:52 AM
Glenn was it a Euro delivery car ?
Posted by: gms Apr 10 2020, 08:10 AM
Glenn was it a Euro delivery car ?
No, owner previous to Bill converted fogs, turn signals, lenses and badge
Posted by: porschetub Apr 10 2020, 02:17 PM
Good idea protecting the paint with duct tape. Looking great!
Thanks, getting the box in can be a challenge.
 done it once
  but need to do again to do Boxster drive motor conversion,did you find it easier with the hood removed ?,nice work by the way
 Posted by: rgalla9146 Apr 10 2020, 03:30 PM
Glenn was it a Euro delivery car ?
No, owner previous to Bill converted fogs, turn signals, lenses and badge
I asked because of the stripe in the seatbelt strap which I believe is a Euro
thing in some Porsche cars.....not sure of 914s
Posted by: gms Apr 10 2020, 03:36 PM
Glenn was it a Euro delivery car ?
No, owner previous to Bill converted fogs, turn signals, lenses and badge
I asked because of the stripe in the seatbelt strap which I believe is a Euro
thing in some Porsche cars.....not sure of 914s
there is new webbing on those Rory
Posted by: gms Apr 10 2020, 03:38 PM
Good idea protecting the paint with duct tape. Looking great!
Thanks, getting the box in can be a challenge.
done it once but need to do again to do Boxster drive motor conversion,did you find it easier with the hood removed ?,nice work by the way I put a blanket in the front trunk and took the hood off to save my back.
it worked well for me.
Posted by: gms Apr 11 2020, 06:21 PM
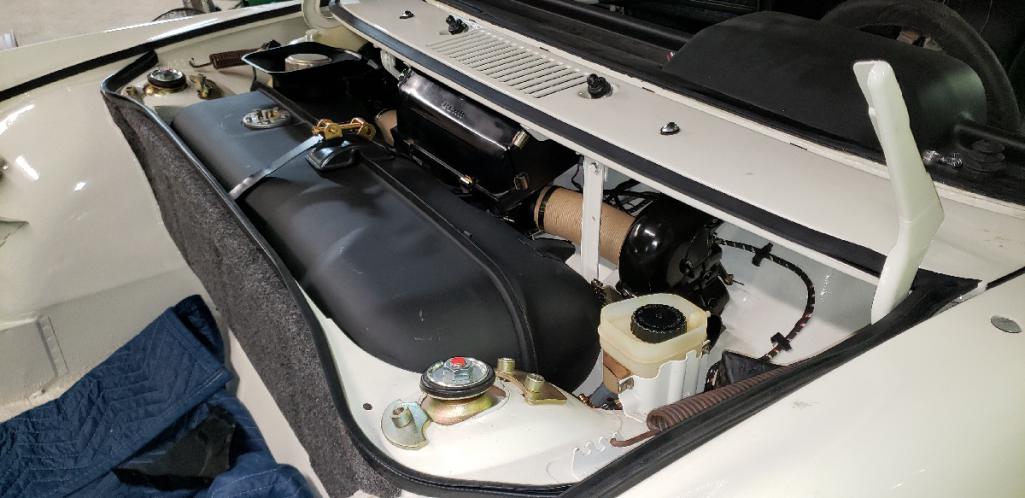
installed master cylinder today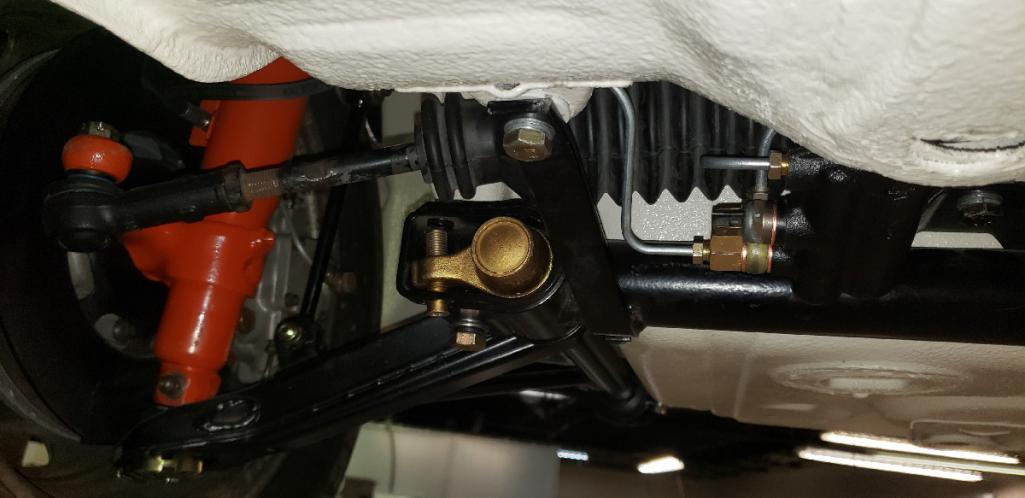
Posted by: gms Apr 11 2020, 06:32 PM
I spruced up the transaxle with a new back-up switch and plated parts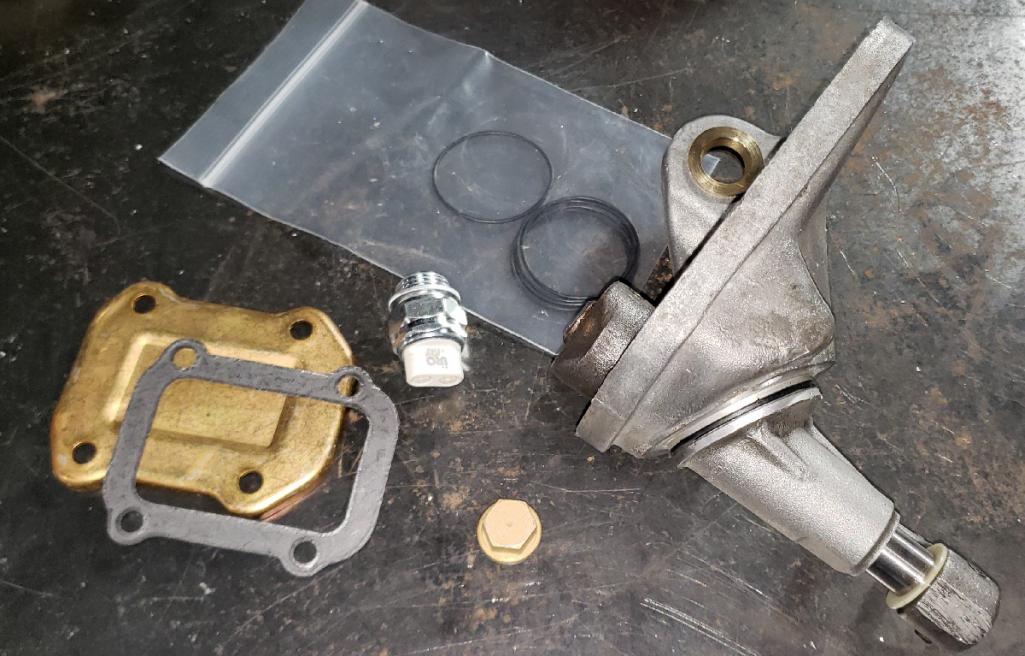
Posted by: gcrotvik Apr 12 2020, 06:36 PM
Hi Glenn,
What shift rod are you using? I had Rory make one for my 70 with the side shift conversion.
Greg
Posted by: Cairo94507 Apr 13 2020, 08:19 AM
That Six will be driving very soon.
Posted by: gms Apr 13 2020, 09:59 AM
Hi Glenn,
What shift rod are you using? I had Rory make one for my 70 with the side shift conversion.
Greg
Hi Greg,
I am not sure who made this custom linkage, I will take a picture of the rear linkage piece when I have a chance.
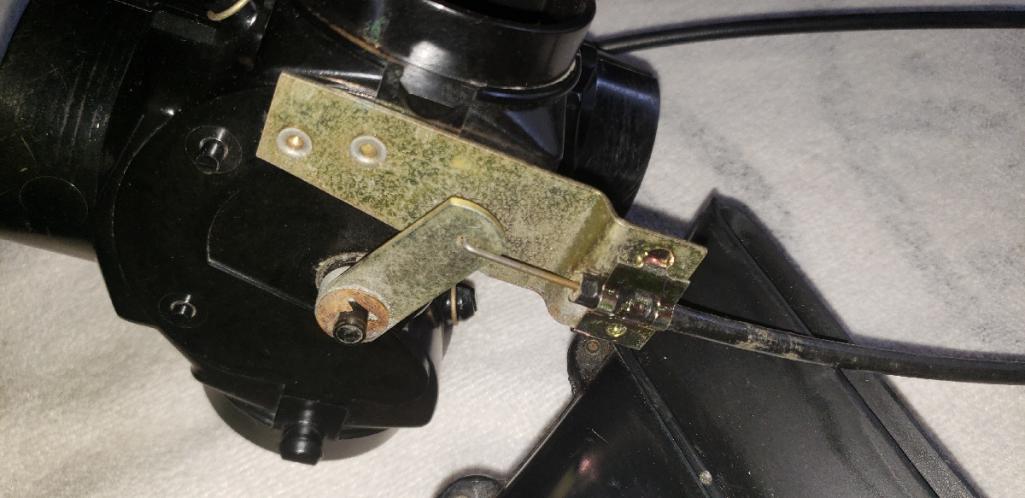
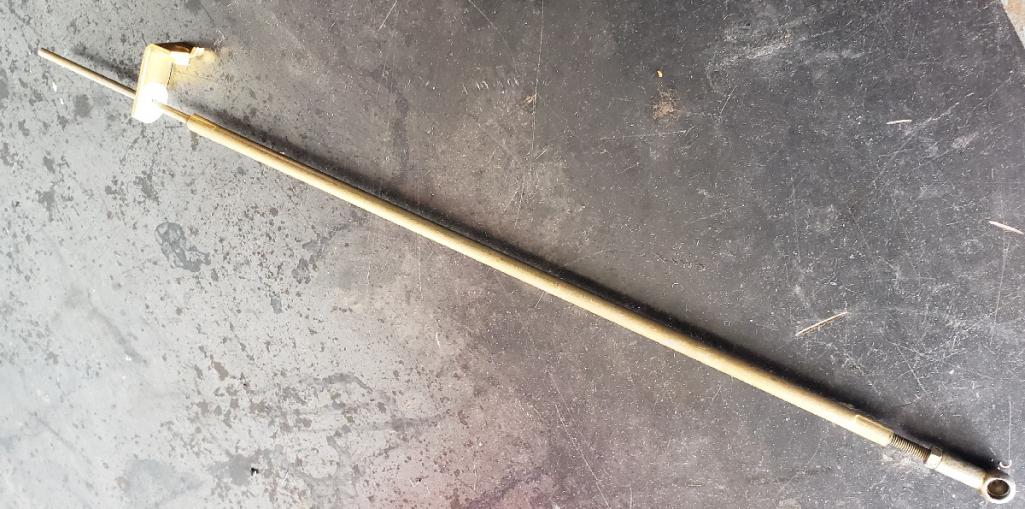
Posted by: gms Apr 13 2020, 10:02 AM
That Six will be driving very soon.
Michael I am getting close!
Posted by: gms Apr 13 2020, 06:20 PM
master cylinder detail pic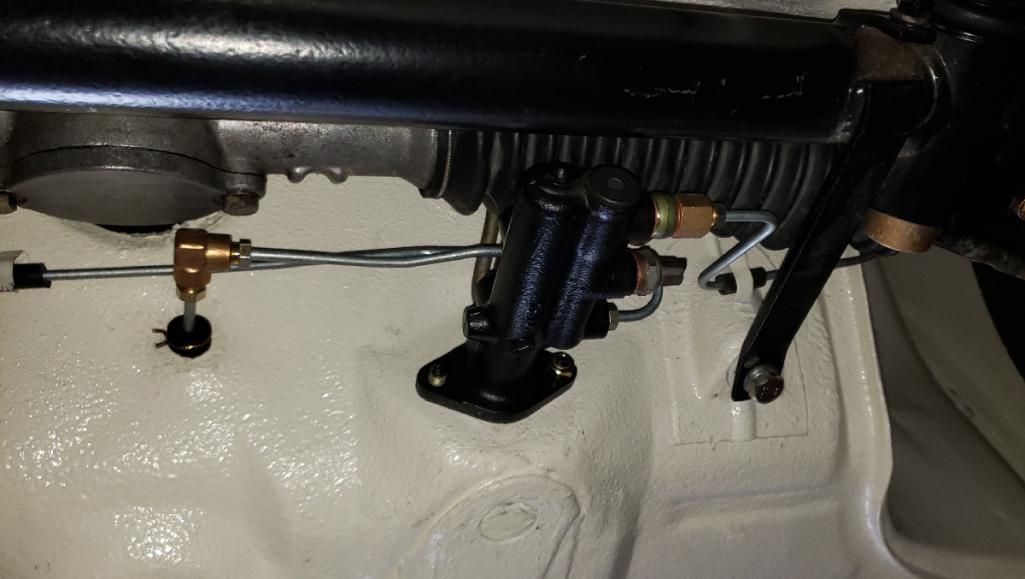
Posted by: gms Apr 14 2020, 10:05 PM
Hi Glenn,
What shift rod are you using? I had Rory make one for my 70 with the side shift conversion.
Greg
I am not sure who made this but here are some pix

Posted by: gms Apr 14 2020, 10:15 PM
underside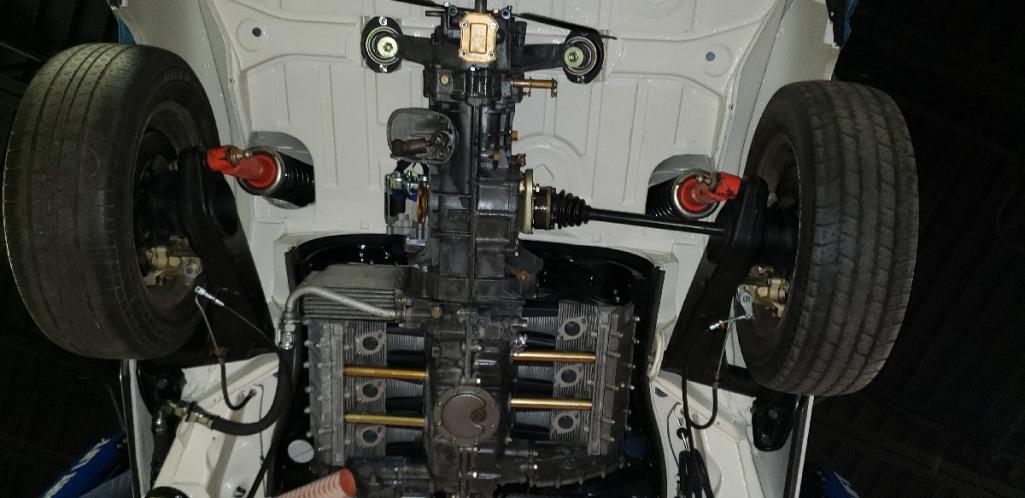
Posted by: gms Apr 14 2020, 10:17 PM
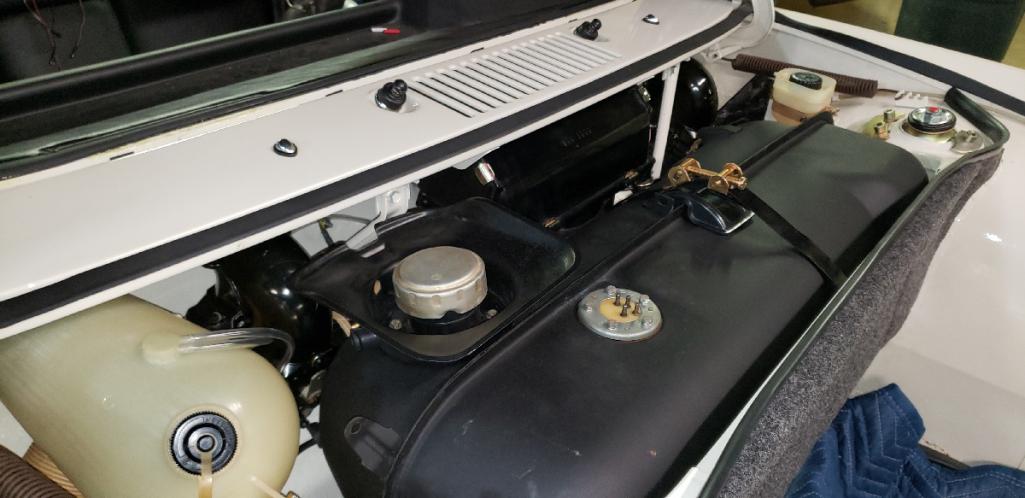
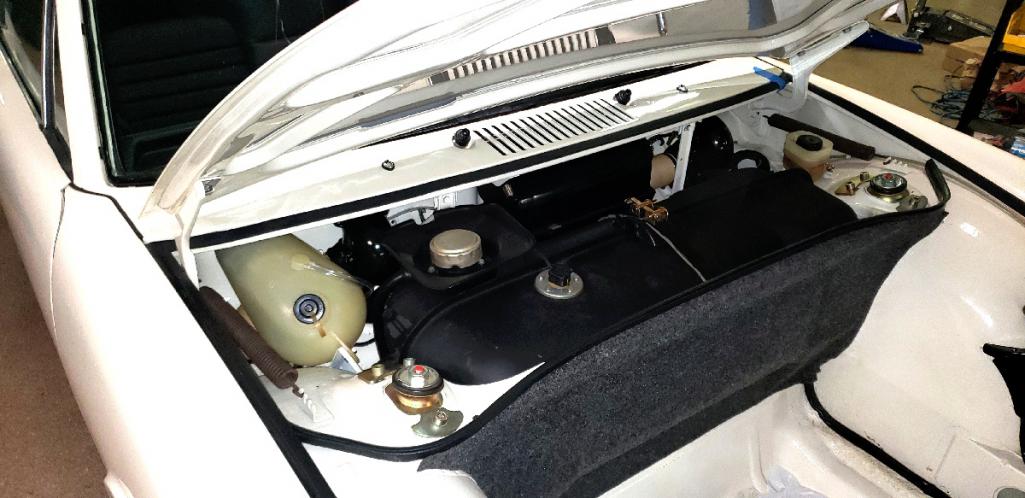
preparing fuel tank for installation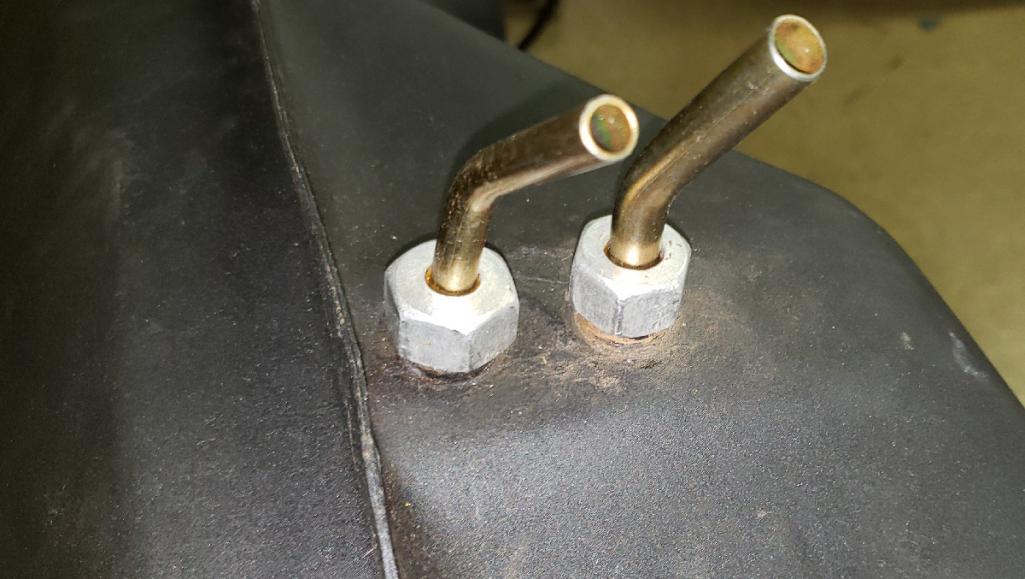
Posted by: gms Apr 15 2020, 09:23 PM
fitting fuel tank after cleaning out some debris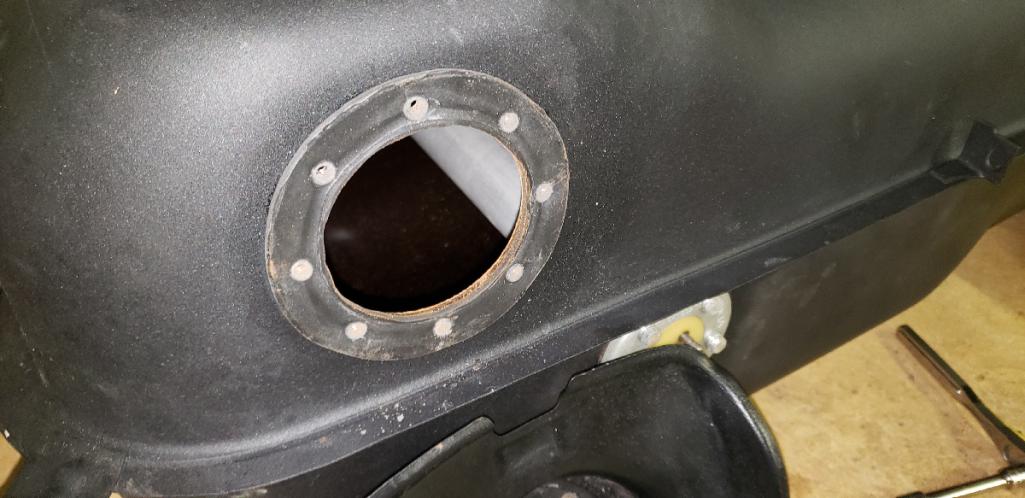
Posted by: porschetub Apr 15 2020, 10:08 PM
Good idea protecting the paint with duct tape. Looking great!
Thanks, getting the box in can be a challenge.
done it once but need to do again to do Boxster drive motor conversion,did you find it easier with the hood removed ?,nice work by the way I put a blanket in the front trunk and took the hood off to save my back.
it worked well for me.
Thanks will do ,my back isn't that flash besides.
Posted by: gms Apr 16 2020, 10:19 AM
the oil cooler has arrived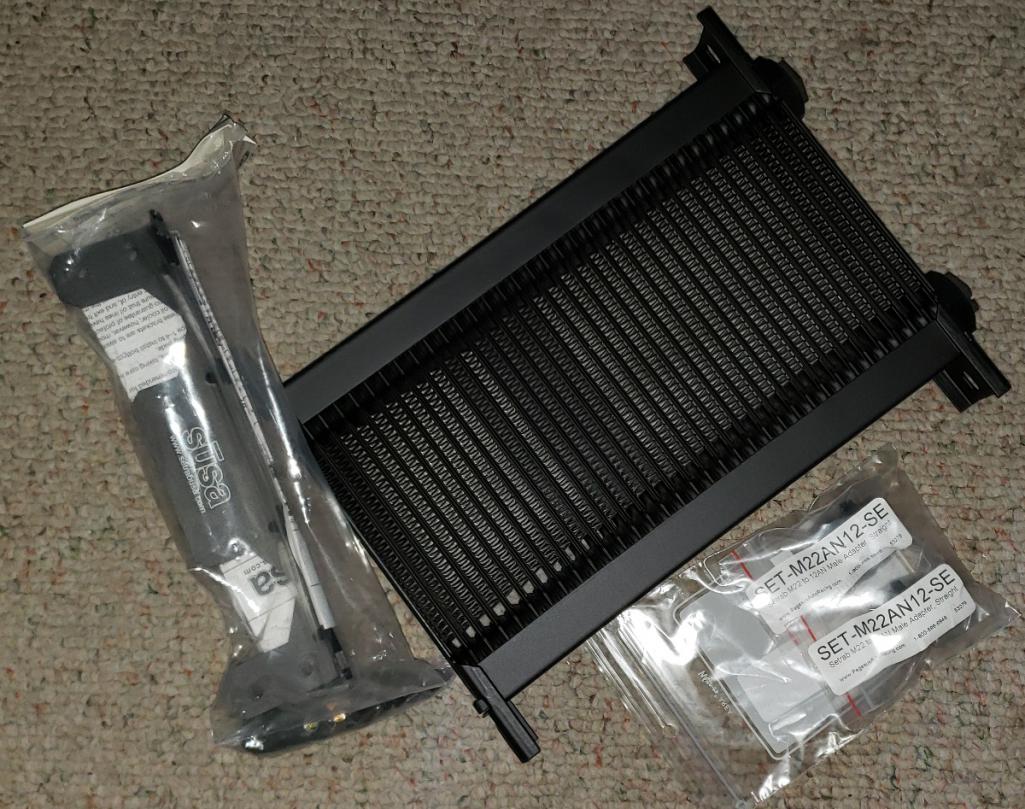
Posted by: gms Apr 19 2020, 07:57 PM
place support pads and fastened the fuel tank in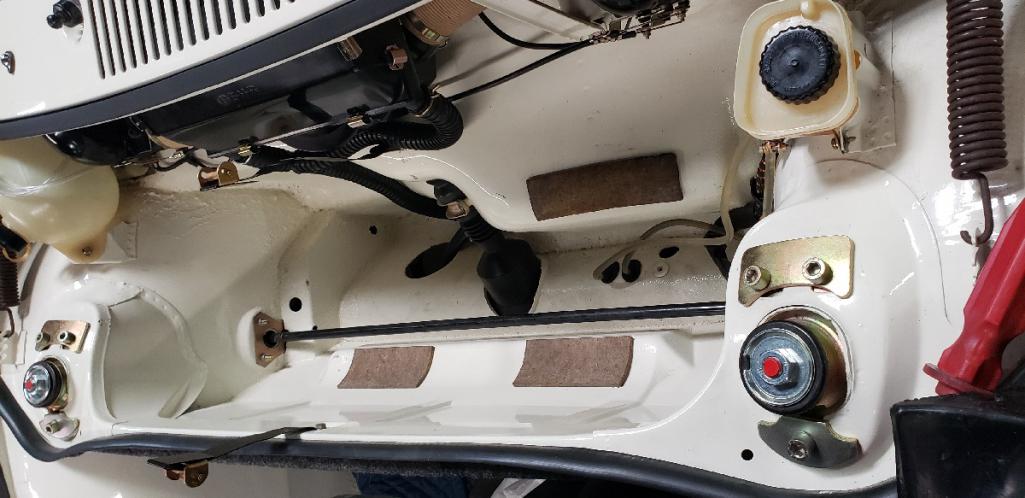
Posted by: gms Apr 19 2020, 08:46 PM
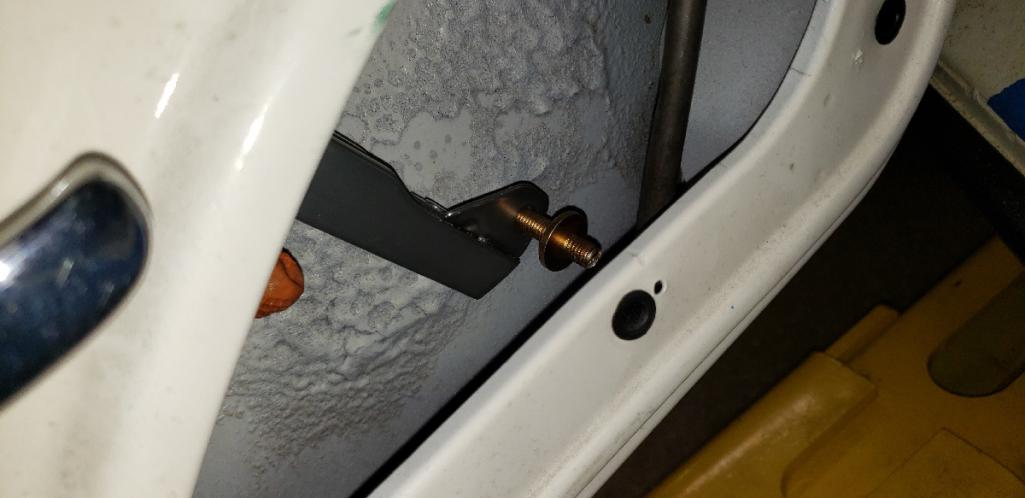
final adjustment to side windows were made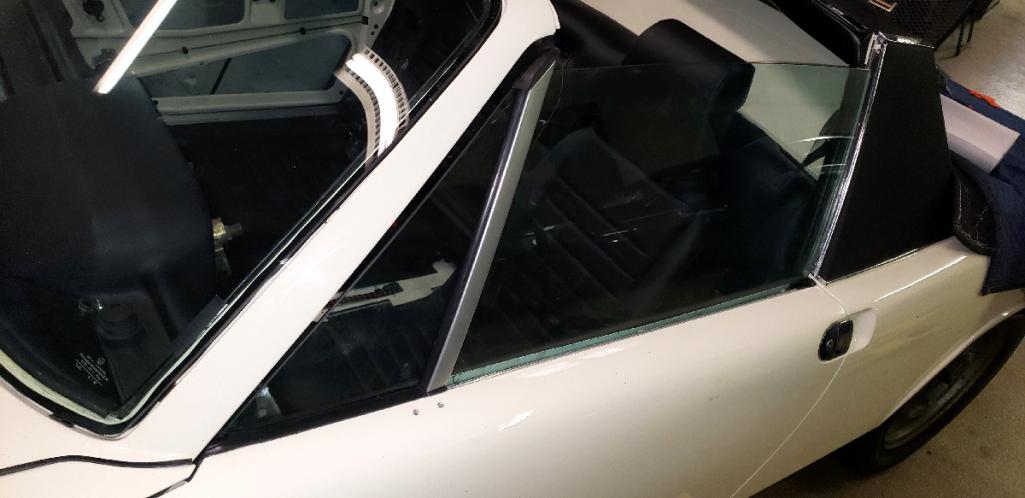
Posted by: gms Apr 19 2020, 08:49 PM
Period correct windshield
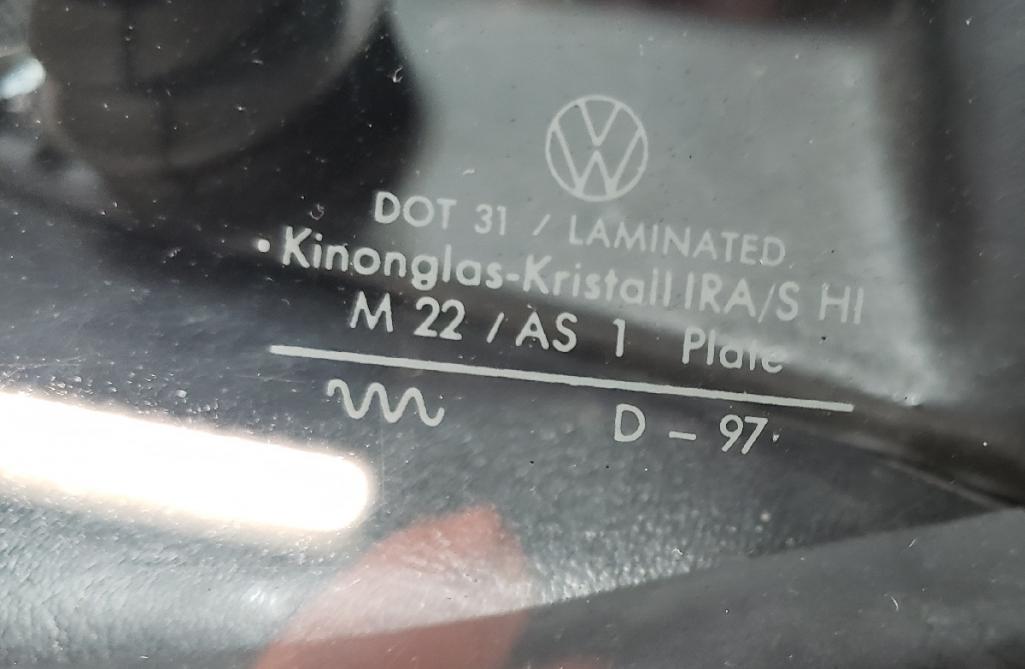
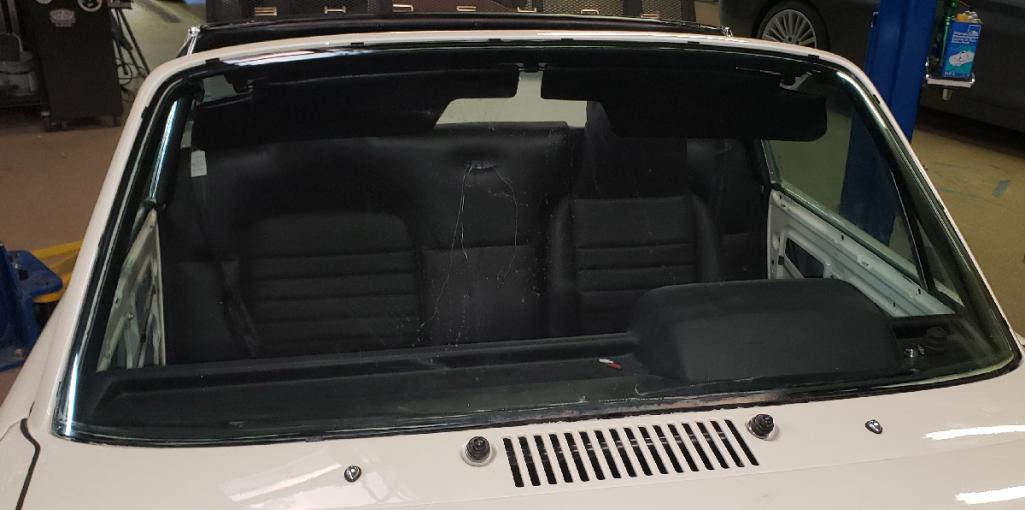
Posted by: gms Apr 19 2020, 08:51 PM
and the windshield was installed 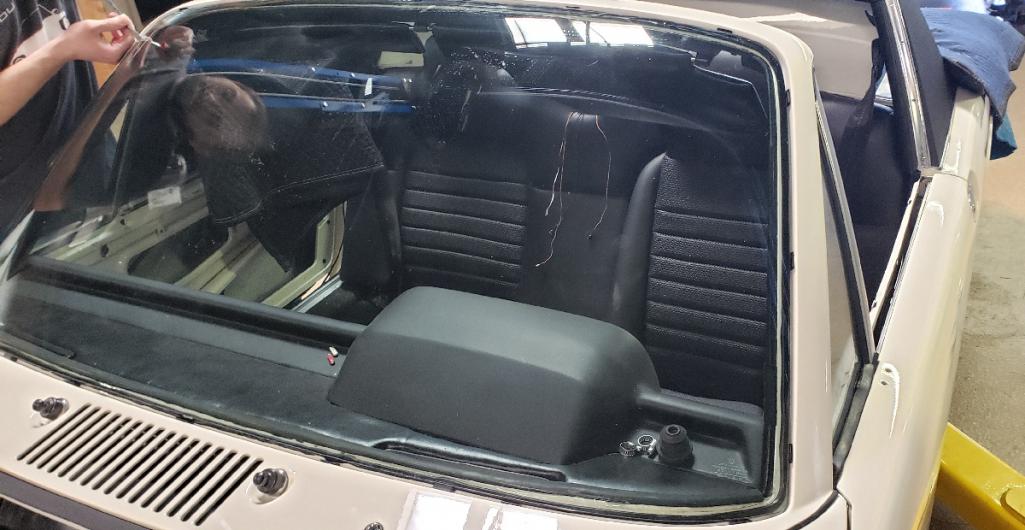
Posted by: gms Apr 24 2020, 04:00 PM
Our Blaupunkt radio guru @http://www.914world.com/bbs2/index.php?showuser=13069 tested the radio and made model year corrections to the knobs and face plate.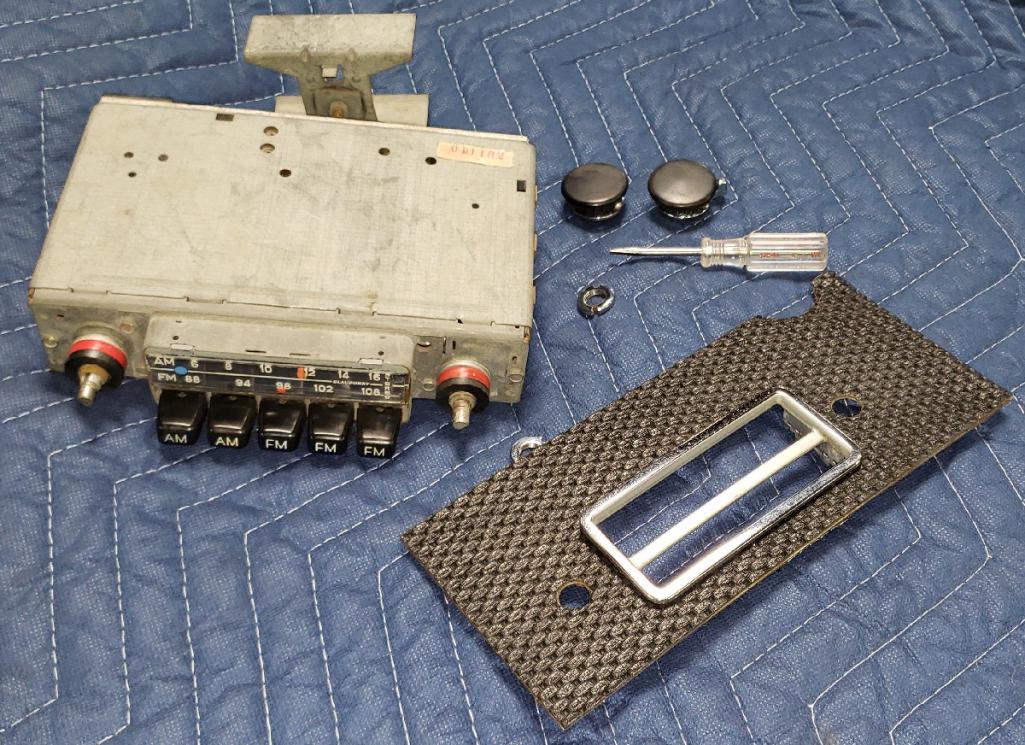
Posted by: gms Apr 29 2020, 07:17 PM
.
Posted by: gms Apr 29 2020, 07:20 PM
passenger door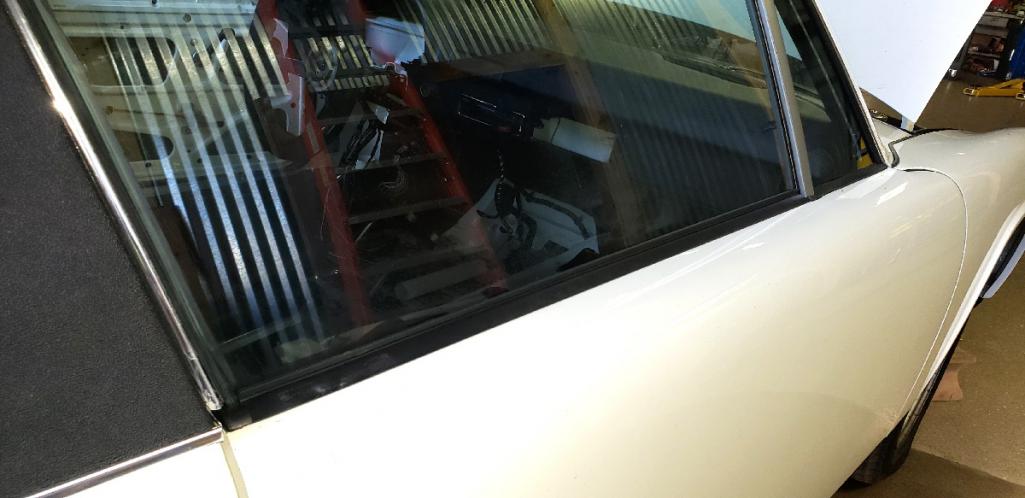
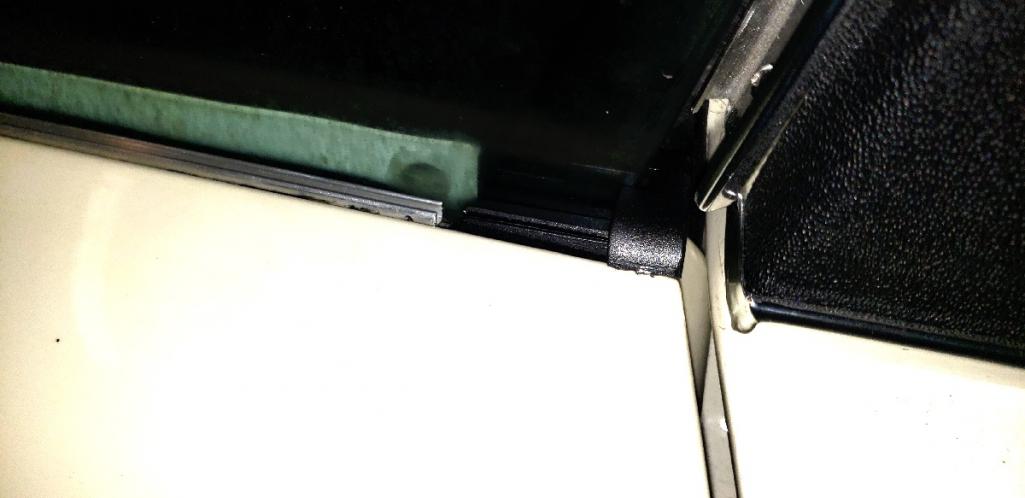
Posted by: gms Apr 29 2020, 07:23 PM
end cap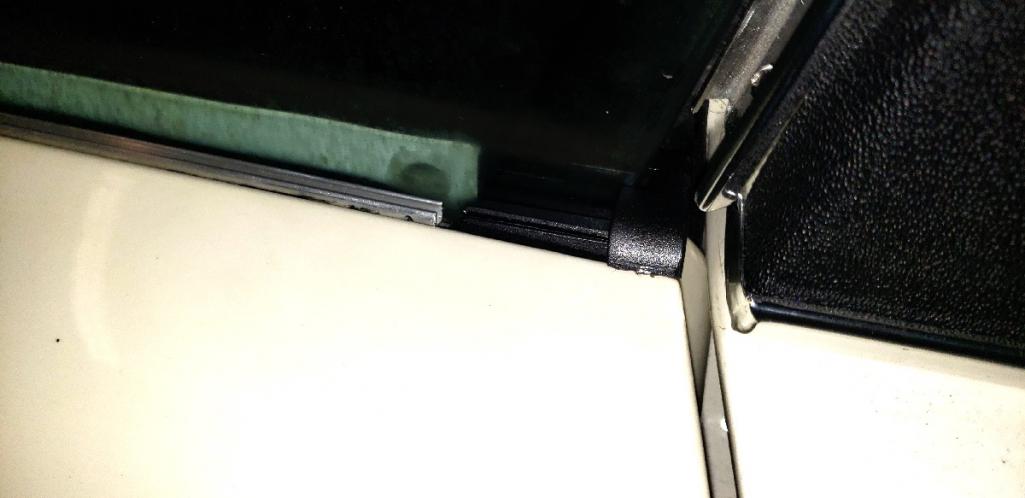
squeegee and fuzzy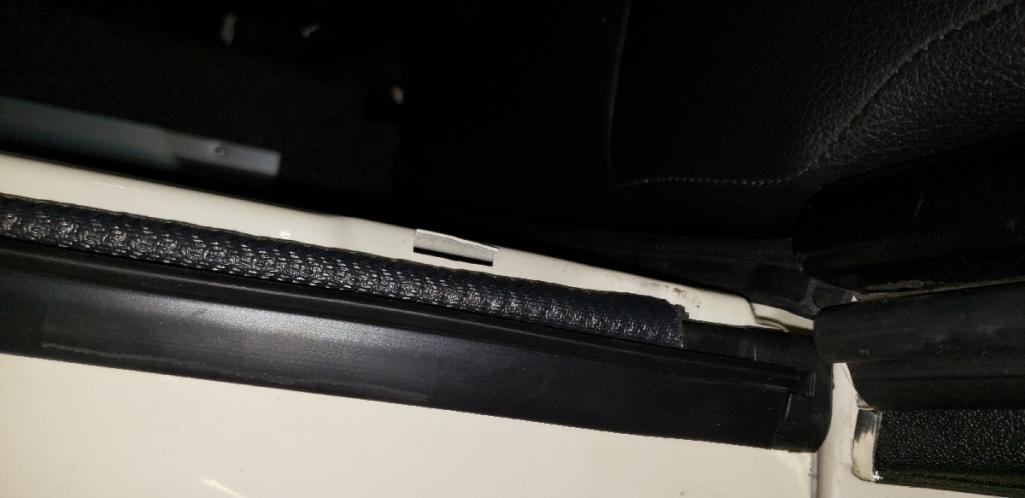
Posted by: Targa70 Apr 30 2020, 06:40 AM
I think I bought that windshield from Garold about 5 years ago. I fractured the original when I was trying to pull it out of the car in the mid 2000's. Seems like yesterday but at the same time feels like forever ago. Glenn, you do amazing work.
Posted by: Targa70 Apr 30 2020, 06:41 AM
@http://www.914world.com/bbs2/index.php?showuser=865
Posted by: JOEPROPER Apr 30 2020, 06:59 AM
Is that an original window end cap? Where did you get it???
Posted by: gms Apr 30 2020, 09:36 AM
Is that an original window end cap? Where did you get it???
end cap is a repro from 914rubber
Posted by: Cracker May 5 2020, 05:26 PM
Great to hear, sir...I forgot I gave you one of those! Ha.
Tony
@http://www.914world.com/bbs2/index.php?showuser=11316 this has become one of the most useful tools i have...Thanks again
Posted by: krazykonrad May 6 2020, 11:17 AM
Great to hear, sir...I forgot I gave you one of those! Ha.
Tony
@http://www.914world.com/bbs2/index.php?showuser=11316 this has become one of the most useful tools i have...Thanks again
Headlamps make every job so much easier. I use mine for everything but eating breakfast.
Posted by: gms May 6 2020, 07:30 PM
added the replacement handle on the driver's seat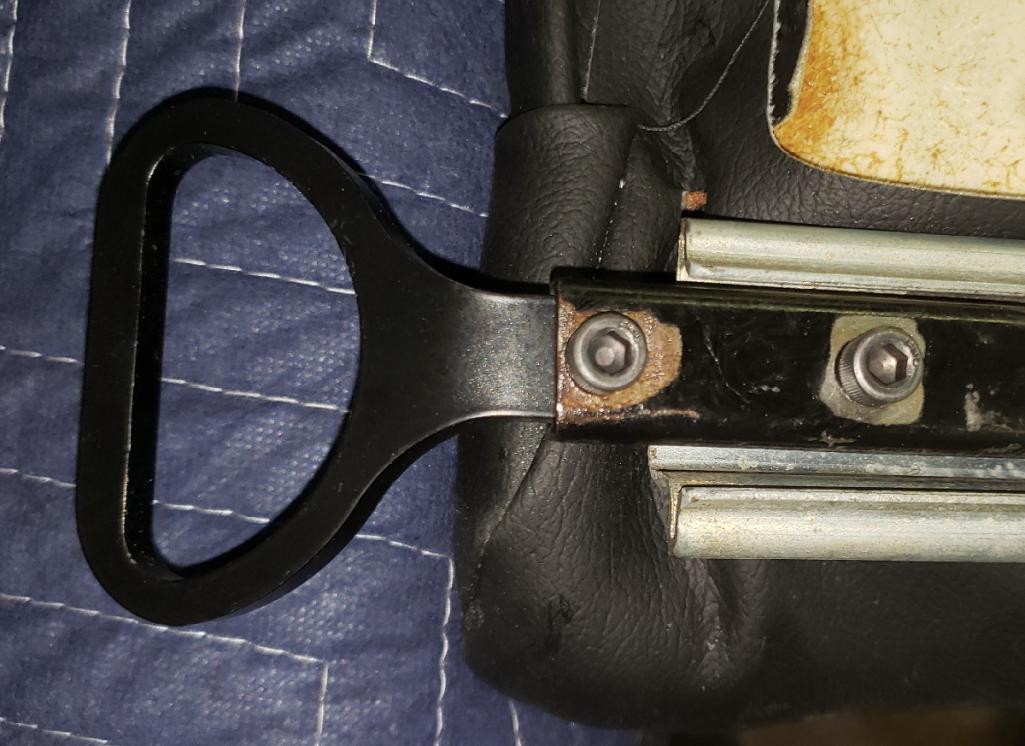
Posted by: gms May 6 2020, 07:31 PM
sand blasted the new radio face plate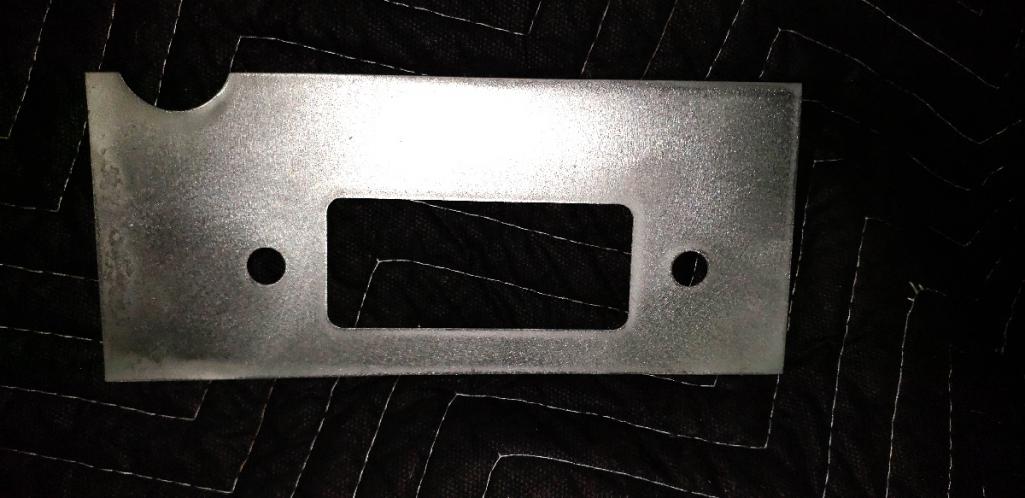
Posted by: gms May 7 2020, 03:28 PM
Also had issue with the new Porsche trim, so the ends were re-contoured to give a better fit.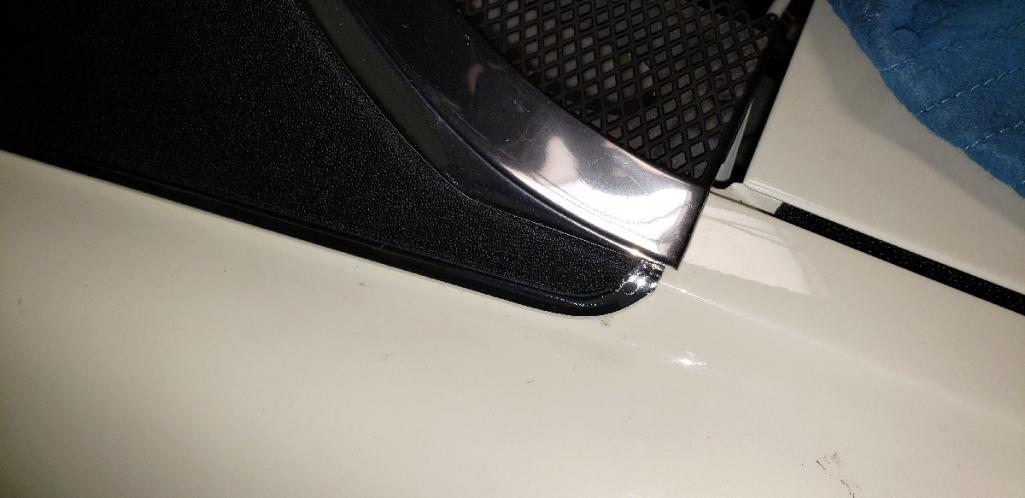
Posted by: gms May 8 2020, 08:51 PM
drilling holds and mount muffler shield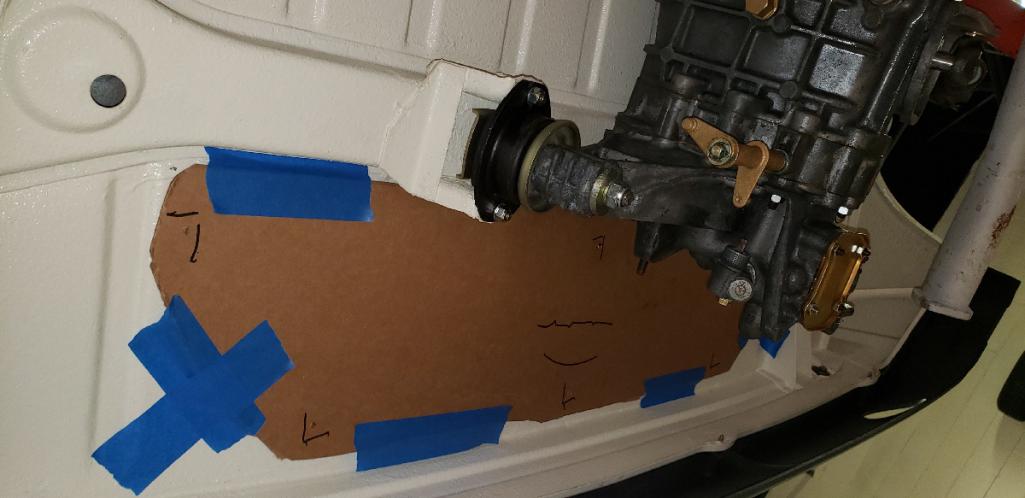
Posted by: gms May 8 2020, 08:52 PM
.
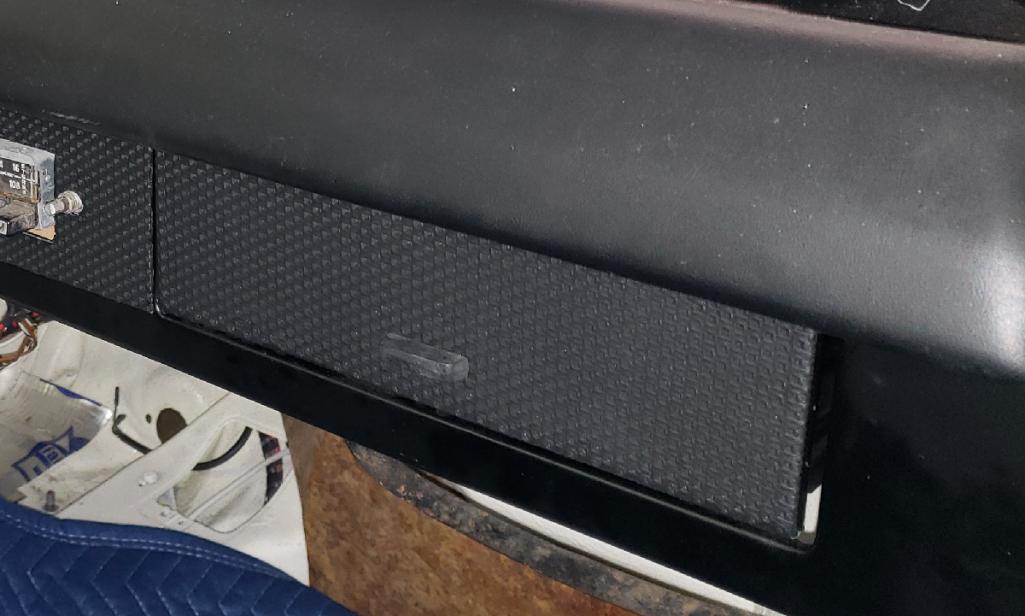
Posted by: gms May 11 2020, 11:46 AM
I am not so happy with the door pocket, time to call @http://www.914world.com/bbs2/index.php?showuser=865 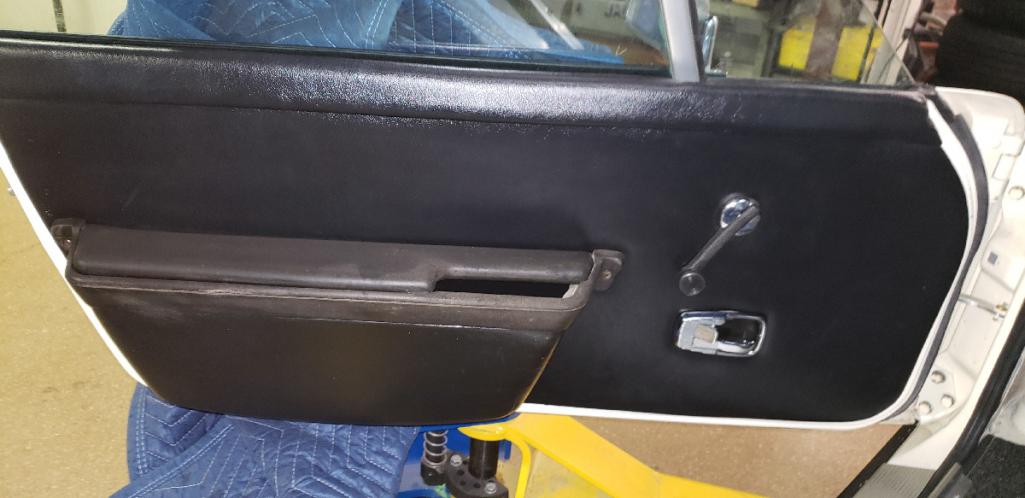
Posted by: gms May 11 2020, 11:51 AM
feeding the wires thru the scrunchies and thru the carb manifold.
Sadly the ignition switch is not working on the "Run" position so no start up this week and at least 5 days to get a new replacement. 
Posted by: UROpartsman May 11 2020, 12:11 PM
Looks like our Ignition Wire Holder https://apaindustries.com/parts/10110 there?
Posted by: gms May 11 2020, 05:27 PM
Looks like our Ignition Wire Holder https://apaindustries.com/parts/10110 there?
Yes
Posted by: Targa70 May 14 2020, 07:43 AM
@http://www.914world.com/bbs2/index.php?showuser=19288 I can't tell you how pleased Glenn and I have been with the URO parts we have been using for this build. It has all fit very well and is close to stock in appearance. I know you probably have multiple suppliers with varied levels of quality and fit, but thus far we have not been disappointed.
Posted by: UROpartsman May 15 2020, 02:23 PM
@http://www.914world.com/bbs2/index.php?showuser=19288 I can't tell you how pleased Glenn and I have been with the URO parts we have been using for this build. It has all fit very well and is close to stock in appearance. I know you probably have multiple suppliers with varied levels of quality and fit, but thus far we have not been disappointed.
Thank you for your feedback Targa70, we're thrilled to be a part of your amazing restoration!
Posted by: gms May 16 2020, 01:22 PM
oil hose and air duct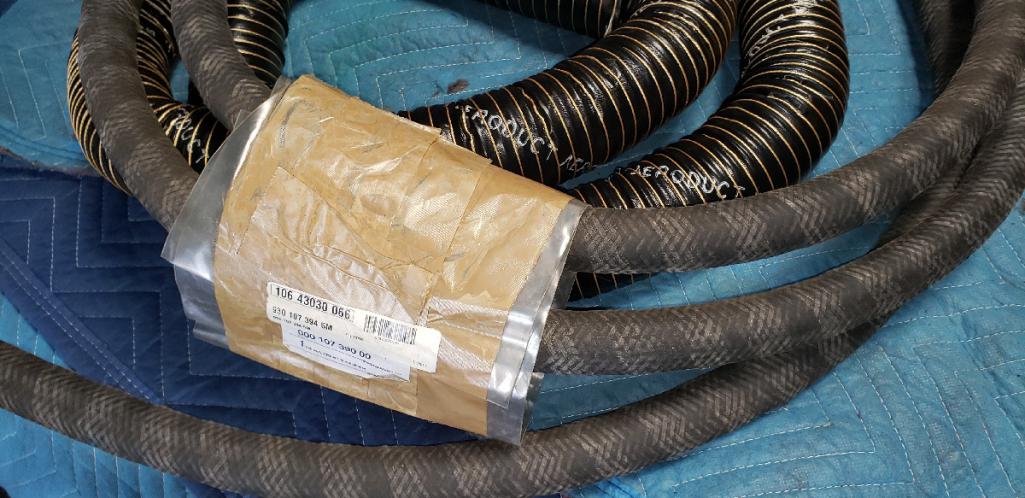
Posted by: gms May 16 2020, 01:23 PM
New ignition switch has arrived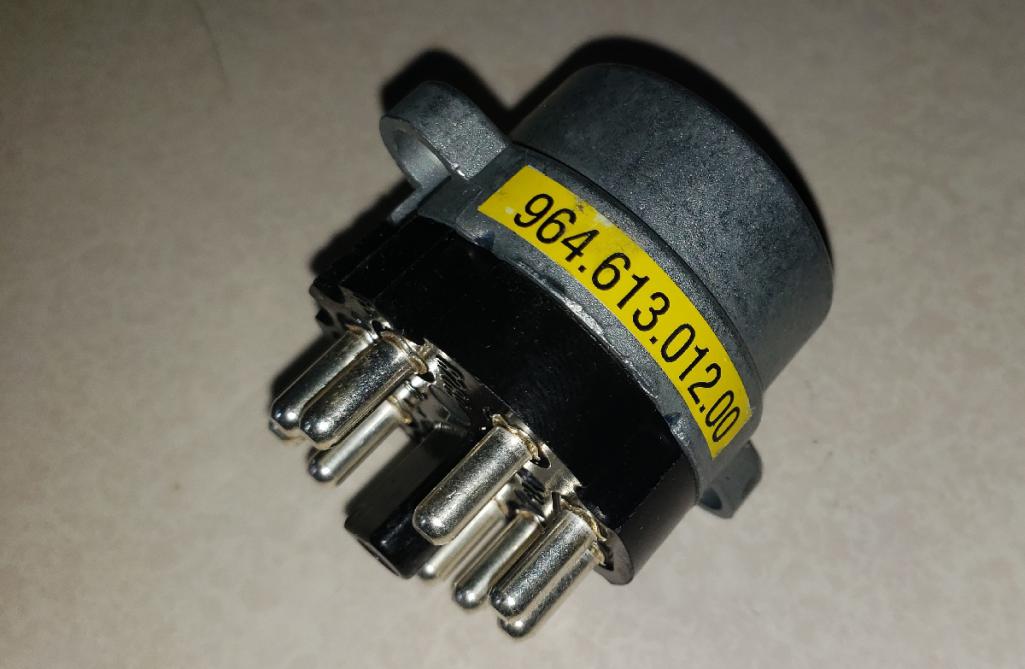
Posted by: gms May 16 2020, 01:40 PM
.
Attached thumbnail(s)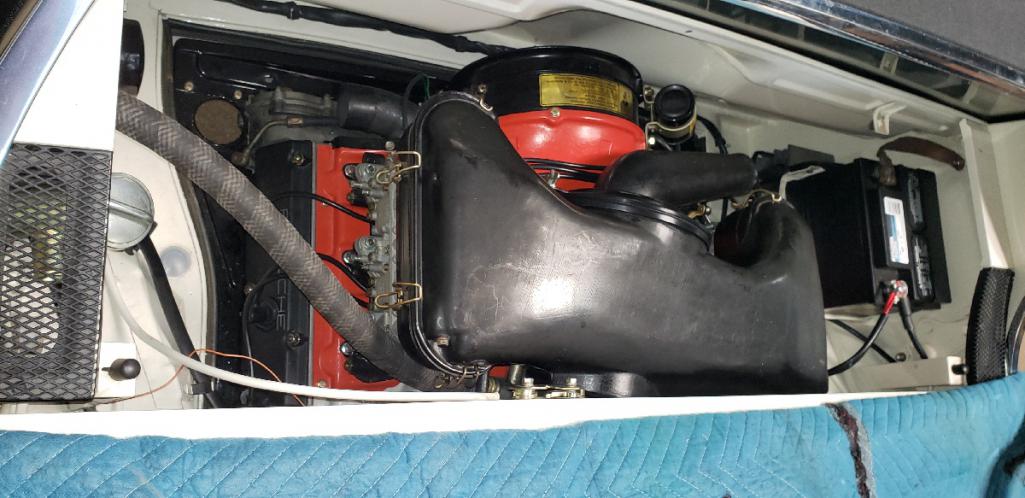
Posted by: gms May 16 2020, 01:41 PM
.
Posted by: gms May 16 2020, 01:42 PM
Electricity is coursing thru her wires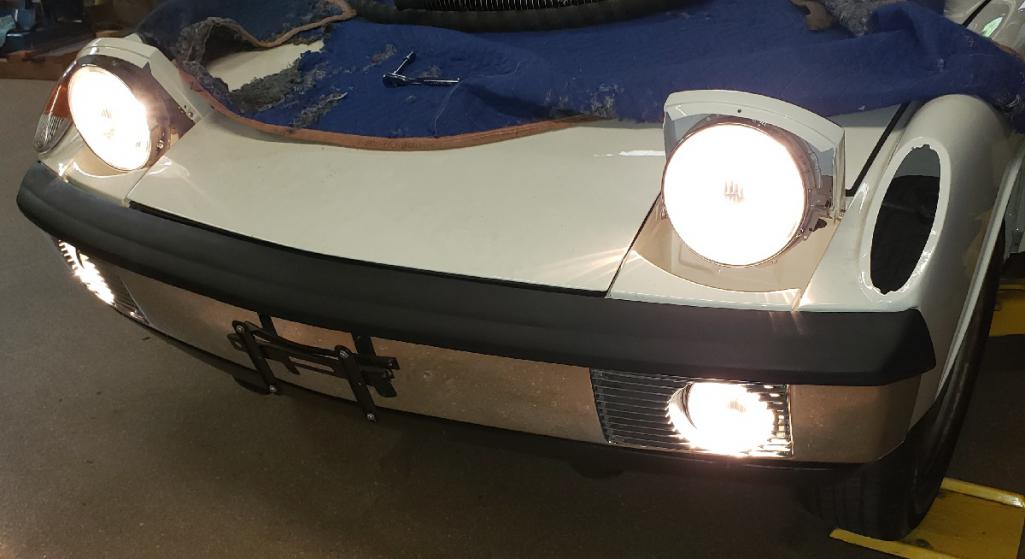
Posted by: gms May 16 2020, 02:03 PM
I received an email with questions:
Wanted to know the color light ivory what brand of paint was that ? there’s so many brands.
Although I did not paint the car I know they used PPG (some prefer Glasurit paint)
OEM code 131,L80E - HELLELFENBIEN
also the under body and fender wells I see the texture on it what type did you use on that under coating then painted over it with the ivory ?
The texture is achieved using Wurth Body Schutz
Posted by: Tman914 May 17 2020, 02:38 PM
Hello nice build btw I just have a few questions on the paint light ivory what style paint / brand there’s so many brands out there now
Also the under coating texture paint
Thanks for your time
Tman914
Posted by: Tman914 May 18 2020, 11:02 AM
Ok thanks for the response
Tman914
Posted by: RoadGlue May 18 2020, 12:36 PM
Amazing build Glenn!
Posted by: Bartlett 914 May 18 2020, 02:28 PM
Amazing build Glenn!
You! All you have to do is turn on the lights and start it up.
Posted by: gms May 19 2020, 06:37 AM
Amazing build Glenn!
Thanks Randy
Posted by: gms May 19 2020, 06:47 AM
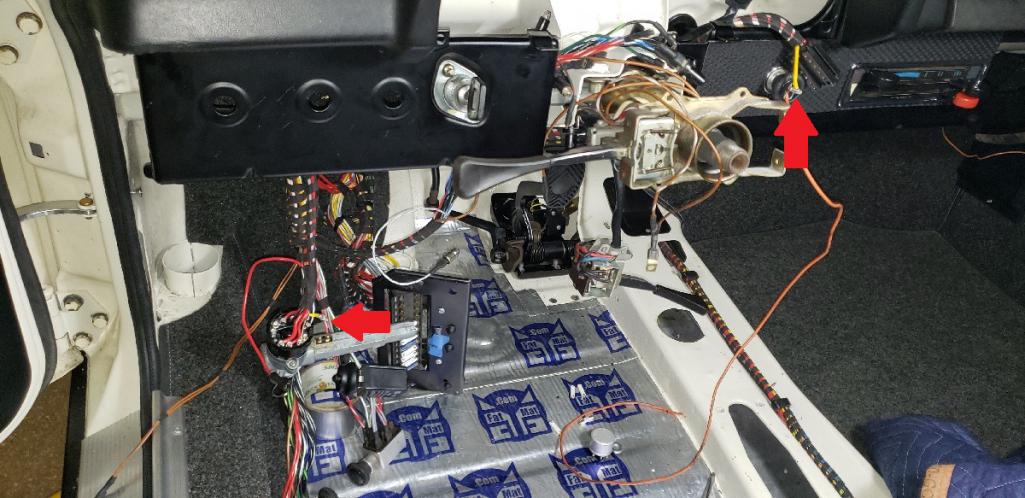
Last week I encountered a very strange malfunction while assembling the final switching and wiring. The “start” mode of the ignition switch would turn on the headlights and when in “run” mode the headlight switch engaged the starter…yes you read that correctly! I said the STARTER!
My first assumption was a faulty ignition switch because I did not think the wiring harness would be at fault, I was wrong. After installing the new ignition switch the symptoms remained.
Sunday I found that the ignition switch connection that was supposed to go to the relay board was in fact connected to the headlight switch somehow.
Yesterday I enlisted the help of Mark Kinnaman @http://www.914world.com/bbs2/index.php?showuser=4707 After a couple hours we were able to find the wire that connected to the relay board, it was erroneously connected to the turn signal switch. While running thru the fuse panel a couple other wires were found to be incorrectly connected.
I will put together a report and hopefully Kroon can prevent this from happening on future harness builds.
Thanks Mark!
Posted by: gms May 19 2020, 06:49 AM
Just need to swap these 2 wire ends
Posted by: Luke M May 19 2020, 07:38 AM
Hi Glenn,
I'm glad you figured out the issue. When was your harness made?
I hope that my new Kroon harness doesn't have this issue.
Posted by: gms May 19 2020, 07:42 AM
Hi Glenn,
I'm glad you figured out the issue. When was your harness made?
I hope that my new Kroon harness doesn't have this issue.
@http://www.914world.com/bbs2/index.php?showuser=3574 I can walk you thru a check of your harness
Posted by: Luke M May 19 2020, 08:10 AM
Hi Glenn,
I'm glad you figured out the issue. When was your harness made?
I hope that my new Kroon harness doesn't have this issue.
@http://www.914world.com/bbs2/index.php?showuser=3574 I can walk you thru a check of your harness
Sounds good. I'll send you a pm.
Posted by: gms May 19 2020, 08:37 AM
Ignition Switch #50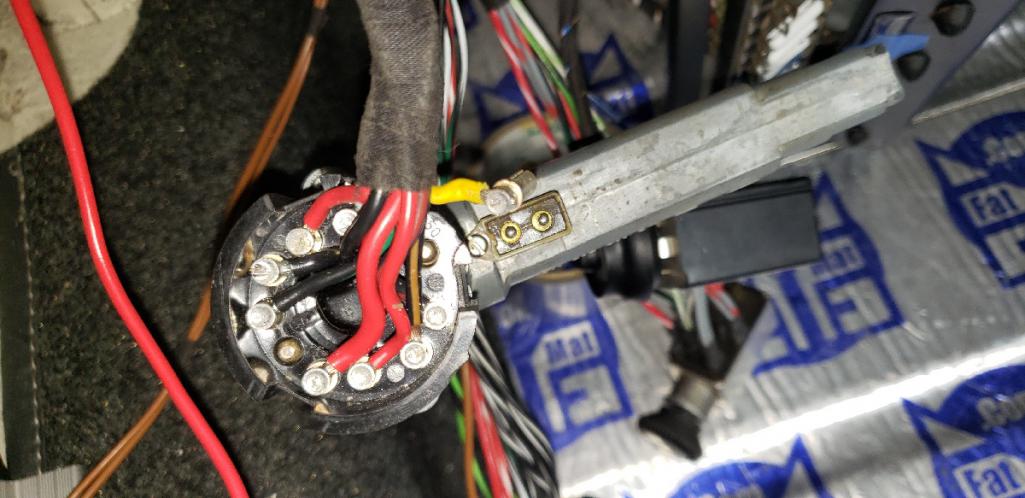
Turn Signal 12 pin connector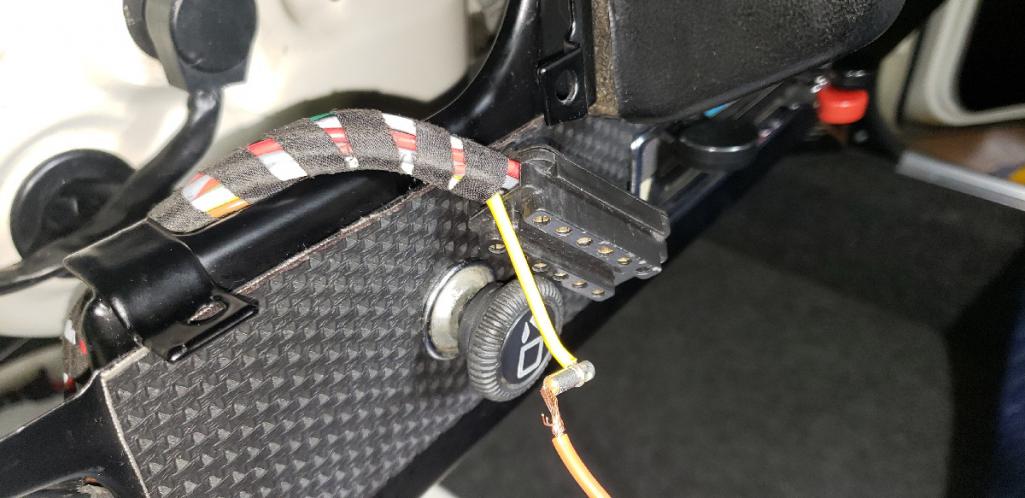
Posted by: Bartlett 914 May 19 2020, 09:17 AM
I would add that when you turned on the lights. The starter would engage. Real fun!
Posted by: gms May 21 2020, 01:16 PM
@http://www.914world.com/bbs2/index.php?showuser=4707 and I got after the wiring fix last night, headlights work and starter only work when ignition switch is in "START" position. Tracking down the horn issue and then wiring in fog light switch because they setup to run only when high beams are on.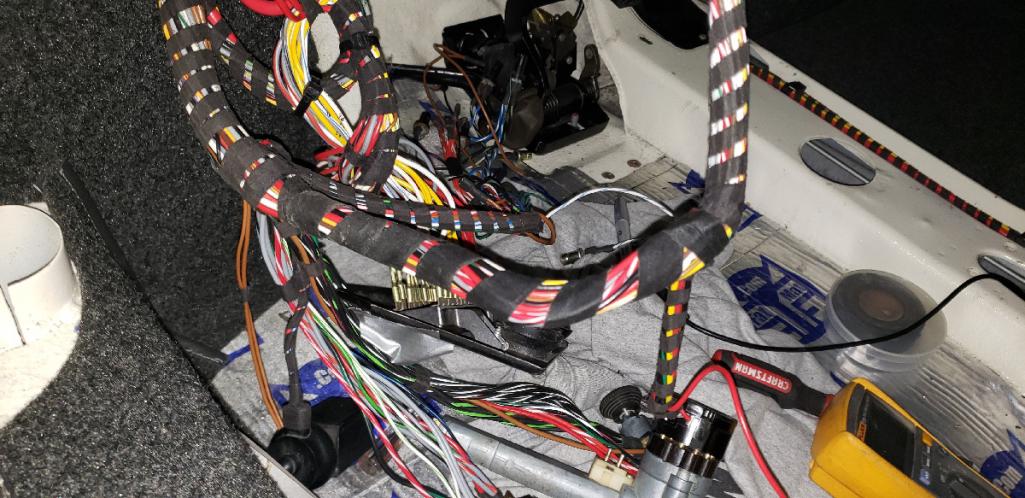
Posted by: gcrotvik May 21 2020, 04:31 PM
This is good to know. My Kroon 6 harness is still in the box it was shipped in. I purchased it at least 2 years ago. I will have to open it up again and take a look.
Thanks Glenn.
Greg
Posted by: raynekat May 21 2020, 05:08 PM
When I built my 71 914-6 conversion, I used a NOS 914-4 wiring harness. I went through the entire harness with a multimeter on my living room floor and checked every wire.
I found 2 that were incorrect. I was able to correct the issue before the harness went in the car and had no electrical issues upon startup.
Those wild and crazy Porsche AG assembly line guys must have hit the Haufbrau Haus early once a week and let their quality slide just a smidge.
Posted by: gms May 24 2020, 09:17 AM
@http://www.914world.com/bbs2/index.php?showuser=4707 custom made a bushing for the hand throttle control.
Thanks Mark!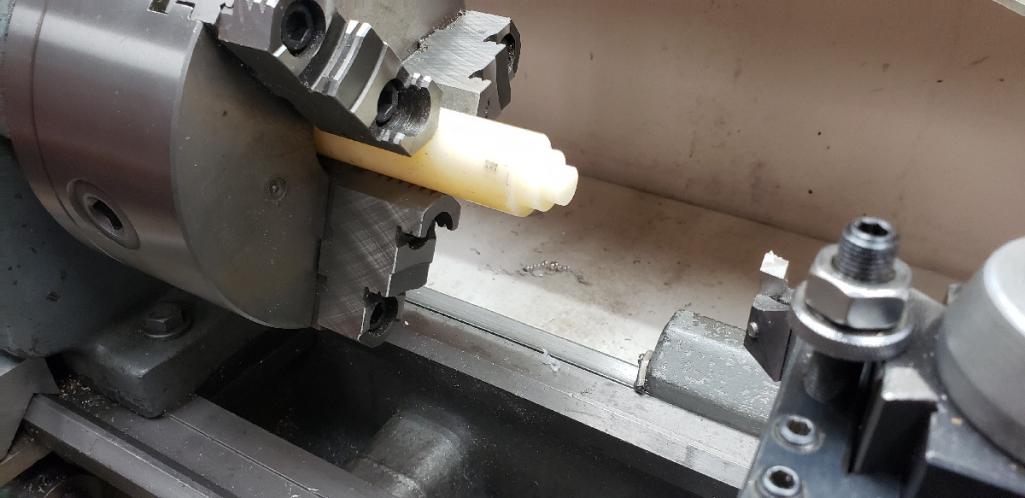
Posted by: gms May 24 2020, 09:23 AM
The shift lever was too rusty to put in this car so I switch it out.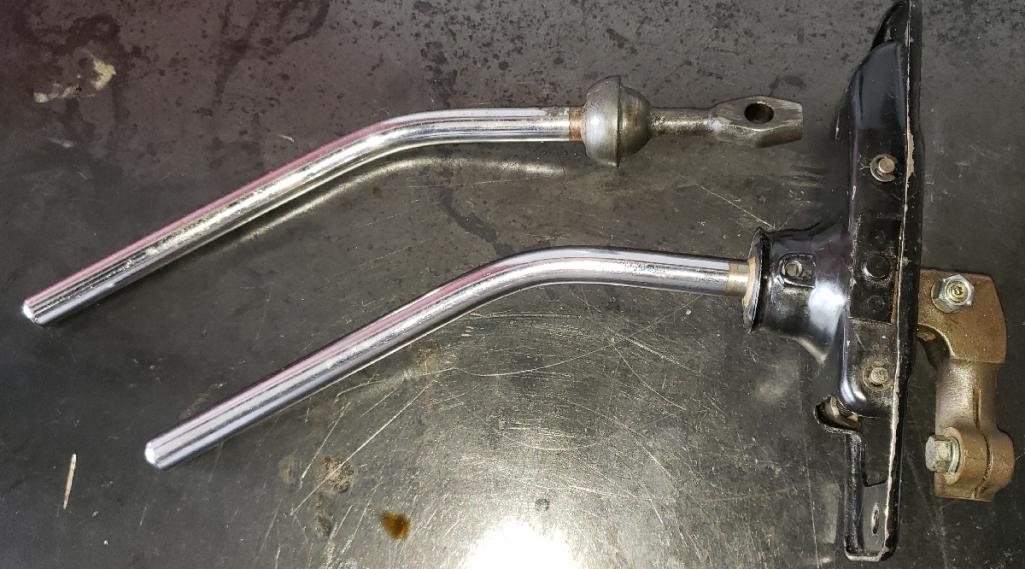
Posted by: gms May 24 2020, 03:58 PM
finished installing the last air hose under the dash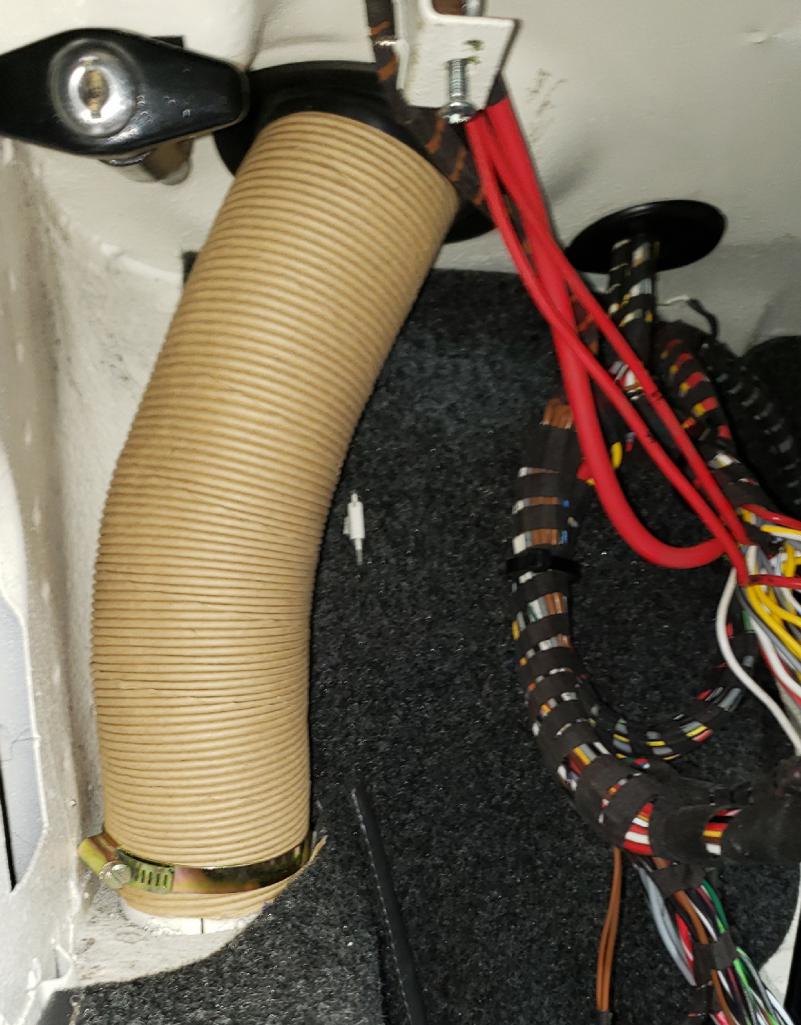
Posted by: gms May 26 2020, 03:23 PM
I was all ready for start-up and then I found a seal on the fuel pump went bad, fuel poured out on the floor.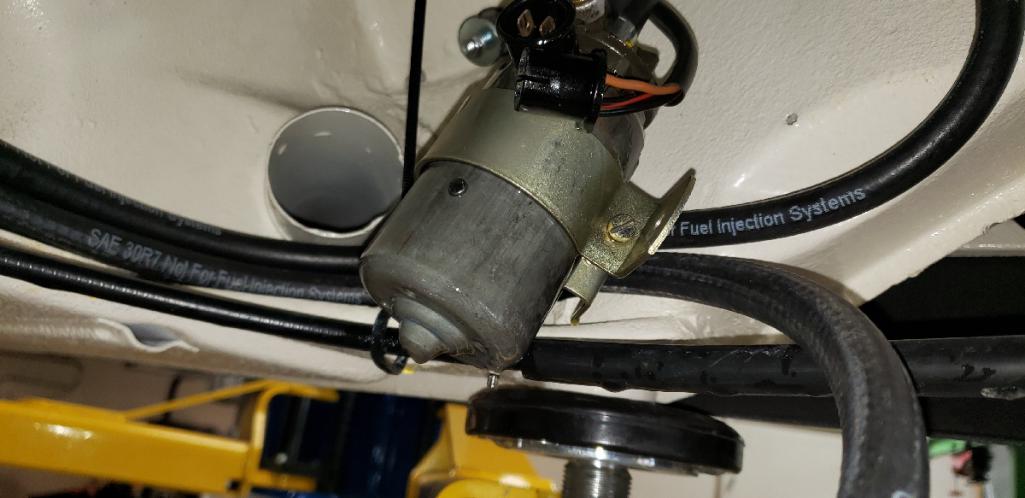
Posted by: RoadGlue May 26 2020, 04:24 PM
I was all ready for start-up and then I found a seal on the fuel pump went bad, fuel poured out on the floor.
NOS pump?
Posted by: gms May 26 2020, 06:28 PM
I was all ready for start-up and then I found a seal on the fuel pump went bad, fuel poured out on the floor.
NOS pump?
No it was used, probably dried out over time
Posted by: Targa70 May 27 2020, 12:59 PM
Glenn, your work is mind blowing. No doubt this baby is in better shape than when it rolled out of the factory.
Posted by: gcrotvik May 27 2020, 03:10 PM
@http://www.914world.com/bbs2/index.php?showuser=4707 custom made a bushing for the hand throttle control.
Thanks Mark!
Are these available? If so, I'd take 2. Glad to pay for custom work.
Greg
Posted by: gms Jun 15 2020, 04:46 PM
way behind on posting pictures
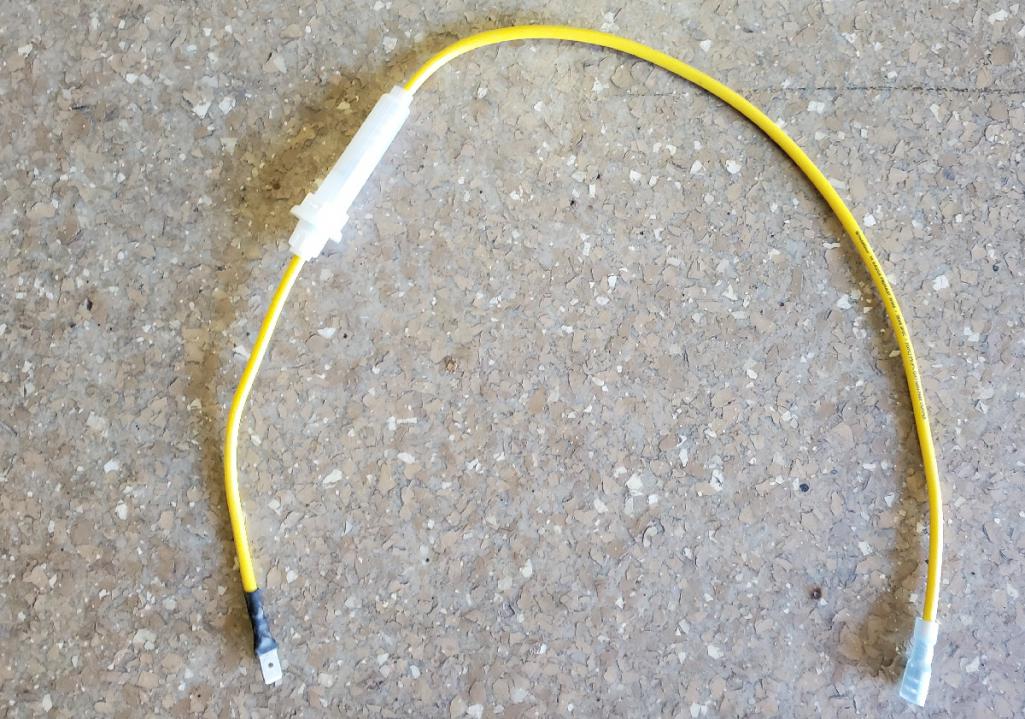
Finished radio plate basketweave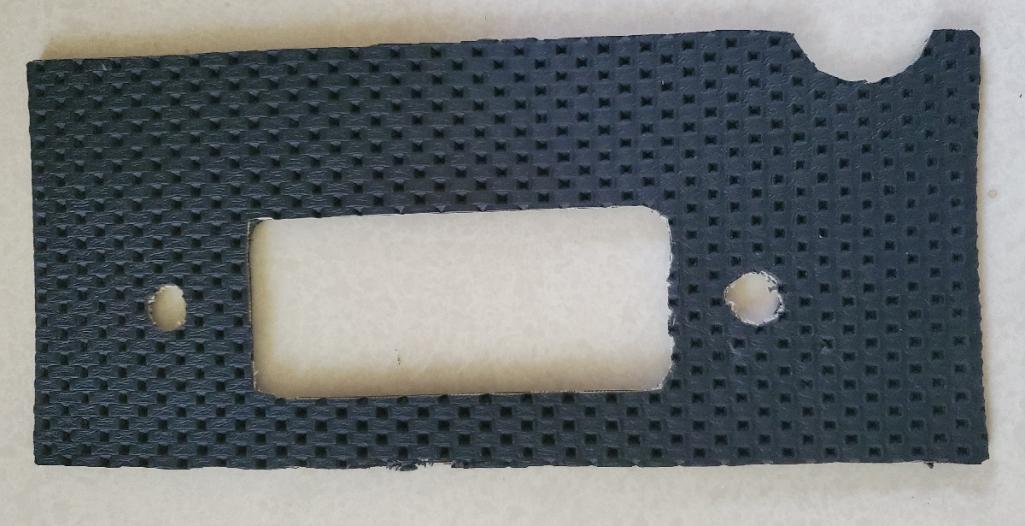
Made the radio power cord with fuse using an old Lucus kit.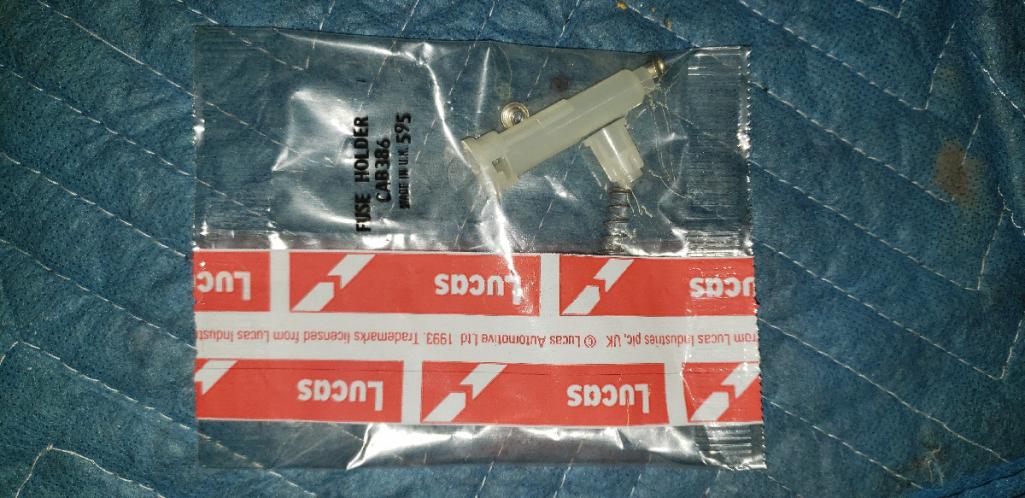
Posted by: gms Jun 15 2020, 04:48 PM
switches in dash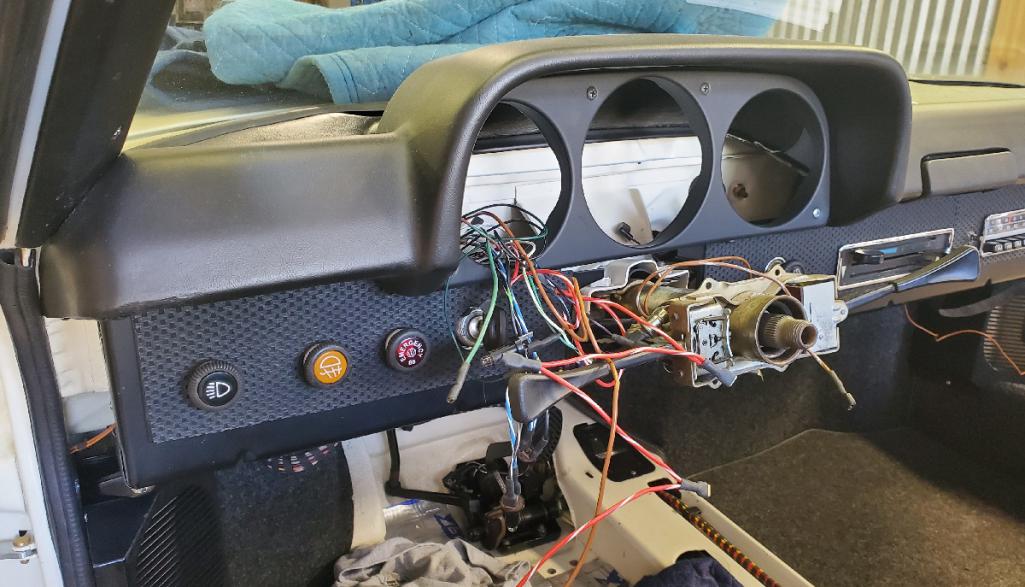
Posted by: gms Jun 19 2020, 09:17 AM
gauge wiring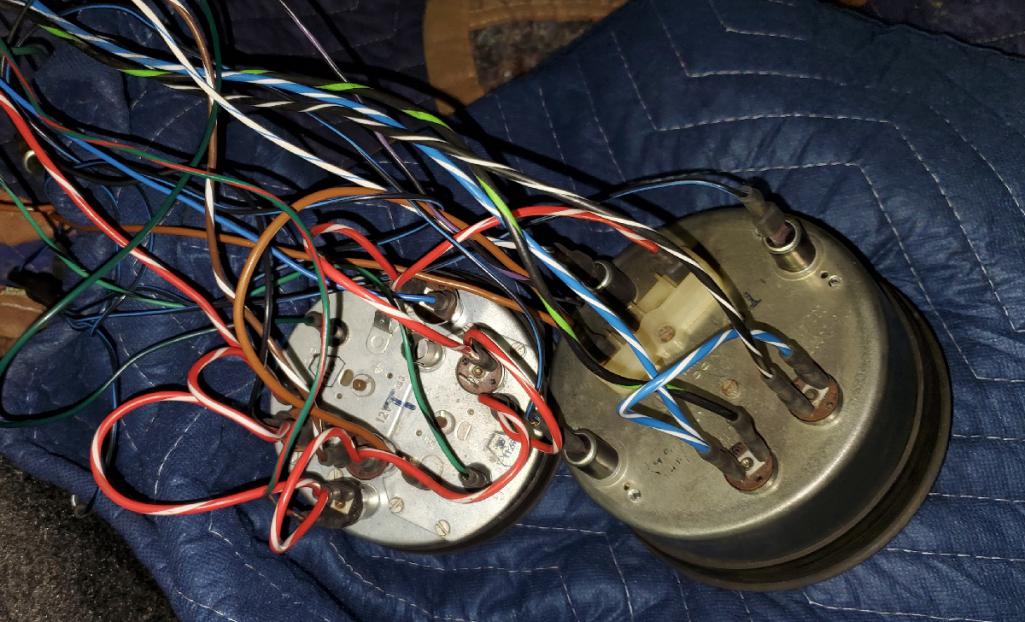
Posted by: gms Jun 25 2020, 10:28 AM
The build has taken a detour! After many attempts to start the car it is just not possible to get the timing correct. It did seem like the cam timing was off so I gave @http://www.914world.com/bbs2/index.php?showuser=2744 a call, went thru other possibilities and as it turns out the engine builder did set the cams incorrectly! 
I pulled the motor and brought it to Kinnaman’s ( @http://www.914world.com/bbs2/index.php?showuser=4707 ) shop which is nice and clean to not only set the cam timing but also add rocker arm seals. 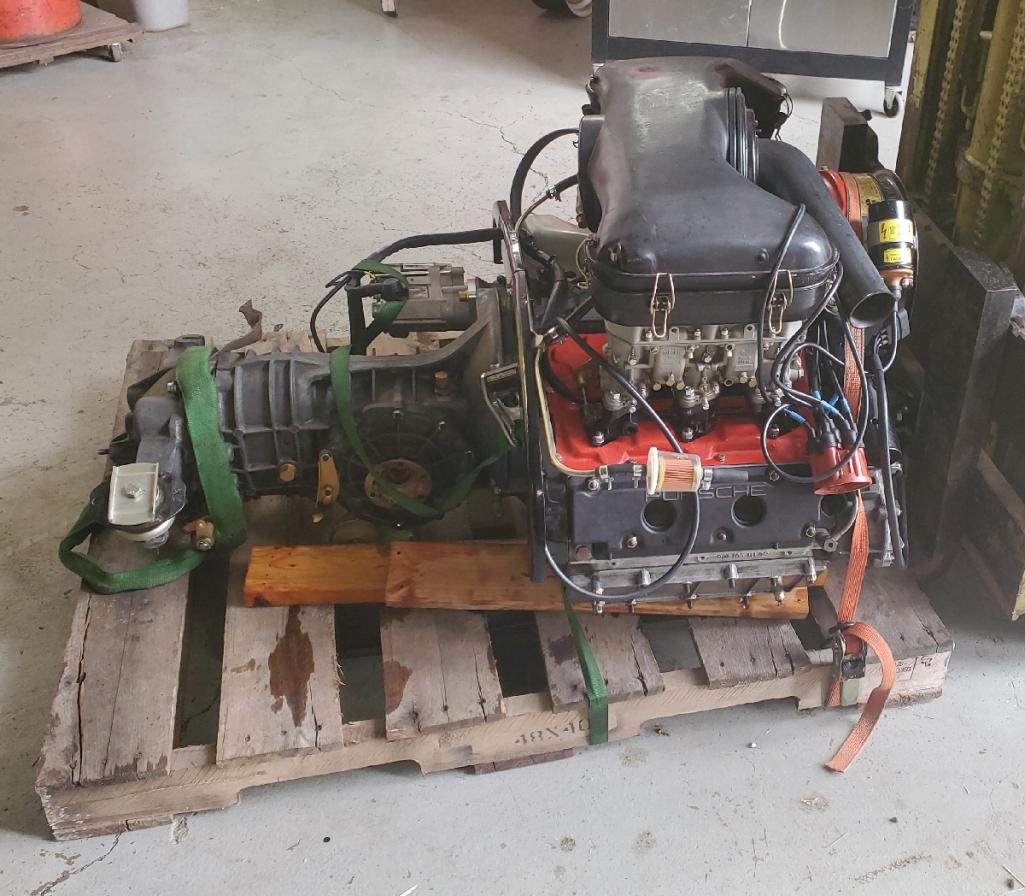
Posted by: RoadGlue Jun 25 2020, 10:47 AM
> the engine builder did set the cams incorrectly
Known builder, or someone's friend of a friend?
Posted by: gms Jun 25 2020, 11:39 AM
> the engine builder did set the cams incorrectly
Known builder, or someone's friend of a friend?
Someone local to Bill
Posted by: sixnotfour Jun 25 2020, 11:42 AM
Another incident today with a Turbo...many shop hrs...Ya your right cam 180 out.
Posted by: gms Jun 25 2020, 11:59 AM
The rocker arm shafts moved after only trying to start the car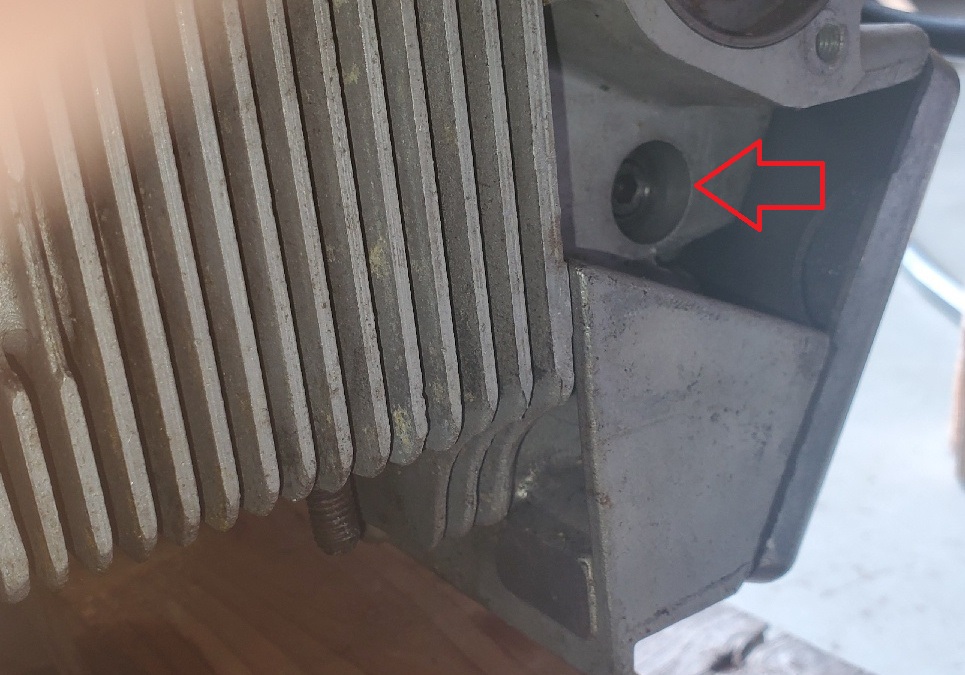
Posted by: sixnotfour Jun 25 2020, 12:51 PM
The rocker arm shafts moved after only trying to start the car
When you pull the covers you will see there is narrow web and a thick web..So it will appear as your pic. on the thick web side
Posted by: gms Jun 27 2020, 08:50 PM
Cams set, just need to go thru the rest of the rocker shafts now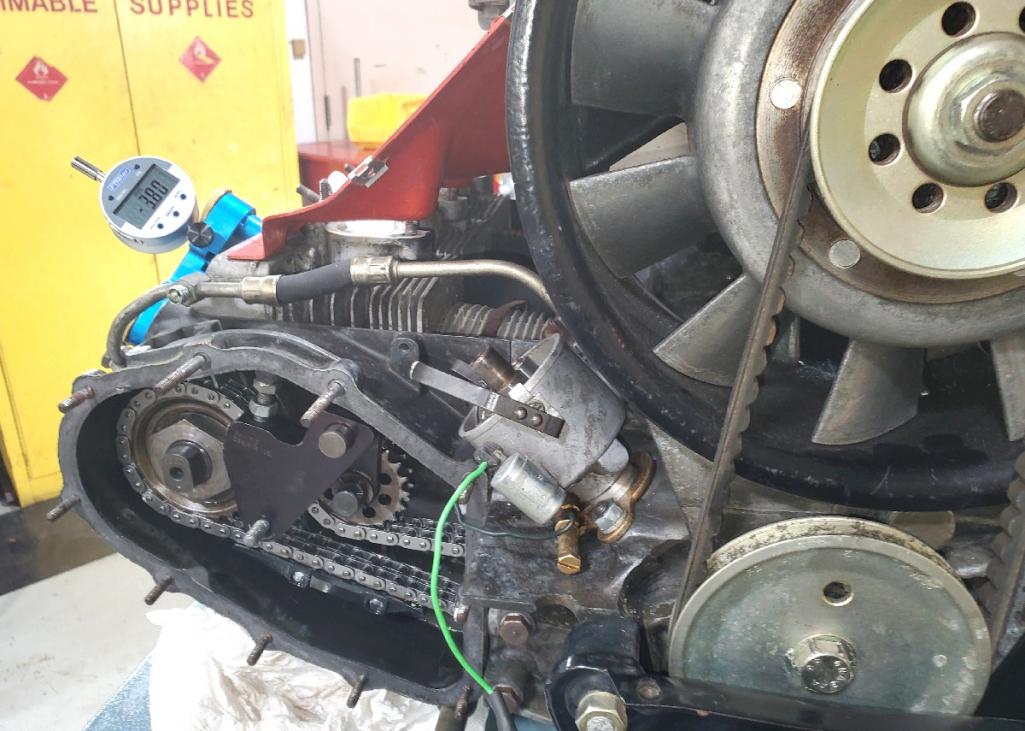
Posted by: gms Jul 13 2020, 08:31 AM
after cams were set the engine was reassembled and installed again.
Finally the engine started yesterday! thanks to Mark Kinnaman’s ( @http://www.914world.com/bbs2/index.php?showuser=4707 ), we got the engine in pretty quickly! 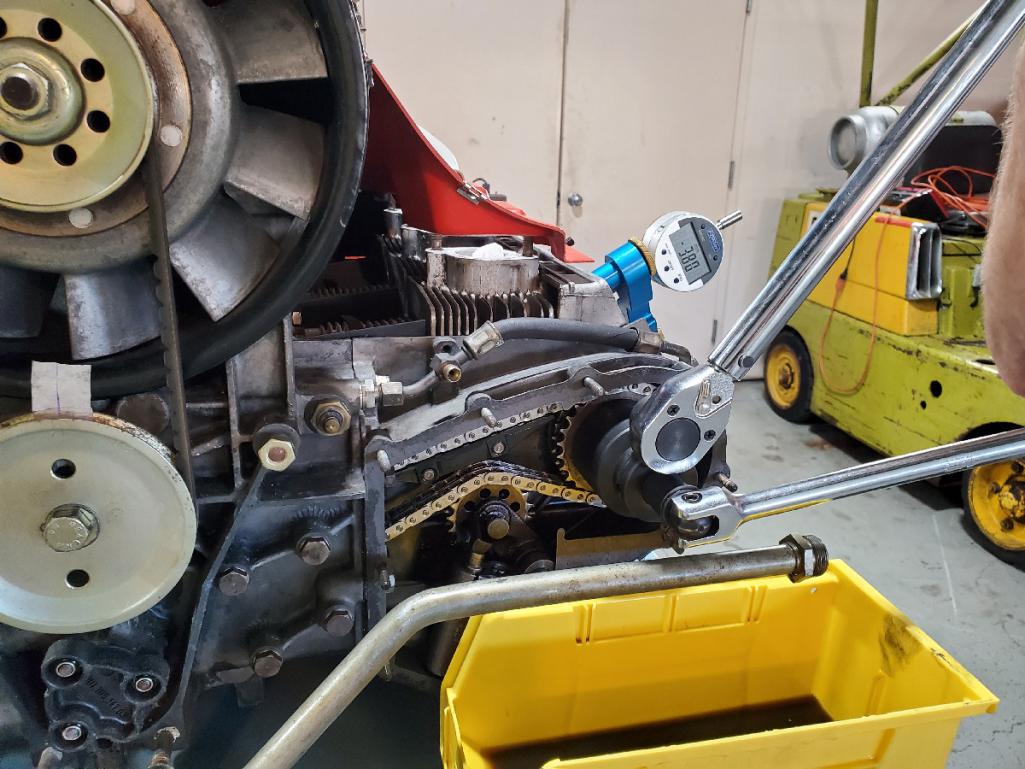
Posted by: DRPHIL914 Jul 13 2020, 10:27 AM
finished installing the last air hose under the dash
where did you find new yellow zinc hose clamps?
I only have one original that was in decent shape amd could not find a sourced for these
Phil
Posted by: gms Jul 13 2020, 11:02 AM
finished installing the last air hose under the dash
where did you find new yellow zinc hose clamps?
I only have one original that was in decent shape amd could not find a sourced for these
Phil
they are old clamps that are cadmium plated (re-plated)
Posted by: Bleyseng Jul 13 2020, 11:07 AM
switches in dash
Shouldn't the fog light switch be a green one?
Posted by: Bartlett 914 Jul 13 2020, 12:57 PM
switches in dash
Shouldn't the fog light switch be a green one?
I think the green one is for the rear window defogger
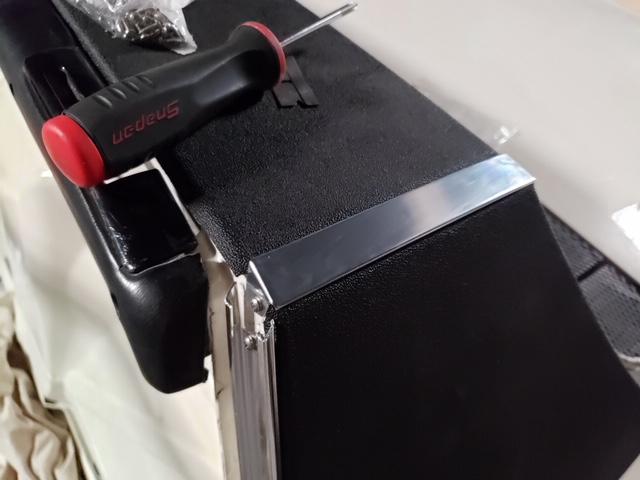
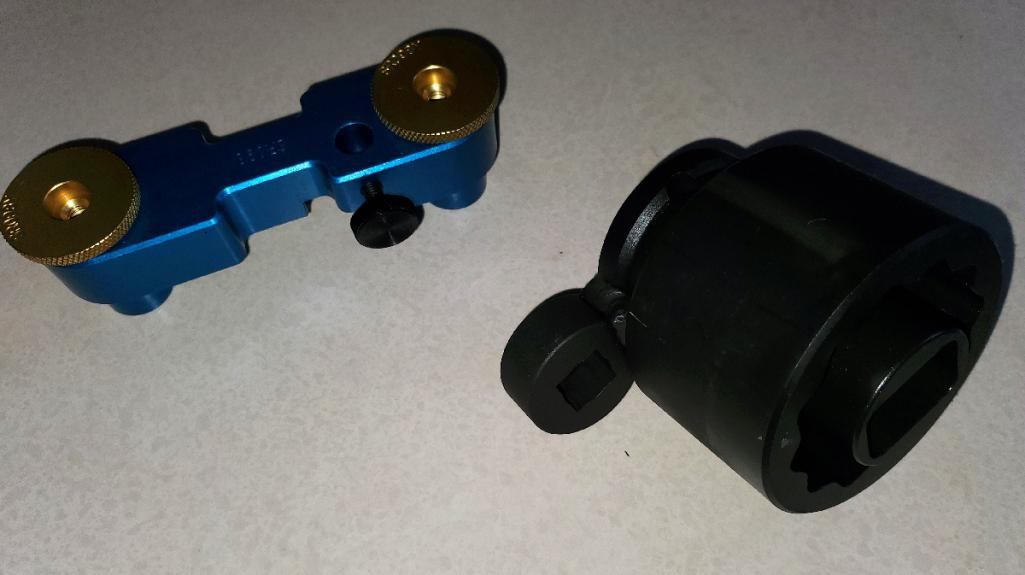
Posted by: sixnotfour Jul 13 2020, 01:21 PM
Yummy Stomski tools...
Posted by: gms Jul 13 2020, 01:25 PM
switches in dash
Shouldn't the fog light switch be a green one?
You are correct, I don't have one at this point and I am trouble shooting wiring so yellow it is...for now
Posted by: gms Jul 13 2020, 01:29 PM
Yummy Stomski tools...
I love these tools!!!
Posted by: Bleyseng Jul 13 2020, 02:48 PM
switches in dash
Shouldn't the fog light switch be a green one?
You are correct, I don't have one at this point and I am trouble shooting wiring so yellow it is...for now
I have one if you need it
Posted by: Targa70 Jul 13 2020, 07:29 PM
Great are your skills master Jedi.
Posted by: Mike Fitton Jul 19 2020, 09:06 AM
Glenn if this is what you need, it's yours.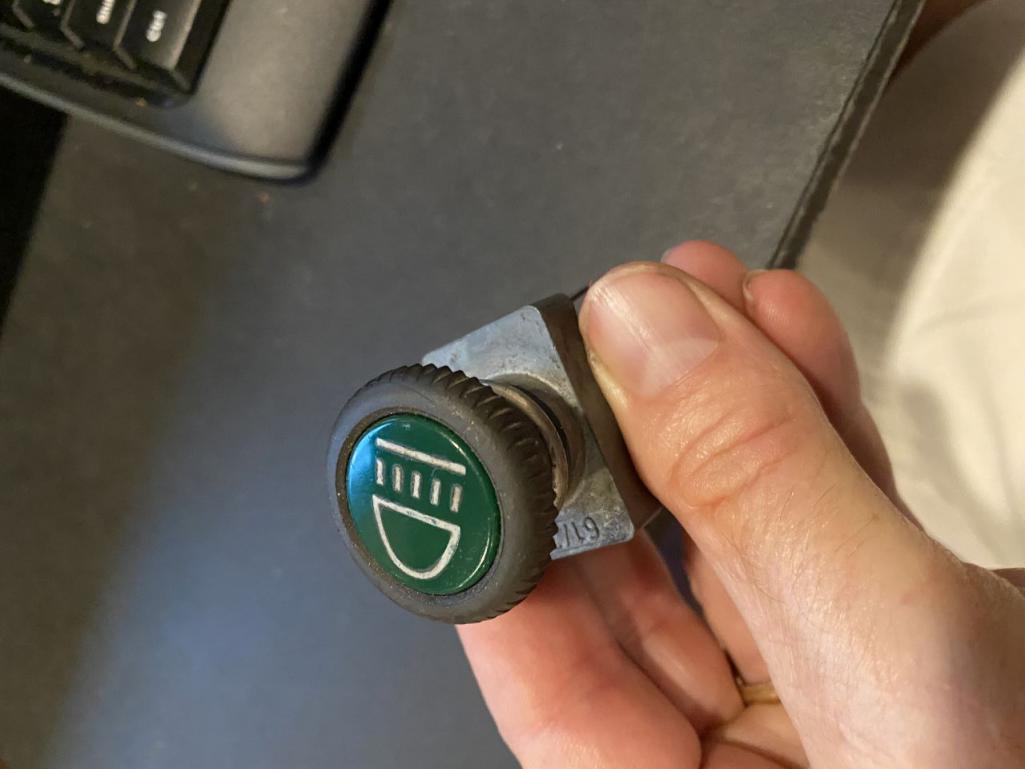
Posted by: gms Jul 20 2020, 07:56 PM
Glenn if this is what you need, it's yours.
Perfect!
let's grab lunch!
Posted by: rgalla9146 Jul 21 2020, 05:01 AM
Looks great Glenn
I had some head scratchers with harness install too.
Beautiful work.
Posted by: gms Jul 23 2020, 11:41 AM
dizzy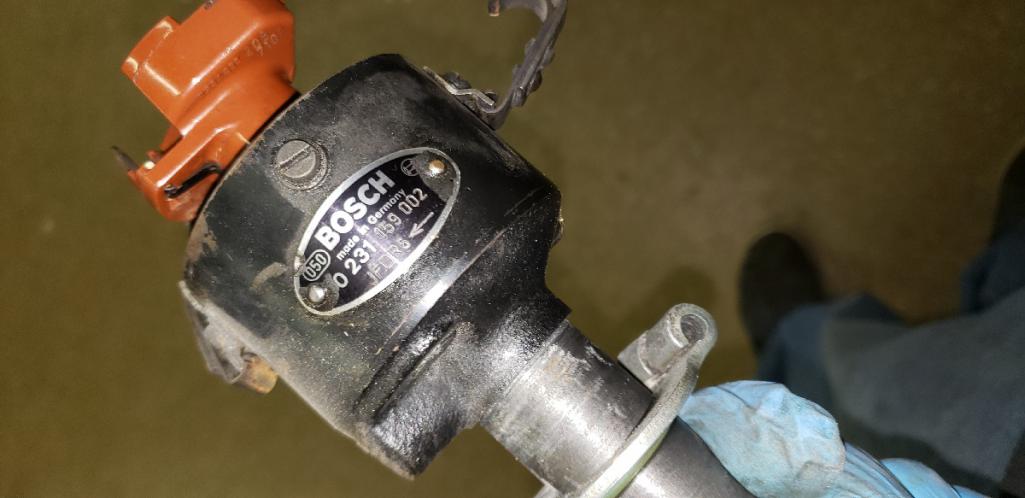
Posted by: siverson Jul 23 2020, 12:39 PM
Looks great!
> they are old clamps that are cadmium plated (re-plated)
Is it really cadmium or yellow zinc? I know the factory parts are cadmium but I haven't found anyone in CA that does cadmium plating.
-Steve
Posted by: gms Jul 23 2020, 01:03 PM
Looks great!
> they are old clamps that are cadmium plated (re-plated)
Is it really cadmium or yellow zinc? I know the factory parts are cadmium but I haven't found anyone in CA that does cadmium plating.
-Steve
They actually still cadmium plate here in IL
Posted by: gms Aug 9 2020, 05:54 PM
We had an issue with one of the cam oil feeds, replaced and significantly less oil leakage. I went ahead and connects accelerator and clutch cables and took her out for a parking lot tour yesterday. The engine starts and runs smooth!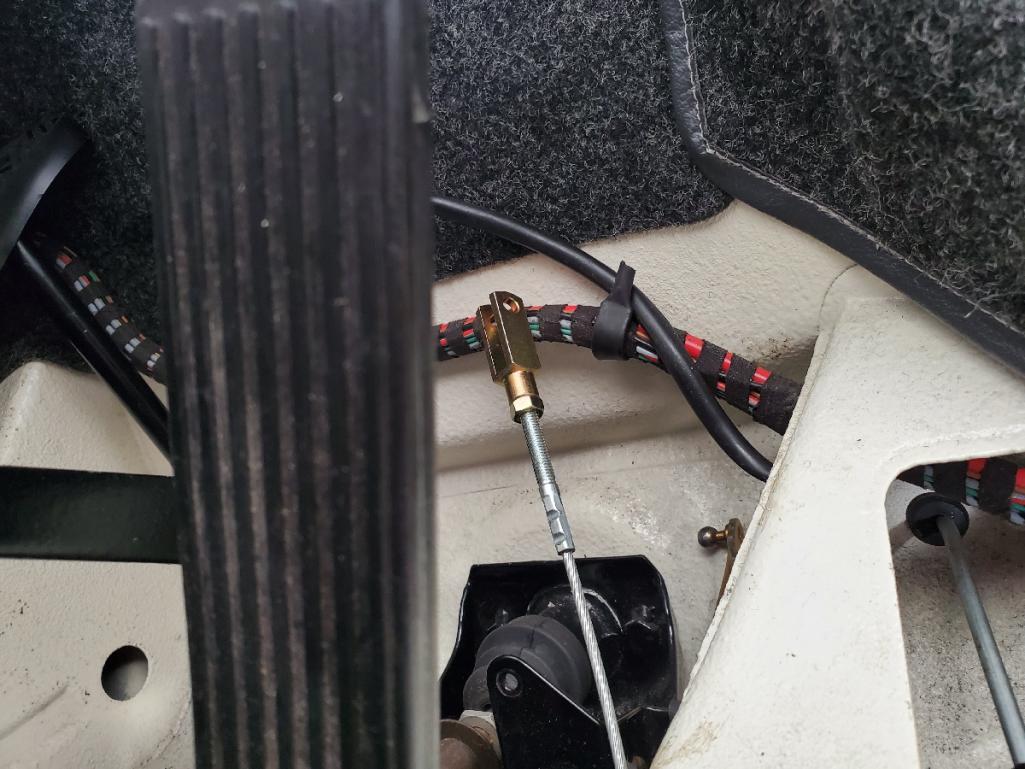
Posted by: RoadGlue Aug 9 2020, 06:46 PM
Posted by: Cairo94507 Aug 9 2020, 07:11 PM
Posted by: sixnotfour Aug 9 2020, 07:18 PM
um..GEMO for the six...
Posted by: gms Aug 9 2020, 09:41 PM
gauges wired!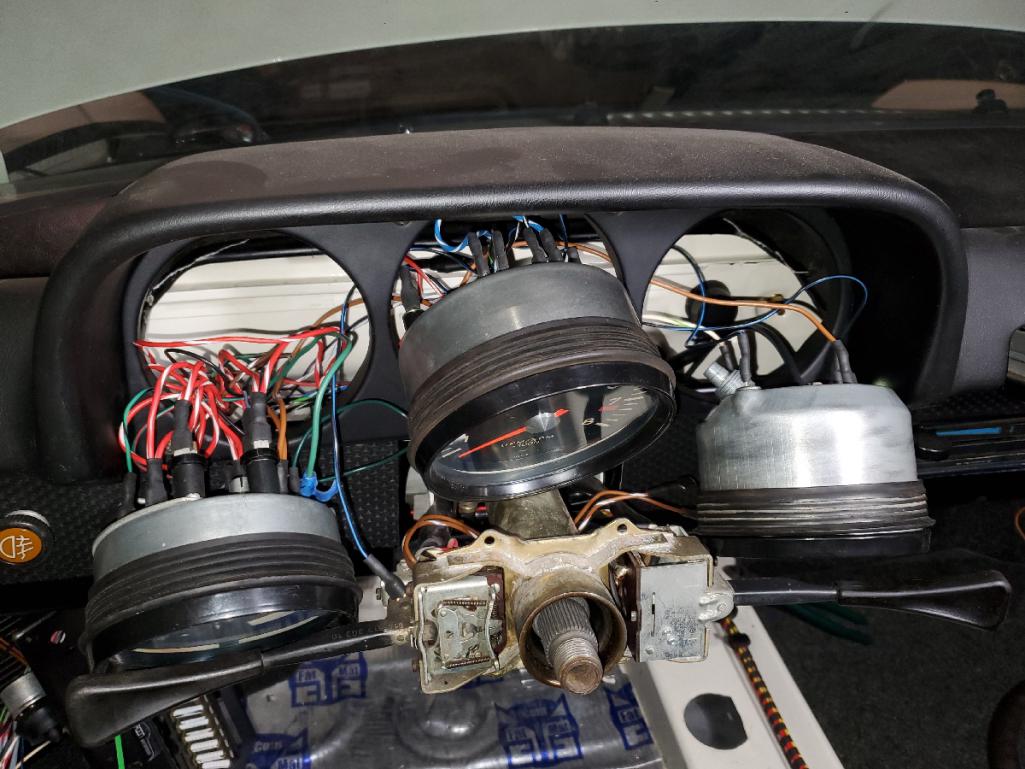
Posted by: gms Aug 9 2020, 09:51 PM
There was another problem with the Kroon wiring harness, the back-up switch and the brake light were switch, As a result the back-up light did not work and the brake light was always on. Here is the sorted wiring. Thanks @http://www.914world.com/bbs2/index.php?showuser=4707 for lending a hand!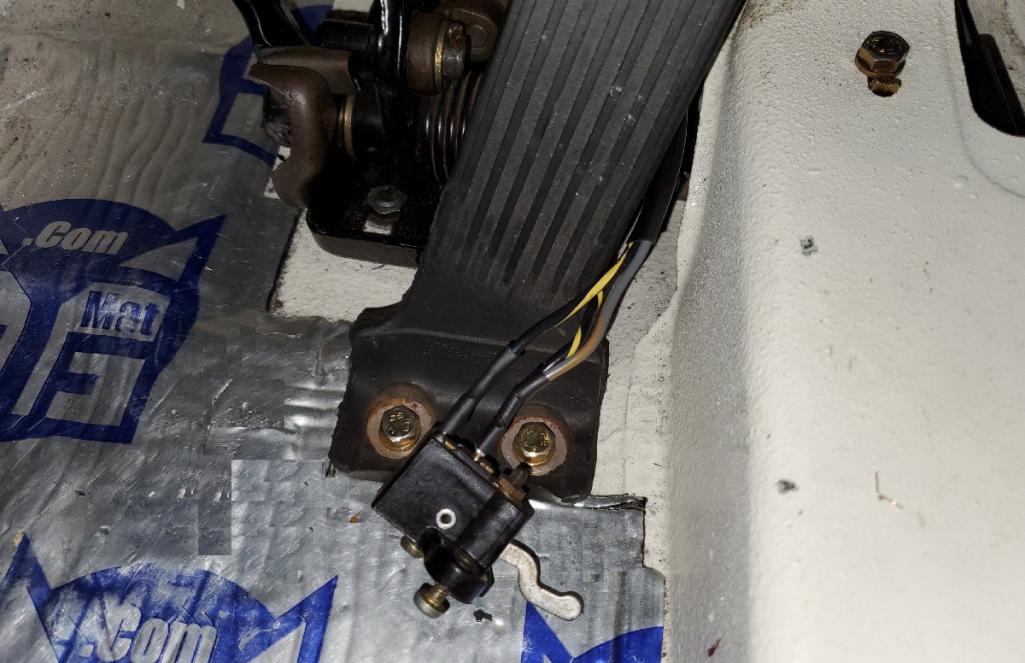
Posted by: sixnotfour Aug 10 2020, 01:27 PM
Is Kroon giving any rebates for the redevelopment work ??
Posted by: 7T914-6 Aug 10 2020, 09:48 PM
Kudos on the build. Just beautiful. Curious where you sourced Your fuel oil pressure gauge to replace the fuel parking brake gauge of the standard 914 gauge. Also, did you obtain an original 914-6 tach (with the higher redline) or did you have it converted?
Anxious to see this completed.
Posted by: gms Aug 10 2020, 10:21 PM
Is Kroon giving any rebates for the redevelopment work ??
Bill is waiting until I document all the wiring issues so as to just file one report. Electrically I only have one last item to fix and that is the interior light and door switched. There was an issue with headlight switch that I will have fixed tomorrow.
I was contacted by two individuals who bought Kroon harnesses and after inspection they did NOT have the same defects...bad QC I guess
Posted by: gms Aug 10 2020, 10:25 PM
Kudos on the build. Just beautiful. Curious where you sourced Your fuel oil pressure gauge to replace the fuel parking brake gauge of the standard 914 gauge. Also, did you obtain an original 914-6 tach (with the higher redline) or did you have it converted?
Anxious to see this completed.
Thanks!
Both gauges came to my shop with the 914/6 so this would be a question for @http://www.914world.com/bbs2/index.php?showuser=15683
Bill?
Posted by: gms Aug 11 2020, 09:20 PM
Finished up wiring for fog light indicator and gauge back lights (thru dimmer) on the headlight switch.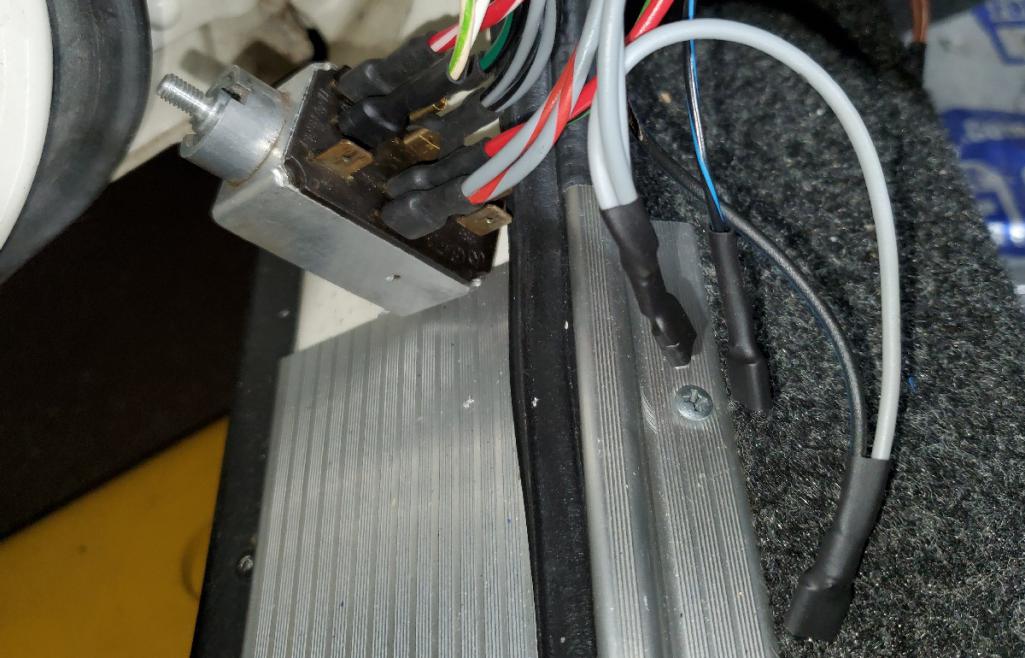
Posted by: gms Aug 11 2020, 09:20 PM
Gauge back lights and the dimmer now working!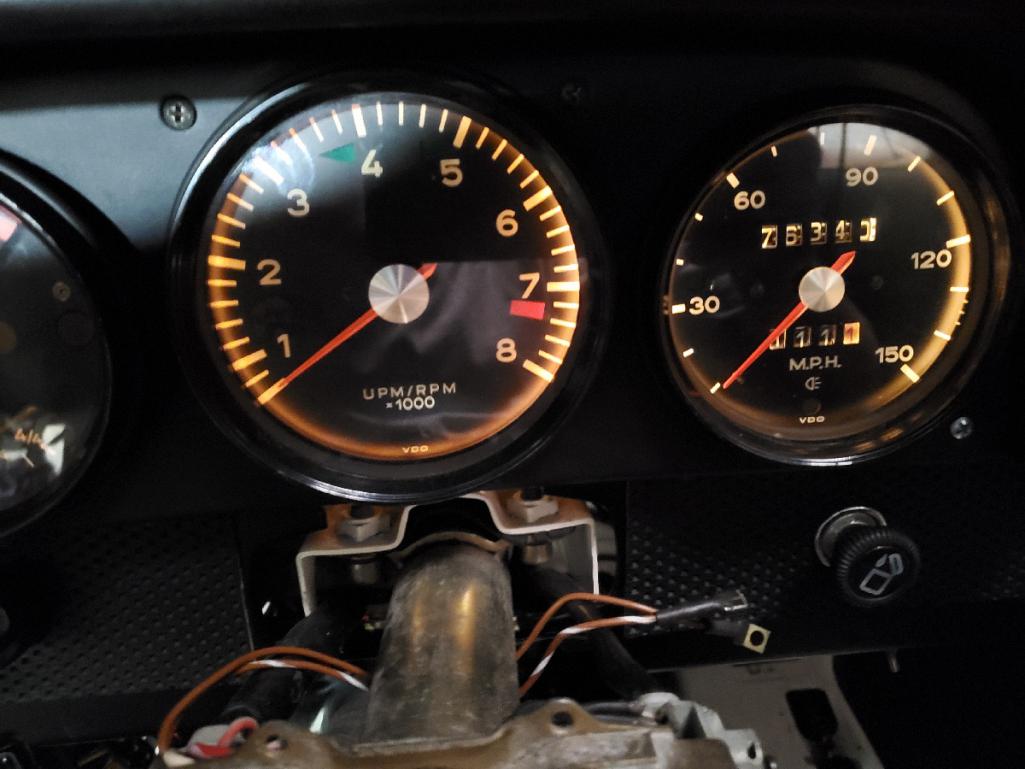
Posted by: gms Aug 13 2020, 07:04 PM
@http://www.914world.com/bbs2/index.php?showuser=13069 dropped off more goodies!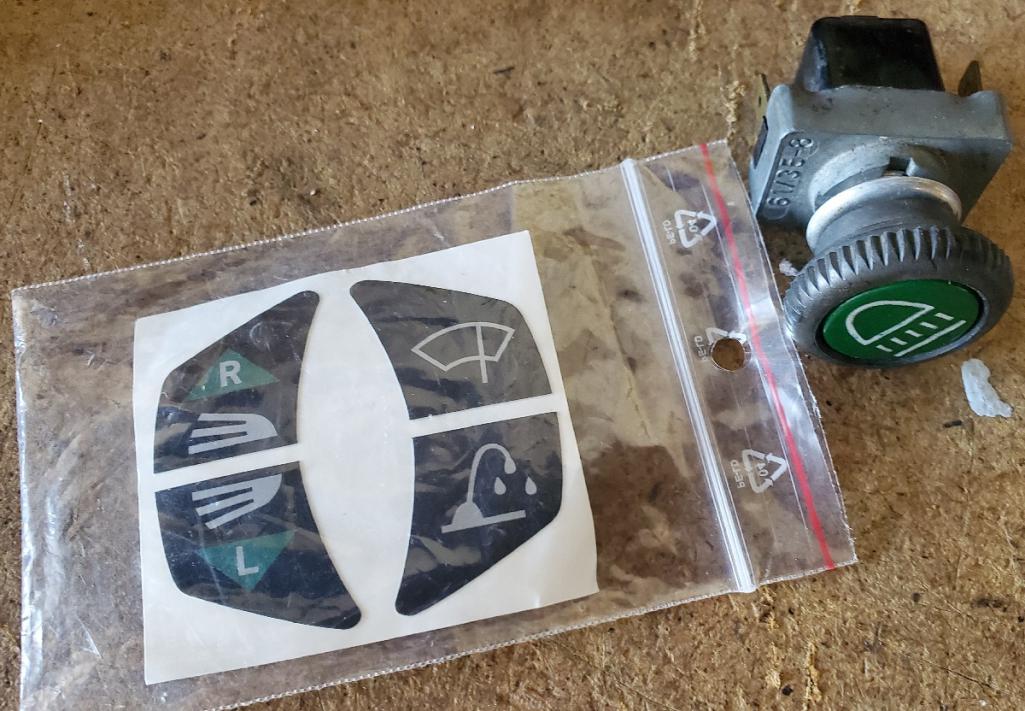
Posted by: porschetub Aug 13 2020, 07:31 PM
So many nice "6" builds going on now really liking it ,well done gms .
Posted by: gms Aug 13 2020, 07:36 PM
So many nice "6" builds going on now really liking it ,well done gms
.Thanks!
Posted by: gms Aug 15 2020, 03:49 PM
Posted by: Bartlett 914 Aug 15 2020, 03:56 PM
Awesome Glenn! So good to see it running.
Posted by: Cairo94507 Aug 15 2020, 03:58 PM
Congratulations Glenn. Sounds great. Another one back on the road!
Posted by: gms Aug 17 2020, 09:09 PM
Here is the details on the gauges
This is 914 641 101 10 a 914/6 combo gauge
Posted by: gms Aug 17 2020, 09:11 PM
This is 911 641 501 01 is a 911/914-6 speedometer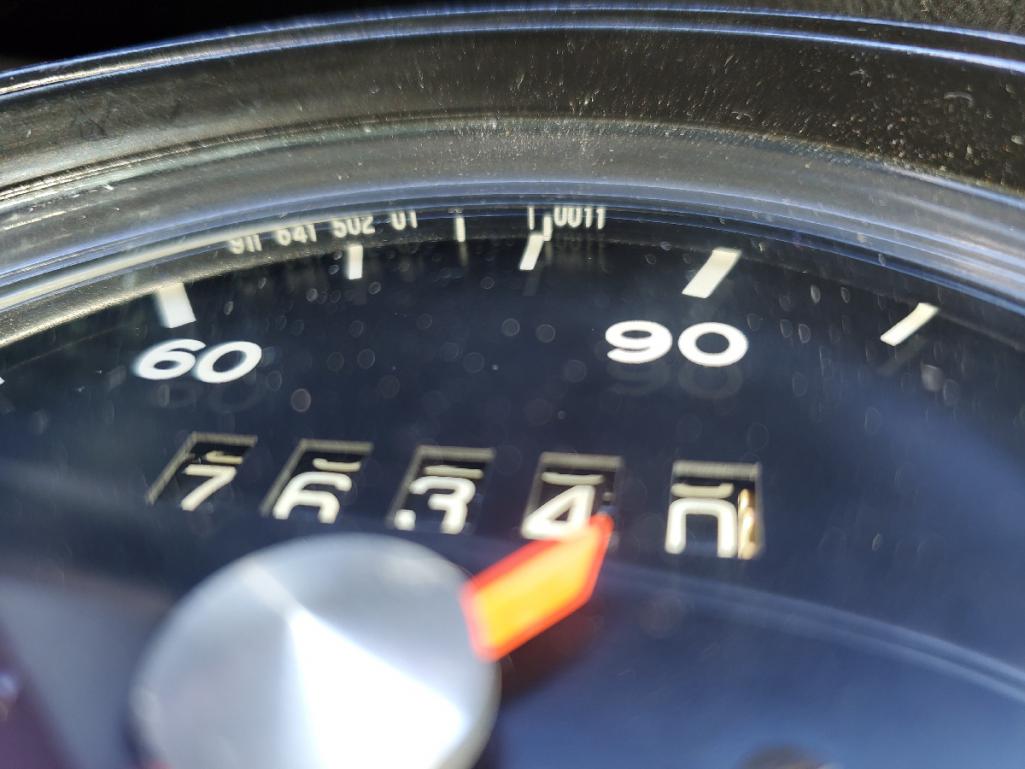
Posted by: gms Aug 17 2020, 09:15 PM
901 741 302 05 is a tachometer for a 911S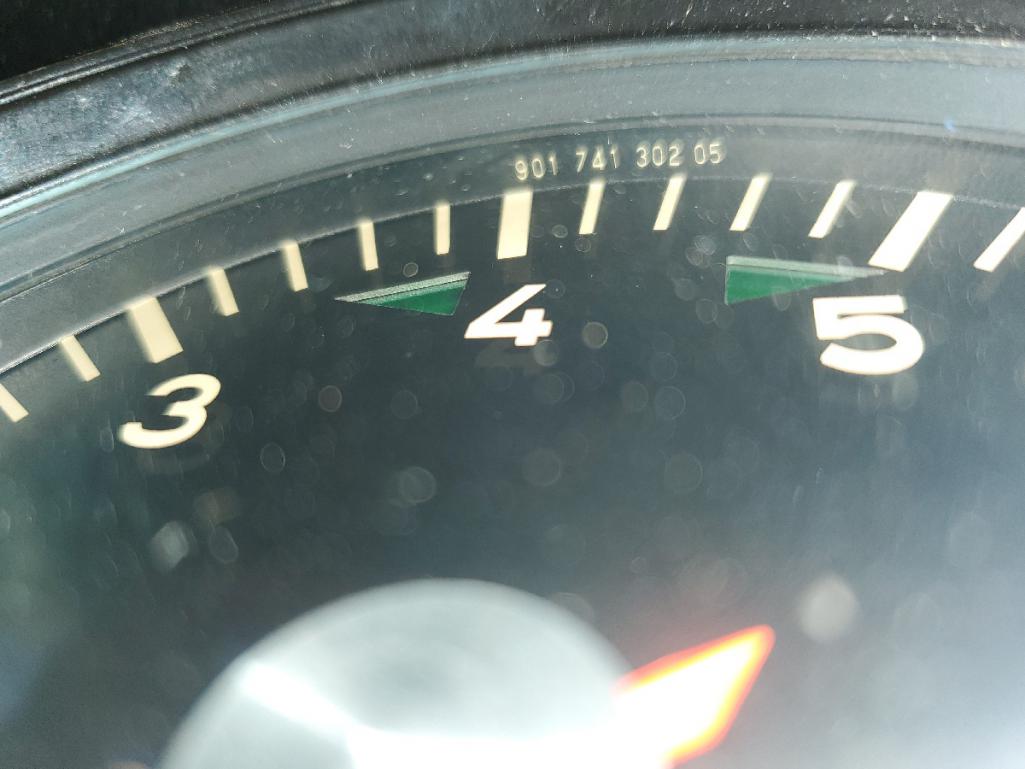
Posted by: gms Aug 30 2020, 03:03 PM
@http://www.914world.com/bbs2/index.php?showuser=15683 914/6 with @http://www.914world.com/bbs2/index.php?showuser=4707 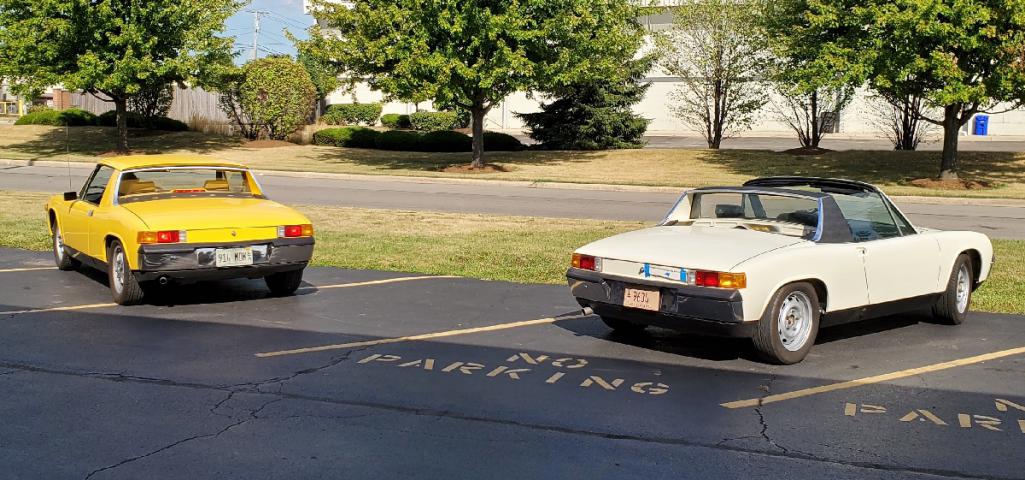
Posted by: gms Aug 31 2020, 07:13 AM
I put some tires from the 2010s instead of the 1970s so i can put some miles on her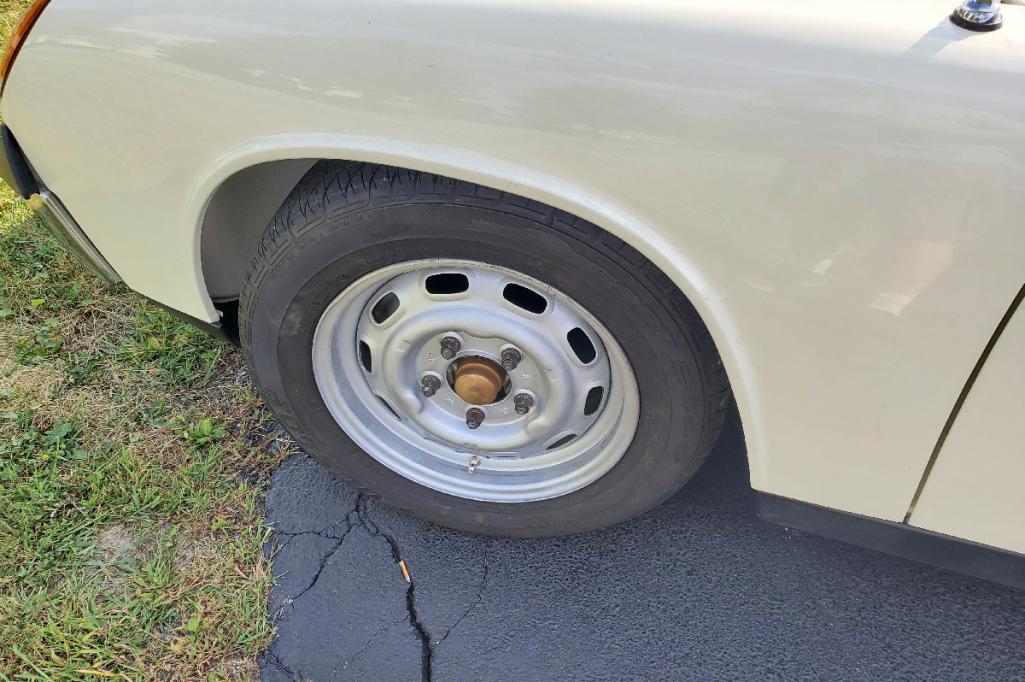
Posted by: gms Aug 31 2020, 08:07 AM
um..GEMO for the six...
umm, ya
No Terrycables on my builds
Posted by: gms Sep 3 2020, 08:08 AM
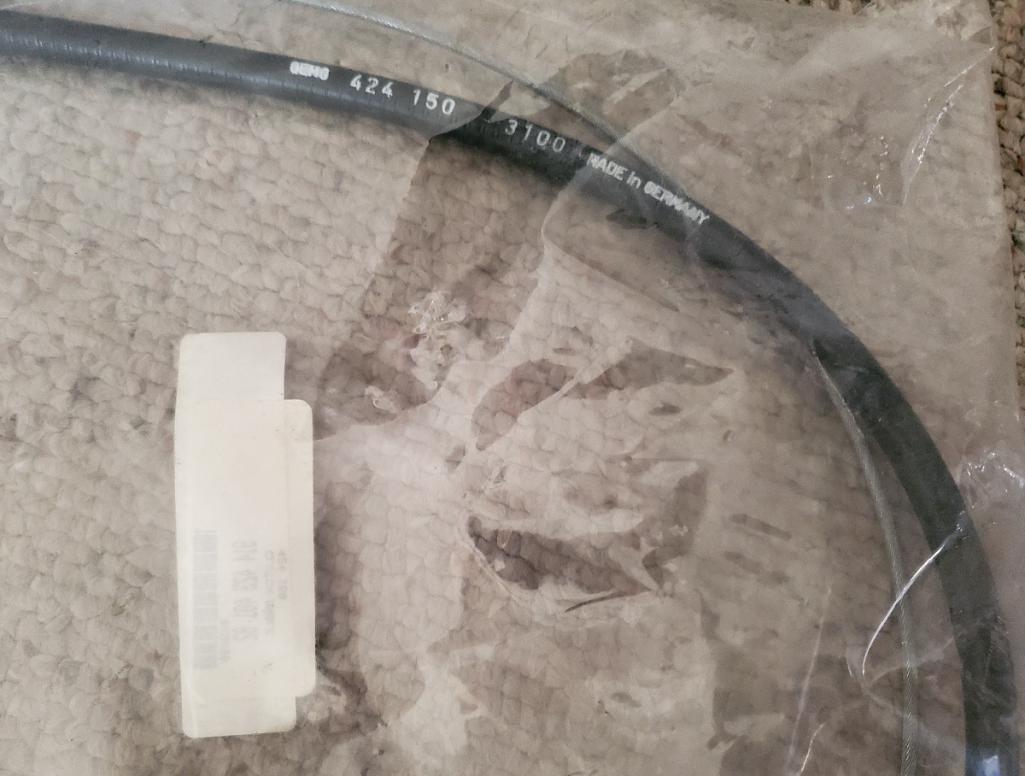
Speedometer cable is in (also GEMO)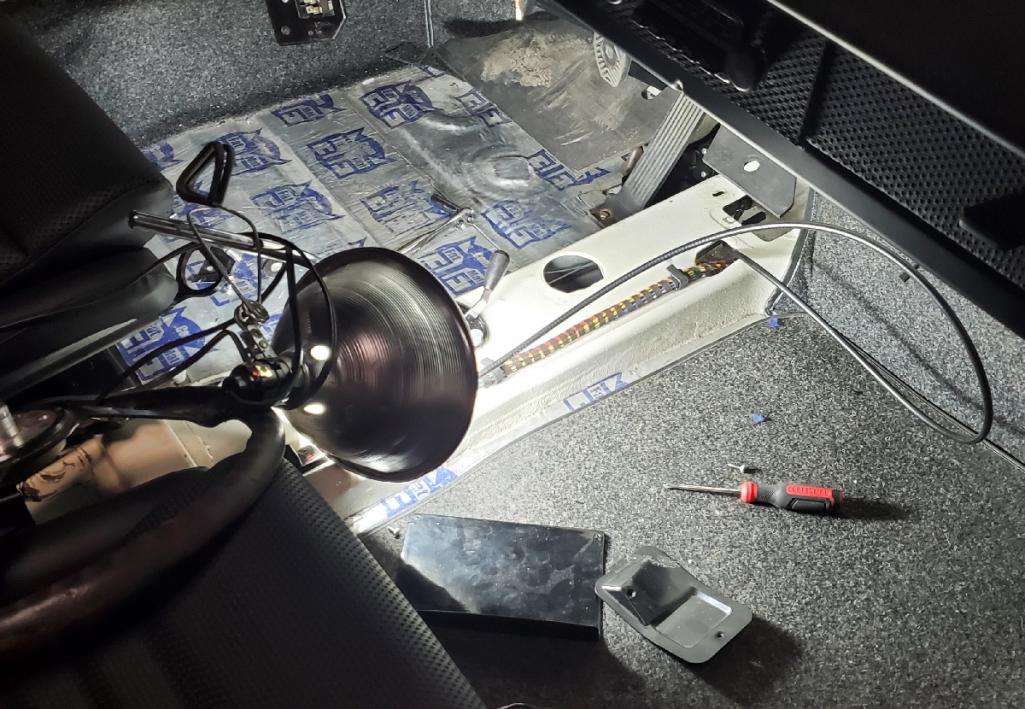
Posted by: Targa70 Sep 3 2020, 12:48 PM
Glenn, It sure does seem like a shame to leave all those miles on what is really going to be a new 914/6. Your work is top notch and we love the updates.
Posted by: gms Sep 17 2020, 10:18 AM
and you thought Magnus Walker had skills...I present to you
the "Rosa Targa" edition! 

Posted by: Superhawk996 Sep 17 2020, 11:27 AM
Glenn, It sure does seem like a shame to leave all those miles on what is really going to be a new 914/6. Your work is top notch and we love the updates.
My vote would be leave the miles on. Be proud of them and the restoration.
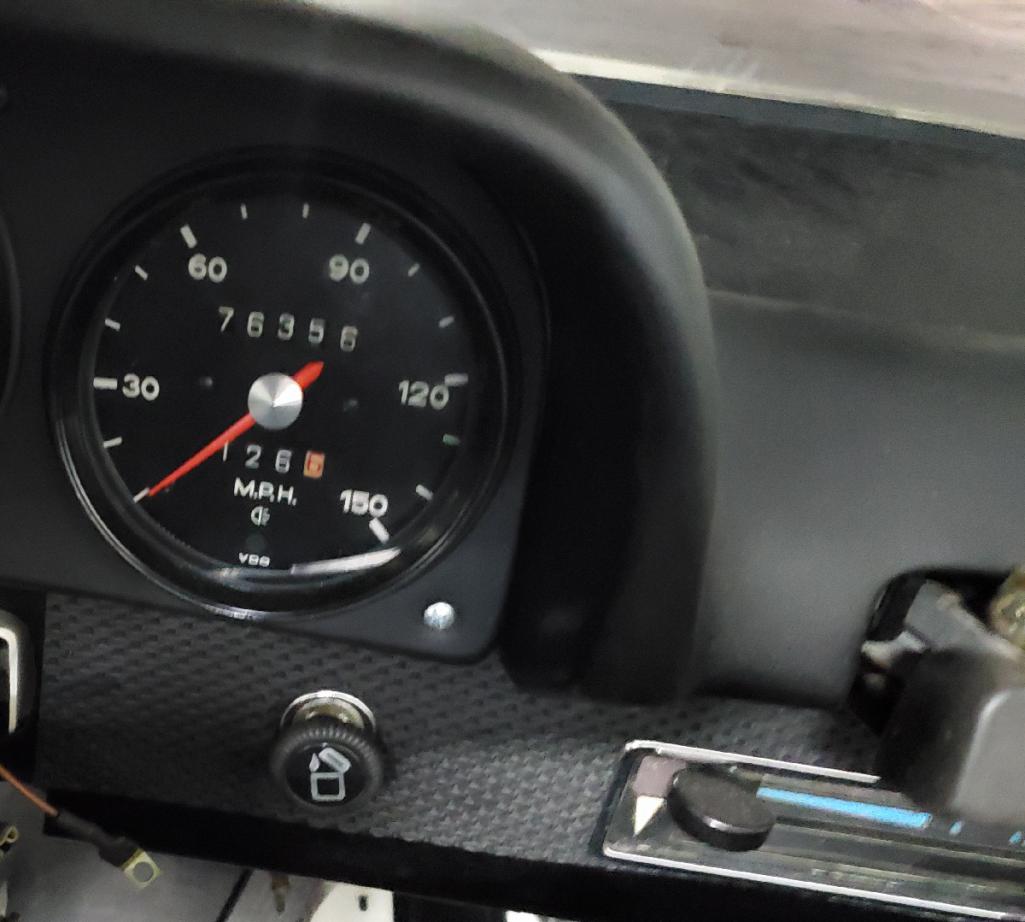
5 digit speedo is a relic from an era where most cars weren't expected to make it to 100k miles.
I'm always amazed by the number of people that think they have a 20K mile car but yet there is no service or storage history to back that and typical wear points that clearly say otherwise.
Posted by: Cairo94507 Sep 17 2020, 03:02 PM
I was concerned about my mileage too. I was at 89,6xx and it was documented in the little log book that came with my car. So I definitely wanted to keep it accurate. I switched to a later 911 electronic speedometer so I gained the extra digit in the odometer. I am already at 90,6xx now. Now to make that swap we had to add a GPS and calibration unit from Dakota Digital which gave us a minor issue initially but it is all working 100% now and I have no speedo cable in the tunnel and no leak from the speedo drive to ever worry about. 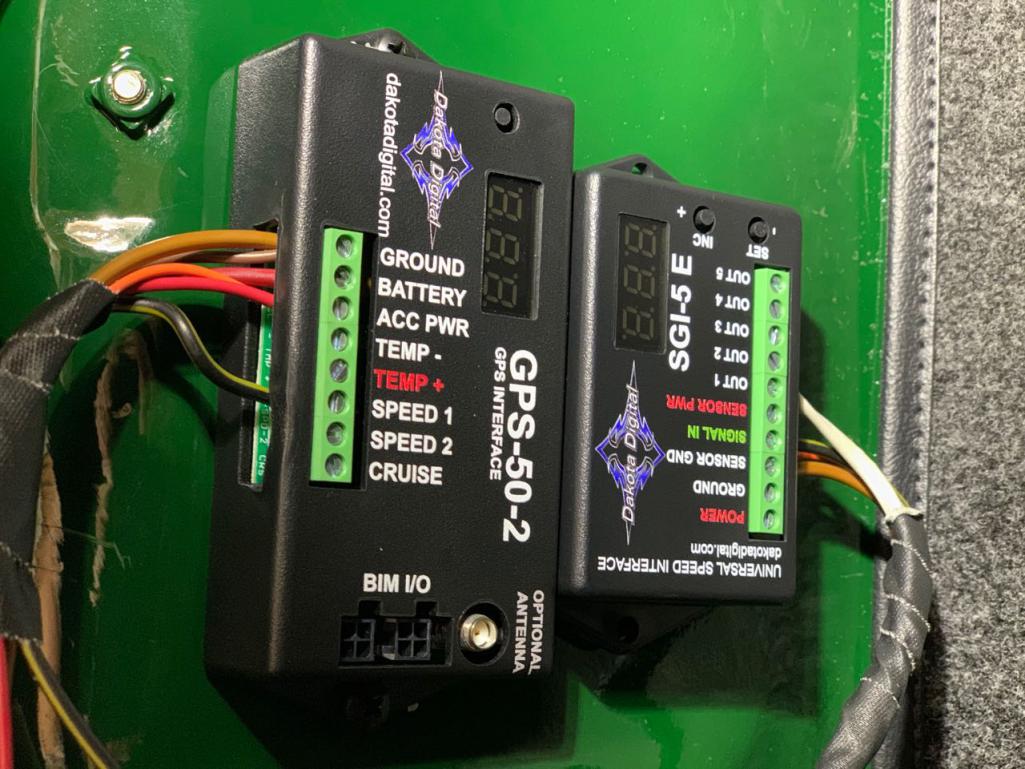
Posted by: FlacaProductions Sep 8 2022, 07:25 PM
If you followed this build, this car is now on BaT:
https://bringatrailer.com/listing/1970-porsche-914-6-66/
Posted by: rgalla9146 Sep 10 2022, 04:41 AM
Isn't it curious that people go to the trouble of creating beautiful restorations
and powerful hotrods and then sell them soon after ?
Two examples on first page of Garage right now.
What's up with that ?
Posted by: mate914 Sep 10 2022, 06:35 AM
It takes all kinds in this world. Some of us build to keep and drive and enjoy. Some of us build to sell to others who can not build. They have to be making money right?
Matt 
Isn't it curious that people go to the trouble of creating beautiful restorations
and powerful hotrods and then sell them soon after ?
Two examples on first page of Garage right now.
What's up with that ?
Posted by: Jett Sep 13 2022, 11:26 PM
The car is amazing and hopefully sells
Why would someone remove the oil cooler?
Powered by Invision Power Board (http://www.invisionboard.com)
© Invision Power Services (http://www.invisionpower.com)