Printable Version of Topic
Click here to view this topic in its original format
914World.com _ 914World Garage _ Gauging interest...pun intended
Posted by: Mark Henry Apr 21 2019, 09:03 AM
I'm making up several 14point7 SLC free 2, WB O2 meters for customers and myself and just wondering if this would be of interest to the brotherhood.
Problem with most O2 meters is the wire harness, most of the time they are just a bit short for a clean rear/mid engine install. The wires are often cheaper quality loose wire covered with the Chinese finger puzzle like plastic sheathing.
I'm using a high quality sheath, twisted, 6 wire with shrink wrap tubing on the ends, for the main harness.
Attached image(s)
Posted by: Mark Henry Apr 21 2019, 09:08 AM
The meter works with any fuel, gas, diesel, alcohol, propane, NG, hydrogen...you just need to know the fuel's stoich. The meter is self calibrating and uses the latest 4.9 LSU Lambda.
The sort of bad is it only shows the raw lambda signal.
This isn't too hard to get your head around as it shows a decimal value that you times by the fuel stoichiometric ratio. For gas that's 14.7, so a reading of 1.00 X 14.7=14.7:1 AFR. you don't have to do the math every time, just remember the range.
So for our aircooled cars say you want between a 12.5 to 13.5 AFR, so all you have to remember is you want a range between a .85 (12.5) and .93 (13.5) reading.
This is how many data loggers show AFR, how auto technicians would read AFR in modern cars and it's how I see values on my Durametric pro for any Porsche with OBD2.
The huge bonus of the system is it shows the lambda temperature, this will tell you if you have the bung/lambda mounted in a correct location, also if the lambda heater is working and if a lambda is getting beyond it's service life.
Posted by: mobymutt Apr 21 2019, 09:21 AM
I have interest, although I've pretty much blown the budget for the year.
How would you set it up for dual carbs and the stock exhaust?
Posted by: Mark Henry Apr 21 2019, 09:23 AM
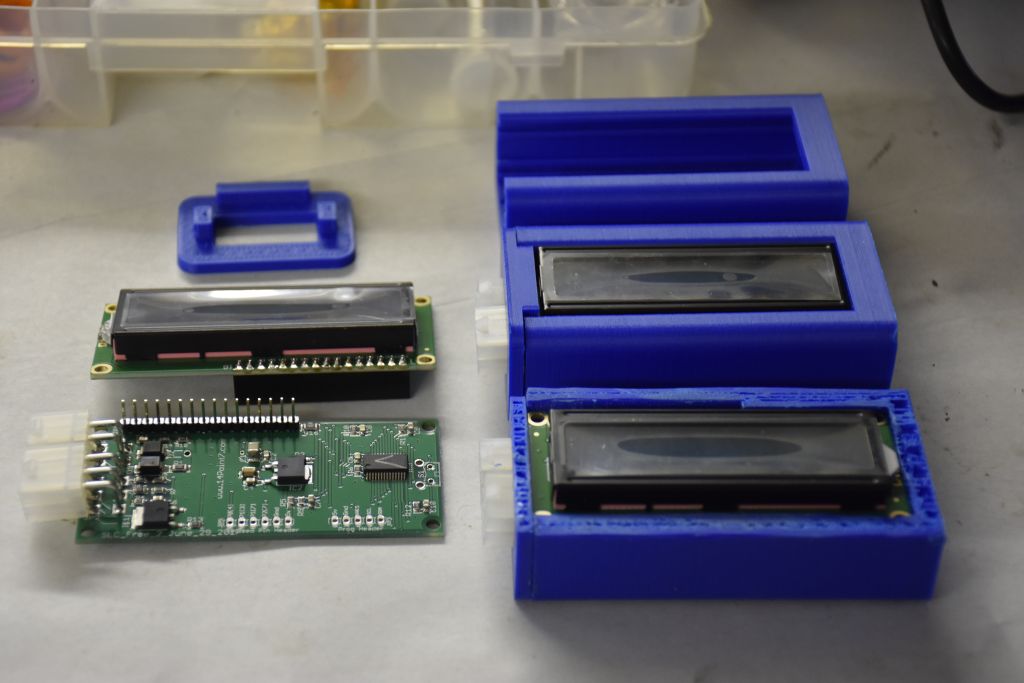
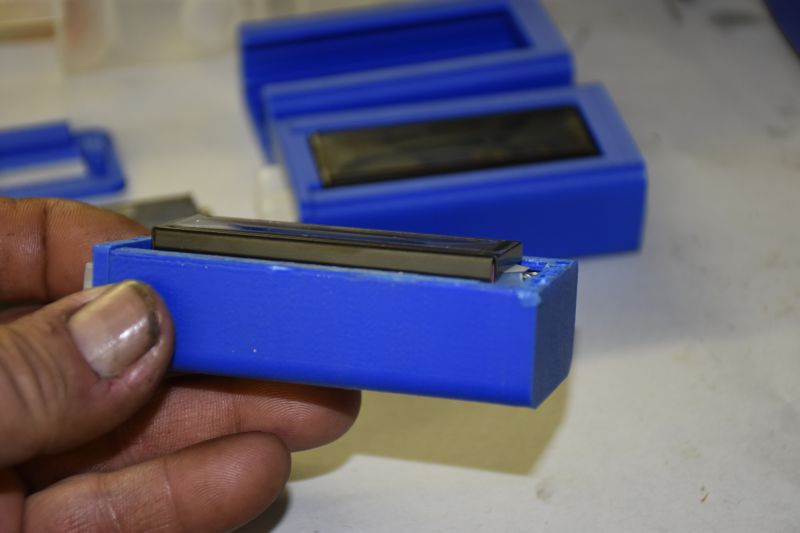
As I said these come as a kit, I have to solder in the headers and the connectors and make the harness. Second pic shows the finished boards and the case. I cut down one of the cases to do a flush install in say a center console face or modified ashtray.
Attached image(s)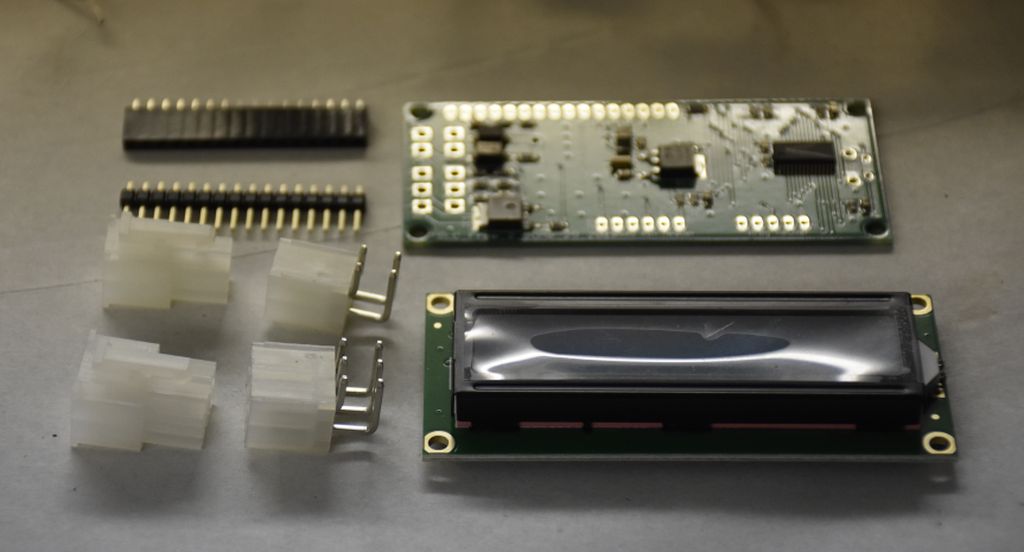
Posted by: mepstein Apr 21 2019, 09:30 AM
I'll take one. Tell me when you want money. Thanks, Mark
Posted by: Mark Henry Apr 21 2019, 09:39 AM

I'll take one. Tell me when you want money. Thanks, Mark
Geeeezzzz.... can you wait till I finish the sales pitch.

Posted by: Mark Henry Apr 21 2019, 09:45 AM
This shows the solder job on the daughter board, I bought a new Hakko solder iron for the job
Attached image(s)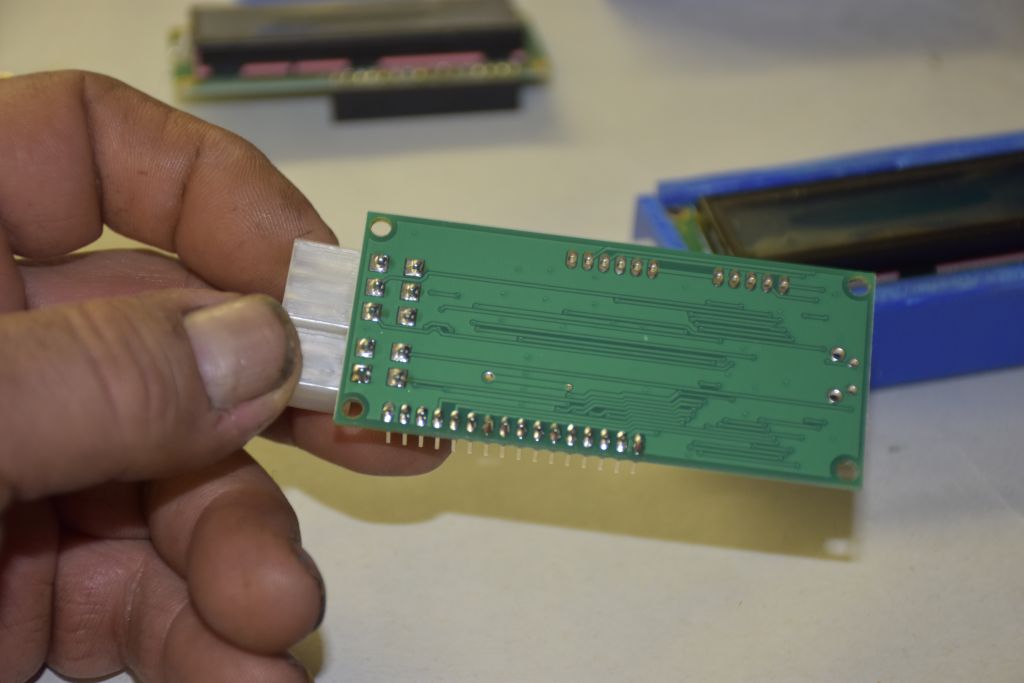
Posted by: Mark Henry Apr 21 2019, 09:56 AM
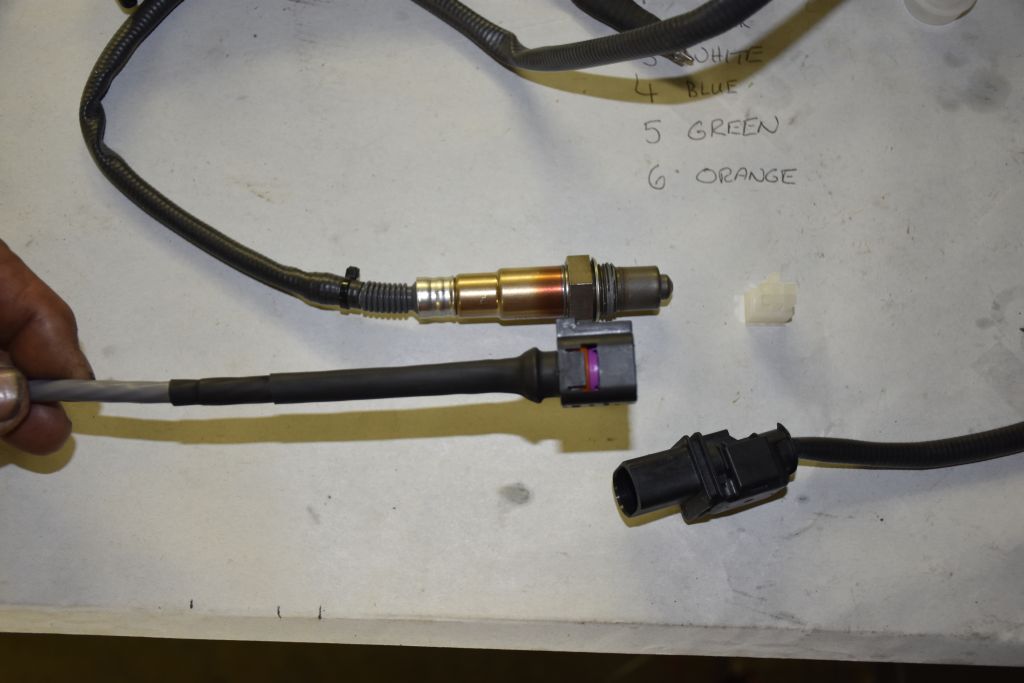
The 4.9 LSU connector, 2nd pic black doesn't show up the greatest but I use 3 pieces of heat shrink on the wire/connector. Most don't do this but since this is exposed to the elements I feel it's a good idea.
Debating if I should also put a zip tie on it, I don't think it needs it.
Attached image(s)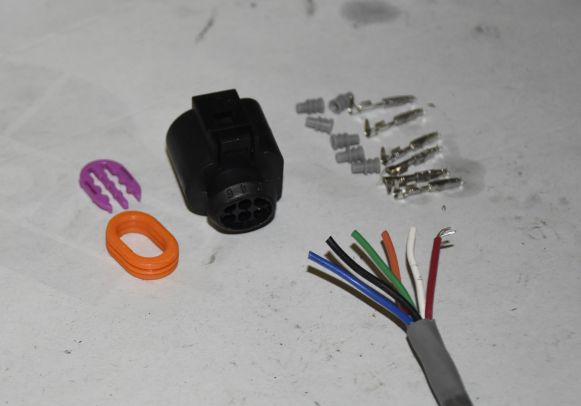
Posted by: Mark Henry Apr 21 2019, 10:06 AM
This is the power and output leads, fuse and holder is included.
red/ 12 volt keyed power +
black/ ground -
white/ simulated narrow band output
blue/ wideband output
The white narrow band output most will never need, I could cut it short, hide it in shrink tube so it's there just in case it's ever needed.
Attached image(s)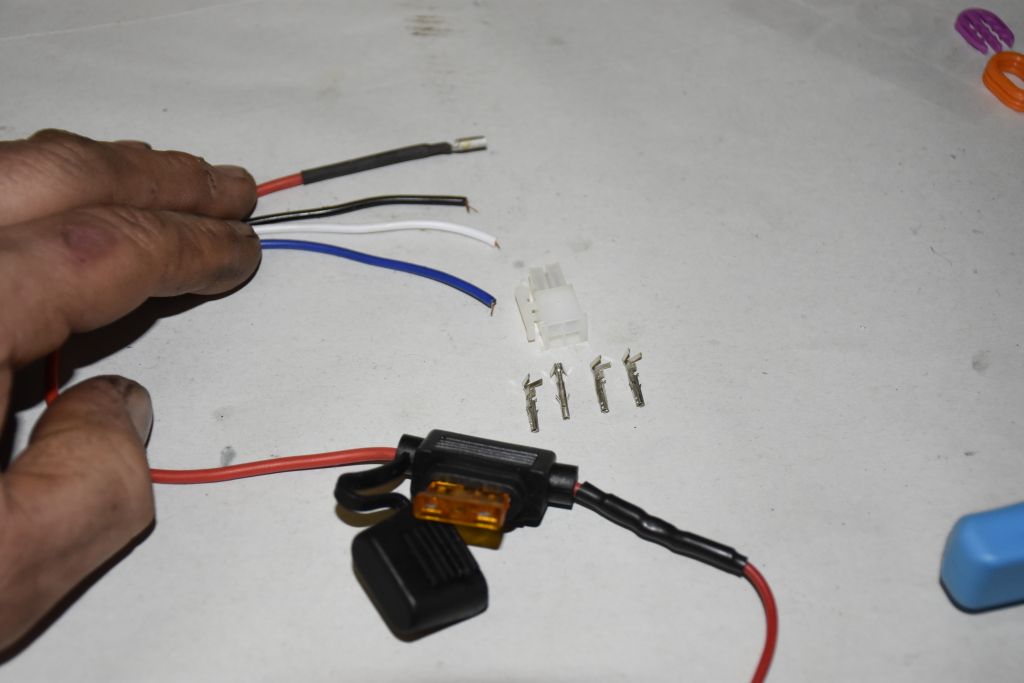
Posted by: jd74914 Apr 21 2019, 10:26 AM
How much? Is that a 14point7 SLC board?
Posted by: Mark Henry Apr 21 2019, 12:10 PM
How much? Is that a 14point7 SLC board?
Yes it's a 14point7 (.com) I thought I said this but I guess I didn't

You can buy this kit directly from 14point7 for $95, but you have to provide the wire, heat shrink, soldering, wire crimping, time, etc. No warranty
I want to keep it cheap than most others but one problem is the cable I'm using, it's more than twice the cost of a cheaper wire cable. That adds up to $10 extra bucks on the main cable. I looked at other cables, you gets what you pay for.
So ballpark $150. plus $15 std. post shipping = $165. I'll stick that as a for sure on the first 10 meters.
I will have to build 10 at a time to make it worth my while, but what I don't sell I'll put in stock.
I have 4 more here to build the cables for, now that I have my process mostly sorted, I'll time myself to see if I can do better with the 4 at once.
Other options, I could make a 2nd set of cables, one set for permanent install in your 914, the 2nd set so you remove the meter and lambda to use it temporary on a buddies car. Tentatively $50 extra, might bump up postage. BTW the cable is where the labour is and I'd have to buy a 2nd set of lambda and molex connectors.
Another idea is rentals, maybe complete Weber tuning kit, jet reamers, jets...maybe even a two meter kit for tuning a 6.

In case you're wondering you can't run two lambda's off of one meter. The lambda must always be powered when the car is running, one of the quick ways to kill your lambda is installed with no power.
I won't be ready to do these for a few weeks, my connector pin crimp set works perfect on the larger LSU pins, but not on the wire jacket strain relief crimp on the smaller molex pins. I have a better crimpper coming from Japan, ETA may 5th.
I also want to test them, I have meter and a brand new 2056 on the engine test stand right now.
Plus I want to do an full install on a 914 I think I need 12' of cable but some may not like how I'm doing this in my teen. I'll post pics and I need opinions on the installation.
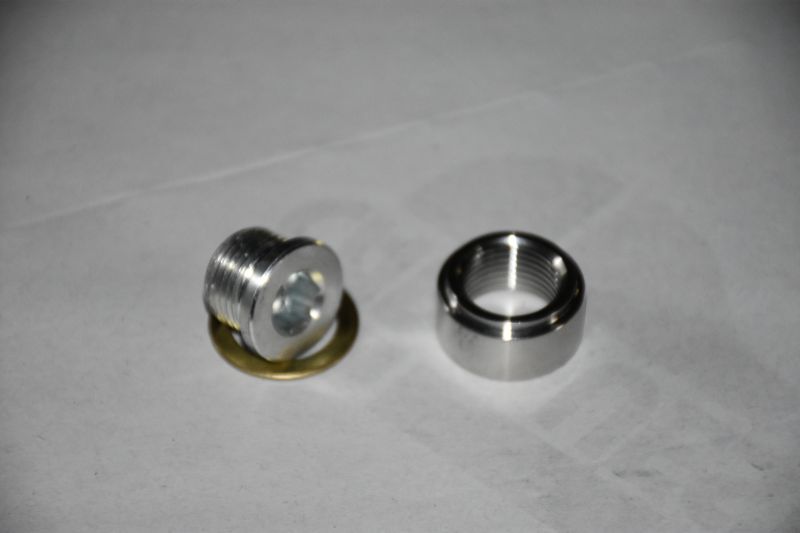
Warranty, well it's electronic if you don't follow instructions you can fuch it up, but I will fully test every meter, provide clear instructions, I stand behind my cables and work with anyone that has a mishap. I will sell components separately and do repairs. I can provide weld in SS bungs, but I need a supplier for the caps (left), most carb guys can remove the meter after tuning and this would be a bonus if I was to do rentals.
These are pretty stout units, but if you wire it backwards, remove/install the connectors when the ignition is on, don't use a proper grommet, cut and short out the harness or run the car with the lambda unpowered... I'm not going to cover those kinds of mishaps.
Attached image(s)
Posted by: Mark Henry Apr 21 2019, 12:42 PM
I likely could make each one around $10 cheaper using loose wire and the braided plastic covering.
Not near as nice as the UL grade cable I'm using.
The braided covering is also too expensive locally, to get the price brake I'd have to order it from china, ETA 8 weeks.
Attached image(s)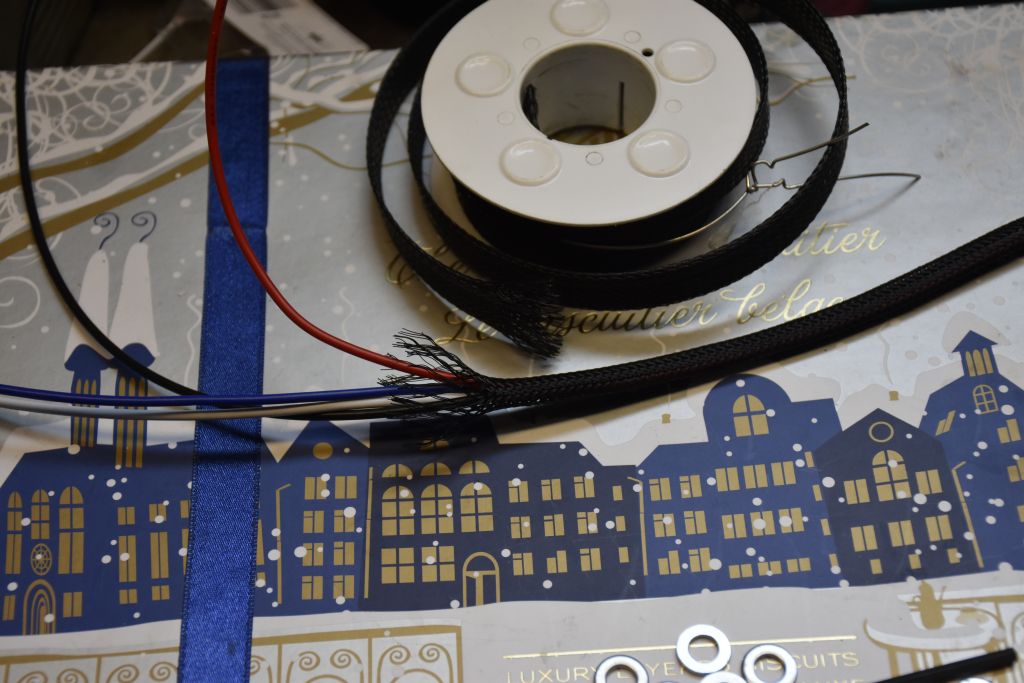
Posted by: mb911 Apr 21 2019, 01:41 PM
Mark,
I think I would be in.. I need something and currently have nothing so this would help.
Posted by: Mark Henry Apr 21 2019, 02:20 PM
Mark,
I think I would be in.. I need something and currently have nothing so this would help.
Ben we'll talk, you may already offer this as an option, but I'd like you to offer the bungs welded in on you're headers/exchangers. I have MSDS headers but the placement just pass the collector should be the similar.
The tangerine /4 header I have here has a bung welded in I'll have to mock up a /4 to see the location.
I want, not only for myself, but to have the perfect locations for peeps to mount the lambda on their exhaust.
My headers are ceramic coated how far do I have to grind the coating back to weld my bungs in?
I want to do as little as required. 1/4 inch?
Posted by: mb911 Apr 21 2019, 07:28 PM
Mark ,
1/4" should be perfect. I just did this on a 15 year old m&k muffler for a customer..
Here are the stepped headers I built for my car.. I will build heat exchangers over them after some testing but notice my 02 bung location. 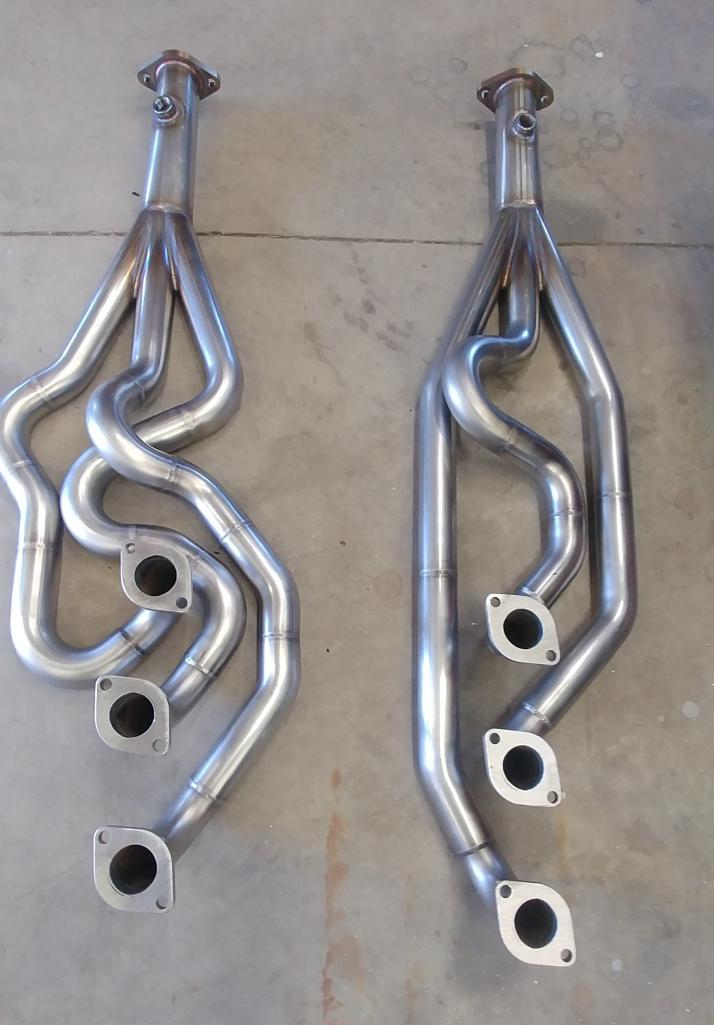
Posted by: tmessenger Apr 21 2019, 08:03 PM
I bought one of these for my car a couple of months ago. A couple of things I like about it:
It reads and displays the OX sensor temperature.
If you make up the gauge connector after you run the wire through the tunnel the hole size into the tunnel is very small. I drilled a 3/8" hole for a grommet and this worked great to run the wire through.
I've attached a chart I've made up for 100% petrol that I can buy in Iowa (no ethanol)
Note: The idle circuit on my cars carbs as it came to me were way rich so I am now working out the correct jets.
Tim Lambda__A_F.pdf ( 31.42k )
Number of downloads: 44
Lambda__A_F.pdf ( 31.42k )
Number of downloads: 44
Posted by: Mark Henry Apr 22 2019, 05:17 AM
Mark ,
1/4" should be perfect. I just did this on a 15 year old m&k muffler for a customer..
Here are the stepped headers I built for my car.. I will build heat exchangers over them after some testing but notice my 02 bung location.
The bung should be clock to the 10 or 2 o'clock, it's the best position for any moisture to fully drain out of the o2 sensor. Moisture can cause thermal shock to the sensor.
Posted by: mb911 Apr 22 2019, 05:35 AM
Mark,
I had always read 10 to 2 o clock?
Posted by: 914forme Apr 22 2019, 07:53 AM
Dual setup would be my choice if your counting Mark. It would be in the 914-6 for tuning the PMOs. Most likely pull it out once tuned, Carb running and chasing AFR is like trying wack-o-mole with a chop stick.
Posted by: jd74914 Apr 22 2019, 10:27 AM
Yes it's a 14point7 (.com) I thought I said this but I guess I didn't
You can buy this kit directly from 14point7 for $95, but you have to provide the wire, heat shrink, soldering, wire crimping, time, etc. No warranty
I want to keep it cheap than most others but one problem is the cable I'm using, it's more than twice the cost of a cheaper wire cable. That adds up to $10 extra bucks on the main cable. I looked at other cables, you gets what you pay for.
So ballpark $150. plus $15 std. post shipping = $165.
Awesome! I've been really impressed with their other products-fantastic board reliability and the heater circuits seem to work quite well.
Your price seems really reasonable given the amount of cost and work that goes into making a really nice harness. Much nicer than the commercial-grade wiring 14point7 uses in their prebuilt stuff. Looks like the best of both worlds!

I'm not in the market right now or I'd definitely by a customer.
Edit: Thanks for the really detailed response BTW.
Posted by: Mark Henry Apr 22 2019, 11:09 AM
Mark,
I had always read 10 to 2 o clock?
10 or 2 o'clock, basically 45 degrees.
It's the best position for fully draining the sensor tip of moisture.
If you look at the tip it has a bunch of holes around the tip and a bigger hole in the tip center. The center hole goes nowhere, it's the little holes that needs to drain. Straight up at 12 o'clock the tip can hold moisture in it like a little cup, at 3 o'clock moisture will lay in the sensor. Sitting at a 45* then you are sure both the tip and body drain.
Moisture will/could cause thermal shock as it heats up.
Posted by: mepstein Apr 22 2019, 11:17 AM
Attached thumbnail(s)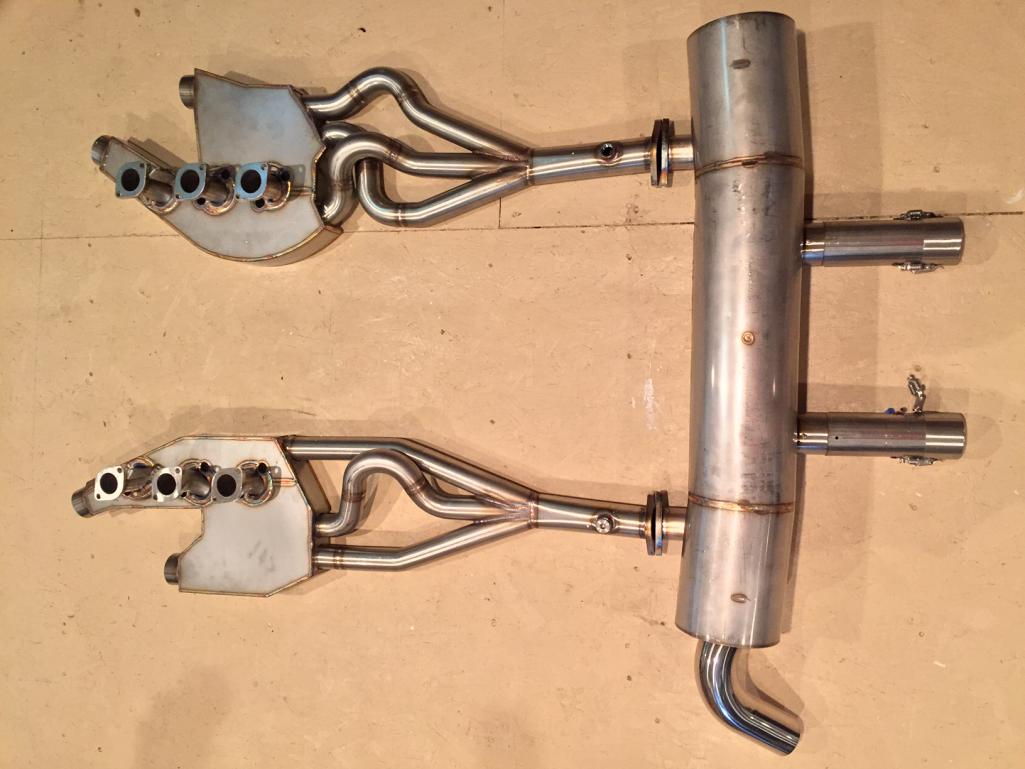
Posted by: mb911 Apr 22 2019, 11:32 AM
I was just looking at innovates website after I wrote that this morning and they suggest 9 to 3 o'clock. I may look at changing mine though in the future.
Posted by: Mark Henry Apr 22 2019, 12:41 PM
Maybe I'm wrong or misinformed, wouldn't be the first time... the 14point7 instructions says between 10 and 2 o'clock.
About 3 feet from the exhaust or turbo outlet.
Posted by: mb911 Apr 22 2019, 02:52 PM
Maybe I'm wrong or misinformed, wouldn't be the first time... the 14point7 instructions says between 10 and 2 o'clock.
About 3 feet from the exhaust or turbo outlet.
Well maybe I am wrong as well. I just want to make sure it works correctly..
Posted by: Gary Apr 22 2019, 05:59 PM
Mark, I'm in for a setup too, probably a two-harness deal. Let me know as things firm up.
Posted by: ctc911ctc May 15 2019, 11:20 AM
Ready to ship yet?
[
quote name='Mark Henry' date='Apr 21 2019, 12:42 PM' post='2707440']
I likely could make each one around $10 cheaper using loose wire and the braided plastic covering.
Not near as nice as the UL grade cable I'm using.
The braided covering is also too expensive locally, to get the price brake I'd have to order it from china, ETA 8 weeks.
[/quote]
Powered by Invision Power Board (http://www.invisionboard.com)
© Invision Power Services (http://www.invisionpower.com)