Printable Version of Topic
Click here to view this topic in its original format
914World.com _ 914World Garage _ My Hellhole Repair
Posted by: Tenner May 13 2019, 08:33 AM
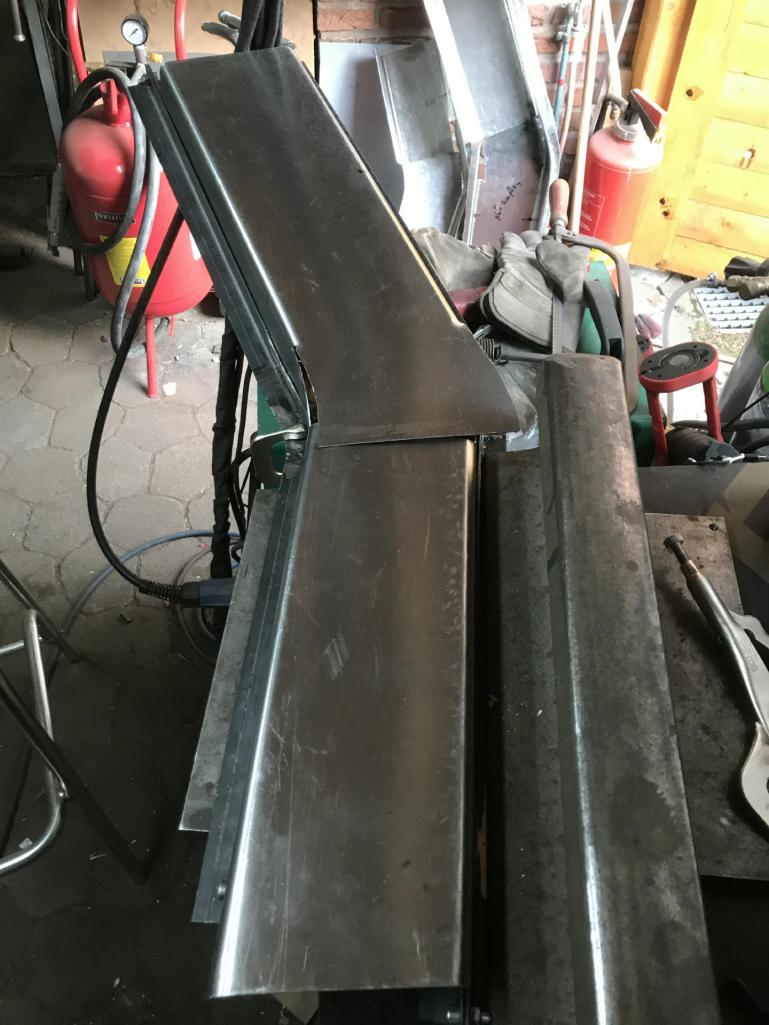
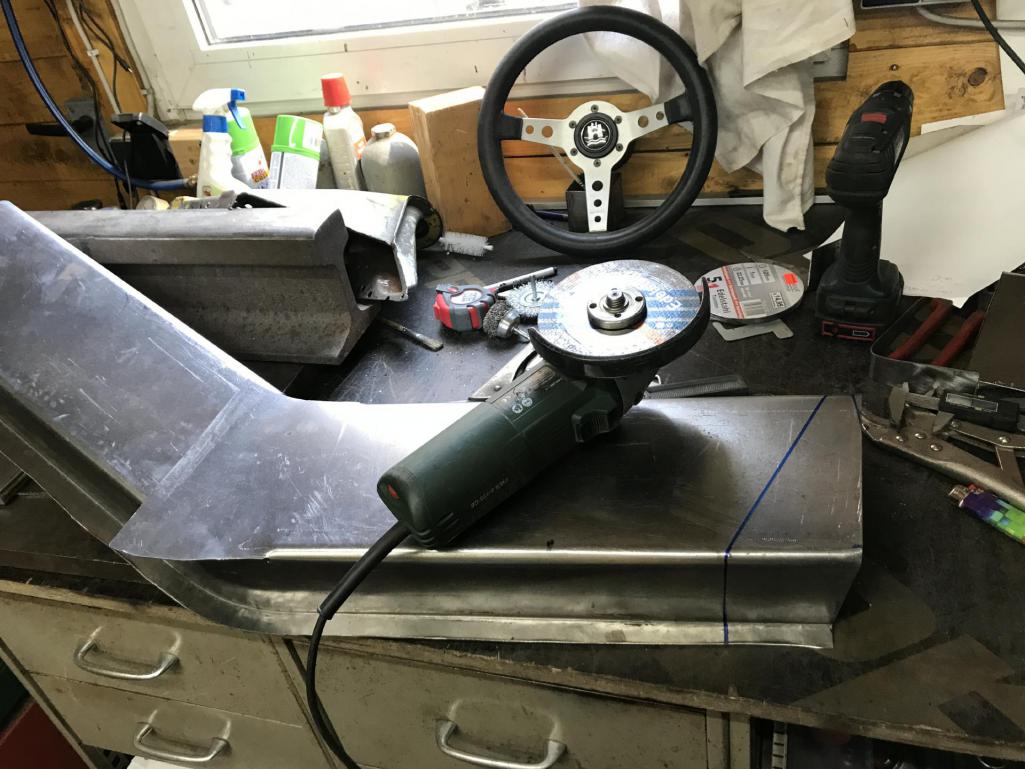
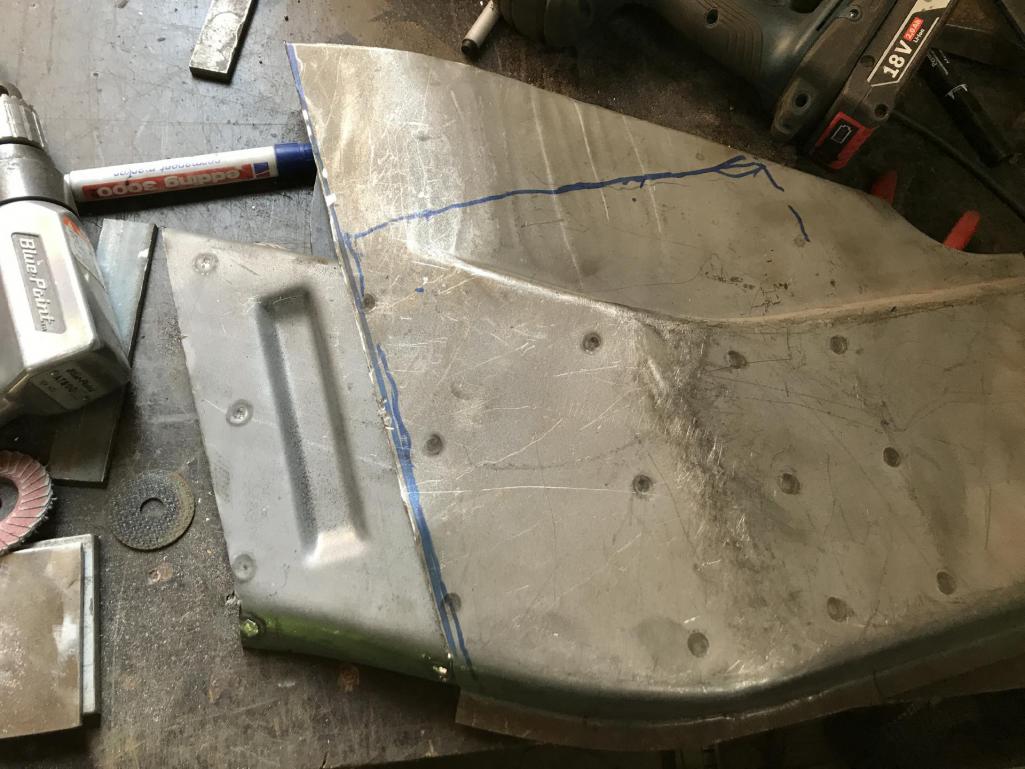
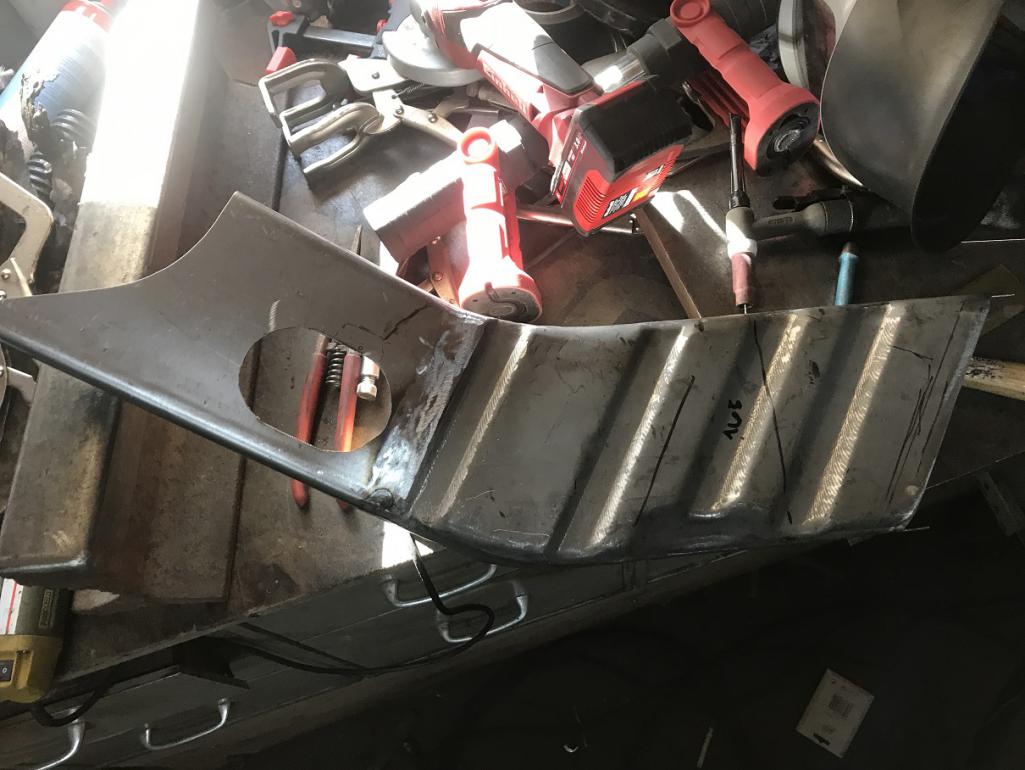
As I have written before in Superhawk996 thread, I build the inner longitudinal myself. However, it took more than 6 months for me to come to a useful conclusion and 3-4 attempts with different approaches. The aim was to form the longitudinal from one piece of sheet metal to have as few welds as possible at the end. The starting point was, except for the first attempt, a 1000x500mm large, 1.2mm thick steel sheet. At the first attempt, I first put down the lower edge and then brought the rounding into the metal sheet with a stretching and compression device. At the end of the procedure, the lower edge lay flat on the repair panel of the inner wheelhouse.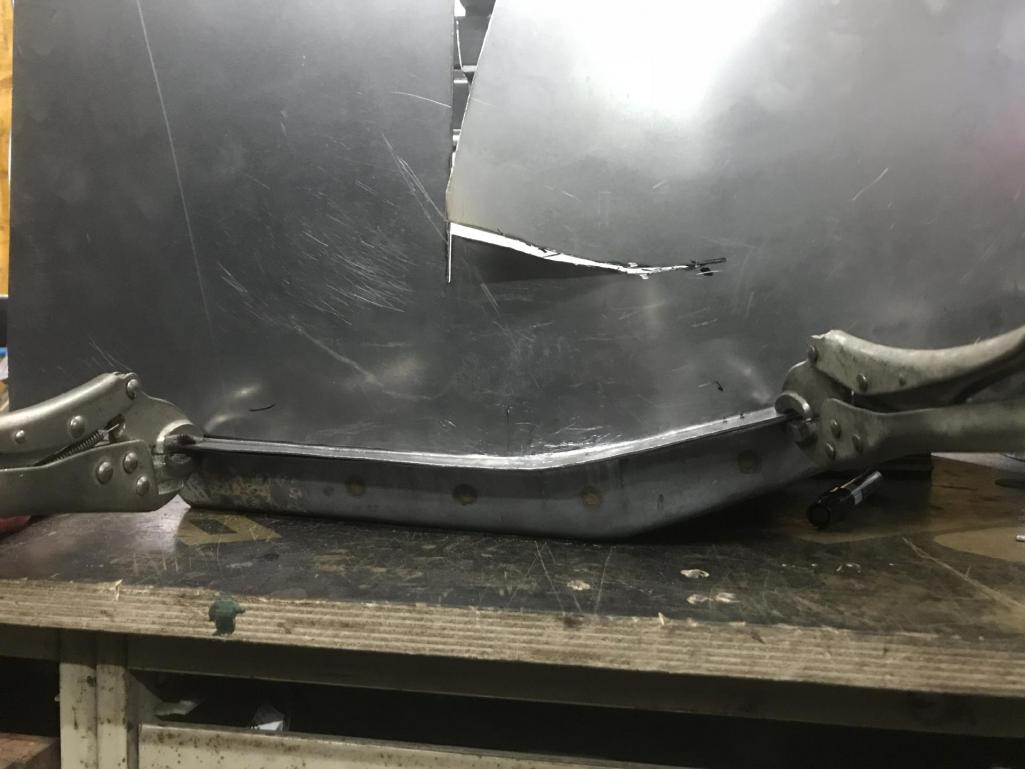
In the next step, the second "edge" had to be bent. Since this edge is less an edge than a curve, I built a tool to bend the sheet.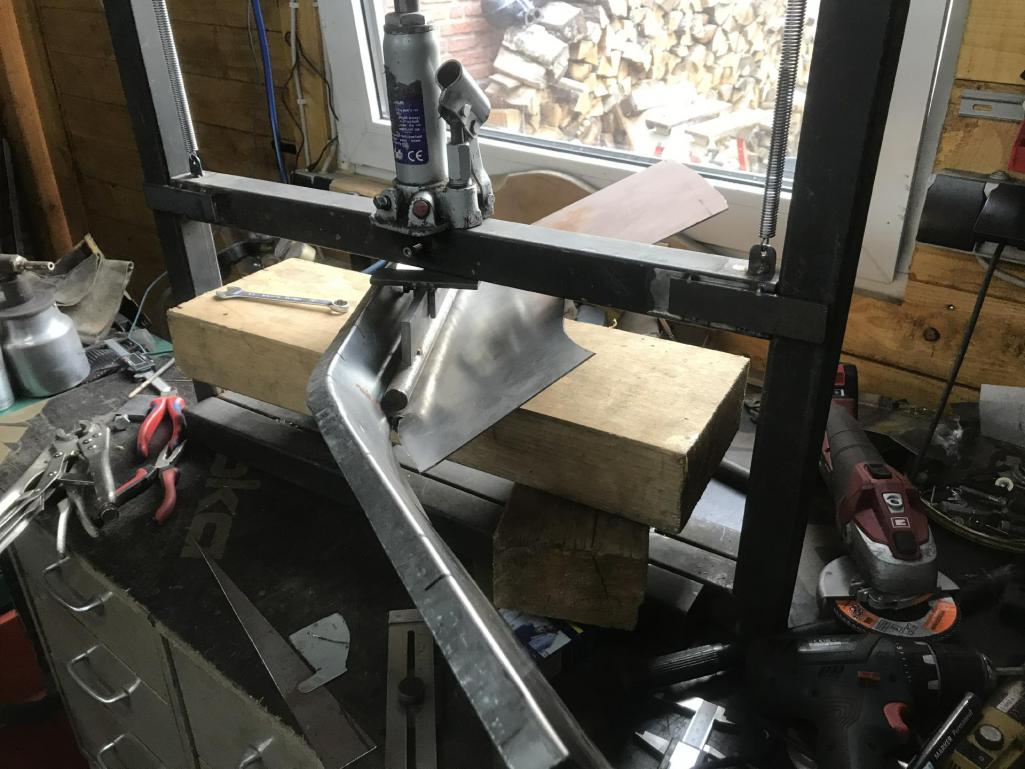
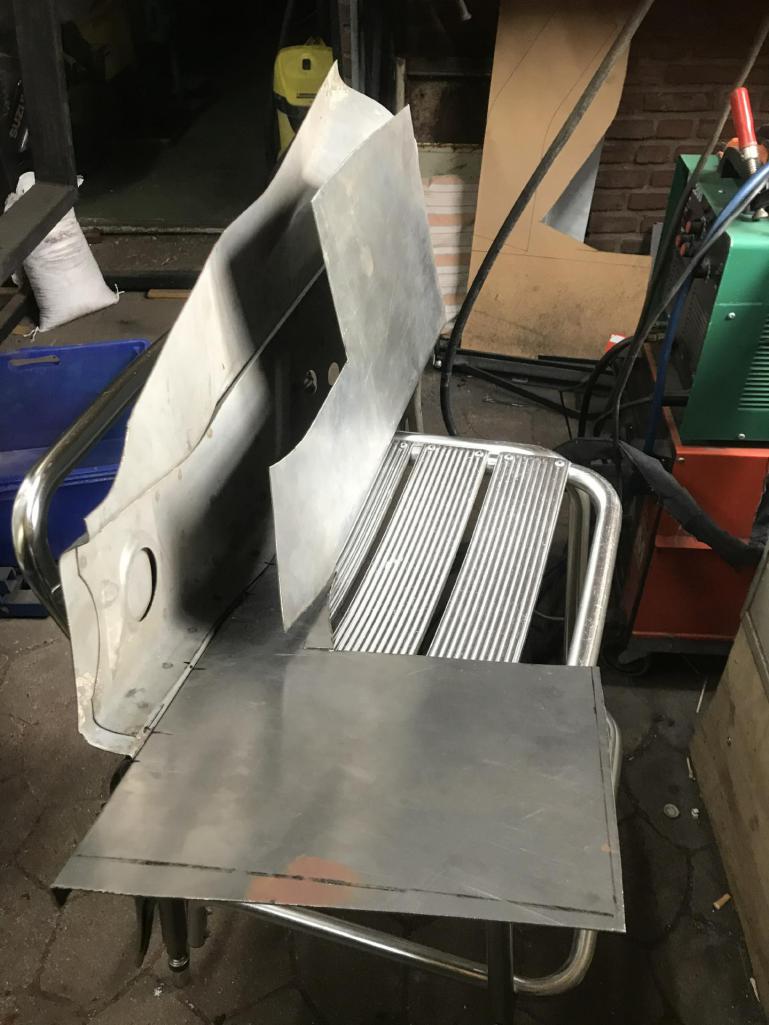
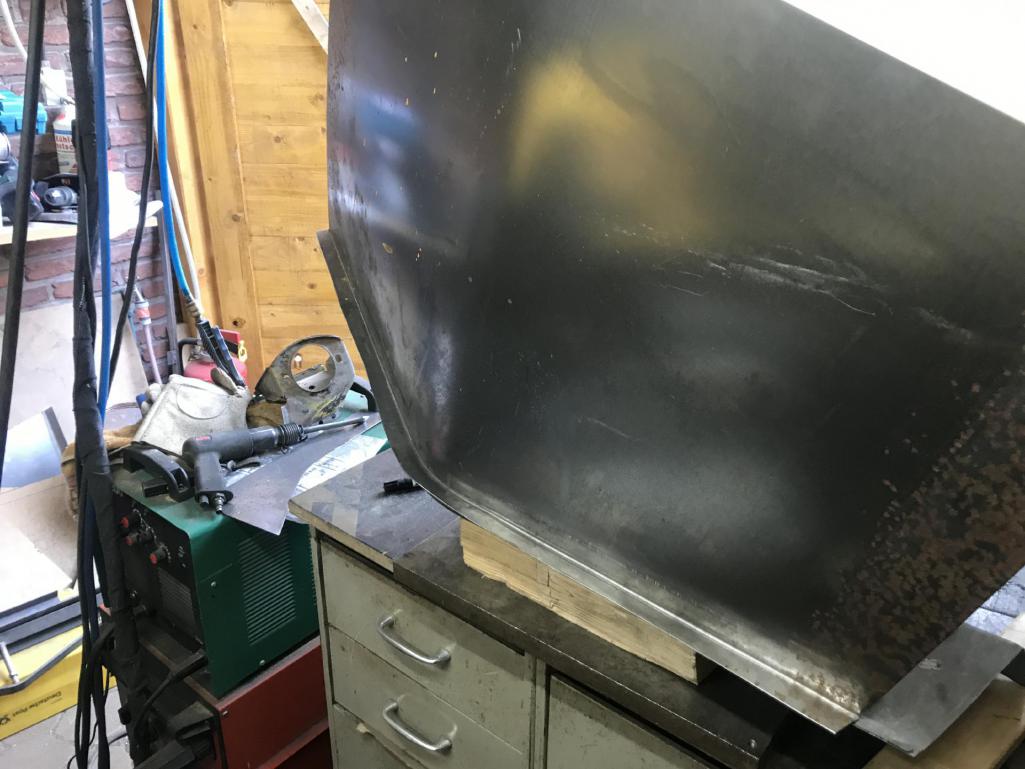
The top edge / rounding and the first attempt was done ...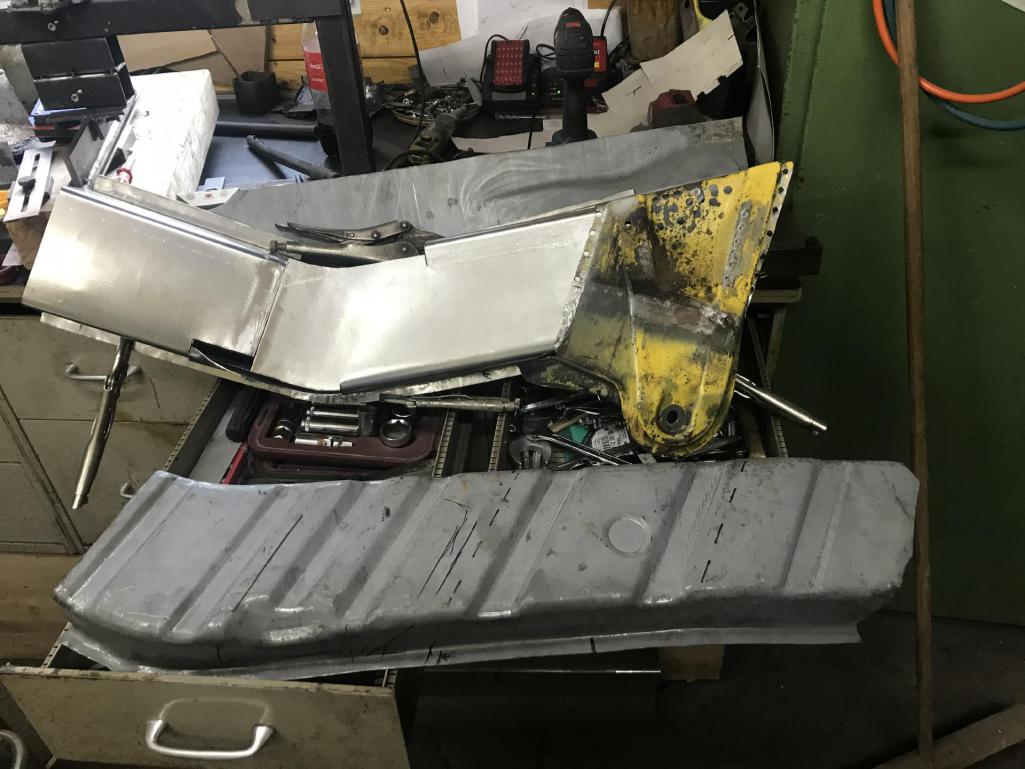
basically quite good, but unfortunately I had to realize that the part was a bit short. When fitting, I noticed that the sheet metal at the longitudinal in the passenger compartment was very thin. I had to cut much more out of the longitudinal. In addition, my repair sheet was 1.5mm and not as original 1.2mm.
The second attempt was a single failure, too short at the front, too long at the back and too little material in the width.
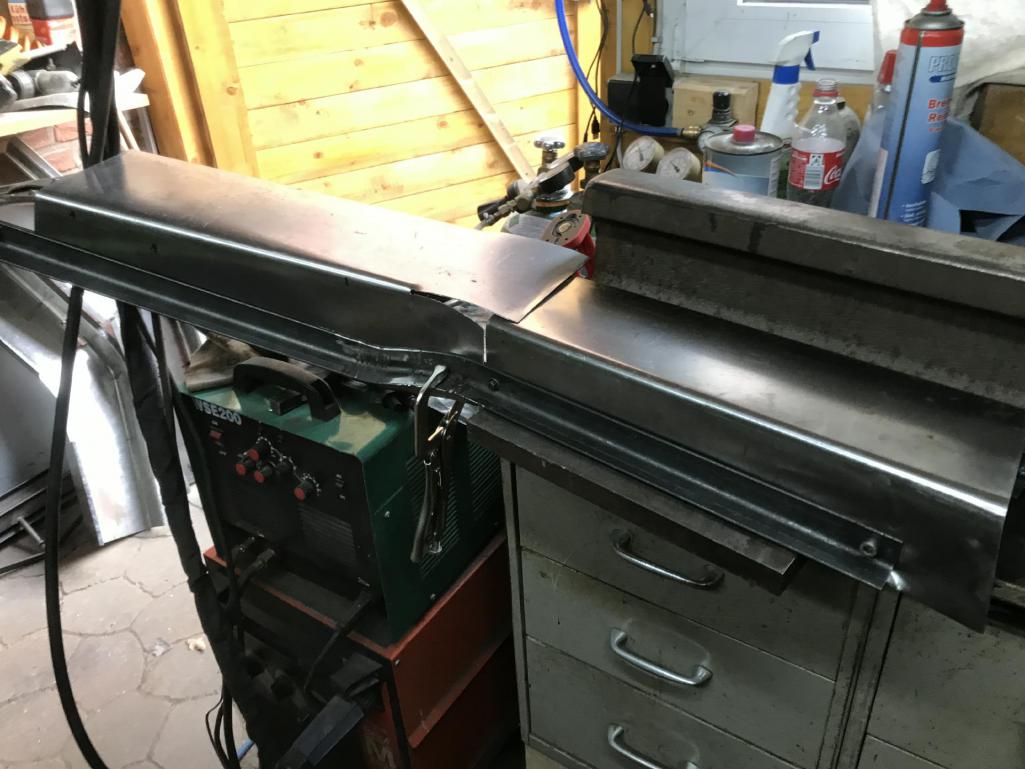
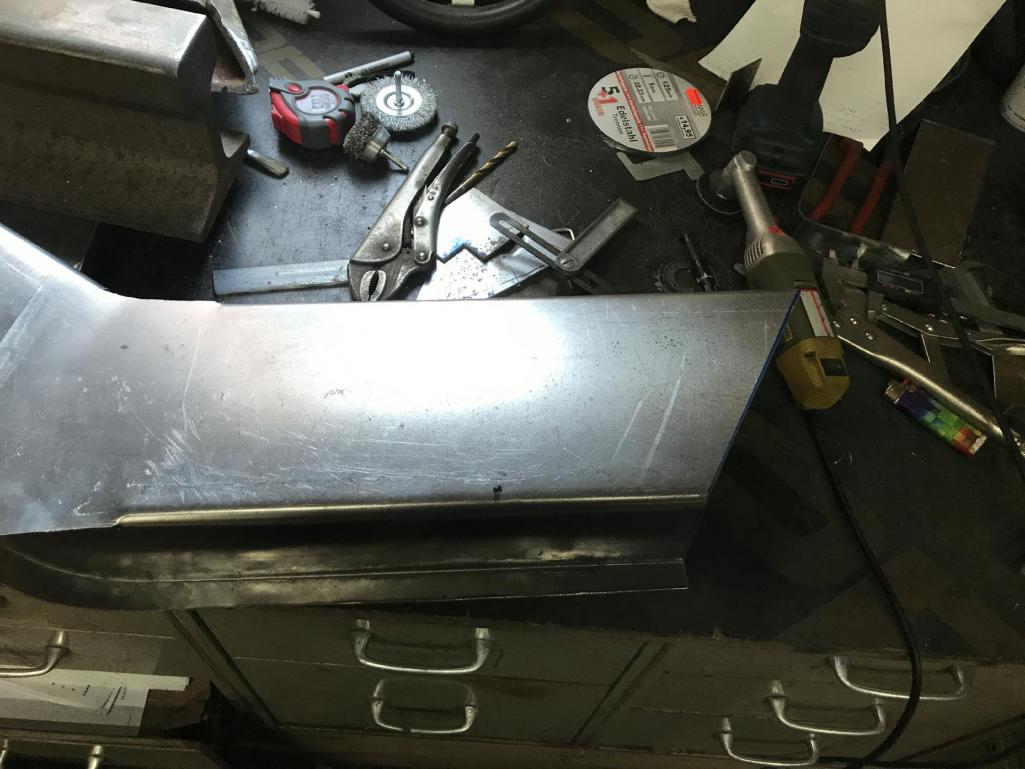
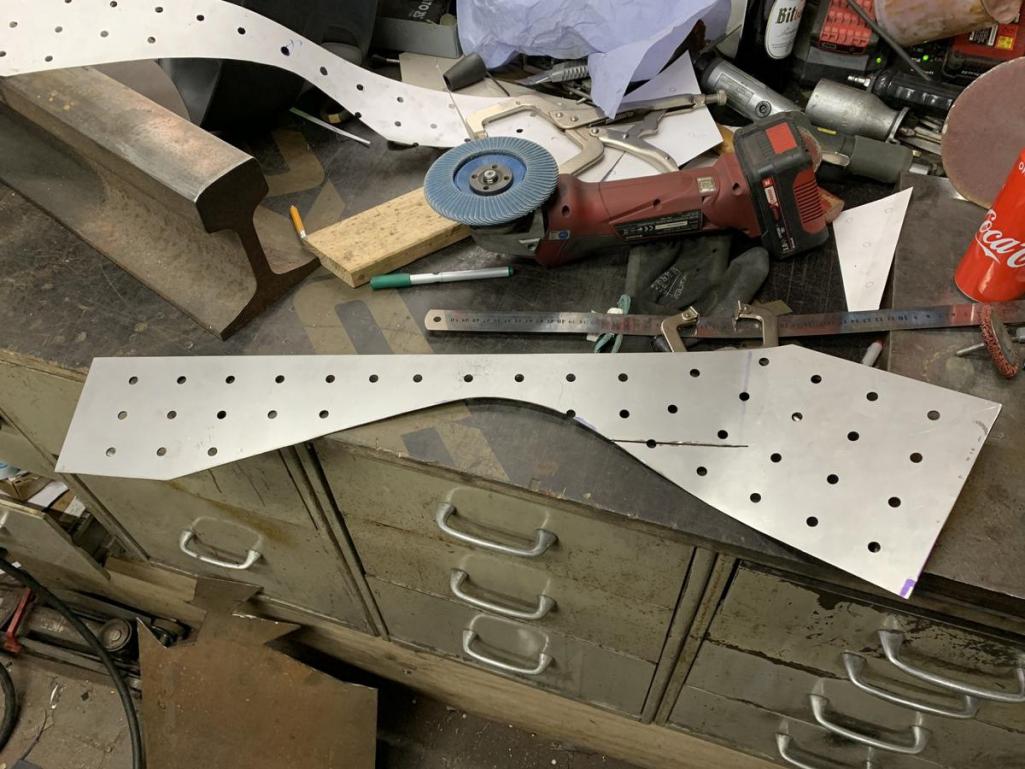
For the 3rd attempt, I ordered 1.2mm sheet metal and started again. Since the 1st edge already has a rather complex shape and the forming with the stretching and compression tool was a pita, I made a knocking mold out of a 1m long angle iron.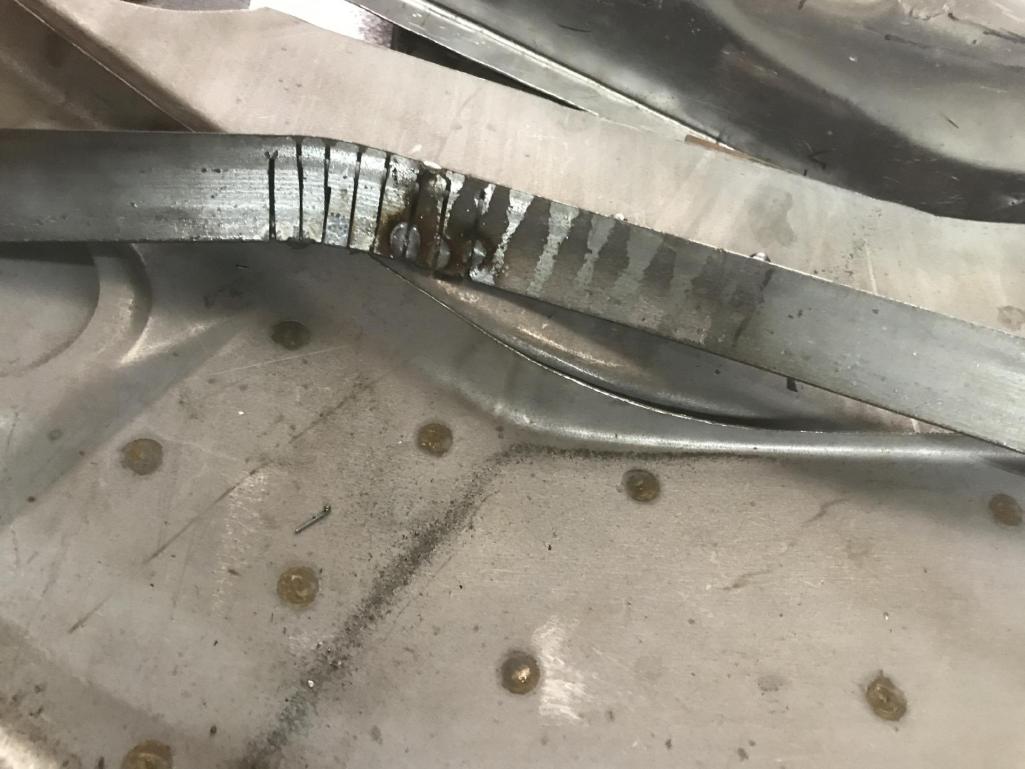
The sheet metal is clamped in between and the sheet has its profile. Then the edge is shaped with a hammer.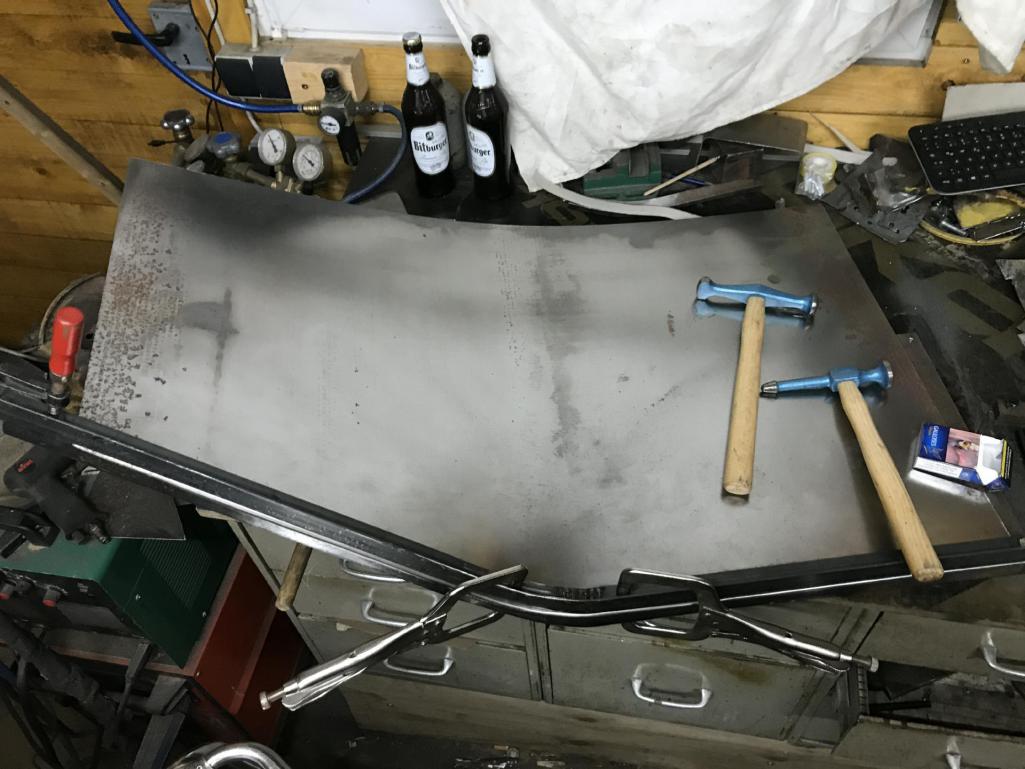

Posted by: Tenner May 13 2019, 08:40 AM
Also very tedious, but the result is good.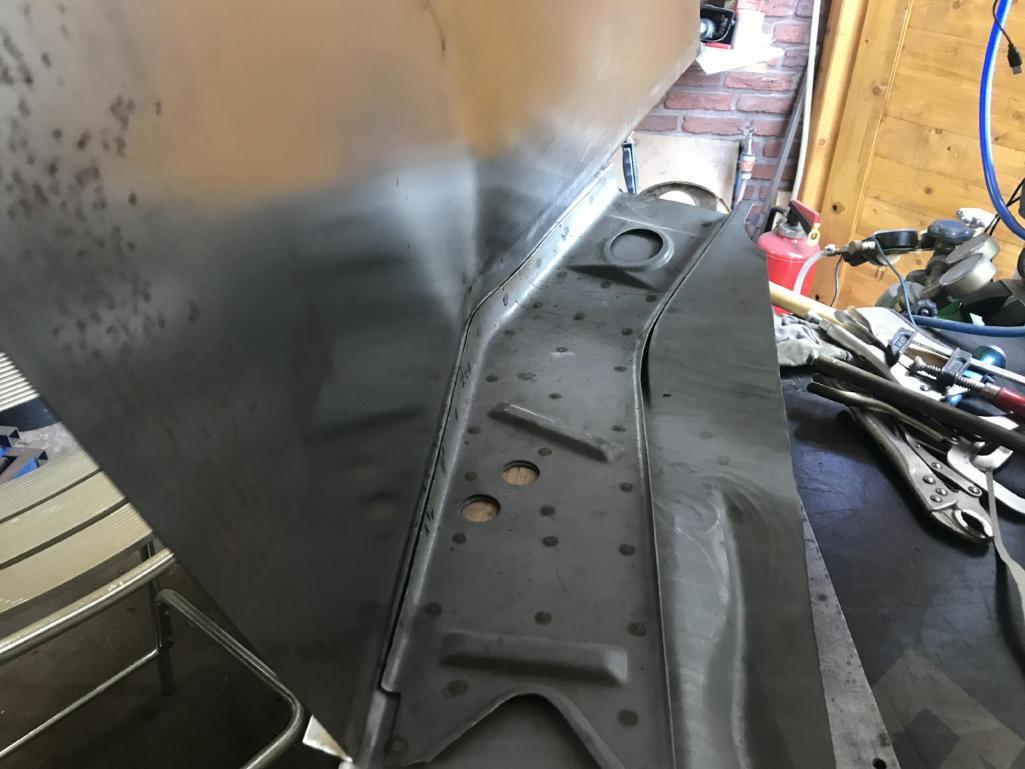
The next steps I did exactly as I did on the first try. But the sheet was useless too. At the last edge (Welding to the inner wheelhouse) I confused the dimensions front / rear, so that the box in the front of the engine compartment was too wide and too narrow at the back. Stupidly, I had already cut off the excess material, otherwise I could have straightened the edge again and turn again.
Despite the failures my motivation was unbroken.
3. Attempt. This time I built a second knock mold for the upper edge.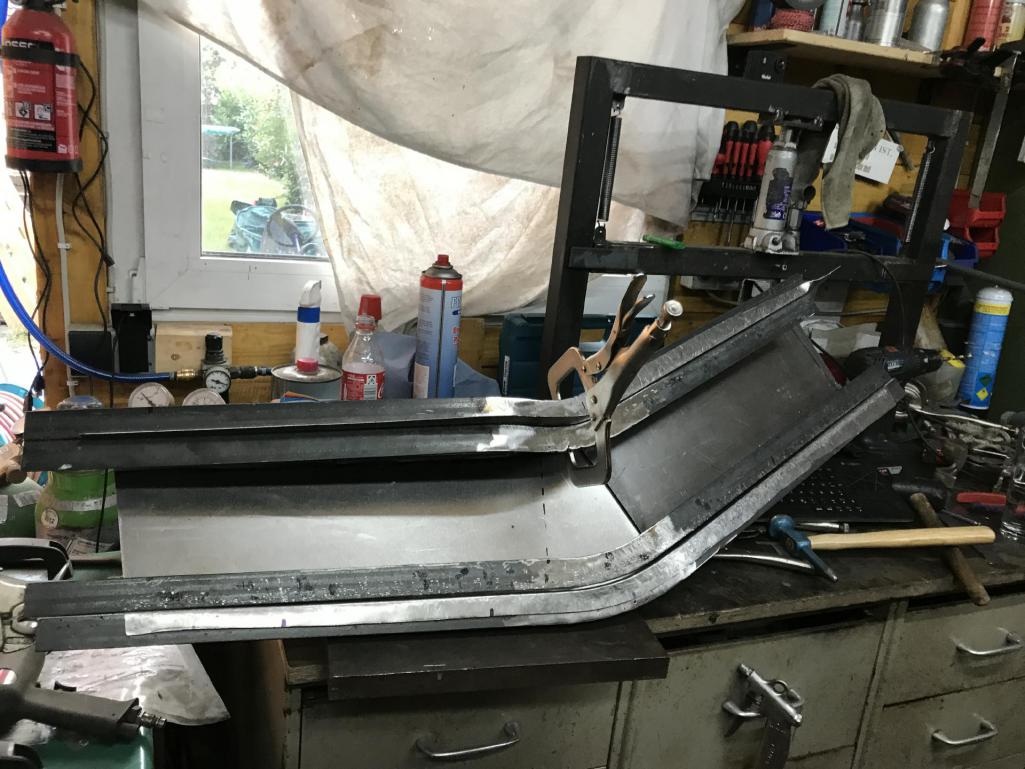
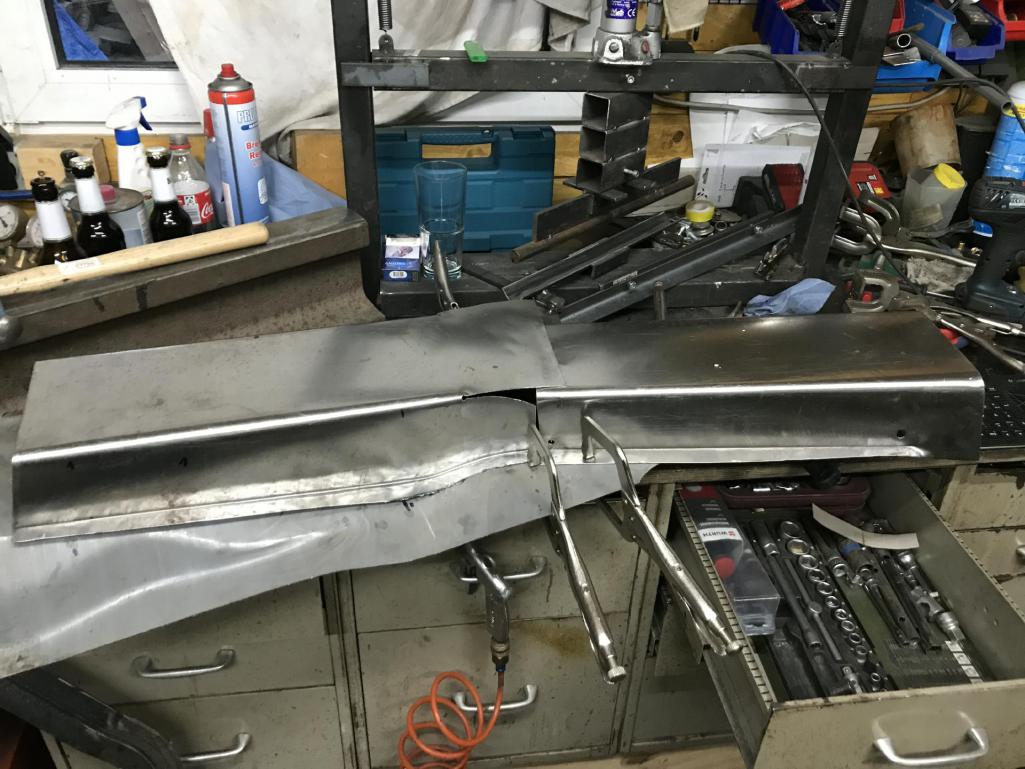
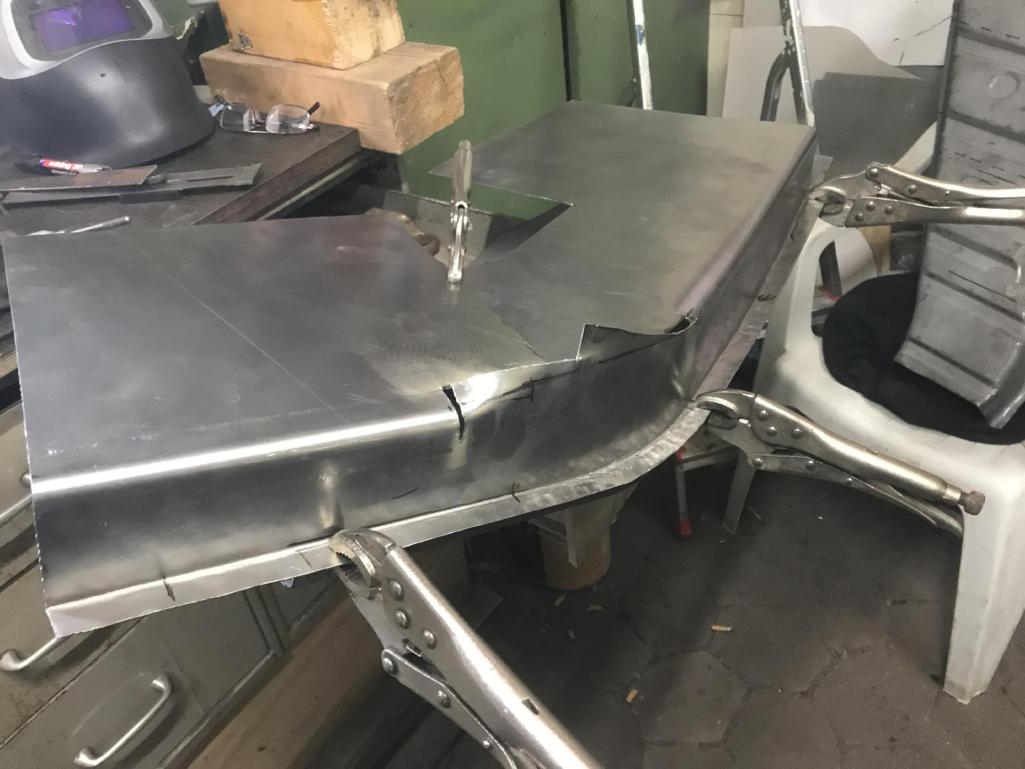
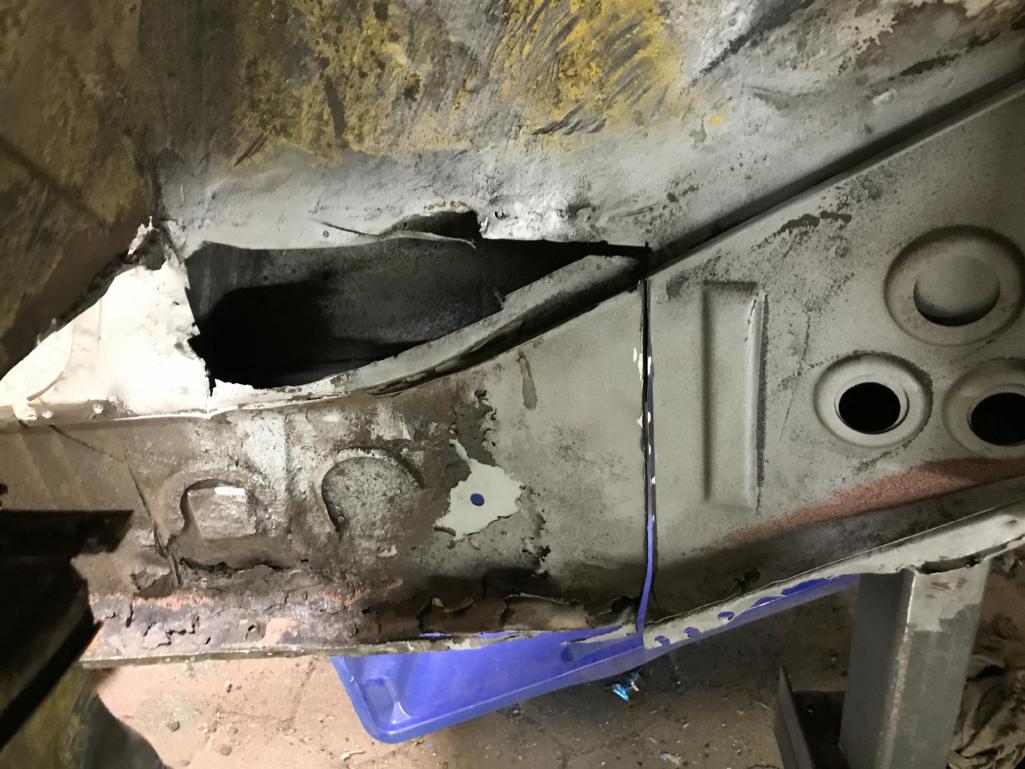
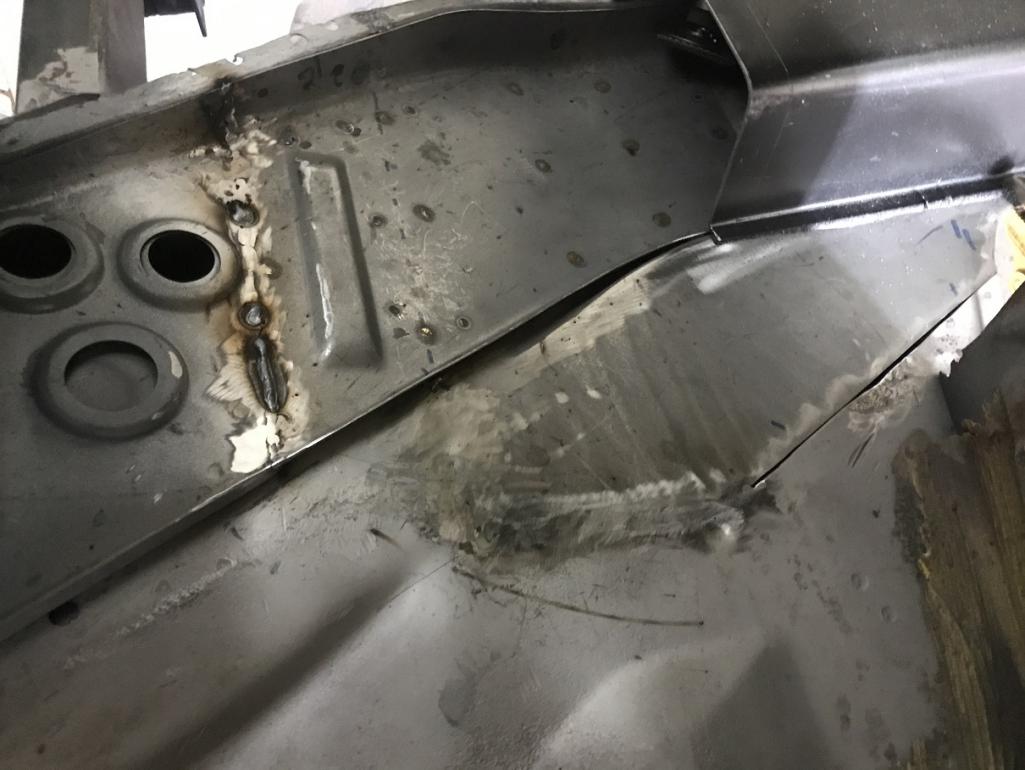
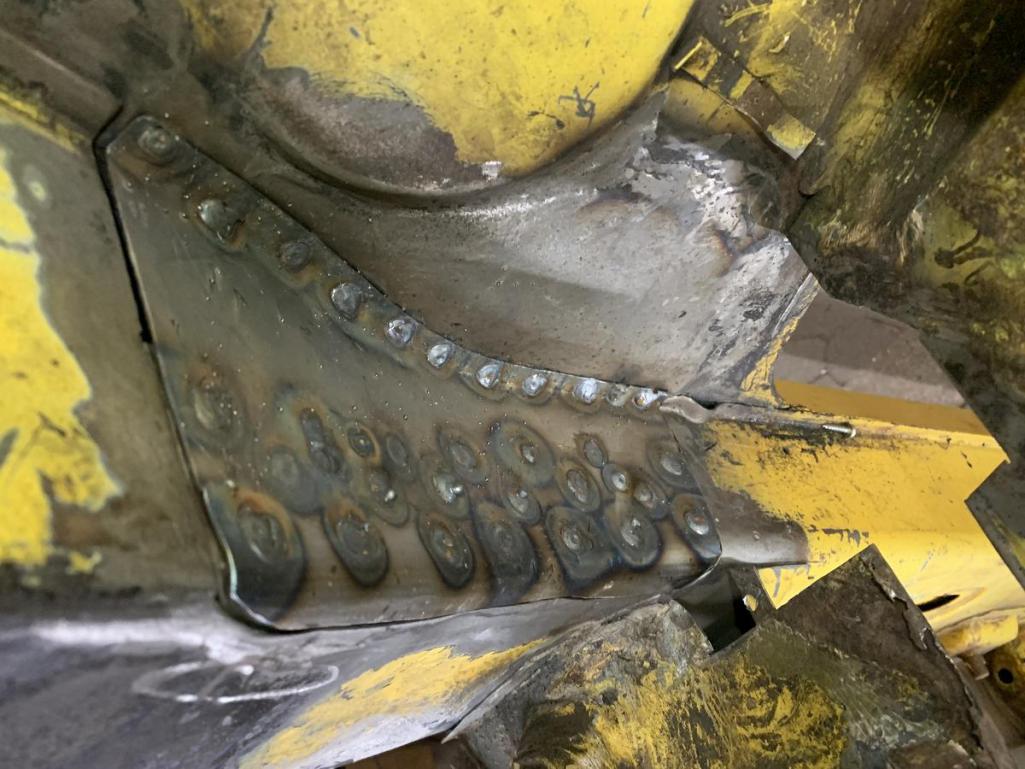
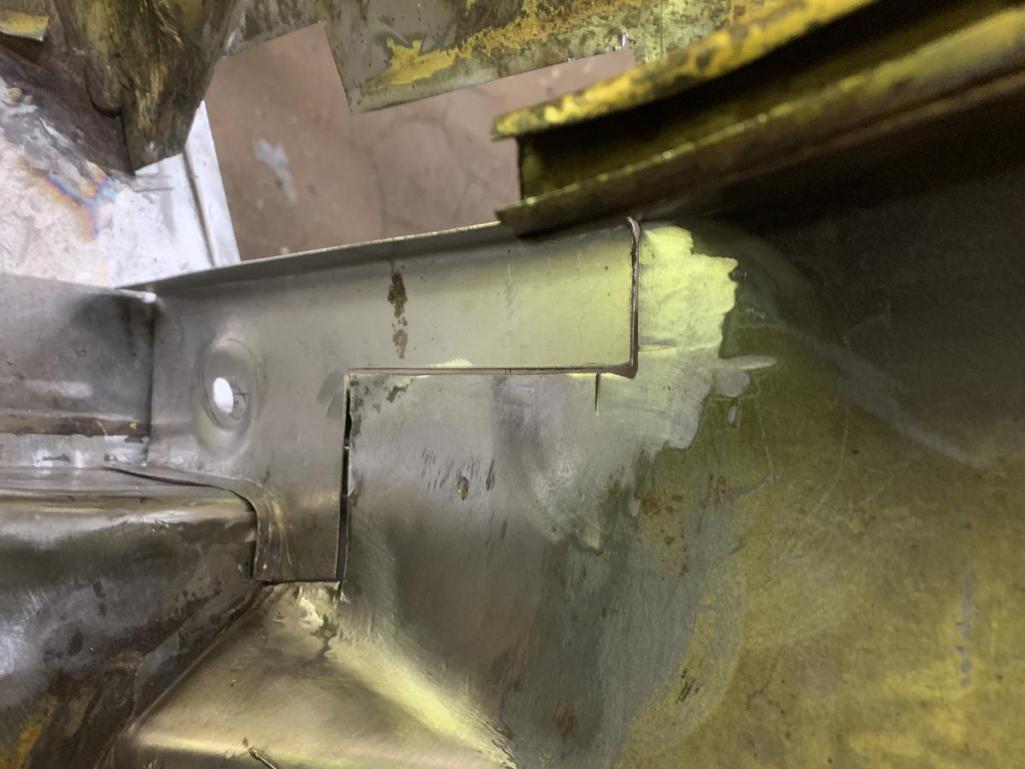
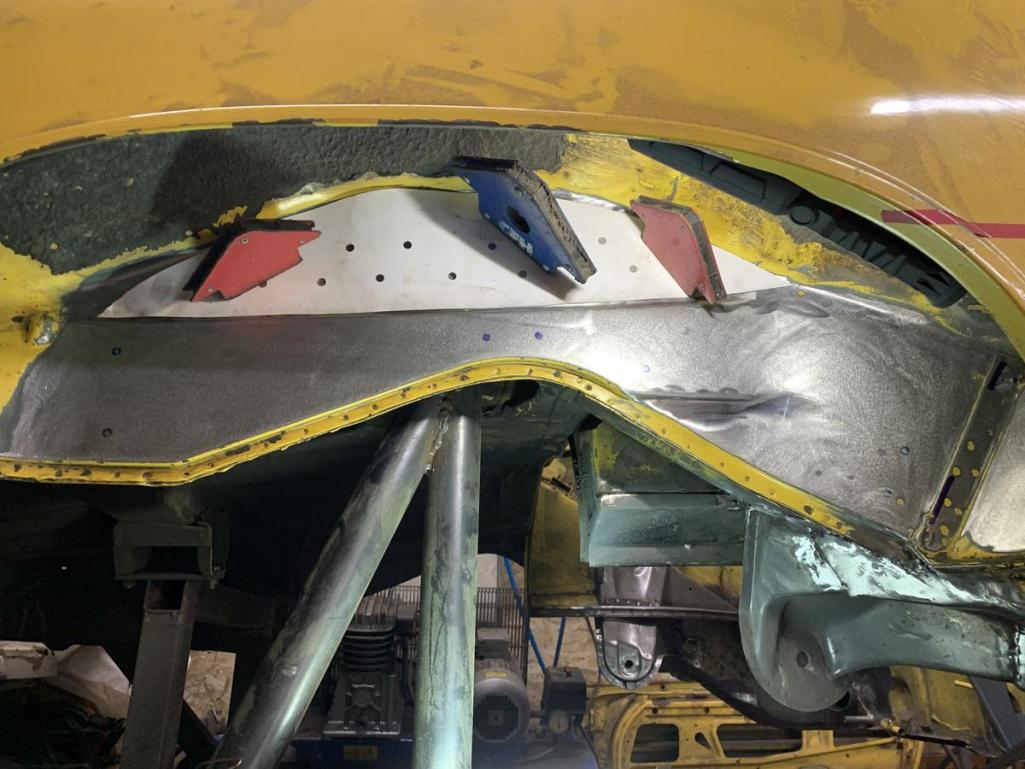
In the last 3 weeks I have adapted the new repair sheet to the body, and vice versa.
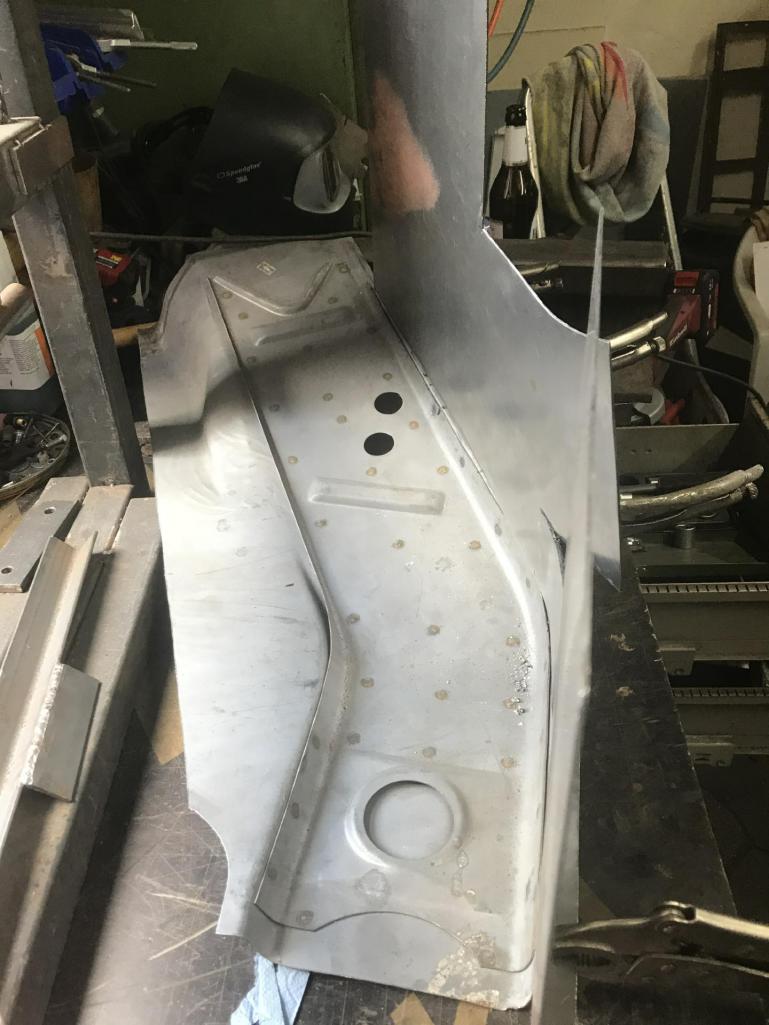
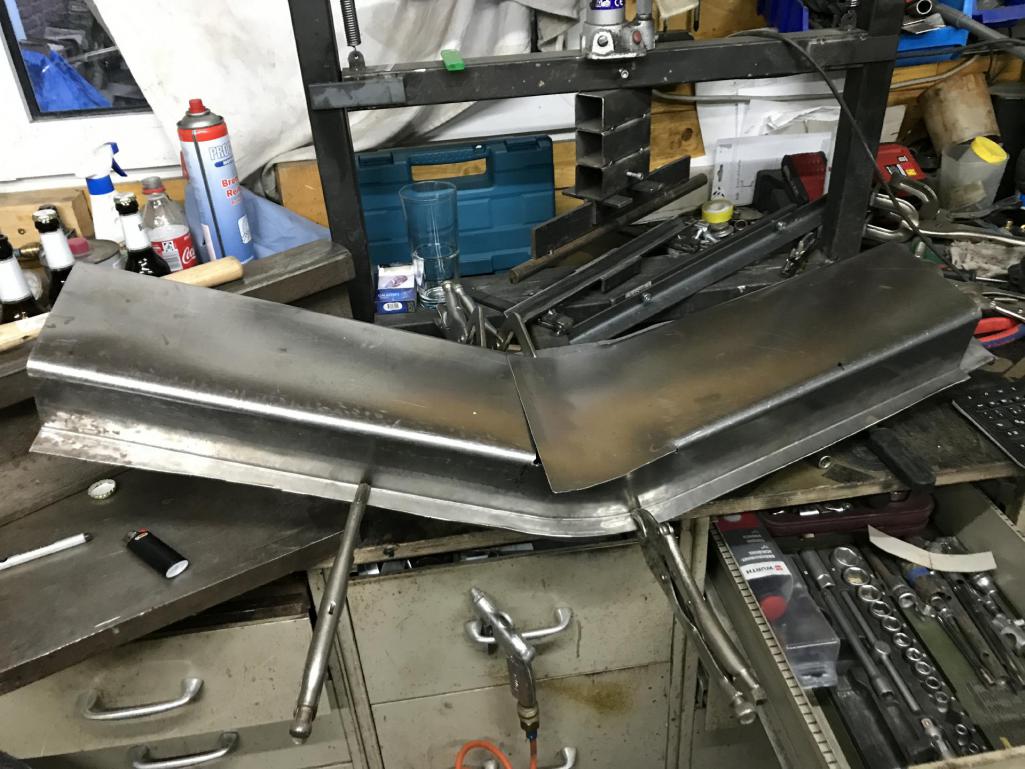
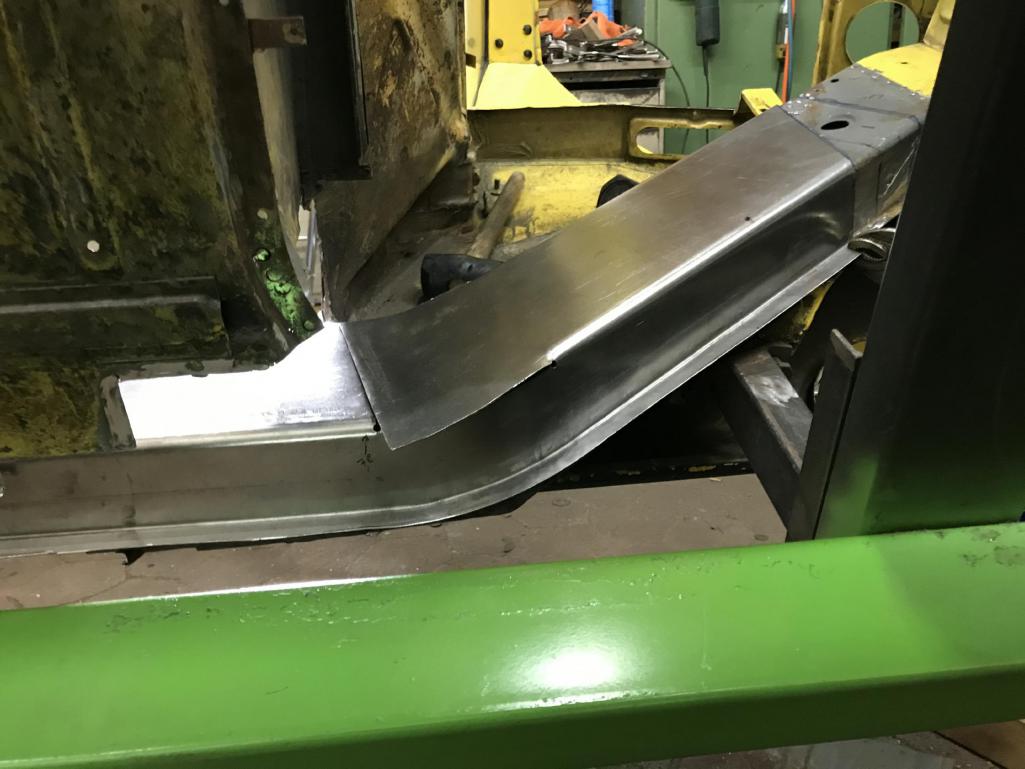
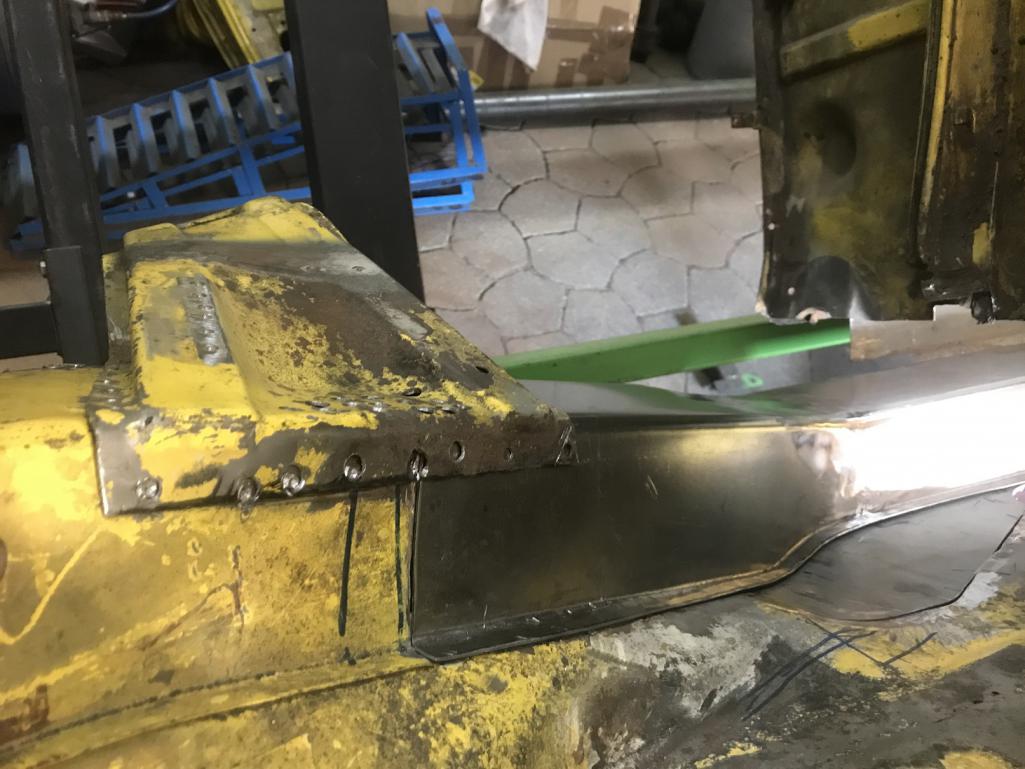
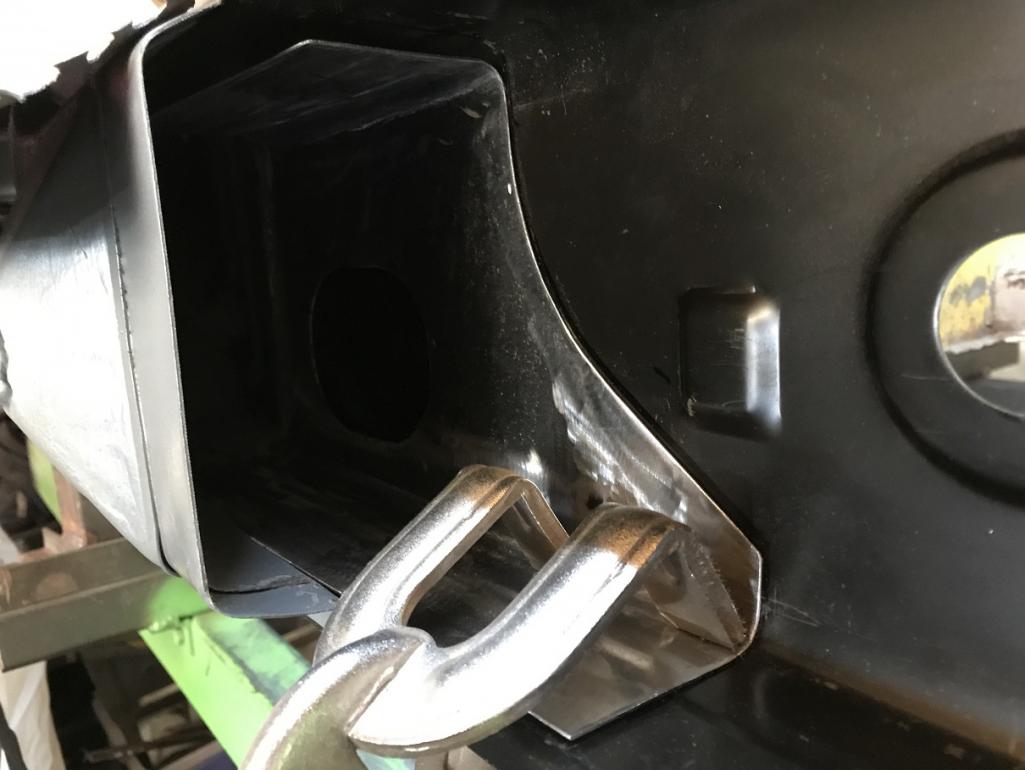
I started with the inner longitudinal. At the front it fits quite well.
Since I wanted to save as much of the internal reinforcement as possible, I peeled off so much metal that only healthy material was left over. The overlap of internal reinforcement and the sill should be sufficient to stabilize the weld. The weld between original sills and repair panel is then hidden under the rear axle mount.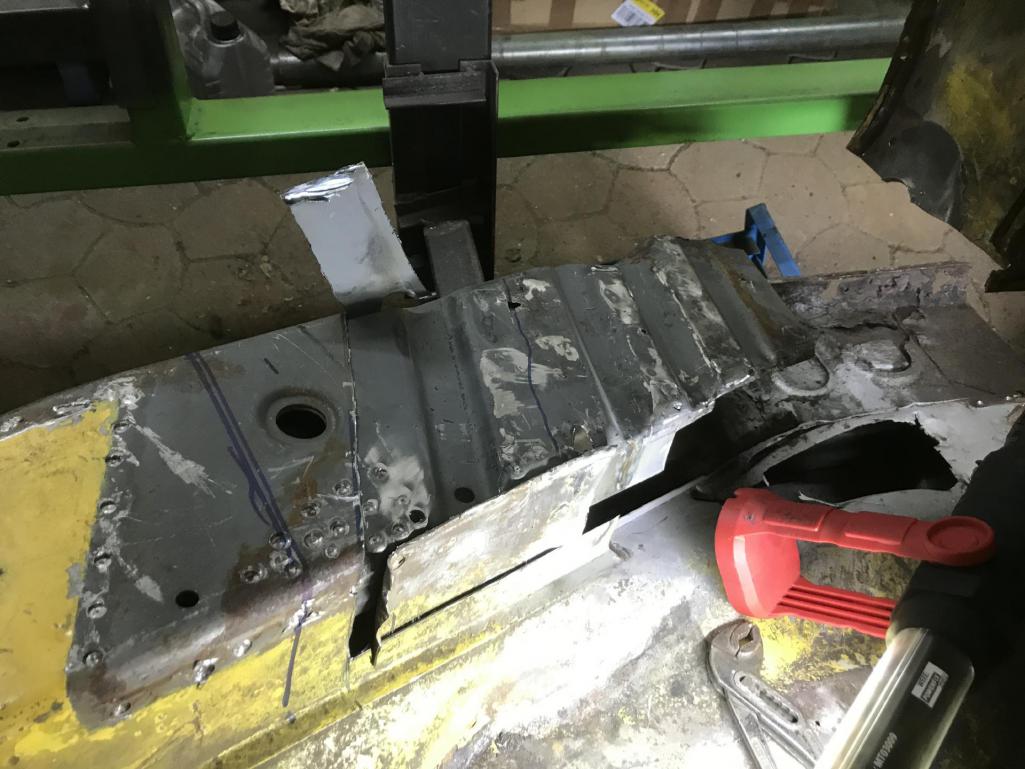
After a bit of grinding and filing, the sheet was in the right place.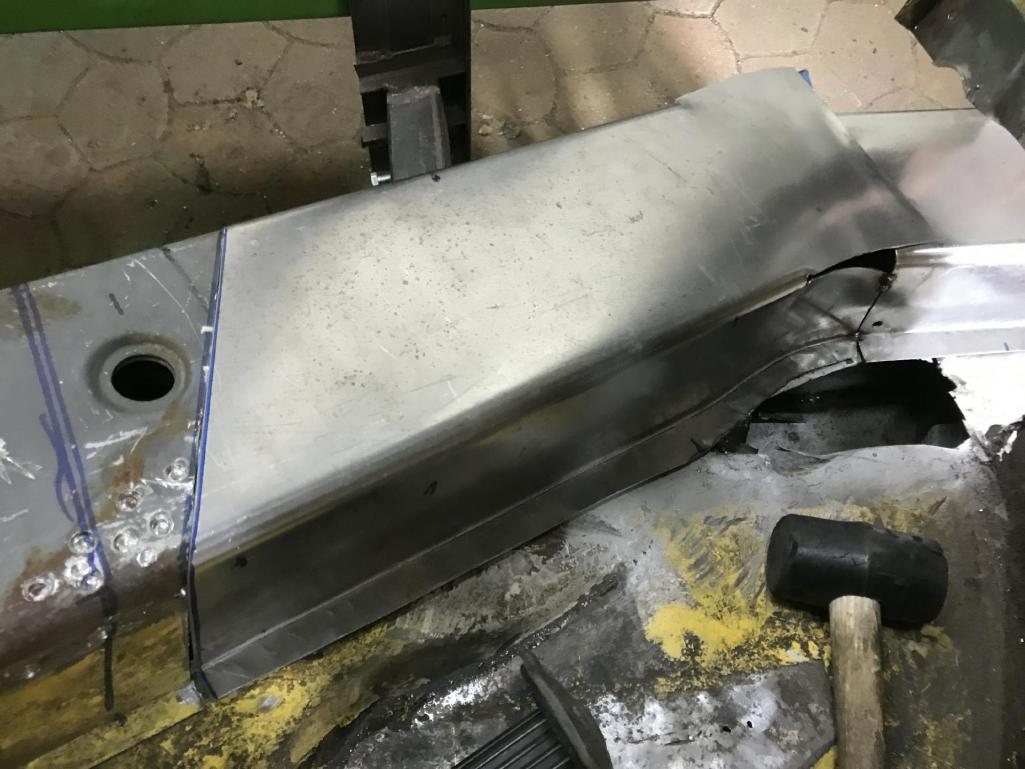
Posted by: Garland May 13 2019, 08:46 AM
Love it, keep it up.
Posted by: Tenner May 13 2019, 08:47 AM
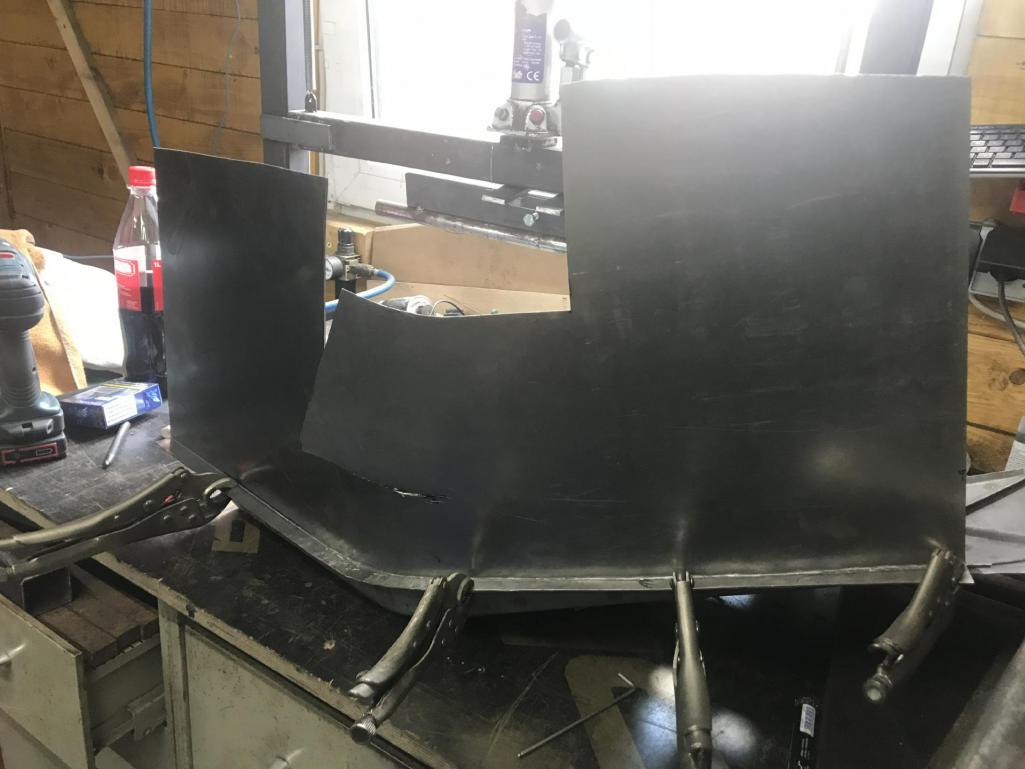
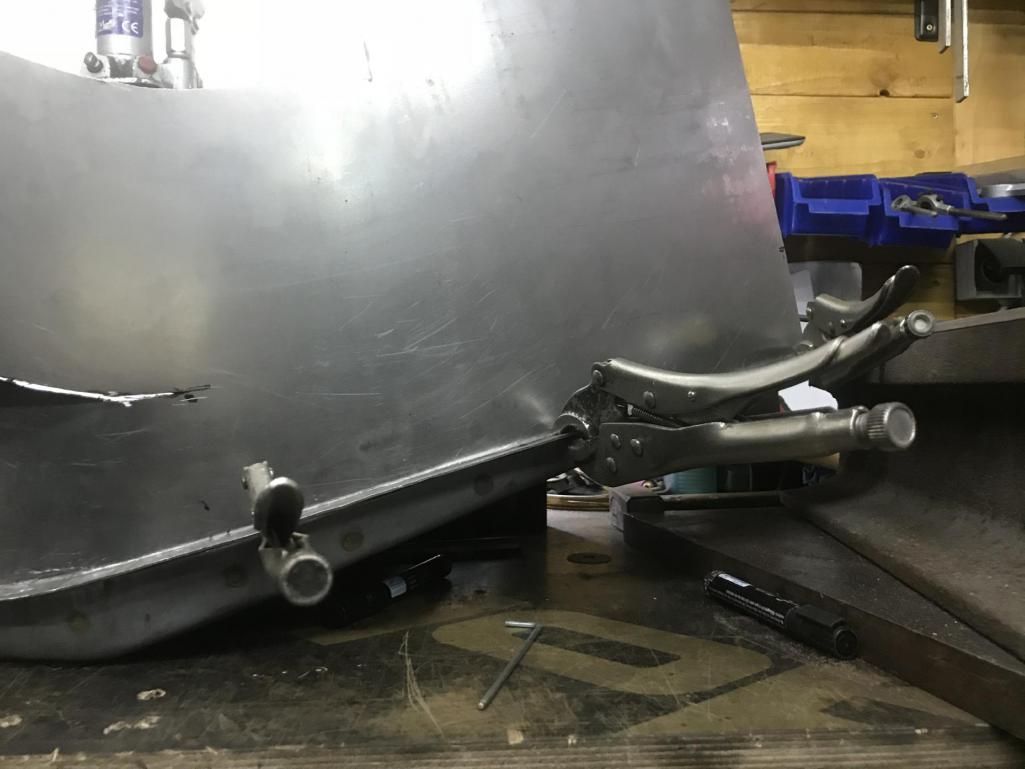
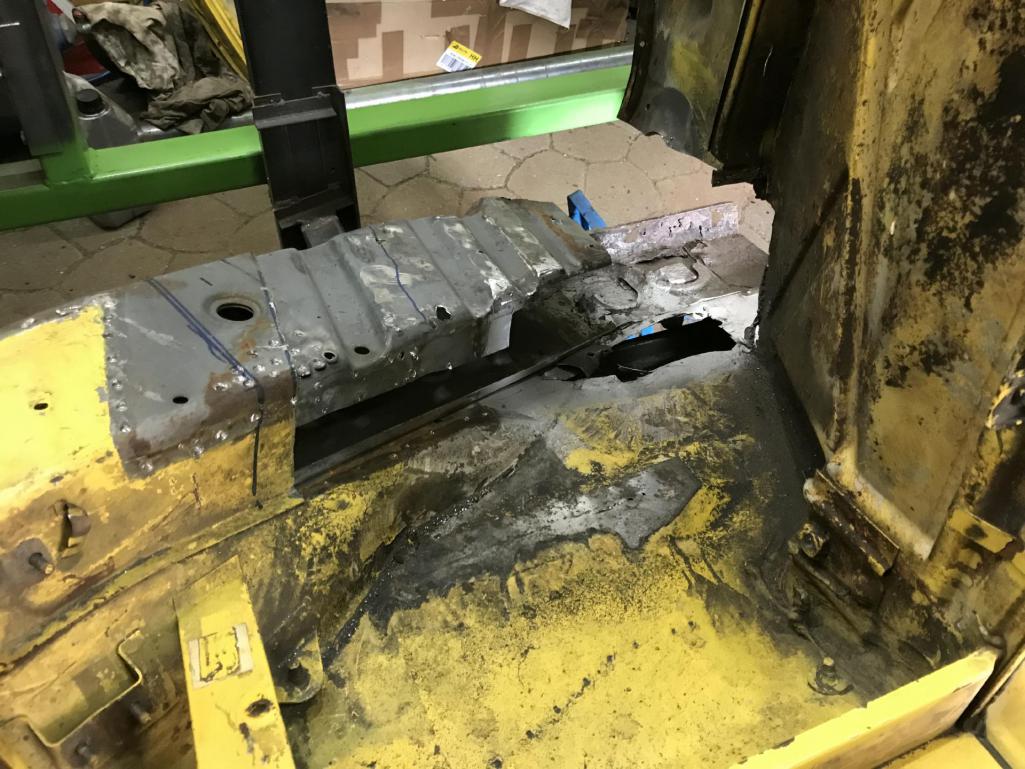
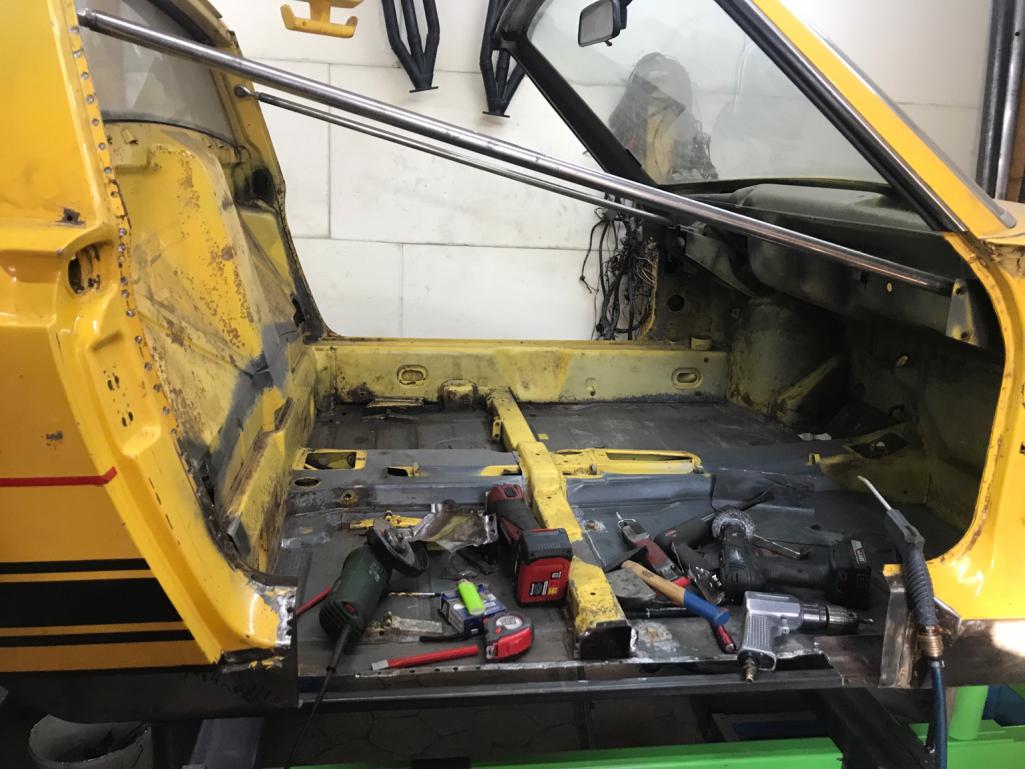
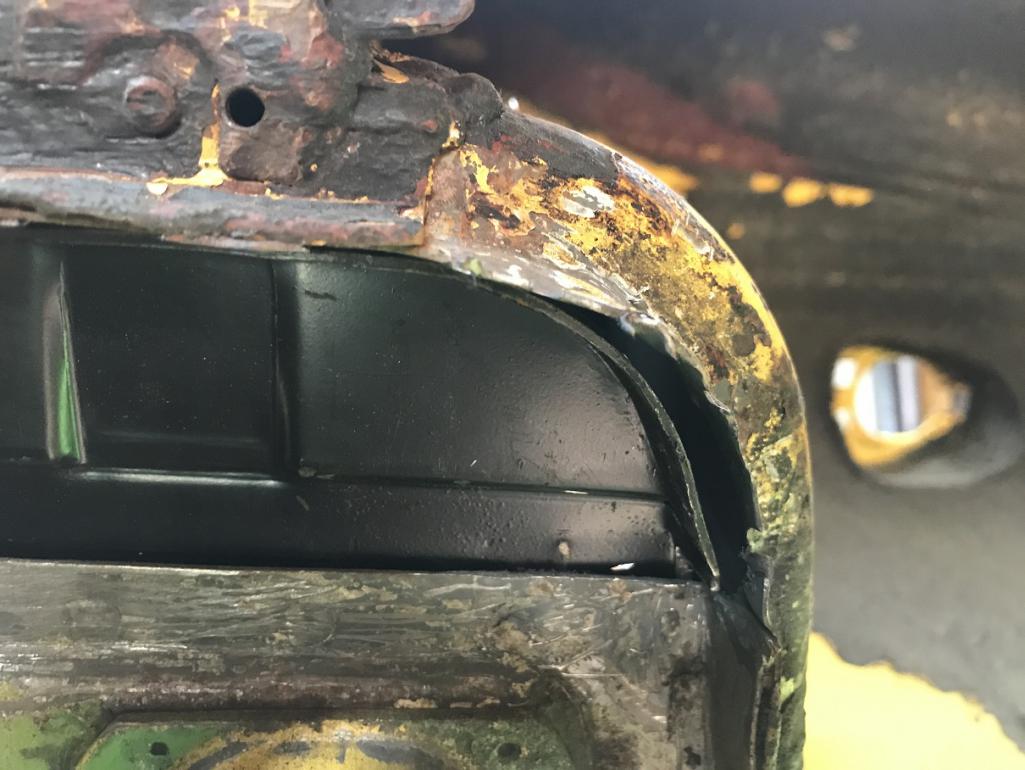
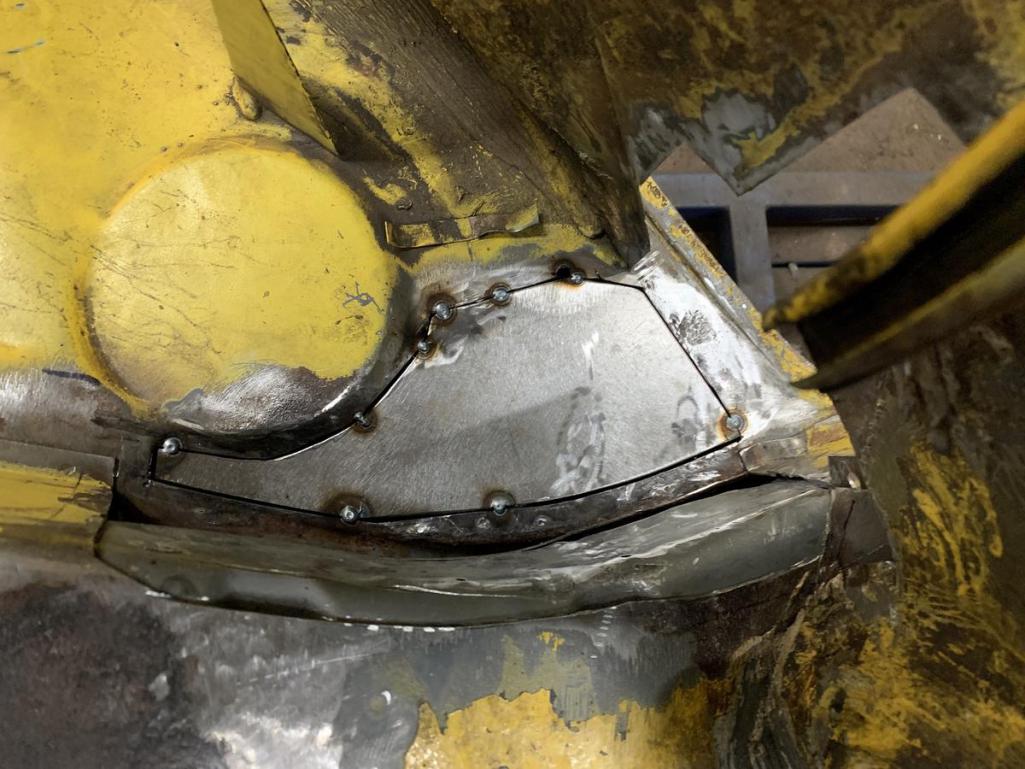
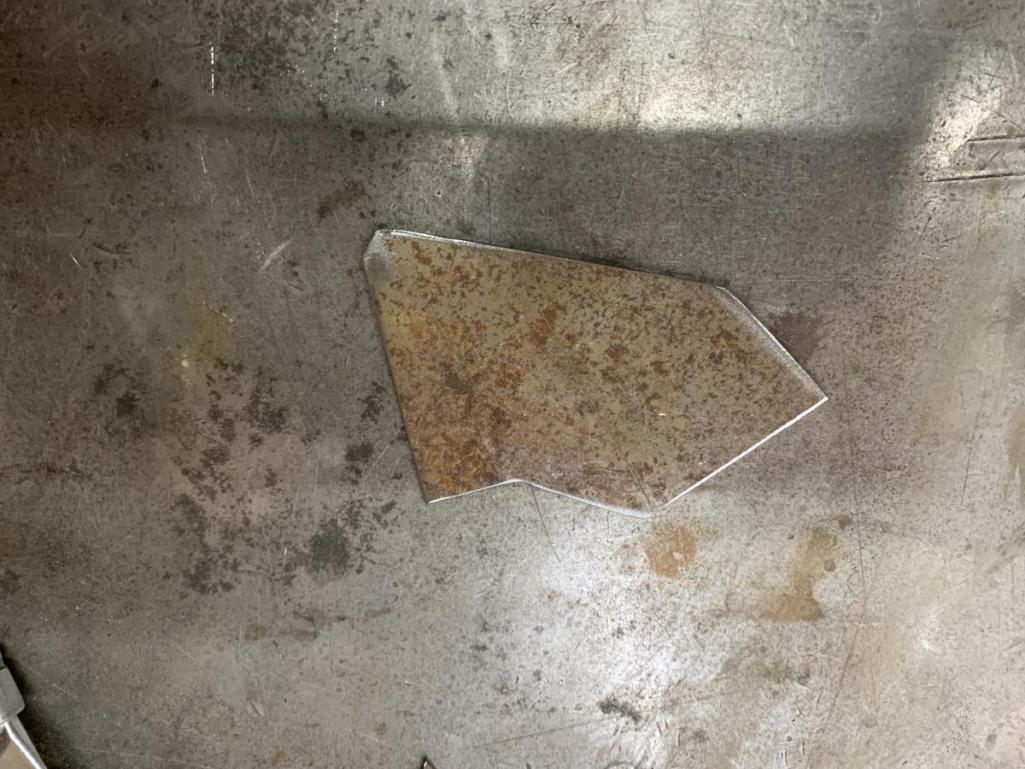
Next to do, inner wheelhouse.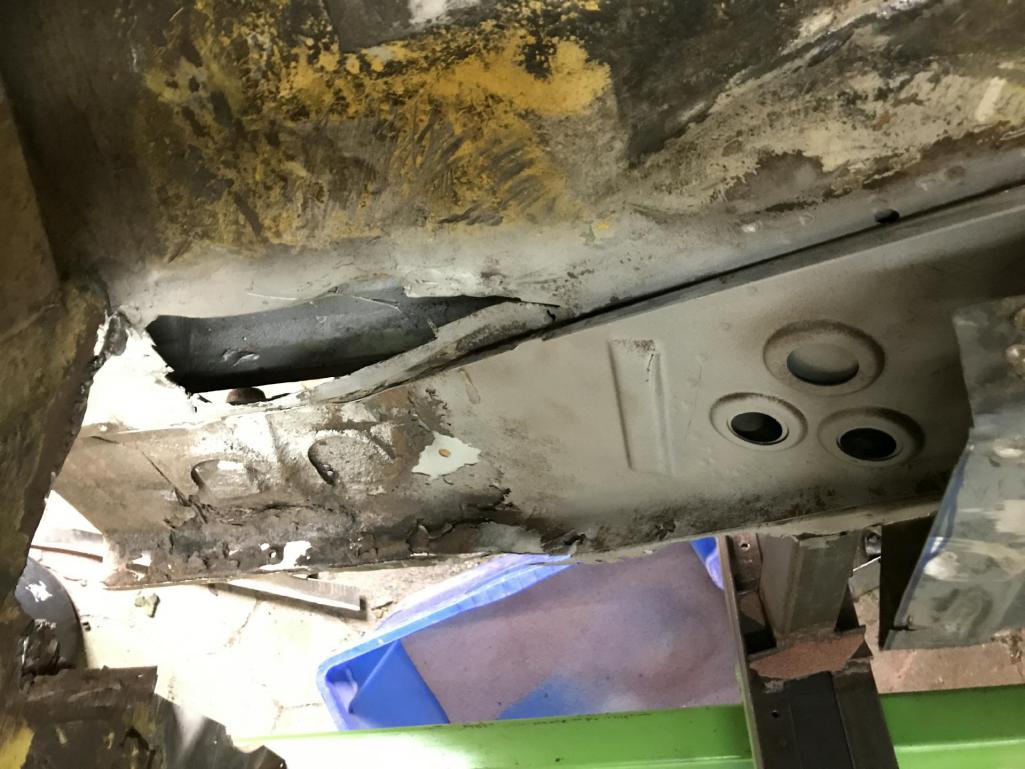
It's always as if I had to cut off a finger ... until I finally get my way back to cutting a piece of sheet metal out of the car.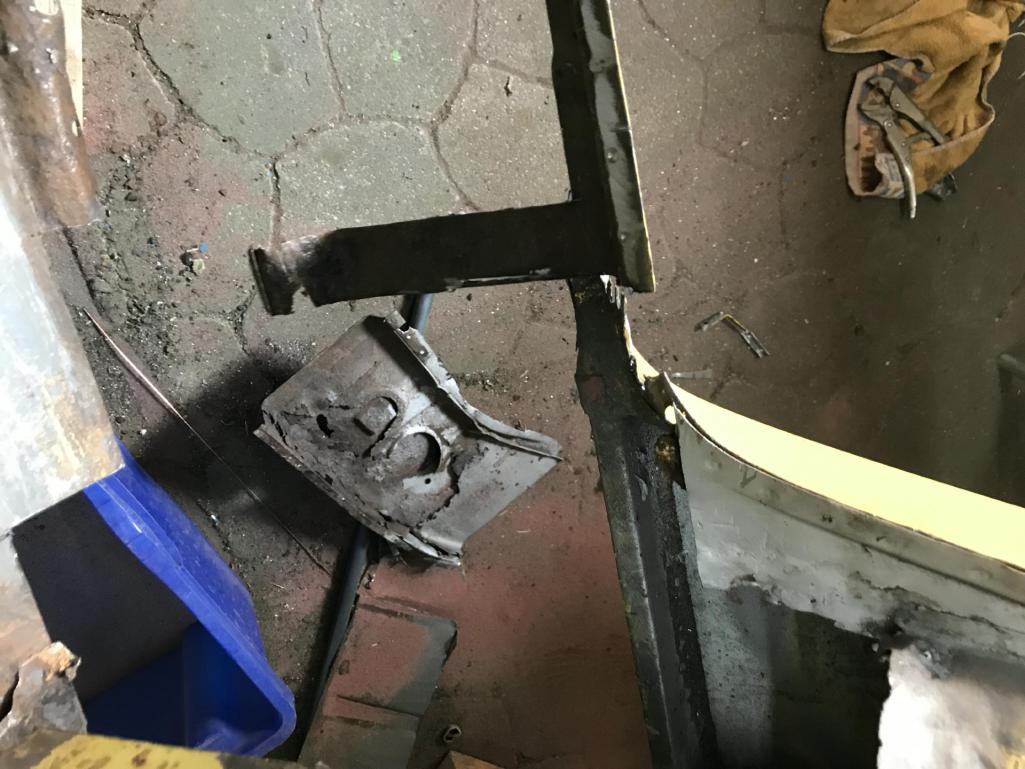
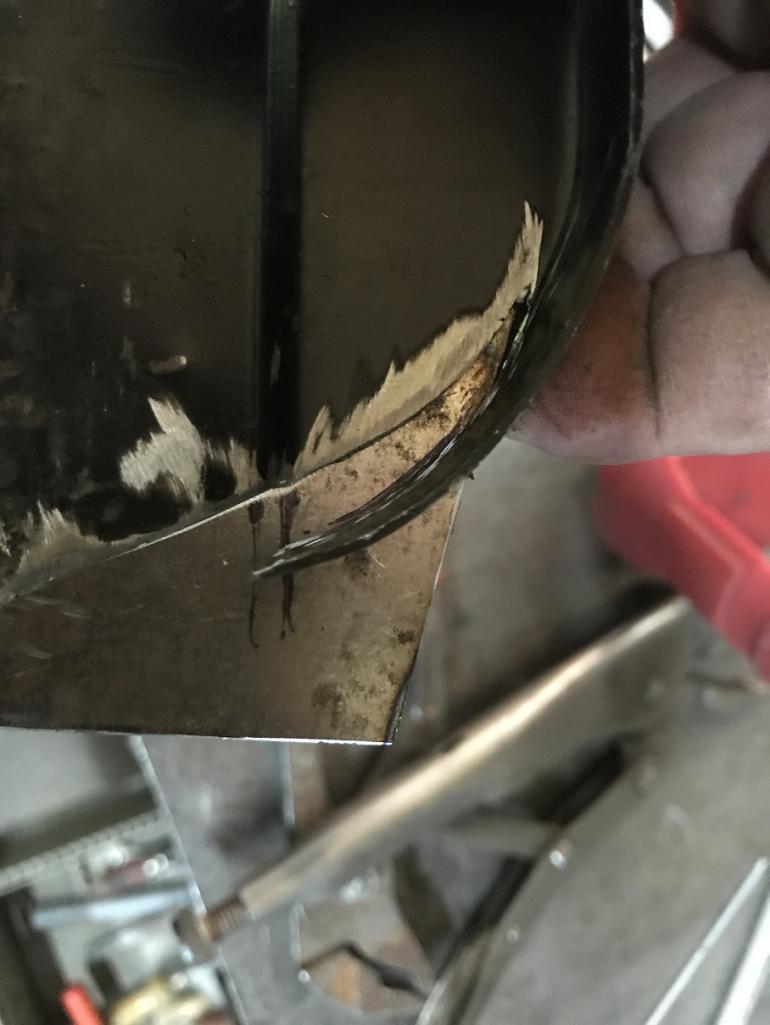
Peeled off the reinforcement about 8cm ...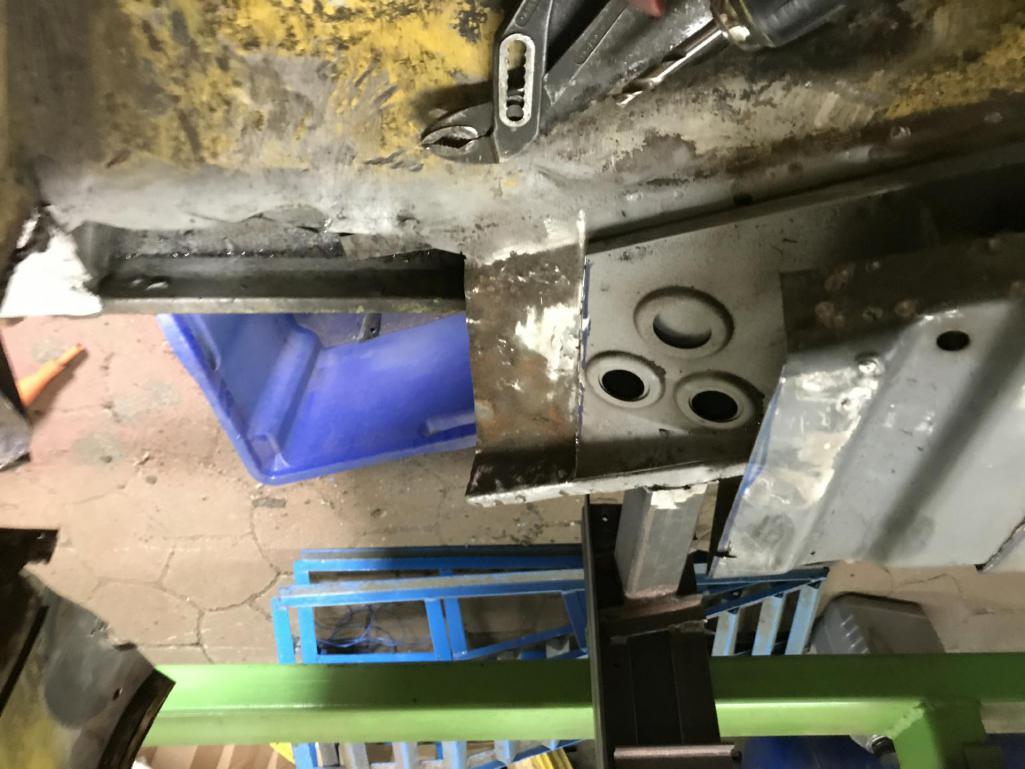
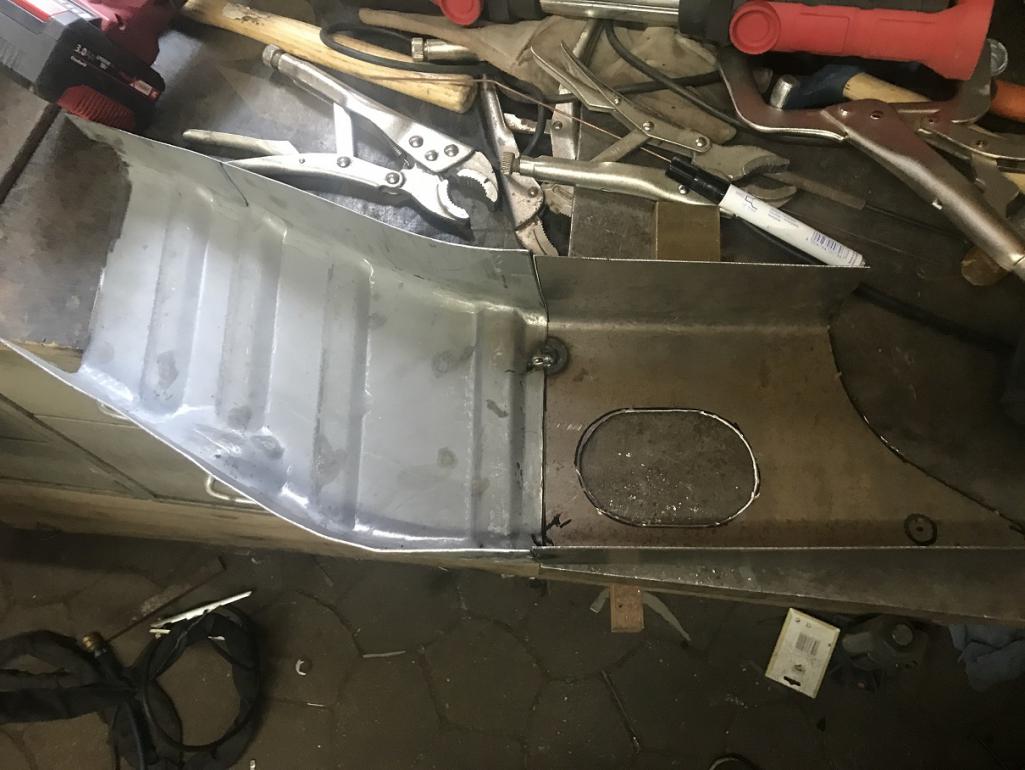
and cut the repair sheet to size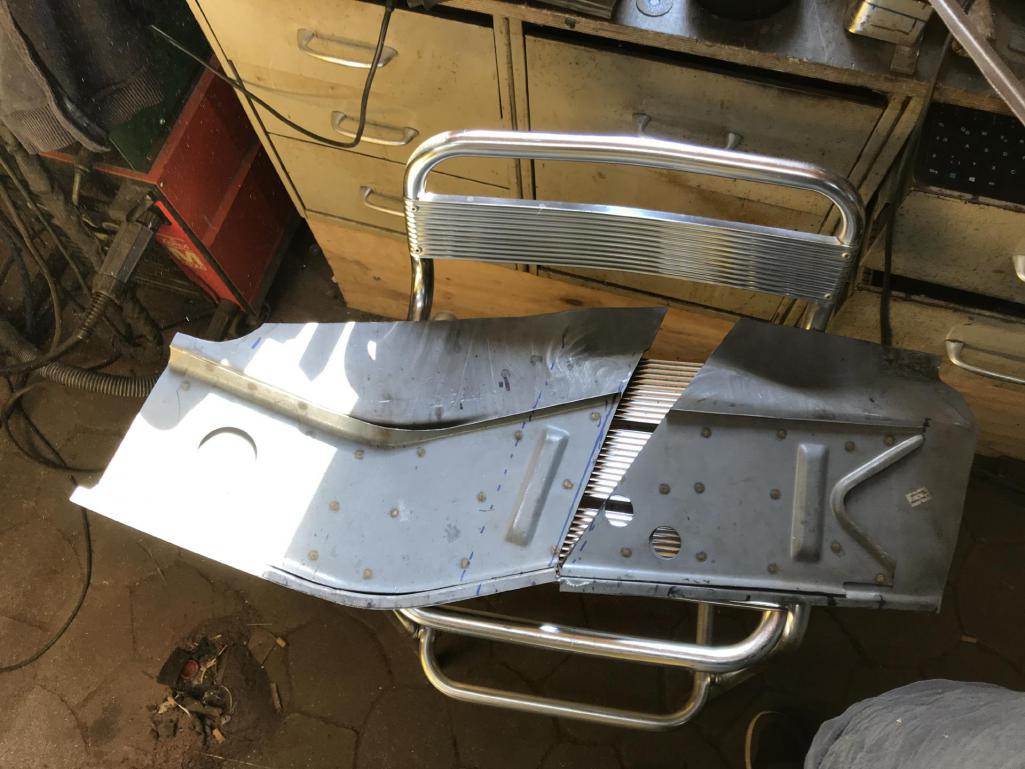
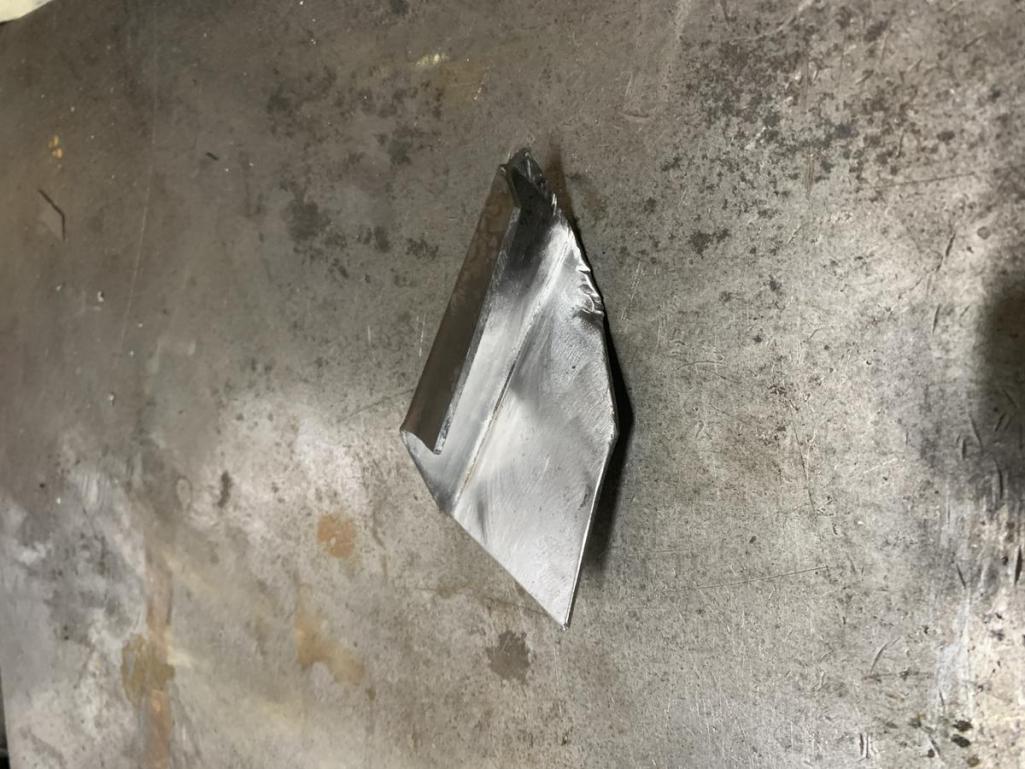
test fit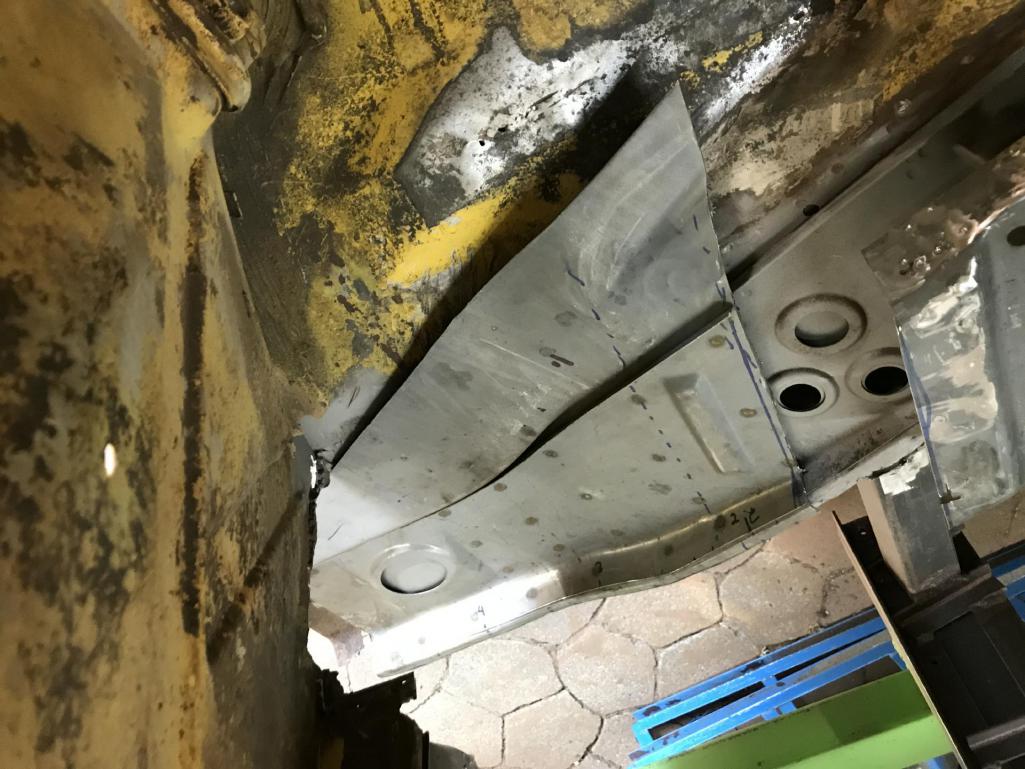
and cut to size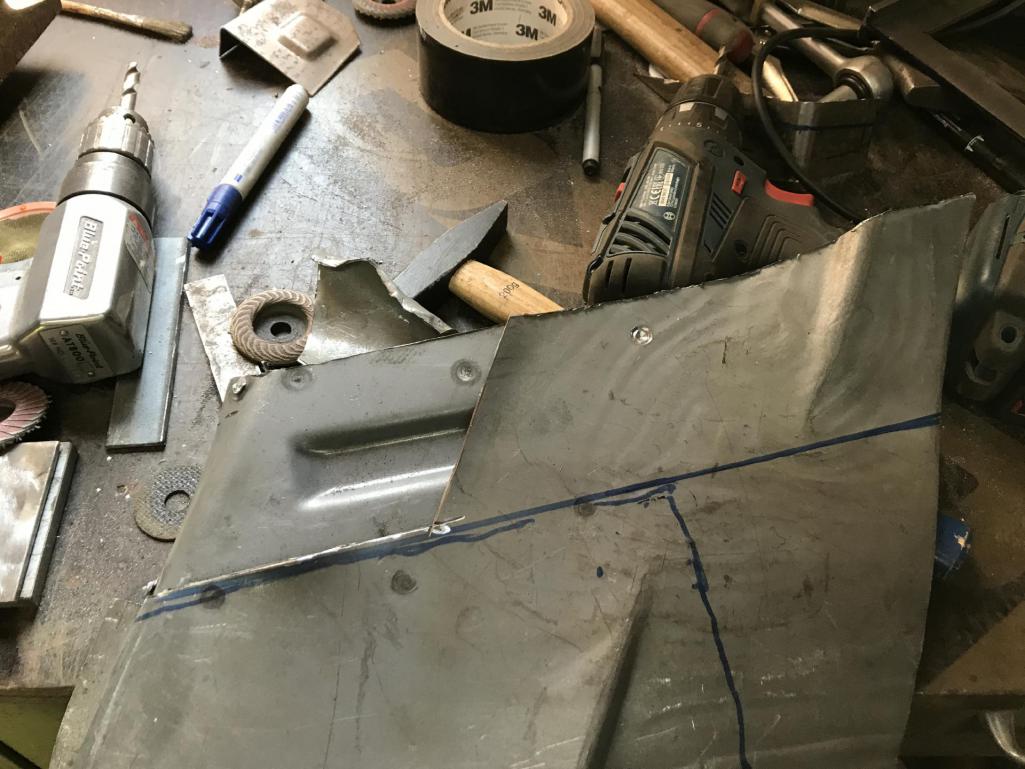
file a little and flex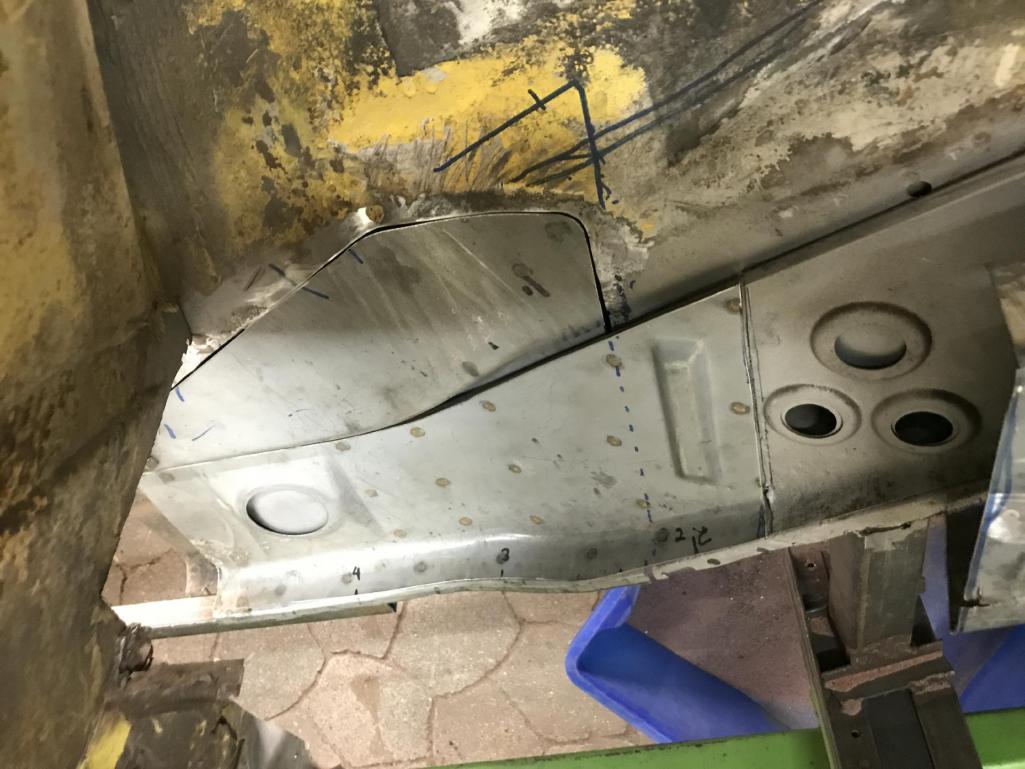

fits good
Posted by: defianty May 13 2019, 09:27 AM
Crikey that's a lot of work. Nicely done though!
Posted by: dr914@autoatlanta.com May 13 2019, 09:47 AM
certainly some excellent work, you talented guy!
Posted by: 76-914 May 13 2019, 09:54 AM
Nice work and great attitude. I usually have a grand size temper tantrum when doing something for the 3rd time! 
Posted by: Superhawk996 May 13 2019, 11:49 AM

I love seeing how folks attack similar problems and making the tools they need. Love the angle iron forming tools.
This site has so much information on how to make do with what you have.
Nice to see another skeleton being brought back to life!
Keep up the good work and keep posting your progress! 
Posted by: mbseto May 13 2019, 12:42 PM
Man, that's some beautiful work. Valuable thread.
Posted by: bbrock May 13 2019, 04:28 PM
Simply amazing.
https://www.youtube.com/watch?v=f8Y2ZflC7hg
Posted by: billium01 May 13 2019, 05:38 PM
Looks great! Just FYI for anyone reading this and looking at doing the same repair......When I was looking for parts to get my hell hole redone I found that Restoration Designs only offers this part now.  The version that had more of the sheet metal that extended up the wall is not being produced anymore because the dye wore out. Now they only offer this shortened version. The older and bigger piece IS still available though Auto Atlanta.
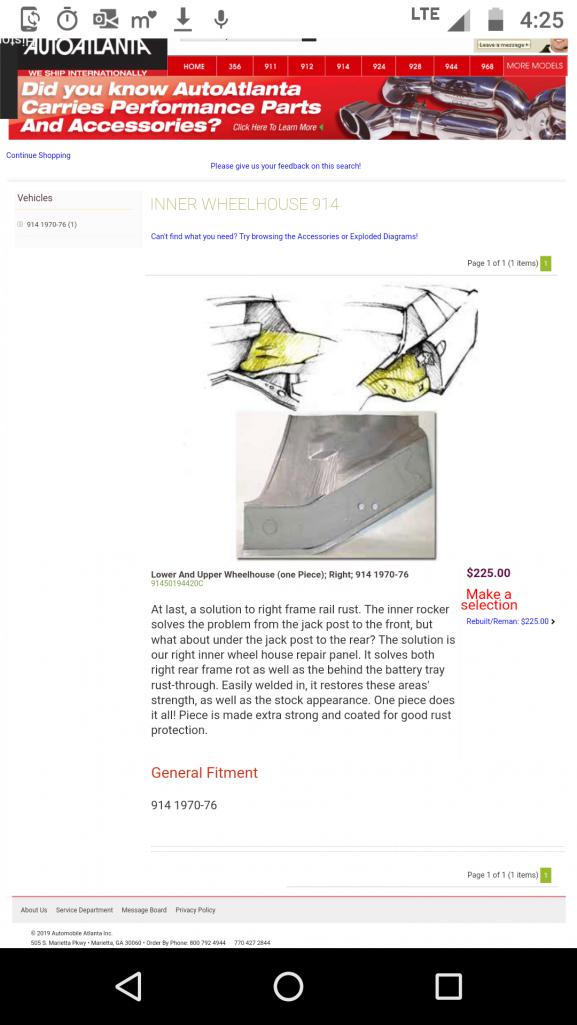
Attached thumbnail(s)
Posted by: Tenner May 14 2019, 12:47 AM
Thank you for the kind words and the encouragement! I learned a lot from you, people. The forum is always an inspiration and all the building threads motivate me to go on.
I will try to keep you up to date.
Posted by: Tenner May 23 2019, 03:52 AM
only small but steady progress.
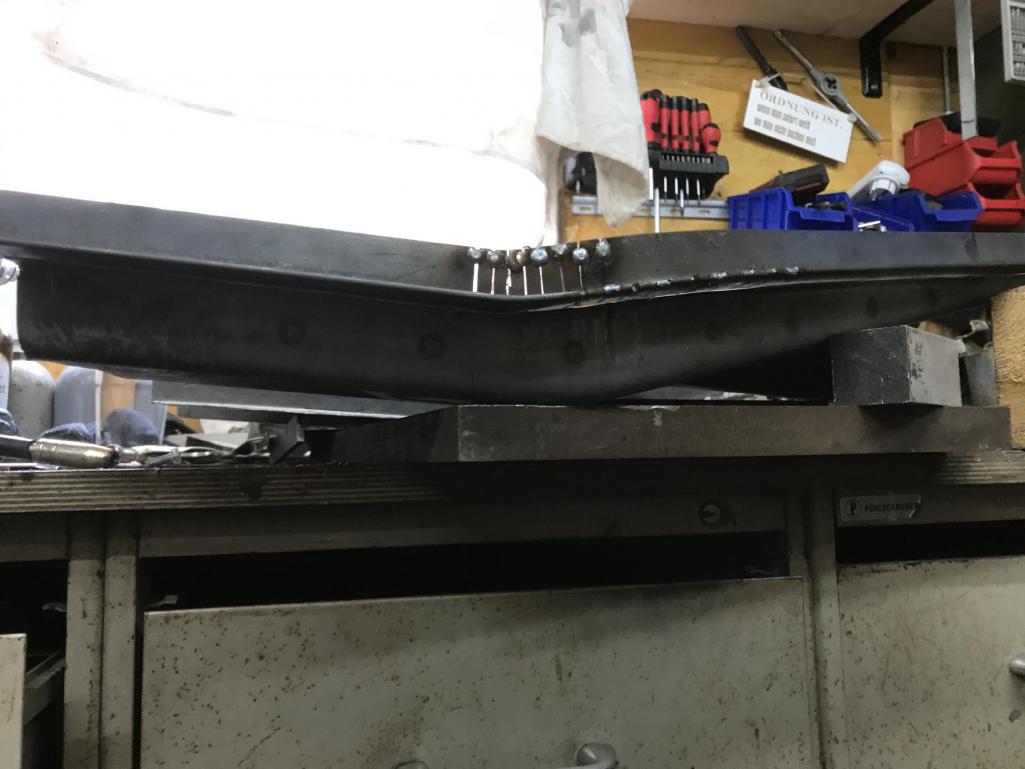
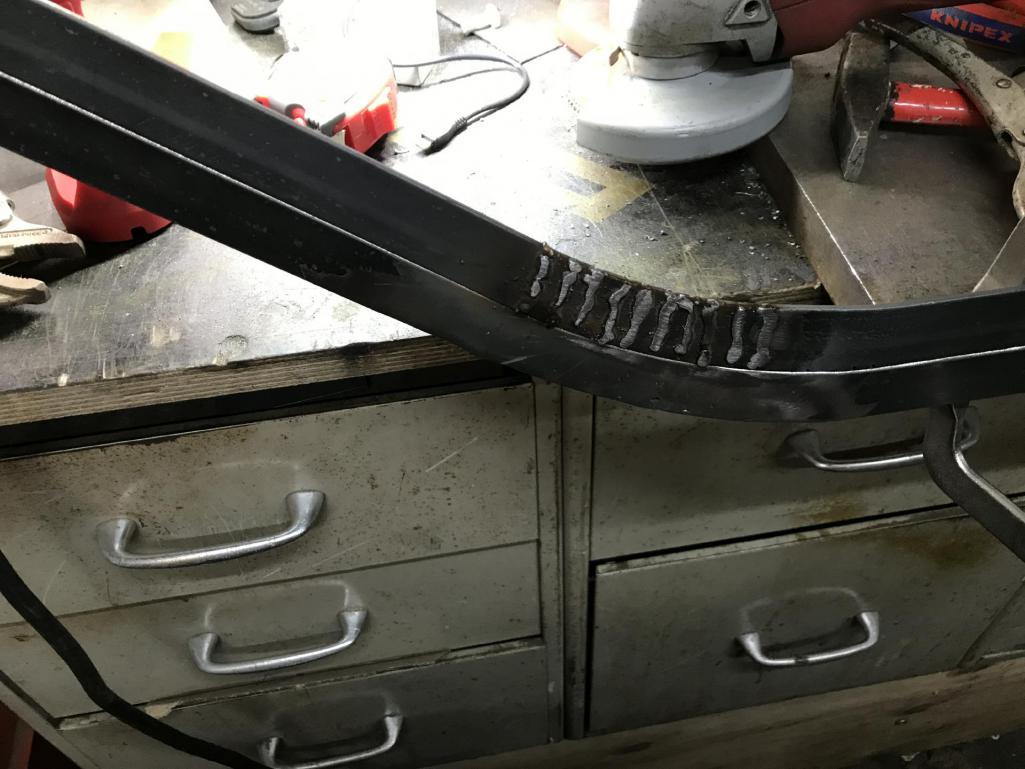
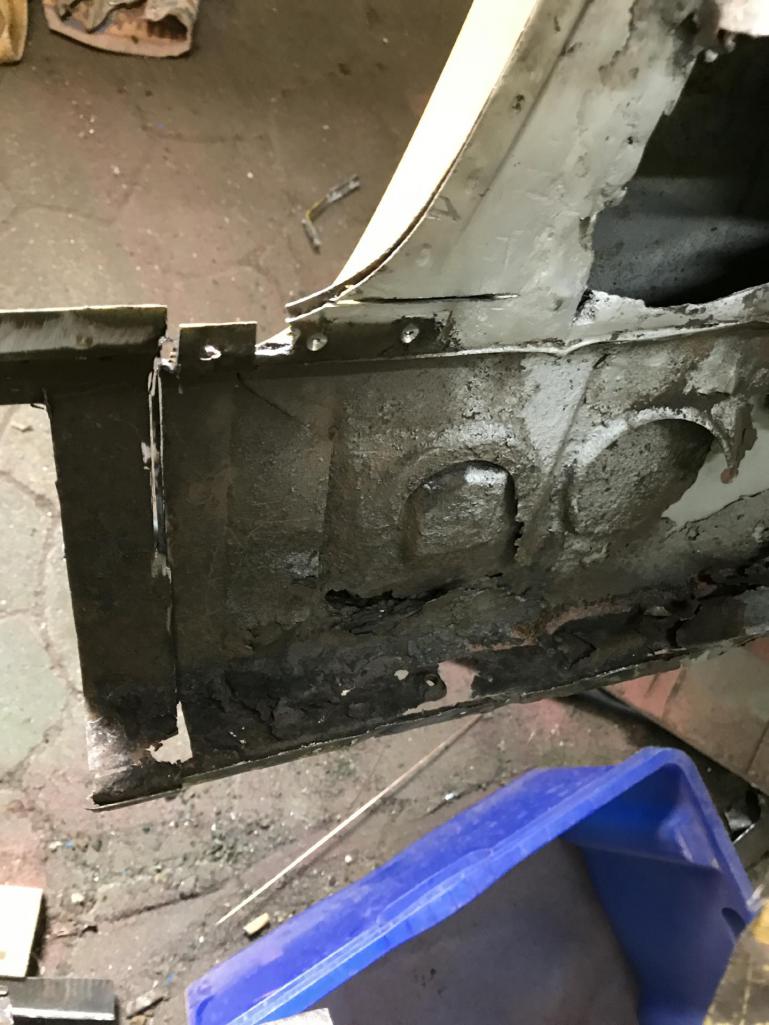
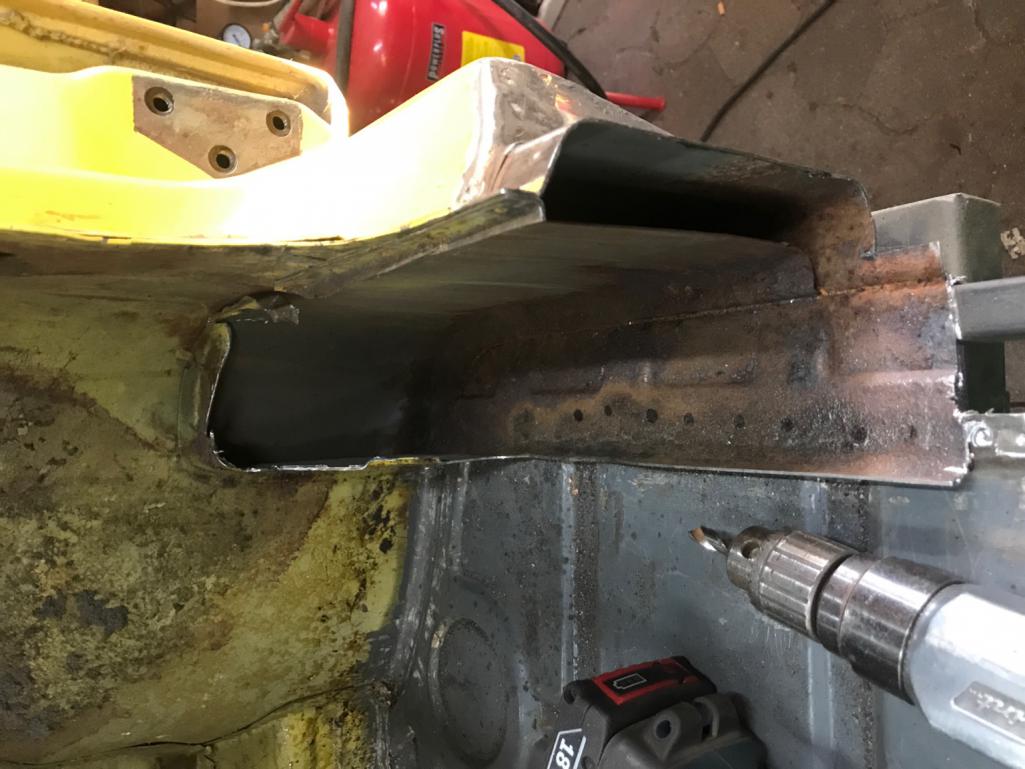
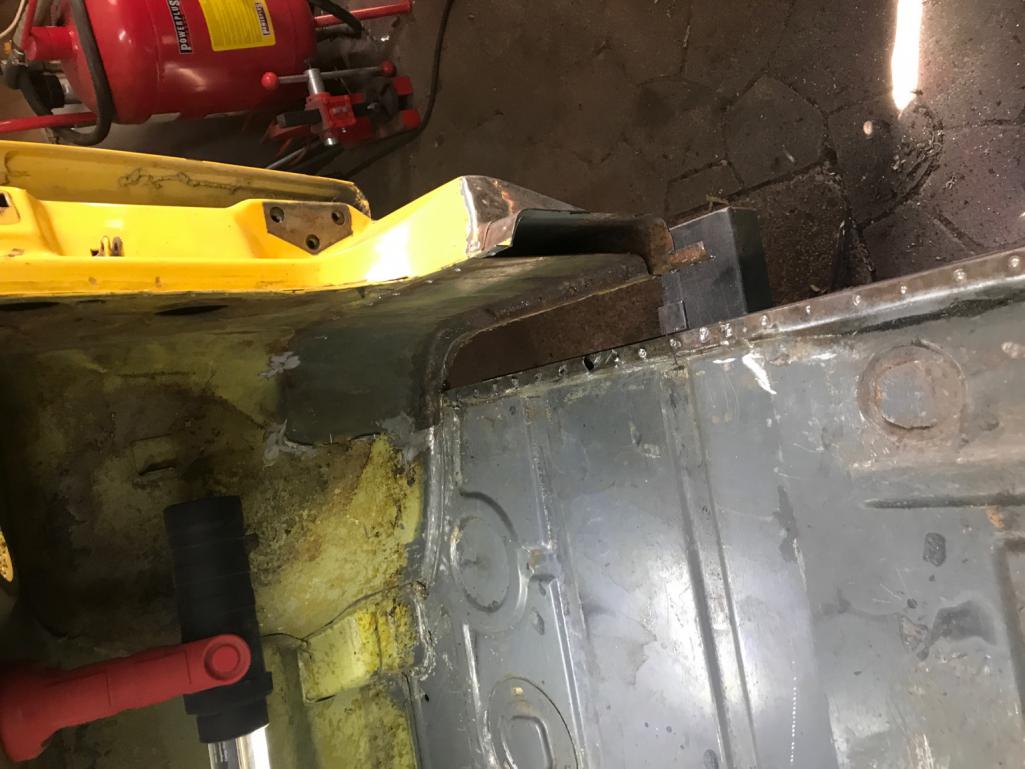
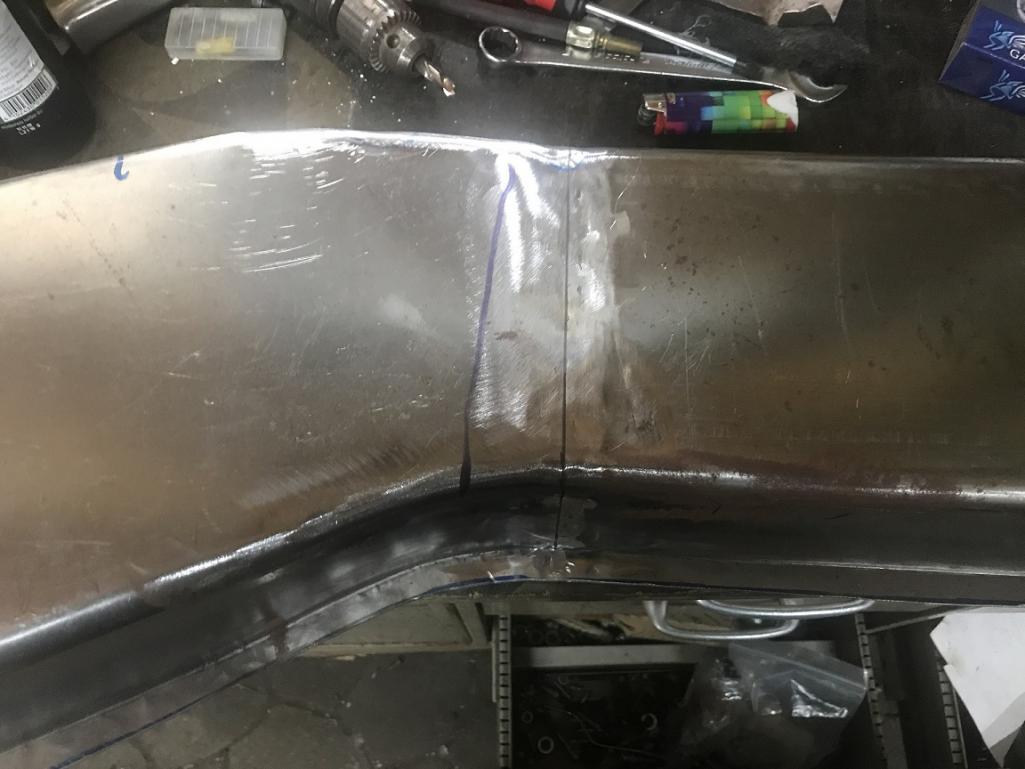
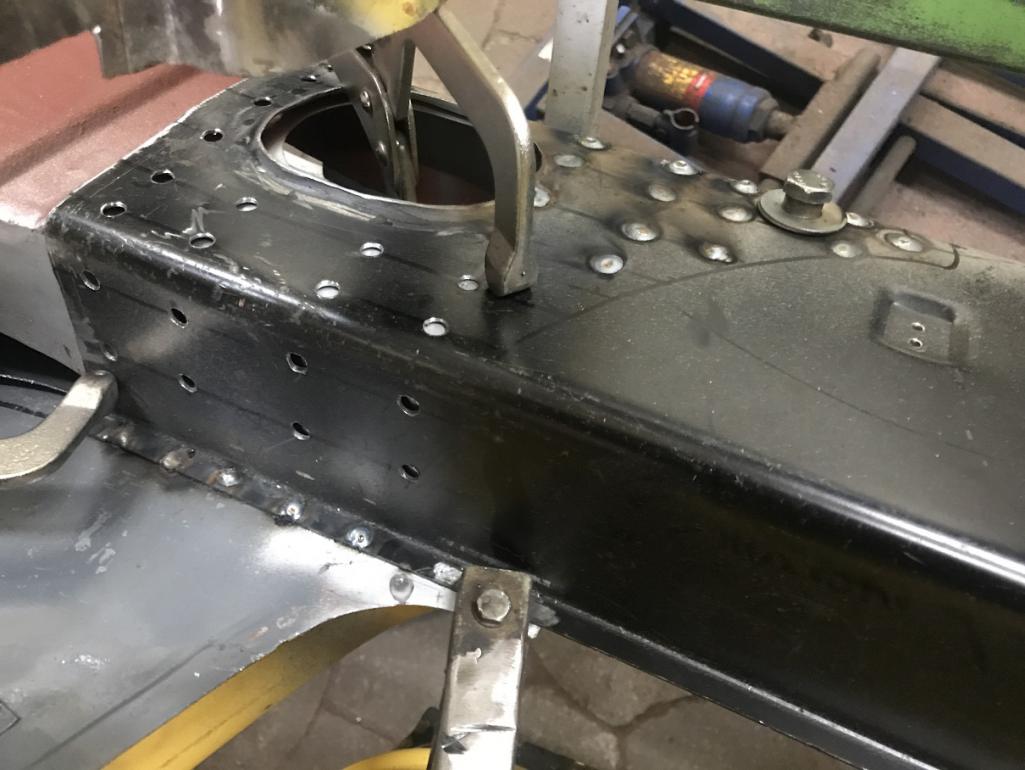
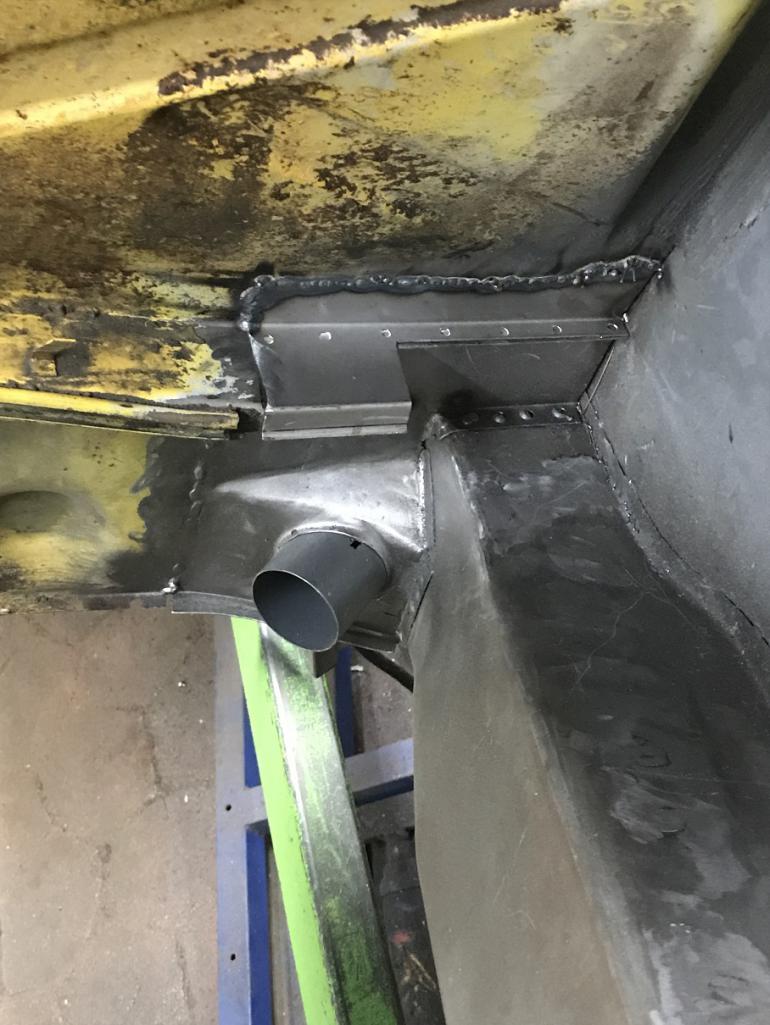
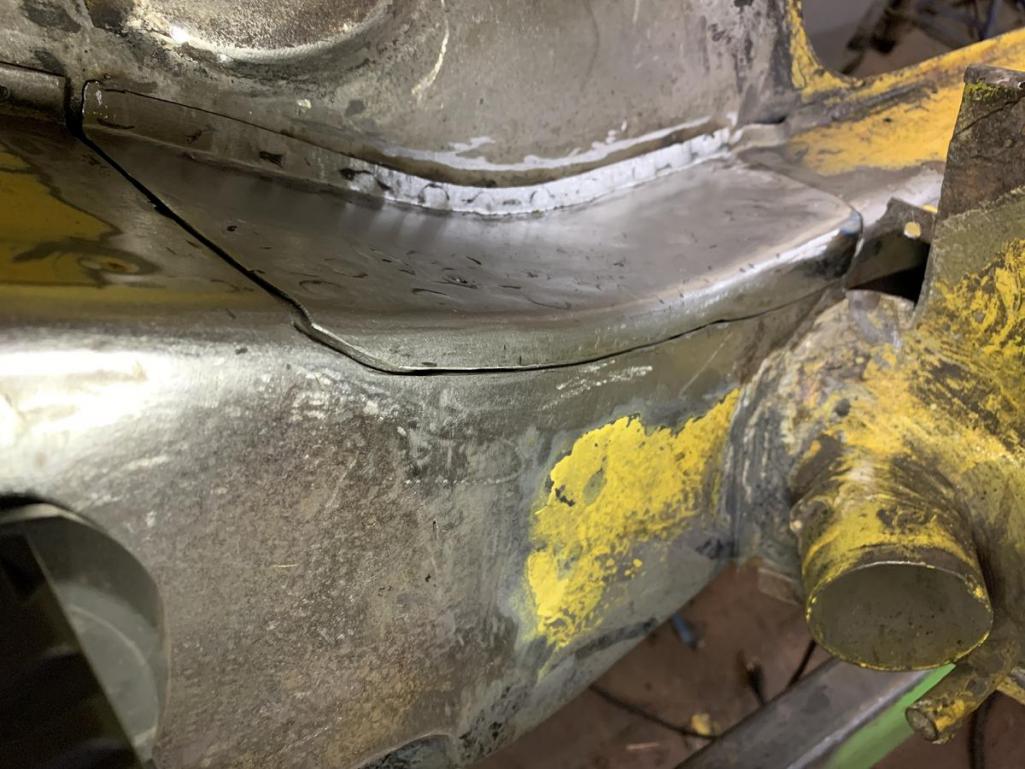
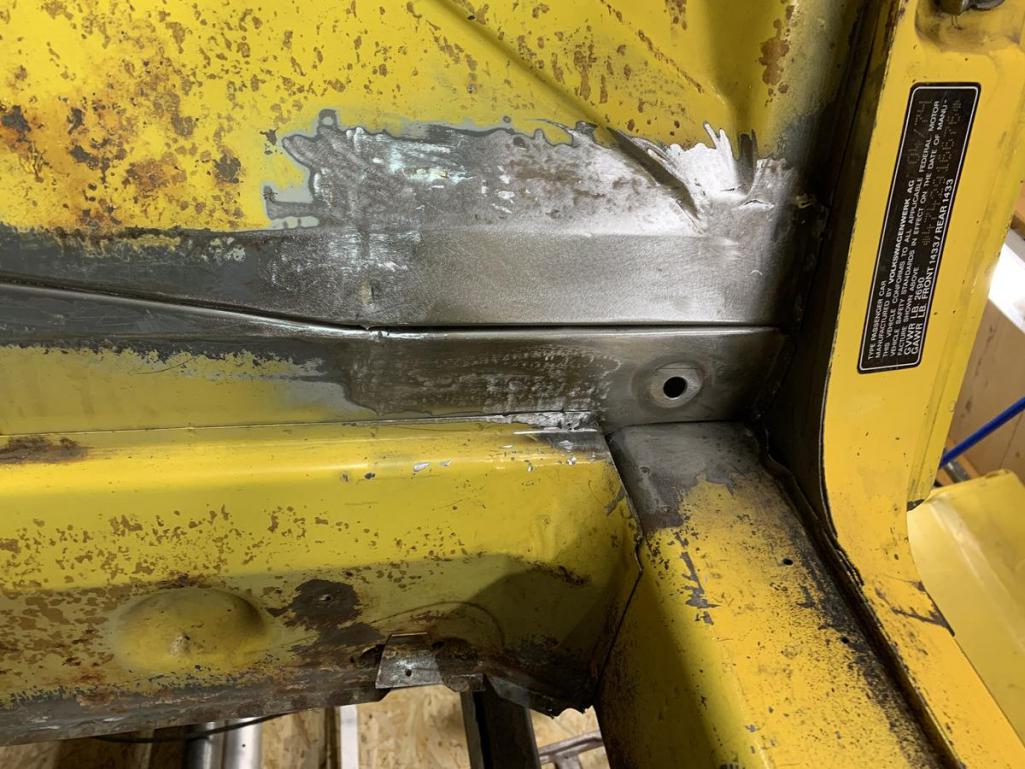
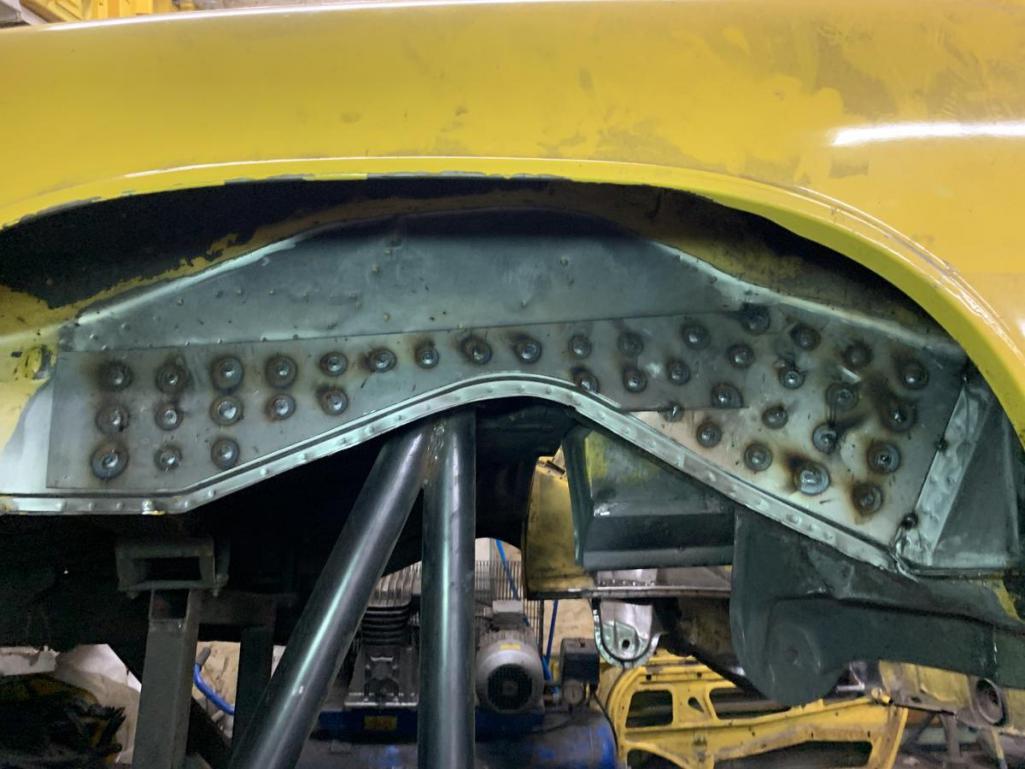
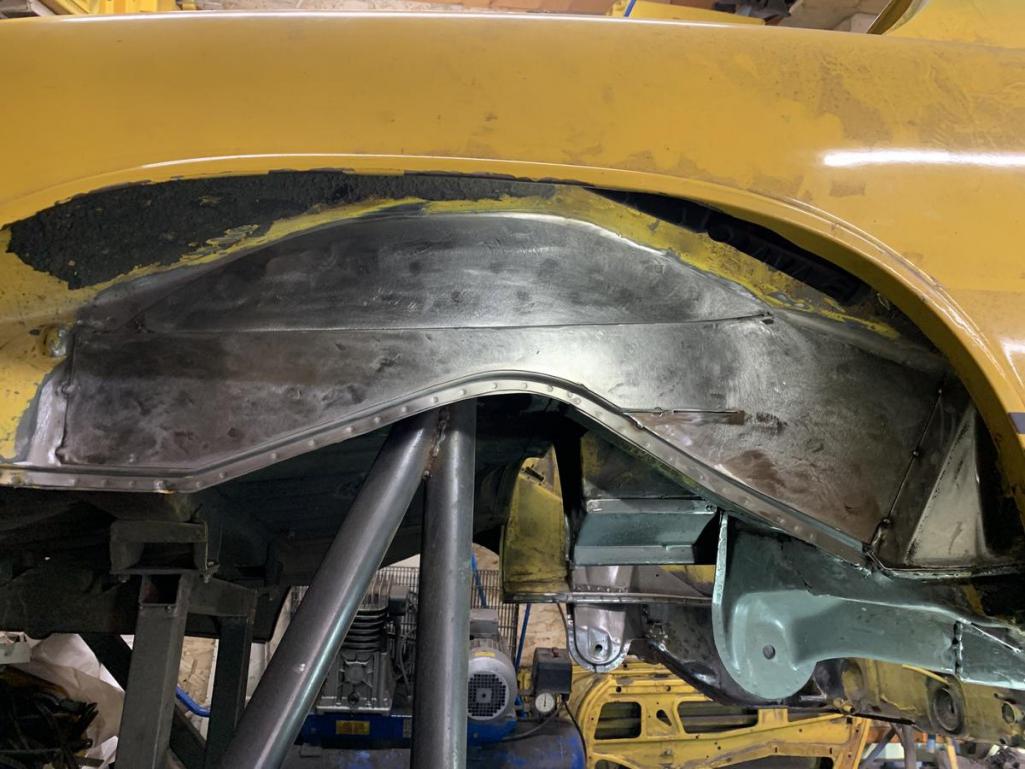
I've been working on the sill for the last few days. Everything is welded and the gaps closed. A few more adjustments and now the sheet sits quite neat.
But I'm not 100% satisfied yet, the long weld annoys me and I think that I can do better, so it only has to be welded on the top and bottom.
What do you think?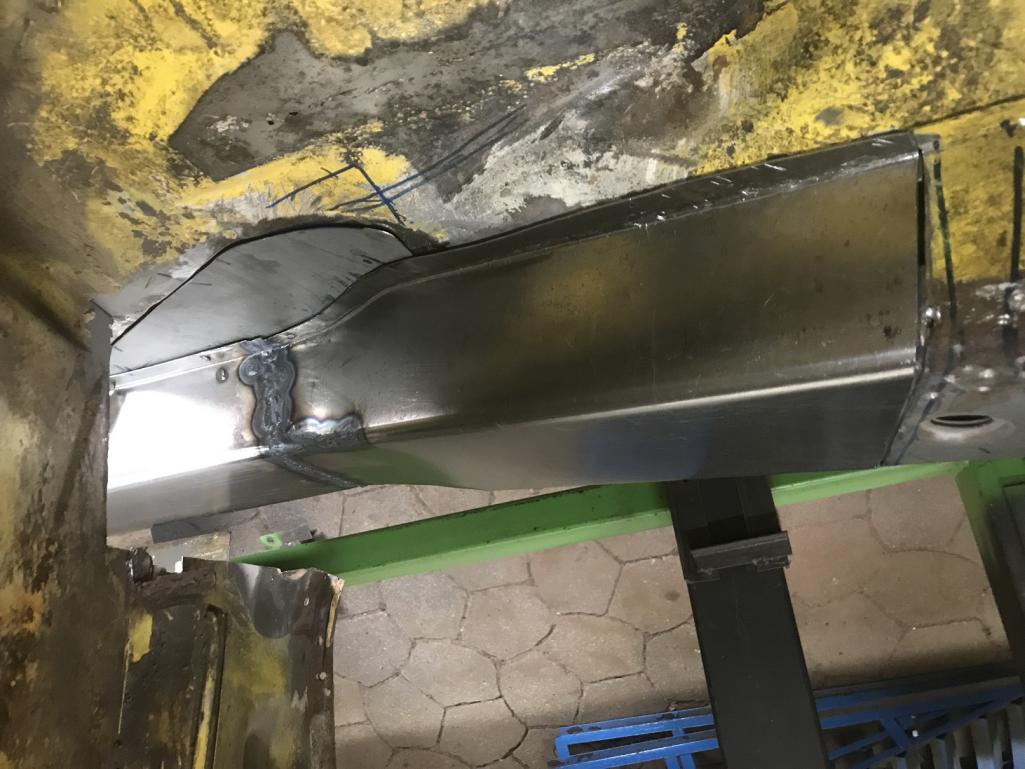
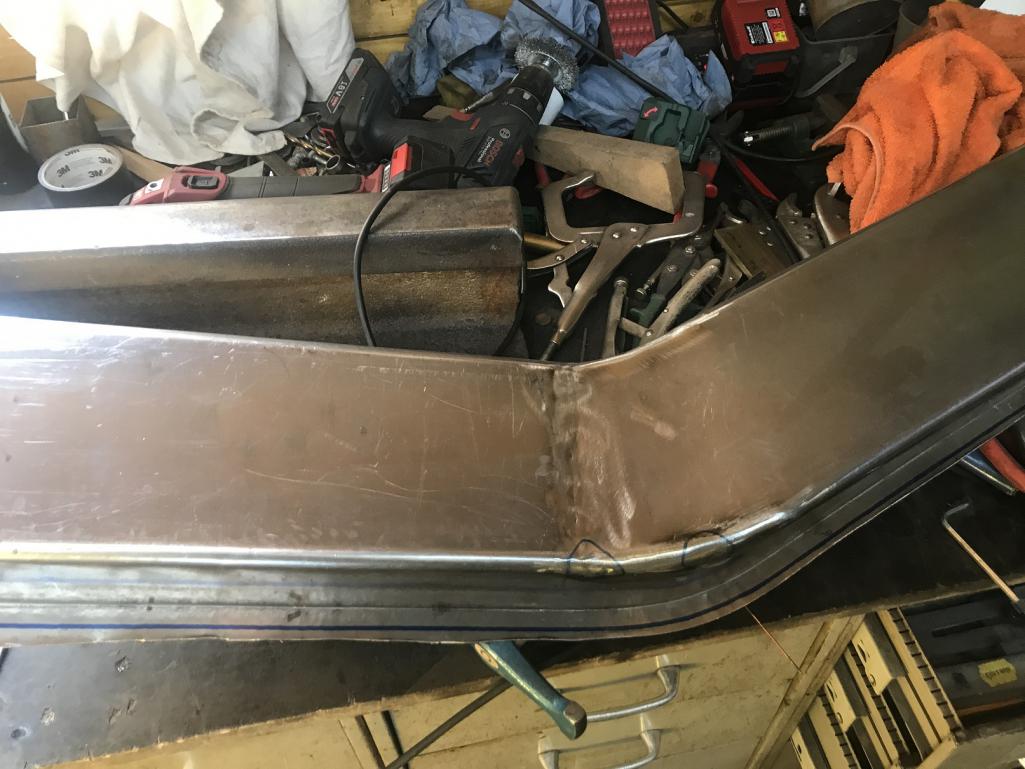
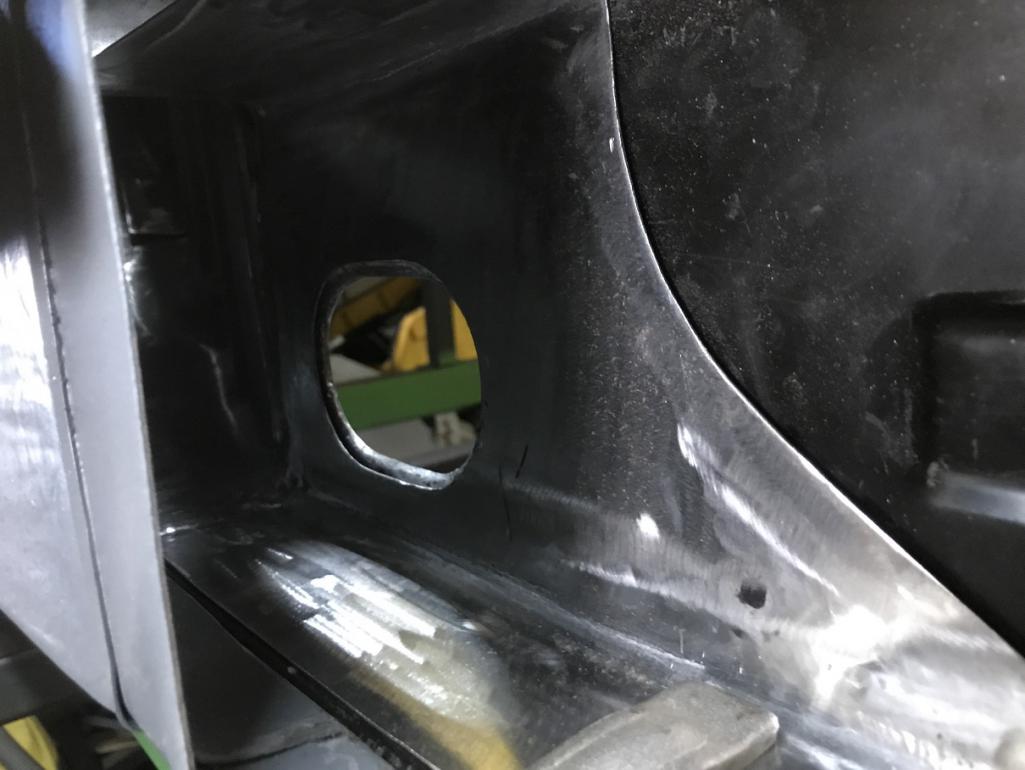
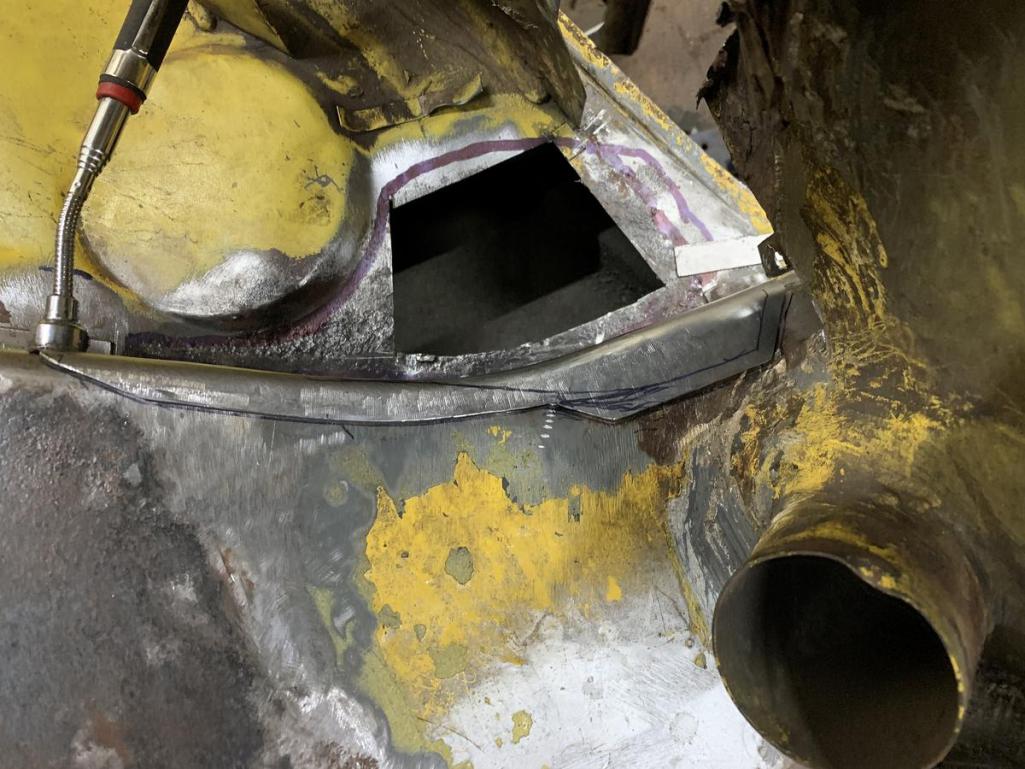
Next, I need to press in recesses for the service hole (or what is it called?), The heater tube holder, and the structure at the bottom.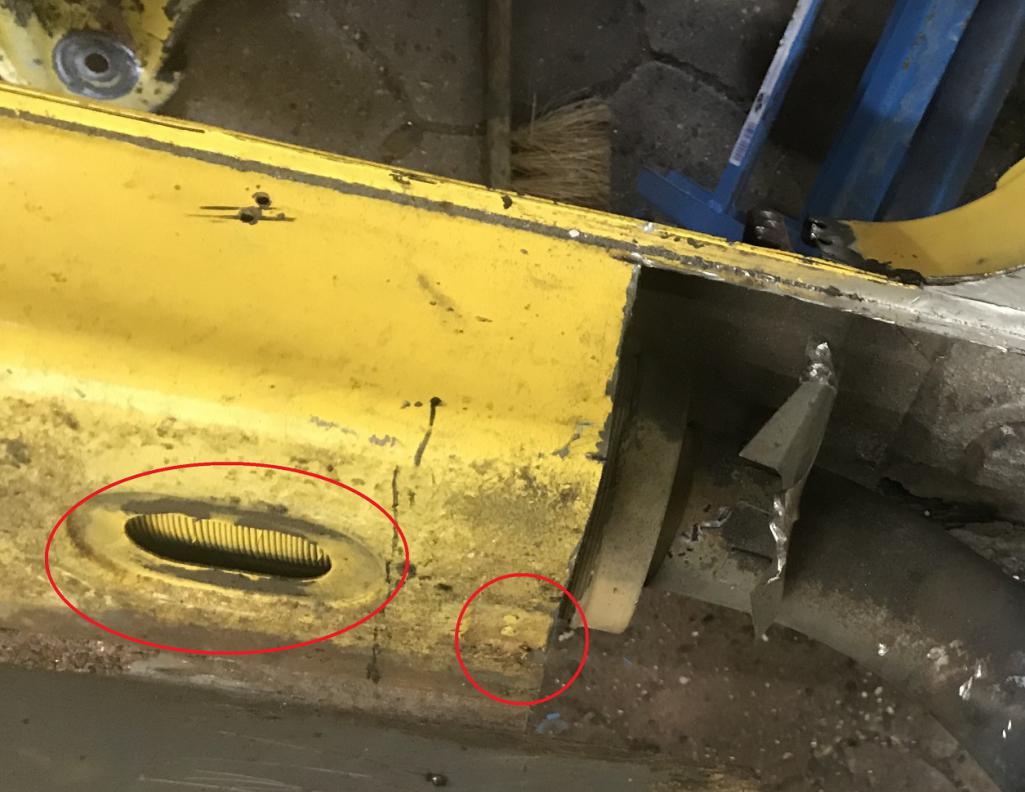
I then worked a bit on the old oil tank ...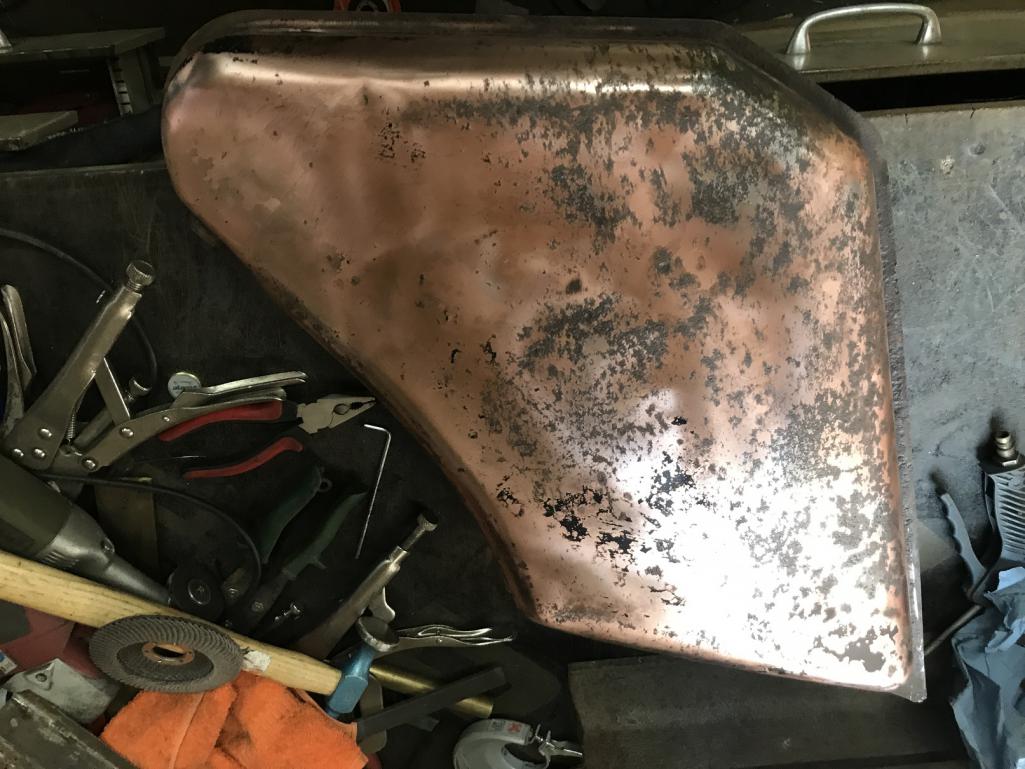
recently I was able to buy this here for not too much money.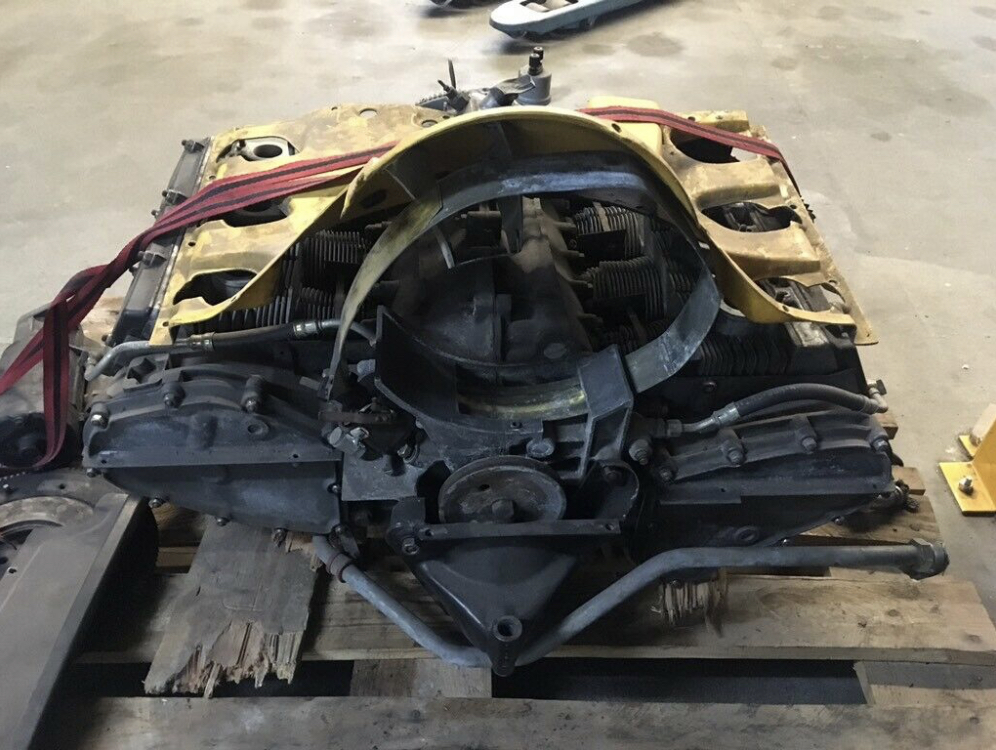
Original / 6 engine 901/38.
Posted by: Jeff Hail May 23 2019, 08:43 PM
The high road always has the better view. That's how the coach builders did it, start with one big piece of sheet metal. Nice job.
Posted by: Tenner Jun 25 2019, 01:59 AM
Hello Jeff, thank you, guys like you, bbrock, Superhawk996 ... inspire me to do the things myself. I've been told by several people "give it to a professional restoration shop, that's a number too hight for an amateur", but I always want to say, "I did it myself!".
As with my Motorcycle, all custom parts, exept tank and wheels, were made by myself with a little bit help of a freind (aloy welding).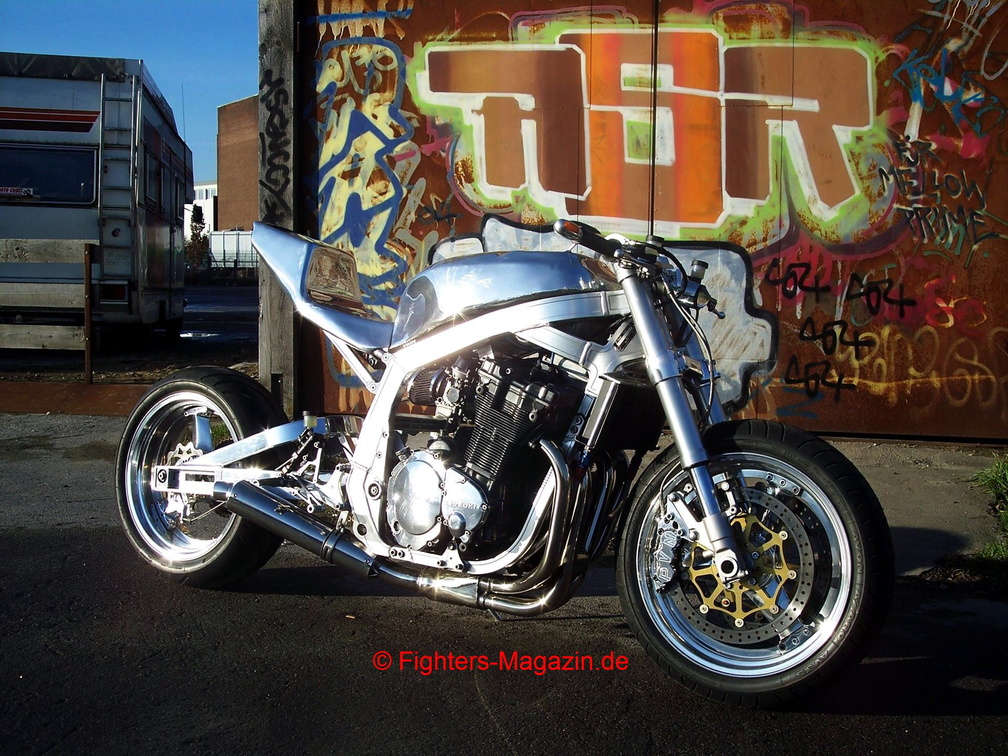
But back to the 914. Have not done much in the last few weeks. A little bit disappointed, a little bit lazy, waiting for new parts.
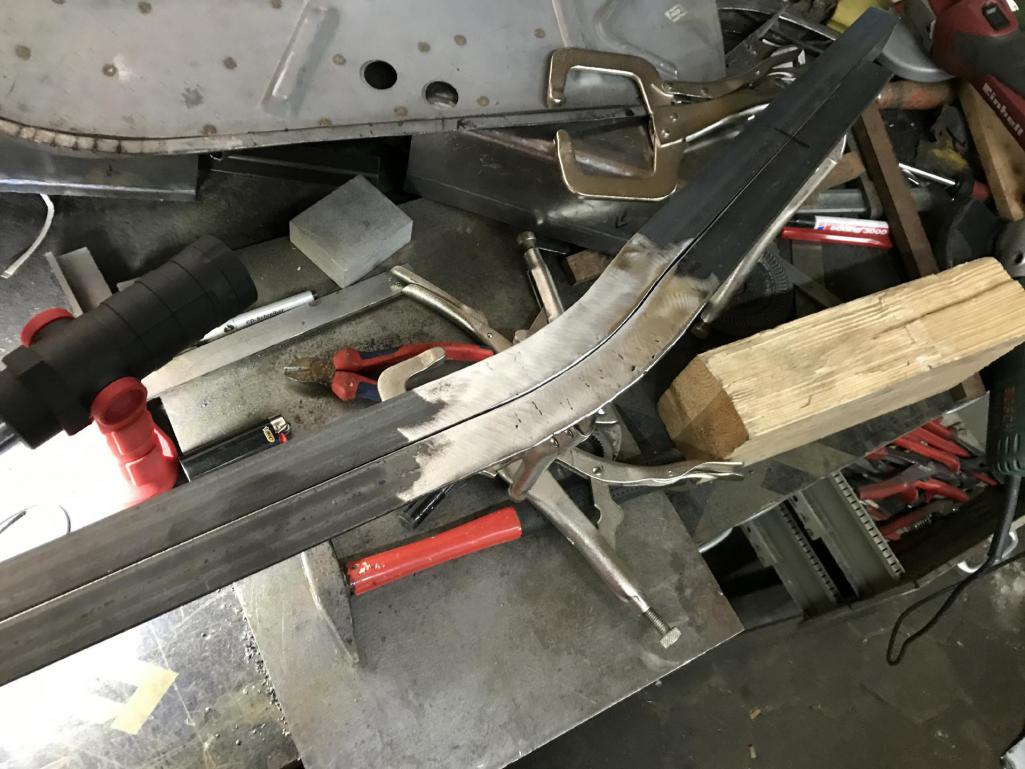
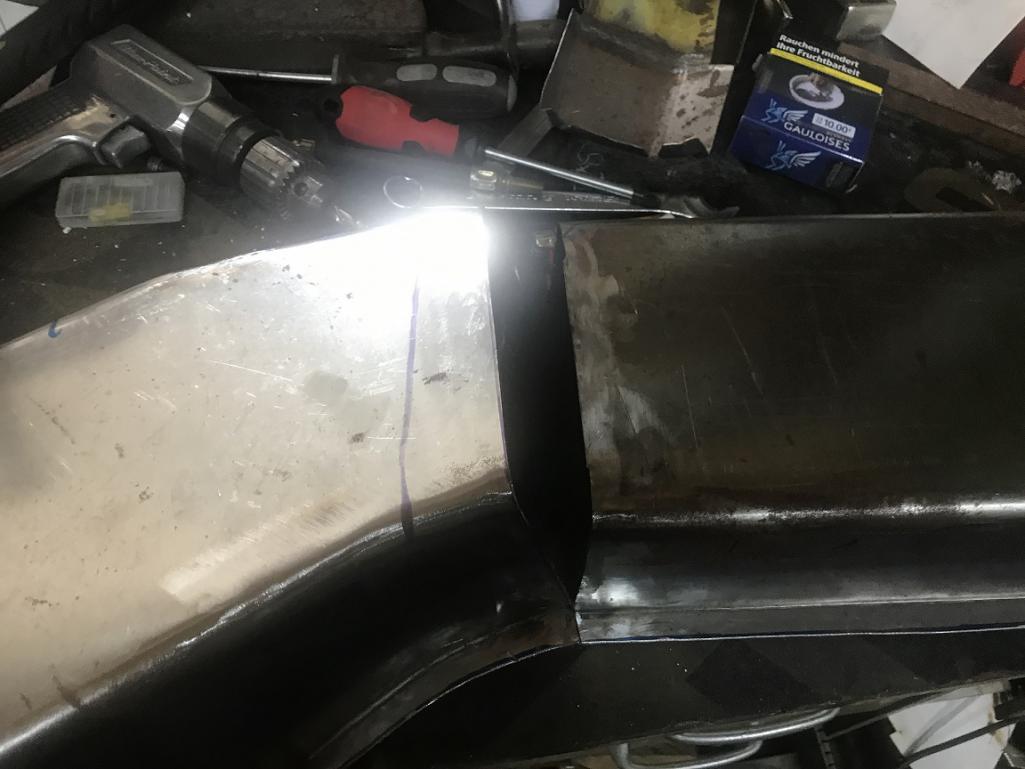
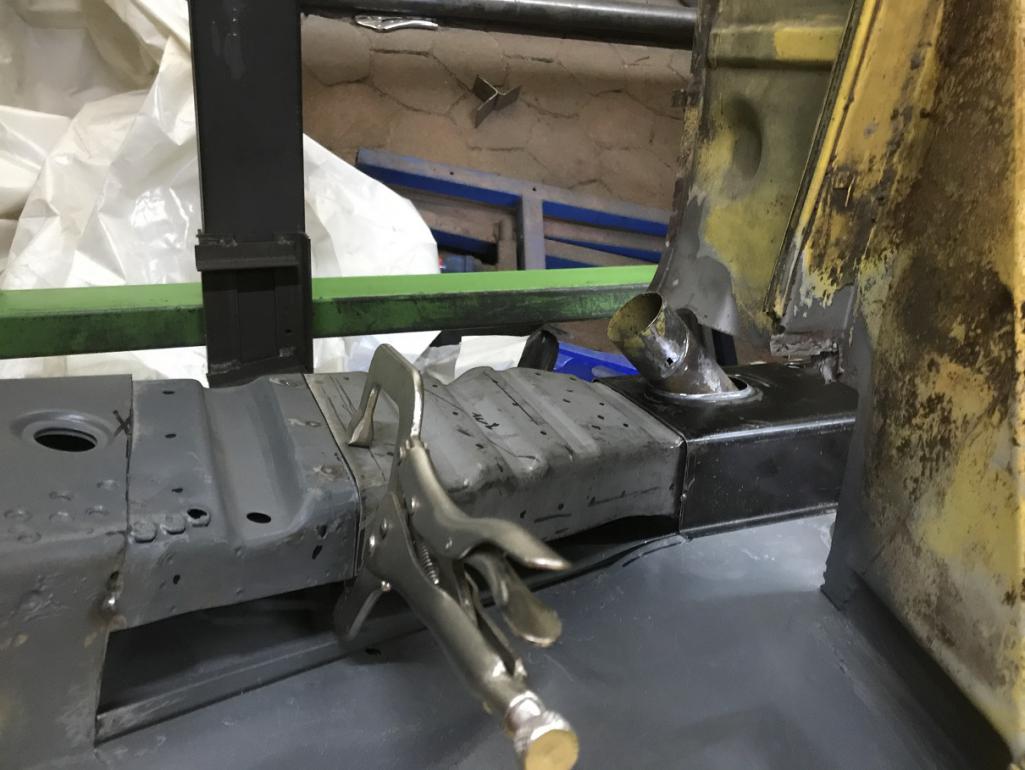
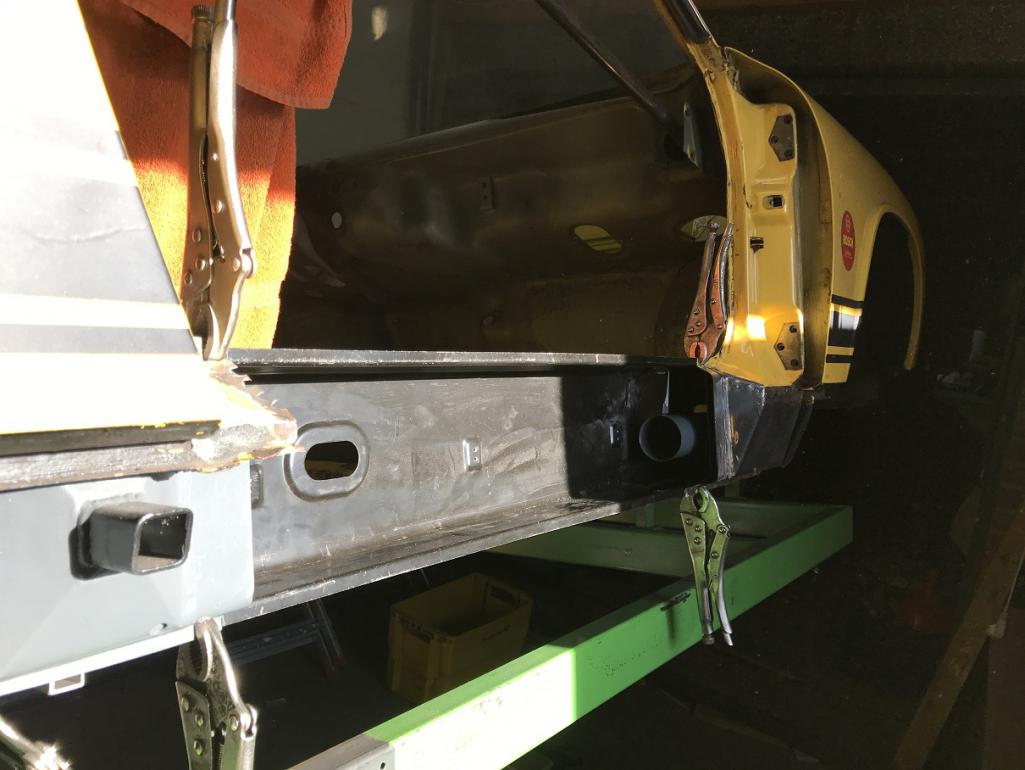
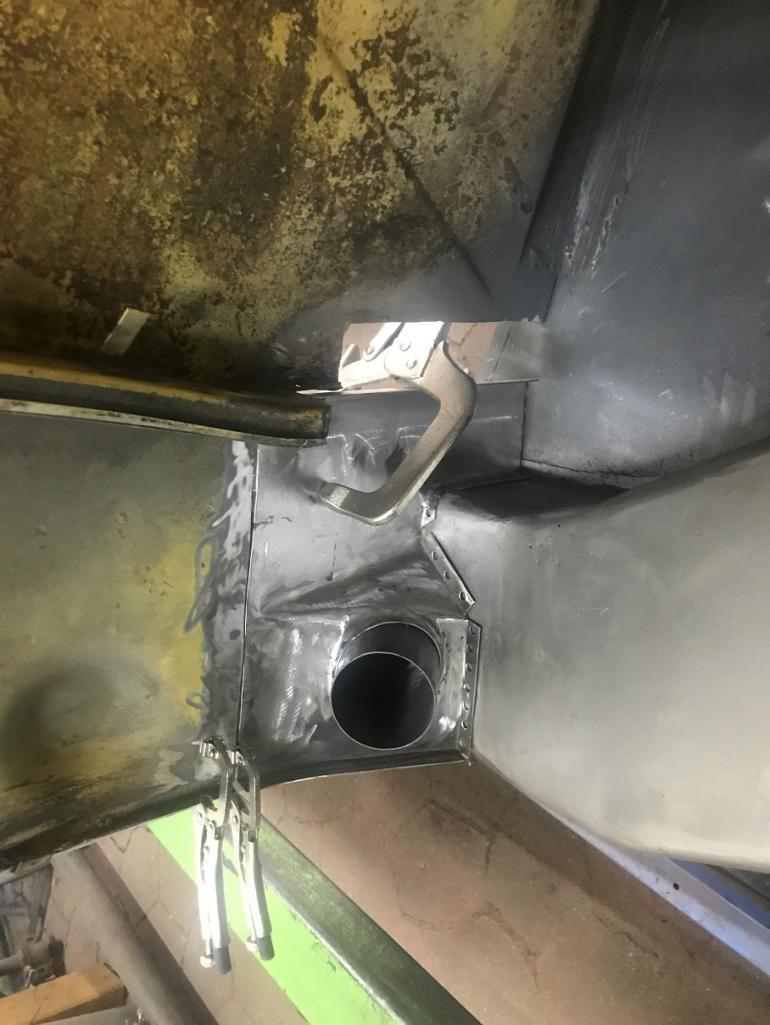
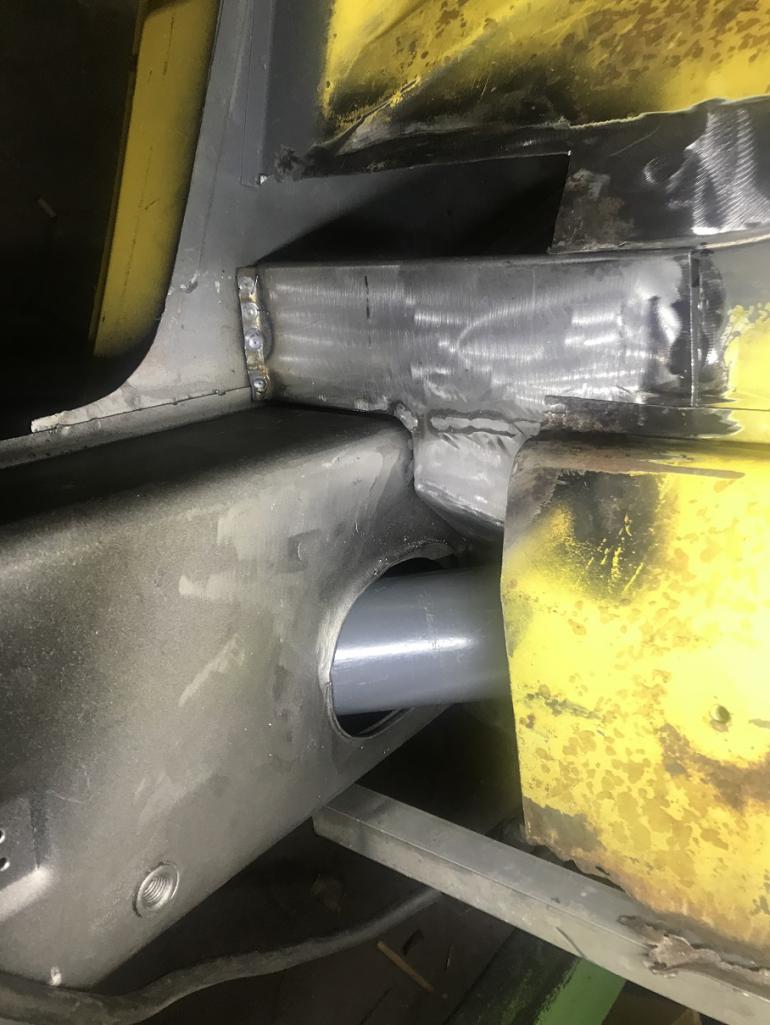
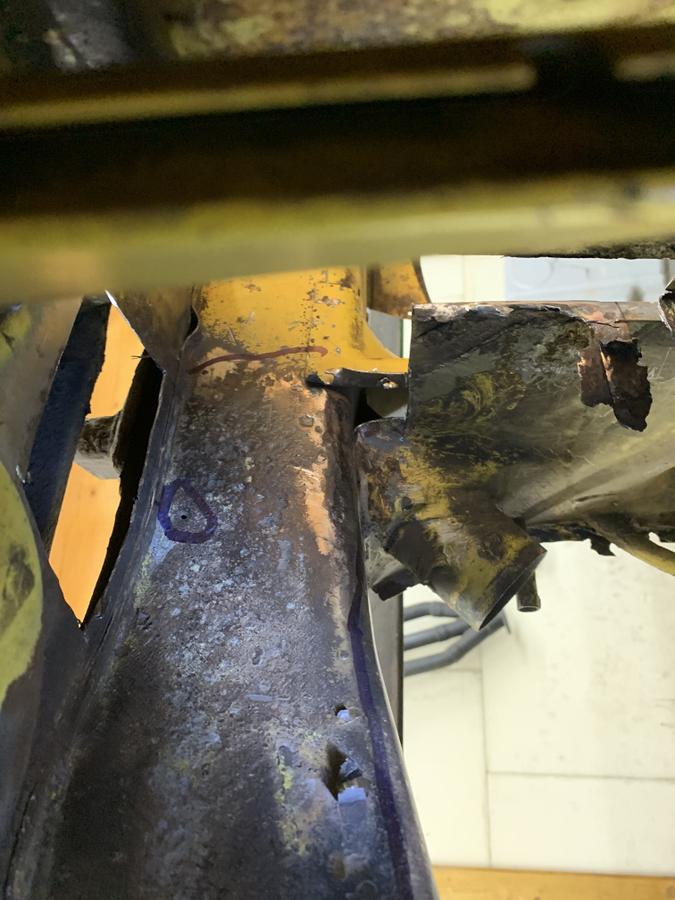
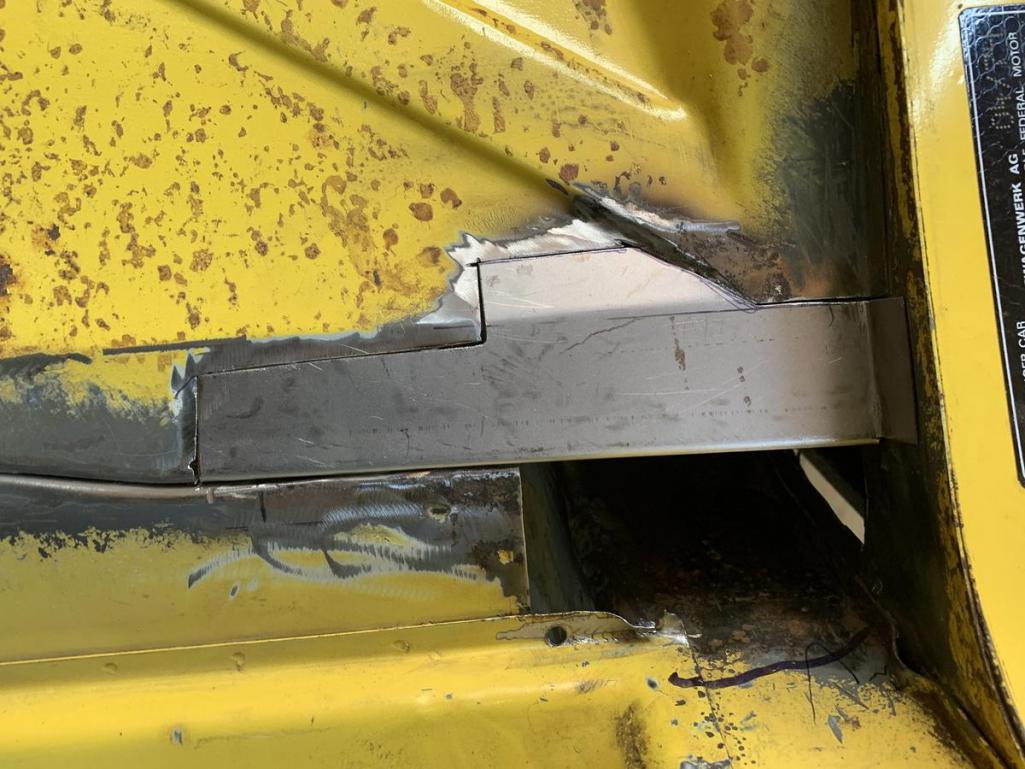
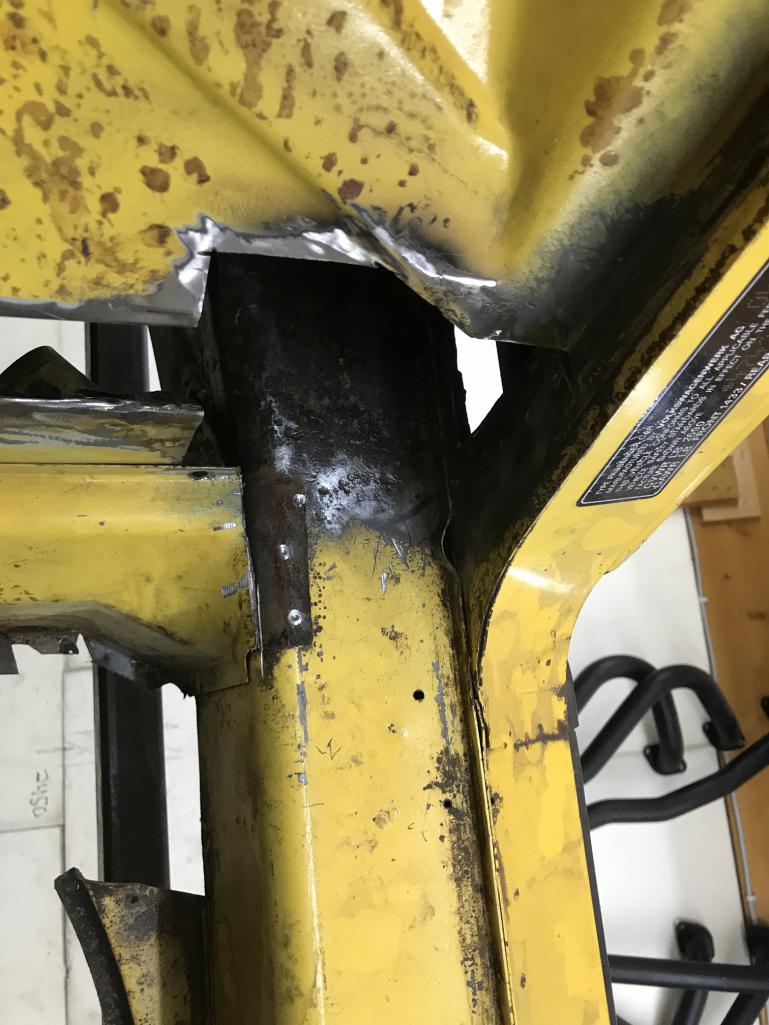
Since the Long had to be welded in the middle of the car, I decided to by a new long from Mittelmotor. The long is essential for the stiffines of the car, and I dont want to have a weld at that point.
cut out the old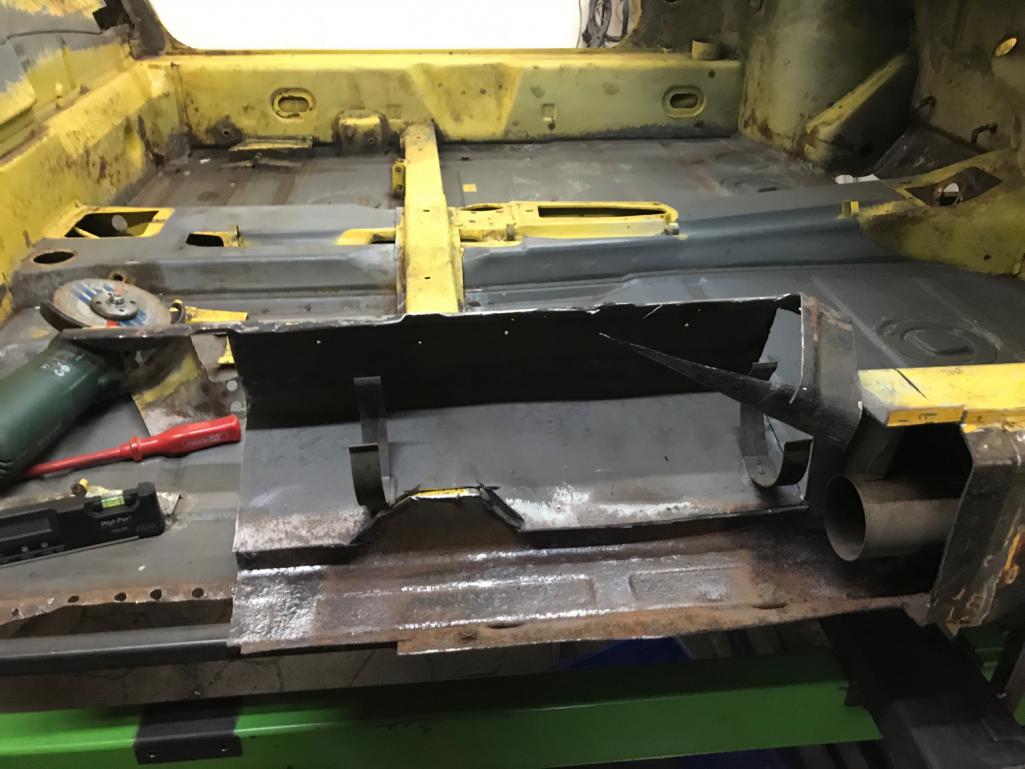
test fit the new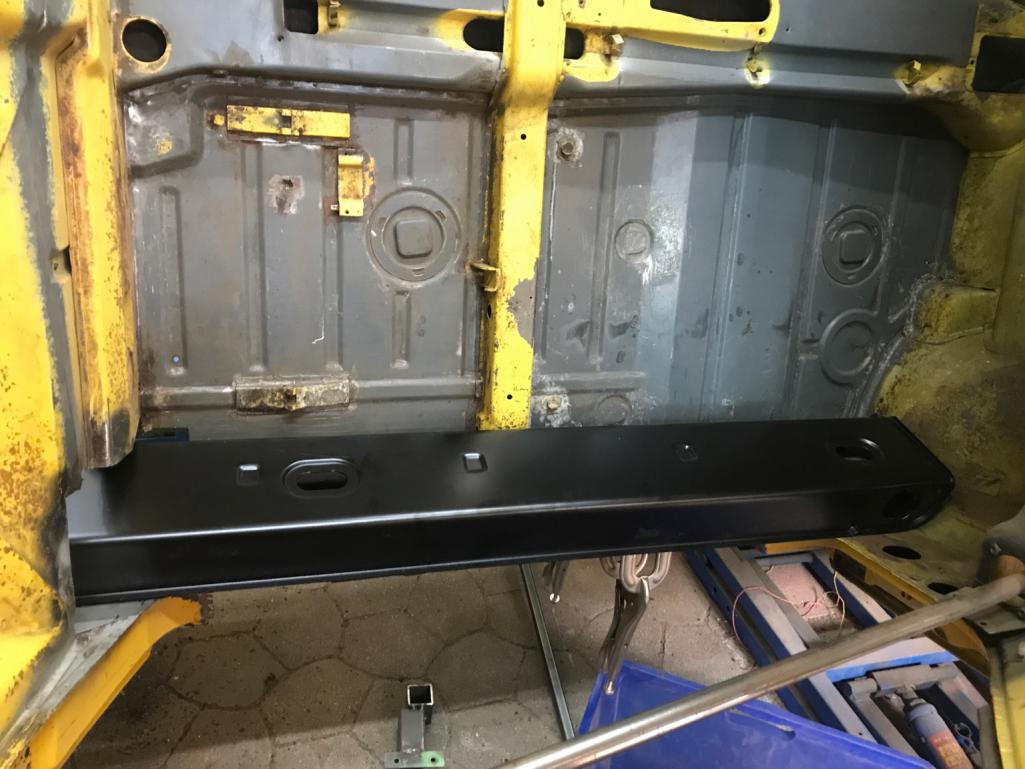
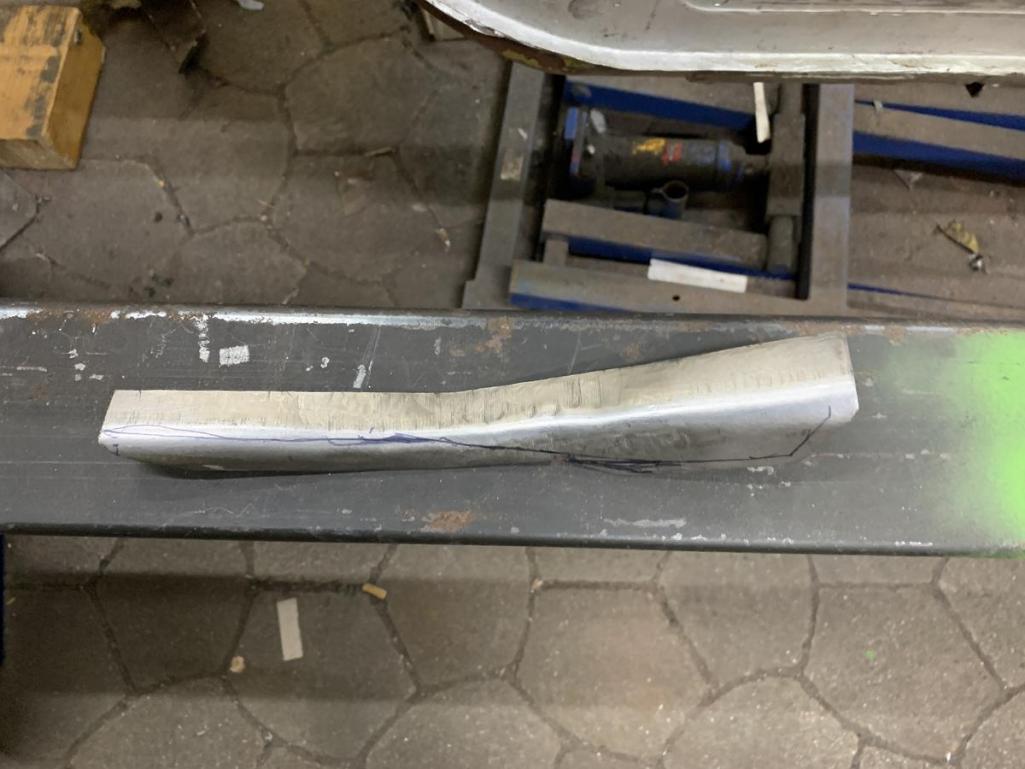
Not welded in yet, the new long needs a little bit of tweaking and I have to shorten my previous build part to fit.
Posted by: saigon71 Jun 25 2019, 05:18 AM
Absolutely outstanding metal work.
Well done sir.
Posted by: Cairo94507 Jun 25 2019, 06:46 AM
![popcorn[1].gif](style_emoticons/default/popcorn[1].gif)
Posted by: Krieger Jun 25 2019, 07:17 AM
You have excellent metal skills. I am glad you decided to take on the challenge yourself!
Posted by: Tenner Feb 11 2021, 05:53 AM
Long time since my last post but the Project is still alive.
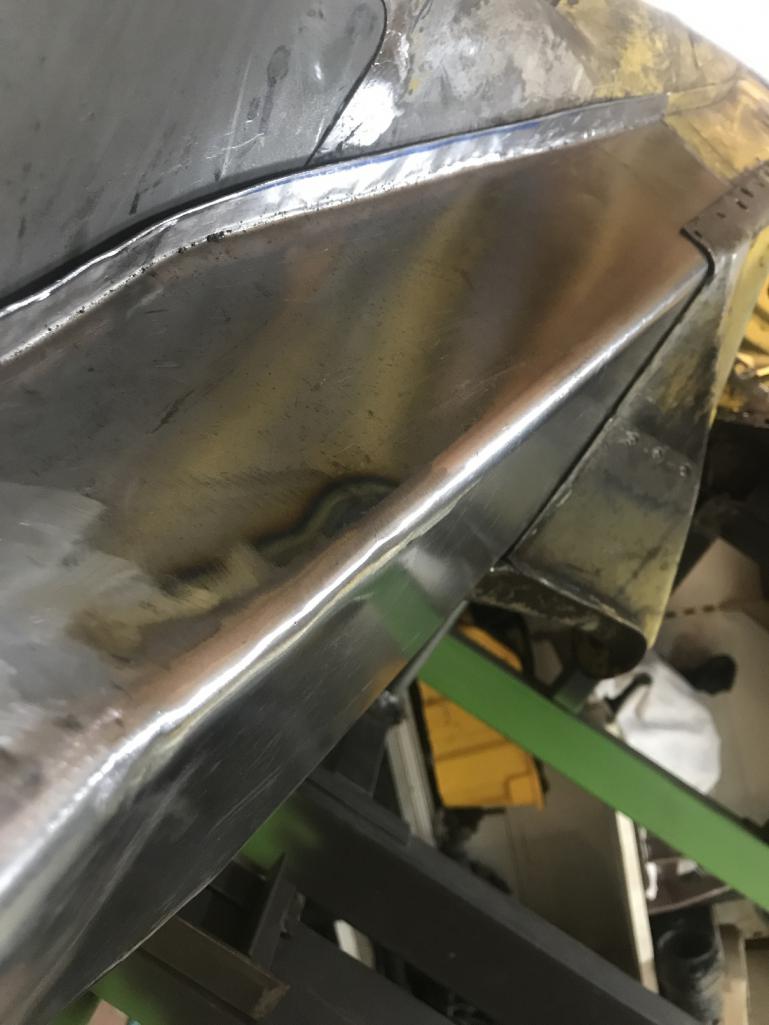
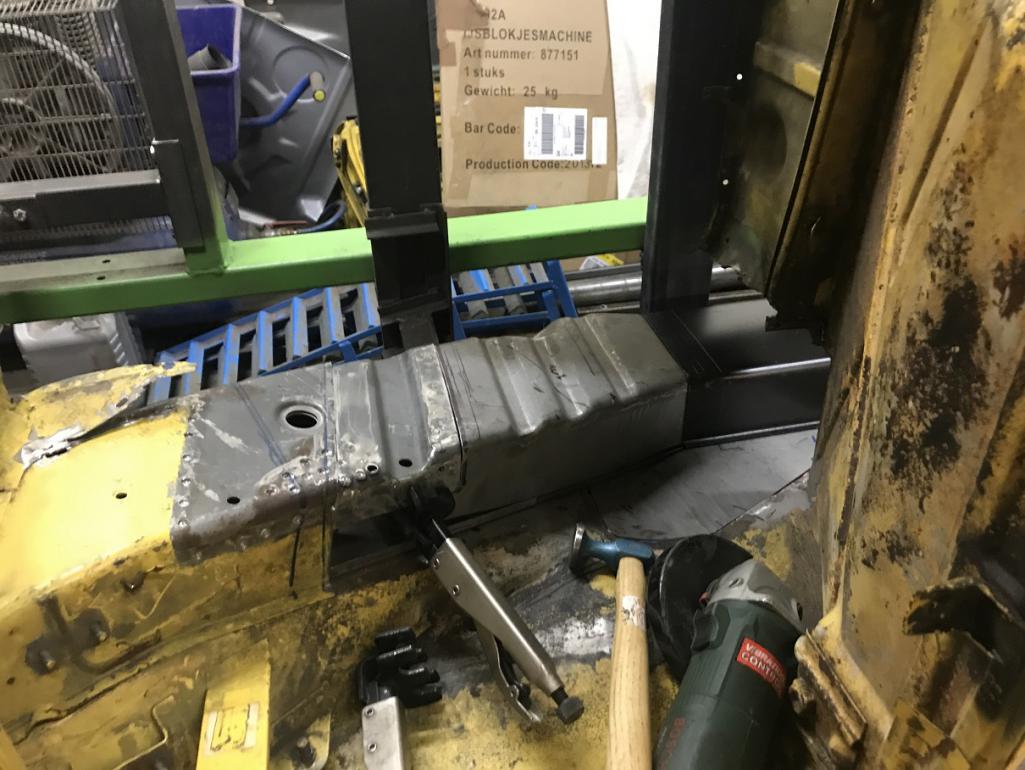
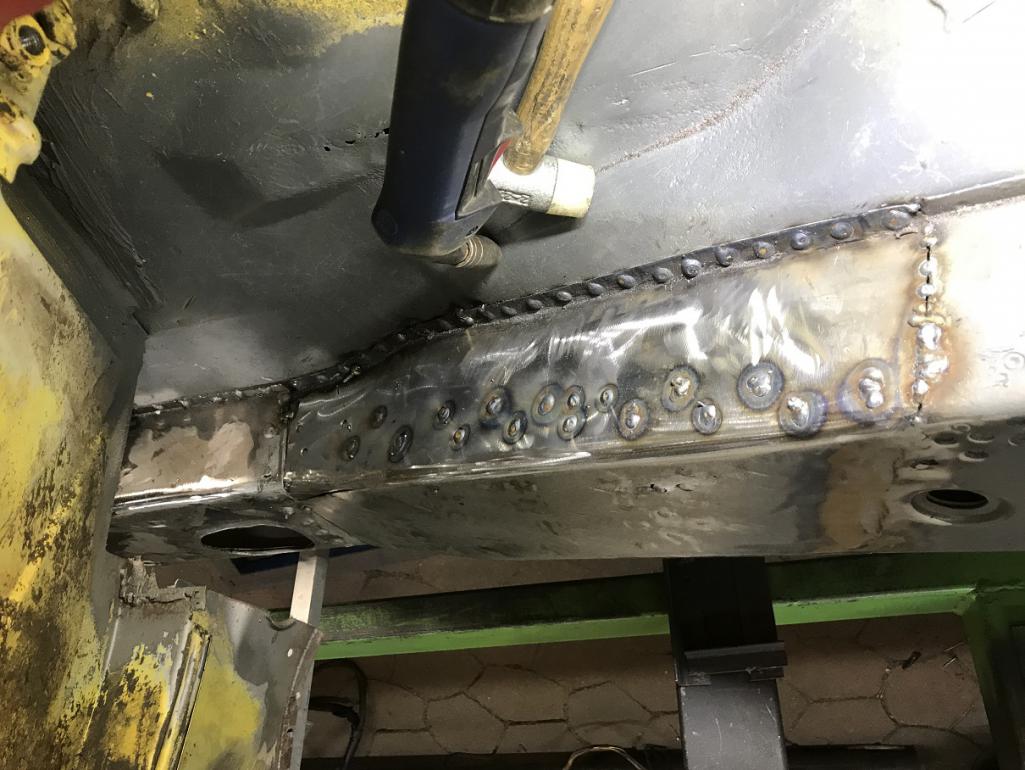
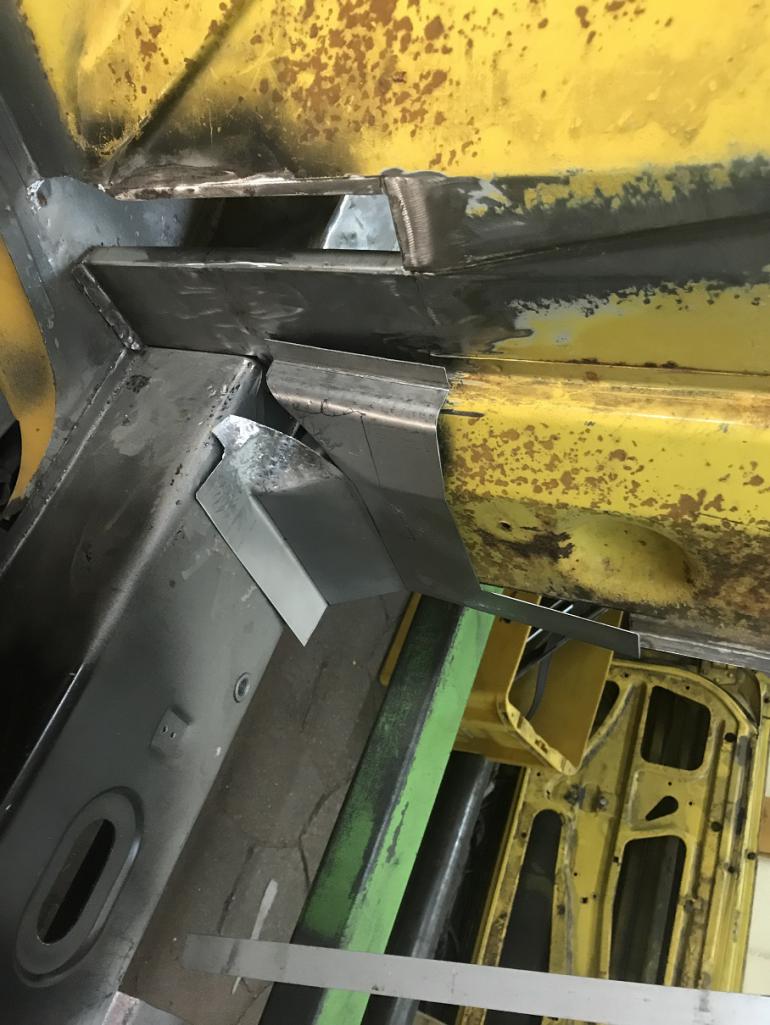
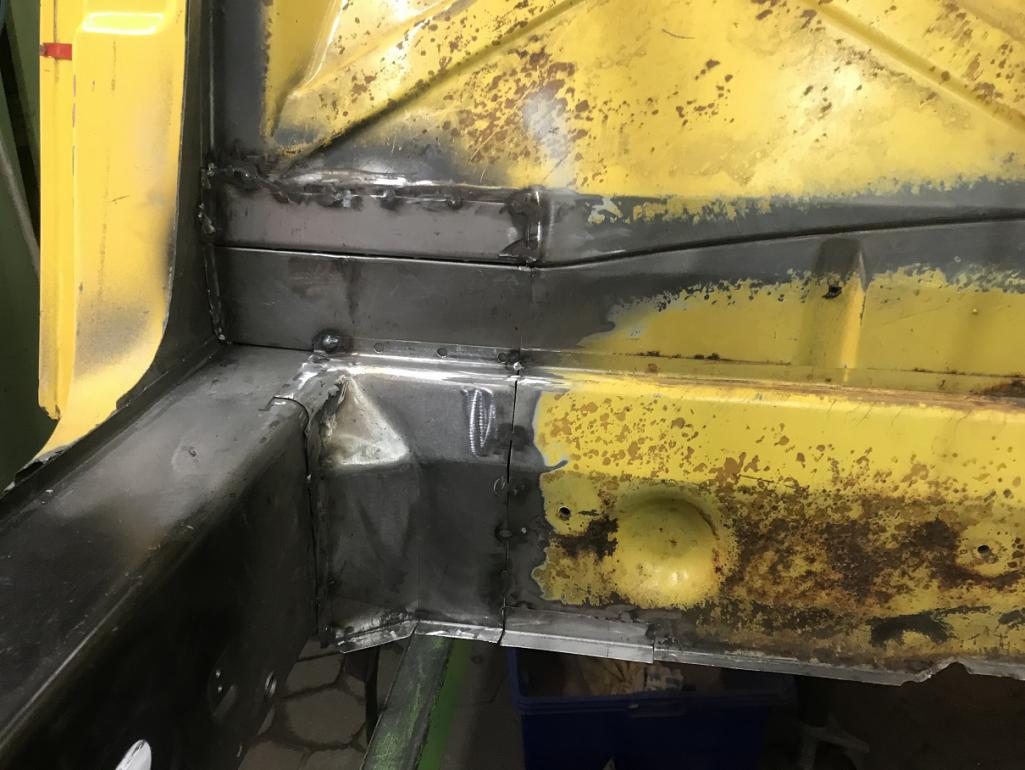
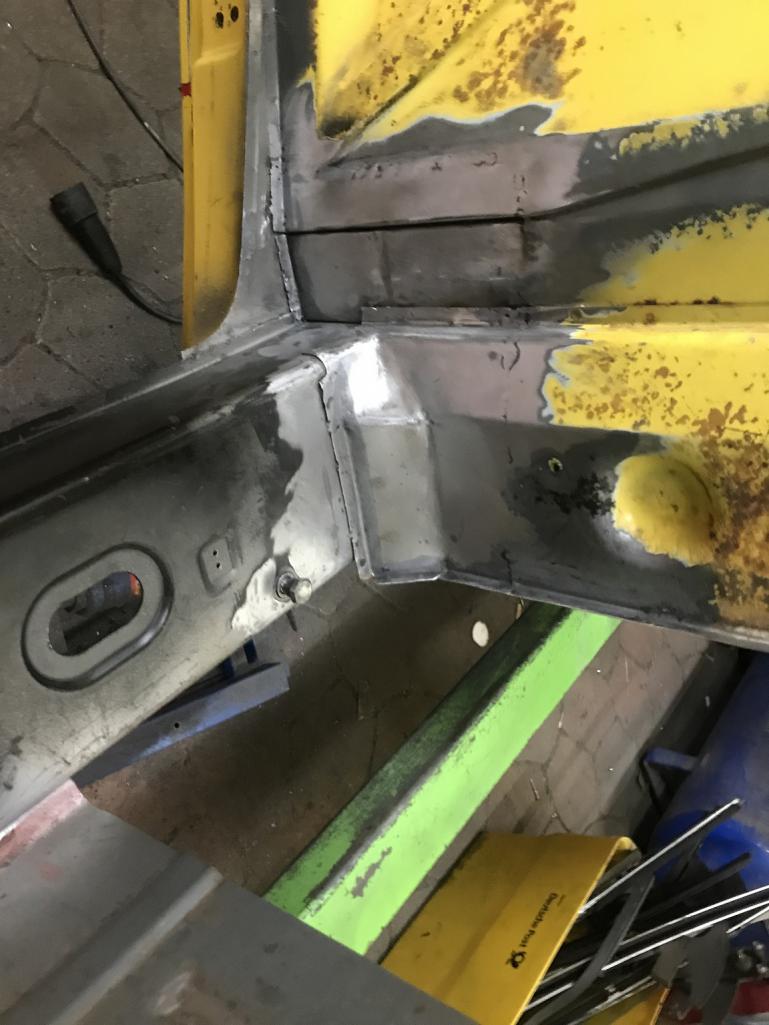
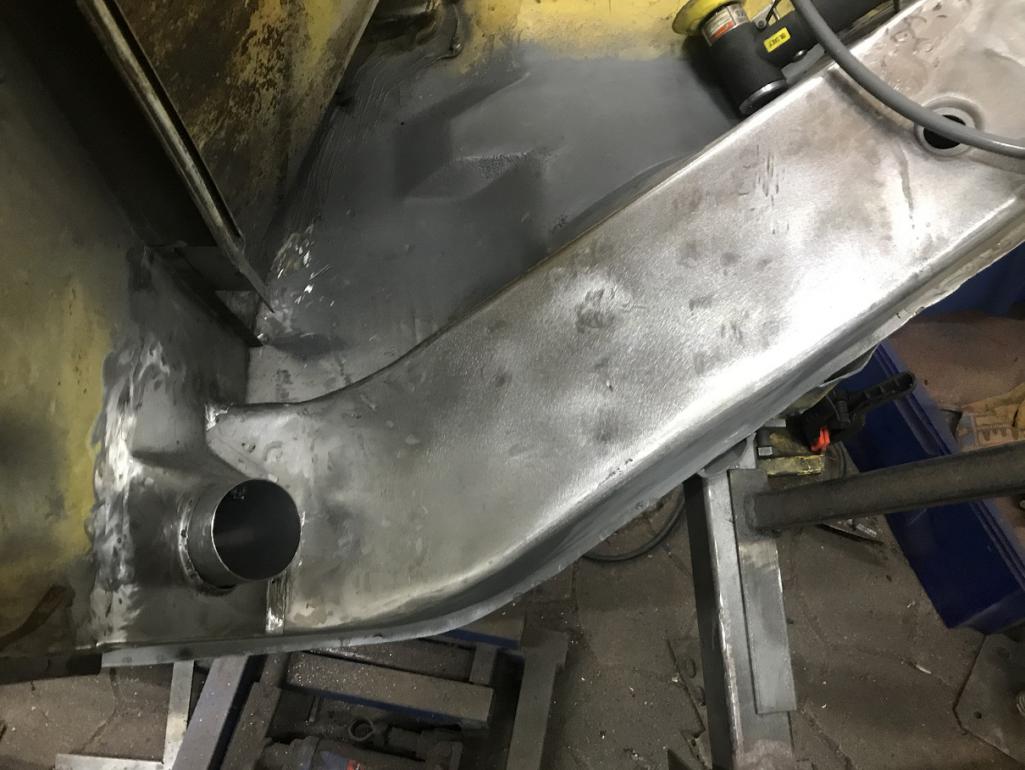
The new sill has now been adapted and welded in.
A few adjustments to the sill were necessary, but essentially the part is quite well made.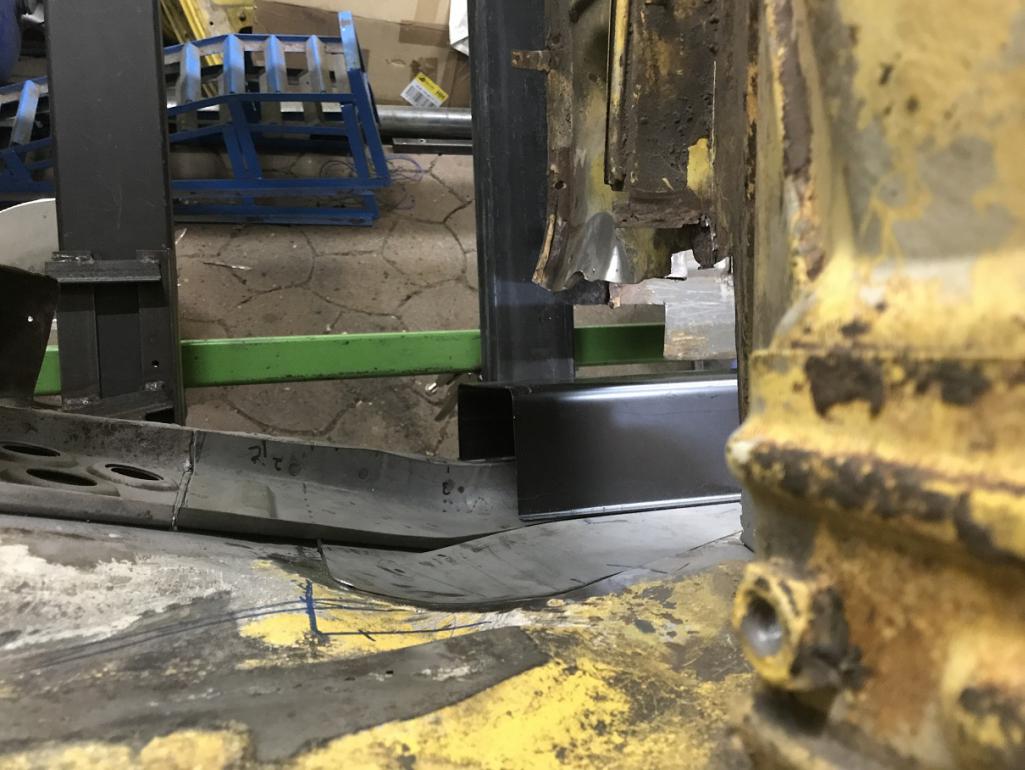
Posted by: Tenner Feb 11 2021, 05:57 AM


Attached thumbnail(s)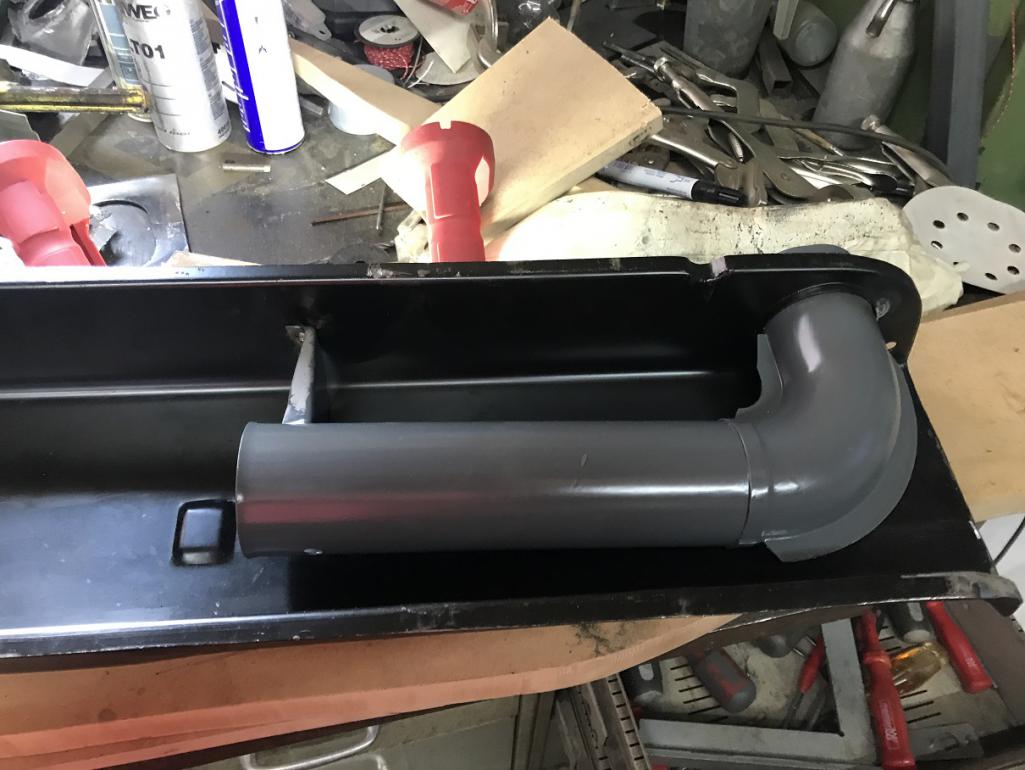
Posted by: Tenner Feb 11 2021, 06:03 AM
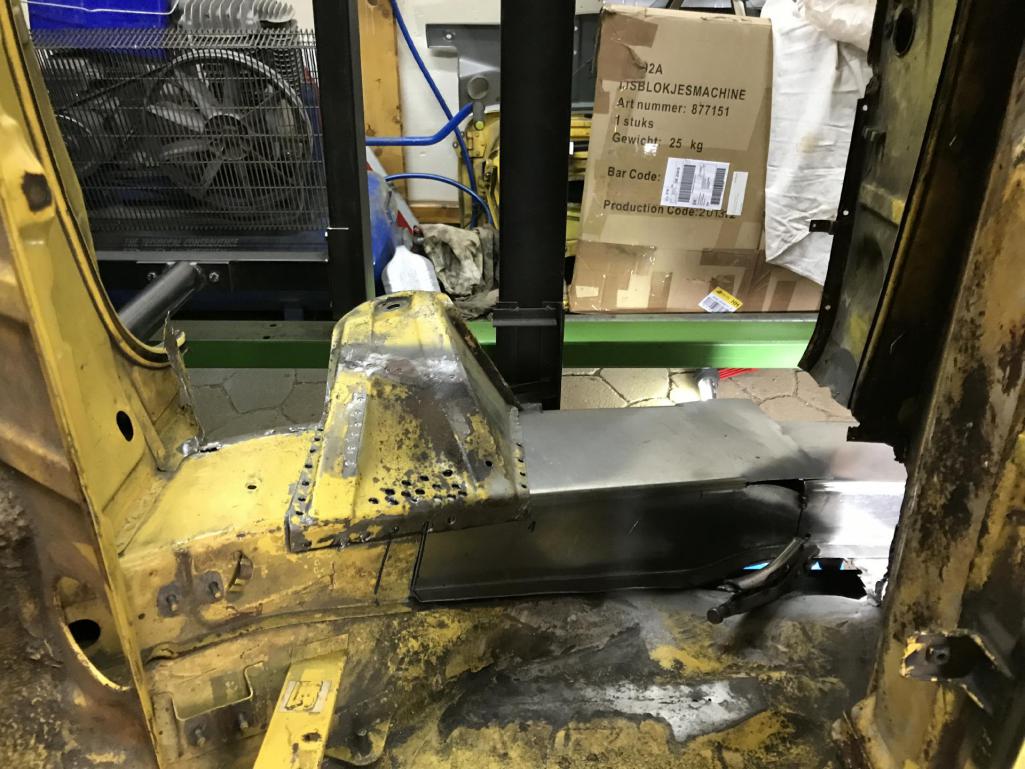
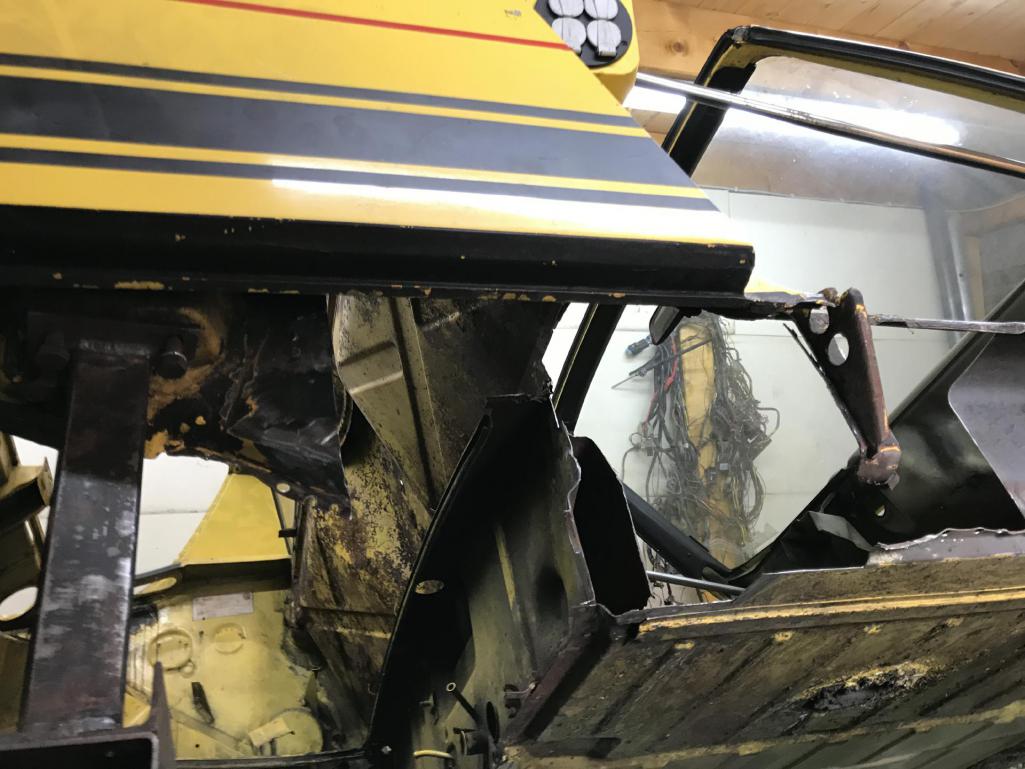
Firewall rebuild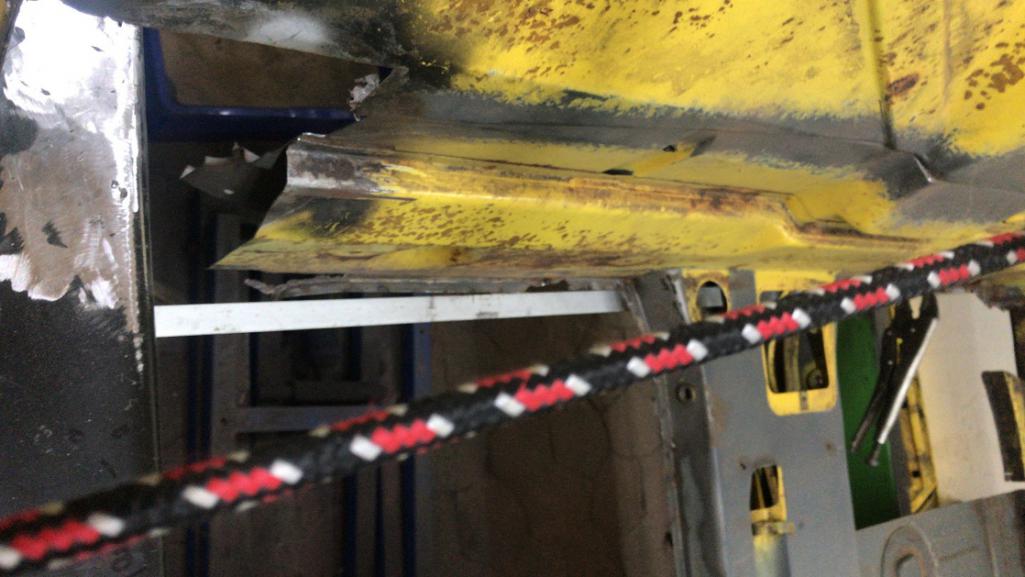
Posted by: saigon71 Feb 11 2021, 06:41 AM
Some amazing metal work going on there - well done!
Posted by: michelko Feb 11 2021, 06:56 AM

Some amazing metal work going on there - well done!
fantastic work.Reminds me on my hell hole repair
Another one on its way back to life, please keep on posting

Michael
Posted by: TRS63 Feb 11 2021, 06:59 AM
Amazing work, thanks for Sharing!
Where are you in Germany?
Grüße
Antoine
Posted by: Superhawk996 Feb 11 2021, 07:20 AM
Glad to see this is still moving forward.
Great job with all the fab work! 
Keep going!
I love seeing stuff getting fixed the right way! I really admire the pattern making of the complex corner sections. I've taken the easy way out and bought stamped parts. It is awesome that you're doing that from scratch! 
Posted by: michelko Feb 11 2021, 08:02 AM
Amazing work, thanks for Sharing!
Where are you in Germany?
Grüße
Antoine
Ja jetzt hab ichs auch erst gesehen, noch ein Muttersprachler.
Würde mich auch interessieren wo du her kommst. Ich komme aus der Nähe von Ludwigshafen.
Gruss Michael
P.S: Habe deine geheimen Zeichen ( Bitburger Flaschen) entdeckt. Trinke ich auch gerne.

Posted by: mate914 Feb 11 2021, 08:11 AM
Nice metal surgery.... Be sure to coat inside the longs.. Metal now adays rust very fast? I wondy why?
Matt
Posted by: DRPHIL914 Feb 11 2021, 09:28 AM
Hello Jeff, thank you, guys like you, bbrock, Superhawk996 ... inspire me to do the things myself. I've been told by several people "give it to a professional restoration shop, that's a number too hight for an amateur", but I always want to say, "I did it myself!".
As with my Motorcycle, all custom parts, exept tank and wheels, were made by myself with a little bit help of a freind (aloy welding).
But back to the 914. Have not done much in the last few weeks. A little bit disappointed, a little bit lazy, waiting for new parts.
Since the Long had to be welded in the middle of the car, I decided to by a new long from Mittelmotor. The long is essential for the stiffines of the car, and I dont want to have a weld at that point.
cut out the old
test fit the new
Not welded in yet, the new long needs a little bit of tweaking and I have to shorten my previous build part to fit.
no one else going to say anything about that amazing bike??

Beautiful bike, a work of art. WOW!
Posted by: mskala Feb 11 2021, 09:58 AM
Awesome job. If you are putting in the 4-cyl engine mounts, don't you need to create
the half-moon indent on the inner side?
Posted by: Rleog Feb 11 2021, 01:56 PM
Great work. Keep us posted.
Michelko: “ fantastic work.
Reminds me on my hell hole repair
Another one on its way back to life, please keep on posting”
Anyone who saw your repair would never forget it. Hope you and your 914 are thriving.
Posted by: 930cabman Feb 11 2021, 05:49 PM
Time, patience, skill, ........
Keep it going you will be at the finish line soon
Posted by: Tenner Feb 12 2021, 03:41 AM
Thank you all for the kind words. 
@http://www.914world.com/bbs2/index.php?showuser=1277 : I've read your Thread "diggin into hell" years ago, greate Work.
@http://www.914world.com/bbs2/index.php?showuser=1277 and Antoine: Ich komme aus Münster NRW. Ich war letztes Jahr im Sommer bei euch unten im Süden Urlaub machen. Rust, Speyer, Sinsheim ... Würde ich gerne nochmal mit dem 914 machen.
I love seeing stuff getting fixed the right way! I really admire the pattern making of the complex corner sections. I've taken the easy way out and bought stamped parts. It is awesome that you're doing that from scratch!
Thank you, but compared to your work this is all child's play (Kinderkram). There was far more rust on your car and the work you did there is amazing.
Nice metal surgery.... Be sure to coat inside the longs.. Metal now adays rust very fast? I wondy why?
I've coated all reachable areas with Epoxy Primer. But if everything goes as planned, the car will be chemically stripped of paint, rust-proofed and finally get KTL.
no one else going to say anything about that amazing bike?? drooley.gif
Beautiful bike, a work of art. WOW!
Thank you very much.
Awesome job. If you are putting in the 4-cyl engine mounts, don't you need to create
the half-moon indent on the inner side?
Thank you. Yes, your are right. Yes you are right. I am still thinking about it. The plan is to go to a 6. But for an original look ... mhh
Posted by: Krieger Feb 12 2021, 08:47 AM
WOW! Fantastic work!
Posted by: jd74914 Feb 12 2021, 11:16 AM
Looking awesome!!
Could you post some more pictures of the bike?? It looks very well done too!
Posted by: Dion Feb 13 2021, 07:49 AM
Fantastic work. Nice to see another 914 being rescued.
That bike looks amazing.. what’s the specs and story on that?
Keep forging ahead 
Cheers, Dion
Posted by: Tenner Apr 15 2021, 05:34 AM
it's been a bit since my last post.
Here's my progress over the past few weeks.
On the left side there were also a few rust perforations to repair.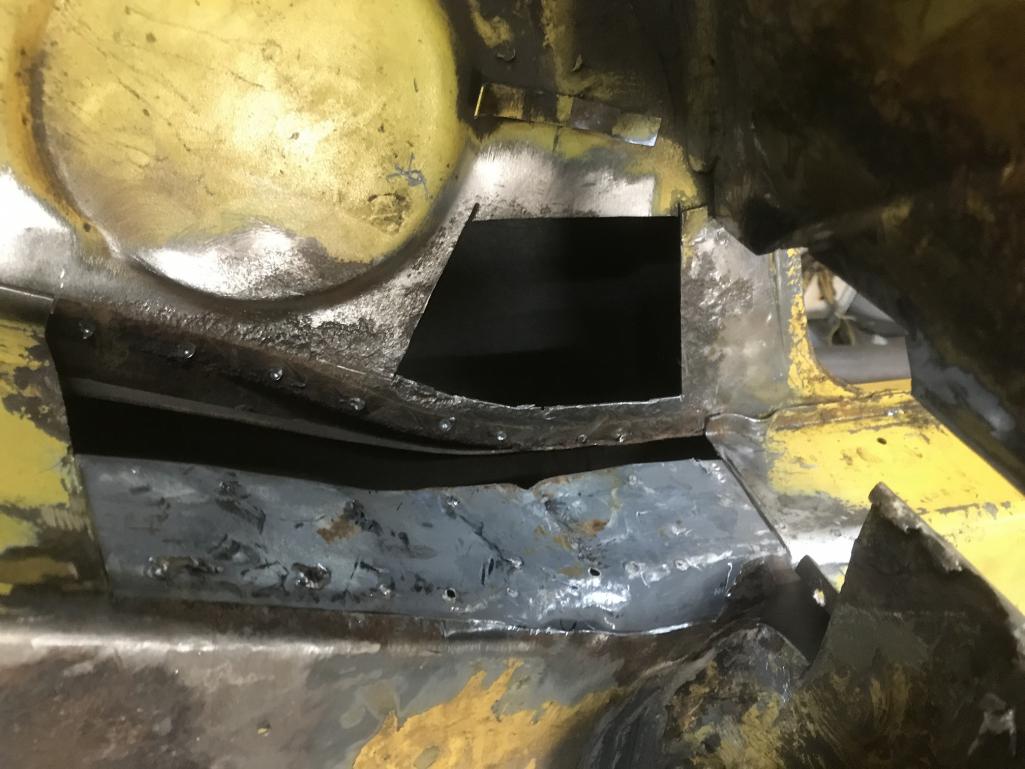
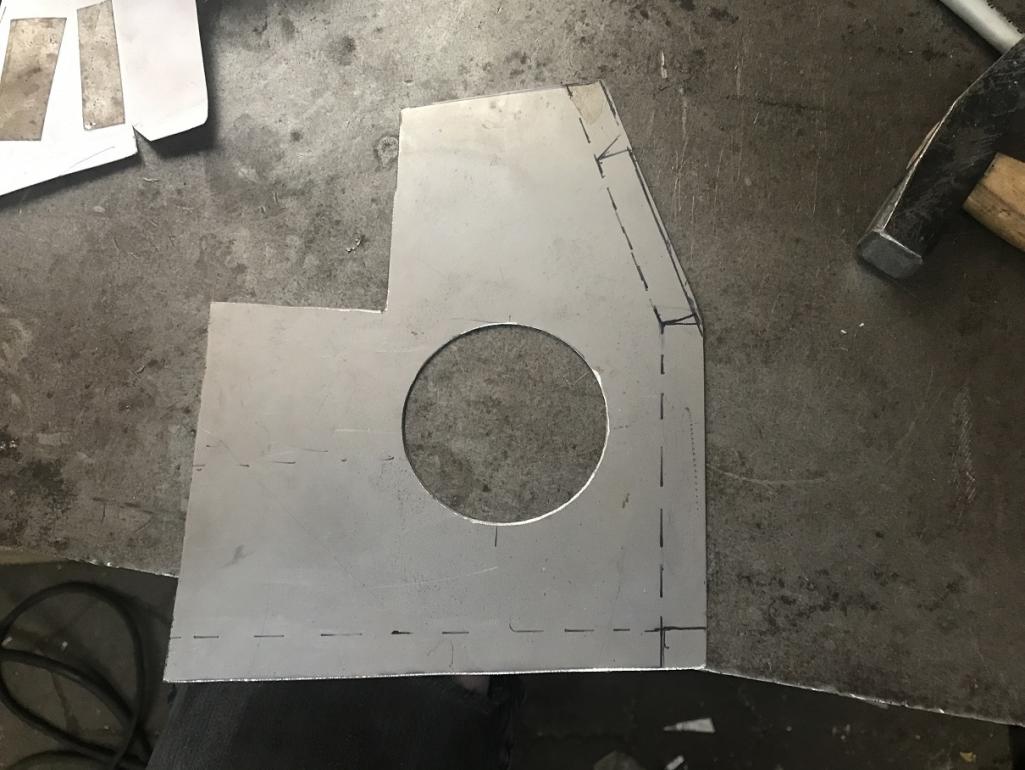
only as a template ...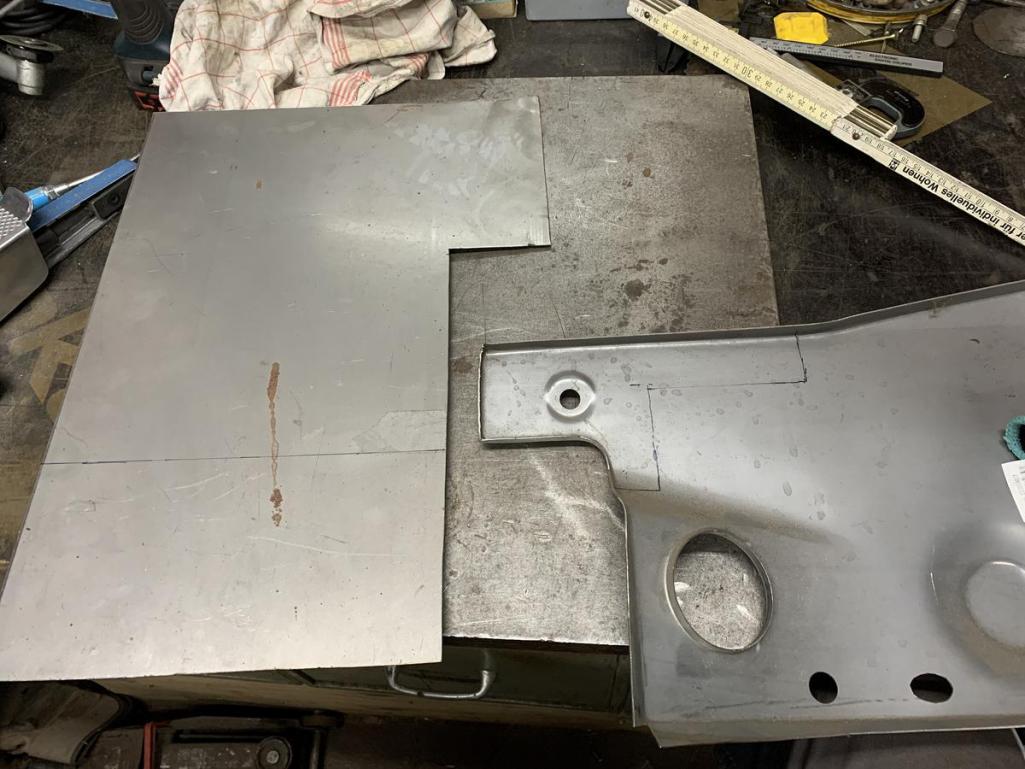
recreated 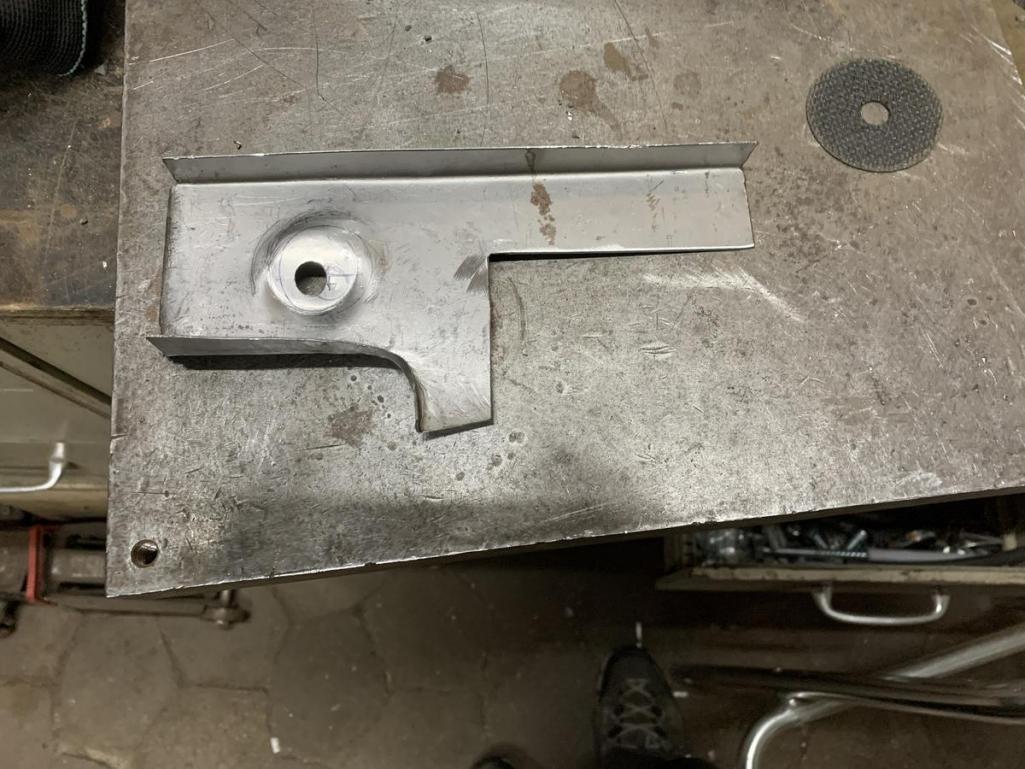
Attached thumbnail(s)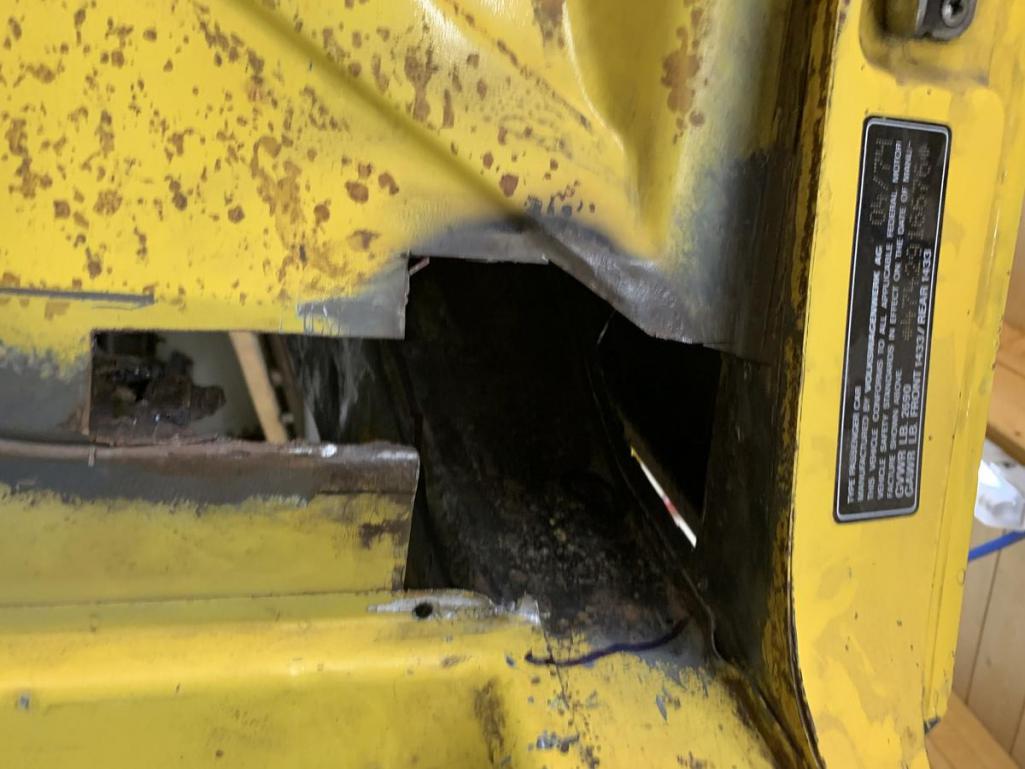
Attached image(s)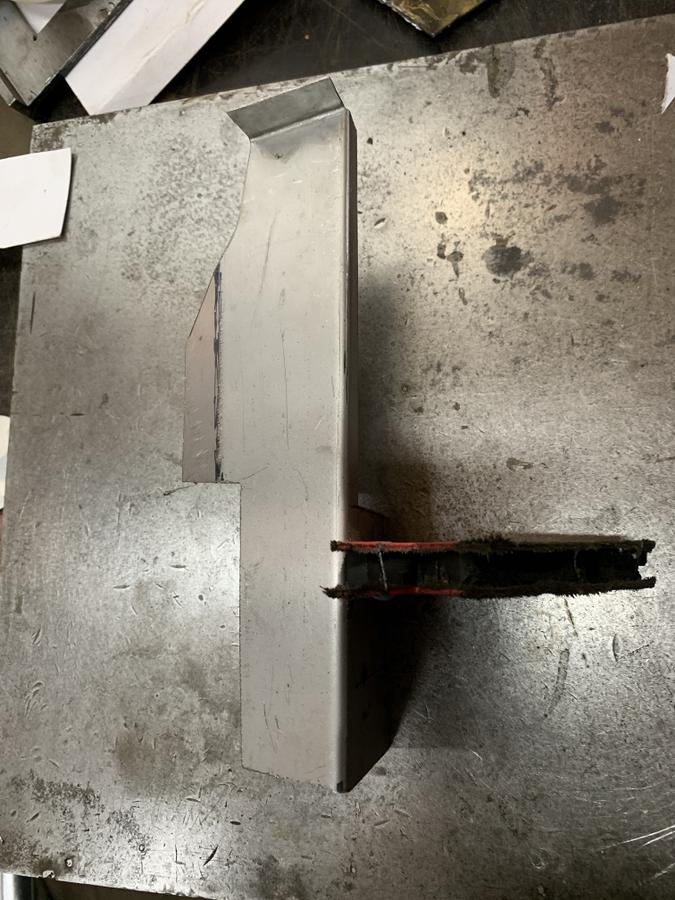
Posted by: Tenner Apr 15 2021, 05:47 AM
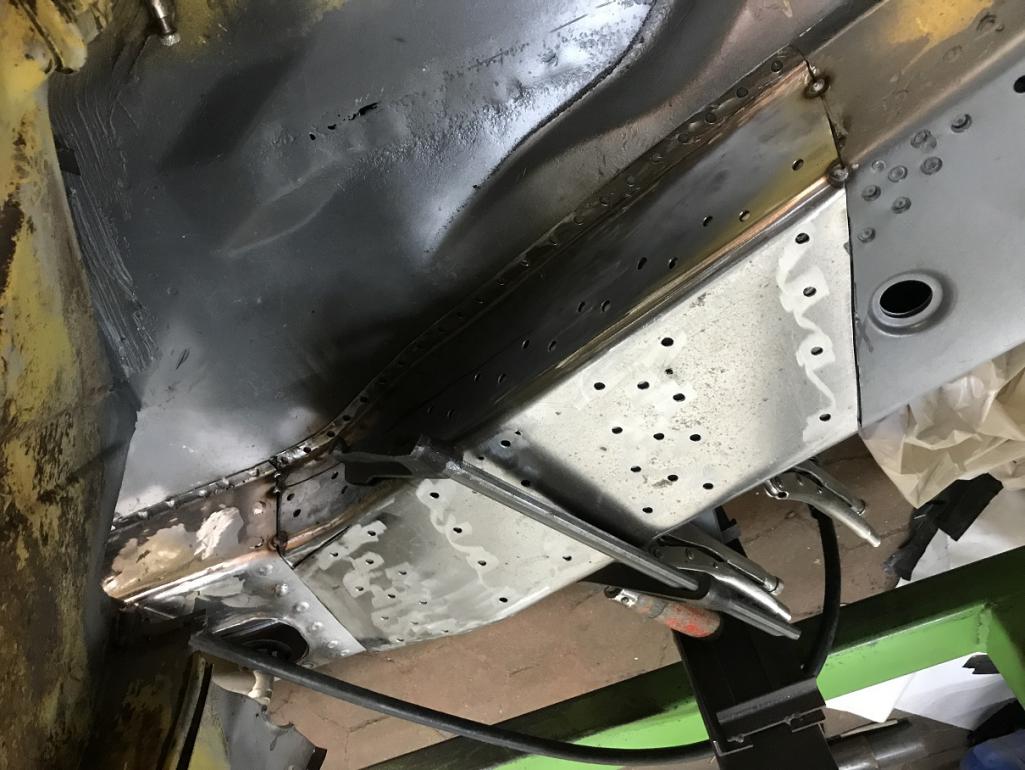
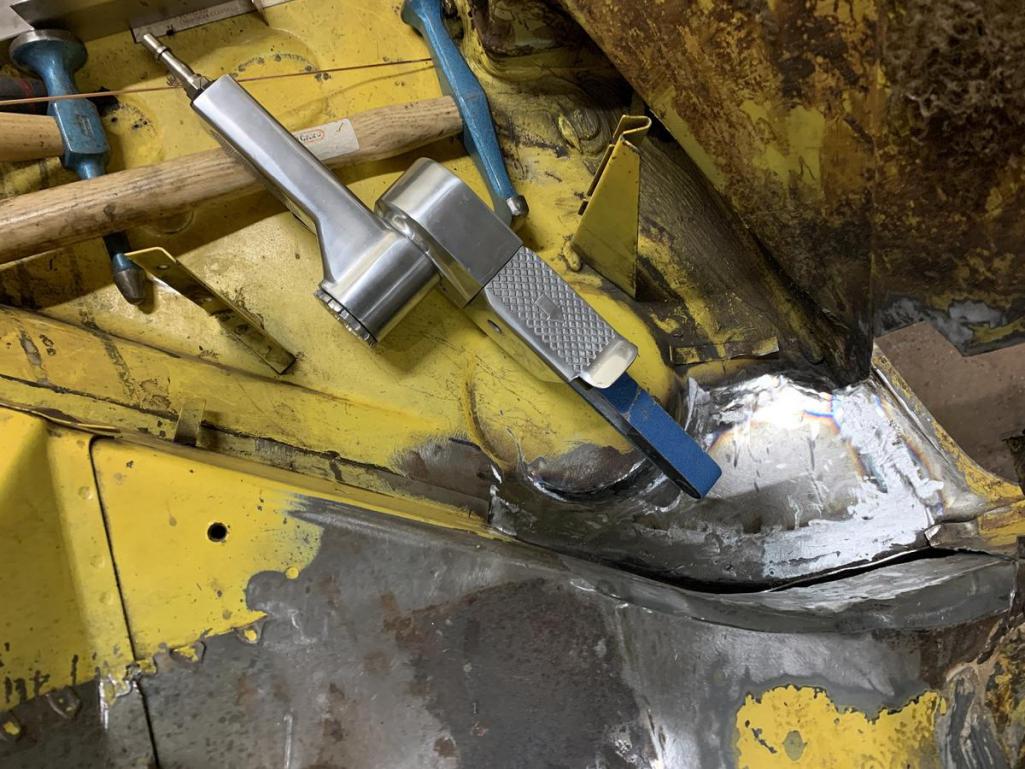
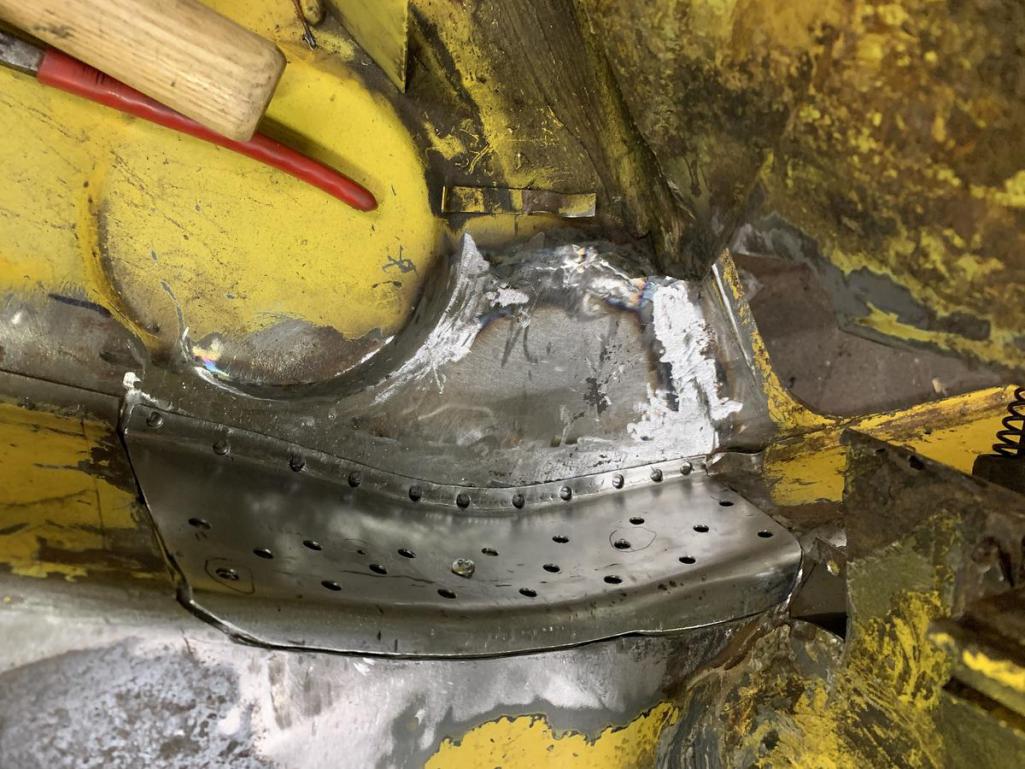
After repairing all of the rust perforations in the rear, I focused on the engine pan. For the right side I took the panel from JP, 115 € is a reasonable price. For the left side, I made the panel myself, as the panel is only available from Restoration Design / AA and I didn't want to pay 225 € for it.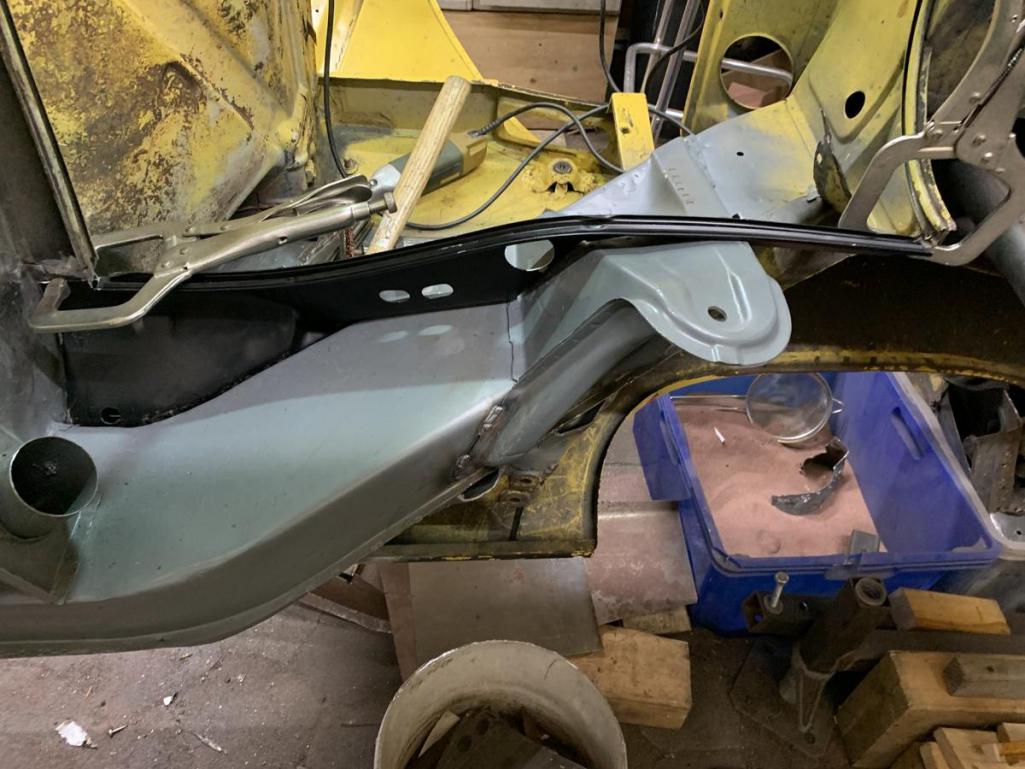
The panel had to be lengthened a little 
Original and fake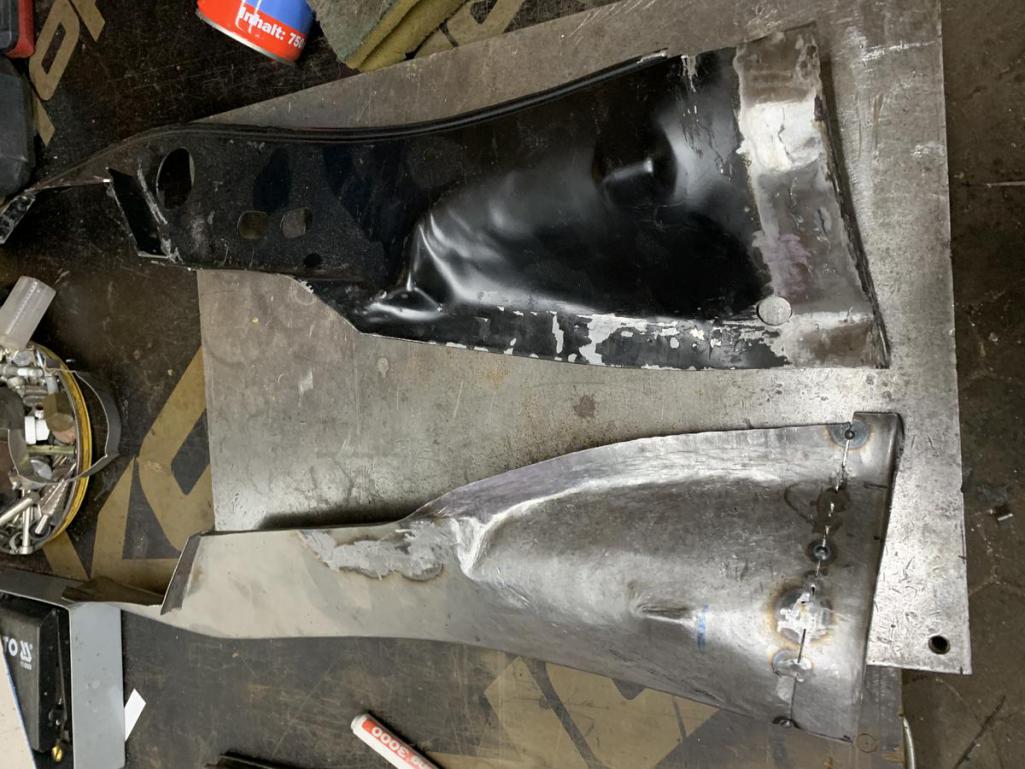
welded in on the left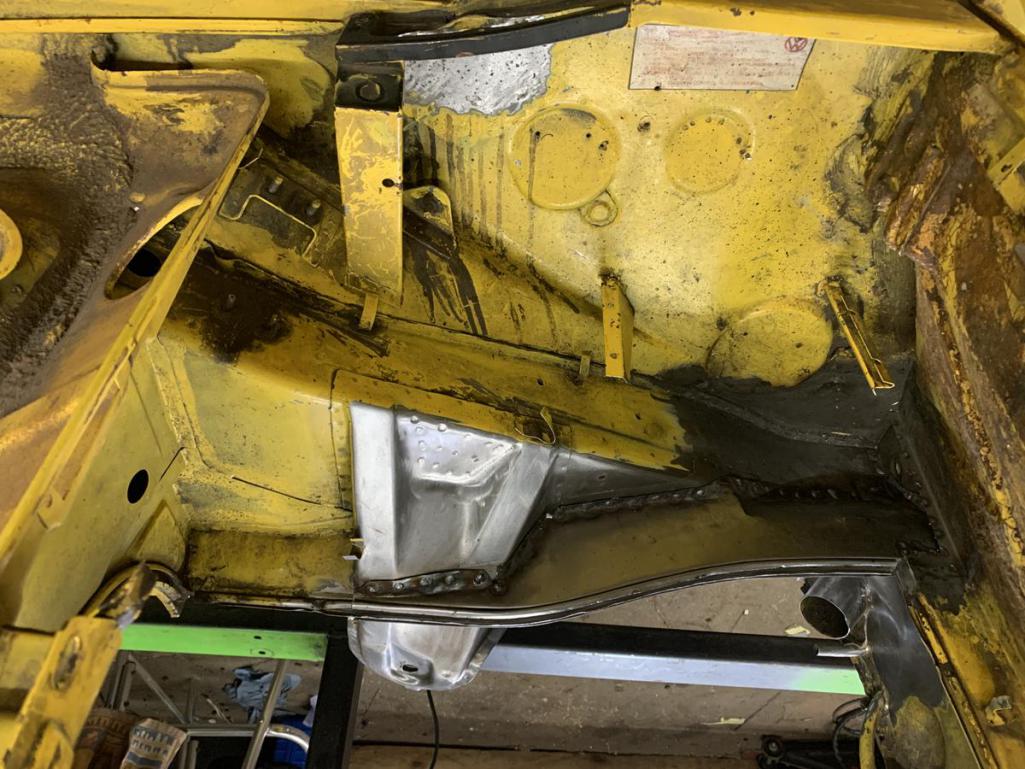
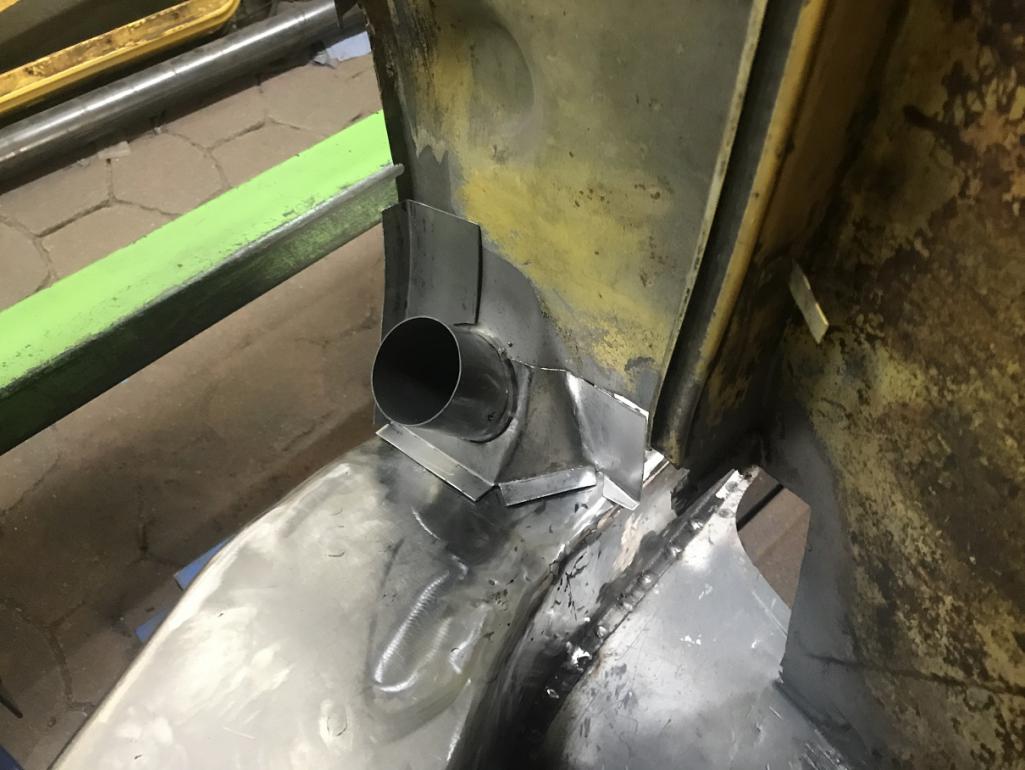
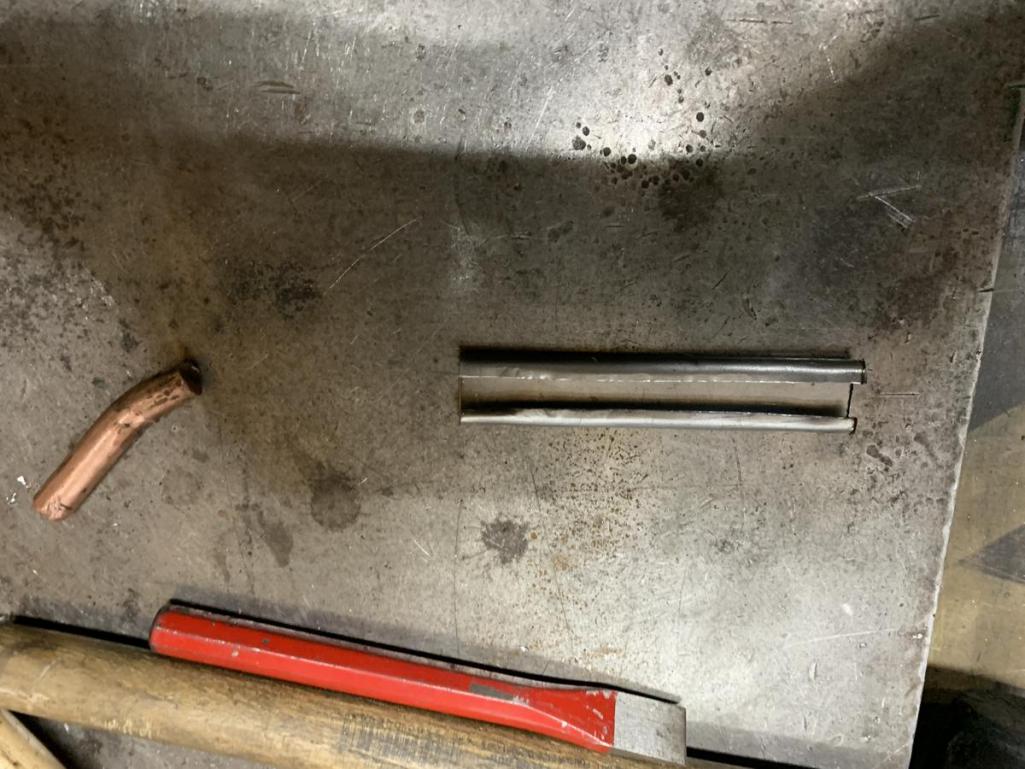
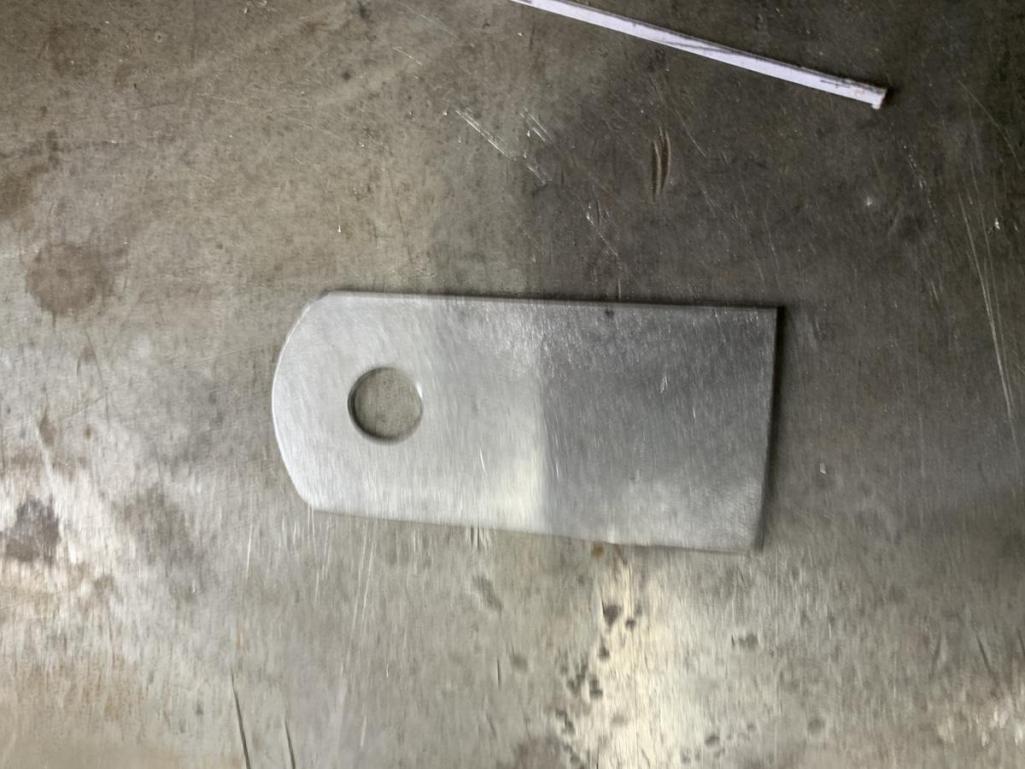
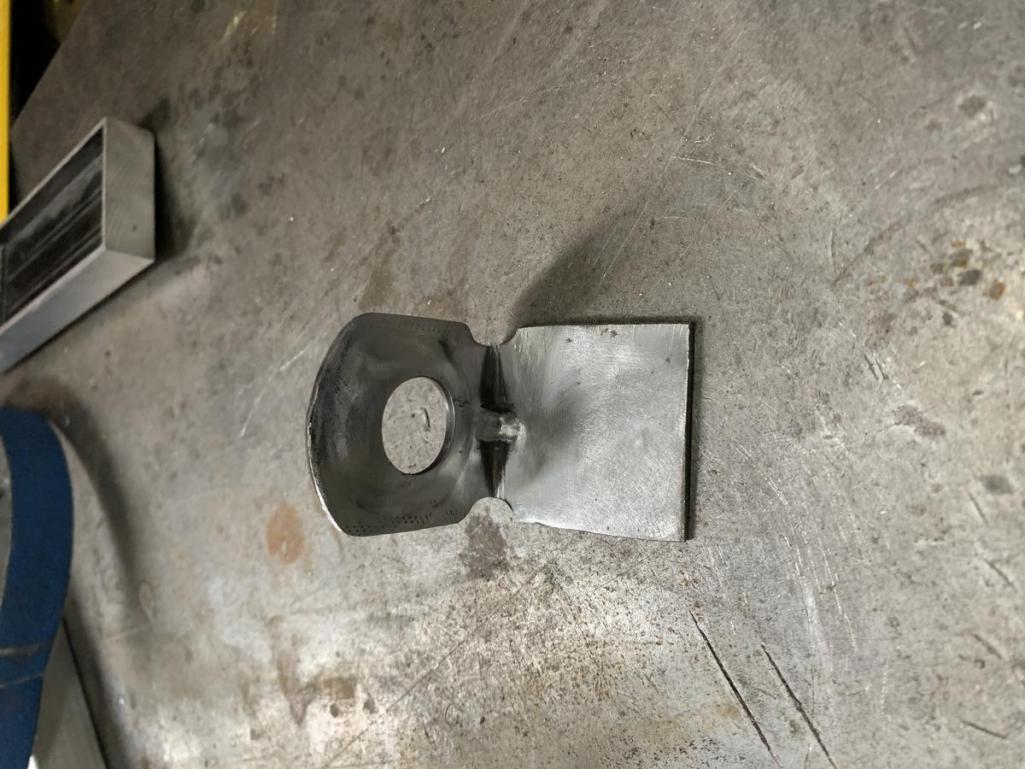
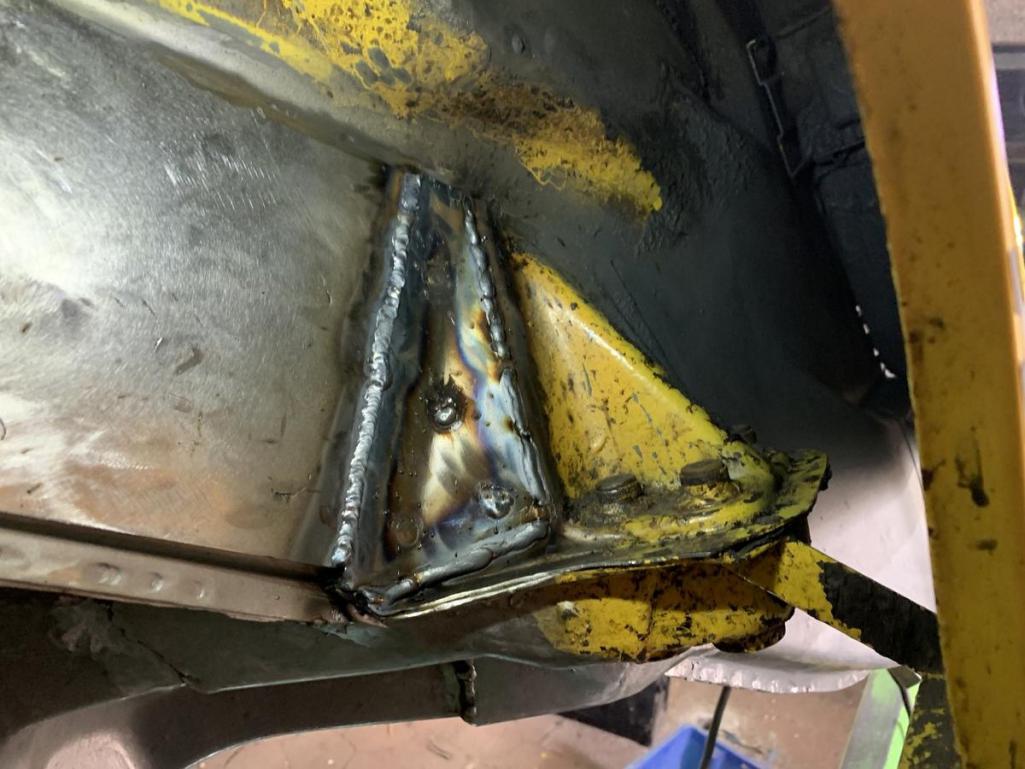
reconstruction of the bracket for the brake line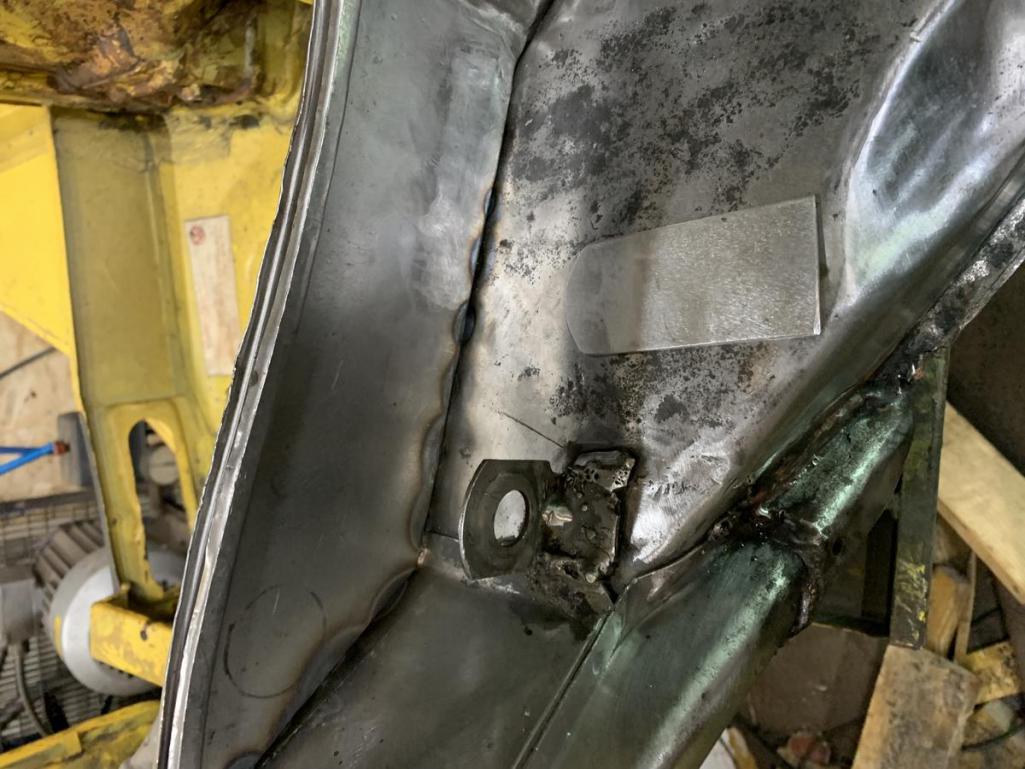
Reinforcement between the inner and outer axle console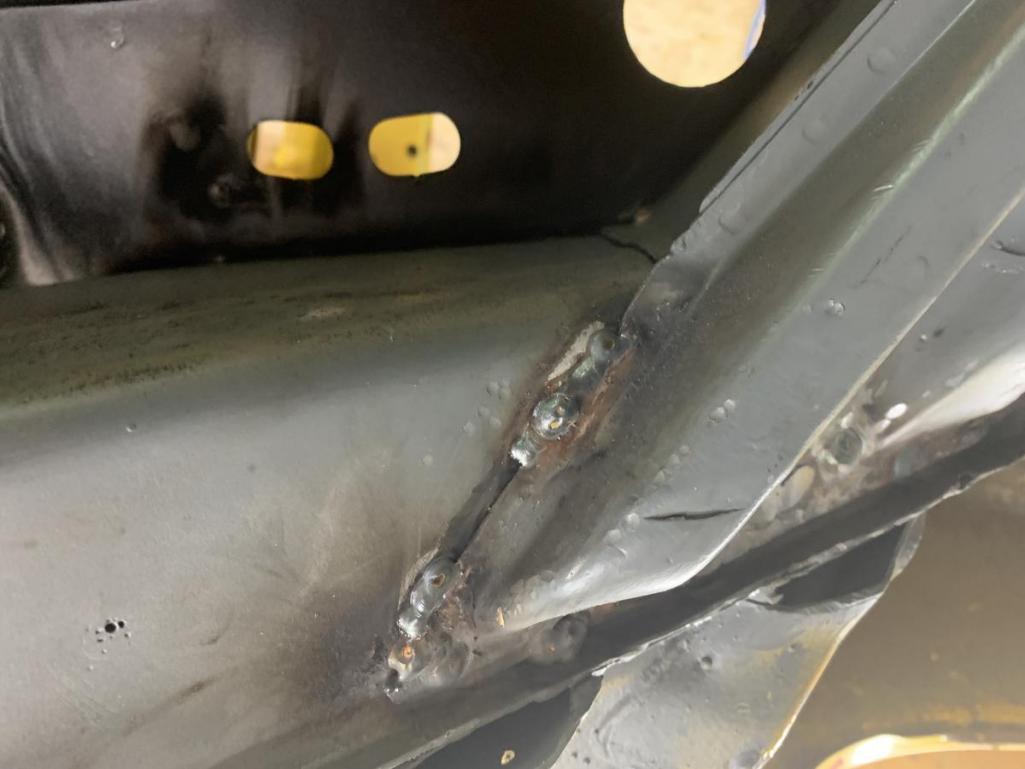

Since almost everything in the engine compartment has now been repaired (a few small pieces of the mount for the engine compartment seal still have to be replaced), I continued with the GT chassis stiffinng kit.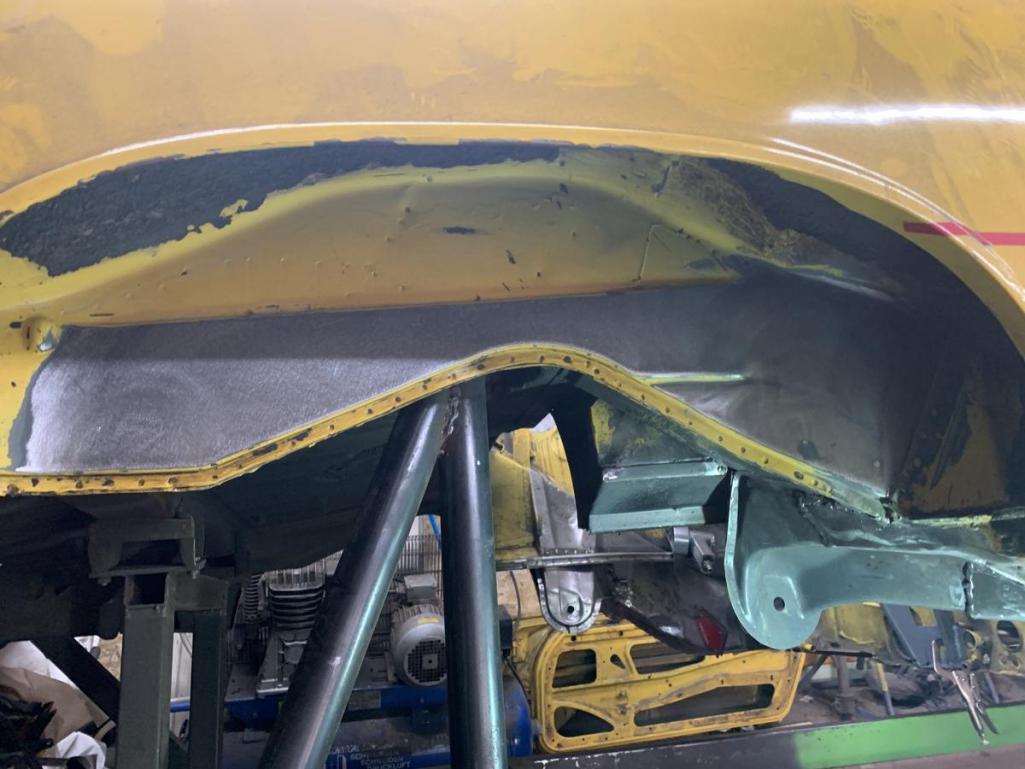
Posted by: Tenner Apr 15 2021, 05:53 AM
@http://www.914world.com/bbs2/index.php?showuser=11106 : here you can find more infos and photos from my bike. https://www.fighters.bike/index.php?/category/reportage-12er-alu-knicker
The bike is handbuild by me an some friends
Posted by: Cairo94507 Apr 15 2021, 07:08 AM

Posted by: 76-914 Apr 15 2021, 02:31 PM
Love this thread.
Posted by: MM1 Apr 15 2021, 03:19 PM
Vielen Dank! Sehr cool . . . 
Posted by: Montreal914 May 14 2023, 02:33 PM
Bumping this up...
@http://www.914world.com/bbs2/index.php?showuser=11863 : I just went through your build thread Awesome metal work. Any updates?
Posted by: Vysoc May 14 2023, 07:47 PM
Very nice work, you encourage us all!!!
Thank you,
Vysoc 
Posted by: Cairo94507 May 15 2023, 06:24 AM
The skills we see here are just amazing.
Powered by Invision Power Board (http://www.invisionboard.com)
© Invision Power Services (http://www.invisionpower.com)