Printable Version of Topic
Click here to view this topic in its original format
914World.com _ 914World Garage _ dt4's 914 journey
Posted by: dt4 Jun 17 2019, 12:26 PM
I know I am not the first to bring a car from the USA to the UK but its the first time I have imported a car so its something of a journey for me
I asked if any one had a car for sale and would be happy to sell to a UK buyer and the dealing with the shipping company
The first to get in touch was Dylan (chi-town) and we have subsequently done a deal on the car he took to the recent WCR.
Dylan also put me in touch with someone in Scotland who knows the importing process and he has recommended a shipping company to me and I am in the process of organising the shipping once things are in place stateside.
My previous restorations have all been Toyotas mainly Celica gt4's from the late 80's and early 90's so a 1975 Porsche is new territory.
I have a 1999 996 so I am not unfamiliar with Porsche or with spanners but the 914 is my first air cooled.
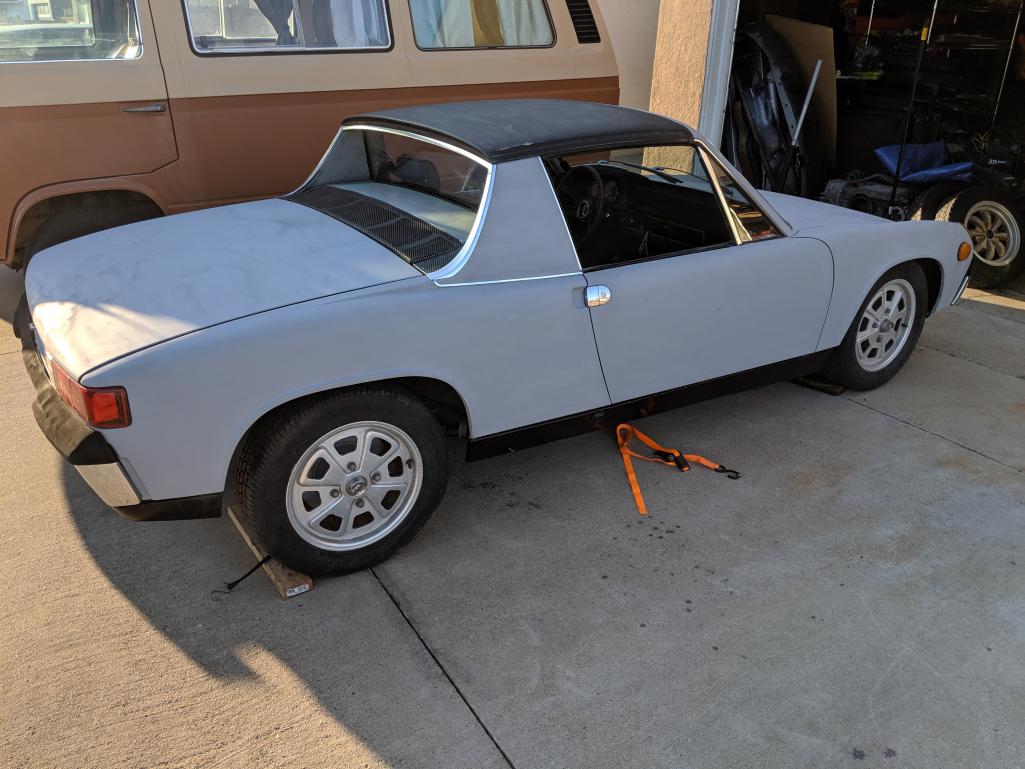
Dylan has sent me a number of photos that I will use to mark the start of the journey, adding as things develop and progress.
Thanks for reading
David
Posted by: Cairo94507 Jun 17 2019, 12:30 PM
 Sounds like a great start. Dylan (chi-town) is a terrific guy who has provided my build some critically needed parts. I look forward to seeing pictures and hearing about the whole experience.
Posted by: mepstein Jun 17 2019, 12:34 PM
 Sounds like a great start. Dylan (chi-town) is a terrific guy who has provided my build some critically needed parts. I look forward to seeing pictures and hearing about the whole experience.
  There are a lot of scammers out there. Dylan is legit. Good luck with your new toy.
Posted by: dt4 Jun 17 2019, 01:10 PM
The second purchase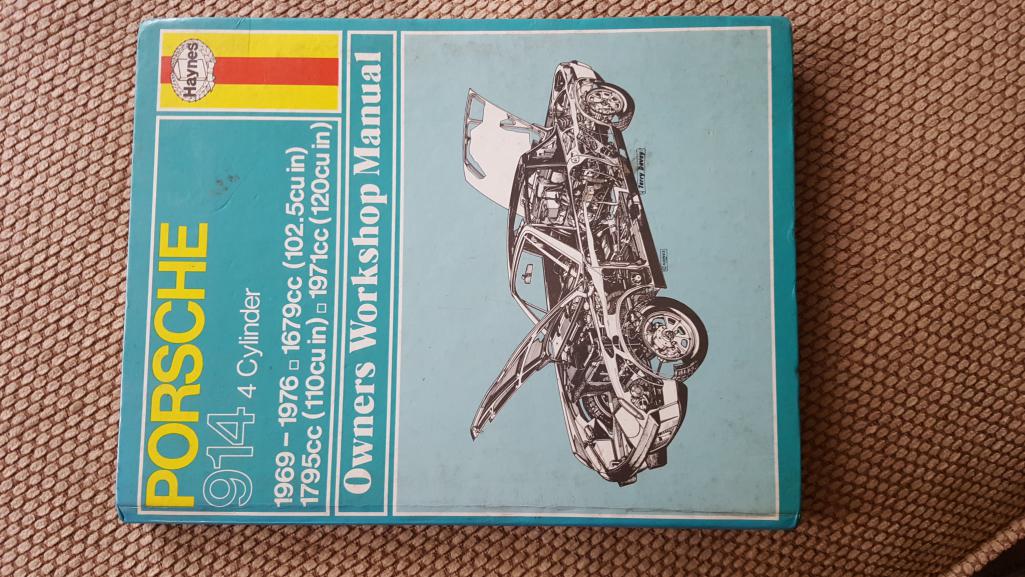
Posted by: dt4 Jun 17 2019, 01:19 PM
Sounds like a great start. Dylan (chi-town) is a terrific guy who has provided my build some critically needed parts. I look forward to seeing pictures and hearing about the whole experience. There are a lot of scammers out there. Dylan is legit. Good luck with your new toy.thanks for the welcomes, I was lucky to find Dylan
heres a picture of it as it was pre WCR
Posted by: burton73 Jun 17 2019, 01:32 PM
I sold 2 cars to Danny (Daxx) here that went to Belgium. My 86 Carrera Cab and my 76 Original Paint 914. I delivered them to a car shipper close to Los Angeles and they went in a cargo Box to Belgium. He knew of this carrier because he is in the Sea Freight biz.
The money can go to the shipper and then be transferred to the sellers after they get the car and take all the pictures of it and document everything. You as a buyer feel good and safe, and he as a seller gets his money after the car is secured with them and they have the ownership papers.
Just what you need for the UK I cannot say but I want to say that the whole translation went very smooth. Money was wired right into my account in 15 min and then I gave them the Ownership papers. I was done. I can look up the Sea Freight people for you if you want
Best from Los Angeles,
Bob Burton
Posted by: burton73 Jun 17 2019, 01:36 PM
Well here it is just in case anyone wants to look it up.
Hey Danny,
We just completed the transaction with bob, all went well we have title vehicles and keys in hand, all numbers matching, please see attached few pictures for your reference. We will begin coordinating shipping asap!
Thank you,
Best Regards - Met vriendelijke groet - Freundliche Gruesse,
Sincerely,
Christian B. Ortiz
Follow us, like us, visit us at:
Twitterhttps://s3.amazonaws.com/htmlsig-assets/spacer.gifFacebookhttps://s3.amazonaws.com/htmlsig-assets/spacer.gifInstagram<image005.png>Google +https://s3.amazonaws.com/htmlsig-assets/spacer.gifhttps://s3.amazonaws.com/htmlsig-assets/spacer.gifhttps://s3.amazonaws.com/htmlsig-assets/spacer.gifYoutubehttps://s3.amazonaws.com/htmlsig-assets/spacer.gif
Direct Express, Inc
230 W Carob St
Rancho Dominguez, CA 90220 USA
Untitled-1.jpg
p:
(310) 324 2100 (xtn 211)
f:
(310) 324 7500
c:
(562) 922 2109
*All services are performed pursuant to Direct Express, Inc terms and Conditions of service, which limit DEI”S liability and are available for viewing at DEI’S website: www.shipdei.com or kindly request a copy of our terms & conditions which are provided in our shipping instructions and or bills of lading, condition reports.*
From: Christian B Ortiz | Direct Express, Inc.
Sent: Friday, February 16, 2018 9:05 AM
To: 'Robert Burton'
RE: RE: booking Porsche 911 + Porsche 914 LA to Rotterdam
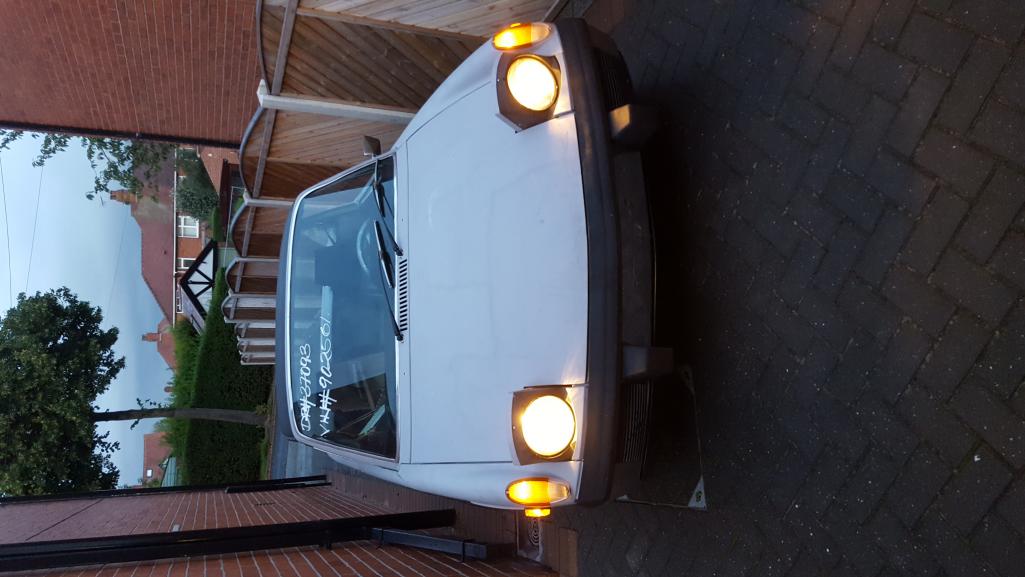
Posted by: dt4 Aug 14 2019, 08:56 AM
On its way from the docks, should be here in about 4 hours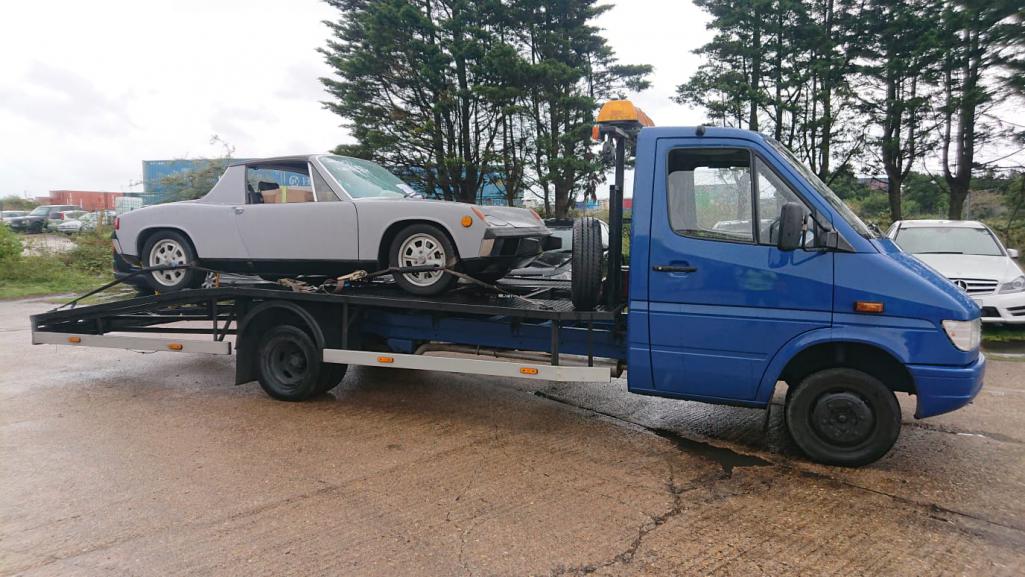
Posted by: Dion Aug 14 2019, 09:00 AM
Nice! Enjoy the new journey.
Posted by: FlacaProductions Aug 14 2019, 09:13 AM
Very cool! Looks like a great starting point!
Posted by: ValcoOscar Aug 14 2019, 09:15 AM
Congrats!!! Dylan is a good guy.
Oscar
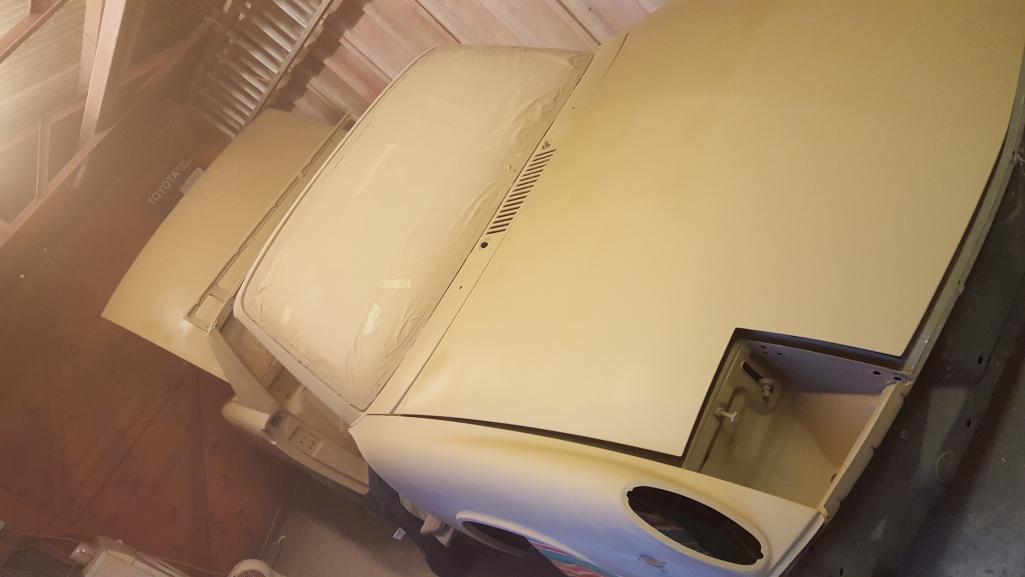
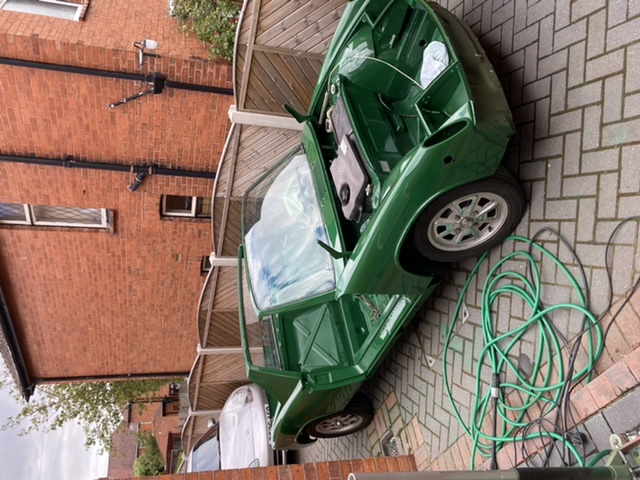
Posted by: dt4 Aug 14 2019, 02:32 PM
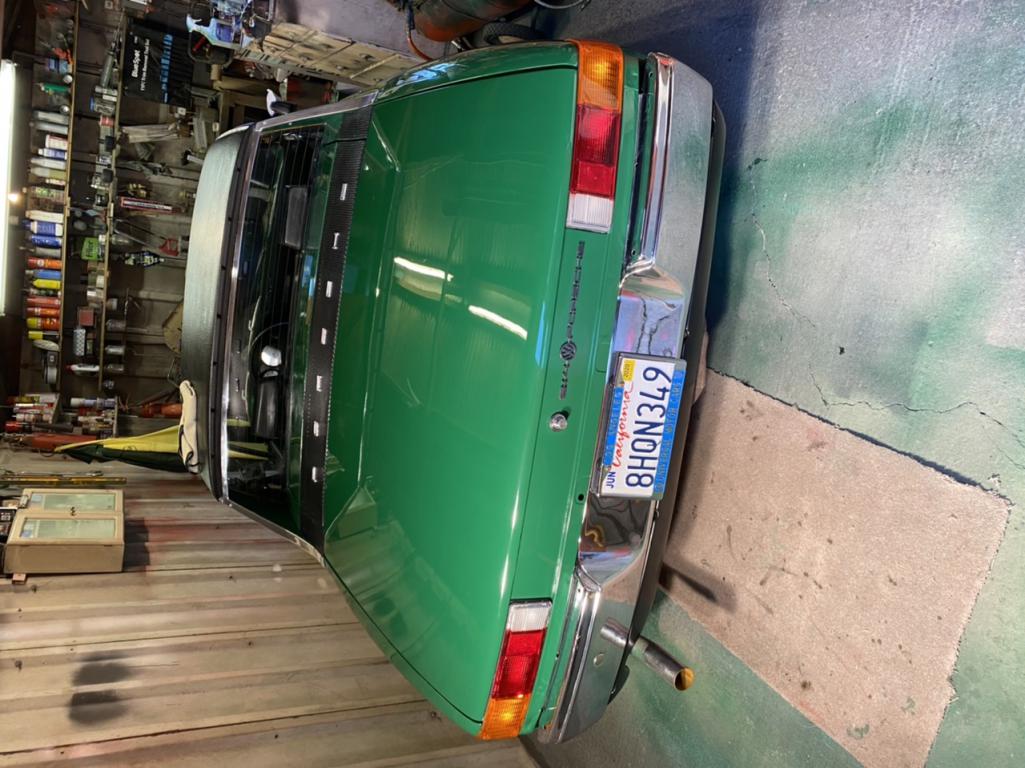
It finally arrived, having travelled 5300 from the west coast of America to West Yorkshire England, Leeds
It was getting dark by the time we unloaded and it was tucked away in the garage
Massive thanks to Dylan - a true gent 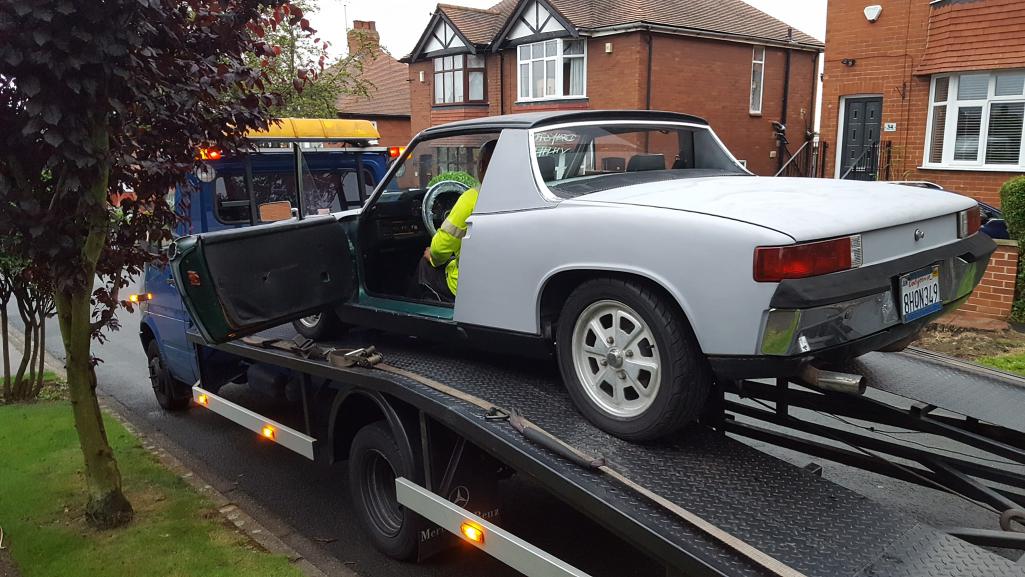
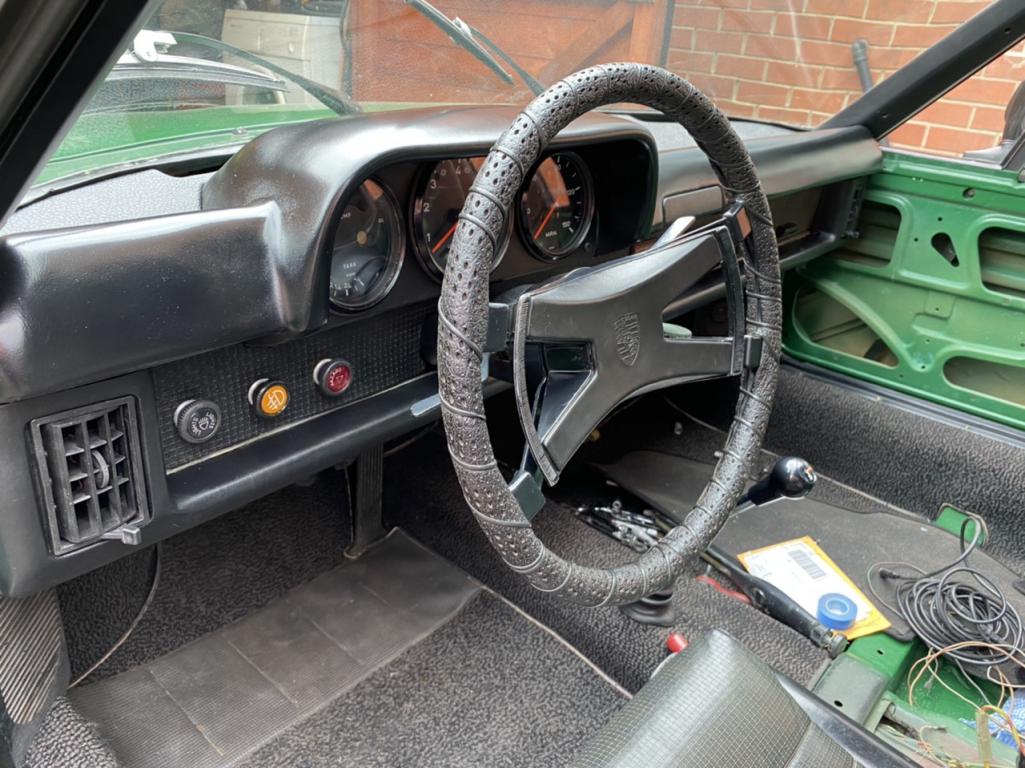
Posted by: dt4 Aug 14 2019, 02:44 PM
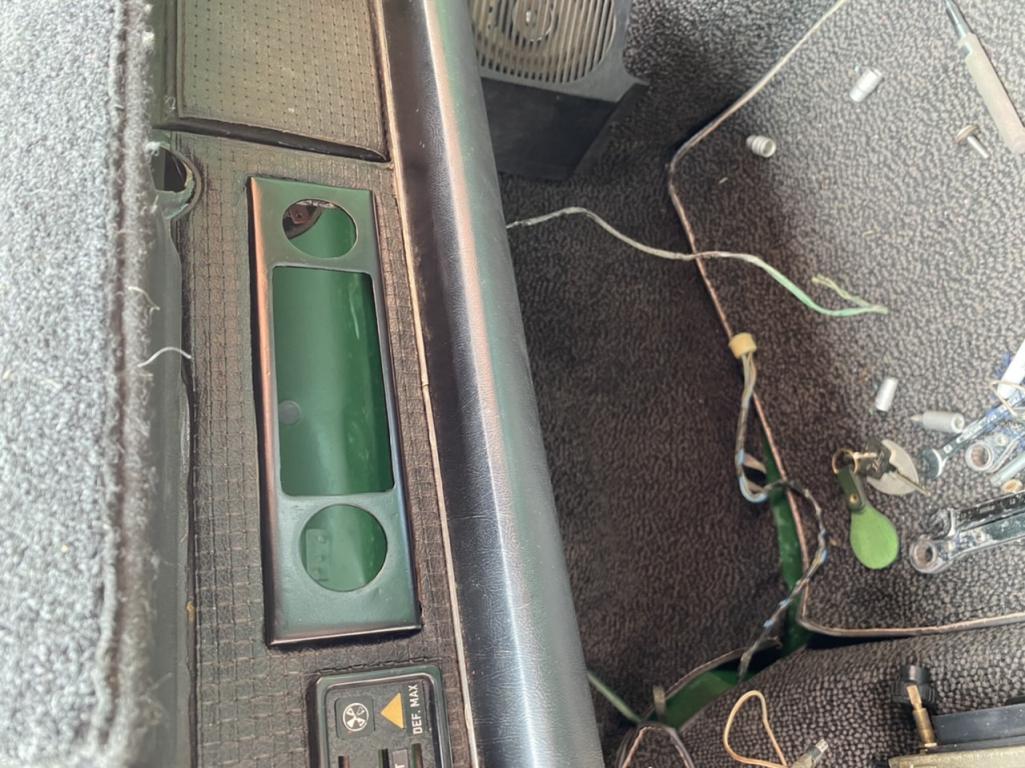
Is there a pdf of an owners manual any where that can be downloaded?
I dont know what all the controls do or where they are to be found - sorry 
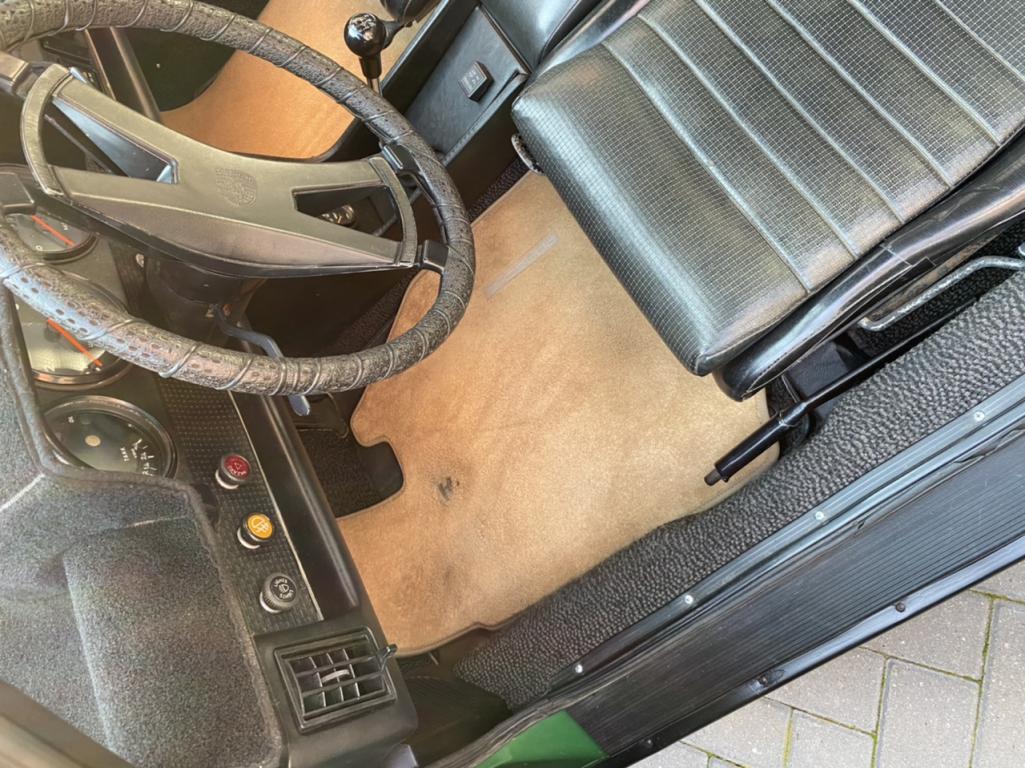
for example, what does the lever with the brown handle on the transmission tunnel do 
just a diagram of the cabin with the controls labelled would be a start 
Posted by: dt4 Aug 14 2019, 02:55 PM
it looks like the level is the heater control lever?
Errmmmm what does it actually do ?
Posted by: burton73 Aug 14 2019, 03:04 PM
Is there a pdf of an owners manual any where that can be downloaded?
I dont know what all the controls do or where they are to be found - sorry
for example, what does the lever with the brown handle on the transmission tunnel do
just a diagram of the cabin with the controls labelled would be a start
It is a red color. Yours must have faded to brown.
You need Dr. 914 Book TECH TIPS 700
A complete guide to the VW-Porsche 914
By George A Hussey
Congrades and you new used car.
Cheers
Bob B
Posted by: Chi-town Aug 14 2019, 03:57 PM
Glad to see it arrived safely.
The lever on the floor are for the heater valves that hey installed in the rear on the heat exchangers (the valves are in one of the boxes).
The main controls are in the box in the passenger seat to be installed after paint along with the fresh air system that you'll find boxed up in the front trunk.
I'm looking forward to seeing this car finished as it was the cleanest one I've had.
Posted by: dt4 Aug 15 2019, 12:32 AM
Glad to see it arrived safely.
The lever on the floor are for the heater valves that hey installed in the rear on the heat exchangers (the valves are in one of the boxes).
The main controls are in the box in the passenger seat to be installed after paint along with the fresh air system that you'll find boxed up in the front trunk.
I'm looking forward to seeing this car finished as it was the cleanest one I've had.
Thanks Dylan
As I will prove over the weeks / months / years, I have a lot to learn
It was a great moment last night when I reversed it away from the trailer, found first gear and parked it on the driveway.
Posted by: Chief Aug 15 2019, 01:40 AM
Congratulations!
Another 914 in the U.K. We just about had 50 turn out for Brooklands Motor Circuit.
Kinda shows how few are over here in good old Blighty.......
Look forward to seeing what plans you have for the new recruit!
Posted by: Dion Aug 15 2019, 09:14 AM
Give this a go David,
Temporary till ya get a hard copy.
http://www.914world.com/bbs2/index.php?automodule=blog&blogid=472&showentry=2420
Posted by: dt4 Aug 15 2019, 02:32 PM
thanks Dion
Posted by: dax1969 Aug 19 2019, 08:56 AM
All you need is an honest seller, a buyer who keeps his word and a shipper who knows his business...the rest is peanuts (to me at least, I am in the shipping business since 1990).
Will do it again if the right car comes along but only with reputable forum members 
some pics of the journey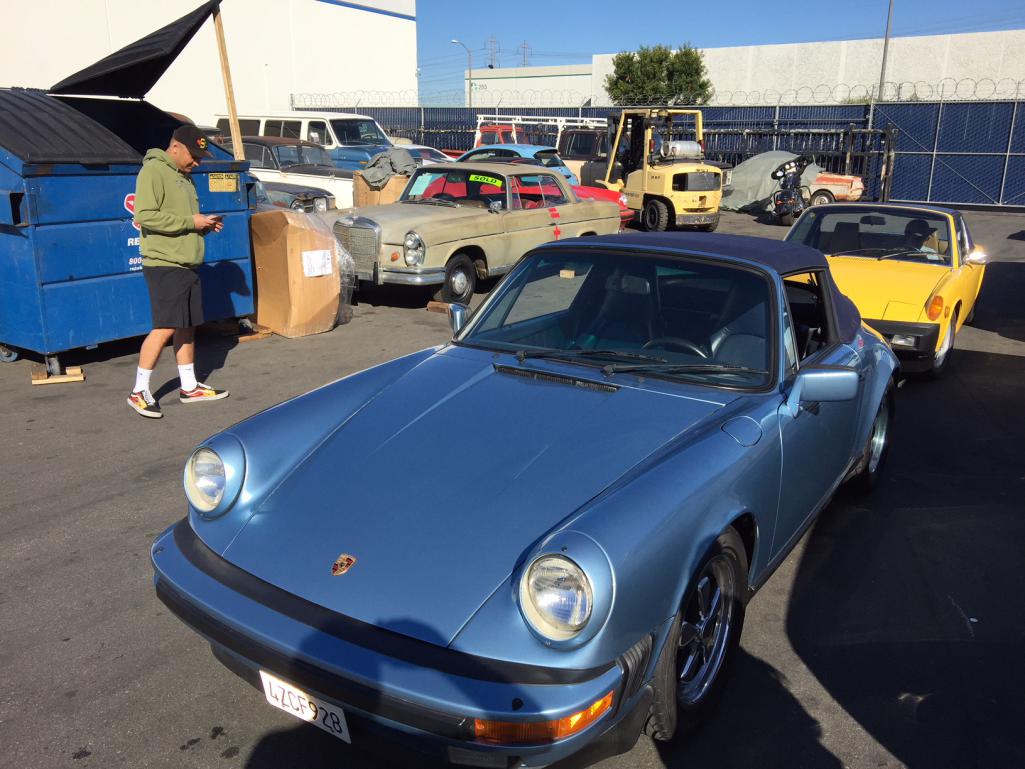
delivered by Bob (burton73) who owned both cars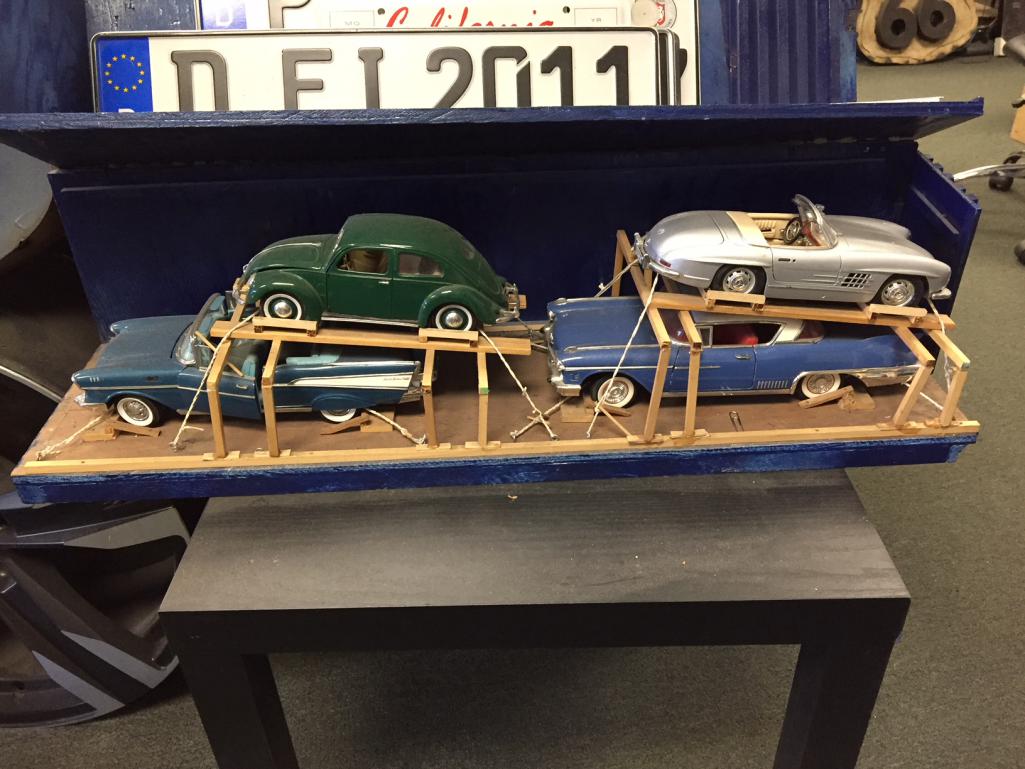
this is how they possibly get stowed in the container... mine were (at my request) stowed flat
cheers
Dax
Posted by: dt4 Aug 28 2019, 02:00 PM
I drove it off the transporter and onto the driveway 
I was pretty pleased with things
Posted by: dt4 Aug 28 2019, 02:01 PM
Yesterday the painting stripping began
Posted by: dt4 Aug 28 2019, 02:03 PM
and continued for a couple of hours tonight
Attached thumbnail(s)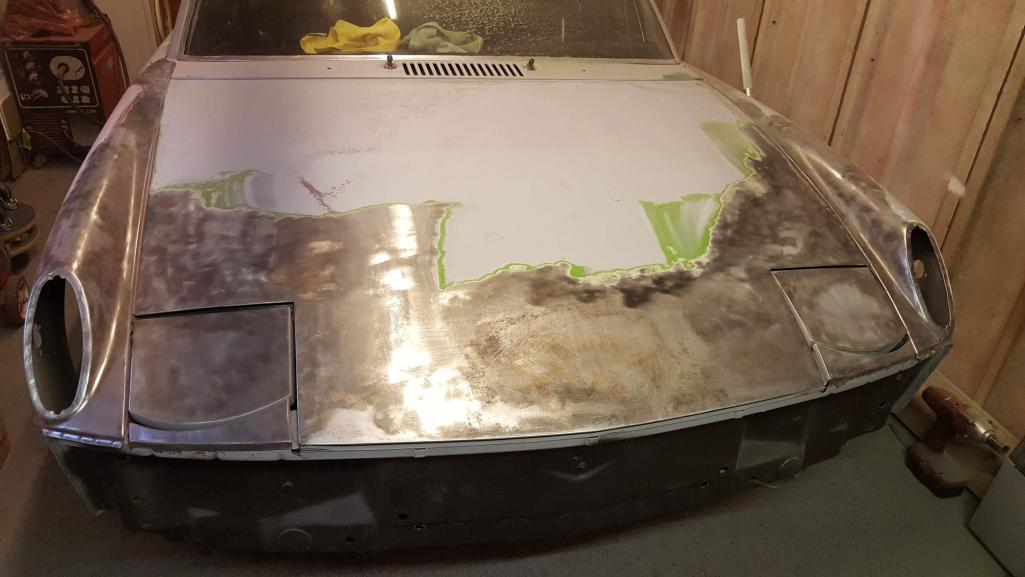
Posted by: dt4 Aug 30 2019, 02:40 AM
Its like progress but slower
Overall I am pleased with how its going
Using wire wheels with an angle grinder means needing be careful of hitting anything delicate and avoiding too much heat build up to prevent distortion
I will go and buy some poly discs today as an alternatve to the wire wheels plus some paint stripper for the hard to reach areas
Posted by: dt4 Aug 30 2019, 03:09 AM
Its like progress but slower
Overall I am pleased with how its going
Using wire wheels with an angle grinder means needing be careful of hitting anything delicate and avoiding too much heat build up to prevent distortion
I will go and buy some poly discs today as an alternatve to the wire wheels plus some paint stripper for the hard to reach areas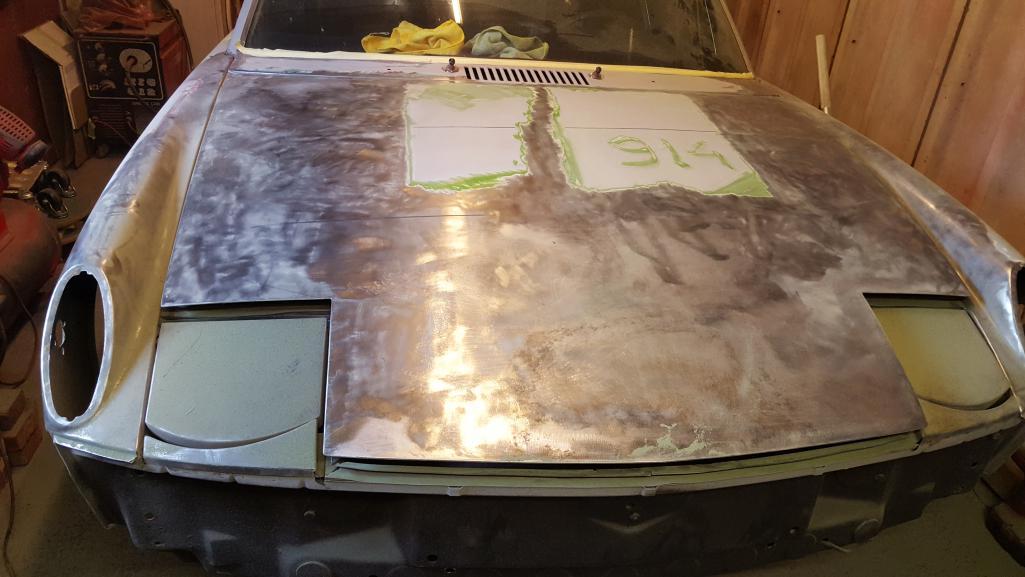
Posted by: dt4 Sep 3 2019, 12:56 AM
All the paint is stripped from the outer surfaces
The doors, front and rear trunk etc all need to be come off now to get to the inner surfaces
First off all the garage needs a good clean up
Posted by: dt4 Oct 29 2019, 02:41 AM


Posted by: dt4 Oct 29 2019, 02:42 AM
Posted by: dt4 Oct 29 2019, 02:44 AM
Posted by: dt4 Oct 29 2019, 02:45 AM
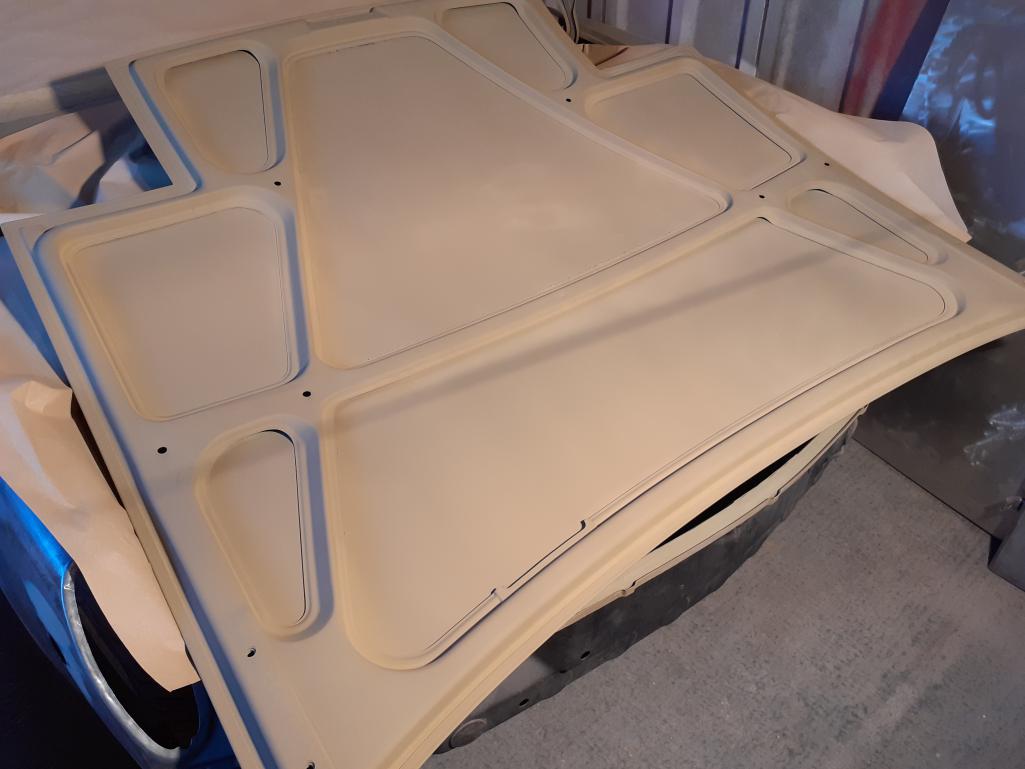
Posted by: dt4 Oct 29 2019, 03:13 AM
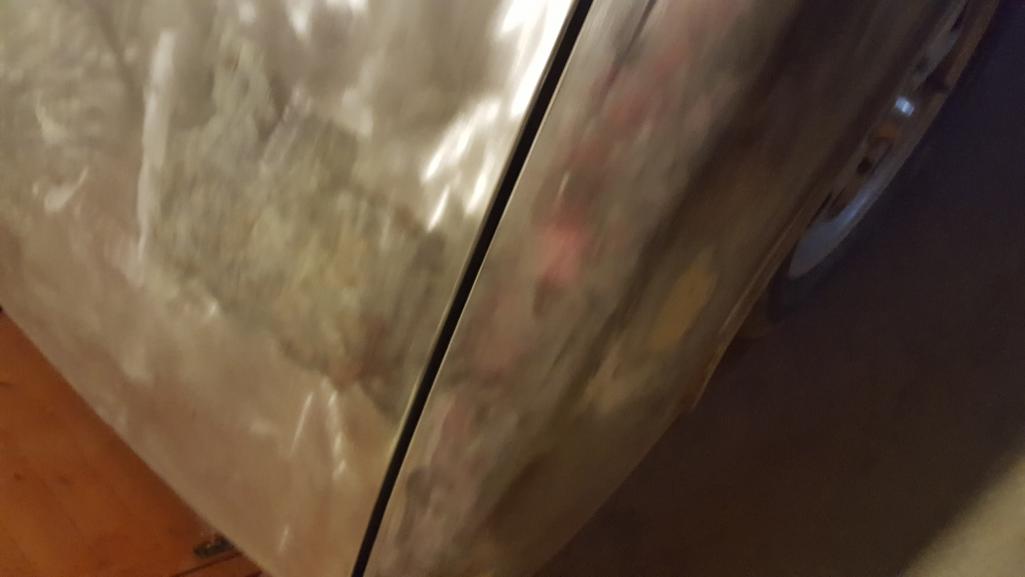
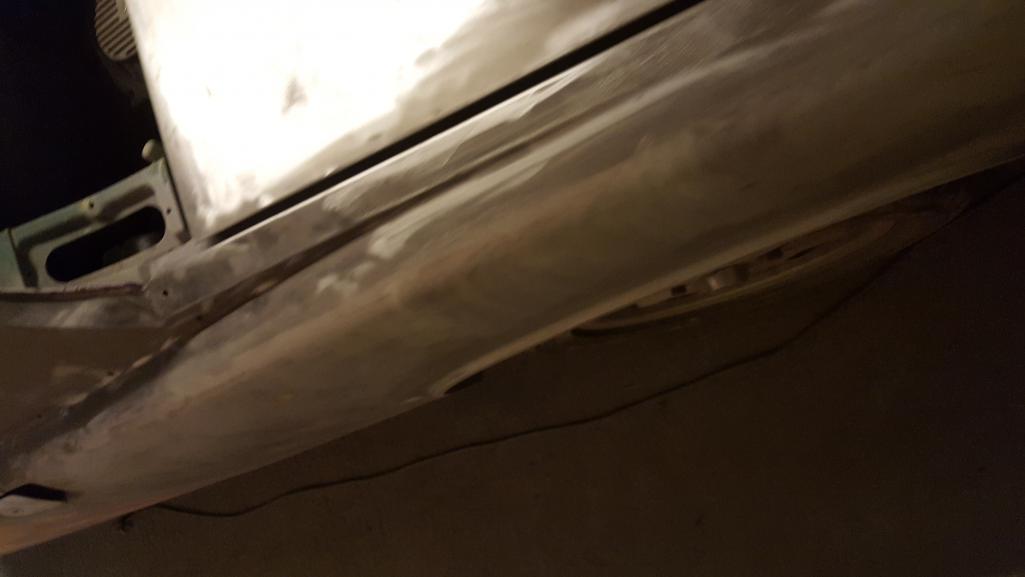
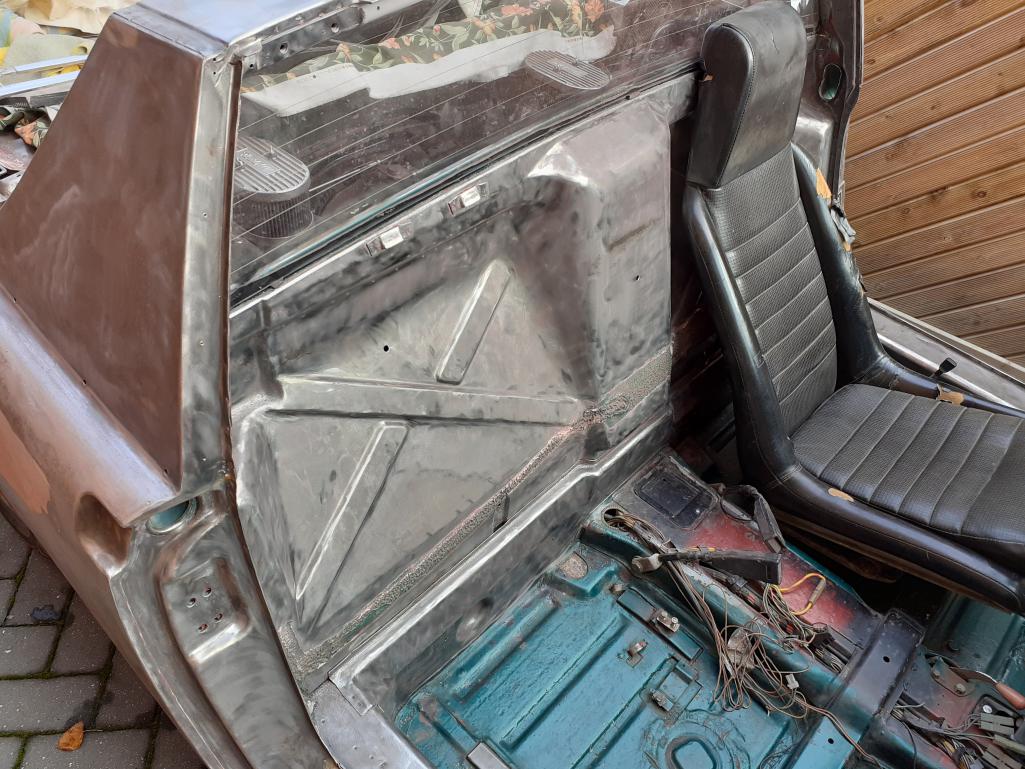
So it took many hours of work with the wire wheel, poly disc and palm sander and a needle gun to remove all the paint from the internal and external surfaces.
The selection of photos show some of the work.
I then had to empty the garage blow down all the dust and crap, vacuum and wash it down and then move onto the car to completely clean it down ready for preparation for the primer.
It was starting to get cold and damp over here in October so wanted to get the primer on before too long.
I have always used "Ken & Lyn" car restoration paints in the UK as they give great advice, provide period paint colours and a great over all customer service.
After a long conversation with Ken we arrived at a cellulose 2 pack acid etch primer.
I am applying it to the internal surfaces before moving onto the exterior panels
Posted by: dt4 Oct 29 2019, 03:15 AM
Posted by: dt4 Oct 29 2019, 03:27 AM
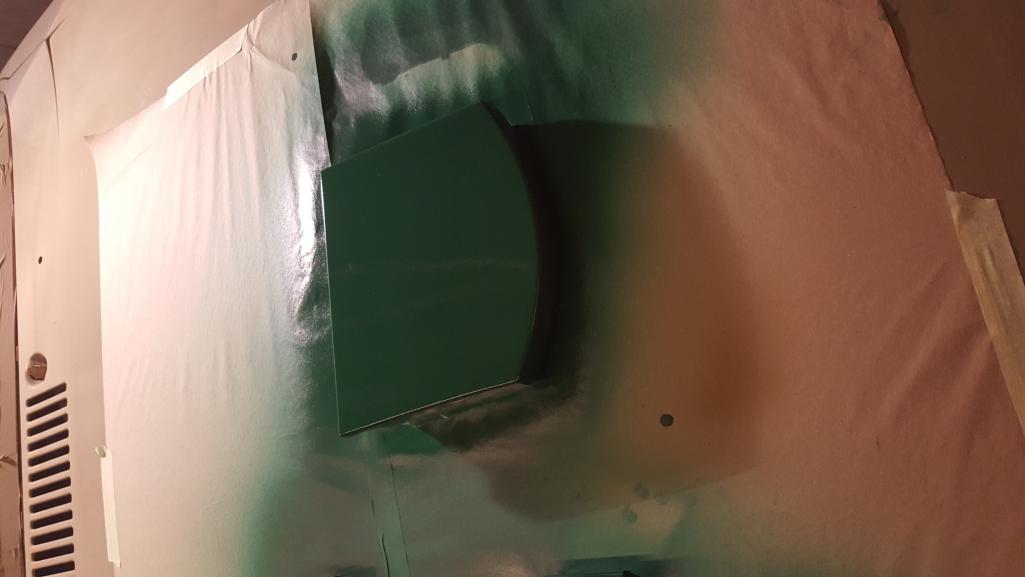
Getting the bonnet off and then back on again single handed was a bit tricky, not something I would risk when the final colour is on the car.
I have decided to paint the car in Zambesi / Forest green and although the weather over here means that it will be getting on for 6 months before the colour can be applied I doubt I will be able to resist painting a head light cover or two to see what it looks like
I will be finding a new compressor between now and the spring, the compressor I am using has been great and I have used it for stripping and then repainting 3 other cars and it is is fine for the primer but its getting tired and noisy so I will look for a bigger belt driven one to make for an easier / quieter life
Posted by: Chi-town Oct 29 2019, 09:12 AM
Car is looking great!
Posted by: dt4 Oct 29 2019, 02:52 PM
Car is looking great!
Thanks Dylan
So far so good
Posted by: dt4 Nov 3 2019, 12:39 PM
I spotted this going through an auction around 60 miles from me
https://mathewsons.co.uk/auctions/auction-dates/vehicles/12350-new-entry-1991-rover-mini-1000-city-e-8
I went to look at it last weekend
It was past saving in my view, the chassis integrity was gone and it was folding in the middle and nipping the doors up
The floor, front and rear boot, doors, wings, A pillars, rear quarters were shot through
It had been a Jersey (channel islands - UK) car most of its life and was complete and the interior wasnt too bad, the dash and centre console, door cards, and back pad were in good condition so valuable to some one with a US import with sun damage
It was a 2.0 litre model but not running so if it turns out to have a good engine and transmission it would have value.
I went back yesterday to see it go through the auction
I set my limit based on the nominal value of parts that were of interest to me and I pulled out at £1600, it went for £1650. I was initially going to go to £1800 which would have then cost circa £2000 including the commission but decided I could buy a lot of parts for £2000 hence pulling out a bit earlier than planned
I hope the winning bidder is a member here, it would be good to know his plans and how he valued it
Posted by: Cairo94507 Nov 3 2019, 12:51 PM
You are making great progress. Thanks for the update pics.
Posted by: Dion Nov 3 2019, 03:16 PM
You are really knocking it out David.
Really nice progress. That green is a great colour choice.
Cheers
Posted by: dt4 Nov 10 2019, 12:31 PM
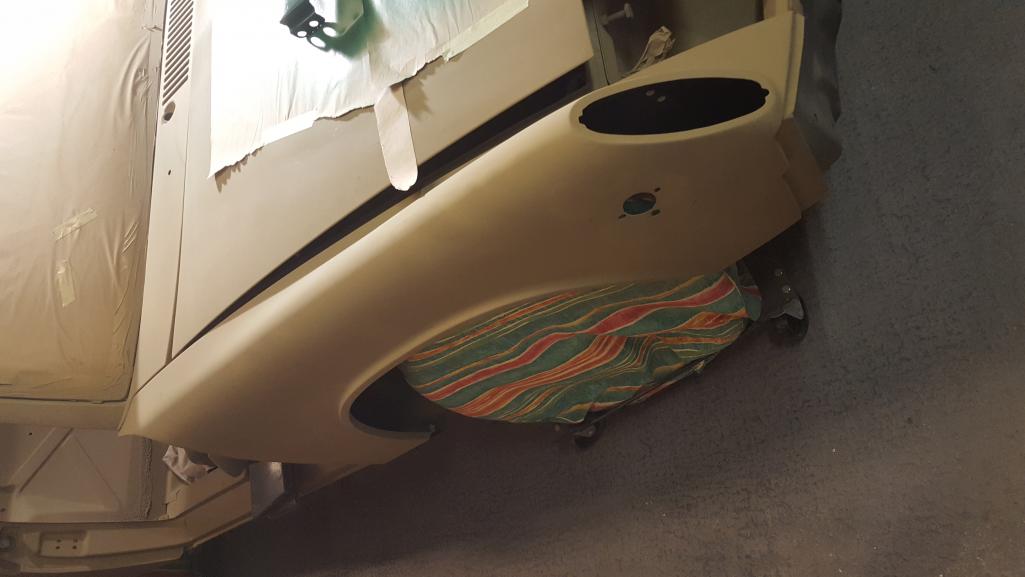
Thanks for the encouragement
I want to get the body in primer before the end of the month
I had a good day yesterday and got the passenger side painted.
I also mixed a bit of colour up to see what it looked like
The photos were took after it got late and aren't very good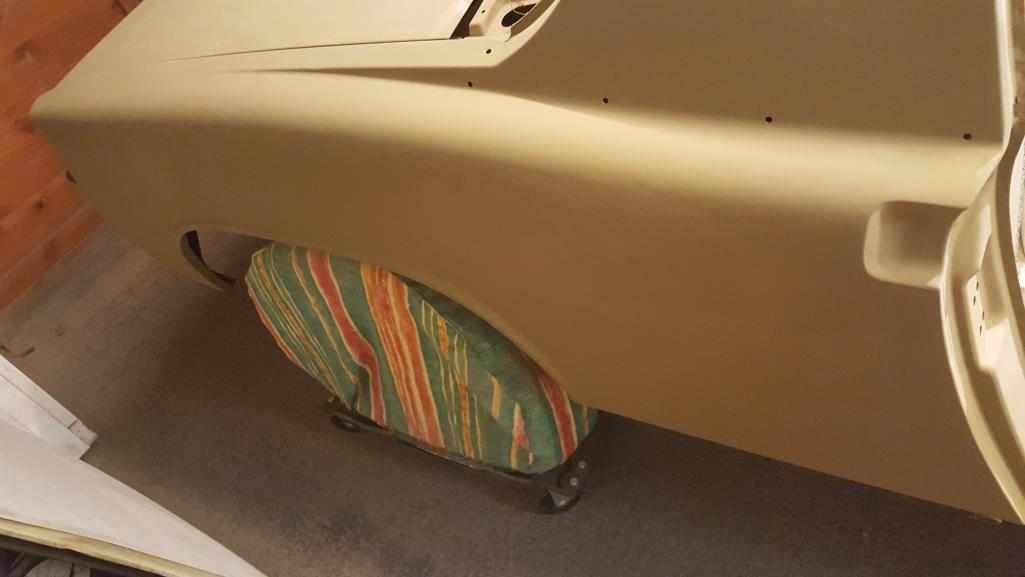
Posted by: dt4 Nov 10 2019, 12:31 PM
Posted by: dt4 Nov 27 2019, 03:30 PM
Happy to have got the body in etching primer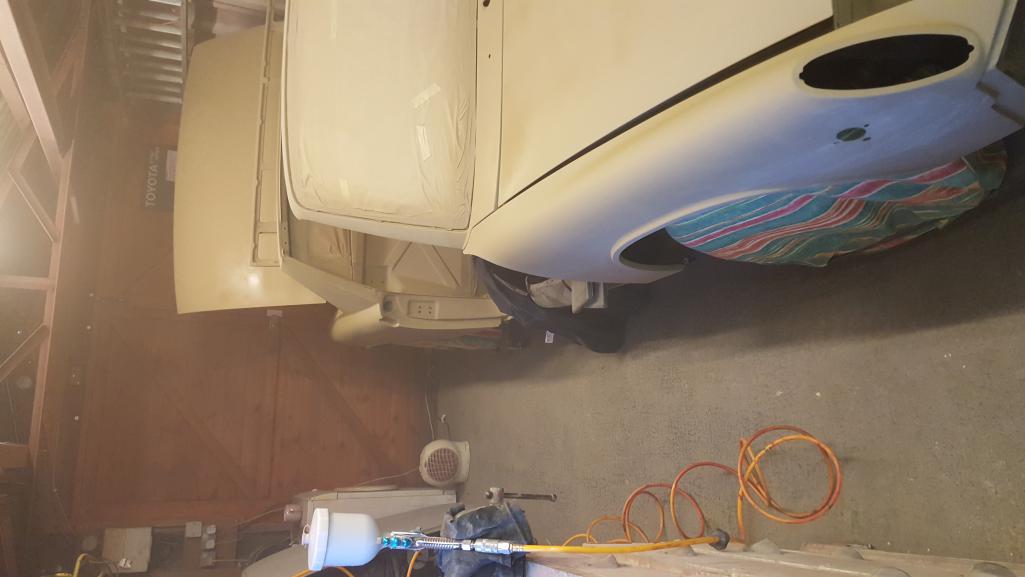
Posted by: dt4 Dec 28 2019, 11:51 AM
A few photos of what I have been doing recently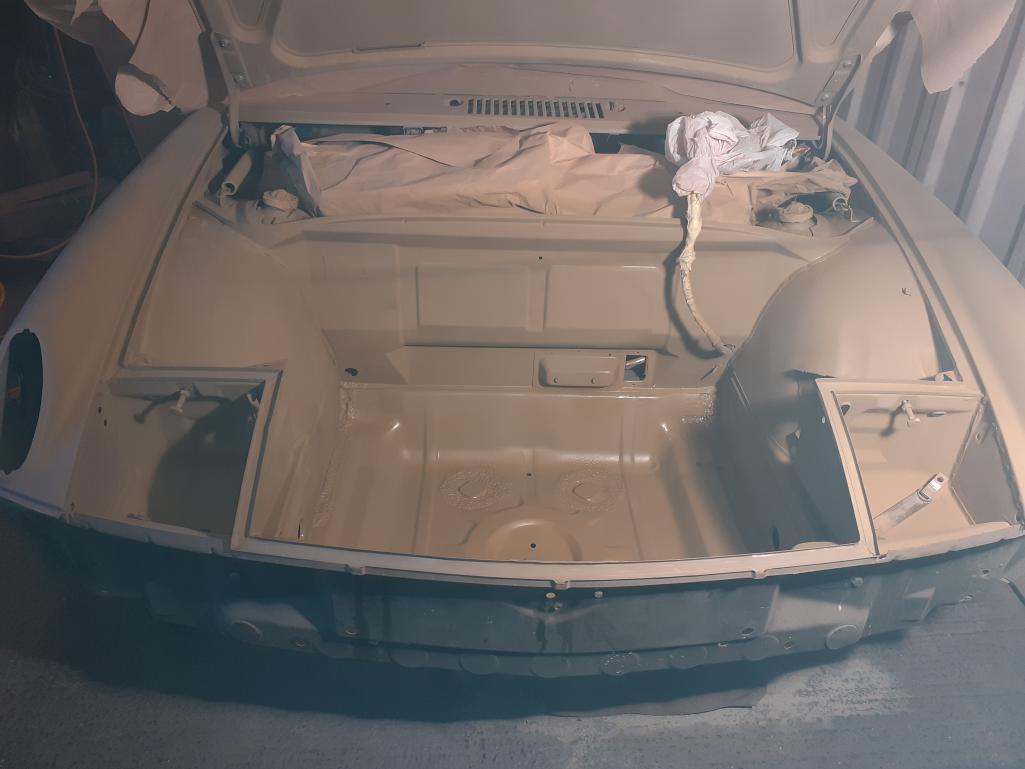
Posted by: dt4 Dec 28 2019, 11:52 AM
Posted by: dt4 Dec 28 2019, 11:54 AM
Posted by: dt4 Dec 28 2019, 12:01 PM
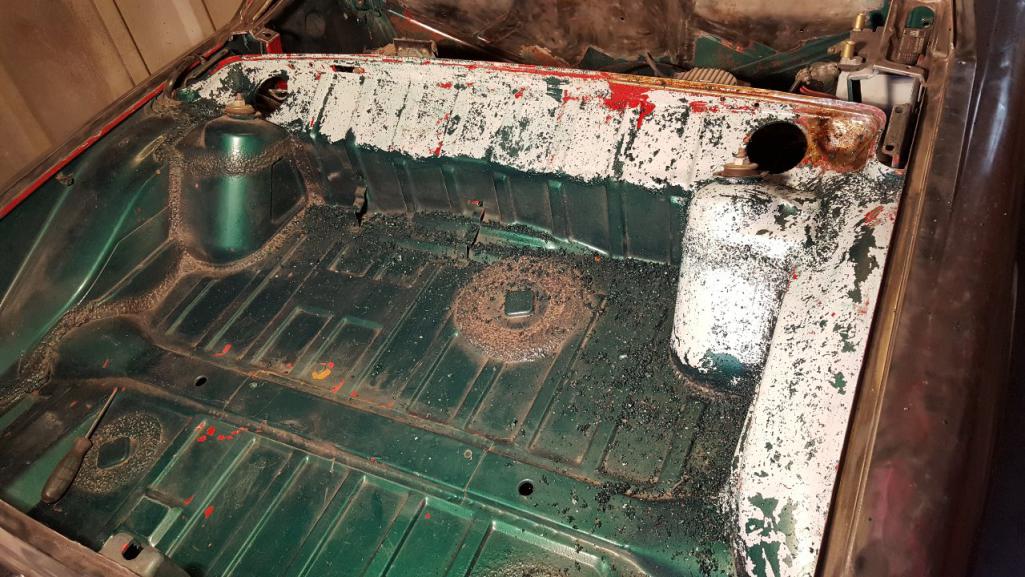
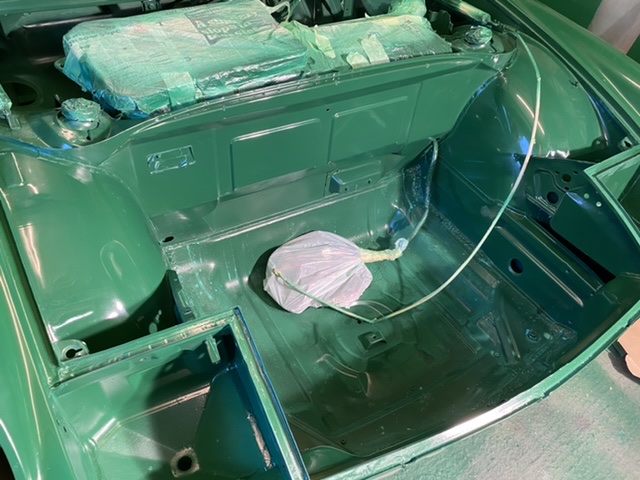
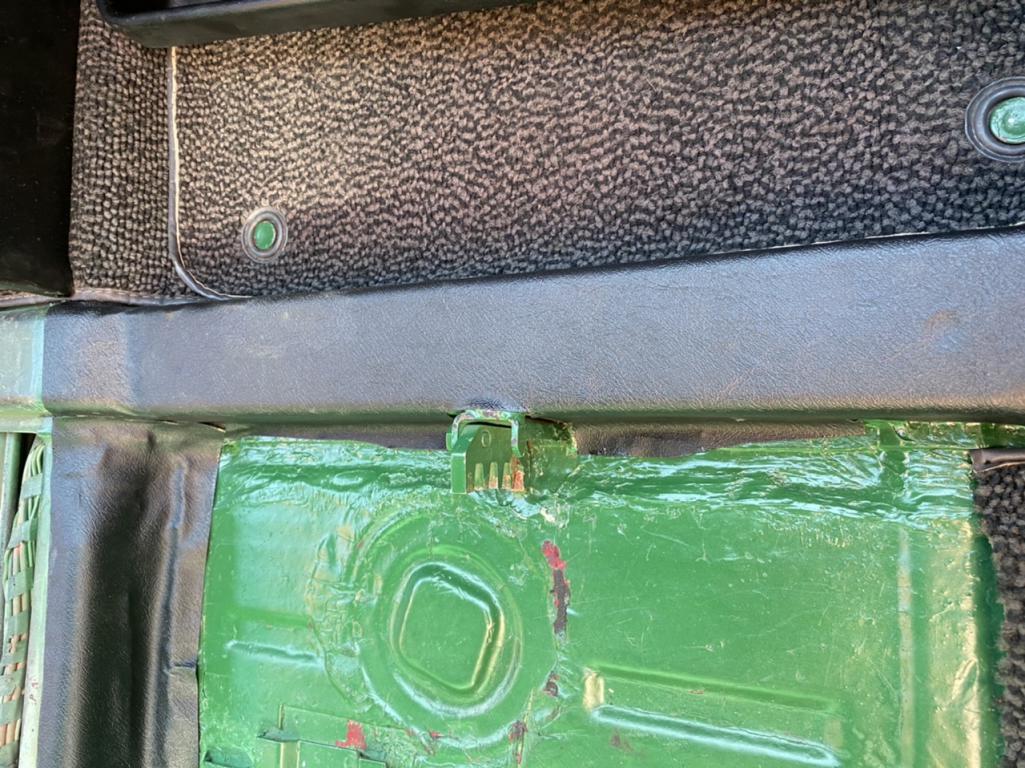
The only sign of rust found on the entire vehicle was under some sound deadening in the cabin
Its surface rust that showed clean metal underneath once given the wire wheel treatment
It's currently drying following being painted with rust converter and zinc primer prior to seam sealer being applied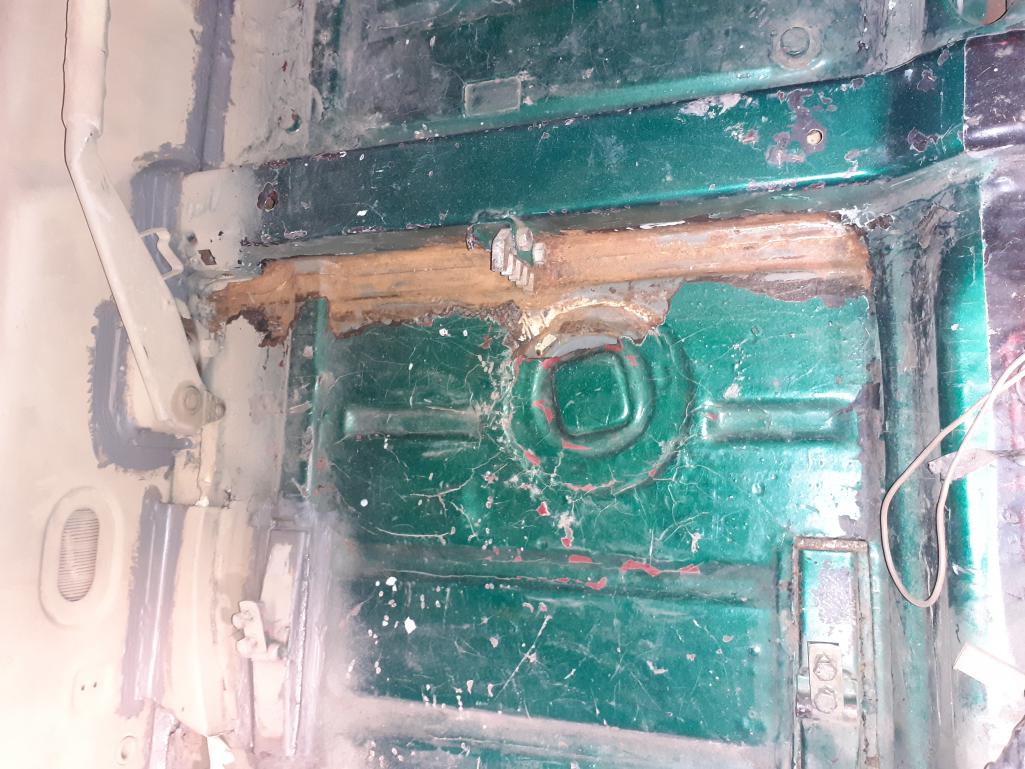
Posted by: dt4 Dec 28 2019, 12:03 PM
Posted by: dt4 Jan 7 2020, 12:03 PM
So as I intend to get a new dash pad when funds allow I thought I would give the repair a go
First off all I opened up the cracks and splits
then I used seam sealer to fill them as its pretty flexible and sandable and filled the foam well but has a tendency to sink once fully cured
I then gave it a skim of dolphin glaze
[attachmentid=724981] [attachmentid=724982]
Attached thumbnail(s)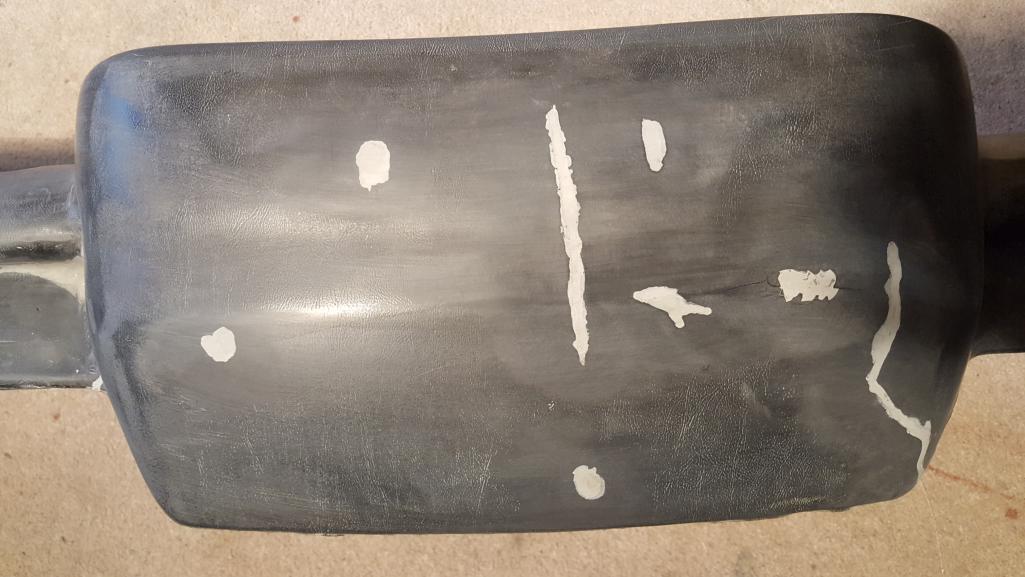
Posted by: dt4 Jan 7 2020, 12:04 PM
once sanded and cleaned down with panel wipe I applied a couple of coats of plastic primer
[attachmentid=724984] [attachmentid=724983]
its ready for painting in satin black
because its sanded smooth in a couple of places I will give it some texture by spraying at low pressure and from distance so it goes on a little dry and grainy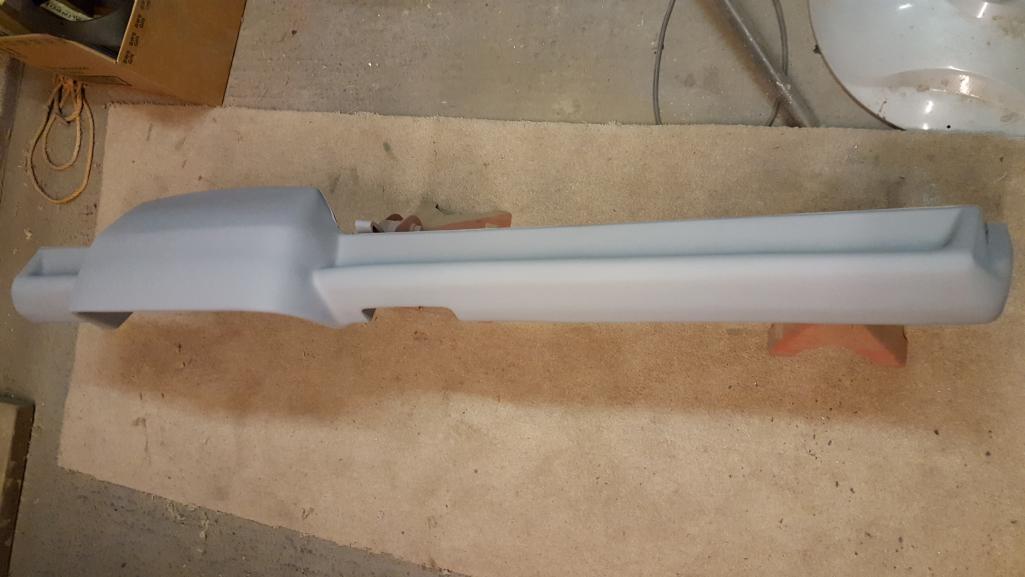
Posted by: dt4 Jan 7 2020, 12:06 PM
I used satin black cellulose with 30% high gloss thinners. I put the paint on with the trigger half open and from a distance which had the effect of the paint being cold and dry when it hits, this gives a grainy texture.
It looks pretty good but its bit too rough / gritty in feel
The underside is much more "factory" which was a result of similar trigger setting but less distance giving a slightly wetter application
I'll give it another go tomorrow.
[attachmentid=725110] [attachmentid=725111]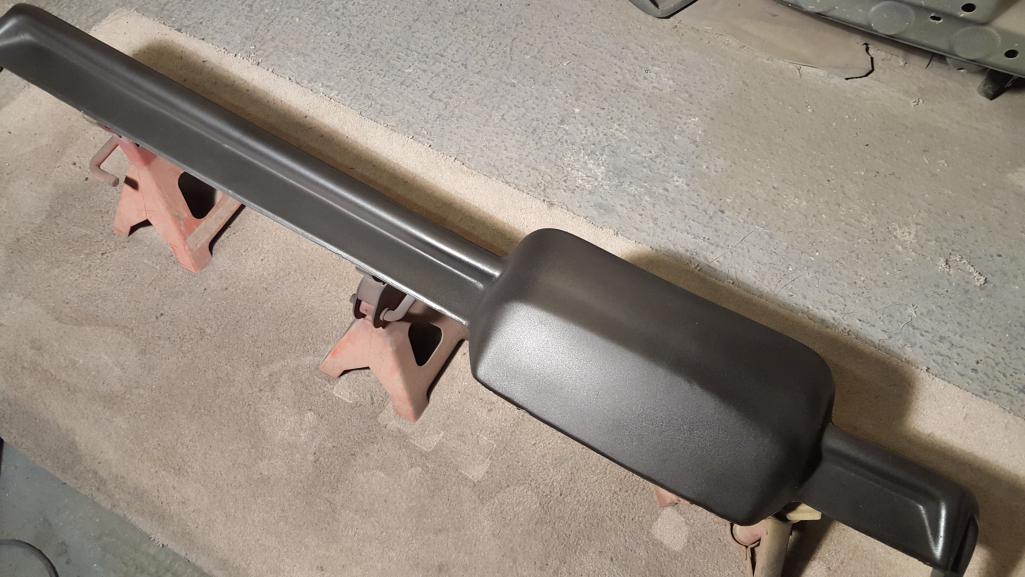
Posted by: dt4 Jan 7 2020, 12:22 PM
Rather than having a separate thread for the dash pad I have added the photos here
Posted by: dt4 Jan 7 2020, 01:19 PM
Thats better
A reasonable finish and neither too mat or too gloss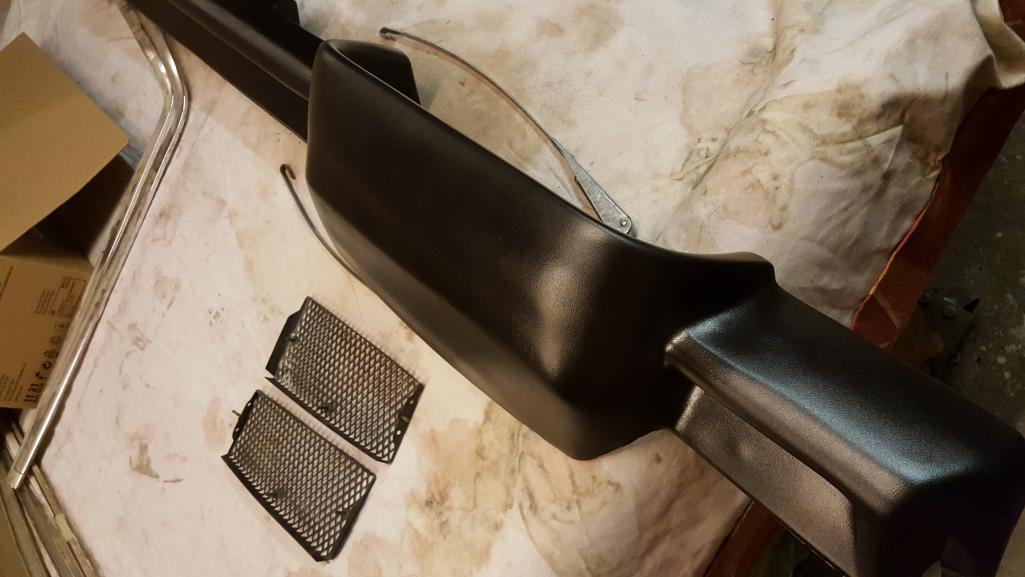
Posted by: Dion Jan 8 2020, 06:38 AM
Car is coming along nicely.
I don’t recall anyone doing a dash repair like that. That looks great in the pics.
Well done.
Posted by: daytona Jan 8 2020, 07:29 AM
Looks like a great job on the dash. As previously posted; I have never seen a dash repair using this method with seam sealer. Seems like a great idea.
I have two or three derelict cracked dashes that I think I will try your repair method. But what in the world is "dolphin glaze"???
Great work.
Bill.
Posted by: dt4 Jan 8 2020, 09:10 AM
Thanks chaps
Bill, dolphin glaze is a product over here which is also called stopper
It's the finishing filler, basically a ready mixed self levelling filler
Posted by: dt4 Jan 16 2020, 10:48 AM
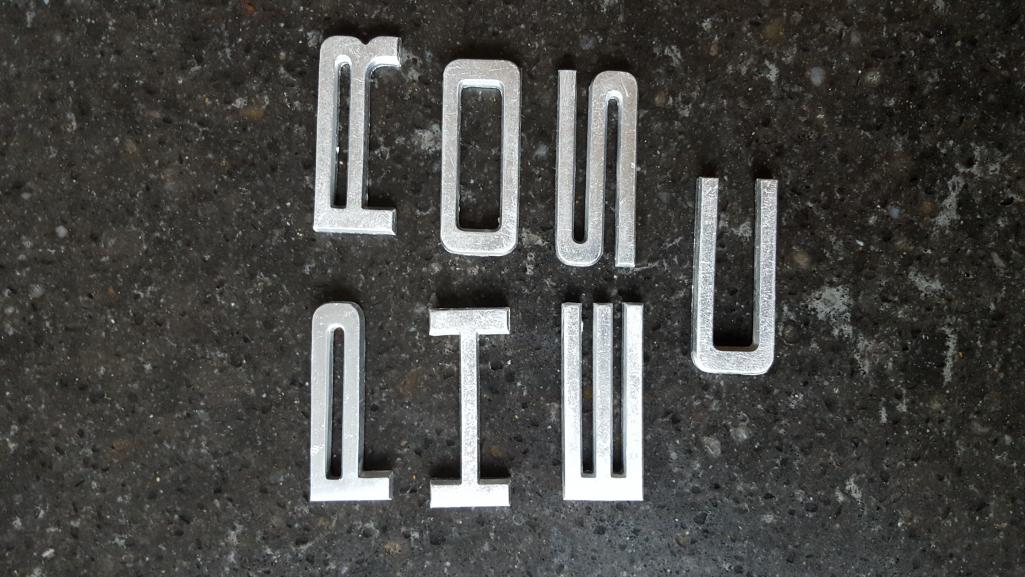
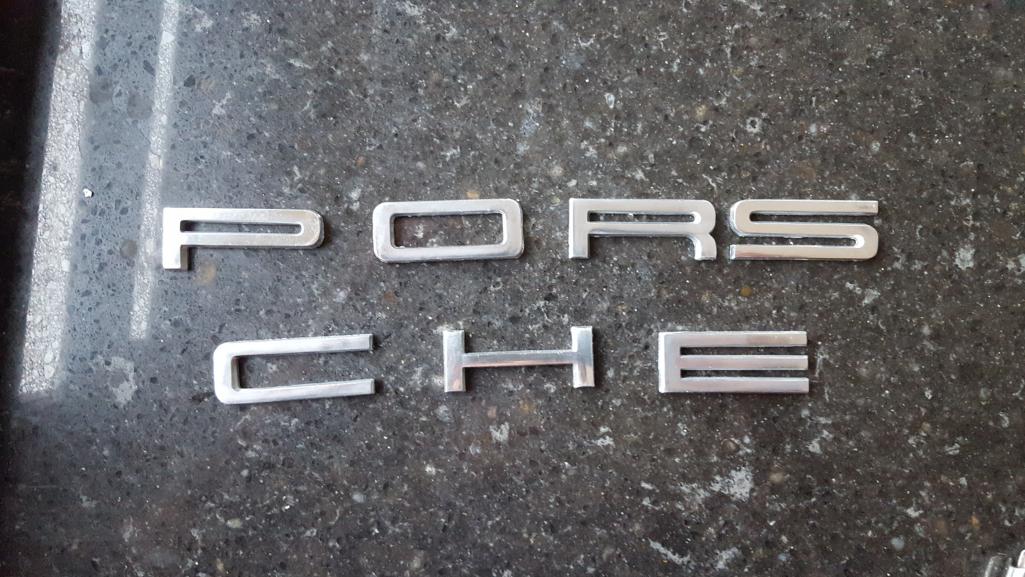
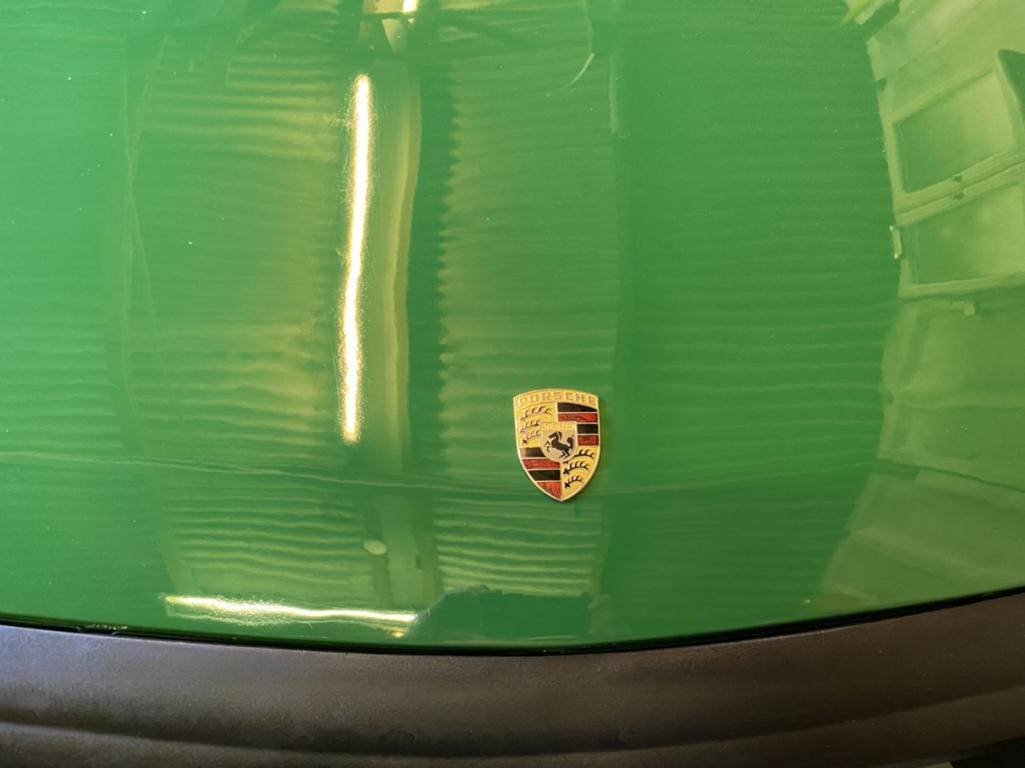
I picked a set of letters up for the engine lid
Unfortunately they were gold anodized, a little scratched and the P had been sanded
I used a strong oven cleaner to strip the anodising
Then stuck them on a board to sand then with 1000 and 2000 grit paper, finally polishing them with autosol paste, a polishing head and a dremel 
Posted by: dt4 Jan 16 2020, 10:49 AM
Posted by: dt4 Jan 24 2020, 12:05 PM
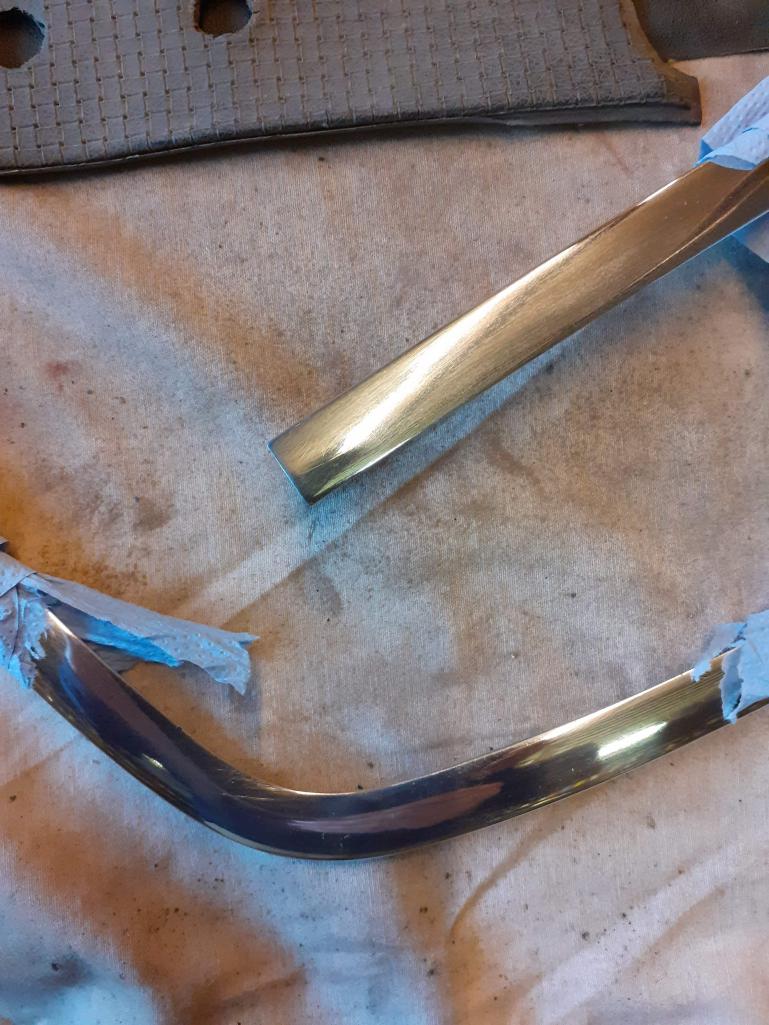
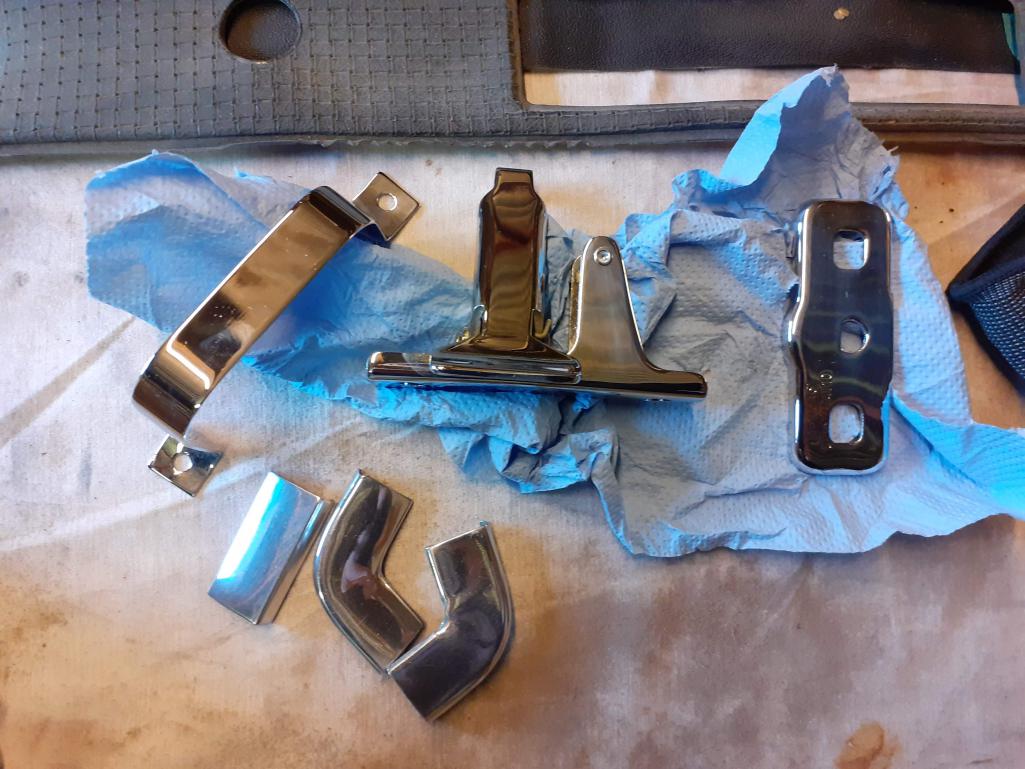
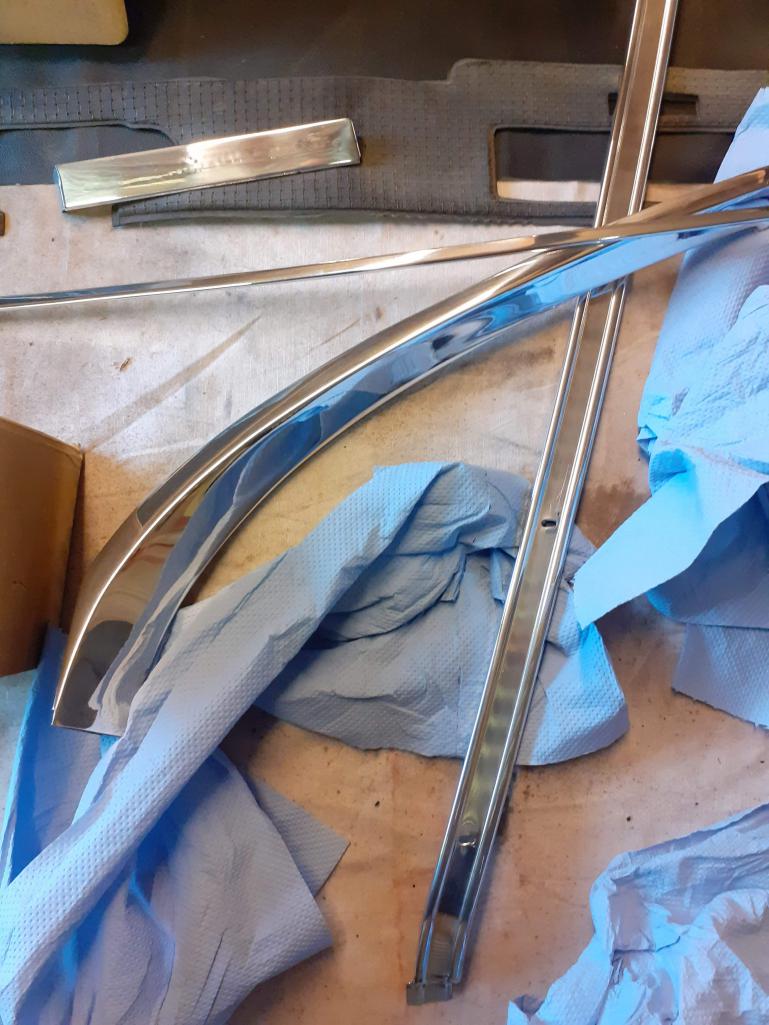
I had the screen trim and sail panel trim plus other bits and pieces stripped and polished
Also a couple of parts stripped and chromed
No doubt I will have plenty more for them to do in due course but wanted to see what the local supplier could do
Posted by: dt4 Jan 24 2020, 12:32 PM
Posted by: dt4 Jan 24 2020, 12:34 PM
Posted by: ValcoOscar Jan 24 2020, 12:59 PM
Great job....keep the photos coming.
BTW...love your dash repair and refinish!!!!
Oscar
Posted by: dt4 Jan 25 2020, 02:37 AM
thanks Oscar
I have sourced some fabric to make up a tool roll, so I am collecting the tools to go with it and will also make up a bag for the car jack
I awaiting a sample of hood vinyl to match against the sail panel fabric to see if that can be used
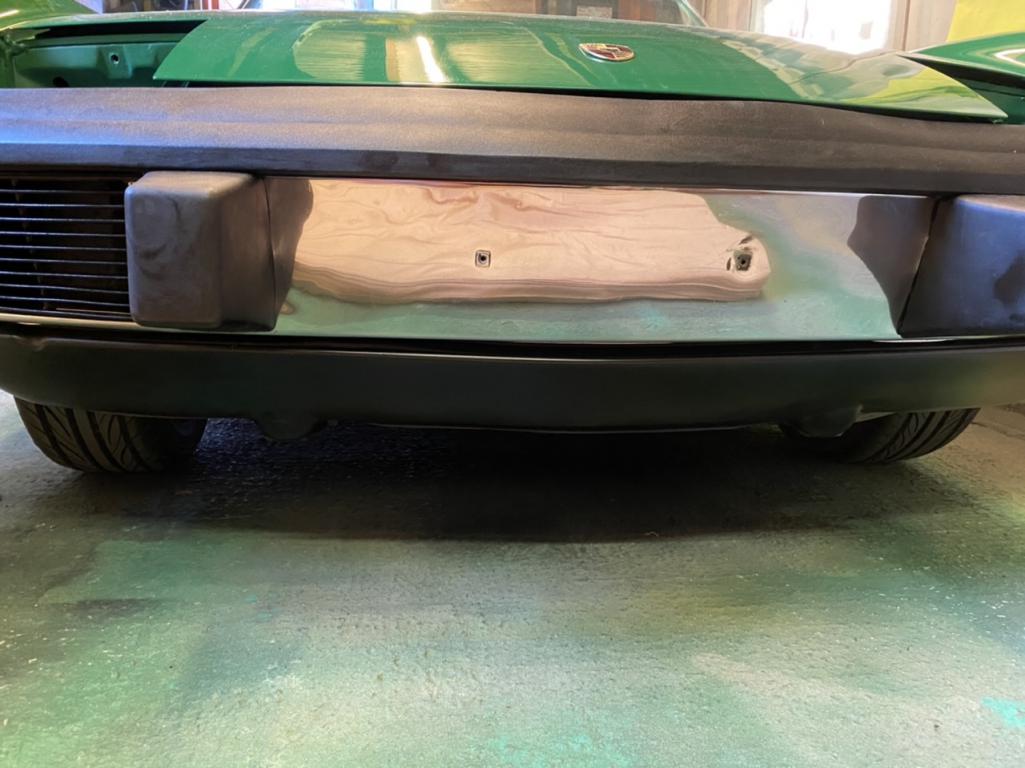
I also have the rear bumper top at a local fibre glass company to see if they can produce a replacement top from the floppy rubber part I have left with them
Posted by: dt4 Jan 25 2020, 10:12 AM
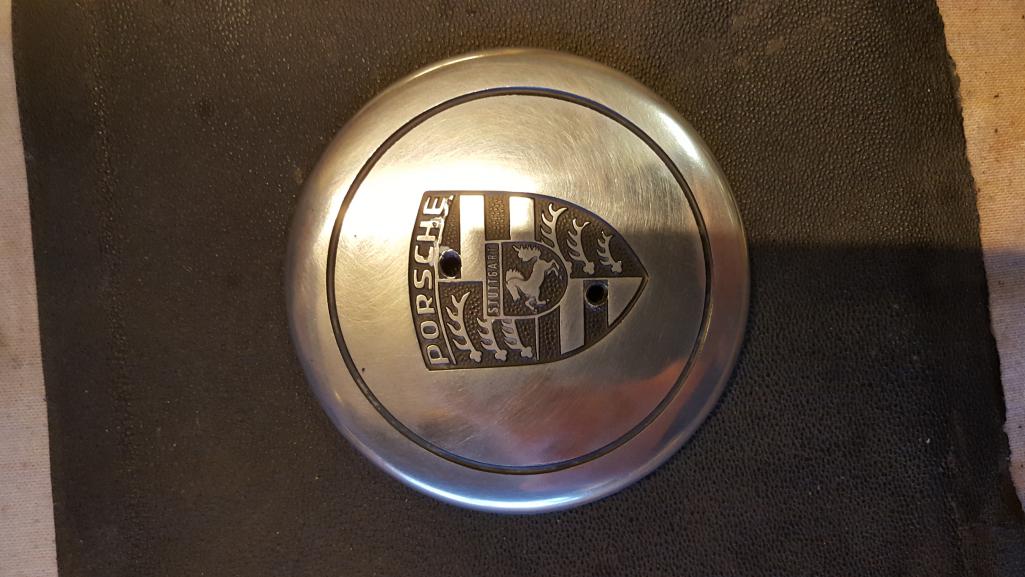
Just a bit of fiddling about today
Plus a garage ornament 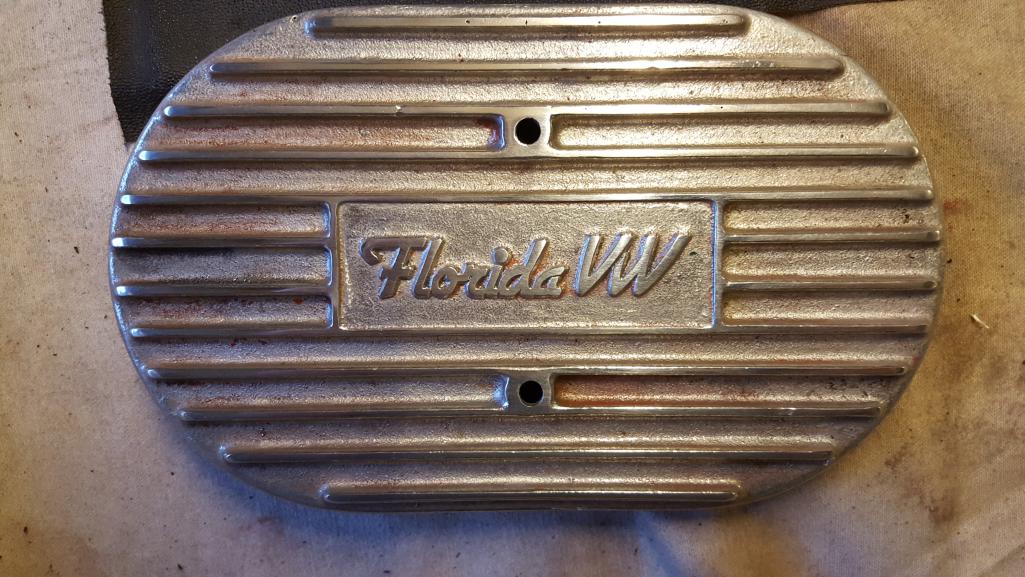
Posted by: dt4 Mar 22 2020, 10:55 AM
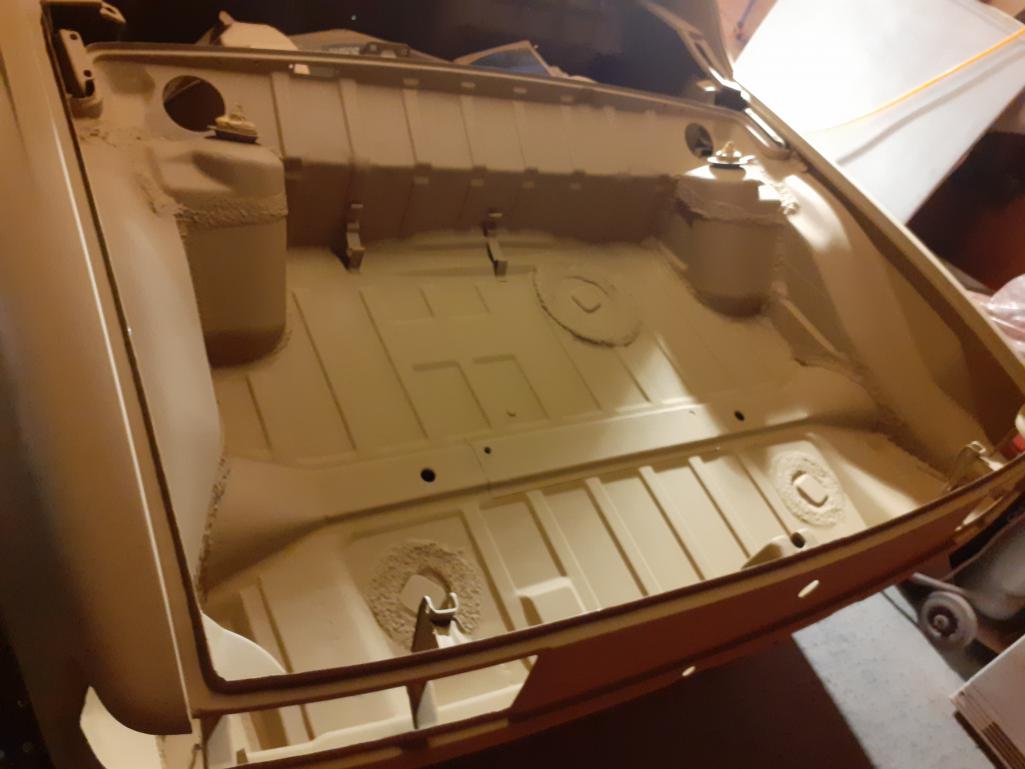
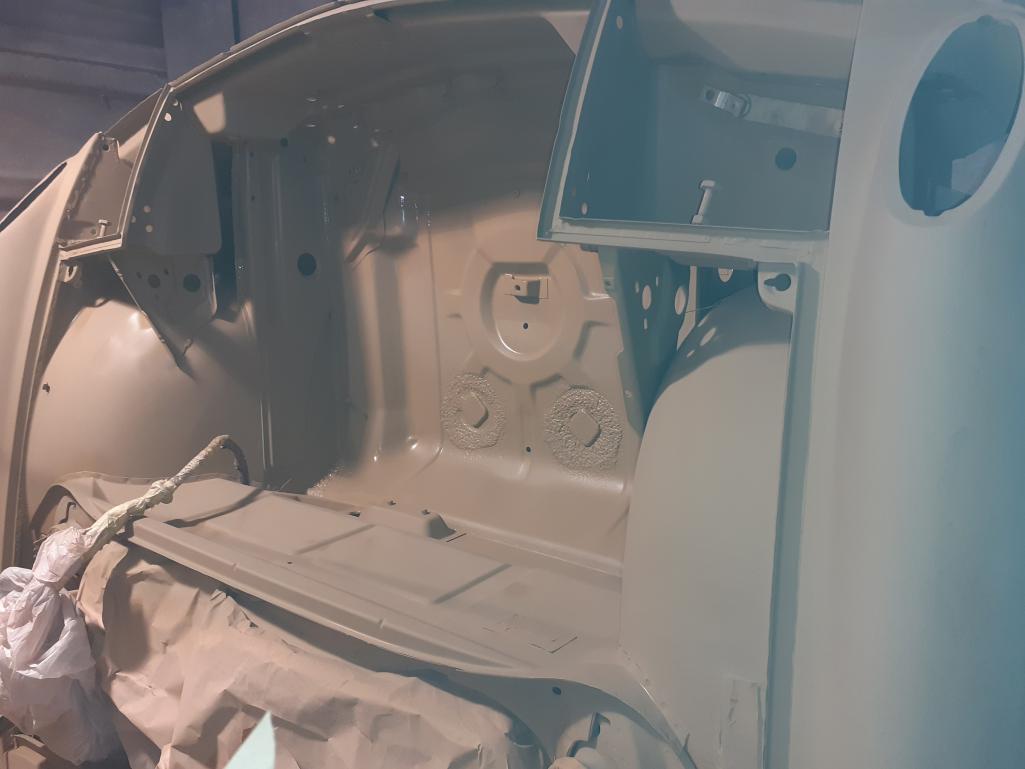
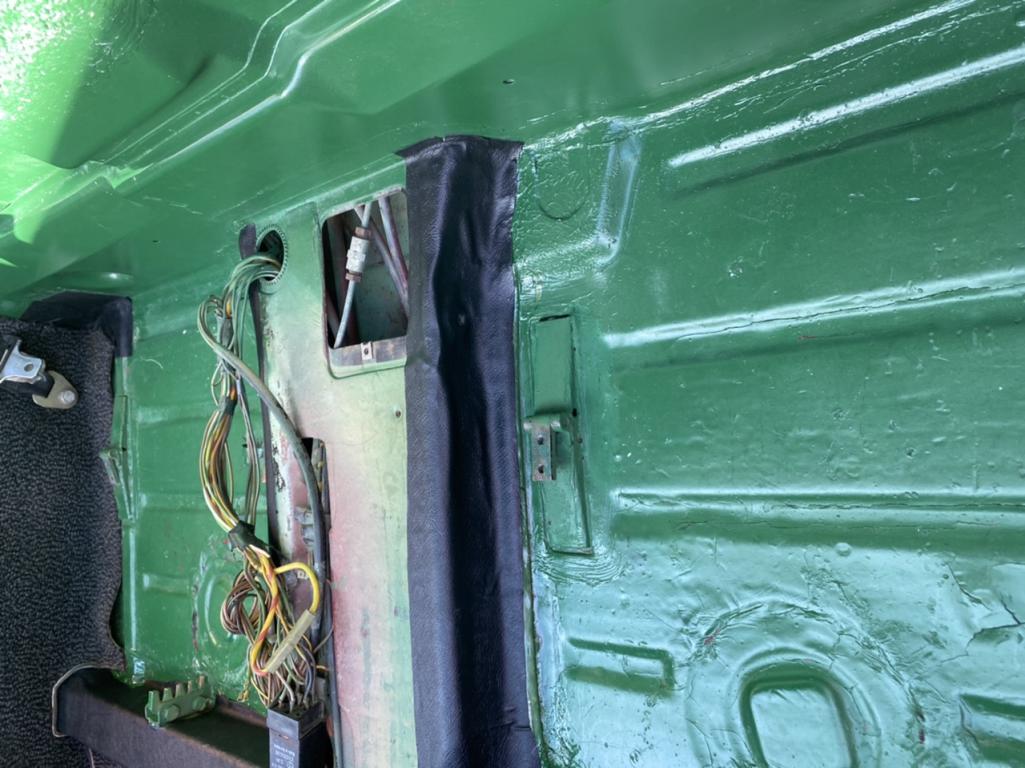
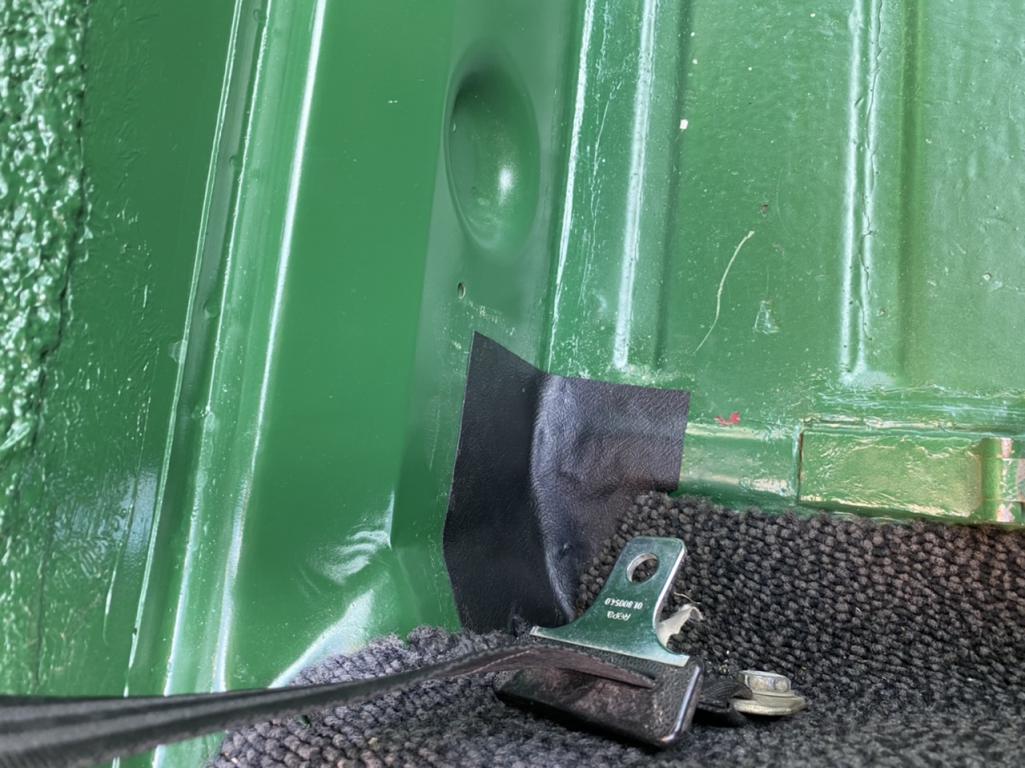
Since getting car running following the miss connected battery screw up I have given the internal compartments a first coat of paint
Attached thumbnail(s)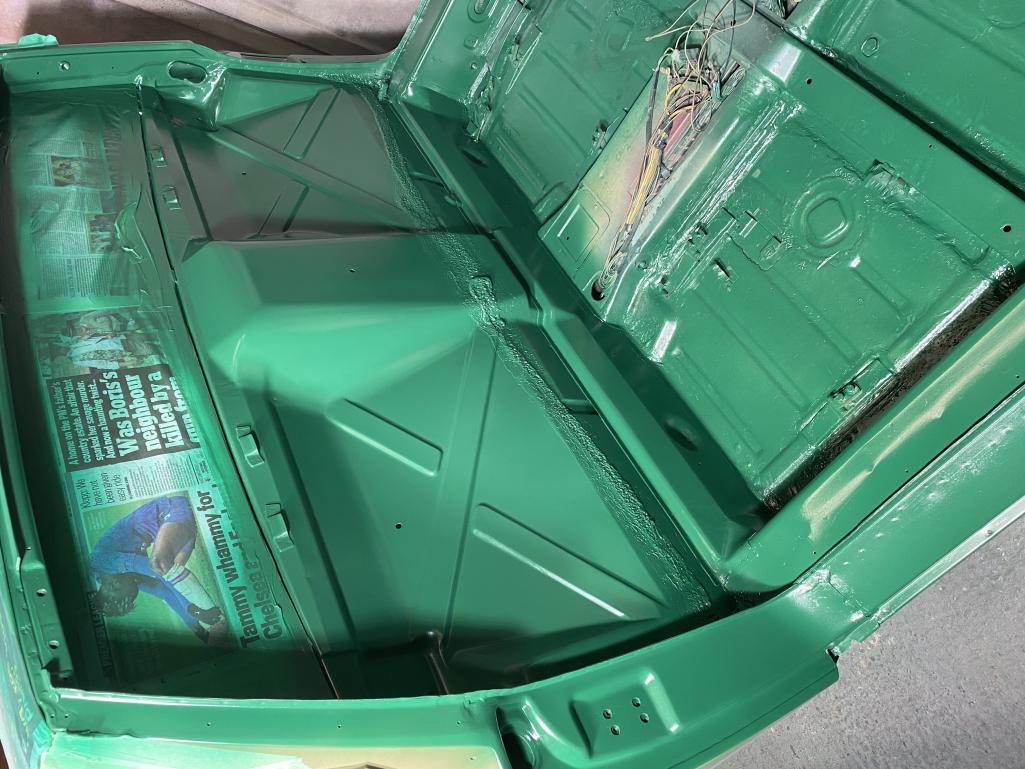
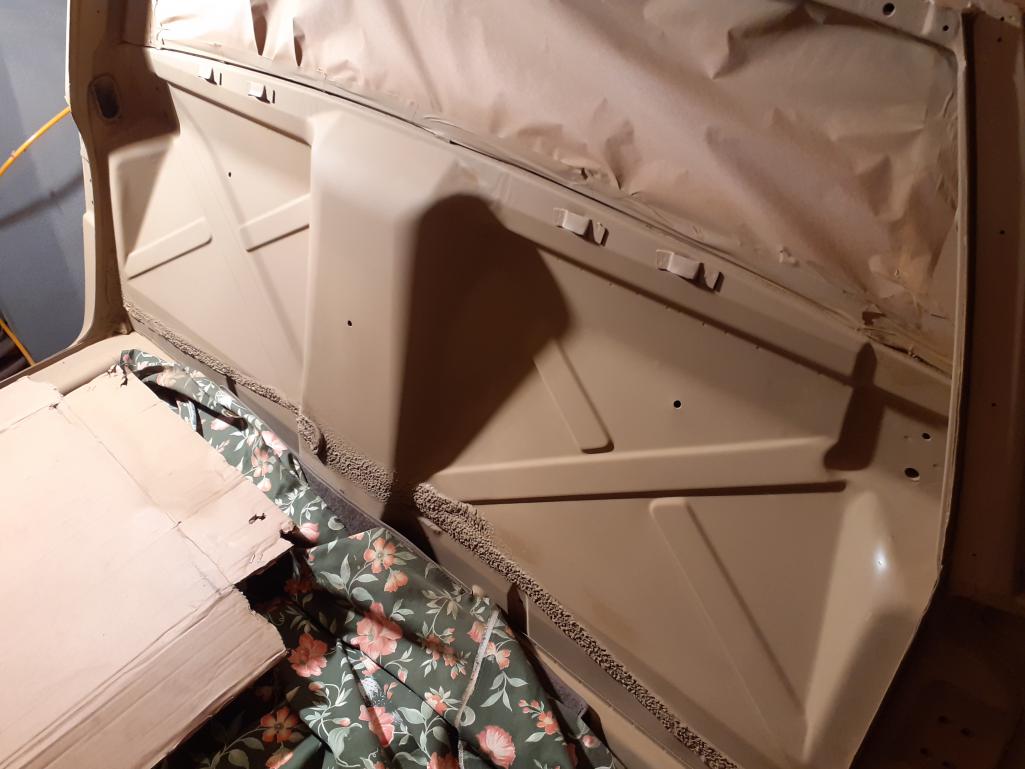
Posted by: dt4 Mar 22 2020, 10:59 AM
Cabin
Attached thumbnail(s)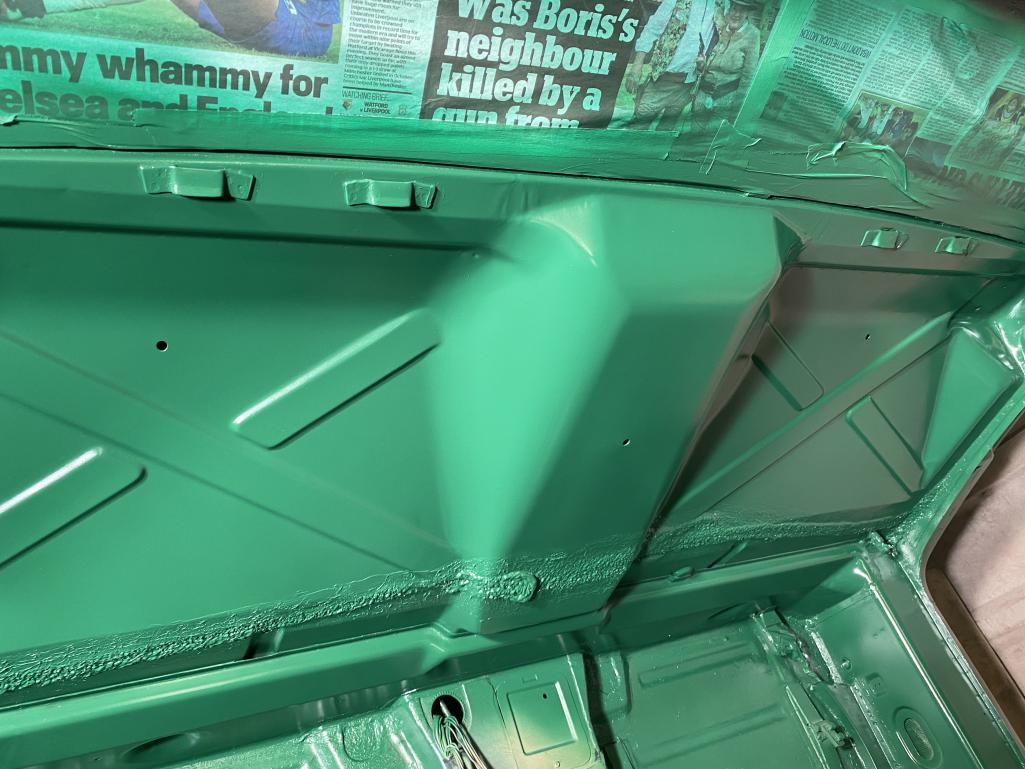
Posted by: dt4 Mar 22 2020, 11:14 AM
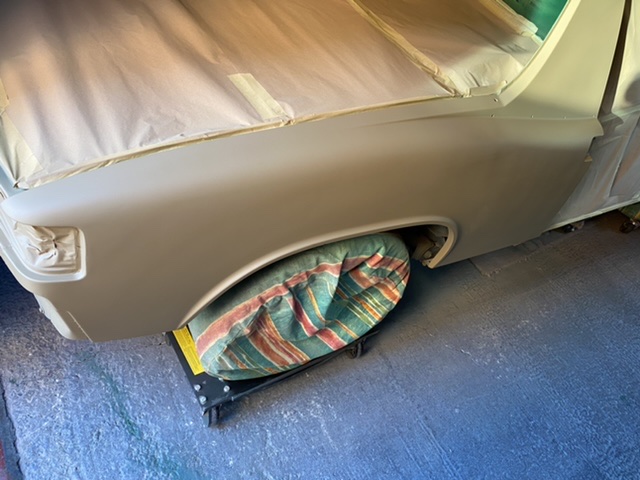
Got the home made wheel covers on and the car on dollies and also masked the car off for additional coats of primer
Attached image(s)
Posted by: dt4 Mar 22 2020, 11:16 AM
Masked for primer coat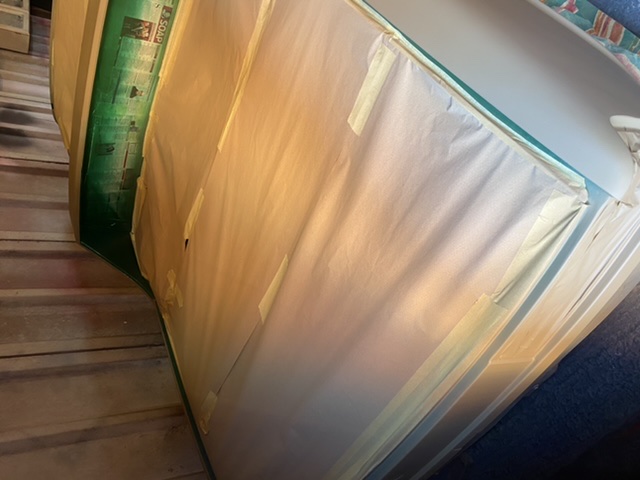
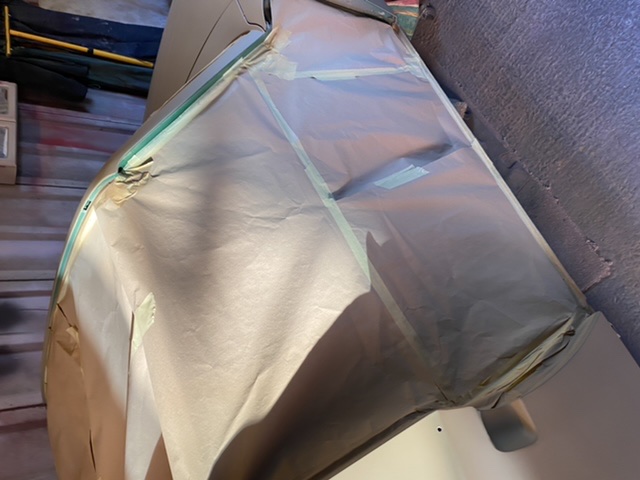
Posted by: dt4 Mar 22 2020, 11:22 AM
First fresh coat of etch primer applied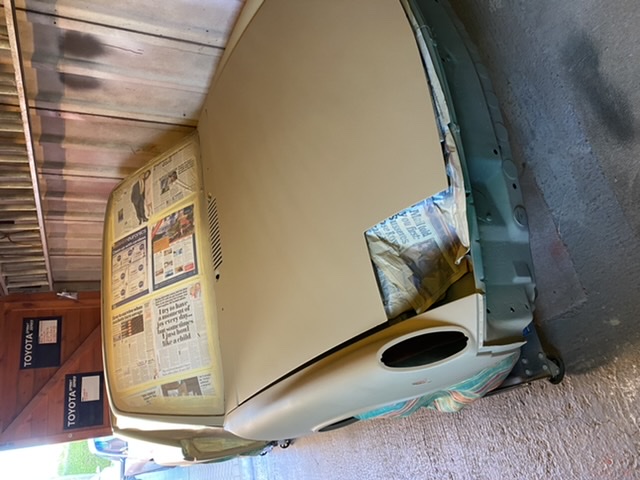
Posted by: dt4 Apr 5 2020, 11:41 AM
I’m still flatting back and primmering the shell, doors and hoods
But had a break today to set up a spray tent 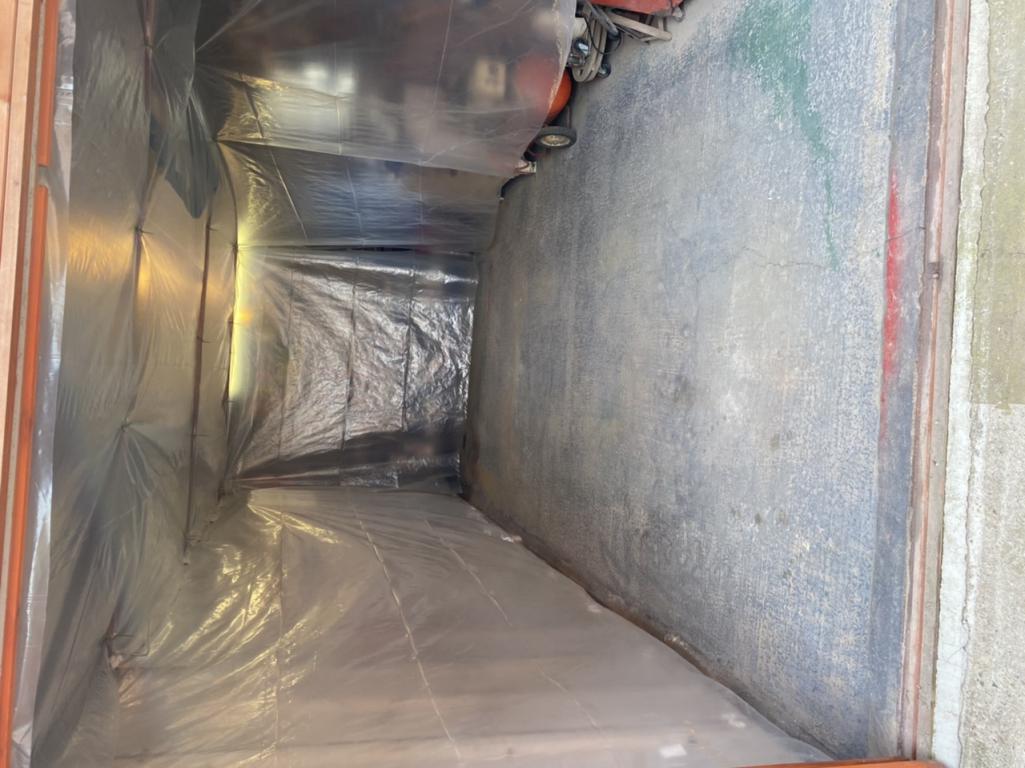

Posted by: dt4 Apr 15 2020, 12:13 AM
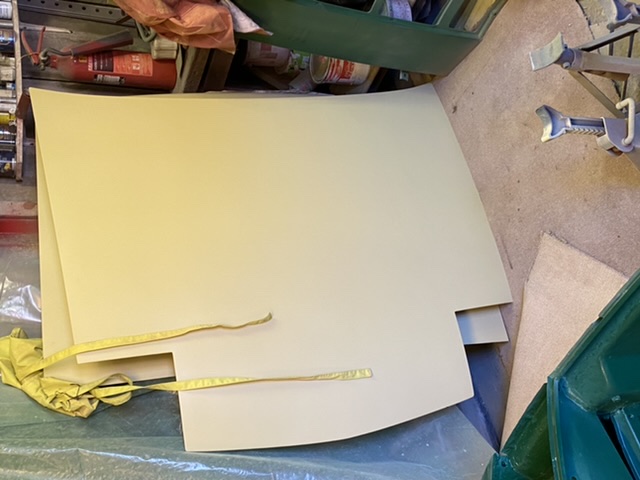
So I have had issues with particles in the paint that weren't there when I painted the interior compartments, I have spoken to my paint supplier and he recognises the particles as yellow pigment that has settled out and then disturbed in mixing the paint.
I will add a straining process to make sure the filter in the gun can cope
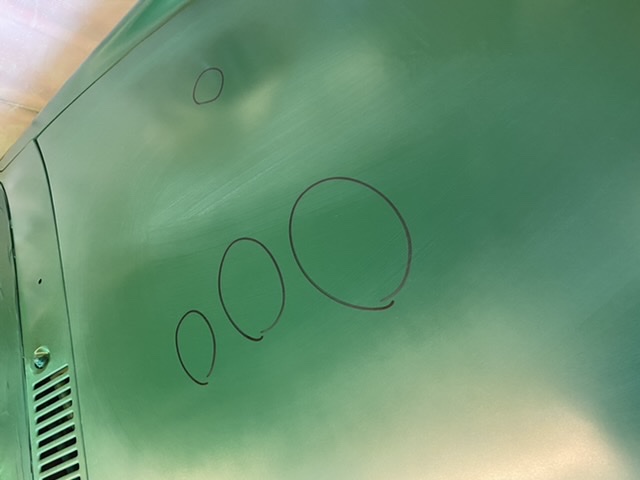
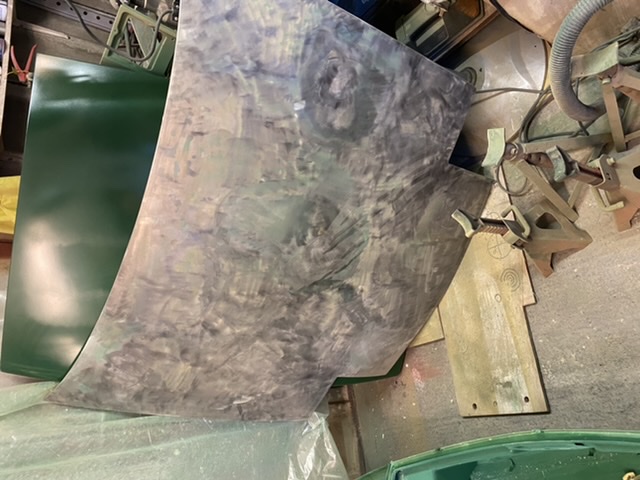
I also noticed some mapping on the front and rear trunk lids, this is a big time pain in the arse.
The front lid has had to be totally stripped back to metal due to the location of the mapping, the rear may be salvageable

Posted by: dt4 Apr 15 2020, 12:20 AM
The rest of the car has had 2 light coats and now needs blocking to remove the paint contamination 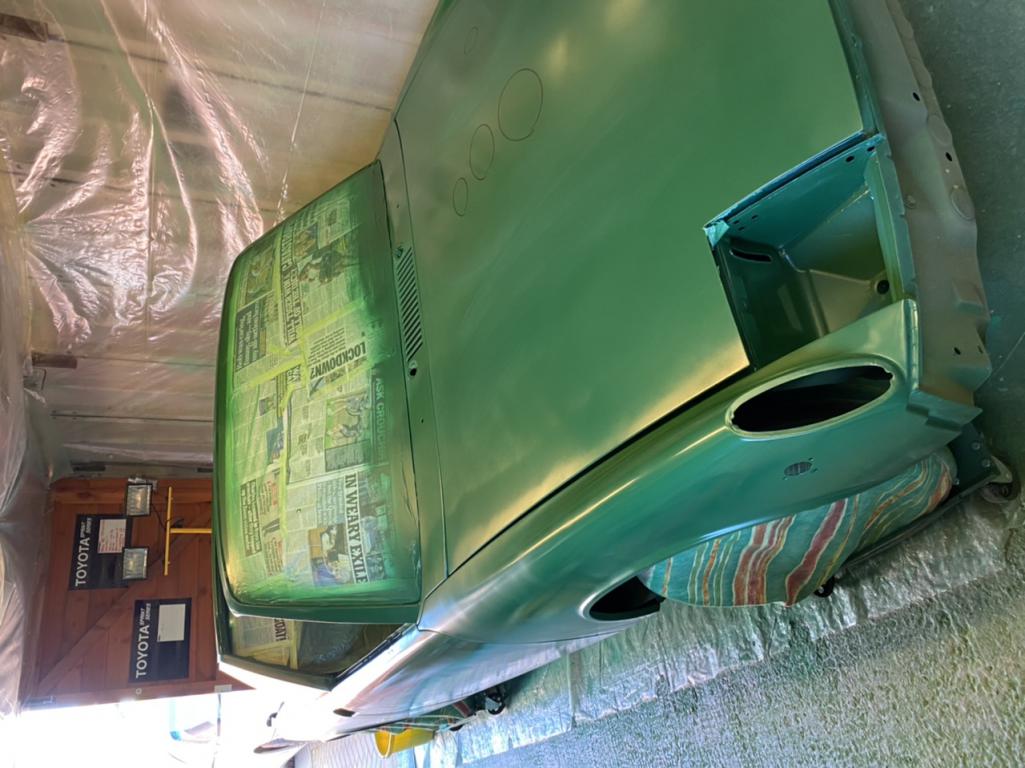
Posted by: sixnotfour Apr 15 2020, 01:44 AM
Your paint supplier thinks its OK ? 
![popcorn[1].gif](style_emoticons/default/popcorn[1].gif)
Posted by: dt4 Apr 15 2020, 01:53 AM
I am going to see if the particles dissolve in thinners (I think you call it reducer?)
If they do then there is a case to say I haven't mixed it properly, if they don't then there is a case to say that the paint is questionable.
I know a guy who has a spray paint business and will ask him for a view but with the lockdown as it is over here that's not really viable
I can add a straining process to the overall paint mixing for a couple of £'s and be able to continue
Posted by: dt4 Apr 19 2020, 12:16 PM
So, backward steps taken
I had to strip the front and rear hoods back to metal as the filler was mapping, you could see the outline through the primer and the top coat wasn’t fixing it
Basically as I had applied very light amounts of glaze filler over the etch primer in places where the initial filler hadn’t been sufficient the filler was sat on top of the primer and even though additional coats had been applied the filler wasn’t isolated
So back to the drawing board
Attached thumbnail(s)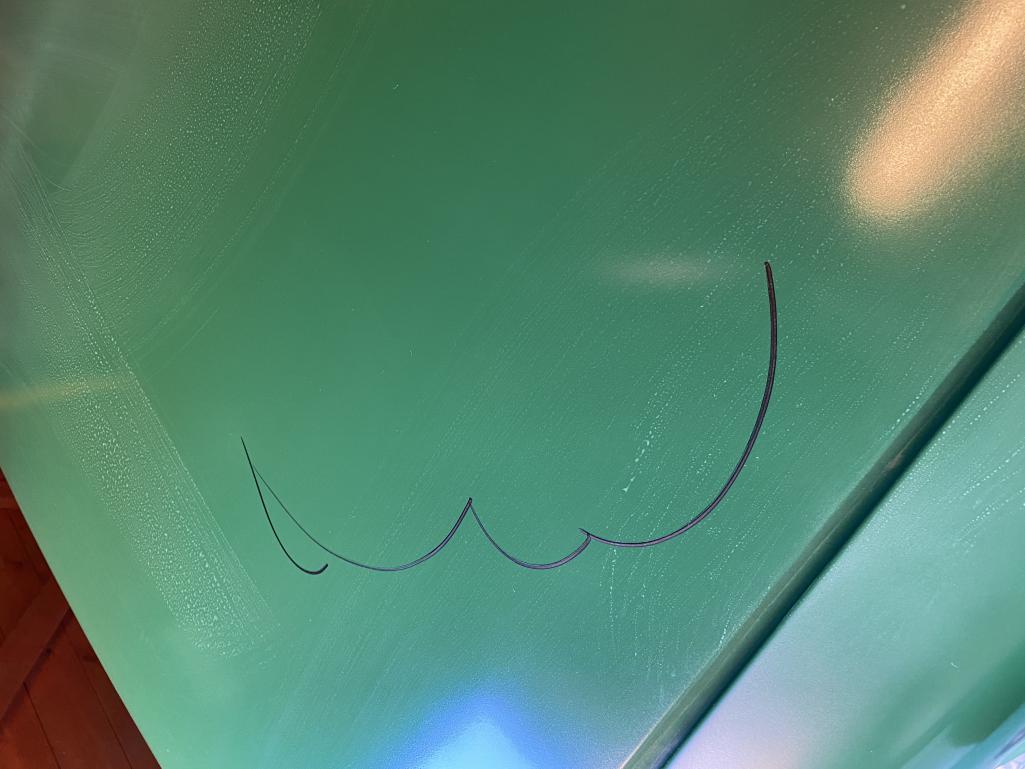
Attached image(s)


Posted by: dt4 Apr 19 2020, 12:19 PM
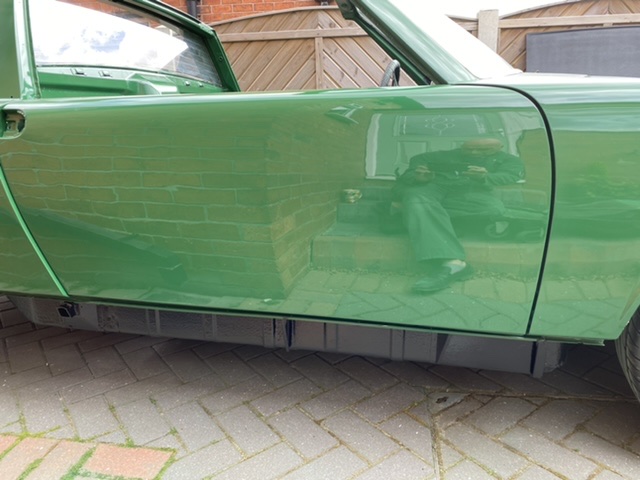
On a brighter note, even though there are only 2 coats of colour on the body it polished up quite well in only a few minutes with a DA polisher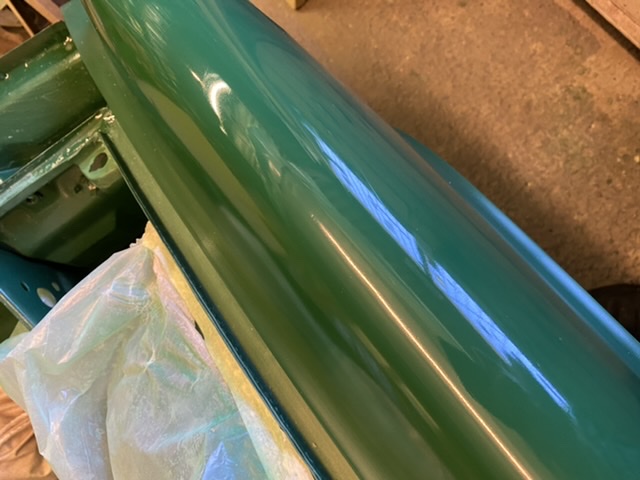
Posted by: Frankvw Apr 20 2020, 01:19 AM
Looking great. you are doing it step by step and over and over :-)
Nice to see the pictures of the progress, thanks !
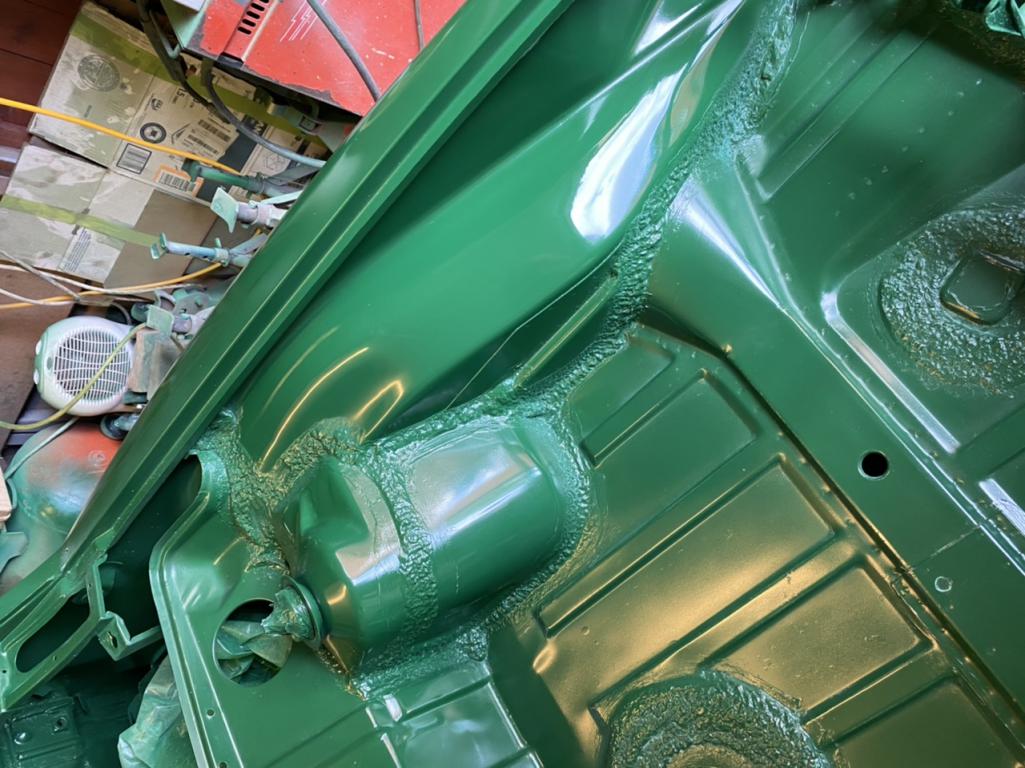
Posted by: dt4 Apr 27 2020, 11:27 AM
Found the time to do a little more painting at the weekend
The rear trunk has turned out OK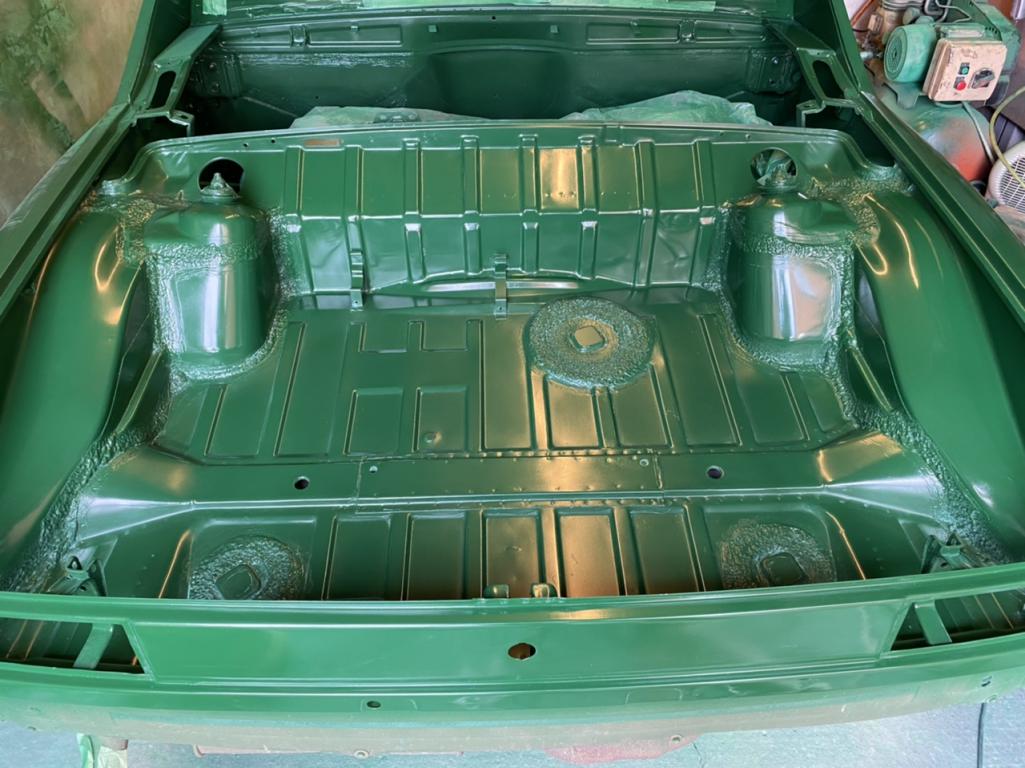
Posted by: ValcoOscar Apr 27 2020, 11:53 AM

Posted by: Root_Werks Apr 27 2020, 02:00 PM
Inspiring as I will need to paint my 914 hopefully this year.
Posted by: dt4 May 5 2020, 03:26 AM
A little more painting carried out over the weekend 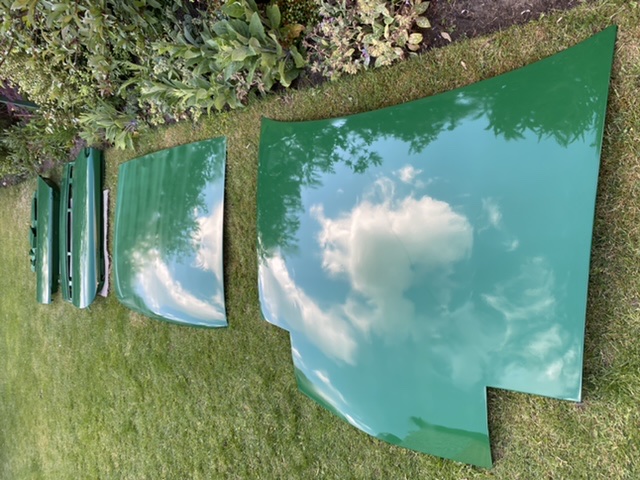
Posted by: dt4 May 16 2020, 12:24 PM
Completed the painting of the shell and put the panels back on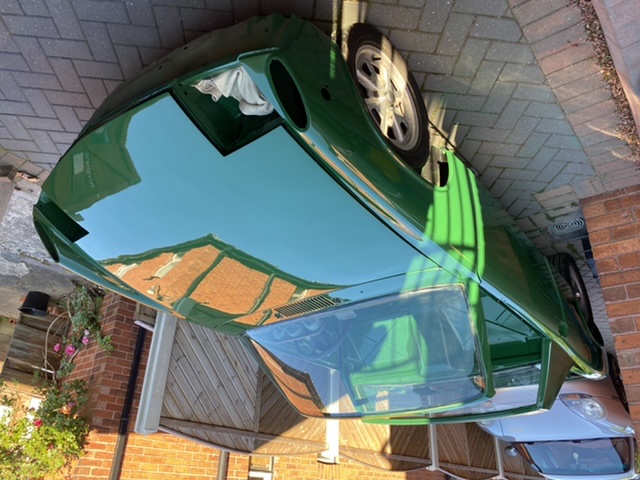
 [attachmentid=744
280]
Attached image(s)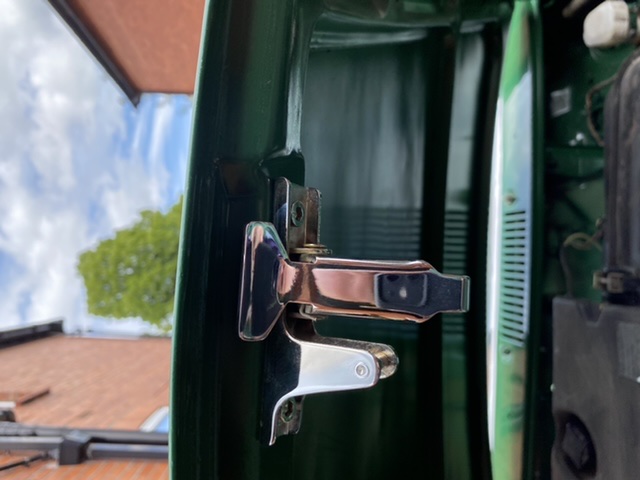
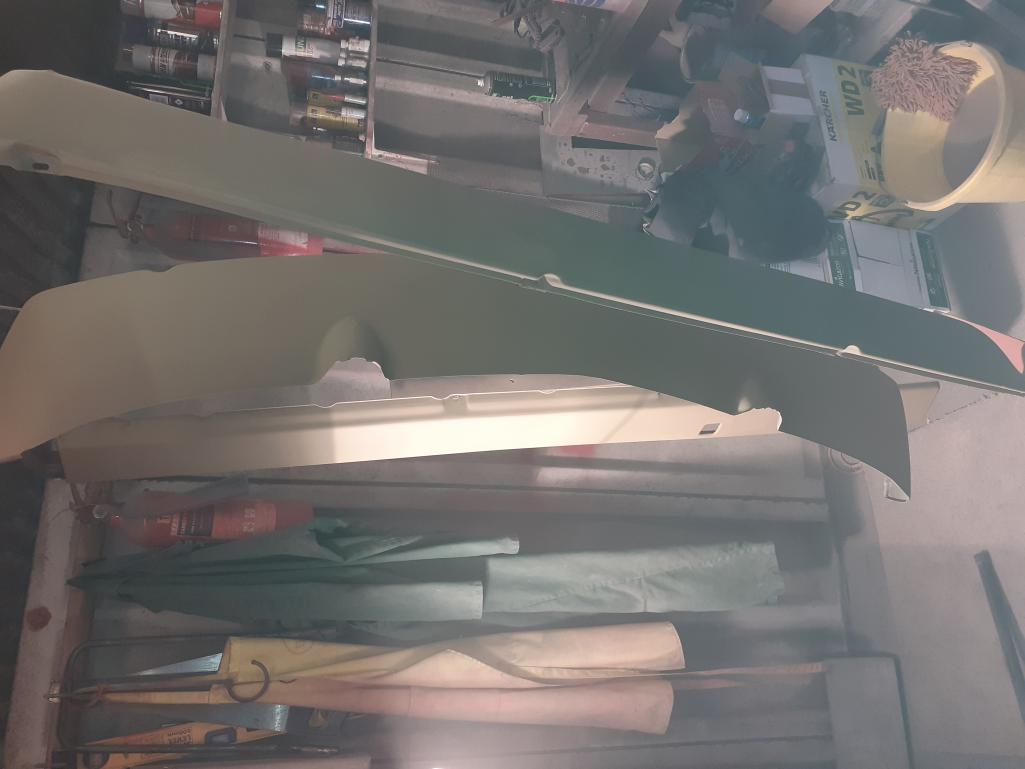
Posted by: dt4 May 16 2020, 12:26 PM
On to the targa top, rocker covers and valances tomorrow 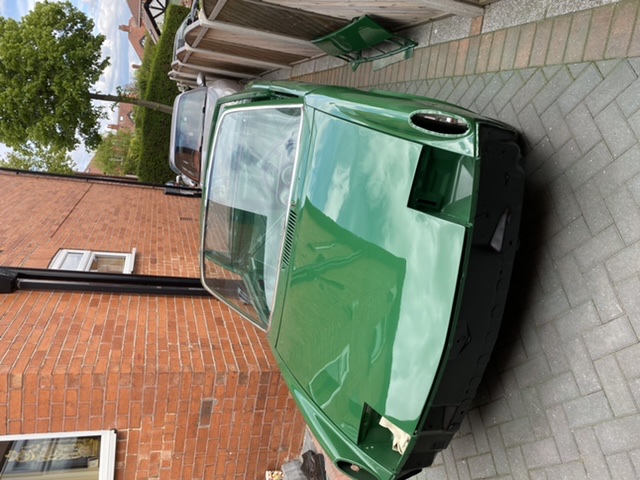
Posted by: Frankvw May 16 2020, 12:48 PM
wow, great progress (and color!) .
i am very curious how you will tackle the targatop ....standard black with structure in the paint or in the color of the car ?
Posted by: dt4 May 17 2020, 12:14 PM
wow, great progress (and color!) .
i am very curious how you will tackle the targatop ....standard black with structure in the paint or in the color of the car ?
I have struggled getting the finish I wanted on the targa top
It had some flat spots as well as texture to the finish, as though it might have been flatted off at some point
I tried to recreate the textured finish by stippling some high build primer when it was still tacky, it was better but not a lot
I then applied some textured truck bed liner paint, that evened things out but the finish was very gritty
Next step was to flat it off slightly with 400 grit on a 6" orbital sander and then spray 3 coats of semi gloss black.
It looks ok for now but I expect I will have another go at it at some point
I painted the rockers covers and valances with the semi gloss black and they came out well right up to the point where I knocked one off the paint stand so that will need repainting

Posted by: Dion May 17 2020, 02:57 PM
David that’s some tremendous work there.
The paint turned out great. 
Yes, looking forward to your approach on the targa. Sorry bout the rocker mishap.
Cheers
Posted by: 02loftsmoor May 17 2020, 04:20 PM
dang what a paint job !!!
Posted by: dt4 May 19 2020, 01:16 PM
Adding bits each day
The hardest part is finding the parts in the mountain of boxes and figuring out what goes where
Fitting the engine deck was a bitch of a job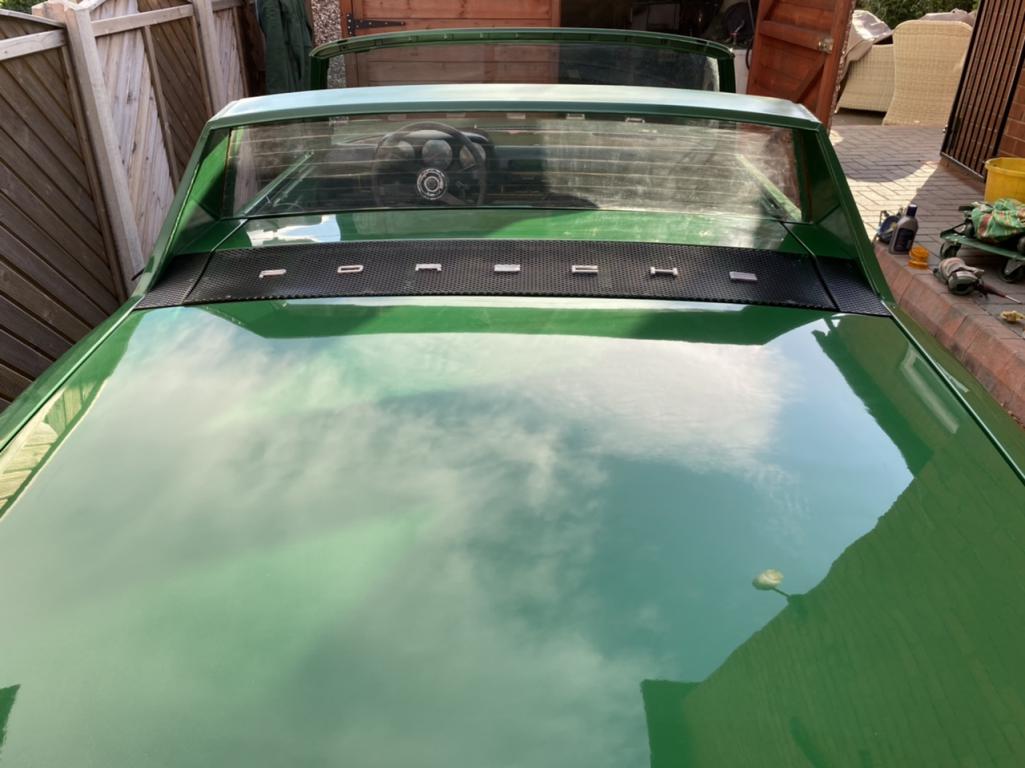
Posted by: ValcoOscar May 19 2020, 01:23 PM
Man on a mission..... 
LOVE that Color!!!! 
Oscar
Posted by: dt4 May 20 2020, 12:42 AM
Thanks Oscar
One step at a time 
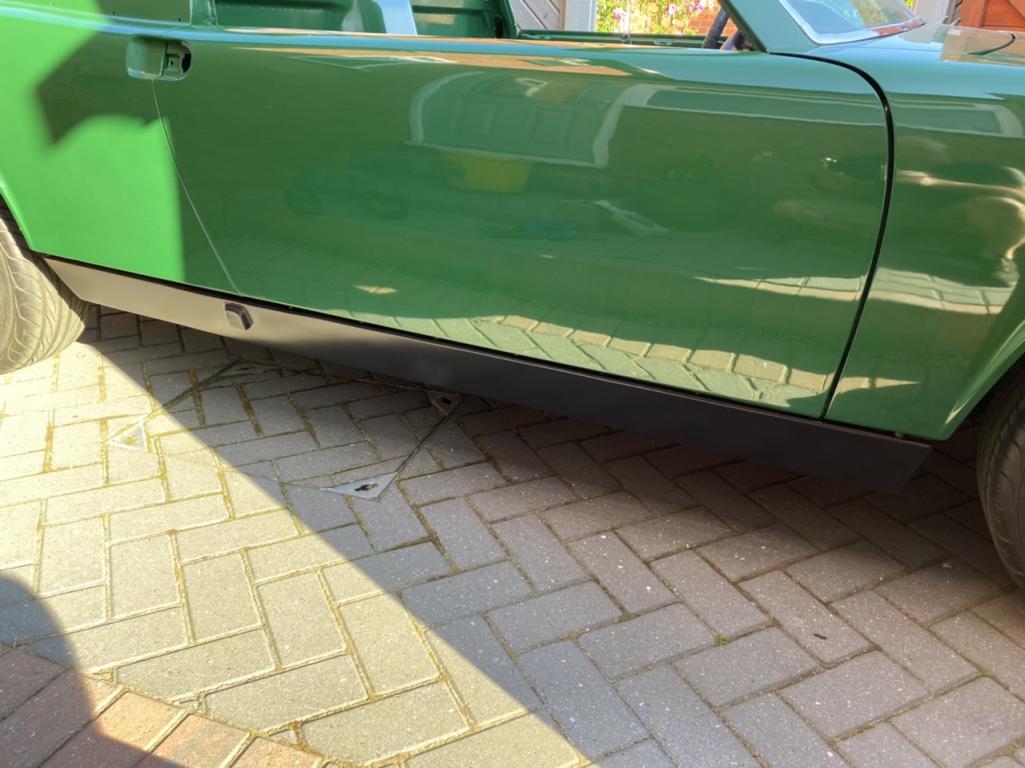
Posted by: dt4 May 20 2020, 01:45 PM
Today’s effort
Sill covers fitted plus new front indicators 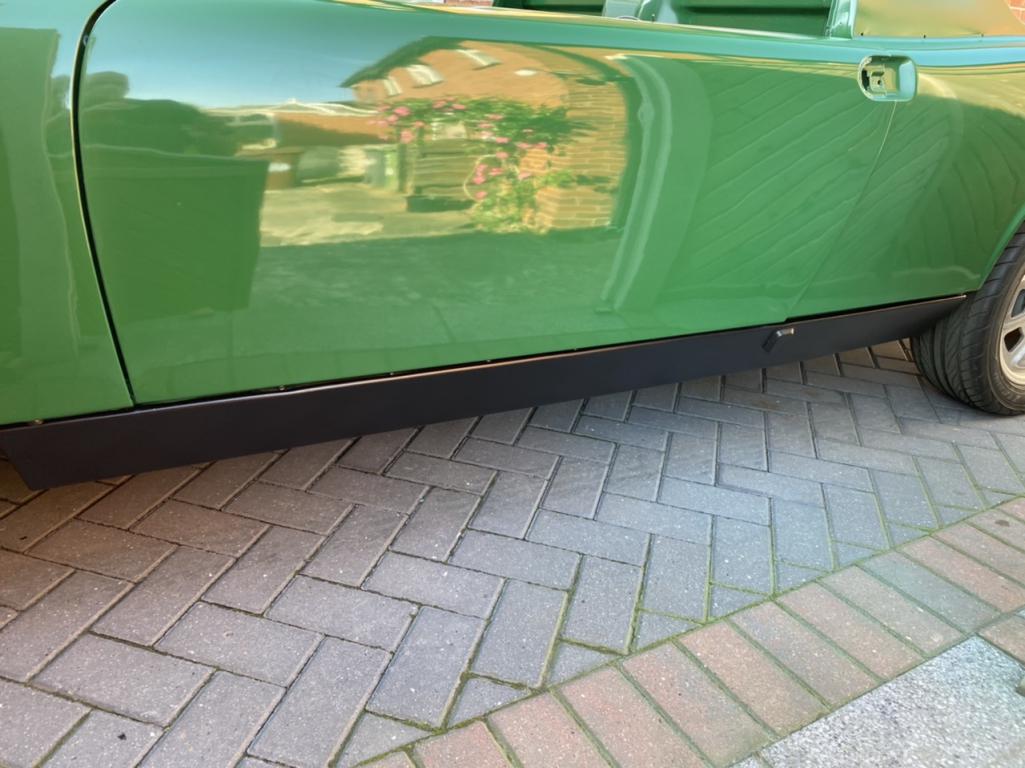
Posted by: Frankvw May 20 2020, 02:28 PM
looking better every day ! your effort pays off !
Any plans for a PORSCHE script on the sides ?
Posted by: dt4 May 21 2020, 12:33 AM
Hadnt planned on putting on the side script, I cant decide if its a bit too much.
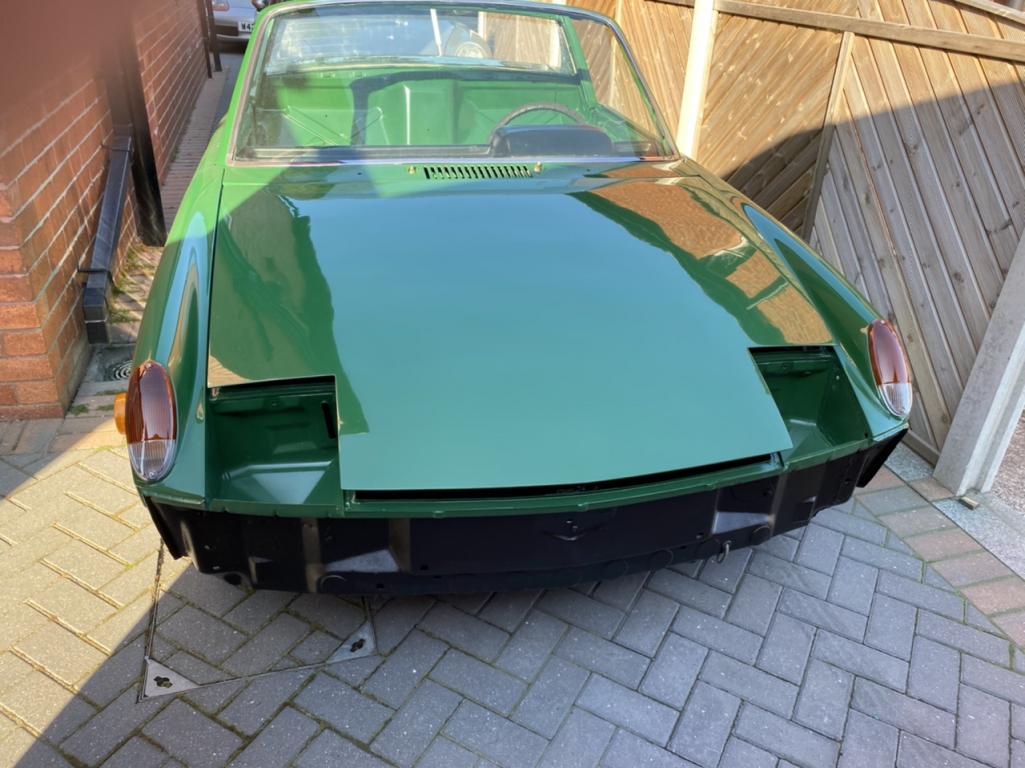
Posted by: dt4 May 24 2020, 12:34 PM
Adding bits and pieces each day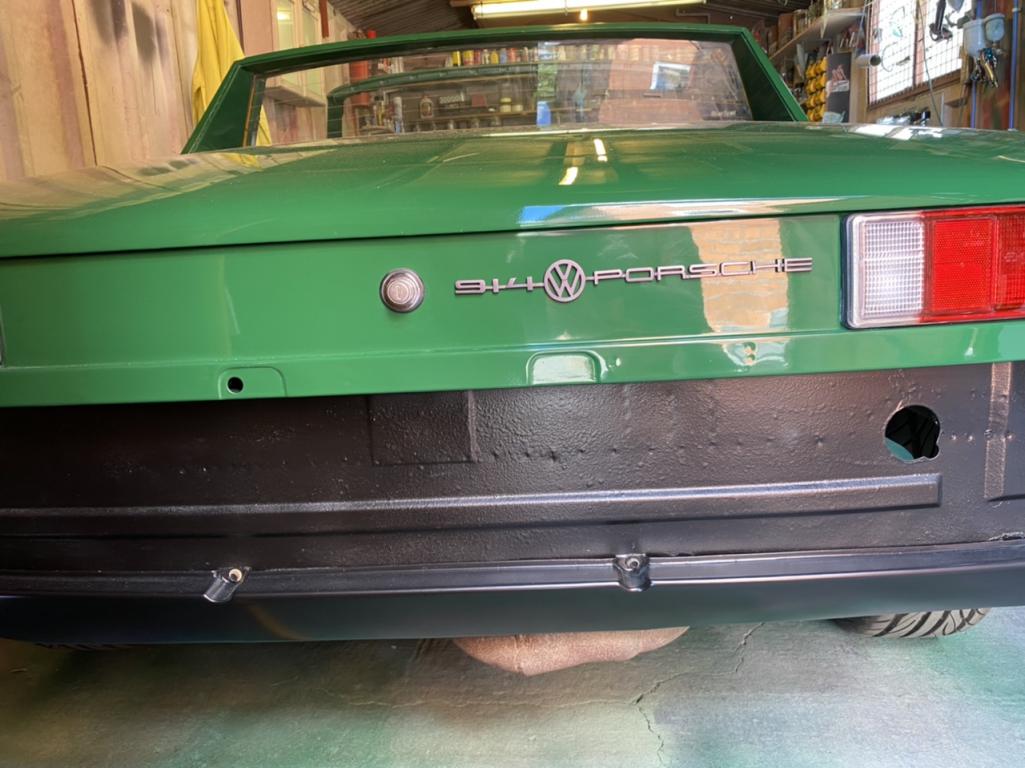
Posted by: dt4 May 24 2020, 12:38 PM
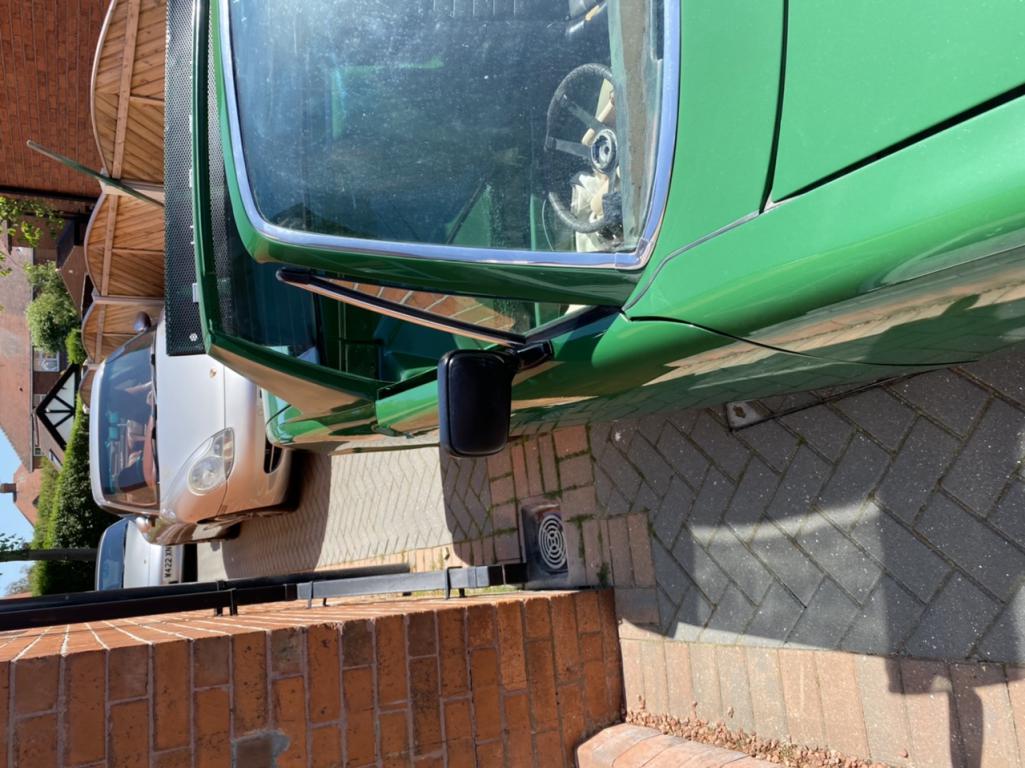
Needed to make a bracket for the passenger side Vitaloni mirror that I am using as a temporary measure 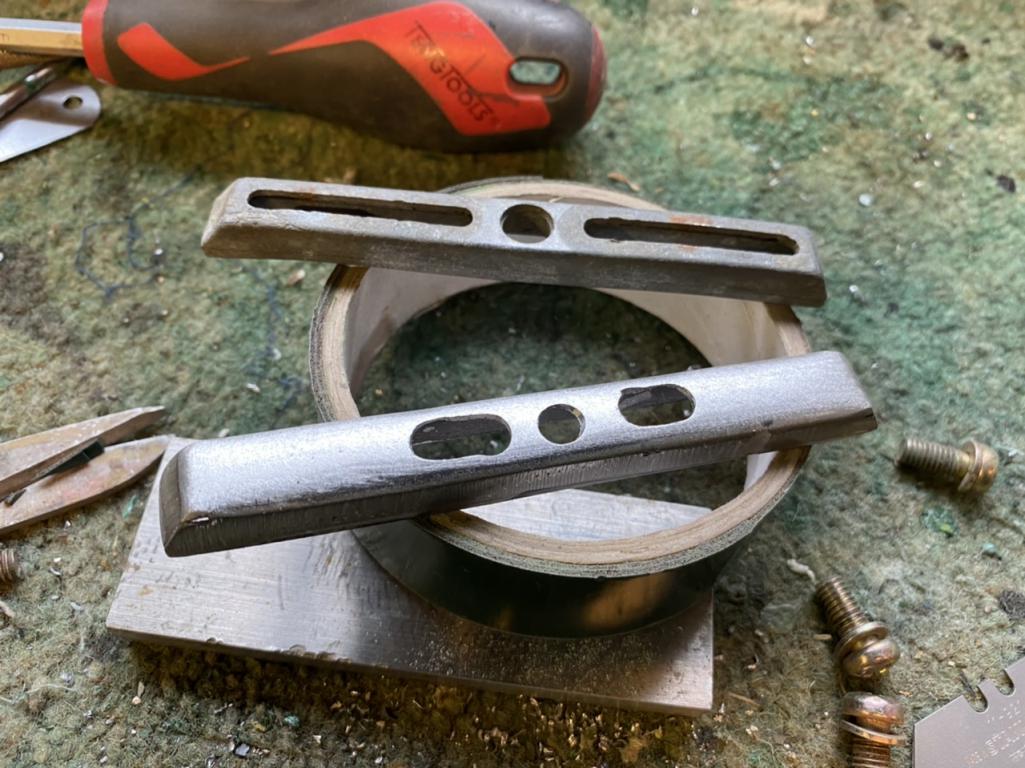
Posted by: dt4 May 26 2020, 01:59 AM
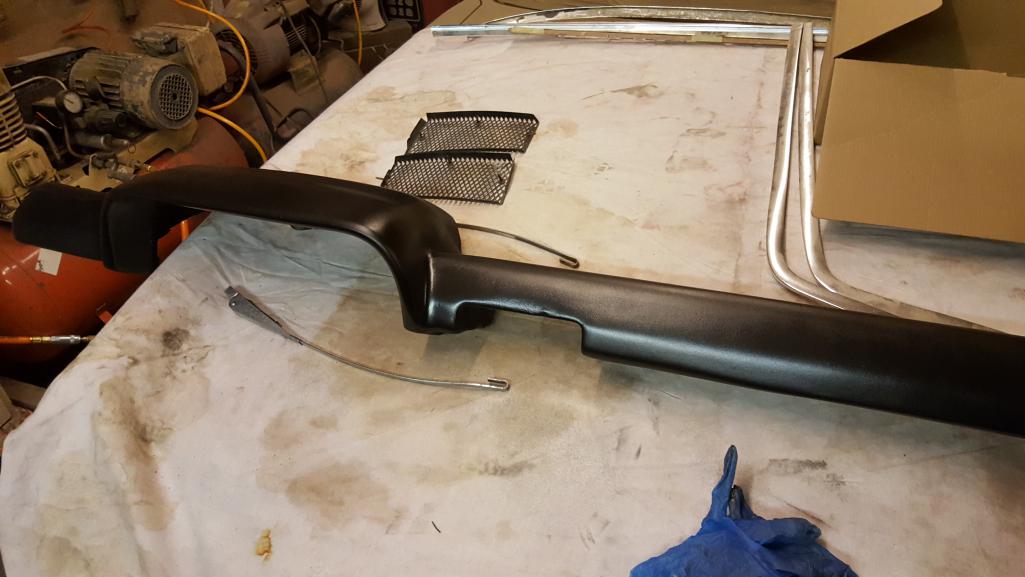
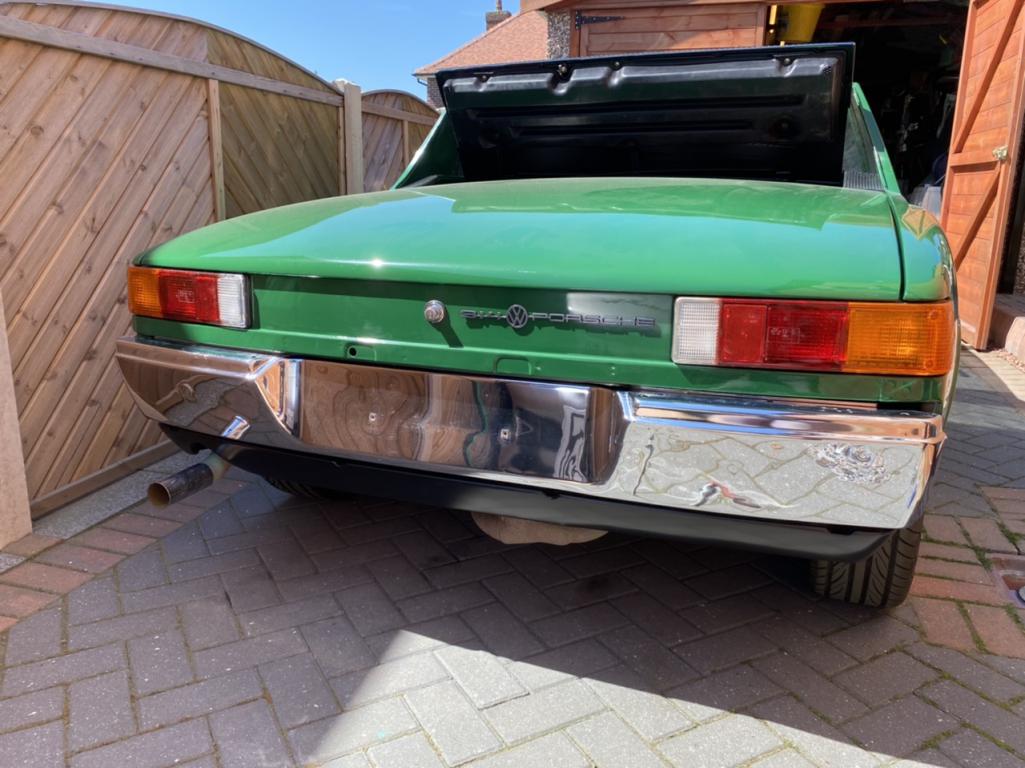
Targa top finished
Rear bumper and valance minus rubber top fitted
Side glass and door mirrors fitted 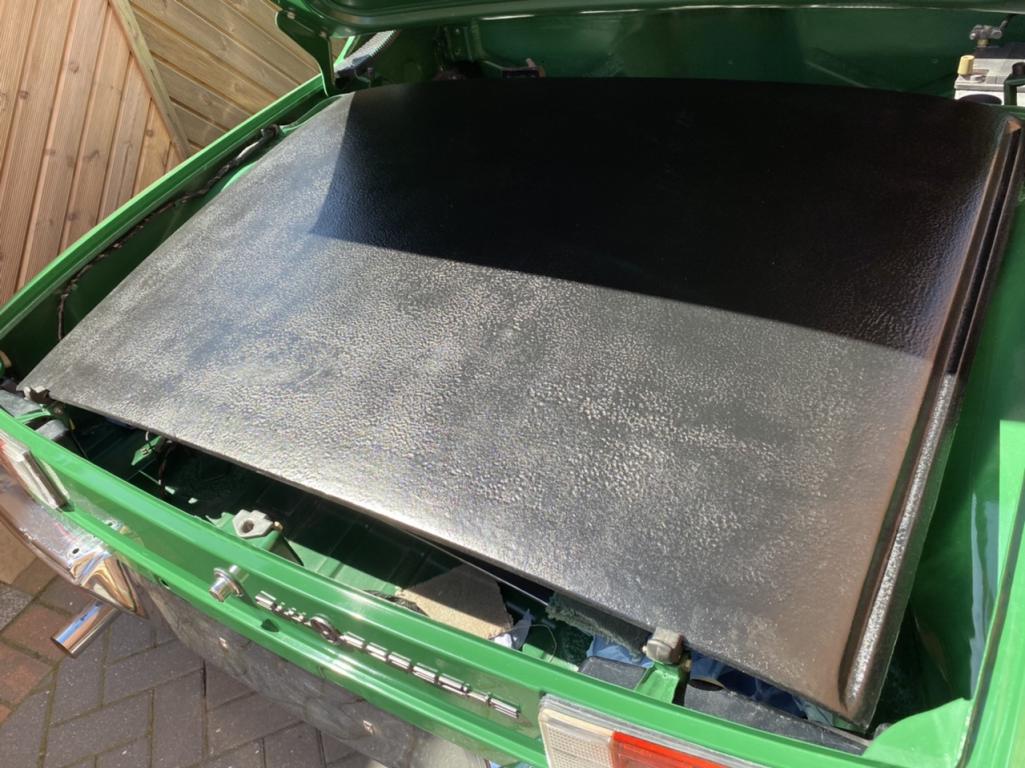

Posted by: Frankvw May 26 2020, 02:57 AM
Looking really good, a lot of work is in these little things.
I think you have to change the signature from:
1975 1.8 914 trying to get it into primer before the winter
to
1975 1.8 914 trying to get it more beautiful every day
Posted by: kroelofsen May 26 2020, 03:55 AM
serious progress there... Color looks great and the paint job is well done!
Posted by: dt4 May 26 2020, 04:49 AM
Looking really good, a lot of work is in these little things.
I think you have to change the signature from:
1975 1.8 914 trying to get it into primer before the winter
to
1975 1.8 914 trying to get it more beautiful every day
Thank you, good pint about the signature
Posted by: dt4 May 26 2020, 04:50 AM
serious progress there... Color looks great and the paint job is well done!Thank you
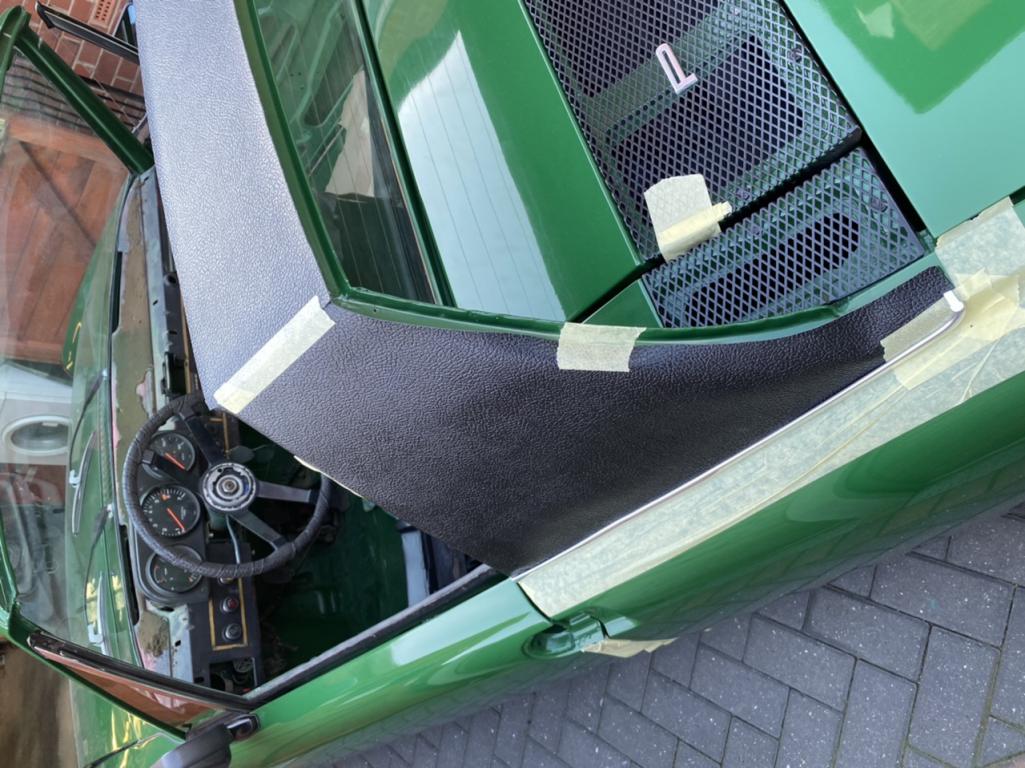
The adhesive for the sail panel vinyl and roll bar top turned up today - gulp - no excuse not to do it now
Posted by: dt4 May 26 2020, 01:59 PM
Got the vinyl cut and checked for fit
Anxious times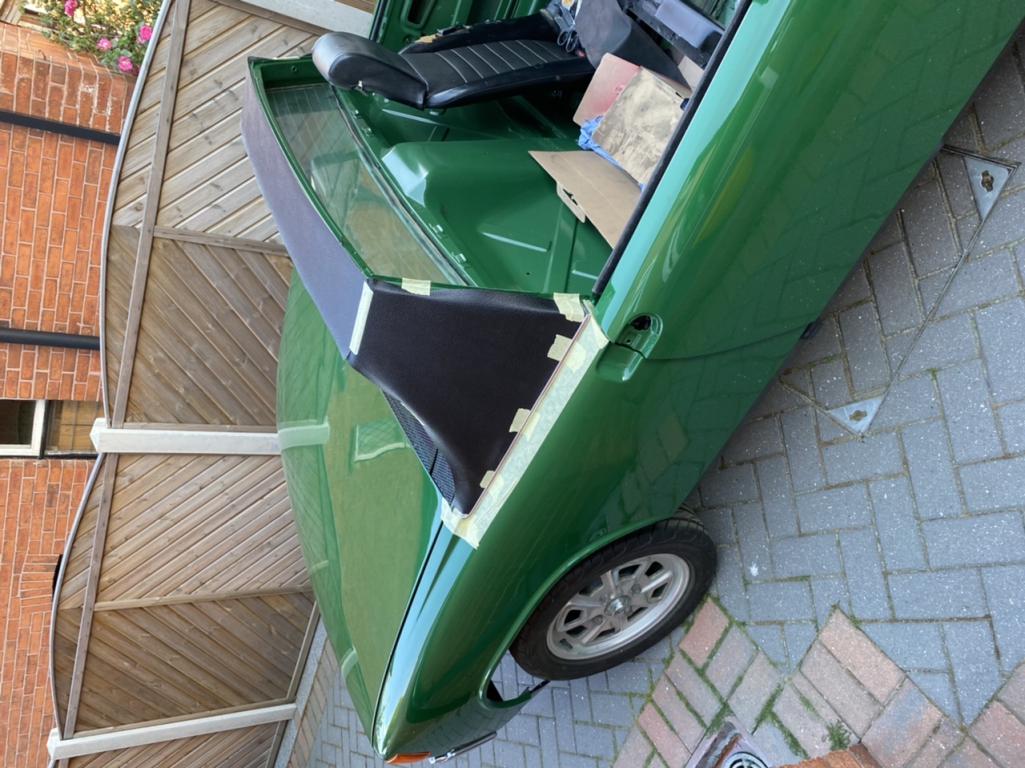
Posted by: Bleyseng May 26 2020, 02:07 PM
Where did you source that vinyl?? Been looking for that late rough pattern for awhile.
Posted by: dt4 May 27 2020, 12:31 AM
Where did you source that vinyl?? Been looking for that late rough pattern for awhile.
A place in the UK called Martrim, they said it was Ford roof vinyl
I wanted something that resembled the targa top finish and this was closest
Posted by: falcor75 May 27 2020, 12:53 AM
Looking great, keep up the progress.
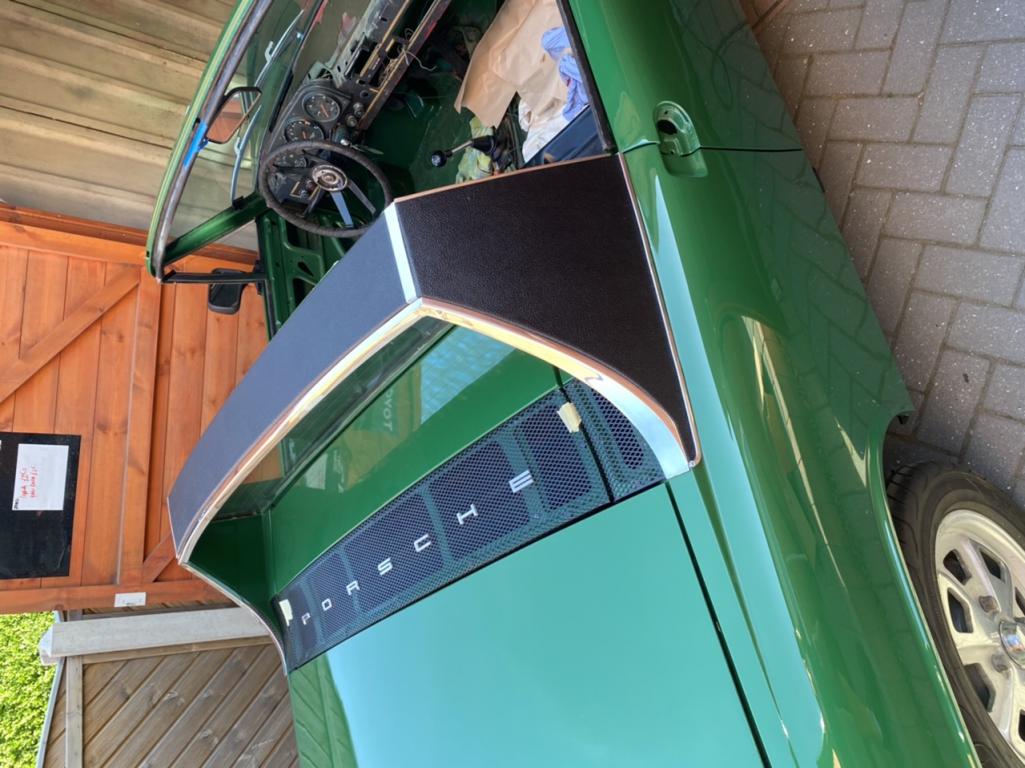
Posted by: dt4 May 28 2020, 12:30 PM
I’m glad that’s over
Sail panel and roll bar covered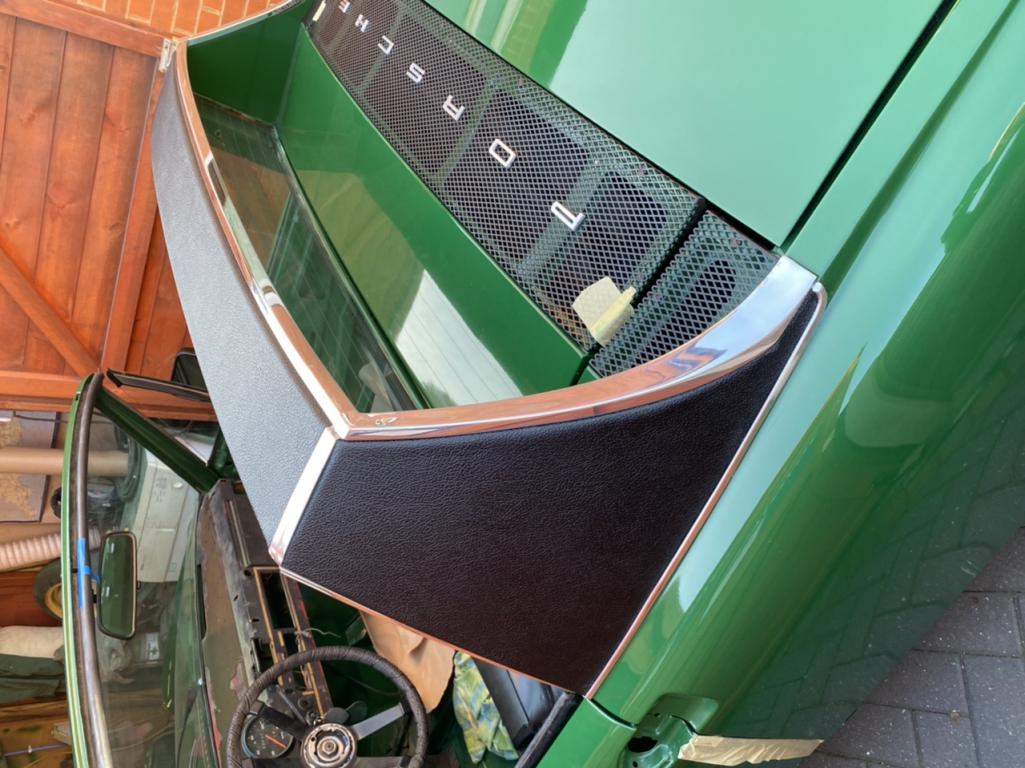
Posted by: dt4 May 28 2020, 12:34 PM
Also added my Dads old Automobile Association badge
He had it on all his cars up to passing away in 2018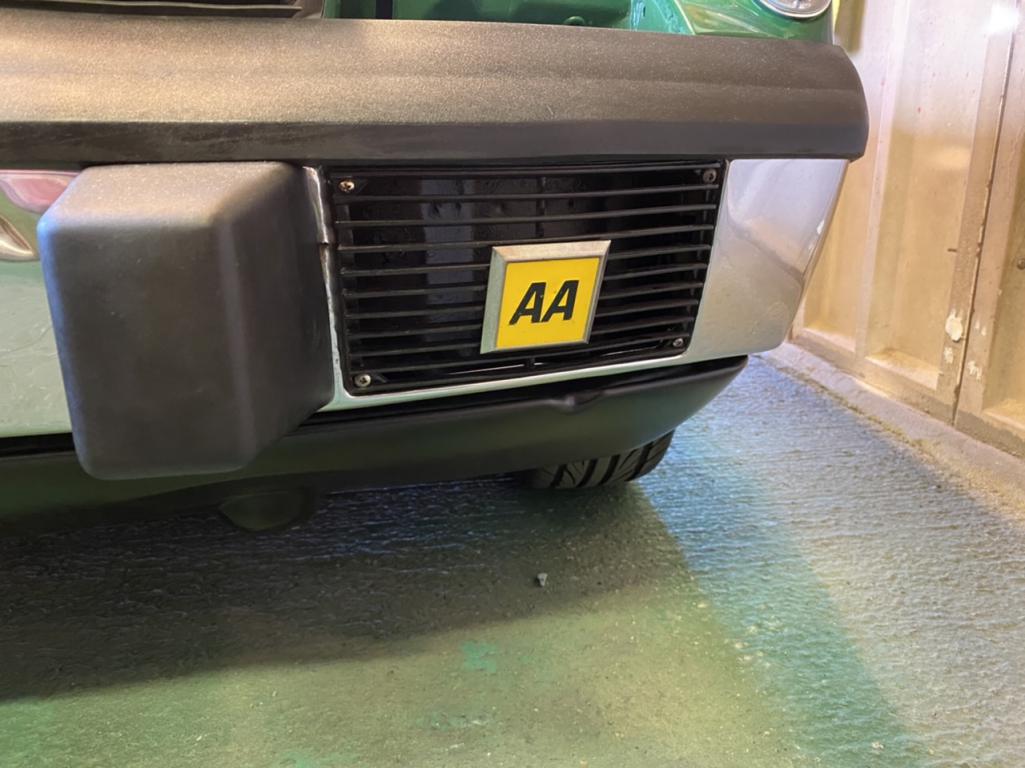
Posted by: wysri9 May 28 2020, 01:41 PM
Lovely work - my vinyl time approaches....similarly apprehensive!
Posted by: dt4 May 31 2020, 12:55 PM
Added the seat belts and interior seals and trim so the roof can be fitted and not clutter up the garage etc ...
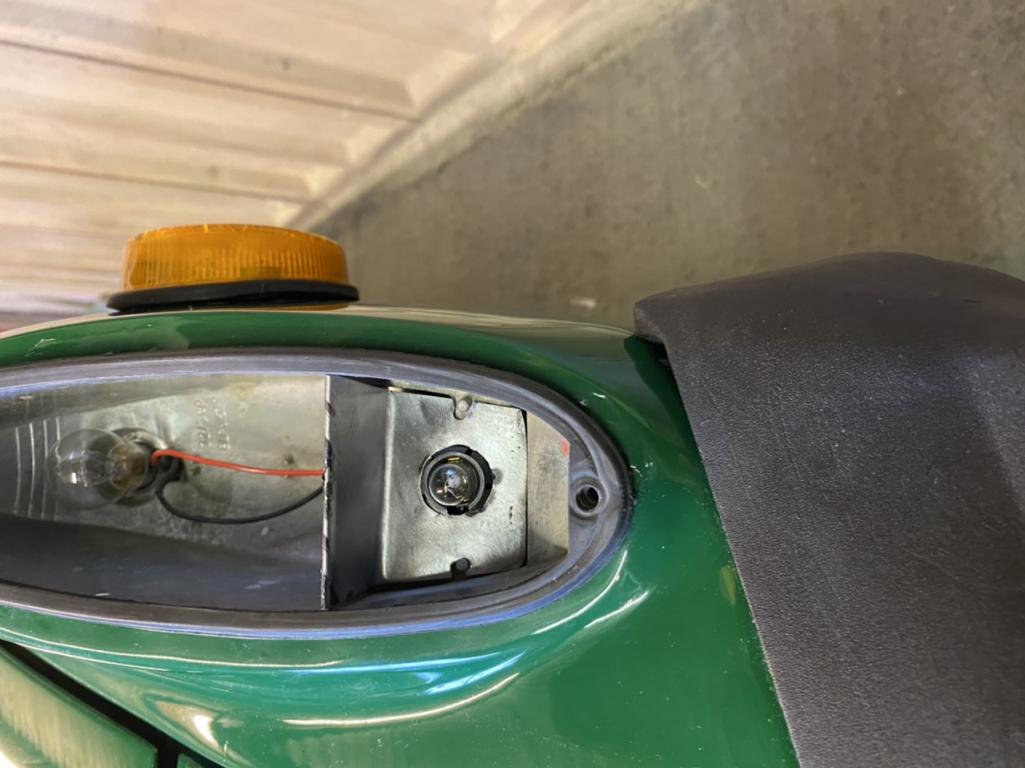
Also fitted the headlights and wired up all the lights
The headlights aren’t functioning yet and whilst the Side lights are working fine the indicators aren’t flashing so there’s more to do there 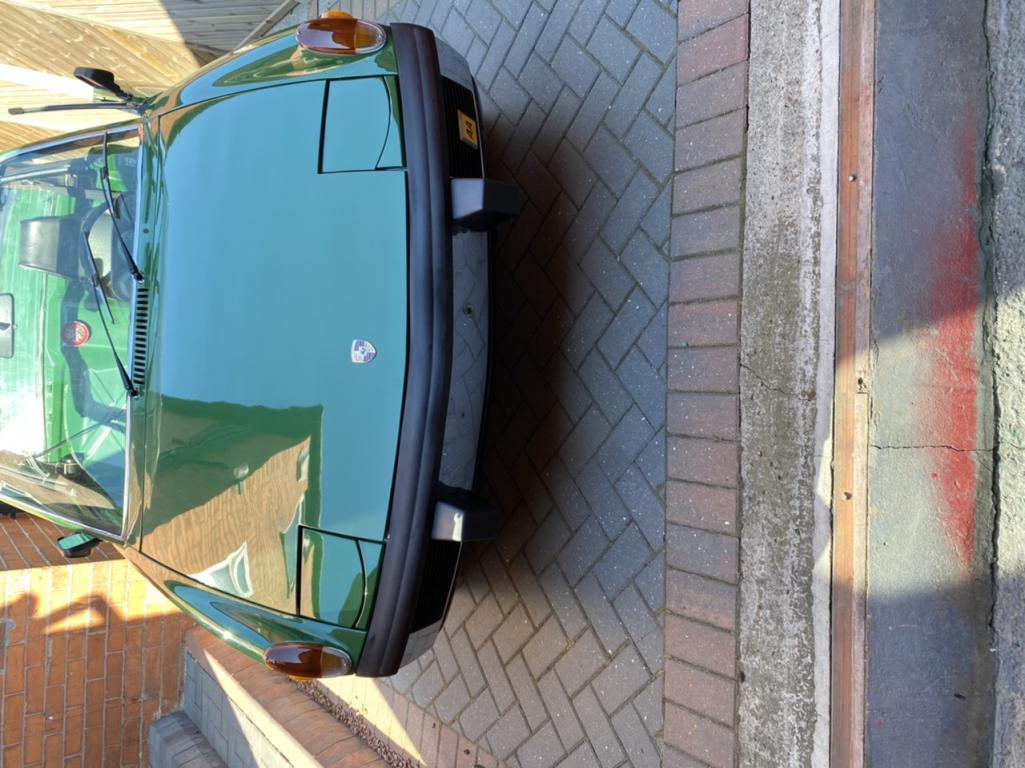
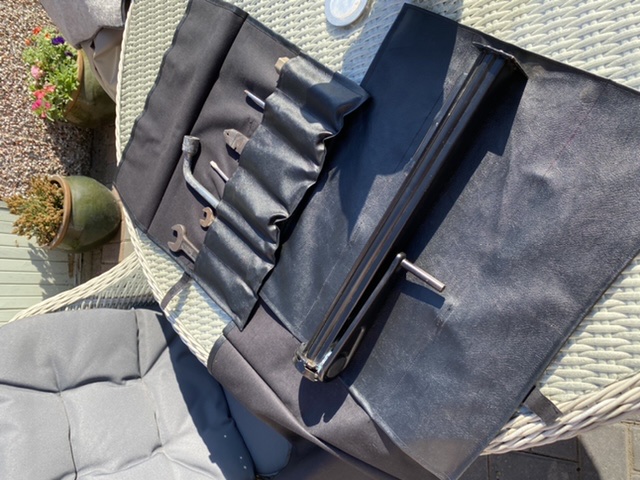
Posted by: dt4 May 31 2020, 12:58 PM
My Mrs made me a tool roll and a bag for the jack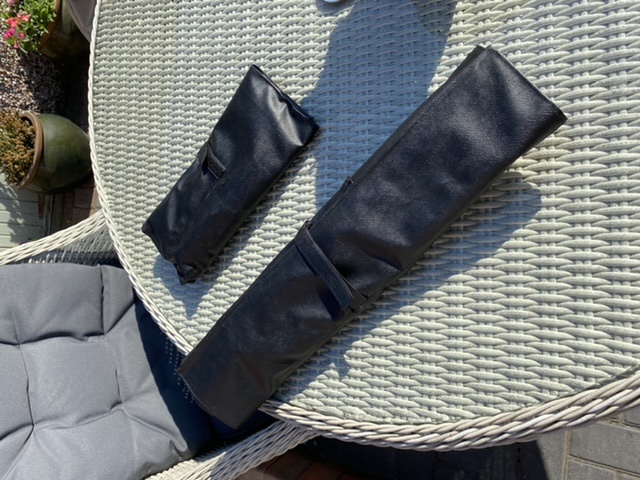
Posted by: dt4 Jun 4 2020, 12:52 PM
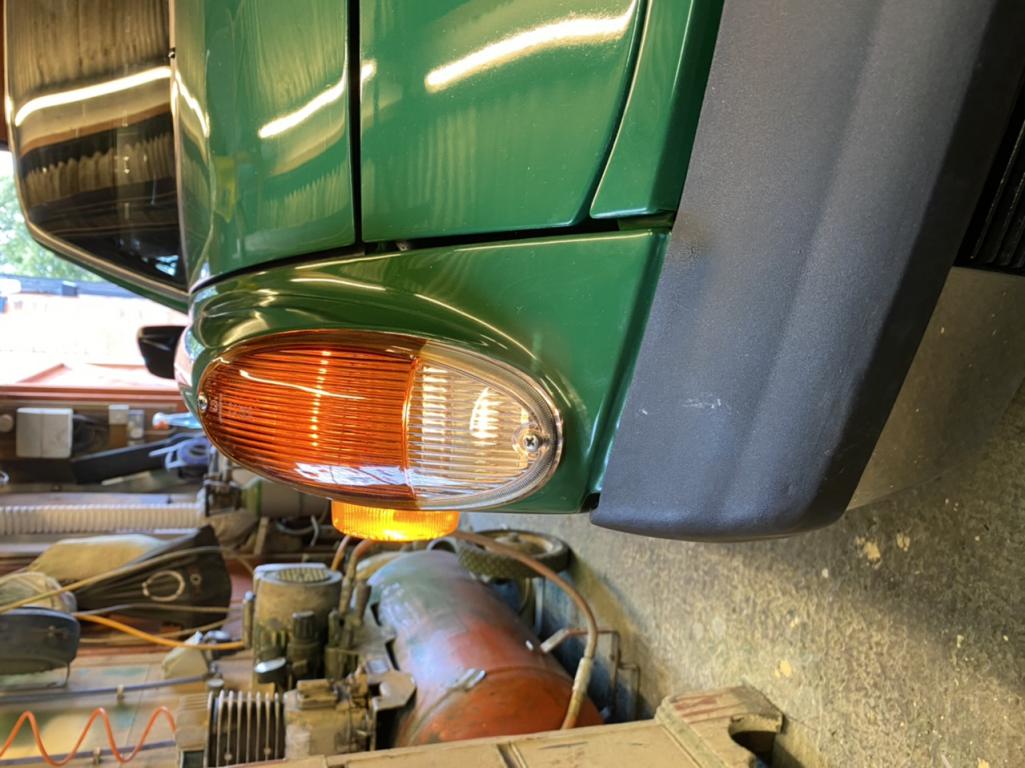
I now having functional lights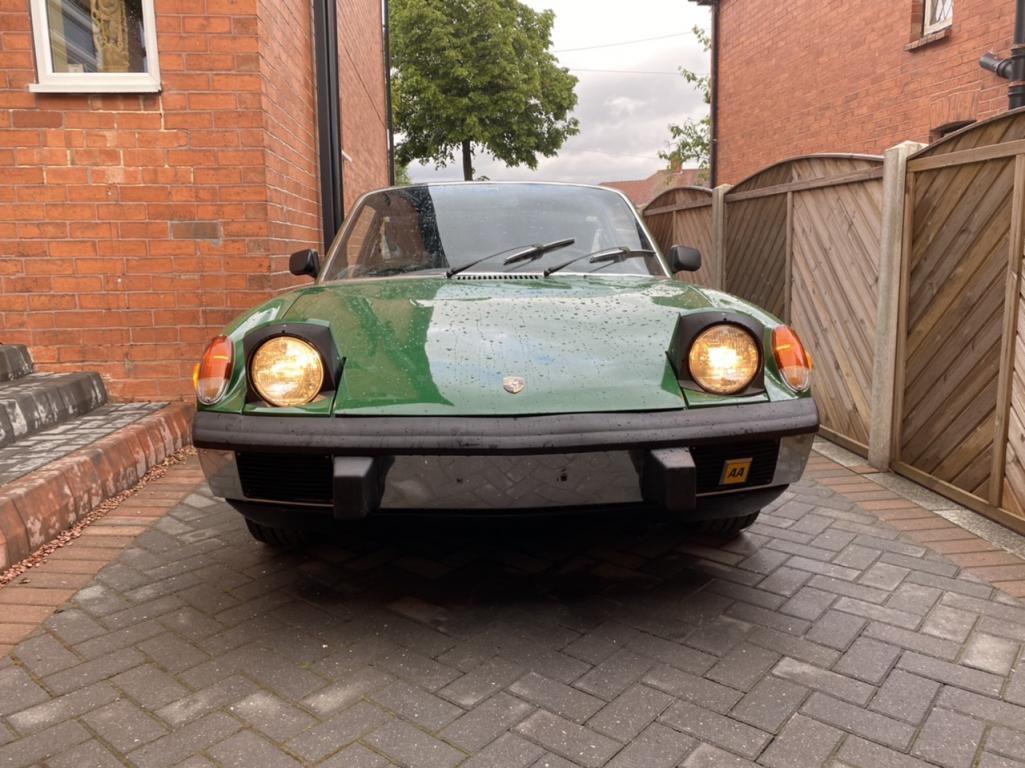
Although the red lights should be on on both sides not the amber 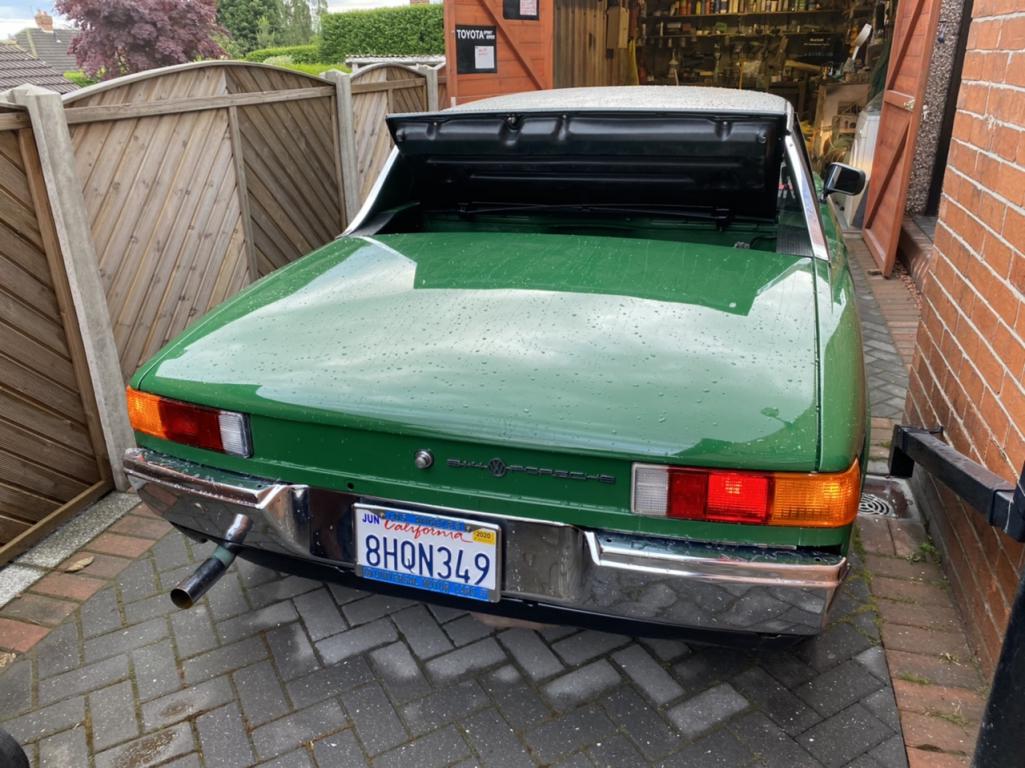
Posted by: Frankvw Jun 4 2020, 02:46 PM
compliments for the progress, but for sure compliments to your Mrs for that nice toolbag she created !
Posted by: dt4 Jun 5 2020, 12:37 AM
Thanks Frank
The tool bag is great, her hobby is sewing and making aprons and bags for craft fairs so it has turned out really nicely.
The tools were my Dads, he never got to see this car so by using his old AA badge and the tools in the tool bag it keeps his memory going
Posted by: dt4 Jun 6 2020, 12:30 PM
Removed the dash so I could fit the dash cover and the windscreen seal 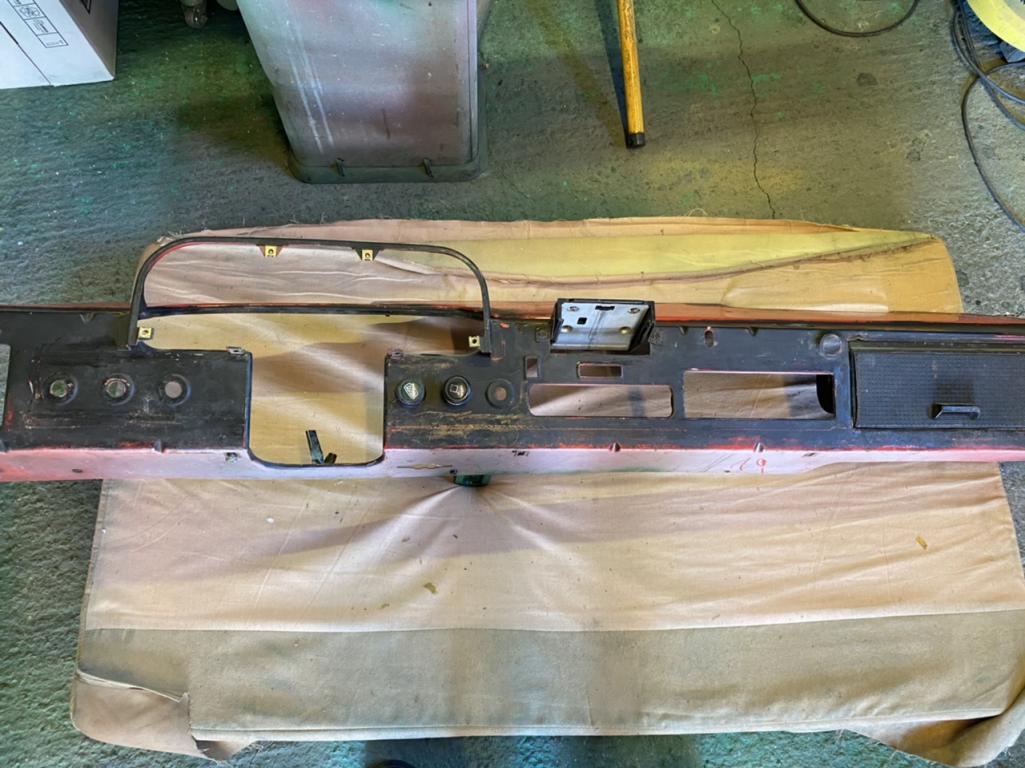

Posted by: dt4 Jun 9 2020, 11:22 AM
I did some work getting the dash in shape, I cut down a seal for the screen to dashboard and used some remaining vinyl for the back of the dash
I tidied up the gauges and the surround and refitted it along with my repaired dash top
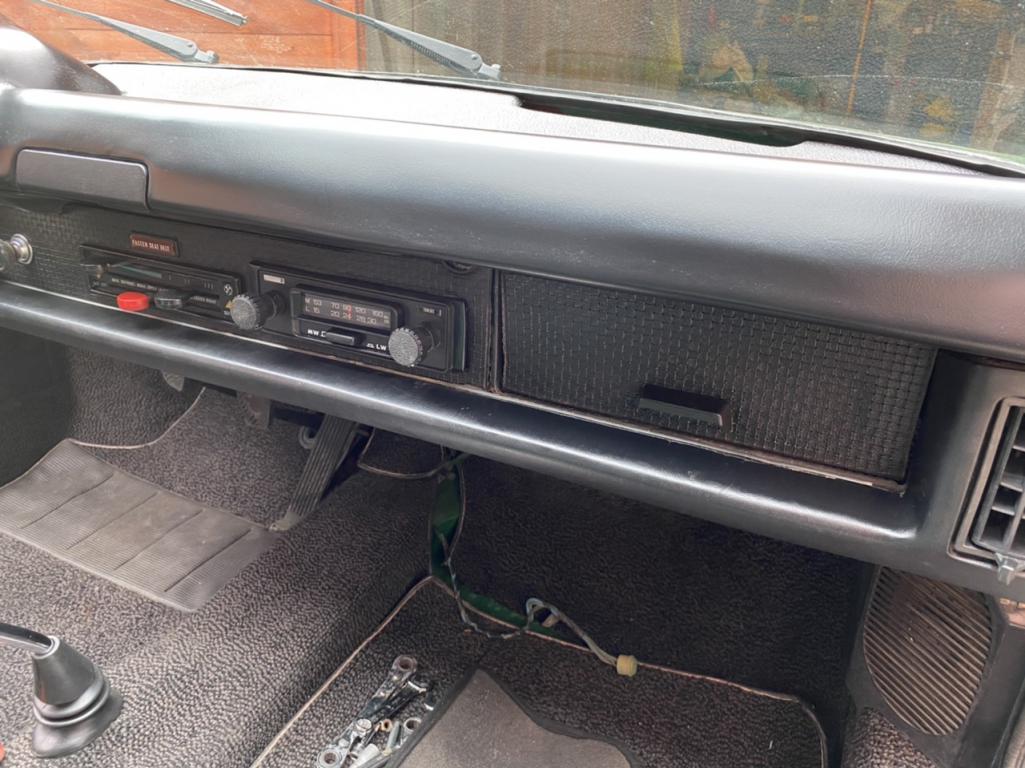
I made a plate up to fit the DIN slot as the radio I picked up needed something to mount to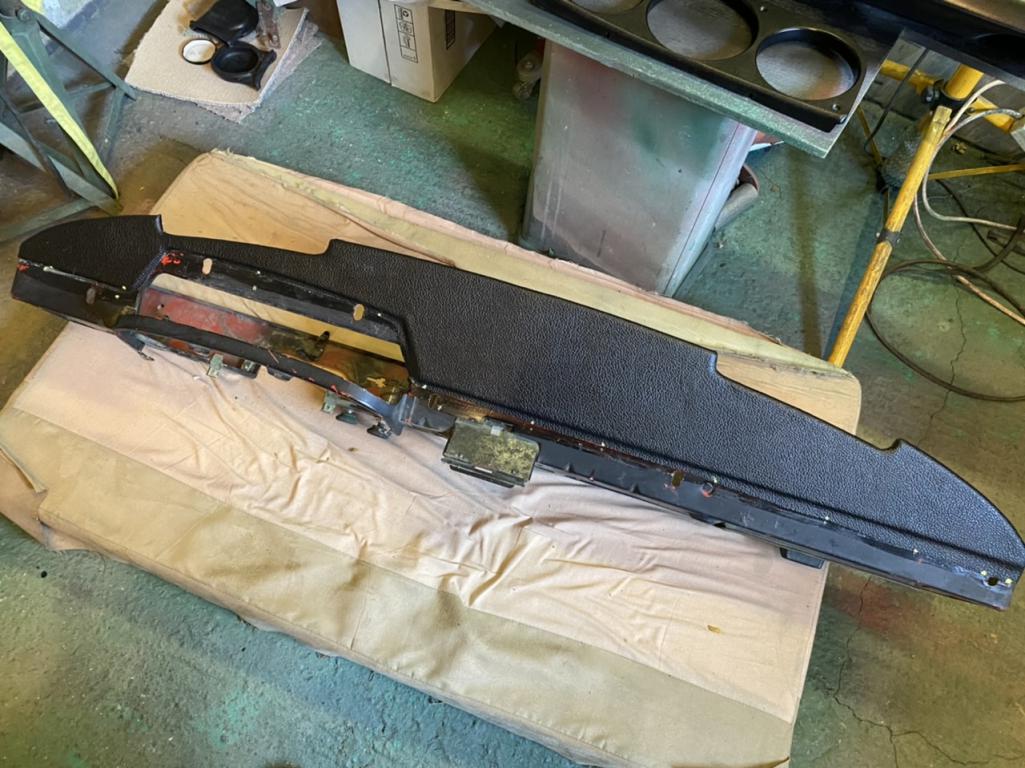
 [attachmentid=747
773]
Attached thumbnail(s)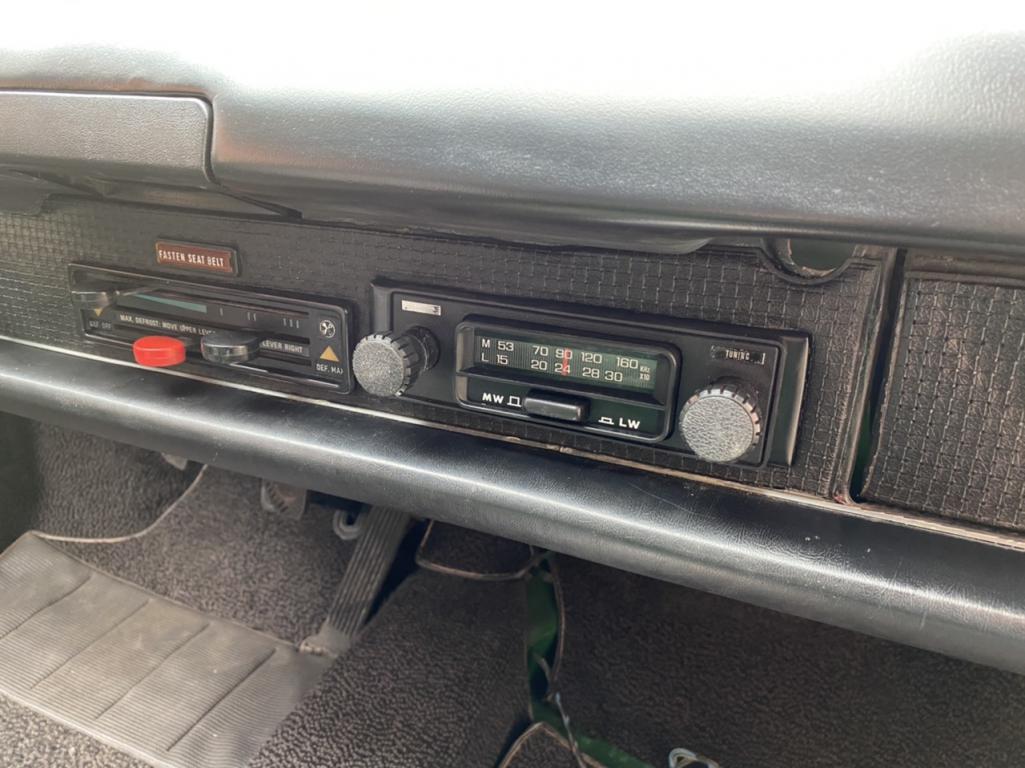
Posted by: Frankvw Jun 9 2020, 11:41 AM
Great progress....this thing is coming together in no time :-)
Do you not have a job that you can build this fast ?? :-)
Posted by: porschetub Jun 9 2020, 01:59 PM
Also added my Dads old Automobile Association badge
He had it on all his cars up to passing away in 2018
We had the same badge here in New Zealand,very cool.
Cars looking great by the way
 .
.Posted by: dt4 Jun 9 2020, 02:17 PM
Great progress....this thing is coming together in no time :-)
Do you not have a job that you can build this fast ?? :-)
I have been working from home for 12 weeks so I am done and dusted by 5pm each day and can get in the garage for a couple of hours
Posted by: dt4 Jun 12 2020, 06:39 AM
I managed to lift the tank into the front without having to disconnect the fuel lines
It was hard work with half a tank of fuel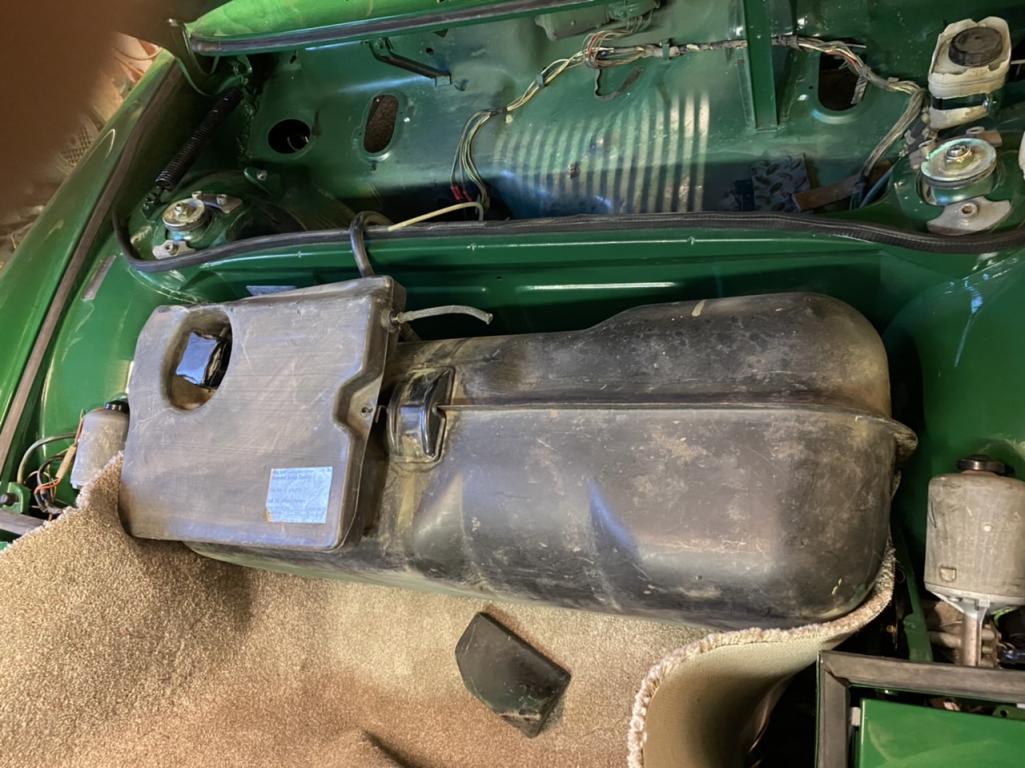
I put the air box together using some contact adhesive to keep the grill in place and then went for it
It took about 15 minutes of pushing and levering but went in pretty easy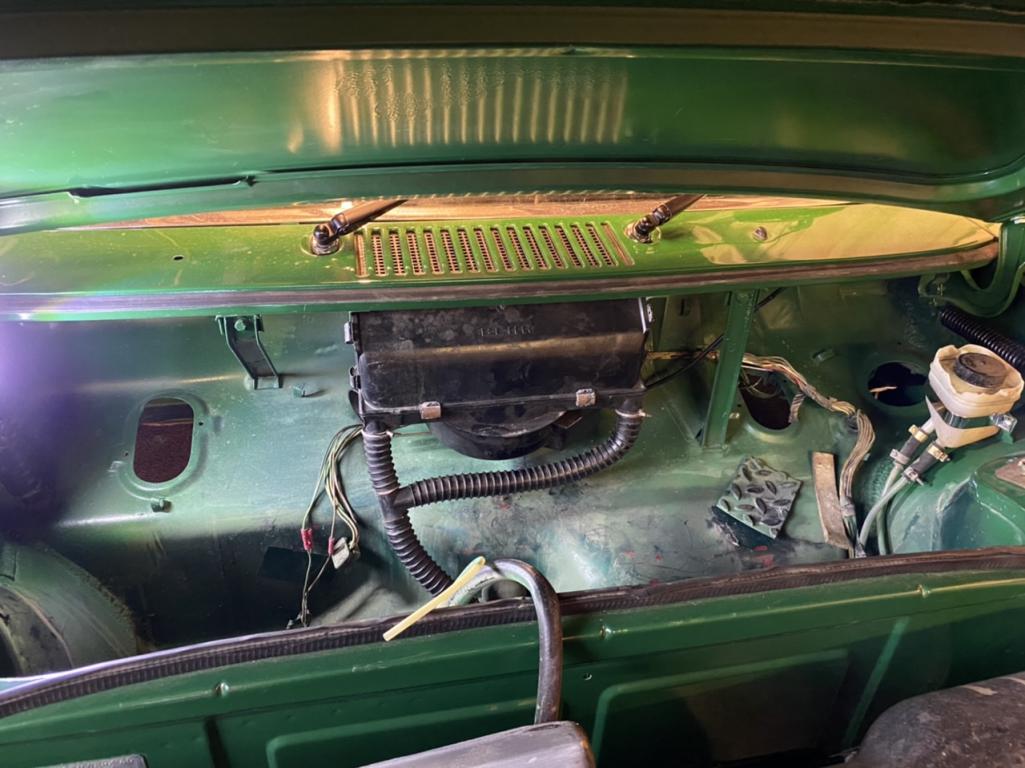
Posted by: dt4 Jun 12 2020, 01:31 PM
It was harder to put the parts in than it was to get the air box in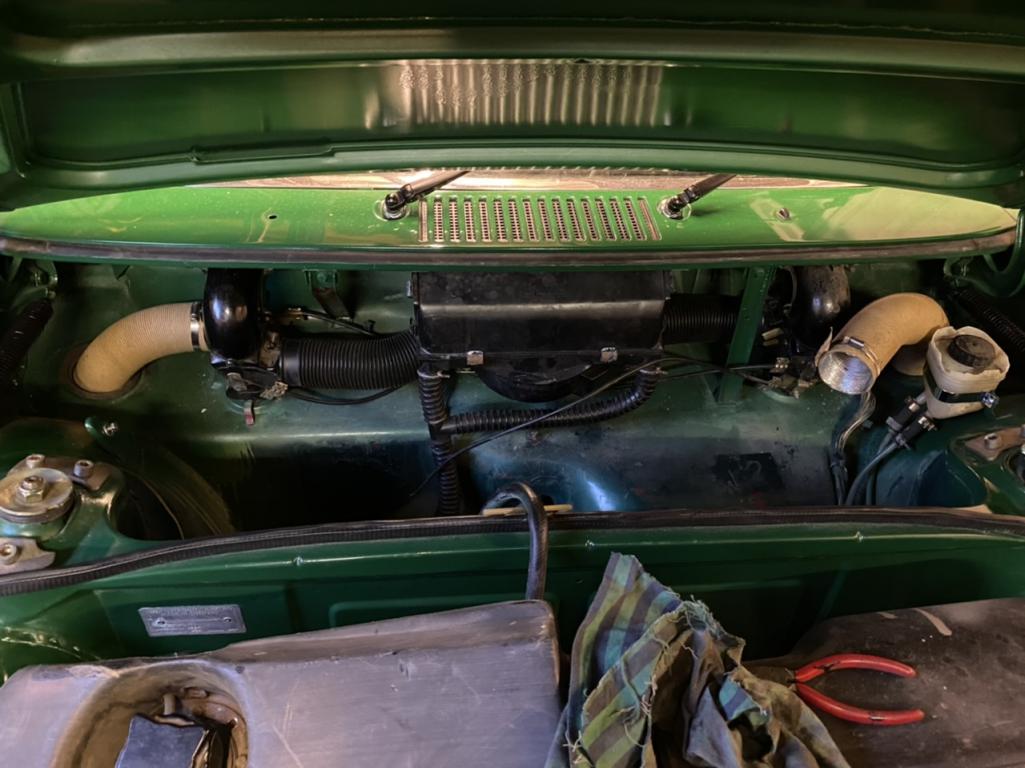
Posted by: dt4 Jun 15 2020, 12:41 PM
Another job completed that I wasn’t looking forward to
I need the seals for the outside but I wanted to figure out how it goes together 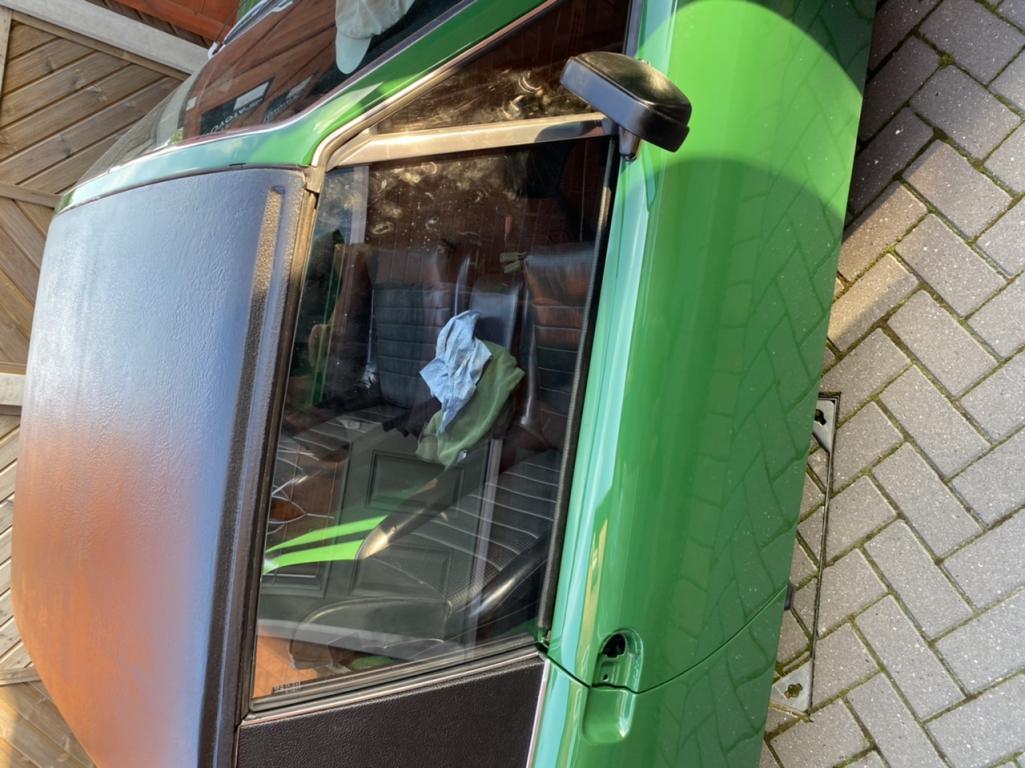
Posted by: dt4 Jun 15 2020, 12:43 PM
Got the ventilation control unit sorted out in the end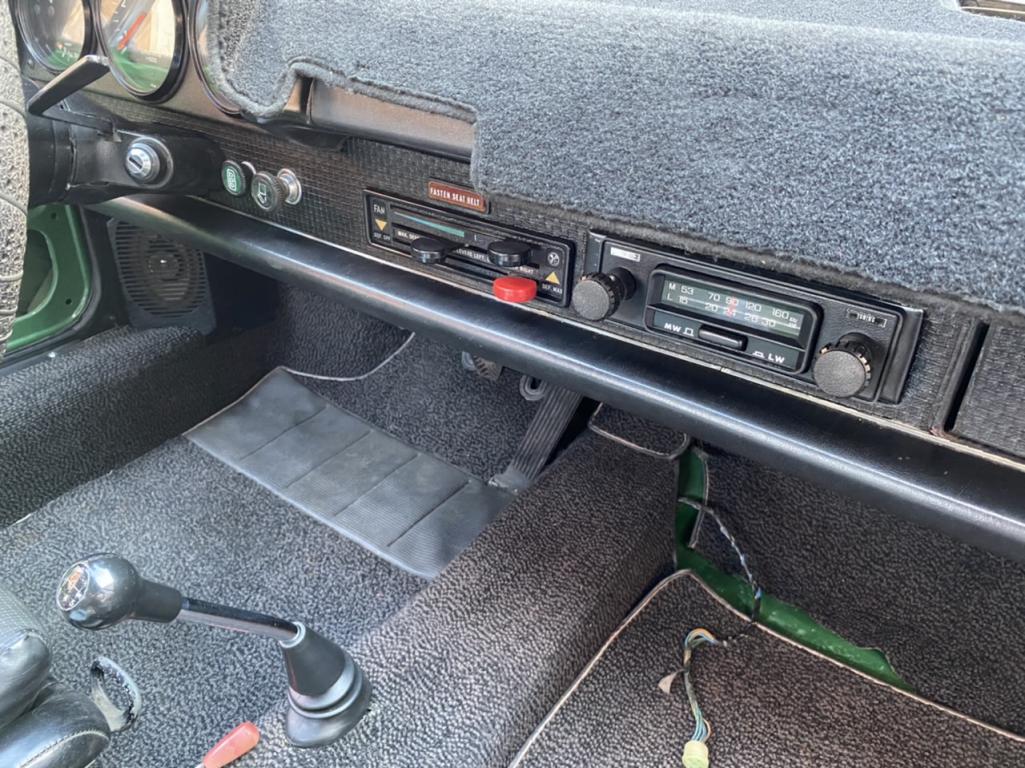
Posted by: dt4 Jun 17 2020, 12:57 PM
Got the centre console fitted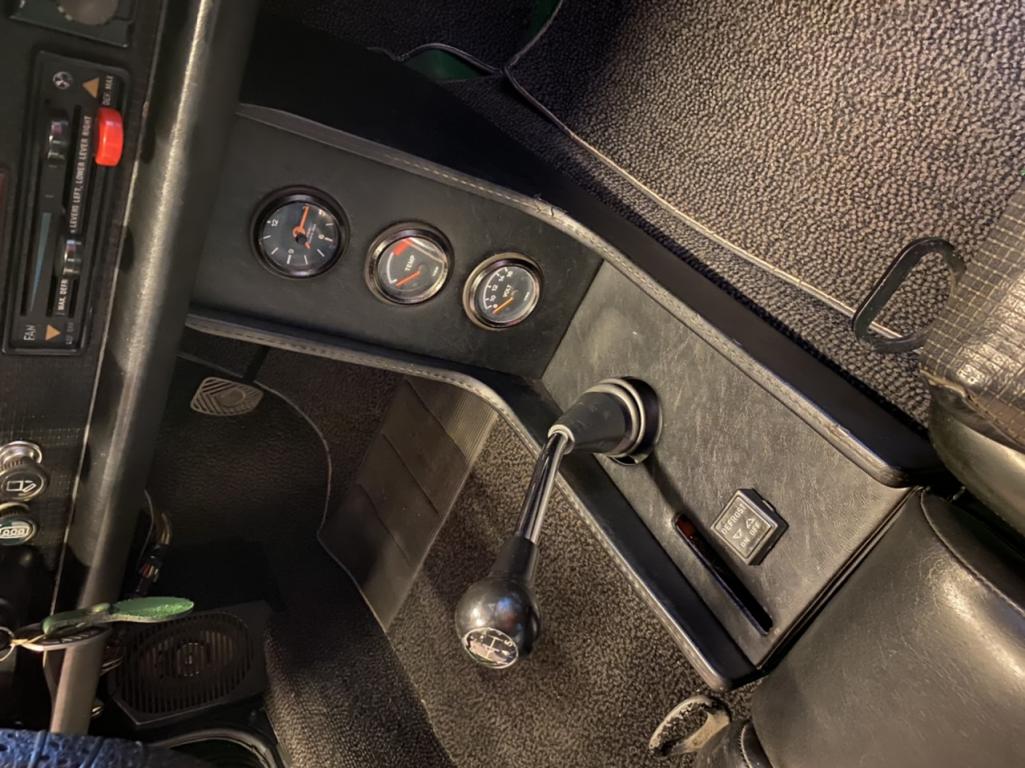
Posted by: dt4 Jun 21 2020, 12:41 PM
Managed to get the windscreen wash all piled up and working plus the door open sensors wired up to the buzzer in the relay
Also used the left over vinyl from the tool roll to cover the exposed sections in the cabin 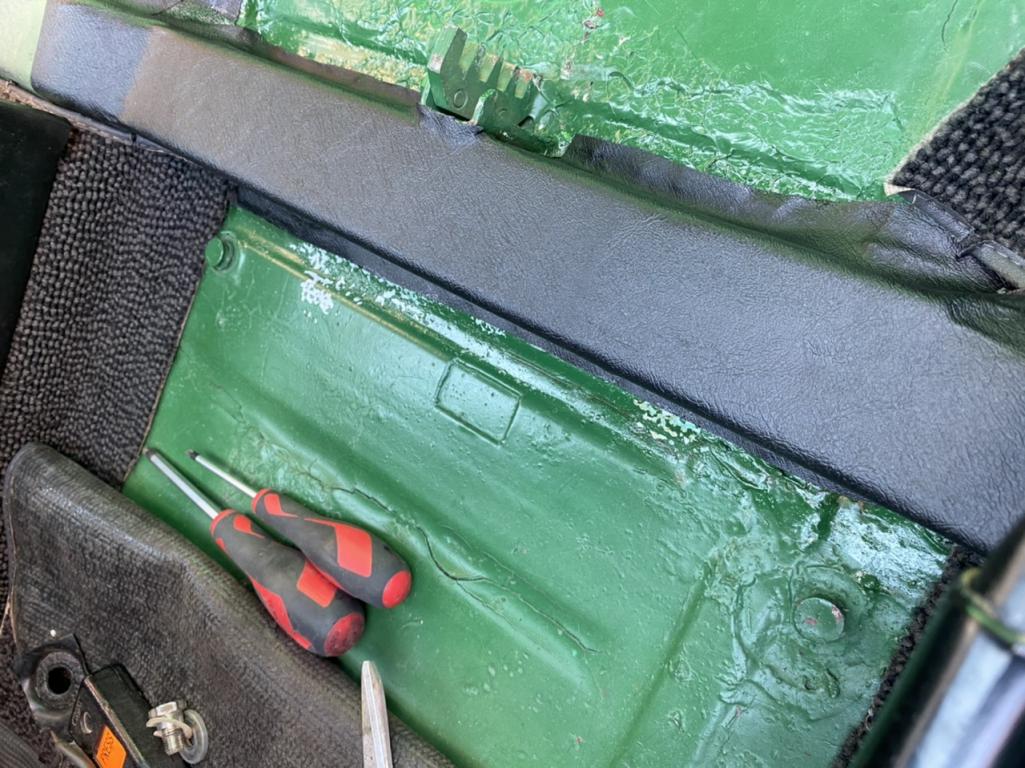
Posted by: dt4 Jun 23 2020, 11:05 AM
Fitted the back pad and light today
Also picked up some 996 mats for $10 as a temporary measure 
Posted by: Nacho Jun 23 2020, 12:35 PM
She's looking really good! a lot better since I last  her here in Cali. Ironically it's the only 914 I've ever driven. I have a rule "Never drive other people's cars" peer pressure kicked in on this one
-Nacho
Posted by: dt4 Jun 23 2020, 01:29 PM
Hey @http://www.914world.com/bbs2/index.php?showuser=20716 was that on the WCR in June last year with chi-town?
how did it drive?
I have only driven it in and out of my garage so i have a lot to look forward to
Posted by: Nacho Jun 23 2020, 02:24 PM
@http://www.914world.com/bbs2/index.php?showuser=23161 she drove great! and like a typical rookie I shifted into 4th instead or 3rd  chi_town only knows how to build cars the right way! You have a solid car to enjoys for many years!
-Nacho
Posted by: dt4 Jul 10 2020, 02:02 AM
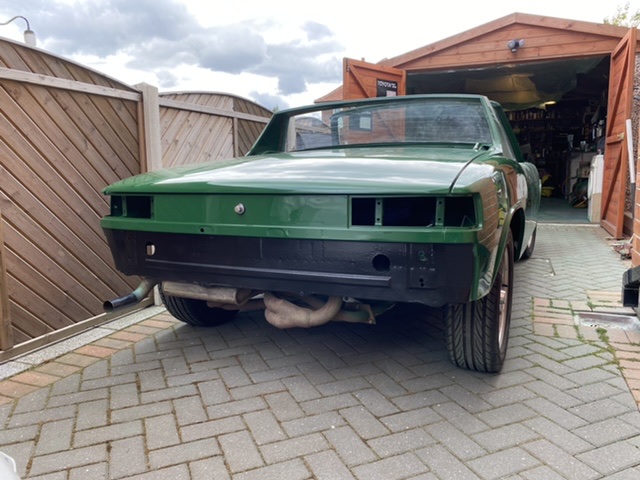
With the exception of a rear bumper top and a few bit’s and pieces to be ordered from 914rubber it’s just about complete
I can’t have it inspected and register it over here until the bumper top is fitted as it houses the license plate lights plus I need to figure out the rear lights for the uk requirements 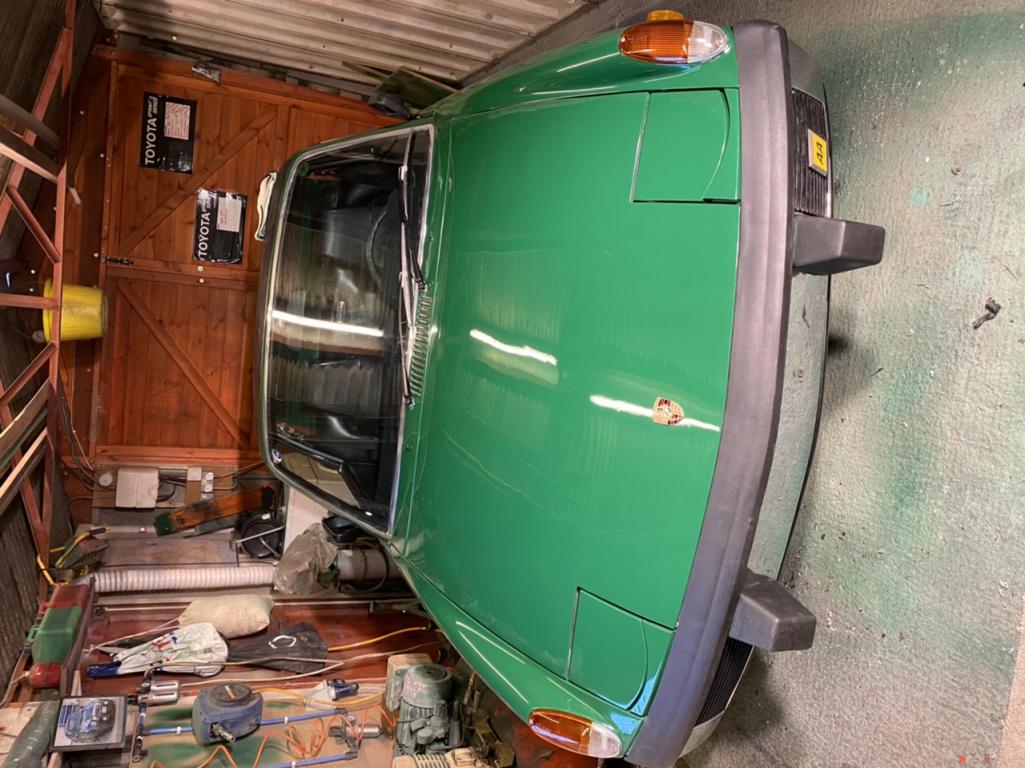
Posted by: porschetub Jul 11 2020, 09:43 PM
How do you go about getting it on the road in the UK ? over here we have the same as your MOT but ours is called a WOF (warrant of fitness ) which is stricter than that for a registered car,any modifications have to be inspected by a engineer and if up to spec for the compliance engineer a modification plate is riveted on,in my case it will be engine,brakes, suspension and wheels and the kicker is that each item has to be checked off separately so it is more $$$.
Hope you have an easy time getting on the road,great work done in a short time and nice car by the way .
Posted by: dt4 Jul 22 2020, 11:12 AM
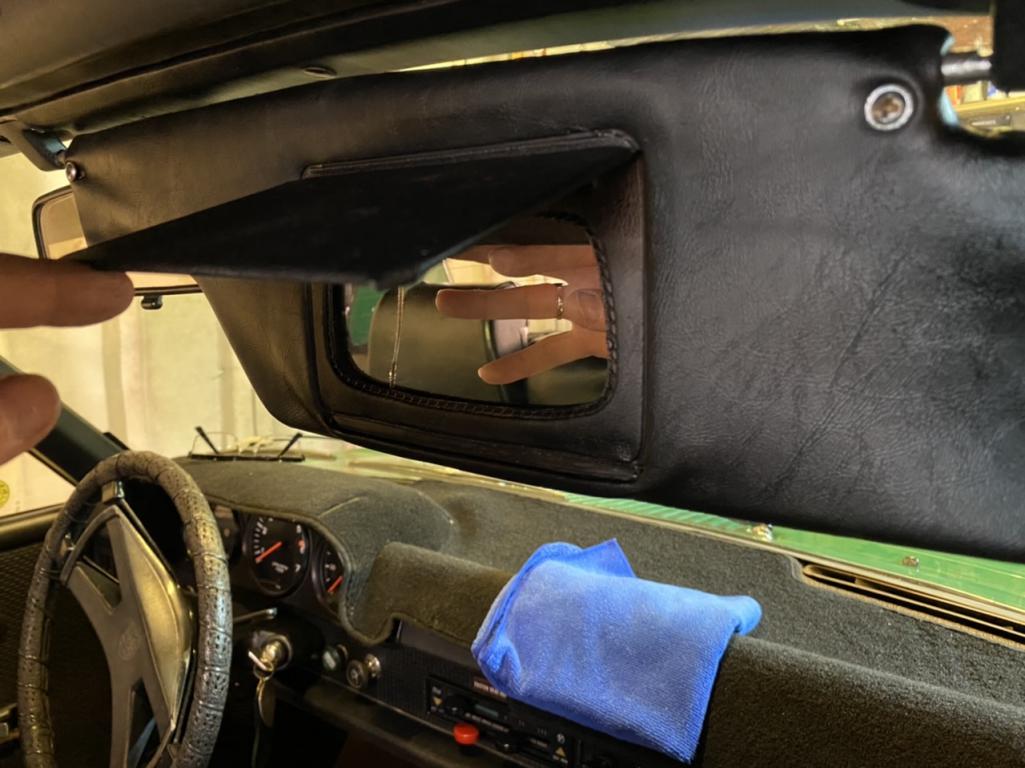
I made a new flap for the passenger side visor, I had to hinge it at the top 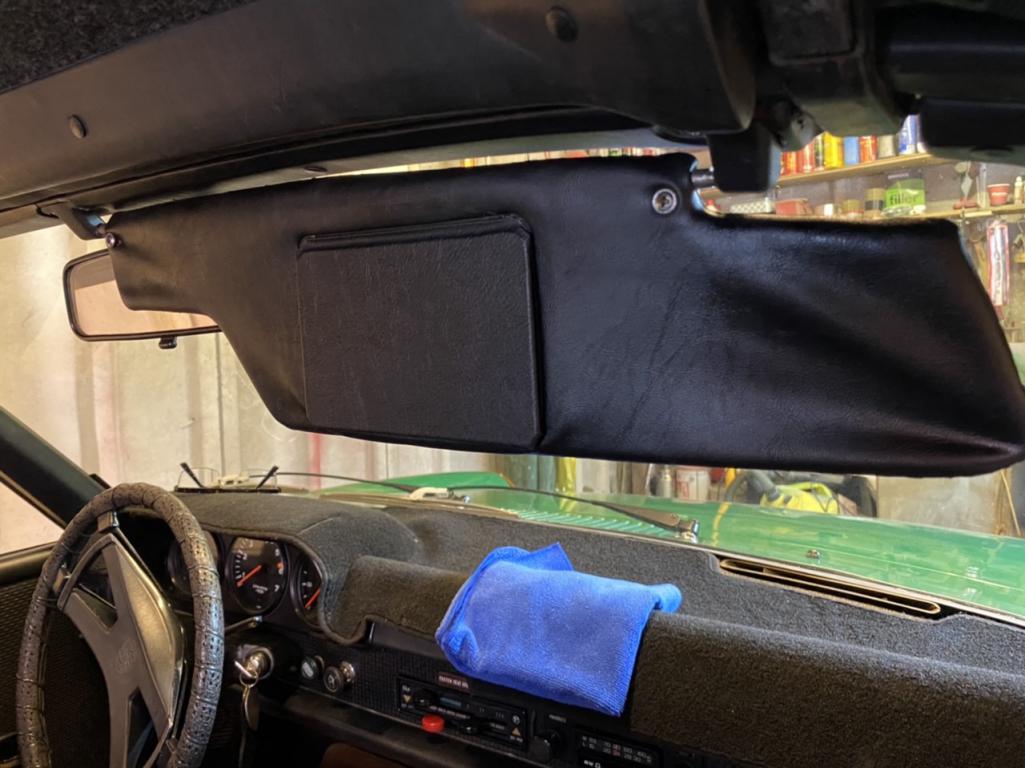
Posted by: dt4 Aug 9 2020, 02:41 AM
I made a couple of brackets to take a side light bulb and fit them into the front light buckets
Don’t know what the tester will make of the amber side markers 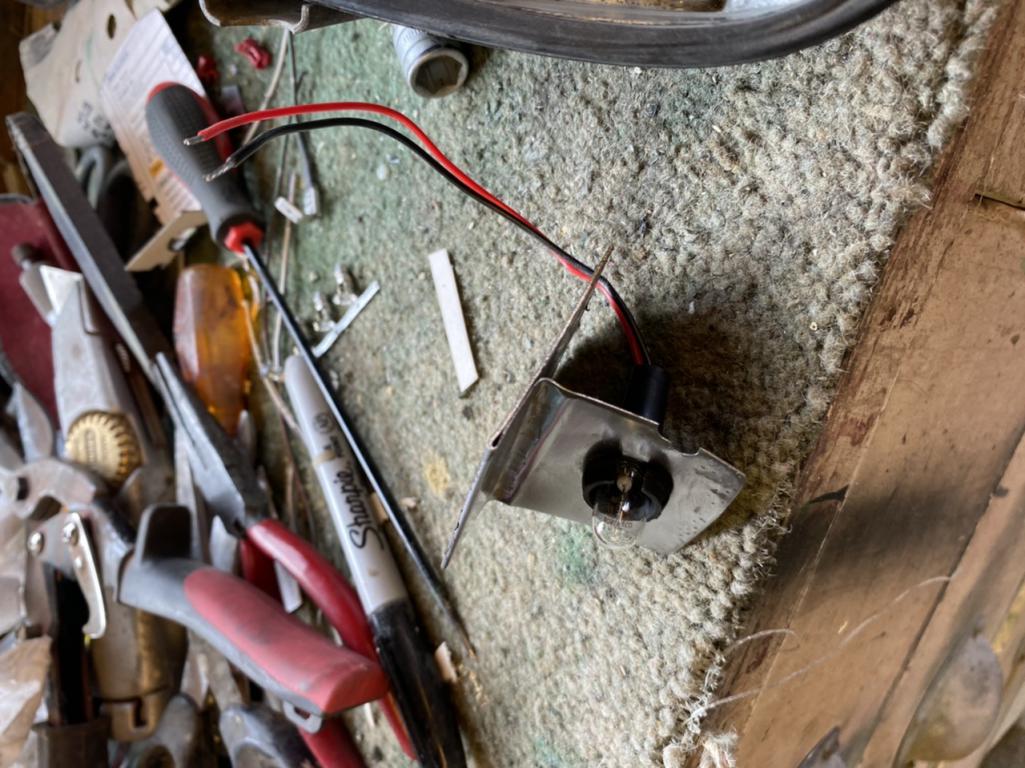
Posted by: Frankvw Aug 9 2020, 03:56 AM
"Don’t know what the tester will make of the amber side markers"
In the past that was an issue as well in the Netherlands, not allowed. Then I think Volvo came with these sidelights on their new cars, and they were approved and after that it was allowed.
My VW T2b has original red illuminated rear side markers. That was not allowed back then, so I had to cut the wire during the test and then it was just a reflector
Now that is also allowed over here.
Posted by: dt4 Aug 25 2020, 04:43 AM
"Don’t know what the tester will make of the amber side markers"
In the past that was an issue as well in the Netherlands, not allowed. Then I think Volvo came with these sidelights on their new cars, and they were approved and after that it was allowed.
My VW T2b has original red illuminated rear side markers. That was not allowed back then, so I had to cut the wire during the test and then it was just a reflector
Now that is also allowed over here.
The MOT guy is some one I have known for 40 years, we played in the same pub football team and he has done my MOTs for all that time so he allows me some lea-way especially when I he is advising me on what needs fixing and what is advisory.
The side markers didn't receive comment, the amber in the front lights did.
My main issue was the parking brake / handbrake - it was at 100% on the drivers side but not releasing fully due to the cable pushing back into the outer sheath and was only at 20% on the passenger side
I have just received replacement cables so I'll fit them and see how it performs
Posted by: dt4 Aug 25 2020, 04:48 AM
New cables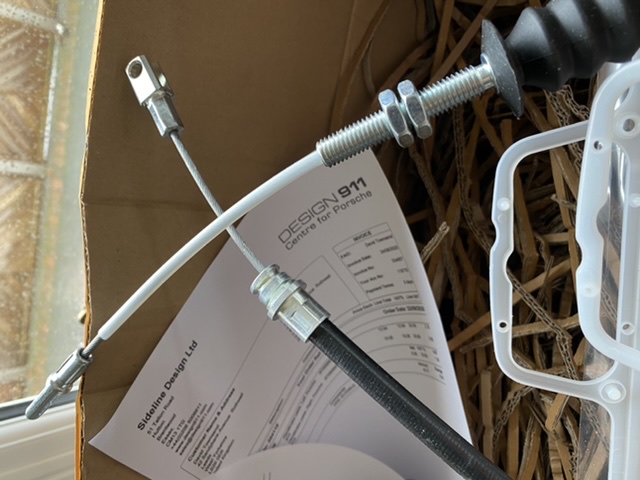
Posted by: Frankvw Aug 25 2020, 05:13 AM
welll...'just' the handbrake at the test is a great score after all the work you did !
After your work, the handbrakecables are not the biggest job to finalize !!!
Good luck.
Posted by: wysri9 Aug 25 2020, 06:04 AM
Agreed - that is a great result! Well done. I also have a "friendly" MOT man - I hope he is as sympathetic as yours......
Posted by: dt4 Sep 14 2020, 08:28 AM
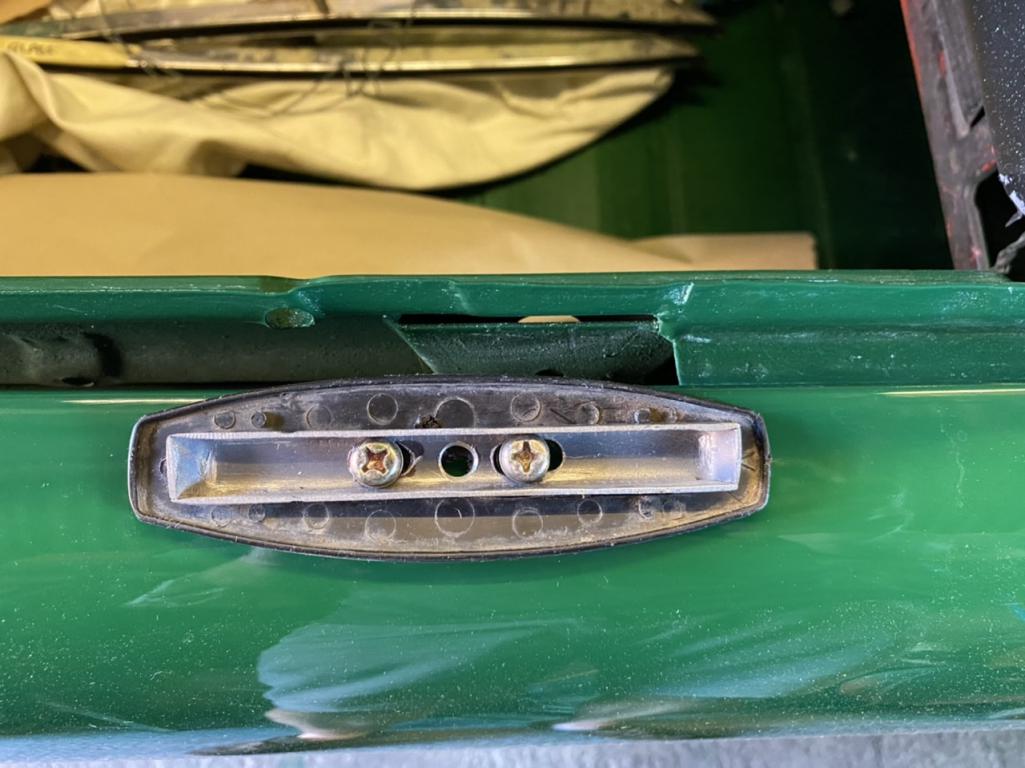
Lost a circlip and the targa latch kept flying apart
A quick, for pennies, replacement star push washer has rescued the day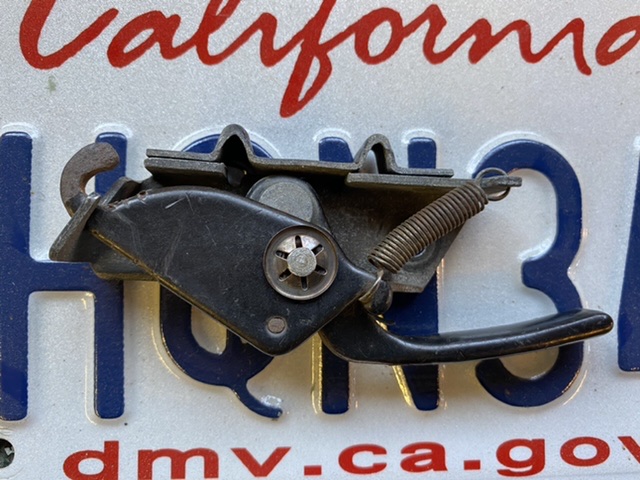
Posted by: Frankvw Sep 14 2020, 12:29 PM
good. Did the new handbrake cables solve your handbrake issue ? did you end up with Porsche or Dansk cables ?
Posted by: dt4 Sep 14 2020, 01:46 PM
good. Did the new handbrake cables solve your handbrake issue ? did you end up with Porsche or Dansk cables ?
havent taken it back for retest yet as I am waiting for the registration documents to come through but the drier side releases now so thats sorted one side out
They arent Porsche cables but not sure what make they are, they were identical to the cables that came off the car
Posted by: dt4 Oct 1 2020, 12:35 PM
Not registered and can be driven on the road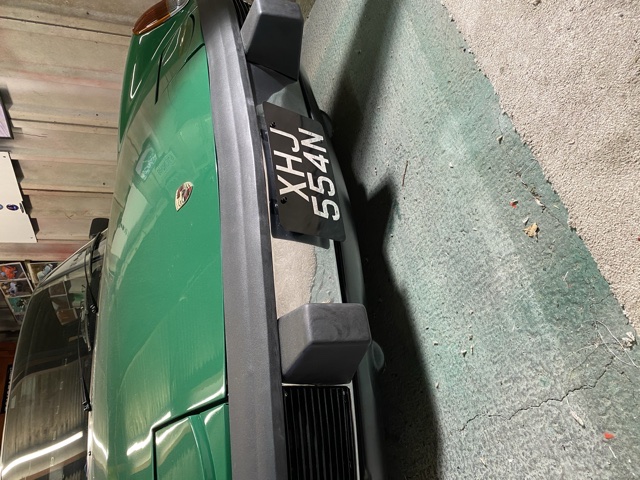
Posted by: ndfrigi Oct 1 2020, 12:48 PM
yehey! congratulations! I saw your car at the seller’s house here before it was ship.
Posted by: dt4 Oct 1 2020, 01:16 PM
if you speak to Dylan, let him know it will be being driven in the UK this weekend approximately 15 months since it was driven on the WCR last June
Posted by: ndfrigi Oct 1 2020, 02:04 PM
if you speak to Dylan, let him know it will be being driven in the UK this weekend approximately 15 months since it was driven on the WCR last June
Sure! I think he will see this post also. Although lately he’s been quiet in this forum.
Posted by: dt4 Oct 11 2020, 07:36 AM
Went out for a drive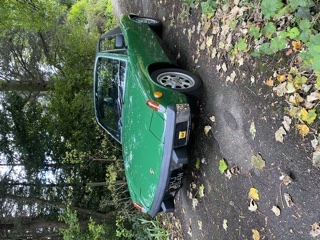
Posted by: dt4 Oct 11 2020, 07:37 AM
Why do the photos always get turned through 90 degrees WTF
Posted by: Gint Oct 11 2020, 07:52 AM
Orientation issues between various platforms.
https://www.ivertech.com/Articles/Image-Rotation-Issue-With-Windows-10.aspx
Posted by: bkrantz Oct 11 2020, 08:46 PM
Orientation issues between various platforms.
https://www.ivertech.com/Articles/Image-Rotation-Issue-With-Windows-10.aspx
What works for me is to open the jpeg file before posting, rotate the photo through 360 degrees, save and close.
Posted by: dt4 Apr 27 2021, 11:37 AM
went on a run to the coast, the longest run to date at around 150 miles round trip
the car ran great although the speedo stopped working, there is an annoying squeak behind my head and the passenger visor drops down and knocks the rear view mirror out of position and wont stay up
Posted by: dt4 Jul 7 2021, 10:01 AM
Heater tubes are back from powder coating 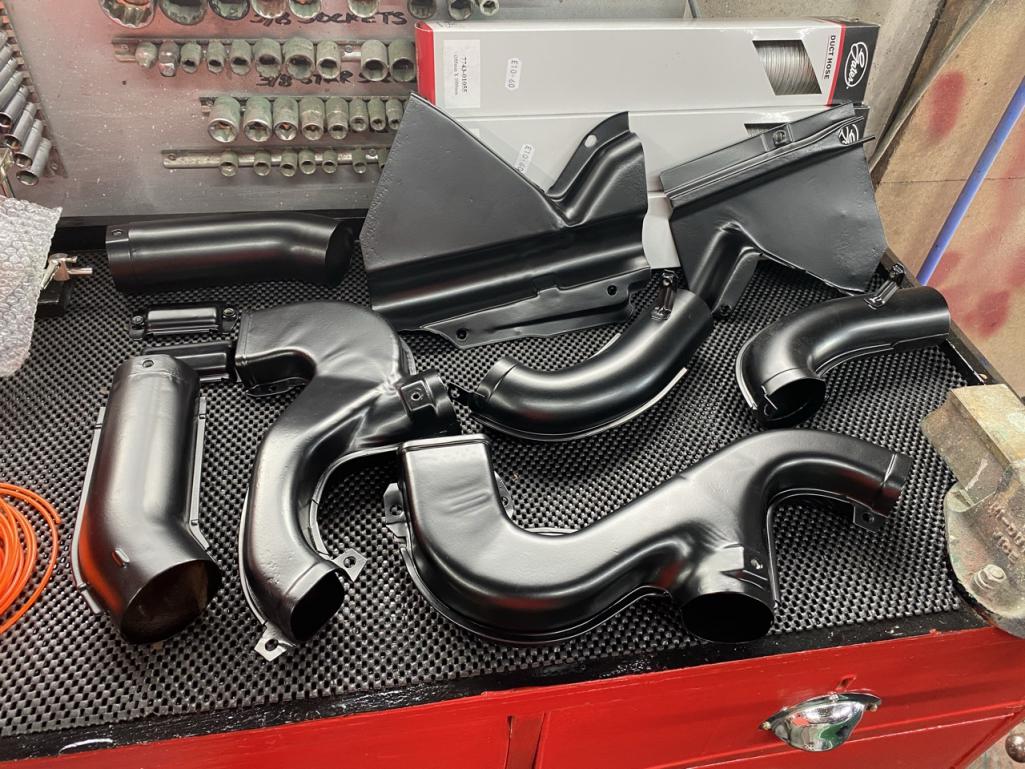
Posted by: Dobbsy Jul 7 2021, 10:38 AM
Nice to see your progress, where did you get the flexible ducting hose from, I will be need some soon.
Posted by: dt4 Jul 7 2021, 12:25 PM
Nice to see your progress, where did you get the flexible ducting hose from, I will be need some soon.
I got it from my auto supply shop, the best round here - Auto Spares Kippax (ASK)
They had it in 55mm and 60mm so perfect for the hoses from the fan to the tubes and from the flapper boxes to the tubes in the longs
Posted by: dt4 Sep 5 2021, 11:45 AM
I picked up a pair of driving lights at an auto jumble yesterday and fitted them today
Attached thumbnail(s)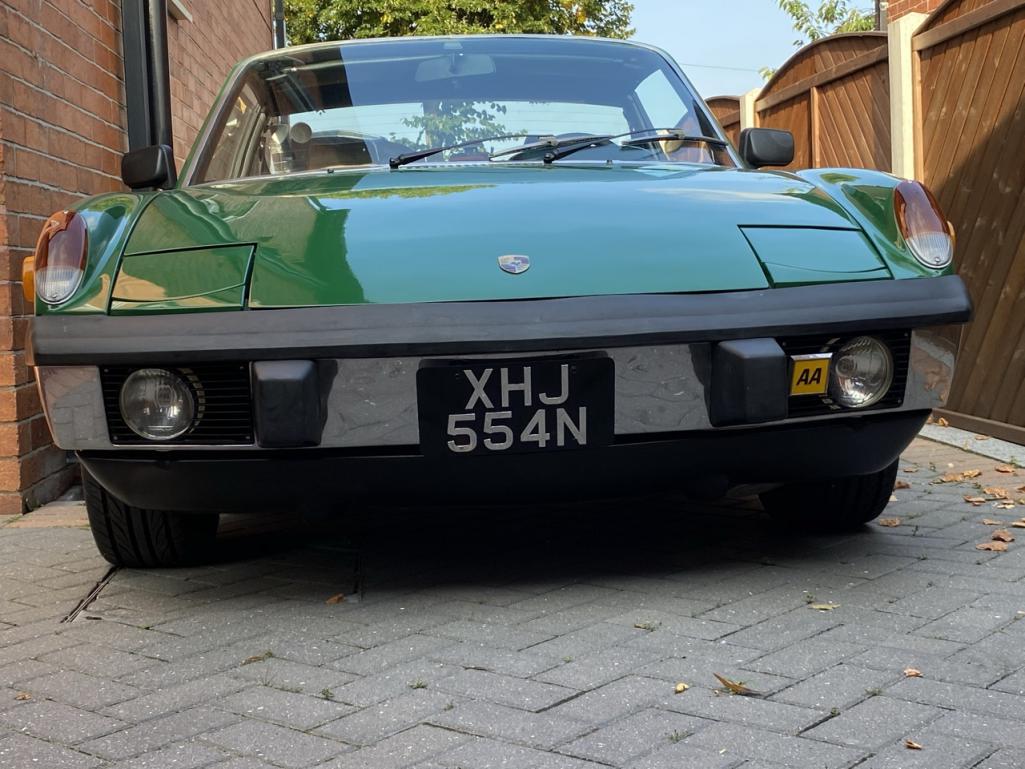
Posted by: dt4 Sep 5 2021, 11:47 AM
Looks nicer than without
Attached image(s)
Posted by: Shivers Sep 5 2021, 08:10 PM
Nice job dude, 100% pure concentrated fun. I found the aux lights really finished off the front.
Posted by: Cairo94507 Sep 6 2021, 06:12 AM
I agree; the lights really add to the great look of the front bumper.
Posted by: FlacaProductions Sep 6 2021, 09:59 AM
Looks great - and I'm always surprised how good the contrasting grills look. Black with chrome bumpers or chrome with black bumpers. Mine is black with black bumpers and they all look good.
Posted by: horizontally-opposed Sep 6 2021, 11:03 AM
Looks great - and I'm always surprised how good the contrasting grills look. Black with chrome bumpers or chrome with black bumpers. Mine is black with black bumpers and they all look good.
Perhaps it's because the 914's bumper openings exactly correspond with its headlight lines? Contrasting grilles help highlight this subtle (and very cool) design cue, which is usually "lost" thanks to the black bumper strip, grilles matching the finish of the bumper, and trim pieces in front of the headlights.
Posted by: dt4 Sep 10 2021, 11:57 AM
Got the wiring sorted out today 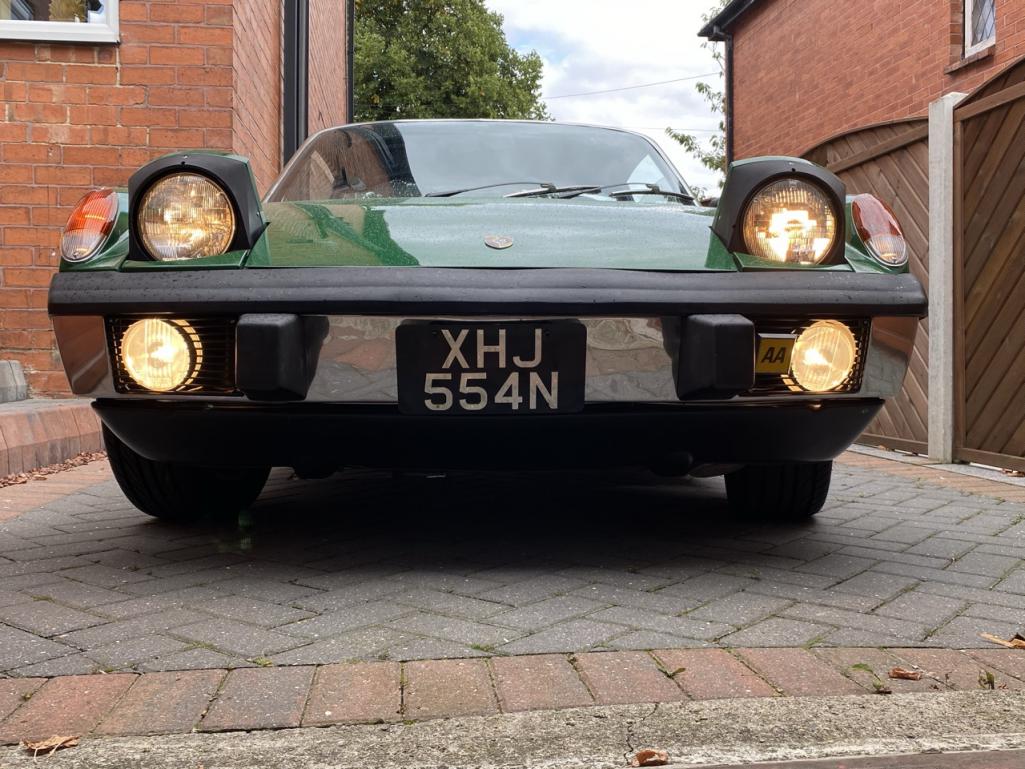
Posted by: dt4 Oct 8 2022, 12:05 PM
the car is running great although the miles per year is measured in hundreds not thousands
I am thinking of selling aswe are moving house and I could do with cash to ease the pain due to the ever increasing mortgage interest rates
Powered by Invision Power Board (http://www.invisionboard.com)
© Invision Power Services (http://www.invisionpower.com)