Printable Version of Topic
Click here to view this topic in its original format
914World.com _ 914World Garage _ Project Thread Fredriks GT build
Posted by: GTSandberg Aug 23 2019, 08:08 AM
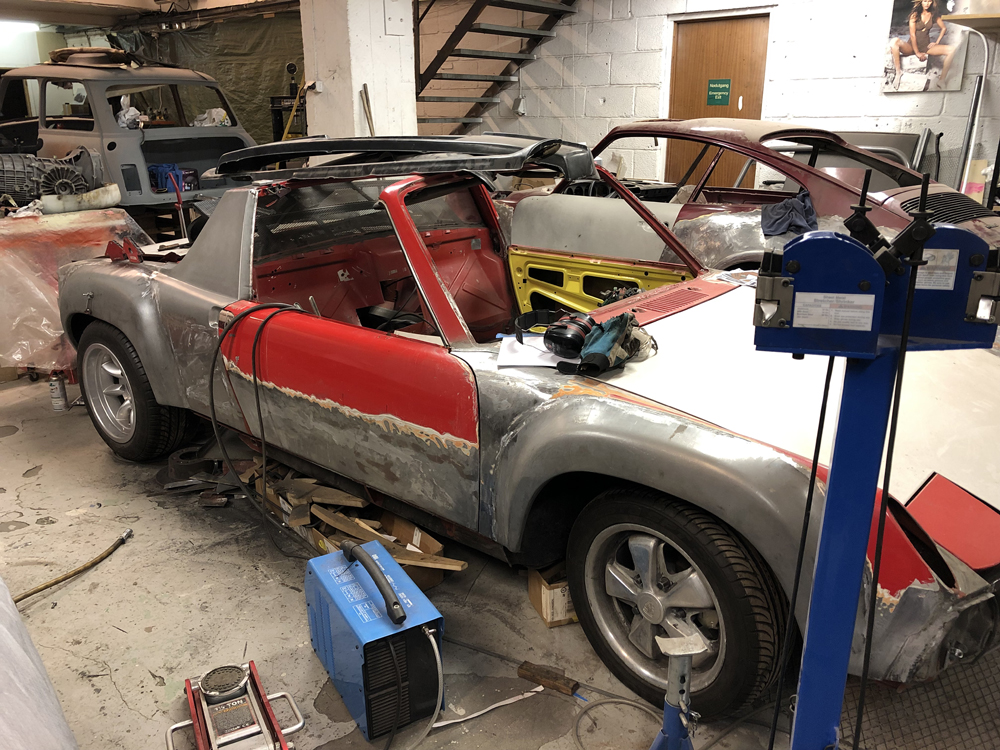
I am starting this thread "in medias res" with the car as it is today.
Then I will post a confusing mix of past and present, showing the project updates and process. Promise to nerd out on the details.  .
.
Posted by: mb911 Aug 23 2019, 08:29 AM
Will be watching.
Posted by: Retroracer Aug 23 2019, 12:59 PM
Ditto. Keep the posts coming!
- Tony
Posted by: Cairo94507 Aug 23 2019, 05:30 PM
Love the build threads. 
Posted by: tygaboy Aug 23 2019, 08:07 PM
Great looking with the Minilites/Fuchs mix! And it looks like there's been a lot of metal work done. I'd love to see details on all that, if you have it.
Keep the posts coming and best of luck with your build. 

Posted by: GTSandberg Aug 26 2019, 07:55 AM
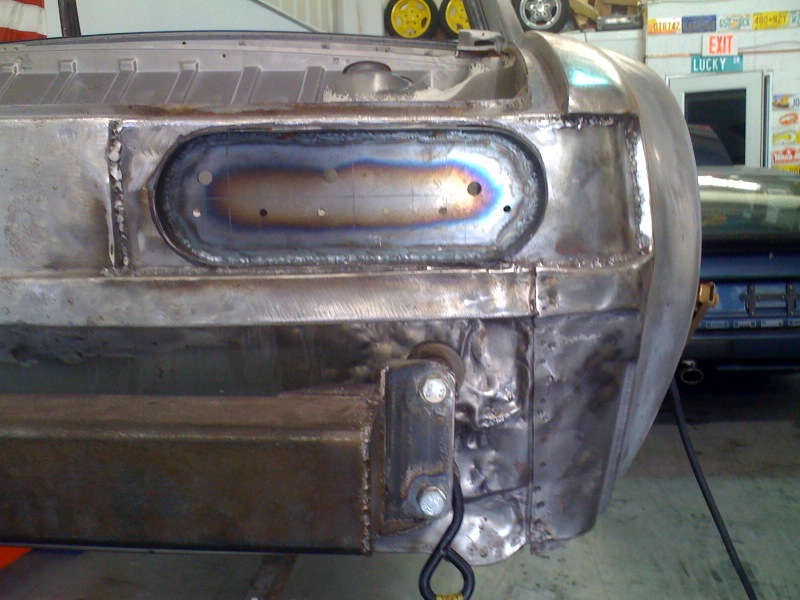
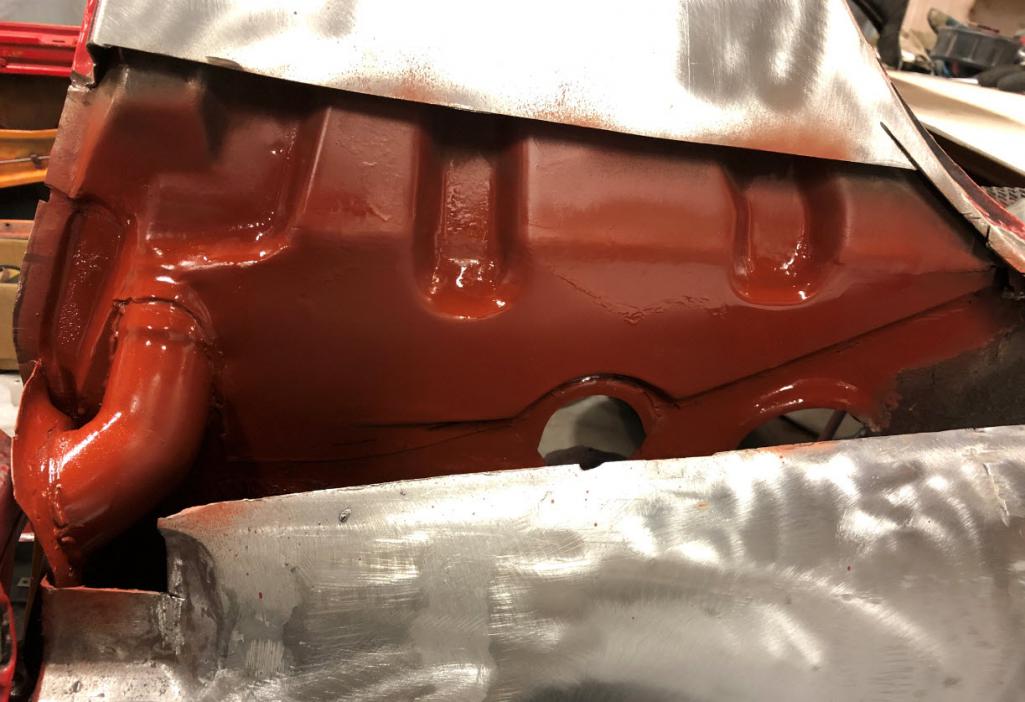
Ok, so the hell hole, turns out it was not rust free.. Hælveteshøl it would be called in Norwegian btw.
It seemed to be solid, but some closer investigation revealed sloppy previous rust repairs. (x2)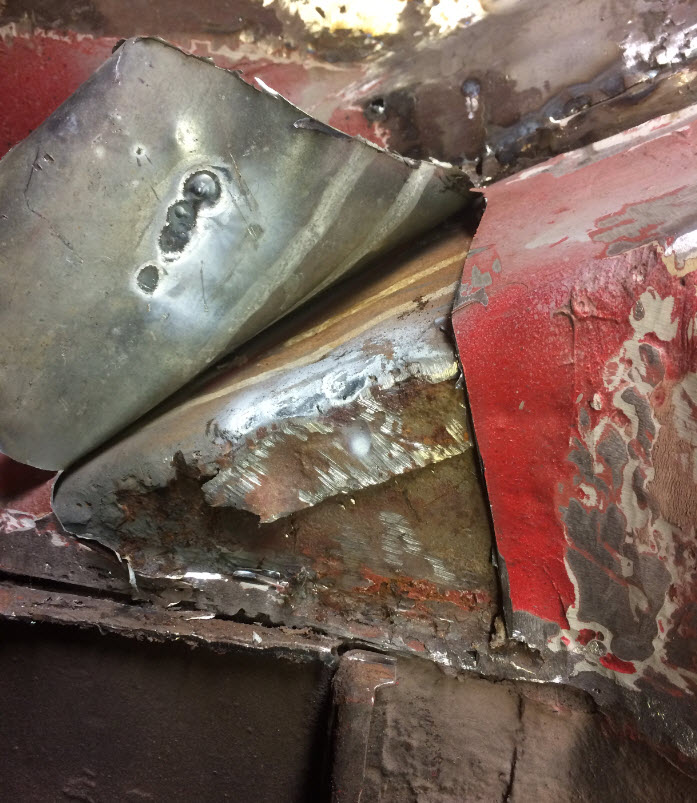
Not one, but two layers of new metal without removing the original disaster area.
After removing the old crap I started fabricating the new parts. It is not really very complex geometry, and only two areas needed "special tooling".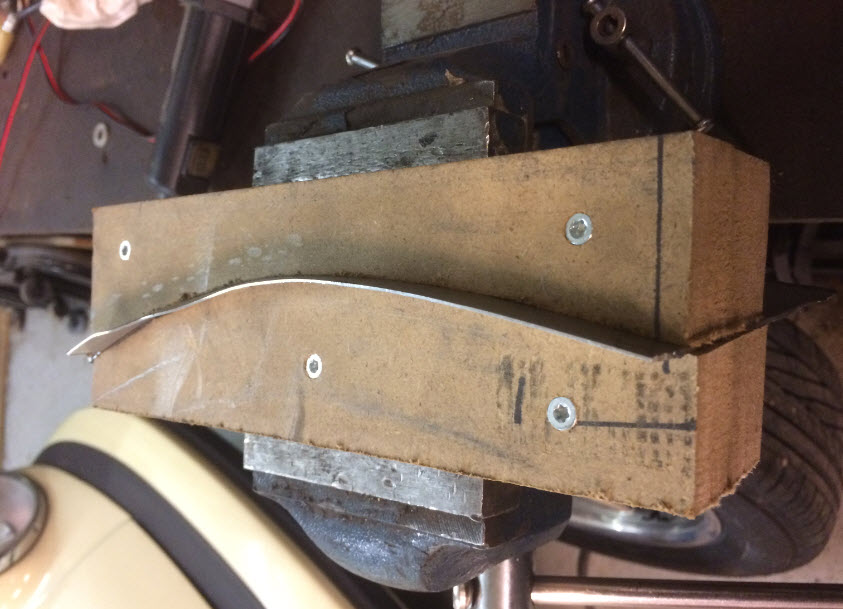

This is the bottom of the hole, and the flange towards the side.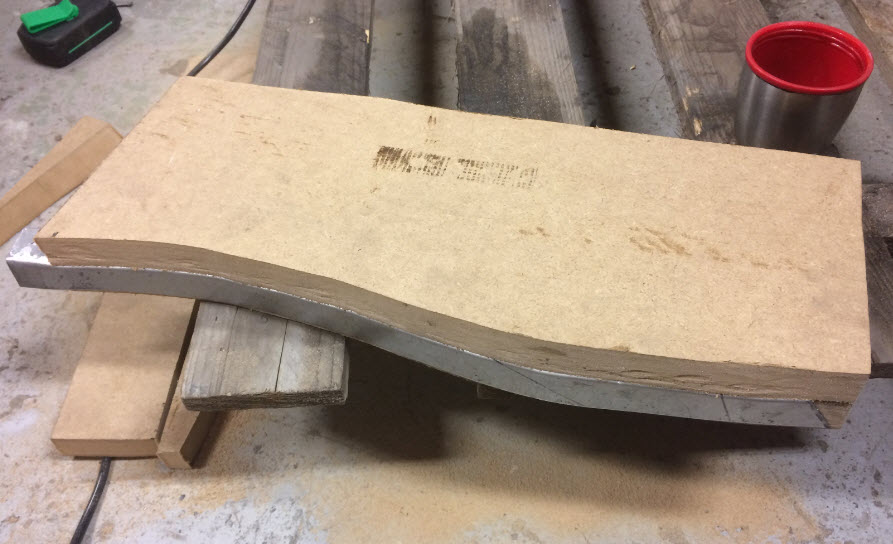
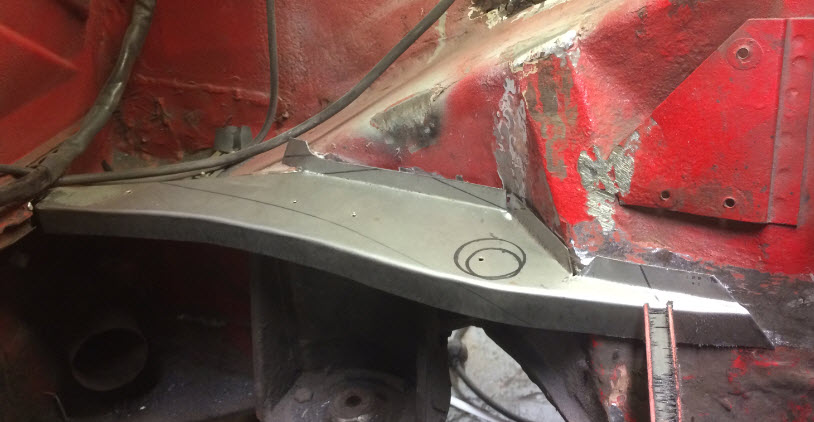
And the shelf.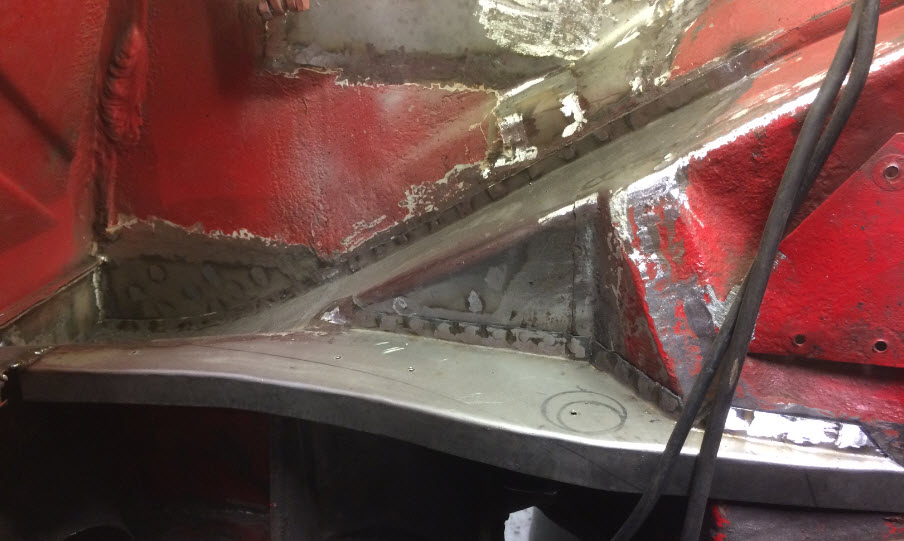
I would not call it hell, but more like tedious and annoying-hole.
Posted by: Dion Aug 26 2019, 08:50 AM
Fantastic work. Obviously not your first rodeo.
I’m tuned in. I’ll have to consult with my Norwegian Elghund to
interpret for me.
Posted by: Literati914 Aug 26 2019, 10:00 AM

That's about the cleanest looking HH repair I've seen, great job! Did you put a drain hole down towards the bottom of it, as stock?
.
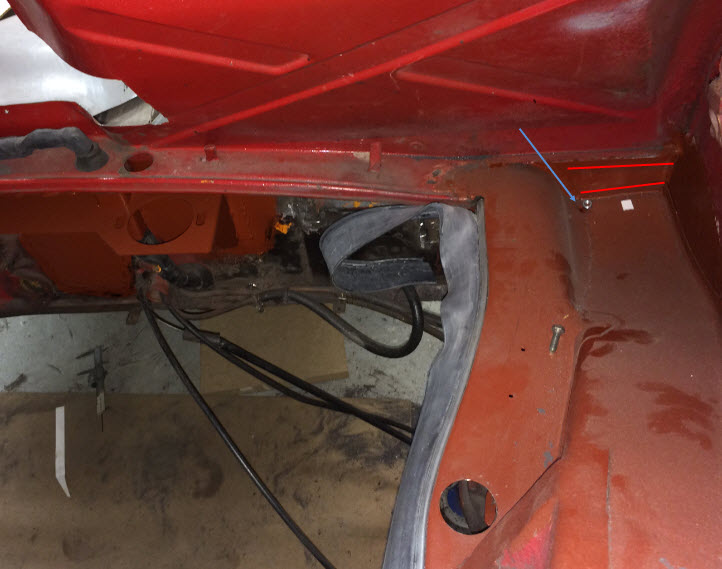
Posted by: GTSandberg Aug 27 2019, 06:59 AM
That's about the cleanest looking HH repair I've seen, great job! Did you put a drain hole down towards the bottom of it, as stock?
.
Thank you! Also a good point, The drain hole is in place, important to make it the lowest point, as indicated by the two red lines. As seen in the picture small parts tend to gather in the HH, neat.
Posted by: GTSandberg Aug 27 2019, 07:01 AM
Fantastic work. Obviously not your first rodeo.
I’m tuned in. I’ll have to consult with my Norwegian Elghund to
interpret for me.
Thank you, say hello to the Elghund!

Posted by: mepstein Aug 27 2019, 07:12 AM

Posted by: Cairo94507 Aug 27 2019, 07:25 AM
Beautiful repair.
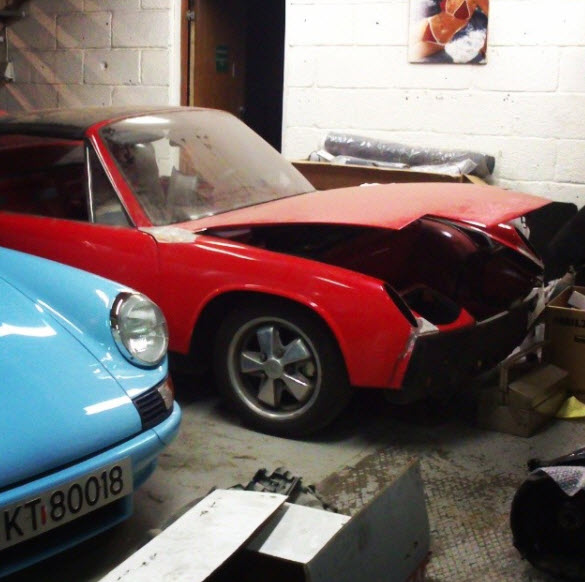
Posted by: GTSandberg Aug 28 2019, 03:22 AM
Appreciate all feedback 
Here are two pictures of the car before I started cutting in it. Quite complete, but not pretty. Solid but a bit rough.. 
Posted by: GTSandberg Aug 29 2019, 07:55 AM
The front fenders has been a lot of work, 914s are not very common in Norway and spare parts are not easy to come by. There were some previous rust repairs that needed to be redone.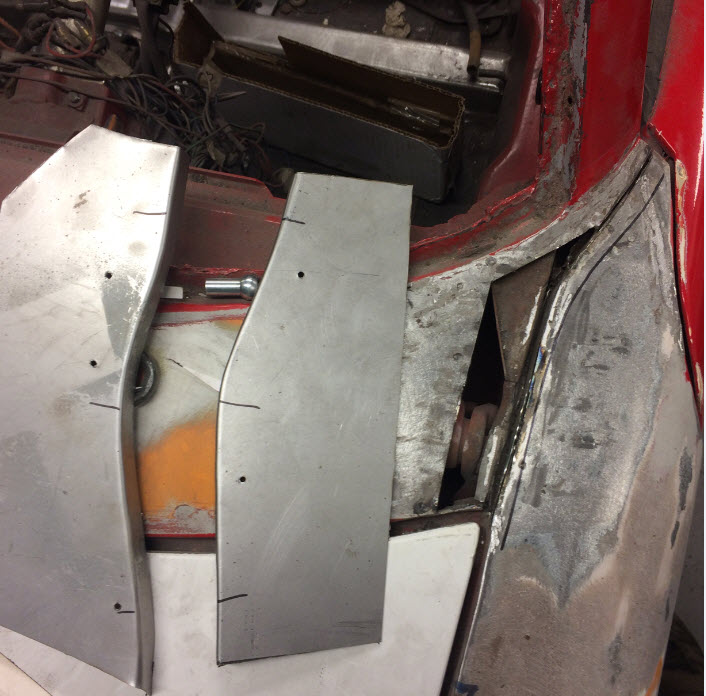
The gap between the fender and the part infront of the windshield was welded together, and was not straight. Here I am making the two parts to weld in.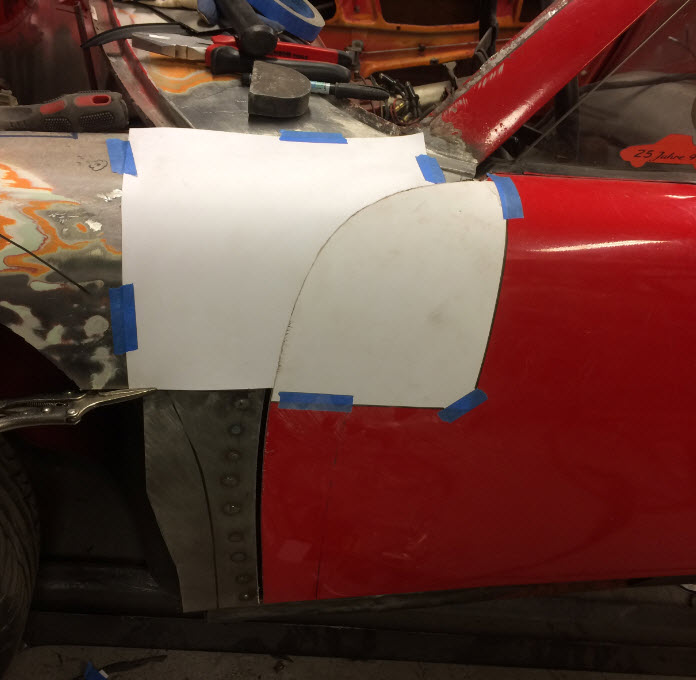
There was also something odd with the door gap..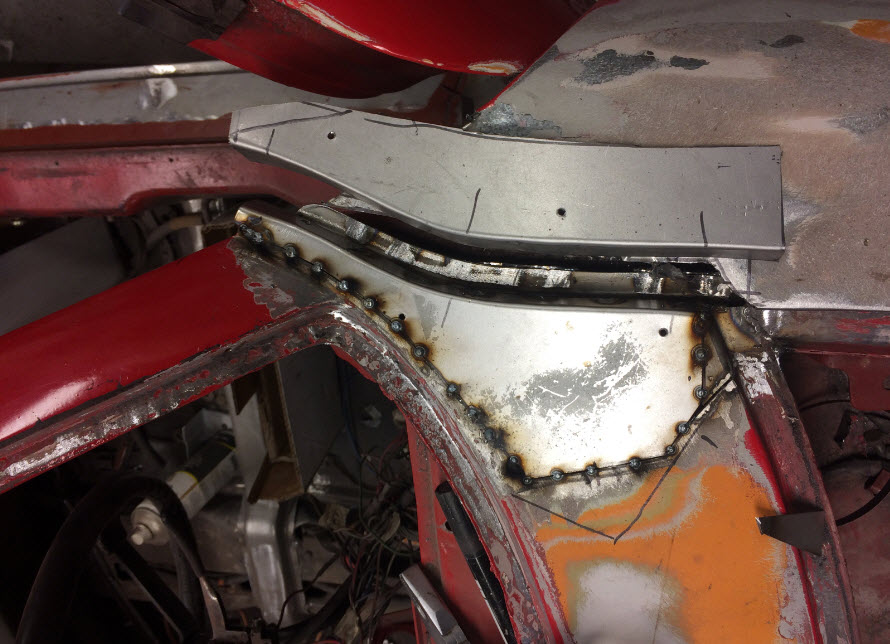
In progress..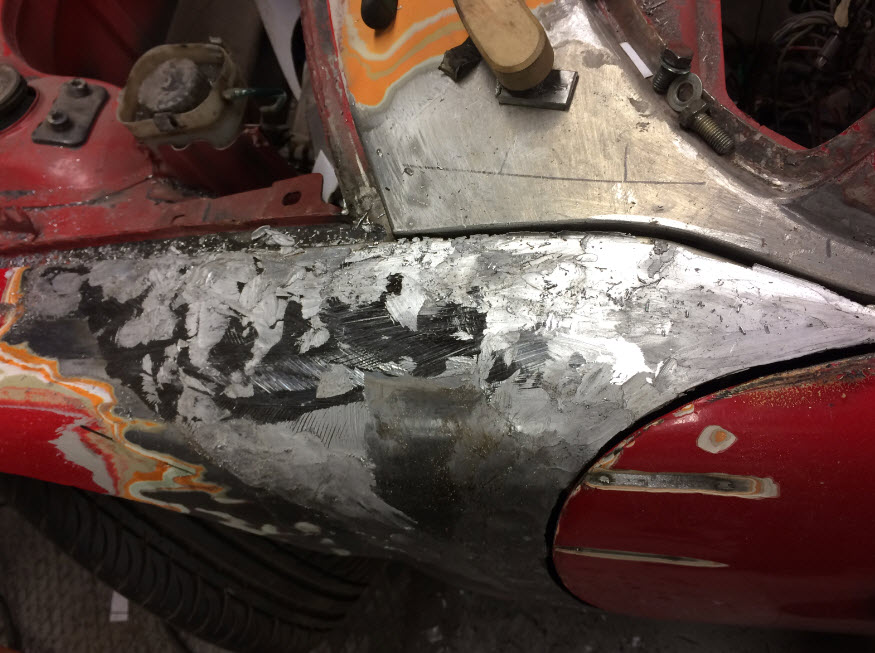
Welded in place, and doing some body soldering with lead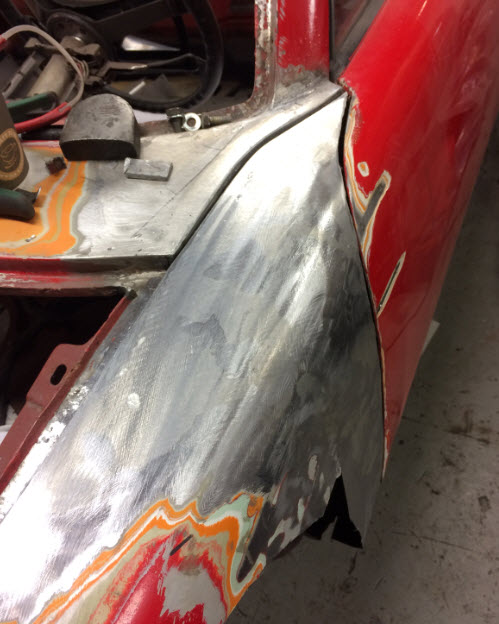
More or less finished, how many layers of paint can you see? 
Posted by: GTSandberg Sep 5 2019, 08:11 AM
Here is a good example of doing things the hard way.. The goal is to modify the sheet metal structure around the jack mounts to make room for the GT-oil lines. To do this modification I would recomend the following. Buy the replacement sheet metal part, cut and weld. I choose to make a stamping tool 
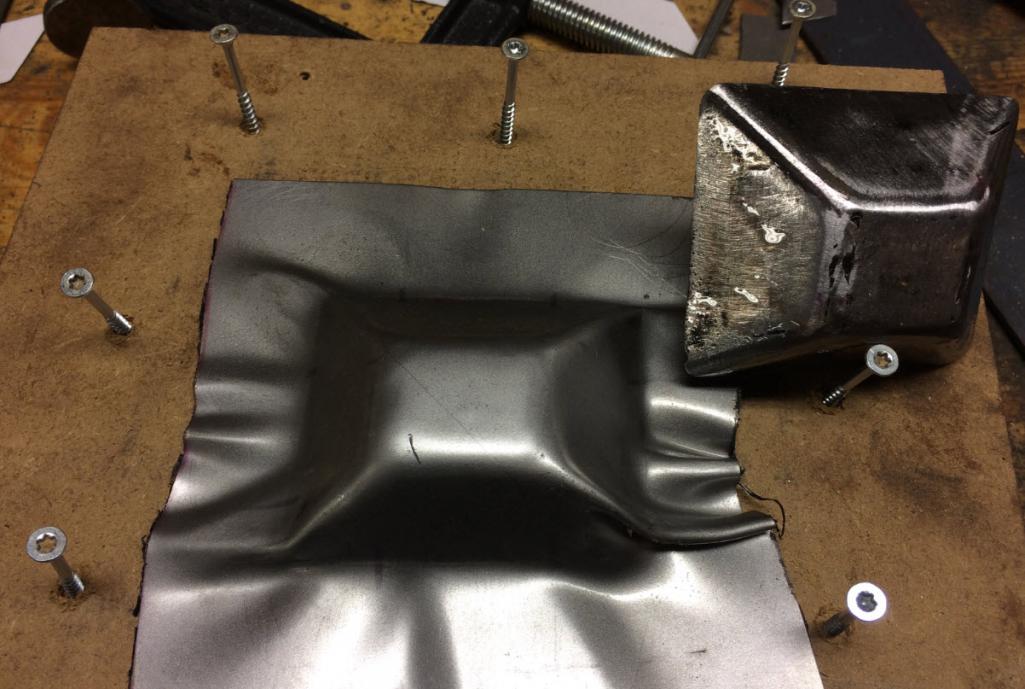
One of the failed attemts and the male tool.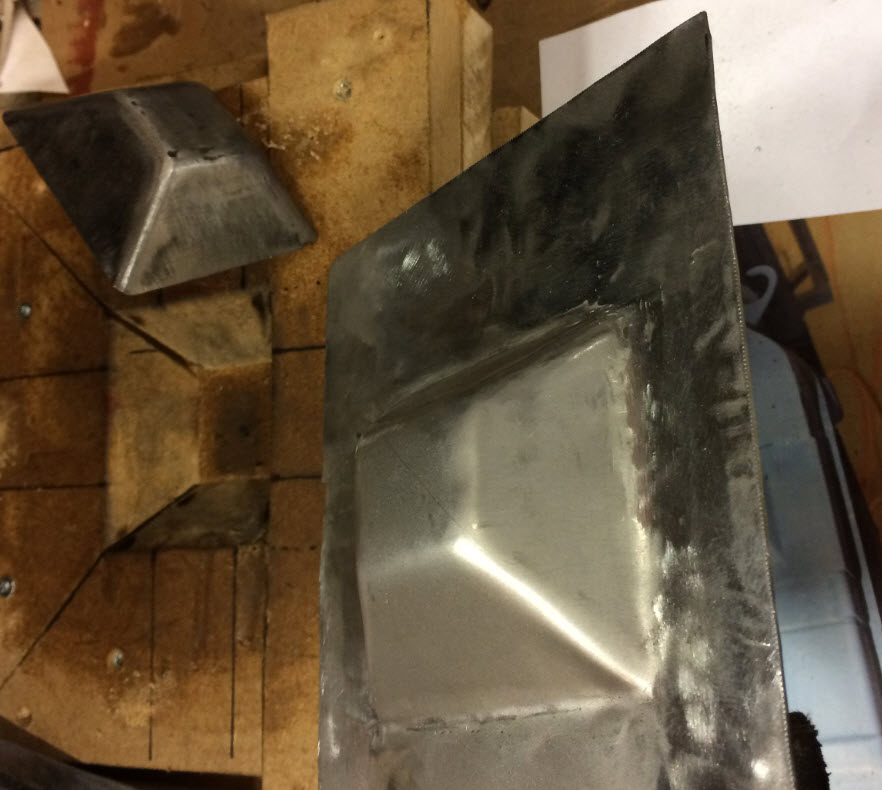
One of the almost good parts after some work, and the female tool.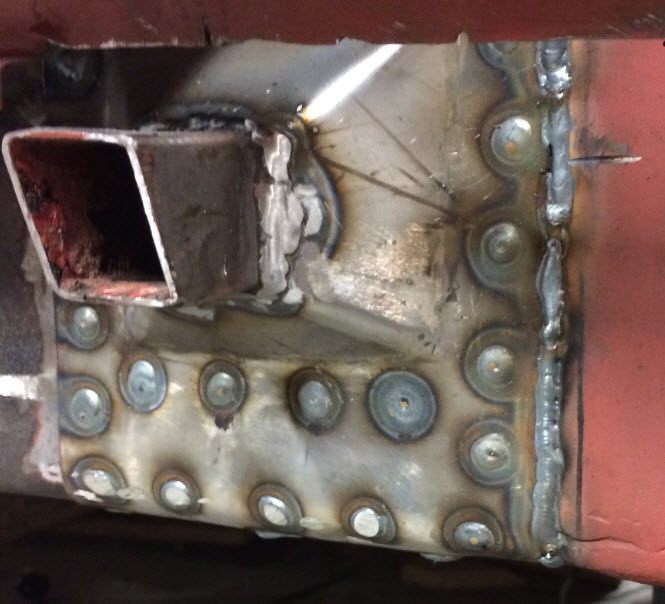
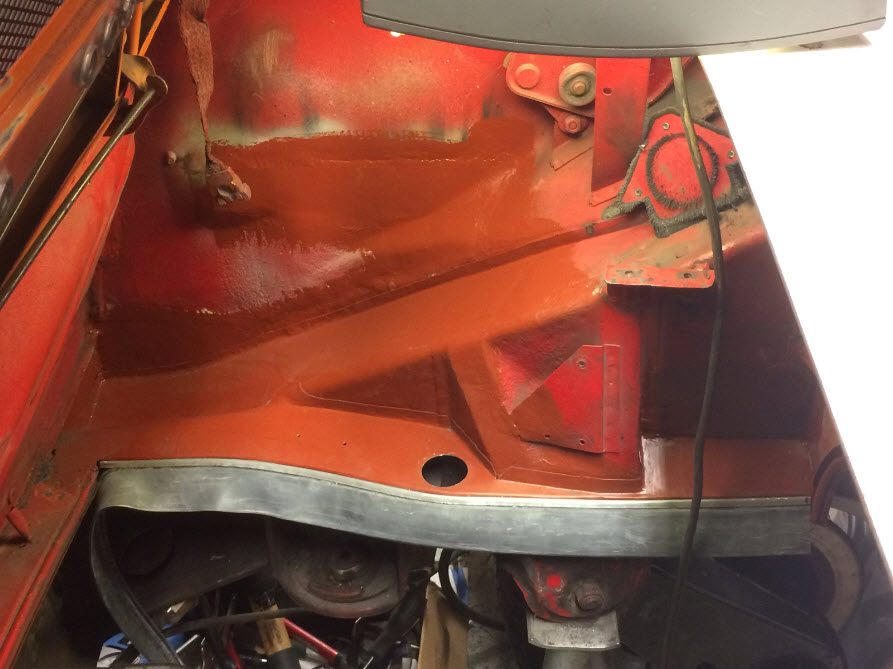
Welding in the fabricated part.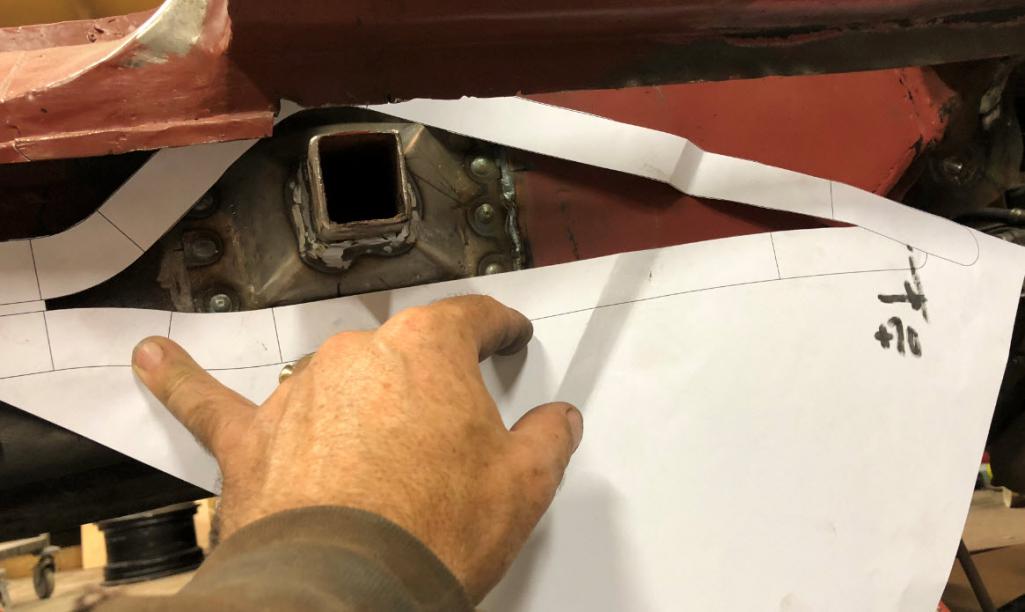
Test fitting my brand new paper oil lines.
Posted by: bbrock Sep 5 2019, 08:24 AM
I'm just catching up on your build thread. Loving your fabrication work! Keep 'em coming. 
Posted by: 76-914 Sep 5 2019, 08:35 AM

Posted by: GTSandberg Sep 5 2019, 01:16 PM
I'm just catching up on your build thread. Loving your fabrication work! Keep 'em coming.
Thanks! I will keep posting

Your build thread has been a true inspiration to me btw!
Posted by: defianty Sep 5 2019, 01:20 PM
Nice work, look forward to seeing more.
Posted by: mb911 Sep 5 2019, 02:15 PM
Just a note as I have had made and sold 38 sets of GT hard lines the indent really is not required.. I had no issues fitting mine personally ..
Posted by: GTSandberg Sep 5 2019, 02:21 PM
Just a note as I have had made and sold 38 sets of GT hard lines the indent really is not required.. I had no issues fitting mine personally ..
Haha, that just makes the time spent on this even more worthwhile

Posted by: GTSandberg Sep 5 2019, 02:23 PM
Nice work, look forward to seeing more.
I may say exactly the same, just saw your own build thread, wow!
Posted by: GTSandberg Sep 6 2019, 08:11 AM
The GT oil system is of course a challenge. 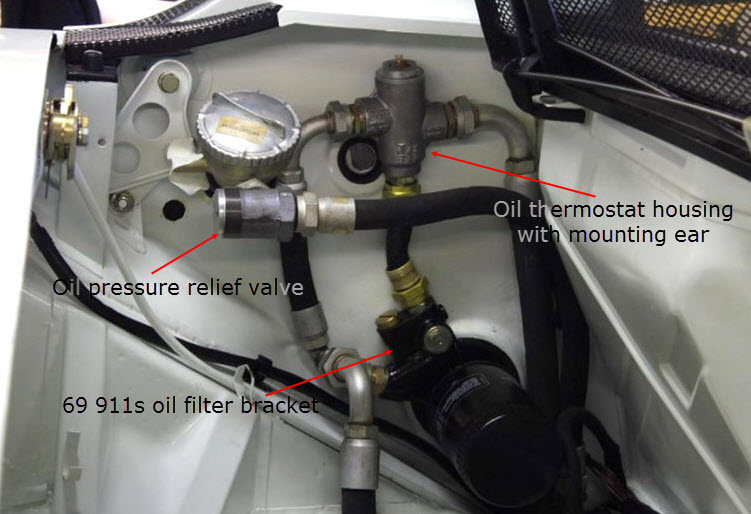
These are 3 vital components that are really difficult to come by/expensive
Luckily this is old school technology and possible to reverse engineer and replicate. At least the thermostate and oil pressure relief valve. Casting the oil filter bracket is a bit trickier, and most of them are magnesium also..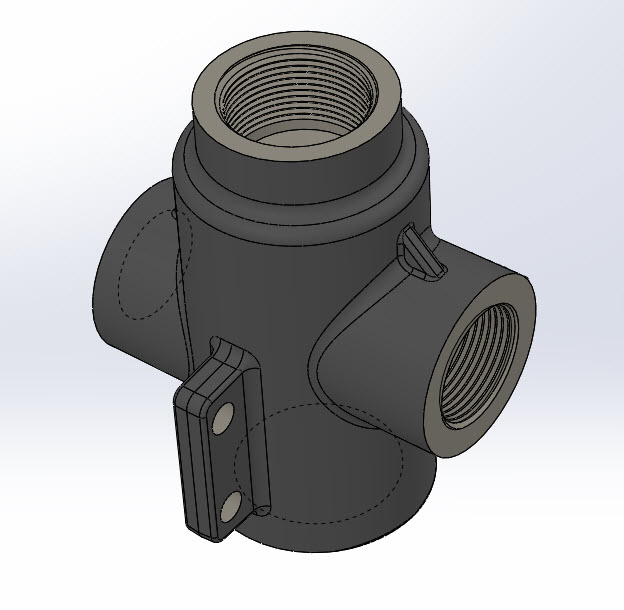
Thermostate housing 3D-model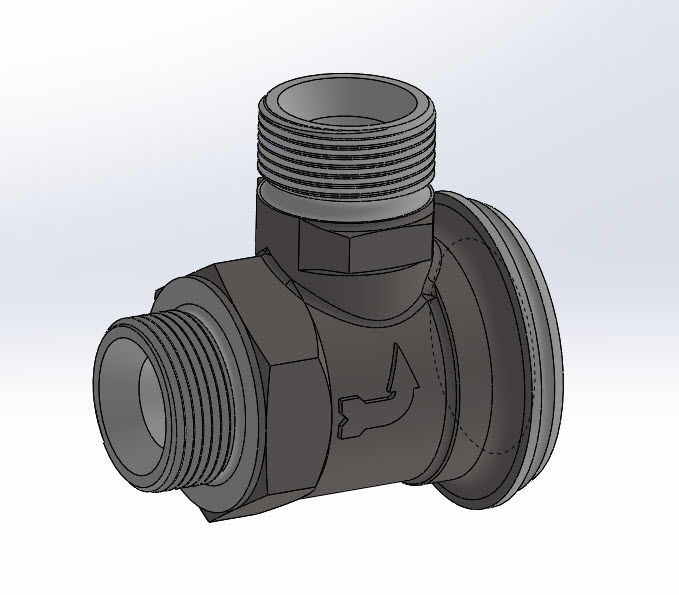
OPR-valve 3D model (cast part)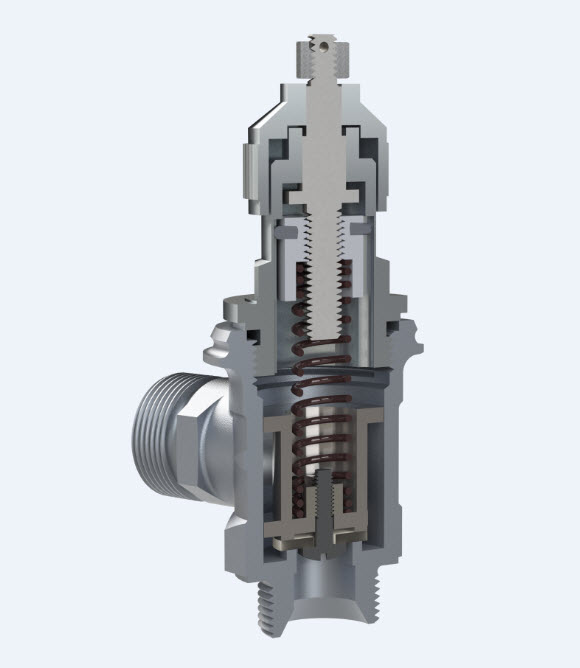
3D-model of opr-assembly
Plugs (is it called that..?) for sand casting (I have a guy who is going to do the metal casting).
Work in progress, very exciting
Posted by: jd74914 Sep 6 2019, 09:34 AM
Plugs (is it called that..?) for sand casting (I have a guy who is going to do the metal casting).
Work in progress, very exciting
That's awesome!! Very cool. Did you oversize them to allow for casting shrinkage? In the past I've had a number of parts sand cast and have had to oversize between 1.5-3% for different magnesium and aluminum alloys.
They are called plugs.
Posted by: Mueller Sep 6 2019, 09:45 AM
Impressive amount of sheet metal, and casting your own parts takes it up a notch for sure.
Posted by: tygaboy Sep 6 2019, 09:50 AM
Stamping dies! Really impressive fabrication. Keep up the fabulous work.
Posted by: bbrock Sep 6 2019, 09:59 AM
What???!!! ![shocked[1].gif](style_emoticons/default/shocked[1].gif) Truly next level!
Truly next level! 
Posted by: raynekat Sep 6 2019, 01:37 PM
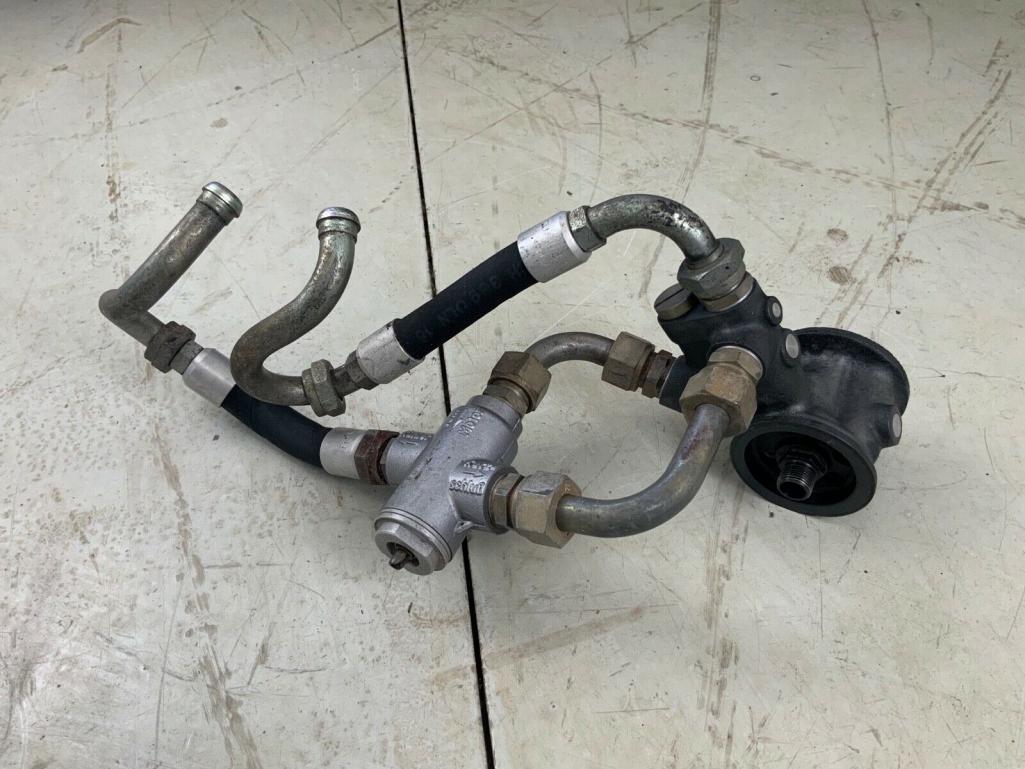
The GT oil system is of course a challenge.
These are 3 vital components that are really difficult to come by/expensive
Cool project.
This just happens to be on Ebay right now.
Not affiliated.
Posted by: sixnotfour Sep 6 2019, 03:56 PM
you can get the thermo, with ear repo. germany and the preschona valve, germany and usa(armando) but you probably already knew that.. nice to have the capability to make these..

![popcorn[1].gif](style_emoticons/default/popcorn[1].gif)
Posted by: GTSandberg Sep 10 2019, 07:34 AM
Plugs (is it called that..?) for sand casting (I have a guy who is going to do the metal casting).
Work in progress, very exciting
That's awesome!! Very cool. Did you oversize them to allow for casting shrinkage? In the past I've had a number of parts sand cast and have had to oversize between 1.5-3% for different magnesium and aluminum alloys.
They are called plugs.
Thank you for the feedback!
I have compensated 1,1% in the model + a layer of filler.
Posted by: GTSandberg Sep 10 2019, 07:48 AM
Impressive amount of sheet metal, and casting your own parts takes it up a notch for sure.
Thank you, good to hear Im not the only one who finds fabrication inspiring
Posted by: GTSandberg Sep 10 2019, 07:51 AM
Stamping dies!
Really impressive fabrication. Keep up the fabulous work.Not the most sucessful/effiecient project with the dies, but I really enjoy the process of making things myself in the garage.
Posted by: GTSandberg Sep 10 2019, 07:53 AM
What???!!!
Truly next level! Thank you
Posted by: GTSandberg Sep 10 2019, 07:57 AM
The GT oil system is of course a challenge.
These are 3 vital components that are really difficult to come by/expensive
Cool project.
This just happens to be on Ebay right now.
Not affiliated.
Thermostat is "missing" the mounting ear, but the bracket looks really nice. Seems to be a good price (but still a quite a lot of money).
Posted by: GTSandberg Sep 10 2019, 07:59 AM
you can get the thermo, with ear repo. germany and the preschona valve, germany and usa(armando) but you probably already knew that.. nice to have the capability to make these..
I have seen the preschona reproduction, but not the thermostat..
Posted by: GTSandberg Sep 10 2019, 08:09 AM
And then, some pictures of the brake set up. Not home made this, except the spacer inside the rear discs.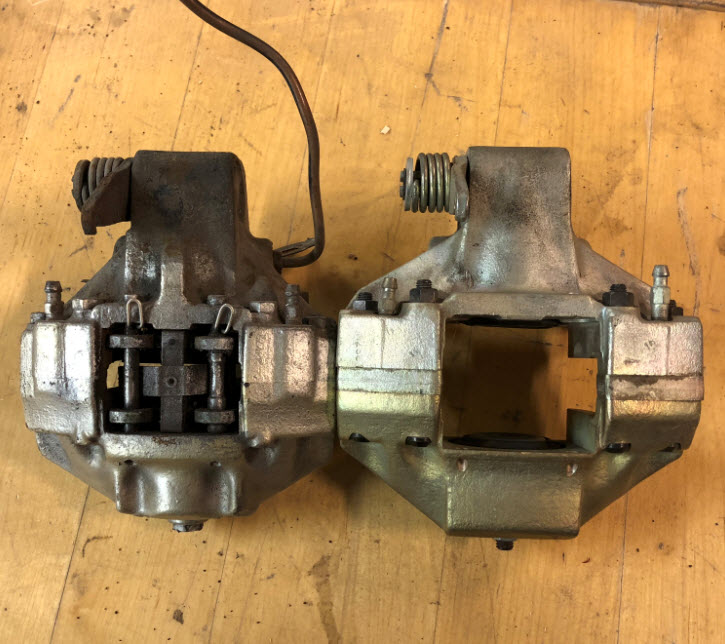
Standard 914 and the 914/6 GT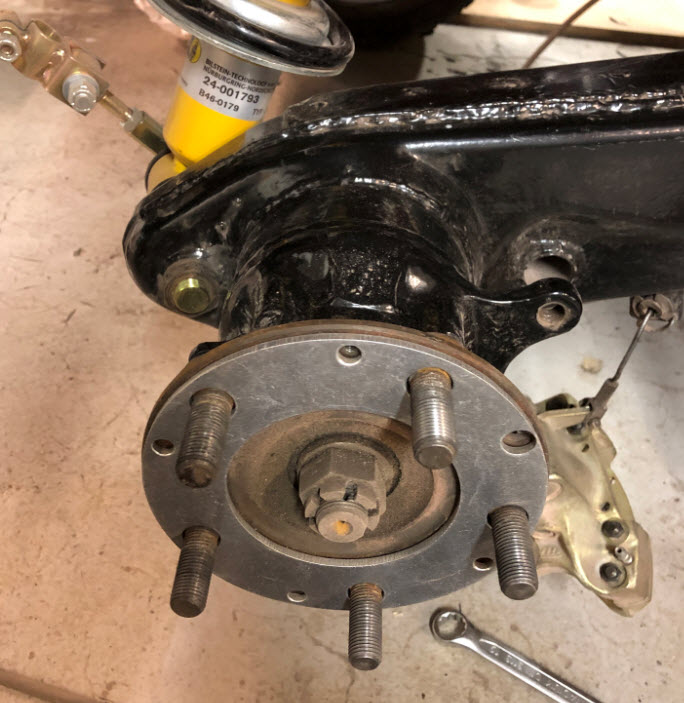
Spacer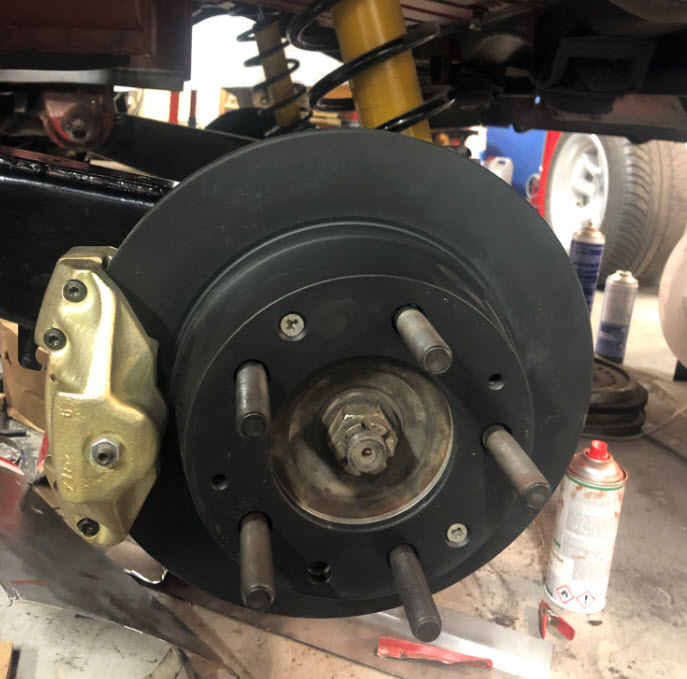
rear assembly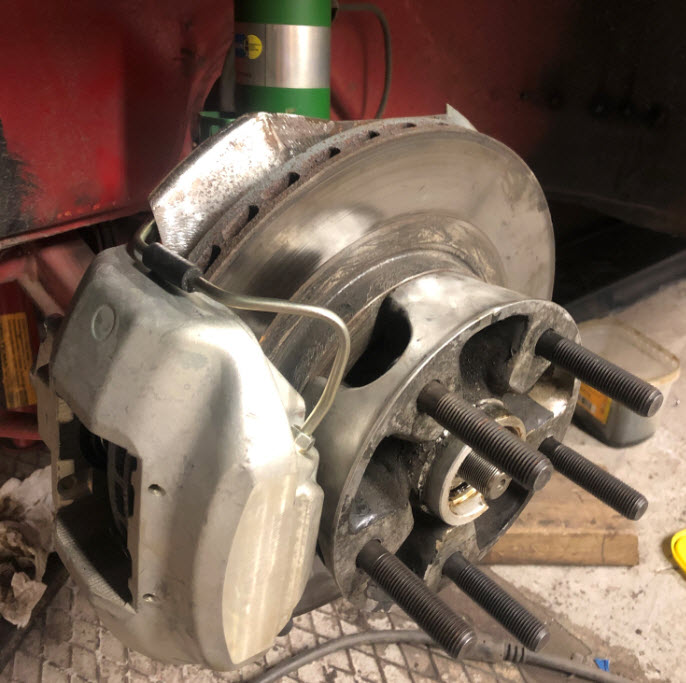
Front setup (under construction..)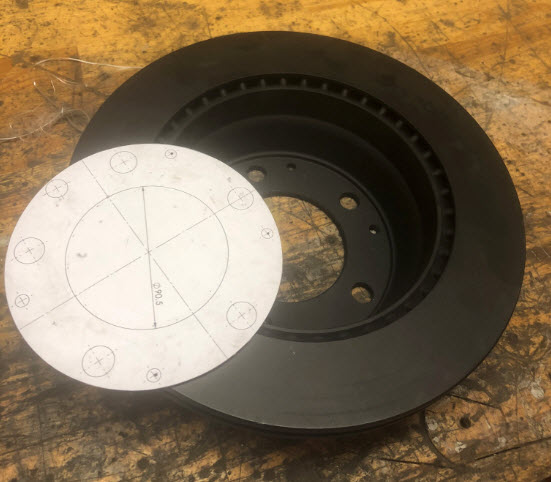
911 caliper and paper version of the spacer
Posted by: GTSandberg Sep 11 2019, 07:35 AM
I bought the project in 2012 (I think..) and most of the time from then to 2016, when I really started working on it again, has been used to ponder about color. The car is originally signal orange, a really cool color. However.. living in the worlds most sparsely populated country , there are not many 914 gt's around, and one of them is signal orange. I can guarantee this car and my car will meet on some cars and coffee in the future. So what else.
The car has been repainted ridiculosly many times and not much of the original paint is saveable, so I consider it a blank canvas.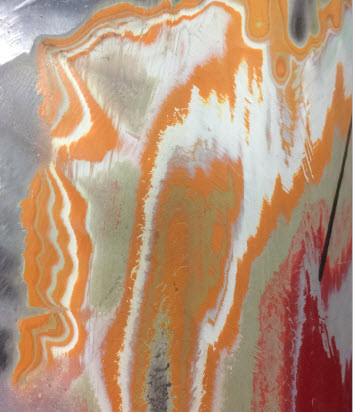
I have never managed to figure out how many layers of paint there are.
I fell in love with the Sunoco/Duval livery, so I am quite sure it is going to be like this.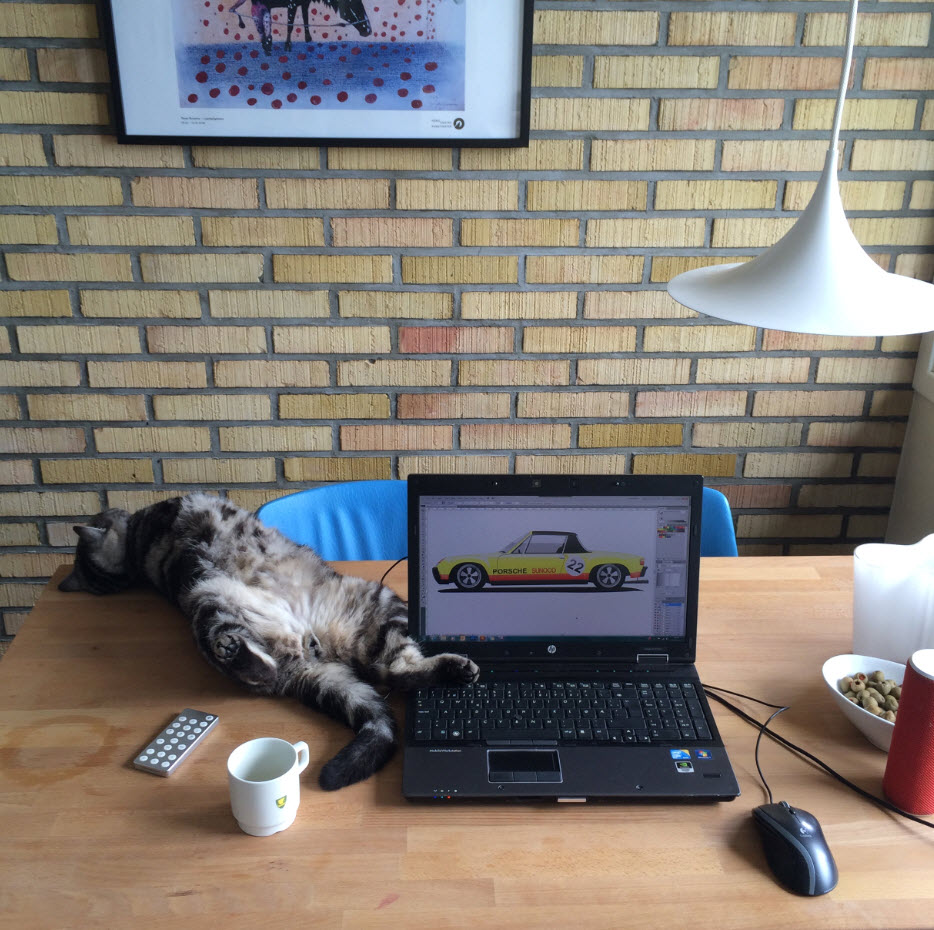
Even the cat seems to agree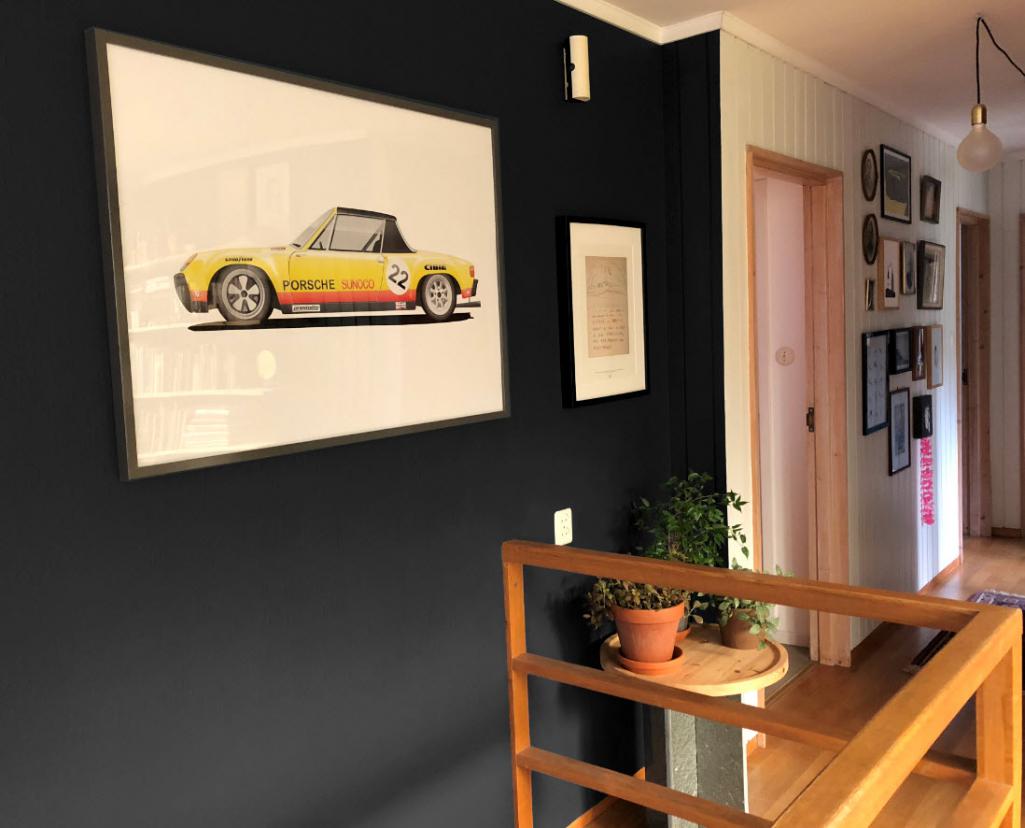
I guess I am fully committed as it has been granted a spot in the living room as well 
Posted by: mepstein Sep 11 2019, 08:04 AM
Sunoco/Duval livery - great choice.
I fduval is his son and 914world member.
http://www.914world.com/bbs2/index.php?showtopic=172644&hl=Duval
Posted by: GTSandberg Sep 12 2019, 07:35 AM
Sunoco/Duval livery - great choice.
I fduval is his son and 914world member.
http://www.914world.com/bbs2/index.php?showtopic=172644&hl=Duval
Interesting read in the link! I have had some contakt with Francois about the yellow color some time ago, very nice and helpful guy!
He thought the yellow was the yellow in the Sunoco logo. I have found some info about this online, and Sunoco had a RAL code in a document (RAL 1018)
This did not look right at all, to much green I think.
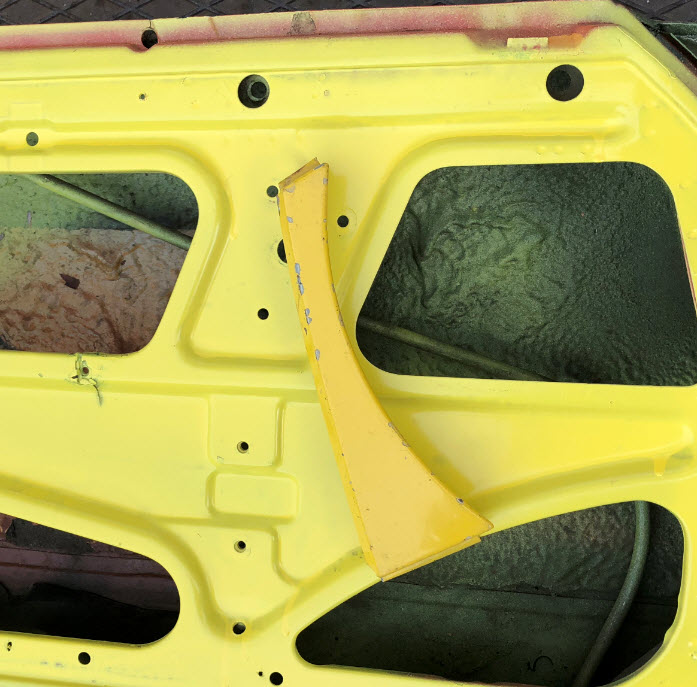
I painted the inside of the door to see, In my mind the part laying on top has a more similar color..
I have from other sources found other color codes that look better, more red in the yellow. I will try them out.
These are things that may have changed over time I suppose (new versions of the logo)..
Posted by: defianty Sep 12 2019, 08:15 AM
Looks like this is going to be a great build. I've almost finished mine and am already missing the research stage of the project, great fun.
Posted by: GTSandberg Oct 4 2019, 03:46 AM
I have been busy with non Porsche activities last couple of weeks  , but made some progress on a crucial part of the oil system.
In late august I bought the oil filter bracket (69-71 911S) from a very nice and helpful forum member. The part was corroded quite badly as many of them are, and I got it for a fair price. It was of course a bit of a gamble, fixing magnesium parts is not guaranteed success.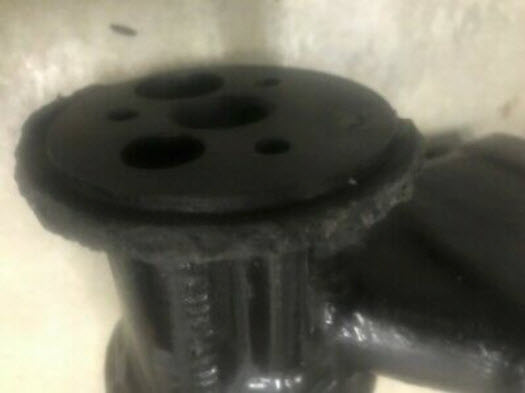
The surface threatment wears away when the oil filter are tightened, and the magnesium corrodes heavily.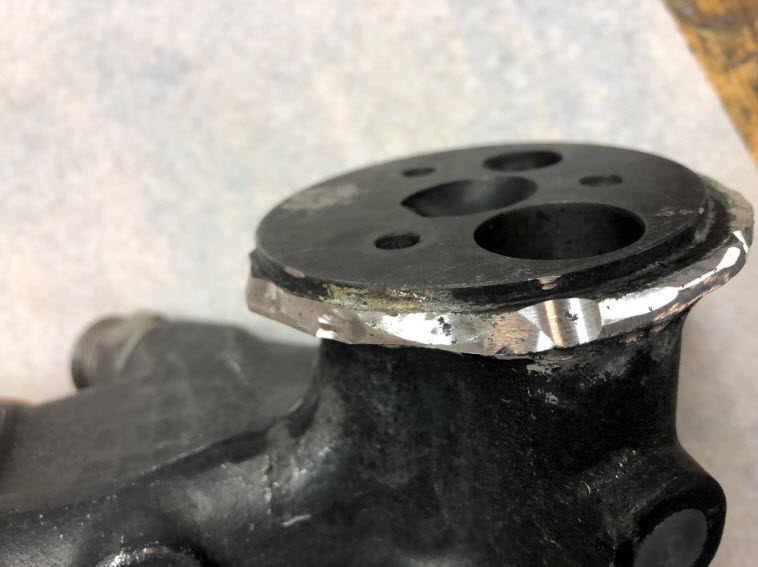
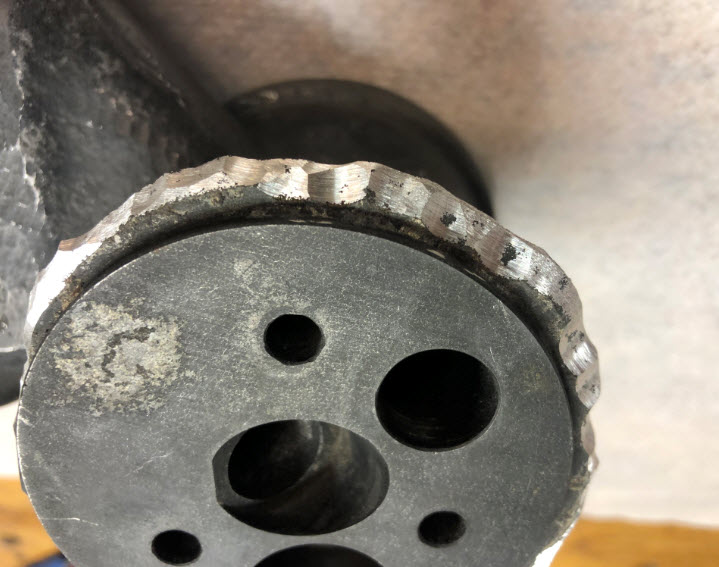
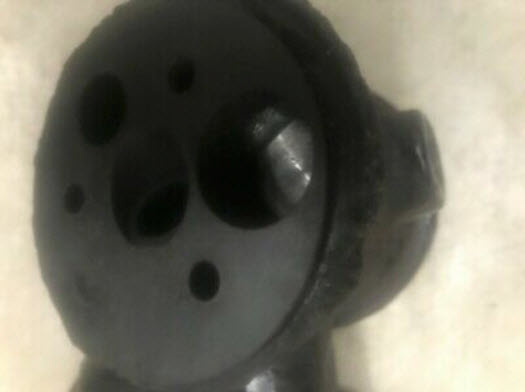
I removed the paint and ground away the corroded areas, it goes surprisingly deep.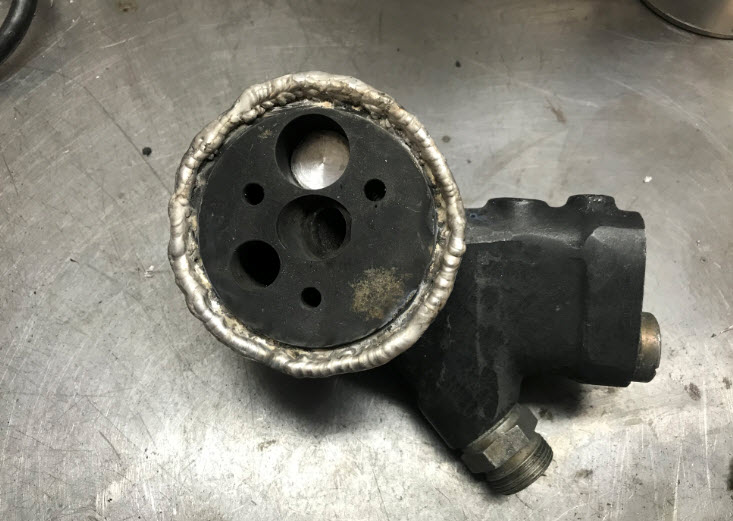
Material added (two hours of TIG welding by an extremely talented friend).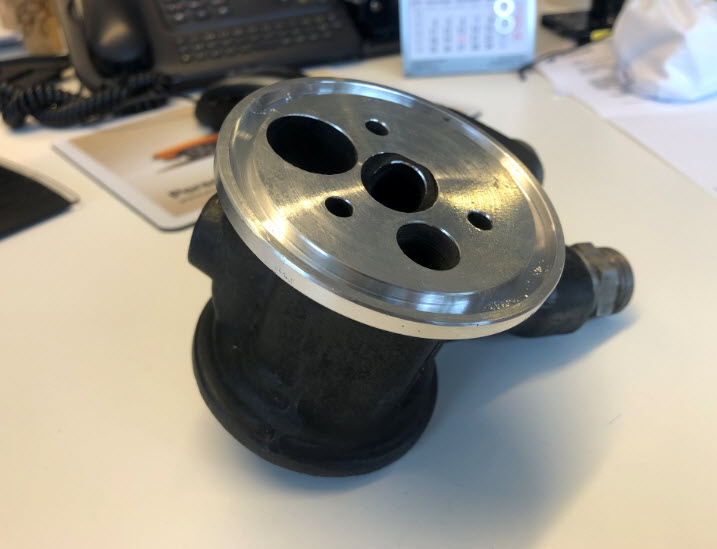
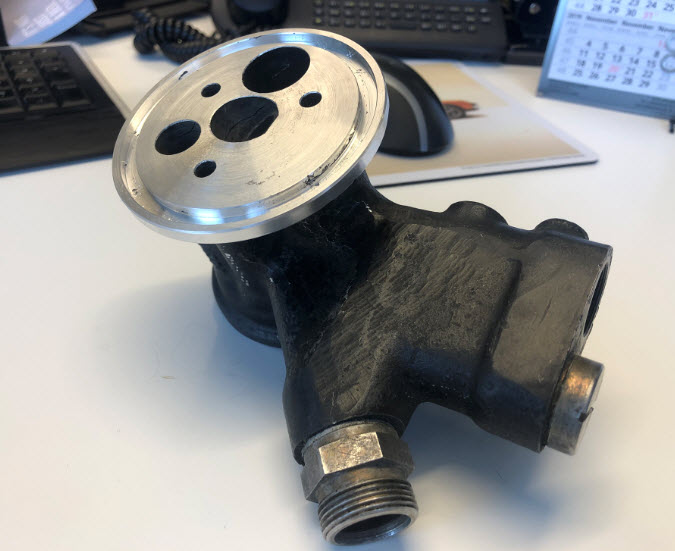
After machining, the result was very nice! Only thing to do now is surface treatment.
Posted by: rick 918-S Oct 4 2019, 04:35 AM
Posted by: 914forme Oct 4 2019, 06:55 AM
That is some nice work right there - welding mag is not the easiest task in the world. And when it goes wrong it goes wrong in a big way.
You have understated your friends skills. Hope you take him large amounts of what ever his favorite substance is 
Posted by: GTSandberg Oct 4 2019, 07:30 AM
That is some nice work right there - welding mag is not the easiest task in the world. And when it goes wrong it goes wrong in a big way.
You have understated your friends skills. Hope you take him large amounts of what ever his favorite substance is
He is definitely the most crucial peace in the puzzle of fixing this part, and his garage is still standing
Posted by: Norskpole Oct 4 2019, 07:37 PM
Very impressive!
Posted by: GTSandberg Oct 23 2019, 07:49 AM
Very impressive!
Thank you for all the help John!
Posted by: GTSandberg Oct 23 2019, 07:59 AM
Finished some details around the oil cooler setup.
Fabricated the protective grille and reinforcement in the trunk floor.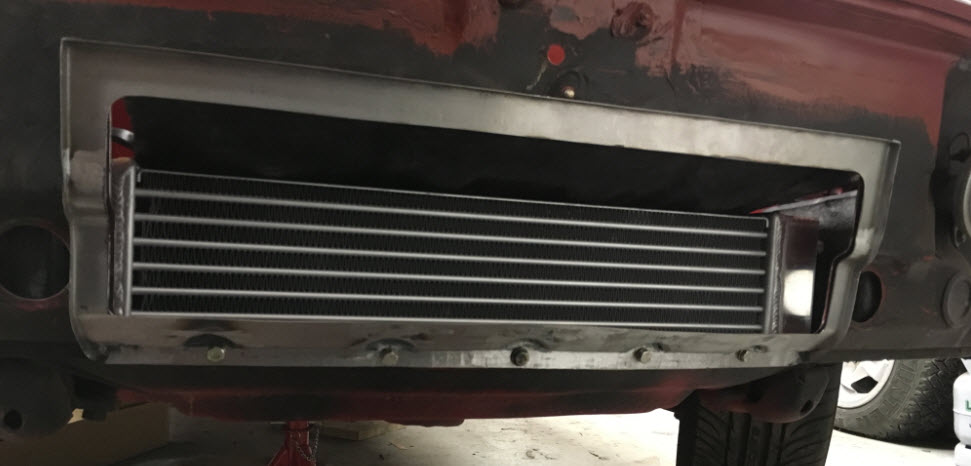
Test monting before mesh and paint.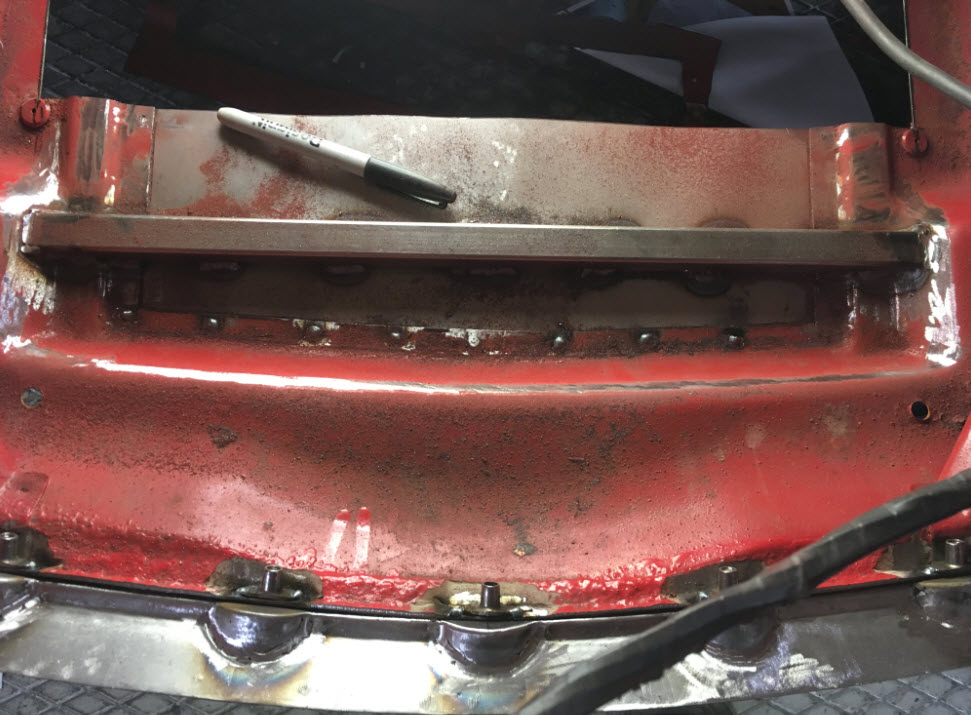
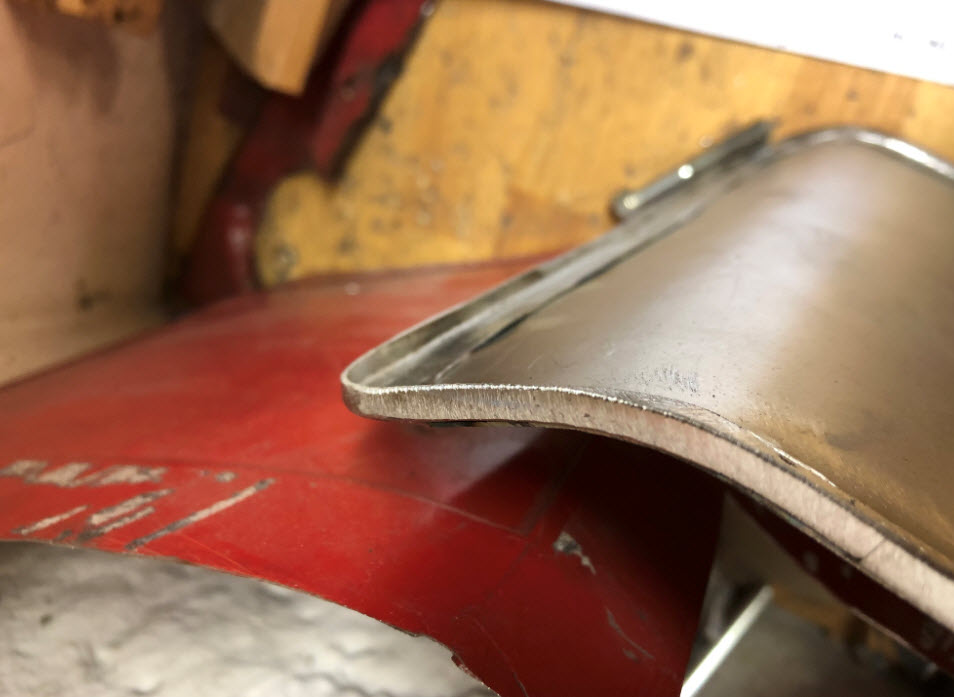
Reinforcement.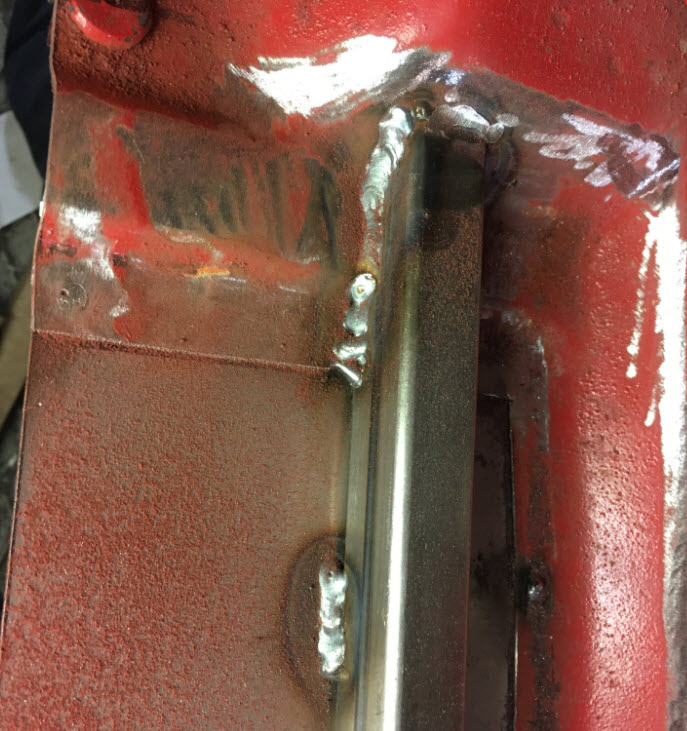
Welded in place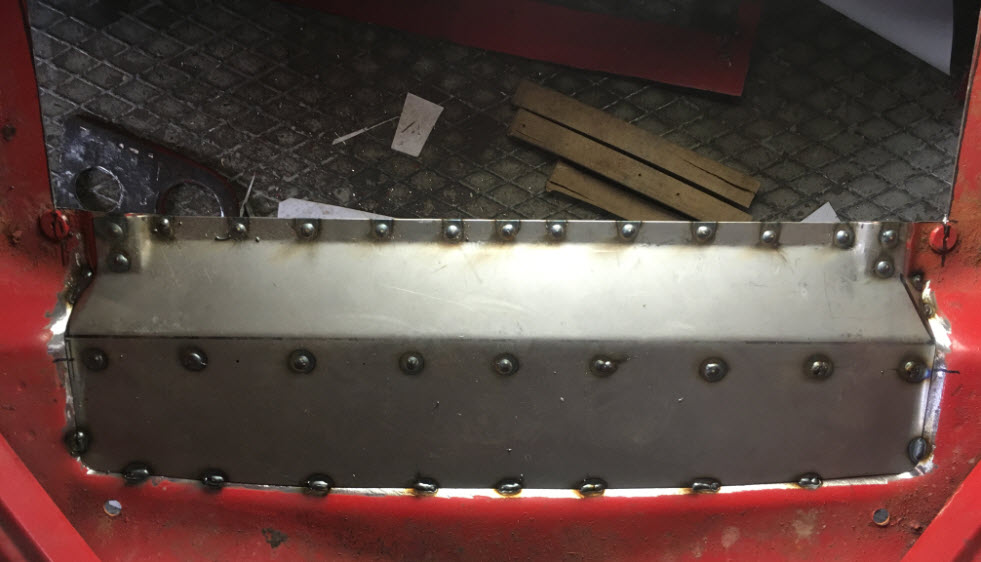
Boxing, this stiffens it up!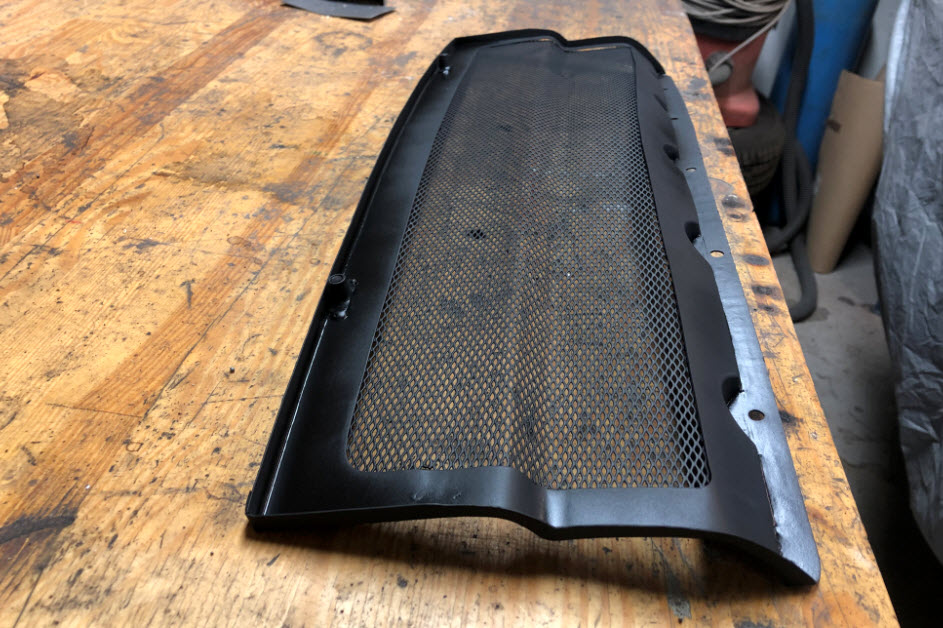
Paint almost dry 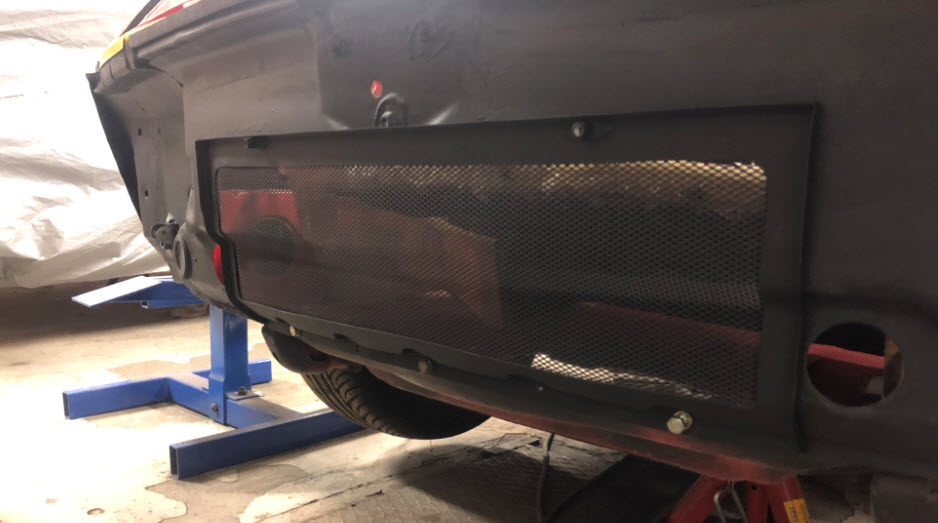
Final test mounting and scratching paint..
Posted by: Cairo94507 Oct 23 2019, 08:00 AM
Nice work and I love the grill.
Posted by: gereed75 Oct 23 2019, 09:22 AM
This project displays some great cradtmanship!!
What mesh did you use and where did you source it?
Very cool
Posted by: GTSandberg Oct 23 2019, 10:28 AM
Nice work and I love the grill.
Thank you, appreciate the feedback!
Posted by: GTSandberg Oct 23 2019, 10:33 AM
This project displays some great cradtmanship!!
What mesh did you use and where did you source it?
Very cool
Craftmanship, I like that
!If I remember correctly the mesh is from an ac instalation I removed from my 911, so it is vintage mesh

Posted by: raynekat Oct 23 2019, 05:14 PM
Looking awesome.
Posted by: GTSandberg Oct 24 2019, 08:00 AM
Looking awesome.
Thank you, I also have an 73 inspired hotrod in my garage, but its blue like a smurf..
Posted by: ValcoOscar Oct 24 2019, 08:28 AM
Sent you a PM
Oscar
Posted by: GTSandberg Oct 25 2019, 08:09 AM
Some quick updates before the weekend.
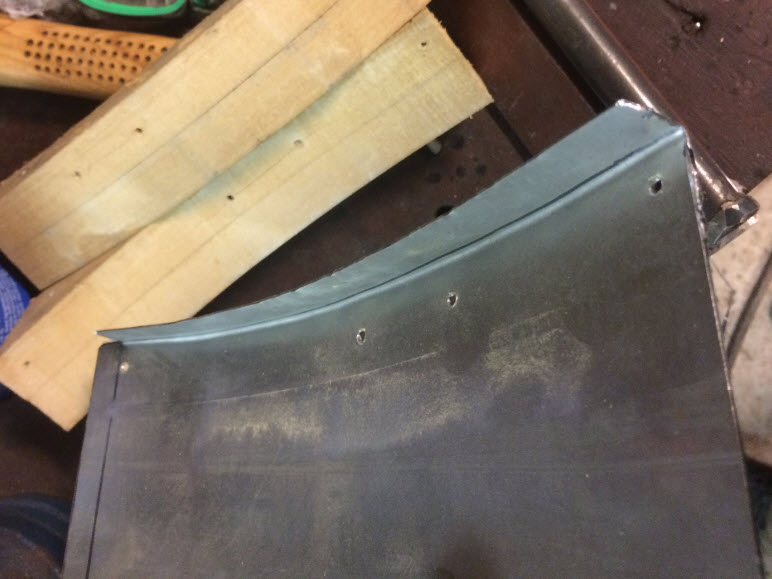
Fabricated a new inspection hach for the firewall. It already was one there, but it was not nice.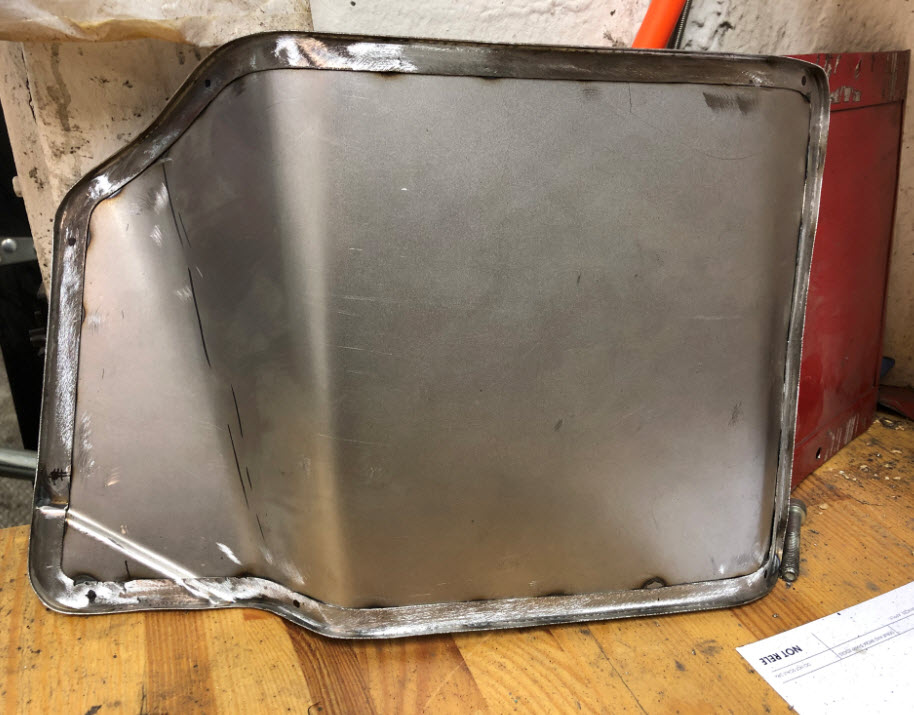
Used the shrink/strech tool a lot for this.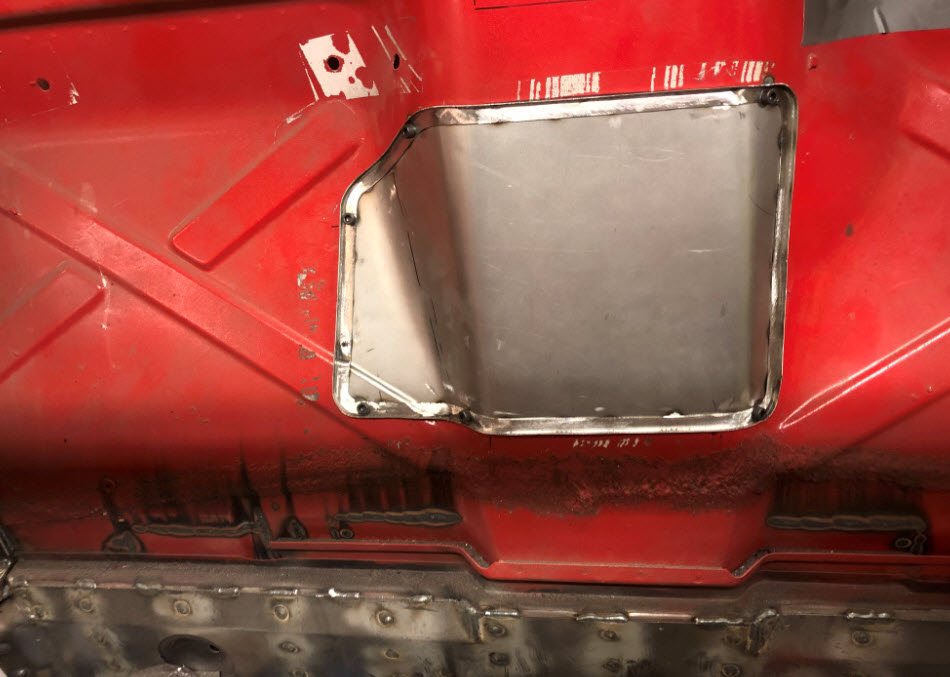
I was also very pleased about how the speedo cleaned up, it looked like it had been under water before I started..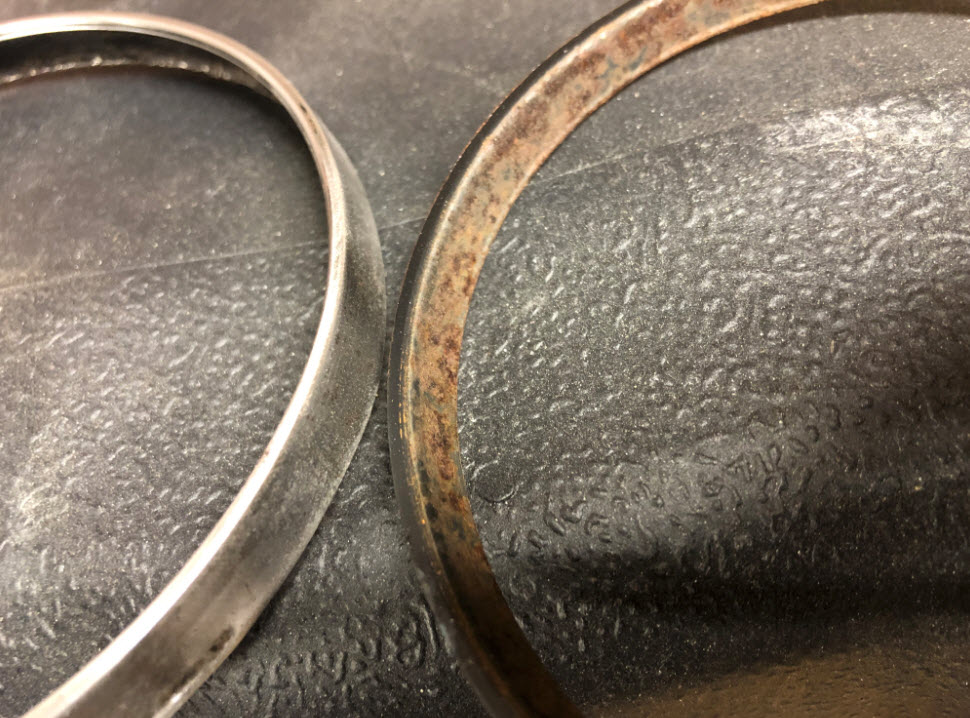
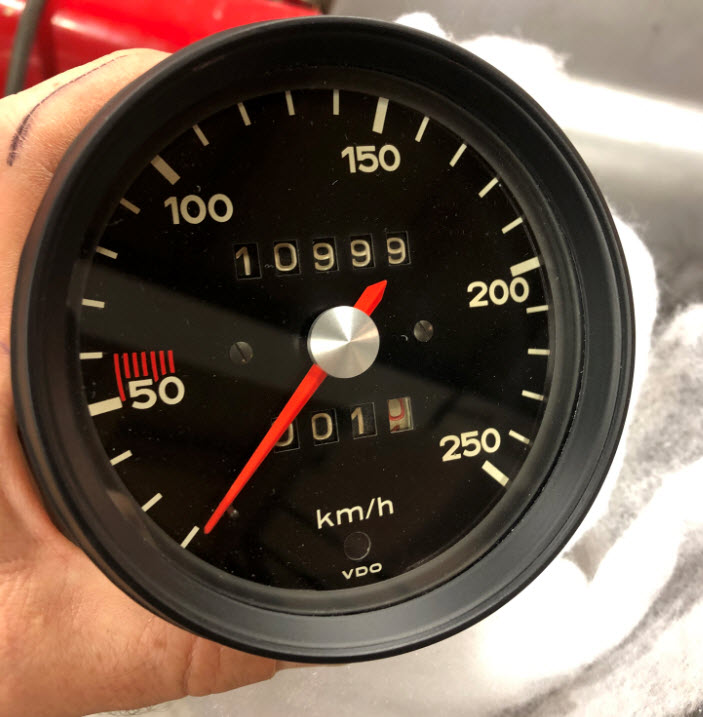
Have a nice weekend
Posted by: GTSandberg Nov 7 2019, 04:00 AM
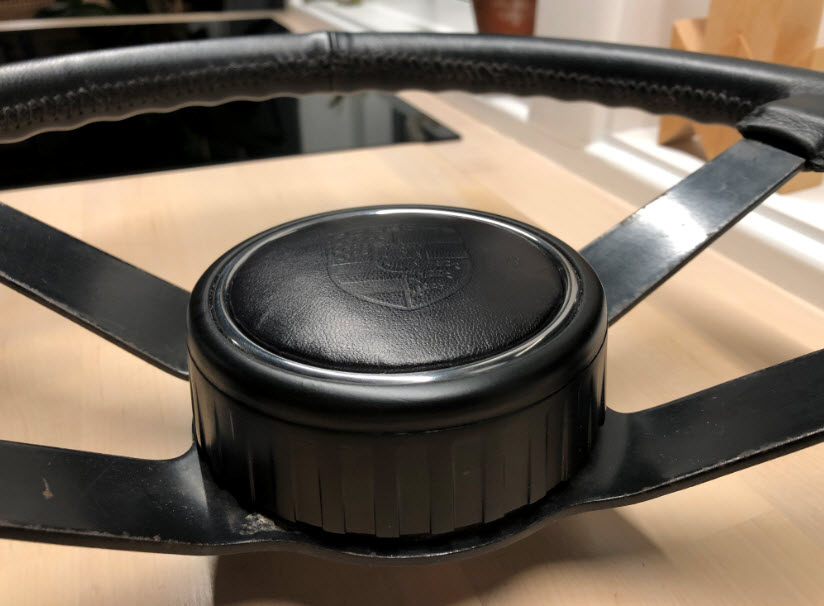
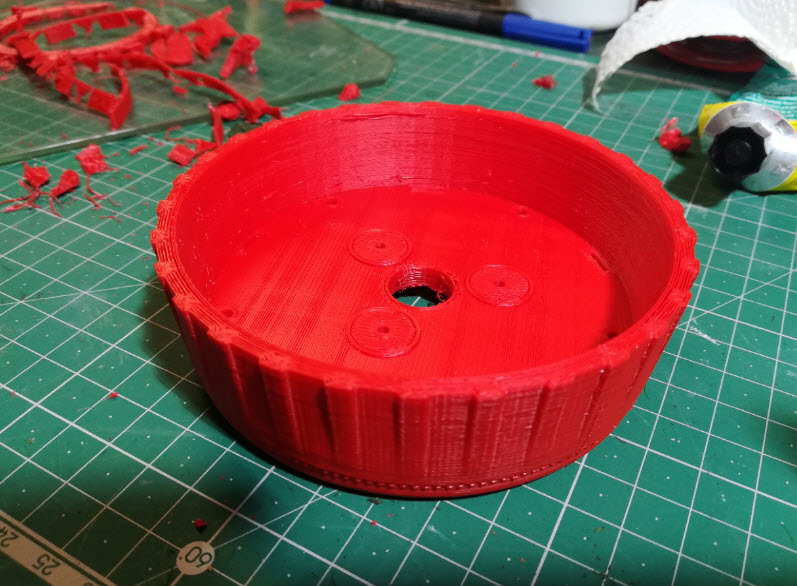
Finaly got the steering wheel finished. Home made hockey puck horn button. 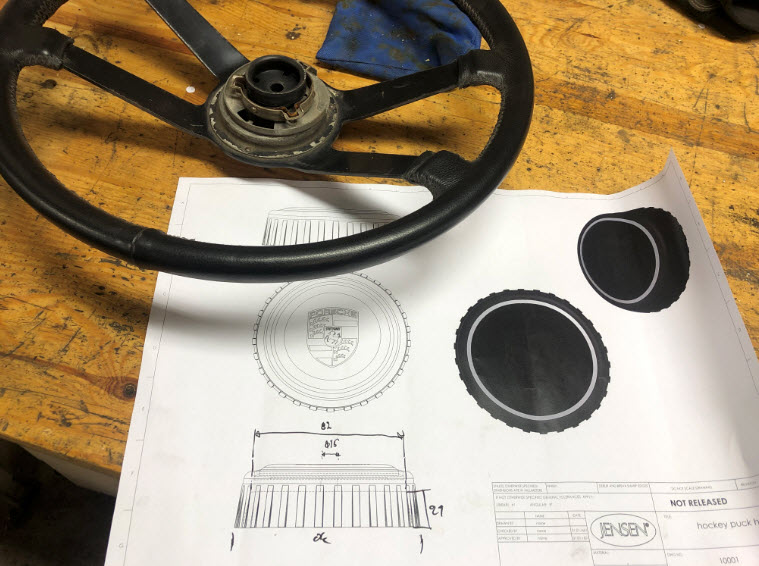
3D model of the plastic part.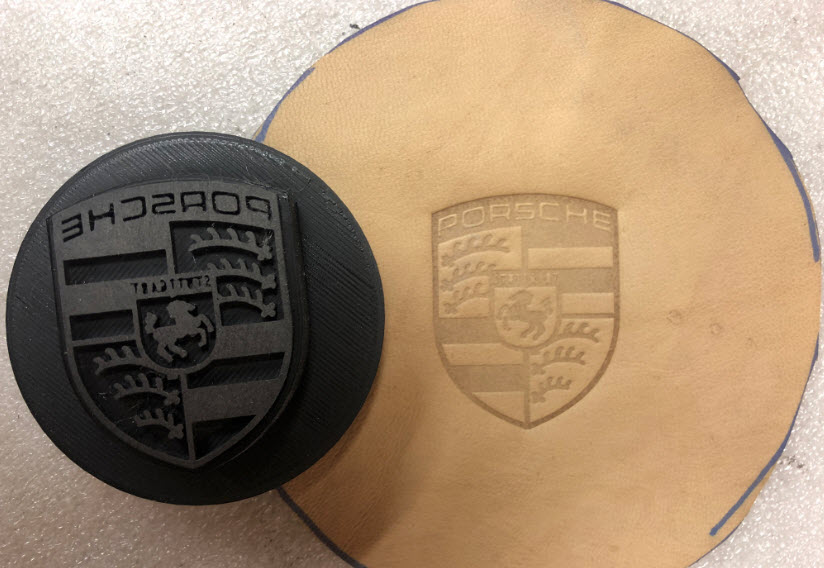
Tool (nr. 3...) for the porsche crest leather stamp. Goat skin from Uganda btw.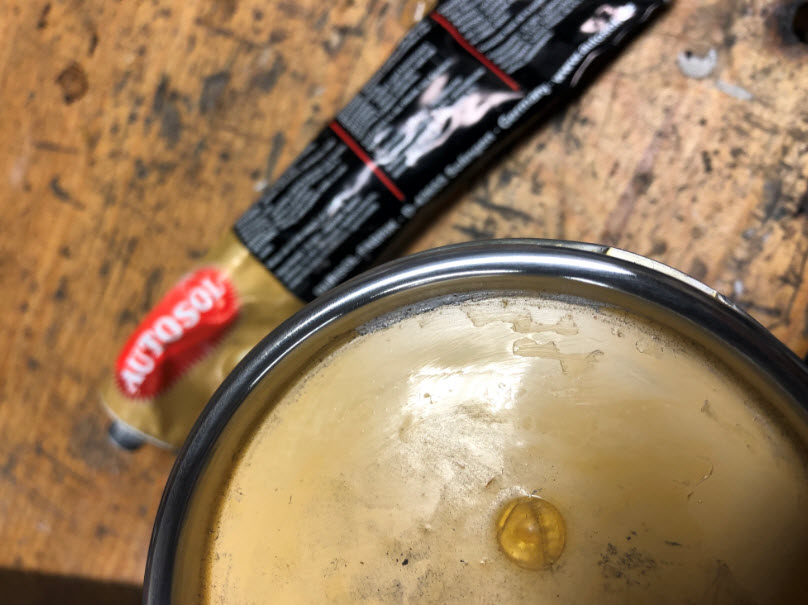
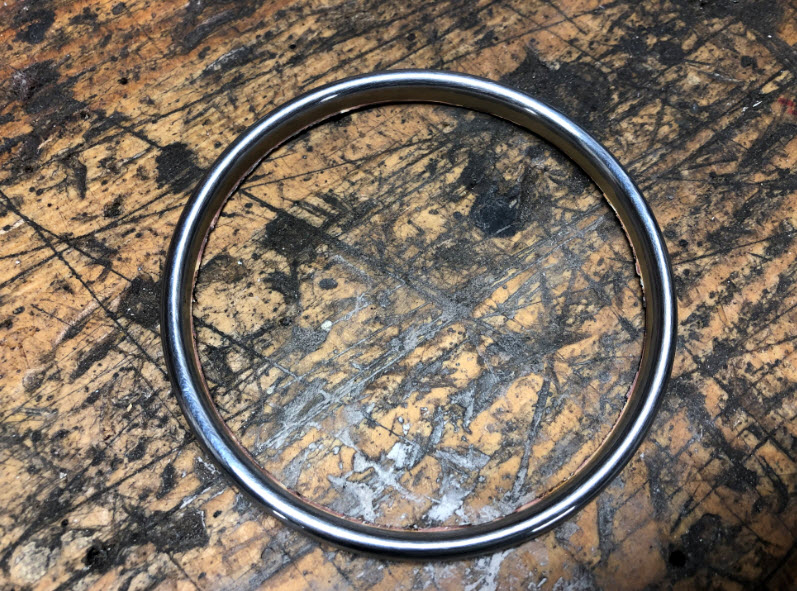
You also need the lid from an Owatrol box 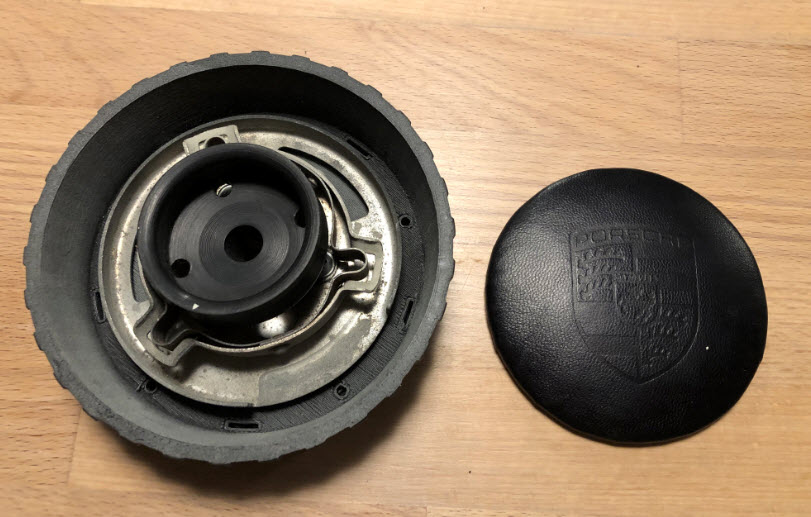
Leather part finished and harware mounted.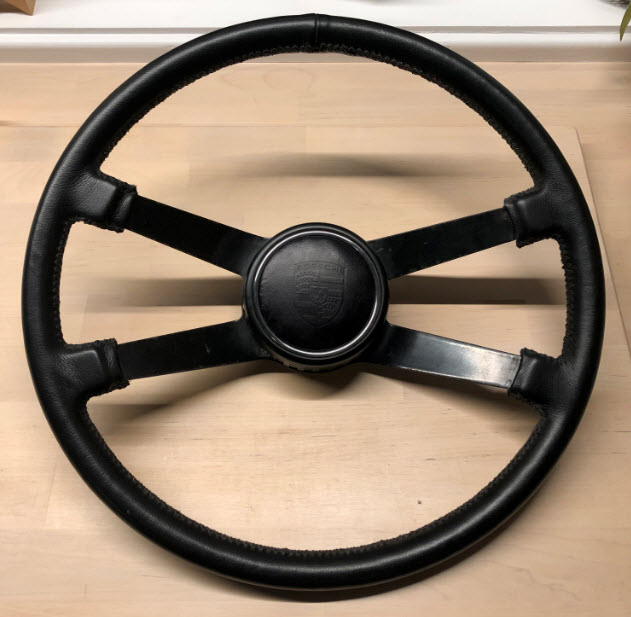
Posted by: Dion Nov 7 2019, 05:31 AM
Beautiful work on the steering wheel! There’s that craftsmanship again. 
Posted by: whitetwinturbo Dec 2 2019, 11:43 PM
......wow, just awesome skill!

Posted by: GTSandberg Dec 6 2019, 06:44 AM
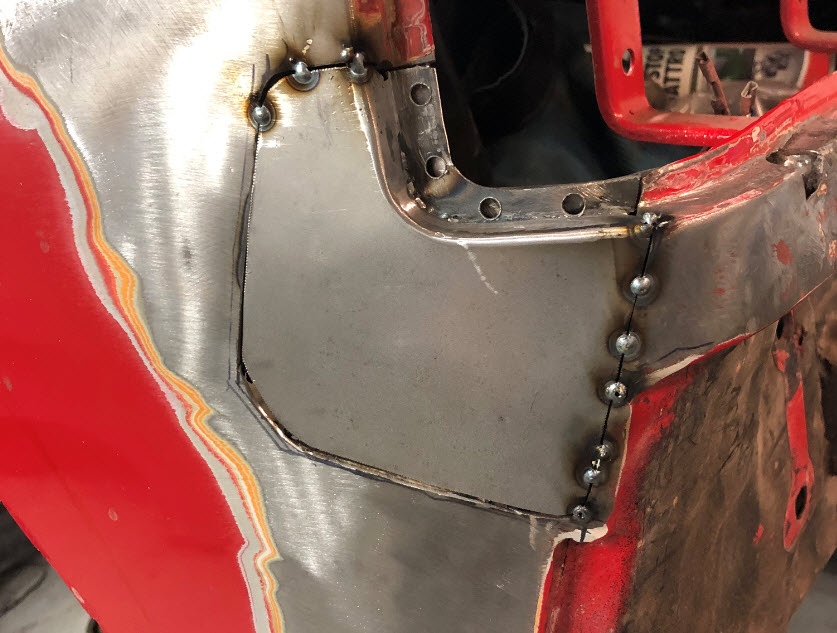
The wiper assembly mechanism arm hole.. thing.. was looking a bit suspicious. So I started a little investigation. Luckily it was much better than feared.. wrong!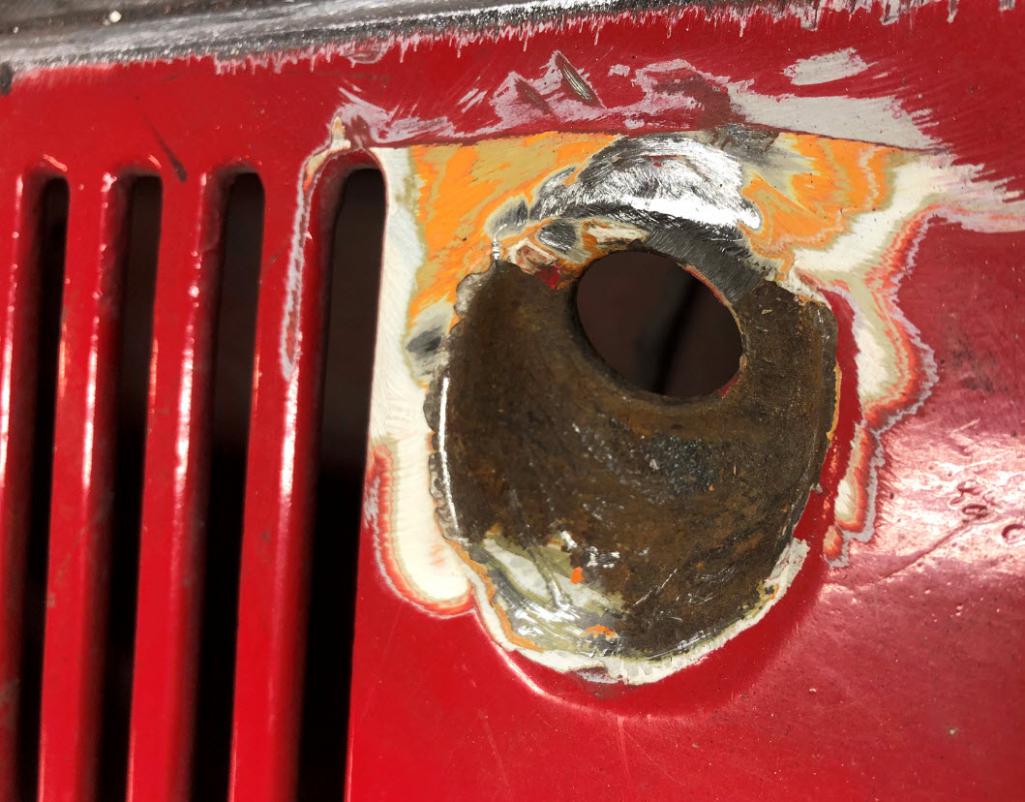
The bottom was not saveable, deep rust pitting.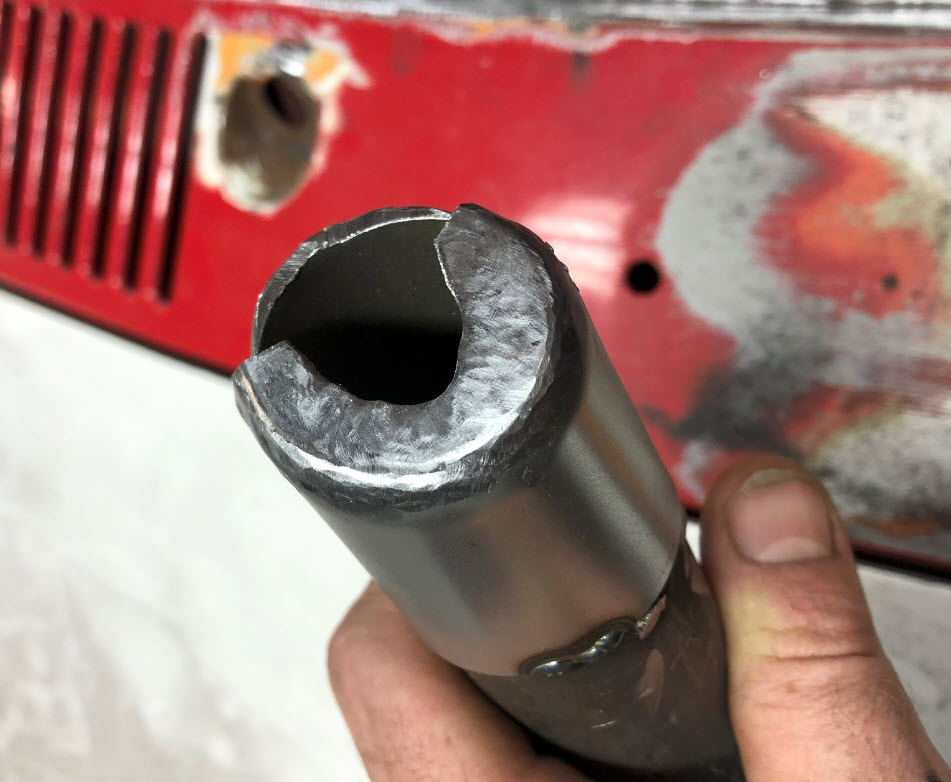
Made a high tech special tool.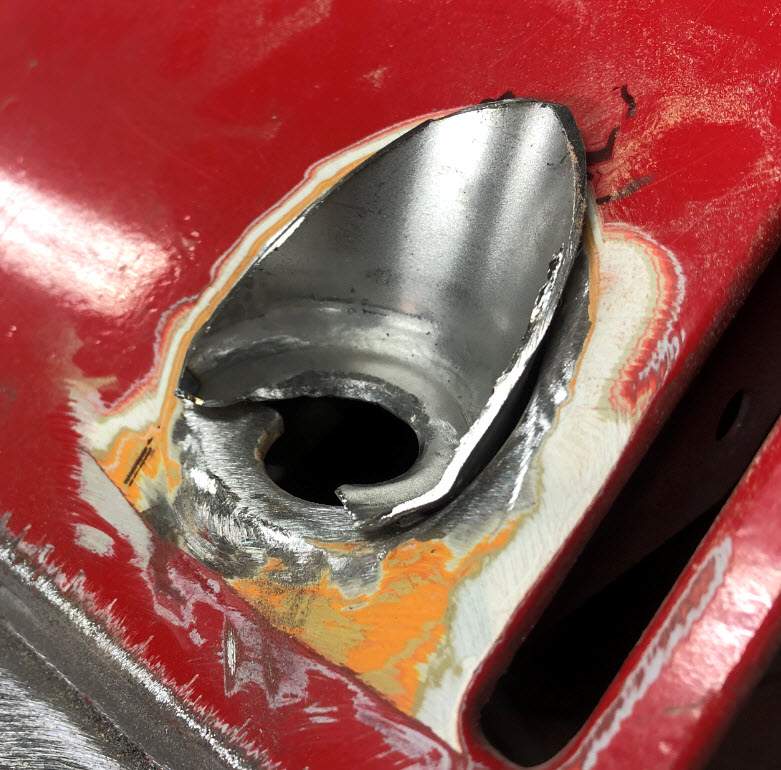
Test fitting the part.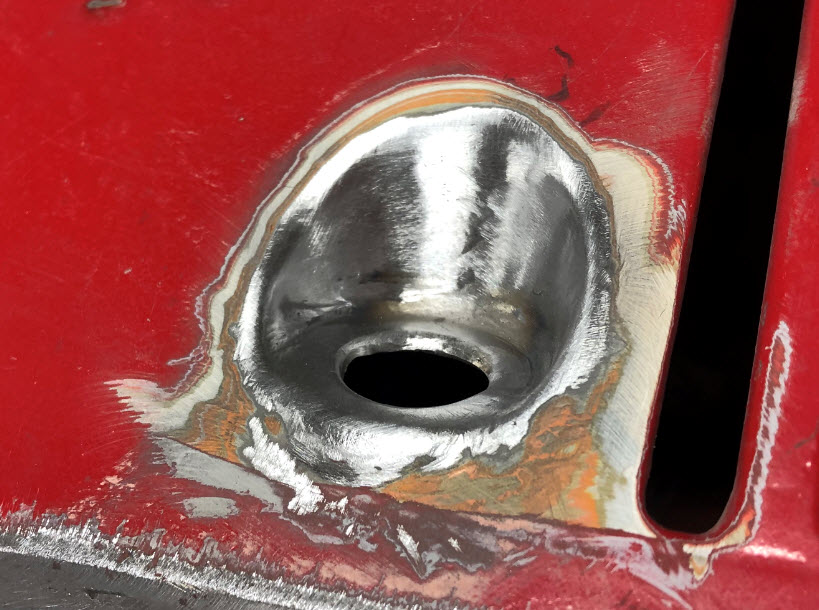
It turned out quite nice.
The other side is probably better.. very wrong! The panel around the hole had been dented with an hammer for the bondo. (unfortenatly I was to upset to remember to take a photo of this).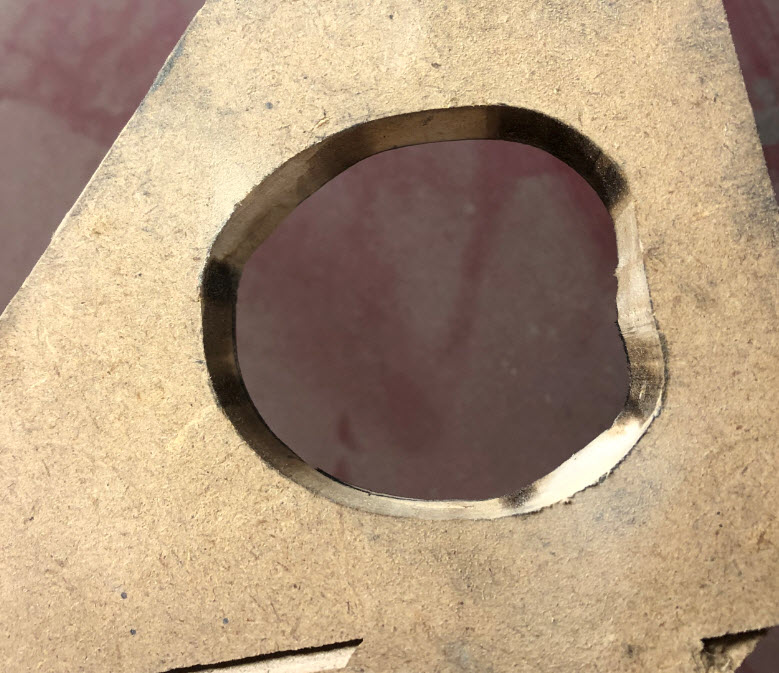
New tool to make the fillet on top.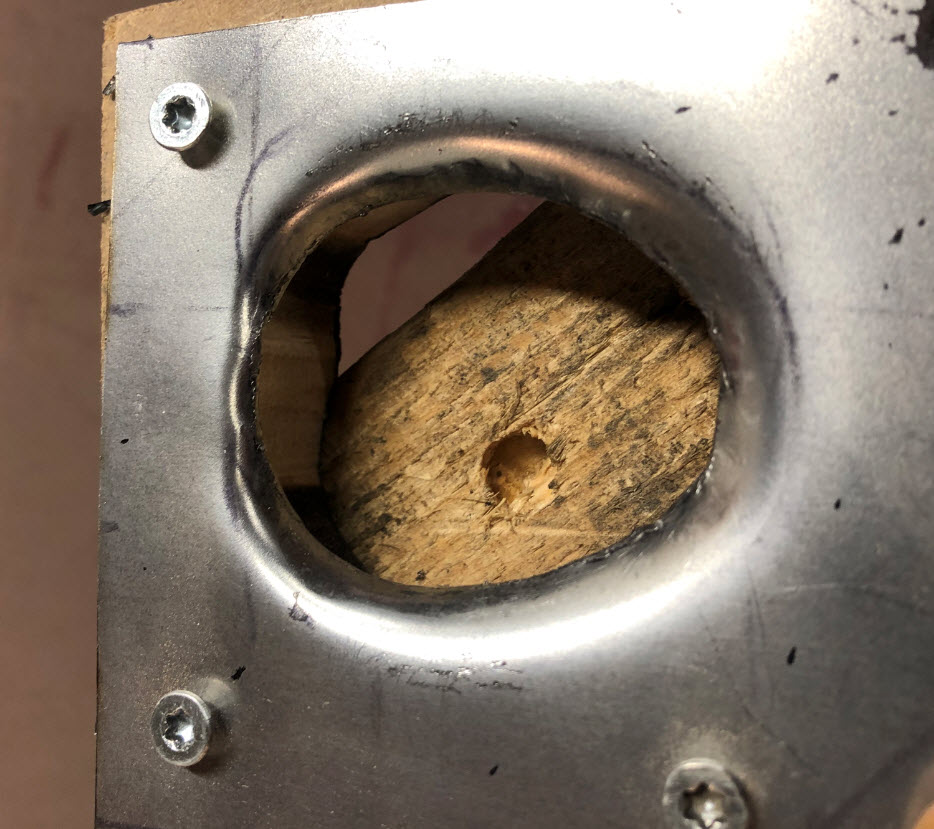
Had to make this panel in two parts.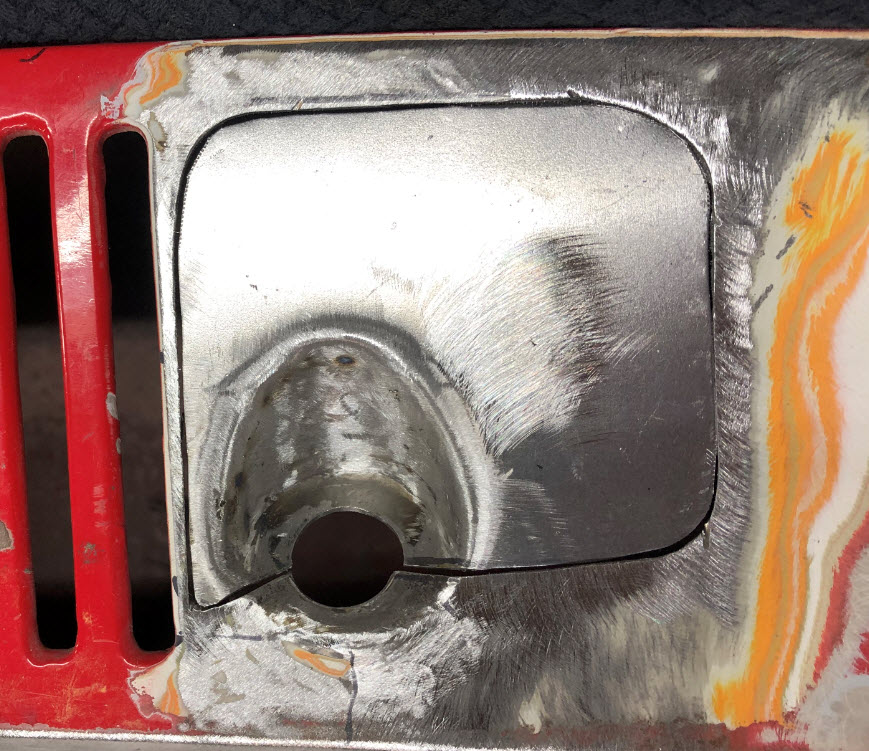
Finished part pre welding.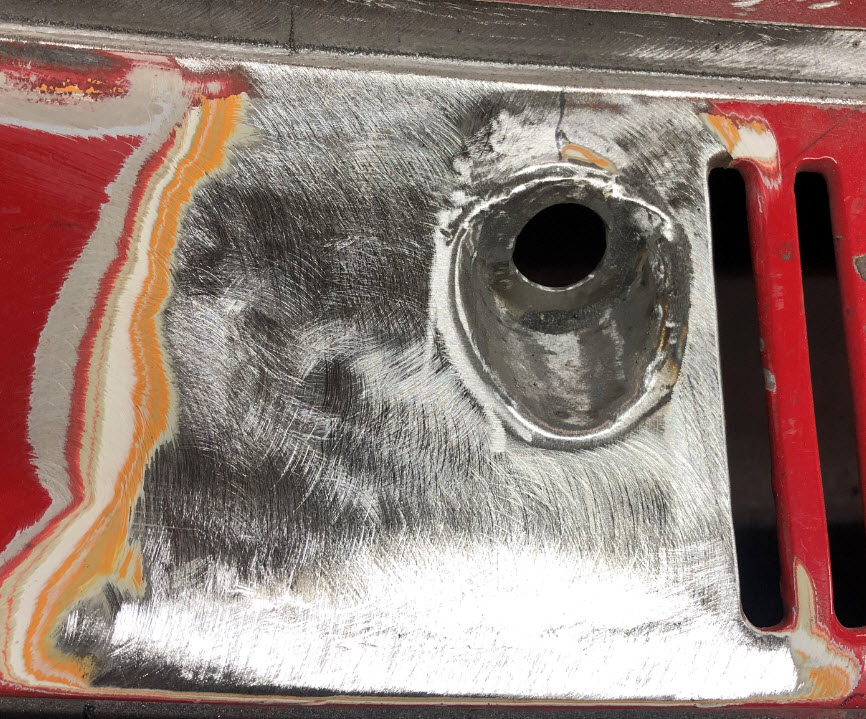
Finished repair.
Posted by: AZBanks Dec 6 2019, 07:46 PM
Great work!
Posted by: Dragoa914-6 Dec 8 2019, 12:40 AM
Any idea who makes a rear tail light mod for 914's...Looking for the circular almost F 308 like look.
Posted by: GTSandberg Dec 11 2019, 09:04 AM
Really tired of rust repair, so doing some fun detours along the way.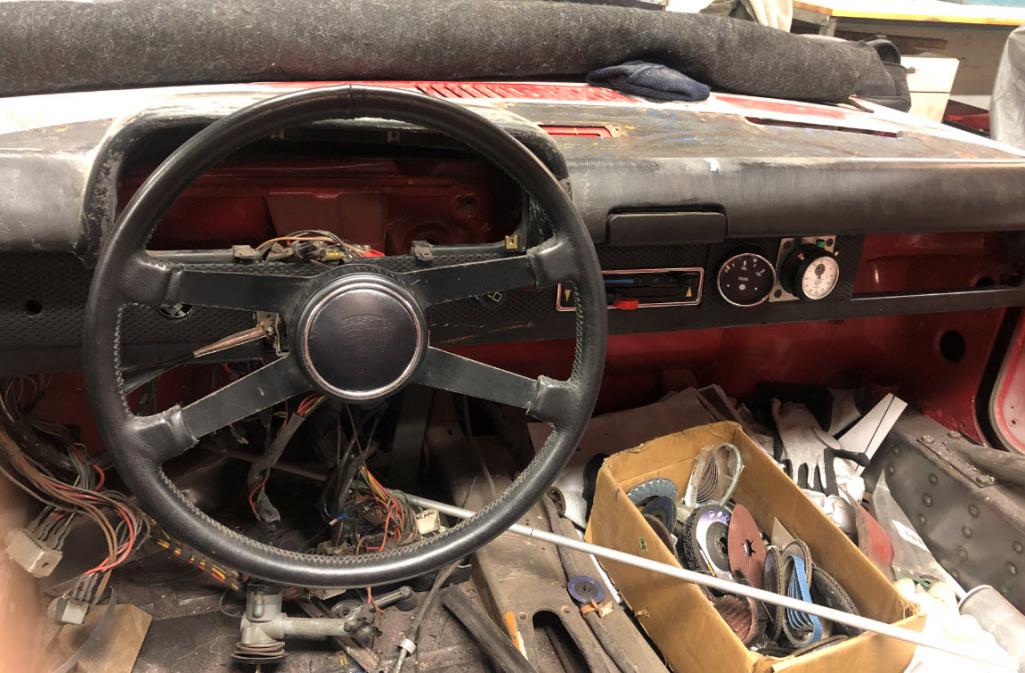
Found a ø60mm vdo gauge from a boat, and made the dashboard mount. Gauge still needs new face and black trim.. Also bought a 70s Heuer clubmaster stopwatch, really cool looking
with the green/red/black anodized buttons. Made a mount for this one too. cleaned up and added blue paint on the defroster panel.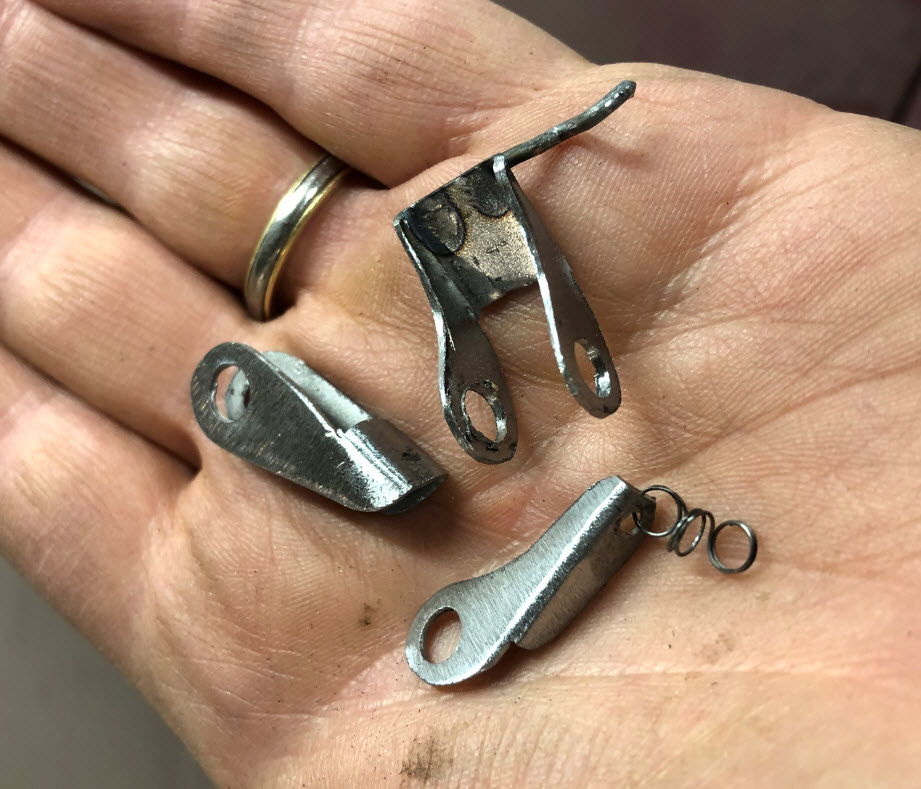
Since the stopwatch is pretty far away from the driver I thought I make a mechanism to operate it from driver pos. Lots of small parts.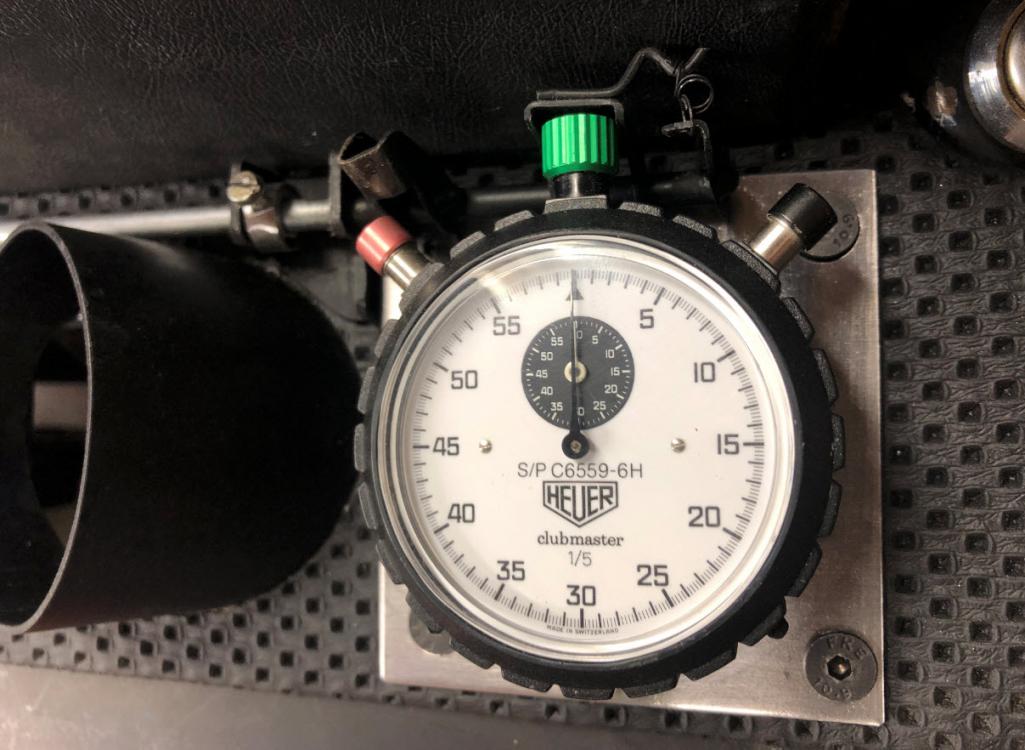
Working mechanism, pres to start, press a little harder to stop. (note the 10.9 bolts )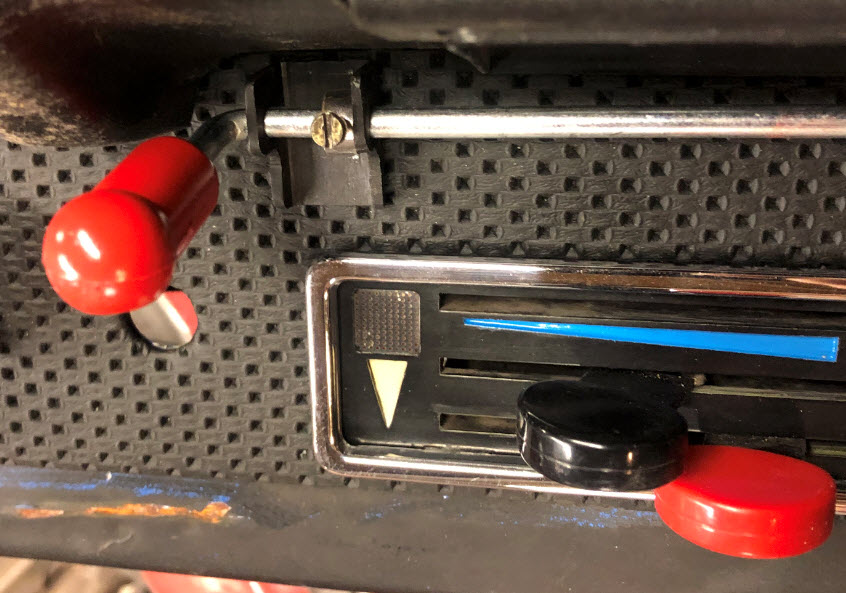
Lever had to be red. Probably never going to use this set up, but looks kind of cool I think.
Posted by: sixnotfour Dec 11 2019, 12:01 PM
Posted by: sixnotfour Dec 11 2019, 12:36 PM
Series 9 did this on Jon Nelson 914....
@http://www.914world.com/bbs2/index.php?showuser=6831
http://www.914world.com/bbs2/index.php?showtopic=131528&hl=
Attached image(s)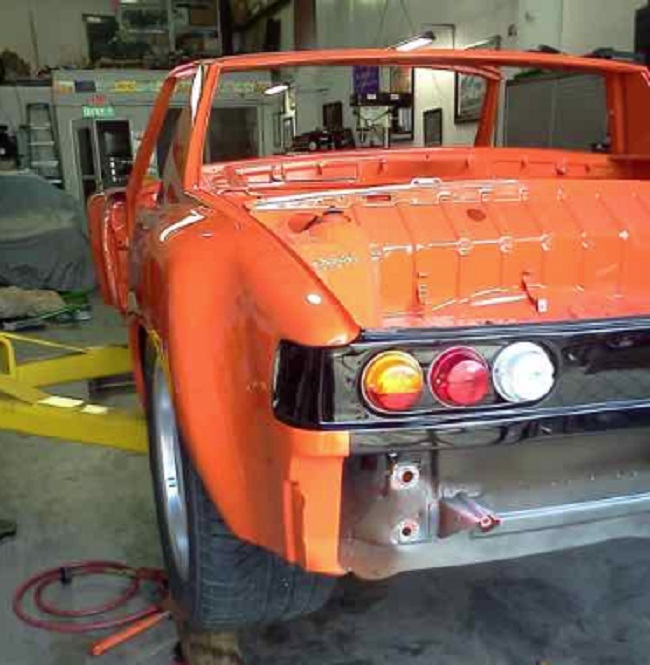
Posted by: mepstein Dec 11 2019, 12:45 PM
Series 9 did this on Jon Nelson 914....
He made them out of steel and welded them to the car.
Posted by: sixnotfour Dec 11 2019, 12:46 PM
here is who made the fiberglass sets,,,,
Mike Swanson
AR Concepts
ar_concepts@hotmail.com
(818) 470-5700
Attached image(s)
Posted by: sixnotfour Dec 11 2019, 12:49 PM
Attached image(s)
Posted by: sixnotfour Dec 11 2019, 12:51 PM
Here is a link to kits and install
http://www.914world.com/bbs2/index.php?showtopic=110845&hl=911R%20taillamps&st=20
Posted by: mepstein Dec 11 2019, 01:52 PM
Here’s the thread of the metal ones - http://www.914world.com/bbs2/index.php?showtopic=131528&hl=Lens
Attached image(s)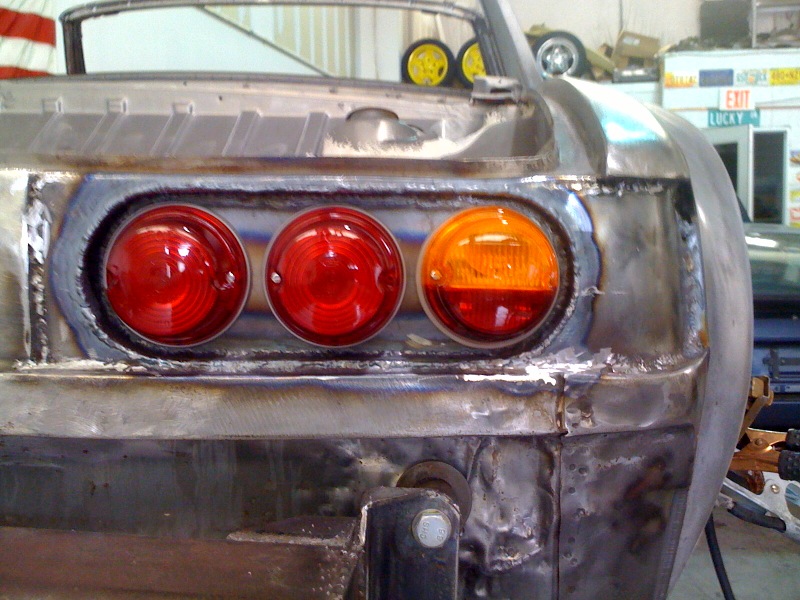
Posted by: GTSandberg Dec 13 2019, 08:15 AM
Here’s the thread of the metal ones - http://www.914world.com/bbs2/index.php?showtopic=131528&hl=Lens
Thanks for sharing, very impressed about the collective knowledge on this forum
Posted by: GTSandberg Dec 13 2019, 08:37 AM
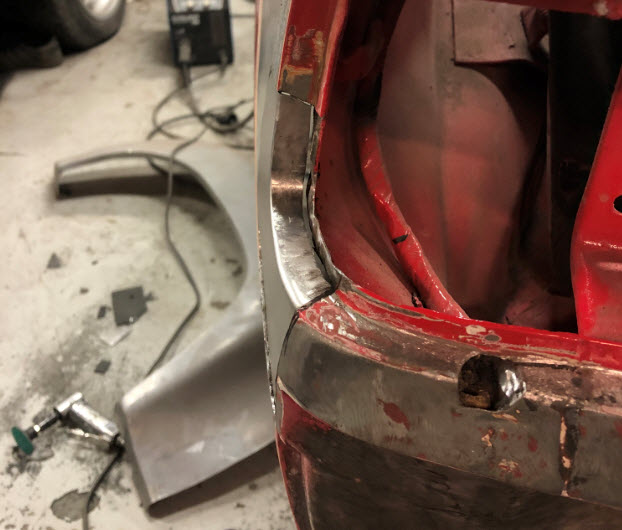
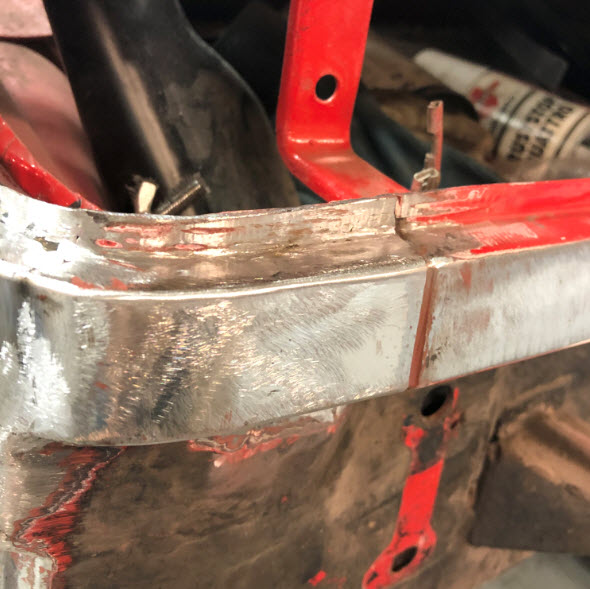
As its close to the weekend, here are some pictures of some more rust .
This is from a while back luckily. Internal structure of the roll bar was in really bad shape. Not uncommon I think..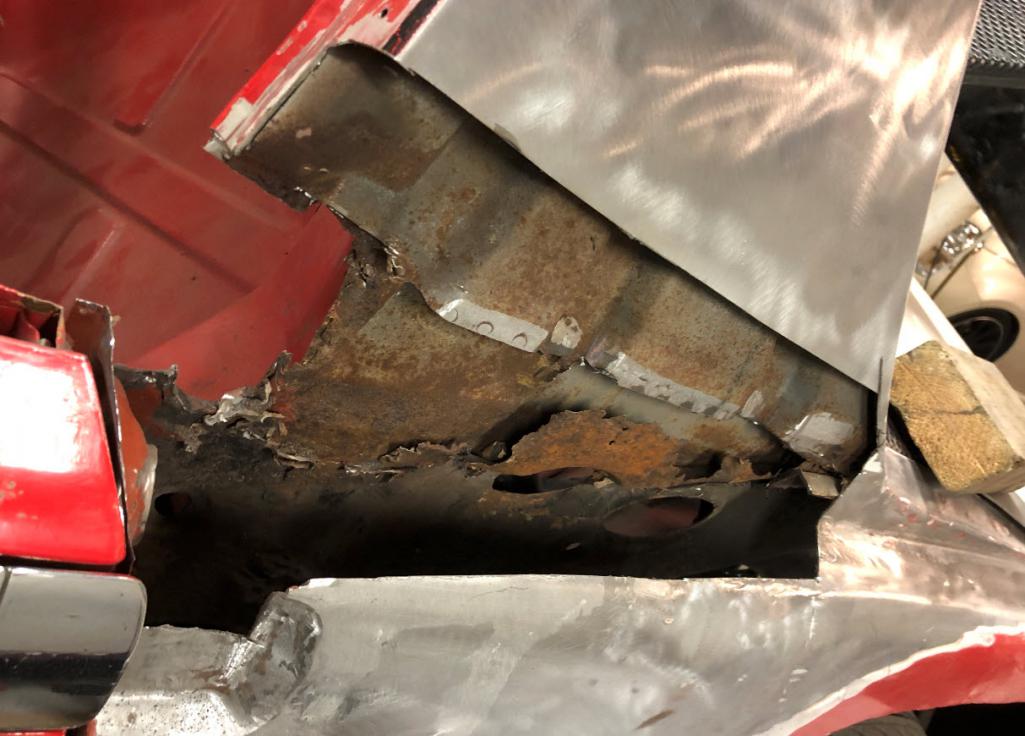
Not much left of the original structure.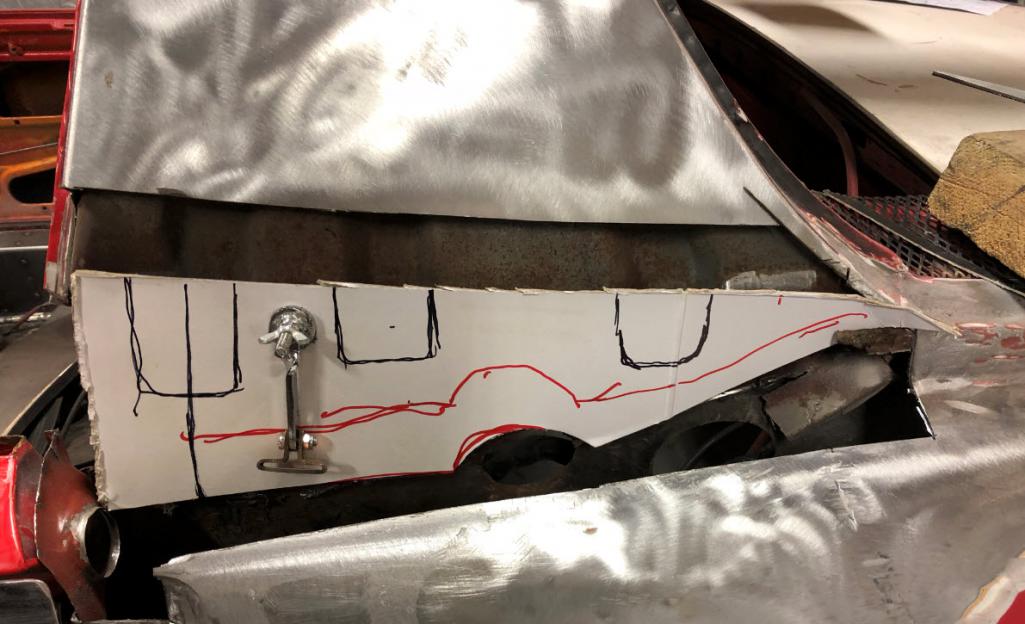
Cardboard repair panel 
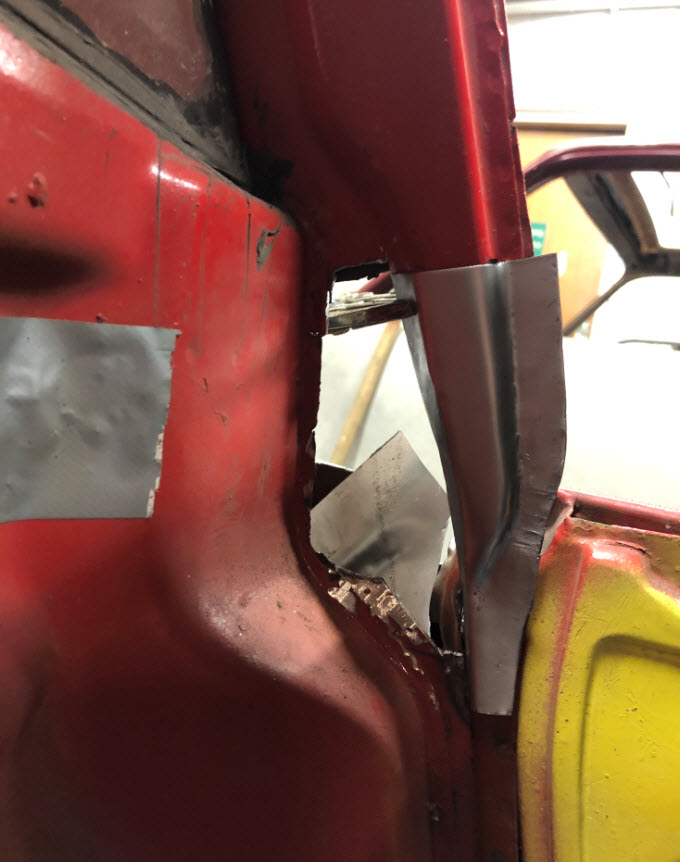
Extencive area was damaged.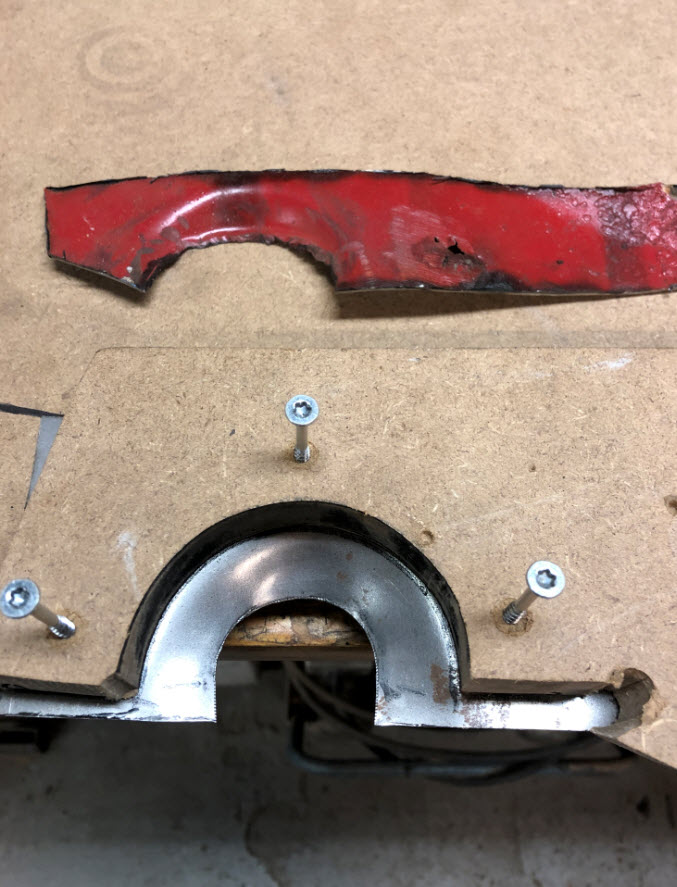
Tool for inner structure.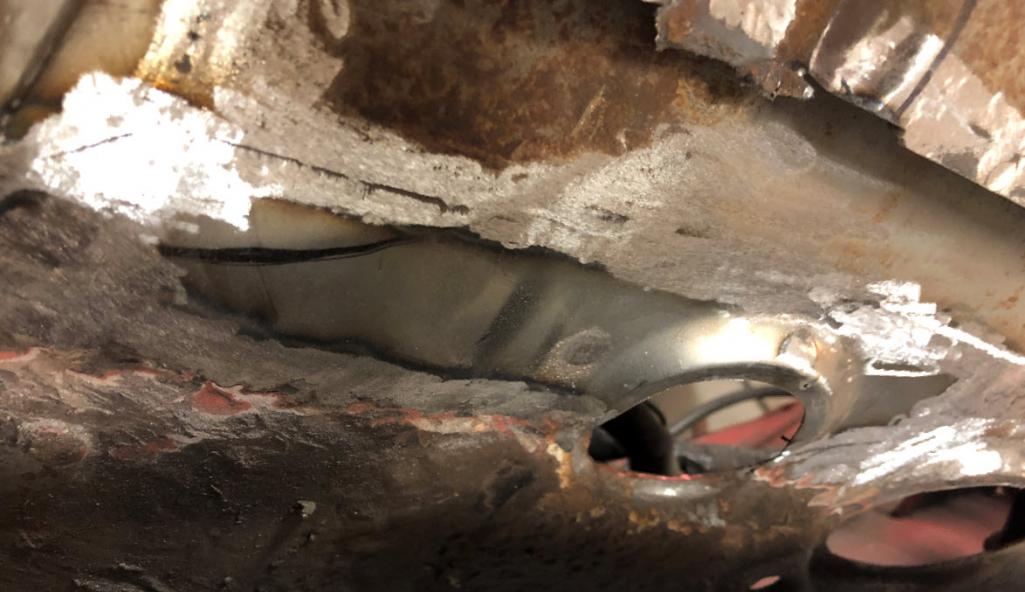
In place.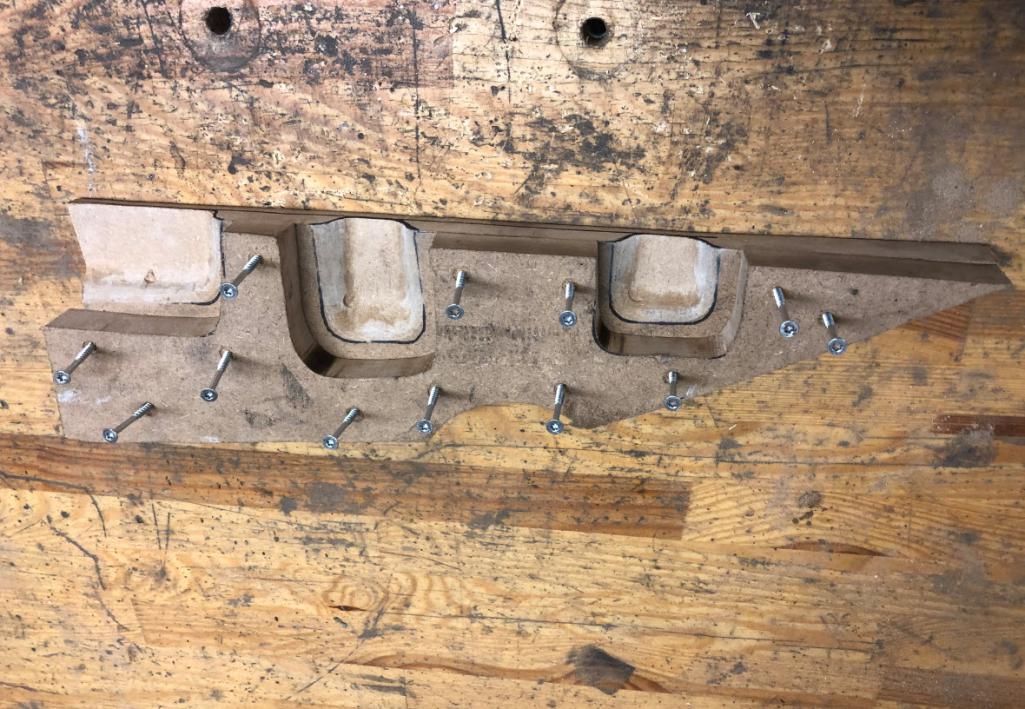
Tooling for outer (inner structure).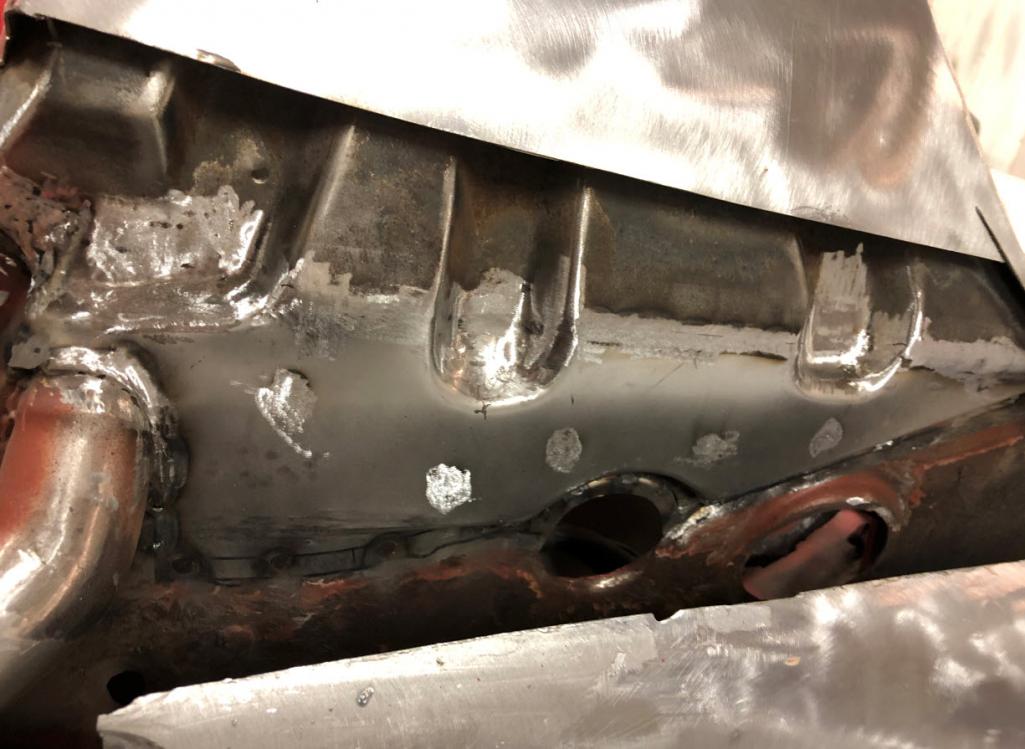
In place.
Wishing everyone a nice weekend!!
Posted by: sixnotfour Dec 14 2019, 01:23 AM
Damn dog, cant wait to see your tail lights .. 
Posted by: GTSandberg Jan 2 2020, 08:51 AM
Damn dog, cant wait to see your tail lights ..
You will be disappointed
. They will be boringly original..But of course there vere some rust

One more suspicious hole.
Posted by: GTSandberg Jan 3 2020, 09:11 AM
Fuchs Friday.
bought some 8x15 fuchs wheels some time ago. They were painted and had some pitting, but otherwice guite nice. I got them stripped and powder painted in the same finish as the rear 9x15 minilites. They were not possible to restore "properly" with anodized surface bechause of the pitting. I did the black detailing myself. 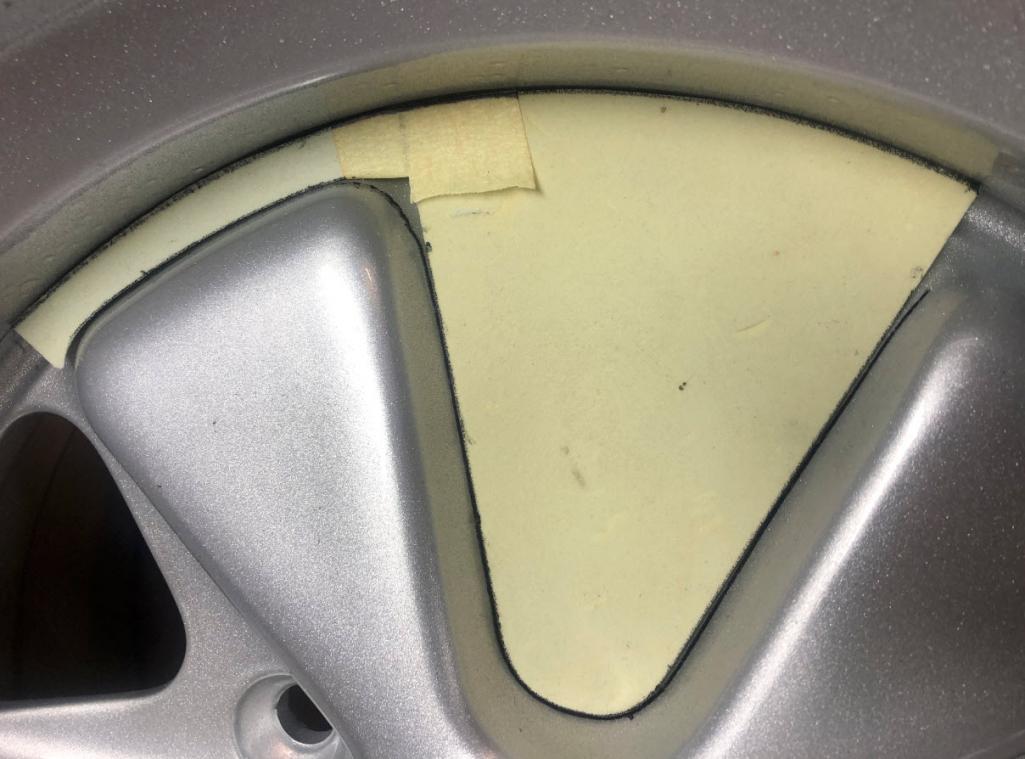
Started doing the masking by hand, but was not sucessfull  , so I made a part I could draw a help line with.
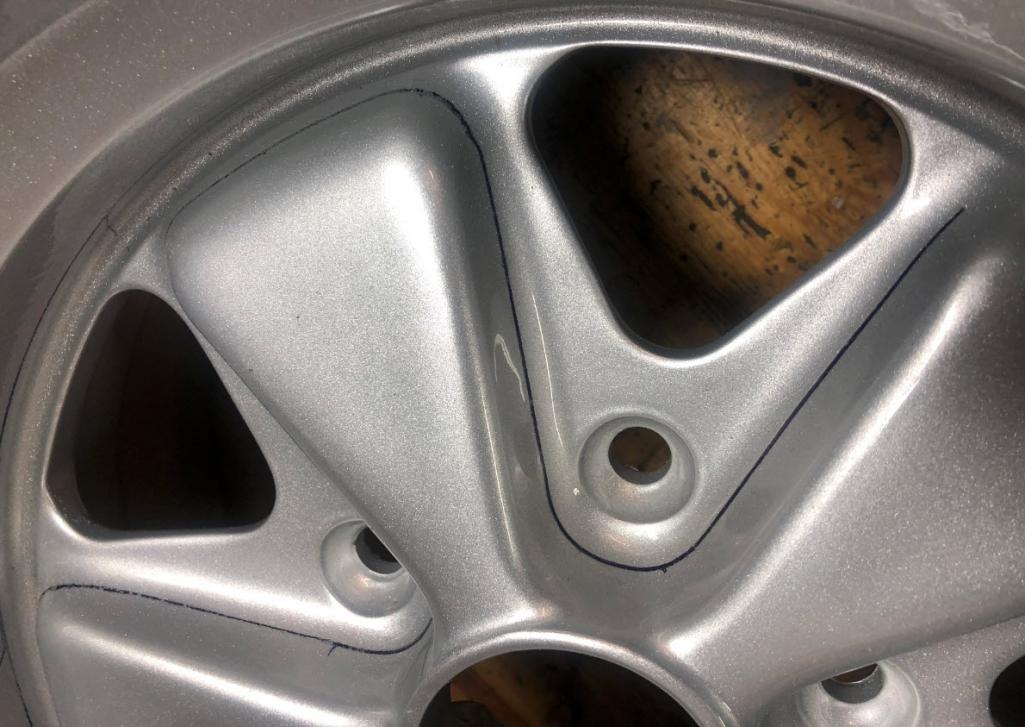
Line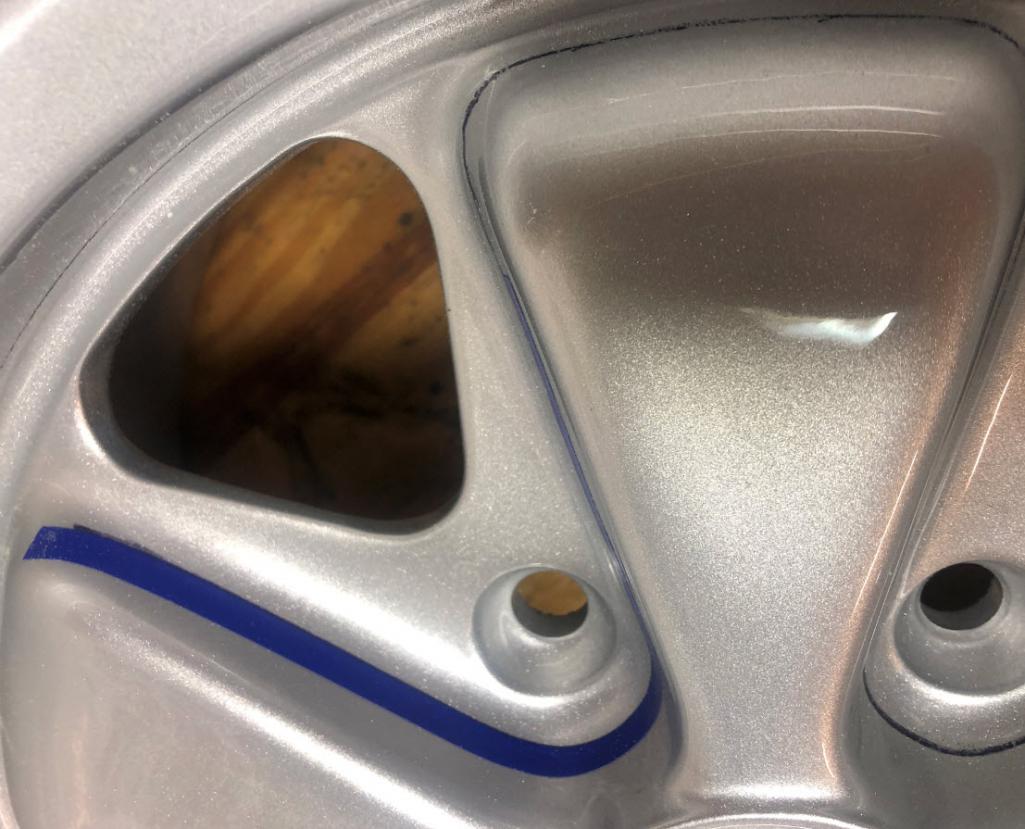
Then I used thin masking tape and followed the line.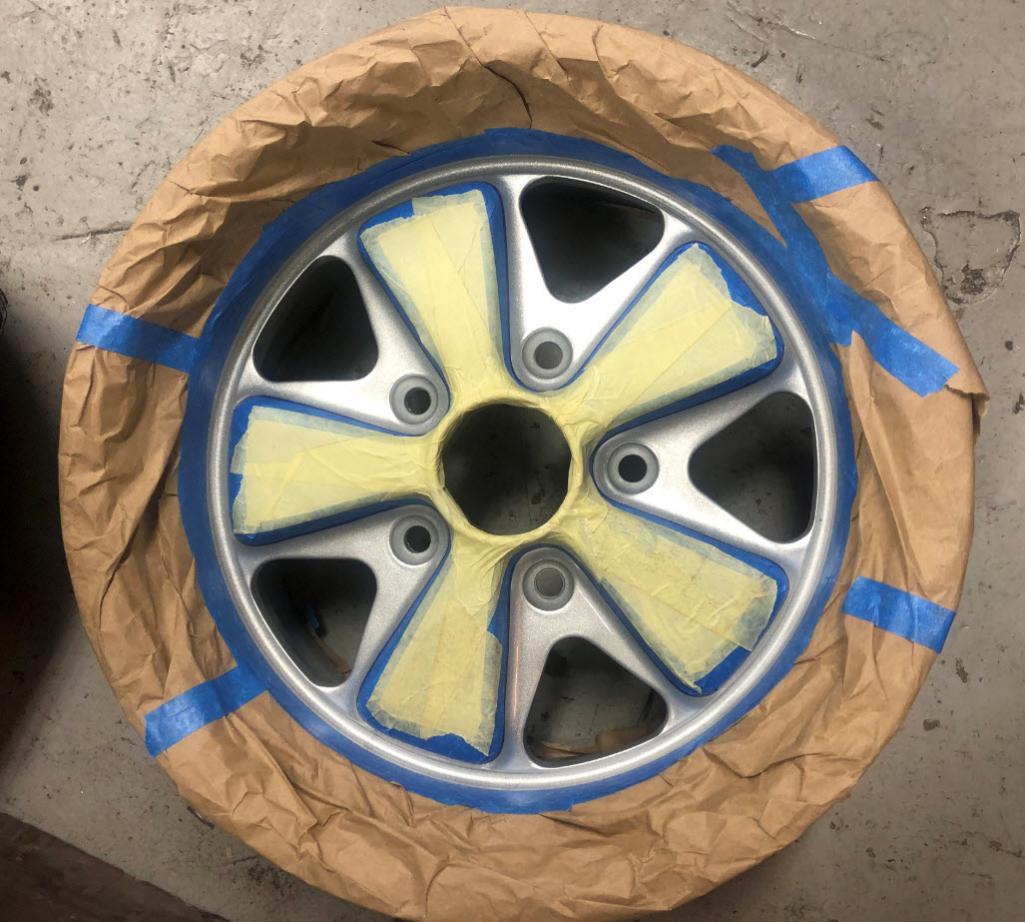
And some more masking..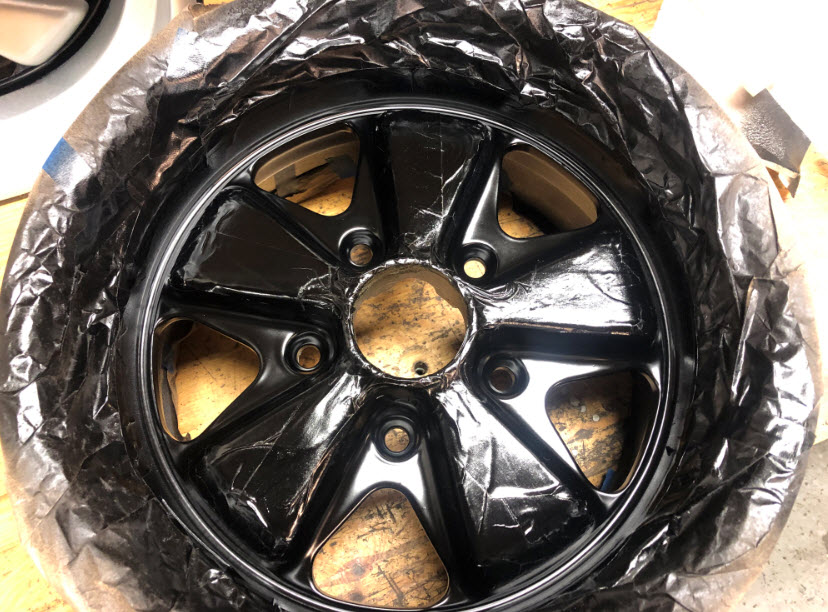
And painted with 2K satin black.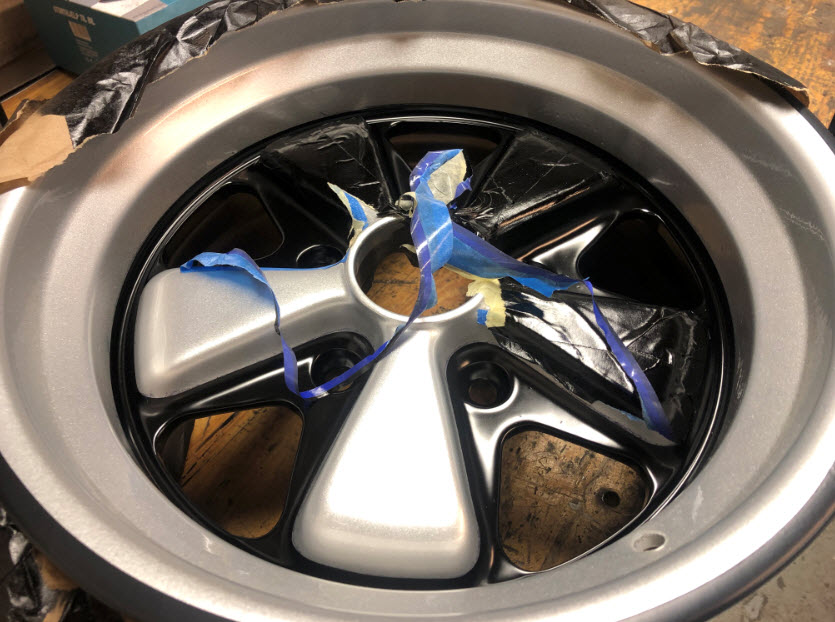
Exciting moment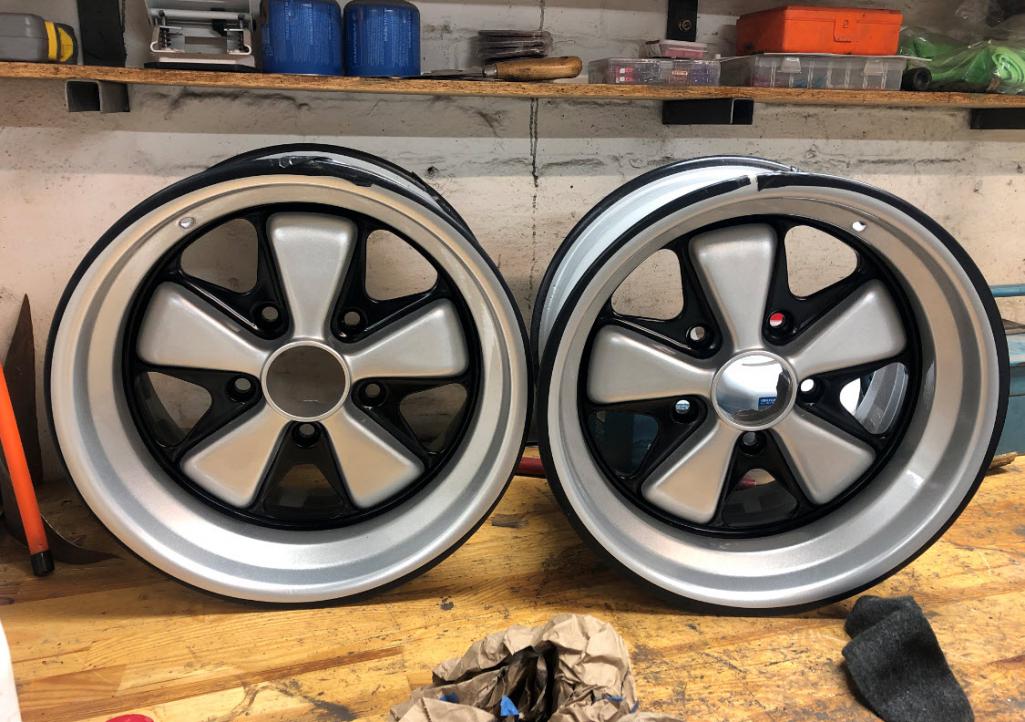
Glad it was only two though.
The rear Minilites
Posted by: GTSandberg Jan 10 2020, 08:50 AM
The definitive highlight this Christmas was first shot at the sandcasting of the GT oil thermostate housing. There was a little bit of sinking around the mounting ear, but we will sort this out next run. 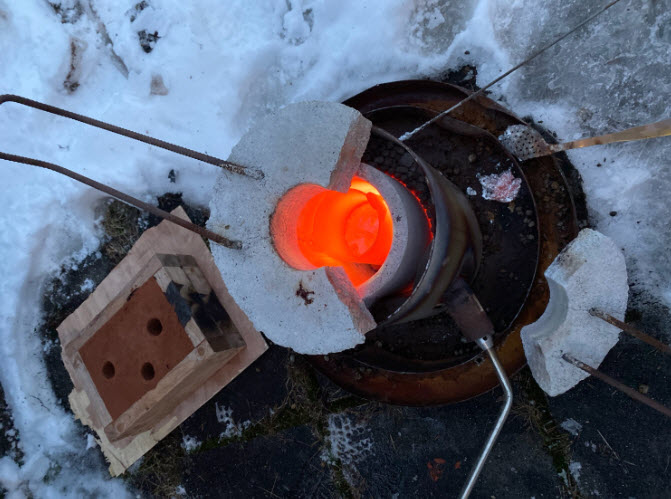
Melting the snow outside my very skilled casting connections garage 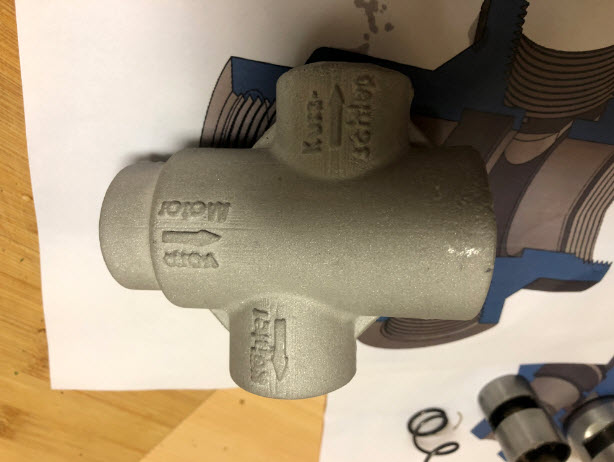
casting pre meachining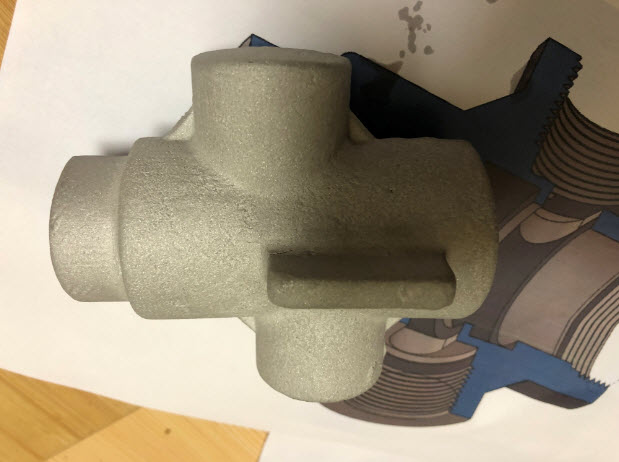
Other side of part with sunken area. Machining plans on the paper under the part
Have a nice weekend
Posted by: jd74914 Jan 10 2020, 10:36 AM
Wow, that came out great! I'm amazed at the text definition from a home sand cast part. Just awesome!
Posted by: GTSandberg Jan 10 2020, 10:43 AM
Wow, that came out great! I'm amazed at the text definition from a home sand cast part. Just awesome!
This is very much a back yard project, fun to see industrialized processes can be replicated this way.
Posted by: Sway Bar Jan 10 2020, 03:03 PM
Wow, that came out great! I'm amazed at the text definition from a home sand cast part. Just awesome!
This is very much a back yard project, fun to see industrialized processes can be replicated this way.
Back Yard Project...I think few are sand casting parts
Most definitely next level here. I'm sure the next questions will be are you willing to produce more of those.Love it, you are rocking it
Posted by: Cairo94507 Jan 10 2020, 07:38 PM
The wheels look terrific. As for the sand casting......wow!
Posted by: Norskpole Jan 10 2020, 09:00 PM
Mad skills there!
Posted by: sixnotfour Jan 10 2020, 10:33 PM
Very Nice.....
Posted by: GTSandberg Jan 14 2020, 06:47 AM
Wow, that came out great! I'm amazed at the text definition from a home sand cast part. Just awesome!
This is very much a back yard project, fun to see industrialized processes can be replicated this way.
Back Yard Project...I think few are sand casting parts
Most definitely next level here. I'm sure the next questions will be are you willing to produce more of those.Love it, you are rocking it
Not any plans of making any more of these, quite time consuming. I think they would be expensive in small scale production. Appreciate your feedback
Posted by: GTSandberg Jan 14 2020, 07:35 AM
The wheels look terrific. As for the sand casting......wow!
Thank you
Posted by: GTSandberg Jan 14 2020, 07:48 AM
Mad skills there!
Thank you John, say hello to my lovely cousins
Posted by: GTSandberg Jan 14 2020, 07:49 AM
Very Nice.....
Posted by: GTSandberg Jan 14 2020, 08:32 AM
A little spin off series on the home made hockey puck project. Forum member @Miguel K R has given it a try based on my 3D-models, and even taken it a notch up with magnesium etched tool for the leather stamp. Fun to see my project can inspire others 

Posted by: GTSandberg Jan 17 2020, 09:24 AM
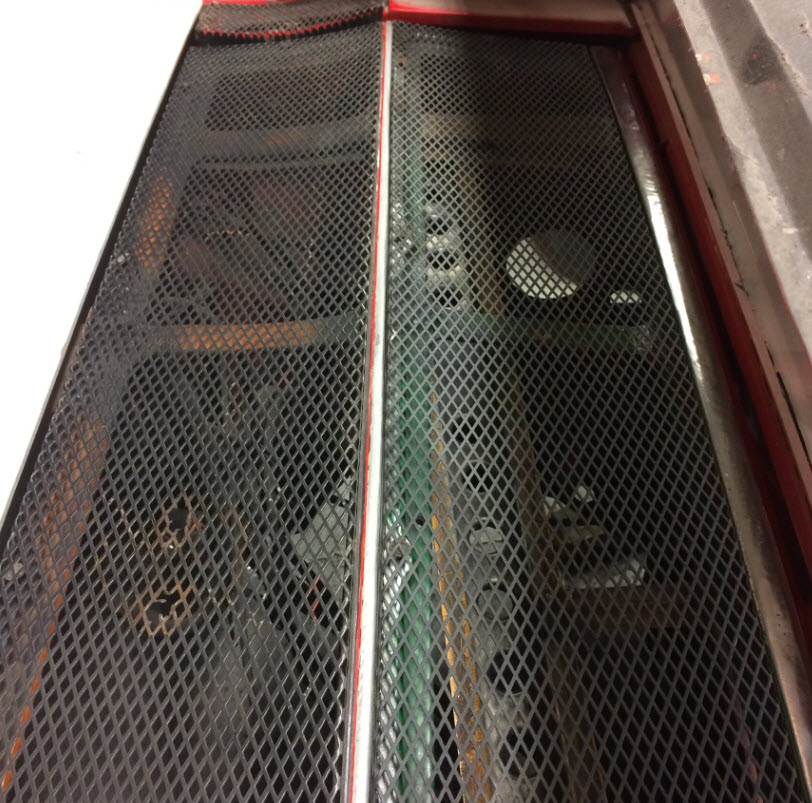
A quick update before the weekend. Here are some pictures of the fabrication of the GT-engine lid. I initially bought the mesh typically used in period, but thought it was a bit rough, so I made my own iterpretation based on the original lid and mesh.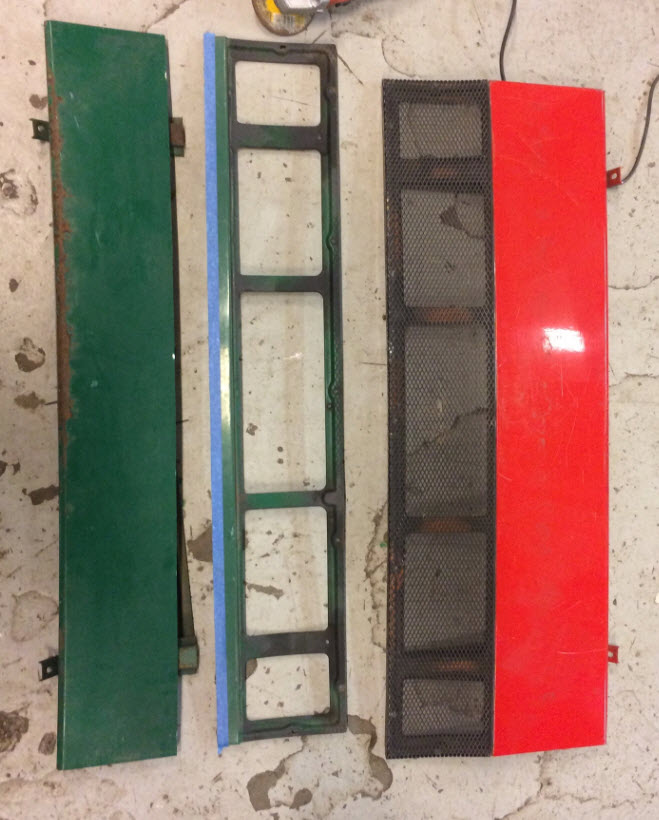
The idea was to merge two lids into one.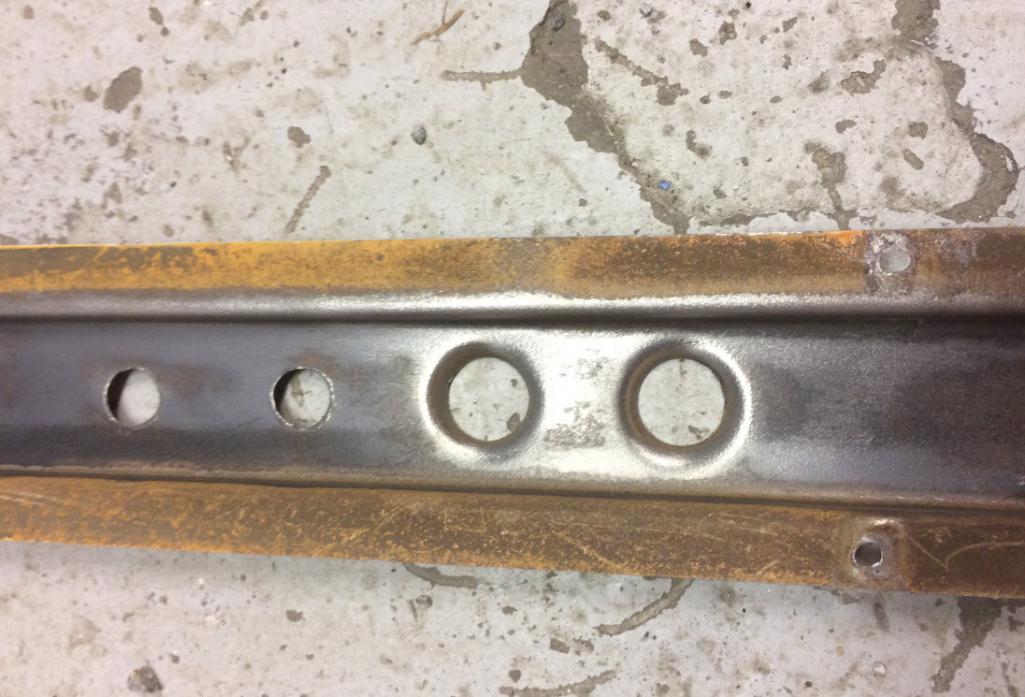
Also had to add some holes in the crossmember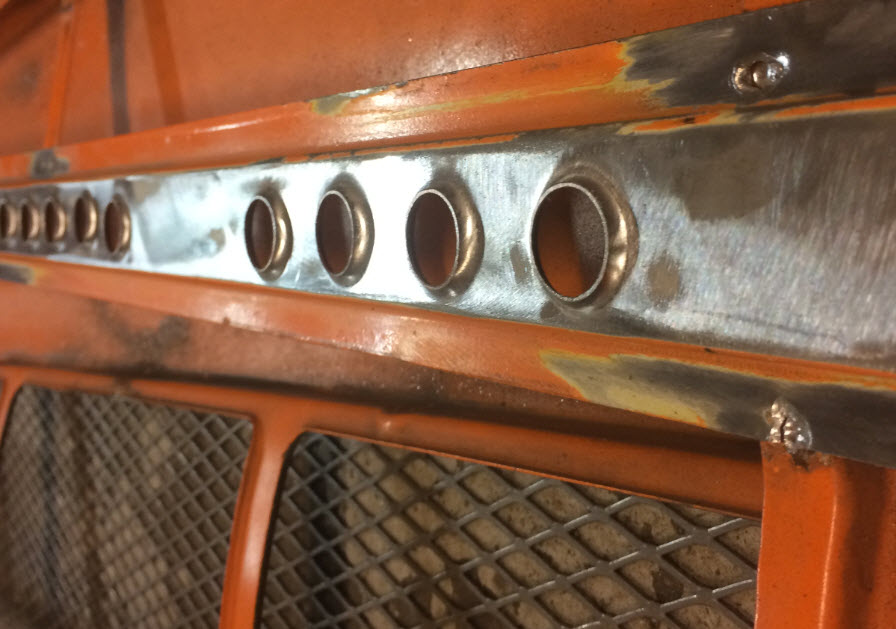
The near finished product. some battle scars in the mesh..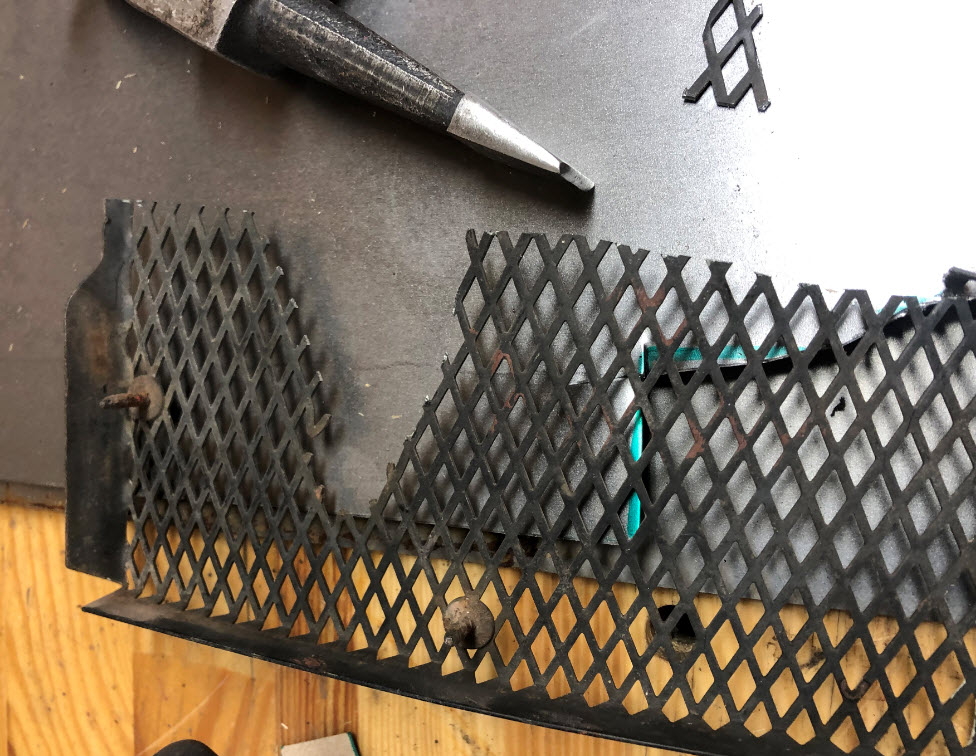
Good thing I had some extra mesh.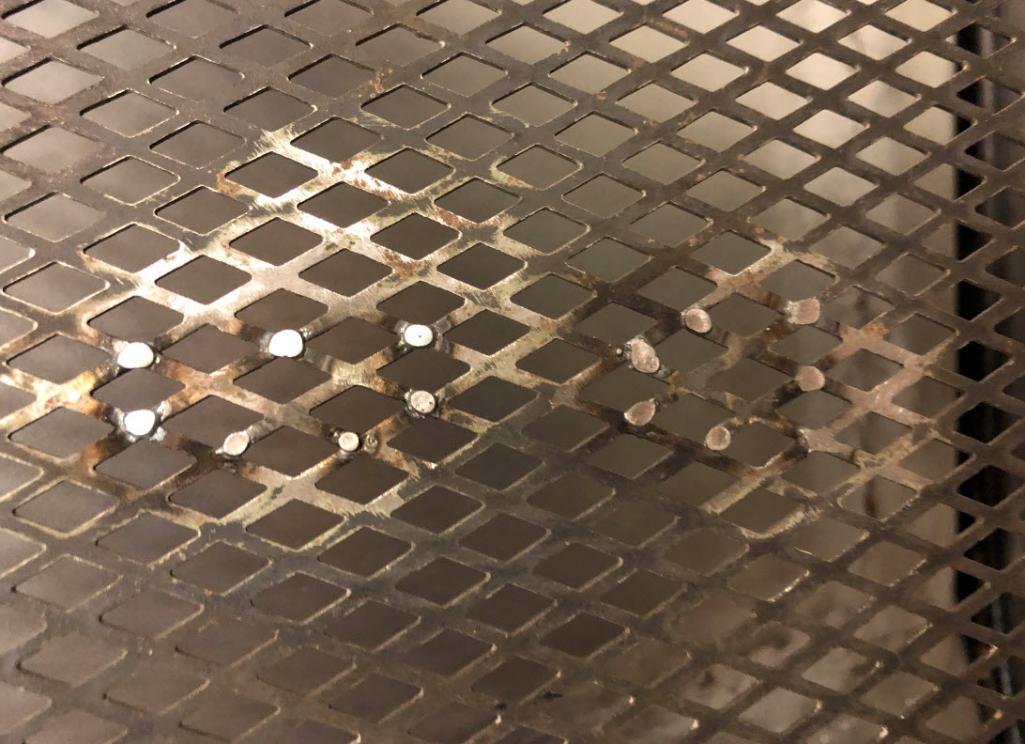
And some precision mig welding 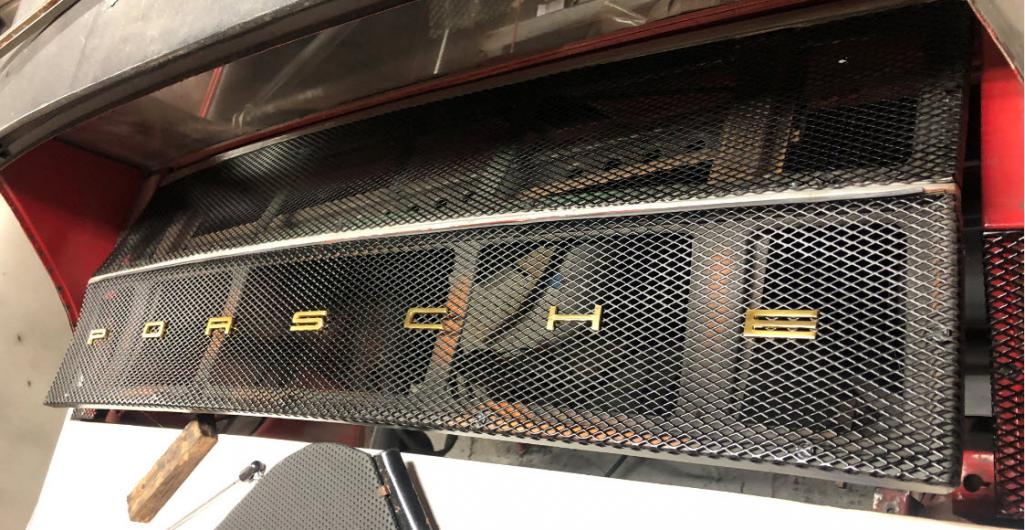
More or less finished.
Have a nice weekend!
Attached image(s)
Posted by: Retroracer Jan 17 2020, 11:26 AM
Excellent work, and a nice variation on the GT lid theme. Many folks delete the oblique crossmember, but your added lightness approach works well and looks racy!
And the precision MIG welding - wow. Keep the posts coming,
- Tony
Posted by: GTSandberg Feb 7 2020, 09:03 AM
Wishing everyone a nice weekend 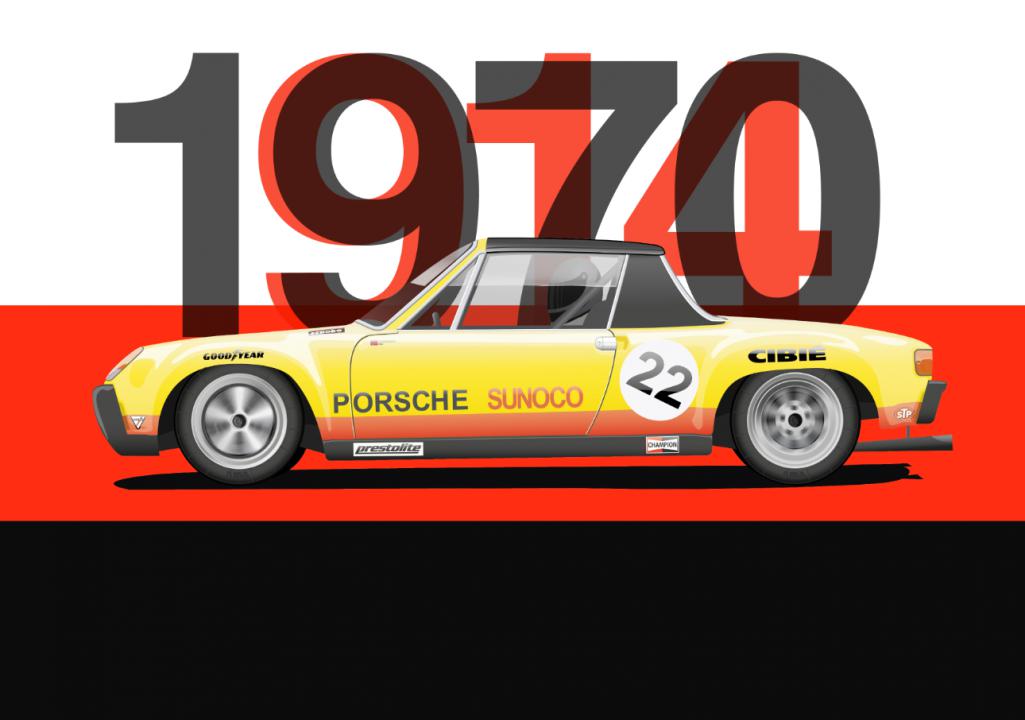
Posted by: GTSandberg Dec 11 2023, 01:47 PM
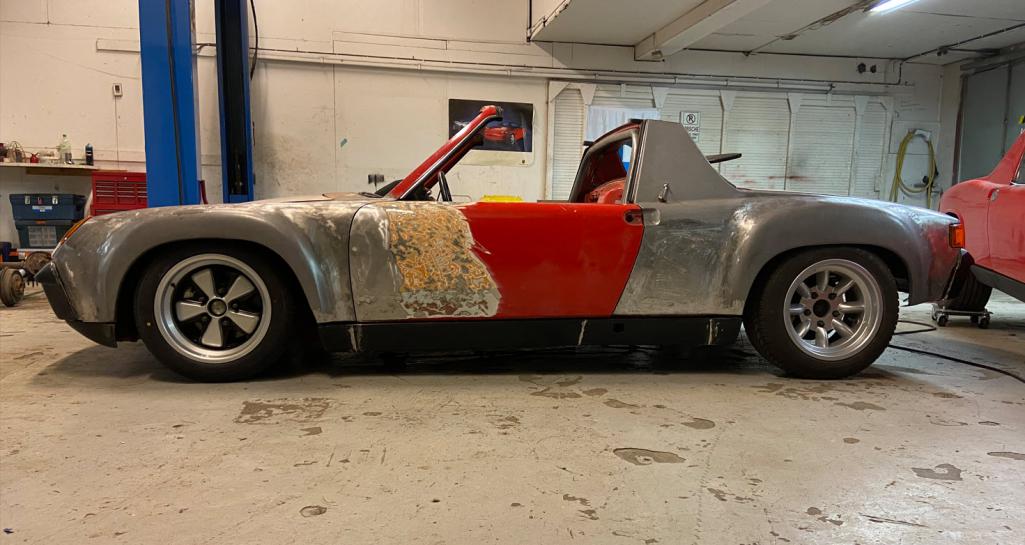
So, got a "Covid"-child.. And progress kind of stopped a bit 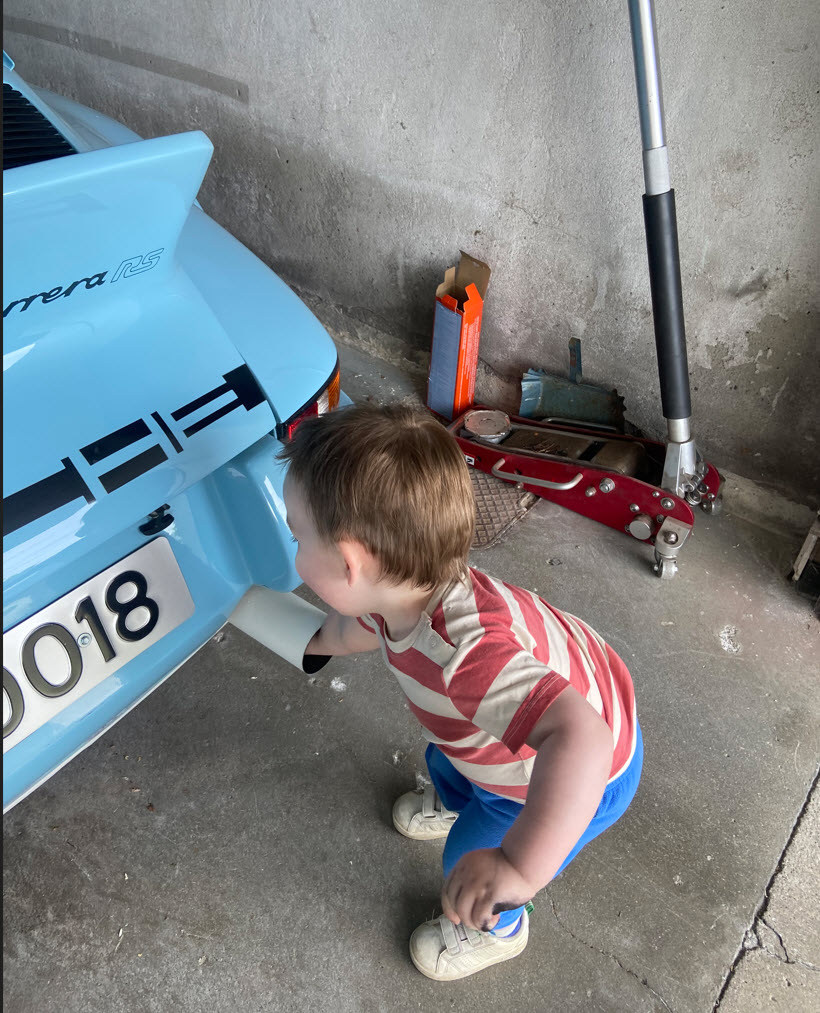
This is about how the car looks now (done some more work on the doors ++). Not far from paint actually.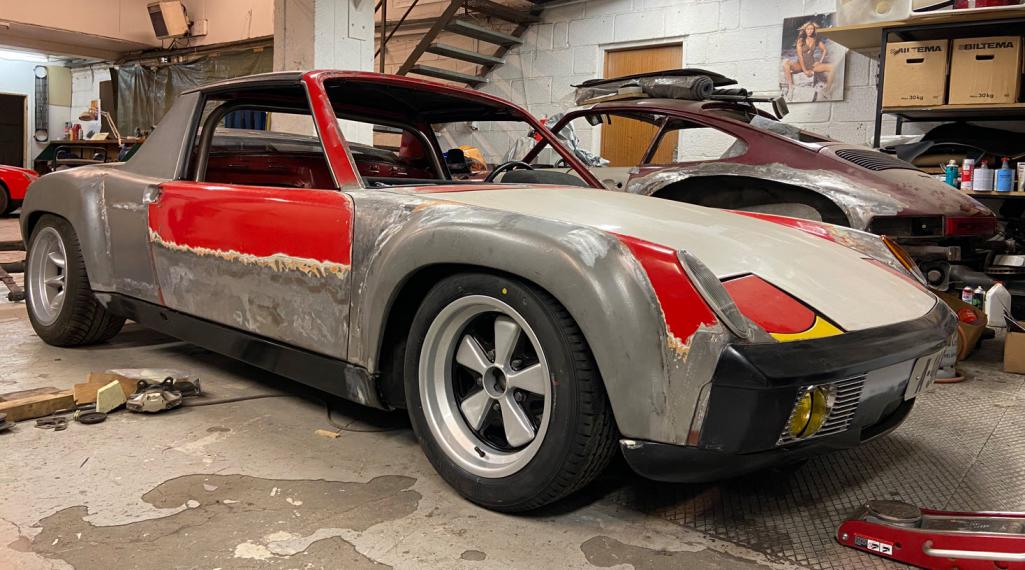
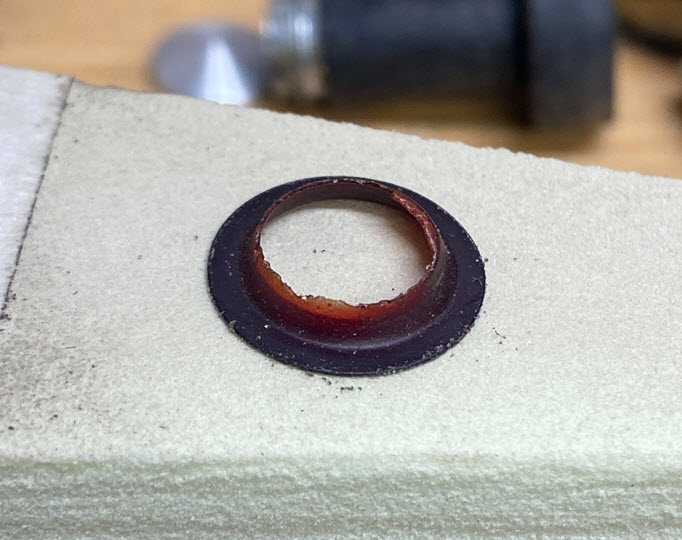
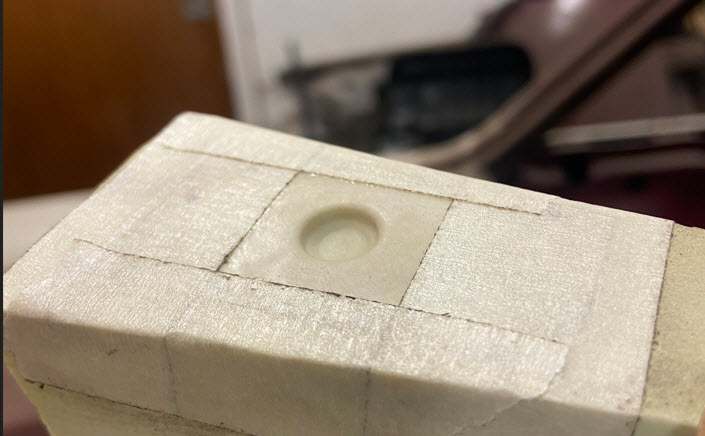
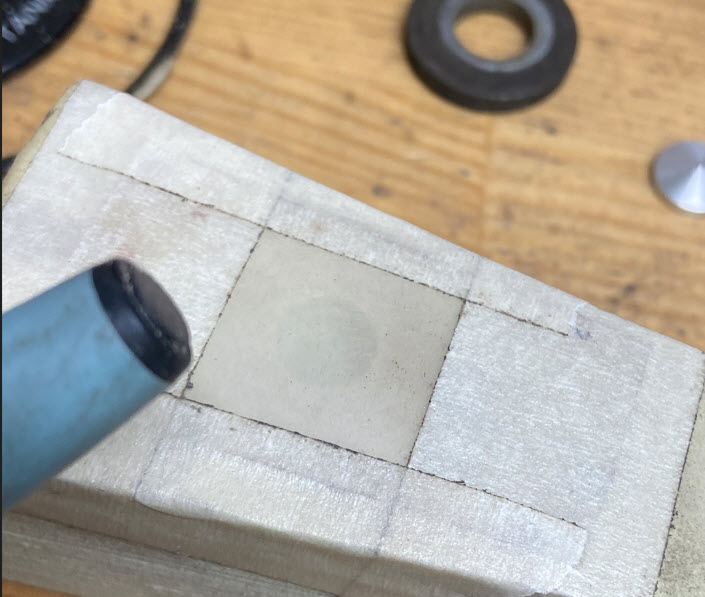
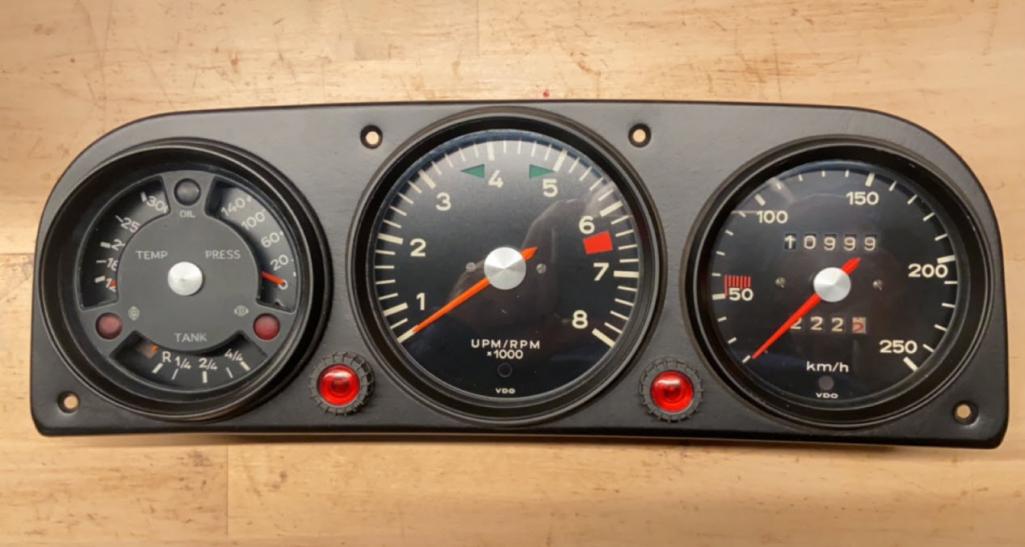
A lot of stuff I have done previously I can dig up, and I will try to do so, but recently the greatest highlight is finishing the instrument cluster..Found a 3 gauge in parts in an ad for some other parts, and it cleaned up quite good. Had to make the colored light.. thing.. that had cracked.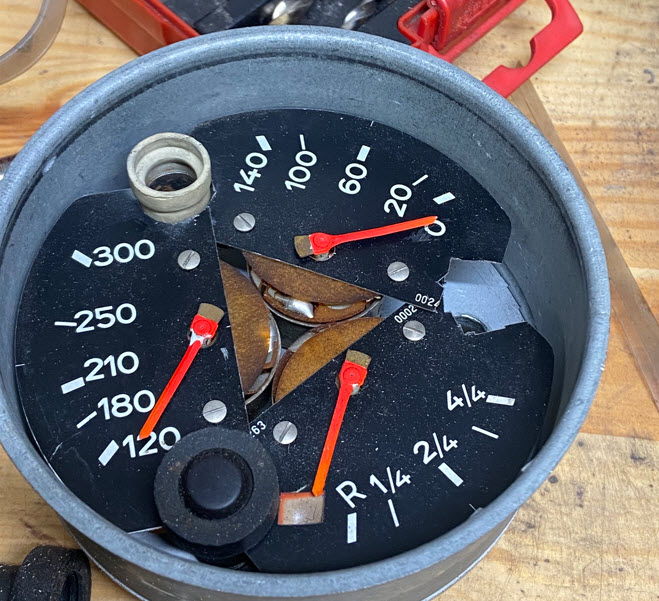
Posted by: gereed75 Dec 11 2023, 03:38 PM
Great to see you back posting. Your work is fabulous as usual and very entertaining to see. And that little guy looks like lots of fun too!
Any photos of the RS anywhere?
Posted by: GTSandberg Dec 12 2023, 04:27 AM
Great to see you back posting. Your work is fabulous as usual and very entertaining to see. And that little guy looks like lots of fun too!
Any photos of the RS anywhere?
Thank you for the kind words
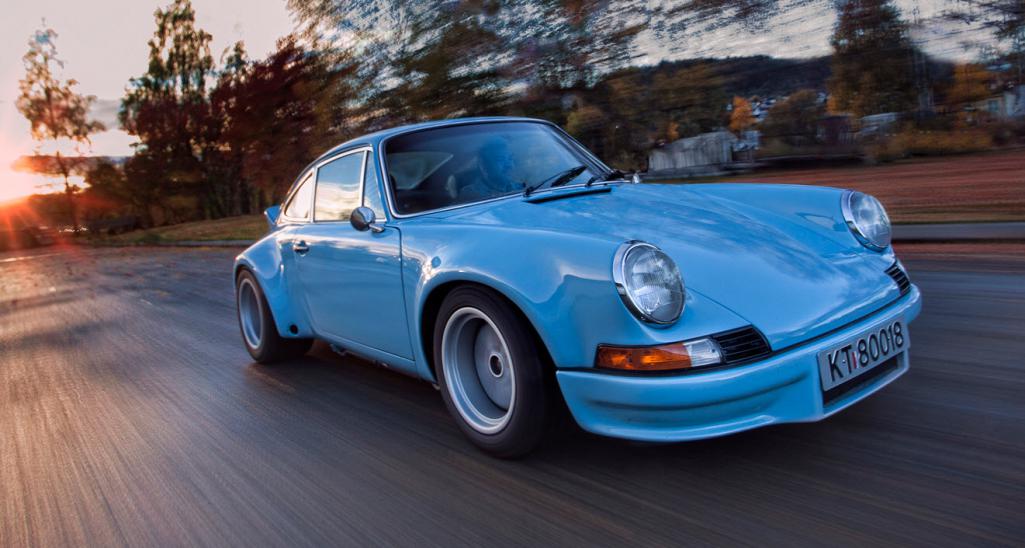
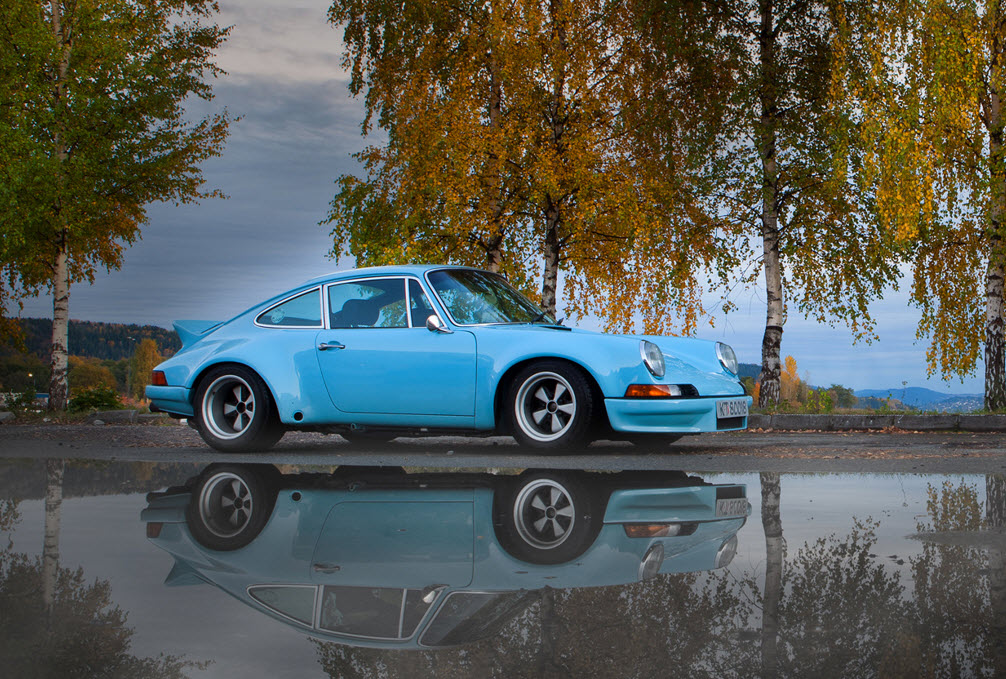
The rsr project was finished 10 years ago now, bare metal, lots of rust and welding.
It is a project thread on the pelican forum, but pictures are gone..
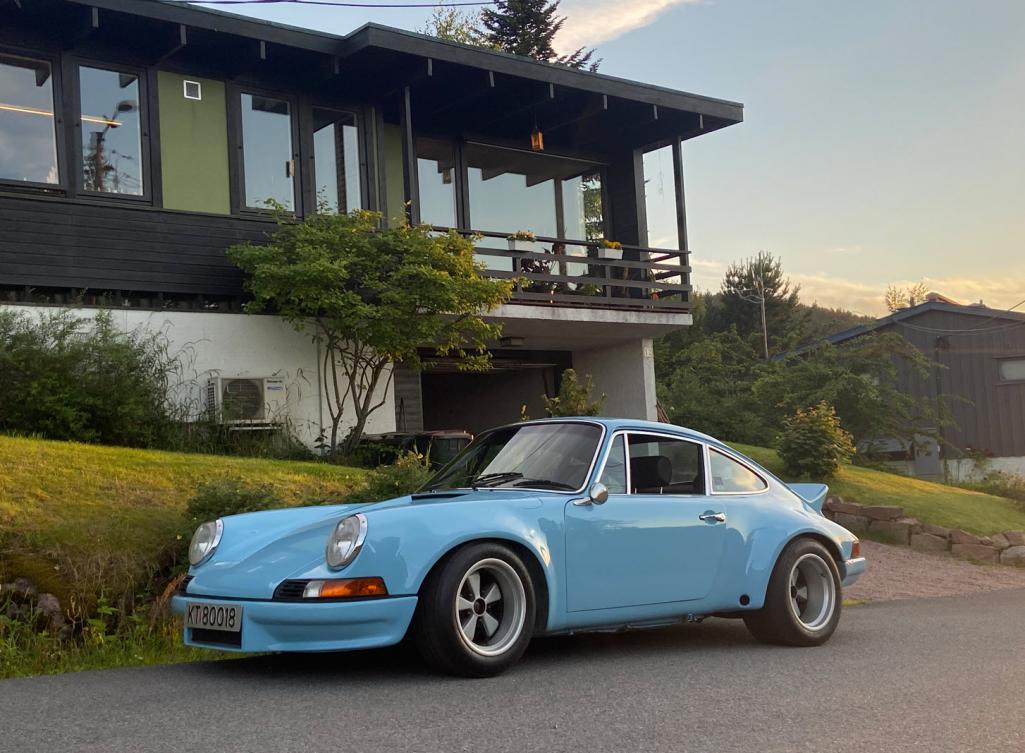
On request some pictures of the non 914..

Posted by: gereed75 Dec 12 2023, 07:13 AM
Thanks. Great looking car in a fabulous color. Sort of a tribute to the 914 that you have that great 911 but are building a -6 GT clone.
Nothing like having that flat six right behind your head. Sort of the ultimate air cooled Porsche experience short of a 910!
Posted by: GTSandberg Dec 12 2023, 08:08 AM
Thanks. Great looking car in a fabulous color. Sort of a tribute to the 914 that you have that great 911 but are building a -6 GT clone.
Nothing like having that flat six right behind your head. Sort of the ultimate air cooled Porsche experience short of a 910!
Absolutely, the 914 in many ways feels more special, especially the seating position with straight legs and the enginefan almost inside the cabin.. and of course, pop up lights
Posted by: Justinp71 Dec 13 2023, 11:01 AM
Stance and wheel tire combo on the 914 is perfect!
Posted by: gereed75 Dec 13 2023, 01:54 PM
911 is pretty sweet also!!
Posted by: TRS63 Dec 14 2023, 06:54 AM
Can't believe I never saw your thread before. Fantastic work, creativity, I am a huge fan !
Loving the RSR too!
Bests
Antoine
Posted by: 930cabman Dec 14 2023, 05:23 PM
So, got a "Covid"-child.. And progress kind of stopped a bit
This is about how the car looks now (done some more work on the doors ++). Not far from paint actually.
A lot of stuff I have done previously I can dig up, and I will try to do so, but recently the greatest highlight is finishing the instrument cluster..Found a 3 gauge in parts in an ad for some other parts, and it cleaned up quite good. Had to make the colored light.. thing.. that had cracked.
Nice work with the gauges.
Have you considered paint remover instead of abrasives? Less messy, less effort, ...
Posted by: Dion Dec 15 2023, 09:30 AM
Welcome back!! Great work as usual.
You have a little helper now, exhaust specialist I see.
911 looks amazing.
Powered by Invision Power Board (http://www.invisionboard.com)
© Invision Power Services (http://www.invisionpower.com)