Printable Version of Topic
Click here to view this topic in its original format
914World.com _ 914World Garage _ Cary going in deep again : MiddleMotors
Posted by: cary Nov 24 2019, 08:16 PM
Last spring I got a call from a gentlemen that I will call DP. Please come by and look at my car.
My son and I rebuilt the engine in 2012 and never started it.
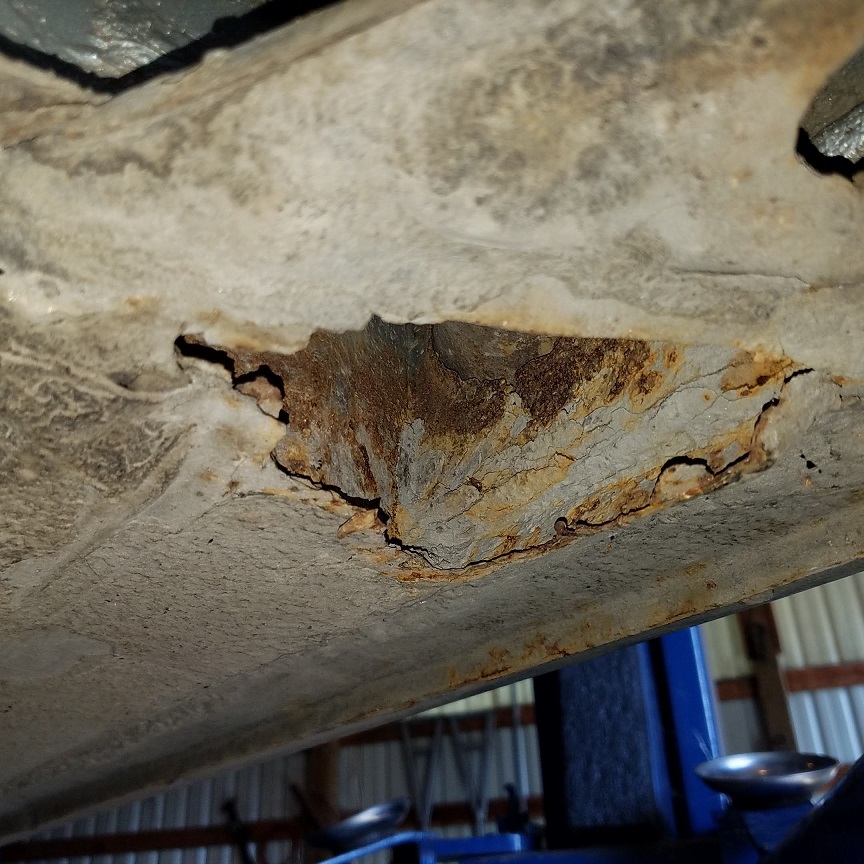
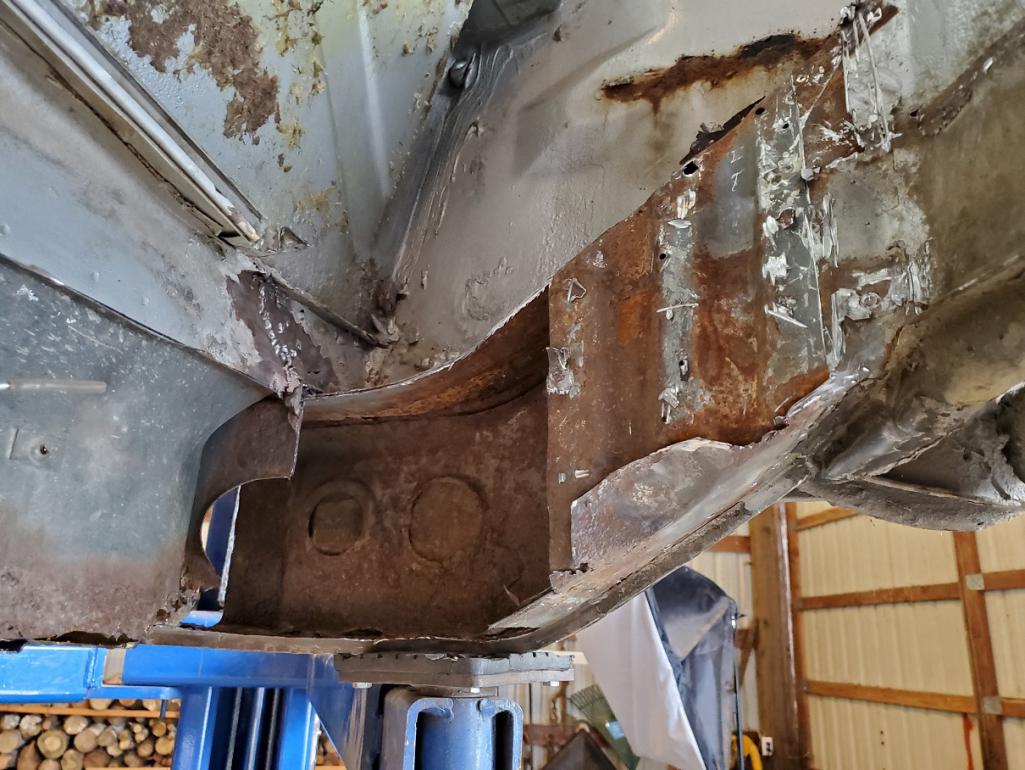
So Jack and I made a house call. Laying on the floor I saw the hole in the long. 
Basically I told him car shouldn't be driven unless the rust is repaired.
Let him know where he fell in the line up of projects.
Picked up the car around the first of September.
Original scope of work :
1. Get engine up and running.
2. Get car shifting correctly.
3. Complete PMB brake restoration.
4. End of day, make car reliable
After getting the car on the lift I gave him my best guess on the hours needed to complete the job. 
Drive train on the table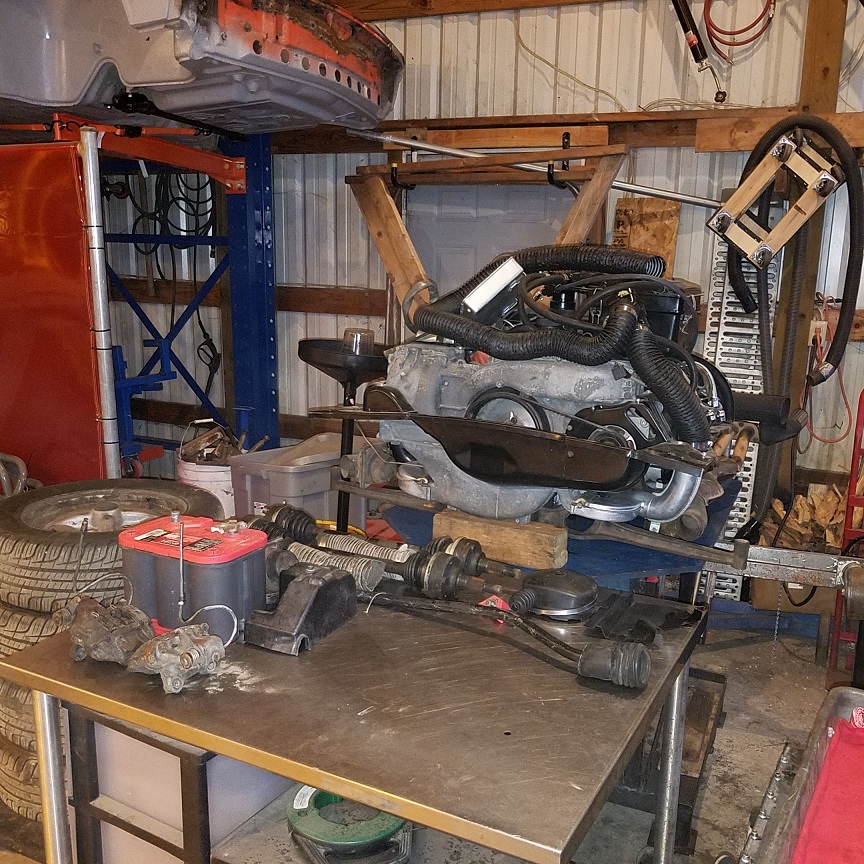
Posted by: tygaboy Nov 24 2019, 08:29 PM
Cary, Wow - you weren't kidding about that hole! Be sure DP joins the World and knows what great hands his car is in! 
Posted by: cary Nov 24 2019, 08:35 PM
He is, but for the life of me I can't remember it.
Posted by: cary Nov 24 2019, 08:39 PM
Next : the lie detectors for the seam sealer removal 
Posted by: cary Nov 25 2019, 12:47 AM
Starting point..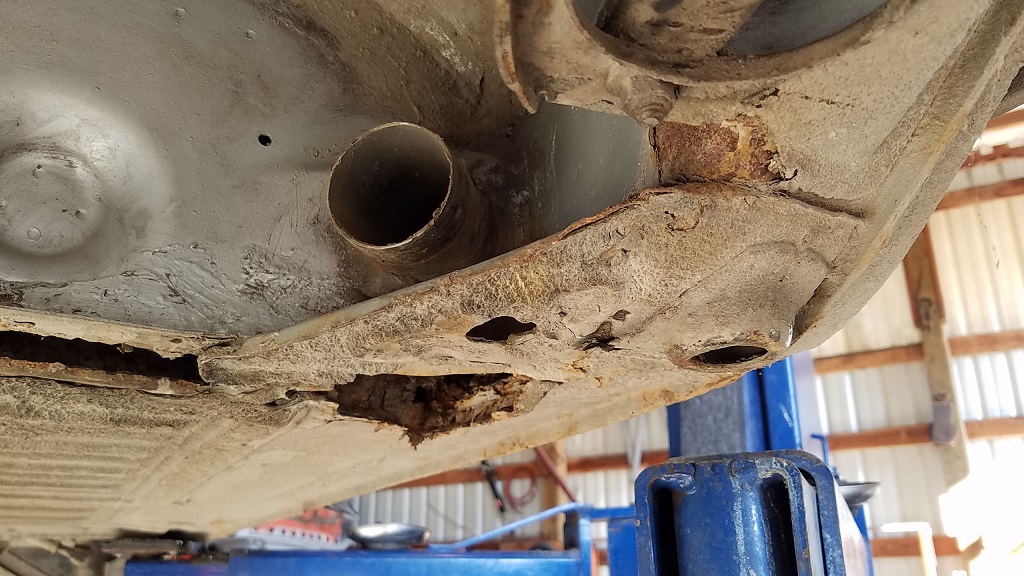
Here's the engine bay after the lie detector work and jack point removed.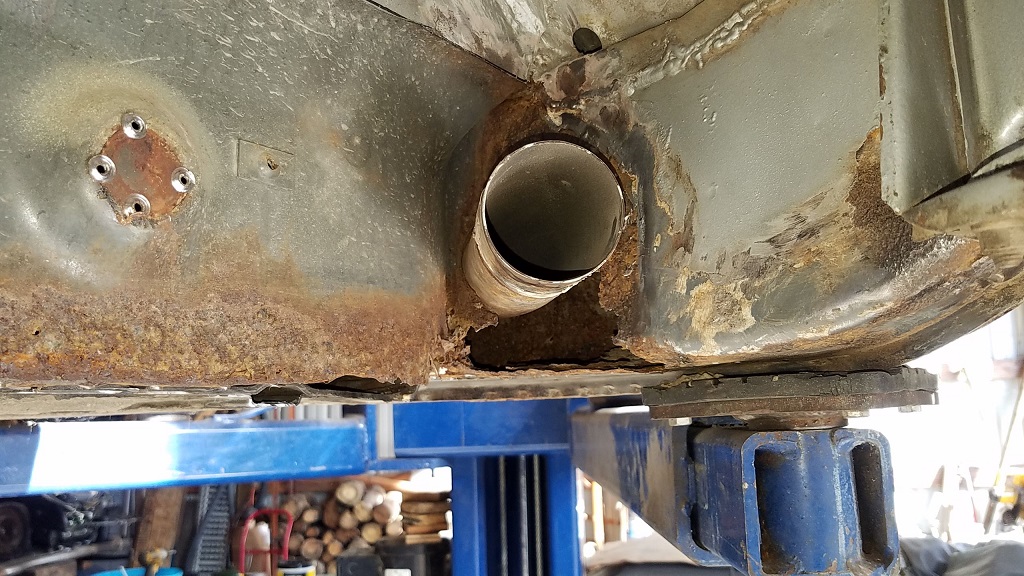
Posted by: Andyrew Nov 25 2019, 06:56 AM
Eeeeek that's a nasty one!
Posted by: cary Nov 25 2019, 09:19 AM
Time to start cutting my way in. But always thinking, how am I going to weld and encapsulate my way out.
I was hoping the damage was isolated to the jack point area. Not to be.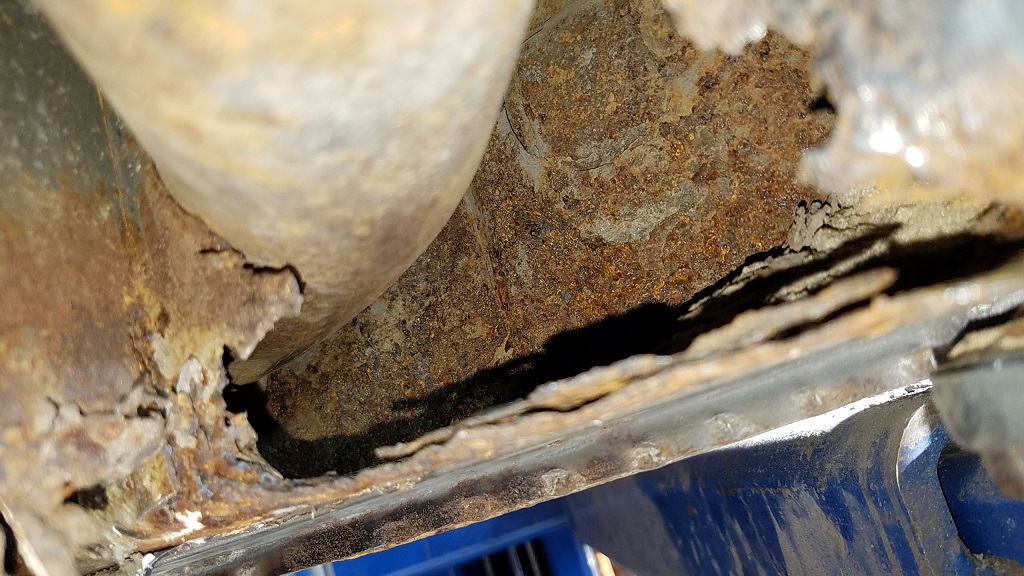
Off comes a portion of the floor. No window leakage damage. Just hell hole damage eating its way up.
Both inner and outer firewalls will need some patching.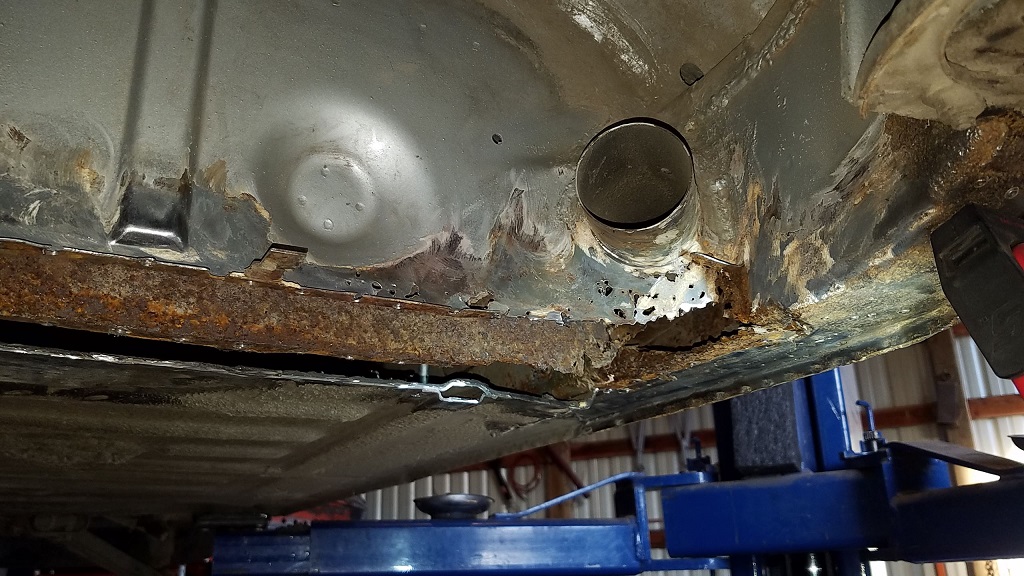
Posted by: mepstein Nov 25 2019, 10:04 AM
If it was for sale, I'm sure the ad would have read - Light surface rust on one spot, nothing structural.
Thanks for documenting.
Posted by: cary Nov 25 2019, 07:42 PM
Thanks, Mark & Chris.
Its all about bringing cars back to life and putting them on the road again.
Posted by: cary Nov 25 2019, 07:49 PM
Trimming out the cancer in the engine bay.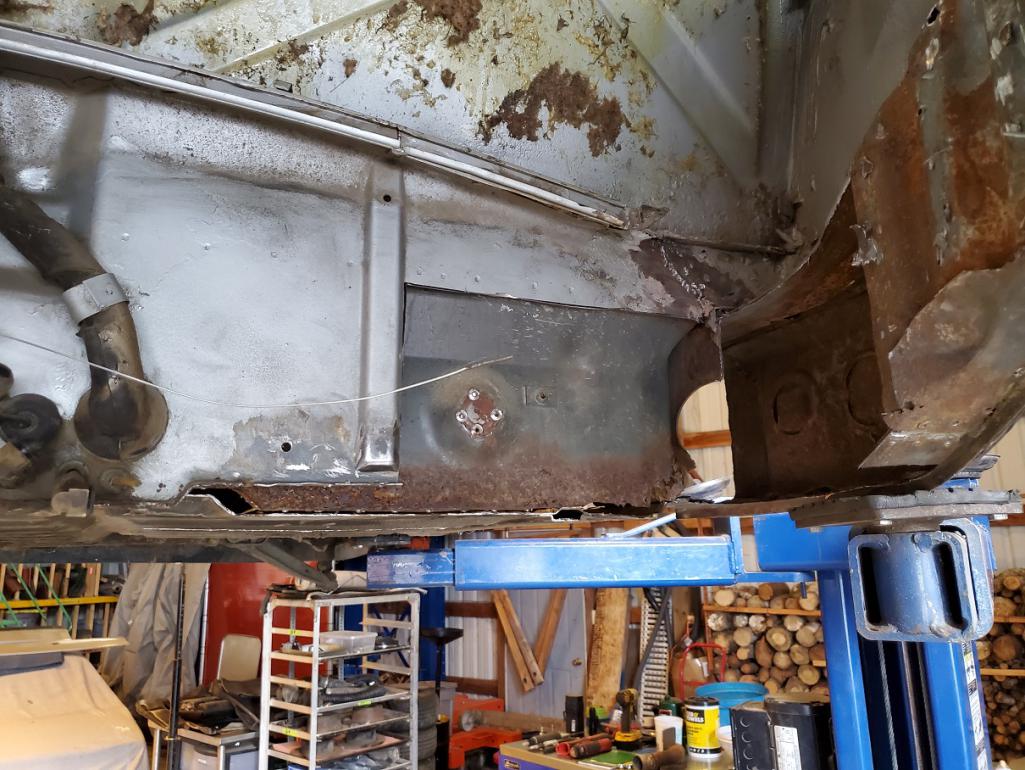

After motor mount removed and treated with OSPHO. Ready for cold galvanizing.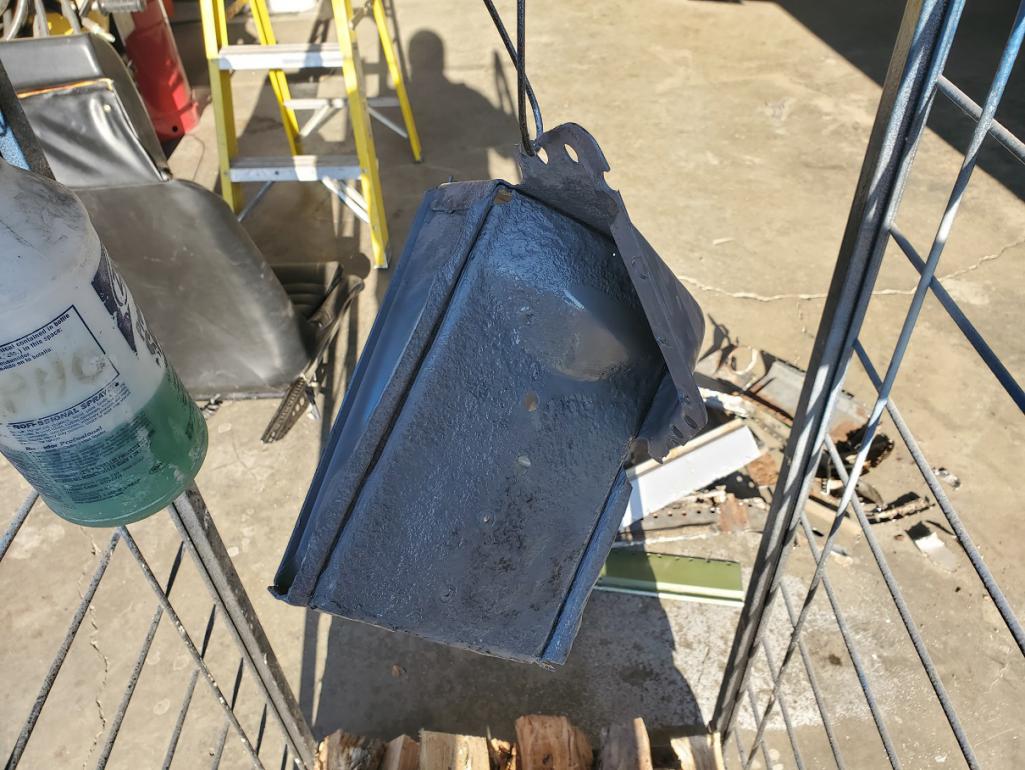
Posted by: cary Nov 25 2019, 09:54 PM
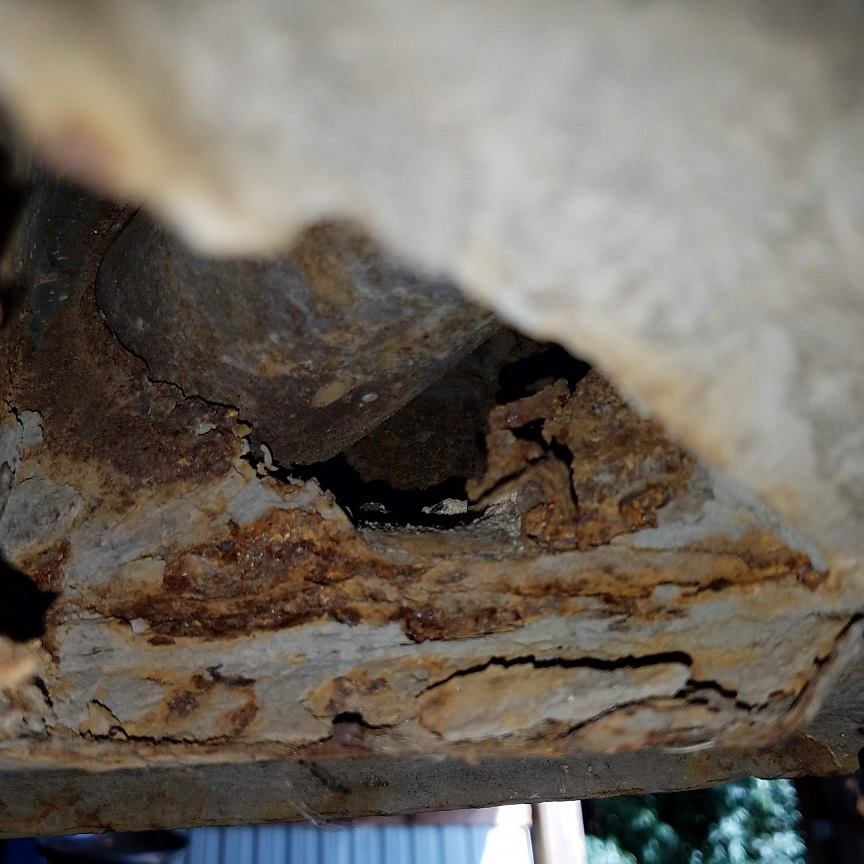
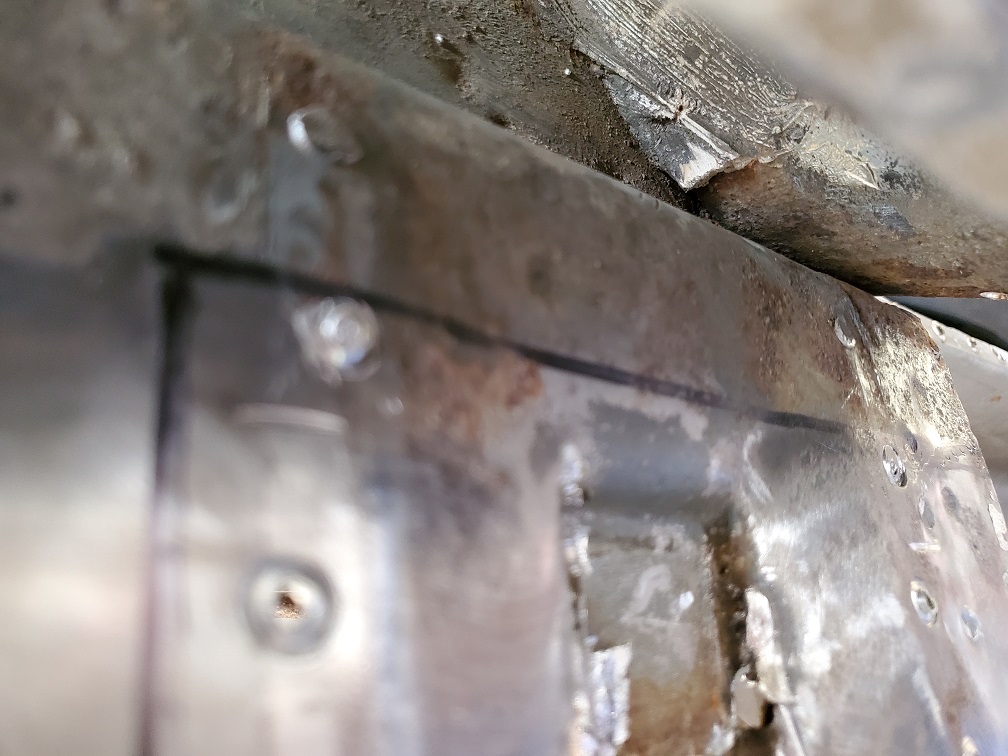
Here's a few shots of some other spots that will need some attention.
Hell hole was patched right over the battery acid rusty metal. 30 years ago.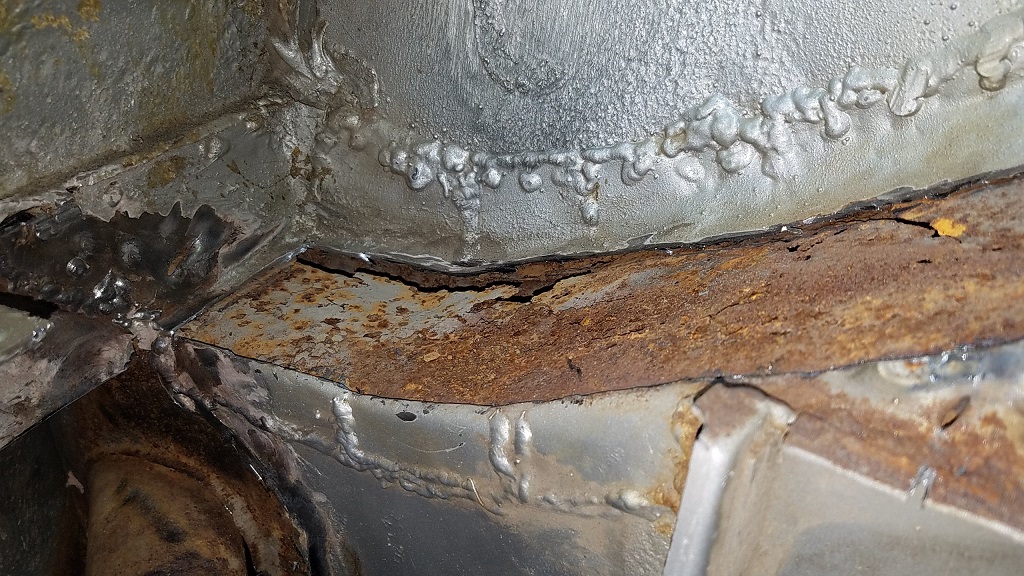
This is a good shot of the usual battery acid rust damage.
Shows the 2 layers under the hell hole patch.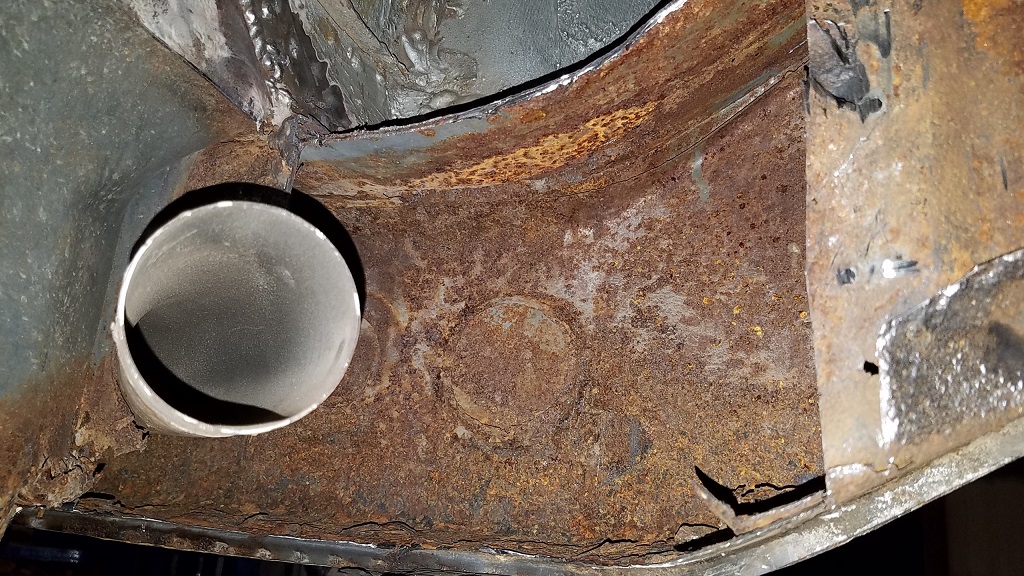
Here's shot of the damage to the outside of the upper long / wheelhouse piece.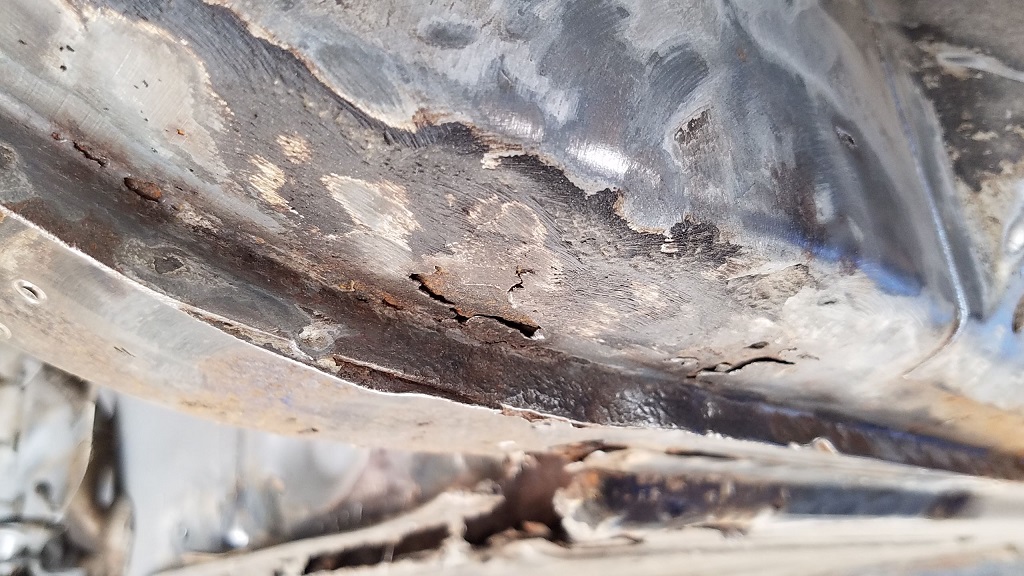
Posted by: cary Nov 25 2019, 09:59 PM
I figured it was about time I check the left rocker to before I submit my sheet metal order.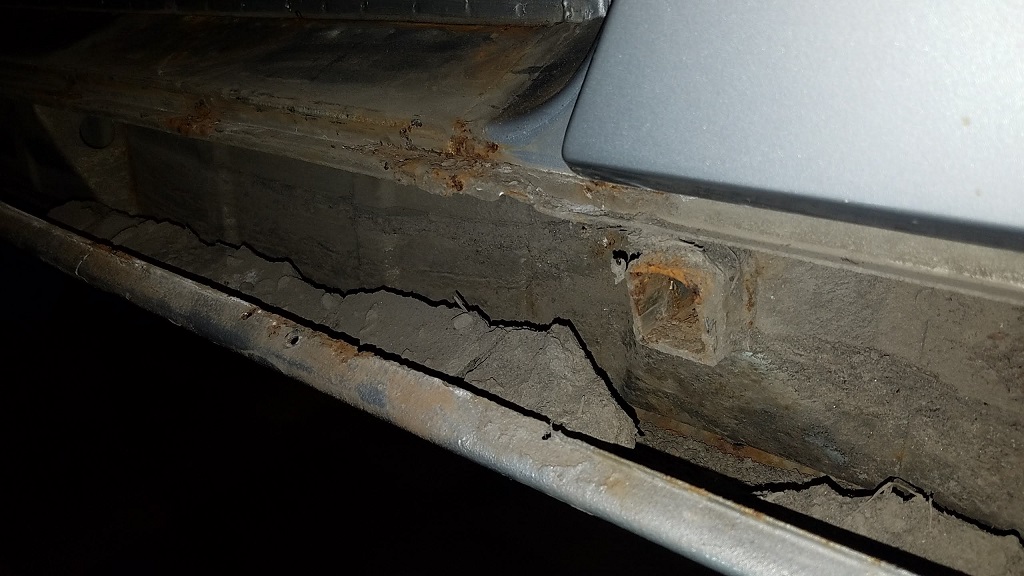
Packed with a mud/sand combo, but no rust. 
Posted by: cary Nov 25 2019, 10:08 PM
Now it was time to open up the long to see if I could do a partial repair/patch.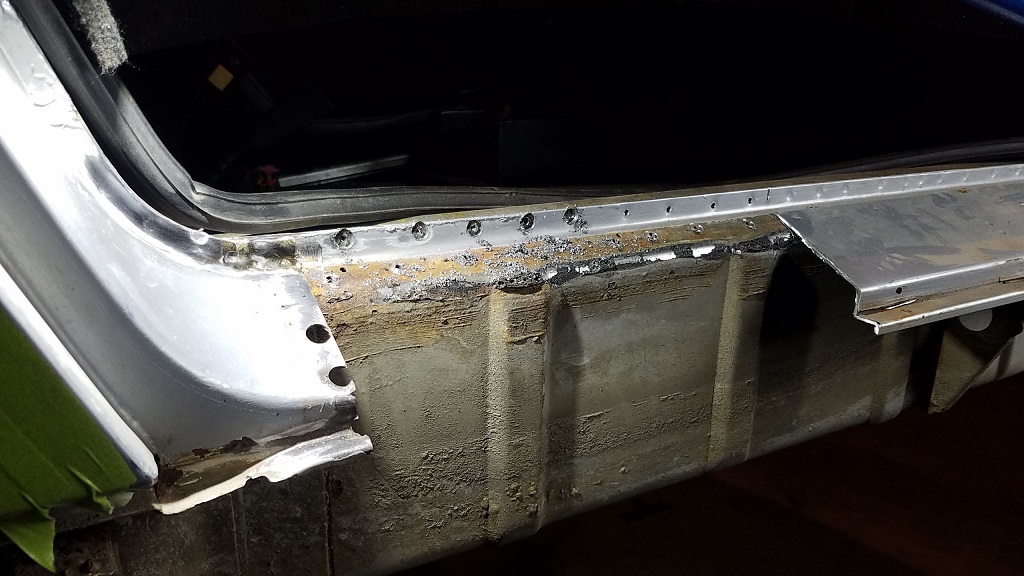
Not to be ................. 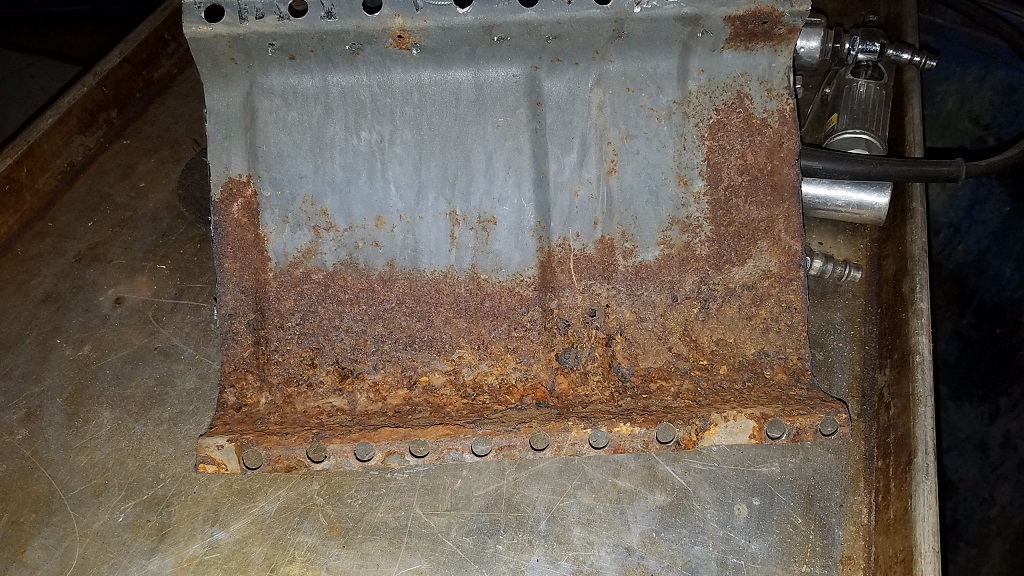
Posted by: cary Nov 25 2019, 10:21 PM
Now its time to get serious. Cutting open the long.
Then it was time to cut the cancer out of the long itself. 
Using the 2 post lift I need to get the front arm out of the way.
Find my level.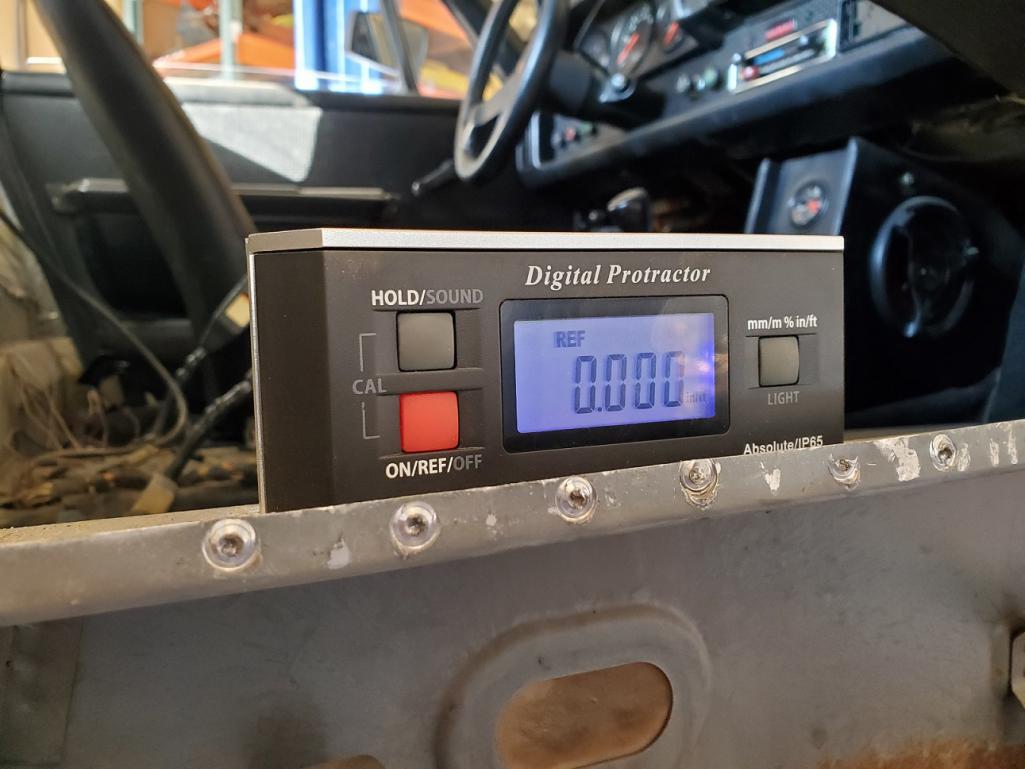
With screw jack, raise the car enough to move the arm.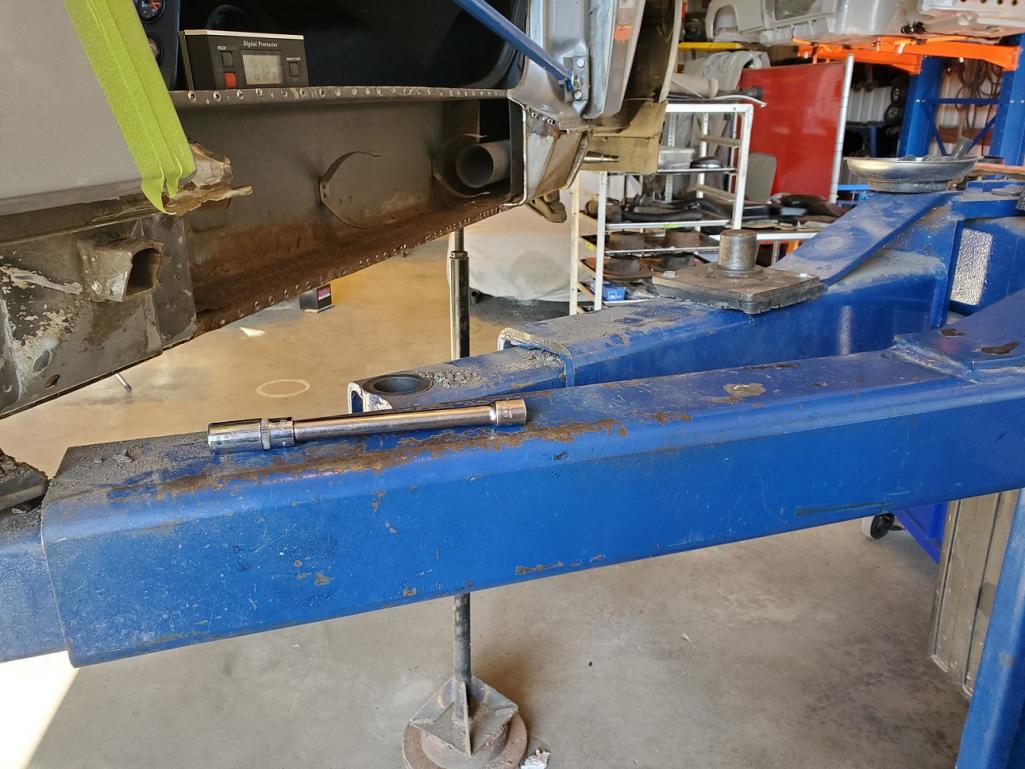
Took a .125" lift to move the arm.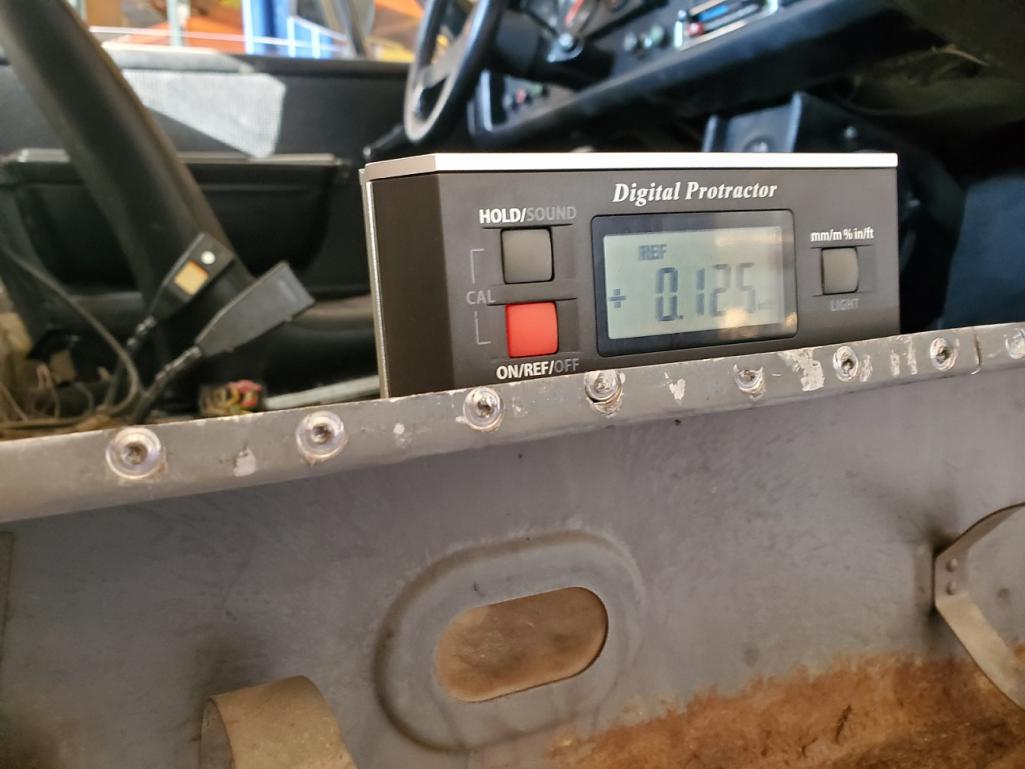
Then dropped it back to zero.
Posted by: cary Nov 25 2019, 10:26 PM
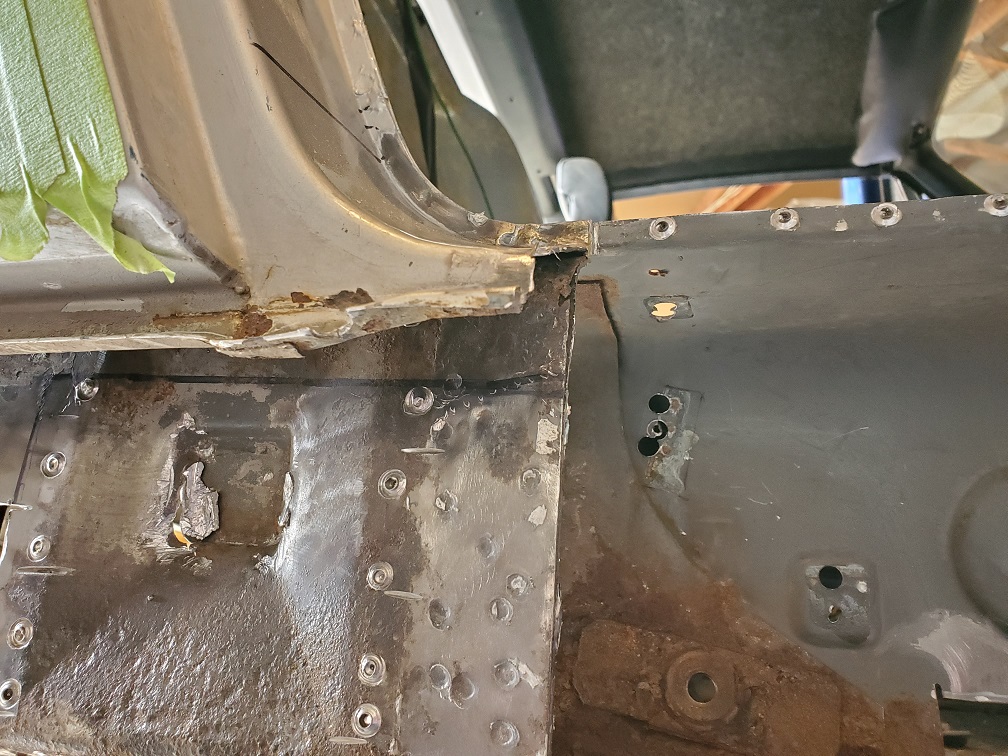
Here's a shot up into the base of the hinge post.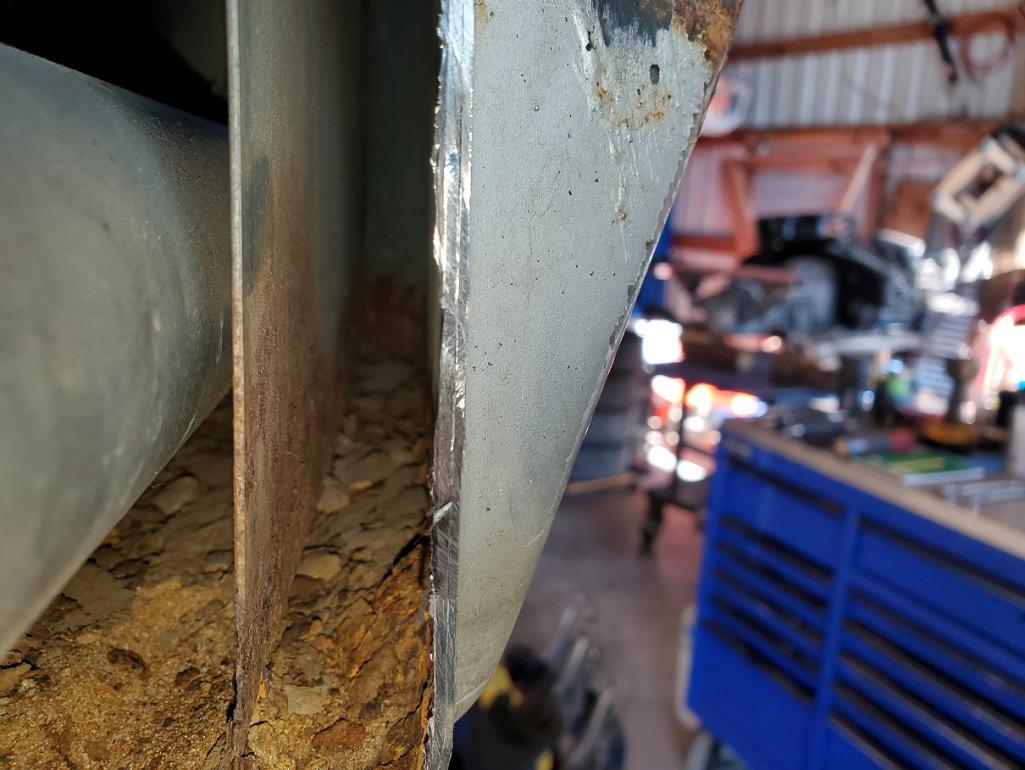
Lots of sand, lots of rust flakes. I may need to re create the bottom inch of the door
post behind new rocker door post support box.
Posted by: cary Nov 25 2019, 10:35 PM
Swung for the fence on the floor pan and hit a home run. Absolutely no degradation on the floor pan under the long.
First a shot of the rusty long up to the edge of the floor pan.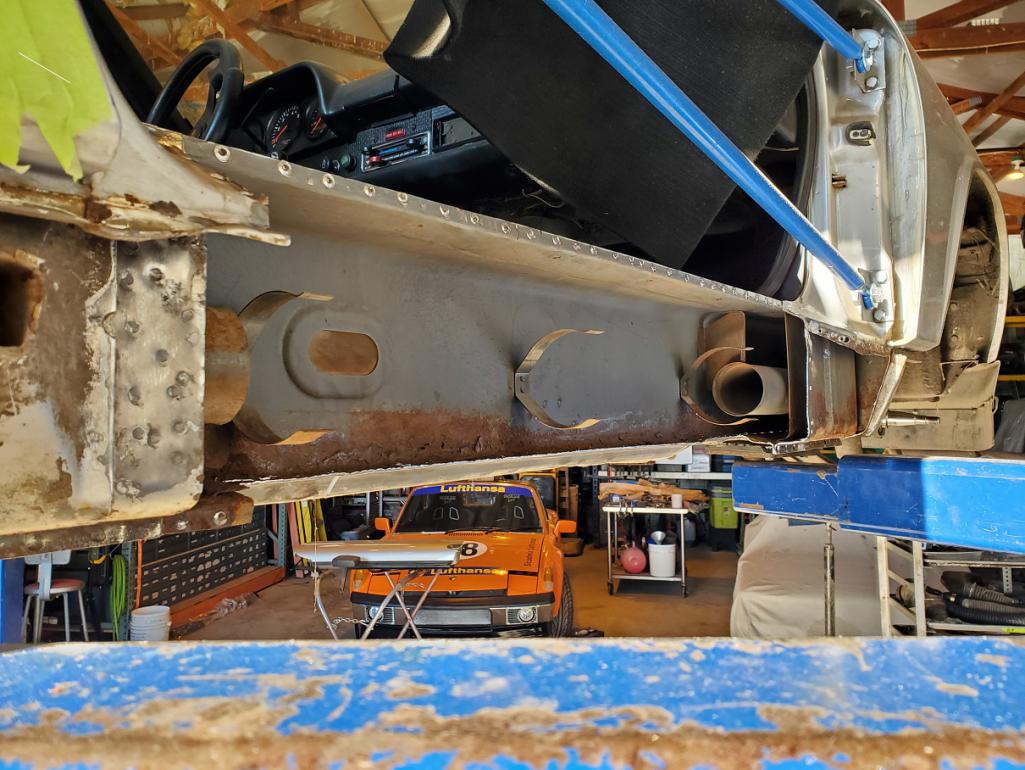
A close up of what I removed.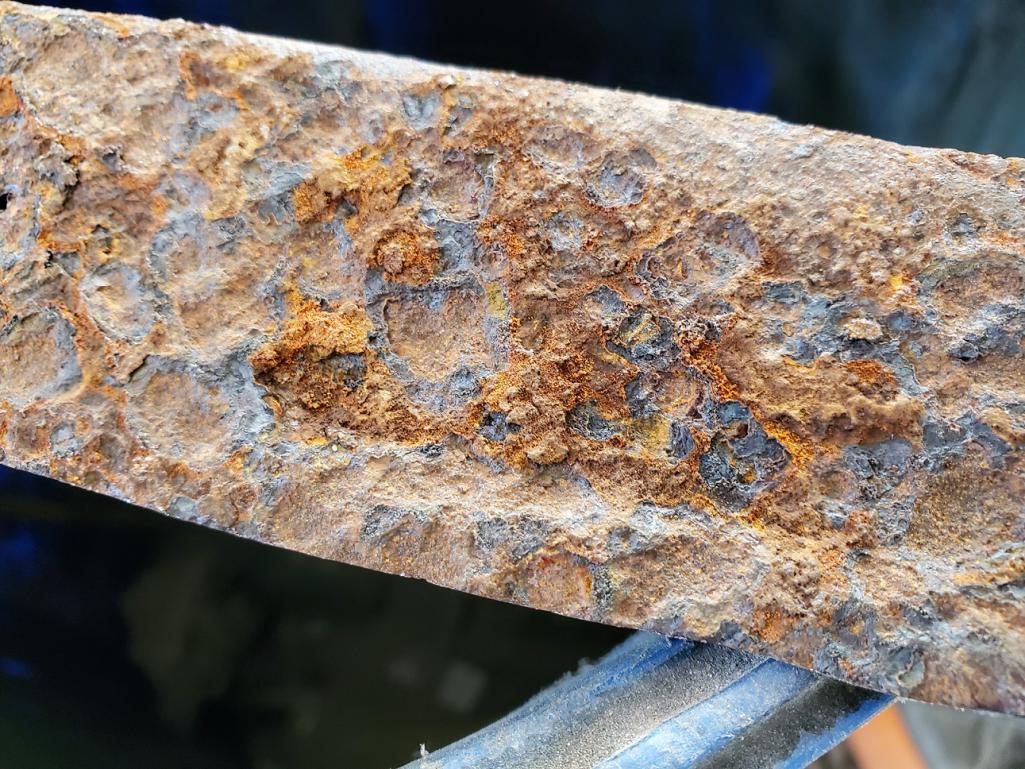
Spot weld cutter drilling out the floor pan.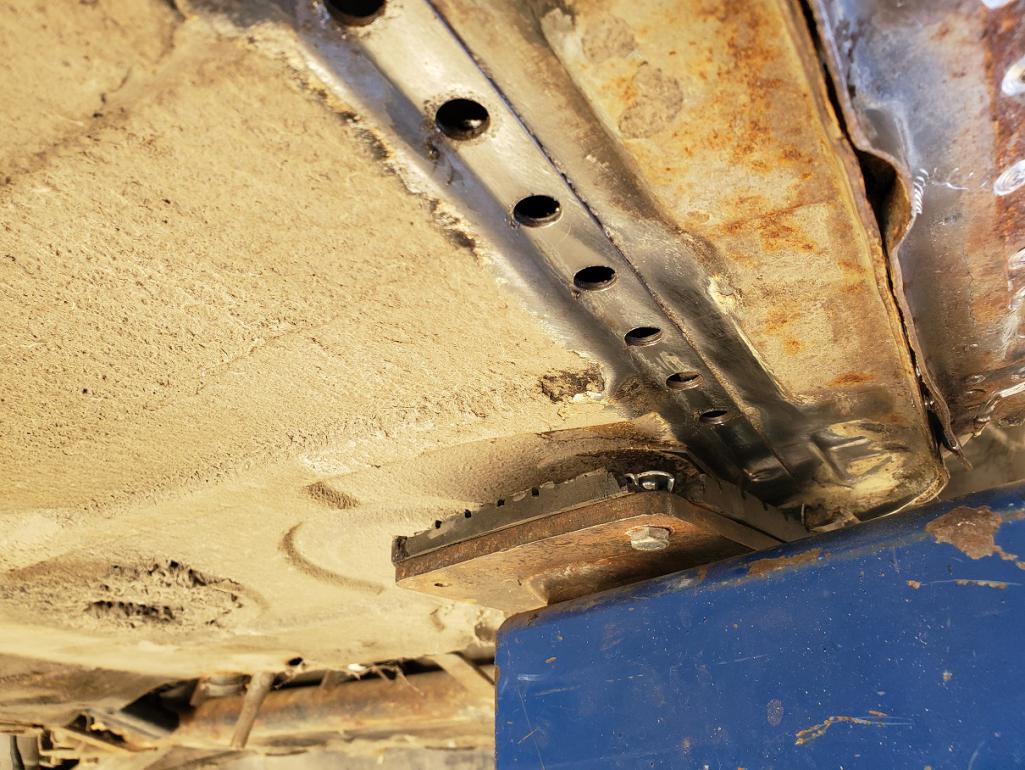
Posted by: cary Nov 25 2019, 10:39 PM
Long trimmed out.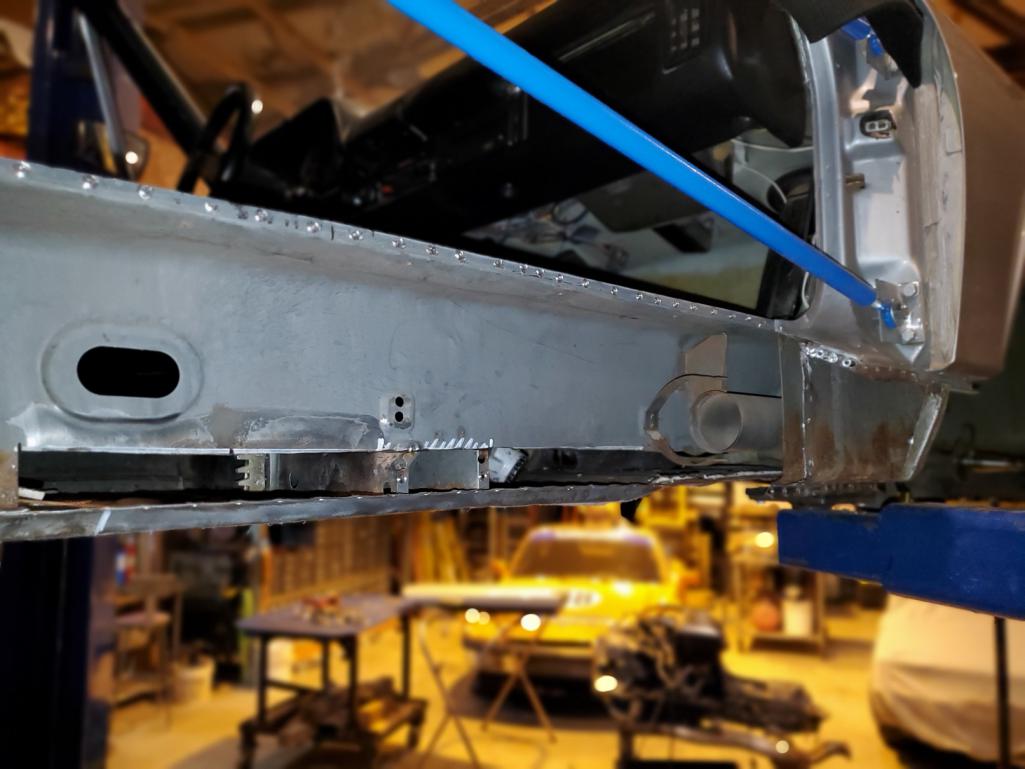
Here's where we sit till the sheet metal arrives. Backbone won't be cut until I have 3 more screw jacks in my way. 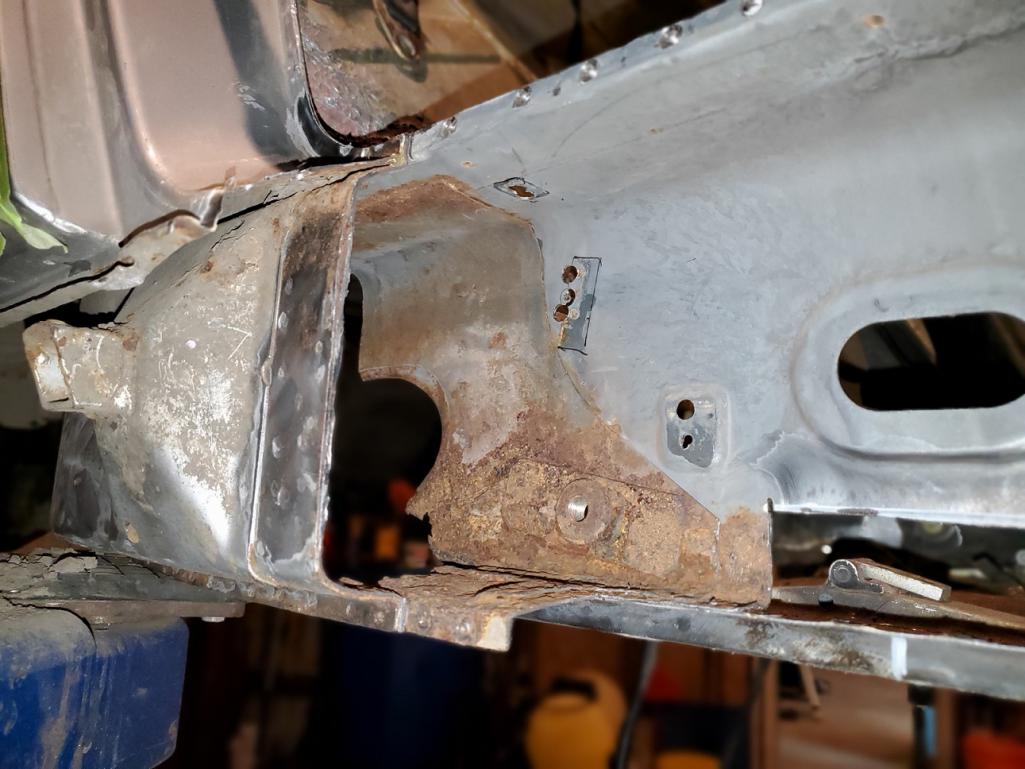
Posted by: jesse7flying Nov 26 2019, 09:22 AM
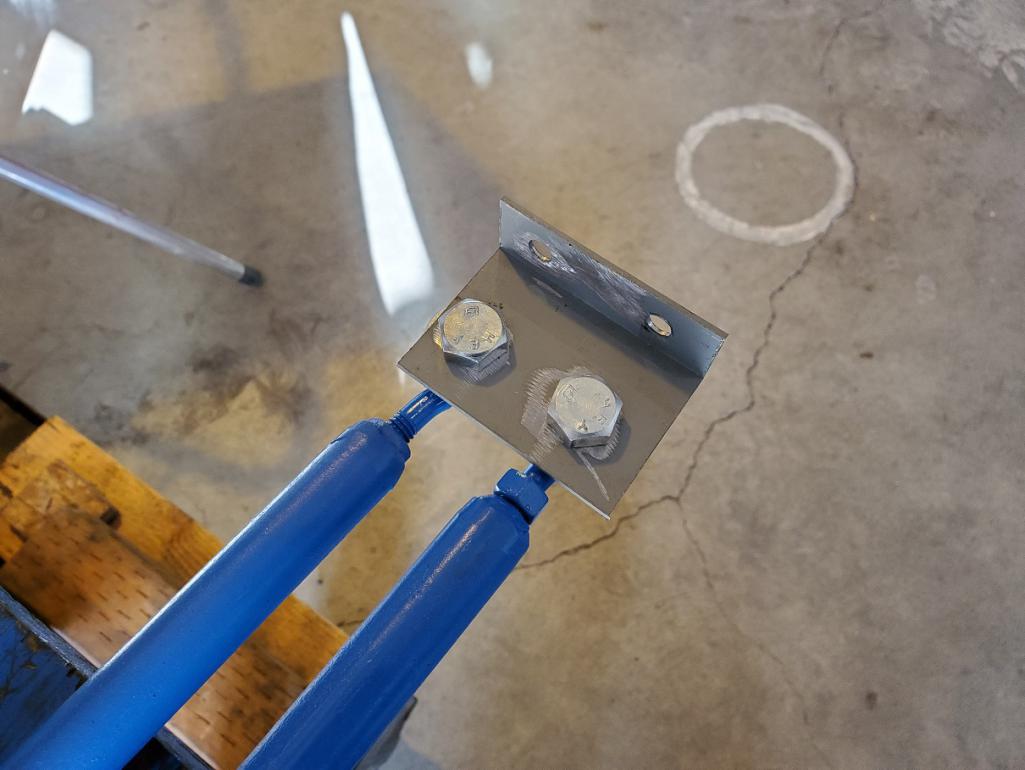
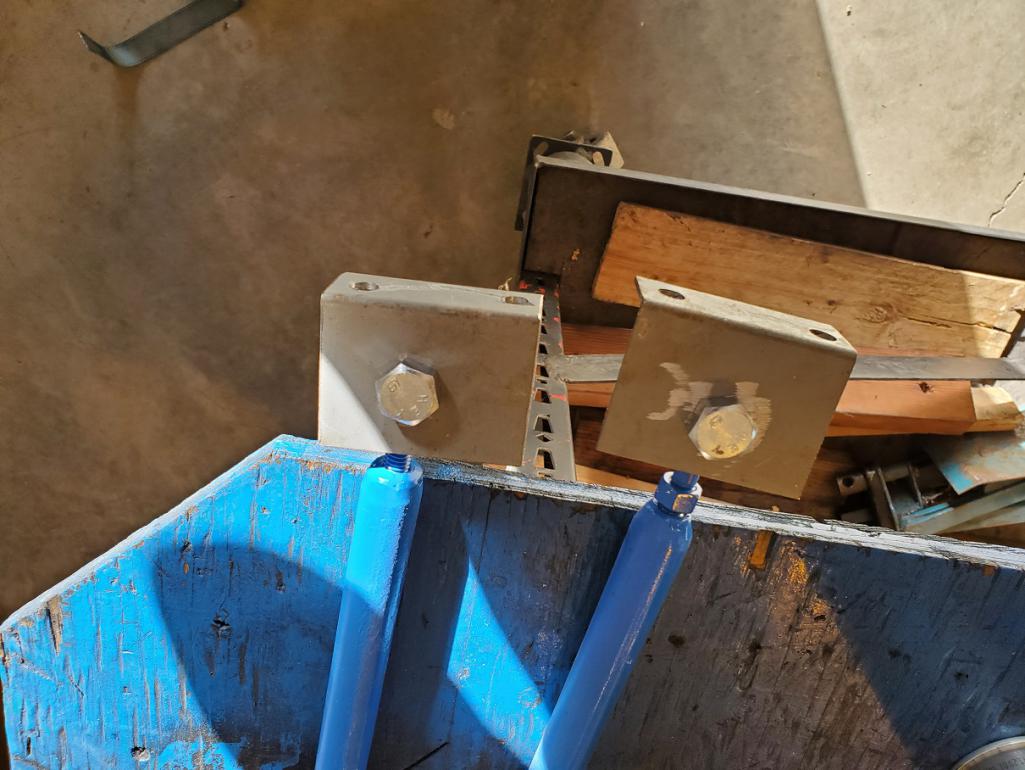
Love your threads Cary! Do you have a better shot of how you handle the upper attachment point for the blue reinforcement bars? Thx
Jesse
Posted by: Charles Freeborn Nov 26 2019, 10:52 AM
Yowzer. Big project.
Maybe I can see it some time.
BTW, I've got some engine questions for you. Considering building a spare 4 for the race car.
Posted by: cary Nov 26 2019, 04:12 PM

Love your threads Cary! Do you have a better shot of how you handle the upper attachment point for the blue reinforcement bars? Thx
Jesse
I'll shoot a couple shots tomorrow.
Someone on Instagram wants to buy a set.
Posted by: cary Nov 26 2019, 04:13 PM
Yowzer. Big project.
Maybe I can see it some time.
BTW, I've got some engine questions for you. Considering building a spare 4 for the race car.
Your smiling face is always invited ..............
Posted by: cary Nov 26 2019, 08:48 PM
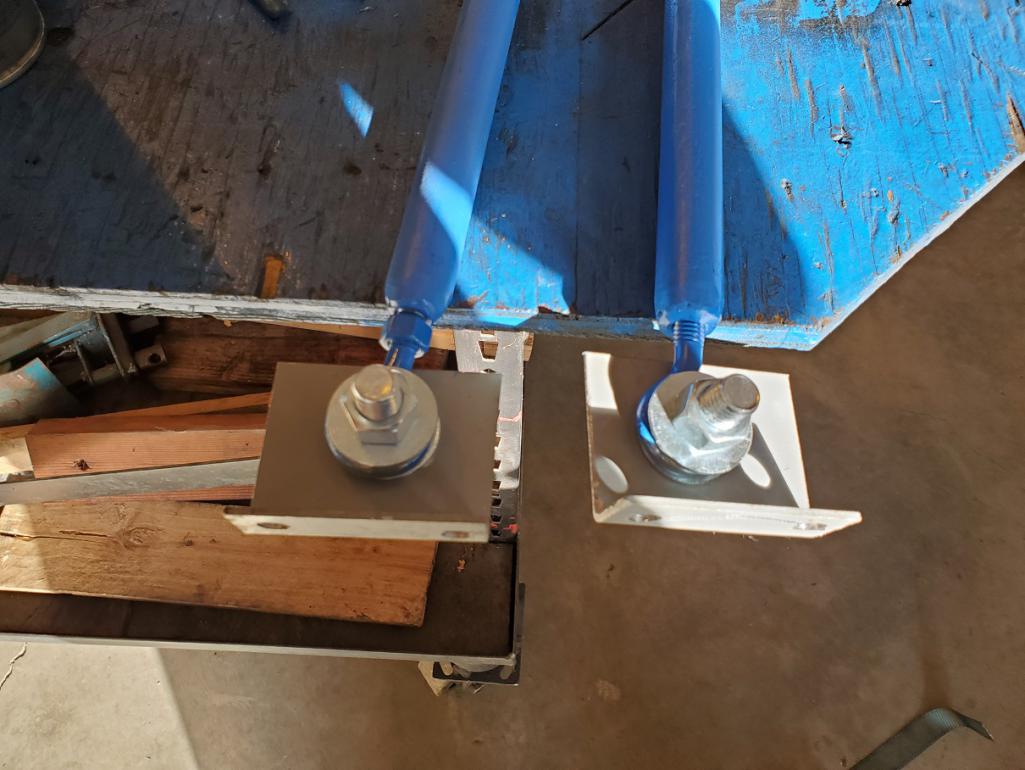
Here is a couple shots of my door gap checking rod.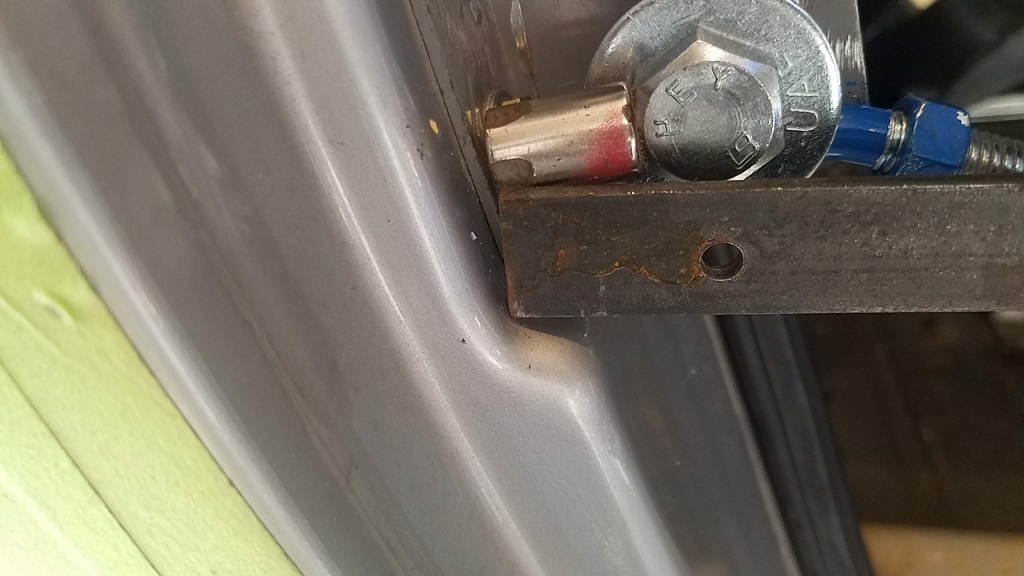
On this project I'm going to try and work around not completely cutting
the backbone on the long.
1. Door braces
2. Not removing the roof
3. Using the digital level in multiple locations
4. Multiple floor screw jacks (6)
I think we'll create a roof type frame to install on the chassis when a car is stripped
and on the rotisserie and or frame bench.
Frame bench fixtures are next after the engine drop/run stand.
Posted by: cary Nov 26 2019, 10:23 PM
A couple missing shots of the trimming inside the engine bay.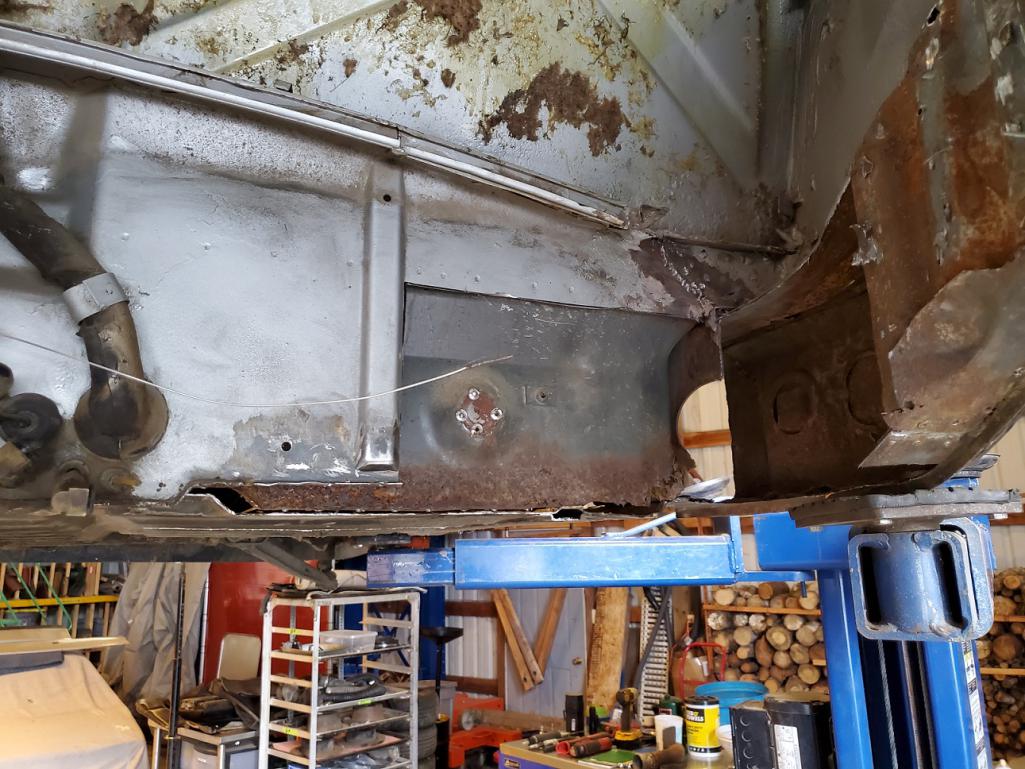
Posted by: cary Nov 28 2019, 09:23 PM
Here's a few shots of my door braces.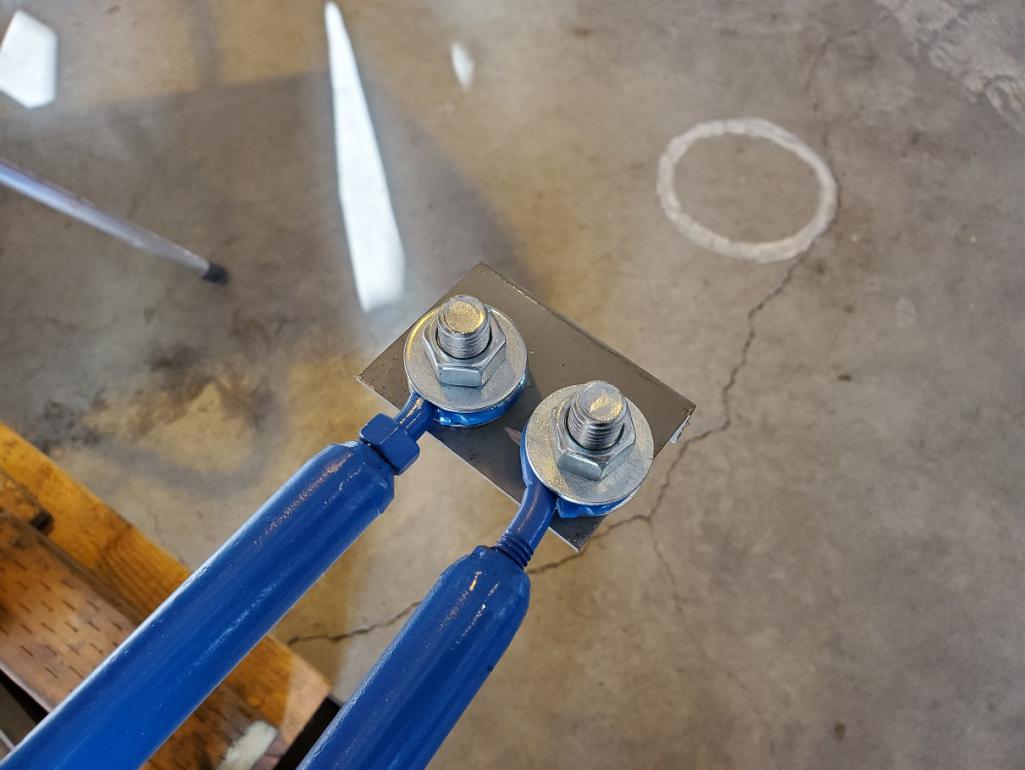
Posted by: altitude411 Nov 28 2019, 10:47 PM
Subscribed to watch Cary work his magic on another one... ![popcorn[1].gif](style_emoticons/default/popcorn[1].gif)
Posted by: raynekat Nov 28 2019, 11:41 PM
Be careful with the axe Eugene.....err Cary.
Posted by: jesse7flying Nov 29 2019, 10:57 AM
Thx for the door brace shots Cary. Just what I needed.
Cheers--Jesse
Posted by: cary Nov 30 2019, 06:01 PM
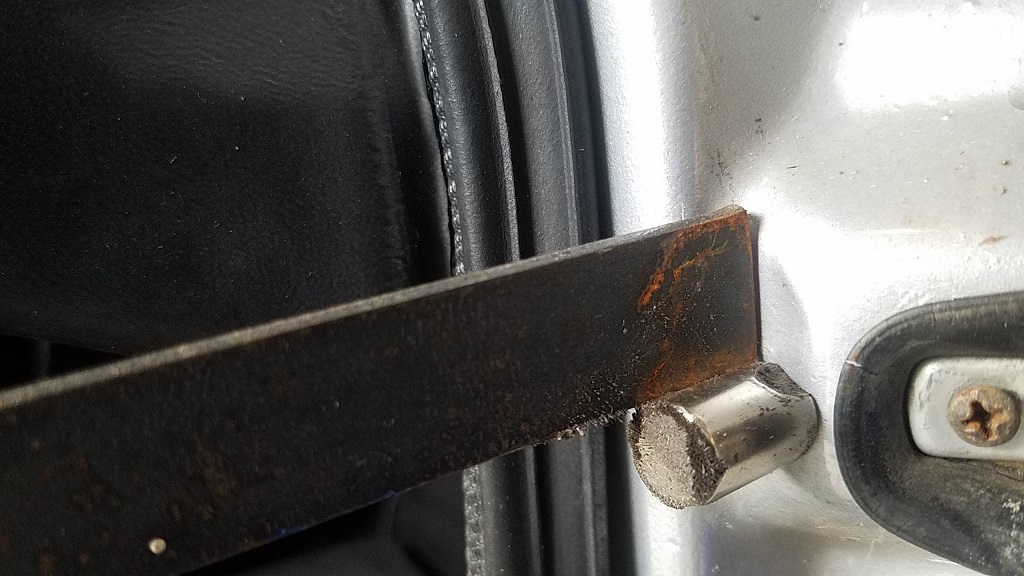
Off came the jack point without cutting into the door jamb.
I have some specially made tools that allow me to do that. It comes off without ripping
any holes under any of the spot welds on upper lip.
Here's one of the tools. 18" 3m belt sander. Allows me to dig out the upper spot welds.
Then peel them back with multiple chisels and spot weld removers.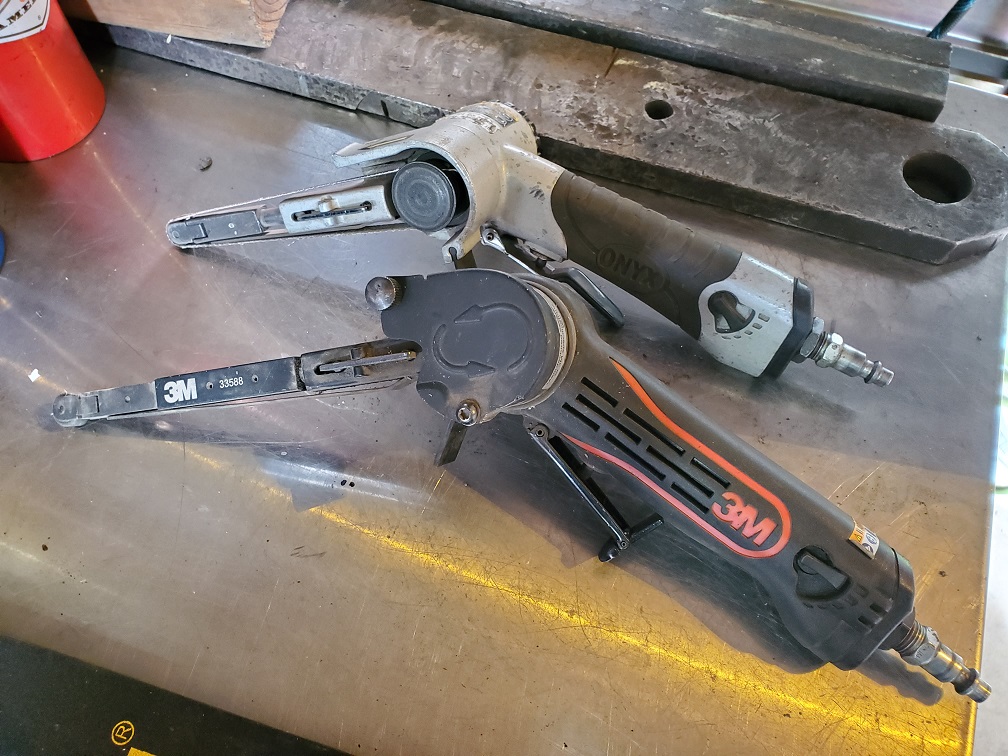
Might be adding a 25" 3m sander to the tool chest. Longer and perfect fit for the lip.
Posted by: cary Nov 30 2019, 06:07 PM
Did a test peel back on the outer wheel house. I can see the stiffener is gone, but maybe, just maybe, the rest of the skin can be saved.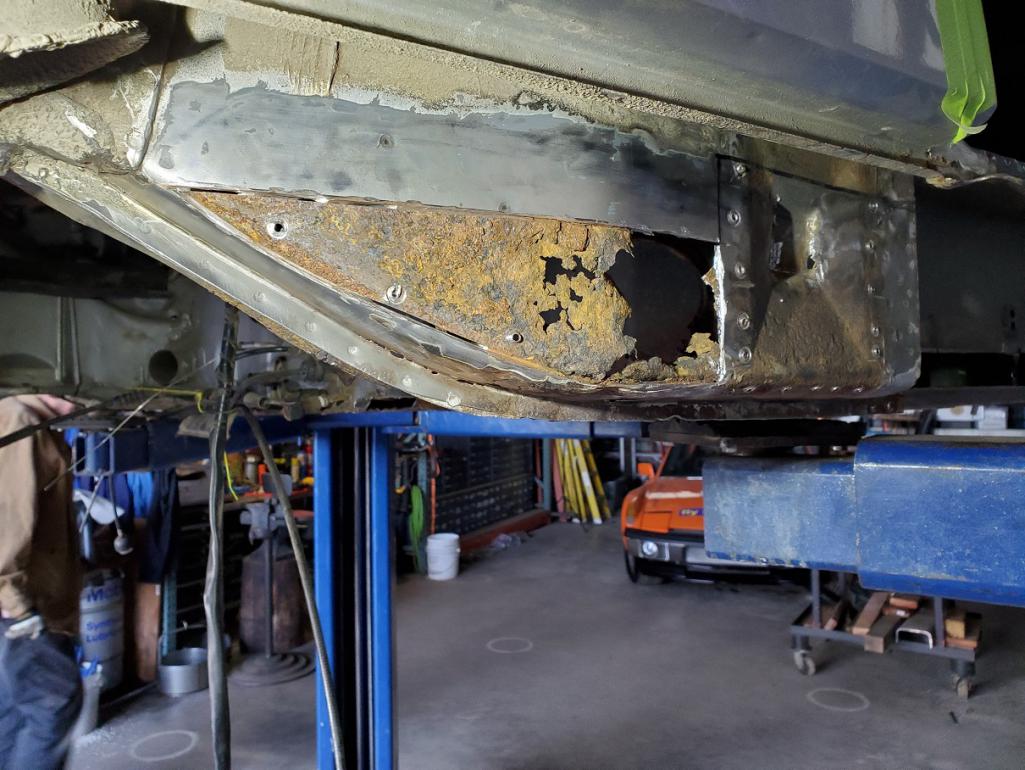
Not .................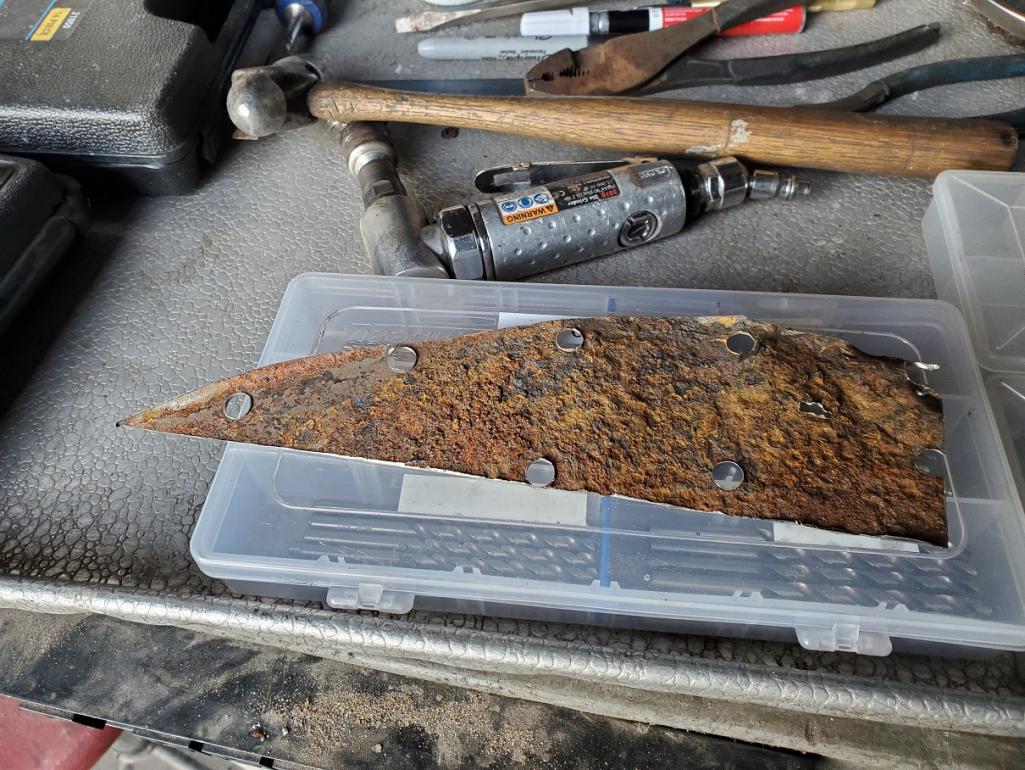
Good portion of the outer wheelhouse will need to be replaced.
Now we wait for the sheet metal.
Posted by: tygaboy Nov 30 2019, 06:58 PM
It seems to me I'd be bored with "another hell hole/long repair..." 
But NO!
Cary, you do such a great job of detailing your work; and what also comes through clearly is your careful thinking through of the repair BEFORE you start cutting.
Really informative, impressive and educational.
Thanks for all that! 
Posted by: porschetub Nov 30 2019, 07:17 PM
Sad to see a car that has great outside appearance could be so rotten underneath,mind you someone mentioned these cars rusted from the inside out...no different than any car built in this era really.
Posted by: cary Nov 30 2019, 11:08 PM
I turned down another one just as nice, but worse. Stunning, it too silver. But starting hole was twice as large. No way I would attempt that one without the frame bench.
This one is borderline .... It's all about keeping the backbone tied together.
Now we wait for sheet metal.
Chris,
I kinda feel bad for the "noodling" time. But its all about the "plan".
Next step is determining my working height and moving in the 4 screw jacks. From there
nothing moves.
I'll feel much better when I'm here ......................
But a whole lot more car attached together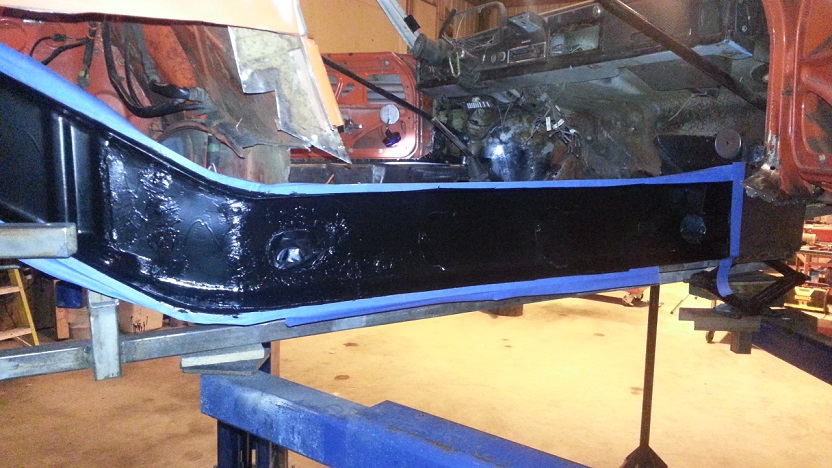
Posted by: sixnotfour Dec 1 2019, 12:27 AM
Question do you adjust for cold shrinkage??..
Posted by: cary Dec 1 2019, 12:51 AM
Not really. When I start welding I go slow. Don't go to the next weld until its spot is cooled to 120 degrees. Plus I constantly check the door gap as I go. The "H" dimension.
Posted by: AKFish Dec 9 2019, 07:58 PM
Watching with great interest....if you were a little closer to Boise I would apply to get my car in line for this repair at Middle Motors....
Posted by: Mikey914 Dec 10 2019, 08:39 AM
Boise isn't that far.
I have 2 in line with him now so not sure what his schedule is but I know there is a backlog of work. If you need the work done and want it right, he's probably your closest solution.
Posted by: cary Dec 11 2019, 02:45 PM
I plan on working on the projects list this afternoon.
Yes, I does seem to get bit longer every month. Just when I think about "retiring" from Rothsport and working at MiddleMotors full time. Jeff brings me another rally/Baja car to help build .................. 90 day build schedule. Then a Tuthill G body car after that. The G body might be built at the new shop space at MiddleMotors.
Powered by Invision Power Board (http://www.invisionboard.com)
© Invision Power Services (http://www.invisionpower.com)