Printable Version of Topic
Click here to view this topic in its original format
914World.com _ 914World Garage _ Working on refurbishing used wire harness
Posted by: Daryl32 Jan 24 2020, 10:02 AM
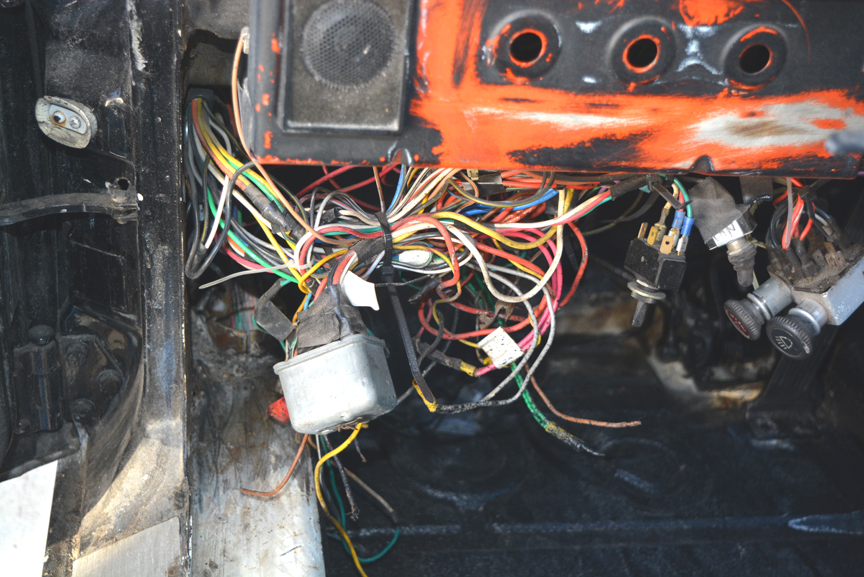
So the refurbish for the 73 914 with Chevy 350 is now at the "What is this Mess?" Stage
Wiring in front bonnet area looks great - but once it goes through the "fire wall?" not sure what you call a front bulkhead? The wiring really takes a turn for the worse.
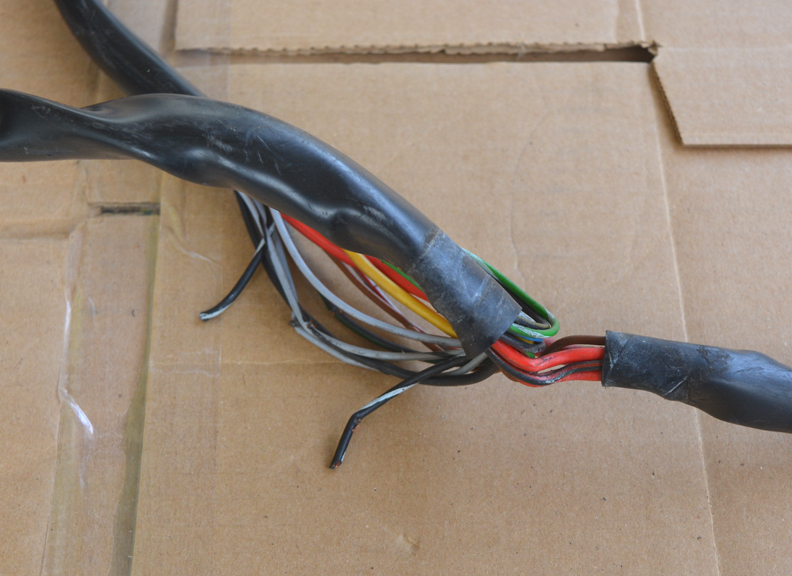
The owner got a new to the car complete harness with it. It is a used harness that was removed from another car pretty much intact. The only real issue with it, is that some of the wires were cut with a cut off wheel. The area is where it came through the rear bulkhead.
Plans are to use the 12 wire plug wires for the engine and gauges, some for what they are for.
Wondering what others have done? Any help will be gratefully accepted. 
I found wires in the car that went no where just attached and cut at both ends.
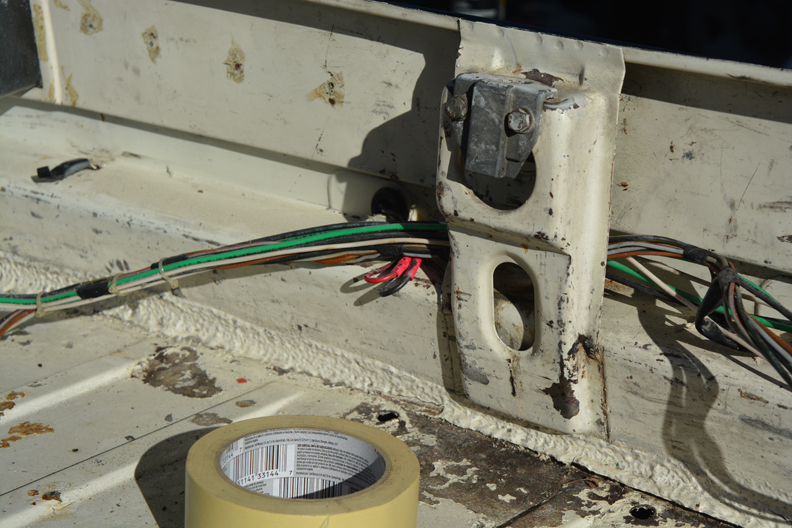
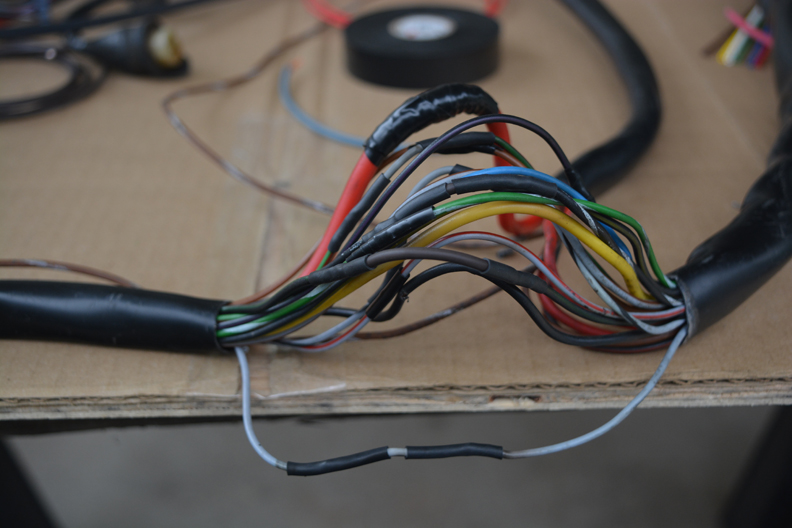
Some pictures of the wiring:
After new used harness was unwrapped and inspected, I rolled it up and set it on the floor of the passenger side of the car. Went into the house and had a medium old guy panic attack. 
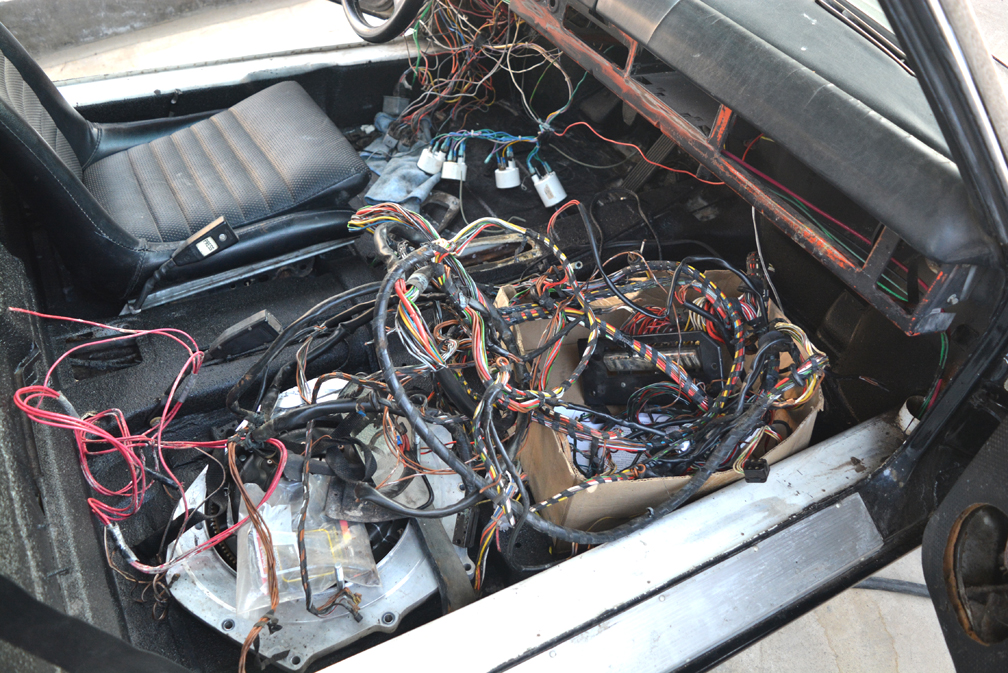
A couple of weeks later I started to tackle the new harness - laid it out of the table and had at it.
I made a 4x8 table out of a sheet of plywood and covered it with cardboard, then laid the harness out for inspection. I started tracing wires to see where they went and inspecting for cuts or bare spots. I removed the factory fuse panel as the car has a bigger blade fuse style panel in it. 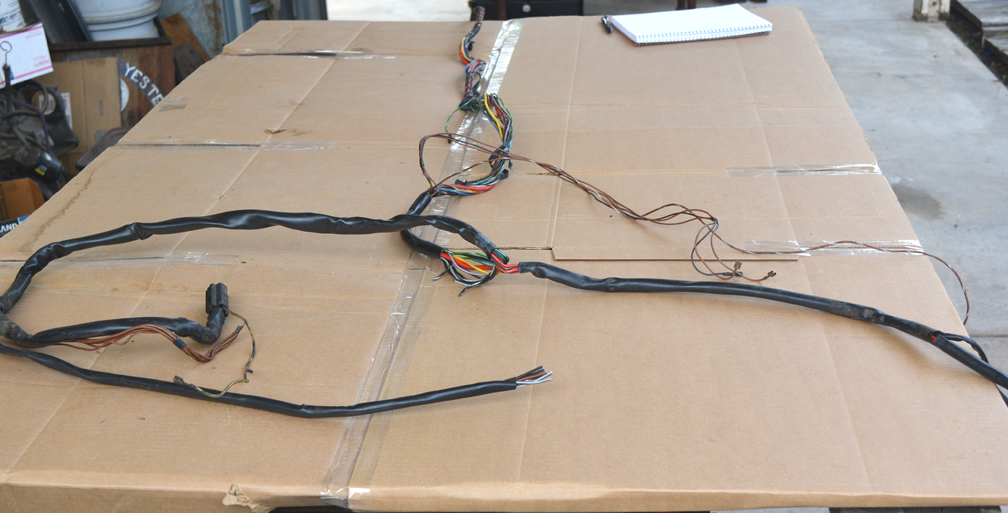
Posted by: Daryl32 Jan 24 2020, 10:12 AM
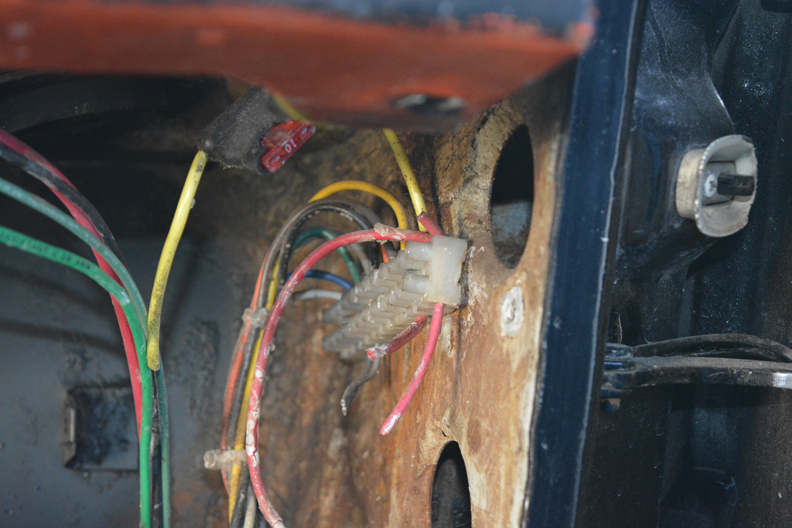
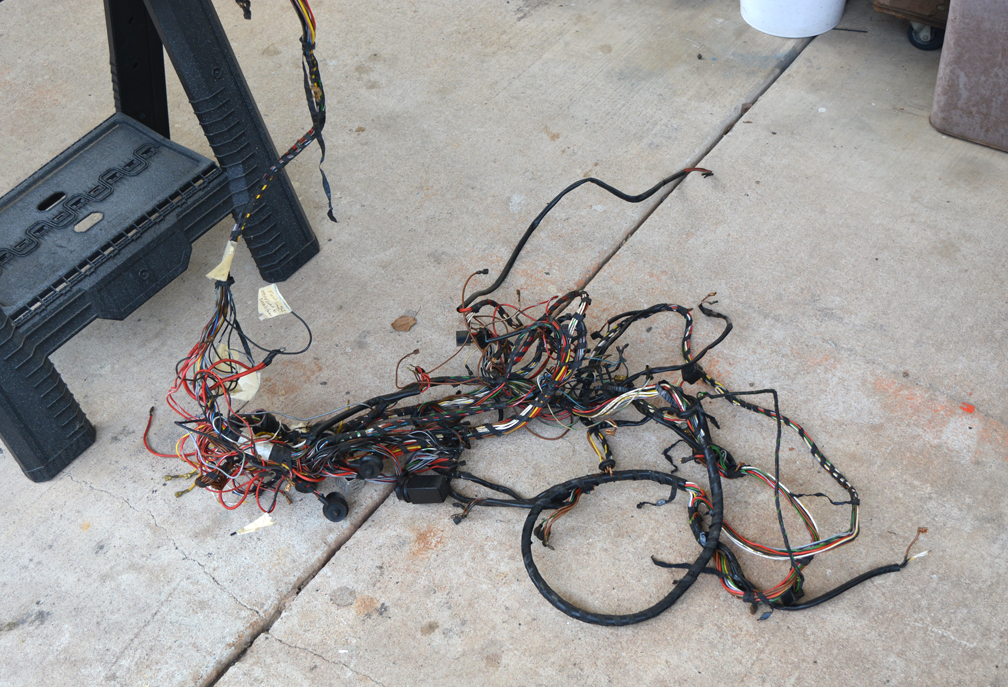
Some more pictures of the refurbish of the better stock harness. Some of the wires were not cut, just the covering was nicked. So I wrapped these areas with electrical tape. Good 3M vinyl stuff.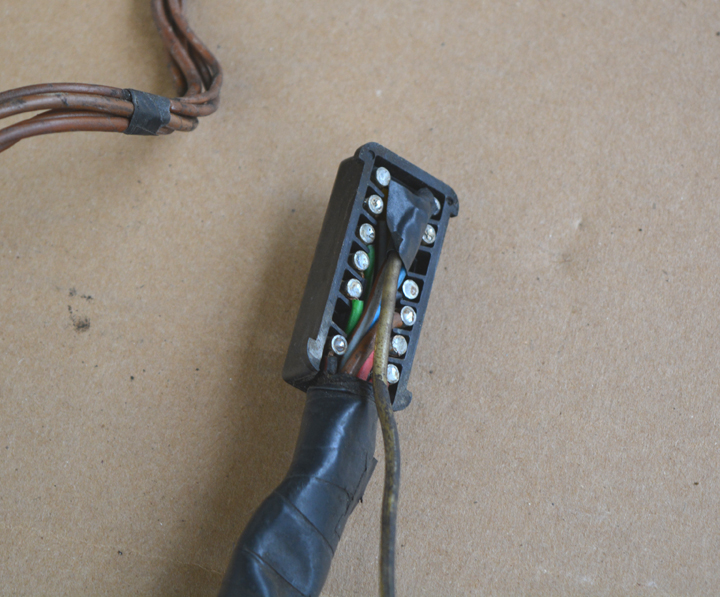
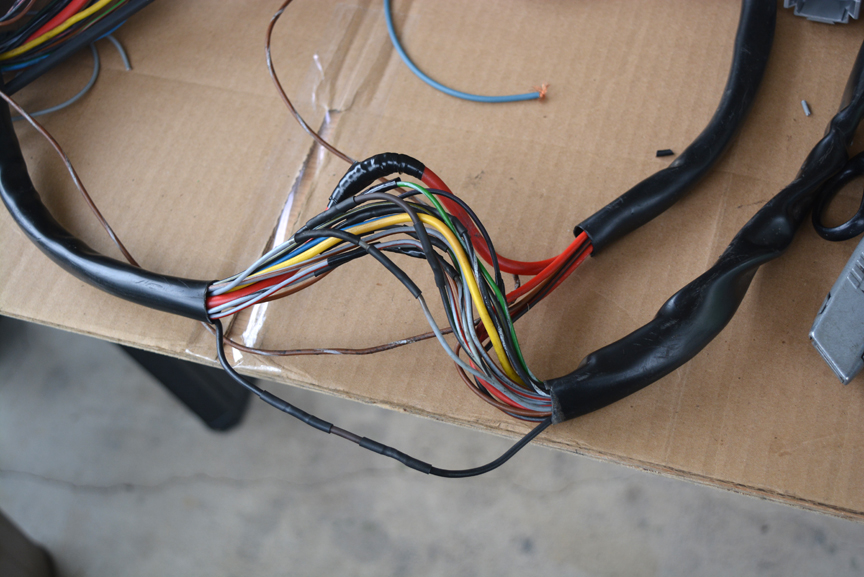
So I cut the tail light loom about 6" into the engine compartment and rewired the tail lights with the newer harness. I was not ready to start this refurbish of the whole harness, nor ready to run the whole thing through the fire wall. So that is what this connector is for - tail lights.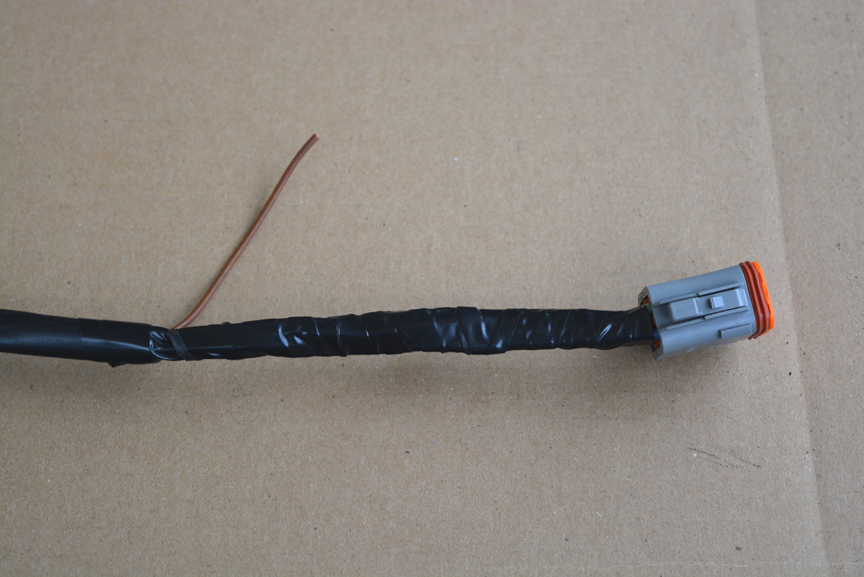
I plan to make a wiring harness for the engine including starter and back up light switch that has a connector / connectors somewhere along the steel tube of the engine cover latch. This is how it was: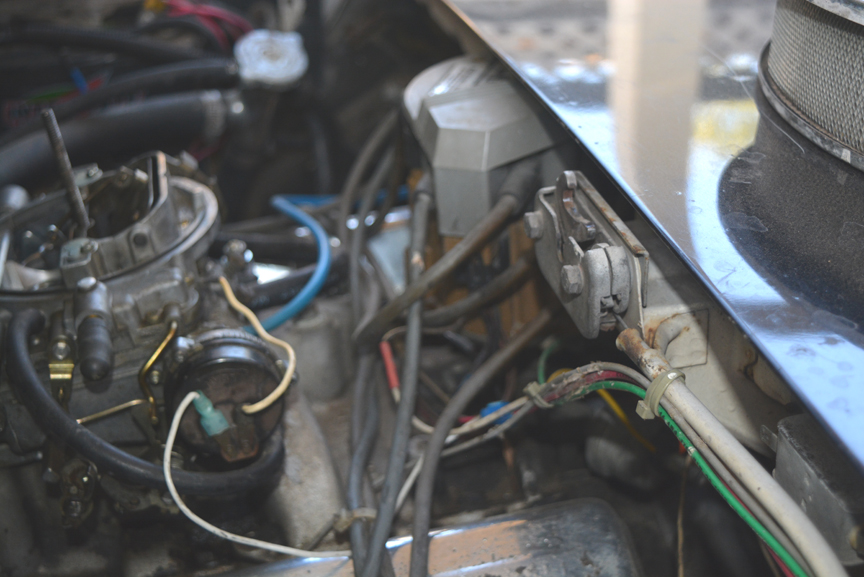
Posted by: DickSteinkamp Jan 24 2020, 11:34 AM
I was lucky enough with my V8 conversion wiring that the original harness and all electrical equipment was in place and in good condition. Very few changes are needed to the original harness to install a V8.
Get a BIG blow up in color of the stock wiring system
If you get back to the replacement harness in the car and everything cleaned back to stock (a big IF) including the installation and wiring of the relay panel in the engine compartment behind the driver, do the following...
Remove the ECU and everything that harness goes to if this hasn't been done already.
Replace the stock FI fuel pump with a low pressure one for a carb. Mount it in the original position with the original wiring.
Ground one terminal of the connector on the rear left of the relay panel (I can look it up for you or you can search here). That will fool the system into thinking there is an ECU in place when you turn the key so the fuel pump will run.
Run a normal 3 wire internally regulated Delco alternator. Run the hot terminal direct to the battery. Loop the sensor wire back to the hot terminal on the alternator. Remove the stock VR on the relay panel and run the idiot light wire from the alternator to a pin on a post where the VR mounted (again, I can look that up that pin for you or you can search).
Pick up a switched hot on the relay panel for the electric choke.
Wire the cooling fans with relays and fuses direct to the fuse box under the dash. I ran to an "always hot" terminal there so my fans would run after shut down if needed.
The starter will run with the stock harness and connections. No need to do anything different or special there. Some guys do put a solenoid in line to keep the current off the switch like newer cars, but it's not necessary. Same with the BU lights. (those wires wire tied to the engine hatch cable housing do not look stock and if they are they are run in the wrong location)
In your case, you may have to get more creative, but stick as close as you can to the original wiring diagram with the above changes so as not to create more problems.
Good luck!
Posted by: ValcoOscar Jan 24 2020, 11:44 AM

Another SoCal guy. 
What city are you in? 
Oscar
Posted by: Daryl32 Jan 24 2020, 12:33 PM

In your case, you may have to get more creative, but stick as close as you can to the original wiring diagram with the above changes so as not to create more problems.
Good luck!
Thank for all the great tips Dick - I will print this out and add it to my wiring log book for the car.
Posted by: Daryl32 Jan 24 2020, 12:34 PM
Another SoCal guy.
What city are you in?
Oscar
Oscar I am in Corona, the owner of the car lives in South Bay area. You are welcome to drop by and watch the smoke rise.
Posted by: Daryl32 Jan 24 2020, 12:37 PM
Question : What tach are you running - or can the stock one be revised to work with a V8?
Posted by: Daryl32 Jan 24 2020, 12:41 PM
Dick the car was gutted of it's wiring 10 years or so ago - and the new old harness did not come with an engine bay relay panel. I may make one if needed, still working all this out.
Still trying to work out what relays at the engine a 350 really needs. None of my old Chevys ever had - have any.
Did you use any inline fuses for new things?
One of my older cars.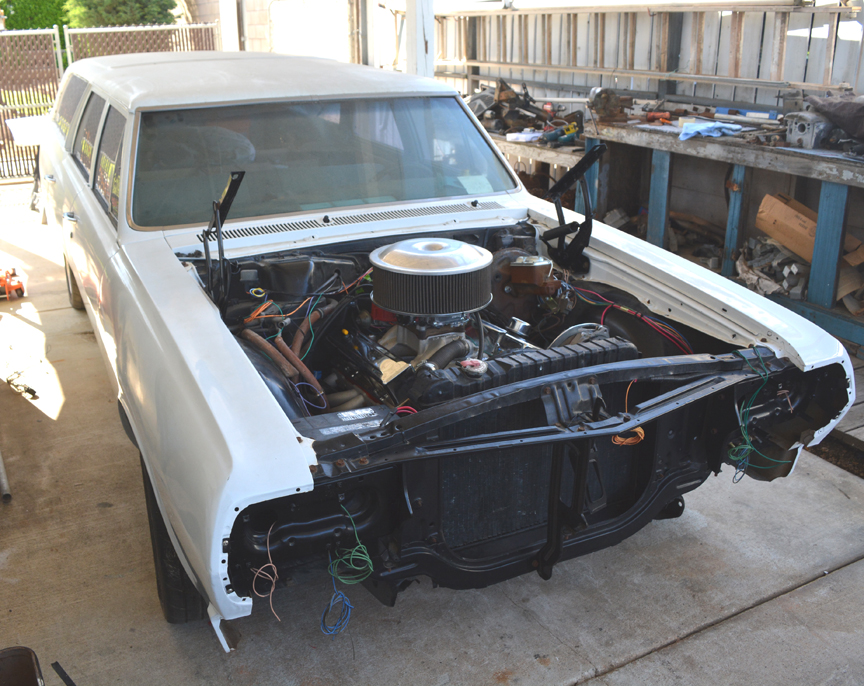
Posted by: porschetub Jan 24 2020, 01:04 PM
Question : What tach are you running - or can the stock one be revised to work with a V8?
You can use the 4cyl tach with an Ashlock Tach-adapt,you can buy them from Bob direct,great guy helped me setup my whole ignition or you can buy from Pelican parts.
Make sure your tach is good however as the tach-adaptor won't fix a bad one.
You have some work ahead of you but you will get there...good work so far,the Deutsch plugs are great,I used them on my ignition system,I also have some to fit on my gauges also.
Good luck.
Posted by: Daryl32 Jan 24 2020, 01:13 PM
You can use the 4cyl tach with an Ashlock Tach-adapt,you can buy them from Bob direct,great guy helped me setup my whole ignition or you can buy from Pelican parts.
Make sure your tach is good however as the tach-adaptor won't fix a bad one.
You have some work ahead of you but you will get there...good work so far,the Deutsch plugs are great,I used them on my ignition system,I also have some to fit on my gauges also.
Good luck.
Thank you so much, I will reach out to Bob. Owner says tach worked to 3,500 rpm and then back off - it did go in and out but 3,500 was it's max.
I need to look up behind the tach and trace the wires, to see if anything is attached.
Posted by: DickSteinkamp Jan 24 2020, 03:08 PM
Relay boards are available either used or http://www.914world.com/bbs2/index.php?showtopic=342258
If yours is missing, I might be tempted to figure out how to do without it. There are some critical things there like the power relay, fuel pump relay, etc. that you'll need to "reinvent".
Posted by: porschetub Jan 24 2020, 03:17 PM
Question : What tach are you running - or can the stock one be revised to work with a V8?
Ok then maybe you may need to replace it ,but your issue could be its reading the wrong signal which is most likely,try the adaptor first and see.
Posted by: DickSteinkamp Jan 24 2020, 04:14 PM
Still trying to work out what relays at the engine a 350 really needs. None of my old Chevys ever had - have any.
Did you use any inline fuses for new things?
I don't think the engine needs any relays, but other devices will and did with the stock wiring.
The only new things for me were the electric choke and the cooling fans. I in line fused these.
Posted by: DickSteinkamp Jan 24 2020, 04:16 PM
One more thought. The motor revs up so quickly with the little flywheel and a light car that is geared pretty low that a rev limiter is in order.
Posted by: porschetub Jan 25 2020, 12:52 AM
Question : What tach are you running - or can the stock one be revised to work with a V8?
Ok then maybe you may need to replace it ,but your issue could be its reading the wrong signal which is most likely,try the adaptor first and see.
Porsche tach's received 2 different voltage signals year dependant,cannot remember which is which but the signal from a V8 will be all wrong what ever voltage input and of course upset by 8 signals every rotation .
If the needle on the tach you have is even and constant in movement you should be ok with that one with adaptor.
Posted by: Andyrew Jan 25 2020, 01:29 AM
Dick the car was gutted of it's wiring 10 years or so ago - and the new old harness did not come with an engine bay relay panel. I may make one if needed, still working all this out.
Still trying to work out what relays at the engine a 350 really needs. None of my old Chevys ever had - have any.
Did you use any inline fuses for new things?
One of my older cars.
Fuel pump should be on a relay, factory 914 one is fine.
Fans should be on a relay
Thats it. You'll need to wire in the alternator, maybe a choke if you use one, and the power wires to the distributior and the distributor to the tach... Thats all you need with a v8.
Posted by: Daryl32 Jan 25 2020, 09:21 AM
Thank you all for your help!
I did some work yesterday on the wiring - about 5 hours or so.
Then at dinner I realized I have no idea how the back up lights work. My wiring harness and diagrams show two gray w/brown stripe wires coming from dash to the 12 pin connector. Then it shows two gray w/brown stripe wires going to the switch on the tranny, for the life of I cannot see what feeds the lights them selves?
Posted by: Daryl32 Jan 25 2020, 09:25 AM
I don't think the engine needs any relays, but other devices will and did with the stock wiring.
The only new things for me were the electric choke and the cooling fans. I in line fused these.
I have bought relay plugs and relays, I was thinking I will add them in as needed to make things work.
The big Black wire in the 12 pin is the ignition power feed for the stock relay panel - correct?
Posted by: DickSteinkamp Jan 25 2020, 10:26 AM
http://www.914world.com/bbs2/index.php?act=Search&CODE=show&searchid=eca3e4a092a85f04bb1da2266576186b&search_in=titles&result_type=topics&highlite=wiring+diagram
Posted by: Daryl32 Jan 25 2020, 11:23 AM
http://www.914world.com/bbs2/index.php?act=Search&CODE=show&searchid=eca3e4a092a85f04bb1da2266576186b&search_in=titles&result_type=topics&highlite=wiring+diagram
thank you Dick! Been searching google with not much understandable stuff yet. And still working on figuring out the way the forum software works here.
Posted by: Daryl32 Jan 25 2020, 11:32 AM
OK yet another question.
The car is a 1973 2.0 originally. Original wiring is totally gone and replaced with homemade harness. I am working on getting it all out.
The replacement harness does not seem to completely match the diagrams on line for a 1973 car.
Question : anyway to figure out what the new harness is out of? It has a 12 ga black wire going to the 12 pin engine relay board connector that comes from the ignition switch.
Powered by Invision Power Board (http://www.invisionboard.com)
© Invision Power Services (http://www.invisionpower.com)