Printable Version of Topic
Click here to view this topic in its original format
914World.com _ 914World Garage _ 1974 914 Rust Repair Project
Posted by: sreyemj Feb 7 2020, 04:14 PM
This will be an attempt to document a long and sordid history of my 1974 1.8L 914. It's been with me a long time, and suffered many ills both before and during my ownership.
My initial interest in Porsches came after reading "Porsches For The Road" as a young child, I still have the book!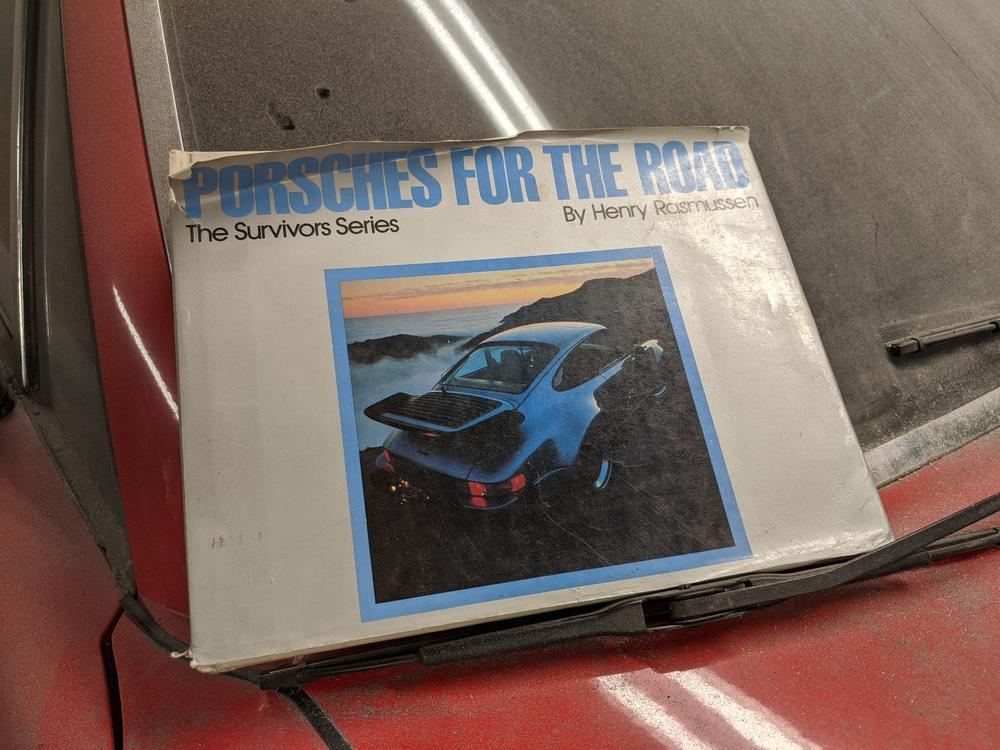
I really wanted a 911 or 912, but even project cars were beyond my budget of about 2k. I thought I had it made when our elderly neighbor parked a neglected yellow 1984 911 Targa under a tarp in the alley between our houses. He didn't want to sell it, but I used to keep the tarp tied down in the hopes I could one day purchase it. Unfortunately, we never made a deal and when he died several years later the car disappeared.
After that, I started shopping for 914s, and this 1974 914 car popped up for $800 on craigslist. It was garaged, had awful brown paint, and the passenger door closed nicely. The seller mentioned he wasn't the original owner and that he parked it when the motor became "tired" in the mid 1990s. A deal was made, and I brought it home in a torrential downpour. I was about 15 years old at this point.
First restoration efforts (2007ish):
My first attempt at getting the 914 back on the road included painting it a red I picked out of the Sherwin-Williams catalog instead of the original Marathon Blue Metallic (unfortunately!).
Upon further investigation, there were some pin holes in the bottom of the passenger long as well as some small holes under the battery tray. The door closed fine and it didn't look like the really ugly pictures I had seen, so I figured it was at least structurally sound.
I remember pouring a rust converter into the small holes under the battery, then welding a plate over the top. There were some holes in the rear trunk, so I cut that metal out and welded sheet metal in. The bottom of the passenger long looked fine, so I left that as is. 15 year old me was not a talented welder.
While removing the paint, I discovered the car had been in an accident, and that the driver's front fender/headlight cavity were not-so-artfully grafted on from another car. I also found accident damage on the passenger rear quarter panel and rear trunk. The seller did not admit to any accidents, so I assume these are from a previous owner.
After painting, I never really put it back together and the car sat for about a decade. During this time I was off at college, then the military, and then more school. My younger brother wanted to use it as a getaway car at his wedding, and almost completely reassembled it with a 1.7L engine I had purchased from a guy doing a V8 swap. I sold the original 1.8L during one of several moves over the years…
I drove the car exactly once with the 1.7L engine, I remember it ran poorly with high idle and leaked a fair amount of oil.
Getting started, one of the only early pictures of the car: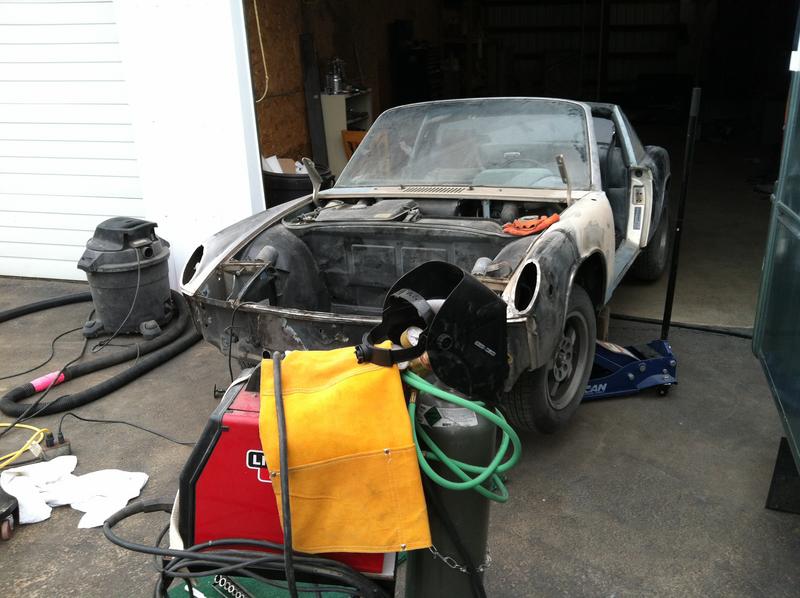
Car after painting (side skirts never made it on):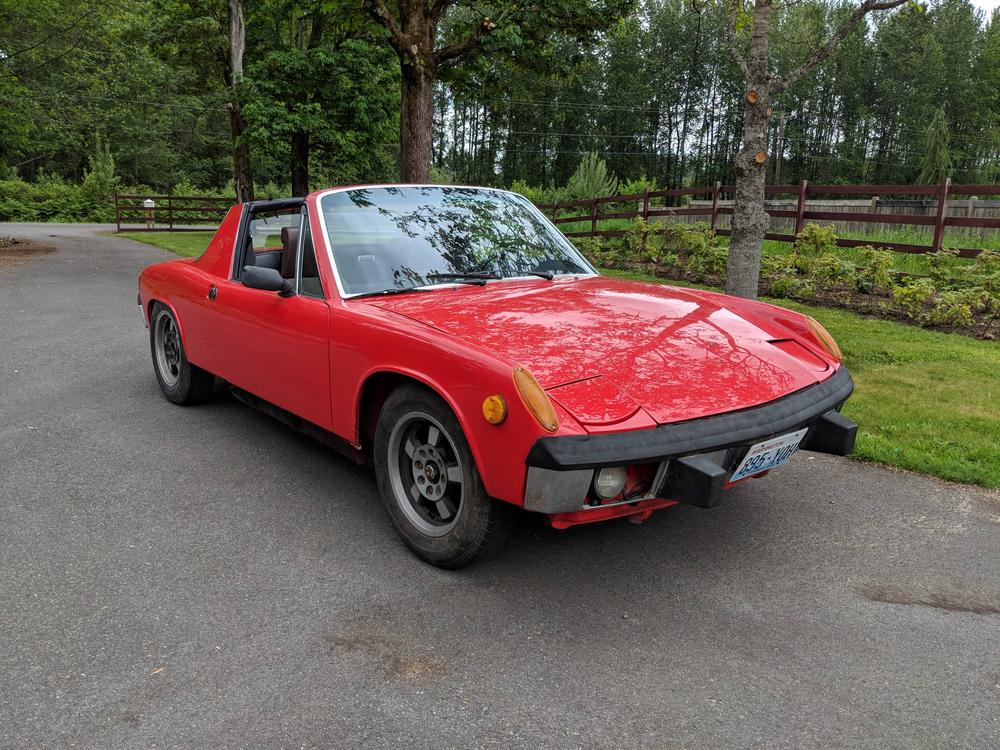
Second attempt (2020ish):
It had been almost 15 years since I bought the car. I had moved many times for school, military, more school, and then more military. The car mostly lived at my dad’s house during this time, but I now had a small garage I could park it in. I brought it home and got to work.
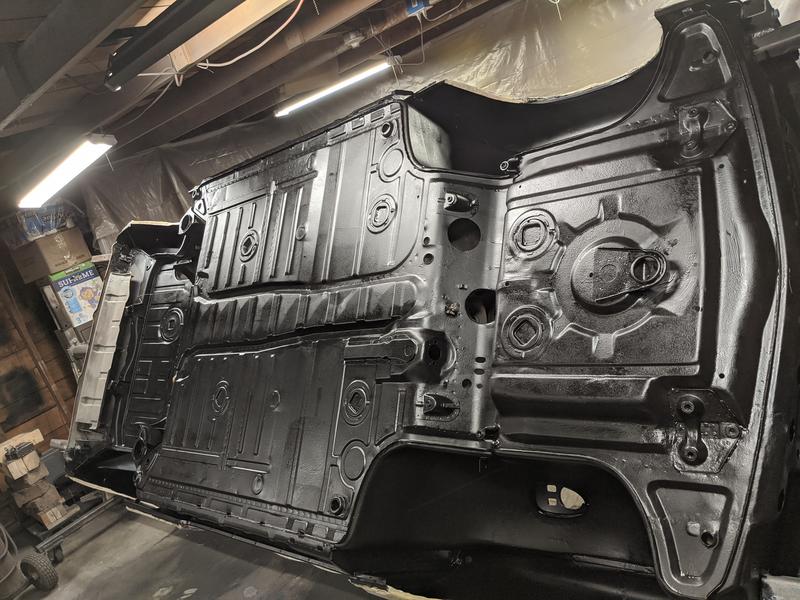
It quickly became obvious (thanks to browsing 914world!) that the rust problems were not minor, and would require significant work to repair before anything else. I decided to move front to back. The bottom of the car was coated with a thick bed-liner type coating that I removed from the bottom of the floor pans and much of the front trunk. You can see some of the original paint in the wheel well where the coating was removed with a putty knife.
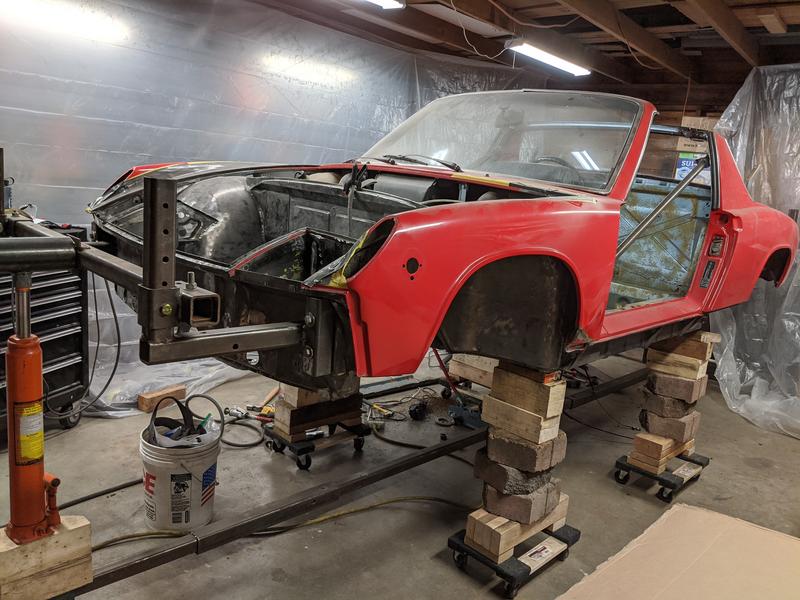
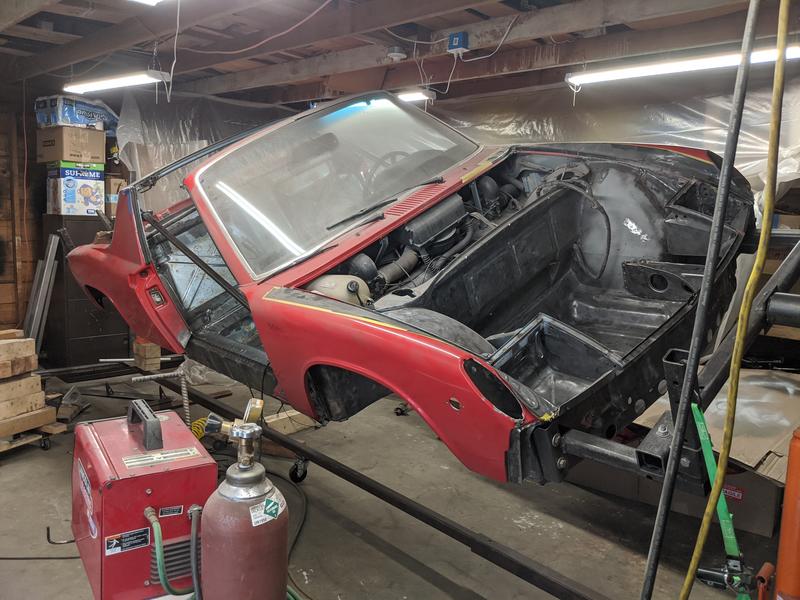
As it sits today: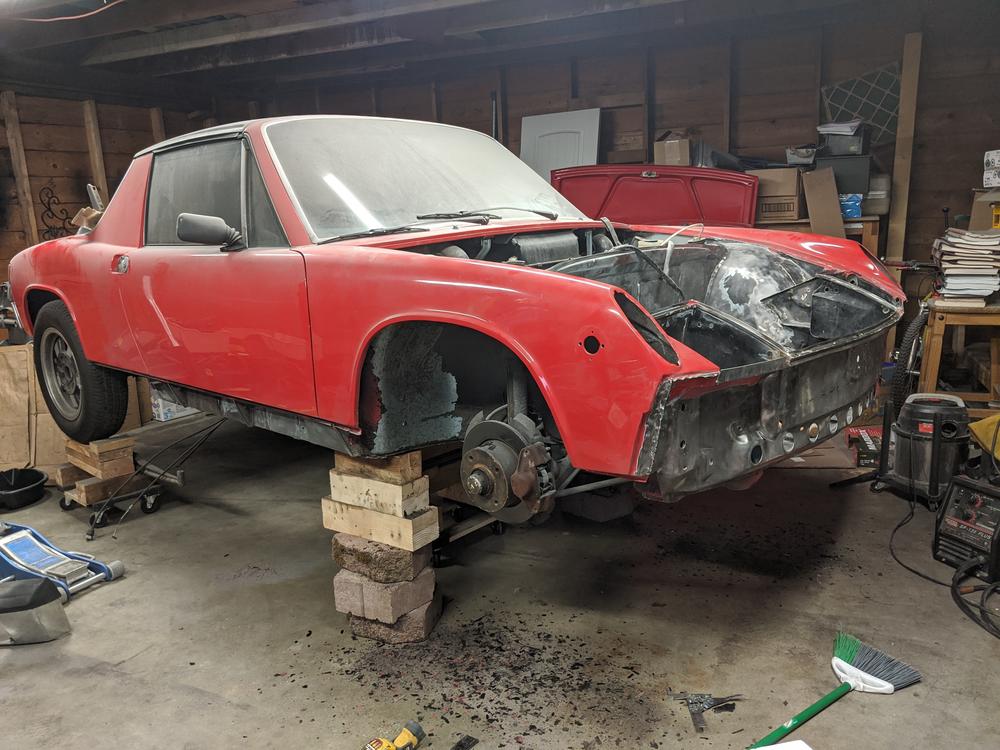
Passenger long, looks fairly solid from the outside. The hole is where I used a cheap endoscope to look at the inside (lots of rust).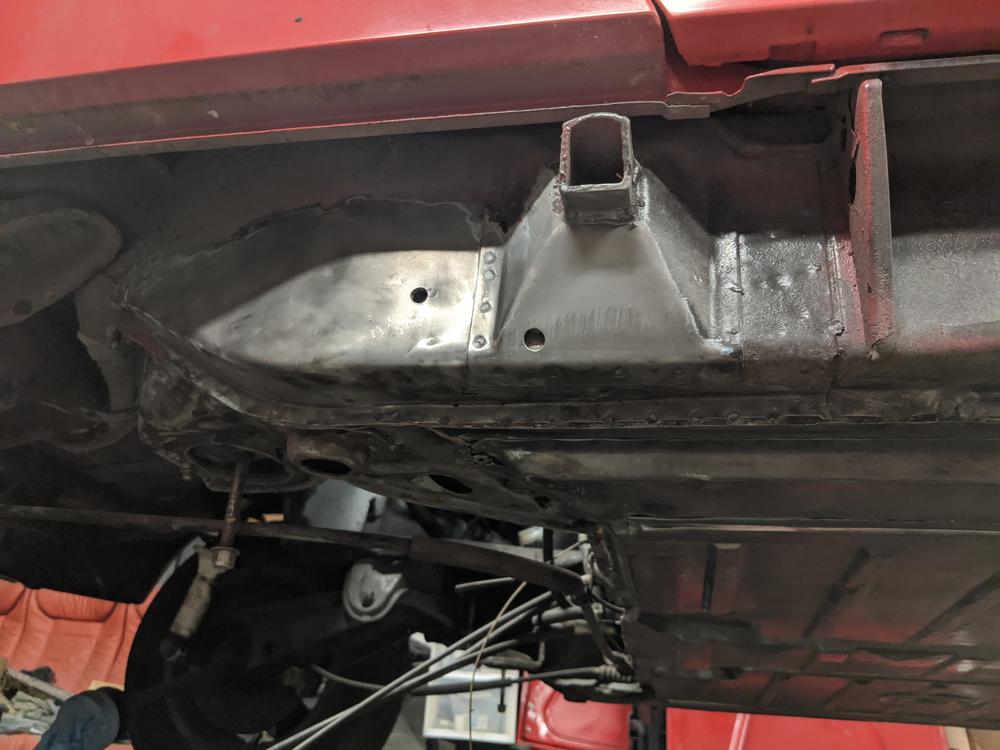
The 1.7L motor. Not sure why it's blue, definitely needs some help.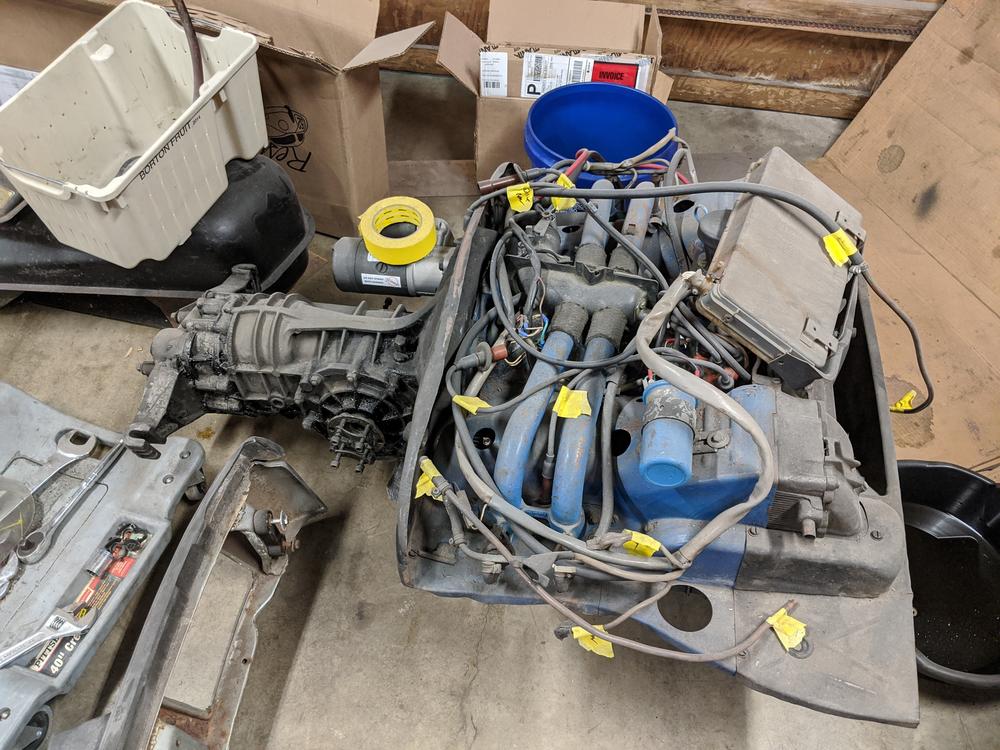
Posted by: sreyemj Feb 7 2020, 04:27 PM
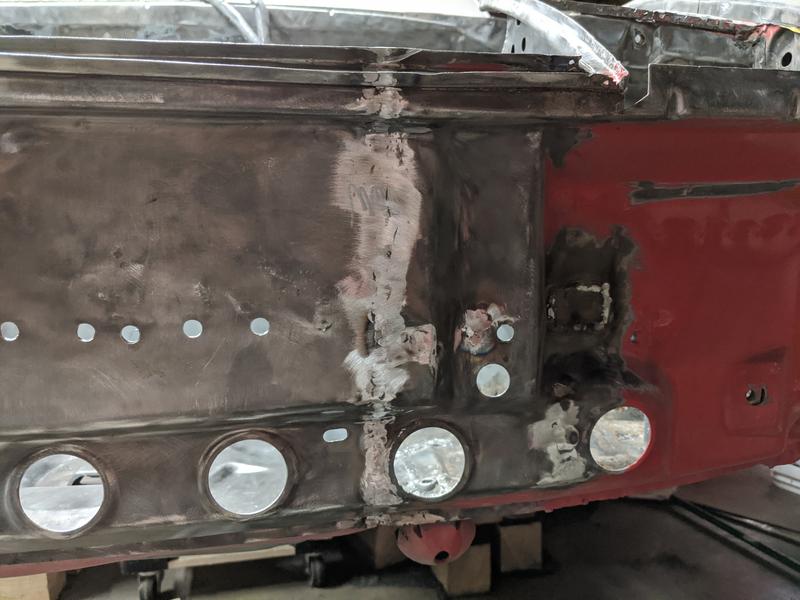
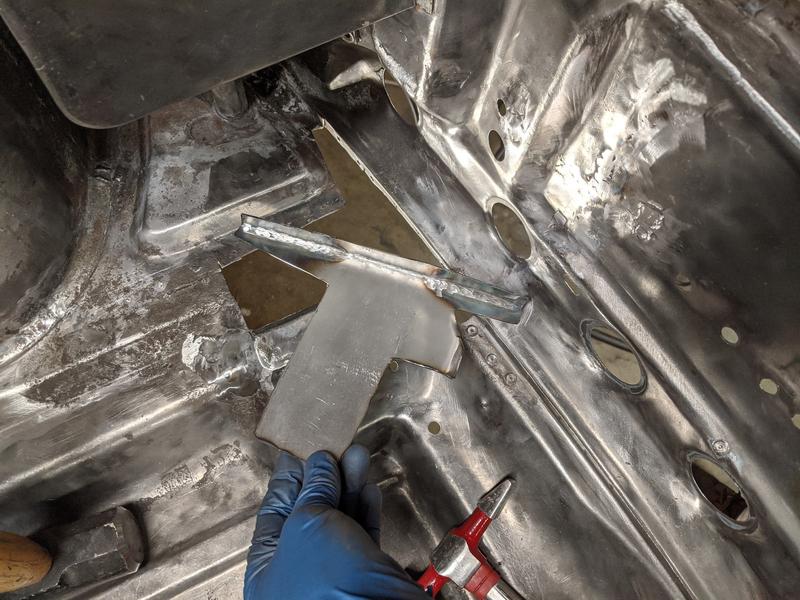
Rear trunk, back is fairly lumpy and has a lot of bondo. I have the restoration design floor pan and a member here is sending me a rear section that I will replace at the same time.
Front trunk rust hole: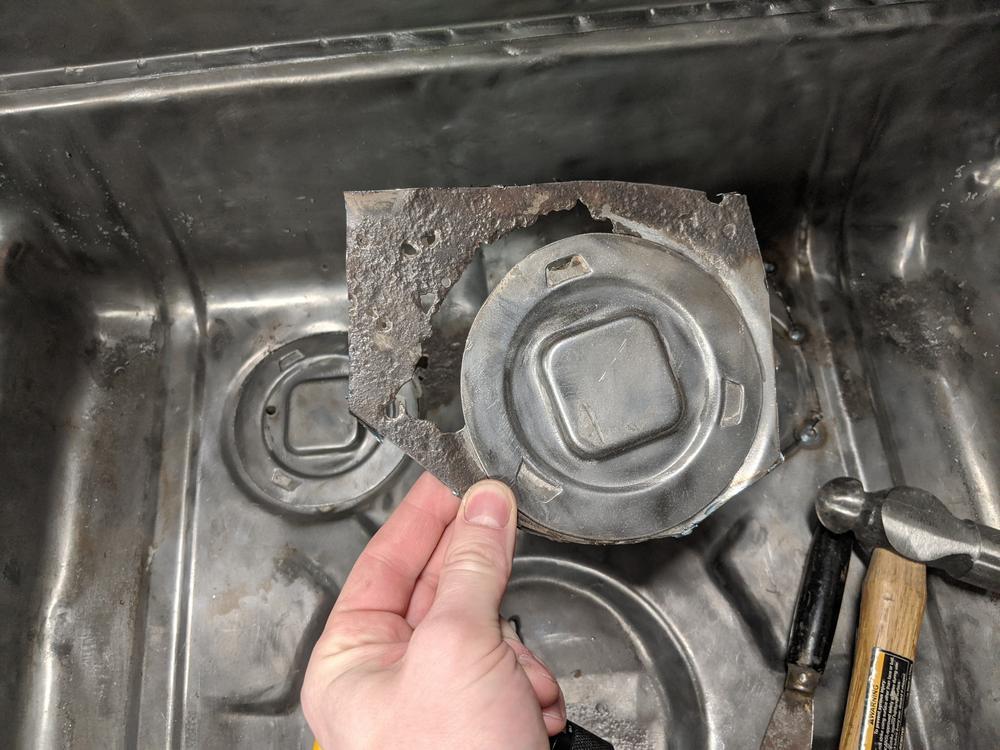
Replacement piece being welded into place: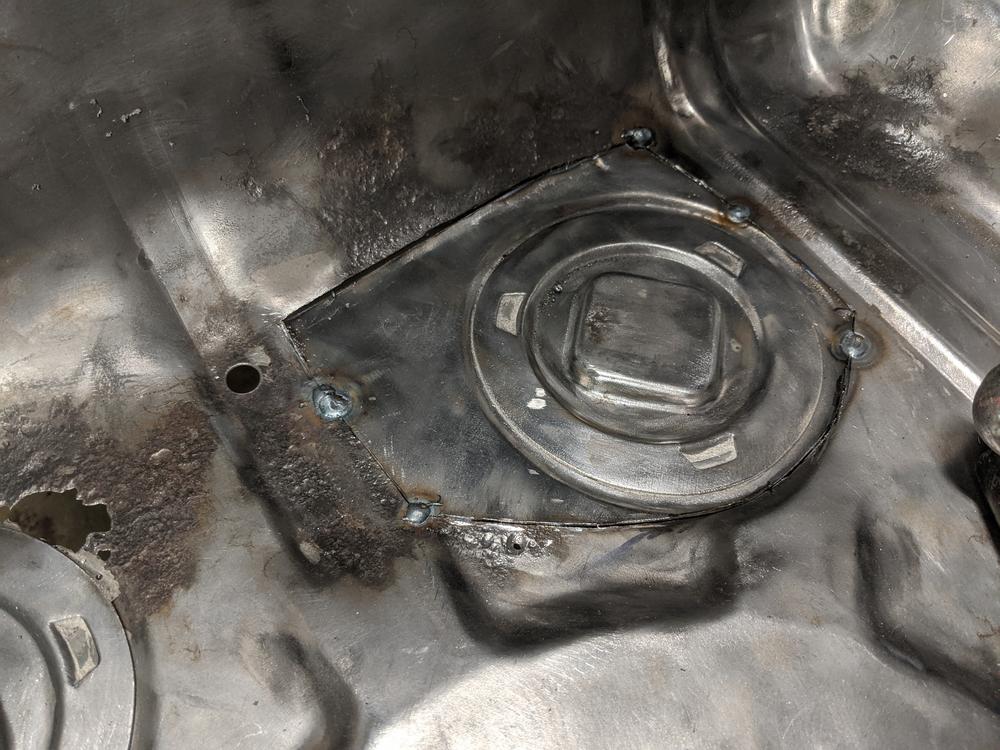
Posted by: jimkelly Feb 7 2020, 04:43 PM
man, find a safer way to work under that car.
be carefuller than you think you need to be !!!

Posted by: sreyemj Feb 7 2020, 05:10 PM

man, find a safer way to work under that car.
be carefuller than you think you need to be !!!
Good catch, I'm not working under it like this. Just raised to front to save my back while I work on the trunk.
Posted by: sreyemj Feb 7 2020, 05:53 PM
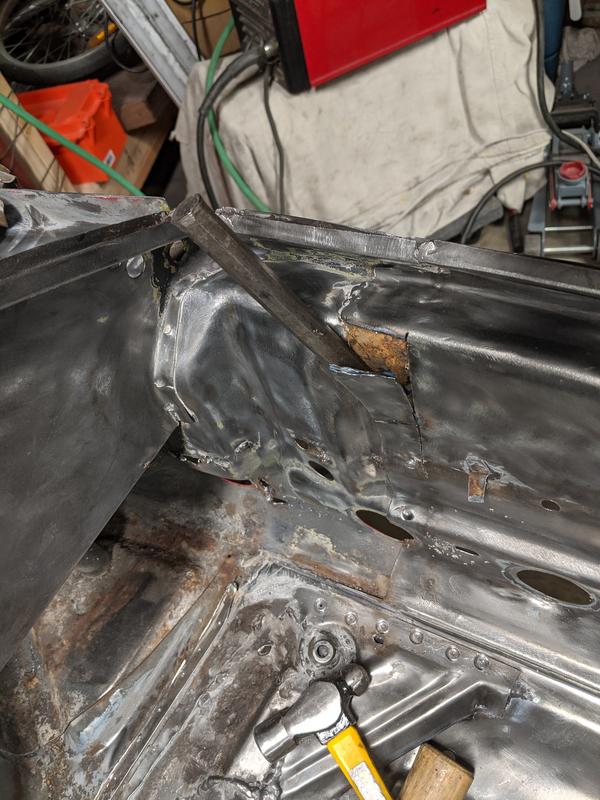
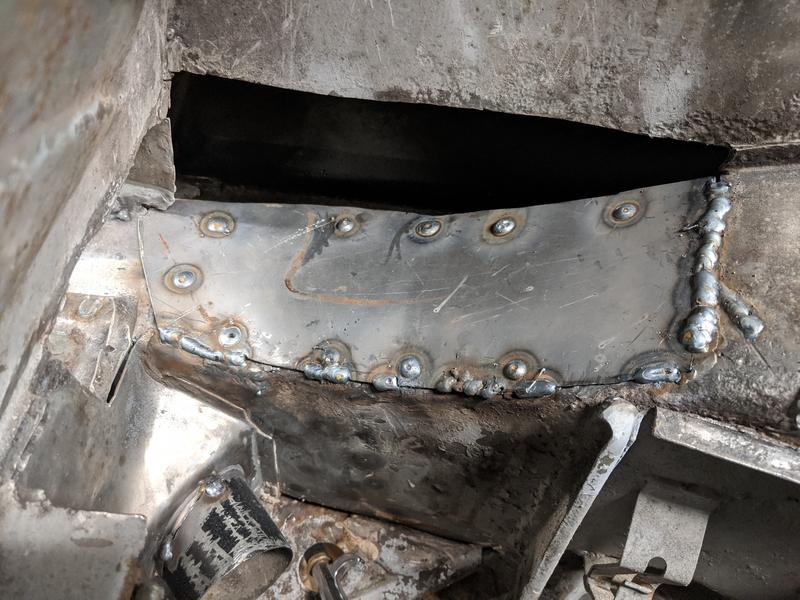
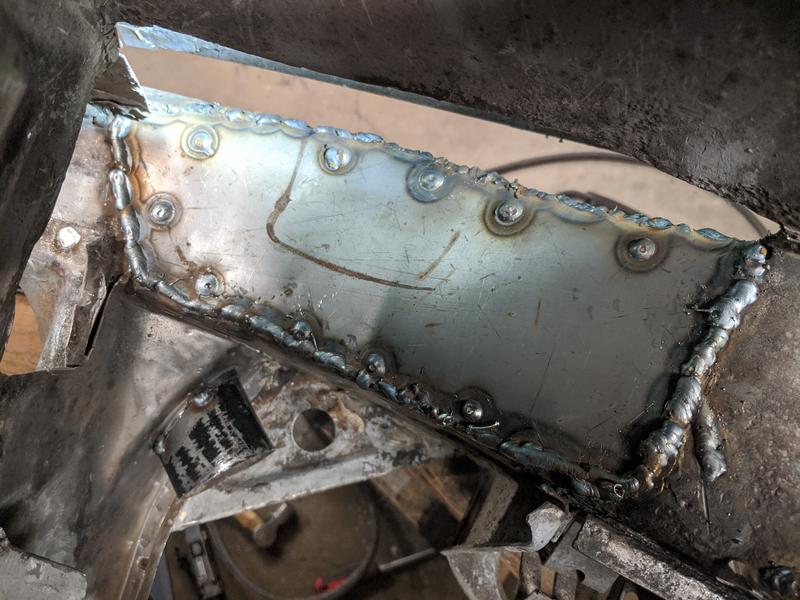
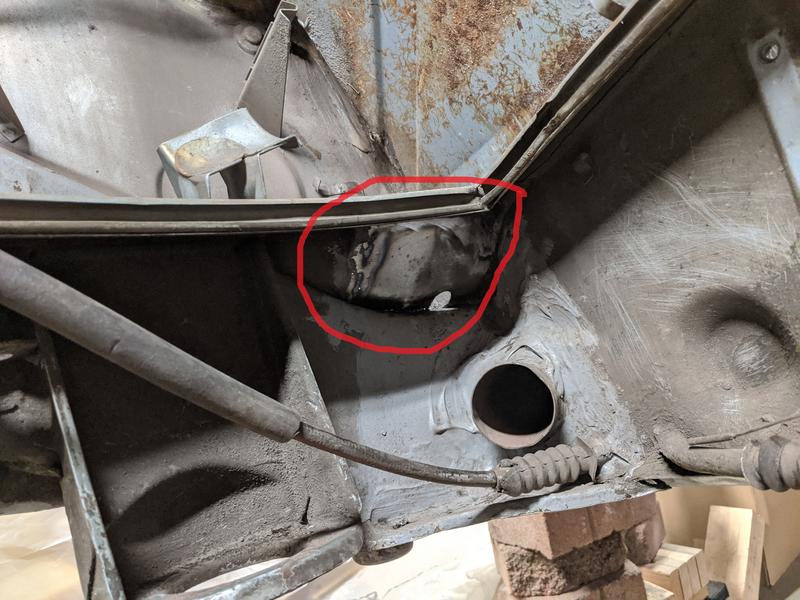
Hell hole looks ok, this is what I welded in a long time ago with rustoleum over the top. I'll likely end up cutting most of this out and replacing it with a cleaner repair piece after I get door braces on. I'm planning on using POR 15 for the trunks, floor pans, and wheel wells. I like fluid film and will probably coat everything inside and out with it when everything is done.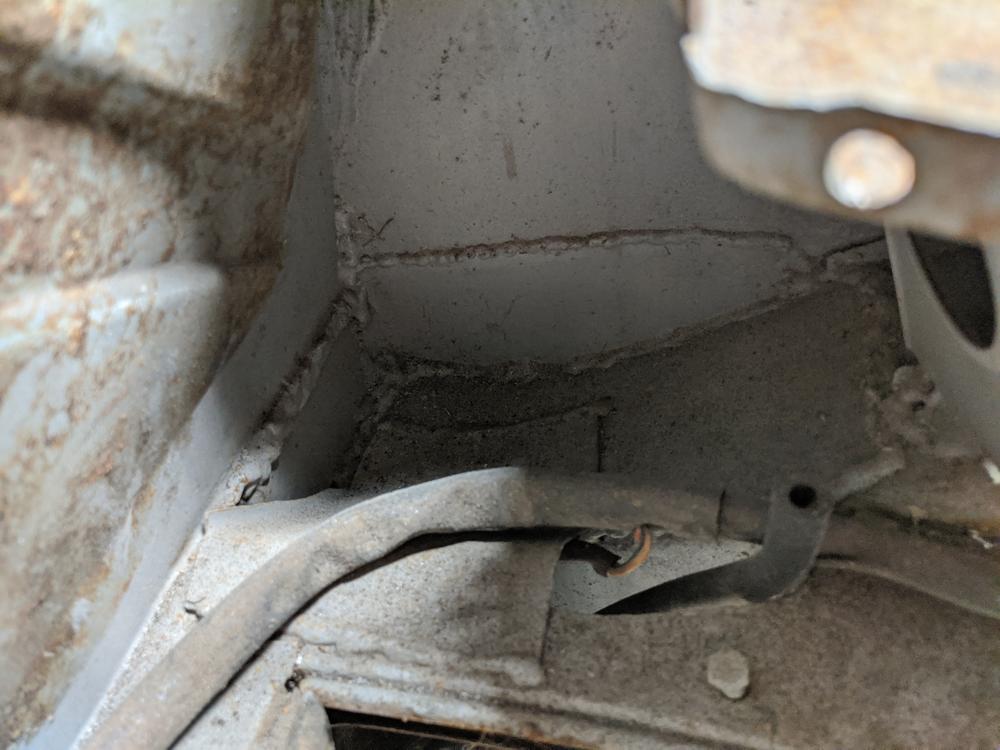
Suspension console was "repaired", but not well. I have the replacement piece to weld in: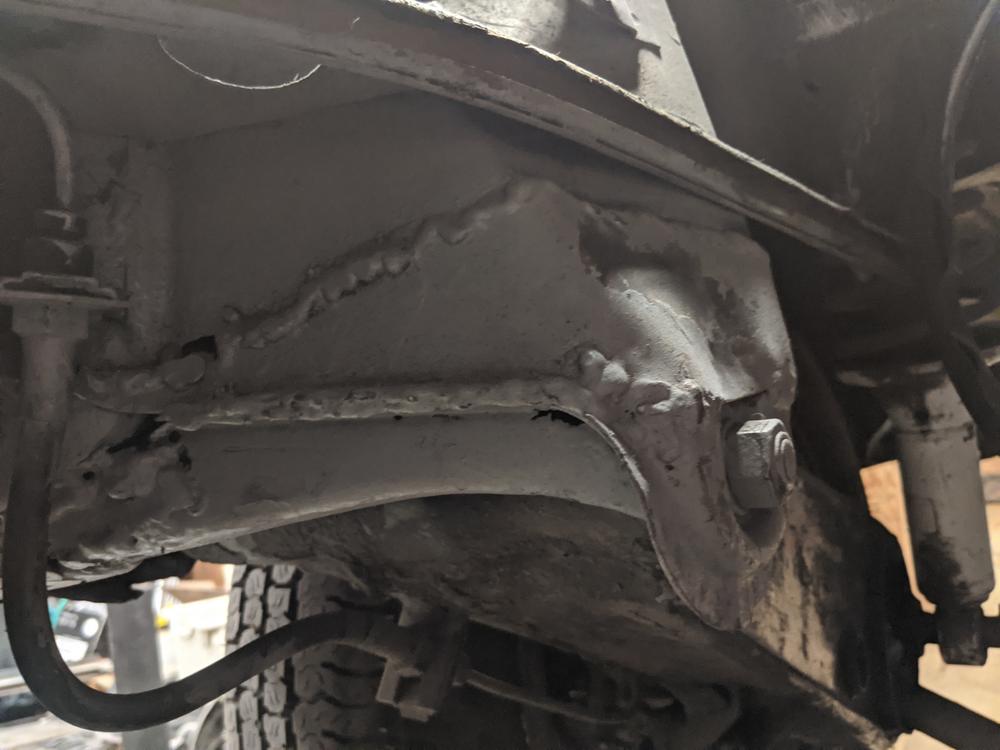
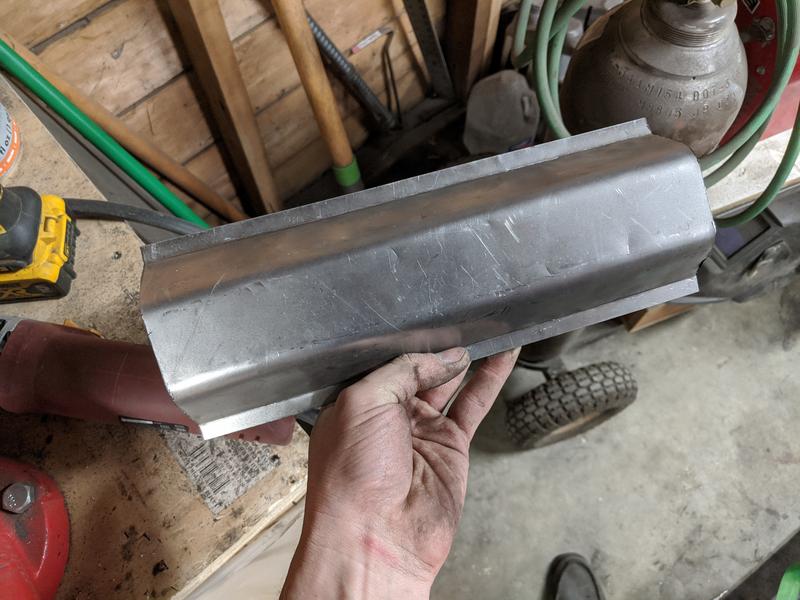
Some of the hood seal channel is rusted out, I'm going to try making some repair sections with 18/20ga steel and a harbor freight bending brake. Fortunately it looks like only one side will need to be replaced in any given place: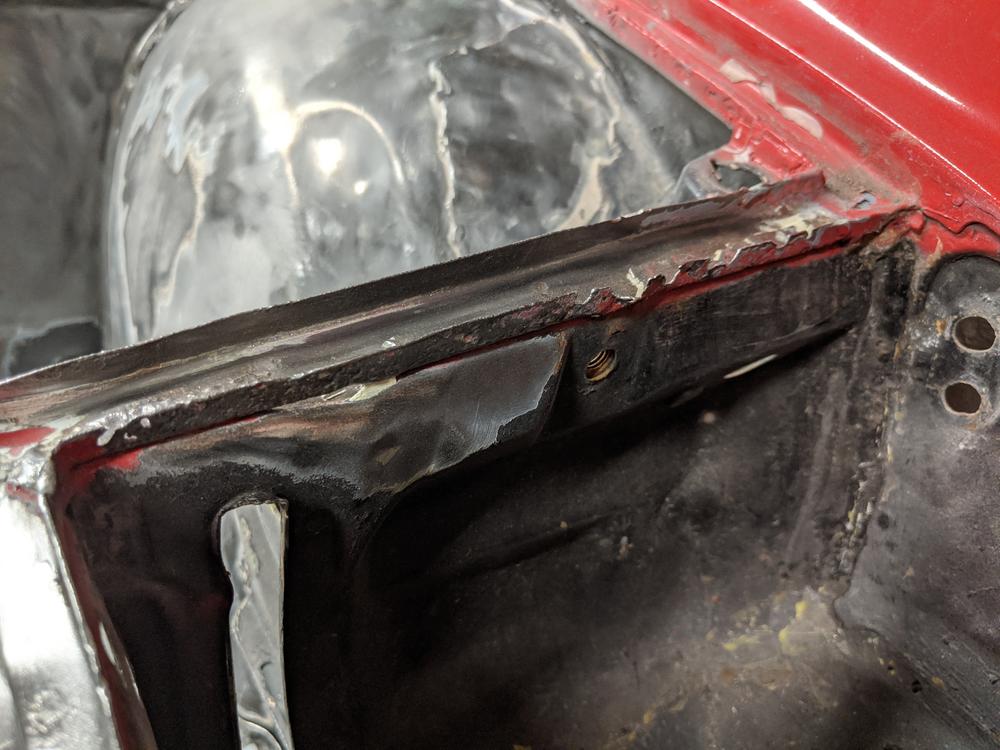
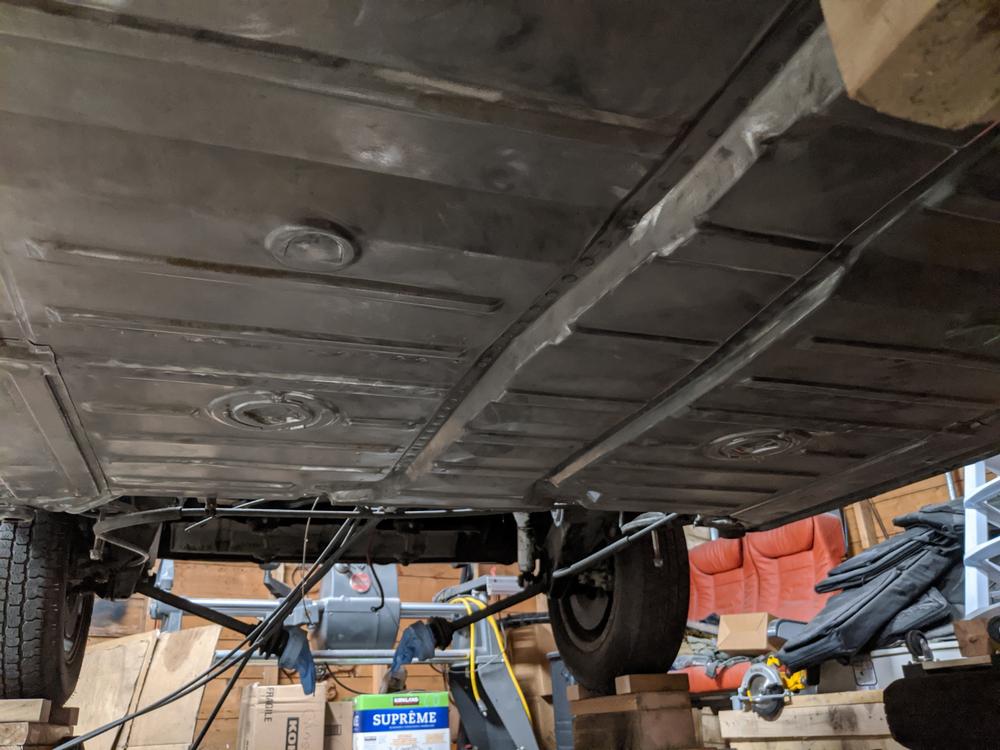
Floors are very solid, you can see my failsafe support in the middle of the two jack point supports: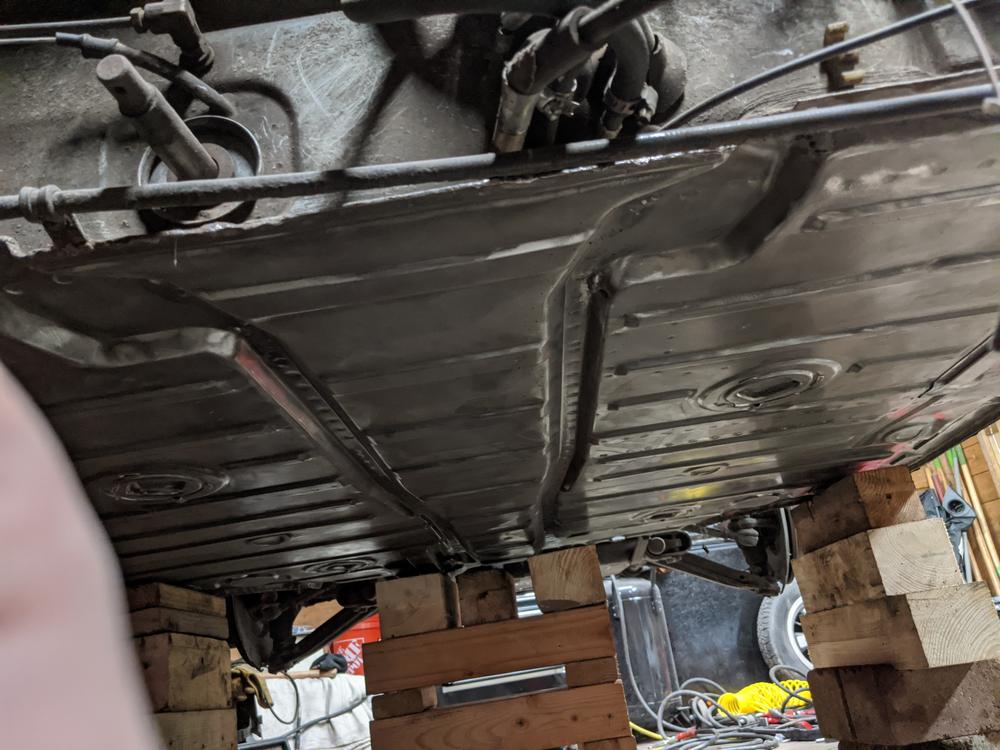
Posted by: Mark Henry Feb 7 2020, 06:31 PM
If you have the bottom that clean use epoxy paint or get some DuPont Nason black truck paint and a cheap can of urethane catalyst. It's a spray paint so it's a bit thin, but it does go on with a brush OK. It flows out so you can hardly see the brush marks, do 2+ coats.
I'd wash it with some Krud Cutter to keep it from rusting till you get the paint on.
Better than Por-15 IMHO, I've seen and have Por-15 on my bug pan, couple areas came off in a whole sheet. I won't use it again.
Posted by: sreyemj Feb 7 2020, 06:59 PM
If you have the bottom that clean use epoxy paint or get some DuPont Nason black truck paint and a cheap can of urethane catalyst. It's a spray paint so it's a bit thin, but it does go on with a brush OK. It flows out so you can hardly see the brush marks, do 2+ coats.
I'd wash it with some Krud Cutter to keep it from rusting till you get the paint on.
Better than Por-15 IMHO, I've seen and have Por-15 on my bug pan, couple areas came off in a whole sheet. I won't use it again.
Interesting, haven't heard of Por 15 coming off like that too often. wonder if the prep was bad or it just didn't like the surface? I'll probably end up using the Por-15 anyway, as I have it in my hot sweaty hands and I don't have as much experience spraying. In an ideal world I would do a full rotisserie resto, but this one is probably solid enough to not need it and I'm going to go back at some point to repaint it the factory color.
This garbage bed liner crap that was on it separated and held water in a few areas. Fortunately, the factory paint/primer were well adhered so there isn't too much rust from that.
The big challenge areas on this car are going to be positioning the suspension console correctly and fixing some of the monkey business in the front trunk and drivers quarter panel. I'll get some pictures up of that area later, the accident repair was less than ideal. The rear trunk is not strictly a nessesary repair, but I hate having that flat plate instead of a proper floor and the globby Bondo/fiberglass rear section between the tail lights is annoying.
Posted by: IronHillRestorations Feb 8 2020, 08:47 AM
About a year ago I got some Kirker Enduro Prime epoxy primer, and so far I've been very pleased with the results. It's very tough and budget friendly. You can get it in quart or gallon and comes in white, gray, and black. A couple weeks ago I had a little left after spraying a section, so I brushed some on a fixture I made, no prep or clean up on it, and it's stuck amazingly well, so properly prepped metal will give great adhesion
Posted by: 914forme Feb 8 2020, 11:13 AM
POR 15 with come off in sheets, even with the best prep work. It will not come off your skin, you will wear it as a badge of stupidity for days.
Not a fan of POR15, I would prefer you to use a can of rustolium. Or about anything else including water.
Epoxy primer top coat is the way to go. Tinted U-Pol truck bed liner will work also. I want to go with something I know works today, and is easily repaired in the future. Epoxy primer, and U-Pol is the way I would do it.
Wood is safe in compression, nothing wrong with it, just be careful, like with anything. Even steel and lifts have been know too fail.
I for one say keep at it, your making head way in less than ideal conditions, while I can't seem to get off my butt while I figure out how to build a charging station and battery storage system for my collection of M12 tools. Stupid Garagejournal for adding nice place to work to my first world needs. When I was younger I got so much more do with out the well lite space, beautiful floors, and proper tools.
Keep rocking this build.....
Posted by: IronHillRestorations Feb 8 2020, 12:04 PM
POR 15 is good for rusty metal, but not so for clean metal
Posted by: rjames Feb 8 2020, 12:59 PM
POR 15 is good for rusty metal, but not so for clean metal
The only thing hood got rusty metal is to remove it.
Poor 15 needs something to bite into to adhere properly.
There are applications that por15 isn’t suited for, but the durability of the product truly comes down to prep. You must clean the surface thoroughly, making sure all oils are removed and then use something to etch the metal (like their Metal Ready product) before applying.
Lots of people complain about por15 coming off, but I’d be willing to bet they didn’t really prep things correctly beforehand. 10 years ago I used it on my floor pans inside and out, the outer longs, and rocker panels and it looks exactly the same as the day I applied it but I also followed the prep instructions beforehand.
Posted by: sreyemj Feb 8 2020, 06:56 PM
I'm looking into an epoxy based solution. I'm not so concerned about the clean metal, but now that the seam sealer is off there are a lot of seams and cracks that need to be sealed by whatever I paint it with.
Posted by: sreyemj Feb 15 2020, 08:50 PM
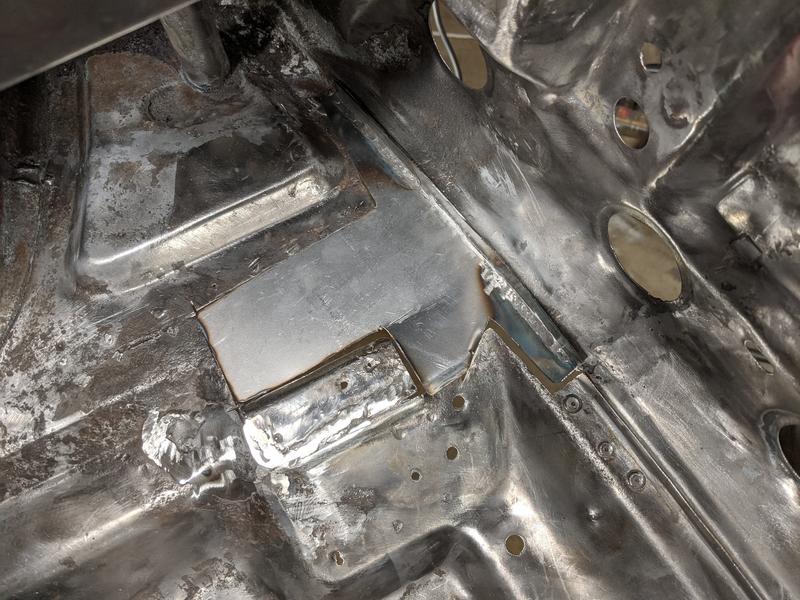
Front trunk patches welded in: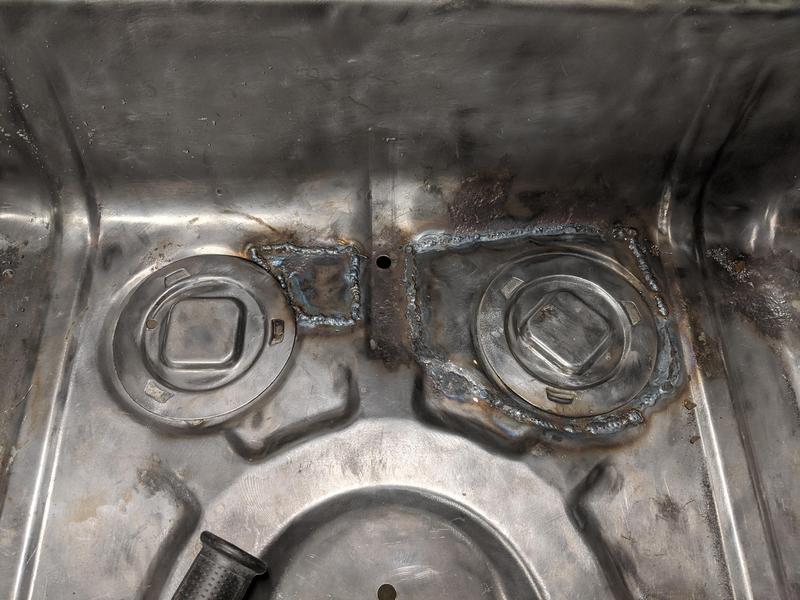
Welds ground: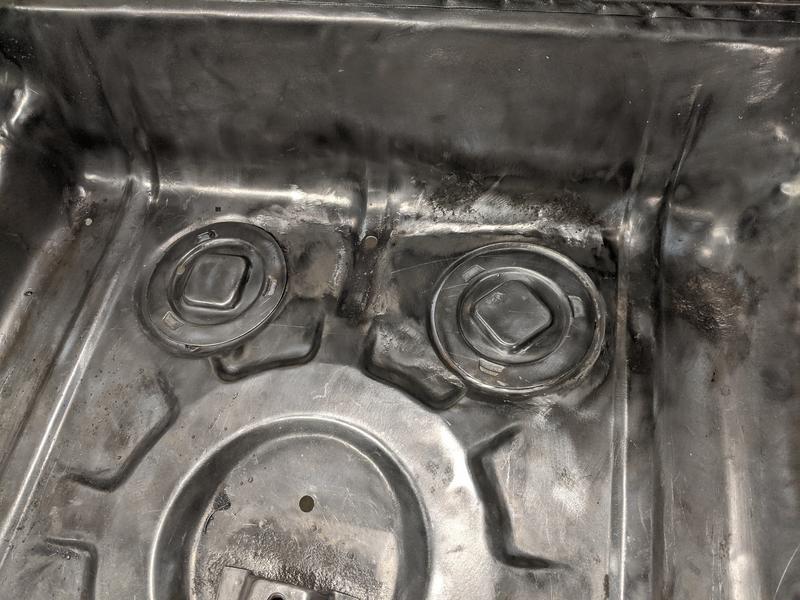
Posted by: sreyemj Feb 15 2020, 09:07 PM
The driver's side front corner was repaired with a welding in section. Unfortunately, the repair was less than perfect and there are large areas of overlap (similar to a lap joint) that are welded on only one side and have rust in the gap. I'm starting the process of cutting through the welds, trimming the overlap, and re-welding with butt joints. 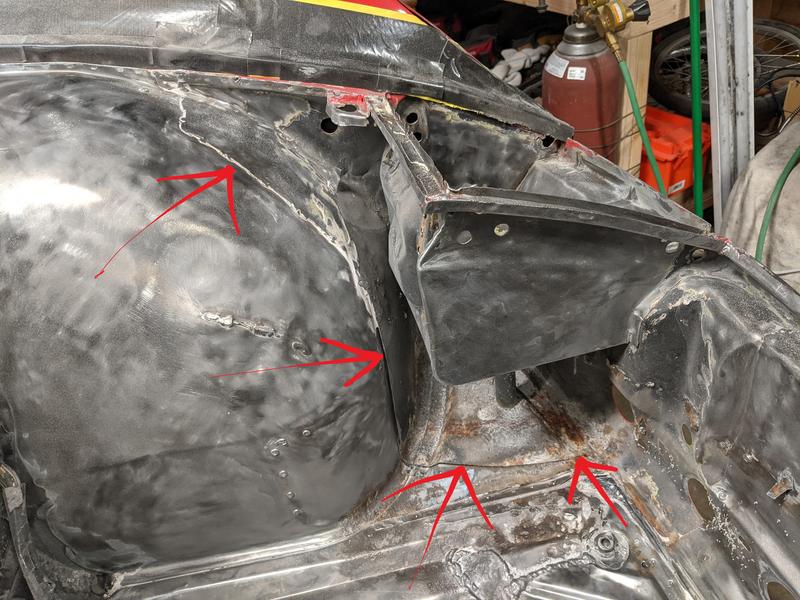
Posted by: bkrantz Feb 15 2020, 09:13 PM
I have a front left corner you can have for the price of shipping.
Attached thumbnail(s)
Posted by: sreyemj Feb 15 2020, 09:14 PM
Posted by: sreyemj Feb 15 2020, 09:22 PM
I have a front left corner you can have for the price of shipping.
Thanks for the offer, I think I can save this one and preserve the paint job. For the fender portion that is under the paint, I'll just trim the loose end and wire wheel the rust off.
I bought some BAR-RUST 235 epoxy primer and Devthane 379 that will be going over everything under the car and in the trunks.
Posted by: cuddy_k Feb 15 2020, 09:29 PM
One more reason to avoid POR-15...it can kill you (EDIT- make you really sick. Apparently the molecules are very volatile and if you apply it without a respirator, your lungs and bloodstream can be seriously compromised). I guess it has its place, but ALWAYS use the proper respirator...
I had a bad reaction after touching up a small area and came across some scary reading...
http://forums.pelicanparts.com/porsche-911-technical-forum/717334-warning-car-lovers-rust-repairs-por15.html
Posted by: sreyemj Feb 15 2020, 10:10 PM
One more reason to avoid POR-15...it can kill you. Apparently the molecules are very volatile and if you apply it without a respirator, particles of the stuff can collect and harden in your lungs. Seriously dangerous stuff. I guess it has its place, but ALWAYS use the proper respirator...
I read quite a bit about POR-15 after the discussion above, doesn't seem to be the right choice for this purpose. I would definitely wear a full respirator for any aerosol application as you're risking an inhalation pneumonitis or worse. I also prefer to wear a simple mask when I'm using grinders or wire wheels, it keeps the dust out and is easy to wear.
The engine part of this project has been on the back burner, but I'm starting to research various configurations. My budget for engine stuff was going to be about 3-4k and I was thinking of a 1911 or 2056 and ditching the D-jetronic for duel Webers. After some more research, I noticed The Dub Shop is only about 1 hour away and now I'm thinking one of their FI systems may be worth stretching the budget for. I would appreciate any suggestions for engine builders in the Seattle/Portland area, looks like there are a few to choose from.
Posted by: sreyemj Mar 1 2020, 10:38 PM
Slow going, but finally got to peel back some of the overlapping bit under the driver's side fender. Lots of dust and rust between the metal.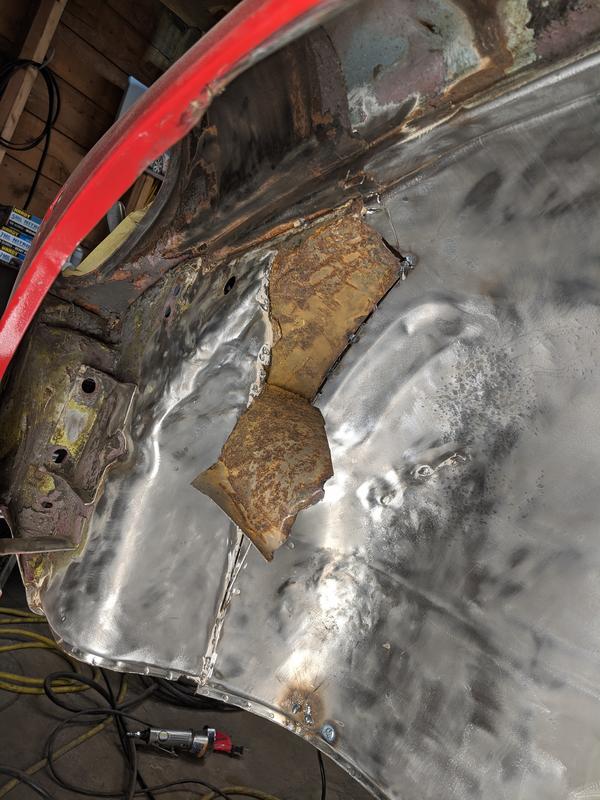
Posted by: StarBear Mar 2 2020, 09:30 AM
Best wishes and providence on your effort! Definitely a passion (and time). Not as easy or quick as they present on those car resto/custom shows.
Posted by: sreyemj Mar 14 2020, 11:03 AM
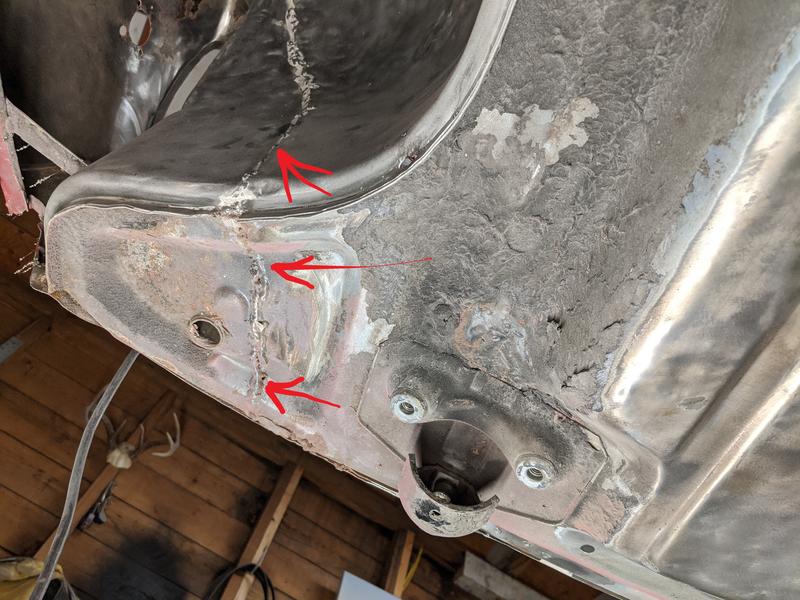
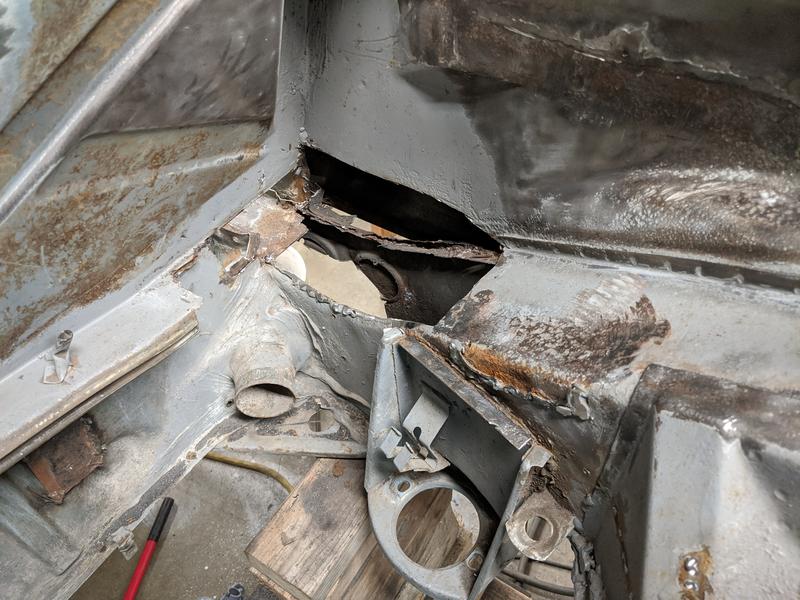
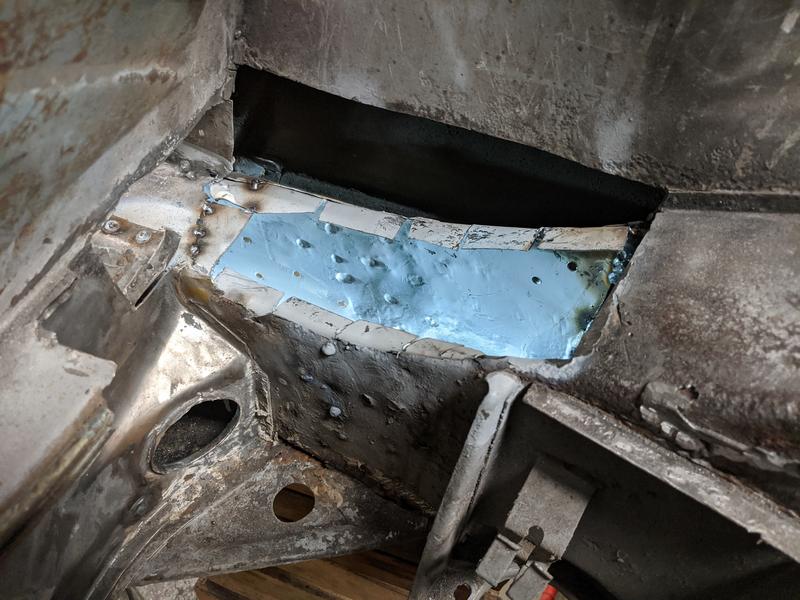
Cleaning up the last rusted section of rust on the front. This area had several rust holes that went through the trunk floor to the torsion bar mount (from a leaking headlight bucket). It was also affected by the shoddy repair of the driver's front corner and the pinch weld at the front was mostly detached/rusty.
If anyone has a picture of this area with the reinforcement plate off, that would be helpful!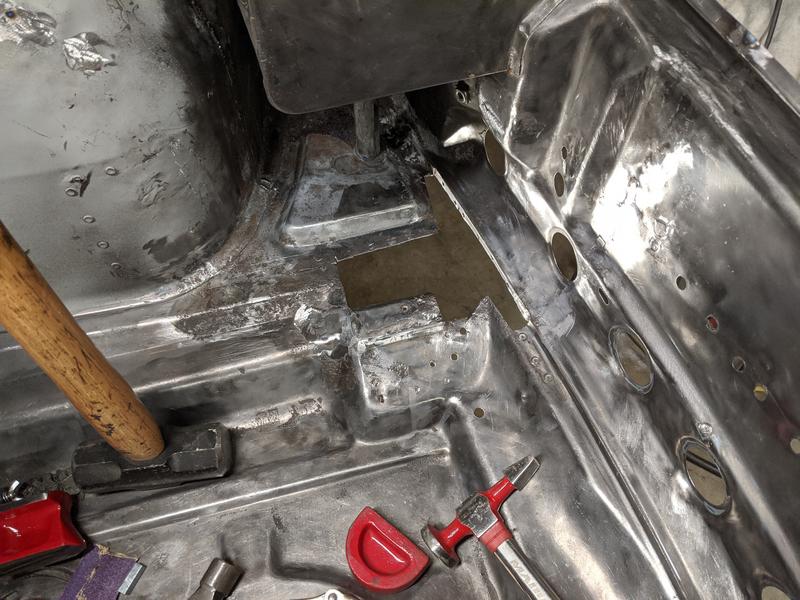
Torsion bar mount, will be welded on the bottom. Very little rust on this piece.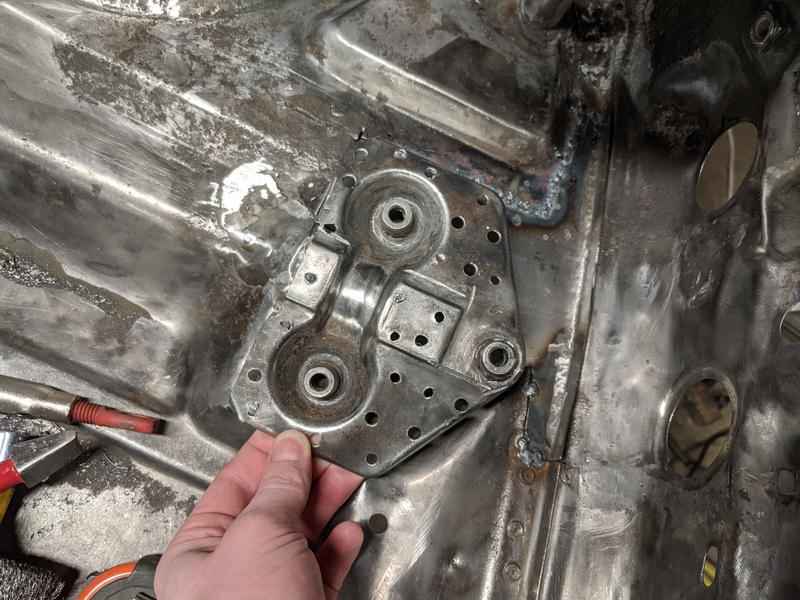
Corner reinforcement plate (old one was completely rusted through).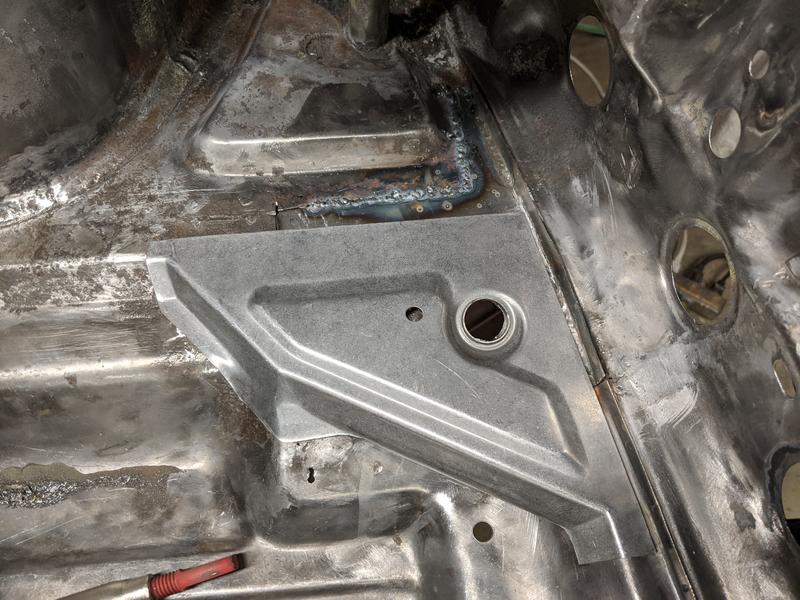
Posted by: rhodyguy Mar 14 2020, 03:07 PM
Walk over to my place if you need to take more pictures.
Posted by: bkrantz Mar 14 2020, 08:30 PM
What did you use to strip the paint inside the frunk?
Posted by: sreyemj Mar 14 2020, 11:11 PM
Walk over to my place if you need to take more pictures.
Will do, this area under the trunk corner support would be covered on yours (unless someone had removed it). Not a big deal, was just curious what the metal looked like before it rusted away!
What did you use to strip the paint inside the frunk?
Wire wheels, lots of work and takes forever. Blasting is better if you're able to strip the car down.
Posted by: Superhawk996 Mar 15 2020, 04:15 AM
Keep going. Such a bummer to have to fix previous repairs that were a bit shady but you'll know it's been fixed right this time!
Posted by: sixnotfour Mar 15 2020, 07:00 AM
1st love, hard to get over, I still have my 1st 914, it needs luv.
Attached image(s)
Posted by: sreyemj Mar 15 2020, 12:02 PM
1st love, hard to get over, I still have my 1st 914, it needs luv.
Perfect, thanks!
Posted by: sreyemj Mar 15 2020, 10:10 PM
Replacement piece welded in. This would have been much easier with a salvaged piece, fabricating the piece took forever and isn't as clean as I would have liked: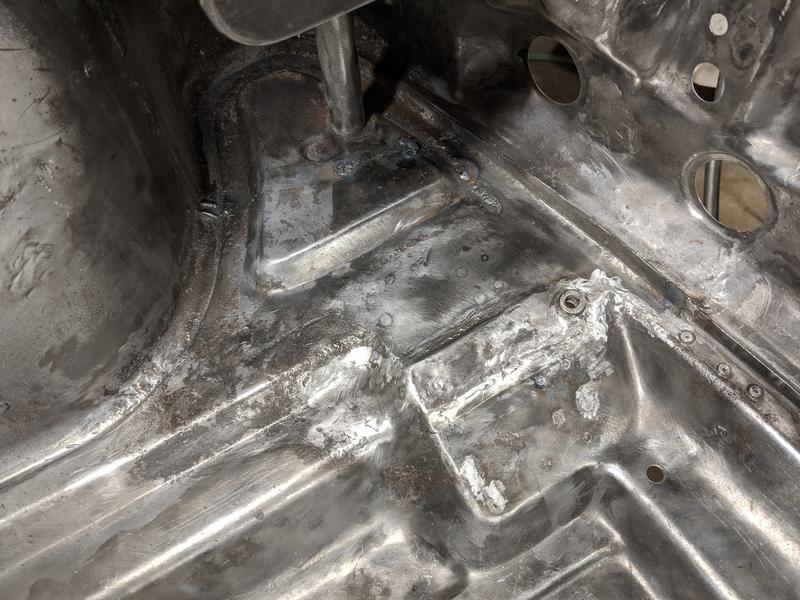
Weld through primer: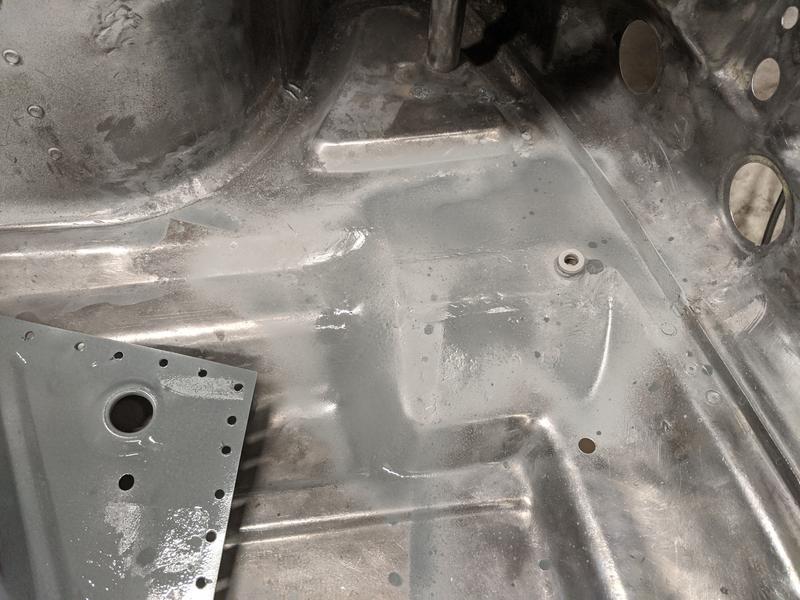
Fortunately this corner reinforcement will cover most of the repair: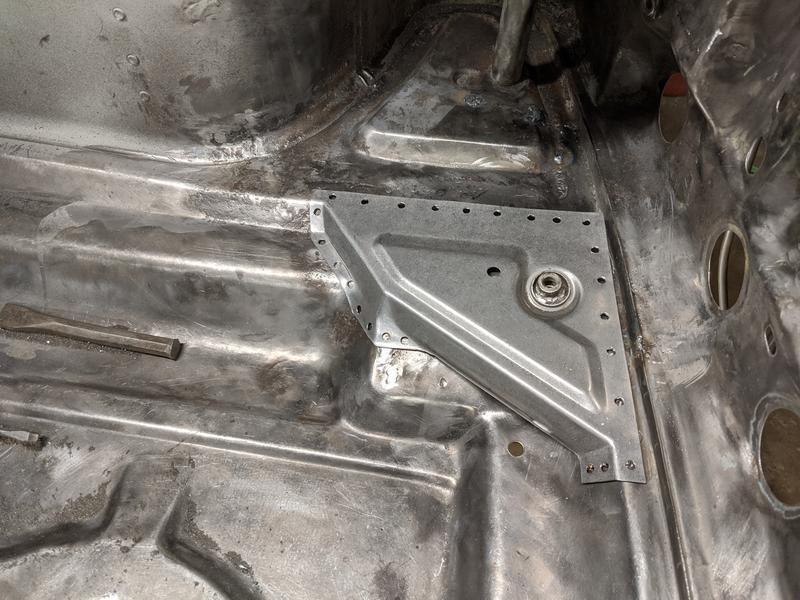
Posted by: sreyemj Mar 30 2020, 10:33 PM
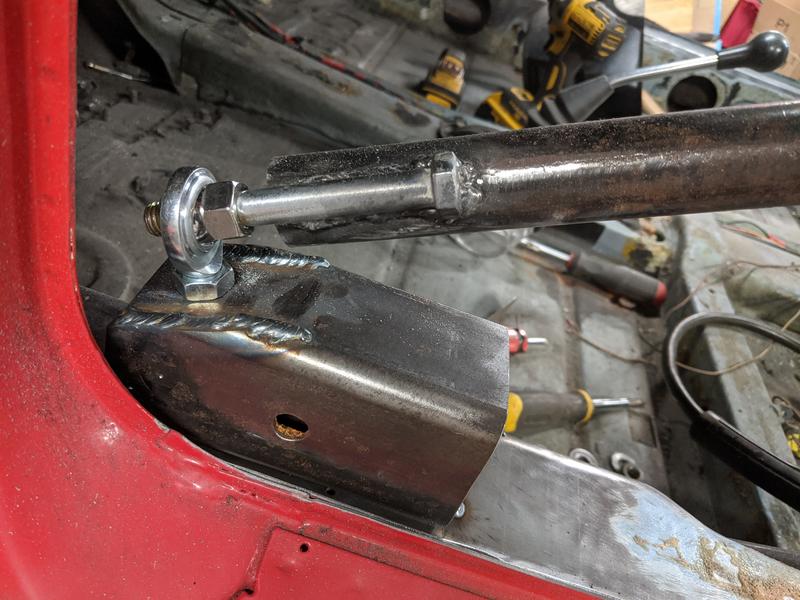
I purchased a large lot of parts with another car which included a rotisserie. I'm hoping this speeds the project, but it has taken me a few days to modify the rotisserie and some door braces. I'm going to tack weld the square steel tubing to the long (where my finger is) so the doors can be put back on the car.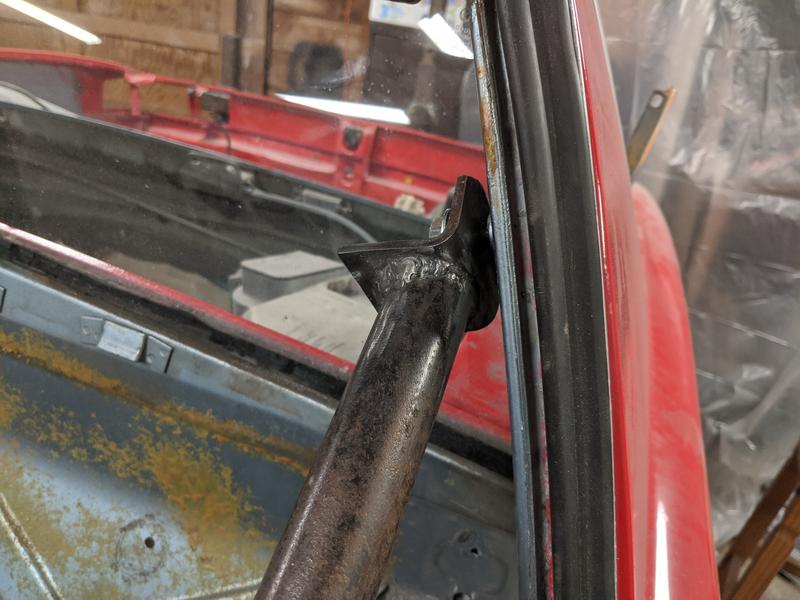
Posted by: sreyemj Mar 30 2020, 10:47 PM
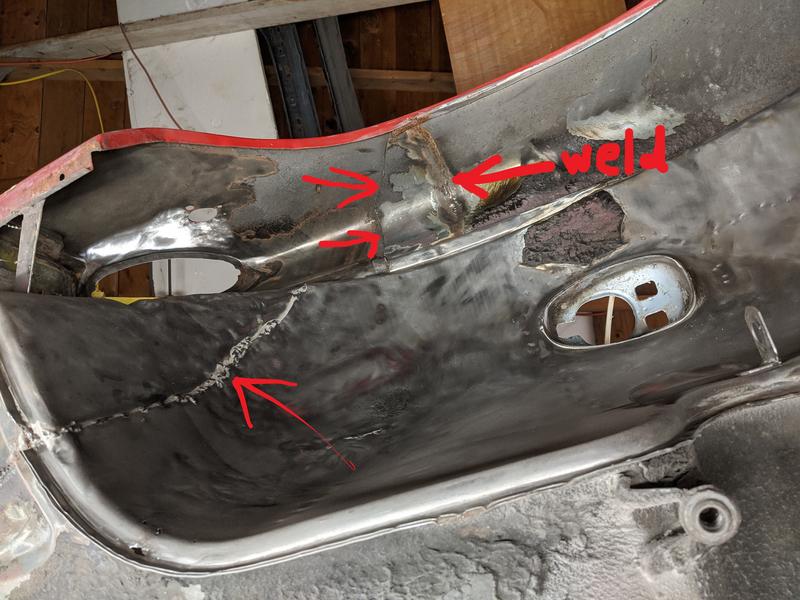
I removed the interior so I could weld my door braces on, and made an interesting discovery. It looks like someone has cut into the inside long and stuffed it full of fiberglass insulation? There are aluminum covers pop-riveted over the large round holes as well as duct tape and some duct tape inside the long on the heating tube.
Trying to decide what to do with this. I can access the inside of the long from these holes and probably knock off most of the rust with a die grinder. I was going to use the 914 LTD reinforcement kit (already purchased), but the inner long reinforcement kit would cover this area nicely. I'm also curious if treating this rust inside the long with Ospho would be sufficient. The outside looks ok, and I'm not sure I'll gain much by opening it up.
The metal covers: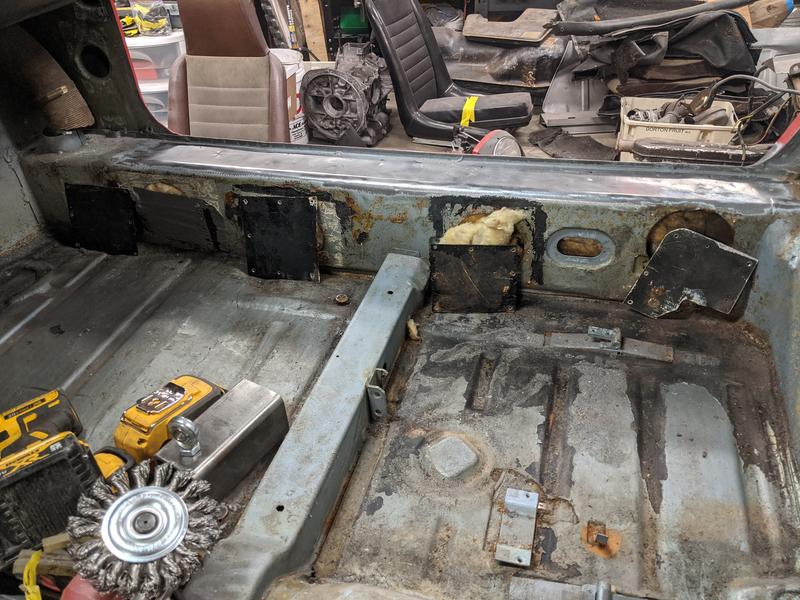
The holes and insulation: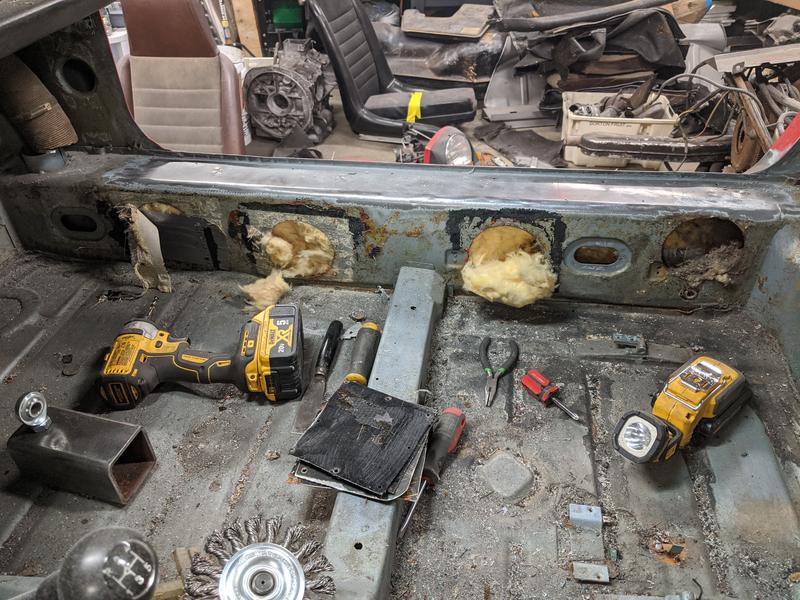
Outside of the long:
Loose rust inside the long, doesn't look too bad:
Posted by: rhodyguy Apr 1 2020, 06:04 AM
Is the new car at the house on 40th? I peeked over the fence and did'nt see it. Come over and knock on the door if you're so inclined.
Posted by: Superhawk996 Apr 1 2020, 06:14 AM
It looks like someone has cut into the inside long and stuffed it full of fiberglass insulation?
 The stuff previous owners did to these cars never ceases to amaze me.
If there is a competiton for most abused model of cars, 914's surely must be near the top of the list.
I know you probably don't want to hear this but you really should open it up and just do it right once and for all.
I see pin holes on the outer long. That means the inner is side of the outer longitudinal has been rusting from the inside outward. You can put the LTD long kit over that but you'll basically be covering over the lower portion of the rusted long outer. You look like you have the skills to do it right.
With that level of rust and previous owner damage to the inner long you really would do well to just fix it right. That inner long is what the seat belt attaches to. That big hole cut above the seat belt anchor is dangerous and will lead to the anchor just tearing out if it were in an impact.
The C-shape section of the long inner is where much of the structural strength comes from. Once that C section is closed out by the long outer you have a box section that is quite stiff and is the main structural element. You most definately don't want a lack of metal integrity there.
I feel your pain and the desire to do it as quickly as possible and potentially with the LTD, or Engman inner long type kits. I had very similar challenges on my car upon discovering that the longitudinal rust was more extensive than I had hoped when 1st bought the car but my car is certainly worse than where you're starting from.
Posted by: sreyemj Apr 1 2020, 10:50 AM
Is the new car at the house on 40th? I peeked over the fence and did'nt see it. Come over and knock on the door if you're so inclined.
No, over at my place. I'll stop by next time I'm over there.
Posted by: sreyemj Apr 1 2020, 10:51 AM
I know you probably don't want to hear this but you really should open it up and just do it right once and for all.
Yeah, I took a closer look and I think that has to happen.
Posted by: sreyemj Apr 1 2020, 11:36 PM
Car is on a rotisserie now, planning to cut into the long tomorrow. I'm thinking I'll start by reinforcing the inner long from the inside of the car because I'm worried the car will distort if I cut the outer long with the inner long weakened as much as it is. The other option would be settling it on the jack points and then cutting into it. Anyone have any insight on this?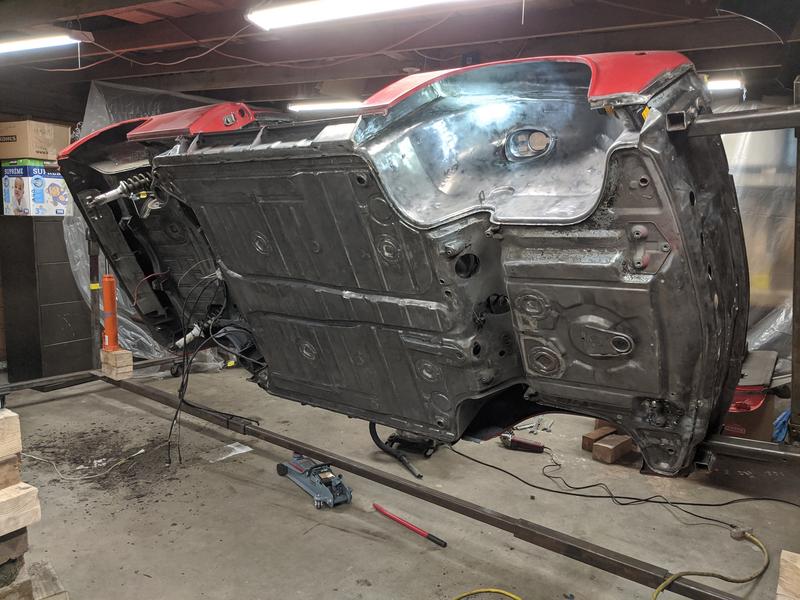
I also took a crack at repairing the nasty front trunk seal channel with some steel and a harbor freight bending brake: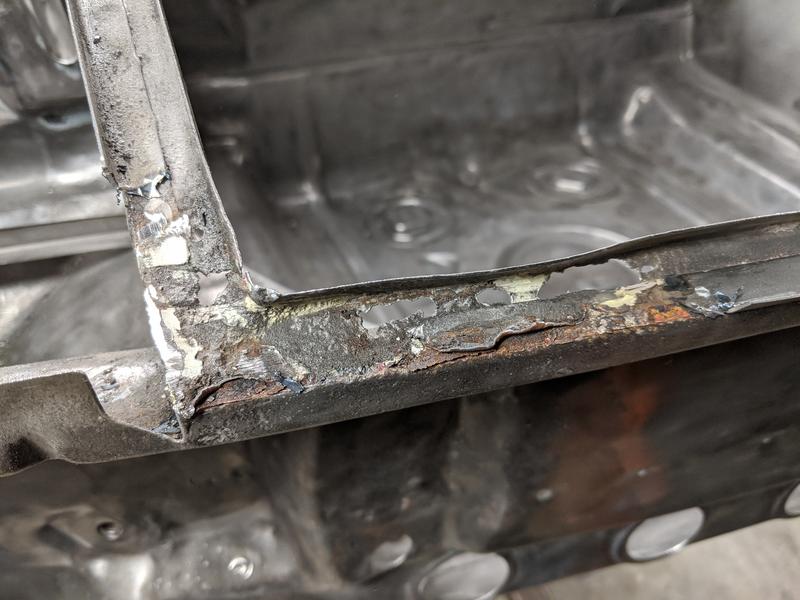
Better: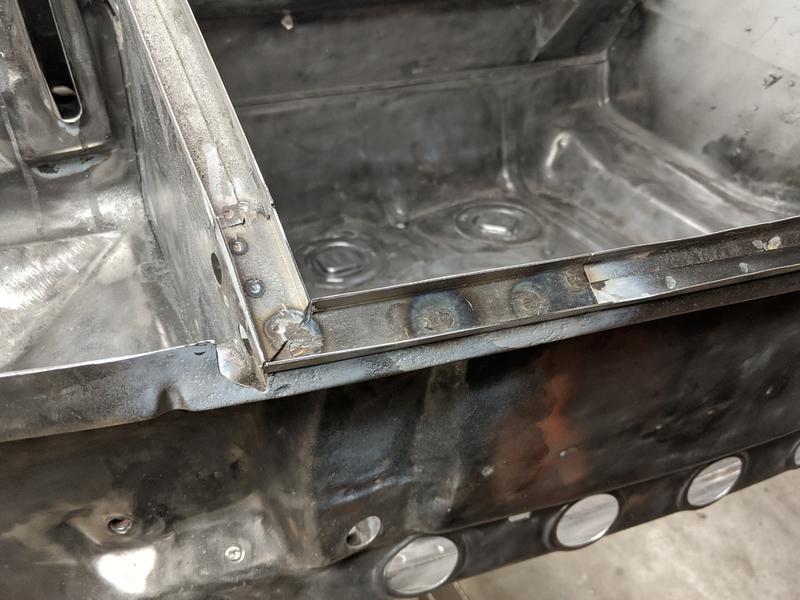
Posted by: sreyemj Apr 2 2020, 03:03 PM
I used the rotisserie to lower the car on to the four jack points and then checked with a laser level to ensure everything was level (see laser near bottom of long in the picture). Door gaps were not far off, and adjusted nicely with the door braces.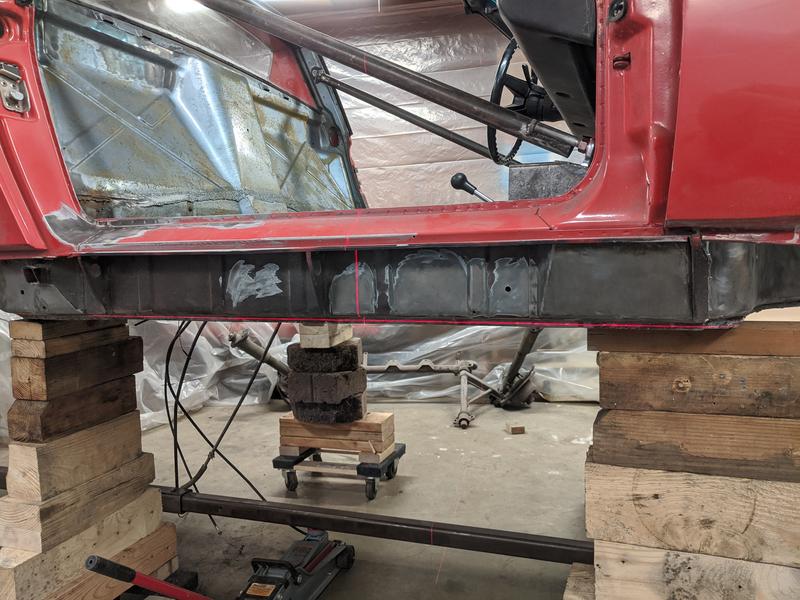
Posted by: sixnotfour Apr 3 2020, 03:08 AM
So the heater tube is gone and the long is stuffed with insulation....The heat must have had an interesting aroma ?
Posted by: sreyemj Apr 3 2020, 09:27 AM
So the heater tube is gone and the long is stuffed with insulation....The heat must have had an interesting aroma ?
Lol, tube is still there. Just had insulation around it for some reason.
Posted by: CoolAirVw Apr 3 2020, 09:57 PM
encouragement for you! Keep on trucking!
Posted by: Costa05 Apr 3 2020, 10:22 PM
I used the rotisserie to lower the car on to the four jack points and then checked with a laser level to ensure everything was level (see laser near bottom of long in the picture). Door gaps were not far off, and adjusted nicely with the door braces.
You are brave. Be careful if you lean up against your car with any weight in your hands!! Yikes.
Posted by: sreyemj Apr 3 2020, 10:37 PM
You are brave. Be careful if you lean up against your car with any weight in your hands!! Yikes.
It's still supported by the rotisserie, the blocks are there to keep it flat.
Posted by: sreyemj Apr 3 2020, 10:55 PM
Finally opened up the longitudinal. I tacked some plugs on the inside long to help stiffen it before I cut into the outside. Rust actually doesn't seem that bad compared to some that I've seen.
I also found some mouse droppings so it may be that the insulation was part of a mouse nest. The duct tape was probably the PO's attempt to clean up the mouse nest. Hopefully the heater tube is usable, replacements look expensive.
The plugs: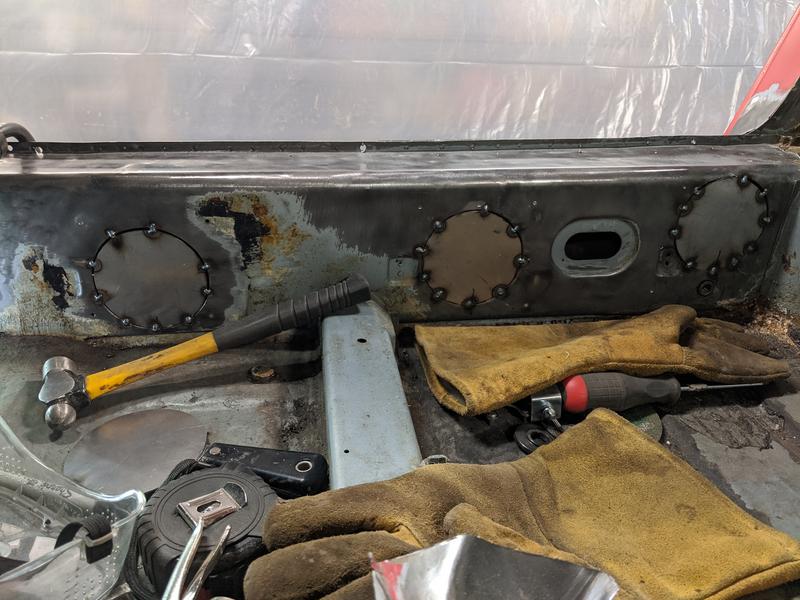
Outer: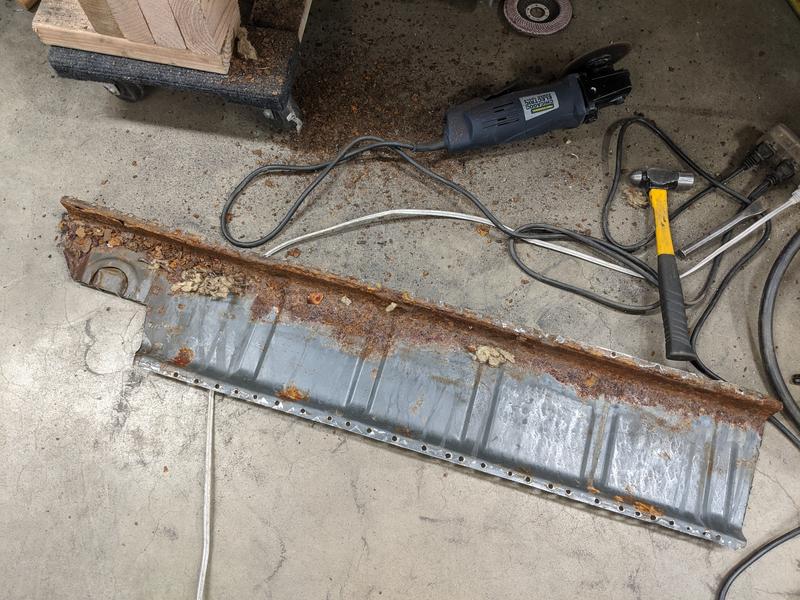
Inner: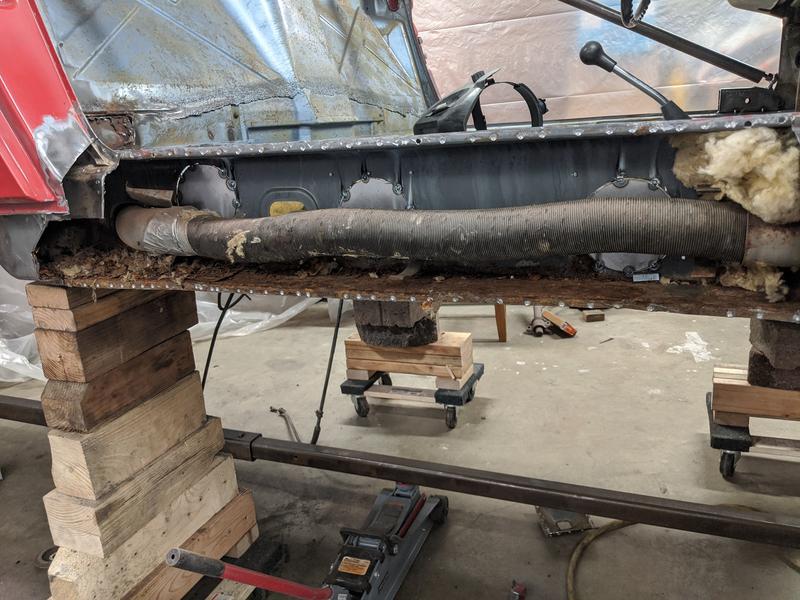
Prior owner's duct tape and some mouse droppings: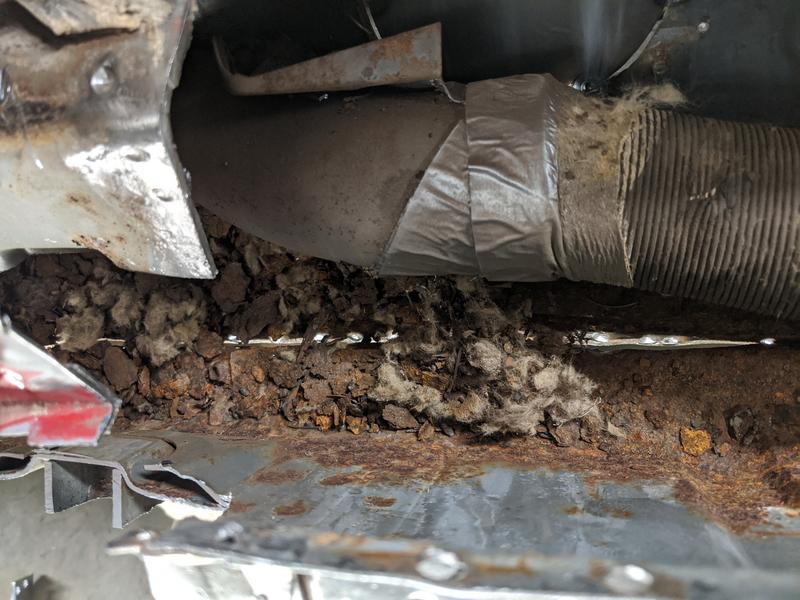
Posted by: bbrock Apr 4 2020, 08:31 AM
Unfortunately, that heater hose isn't the original. The original is a fat, insulated hose that clips into place. It looks like the PO replaced with cheap heater hose and then packed the long with insulation to make up for it. I"m shocked you don't have more rust in there than you found.
Posted by: doug_b_928 Apr 4 2020, 08:32 AM
The duct tape was to hold the tube on because it`s not the original tube. The original tube has some built-in insulation which makes it a larger diameter than the tube the PO installed in your car and it has plastic male on each end that fit inside the steel pipes. So, my guess is the insulation was added to try to keep the heat in the air in the non-insulated replacement tube.
Posted by: doug_b_928 Apr 4 2020, 08:33 AM
You beat me to it, Brent.
Posted by: sreyemj Apr 4 2020, 09:41 AM
Ah, makes sense. I guess I'm looking for a replacement then.
Posted by: bbrock Apr 4 2020, 11:24 AM
Well, it isn't the first time someone's been hosed by the PO. Sorry, couldn't resist. 
Posted by: FourBlades Apr 4 2020, 11:45 AM
You are doing a great job! 
When you finish it will be all done right and ready for 40 more years on the road.
John
Posted by: sixnotfour Apr 4 2020, 11:49 AM
Well, it isn't the first time someone's been hosed by the PO. Sorry, couldn't resist.


![popcorn[1].gif](style_emoticons/default/popcorn[1].gif)

Great Job..
Posted by: Luke M Apr 4 2020, 11:50 AM
Looks like you need one of these.
http://www.restoration-design.com/store/product/PP301T
Posted by: sreyemj Apr 4 2020, 12:23 PM
Looks like you need one of these.
http://www.restoration-design.com/store/product/PP301T
914werke has one he's sending me (only $35 + shipping!).
Posted by: Superhawk996 Apr 4 2020, 12:40 PM
You are doing a great job!
When you finish it will be all done right and ready for 40 more years on the road.
John


Posted by: sreyemj Apr 4 2020, 05:21 PM
When you finish it will be all done right and ready for 40 more years on the road.
John
That's the idea, although I bought this about 2006ish and it had been off the road for quite awhile before that (I think the seller mentioned 8 years).
I'm thinking of using ospho, then rustoleum primer on the inside of the longs. Apparently ospho doesn't play well with some epoxy primers and I don't want to take any chances.
Posted by: bbrock Apr 4 2020, 07:24 PM
Apparently ospho doesn't play well with some epoxy primers and I don't want to take any chances.
Curious where you read that. PPG actually recommends using an acid rust converter to promote adhesion of their epoxy. Lots of us have used Ospho/phosporic acid as metal prep for epoxy without any issues. After all this work, you don't want to skimp on your one chance to lay down solid protection. There are things you can spray in the longs after they are together, but none will be as good as a good coat or 2 of epoxy. Also, remember that most primers will allow water through to the metal. Epoxy won't.
Posted by: sreyemj Apr 4 2020, 08:36 PM
Apparently ospho doesn't play well with some epoxy primers and I don't want to take any chances.
Curious where you read that. PPG actually recommends using an acid rust converter to promote adhesion of their epoxy. Lots of us have used Ospho/phosporic acid as metal prep for epoxy without any issues. After all this work, you don't want to skimp on your one chance to lay down solid protection. There are things you can spray in the longs after they are together, but none will be as good as a good coat or 2 of epoxy. Also, remember that most primers will allow water through to the metal. Epoxy won't.
The ospho bottle says recommended for use under oil-based primer and to do a trail before using with epoxy or other systems. Based on that, I googled around and found some people who had trouble (but you can find people who have failures with almost any paint/primer product).
Did you do anything to the ospho'ed surface before using the epoxy primer (rinsing, sanding, etc)? I can wire wheel it down to bare metal, but there is still going to be a small amount of rust in the pitted metal unless I convert it with ospho before primer. If you wire wheel after ospho you just take off the converted material and potentially expose more unconverted rust.
Posted by: bkrantz Apr 4 2020, 09:13 PM
I wonder if all those big round holes were made by the clever PO to do surgery on the original heater hose and then install the cheap replacement.
Posted by: bbrock Apr 4 2020, 10:12 PM
Did you do anything to the ospho'ed surface before using the epoxy primer (rinsing, sanding, etc)? I can wire wheel it down to bare metal, but there is still going to be a small amount of rust in the pitted metal unless I convert it with ospho before primer. If you wire wheel after ospho you just take off the converted material and potentially expose more unconverted rust.
Yeah. I let the Ospho sit for several hours or overnight. Then rinse with water to neutralize the acid. That will create a white phosphorous coating that will protect the metal somewhat and you can leave it until ready to paint. The go over it with a red Scotch Brite pad to remove the loose powdery stuff. I learned this from a few people on here who restore cars professionally. I've never had any problems with epoxy or any DTM paint sticking to it.
I also do like you are planning and clean as much of he rust out as possible before treating with the Ospho. The Ospho soaks down into the pits rust to convert the rust and doesn't just encapsulate it. It's really good stuff.
Posted by: sreyemj Apr 4 2020, 11:19 PM
Did you do anything to the ospho'ed surface before using the epoxy primer (rinsing, sanding, etc)? I can wire wheel it down to bare metal, but there is still going to be a small amount of rust in the pitted metal unless I convert it with ospho before primer. If you wire wheel after ospho you just take off the converted material and potentially expose more unconverted rust.
Yeah. I let the Ospho sit for several hours or overnight. Then rinse with water to neutralize the acid. That will create a white phosphorous coating that will protect the metal somewhat and you can leave it until ready to paint. The go over it with a red Scotch Brite pad to remove the loose powdery stuff. I learned this from a few people on here who restore cars professionally. I've never had any problems with epoxy or any DTM paint sticking to it.
I also do like you are planning and clean as much of he rust out as possible before treating with the Ospho. The Ospho soaks down into the pits rust to convert the rust and doesn't just encapsulate it. It's really good stuff.
I'll try that. The ospho bottle just says dry for 24hr and then paint, but I will definitely rinse first.
I wonder if all those big round holes were made by the clever PO to do surgery on the original heater hose and then install the cheap replacement.
I'm sure they were, looks like they used a hole saw.
Posted by: sreyemj Apr 4 2020, 11:36 PM
Done with most of the cutting. I had to back off my passenger door brace slightly as the gap had widened by about 1/16in after removing all this metal. There are areas of the removed metal that are made of two laminated pieces of steel (including the top of the long in the engine compartment. It would be nice to reproduce the factory configuration, but I will probably use 16ga steel for the structural parts of the long repair.
From inside the passenger area: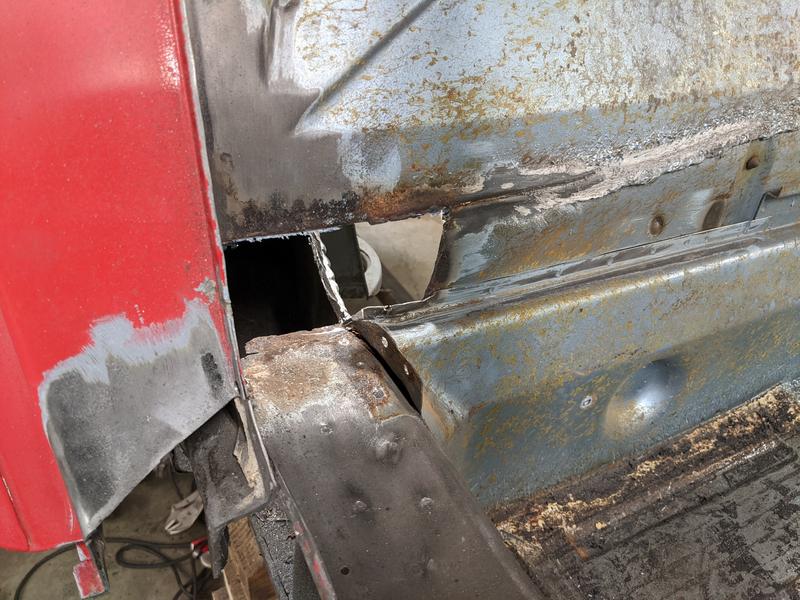
Inside the long, dark from the ospho: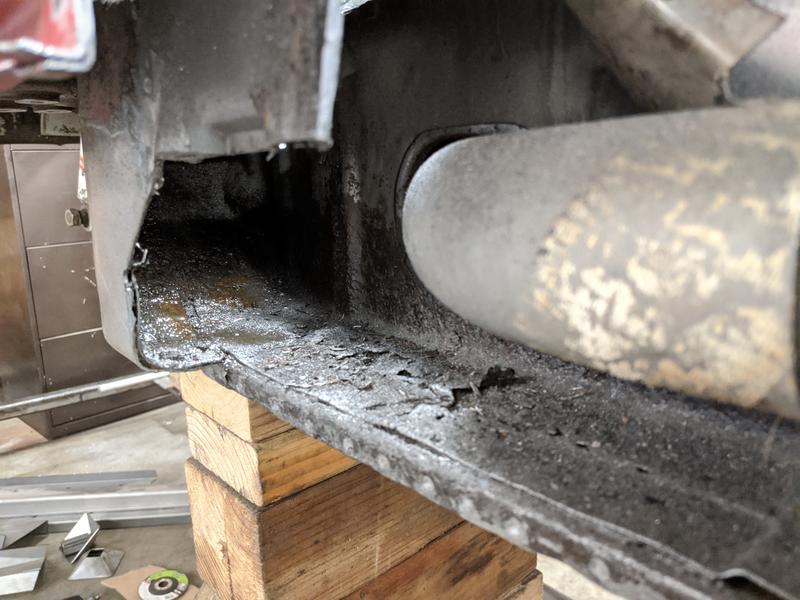
From inside the rear fender: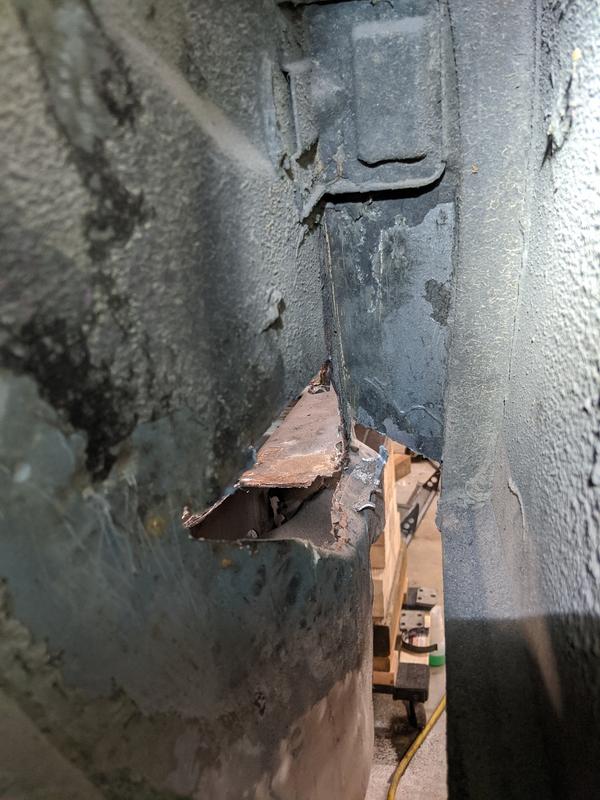
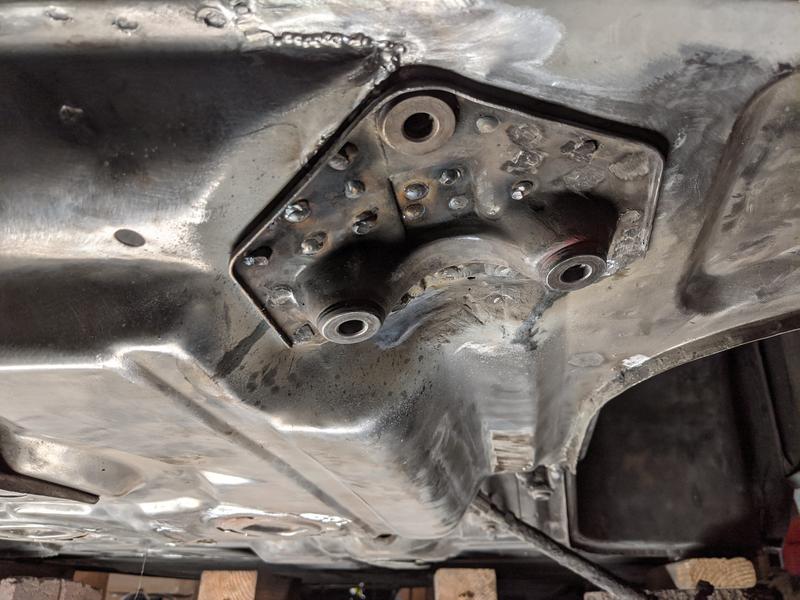
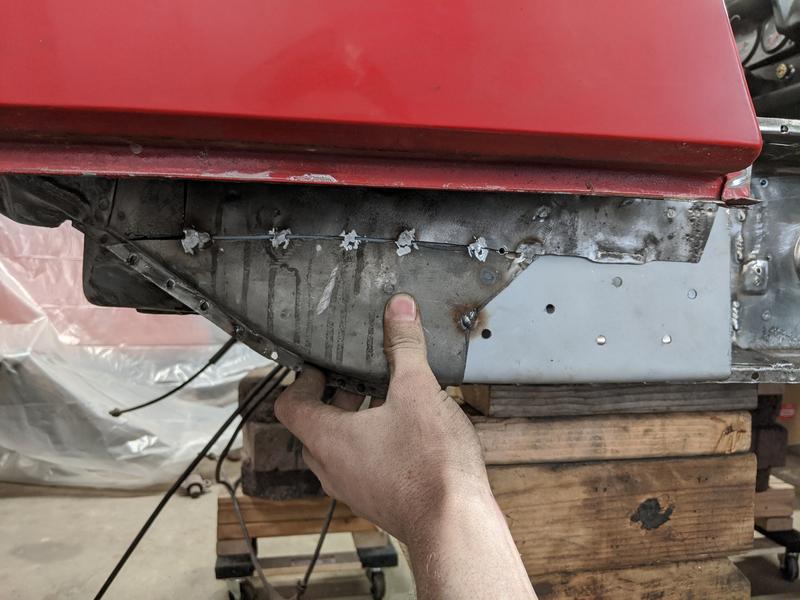
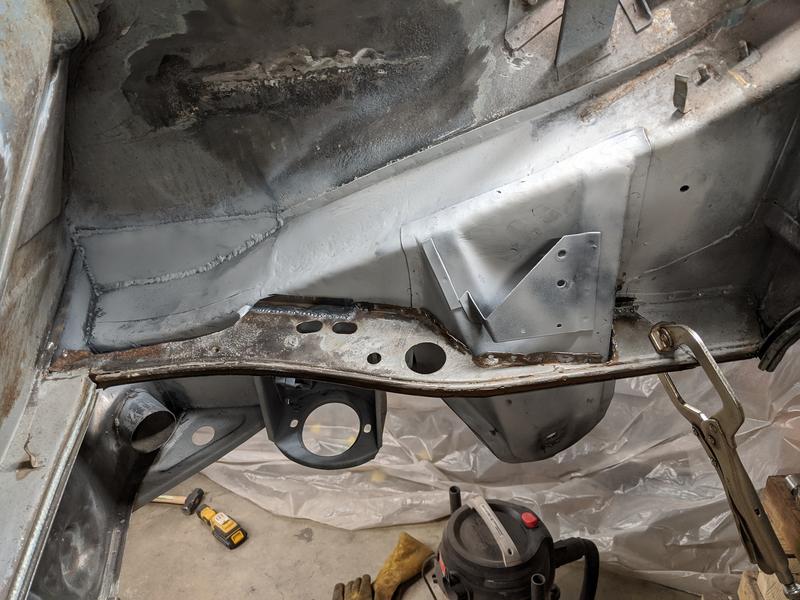
The rear suspension console has some welded repairs. This will be replaced after the long repair so I removed the engine shelf on the passenger side: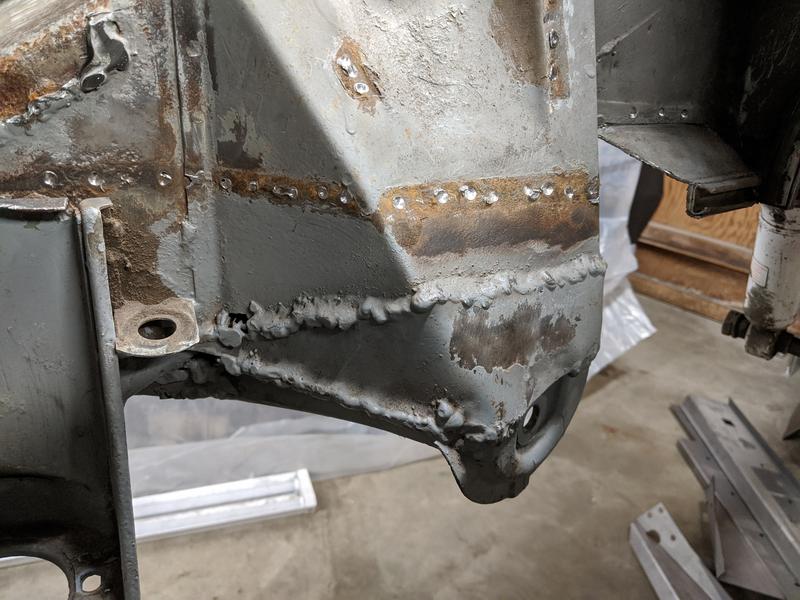
Posted by: bbrock Apr 4 2020, 11:43 PM
I'll try that. The ospho bottle just says dry for 24hr and then paint, but I will definitely rinse first.
Yeah, I think they might have changed the directions and to be honest, I've done that on some suspension parts that I could easily repaint if things didn't work. I had no problem that way either. All of the competing brands of phosphoric acid I've used all said to rinse and lightly scuff off the residue like I described and all the guys who have been using Ospho for a long time say to do the same. So I'm not sure if the directions for Ospho were always just apply, wait, and paint or if they later decided that neutralizing the acid wasn't necessary. At any rate, I like the surface left behind after neutralizing and scuffing off the residue better. If you just leave it on, it can sometimes leave a slightly sticky coating and that seems like where you might get adhesion problems.
Great work on the car BTW!
Posted by: Superhawk996 Apr 5 2020, 09:07 AM
The rear suspension console has some welded repairs. This will be replaced after the long repair so I removed the engine shelf on the passenger side:
 Scary stuff. I found braze in my suspension console.
Rant for previous abusers of these vehicles:
People -- this is the part that holds the wheel on the car for crying out loud. Were you really willing to trust your lives to that rusted metal and pooly welded (or brazed in my case) backyard fix?

OK - Done now.
Posted by: bbrock Apr 5 2020, 09:14 AM
Scary stuff. I found braze in my suspension console.Oh my!


Posted by: sreyemj Apr 8 2020, 10:53 AM
I took a few steps forward and one back. I did weld a patch on the top of the long, but the inner layer of the long was more badly rusted than I had hoped. I used a wire wheel and blasted the edges, but there was still enough rust to contaminate the welds and I wasn't really happy with it. To correct this, I opened the long some more, and removed most of that inner lamination. I'll fabricate a piece and rosette weld it to the inside of the inner long.
Looks pretty good from the outside: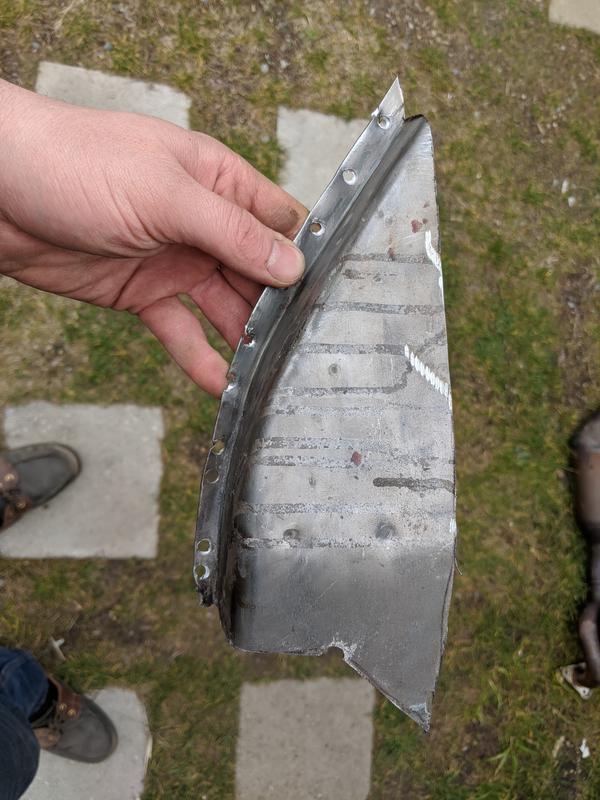
Inside layer is badly rusted: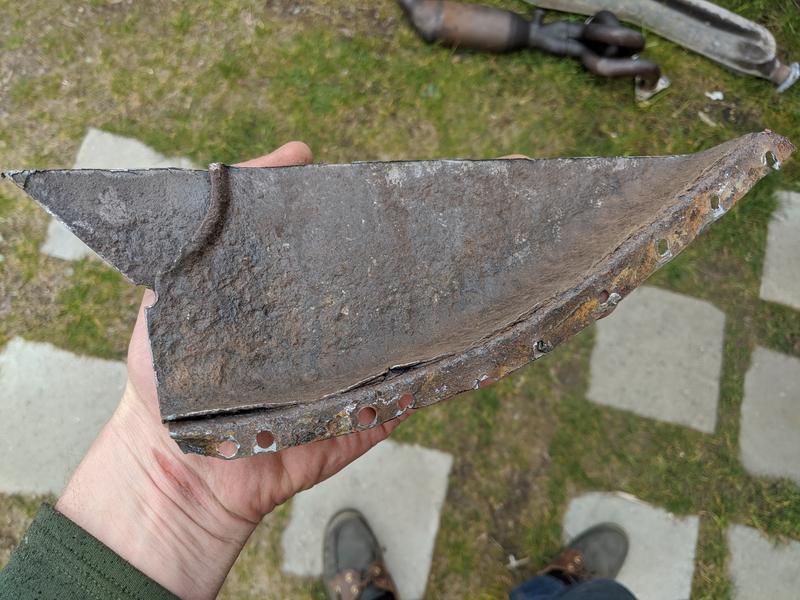
Inside of the long with the worst rust cut out: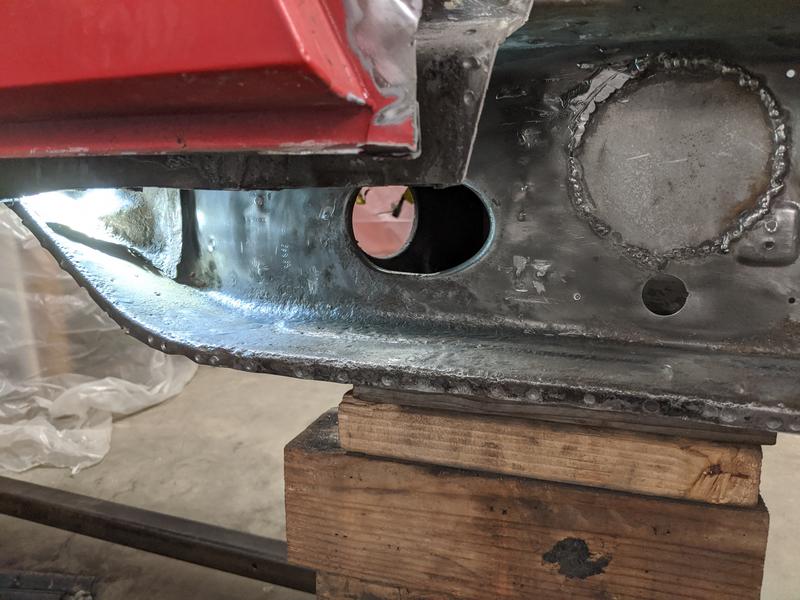
Starting to fabricate the piece to reinforce the inner long: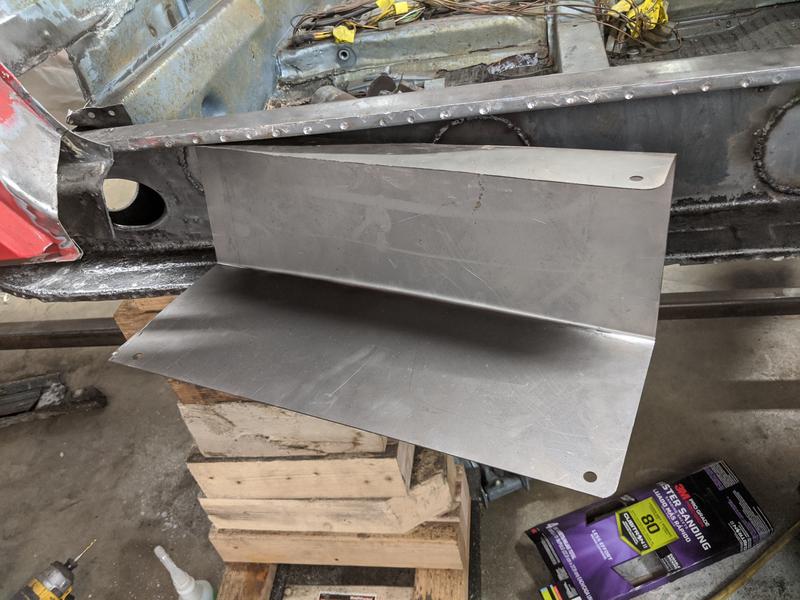
Posted by: Superhawk996 Apr 8 2020, 12:46 PM
Yup,
Most people don't believe that these cars literally rust from the inside out. 
By the time you can see a pin hole on the front, the back is virtually gone.
Posted by: sreyemj Apr 8 2020, 09:01 PM
Yup,
Most people don't believe that these cars literally rust from the inside out.
By the time you can see a pin hole on the front, the back is virtually gone.
New inner lamination, butts up to and will be welded to clean metal:

Welded in:

Posted by: sreyemj Apr 10 2020, 02:39 PM
Fabricating the piece for the outer long. Not sure why people say the outer long is the main source of strength? 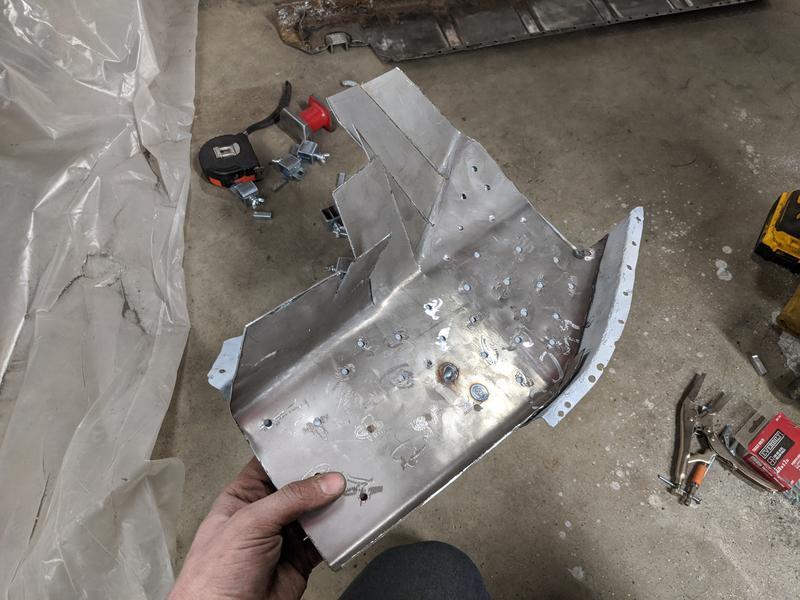
Posted by: Superhawk996 Apr 10 2020, 04:40 PM

Keep going. The hours are endless but you're making great progress. 
Posted by: sreyemj Apr 14 2020, 12:04 AM
I'm hoping to drive this from Washington to Texas (moving to start residency) in about a month, so I had to speed things up and take fewer pictures. I had Tim's ACVW freshen up the 1.7L that was in the car, reasonable cost and it's no longer leaking copious oil. Door gaps have remained spot on. I'm tasting victory in the next few weeks.
Installed the heater tube from 914werke.com: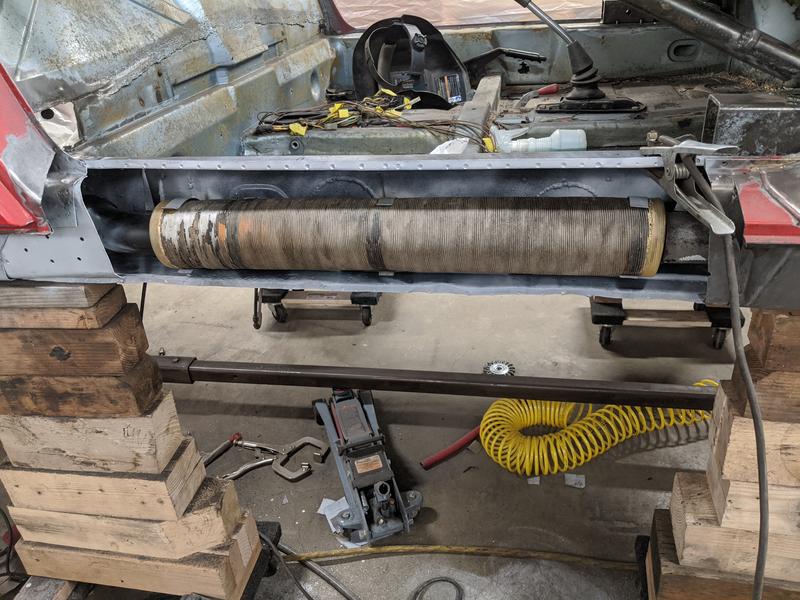
Starting to weld the outer long: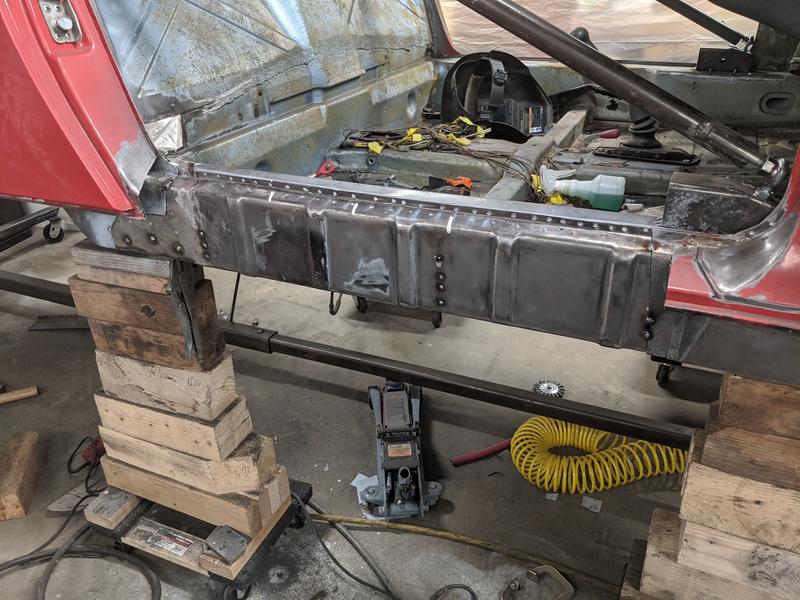
Posted by: jaredmcginness Apr 14 2020, 07:26 AM
Really great progress. Having a little bit of PTSD because I just finished the repairs on this section on my '71. You reinforced that area a bit more than me, but I will be running a stiffening kit. Look nice.
Stay motivated, I'll be following!
Posted by: sreyemj Apr 14 2020, 09:49 PM
Really great progress. Having a little bit of PTSD because I just finished the repairs on this section on my '71. You reinforced that area a bit more than me, but I will be running a stiffening kit. Look nice.
Stay motivated, I'll be following!
After closing up the outer long, I put the final patch over the hell hole area. I used my inner layer (the new metal) to make tabs along the edge and then plug welded the new piece to the tabs. After that, I was able to hammer down the edges and weld the seams. The welds look scrappy because I was only doing short sections (and cooling with compressed air), but I'm really happy with how it welded up. On the rotisserie afterward, the car is MUCH stiffer.
Posted by: FourBlades Apr 15 2020, 06:33 PM
More great work! 
John
Posted by: sreyemj Apr 17 2020, 11:40 PM
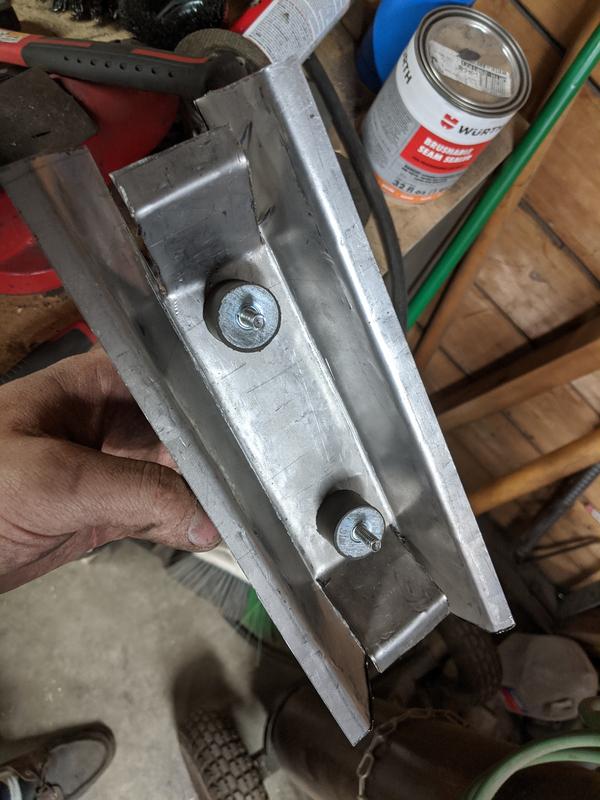
More grinding away, literally. Removed the passenger jack mount, it will be replaced. I think the mount for the engine bar might be compromised too, at least there is rust behind it. I'm going to remove it and see how bad the rust is. Having a hard time finding a replacement piece, anyone know of a source?
Welds ground down over hell hole: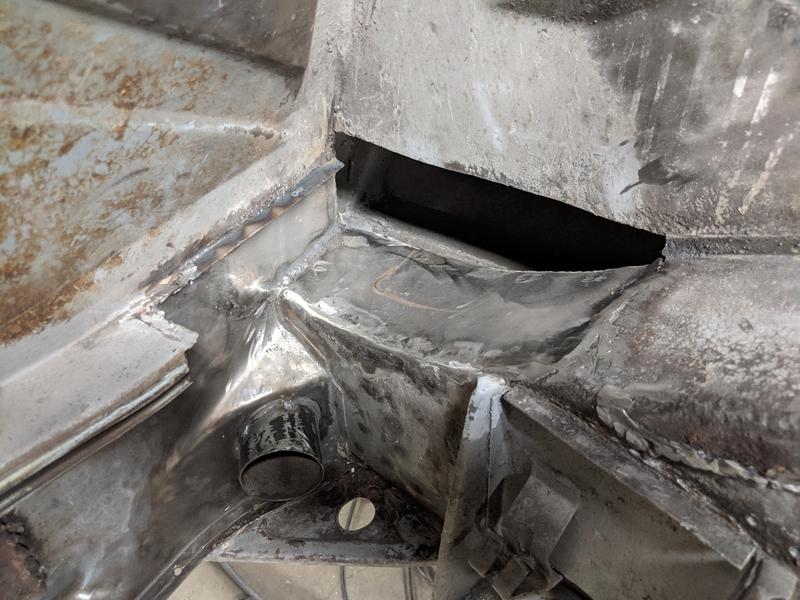
Patching the firewall:
"Rust free" from the outside: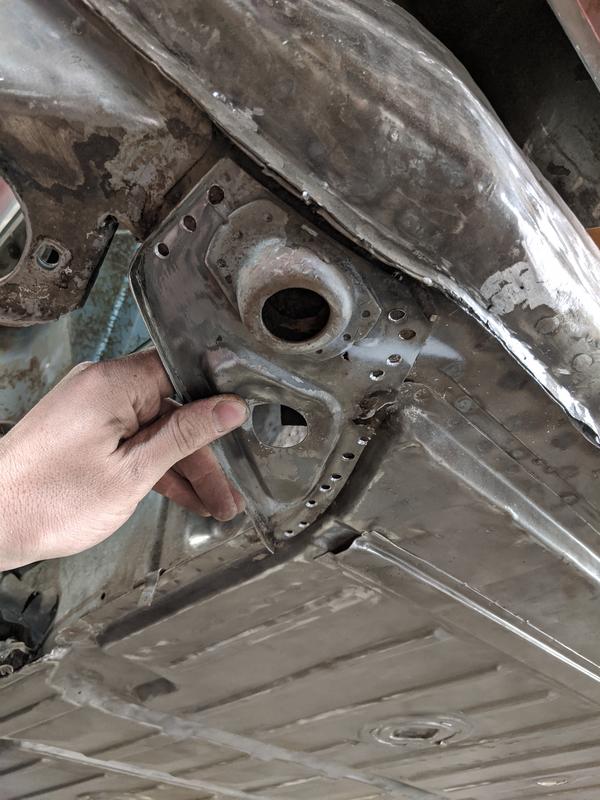
NOT rust free: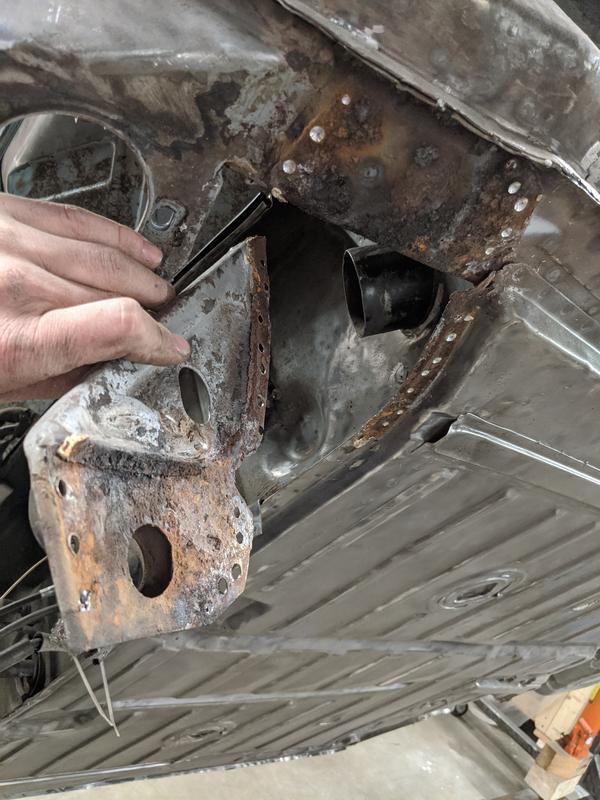
Posted by: sreyemj Apr 18 2020, 08:50 PM
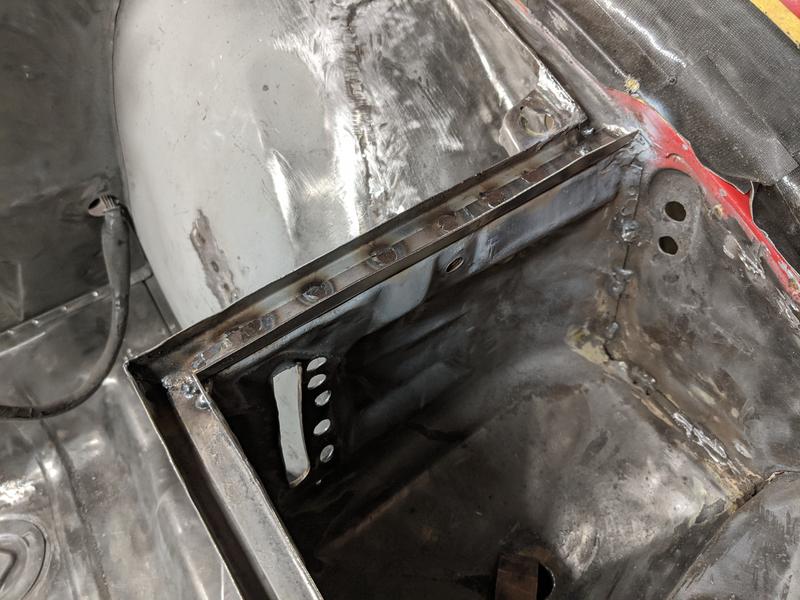
Getting ready to replace the suspension console. I used a 9/16th bolt and welded a quick bracket to locate the hole. Not sure this is the most reliable way to do it, but it seemed like a good idea at the time.
Bracket: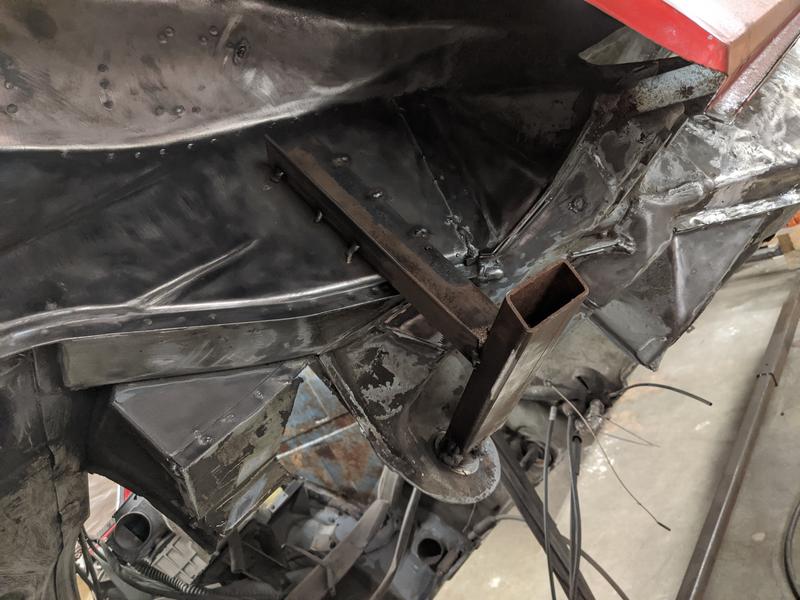
Had to see, but there's a bit washer welded to other side that is keeping it flat: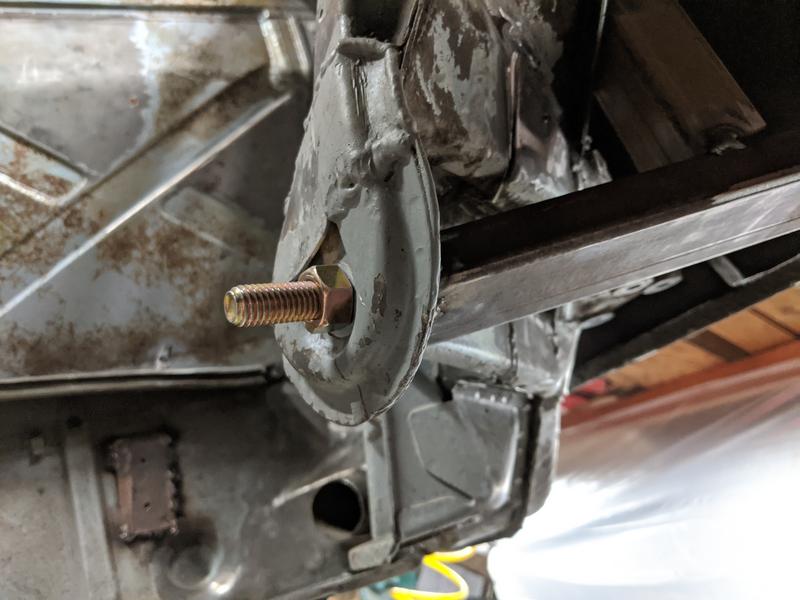
Cutting into the suspension console, gross!
Posted by: sreyemj Apr 18 2020, 09:01 PM
The inside longitudinal behind the engine bar mount and suspension console had been "bathed" in battery acid. This resulted in some severe pitting, but everything inside the long (based on several holes I poked through it) is rust free. I've already seen the inside of the long and fixed what needed fixing. I think for this area I will treat the rust/paint and add a 20ga sheet to the outside.
Suspension console (and engine bar mount) cut off:
Found the soft spot on the inside of the long behind the engine bar mount and punched a screwdriver through it. The metal was thin in this spot, but the area behind is rust free: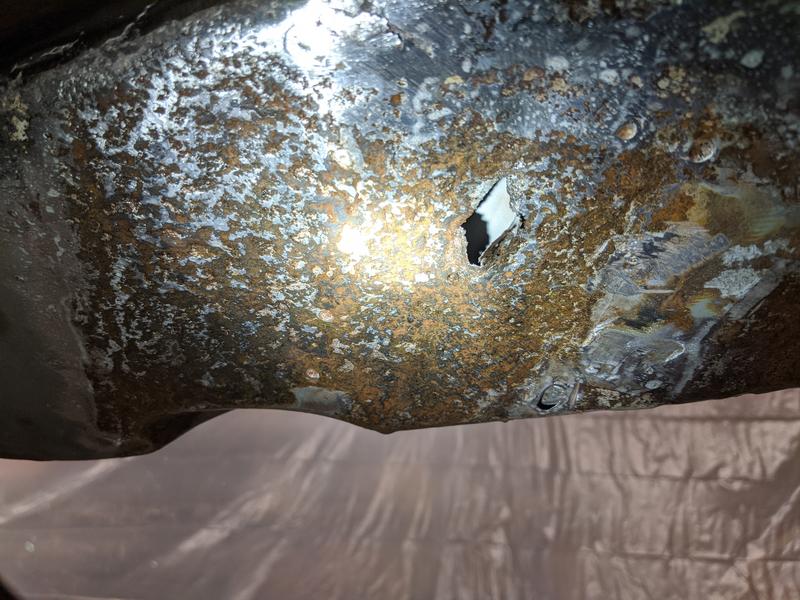
Engine bar mount, pitted, but solid: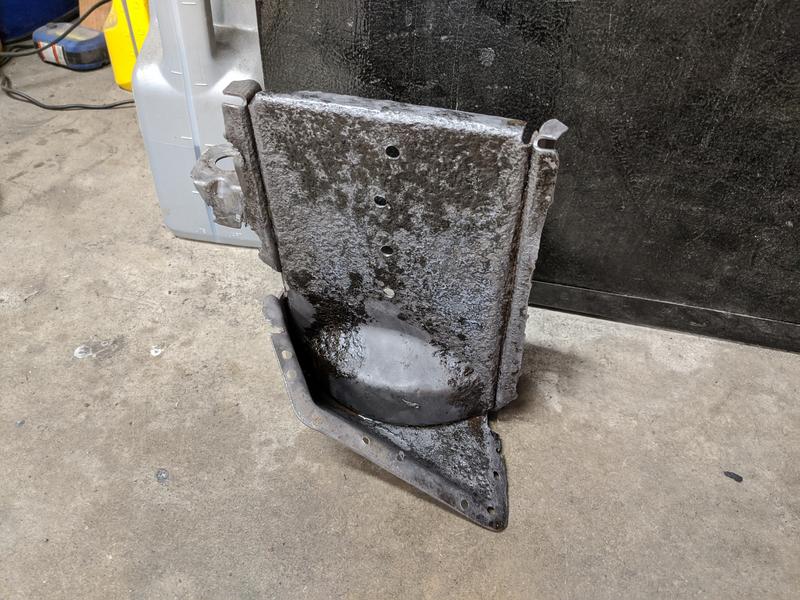
Posted by: Tdskip Apr 19 2020, 07:04 AM
Thanks for the updates, making great progress!
(Blocks of wood supporting the car make me nervous still)
Posted by: sreyemj Apr 19 2020, 08:27 AM
Thanks for the updates, making great progress!
(Blocks of wood supporting the car make me nervous still)
It's on a rotisserie, the blocks were to keep it flat.
Posted by: sreyemj Apr 20 2020, 11:16 PM
I decided to cut out the piece of the long behind the motor bar mount after all. There were two spot where the metal was very thin (see picture above) and I wanted to be sure it was sound. It turns out that there was no rust behind the outer skin so an overlay piece probably would have been fine, but having lots of solid metal made it very easy to weld the patch in and eliminate the soft spots for good.
Area behind the outer skin, no rust at all: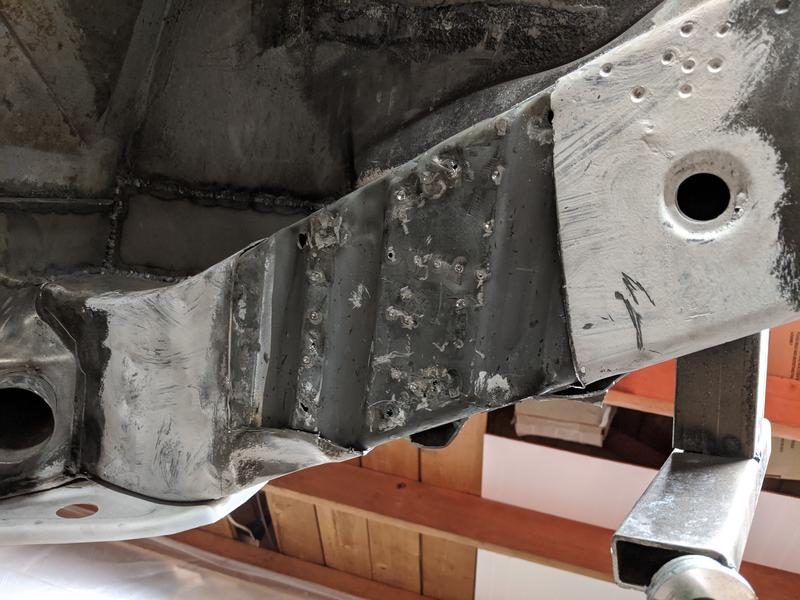
Patch being fit: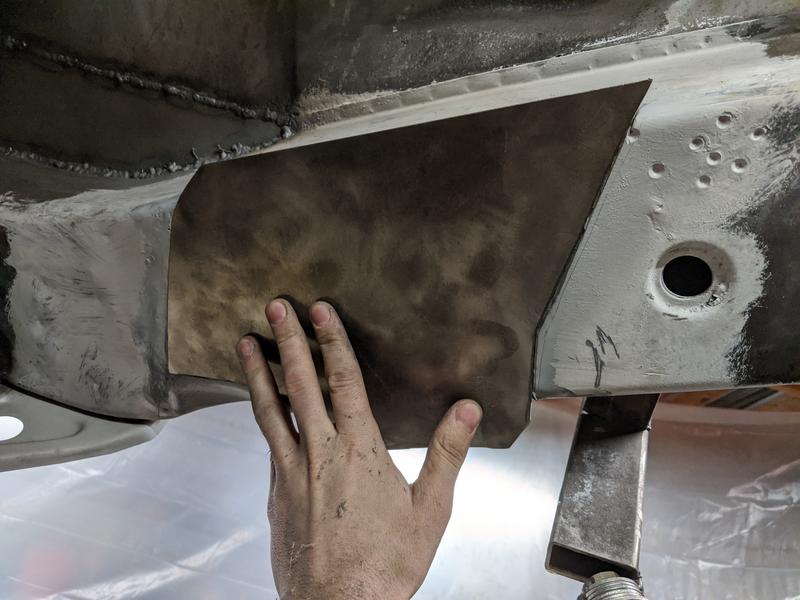
These holes are a bit small, I opened them up for better welding: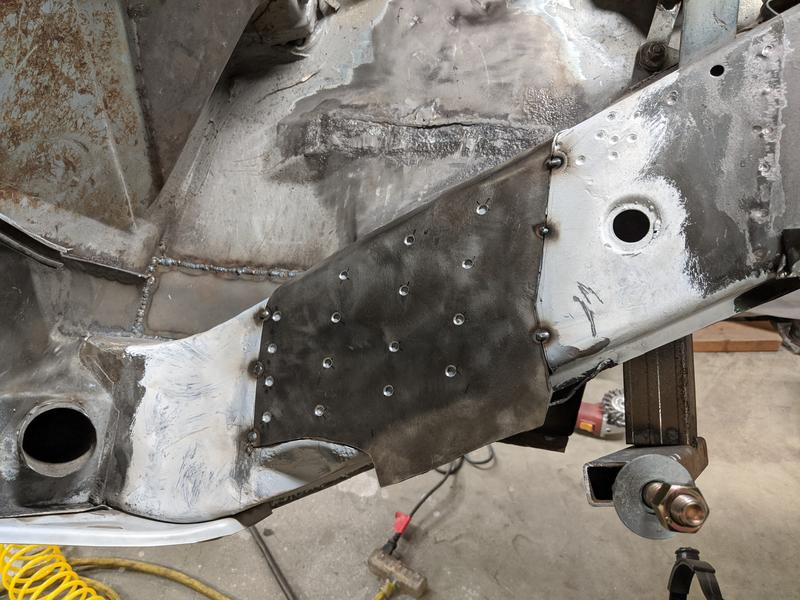
Ready to grind off the welds:
Posted by: jaredmcginness Apr 21 2020, 06:00 AM
This progress is seriously awesome.
I like that idea for locating the suspension console. That is about the only part I didn't hit on my rebuild. This post makes it seem not as scary...
If I missed it, are you using a cutout console from another car, or a replacement piece?
Posted by: sreyemj Apr 21 2020, 08:54 AM
This progress is seriously awesome.
I like that idea for locating the suspension console. That is about the only part I didn't hit on my rebuild. This post makes it seem not as scary...
If I missed it, are you using a cutout console from another car, or a replacement piece?
Replacement part.
Posted by: sreyemj Apr 21 2020, 09:36 PM
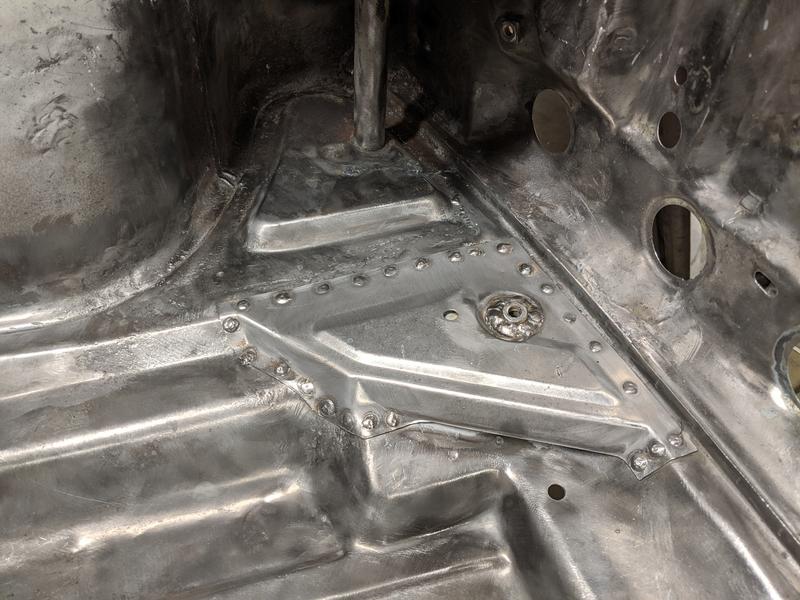
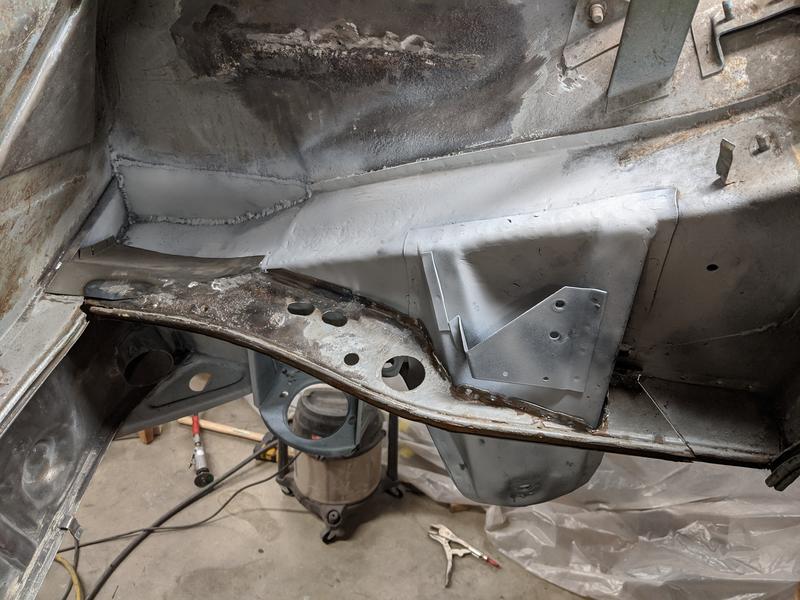
Getting closer, welded the engine bar mount and suspension console on today. The suspension console took forever to position because it didn't fit well when positioned as the previous one had been (1/4 inch gap on the bottom rear). I used the locator bracket but measured as well. I mounted the swing arm after to see how it fit and everything seems to be aligned. Definitely not my favorite part of this project, will be a relief after the car is running and aligned.
Welds ground down: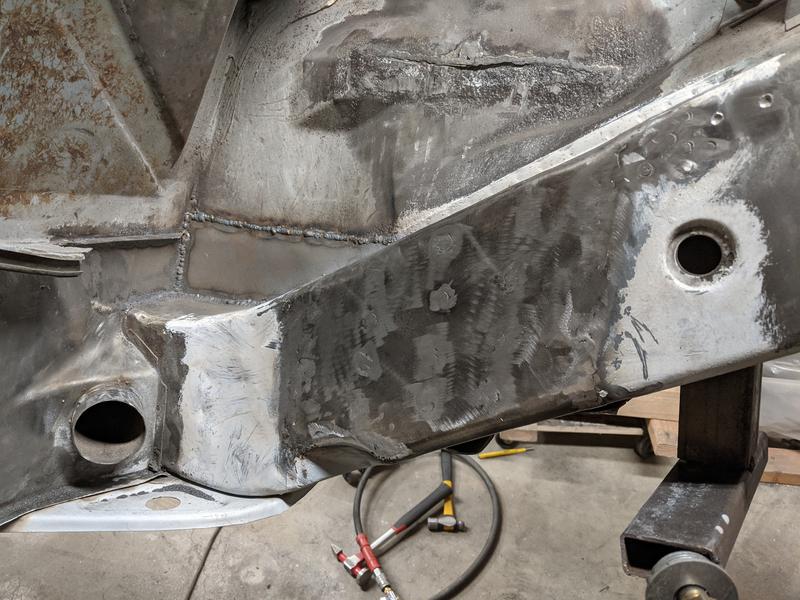
Weld through primer: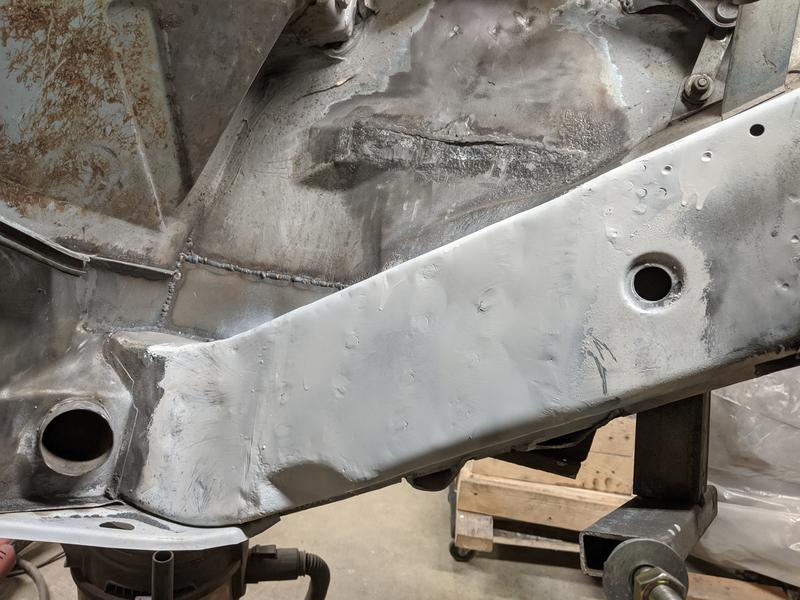
Test fit: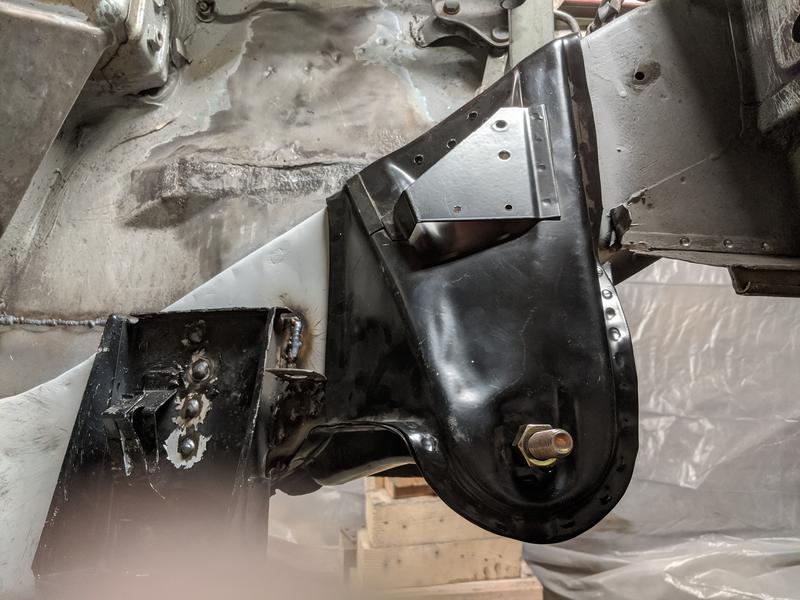
Mostly done: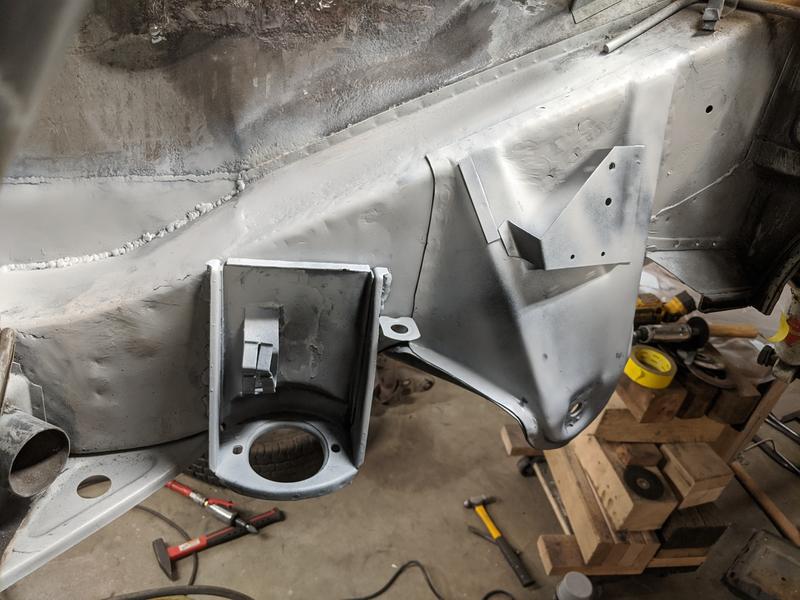
Posted by: sreyemj Apr 22 2020, 11:59 PM
Finished some minor weld grinding and started rebuilding the engine shelf. I'm going to add a drain hole and weld it in tomorrow. 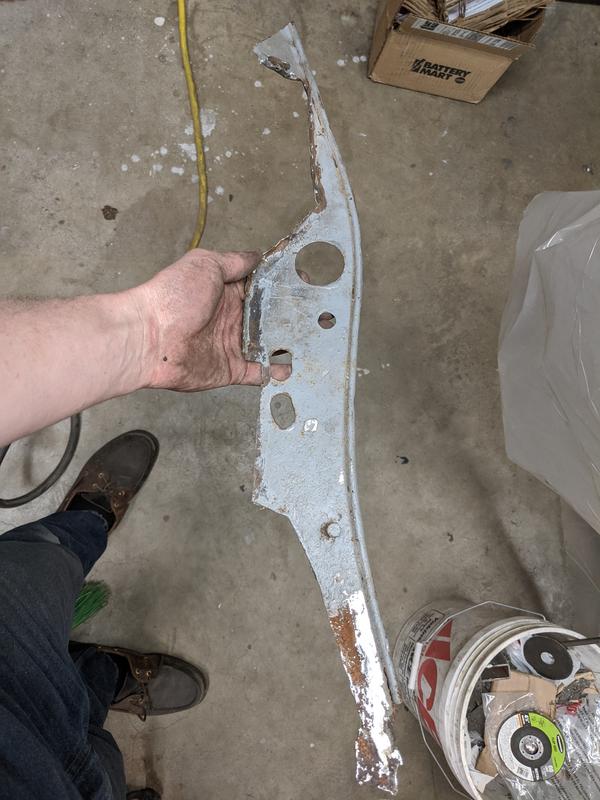
Posted by: sreyemj Apr 24 2020, 09:57 AM
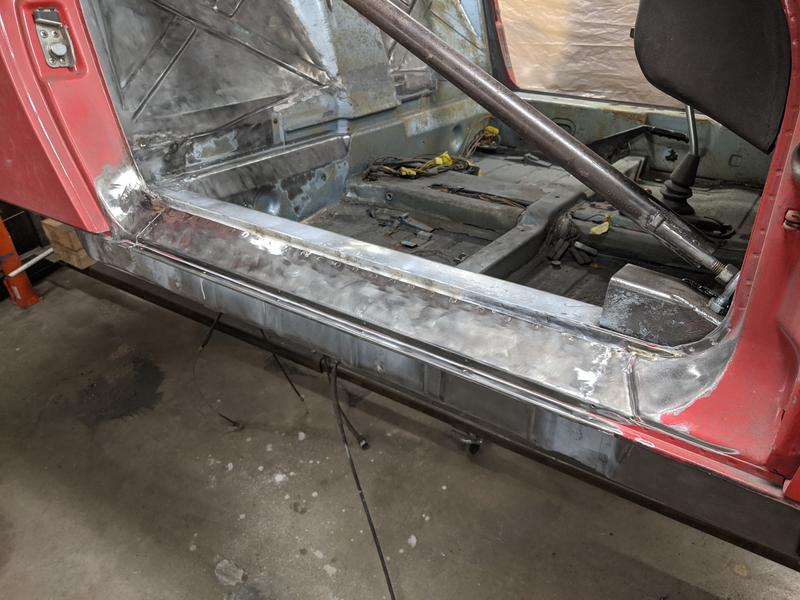
Reattached the passenger door sill and repaired the driver's side engine shelf (drain plug had clogged). 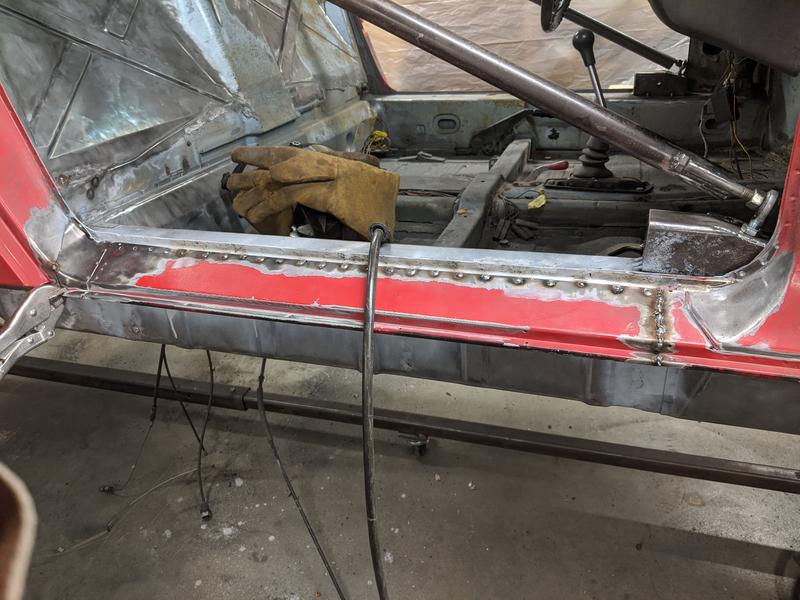
Posted by: sreyemj Apr 28 2020, 08:37 PM
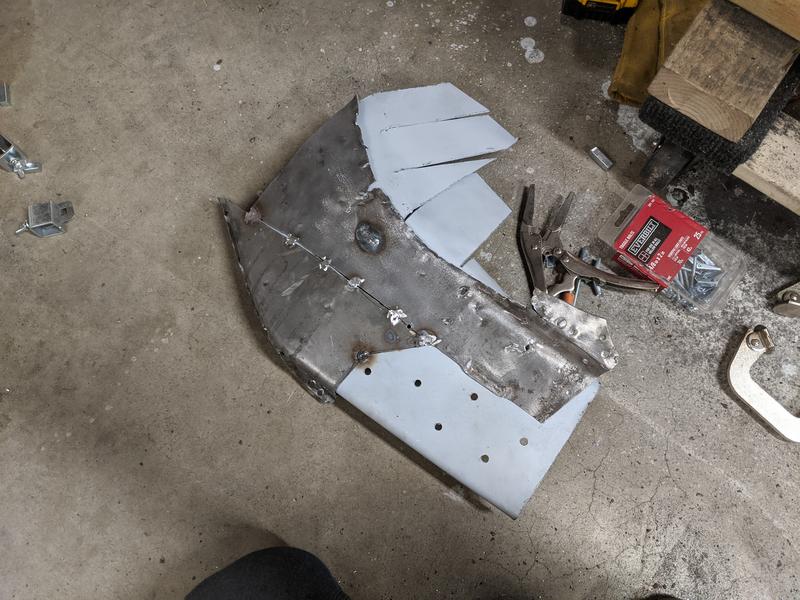
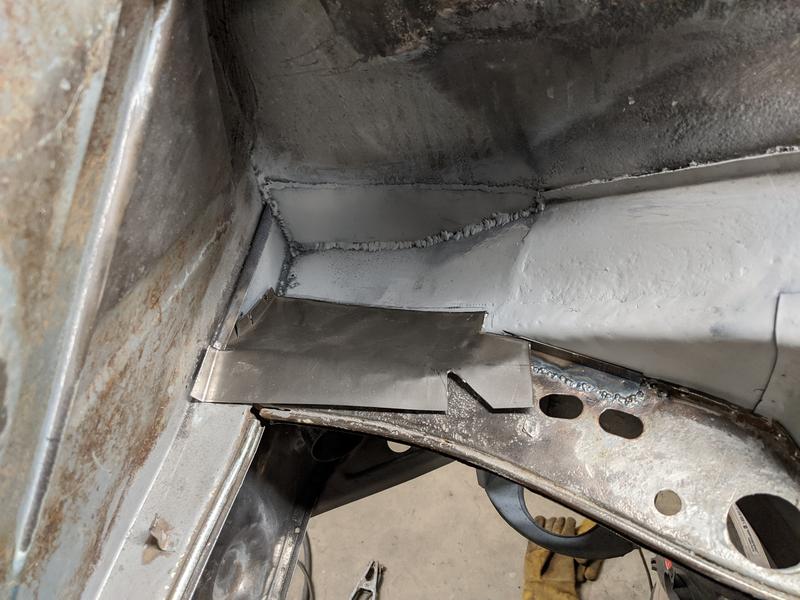
I've been cleaning off the bottom of the car to get it ready for epoxy primer. Unfortunately, cleaning out the inside of the driver's wheel well exposed some rust and a fiberglass repair of the trunk seal channel. I was going to leave this when I painted the body so as to not disturb the paint, but it will just have to be a bit ugly until then.
Rust, freaking rust: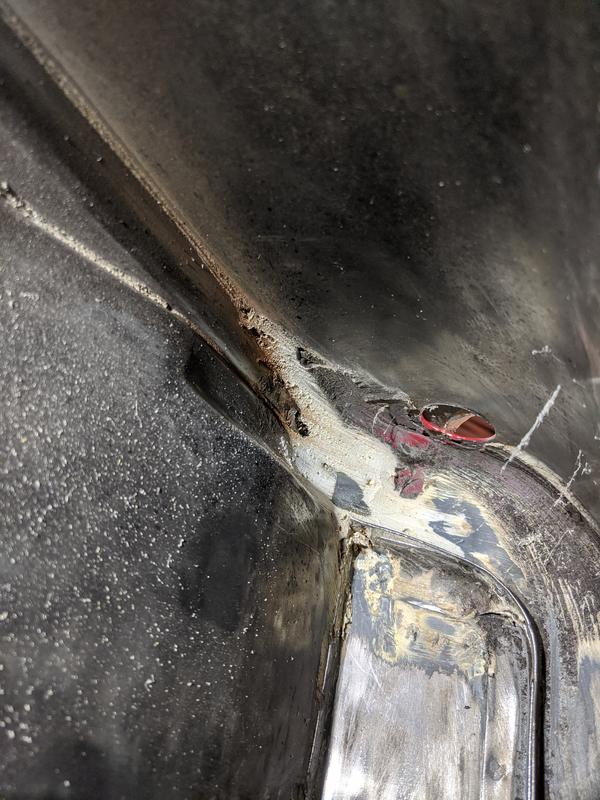
There's the rust:
Cut it out: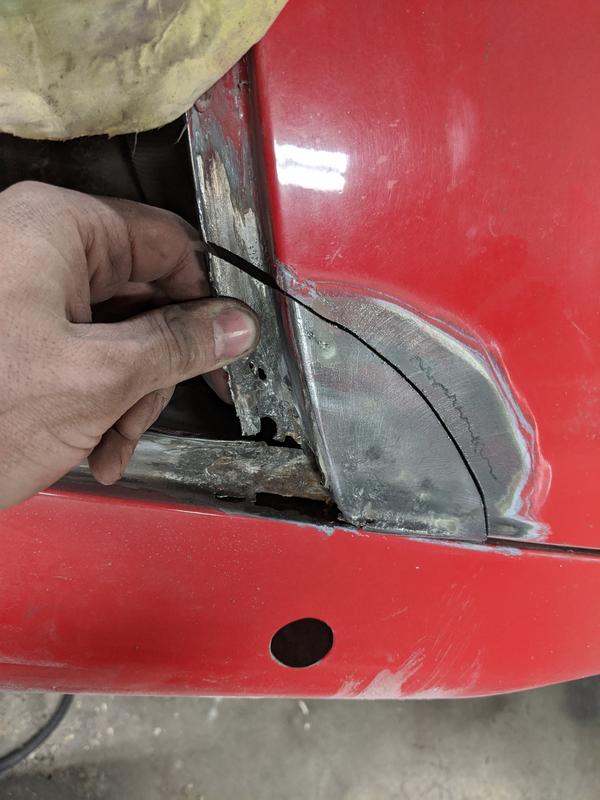
Cleaned up: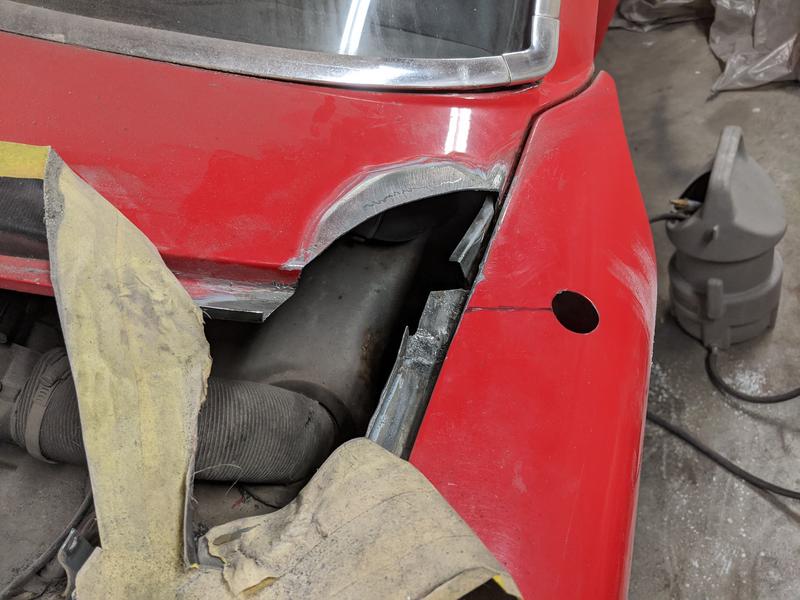
Make stuff that looks like the stuff you cut out:
That looks similar: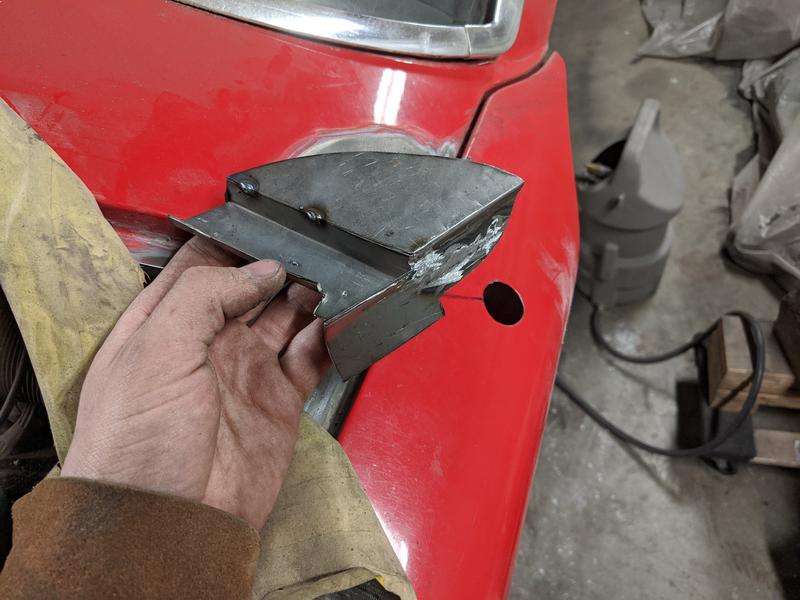
Time to spend way too much time welding it in: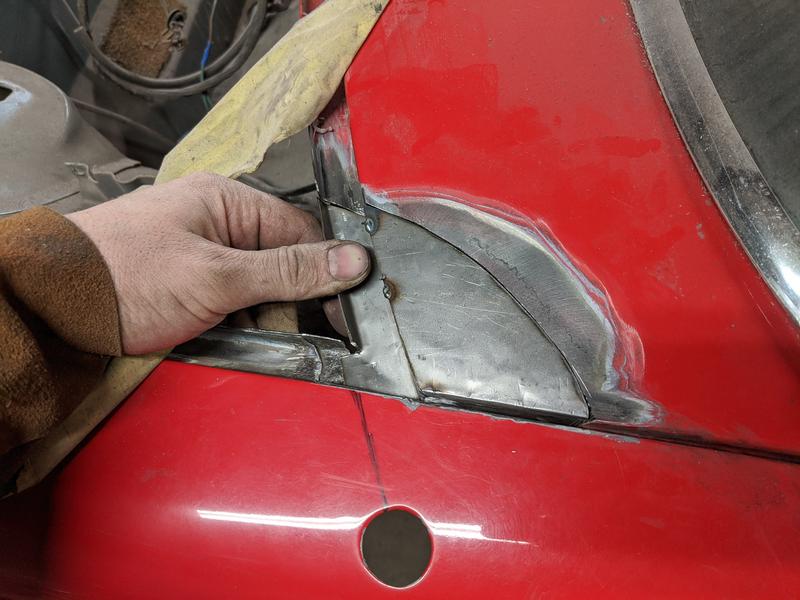
Solid, but ugly now until paint: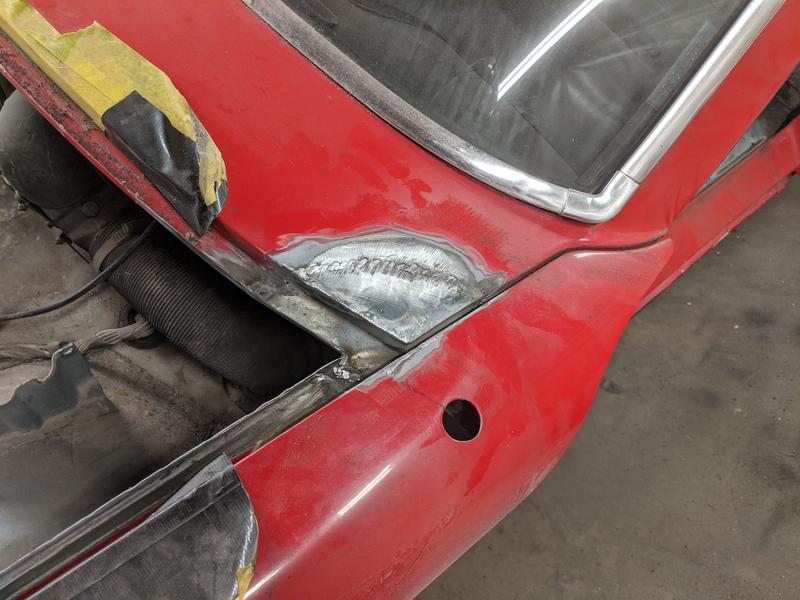
Posted by: ctc911ctc Apr 29 2020, 07:53 AM
WOW, master-level Skilz, very impressive!
I've been cleaning off the bottom of the car to get it ready for epoxy primer. Unfortunately, cleaning out the inside of the driver's wheel well exposed some rust and a fiberglass repair of the trunk seal channel. I was going to leave this when I painted the body so as to not disturb the paint, but it will just have to be a bit ugly until then.
Rust, freaking rust:
There's the rust:
Cut it out:
Cleaned up:
Make stuff that looks like the stuff you cut out:
That looks similar:
Time to spend way too much time welding it in:
Posted by: jaredmcginness Apr 29 2020, 09:51 AM
Nice piece, that looks bad ass.
Posted by: mbseto Apr 29 2020, 12:52 PM
Great work, love watching new metal take shape.
Posted by: sreyemj May 1 2020, 12:28 AM
Spending way too much time cleaning up random bits and pieces of the project. The frunk seal channel was rusted away in a few places so I added some new metal.
New metal:
Ground down: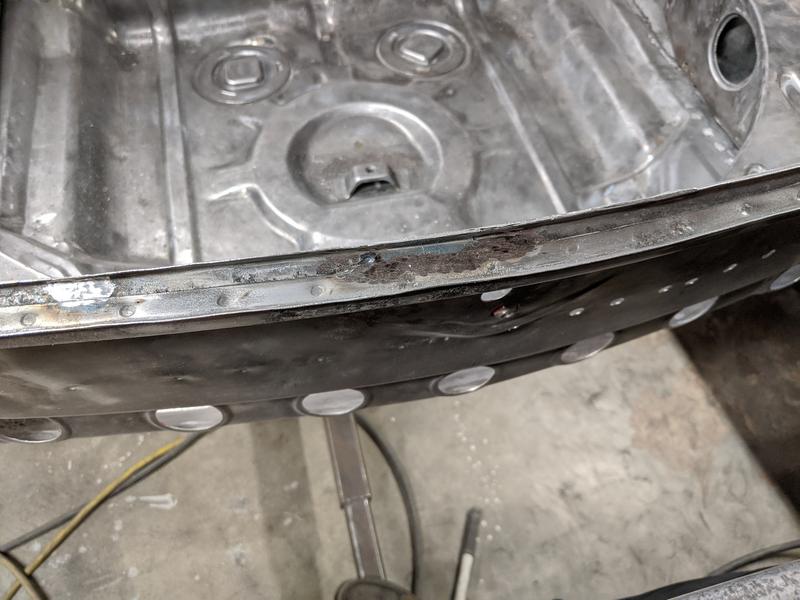
Over the headlight area, this is the side with the fender splice: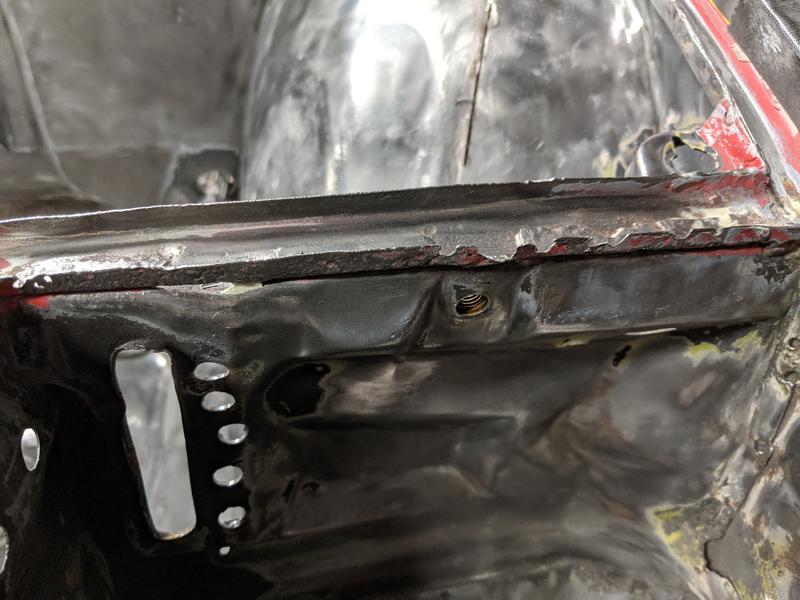
Posted by: sreyemj May 1 2020, 12:32 AM
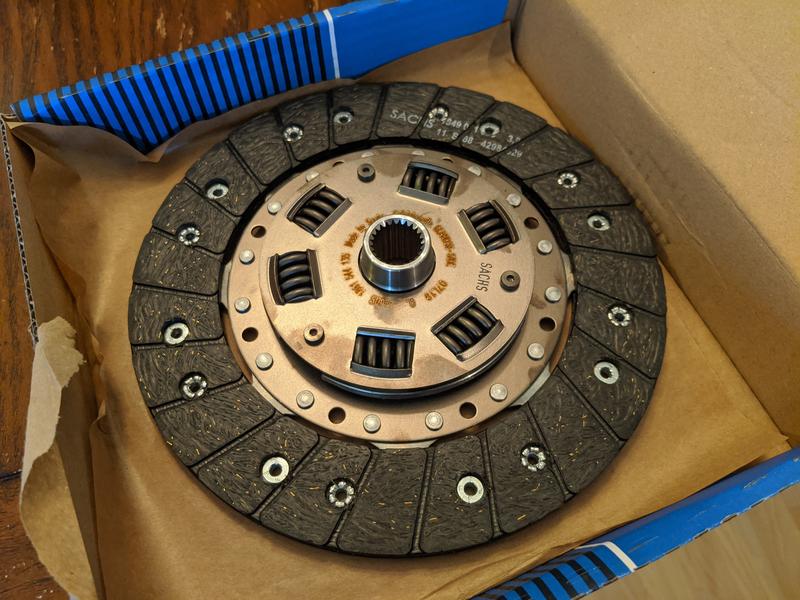
Some new stuff from 914rubber, and a replacement clutch disk (engine was missing the rear seal and soaked the clutch disk with oil).
Posted by: sreyemj May 1 2020, 02:01 PM
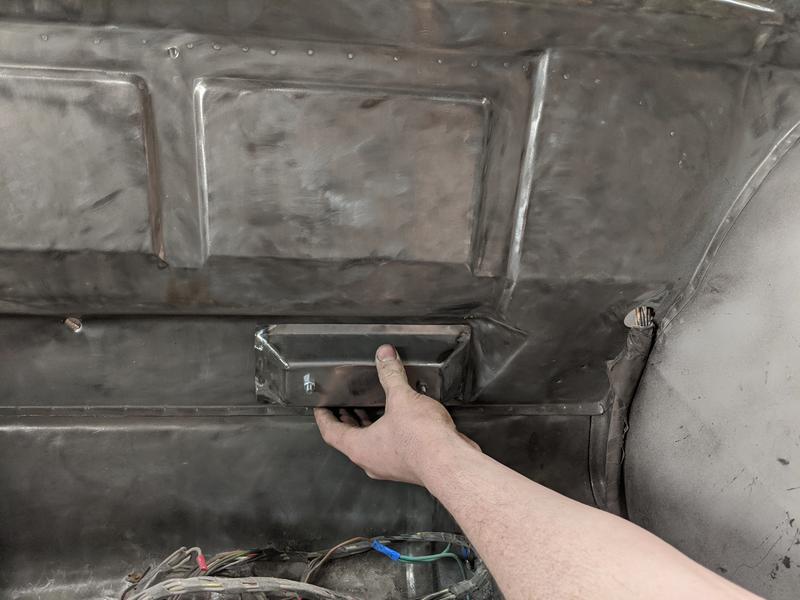
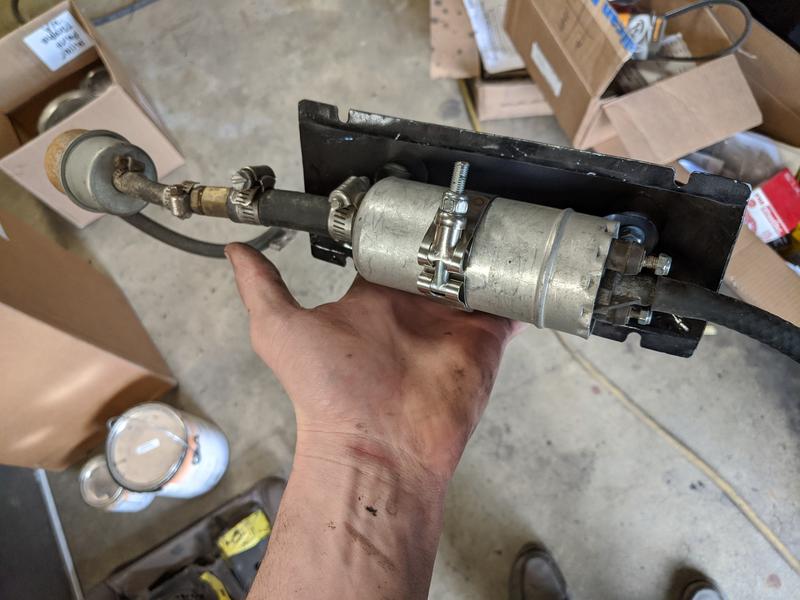
Tried making a front firewall mount to relocate the fuel filter to the front. I had mount from a 1976 car that I sort of copied.
Mount from a later car:
Posted by: sreyemj May 11 2020, 11:53 PM
Been awhile since I posted an update. I stripped everything down as much as I could with wire wheels and abrasive blasted everything else down to bare metal.
Very dusty: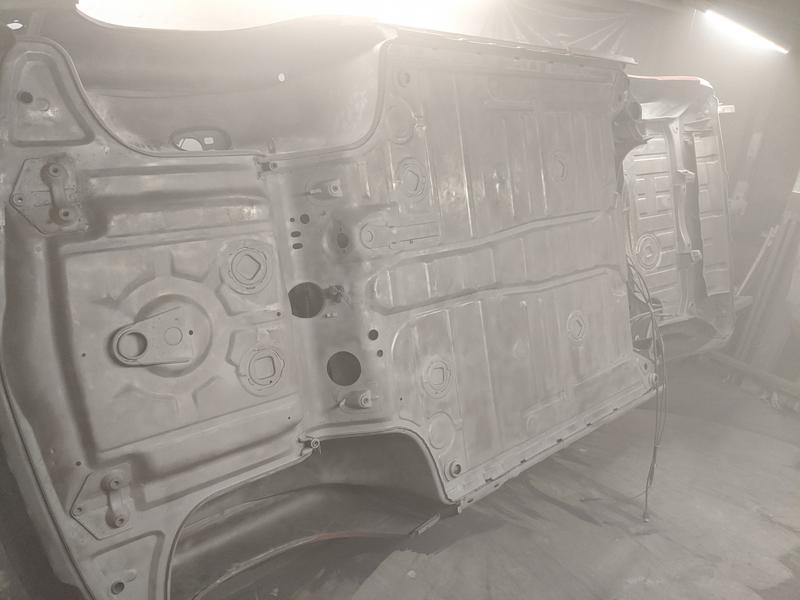
Not the most fun, next time I'll hire this part out: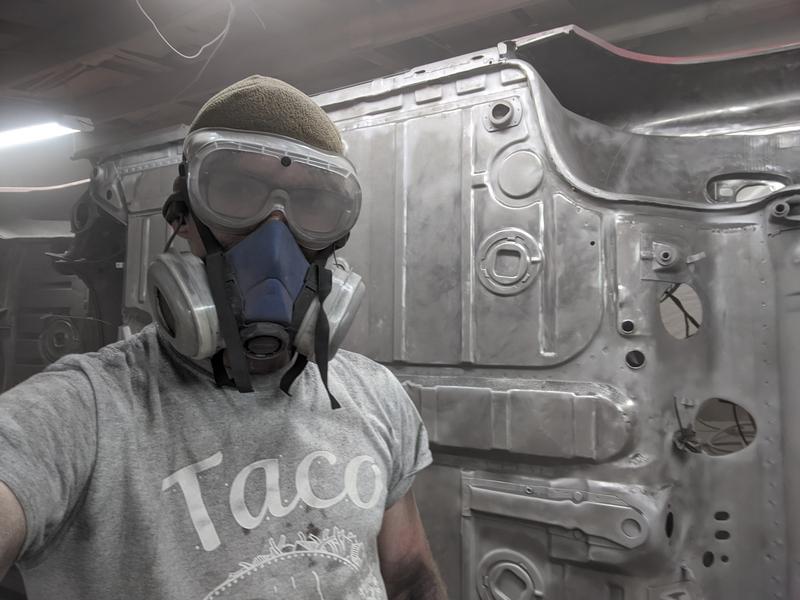
Posted by: sreyemj May 12 2020, 12:00 AM
Putting on the epoxy primer. I was going to spray it on, but my shop isn't the best space and I wasn't sure I could get inside the fenders with a spray gun so I used a brush and roller.
Taped off, probably not needed since I'm not spraying: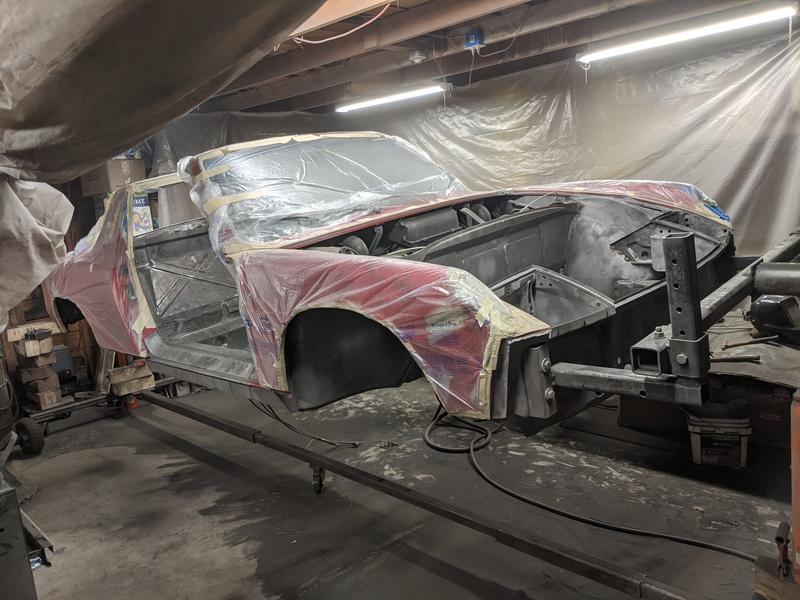
Interior done: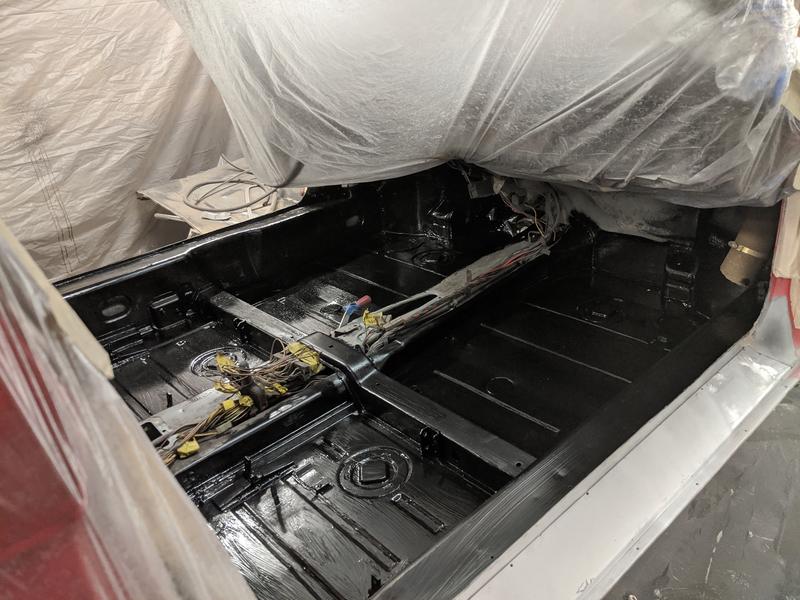
Part done: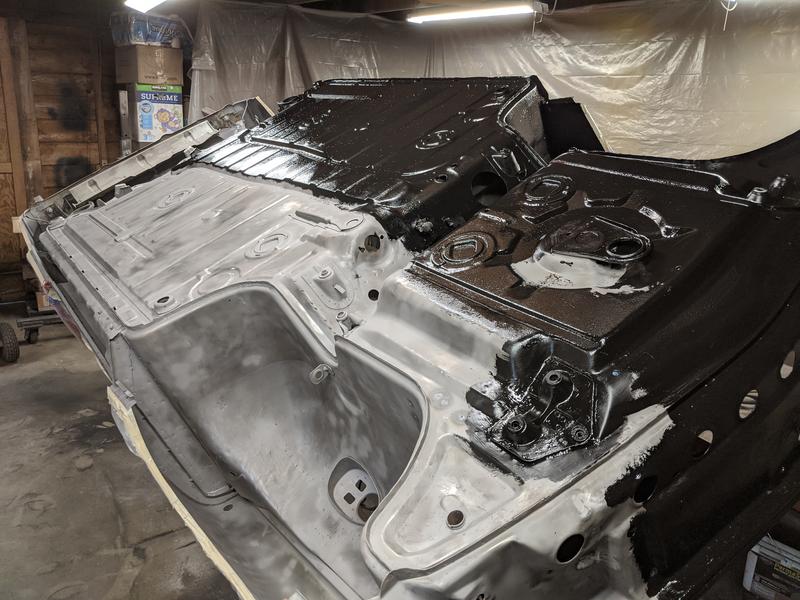
The area where the driver's fender was spliced, actually turned out to be fairly well concealed: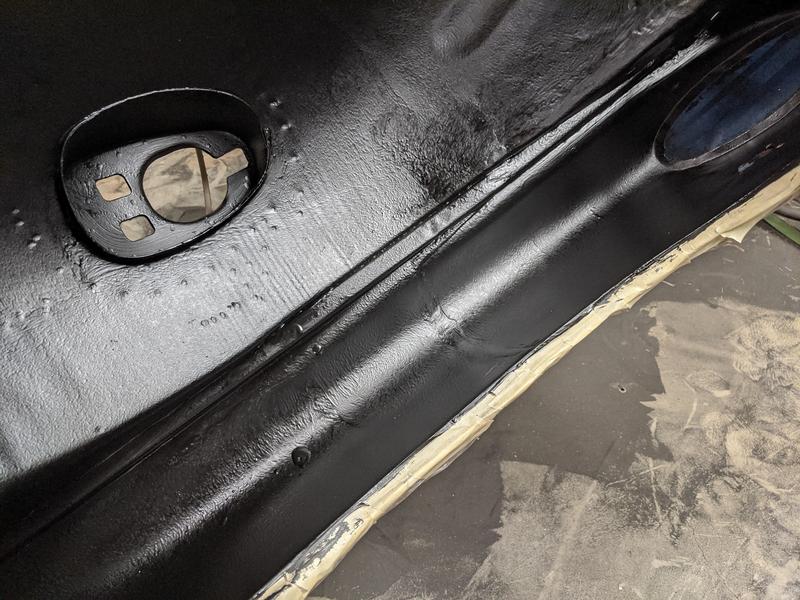
Posted by: sreyemj May 14 2020, 03:33 PM
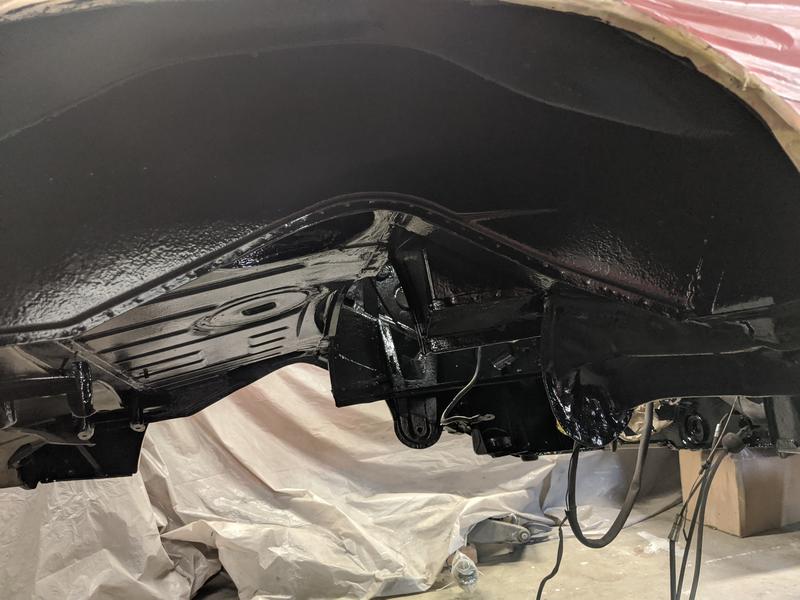
More pictures after epoxy primer
Front trunk: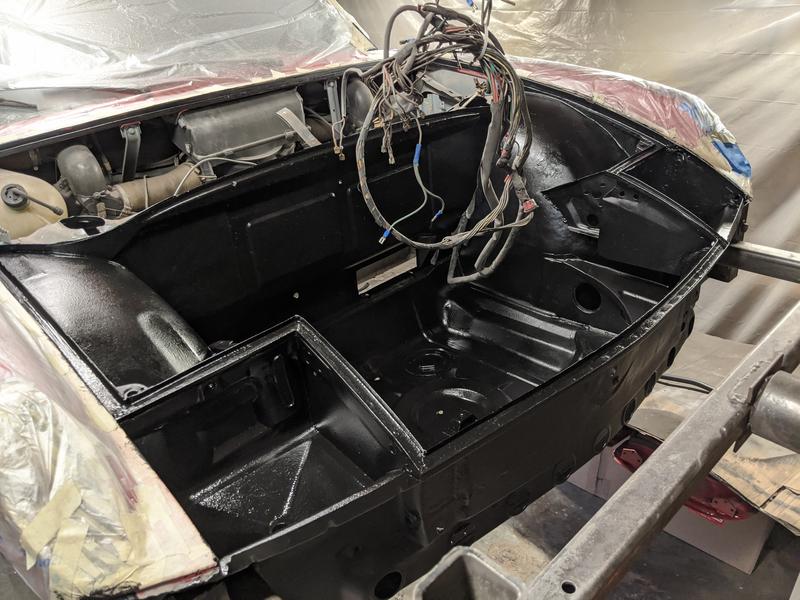
Engine compartment:
Hell hole area: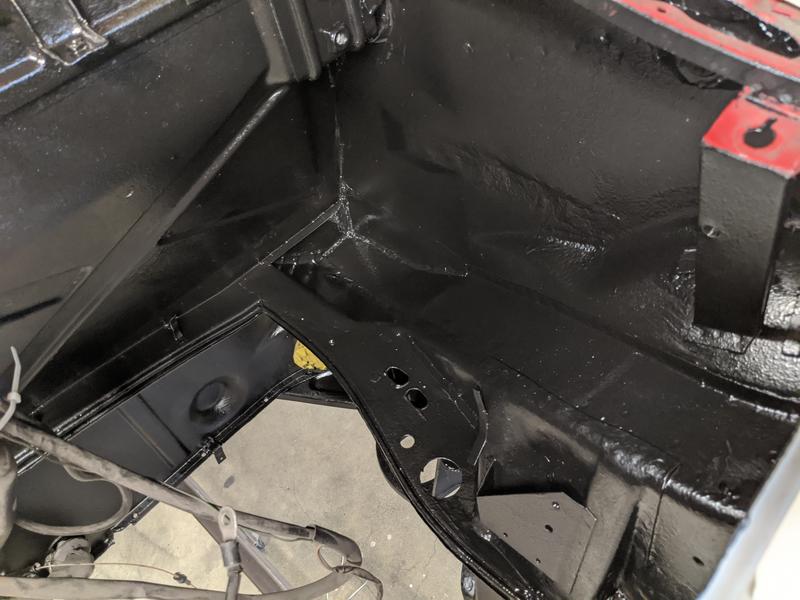
Wurth seam sealer is next:
Posted by: sreyemj May 18 2020, 02:27 PM
This car is moving from Washington to Texas in 2 days, doesn't leave me much time to get it trailer ready!
Quickly abrasive blasted and painted the engine tin with high temp paint: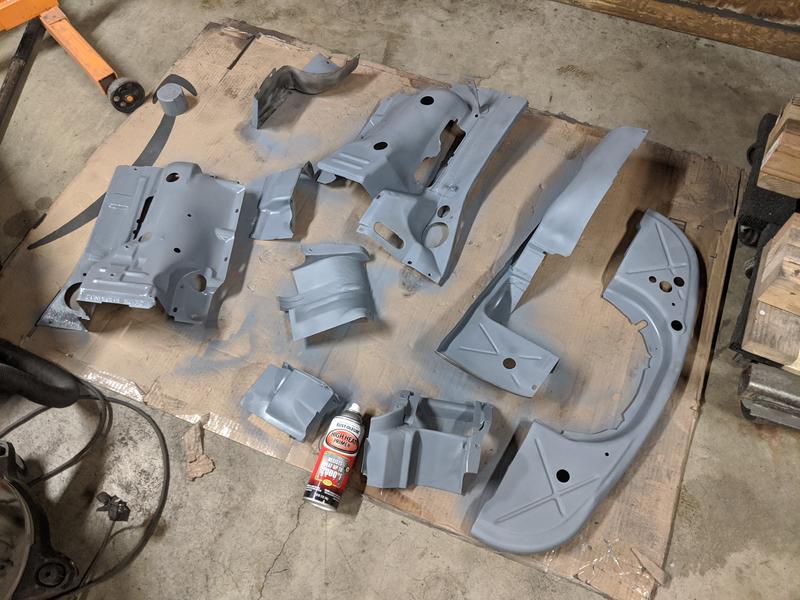
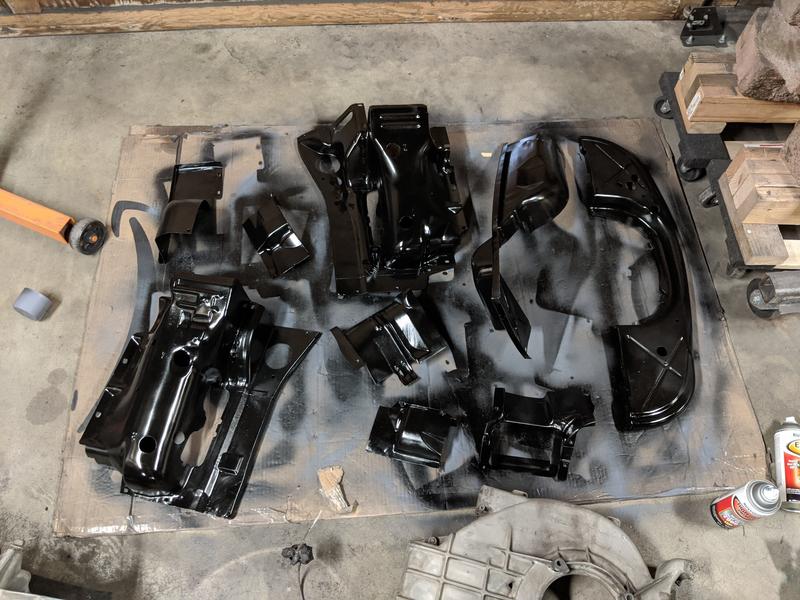
Posted by: sreyemj May 18 2020, 02:28 PM
I put a new rubber snorkel from 914rubber on, doesn't fit at the top though (hole in engine shelf is too big). I have an idea on how to fix it, but it's odd that the website says that it fits all years?
Posted by: sreyemj May 18 2020, 02:32 PM
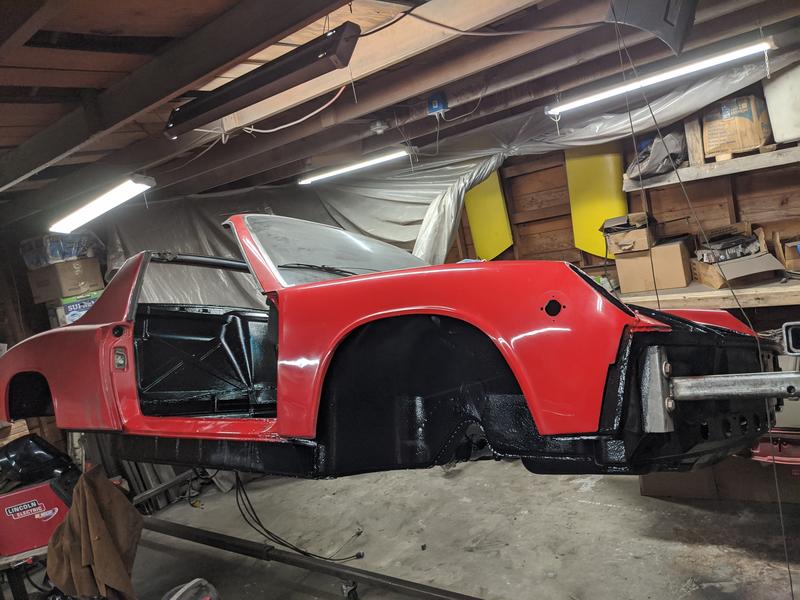
Paint ended up being more shiny vs the primer than I would have liked (I actually exchanged the gloss for semi-gloss, still looks pretty shiny though). Doesn't matter much as the paint is not going to be exposed except in the front trunk.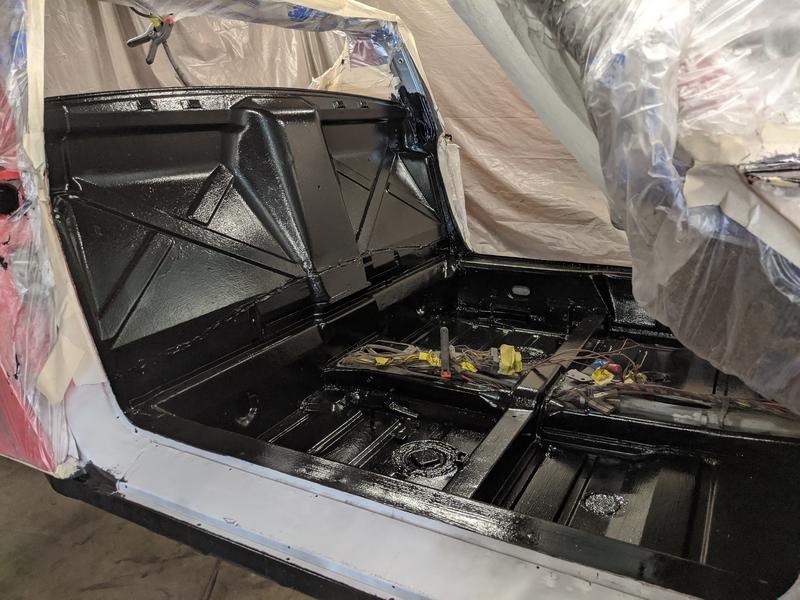
Posted by: trojanhorsepower May 18 2020, 02:45 PM
Looks good!
Posted by: sreyemj Jun 3 2020, 11:06 AM
Car made it safely to San Antonio. Only passed one other 914 on the 2000 mile trip (on a trailer as well!). Will be awhile before I get time to finish it, panels are on but not aligned and it has a lot of small details to finish.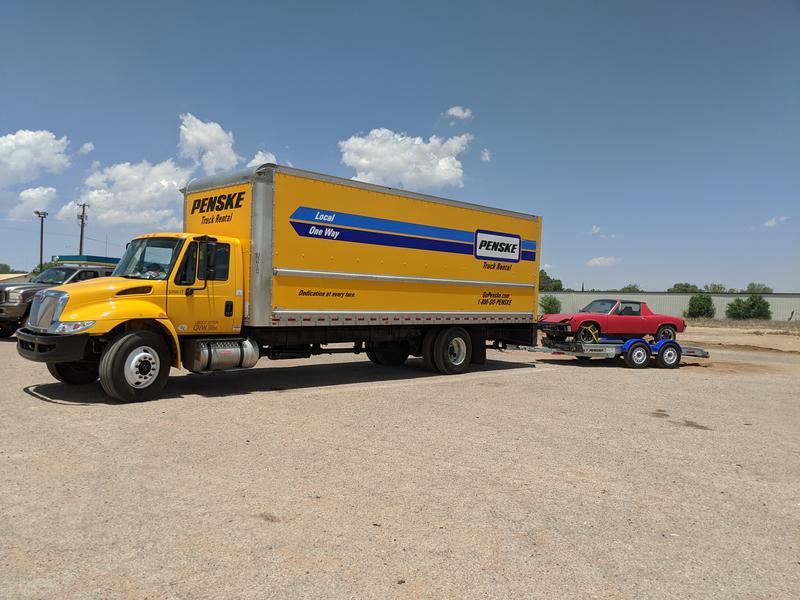
Posted by: FourBlades Jun 4 2020, 12:09 AM
Congrats on the move!
Great work you are doing.
Making lots of progress.
John
Posted by: sreyemj Jun 4 2023, 08:43 PM
Quick update on this project. Long story short, I started residency in Texas andso have been too busy to make much progress on the car. It's been a bit frustrating, and I have done some small projects but it still has a lot of odds and ends before it will be drivable.
New engine bar brackets from bdstone914, old ones were trash: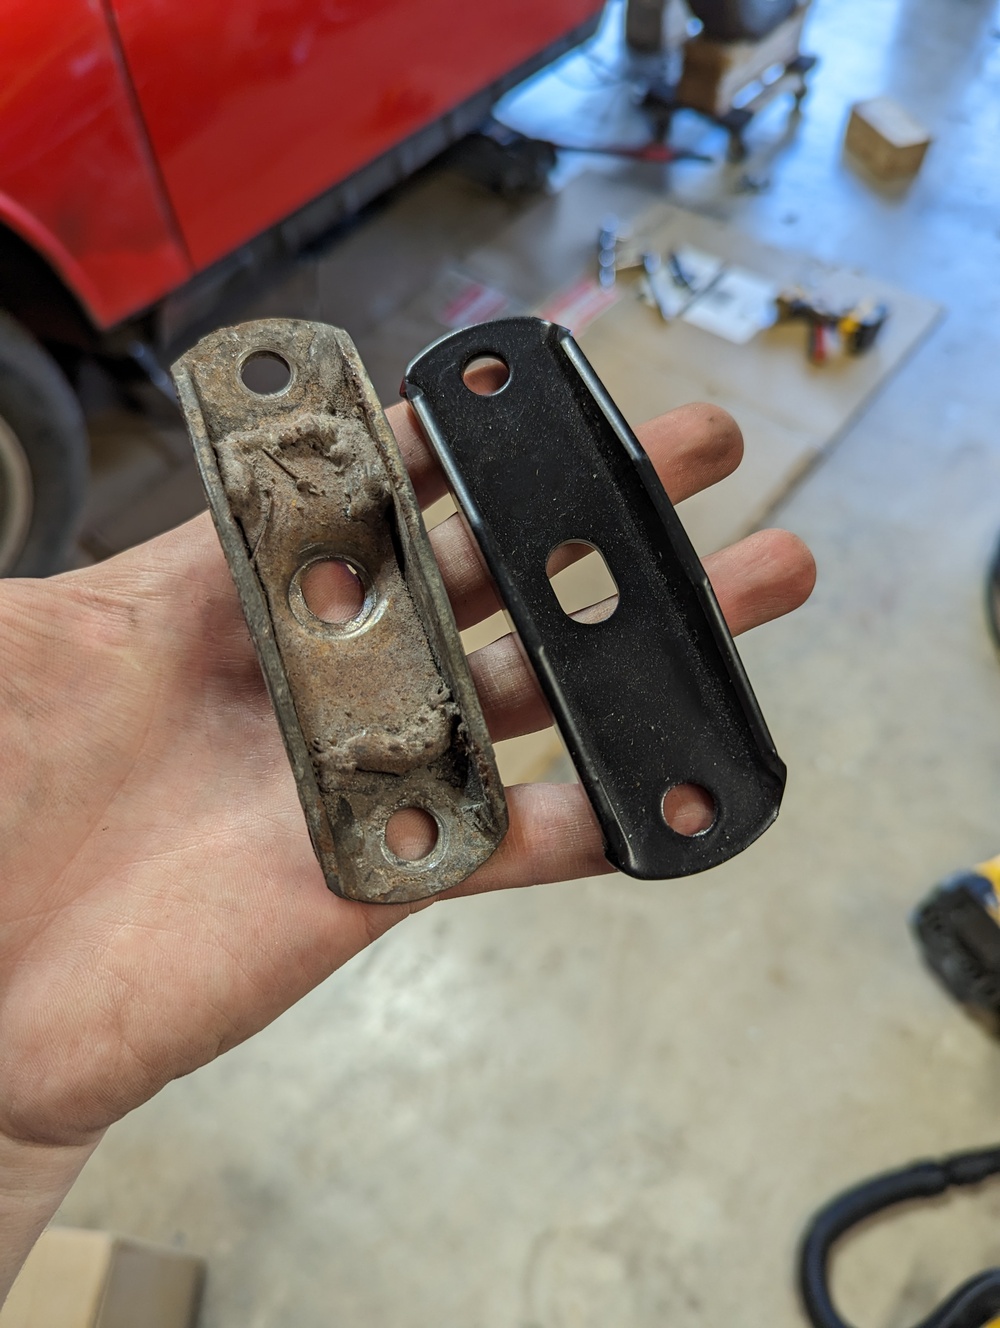
New MSDS header with spintech muffler (muffler needs to be welded on). Also a Tangerine shift linkage in there somewhere: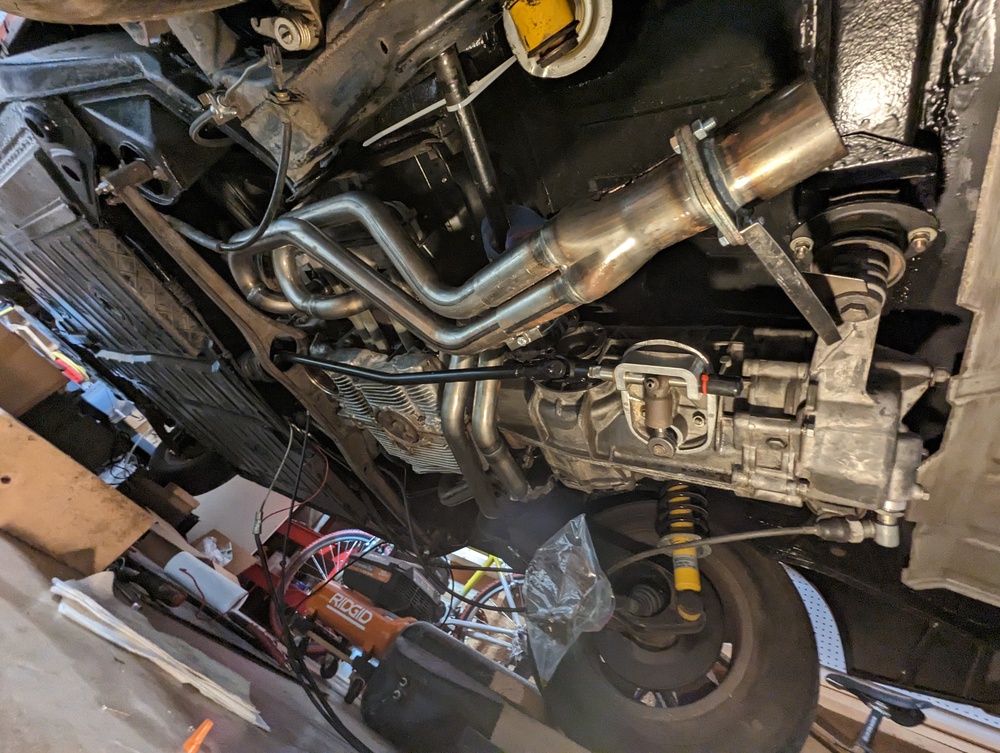
This engine has a couple delightfully random exhaust bolt heli-coils, including one that happened to be the same thread as an old E39 BMW head bolt...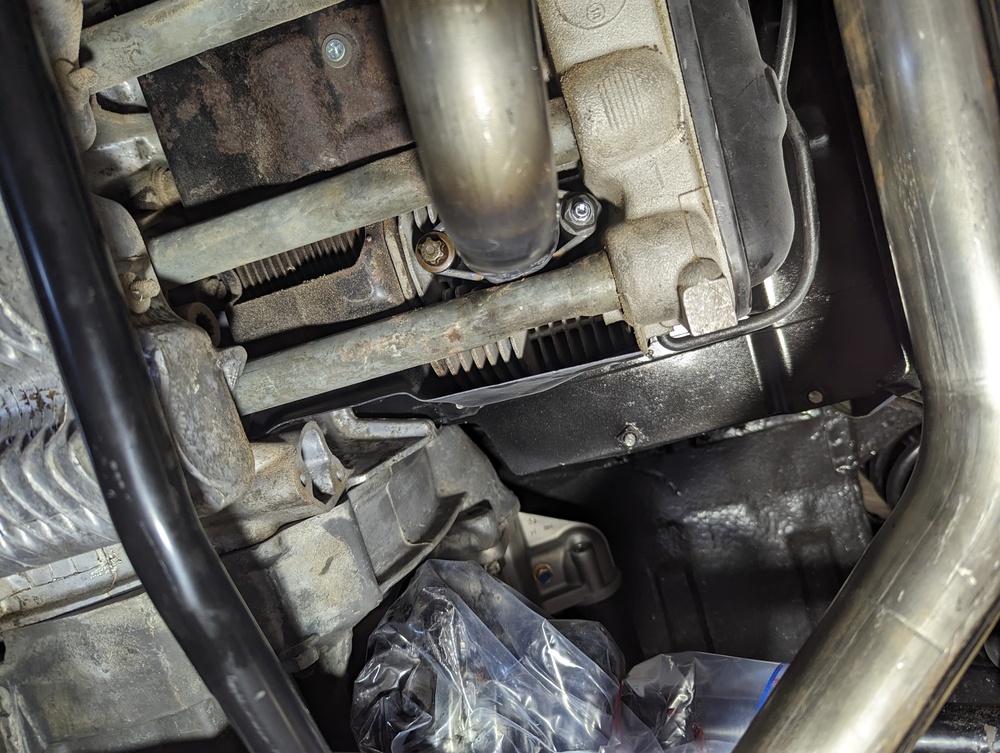
Posted by: sreyemj Jun 4 2023, 08:59 PM
Made a bracket for the D-jet brain. Battery holder is something from amazon: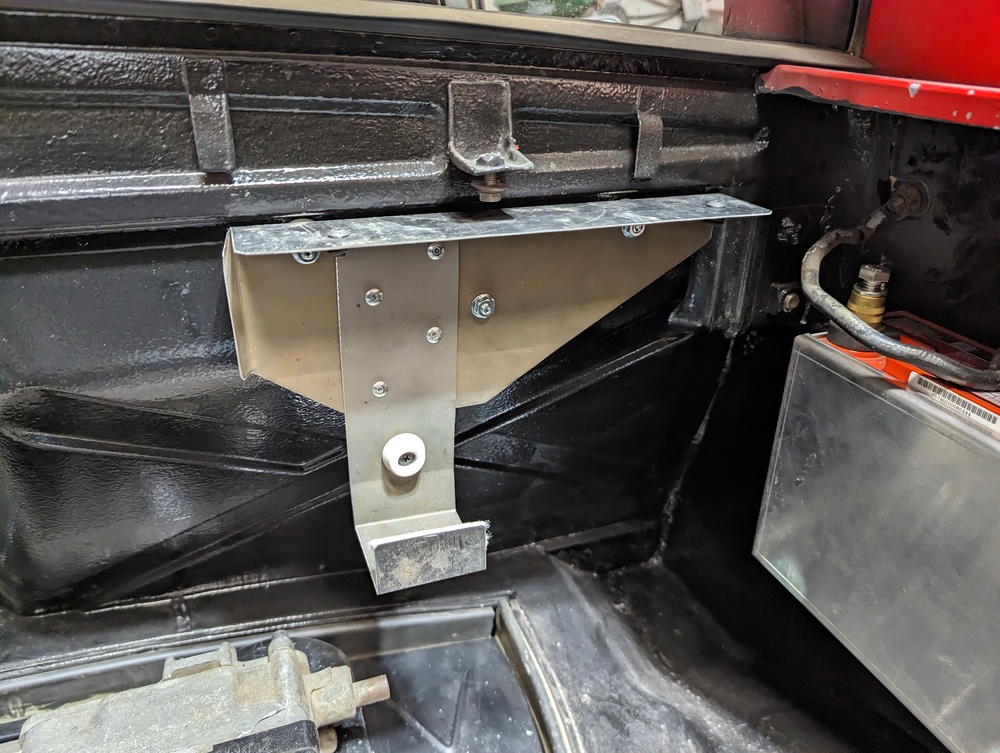
Posted by: 930cabman Jun 5 2023, 04:59 AM
I just happened on this thread, and what great progress even if life gets in the way sometimes. When will she be running?
Posted by: East coaster Jun 5 2023, 05:13 AM
Nice work!
Posted by: sreyemj Jun 9 2023, 10:11 AM
I wish I knew. Pretty close to just pulling the plug on the D-jet project. There's no real reason to mess with it on this car since it's not even an original D-jet car (other than saving money, and the experiencing 1970's FI tech) . Apparently I lost the intake/filter assembly in the last move, so more parts/expense if I want to keep the D-jet.
Dub Shop has a crank trigger/megasquirt package for 4k, might just bite the bullet and do that. That would be useful for the 2270 motor I intend to install at some point...
Posted by: Montreal914 Jun 10 2023, 10:12 AM
Just read through your whole project!
Very nice work!! Thank you for documenting. I am going through this hell myself and really appreciate the fact that you were able to do all of these repairs on the passenger side long without removing the rear fender.
Loving the headers too. 
Posted by: sreyemj Jun 12 2023, 10:42 AM
Just read through your whole project!
Very nice work!! Thank you for documenting. I am going through this hell myself and really appreciate the fact that you were able to do all of these repairs on the passenger side long without removing the rear fender.
Loving the headers too.
Yes, although if I do another I'm going to cut the fender for sure. Very hard to weld under there. Sometimes working around a thing is much more difficult than repairing it!
Going to drop a WTB for the missing D-jet parts intake parts. Would be great to replace everything all at once, but you have to draw the line somewhere...
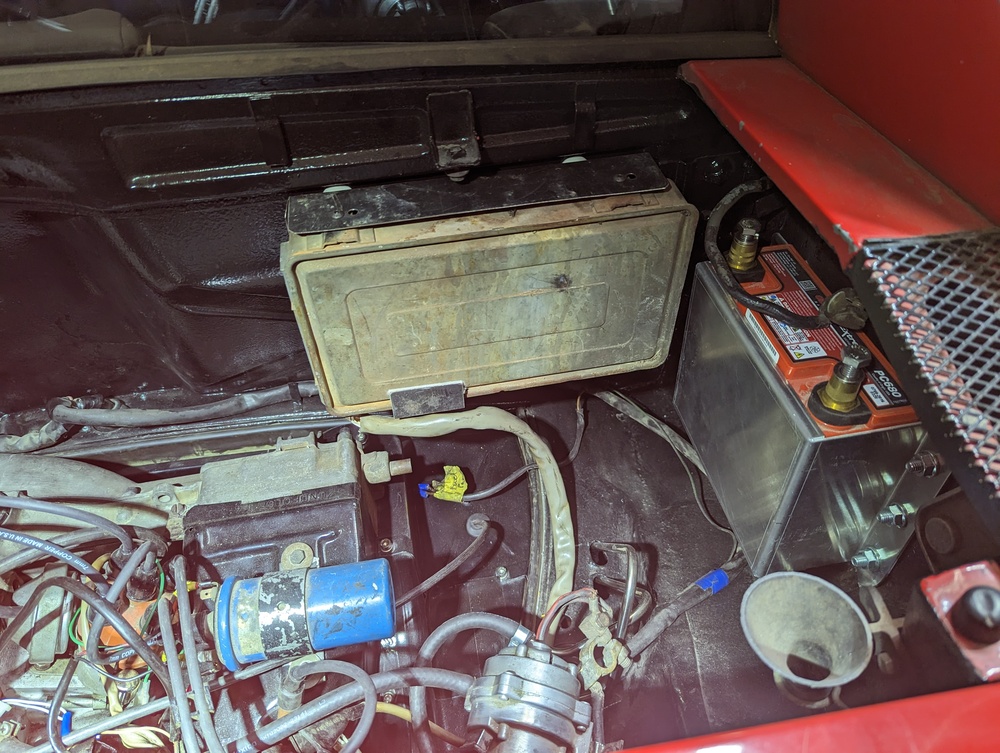
Posted by: BillJ Jun 12 2023, 11:14 AM
Love your battery and box combo. Share details please?
Posted by: sreyemj Jul 12 2023, 08:15 AM
Love your battery and box combo. Share details please?
It's just an Odyssey PC680 with an aluminum tray. Supposed to work well, but I have not tried it yet.
https://www.amazon.com/ODYSSEY-PC680-Odyssey-Battery/dp/B0002ILK6I
https://www.odysseybatteries.com/odyssey/hd680.html
Posted by: sreyemj Jul 12 2023, 09:19 AM
Unfortunately, some less good news. Since taking it off the rotisserie, the passenger door has rubbed when closing. I had attributed this to the door sill shrinking when I welded it back in, but it appears that the body is "twisted" (distance between the windshield and targa frame remains ok on both sides). Now the targa top overhangs on the passenger side and is flush on the driver's side. The door fit on both sides seems to indicate that the front of the car is slightly rotated (driver's front up, passenger side down).
I don't know if this happened during the restoration process, or if it's from the driver's side front hit that required the driver's front corner to be replaced many years ago. I used a laser level to keep the two longitudinal pinch welds flat while it was on the rotisserie, but was not actively measuring for "twist" in the body (next time!). The passenger longitudinal was very weakened by the prior owner drilling holes in it, and I remember the doors fitting better before. Its entirely possible I caused this issue by not cross-bracing the car (an "X" between my two braces would have been perfect).
Dr 914's videos were very helpful in diagnosing this issue, and it sounds like his frame guy can fix this given enough time and money. It would be very inconvenient to bring the car all the way to Atlanta from Texas, if he even had time to work on it. A guy at work recommended a local shop with a frame rack that did a good job on his daughter's vintage Mustang. I don't want to trade expediency for results, but given the less-than-concours nature of my 914 maybe this would be an option?
On the brighter side, I finally saw a 914 at our local cars and coffee. Great looking car, but closer inspection revealed lots of the rust issues I've spent so much time addressing! I ordered the rest of the 1.7L D-jet parts I needed, as well as a replacement ignition harness (figured I might as well replaced all the old wires). This year has me working out of town about half the time so I won't get a chance to install anything for several weeks!
Posted by: 930cabman Jul 12 2023, 01:47 PM
Unfortunately, some less good news. Since taking it off the rotisserie, the passenger door has rubbed when closing. I had attributed this to the door sill shrinking when I welded it back in, but it appears that the body is "twisted" (distance between the windshield and targa frame remains ok on both sides). Now the targa top overhangs on the passenger side and is flush on the driver's side. The door fit on both sides seems to indicate that the front of the car is slightly rotated (driver's front up, passenger side down).
I don't know if this happened during the restoration process, or if it's from the driver's side front hit that required the driver's front corner to be replaced many years ago. I used a laser level to keep the two longitudinal pinch welds flat while it was on the rotisserie, but was not actively measuring for "twist" in the body (next time!). The passenger longitudinal was very weakened by the prior owner drilling holes in it, and I remember the doors fitting better before. Its entirely possible I caused this issue by not cross-bracing the car (an "X" between my two braces would have been perfect).
Dr 914's videos were very helpful in diagnosing this issue, and it sounds like his frame guy can fix this given enough time and money. It would be very inconvenient to bring the car all the way to Atlanta from Texas, if he even had time to work on it. A guy at work recommended a local shop with a frame rack that did a good job on his daughter's vintage Mustang. I don't want to trade expediency for results, but given the less-than-concours nature of my 914 maybe this would be an option?
On the brighter side, I finally saw a 914 at our local cars and coffee. Great looking car, but closer inspection revealed lots of the rust issues I've spent so much time addressing! I ordered the rest of the 1.7L D-jet parts I needed, as well as a replacement ignition harness (figured I might as well replaced all the old wires). This year has me working out of town about half the time so I won't get a chance to install anything for several weeks!
this is not good news!! Given this is of driver quality, I might look into racking the chassis as a DIY project. I cannot provide details, but there is a way
Posted by: sreyemj Jul 12 2023, 05:37 PM
I'm not sure this is a DIY type of thing. I don't think it is enough to make it undrivable, but frustrating for sure.
Posted by: bkrantz Jul 12 2023, 07:40 PM
Can you get access to a near-flat and level floor? You might be able to measure twist, comparing front and rear.
Posted by: Montreal914 Jul 12 2023, 09:15 PM
Targa bar to windshield distance is OK on both sides, but what about cross measurement (targa driver to passenger windshield, and vice versa).
Targa top has give as far as location, I wouldn't 100% trust it.
Posted by: sreyemj Jul 12 2023, 09:25 PM
Targa bar to windshield distance is OK on both sides, but what about cross measurement (targa driver to passenger windshield, and vice versa).
Targa top has give as far as location, I wouldn't 100% trust it.
I'll check when I get home in a few weeks.
Powered by Invision Power Board (http://www.invisionboard.com)
© Invision Power Services (http://www.invisionpower.com)