Printable Version of Topic
Click here to view this topic in its original format
914World.com _ 914World Garage _ 74 Roller rebuild and Subaru conversion
Posted by: mgarrison Feb 29 2020, 09:54 AM
Hello,
I new around here, but have been lurking for a bit trying to soak up all the 914 knowledge and information I could! I was looking into building a Factory Five 818 kit with the Subaru flat-4, but the cost of entry was a bit too high, and the time & space needed to build a car from scratch seemed overwhelming. But it got me thinking; that's basically a tube-framed 914 with an odd body. I wonder if anyone has put a Subaru flat-4 in a 914? A few Google searches later I learned that a lot of people had, and parts were out there to spend my money on!
Long story short, I found two rollers with no engines or transmissions in Tucson, AZ a couple of hours South of me. Soon I rented a car hauler for a couple of days and my "Craft Project" (my wife's label) was begun.
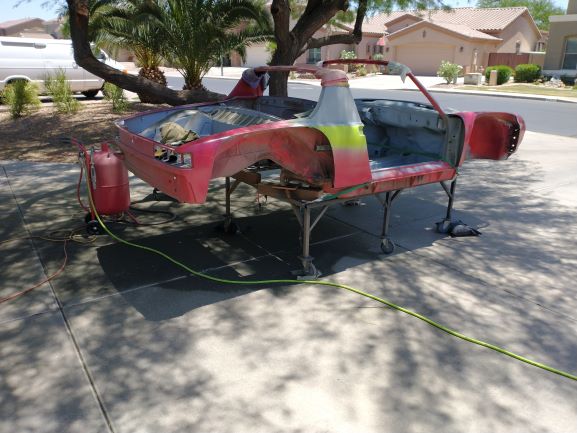
The rollers were a green 1971, and a red 1974. I wanted to restore the 71 because it just seemed to have more character. The 74 had been partially stripped for an electric conversion project, and seemed less "car like". Sadly, the 71 needed a bit more work than I was setup to handle. So, it had to be the 74 who I have simply labeled as "Red".
I will try to track my build process here as best I can. I tend to get working on things and forget to document things, but will try to keep track.
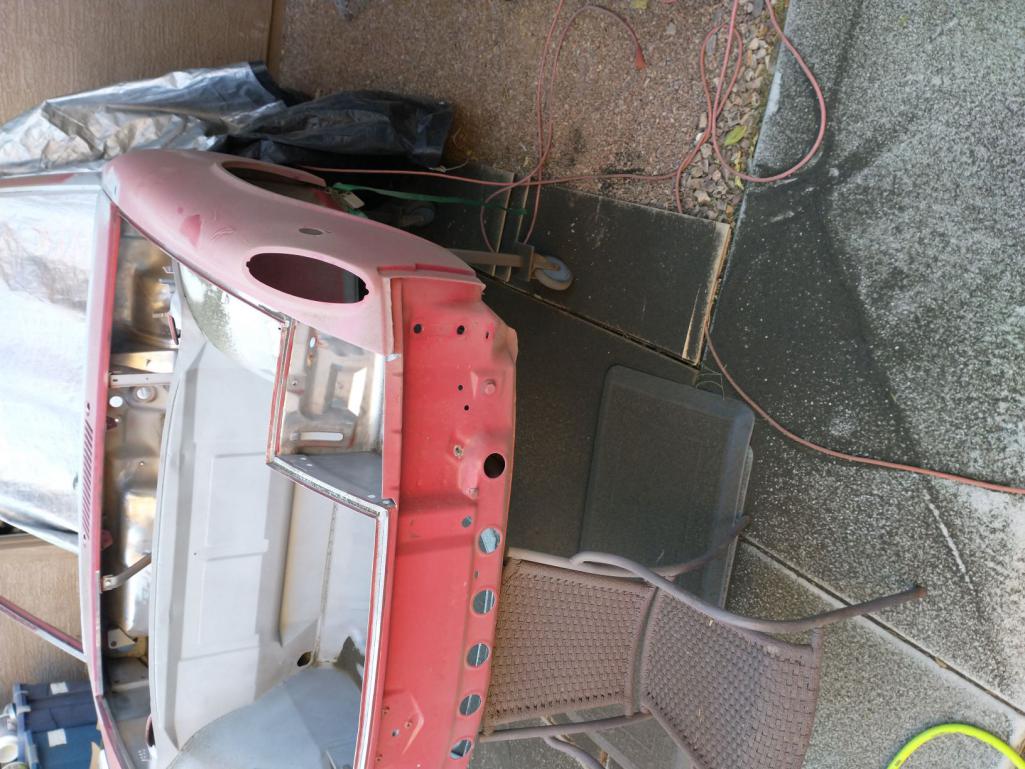
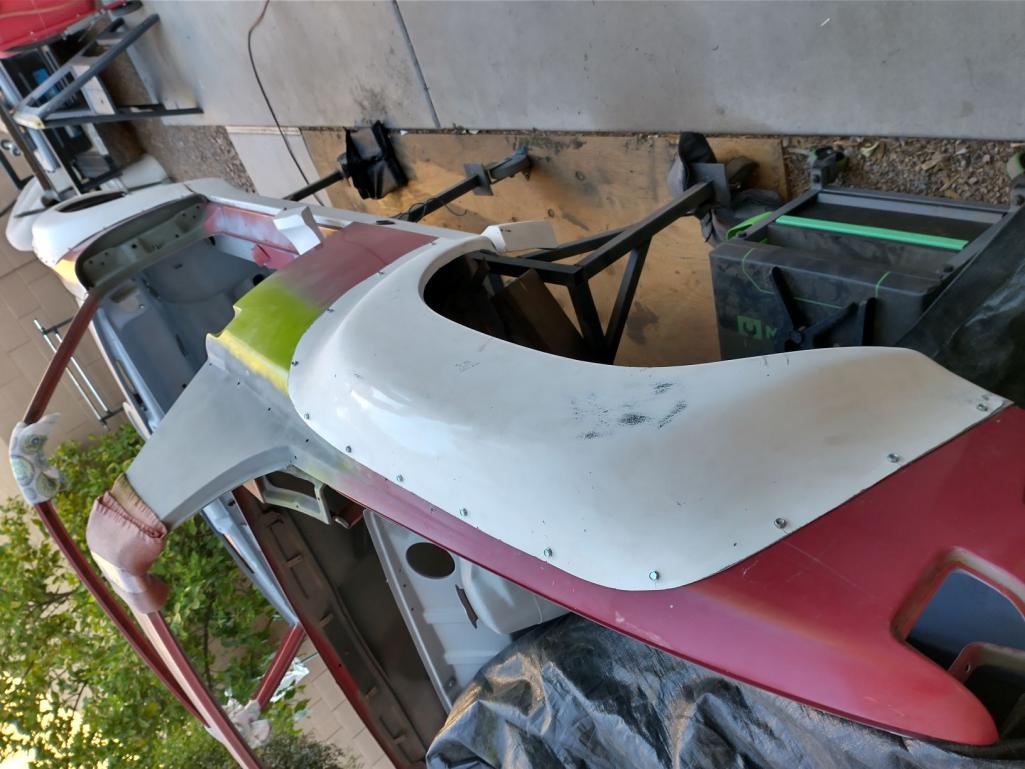
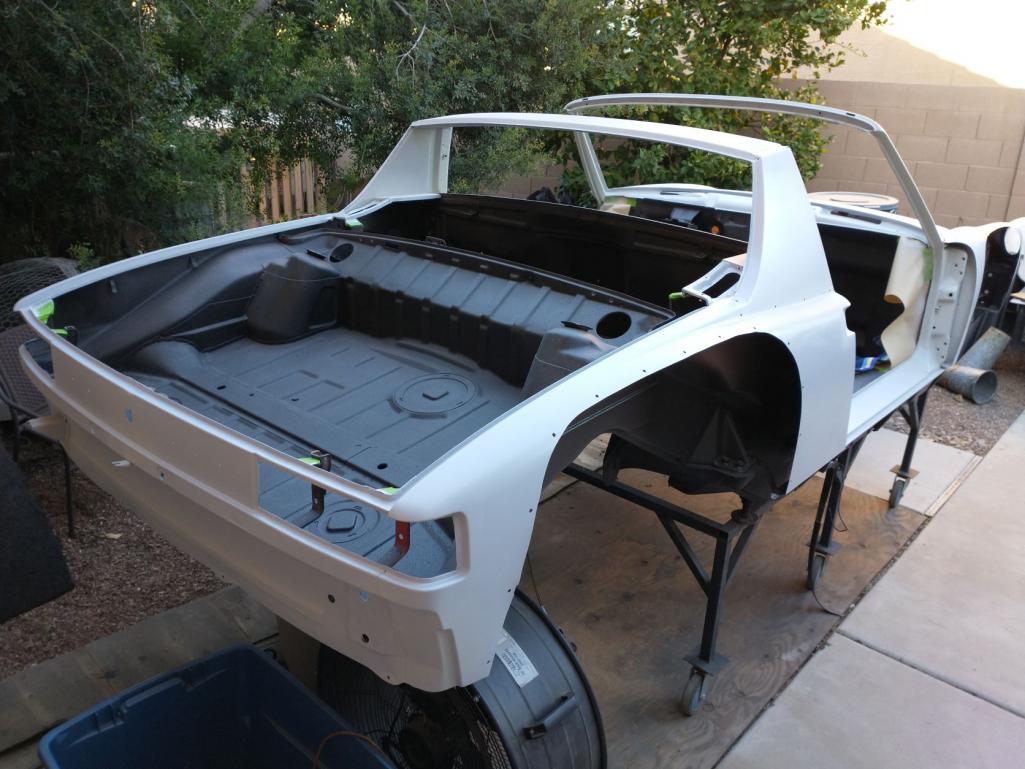
Here's Red when we got her home on the trailer and tucked away in the back yard for the moment.
Mike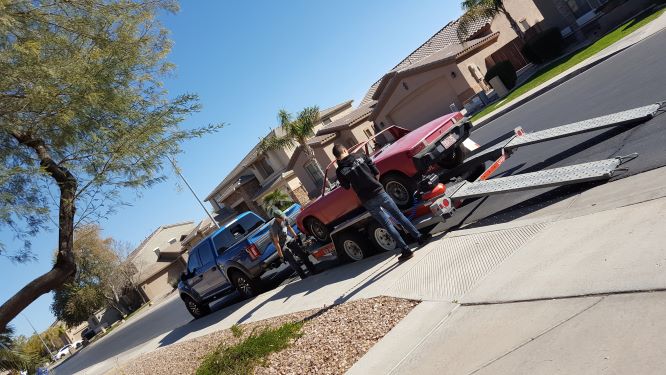
Attached image(s)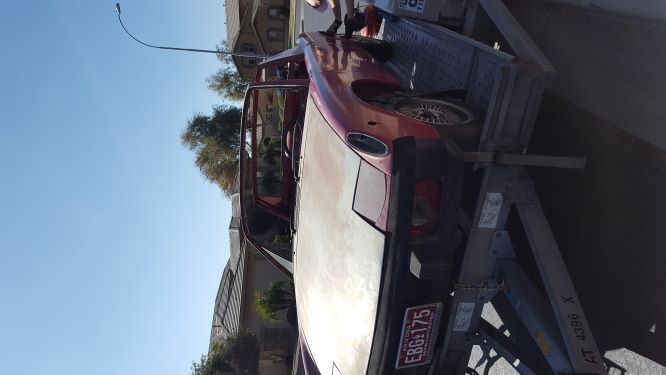
Posted by: mgarrison Feb 29 2020, 09:56 AM
If anyone knows how to correctly rotate portrait images, please let me know - can't seem to figure that one out yet!
Posted by: mgarrison Feb 29 2020, 10:01 AM
We got Red tucked away in the back yard so that we could run down to Tucson again the next day to get the green 71.
Once both cars were safely home, I started looking them over to see which one was going to work best, and what issues I might be facing.
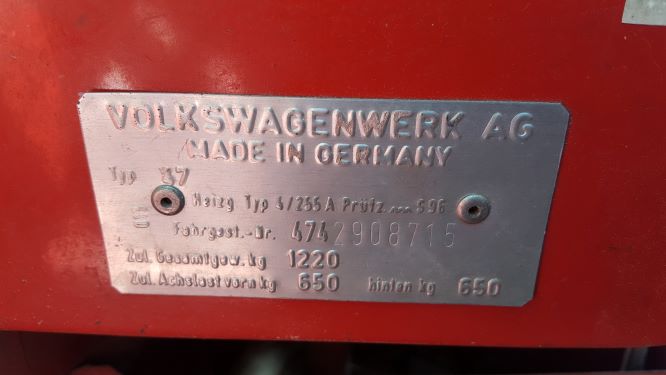
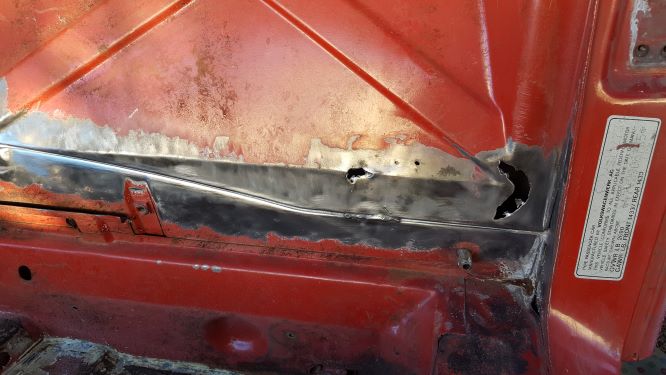
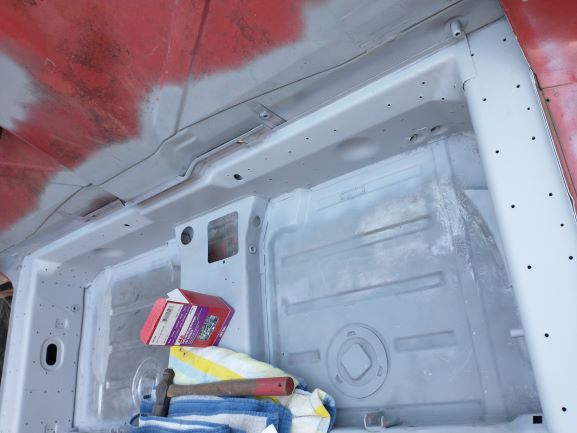
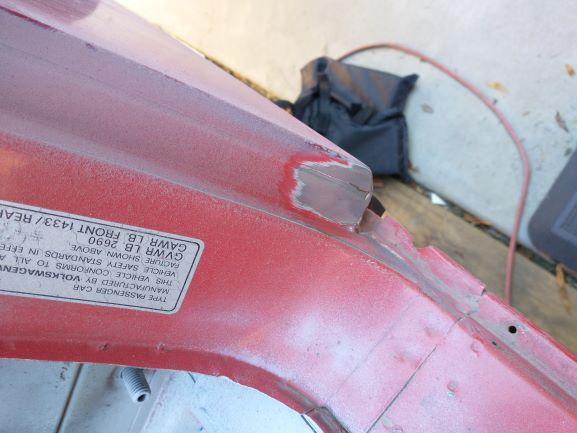
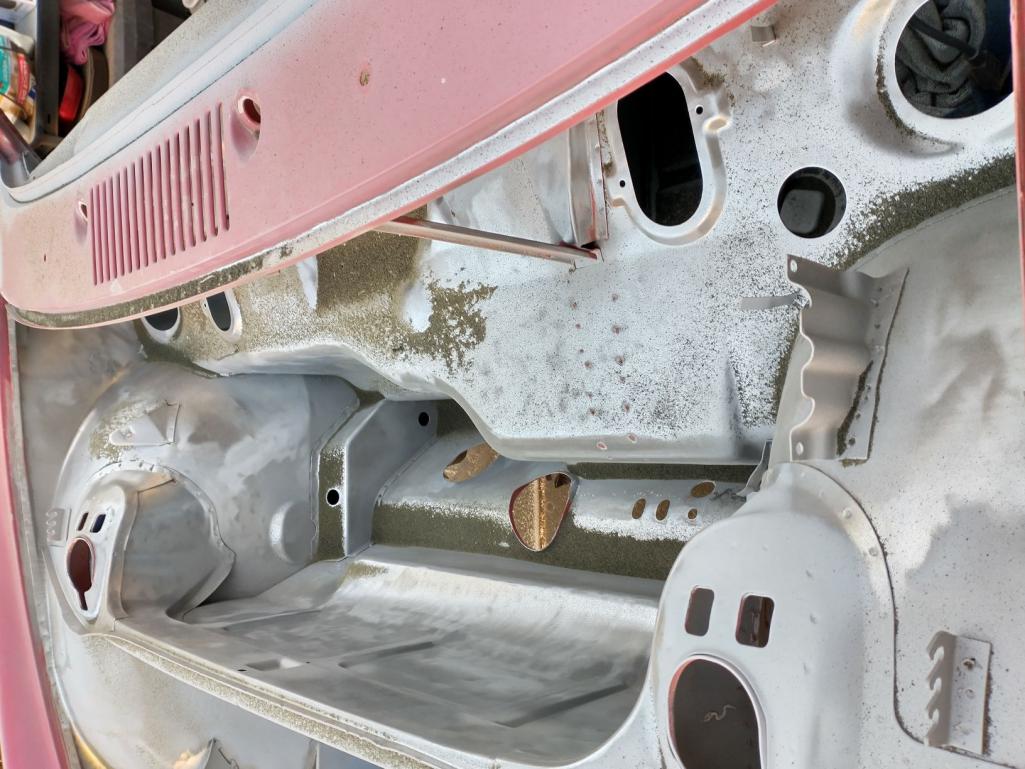
Red seems very solid, with almost no rust, and just a bad AC trunk floor repair to contend with. I documented the VIN, and entered it into my profile.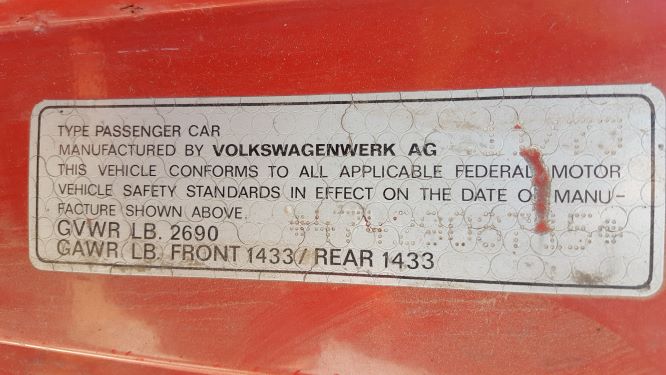
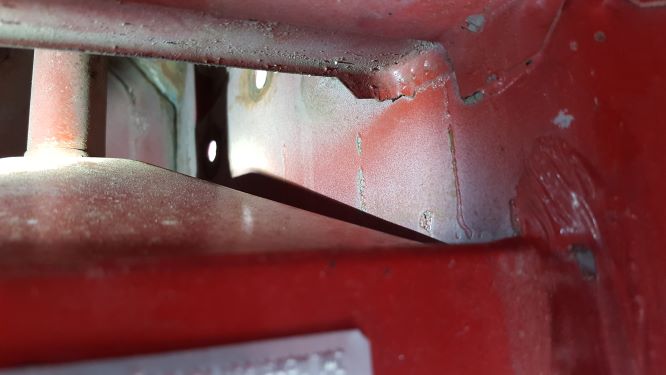
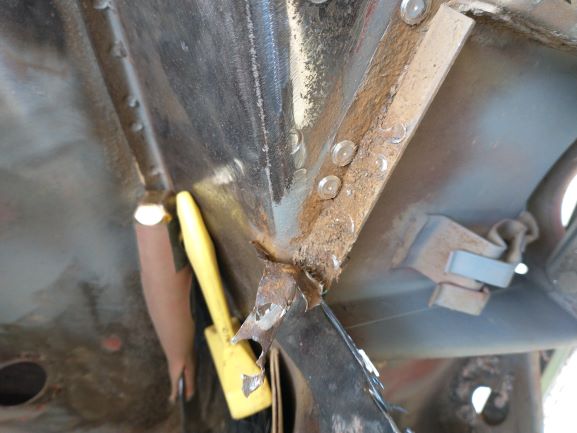
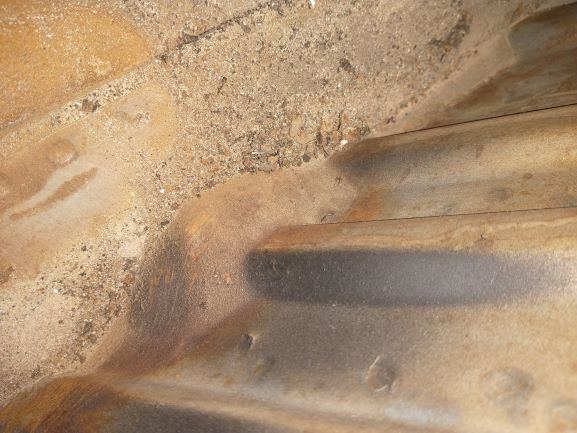
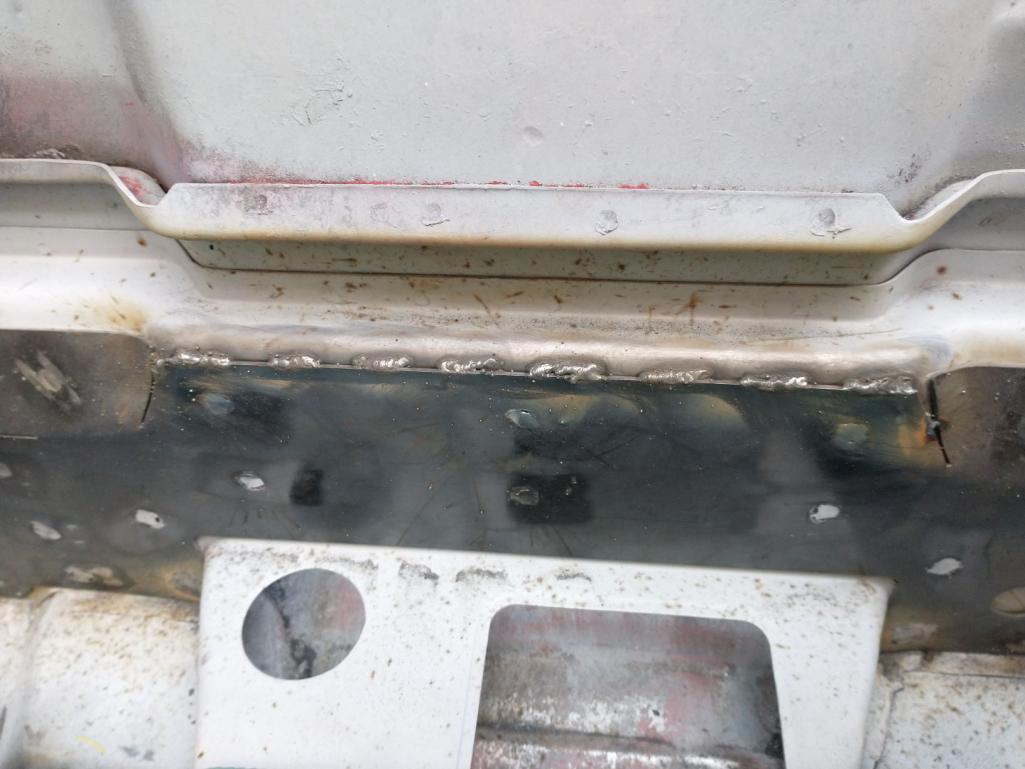
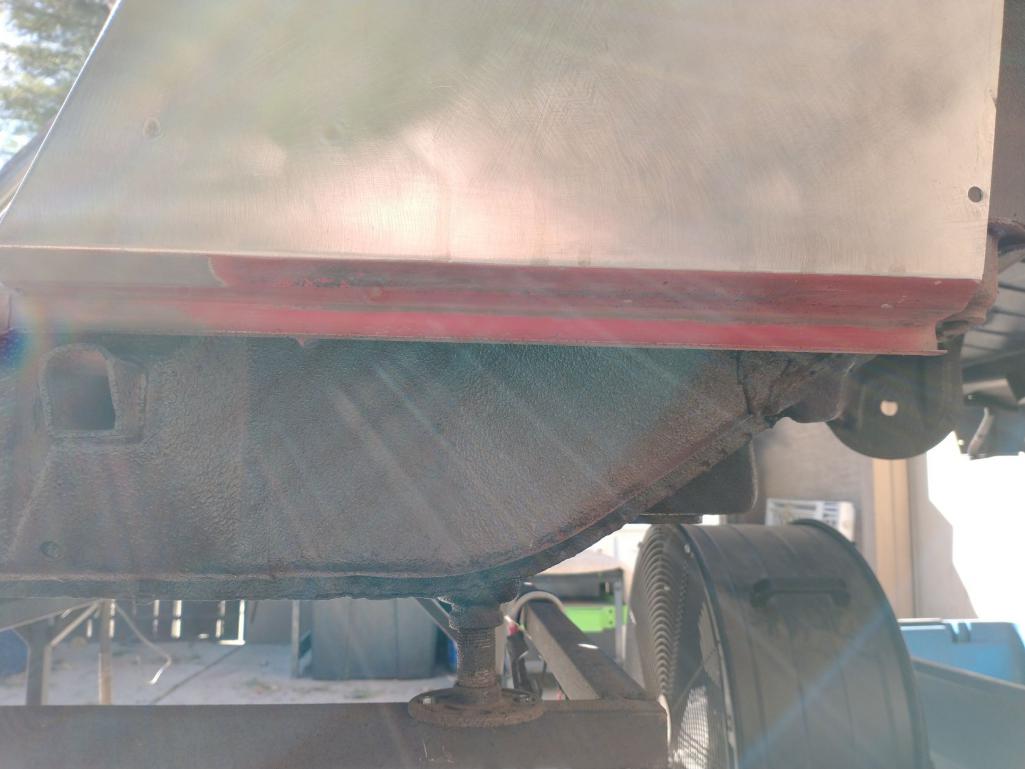
Here's the trunk floor "repair". They cut out the partially rusty front trunk floor from the green 71 and tacked it into Red!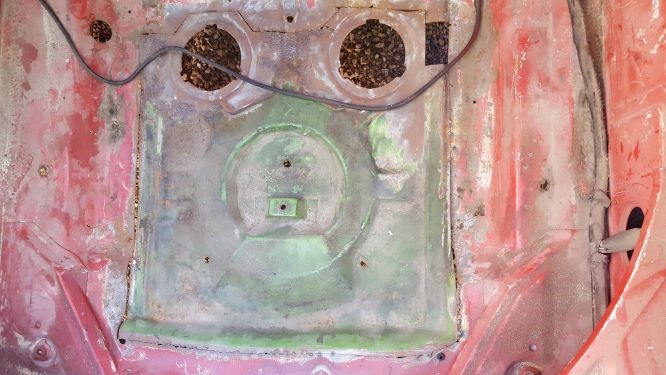
Posted by: mgarrison Feb 29 2020, 10:02 AM
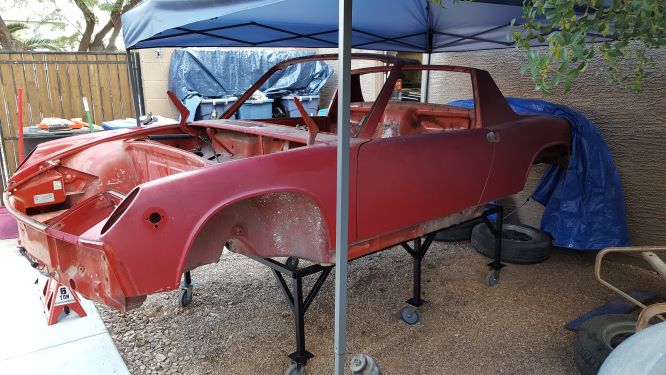
Here is her temporary home until I decided she was the best candidate for rebuild.
Posted by: mgarrison Feb 29 2020, 10:08 AM
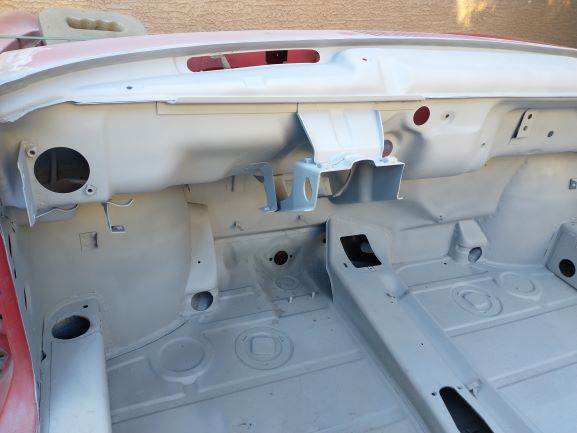
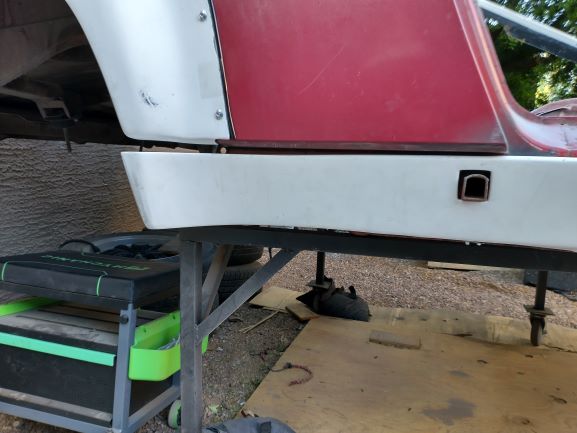
Once I got Red squared away in my working area, I started pulling the rest of the parts and pieces off her so that I can deal with any rust issues, repairs, etc. She looks really solid, thankfully!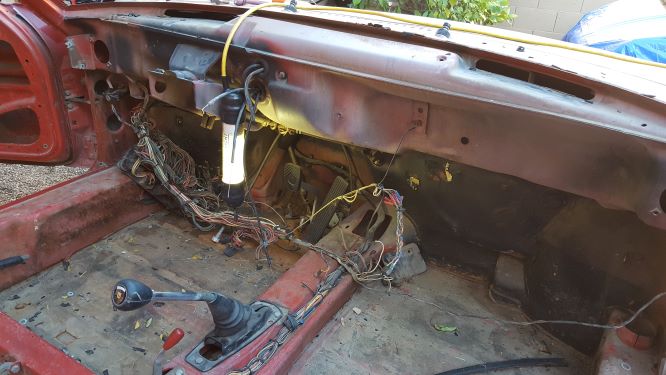
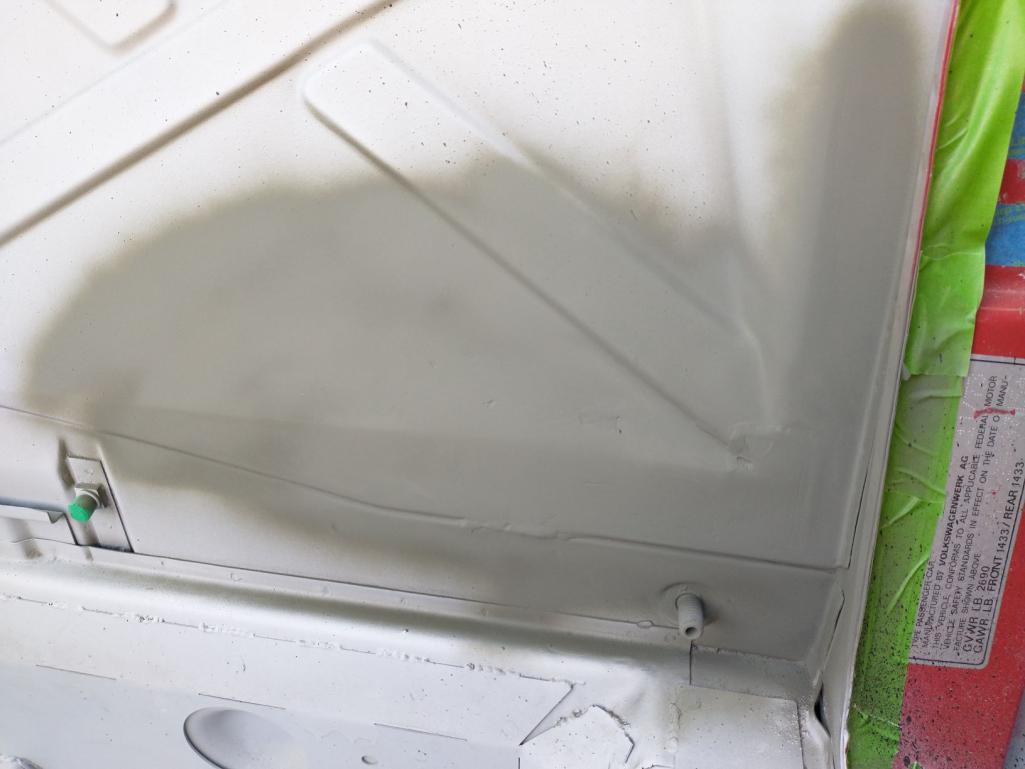
Someone had repainted the inside of the front trunk lid white, and they got over spray all over the dash. A bit of extra work to correct it.
I pulled the outer rockers off, and despite five pounds of silt coming out, they still look amazingly rust free!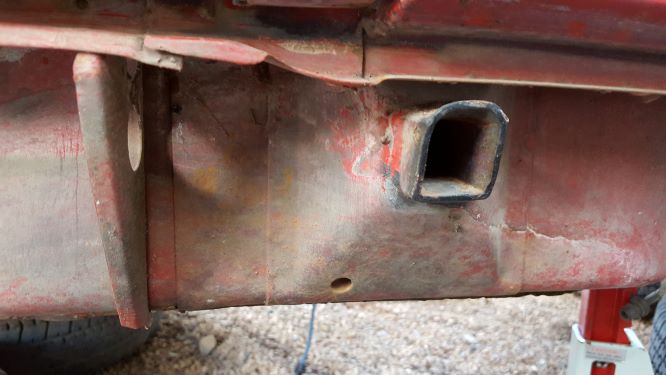
Posted by: mgarrison Feb 29 2020, 10:25 AM
I managed to get the headlight assemblies all out, and focused on trying to clean up the tiny, hard to reach area under the headlight buckets. Not sure how you really get in there to clean, repair, etc. but it seems like even the Germans had a tough time getting paint back in there!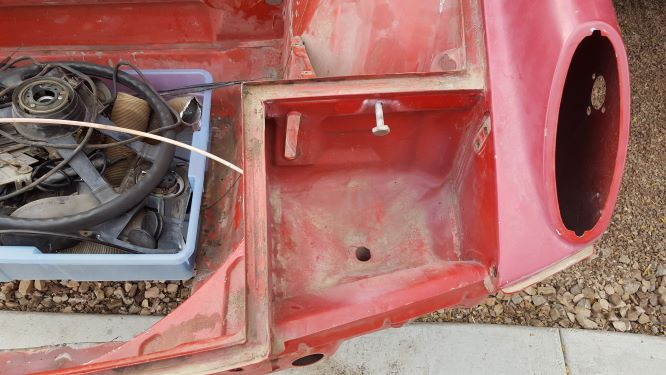
Posted by: Mueller Feb 29 2020, 10:27 AM
The red car does look solid, I wish my car was a rust free as yours!
Posted by: JRust Feb 29 2020, 10:36 AM
Welcome to the madness. There are quite a few suby conversion on here. Did you decide on a suby motor? I'd recommend doing the ez30 6 conversion. With a Subaru trans as well. Lot's of help here with it. There is even a nice finished one for sale in the classifieds for $14,500. Your 74 is definitely in good shape rust wise. I'll be following along to see how it goes.
Posted by: Thunderchief Feb 29 2020, 10:44 AM
Is it hard to get the headlight assembly out? I need to do that.
Posted by: mgarrison Feb 29 2020, 11:41 AM

Is it hard to get the headlight assembly out? I need to do that.
It was not horrible, but not too obvious on a couple of parts either. Hardest part was getting the pivot shaft for the popups out. Still not sure exactly what worked in the end. Its 2 bolts on the outside, and 3 bolts on the inside of the car towards the middle of the trunk - I missed the upper inside bolt on the first side and could not figure out why it was not loose for a minute. The plastic connector plugged into the headlight on the drivers side crumbled into my hand when I tried to unplug it.
Posted by: mgarrison Feb 29 2020, 11:43 AM
Welcome to the madness. There are quite a few suby conversion on here. Did you decide on a suby motor? I'd recommend doing the ez30 6 conversion. With a Subaru trans as well. Lot's of help here with it. There is even a nice finished one for sale in the classifieds for $14,500. Your 74 is definitely in good shape rust wise. I'll be following along to see how it goes.
I am thinking a WRX motor and trans, but not a STI. Want to stick with the 5 speed. I grew up on early Saab turbos in the late 70's and really like small displacement turbo motors.
Im hoping Ian will be back making cradles by the time I am ready. Not sure I want to tackle fab'ing a cradle up, but if push comes to shove...No way I will pay for the Renegade setup.
Posted by: GermermanCarGuy Feb 29 2020, 04:34 PM
I, too, am currently in the process of doing a subi conversion. You've got a better starting car (a lot less rust).
If you're thinking a 2.0 or 2.5 WRX conversion, I have a Small Car Performance Subaru 4 Cyl-Vanagon 4WD Engine Mount cradle that I'm not going to use (for sale). Several others on this site have used these cradles with no problems. I'm going a different route.
If you're interested, PM me.
RobF
Posted by: mgarrison Feb 29 2020, 09:15 PM
After some wasted time repairing a sprinkler valve this morning, I was able to spend a few hours working on the 914.
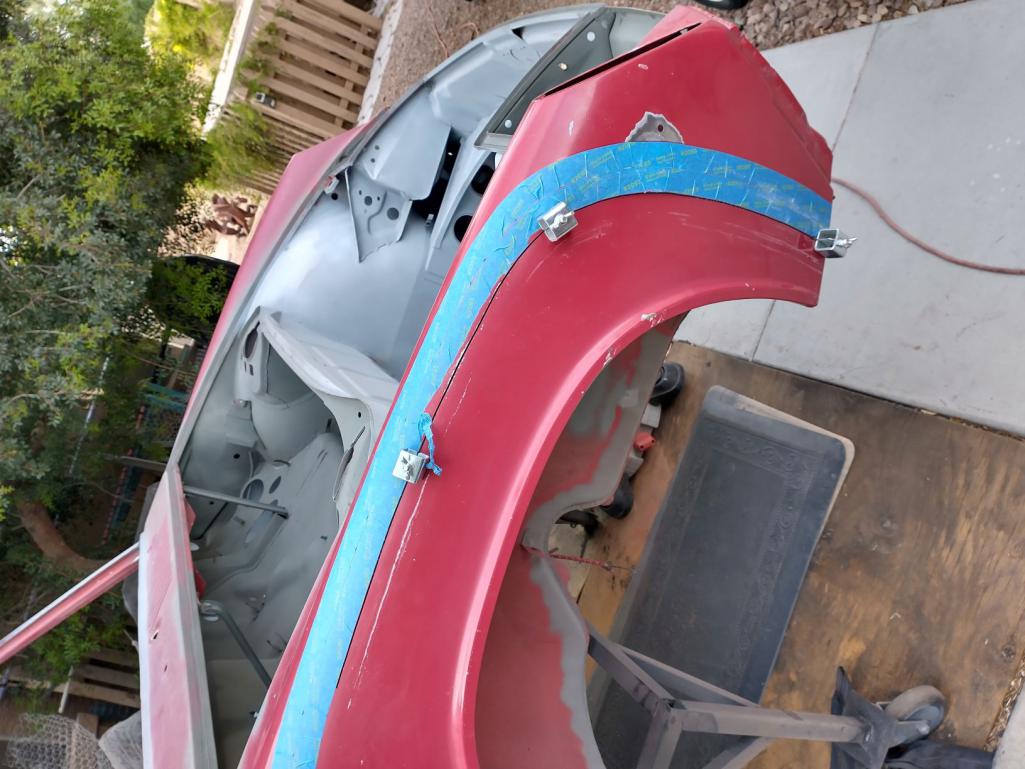
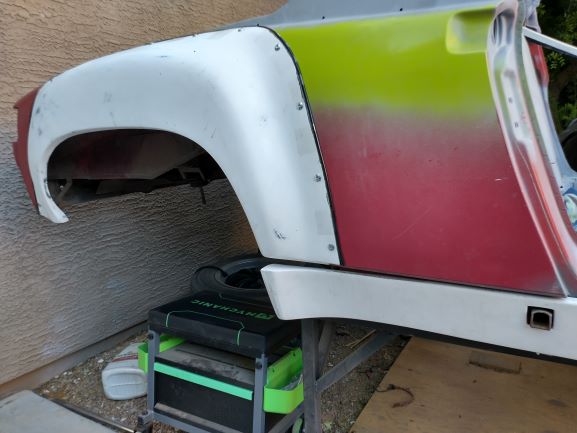
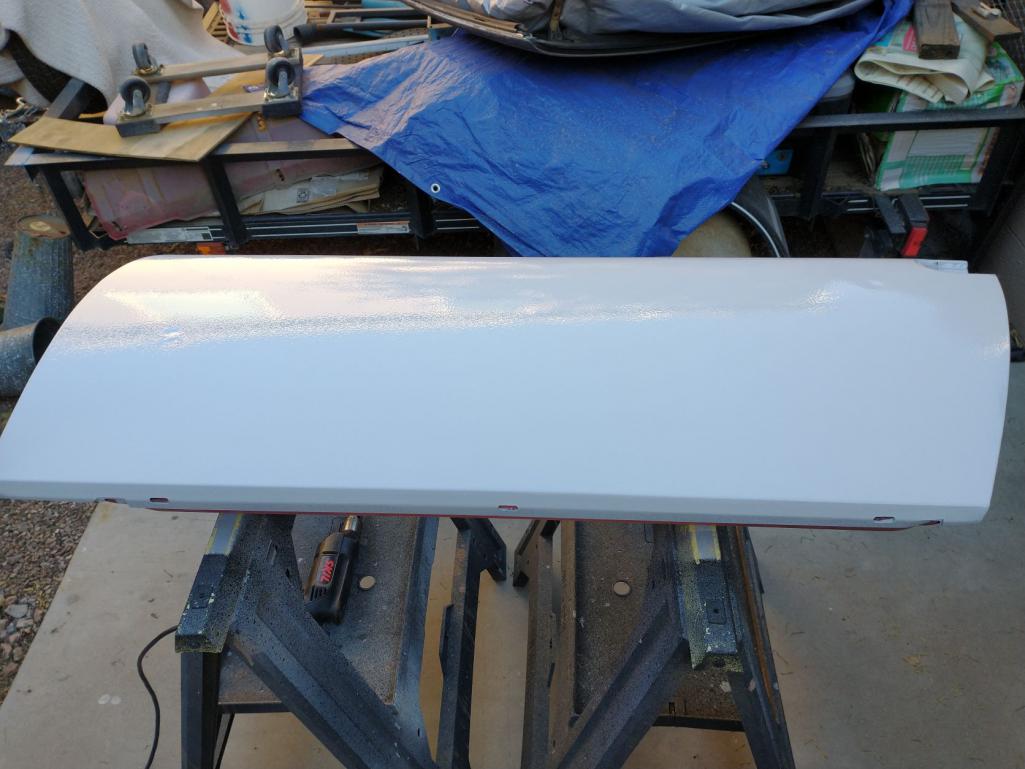
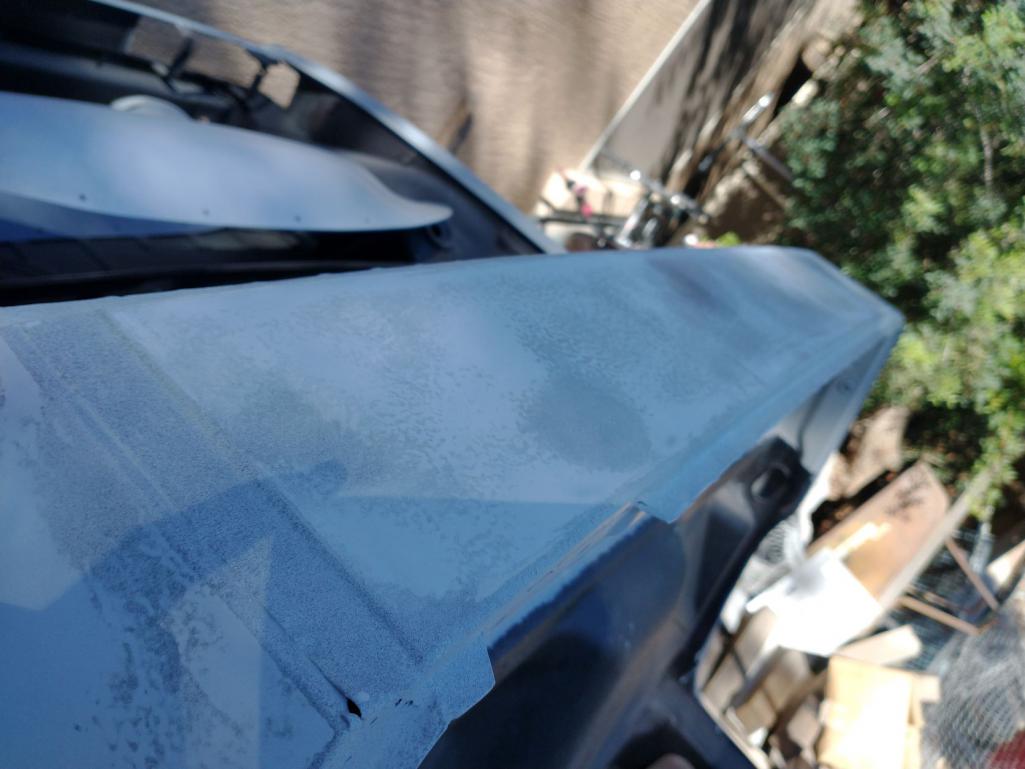
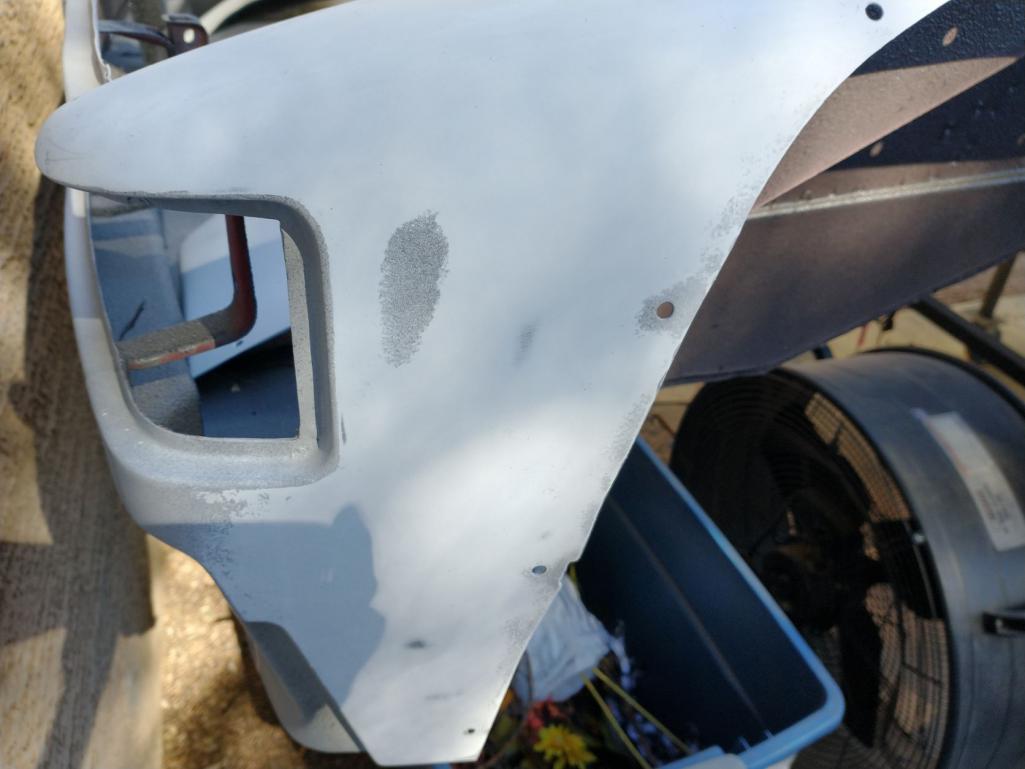
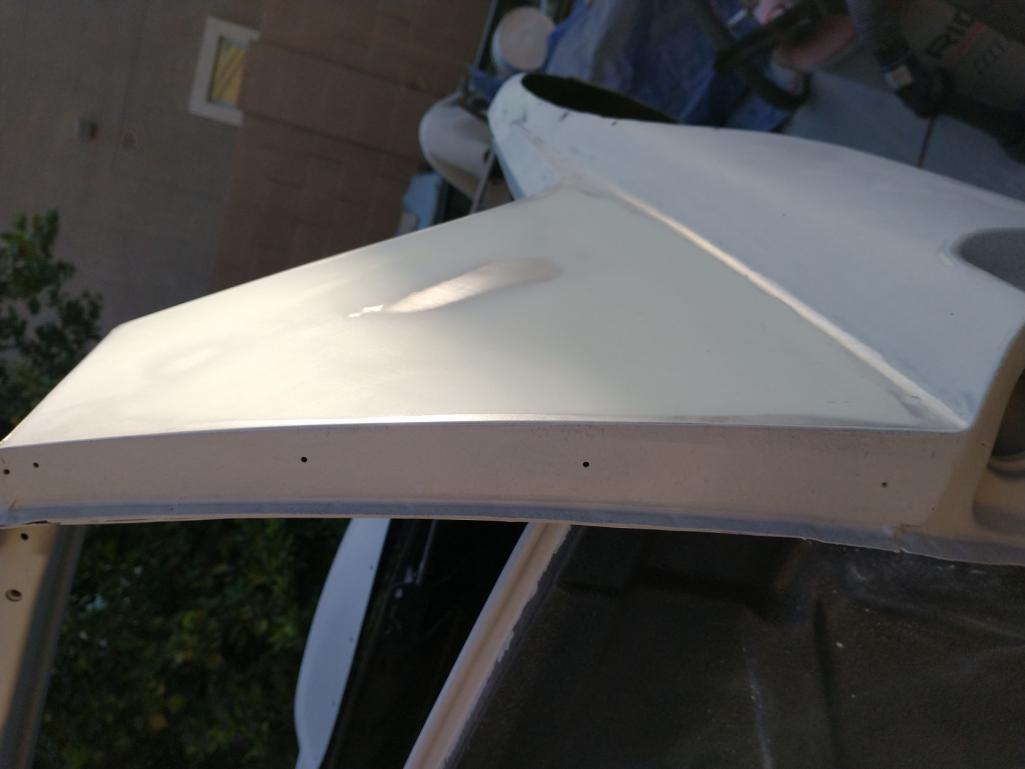
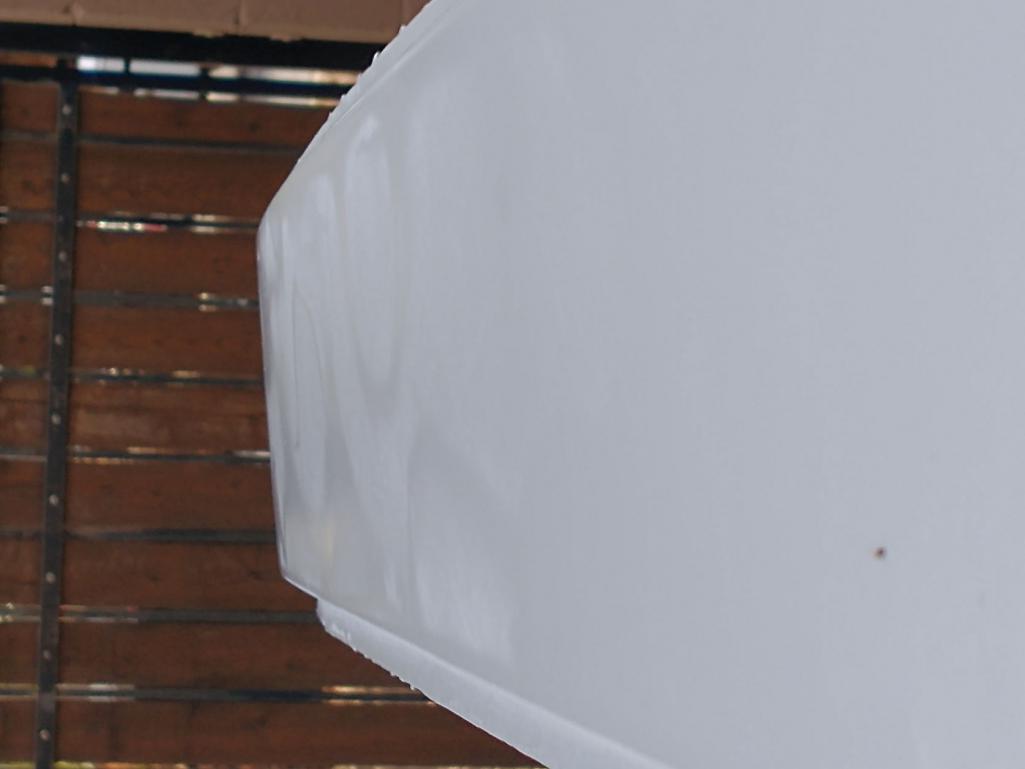
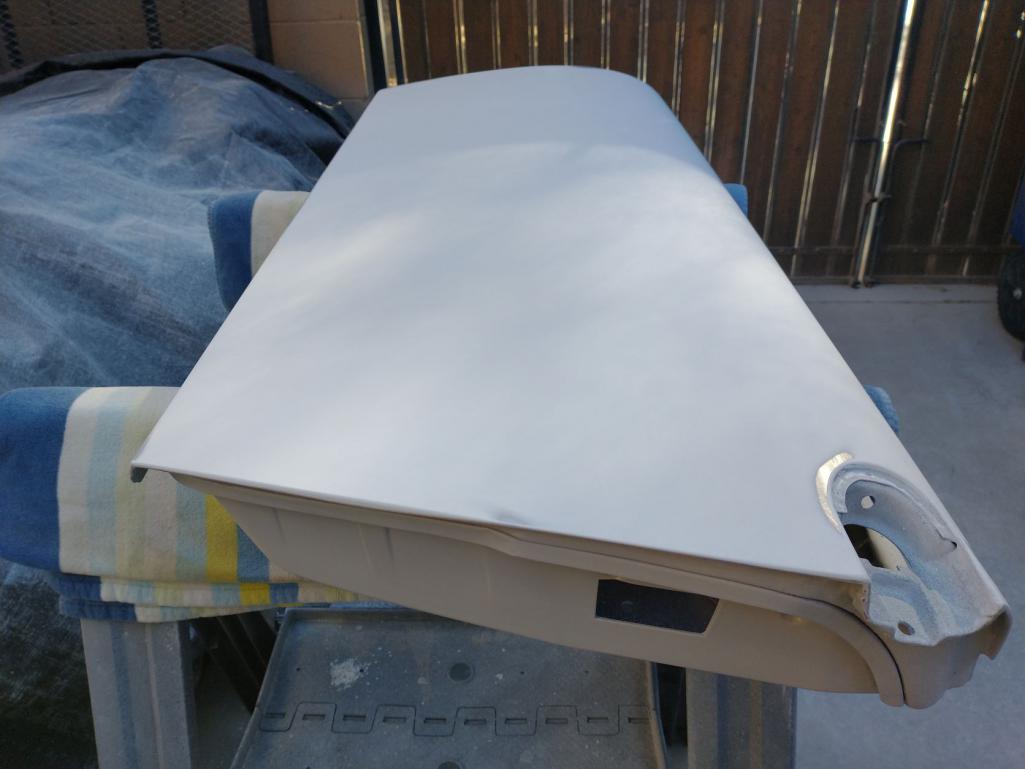
Yesterday just for the heck of it I decided to buff out one of the fenders to see what the paint looked like under all the years. Not too bad considering!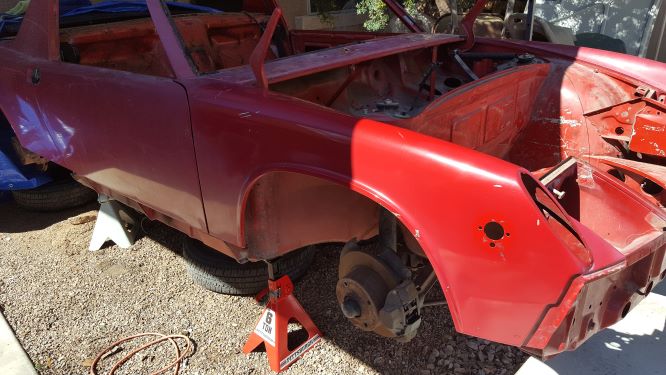
Its too bad I dont like/cant really see red very well. It would be a lot less work to just clean up the Bahia red than it will be to change the color! Oh well, the joys of being color blind...
Posted by: mgarrison Feb 29 2020, 09:20 PM
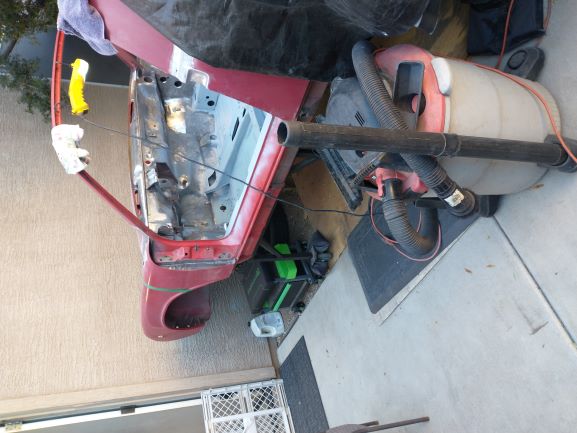
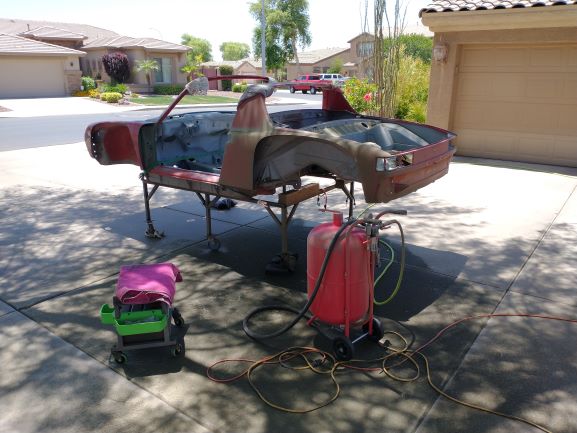
Since all my garage space is taken up already, I had to get creative and create my own temporary, outside garage. It seems to work, at least until I start doing some serious engine and trans work. I may have to kick my son's Miata out of its spot at some point.
Here's the overnight, storage setup.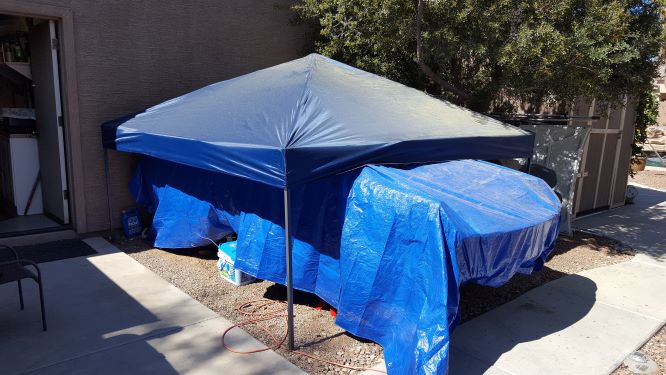
And the I'm working now, so leave me alone unless I am bleeding, screaming, or lodged under the car in a life threatening manner.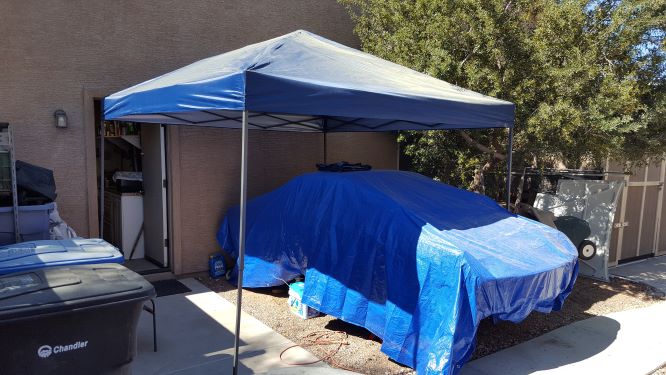
The pollen coming of the tree is a bit much this time of year though.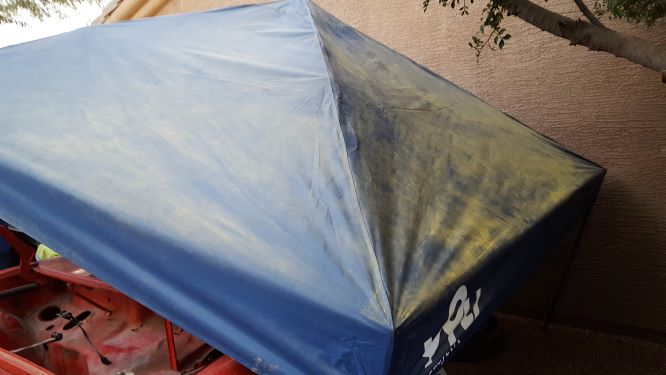
Posted by: mgarrison Feb 29 2020, 09:26 PM
I did manage to get the pedal cluster out. Quite a bit of surface rust under there, but nothing seems to have gone very deep.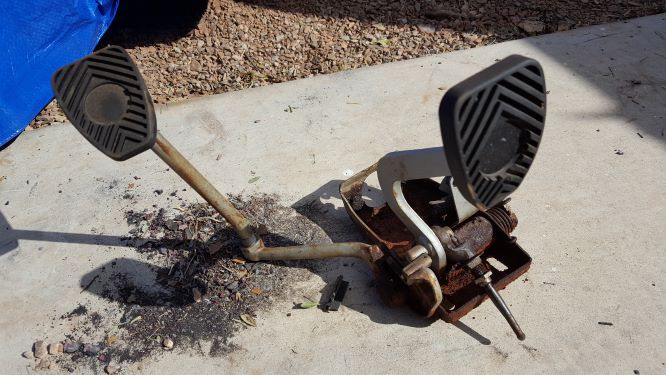
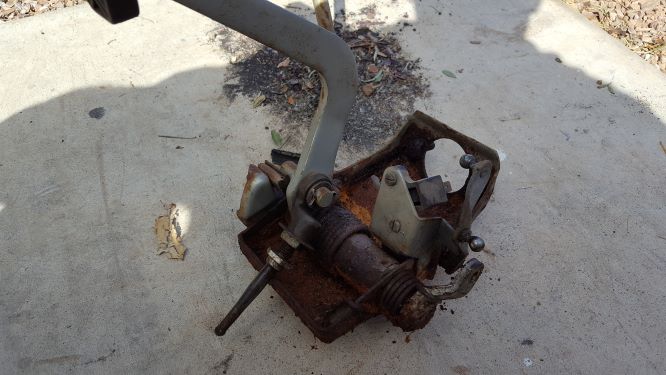
A bit of cleaning and sealing is due back here...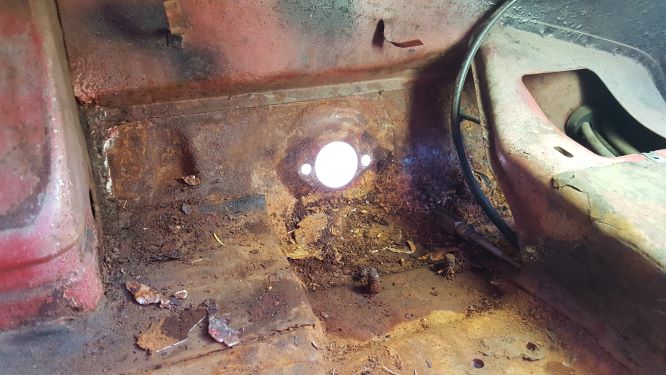
The wiring harness removal was way too much fun. Got 95% of it out intact in case its needed down the road, but it so old and crunchy I'm not sure it safe/worth using!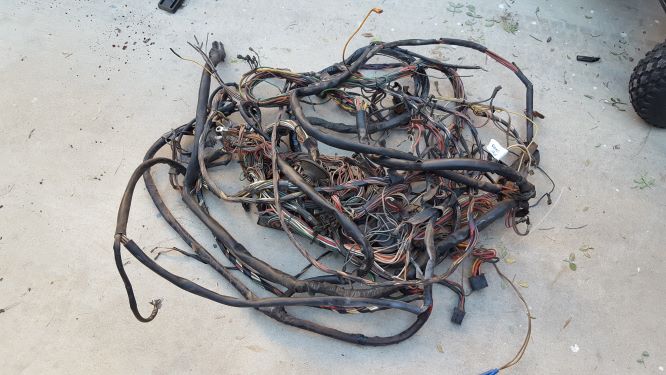
Does anybody have any amazing, creative ideas on how to clean out the tunnel area if you are not replacing any of the floor? Bit of a mess in there, and impossible to get to. Some kind of chimney sweep brush hooked to a drill???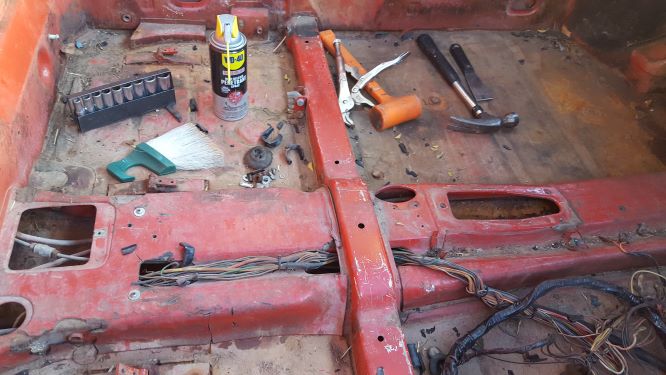
Posted by: mgarrison Feb 29 2020, 09:30 PM
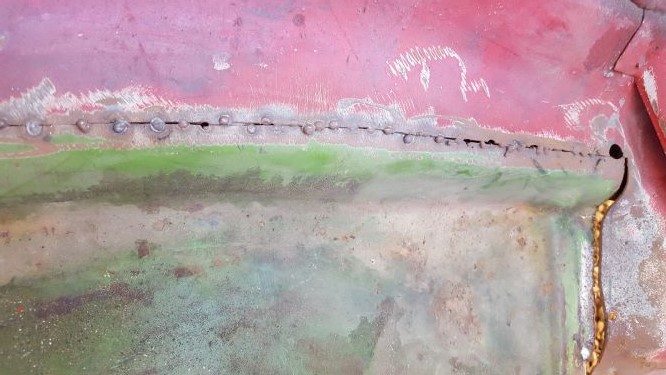
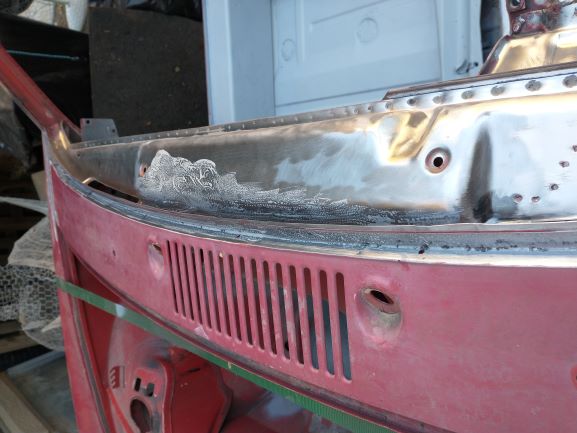
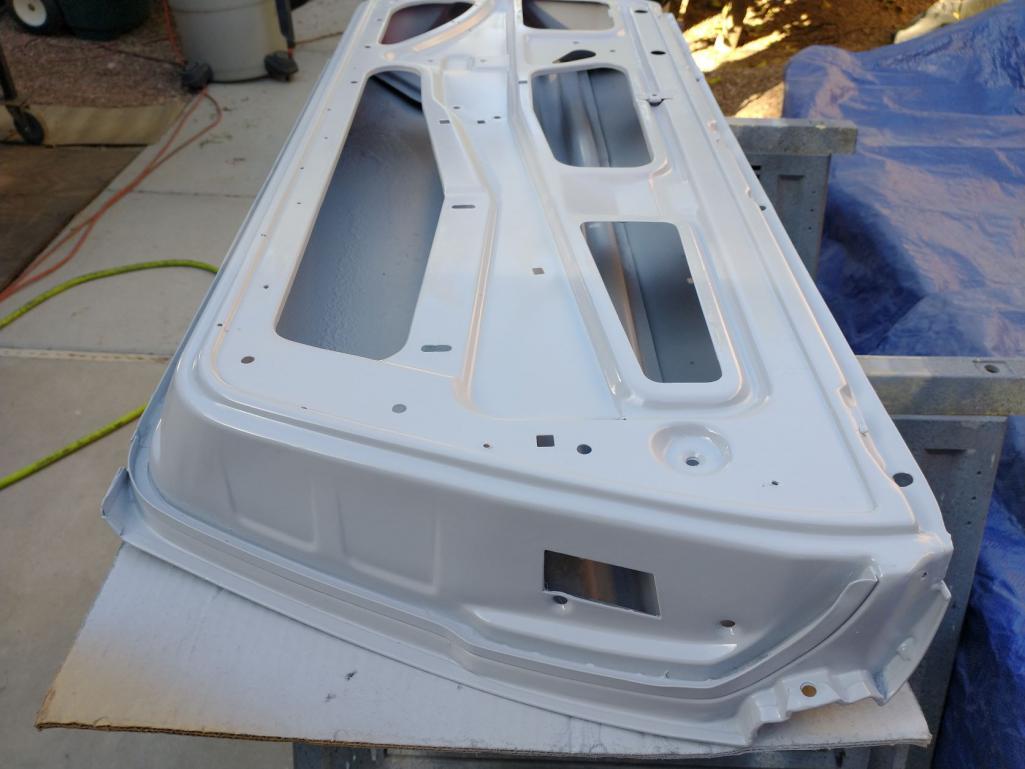
I also pulled the read trunk lid off so I could remove the wiring harness from the rear of the car.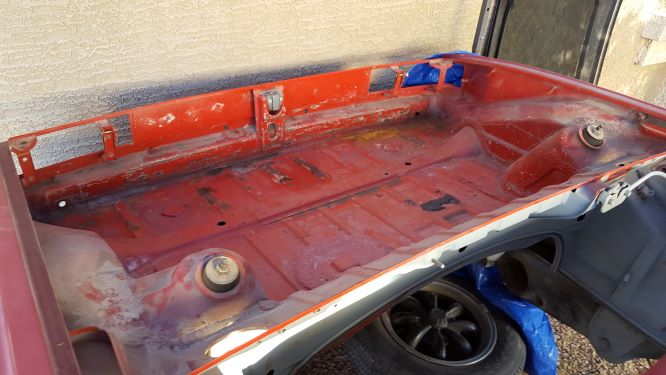
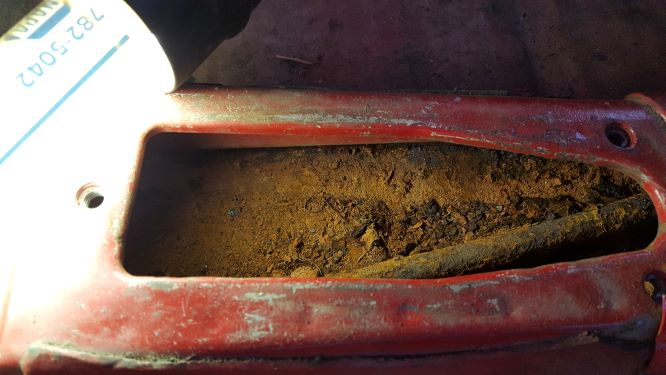
I was checking out the battery tray, and it literally came off in my hand! Two very unsuccessful tack welds were not doing much to hold it in place. Looks like it may have been replaced around 2008 from the sticker still on the bottom.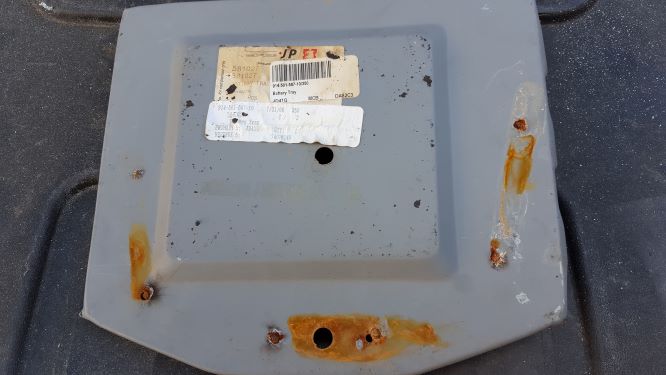
Posted by: billh1963 Mar 1 2020, 05:46 AM
You are starting with a very solid car....congratulations!
Posted by: Mayne Mar 1 2020, 08:28 AM
Looks like you’re having fun! Keep posting so we can see this one come back to life.
Posted by: Literati914 Mar 1 2020, 10:52 AM
..
Does anybody have any amazing, creative ideas on how to clean out the tunnel area if you are not replacing any of the floor? Bit of a mess in there, and impossible to get to. Some kind of chimney sweep brush hooked to a drill???
I'd like to know the same. I did get mine pretty clean though by using a shop-vac with a small wand/nozzle (shift rod, etc. removed)... I'm thinking next I'll use a landscape leaf blower and blast it from the Shift rod hole (@ the engine compartment) forward, and from the rear access hole in the tunnel - blow towards the pedal cluster area. Then I was thinking I'd maybe attach a cloth/sponge (soaked in diluted phosphoric acid solution) to the end of a long flexible rod .. and work it up in there everywhere, to stop/kill surface rust. Let that dry then use 'internal frame rust paint' paint from Eastwoods to spray for future protection (it comes with a long flexible applicator hose/nozzle w/ a fan pattern). Heck I might even go with a spray-on wax product after that (I forget the name), which is made for such situations. That's my plan so far - anyone got a better solution, we're all ears !
Posted by: mgarrison Mar 1 2020, 10:02 PM
Didn't seem like I got much done today, but I'll take what progress I can get!
The first order of business was to eliminate the branch that I walked into three times yesterday!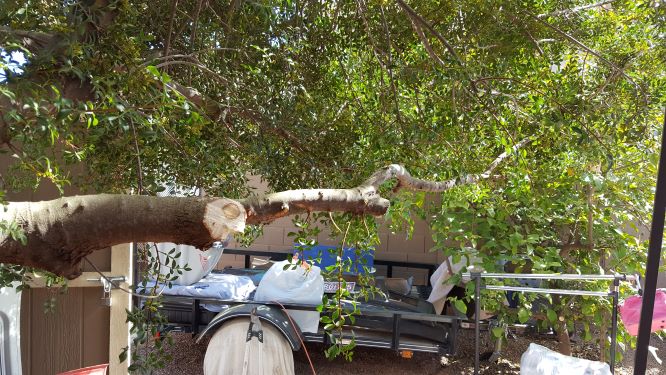
Forehead was getting sore from that stupid, low hanging branch...
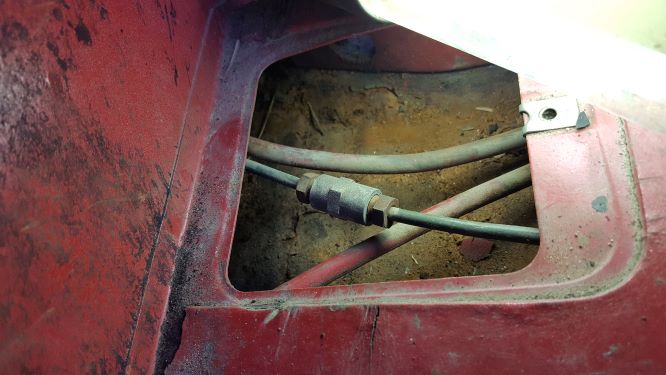
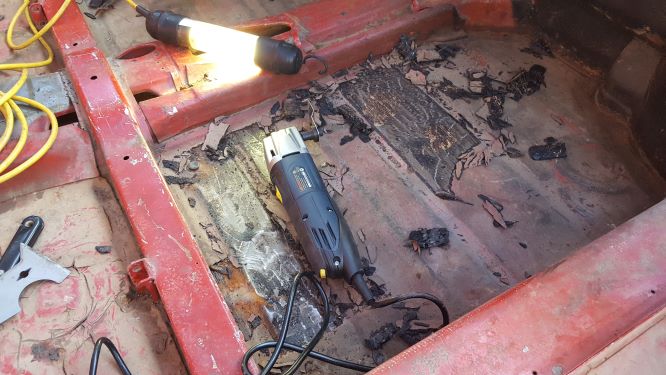
I managed to get the brake line and the fuel lines out of the tunnel with some help from above from my wife. That's not a 1 person job for sure! Once those were out, I thought I'd take a shot at the tar lining the floor. Need to say a big thanks to one of the posters here that showed using an oscillating tool on the tar - it jarred my addled brain enough to remember I had one of those from HF in my storage! It made fairly quick work of the tar, but does bog down a bit on the seam sealer. Floor looks like it is in pretty dang good shape except for a few dents from hitting things over the years - sure can't complain!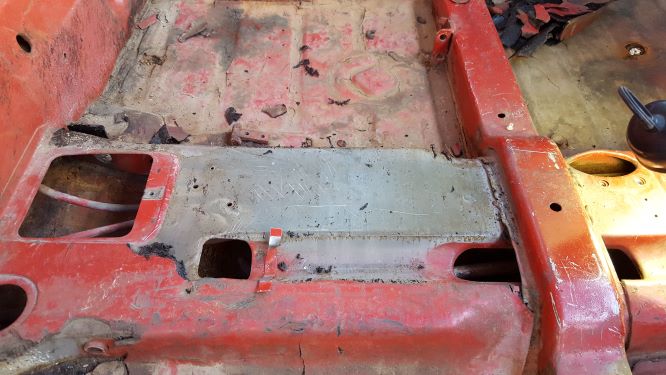
I had to bundle the car back up for the evening. Supposed to rain tomorrow...not supposed to happen this often in central AZ!
Posted by: mgarrison Mar 9 2020, 01:01 PM
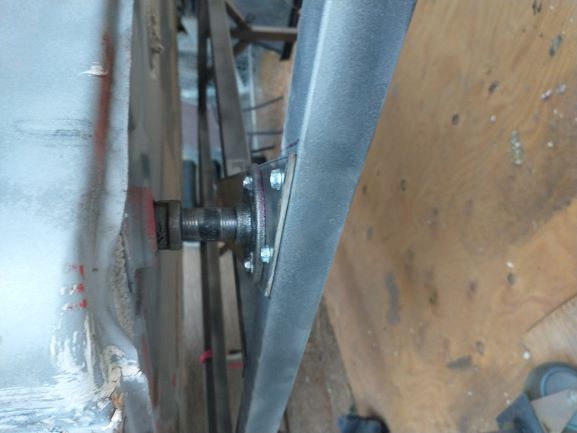
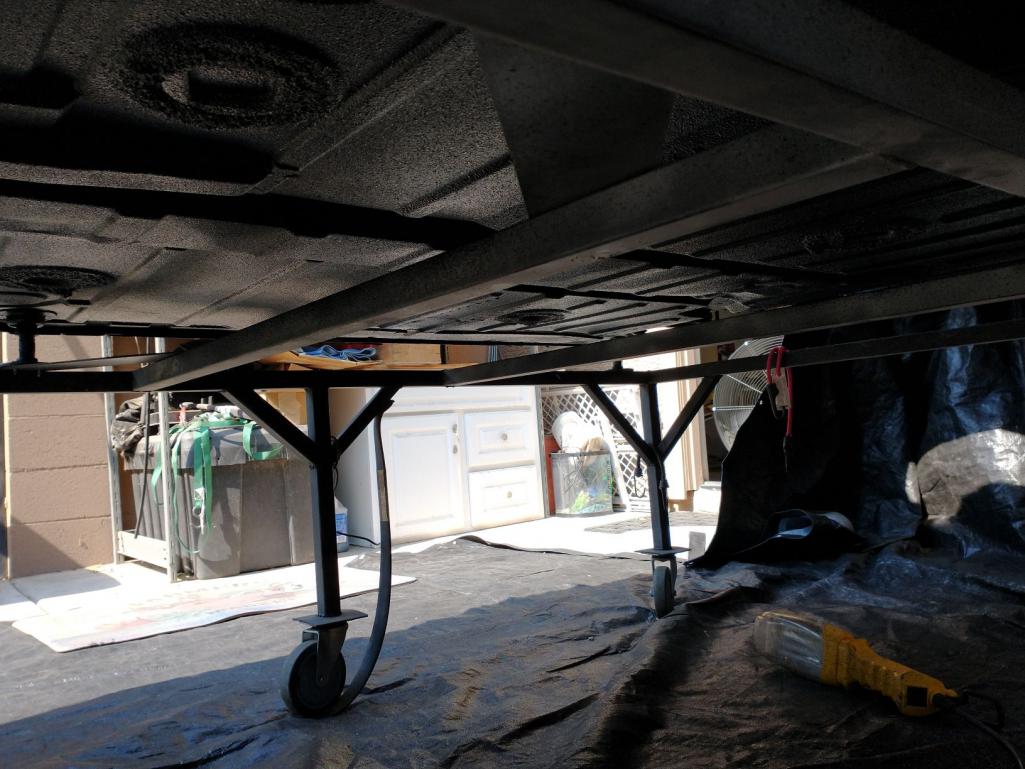
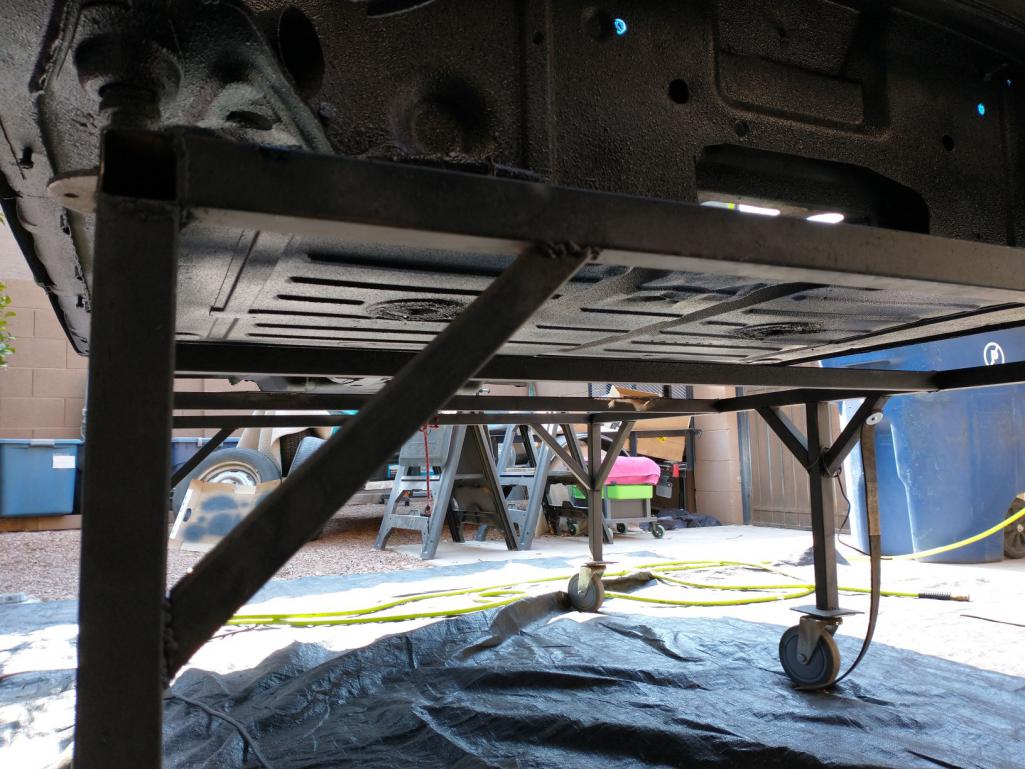
I got distracted for about a week fab'ing up a body dolly. It took a lot longer than expected (of course), but seems to work well!
Here's what I came up with based on how high I could jack up the 914, and the local supply of steel tube...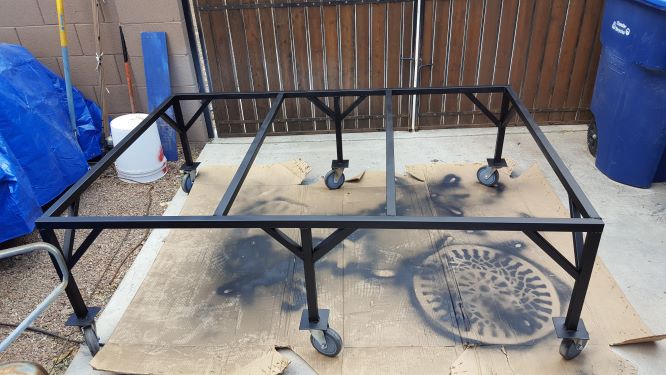
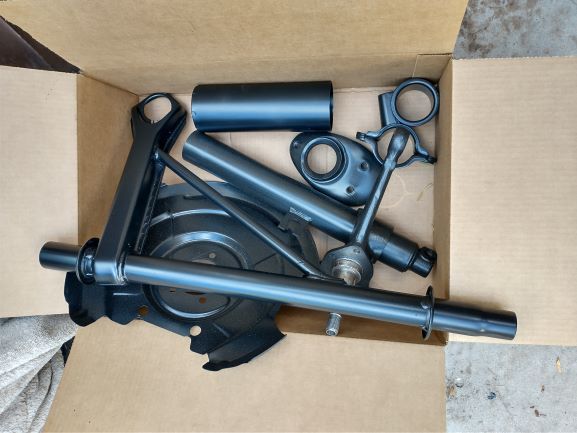
I dropped the front and rear suspension, as well as the steering rack of the body to lighten things up as much as possible.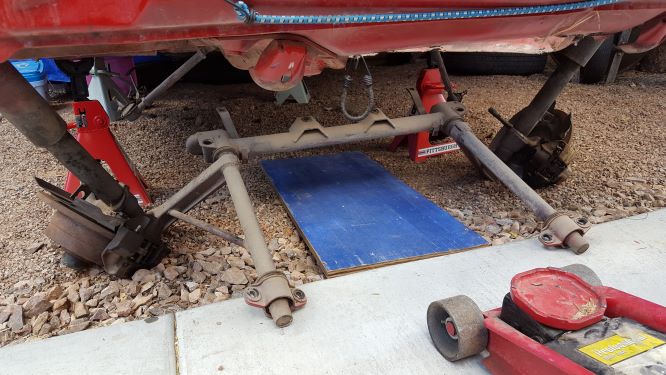
It took a team effort, but we finally got the dolly positioned where I wanted it. Will be nice to have my jack stands back, and not have to bend over much to work on the 914.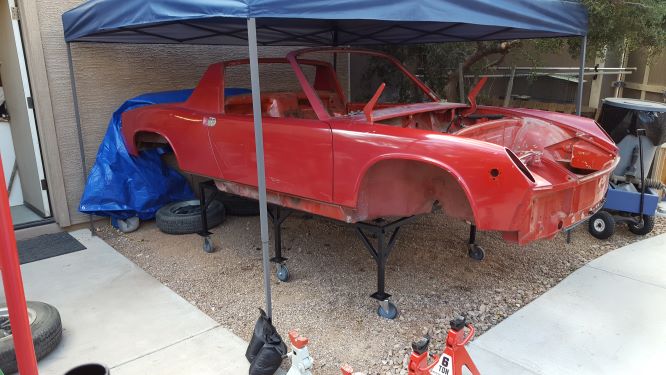
I was even able to position the 914 a bit by myself in the gravel. That was a bonus as I expected it to take 2-3 people to move it in the gravel! Lot's of room to tuck things away under the body now.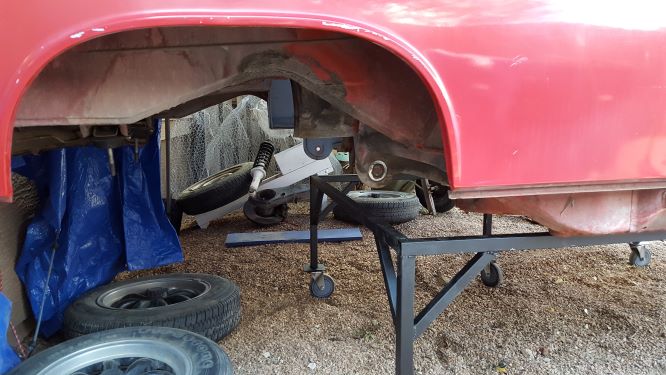
I just need to figure out how to tie it down to the dolly so it can't move/slip...
Posted by: 76-914 Mar 10 2020, 10:41 AM
Nice job. Throw a couple of sheets of plywood over that gravel. Stay after it. 
Posted by: mgarrison Apr 2 2020, 03:43 PM
Finally got back to the '14 after being distracted by a leaking dishwasher, then a clogged bathroom drain, then a leaking pool filter! Some month's, I just LOVE owning a home!
Received my RD frunk replacement floor pan. Seems like mine was cut forward of where they were supposed to be cut. Will need to buy some extra steel to cover that gap.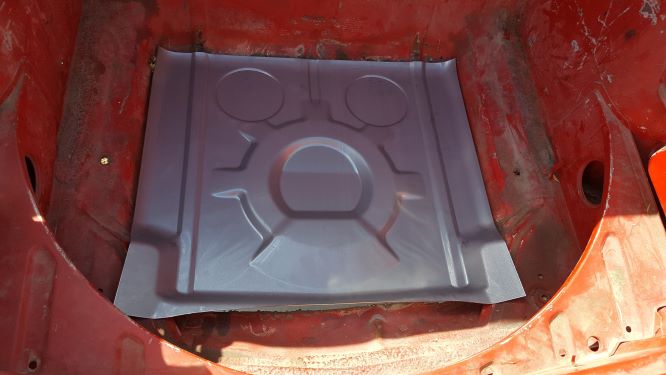
I also lost a weekend to my Son's Miata. Replaced the ball joints and corrected the Eibach coilovers - A previous owner installed the front coils on the rear, and the rear coils on the front! Not sure how they pulled that one off since the front coils were a good 1/4" longer than the rears.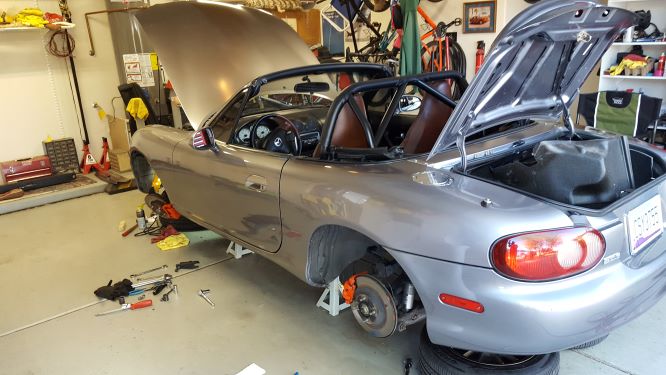
Posted by: mgarrison Apr 2 2020, 03:49 PM
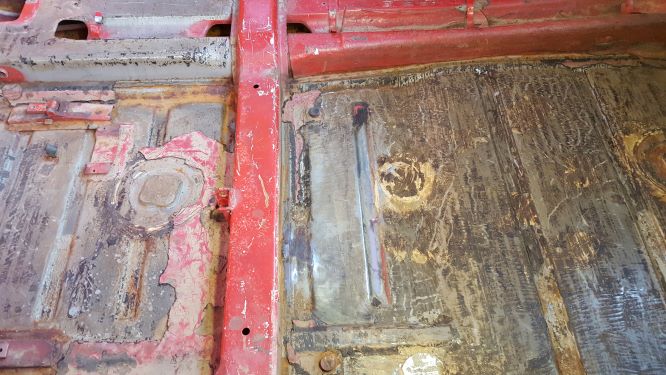
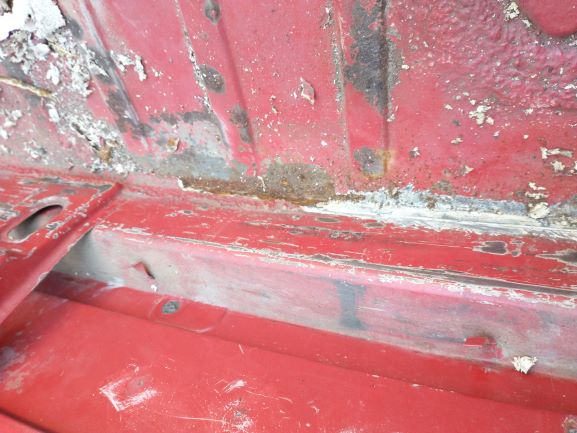
Got the tar off the floor pan fairly easy, but that seam sealer is some tenacious stuff! Floors look really solid.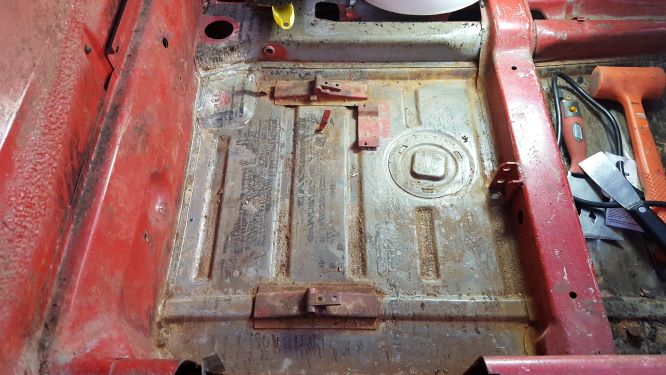
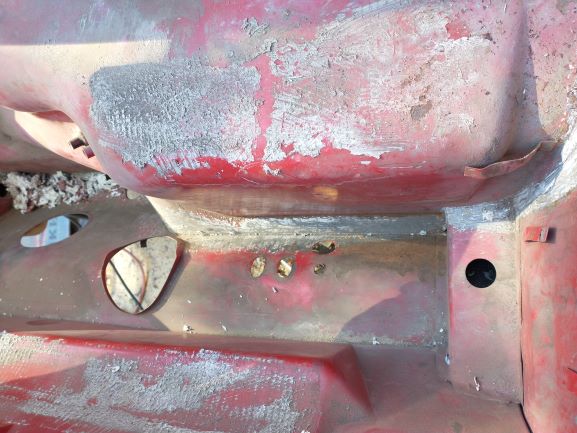
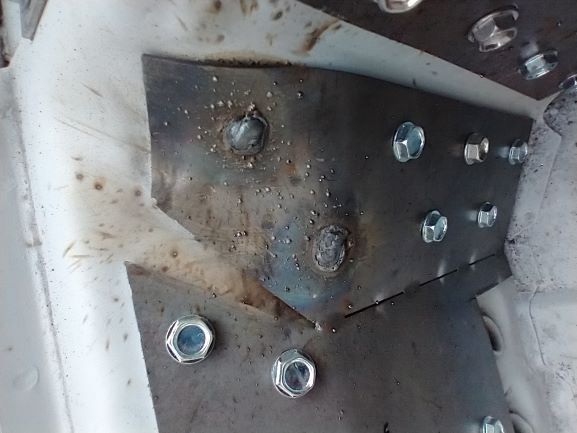
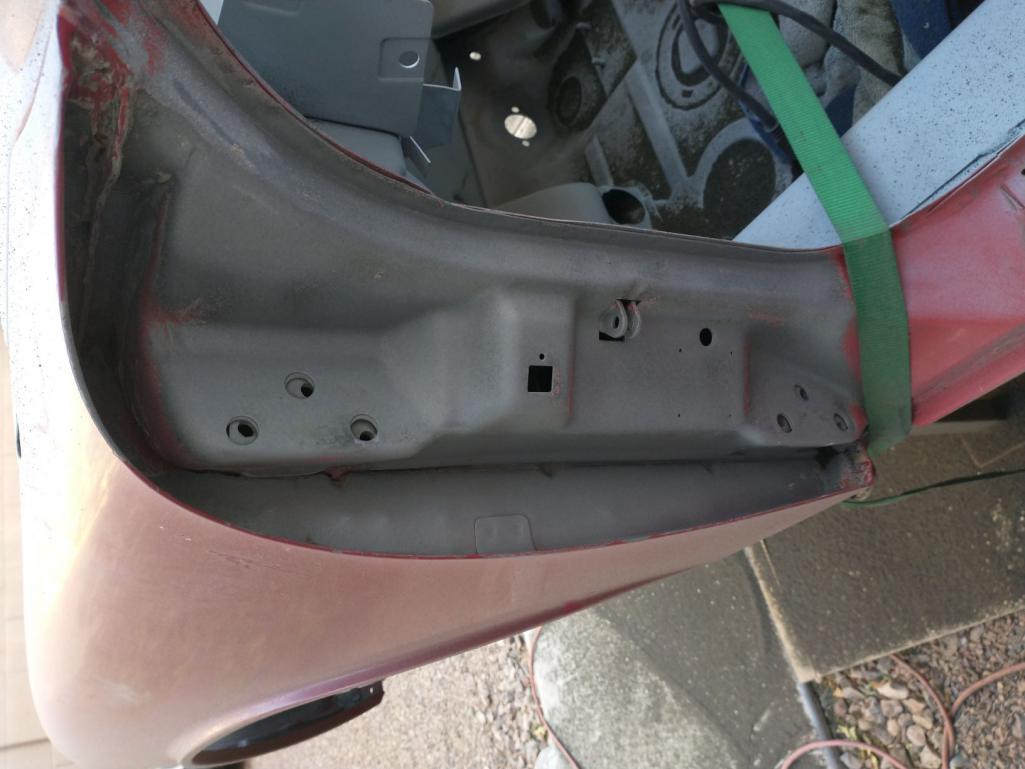
The worst rust spot and only penetration is behind the drivers seat, on the upper firewall. Seems like an odd spot for rust to collect/happen.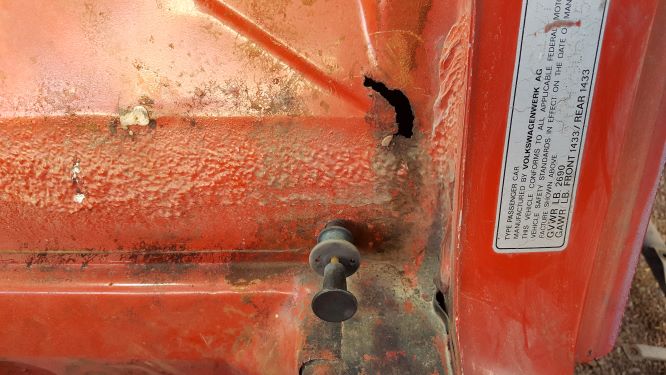
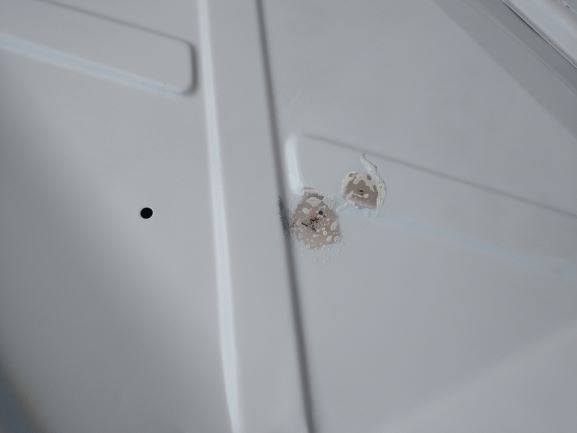
I found a couple of odd holes with rather large bolts & washers in them. One in the front middle of where the drivers seat would be. And one behind the drivers seat in the middle as well. Nothing like these on the passenger side.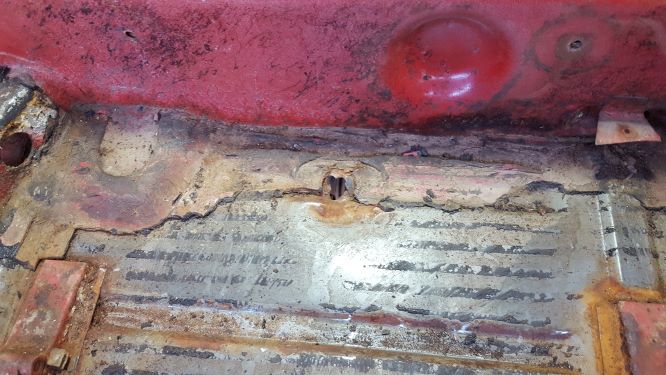
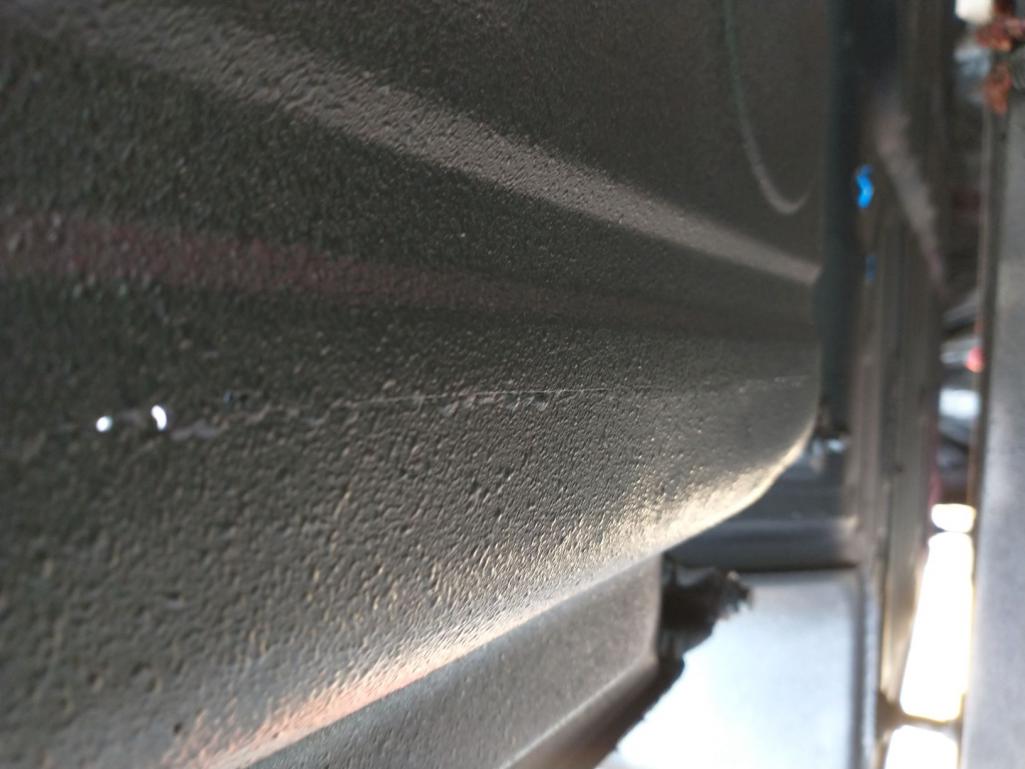
I did find stress cracks on the driver's long at the indent for the hand brake. No rust, just the cracks. Kind of artistic looking in the closeup.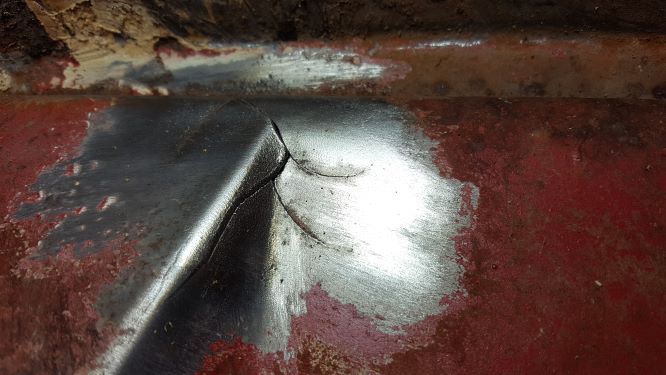
I took the wire wheel to the rust hole on the firewall. It opened up quite a bit and I discovered someone had tried to Bondo over it from the engine side. Why, why, why...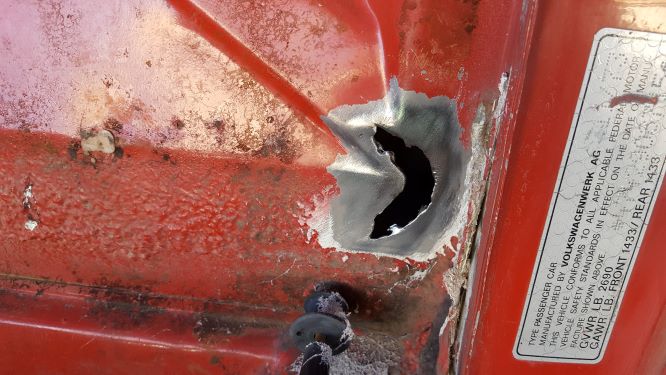
Posted by: mgarrison Apr 2 2020, 03:57 PM
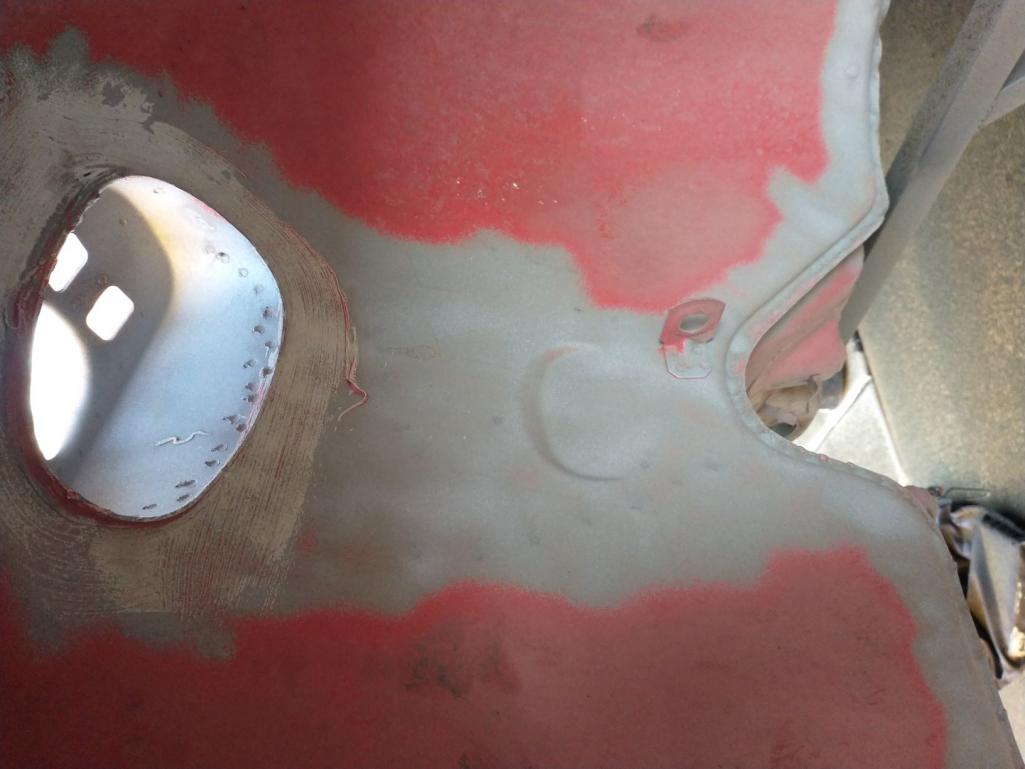
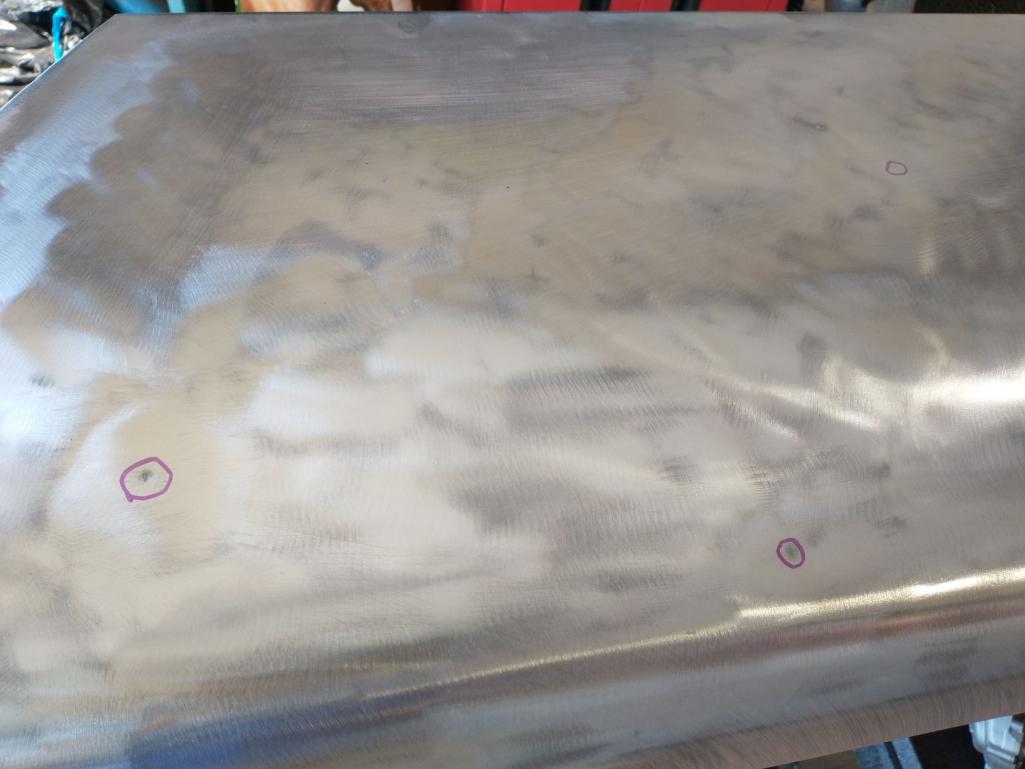
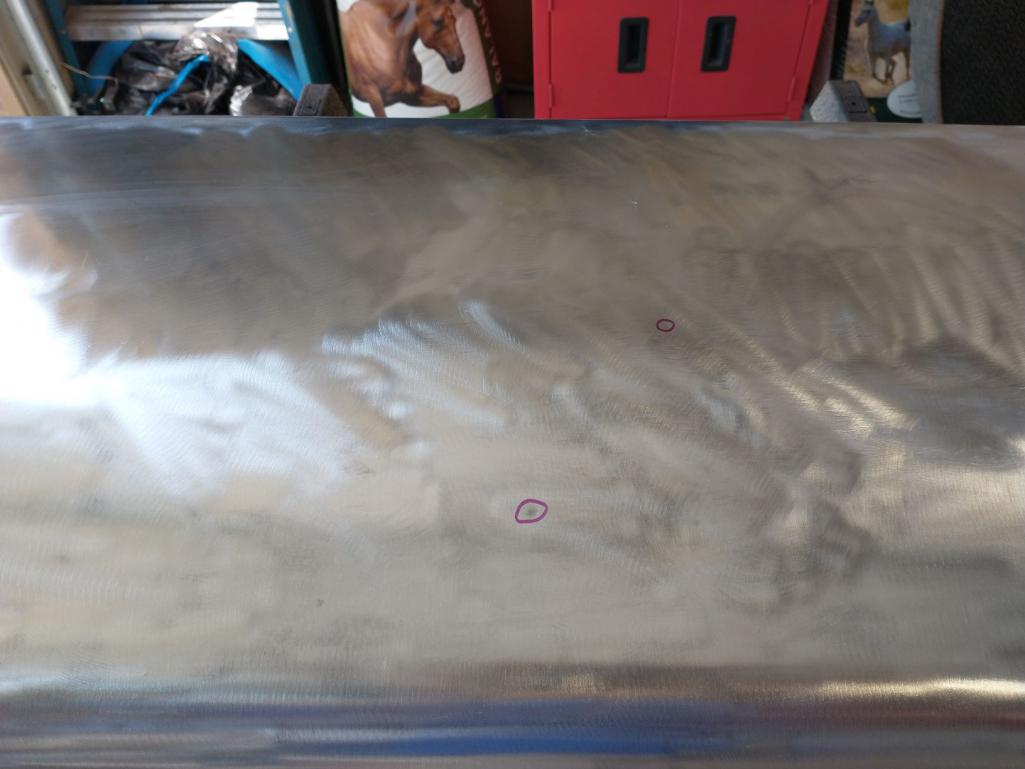
A bit of surface rust near the pedal box. Does not look too bad really. Feels pretty solid poking at it rather hard.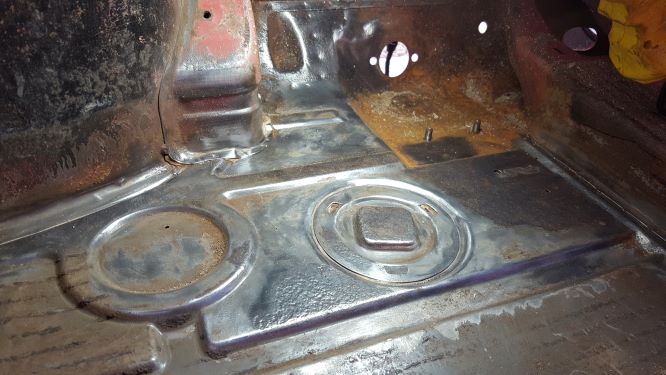
Got all the nasty seam sealer out of the firewall seam. Comes out OK with a wire brush in the angle grinder, but man what a mess!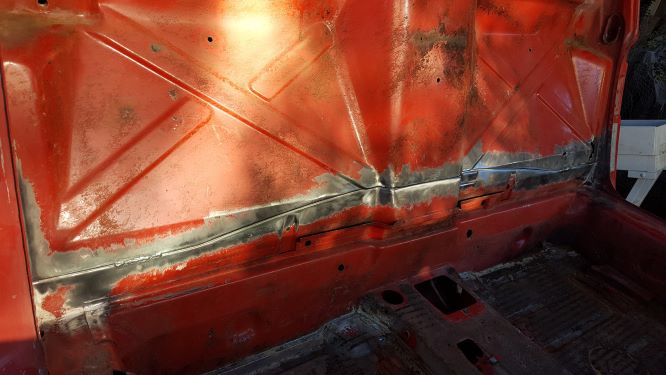
It turns out there is more than one rust hole on the firewall. Go figure...
Pedal area cleaned up a bit more. Still looks really solid.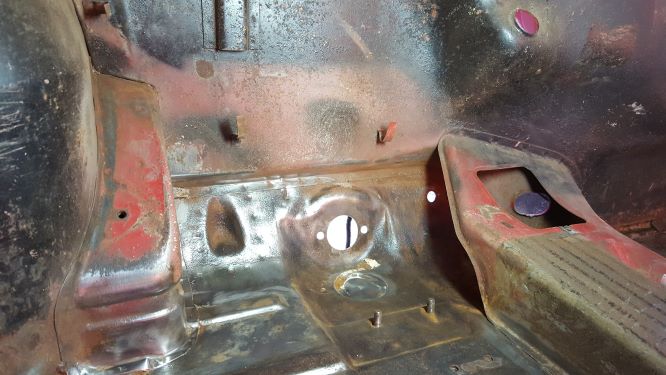
There was a section cut out of the passengers long - no idea why as I don't see anything that needs attention in there. (keeps rotating this one 180!)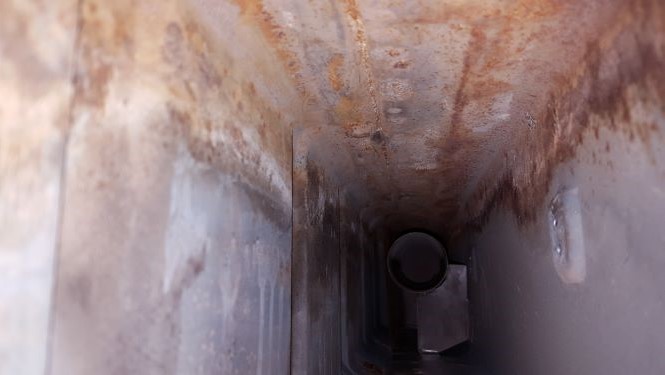
Posted by: mgarrison Apr 2 2020, 04:05 PM
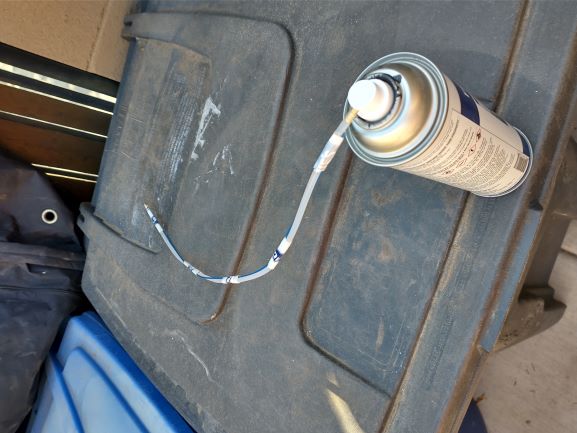
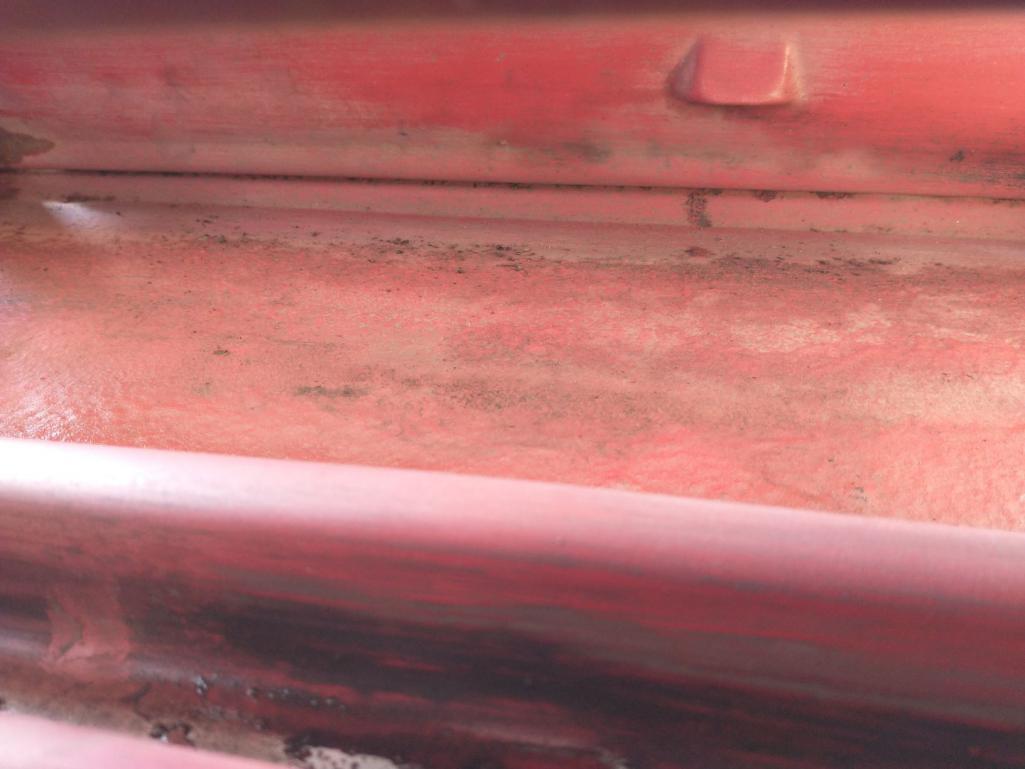
I want to run my radiator hoses through the longs like I have seen some others on the site do. I need to eliminate those elbows on the front end of the longs, but I am not replacing floors. Quite the puzzle of how to get those crazy things loose/out!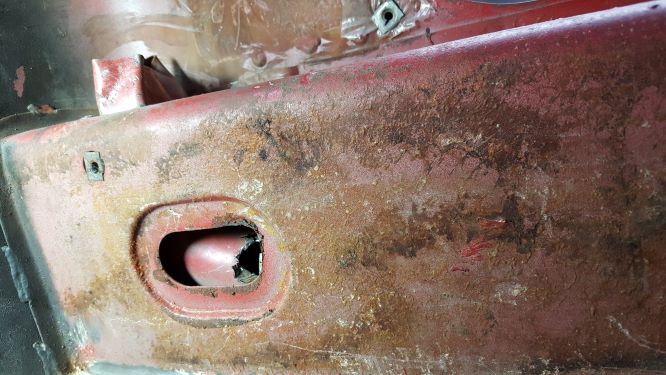
My wife's idea of distraction/humor during the social distancing/isolation. I guess she sent one to her sister too. You gotta love Bob!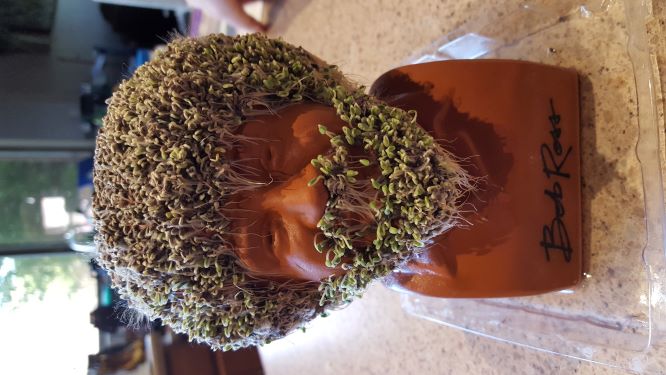
Only way I could figure to get the elbows and tubes out of the longs. I did not want to open her(need to come up with a good/saucy name for her) up this much, but it will give me a chance to clean and coat the insides of the longs.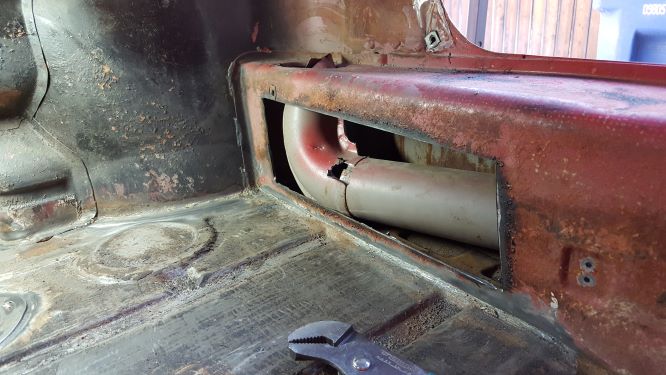
Finally got one out - quite the battle! Even managed to set a towel on fire with the sparks from the cut off wheel. Kind of funny actually...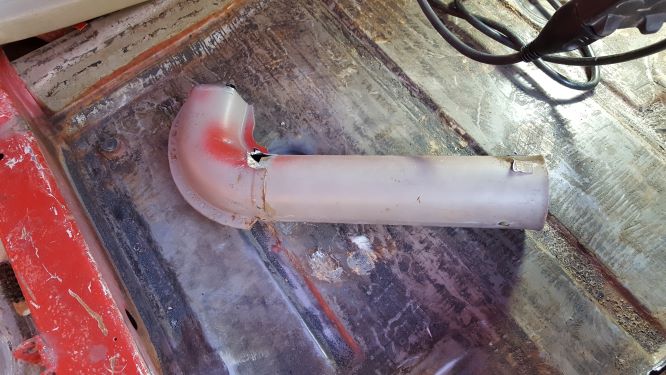
And the driver's side. Was a challenge to get the cardboard tube out from the front end of the long, but finally got it all out.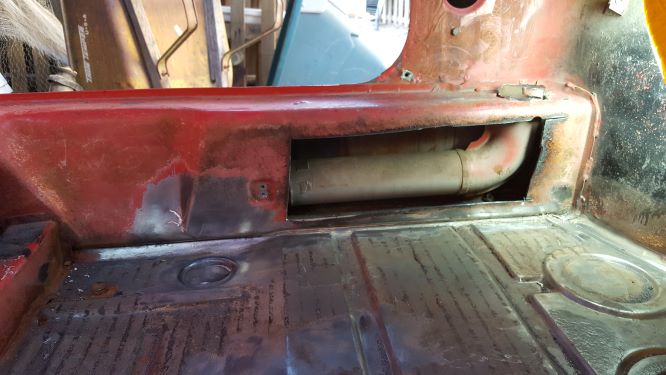
Posted by: mgarrison Apr 2 2020, 04:09 PM
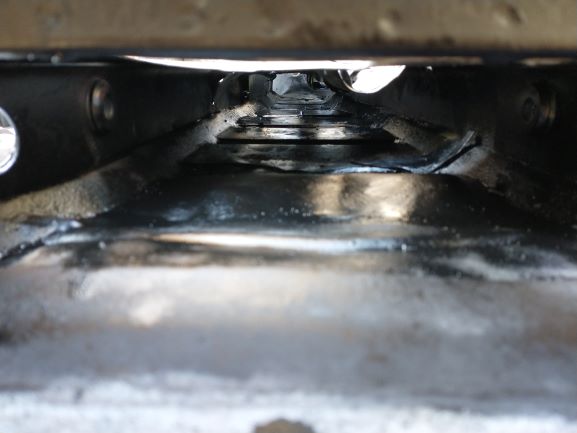
Not really sure what to say about some of these factory welds...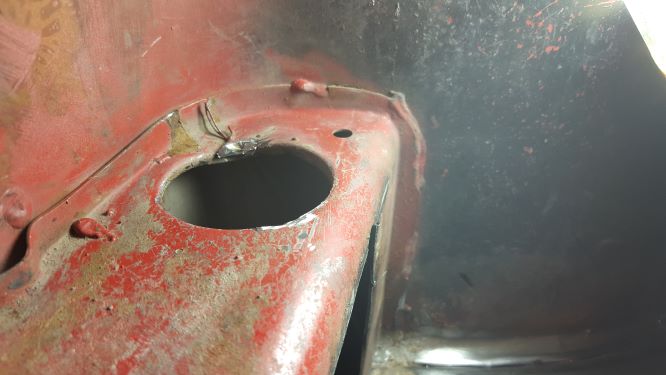
Driver's long looks really good in there too.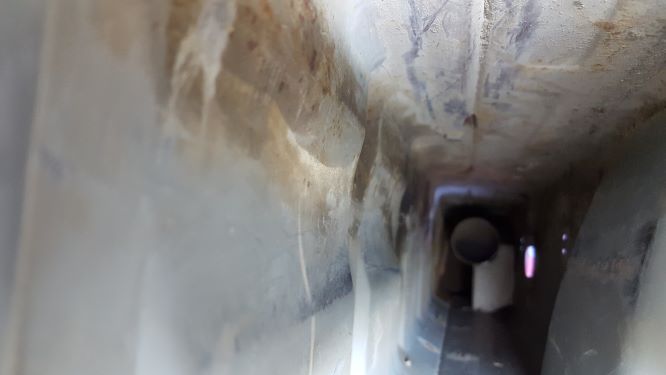
The back side of the stress cracks at the hand brake indent.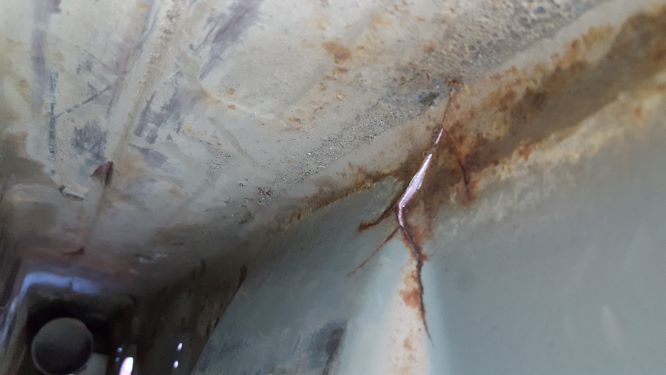
One section mostly cleaned off. Definitely took more than a minute.
Posted by: Cairo94507 Apr 2 2020, 04:28 PM
I sometimes think that stress crack at the handbrake is factory installed. I think most 914's have had or need that repair.
Posted by: 76-914 Apr 2 2020, 09:12 PM
The interior view of those longs looks cherry. Are you going to install the interior stiffer kit? ![popcorn[1].gif](style_emoticons/default/popcorn[1].gif)
Posted by: mgarrison Apr 3 2020, 11:13 AM
The interior view of those longs looks cherry. Are you going to install the interior stiffer kit?
Yea, I think so. I was looking at what kits were still available. Planning a WRX motor & trans, so the kit seems like a wise idea.
Posted by: mgarrison Nov 5 2020, 01:22 PM
It's been a long time since I updated this - been distracted like everyone else, and it was just too hot here during the summer to work on the 914 much at all. I also managed to bounce a running angle grinder off my face at the start of the pandemic lockdown! Safety glasses saved my right eye...My Sister-in-law's guidance was key to being able to treat it at home with very little scarring - saved my bacon!!
I ordered some Eastwood inside frame paint with the cool little spray tube. You can see it covered pretty well inside from the seeping out between the seams: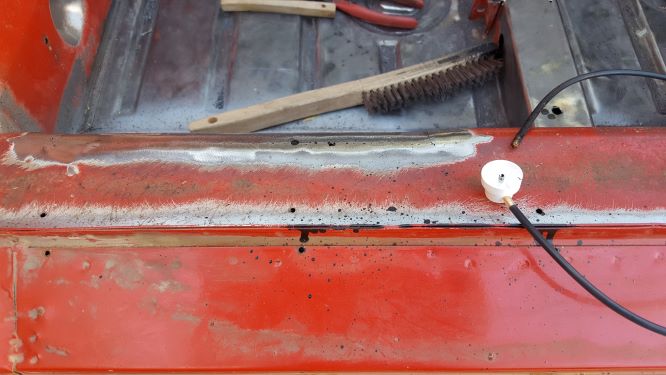
I've patched up a few small holes in the tub working on my welding skills before I try to weld in the front trunk pan AC fix panel: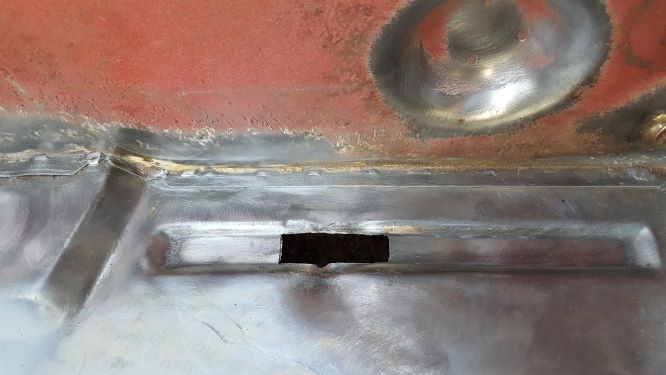
We ended up donating the green '70 that was rusty to the automotive program at the local tech school where our Son attends. Getting "Greenie" out and on a trailer took some juggling...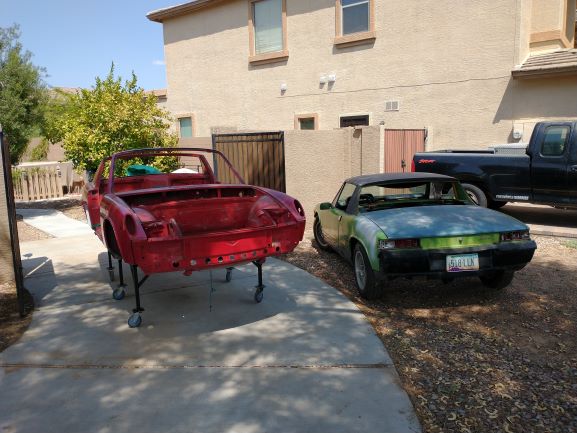
I joked the 914 was "out for a drive".
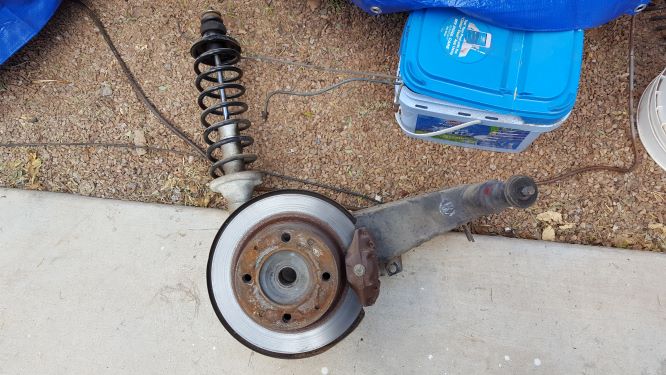
It still seemed just too hot to weld, so I switched over to pulling the suspension apart, cleaning, and repainting the pieces.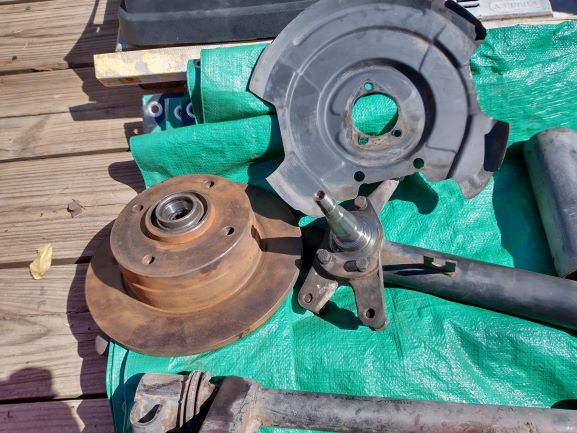
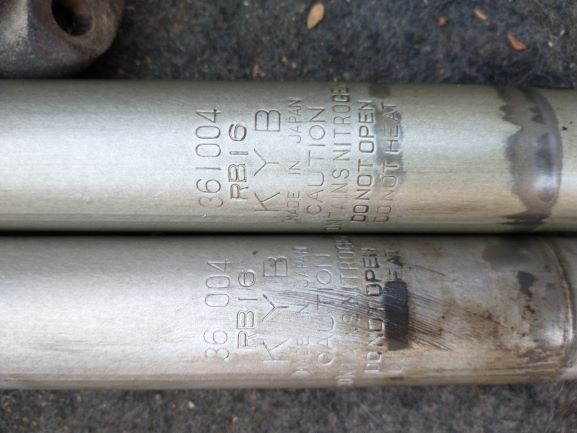
The shocks and inserts were budget KYB items. I think I will replace with the Koni adjustable units. Can anyone verify those are Boge strut housings?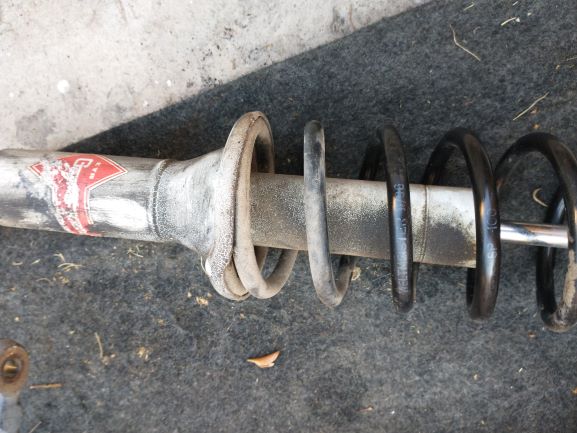
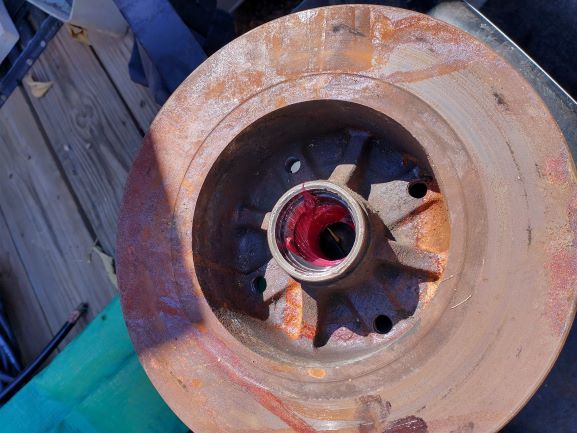
It's interesting, the brake pads, rotors, grease and bearings all seem almost brand new: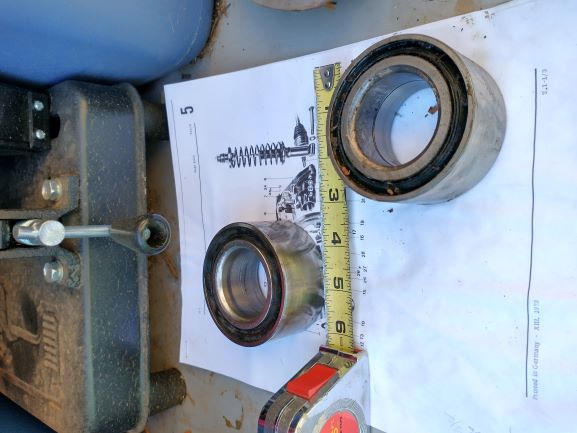
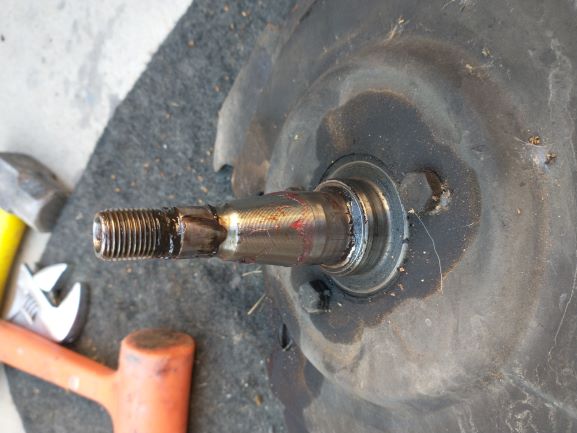
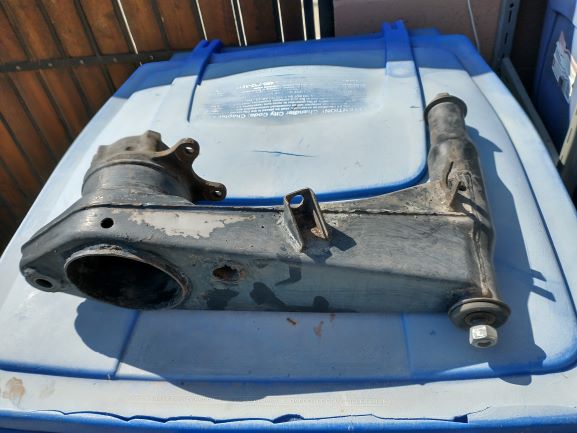
Getting those ball joints loose was quite the challenge. Thanks to the various members here who have posted what worked for them - the pipe wrench method won in the end!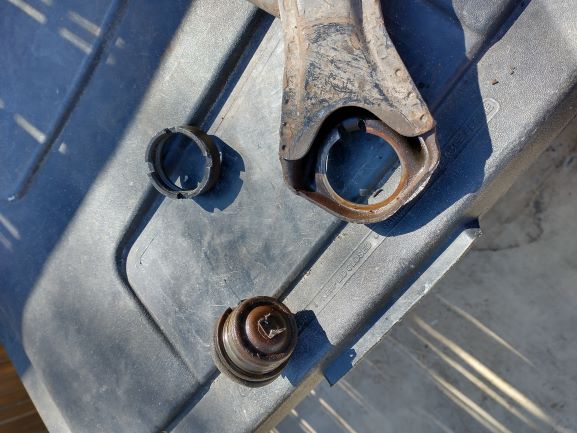
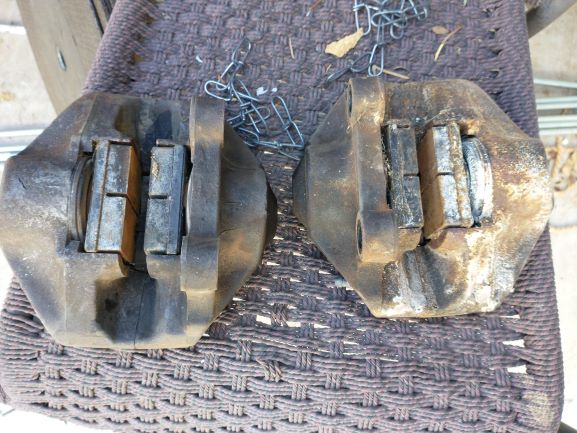
While some components seemed almost new, others seemed totally shot: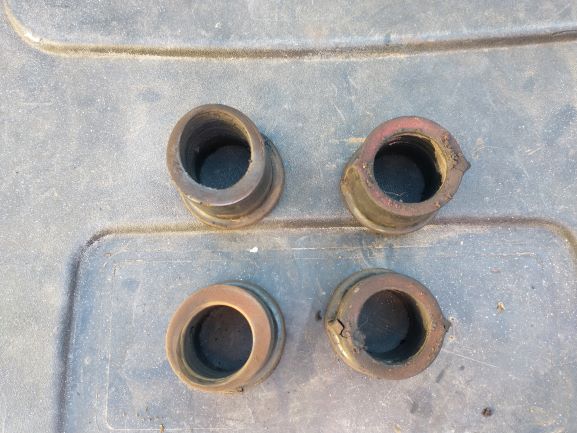
I'll try to update more regularly now that its cool enough to work outside again...
Posted by: mgarrison Nov 5 2020, 01:44 PM
A couple more pics of suspension/brake stuff. I didn't want to spend the money to have them blasted and powder coated, so I just used a wire brush in a cordless drill, and my time. Looks ok for now. Not sure how well they will hold up, but not much moisture, rain, etc. in Phoenix, AZ area.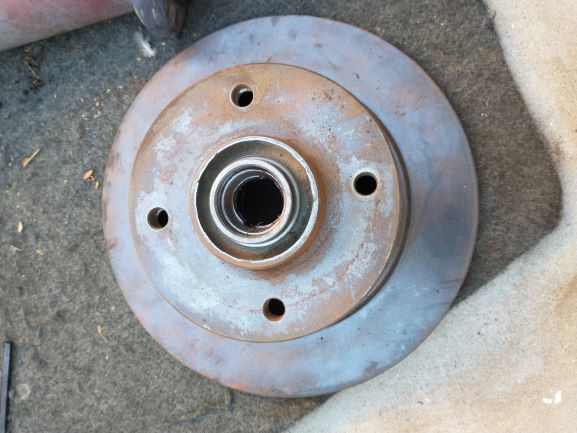
I did purchase a new toy to make our lives a bit easier working on the cars. The Miata was a real challenge to get a jack under; you had to drive up onto 2x4s for the jack to fit. Now it takes a quarter the time it used to!
It's rated for 7,000 pounds, so I can use it for the Wife's Jeep and my truck as well, but I did have to buy the SUV kit for it to lift the truck high enough to get the rear wheels off the ground! That 14" of travel makes some simple maintenance rather challenging...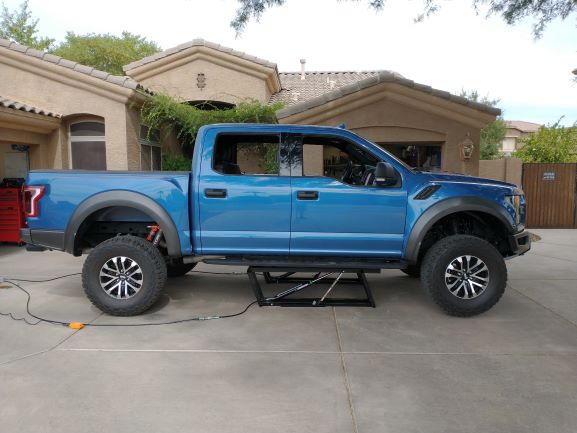
Posted by: mgarrison Dec 20 2020, 10:43 AM
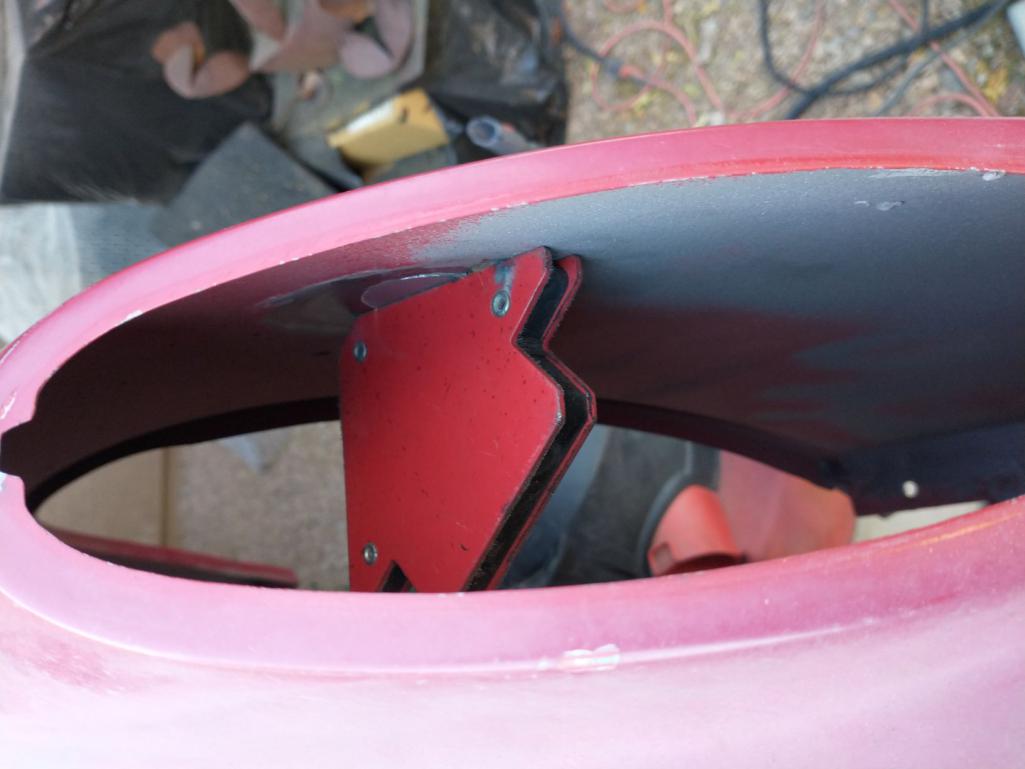
Finally getting around to posting another update!
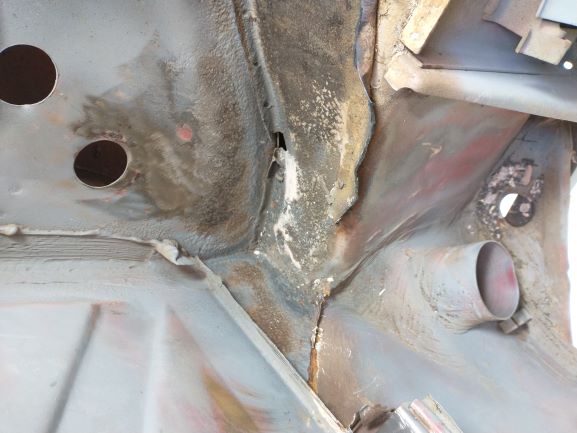
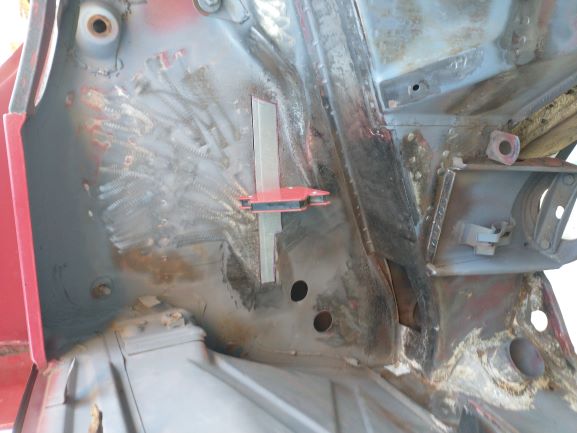
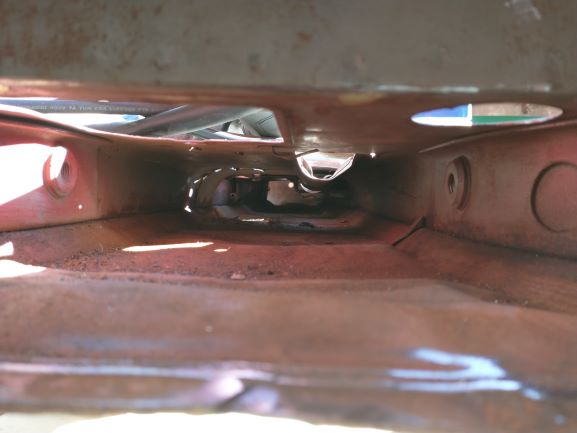
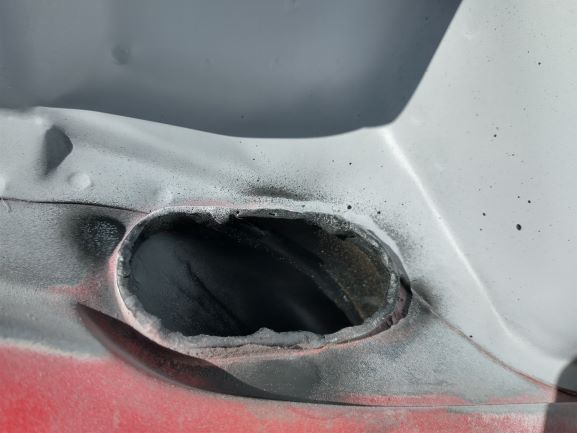
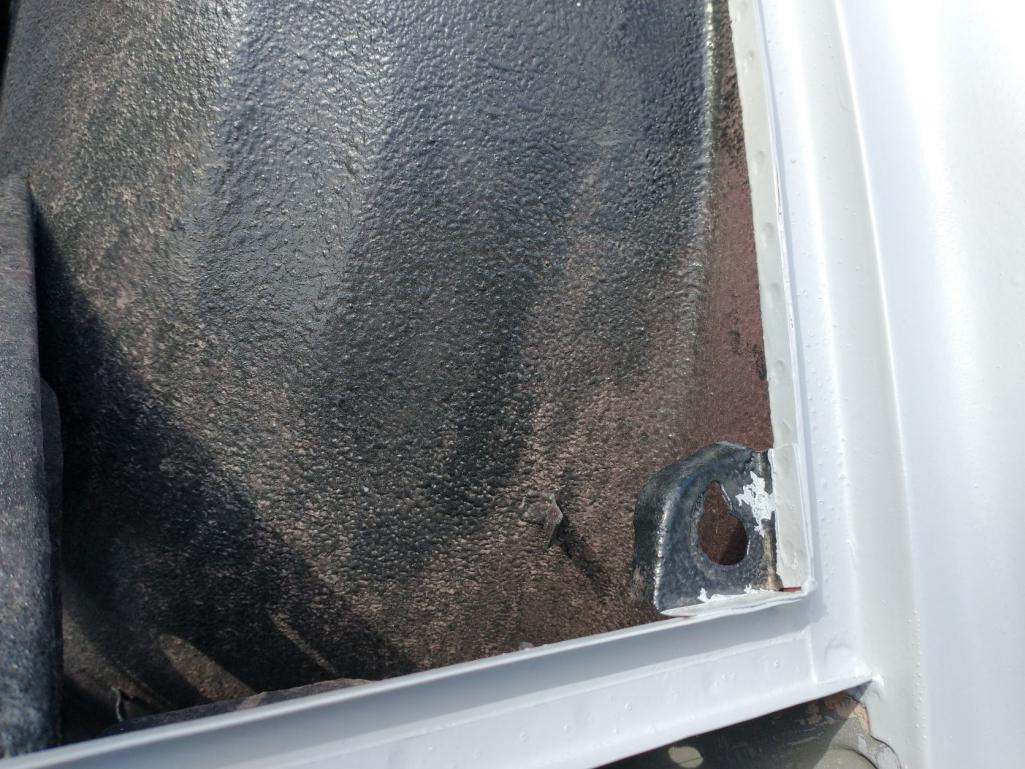
I removed the battery tray support and discovered some minor Hell hole issues...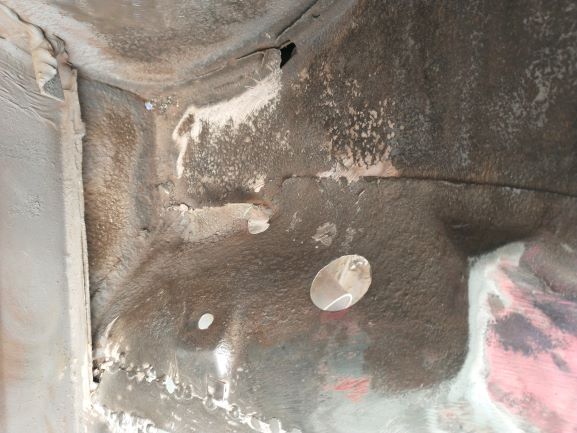
Noticed some odd holes on the inner fender next to the openings for the AC tubing. Looks like they might have bolted something to the inner fender here...?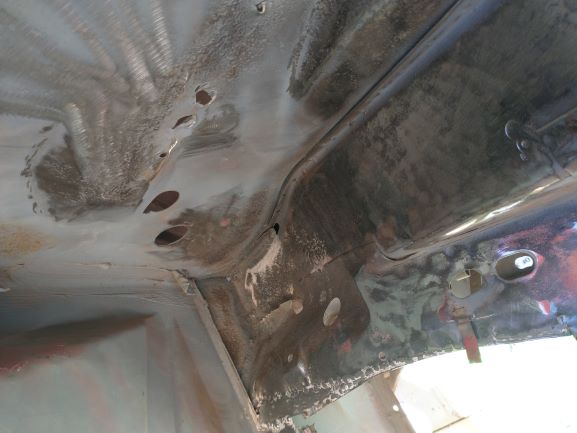
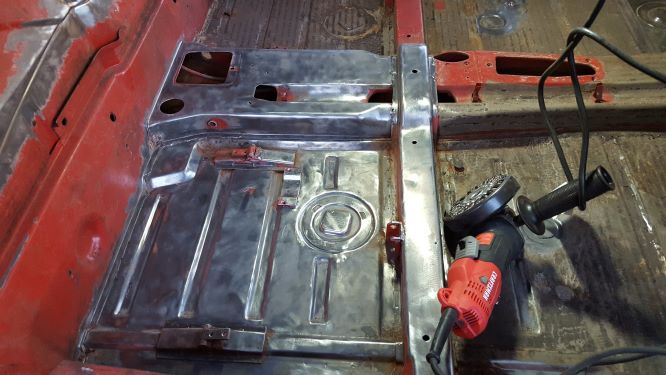
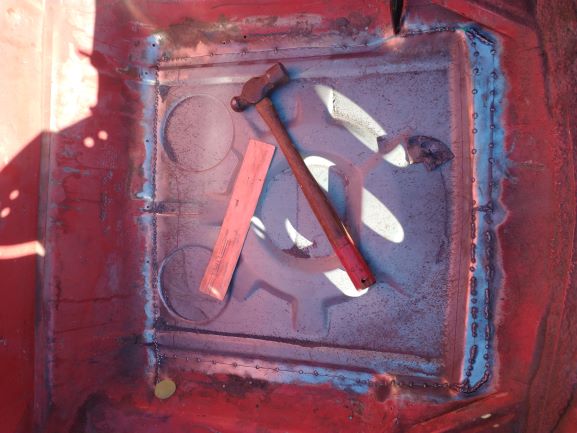
I set about removing the engine tray. Since my roller did not have engine, trans, seats, etc., I will be doing a Subaru conversion and wont need the engine tray. Cutting spot welds is quite the long, tedious process!
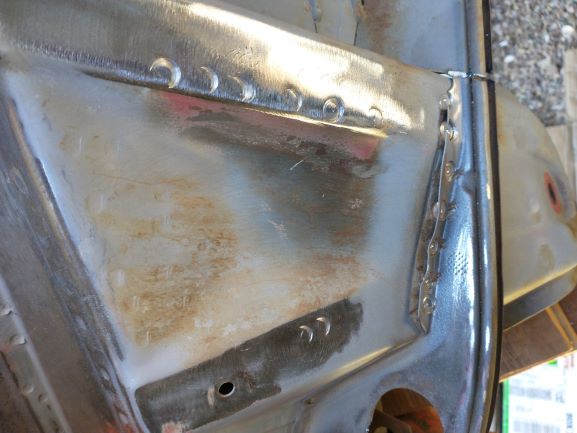
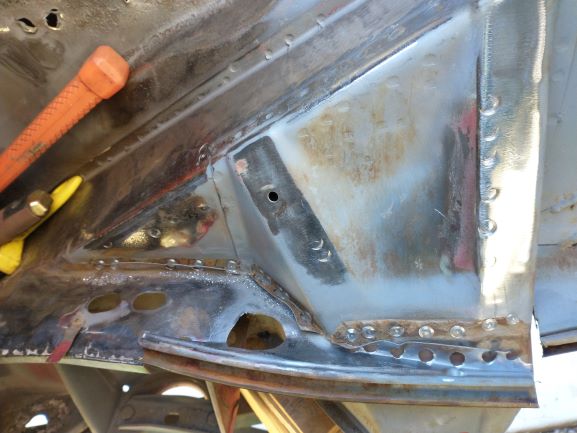
Finally...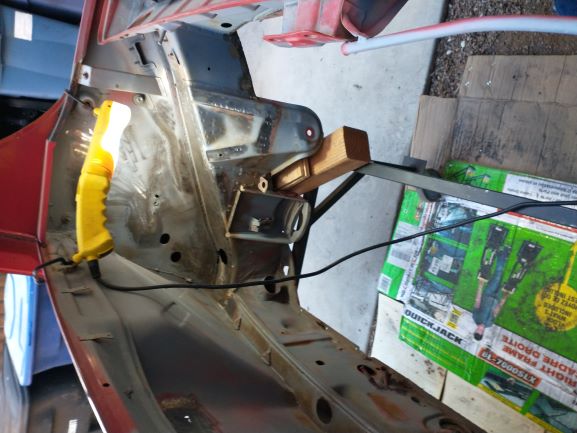
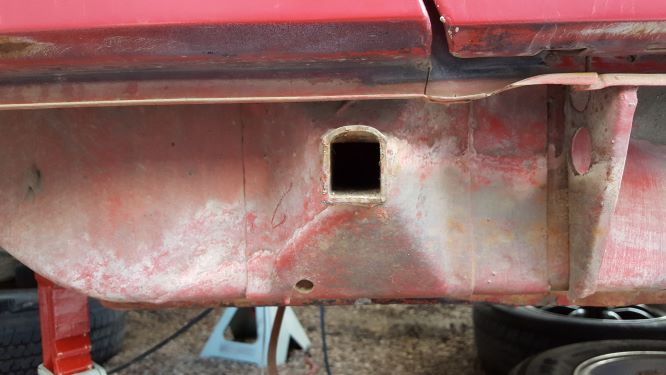
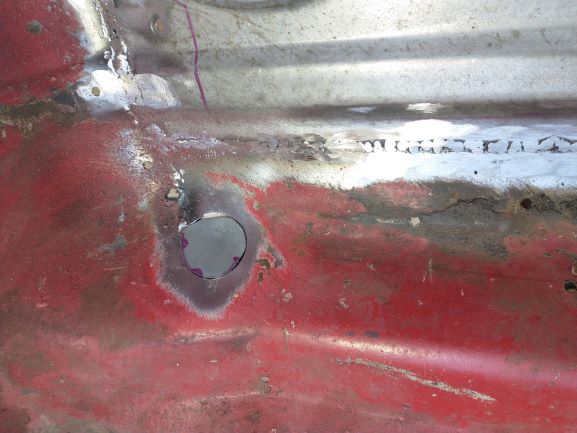
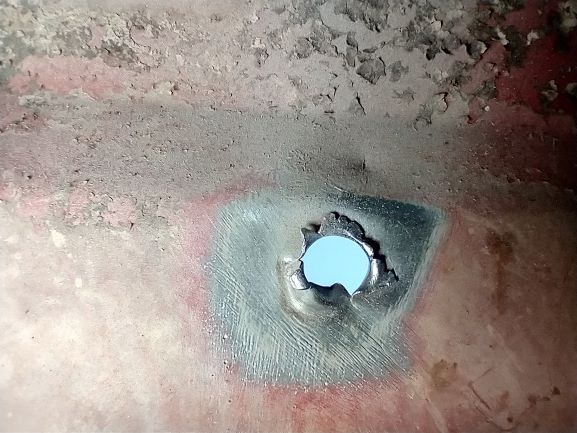
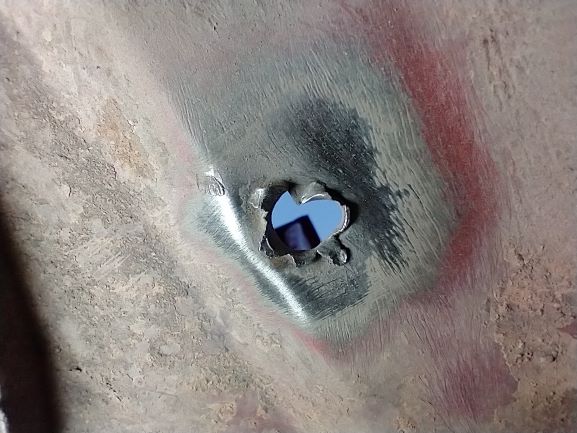
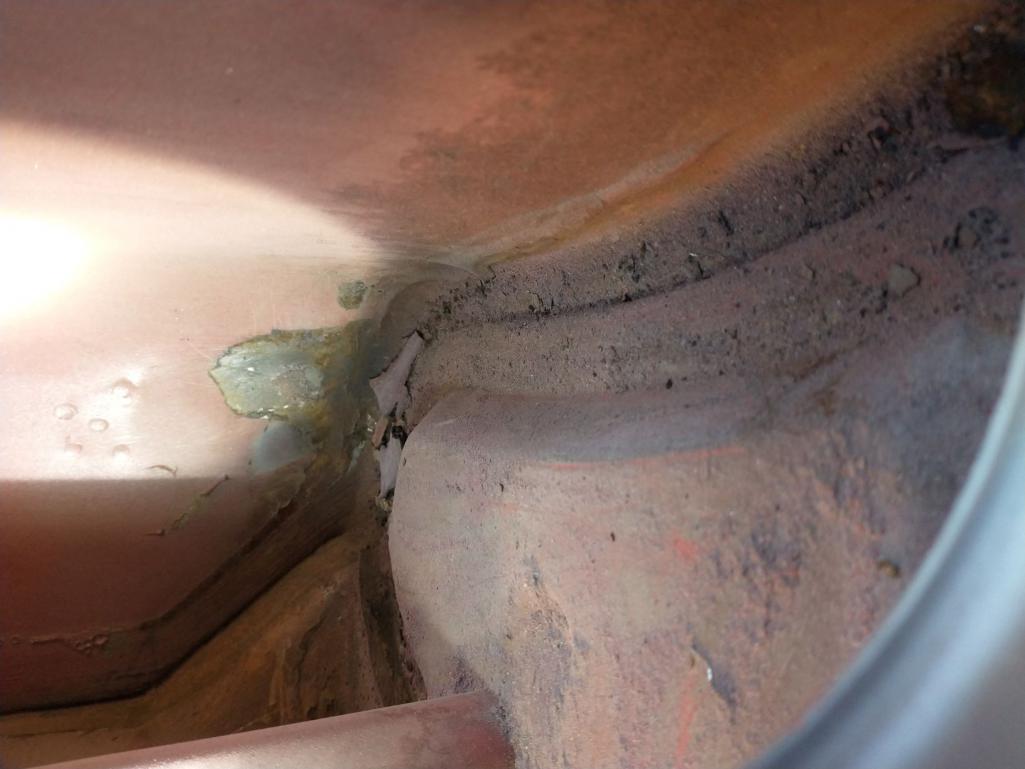
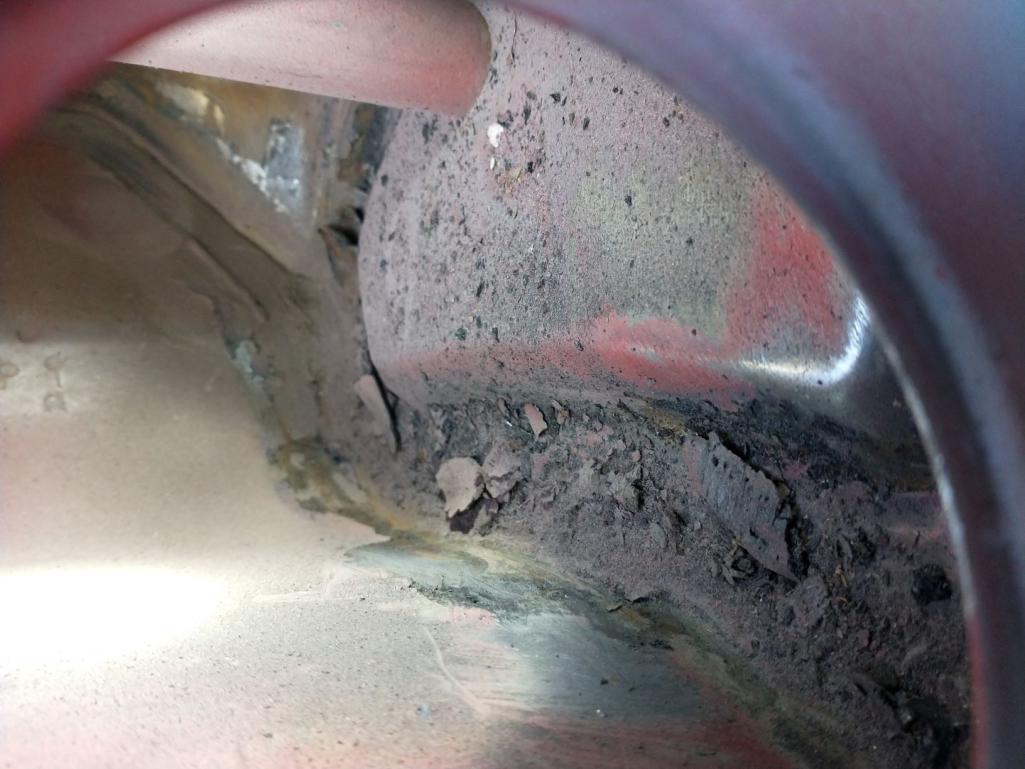
I drilled a 2" inspection hole to see how bad the damage was, and that I can cut out and weld a patch back in.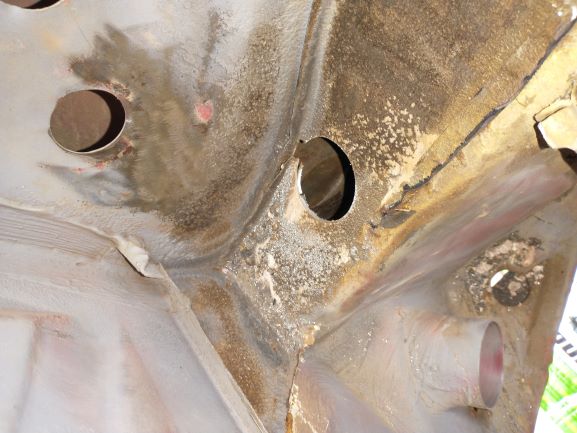
Tried to take a pic to see what the inside looks like, but hard to really tell..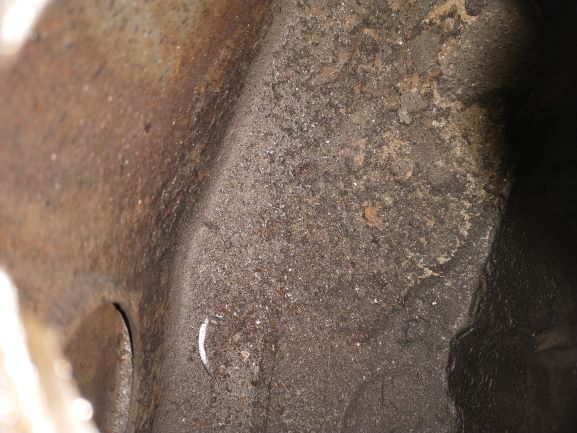
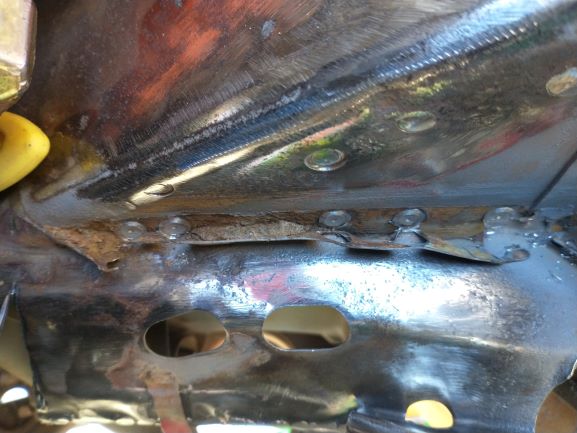
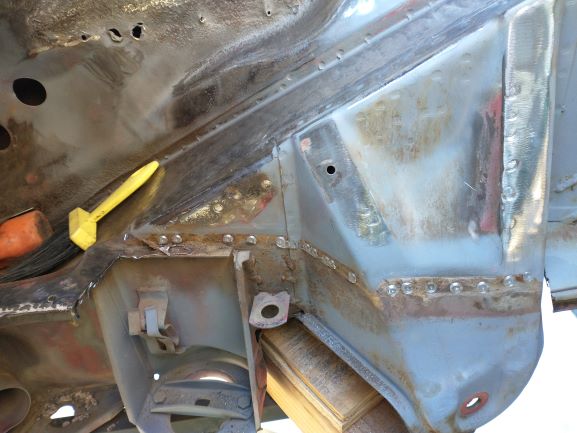
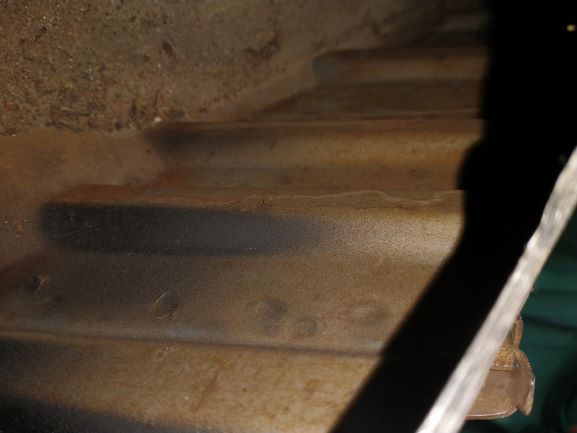
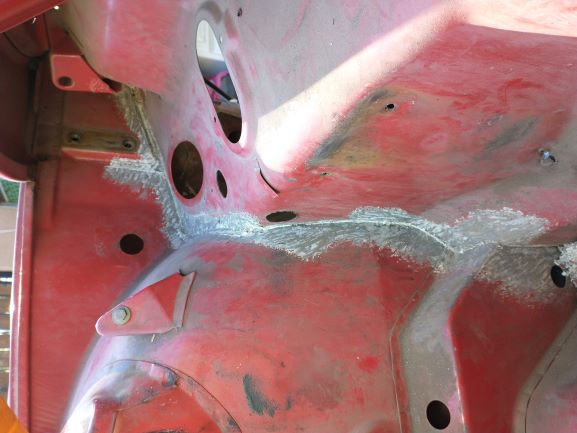
I rolled the 914 around to the garage so I could use the high speed air saw, and cut out the rusted sections that need to be patched up.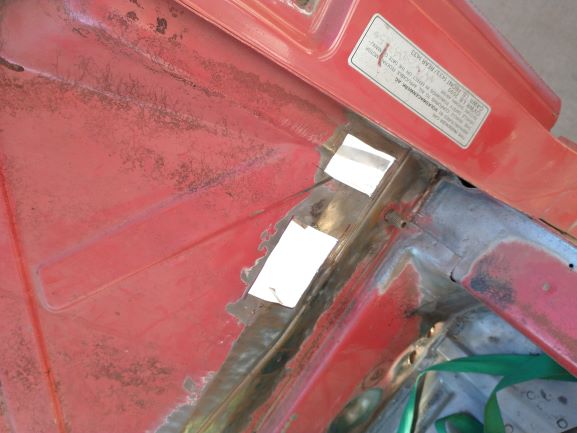
While I was waiting to give the compressor a break, I drilled the openings to run my coolant lines up to the front trunk.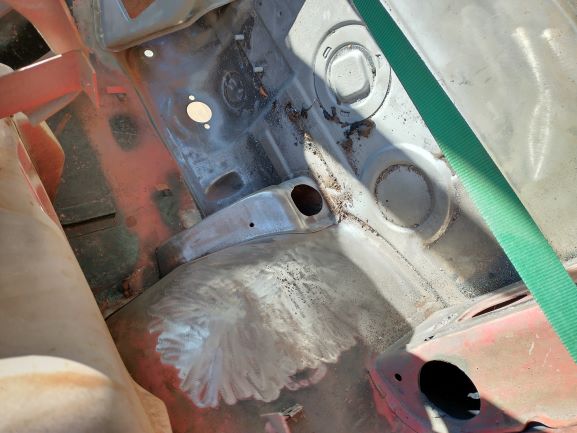
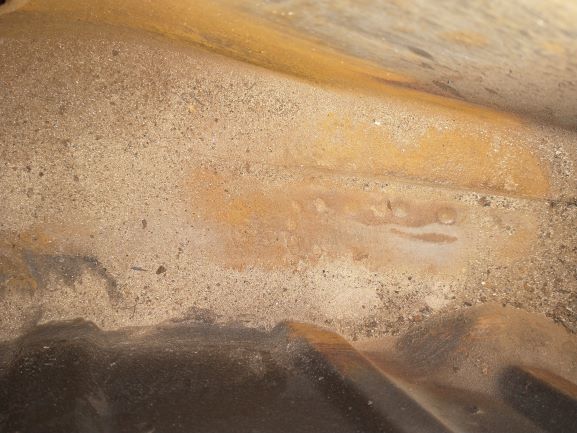
Getting the patches to fit just right is a crazy TEDIOUS process!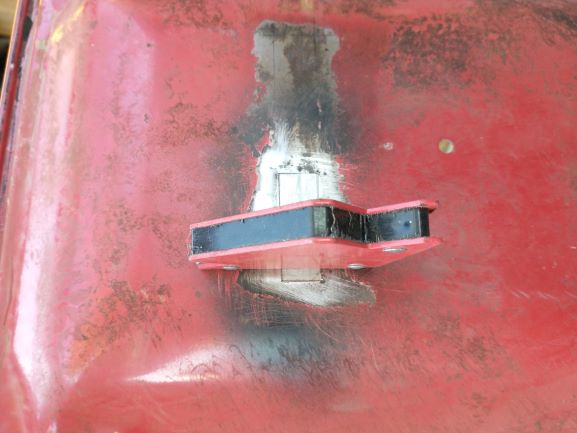
In my spare time here & there, I have been working on removing seam sealer aka "Rust Hider" to get any rust addressed properly.
Is there a consensus on replacing the seam sealer? Since I am doing a Subaru conversion, I'm not concerned with looking 100% original as my roller did not have historic value. Does the sealer REALLY keep rust out? With modern rust treatment and paint products, is it still necessary?
Posted by: 76-914 Dec 20 2020, 12:31 PM
You're making good progress. I've got mixed feelings about seam sealer. One thing is for sure; it's just as good retaining moisture as it is preventing it. Ian just completed a run of cradles, too. This is a good place to document your build but you can't expect much support or conversion product updates here. There are a couple of forums on FB dedicated to Subaru conversions, conversion parts and services. Stay after it.
Posted by: rhodyguy Dec 20 2020, 03:29 PM
A painters '5 in 1' tool and the heat gun makes shorter work of the seam seal. You can 'lean' harder on the sealant with the 5 in 1. The point edge digs in to tight corners.
Posted by: Costa05 Dec 20 2020, 04:44 PM
A painters '5 in 1' tool and the heat gun makes shorter work of the seam seal. You can 'lean' harder on the sealant with the 5 in 1. The point edge digs in to tight corners.
Agree!
Posted by: mgarrison Dec 21 2020, 09:00 AM
You're making good progress. I've got mixed feelings about seam sealer. One thing is for sure; it's just as good retaining moisture as it is preventing it. Ian just completed a run of cradles, too. This is a good place to document your build but you can't expect much support or conversion product updates here. There are a couple of forums on FB dedicated to Subaru conversions, conversion parts and services. Stay after it.
Regarding "Ian just completed a run of cradles, too." - Which Ian are you referring to? If ColdWater914 is back online, I'm super interested!
Mike
Posted by: mgarrison Dec 21 2020, 09:08 AM
A few more pics of yesterday's work.
Here's my small patch welded in on the firewall between the seats.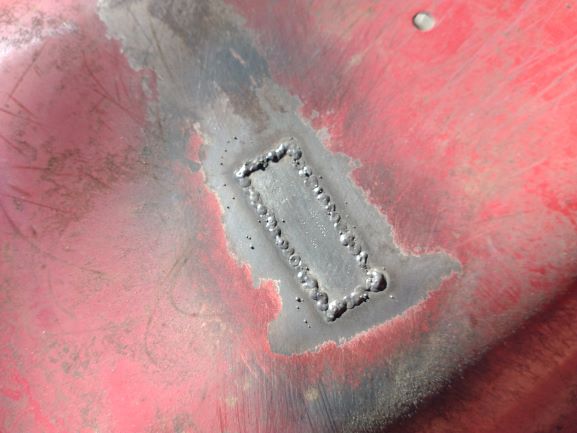
I can't remember who, but someone on the forum posted about using a smashed copper pipe as a backing when welding sheet metal, to act as a heatsink. Works really well when you are struggling with burning through in spots. I had my welder down as low as it can go, but still had some challenges in some corners. I just used a smashed copper elbow. The welds don't stick to the copper at all.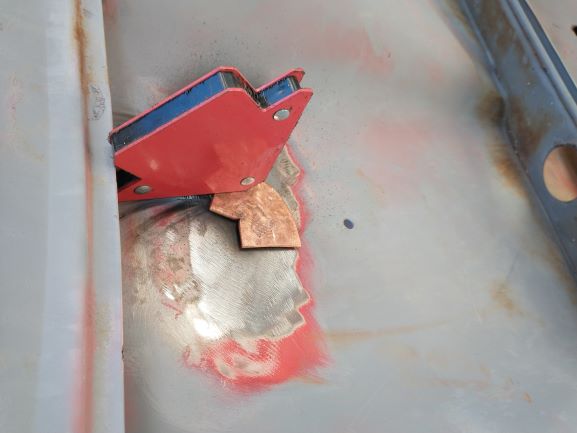
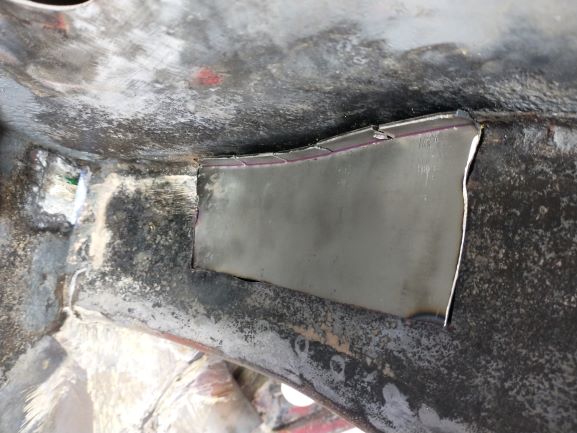
Here's the inner fender patch tacked in place.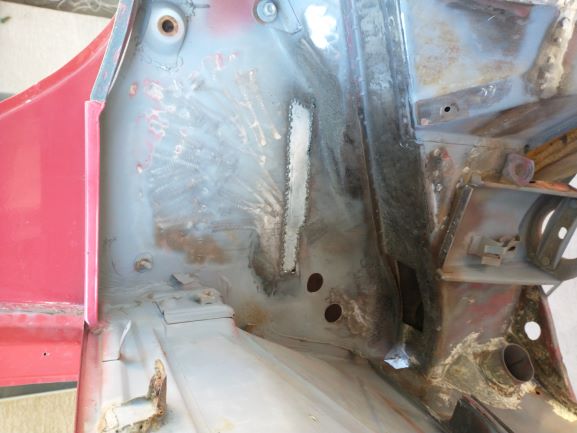
And mostly complete - I will have to see where I missed after grinding it out a bit.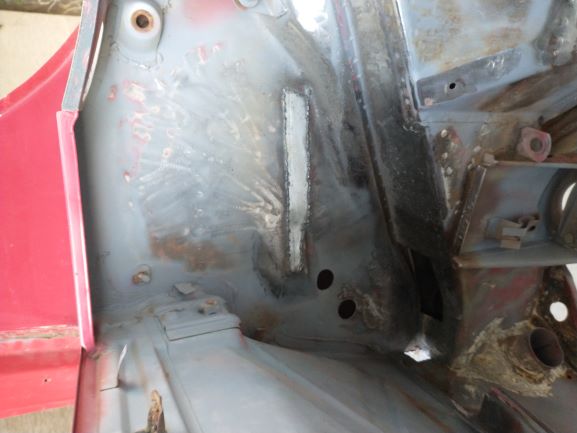
Three more "easy" patches, then I need to form up the patch for the inner long - I'm sure that's going to take some time and effort to get the correct shape! Still need to replace the frunk floor from the AC cutout, and then weld in the MadDog inner long stiffeners...So slow sometimes I feel like I'm sliding backwards! Ah, but it keeps me off the streets, right!
Posted by: 76-914 Dec 21 2020, 12:10 PM
You're making good progress. I've got mixed feelings about seam sealer. One thing is for sure; it's just as good retaining moisture as it is preventing it. Ian just completed a run of cradles, too. This is a good place to document your build but you can't expect much support or conversion product updates here. There are a couple of forums on FB dedicated to Subaru conversions, conversion parts and services. Stay after it.
Regarding "Ian just completed a run of cradles, too." - Which Ian are you referring to? If ColdWater914 is back online, I'm super interested!
Mike
Yep, Coldwater. He made 20 sets. New and improved. will accept any series engine and will accept the 914 transmission as well as Subaru TY75. IMHO, the 914 transmission is a step back.
Posted by: IM101 Dec 21 2020, 12:23 PM
You're making good progress. I've got mixed feelings about seam sealer. One thing is for sure; it's just as good retaining moisture as it is preventing it. Ian just completed a run of cradles, too. This is a good place to document your build but you can't expect much support or conversion product updates here. There are a couple of forums on FB dedicated to Subaru conversions, conversion parts and services. Stay after it.
Regarding "Ian just completed a run of cradles, too." - Which Ian are you referring to? If ColdWater914 is back online, I'm super interested!
Mike
Yep, Coldwater. He made 20 sets. New and improved. will accept any series engine and will accept the 914 transmission as well as Subaru TY75. IMHO, the 914 transmission is a step back.
It’s true! I am back! While technically the cradles have been delayed by a week because of some issues with the laser cut parts I’ll be shipping them out in the next few weeks. Also have hardware and parts inbound for the cable shift setups and back plates. I am holding off on the axles and couplers for now as they are expensive to produce and there are great options like Dutchman axles and Subarugears for those parts. Shoot me a line at ian@coldwater914.com if you are interested!
Good luck with the build looks like a great base to start with!
-Ian
Posted by: mgarrison Dec 22 2020, 01:59 PM
Finished another patch section. Right side was difficult for some reason, but got it filled in finally...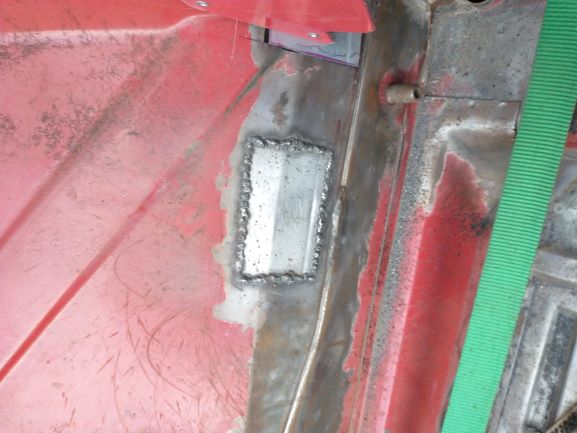
I cut out the back of the center tunnel so I could remove the stock tubing that I will not need with the Subaru engine and trans. Also gives me a decent opportunity to clean it out as best I can, and paint with the Easton inside frame rail paint to prevent any future rust.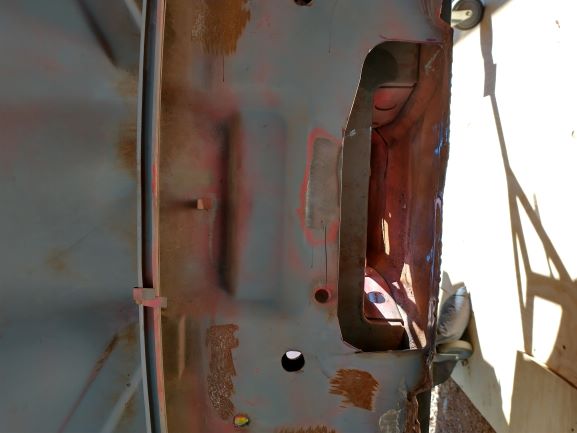
Posted by: mgarrison Dec 23 2020, 05:40 PM
Completed one more small patch. Was a total PITA to weld! Starting to feel like a bad trend...aren't you supposed to improve with practice??? 
Received my replacement handbrake parts from AA. Trying to locate them based off the spot welds I drilled out as I did not find any reference as to how to exactly locate them. Need to drill the holes for the rosette welds...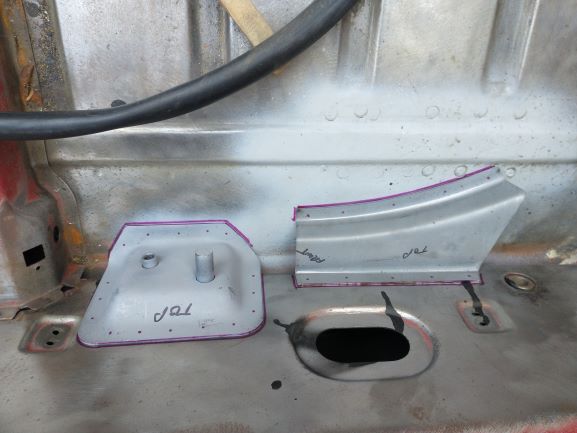
Posted by: djway Dec 23 2020, 06:22 PM
I hear ya on the supposed to get better with practice idea. I discovered one time my little welder needed maintenance and another time the metal was not as clean which caused headaches. Keep on trucking.
I like the clean look removing the engine shelf. I may have to borrow that idea...
Posted by: mgarrison Dec 30 2020, 09:56 AM
Another small update. Progress seems SO SLOW, but I keep trying to plod along!
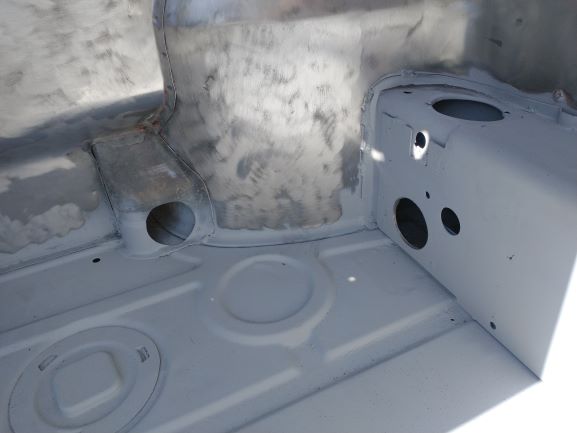
Once I opened things up with the air saw, I tried to get a better look inside the inner long/suspension console area/frame rail/WTH do they call this area! looks better than I thought it might in there - I know many of you would love to have a 914 with this little rust, so I am grateful. I wire brushed inside as best I could, then vacuumed it out with the shop vac, then sprayed the Eastwood inside frame rail paint in there everywhere I could reach with the little nozzle: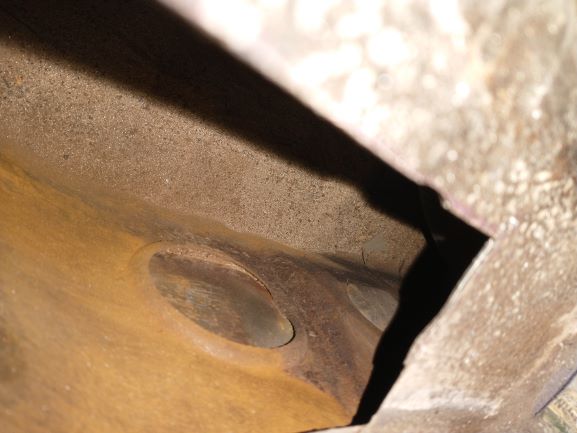
Some of what I have repaired/resurrected on 914World is simply incredible - some real talent out there! I treated all the rust I could get to with rust inhibiter, and then shot it with weld through primer.
It took me quite a while to get my patch shaped, and then fit just right so that I had some chance of being able to weld it in without total disaster occurring (due to my cheap welder, and very limited skills):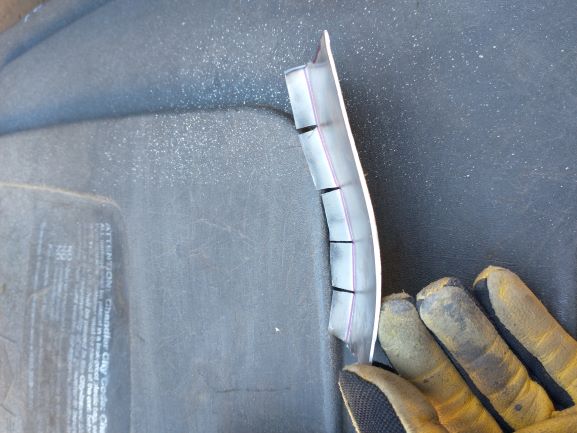
My initial welds to tack in place were rather embarrassing! I could not get my welding helmet back into the corner by the firewall far enough to really see exactly what I was doing, and the patch was sloping away from me too. A bit of blind welding ensued! 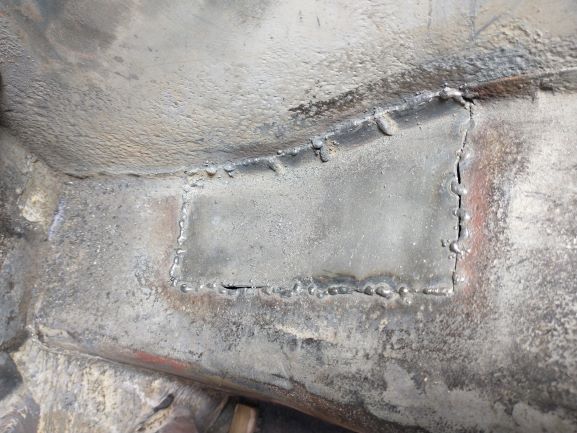
But after grinding a bit, and filling a bit, and grinding some more, and filling. You get the idea...It will have to do: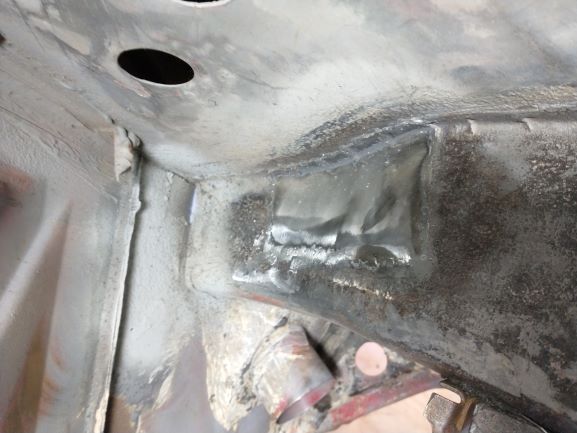
My patch on the inner fender came out ok, but sure not great - not sure how you hold/clamp a piece like this in place so that it stays really flat. I think I should have used my butt weld clamps to keep it flatter, oh well...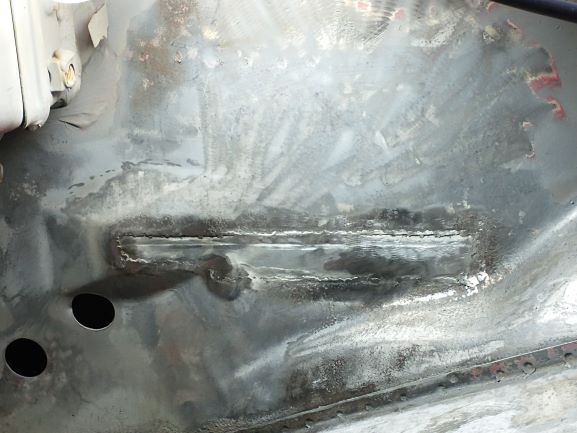
The patch on the upper portion between the seats came out much better, but still needs a little grinding to make it blend in better.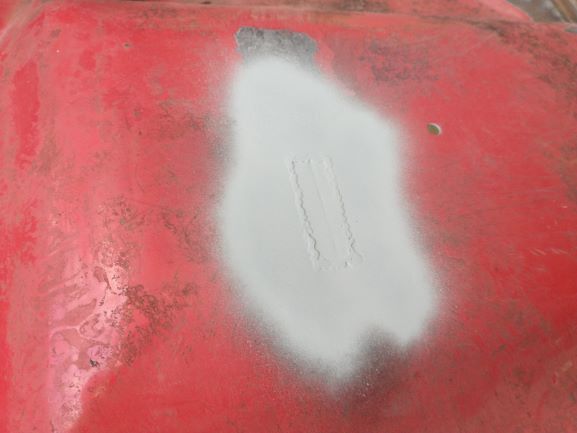
I drilled the holes in my parking brake pieces, and did my first Rosette welds. I believe they came out ok, and they seem solid. Rosette welds seem much easier than the butt welds on thin metal!
Next up is the frunk floor panel, and then the Mad Dog Inner Long kit...Inch by bloody inch! 
Posted by: mgarrison Jan 16 2021, 11:00 AM
I've been taking pictures as I work, but getting them from my phone, to Google drive, then to the laptop, then resized to post...You get the idea!
Finally have the "frunk" mostly finished. I feel like I'm sooooo sloooooow. But progress is progress!
I had to piece in the gap at the front of the frunk floor where too much was cut out. I got some new snips that work much better, so getting the patches cut was much quicker. Half the gap tacked:
And the other half: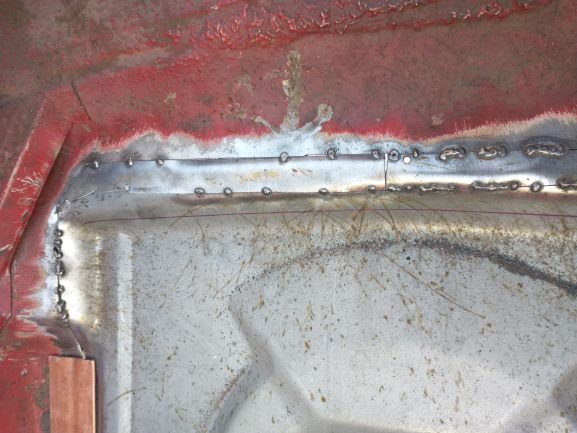
I kept hearing the Taylor Swift song "Death by a thousand cuts" in my head, but it transformed to "Death (of my back) by a thousand tacks" in my addled brain!
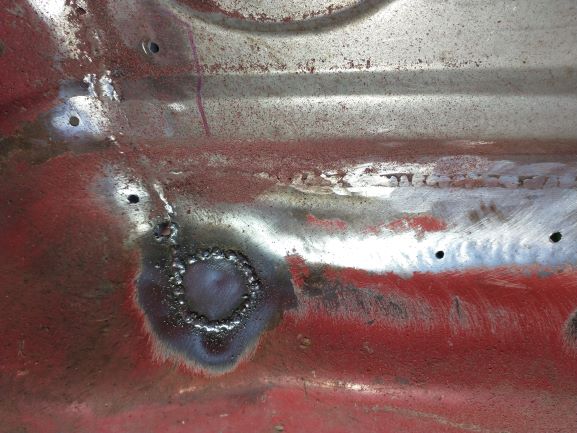
As I was making progress tacking things in, I ran out of welding wire. I had more in the drawer, but it was the good Lincoln stuff. Oddly enough the Lincoln wire gave me more trouble than the cheap HF stuff I was using! Does anyone with more welding experience know why this started happening when I switched to the Lincoln wire?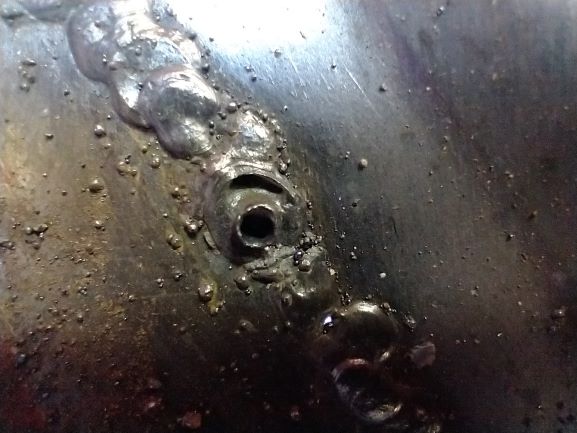

Both are .030 wire. I did not change my settings, etc. Just started getting these crazy craters in some of the tacks! I fiddled with the amps and wire speed and finally got things working better. Almost like the Lincoln wire burned hotter and I could not get my welder set low enough for the thin sheet metal...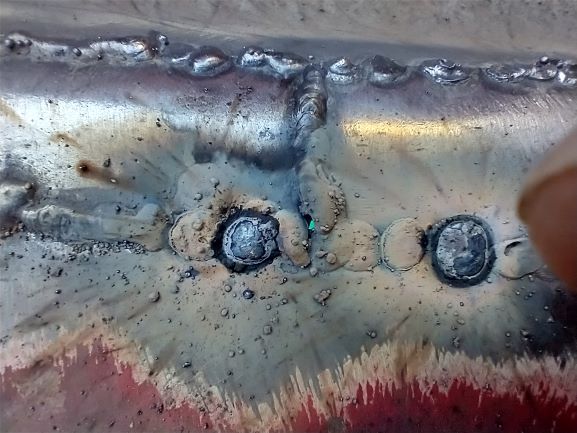
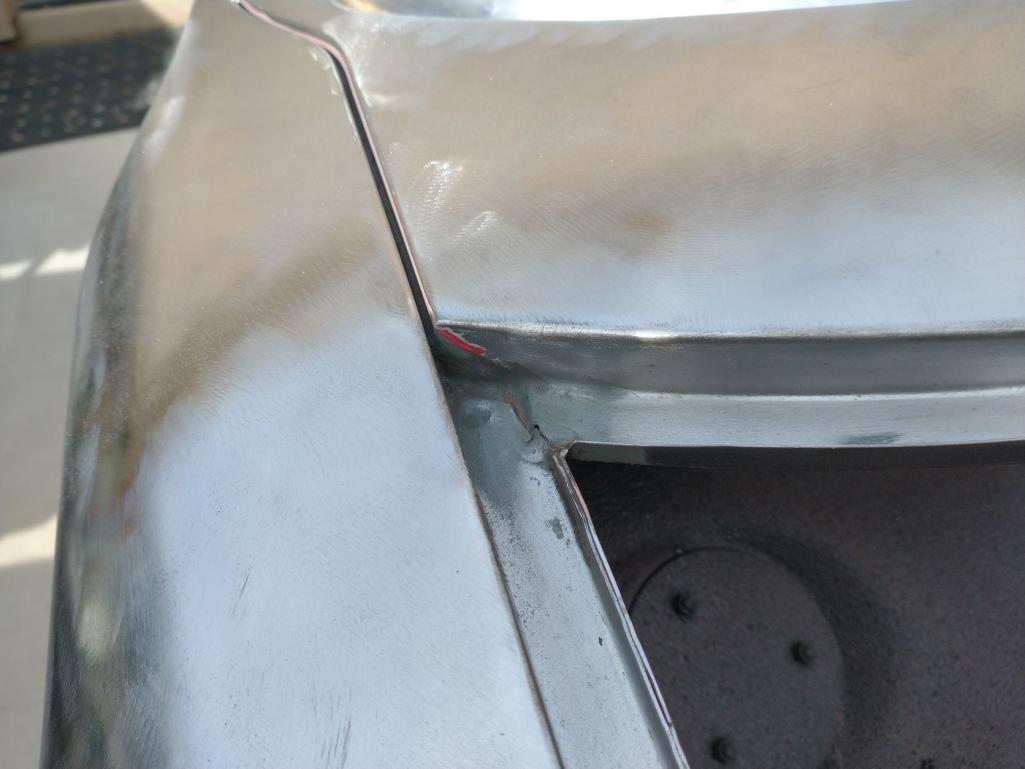
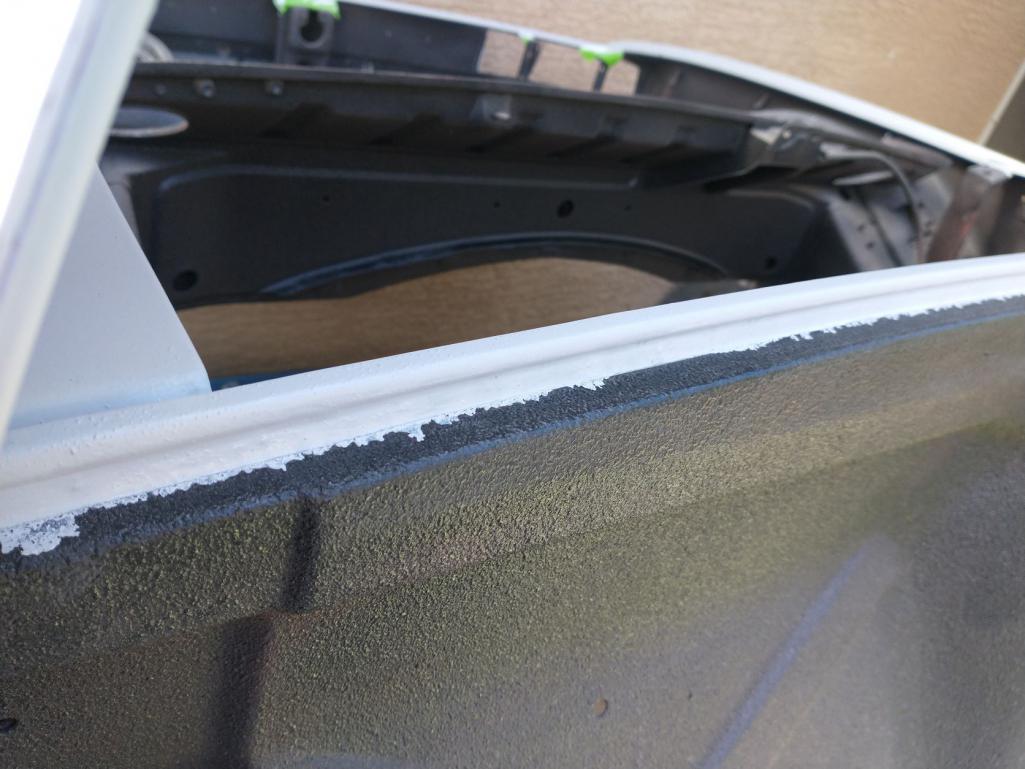
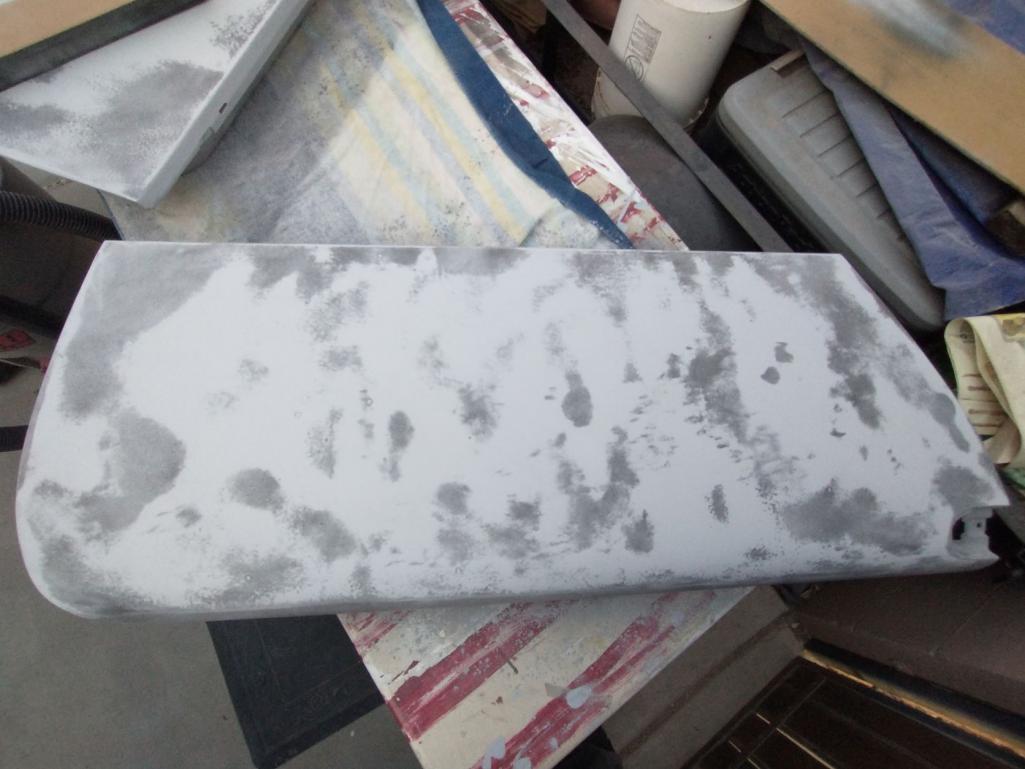
I sprayed a small section of my test color. Then covered it with clear. Then sanded a bit with 800 grit to removed orange peel. Then finally buffed it out with a random buffer. It looked pretty good, at first. Over time this happened!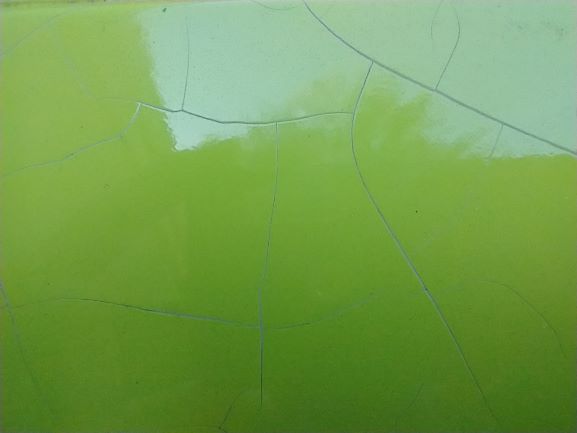
For those with more experience; have you seen this happen before? What would cause it to occur? It looked fine at first, but after a couple of weeks its like the paint shrank, cracked, and exposed the primer underneath!
Back to the frunk floor. I started grinding down some of my welds to see how it was going to turn out. I needed a little break from welding, and to catch my breath before I dealt with a few problem spots: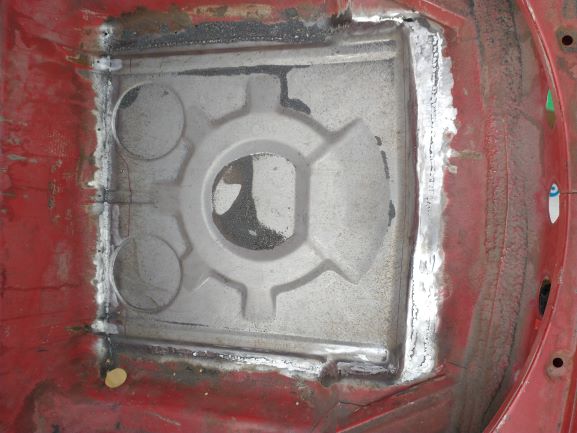
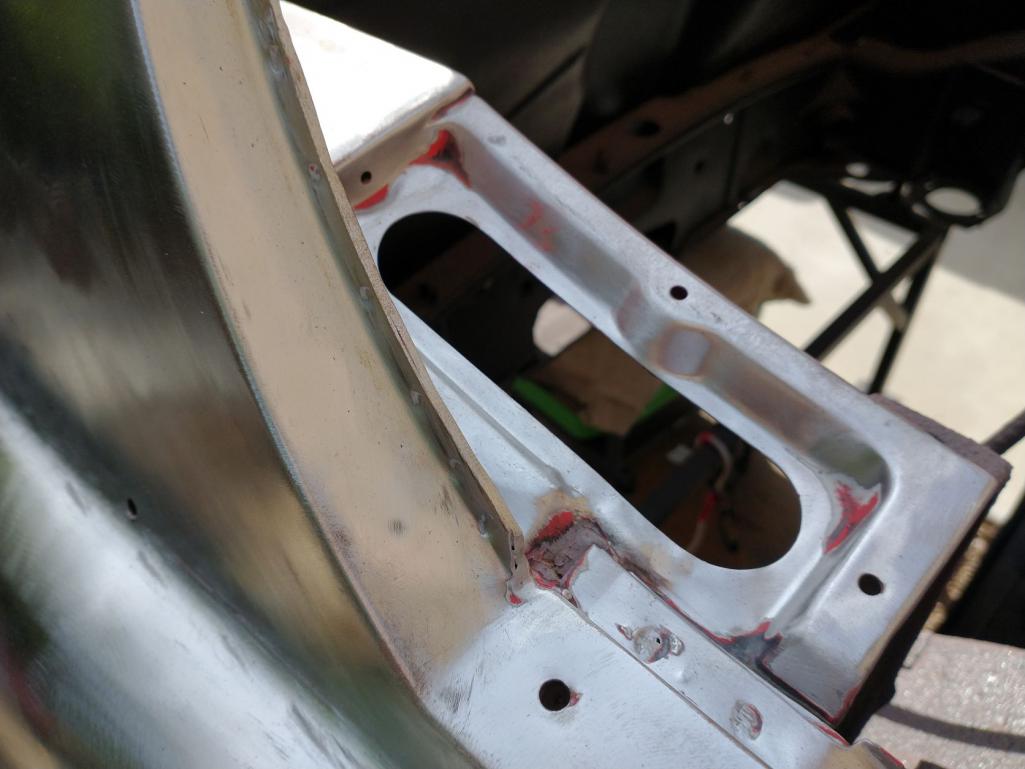
My first problem area was near the drivers side front A-arm mount. They cut out the frunk floor right up against the edge of the mount, which made me nervous welding. Some of the metal just did not seem to want to be welded, or I was not good enough to get it welded, so I ended up using a hole saw to remove the problem section. I then patched it in which was a challenge as it was rather curved.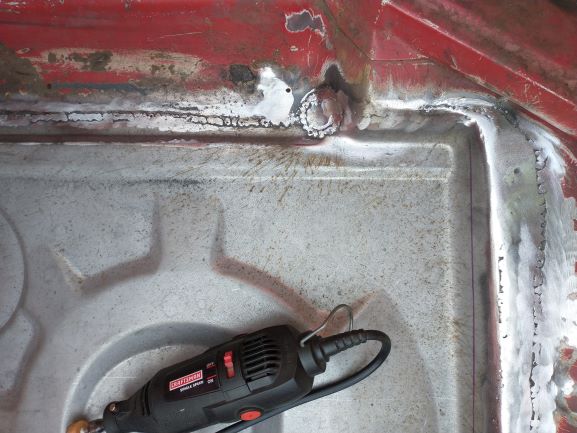
Another difficult spot was near the hole they cut for the AC lines on the passenger side near the rear of the frunk floor. Metal just did not want to weld together, despite the lack of rust, etc.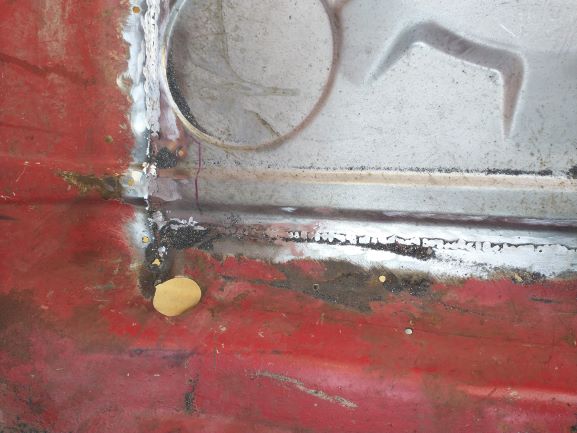
Whoever did the AC installation on this car was rather rough to put it mildly! Not sure what in the world they did with these two mounting holes (assuming they were for the strap/bracket holding the condenser down to the frunk floor), but they tore up the steel so bad I just ended up cutting them both out with the hole saw and patching them up!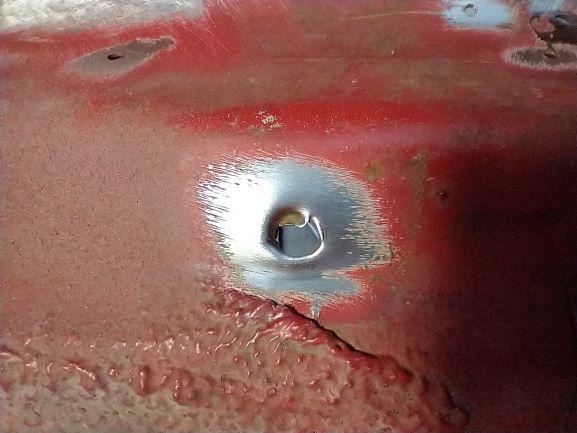
Getting better at cutting out these little patches!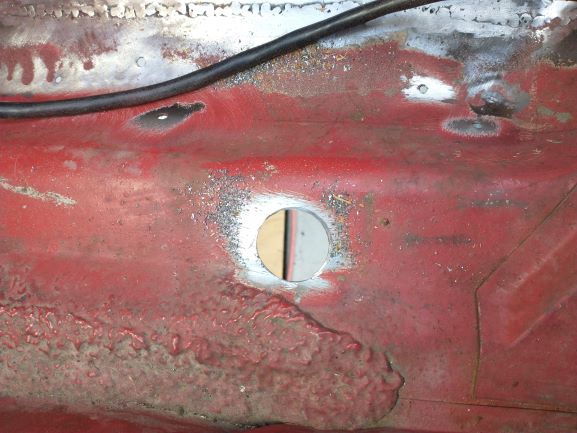

I read on 914World where someone smashed a copper pipe, and used it as backing while welding thin sheet metal. It seems to work rather well to absorb the heat, and is an easy way to back up these little patches - thanks to whoever it was for that tip! Here's my setup for patching the nasty AC mounting holes. You can just see the flat copper pipe on top of the 4x4, pressed up against the bottom of the frunk floor: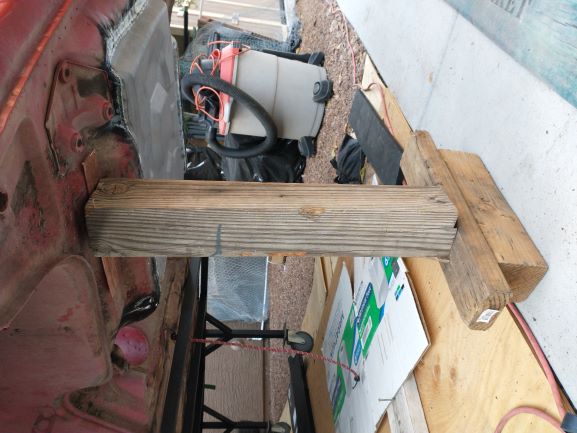
From the top side, it looks like this, and helps keep the patch in place and flush: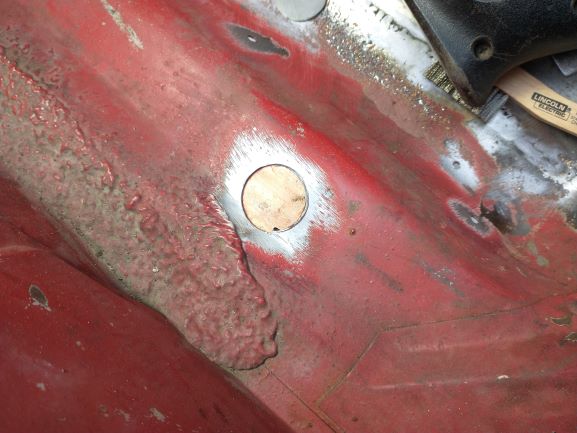
Starting to tack the patch in, and had the dang crater issues again! Arrrgggg.
Settled down and it came out ok in the end. Just had to fill those craters with a really quick tack since they went clear through!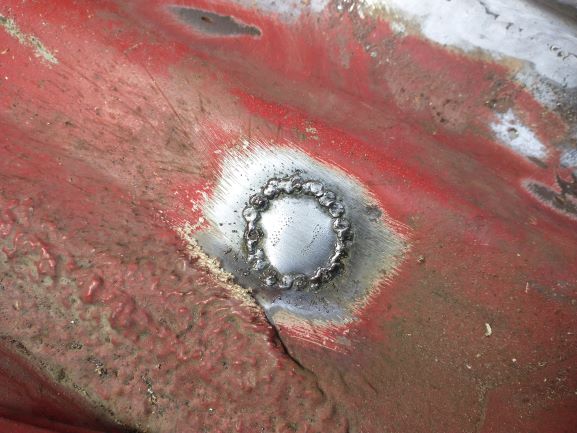
Got my welds ground down good enough, I guess - I'm going to use rubberized undercoating on the trunk floors to seal, protect, and give it a bit of texture to hide my less than idea repair work. I made sure to get the paintable kind of undercoating so I can spray it body color if I decide I dont like the black. Gave it a quick coat of primer top & bottom to keep it protected.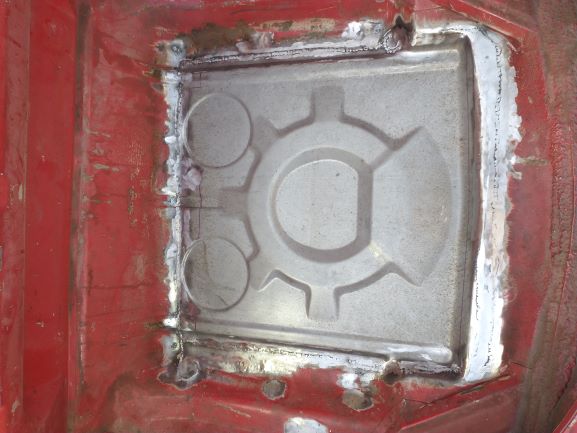
Then spent an hour or so starting to remove some of the seam sealer to ensure nothing was hiding under it anywhere. Found an odd spot that I first thought was rust under there, but turned out to be a missed spot weld or some other oddity - you can just see it on the right edge of the seam, about 2" inches below the hole for the AC line.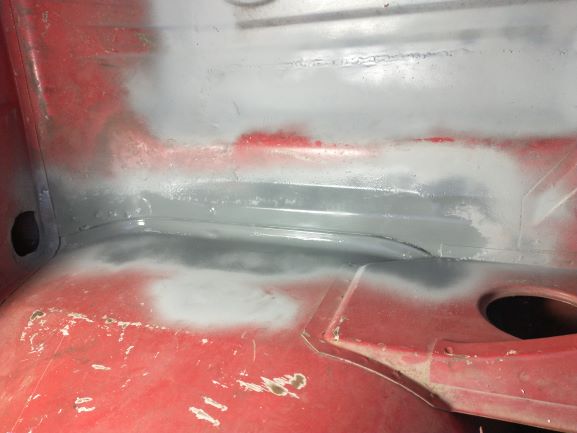
Posted by: 914forme Jan 16 2021, 09:43 PM
You need a sealer step for the paint and even then bad things can happen and these cracks will reappear.
@http://www.914world.com/bbs2/index.php?showuser=9892 - look above at the welding question about the weld wire difference. To me it looks like you drawing up contaminates from the back side of the weld. But Ben is the expert.
Posted by: 76-914 Jan 16 2021, 09:46 PM
You need a sealer step for the paint and even then bad things can happen and these cracks will reappear.
@http://www.914world.com/bbs2/index.php?showuser=9892 - look above at the welding question about the weld wire difference. To me it looks like you drawing up contaminates from the back side of the weld. But Ben is the expert.
 but why did it change when he changed spools? Is it possible that a spool is contaminated? Maybe not enough shielding gas? Watching for Ben's reply. I do see lots os splatter around those suspect areas!
Posted by: mb911 Jan 17 2021, 07:26 AM
You need a sealer step for the paint and even then bad things can happen and these cracks will reappear.
@http://www.914world.com/bbs2/index.php?showuser=9892 - look above at the welding question about the weld wire difference. To me it looks like you drawing up contaminates from the back side of the weld. But Ben is the expert.
but why did it change when he changed spools? Is it possible that a spool is contaminated? Maybe not enough shielding gas? Watching for Ben's reply. I do see lots os splatter around those suspect areas! What number designation wire are you using? Just because it's. 030 doesn't mean its the same wire.
It also does look like your drawing in contaminates.
Posted by: mgarrison Jan 17 2021, 09:15 AM
Thanks guys. Its an inexpensive, gasless, DC inverter welder. I got the HF version since its was $75 less than the same thing at HD/Lowes. Don't want to mess with tanks, and I'm working outside. The label is gone from the Lincoln wire, so not sure on the exact details...
Thanks!
Mike
Posted by: mb911 Jan 17 2021, 12:29 PM
Thanks guys. Its an inexpensive, gasless, DC inverter welder. I got the HF version since its was $75 less than the same thing at HD/Lowes. Don't want to mess with tanks, and I'm working outside. The label is gone from the Lincoln wire, so not sure on the exact details...
Thanks!
Mike
There a really over 25 different kinds of Lincoln innershield wire, you may have gotten something that is metal core, composite, or even solid wire. My guess is you got the wrong wire.
Posted by: tazz9924 Jan 18 2021, 02:09 PM
Thanks guys. Its an inexpensive, gasless, DC inverter welder. I got the HF version since its was $75 less than the same thing at HD/Lowes. Don't want to mess with tanks, and I'm working outside. The label is gone from the Lincoln wire, so not sure on the exact details...
Thanks!
Mike
There a really over 25 different kinds of Lincoln innershield wire, you may have gotten something that is metal core, composite, or even solid wire. My guess is you got the wrong wire.
I agree looks like you have mig wire instead of flux core
Posted by: mgarrison Jan 24 2021, 09:51 AM
A little more progress, I guess. Struggling with the very slow pace of my progress.
I switched back to a new spool of HF wire - still sealed with the label so that I could verify exactly what it was! Really struggling to get things consistent! I did not touch the settings when welding this patch for one of the AC holes, but the welds seem all over the map...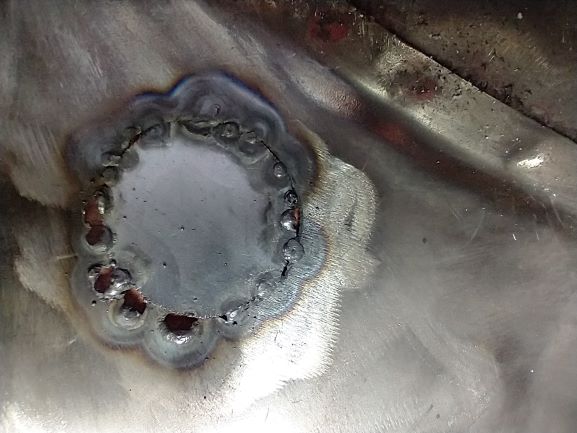
Going to regroup and try to get settings dialed on some scrap metal before any more welding!
Cleaned out the seam sealer in the frunk area under the gas tank. Just minor surface rust, thankfully!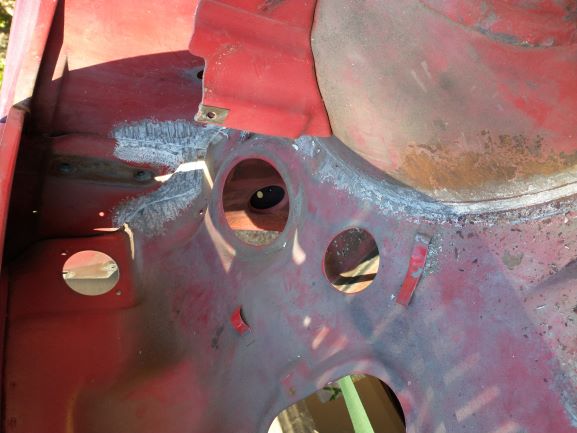
I'm really feeling way too old for some of this work! I walked funny for a bit after getting this last section done...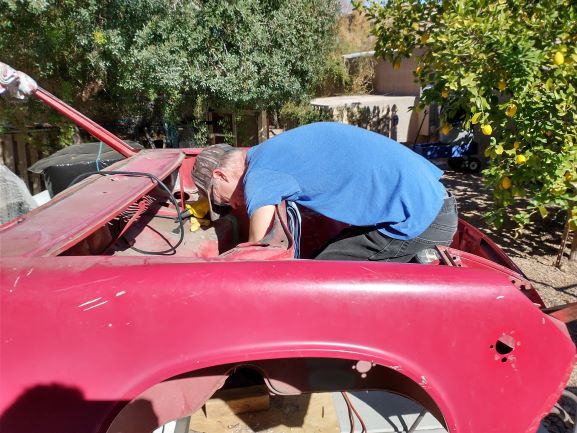
I went back and cleaned off my failed paint test. At least the sail is solid and filler free!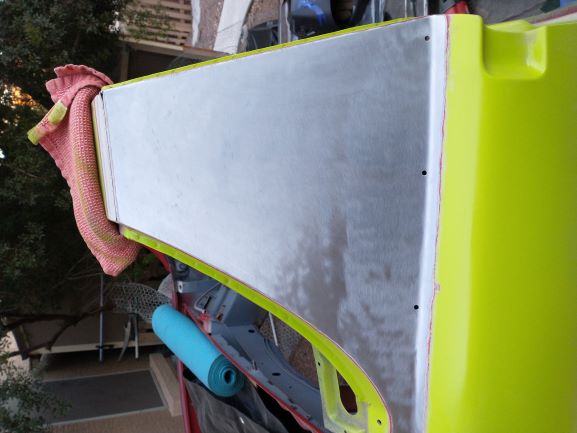
Moved on to the seam sealer in the trunk. Had some rust hiding under it back there and a bit of heavier surface rust in the rear of the trunk to treat.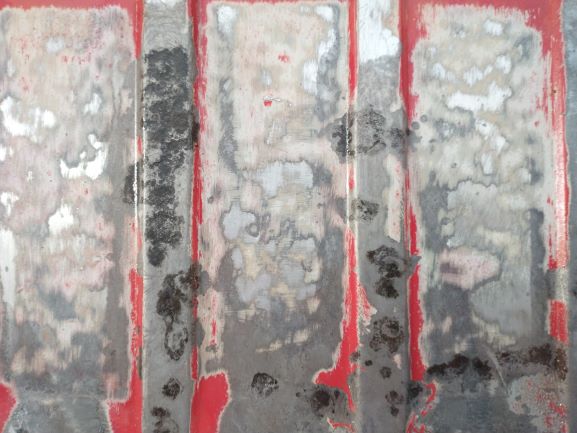
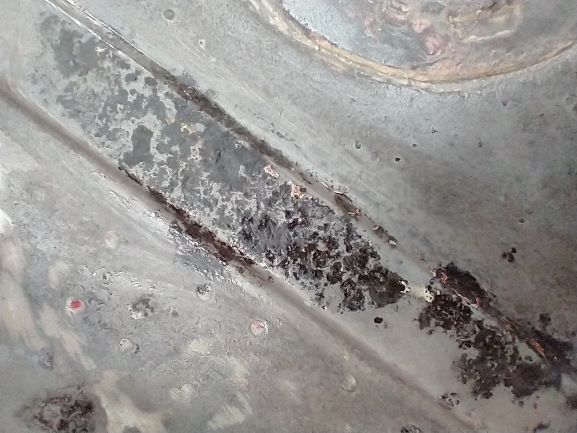
Question; When you treat rust with the acid treatment/converter and it turns black, is it good to go? Or, do you need to try and wire brush it more to remove the black?
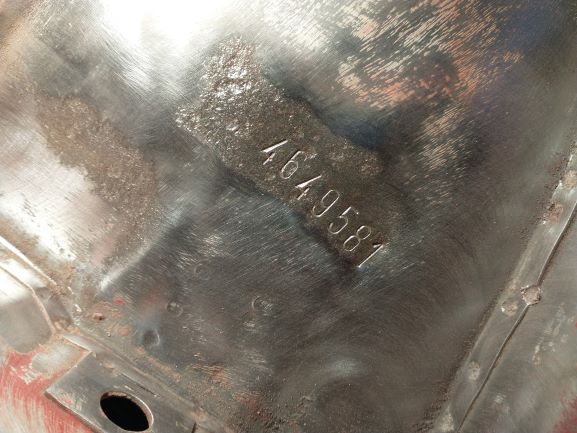
Uncovered the body number in the right, rear of the trunk. Seems like stamping the number created a low spot which caused the area to rust, go figure!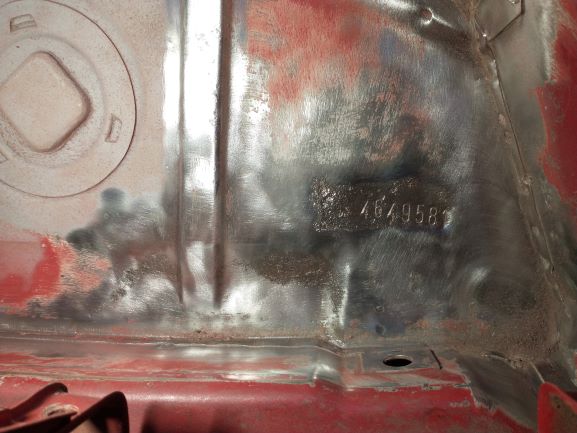
I removed the factory jack mount since I do not have the factory jack, and may need to trim, or open some of this area for the Subaru intake, etc. I hope not, but we will see.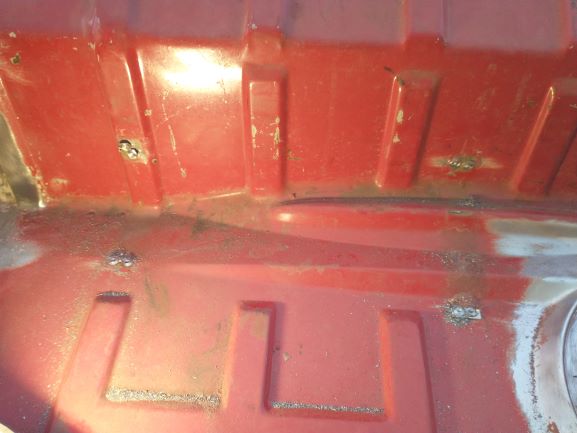
I want to use rubberized undercoating on at least the trunk floors to texture them, and to help a bit with road noise. I made sure to get the paintable kind in case I do not like them black. I read on the label that it needs to be sprayed on bare or primed metal. WOOHOO, more flap disk/wire brush work!
It's raining for the next couple of days, so no chance to work until things dry out again... 
Posted by: mb911 Jan 24 2021, 10:14 AM
Well remember you are using flux core on sheet metal so it is really a challenge. I think it looks great for the equipment being used. I can tell you that I have seen much worse.
Posted by: mgarrison Jan 25 2021, 03:16 PM
Tack weld question; when you are tacking sheet metal, are you doing a small circle with the tip/wire, or staying still/in one spot for the tack?
I've been moving in a small circle for my tacks, but maybe that's causing me issues...
Posted by: mb911 Jan 25 2021, 03:35 PM
No circling for what your tacking
Posted by: Cairo94507 Jan 25 2021, 03:46 PM
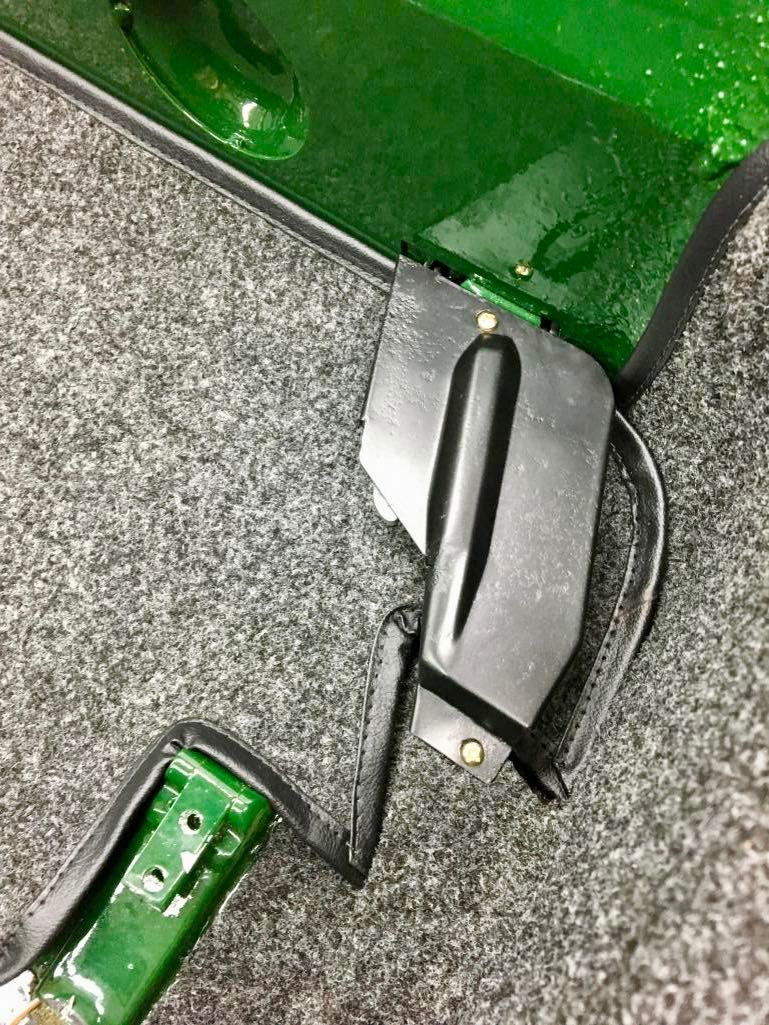
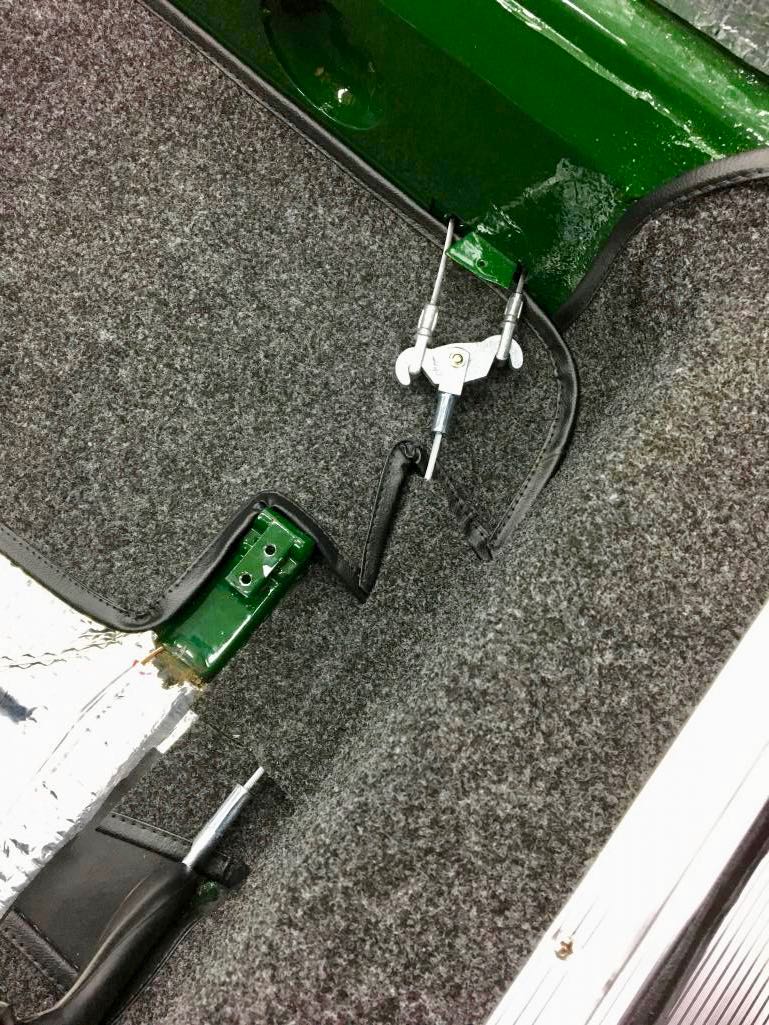
@http://www.914world.com/bbs2/index.php?showuser=23922 - Here are a few photos of my e-brake mechanism, hopefully it helps confirm location for you: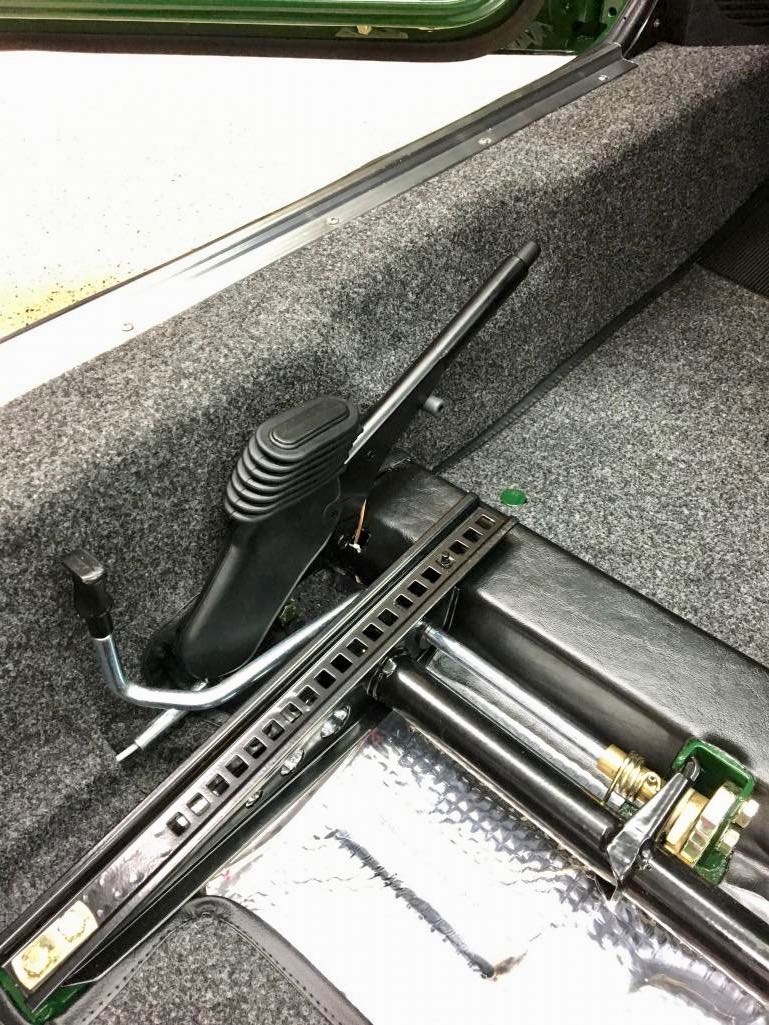
Posted by: djway Jan 25 2021, 11:21 PM
Check all the connections on your welder.
Especially check everything with the ground clamp. Make sure all connections are clean and tight and the clamp surfaces are clean. I discovered that was an issue once.
Also check inside where the wire feeds into the torch tube and make sure that is all clean.
Now back to your regularly scheduled welding....
Posted by: mgarrison Jan 26 2021, 09:45 AM
Thanks for the tips guys! I'm going to practice on some scrap, and try to get my settings dialed in...again. I will also double-check all the connections, and clean the welder up. Appreciate the advise!
Posted by: mgarrison Feb 3 2021, 04:39 PM
More trunk work - that took a lot longer than I anticipated! Safely covered with some primer for now. Need to figure out what/how/where I want to coat it with...Still debating the paintable rubberized uncoating vs. spray bedliner vs. body color. Want to hide my welds/repairs/treated rust and make it look at least decent...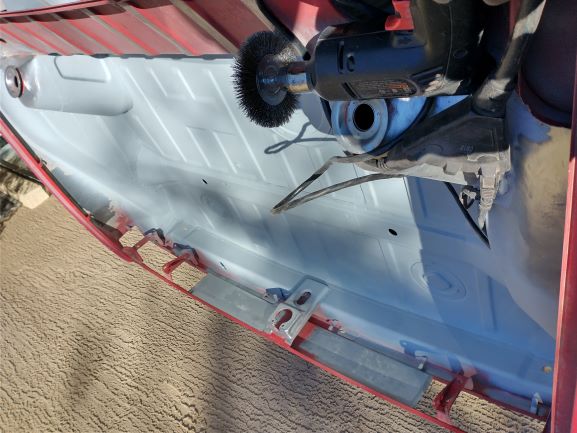
Let's call it finished!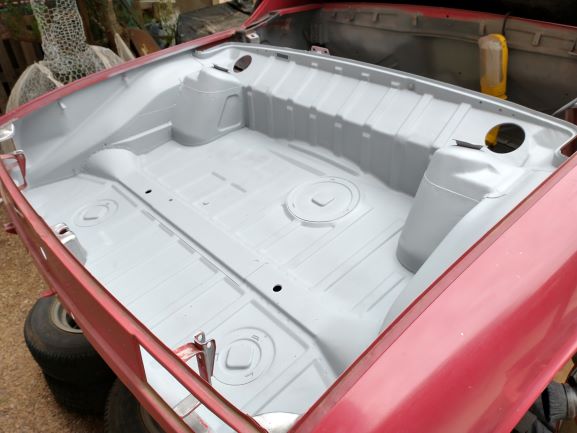
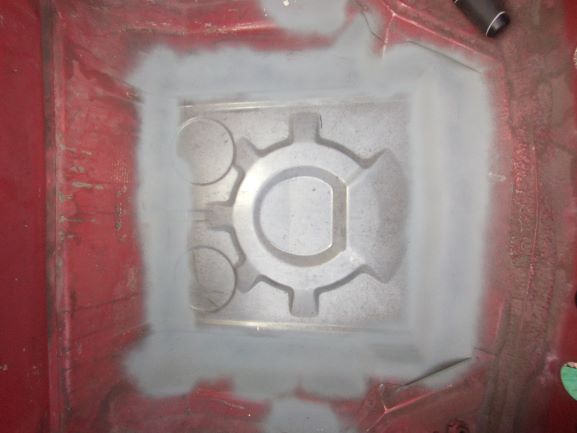
Got the center tunnel wire brushed out as best I could. Treated it with rust converter, let it sit overnight, brushed it again, let it sit and then rinsed it out good. Vacuumed it with wet/dry vac, and then took the lawn blower to it to dry everything as much as possible. Added a quick coat of primer after hitting it with a wire brush again to remove any residue from the rust treatment.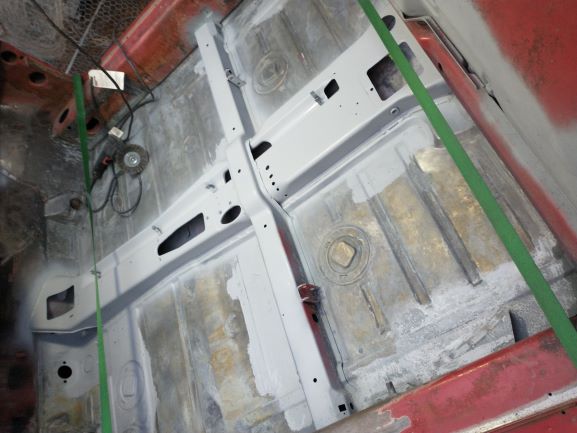
Waiting on more primer and more internal frame paint to finish up the tunnel and floors...
Attached image(s)
Posted by: mgarrison Feb 3 2021, 07:39 PM
The last thing I did last night was check the weather forecast. It said a 1% chance of rain, so I left the tarp off the 914 so it could air out after the rinse, vacuum, and blow dry of the center tunnel. Thinking I should go buy a lottery ticket - it rained for all off maybe 3 minutes this morning! More wire brush time...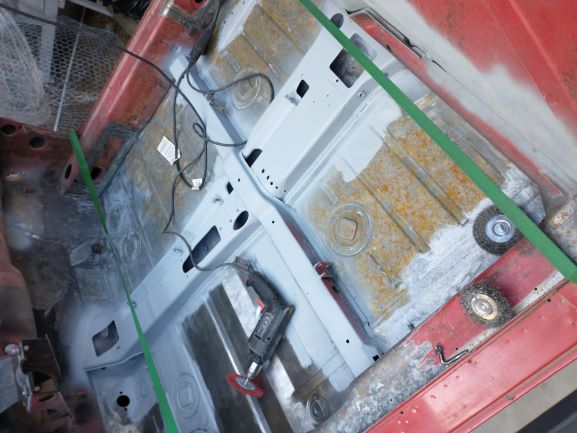
I tried these fiber wheels/brushes from HF. They work pretty well where there's light rust, or you just want to remove paint without chewing up the metal underneath.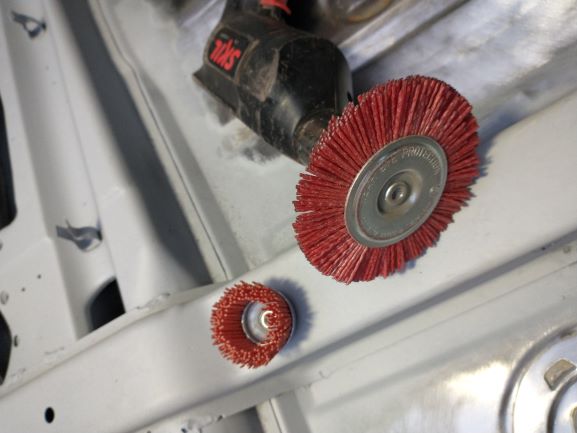
Some decent results with the fiber wheels. Prepping for the Mad Dog inner long stiffener.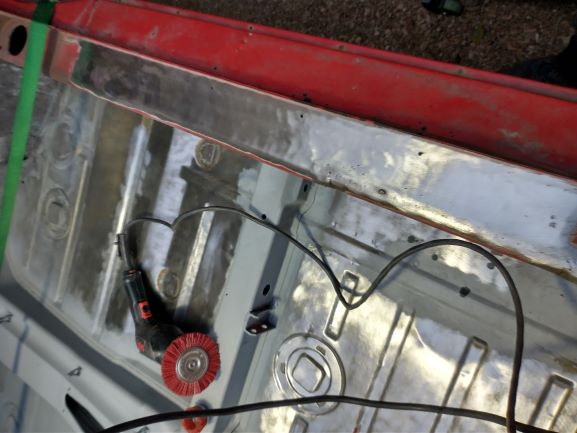
Lost my light for tonight...
Posted by: JRust Feb 3 2021, 08:11 PM
Looking great bud. Keep up the good work
Posted by: 2mAn Feb 4 2021, 11:08 AM
Great build. Moving slow, but you're doing it right. Keep it up
Posted by: mgarrison Feb 4 2021, 07:20 PM
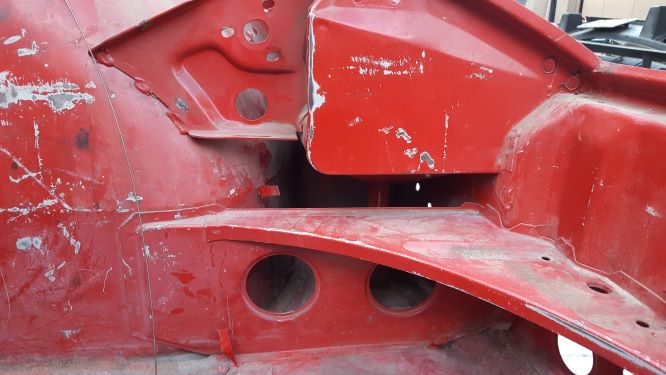
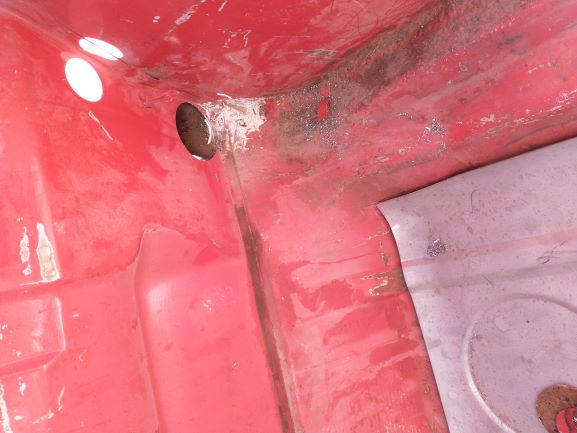
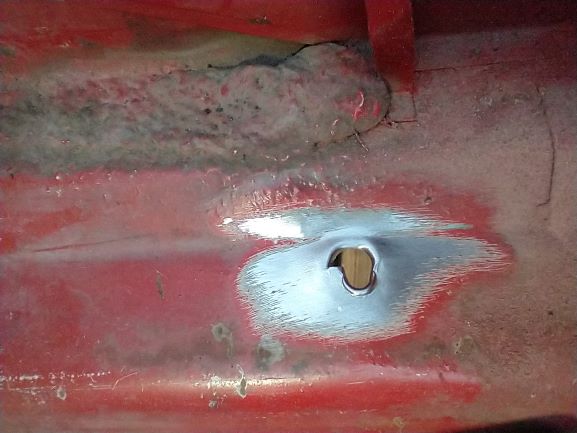
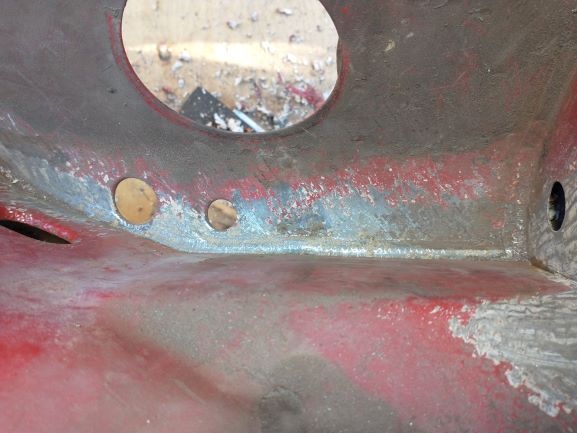
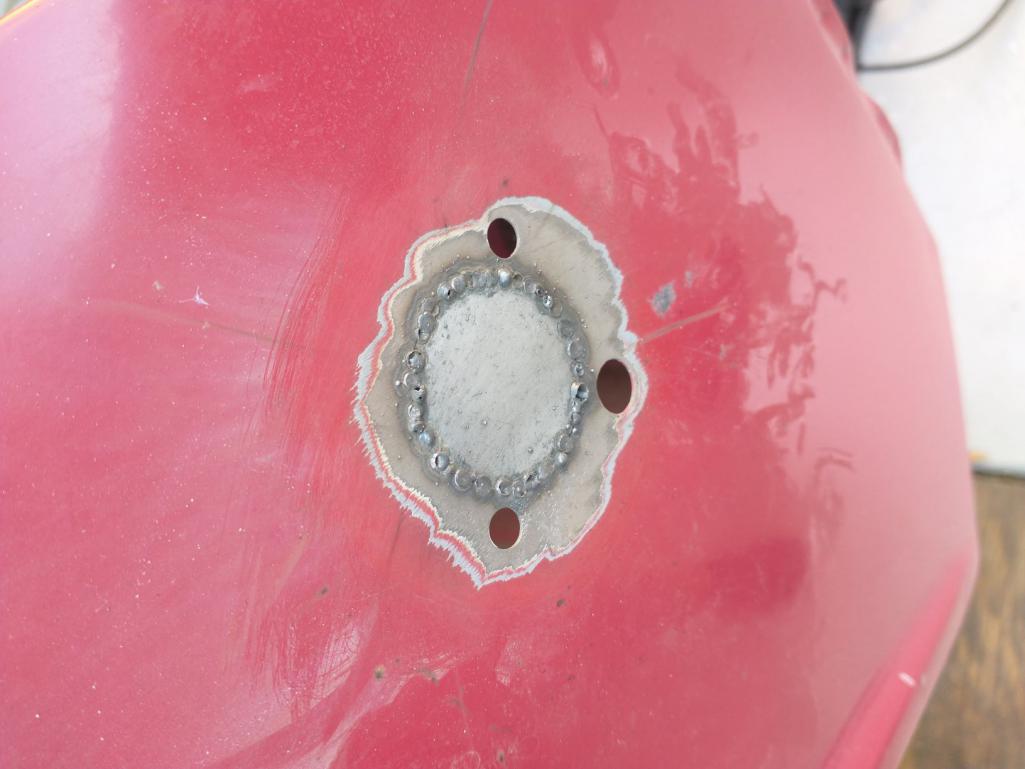
Does anyone know if these two holes should be there? They go all the way through into the engine bay. The one on the right side seems wallowed out and a bit oval. This car seems to have a lot of random, strange holes in odd places...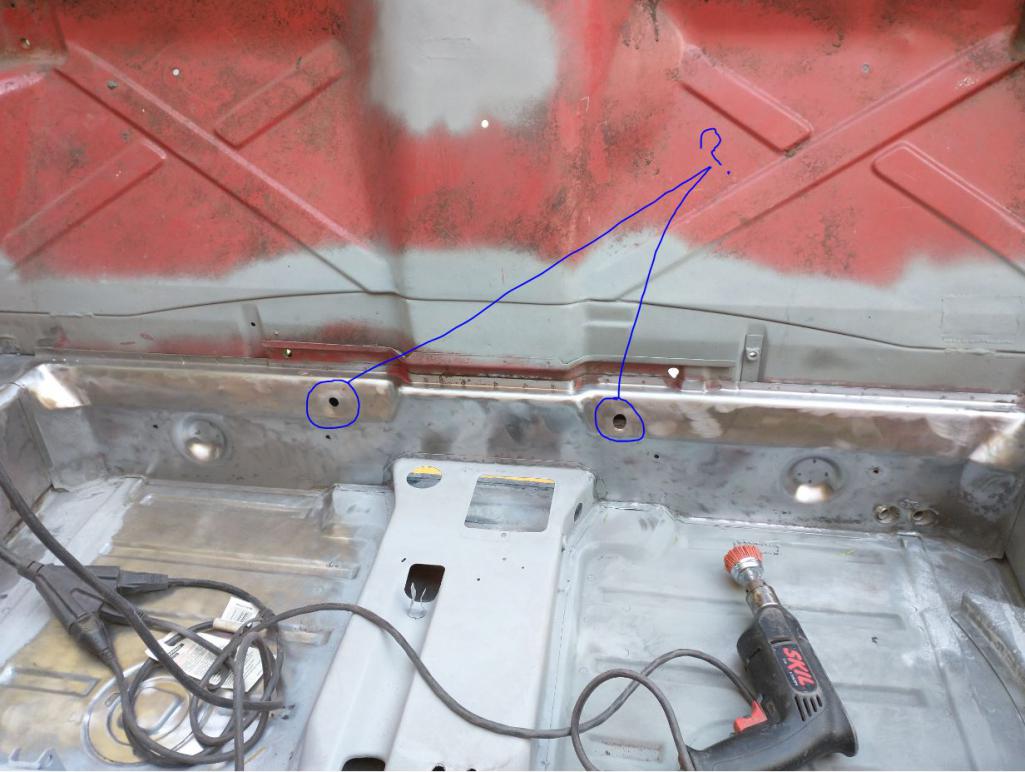
Posted by: mgarrison Feb 5 2021, 07:06 PM
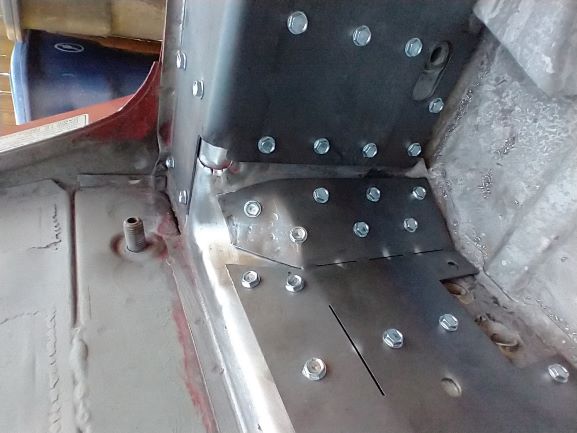
While I'm waiting for more weld-thru primer to get here, I started trying to fit/mold the Mad Dog inner long bracing. I ran into a couple of minor issues. I think my replacement handbrake pivot is a slightly different size than the original.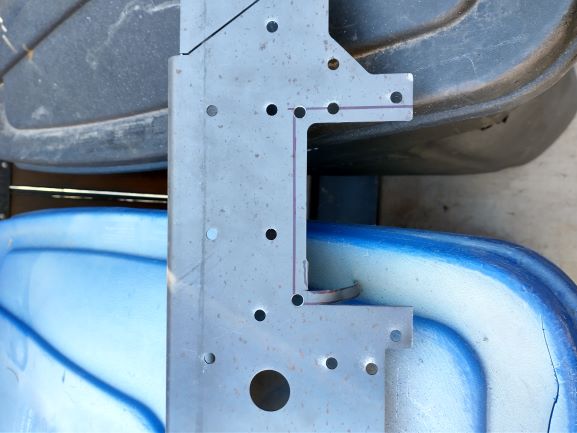
Looks like I need to trim a bit where the handbrake cables exit the firewall as well.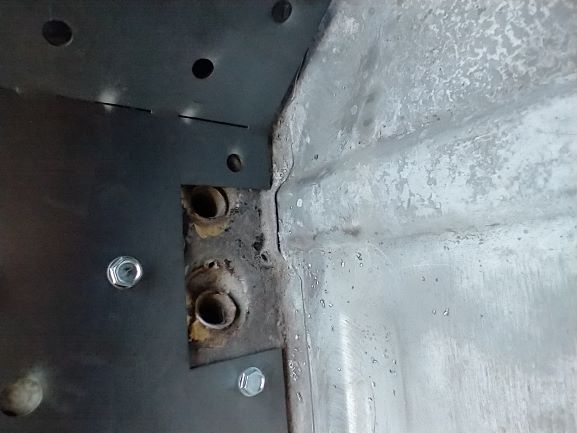
I will have to pull all this out so I can spray everything with the weld-thru primer, but at least it's mostly ready to go!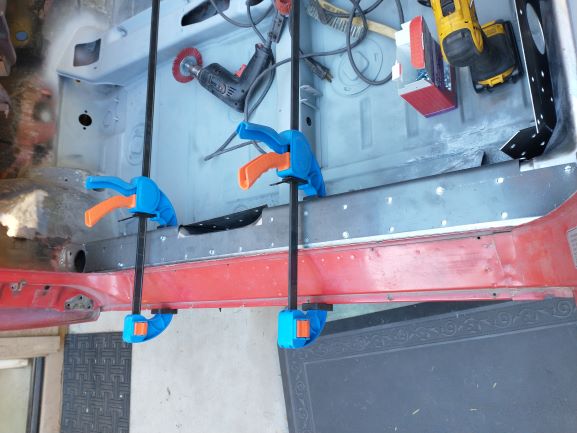
Not totally sure I understand the "screw in EVERY hole" instruction, but I didn't design the kit. Good thing I have two batteries for the cordless drill!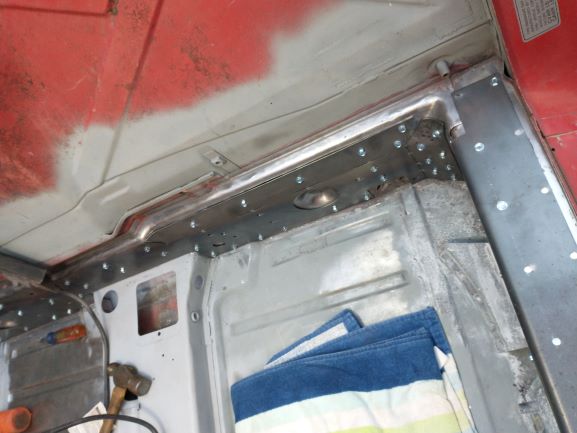
Posted by: dakotaewing Feb 5 2021, 09:30 PM
Your moving along nicely! Just a friendly reminder - Before welding in the stiffening kit it is highly recommended that the opening for the doors get braced before you start, otherwise you might end up with some unwanted shrinkage changing the door gaps. Not sure what your experience is with the weld through primer, but mine was that it sucked. I sprayed mine with epoxy primer as a result, and ground down or taped off the areas I knew would be welded.
Posted by: mgarrison Feb 6 2021, 03:48 PM
Thanks for the advice/reminder! I ran down to my local Lowes, but all they had was one six foot long 1" square tube - not enough for both sides! They did have some four foot 1/2" square tube. Not super sturdy, but it can't hurt. I checked measurements, and they are spot on - want to keep them that way! Hopefully, these little braces will help. I got them in there nice and snug...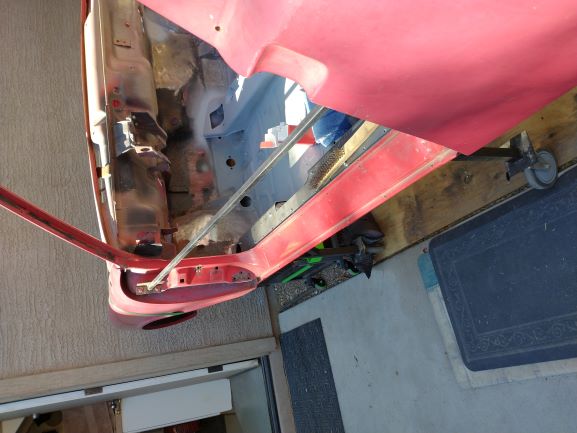
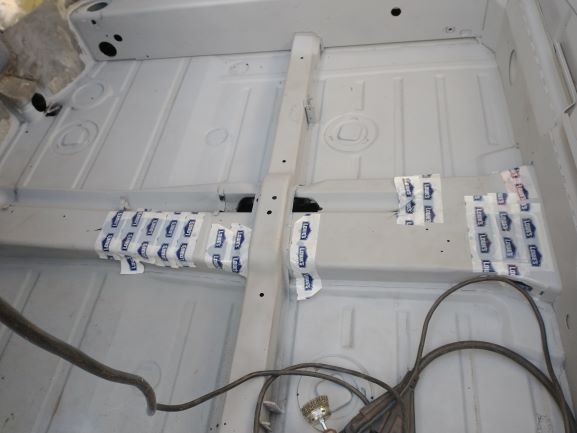
Posted by: mgarrison Feb 13 2021, 08:37 PM
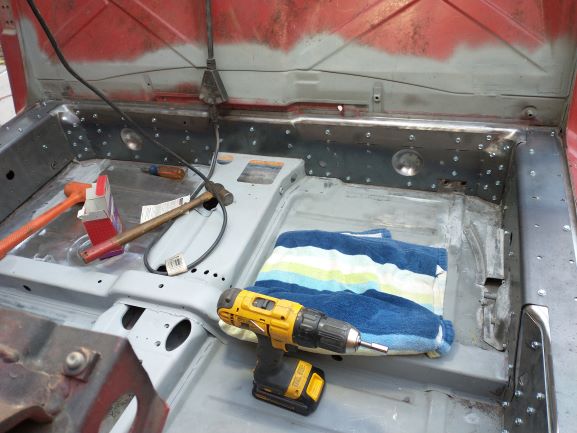
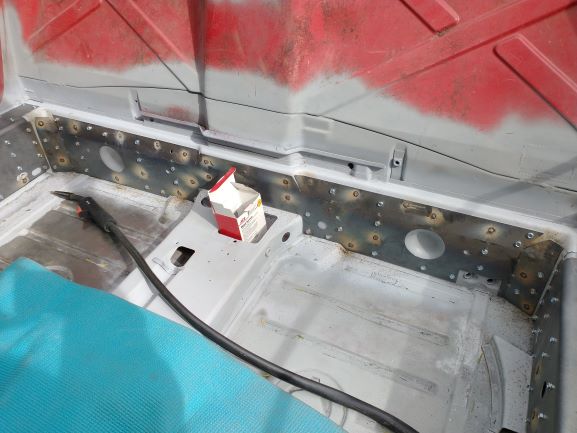
I got each and every hole filled with a screw, and did my best to fit the panels as snug as possible. My hands sure are not used to driving that many screws!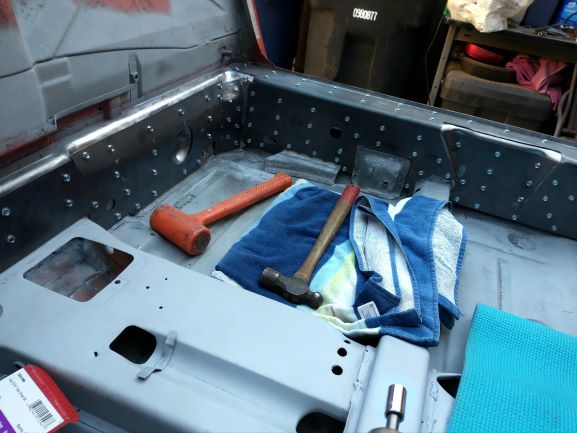
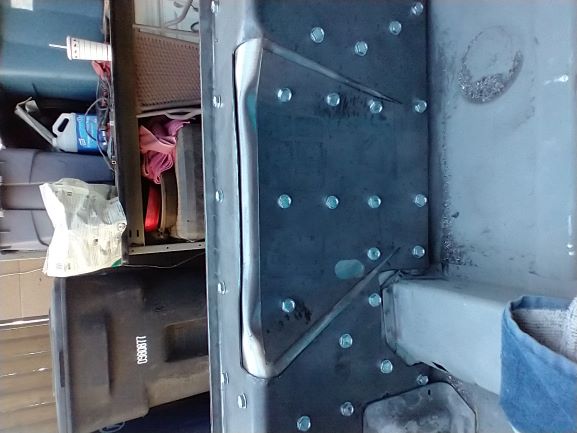
My AWOL order of weld-thru primer finally showed up, so I undid each and every screw. Which is a bit of a PITA as the self-tapping tip never wants to come out! For some reason this reminded me of the pincushion guy from Hellraiser!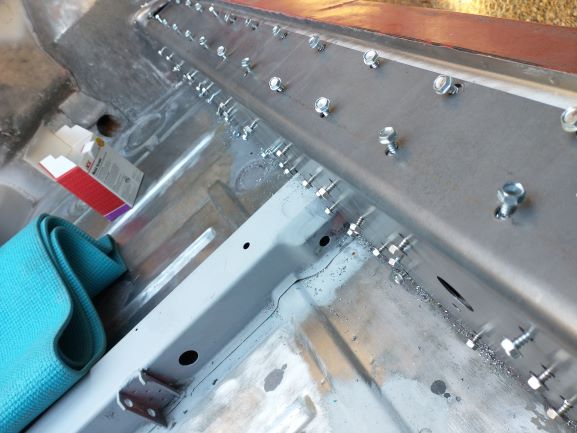
I got the backs of the panels all primed, and primed the bare metal of the longs and lower firewall.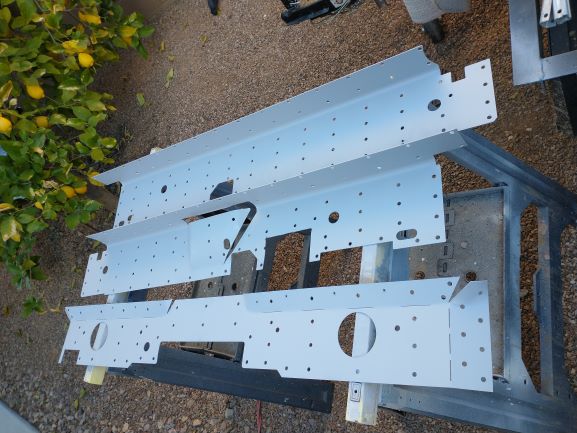
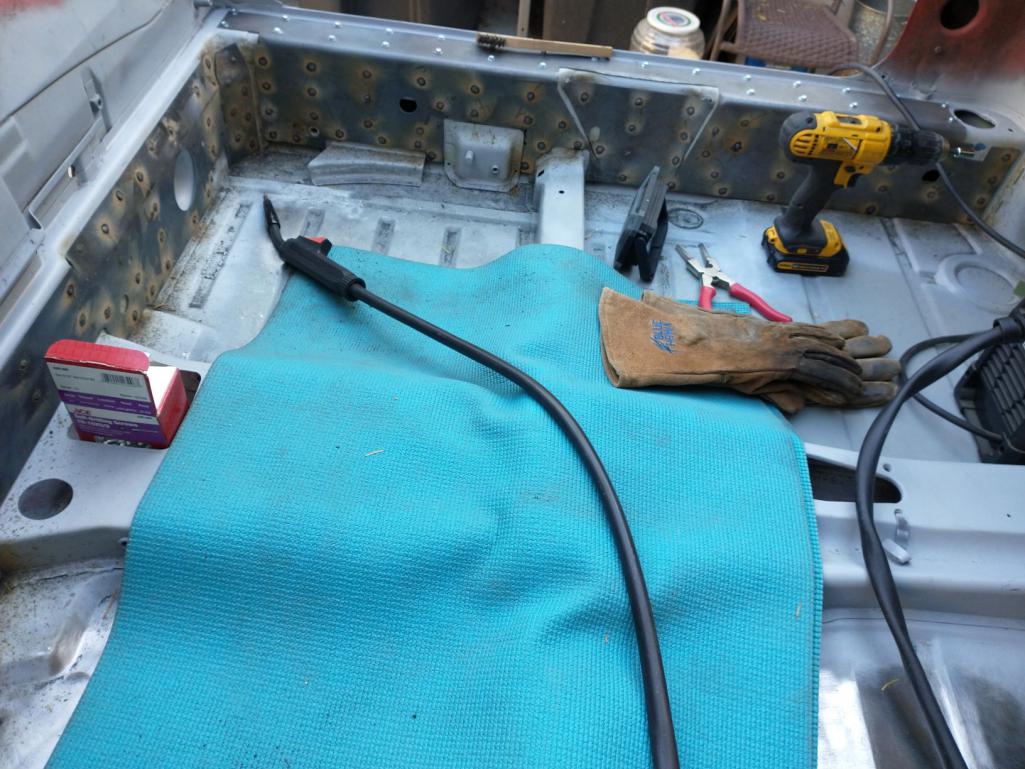
Once they were all screwed back in place, I tested my settings one more time to make sure things were good to go. I got the welder and everything I needed setup inside the car so I did not have to climb in & out any more than needed! I would take one screw out, then fill that hole with weld. Then take another screw out and weld. Then I would move to another panel on the other side of the car and repeat.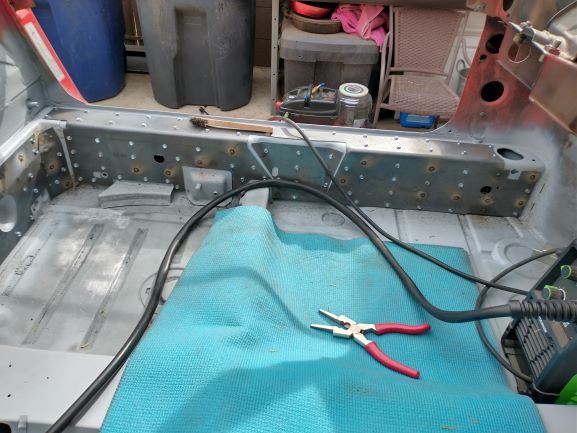
My welds are nothing to write home about, but the price is right! 
Murphy was riding my shoulders once again today - my welding helmet broke and would no longer stay up after I flipped it up between welds. Each time I would go to reposition to the other side of the car, the helmet would fall down, I could not see well and would invariably bonk my head or back on something hard & sharp! Off to HD in the morning for a replacement... 
Posted by: 2mAn Feb 14 2021, 01:25 AM
Loving this thread, keep it up
Posted by: mgarrison Feb 14 2021, 09:44 PM
Ran to HD early (to avoid people) this morning to grab a new welding helmet. After washing, clay barring, and "ceramic" coating my wife's Jeep, it was back to finish up the rosette welds. Nothing too exciting, except my knees are really happy all those welds are complete!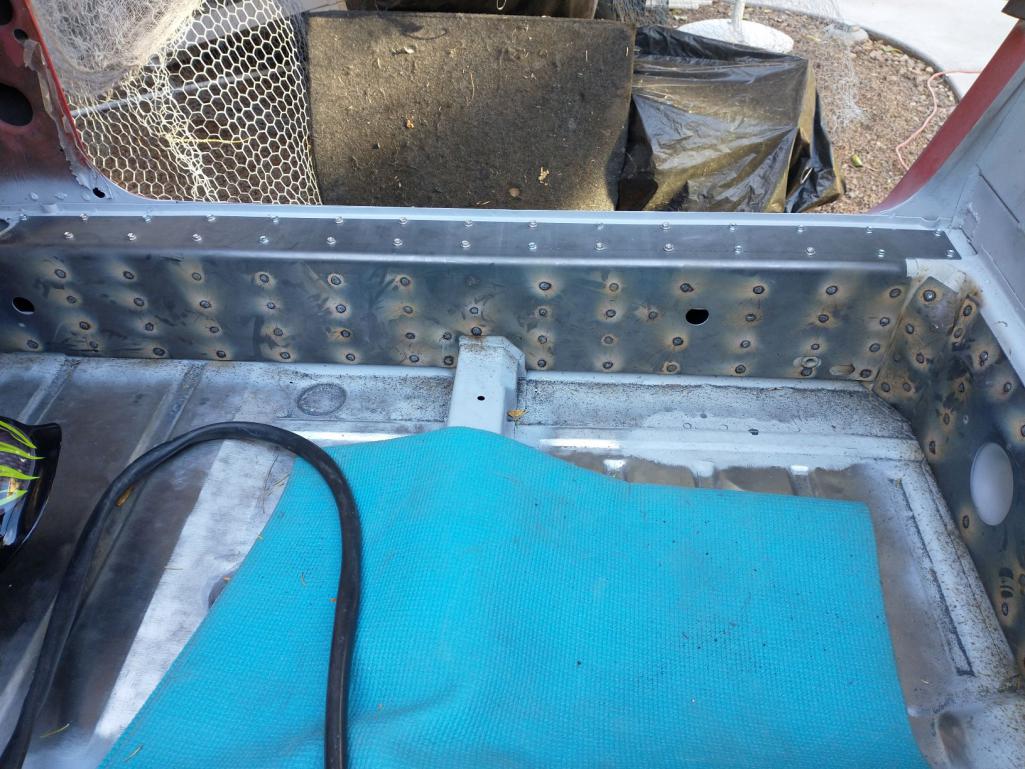
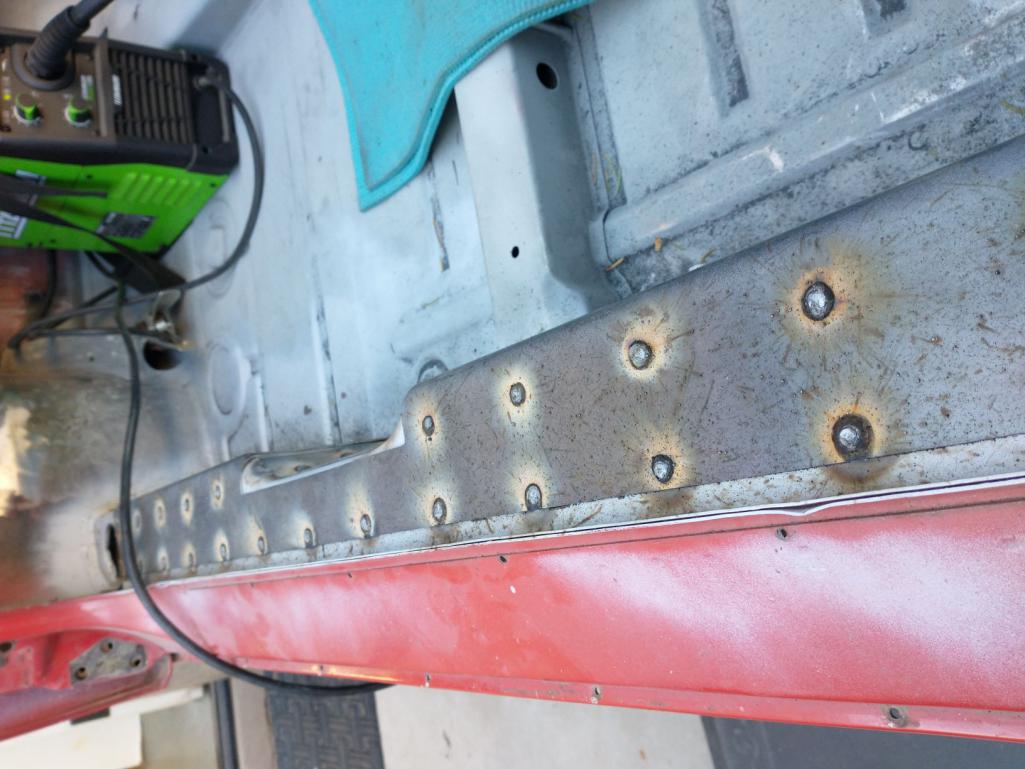
The rosette welds came out pretty ok, at least for my skills & equipment!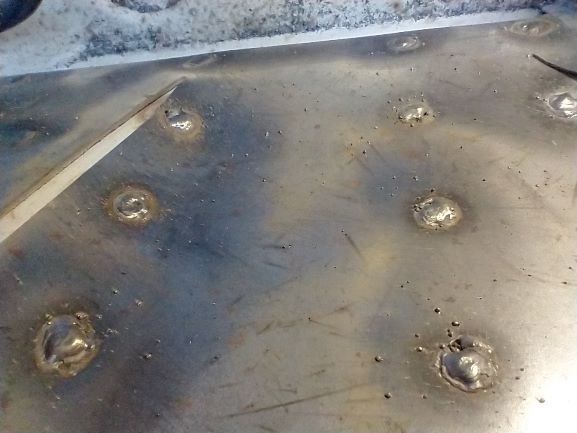
I need to figure some things out before diving into the stitch welds though... 

Attached thumbnail(s)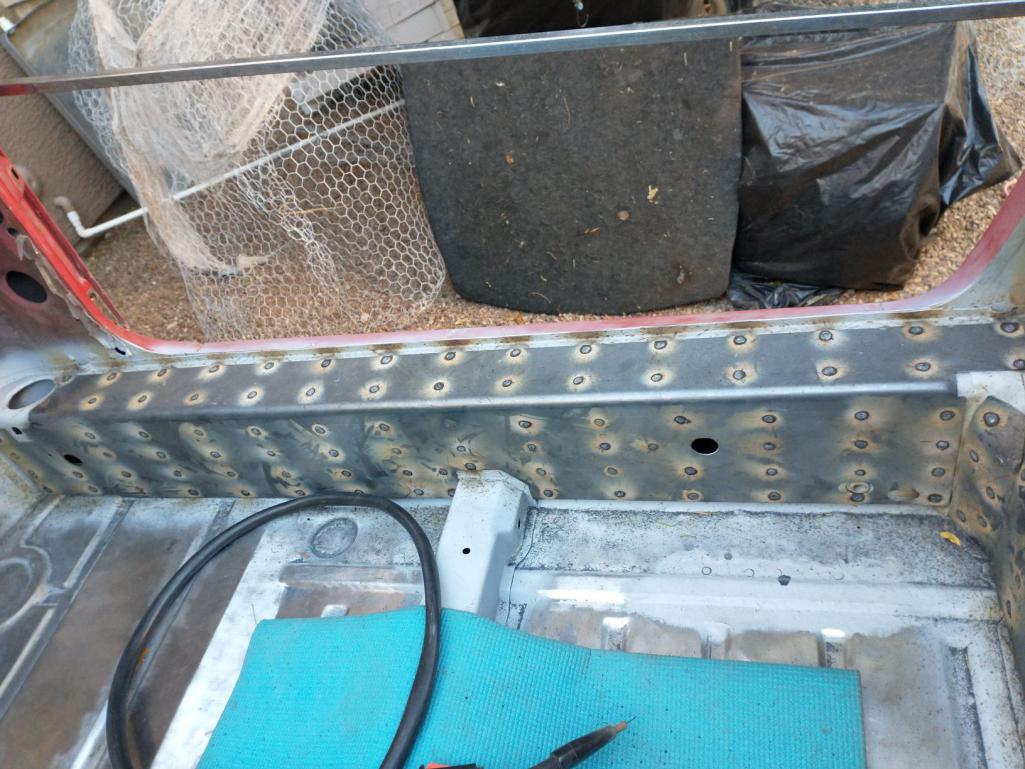
Posted by: djway Feb 14 2021, 10:37 PM
Looks great.
Posted by: 76-914 Feb 15 2021, 09:13 AM
You need a copper backing plate to help with the stick welds. How you angle your gun has an influence also.
Posted by: mgarrison Feb 15 2021, 06:41 PM
I've got some smashed copper pipe to use as backing, but no way to get it inside the long and hold it there. It is what it is...wanted to do as much as I could myself.
Posted by: mgarrison Feb 15 2021, 06:45 PM
Today was mostly washing/cleaning up my truck, but I did manage to spend a couple of hours on the 914. I got all my rosette welds ground down. A few little spots here and there, but overall not to shabby for me.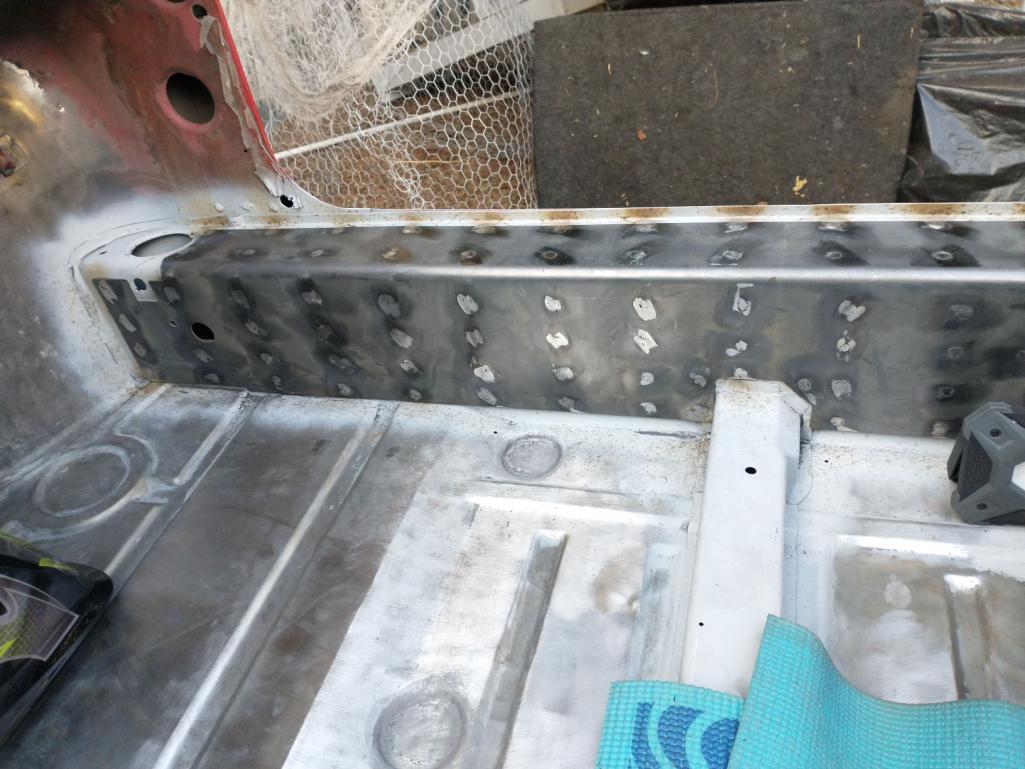
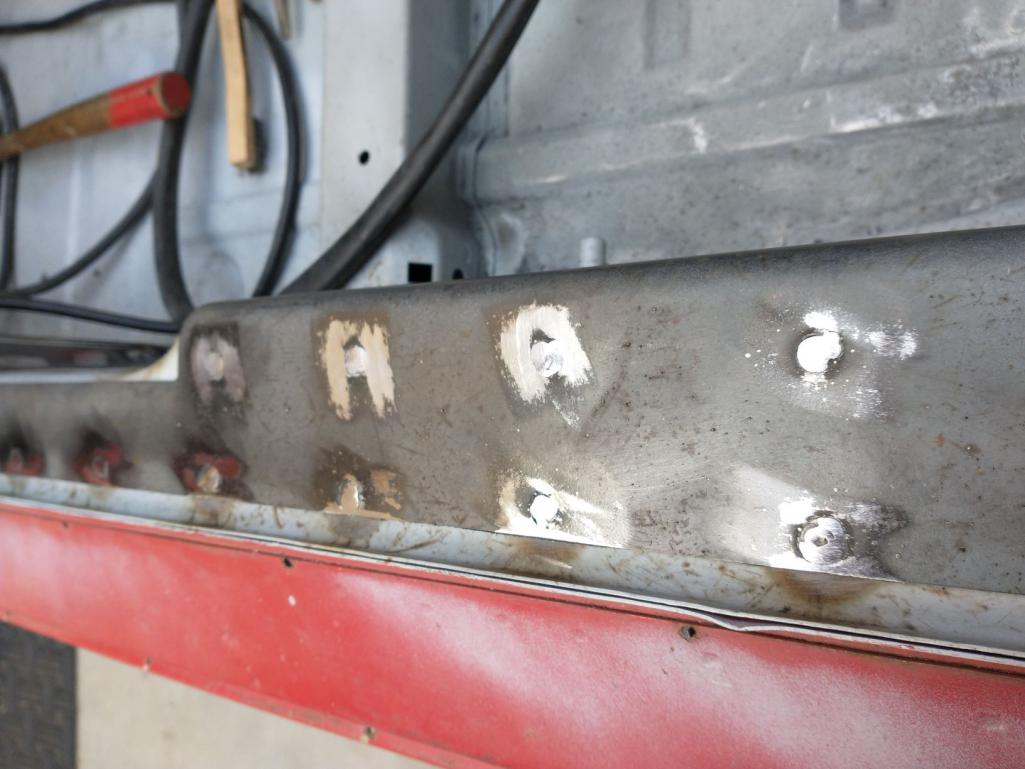
I did some test welds, and tried to ensure my settings were ok, and worked on trying to stay straight! Looking a bit better... 
Posted by: djway Feb 15 2021, 10:18 PM
Does it feel stiffer? 
Posted by: mgarrison Feb 16 2021, 09:43 AM
Impossible to tell...no suspension, wheels, etc.! 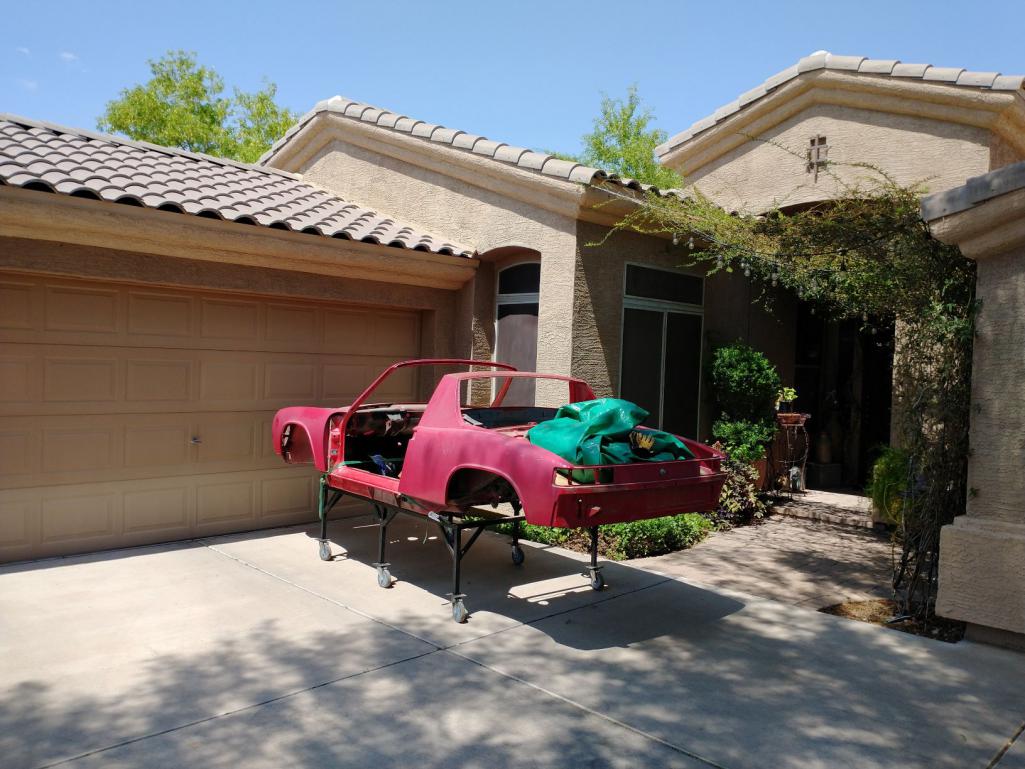
Posted by: mgarrison Feb 18 2021, 07:39 PM
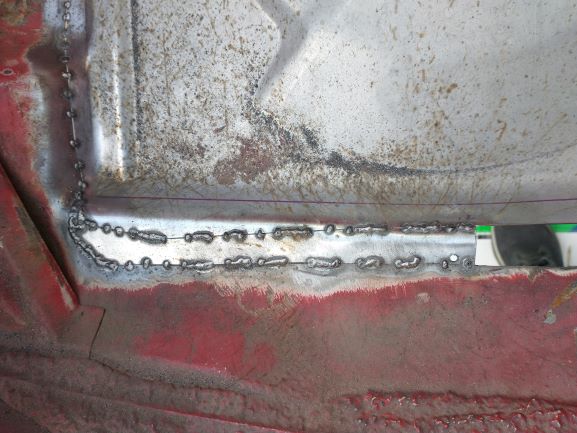
I got the panels all stitched in. Things were going better, so I figured while I was on a roll, I'd just go with it!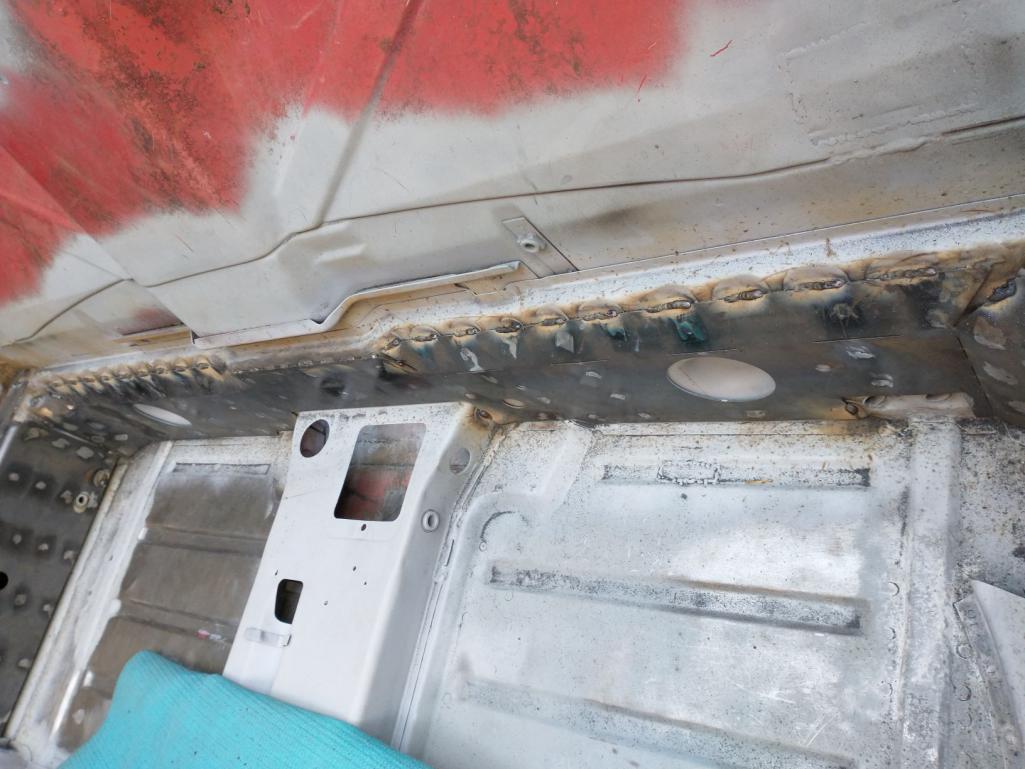
Welds looking better...at least for my welds! 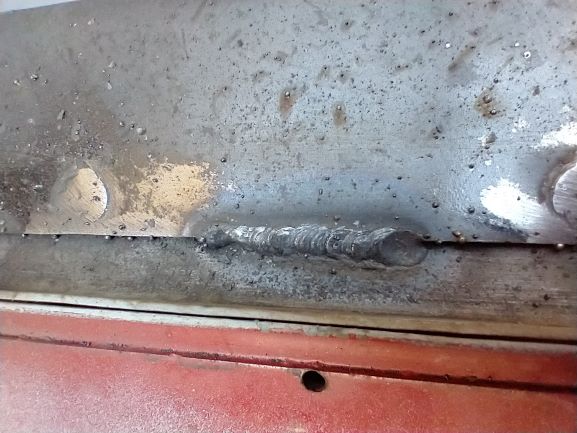
Hit everything with the wire brush, vacuumed up all the debris, and coated with primer to protect it...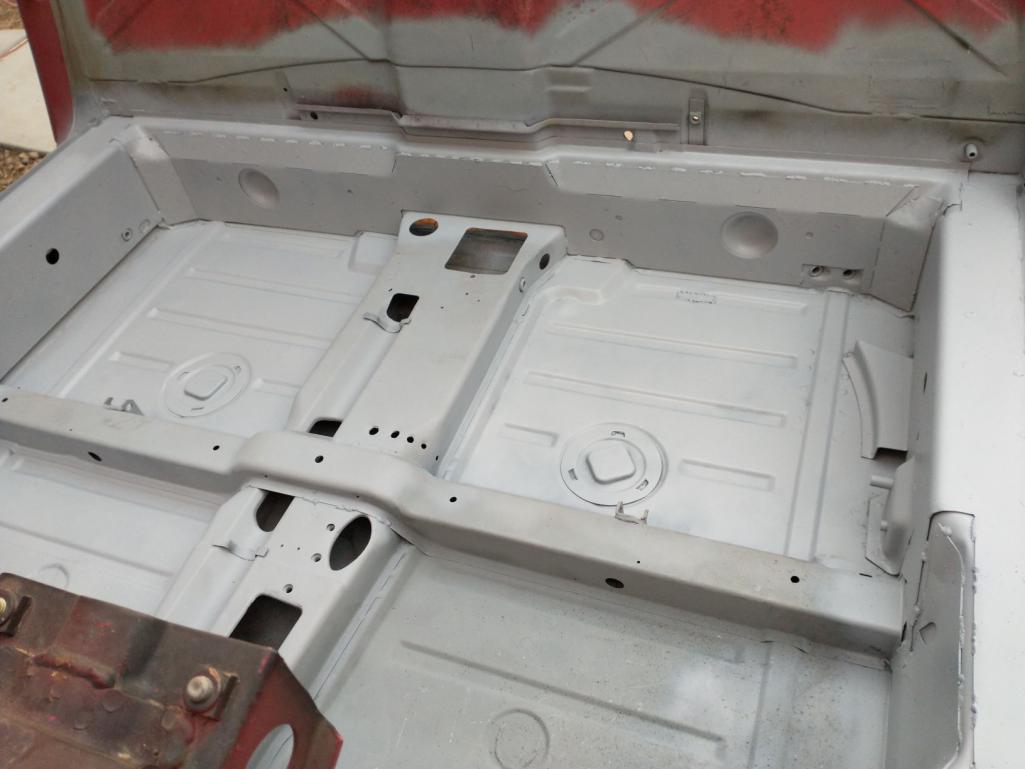
Posted by: seanpaulmc Feb 18 2021, 07:55 PM
Great job!!! 
Is there any stich welding on the bottom at the floor pan?
Curious if this kit can be installed before doing floor pan replacement.
Thanks,
Sean
I got the panels all stitched in. Things were going better, so I figured while I was on a roll, I'd just go with it!
Welds looking better...at least for my welds!
Hit everything with the wire brush, vacuumed up all the debris, and coated with primer to protect it...
Posted by: mgarrison Feb 26 2021, 08:34 PM
Great job!!!
Is there any stich welding on the bottom at the floor pan?
Curious if this kit can be installed before doing floor pan replacement.
Thanks,
Sean
I got the panels all stitched in. Things were going better, so I figured while I was on a roll, I'd just go with it!
Welds looking better...at least for my welds!
Hit everything with the wire brush, vacuumed up all the debris, and coated with primer to protect it...
I did not do any stitch welds along the bottom. Since the longs are curved at the bottom, they pull away from the new panels. Not sure how you would weld down in there, and the stiffening panels do not go all the way down to the floor pan.
Posted by: mgarrison Feb 26 2021, 09:02 PM
Still just trying to keep moving forward. Inch by slow inch...
Trying to get the interior of the chassis all wire brushed, any rust I find treated, and then a quick coat of primer to protect it. With all the little nooks & crannies I think doing the flares and the outside might seem easier! Still have the frunk to finish up!
I found some surface rust under the dash - seems like a really odd place to rust, especially on an Arizona car!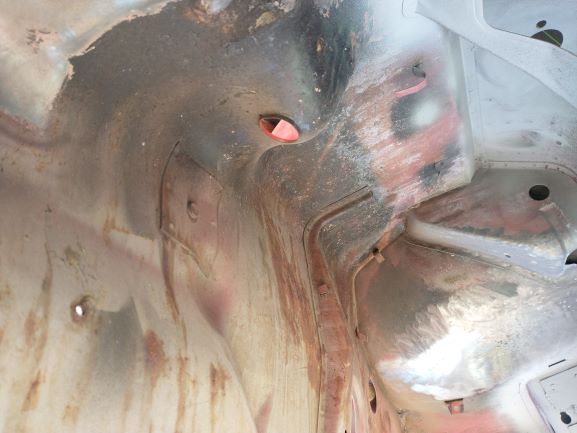
Not too terrible after cleanup.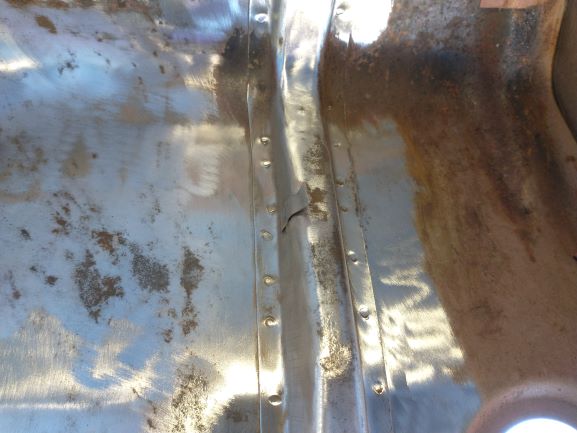
Some more surface rust on the firewall, but not much!
I actually forgot to treat the two spots on the firewall before priming, so I looked back at the above photo and hit the right areas with the wire brush so I could treat them. Just try to ignore my amateur patch on the left there! 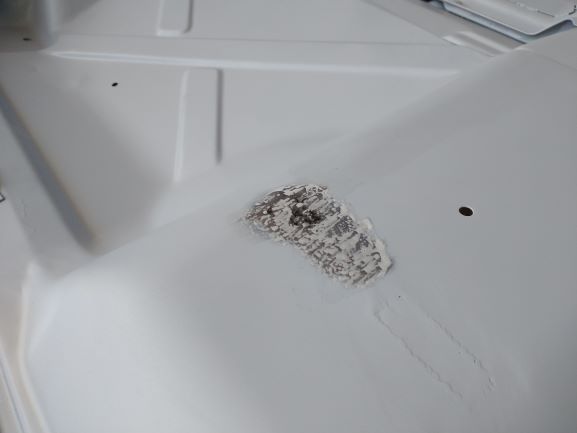
There was some odd, crunchy sealer just in front of the doors under the dash. Very different stuff from the other seam sealer!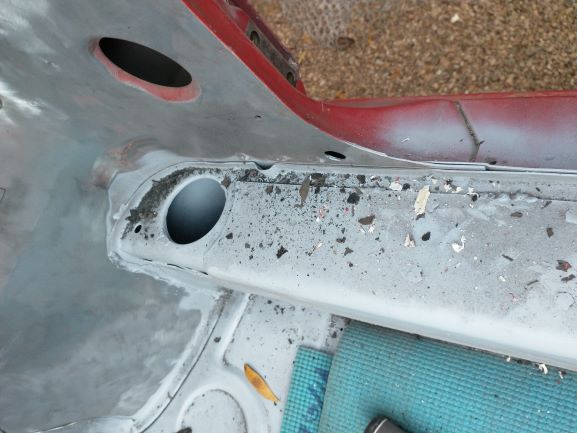
I tried to check all the problem areas to uncover any rust. The usual spots look really good!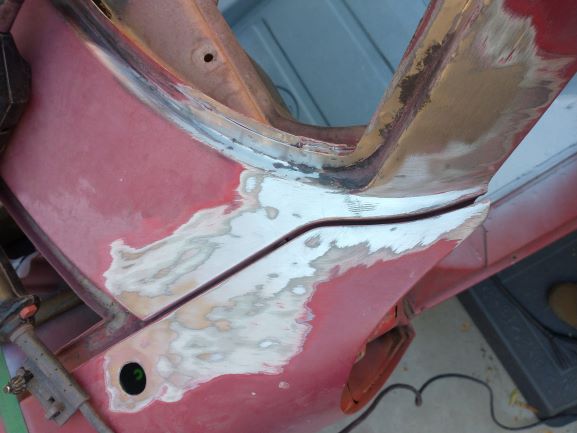
There was a bit of rust in the windshield channel, especially at the two bottom corners. Did my best to wire brush it and then treated it too.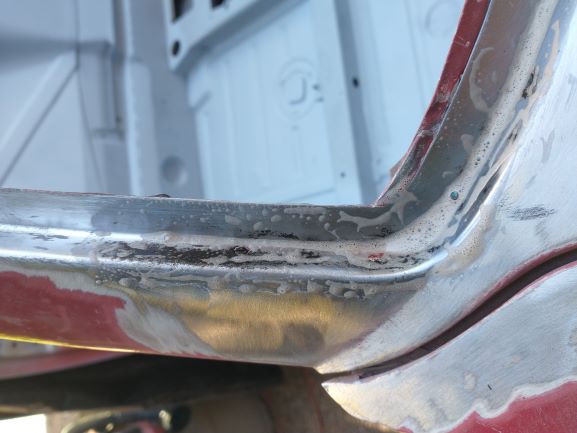
The shop vac is seeing daily use, and getting quite the workout sucking up all the paint dust, rust, and metal shavings! 
Posted by: mgarrison Feb 27 2021, 08:12 PM
I wire brushed the vent holes as best I could and then coated them with the Eastwood internal frame coating. Should keep them from rusting, etc.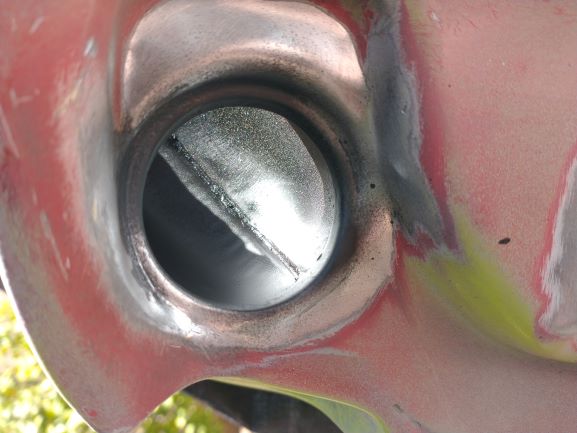
I drilled out the holes for the coolant lines through the longs. Took a deep breath before drilling through the panels I had just welded in!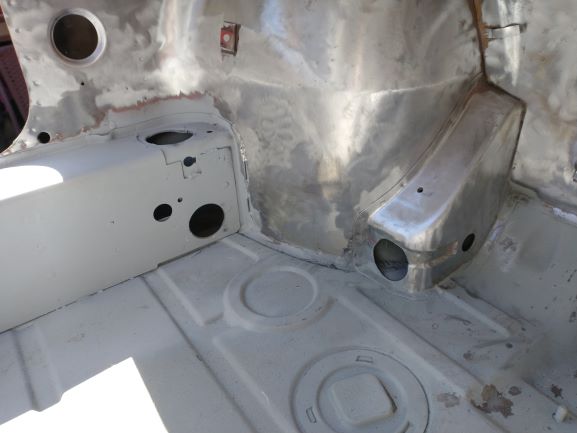
I taped over the smaller holes in the "ducts" where I will run the coolant lines to the frunk, and most of the holes in the center tunnel so I could spray the internal frame coating without getting it in my face...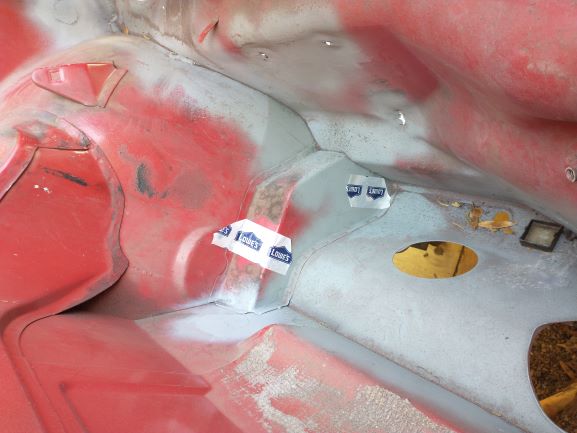
Still got some on my boots though...That's not coming off!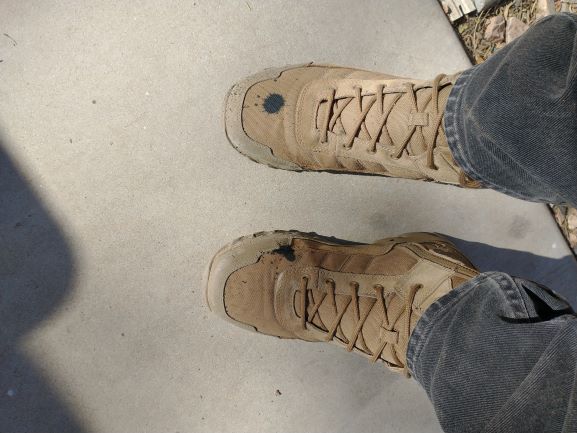
Here's the tube & nozzle it comes with. I taped the tube to a section of coat hanger to keep it straight, and to be able to aim it a bit better.
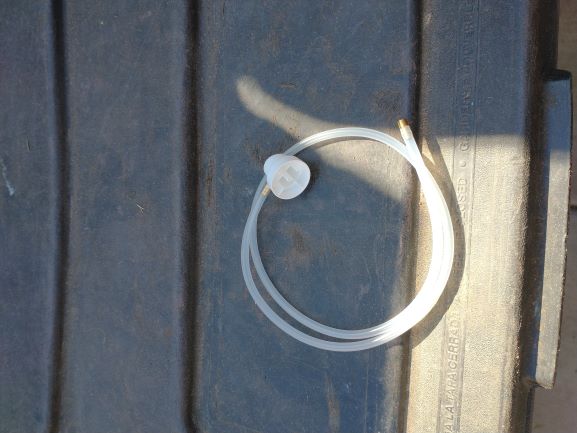
Stuff seems to work rather well, but it does make a mess, and is thin enough to drip out the bottom of the chassis (how it got on my boots).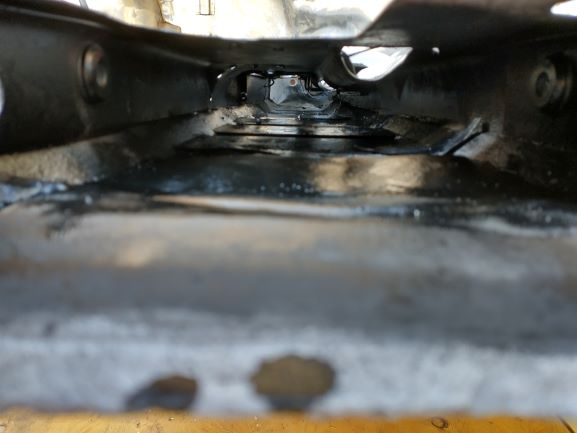

Shot the dash support with some primer, and tried to catch all the other areas I had stripped so they are protected.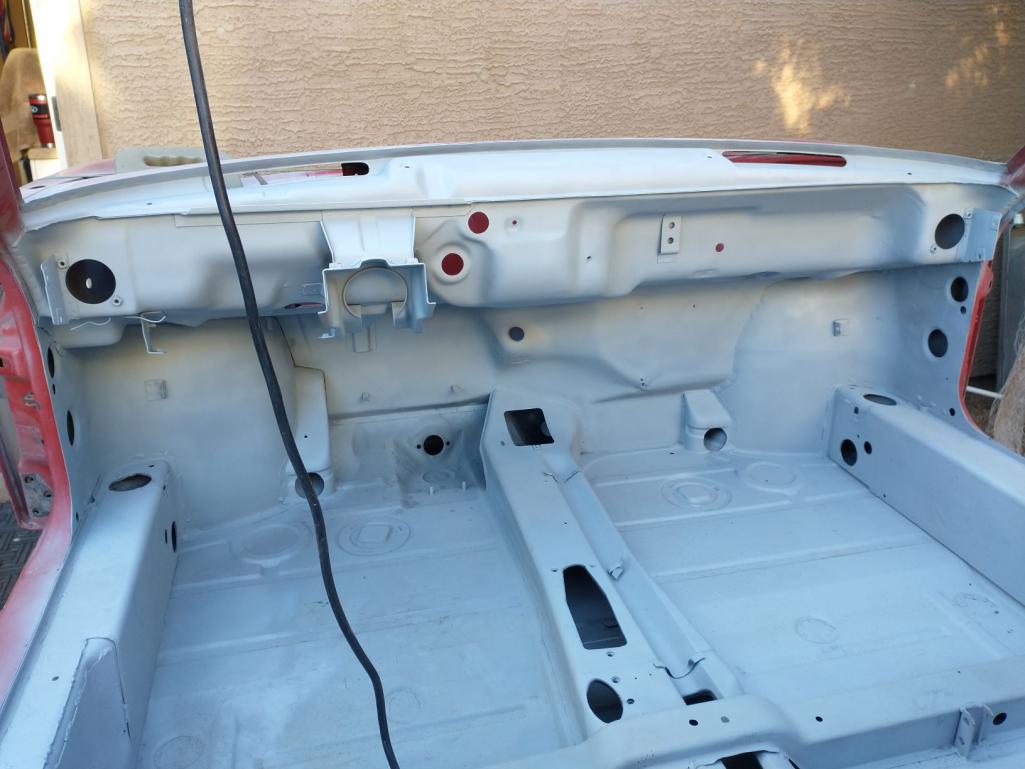
On/back to the frunk!
Posted by: mgarrison Mar 21 2021, 02:38 PM
I've been working along slowly. Just keep swimming...
I removed the tabs for the back pad. I don't have a back pad or 914 seats, and being six foot three will need all the room I can get!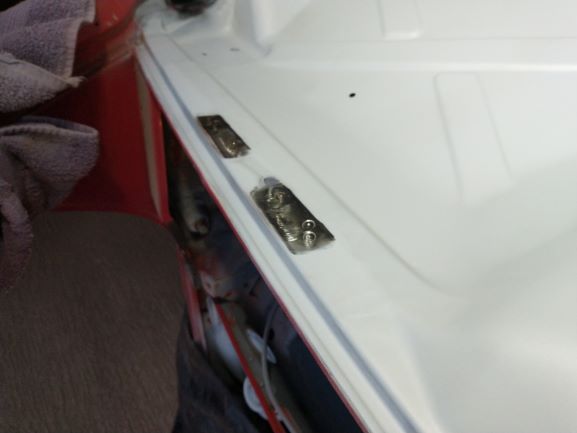
I see why there is not much paint or primer in the area under the head light buckets...HTH do you get in there???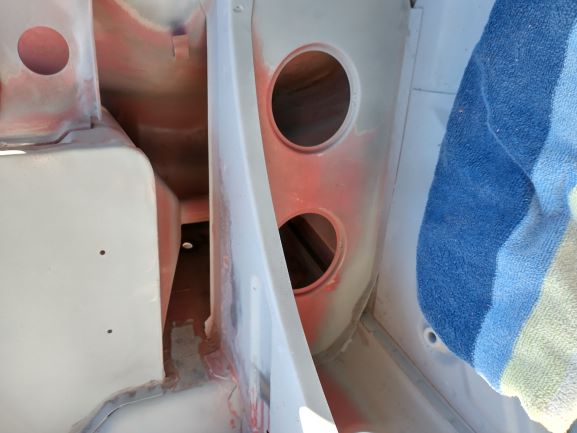
I ordered this extension from Amazon, but it only takes a 1/8" shank, so very limited options other than Dremel ends.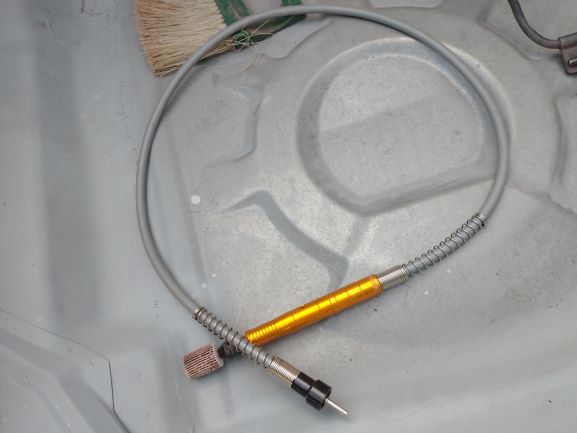
It kind of works, but not very well. I tried using it to get down in the corners of the fender well where it disappears behind the headlight bucket.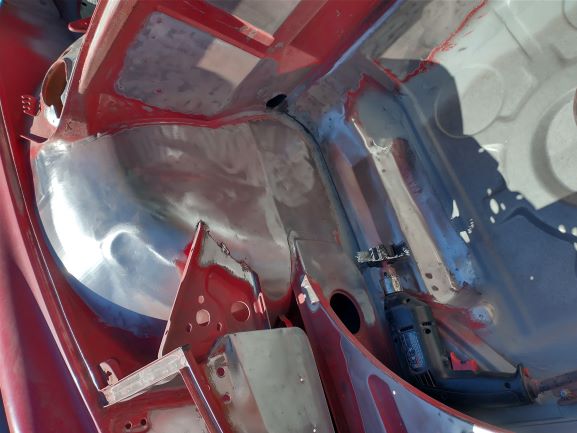
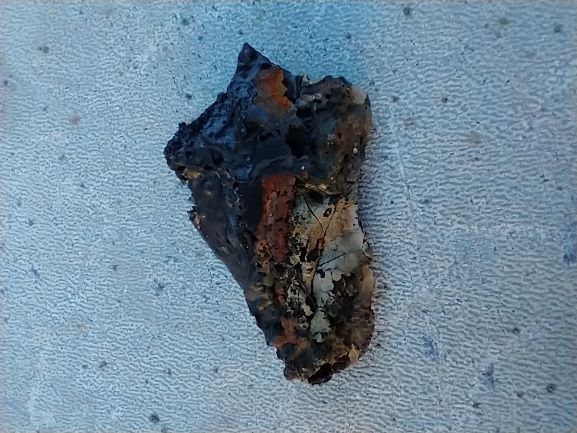
The area under the headlight buckets had a bit of surface rust, but not bad. The "seam sealer" they used in this area was very different from the rest. It is dark and had hardened up to a brittle, charcoal like substance!
Quite a bit chipped off rather easily: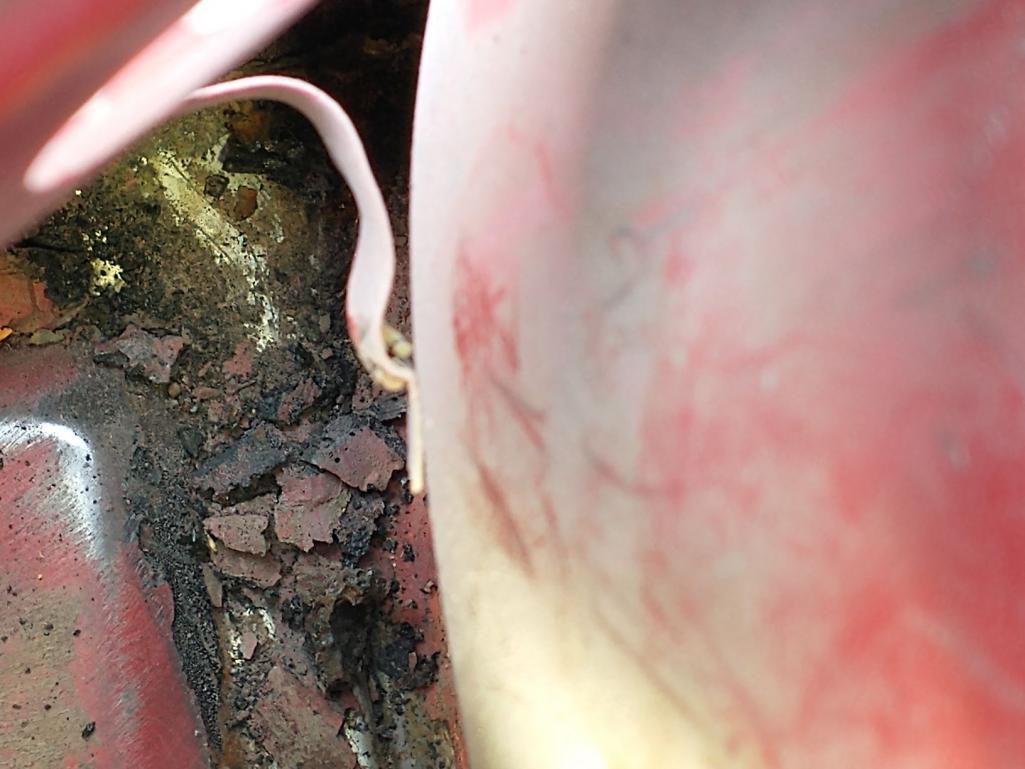
Here's a closeup of a big chunk, odd stuff: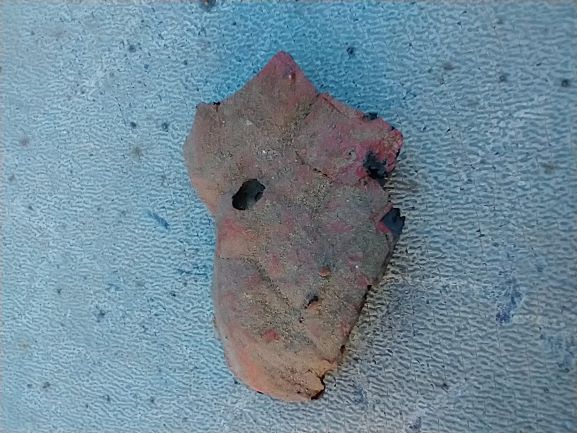
I moved over to the area under the gas tank. I needed to feel like I was making some progress/difference...needed to see some kind of change!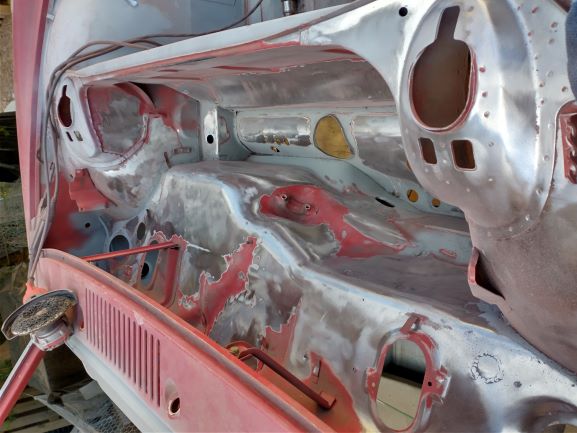
Posted by: mgarrison Apr 7 2021, 10:30 AM
I was really struggling trying to figure out how to get a wire/fiber brush down into all the nooks & crannies in the frunk area, and the area under the gas tank. I thought I had found a flexible extension for my drill, but then received an email that it was no longer available from the supplier!
At that point I gave up and got a abrasive blaster from HF. I decided on the 110lb model since it was only $20 more than the 40lb model. After reading reviews, I stopped by Tractor Supply and got 100lbs of the Black Diamond fine blasting media (coal slag). It's $9.99/bag for 50lbs. The HF media is $24.99/bag for 50lbs!
I have a 2HP Kobalt twin cylinder compressor that's plumbed in to another 32 gallon tank left over from my old compressor that died. So, 62 gallons of 150PSI air, theoretically...
So far, so good. Works pretty well, and I have not run low on air pressure that I have noticed. I blast a section, then take a break - it's been in the mid to high 90s here already, so having a N95, safety glasses, hood, gloves, long sleeves makes it a bit too toasty to blast for very long!
Creates a nice finish, but boy does it make a huge mess!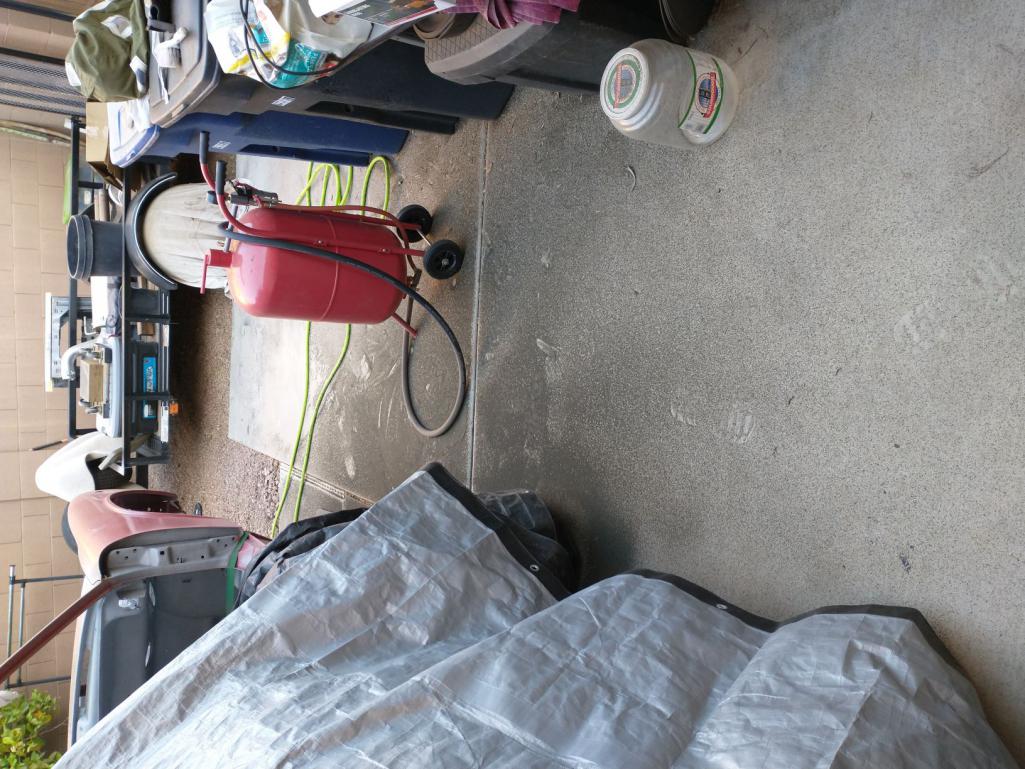

I have been cleaning the media up with my shop vac - one reviewer suggested sucking up all the used media in a clean shop vac, and then sifting it and reusing it. Have not tried doing that yet, but the shop vac is getting pretty heavy!
Posted by: mgarrison Apr 11 2021, 02:41 PM
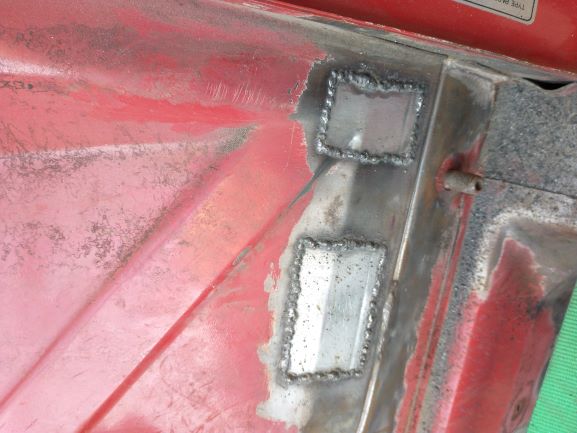
Been plugging along slowly. Finished up the frunk, tested sandblasting a bit along one rocker and both front fender wells. Cut and welded patches for the side marker light holes - Think I'm finally ready to order my flares and outer rockers!
Once I get them mocked up and the fenders cut I plan on sandblasting the inside of the fenders - the larger cut out should make for easier access, I hope!
Some pics of the marker light patches...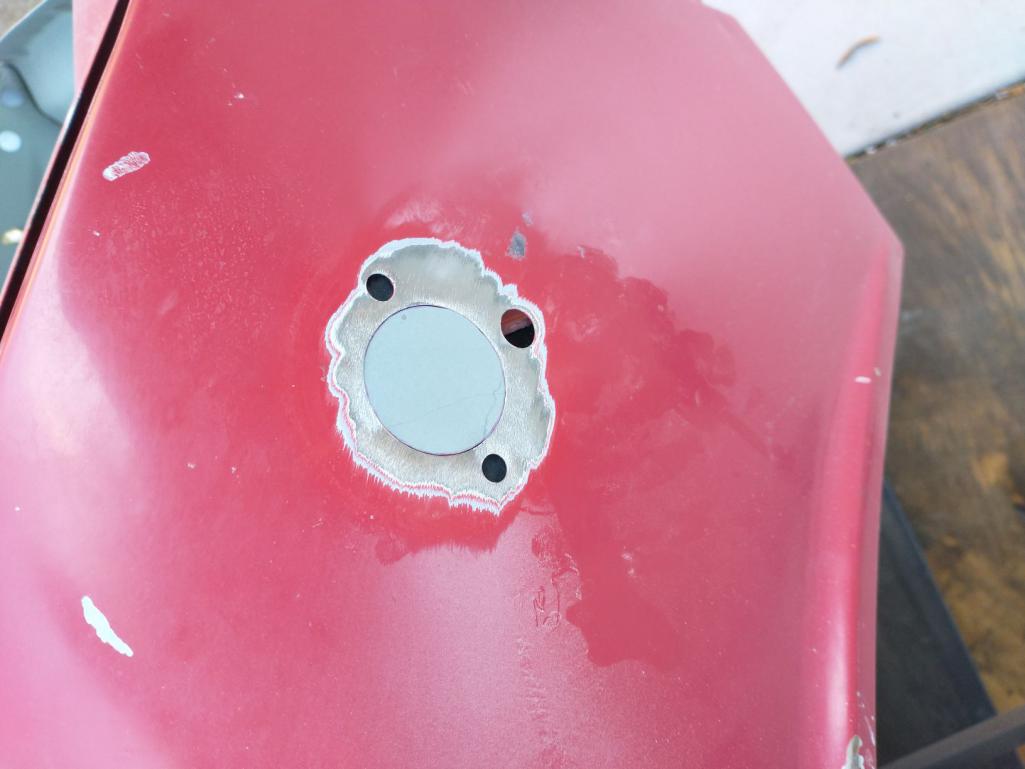
I do lose a couple of days a week helping our daughter at the barn. But it's worth it since I get to hang out and help with this guy!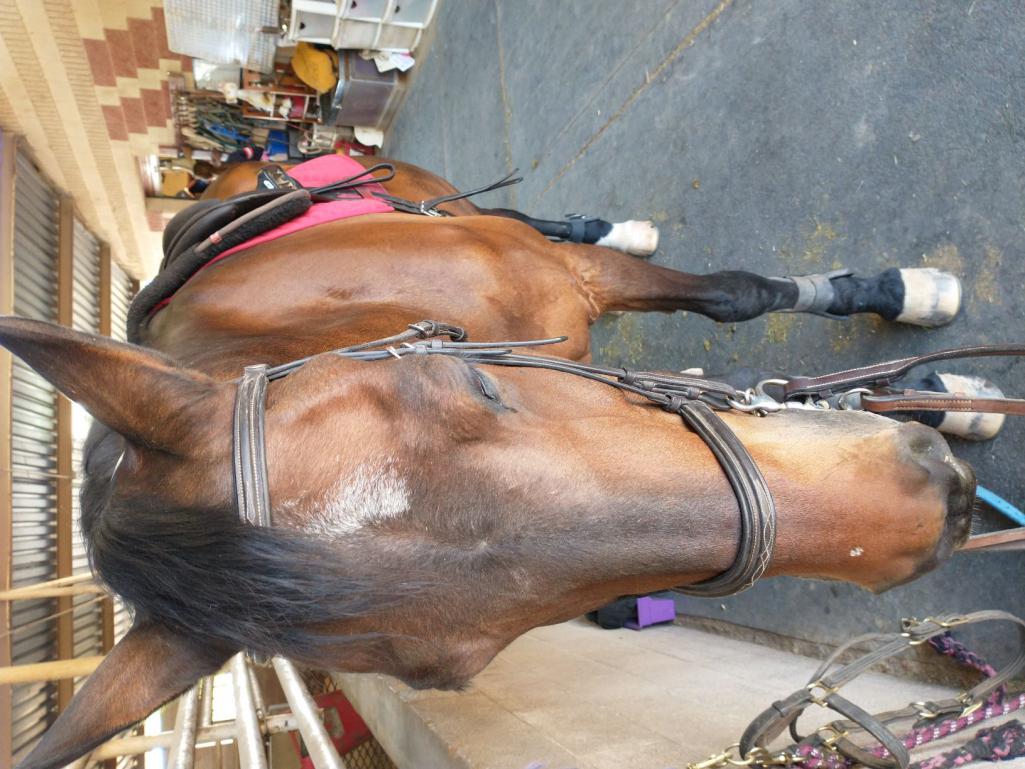
Posted by: mgarrison Apr 16 2021, 09:30 PM
I got the block off plates from Mad Dog Motorsports for the heater openings under the dash. No instructions, but it mostly made sense once I laid it all out.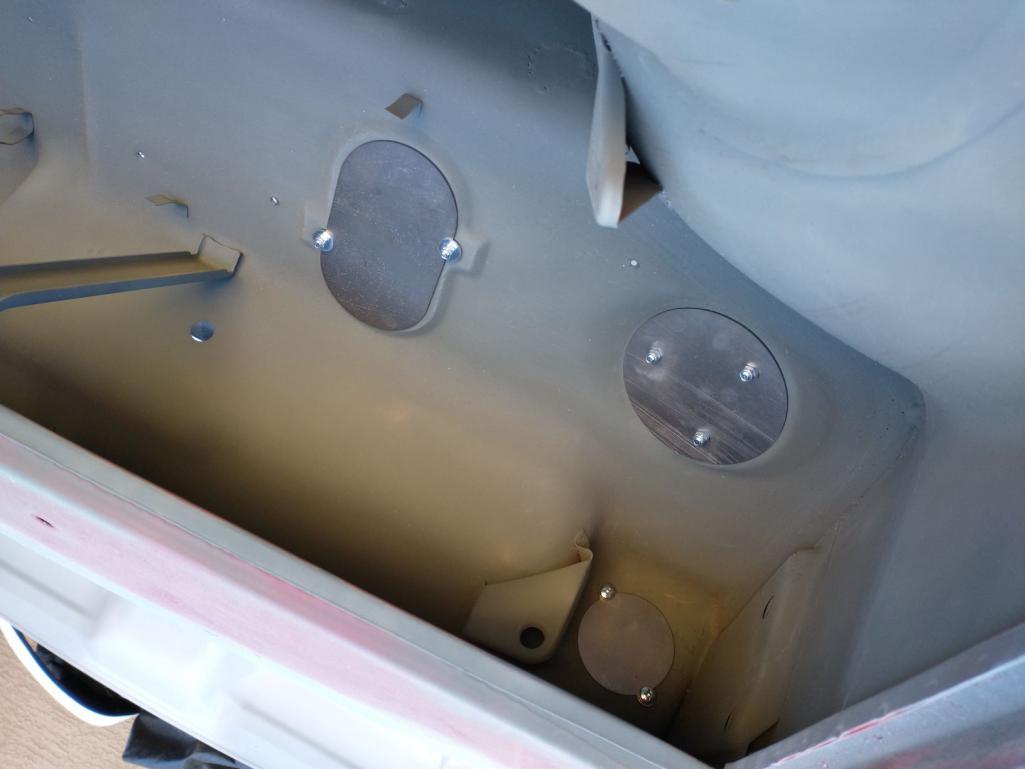
I finally was able to get my flares and rockers. A big shout out to Patrick Motorsports (who knew they were local!), and James Patrick for taking the time to go over his approach, and lessons learned on how to install the flares. I really appreciated his time and getting to see some really cool cars, and learning the local options for take-off parts, etc.
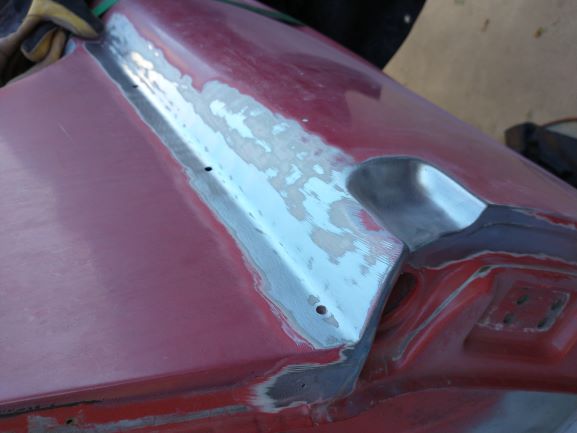
I started with the rockers first. Got them trimmed, openings cut out, and holes drilled for mounting.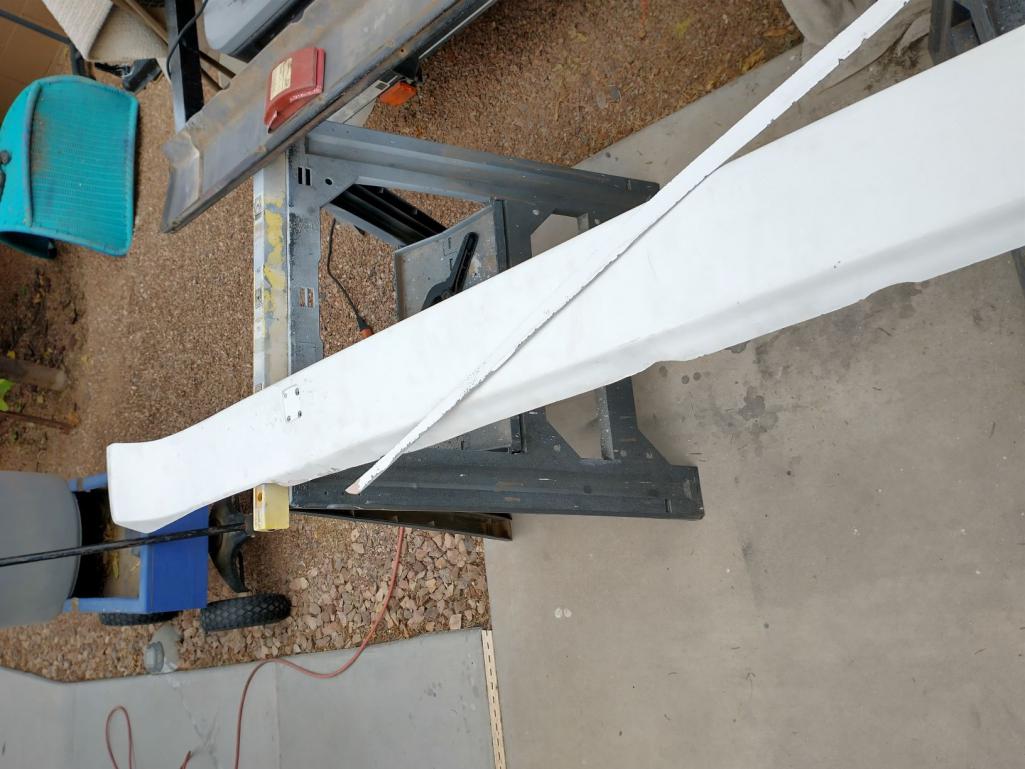

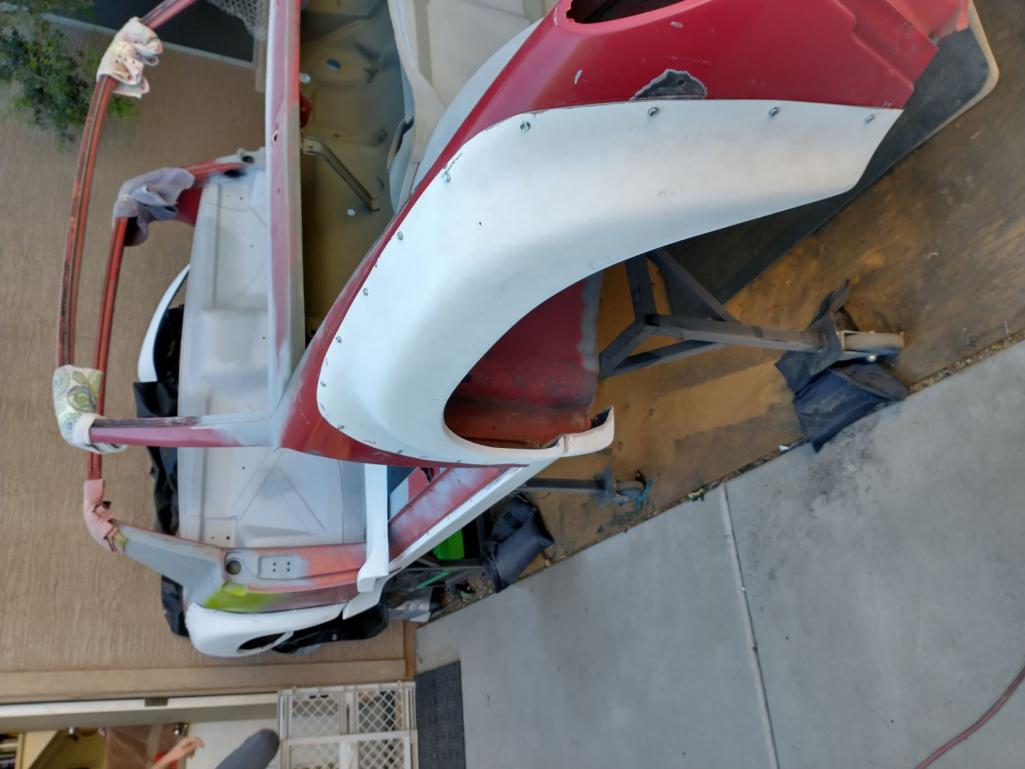
I did my best to get each side of the car all lined up between front, rear, and rocker. It's challenging to try and test fit the flares without an extra sets of hands.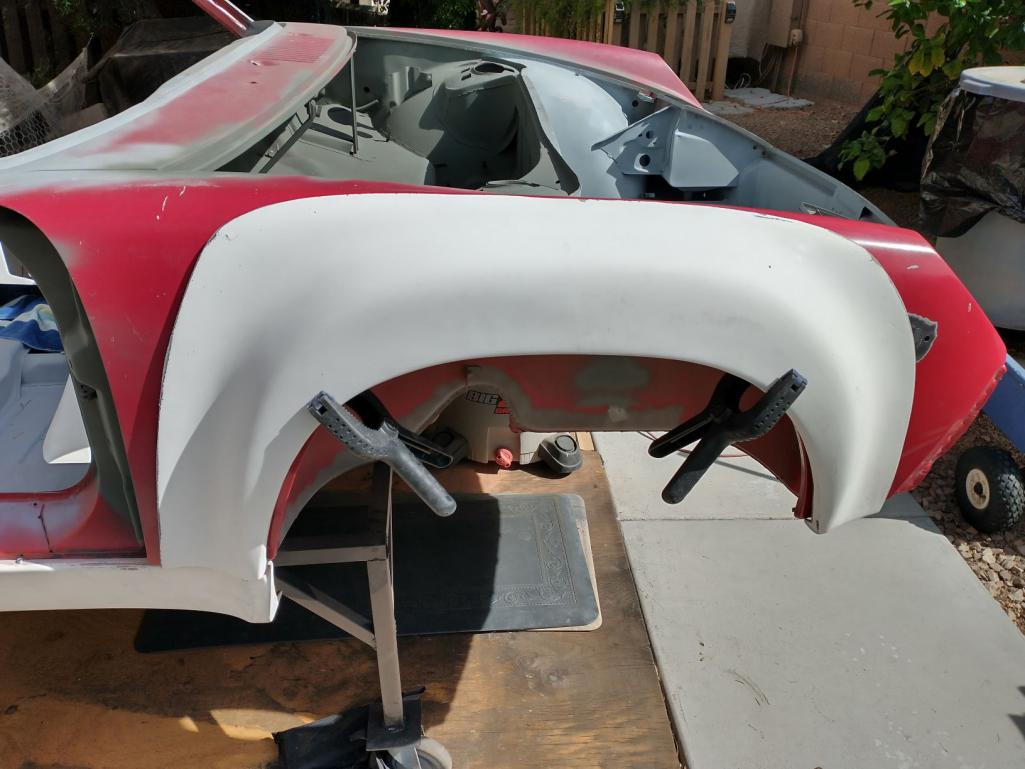
How does that song go? "The first cut is the deepest"...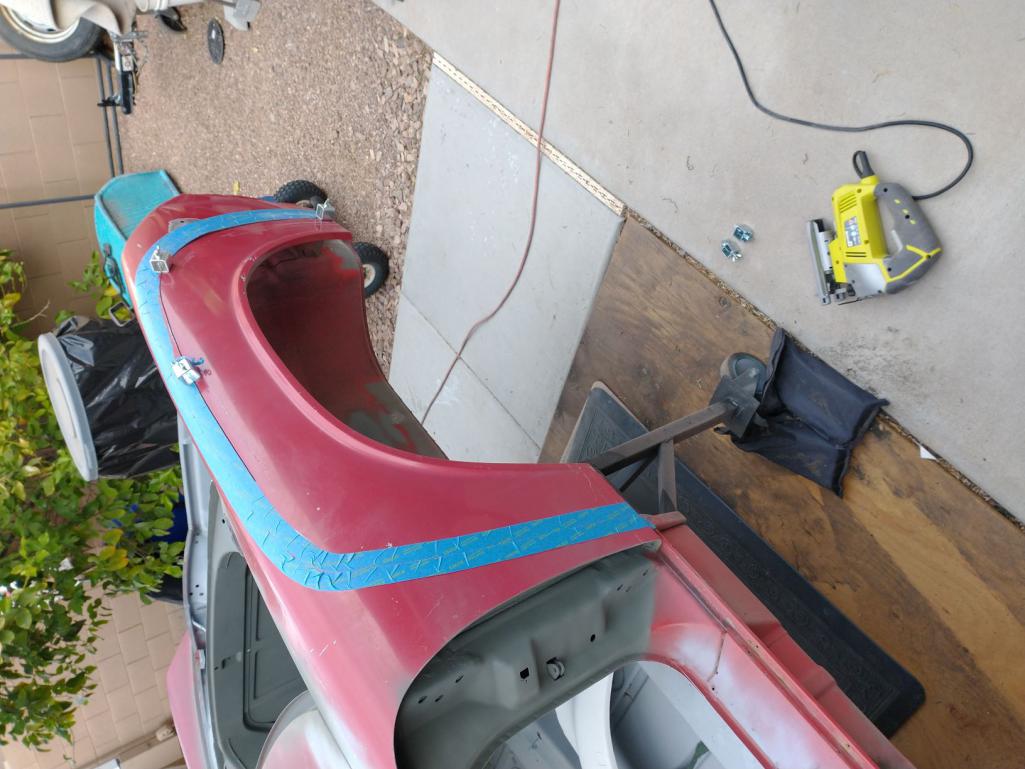
I used my butt-weld clamps to mostly keep things in place until the cut was finished.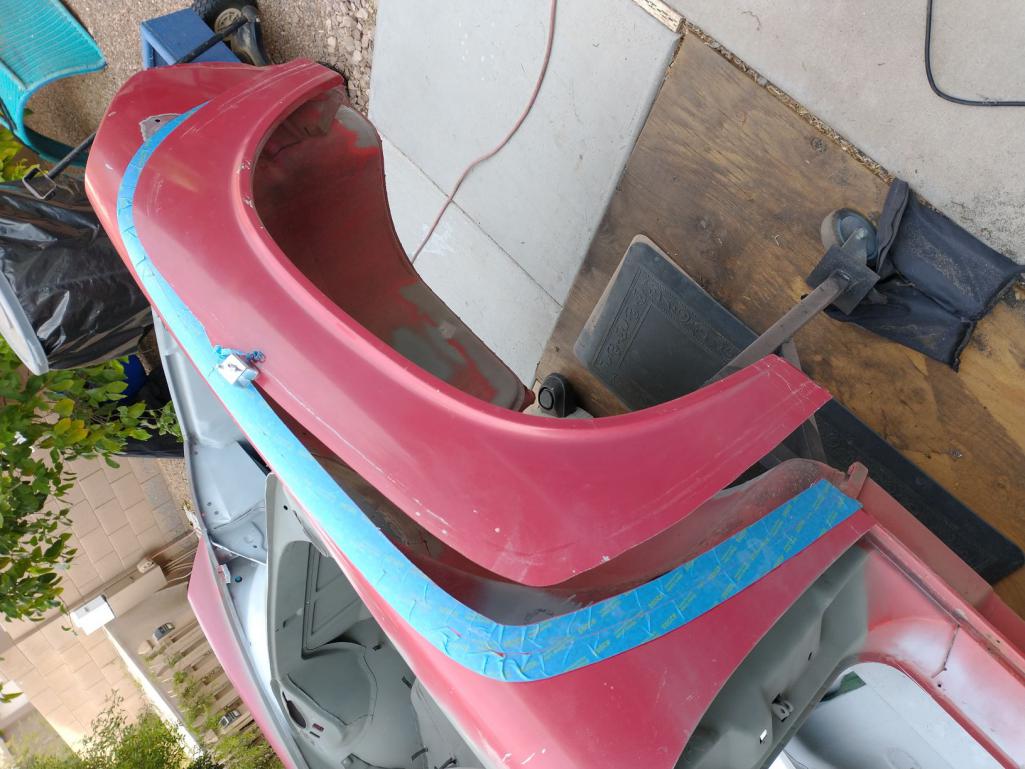
Definitely had the "what have I done!" moment!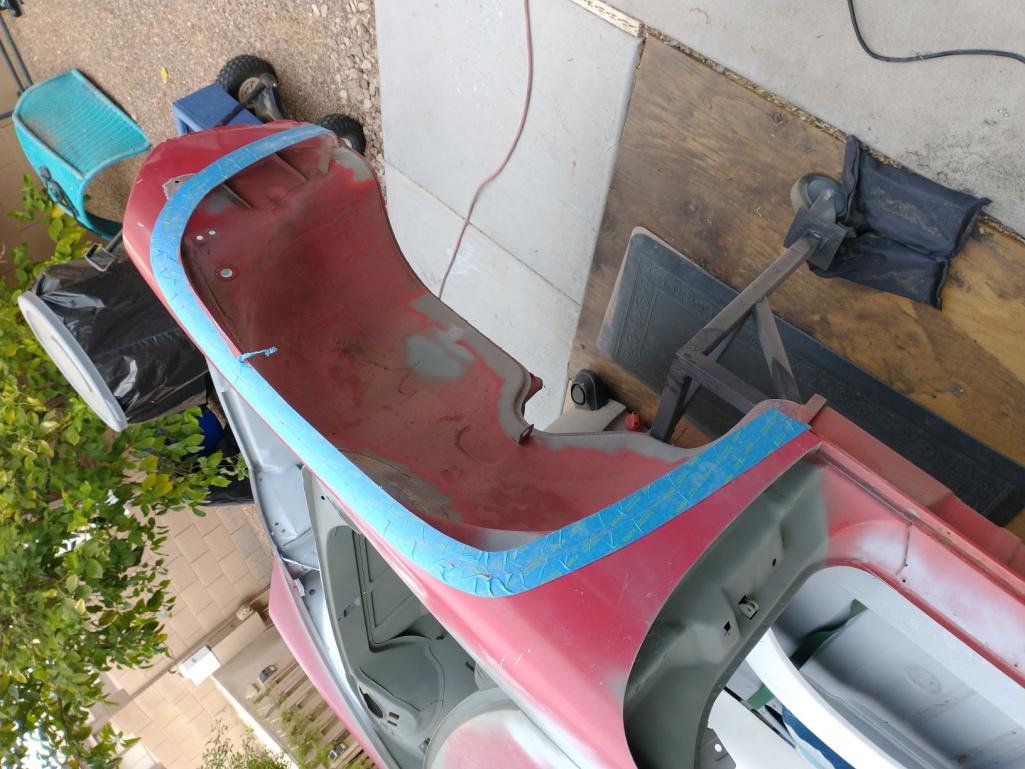
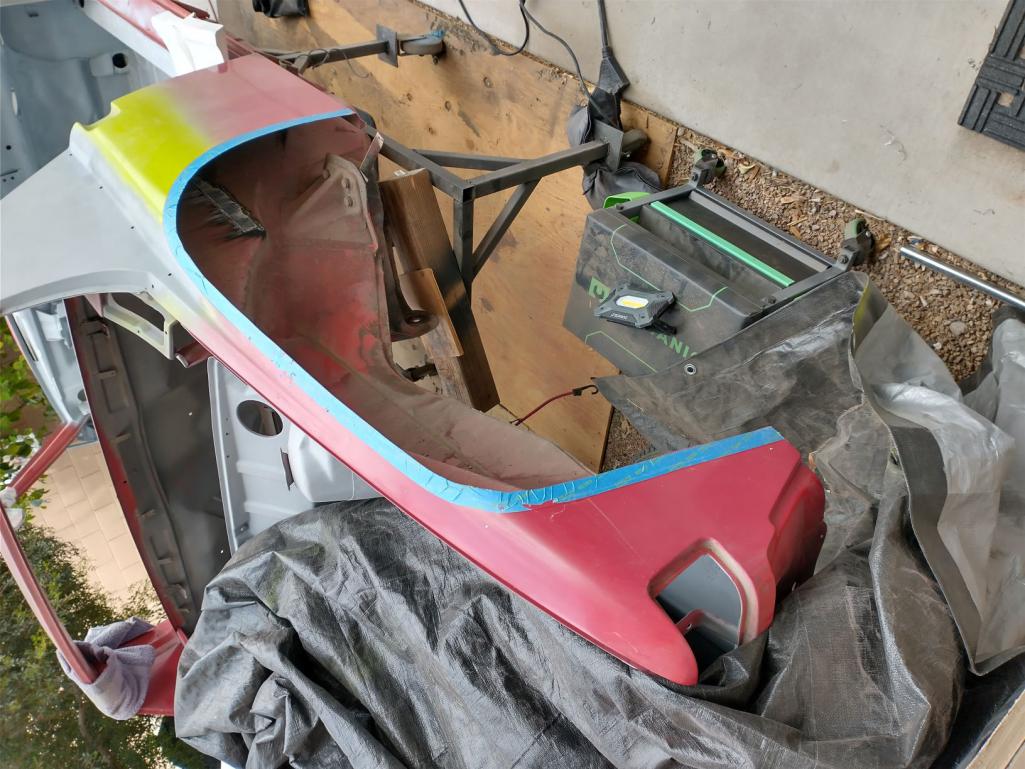
It sure takes a bit of sanding to try and get the flares to fit tight to the body.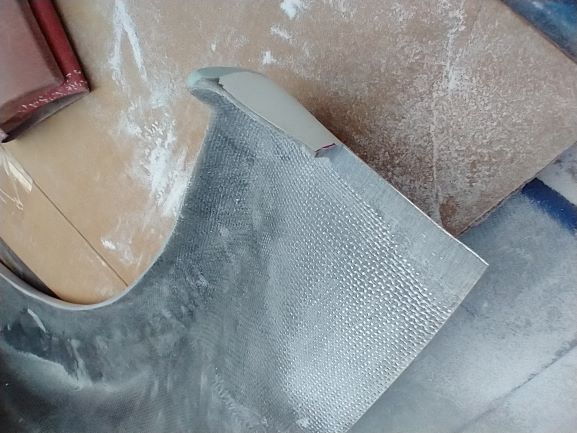
I just have things temporarily mounted. Still need to sand things a bit more in a few spots, and I need to find the right bolts and order some more rivnuts.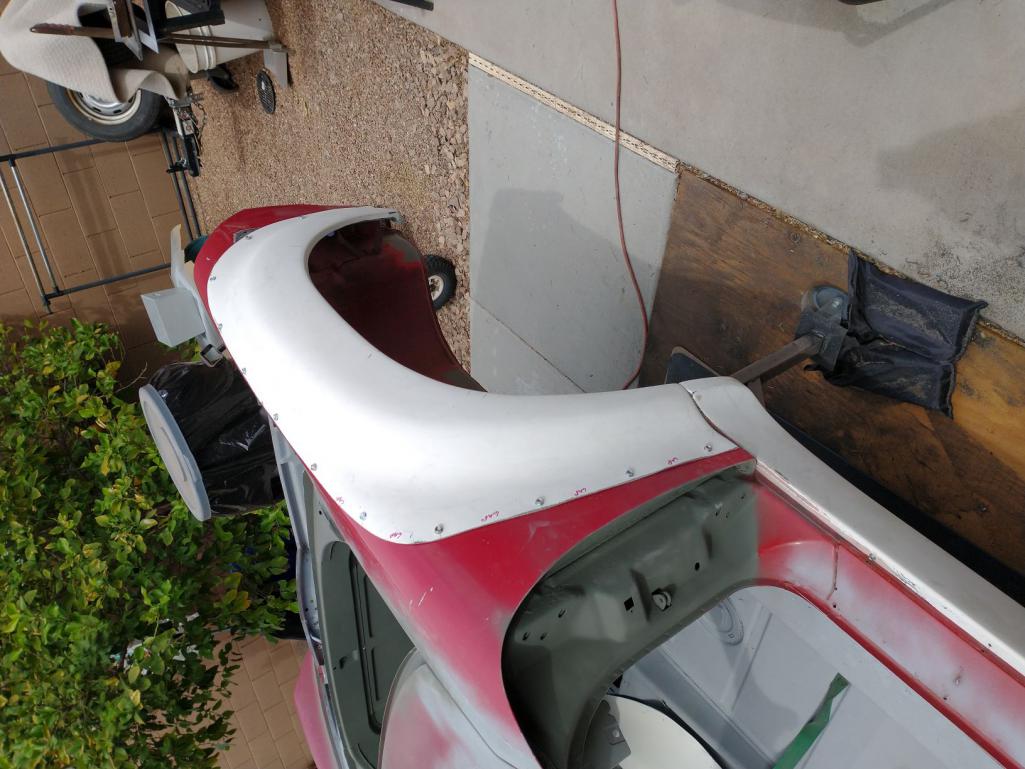
No clue why it keeps rotating the images until you click on them! 
Posted by: mgarrison Apr 20 2021, 10:11 AM
Working on reusing/repurposing the fender braces on the rear fenders since the area they attach to gets cut out. This one is pretty easy since its close to where it needs to be, and can just be bent a little to line up with what's left of the steel fender. It already has the holes in it from drilling out the spots welds.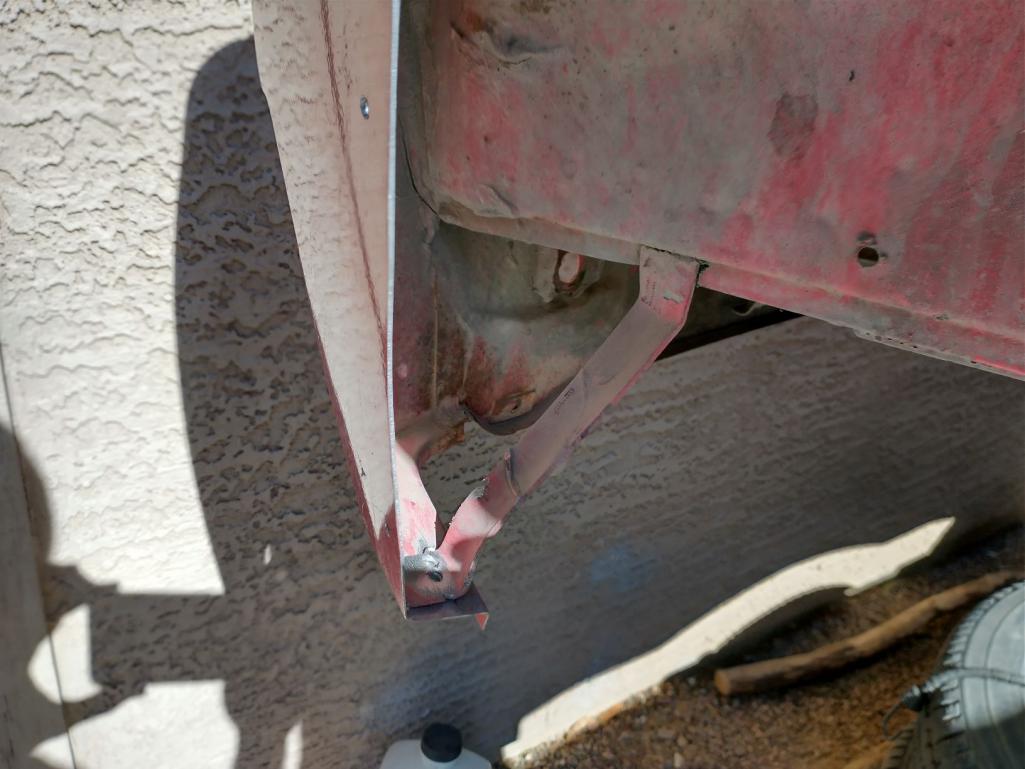
Still need to bend this one around after wire brushing where it needs to be welded back on.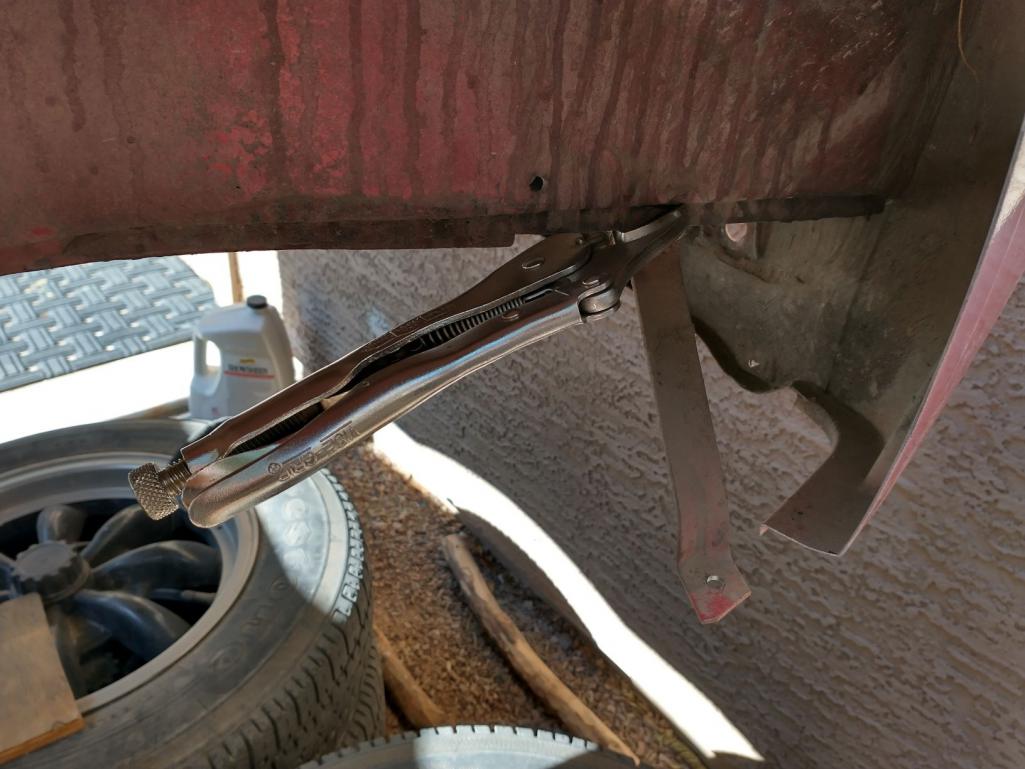
The front brace on the rear fenders needs to be removed, and then re-bent to be reused. Guess I could have just bent a new piece of steel, but figured why not reuse what was there originally since nothing is wrong with it.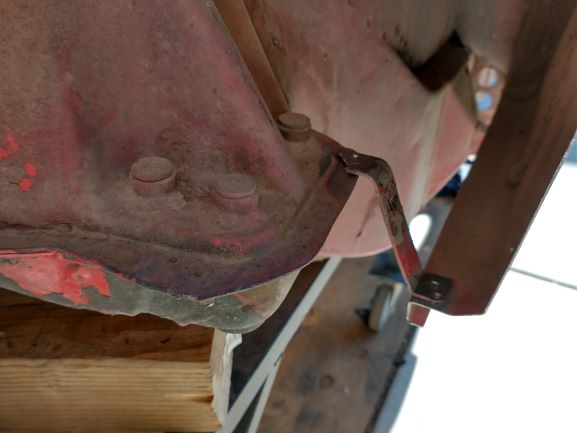
Posted by: 76-914 Apr 20 2021, 07:29 PM
Using those butt-weld clamps as a 3rd hand was a good idea. Or as dad used to say, that's using your head for something other than a hat rack.
Posted by: mgarrison Jun 1 2021, 10:26 AM
Using those butt-weld clamps as a 3rd hand was a good idea. Or as dad used to say, that's using your head for something other than a hat rack.
Yep! When I was squaring up the edges for the frunk pan replacement, those butt-weld clamps were real lifesavers - kept the saw blade from binding up constantly!
Posted by: mgarrison Jun 1 2021, 10:51 AM
I've been making small/slow progress. I just keep trying to do something on the 914 most days - just keep swimming! 
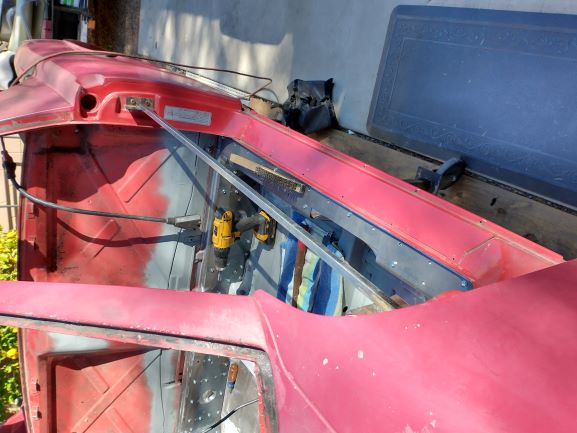
I saw a great idea in "9146C's" thread to lift the chassis up off the body dolly a few inches, so I copied his idea after a quick trip to Lowes for the parts. The front jacking "donuts" sit inside the rears (who noticed!), so I had to add some 1/8" plate to locate them in the proper spot. With a bit of assistance from my son, and some 4x4's laying on the QuickJack rails, we had success!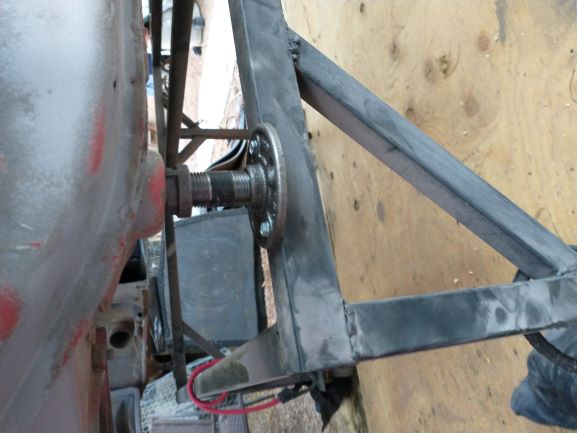
I was going to use "fender nuts" to give me a bit of wiggle room for flare alignment, but in the end it did not really help much - will be going back to my original rivnet/nutsert mounting idea.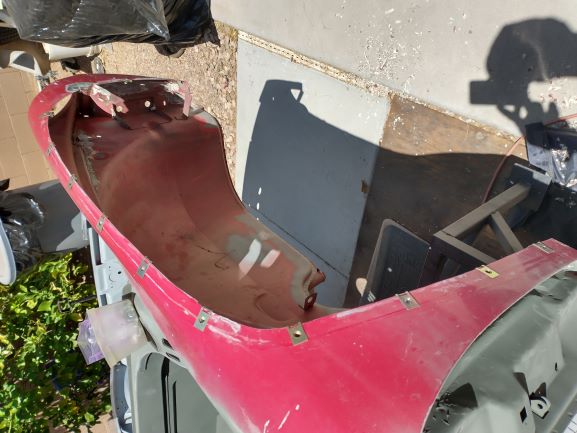
Received my VW fender beading and set about getting it trimmed to fit and clear the mounting bolts, etc.
I believe once the flares are painted body color, and I figure out how to hold the beading in place on the back of the flares, this is going to look pretty decent.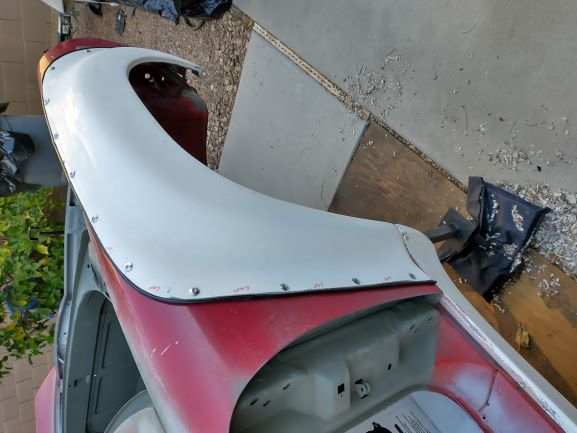
I cut out some metal strips to rivet to the bottom of the fiberglass rockers - this was how James Patrick @ PMS said they mount the bottom of the rockers. A bit annoying, to say the least that you have to create your own mounts for $300 fiberglass rockers!  I may end up going with the weld-on ends eventually since the original metal rockers I have are in good shape. They do line up reasonably well once you get the lower mounts attached.
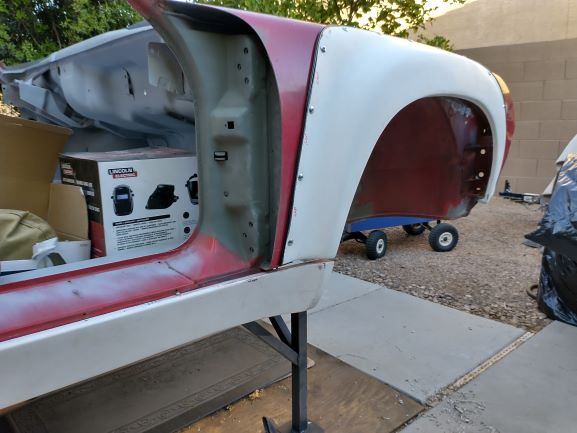
Next up was getting the fender wells and bottom media blasted and ready for the Raptor bed liner coating. Got sick of cleaning up media off the driveway really quick! I was able to reuse quite a bit of media by sifting it into a 5 gallon bucket, then sifting it again as it went into the blaster. I can't believe how much of that crap got into my shoes though - it was under my insoles! 
I sprayed and wiped down the fender wells and the bottom with degreaser just to be on the safe side. There was quite a bit of grease on the passengers side near the rear axle that I had to scrape off before blasting. Grease does not like to come off by blasting - too soft I guess! Grease also got up into the passengers side rear shock mount - that was way too much fun to clean out! Looking pretty decent at this point - still need to finish priming the bottom - ran out of juice just behind where the steering rack mounts... ![yellowsleep[1].gif](style_emoticons/default/yellowsleep[1].gif)
I had a bit of a distraction/another project for the Memorial Day weekend. But, I could not stop smiling about welding up "frog legs"! And I kept thinking of that line from the Six Million Dollar Man; We can rebuild him. We have the technology. 
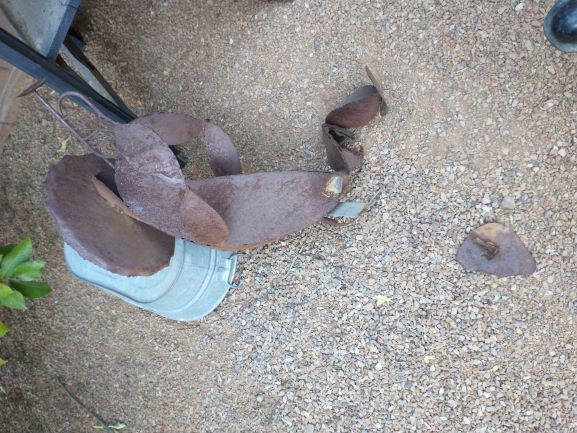
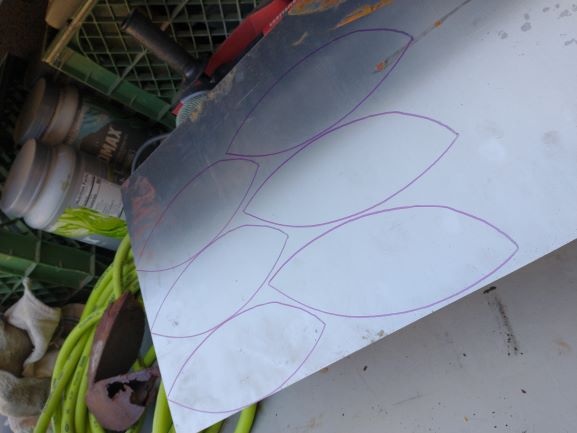
Who ordered the "half-leg" platter?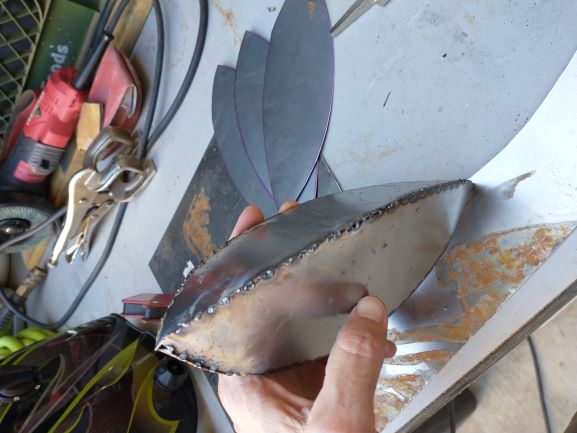
And the "whole-leg"?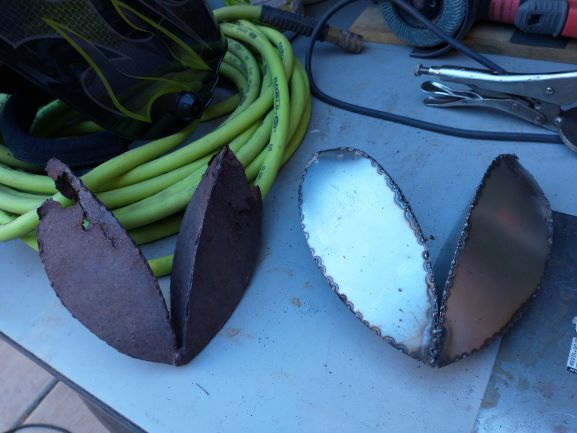
Whole Mariachi Frog again! 
Posted by: 76-914 Jun 2 2021, 09:04 AM
You will finish the project quicker when working on it everyday, whether it be 15 min's or 6 hours. Stay after it.
Posted by: mgarrison Jun 10 2021, 04:43 PM
Finally got my filter/dryer delivered and installed. Getting the right adapters together was a PITA, of course! Hopefully, this keeps the compressed air clean enough for spraying the Raptor liner, and maybe paint one of these days! 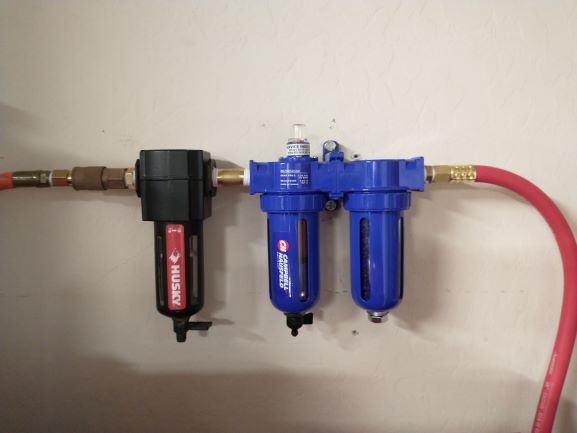
Posted by: mgarrison Jun 15 2021, 09:32 AM
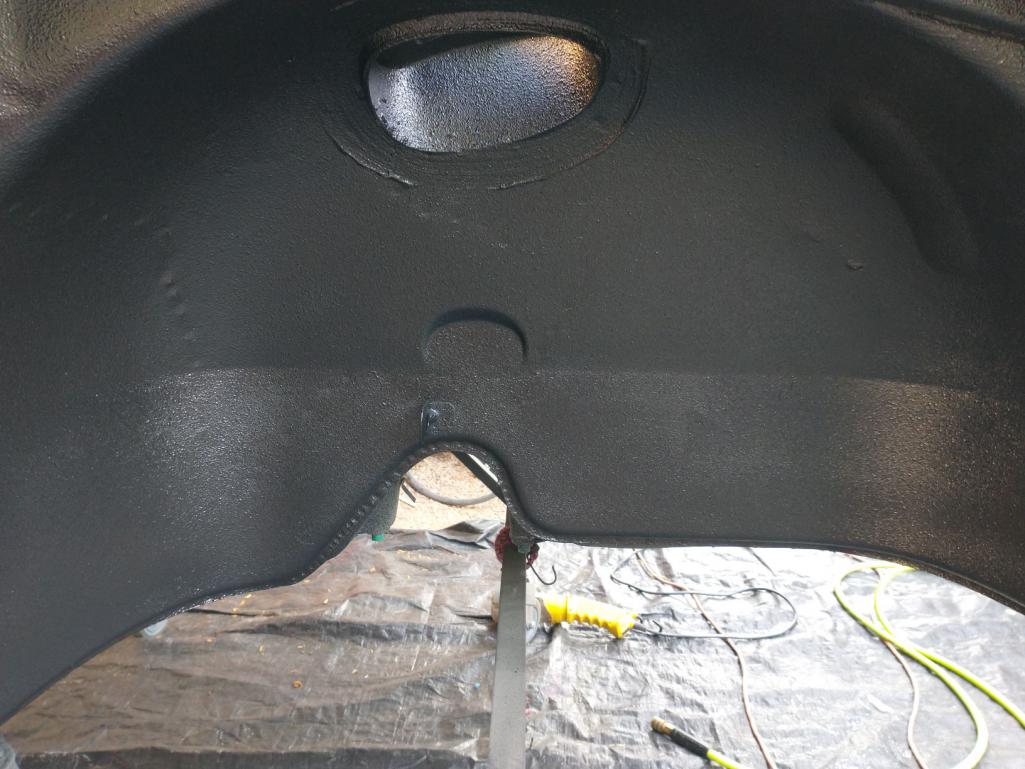
Started before 6am to try and spray at least one quart of Raptor liner on the fender wells before it got too hot. It was already about 85, and toasty with long sleeves, gloves, and respirator on! But, I got three fender wells, and the passenger rocker sprayed with Raptor. Super easy to spray, and the little bit left in the bottom of the jug was still liquid, so the heat did not affect the hardening time that I could tell. I think the flash time was super short though - was dry to the touch in no time! Came out rather well, I think! 
Posted by: 76-914 Jun 15 2021, 12:00 PM
Looks great. What size tip did you use? I don't think moisture will be a problem for you in AZ. Just bleed your compressor's tank before spraying and have a filter at your gun also. I'm in SoCal and don't have any moisture problems here. When I lived in TX it was a different game; entirely.
Posted by: mgarrison Jun 15 2021, 12:57 PM
I just used the Schutz gun that came with the Raptor kit I got. I am running a filter/dryer on the compressor, and I was running about 55PSI at the gun...
About as simple as it can get, I think.
Posted by: mgarrison Jun 17 2021, 10:16 AM
I've been spraying one quart each morning before it gets too hot. I got the bottom covered this morning, and I still have one quart left. There are a few spots that need touch up, but not too many. It's definitely a challenge to spray with the tub on a body dolly, but totally possible. The Raptor is crazy easy to spray - I'm not sure you can really mess it up! Wearing long sleeves, gloves, respirator, etc. in 90+ degree heat is not so easy...But, it does flash off/dry really quickly!
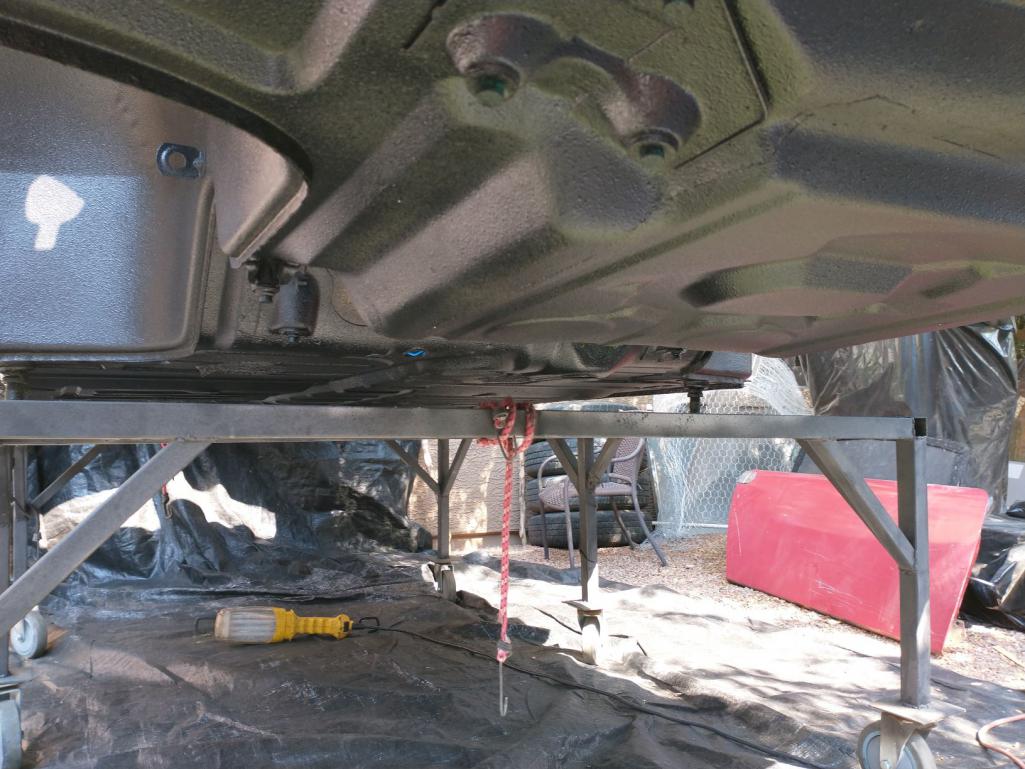
I really like how it came out! So much so, that I ordered a 2nd Raptor kit and plan to do the frunk, trunk, and inside. I may eventually scuff the Raptor and paint it body color in the frunk & trunk, but I really like the texture and durability it provides. It also seems cheaper/easier than lining areas with Dynamat.
Posted by: Costa05 Jun 17 2021, 10:31 AM
I've been spraying one quart each morning before it gets too hot. I got the bottom covered this morning, and I still have one quart left. There are a few spots that need touch up, but not too many. It's definitely a challenge to spray with the tub on a body dolly, but totally possible. The Raptor is crazy easy to spray - I'm not sure you can really mess it up! Wearing long sleeves, gloves, respirator, etc. in 90+ degree heat is not so easy...But, it does flash off/dry really quickly!
I really like how it came out! So much so, that I ordered a 2nd Raptor kit and plan to do the frunk, trunk, and inside. I may eventually scuff the Raptor and paint it body color in the frunk & trunk, but I really like the texture and durability it provides. It also seems cheaper/easier than lining areas with Dynamat.
Looking and making lots of progress. Congrats.
Posted by: mgarrison Jun 28 2021, 09:54 AM
So, the Raptor coating did not hide my patches/repairs as much as I hoped for. Not sure if it's because of the sheen, or if I know where to look. Here's a couple examples where the patch/repair is a bit too easy to see: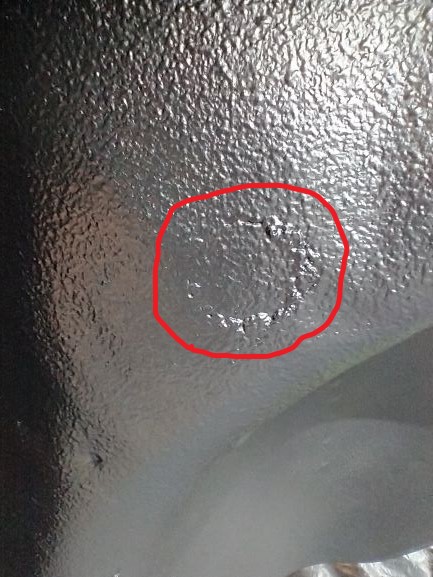
So, I ordered some body glaze and set about seeing if I could fill over and around my repairs so they are not quite so visible. I figured since I'm now working on the topside, I might as well make the effort to make things look better!
Most of the work was where I replaced the frunk floor...
My fingers are a bit tender after all the hand sanding to blend things in/feather the glaze out.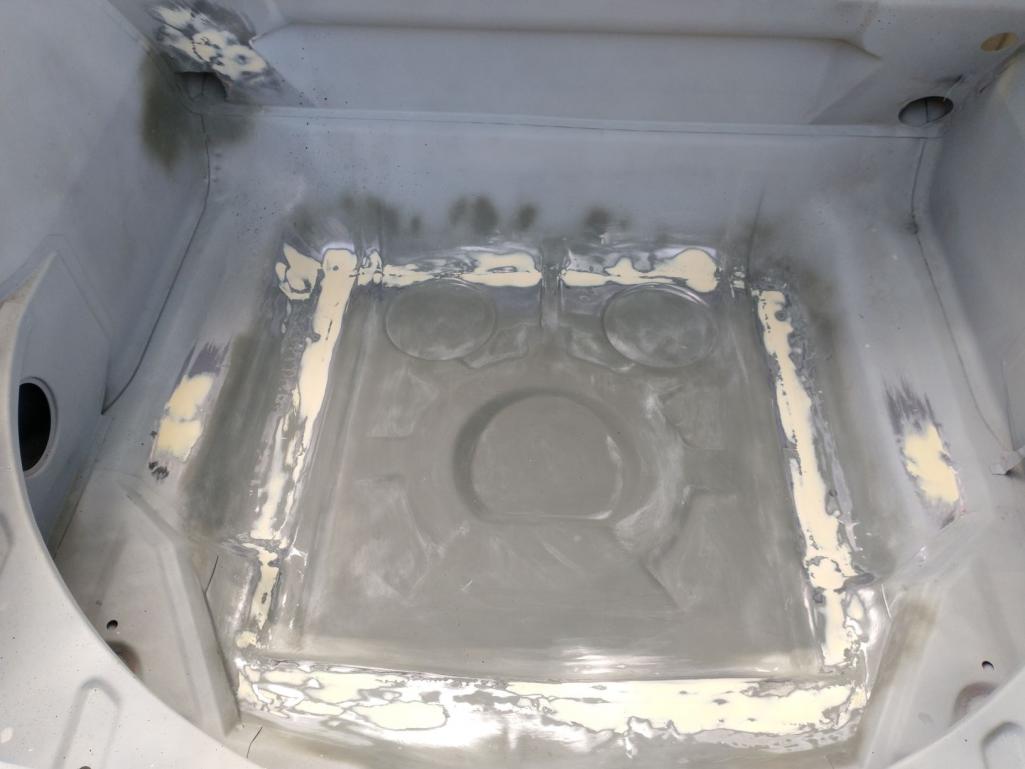
Here's a couple of spots where I did rectangle patches to replace small rusted out sections. I believe once I spray the Raptor liner over them you will be hard pressed to find them (I hope!).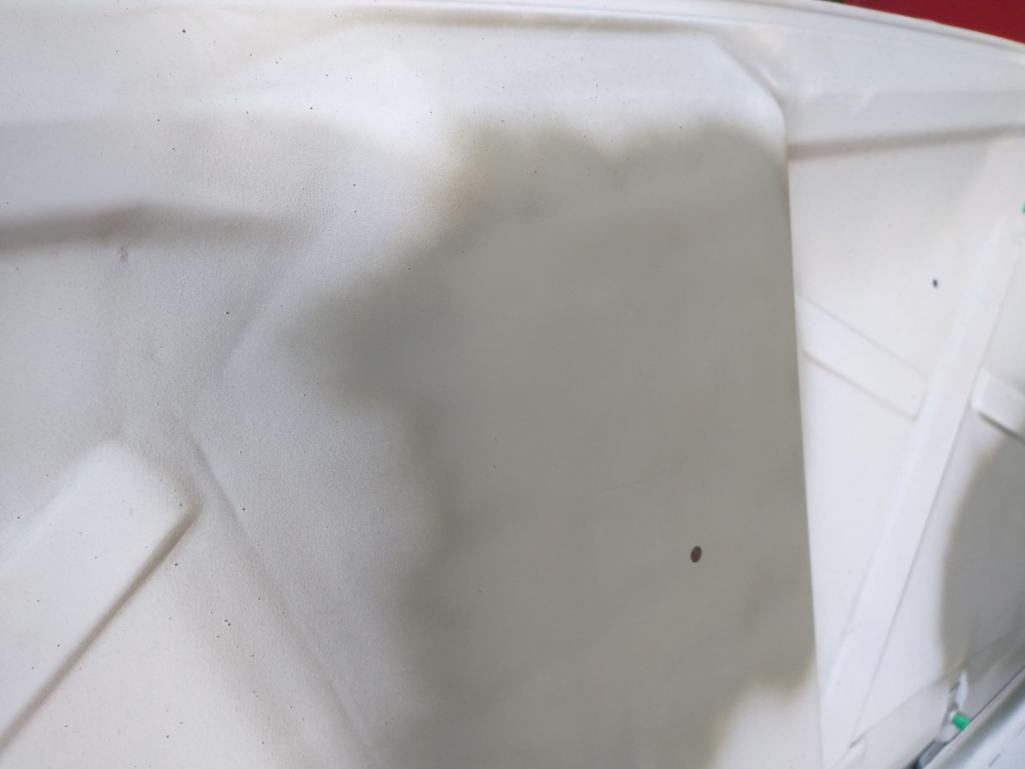
I did go back on that second one and do another layer to blend things in better. I know it will be behind the seat, but if I don't do it now, it will never get done!
I went ahead and sprayed the VIN body color, and coated with clear. Does not look great, but decent enough for under the hood.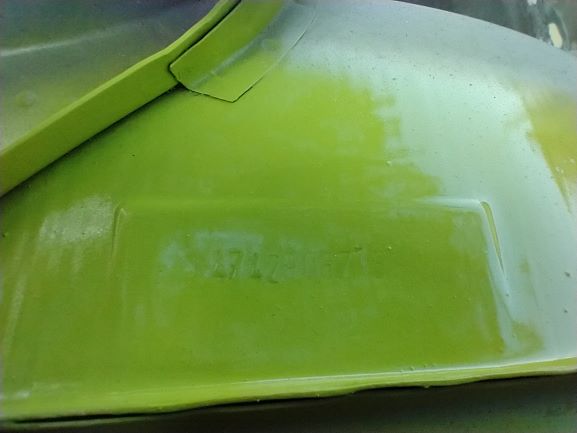
Now I just need to figure out how to mask off a clean rectangle over the VIN number so it does not get coated with Raptor and you can't read it anymore!
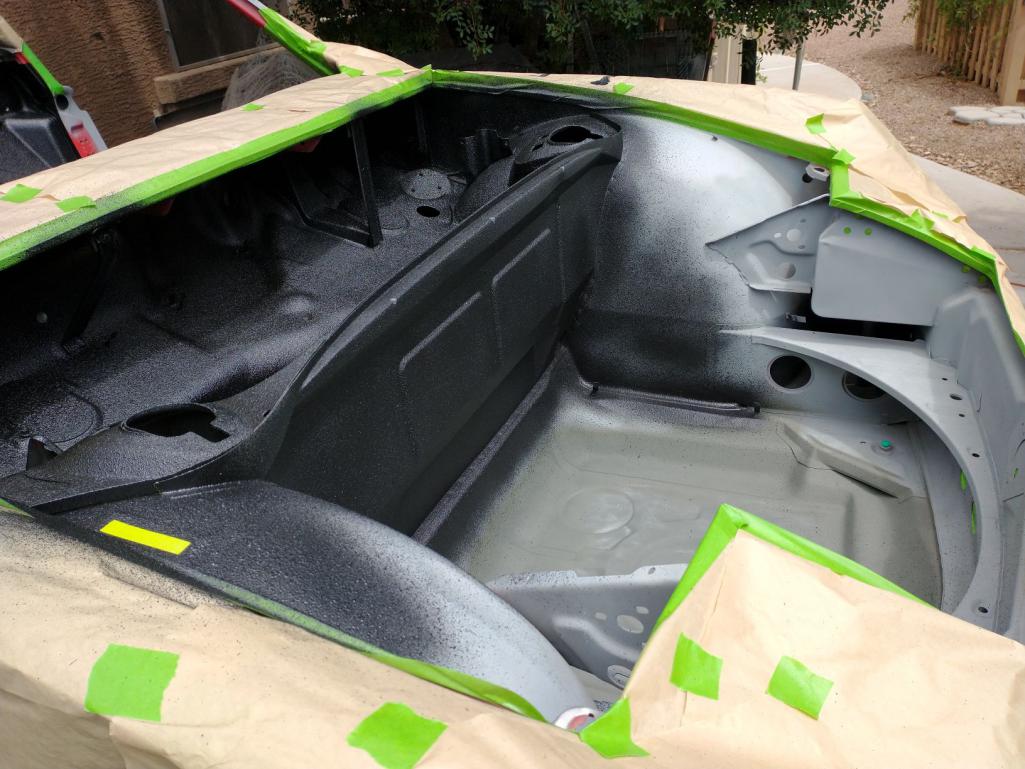
I spent hours yesterday in 112 degree heat masking everything off so I could spray the Raptor in the frunk, trunk, and interior early this morning...Only to wake up to 25mph wind and rain on the way. Chance of rain every day this week. Oh well, we really need the rain...
Posted by: mgarrison Jul 4 2021, 06:02 PM
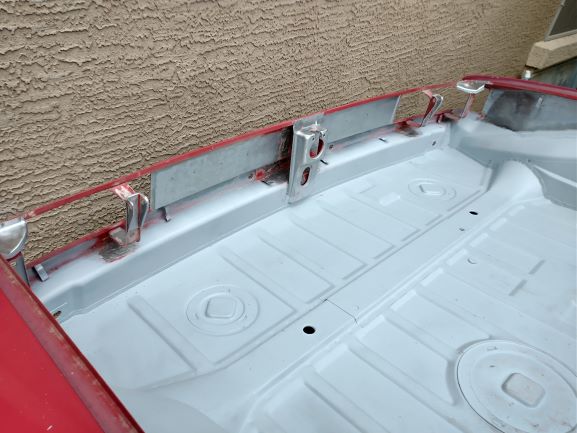
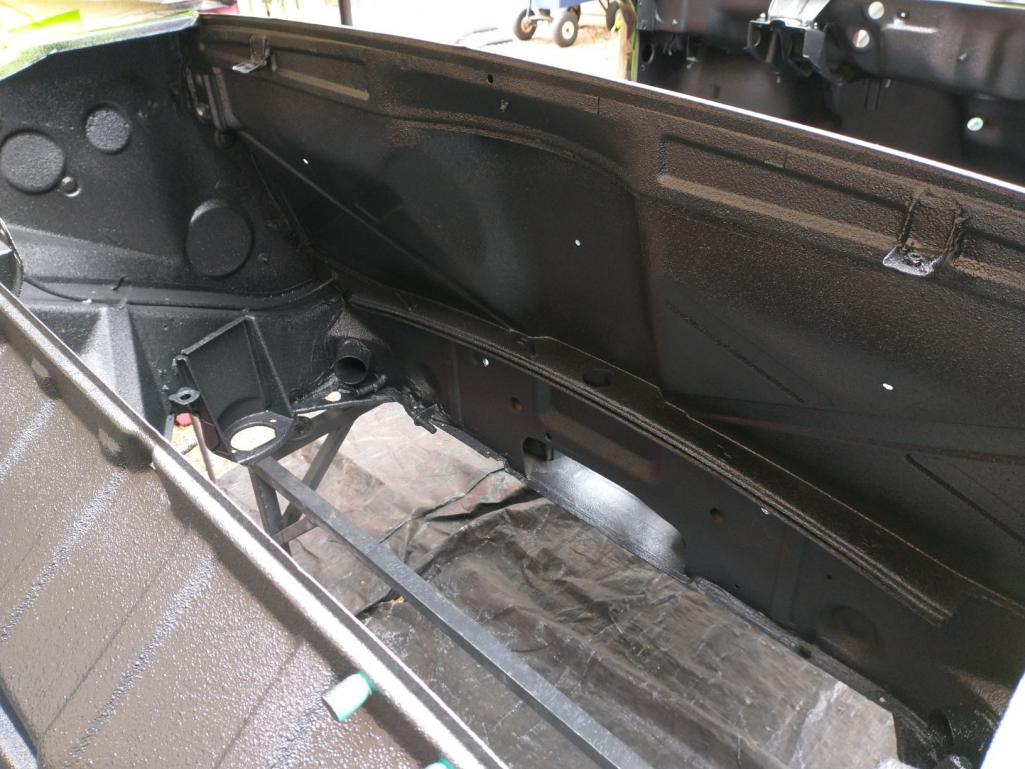
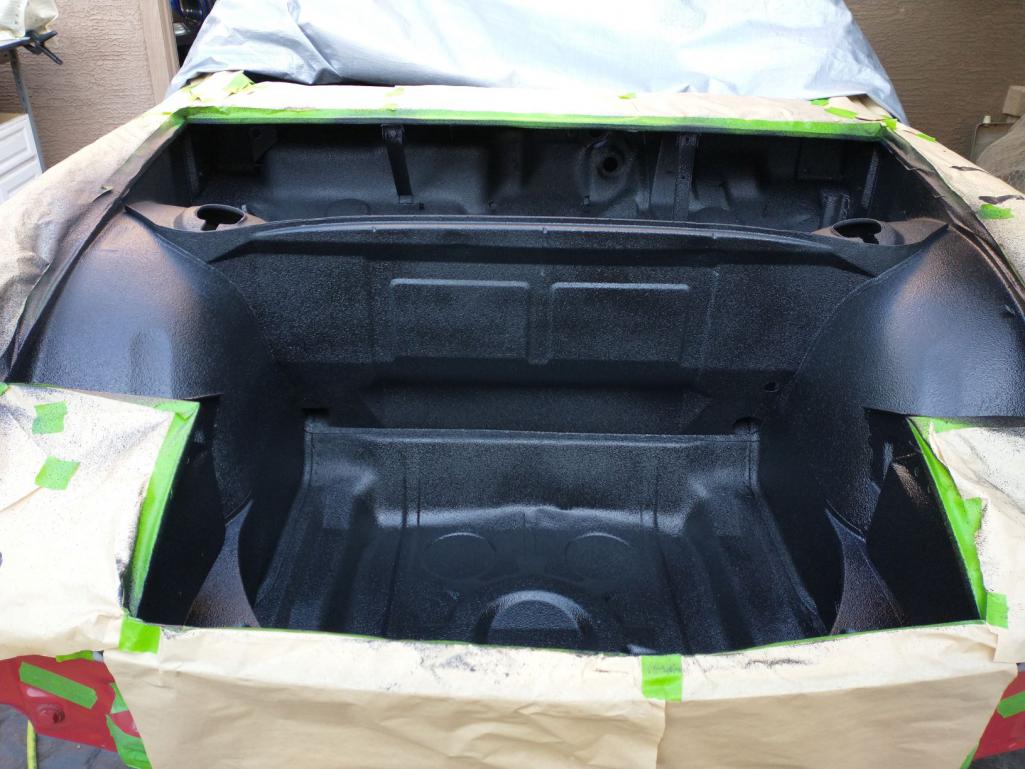
Finally had a morning with little wind, so I gave it a go spraying the Raptor. It tried to rain on me a couple of times, but was not enough to cause any issues, thankfully. I got the trunk and engine bay all sprayed.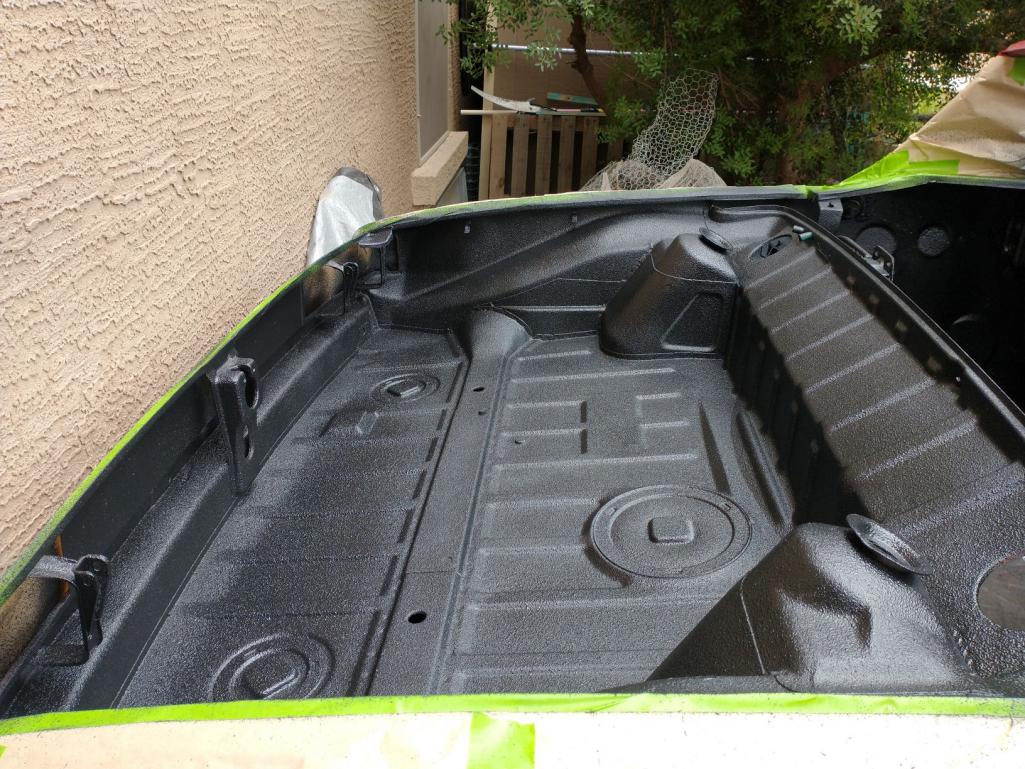
Cleaned the gun, and then mixed up another quart for the cabin.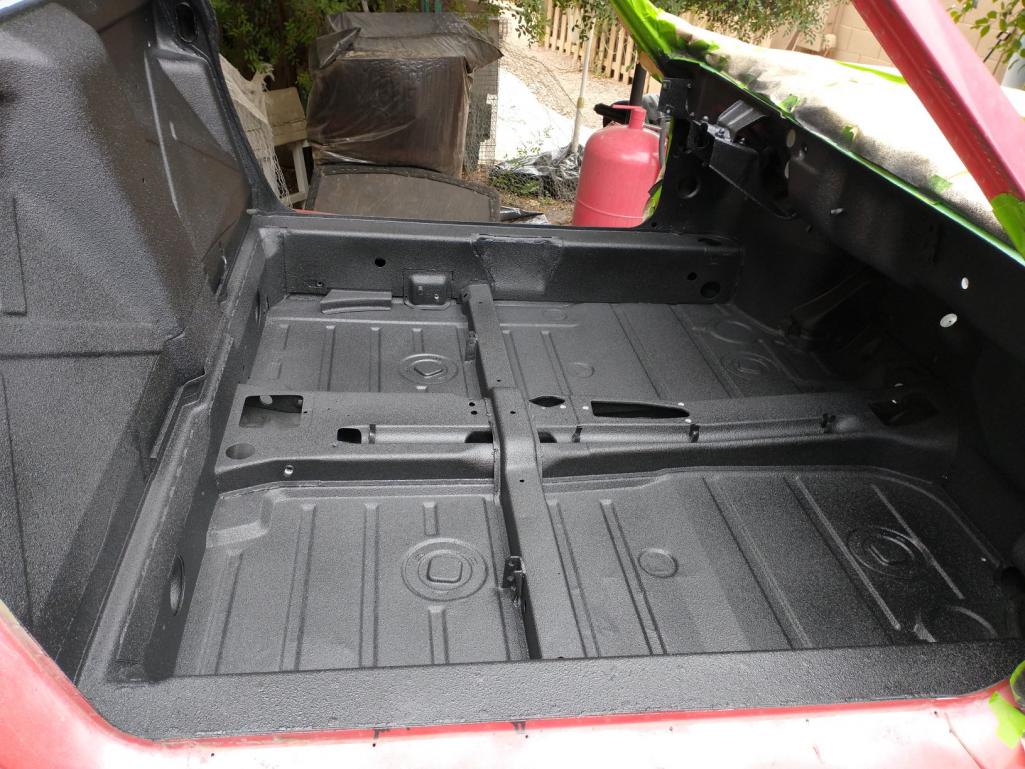
Cleaned the gun between each quart, and used my last quart on the gas tank area & frunk. Almost made it, but not quite 
I ordered a couple more quarts to finish things up; need to touch up a couple spots in the gas tank area, finish the frunk, and still need to spray the rockers. I started filling all the divots, lines, scratches, etc. in the rockers. Lots of filling and sanding!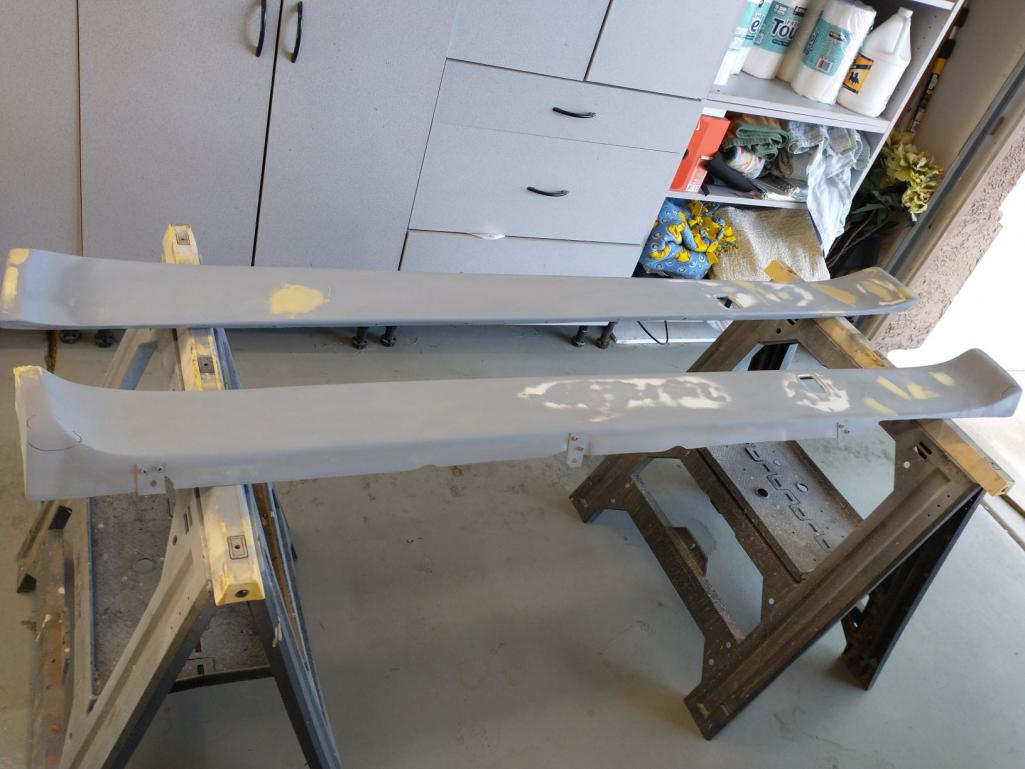
I will take what progress I can get! 
Posted by: Mayne Jul 5 2021, 06:17 AM
Impressive work! Are you going to spray the areas with liner body color or leave them black?
Posted by: mgarrison Jul 5 2021, 12:01 PM
Most likely will leave them black. But, if after I get it painted I dont like the look, I can scuff the Raptor liner with a scotch bright pad and then paint body color. I don't have an engine or trans, and will be installing a Subaru driveline, so not really worried about staying original...
Posted by: Mowog4 Jul 8 2021, 09:10 PM
I am enjoying the build, I am in Mesa with a similar car, look forward to seeing it at the Pavilions.
Posted by: mgarrison Jul 9 2021, 09:47 AM
Yea, dreaming of going to the local meets with our son in his Miata! Seems so far off in the distance though...
Posted by: mgarrison Jul 9 2021, 10:12 AM
My last two quarts of Raptor showed up yesterday. So, I went out early this morning to finish shooting the Frunk, and touch up a few spots that did not cover very well.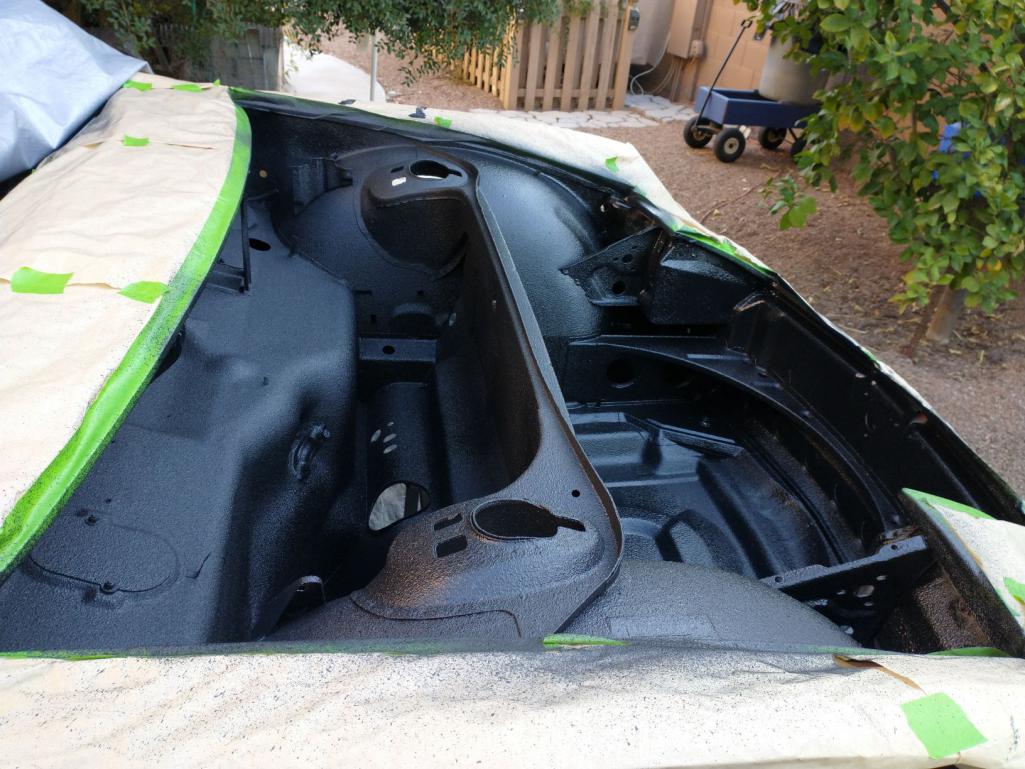
I did not like how the VIN came out in the Ravenna green, so I redid it in satin black. Not perfect/great, but it looks better than it did.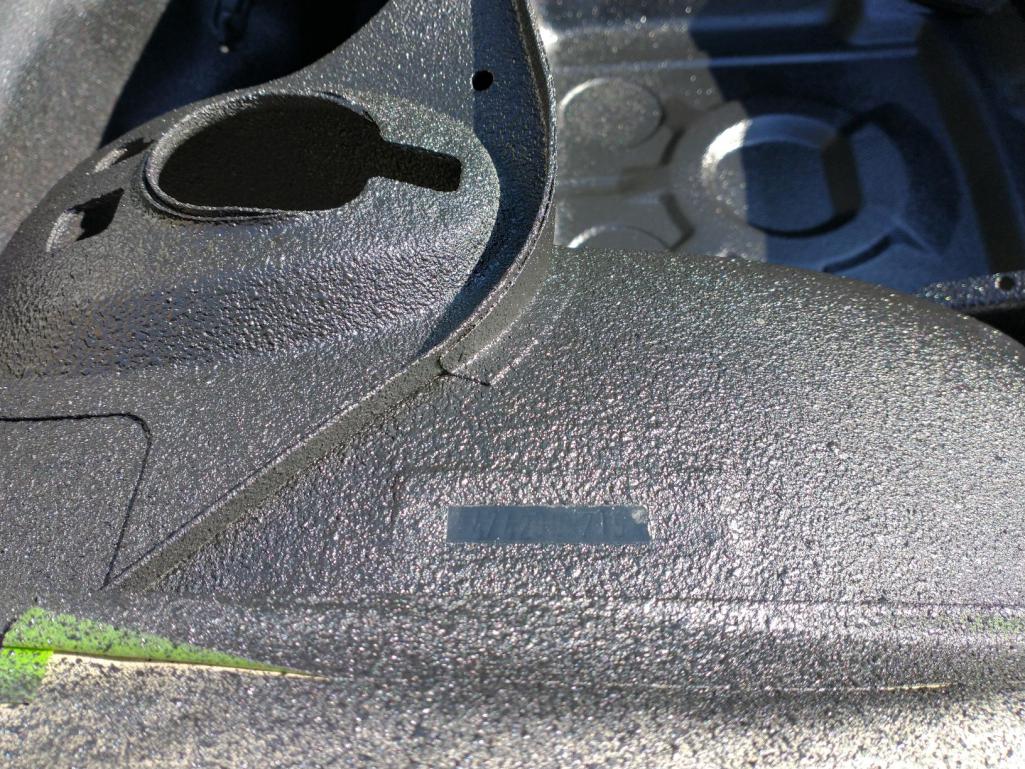
I want the 914 to look good, but I want to do as much as I can myself, so hopefully it looks good from five feet or so!
Posted by: Costa05 Jul 9 2021, 11:21 AM
Making good progress Mike.
Posted by: Mowog4 Jul 9 2021, 11:51 AM
Yea, dreaming of going to the local meets with our son in his Miata! Seems so far off in the distance though...
It’ll happen quicker than you think. Then you spend an equal amount of time finishing the last 10%
Posted by: Mowog4 Jul 9 2021, 02:59 PM
Making good progress Mike.
Rich, how goes it?
Posted by: mgarrison Jul 10 2021, 01:35 PM
I sprayed the rockers this morning, but had some issues
I turned on the compressor, but forgot to open the valve so air flows between the two tanks...OOPS. Lost air pressure as I was spraying the rockers, so it came out much more textured than I wanted/planned. Oh well, can't do anything about it now! 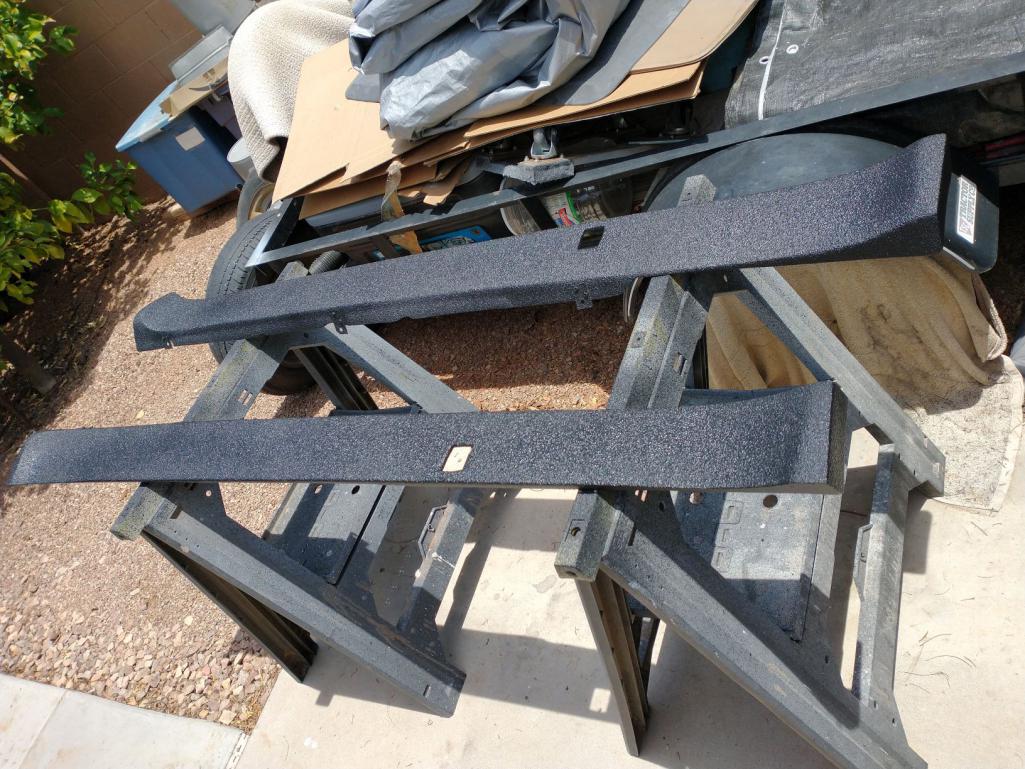
Posted by: mgarrison Jul 12 2021, 09:28 AM
The nightly monsoon storms are a serious challenge. Friday night's storm destroyed our Pergola, and peeled the roof off the hay barn where our daughter rides...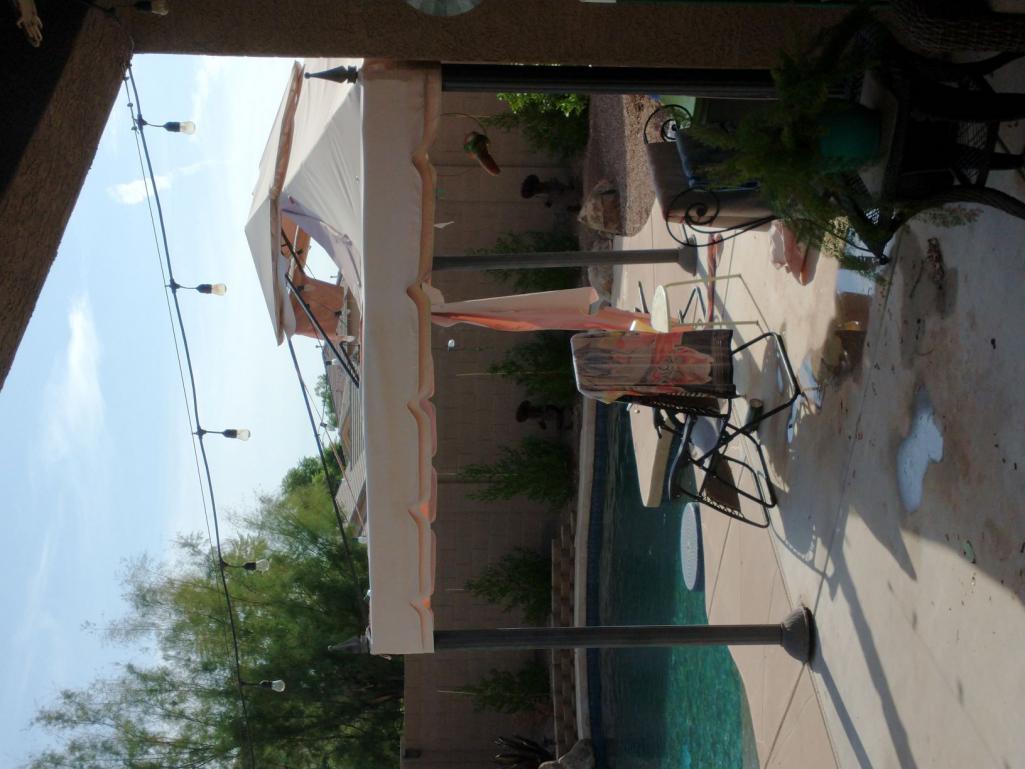
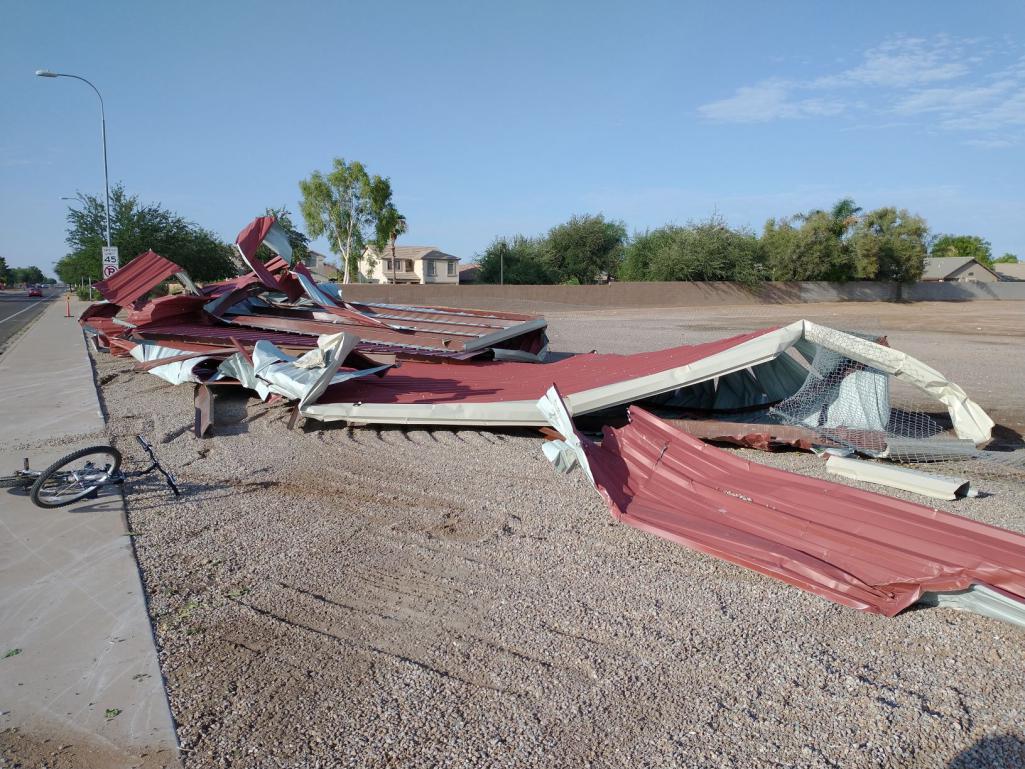
Then Saturday night's storm dropped a tree branch right on the 914! I dont think it dented anything, but I have not uncovered the car yet to confirm. 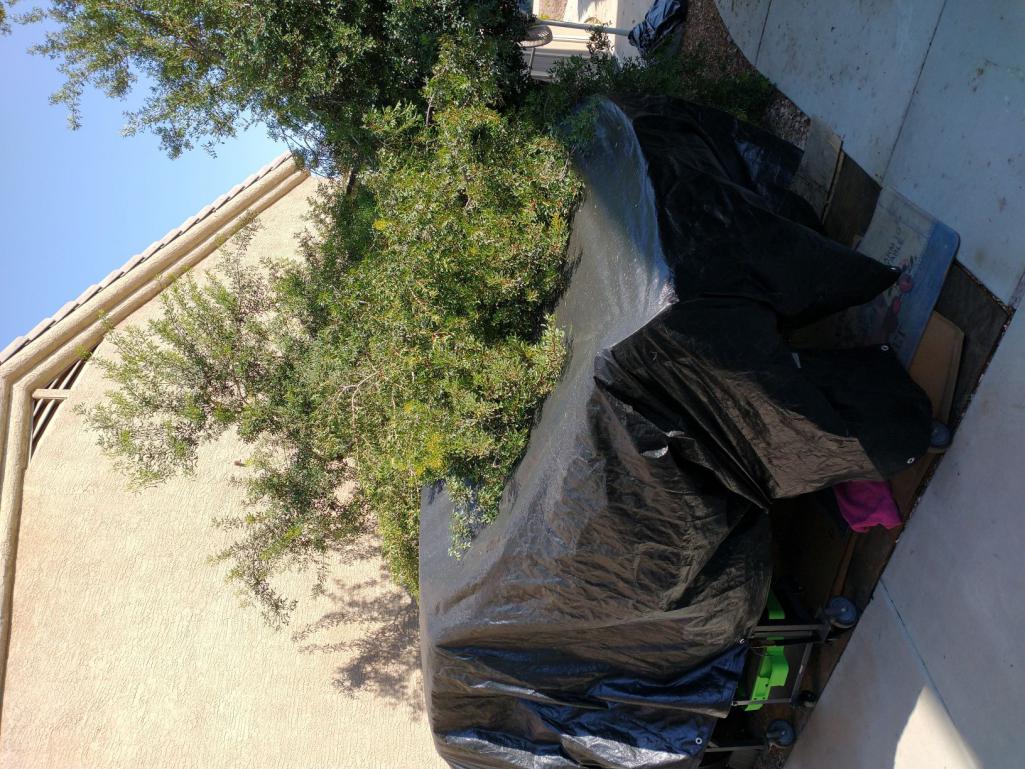
Posted by: mgarrison Jul 14 2021, 05:12 PM
Weather has been too sketchy to do much, but I managed to work on the passenger door in the garage. Trying to get the inside cleaned and scuffed up so I can spray them Ravenna green to match my color change. The insides of the doors are rather interesting...
The top of the doors inside have almost zero paint on them. I saw this on the driver's door also.
The lower portion of the doors, below the safety bars is sprayed with some kind of sound/vibration deadening stuff, but its not very thick. You can see the texture of it if you squint just right.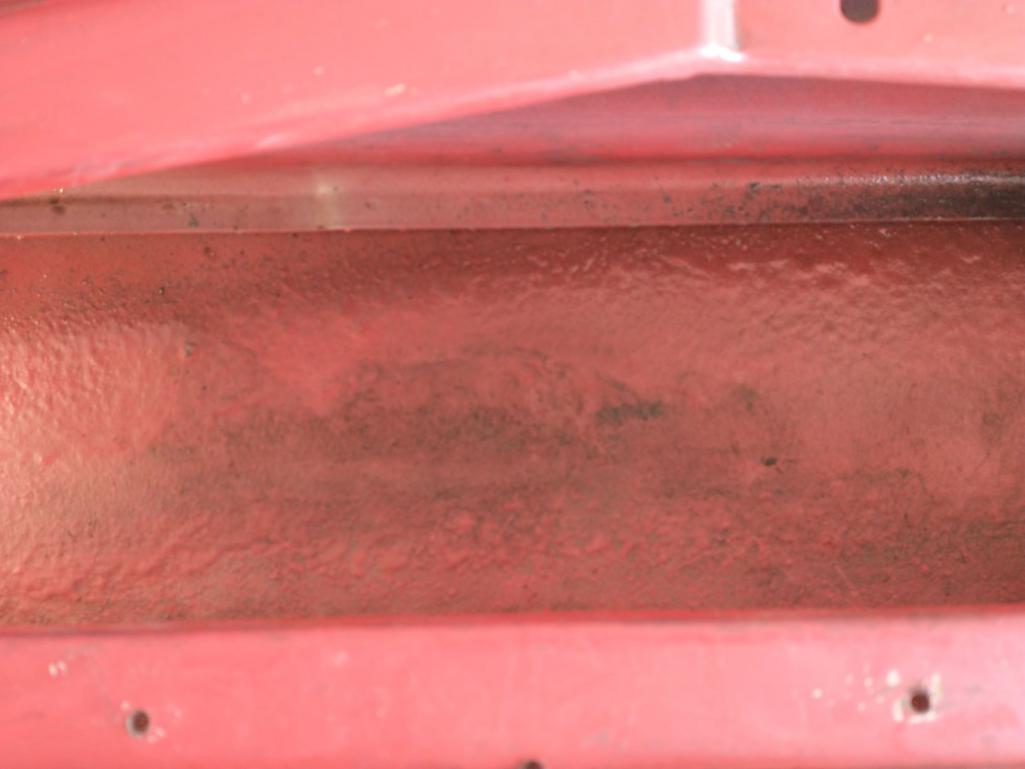
And the safety bars, of course. These make the doors pretty dang heavy. Not sure how much they might do in a side-impact. 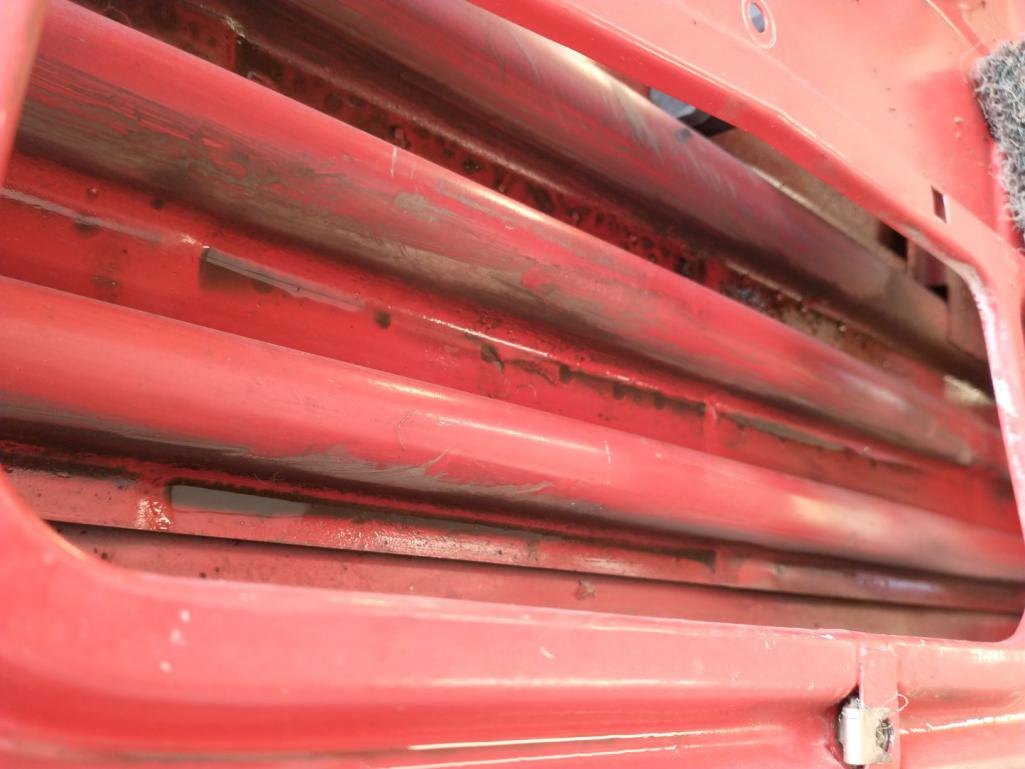
Found a bit of rust in the lower, front corner. Hit it with a wire wheel, and treated it with rust converter. 

Posted by: mgarrison Aug 23 2021, 10:32 AM
Finally got back to the 914 - Weather has been crazy for Phoenix. Roof ended up leaking which is going to kill my funds for the 914
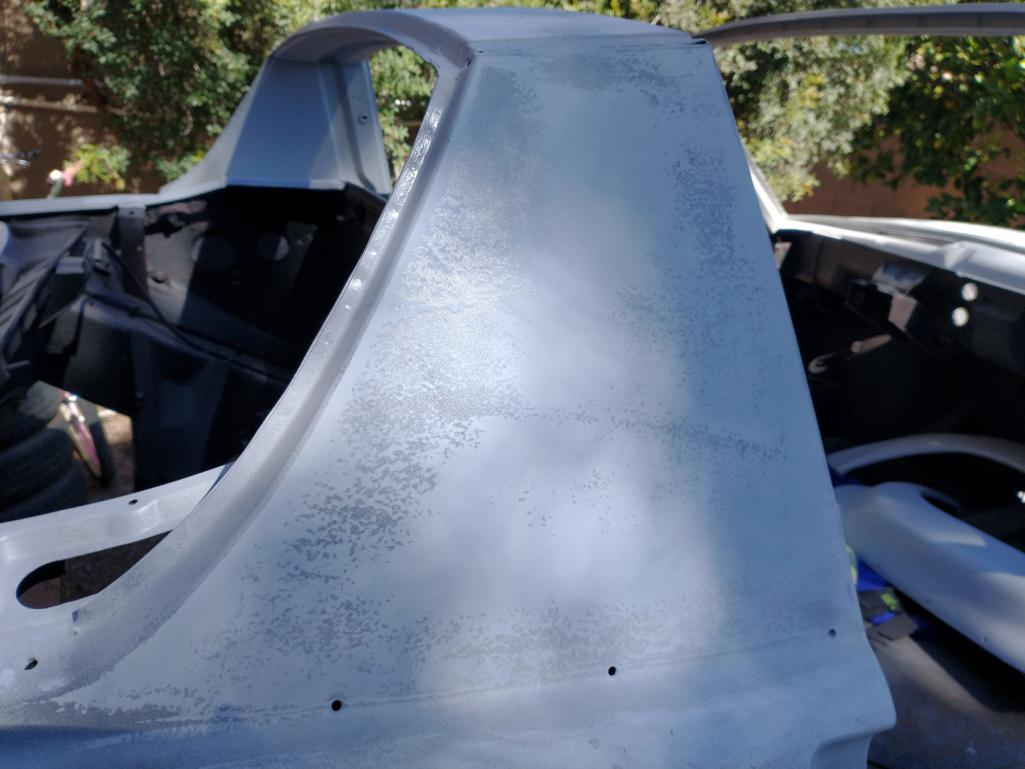
Anyway, I started stripping the paint off the outside of the 914. Worked on the doors first.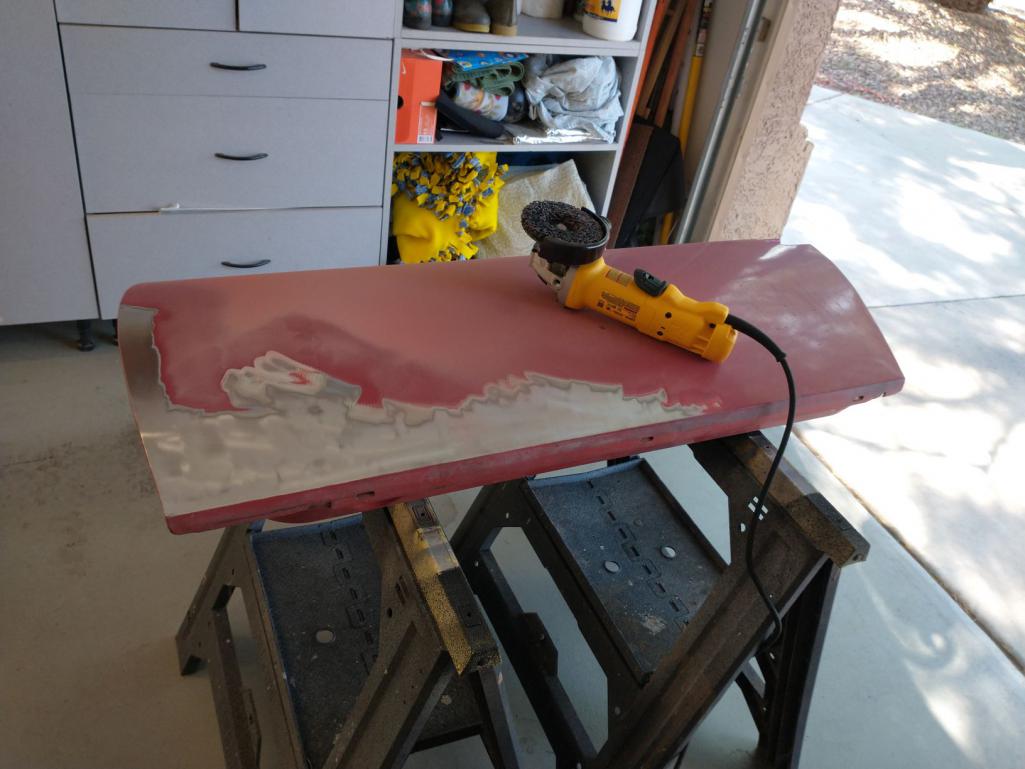
I found a bit of filler hiding some small repair spots, but nothing major.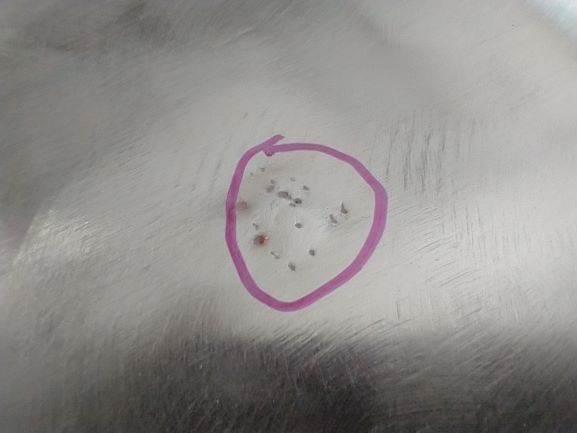
A bit more filler on the passenger door, but was not hiding much at all.
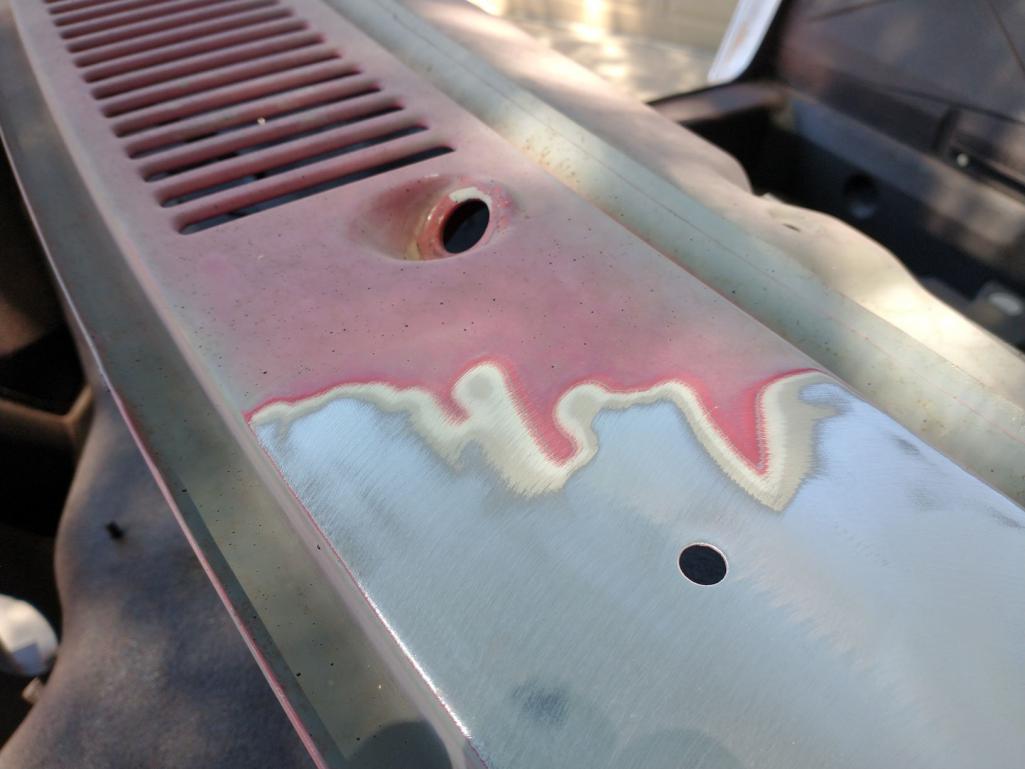
At this point I was pretty positive the 914 had been repainted at least once. I could see the evidence on the fenders - two layers of red, and the gray primer between them.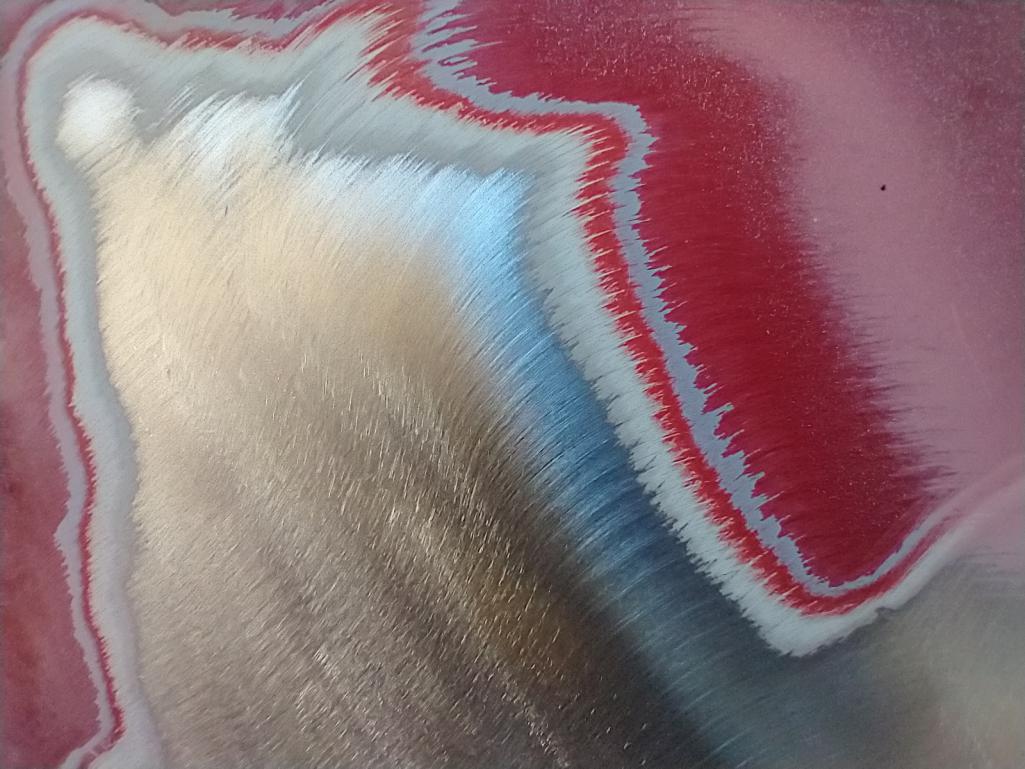
Getting closer to doing the primer, but need the $$$ to buy the fiberglass hood and deck lid... 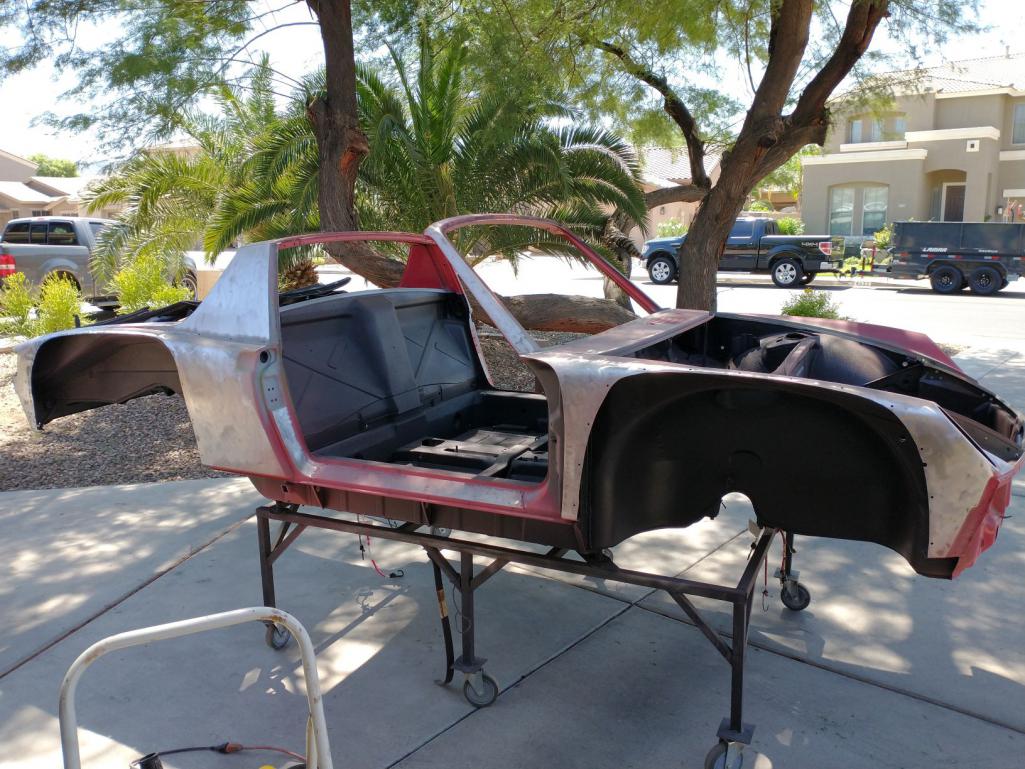
Posted by: mgarrison Oct 8 2021, 11:12 AM
I keep hearing Dory saying "Just keep swimming"...
I've keep trying to move forward, and the treadmill keeps spinning faster! The weather in PHX this summer has been wetter than it has been in years! The 914 has sat covered under the tarp more than I could have believed. Then I had to have our roof re-done due to leaks from all the rain. Than swiped a whopping $12K I could have used for the 914 - OUCH! Then the pool pump started squealing like a stuck pig - another $500. Then our son got Covid - thankfully a super mild "cold" for about 3 days. Then our daughter got thrown off a horse...You get the idea. 
But, the weather has finally dried out and started to cool off a bit. So, I'm back to trying to get ready for primer. It's been slow since every time it rained again, the bare 914 tried to rust, and I got to go over the parts I had already stripped! Getting really close though...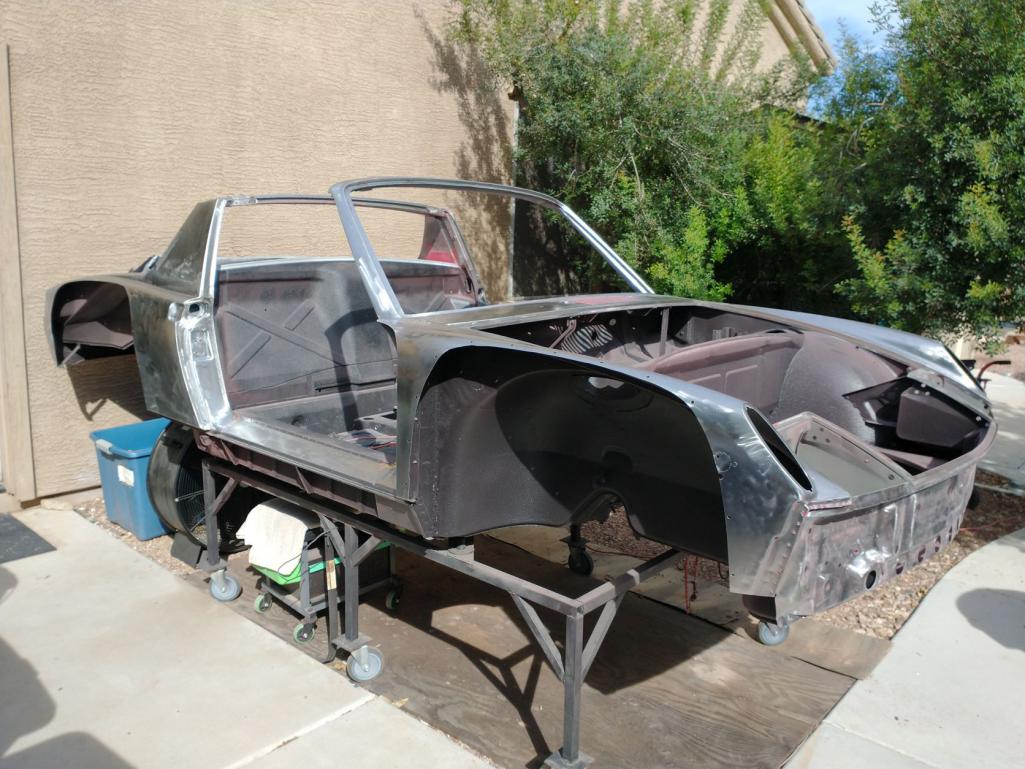
I just have a few little corners, niches, etc. that I can't seem to get into with any shape fiber wheel, etc. So, yesterday I went to HF and got a new dead man's valve and tips for the media blaster. I believe I can hit these little areas without messing up my Raptor liner in the trunks/cabin.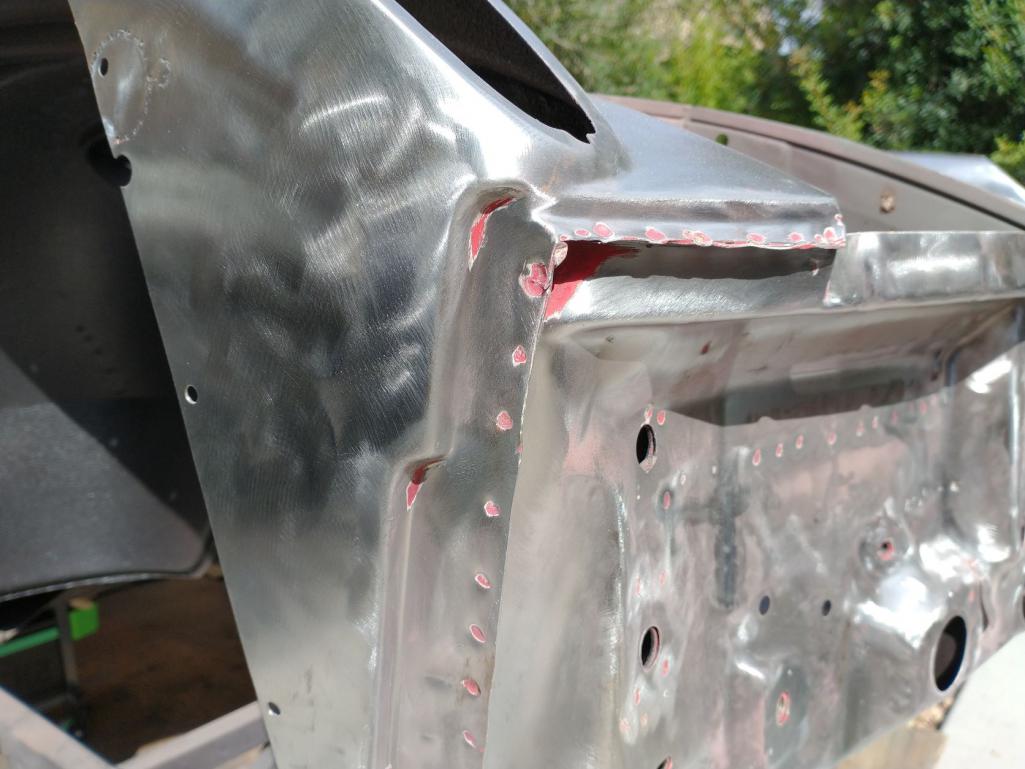
I will say you have not really lived until you have stripped the bottom side of the Targa bar and windshield frame! That is some tedious, uncomfortable work. Lost count of how many times I just shut the drill off and sat there stretching my neck out. Still can't get into some of the spots/corners. Going back to the blaster for the rest, but may need to hold up a piece of plywood to protect the Raptor I've already sprayed!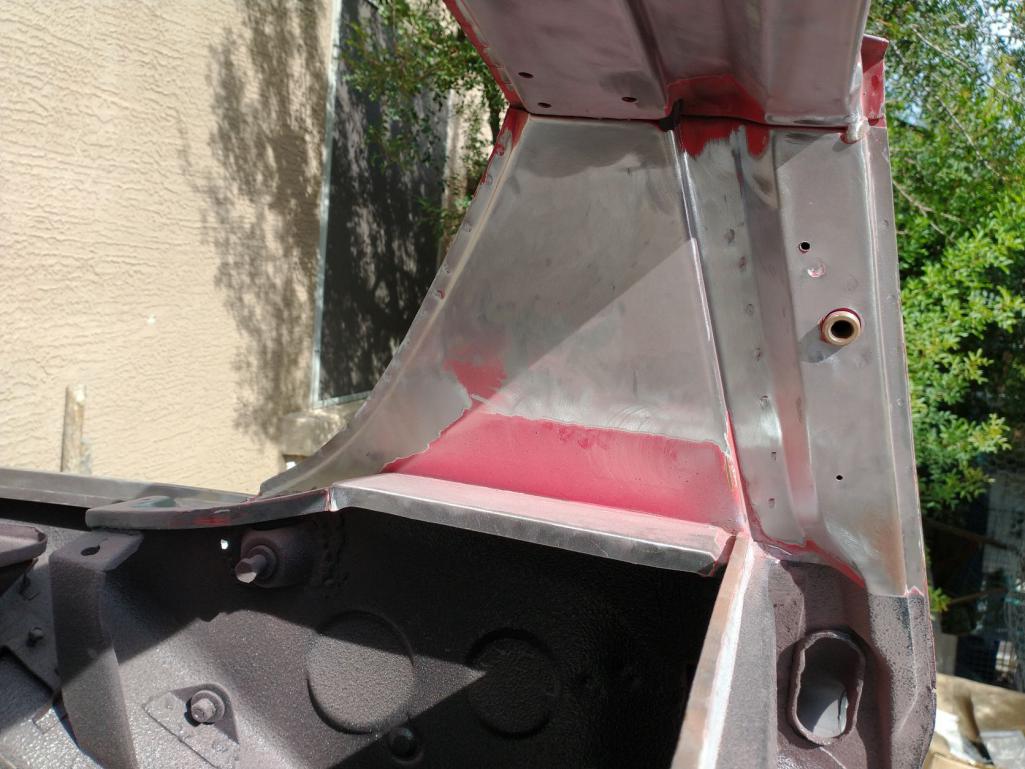
I'm so ready to be done with body work & paint. It has taken me an ETERNITY to get this far! I'm also beginning to think Tygaboy's method of getting the car all together, wired, plumbed, and sorted out, and then taking it all apart again for paint might be "easier" despite the fact it seems like double the work!
Posted by: mgarrison Oct 12 2021, 10:42 AM
You know, when they show ZERO percent chance of rain for the next 7-10 days in Phoenix, AZ you'd think it is pretty safe...Unless your ME! 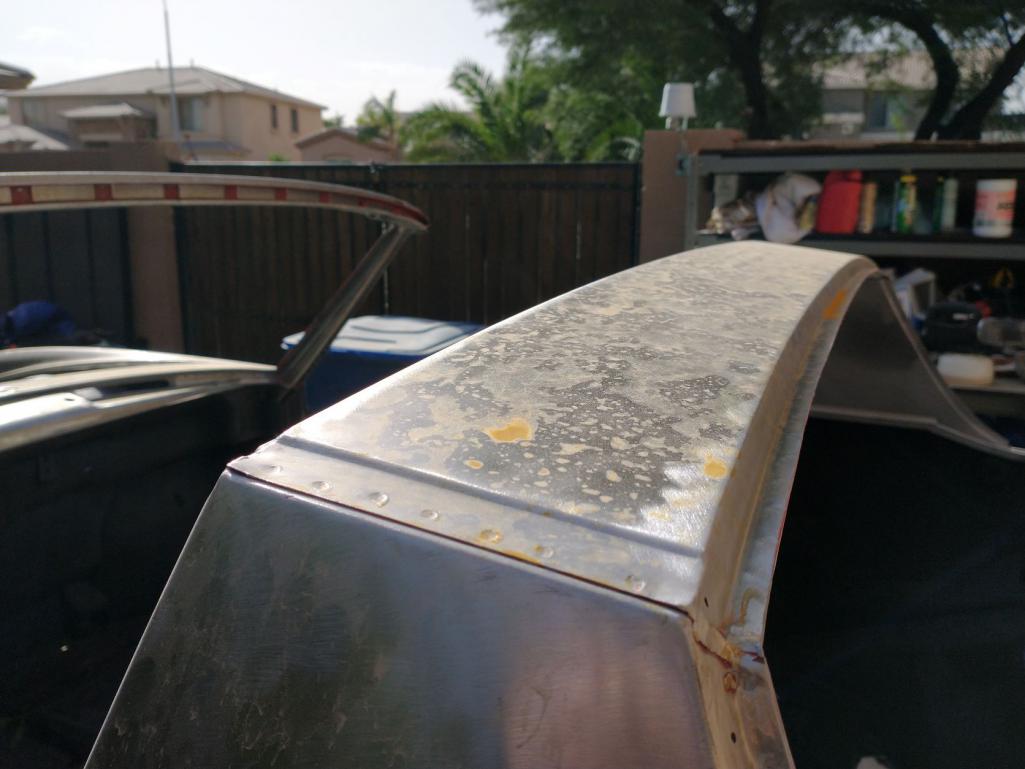
This is getting really freaking old...
Posted by: mgarrison Oct 14 2021, 11:08 AM
I thought I had everything cleaned up , scuffed, and ready for primer...and then I noticed these two spots when I was wiping it down with cleaner/degreaser. 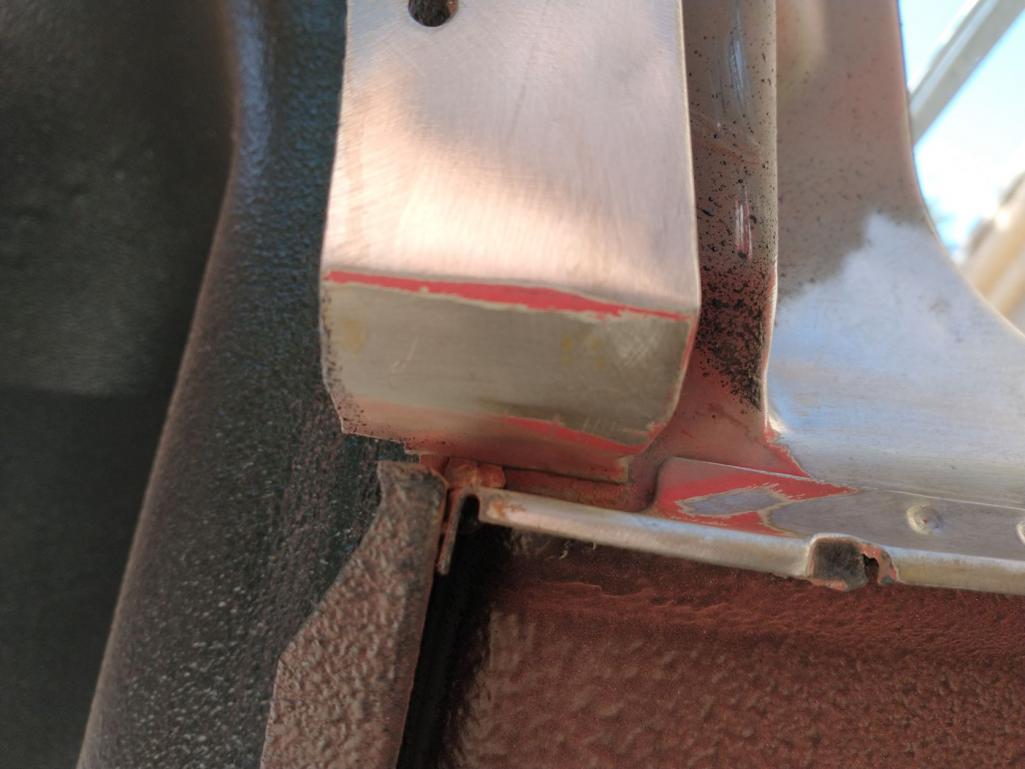
Posted by: mgarrison Oct 21 2021, 11:50 AM
Managed to get 3 coats of the OptiFlow primer on. Used the "rattle-can" to get the areas I was unable to roll or access with a foam brush. At least it's sealed with primer and wont rust because of bare metal!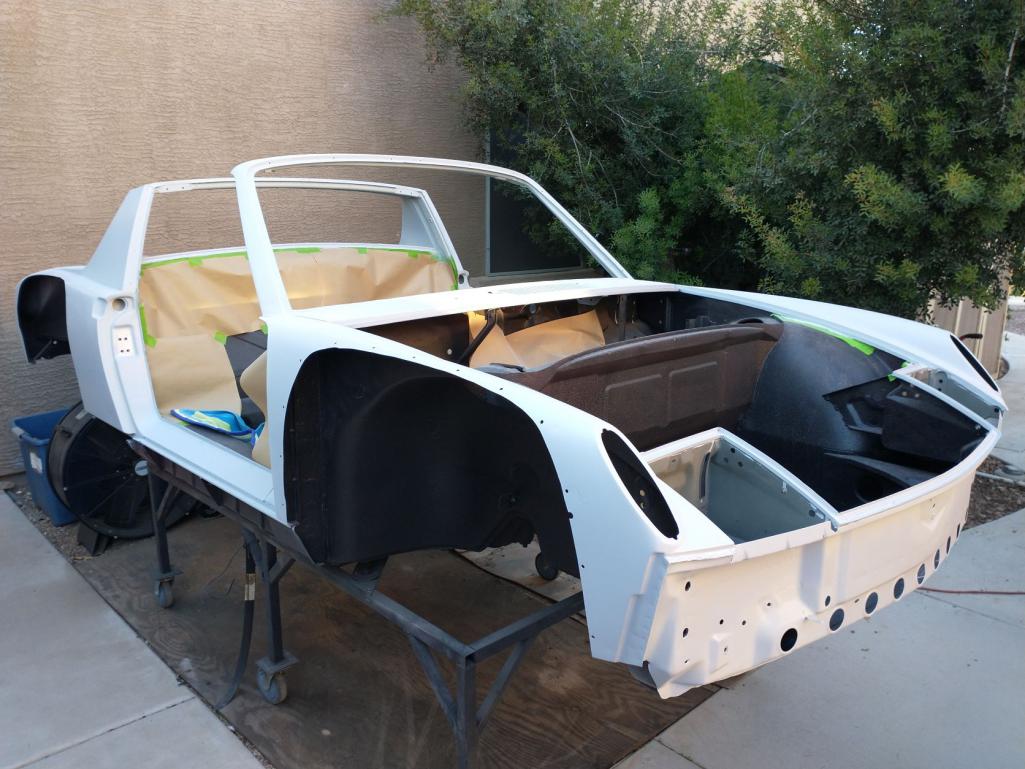
The OptiFlow did not work as well as I was hoping for. The rattle-can did work well though. Probably will spray the final coat instead of trying to roll it on. Here's the link to my specific experience trying to use the OptiFlow roll-on epoxy primer:
http://914world.com/bbs2/index.php?showtopic=356321
Posted by: mgarrison Oct 22 2021, 11:04 AM
I got the door skins primed last night. The larger, mostly flat surface and larger, non-foam roller seemed to work better. They dont look too bad this morning. Still tried to run in a few areas, but not so many joints/edges to contend with.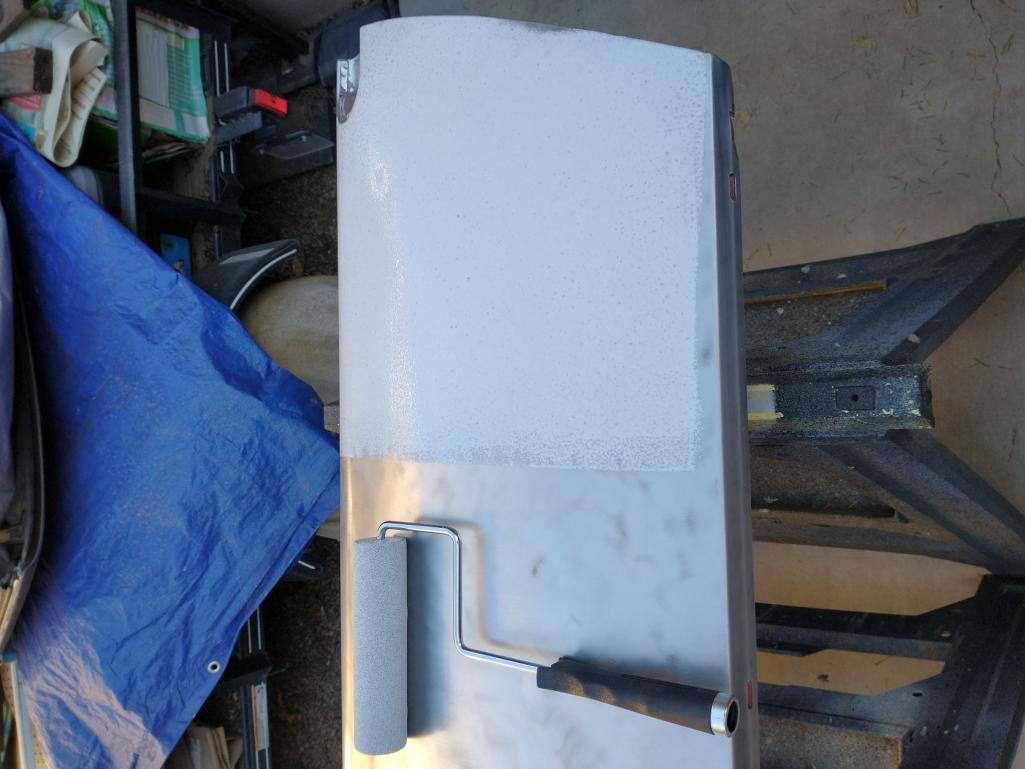

I think I'm going to try and mix up a bit of the primer and try spraying the insides and jambs on the doors and see how well it works - Eastwood does not recommend spraying it, but they wont explain why. I really dont want to waste the $$$ on more of the two-part "rattle cans" unless I have to...
Posted by: mgarrison Oct 22 2021, 02:29 PM
I'm sure some of this is due to the texture of the Raptor liner, but even with Frog tape, the primer "flowed" under the taped off edges... 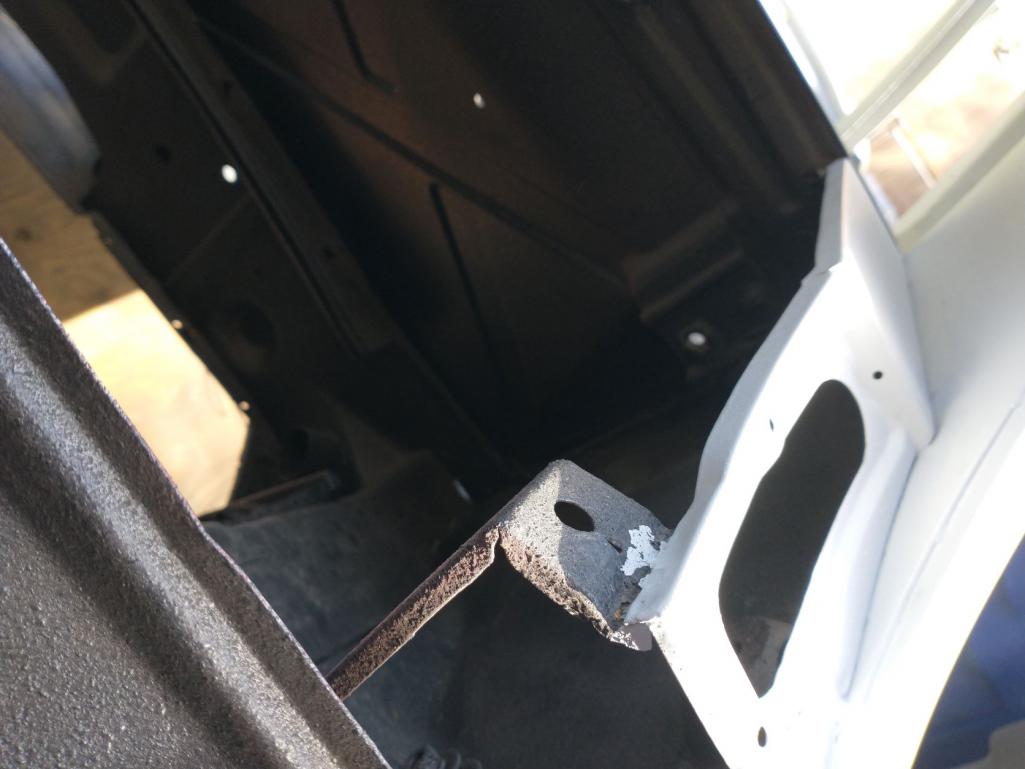
Posted by: mgarrison Nov 9 2021, 12:43 PM
I decided to try spraying the Optiflow primer with my Spectrum (HF) HTE gun. Worked out pretty well - much better than rolling it on, IMHO. Seems like it may take a bit more product to spray it (I used 8oz for each coat per door - 24oz/each door for 3 coats), and cleaning the gun after each coat was a PITA, but that's going to be an issue spraying any kind of epoxy/2K... 

Came out good enough for me!
Posted by: mgarrison Nov 10 2021, 03:22 PM
I started on the guide coat/sanding process to try and get the primer finish as flat/smooth as possible. Looks like I'm going to be busy with filler and sanding for a bit... 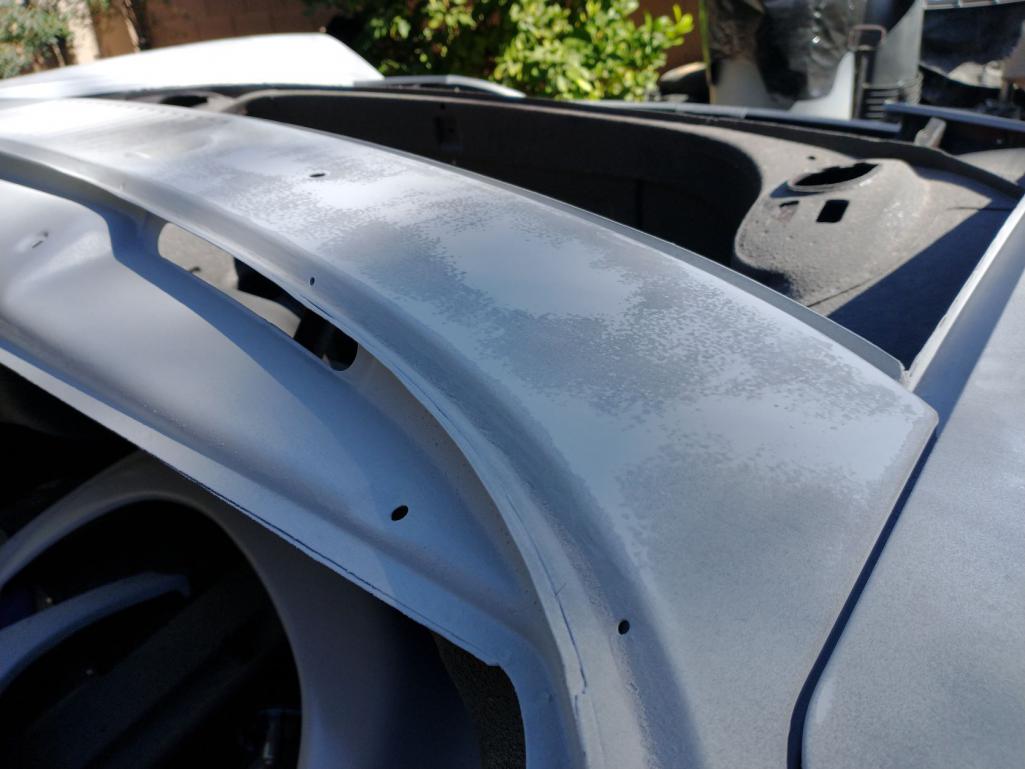
Definitely a few dents in the Targa bar.
Posted by: mgarrison Nov 11 2021, 09:47 AM
It's interesting what you find with the guide coat and block sanding...I would have never known that dent was there (bottom center of pic), but you can totally feel it!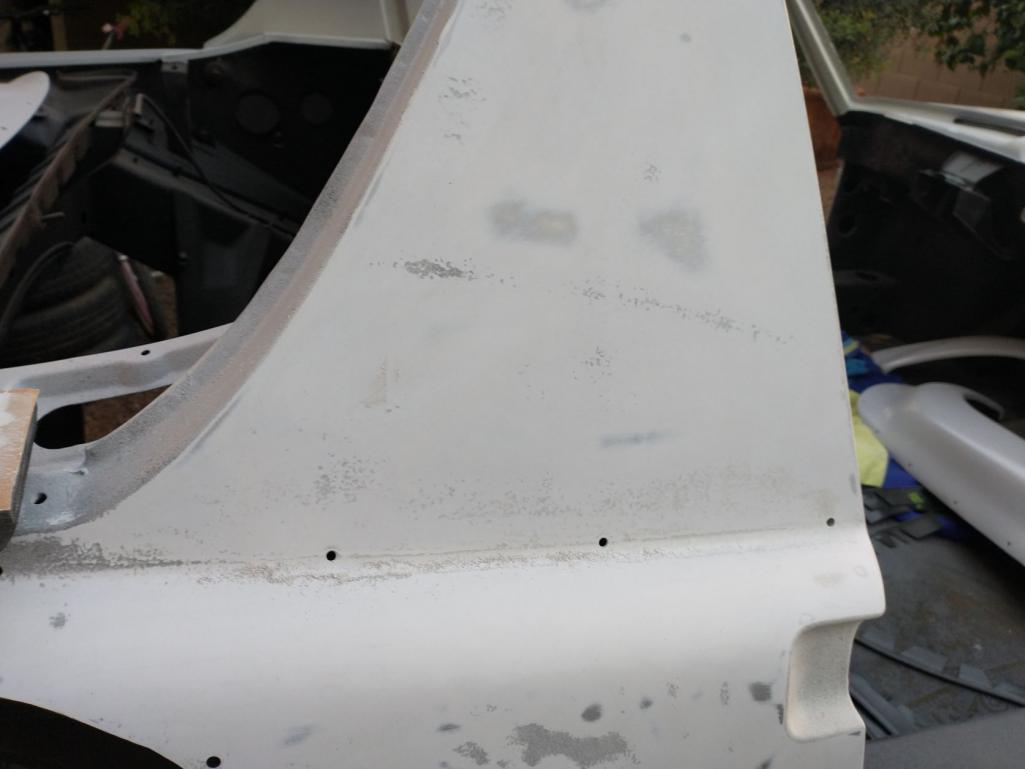
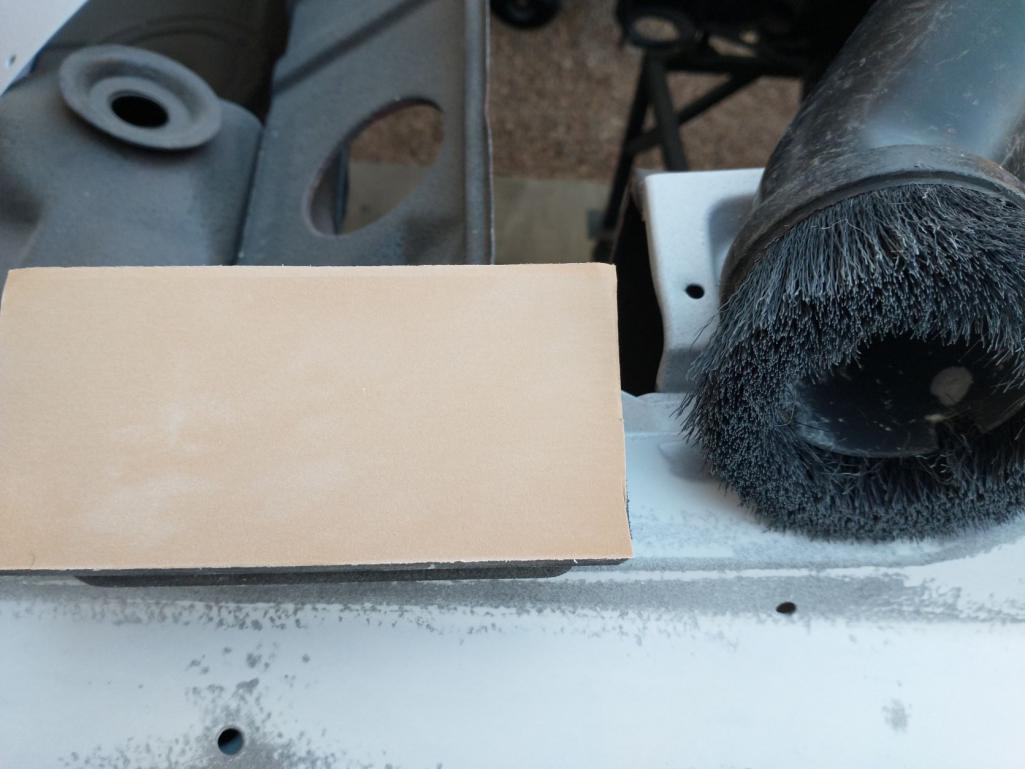
The sand paper loads up pretty quickly, but it's dry so a quick pass with the shop vac with the brush end and it's good for a while longer. 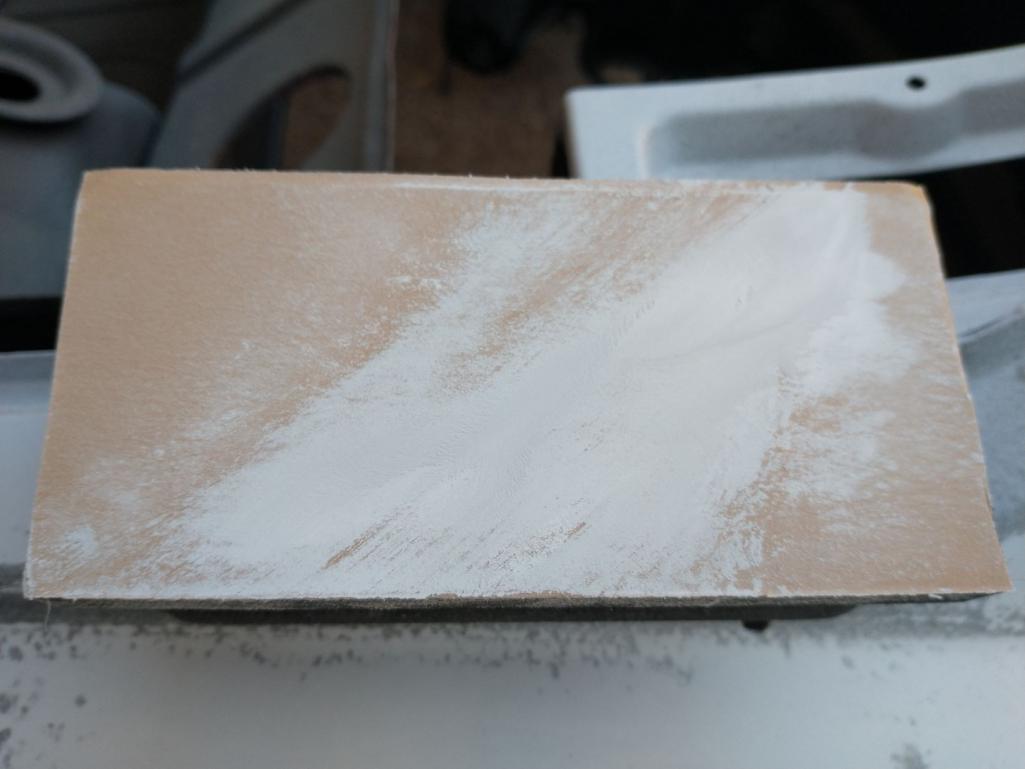
Posted by: mgarrison Nov 11 2021, 06:48 PM
Here's a couple really good examples of dents I never would have noticed without doing the guide coat & block sanding (the dark area is low). 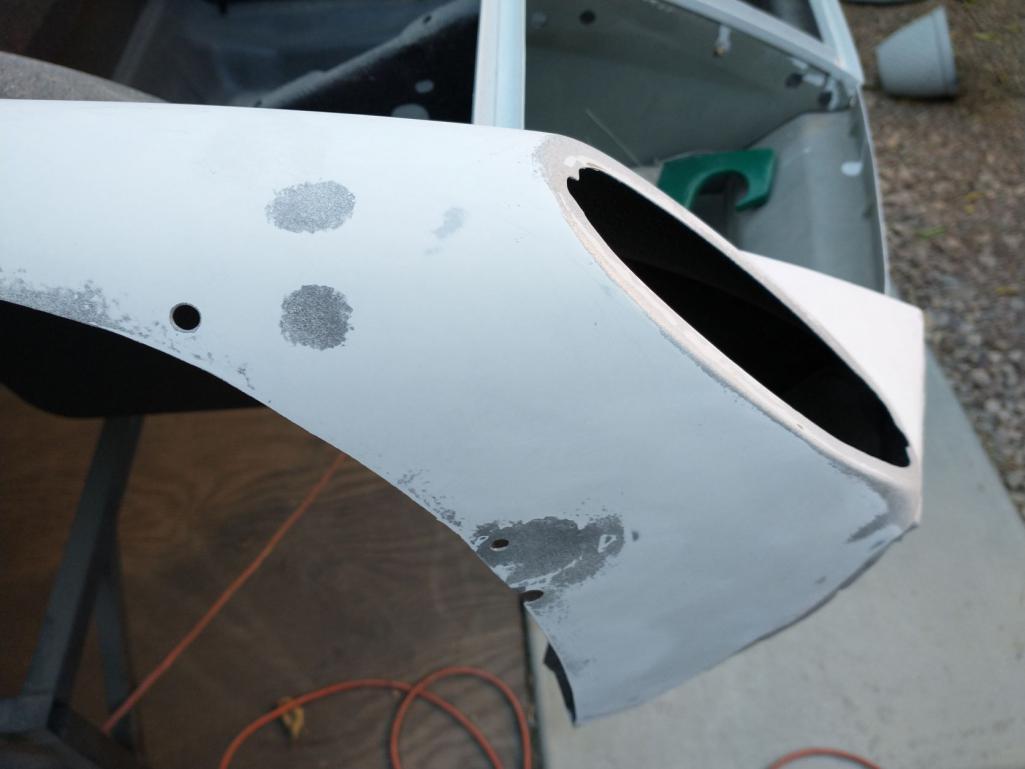
Spent some more time on the Targa bar - going to be a bit of filler work and plenty more sanding to get this smooth/flat.
I always thought the 914 was the less curvy, swoopy Porsche. That was until I started trying to block sand the primer on my 914! She's quite the curvy girl, just way more subtle than her cousin that curvy tart the 911! 
Posted by: Mayne Nov 12 2021, 07:15 AM
Looking good! Those panels are going be nice looking when they’re in paint.
And yes, the longer I own my 914, the more I marvel at the subtle but complex curves of the design.
Posted by: Costa05 Nov 12 2021, 09:18 AM
Nice work. Oddly enough I enjoy the body work phase of my project.
Did you get a reservation made for the paint booth?
Posted by: mgarrison Nov 19 2021, 09:22 AM
Hey Rich, no, no booth reservations. Debating just building a temp booth out of PVC and plastic. The whole transport to EVIT and then back again after fresh paint just seems ripe for disaster - not sure I trust my body dolly enough to strap it down to a trailer for transport!
Nice work. Oddly enough I enjoy the body work phase of my project.
Did you get a reservation made for the paint booth?
Posted by: mgarrison Nov 19 2021, 09:35 AM
I am definitely not enjoying the body work/filler phase! The war between my tendency towards OCD vs. wanting to see progress vs. fearing it might rain again are making me a bit unhinged!
I moved to trying to complete one section at a time, with some sanding on other filler sections while I wait for another layer of filler to harden/dry.
70's VW manufactured body panels are "interesting", I guess you could say.  I started with a longer block, but got too frustrated. Ended up using a 6" x 3" block. This is after 3 coats of 2K primer. Here's the initial sanding with the block in a horizontal orientation:
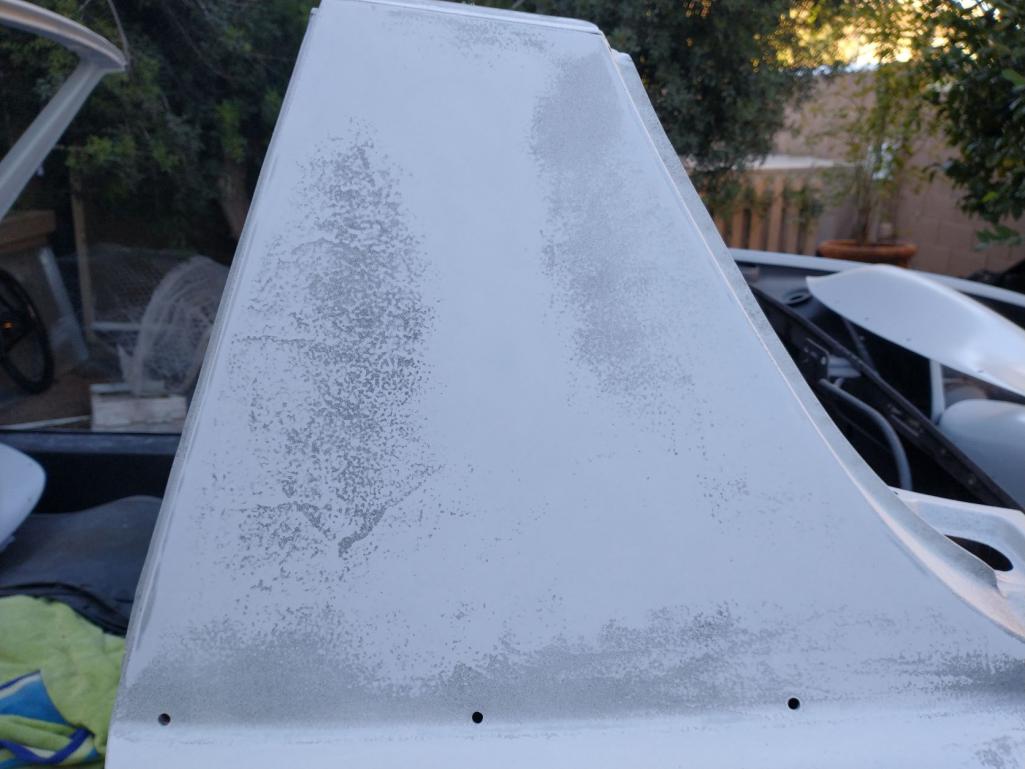
The dark areas are lower, where the guide coat was not sanded off. Here's the second round of sanding with the block in a vertical orientation: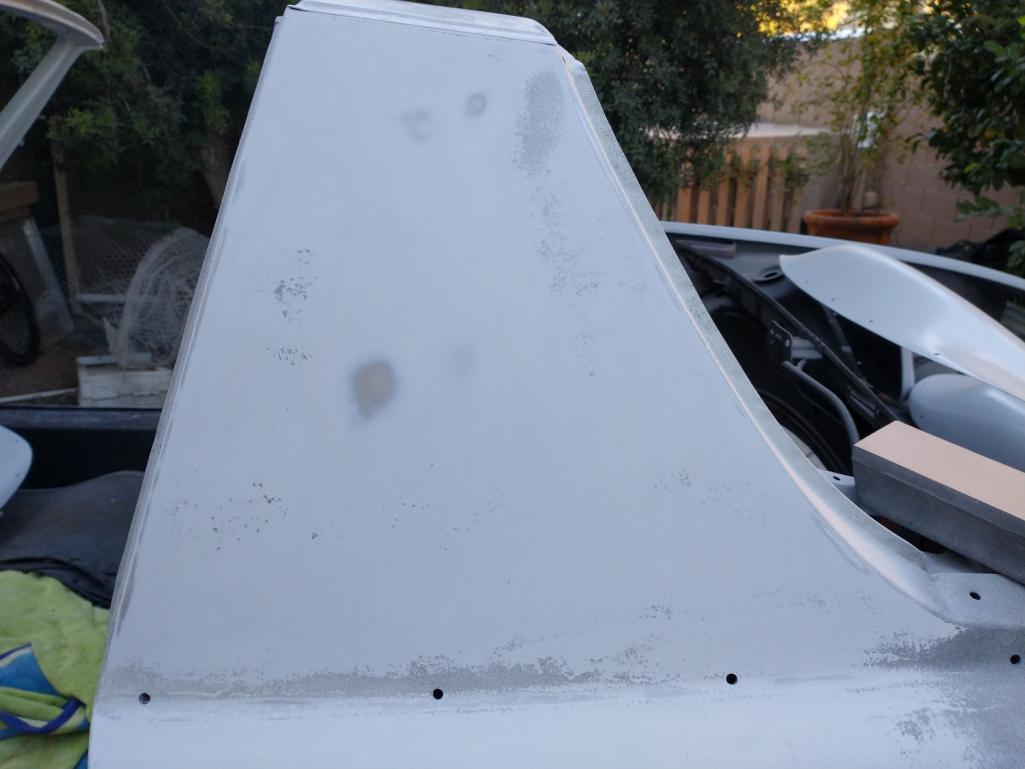
This is after the 3rd round of filler and sanding, keeping the block in a horizontal orientation: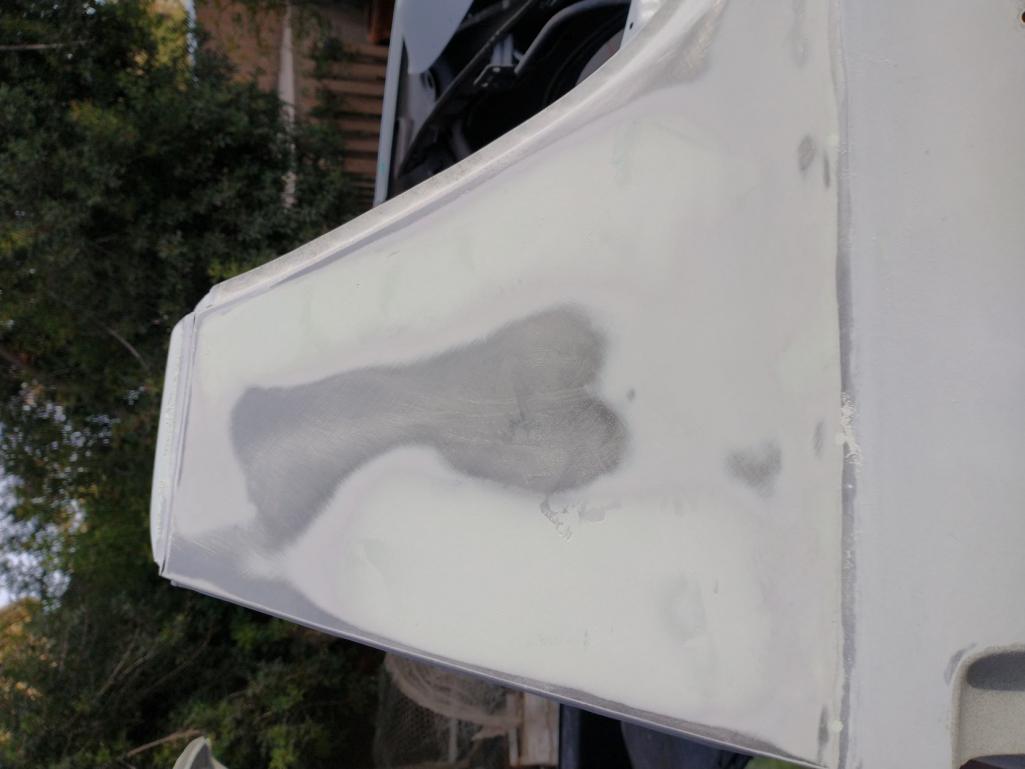
Here's after the 4th round of filler and sanding. Again, keeping the block in the horizontal orientation: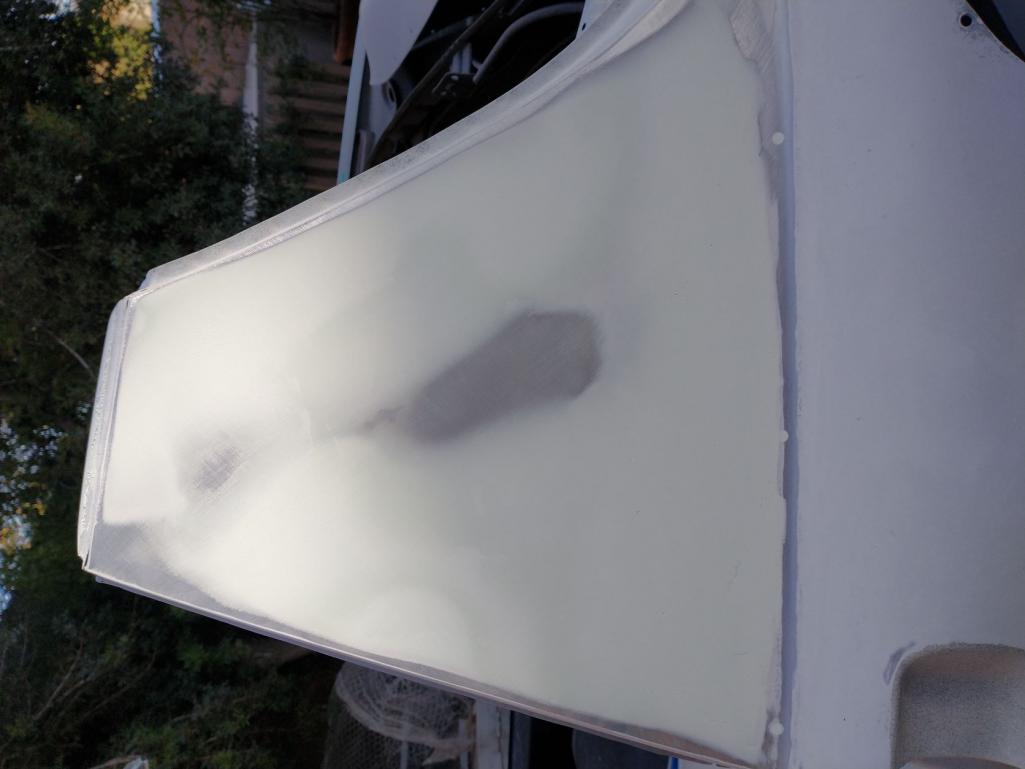
Just need to skim it with some glaze at this point. And, of course need to do the same on the passenger sail panel. And the top of the Targa bar...
Posted by: mgarrison Nov 23 2021, 03:07 PM
After getting all my filler and panels as good as I could (without my head exploding!), I saw there was a chance for rain the next day Since my boss was AWOL and not responding to me, I figured it was time for a break and there was time enough to get a quick coat of primer covering the bare metal to avoid any flash rust from moisture (and my head from exploding). Went pretty well & quick despite being too breezy...
And then I started to notice some "dry patches". I needed to mix up another batch of primer to finish the last fender, so I mixed a bit more and went over the "dry patches" again to make sure they were covered well. No joy...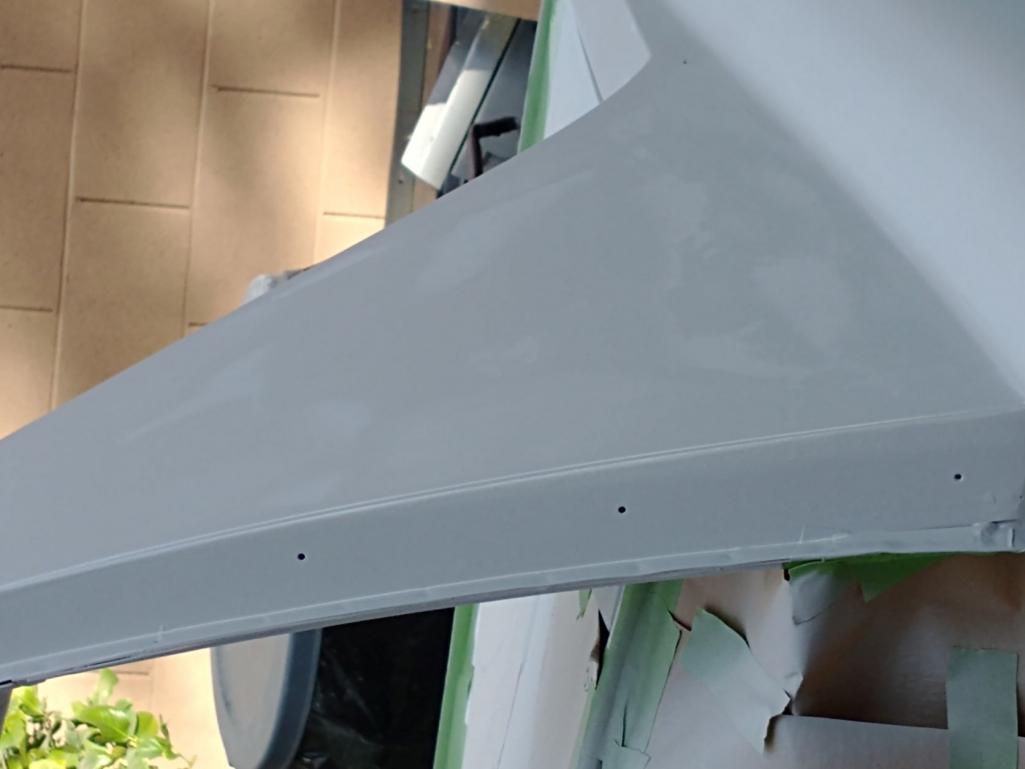
After closer inspection I saw that anywhere I had done filler & glaze, it looked rough/dry. It slowly dawned on me that in my rush to get the bare metal covered, I had failed to sand the filler/glaze with anything beyond 120 grit
I've decided doing bodywork is like playing a video game where you know all the required steps to win/complete the game, but doing them perfectly, and at exactly the right second while not impossible, is highly improbable. 
Posted by: mgarrison Dec 19 2021, 05:15 PM
I finally got the chassis sanded again, and sprayed with primer one last time - I hope! I moved on to the flares and then the doors. Block sanding is rather revealing when it comes to the imperfections you can discover.
The fiberglass flares were not terribly expensive, but when you really get down close with them it gets frustrating fast!
Lucky for me, I had one of the best supervisors around overseeing my efforts! 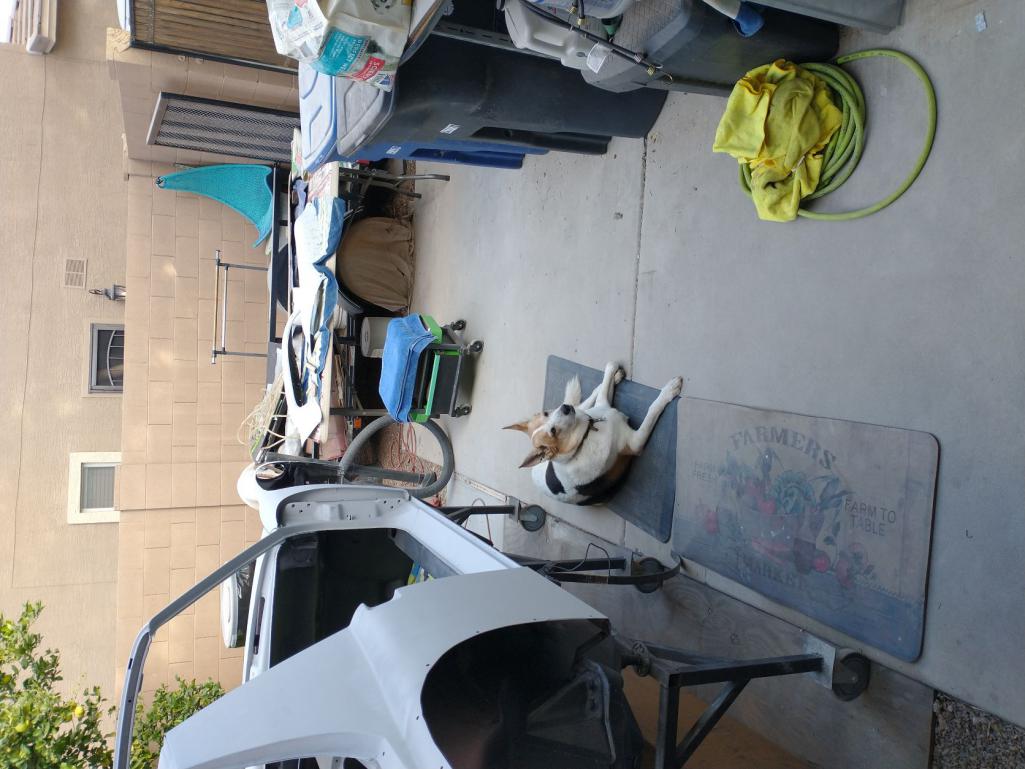
I know the doors are 48 years old, but whew, they are anything but flat/smooth!
I ended up ordering some spray filler/surfacer - basically a high build primer, I guess. I figured it would really help with the minor imperfections I struggled to fix with standard filler/glaze. Also figured I would use the spray surfacer on the flares to deal with their lack of a smooth surface. The surfacer needs a 1.8-2.5mm spray tip. I could not readily find a spray gun with a larger tip, and did not want to spend $100+ for a 1.4mm gun and a 1.8mm tip to go with it. I saw a video of a guy who got the HF "purple" $15 gun and drilled the tip out to use for thicker primers - seemed like a good idea to try for $15...did not work out well! I could not get the gun to spray anything, not even water after drilling the tip out. It's spare parts now! So, what do you do when you have product mixed up, and the gun its in wont spray? Grab another gun of course, but the only thing I had for spraying thicker stuff was the Shutz gun for spraying the Raptor bed liner...Well, it came out a little "bumpy" to say the least! 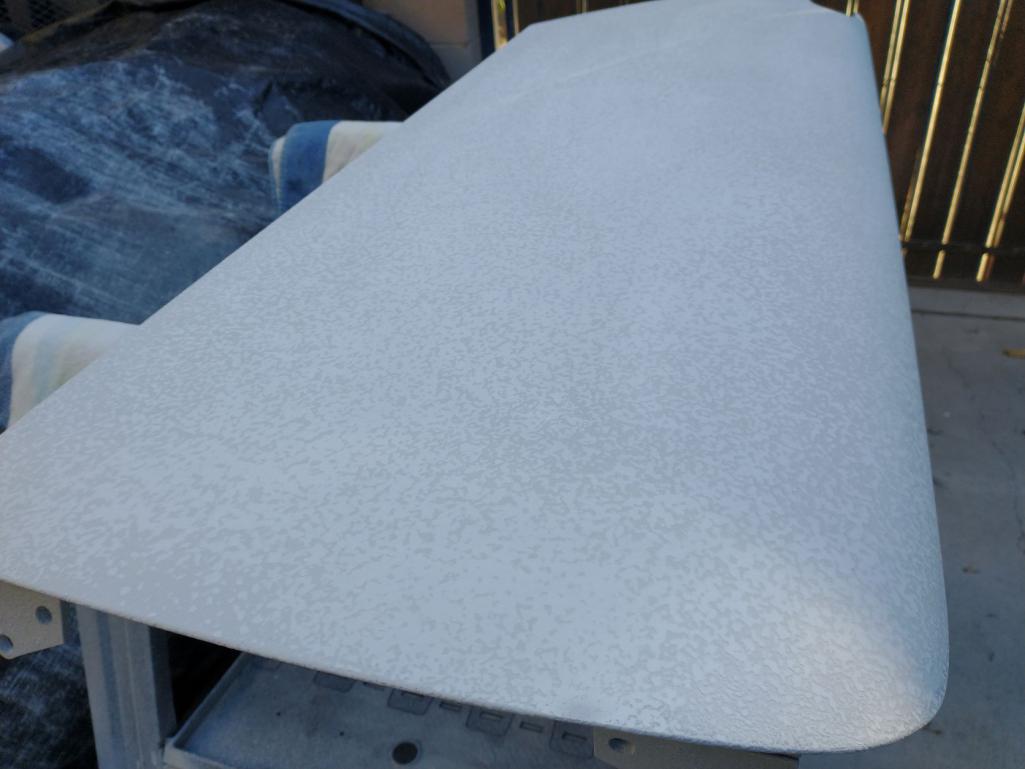
90% gets sanded off anyway...right? It just takes longer...I finally found a two gun kit HF sells for $50 that includes a 1.8mm tip. Worked ok in the end, but seems like I need to thin the surfacer a bit so it will spray easier.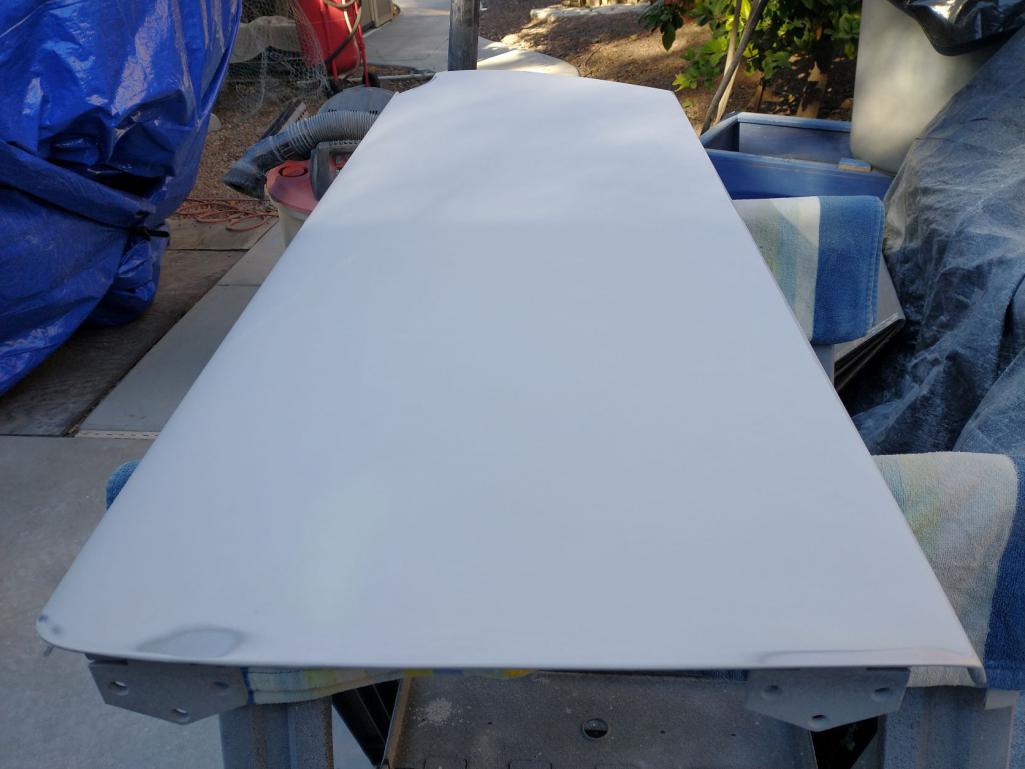
Posted by: Mayne Dec 20 2021, 08:23 AM
Looking good. All this effort to flat these panels will definitely pay off with the final result.
Posted by: mgarrison Jan 7 2022, 03:55 PM
Still plodding along, slowly
Working on block sanding the flares after doing two coats of the primer-surfacer. More tedious than the doors for sure, but less surface area, I guess 
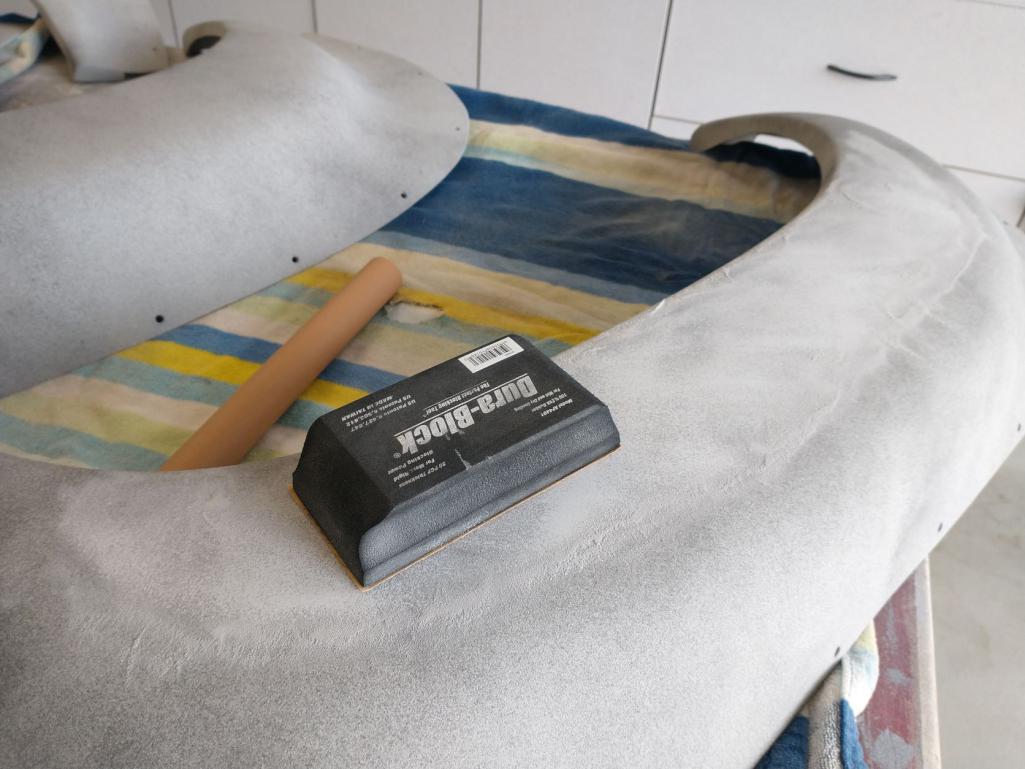
How'd that song go..."One down. One (or 3 in my case!) to go. Another town. One more show..." 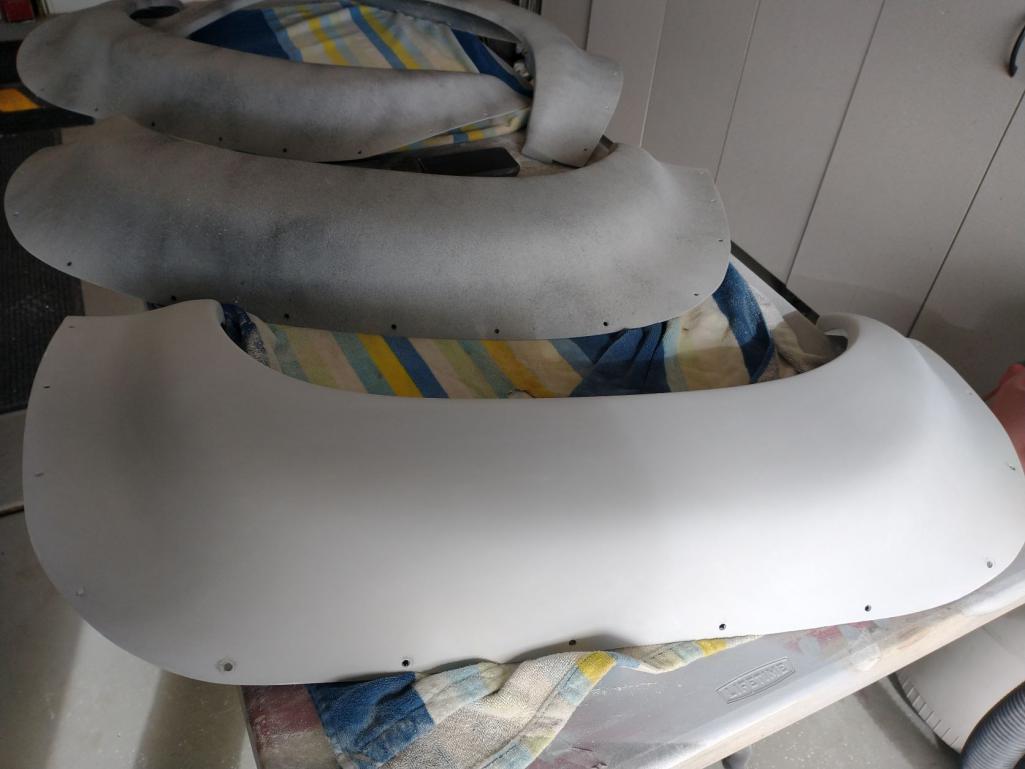
I'm hearing my hood and decklid are supposed to ship out on Tuesday. WOOHOO, more sanding! 
Posted by: slowrodent Jan 7 2022, 04:44 PM
Mike
It makes me chuckle how similar our experiences have been with the high-build primer. I too have an old HF paint gun that would not spray it. I too drilled mine out to a 2.0 tip size. Still had tons of trouble spraying it, and the whole gun plugged up inside. I managed to tear it down and clean it out, but I'm not looking forward to trying it again. I too tried to reduce it a bit (per recommendations) and I really didn't see any improvement. Luckily I'd say my bodywork is essentially done, with the exception of a final wet sand. (minus some final work on trunk, hood, doors)
Always great to see progress such as yours. Keep up the great work!
Kevin
Posted by: mgarrison Jan 19 2022, 04:44 PM
I had my primed flares stashed in the storage, but they were in the way, and I REALLY needed to see/feel some progress, so I installed them today. It's a bit of a process, but came out really nice, IMHO!
I decided to use Rivnuts and motorcycle fairing bolts instead of body rivets. I figured I would be able to easily remove the flares for suspension work, or if one gets damaged for some crazy reason. Rivnuts are just too cool!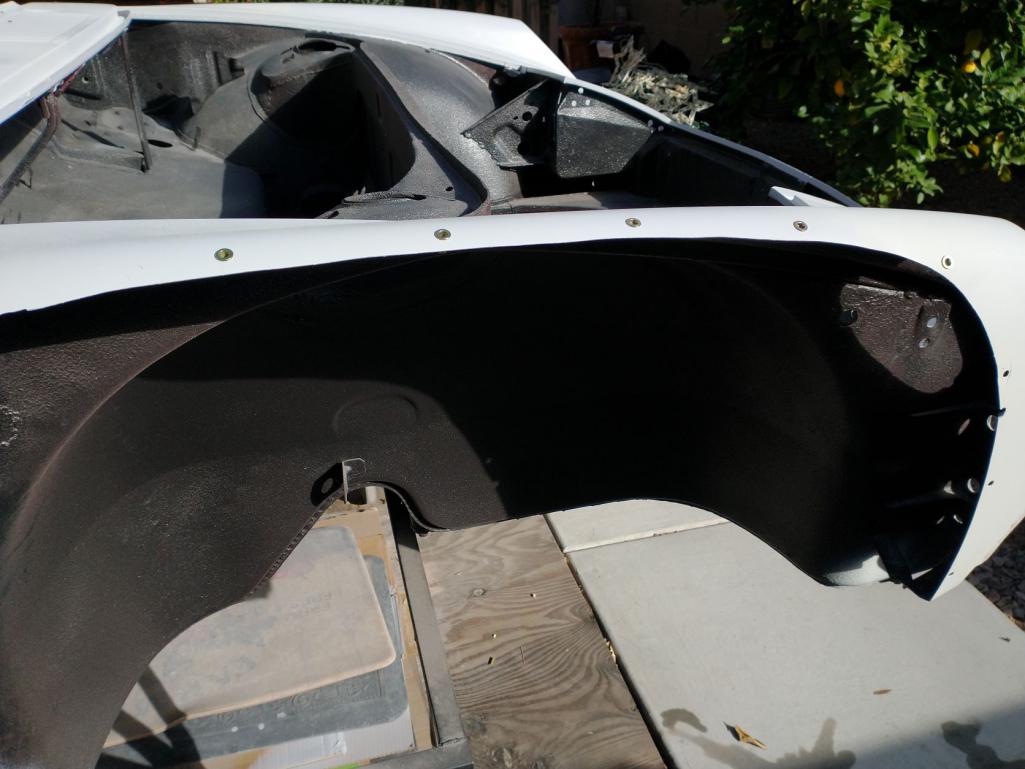
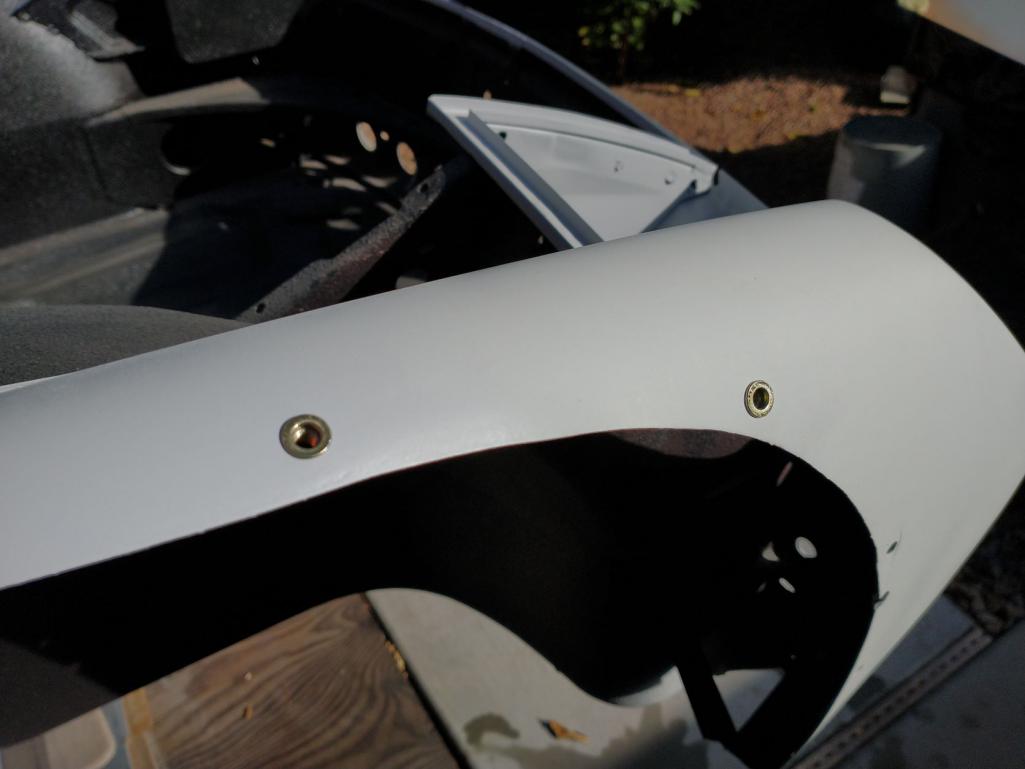
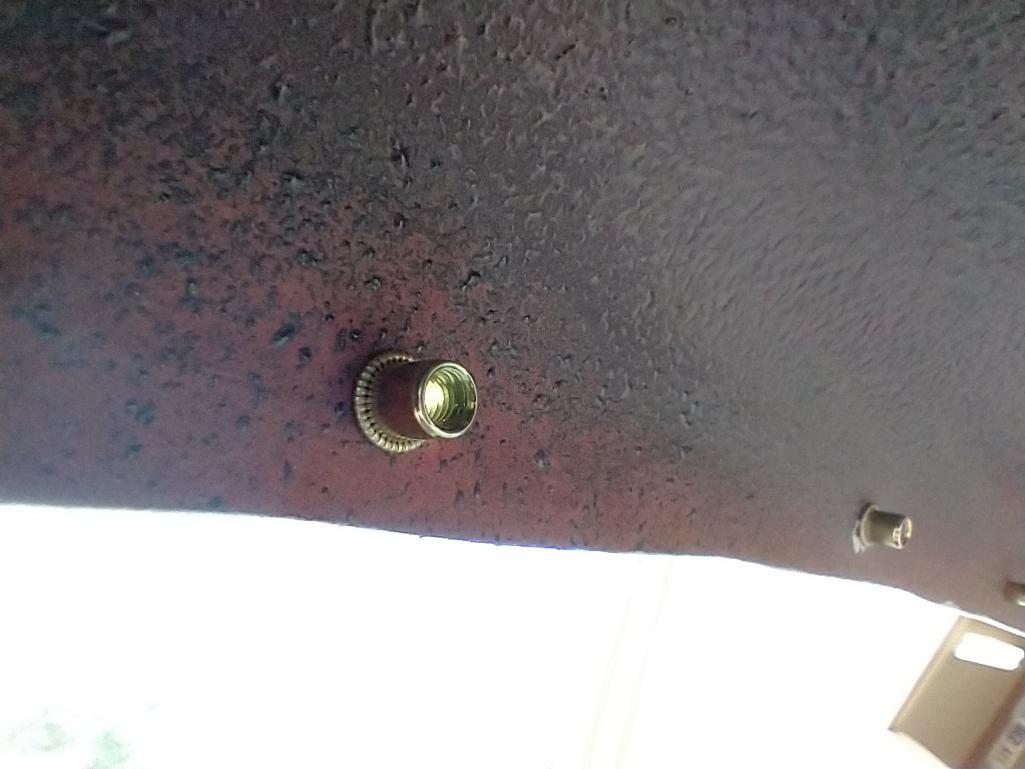
I first tried test fitting everything without the fender beading. 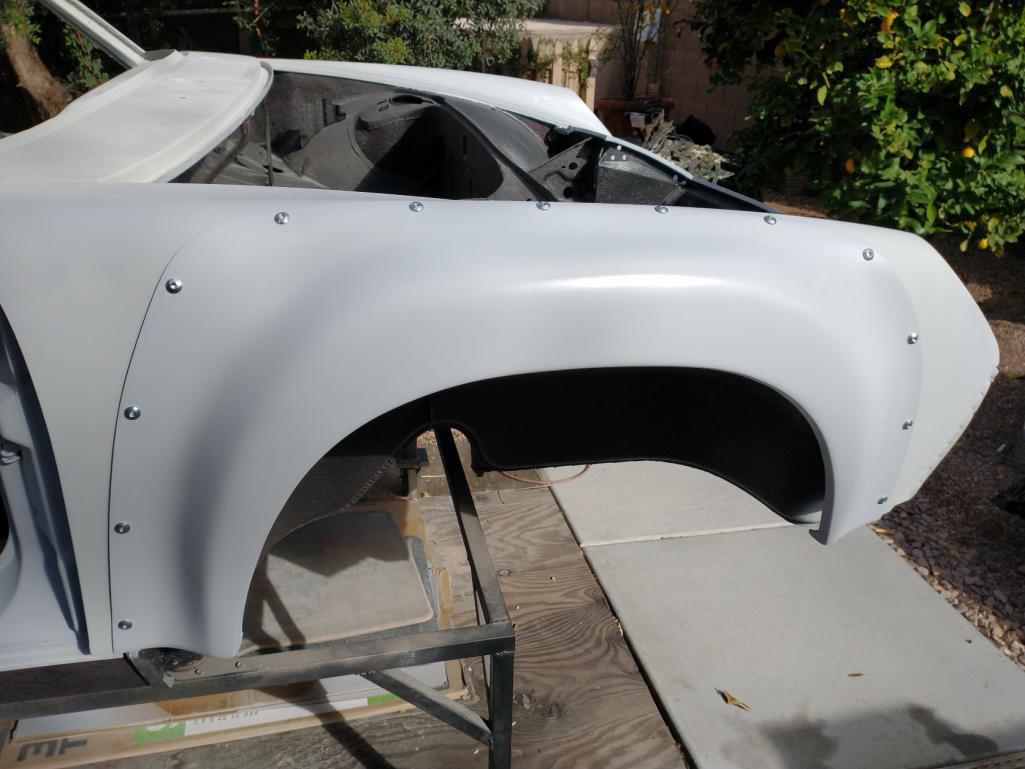
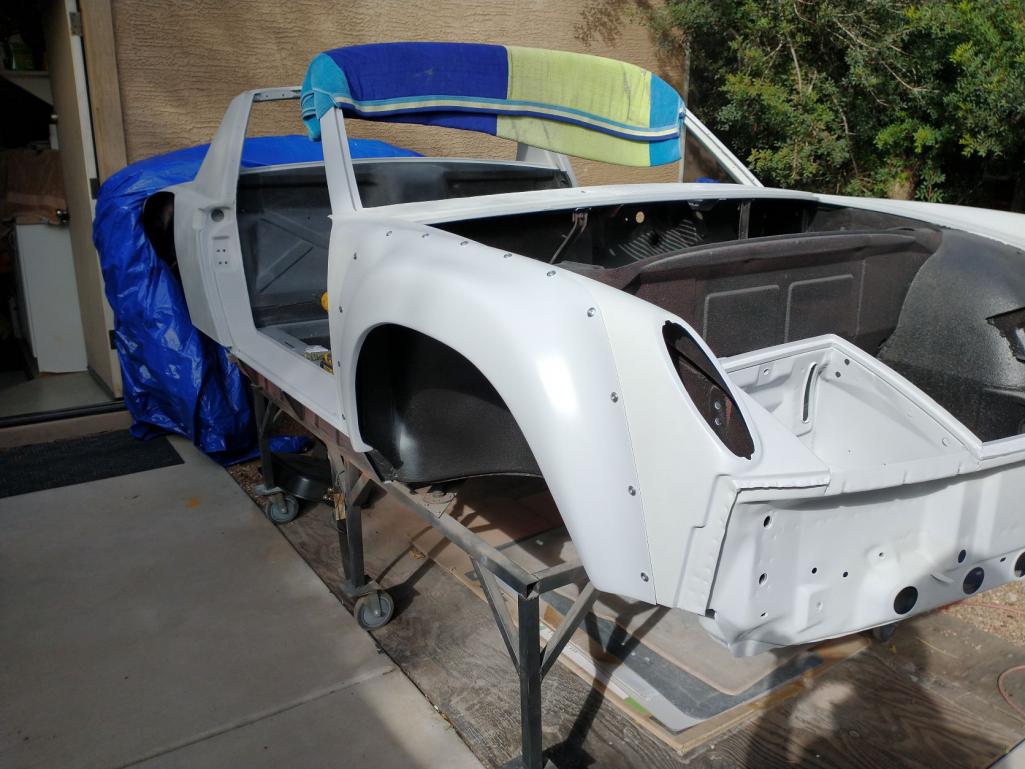
But then decided I should go ahead and install the beading since I will just leave the flares on to keep them out of my way.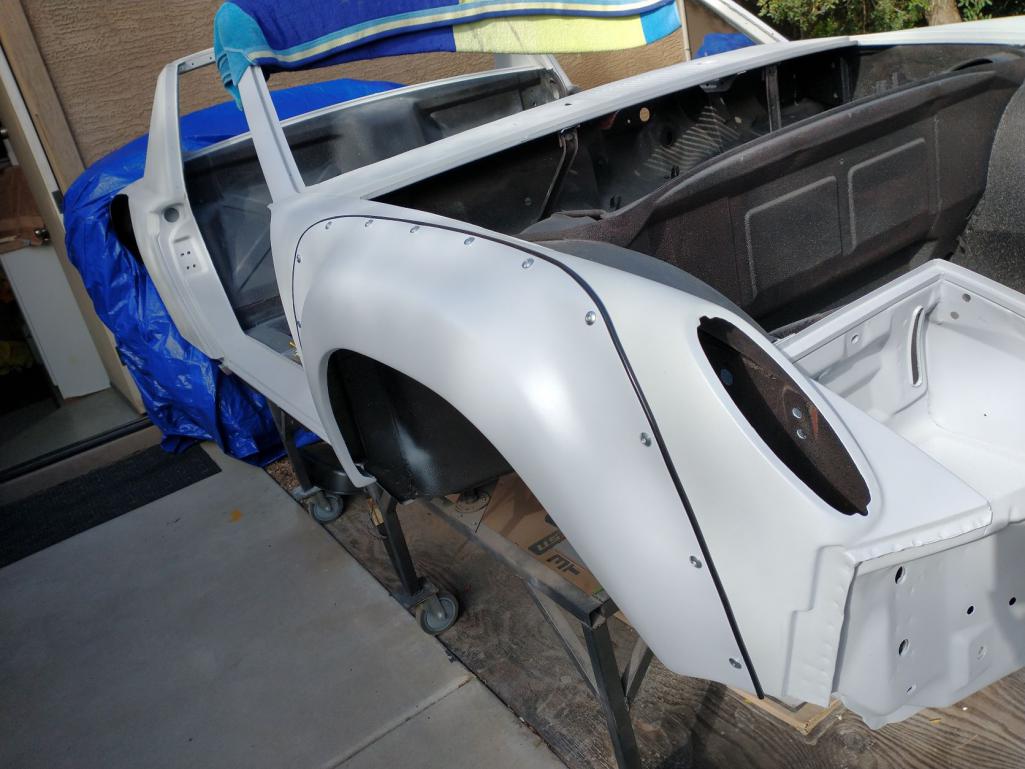
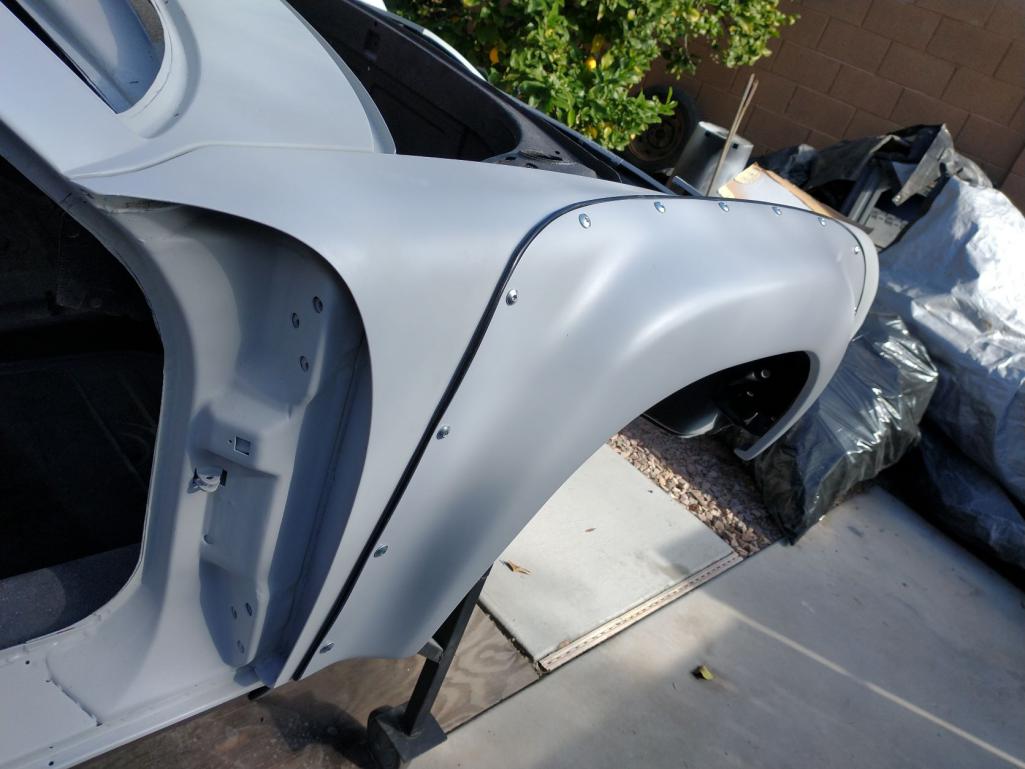
After the first fender, the process went pretty smooth, and things started looking more and more cool! 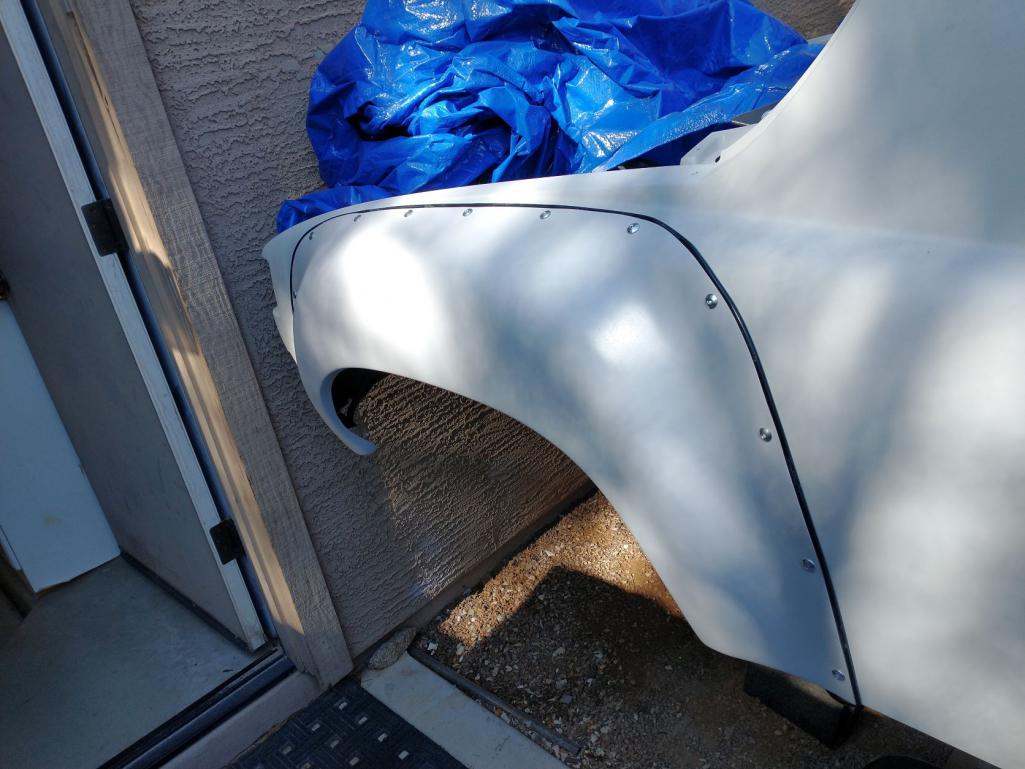

Looking pretty "car like" even if it is only primer!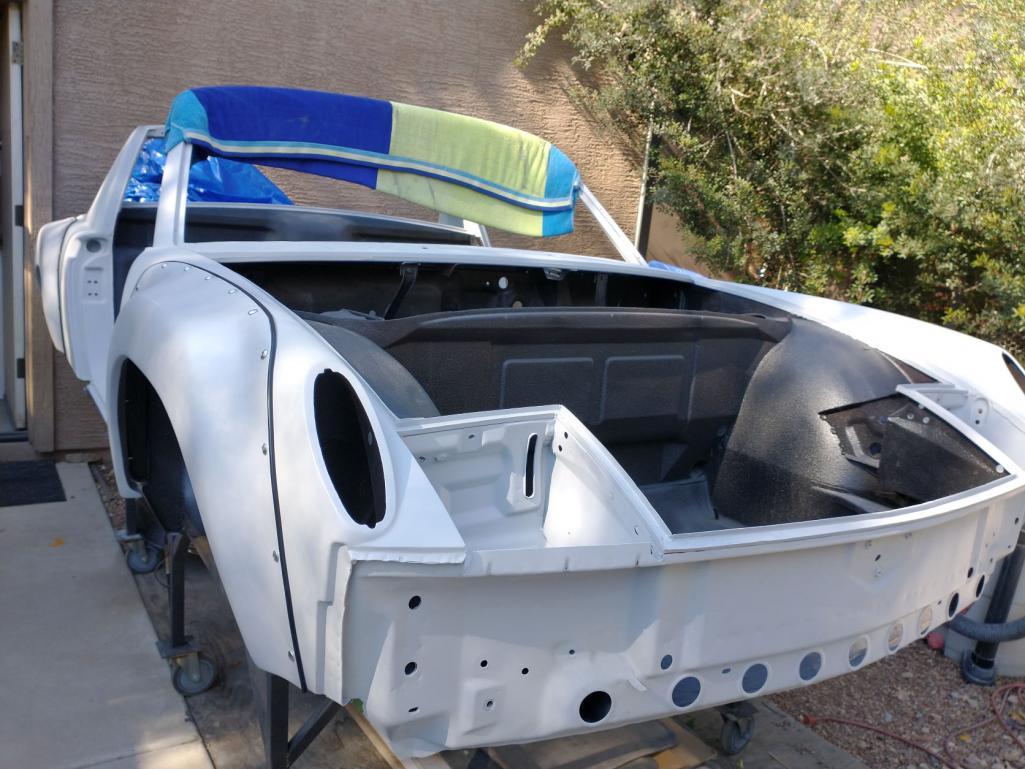
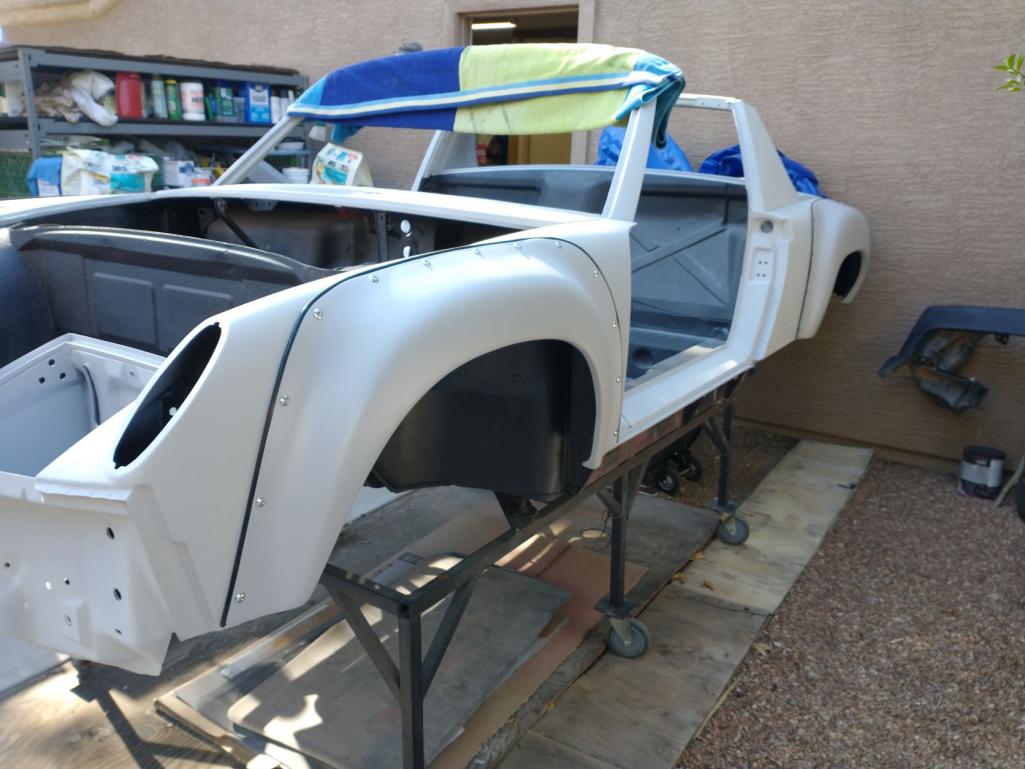
I figured I was on a roll, so I test fit the valance I picked up from a local member who was not going to use it.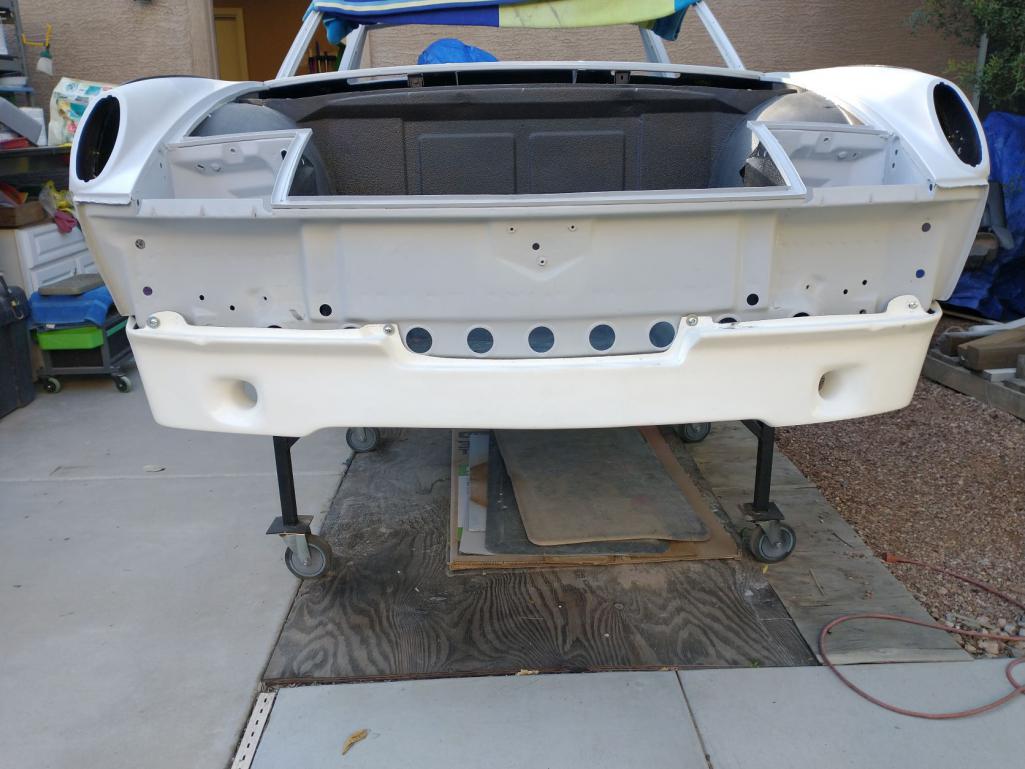
Anyone have any great suggestions for a straight forward way to build out the ends of the valance to match the flares...? 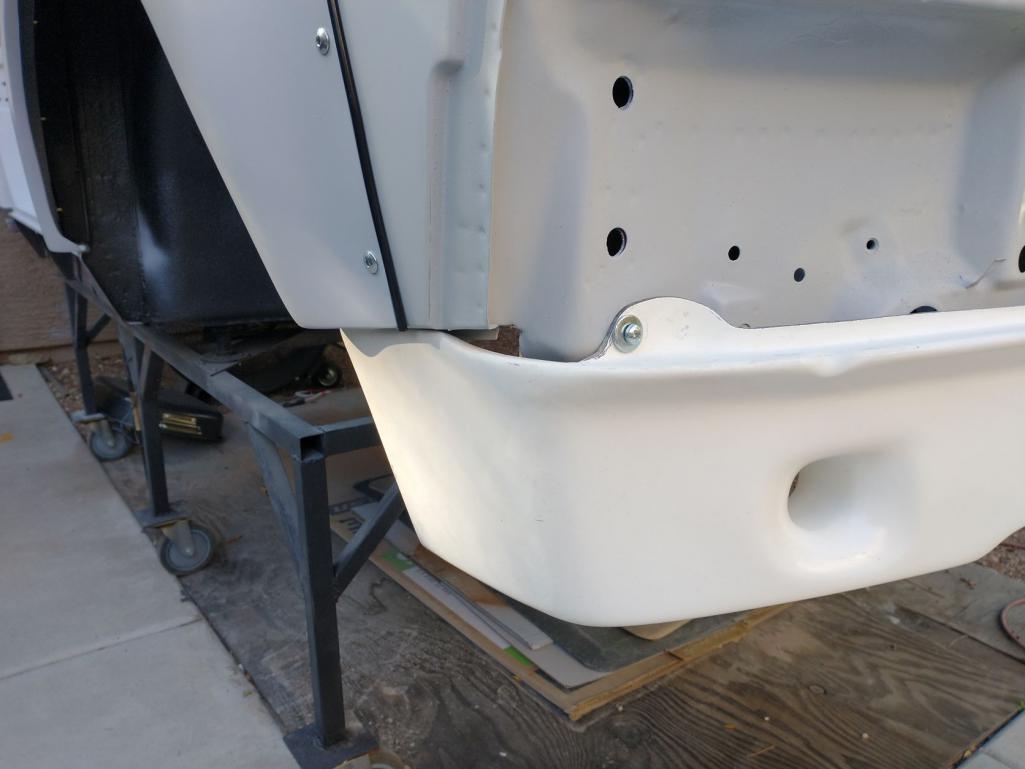
Posted by: 76-914 Jan 19 2022, 10:50 PM
I glued urethane blocks in place, sanded them down to match the contour and glassed over.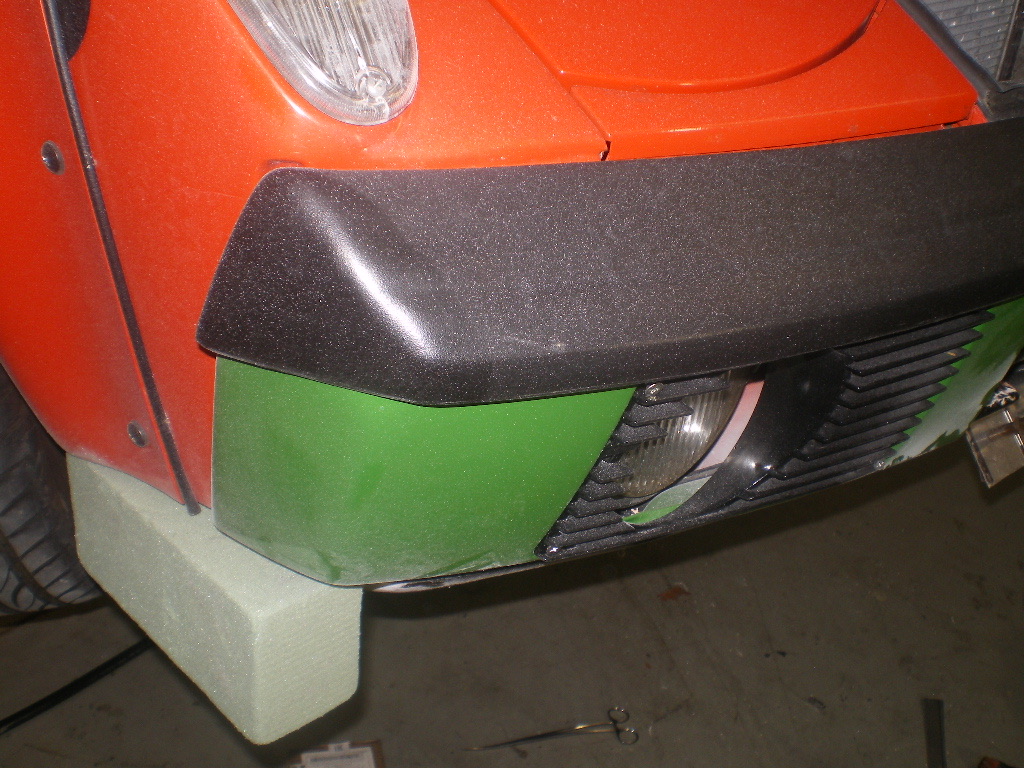
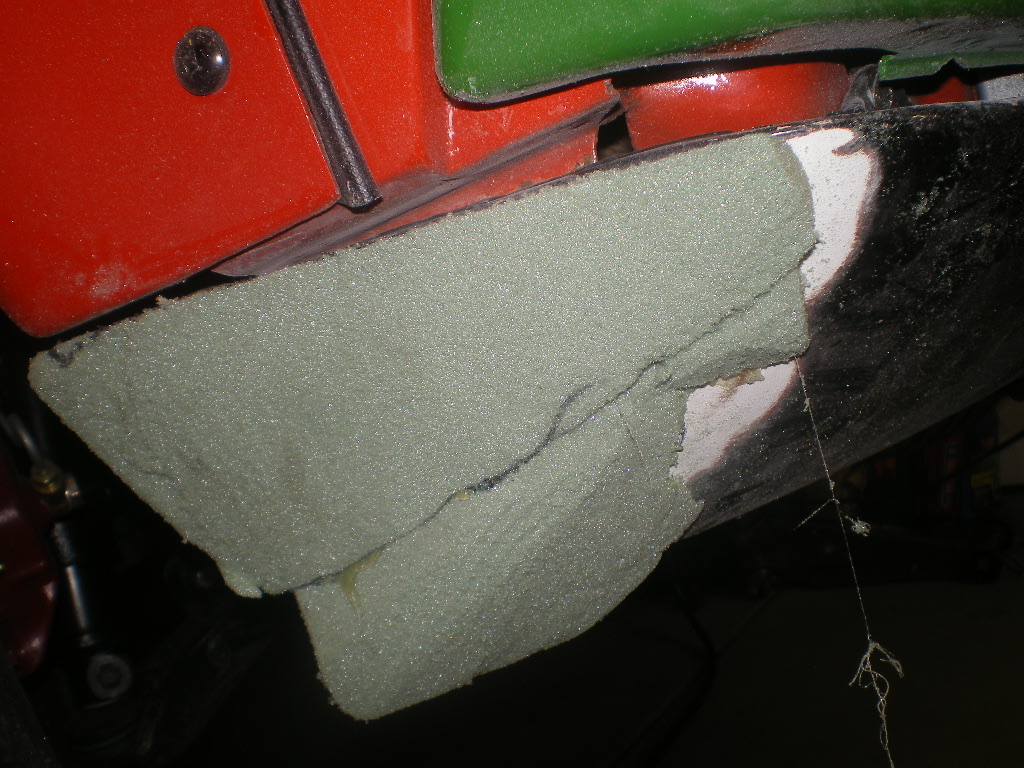
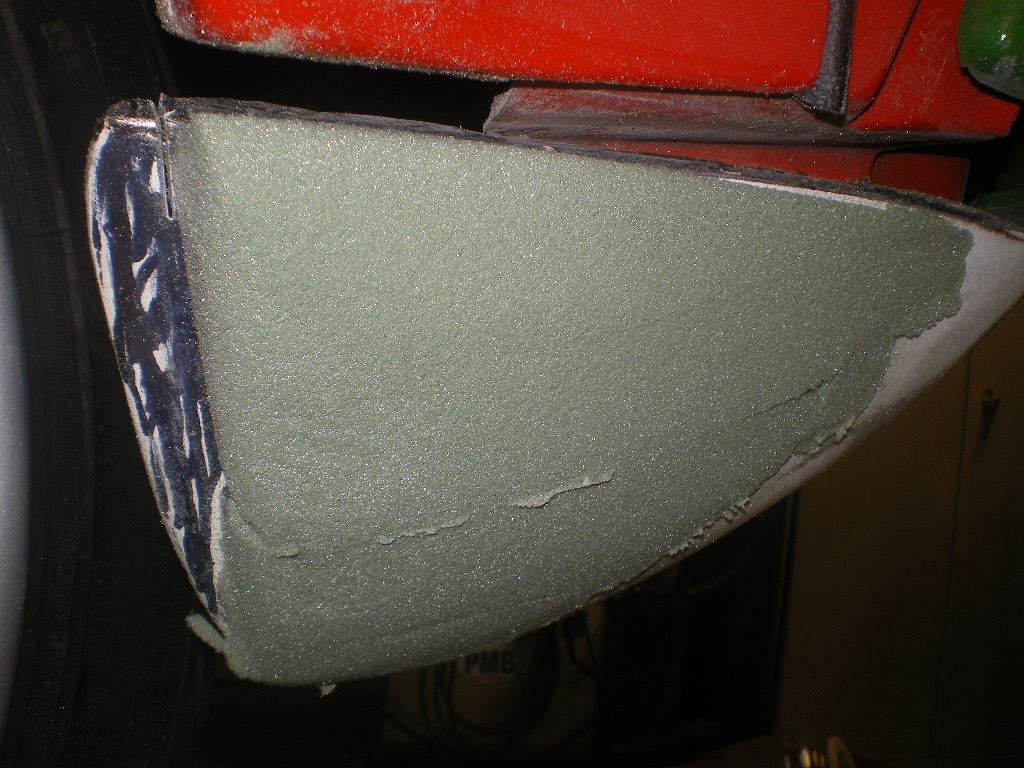
Posted by: mgarrison Jan 20 2022, 07:48 AM
NICE! Thanks for sharing - my brain had not stumbled across a relatively easy, straightforward way of building the ends up to match.
Posted by: mgarrison Jan 20 2022, 08:39 PM
While I'm waiting for my hood and deck lid (sitting on a Yellow Freight truck in PHX - who knows when I'll hear from them to schedule delivery), I figured I would get the hinges ready to put to use. I tried using a wire wheel, but there were too many nooks and crannies, so I got out the abrasive blaster. It makes quick work of things, but the clean up takes forever - such a mess!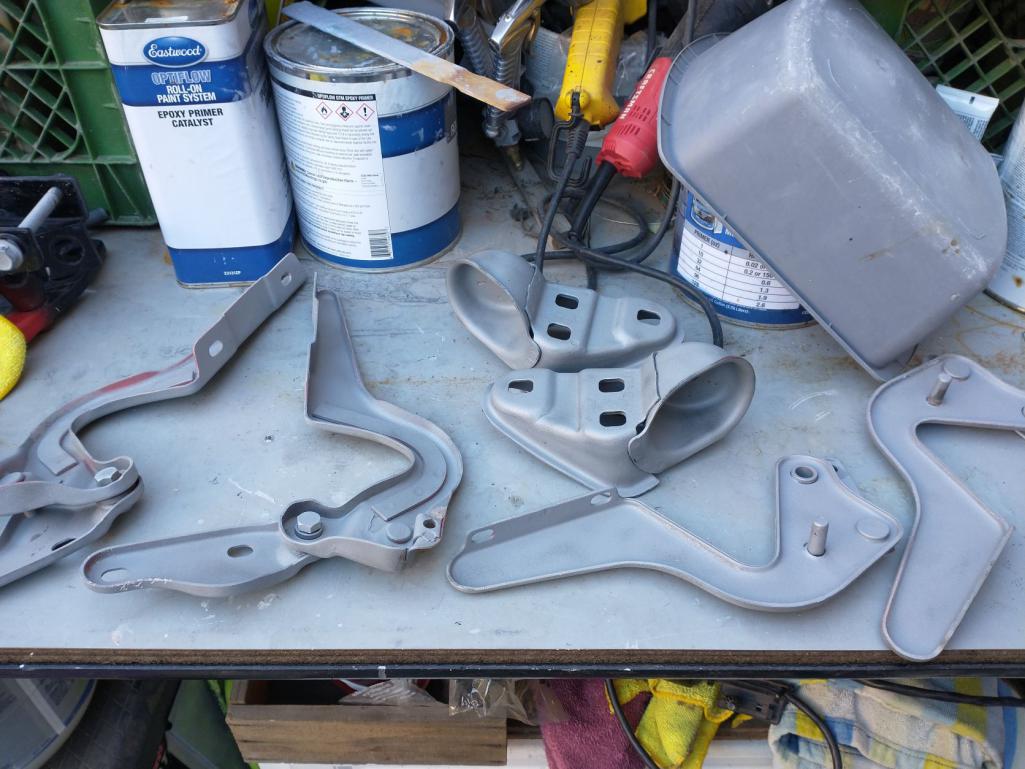
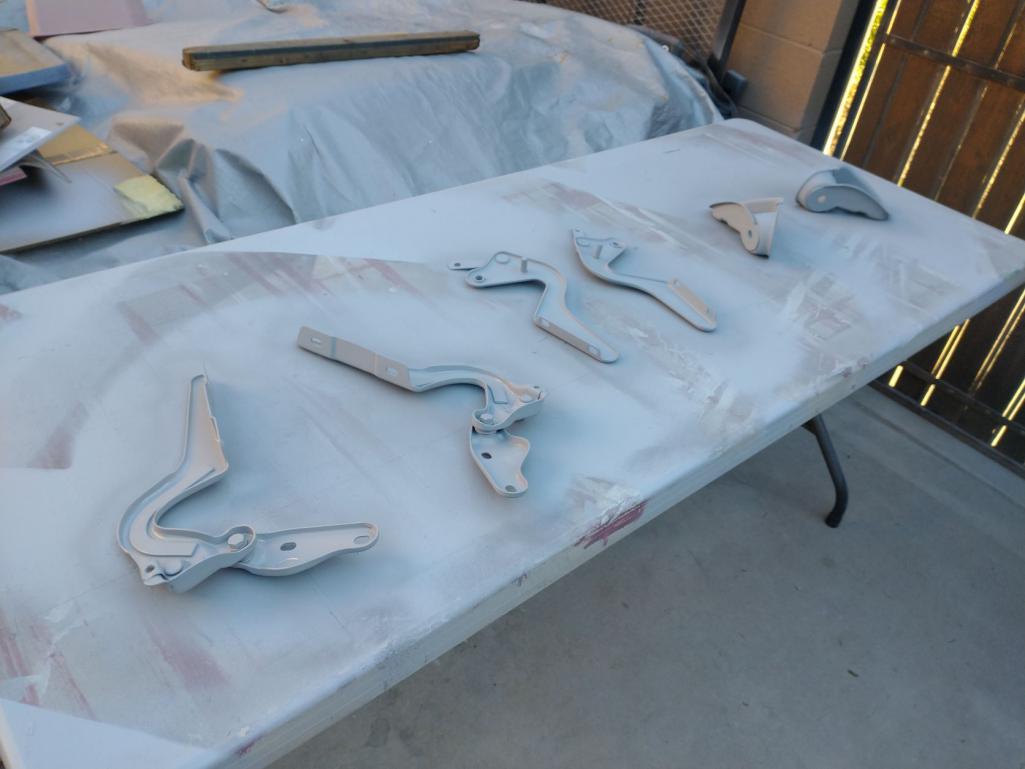
It's not much, but at least I got something done today...
Posted by: mgarrison Jan 22 2022, 10:23 AM
I didn't really like the way the fairing bolts were digging in to the primer in certain spots. The angle of the flare does not match the fender angle very well in some locations. Once you tighten down the fairing bolt, the flare flexes to match the fender much better.
I found some black nylon washers on Amazon and for $10 figured it was worth a try to see how they would look, and how much protection they might add for the paint. Not sure I'm totally sold on them since they make the fairing bolts sick up/protrude out more, but they do match the fender beading well. 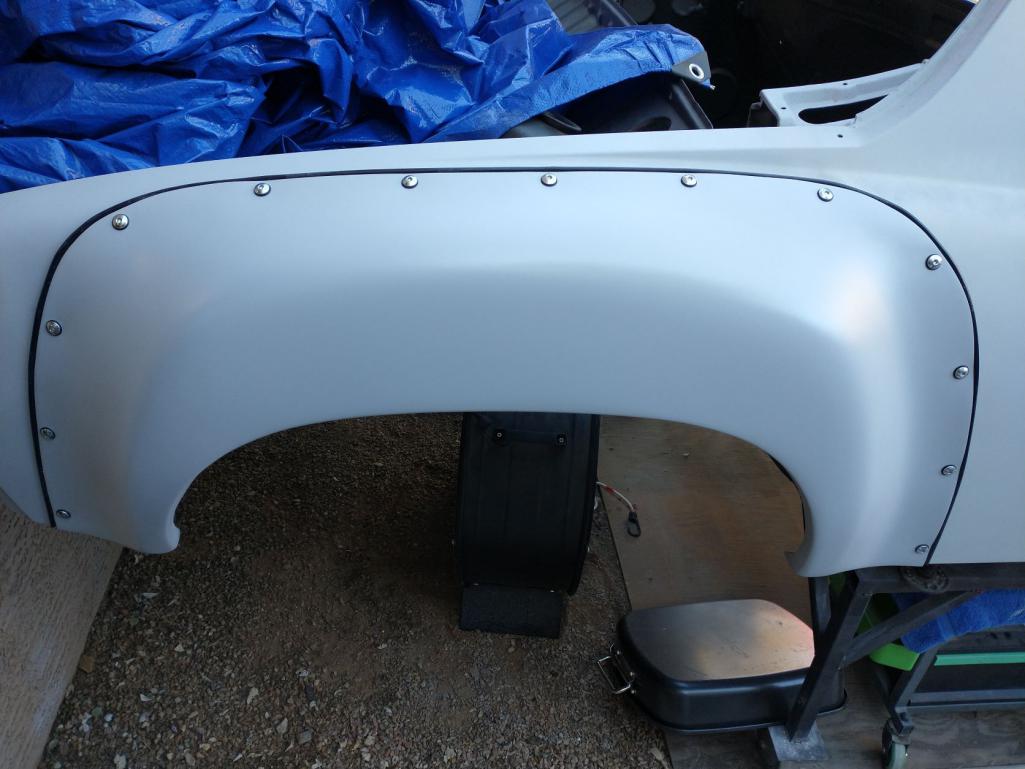
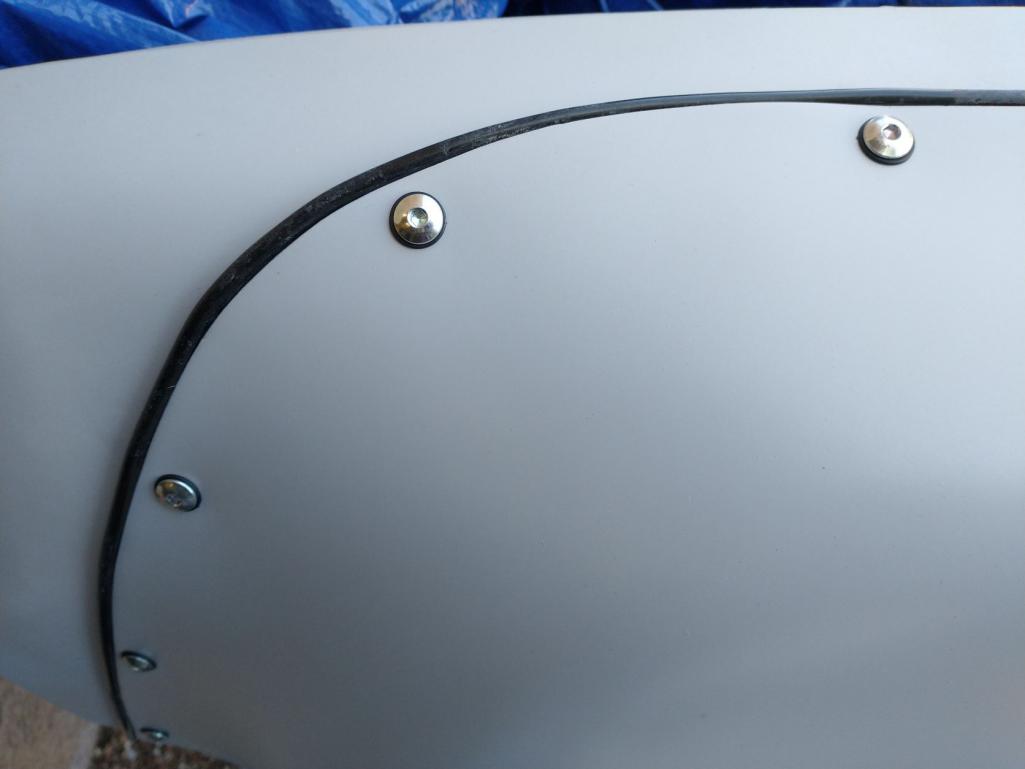
Posted by: mgarrison Jan 22 2022, 07:27 PM
Raining today, so doing what little I can in the garage...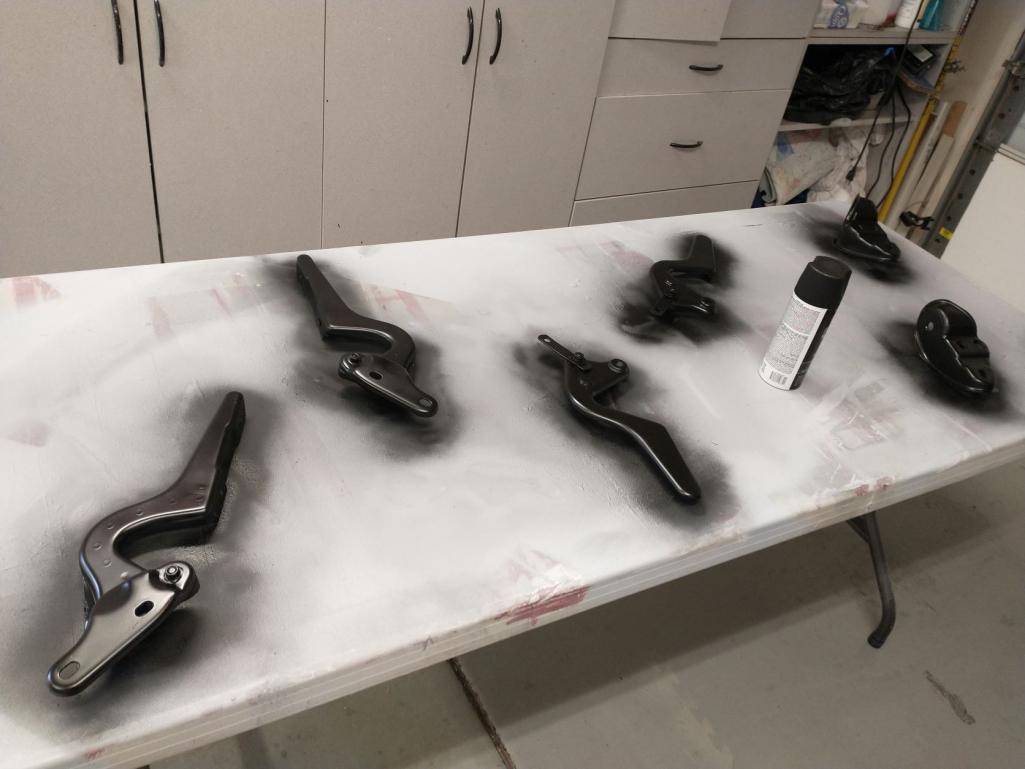
Posted by: 76-914 Jan 22 2022, 07:55 PM
Don't mean to High Jack your thread continuously but wanted to pass this on. In place of a blast cabinet you can use a cardboard box with a piece plexiglass duct taped in for a window and drop light. I used a water heater box with one end open then tilted the box into a bucket to drain off the sand afterwards. The cardboard survives very well since it is soft. I blasted my longer pieces and ended up using for the short pieces as well. When finished I cut it up and put it in the recyclable trash bin. I built a paint booth using a roll of plastic, 1x2's, an electric staple gun for ~ $60. That was in 2009 so adjust accordingly. I used a squirrel caged fan from a junk yard forced air heating unit with a $5 AC filter. It was a pressurized booth rather than the standard negative pressure style but it worked very well. The booth looked like it needed to go on a diet since it puffed out but again it worked well and was cheaper than towing the car to a "real" paint booth. Keep posting your progress.
Posted by: mgarrison Jan 27 2022, 12:55 PM
My hood & deck lid saga...
On November 1st, 2021 I ordered my fiberglass hood and deck lid. Paid the vendor $1,350 including shipping. On January 13th, 2022 I receive noticed my hood and lid are finished and have been picked up by the shipping company. I use the tracking number to keep an eye on things...
According to the shipping company's sight, the truck/trailer arrived in Phoenix 1/18/2022. I don't hear anything, so I follow up with the vendor. They say customers usually hear from the shipper the next business day, and maybe give them till Monday.
Monday comes and goes, so I follow up again. I finally hear back from the vendor once they got the scoop from the shipper: They have lost the freight. Usually they can find it. They are doing a sweep of the three terminals it passed through on its way, but there are 100+ docks at each terminal. Hopefully they will hear from them soon.
Ya just cant make this  up...
up...
Posted by: mgarrison Jan 31 2022, 08:25 AM
While I'm STILL waiting for the shipper to find my hood, I'm trying to keep working on other things.
I trimmed up the front valance. Then sprayed it with surfacer, sanded smooth, and got it sprayed black. Toying with the idea of spraying it with the Raptor liner to match the rockers, but for now just black is good enough.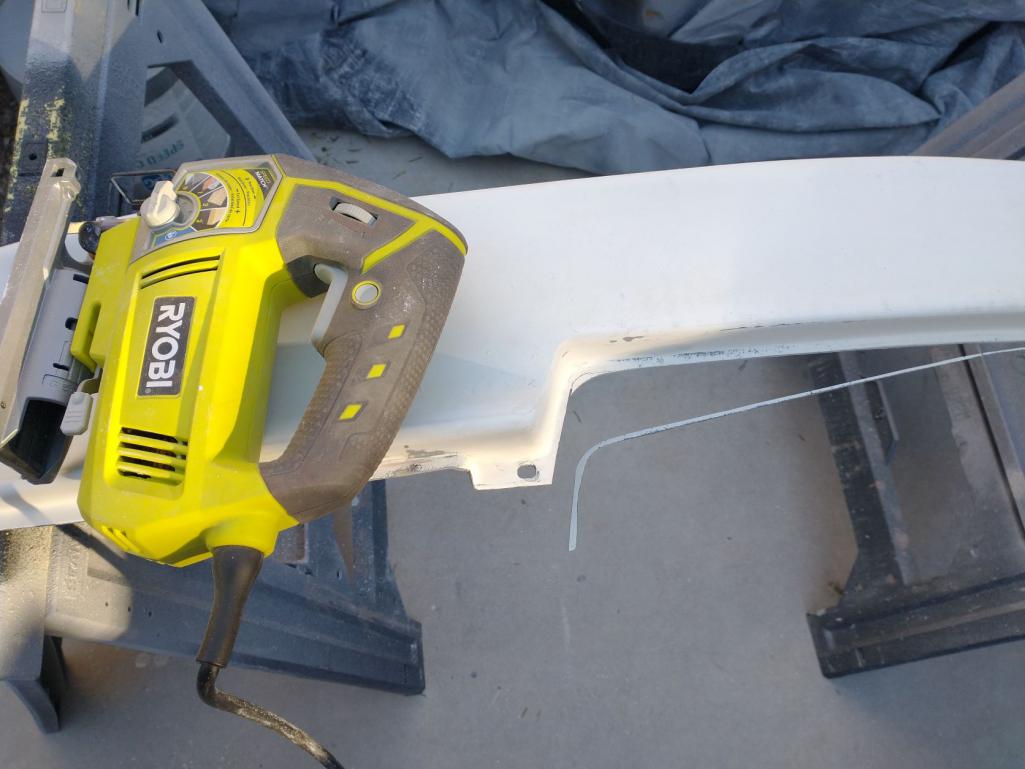
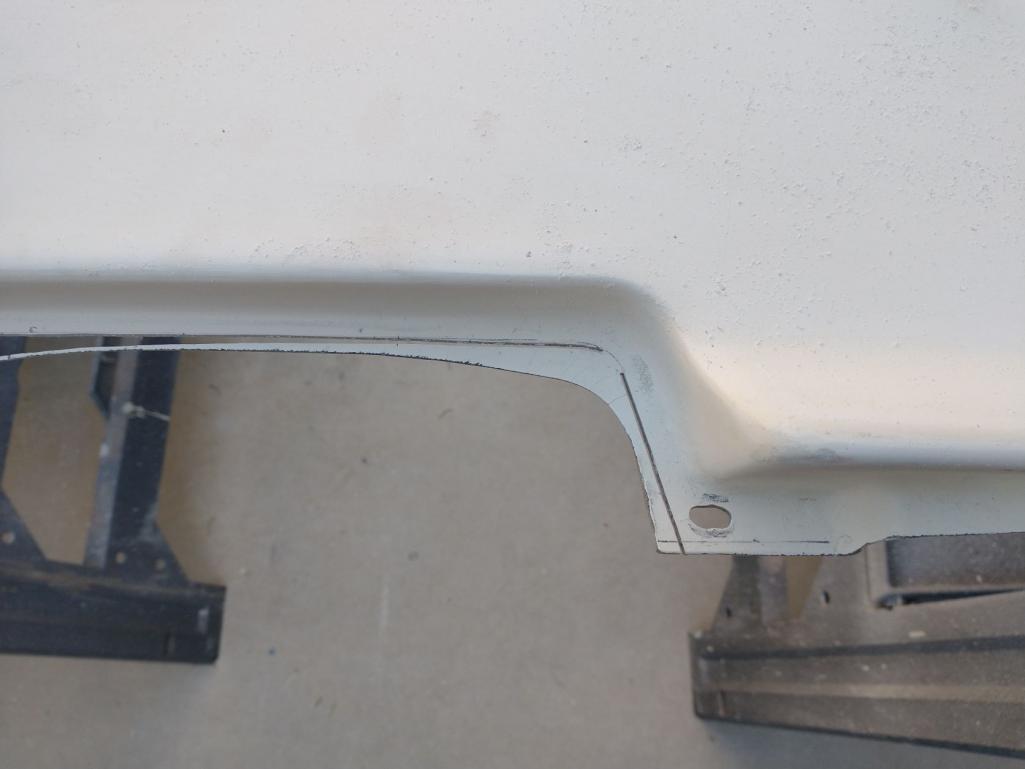
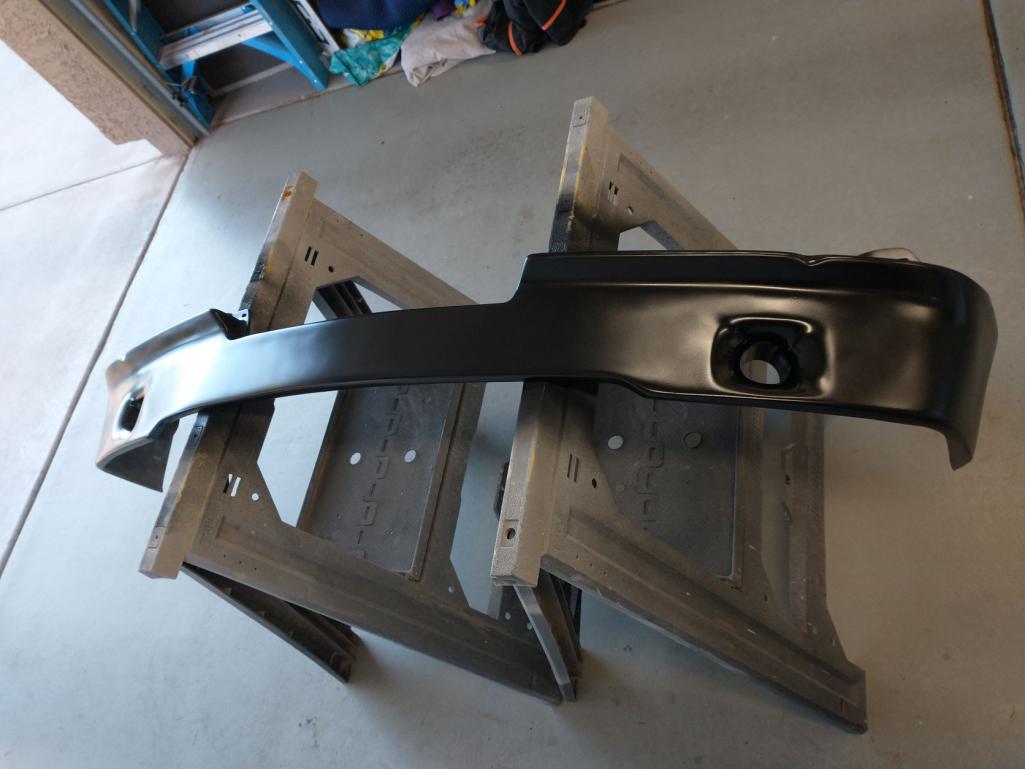
Posted by: slowrodent Jan 31 2022, 02:48 PM
Very nice work Mike. I think your flares look great! Keep up the excellent work.
Posted by: mgarrison Feb 2 2022, 08:46 PM
Boiling bushings today!  Special thanks to Ian for his video on boiling the bushings to help ease the install
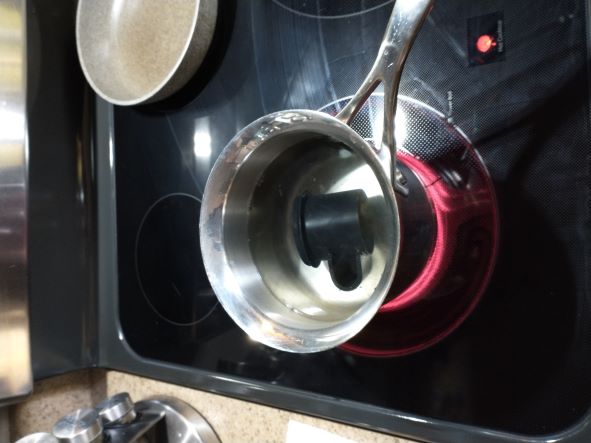
I had to go get a larger diameter threaded rod, washers, etc. Then I did not have a large enough open end wrench for the larger nuts! Borrowed one from a neighbor...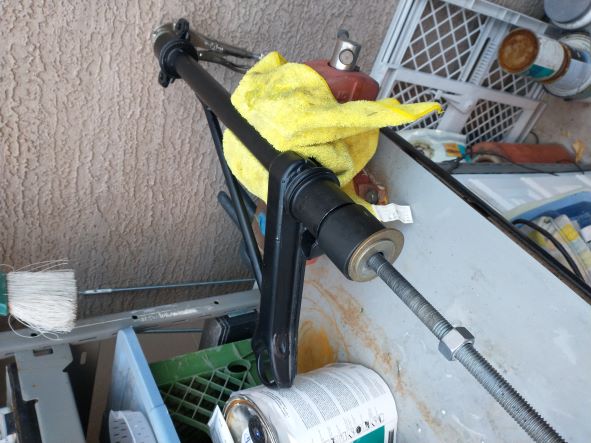
Of course I experienced the extra special fun of installing one of the rear bushings on the wrong A-arm At least I noticed it when I went to install the other rear bushing, but getting that thing back off without destroying it was a small battle! 
Clocking the angles was also more difficult than one might expect - make sure you have a long bar...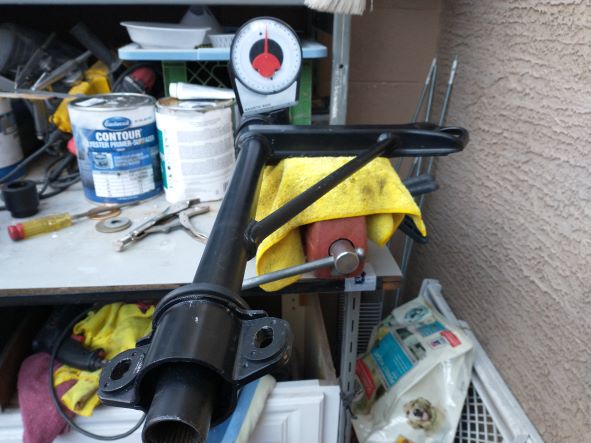
Posted by: mgarrison Feb 4 2022, 07:13 PM
Well, it's official; Yellow Freight lost my hood and deck lid! The vendor emailed me today to let me know they were filing a claim with Yellow Freight, and I could have them build more parts, or they could return my $$$...
I did get my trailing arm bushings installed this afternoon. I tried to follow the basic instructions of using a pipe clamp since I don't have a press. It did not go very well. I spent about 1.5 hours fighting to get the first arm done. 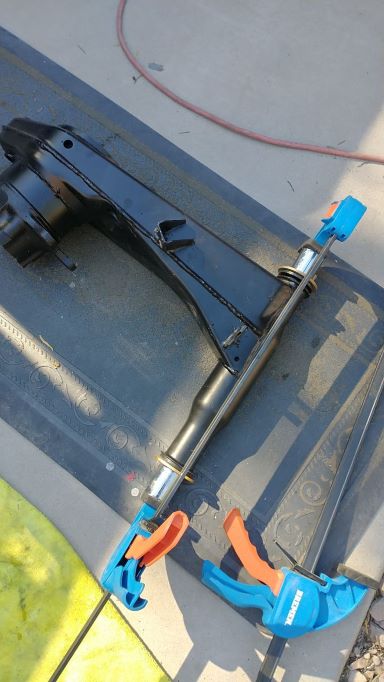
But, I was able to ferret out a method that was simple and effective, but only used an orange plastic dead blow hammer for installation. It literally took me about 10 minutes to install the bushings and shaft in the second trailing arm! Here's my method for those without a press handy:
1. Install one bushing in the trailing arm (I started with the outboard bushing) No soap used/needed, and the bushing pressed in rather easy (my trailing arms are NOT powder coated)
2. Lube the inside of the bushing you installed, and lube one end of the shaft about 1/3 of the length.
3. Starting from the side without the bushing installed, insert the shaft through the arm and into the bushing. Press it in as far as you can with your hands - a twisting motion helped.
4. Tap the shaft further into the bushing with the dead blow. Go past the end of the bushing you installed and keep going until the other end of the shaft is flush with the end of the arm without a bushing.
5. Lube the inside of the second bushing and install it into the trailing arm - you should be able to tap it into the trailing arm without too much difficulty.
6. On the end where the shaft is sticking out too far, drive it back into the second bushing until it's flush with both bushings - I used a large socket on the ground to allow the end of the shaft an opening to go into past the bushing.
Sorry I don't have pics - by the time I figured it all out I had the second arm complete!
I touched up the black paint on the arms where I had scuffed it up a bit wrestling to install all the bushings. One teenie-tiny step closer.
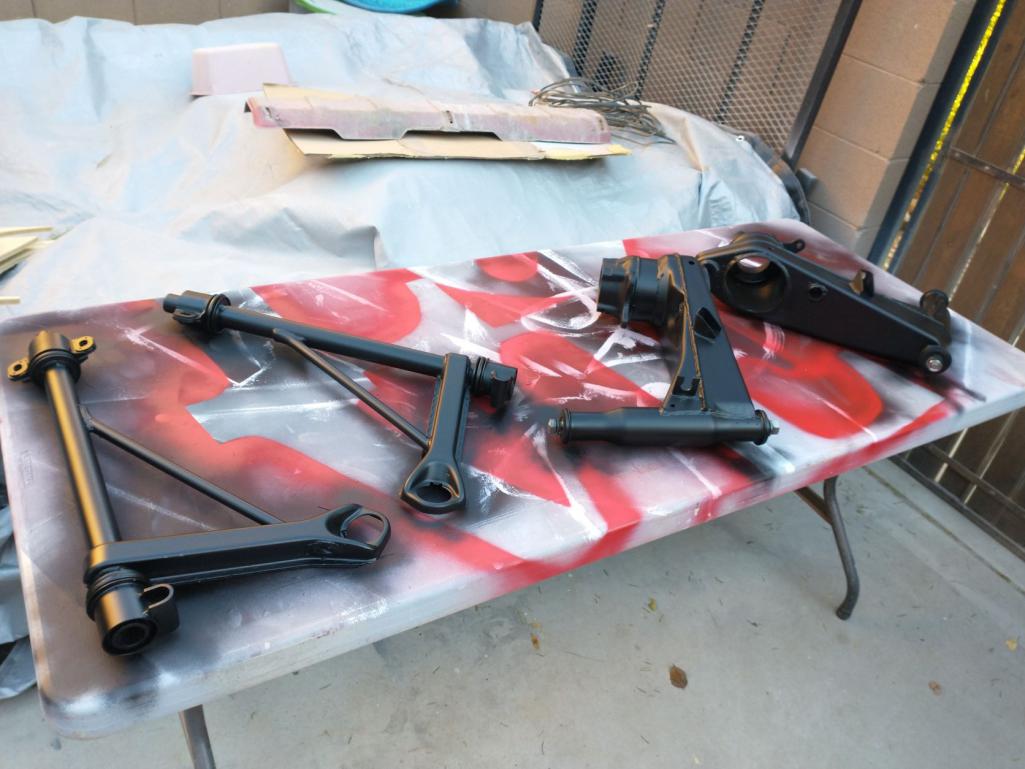
Posted by: Mayne Feb 5 2022, 08:34 AM
Nice, detailed work. Those will look great going onto a freshly painted body.
Posted by: mgarrison Feb 8 2022, 04:25 PM
I've been trying to clean up my 5-bolt hubs and the Boxster calipers. The post about Iron-X was very timely - I just ordered some from Amazon to help cleaning the hubs. The citrus degreaser only gets you so far!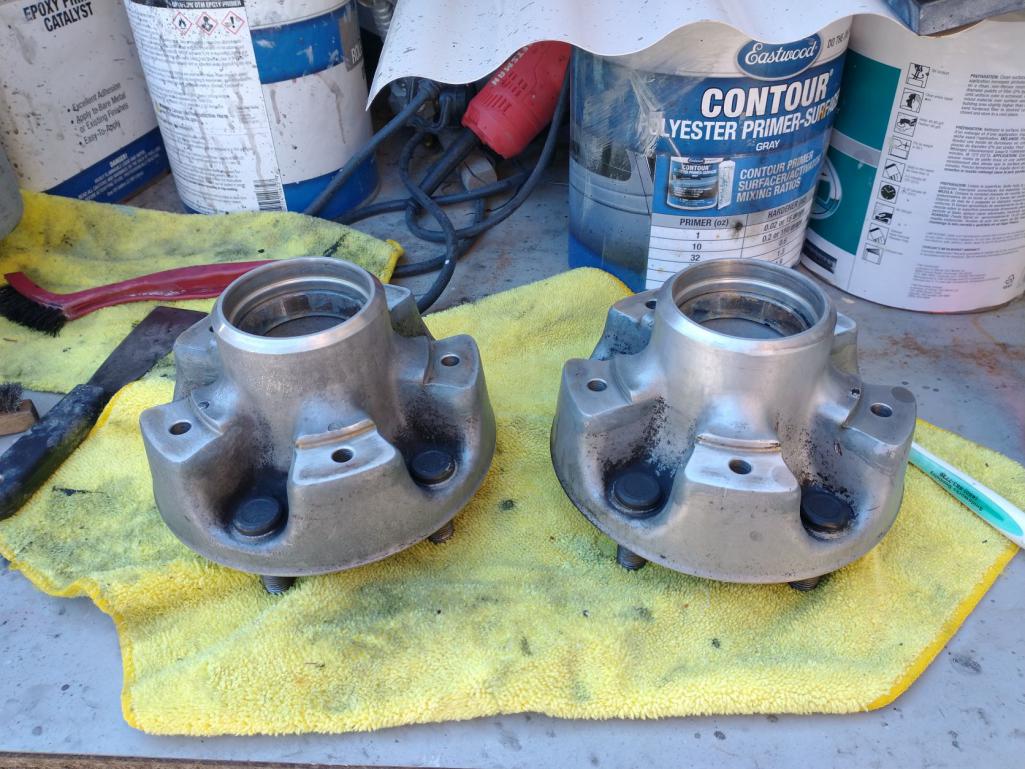
Debating what color to paint these, and still need to order the Brembo stencils.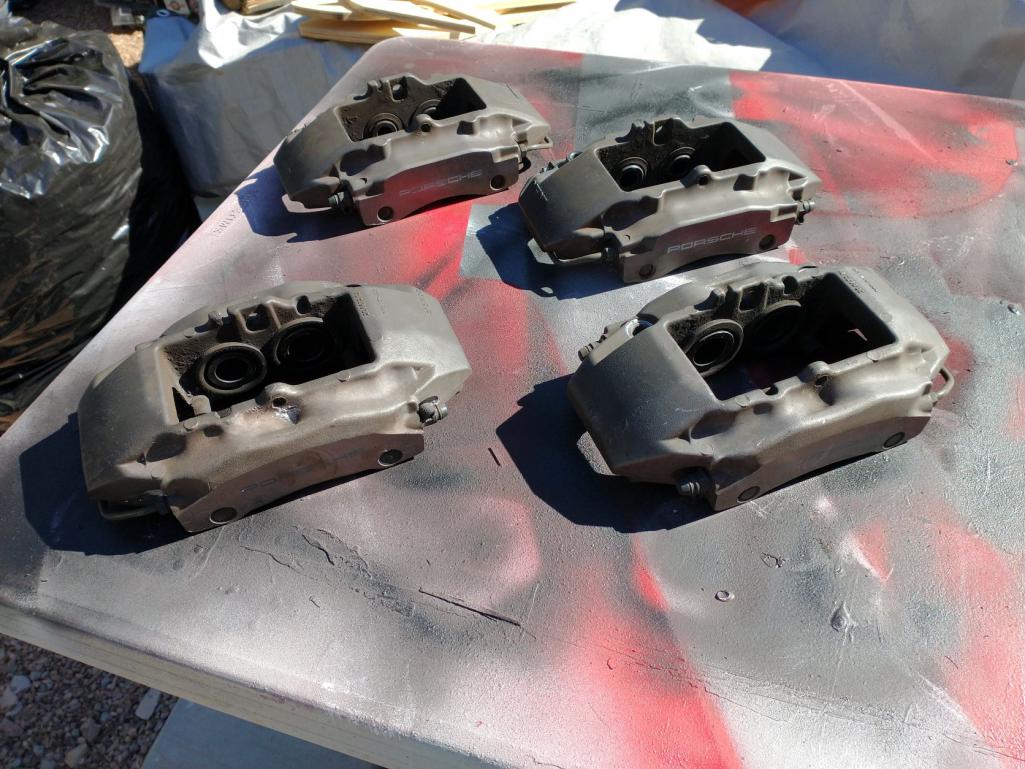
I'd like to paint them Ravenna green with black Brembo logos. The rattle can of Ravenna green I have says it works on calipers, but I'm not sure it would hold up to the heat!
Posted by: mgarrison Feb 10 2022, 09:00 PM
I got the calipers all taped off and bleeders replaced with bolts so I could blast them. They came out pretty dang good!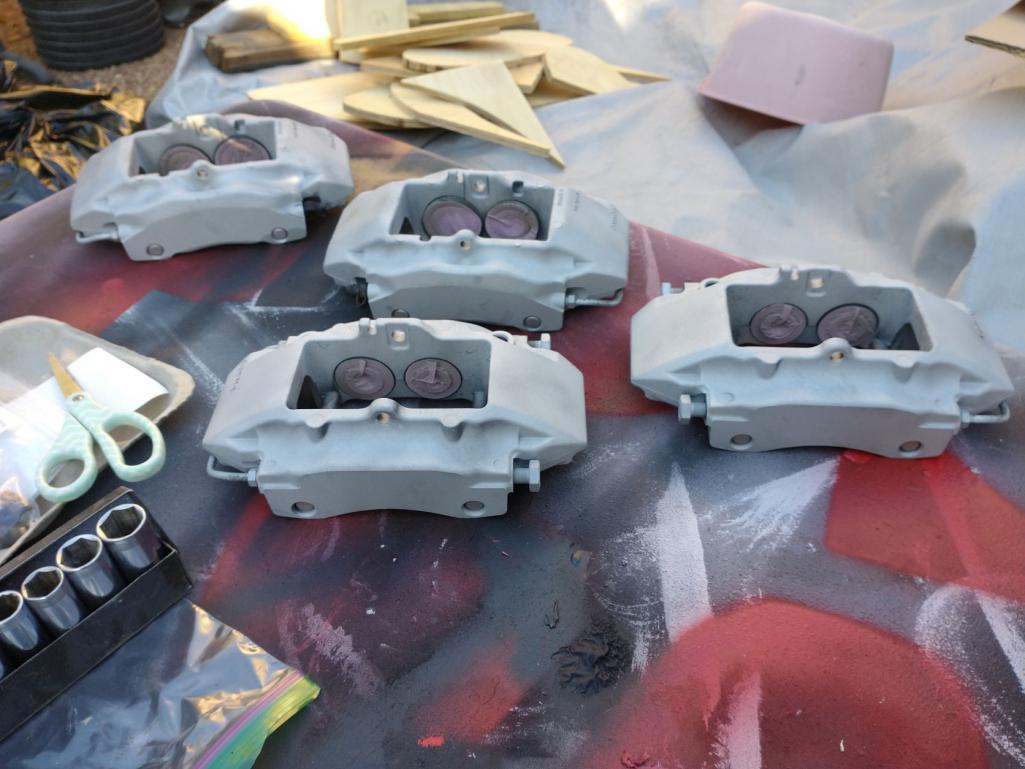
I consulted my Aesthetic Director (my wife), and we decided to go with the traditional red calipers with the white Brembo logo. I got two of them painted with 3 layers of red. Still waiting on the Brembo stencils though.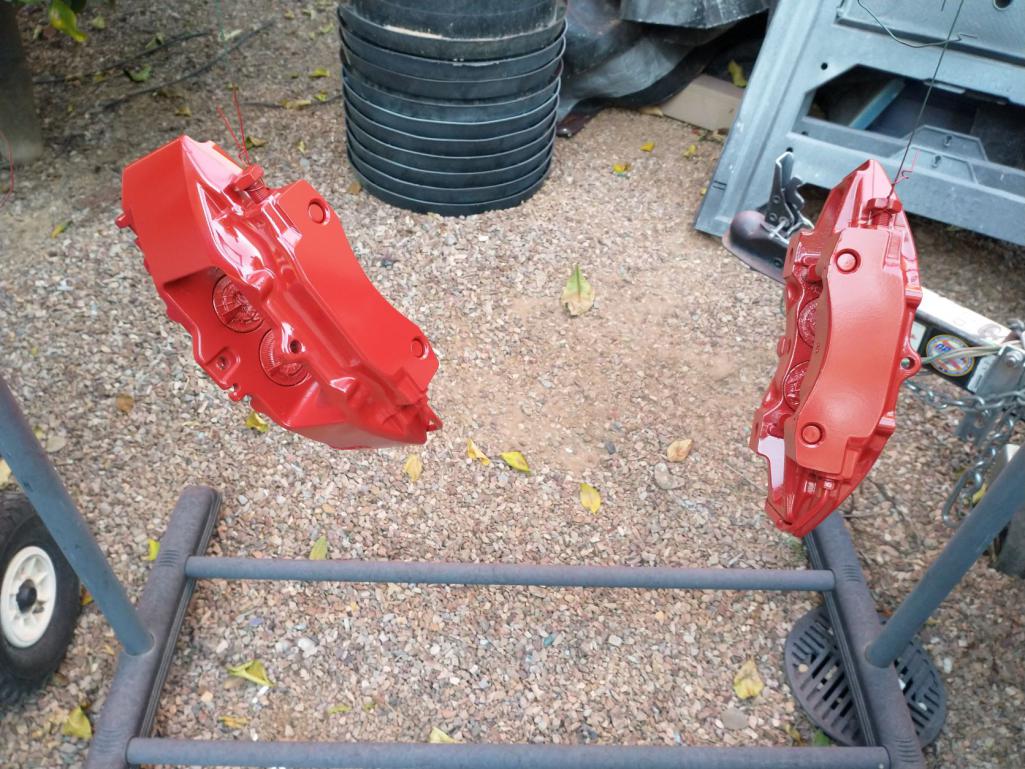
I spent some time removing the old tie rods, and cleaning up the steering rack. Looks much better now.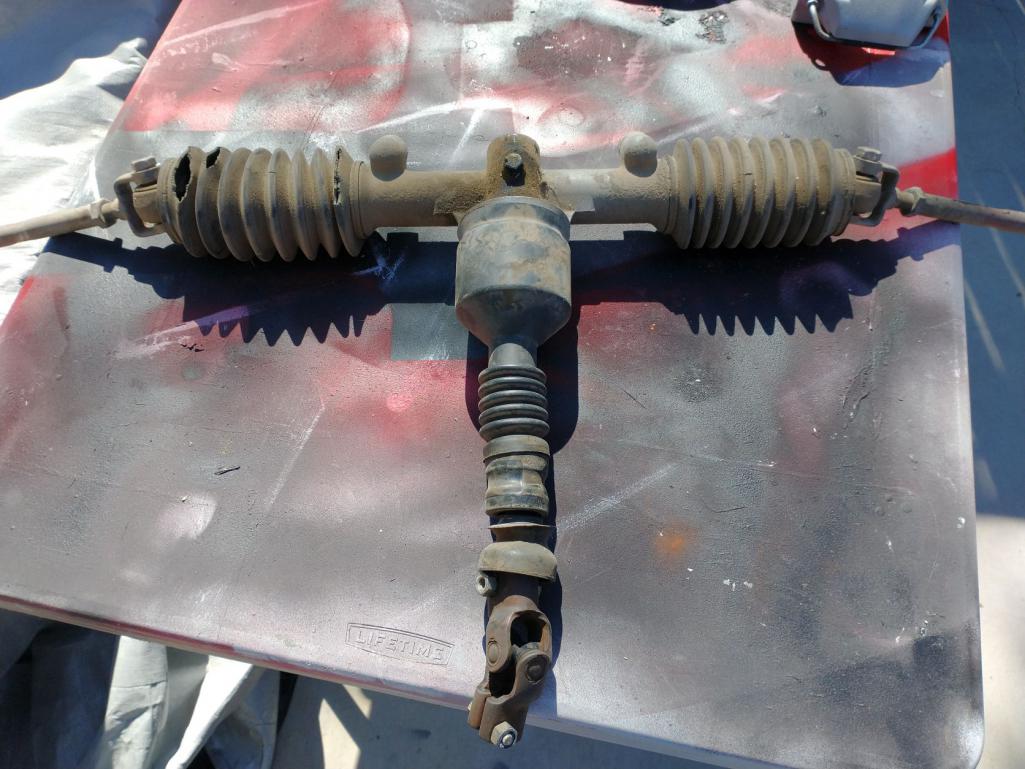
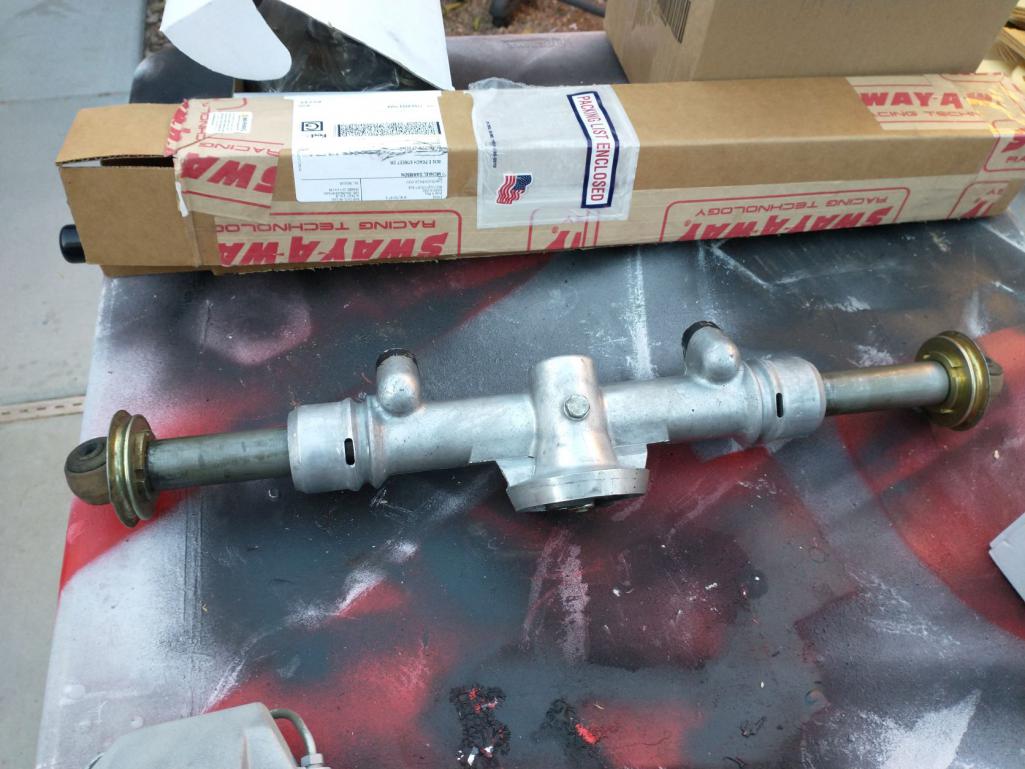
Some of the parts I ordered are starting to show up, but in bits and pieces from various warehouses. The only complete "set" that has made it was the rear hubs and studs, so I installed the studs. My jack pads made it which I hope will assist with getting the chassis off the body dolly and back onto jack stands.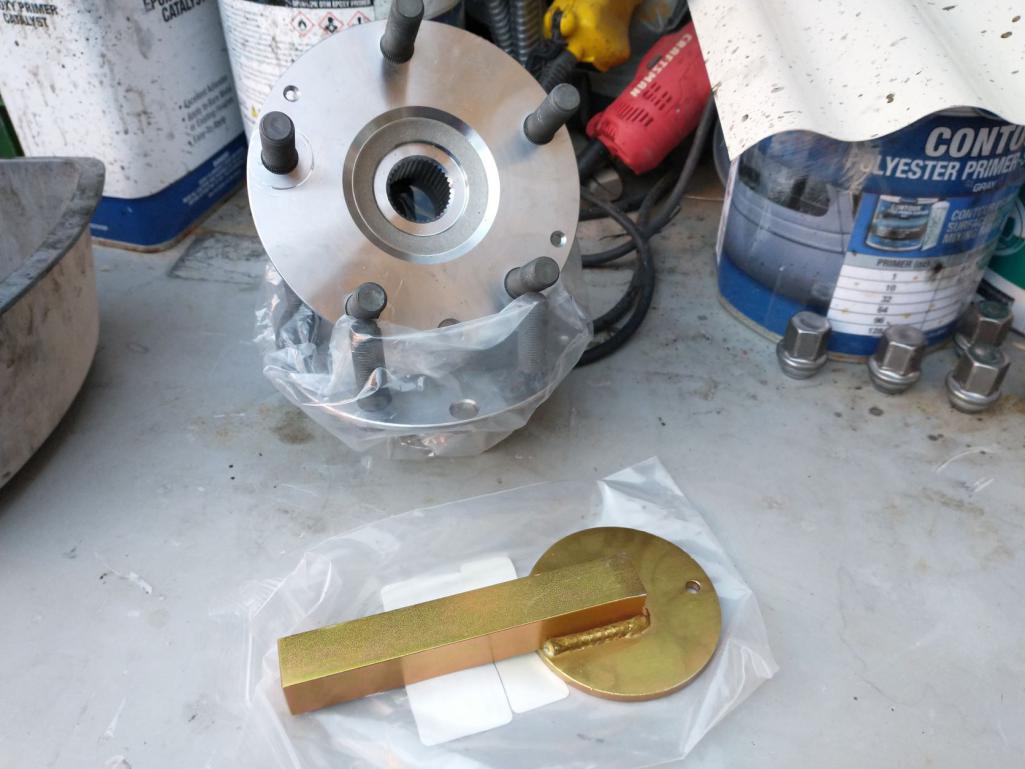
Posted by: mgarrison Feb 11 2022, 02:57 PM
Just when I think things can't get any weirder...YRC shows up at my door a bit ago totally unannounced. They want to deliver my hood & decklid that were supposed to be lost. The driver hands the box down and we notice part of the hood is poking out through the side of the box. Ruh-Roh...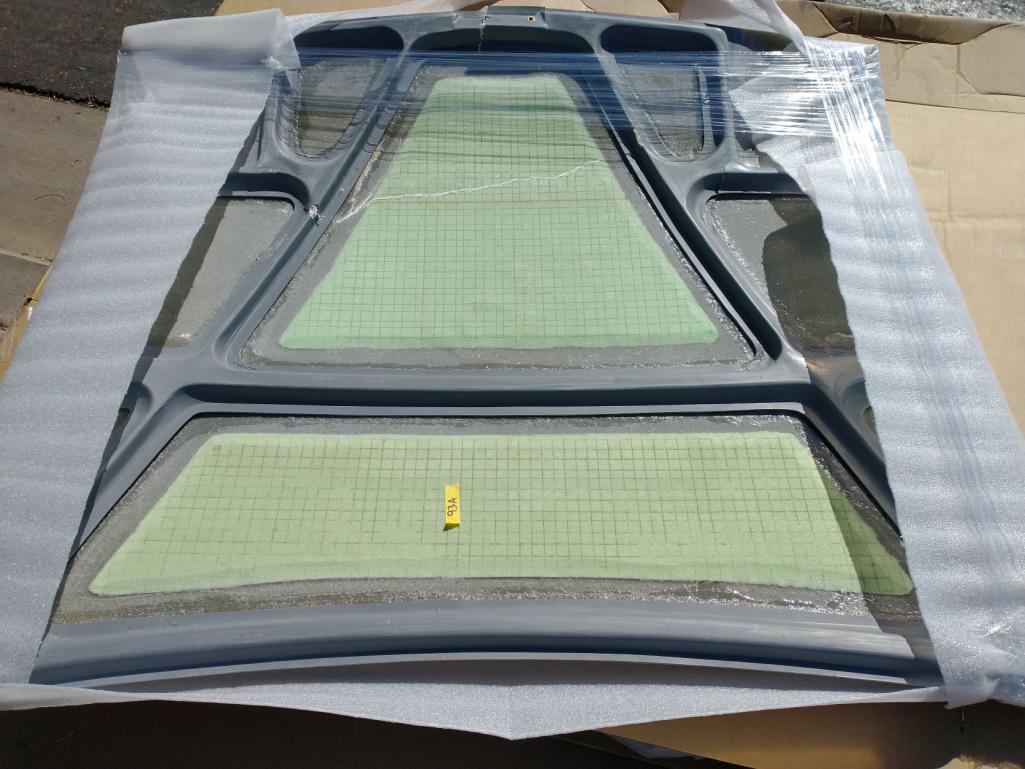
Not sure exactly what they did to this while it was "lost", but it doesn't look like those scratches & break happened while it was in a box!
I thought 2022 was supposed to be better than 2021...
Posted by: slowrodent Feb 11 2022, 03:13 PM
Sorry to see that. Those look like really nice parts... Bummer.
Posted by: mgp4591 Feb 12 2022, 07:26 PM
Not going with the PORSCHE logo on the calipers? They've already got brembo cast into them...
Posted by: mgarrison Feb 13 2022, 06:32 PM
I managed to get the turbo tie rod kit installed on my steering rack. Getting those boots on requires about 6 arms!
I have to say I'm a bit disappointed that a $200+ "kit" does not include any retainers to hold the boots - you have to use your existing inner retainers, and tie wraps for the outer side... 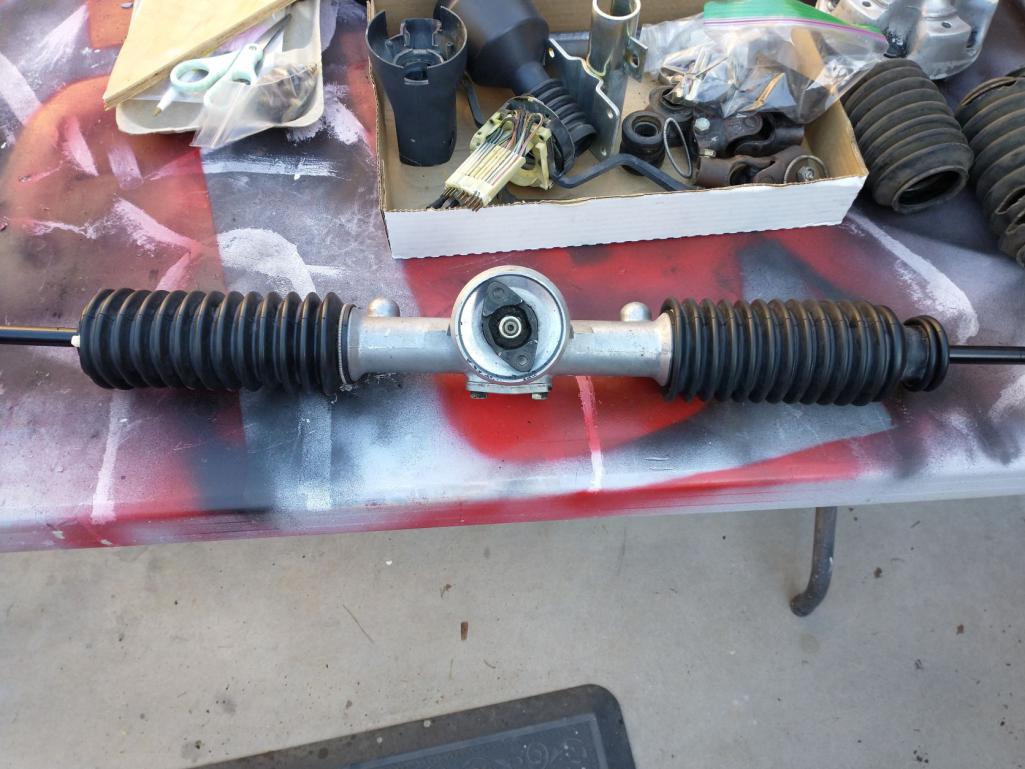
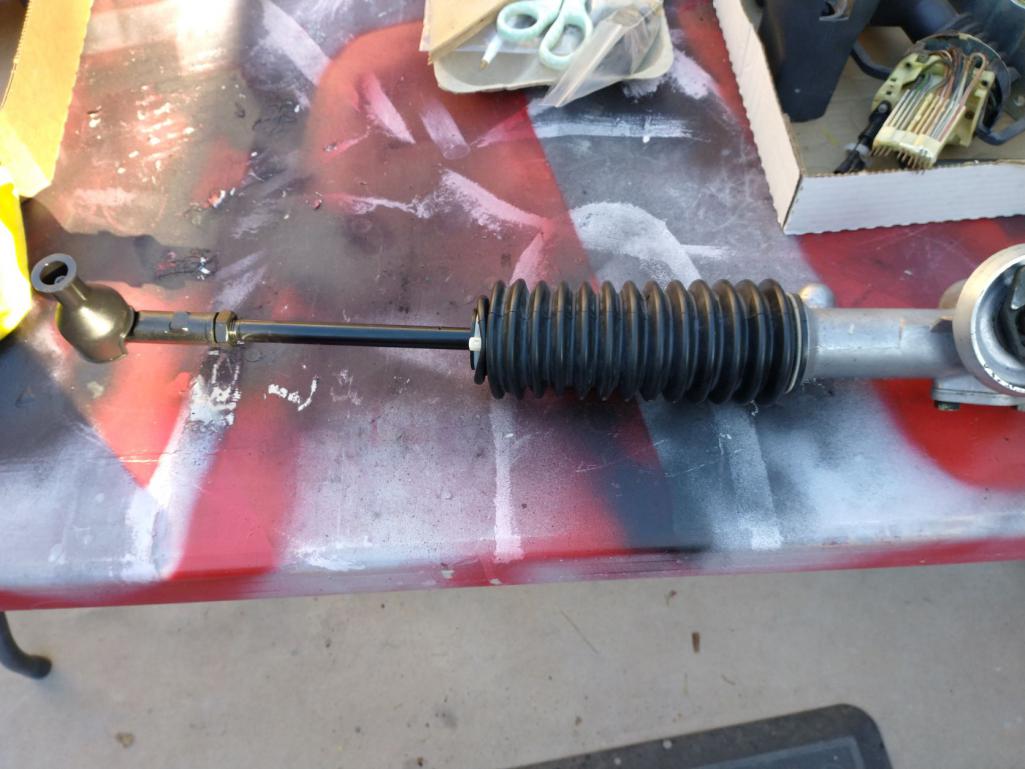
Posted by: mgarrison Feb 17 2022, 07:48 PM
I thought I would get the 914 off the body dolly and onto jack stands so that I can start to bolt the suspension, etc. back on. We put it on the body dolly before we had the Quick Jack. Makes me wonder how...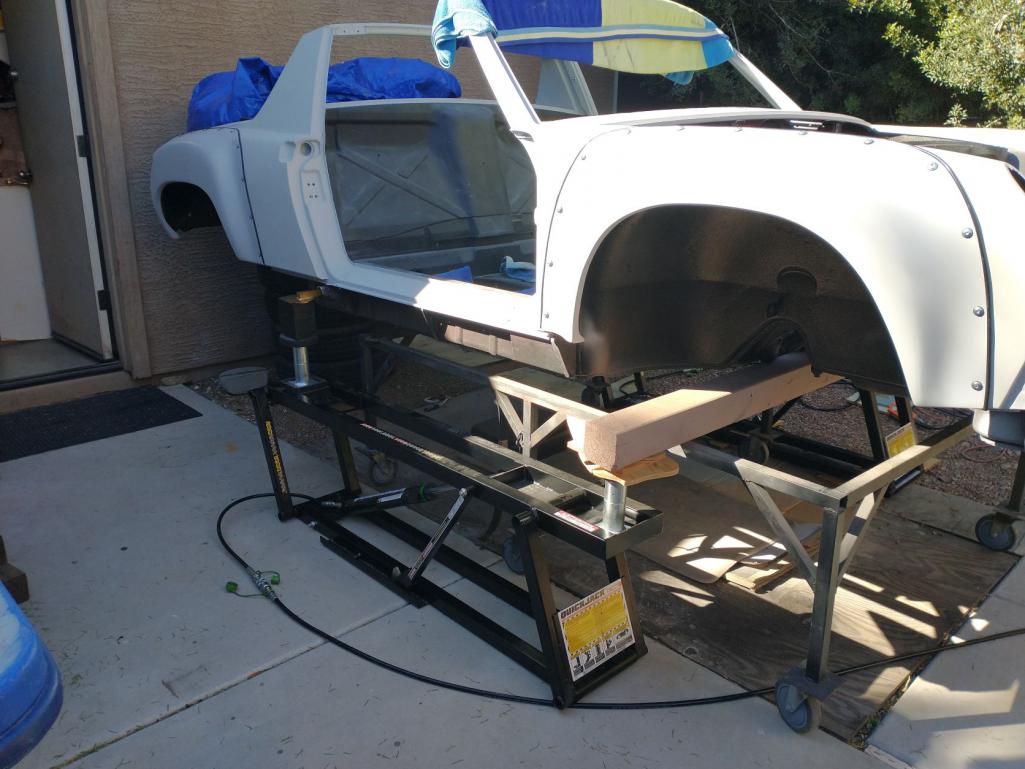
Since it's a full mon, and in the old Happens. This happened when the one Quick Jack did not go down for some strange reason, and I didn't catch it soon enough! 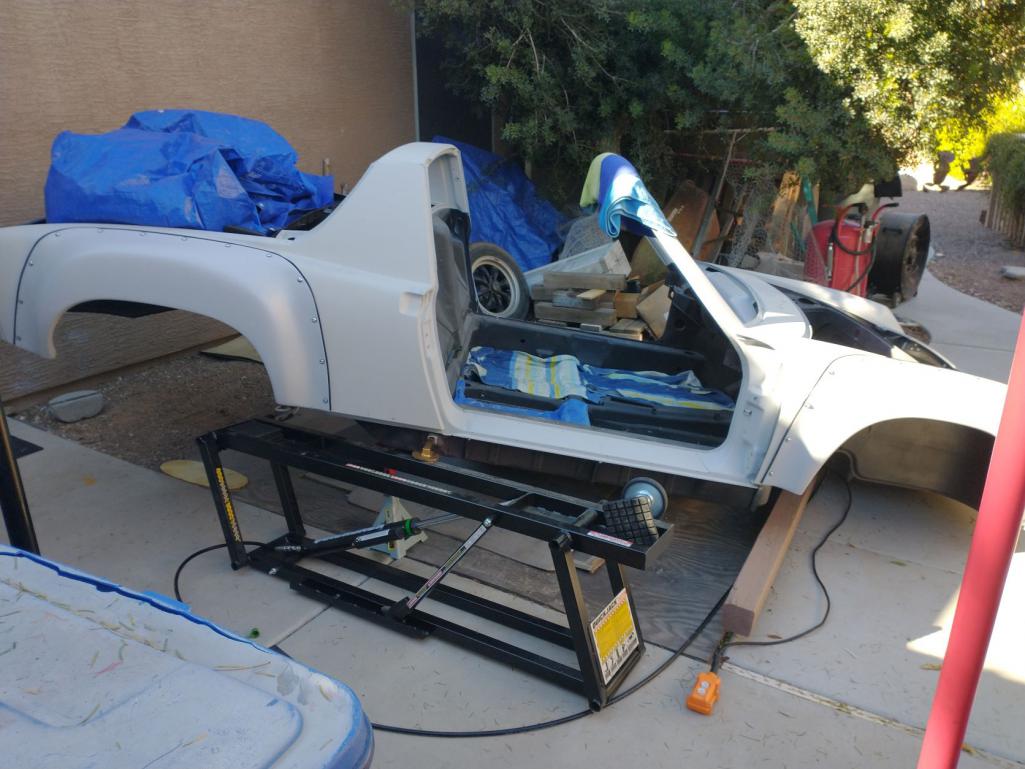
Luckily, it was a slow pivot and the 4x4 I had to stabilize the front kept it from hitting the concrete. I got jack stands under the back ASAP, and worked to get the front up off the 4x4. Inching it back into place took a bit, but thankfully was uneventful. 
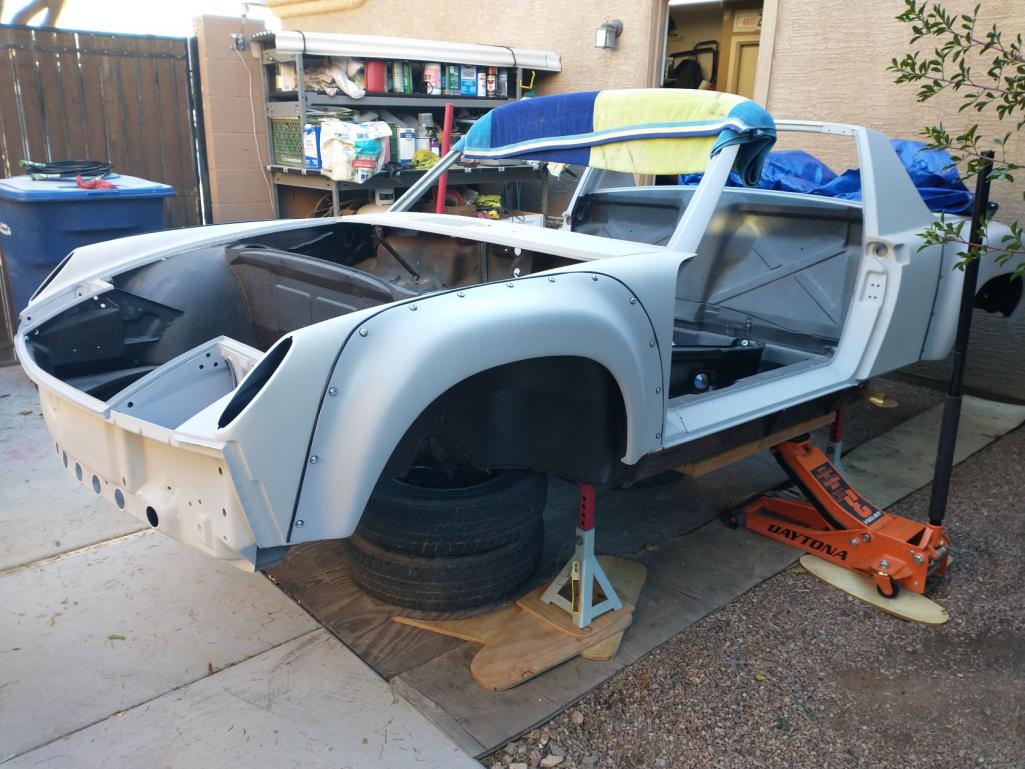
I was going to post something from about "We can rebuild her. We have (most of) the parts...", but the chassis spill took the joy out of it.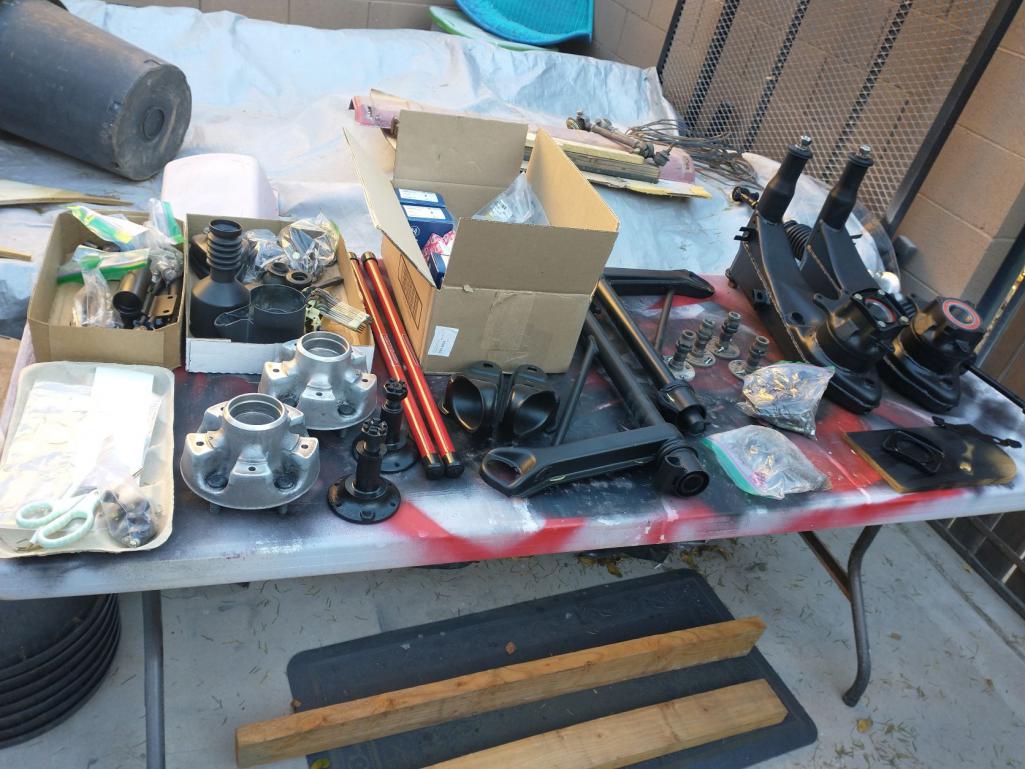
At least I can start to bolt the suspension back on now...And I was wise enough to pull my front valance off "just in case I needed to lift from the front" 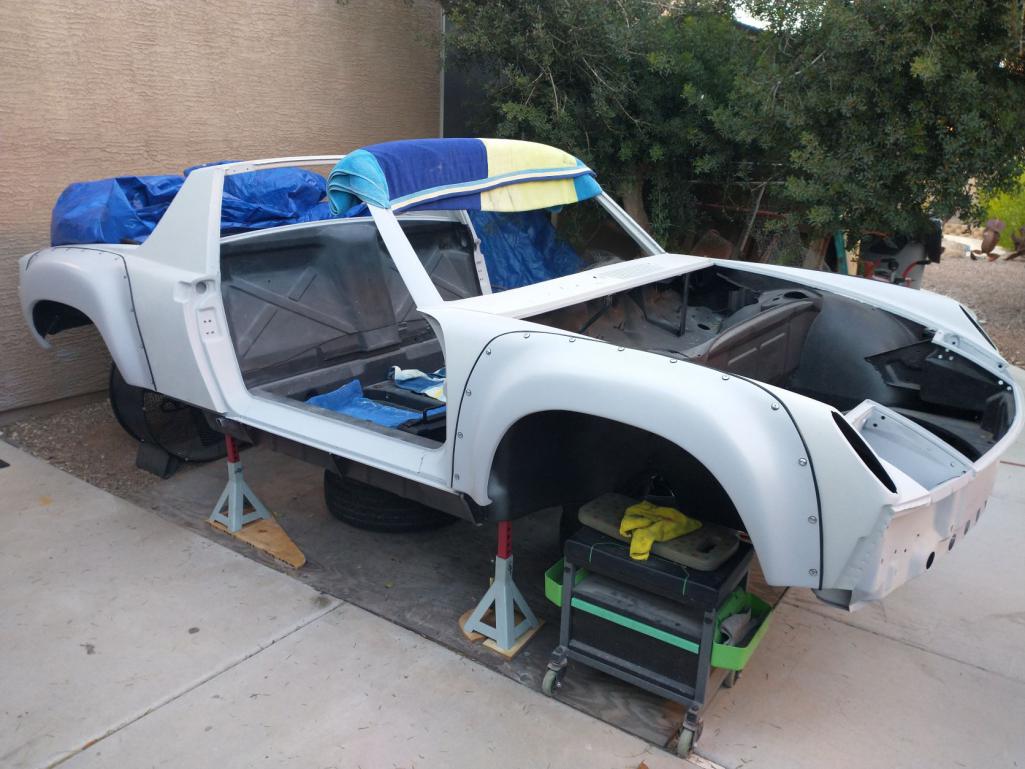
Posted by: 76-914 Feb 17 2022, 07:54 PM
Did you clean your underwear out afterwards?  IIRC, Mark posted that those kits would required re-use of those spring retainers. Probably forgot to list that in the ad.
Posted by: Mayne Feb 18 2022, 08:28 AM
Scary little incident! Glad no humans or 914s were injured.
Posted by: mgarrison Feb 18 2022, 09:48 AM
Yep. I told my wife after that she would have been proud; I didn't yell & curse. I got quiet and thought "ok, that just happened. Now what?". I did scramble to get jack stands under where I could to stabilize it
Posted by: mgarrison Feb 20 2022, 05:58 PM
I'm trying to keep cleaning and doing things that I can while I wait for the rest of my parts to show up. Still need strut top mounts, steering coupler, ball joint hardware, and rear rotors...Shipping these days sucks!
On today's menu; smoked 5-bolt hubs is today's special! I figured this was an easy way to heat the hubs up to 250-300 degrees like the manual says to. 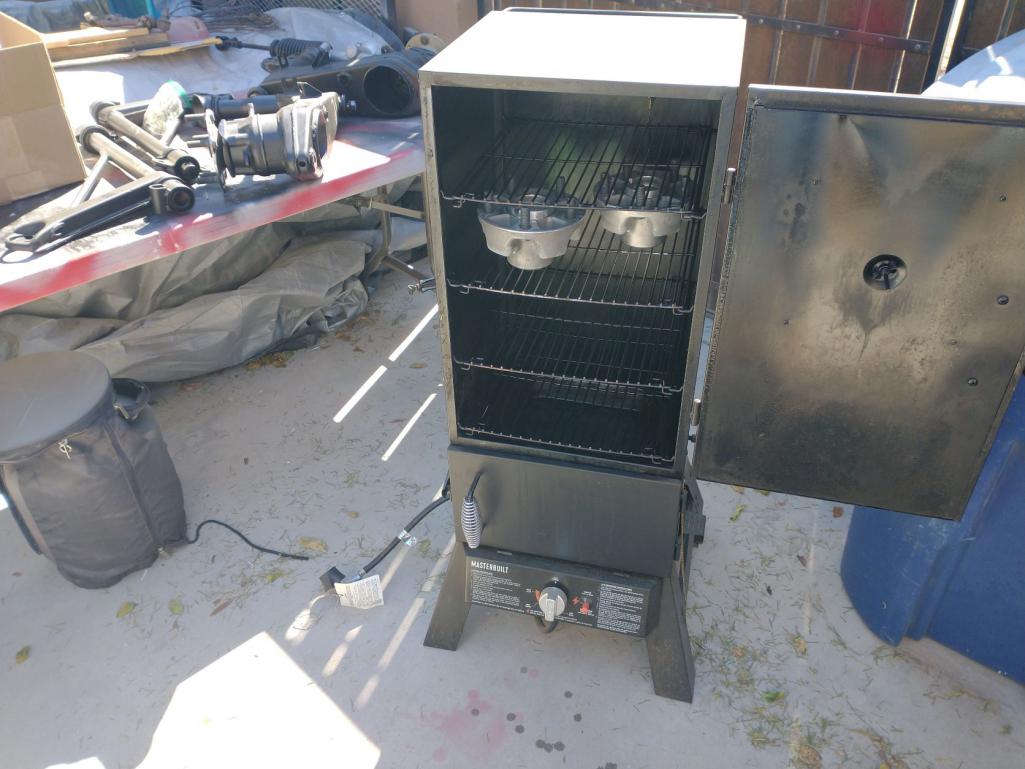
Still was quite the fight to get the inner races fully seated Managed OK in the end, but I did go pretty Tourette's for a bit during the process! 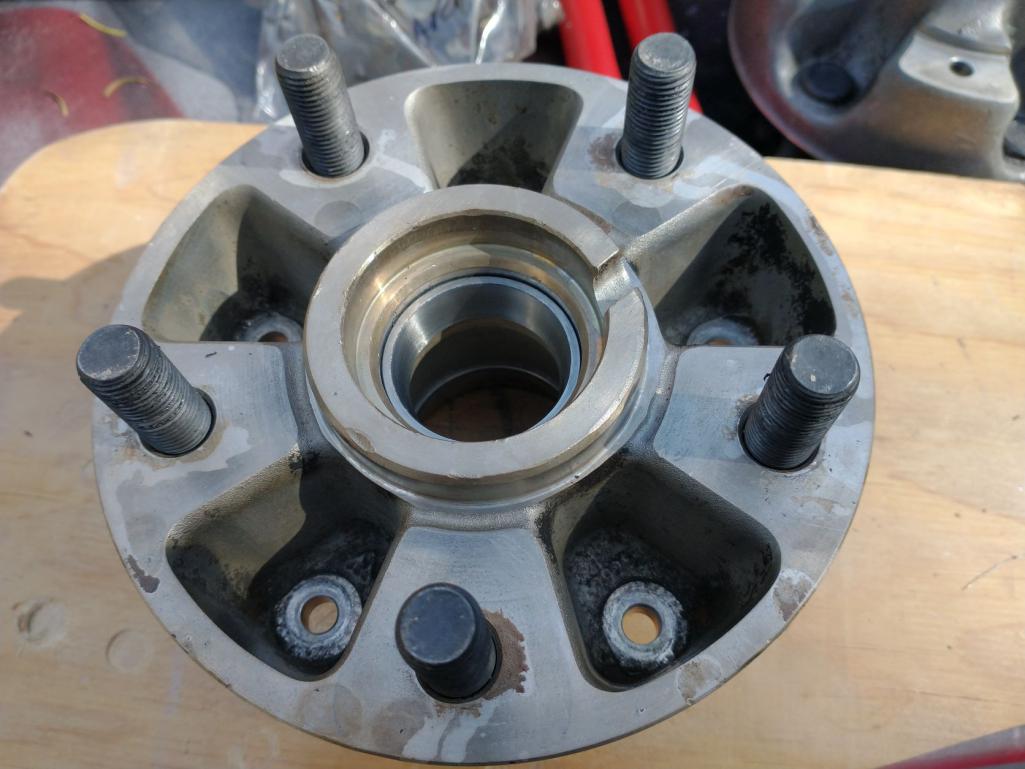
I need to write this date down - I actually bolted a couple parts onto the chassis! 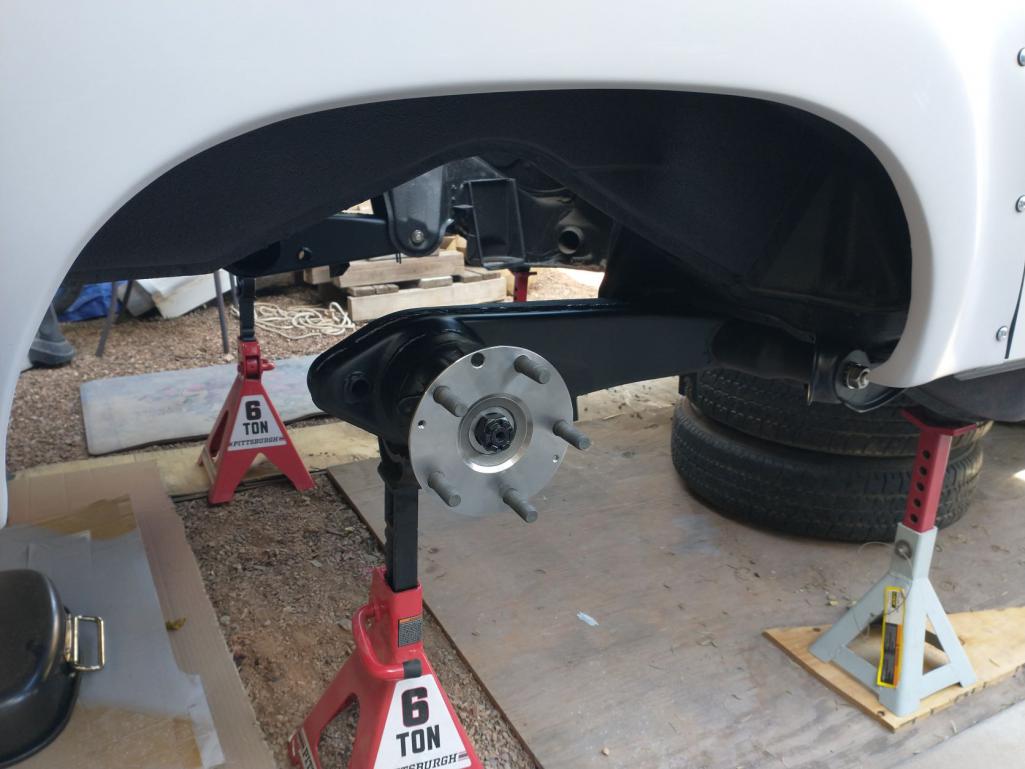
Wrapped the car up tight again...70% chance of rain by Wednesday.
Posted by: mgarrison Feb 21 2022, 03:08 PM
Ok, don't do what I did here: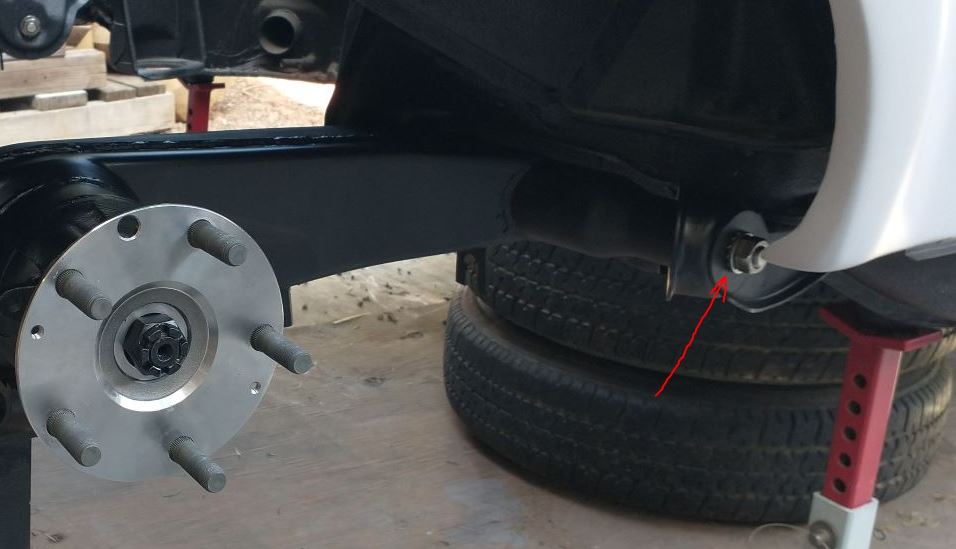
The toothed/splined washer goes on the end of the threaded pivot shaft - the goal is to keep the shaft from spinning. Only the flat washer and nut should be on the outside.
Posted by: mgarrison Feb 22 2022, 02:52 PM
Painted the Brembo logos today before the rain is due tomorrow. They need to cure for a week before I can clear coat them.
Little Brembo "packages"...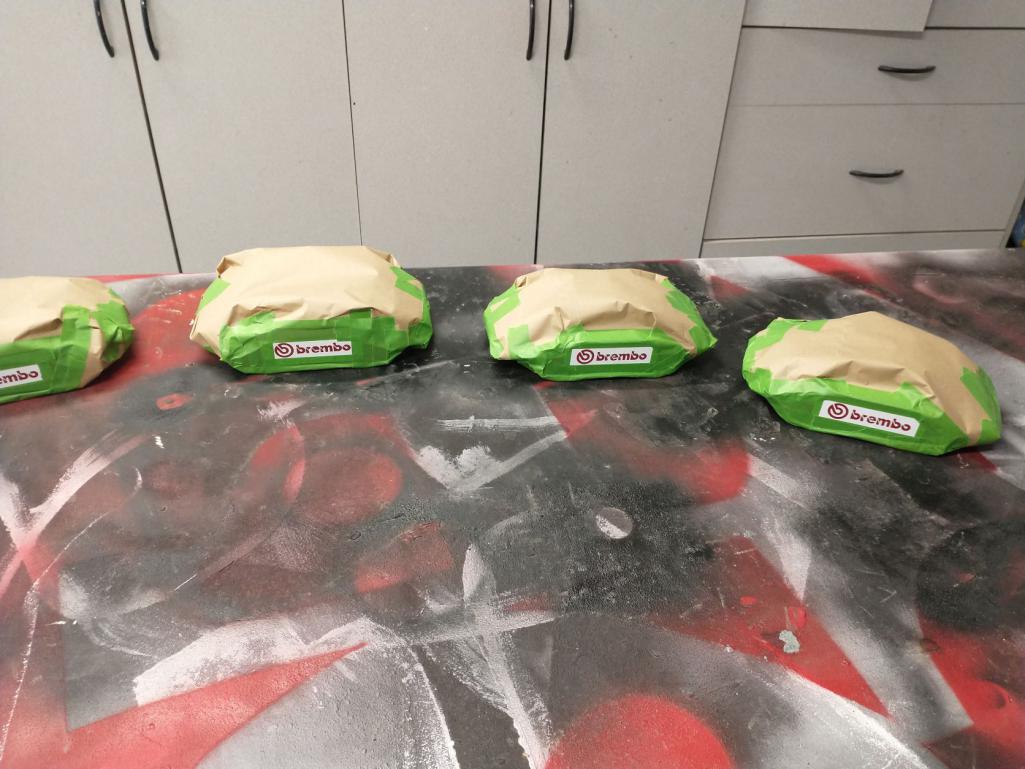
First coat...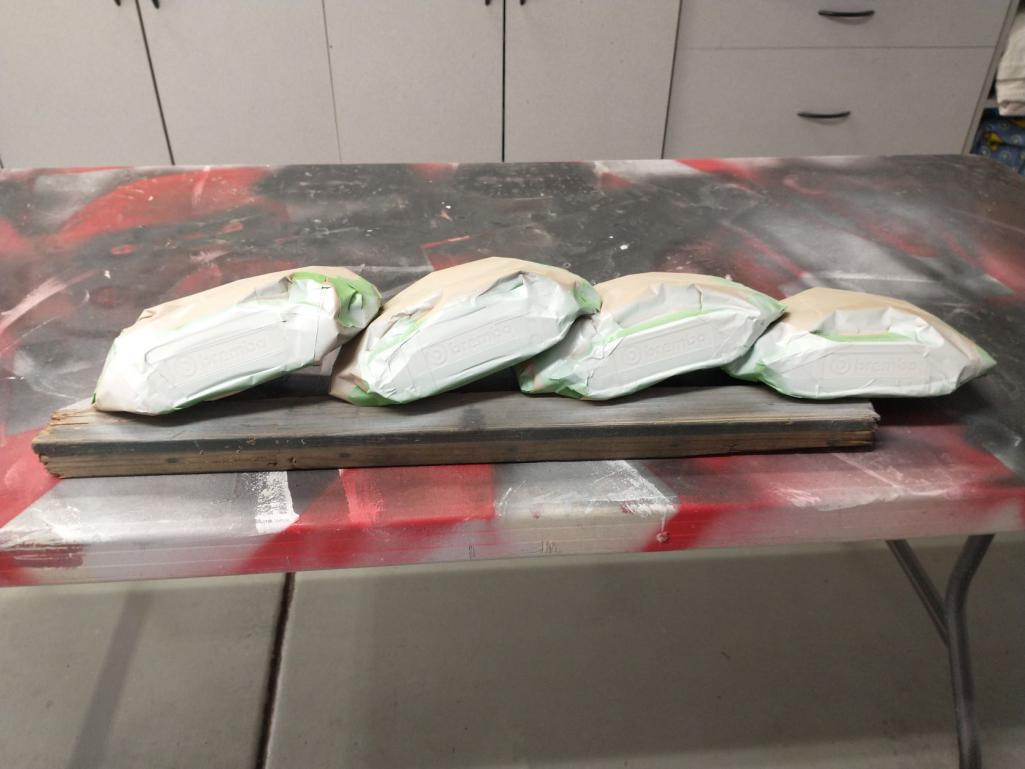
I followed the paint directions of 2 light coats with 10min between each, followed by a 3rd medium coat. Seems like it was too thick/heavy for the logos.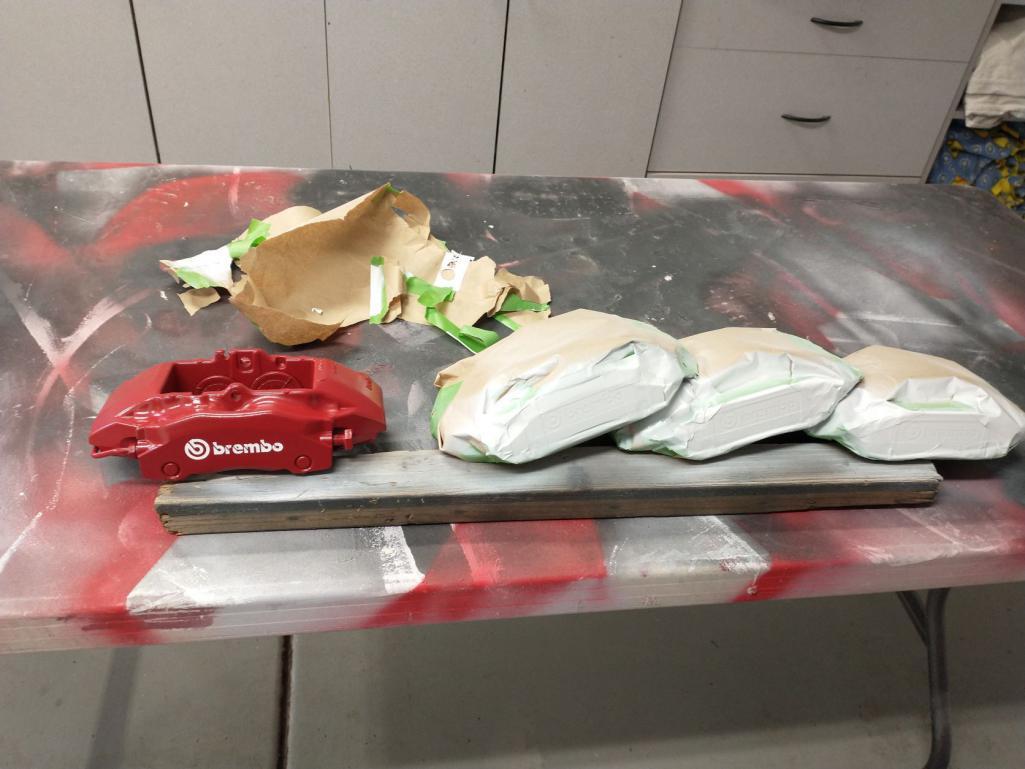
Hopefully, after they cure for a week and get clear coated and cure for another week, they will end up looking ok from 5-10 feet. Oh well, I tried...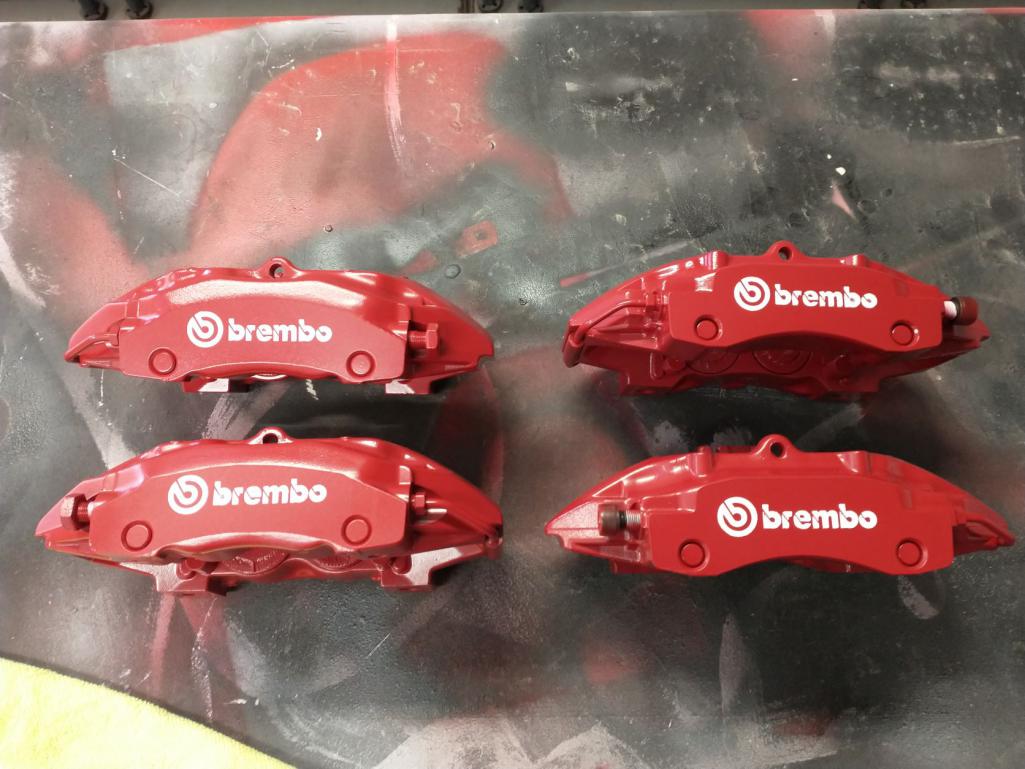
If I had to do it again, I might just buy the cheapo high-temp stickers off Amazon and clear coat them; it was $30 for 4 stencils, plus cost of paint, etc. The stencils were not centered on the backing, which made placing them challenging. I guess I expected too much for my $30+ postage
Posted by: mgarrison Mar 15 2022, 04:26 PM
Been puttering around trying to work on random things while I wait for parts to arrive. I stripped the engine lid, cleaned up the mesh and primed and painted them. I had a rattle can of the sample Ravenna Green, so I figured WTH I'll use it on the engine lid! I ran out of the clear coat to go over it, but it doesn't look half bad...for a rattle can job! 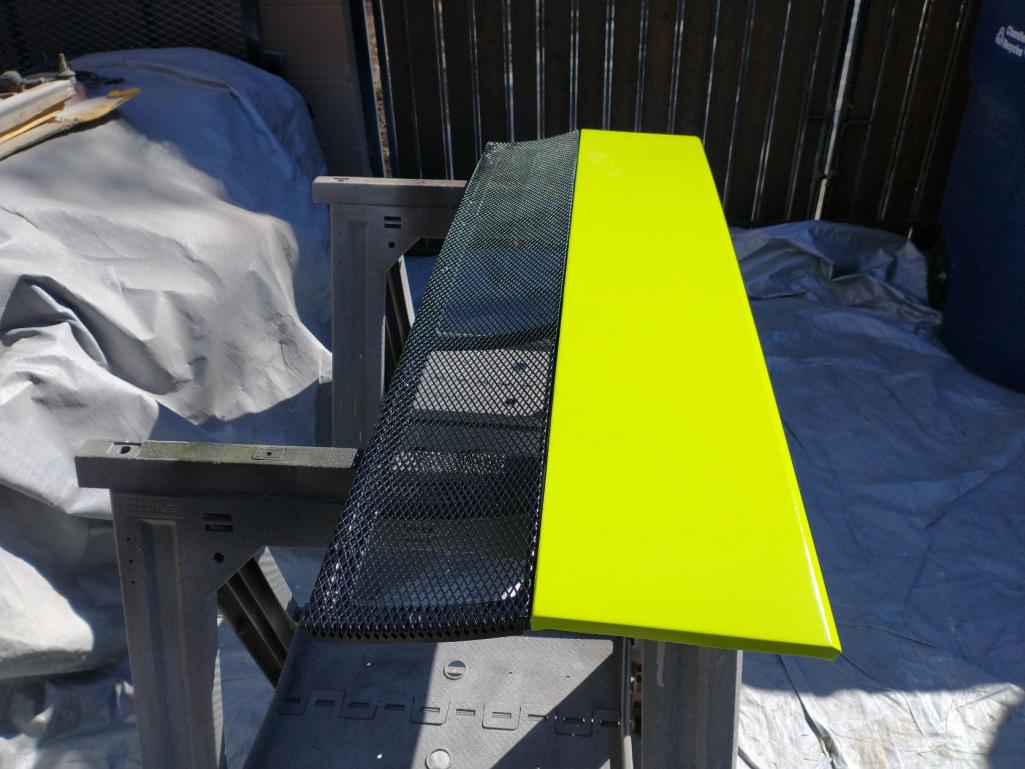
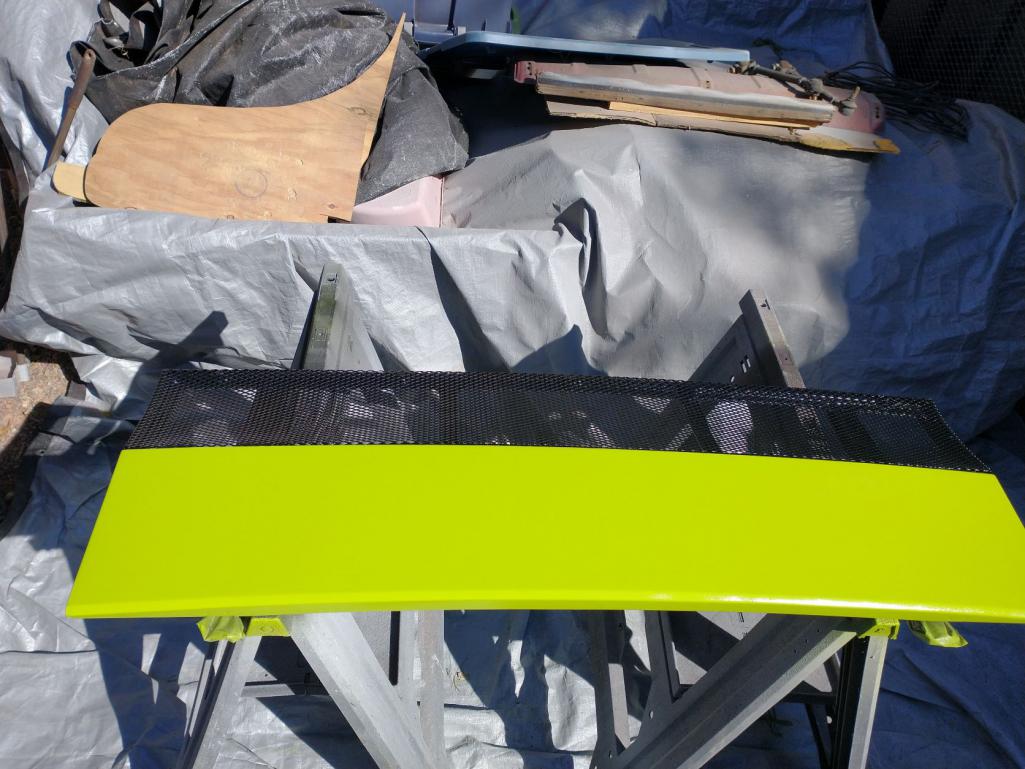
Speaking of parts arriving...My hood and deck lid finally made it! The box looked fine, I pulled them out to check them before the driver ran off. Just when I thought things were looking up. After getting them fully unwrapped, it looks like they must have dropped the box pretty hard and it crushed the corner of the duckbill spoiler on the one side. 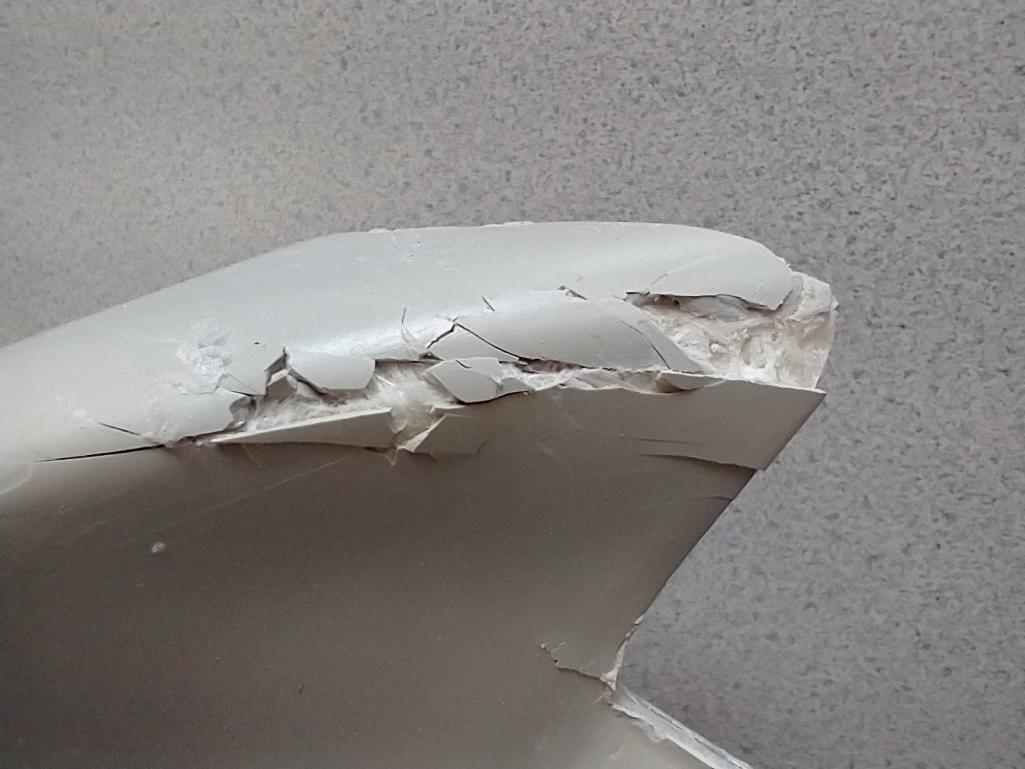
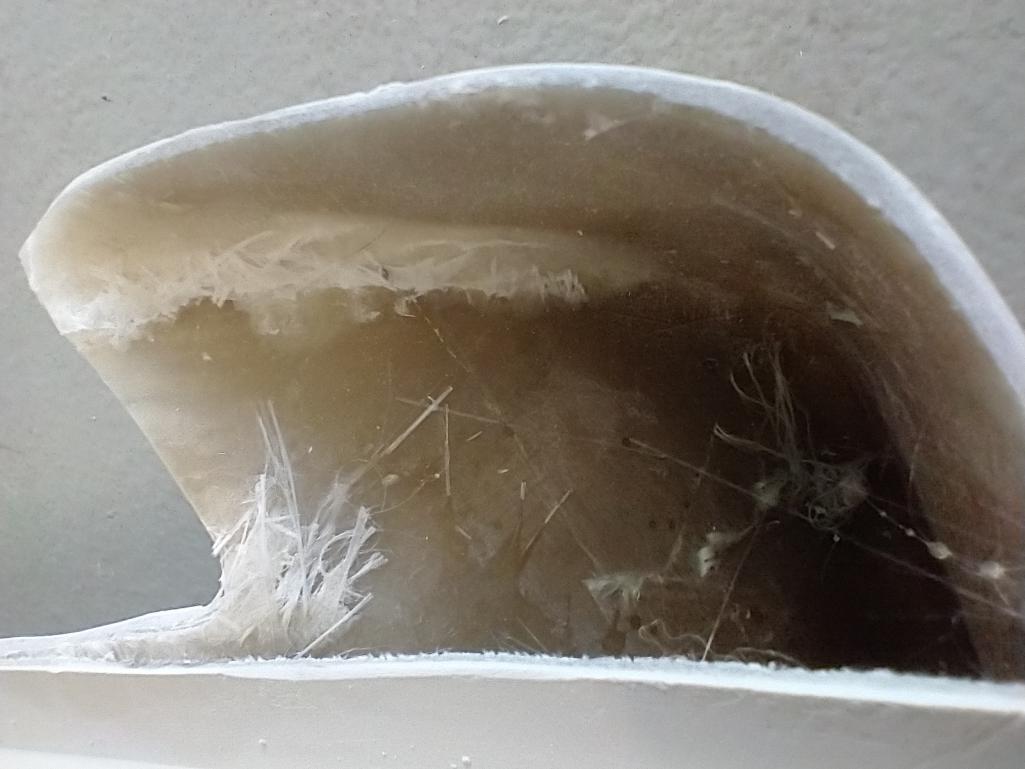
Posted by: mgarrison Mar 17 2022, 09:40 PM
My Rebel Racing parts finally made it! 
It took me two tries, and looking back at the pics on RR's site to get these assembled correctly 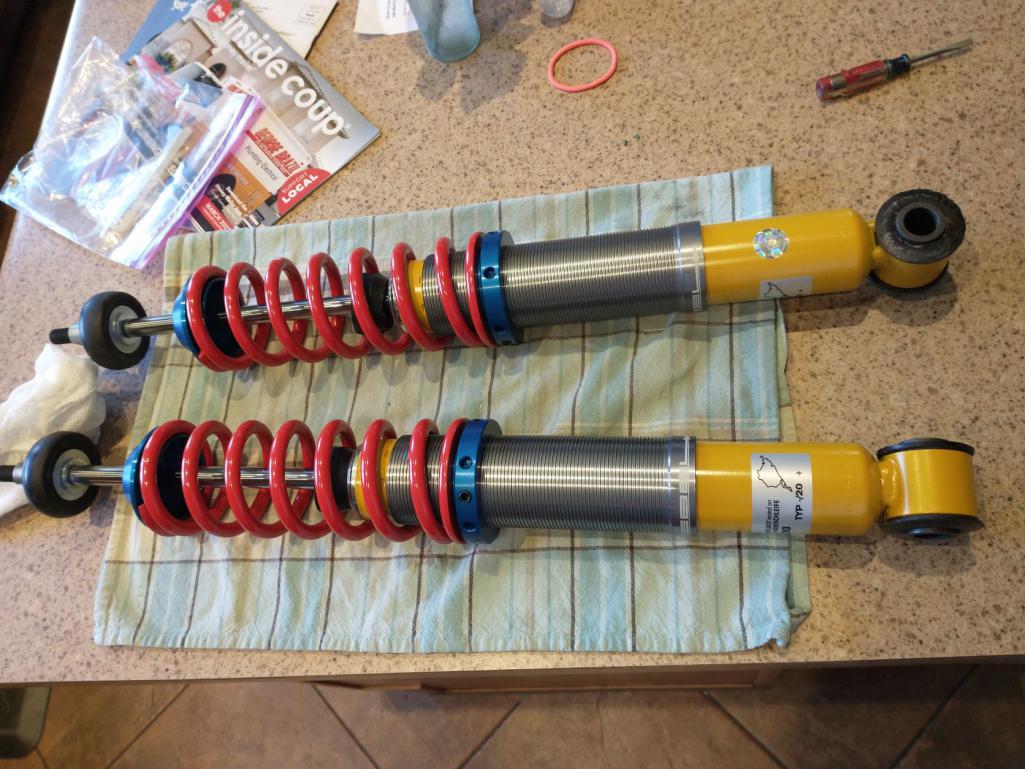
I went with the billet steering coupler...Don't want to mess with it again! 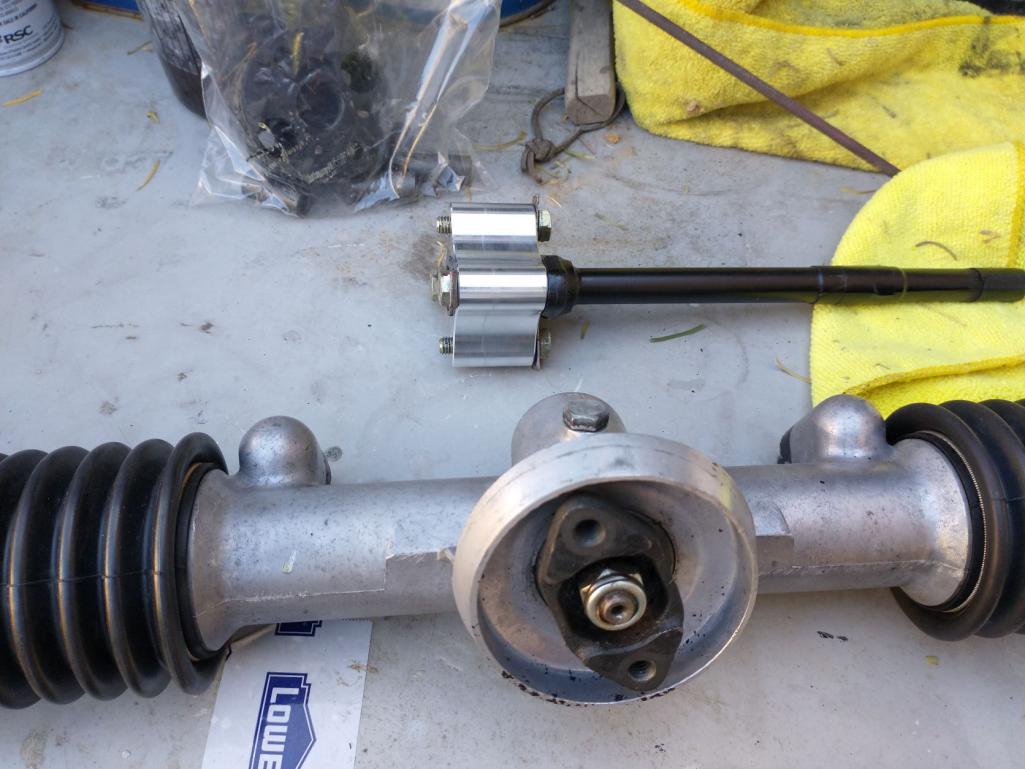
I think it should stop ok... 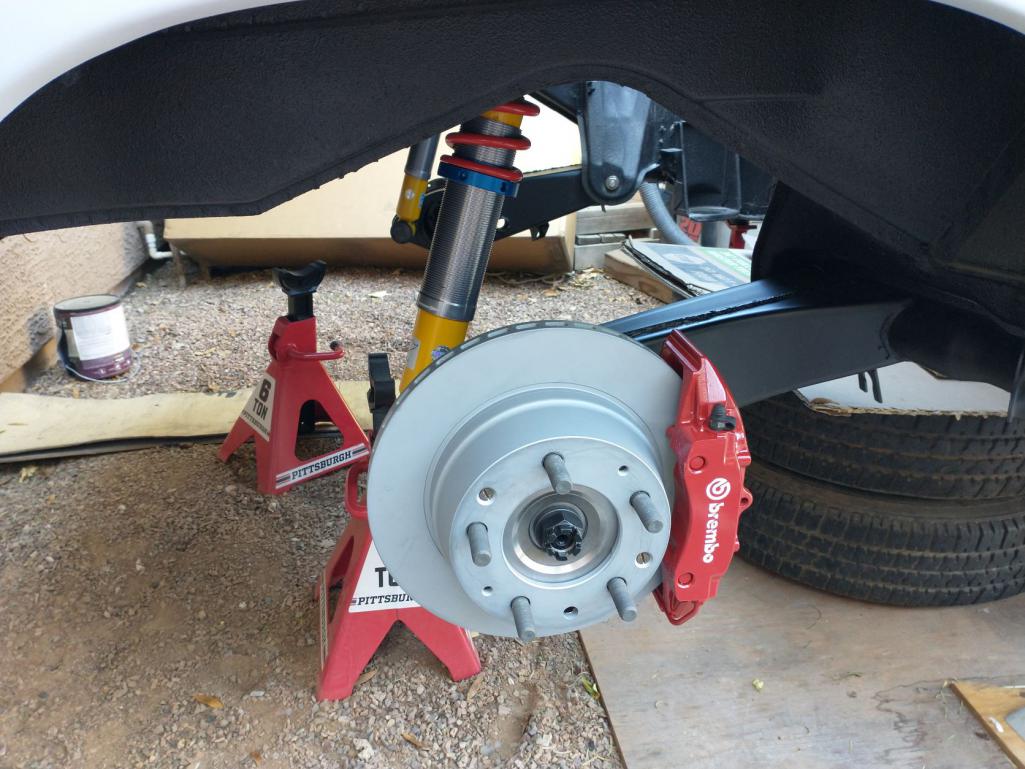
Posted by: tygaboy Mar 17 2022, 09:48 PM
Congrats on all the forward progress! But man, oh man, all the shipping damage you're suffering just sucks. So sorry to see and fingers crossed it all works out.
Posted by: mgarrison Mar 18 2022, 08:56 PM
After destroying a new bearing for the steering column, I regrouped on the front axle. Getting there, inch by bloody inch! 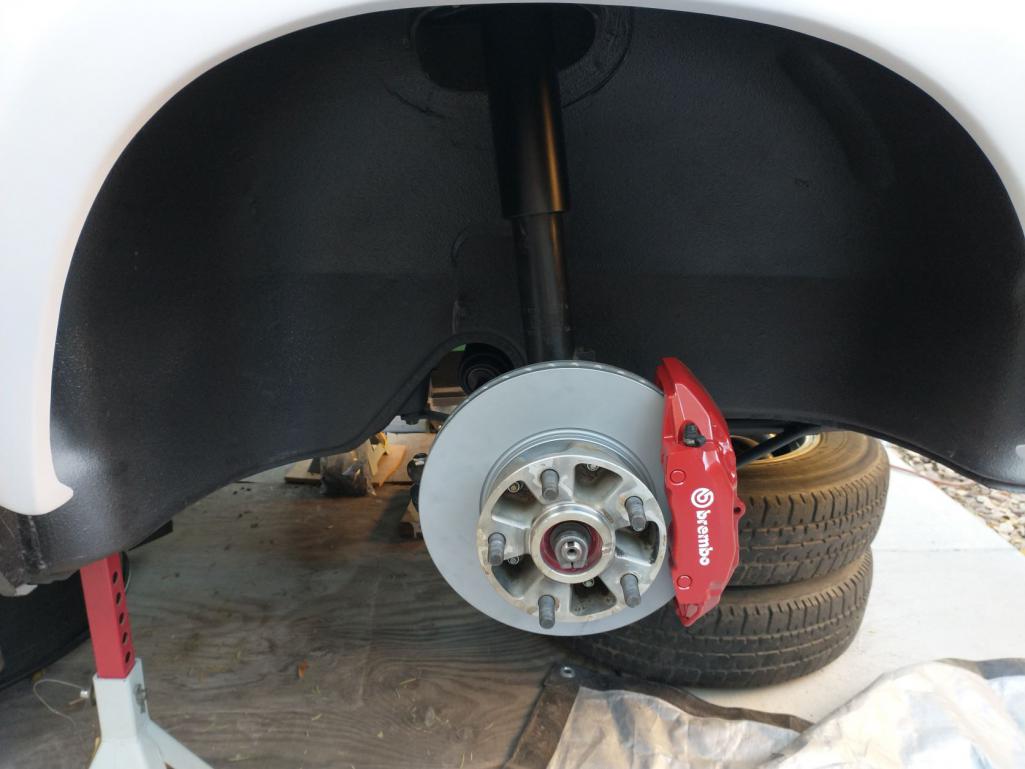
Posted by: Costa05 Mar 18 2022, 09:33 PM
Front rotors and brakes look great. Moving right along with it.
Posted by: slowrodent Mar 19 2022, 08:48 AM
Really excellent work. Your attention to detail is just superb. Gonna be one handsome car.
Posted by: mgarrison Mar 22 2022, 10:03 AM
My brake lines arrived from Pelican/Stoddard... 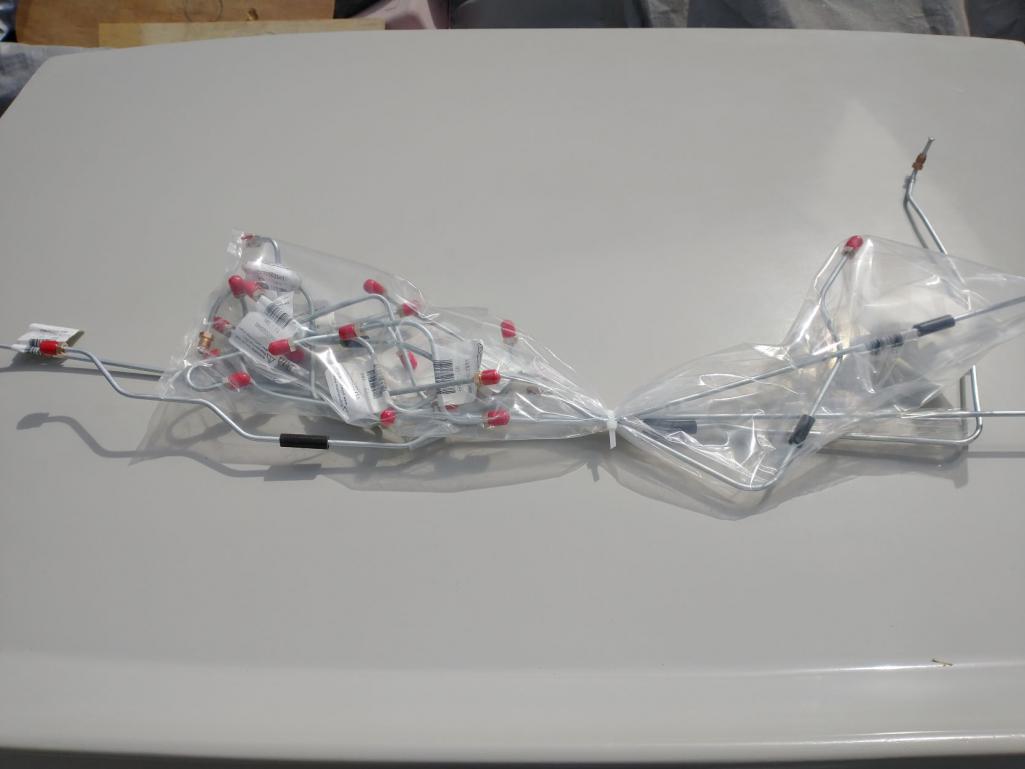
Laid out the old & new together to match everything up. No clue what the two, short "S" shaped lines in the lower, middle are for - don't see any old lines that size/shape! 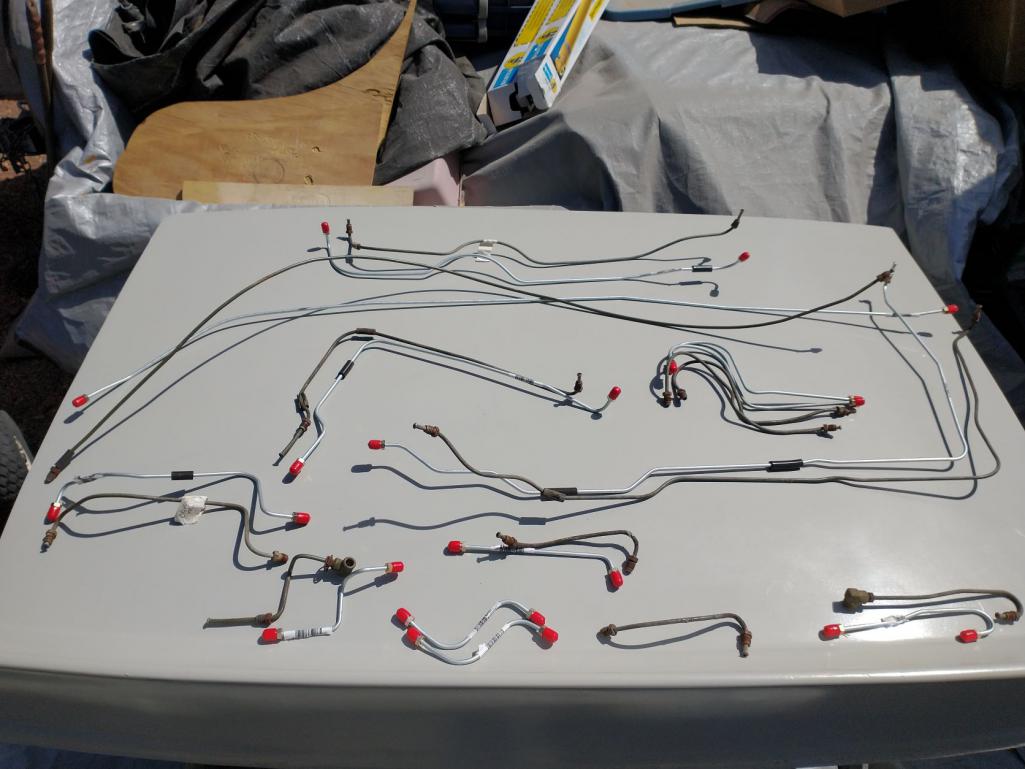
With the Boxster calipers, these two lines from the rear trailing arms are no longer needed. Let me know if you need/can use them, especially if your local.
I got the lines all installed - still need to decide what I'm doing with the pedal cluster/master cylinders, etc. Thinking of using the Wilwood pedal cluster. Started scuffing and checking the deck lid and filled a few spots. Still need to spray it with the high-build surfacer and block sand it, but getting closer.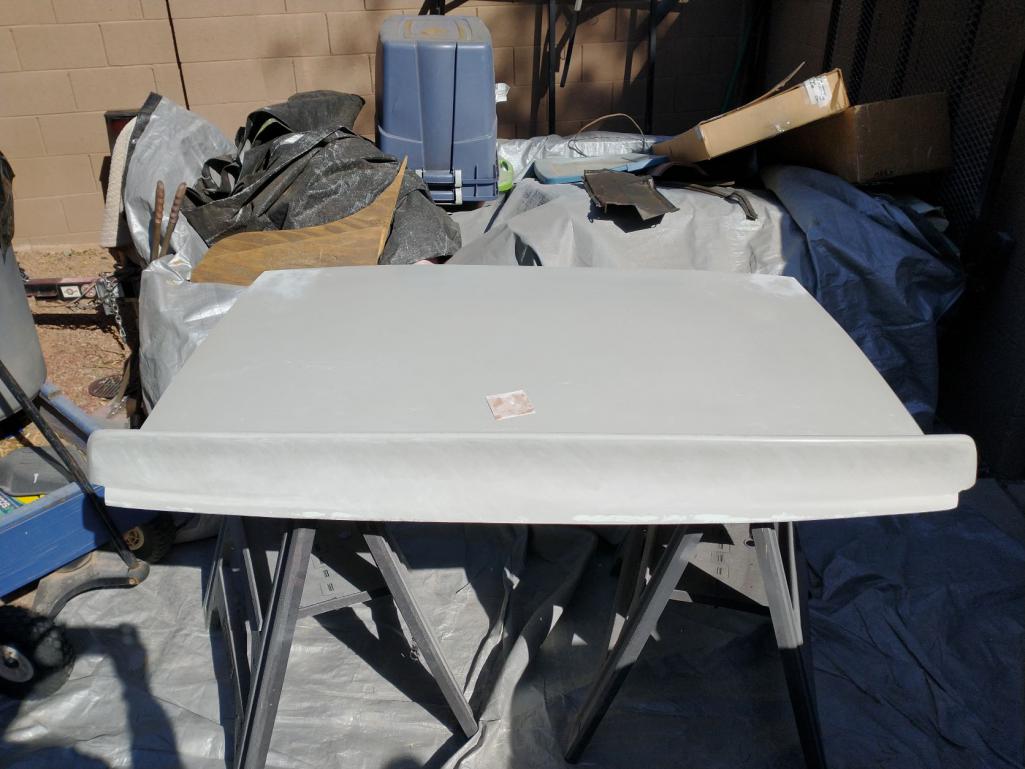
Gaps along the sides are bigger than I hoped for, but it's just sitting loosely in place. Need to start on the hood now! 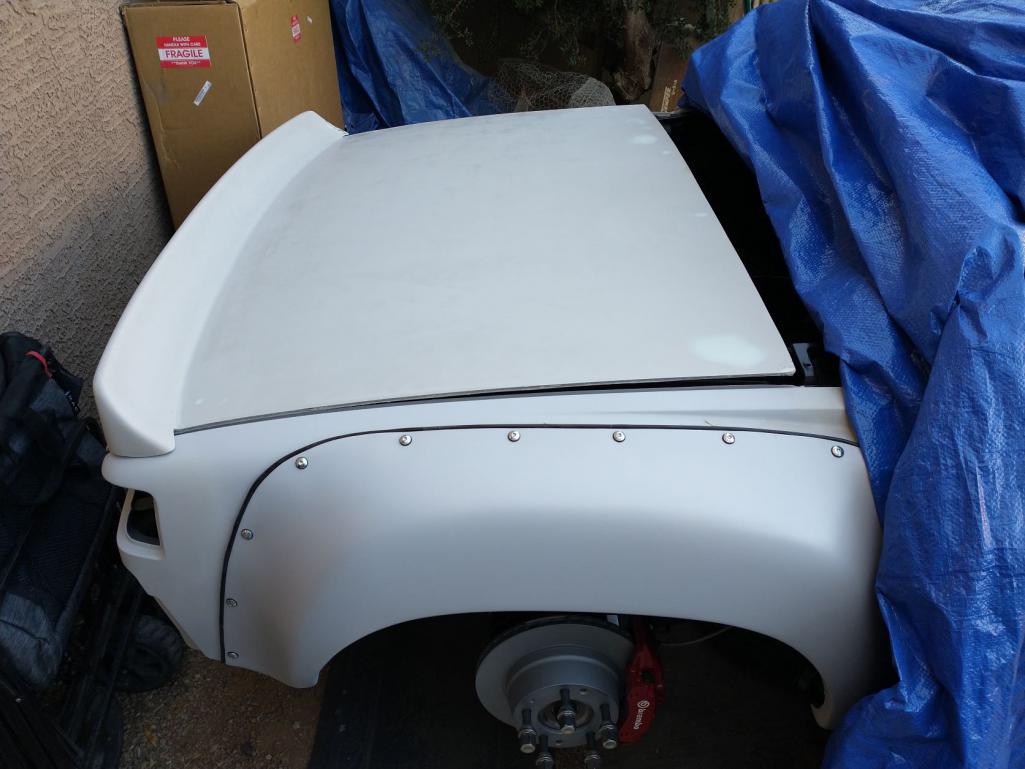
Posted by: mgarrison Mar 22 2022, 08:56 PM
Did a quick test fit of the hood before I start scuffing it and looking for spots that need to be filled 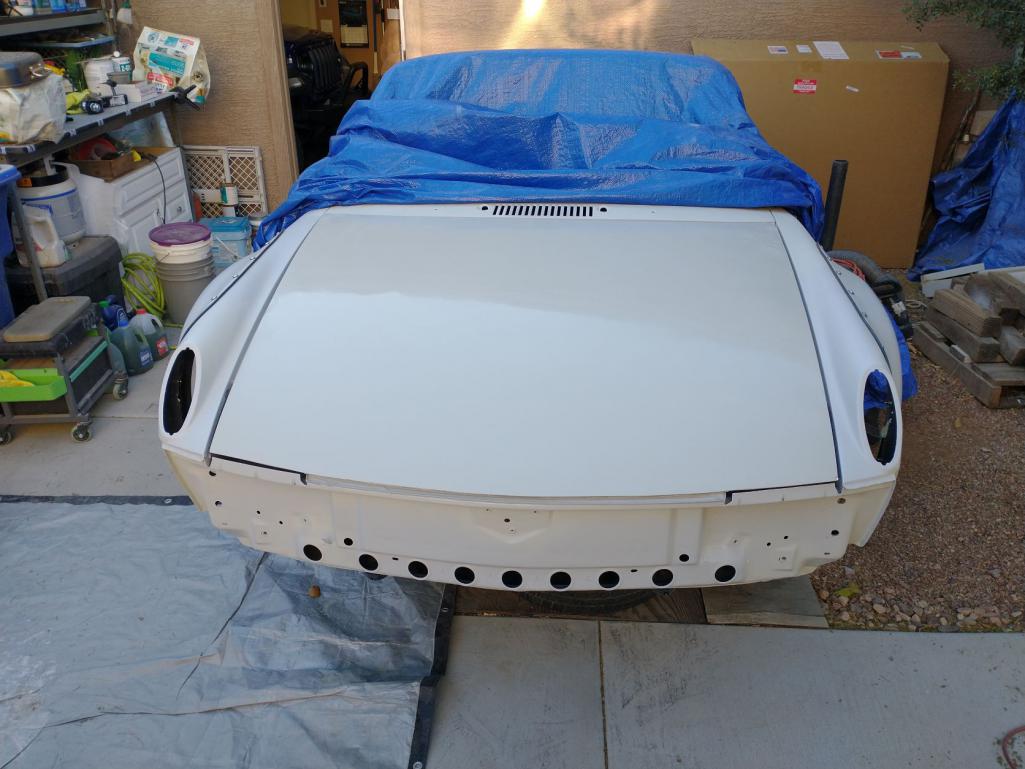
Posted by: mgarrison Mar 24 2022, 10:13 PM
I filled some larger imperfections, and sanded them out on the hood and decklid. I also used up the last of my high-build surfacer/primer but managed to get both the hood and decklid coated pretty well.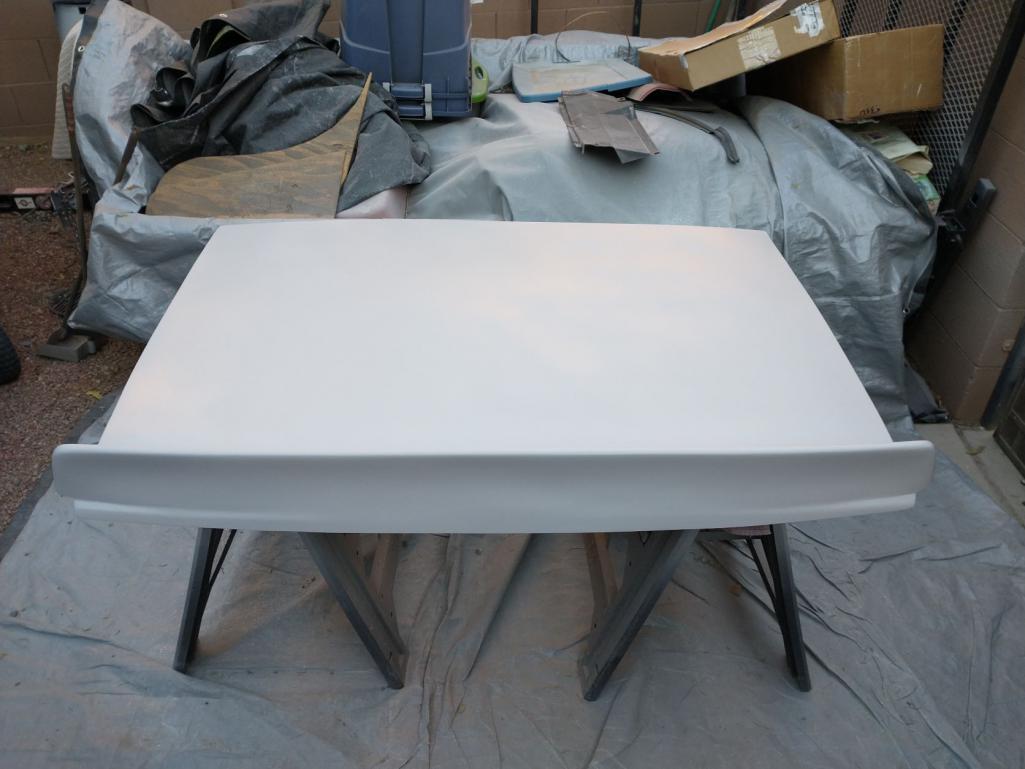
Now for more fun block sanding them both out!
Posted by: mgarrison Mar 27 2022, 08:40 PM
Arrrrrrgggh, even the birds are out to get me! 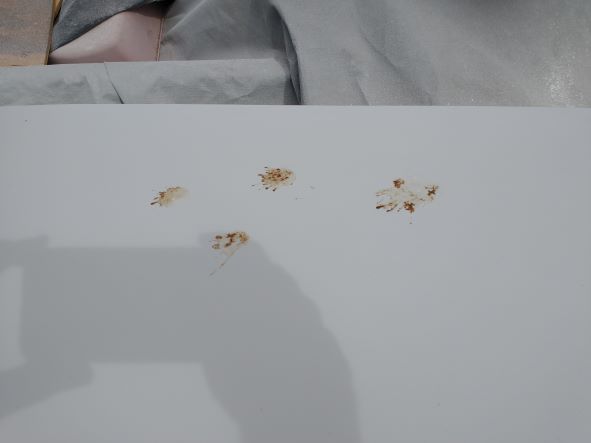
Block sanding is so much fun...except it's not really fun. 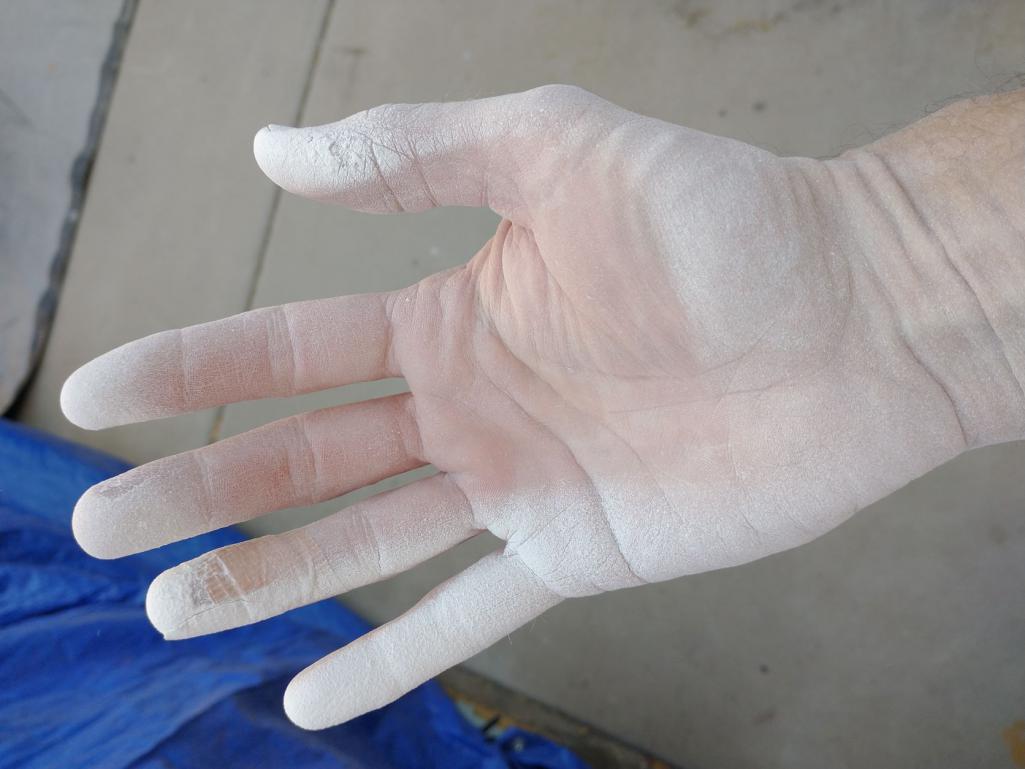
Only 2/3 more to go plus the duck tail 
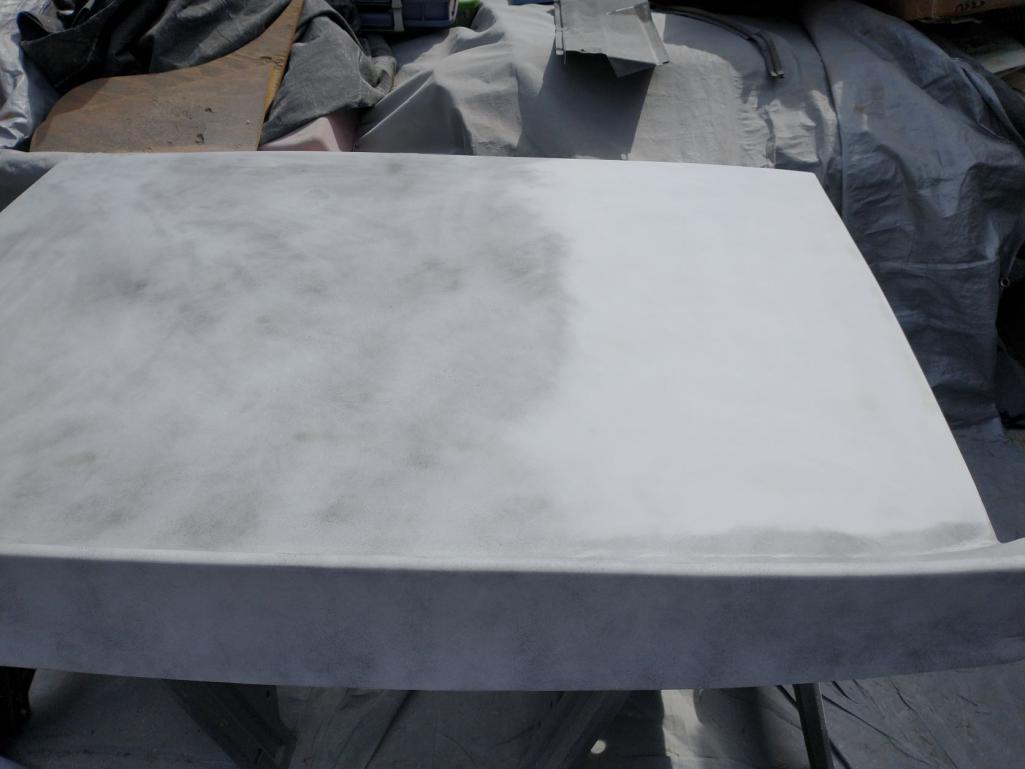
I did managed to get my steering column reassembled. I just need to get it installed into the chassis.
Posted by: mgarrison Apr 4 2022, 08:36 PM
Oh my, she has a hood and trunk...sort of. Or, Look, its her Cars & Coffee pose! 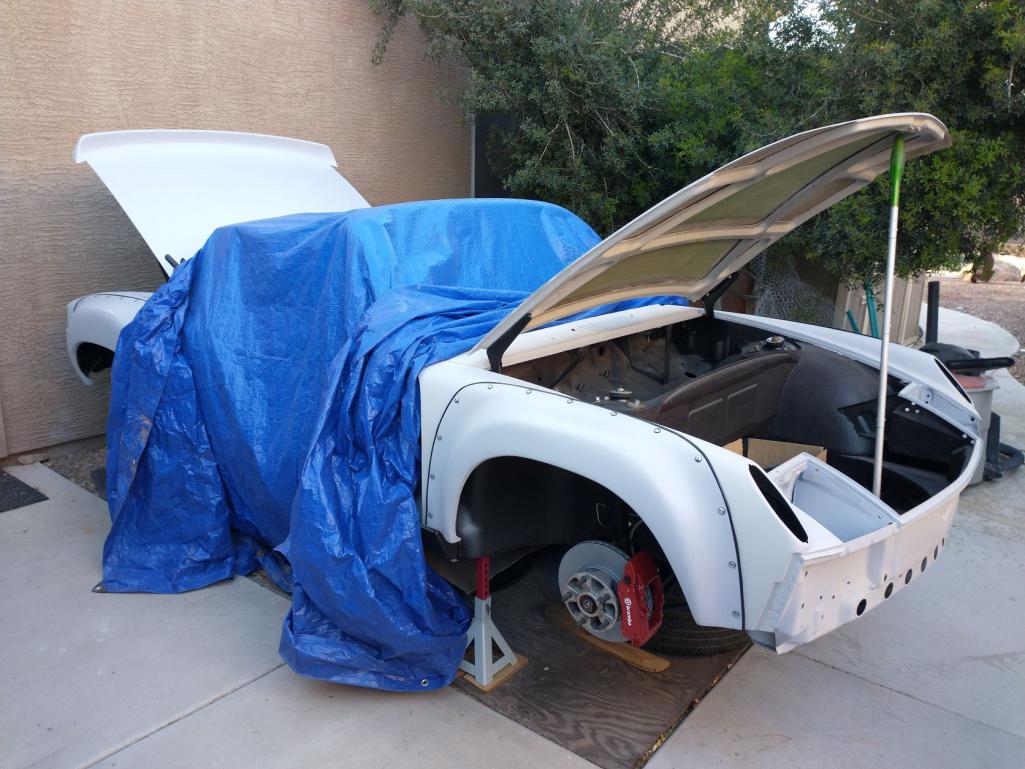
Now all I need is wheels, a fuel tank, some fuel lines, maybe some wiring...Oh yea, and engine & trans too! But, it's still progress, right? 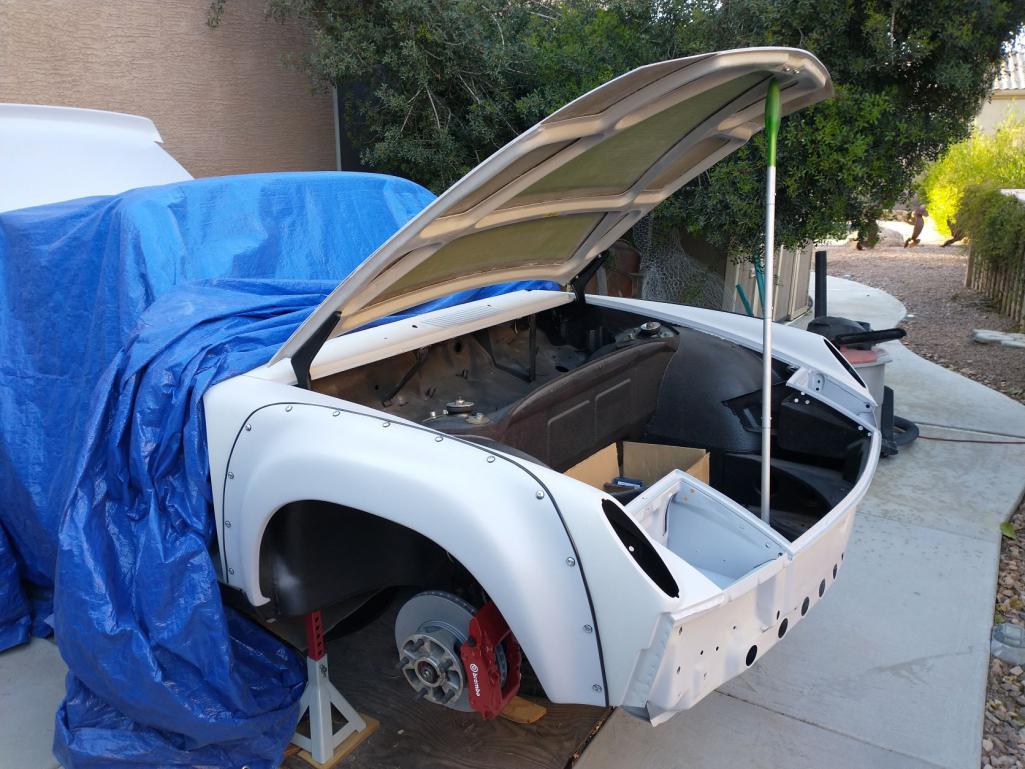
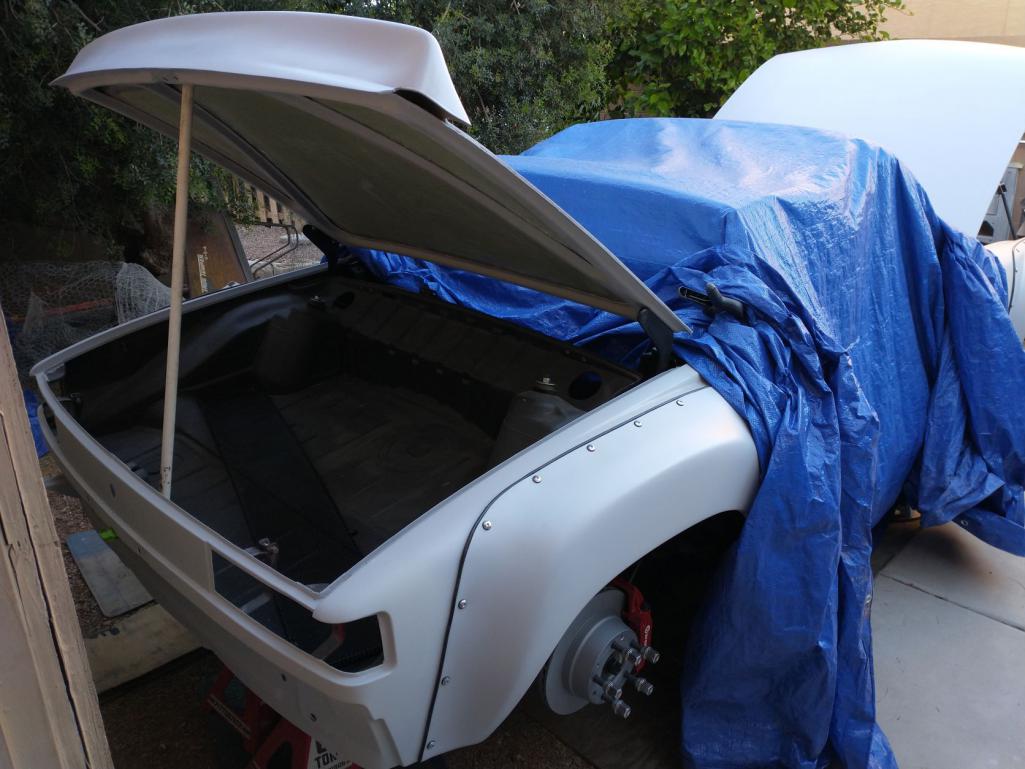
Posted by: 76-914 Apr 4 2022, 10:39 PM
Your 914 is shaping up. Beginning to look like my '70 conversion in many ways. If you paint it red they will be "Twisted Sisters".
Posted by: mgarrison Apr 10 2022, 03:03 PM
Still doing wheel research and trying to keep moving forward in some way. Today I media blasted the steering rack cover piece and the dash. Looks like the dash was baby blue - no idea why they would use blue on a red car... 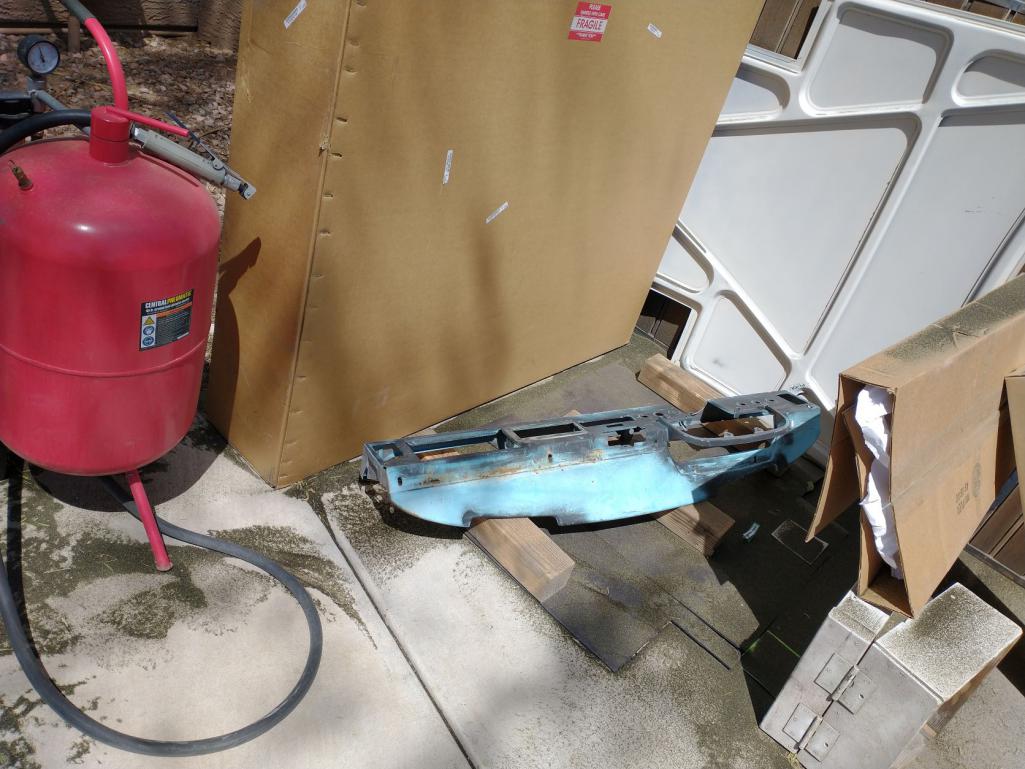
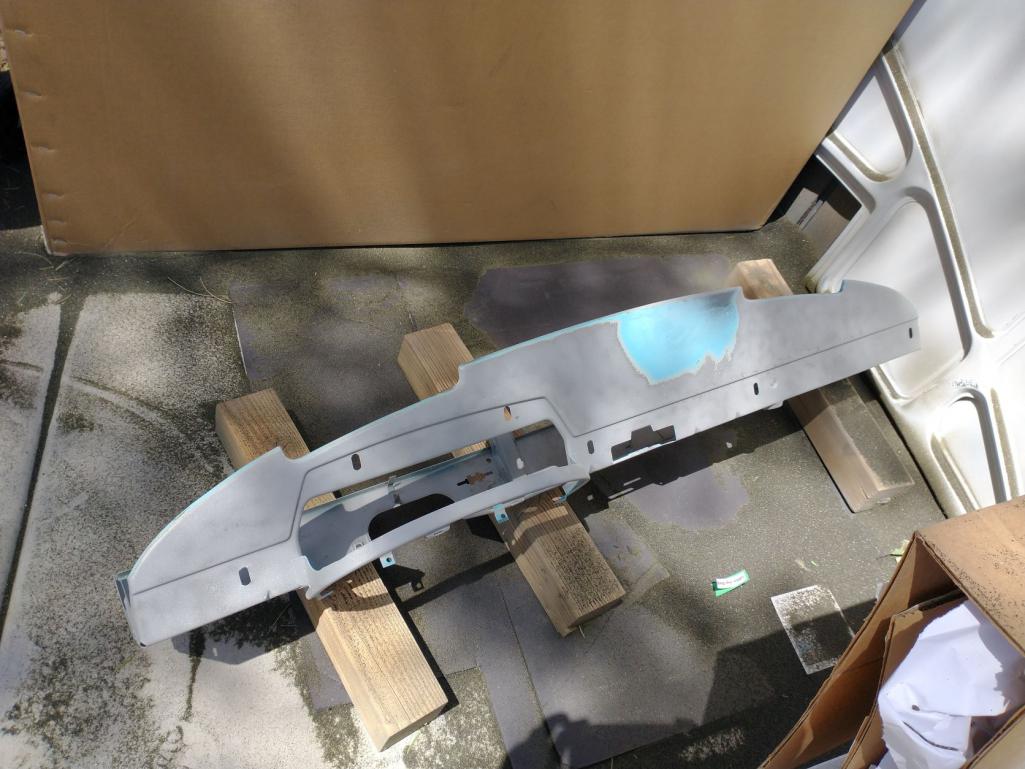
Media blasting is quicker - except waiting for the compressor to catch up. But, having to vacuum out my shoes, then my socks, then between my toes, and...my ears! Grit just goes everywhere!
Posted by: mgarrison Apr 18 2022, 05:02 PM
I'm waiting to collect enough stock $$$ for the purchase of wheels - easily double what I expected to pay!
In the meantime, Chris aka Tygaboy provided some much needed parts porn! I'm the proud second owner of his SpeedHut gauge setup. Woohoo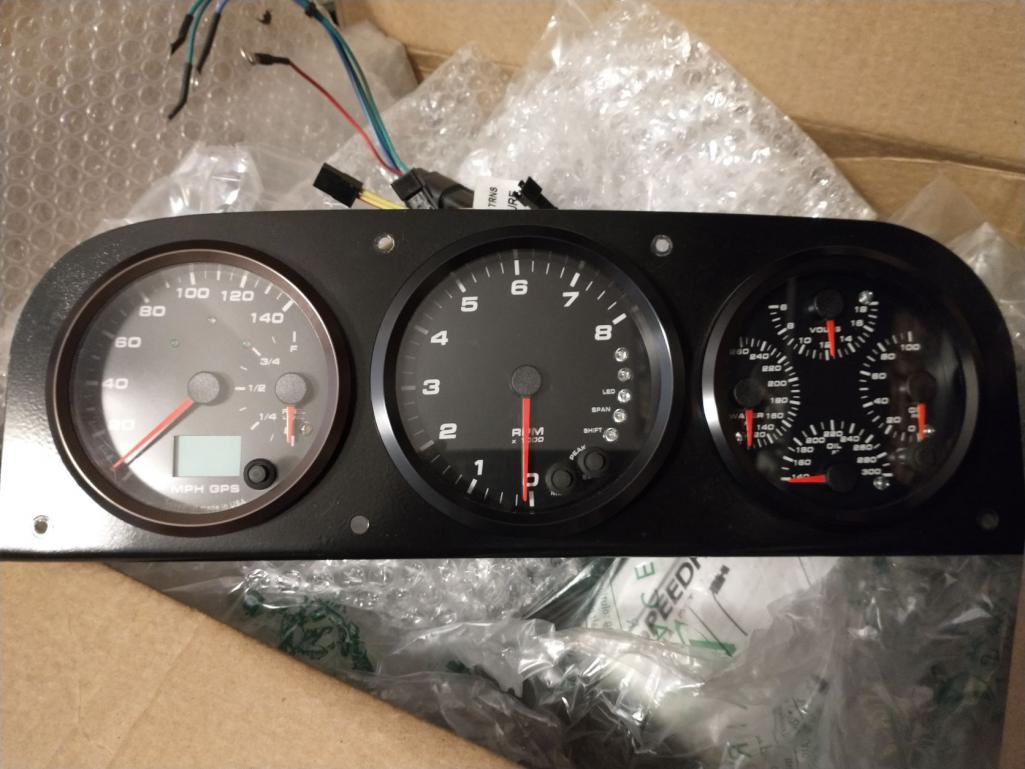
I've already replaced the ring on the speedo so it matches the other two. Still debating if I need to replace the "glass" on the tach - has some barely there scratches. I have the replacement already, just not sure its worth the effort, at least for now.
Our Son's Miata started having some really odd timing issues. The lead tech at the auto shop where he works finally narrowed it down the crank pulley. It's not the dreaded "short-nose" crankshaft - that was the NA 1.6L engine. Once we started taking it apart, it became obvious what happened...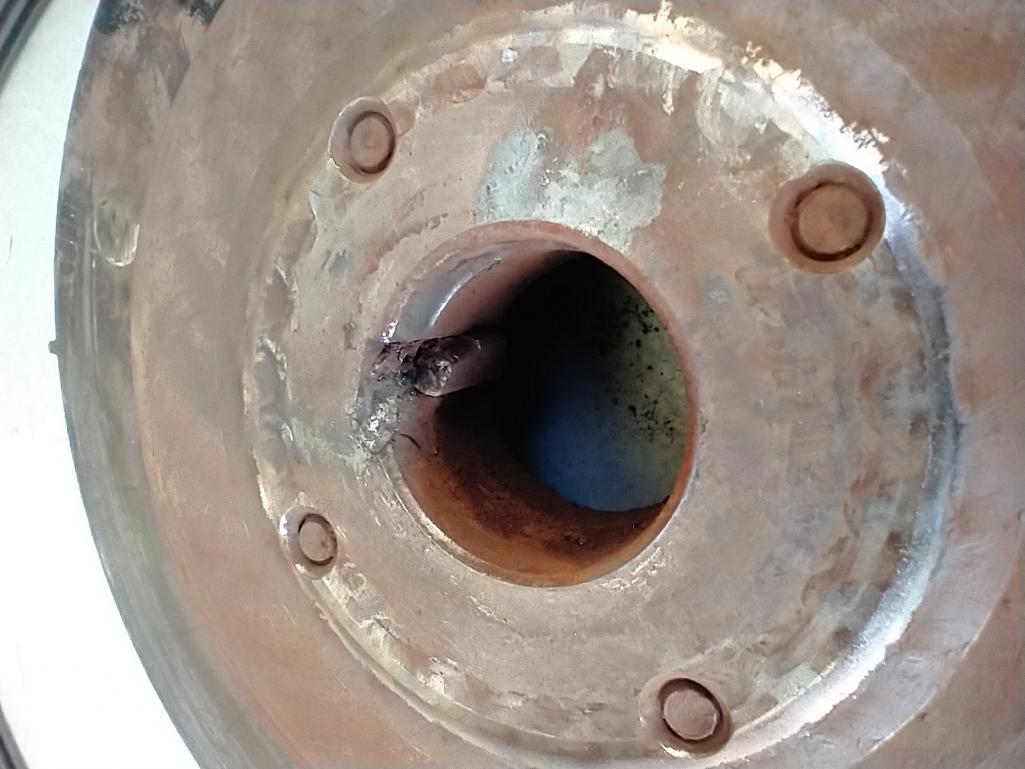
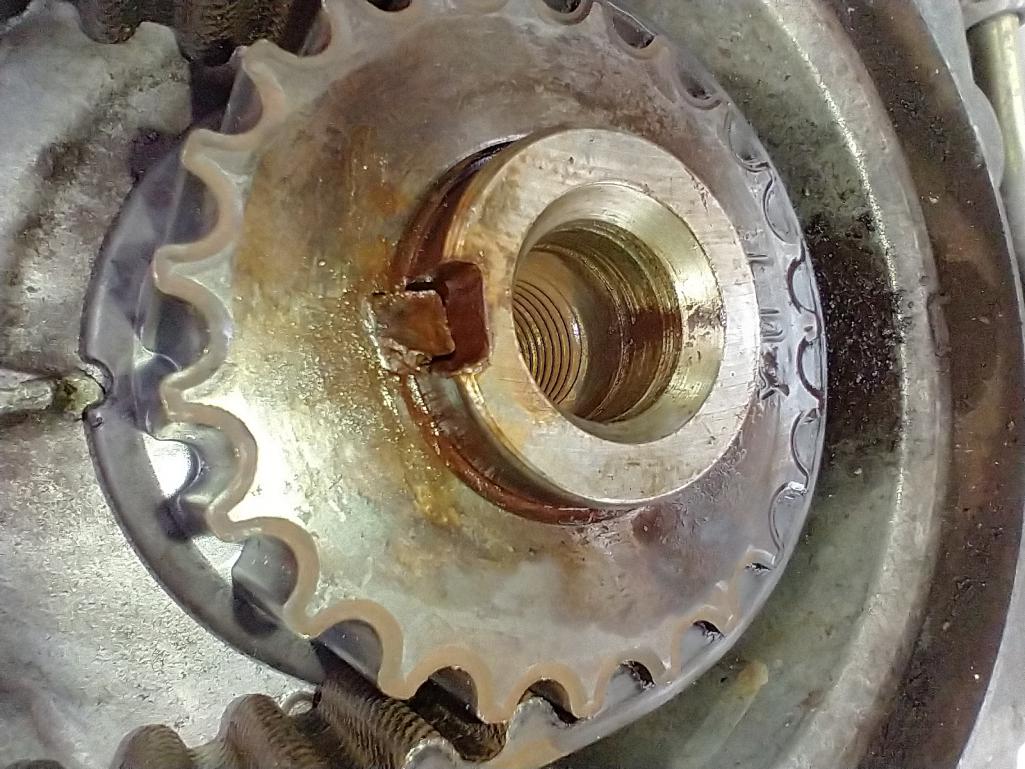
The Woodruff key that holds the timing pulley on the crank, the timing plate, and the harmonic balancer sheared in half. I can tell you from personal experience drilling out a hardened steel pulley to get the broken half of the key out is a true PITA!
At least the keyway in the crank seems ok!
I did finally get some time Sunday afternoon to work on the 914 dash. I wanted to get rid of some openings I no longer have use for: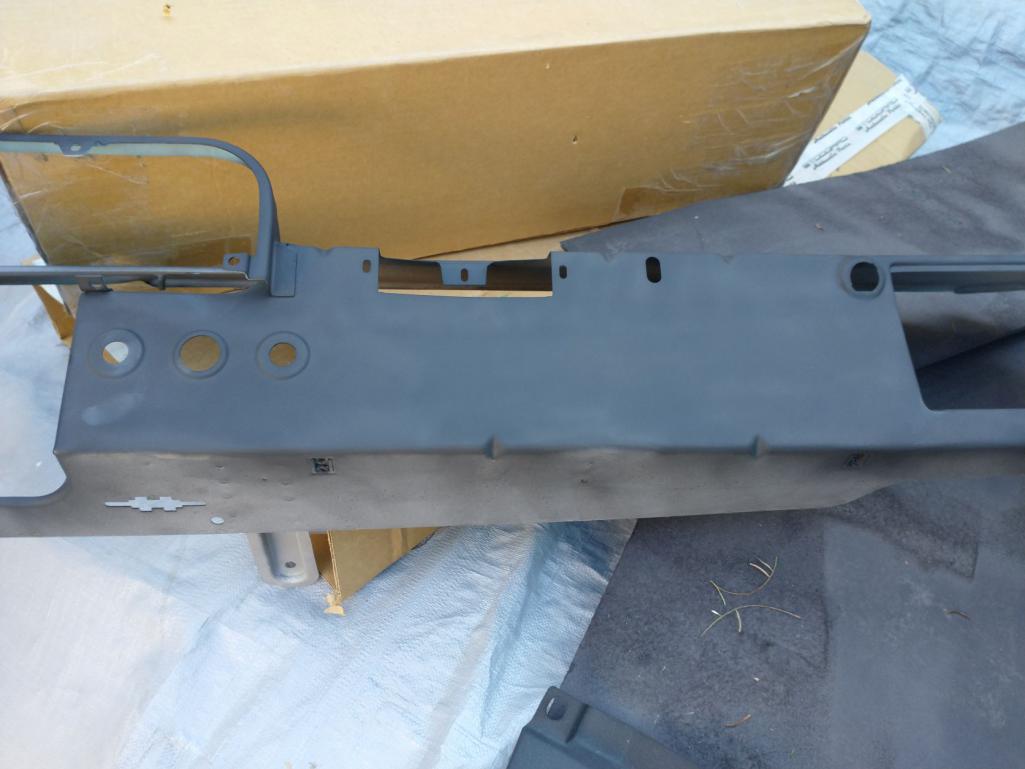
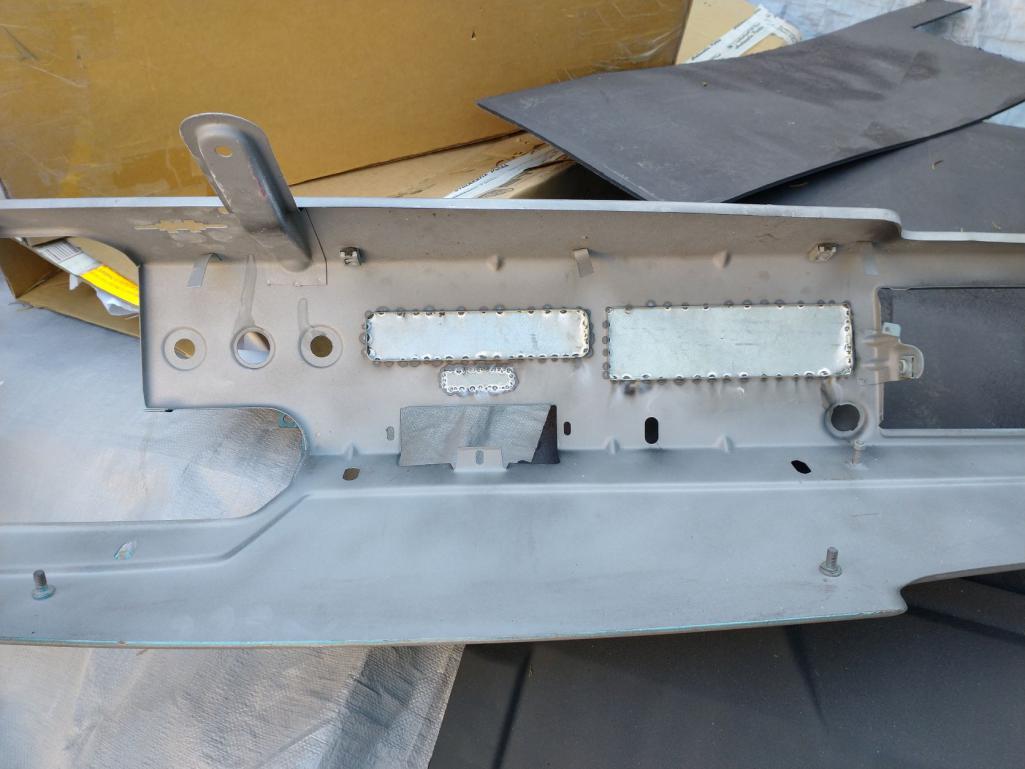
I think it came out rather nice! 
Posted by: nivekdodge Apr 18 2022, 08:34 PM
I did manage to get the pedal cluster out. Quite a bit of surface rust under there, but nothing seems to have gone very deep.
A bit of cleaning and sealing is due back here...
The wiring harness removal was way too much fun. Got 95% of it out intact in case its needed down the road, but it so old and crunchy I'm not sure it safe/worth using!
Does anybody have any amazing, creative ideas on how to clean out the tunnel area if you are not replacing any of the floor? Bit of a mess in there, and impossible to get to. Some kind of chimney sweep brush hooked to a drill???
What are your plans for a wiring harness?
Posted by: mgarrison May 31 2022, 11:39 AM
I did manage to get the pedal cluster out. Quite a bit of surface rust under there, but nothing seems to have gone very deep.
A bit of cleaning and sealing is due back here...
The wiring harness removal was way too much fun. Got 95% of it out intact in case its needed down the road, but it so old and crunchy I'm not sure it safe/worth using!
Does anybody have any amazing, creative ideas on how to clean out the tunnel area if you are not replacing any of the floor? Bit of a mess in there, and impossible to get to. Some kind of chimney sweep brush hooked to a drill???
What are your plans for a wiring harness?
I plan on either using a Painless street/track kit, or possibly the same kit that Tygaboy used on his LS3 914...
Posted by: mgarrison May 31 2022, 11:45 AM
Not much progress lately - waiting for stock to go positive again so I can fund the next needed part for the 914. But, that finally happened - Parts Porn! 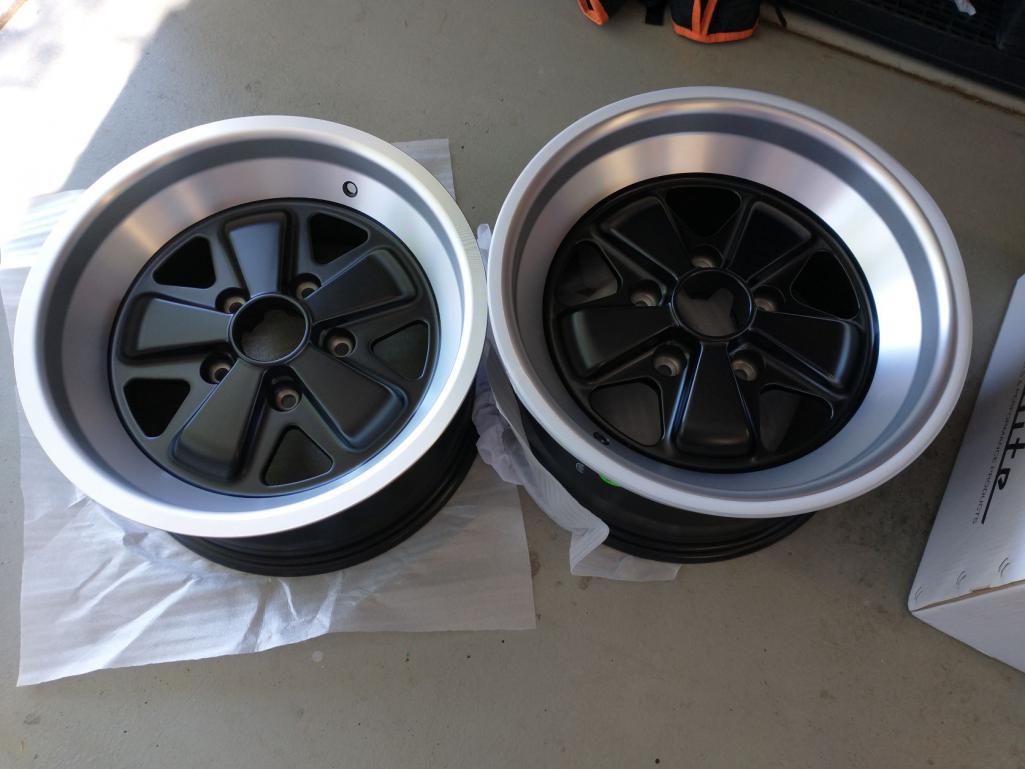
After some runaround, I finally got my wheels ordered and they actually made it to me intact on the first try! The lugs even arrived the same day - maybe shipping is getting back on track!
I did a quick test fit to see how things looked, cleared, etc.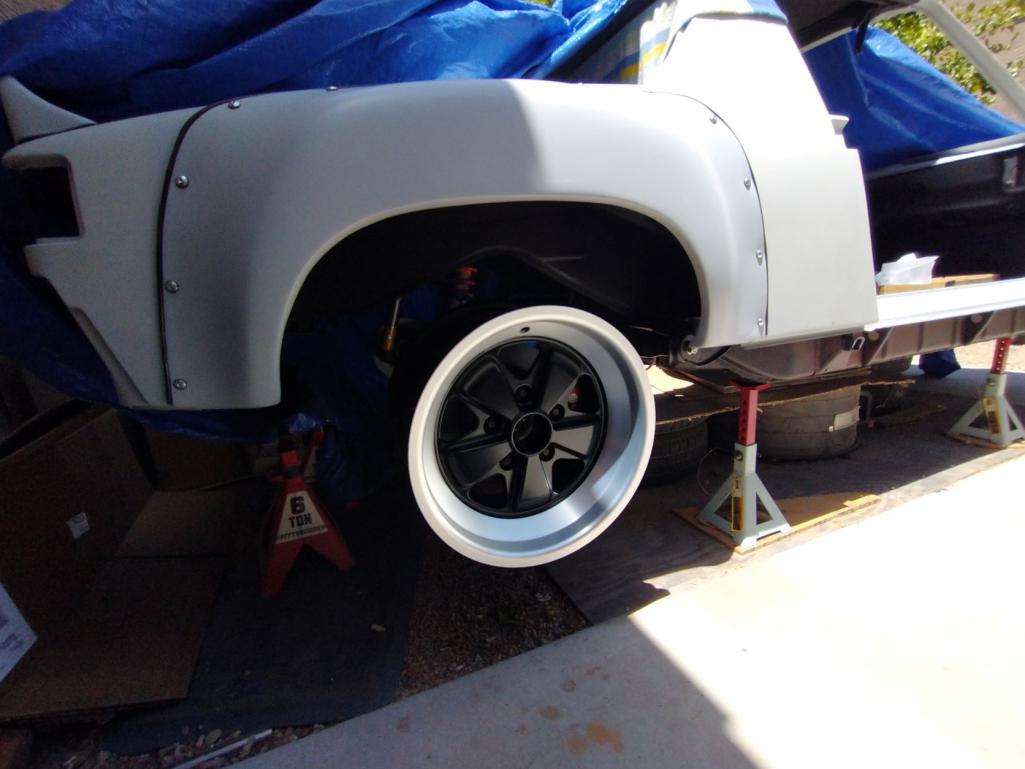
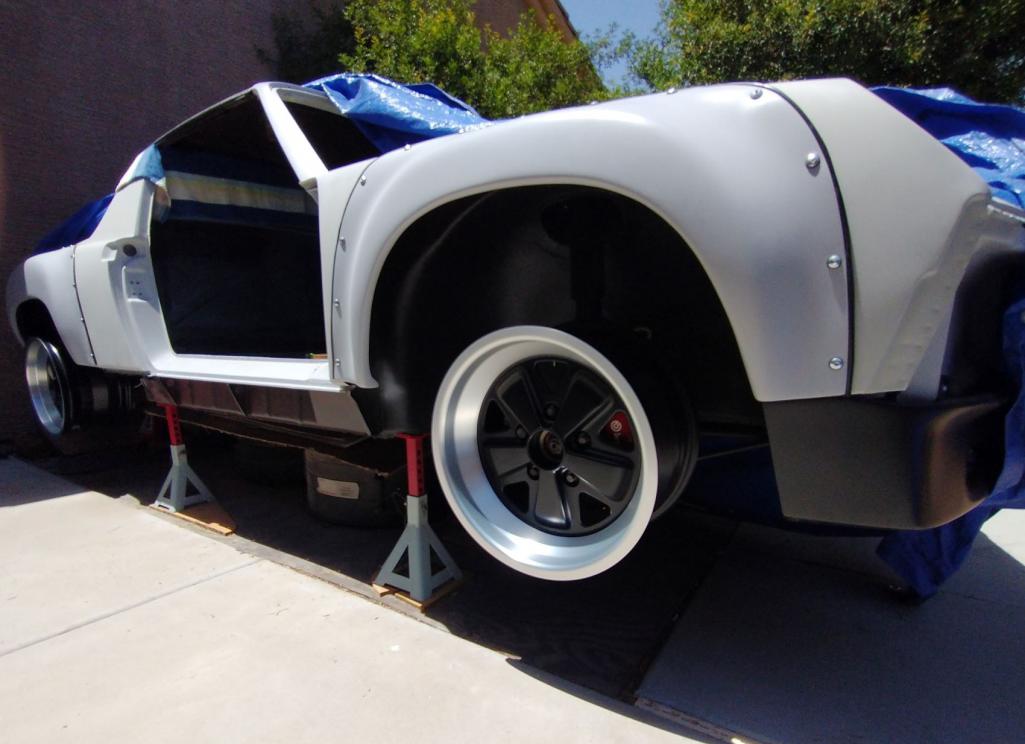
I still need to hit the local Discount Tire to see what my options are for some temporary tires while I finish the rest of the 914...Still a long road ahead!
Posted by: slowrodent May 31 2022, 12:17 PM
Car looks great Mike. Excellent wheel choice! FYI my dash is blue too...seems to be pretty common
Keep up the great work.
Kevin
Posted by: Mayne May 31 2022, 12:25 PM
Looking great! 15 or 16 inch wheels?
Posted by: tygaboy May 31 2022, 01:09 PM
I love your build! If I was doing mine over, I think I'd do riveted flares. LOVE the "tough guy" look they have. Keep up the great work!
Posted by: mgarrison May 31 2022, 02:18 PM
Looking great! 15 or 16 inch wheels?
16x8 and 16x9. Needed 16's to clear the Boxster calipers. Probably should have gone 17's but nobody seemed to have them in stock.
Posted by: autopro May 31 2022, 02:59 PM
Awesome car, I got the same wheels but in size 15. Interested to see what tire choices you come up with.
Posted by: Costa05 May 31 2022, 07:10 PM
Congrats on the wheels! Looks great Mike.
Posted by: mgarrison Jul 19 2022, 05:06 PM
So...I've been trying to track down the BFG's I wanted to use - no luck. Backordered everywhere. I had moved on to my second choice General GMAX RS, but on the way to the tire store I got distracted - SQUIRREL!
After a marathon day to run to Santa Fe Springs, CA and back, without a stop at Disneyland, I now have some more goodies to move me a few BIG STEPS closer to that far away goal...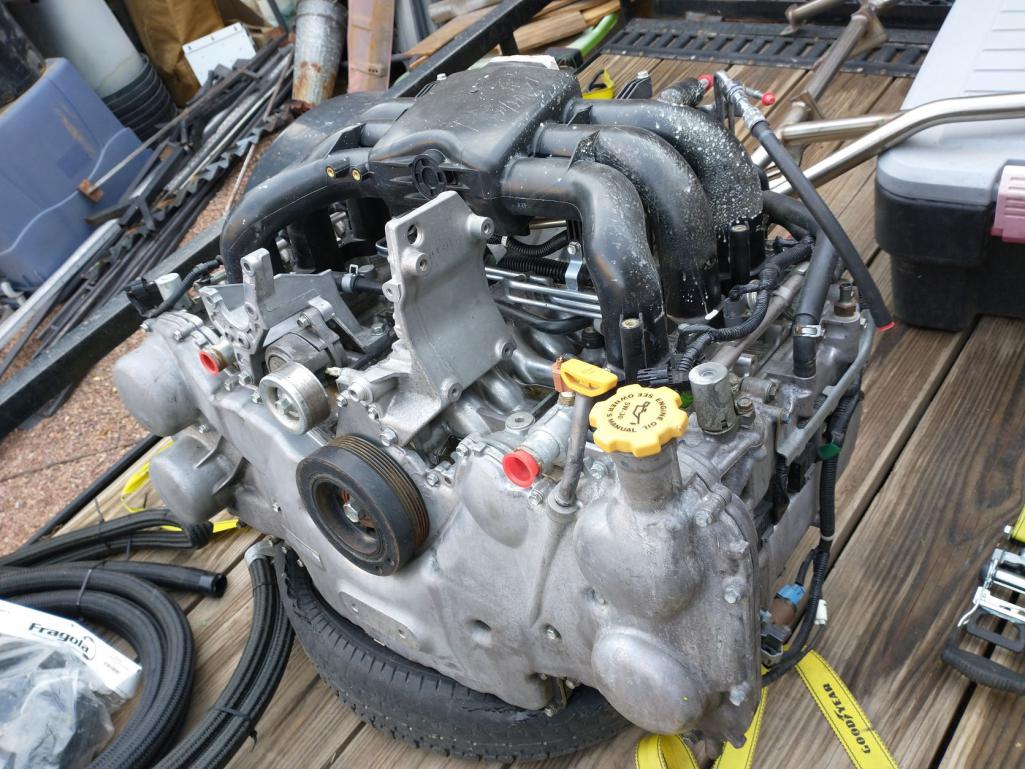
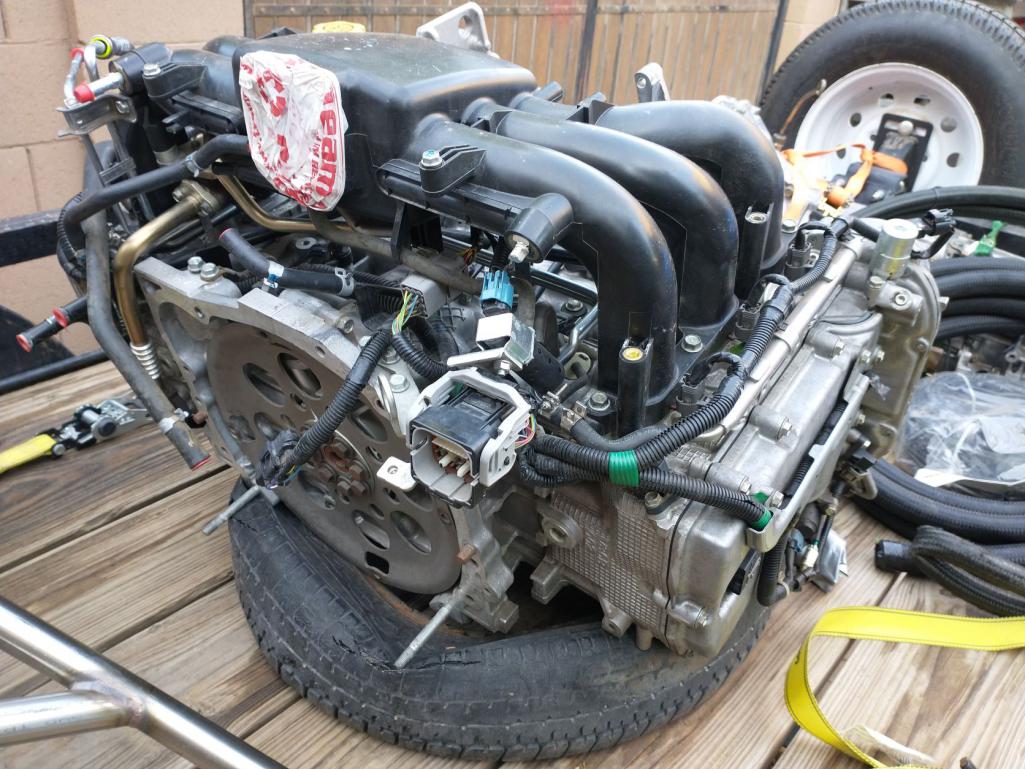
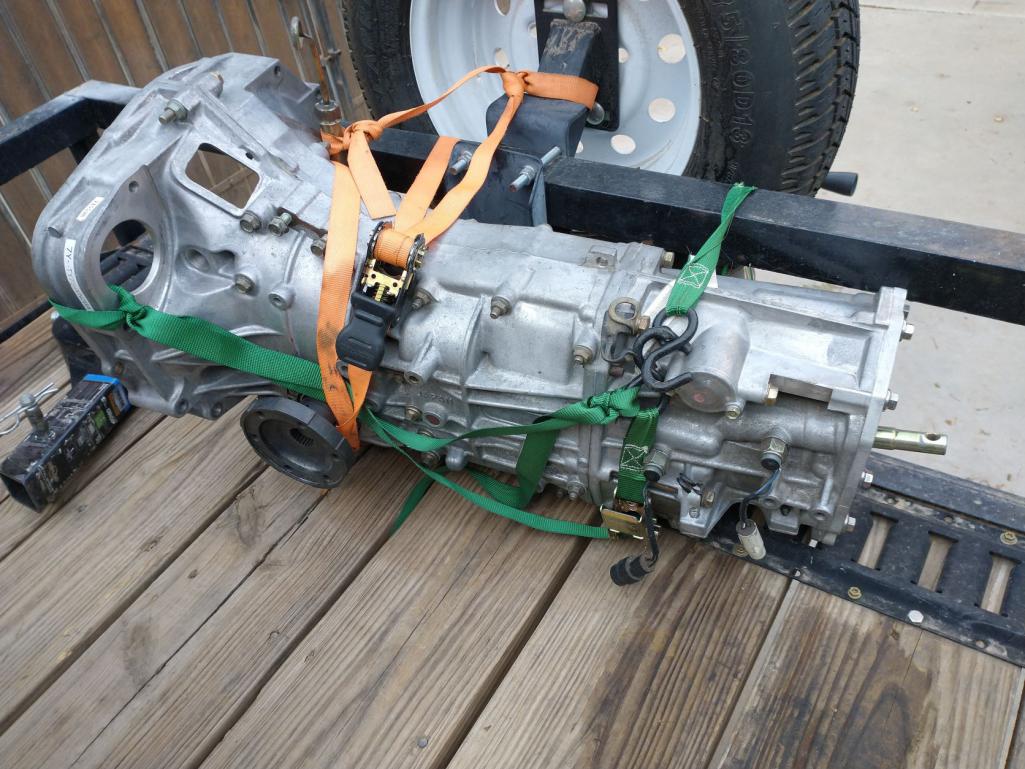
A US market EZ36 with low miles, plus a 5 speed Subaru trans already converted to two wheel drive, AND 930 output flanges already installed was too good an opportunity to pass up! Not to mention the included radiator, braided hoses, AN fittings, stainless steel cradle, brand new motor mounts, MR2 shifter. Feel like I struck gold!
And a huge shout out to Bob Asam for helping me load it all on the trailer
Maybe I can find some CHEAP, used 16" tires to at least get me back to roller stage while I repay my savings account
Posted by: mgarrison Jul 20 2022, 08:42 PM
Did a test fit of the coolant hose down the passenger side, and tried a few things with the radiator that came with the EZ36.
Hose routing seems viable, just need some grommets for the openings to protect the hose.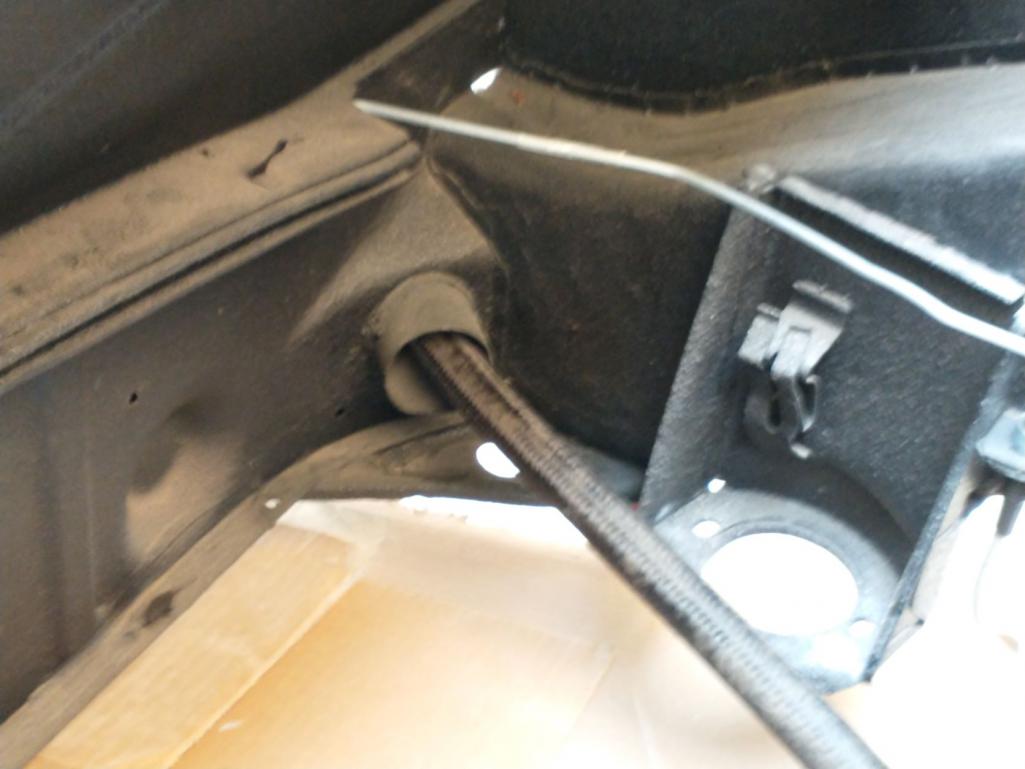
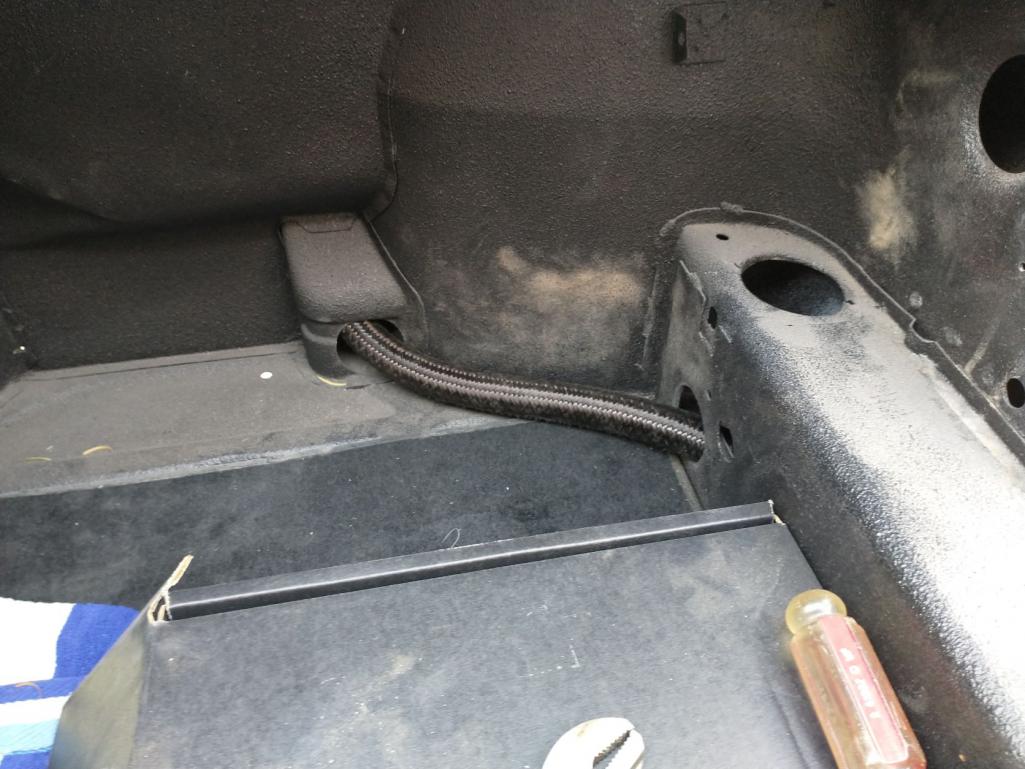
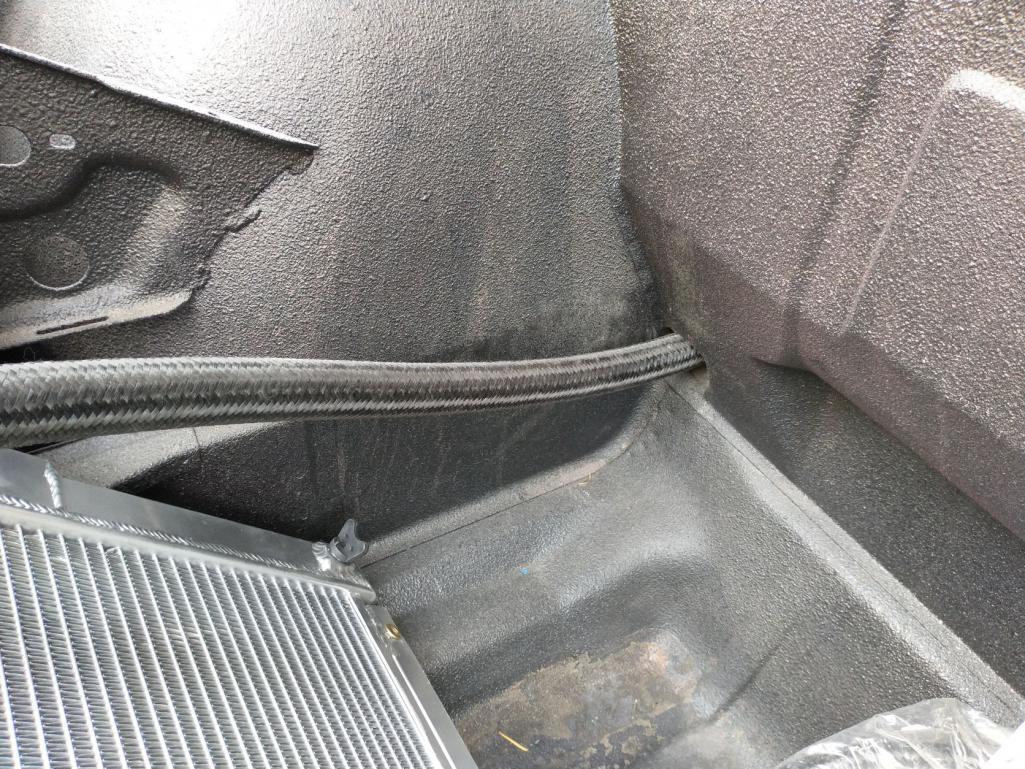
The radiator is too tall for where & how I would like to place it. I tried laying it at an angle, but the upper hose connection would need some kind of elbow to get it headed back down in the right direction. 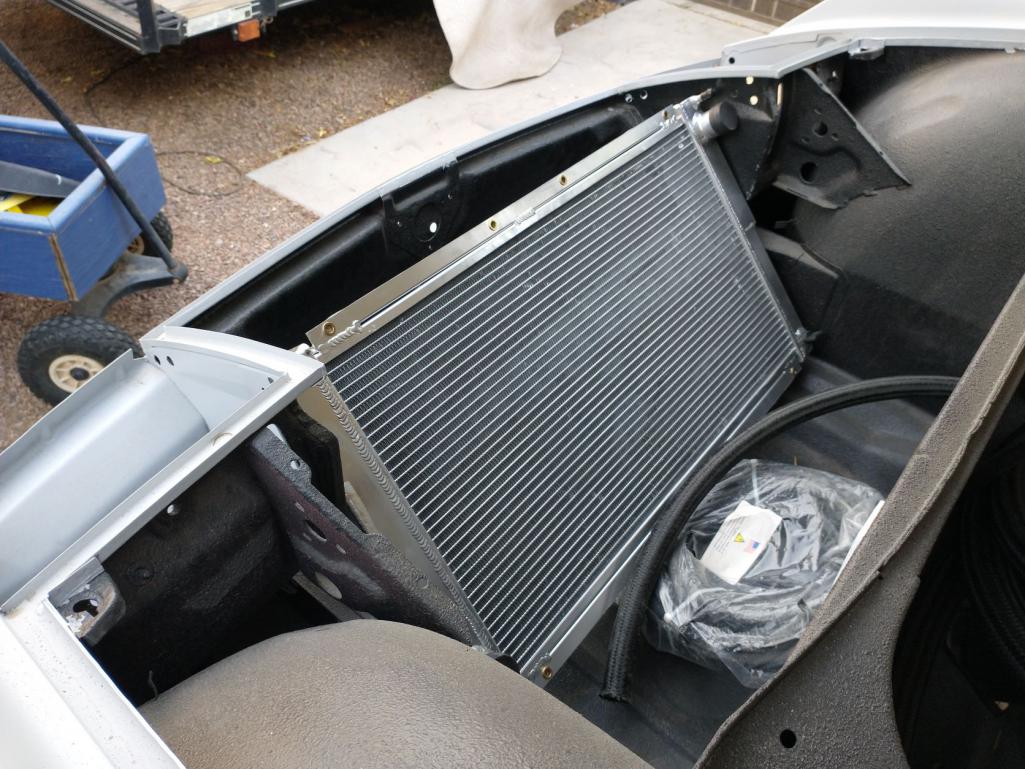
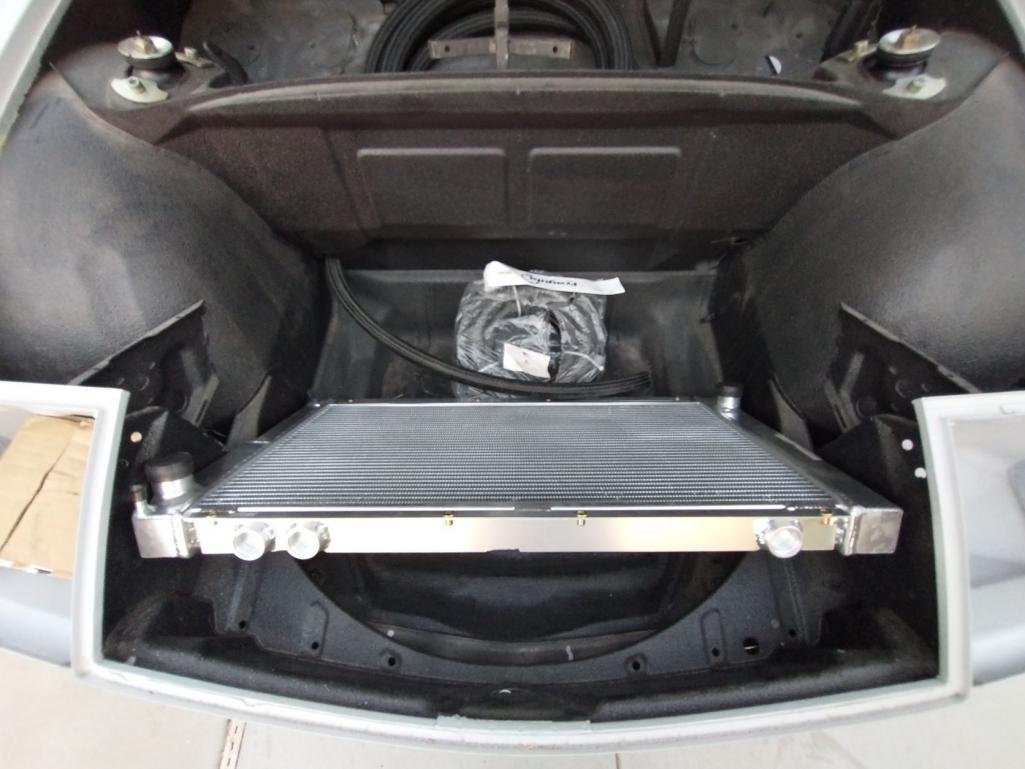
I'll go with the Mishimoto Celica GTS radiator. Input/ouput in much better locations, and about 2" shorter also. If anyone's interested in this radiator, just let me know!
Posted by: slowrodent Jul 21 2022, 09:04 AM
Engine and trans in-house is a huge step Mike. If nothing else for the moment, it's a huge motivator! I saw the posting for that engine/trans and wondered if you'd jump on it. Congrats. As usual, your work looks great.
Posted by: Chris H. Jul 21 2022, 10:27 AM
Can't go wrong with the Celica GTS rad. I bet 20+ 914s are using it. The Mishimoto will probably barely get warm. I have the regular old e-bay aluminum rad with my EG33 and it stays at 185 regardless.
Posted by: mgarrison Jul 23 2022, 09:49 AM
UGH
If I could only find some cheap, used 16" tires I could roll her into the garage and still be able to do something! 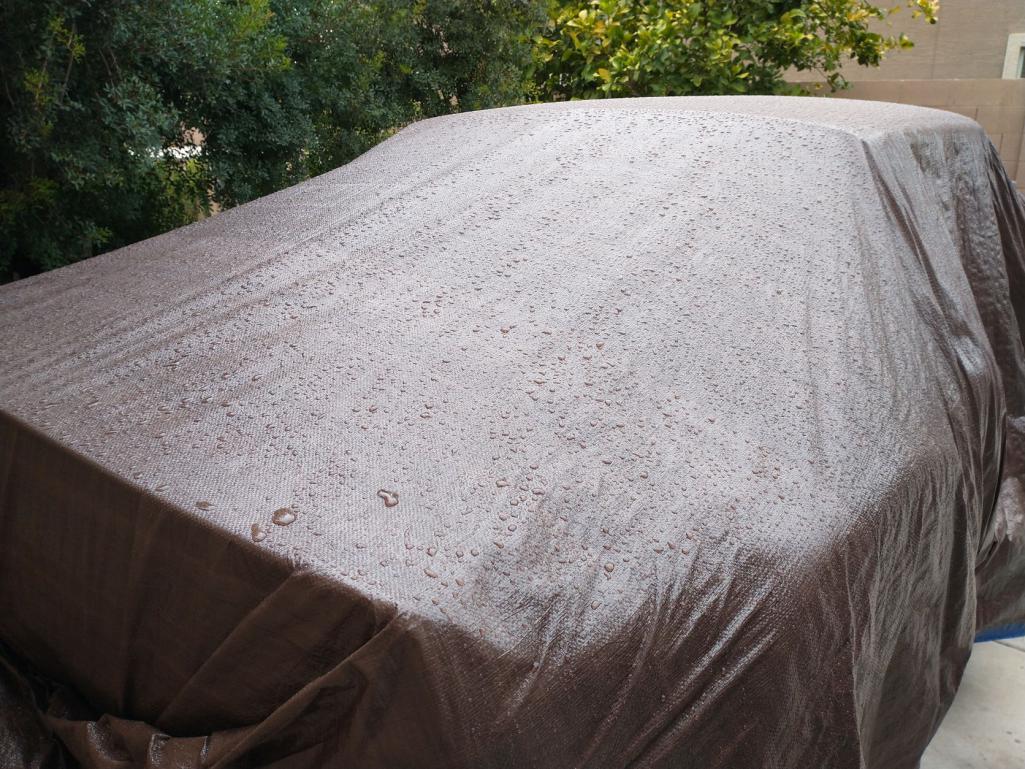
Posted by: Mayne Jul 23 2022, 10:18 AM
Looking good! I’ve got the eBay Celica GTS radiator in my evolving conversion and it seems like it’ll work well. Nice score on the drivetrain and parts.
Posted by: mgarrison Aug 5 2022, 06:11 PM
Been trying to do some little things while I replenish some $$$ for the 914. I got the radiator hoses run through the longs and got the grommets in place to keep them from chaffing on the openings.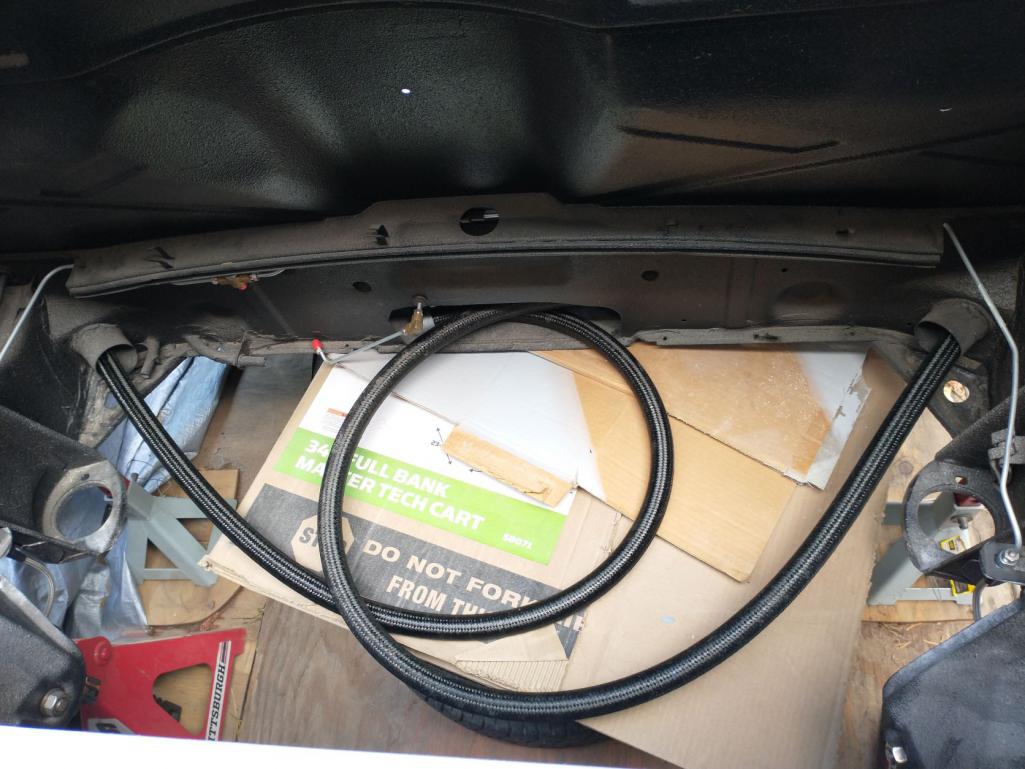
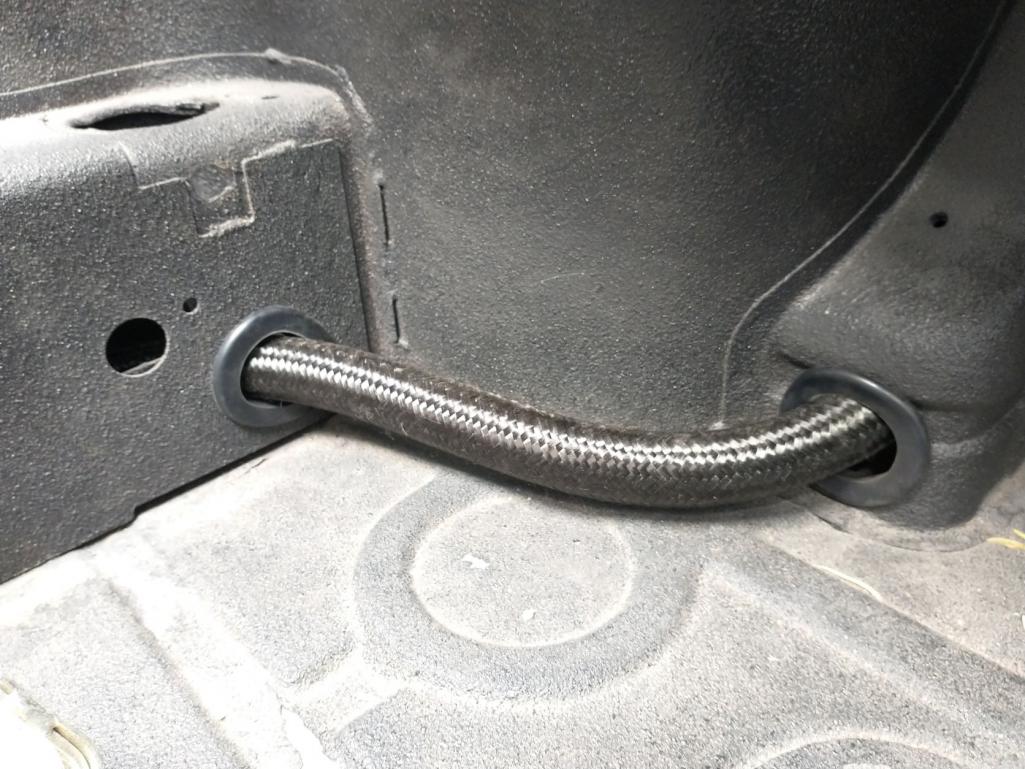
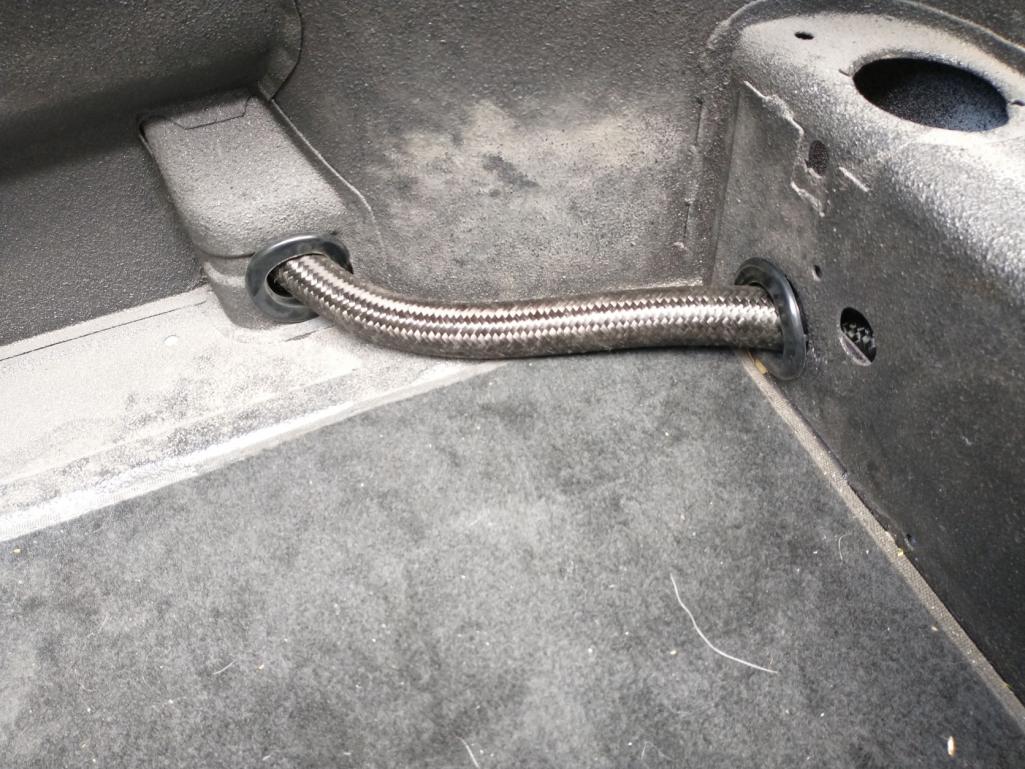
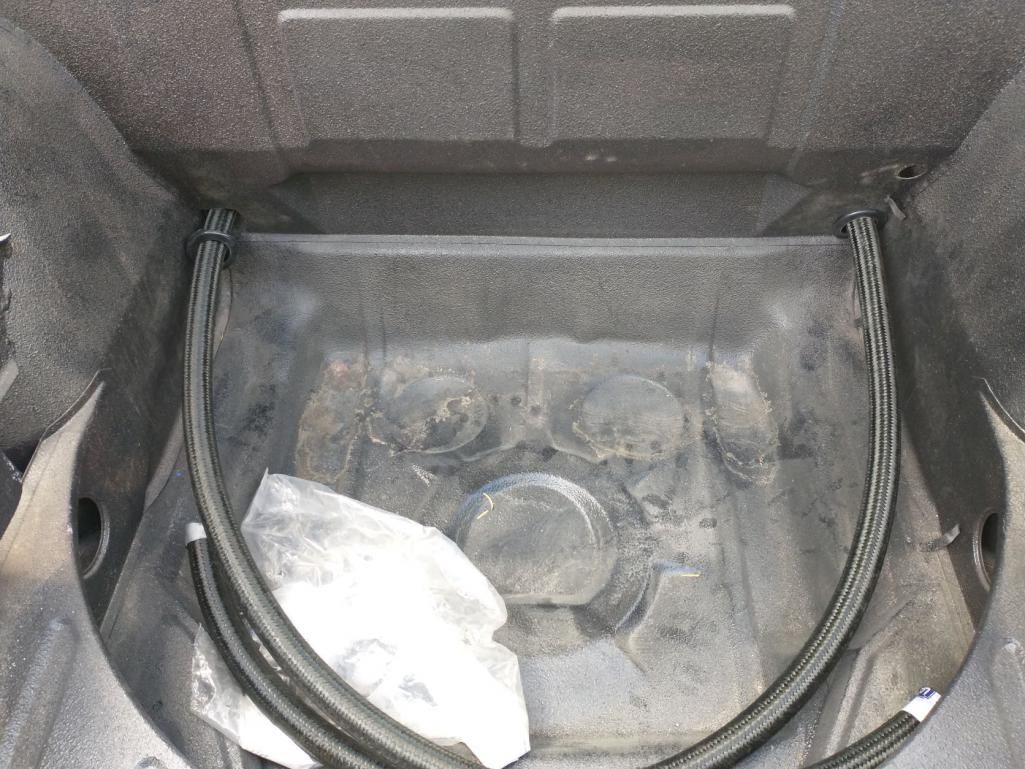
It's not much, but it's something - especially with all the rain we have been getting!
Posted by: Front yard mechanic Aug 5 2022, 08:06 PM
Your build looks fantastic! Never complain about the rain in az
Posted by: 914GTSTI Aug 6 2022, 05:19 PM
Happy to have found your build . I'm doing the same thing up in Glendale.
What wheel offset did you get ?
Randy
Posted by: mgarrison Aug 20 2022, 12:53 PM
Happy to have found your build . I'm doing the same thing up in Glendale.
What wheel offset did you get ?
Randy
Good to hear your on the same journey! Just let me know if you can use any parts I'm not gonna use; I have 4-bolt wheels, brakes, struts, etc. as well as original gauges.
Here's what I ended up getting for wheels...
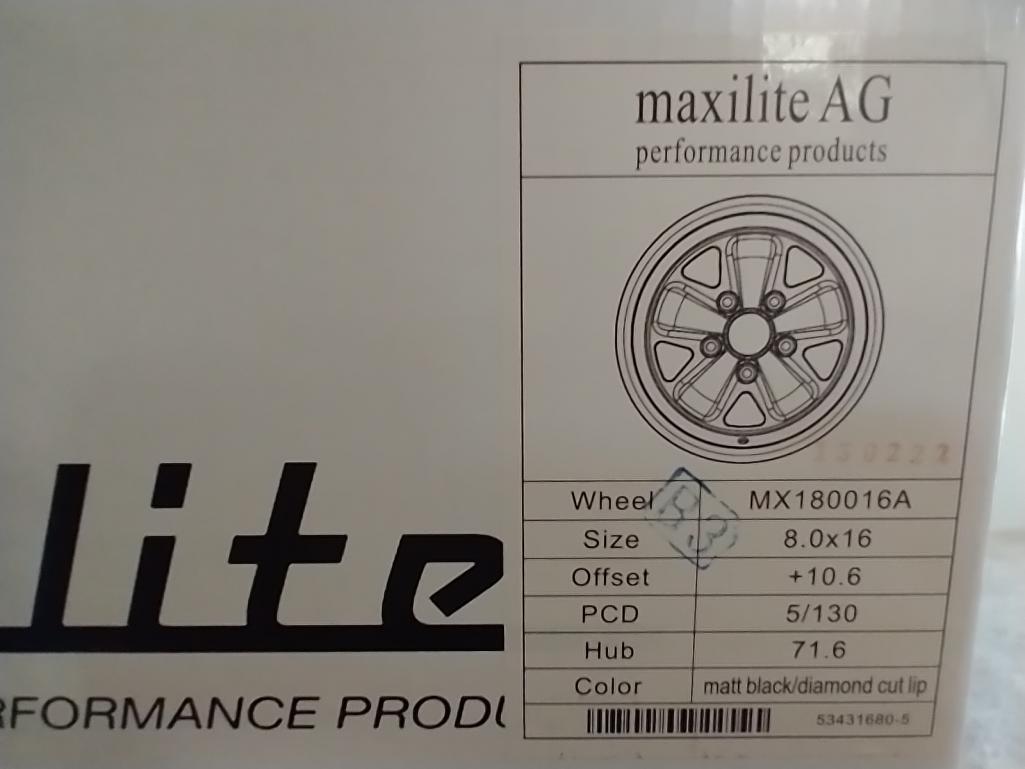
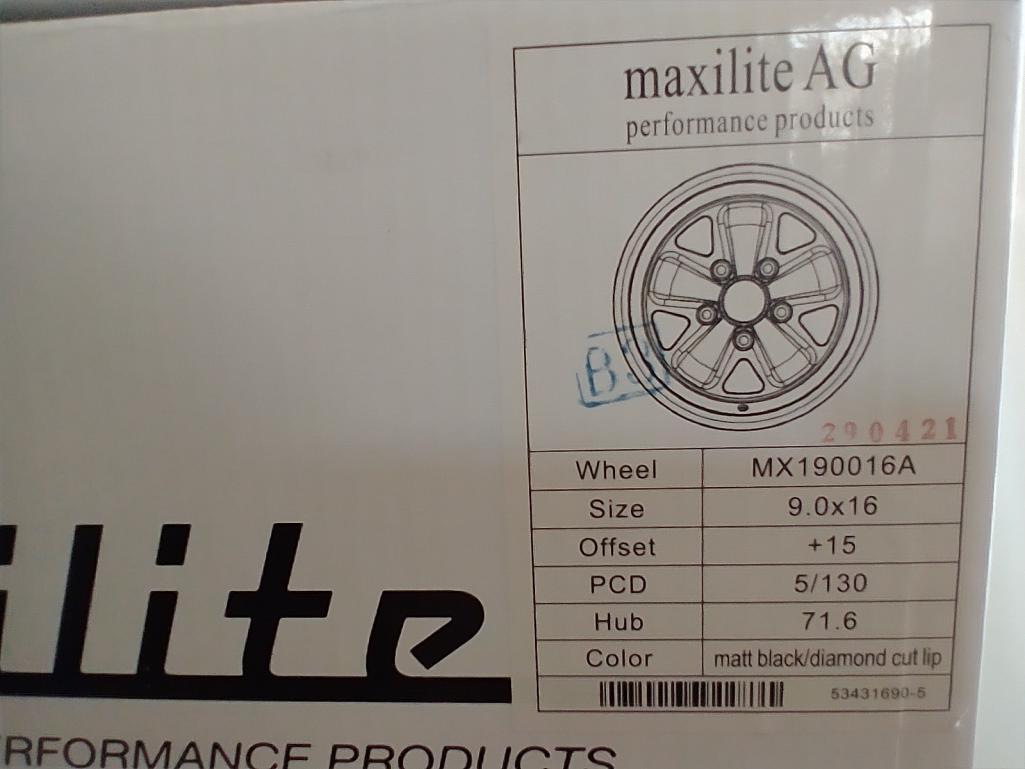
Looking back I should have tried harder to track down the 17" diameter wheels. Tire choices would have been much more plentiful, and I think now they would have looked fine with the 911/Boxster suspension & brake setup.
Posted by: mgarrison Aug 20 2022, 01:08 PM
Been really bummed that I'm out of funds for the 914 at the moment, and still waiting to get tires so that I can get it back down off the jack stands. But, my son hooked me up, and yesterday we took an adventure to EVIT where he attended the automotive repair program. His first year instructor Mr. Mota was a huge help! He turned us loose in the dreaded "tire room". I was warned to picture a scene from Indiana Jones where we would be swimming through, and climbing over old tires! Smaller room than I imagined, but not far off at all!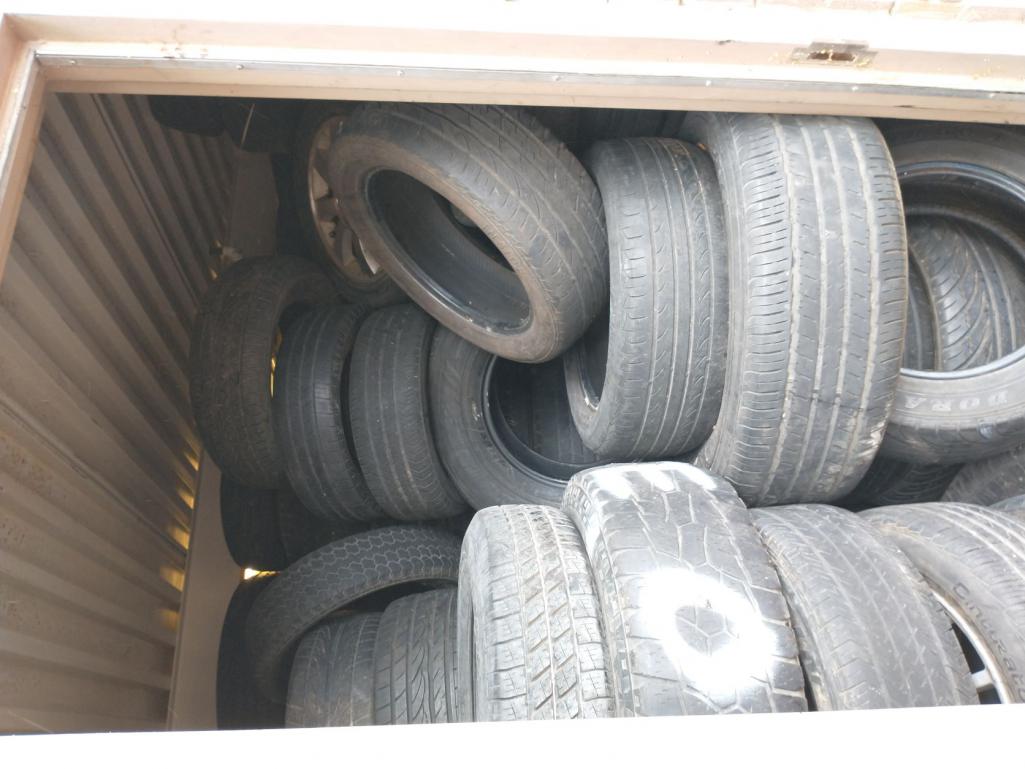
We both climbed up in there and back as far as we could get, and in the end we found four tires that worked! Not close to the final "correct" size, but I just need to be able to roll the 914 around to the garage. My son was able to mount them for me on the swanky European tire machine so nothing got scratched (with a bit of a refresher from Mr. Mota). Some awesome personal service! Nothing like free tires AND free mounting! 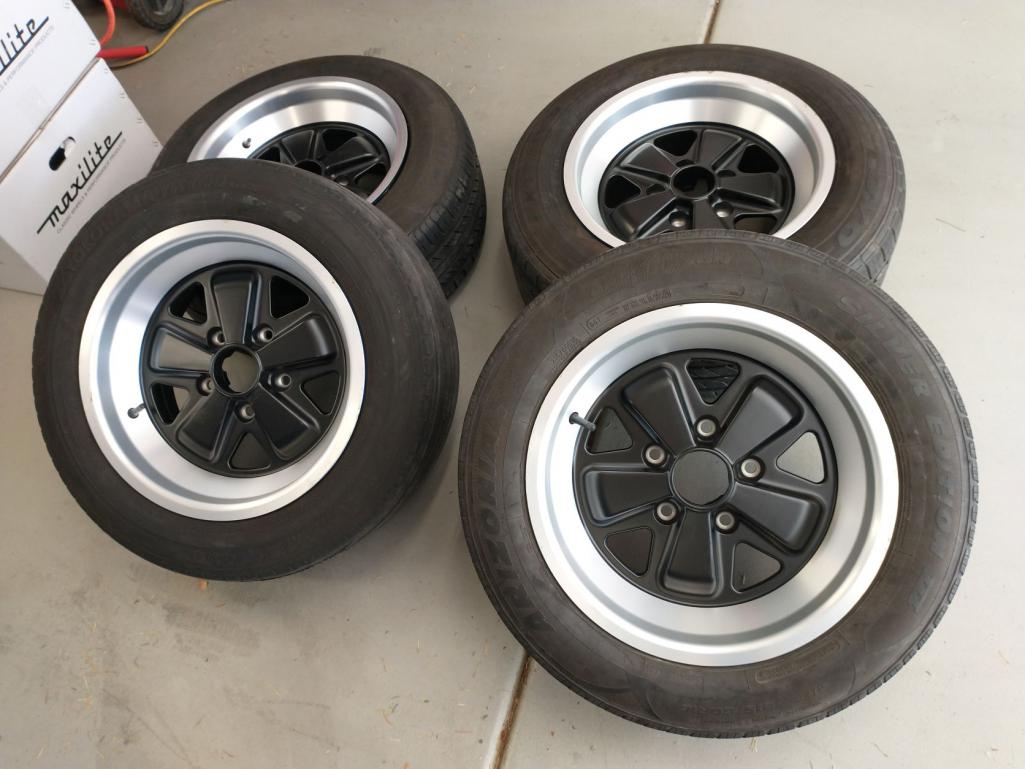
A huge shout out to the East Valley Institute of Technology (EVIT) & Mr. Mota. If your in the East Valley and you, or your kids are interested in automotive stuff, or welding, or medical I can't say enough good things about EVIT. The people are great, and the facility is amazing!
And the coolest part was Mr. Mota introduced us to another 1st year instructor whose class has started work on the green 914 I donated to EVIT. It was in the garage when we were there. He was really interested when I shared how the Subaru motors & trans fit in the 914 since they have several donated Subaru engines there in the garage. Between the welding classes, the auto body classes, and the automotive repair classes, maybe they will save another one!
Now, if the rain would just calm down a bit so I can get them mounted and be able to get the 914 back on the ground where I can torque ball joints, etc.
Posted by: mgarrison Aug 22 2022, 12:40 PM
I believe its taken at least about twice as long as expected, but she's finally a roller again! 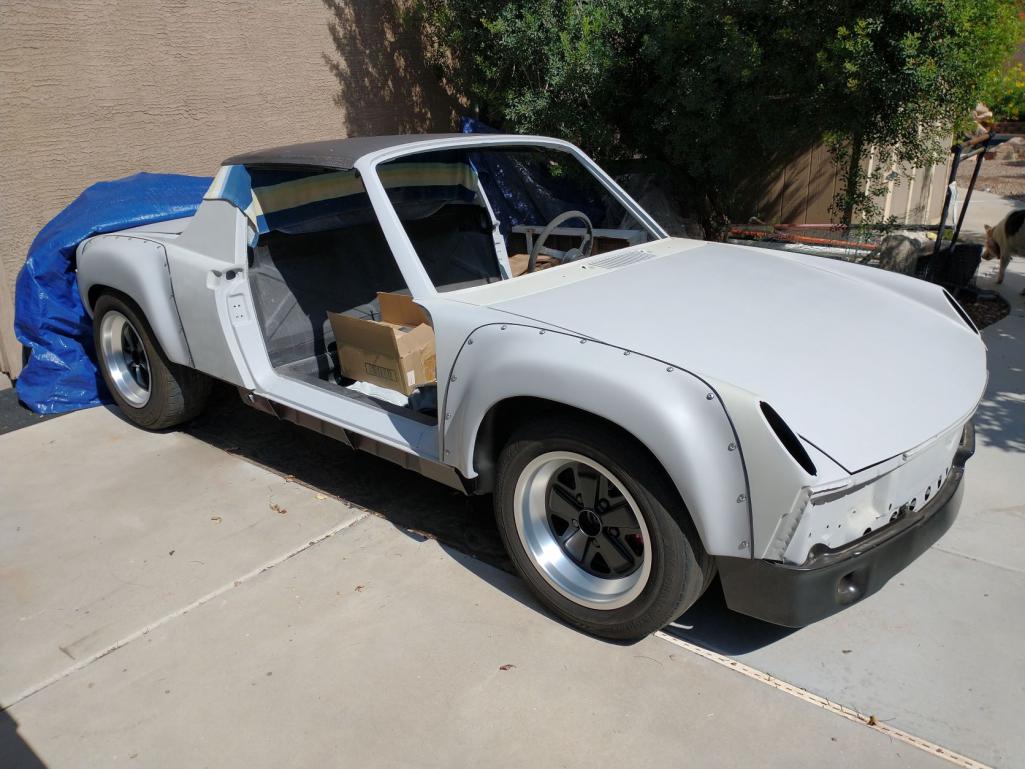
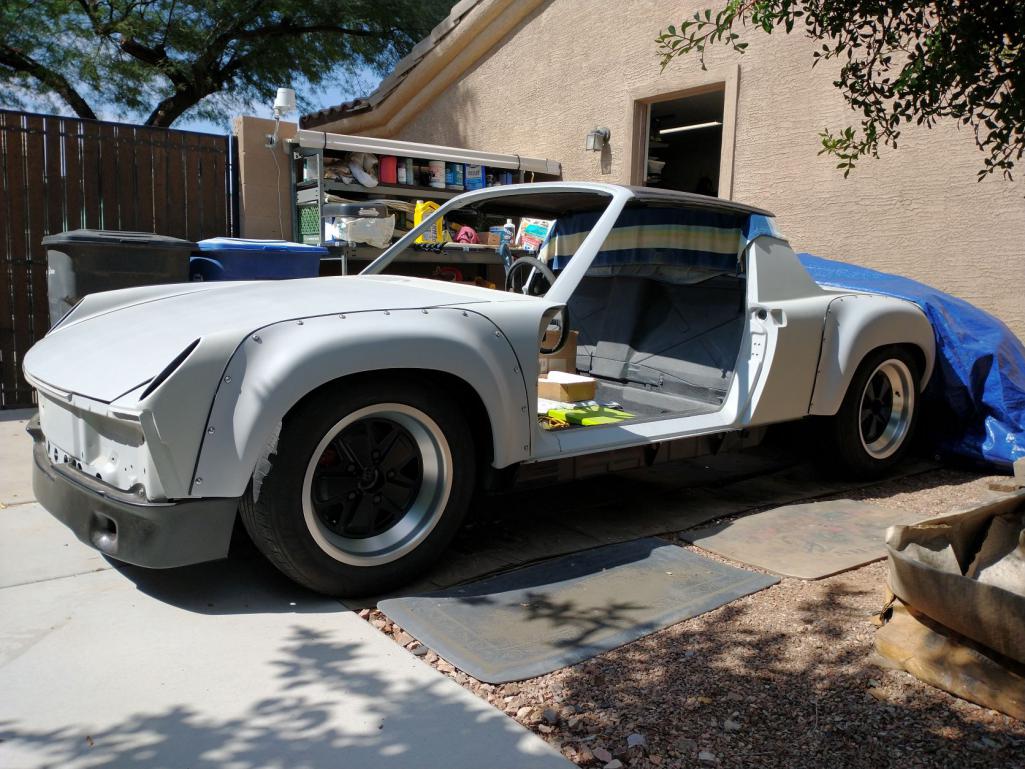
The EZ36 on the cradle tipped forward so bad I thought the motor mounts would tear, I had a 4x4 under the front of the oil pan! I decided to try bolting the transmission up to see if it would balance things out. Sure enough, that did the trick. An interesting side note on the more recent EZ36 motors - it looks like Subaru added a front motor mount bolted to the aluminum front timing cover. It reminds me a little bit of the Porsche six mount...not sure there's really anyway to utilize it, or if its needed at all...
I got some U-bolts and added casters to the cradle so it's easier to move around, but I can remove them when its mounted in the car. The trans acts like it has the LSD installed (what I was told, but no way to confirm), which is an incredible bonus! 
It also has the SubaruGears 108mm 930 output flanges installed: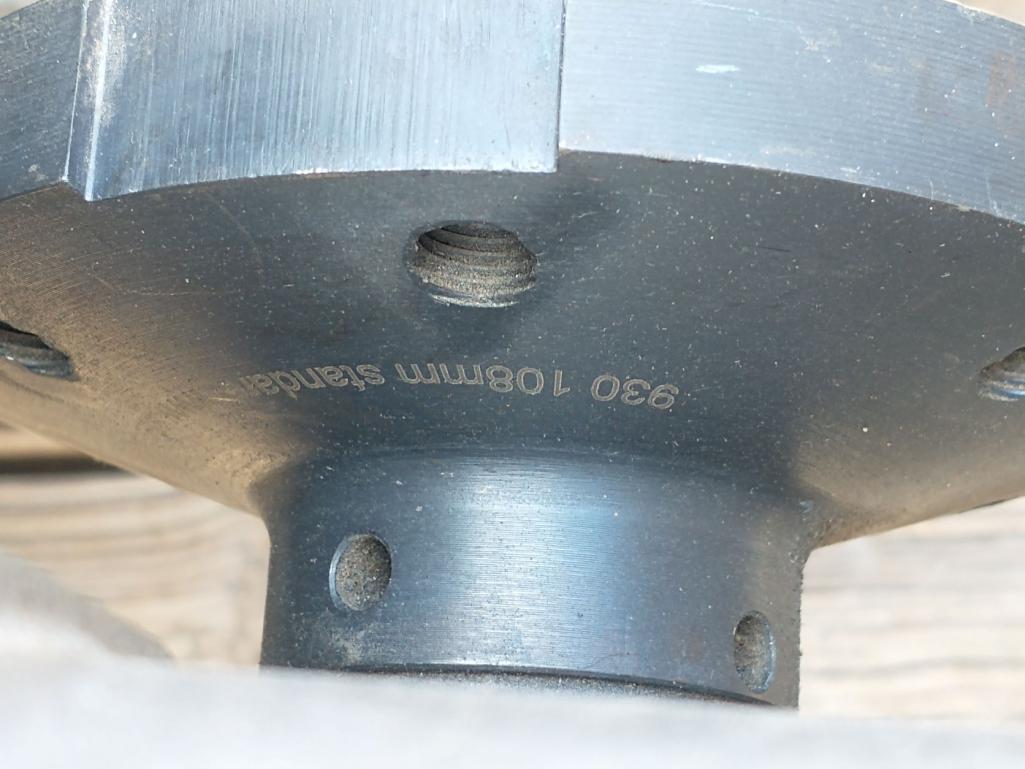
A bit premature, but I like to plan/am a total overthinker With the 108mm 930 flanges on the transmission side, and I installed 914 splined stub axles on the outboard side. Is there an axle/CV joints I can use? Or, is it still going to be a custom axle? Totally not there yet but...
Posted by: autopro Aug 22 2022, 12:57 PM
Car looks great, I love the flares and the wheels.
Posted by: slowrodent Aug 22 2022, 06:37 PM
Progress looks great Mike.... Starting to look like a car again..and a vastly different/better one than the one you began with. It;s quite handsome indeed
Posted by: 914GTSTI Aug 24 2022, 06:16 PM
Looks great.
What tran's are you using ?
Posted by: mgarrison Aug 24 2022, 08:25 PM
Looks great.
What tran's are you using ?
It's a Subaru 5 speed. Not sure what it's out of though. Based on the model/serial number probably a WRX with a 3.9:1 final drive. It was already converted to two wheel drive. 930 flanges from Subaru Gears installed, and a LSD added.
Posted by: mgarrison Oct 3 2022, 12:43 PM
Not much going on here...Too busy paying for and fixing things that break; water heater, pool equipment, garage door opener
I did manage to roll the 914 out, clean her up a bit and then cut the radiator inlet opening. Not much, but something!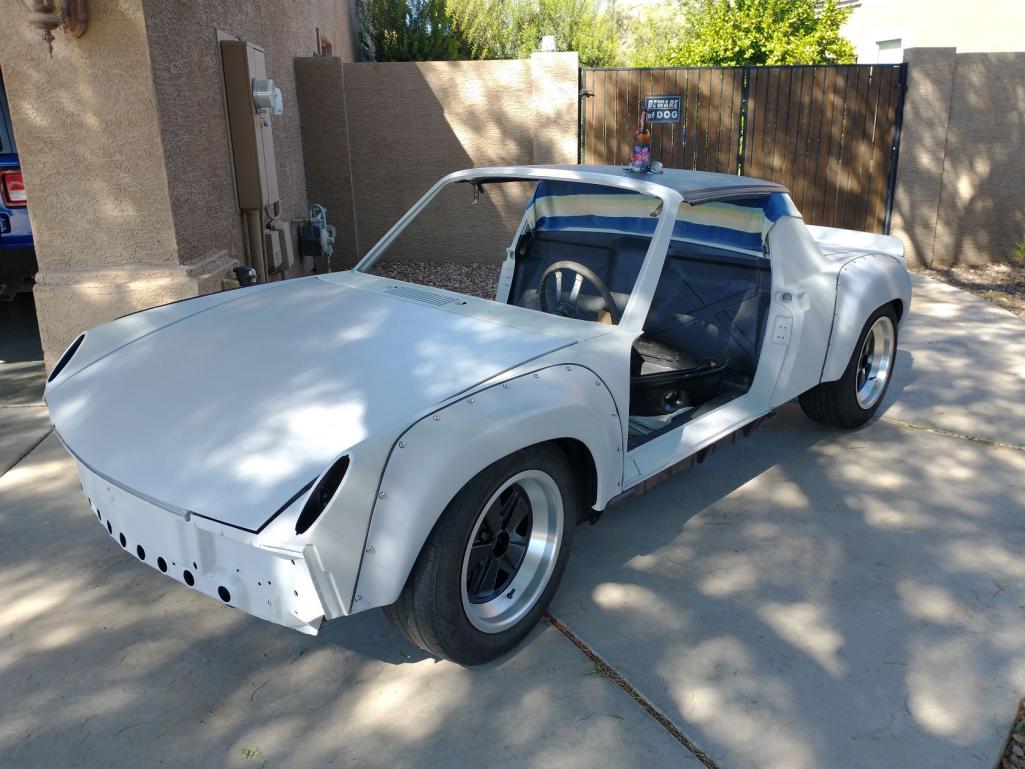
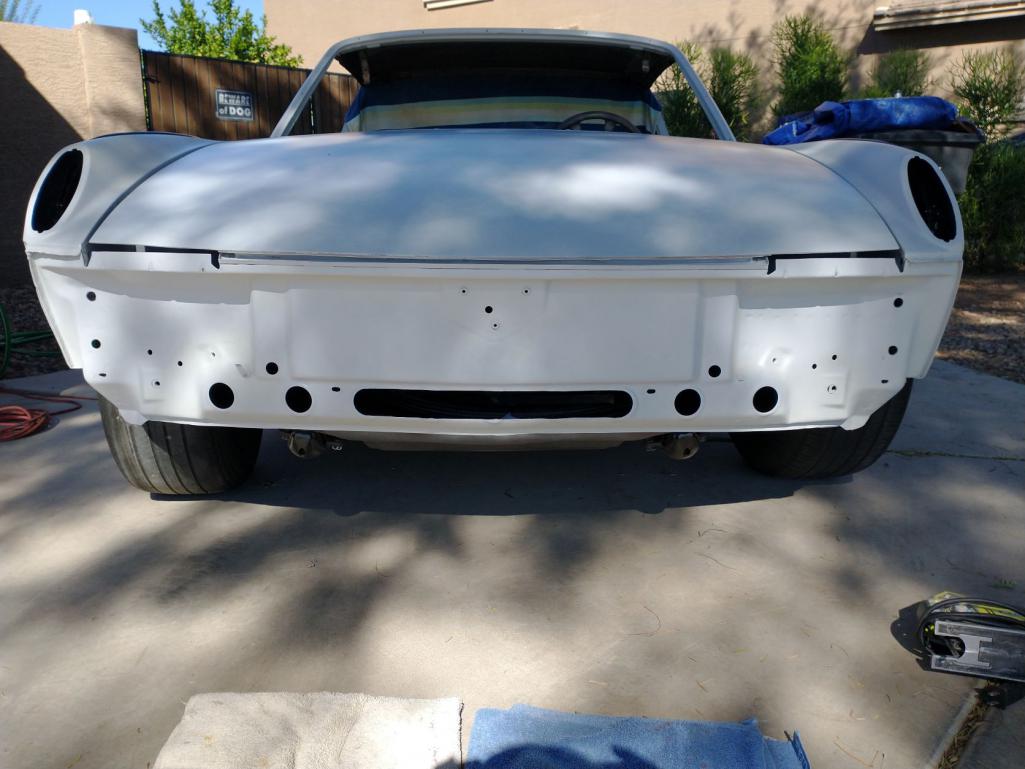
Posted by: Mayne Oct 3 2022, 04:30 PM
Nice intake; I like the minimalist approach. I drilled holes between the factory holes, so maybe about the same amount of airflow. Counting on my EZ30R not being too hotheaded. Car looks great, BTW!
Posted by: mgarrison Oct 11 2022, 06:43 PM
I'm still saving up $$$, but in the meantime trying to keep doing little things as distractions.
Here's this afternoon's diversion... 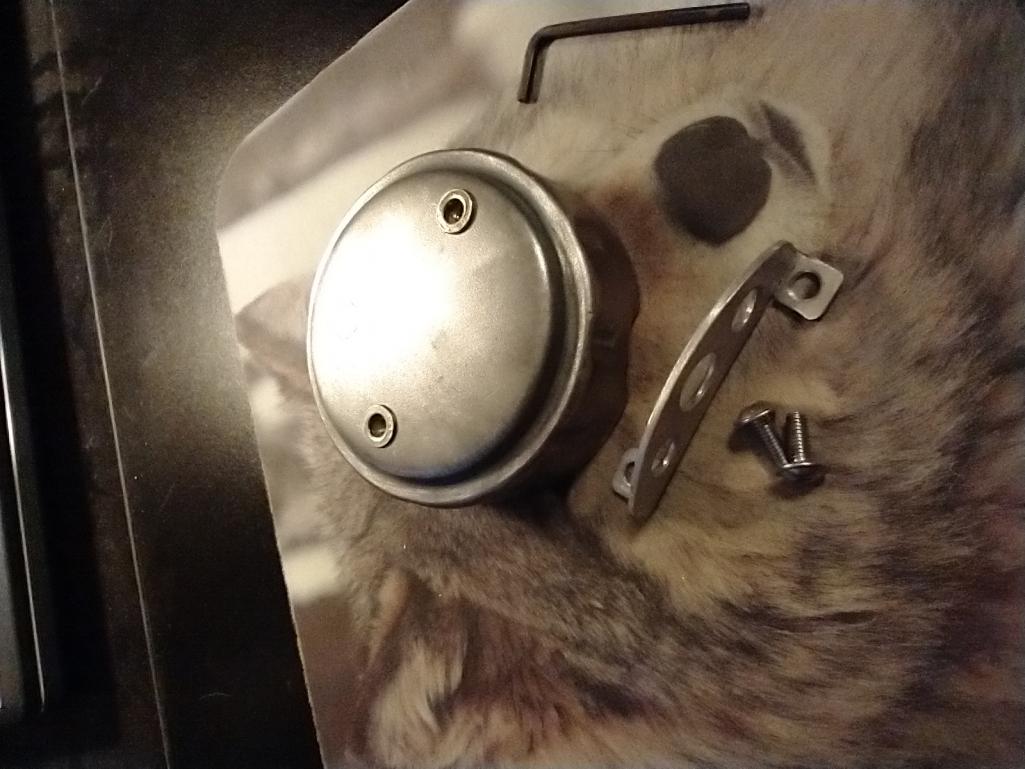
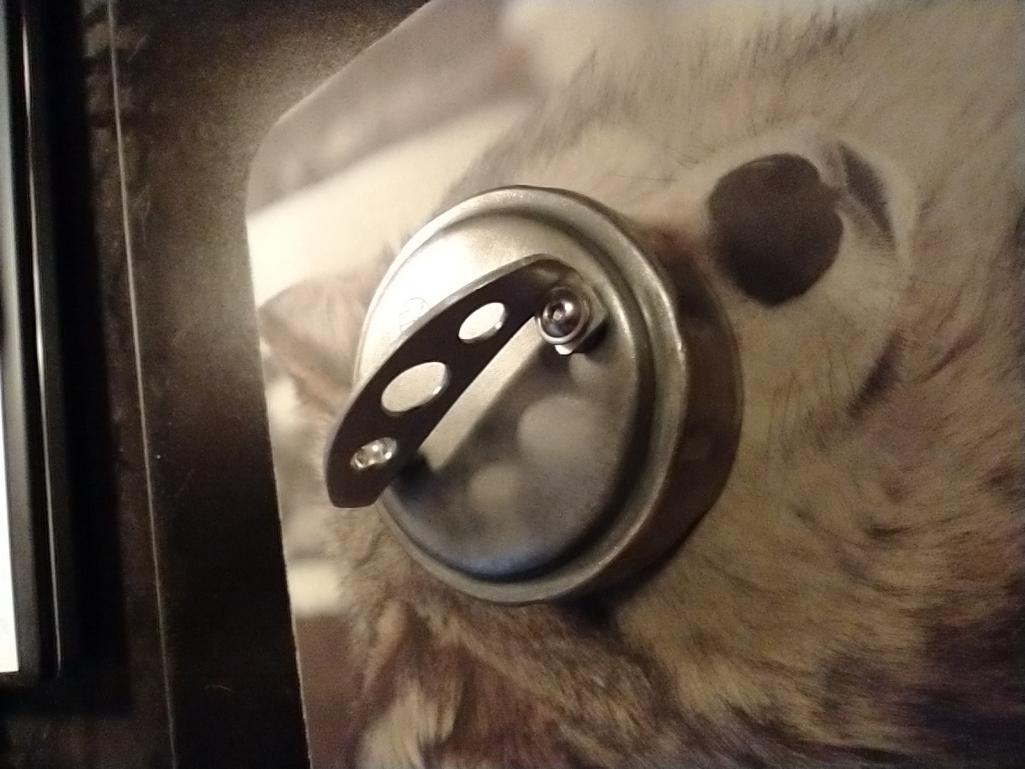
Had to use rivnuts instead of pop rivets, and my holes did not line up perfectly, but close enough! 
Posted by: mgarrison Oct 17 2022, 02:12 PM
Trying to keep myself busy without spending money
I decided to see if I can reuse the old steel bumpers that came on the 914. They are not great, but not horrible either. I mounted the front up real quick to mark where the cooler opening from the valance lines up.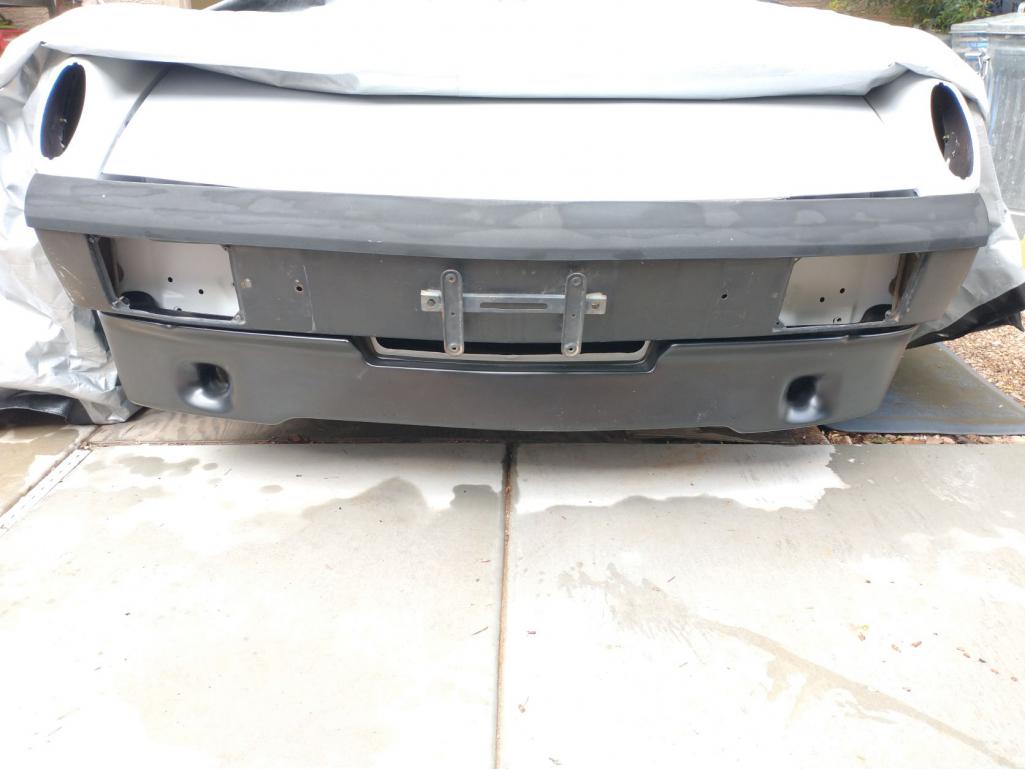
Once I had the sides marked, I laid out where the opening needed to be to line up with the valance opening, and match where I can cut the opening on the nose without messing with the bracing that goes around where the spare tire sat.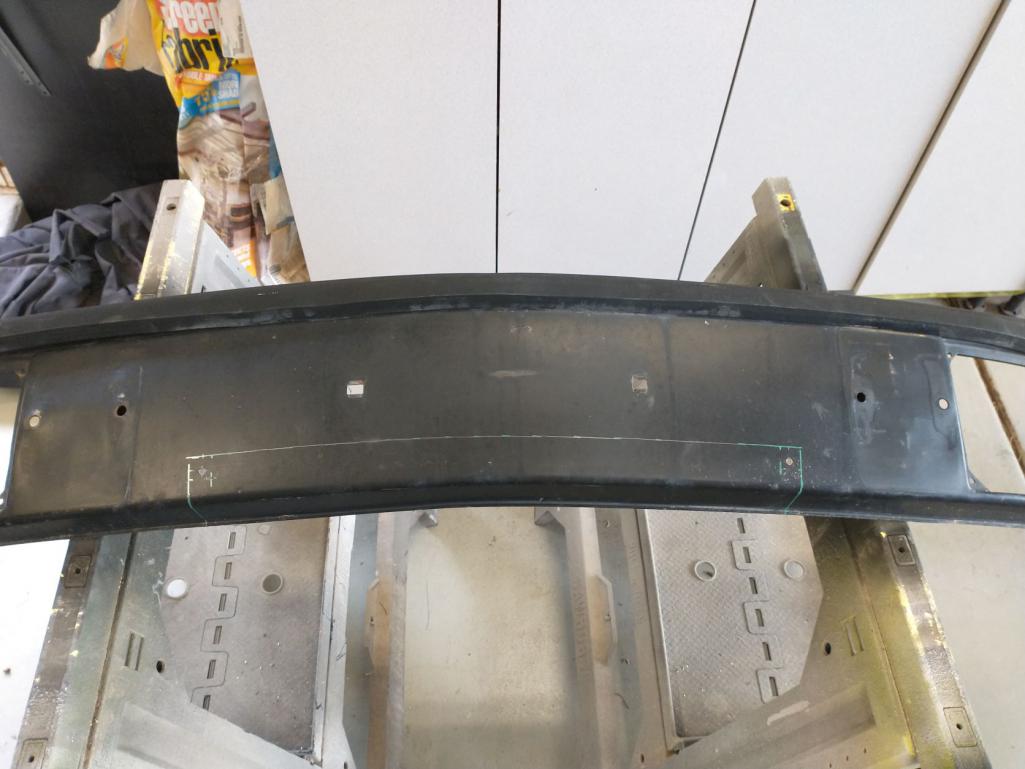
I drilled the holes for the two corners (was off a smidge on both), grabbed some earplugs and started cutting 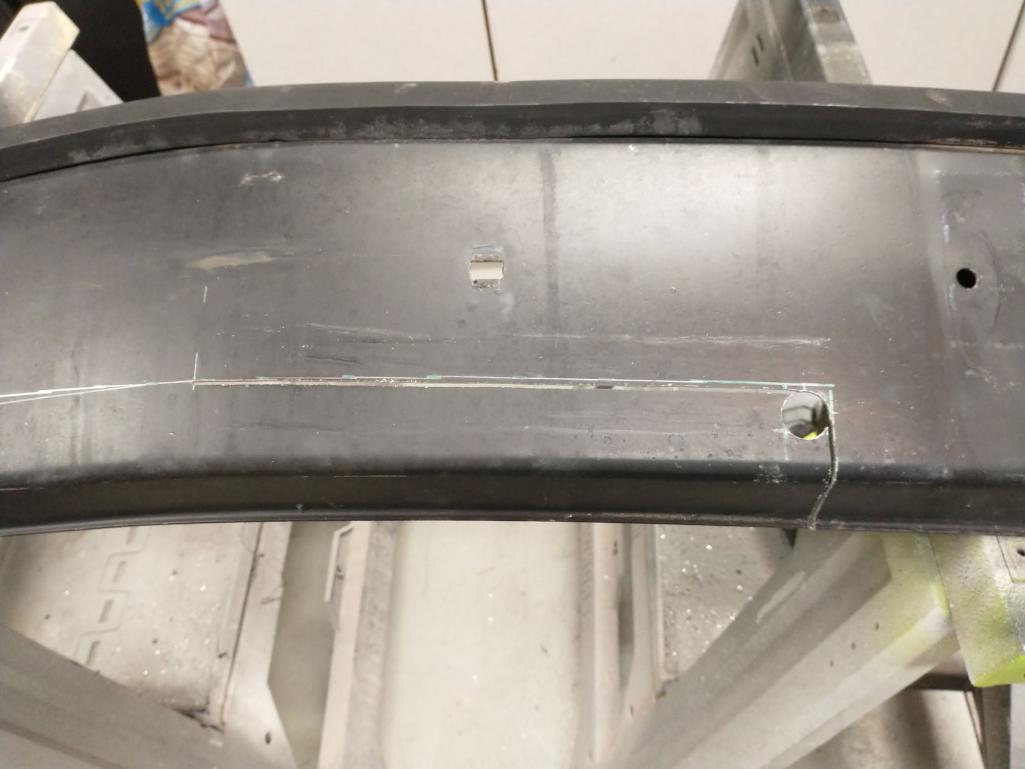
Came out pretty good. Toyed with using the cut out piece to match the lip on the rest of the bumper & valance, but need to mount on the car and measure first.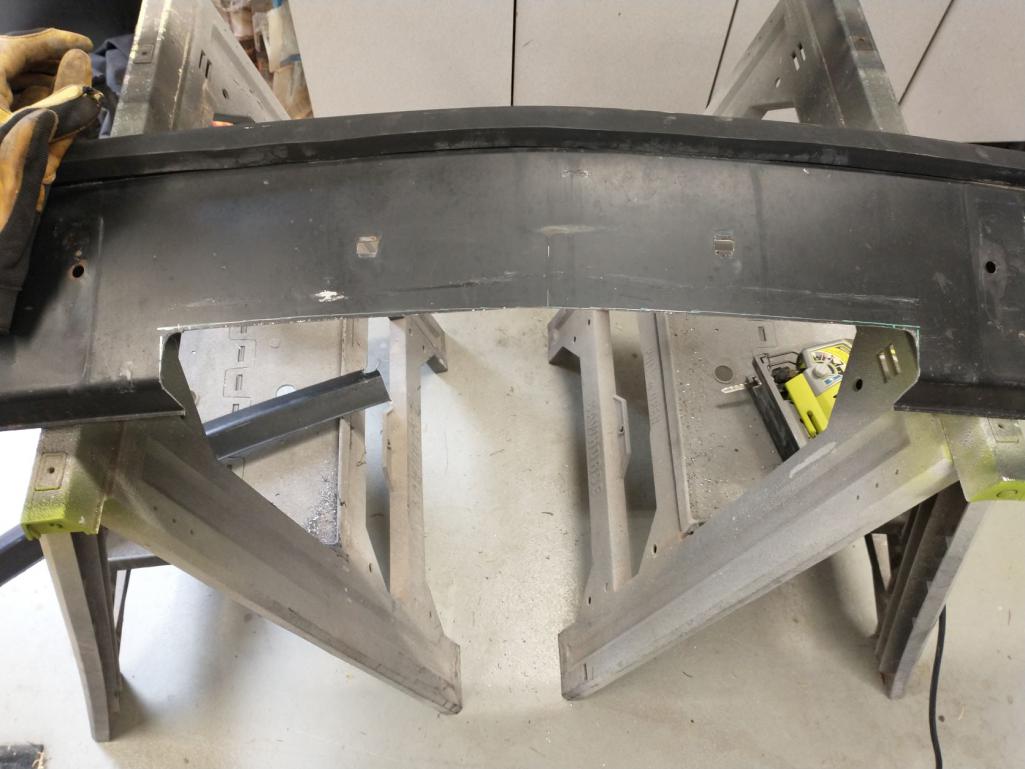
I cut out and welded in some patches for the openings where the license plate bracket was mounted, and where the holes were for mounting the rubber bumper blocks.
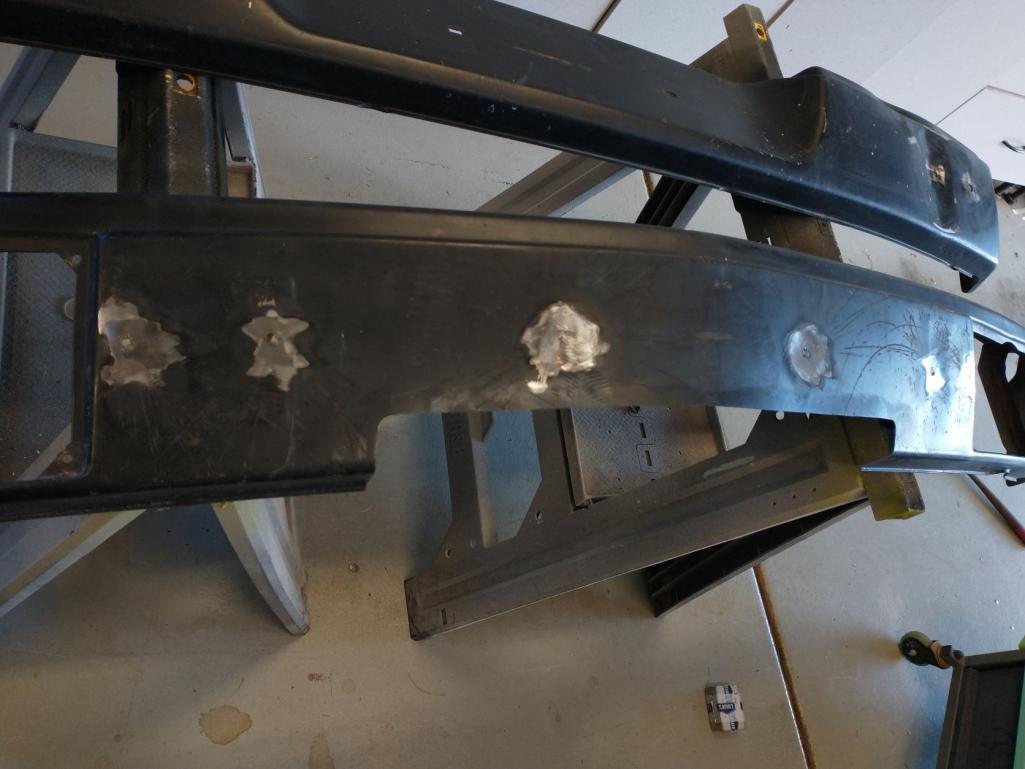
I still need to fill and sand my patches. Front does not look too bad, but the back was pushed in where the blocks mounted and will take a bit more work - you can see the dent on the right side of this pic!
Posted by: slowrodent Oct 17 2022, 06:07 PM
Looks very good Mike... Your body cutout looks very similar to mine. Ive yet to attack the bumper, but your approach seems spot-on..
Posted by: mgarrison Oct 17 2022, 07:15 PM
Quick test fit on the car to get some measurements for trimming out the opening I cut.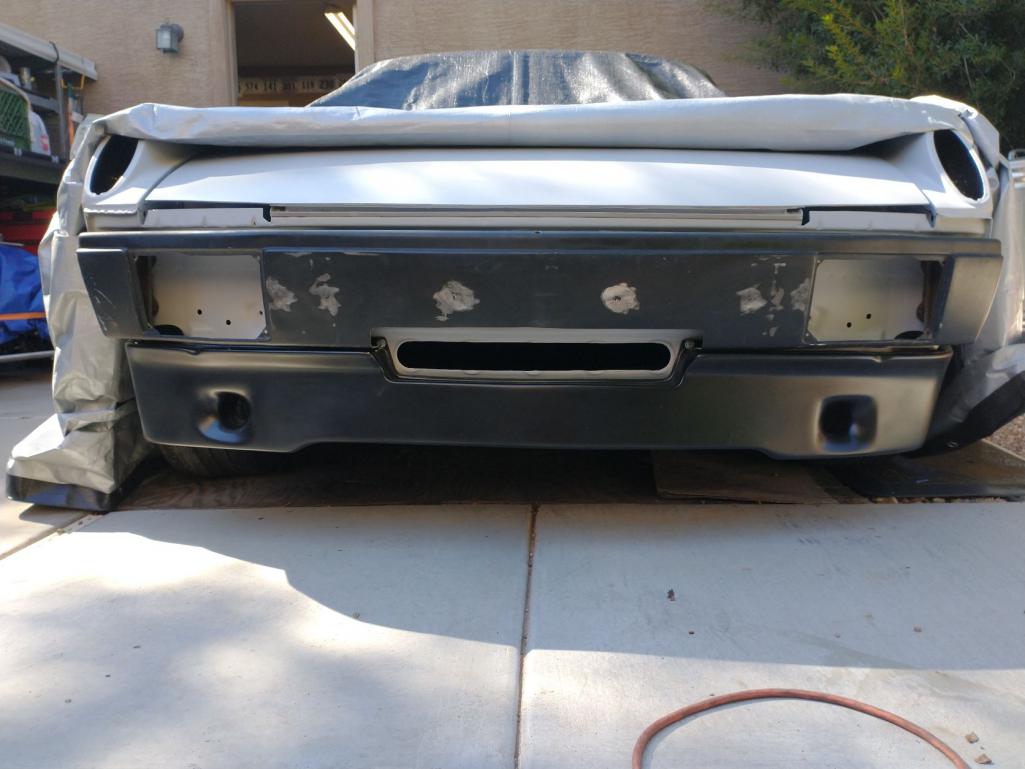
Once I had a rough measurement, I started cutting and forming the pieces I would need.
I needed to do two pieces because the scrap steel I had was not long enough for a single piece. I think it worked out better that way because the angle on the bumper would have made a single piece a challenge!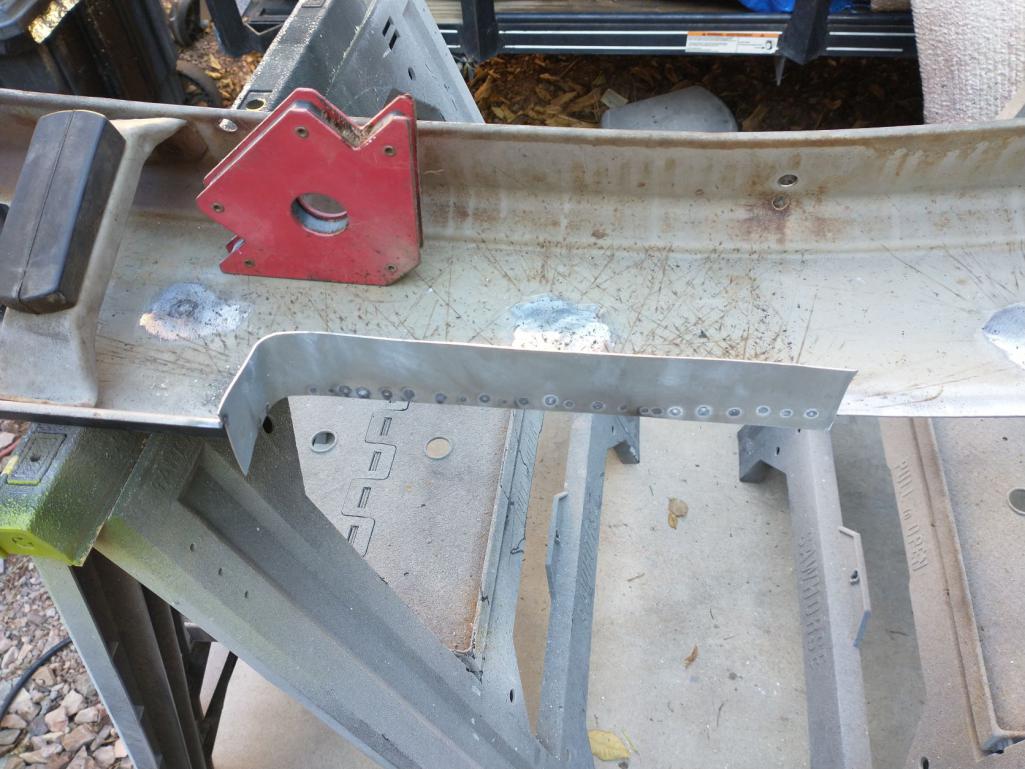
Mostly in place and tacked.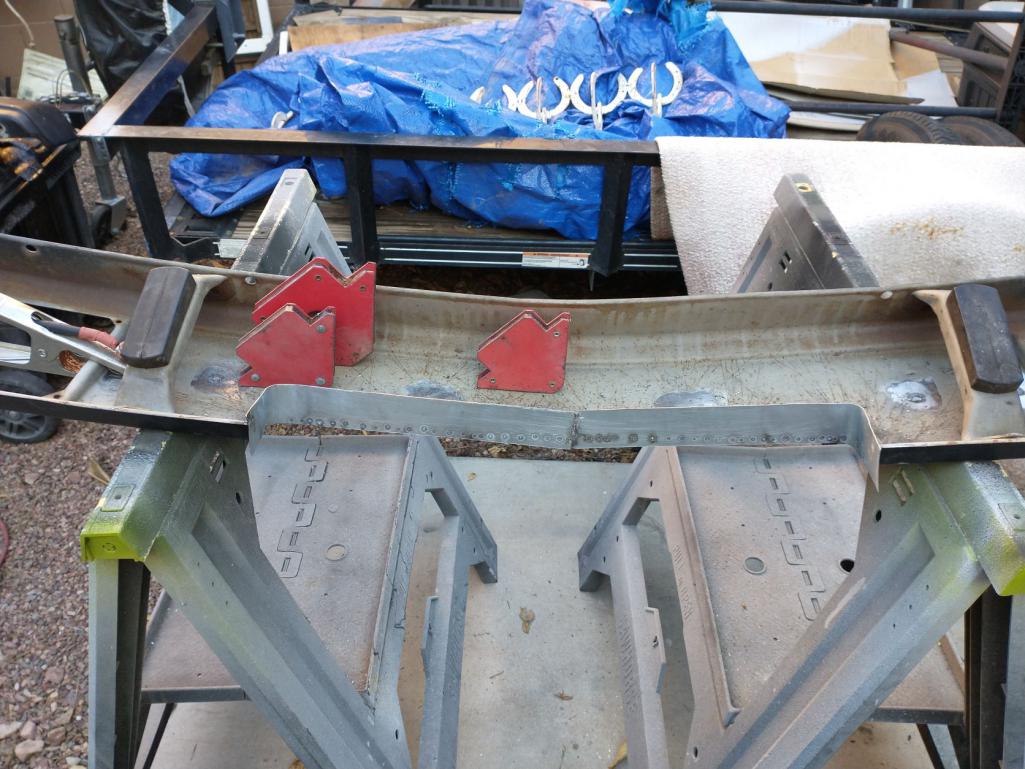
Pay no attention to my crappy welds! 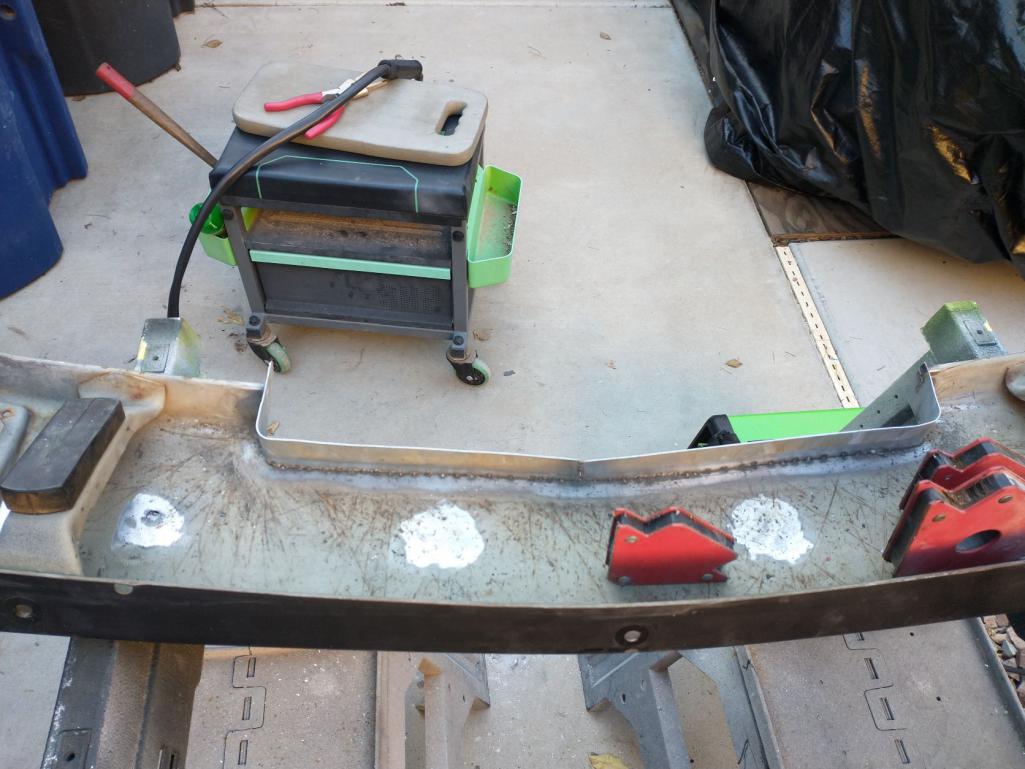
Did a quick, rough trim with the nibbler. More work to do with the angle grinder and body filler!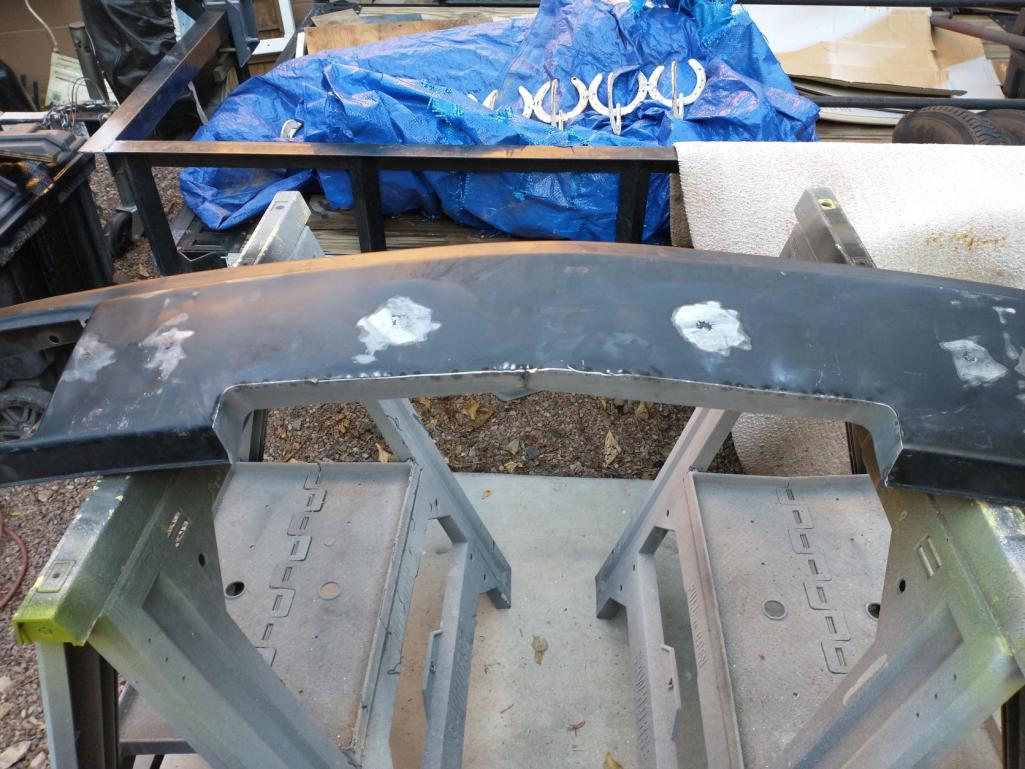
Posted by: mgarrison Oct 17 2022, 07:25 PM
Looks very good Mike... Your body cutout looks very similar to mine. Ive yet to attack the bumper, but your approach seems spot-on..
Thanks Kevin! I got to see Rich's 914 in person last Friday - was nice & helpful to look at things in person and talk through how he accomplished things on his car. Re-stoked some motivation for me to keep moving forward!
Posted by: Costa05 Oct 17 2022, 09:12 PM
Looks very good Mike... Your body cutout looks very similar to mine. Ive yet to attack the bumper, but your approach seems spot-on..
Thanks Kevin! I got to see Rich's 914 in person last Friday - was nice & helpful to look at things in person and talk through how he accomplished things on his car. Re-stoked some motivation for me to keep moving forward!
Glad to help stoke the motivation! Let me know if you need to see it again. I am roughly 30 min from you. Gives me some test drivetime while I work through my worn out suspension issues. BTW your car looks great.
Rich
Posted by: slowrodent Oct 18 2022, 11:11 AM
(taking copious bumper cutout notes...) Natural for us Arizona peops to have a wee drop in motivation over the summer.... Your work looks great.
Posted by: mgp4591 Oct 18 2022, 11:36 AM
Here's this afternoon's diversion...
That's a nice touch on the gas cap...is it a kit or your design?
Posted by: mgarrison Oct 18 2022, 03:14 PM
Here's this afternoon's diversion...
That's a nice touch on the gas cap...is it a kit or your design?
I just looked at the pics of this kit and made my own.
https://www.thoro-tec.de/en/p/fuel-cap-porsche-914
Can't see spending $400 for it
I have a couple ideas on the trim ring, but believe it may not be "needed"
Posted by: mgarrison Oct 18 2022, 07:08 PM
Did some more work on the front bumper opening this afternoon. Cleaned up the edge with the angle grinder and did a test fit to double check the opening I had drawn out.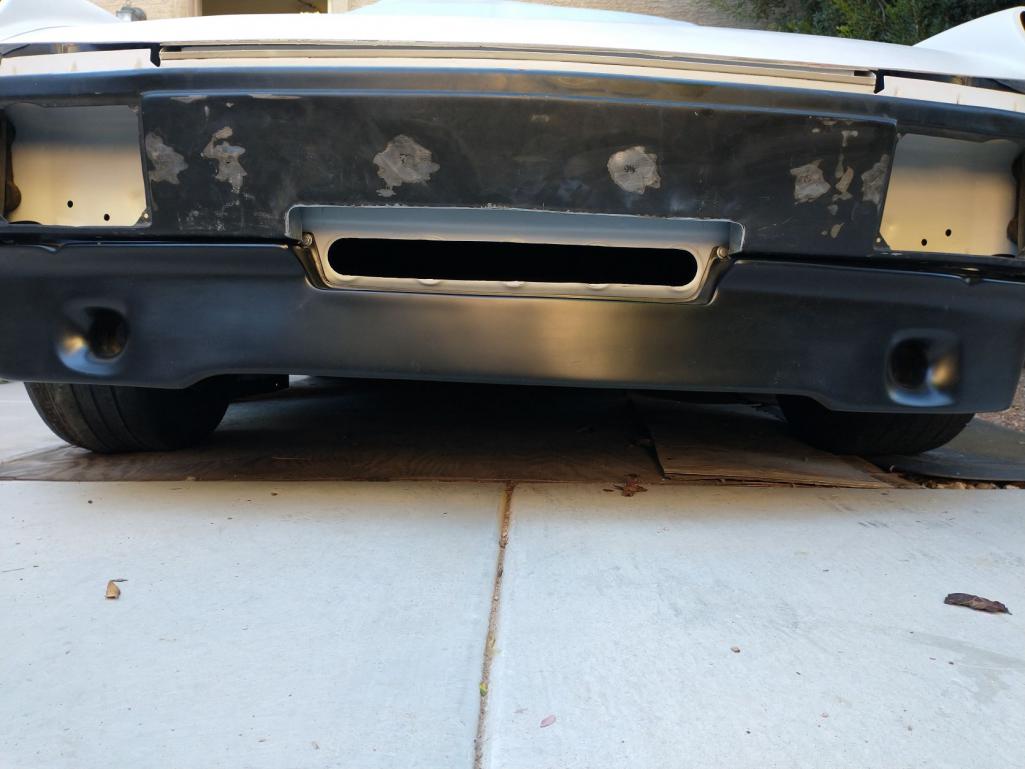
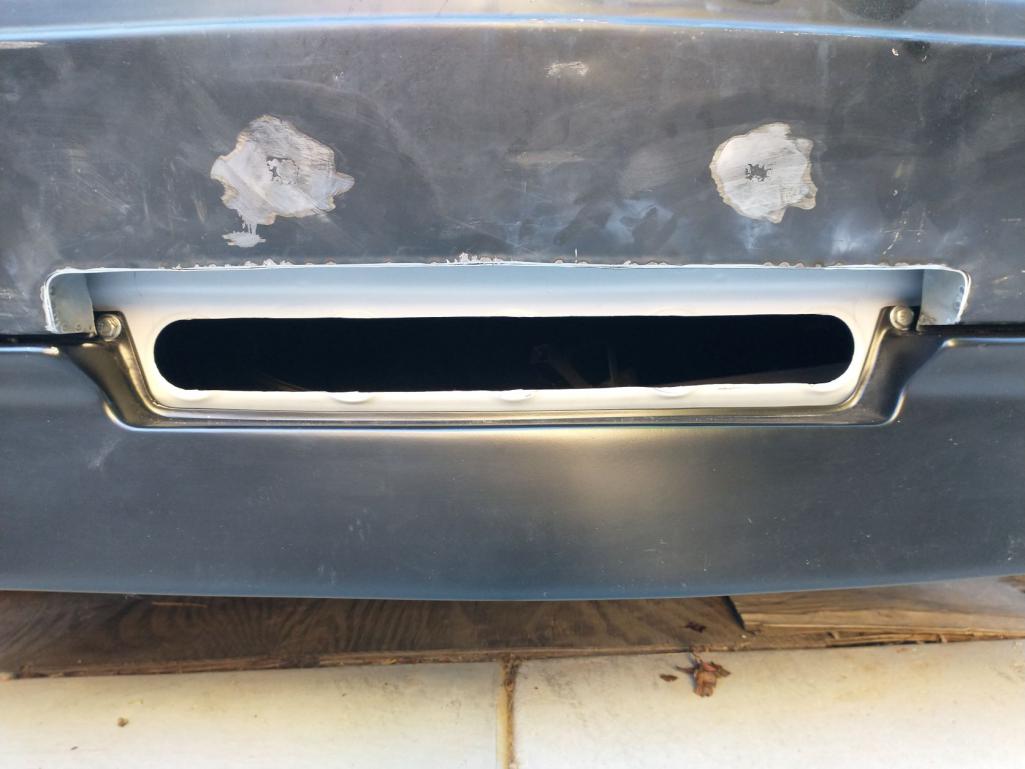
I cut out the inlet to match the opening on the bumper. 
May not really be needed, but more air flow in PHX is always a good idea! I hit the edges with some leftover back spray paint, and mounted it up again.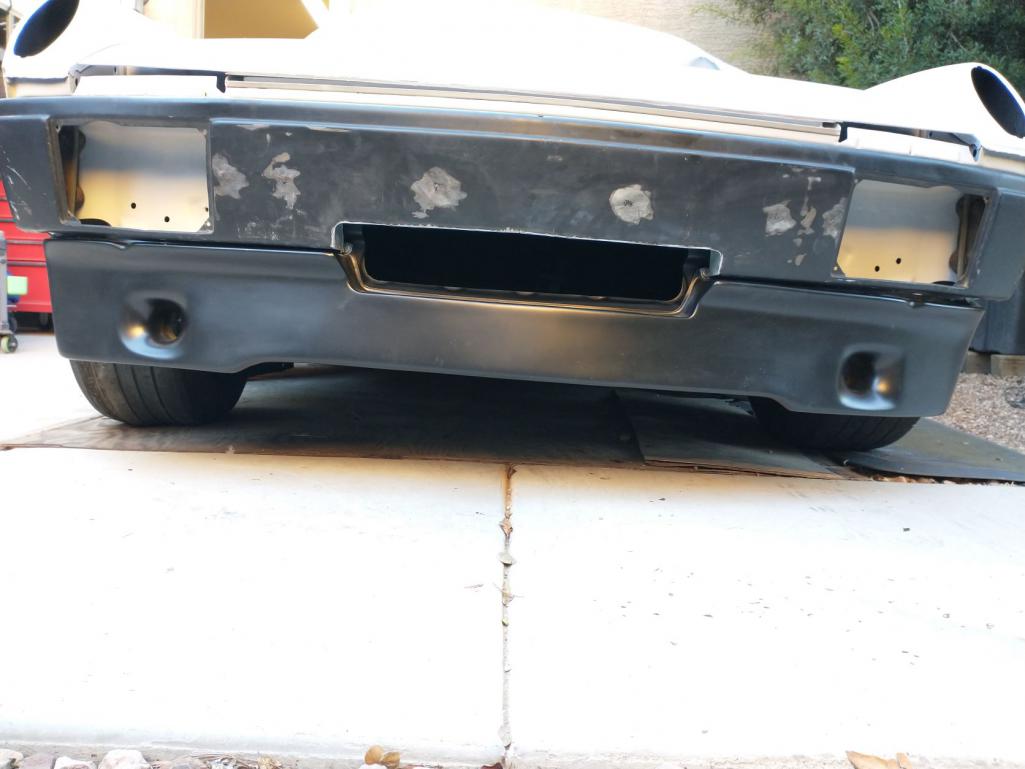
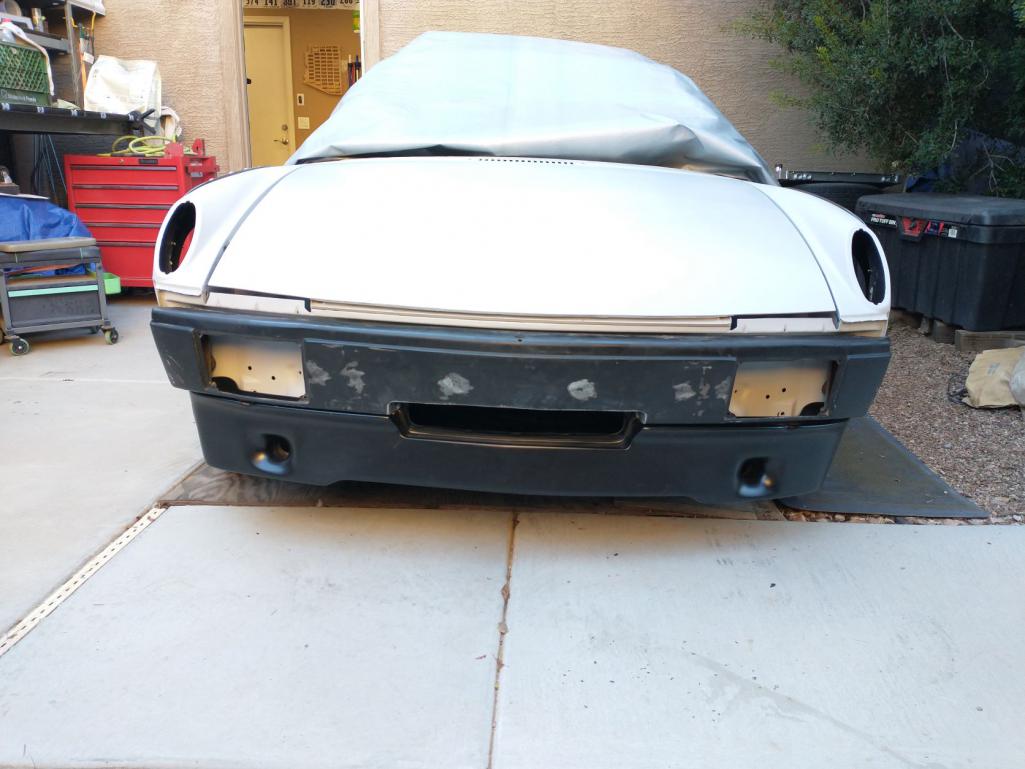
Looks like it will work well enough...
Posted by: slowrodent Oct 19 2022, 08:00 AM
Love the enlarged opening.....
Posted by: mgarrison Oct 19 2022, 09:56 AM
Love the enlarged opening.....
Kevin, mine's a '74 so it has the curved brace on the inside of the frunk. I cut just below where the brace is spot welded to the front of the chassis. I can't recall what year your 914 is, so whether you have that bracing or not kind of dictates where you can cut...
Mike
Posted by: Mowog4 Oct 19 2022, 04:55 PM
Your car looks spectacular, very cool to have another Subie powered 914 in the area. Rich swung by my house on Friday after he left yours, his was looking great also. Let me know if you need anything.
Ed
Posted by: mgarrison Oct 21 2022, 07:15 PM
Still a bit of work needed, but I'm making progress...I think! 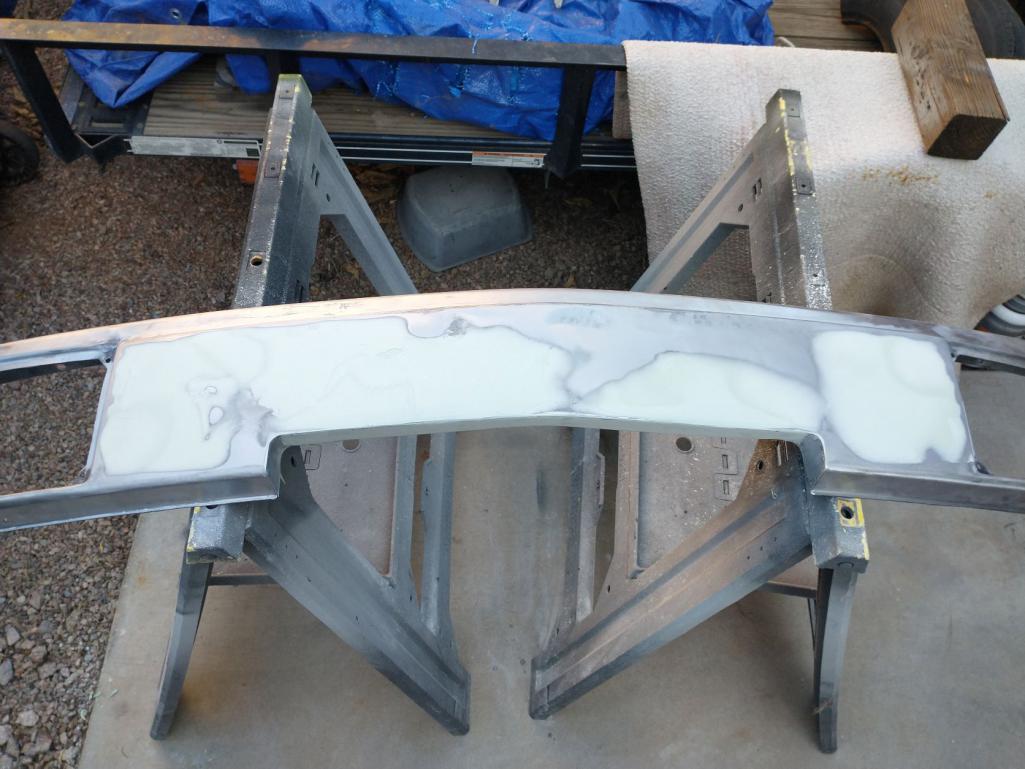
Posted by: Mowog4 Oct 21 2022, 07:34 PM
Still a bit of work needed, but I'm making progress...I think!
Looks great
Posted by: Costa05 Oct 21 2022, 09:27 PM
Let me know if you need some pics of the radiator support frame.
Ed @mowag4 is a huge local resource too. Big HP Subie builds.
Rich
Posted by: mgarrison Oct 27 2022, 10:06 PM
Getting there...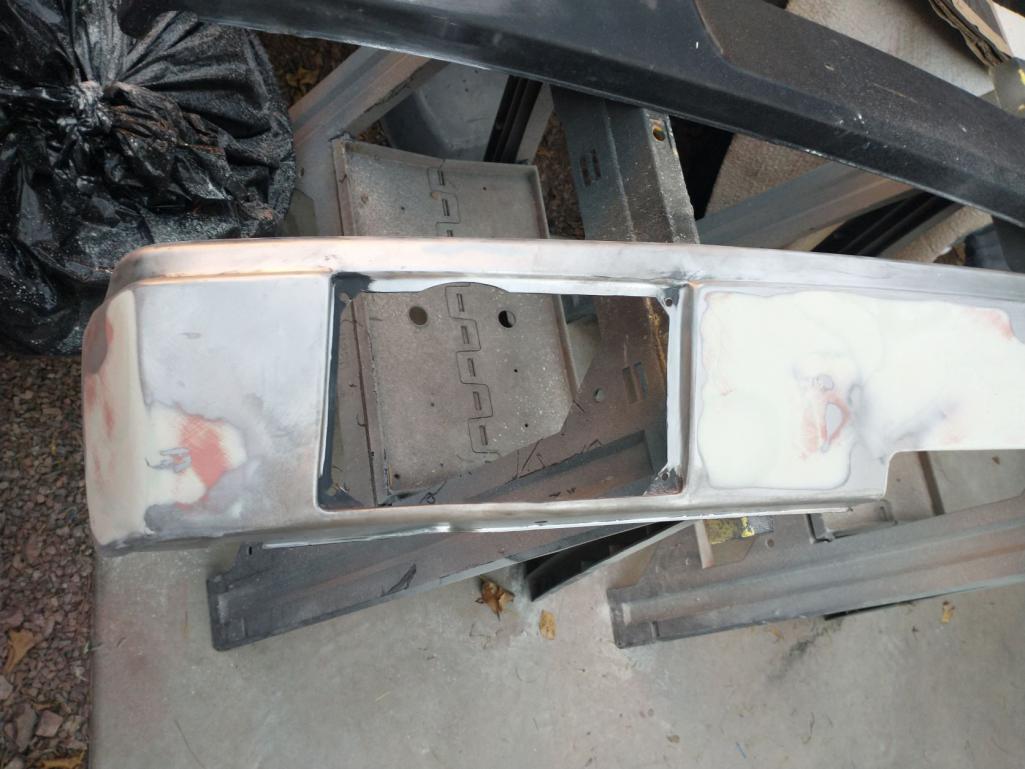
Far from perfect, but good enough...at least for now!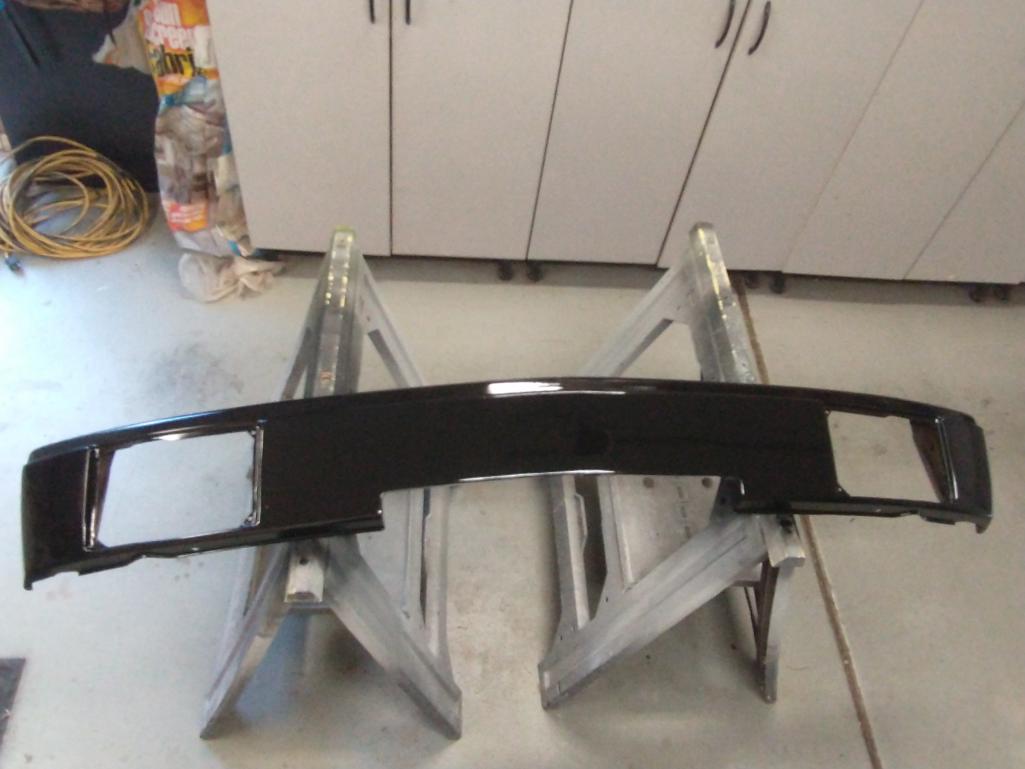
Inlet/opening came out ok.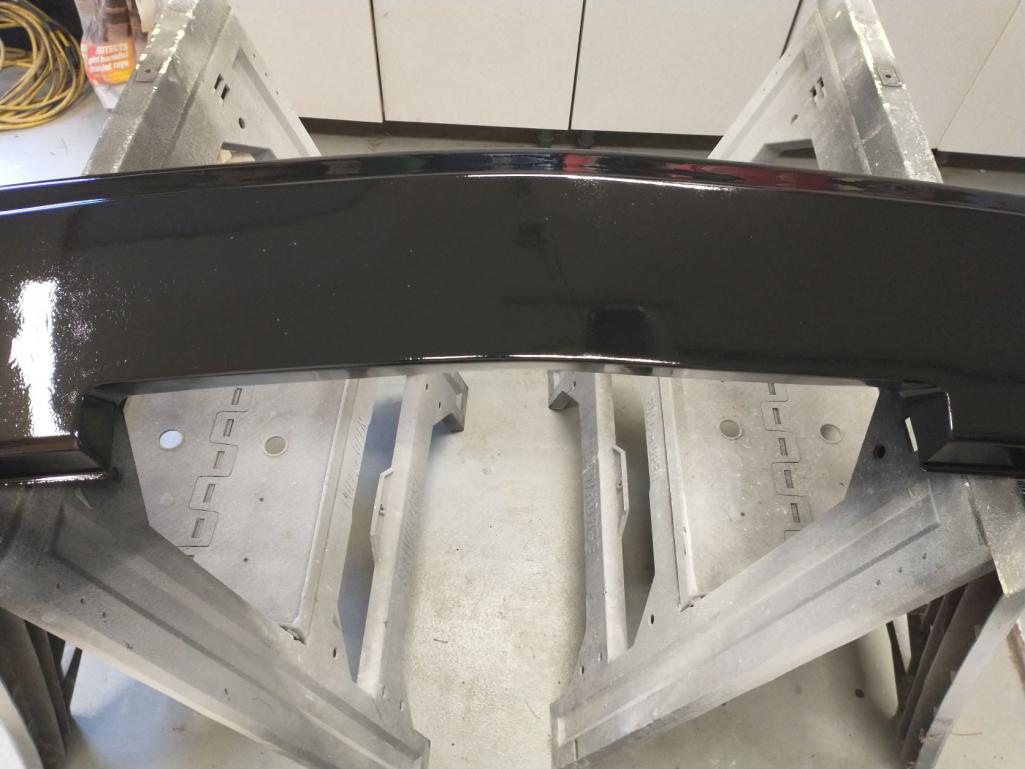
Thinking I may eventually spray the bumpers with the Raptor liner to match the rockers. Would also hide more of my imperfect repairs!
Posted by: Mayne Oct 28 2022, 03:07 PM
Looking great! I’m on a forced hiatus my EZ30R swap because of work. But this Spring, I got big plans, big plans!
Posted by: slowrodent Oct 29 2022, 08:19 AM
looks really good Mike... Cutout is very nicely done and I like the filled in bumper holes too... (PS Mine's a 74 as well)
Posted by: mgarrison Oct 30 2022, 08:48 AM
Got it sprayed with rattle can satin black. Decent, but needs more work with some high-build and the sanding block to better hide the imperfections.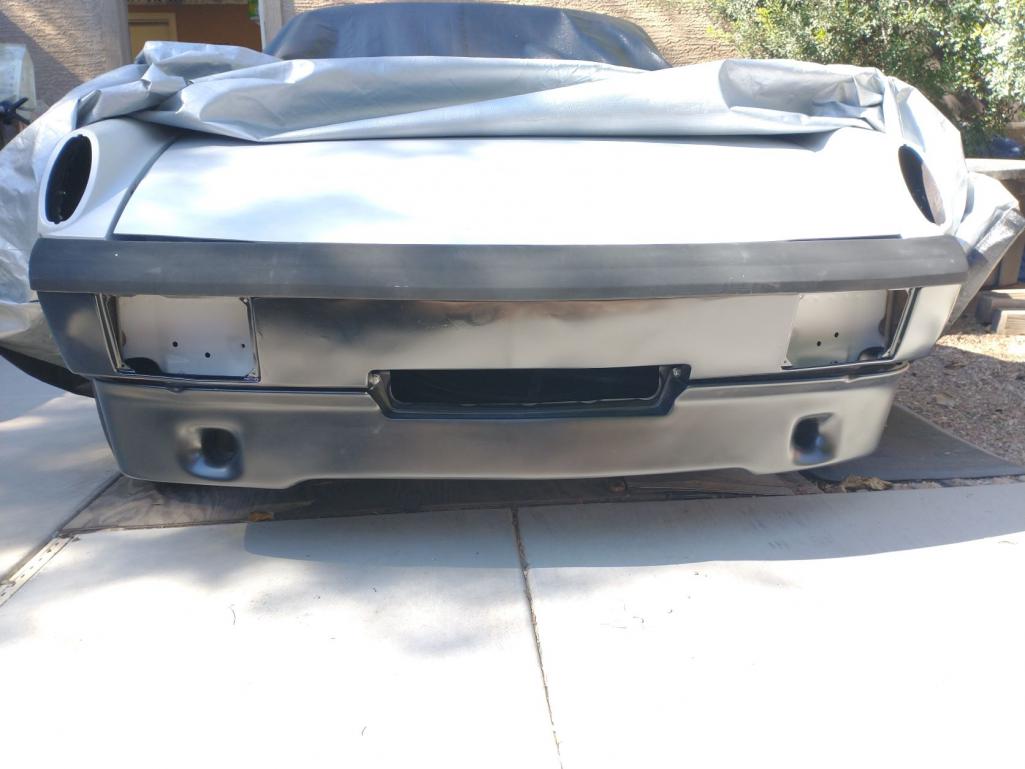
Now on to the rear bumper But it will have to wait; most of my weekend has been spent with this guy up at WestWorld playing photographer, groom, water boy, etc. but he's so worth it! 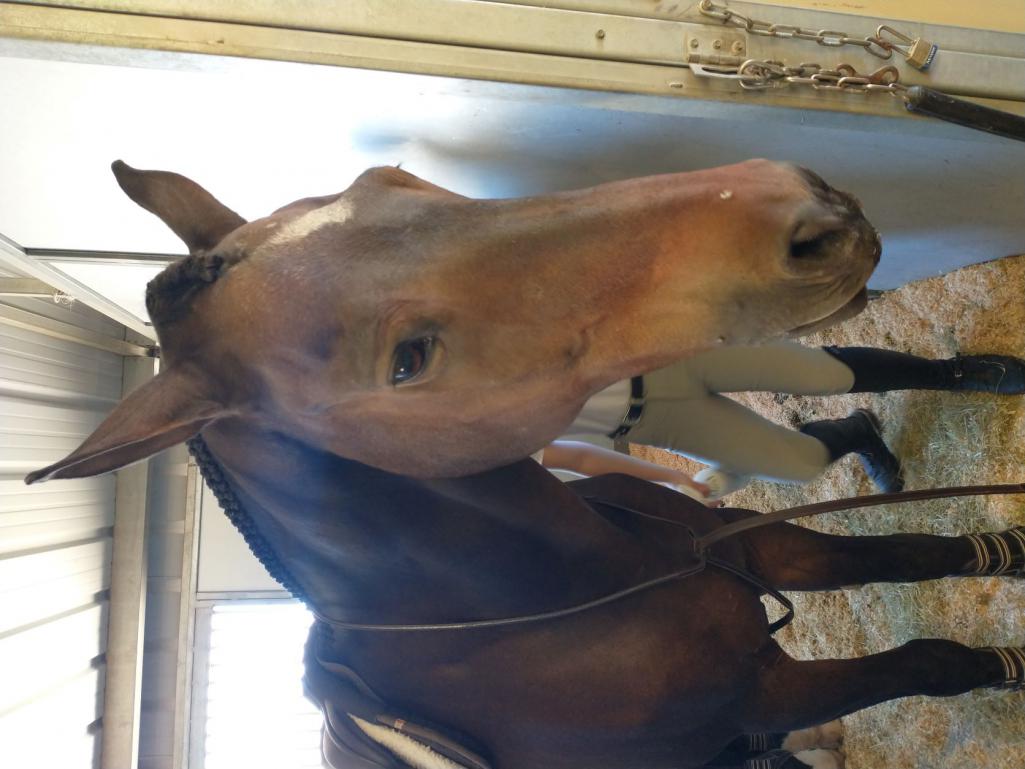
This is her last show with Sudden Impact AKA Clint. Makes us all more than a little
Posted by: mgarrison Nov 7 2022, 06:22 PM
I got the rear bumper cleaned up, painted, and mounted. It was a lot rougher than the front.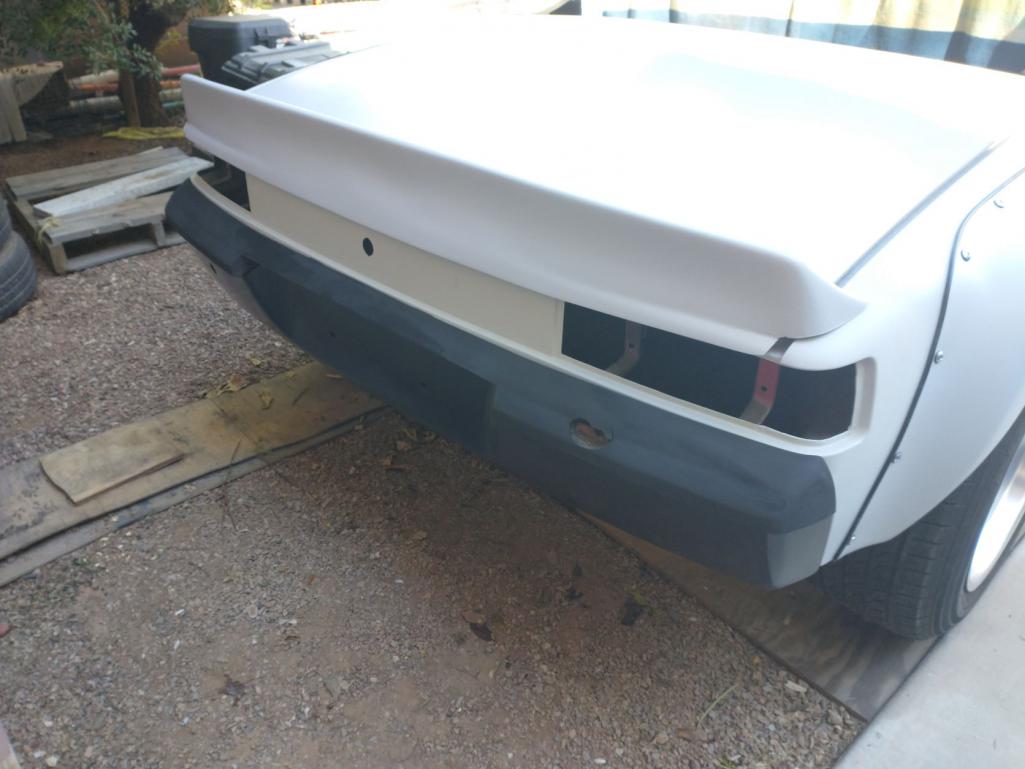
I still need to figure out how to fill in that missing chunk in the bumper top
Posted by: mgarrison Nov 7 2022, 06:27 PM
Then I moved on to cutting out and patching the vent/grille on the cowl. I kept trying to figure out how I would handle water getting in the vent and decided the "easiest" thing to do was just remove it. 
Backing the welds with copper really helps, but clamping/holding the copper in place is quite the challenge!
Quite the tedious process, but came out ok.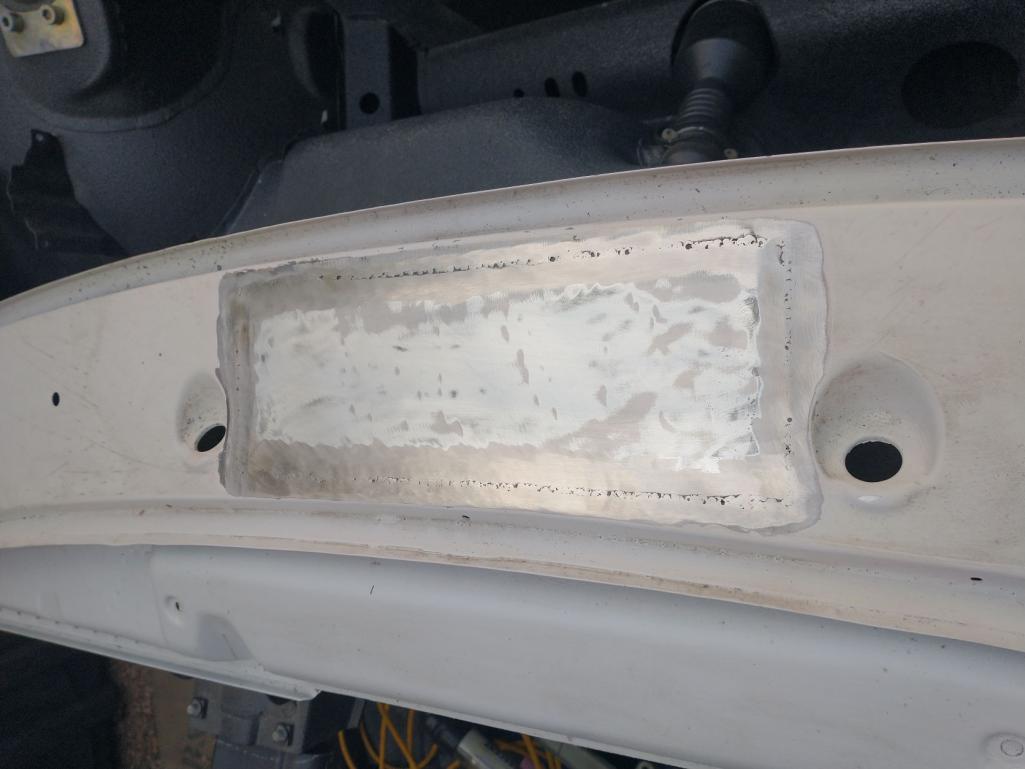
Tomorrow I'll see how level I got the filler when I start sanding 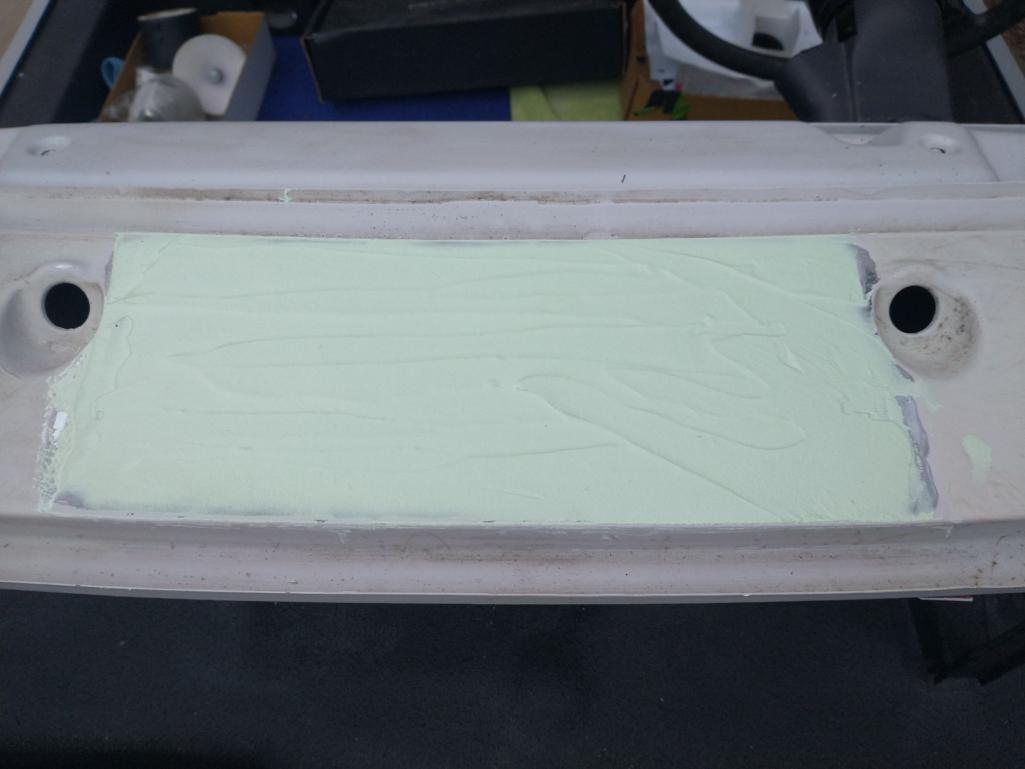
Posted by: mgarrison Nov 10 2022, 06:01 PM
Got it all flat, then filled with glazing putty, then finally all sanded out with 120, then 180, then 320... 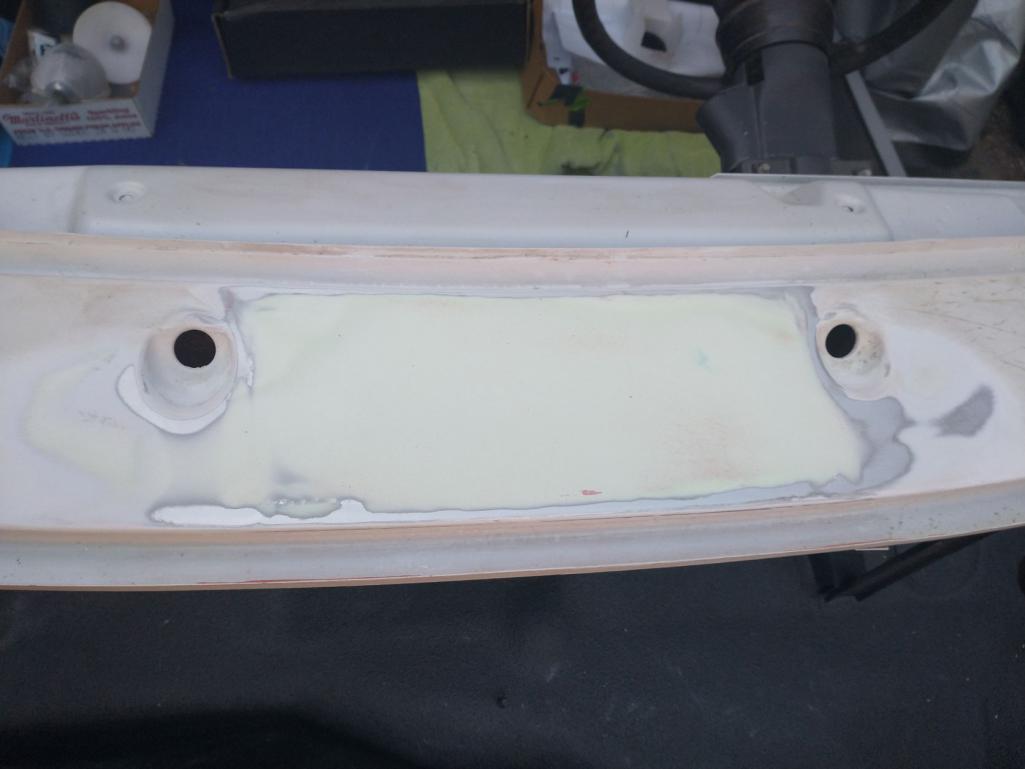
Just waiting for primer to show up
Posted by: slowrodent Nov 11 2022, 12:09 PM
Looking good Mike... Top notch work as usual. I forget what you'd described as your long-term plans for heating/cooling. I know you've finished the block-off plates, etc.
Kevin
Posted by: mgarrison Dec 16 2022, 08:30 PM
Looking good Mike... Top notch work as usual. I forget what you'd described as your long-term plans for heating/cooling. I know you've finished the block-off plates, etc.
Kevin
Kevin, my plan is to just have heated seats. We'll see if that plan fly's...or if it fly's like the Spruce Goose!
Posted by: mgarrison Dec 16 2022, 08:40 PM
I've been working on my radiator mount/frame. But I had to replace my phone and the pics I took are in the new iPhone format and basically unusable. And, I got the whole thing welded together only to discover it was about 1/8" too tall/high. Had to cut off the bottom mounts, move them down, then re-do the upper braces (why there's 4 Rivnuts instead of 2 on each upper brace.
So, I gave up and deleted what I'd taken, but took some new ones this afternoon while testing to see with my rather sophisticated CAD system if I can mount the aluminum shrouding before installing the radiator mount...State of the art CAD system! Even my scissors suck...
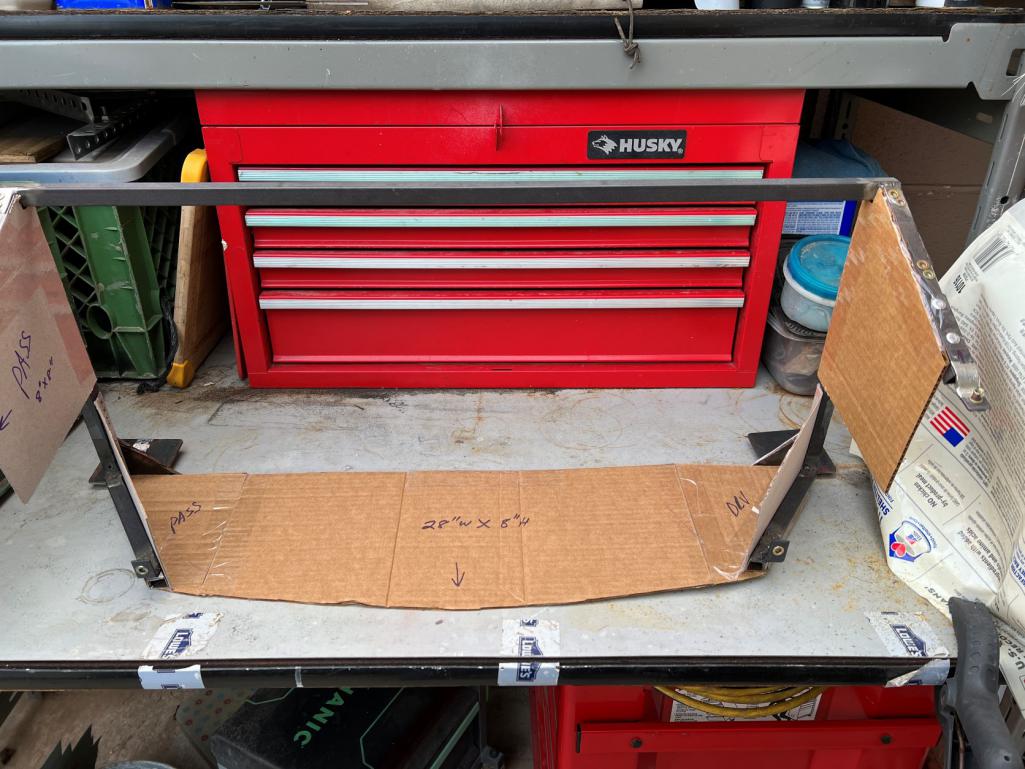
Survey says...Nope! Can't mount the lower sides before it's installed in the car. 
Once it's in the car I believe things will fit ok.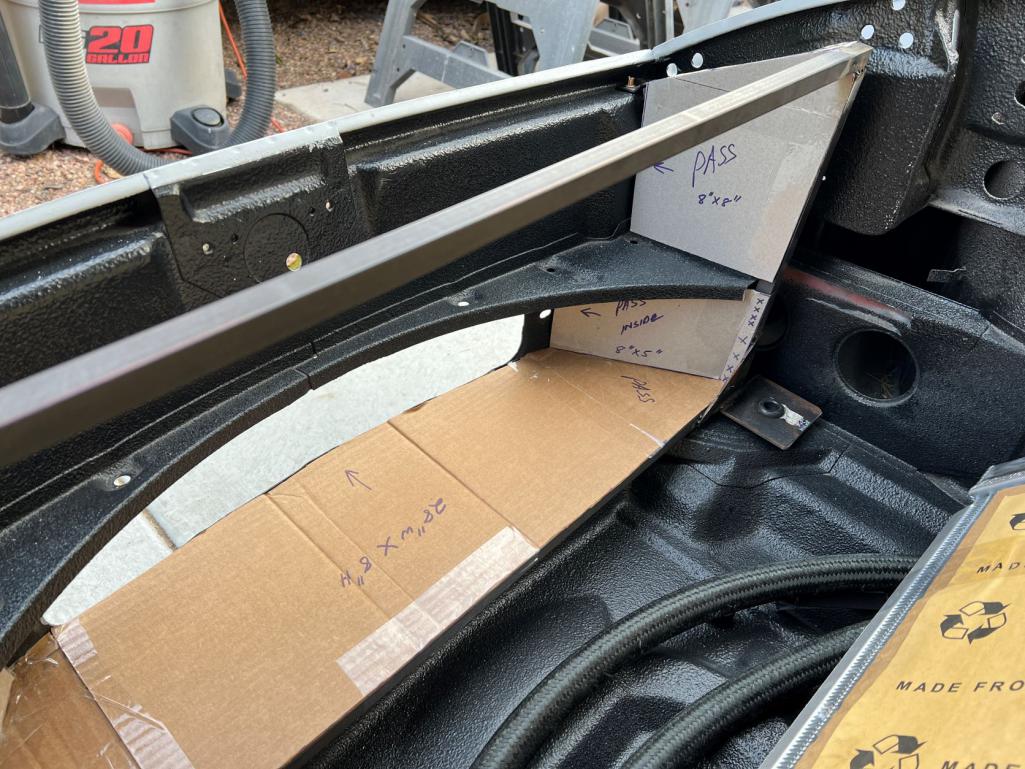
Need an extra 1/2" or so on the back of the bottom shroud to close up this gap though!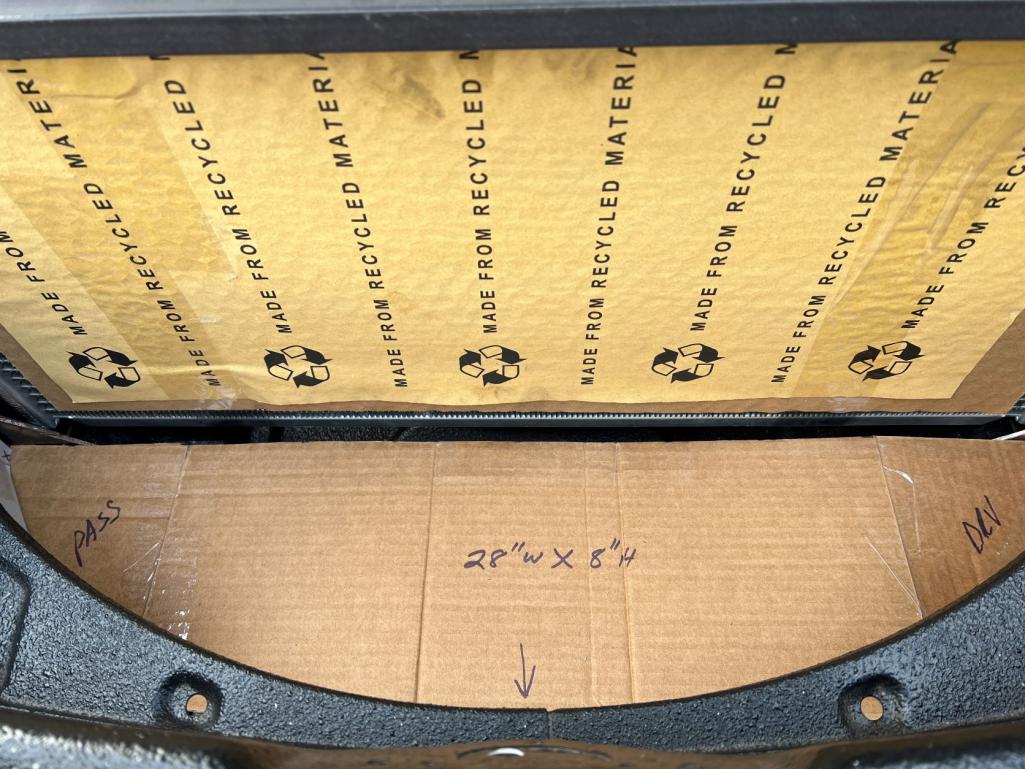
Arguing with myself over how to shroud the portion above the curved bracing. Not sure if I should go angled like this, and then a cosmetic cover over the top, or...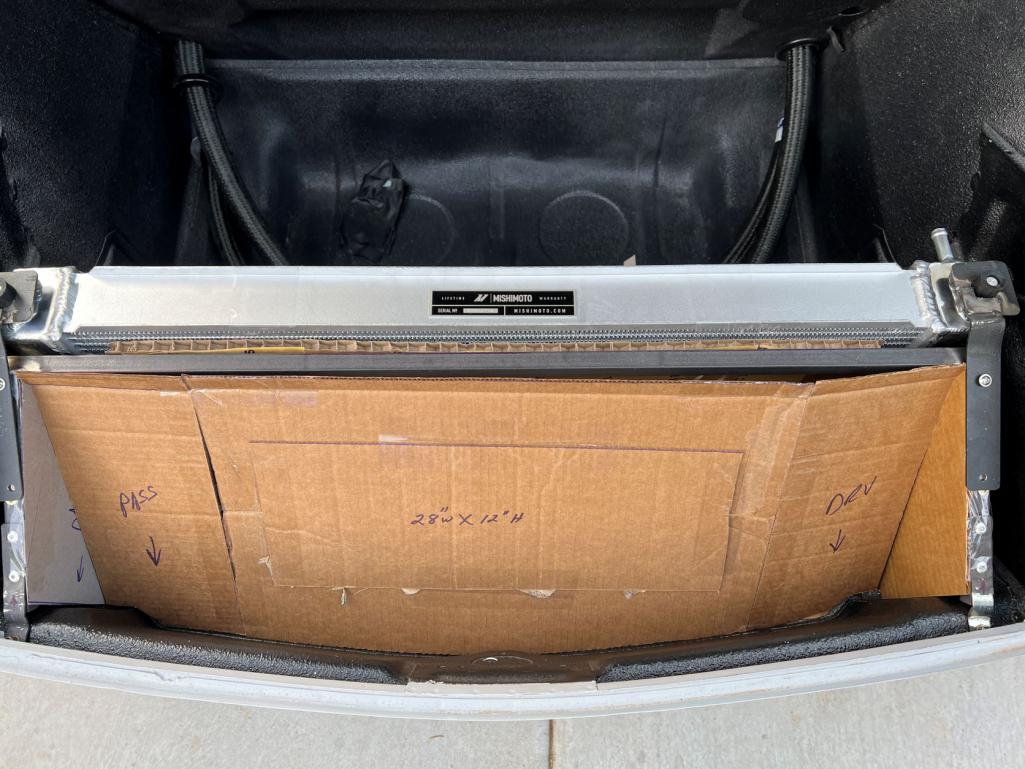
Posted by: slowrodent Dec 17 2022, 09:11 AM
Looks great Mike... Your CAD system is primo and a notch better than my own  .. My only regret (thus far) with my rad mount is that I didn't leave sufficient room for rubber isolaters. I squeezed in some lame thin pads, but I wish I'd have planned for a real buffer of some sorts.... Just FYI...
Posted by: Lilchopshop Dec 17 2022, 12:41 PM
I've been working on my radiator mount/frame. But I had to replace my phone and the pics I took are in the new iPhone format and basically unusable. And, I got the whole thing welded together only to discover it was about 1/8" too tall/high. Had to cut off the bottom mounts, move them down, then re-do the upper braces (why there's 4 Rivnuts instead of 2 on each upper brace.
So, I gave up and deleted what I'd taken, but took some new ones this afternoon while testing to see with my rather sophisticated CAD system if I can mount the aluminum shrouding before installing the radiator mount...State of the art CAD system! Even my scissors suck...
Survey says...Nope! Can't mount the lower sides before it's installed in the car.
Once it's in the car I believe things will fit ok.
Need an extra 1/2" or so on the back of the bottom shroud to close up this gap though!
Arguing with myself
over how to shroud the portion above the curved bracing. Not sure if I should go angled like this, and then a cosmetic cover over the top, or...Looks really good! I’m following build closely since I’m planning to do something very similar.
Couple of questions…. 1. When you ran the coolant hoses in the longs, did you run them right inside of the existing insulated ducts?
2. Is the part number of the radiator “MMRAD-CEL-00”?
3. What radiator fans are you using?
Thanks, Aaron
Posted by: Chris914n6 Dec 17 2022, 02:17 PM
“MMRAD-CEL-00”
Would make sense. MishiMoto Radiator Celica 2000-2004.
There are cheaper copies of the 'racing' radiator for the Celica/MR-S than Mishimoto. Using the Celica radiator is well documented here. I used the factory Celica fans as the generic Chinese fans are questionable. I also used the MR-S version of this radiator as the hose inlets are in a better place.
Posted by: mgarrison Dec 18 2022, 07:57 PM
I've been working on my radiator mount/frame. But I had to replace my phone and the pics I took are in the new iPhone format and basically unusable. And, I got the whole thing welded together only to discover it was about 1/8" too tall/high. Had to cut off the bottom mounts, move them down, then re-do the upper braces (why there's 4 Rivnuts instead of 2 on each upper brace.
So, I gave up and deleted what I'd taken, but took some new ones this afternoon while testing to see with my rather sophisticated CAD system if I can mount the aluminum shrouding before installing the radiator mount...State of the art CAD system! Even my scissors suck...
Survey says...Nope! Can't mount the lower sides before it's installed in the car.
Once it's in the car I believe things will fit ok.
Need an extra 1/2" or so on the back of the bottom shroud to close up this gap though!
Arguing with myself
over how to shroud the portion above the curved bracing. Not sure if I should go angled like this, and then a cosmetic cover over the top, or...Looks really good! I’m following build closely since I’m planning to do something very similar.
Couple of questions…. 1. When you ran the coolant hoses in the longs, did you run them right inside of the existing insulated ducts?
2. Is the part number of the radiator “MMRAD-CEL-00”?
3. What radiator fans are you using?
Thanks, Aaron
No ducts in my longs. Completely open/empty longs. Couple pics here:
http://www.914world.com/bbs2/index.php?s=&showtopic=343765&view=findpost&p=2800284
It's a 2000-2005 Toyota Celica radiator. Mishimoto makes nice things. Didn't want to buy a Chinese knock off radiator, so I waited till they had it on sale around black Friday for about $215.
I have not purchased fans or shroud yet. Debating what fans to go with, etc.
Posted by: mgarrison Dec 28 2022, 02:08 PM
Waiting on some aluminum sheet to get here for the shroud/ducting for the radiator. Meanwhile, my toolbox and stuff kept getting wet when it rained despite my temporary cover. With more rain due soon I decided to build a more permanent cover to try and keep things dry & protected.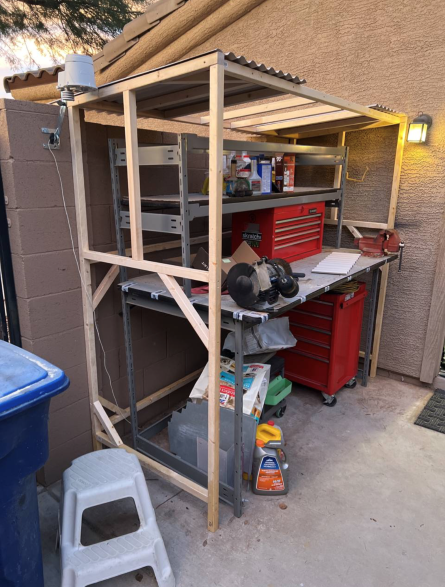
Simple and hopefully effective...
This should keep things dry.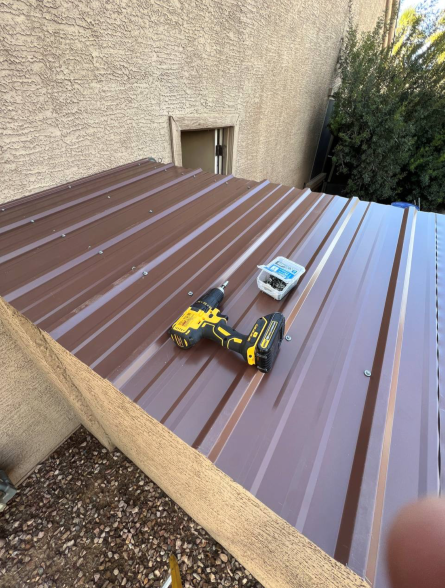
Posted by: mgarrison Jan 15 2023, 03:00 PM
One sheet of aluminum showed up, so I tried to do what I could with it! Still waiting on the second sheet to make it here... 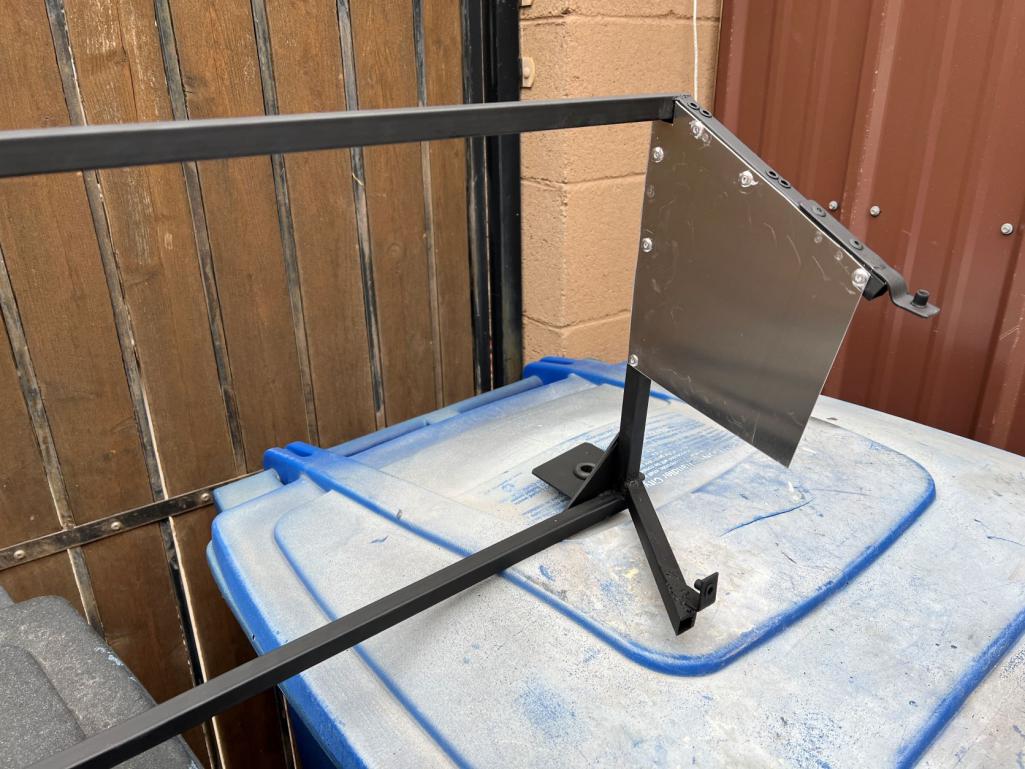
I had a gift card for HF so I picked up this cheap "metal bender". As usual for HF, required a bit of modification to work half decent... 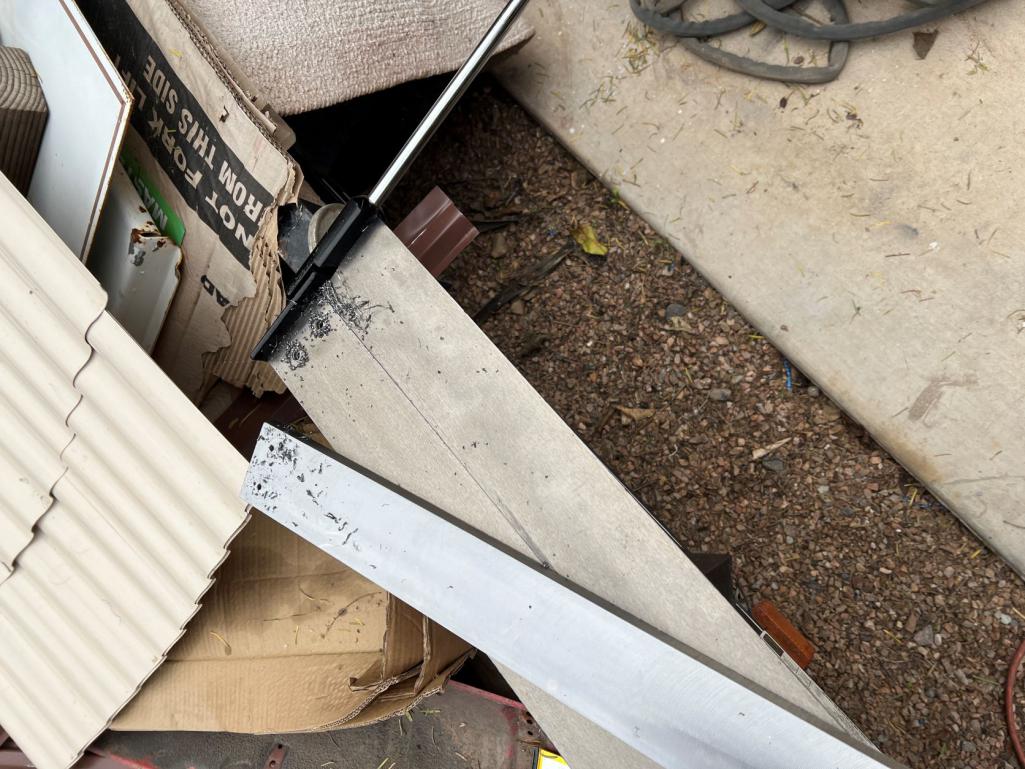
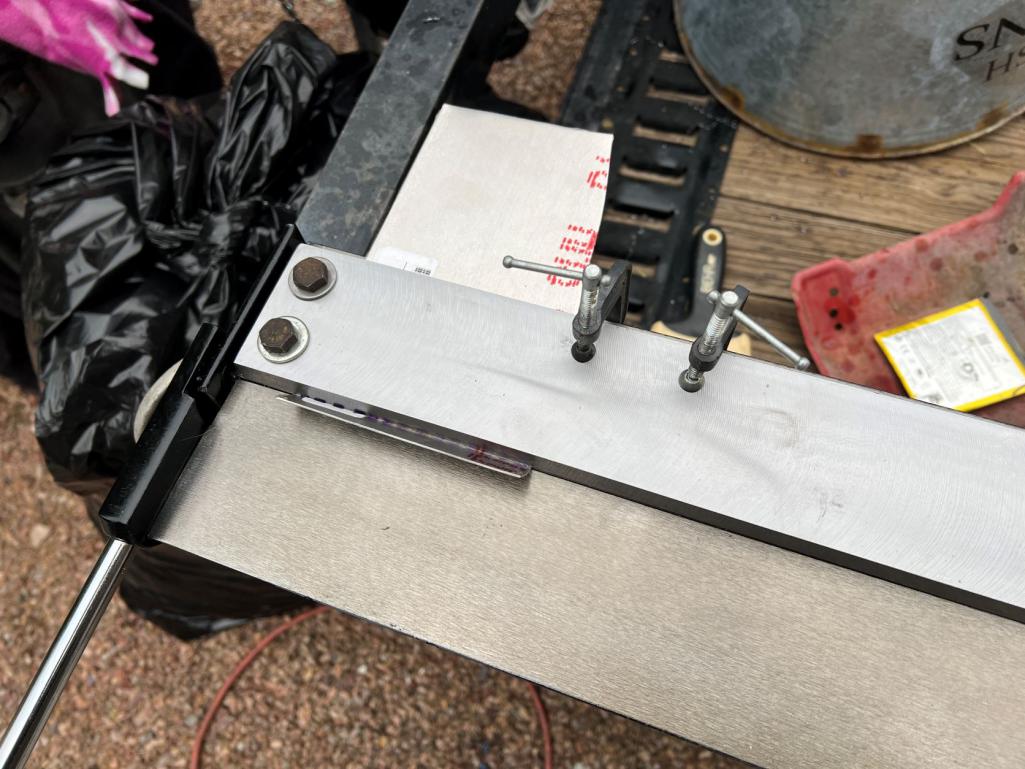
I lost a bit of width, but the top piece cant move around anymore! I thought about drilling a couple more sets of holes across it at maybe 8" & 12", but I think just getting a couple more larger C clamps would be quicker/easier
I can't mount the lower sides until the radiator frame is bolted in, so I'm back to waiting on the rest of my aluminum to show up! 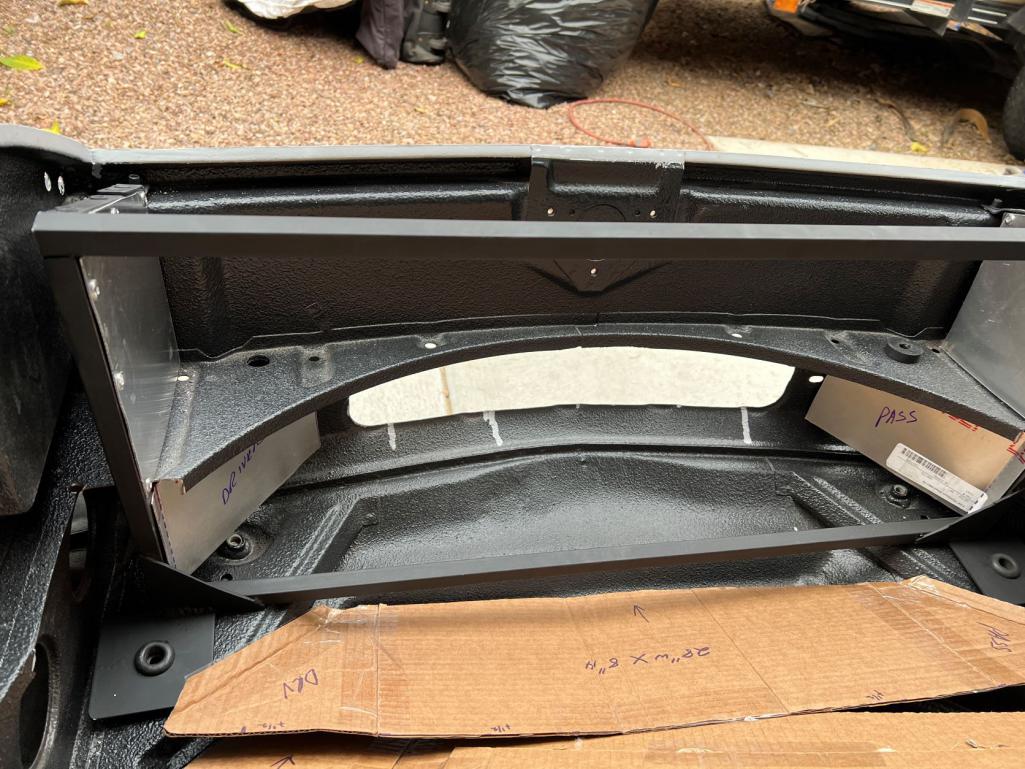
Posted by: mgarrison Feb 5 2023, 08:17 PM
While I was waiting on more aluminum I decided to redo my workbench top. The old top had gotten wet an swelled up and was coming apart. While I was at it, I figured I'd try a "proof of concept" for the concrete countertop videos I've seen.
My first attempt did not go well, and cracked. So I decided to pour half at a time - made it much easier to move into place as well. I welded in some extra support across the middle, and a couple 45s to keep things square. This Snap-On light my son got me for Christmas is the cat's pajamas!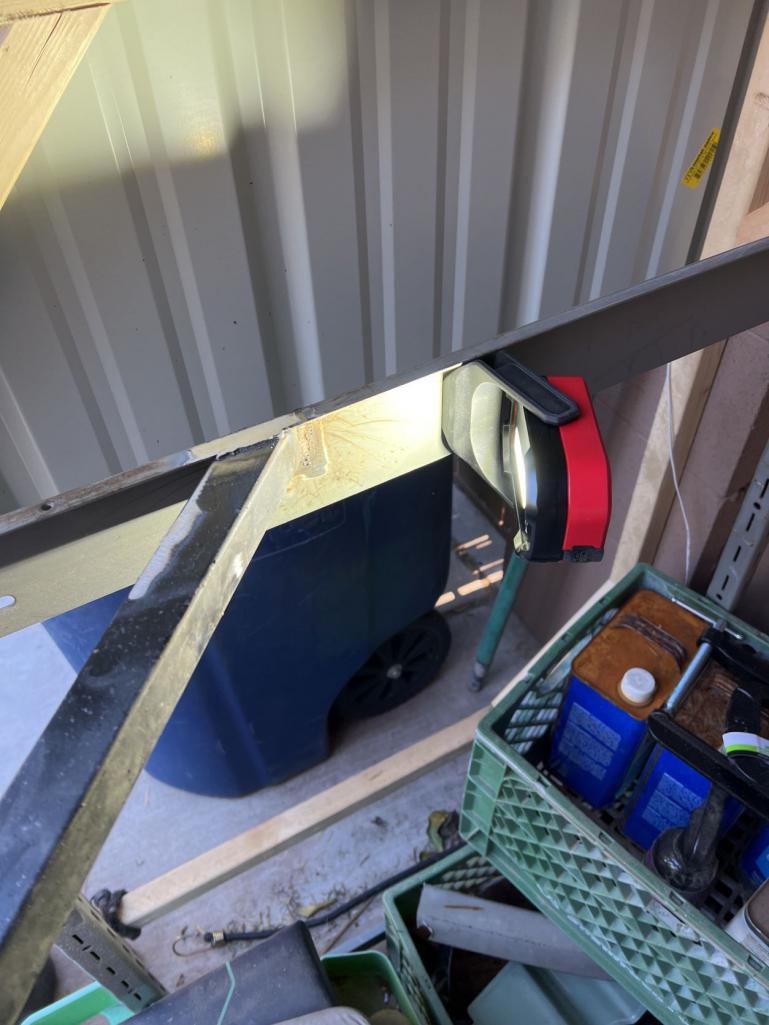
Here's a slab in the form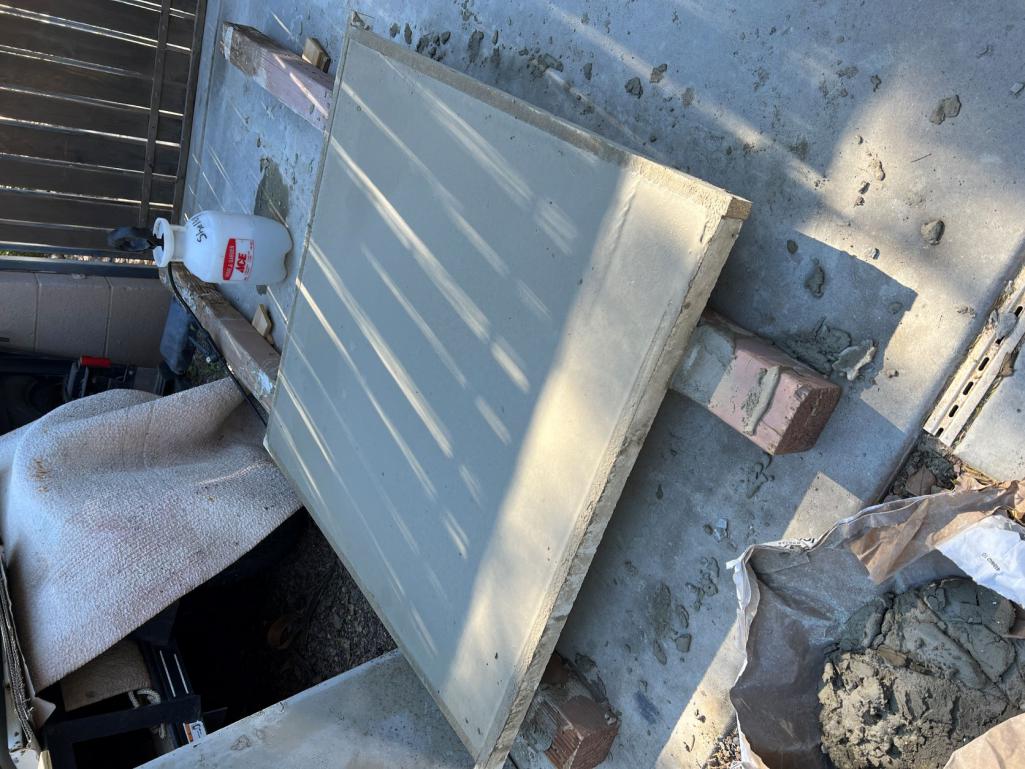
Getting them into place was interesting, but not terrible.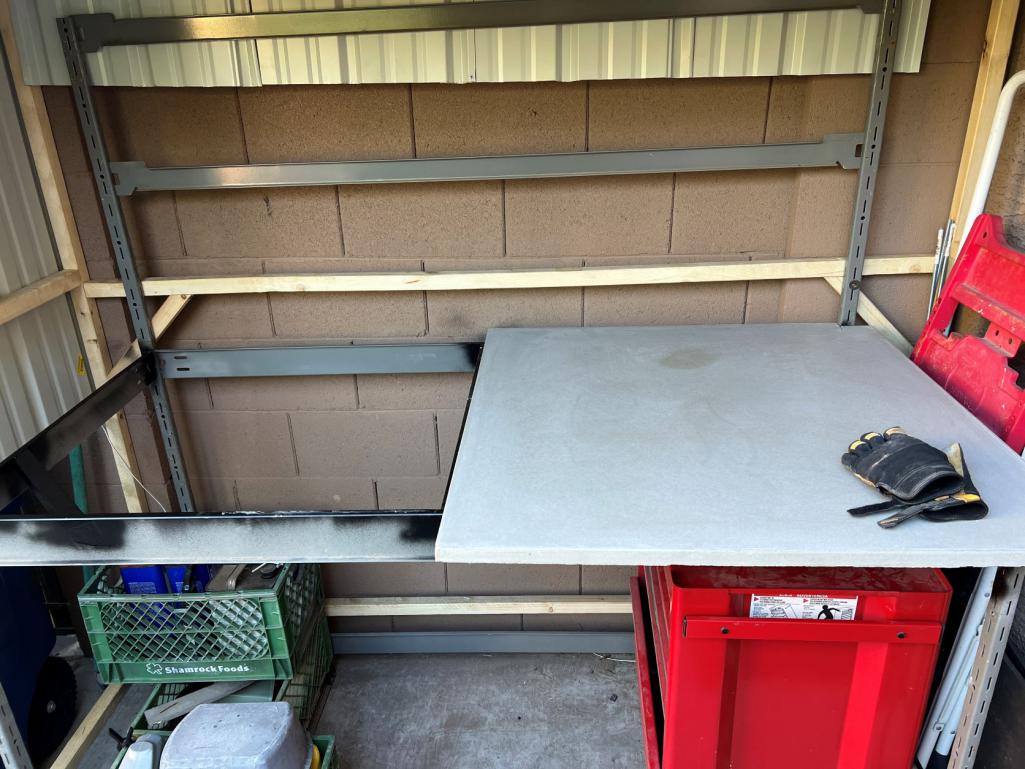
Came out pretty good.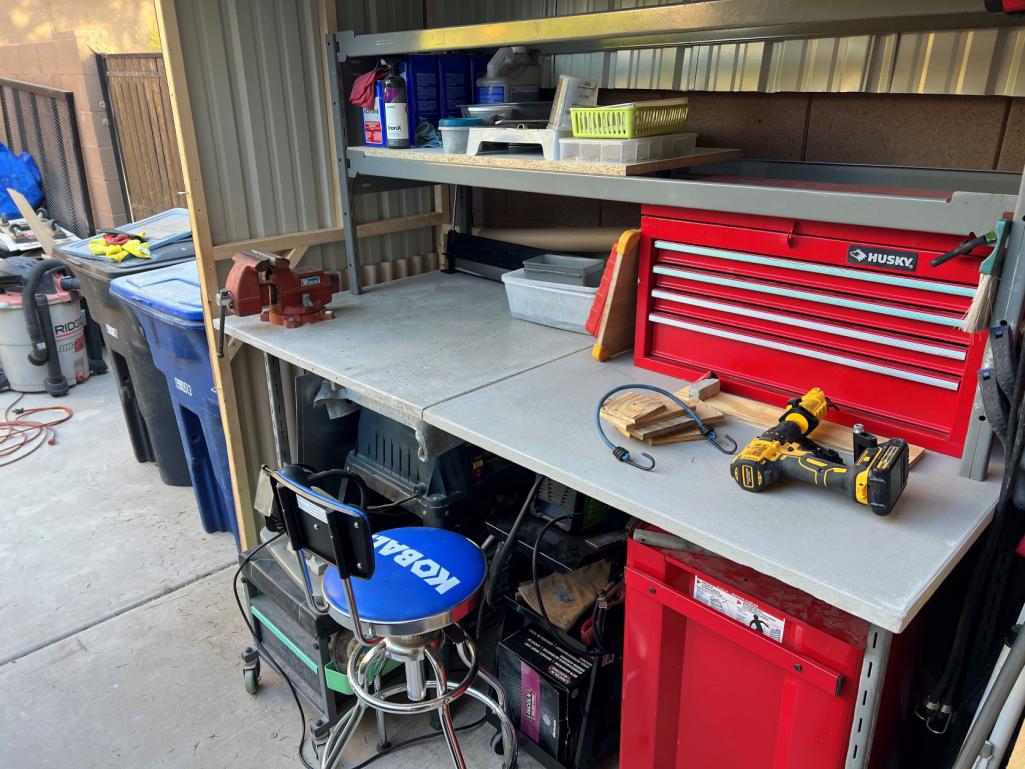
After hearing my aluminum was backordered until late February, I found an alternative source and got back to work.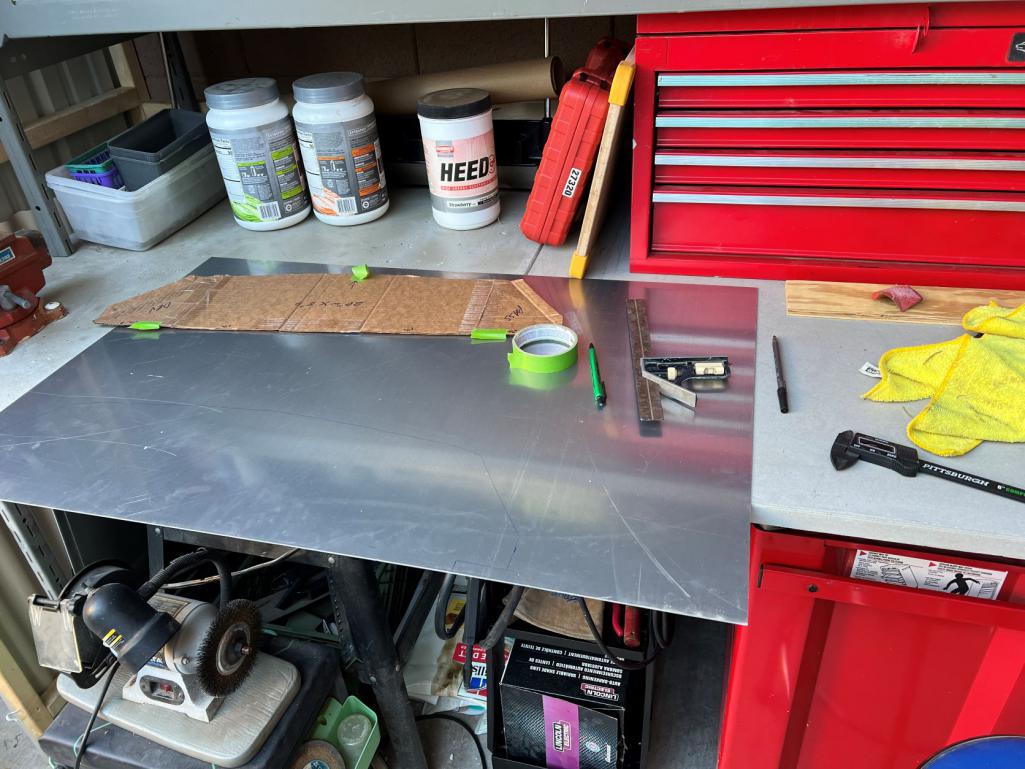
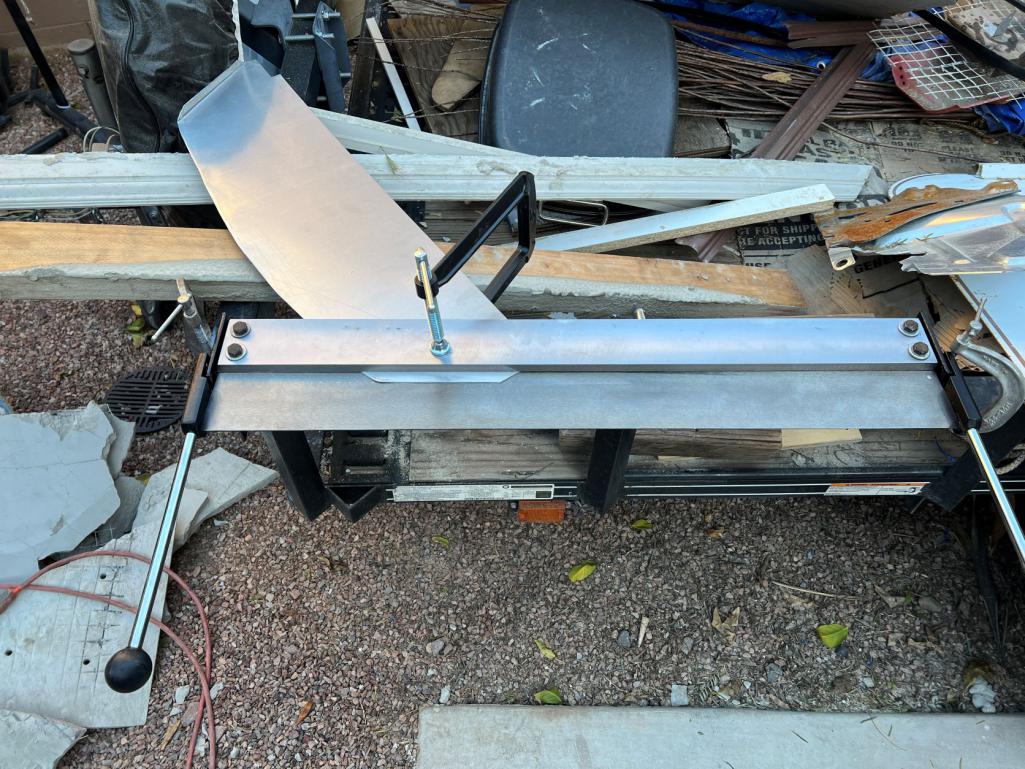
Things are starting to come together a bit.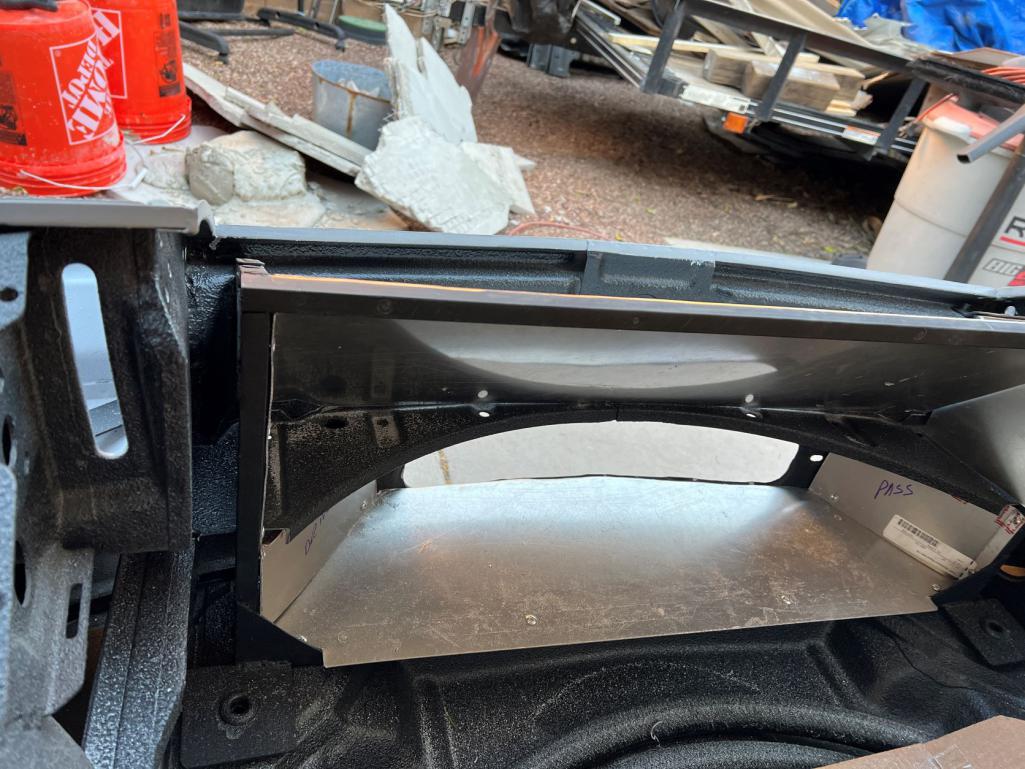
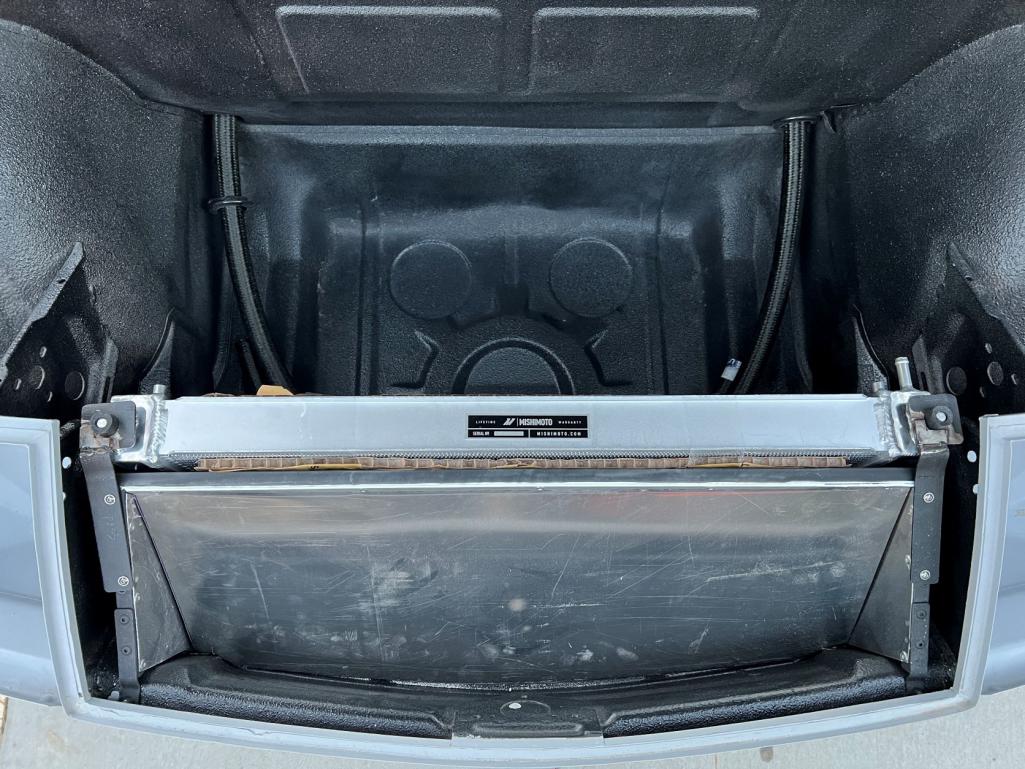
More of that cutting edge CAD work...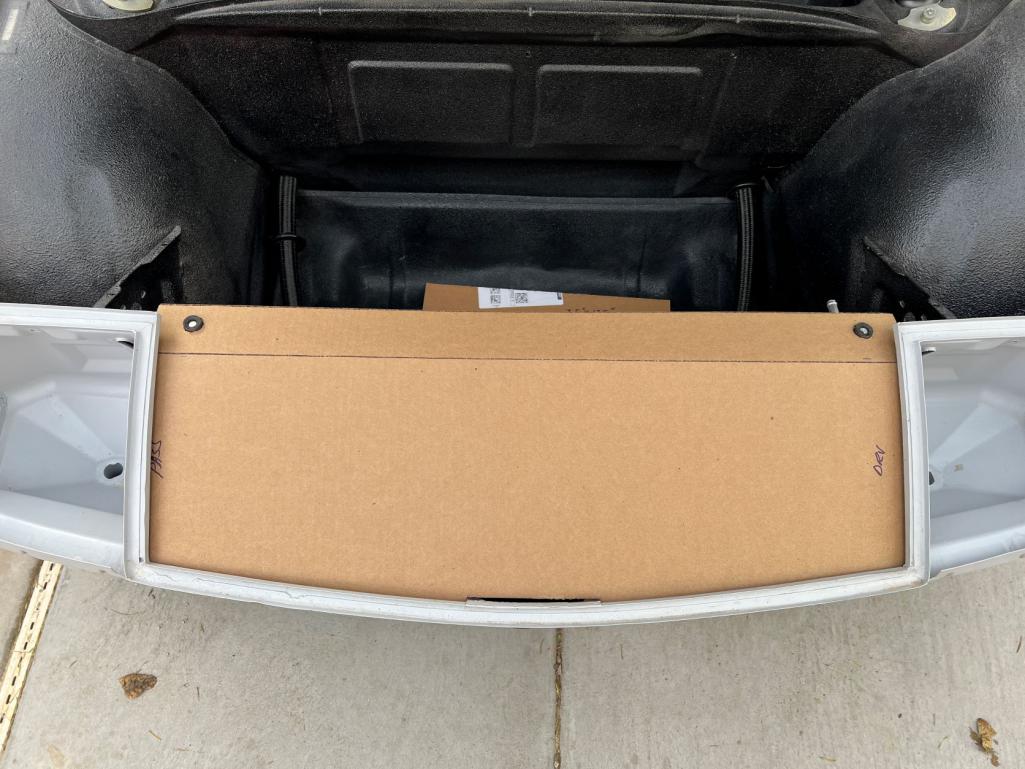
This piece was about 2-3" too long for my little bender, so had to employ some serious "Southern Engineering", but it came out ok.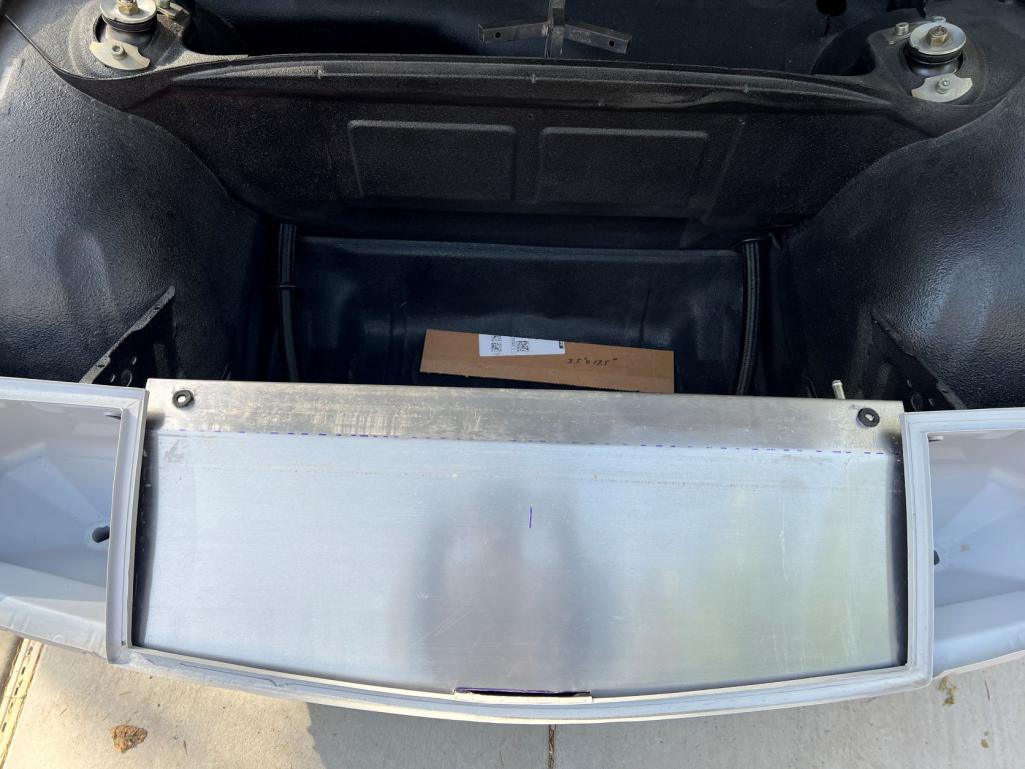
Posted by: mgarrison Feb 14 2023, 10:15 AM
Some more terribly sophisticated CAD...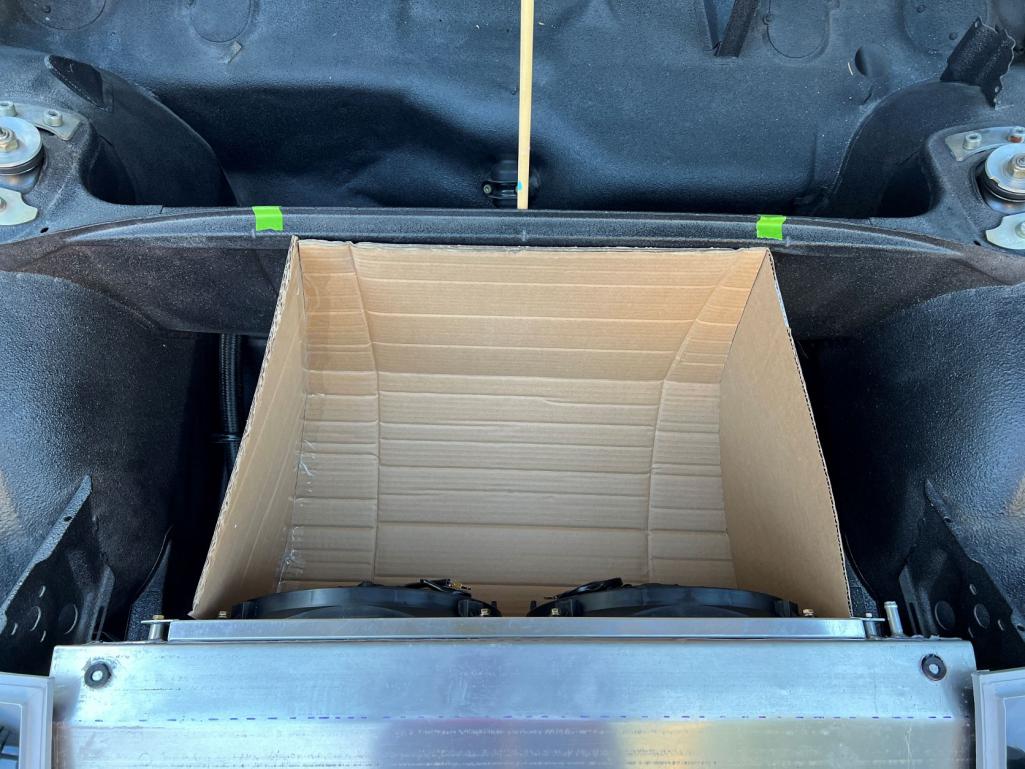
Just need to dream up a way to fold & rivet these pieces together in aluminum. Taking a long look at what Andy did for his oil cooler. But don't think I'll be able to fit a toolbox behind mine
This is what my life has come to; "Paper Dolls" for old guys with classic cars! 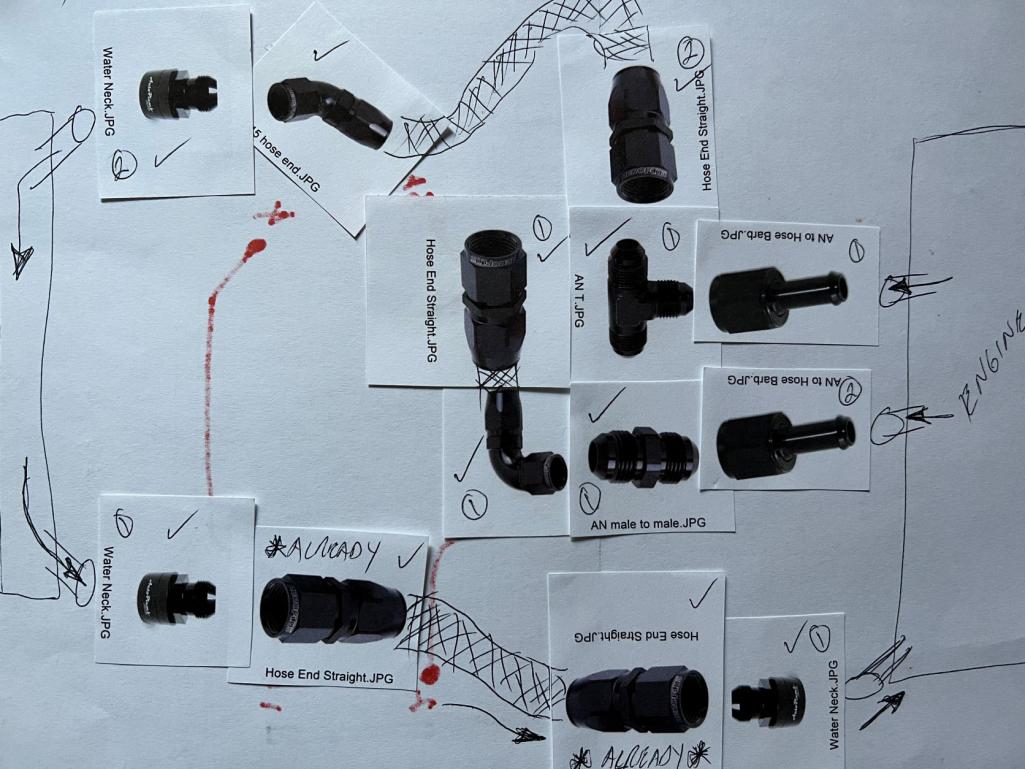
I was struggling so with keeping track of which fitting was male vs female, and if any one company had all the fittings I needed in one place...nope! Still need to confirm a couple of bends/angles are going to be workable. I was able to confirm with Mishimoto the Celica radiator can flow either direction, so no need to cross my coolant lines at the front/rear to make sure it flows driver to passenger side...
Posted by: tygaboy Feb 14 2023, 11:35 AM
OMG... hose end fitting planning is
Your radiator shrouding looks great!
Posted by: mgarrison Feb 14 2023, 11:46 AM
OMG... hose end fitting planning is
Your radiator shrouding looks great!
Thanks Chris!
Just trying to balance my OCD against limited skillset/tools...I can picture how I want it in my head, but making come out that way is
Posted by: mgarrison Feb 21 2023, 05:33 PM
Look Ma, I made SOMETHING! 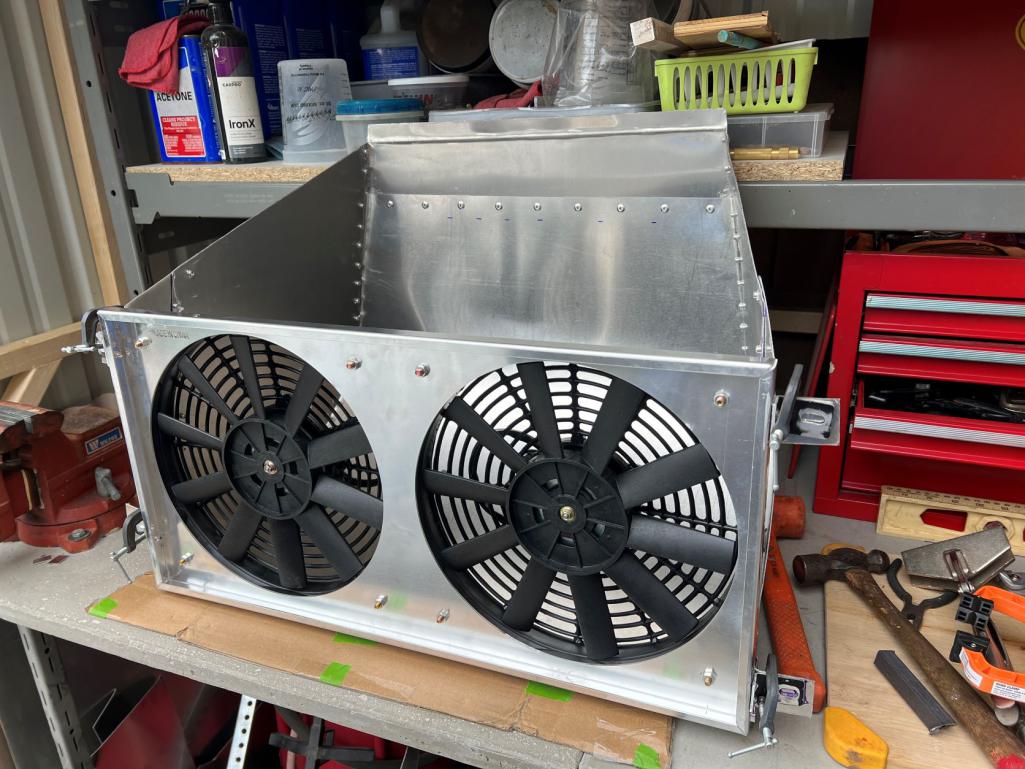
I put the hoses in the headlight buckets and then started chuckling because it reminded me of flux capacitor plumbing in Doc's DeLorean! 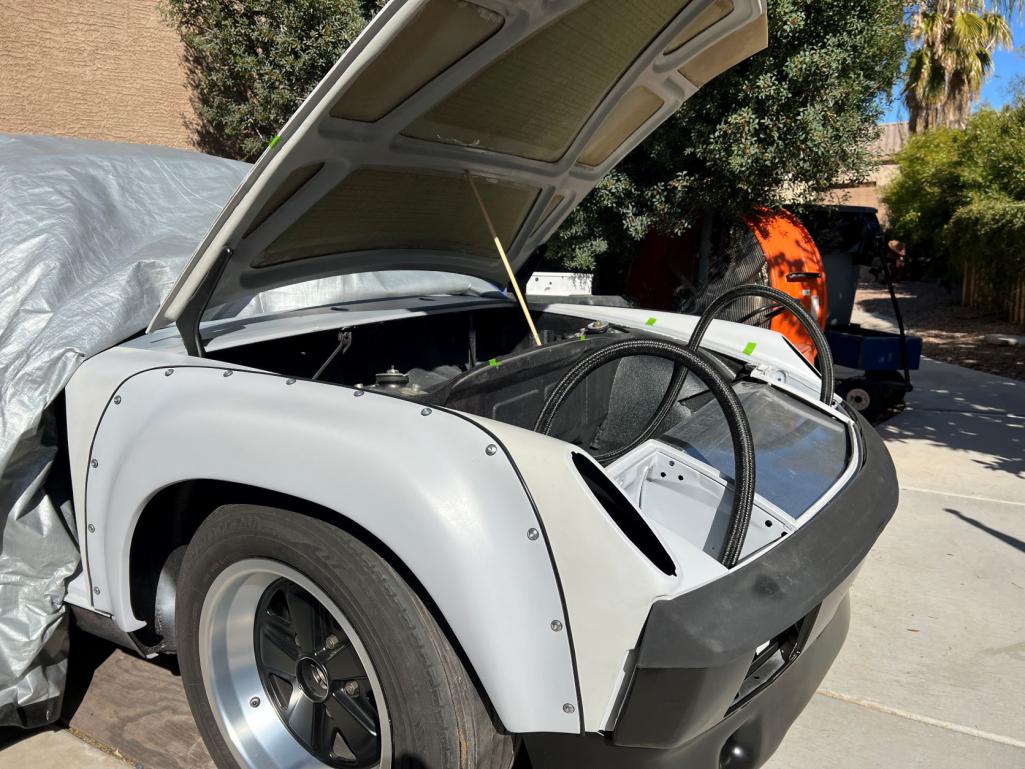
Got my "creation" to mostly fit, and clamped into place.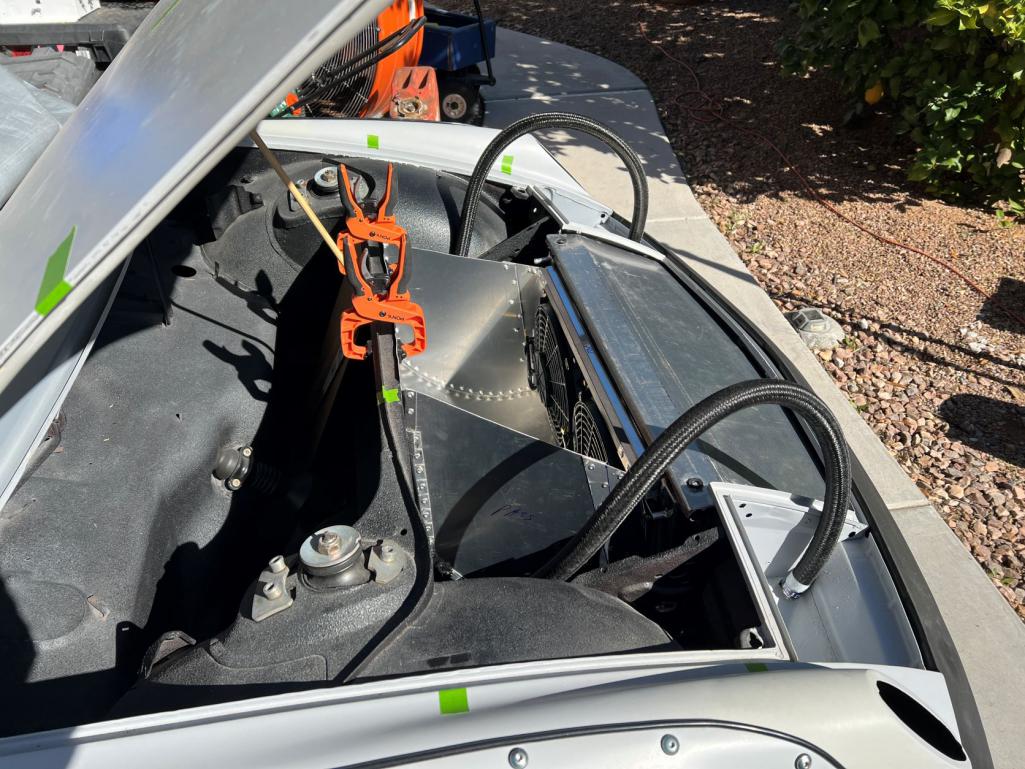
Used rivnuts to mount it up for easy removal.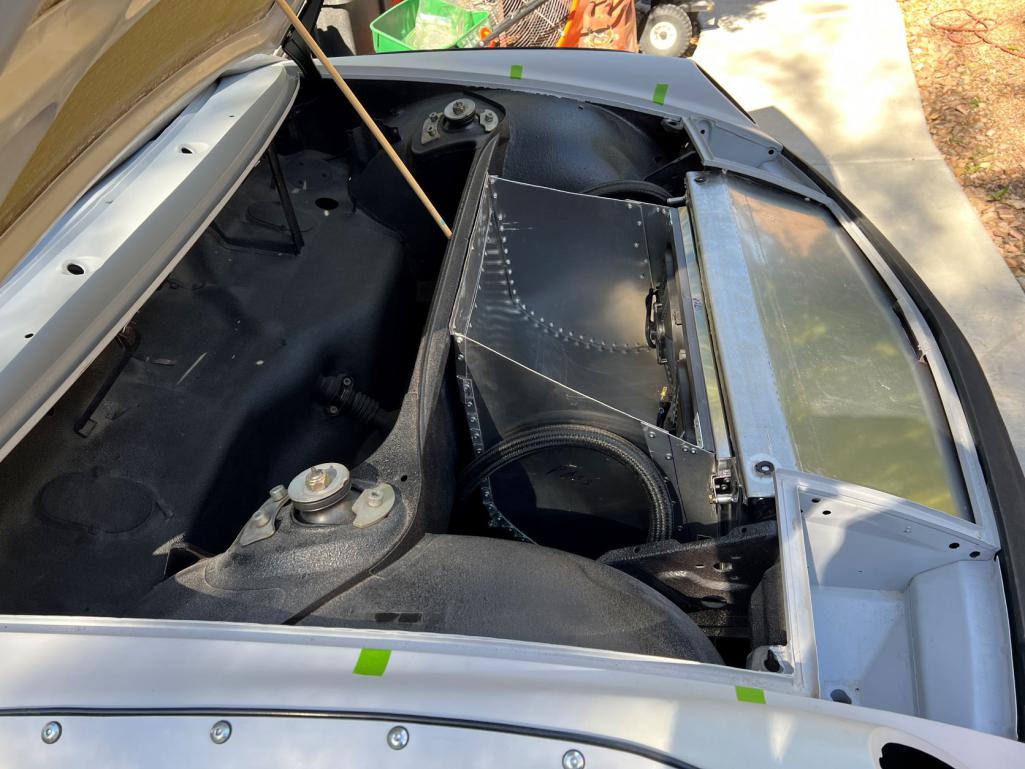
I measured 6-8 times, and still needed a stiff drink before I drilled those holes! Started with a 1/8" bit just in case I needed to fill it. 
Got it in the correct spot, and it came out ok! 
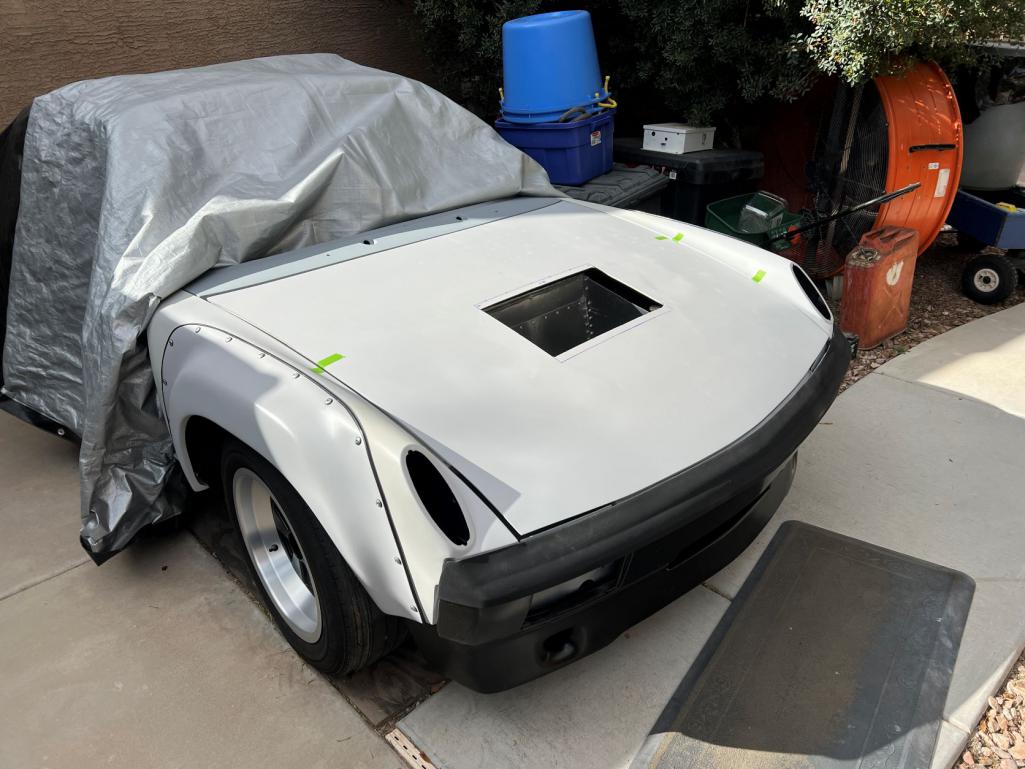
Looks like I'll need to revisit it in the future to extend the overall height for aesthetics, but looks like it will get the hot air out well enough for now!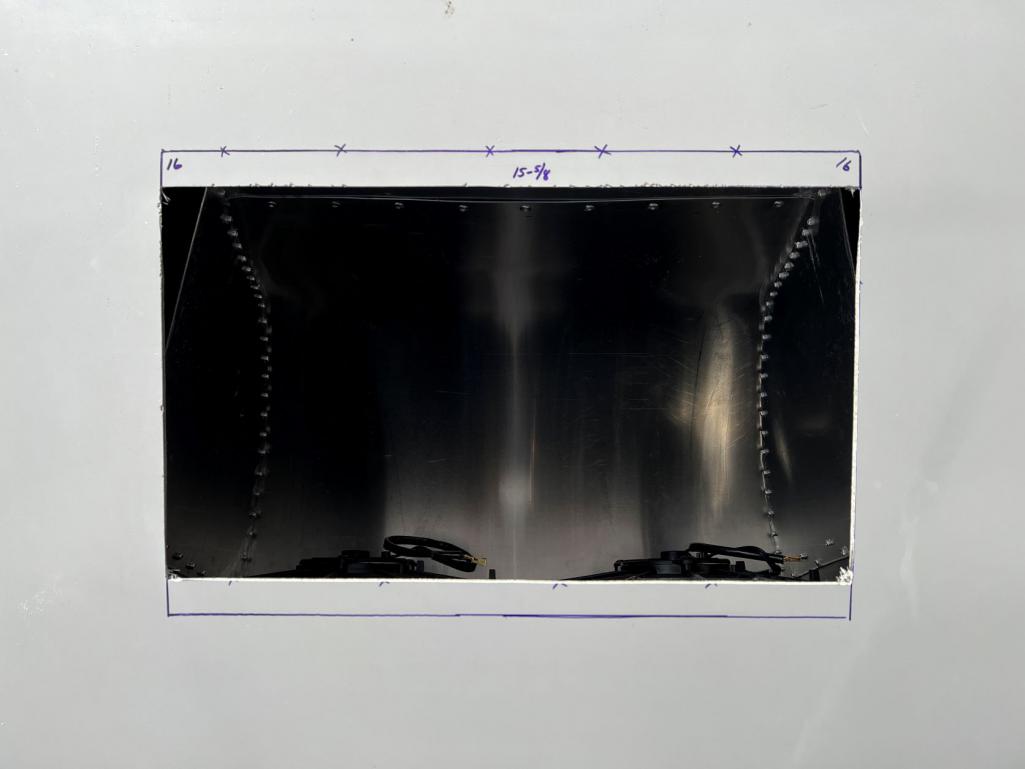
AND I learned the Boys Ranch right across the road has a plasma cutter nobody ever uses. Barn connections...you just never know what you'll learn/find!
Posted by: slowrodent Feb 21 2023, 05:56 PM
Beautiful Mike..... It's really taking shape very nicely.. As I've said before, your detail work is great and will certainly pay off in a high-quality end product.
Posted by: mgarrison Feb 22 2023, 09:22 AM
Beautiful Mike..... It's really taking shape very nicely.. As I've said before, your detail work is great and will certainly pay off in a high-quality end product.
Thanks Kevin! Feeling my way like a blind guy in a room full of rakes with their tines up!

Fingers crossed that the passenger side outlet on the radiator has enough clearance for the AN adapter and fitting
That one's gonna be snug. If it won't clear, I'll be reworking the radiator fit/placement for a third time. Seems like every step takes 4x as long as expected, and costs 2x as much as expected. Quite the journey...I keep joking that our son may have to finish the car after I'm dead and gone!
Posted by: tygaboy Feb 22 2023, 09:28 AM
Built, not bought.
...for the win, everytime!
Posted by: mgarrison Feb 22 2023, 09:57 AM
Built, not bought.
...for the win, everytime!
Thanks Chris! I keep reminding myself I want to do as much of this build myself as I can manage. May not look as perfect, or might take multiple iterations, but I figured it out, and I did it!
Posted by: ClayPerrine Feb 22 2023, 11:23 AM
Built, not bought.
...for the win, everytime!
Every time someone with a new 911 GT3 makes disparaging comments about my Six conversion, I just look at him and say "Anyone can write a check and buy a car. But not everyone can engineer and build one."
And then I blow his doors off..........
Posted by: 76-914 Feb 22 2023, 11:52 AM
Look Ma, I made SOMETHING!
I put the hoses in the headlight buckets and then started chuckling because it reminded me of flux capacitor plumbing in Doc's DeLorean!
Got my "creation" to mostly fit, and clamped into place.
Used rivnuts to mount it up for easy removal.
I measured 6-8 times, and still needed a stiff drink before I drilled those holes! Started with a 1/8" bit just in case I needed to fill it.
Got it in the correct spot, and it came out ok!
Looks like I'll need to revisit it in the future to extend the overall height for aesthetics, but looks like it will get the hot air out well enough for now!
AND I learned the Boys Ranch right across the road has a plasma cutter nobody ever uses. Barn connections...you just never know what you'll learn/find!
Use this to seal your baffle to the hood. All non-radial piston powered planes use it to seal the baffles to the cowling. Question: is the concrete slab reinforced or plasticized? You're making good progress. Stay after it.
Posted by: Costa05 Feb 22 2023, 01:25 PM
Coming along real well Mike!
Posted by: mgarrison Feb 22 2023, 02:12 PM
[/quote]
Use this to seal your baffle to the hood. All non-radial piston powered planes use it to seal the baffles to the cowling. Question: is the concrete slab reinforced or plasticized? You're making good progress. Stay after it.
[/quote]
Did I miss your link? Maybe it didn't paste...
Assuming your referring to the concrete "countertop/workbench"; It's actually quickset mortar with no rocks in it since I only could do a 1" thickness. I put metal lath in the middle to reinforce it. It's basically a POC to see if I could pull off doing our bathroom counters. I did add flow control to make it flow a bit better, and tried to use the least amount of water I could get away with (meets DOT requirements, whatever that means!). I cast the bolt holes for the vise in it using dowels. So far so good. I've hammered out some aluminum on the vise, and I've been clamping and bending the aluminum duct on it too. I kind of expected some cracks by now...
Here's where I got the idea:
https://youtu.be/T7mYB6x68DY
Posted by: mgarrison Feb 22 2023, 03:53 PM
Coming along real well Mike!
Thanks Rich! I need to pick your brain on how you calculated the capacity of your overflow/expansion tank. And, your fuel pump choice...what I've read so far says to size the pump based on HP. Not sure if that's how you went about it, or if you found Subaru specific requirements
Posted by: 76-914 Feb 22 2023, 06:12 PM
Crap! I did forget to post the link. I was doing this on my phone while sitting in the ER. Here you go. https://www.aircraftspruce.com/search/search.php?s=baffle%20seal
Posted by: Costa05 Feb 22 2023, 10:10 PM
Coming along real well Mike!
Thanks Rich! I need to pick your brain on how you calculated the capacity of your overflow/expansion tank. And, your fuel pump choice...what I've read so far says to size the pump based on HP. Not sure if that's how you went about it, or if you found Subaru specific requirements
I chose a basic high pressure Walbro fuel pump. Covers my less than 200 hp needs just fine.
As for coolant expansion, there is a formula for calculating total expansion based upon total volume of coolant and temp. Add in the engine, radiator and hoses into the volume avail. Final size of expansion tank required was minimal so I ran a 1.25 quart Moroso aluminum one. It does overflow into a catch tank at temp which works as it should. No issues yet even on 100 degree days. Good fans and duct work helps a lot. I rarely get above 200 degrees on my temps. I think all systems react differently though.
Posted by: mgarrison Feb 23 2023, 07:53 AM
Crap!
I did forget to post the link. I was doing this on my phone while sitting in the ER. Here you go. https://www.aircraftspruce.com/search/search.php?s=baffle%20sealRuh-Roh...I hope all is ok on your end!
And THANKS! Replying to 914World while in the ER is above & beyond
Posted by: mgarrison Mar 6 2023, 01:59 PM
My AN adapters and fittings finally arrived. I installed the adapters on my radiator, and did a quick test fit of the elbow on the passenger side (lower outlet)...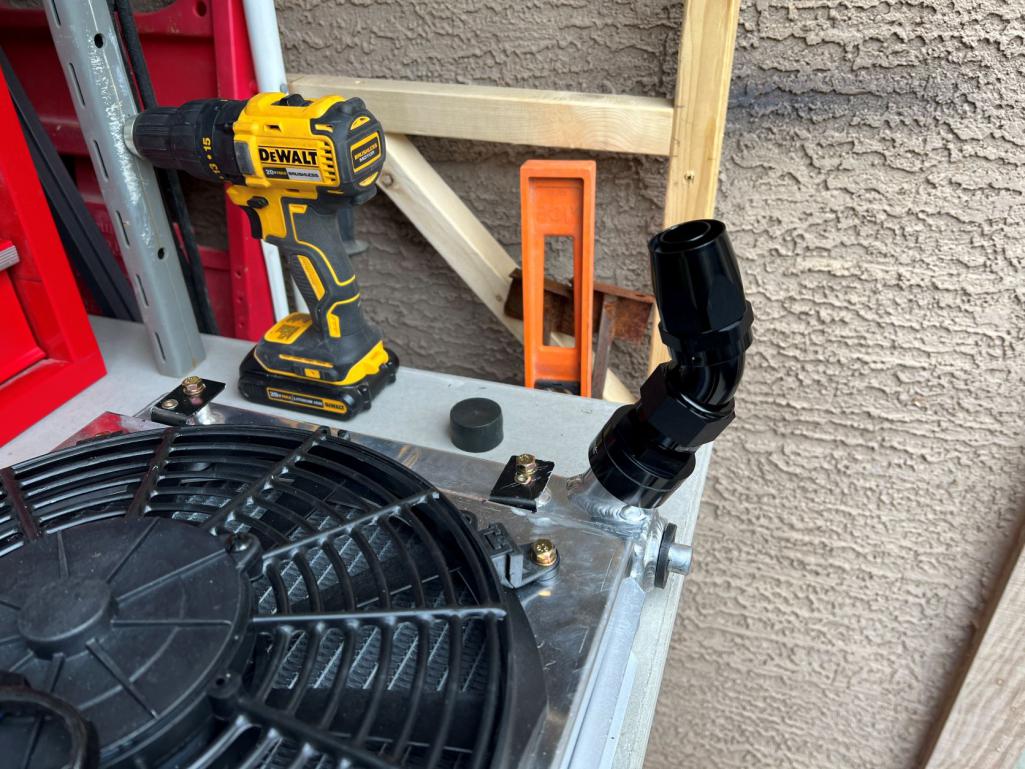
Then into the car to see if it's all going to clear. At first I had about a finger's width below the elbow, but it turns out the radiator was not seated all the way!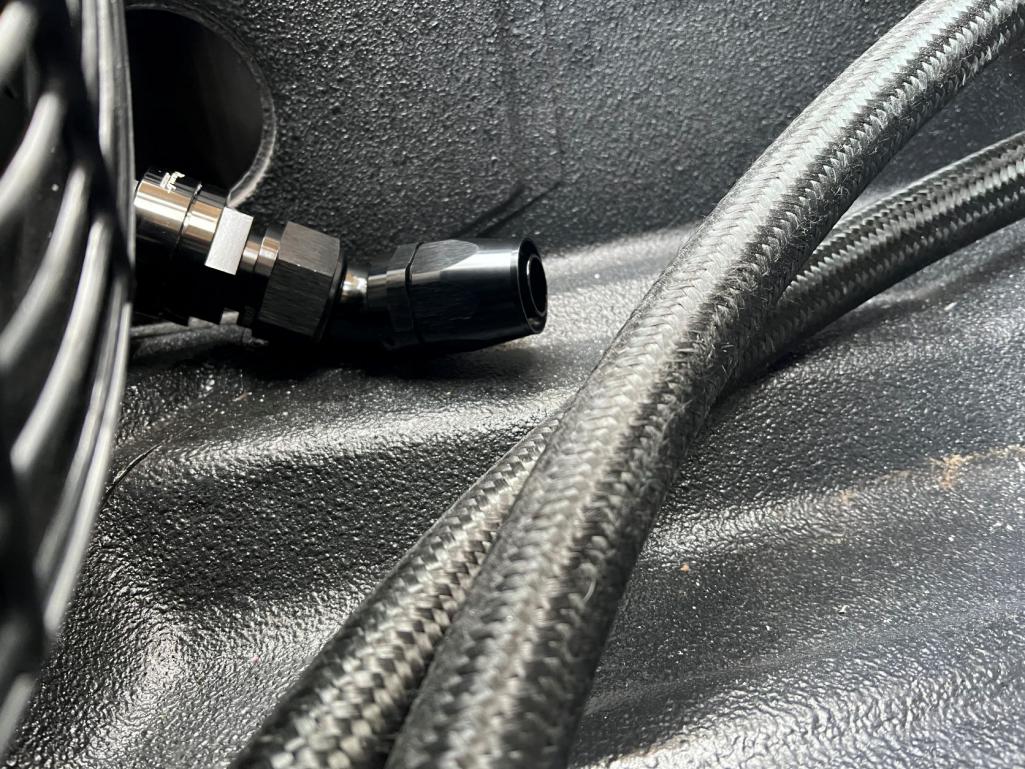
On to revision #3 I guess
Posted by: tygaboy Mar 6 2023, 02:29 PM
Only three revisions? You're far more effecient than I am! 
Seriously though, it sucks when those sorts of surprises happen. Just try and remember, a few weeks from now you'll have it solved and it'll just be another story about your build that you can share at Cars & Coffee when people are drooling over your car!
FAB on!
Posted by: 76-914 Mar 6 2023, 05:26 PM
It happens.I'll bet Phil @http://www.914world.com/bbs2/index.php?showuser=22428 has a few stories of engineering mishaps at one of the Big 3. BTW> VW Golf expansion tanks are dirt cheap and will fit your application.
Posted by: Superhawk996 Mar 6 2023, 07:25 PM
It happens.I'll bet Phil @http://www.914world.com/bbs2/index.php?showuser=22428 has a few stories of engineering mishaps at one of the Big 3. BTW> VW Golf expansion tanks are dirt cheap and will fit your application.
It happens a lot less than it did when I first started. Digital mock up (CAD) came a long way during my career. It still happens occasionally during pre production prototype builds when parts are being heavily iterated and things are hand assembled. By the time you get to mass production an interference like that would be costing millions per day while the line is shut down. Don’t want to be that guy.
I haven’t looked at this thread in a while - wow! Lots of awesome progress. You’ll come up with a rework like Chris said. The car will be awesome and the story will be memorable!
Posted by: mgarrison Mar 6 2023, 09:14 PM
Thanks guys! Appreciate the encouragement
I figure its another shot at enhancing aesthetic/style points...think I've heard that around here somewhere
Posted by: Lilchopshop Mar 7 2023, 05:21 AM
Thanks guys! Appreciate the encouragement
I figure its another shot at enhancing aesthetic/style points...think I've heard that around here somewhere
I'm always excited to see updates on this thread. Nice work @http://www.914world.com/bbs2/index.php?showuser=23922 !
I purchased that same radiator for my build and was also planning on using the water-neck adaptor with AN fittings and hose. What size AN hose are you using?
A couple of thoughts on your interference situation... The water-neck adapter sure does look cool, but maybe it adds too much length here. Could you use a short section of rubber hose as the transition between the radiator and your AN hose?
What about finding someone to TIG weld a short section of aluminum elbow to the radiator outlet?
Posted by: mgarrison Mar 7 2023, 09:03 AM
Thanks guys! Appreciate the encouragement
I figure its another shot at enhancing aesthetic/style points...think I've heard that around here somewhere
I'm always excited to see updates on this thread. Nice work @http://www.914world.com/bbs2/index.php?showuser=23922 !
I purchased that same radiator for my build and was also planning on using the water-neck adaptor with AN fittings and hose. What size AN hose are you using?
A couple of thoughts on your interference situation... The water-neck adapter sure does look cool, but maybe it adds too much length here. Could you use a short section of rubber hose as the transition between the radiator and your AN hose?
What about finding someone to TIG weld a short section of aluminum elbow to the radiator outlet?
Just unprofessional observations from my situation, so YMMV...
I'm sure you could have aluminum AN bungs welded into the radiator inlets. But, I wasn't sure where to get that done/who I'd trust to do it right on a brand new Mishimoto radiator. If I had it to do over, I'd see if Mishimoto would do it for me.
Looking at how low that inlet sits in relation to the bottom of the radiator, and how low you need to mount the radiator to clear the hood support structure (nearly impossible to see/figure out until I cut my hood vent), I don't think a hose would work unless it was molded as an elbow, and even then it would be snug, or you might need to shorten the end attaching to the inlet.
If the inlets were horizontal it would be much simpler...When I spoke to the Mishimoto guys about flow direction in their Celica radiator, they did mention you could run it upside down. Drain plug would be on top, and overflow connection on bottom, but it is possible. That would put the "lower" inlet near the hood and angled towards the hood though.
I was not super happy with how my radiator mount came out. It worked and wasn't really seen, but sure could be better. I'm getting my chance to improve it I guess!
I ran -16 braided hose through my longs. The -20 did not really fit, and seemed to collapse much easier than the -16. Not sure on the hose specs as it came with the engine/trans I bought from another member of 914World. If your using -20 I have 4 -20 bulkhead fittings you can have if you want/need them - just cover shipping and there yours...
Posted by: Lilchopshop Mar 8 2023, 06:27 AM
Thanks guys! Appreciate the encouragement
I figure its another shot at enhancing aesthetic/style points...think I've heard that around here somewhere
I'm always excited to see updates on this thread. Nice work @http://www.914world.com/bbs2/index.php?showuser=23922 !
I purchased that same radiator for my build and was also planning on using the water-neck adaptor with AN fittings and hose. What size AN hose are you using?
A couple of thoughts on your interference situation... The water-neck adapter sure does look cool, but maybe it adds too much length here. Could you use a short section of rubber hose as the transition between the radiator and your AN hose?
What about finding someone to TIG weld a short section of aluminum elbow to the radiator outlet?
Just unprofessional observations from my situation, so YMMV...
I'm sure you could have aluminum AN bungs welded into the radiator inlets. But, I wasn't sure where to get that done/who I'd trust to do it right on a brand new Mishimoto radiator. If I had it to do over, I'd see if Mishimoto would do it for me.
Looking at how low that inlet sits in relation to the bottom of the radiator, and how low you need to mount the radiator to clear the hood support structure (nearly impossible to see/figure out until I cut my hood vent), I don't think a hose would work unless it was molded as an elbow, and even then it would be snug, or you might need to shorten the end attaching to the inlet.
If the inlets were horizontal it would be much simpler...When I spoke to the Mishimoto guys about flow direction in their Celica radiator, they did mention you could run it upside down. Drain plug would be on top, and overflow connection on bottom, but it is possible. That would put the "lower" inlet near the hood and angled towards the hood though.
I was not super happy with how my radiator mount came out. It worked and wasn't really seen, but sure could be better. I'm getting my chance to improve it I guess!
I ran -16 braided hose through my longs. The -20 did not really fit, and seemed to collapse much easier than the -16. Not sure on the hose specs as it came with the engine/trans I bought from another member of 914World. If your using -20 I have 4 -20 bulkhead fittings you can have if you want/need them - just cover shipping and there yours...
I just learned a hip new acronym! (YMMV) I'm one step closer to hanging with the cool kids!
 Thanks!
I'm also using the -16 hose, but thank you for the offer of your fittings! That would be a helluva deal! Those things are not cheap!
Posted by: mgarrison Mar 8 2023, 10:06 PM
I deconstructed my old radiator mount and ducting, saving all the parts that I could reuse - mostly the ducting/shrouding and the lower mounts. I got out the micrometer and discovered this square tubing I'm trying to recycle/upcycle is only .5mm thick! No wonder it's such a challenge to weld. Most of the welds are coming out ok, but some sections seem to be more of an issue. This is with my welder dialed as low as she'll go, and just a beat & a half hit of the juice...
I was able to recover my lower mounts to reuse. Thankfully!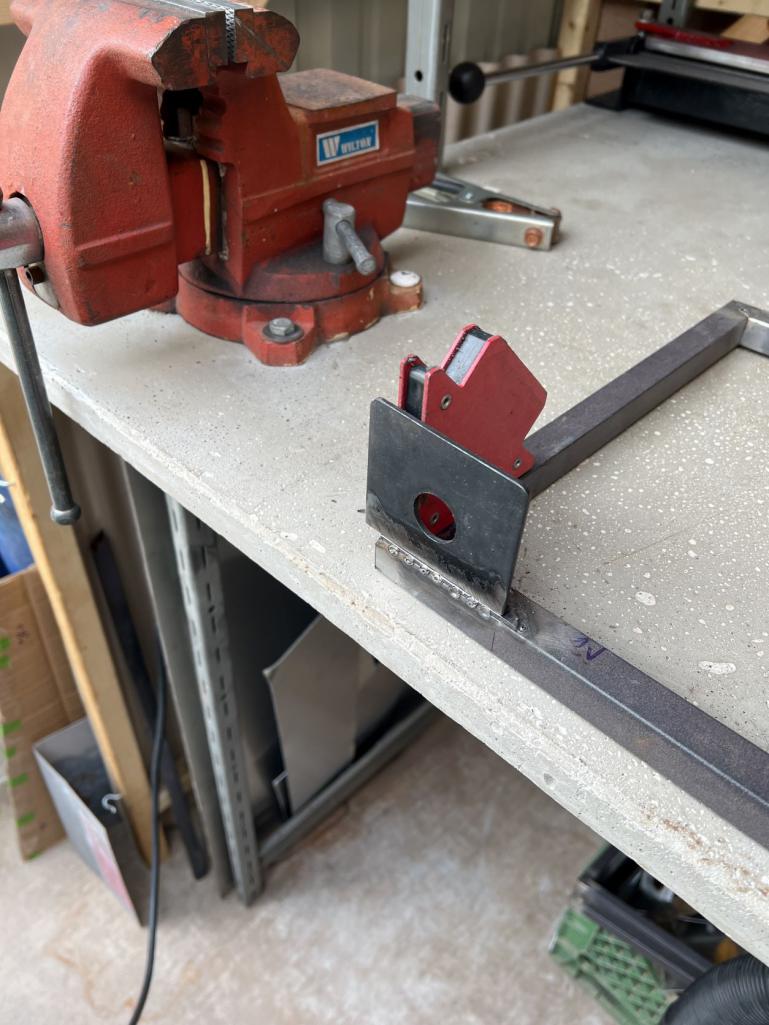
I must have measured 6-7 times and installed/removed the rubber grommets for the mounts too many times to count, but they lined up better than I got them to last time!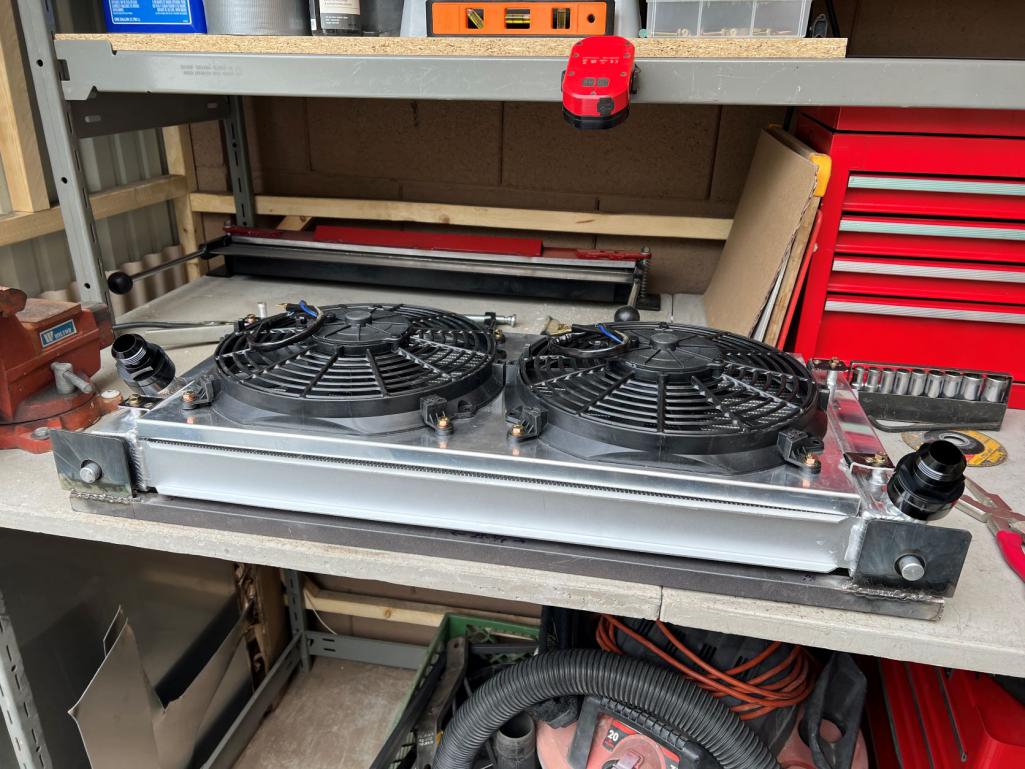
I was so focused on getting the lower mounts to line up as best I could, I totally forgot to pay attention to my overall width, and that little issue of the headlight buckets intruding in the upper half of the space, but not the lower half...Made the frame too wide to fit between the headlight buckets! On to Revision 3.1
Minor remodel complete, I paid much better attention to test fit each step of the way. Looks like it's gonna work out ok.
Got the top mounts figured out after a couple of tries - odd angles always hurt my brain 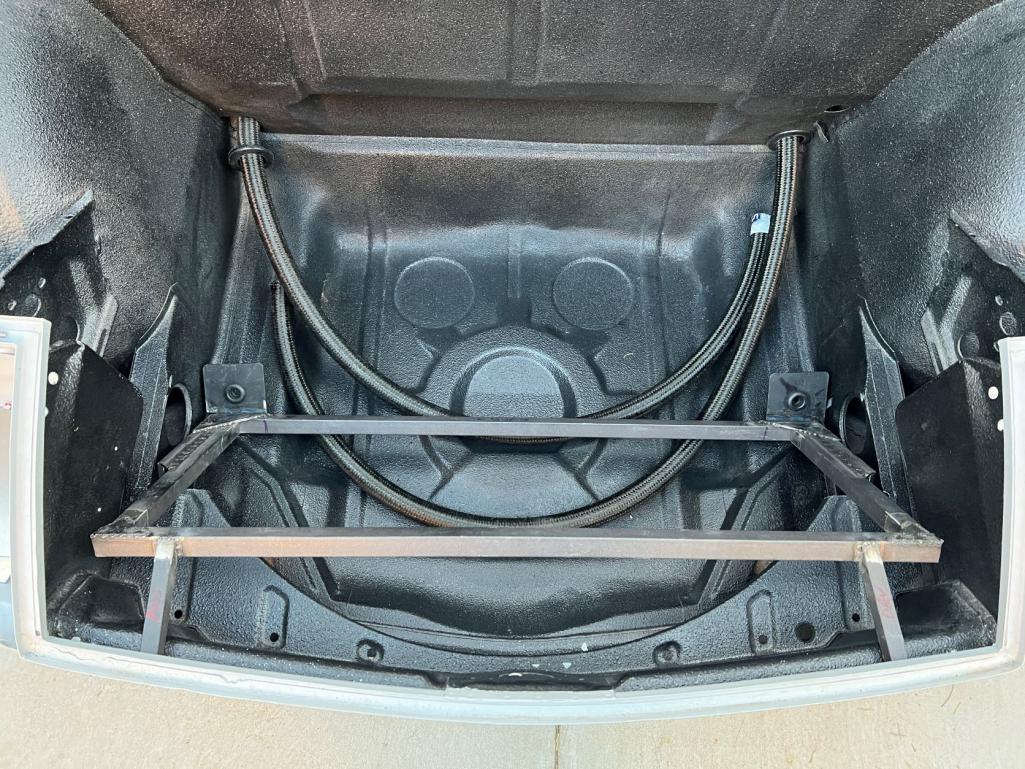
Now to work out the lower attachment points
Posted by: tygaboy Mar 9 2023, 08:51 AM
Not the best pic of it but I just added side walls to that angled support area. It has a floor that extends back far enough that I can get a fastener in there that bolts that area to the chassis. I can get you more specific pics, if that would help.
Attached thumbnail(s)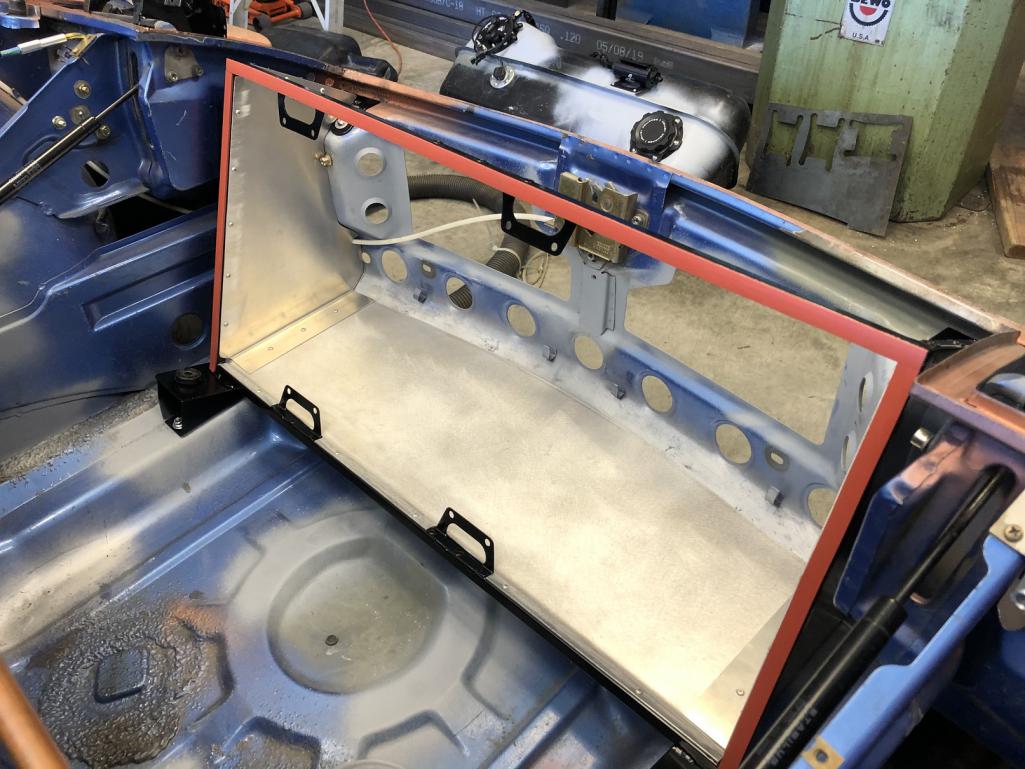
Posted by: mgarrison Mar 9 2023, 11:44 AM
Not the best pic of it but I just added side walls to that angled support area. It has a floor that extends back far enough that I can get a fastener in there that bolts that area to the chassis. I can get you more specific pics, if that would help.
Thanks Chris - I think I have a concept that will work. Funny thing - I'd already saved that pic from your build to help guide me building the frame and ducting!
Posted by: mgarrison Mar 10 2023, 10:32 PM
We interrupt your regularly scheduled update for this distraction...
The 914 took her first "trip". Our neighbors offered me their garage for a week while they are out of town. My wife sang "Flintstone's, meet the Flintstone's" as we rolled across the street! Their garage makes the 914 look like it's in the belly of a giant whale! 
We moved the 914 so I can pour a concrete pad under where it has been parked. Figure I'll use it for the 914, Miata, or trailer often.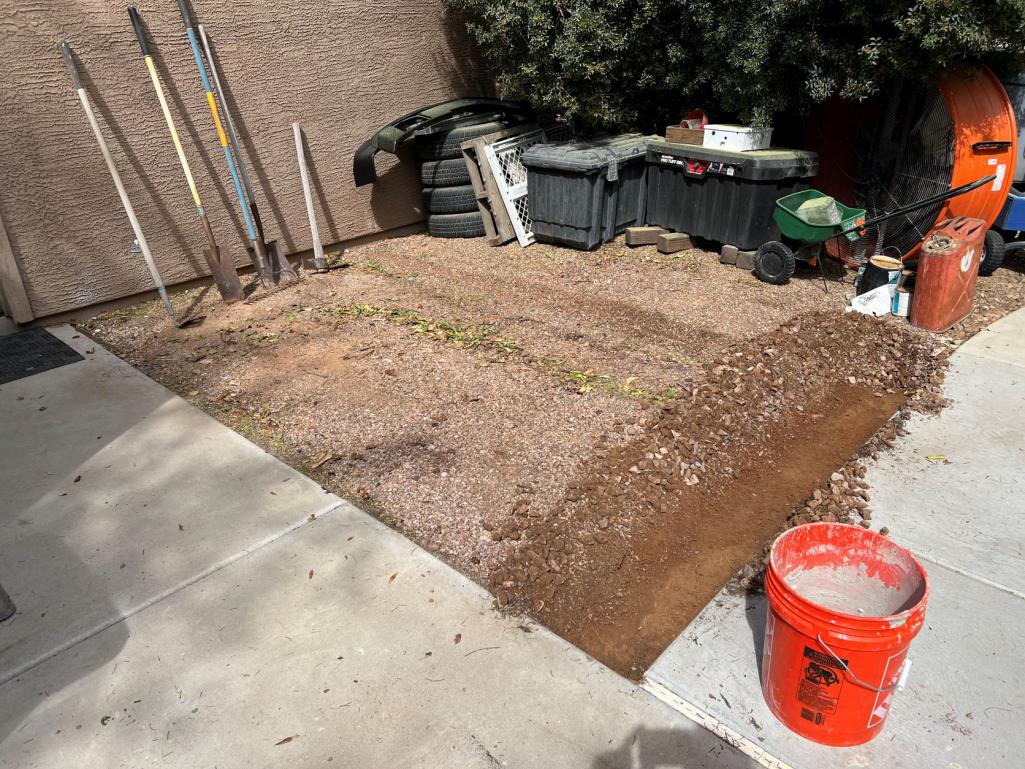
It was twice the cost to have a small concrete truck deliver mix on site, so I split it in half and made two trips with our trailer to get the 37 80lb bags of concrete 
Got it all formed up and ready to go...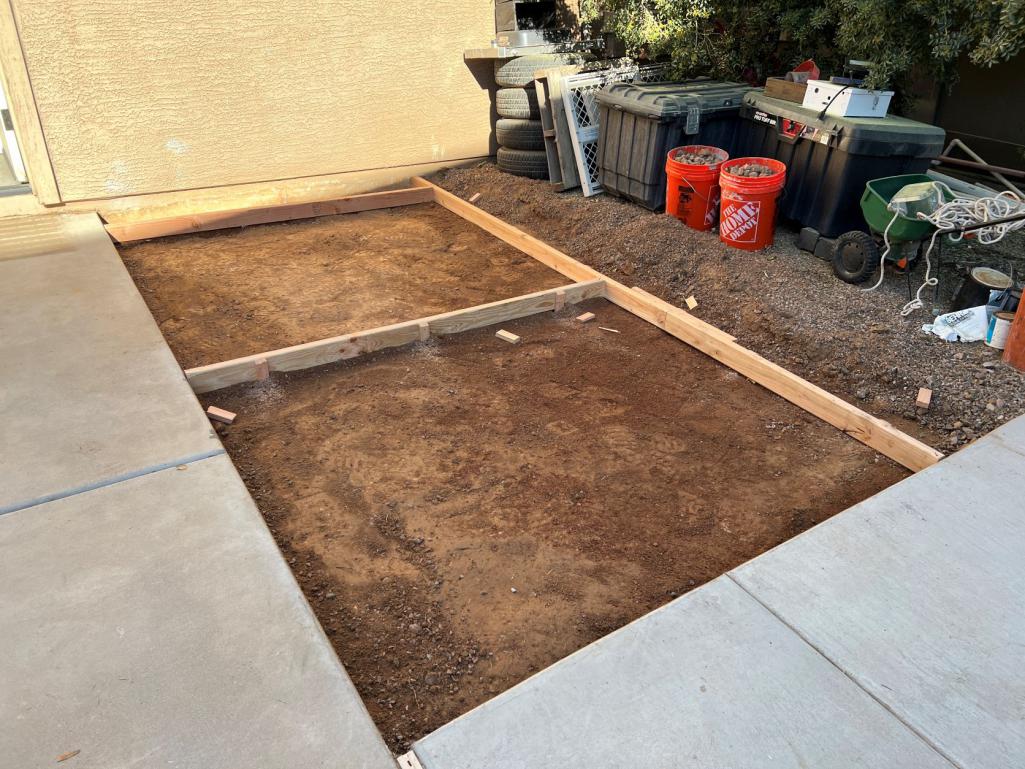
Of course scheduling really bit me in the hiney; everyone was at work/school on the day I needed to mix & pour the first section. Solo Miho, again...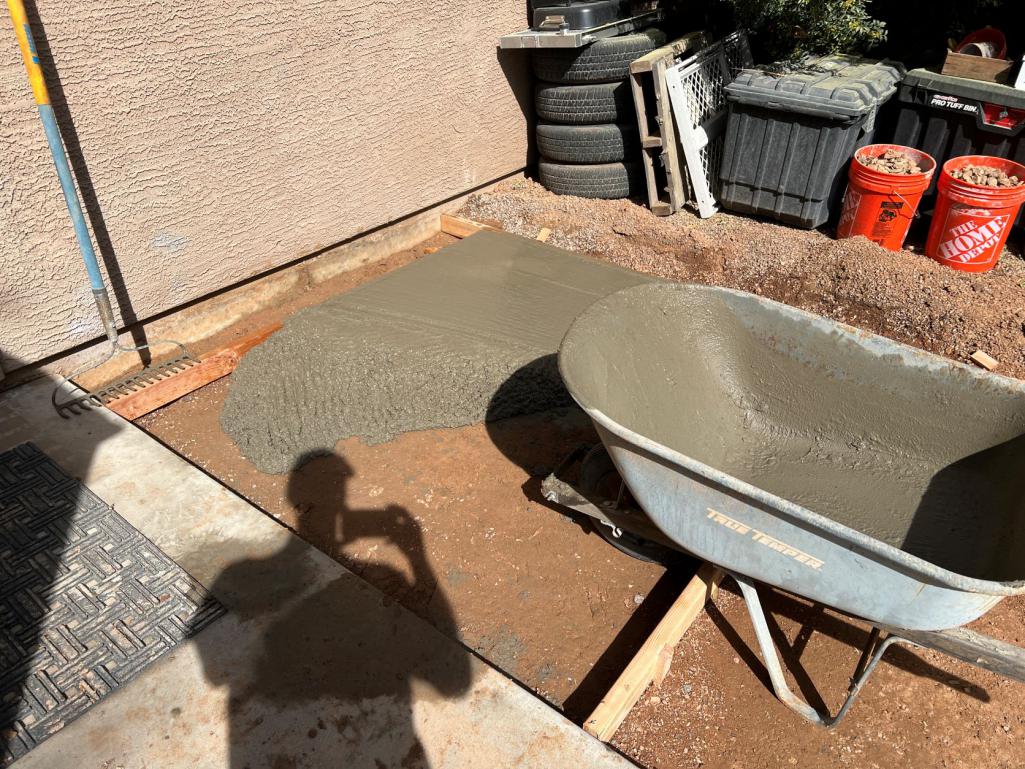
I mixed two bags at a time...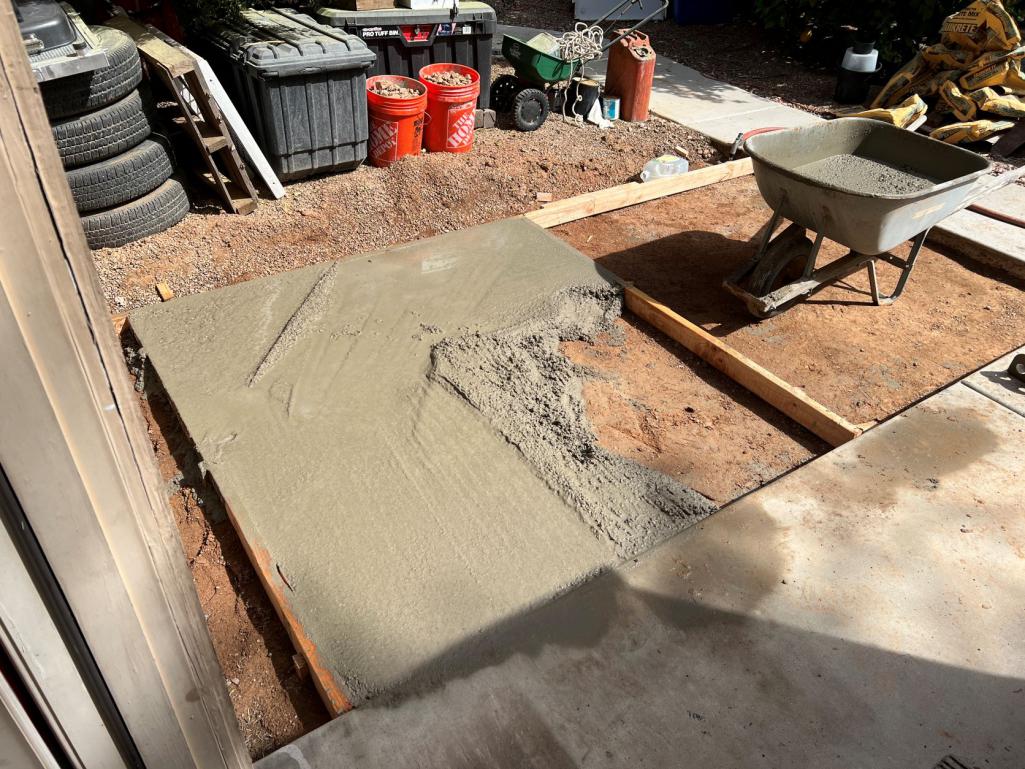
Oddly enough, two 80lb bags equals my body weight. So, I carried myself 9X 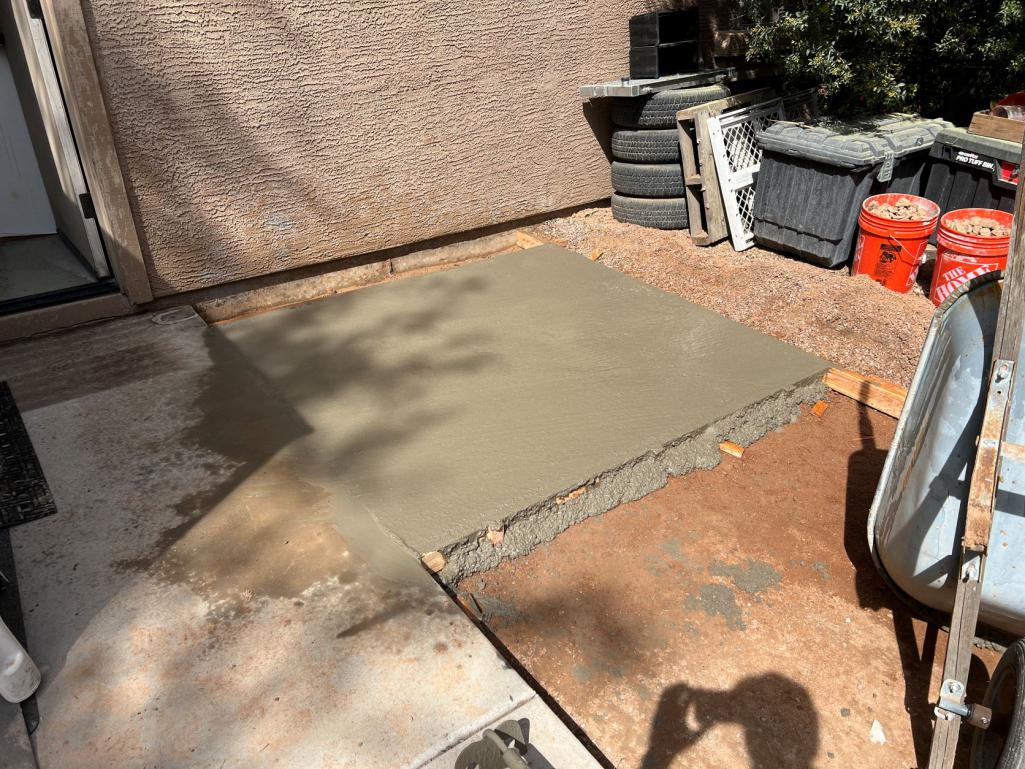
Got it all finished off in time to pick up our daughter from school, and then off to Lowe's to get bags for round #2 on Sunday. Can't wait! 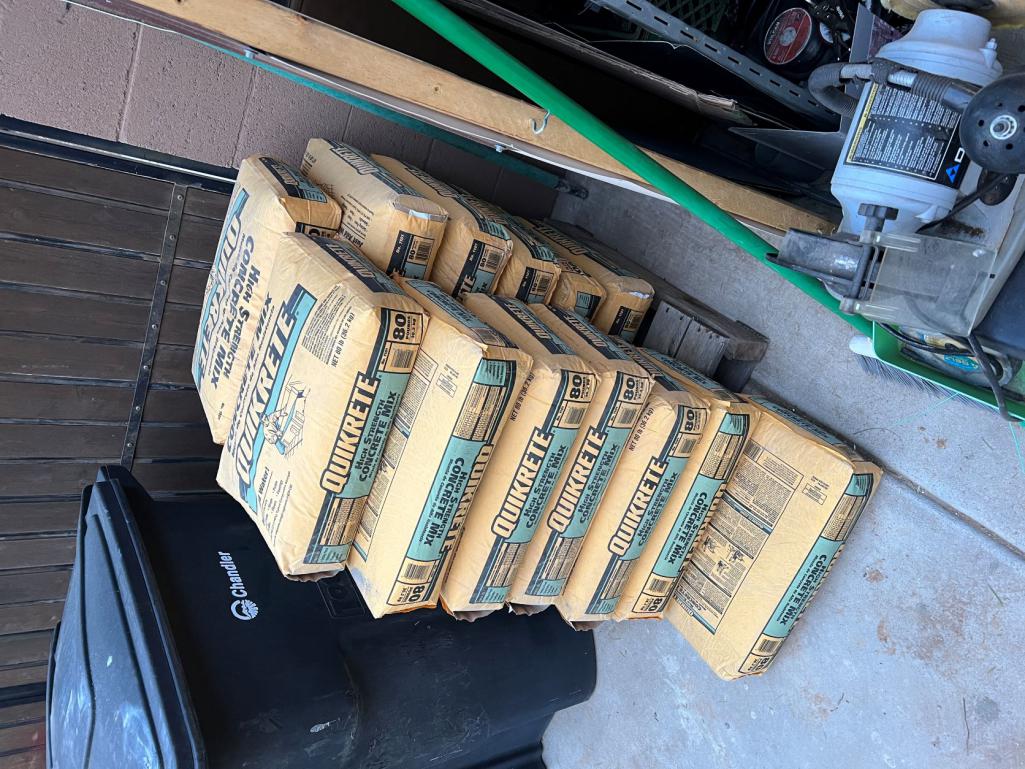
Posted by: mgarrison Mar 13 2023, 02:48 PM
Round two is in the books. Thankfully our son helped me so the mixing was much easier.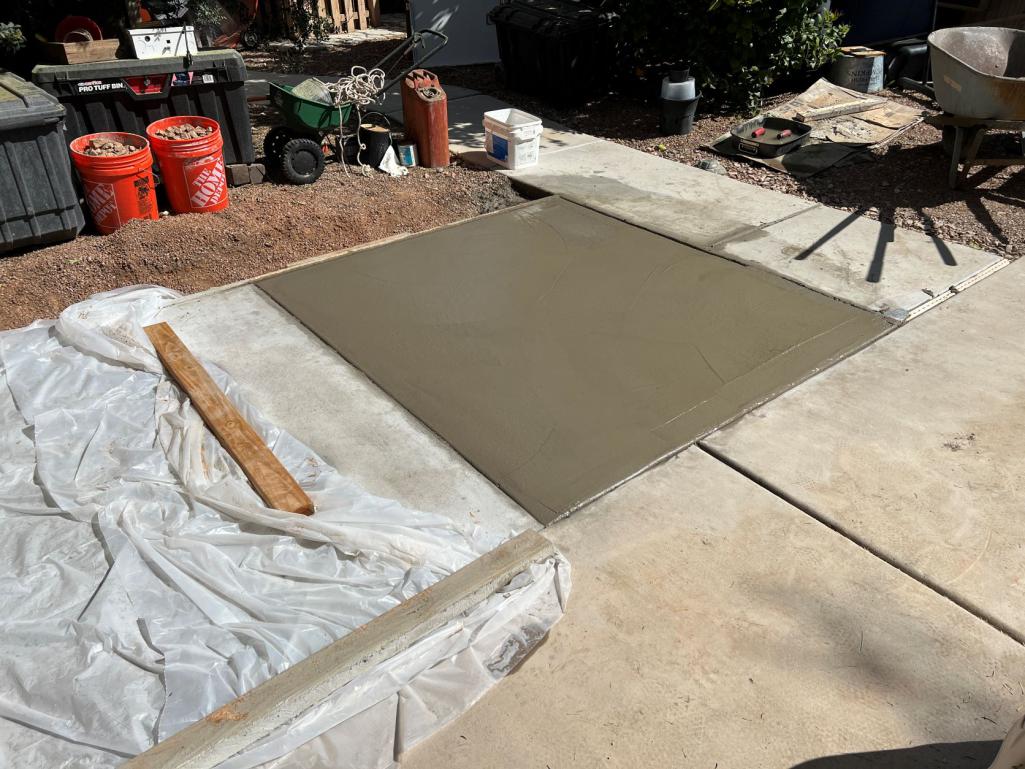

Now just have to wait 5 days for the concrete to cure. Neighbors get back Wednesday, so we need to figure out where to stash the 914 for a couple of days
Posted by: mgarrison Mar 17 2023, 11:57 AM
Kicked the wife out of the "Jeep garage" for a couple of days until the concrete is fully cured. Worked on the lower mounts yesterday afternoon for a bit - killed my back. That frunk floor is a long way down!
This morning I broke out the Quick Jack so that things are easier on my tired, old back!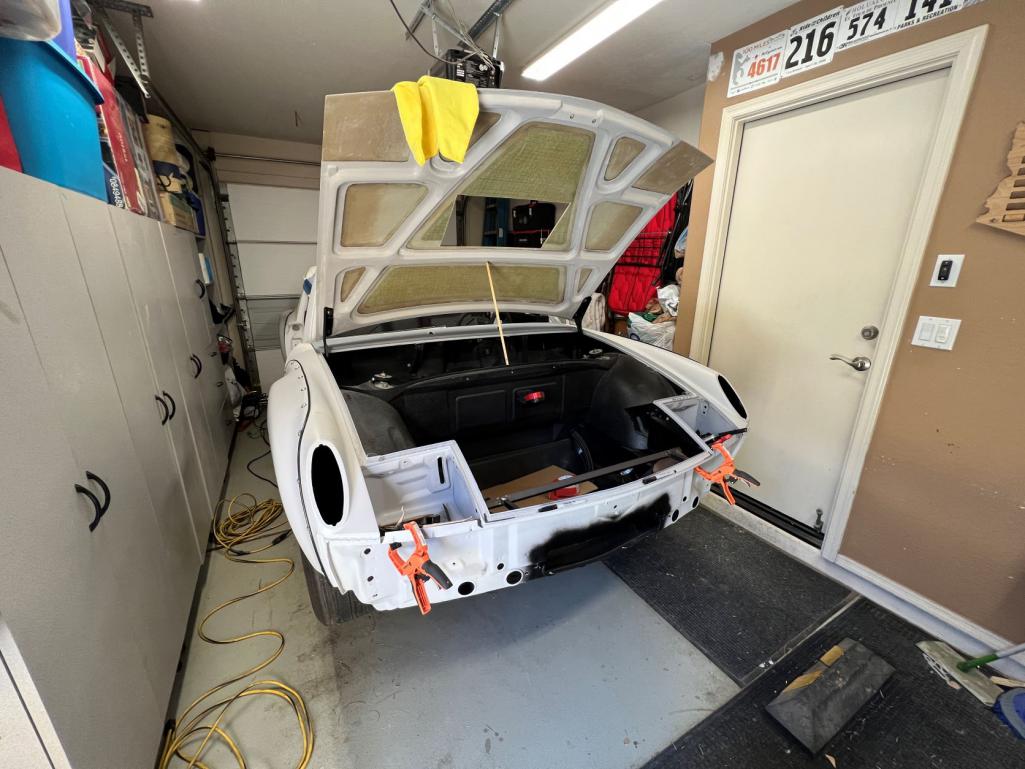
Posted by: mgarrison Mar 17 2023, 08:56 PM
Concrete is all cured and ready for the 914!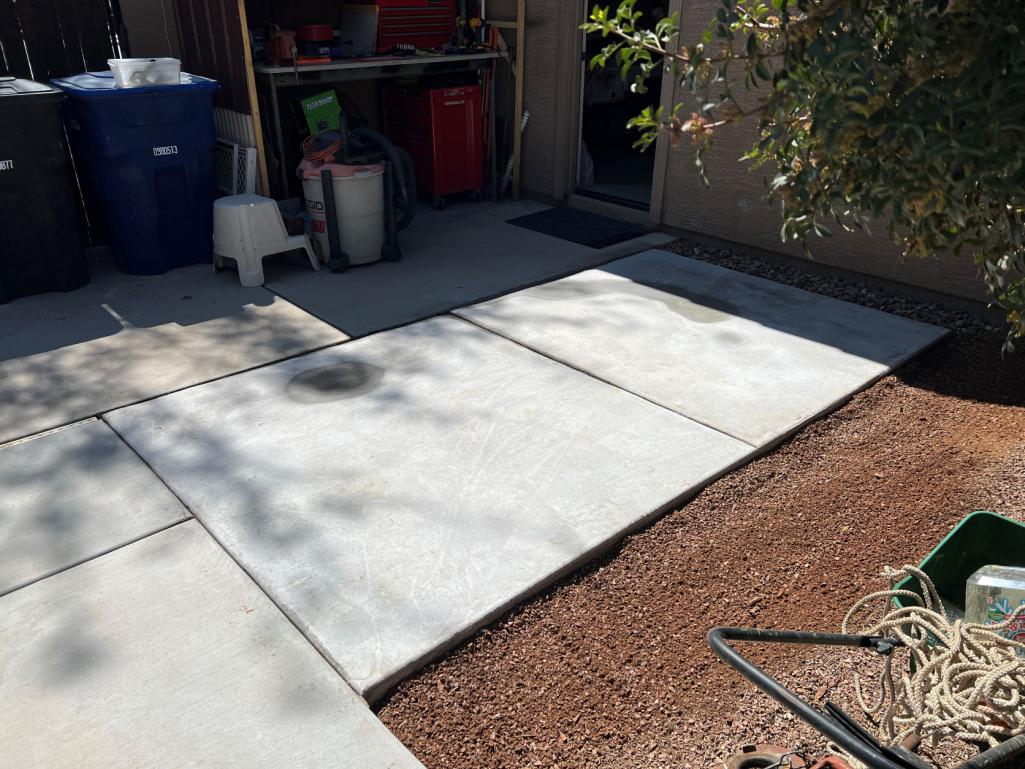
I got to spend a few hours this afternoon and made some progress. Lower ducting is in place. I just need to get more rivets - only had 3 left from the last revision.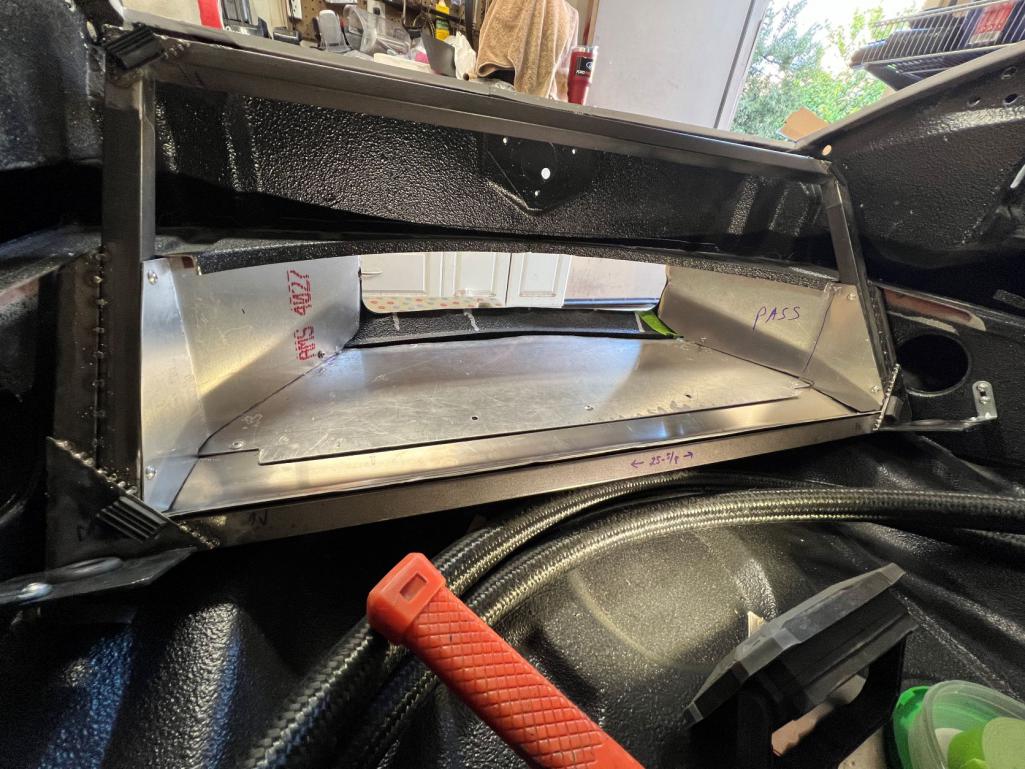
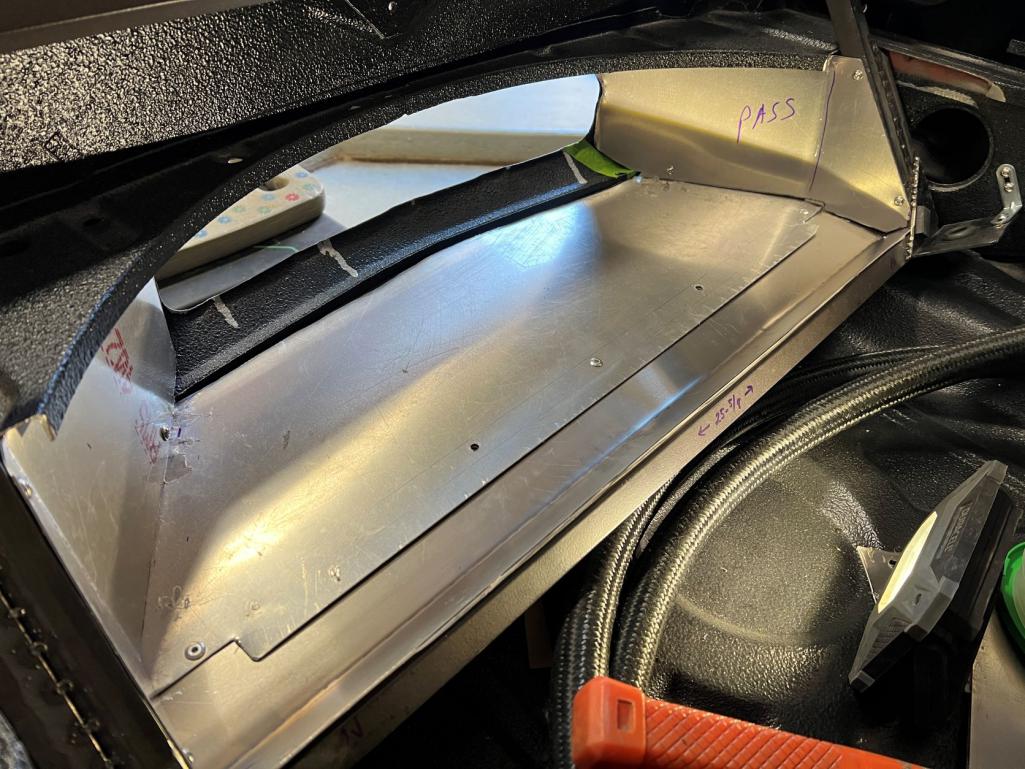
I have the upper sides cut out. Just working on fine tuning them and then I'll need the rivets to attach them. I'm trying to reuse as much as possible from the last revision - that's why the bottom is two pieces riveted together.
Posted by: mgarrison Mar 20 2023, 10:45 AM
I had to redo my upper mounts. I had a bracket that was for...something! Worked out to be about the perfect size and shape. Just had to cut out the center section and drill the mount holes.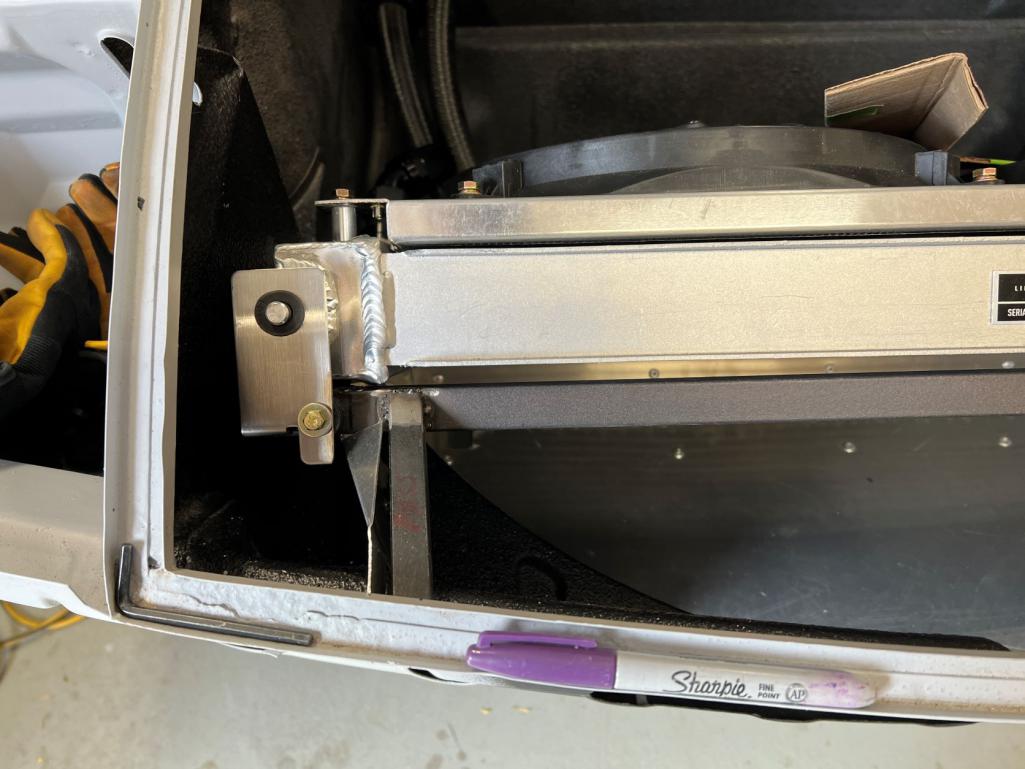
I tried 3-4 times to figure out how to make a cover like this work, and get it mounted, but it just never worked out - always some little issue biting my on the butt!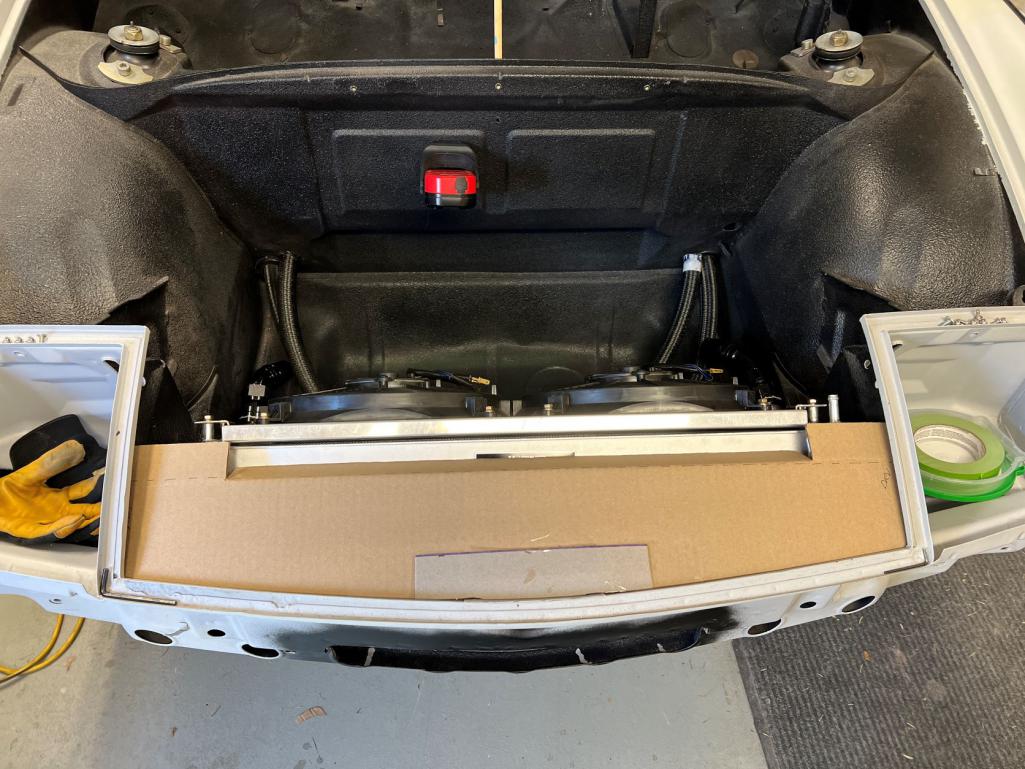
Ended up with a design that covers less, but it directs the air where it needs to go 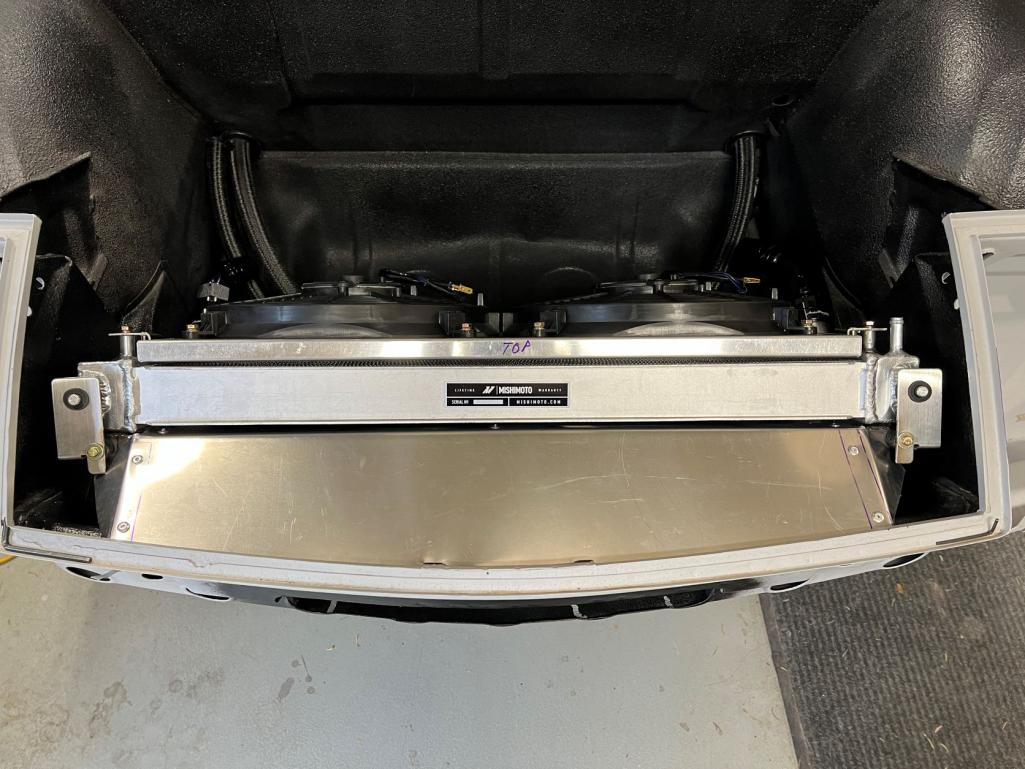
Cosmetic cover will have to come later...maybe. She's back in her spot, but at least the plywood is gone!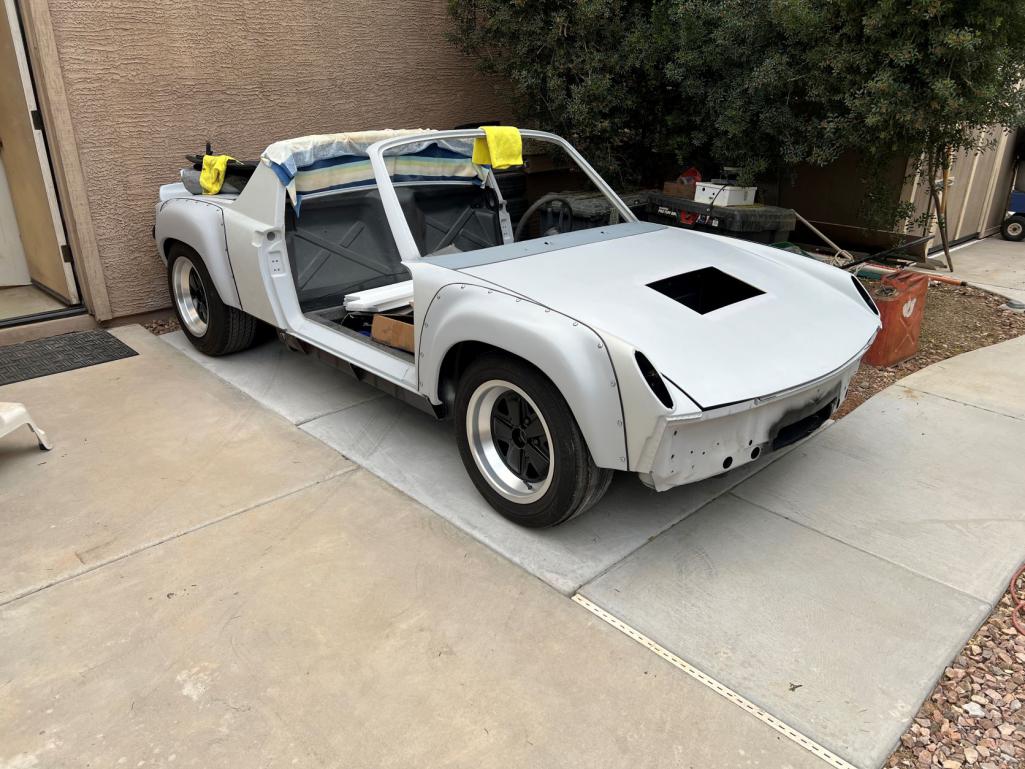
Posted by: Mayne Mar 20 2023, 12:07 PM
Looking good, and that’s a proud little spot for the teener!
Posted by: mgarrison Mar 24 2023, 10:24 AM
I managed to get the hose ends on the front lines about 95% of the way on - waiting on another -16 wrench to finish tightening them down. Typically you use a vise with aluminum jaw pads to install the hose ends, but I don't have that option with the hoses running through the chassis. I guess I could have pulled the hoses out, then installed ends on one end. Run the hoses back through the chassis, and then installed the other ends. Seemed like too much work for not much return!
I decided to cross the lines at the front so that the return (passenger side) goes to the "upper" (really middle inlet on the Celica radiator), and the feed (drivers side) goes to the lower inlet/outlet. Mishimoto said flow direction did not matter, and the radiator would flow fine either direction but...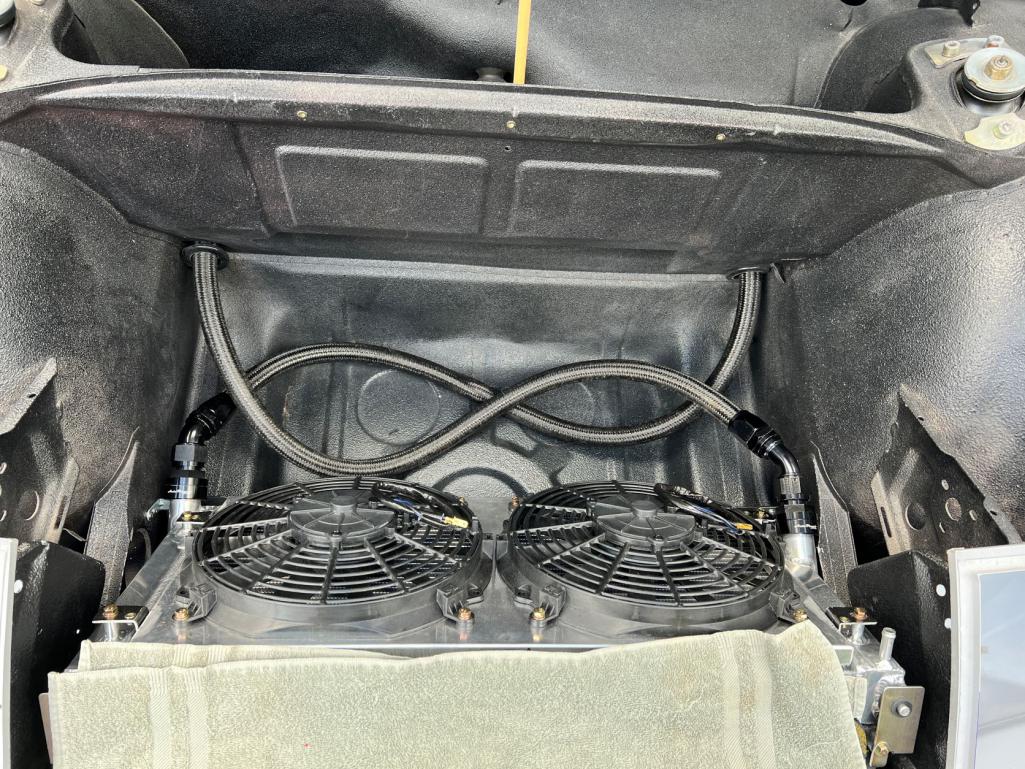
I got the thermostat housing adapter installed. In case anyone's interested in the AutoPlumb adapters (instead of having a bung welded in), here's the basic process:
Put the grip tape around the threaded collar and slip the collar and split ring over inlet.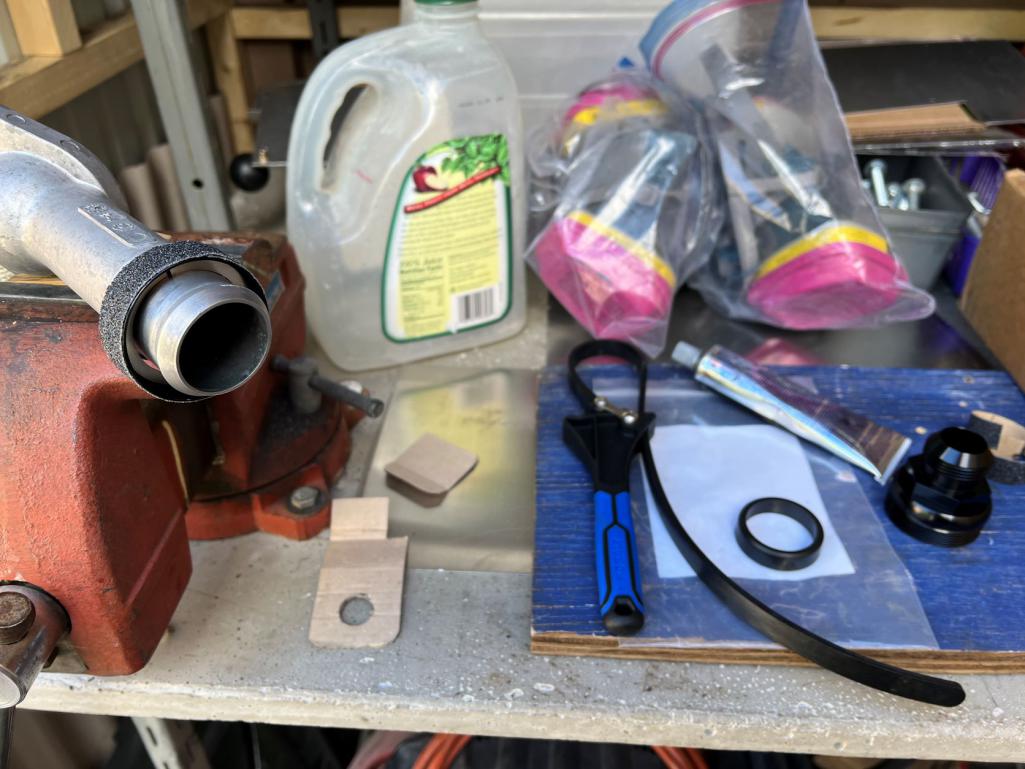
Coat the rubber bushing with black RTV and slip over the inlet with the chamfer to the outside.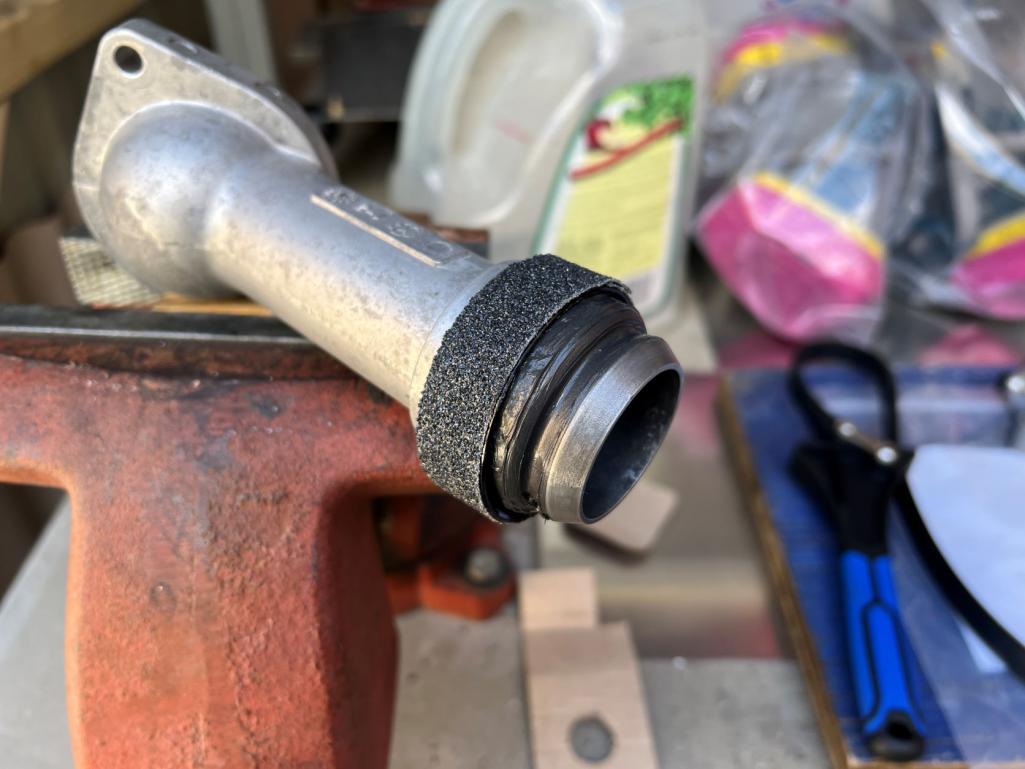
Thread the collar on by hand as tight as you can get it making sure it stays square to the end of the inlet. Tighten the rest of the way using the strap wrench and AN wrench.
Clean the outside up with lacquer thinner.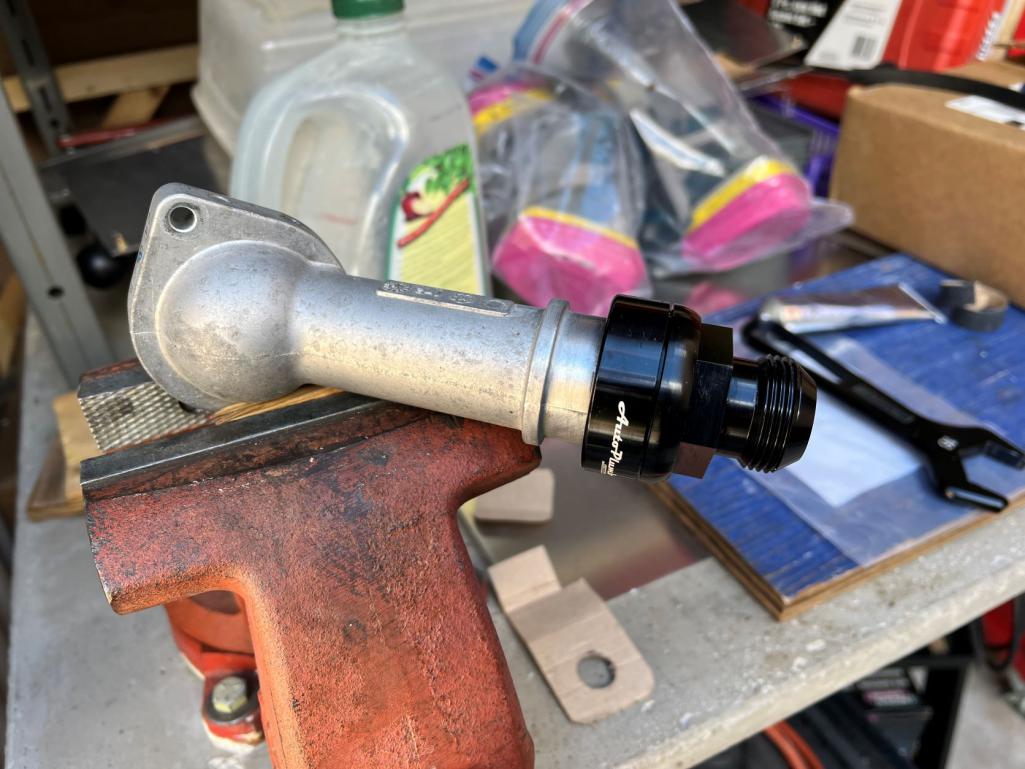
Works pretty well, IMHO... Subaru puts the thermostat housing in the craziest place; bottom of the motor, on the driver's side! 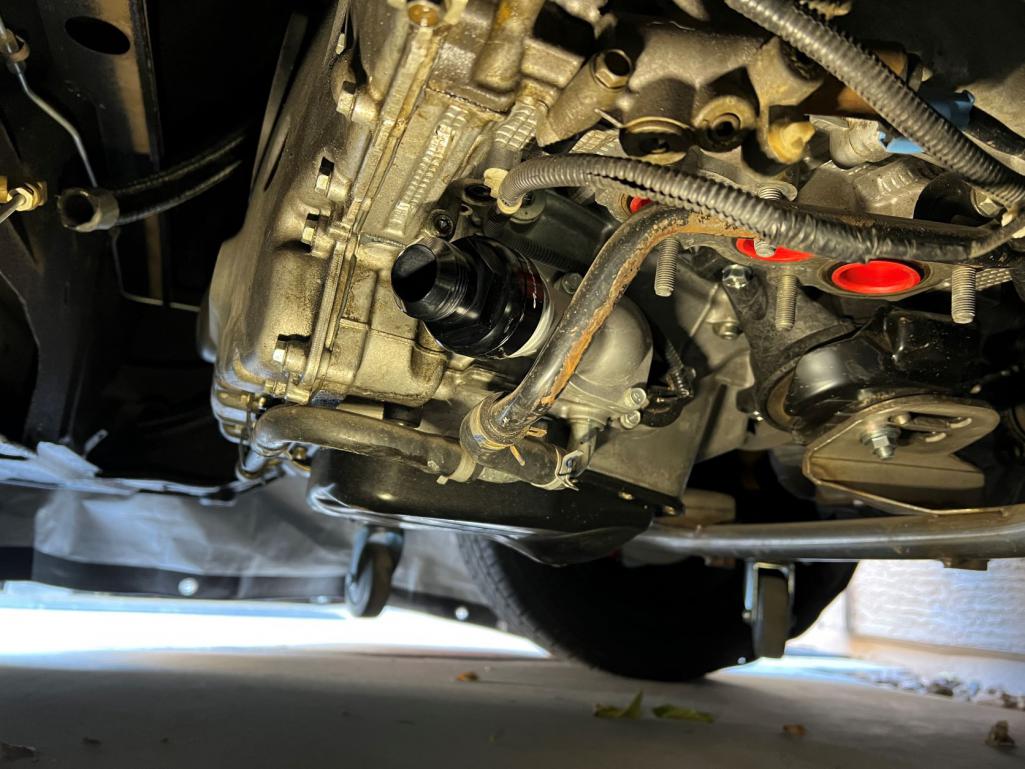
Now I'm waiting on another 45 degree hose end - I used the one that was for the thermostat housing on the radiator due to the change in the radiator mounting angle needed to make everything fit
Using my time to try and work out the exit ducting...again! Trying to reuse what I can, but going to need more aluminum sheet, of course! 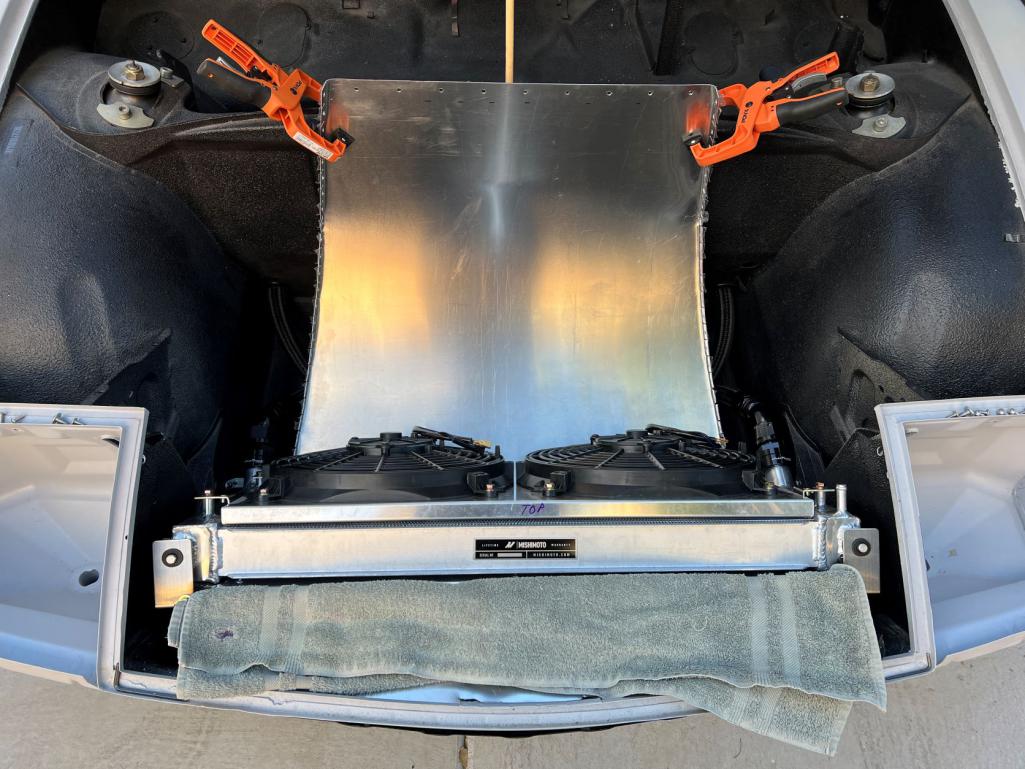
Posted by: slowrodent Mar 24 2023, 03:34 PM
Keep up the great work Mike.. As always, looking very good! 
Posted by: 76-914 Mar 26 2023, 08:42 AM
Do they not use rebar for reinforcement in your neck of the woods? The finish looks good. Did you slope it to keep the rainwater away from the siding? That thermostat location will work out very well and lines up nicely with the nipple coming off the long. Mixing that concrete by hand will give you a good work out!.
Posted by: mgarrison Mar 26 2023, 08:51 PM
Do they not use rebar for reinforcement in your neck of the woods? The finish looks good. Did you slope it to keep the rainwater away from the siding? That thermostat location will work out very well and lines up nicely with the nipple coming off the long. Mixing that concrete by hand will give you a good work out!.
No...They dont even use rebar on driveways out here! Probably because they used to make adobe bricks out of the dang dirt! I tried to match the slope of the existing pad that was added off the garage years ago - it slopes away from the house so should be ok. I wasn't as sore as I thought I'd be...
Posted by: mgarrison Mar 26 2023, 09:04 PM
Made a bit more progress this weekend. Starting to question my life's choices trying to put the AN fittings on the braided hose. Not sure what I'm doing wrong, or if it's just the fact that they are -16 and a crazy challenge!
Anyhow, I have the exit ducting about 95% squared away. I think it would function fine, just an odd gap towards the front of the opening...
Started with the CAD again.
I was able to reuse the main piece, but not the sides.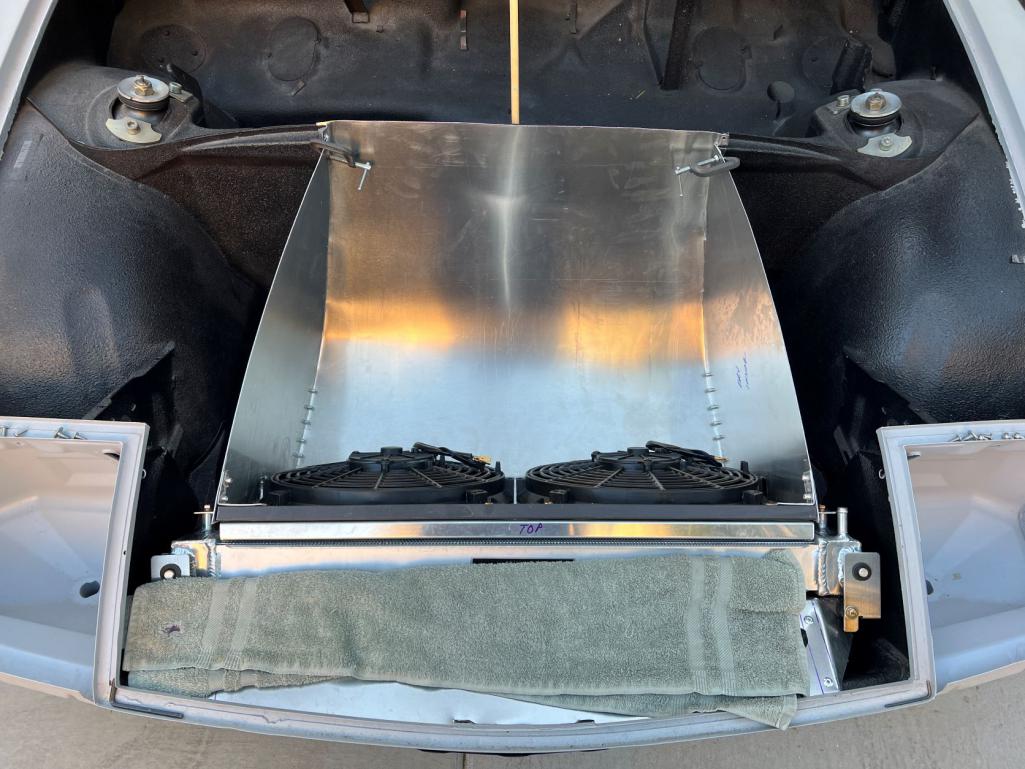
With the angle change on the radiator mount the top of the radiator is farther forward of the opening. Needed to add a covered section, but that added some structure for the sides.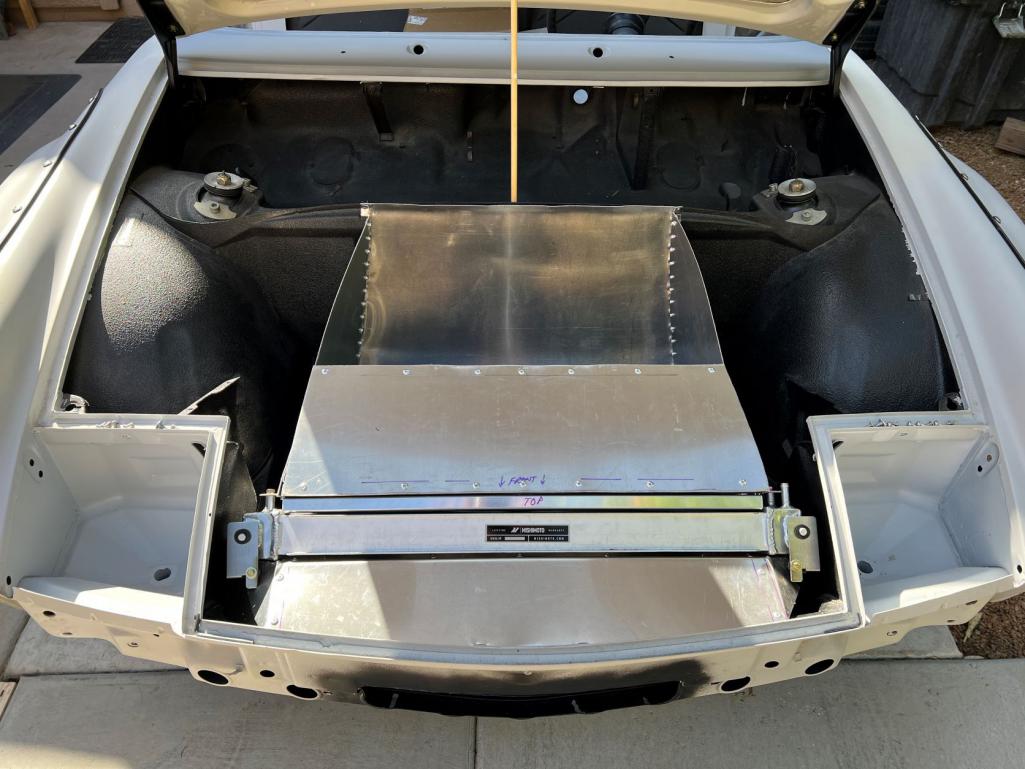
Everything clears good, and there's a bit of room under there for toolbox, or maybe even the battery... 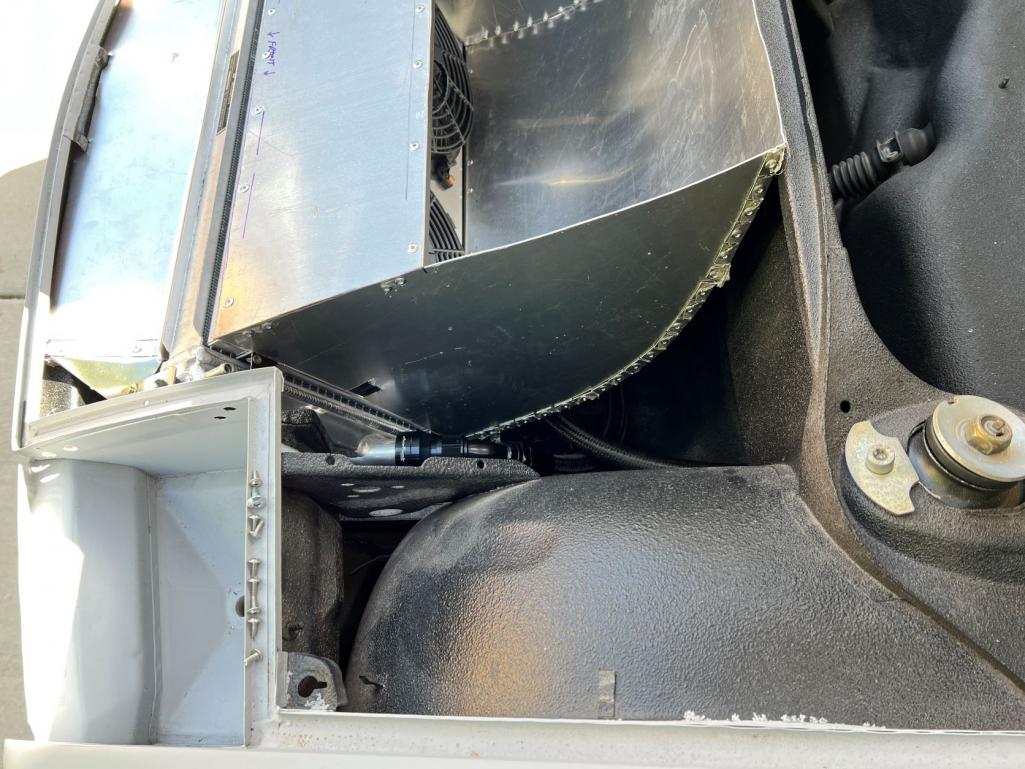
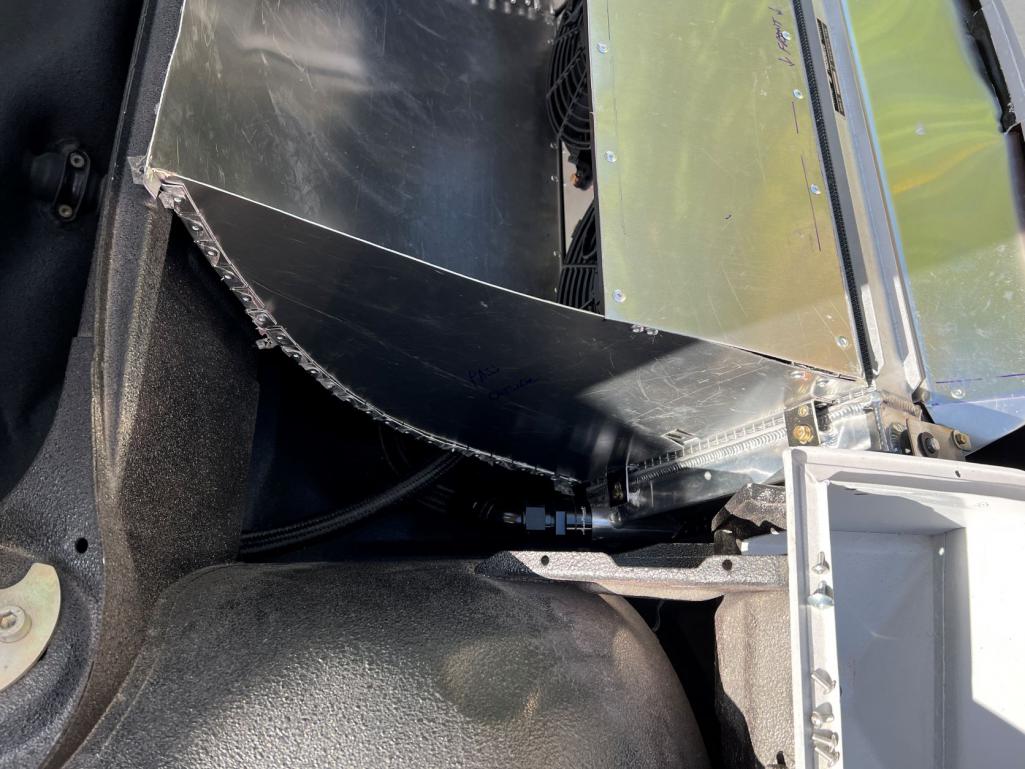
Made sure it was fairly simple to remove.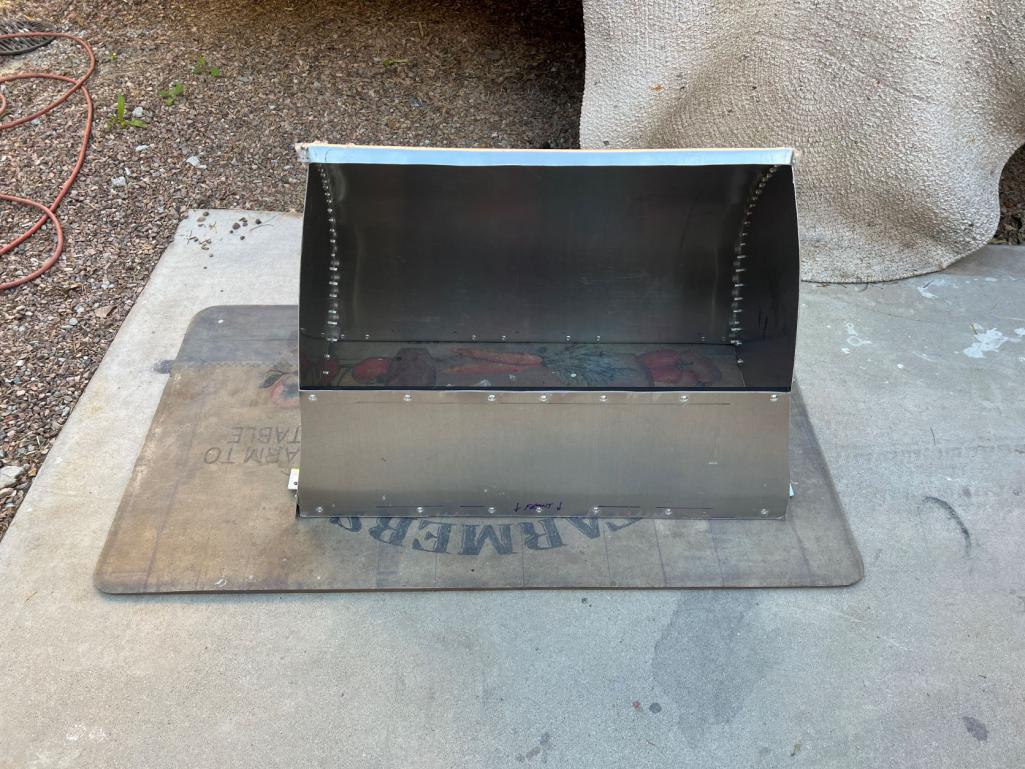
Here's the hose and fittings for the returns coming off the top of the heads. Not as much space as I thought I'd have, but I think I can make it work.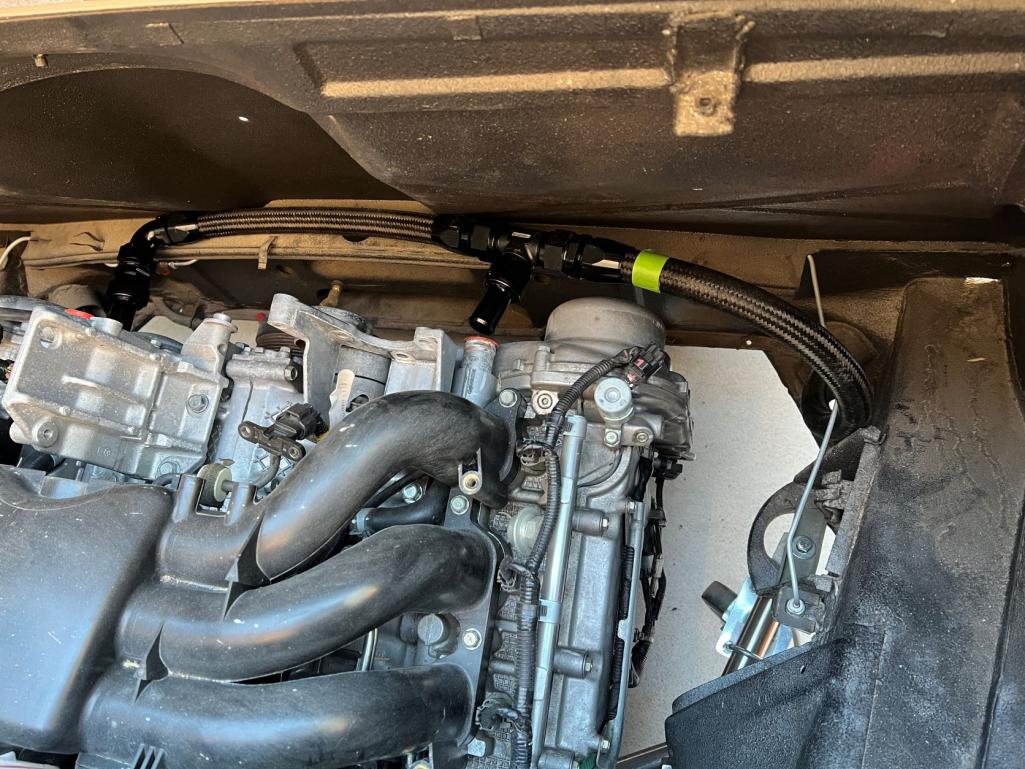
Now just waiting on the 45 degree end for the thermostat housing...Debating on doing fuel tank and lines next, or wiring harness
Posted by: mgarrison Mar 27 2023, 08:52 PM
I wasn't happy with the gap that showed above my exit duct when looking forward in the car, so I started trying to come up with a solution. That section of the hood also does not have any bracing underneath it, so if it could provide support that would be a bonus.
Here's the gap.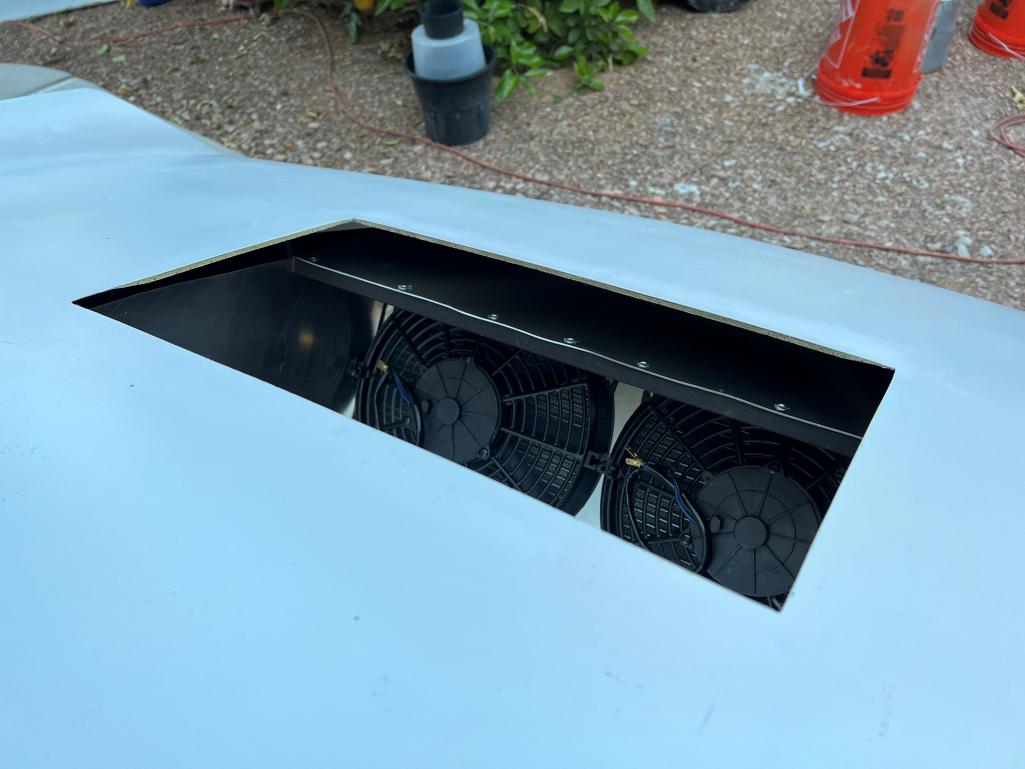
Here's a first try at covering the gap and providing some support for that section of the hood opening.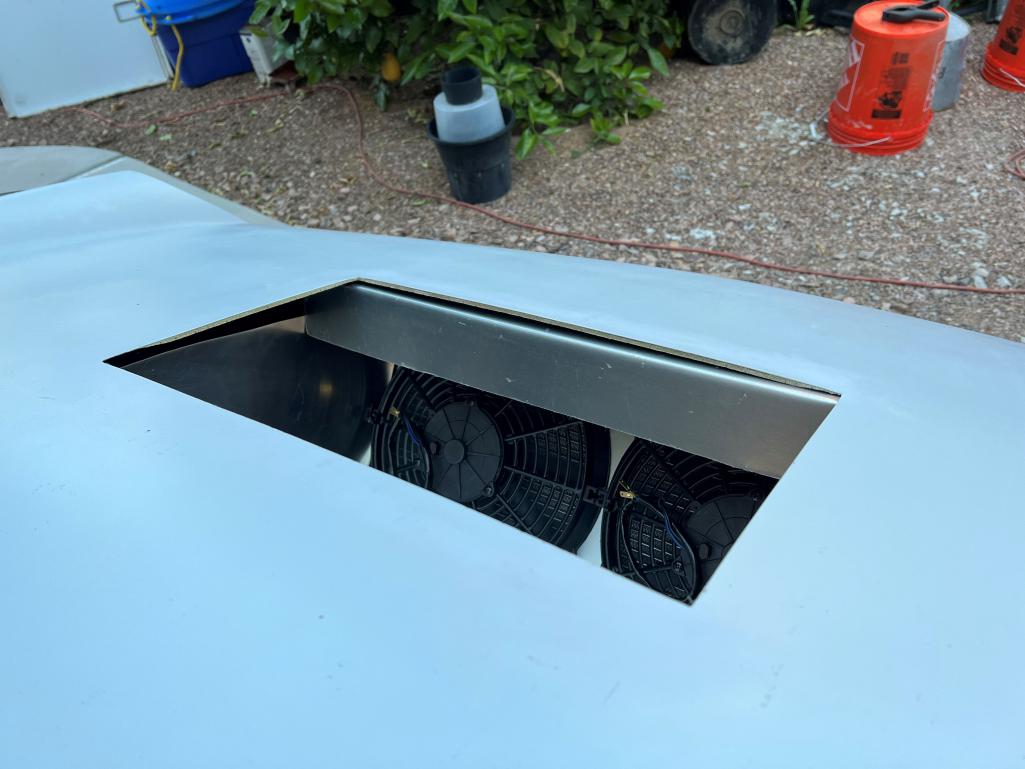
I'm thinking riveted to the cross support, and maybe a piece of foam across the top to protect the underside of the hood... Trying to stay in the KISS zone.
Posted by: slowrodent Mar 28 2023, 09:07 AM
A 3d-printed grate/grill would be awesome...
Posted by: Lilchopshop Mar 28 2023, 11:28 AM
@http://www.914world.com/bbs2/index.php?showuser=23922 , I'm curious if you're worried about airflow getting under the hood and causing it to lift at high speeds? Are you planning on putting any sort of louvers on the big opening?
I'm also wondering about water getting into your duct or getting past the duct and ending up in what's left of your frunk. It feels like there should be some sort of gutter/diverter around the big opening in the hood that directs the water into the duct and then a drain hole/hose in the bottom of the duct to carry the water out the bottom of the car.
These are the crazy things that those of us who don't live in sunny Arizona have to contemplate.
Posted by: mgarrison Mar 28 2023, 11:51 AM
@http://www.914world.com/bbs2/index.php?showuser=23922 , I'm curious if you're worried about airflow getting under the hood and causing it to lift at high speeds? Are you planning on putting any sort of louvers on the big opening?
I'm also wondering about water getting into your duct or getting past the duct and ending up in what's left of your frunk. It feels like there should be some sort of gutter/diverter around the big opening in the hood that directs the water into the duct and then a drain hole/hose in the bottom of the duct to carry the water out the bottom of the car.
These are the crazy things that those of us who don't live in sunny Arizona have to contemplate.
Not really concerned about air lifting the hood. Too many race examples that travel at much greater speeds without issues...Some examples from around these parts:

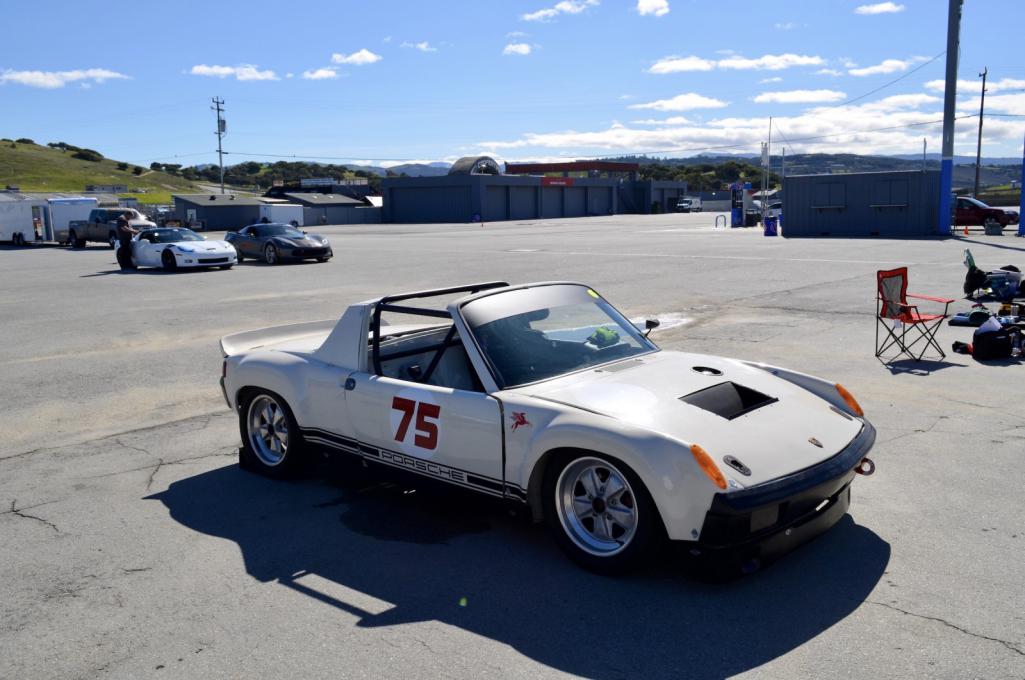
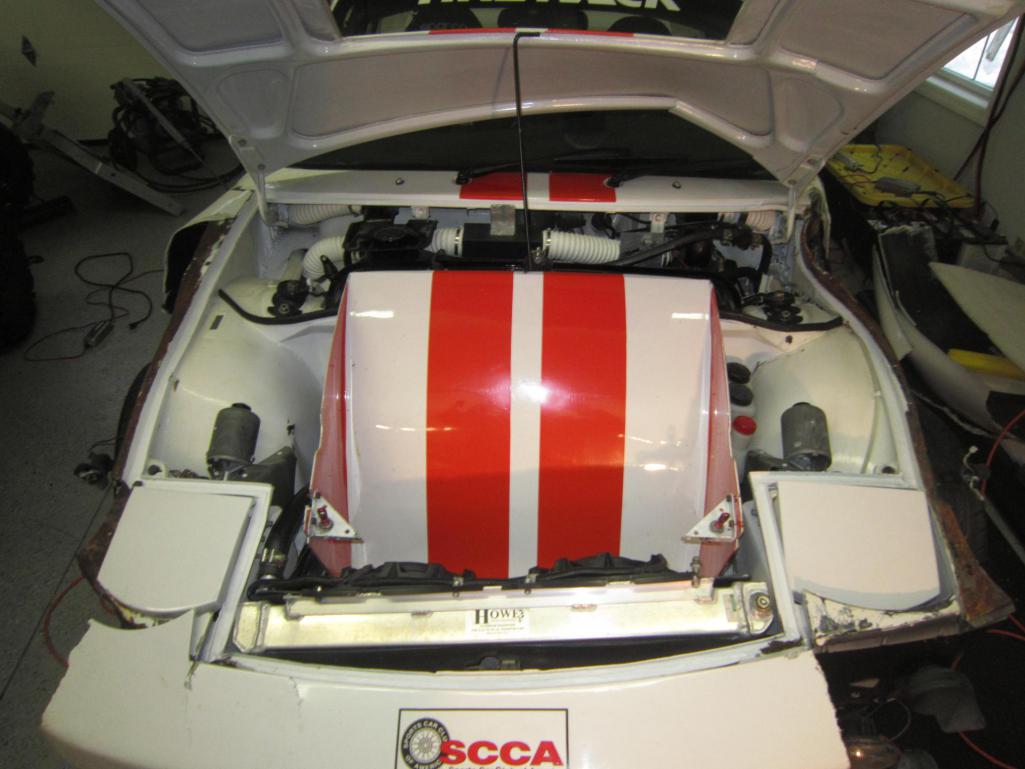
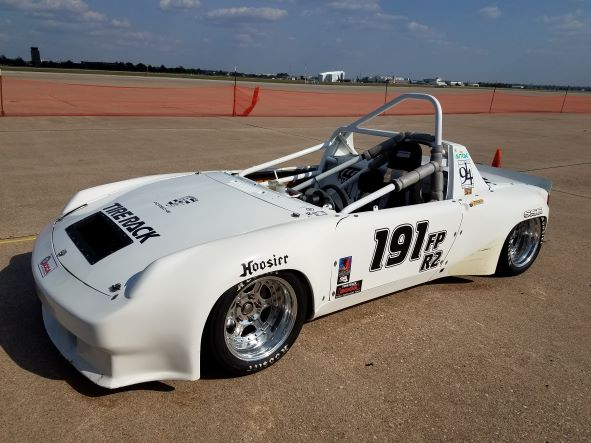
Also, my '03 EVO VIII had a similar vent on the aluminum hood, but with a louvered insert, and even my '19 Ford Raptor has a vented hood with a plastic louvered insert.
Water drainage is definitely more of a thought - mostly from washing the car here in AZ! I plan to put a couple of drains in the bottom of the frunk in the lowest areas. I believe that's what these were designed for:
https://914rubber.com/front-trunk-drain-tube-1
Mostly making it up as I go though!
Posted by: Lilchopshop Mar 28 2023, 12:36 PM
Sweet pictures! Dammit, now I want a hole in my hood!
Posted by: Chris914n6 Mar 28 2023, 12:57 PM
Normally a radiator fills from the top and sucks from the bottom. Idea is that it won't run out of water for the pump/motor until it's really low.
The Celica/MRS is an abnormal design.
Posted by: mgarrison Mar 28 2023, 03:00 PM
Normally a radiator fills from the top and sucks from the bottom. Idea is that it won't run out of water for the pump/motor until it's really low.
The Celica/MRS is an abnormal design.
Yea, the Celica radiator is odd - why I called Mishimoto to see what their take was on the direction of flow in their version. Also why I crossed the lines in the frunk. Was easier to line up the hoses/connectors anyway. It will draw from the lower outlet and fill via the upper/higher inlet. I figured that was the most efficient flow direction...
Posted by: mgarrison Mar 29 2023, 08:55 PM
Had some time this evening to spend on the 914. Still waiting on a couple of hose ends, but trying to keep moving forward...
Cut some steel mesh for the inlet. Still need to square away mounting it a bit more secure and get it painted black, but not too bad for the moment.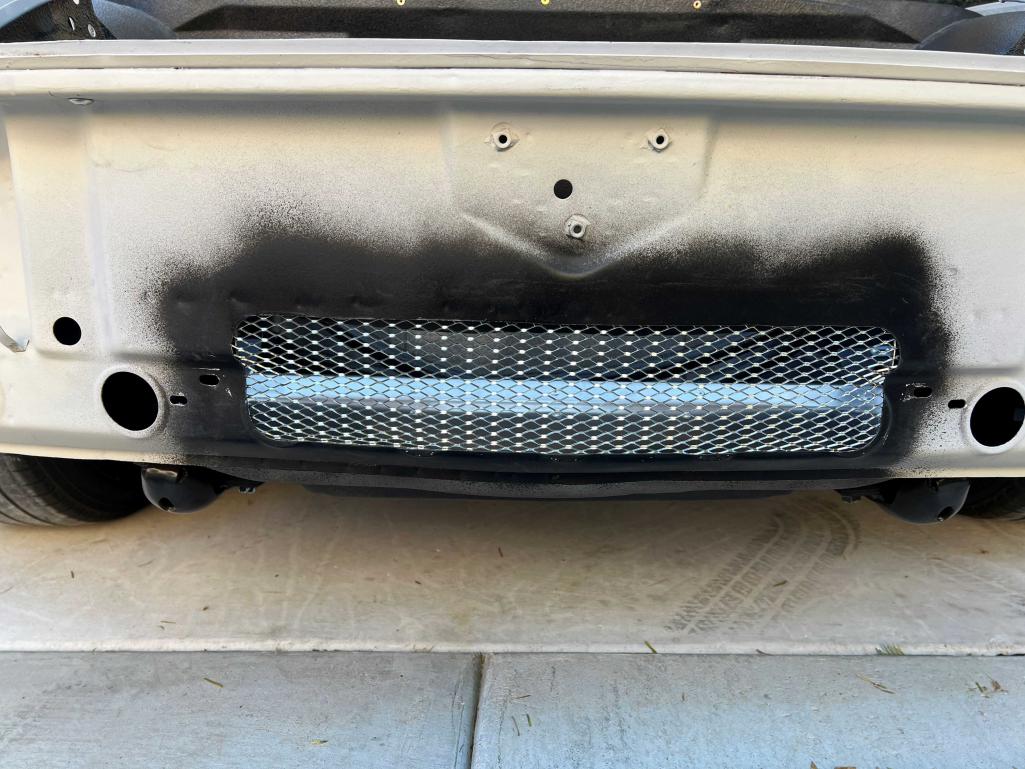
I got my block off plate and "Gurney flap" cut and mounted. Far, far, FAR from perfect/how I picture it in my teenie, tiny mind, but it's ok. I get the feeling I will never be "done", but that's ok in a lot of ways! *The plastic jug is the same dimensions as a 2.5qt round expansion tank...trying to work out where I have room to fit things. 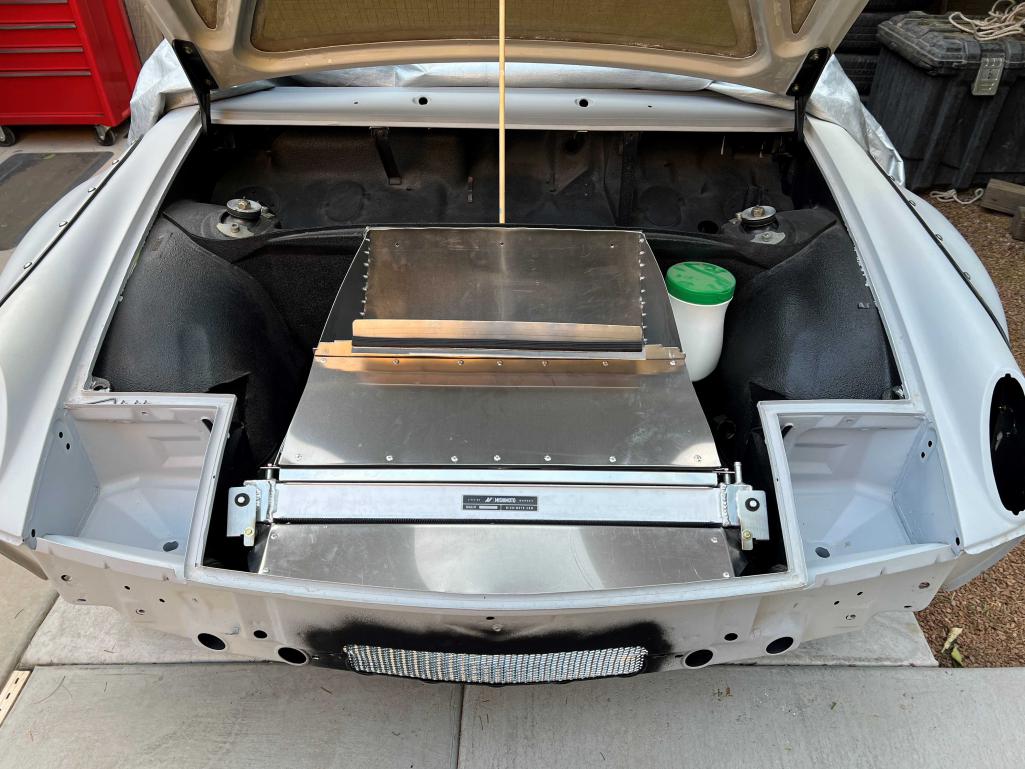
Seems to support the hood pretty well...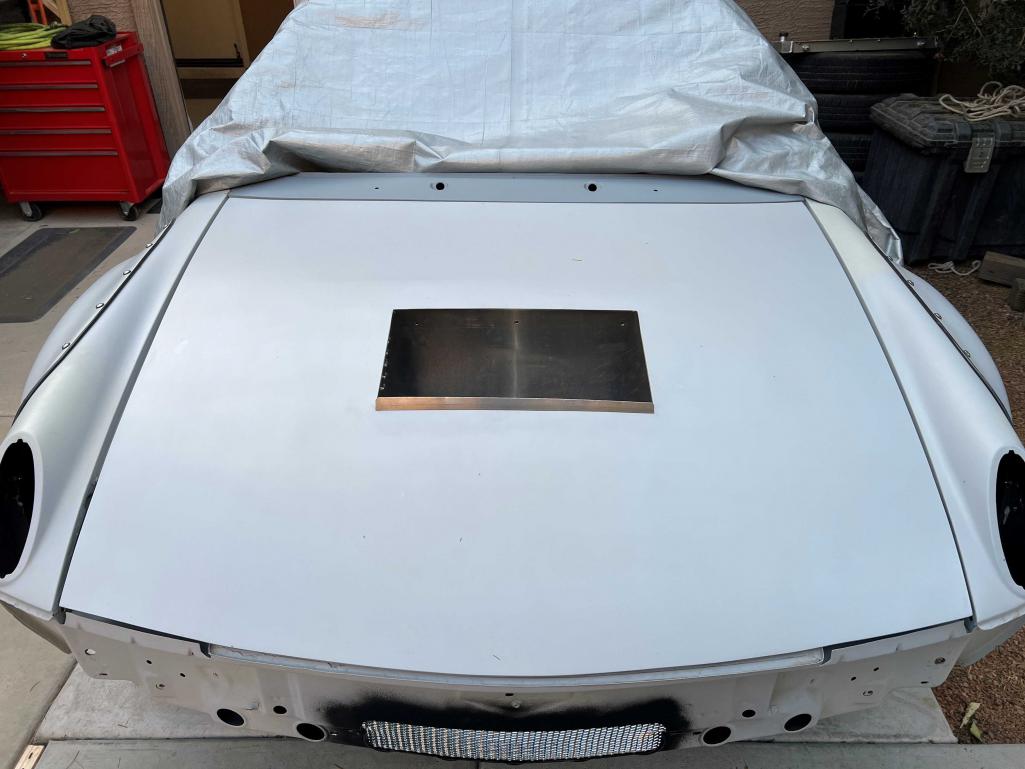
View from the inside is much improved.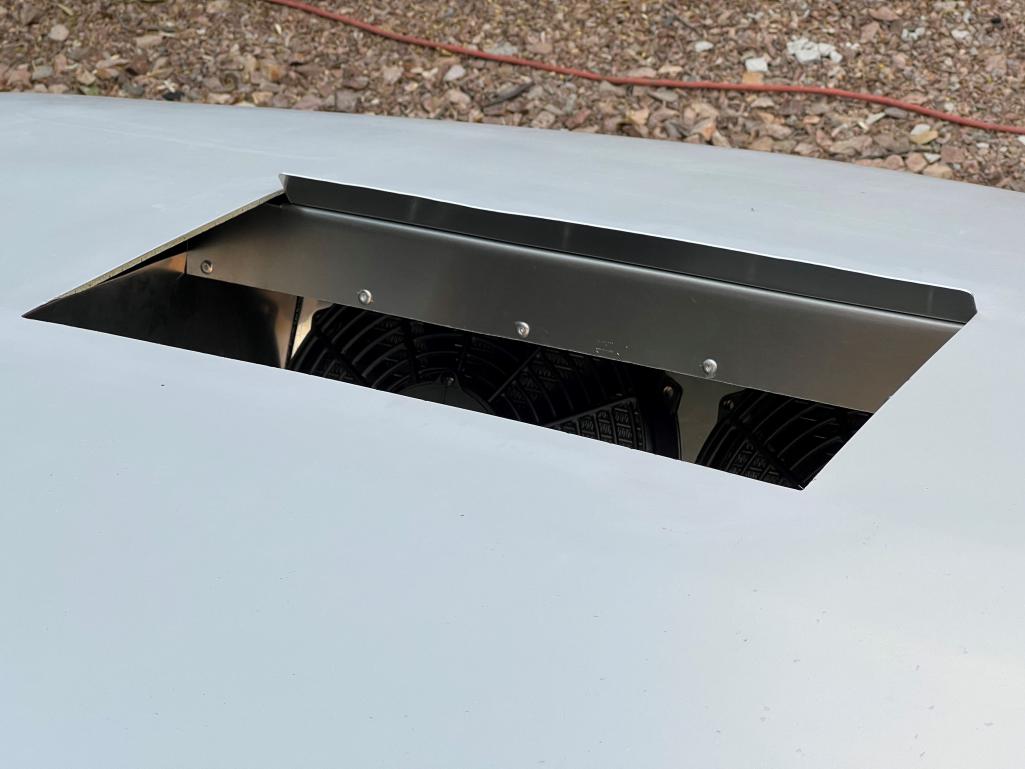
Posted by: mgarrison Apr 3 2023, 10:43 AM
My expansion tank arrived. Time to figure out where it fits best and get it mounted. I originally planned on the driver's side so it was closest to the outlet on the radiator.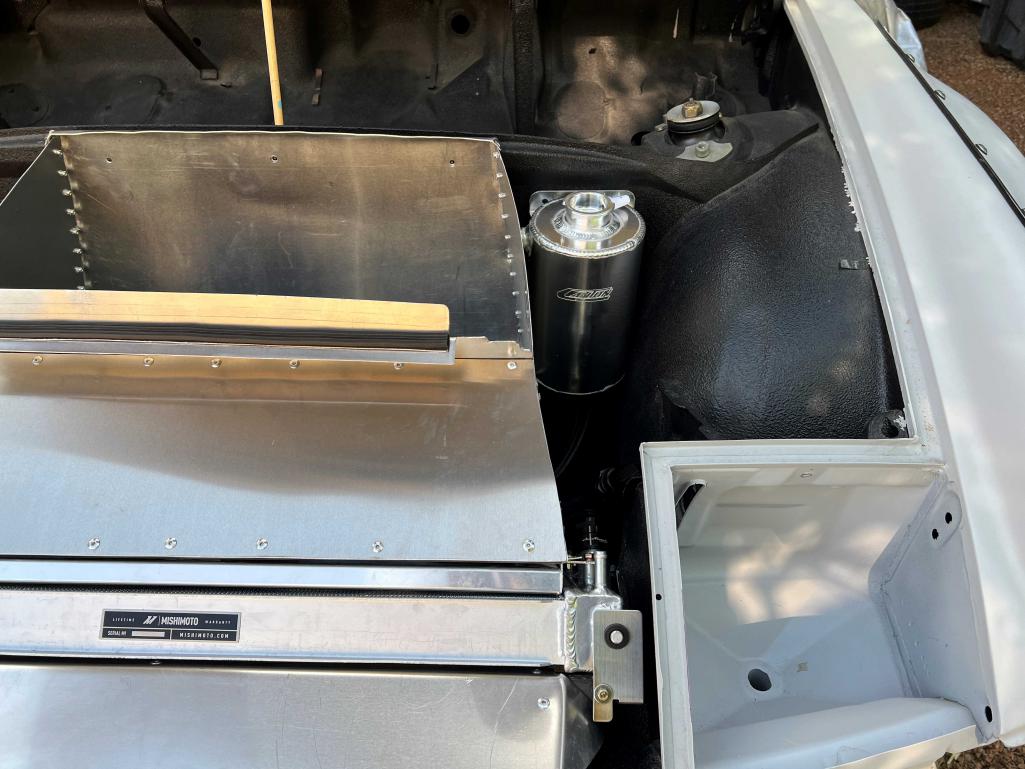
That side proved a little too tight with the second outlet I'm not using is in exactly the wrong spot. So, over to the passenger's side we go.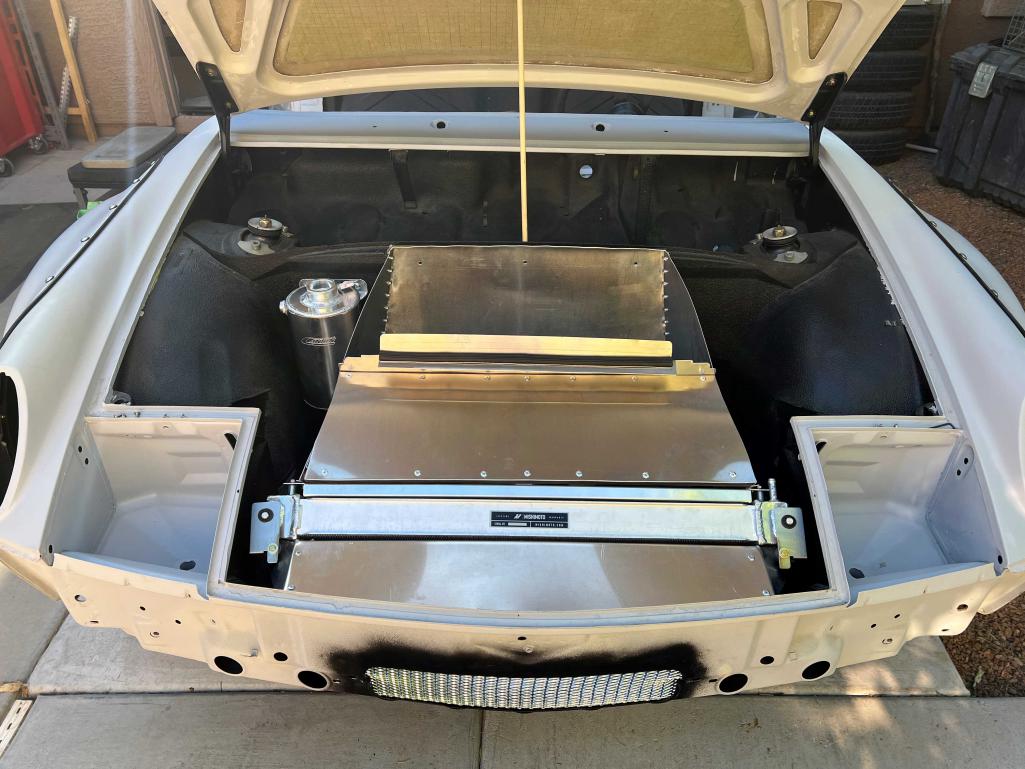
A little bit more room on that side, and the plug for the extra port has room too. Confirmed it sits 3-4" higher than the outlets coming off the cylinder heads, and that it will clear the hood bracing, then mounted it with a couple of rivnuts.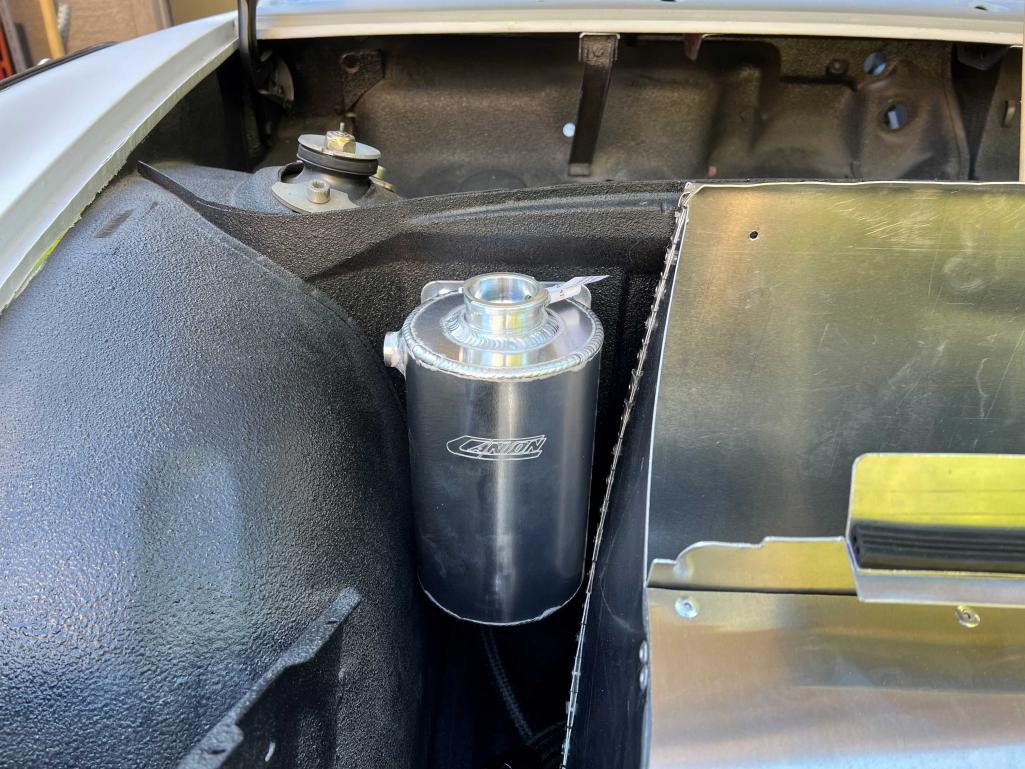
Still room for a recovery/overflow tank on the driver's side, if its needed. Ordered the plug, and a 90 degree elbow for the outlet on the expansion tank. Still need to pickup some 3/8" hose, clamps, etc. at the local auto parts store
Posted by: tygaboy Apr 3 2023, 11:56 AM
It's so cool watching you work through all the things that come up as you custom fabricate your way to your one-of-a kind build. You're doing a splendid job of solving each challenge. Makes me want to steal some of your solutions...
Keep up the great work and keep the pics coming!
Posted by: mgarrison Apr 3 2023, 02:39 PM
It's so cool watching you work through all the things that come up as you custom fabricate your way to your one-of-a kind build. You're doing a splendid job of solving each challenge. Makes me want to steal some of your solutions...
Keep up the great work and keep the pics coming!
Steal away - Lord knows I've stolen any and every idea I can from your builds!
Posted by: Mayne Apr 3 2023, 08:22 PM
Looks great. I can’t quite read the brand. Canton?
Posted by: mgarrison Apr 4 2023, 10:00 AM
Looks great. I can’t quite read the brand. Canton?
Yes, Canton 2.5qt 5" diameter expansion tank...
Posted by: mgarrison Apr 10 2023, 12:45 PM
Had to be "Barn Dad" the last two Saturdays, but got a couple things done on the 914. With the concrete poured, I can at least use the Quick Jack without having to roll the 914 around to the garage.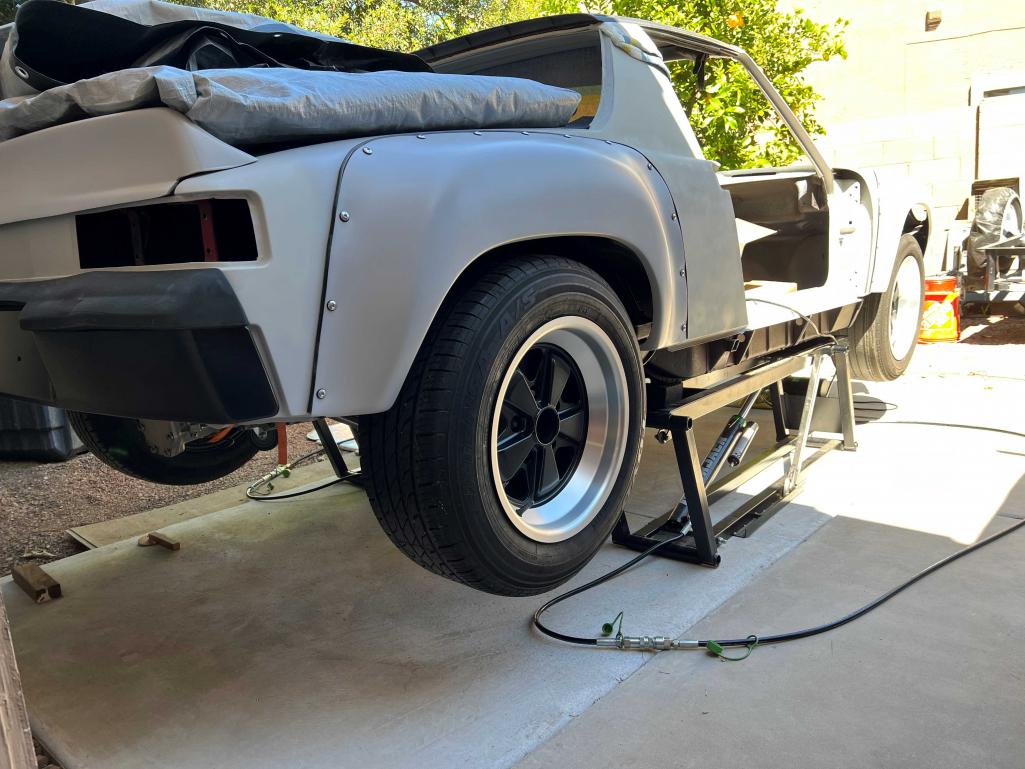
I managed to get the last -16AN hose end on. Had to do this one under the car as it was not long enough to pull out beside the car to install. -16 fittings are a real bear...hoping to not do those again this lifetime! But, they look cool and I like the idea they just unscrew.
My new fuel tank showed up only for me to discover I had an early style tank in my '74. Expansion tank mounts are not correct for the metal expansion tank I have. No charcoal canister in any of the parts that came off the car. We'll see if I need to correct the expansion tank mounts, or...
Posted by: mgarrison Apr 19 2023, 11:20 AM
Trying to get a few things together while I wait on my tunnel lines and sort out fuel pump/filter/regulator. Not much progress, but something!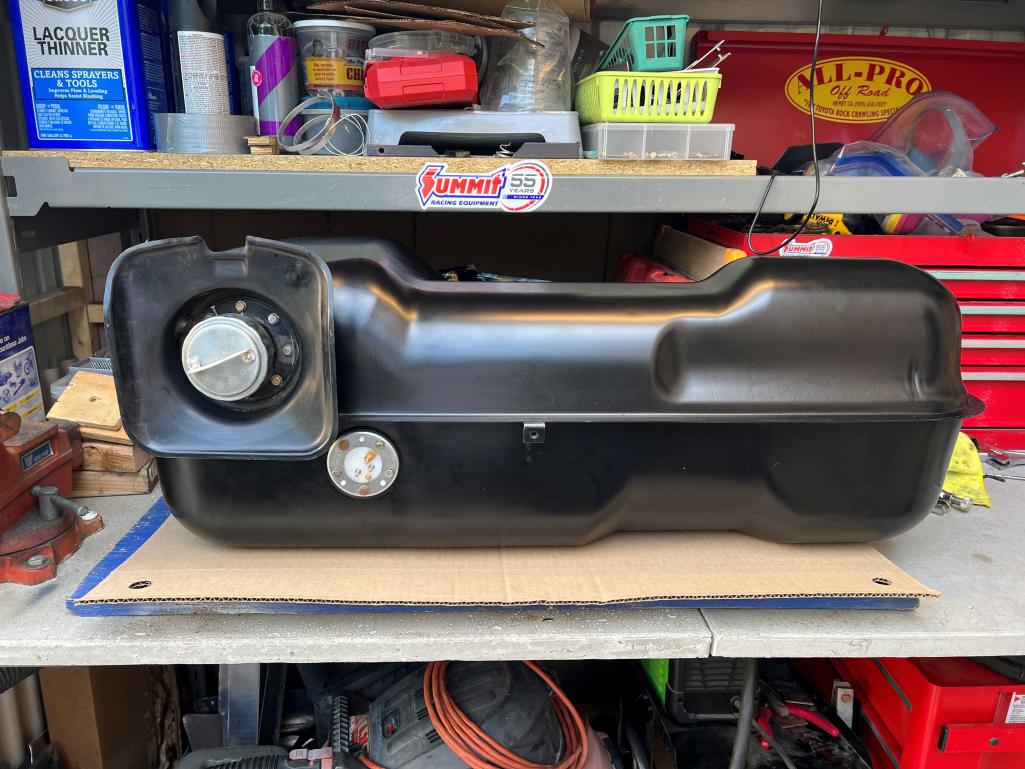
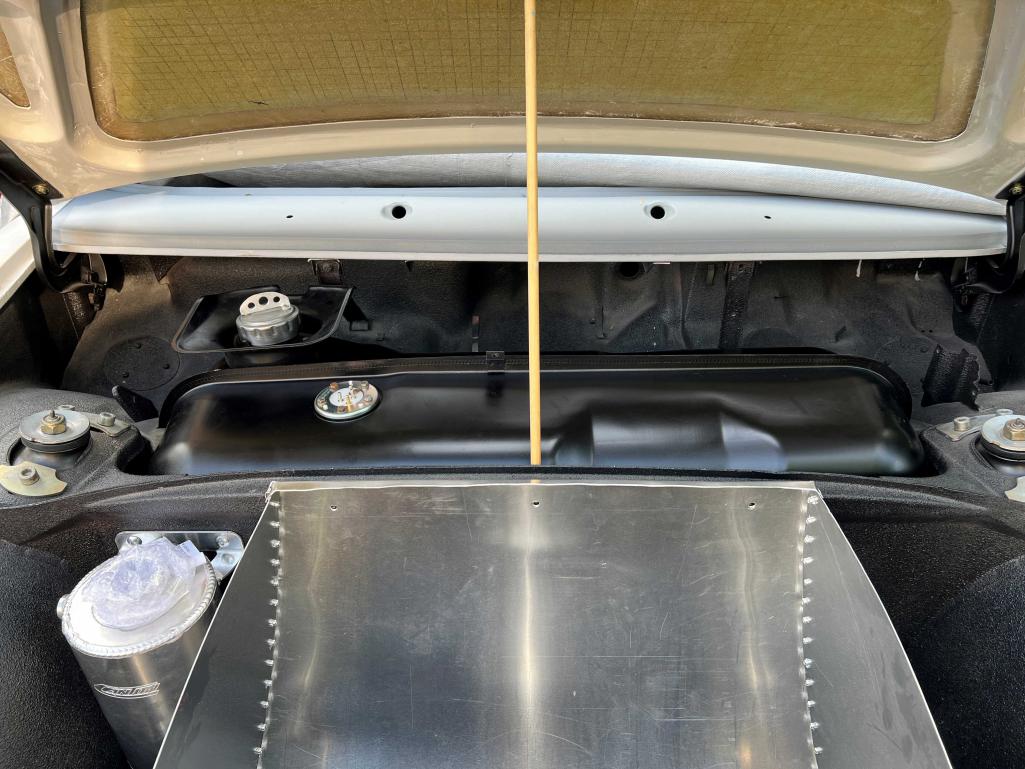
I ended up with a later tank, but my '74 originally had an early tank with the metal expansion tank & mounts. When I set the new tank in place, the "fin/ridge" on the bottom of the tank rests on the plastic dust cover where the steering column goes into the steering rack...Is this due to differences in the old vs. new style tank? I thought the only difference was the mounting points for the steel vs. plastic expansion tanks & charcoal canisters...???
Posted by: mgarrison Apr 20 2023, 01:36 PM
Another couple small pieces of the puzzle arrived and I was (mostly) able to get them installed. For anyone converting to a Subaru six, keep these HPS silicone hose adapters in mind. They have several sizes available, and some sizes available in a 45 or 90 degree elbow as well (Found on the FFR 818 threads).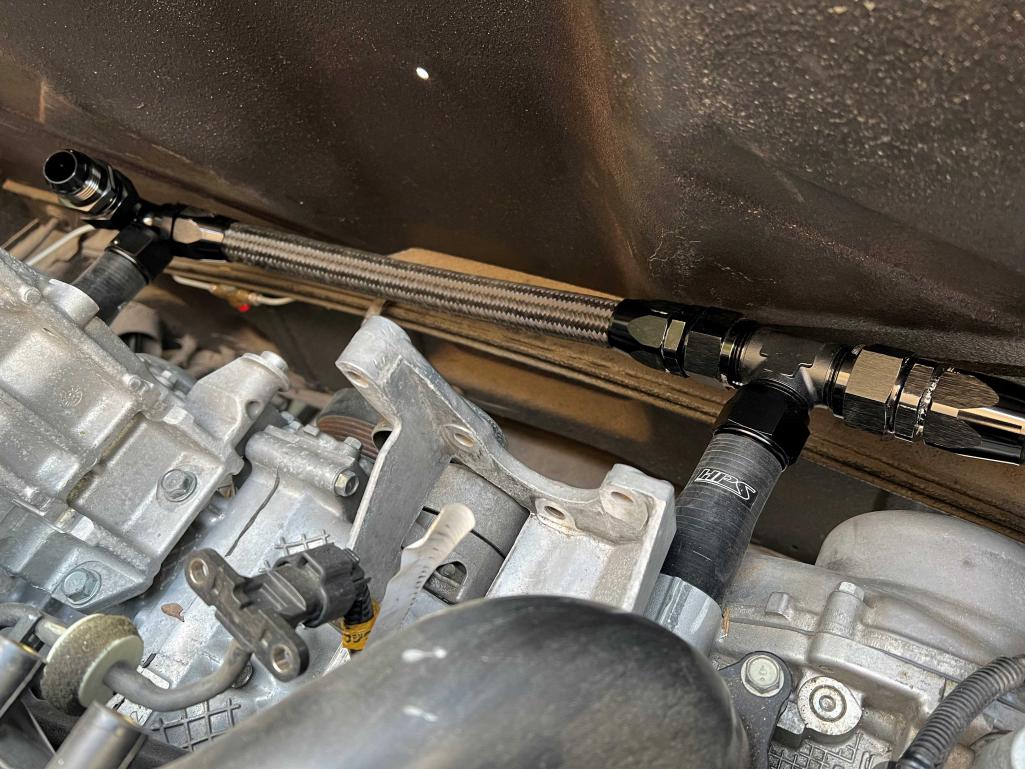
I still need to trim the driver's side down a bit to make enough room to get it all connected. Sadly, they didn't have the elbows in the size I needed.
Kudos to the couple members here at 914World that pointed me to these VW-AN adapters for the outlets on the bottom of the fuel tank. Seems like they will make connecting/routing lines to fuel filter and pump much cleaner & easier 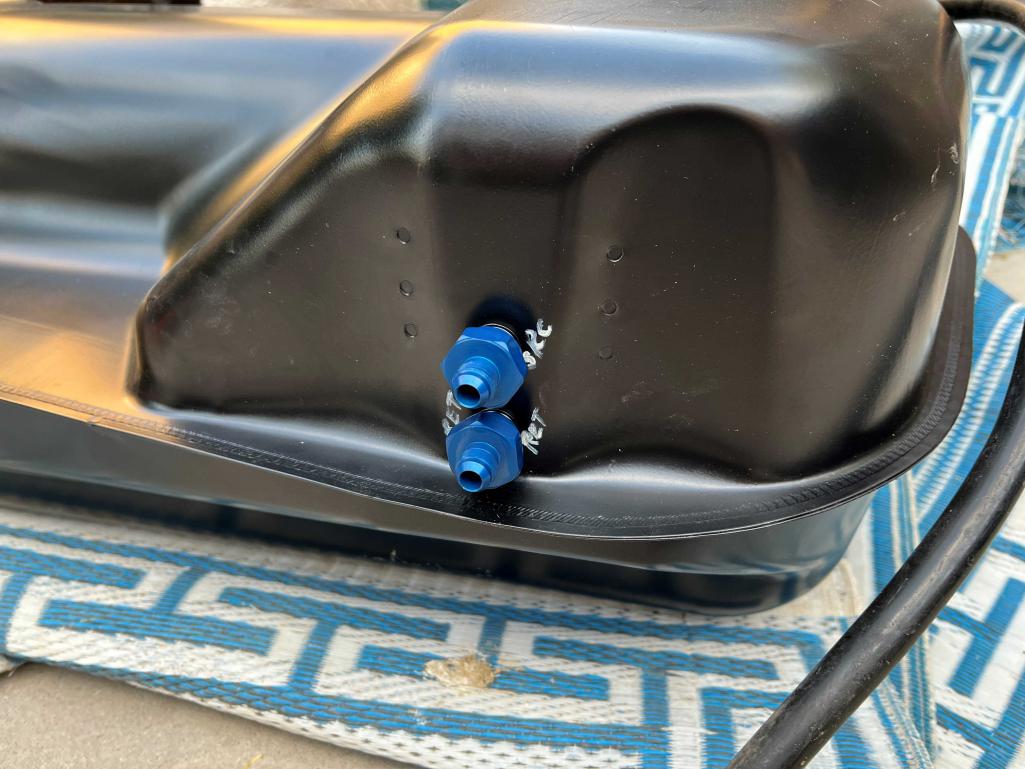
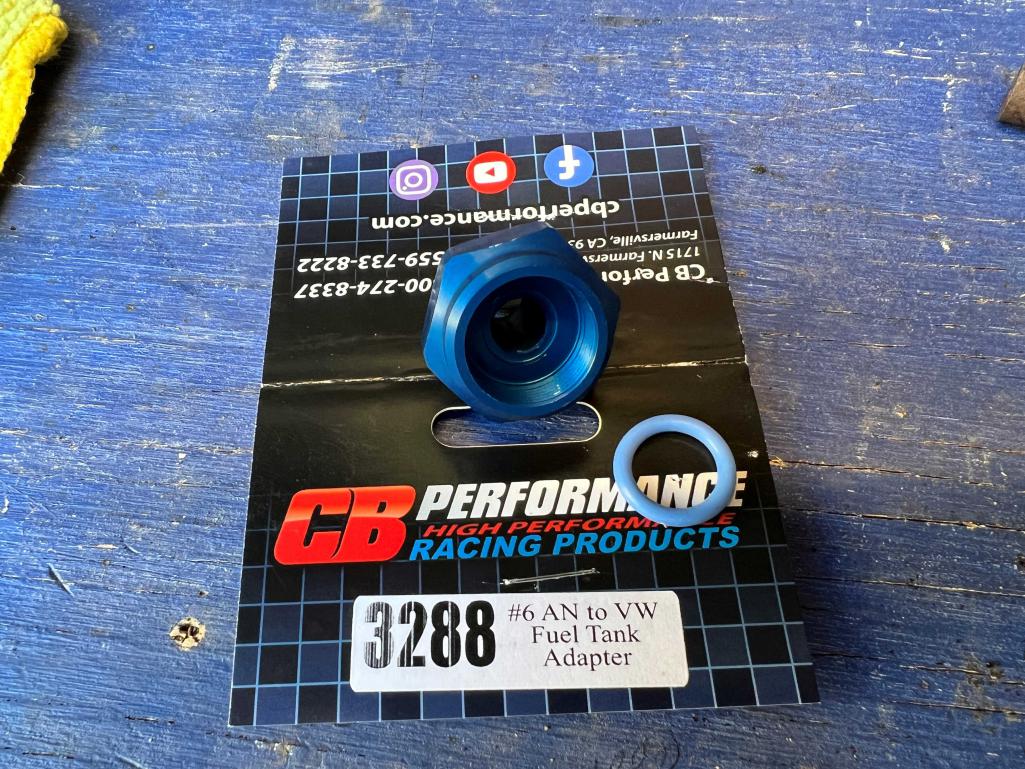
Posted by: mgarrison Apr 25 2023, 11:33 AM
Waiting on fuel pump and various parts, connectors, etc. Printed out the PMS directions for the gas cap opening in the hood. Double-checked several times and got it as close as I could without cutting into the hood support structure on the bottom of the hood. Not perfect, but very little is perfect on my '14! 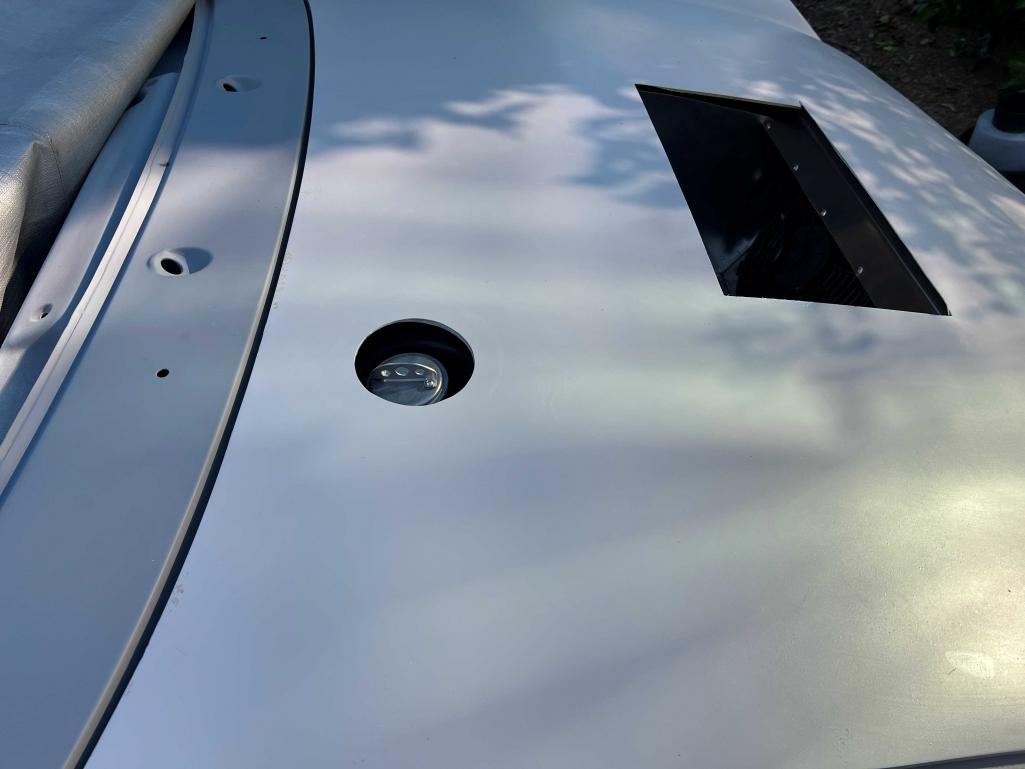
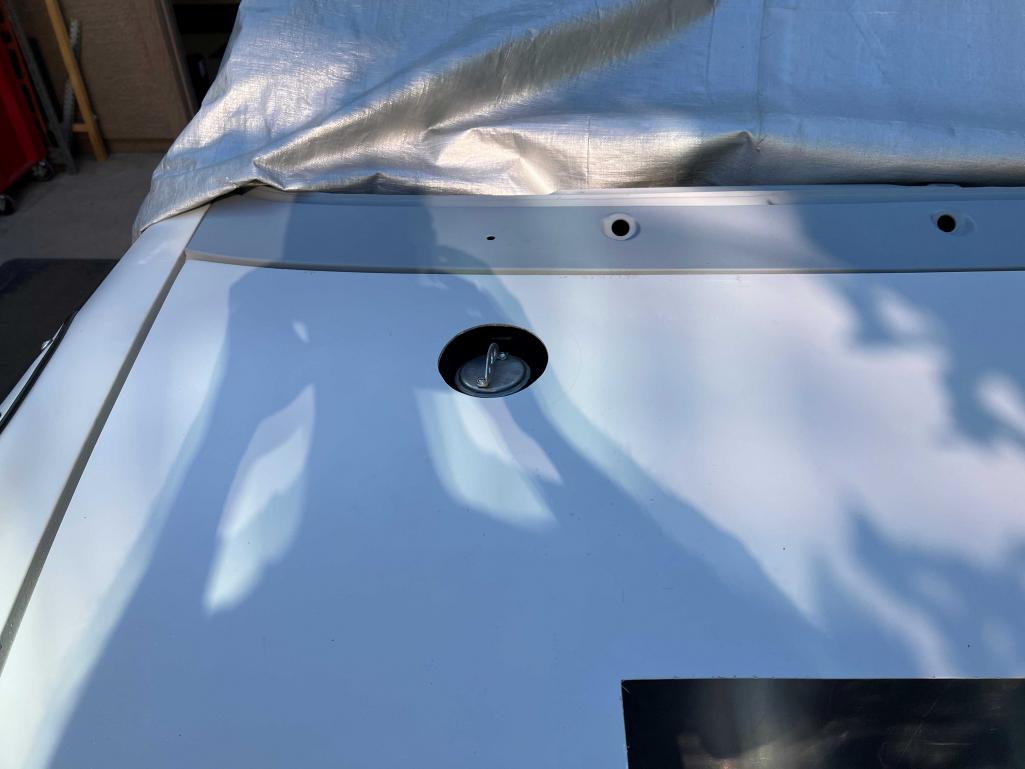
Posted by: slowrodent Apr 25 2023, 04:53 PM
You're making great progress Mike!...... Pretty soon we'll be hiding from the sun here in the desert...
Posted by: mgarrison May 4 2023, 05:04 PM
Received my parts/adapters to re-do the coolant outlets coming off the heads. I had to remove one hose end, cut the hose shorter and reinstall. My stick man arms are barely up to the task of installing -16AN hose ends while under the car, but I got it done. Much cleaner looking, and a lot more room than the straight reducers. 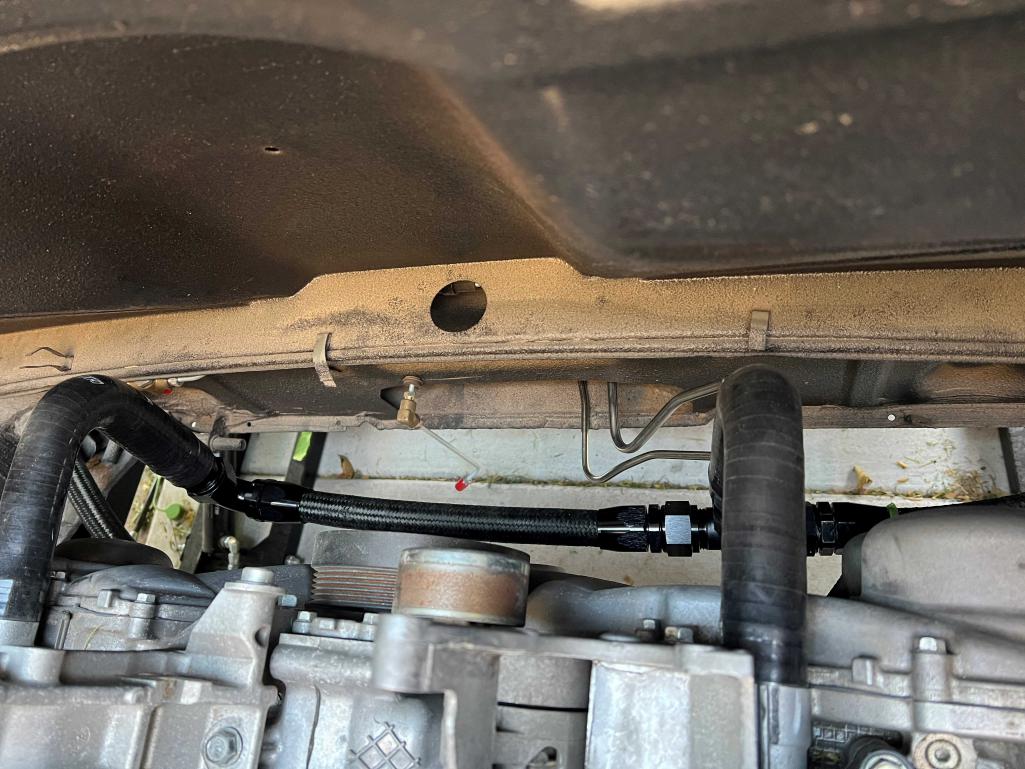
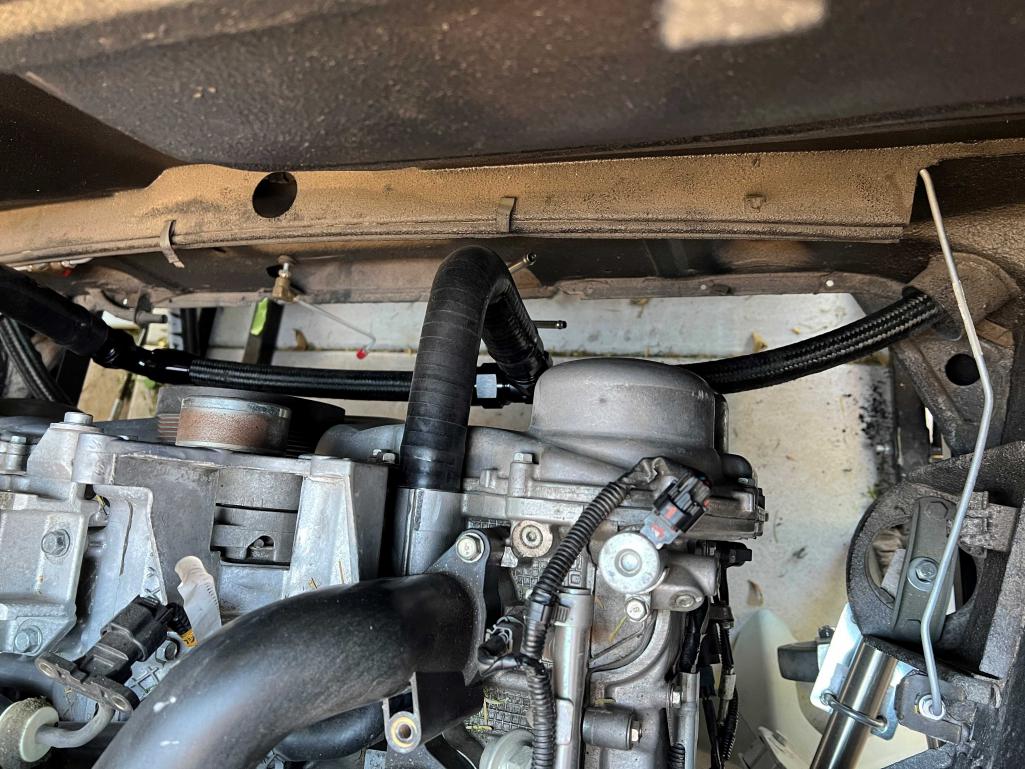
Posted by: mgarrison May 4 2023, 08:16 PM
I received more of my fuel system parts. So, I set about seeing how things are going to fit and where I will be able to install them, how to route hoses, etc.
The elbows coming off the AN adapters for the fuel tank outlets seem to make things a bit easier as you can orient them the direction you need to make connections simple.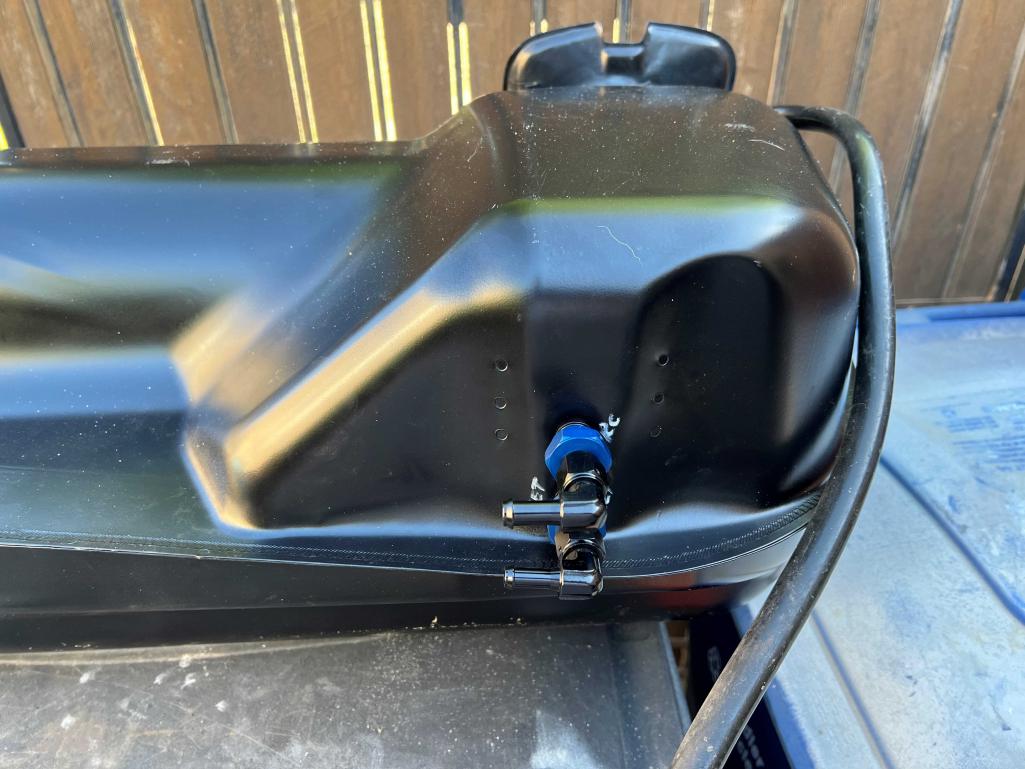
I tried a test fit or two on the fuel pump, but still need to get a pre-filter before the fuel pump so I can route lines and nail down mounting location for the pump.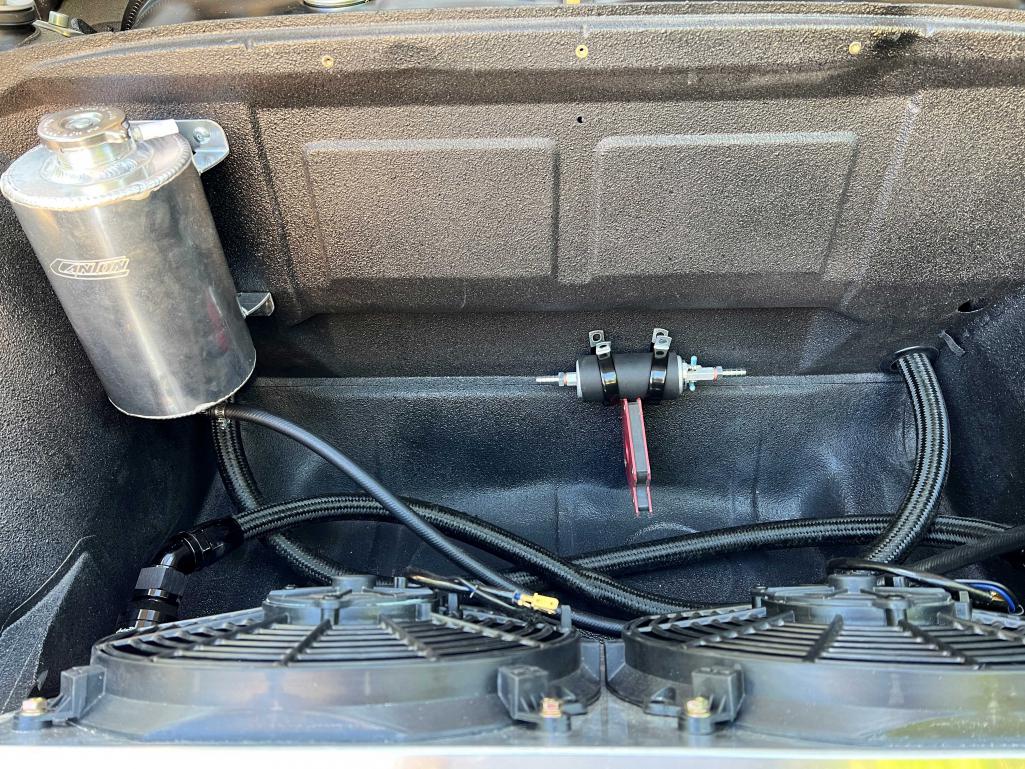
I had to order a radiator cap from Summit - my local FLAPS did not have a single radiator cap in stock! The world has definitely moved on...
Posted by: mgarrison May 11 2023, 09:06 PM
I'm waiting to order my fuel filters & regulator. Had to replace the washer, and have had to pay $2k in medical bills the first 9 days of May.  Has put a damper on ordering 914 parts, that's for sure!
Still trying to do little things to keep moving forward, however slowly. I swiped a paint pen from my wife so I could mark the bolts that have been torqued.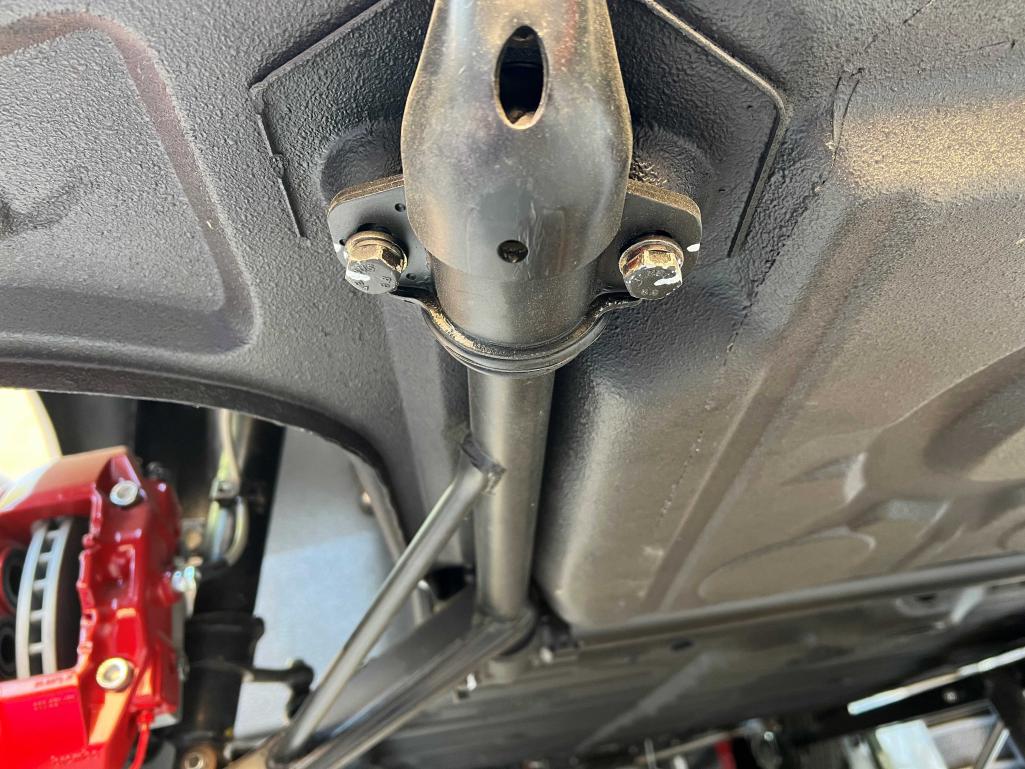
I got my fuel line grommet installed and managed to get the lines through it after a brief struggle and a couple mosquito bites - can't believe these dang Asian Tiger Mosquitoes! Nasty little buggers 
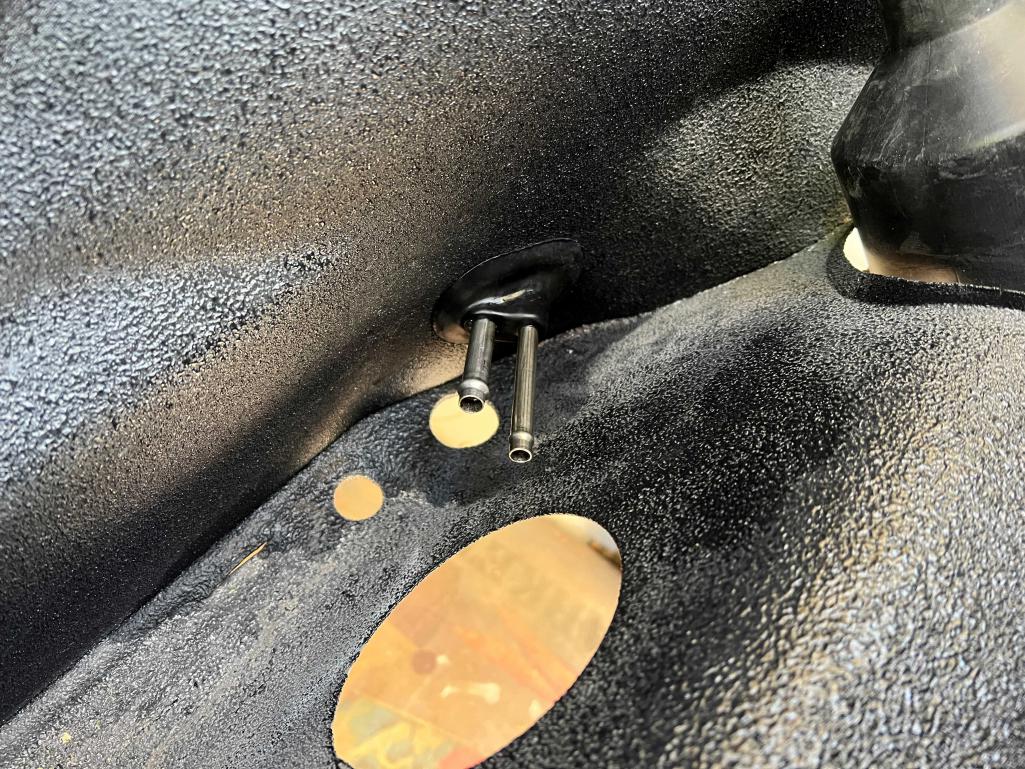
Posted by: mgarrison May 11 2023, 09:09 PM
Figured I will need to have wipers on the car to get it registered one of these days. Got the crusty wiper arms and motor out to try and clean them up and get them working smoothly.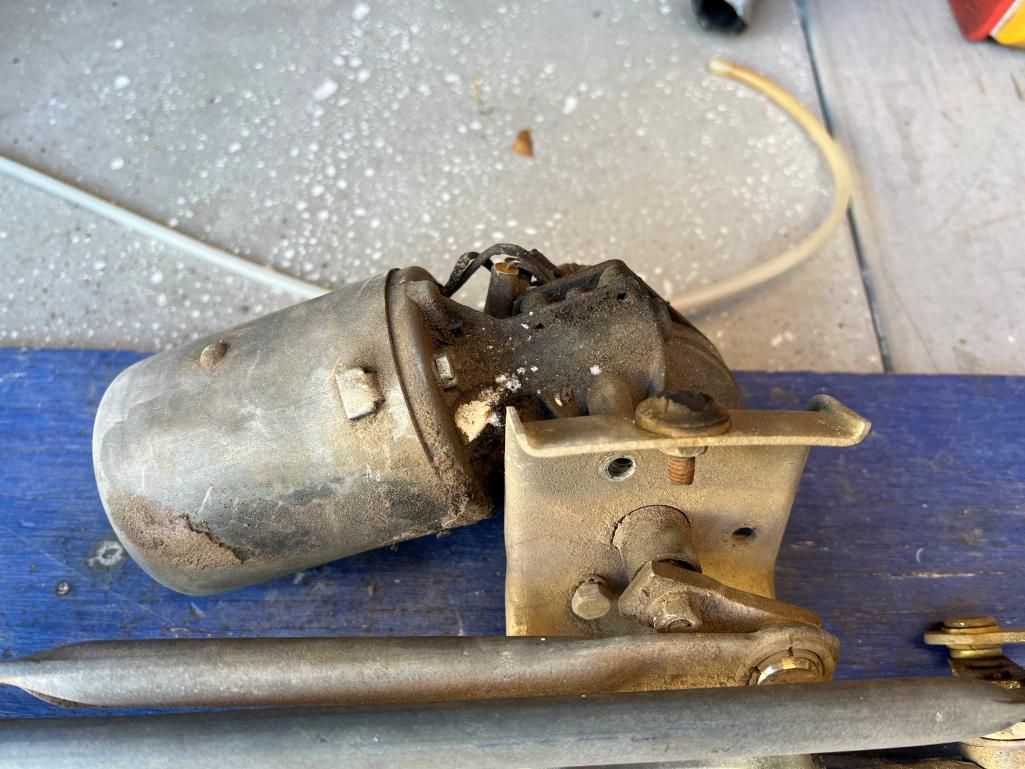
Moves much better after pulling it all apart, cleaning and greasing it. Looks a bit better too.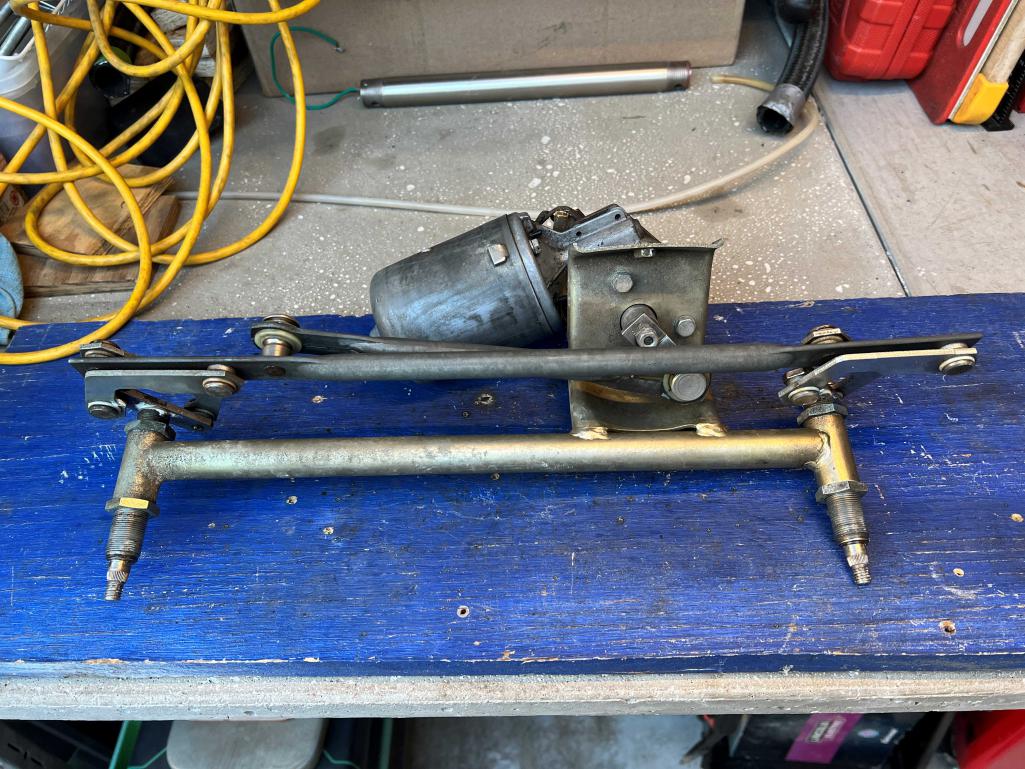
Posted by: mgarrison May 25 2023, 02:22 PM
So, this happened when I was torqueing the strut inserts down...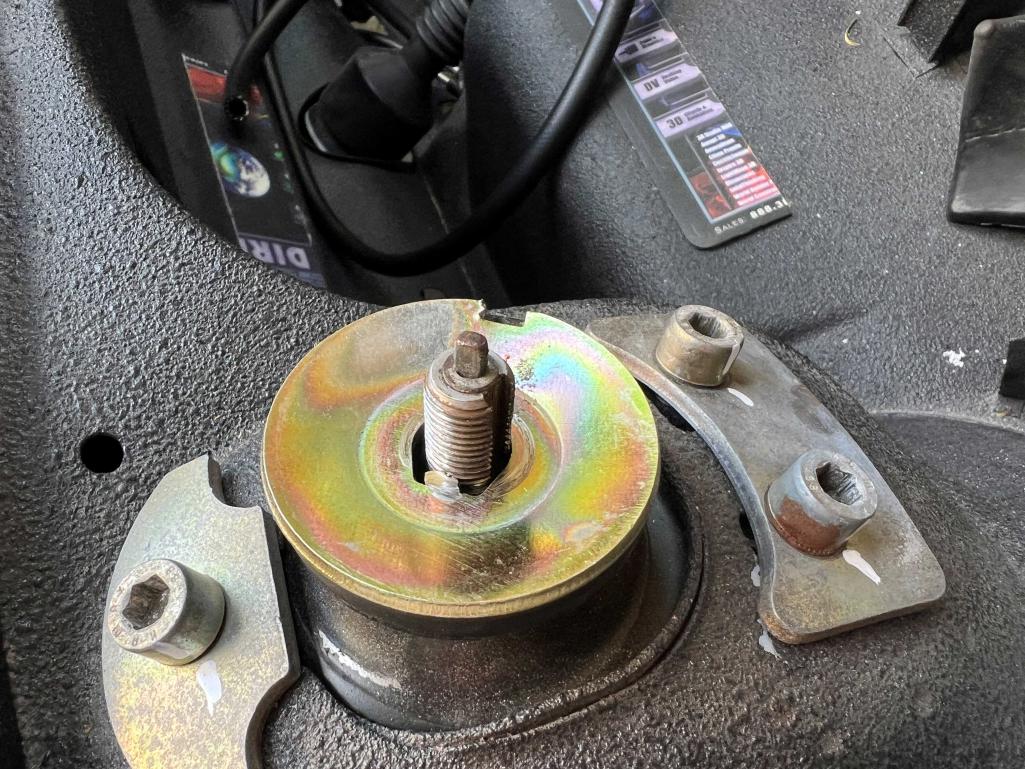
The original big cupped washer with the tab actually broke the tab off when I was torqueing it. I ordered a replacement washer and had issues with that one also - UGH. The strut inserts were used, so it's possible there was an issue with the slot in the threads or something. Passenger side went fine, but driver's side causing chaos.
$400 dollars later, the replacement inserts are supposed to be arriving today
Posted by: mgarrison May 25 2023, 02:27 PM
Plugging along on the fuel pump, filter and lines. That Gates Barricade hose is difficult to work with, but nothing like trying to make AN hoses - thank God! I got my openings drilled/cut, grommets installed and it looks like the lines pass through without any issues.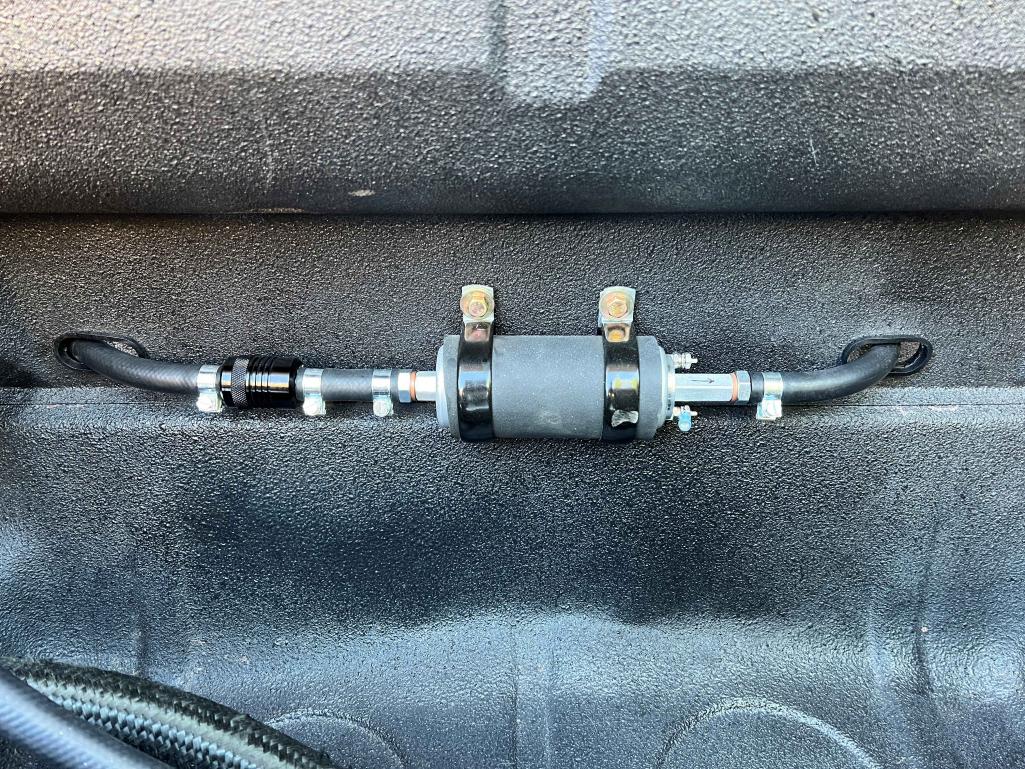
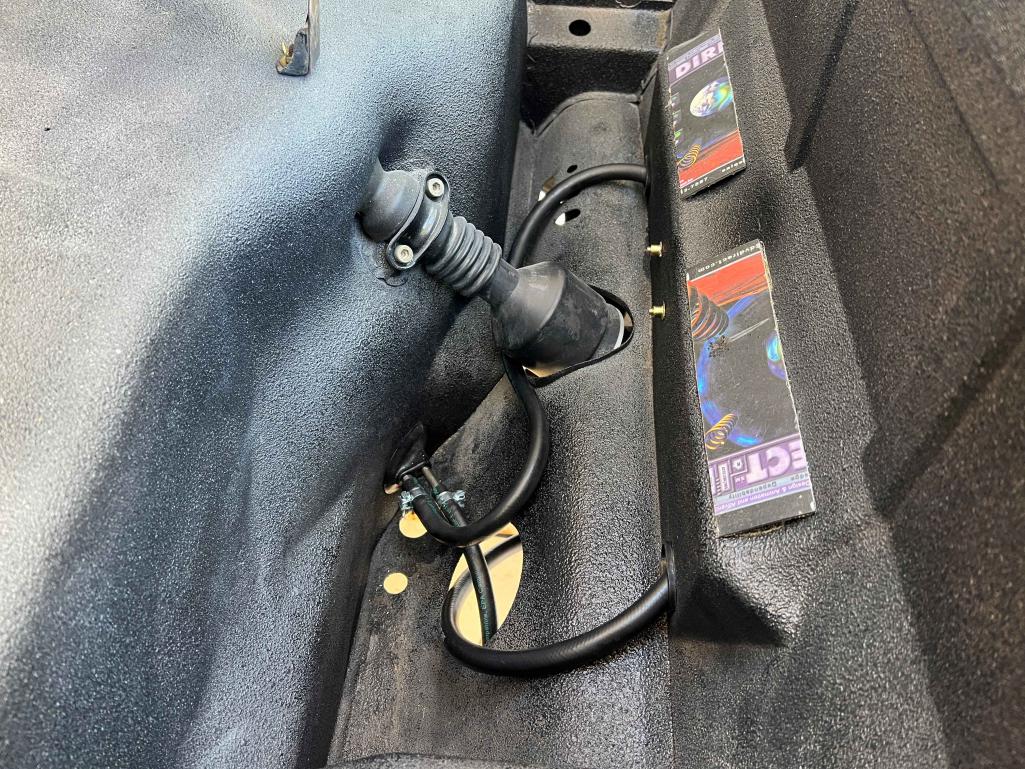
Ordered a 45 degree end for the vent line so that things under the tank will line up better and be easier to get connected. Not much room to work under there, that's for sure!
Posted by: mgarrison May 25 2023, 02:31 PM
It is nice to be able to just unbolt the flares and remove them so you have plenty of room to work with the struts, brakes, etc. Not sure how getting to the strut to remove & get the part number off of the insert might have gone with permanently mounted flares! 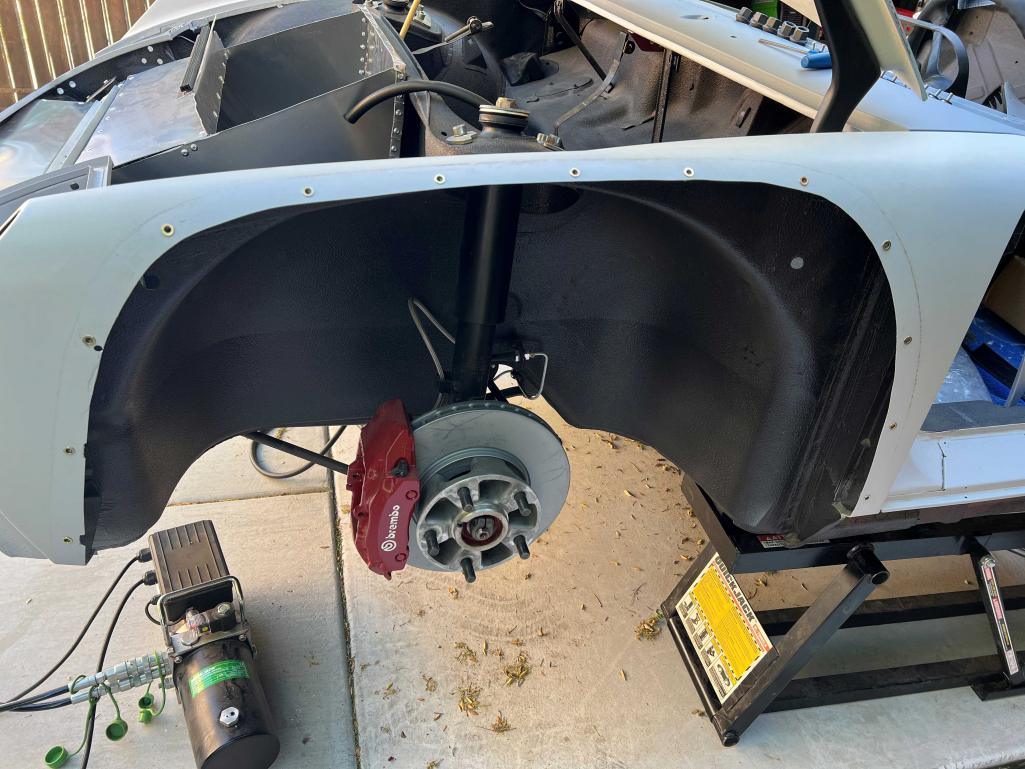
Posted by: mgarrison May 25 2023, 03:23 PM
Koni parts porn has arrived! Guess I have something to do this afternoon after all 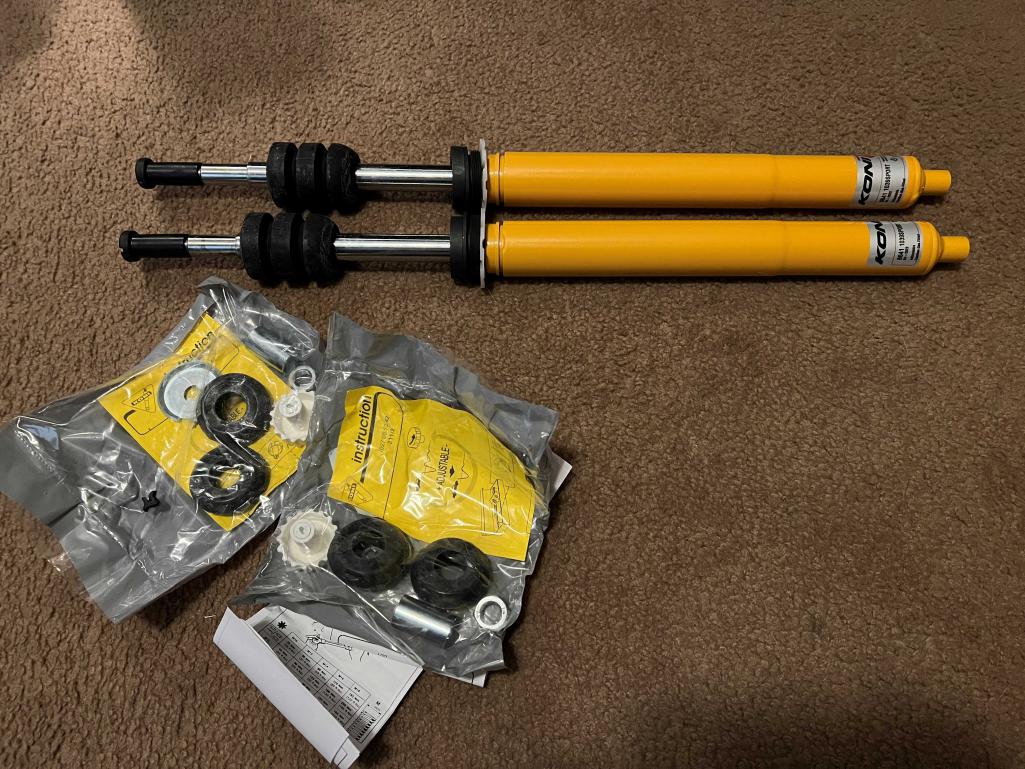
I just need to figure out which pieces I need to use to make them match up what's already installed (know I need the spacers). Not sure about the bump stops though...
Posted by: mgarrison Jun 26 2023, 12:07 PM
I've been trying to plan out my wiring. In the meantime I decided to redo a Yeti cup my company sent out to us. I didn't like the red color, or the big company logo on the side.
So, now it's Ravenna green to match the 914! 
Posted by: slowrodent Jun 27 2023, 11:18 AM
It really is a very nice quality build you're producing.. Keep up the great work. Color will be superb with flares when complete!
Posted by: mgarrison Sep 5 2023, 12:28 PM
I've lost 6-8 weeks due to the crazy 110+ degrees every day! I believe we had 31 days in a row over 110. Didn't even try to work on the 914...about got sick just trying to mow the grass for 20min. We just hid inside for over a month!
Anyway, I did try to get my wiring planned out as much as my brain could handle. Got the fuse block, wires, pins, etc. all ordered.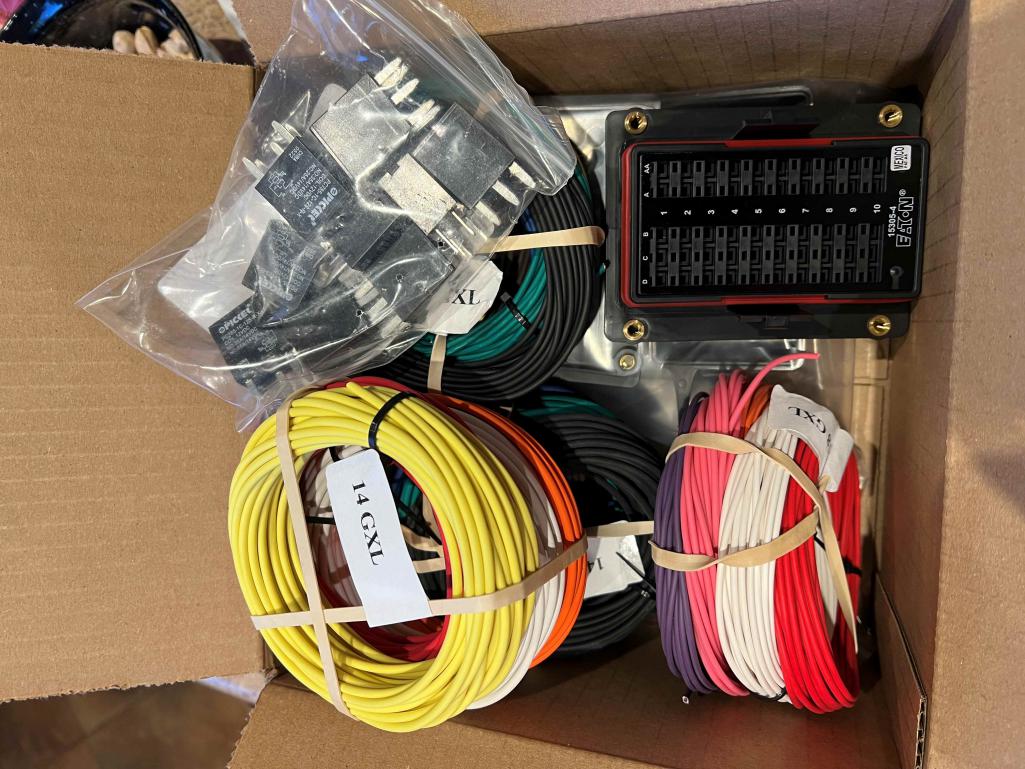
Since working INSIDE was the only real option, I tried to document and wire up what I could in the house.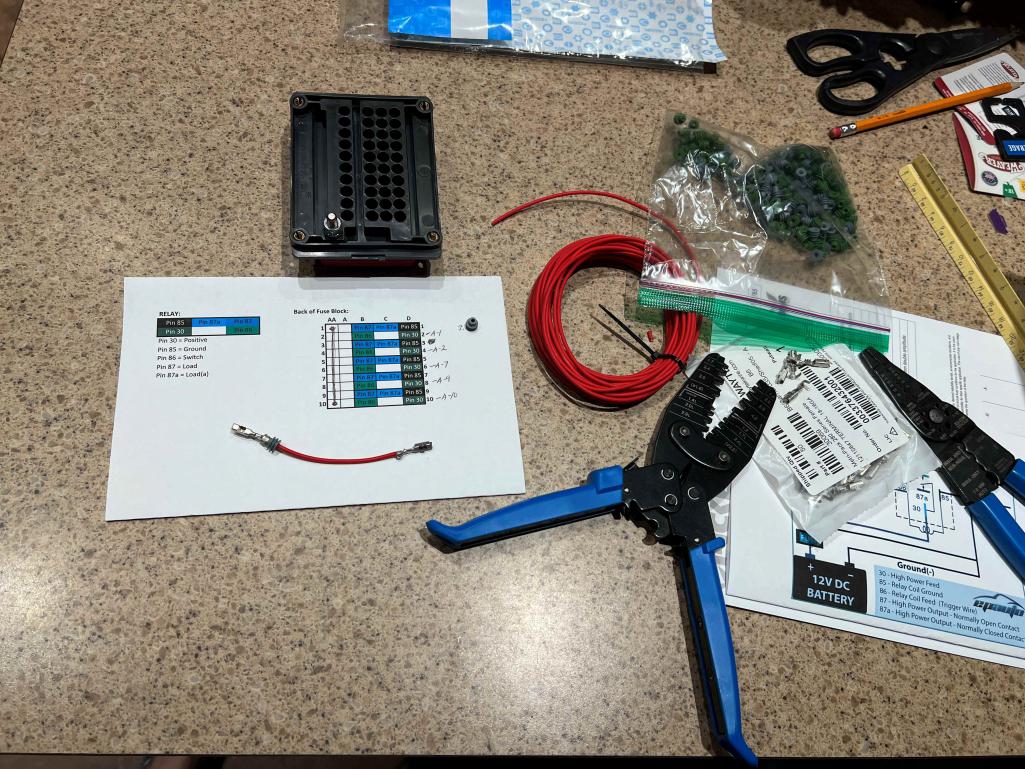
It wasn't much, but it was SOMETHING
It's finally back under 110, at least for a few days so I'm trying to plan out and do a few things on the 914. Still need a big-ass fan running to keep you alive though!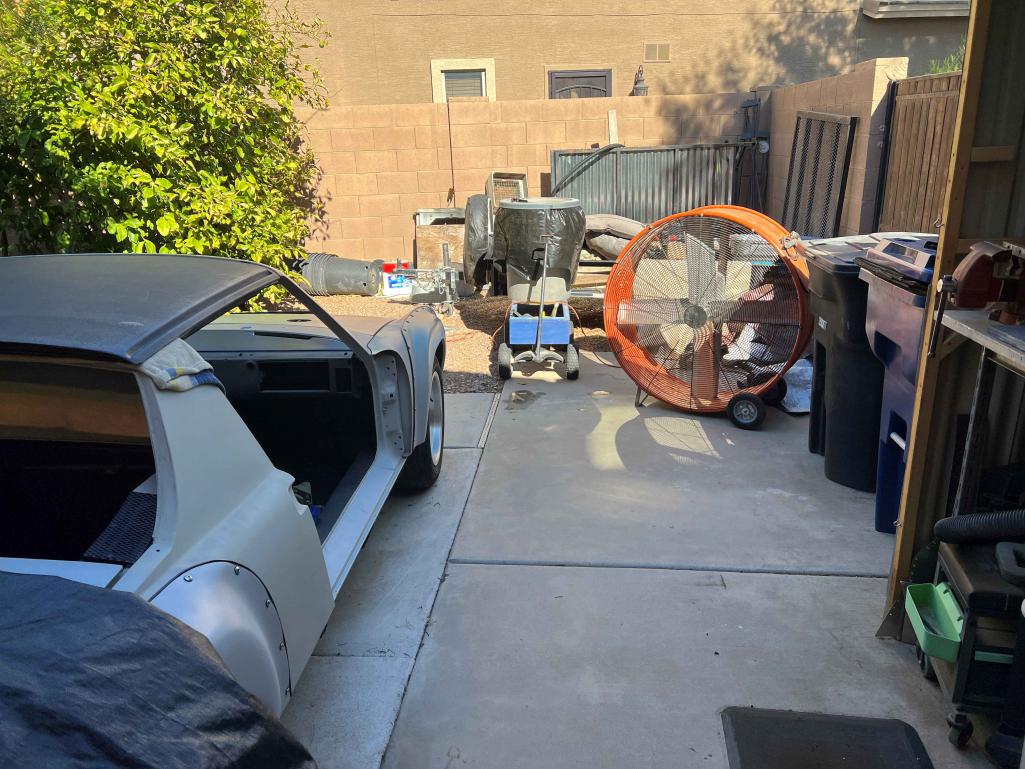
I was unable to find my battery tray support so I had to order another one. Also ordered the rubber mount for the wiper motor. Trying to determine the best spot for my fuse block and needed to see how much room there is under there with the wiper motor in place.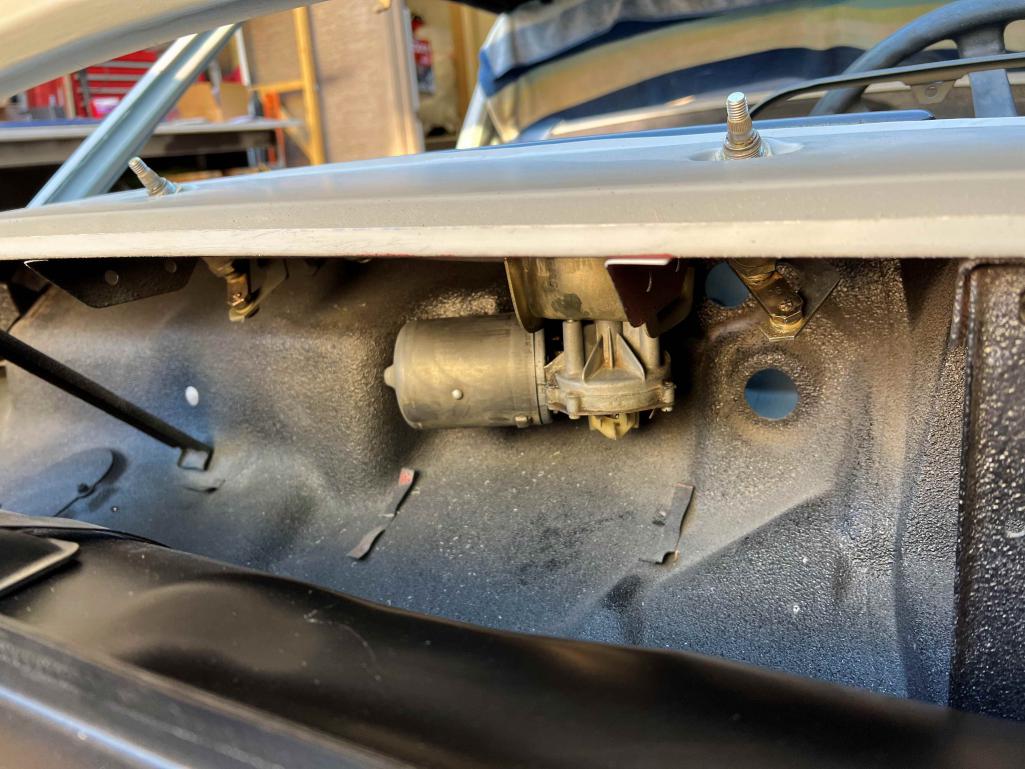
Still need to order new rubber washers/seals for the wiper assembly...
Posted by: mgarrison Sep 5 2023, 12:30 PM
I found a box that is the same basic size as the battery I would like to use. Did a quick test fit of the tray and "battery" box.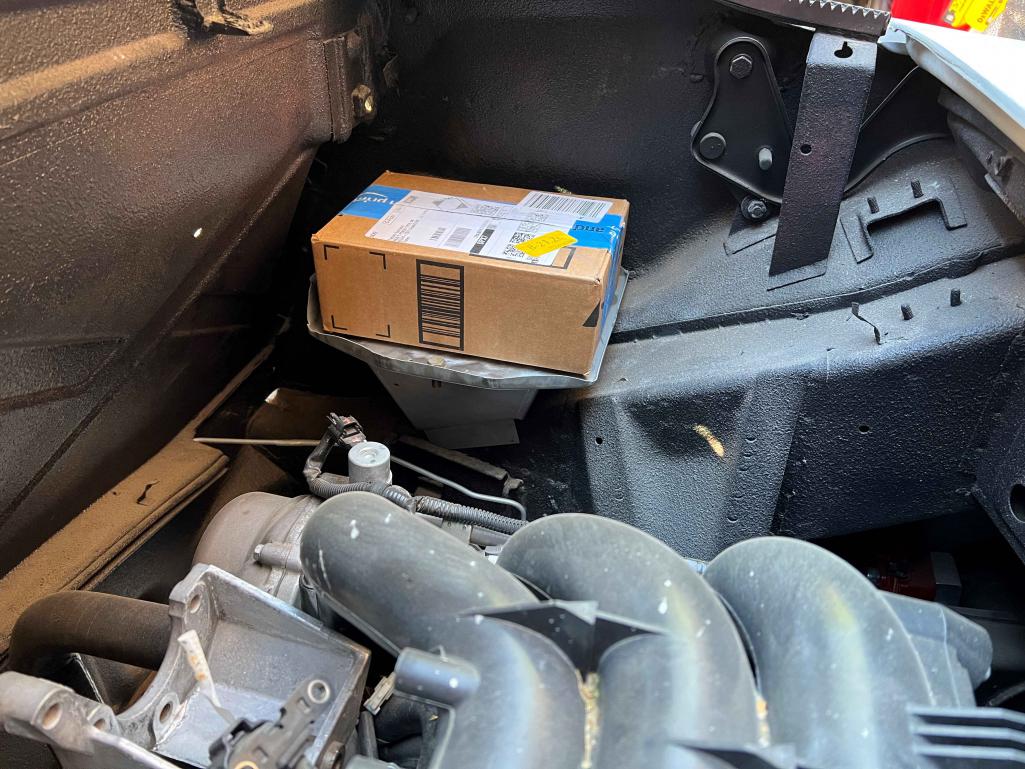
Got the support and tray aligned as best I could in the car and got them screwed together in prep for welding.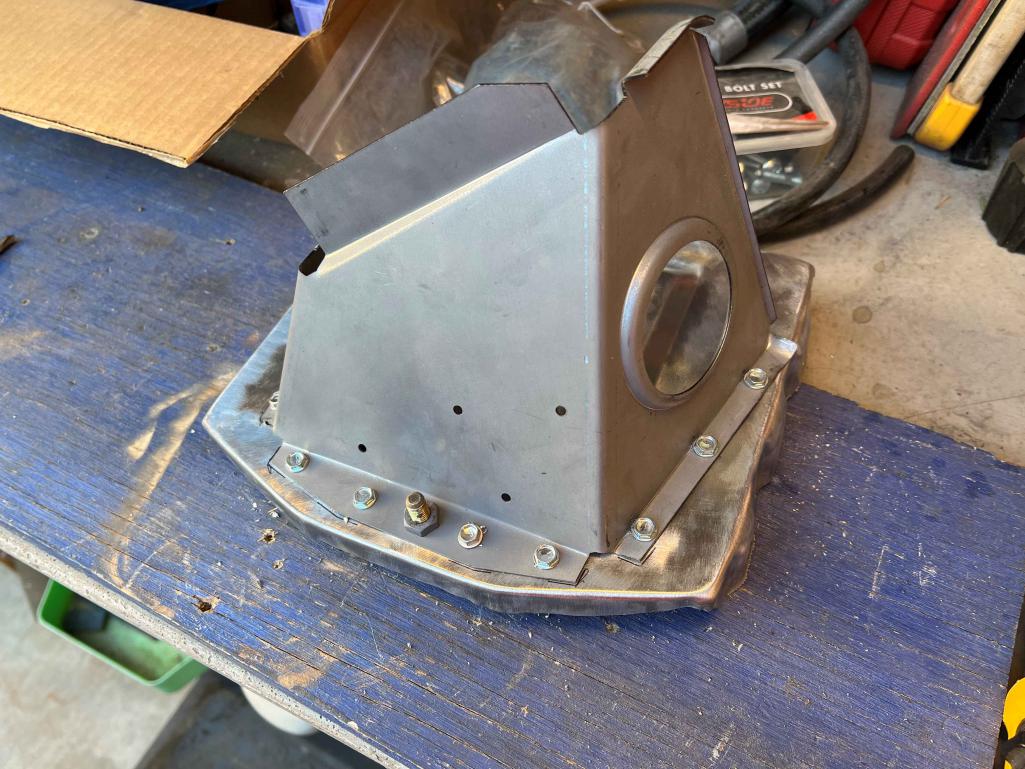
About all I've been able to accomplish this crazy HOT summer...
Posted by: mgarrison Sep 11 2023, 12:58 PM
Well, the 914 is finally in the garage.
But, not for a good reason... 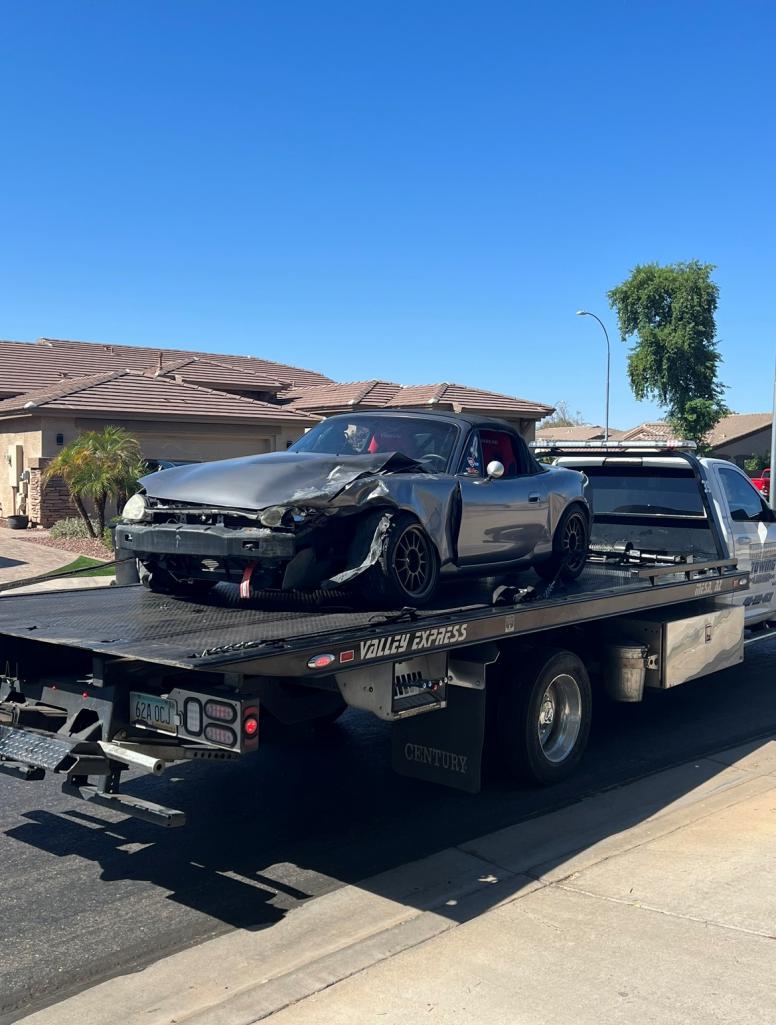
HS girl turned left right in front of our son on his way to work last Thursday morning. Thankfully, nobody was injured. Can't say the same for the Miata! Neither door will even close all the way anymore 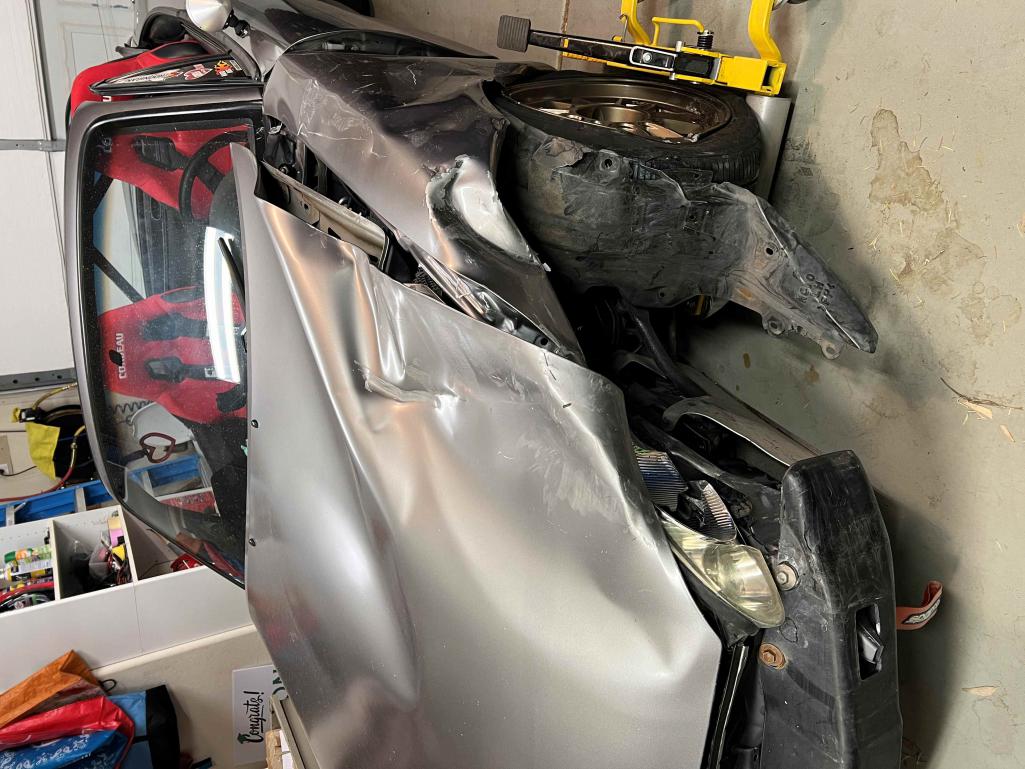
Quick test fit of the Corbeau seats our Son had in the Miata. I may be able to use his Momo steering wheel also...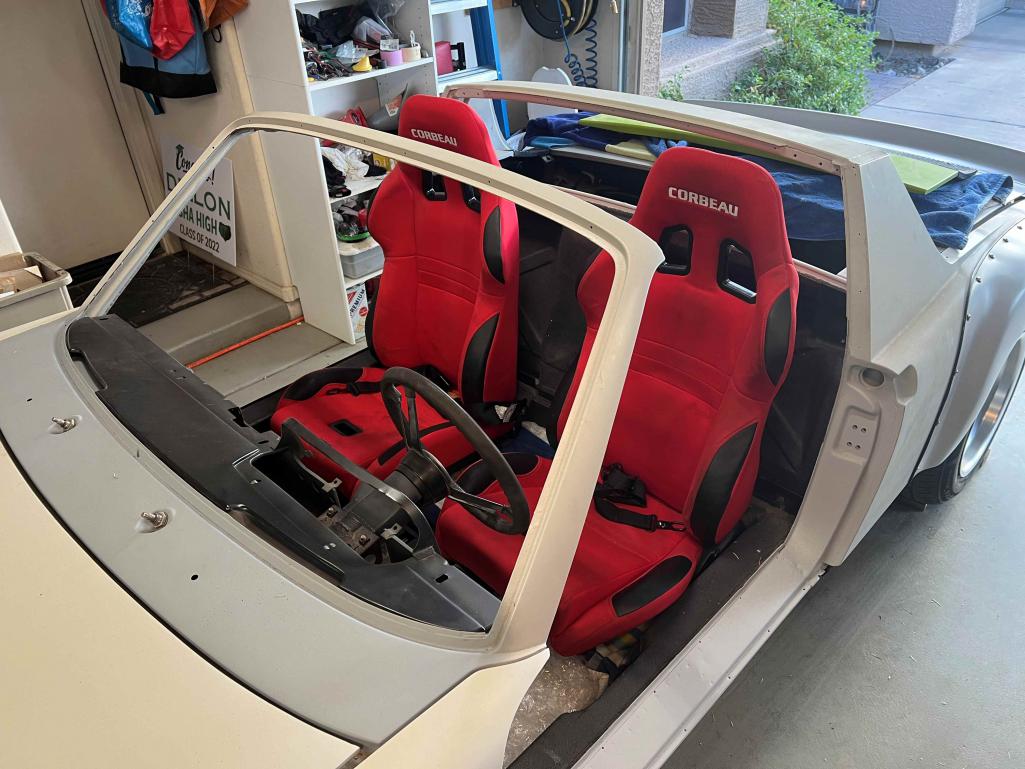
Now for the joyous "Insurance Games"...
Posted by: 76-914 Sep 11 2023, 05:51 PM
That sucks. Are you trying to locate the tray in the stock location? If so I can get you a pic of that.
Posted by: slowrodent Sep 12 2023, 07:15 AM
Sorry to read about the accident Mike. Certainly glad that he is ok. Good to keep a clear perspective during these times. 914 progress looks very good considering a long very hot summer.
Posted by: mgarrison Sep 12 2023, 03:29 PM
That sucks. Are you trying to locate the tray in the stock location? If so I can get you a pic of that.
Yea, basically. Not super concerned about the location being perfect. Debating if I really want to pull engine & trans and weld in the tray. Or, maybe use rivnuts so they tray could be removed if needed for some reason...
Posted by: mgarrison Sep 12 2023, 03:31 PM
Sorry to read about the accident Mike. Certainly glad that he is ok. Good to keep a clear perspective during these times. 914 progress looks very good considering a long very hot summer.
Thanks Kevin, it's been a rough summer, that's for sure! Explains why the PHX area is the worst in the country for road rage - everyone is so hot/miserable/agitated, we are all at each other's throats in an instant!
Posted by: mgarrison Sep 22 2023, 03:09 PM
Got a new rubber mount for the wiper motor, and new seals from 914Rubber. Baby steps...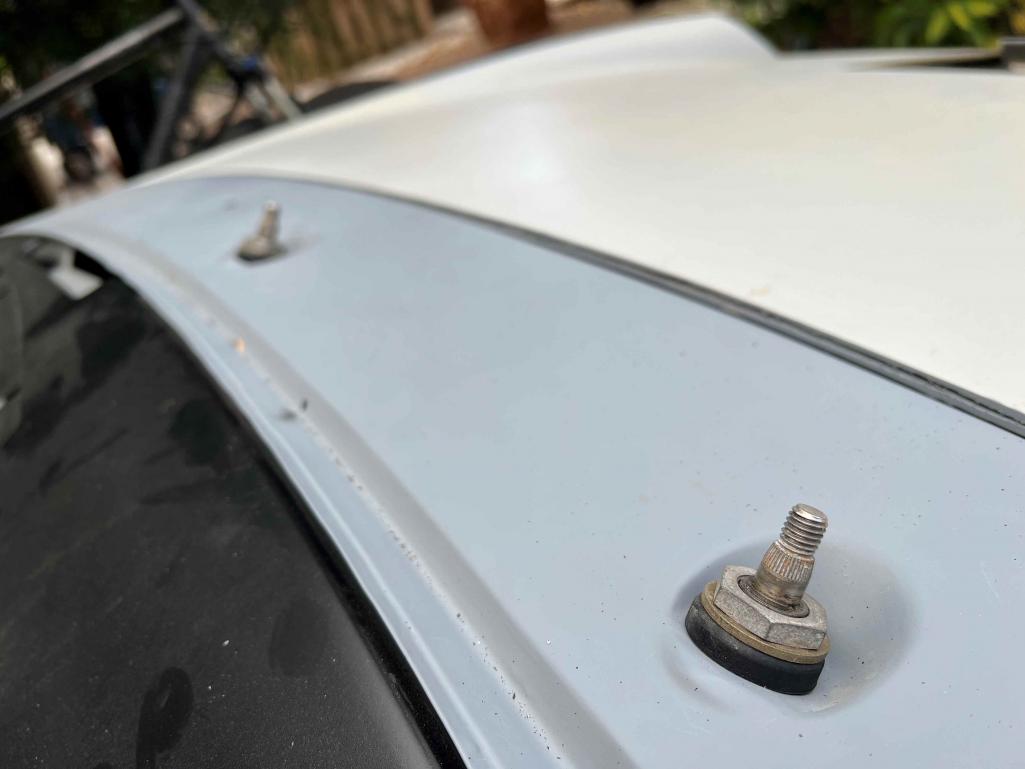
Finally got some mounts for the fuse block. Trying to figure out the best spot to install it. Don't want it under the dash unless it just doesn't work anywhere else. This is right above the original location, and seems like it might work well, while still being fairly easy to access. 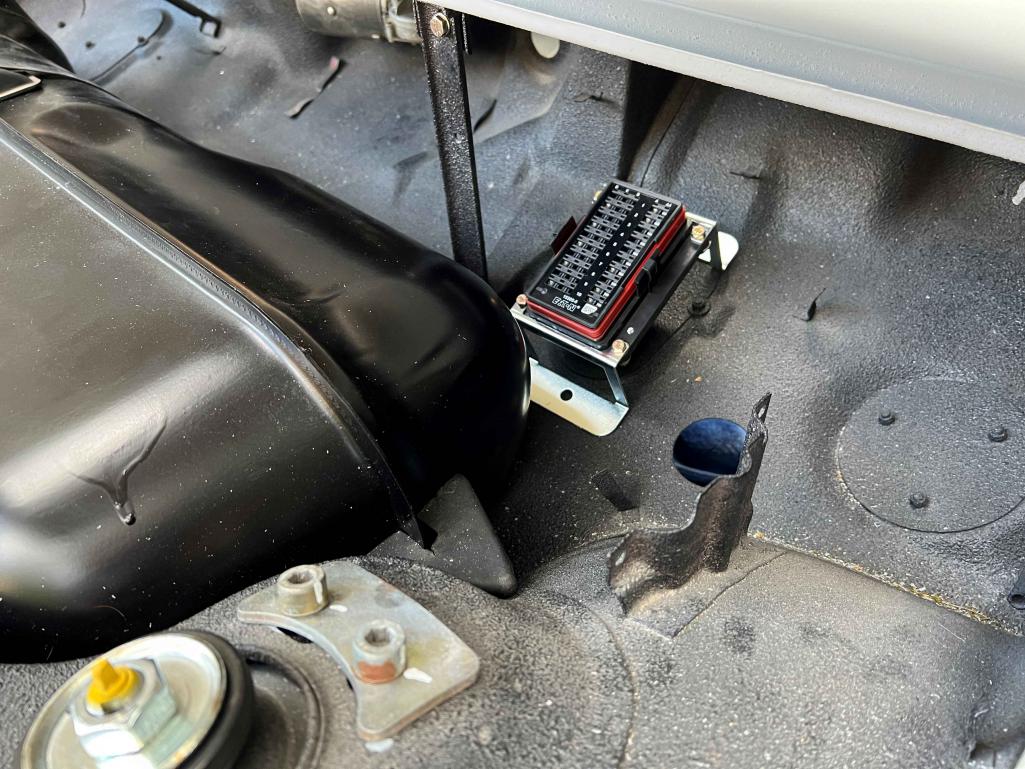
Just need to determine length for the wires for all the front end items and then get those wires labeled and installed into the fuse block. Wiring is more than a bit overwhelming
Posted by: Spoke Sep 22 2023, 05:51 PM
Nice work on the 914 and sorry about your son's accident.
A couple of comments. The fuse block should work where it's at as long as you can easily reach it with the tank in and it has a cover to keep moisture out.
About the tank, not sure if you're going to use the little portal to make the connections to the tank. These can looped around to the driver side and back thus giving ample length to do the connections with the tank out and drop it it. I did this with my 914 and welded the portal closed.
Attached image(s)
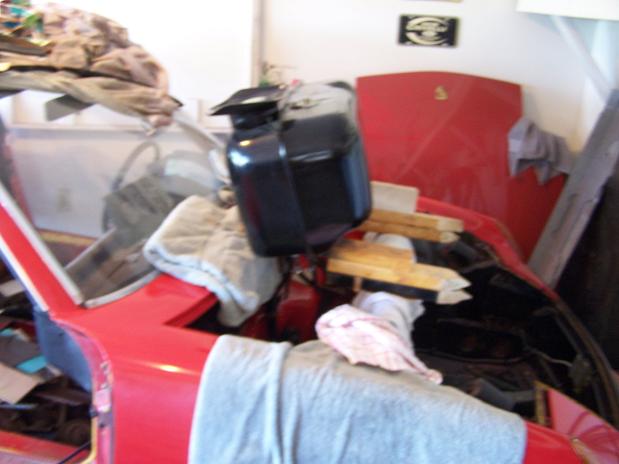
Posted by: mgarrison Sep 25 2023, 11:19 AM
Nice work on the 914 and sorry about your son's accident.
A couple of comments. The fuse block should work where it's at as long as you can easily reach it with the tank in and it has a cover to keep moisture out.
About the tank, not sure if you're going to use the little portal to make the connections to the tank. These can looped around to the driver side and back thus giving ample length to do the connections with the tank out and drop it it. I did this with my 914 and welded the portal closed.
Thanks for the feedback. The fuse block does have a water proof cover & seal. Also, being in PHX area, not much water/rain to contend with.
I have AN adapters on the tank outlet and am using the portal to access and connect them.
Most likely will be hitting you up for the LED lights/panels - plan on going all LED on the car since I'm not worried about originality.
Posted by: mgarrison Oct 25 2023, 11:28 AM
Trying to start running some wires. Still struggling in my head on how to start Figured I would run all the wires that I KNOW go from headlights to relays in the fuse block, or fuel pump to the relay in the fuse block and get them labeled. Then move to the rear and do the same...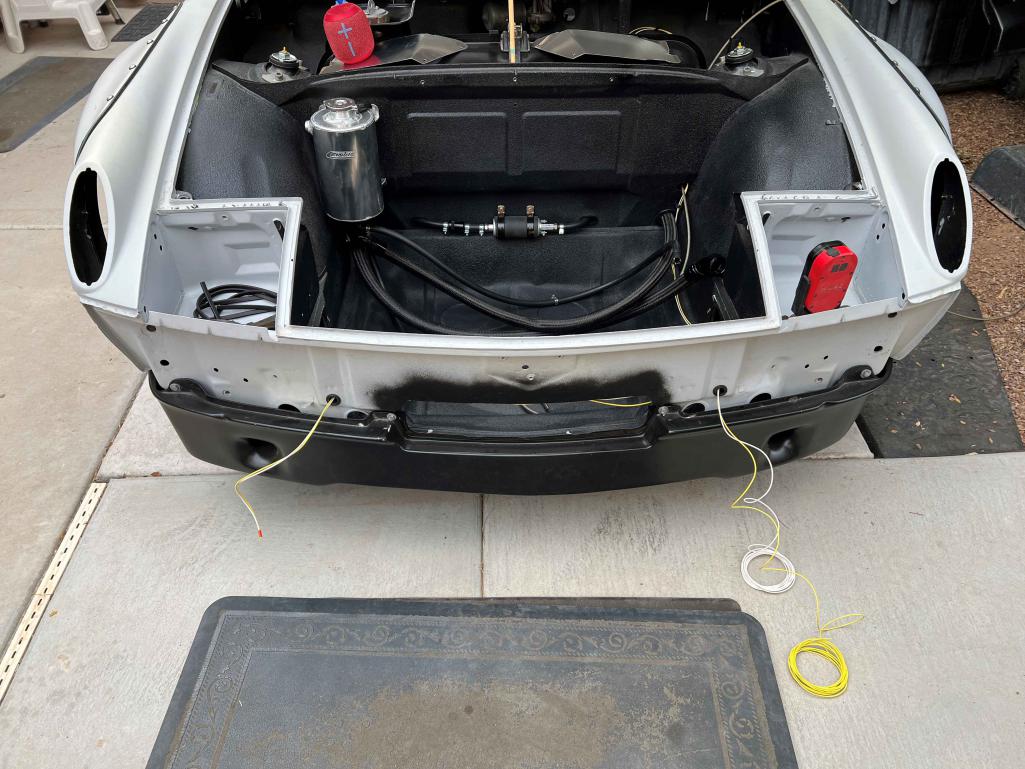
The shrink tube for the label maker is super cool!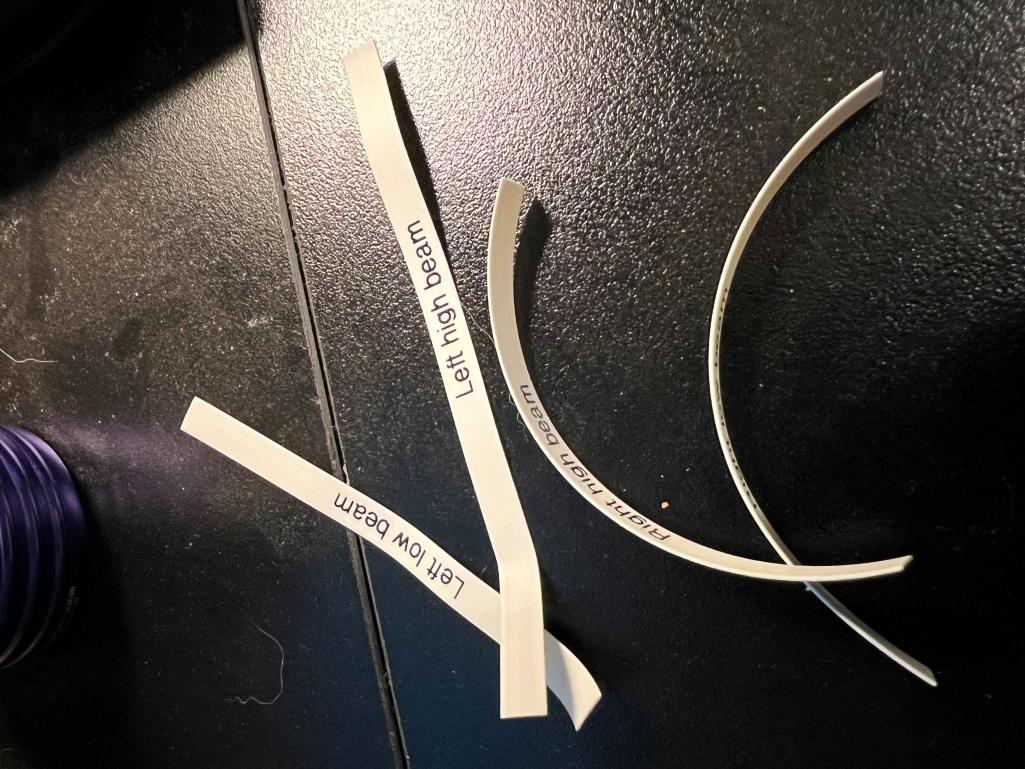
Still need to find/decide on some type of wiring loom I can put over the wires once I have them all laid out in the car.
Posted by: Cairo94507 Oct 25 2023, 11:44 AM
Sorry to hear about your son's accident.
Hopefully the insurance company makes your son "whole" with a nice replacement Miata.
My brother-in-law's cherry 2005 Boxster S was taken out head on by a high school kid playing with his phone while driving. Totaled the Boxster and broke my BIL's foot. That was the 3rd car the kid had totaled in less than 2 years of driving. Also had 4 moving violations, the last for 135 in a 45- still had his license!
Posted by: Jeff_72 Oct 25 2023, 12:03 PM
Sorry to hear about your son's accident.
Hopefully the insurance company makes your son "whole" with a nice replacement Miata.
My brother-in-law's cherry 2005 Boxster S was taken out head on by a high school kid playing with his phone while driving. Totaled the Boxster and broke my BIL's foot. That was the 3rd car the kid had totaled in less than 2 years of driving. Also had 4 moving violations, the last for 135 in a 45- still had his license!
I got a ticket doing 76 in a 25 in 1989. the fine was $15k and lost my license for a year. Don't triple the speed limit is my advise.
Posted by: mgarrison Oct 26 2023, 10:04 AM
Some more detailed shots of the printable shrink tube labels...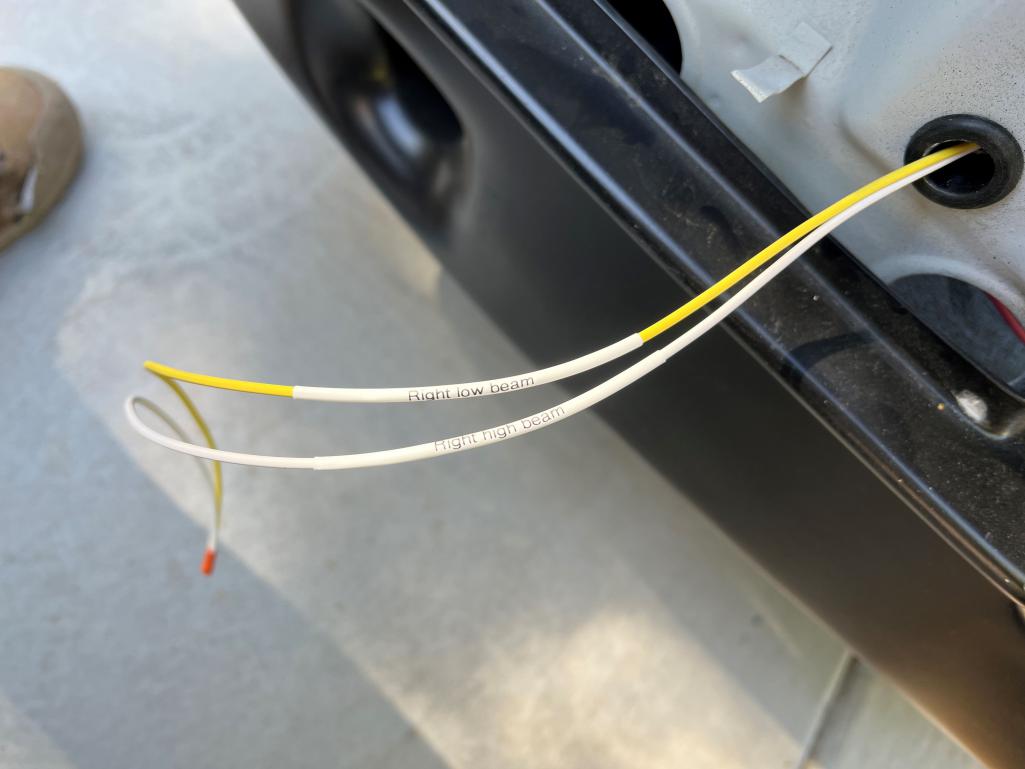
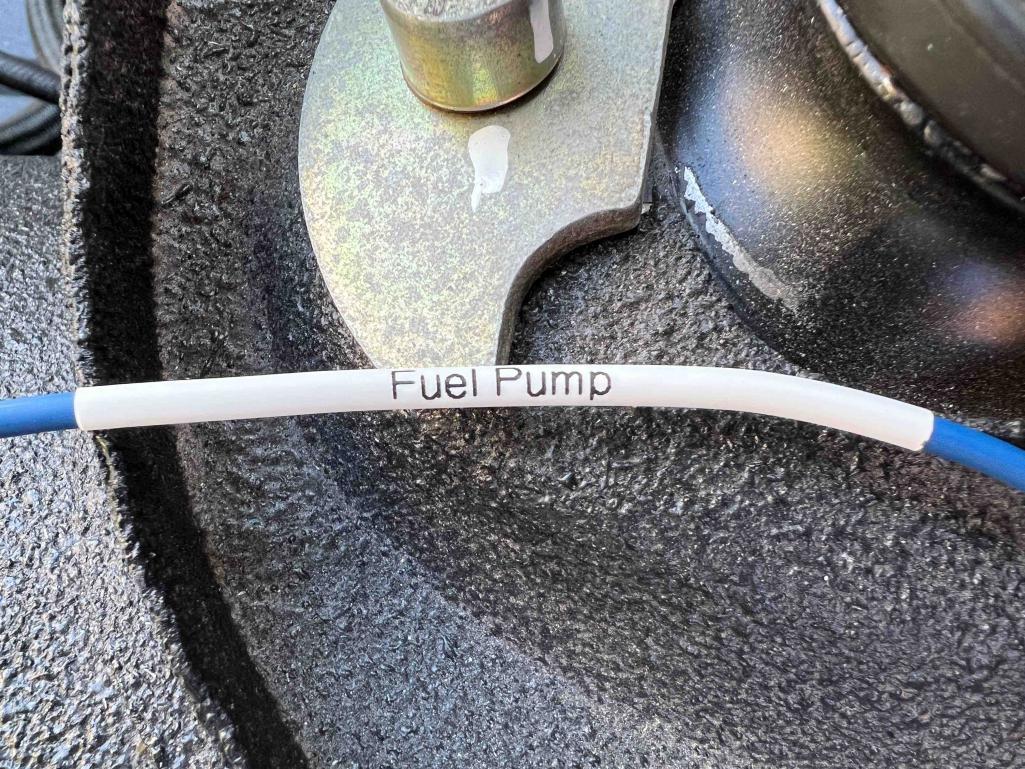
Posted by: slowrodent Oct 26 2023, 10:19 AM
Man Mike... You do some nice work ! Excellent detailing.
Posted by: mgarrison Oct 26 2023, 10:48 AM
Man Mike... You do some nice work ! Excellent detailing.
Thanks Kevin! I'm just floundering along trying to do what makes sense to my itty, bitty brain
All my wiring ideas have be stolen from SuperFastMatt:
https://youtu.be/pSXv8RHa22I?si=xm9A8YfMgOYm8T7A
Posted by: mgarrison Oct 27 2023, 10:47 AM
A little more progress. Waiting on the wiring tab covers, loom, and grommets 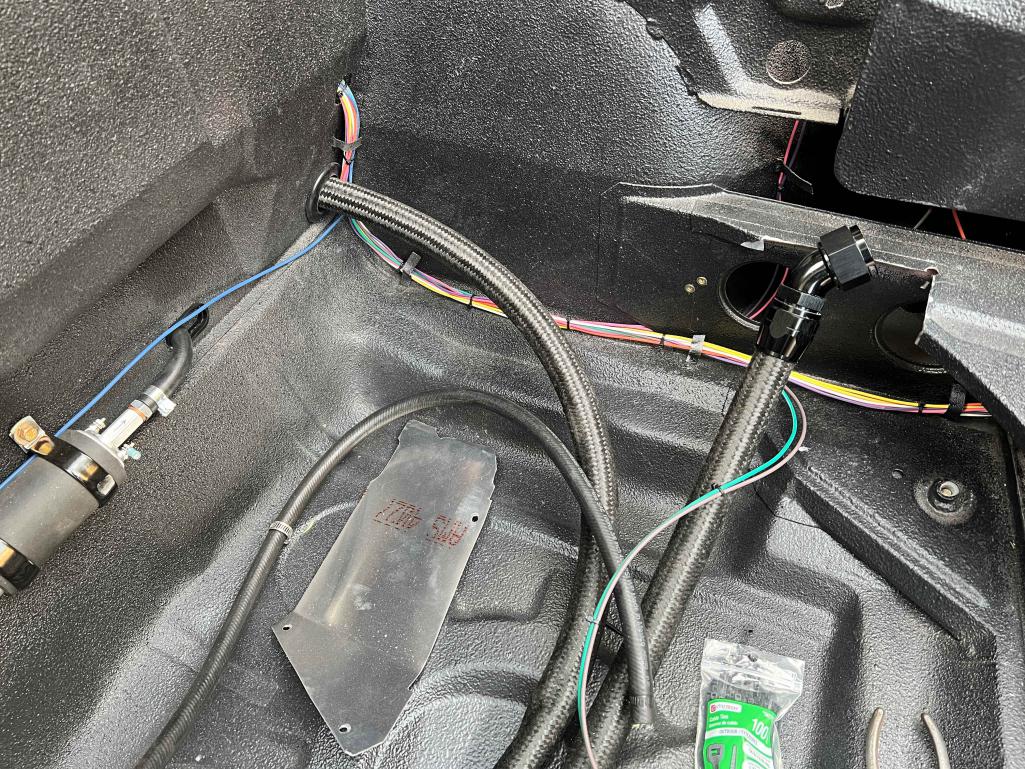
Posted by: mgarrison Nov 7 2023, 01:58 PM
I received my tab cover from 914Rubber, so I measured and cut them to the lengths needed. I got them all installed throughout the chassis and began looming the wiring. A bit hard on the fingers, but works pretty well.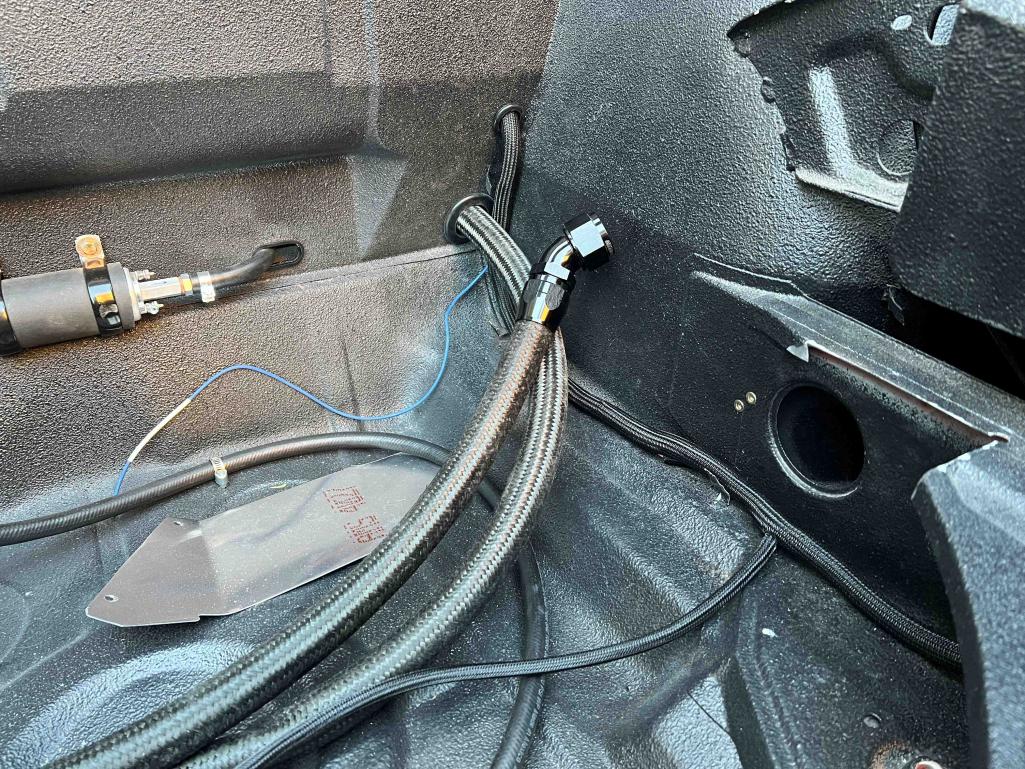

I ordered the incorrect wiper stalk and had to re-order the correct one from Jbugs, but at least I'm not worried about 50 year old plastic crumbling as I reinstall them!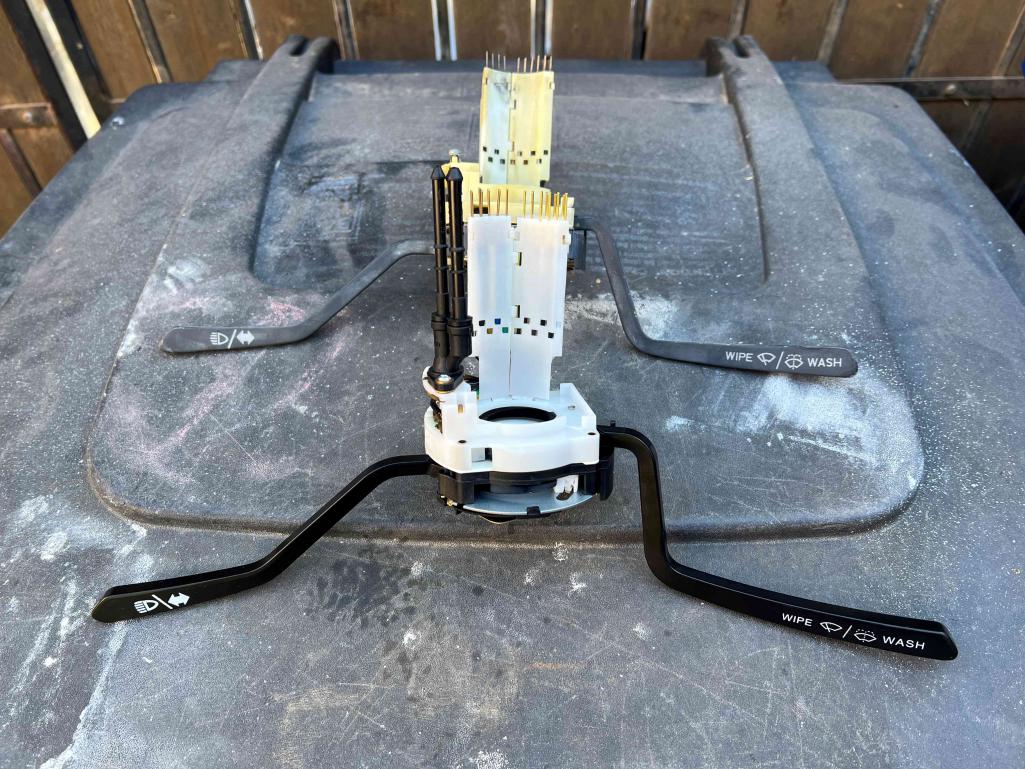
Posted by: mgarrison Nov 7 2023, 02:01 PM
I also got my battery tray welded to the support, welds ground flat in the tray bottom, and some primer sprayed.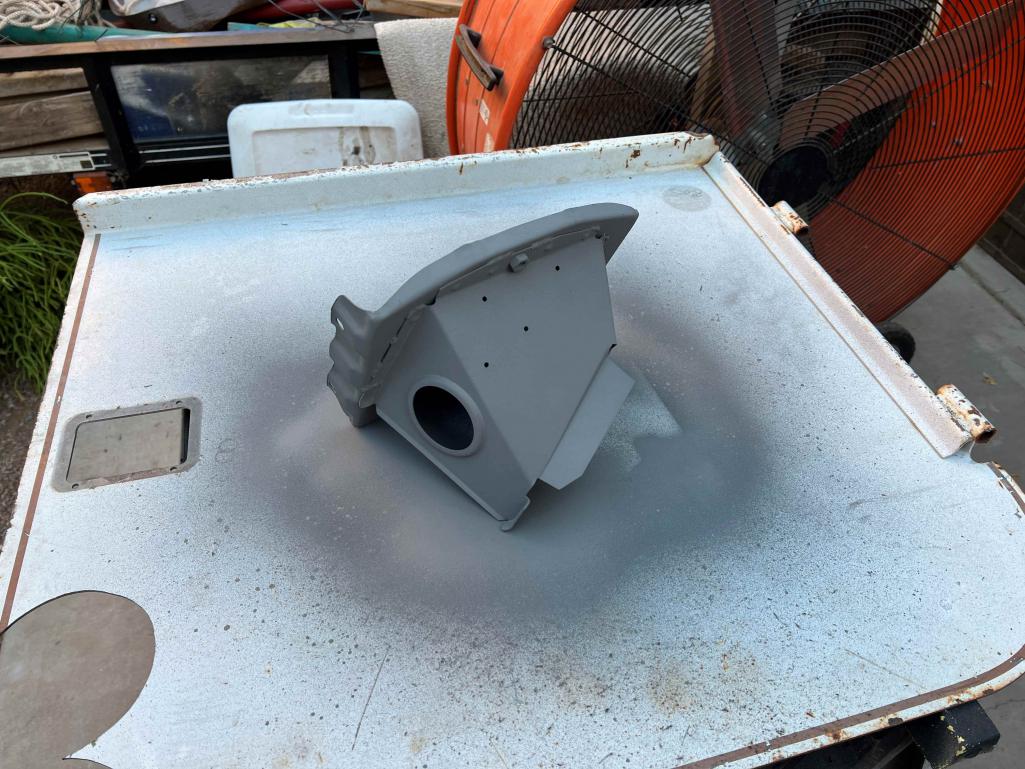
I ordered a Hella dual-tone horn set and got them mounted.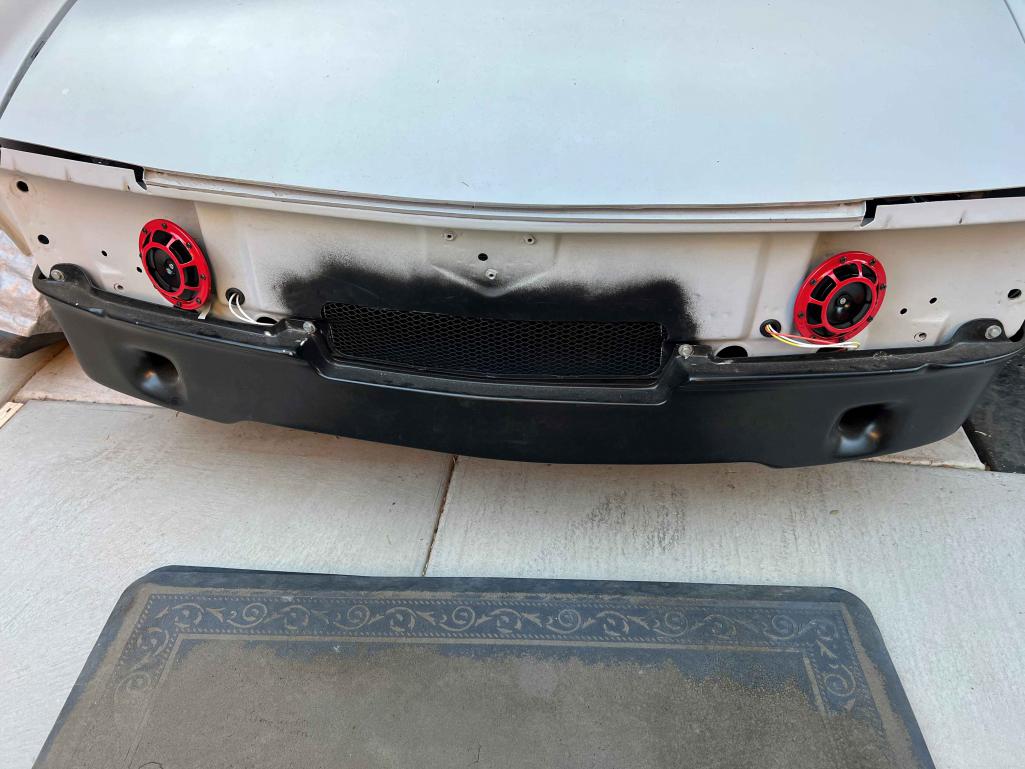
However, my Supervisor still seems rather nonplussed by my limited progress...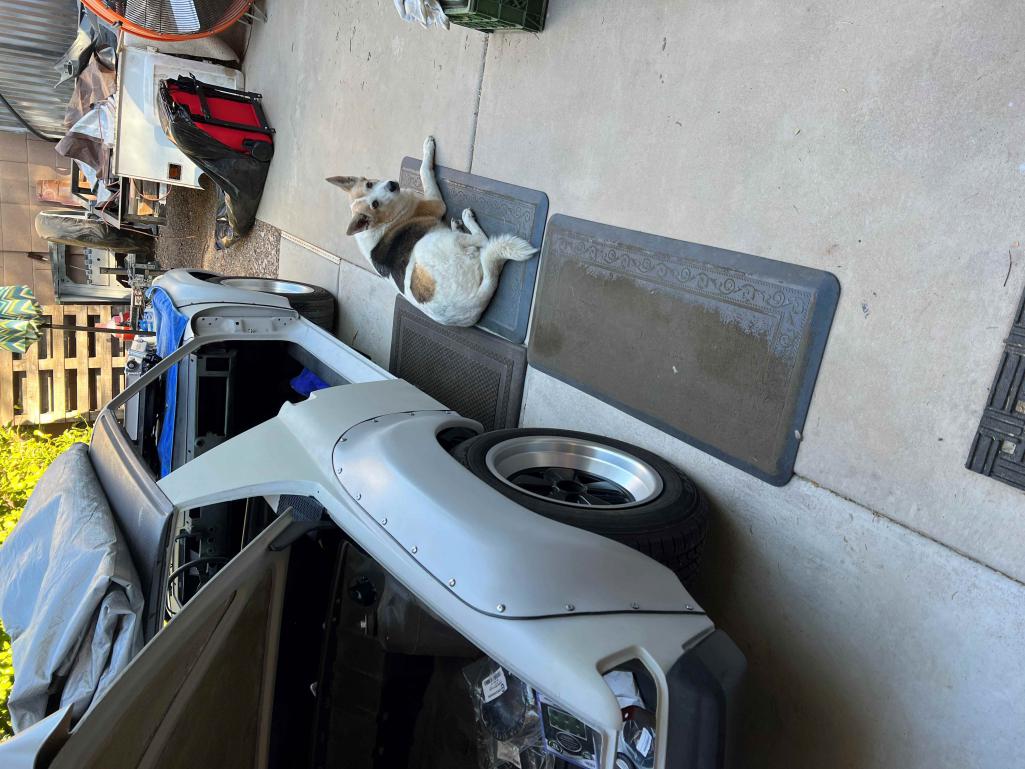
Posted by: mgarrison Nov 22 2023, 11:01 AM
I installed the SpeedHut gauges I bought from Chris just to see how they look, and to have them in place for wiring. Beautiful...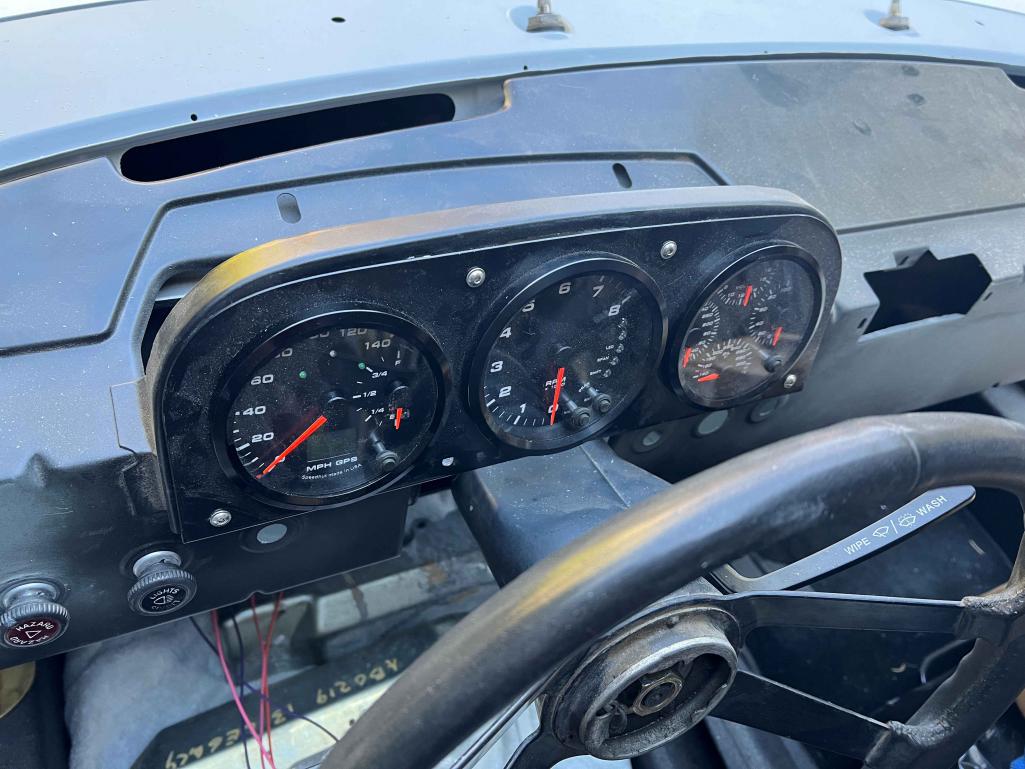
I still just can't get over how THIN they are!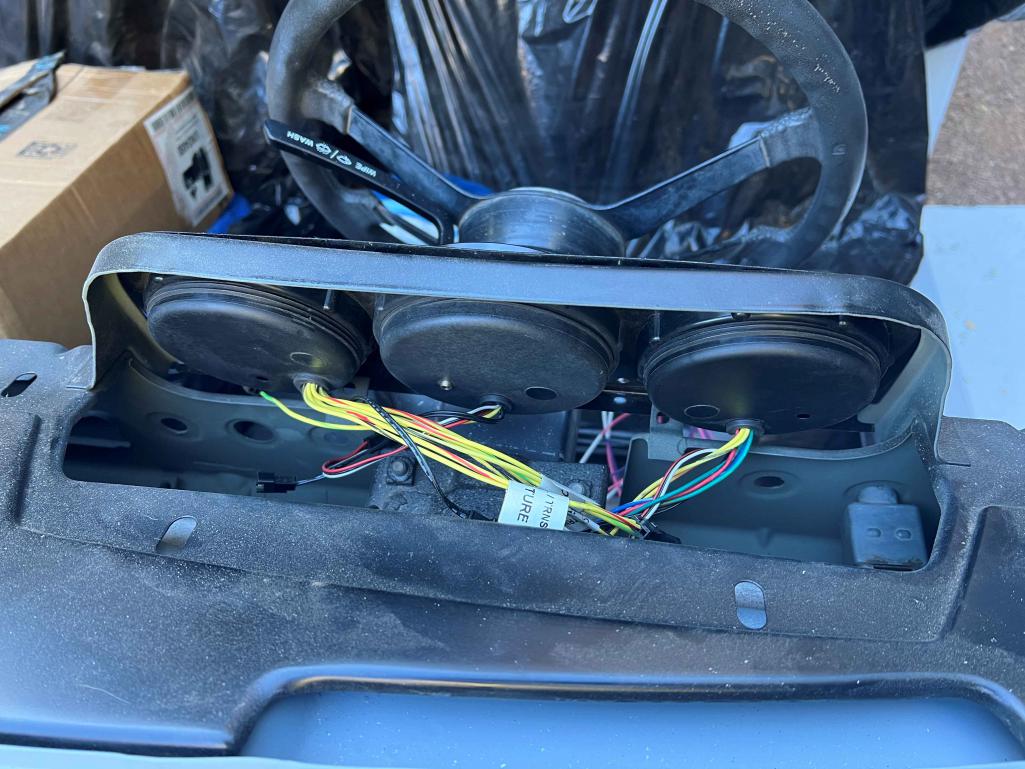
Yesterday I actually hooked up one of the taillights. Of course, there's nothing on the other end of those wires yet, and no ground wire...yet. But it still feels like some small victory 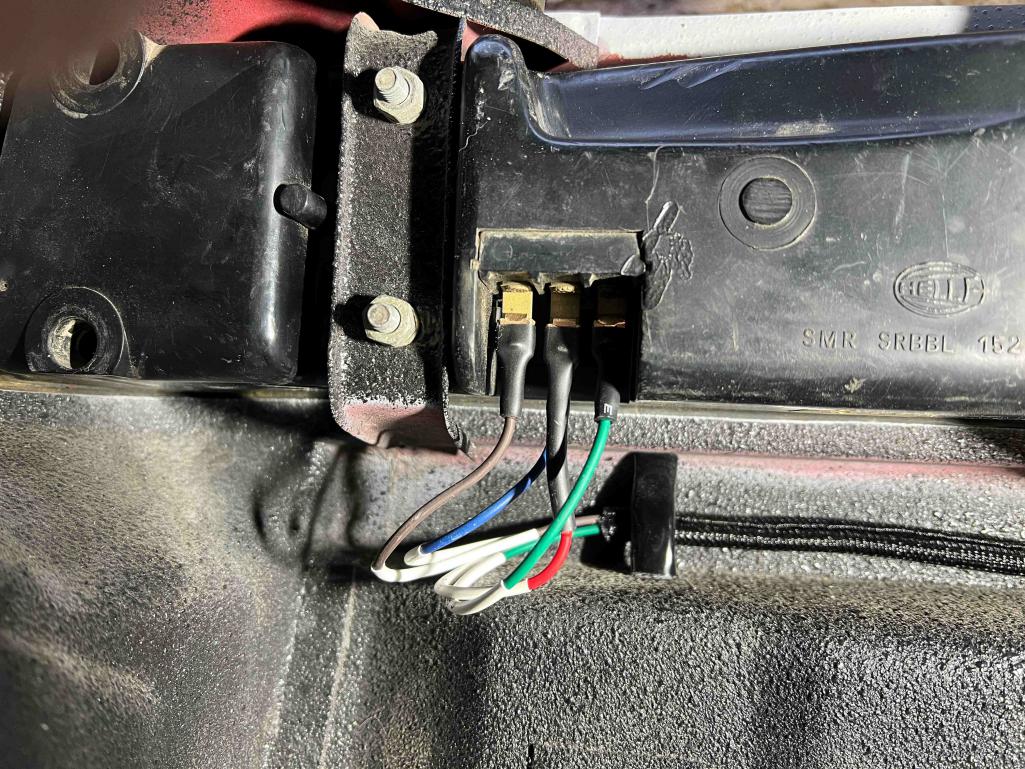
I received my Rennline 6 Pole Cut Off Switch, and my 80A breaker for the main fuse block feed. Just need to decide where to locate each of the components. Trying to do things safely/correctly without over complicating things.
Posted by: slowrodent Nov 24 2023, 10:17 AM
Continues to look great Mike.... Speedhut gauges look awesome.
Posted by: mgarrison Dec 18 2023, 01:42 PM
I've been rather busy and have had limited time for the 914
But, I did receive my battery mount from Rennline.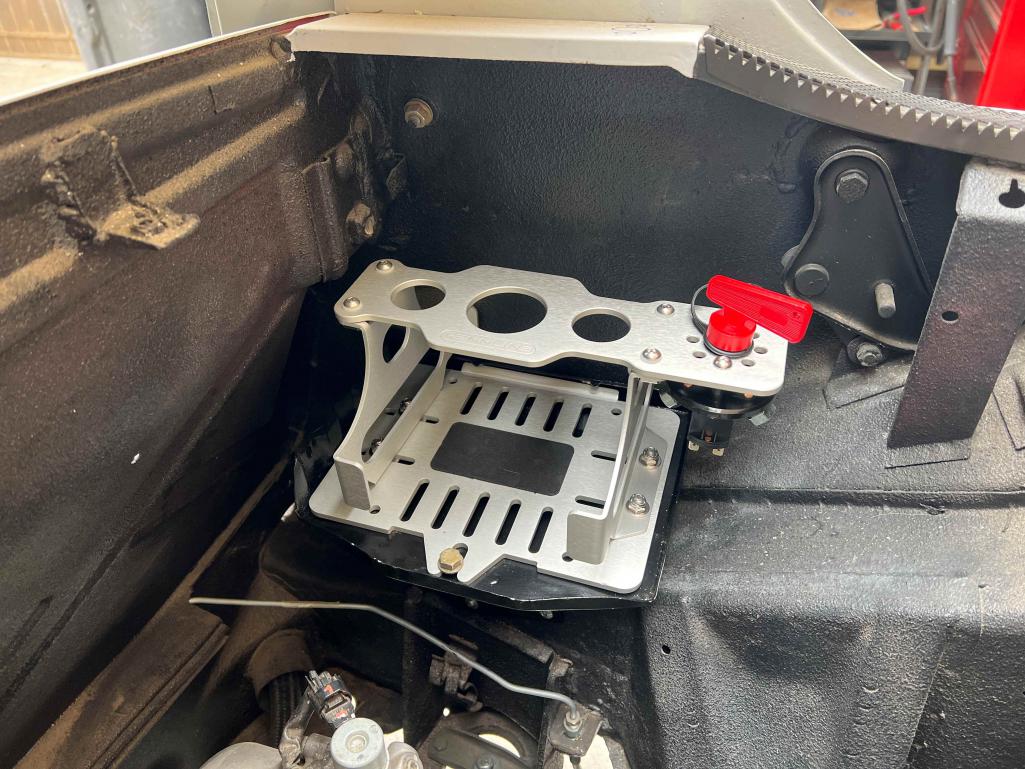
Still need to wire up the kill switch and the breaker for the main fuse block.
I also received my 3DGAuto headlights/turn signals! They were packaged very carefully, and arrived in perfect condition. I actually got them wired up yesterday after a quick email exchange discussing the projector beam pinout as I am wiring them in to the harness (don't have the stock 914 connectors to plug into). Major Kudos to Ben for his super quick reply 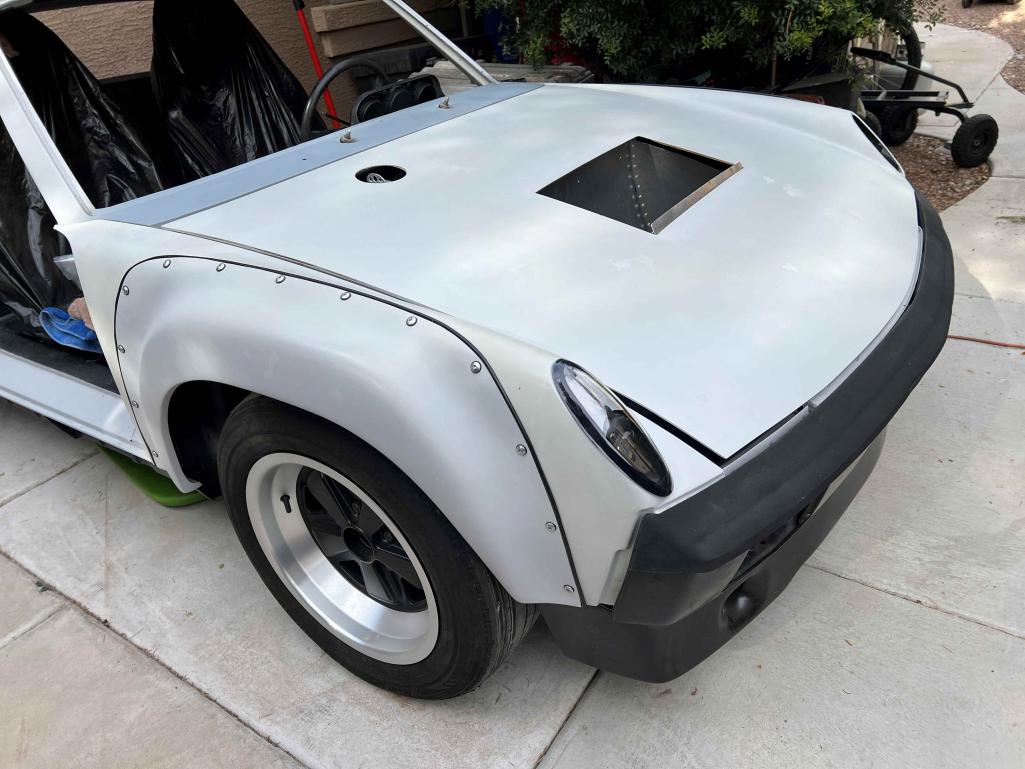
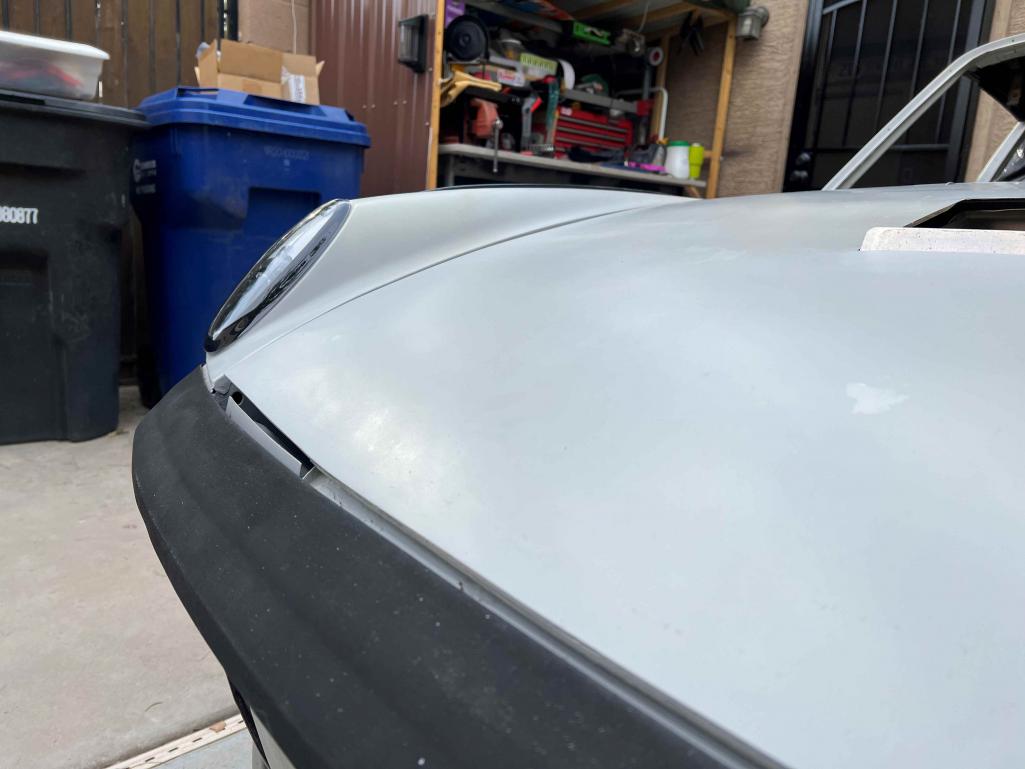
Posted by: slowrodent Dec 19 2023, 09:09 AM
Whole front end has come together really nicely Mike... Must feel good to have your vision realized to that extent..... Headlights are sooooo nice. Excellent decsion. 
Kevin
Posted by: mgarrison Dec 19 2023, 11:50 AM
Thanks Kevin!
I'm hoping I'll feel that sense of accomplishment once I get the whole circuits in place and can test each one with a spare battery, or my battery charger - that way I can limit the test to 2amps running through the wires...
My next big hurdle is deciphering the connections for the turn signal & wiper levers, and the high/low beam switch.
It's quite the process, but I'm hoping it's steeling me a bit for the gauges, ECU, etc. that are still to come.
Posted by: Lilchopshop Dec 26 2023, 05:47 PM
I also received my 3DGAuto headlights/turn signals! They were packaged very carefully, and arrived in perfect condition. I actually got them wired up yesterday after a quick email exchange discussing the projector beam pinout as I am wiring them in to the harness (don't have the stock 914 connectors to plug into). Major Kudos to Ben for his super quick reply
@http://www.914world.com/bbs2/index.php?showuser=23922 , Your work looks great! I’m learning a lot from your build. I love the look of the 3DGAuto headlights. Please let us know what you think of them. I would love to hear your honest opinion as to whether or not they are a viable replacement to the stock headlights in a street car.
Thanks,
Aaron
Posted by: mgarrison Dec 27 2023, 09:39 AM
Aaron, I'm a long way out from a drivable car! It's gonna be a minute
I did take note of the early feedback from other forum members, and I'm pondering how I can fab up a shield to protect the fans on the back of the LED projectors. It looks like it will be pretty straight forward, but not a priority at the moment. Also, living in the Phoenix area, I generally don't encounter much rain/mud/snow!
Posted by: mgarrison Jan 7 2024, 01:40 PM
I finished wiring up my fuse block. Still need to dress in the wire bundles a bit better, but not looking too bad...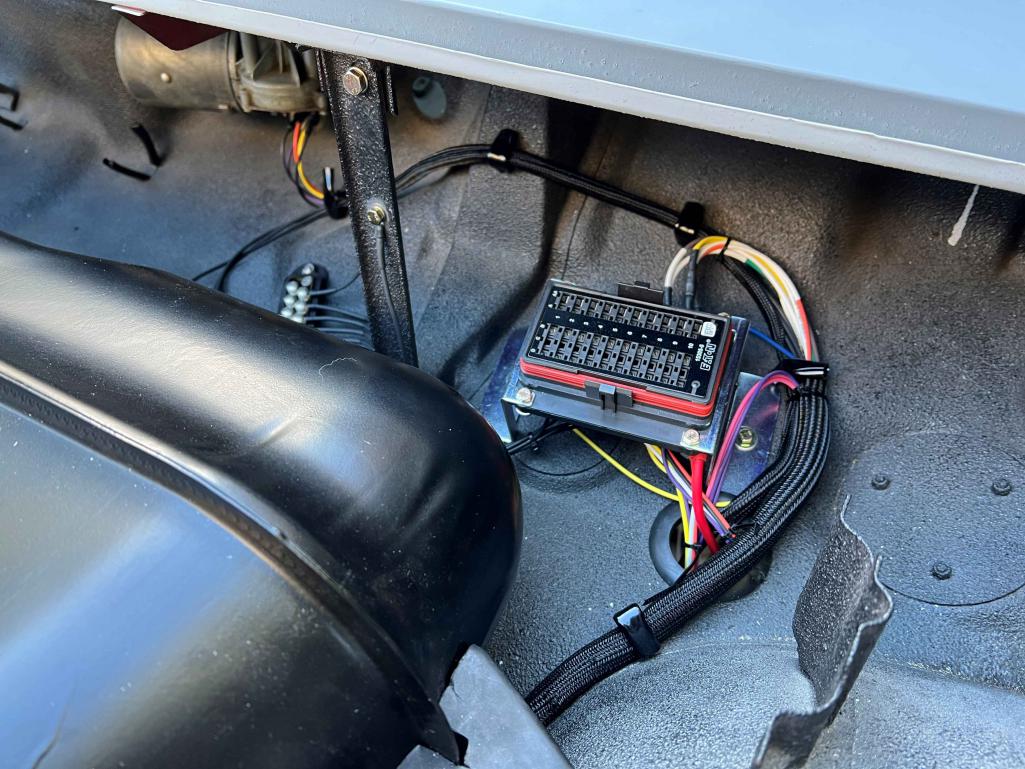
Posted by: mgarrison Jan 7 2024, 01:47 PM
It was a BIG day in the backyard 914 "garage" today! I feel like quoting Dr. Frankenstein "It's Alive!" 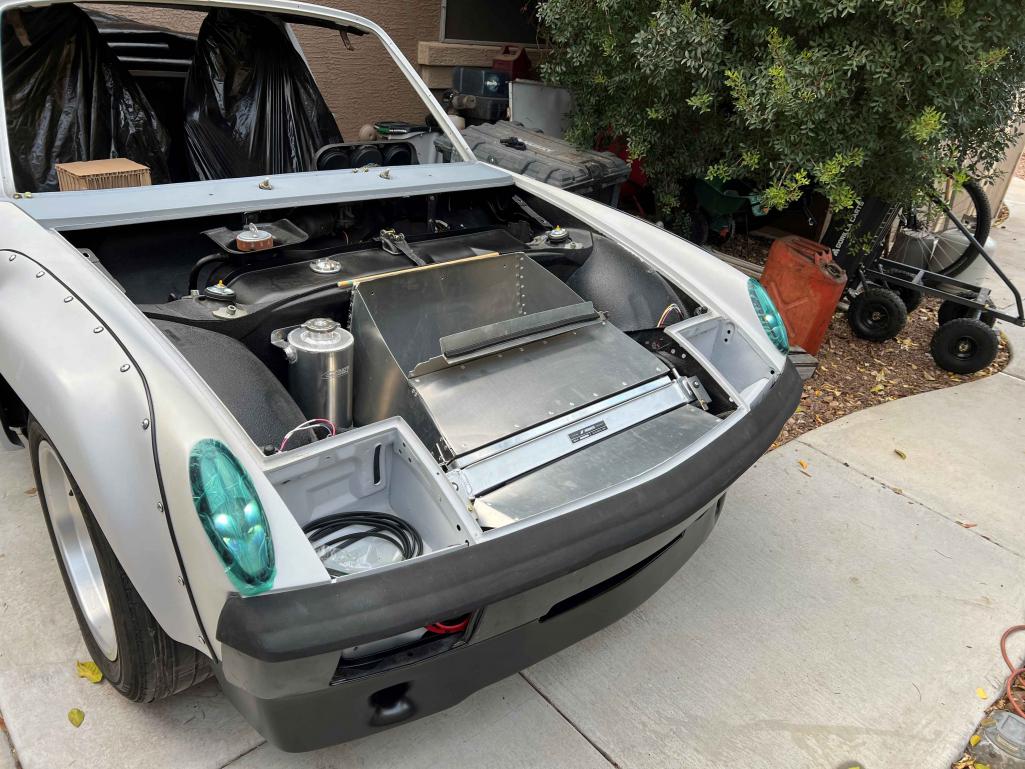
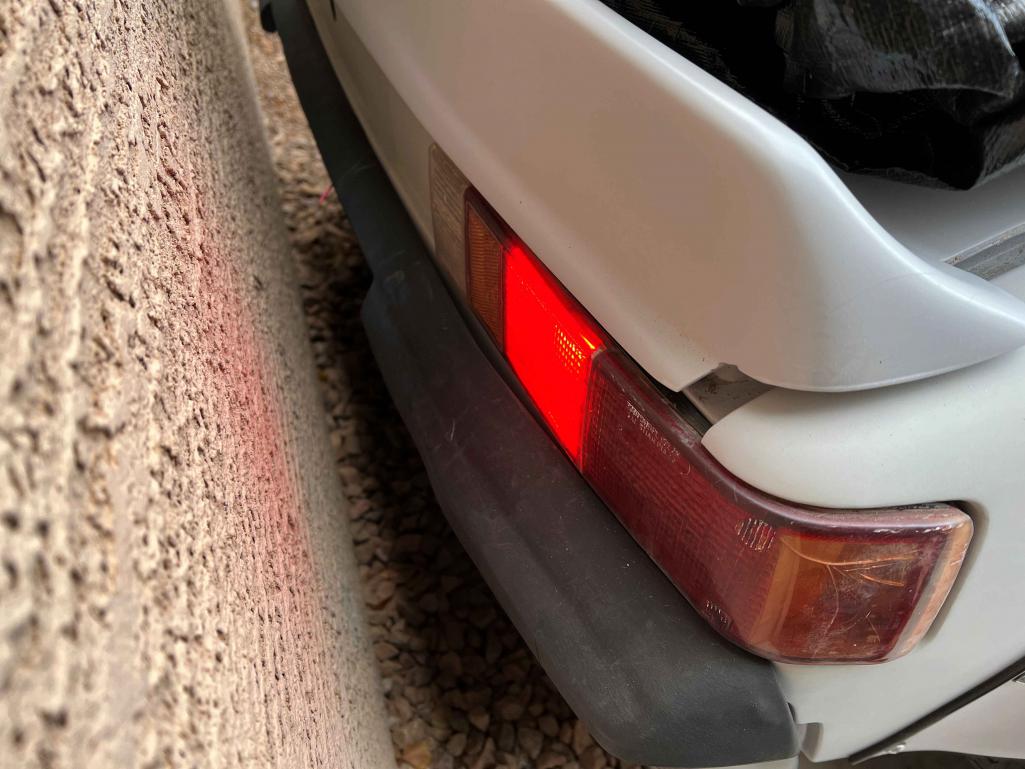
It's just the parking/running lights, but it still feels like a major milestone!
I used the Miata battery and some crazy Chinese battery terminals that appear to use old bicycle wheel quick releases 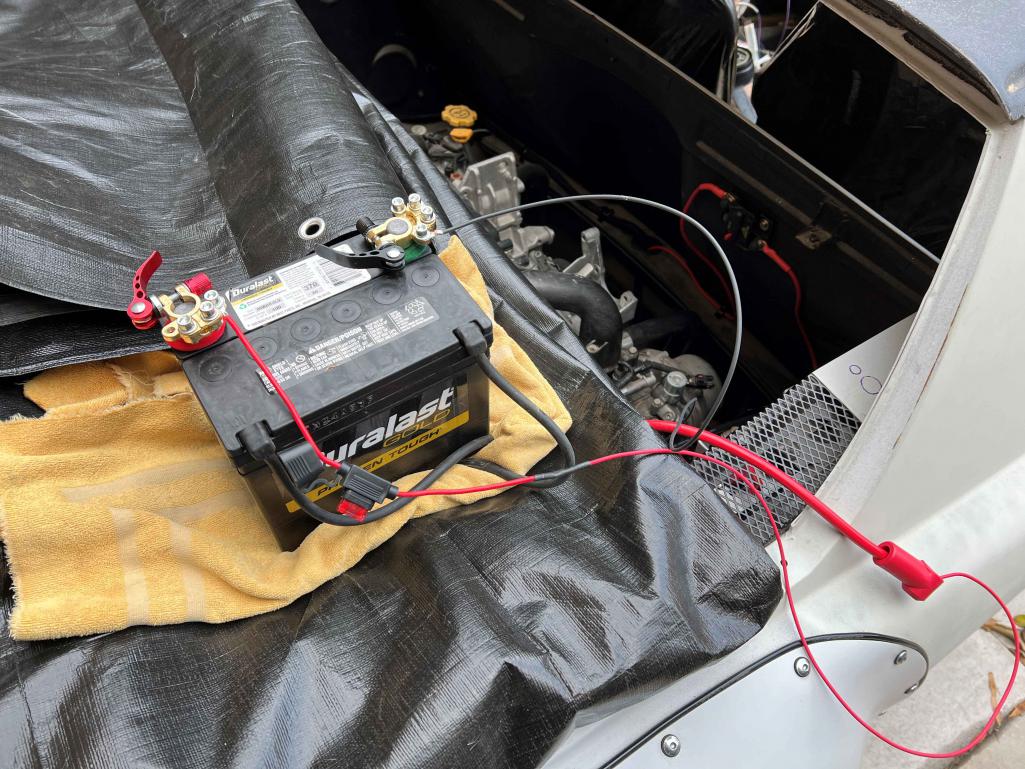
But, its enough so that I can use a small inline fuse for testing each circuit independently. I was also able to test the breaker feeding the fuse block, and my battery kill switch.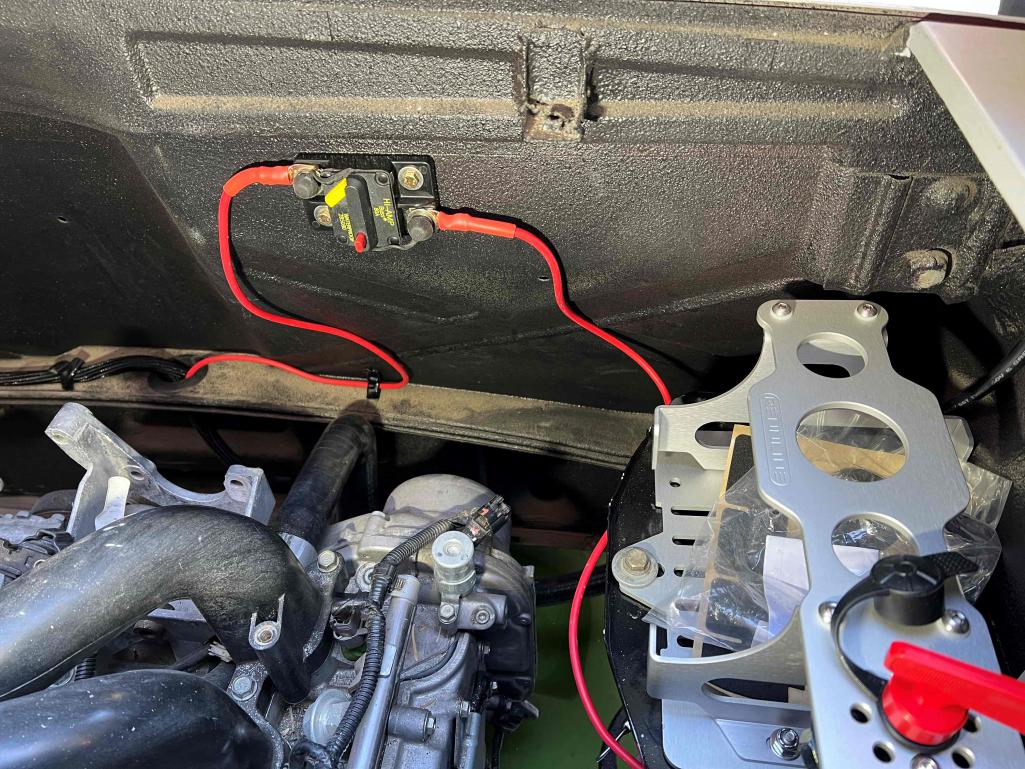
Now if I can just decipher the turn signal & wiper stalk connectors I'll be making some real progress!
Posted by: technicalninja Jan 7 2024, 09:24 PM
Very neat work!
First time I've seen printed heat shrink!
Just bad assed!
I'm not a subie guy but wow, you are kicking its ASS!
I'm going to have to read your whole thread now.
Really very nice!
Posted by: slowrodent Jan 8 2024, 02:32 PM
Always nice to see your updates Mike... I think your wiring methodology is spot-on..and your end result will be super clean. I'll try and adapt a few of your methods for sure..... Mine is a bit more chaotic. 
Posted by: mgarrison Jan 16 2024, 02:03 PM
Finally made a spot for the 2x3 welding fixture table my wife got me for Christmas - looks like a decent little table!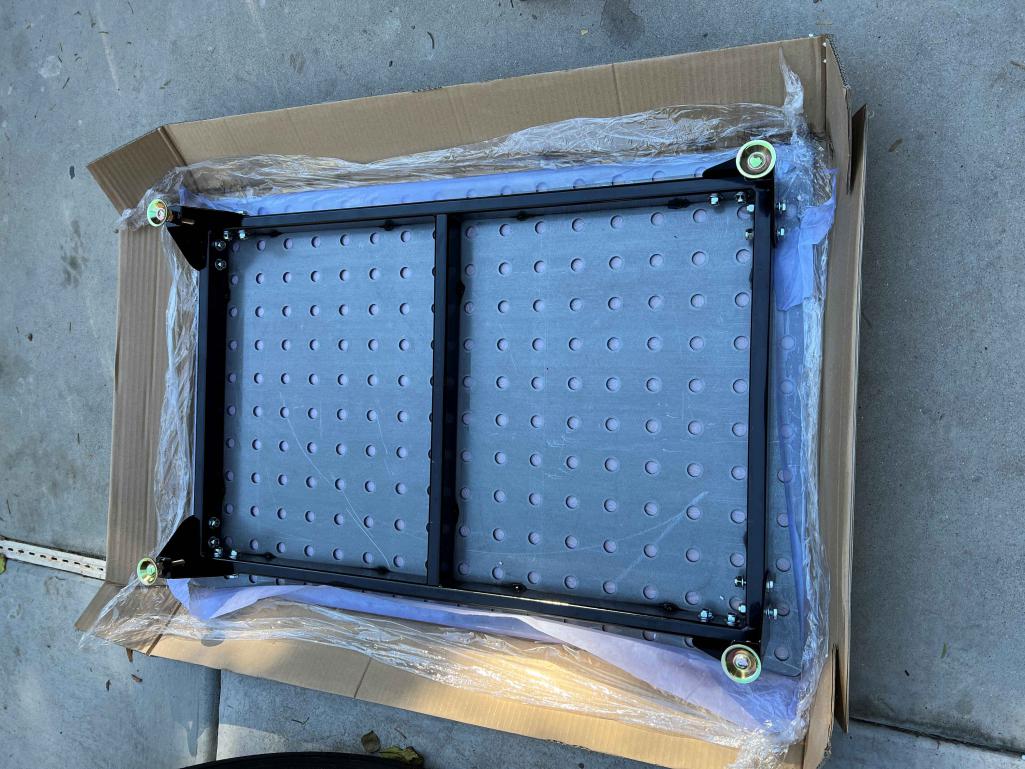
Snug as a bug in a rug!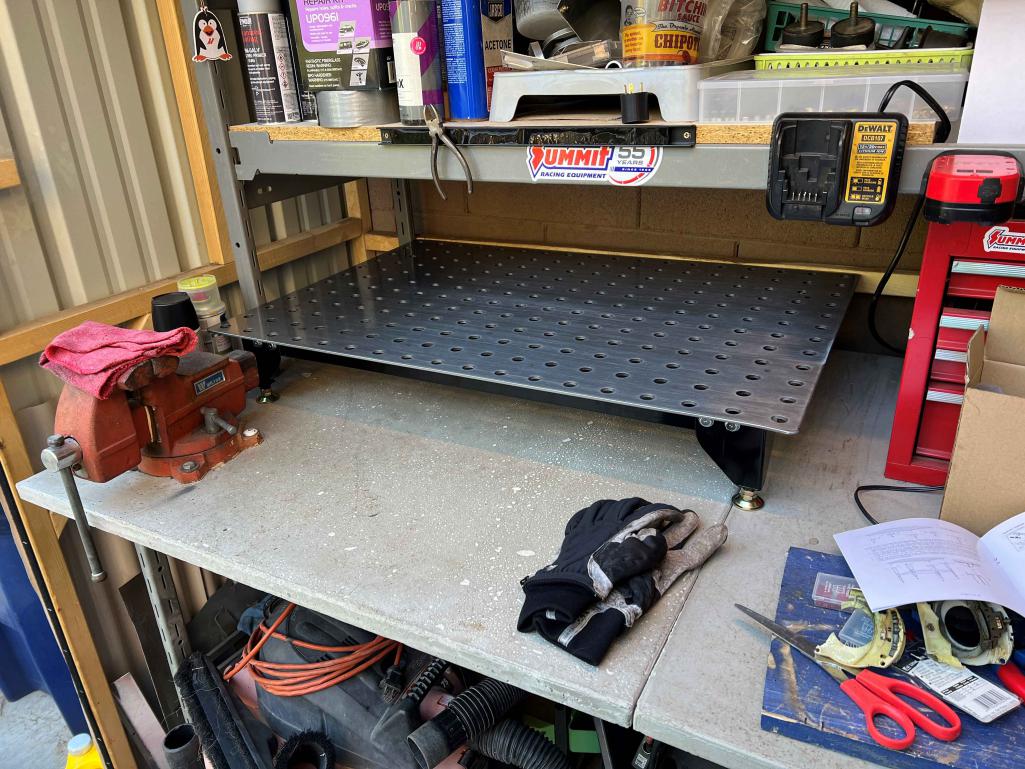
My hazard switch was not checking out with my multimeter. Turns out it must have popped open and lost it's contacts along the way! Ordered a new hazard switch from JBugs...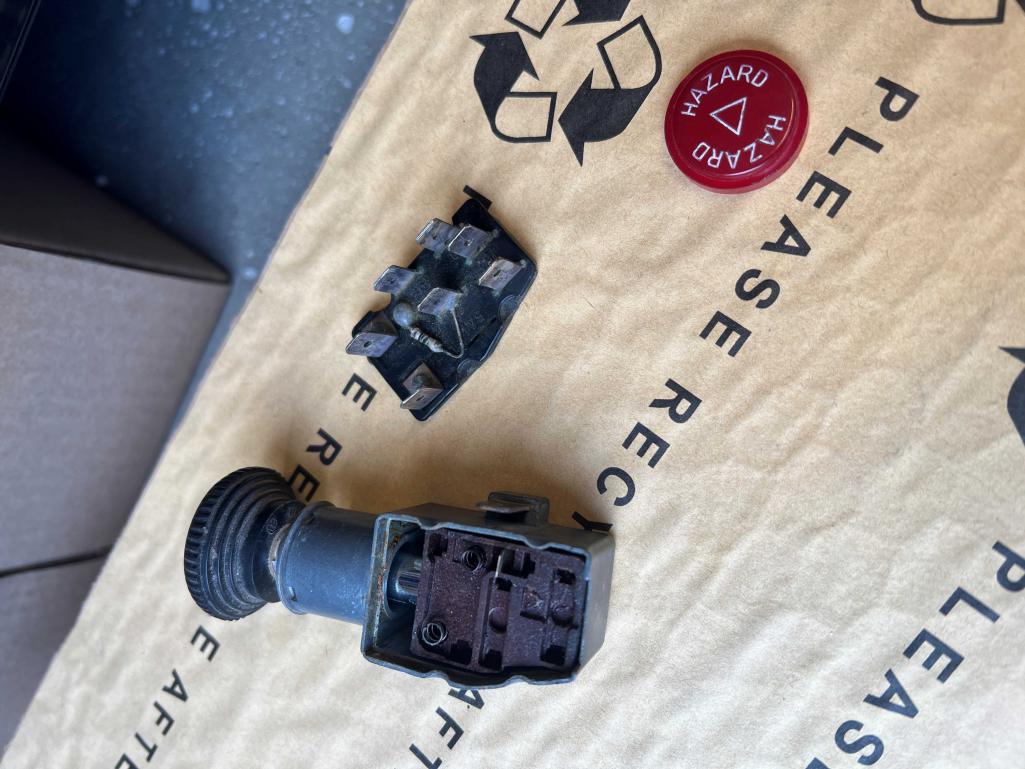
I did get my turn signals working, minus the hazard switch at the moment.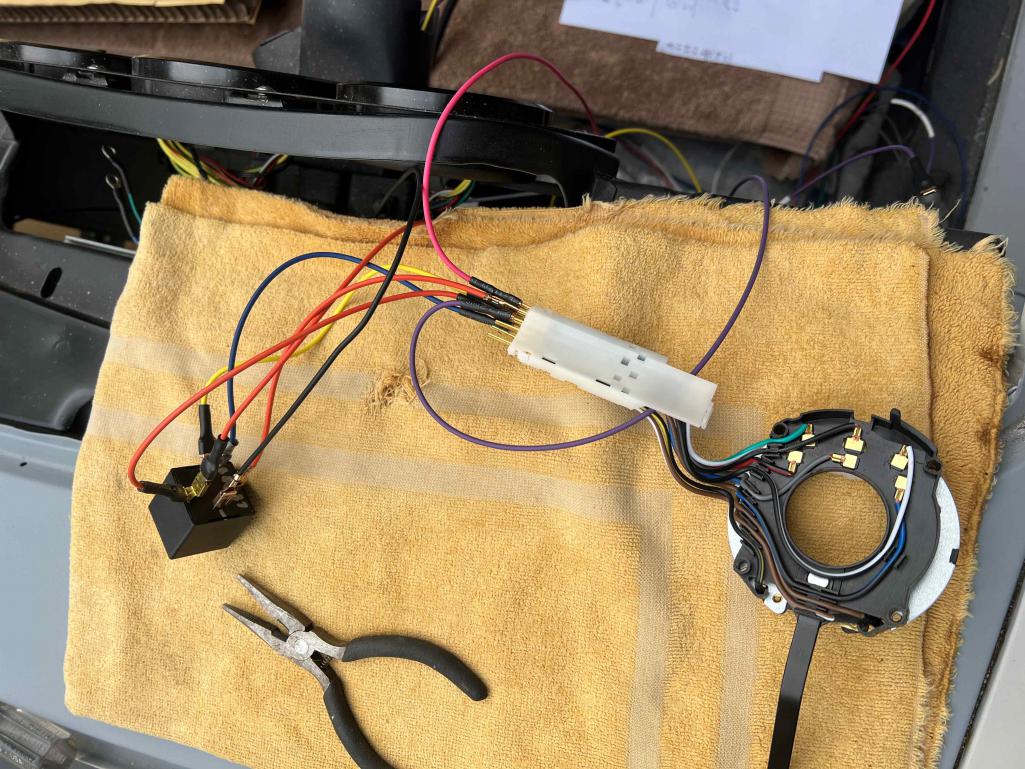
Once I've got it all working together (waiting on a relay to handle the momentary switch for the high/low beams), I'll feed it all through the column and dress the wires in properly.
Posted by: mgarrison Jan 22 2024, 02:53 PM
Received my JBugs hazard switch and got it wired in. Still waiting on the high/low beam relay, but it's been raining so not able to work on the '14 anyway
Here's the JBugs VW hazard switch compared to the original: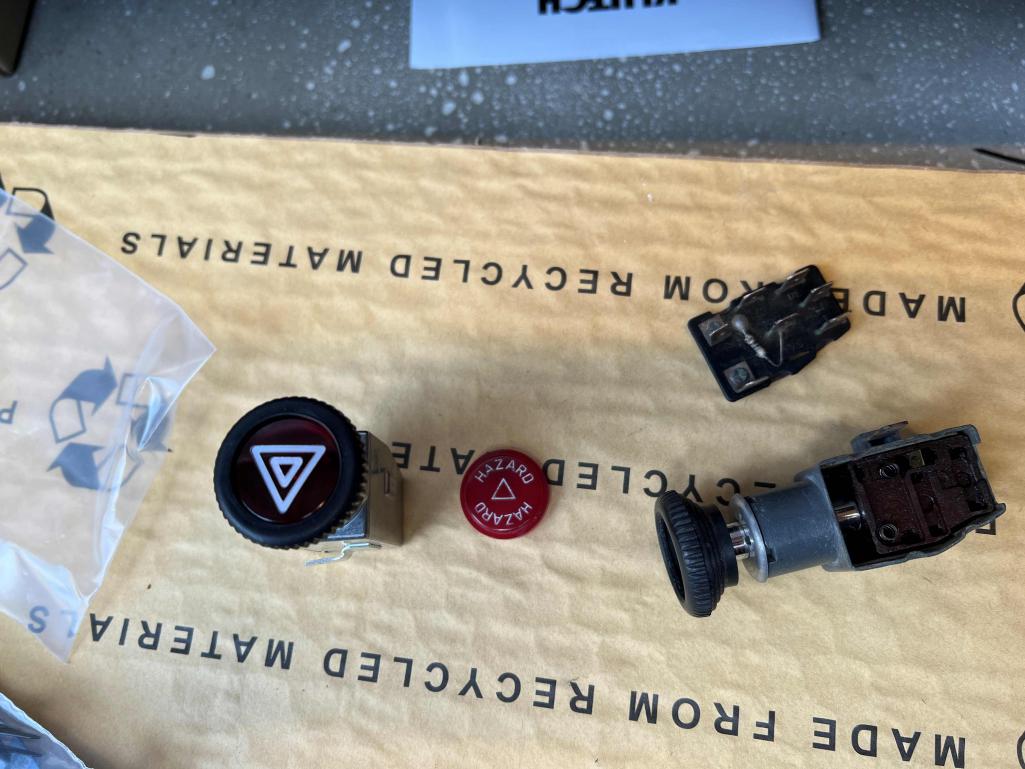
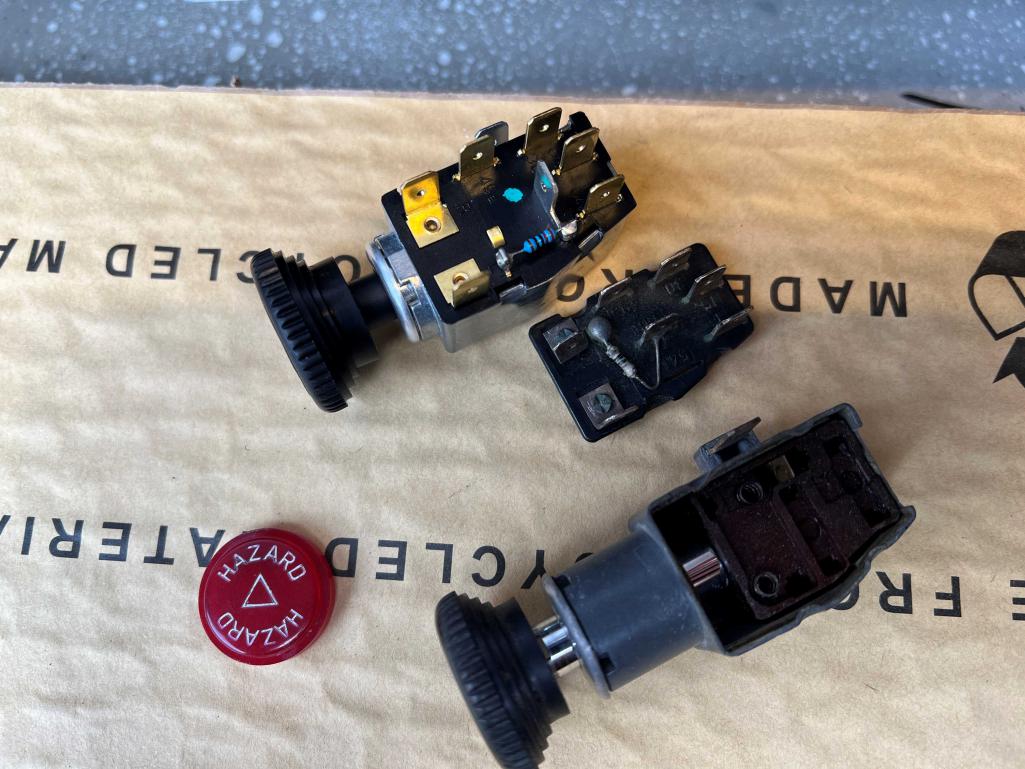
Seems rather simple if you wanted to swap the original switch cover/label onto the replacement switch.
Here's the wiring diagram they provide - seems to match up correctly with the original:
Posted by: TorontoDave Feb 1 2024, 09:06 AM
Did you put those 5-bolt hubs on the spindles from your original 4cyl struts, or did you change the struts to 911 ones? If you used the 4cyl struts exactly what hubs did you use and did you need to use different size bearings to mate up with the spindle? I didn't think 911 front hubs mated properly with the 4cyl 914 spindle. Thanks.
Powered by Invision Power Board (http://www.invisionboard.com)
© Invision Power Services (http://www.invisionpower.com)