Printable Version of Topic
Click here to view this topic in its original format
914World.com _ 914World Garage _ Irish Green '71 "Resto"
Posted by: jaredmcginness Mar 9 2020, 12:23 PM
Hey guys,
I figured I would make a build here. I am very active on the facebook group and have received some great feedback and help from the guys over there. I will try and remeber to update this as I complete some work.
I'm in my late 20's and have wanted a 914 for a long while now. I've been through 11 or 12 VW's water and aircooled - Rabbits, Caddys, Beetle, etc... so it's natural progression I suppose.
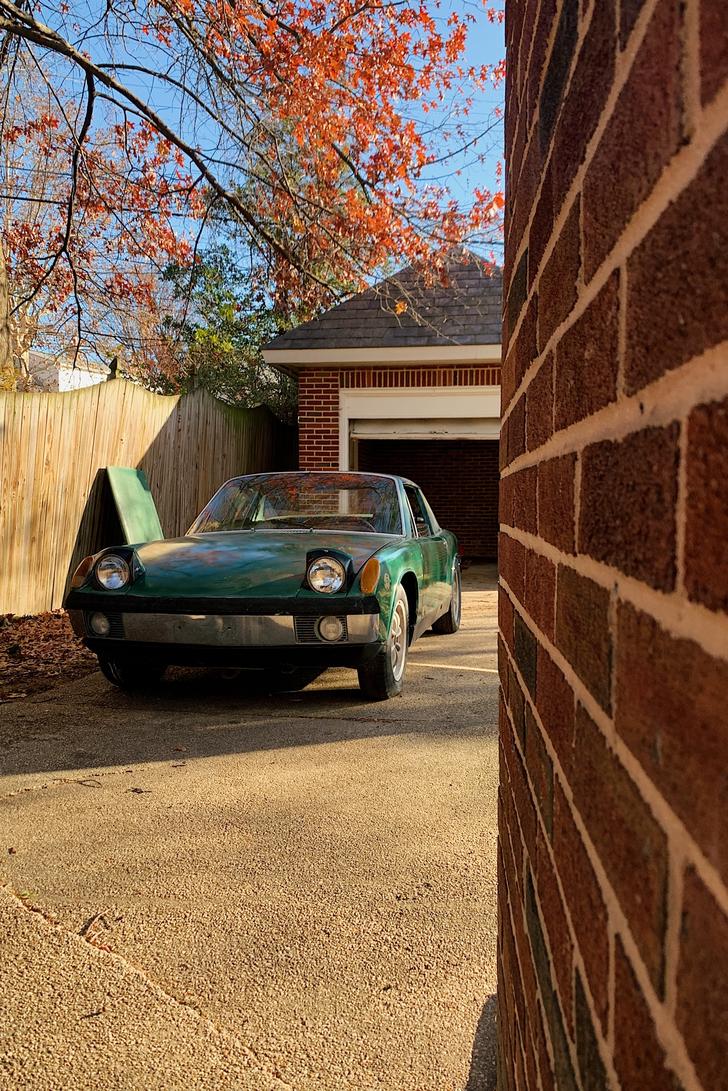
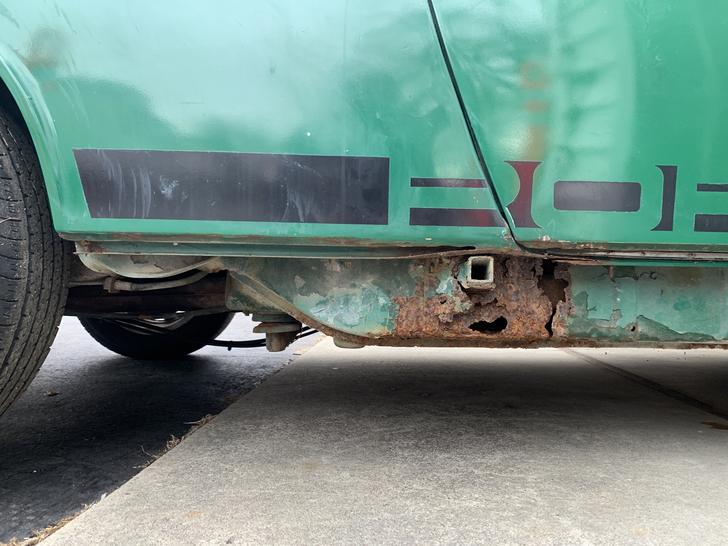
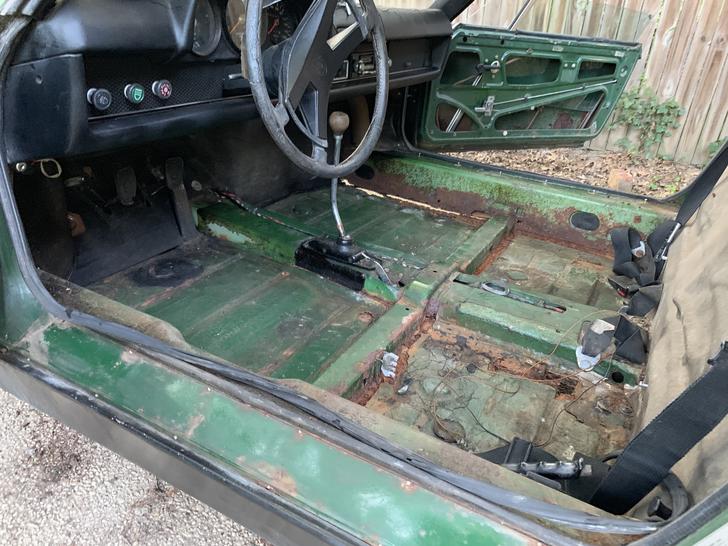
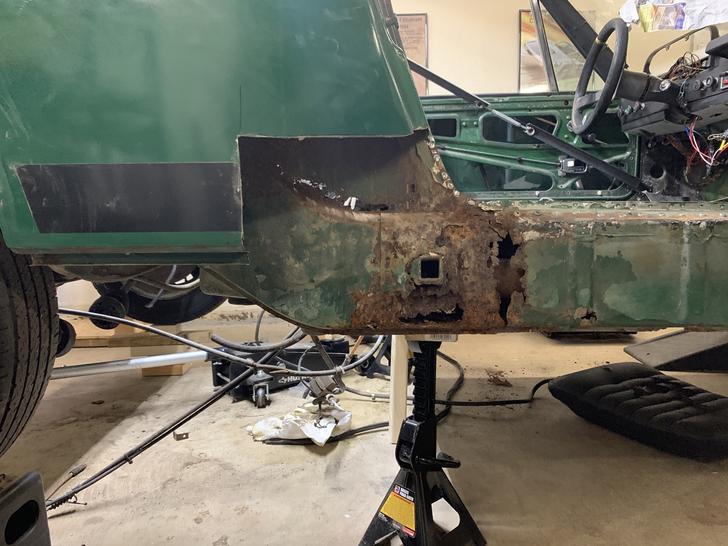
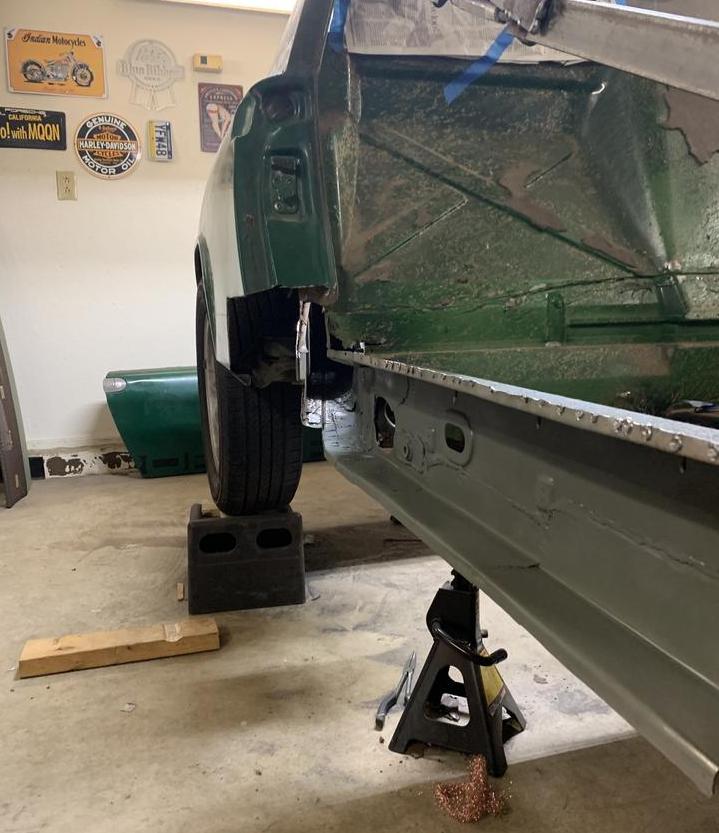
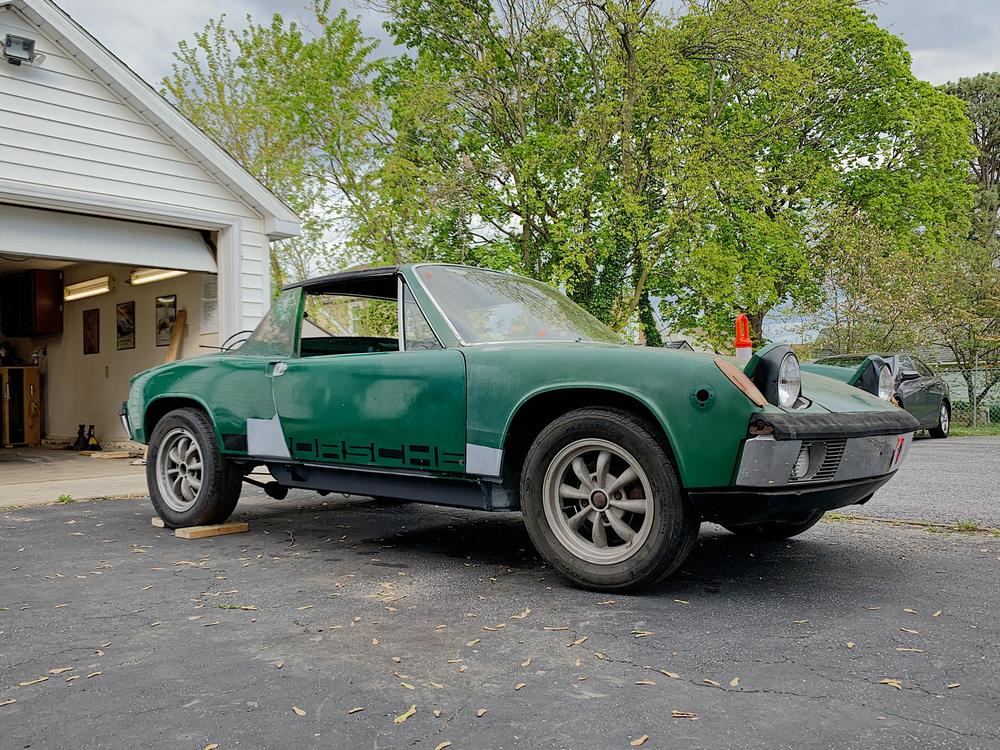
I found this car in Louisville and towed it home last summer. A friend looked at it for me. Gave me the OK, said there was minor rust, but a solid project. I paid for the car, and drove out that weekend. Upon arrival I found there to be a pretty severe case of rust...
I stored the car the rest of the year - bit the bullet and decided to go to town on the structural repairs.
It is the color and the car I want. I work in fabrication by trade, so I am not too scared to take on this project.
I will not be driving the car until I feel it’s solid.
I am cutting some corners - depending on how you look at it. This is a budget build. But I will be using as many replacement parts (AA and RD) as I can. Without removing too much of the car. 
Car:
12/70 vin. Added to database.
Off the road since 1998.
1.7 gunky motor.
Toasty interior.
70k miles shown, iirc. So probably 170k
Came with late style black adjustable seats.
Plan:
Fix structural rust so I can drive the car ASAP
I’d like to keep original paint (too late)
Fix as much rust as I can. (Hell hole, shelf, passenger long, floors)
Drop in replacement motor
Run new brake and fuel lines
5lug swap.
2.0 down the road?
So what's been accomplished? As of July/2020
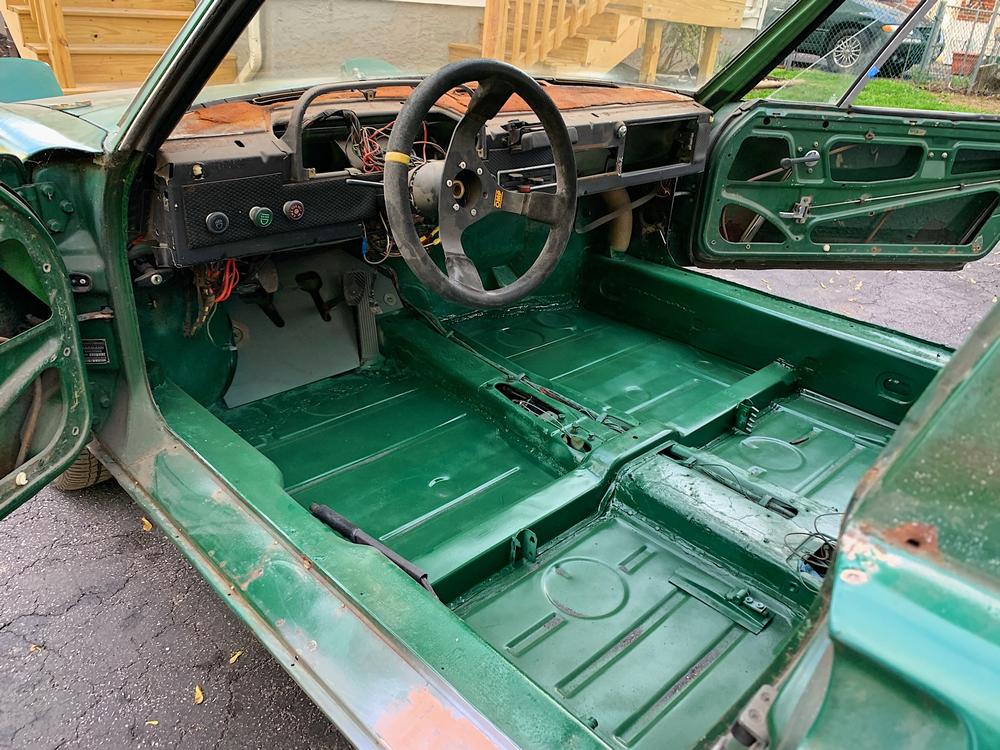
Structural rust fully repaired.
Top end of 1911cc is done, bottom end in the works.
5 Lug swap
Replaced all interior components.
Tail and window rust, outer body rust
Side markers deleted.
924 Retractable seat belts.
Drank sh*tload of beer.
Spent a good deal of cash.
tons of other little things. So much stuff!
This will be a cars and coffee cruiser, not a concour restoration (sorry!)
I just want to drive MY 914!
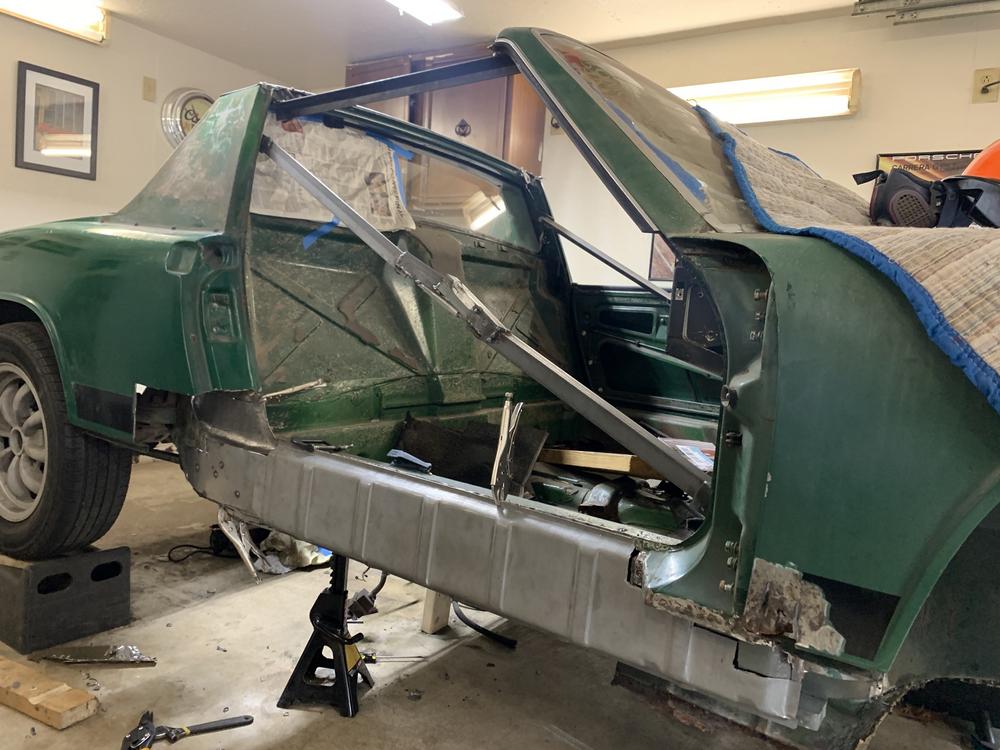
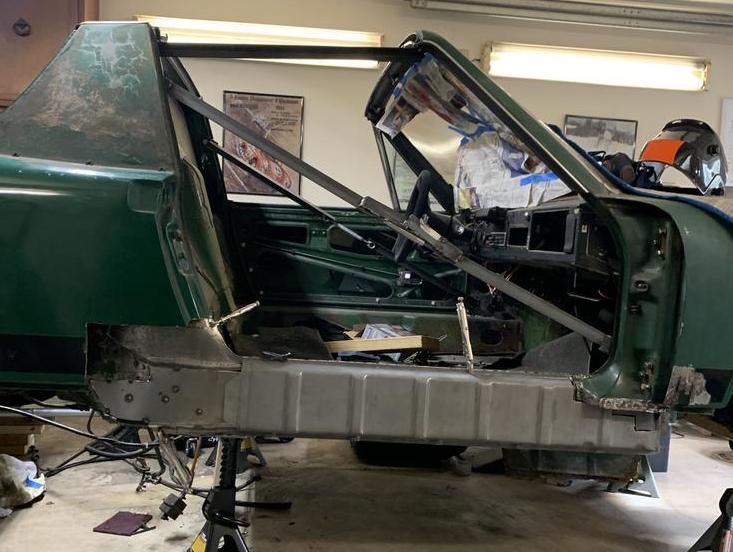
The car as I found it: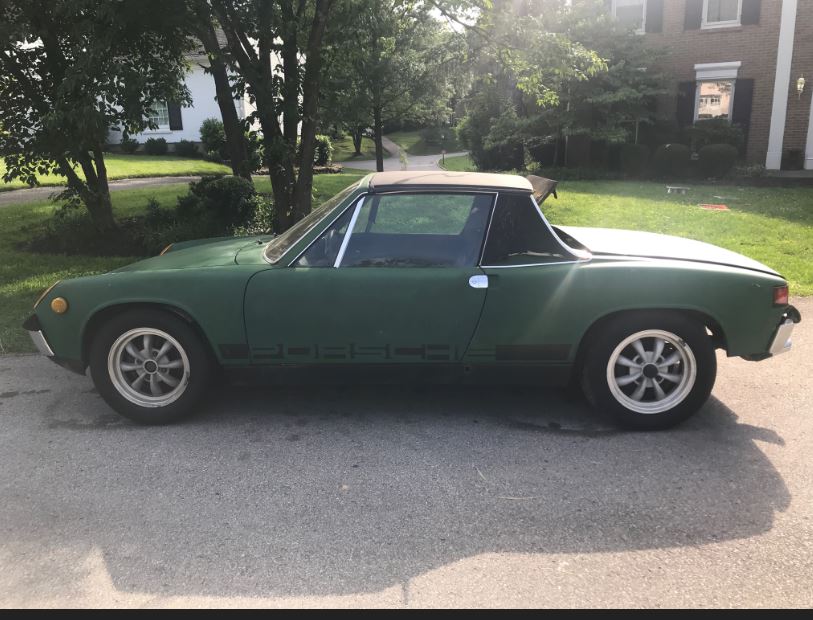

Quick Buff:

Posted by: AZBanks Mar 9 2020, 12:37 PM
 Looking forward to seeing the progress on your project.
Posted by: billh1963 Mar 9 2020, 12:37 PM

Hey guys,
I figured i would make a build here. I am very active on the facebook group and have received some great feedback and help from the guys over there. I will try and remeber to update this as I complete some work.
I'm in my late 20's and have wanted a 914 for a long while now. I've been through 11 or 12 VW's water and aircooled Rabbits, Caddys, Beetle, etc... so it's natural progression I suppose.
I found this car in Louisville and towed it home last summer. A friend looked at it for me. Gave me the OK, said there was minor rust, but a solid project. I paid for the car, and drove out that weekend. Upon arrival I found there to be a pretty severe case of rust...
I stored the car the rest of the year - bit the bullet and decided to go to down. It is the color and the car I want. I work in fabrication by trade, so I am not too scared to take on this project.
The car as I found it:
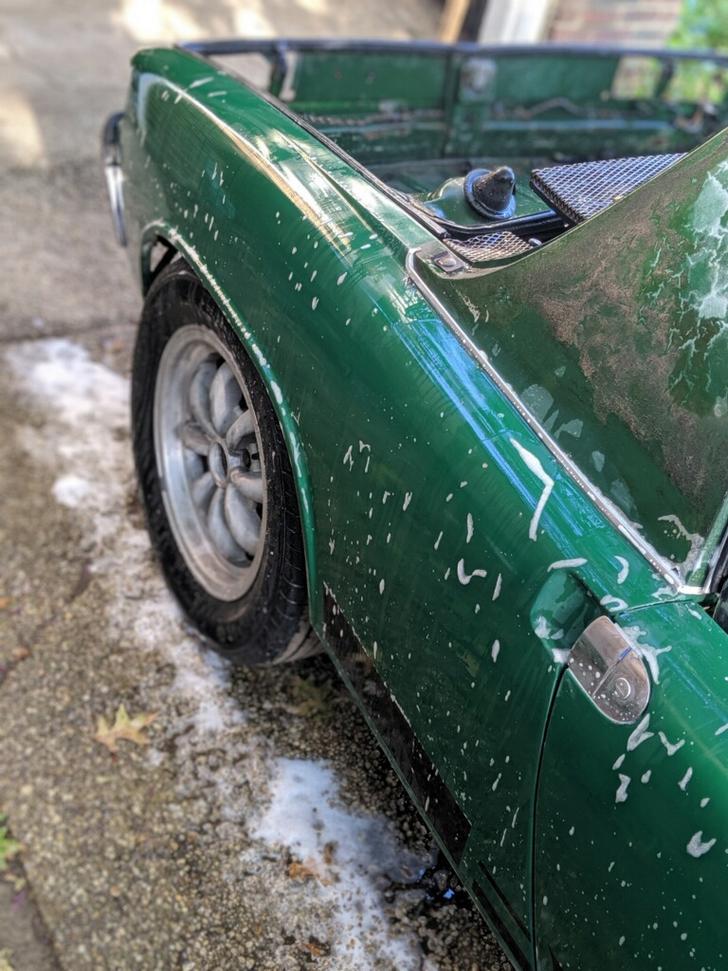
Pretty car. Now, let's see the ugly pictures!

Posted by: jaredmcginness Mar 9 2020, 12:50 PM
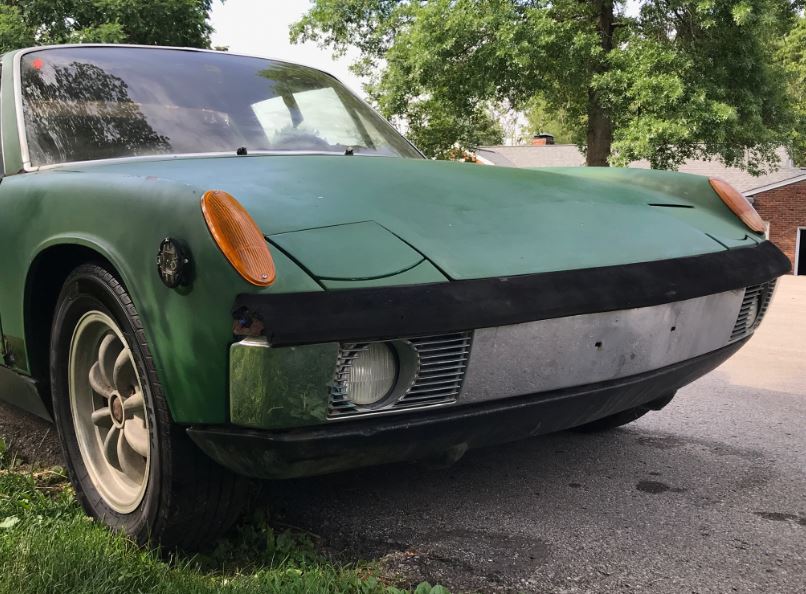
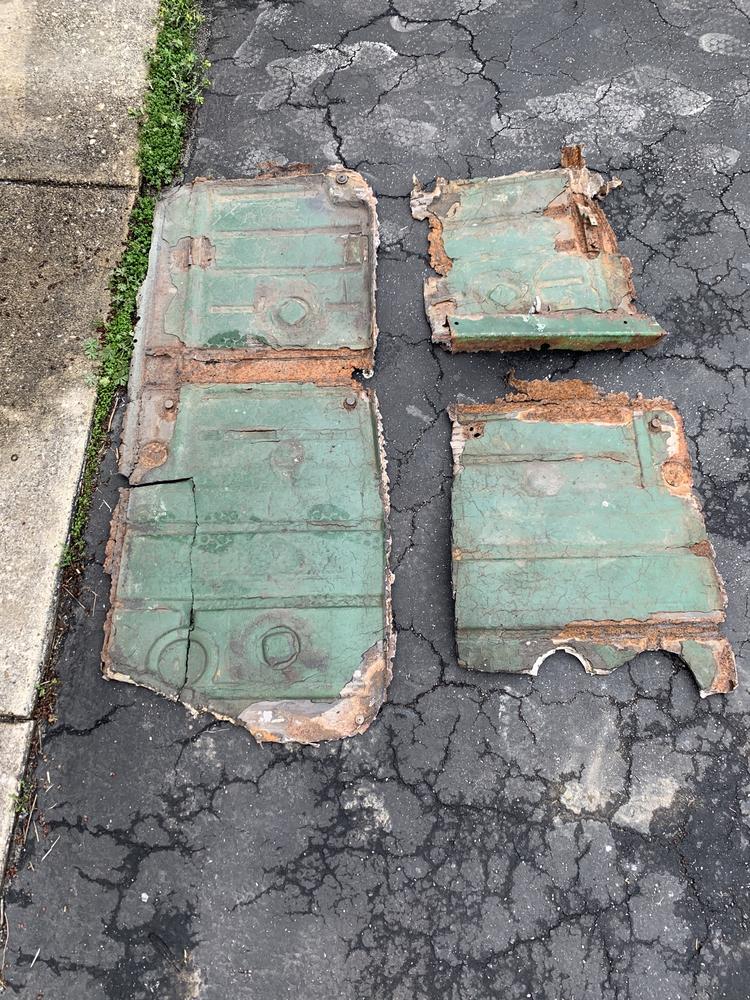
As requested, as for the ugly... 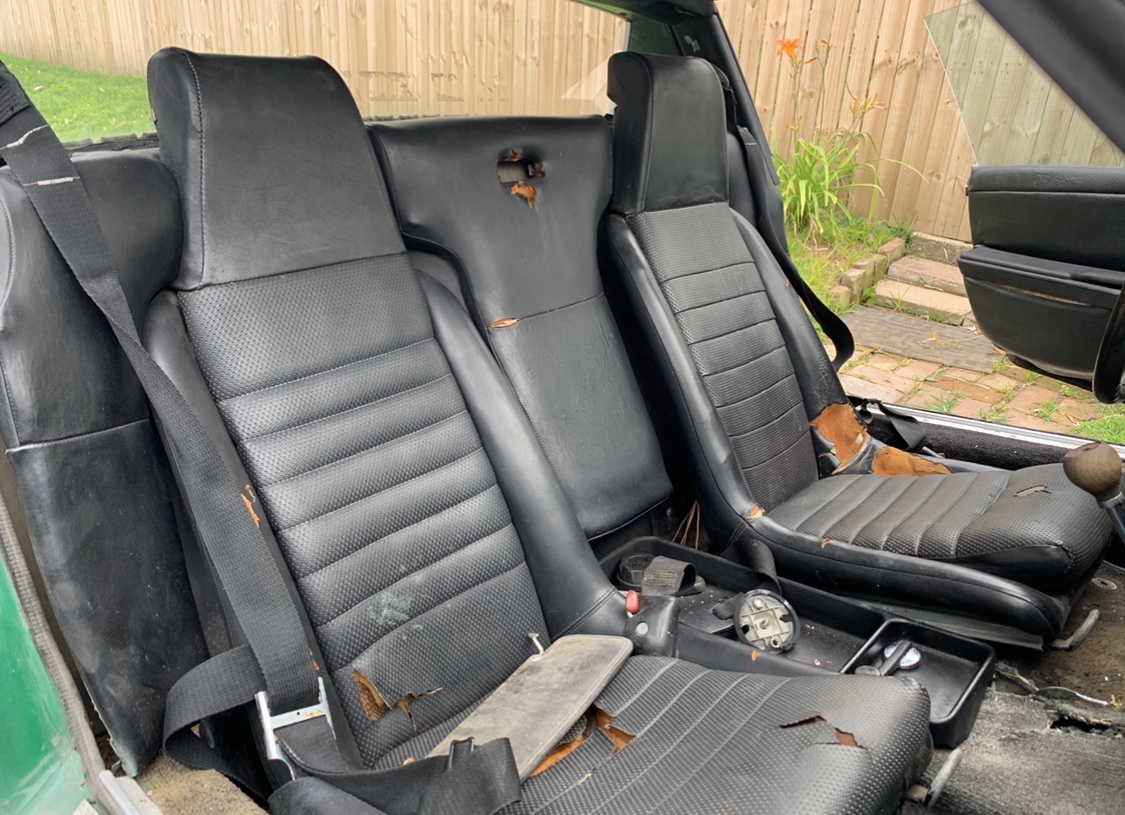

Posted by: TargaToy Mar 9 2020, 12:53 PM
Welcome to the World!!!
As you know, there's a wealth of information here. That's a rusty car but many have started with worse. You've got a leg up, being able to fab. Can't wait to see progress pics!
Posted by: jaredmcginness Mar 9 2020, 12:56 PM
My dad and I picked up a running 1.7 for next to nothing. Will get me on the road faster..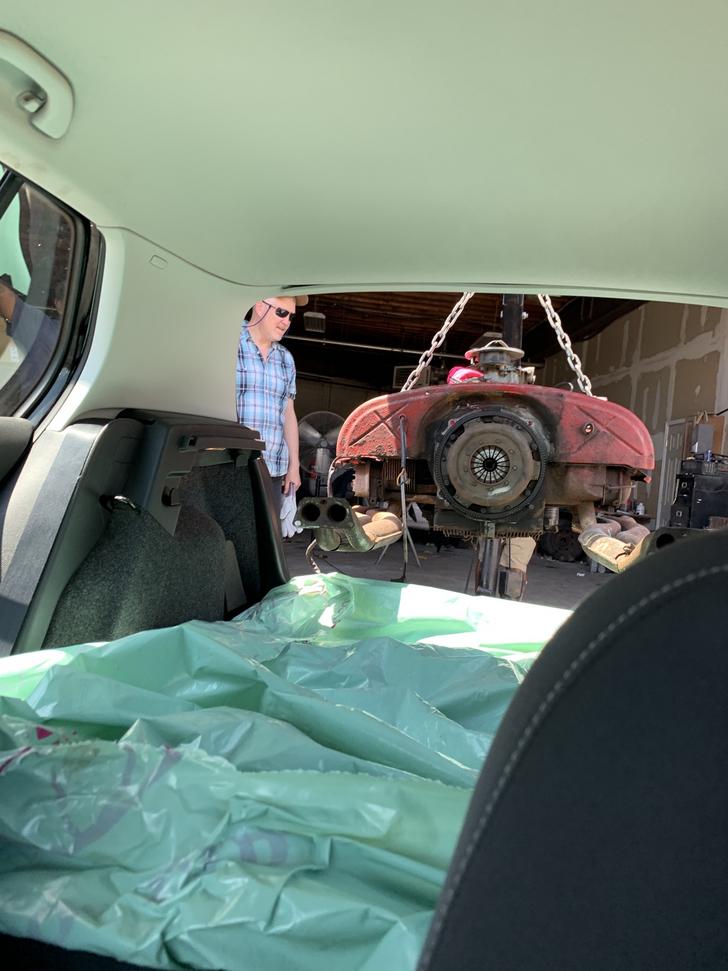
Pulled the old motor: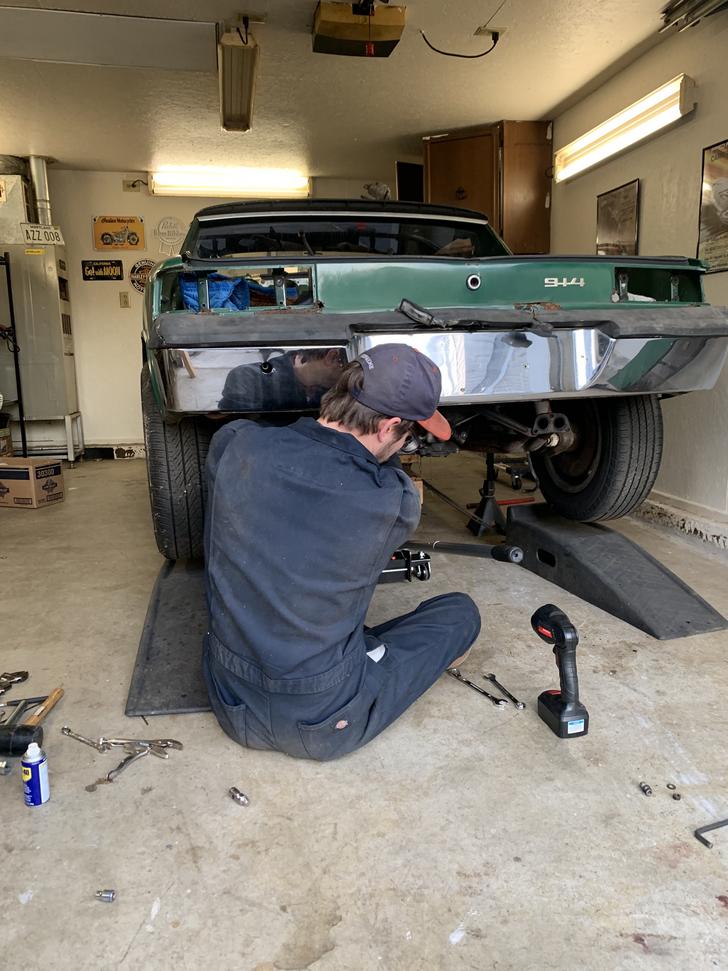
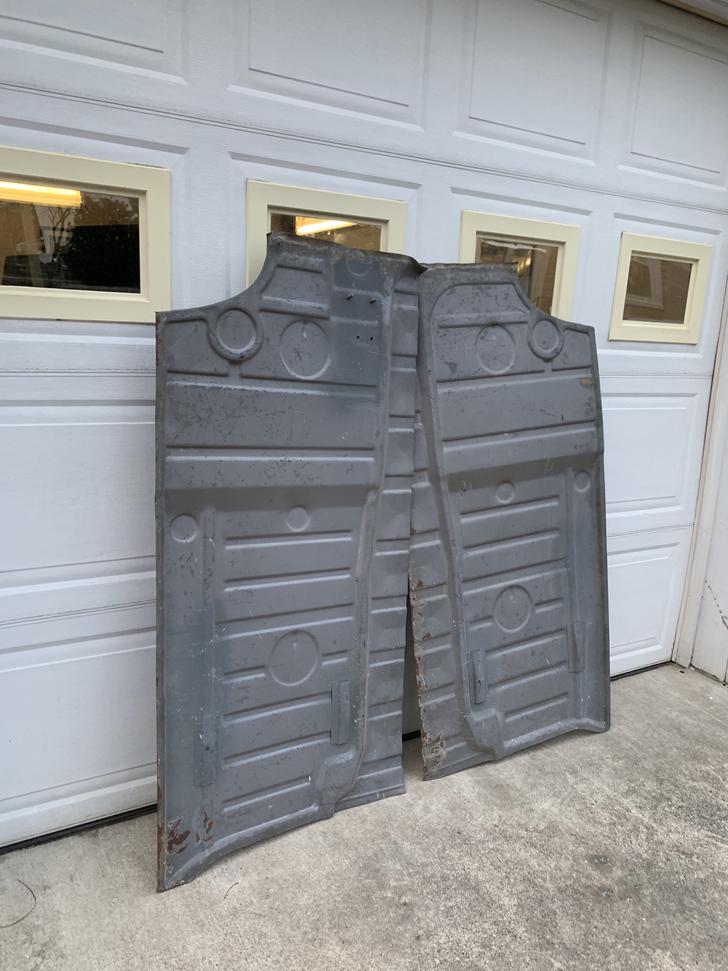
Got a steal on some new floors - $200 for the pair original parts: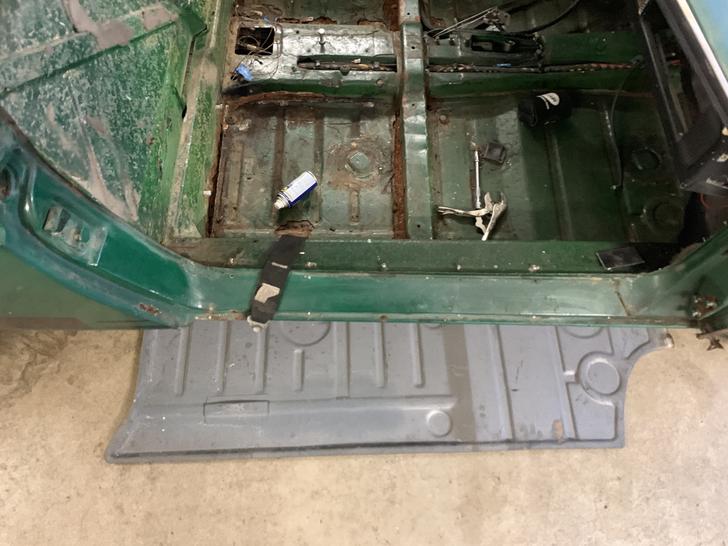
More metal: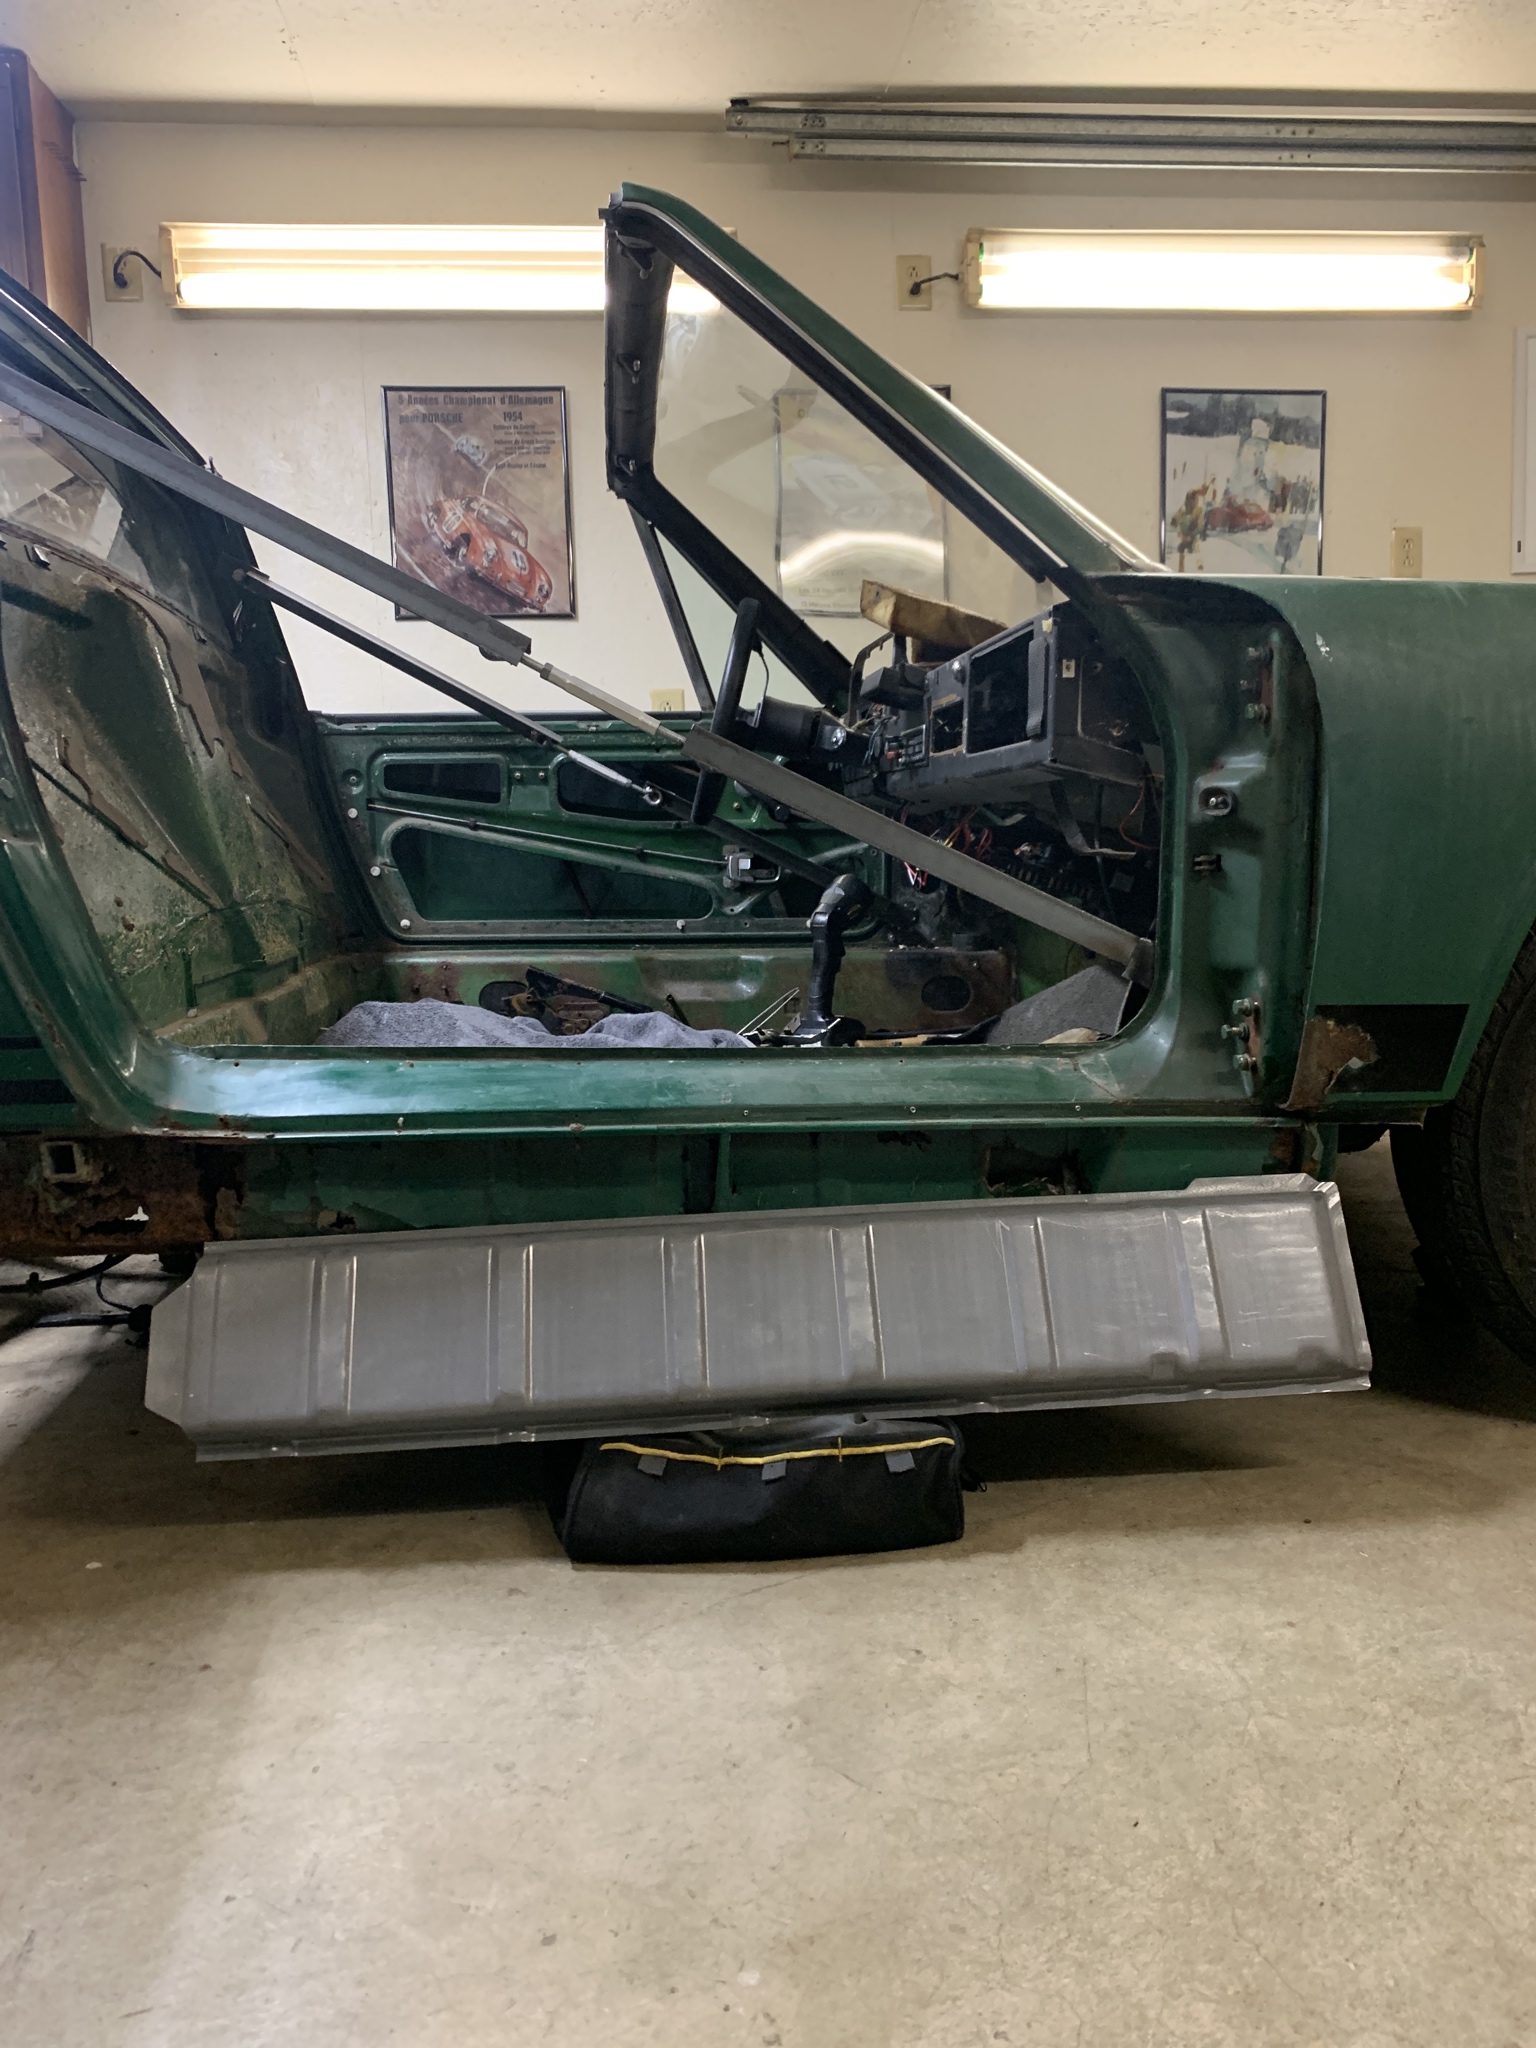
Fabbed up a quick fix to the trunk pull (it wasn't attached and rusted through)
Posted by: Cairo94507 Mar 9 2020, 01:20 PM
Great color and a good project.
Before you put that motor in you may want to check all of the suspension mounting points and the hell hole (area below the factor battery location). Repairs are easier to handle with no engine/transaxle installed.
Of course you may as well replace the fuel lines in the tunnel if they are still plastic and upgrade to the stainless steel from Tangerine Racing or others. Pull the fuel tank and have that boiled out and perhaps coated and replace the remaining rubber fuel lines. Clean all of the body grounds on the car. Then rebuild the brakes calipers, replace the flexible lines and flush the entire system. That should keep you bust for a bit.
These cars are a blast to drive but we always want to make sure the car itself is safe to dive as they are now 50 years old.
Good luck, 
Michael
Posted by: jaredmcginness Mar 9 2020, 01:24 PM
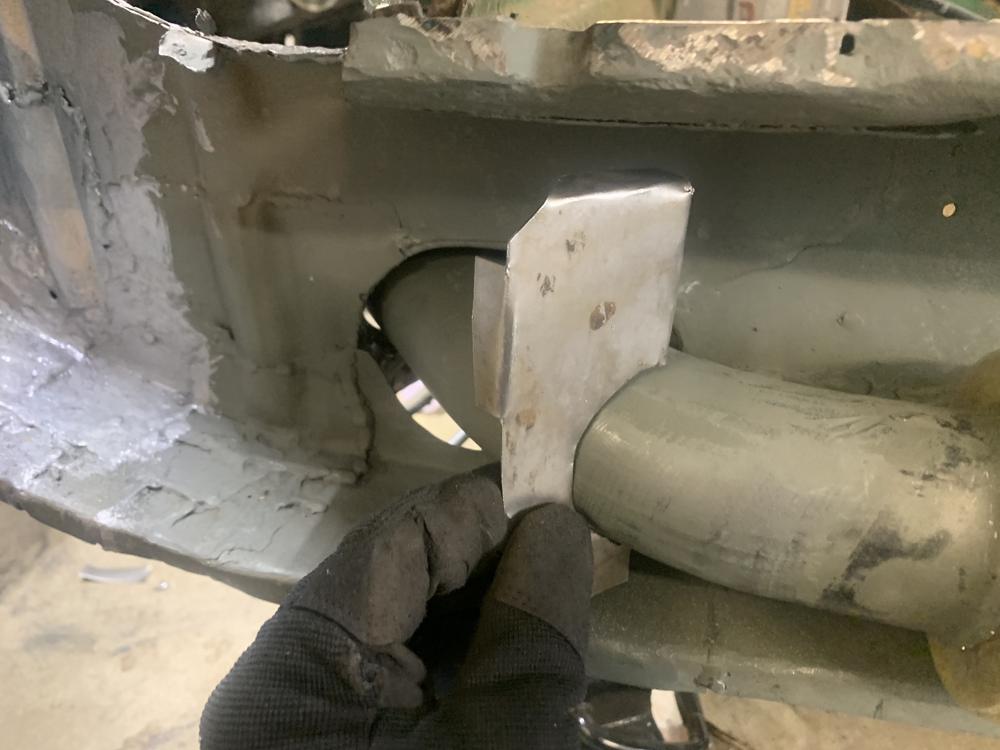
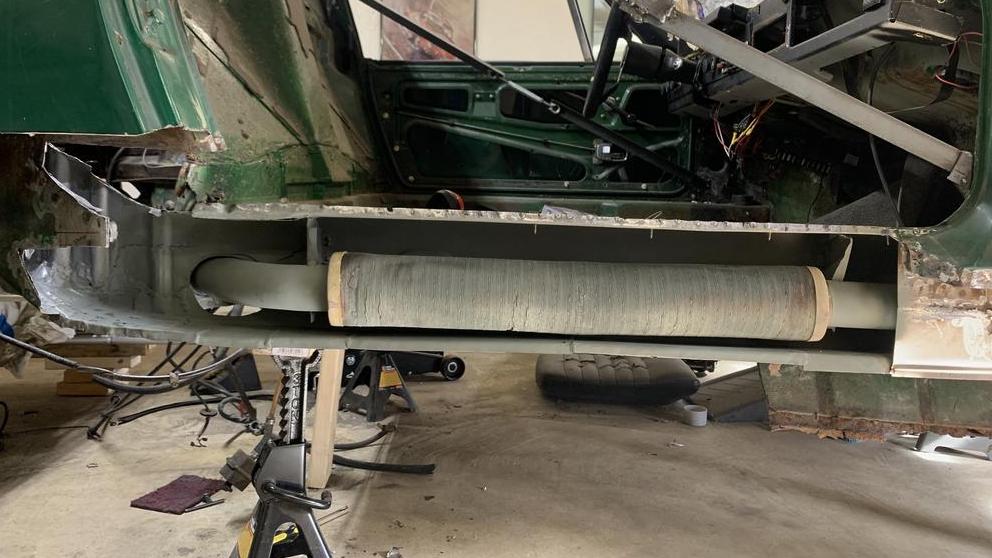
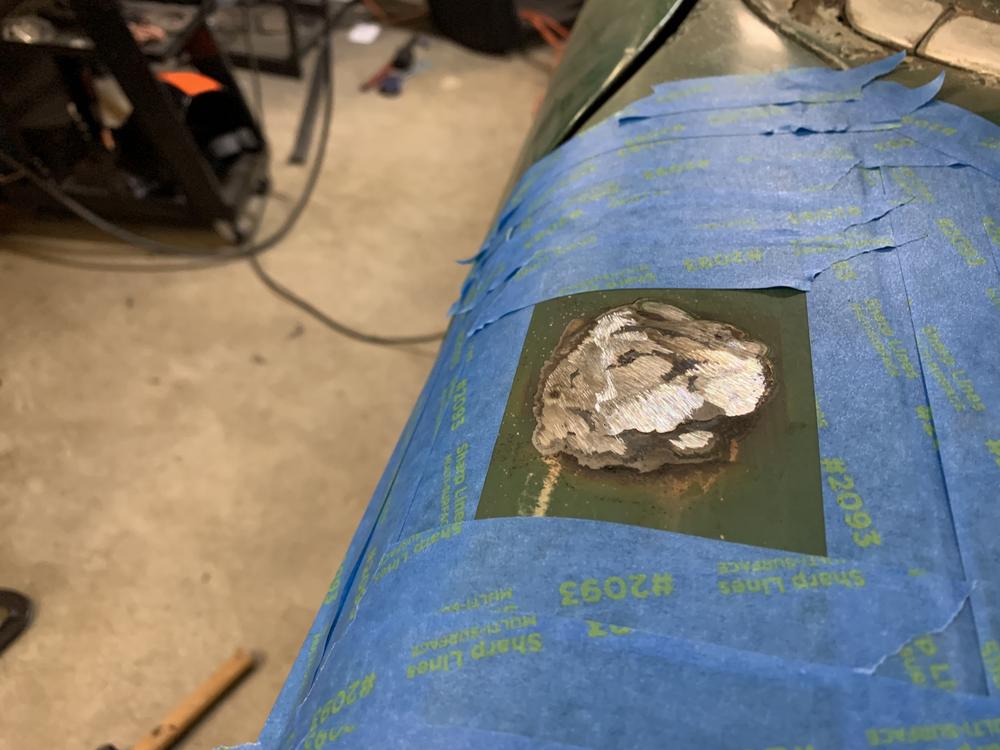
Sandblasted the J pipe: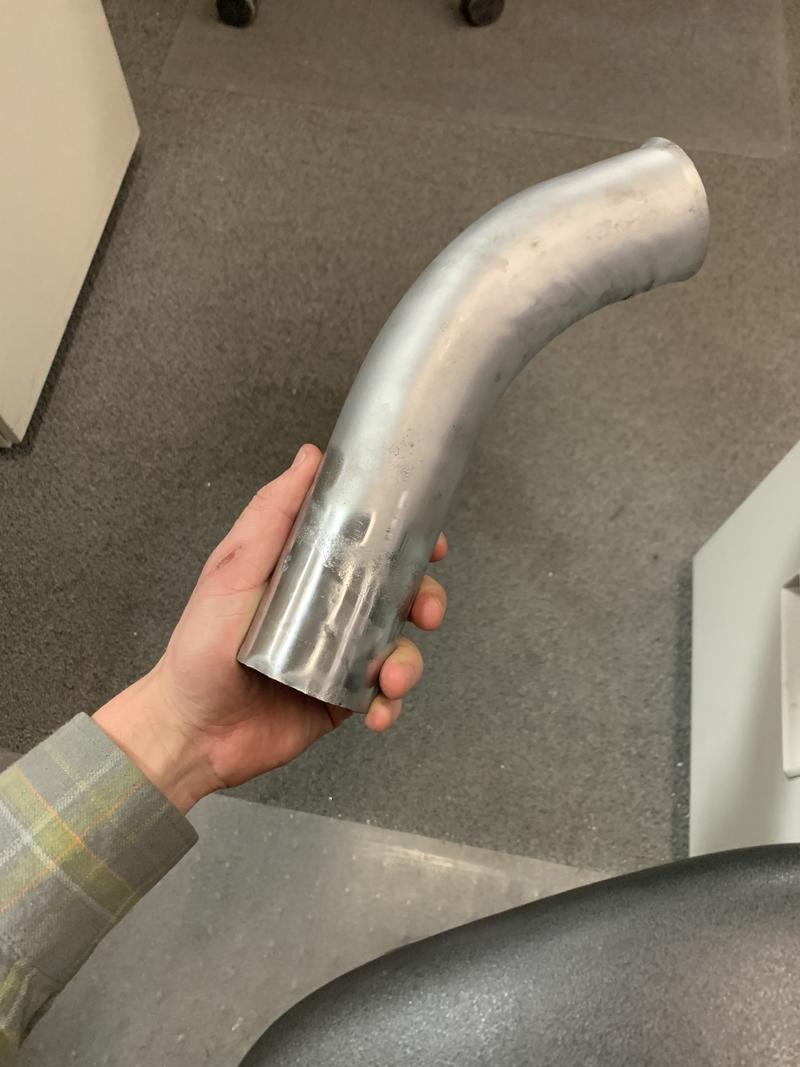
Made some seatbelt bungs on the lathe at work: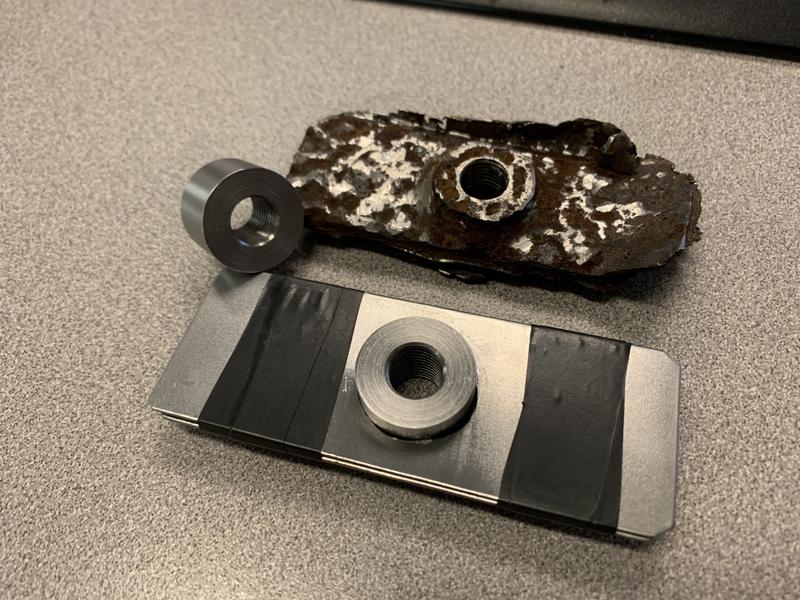
Got the inner long in good order. I used silver POR15 in the inner wheel house: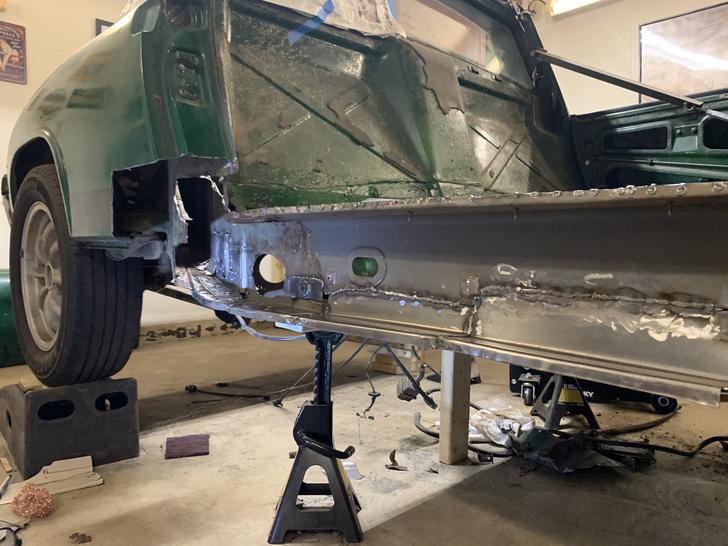
Posted by: JOEPROPER Mar 9 2020, 01:40 PM
Looks like a lot of work 
 Glad you have some some help.
Looking forward to the progress! ![popcorn[1].gif](style_emoticons/default/popcorn[1].gif)
Posted by: mbseto Mar 9 2020, 01:48 PM
Welcome! Good start, will be watching with interest.
Posted by: jaredmcginness Mar 9 2020, 02:43 PM
Great color and a good project. Before you put that motor in you may want to check all of the suspension mounting points and the hell hole (area below the factor battery location). Repairs are easier to handle with no engine/transaxle installed.
Of course you may as well replace the fuel lines in the tunnel if they are still plastic and upgrade to the stainless steel from Tangerine Racing or others. Pull the fuel tank and have that boiled out and perhaps coated and replace the remaining rubber fuel lines. Clean all of the body grounds on the car. Then rebuild the brakes calipers, replace the flexible lines and flush the entire system. That should keep you bust for a bit.
These cars are a blast to drive but we always want to make sure the car itself is safe to dive as they are now 50 years old.
Good luck,
Michael
Thanks for the good tips. I would say I am well versed in the lingo and parts of these cars - I’ve been lurking you guys for 5+ years. I will be running all new fuel lines, fixing the hell hole, 5 lug swap (new brakes) etc.
Posted by: buck toenges Mar 9 2020, 03:53 PM
Rolling Rock and Irish green. Good Choice!
Posted by: jaredmcginness Mar 11 2020, 06:53 AM
Hey guys,
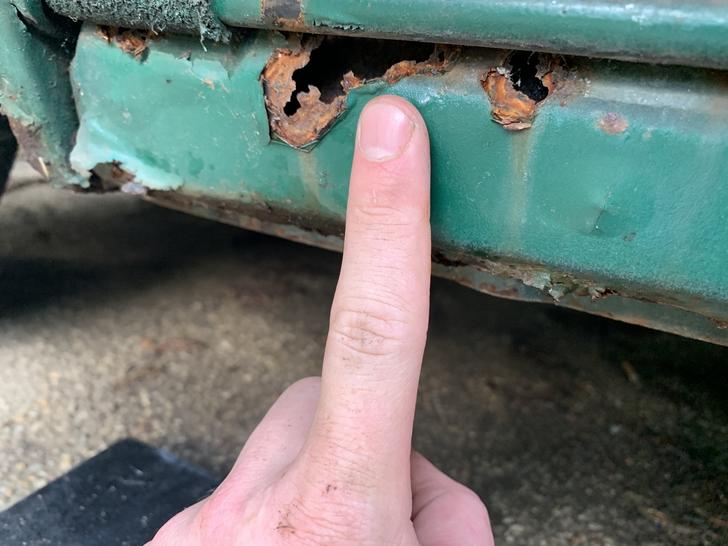
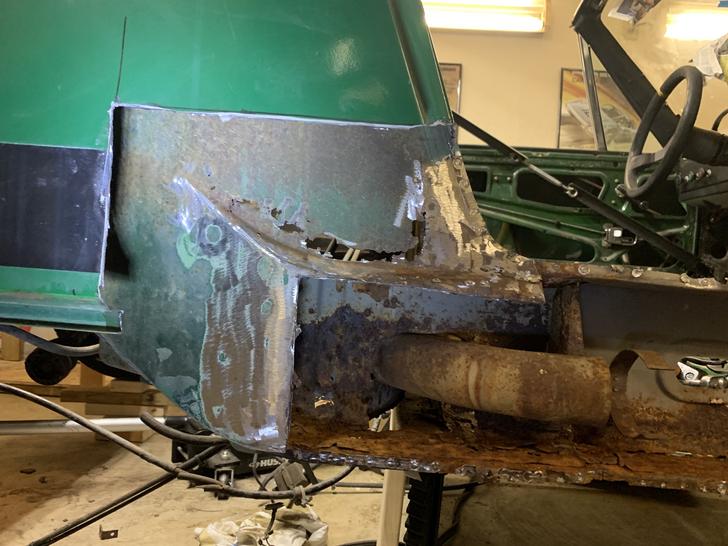
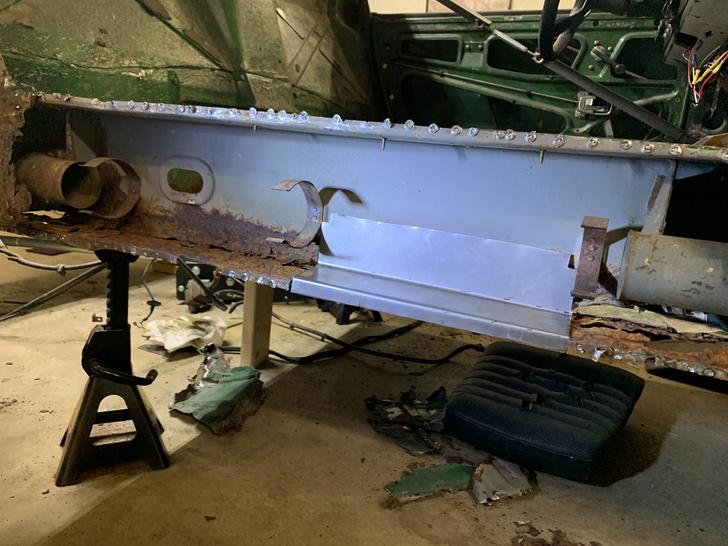
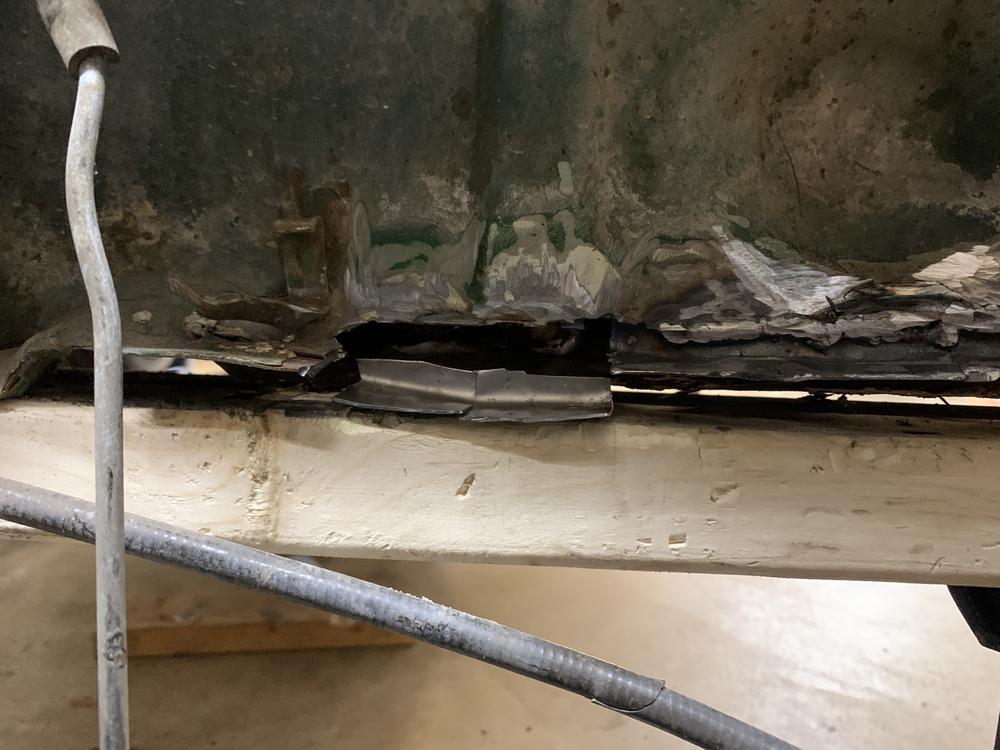
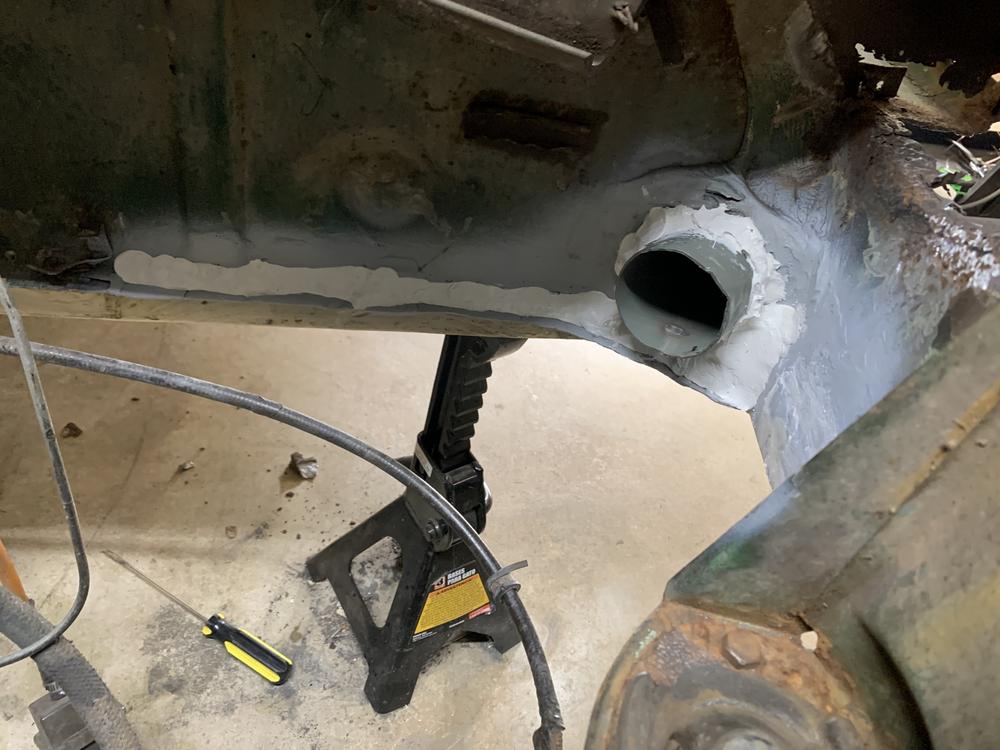
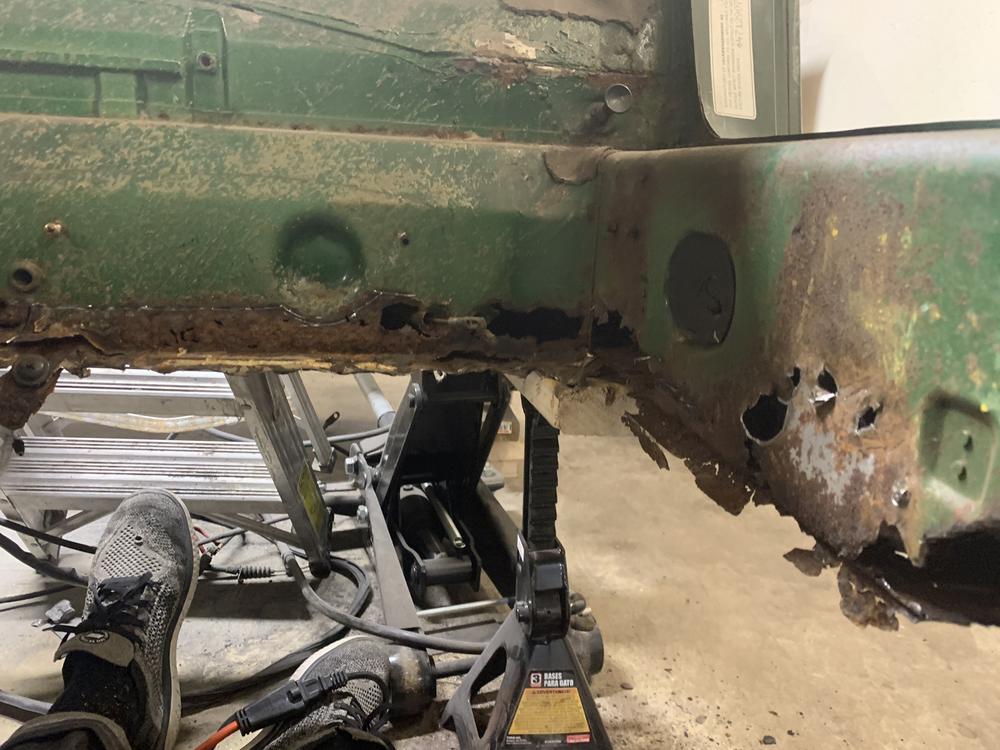
Another little update. Trying to tackle the front section of the long, before the door. Tricky little spot. Soft area in the wheel well. I ground this away to reveal a nice 3" hole.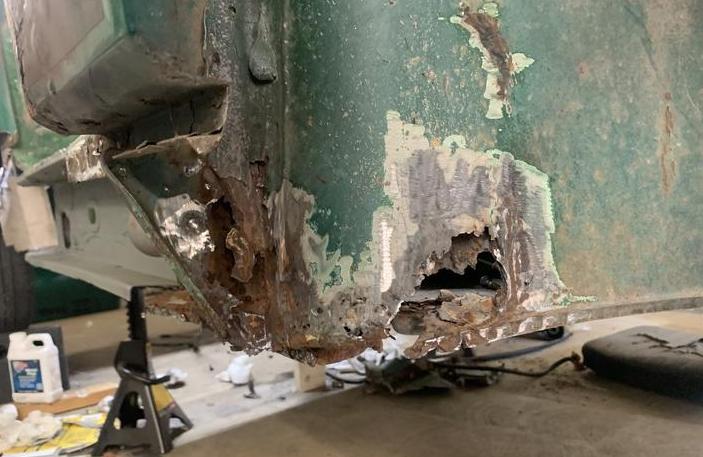
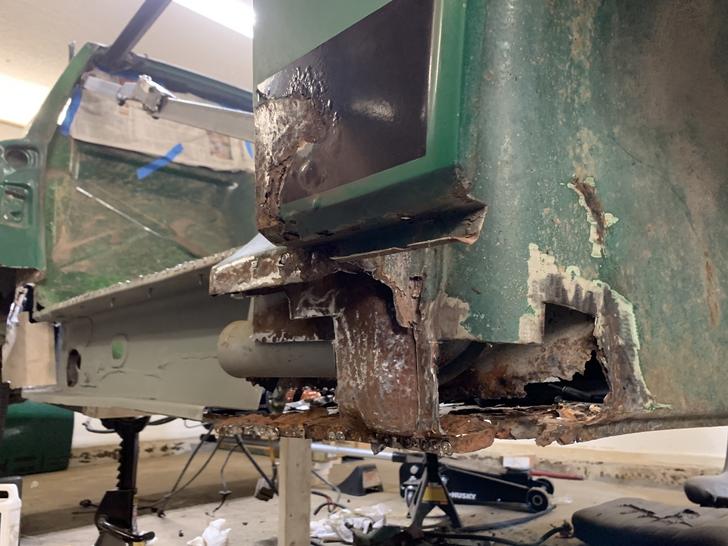
Making a template with a Coors Banquet box. Good for more than a cool buzz.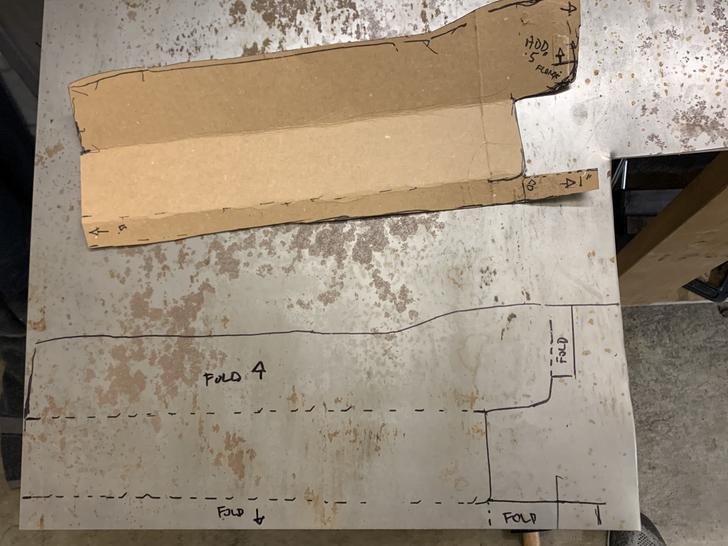
Cut and bent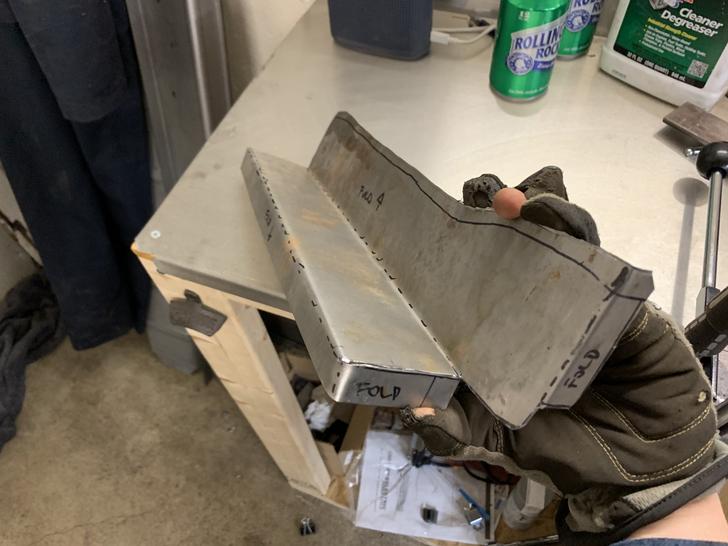
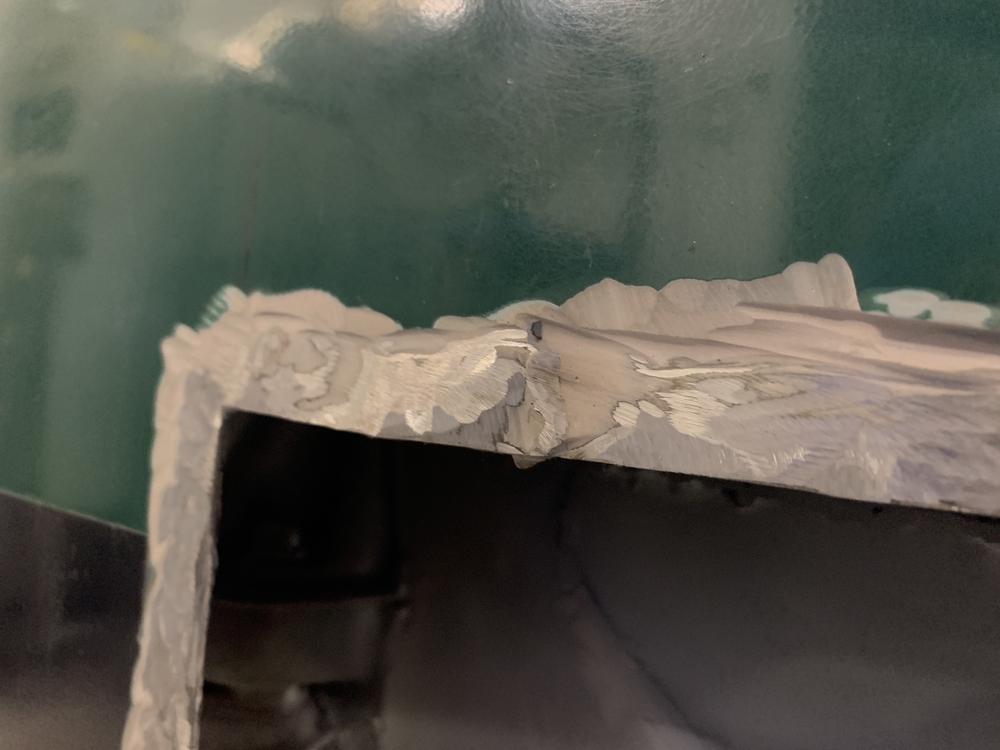
Welded and smoothed with a shot of primer.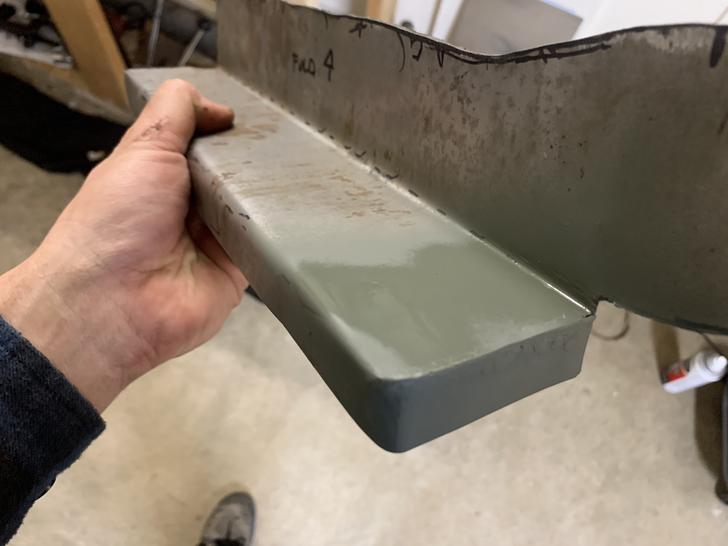
Reasonable fit, will need some tweaking and 20 more minutes of grinding welds.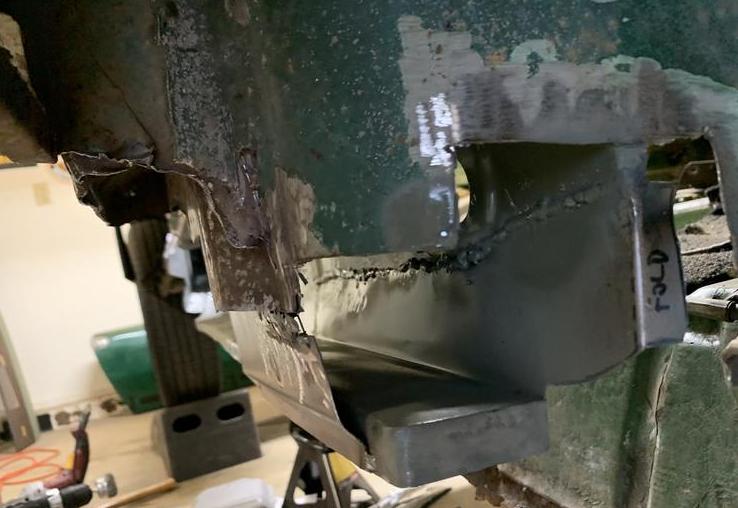
Looking down the long. I think I can do a little better than that, so I will make some adjustments to get it a little closer along these red sketches...
I wish I had the AMADA brakes I use at work to bend these parts.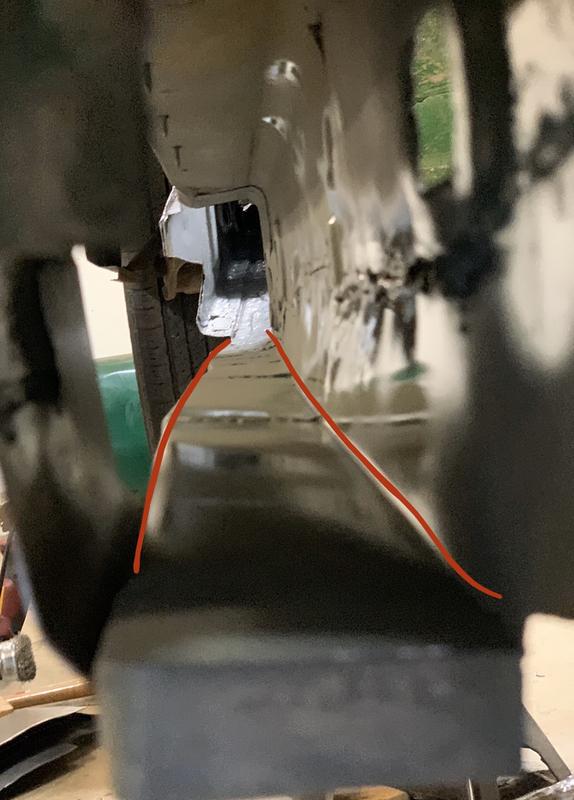
Posted by: jaredmcginness Mar 11 2020, 07:16 AM
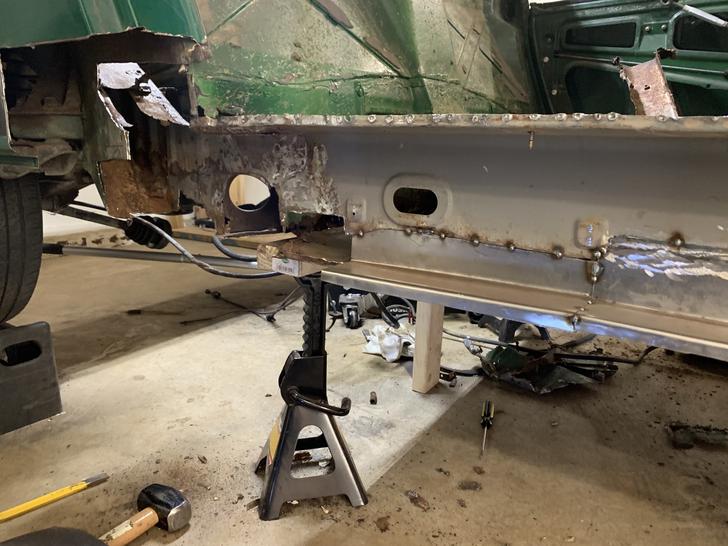
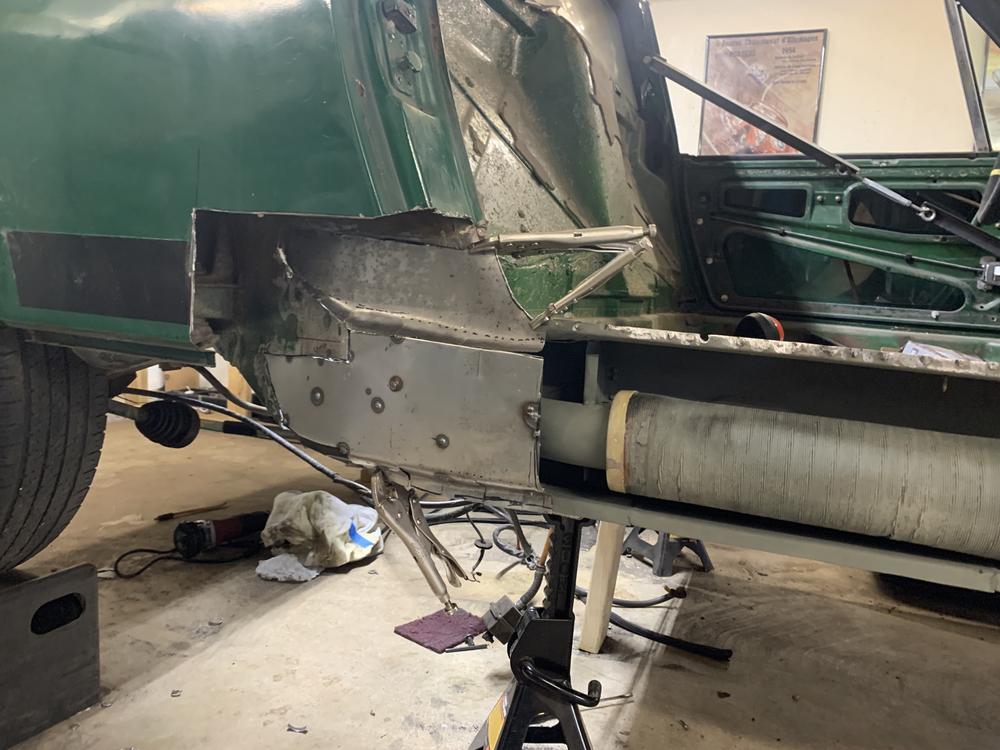
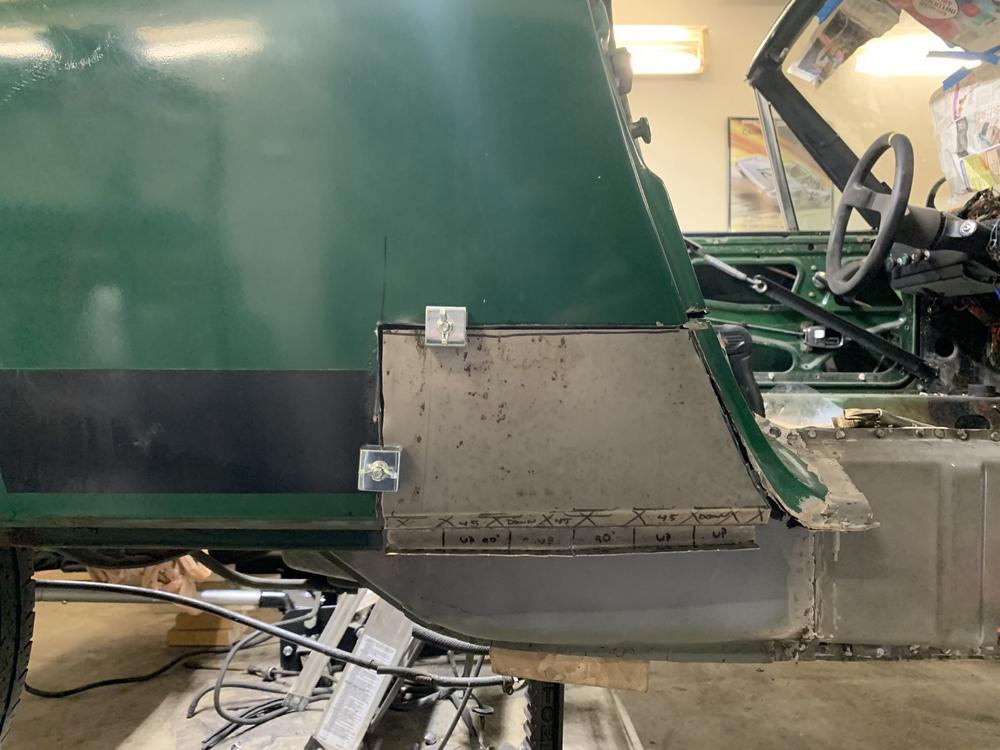
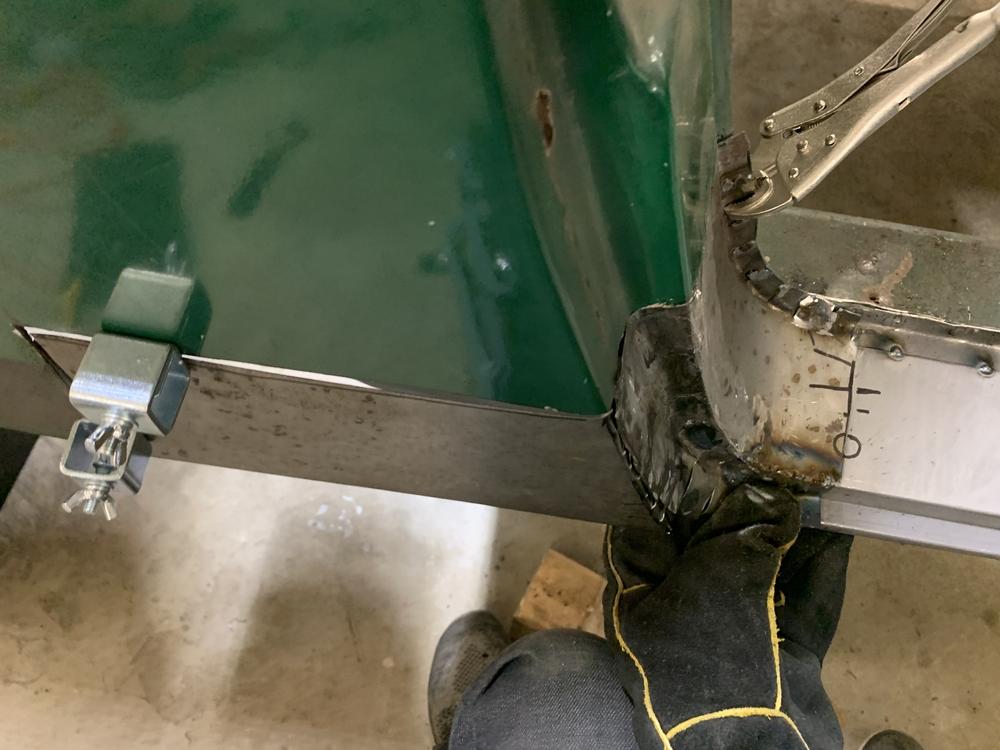
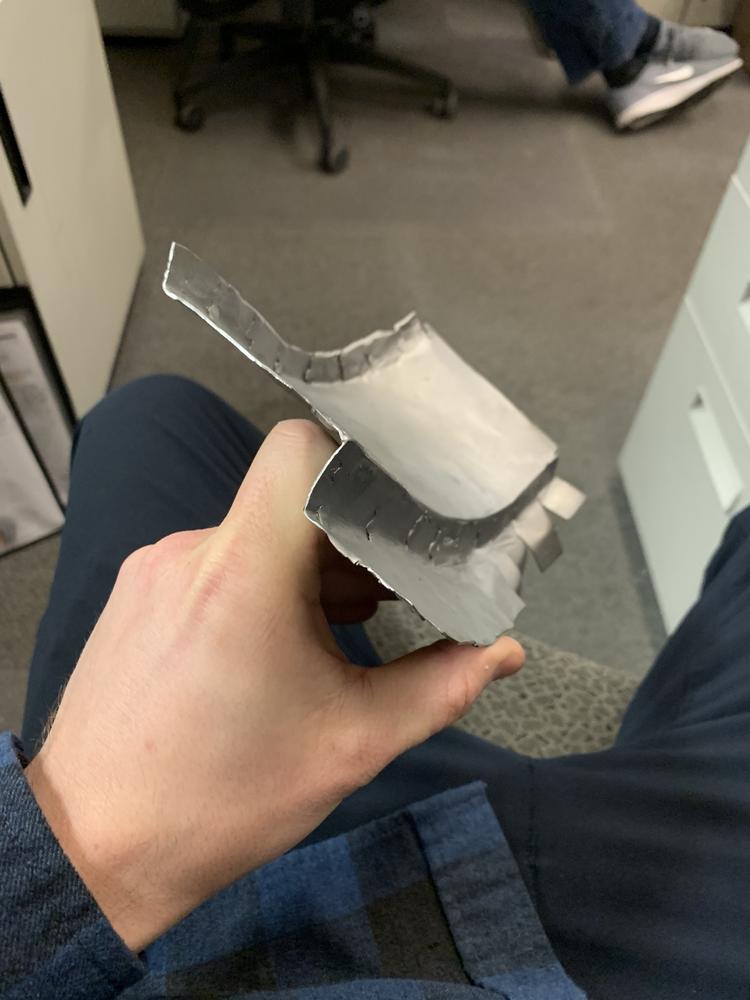
Quickie test fit of the outer clamshell. I wanted to check how far off I am with the lower part of my fabbed long... Close! but more tweaking.
This is a motivating sight!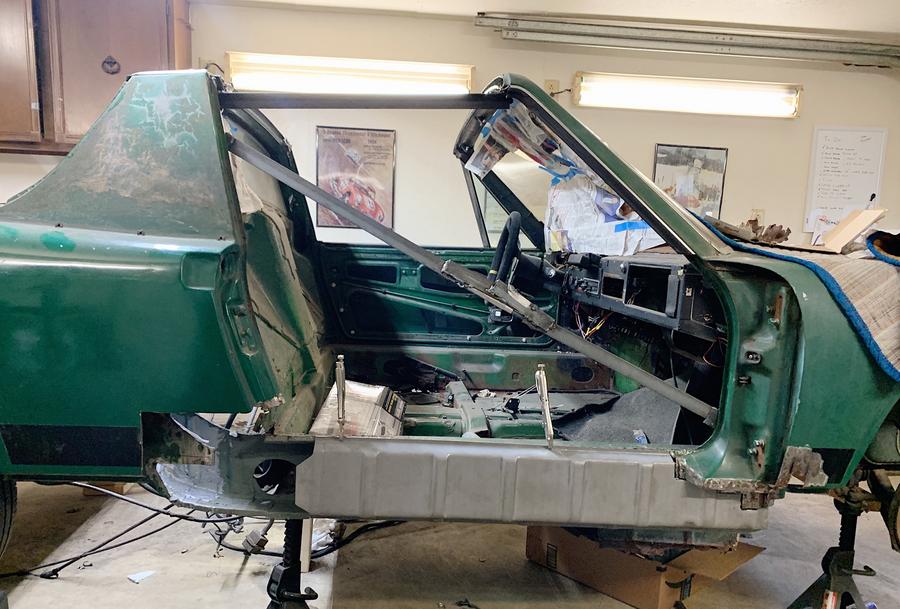
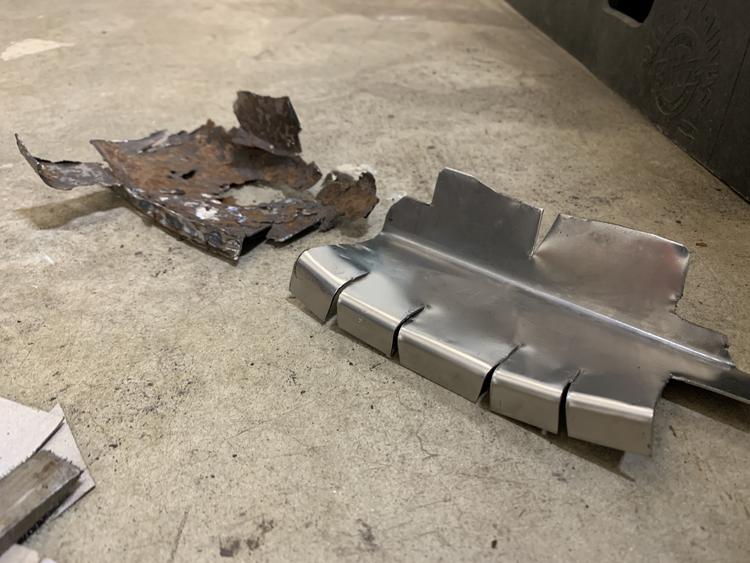
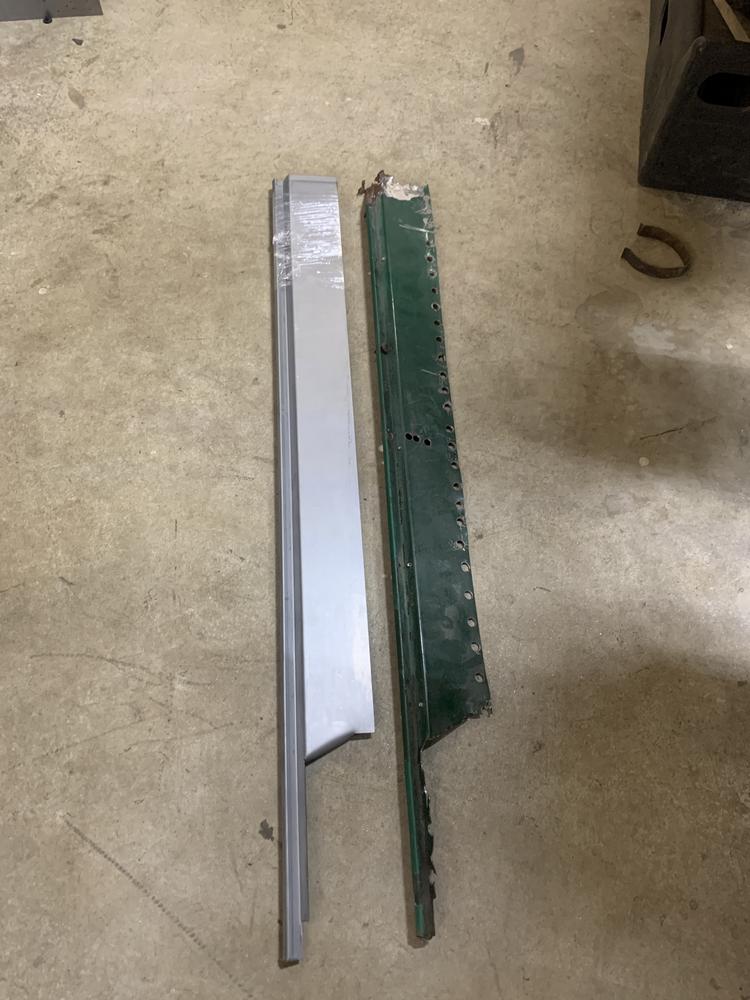
Recreating this rear piece. I used my rusty cut out as a template.
This will be dual layer 16g nice and beefy.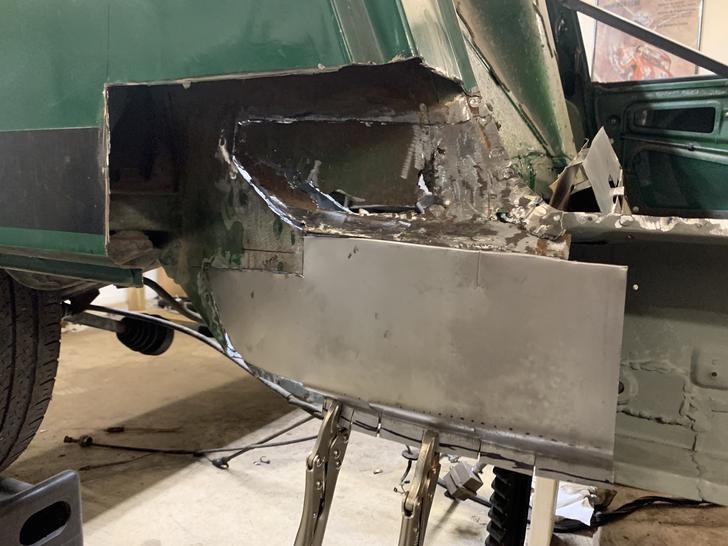
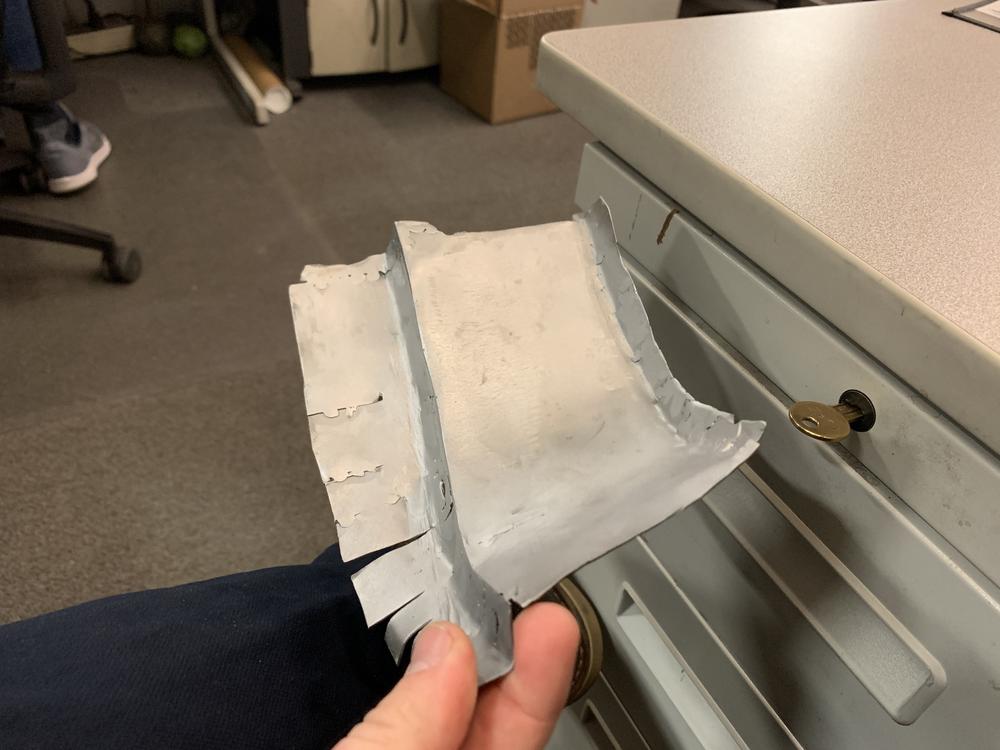
I will not be recreating the jack pyramid area. I have purchased Brad's 914LTD stiffening kit - which deletes the factory pyramid. (not my photo, but this kit:)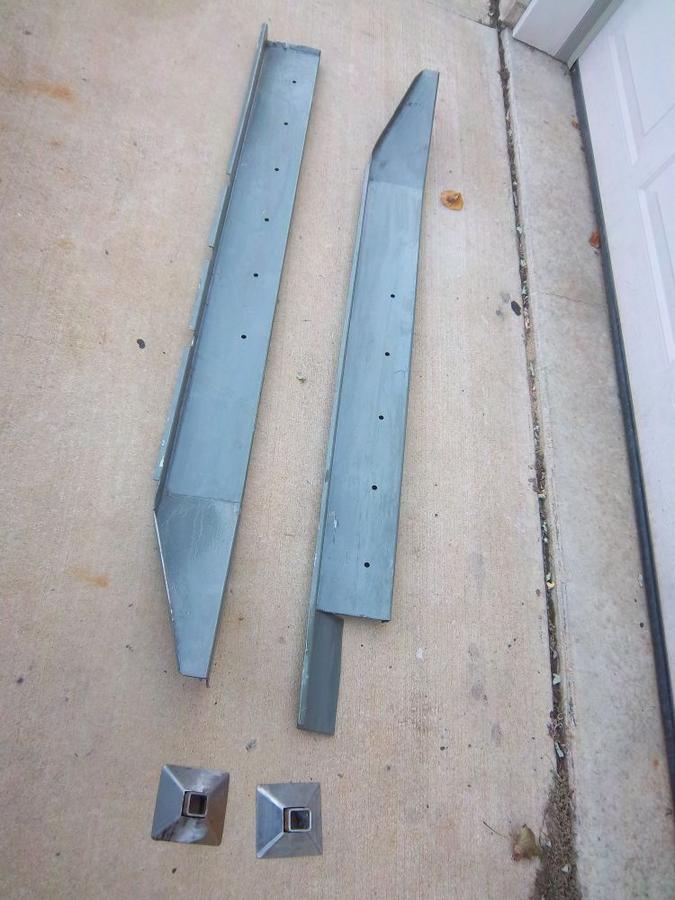
I know it might be unnecessary for - not a racecar - but with the rust this car has... it cant hurt to stiffen the car up and keep it solid.
I am blind and missed a chunk on the bottom. Its ok to make things twice sometimes to get it right.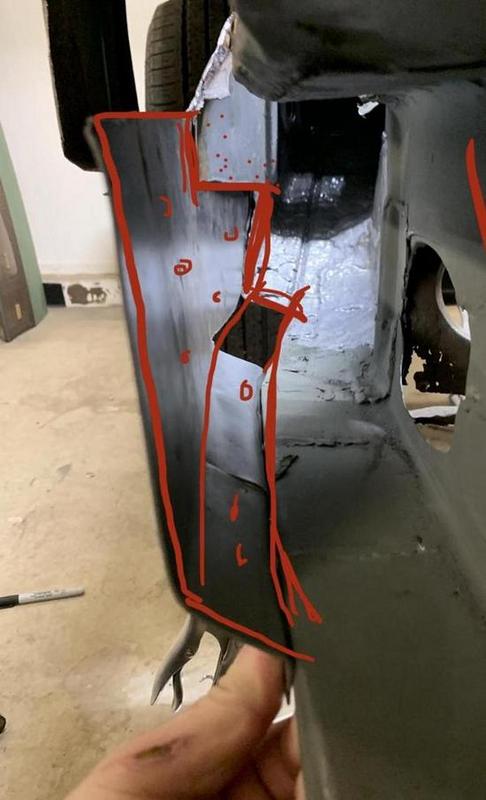
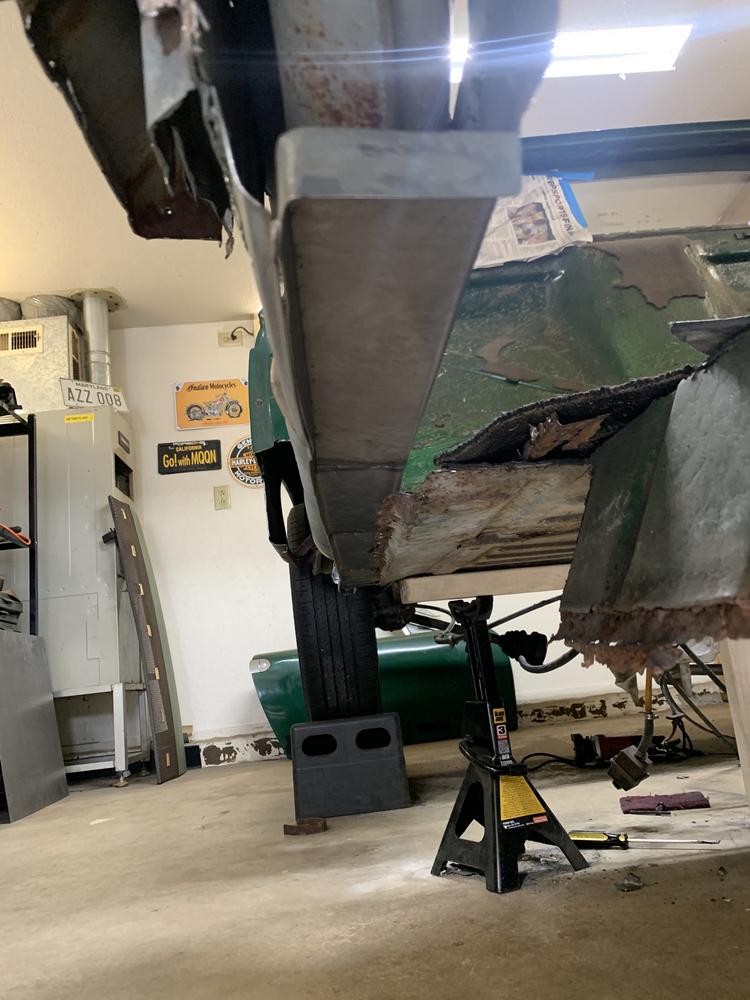
Just a nice photo before I pulled the car in: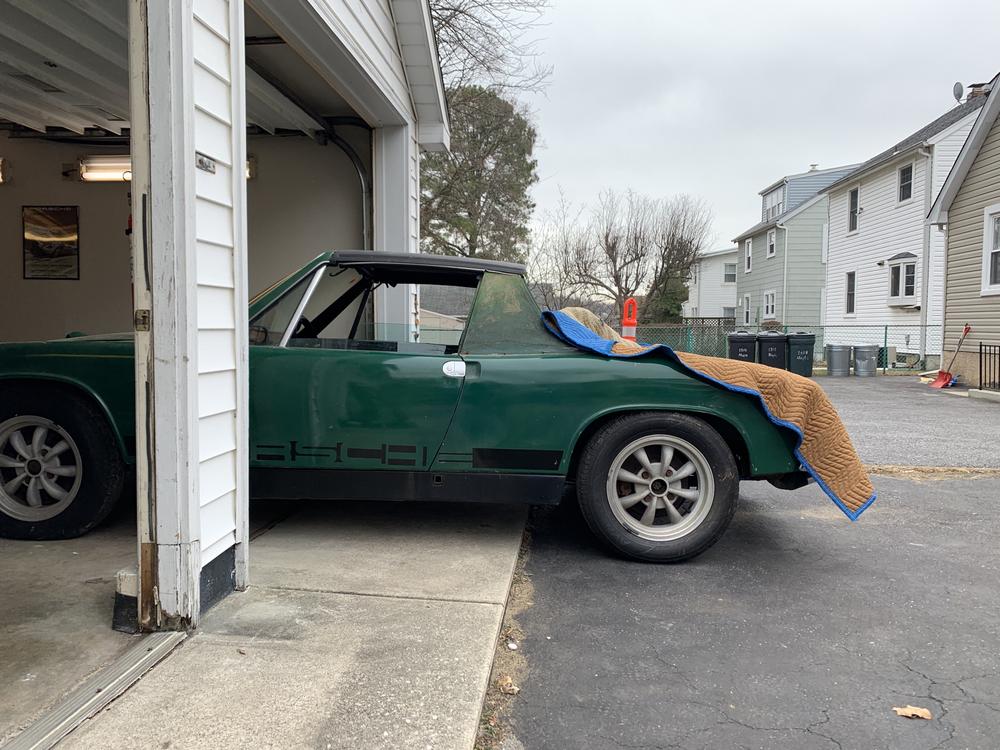
Posted by: dt4 Mar 11 2020, 07:56 AM
Great skills and work levels
Posted by: jaredmcginness Mar 11 2020, 10:01 AM
Here's a list of some of the other things I have accomplished and compiled over the last few months.
Installed ignition switch (early solder in style) and Ign key.
Got some new interior bits from a nice guy about an hour away for a great price: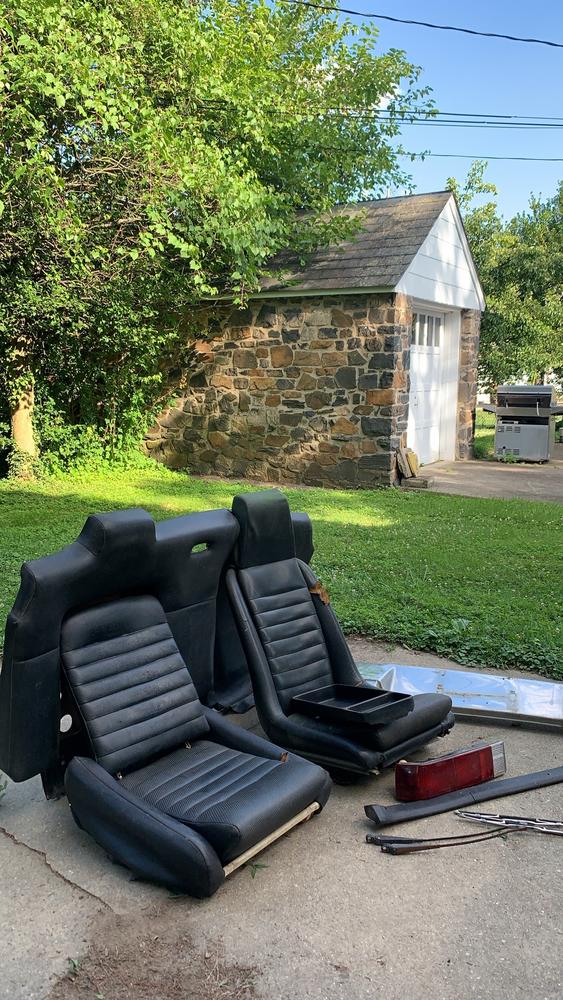
Also a new left tail light, and a much needed rear bumper I found on craigslist in PA for $100: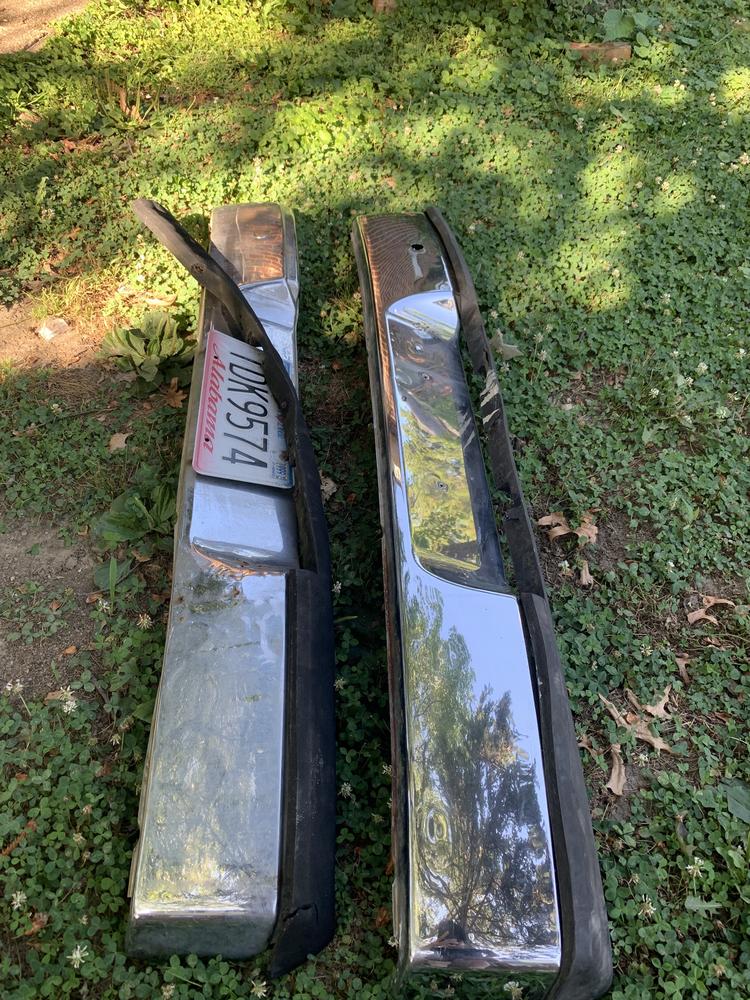
My factory bumper was taco'd and dimpled: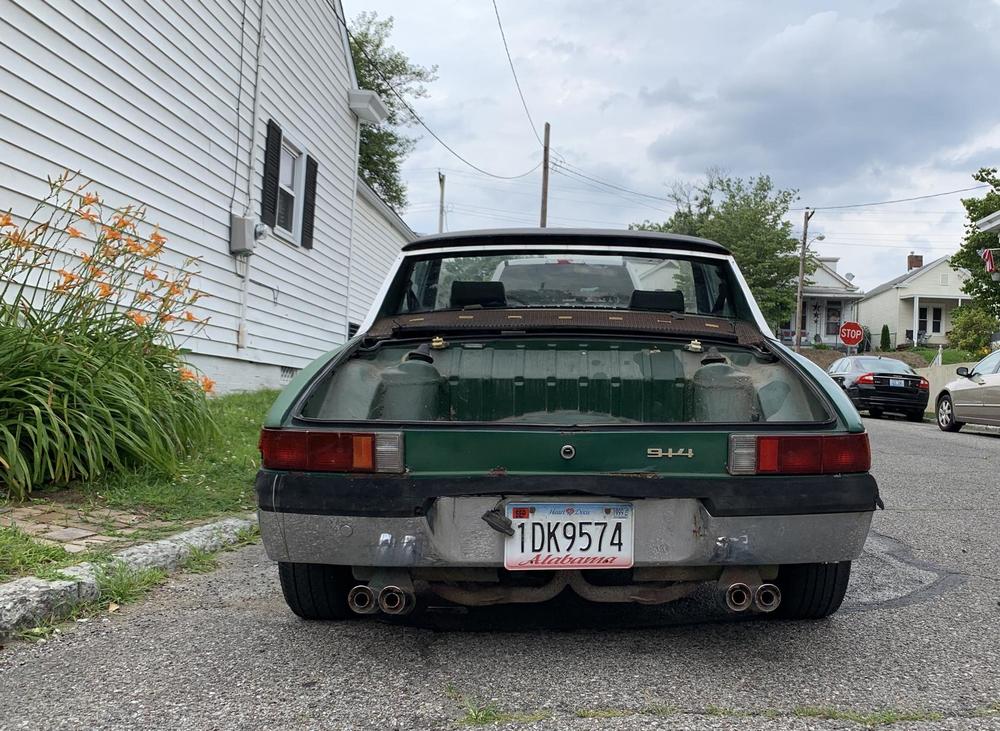
The 914 also had what i would call the WORST dash I have ever seen. Looked like it sat on a grille at a BBQ joint for half a year - found a new one on the forums here for $200: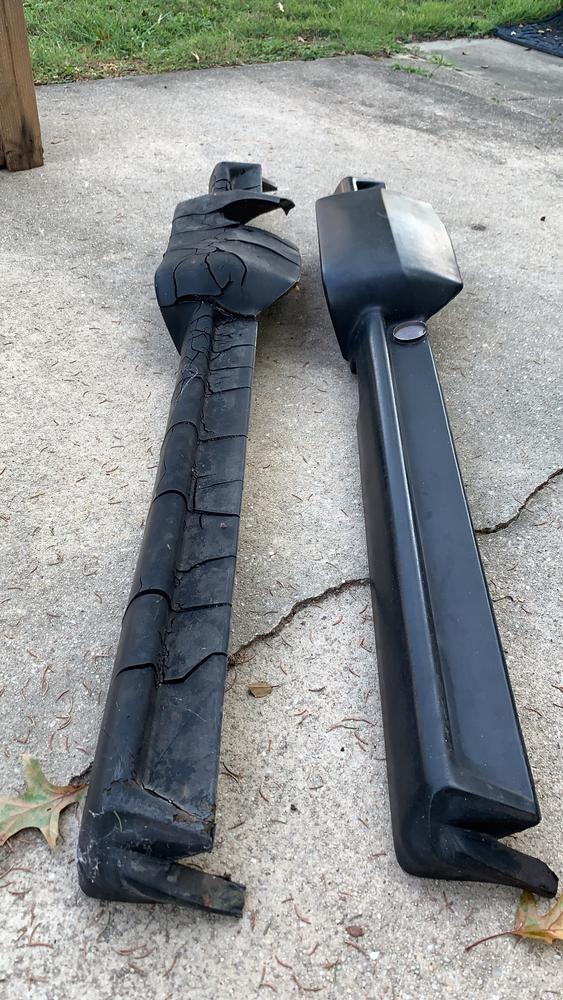
Shot of my work space. Not much but fits a 914.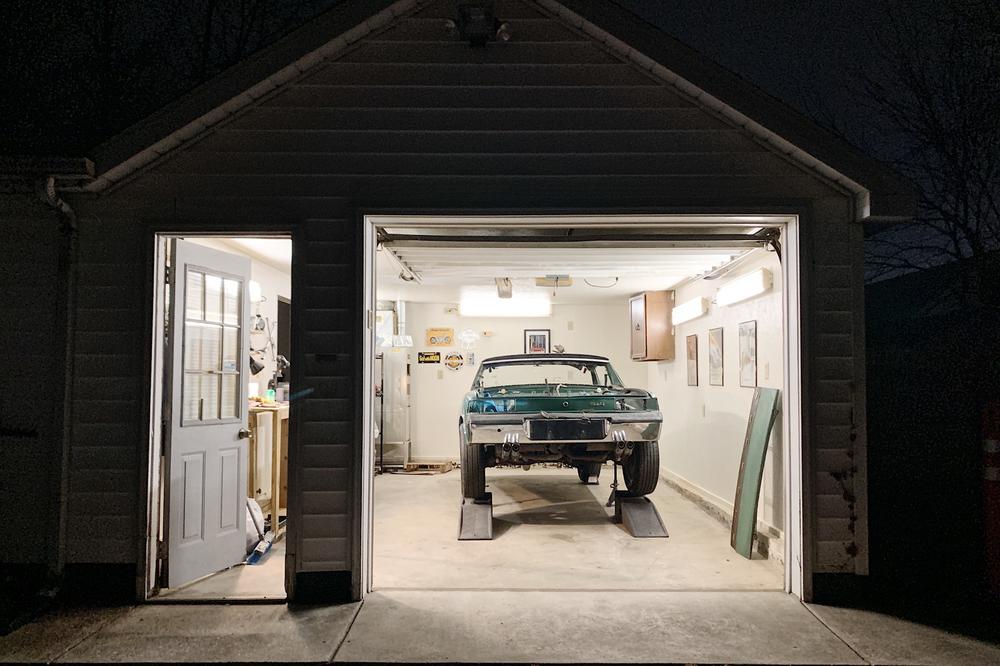
Posted by: jaredmcginness Mar 13 2020, 05:28 AM
Not related to fixing the car... but part of the bigger picture.
Sometimes you need to buy yourself somethin nice!
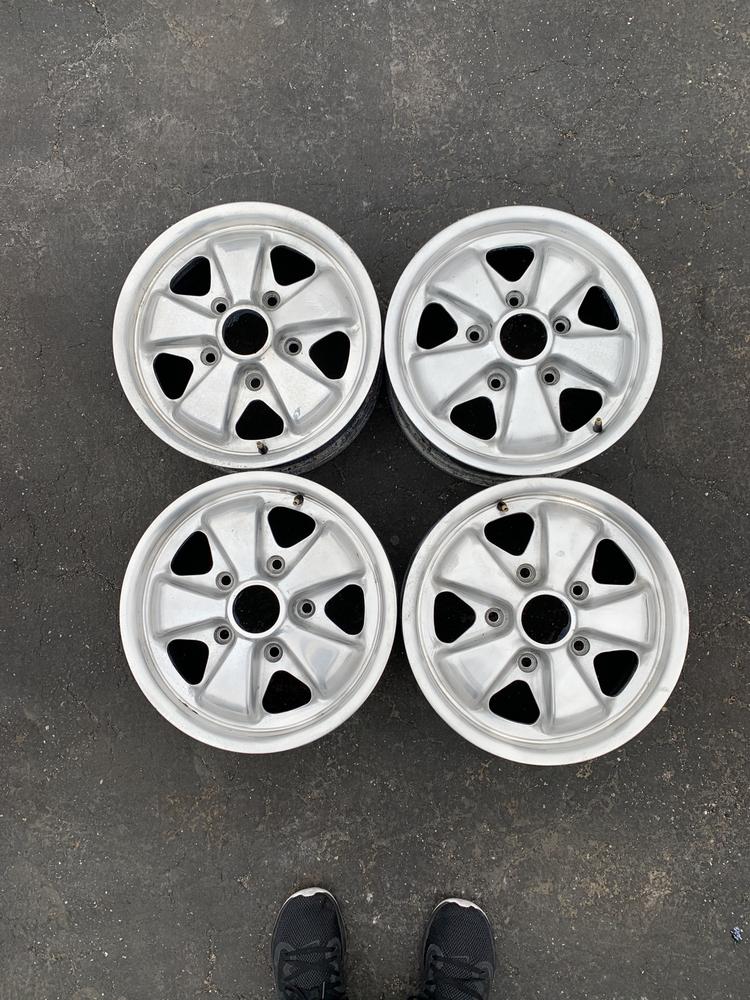
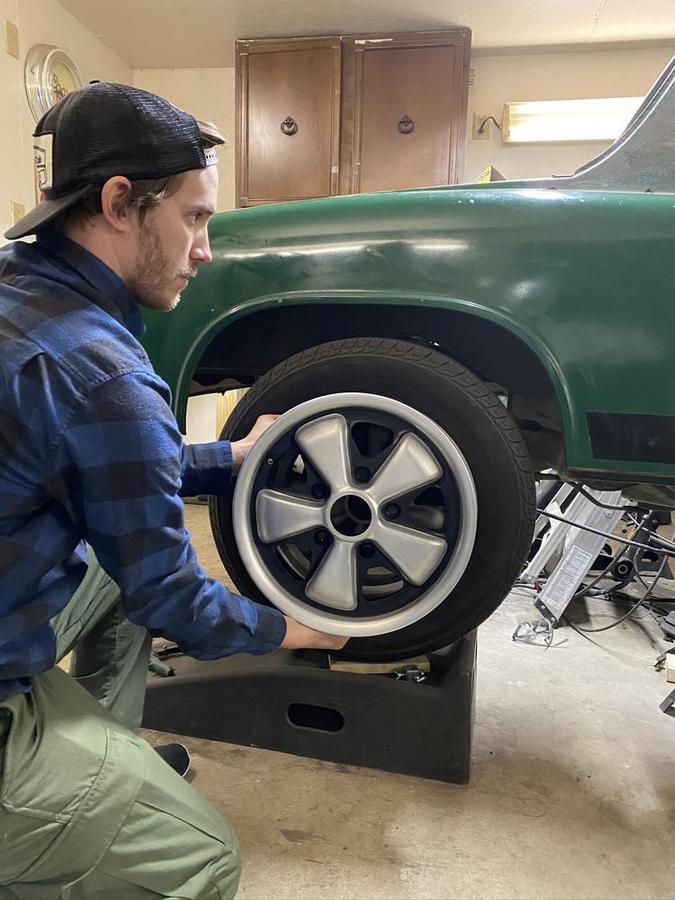
Picked up a set of 14" Fuchs for a great deal, due to the ugly finish. Two '69 dates and two '70 dates. Lets see if I can clean em up.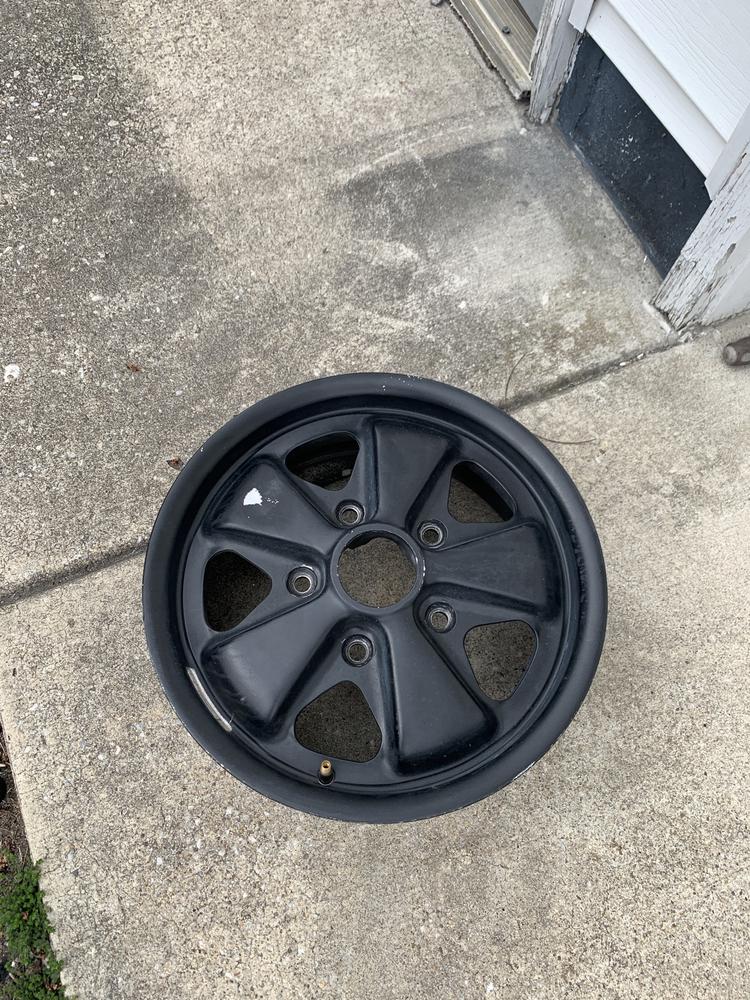
Sprayed some Jascos. 15 minutes of sitting.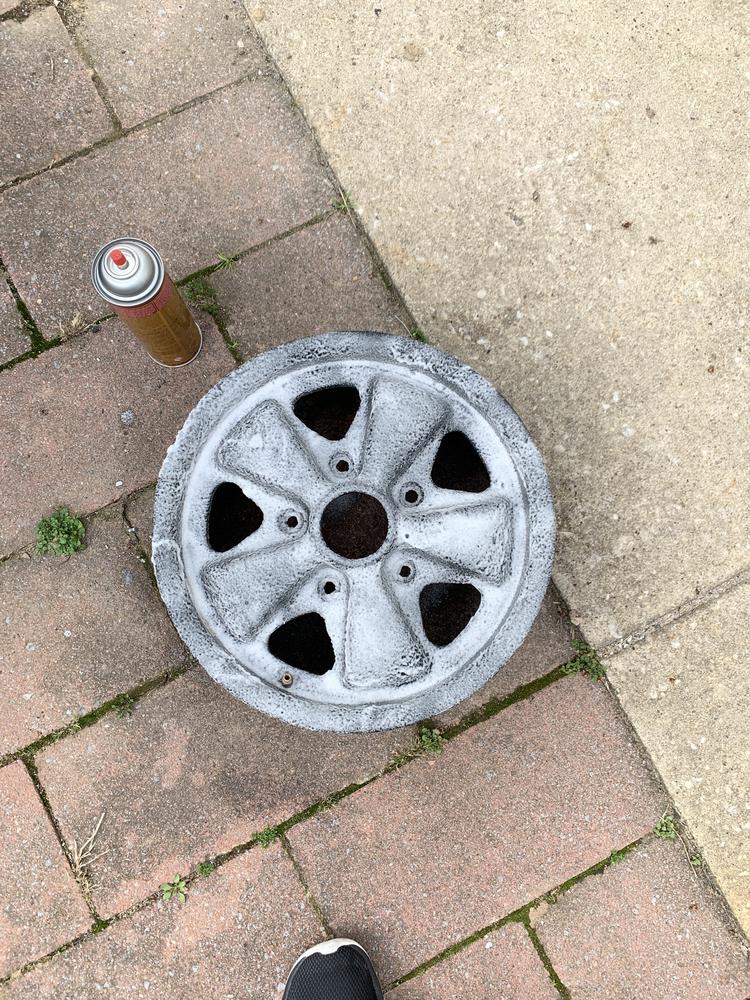
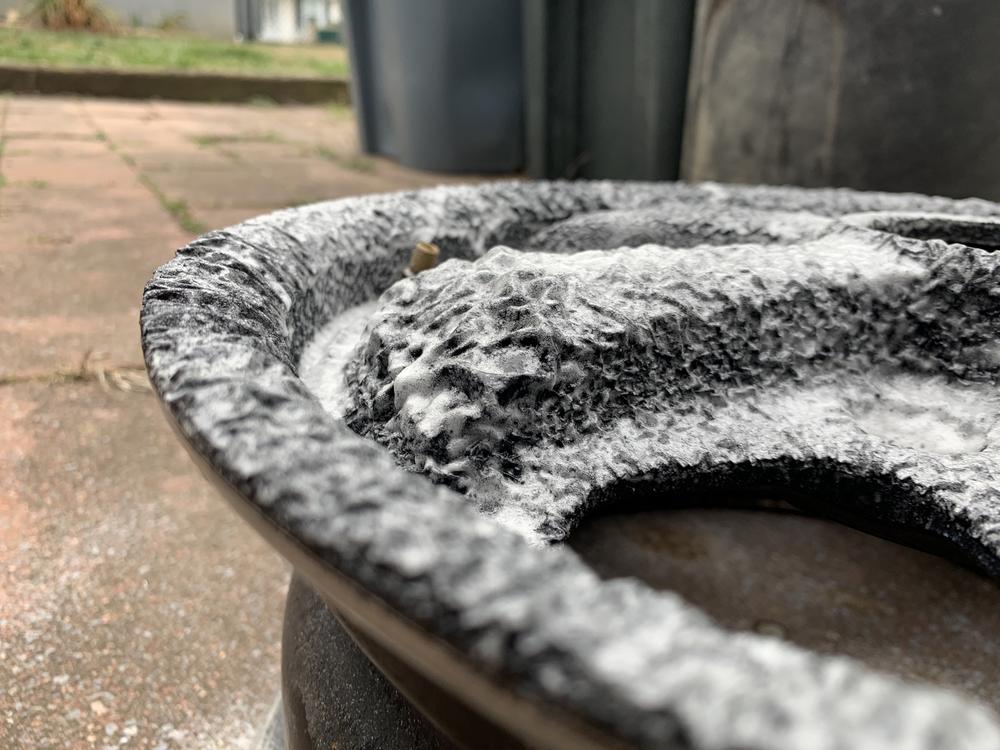
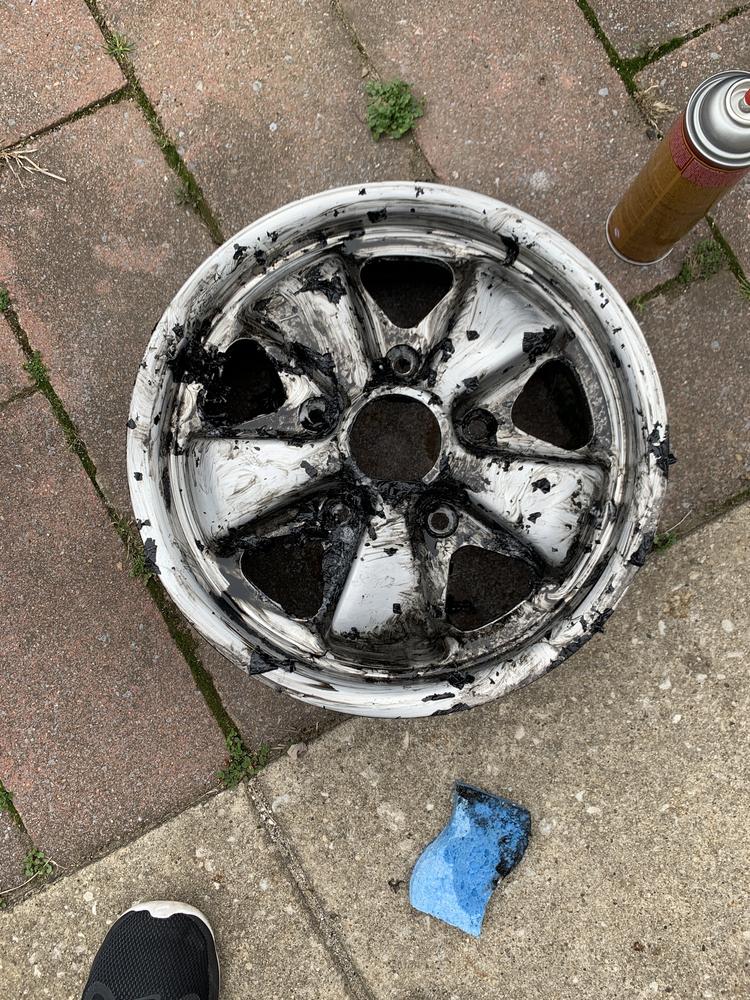
Damn!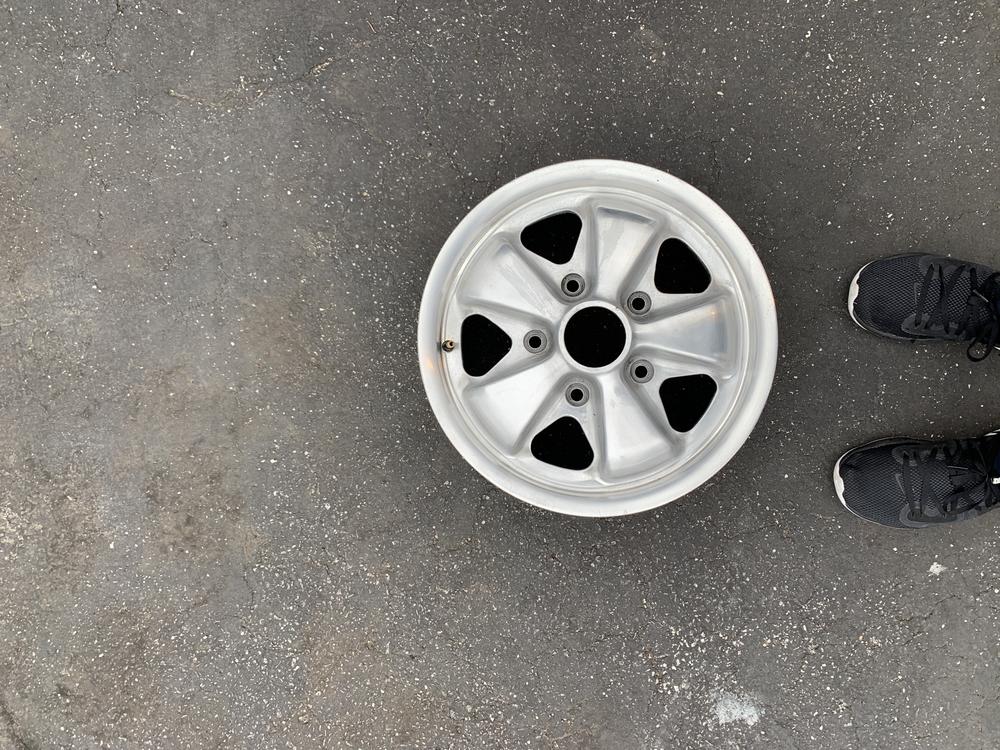
I would say that the spray bomb job preserved this original finish. Good drivers quality. Really feel like I lucked out here. I'll do the other 3 this evening.... then back to welding!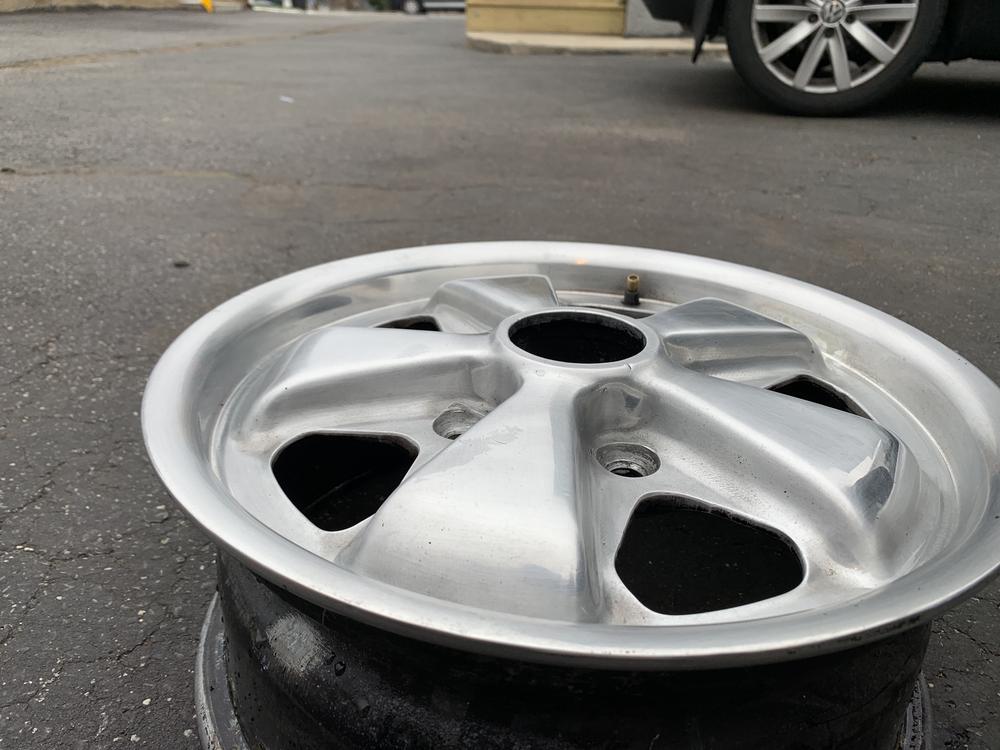
Posted by: Targa70 Mar 13 2020, 05:40 AM
Jared, you have mad skills. My hat is off to you and I wish I had the eye you have when I was your age. Heck, I'd like to have that eye right now. Good work and keep it up.
Posted by: jaredmcginness Mar 13 2020, 06:07 AM
Jared, you have mad skills. My hat is off to you and I wish I had the eye you have when I was your age. Heck, I'd like to have that eye right now. Good work and keep it up.
Thanks much!! I wouldn't say 'mad skills.' Just not afraid to try and make mistakes... There's always beer in the fridge, if something goes wrong.
I grew up in NoVa. Where abouts are you?
Posted by: jagalyn Mar 13 2020, 06:20 AM
Wow... nice job so far. Keep it up!!!
Posted by: jaredmcginness Mar 13 2020, 10:44 AM
Something else I completed.
The frunk handle was not very functional, as you'd imagine with a hole like this. 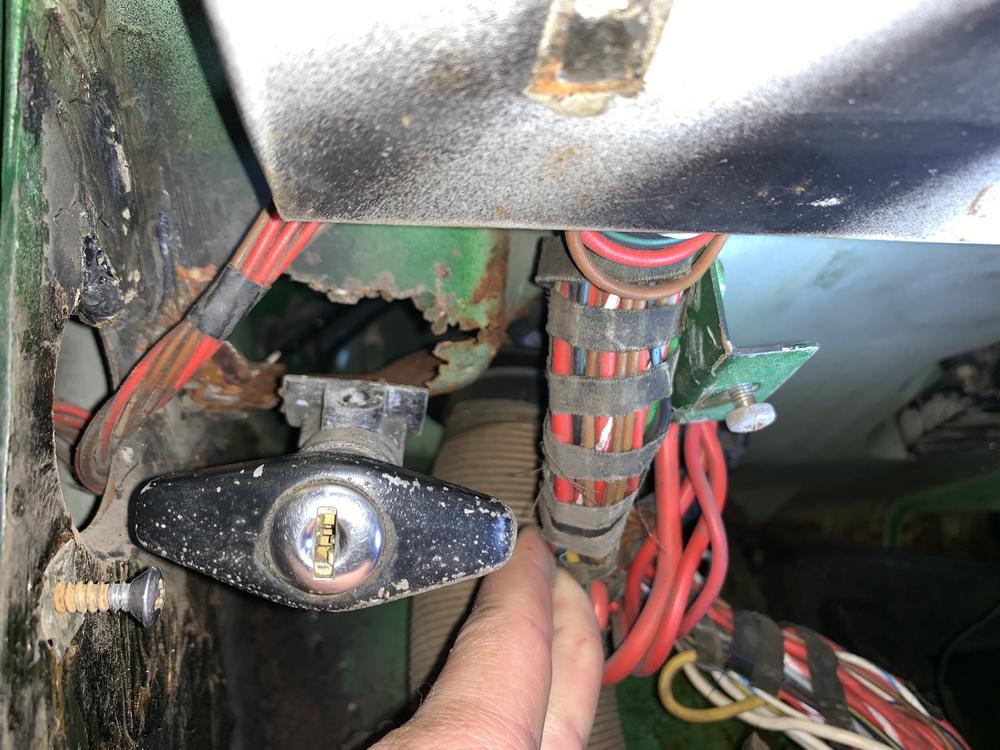
I hammer formed this out of 22g. Weird place to weld, especially from the inside. 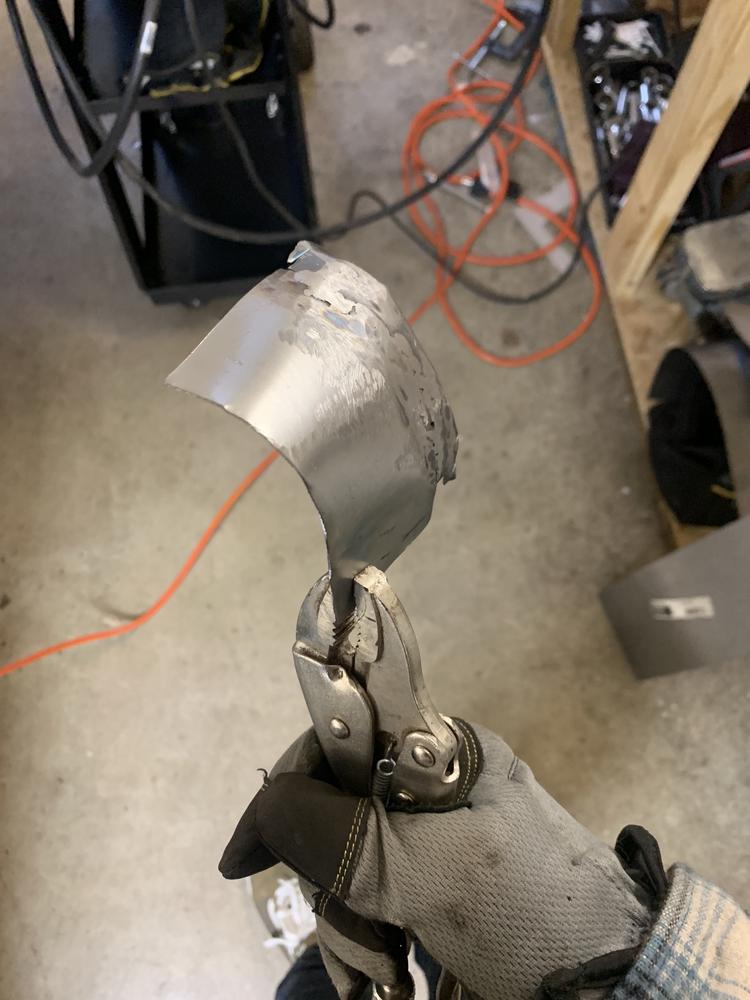
The sheath (?) for the pull handle had stubs of the bolts rusted to it. 
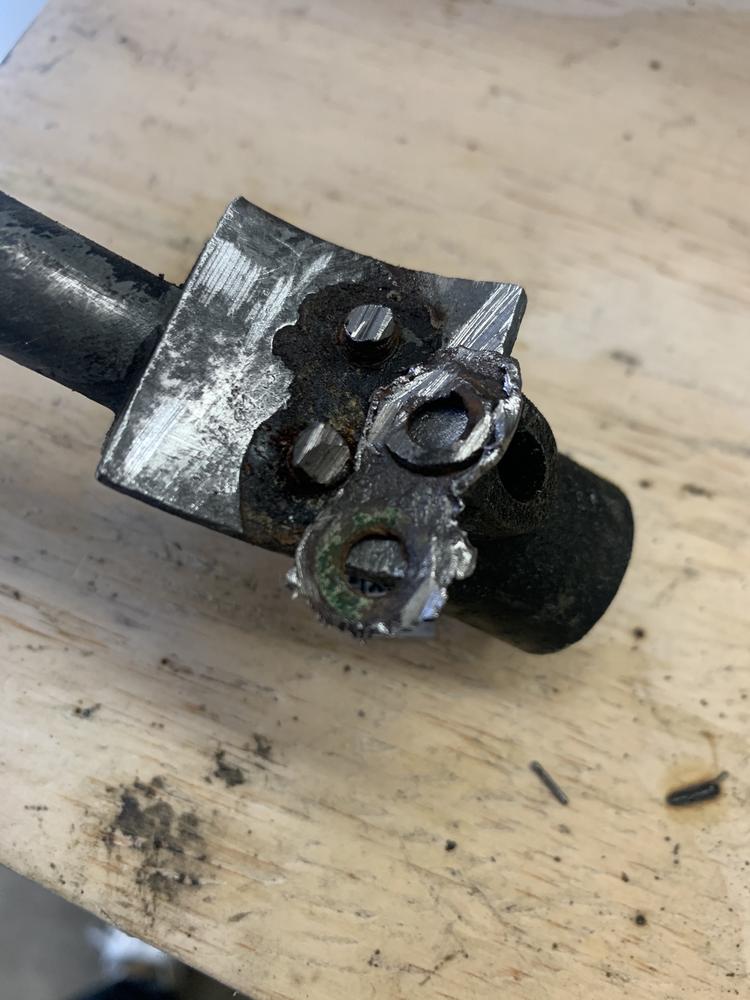
Ground off. Got one bolt stub out with vicegrips. The other was stuck, so I welded a nut to it and she turned right out. 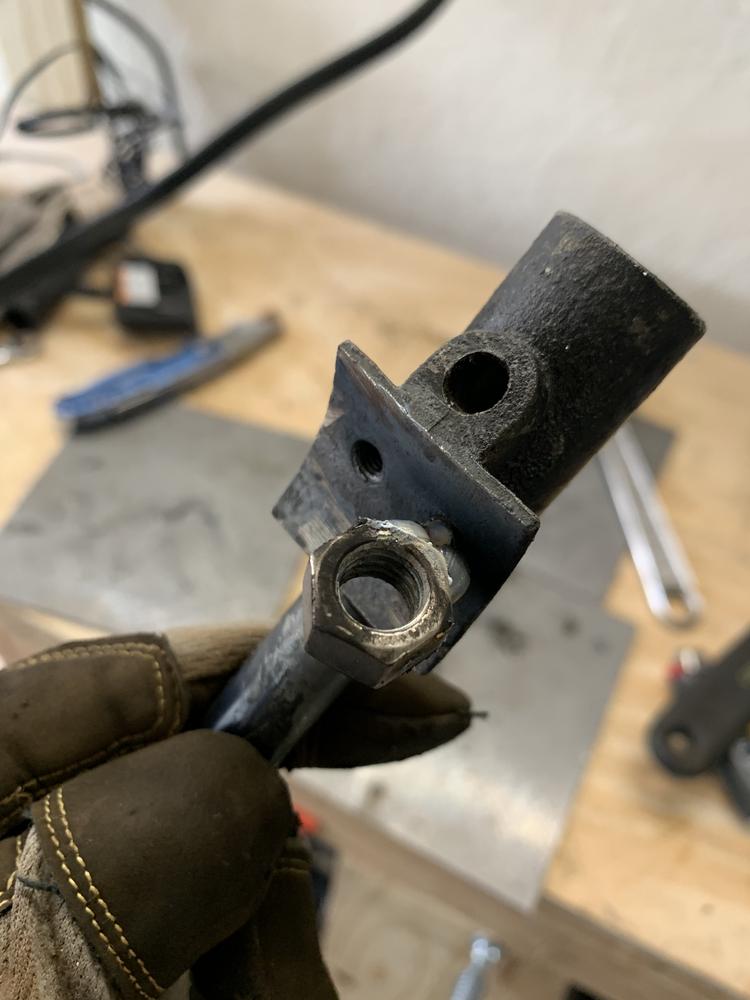
Sand blasted, chased the threads and painted at work. Added new hardware.
Need to do the same for the handle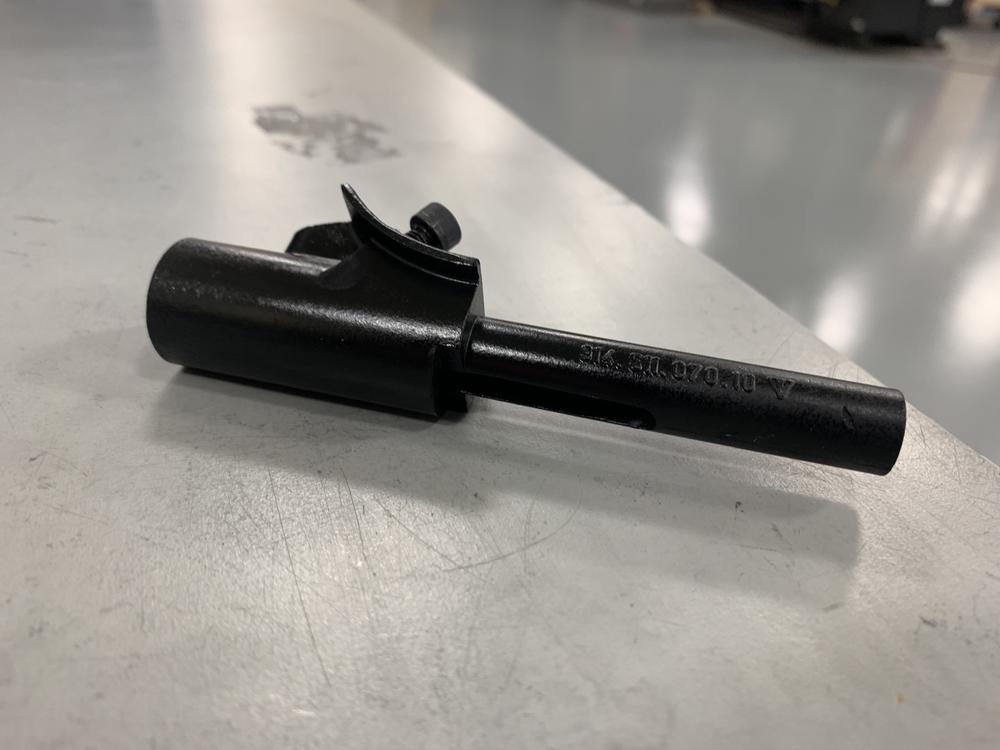

I'm happy with the result, everything works now. Could be prettier, but its very hidden and will (hopefully) be covered in paint someday. 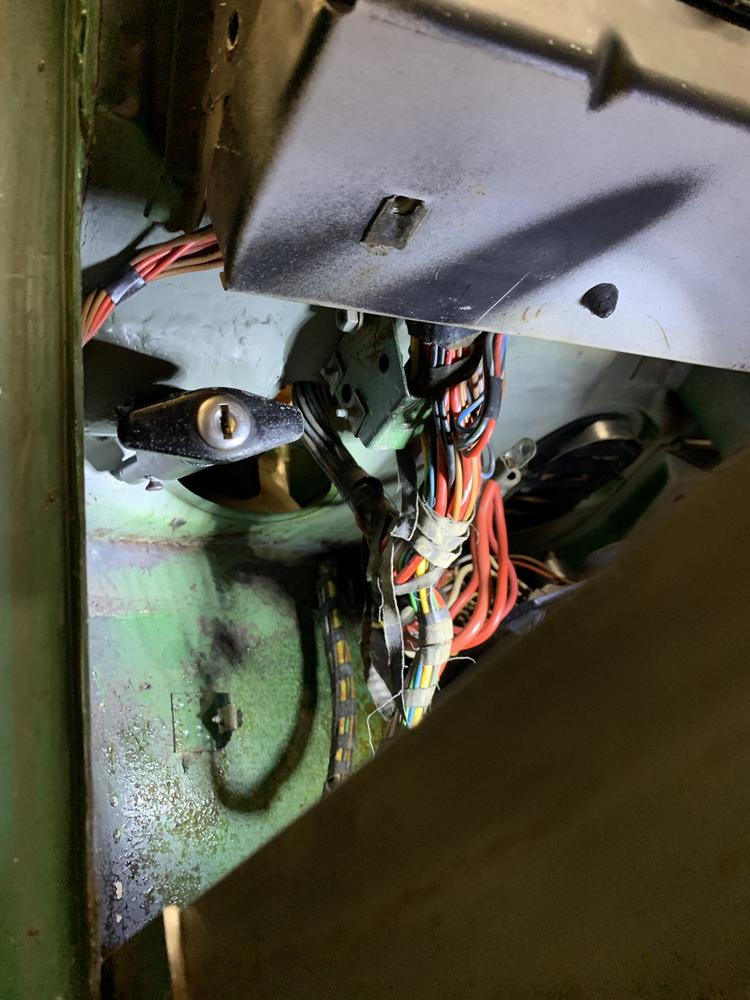
Posted by: jaredmcginness Mar 13 2020, 10:49 AM
Wow... nice job so far. Keep it up!!!
Thank you! The responses I've received here and on the FB group have been very motivating. I figured I'd get a little bit more negative feedback - for not going by the book, and my 'DIY' with all of these harbor freight electric tools.
Posted by: bbrock Mar 13 2020, 11:56 AM
Nice job on the handle patch  I think that was probably the hardest patch I had to do on my whole car. Like you said, not an easy place to weld... And I did mine while my floor was off which eased the pain at least a little.
Posted by: jaredmcginness Mar 13 2020, 12:14 PM
Nice job on the handle patch
I think that was probably the hardest patch I had to do on my whole car. Like you said, not an easy place to weld... And I did mine while my floor was off which eased the pain at least a little.I did mine while my rib cage was leaning over the turnbuckle supports I made.
Thanks for the insight. By the way, I have your Rustoration thread bookmarked and refer to it before I fab any parts for this build/save! I really look up to your skills!
Posted by: Targa70 Mar 13 2020, 12:26 PM
Hey Jared, I'm not up in NOVA. I hang my hat in Williamsburg, a short drive from Va Beach and Norfolk. Being in Baltimore, you should make you way to Hershey. Should it occur...…...
Posted by: kroelofsen Mar 13 2020, 12:47 PM
![]() Thats very nice work, great speed, will watch this with interest!
Thats very nice work, great speed, will watch this with interest!
Posted by: jaredmcginness Mar 13 2020, 01:14 PM
Hey Jared, I'm not up in NOVA. I hang my hat in Williamsburg, a short drive from Va Beach and Norfolk. Being in Baltimore, you should make you way to Hershey. Should it occur...…...
Nice! I went to VCU, so I am totally familiar with Williamsburg and it's ghost tours, haha! I went to Hershey last year and stocked up on a few parts for my would be 914, that i purchased a few months later.
Posted by: bkrantz Mar 13 2020, 09:19 PM
Keep up the good work--and the optimism. That's the best way to deal with the endless 914 rust surprises.
Posted by: jaredmcginness Mar 14 2020, 03:14 PM
Keep up the good work--and the optimism. That's the best way to deal with the endless 914 rust surprises.
Thank you! There's always more...
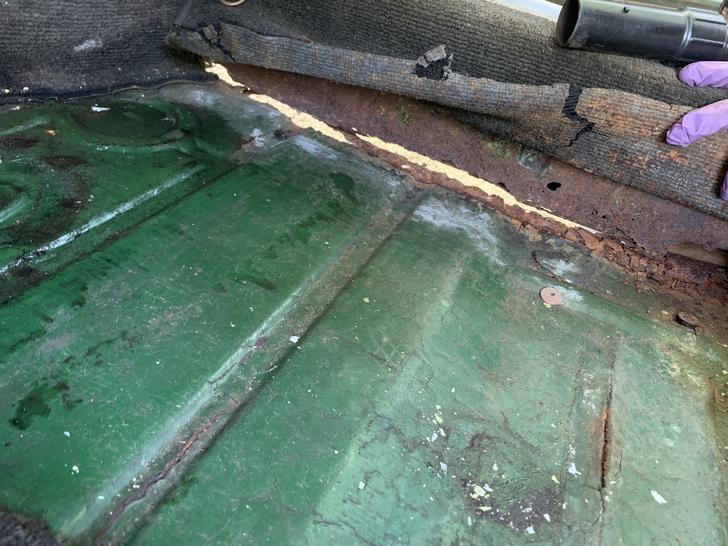
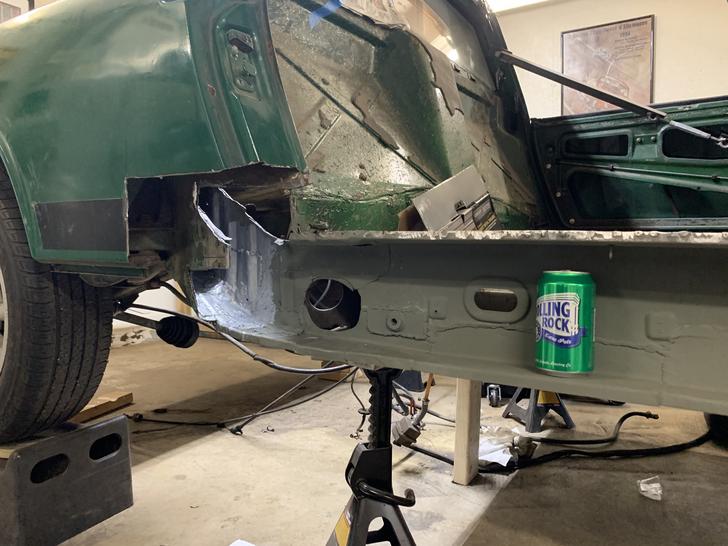
A little work today. Finishing up the floor seam in the engine bay. Chipped away at eh crusty sealer and ground until I saw fresh metal.
Barf.
After filling the flange tabs with some weld, grinding to some extent, tacking in the J pipe, top and bottom, and a shot of filler primer. Seam seal the gaps. A little less sealer than the factory used.
Fabbed up a quick and dirty pipe tab. Mine was toasted. Not too concerned with making this pretty - just needs to be strong. We'll never see it again. Right?
... Right?
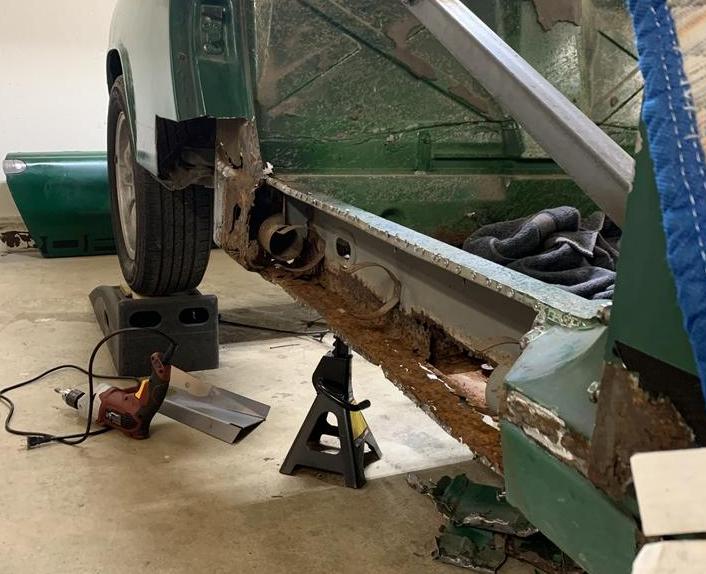
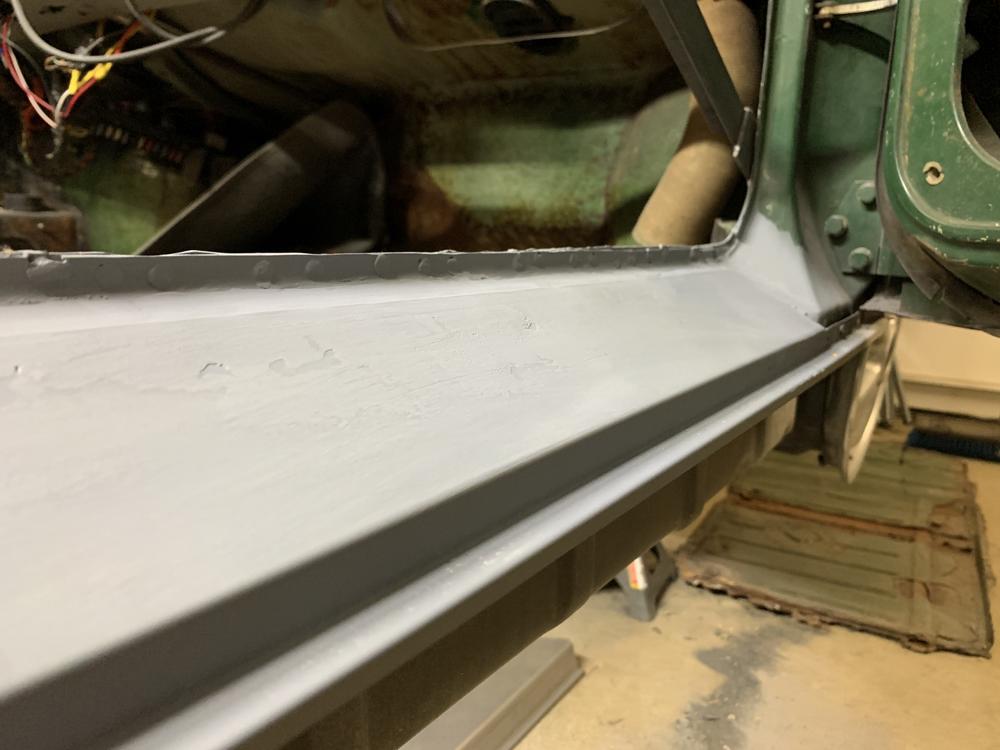
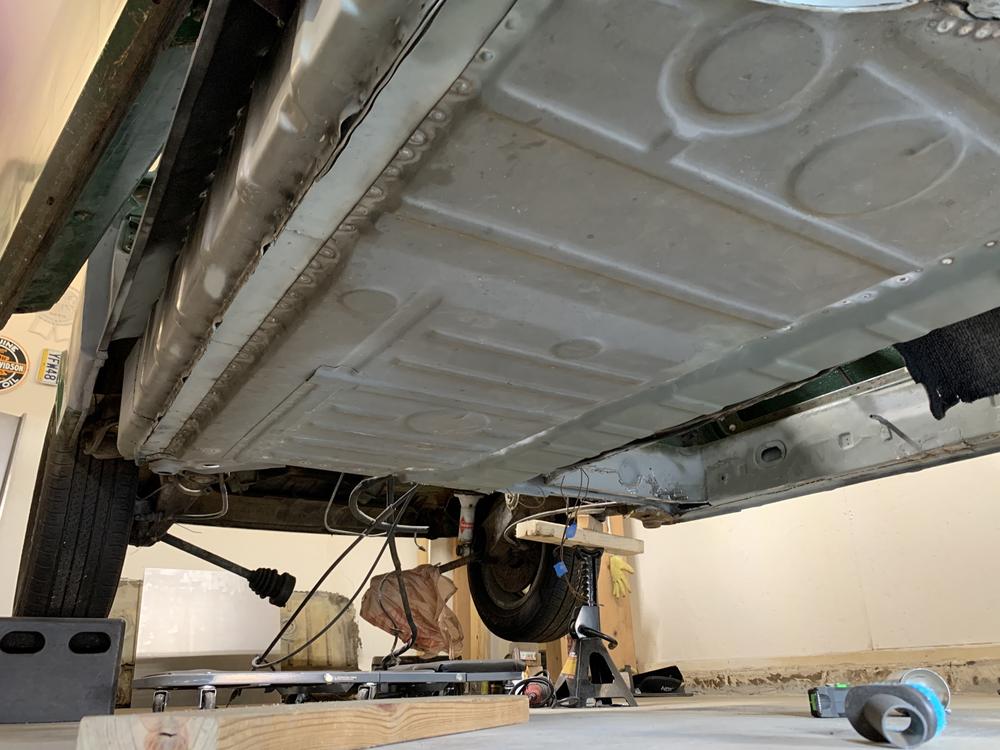
NICE to see a whole fresh inner long! Plenty of room to mount a floor:
Test fit of the tube. I cleaned it out the best I could and sprayed some primer on the outside - to make it look a little cleaner. I need to take it out and rivet or weld the C clamps in place. Ran outta gas!
Next on the list is the hell hole patches, then the sections at the rear of this long, clamshell, etc.
Awaiting a Sill and Jack triangle from Auto Atlanta.
Jared
Posted by: bbrock Mar 14 2020, 06:42 PM
...We'll never see it again. Right?
... Right?

Posted by: Jamie Mar 14 2020, 07:29 PM
Something else I completed.
The frunk handle was not very functional, as you'd imagine with a hole like this.
I hammer formed this out of 22g. Weird place to weld, especially from the inside.
The sheath (?) for the pull handle had stubs of the bolts rusted to it.
Ground off. Got one bolt stub out with vicegrips. The other was stuck, so I welded a nut to it and she turned right out.
Sand blasted, chased the threads and painted at work. Added new hardware.
Need to do the same for the handle
I'm happy with the result, everything works now. Could be prettier, but its very hidden and will (hopefully) be covered in paint someday.
This seems to be a rather odd place to find such extensive rust? Well done repair job!
Posted by: mepstein Mar 14 2020, 08:00 PM
Actually very common. Dirt, debris, mouse nests, etc. collect in the metal recess above the pull and holds in the moisture that seeps into the cowl.
I like how you lit up your garage.
Posted by: jaredmcginness Mar 15 2020, 06:18 PM
Actually very common. Dirt, debris, mouse nests, etc. collect in the metal recess above the pull and holds in the moisture that seeps into the cowl.
I like how you lit up your garage.
I'm sure pulling on the trunk handle adds just the right amount of pressure to pull the rusty steel right through as well.
I love the lights too! I added one hanging LED light from Walmart ($20) right above the engine bay. Very helpful.
I didn't get a ton done today, but I formed the piece above the rear long. Weird shape, still needs some work.
Got a new Sill in from Auto Atlanta... Ordered Friday, arrived Sunday, cant beat it.
Cleaned up the rest of the Fuchs. I'll be doing the windows black, at some point. These are 14x5.5. Not a priority right now. But couldn't pass up the 2010 pricing on the set of 4.
More test fitting. All three of these pieces are just clamped on. The clamshell will be under the rear piece before welding.
That's all for today. Thanks for anyone taking the time to read, and the support everyone's offered for this build.
P.S. Saying "build" is funny because I used to feel like putting BBS wheels, carpet and a H&R Cupkit on a Mk1 Rabbit was a build... How things have changed.
Posted by: horizontally-opposed Mar 15 2020, 06:34 PM
Nice work—great to see someone in their 20s working on one of these (said as someone who is still working on one 30 years later...after starting in his teens...  ).
).
Those Fuchs were a great score—there's something about Fuchs without black backgrounds that works. They'd look great on your car, or you can generate additional project funds if you choose to resell that set as-is or properly repainted—as a 914-6 or 911E owner might want correct 14s. Meanwhile, 15x6s or 16x6s are where the good tires are at. What rear tire size are you on? They look beefy...
Posted by: jaredmcginness Mar 15 2020, 06:43 PM
Nice
Those Fuchs were a great score—there's something about Fuchs without black backgrounds that works. They'd look great on your car, or you can generate additional project funds if you choose to resell that set as-is or properly repainted—as a 914-6 or 911E owner might want correct 14s. Meanwhile, 15x6s or 16x6s are where the good tires are at. What rear tire size are you on? They look beefy...
Cheers! Not a bad tip. I think I would like 15x7 better, plenty of good tire options there. Wasn't trying to spend $1500+ right now on them though

The tires I have on these 15s are 195/65. Which is similar to what I'd run on the 14x5.5s I believe that is near stock size, but a hair shorter.
Posted by: jaredmcginness Mar 19 2020, 07:26 PM
Hey all,
Hope everyone is doing OK with this Covid virus going around.
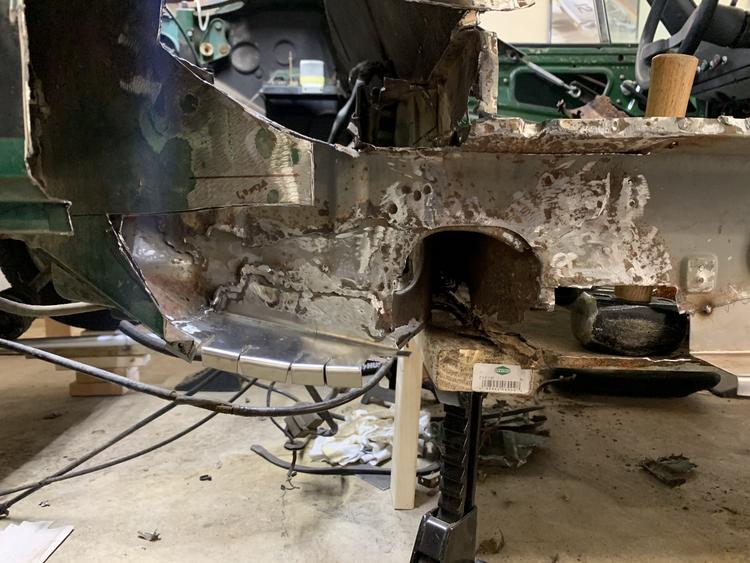
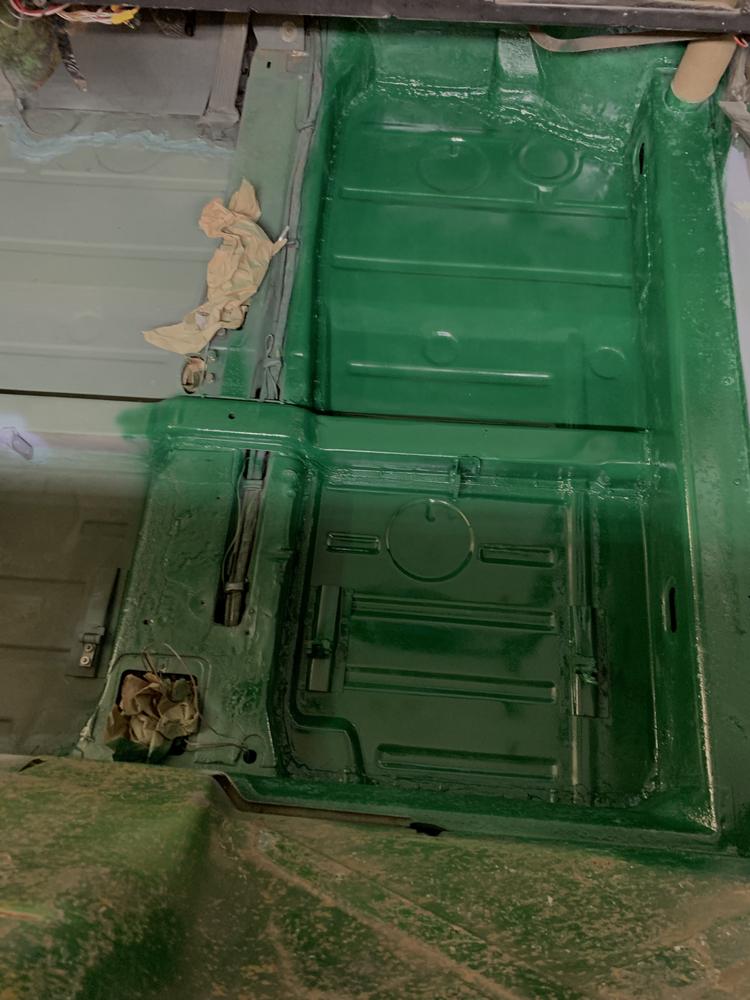
Here are a few updates from the past couple days. Firewall and the all mighty Hell Hole! I have been dreading this. You guys have conditioned me to hate it! Maybe it wont be so bad.... 
Upper firewall rust is cut out.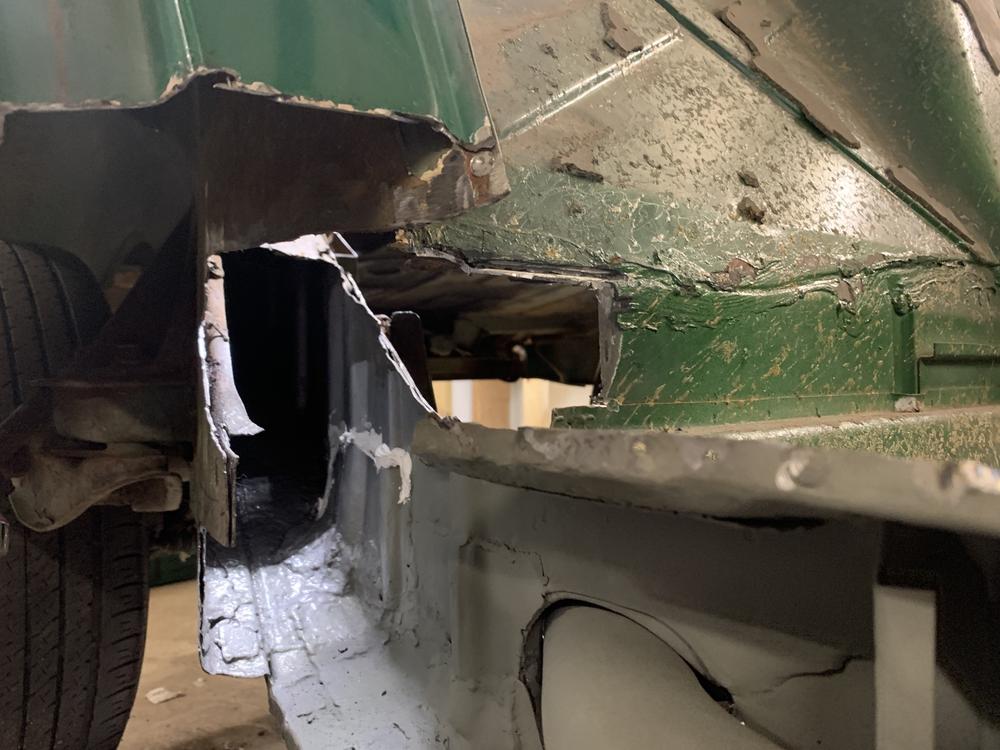
Needs some more grinding. Right side looks decent.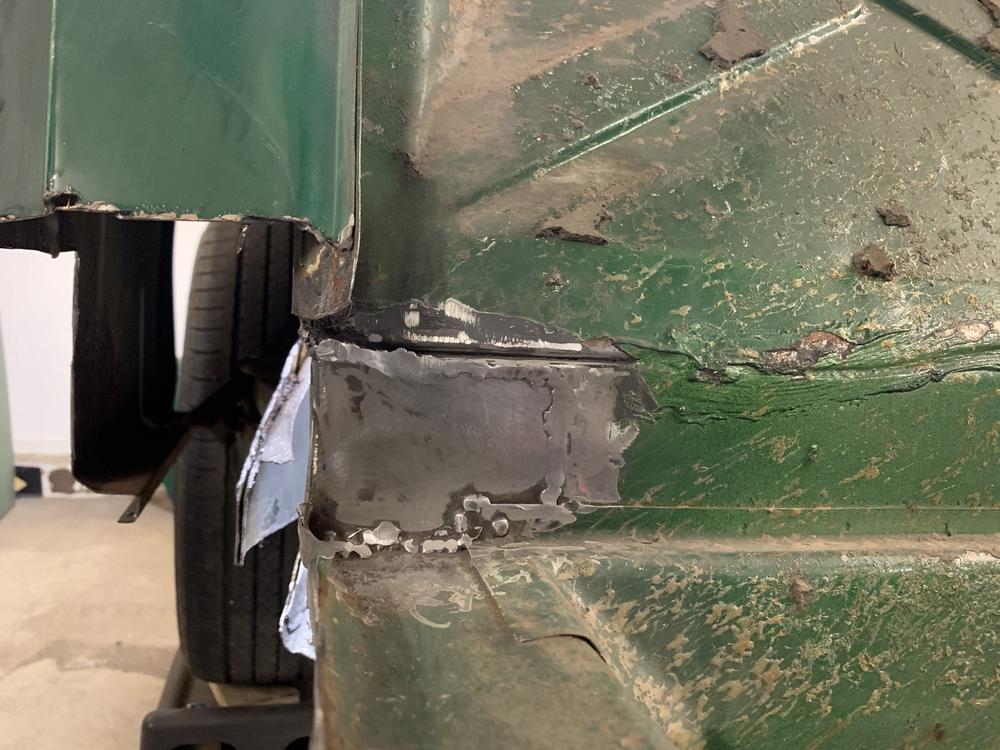
Cleaned and primed. Nice.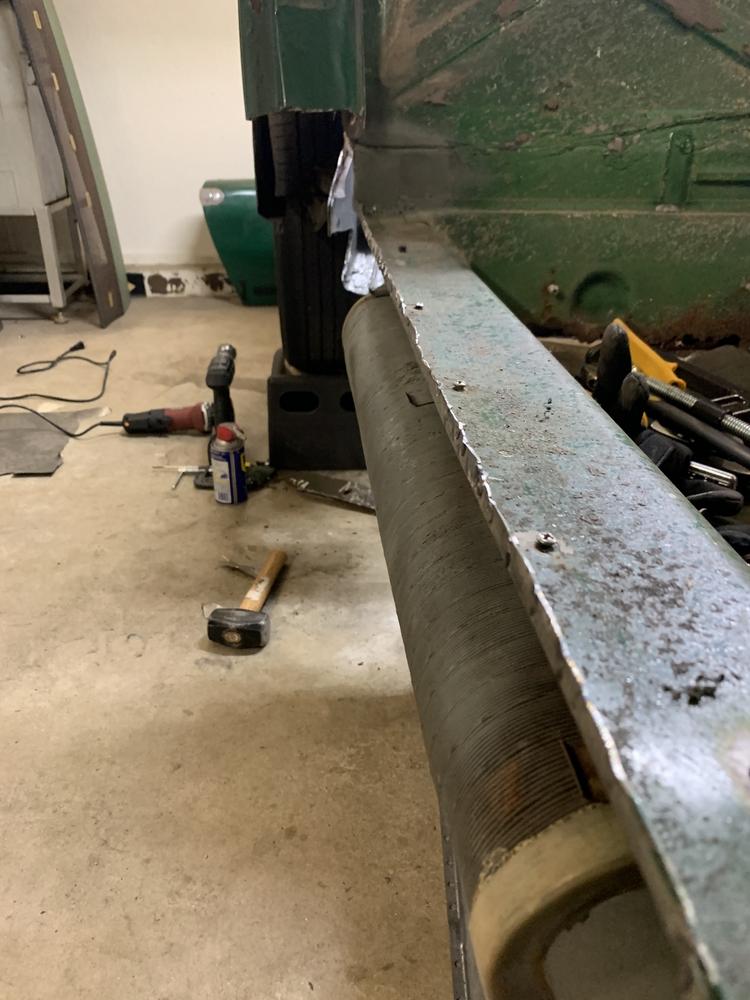
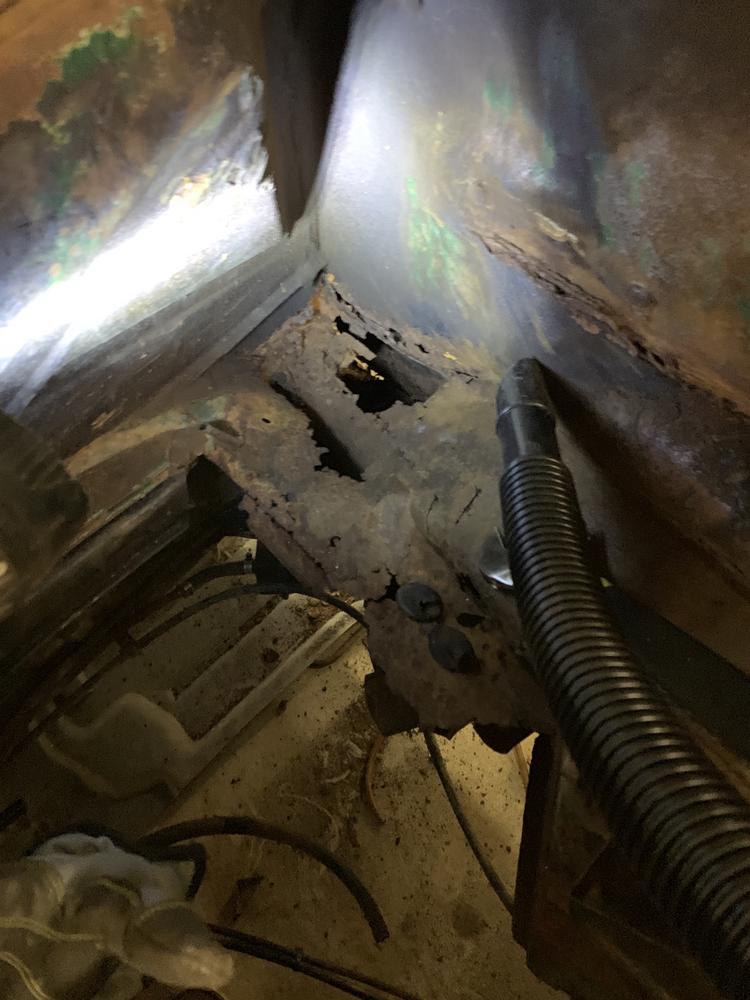
This piece will serve as the wall and base to weld the lower Hell Hole patches in place.
This is what I was working with.... Yikes. Lets cut some more away.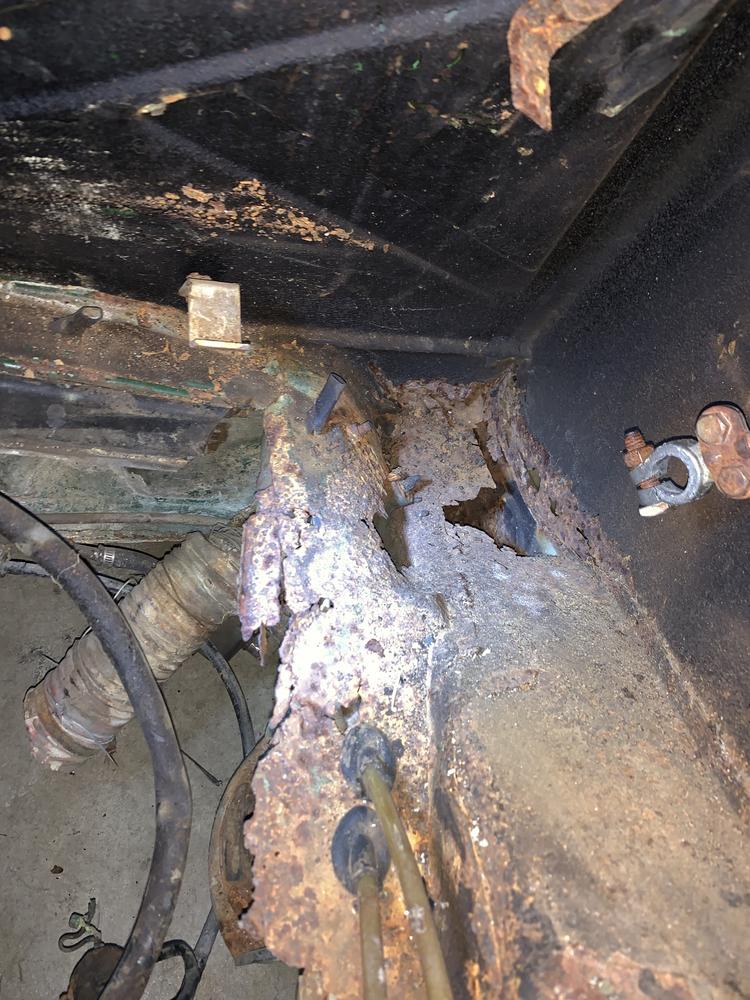
Engine shelf removed. What was left of it anyways.
"Lets form some new metal." - Probably Bob Ross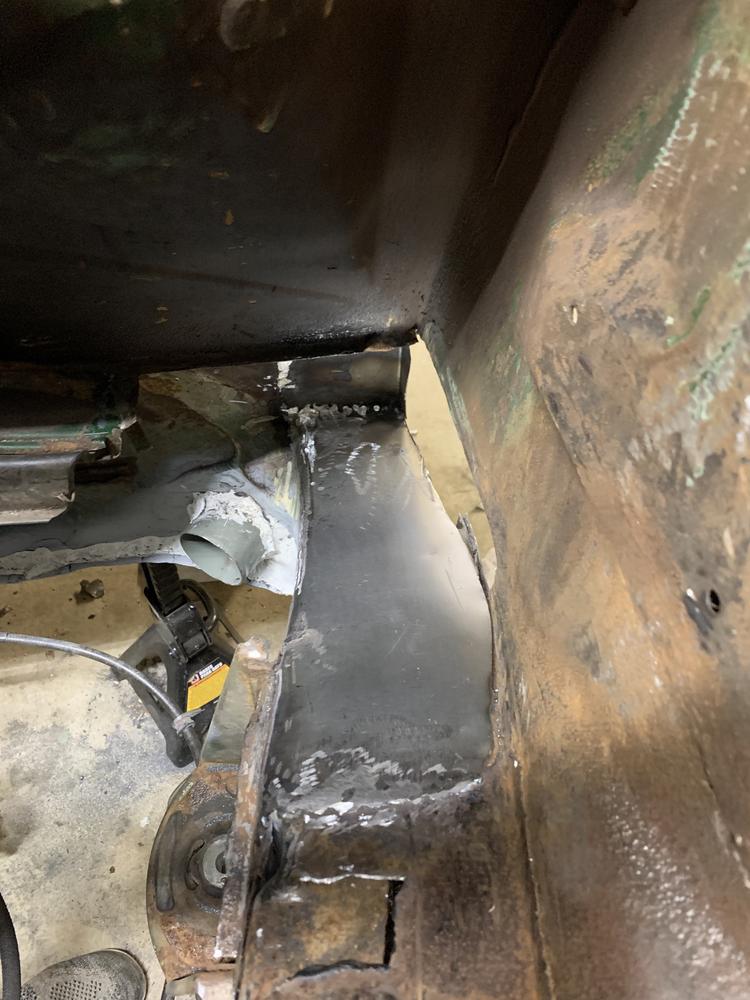
This is all 16 gauge. I bent the large shapes over my thigh, tack welded a few spots and hammer formed to get the fit better.
Grind for 1 hour. Prep with Metal Ready. This is how it looks after: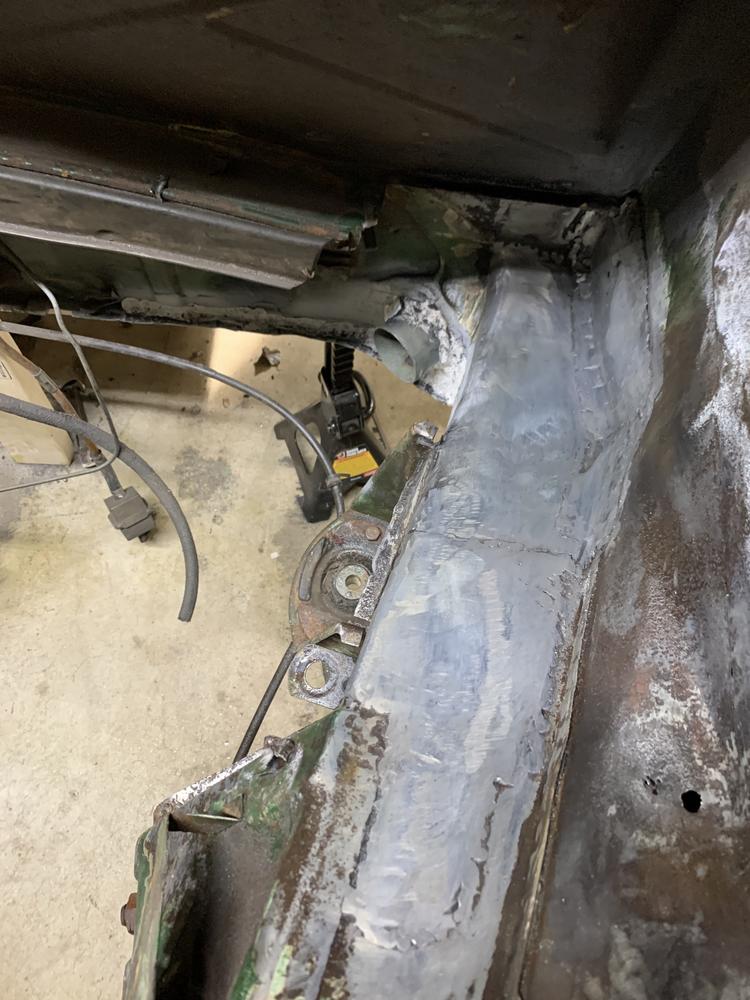
Self etch primer, and some filler primer on top. This is the result: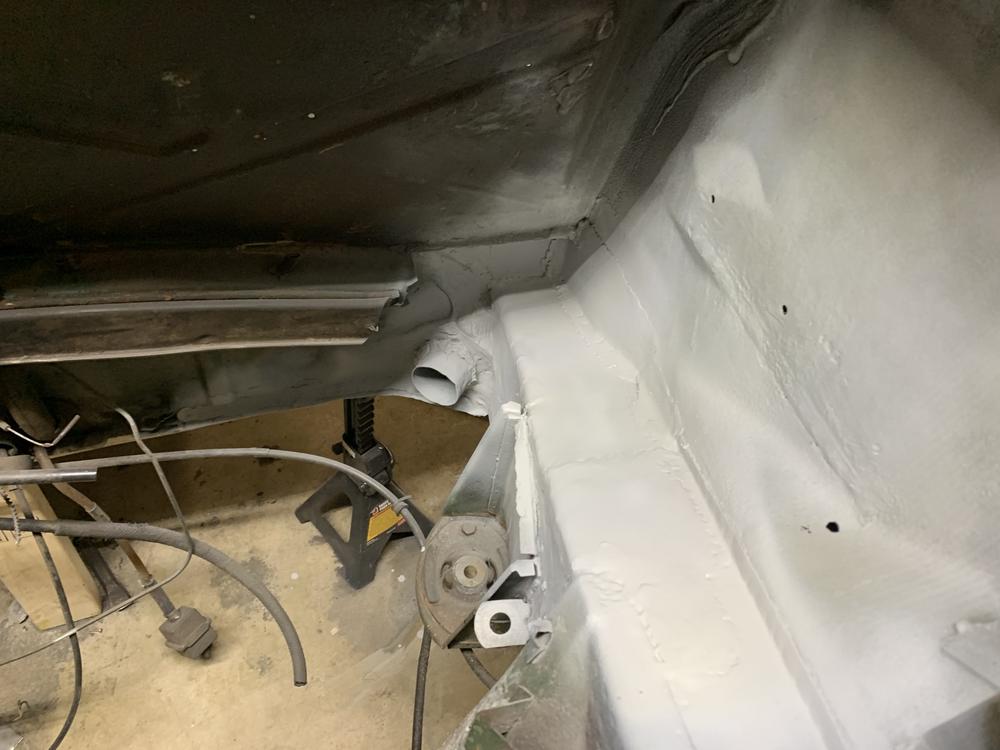
I got a little "trigger happy" and sprayed some primer over all the fresh metal, not thinking that I still need to weld (and purchase) the engine shelf.
Regardless.... There have been prettier repairs, but its a good deal better than no metal there at all!
There is still a hole and thin area that needs patched (lower right of the last photo)
Question: Would you guys recommend a skim layer of body filler to smooth the gaps out on the hell hole? I have never used the stuff before, but I'd like to finish with a nice repair.
Overall the hell hole wasn't the worst thing ever. Would not look forward to doing it again though. I have about 6 hours straight into the repair. What a pain in the butt it is getting in and out of there. 28 is too young for my knees to feel like this.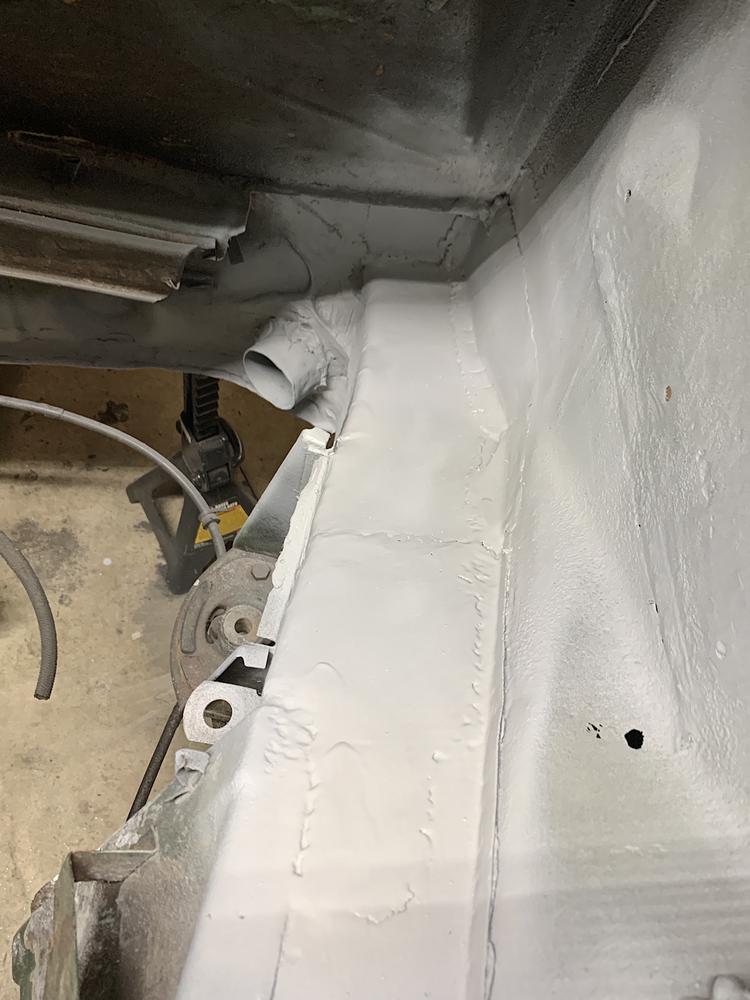
Thanks for reading!
Posted by: BeatNavy Mar 20 2020, 05:53 AM
Wow, I just noticed this thread. You're doing great work, and your fabrication skills are excellent. I found that to be a HUGE asset (or in my case mostly, a liability) in terms of repair. Great welding can't makeup for crappy fab skills. The 16 ga will hold up nicely.
I suppose you could body filler on the hell hole there if you want it to look nicer, or, if later, you don't want it too obvious that it was repaired. But I don't think there's any "dishonor" in that repair, and in fact it is evidence of all the good work you did/are doing. OTOH, you're most interested in driving this thing 
I spent last 25 years (or so) in NoVA, but just relocated mostly to Easton in the last year. My daughter went to VCU (probably a year or two behind you), and my wife is from Stoneleigh. The neighborhood and garage pics remind me a bit of her old house. (EDIT: Forgot to add that her dad let me store an old MGB in their garage that was similar, but smaller. I did an engine rebuild and some other work on it out of that garage while stationed at Aberdeen. Brings back memories.)
Lastly, I've got an Irish Green '72 (that became something like guards red at some point) and a '75 that I'm stalled on. It was in similar shape to yours, and I made a lot of progress and then hit a wall for a while. Last week with help I managed to get it to Easton, so maybe I can  again!
Good luck -- maybe we can catch up at some point.
Posted by: AZBanks Mar 20 2020, 06:12 PM
Instead of body filler, I would spend a little more time with the grinder to smooth out the rough spots.
Posted by: bbrock Mar 20 2020, 06:41 PM
Nice work! It isn't a bad idea to put a skim of fiber reinforced filler over the welds anyway just to make sure all pinholes are filled and eliminate depressions that could trap moisture. @http://www.914world.com/bbs2/index.php?showuser=9892 pointed me to https://www.amazon.com/Fibreglass-Evercoat-633-Reinforced-Compound/dp/B000P70VGQ/ref=sr_1_1?keywords=evercoat+fibertech&qid=1584751223&sr=8-1 and I really liked it.
Posted by: jaredmcginness Mar 20 2020, 07:19 PM
Wow, I just noticed this thread. You're doing great work, and your fabrication skills are excellent. I found that to be a HUGE asset (or in my case mostly, a liability) in terms of repair. Great welding can't makeup for crappy fab skills. The 16 ga will hold up nicely.
I suppose you could body filler on the hell hole there if you want it to look nicer, or, if later, you don't want it too obvious that it was repaired. But I don't think there's any "dishonor" in that repair, and in fact it is evidence of all the good work you did/are doing. OTOH, you're most interested in driving this thing
Good luck -- maybe we can catch up at some point.
So many similarities! Thank you for the kind words. We can certainly link up at some point. I know there's a good few shows and cruise ins over the bridge.
I bought filler today, and will experiment a bit this weekend.
I'll need some regardless on a few sections of the car. I might attempt some more sanding to smooth this area out for now.Instead of body filler, I would spend a little more time with the grinder to smooth out the rough spots.
Good plan. I will get get back in there with a fresh set of eyes, when it comes time to mount the battery tray.
Nice work!
It isn't a bad idea to put a skim of fiber reinforced filler over the welds anyway just to make sure all pinholes are filled and eliminate depressions that could trap moisture. @http://www.914world.com/bbs2/index.php?showuser=9892 pointed me to https://www.amazon.com/Fibreglass-Evercoat-633-Reinforced-Compound/dp/B000P70VGQ/ref=sr_1_1?keywords=evercoat+fibertech&qid=1584751223&sr=8-1 and I really liked it.I appreciate the link and plan to pick some up. There's plenty of other spots on this '71 that needs attention.
Thanks for the recommendations, guys. After looking at the hell hole repair a new day, without dust in my eyes, I could do a little better - if I rush just a bit less.
Happy Friday.
Posted by: bbrock Mar 20 2020, 07:28 PM
Just to be clear. I agree with Rob there is no shame at all in the repair you have done. When you go back to grinding, just make sure you are grinding only the weld and not the surrounding parent material. You can grind just about any weld to invisibly smooth if you don't mind thinning the metal to become foil. Obviously not good. Better to live with a bit of weld shrinkage and have it strong than pretty and weak. Finding that balance was one of the trickier parts for me.
Posted by: jaredmcginness Mar 20 2020, 07:37 PM
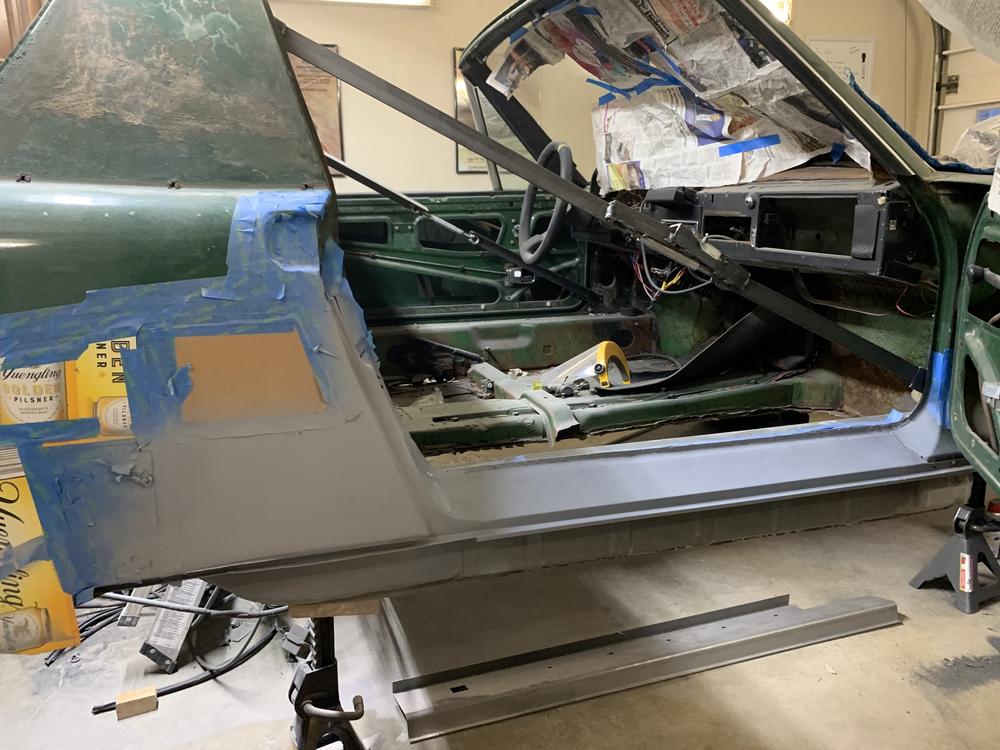
Posted and forgot to add the work I accomplished today.
I fit these two panels today. I had to modify them a hair, but over all they fit nice.
I traced these shapes off of the pieces I cut out. Pretty cut and dry - or... weld.
In progress. Ignore the bacon welds. 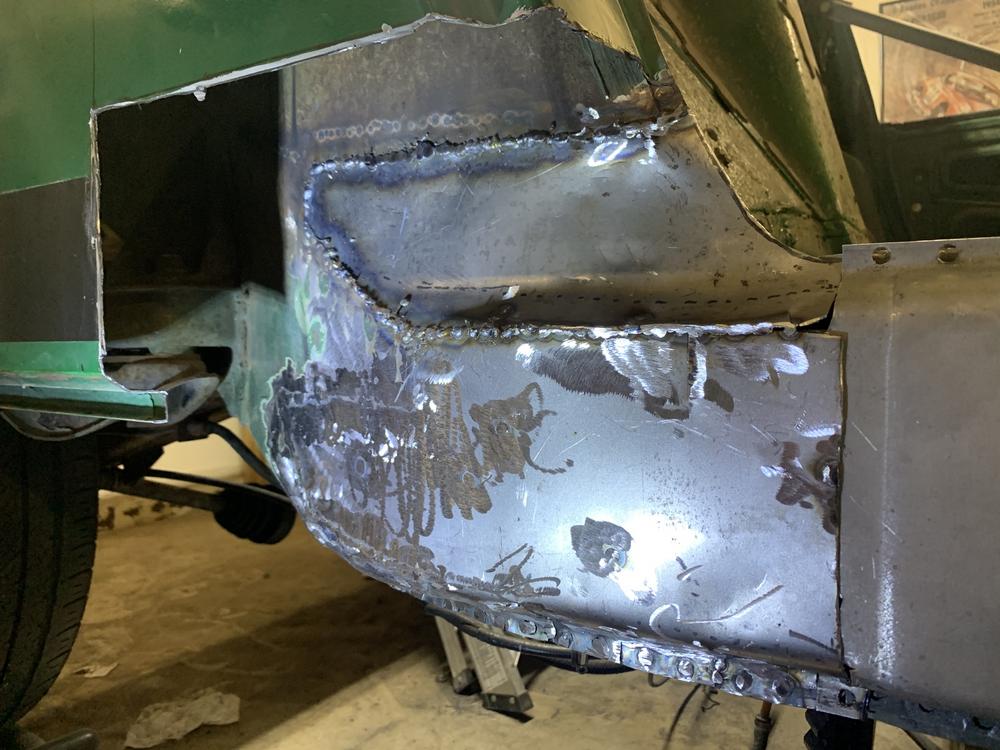
A lot of the same sounds echoing from the garage this week... I'm glad I bought ear muffs.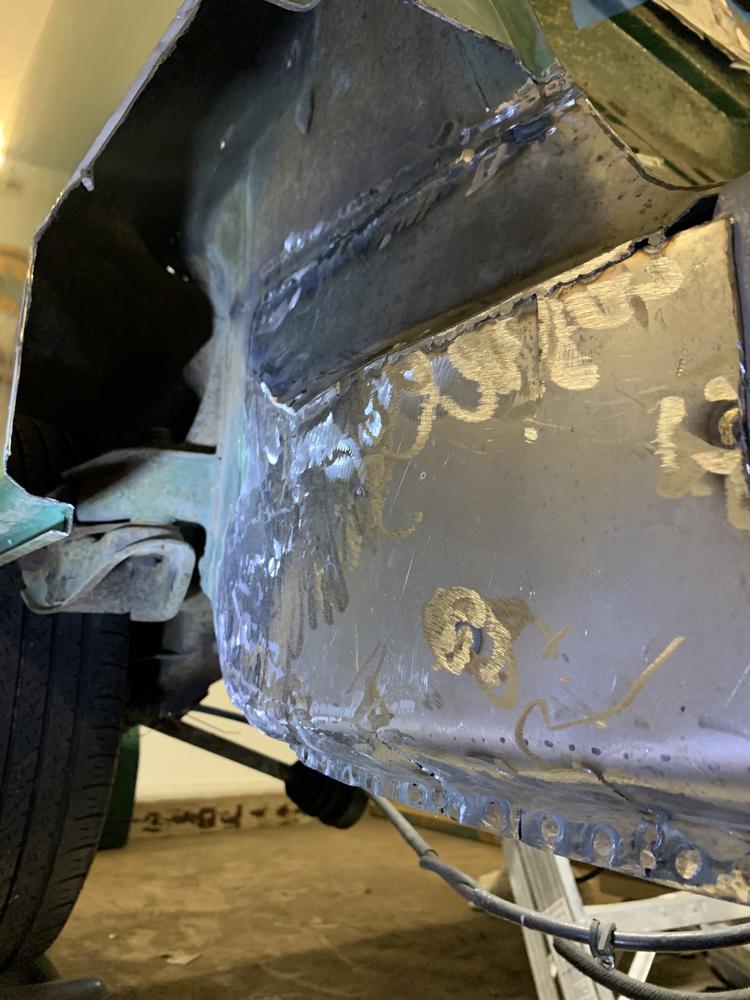
Mimicked the spot welds on the bottom. Light coat of SE primer.
I will need to fill in another spot or two, and figure out the transition to the outer clamshell.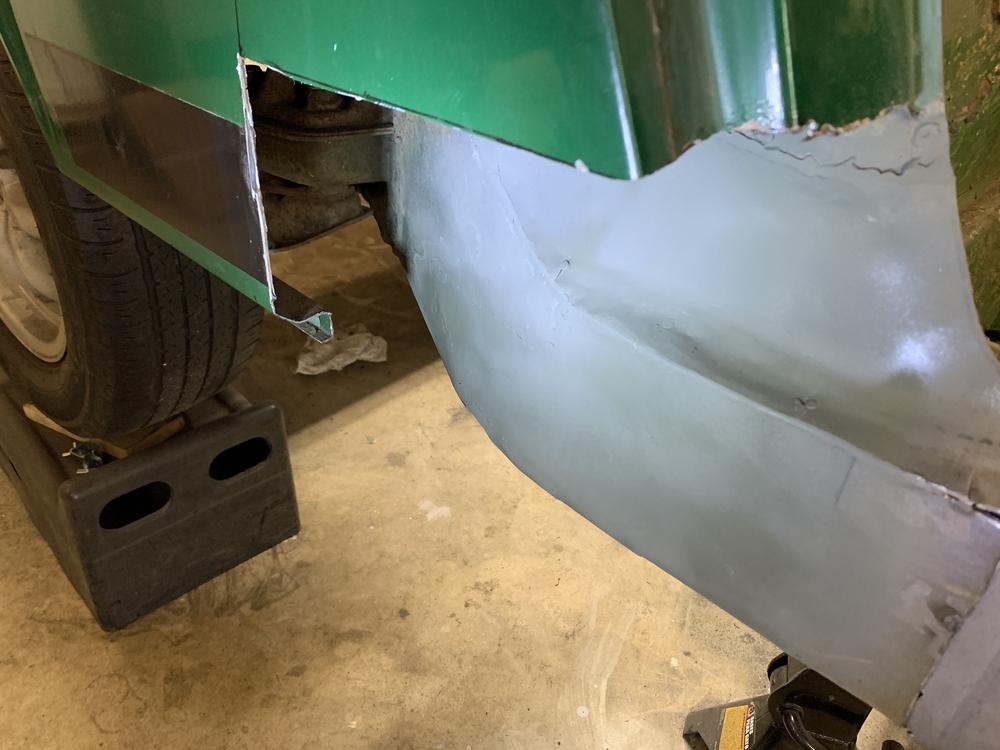
I have to say I am really proud of how this looks... If you scroll back to the first photos, there was not a lot of meat here!
Factory shape looks pretty close. As a reminder, I am not using the factory jack pyramid (I will be using Brads Meyer's stiffening kit) so this section was left flat.
Dual wall 16g, pain in the D to form.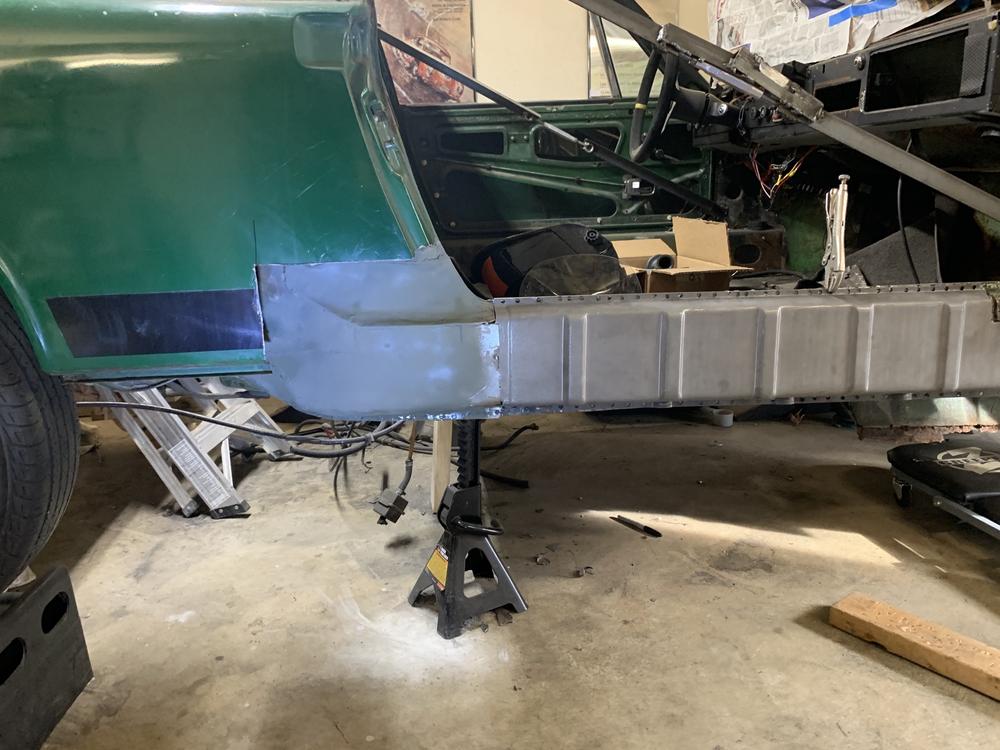
DANG! Nice. Fits up pretty well with the outer clamshell. took a mallet hit or two.
I drilled these holes for the spot welds last night, made a few trims - But it sandwiches nicely in between the dual wall.
Lastly. The girl and I started taping off my Fuchs - for the semi gloss windows. Just like the car... time consuming but worth it for the outcome.
P.S. Here is my cat, Oatmeal, in case anyone needed to see this today.
Posted by: jaredmcginness Mar 20 2020, 07:45 PM
Just to be clear. I agree with Rob there is no shame at all in the repair you have done.
When you go back to grinding, just make sure you are grinding only the weld and not the surrounding parent material. You can grind just about any weld to invisibly smooth if you don't mind thinning the metal to become foil. Obviously not good. Better to live with a bit of weld shrinkage and have it strong than pretty and weak. Finding that balance was one of the trickier parts for me.Much appreciated. I dealt with that on the inside of the long. Grind long enough and you can see the weld curling away, while a new hole gets bigger.
 Certainly has been tough finding the balance. Thanks B!
Posted by: jaredmcginness Mar 22 2020, 10:54 AM
Weekend update:
Part 1:
Decided to go at the hole on the Lower front PS fender. This will be my first time ever using body filler. I have nothing but time on my hands today. So I am ready to sand. Nice little spot to try this out.
Here's the play by play....Cut out: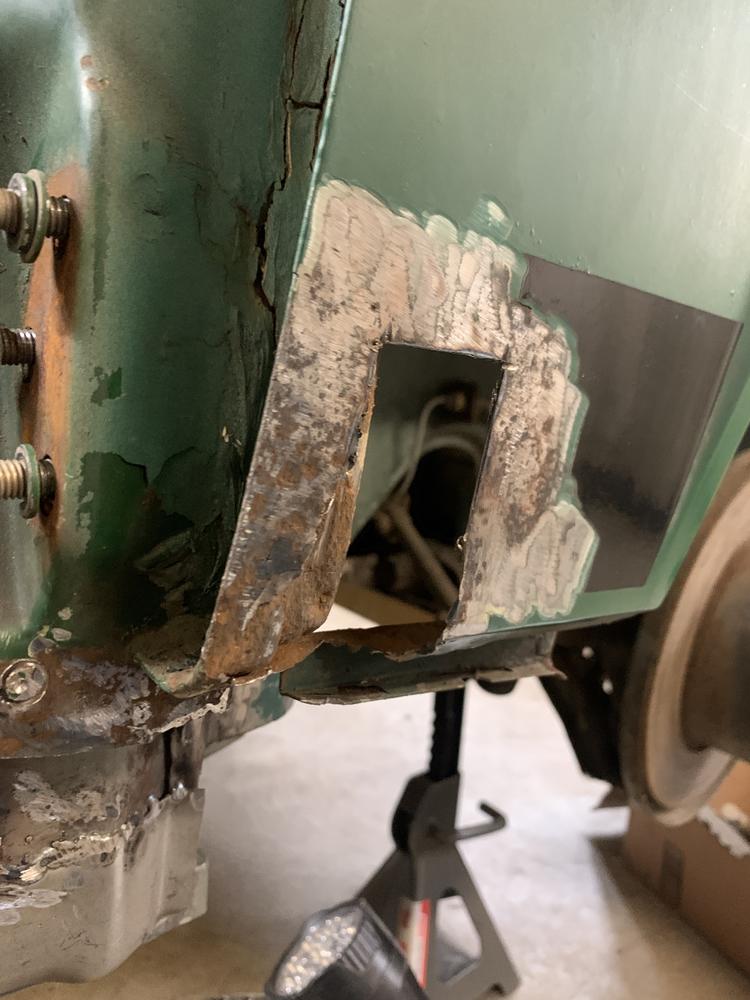
Trace the shape of the piece you need. This time I used a Yuengling box for a template. The cardboard you use all depends on your beer preference that day. 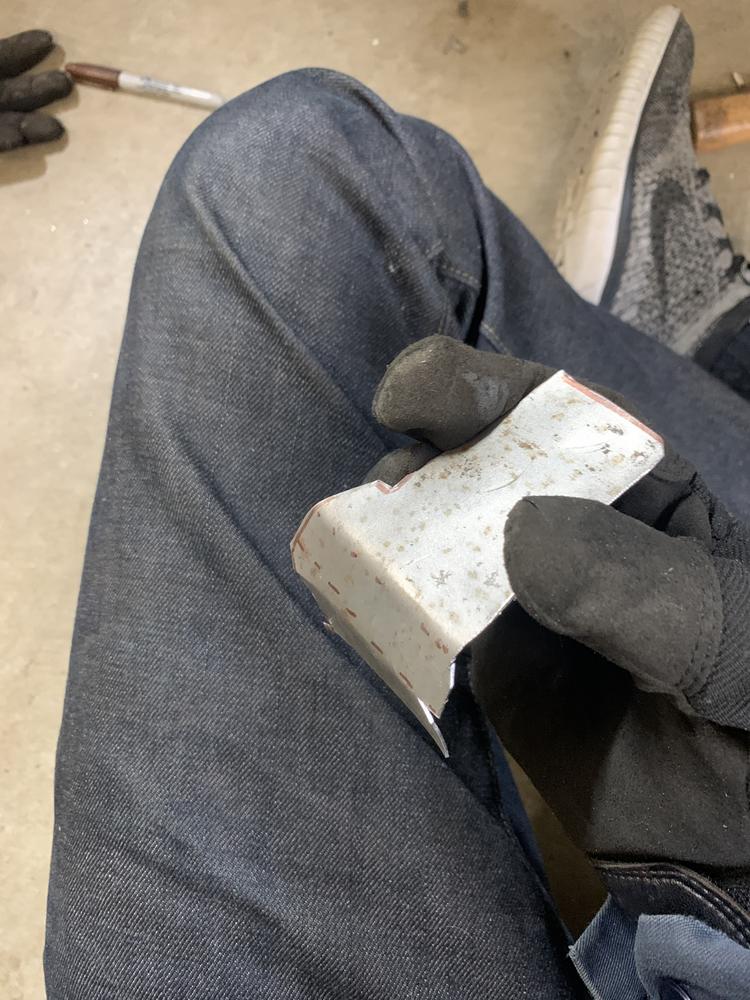
Looks good to me.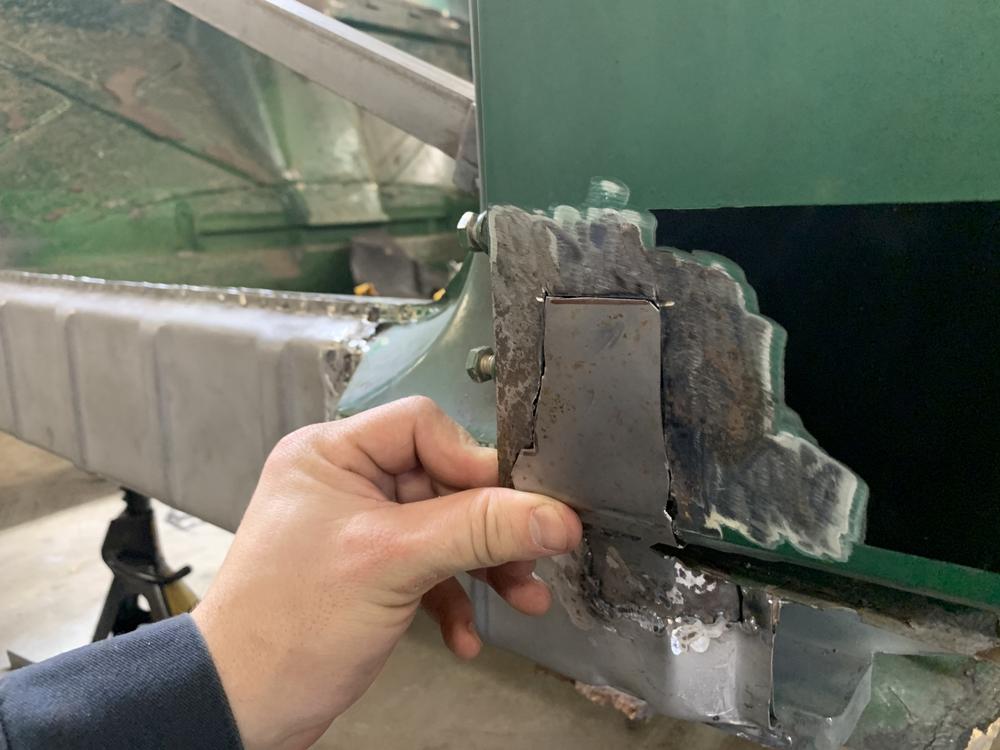
Weld, grind, "smooth".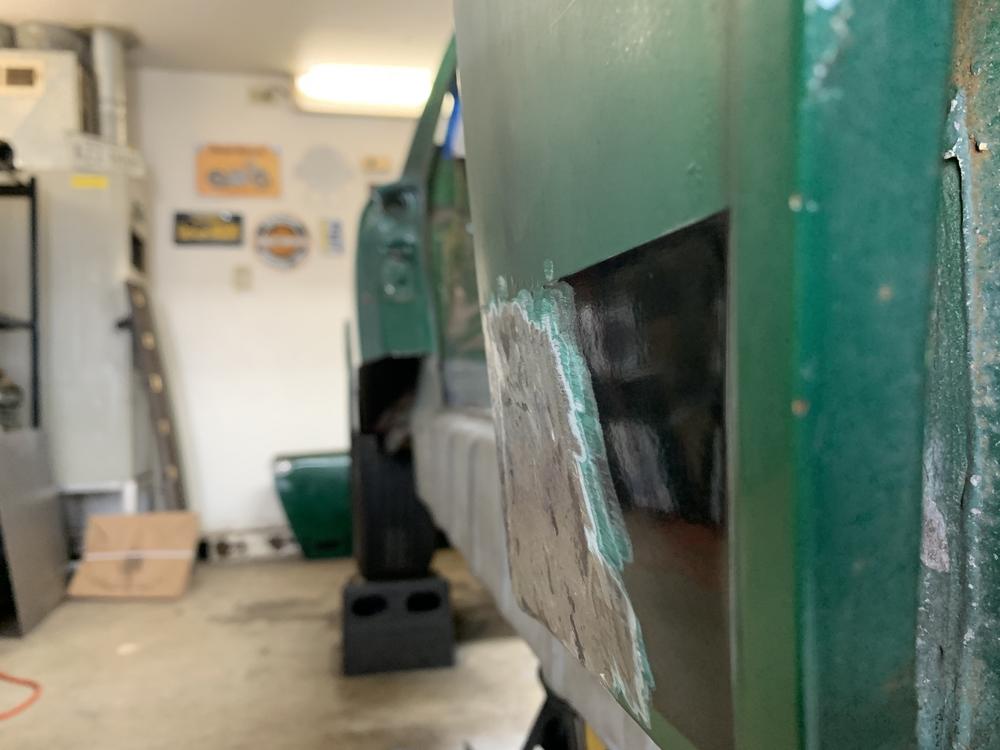
Body filler: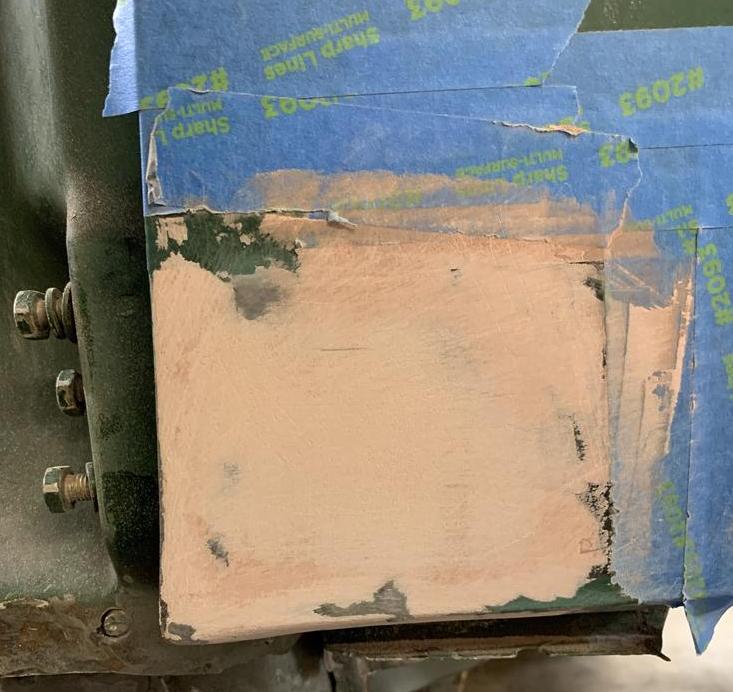
Then you realize you still have the negative stripe vinyl beneath that tape. Grind that off, rather unevenly. Apply another skim of body filler.
Sand for like 40 minutes. 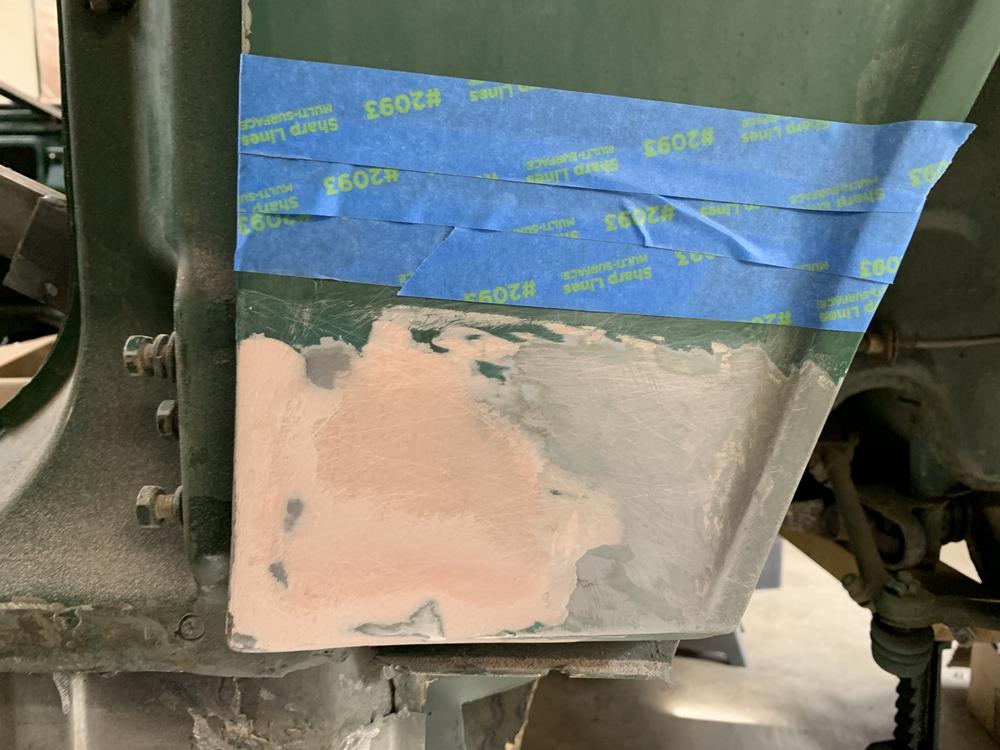
Voila! I am pretty proud of this! Not horrible for a first time at "body work". Certainly time consuming...
I see a couple dings left. Honestly, I think that's an OK thing - or this fender might stand out like a sore thumb, as compared to the rest of the car. As of right now I am not going for a perfect resto. This will be as original paint as possible.
Gives me a bit of hope for down the road when I take it a step further, with a respray and such.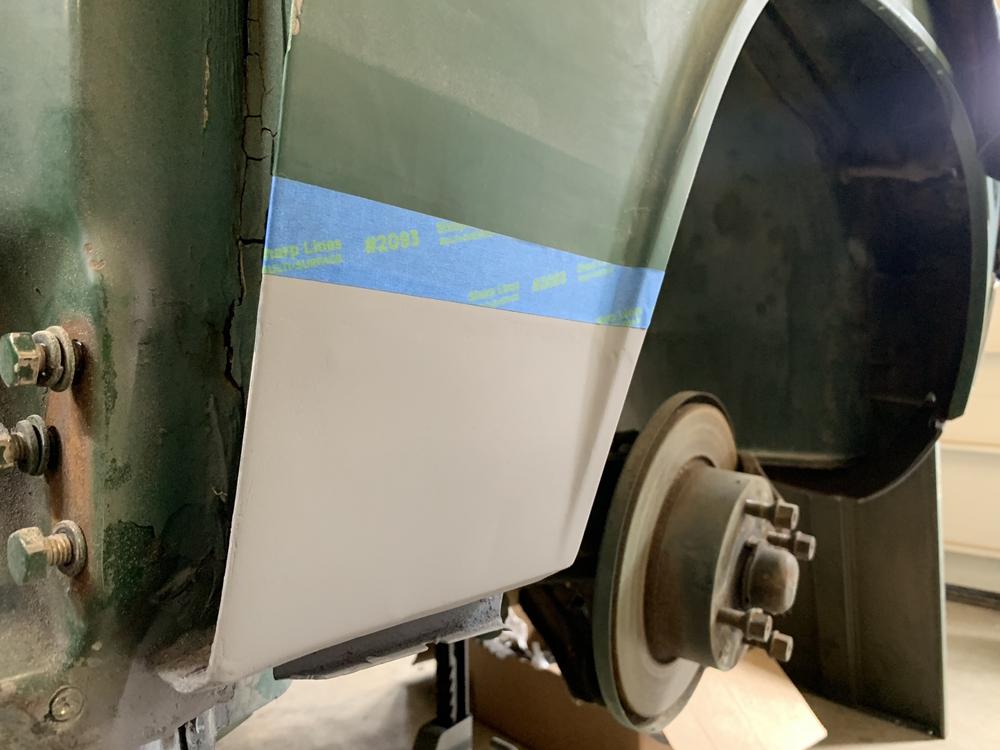
Part 2:
I spot welded the outer clamshell in place. This feels great and is so satisfying to see. Weld one, move a foot over, weld another, let cool, repeat.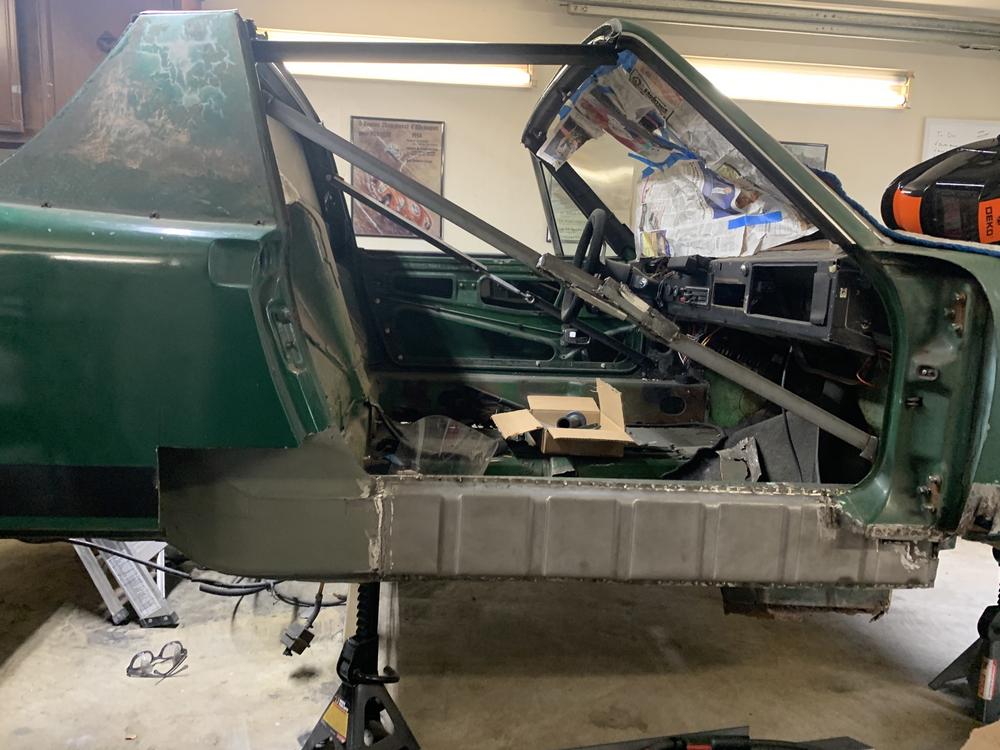
Still have a bit of grinding and smoothing to do. A theme for this project...
Now for the big test. Does this door still fit?
BOOM!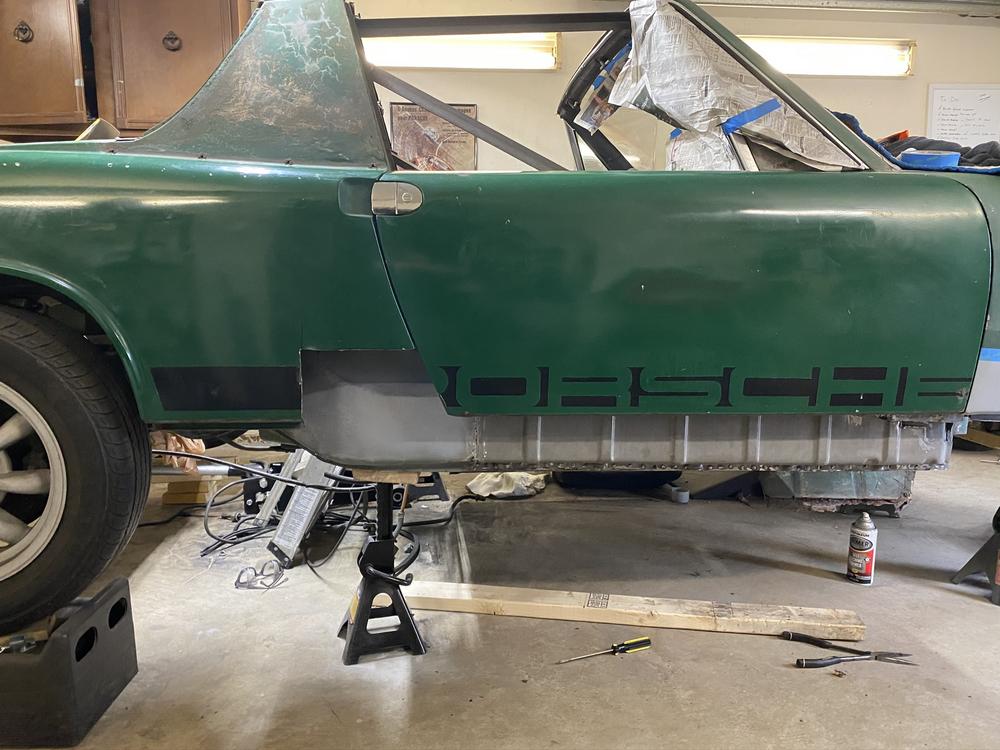
Door gap looks pretty damn good and she closes like a German bank vault! Lots accomplished in the last few days, and a lot of stuff checked off the whitebaord list.
Whats next:
Door jamb, and body section.
Door sill
Drop floors
Stiffening kit.
Battery box, etc.
Not really in a particular order.
Thanks for reading and wash your hands.
Jared
Posted by: bbrock Mar 22 2020, 01:09 PM
Pure inspiration!!! I love watching this... and look at those gaps. 
Posted by: Chief Mar 22 2020, 01:15 PM
Great work! And loving Oatmeal!!
Posted by: jaredmcginness Mar 23 2020, 10:03 AM
Thanks guys!
Sunday project. My girlfriend and I spent the morning finishing up taping off my fuchs wheels for restoration. Took a while!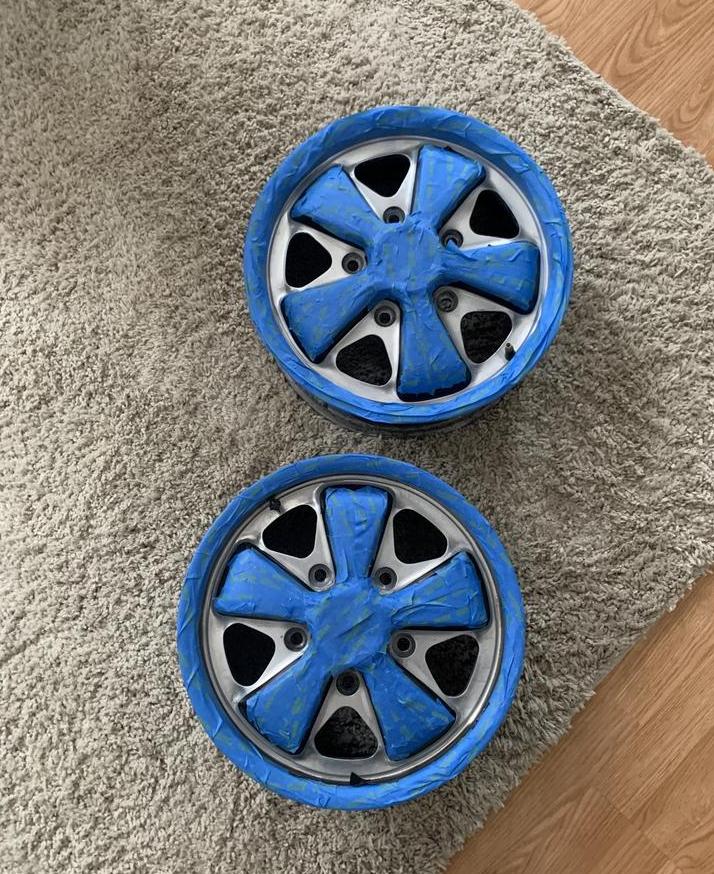
Scuff, Prime 2 coats, Semi Gloss black 3 coats, Matte clear over top.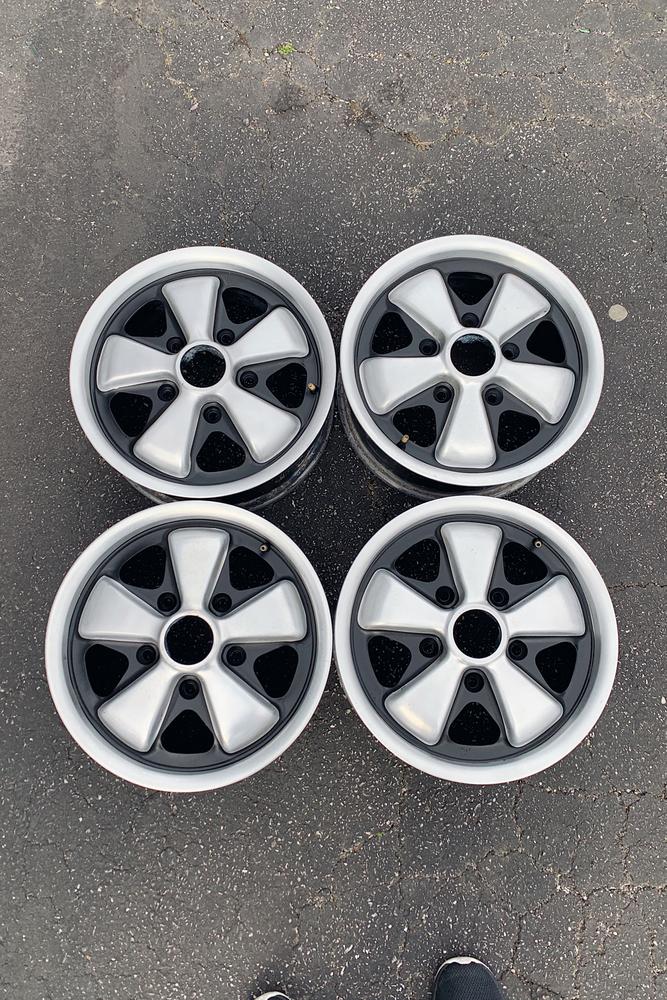
1 bolt holding it on for the photo (still 4 lug) Just had to see.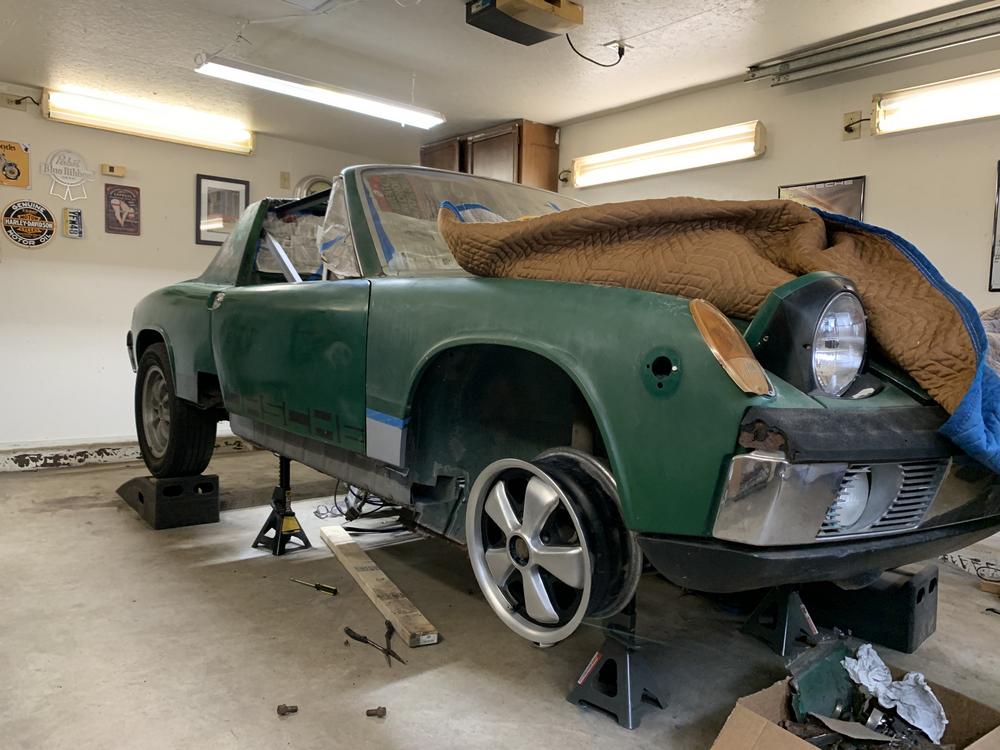
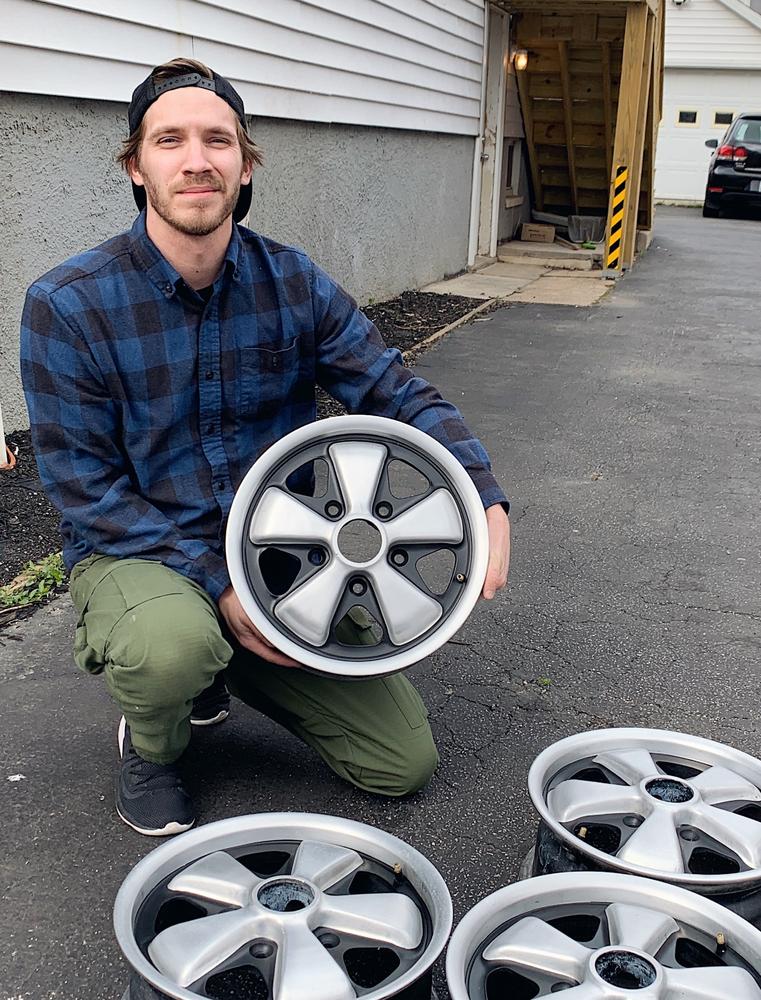
I am so happy about these.
They are going to look great on here one day. Not a bad tidy up for a $700 set of fuchs!
Posted by: BeatNavy Mar 23 2020, 10:41 AM
Those Fuchs look great. What did you do to the petals? Just matte clear?
Posted by: jaredmcginness Mar 23 2020, 10:53 AM
Those Fuchs look great. What did you do to the petals? Just matte clear?
Thanks, they are the raw finish - I believe its factory anodize. I just cleaned them up and cleared right over them. We'll see how it holds up?
Posted by: PCH Mar 23 2020, 01:17 PM
Great work Jared! Love watching your car progress and glad to see that spare metal sitting in the garage being put to good use.
Posted by: Cairo94507 Mar 23 2020, 01:44 PM
You are doing a nice job and that 914 is going to be on the road soon enough.
Posted by: jaredmcginness Mar 24 2020, 06:53 PM
Tuesday update.
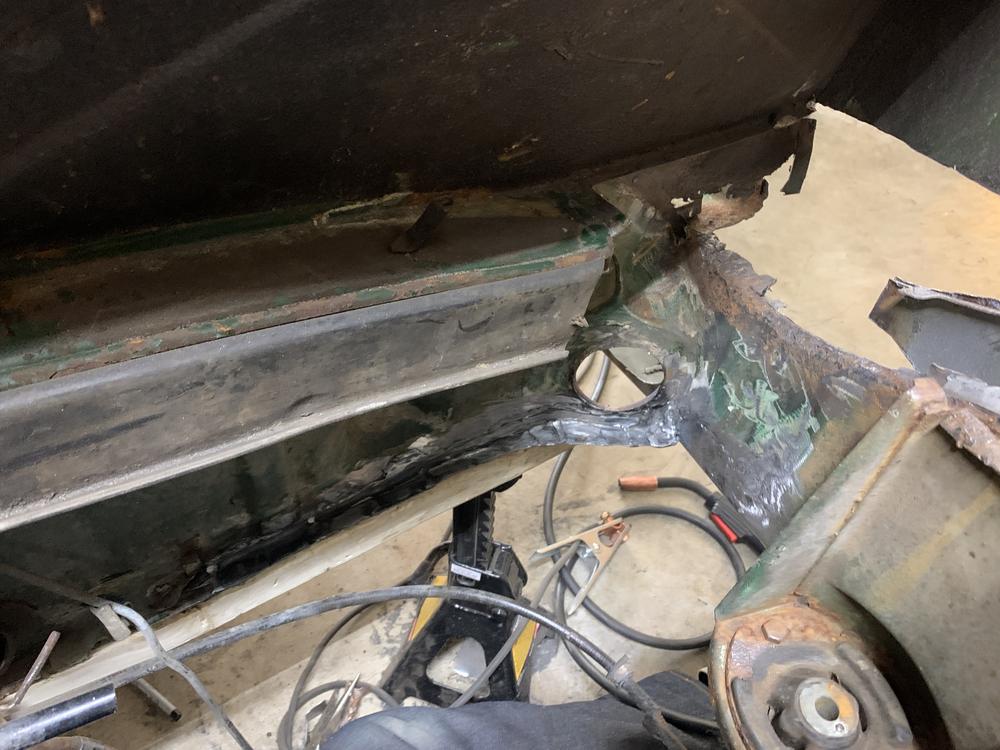
I'm ready to weld the sill back in - so I need to get that lower jamb and body section figured out.
I sandblasted my cut-out section, found a ton of rust, body filler (like .25") rivets, and old brazing. Really just a bad repair at some point in the cars life.
Best to just replace the whole section, right?
I made a few threads and posts in that last month+ asking if anyone has a car they are cutting up, but no luck.
I will try and make my own, before I drop $90-$120 on a jamb section.
I got started on this today. Here's the old section that I do not want to reuse.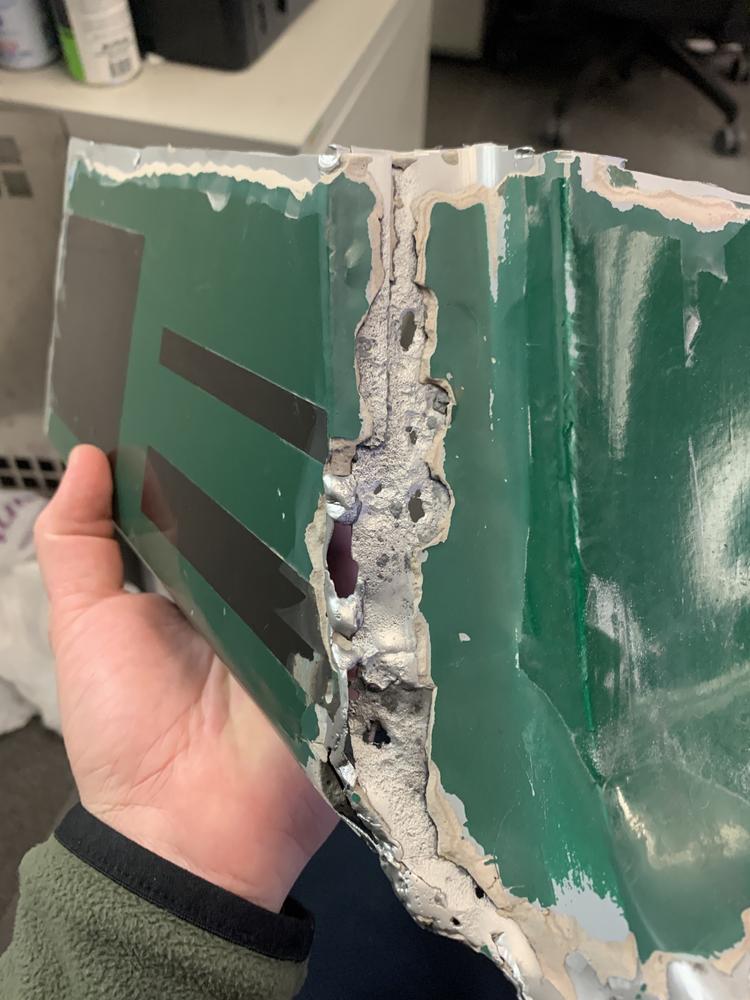
Rear. Its like 5 pieces stuck together.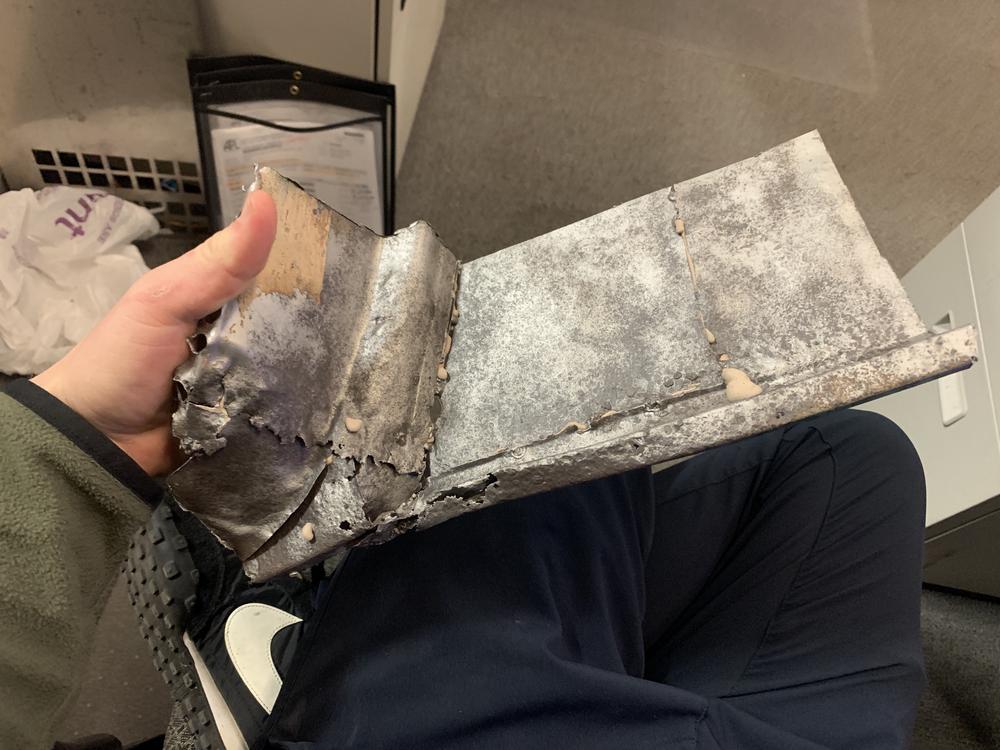
I will try to make my own, and see how it turns out. Cave man scribbles...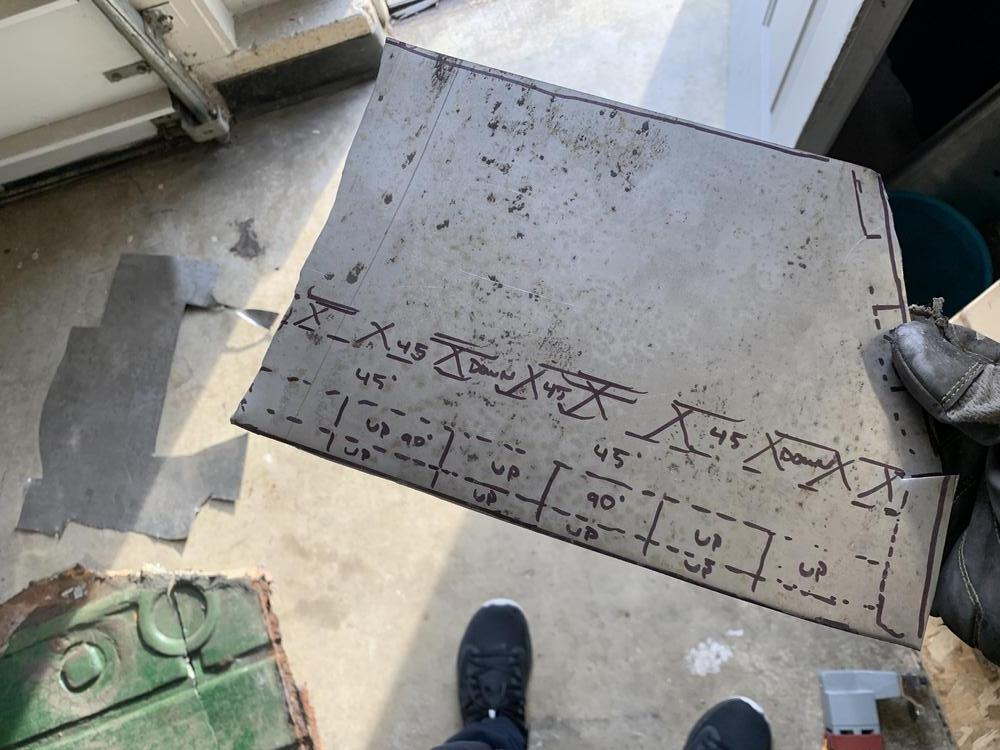
Pain in the butt to bend with my little HF Brake. 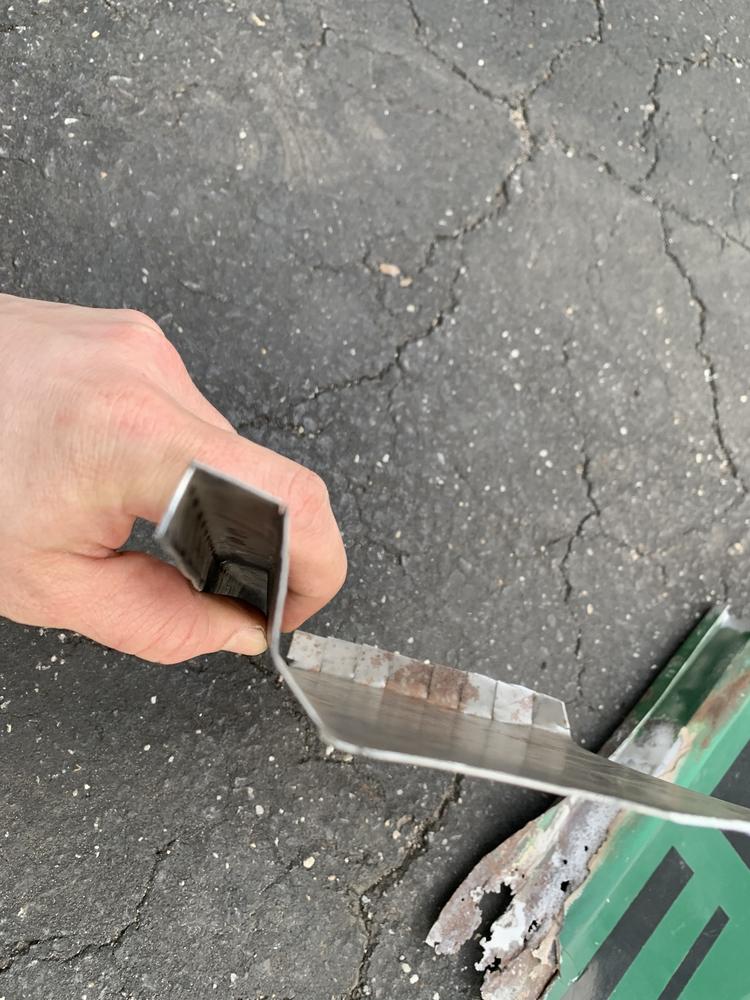
On the right track in a bit under an hour. Jamb will be a different story.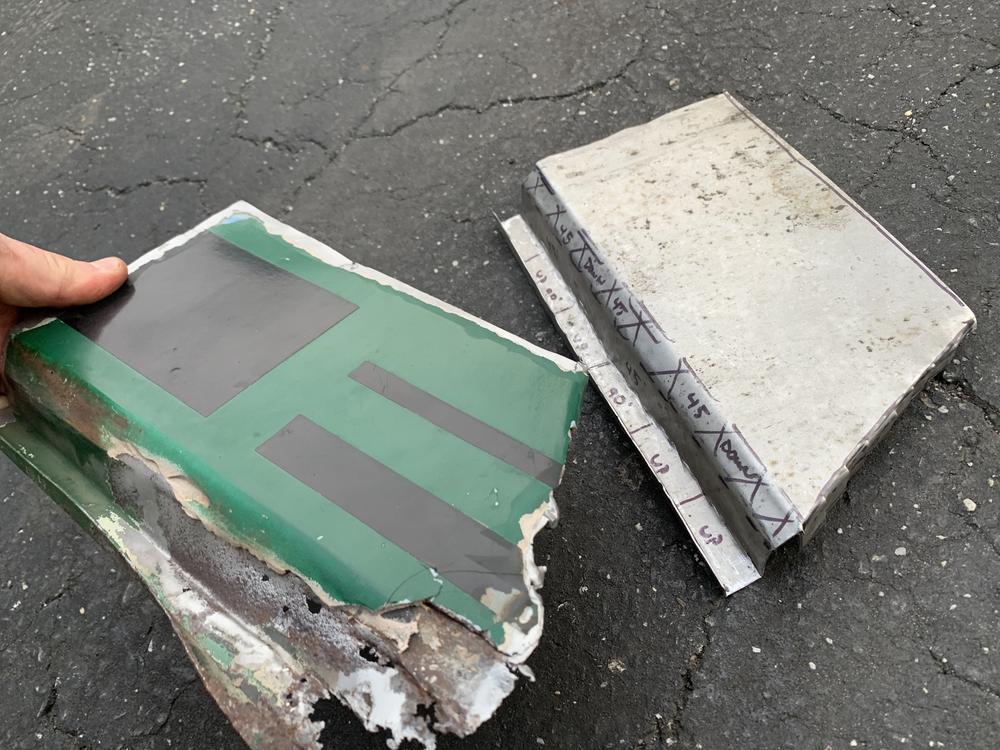
Definitely close! With some tweaking, I think this could be a good part.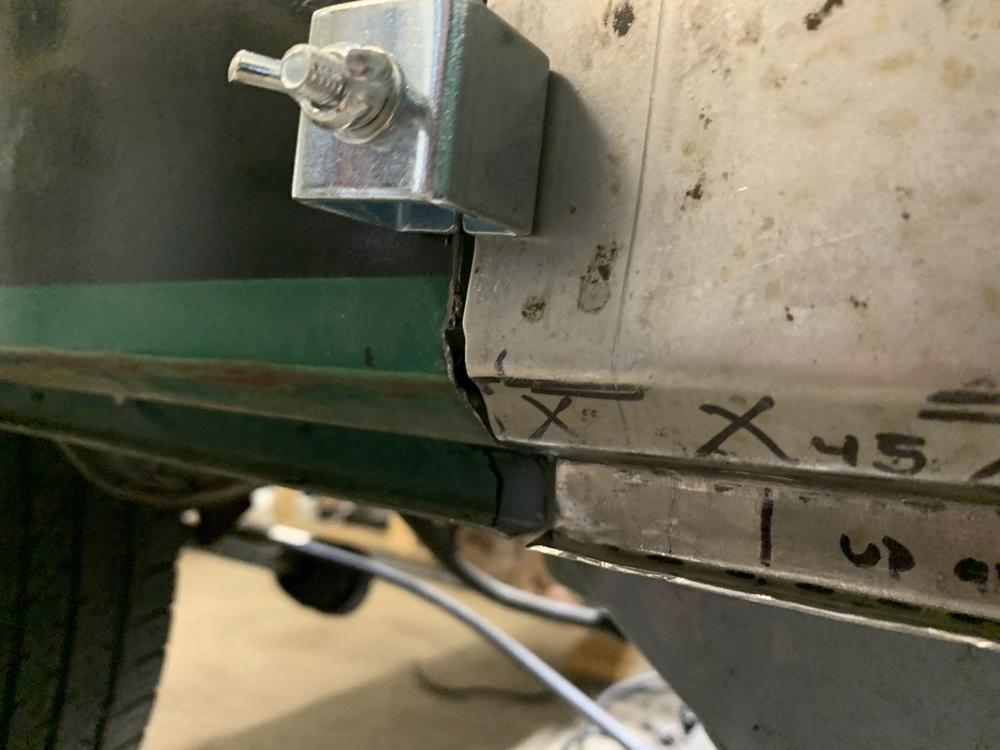
Other bits:
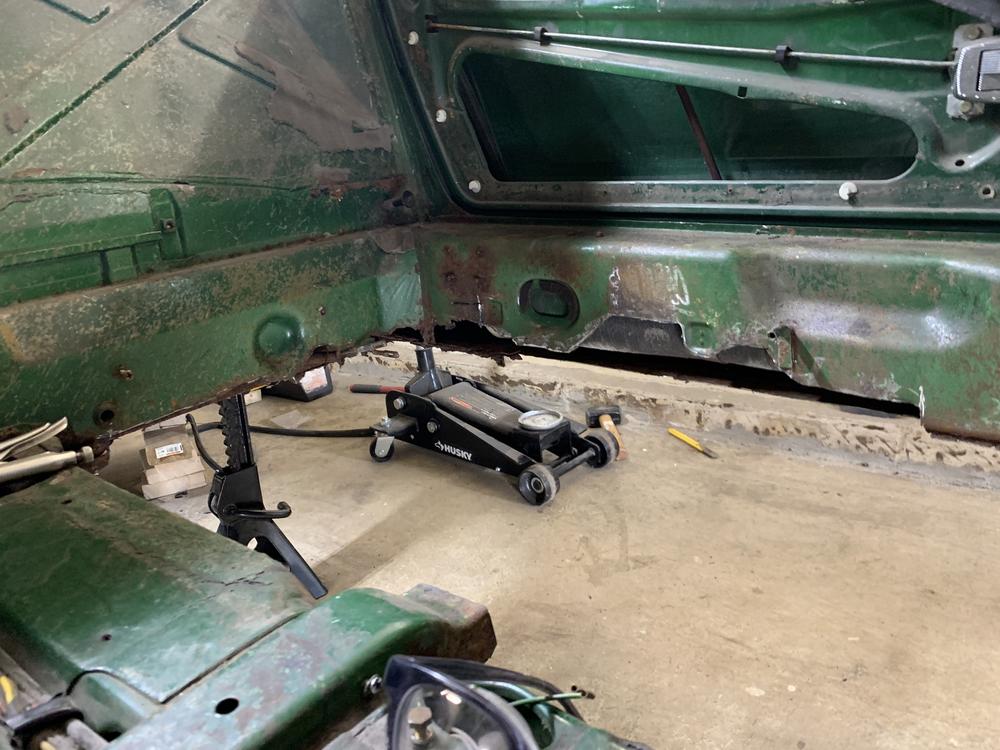
Got the passenger side floor out.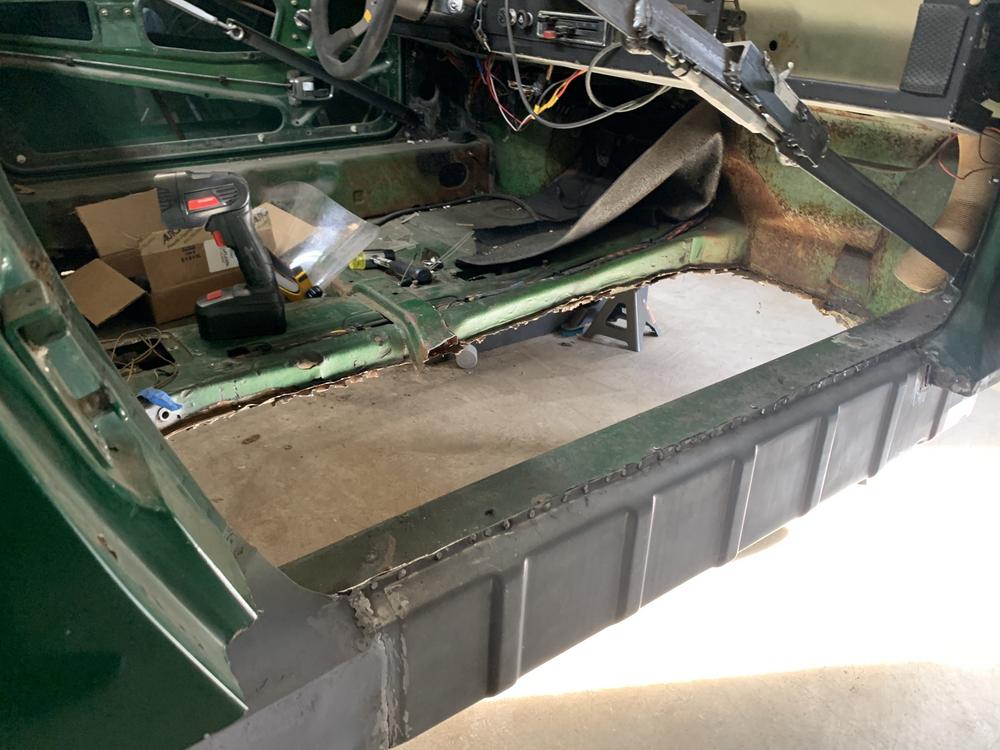
Received this beautiful part from Auto Atlanta.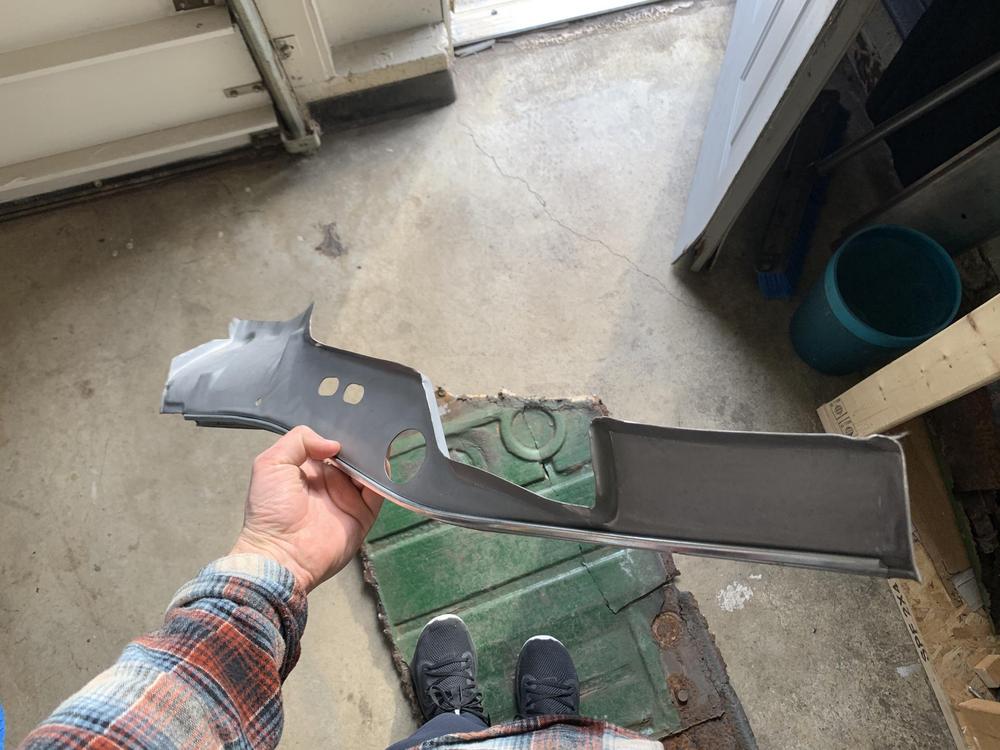
Had a celebratory brew on the defeated carcass of a floor.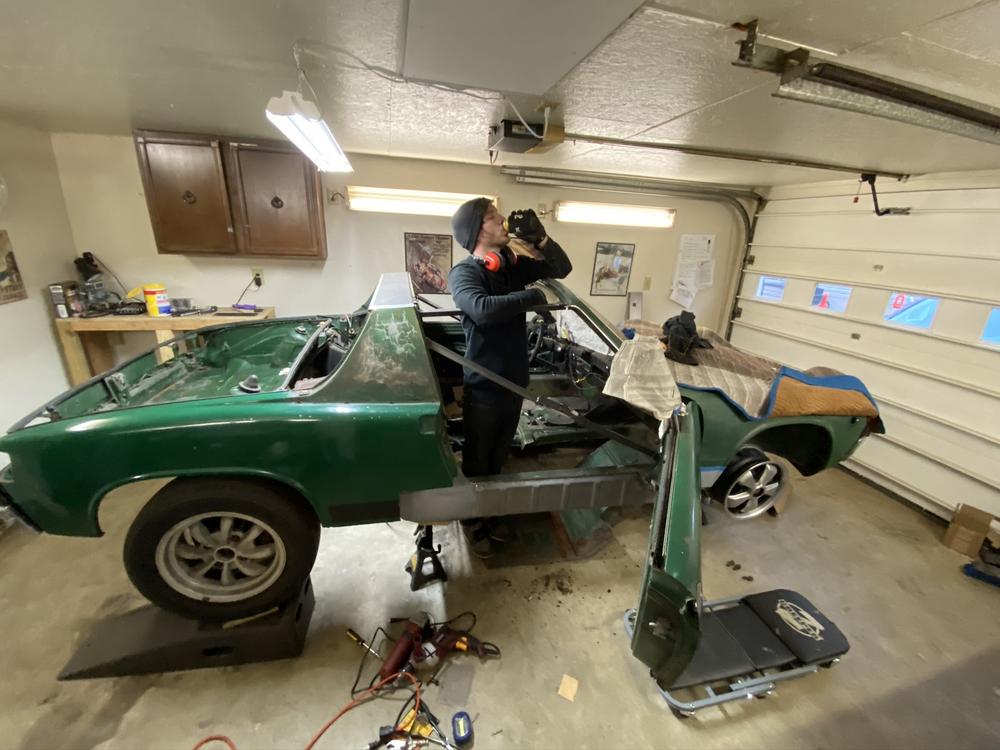
And a final pic, because the light was nice.
Also serves as a summary of some of this weeks accomplishments, so far.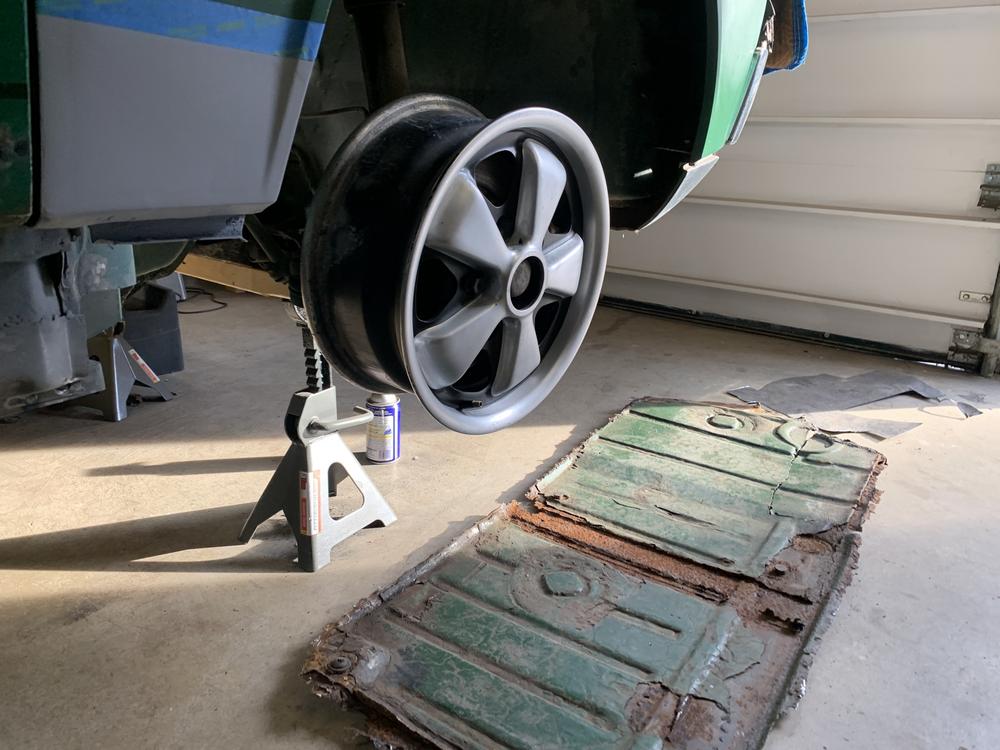

Posted by: bkrantz Mar 24 2020, 08:02 PM
Nice progress. And that jamb section could have a place in the 914 PO botched repair hall of fame.
Posted by: bbrock Mar 24 2020, 09:20 PM
Of all the horrors I witnessed on my car, I don't think any were as nasty as that jamb. It's one thing when Mother Nature Fs up the car, but... Are you sure that's even filler? Looks like somebody poured concrete.  You patch is pure artistry. That took guts to even attempt.
Posted by: jaredmcginness Mar 27 2020, 06:23 AM
Edit: Seriously thanks for the kind words guys, it gives me a ton of motivation.
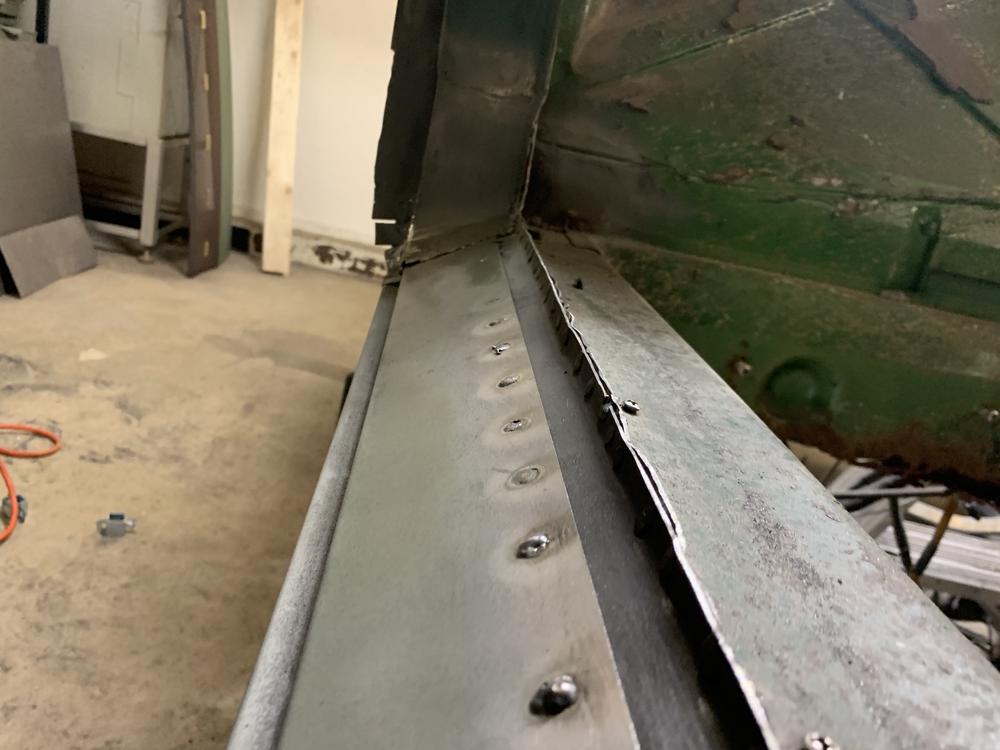
Hey guys, decided to try and tackle this lower jamb.
WORK IN PROGRESS. Man this is a tough piece. Check out the pics for where I am at so far. 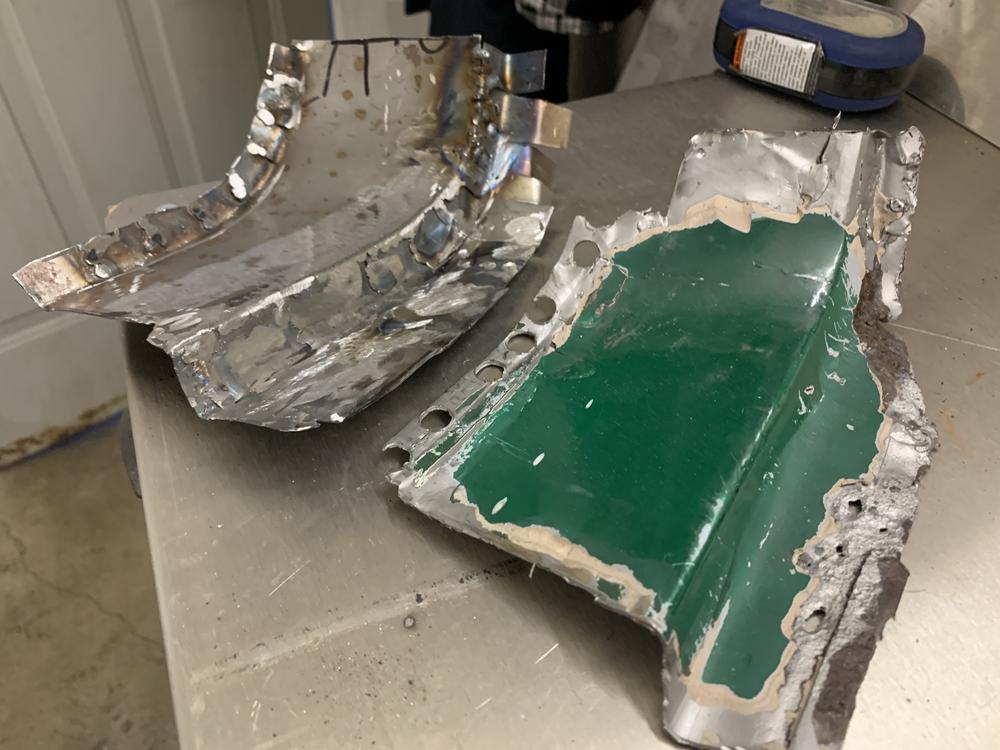
I achieved the rolled shape by clamping my new piece to the original lower jamb, pressing with my thumbs, clamp again closer, press, then hammer form.
Outer flange is one piece, and the rolled flat is another. 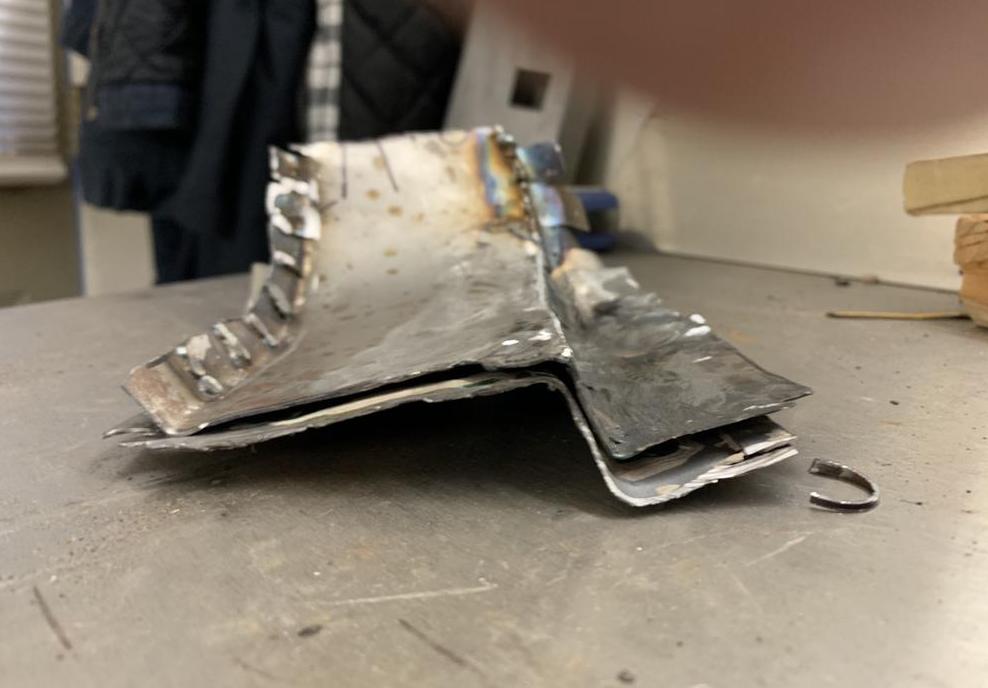
Fit is close... getting there. 
Cleaned up and sandblasted a little more. Now I can see where else I need to spot weld to finish filling this piece in. 
Shape is there, its a clean fit and the door closes nicely over it.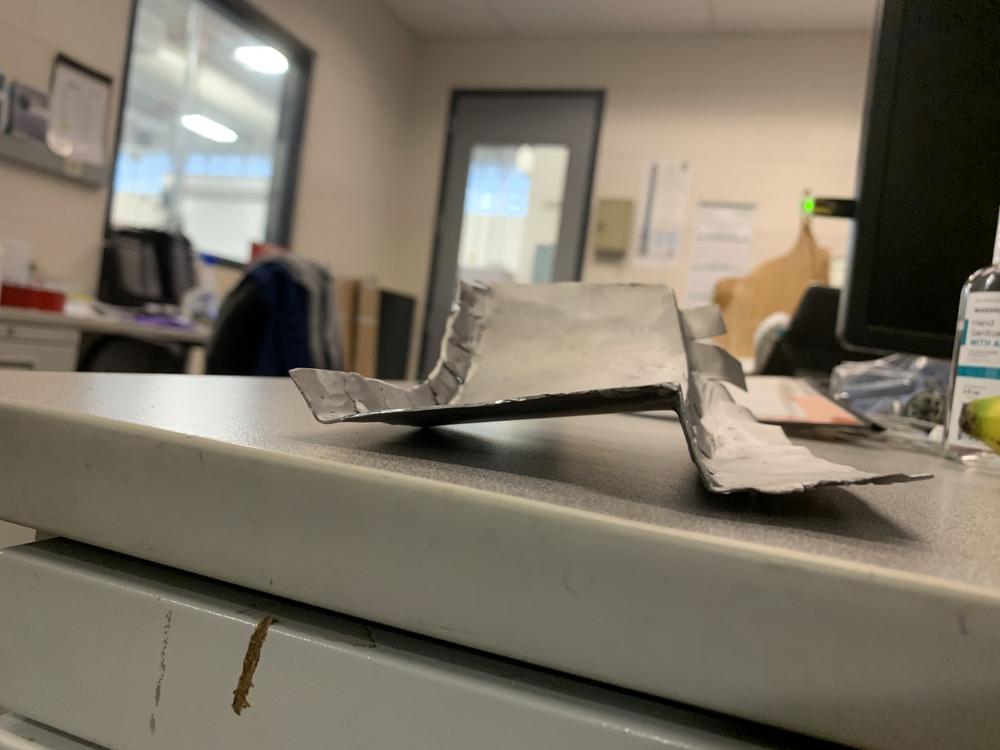
3 hours into this pieces so far. Still cheaper than buying the whole jamb for $129. Depending on what I value my hourly work at... minimum wage?
I have not figured out how to blend those tabs at the end into the sill, I will check out a few more photos of others cars.
Little more welding, shaping, drill the spot weld holes... I might be in business. At least its a more honest shot at a repair than what was on there.
Posted by: JOEPROPER Mar 27 2020, 06:45 AM
A lot of patience and talent. I wish I had nerve to try this when i was your age. This has turned out to be and inspirational thread. Keep up the good work!! I'm sure many of us are following your progress.
Posted by: DRPHIL914 Mar 27 2020, 07:15 AM
thanks for keeping us updated on your project, its great to follow along and see you tackle this extensive of a repair. A car like that would have been scrapped up until a few years ago, by most anyway, I know there are some hear that have rescued some this bad or worse that probably were not "worth it" at the time. AND there are fewer it seems your age willing to develop the skill set to do it. I know my son would not, but my daughter and son-in-law to be want to start one too, so I know there is hope!! anyway just wanted to give you props for saving it. you will enjoy the fruit of your labor soon! I think you could have a future in this if you wanted to, these cars and the other Porsche's are now worth what you put into it so I am sure you can gain back more that just that "minimum wage" you were joking about!!
Phil
Posted by: StarBear Mar 27 2020, 08:24 AM
Nice progress. And that jamb section could have a place in the 914 PO botched repair hall of fame.

Posted by: AZBanks Mar 27 2020, 11:30 AM
Really enjoying seeing your progress on this project.
Posted by: pete-stevers Mar 27 2020, 12:20 PM
Great thread! Keep up the great work!!
Posted by: jaredmcginness Mar 28 2020, 08:44 PM
A lot of patience and talent. I wish I had nerve to try this when i was your age. This has turned out to be and inspirational thread. Keep up the good work!! I'm sure many of us are following your progress.
There's been a few curse words and tools thrown, but we've made it this far. The way I see it, this is the only thing holding me back from Aircooled Porsche cruising to Cars and Coffee, so lets knock it out.
thanks for keeping us updated on your project, its great to follow along and see you tackle this extensive of a repair. A car like that would have been scrapped up until a few years ago, by most anyway, I know there are some hear that have rescued some this bad or worse that probably were not "worth it" at the time. AND there are fewer it seems your age willing to develop the skill set to do it. I know my son would not, but my daughter and son-in-law to be want to start one too, so I know there is hope!! anyway just wanted to give you props for saving it. you will enjoy the fruit of your labor soon! I think you could have a future in this if you wanted to, these cars and the other Porsche's are now worth what you put into it so I am sure you can gain back more that just that "minimum wage" you were joking about!!
Phil
Thank you Phil, what a kind response. Like your daughter, there are those of us that are out there. I have my iron in a lot of fires.
I would love to do a 912 after this. Not sick of it yet..
Really enjoying seeing your progress on this project.
Great thread! Keep up the great work!!
Thanks! More to come shortly.
Posted by: jaredmcginness Mar 28 2020, 09:08 PM
Happy Saturday,
Lets finish up this passenger side!
Weld on sill and finish lower jamb. What will that take 30 mins?
.... 6 hours later....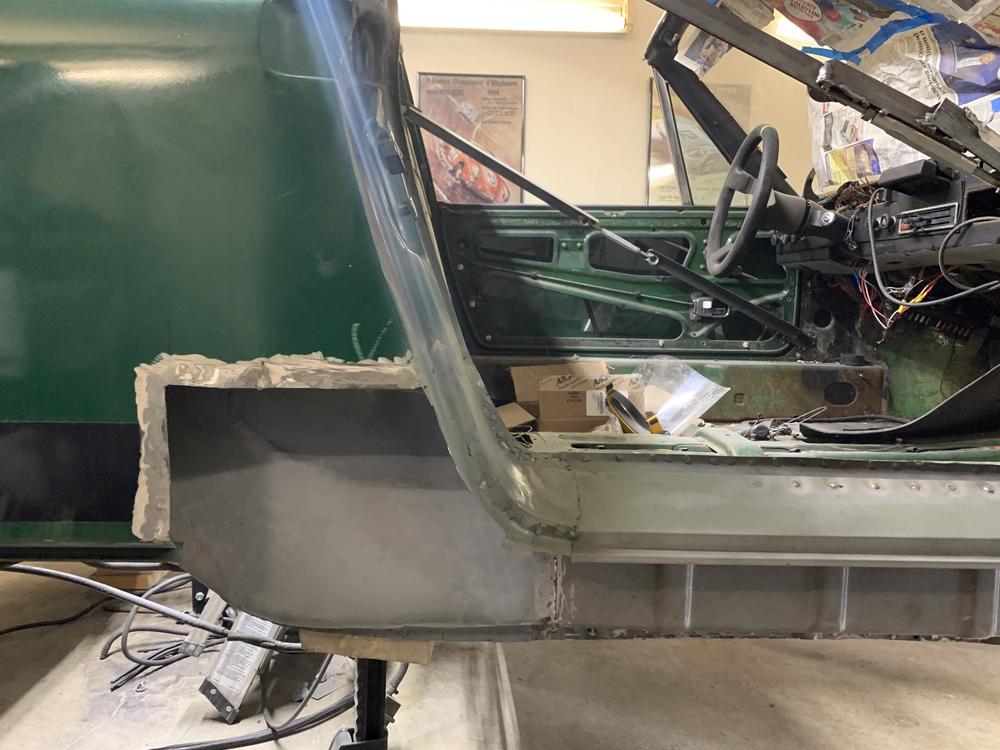
I ran into a fork in the road here.
As I ground away the paint to weld in the new body section,
I found about 3/16" of body filler. This goes all the way up to the door handle, following the shoddy jamb repair from earlier. What to do?
Since I do not plan on painting the car right now, (or dig this much deeper!)
I decided to place the remade body panel in, smooth what I can, and use filler for the rest. Not what I was expecting to see or do... Down the road, I would like to replace the entire passenger rear, sail, fender, etc. So I will clean it up and move on until that day.
Sorry to let down any folks, I know this is not doing it "right" and just hiding the inevitable.
Here's the filler.... Lets carry on.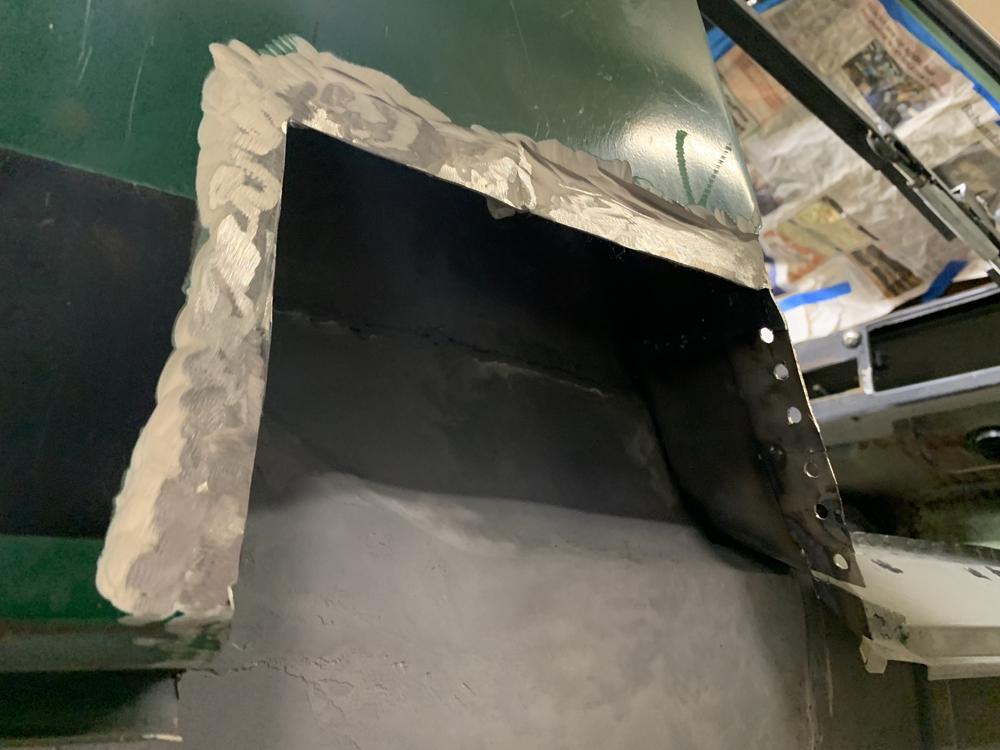
Life goes on, lets weld it up.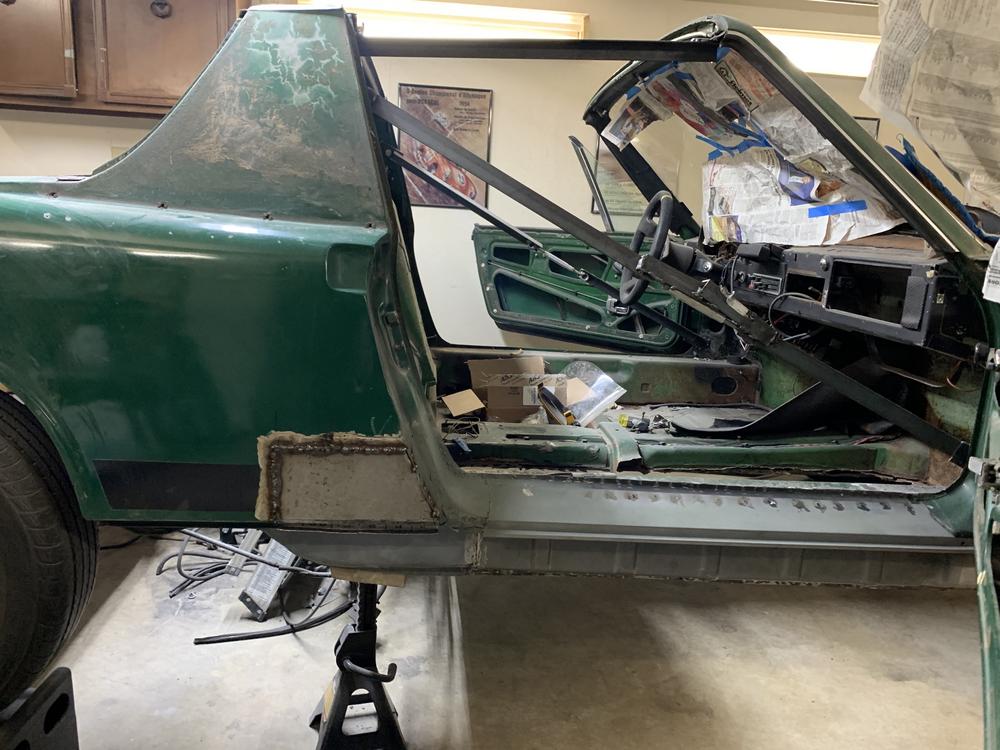
Grind.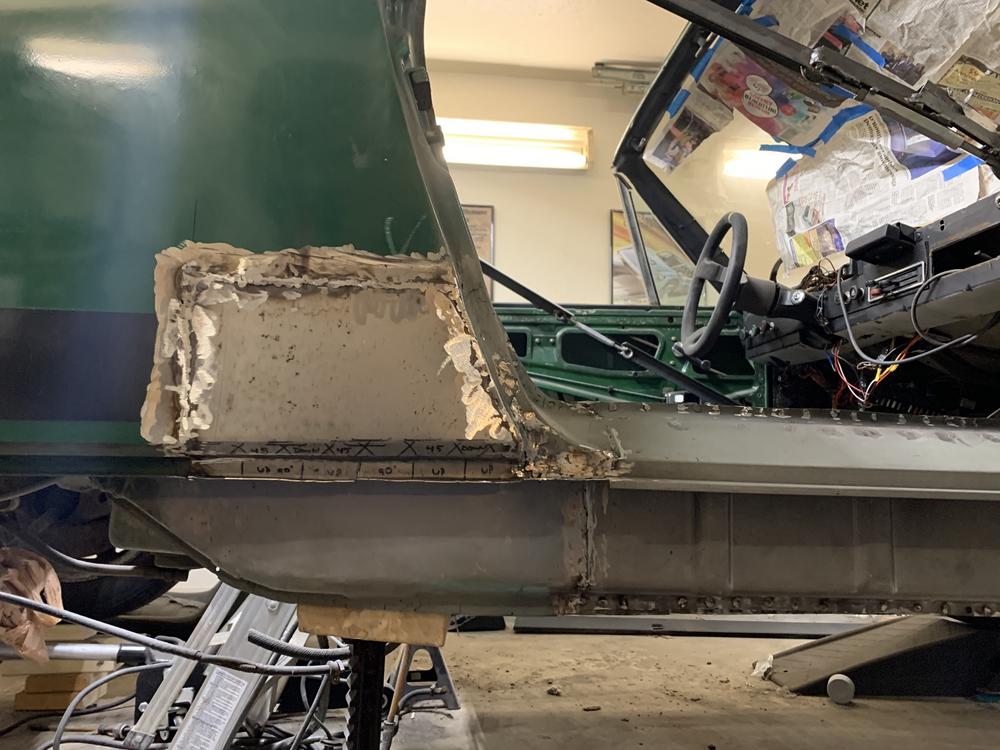
Sand a ton, smooth, sand, prime. Still need to sand.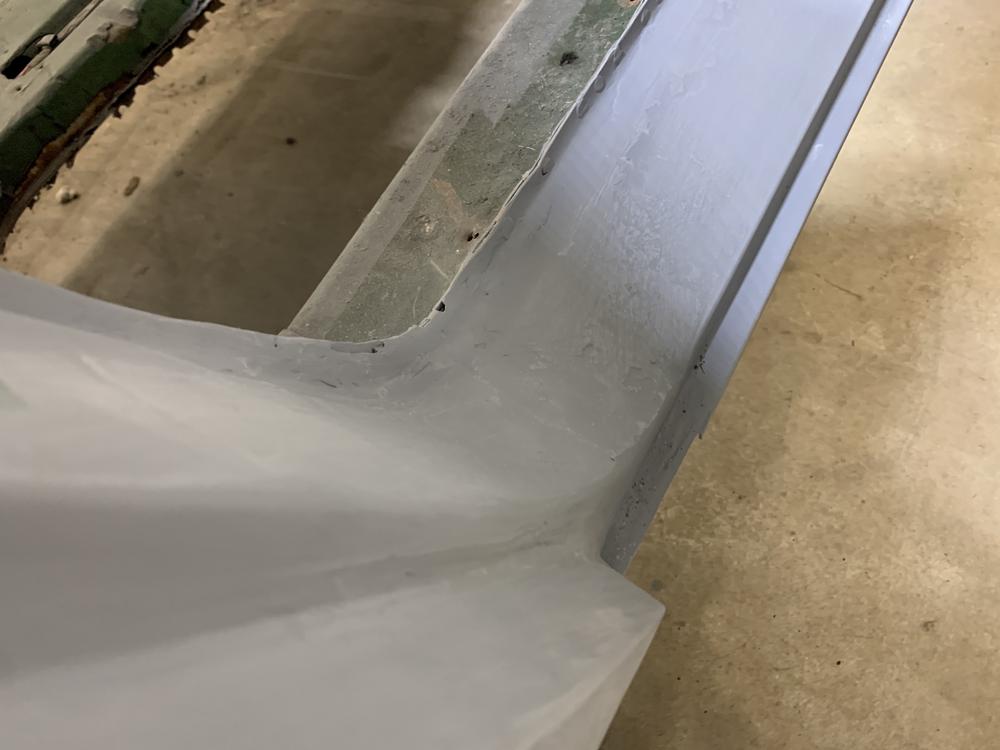
2 hours later: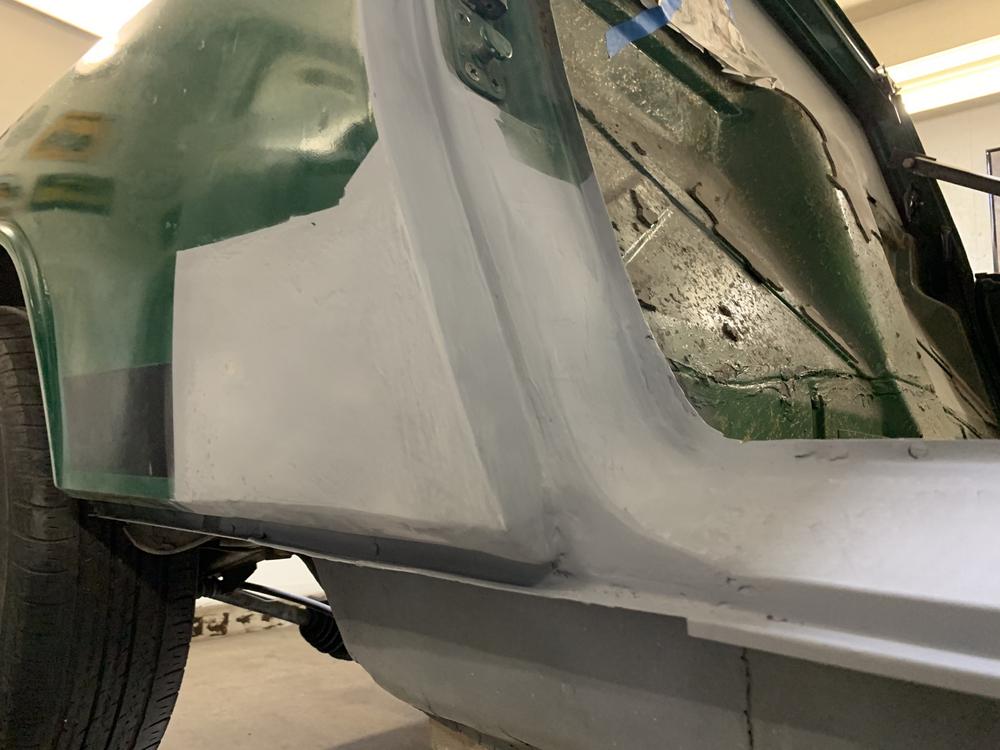
Full shot:
Little bit to sand left, just eager to make another post. I feel really great about these steps. Passenger side is effectively... DONE!
Serious progress for 5 weeks! I am excited to open the garage door tomorrow and see it with fresh light.
Whats next:
-Weld in battery tray/support and engine shelf.
-remove drivers floor.
-914LTD reinforcements.
-rebuild flanges around drivers firewall and long.
-replace floor.
Until tomorrow!
Jared
Posted by: JOEPROPER Mar 28 2020, 09:40 PM
Posted by: bbrock Mar 29 2020, 08:52 AM
Sorry to let down any folks, I know this is not doing it "right" and just hiding the inevitable.
To the contrary! You are doing what is needed to save your car the RIGHT way but still get it back on the road quickly. Hold your head high and know that you've proven you'll be ready with your skills when you decide to tackle the rest. I love watching this thread.
Posted by: StarBear Mar 29 2020, 09:47 AM
A champion! Loving this thread - better than a Motor Trend TV episode, with no commercials, too! 
Posted by: JOEPROPER Mar 29 2020, 11:36 AM
Sorry to let down any folks, I know this is not doing it "right" and just hiding the inevitable.
To the contrary! You are doing what is needed to save your car the RIGHT way but still get it back on the road quickly. Hold your head high and know that you've proven you'll be ready with your skills when you decide to tackle the rest. I love watching this thread.
love it!
Posted by: jaredmcginness Mar 29 2020, 06:18 PM
To the contrary! You are doing what is needed to save your car the RIGHT way but still get it back on the road quickly. Hold your head high and know that you've proven you'll be ready with your skills when you decide to tackle the rest. I love watching this thread.
True words Brent! Maybe when I add a tough guy motor and GT flares, that would be a good time to tackle that spot.
A champion! Loving this thread - better than a Motor Trend TV episode, with no commercials, too!
Haha! I love that! I do have a few product placements, but I'll keep that ads to a minimum.
You guys are great!
----------
Not a ton of fun things accomplished today, but I got some hours in and knocked the floors out! Had to do the labor work, one day or the next... lets get it over with.
There are still some tabs left, where the rotabit didn't get through all the way. But I am tired of laying on my back.... next time, no excuse not to build a rotisserie.
So the floors were so crunchy, I said F it, cut the main square sections out, this way I can sit up (as much as I can) while I work on the spot weld tabs.
You could say I had my work........ cut out.... for me.... Get it...? Nevermind
Chop.
Still need to get the middle section out.
The area near the pedal cluster is in nice shape. So I left that in. I'll stitch in around there, to the new pan.
So the plan otherwise:
-Get that middle section fully out (Some spot welds still hanging on)
-Rebuild the drivers inner long (bottom radius)
-Replace fuel lines - should be here this week.
-Weld in floors.
-Also.. I'm going to need to rebuild that E-brake area, as well as the cable guide sheet metal... Another day, another post.
Cheeeeers,
Jared
Posted by: bkrantz Mar 29 2020, 08:18 PM
You are a better (tougher) man than me, getting all that done without a rotisserie. I have certainly gotten worn out at times on my project, but the option to turn the car sideways and upside-down has eliminated most of the grief.
And I feel your pain from the bondo surprise. I had a couple of those, and a few choice words.
Posted by: BeatNavy Mar 30 2020, 04:07 AM
You're rocking and rolling! I think it took me like 2 weeks to get the floor pan off with all those spot welds...and I had it on a rotisserie!
Don't beat yourself up about doing it "right" as Brent says. When perfect becomes the enemy of good these projects can get stalled (ask me how I know), or worse, and it sounds like you actually want to be driving this year
Glad your pedal cluster area was in good shape. Below is a pic of mine. It was one of the ugliest "repairs" on my project car, and it took a long time to fab up something to go there. Not sure where you learned to fab and weld, but you've got a talent for it.
Sketchy!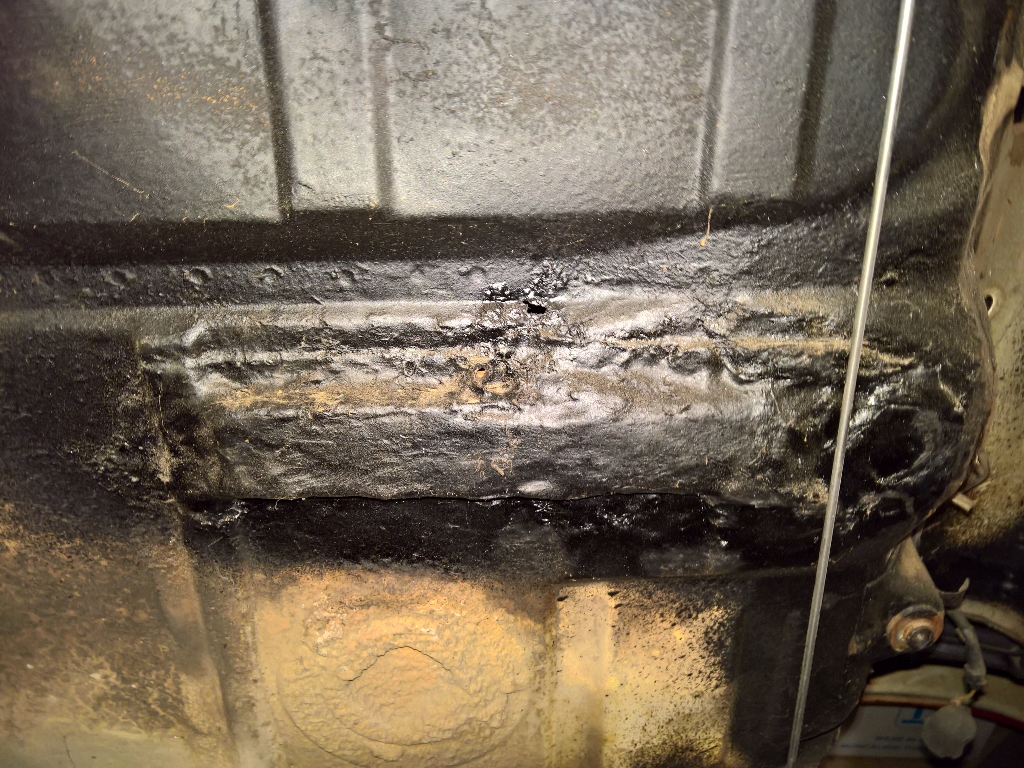
and underneath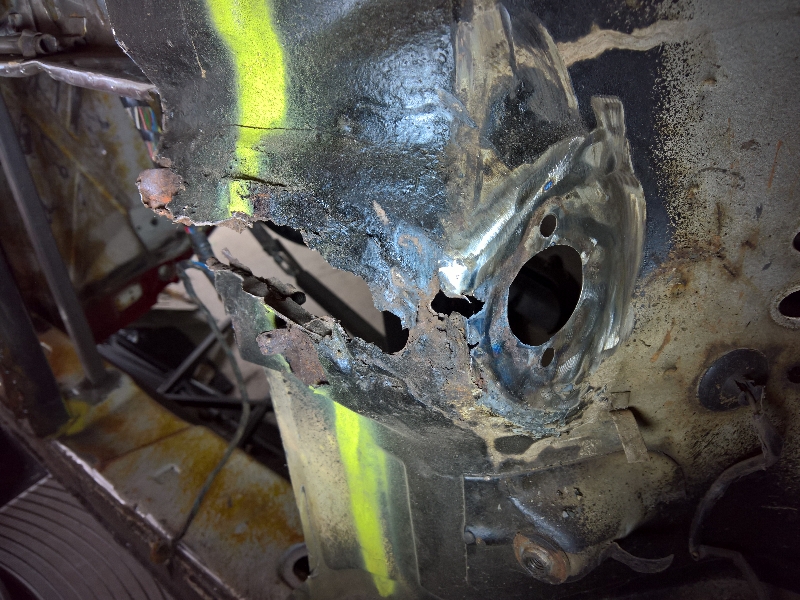
Keep going, Jared!
Posted by: jaredmcginness Mar 30 2020, 06:39 AM
You are a better (tougher) man than me, getting all that done without a rotisserie. I have certainly gotten worn out at times on my project, but the option to turn the car sideways and upside-down has eliminated most of the grief.
And I feel your pain from the bondo surprise. I had a couple of those, and a few choice words.
I'm sure most of these cars have them, after 50 years of shade tree repairs. I'll be willing to bet - even after having most of the car stripped down, there are still a few surprises.
You're rocking and rolling! I think it took me like 2 weeks to get the floor pan off with all those spot welds...and I had it on a rotisserie!
Don't beat yourself up about doing it "right" as Brent says. When perfect becomes the enemy of good these projects can get stalled (ask me how I know), or worse, and it sounds like you actually want to be driving this year
Glad your pedal cluster area was in good shape. Below is a pic of mine. It was one of the ugliest "repairs" on my project car, and it took a long time to fab up something to go there. Not sure where you learned to fab and weld, but you've got a talent for it.
Keep going, Jared!
I definitely just want to get the floors out and over with, so I am trying to bang it out as quick as I can.
I shouldn't be so hard on myself I suppose. I love that quote. One of my personal faves now is, "If the minimum isn't good enough, it wouldn't be called the minimum."
Yikes, I am a bit scared of doing that pedal cluster section, but I might bend up something at work to fill in the end of the support that I cut off.
On that ticket, I learned how to mig weld in college, and I tig welded for my job (about 5 years ago) at a well known VW/Audi performance parts company. I haven't really welded since then so I am a little rusty. (and to be frank, not that concerned with pretty welds, because they are getting ground anyways.)
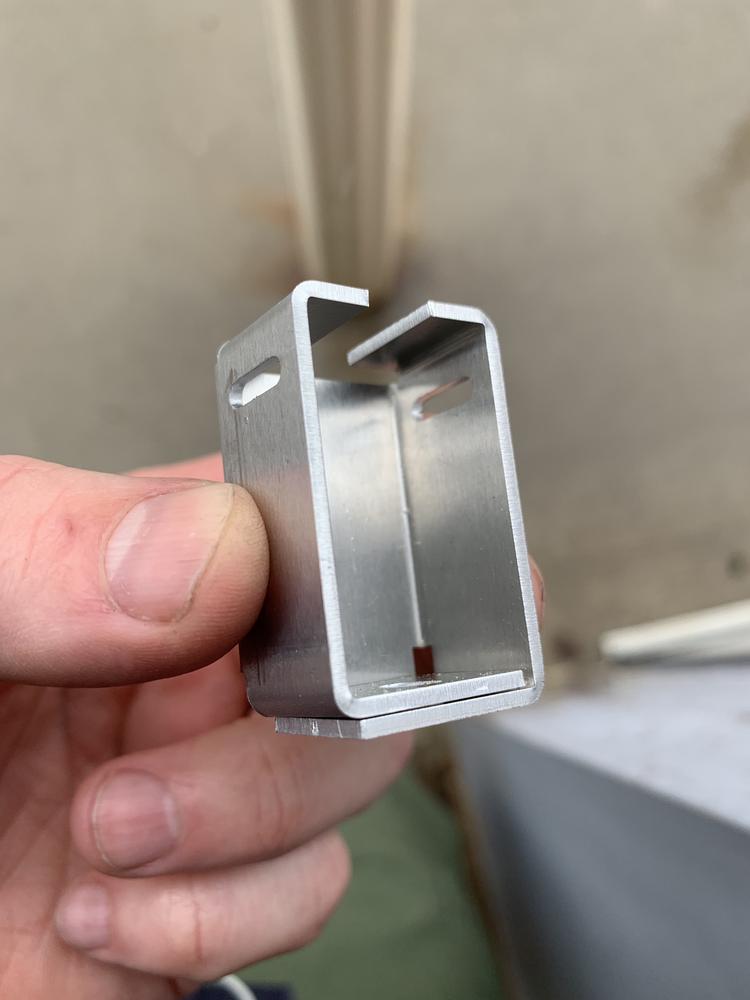
Now, I work at a precision prototype sheet metal shop, I use lasers, 4-7 ton brakes, etc. Here's an example of some test or scrap pieces I made at work.

Its funny comparing the accuracy I need at work... to me just smashing sharpie lines with a mallet over a 2x4 at home. I call that the minimum.
Posted by: bbrock Mar 30 2020, 07:57 AM
Add me to those amazed at your ability to tackle the floor without a rotisserie. When you get that center section out, take a little time to check and reinforce the attachments for the clutch cable tube. It's just a minor little task when the tunnel is open, but a major PITA if it breaks after the tunnel is closed back up.
Posted by: BeatNavy Mar 30 2020, 08:01 AM
One of my personal faves is, "If the minimum isn't good enough, it wouldn't be called the minimum."
One of my favorites too. My Army buddy used to say it all the time, and that's why it's in my signature below
On that ticket, I learned how to mig weld in college, and I tig welded for my job (about 5 years ago) at a well known VW/Audi performance parts company. I haven't really welded since then so I am a little rusty. (and to be frank, not that concerned with pretty welds, because they are getting ground anyways.)
Now, I work at a precision prototype sheet metal shop, I use lasers, 4-7 ton brakes, etc. Here's an example of some test or scrap pieces I made at work.
Ok, that makes sense. You've got some learnin' in ya!

Posted by: jaredmcginness Apr 1 2020, 08:29 AM
Took Monday night off to hang out and not do any work.
Small update last night:
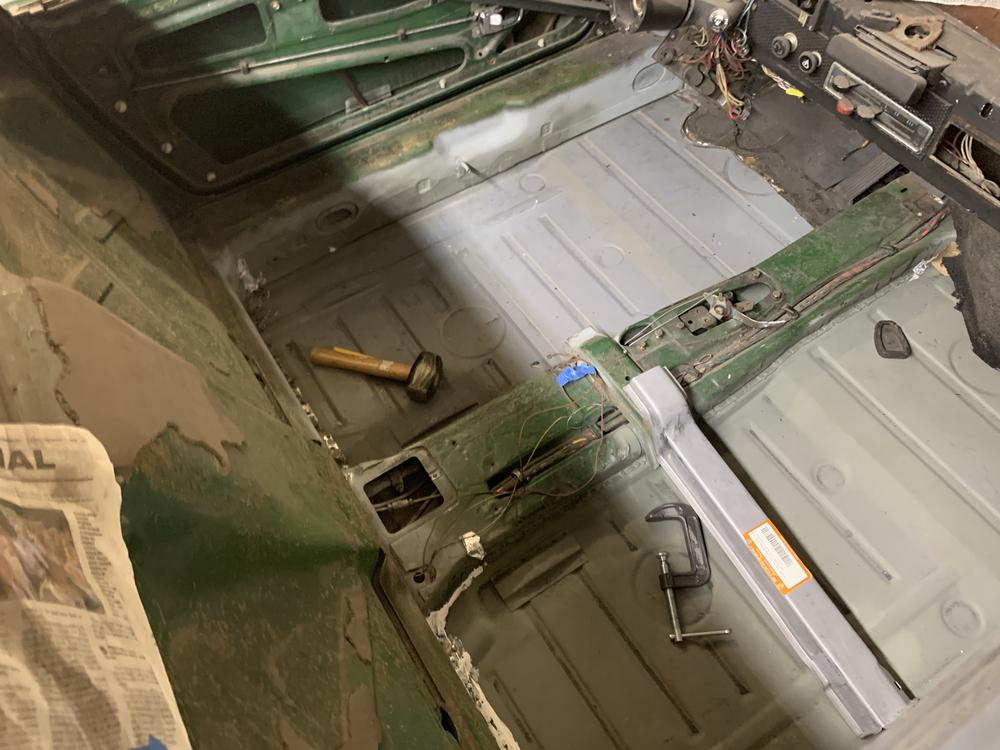
Got the center floor out - oh how i hate laying on my back under this!
Got her out in one piece, rust, acorns and leaf collection in tact.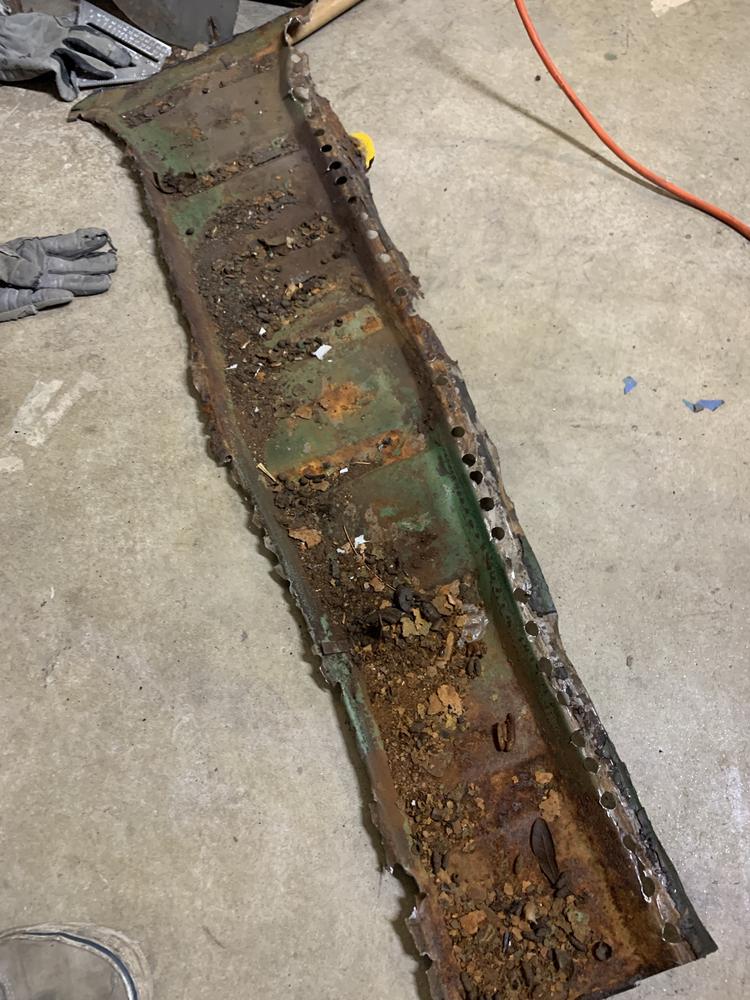
I believe this is the commonly broken, brazed area, looks to be in good shape, any confirmaiton?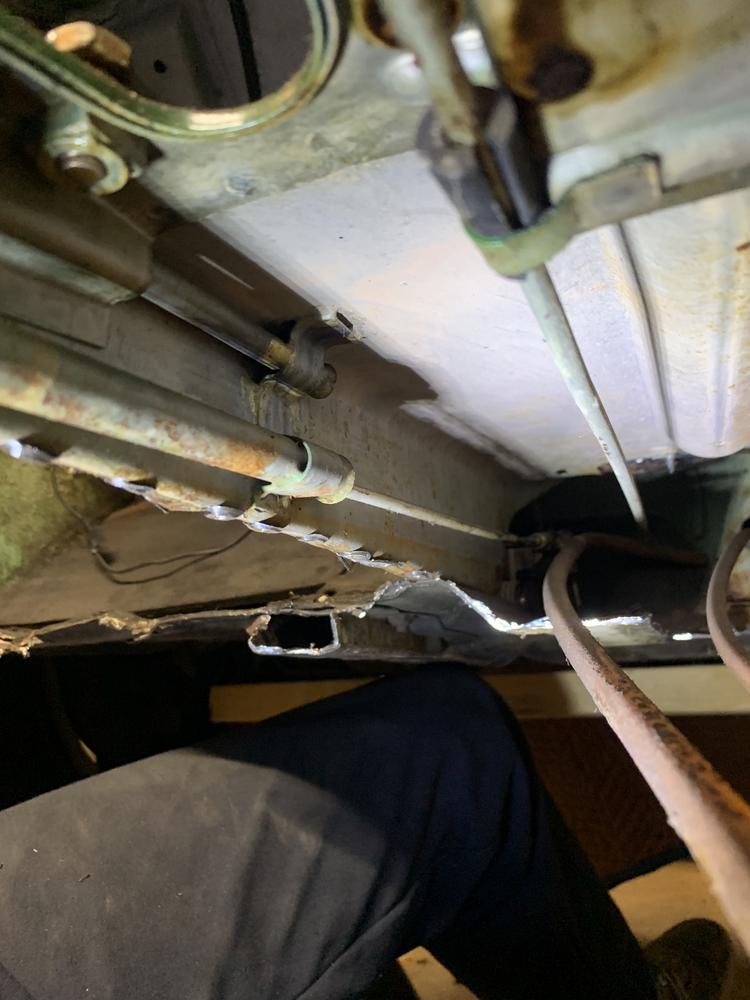
Fuel lines are totally nasty... Must have been sitting for a long time with gas.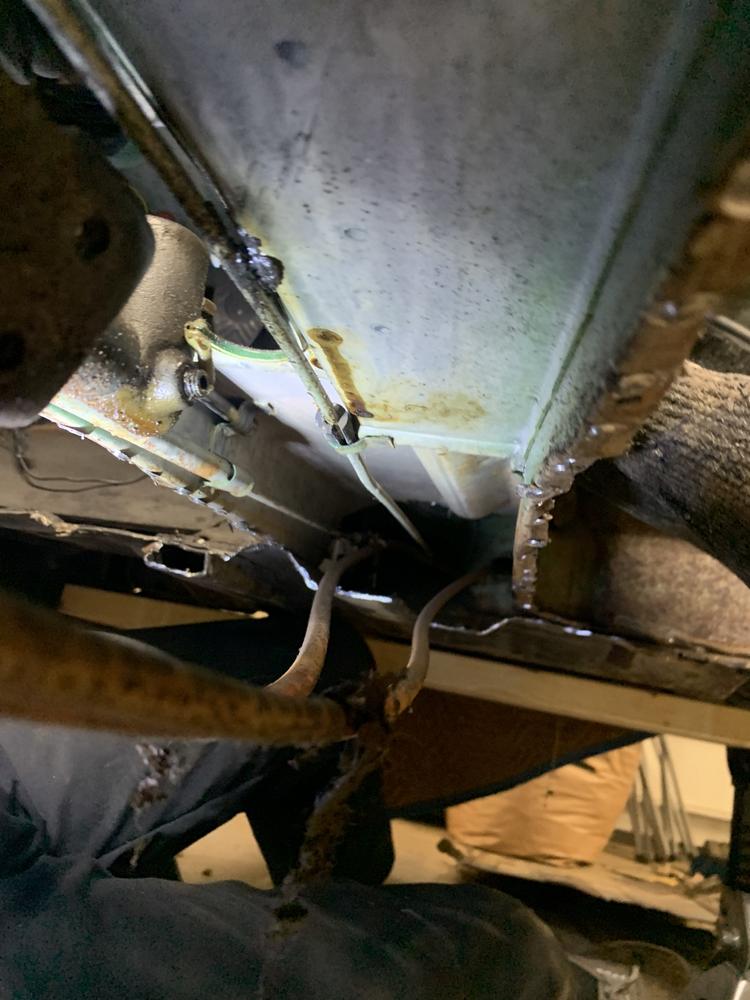
I am very glad I bought these from Pelican parts! Should be an easy install now.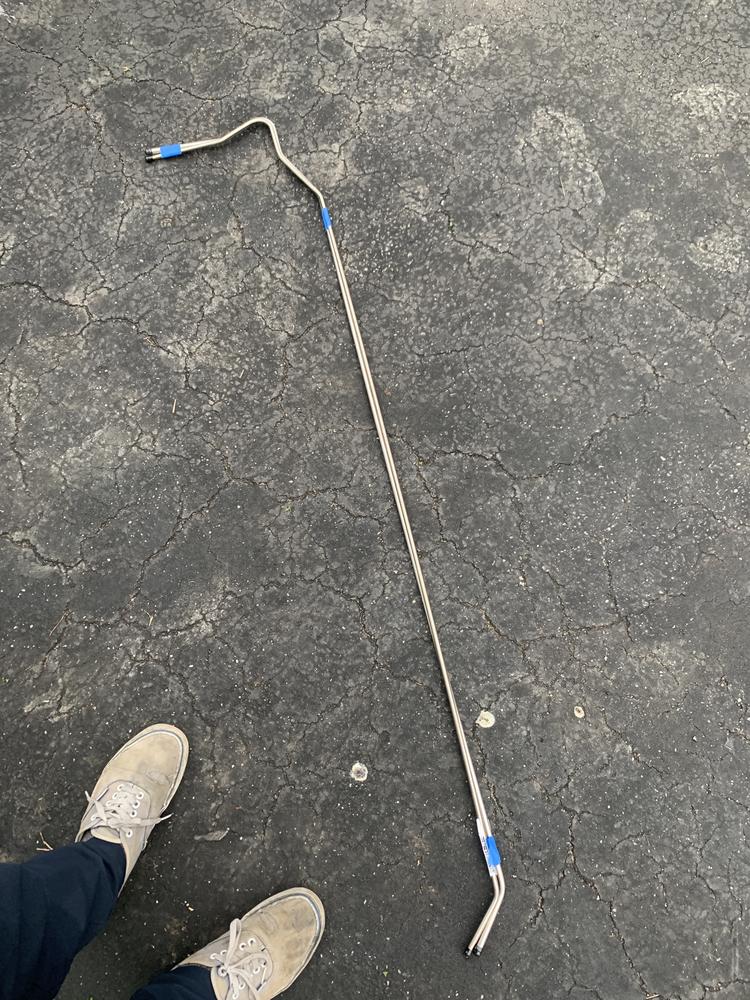
Lastly, I took a few measurements of the pieces I will need to rebuild the inner long radius and lower firewall.
I took a sheet of 18g to work, sheared and bent up some pieces to make my life juuuust a little bit easier at home. 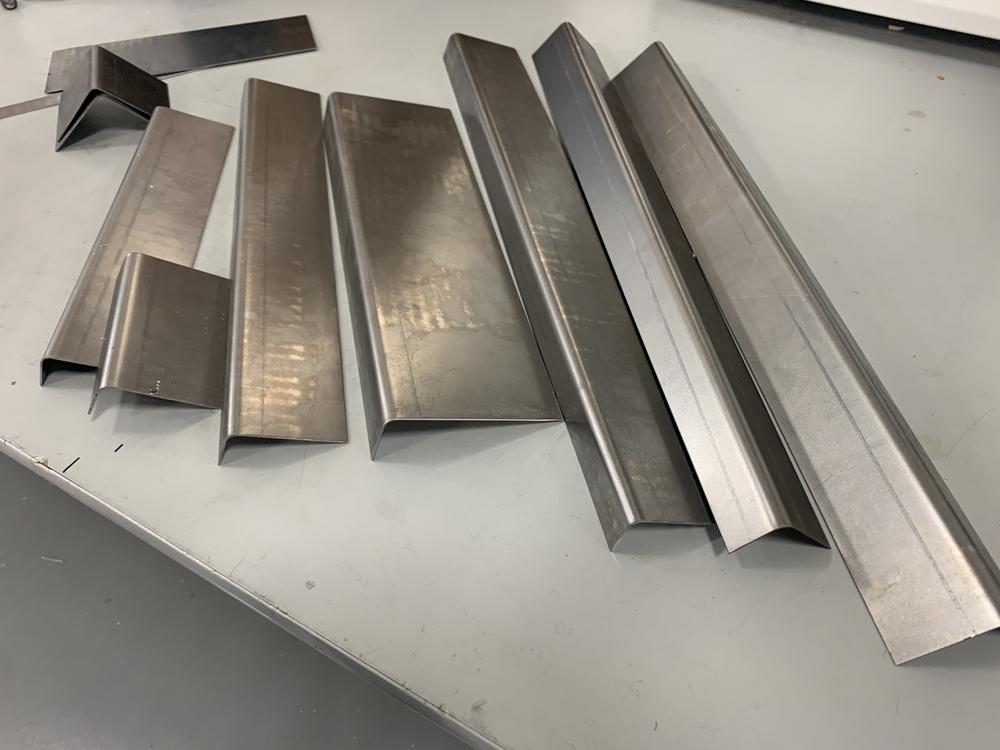
So I'll rebuild this section, I might lap weld the firewall, maybe put a coating of POR15 between the two firewall sections, install the fuel lines,
line the floor up and start getting it attached.
Exciting stuff. Glad to have a creeper.
Posted by: JOEPROPER Apr 1 2020, 08:56 AM
Man, you're a handy guy to have around.
Posted by: BeatNavy Apr 1 2020, 09:36 AM
I believe this is the commonly broken, brazed area, looks to be in good shape, any confirmaiton?
Yes, and it looks in surprisingly good shape.
I wish I had the machining tools and expertise to use them available!
Posted by: bkrantz Apr 1 2020, 08:16 PM
Got the center floor out - oh how i hate laying on my back under this!
Got her out in one piece, rust, acorns and leaf collection in tact.
Where's the required mouse nest?
Posted by: jaredmcginness Apr 2 2020, 07:43 AM
Where's the required mouse nest?
There were two under the gas tank! I had a nice afternoon with the vacuum and a bottle of bleach.

Posted by: bbrock Apr 2 2020, 08:11 AM
I believe this is the commonly broken, brazed area, looks to be in good shape, any confirmaiton?
That's one of them. The other place they break is where they go through the firewall. I would reinforce them while you have it open regardless of their condition. Mine were perfectly attached too but after doing some cutting and patchwork on the front end of the tunnel, my front one had broken loose from the vibration. Made me realize how fragile those brazed joints are. I welded the front in and welded a little reinforcement loop at the rear firewall. Just a little extra security to hopefully not have to cut open my tunnel later for repair.
Posted by: jaredmcginness Apr 4 2020, 04:35 PM
Hey guys,
Here is today's diary entry.
Spent the last two afternoons in the garage rebuilding the firewall flanges.
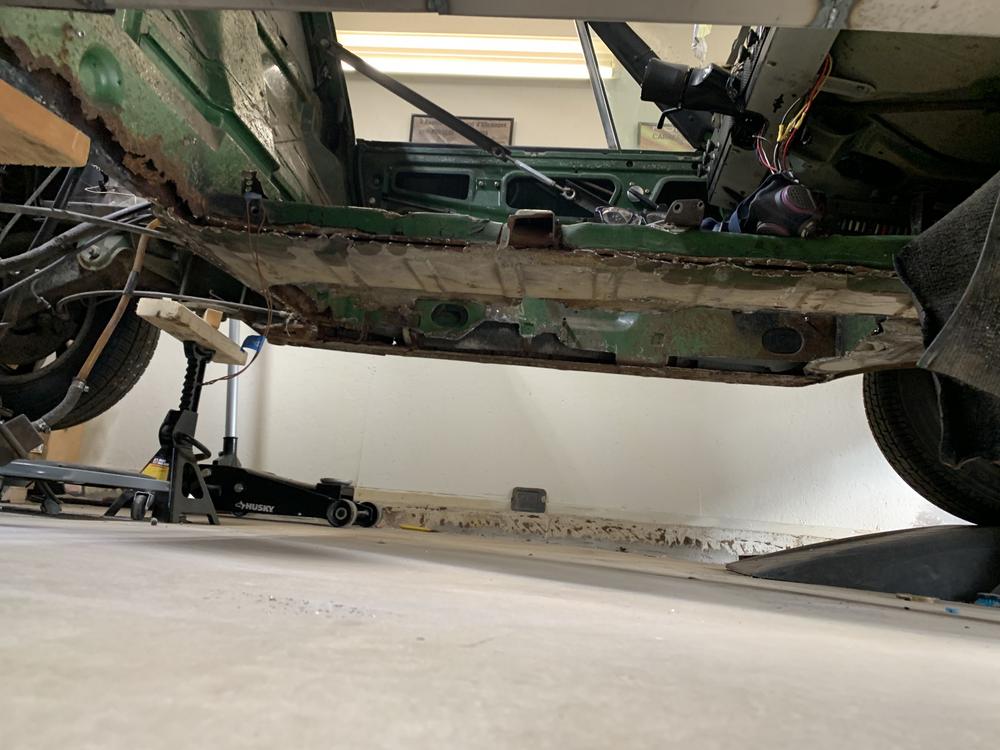
I lap welded the fire walls and butt welded the driver's long.
Here are some photos. Ran out of 1/2" sanding belts, so all of the corners of the inner firewall still need sanded. Ignore these for now.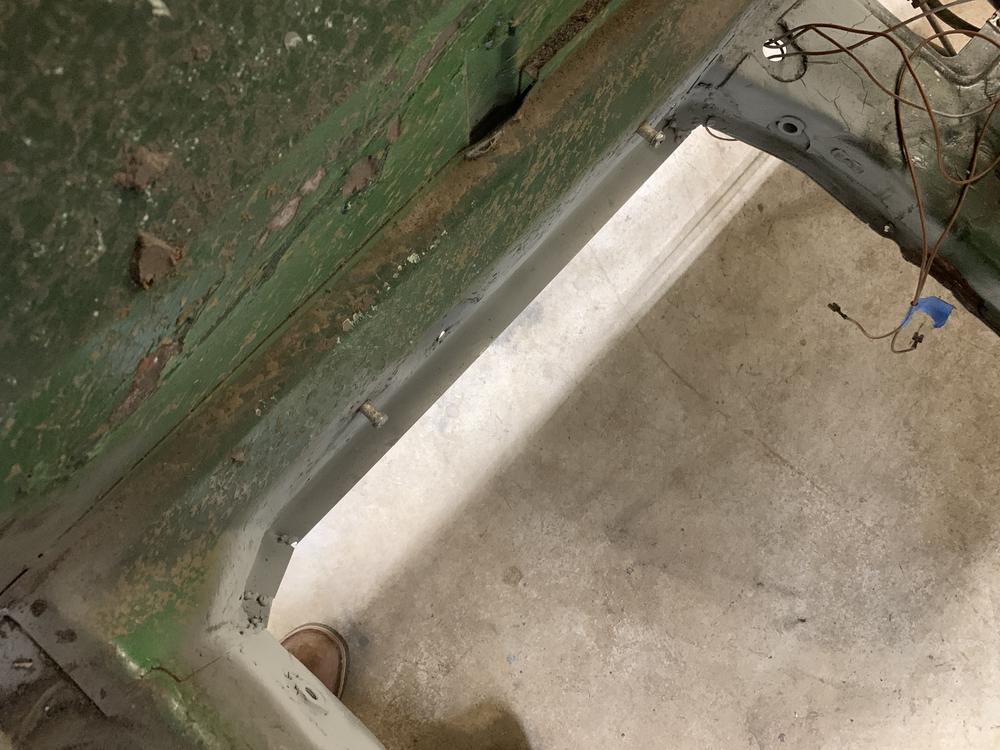
Ugly, but honest.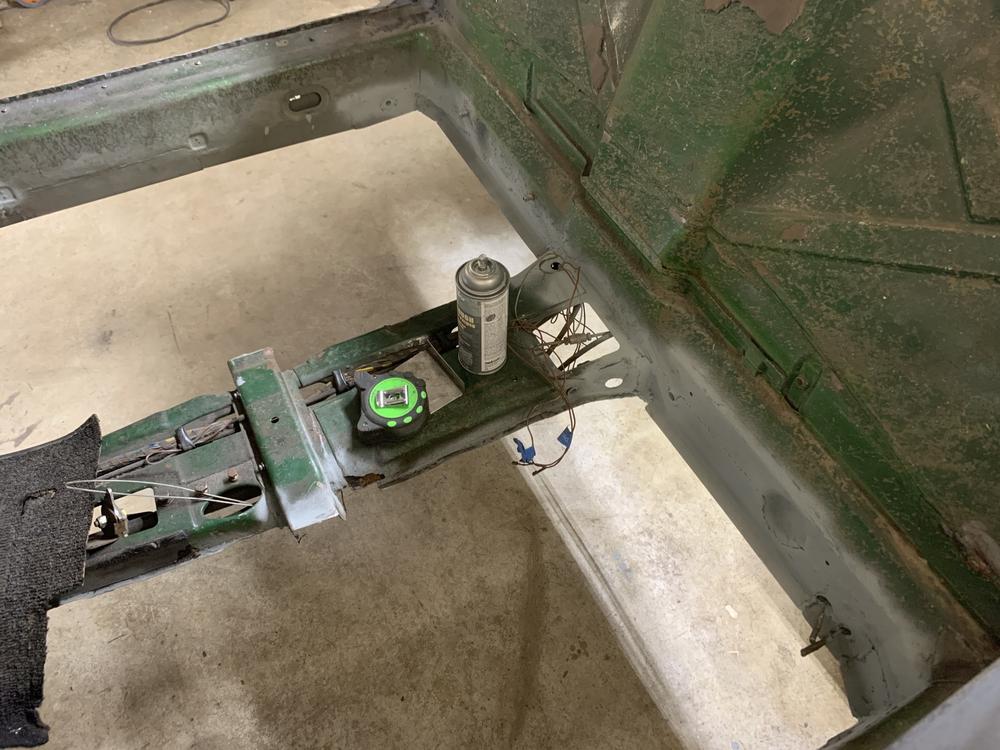
Ahh. This long is a pain in my ass. This metal is so easy to burn through. I'm mostly done, still have a few spots to fill in. I should have extended these, top and bottom to make it a lap weld.
It will be covered with carpet anyways right? I hate to make excuses, but that's the fact of the matter. Cant beat myself up over stuff I am still learning/perfecting.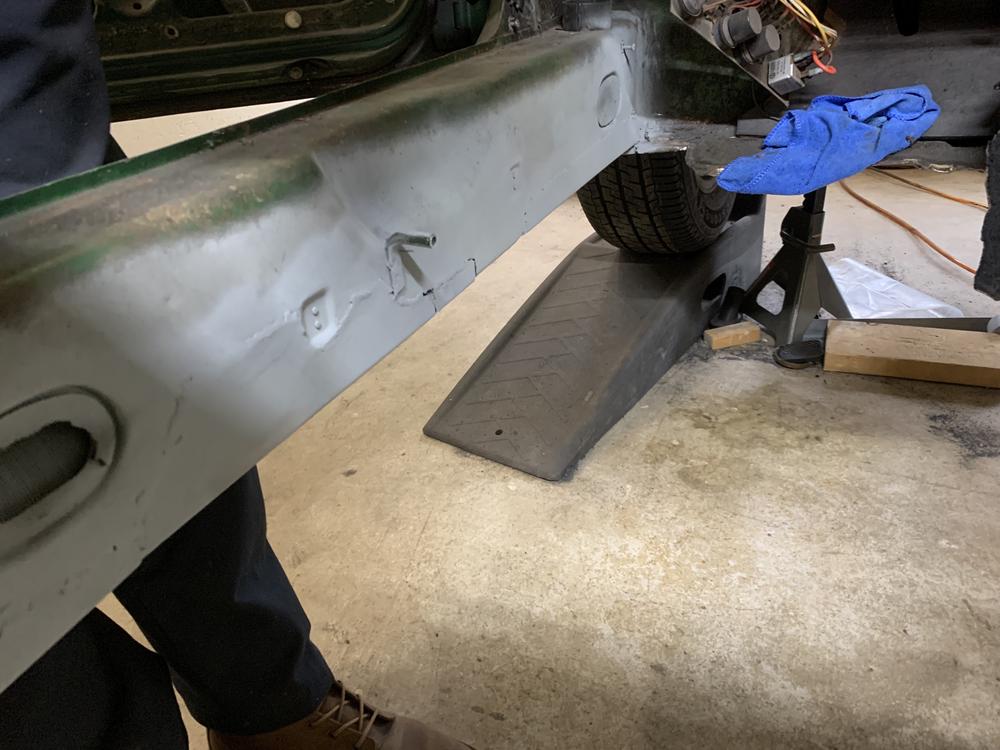
As recommended from my internet friends above, I made a little bracket and tacked the clutch tube in place. Hopefully this will help disperse the load, and neither of these will break. I brought the heat down a lot on this, does not seem like a good tube to blow a hole into!
I found this stuck under the dash carpet. I assume this is the shift knob badge.
Also a metaphor for the condition of this vehicle. 
A photo I grabbed. Cluttered, tired but a bit hopeful. 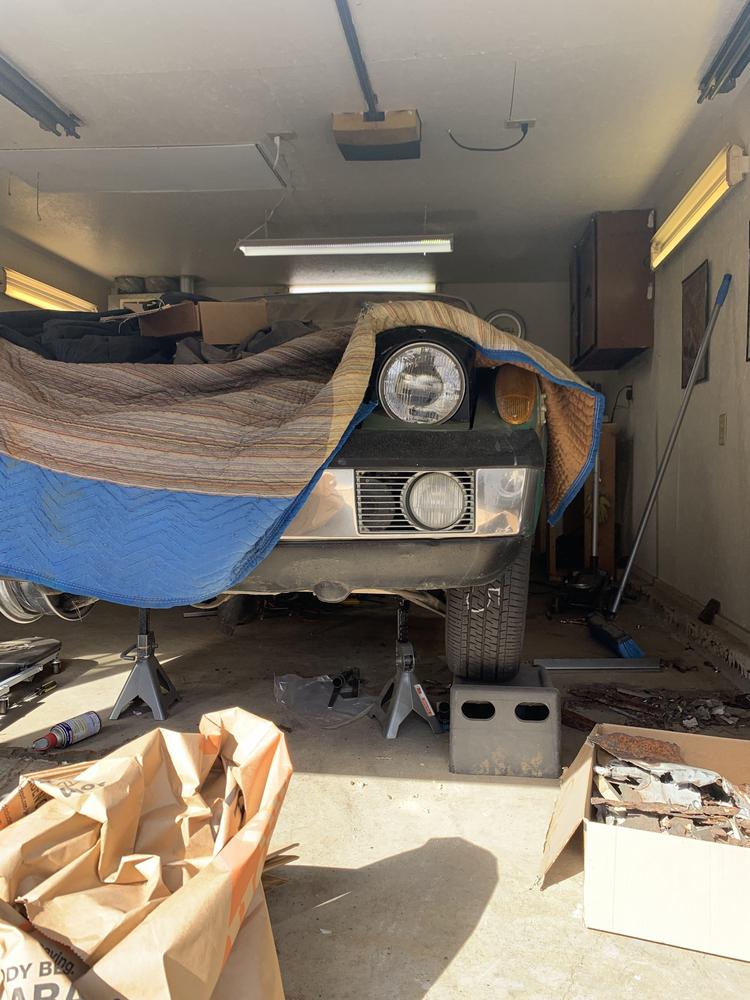
Certainly leaving the garage today frustrated. Welding on your back SUCKS. It is so easy to blow through your new metal, but you cant really tell you are.... because you neck is getting covered in sparks and glowing slugs.
If anyone reading this is on the fence... build the rotisserie!
All that being said - another good few hours out there and the floors should be ready to go in.
Thanks for reading!
Posted by: BeatNavy Apr 4 2020, 05:13 PM
Ugly, but honest.
Honest is better than pretty. Good thing you reinforced that clutch cable. And yes, welding on your back sucks. I once basically set my crotch on fire (I was wearing overalls) welding underneath the car to anchor the clutch tube at the firewall.Thanks for reading!
Posted by: jaredmcginness Apr 6 2020, 11:01 AM
Weekend Update:
Spent about 12 hours outside Friday to Sunday, finished up the passenger long. Frustrating few days. But good progress none the less.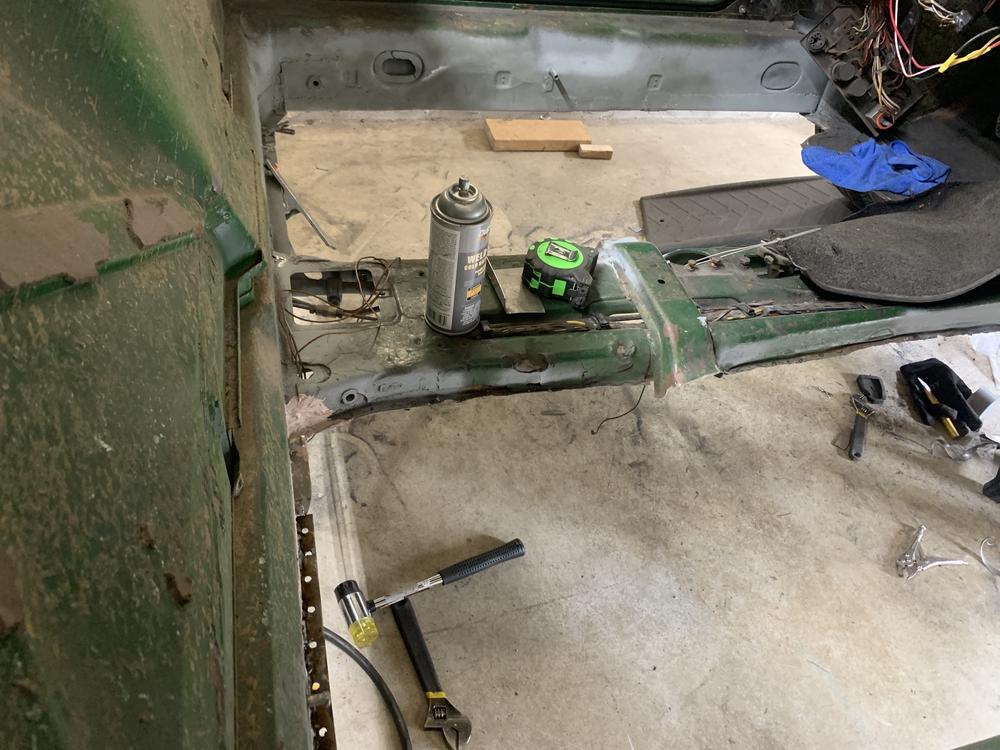
Test fitting my passenger floor... Couple issues. I realized the rear, inner firewall is not flat across the flange, it has a 7/8" step down to the floor spot welds. Had to cut and adjust that.
The woes of making your own parts, with nothing to compare it to (rusted away!) Should have fit the floor first!
Another issue I am working out is the connection of the floor with the horizontal spot welds near the front fender. There's not a lot of meat left, so I will need to make a new strip (on the inner fender)
Here's the fit. Definitely a nice sight, we've come a long way.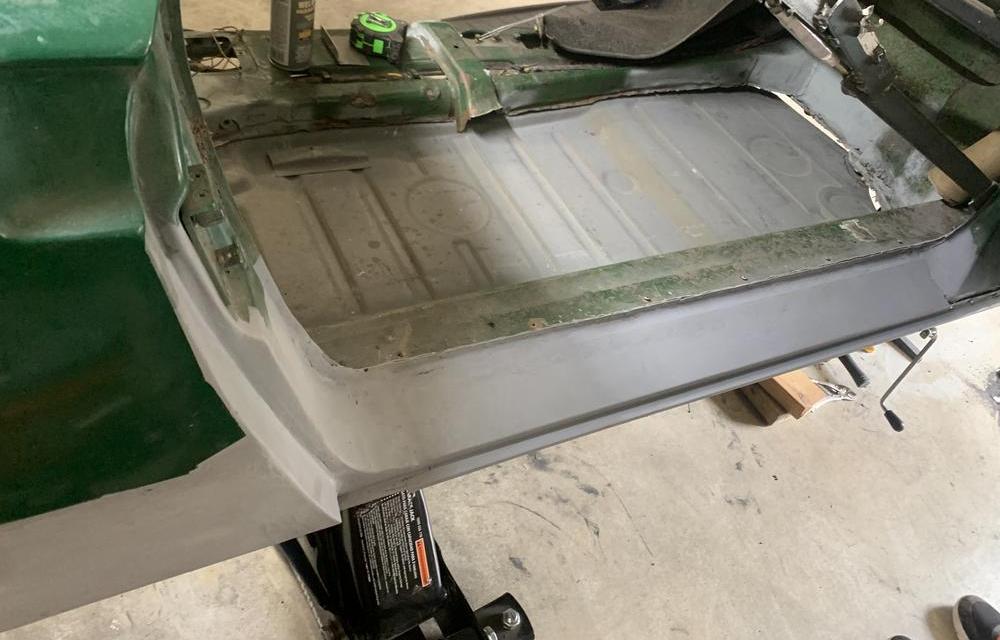
Patched the lower front, inner fender. This is only really welded along the top, in case I need to make adjustments to accommodate the floor flange.
Which you can kind of see in this photo: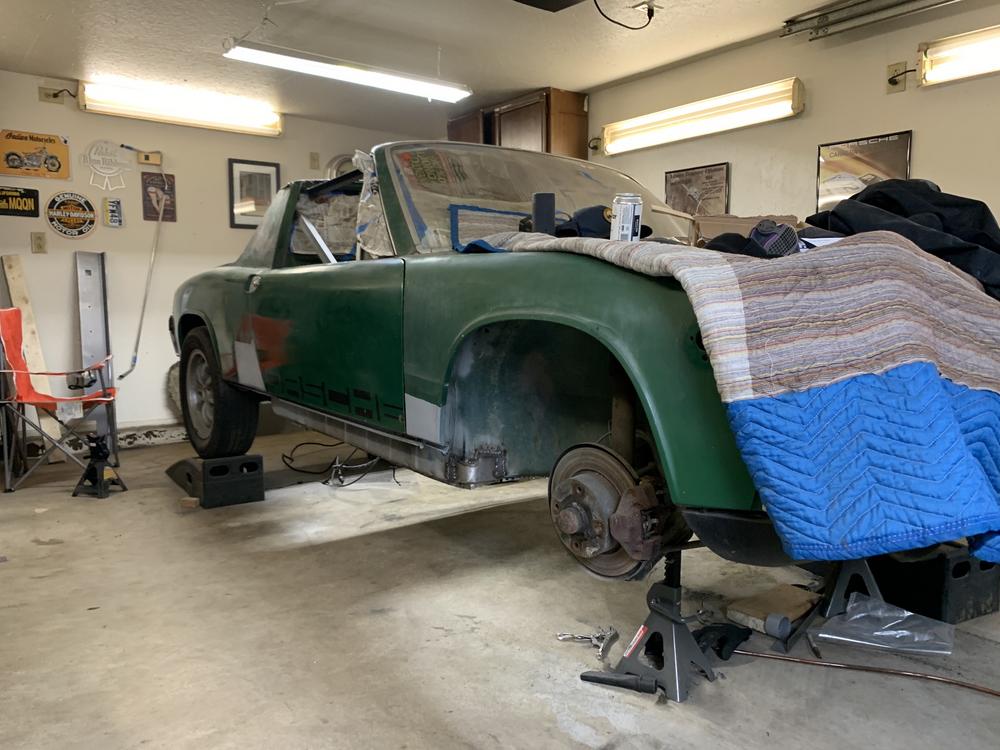
Gotta keep going! Might take a night off so I don't get burned out.
As another member said, gotta keep fighting the good fight.
Posted by: bkrantz Apr 6 2020, 09:02 PM
Congrats on that milestone. I had my door on for a few days last week and it felt like progress.
Posted by: jaredmcginness Apr 9 2020, 05:43 AM
More prep and a few questions!
Installing my stainless fuel lines. A breeze with the floor off! I feel bad for anyone that's done it otherwise.
Questions:
-Is this an acceptable lay out? Would you raise them over the wiring harness?
-2 cables ties to keep them tight together, I dont want them flopping around, other wise fine to just chill there?
-the larger 9mm one stays on the passenger side, and comes out the lower passenger side slot in the engine bay?
Looks right for my gas tank outlets. 

Another question:
-What is this empty mount on top of my control arm?
Where I've spent most of my time the last 6 days, on my back!
Long looks nice, hit it with some weld thru right after this.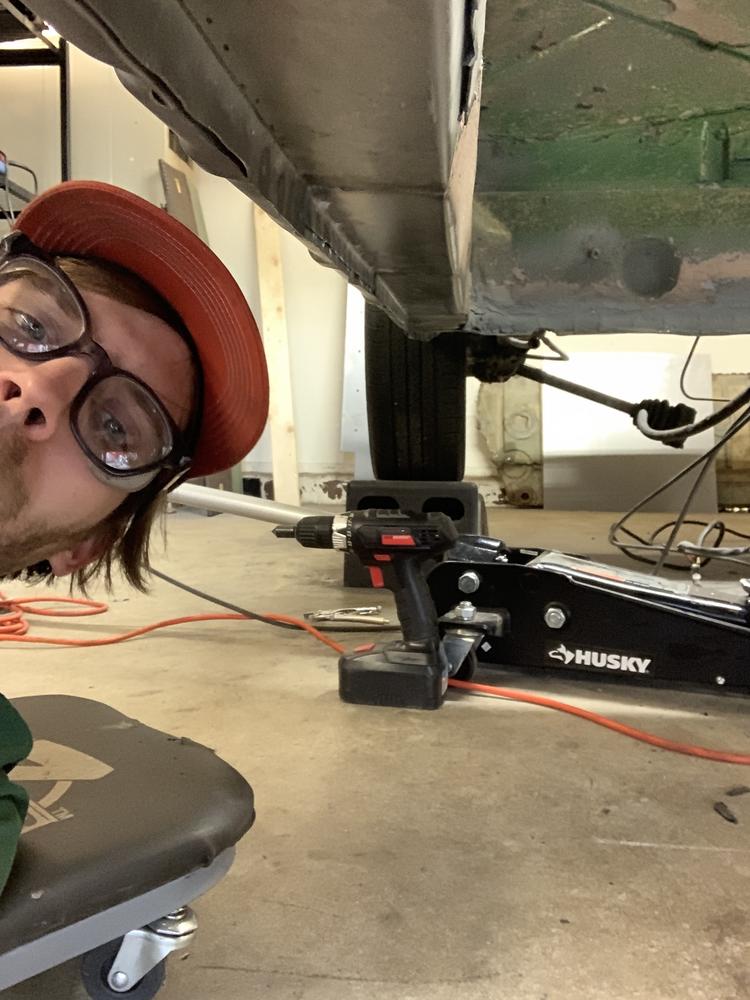
Drilling the spot weld holes. 70 something holes in the pan and 40
in the fire wall/ tunnel. I hit some zinc primer on the inside of the floor tunnel.
Didn't want to leave it raw.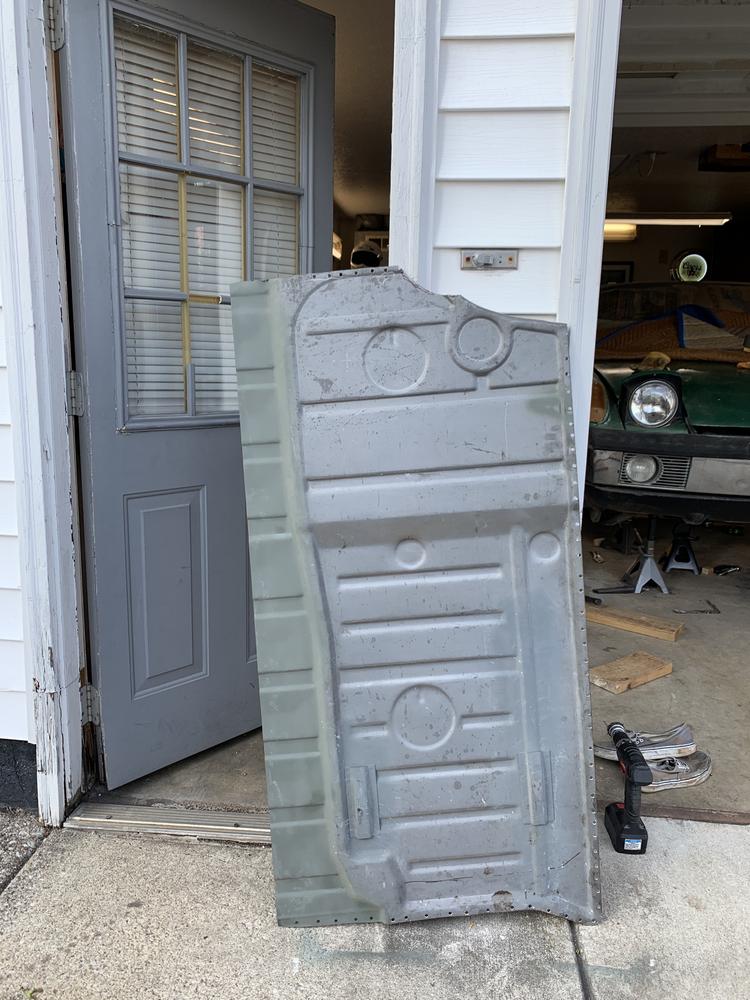
Basically the final fit, I'll start spot welding tonight.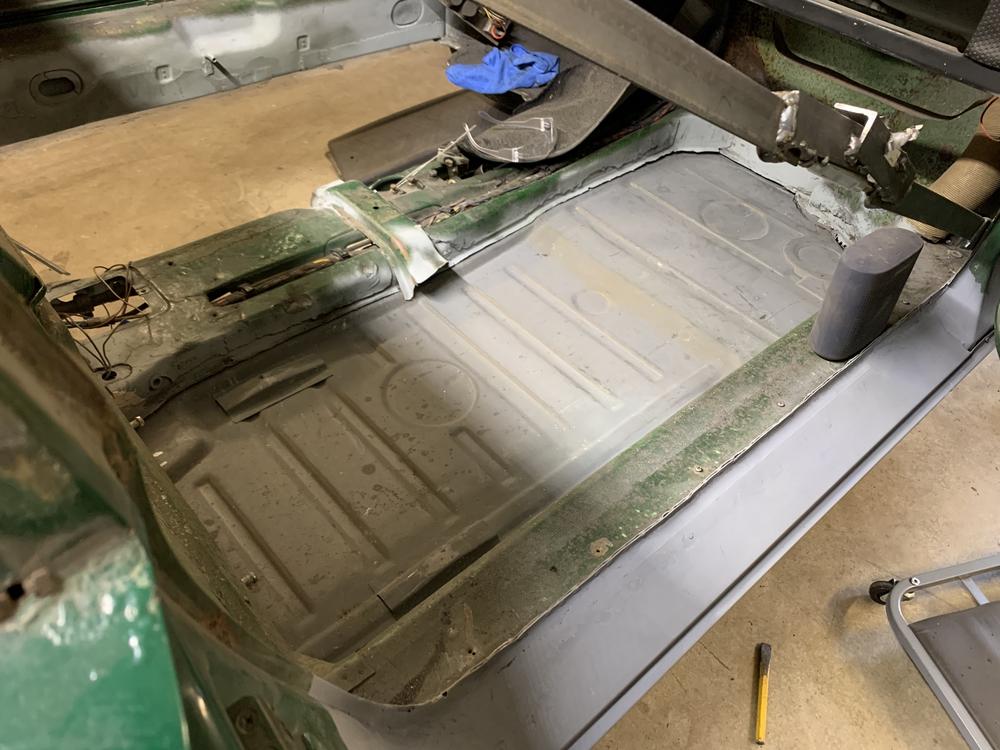
My checklist has not gotten much bigger these days.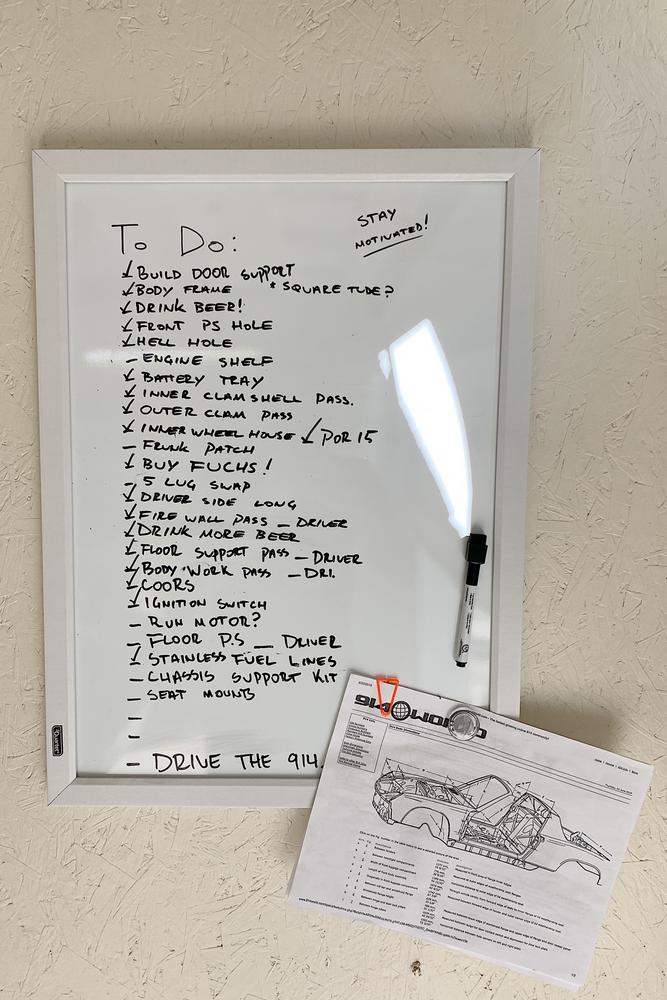
I have a pretty good idea of what needs accomplished - though,
I have left a few blank spots for any surprises....might, need more than 2.

As always, many thanks for reading and the support!
Posted by: BeatNavy Apr 9 2020, 07:07 AM
Nice Jared. I like how you have the body dimension sheet taped up to your whiteboard. Good reference and reminder!
SS fuel lines: I think your layout is fine. Probably better under the wiring harness, as it's more likely you'll need access to the wiring harness than the fuel lines after you seal everything back up. Someone with better memory can comment on orientation of the lines in terms of which side.
The cable tie is nice touch, but mine have never flopped around without it. Actually installing them, even with floor and engine in, wasn't nearly as hard as it might seem, although having a helper/spotter (my son, in my case) is definitely helpful. Not in my "Top 25 PITA" tasks on my teener.
That empty bracket on your control arm is a mount for the optional sway bar. I can't recall exactly, but I don't think early cars came with the front sway bar. It's a great addition for handling, though.
Posted by: jaredmcginness Apr 9 2020, 12:46 PM
Not in my "Top 25 PITA" tasks on my teener.
That empty bracket on your control arm is a mount for the optional sway bar.
I hate to know what makes the top 25 then! But.. ehh, I think I have a few ideas.
Great thanks, I didn't think 1.7's came with mounts for a sway bar.
Posted by: jaredmcginness Apr 11 2020, 06:57 PM
Hey guys,
Finished up the passenger floor today.
Added the Jack triangle, fits with a couple swings of my Universal Adjustment Tool.
She's sturdy. (I wont be jumping though. No cross bar yet)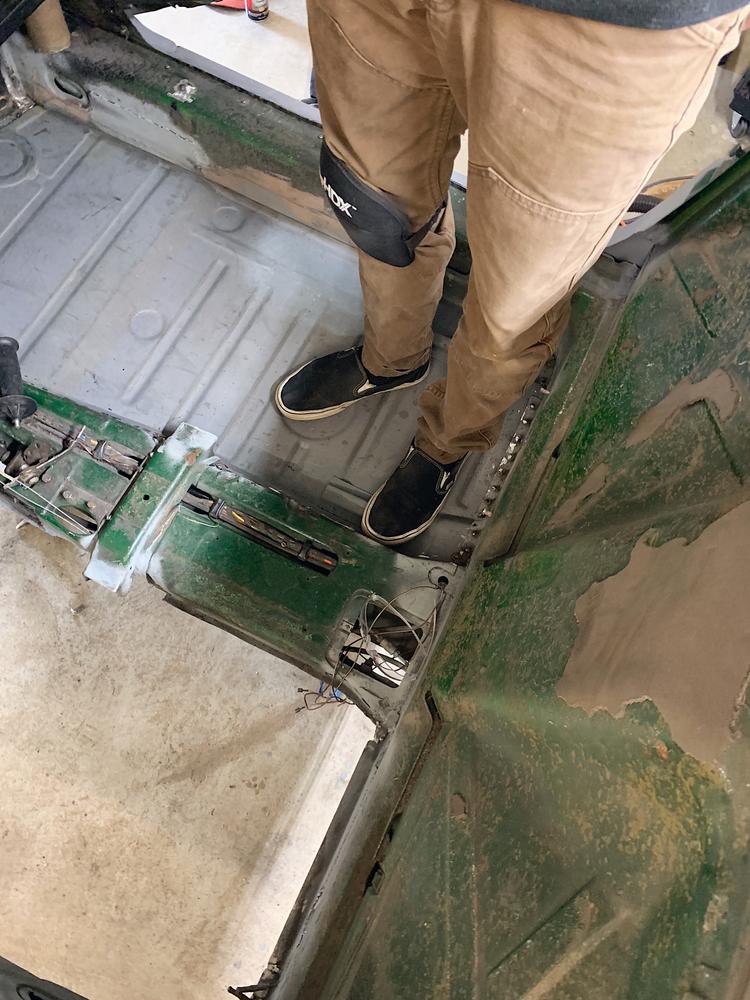
Working on this front section patch. Maybe a bit more smoothing... and I need to finagle the triangle that goes up at the end.
I ordered the crossmember and seat mounts from Stoddard.
So next up on the list for this area.
-Finish up driver side floor flanges and clean everything up.
-Install D.S. floor.
-Install handbrake and accessories.
-Crossmember and Seat mounts.
-Seam seal everything.
-Paint the floor with something.
-Undercoat the bottom.
-Dyna Mat or similar.
-Install interior!
Posted by: tygaboy Apr 12 2020, 04:43 PM
Us old guys call what you're doing "kicking ass and taking names".
Great progress. At this rate, you'll have it back on the road in no time.

Posted by: Cairo94507 Apr 13 2020, 08:22 AM
Chris- Are you sure you were never a LEO? That was a very common expression back in the day.
Posted by: jaredmcginness Apr 14 2020, 07:17 PM
Hey Ladies,
Something to look at on your lunch breaks (or just blatantly at work - if you are like me)
Got some goodies in from Stoddard! Last of what I need for the floor.
Cross member halves
4x seat weld brackets
Throttle Cable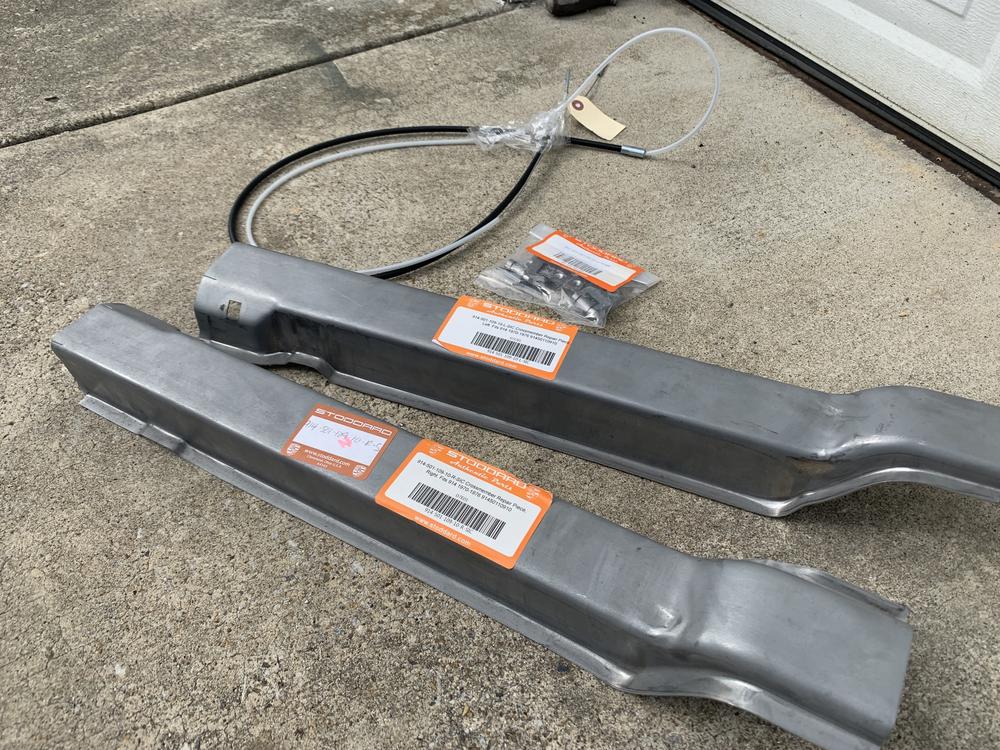
And compared to what I had in there... Yikes.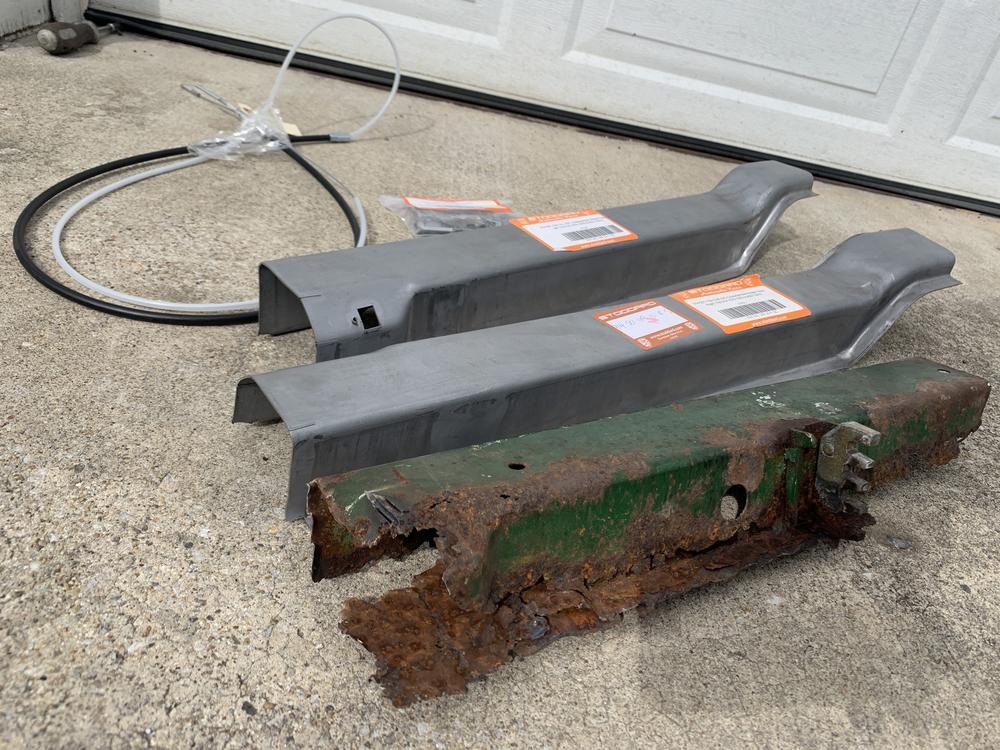
So the throttle cable was left connected when I pulled the motor. Amateur move Jared... So, I needed a new one.
This is 10,000 times easier with the floor still not completely sealed. Easy access.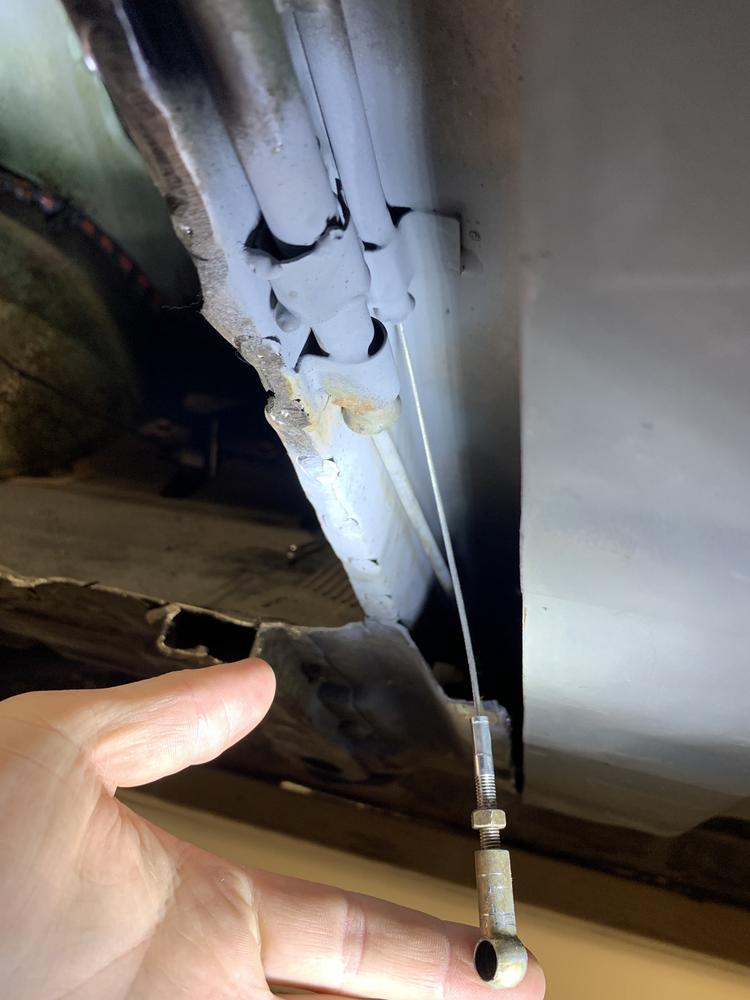
Arrived at the right time too, finished up the prep for the floor mounting points.
Drilled some spot welds for the drivers side.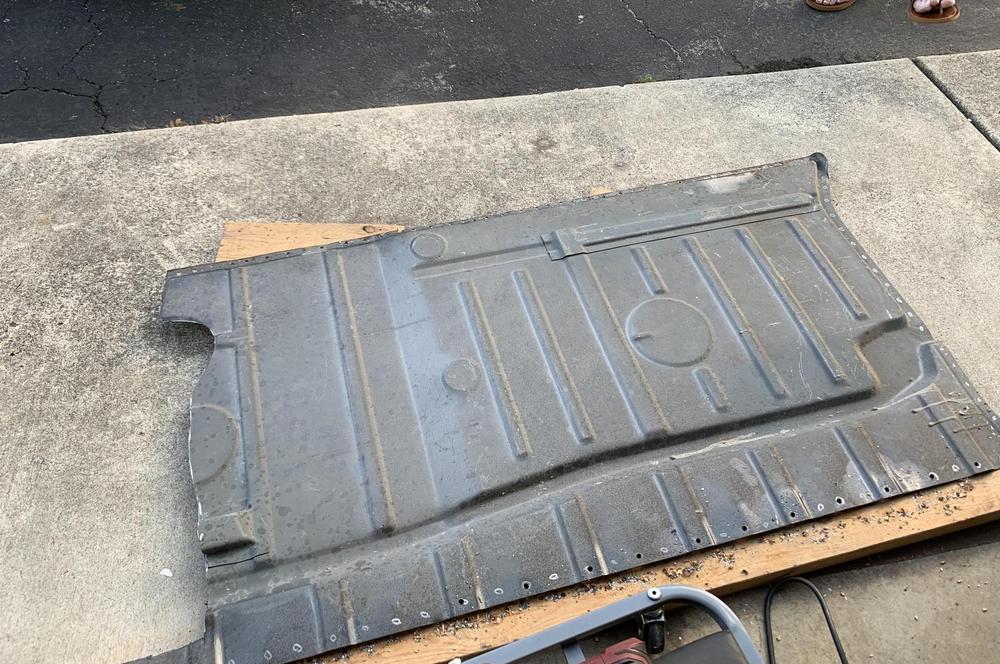
Started tacking this bad mother in.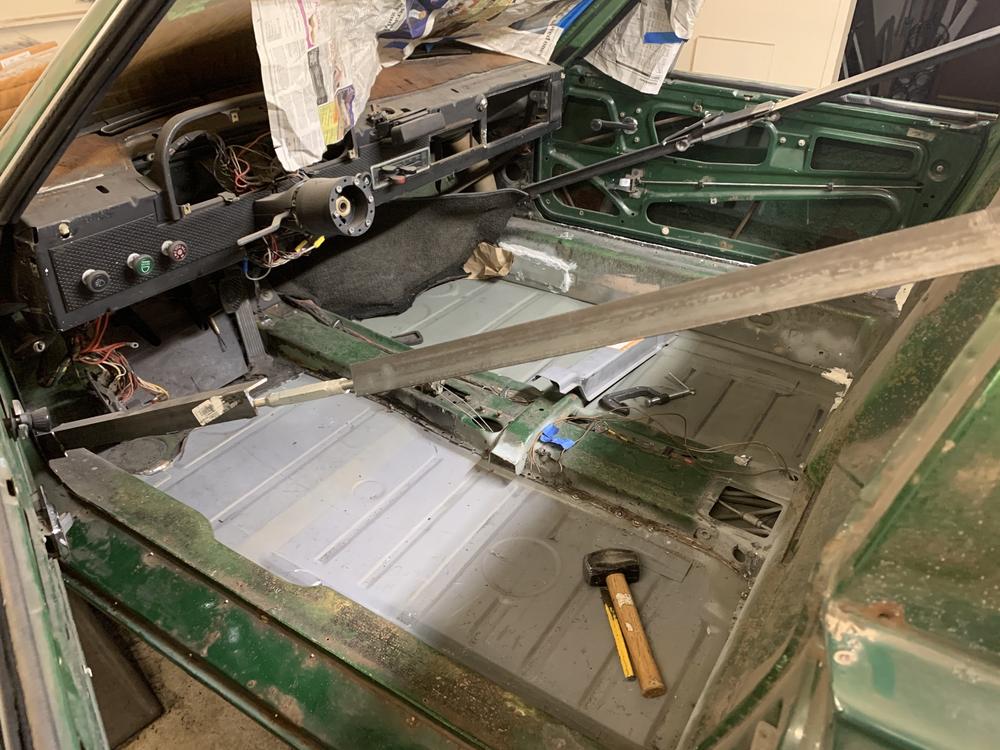
Ran out of argon after about 15 of 120 or so spots. Light at the end of the tunnel.
Until next time,
Jared
Posted by: bbrock Apr 14 2020, 08:51 PM
And compared to what I had in there... Yikes.
Okay, now I see why you cut those cross member out. That was puzzling me but I figured all would be revealed.
Until next time,
Jared

Posted by: jaredmcginness Apr 15 2020, 06:40 AM
Okay, now I see why you cut those cross member out. That was puzzling me but I figured all would be revealed.
I didn't even have to cut it! Bent it straight up, and it pulled out clean!
Posted by: JOEPROPER Apr 15 2020, 08:03 AM
Go get the argon tank filled so we can continue to watch the progress.
This is coming along very nicely. Great work!
Posted by: Baker17 Apr 15 2020, 03:15 PM
Got a 1973 1.7 L by the side of the house just waiting to be worked on. I find your build inspiring and I wish I will be half as good as you are when I get to it. My 914 is typical: shot rear floors and bottom firewall, rust coming out from under the paint on doors, hood and rockers and to add an additionnal degree of difficulty, it was lightly rear ended on the drivers side. And this is what I see... And to think that this is just the tip of the iceberg as I've learned from reading many build threads that there is way more under than what you can see. Oh, and I forgot to mention that the engine has a MAJOR exhaust leak and that I found out that there were many exhaust manifold studs either missing or just plain holding by some miracle ( I m sure they are pulled from the head, but let me dream a little, please!!!) I know, you must be asking yourself why I even bothered; well, this is what I call a bucket list affair and no one but myself will stop me from getting it back on the road. I love bringing stuff back from the depths, it is so rewarding. I just hope I will have the "stamina" to get it finished.
Anyways, very good work on your 914.
Posted by: bbrock Apr 15 2020, 03:58 PM
I know, you must be asking yourself why I even bothered; well, this is what I call a bucket list affair and no one but myself will stop me from getting it back on the road. I love bringing stuff back from the depths, it is so rewarding. I just hope I will have the "stamina" to get it finished.
Anyways, very good work on your 914.
DO IT! Don't let the naysayers talk you out of it. If you have the desire, I've found restoring the old rust bucket the most rewarding of MANY large projects I've tackled. Oh, and it is oh so sweet to see the jaws drop on those people who mocked and ridiculed the old basket case when they first see the swan that emerges.
Posted by: jaredmcginness Apr 16 2020, 06:44 AM
Got a 1973 1.7 L by the side of the house just waiting to be worked on. I find your build inspiring and I wish I will be half as good as you are when I get to it. My 914 is typical: shot rear floors and bottom firewall, rust coming out from under
And to think that this is just the tip of the iceberg as I've learned from reading many build threads that there is way more under than what you can see.
I know, you must be asking yourself why I even bothered; well, this is what I call a bucket list affair and no one but myself will stop me from getting it back on the road.
I just hope I will have the "stamina" to get it finished.
Anyways, very good work on your 914.
I think a lot of us have been in this boat! These cars all seem the same. My car sat around for 7 months, while I stared at it every day. My main motivation early on was not wanting to be the guy that says "i'll get to it".
Honestly, @http://www.914world.com/bbs2/index.php?showuser=18857 the last 6 or 7 weeks have flown by. Its been a pretty straight forward project, cut the brown out, replace it with shiny.
Metal is easy. If you make a mistake you can always cut it out, drink a beer and start over. We'd love to see photos of your car. We can give you plenty of motivation
I appreciate the comment, truth is: I look up to so many other guy's threads, here on the World (and reference them when I come across a new task) I just try to emulate them.
Nothing to it, but to do it! Right?!
Posted by: jaredmcginness Apr 17 2020, 06:01 AM
95% finished the floor up.
All the spot welds are done, just need to butt weld the front seam, prime, seam seal and under coat. This weekend.
Never thought I'd have a 914 with floors. 
ALMOST done laying on my damn back!
Reused the drivers Jack triangle. Its rugged, but sturdy, did not get a pic yet, but you can see I have it welded up in this photo.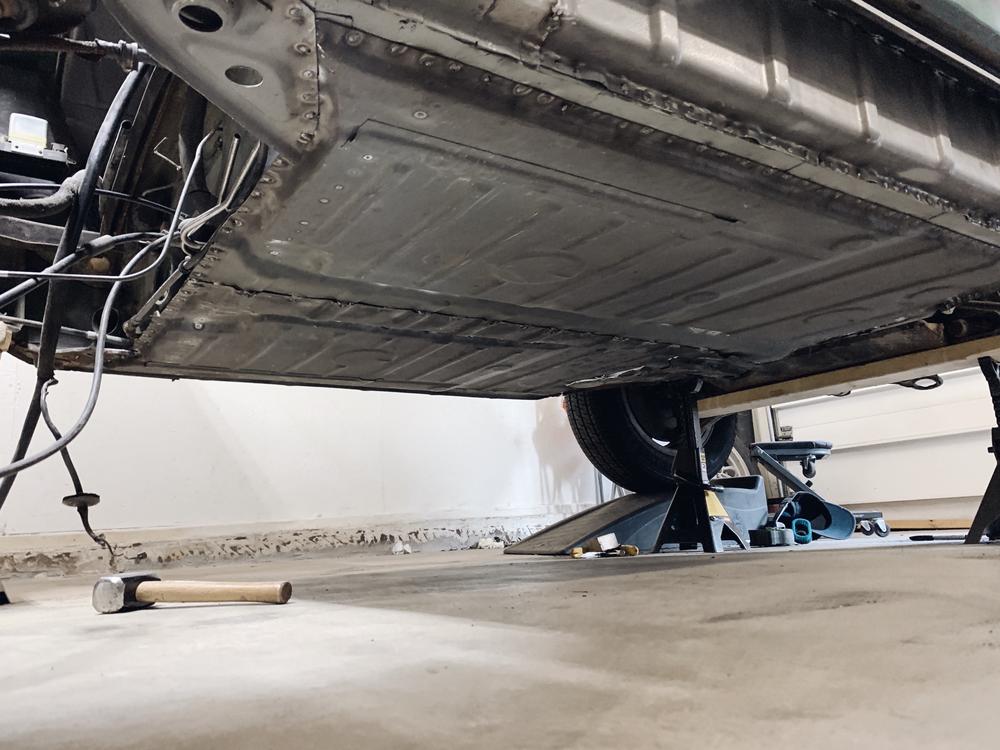
Holds up my 160lb butt - before the support is welded up... So I would say we are good.
A far cry from this:
Next on the list:
-Reattach hand brake, and build an E-brake cable guide.
-Butt weld floor near pedal
-Weld in seat mounts
-Seal floor ![]()
Feeling pretty good.
Edit: Dang 50 posts! Lost my "914 Newbie" status
Posted by: BeatNavy Apr 17 2020, 06:17 AM
Man, all that new steel looks GOOD!
Keep rocking, newbie, Jared!
Posted by: DRPHIL914 Apr 17 2020, 07:32 AM
95% finished the floor up.
All the spot welds are done, just need to butt weld the front seam, prime, seam seal and under coat. This weekend.
Never thought I'd have a 914 with floors.
ALMOST done laying on my damn back!
Reused the drivers Jack triangle. Its rugged, but sturdy, did not get a pic yet, but you can see I have it welded up in this photo.
Holds up my 160lb butt - before the support is welded up... So I would say we are good.
A far cry from this:
Next on the list:
-Reattach hand brake, and build an E-brake cable guide.
-Butt weld floor near pedal
-Weld in seat mounts
-Seal floor
Feeling pretty good.
Edit: Dang 50 posts! Lost my "914 Newbie" status
looks good on the floor way to go!! BUT— looking at those cross braces i think you need to flip them around, and switch them side to side , the drivers side one will have the E-Brake switch hole and it looks like you have them swapped, if you are standing on driver side , then i see the drivers side support is currently mocked up on wrong side.... hope you have not tacked those down like that yet!
Posted by: bbrock Apr 17 2020, 07:42 AM
looks good on the floor way to go!! BUT— looking at those cross braces i think you need to flip them around, and switch them side to side , the drivers side one will have the E-Brake switch hole and it looks like you have them swapped, if you are standing on driver side , then i see the drivers side support is currently mocked up on wrong side.... hope you have not tacked those down like that yet!
Good catch!!!
And great work there "member"
Posted by: jaredmcginness Apr 17 2020, 07:53 AM
looks good on the floor way to go!! BUT— looking at those cross braces i think you need to flip them around, and switch them side to side , the drivers side one will have the E-Brake switch hole and it looks like you have them swapped, if you are standing on driver side , then i see the drivers side support is currently mocked up on wrong side.... hope you have not tacked those down like that yet!
Awesome catch, thanks for the PM and response. I will adjust. Just tossed in for the photo! Not tacked in yet.... I might have missed it, due to no reference. (it was all rusted away!)
Thanks all! More updates to come this weekend.
Posted by: djway Apr 17 2020, 09:37 PM
Great job. After an hour or so of reading tonight I am beginning to believe that the rust was installed at the Karmann factory......
Posted by: Dick Bandwagon Apr 18 2020, 03:19 PM
Good looking floors, Suzanne must be proud.
Posted by: twistedstang Apr 18 2020, 04:07 PM
Wow. First time checking out this build thread......great fab skills, a great build thread, and fast too. Very nice work!
Posted by: jaredmcginness Apr 18 2020, 06:28 PM
Great job. After an hour or so of reading tonight I am beginning to believe that the rust was installed at the Karmann factory......
1000%! I feel like every seam, pre factory weld, was sprayed with a rust inducing layer.
Good looking floors, Suzanne must be proud.
Haha! Thanks for reading the thread Nate!
Wow. First time checking out this build thread......great fab skills, a great build thread, and fast too. Very nice work!
Much appreciated. This virus has left me socially.... free. A lot of unrestricted garage time. Sooner I get it done the sooner we're on the road. Another update coming in a moment.
Posted by: jaredmcginness Apr 18 2020, 06:44 PM
Page 6.
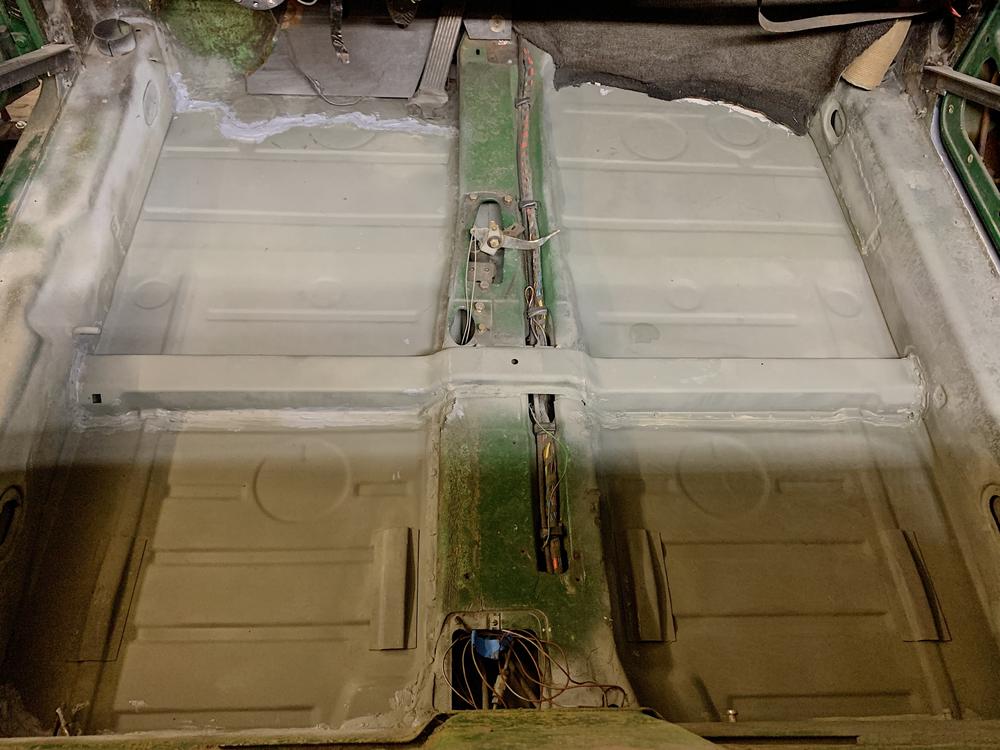
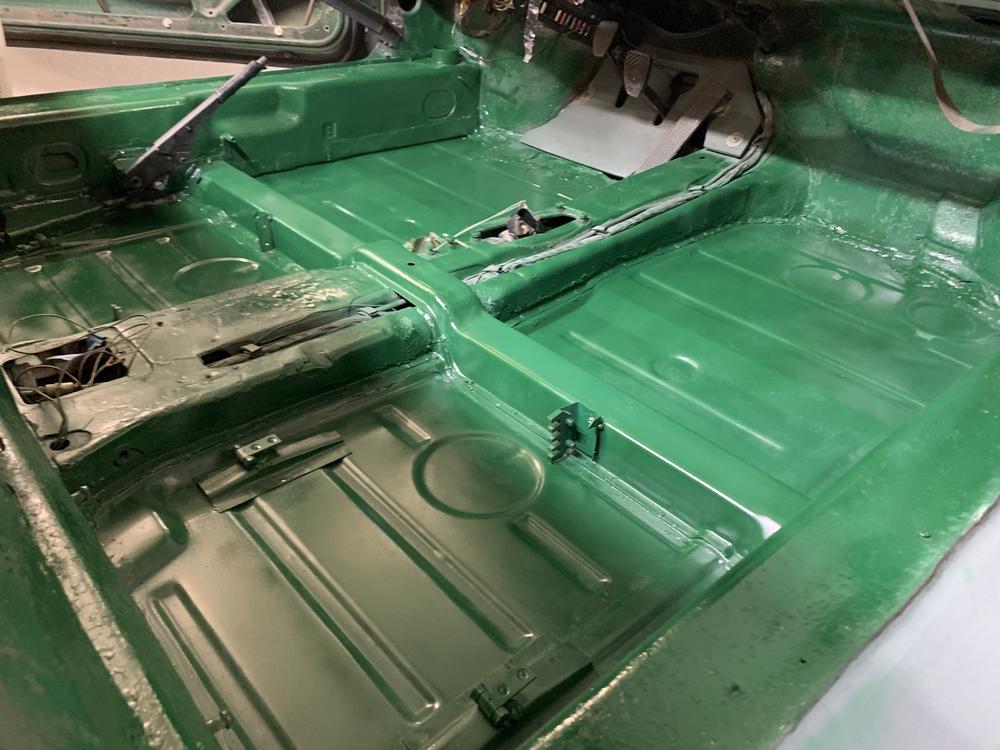
Floors are "100%" Here's some photos.
Correct side, thanks to you guys.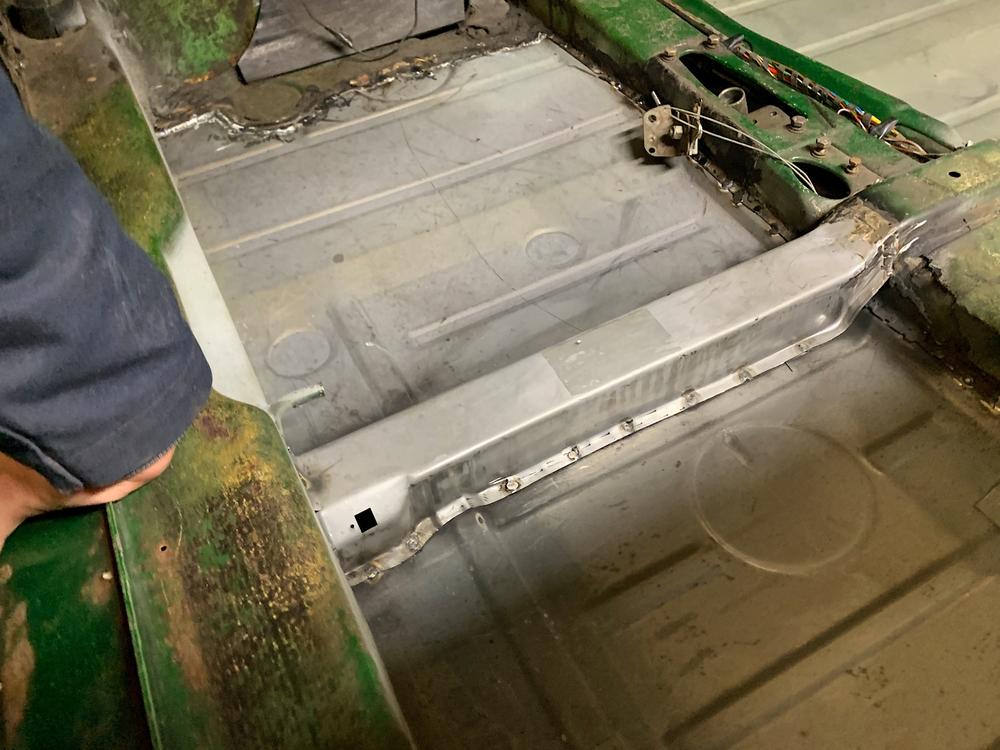
Blending in.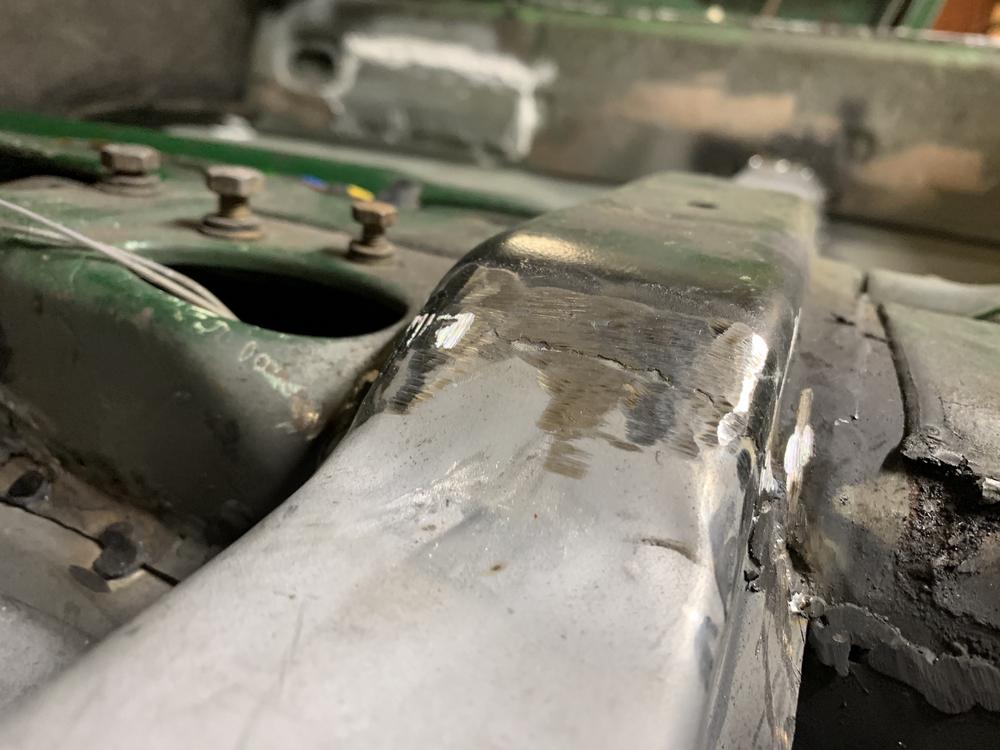
Both sides.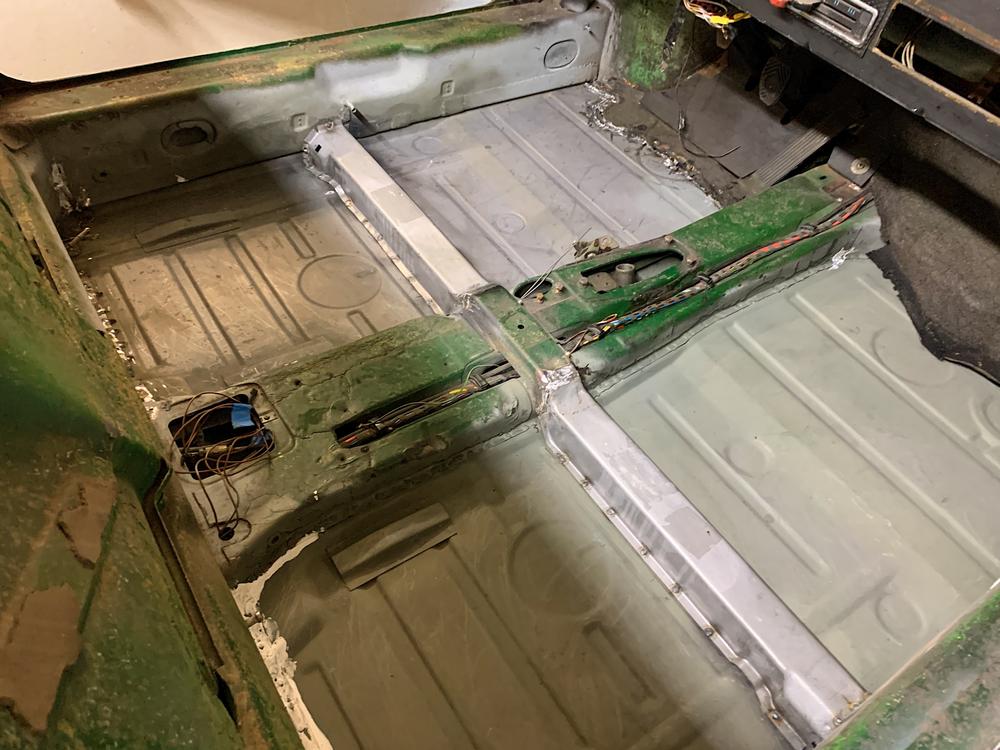
Ground seam sealed and primed. Wow, it looks nice when things are one color.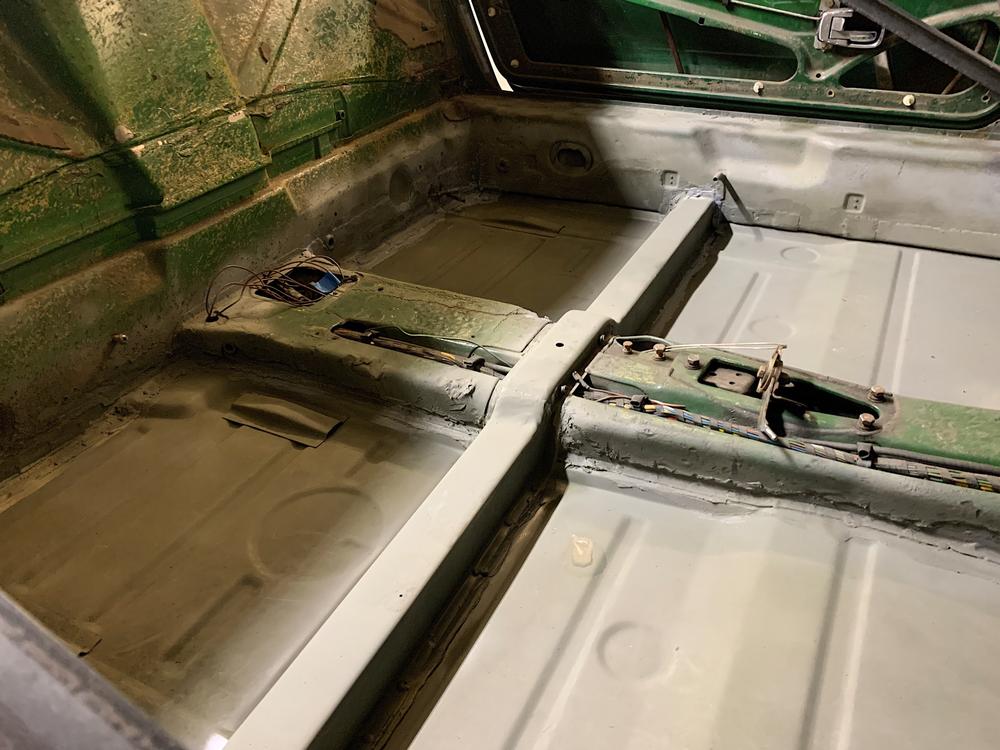
Same order of business for the underside. Sealed every seam I could find.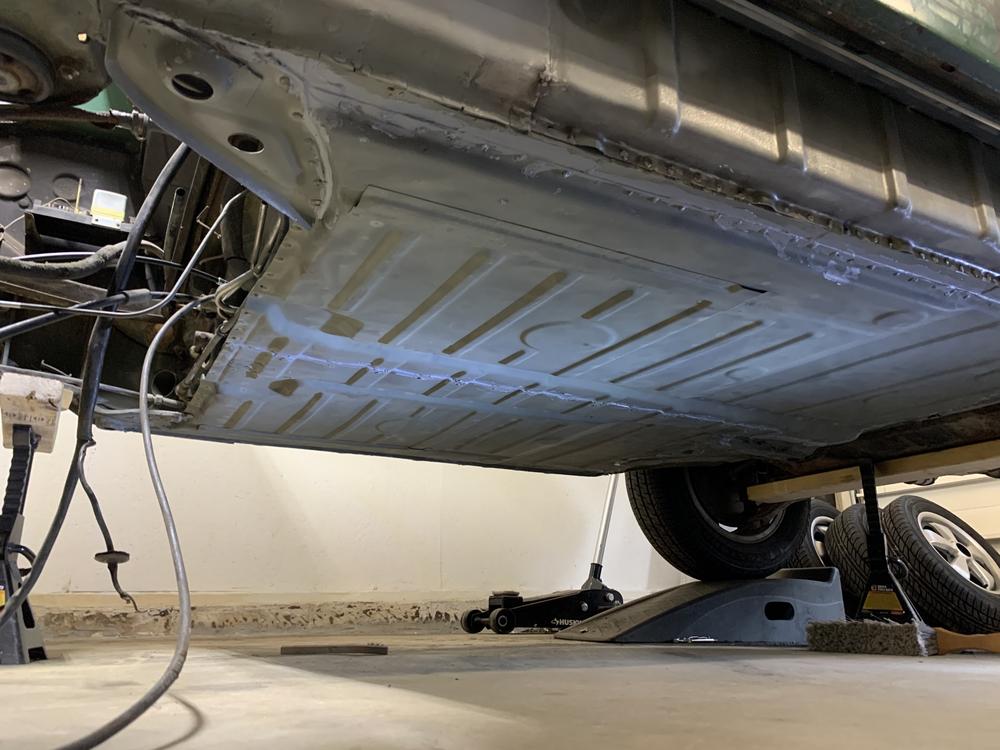

If you have a keen eye, you'll notice in the background that I wrapped up my Fuchs. I used 185/65. Nice and puffy. Not too big.
Some might be upset that I bought Ohtsus and not R888s but hey, its just a 1700cc. ha. I had them on my '93 Corrado in 16" and was totally happy with them. 
Tomorrow, I'll weld in the seat mounts and E-brake accoutrements.
I've decided to use a roll on tar-like sound deadening that I found in another thread. So I will do the firewall and probably floor pans up with that.
Another choice I made this weekend was to nix the backpad and go with the perlon carpet fire wall. I think it looks nice, opens things up, and suits my style.
I have an early and late style backrest, both are not in great shape. Obviously, I am not a perfectionist or a purist. So I don't too much care about keeping this car "as it came"
I do a little (a lot) sewing work on the side, so I think it will be a fun project. I've seen enough photos in other threads to be convinced that I like the carpeted wall.
Thanks for reading!
Posted by: trojanhorsepower Apr 18 2020, 07:23 PM
Wow. Great work!
Keep the updates coming.
Peter
Posted by: bkrantz Apr 18 2020, 09:29 PM
Tomorrow, I'll weld in the seat mounts and E-brake accoutrements.
I had good luck bolting the hinges to the seat bases, and clamping the front tilt-adjustment teeth to the cross bar, and then tacking everything in place.
Posted by: jaredmcginness Apr 20 2020, 10:28 AM
Ok, weekend fun. Large amount of small updates...
Part 1:
Cleaned up the seatmounts in preparation of install. Wire brush, paint and prime.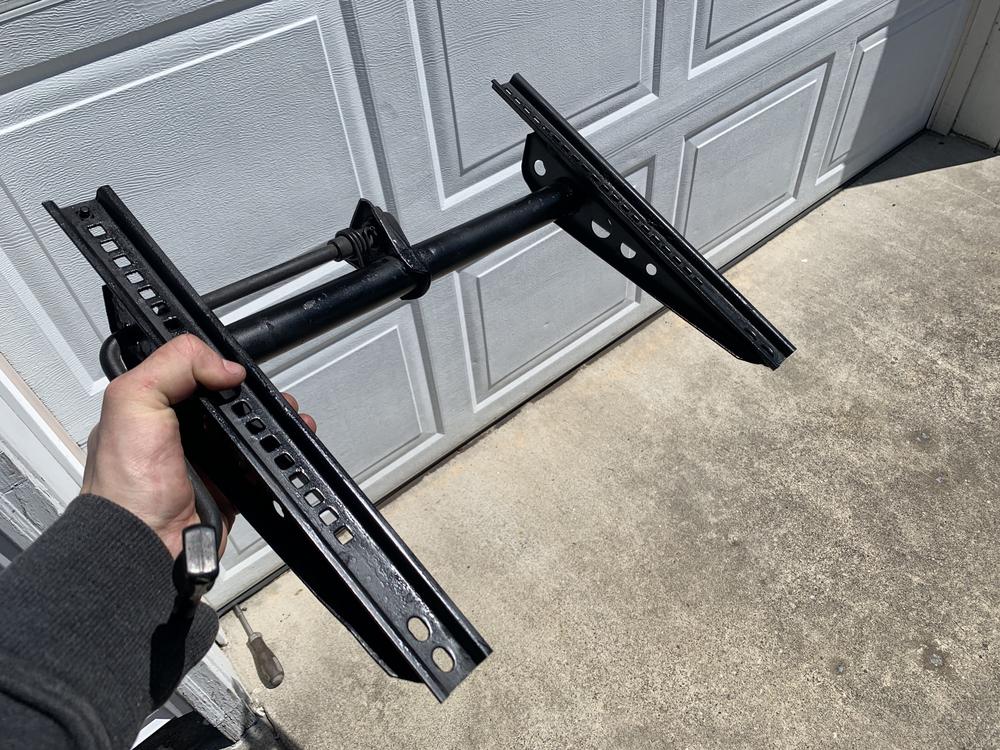
As Bkrantz recommended above. I clamped the U Height adjuster bracket, lined the seat bracket up, bolt the hinges to the base and tac it all together. Worked great and took mere minutes.
Both installed: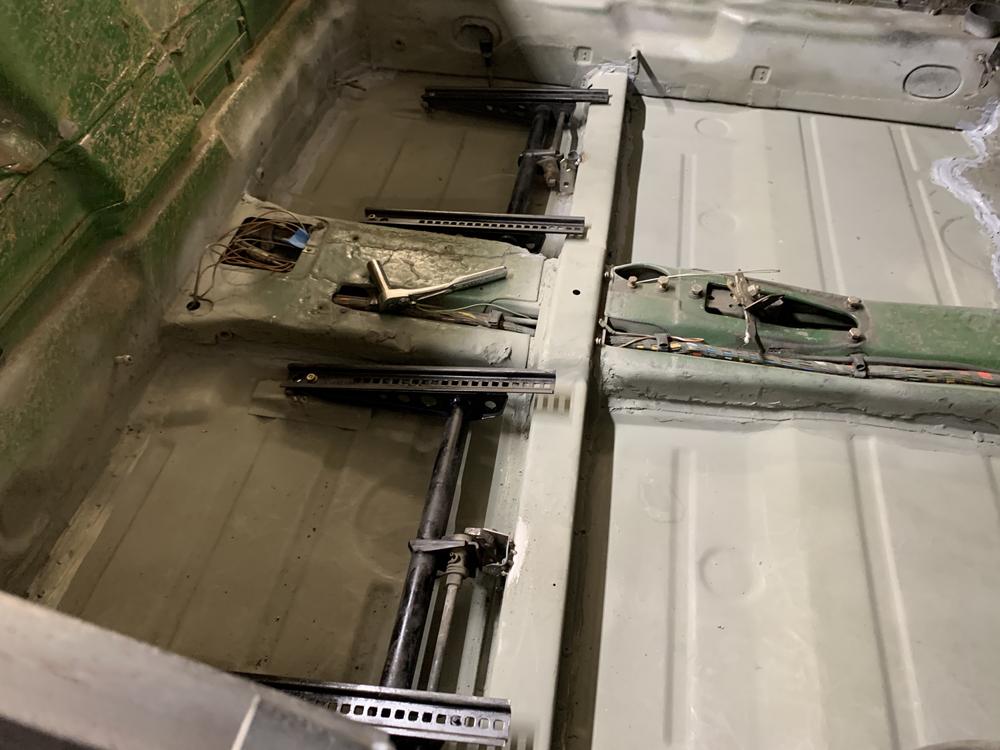
Being a '71 I only had a drivers side U bracket and height adjust teeth. I am going to run later style, single seats.
I made the U brackets out of 16g and a hammer... I found the teeth online.... eh... lets make it ourselves at work.
Drew this up on solidworks. Took the better part of an hour. 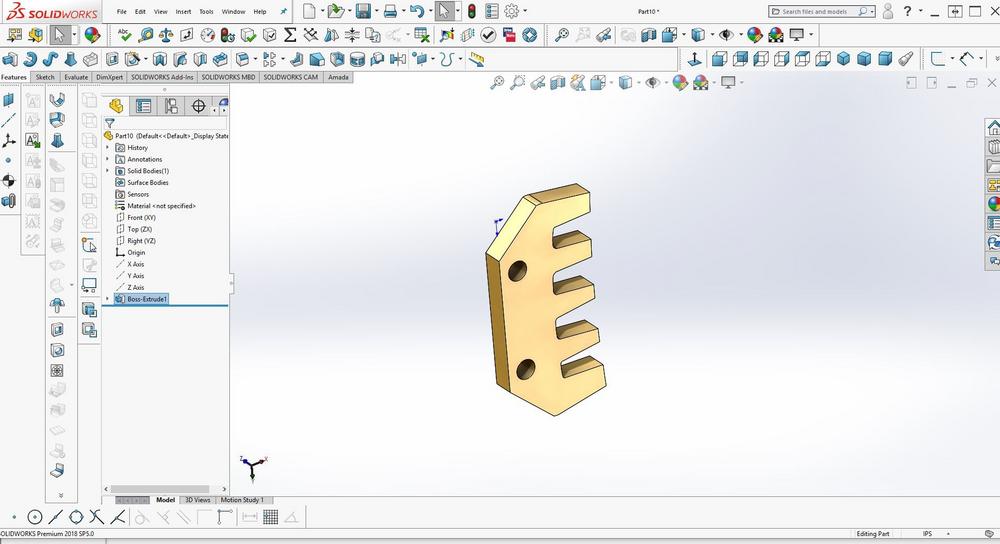
Measurements taken entirely off the old piece. Cut on a laser, .25" A36 Steel. Tapped to M8.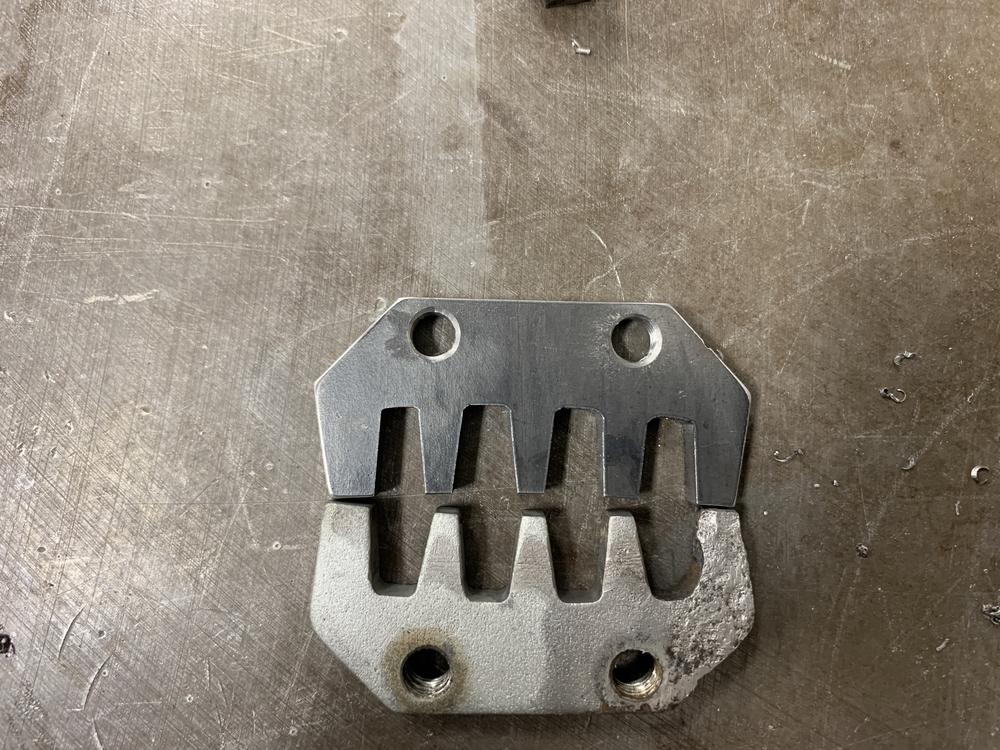
Stock teeth is 5/16" wide. So my new piece is a bit narrower, but I don't think .060 will make a difference in the seat mounting/adjustment.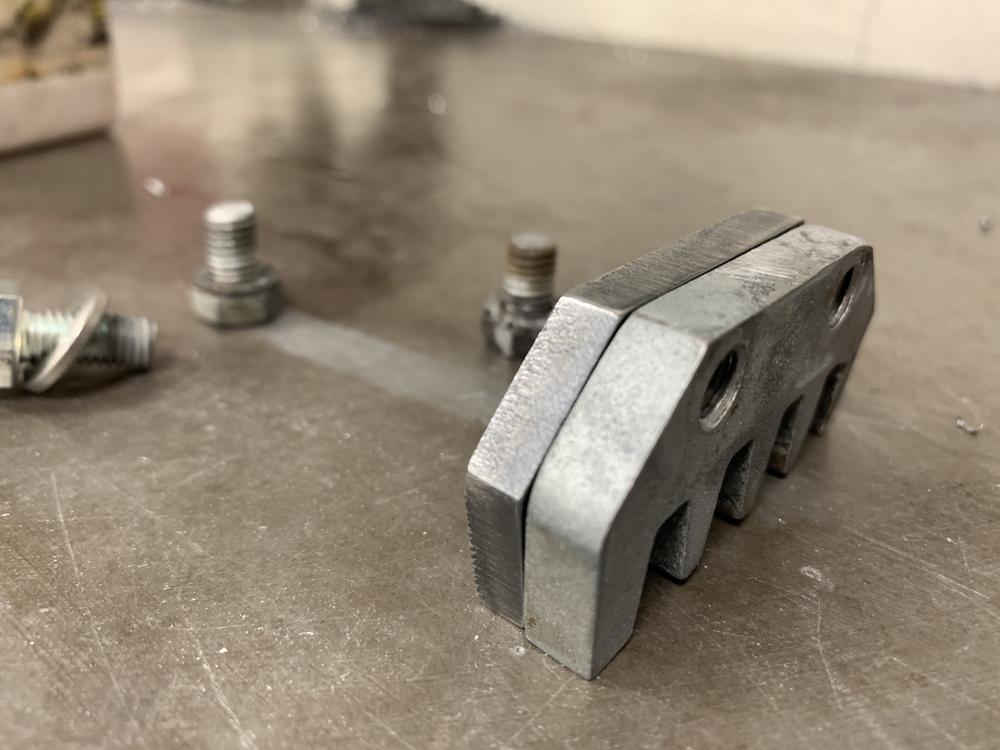
Old and New. Pretty happy with it.
Part 2:
Worked on a quickie fix for the hand brake bulb. Bottom half rusted away.
Remade the cable guide cover.
Overlapped.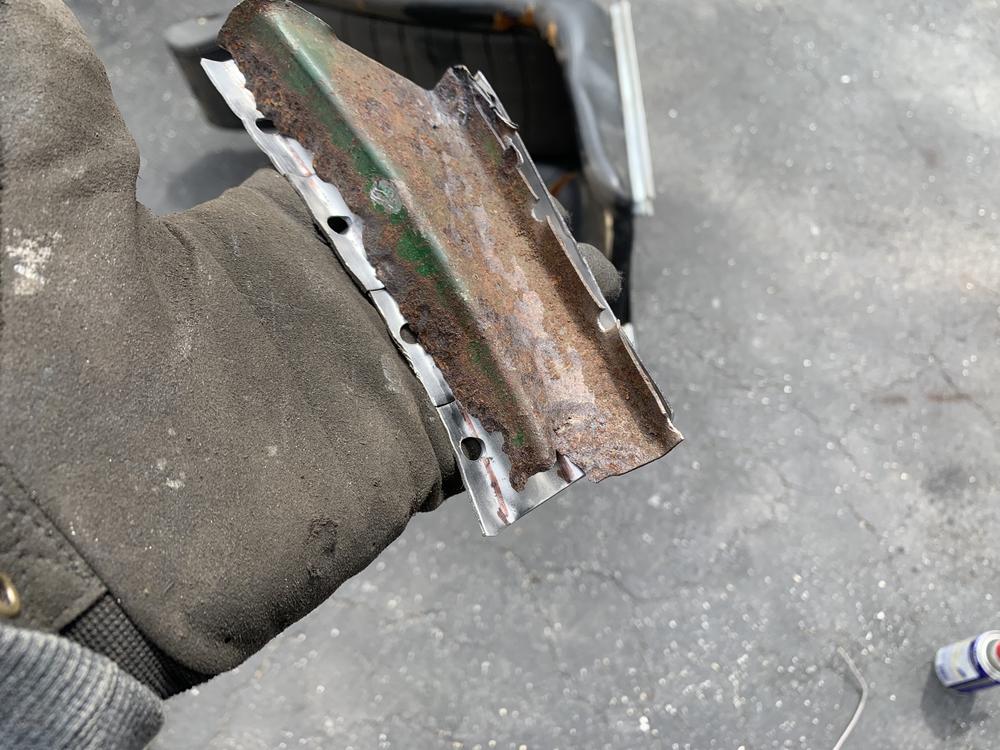
Back to the hand brake. Sanded and painted. This is a finicky piece! Bare with me....
Apparently '70 and '71 have a cool 2 piece folding handle design, so you dont catch your thigh on the lever. Cool piece but annoying. I found out I was missing a spring piece that releases the tooth.
I did some research and learned its a common break. I found the replacement rod + spring for $40. I'll try and fix it first.
Here is the fix I cooked up. Bent piece of 16g welded to the end. It seems to work on the vise.... This might be one of those situations where I upgrade to the late style in the near future....
(hint... anyone have an extra laying around?)
Thanks for reading.
Posted by: Dick Bandwagon Apr 20 2020, 09:55 PM
Seat adjuster turned out very nicely.
Posted by: jaredmcginness Apr 22 2020, 11:23 AM
Handbrake welded and cable attached, cable cover welded, sealer applied, primed...
![yellowsleep[1].gif](style_emoticons/default/yellowsleep[1].gif)
Now laying some paint down in the floors today. Looks nice, so far.
Posted by: jaredmcginness Apr 22 2020, 06:02 PM
And paint on the floor is done. Looking nice and smooth.
Here's a quick throw back from a few weeks ago: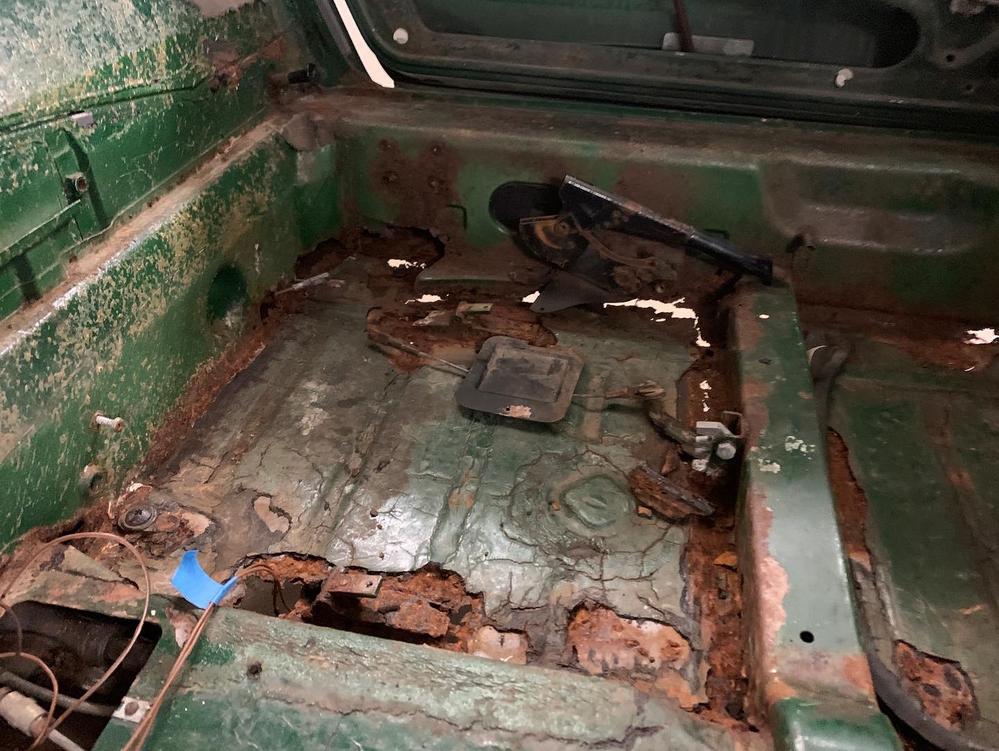
Second lease on life for this floor pan!
Next on the list (that are big enough to be their own posts):
-914LTD outer reinforcement kit
-Butyl and Carpet
-Battery tray and paint
-Delete side markers and antenna.
-5 Lug Swap kit (when it arrives)
Posted by: bkrantz Apr 22 2020, 09:19 PM
Looking great! You are getting ahead of me now.
Posted by: jaredmcginness Apr 24 2020, 05:48 PM
Hey all,
Not a ton to update. Driving down to VA in the morning to pick up some drivers quality seats and a few other pieces, for pennies on the dollar. The seats I have are gnarly and crispy.
Here are a few updates on the car...
Started the passenger 914LTD outer Stiffening Kit. Fits great.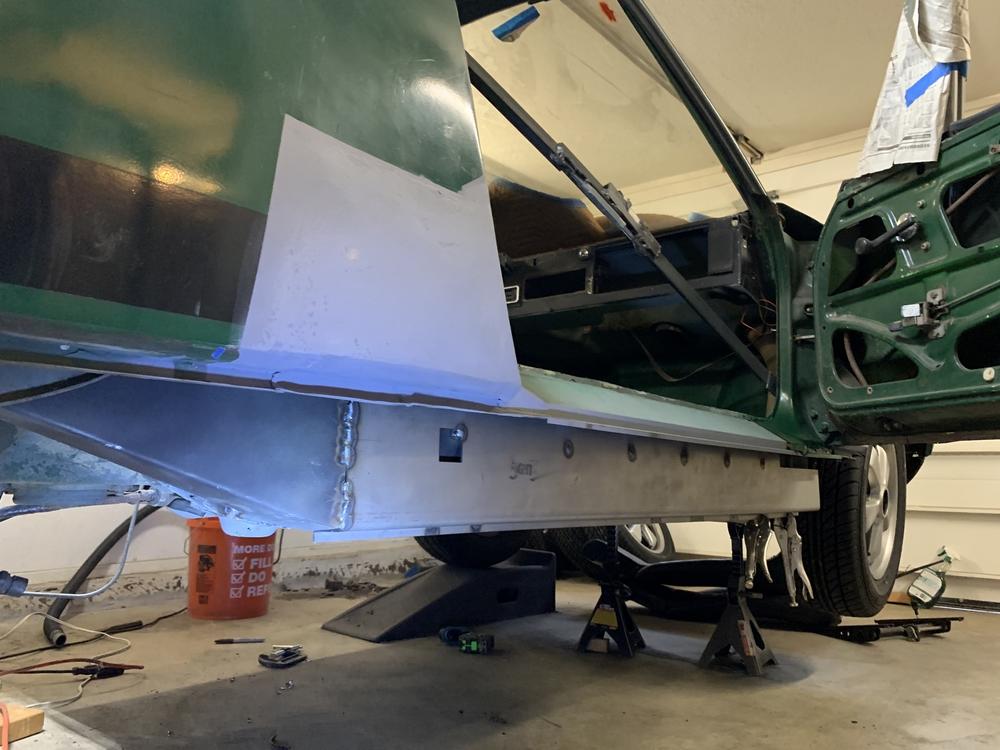
Passenger side requires a bit of rust repair before I install that side.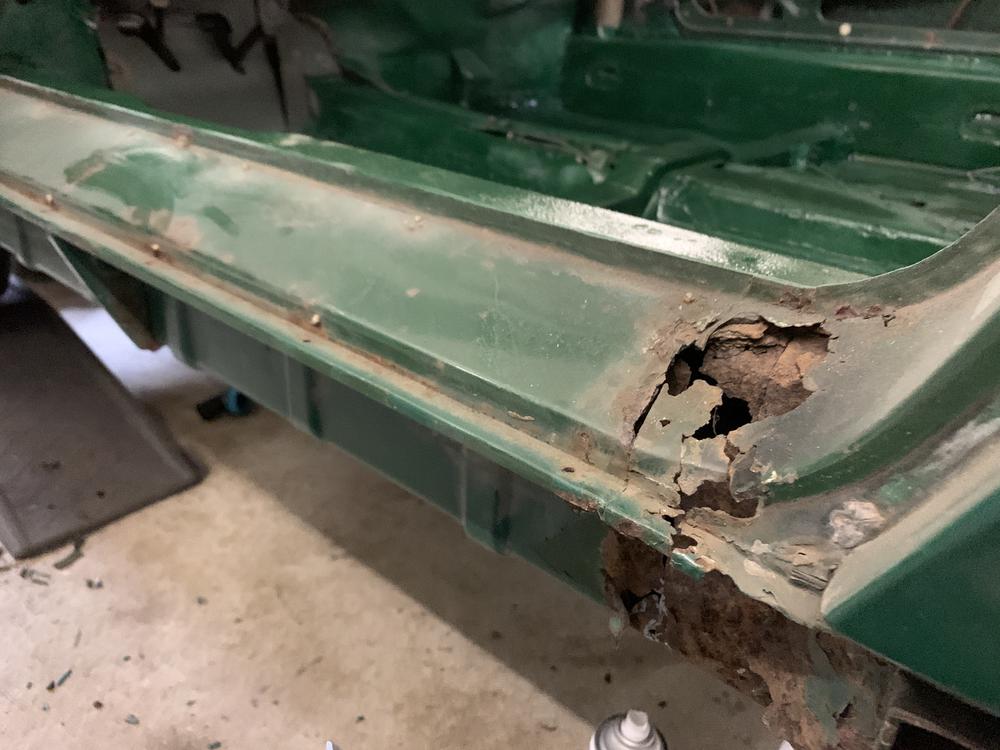
Cut out.
Metal ready, shape replacement, weld and grind.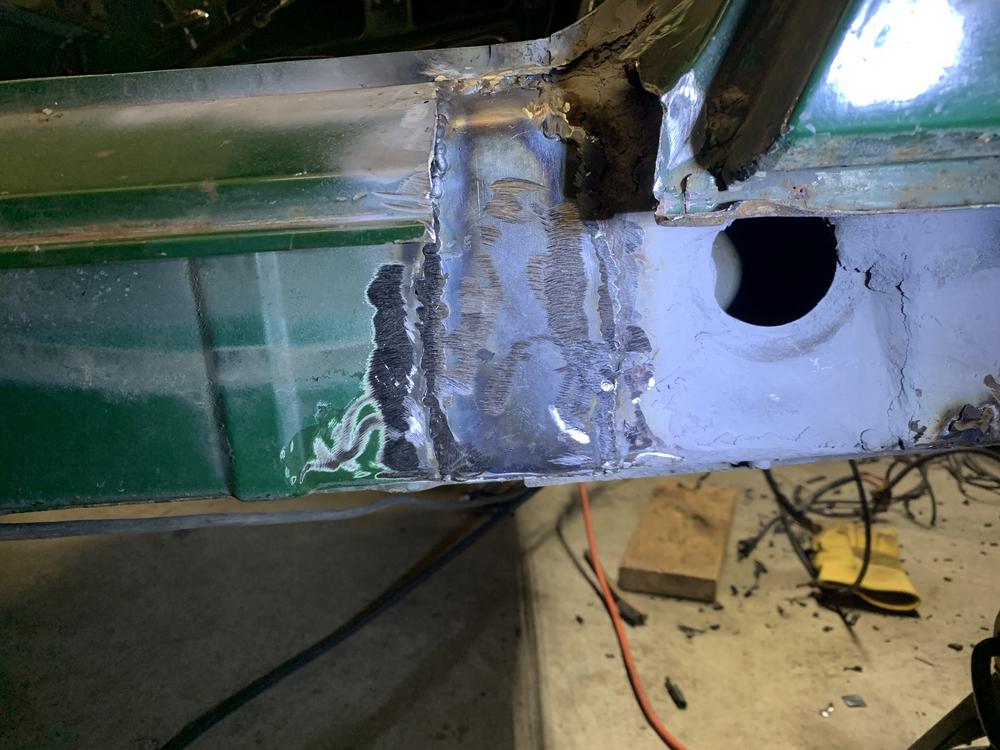
Start forming the replacement jamb section. All of these parts are 16g.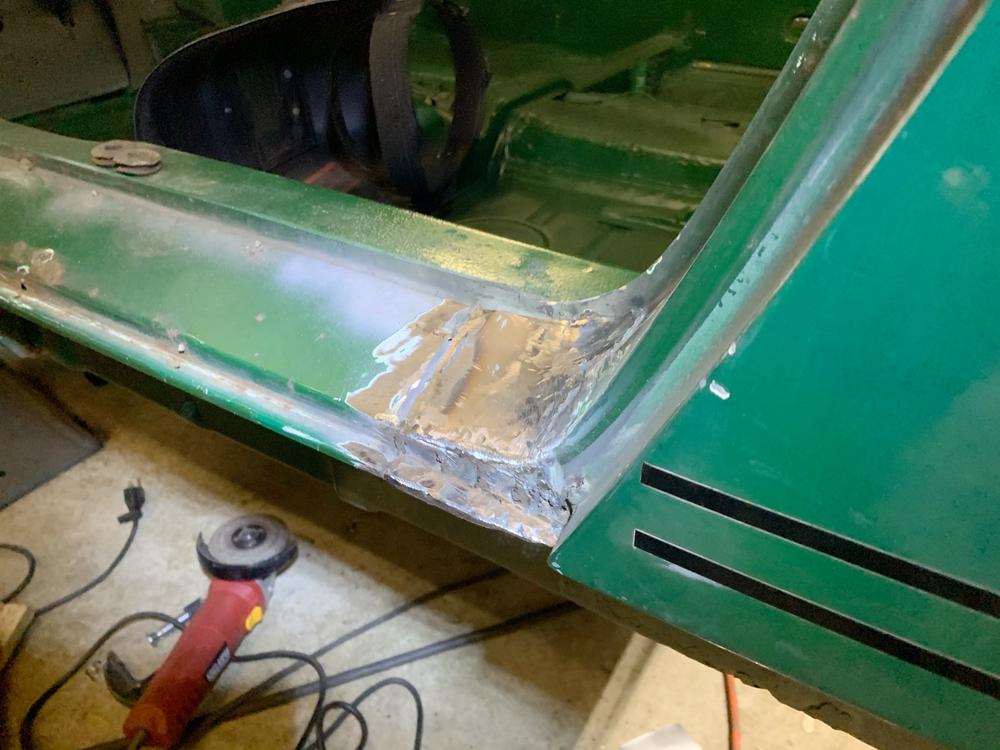
Little more sanding and filler primer and we should be smooth.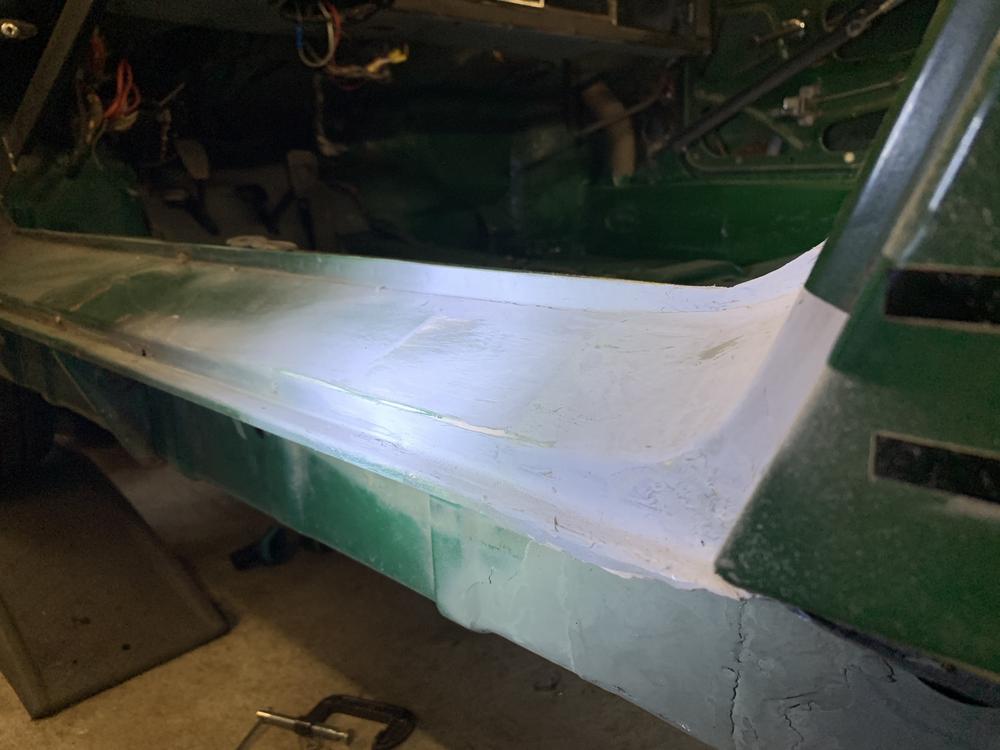
I'm grateful this side of the car has a lot less rust... an afternoon of work vs. 3 weeks. 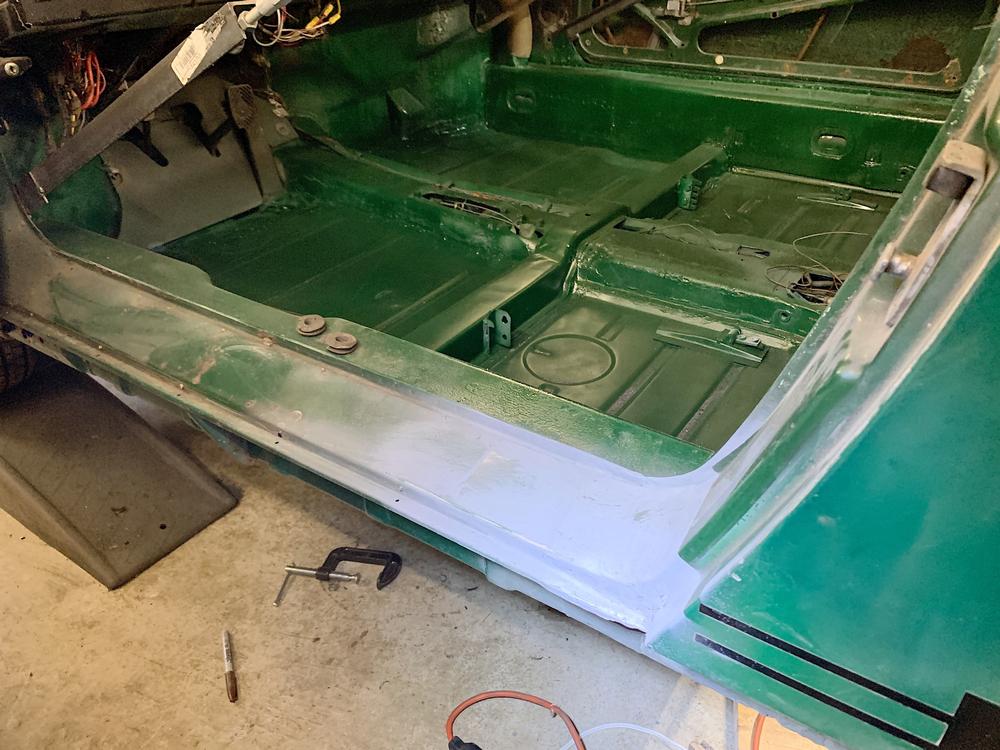
I hope every one has a nice weekend.
Posted by: kroelofsen Apr 25 2020, 05:01 AM
Nice work indeed... Good progress!
Posted by: jaredmcginness Apr 25 2020, 08:01 PM
Picked up some seats this morning. Pretty unassuming corduroy. Will clean up well. Nice bolsters, will get me by for now....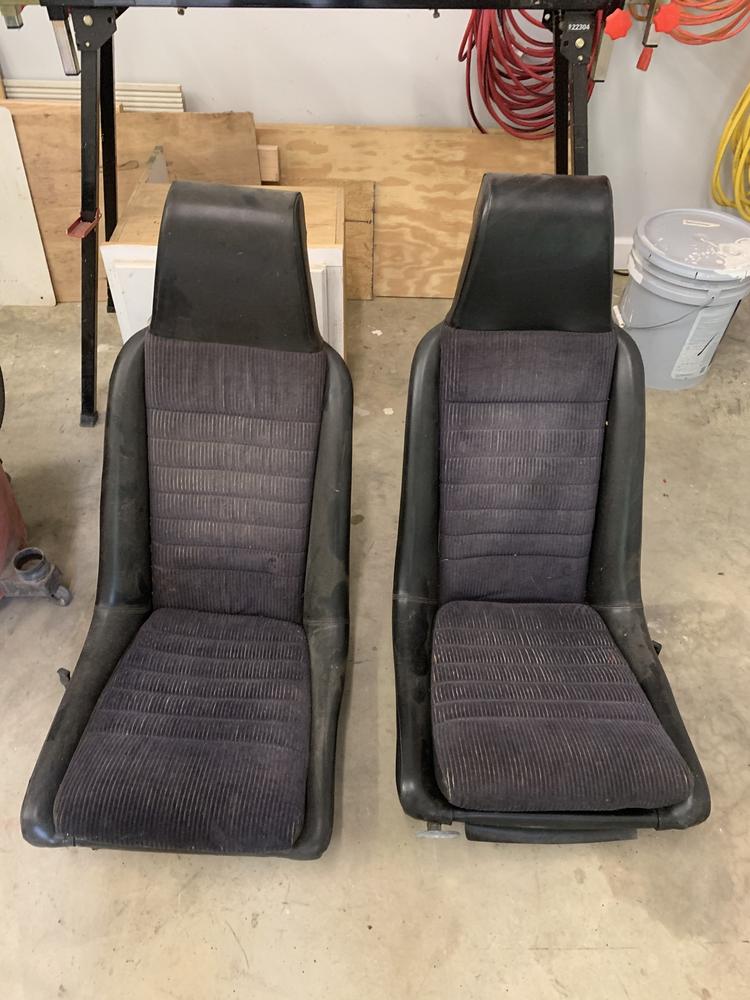
Upon further inspection... seller said they may have been a recover...
Later in the car, the girlfriend started peeling the cord back. 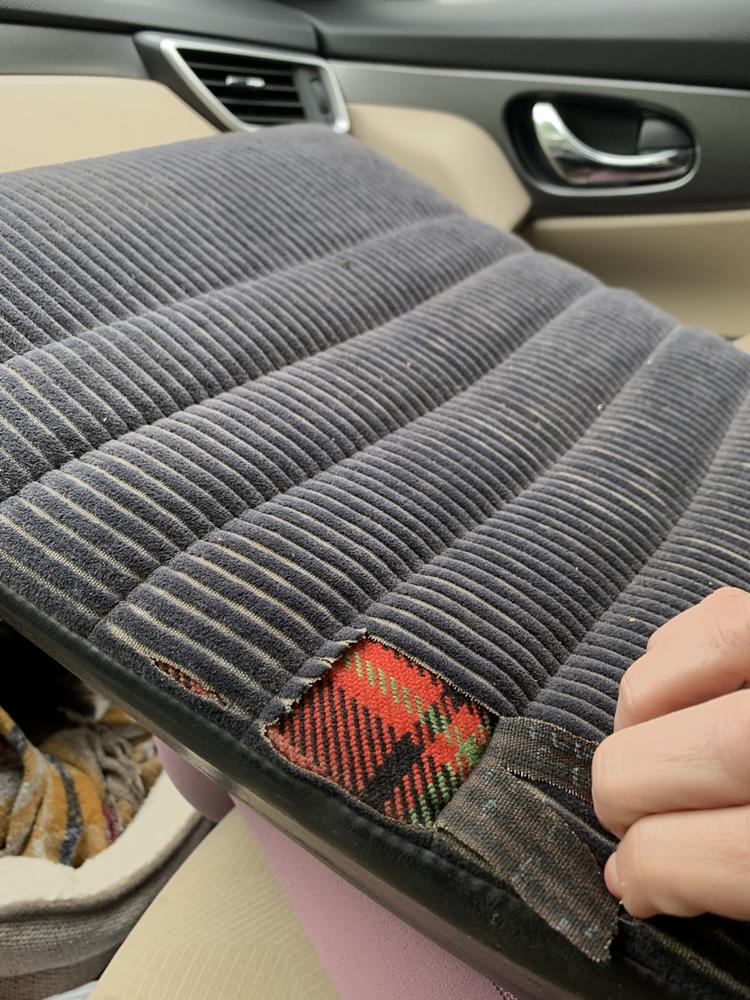
What's this!!! Lets peel some more.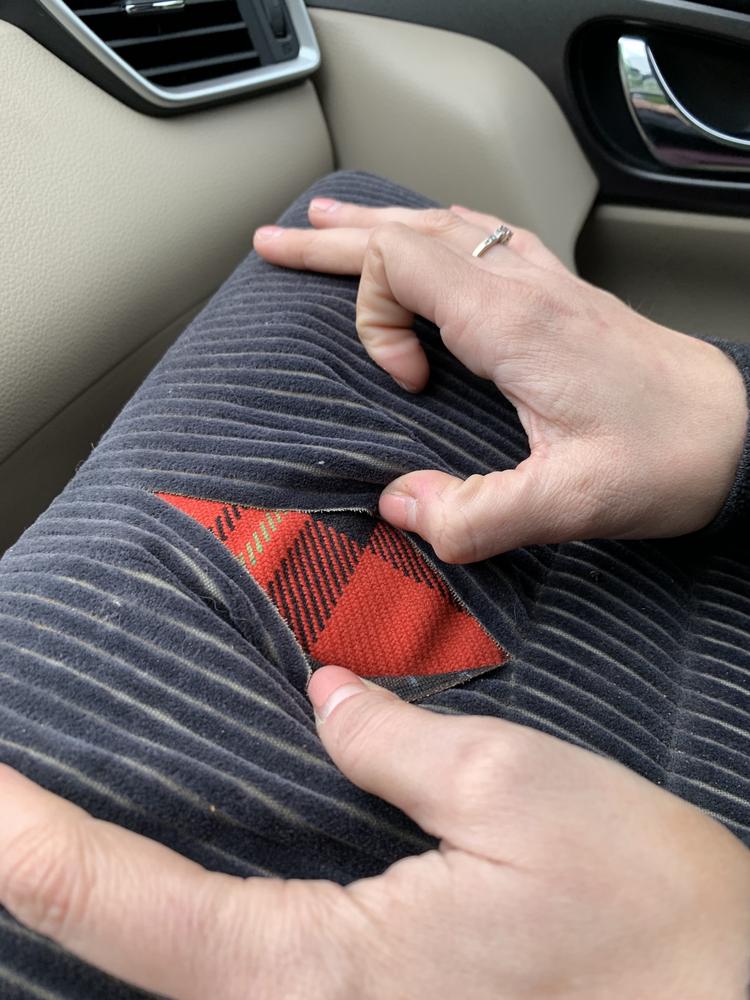
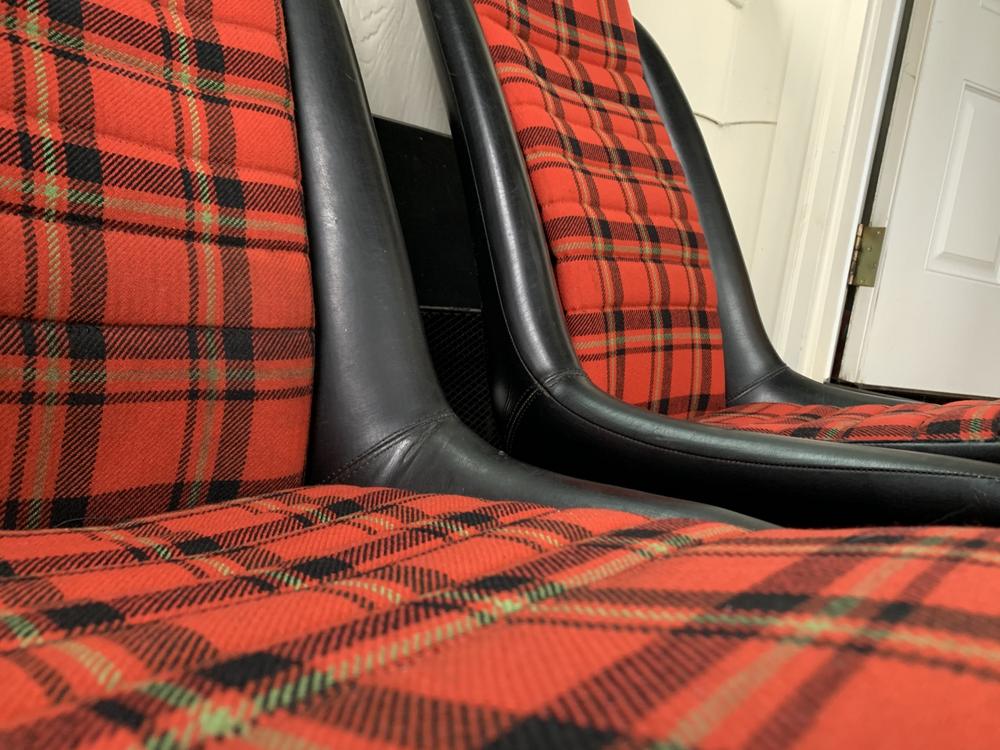
Beautiful brand new tartan plaid beneath!
I assume this was a dealer cover up? Maybe they couldn't sell the audacious plaid in '76? Or someone wanted 'this' car with 'that' interior.
Regardless, I am really happy to have come across these for $50 from another world member. I love tartan - its a saved ebay search of mine - so this made my weekend.
I will peel back the rest tomorrow with my seam ripper and see what is beneath.
Jared
Posted by: JOEPROPER Apr 25 2020, 08:21 PM
Nice score! 
Posted by: DRPHIL914 Apr 25 2020, 10:00 PM
Picked up some seats this morning. Pretty unassuming corduroy. Will clean up well. Nice bolsters, will get me by for now....
Upon further inspection... seller said they may have been a recover...
Later in the car, the girlfriend started peeling the cord back.
What's this!!! Lets peel some more.
Beautiful brand new tartan plaid beneath!
I assume this was a dealer cover up? Maybe they couldn't sell the audacious plaid in '76? Or someone wanted 'this' car with 'that' interior.
Regardless, I am really happy to have come across these for $50 from another world member. I love tartan - its a saved ebay search of mine - so this made my weekend.
I will peel back the rest tomorrow with my seam ripper and see what is beneath.
Jared
ok this is the 914 equivalent to someone buying a “dogs playing poker” painting and finding an original Rembrandt behind it!! nice!
Posted by: BeatNavy Apr 26 2020, 05:29 AM
ok this is the 914 equivalent to someone buying a “dogs playing poker” painting and finding an original Rembrandt behind it!! nice!
Or in 914 terms taking off a rocker cover and finding brand new steel.
Jared, your car is going to be a battle tank with those long reinforcements and other 16 ga metal. How long before you end up upgrading the 1.7?

Posted by: jaredmcginness Apr 26 2020, 09:56 AM
Jared, your car is going to be a battle tank with those long reinforcements and other 16 ga metal. How long before you end up upgrading the 1.7?
It's a tad overkill but. I dont want to think about repairing a long on this car again. So.
I hope once I get that 1.7 in, drive for a bit and personally experience how anemic they are known go be, I will be more likely to put some money aside for a 2.0. Unless someone has a great deal on one now. ha!
Here's the seat update. Made a side thread, because it is just so fun...
Peeled.
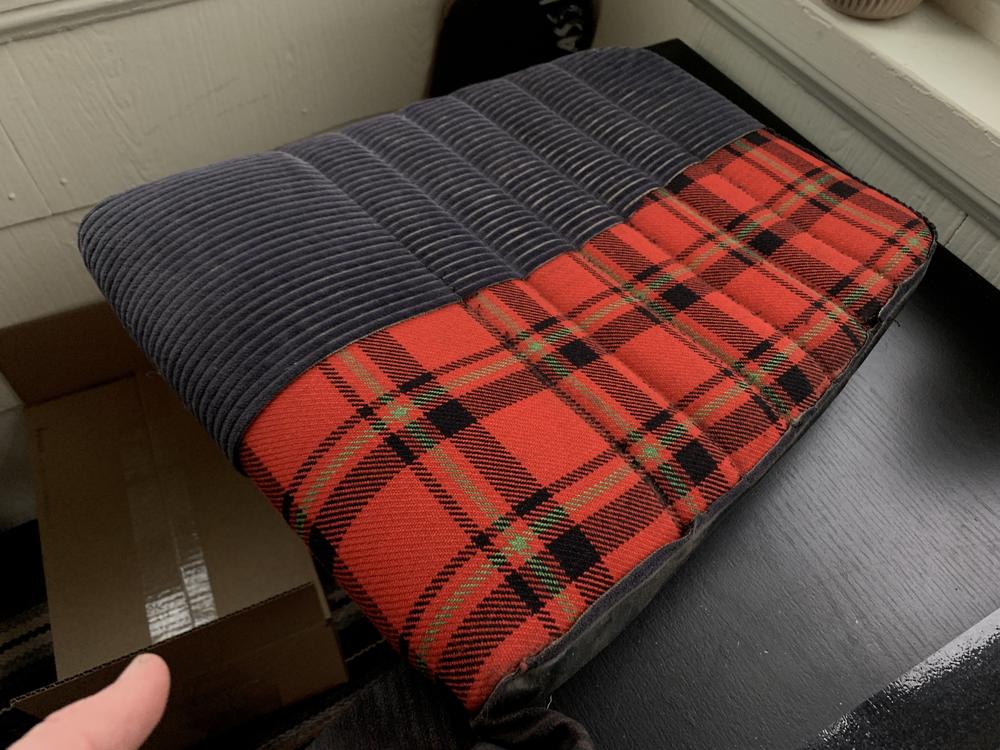
3 hours with a seam ripper.
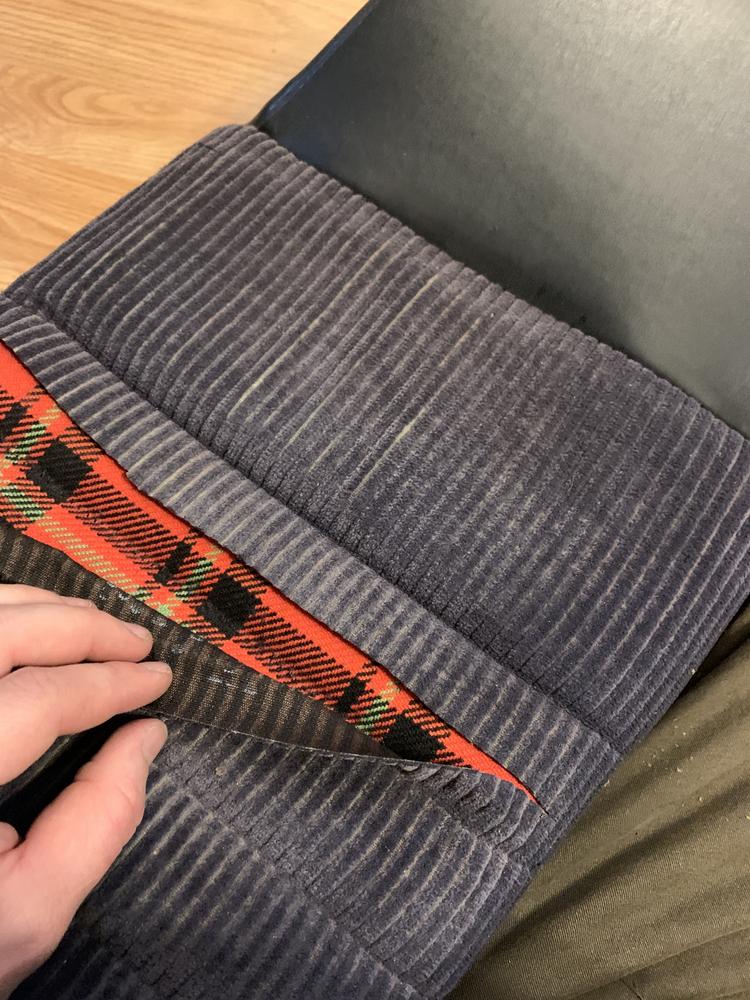
Clean and assembled.
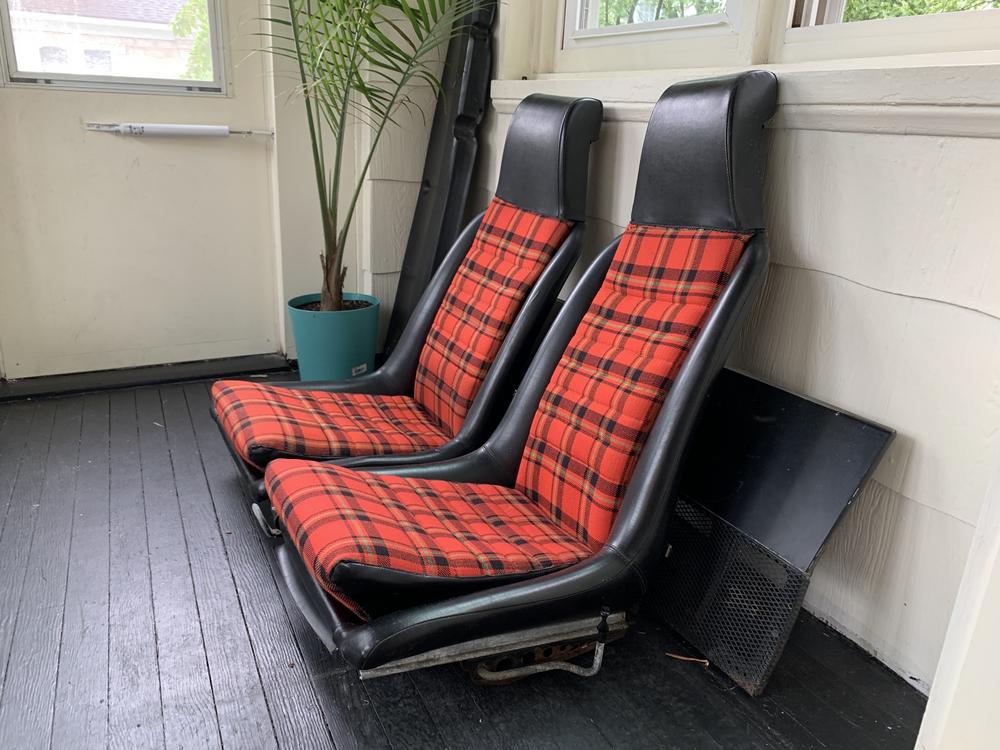
I am in love.... All coming together, eh! I lucked out on this one.
Posted by: djway Apr 26 2020, 11:56 AM
Jared, your car is going to be a battle tank with those long reinforcements and other 16 ga metal. How long before you end up upgrading the 1.7?
It's a tad overkill but. I dont want to think about repairing a long on this car again. So.
I hope once I get that 1.7 in, drive for a bit and personally experience how anemic they are known go be, I will be more likely to put some money aside for a 2.0. Unless someone has a great deal on one now. ha!
Here's the seat update. Made a side thread, because it is just so fun...
Peeled.
3 hours with a seam ripper.
Clean and assembled.
I am in love.... All coming together, eh! I lucked out on this one.
That there is some beautiful hidden treasure
Posted by: jaredmcginness Apr 27 2020, 06:32 PM
Today's update: On ALL Fours!
Seam sealer and undercoating applied. I used 3m Professional rubber coat. 2 coats. I said this was a budget build right? We will see how it holds up.
That only means one thing - Floor and frame are effectively done.
Lets get it off the jackstands and let her breathe for the first time since winter. All that work and it still looks like this. 
Stiffening kit: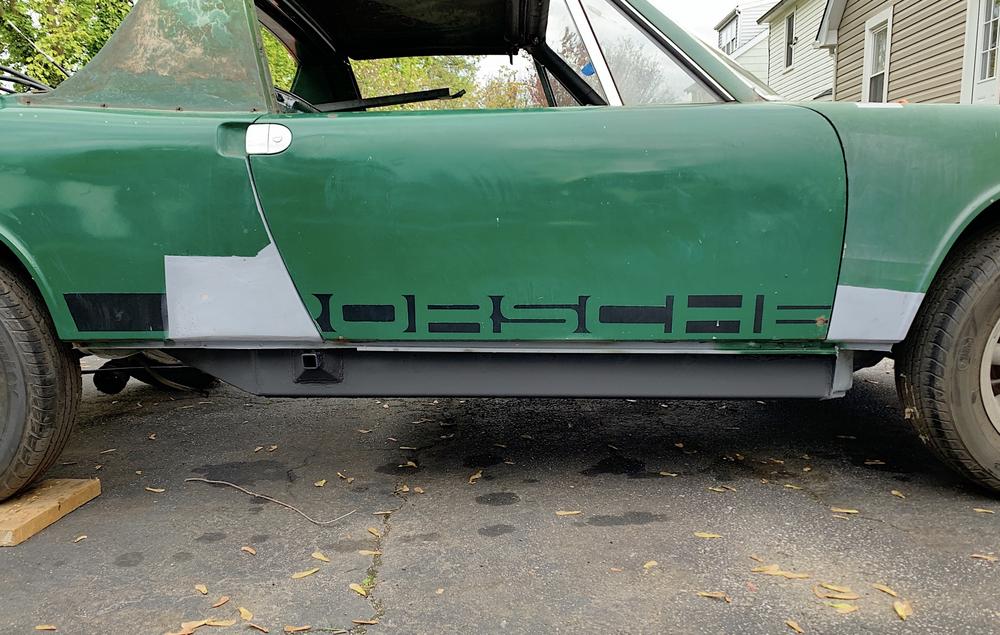
Majority of 2 months work in one shot here: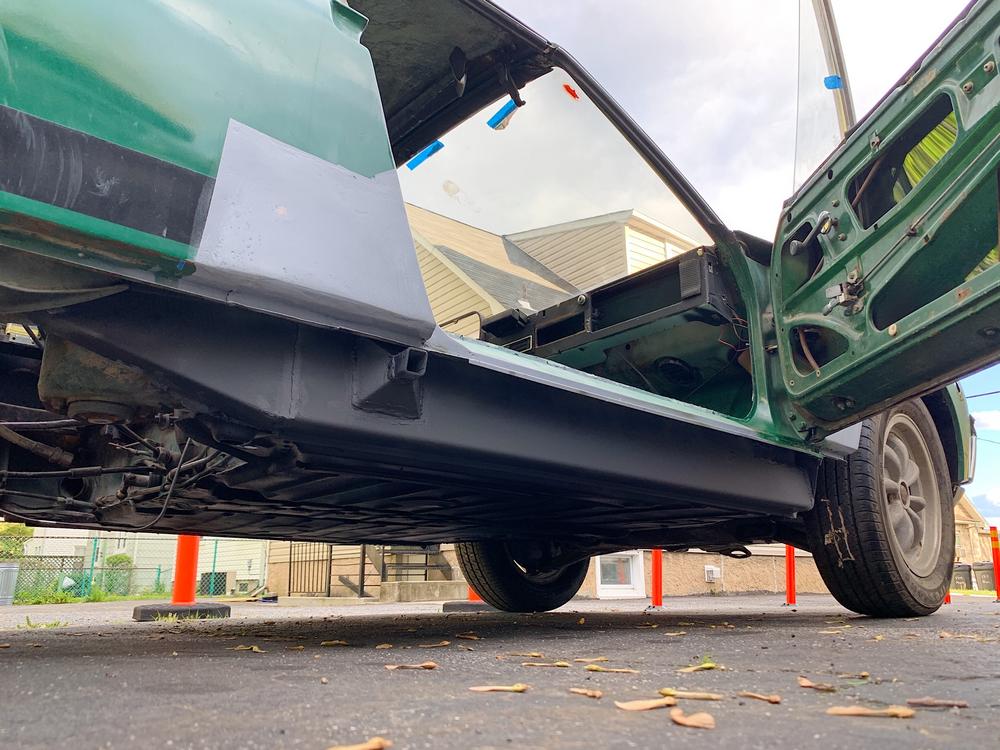
Inside.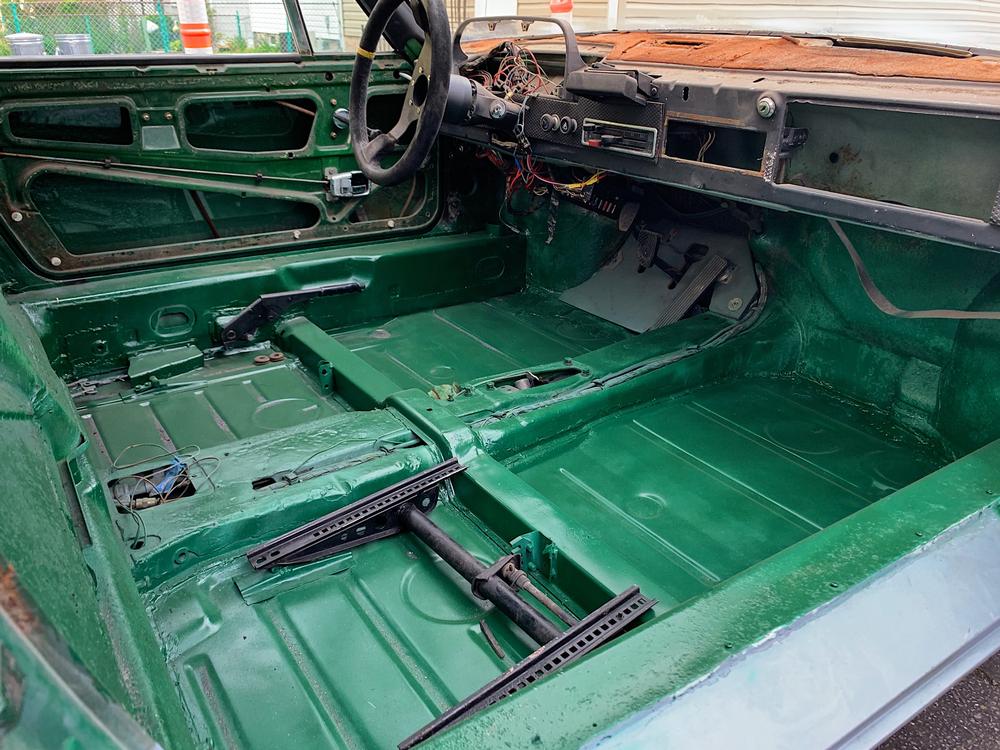
Underneath - the money shot. Literally.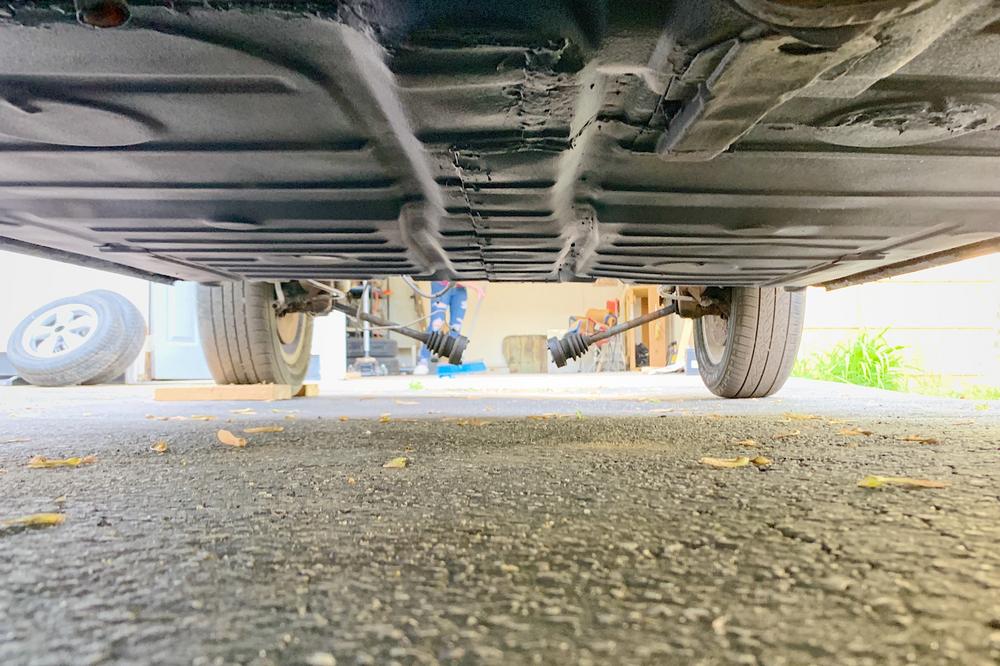
Also deleted the antenna hole.
Quick and dirty save. There's a lot more work to do. I'll stop being ecstatic, pull her back in and get to it! .... After we sweep up...
(Still trying to keep my original goal of road ready by Luft 7 - May 29th)
Posted by: bbrock Apr 27 2020, 07:34 PM
Ah! The old A-hole delete. Be careful with that. Things can back up on you.
Posted by: bkrantz Apr 27 2020, 08:48 PM
Congrats on reaching that milestone!
Posted by: 9146C Apr 27 2020, 10:14 PM
I've really enjoyed following your build...great work!
Posted by: jaredmcginness Apr 28 2020, 06:46 AM
Many thanks to all your advice and motivation. Lots left to do! The hardest part is over. I think..
Door gap
Now that its on the ground I found it to be a little closed on top of the passenger door, and a little open on the drivers. I suppose that's a slight body twist. Attempted to check (and keep) my diagonal measurements several times.
Maybe to be expected with the technique I used... jackstands and no jig!
Regardless, the doors close awesome with a person sitting in the cab. No catching and a solid THUD So I am happy.
Driver: (note wider gap near handle)
Passenger: (note smaller gap near handle)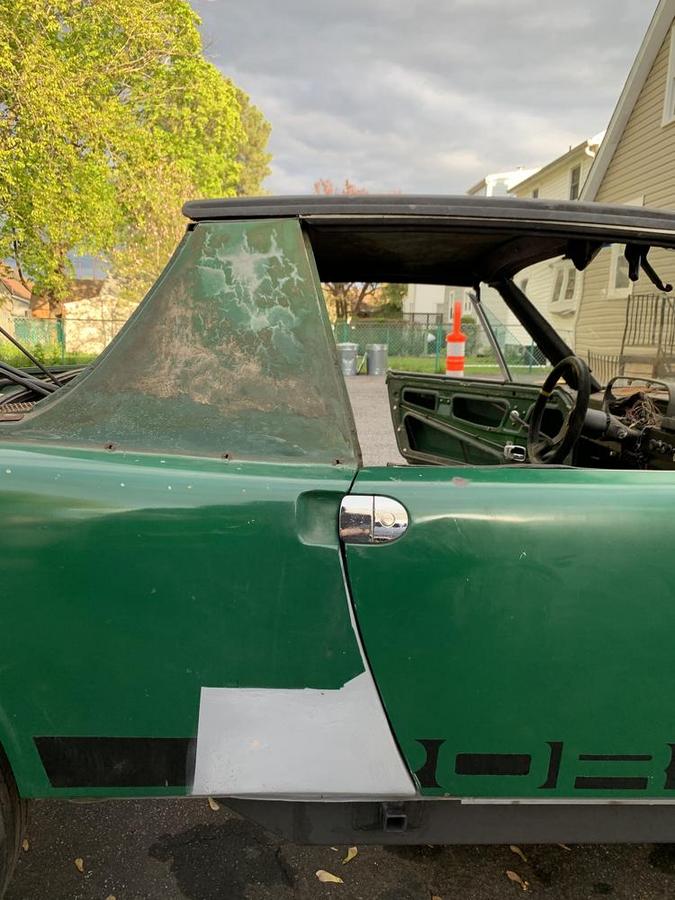
Worth noting that I have not adjusted either door yet. But the passenger side has always looked a little tight on top with a nice even gap going down.
I suspect this might have something to do with the amount of bondo around the door handle that we discovered a few weeks ago.
The prettier side of the car... Warts are being deleted. I cannot stand to look at them.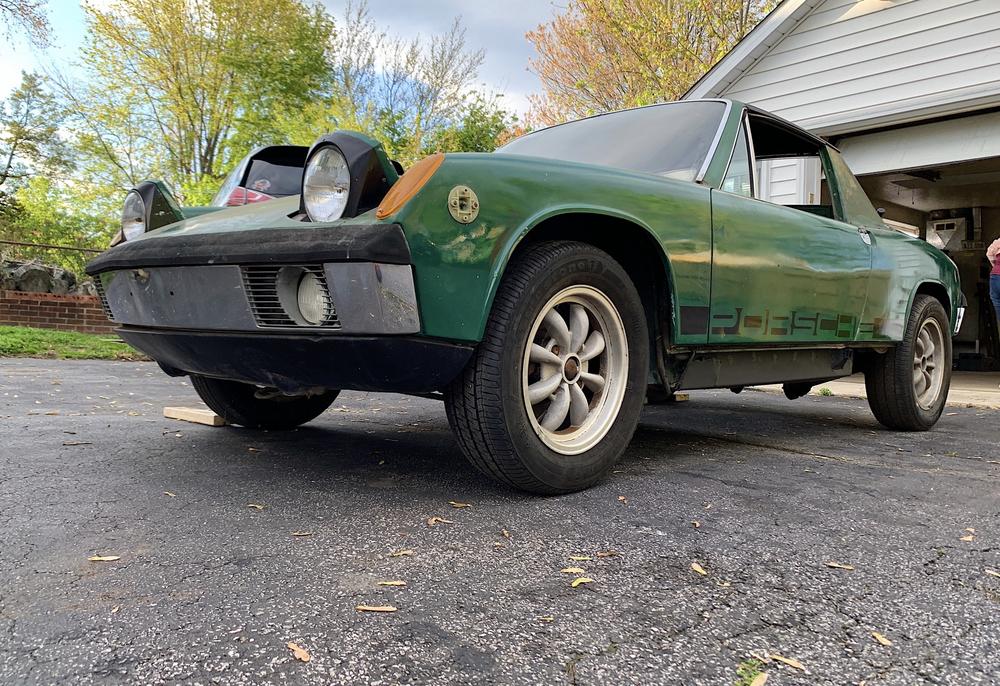
And just for fun... somewhere down the line.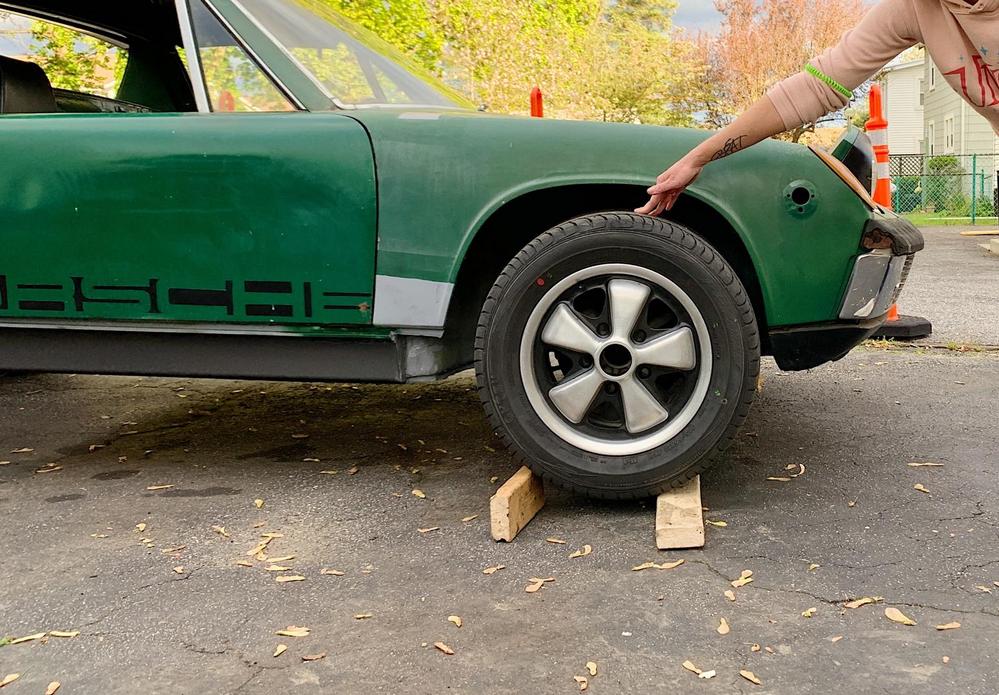
Back to work.
Posted by: BeatNavy Apr 28 2020, 07:03 AM
Jared, I've got a similar situation with door gaps on my project car. Drivers side measurement between windshield flange and rollbar is perfect, but door gaps are a bit off, both front and back. Meanwhile passenger side measurement is slightly too big (~ 1/8 inch) but gaps look perfect. 
My working theory now is that it has to do with the upper hinge point on the driver's side. I think the metal at the top hinge is weak, and years of people putting their weight on the door tend to make it sag. Inspect that area and see if the metal looks stretched at all. I had a similar situation on my driver. A few years ago I was working on installing triangle door seals, and I think I put too much downward pressure on the door and stretched the metal there. After carefully tapping (or whacking  ) on that section the door lined up much better. I may try same thing on the project.
On different topic, at some point I'd like to get more thoughts from you on those long reinforcements. I'm considering those once I seal my driver's side long up, but I wanted to get more thoughts about fitment, weight, etc. It adds a ton of structural rigidity, but they are not light.
Posted by: twistedstang Apr 28 2020, 07:05 AM
Nice work. Cant wait to do an antenna/wart delete.
Posted by: bbrock Apr 28 2020, 08:01 AM
Trailing edge door gaps wider at top than bottom is pretty common. When I was working on gaps, I started paying close attention to any pics of doors posted on the forums and noticed even low mileage survivors often show it.
+1 on Rob's comment on the top hinge metal stretching. I had a severe case of it on one side and mild on the other but was able to gain gap at the top rear by adjusting the hinge area with a hammer. I think many of us get in a bad habit of using the doors as grab handles to lever our fat asses out of those low seats.
Posted by: BeatNavy Apr 28 2020, 08:04 AM
Truthfully Brent helped me out on this one. I PM'ed him after seeing his thread fighting the door gaps and was like "Really? That's a solution?" Anyway, it was good advice he gave me. Use your hand to see if you can feel a ripple in the metal or can otherwise see where or if it was stretched.
Posted by: jaredmcginness Apr 28 2020, 08:17 AM
Truthfully Brent helped me out on this one. Use your hand to see if you can feel a ripple in the metal or can otherwise see where or if it was stretched.
Thanks boys. Sheesh, I'm 28 and and 160lbs and I was "ErrrGH!" lifting up out of the thing yesterday. This car is accelerating my aging.
I will inspect these areas this evening. I appreciate the feedback.
Rob, when I get it on the road I'll definitely provide feedback. As far as the original fit, everything went together easy... (infact, the pre-cut, new jack prymids exactly lined up first try with the cut out in the side skirt, nice job brad!)
Maybe a couple swings of the Universal Adjustment Tool here and there. Only gap/fit issue was on the lower long (that I made myself, came up a little short.) but some C clamps and a fat weld connected them no problem.
I'd imagine they add something like 45-55 lbs.
Posted by: jaredmcginness Apr 30 2020, 08:06 AM
Happy Thursday (thirsty Thursday?)
Here's a question, whats the name of this windshield insert to targa seal?
Mine is totally chewed up. Cant seem to find a replacement. Any of you guys have a spare laying around in decent shape I could purchase?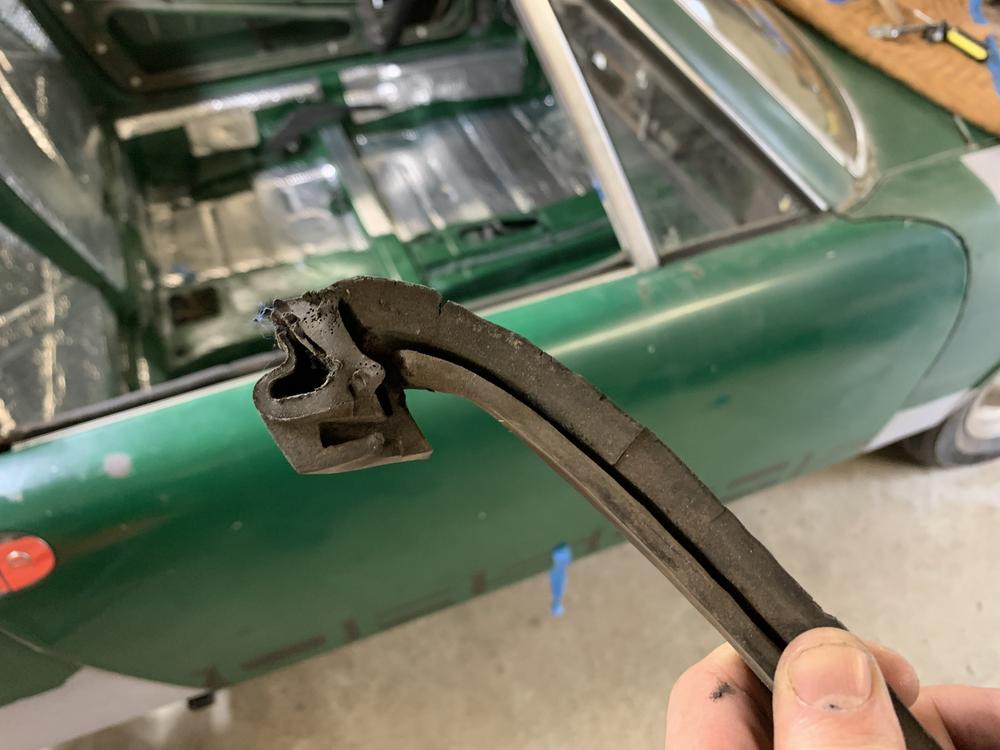
The girlfriend and I laid the Noico rubber down yesterday. I think I found this stuff from an old comment made by... @http://www.914world.com/bbs2/index.php?showuser=17068 ? I can say that just sitting as is, no interior installed, there is already a good deal less resonance when shutting the doors.
I paid $65 or something for the 80mil small car kit, and have 4 or so full sheets left over.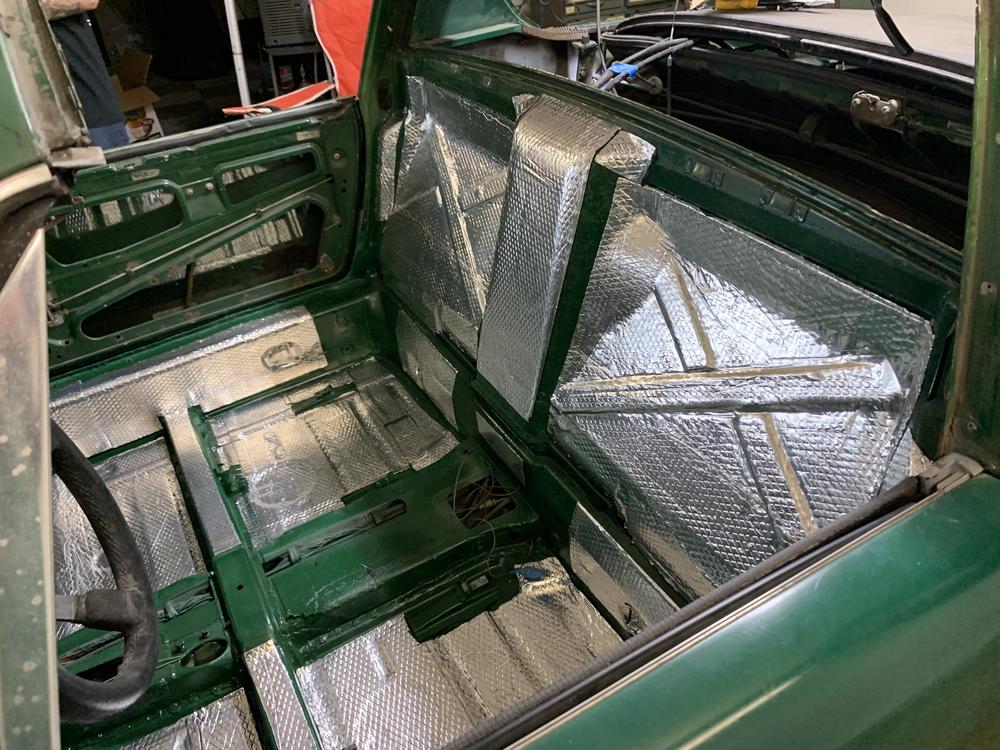
Carpet arrives next week. I ordered the Gray Perlon kit from AppBiz. I've read good stuff about their kits.
As for the rest of the interior....
Here are the door panels I have.... I don't want to break the bank essentially paying $400.00 shipped for a nice pair. So how can we take care of this on the low?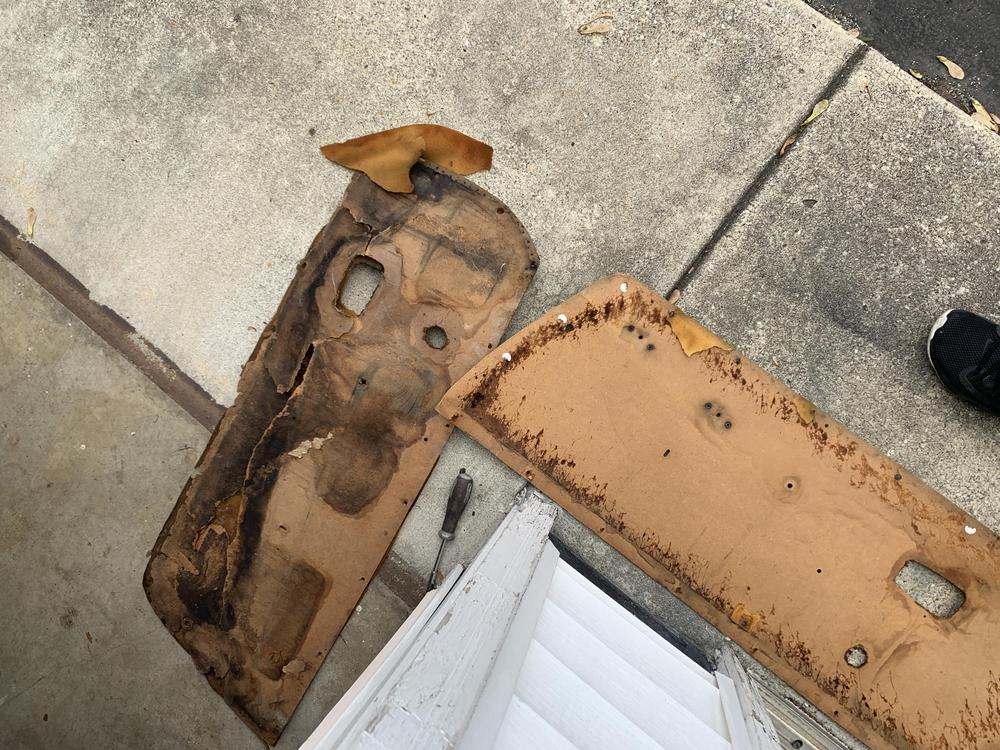
Maybe I can remake these myself.
Harbor Freight measuring tools 
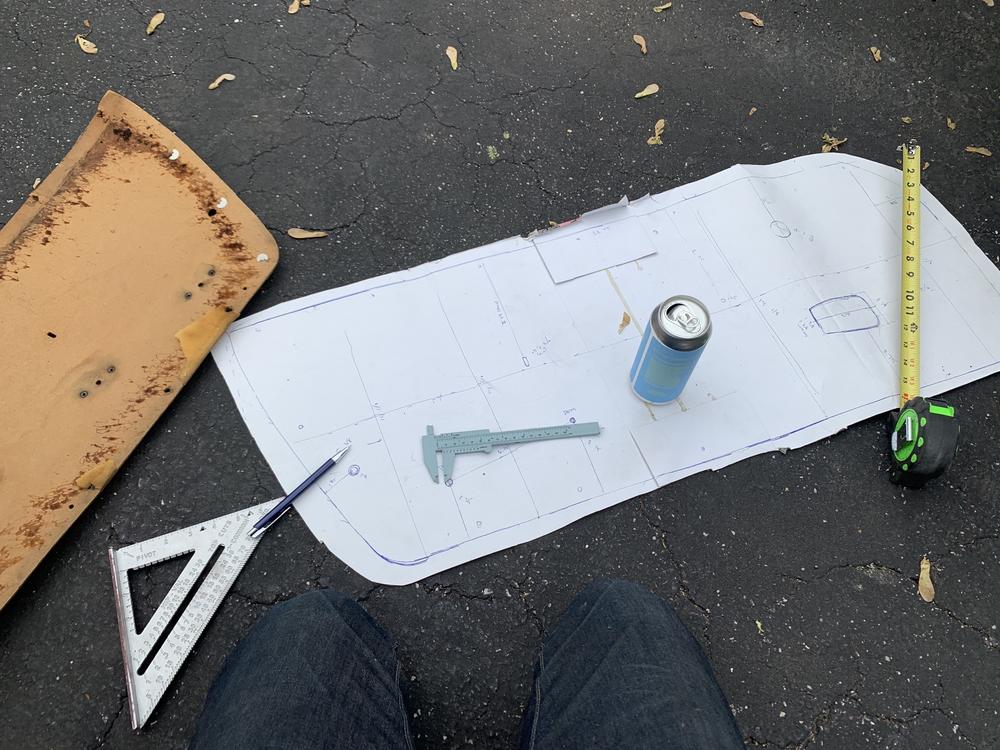
Drawn up in solidworks. I left out all the extra holes... arm rest etc. Maybe go with a simple GT style.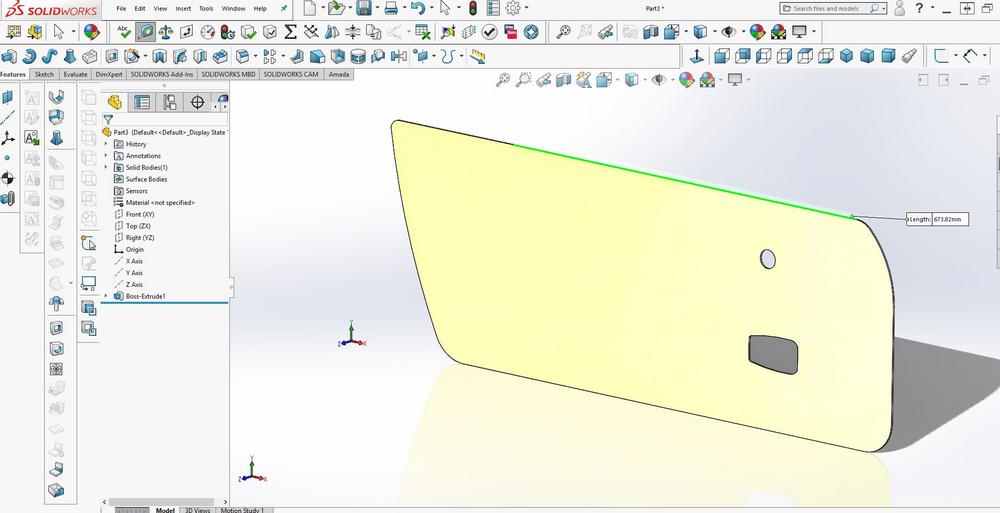
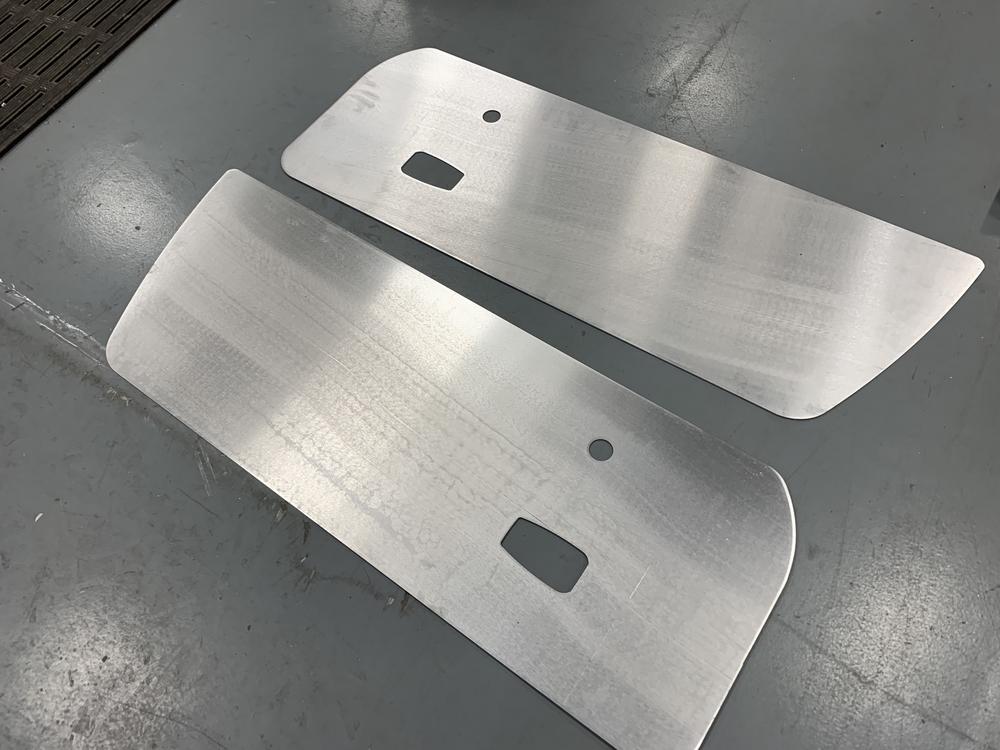
Solid fit.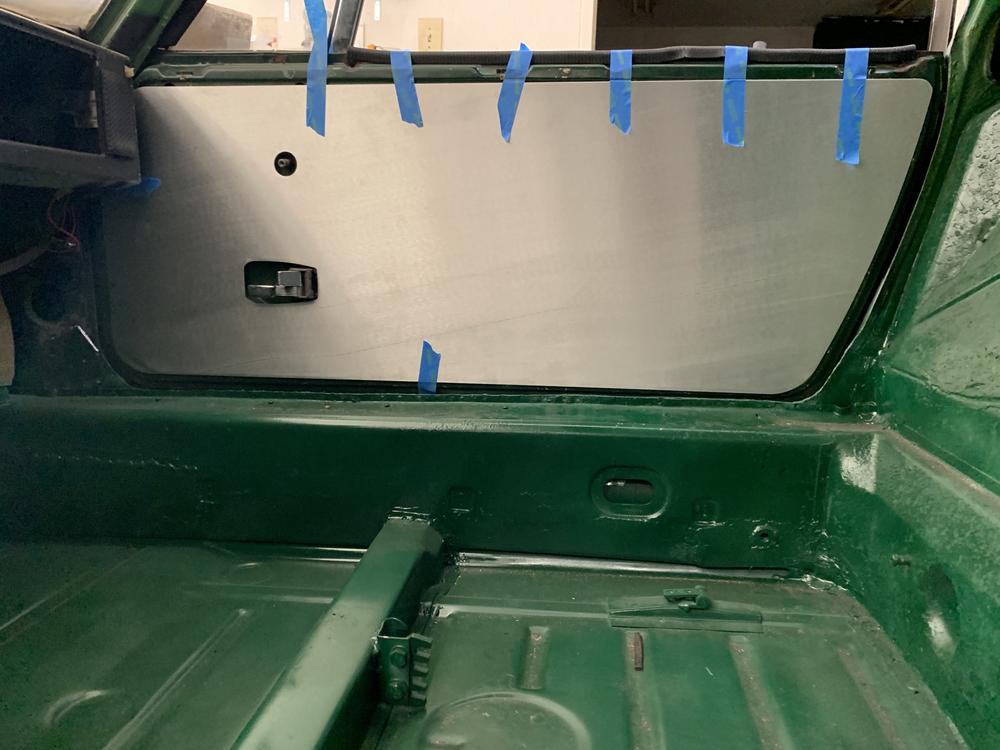
My original plan was to reuse the original smooth fabric, its in OK shape but.... Why?
I'll just recover the new skins, new foam, etc. and get it fresh.
I dont like the early smooth vinyl anyways. I ordered some interesting, kinda factory (maybe not widely liked) material to cover these up. We'll see how it turns out this weekend.
Thanks,
Jared
Posted by: bbrock Apr 30 2020, 08:12 AM
I used Noico too and like it. You should probably go over yours some more with a roller. Tight bonding to the metal is important to get best sound deadening and the instructions say to roll it until the diamonds embossed in the foil are flattened out. That's when you know it has been pressed down tight enough.
You are making great progress!!!
Posted by: bbrock Apr 30 2020, 08:14 AM
Oh, and 914Rubber has that seal. Can't remember the exact name but you can find it in their parts diagrams.
Posted by: Larmo63 Apr 30 2020, 08:21 AM
I used the black Noico and did the WHOLE firewall area. I think it took me about an hour and it transformed the driving experience.
Posted by: jaredmcginness Apr 30 2020, 08:25 AM
I used Noico too and like it. You should probably go over yours some more with a roller. Tight bonding to the metal is important to get best sound deadening and the instructions say to roll it until the diamonds embossed in the foil are flattened out. That's when you know it has been pressed down tight enough.
You are making great progress!!!
Thanks @http://www.914world.com/bbs2/index.php?showuser=20845 .
I used a clear plastic roller, It seems like a tight fit and doesnt peel up. But I will look for a metal roller locally... Get some more bite on it.
I used the black Noico and did the WHOLE firewall area. I think it took me about an hour and it transformed the driving experience.
Sounds good. I have plenty left to fill the spots in. Cheers.
Edited and added a photo of the fit of the door card. I will drill the clip holes of course.
Posted by: jaredmcginness May 1 2020, 09:15 PM
Hey guys,
Happy May - I cant believe we are already here.
I've been putting off the lower windshield rust. Part of me wanted me to like... seal it up and worry about it next round of restoration (paint and fenders?) Something scary about pulling a windshield.
I think the right time to do these repairs is now. Otherwise I'll keep staring at it.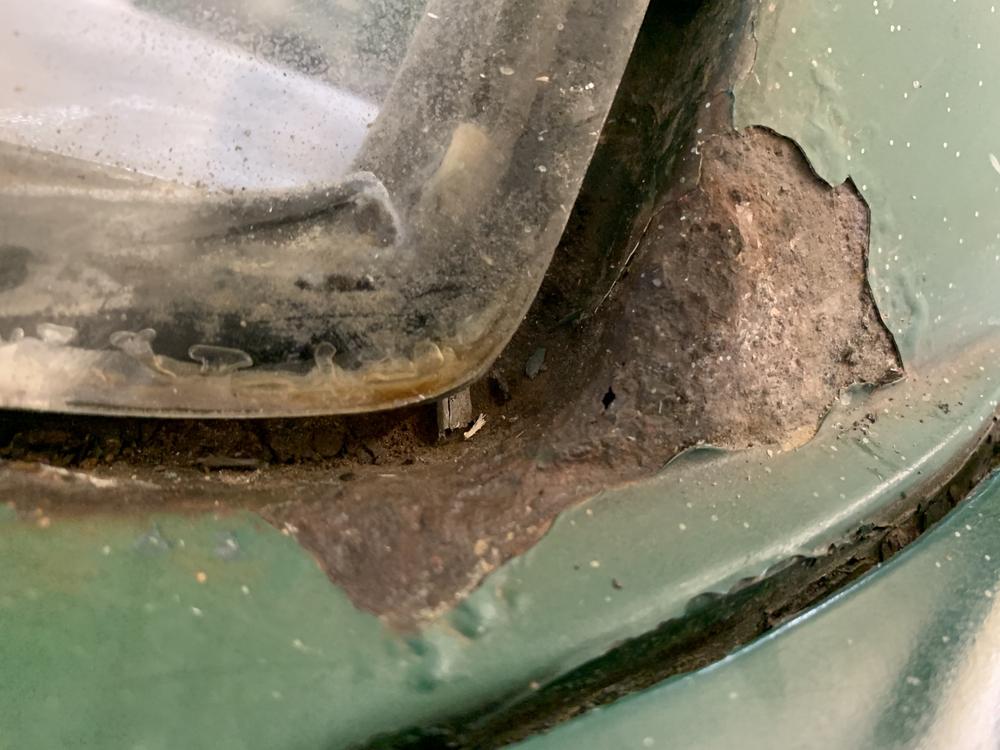
Guess that means pull the windshield... Actually came out really simply. WD40 and wire had it out solo in 45 minutes.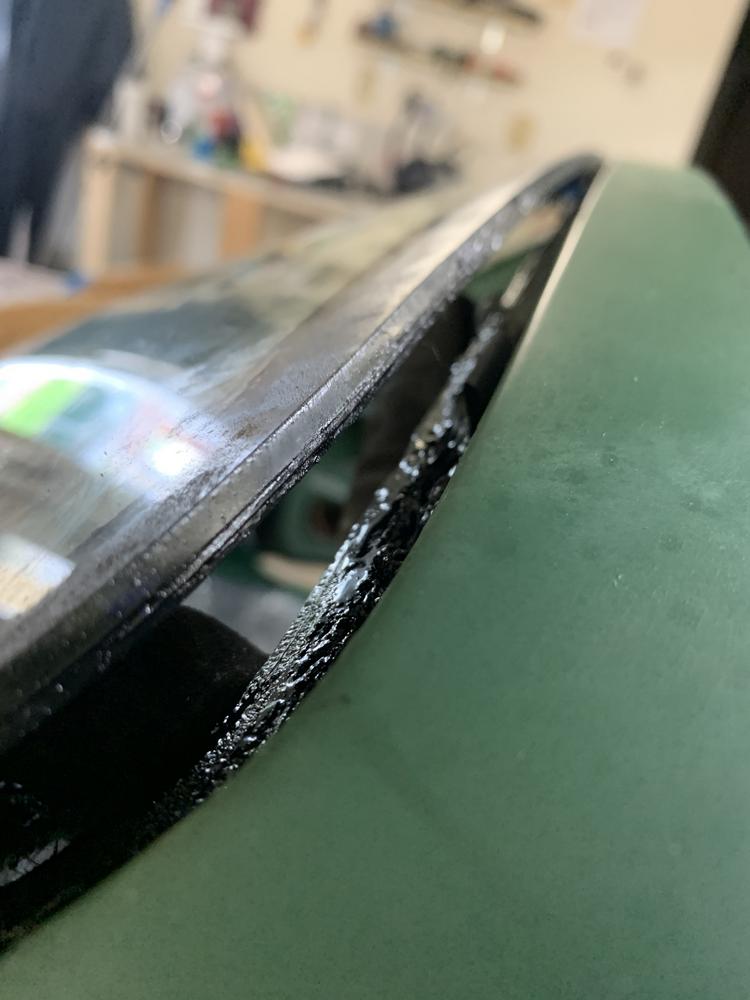 .
.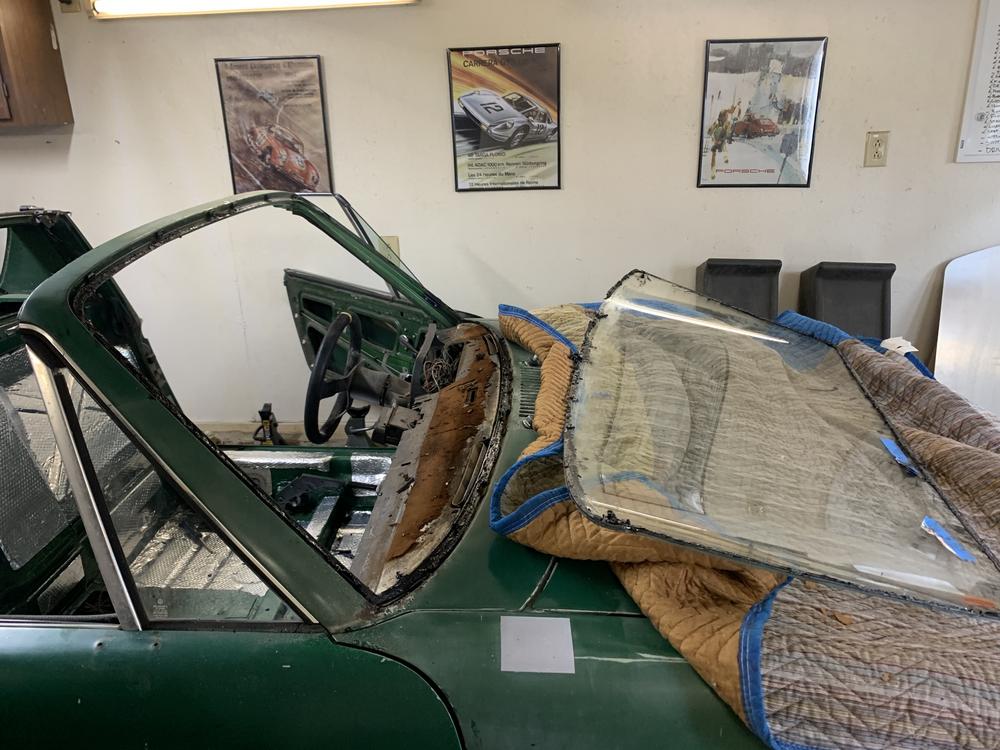
The only casualty when removing was a crusty turn signal. Luckily I received these as a gift! Little too fresh for the car in this state 
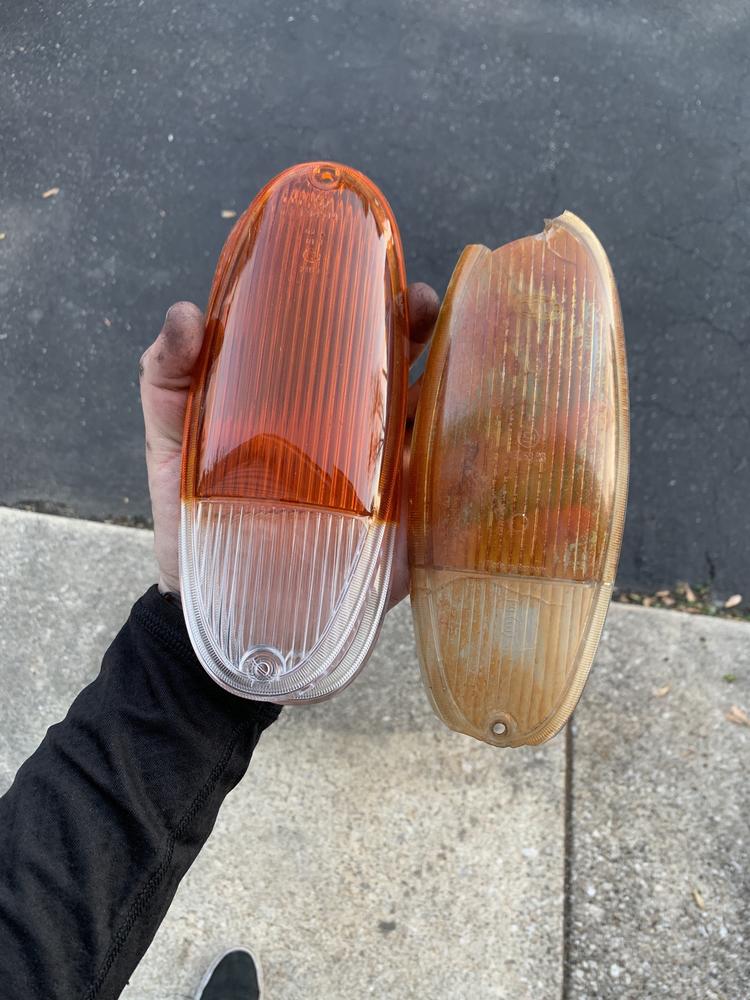
Perfect time to do everything there. I'll install my dash vinyl, buff the paint seals, etc.
I also made a 914 rubber order amd got all the seals for this area. Another fun thing I ordered is their chrome trim delete. (replaces the chrome with rubber)
So both sides look about like this... Better than I imagined with all that bubbly paint. the middle of the windshield flange is rust free.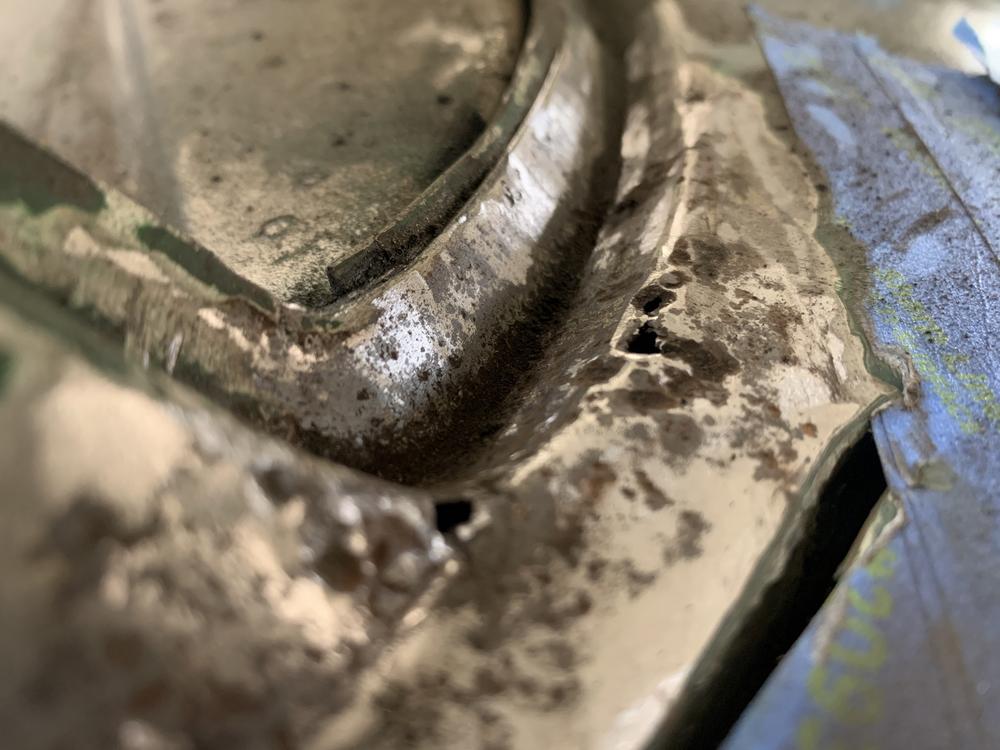
Started crafting a replacement this evening. Not complete yet.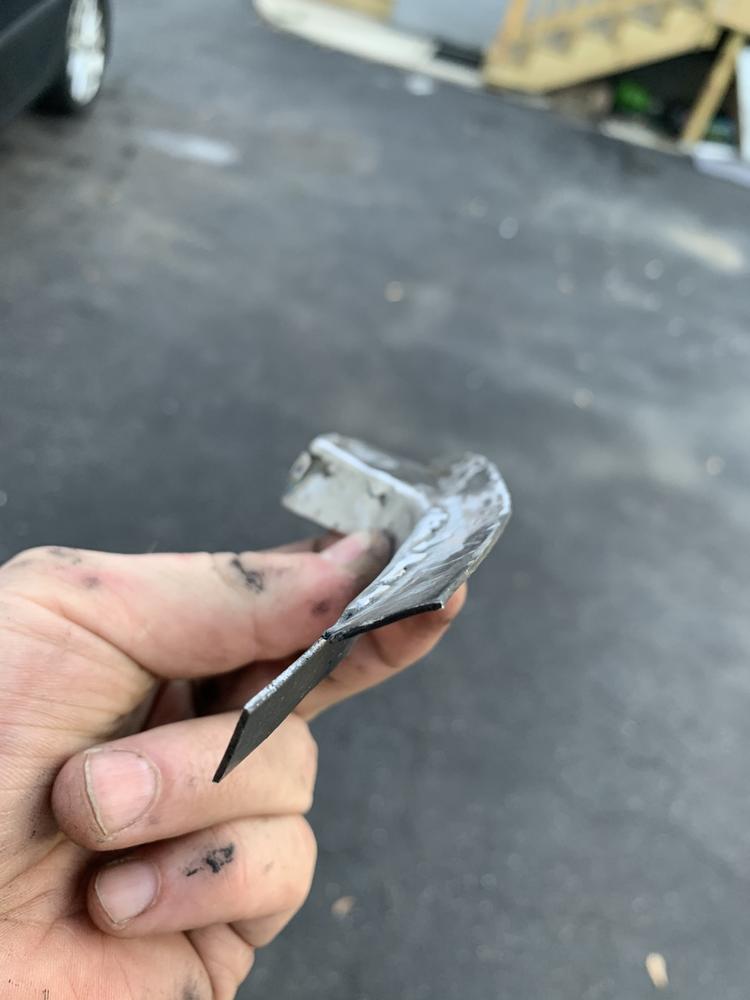
Weird shape!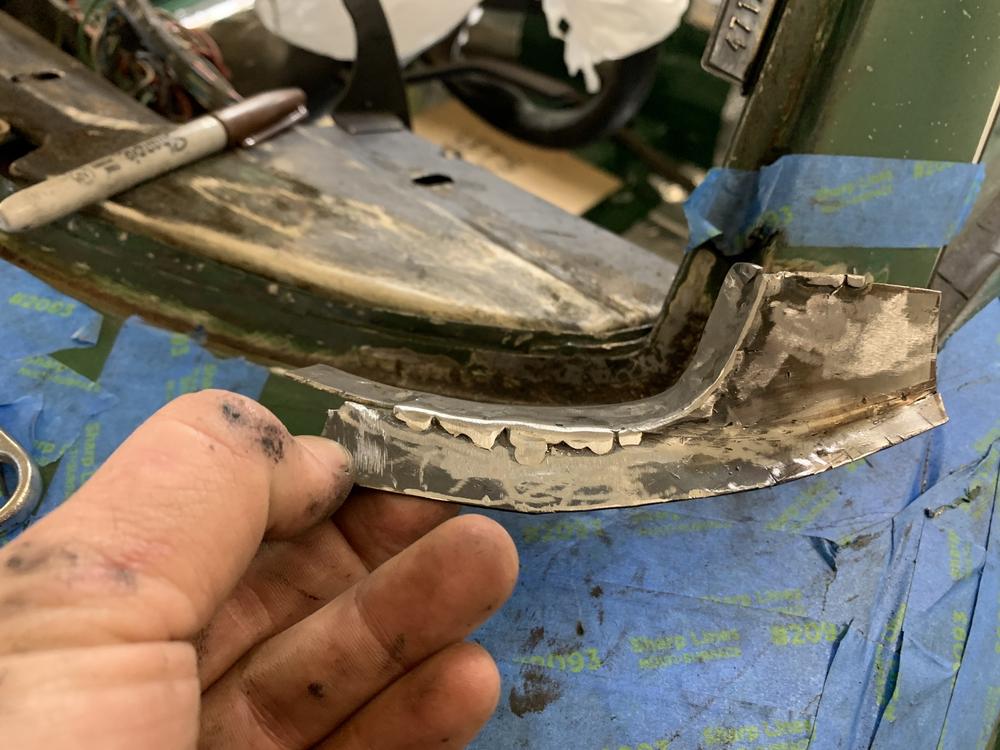
Part 2:
Per your recommendations, I needed a better roller for the sound deadner. The plastic guy we had has no weight to it. Couldn't find anything, locally so I made this heavy duty stainless roller at work. Lathe cut roller, bent the bracket and welded at home. The thing weighs damn near 3 pounds.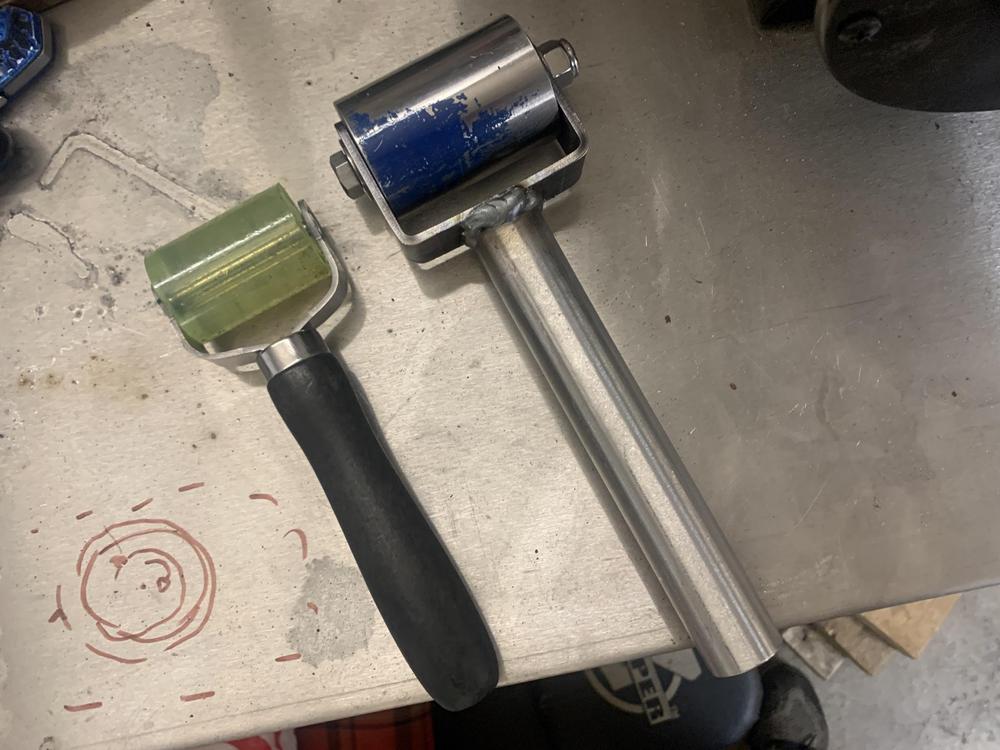
Has no problem laying the stuff down flat.
Posted by: jaredmcginness May 2 2020, 06:20 PM
Just about finished up with the passenger wind screen rust. heres a play by play
Needs the fix.
Pleased to see just about no rust under there!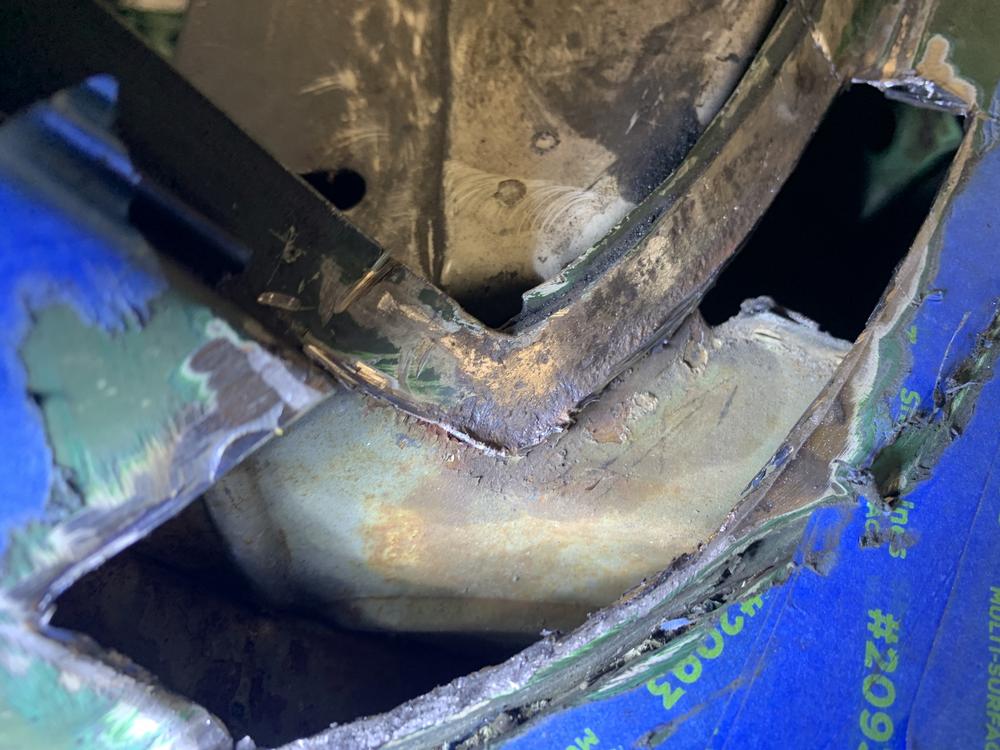
Solid hour into this little guy.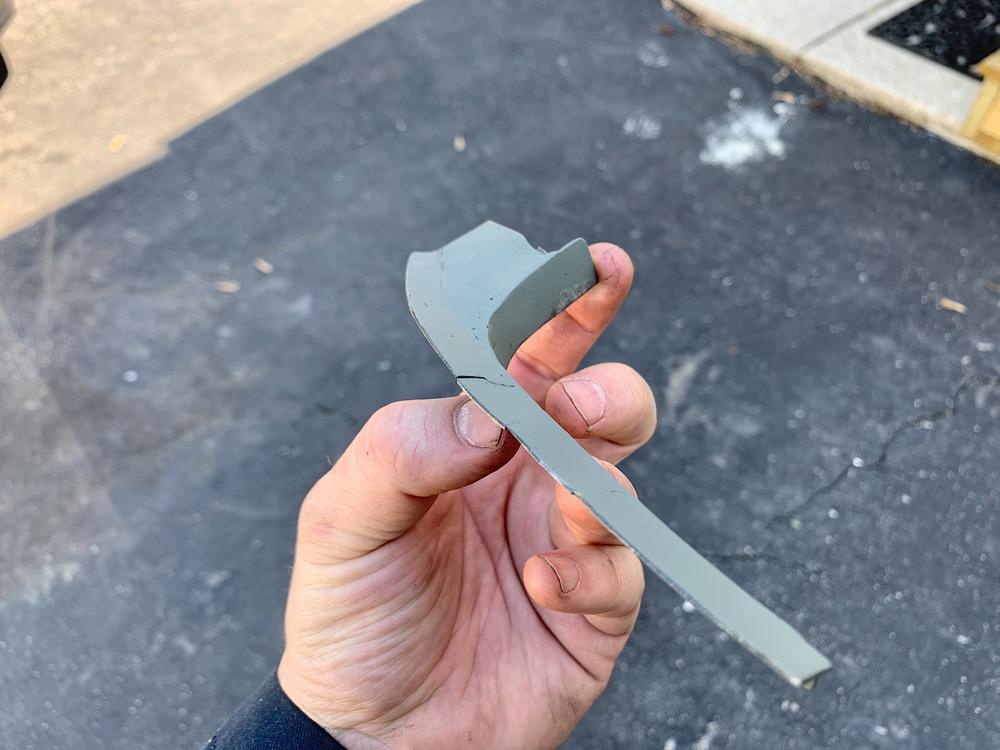
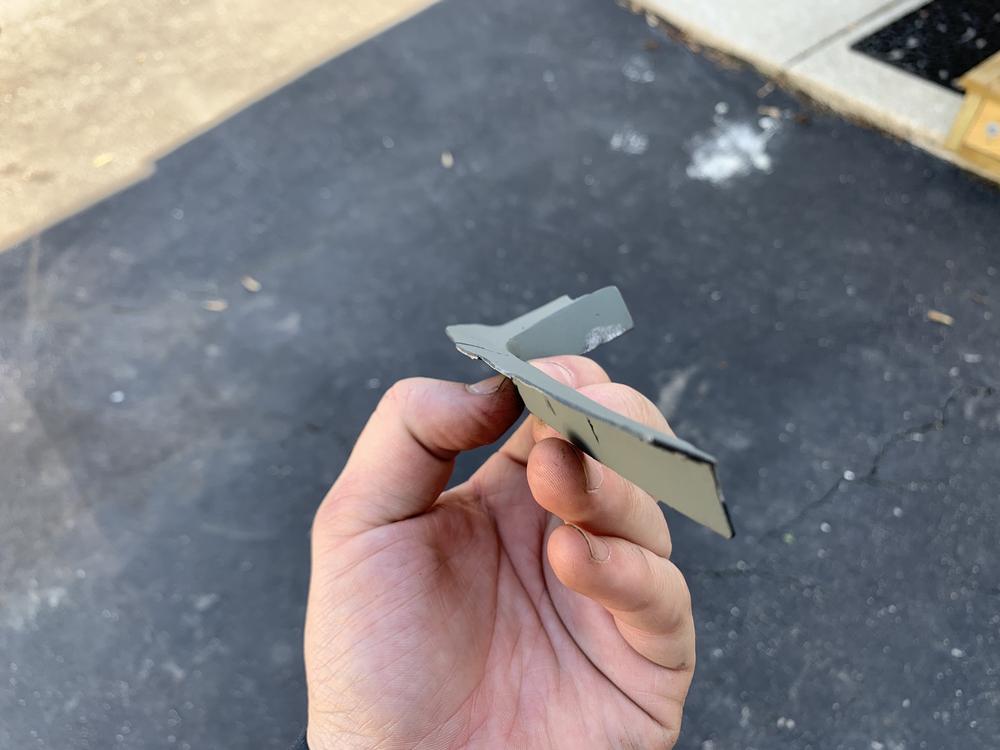
Going to be a close fit boys.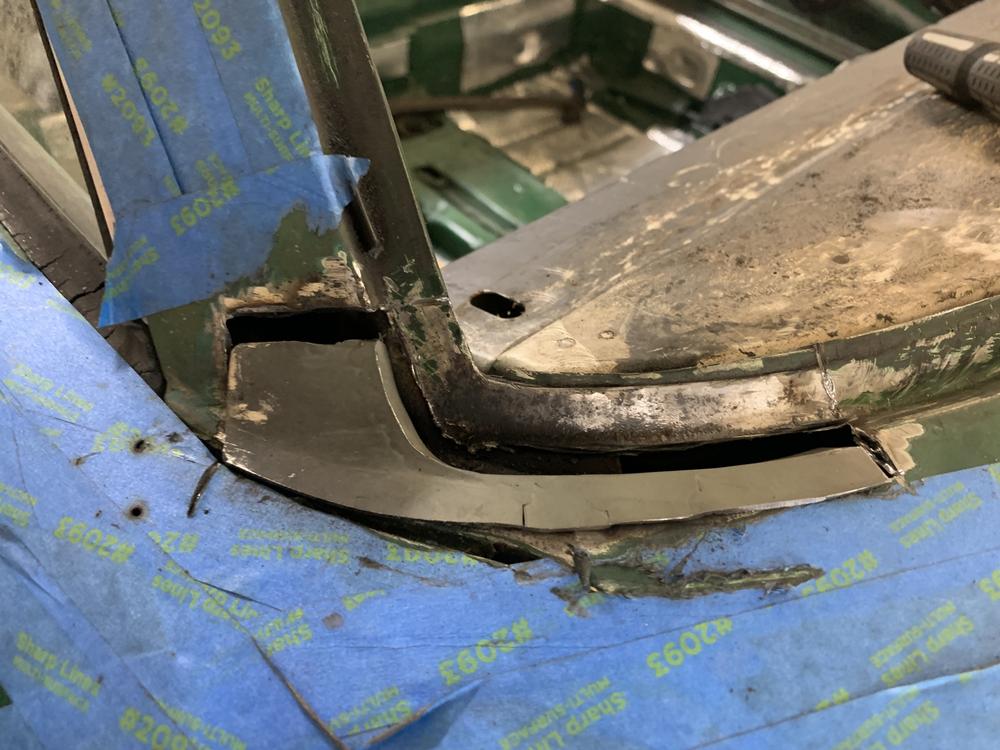
Weld and smooth. Repeat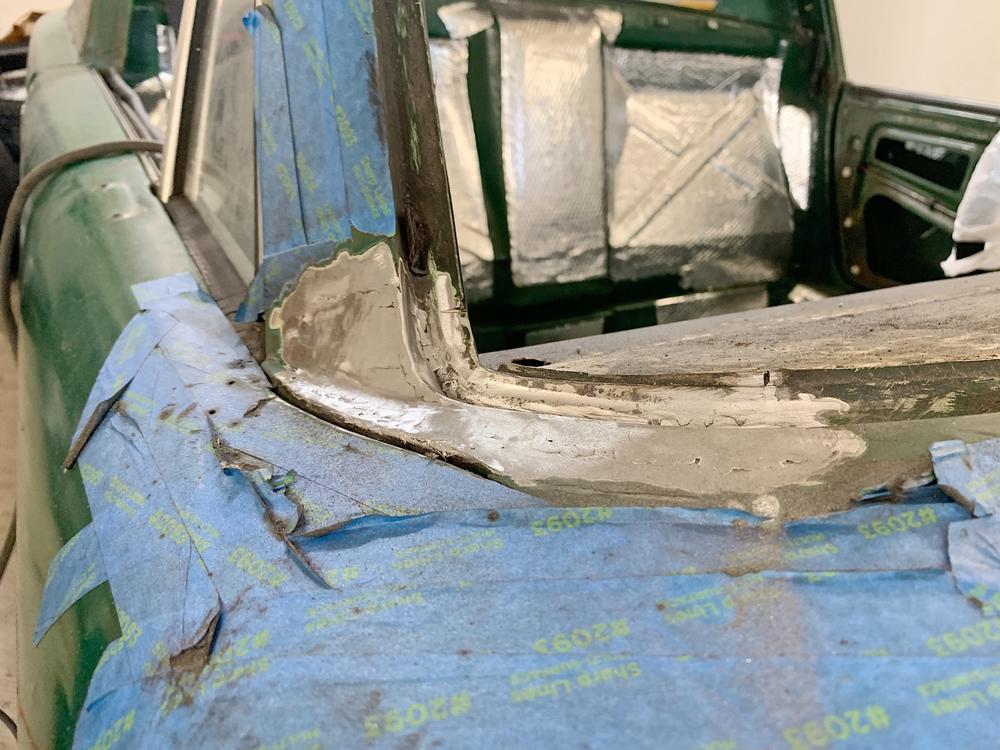
Lay some primer down.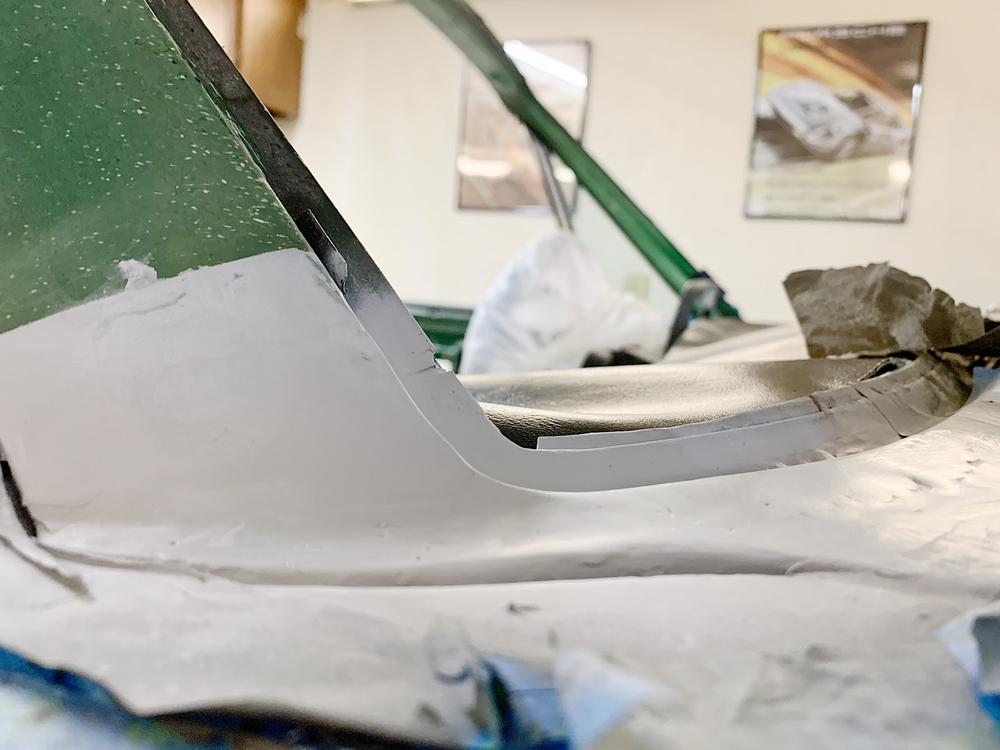
Respectable fix!! A little more sanding and it should look great.
Making this piece myself saves me $130 per side. More money for other parts, or beer so I can cope with the time and money I've sunk into this in 7 weeks.
Also quickie wart delete: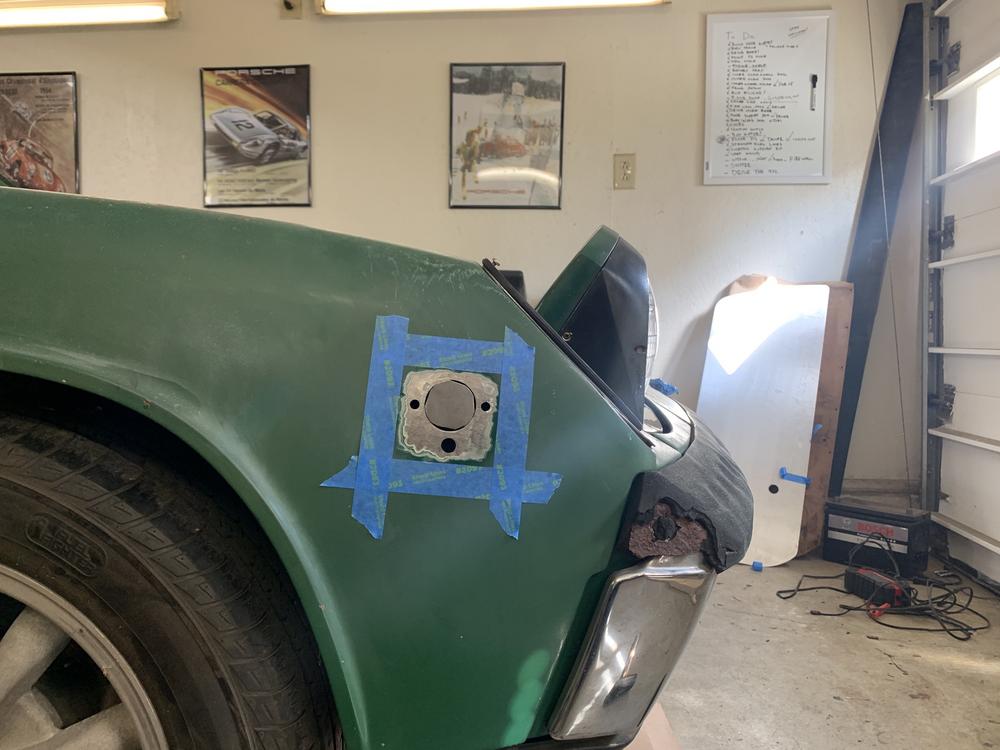
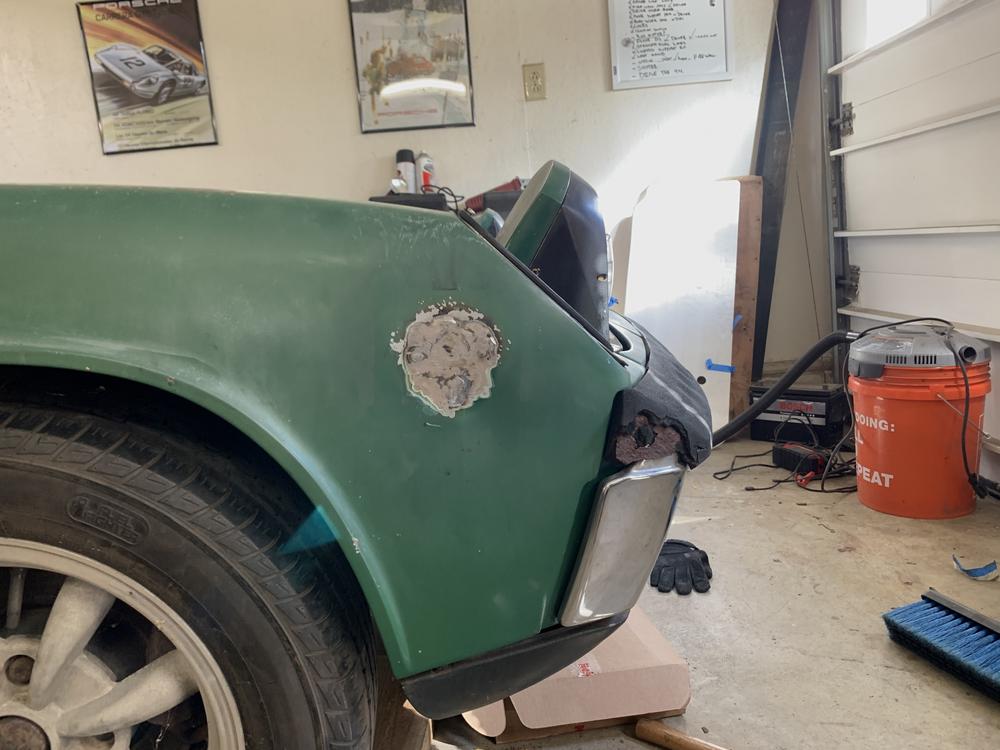
Amateur hour over here, but I'm doing the gosh damn thing and learning a lot.
Back at it tomorrow. Time to sit by the fire and sip on one.
Have a safe Saturday. 
Posted by: bkrantz May 2 2020, 09:31 PM
Nice work! And welcome to the wart remover club.
Posted by: BeatNavy May 3 2020, 06:25 AM
Man, I wish I had the tools, and more importantly, the SKILL to fab metal like you can. I've gotten better, but if I have to fab something even remotely complex it takes me WAY longer than what you're doing.
Nice job, Jared.
Posted by: jaredmcginness May 8 2020, 07:53 AM
Hey everyone,
Happy Friday. I haven't made an update in a few days. Lots of small jobs, waiting for material, etc.
Here's what I'm working on:
After a few sessions of smoothing I got the temporary paint laid down on the windscreen corners. Not a perfect match. But cheap and "OK" for now. As my GF said... just about any green is better than bright grey primer patches. (maybe true... unless it was Ravenna green )
...At least until paint squeezes its way into my budget.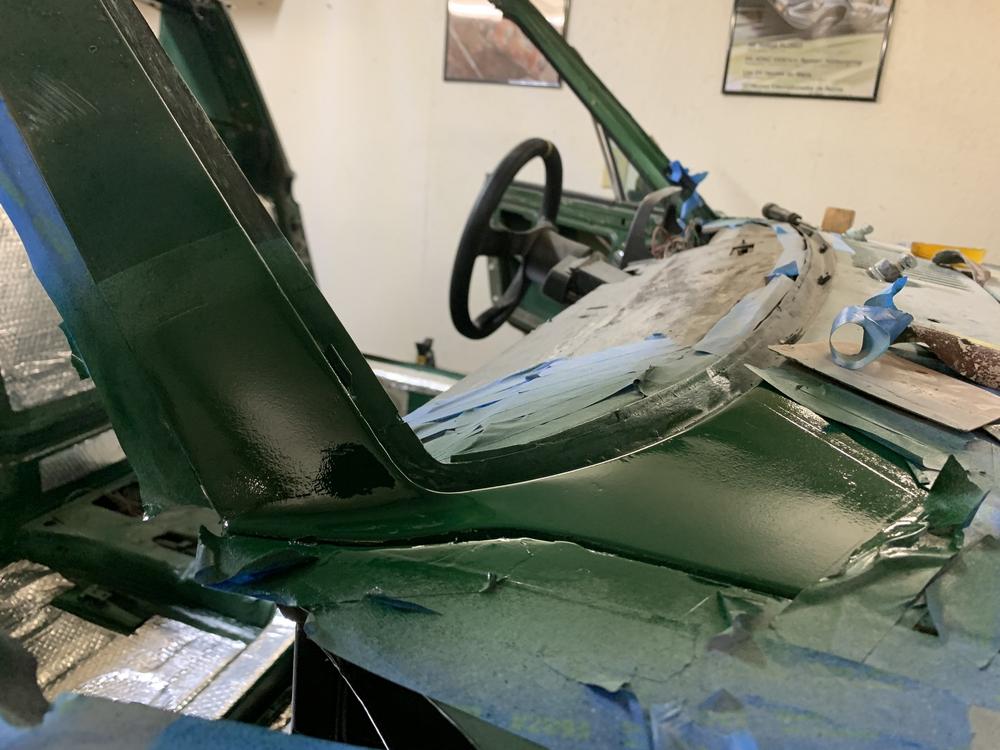
I need to get some wet sanding done, better than the rust holes!
Pretty nice fab on the corners. I am content.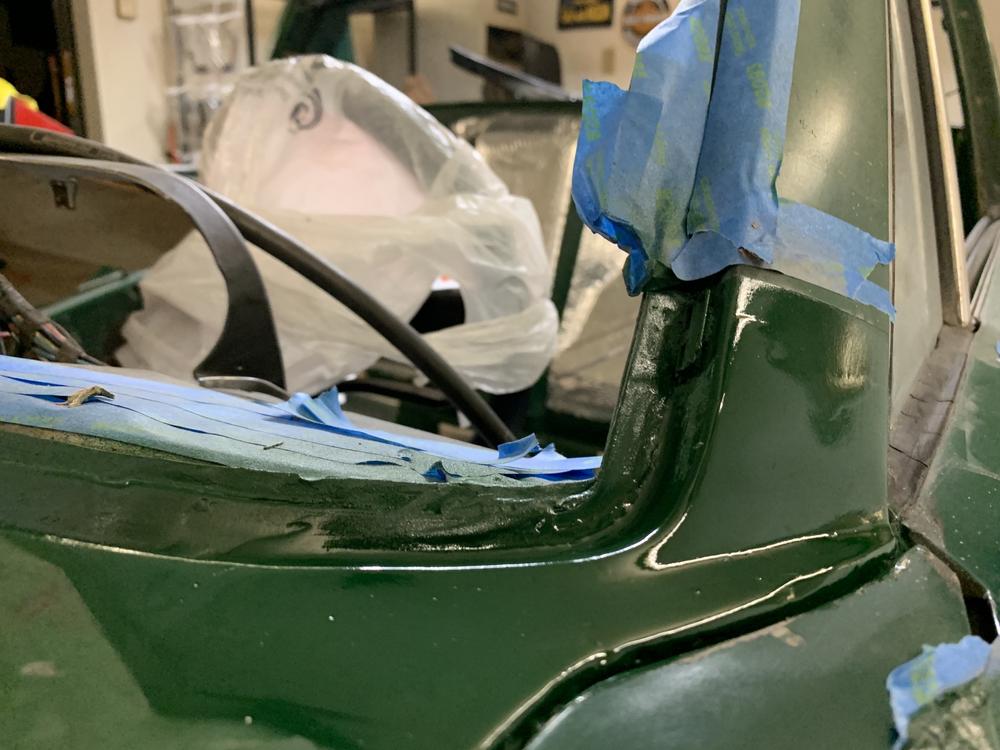
After this, I went around and cut the paint around the windscreen and above the hood. A job easily done with the windscreen out of the car.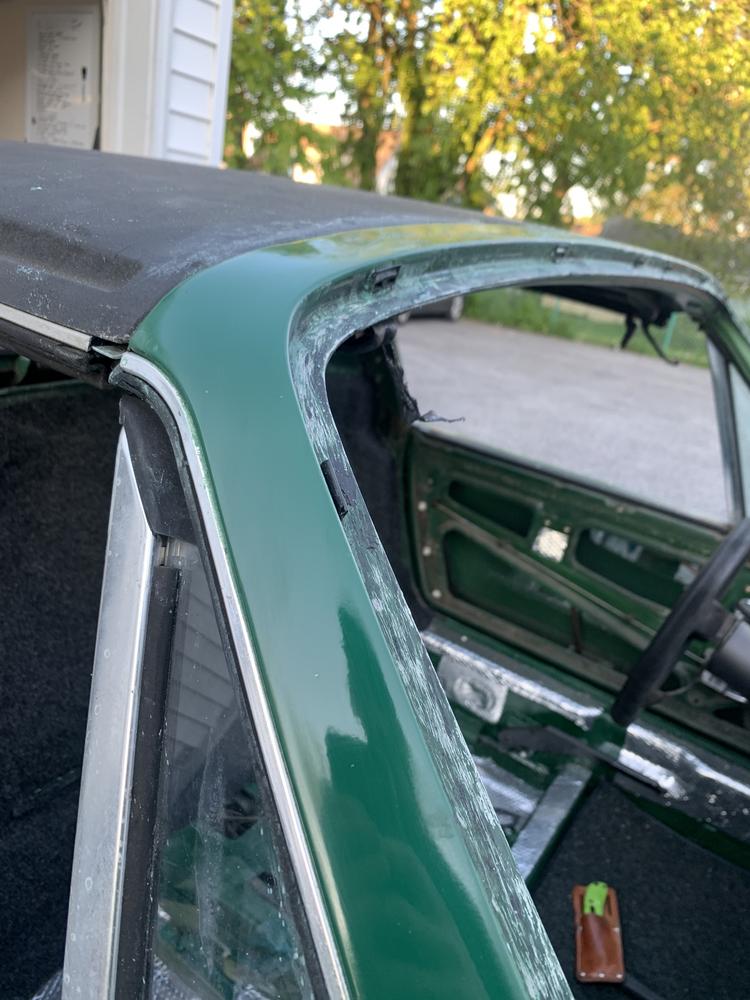
This is coming from totally flat, chalky paint (see the first page!) So its nice to see some form of sheen.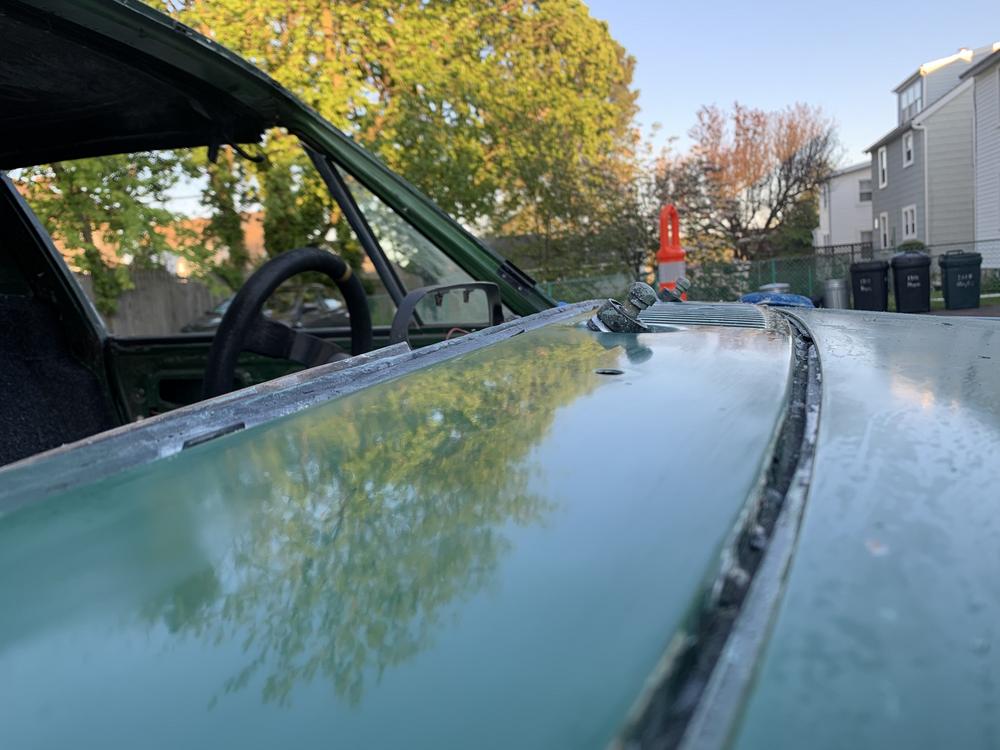
I started the carpeted firewall. I ordered the raw material from Pelican parts - $40. Some (a ton of) cutting required.
This is just the sound deadening and 3M 90 (applied to both the SD and Carpet)
I will do a vinyl strip along the top between the carpet and the rear window, to keep it clean.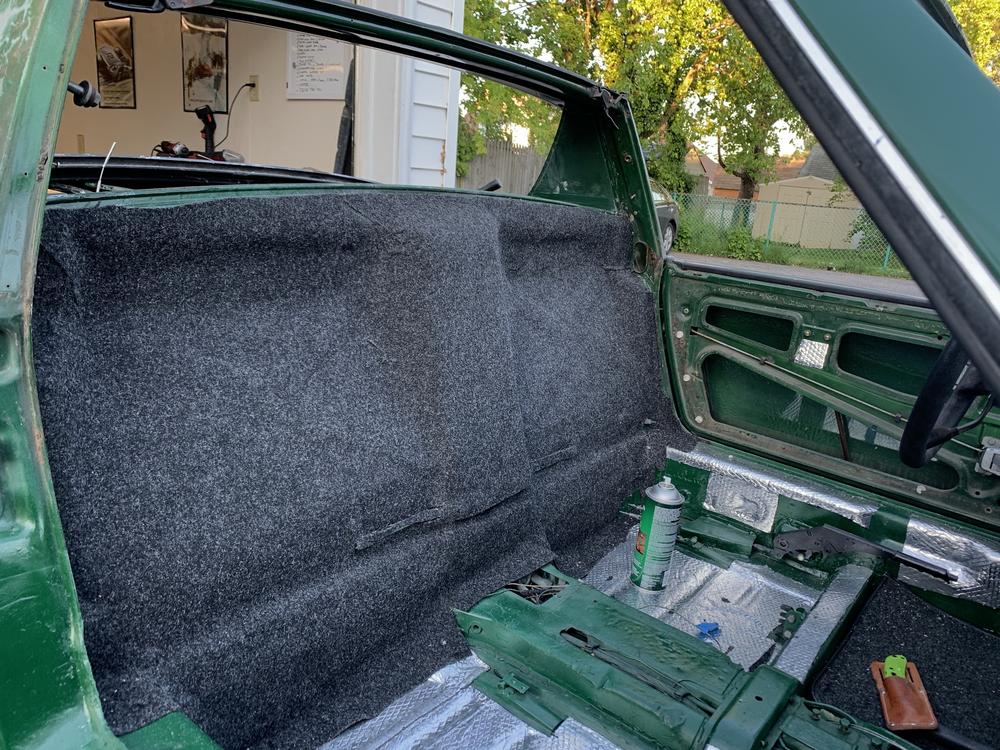
I adhesed...adhered? the under dash carpets, started longs, etc.
Pretty exciting to see. The vinyl floor pieces are arriving today. So I can finish the carpet after that.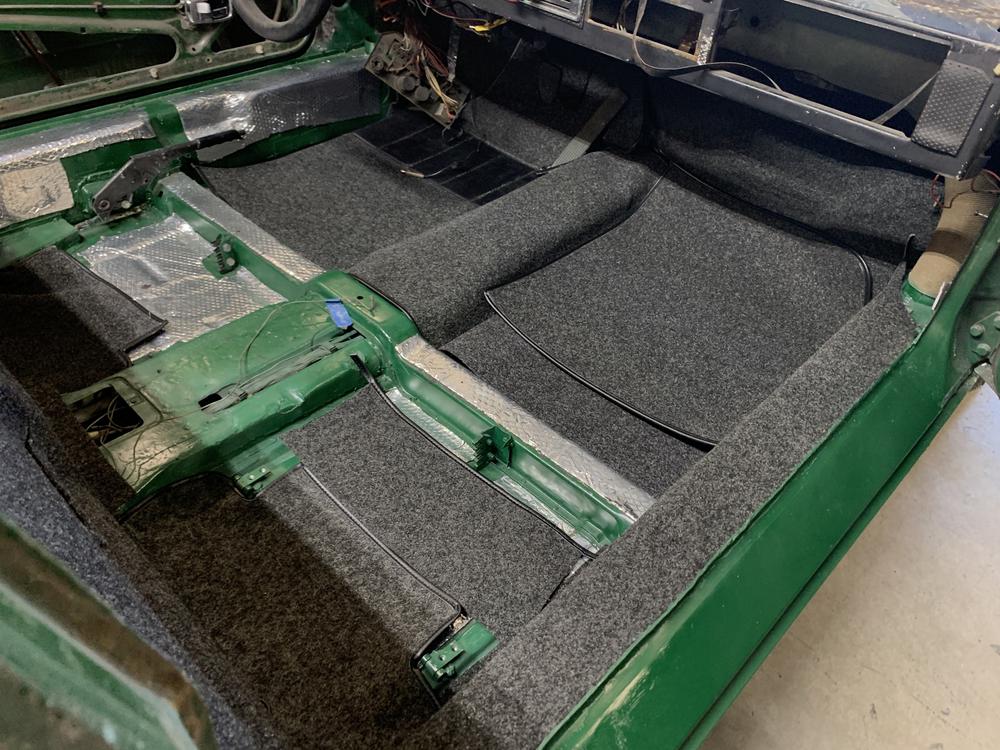
On the list this weekend.
-Install rear window and vinyl beauty strip.
-Install dash top vinyl and dash.
-Install floor vinyl and finish carpet.
-Install seats + mounts.... (am I getting ahead of myself?)
-Design and build my custom door panels....
By-the-way, here is the fabric for my door panels. Maybe liked, maybe not...
Factory VW black vinyl basket weave - An ode to my VW roots (and the Splitty I have tattood on my leg!)
(I also settled on this because 914rubber said "backordered" on their door material  Turns out it was in stock the whole time. Oh well.)
Cheers.
Posted by: jaredmcginness May 10 2020, 06:34 PM
Ok fun stuff.
Fitting the door panels I made: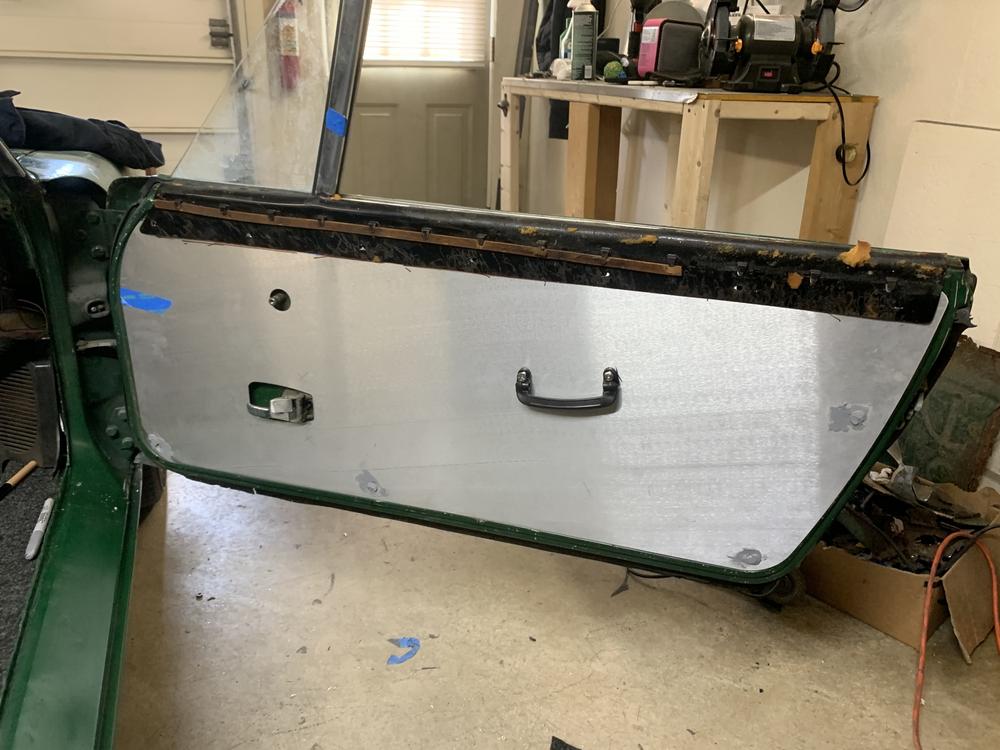
You might note the handle. '73 RSR style. Welded nuts behind the door frame.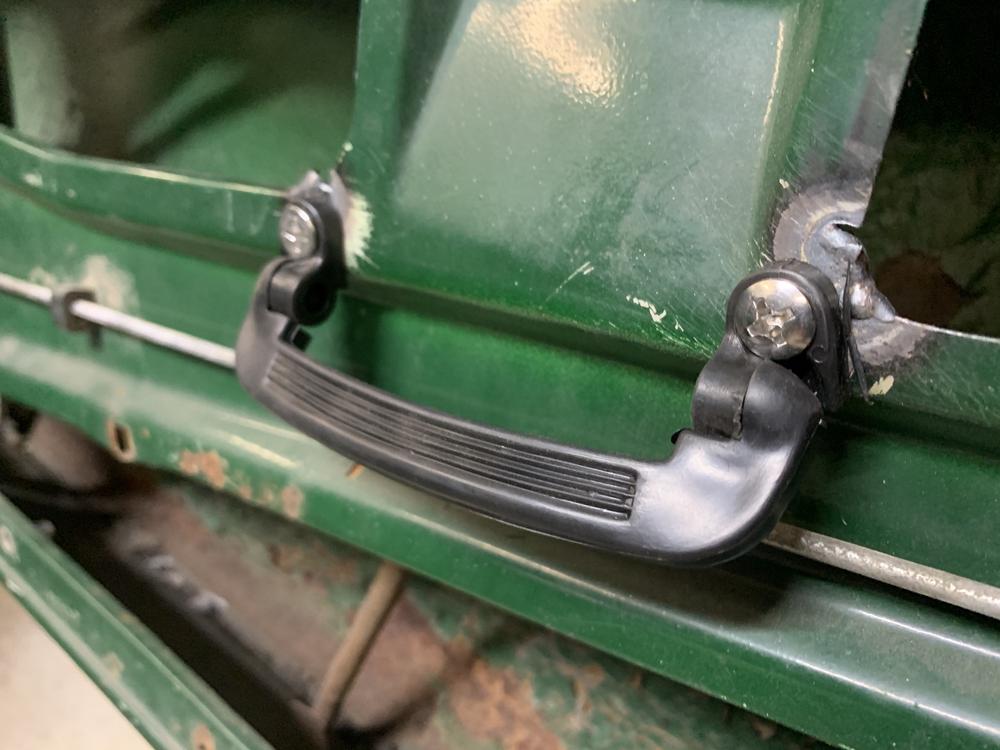
Laying the vinyls together. 1/8th" foam backing.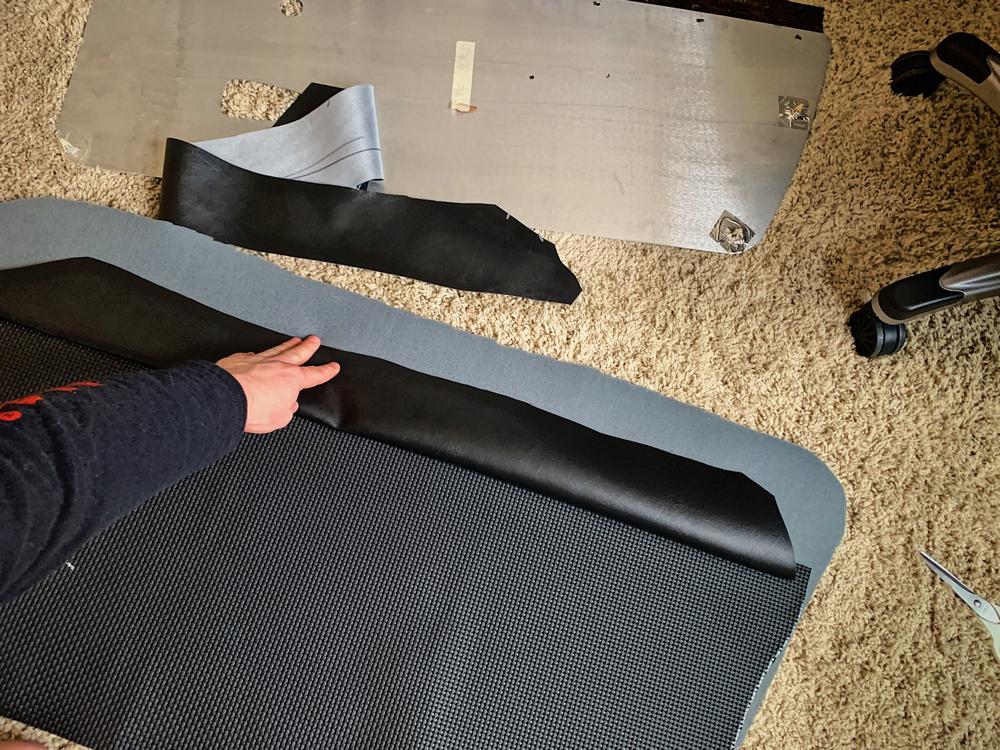
Sewn and adhesed (? Still don't know this word... I will always type it wrong...) adhered. 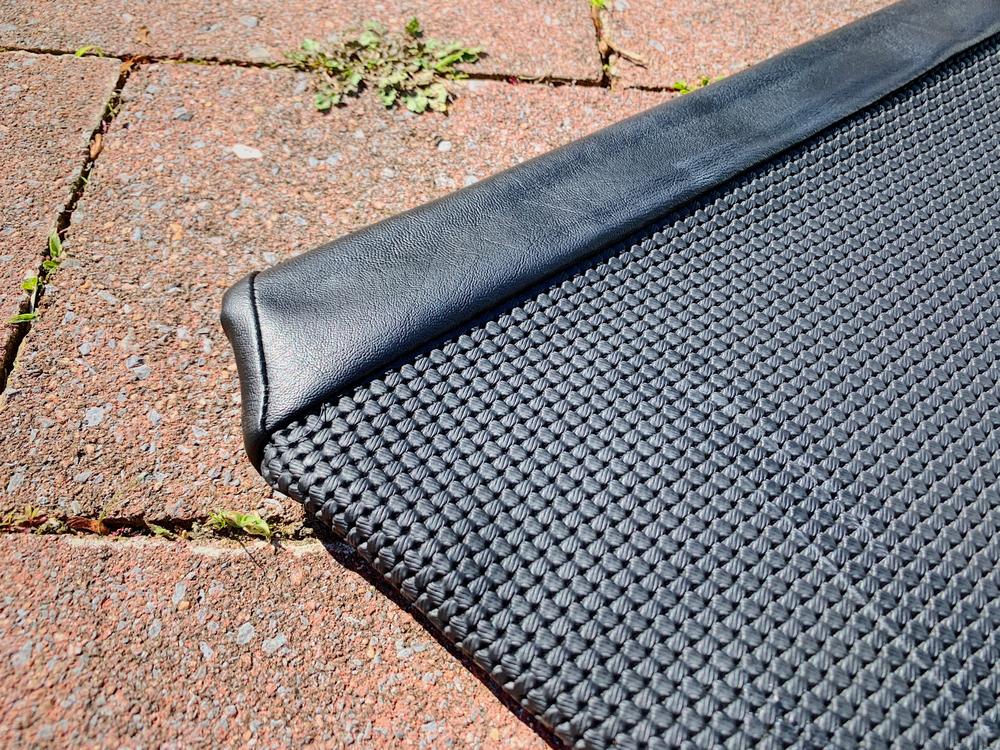
Gotta say I had thrown a few F bombs around while making these. The vinyl on top gets tacky in about -1 second and sticks in about 1 millisecond. Freakin EYEROLL.
If you try and pull it up to reapply, it destroys the foam underneath.
Better than no panel right? I gotta try and think if I bought the car like this would I be worried right away? Not at all... Just want it to be top tier with all the effort.
Total on materials for the panels is $58.00. Cheaper than any on the classifieds!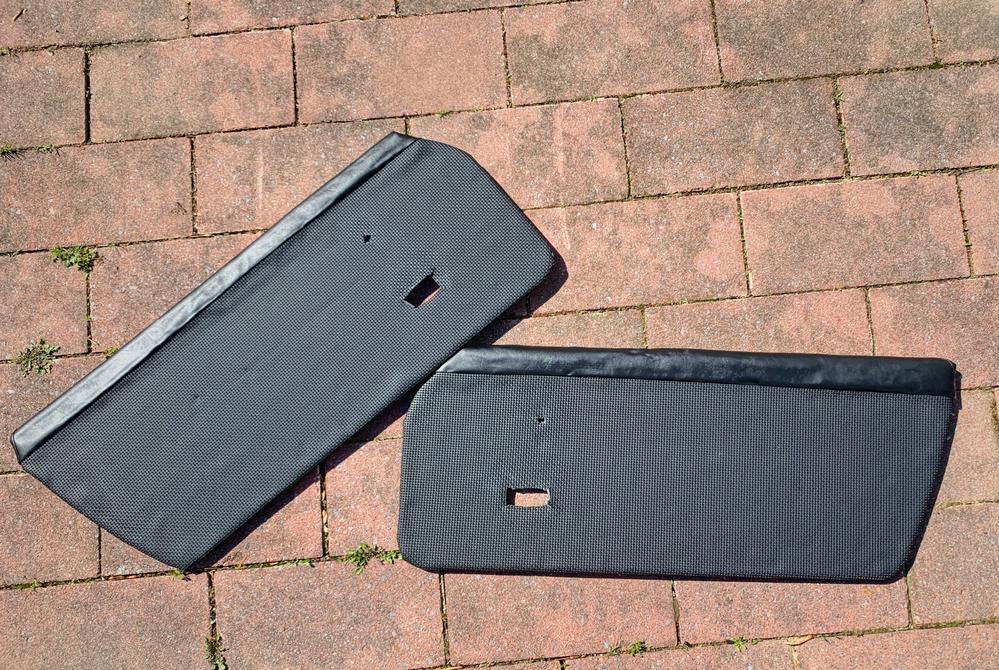
Here I have added the tartan seats and installed the rear window.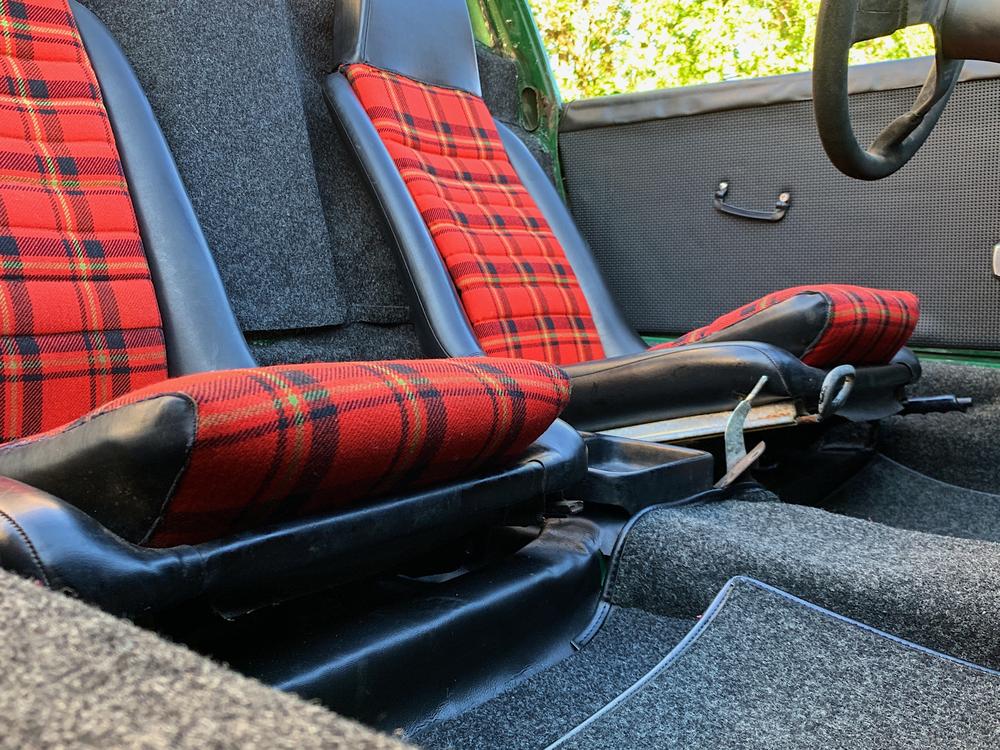
More photos.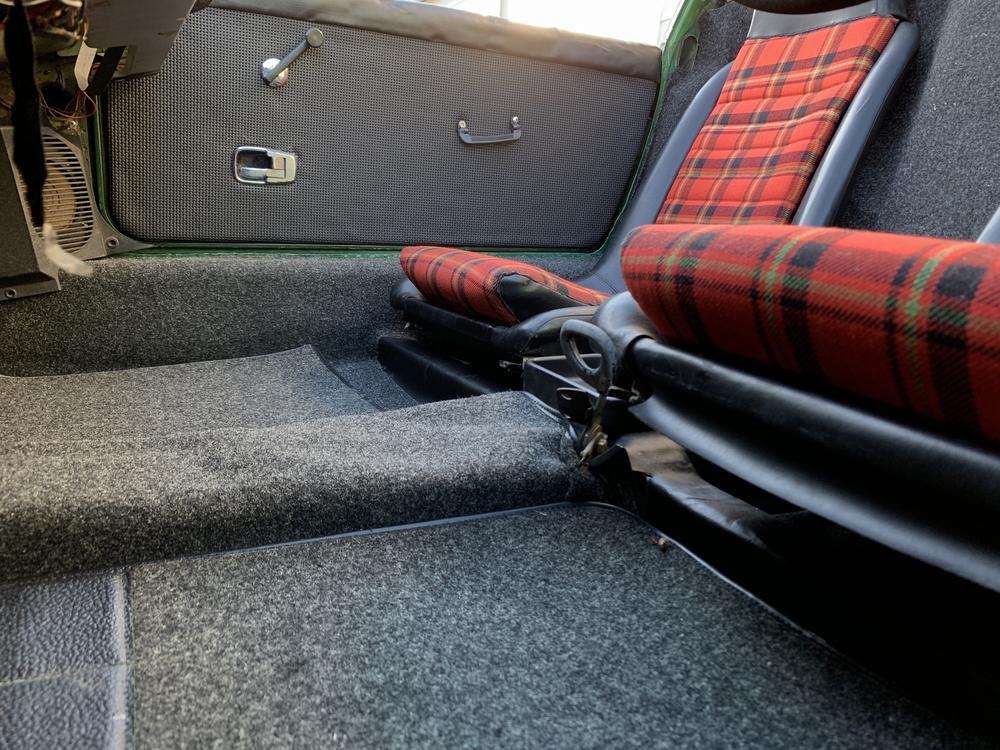
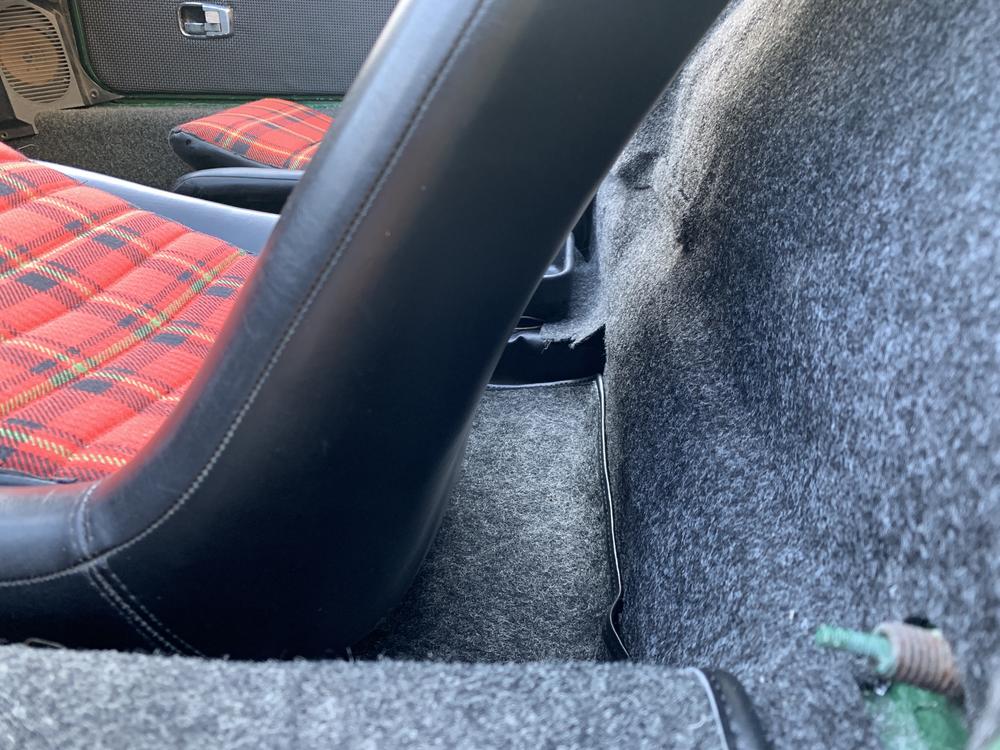
Carpeted firewall looks damn good!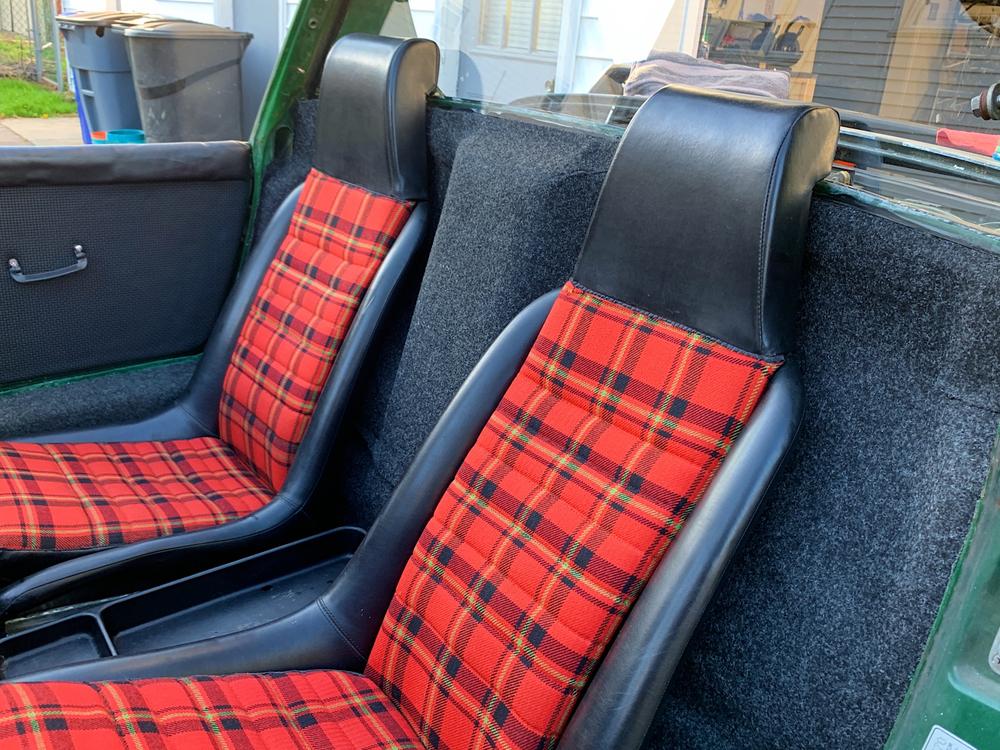
Still... a lot of things accomplished this weekend. Window, floor vinyl, carpet etc.
Next is dash. 5 Lug swap should be shipping from PMB Performance mid next week!
Posted by: jaredmcginness May 13 2020, 06:42 AM
Hey guys,
Criticism is always welcome here. I still plan to redo the top vinyl on the door panels. Some time...
Last couple days I added Dash Top, Lower dash, Windshield seal, Main Targa seal, back glass. A few pain in the butt items! I almost forgot those two pesky dash nuts behind the gauge cluster. I will never understand the idea behind the placement of those!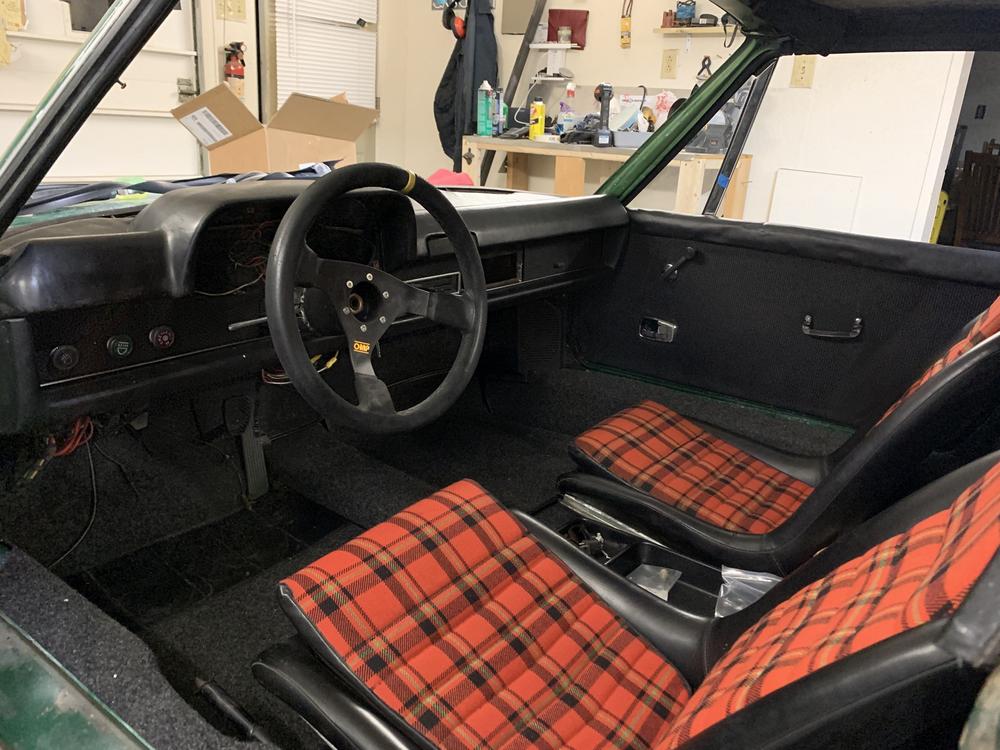
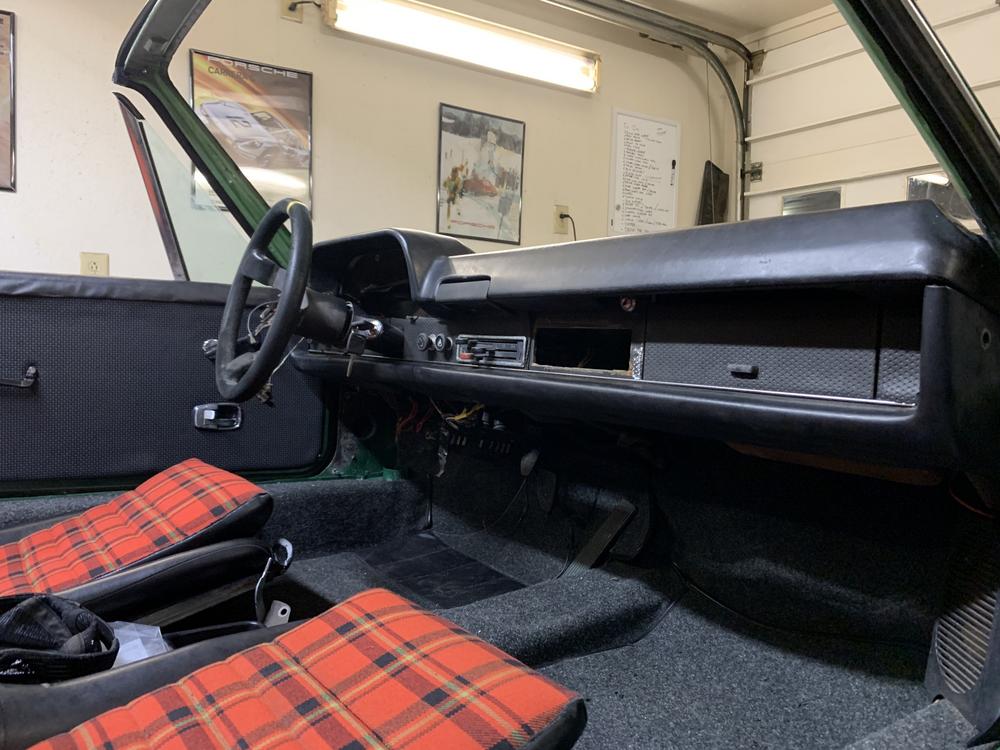
Dashboard vinyl. Easy project with the windscreen out.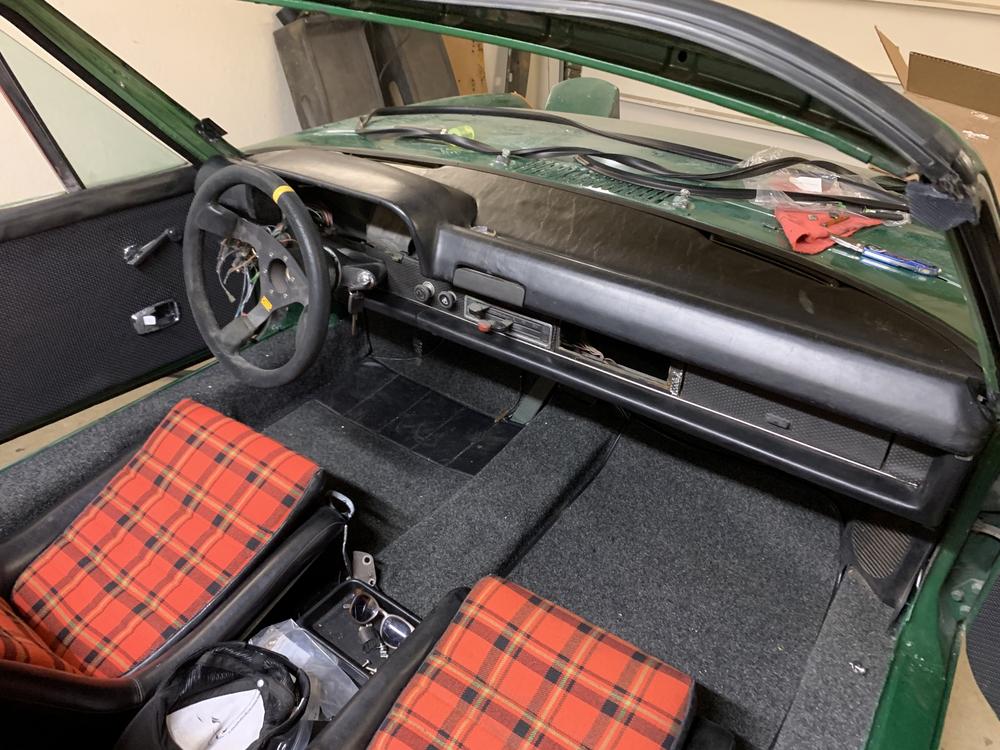
Here's a throw back to last June. The day I bought the car. Ashamed to say I was even "proud" to have it then. I had a vision for what it could be!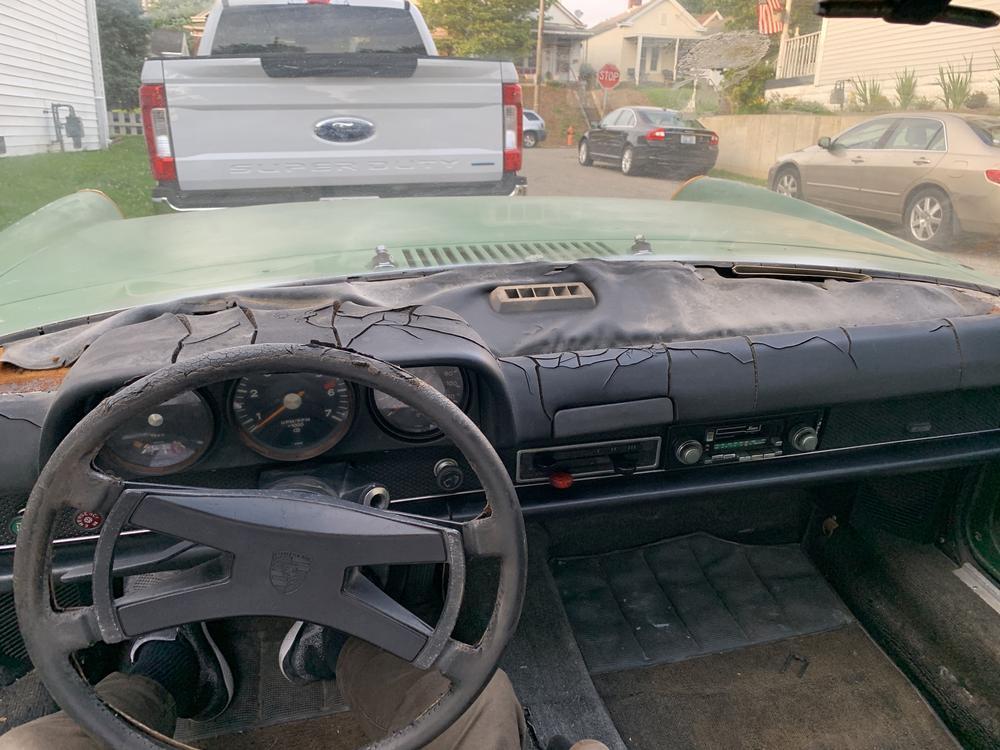
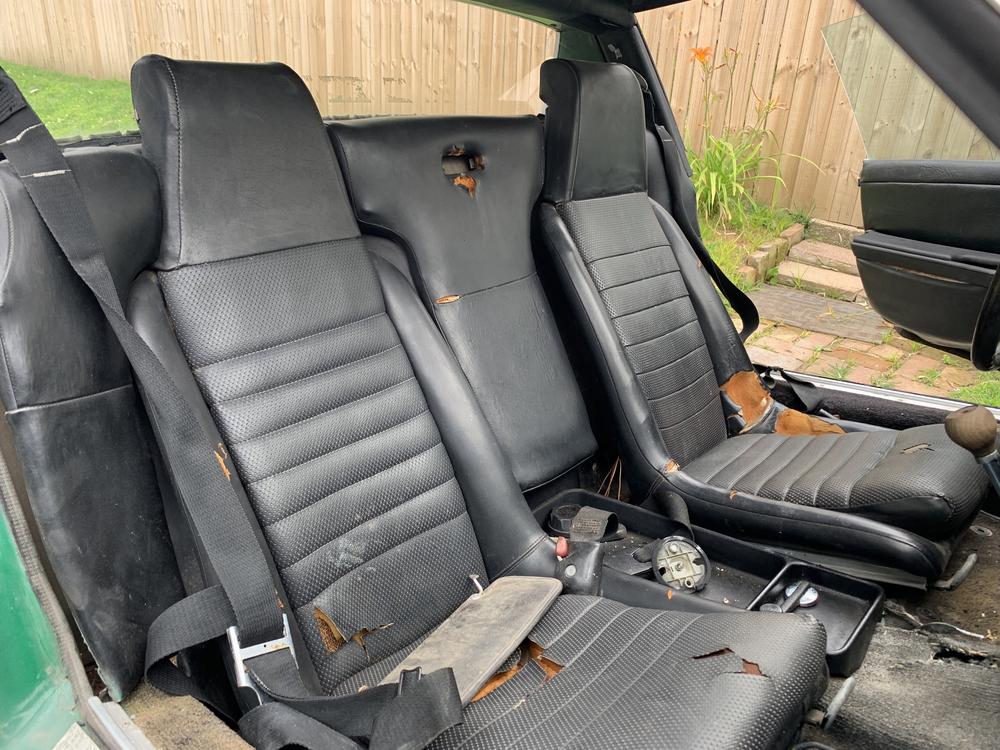
Feels fantastic to sit in there and close the door to a nice THUD. Nice and quiet (even without the front glass) I think this is a respectable interior so far!
Even smells like fresh vinyl too.
Thanks for reading.
Posted by: kroelofsen May 13 2020, 07:10 AM
Nice work...! Looks great!
Posted by: Cairo94507 May 13 2020, 07:16 AM
Amazing progress. You will be driving before you know it.
Posted by: bbrock May 13 2020, 07:33 AM
Fantastic work in record time I think you had the mother of all cracked dashes. Almost artistic in its own way.
I learned those dash nuts under the instrument pod are not a problem at all when installing the dash with the subframe out of the car and on a bench the way the factory probably did. Installing them with the dash in the car is a real f-bomb factory. Nice work!
Posted by: BeatNavy May 13 2020, 07:34 AM
Wow, that dashtop was a disaster!  And now everything looks great!
You removed the center dash vent you had. Did you want to account for that with the top vinyl?
Posted by: jaredmcginness May 13 2020, 07:43 AM
Almost artistic in its own way.
. Installing them with the dash in the car is a real f-bomb factory. Nice work!
I agree artistic. Maybe good for the garage wall, but at the time i had no problem stomping it into a trashbag.
F-bomb factory it was!
You removed the center dash vent you had. Did you want to account for that with the top vinyl?
I used a block off plate, sealer and hvac aluminum tape on the outside. I don't see it being an issue down the road.
Thanks so much guys!
Posted by: jaredmcginness May 17 2020, 06:28 PM
Hey ladies,
I got some good work accomplished this week. A lot of simple small jobs. Here's the cliff notes.
We pressed the glass in. No breaks! Pretty proud of that.
I used the 914rubber "Rubber Windshield seal" that goes in place of the chrome. I like it more.... less chrome is good for me.
New Main Targa seal as well. Fresh.
Finished my engine shelf, battery tray, paint, etc.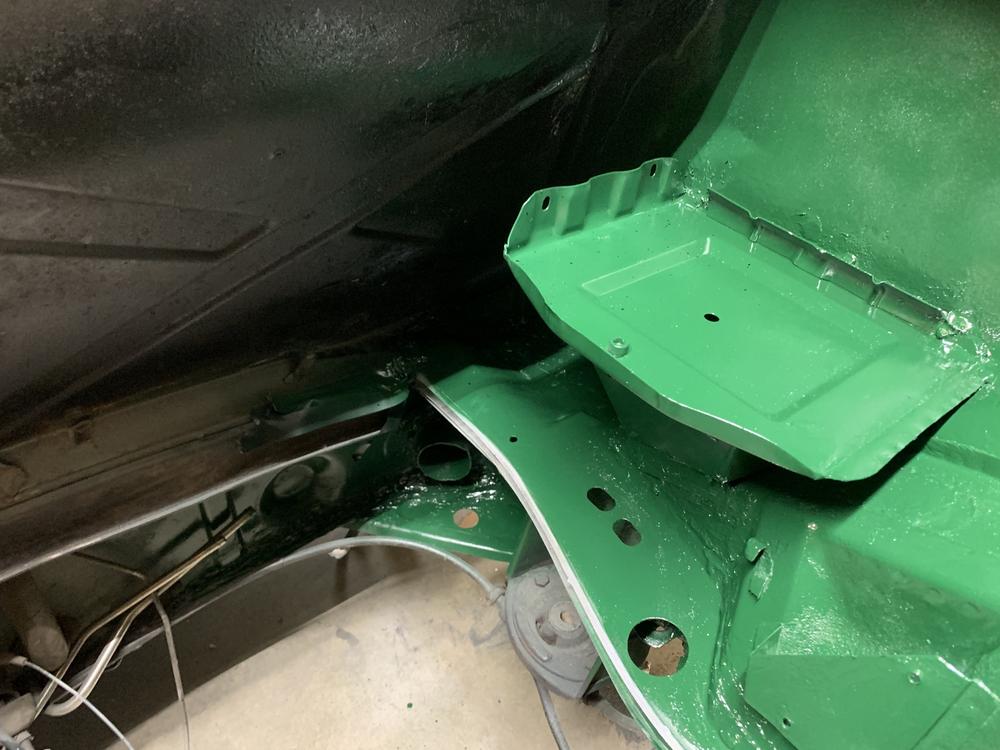
Totally respectable, IMO.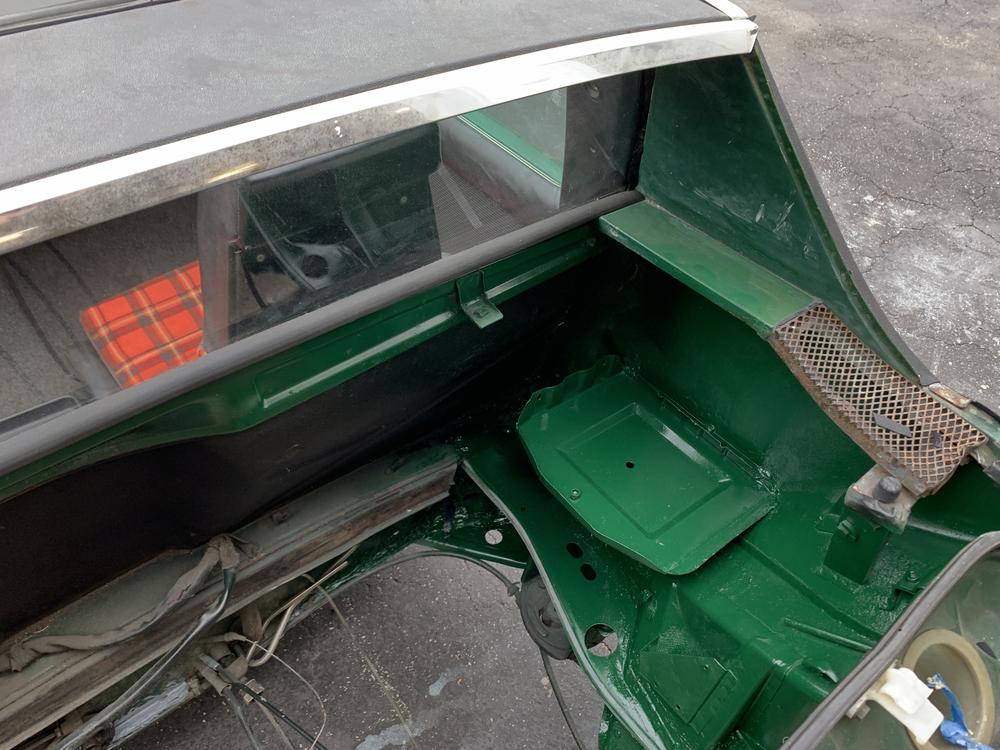
Finished up the driver's side door jamb: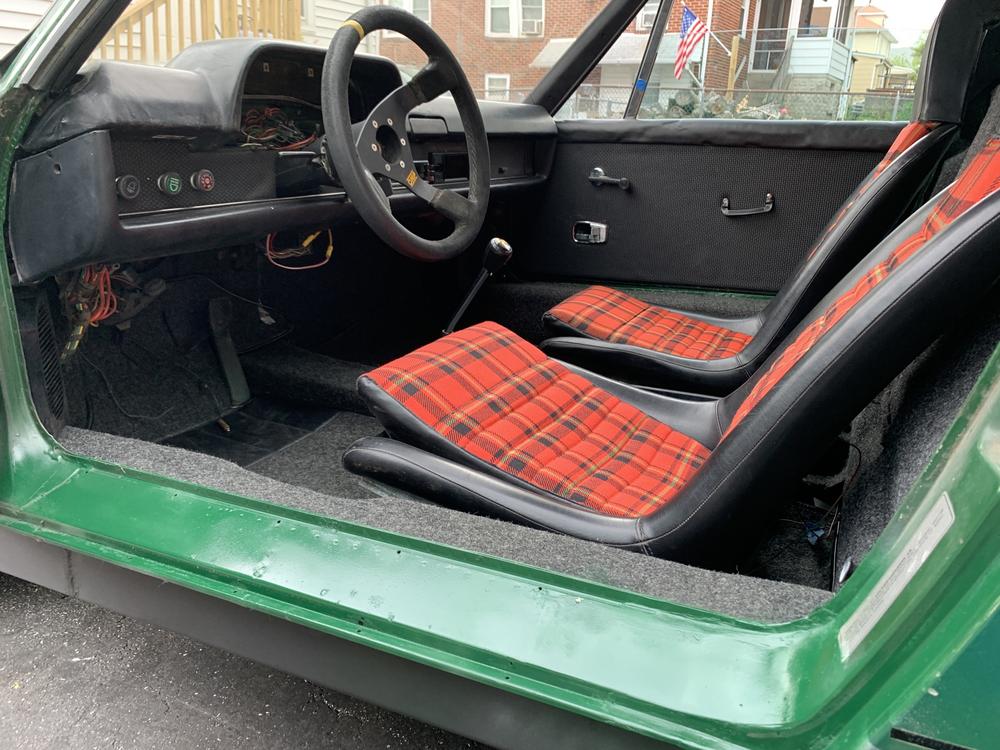
Added the rest of the interior trim and a vinyl strip I made for the rear window to carpet transition: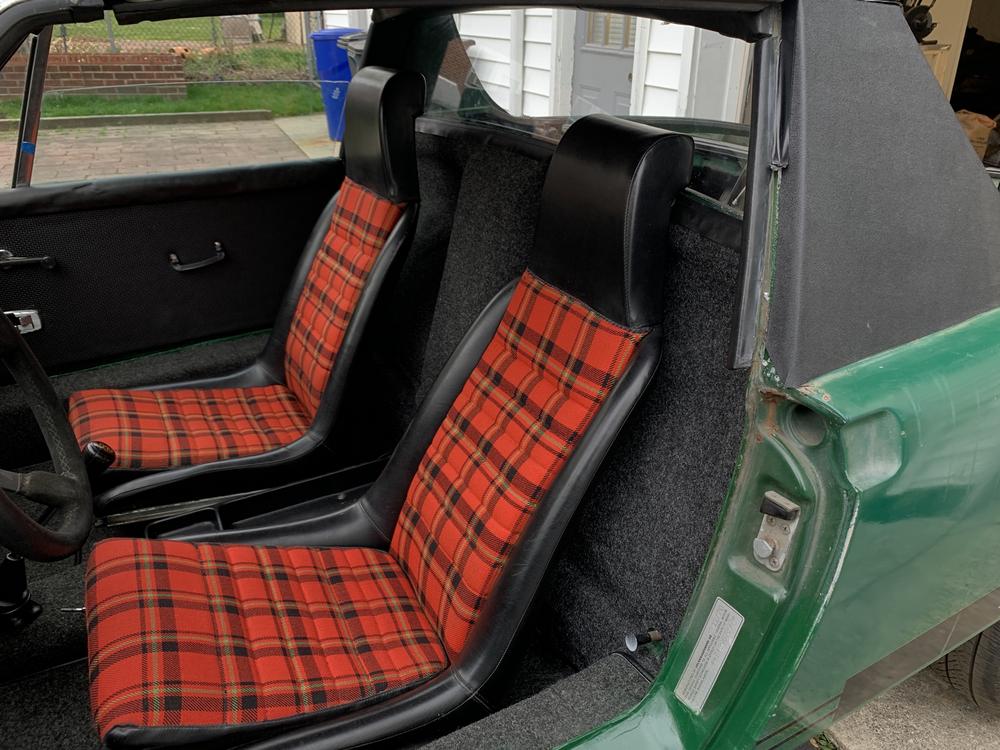
I replaced all of the shifter bushings.... this was easy.... because there were not any bushings to replace! 3 of 4 were missing!
I was going to say... when I first tried out the gears, I couldn't imagine the tail shift was THAT bad. ha!
Example:
Nothing there.
Also purchased this great Personal Shift knob from @http://www.914world.com/bbs2/index.php?showuser=7222 . Love it: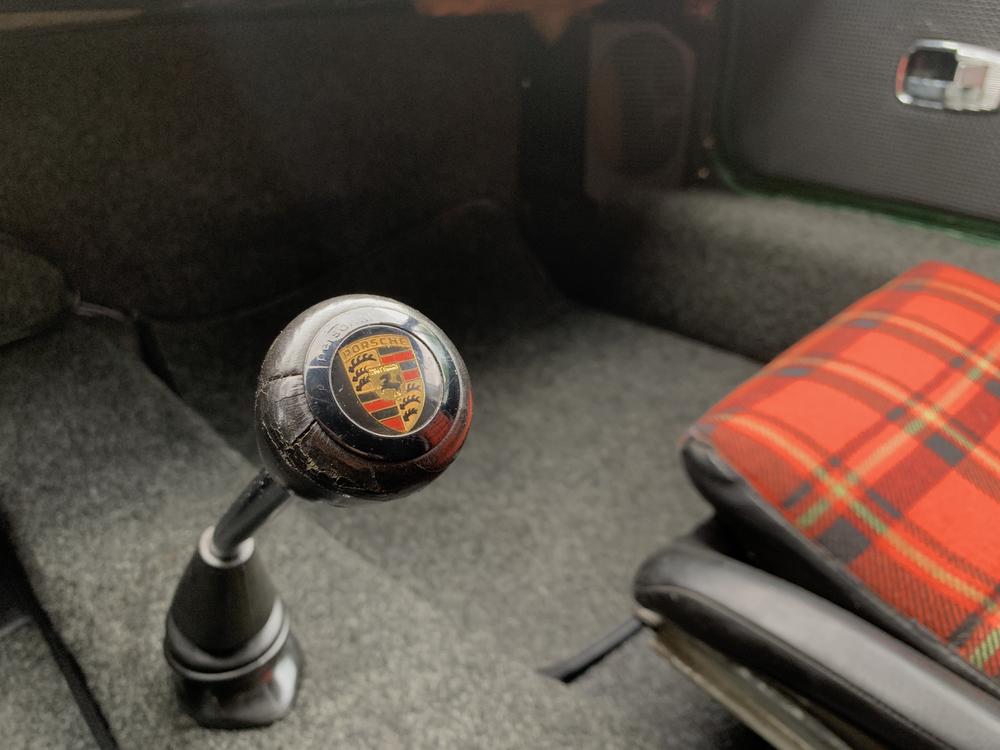
Added sail vinyl on both sides: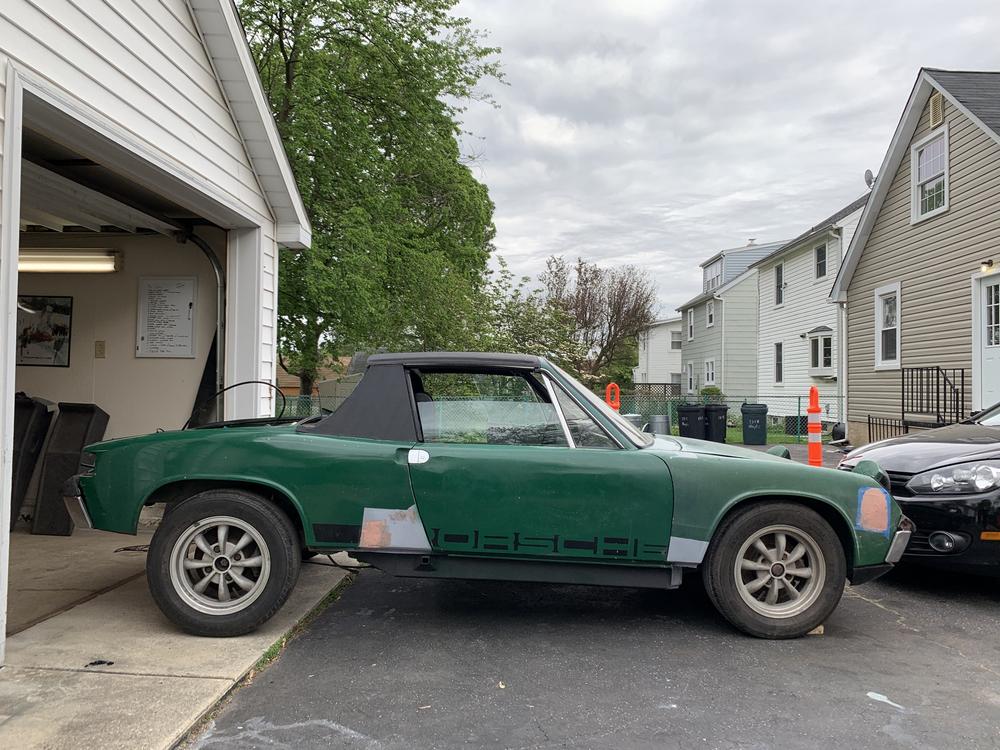
Interior as it sits now: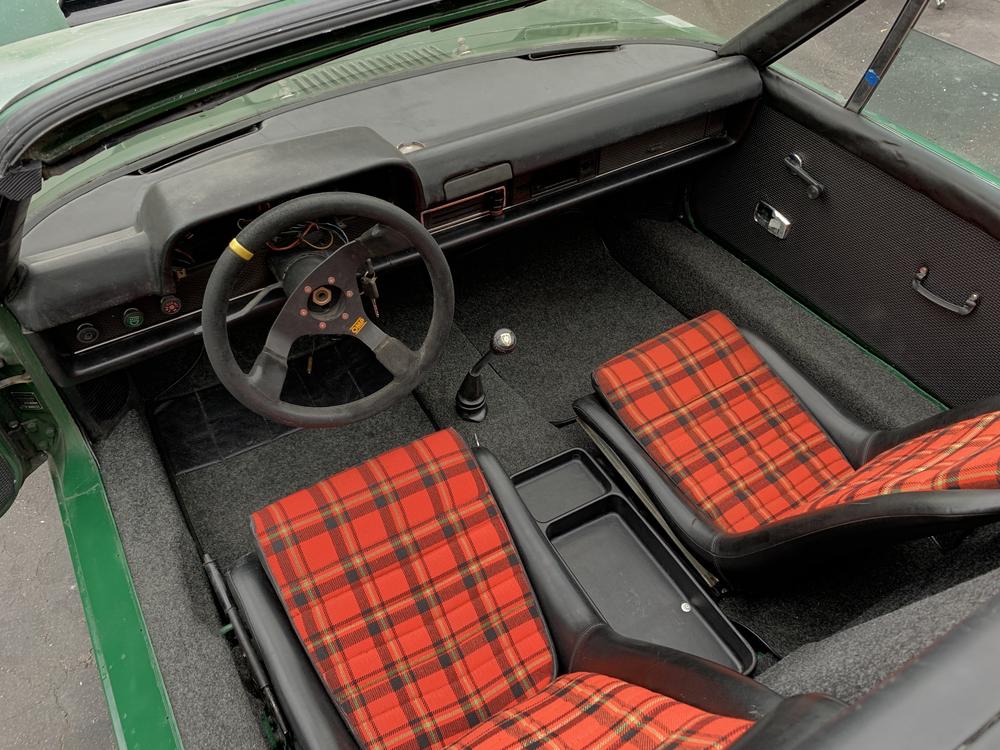
Come a seriously long way!
Thanks for reading.
Posted by: bkrantz May 17 2020, 09:18 PM
Give us another photo of your white board!
Posted by: ndfrigi May 17 2020, 11:44 PM
Nice work! still like those seats you got after removing the corduroy cover. Really match my 74 Bahia Red.
Regarding the engine mount bar, are you keeping that tranny mount instead of the stock bracket type? bdstone or 914rubber has them. 
Posted by: jaredmcginness May 18 2020, 04:41 AM
Give us another photo of your white board!
@http://www.914world.com/bbs2/index.php?showuser=23343 I was thinking the same and already snapped a photo!
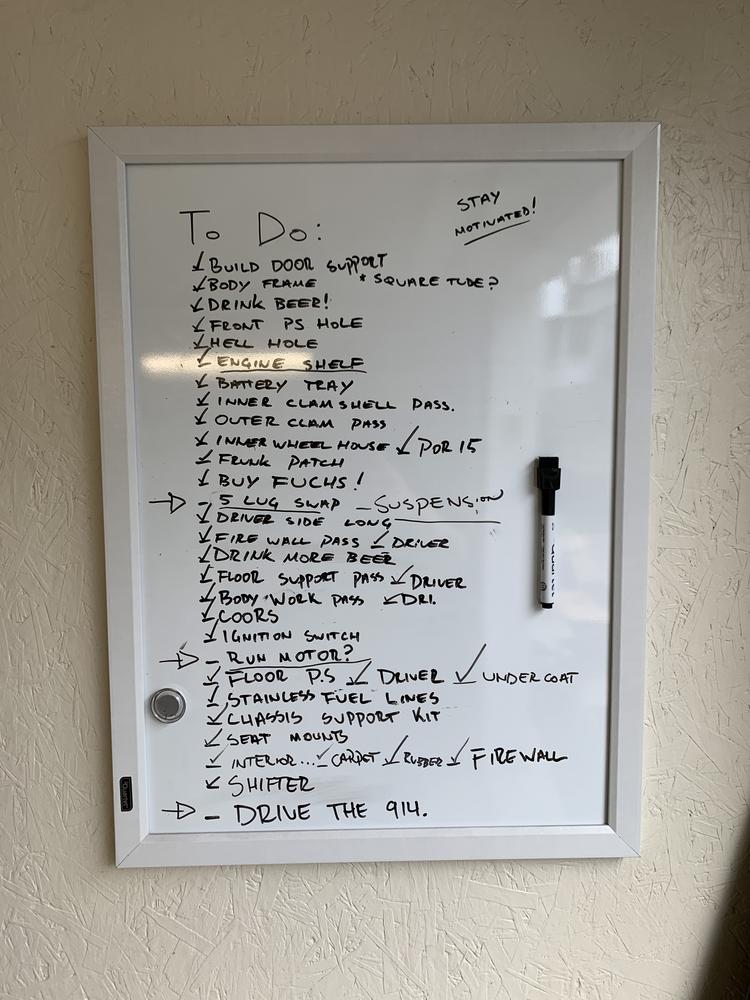
To be fair, I should probably make another one, there will be a decent sized list of engine stuff, little linkage, soft fuel lines, brake lines, master cyl, adjustments etc. Great to see so many checks though.
Thanks!
Regarding the engine mount bar, are you keeping that tranny mount instead of the stock bracket type? bdstone or 914rubber has them.
I have to say I am a bit confused here @http://www.914world.com/bbs2/index.php?showuser=13474 , do I have the wrong mount here? If it should be the straight bracket type you have pictured, I'll make sure to order one and get it in there. Not sure why it would have the wrong style. Seemed to bolt up okay when I removed the motor. Always something to knock out

EDIT: I found a quote from @http://www.914world.com/bbs2/index.php?showuser=4947 on the samba "the round mounts with the rubber insert that fit in this position are for the 70-72 914-4 models"
So potentially this round style came in early 4 cars.
Posted by: BeatNavy May 18 2020, 05:09 AM
You have the correct mount for early cars.
Posted by: twistedstang May 18 2020, 05:22 AM
Looking good. I love those seats against the green!
Posted by: Tbrown4x4 May 18 2020, 06:34 AM
You have the early mounts. The later cars had the rubber mounts on the engine, and the solid mounts to the outer ends of the bar.
I always thought it made more sense to have the rubber mounts farther apart, but I'm no engineer.
*edit* How long did I take to post this? I must have been working instead of posting! haha
Posted by: ndfrigi May 18 2020, 11:37 AM
Oooops never seen on my previous 2 early 914 I’ve owned with that mount but probably because bought are converted to side shift. I guess it still work for side shift conversion.
Learned another thing about this 914.
Posted by: jaredmcginness May 20 2020, 03:30 PM
Hey Guys,
Took a couple days off work, while we are getting some of our main machines repaired. So I might as well work on the car...
Today's update is more of a question to see how F***ked I am.
I bought this 1.7 off a 914 guy up in Philly last year. He said its a really nice runner, no leaks. He said he put the gummy carb on there and kept the duals it had for himself...
So I finally get around to taking the tins off - I was going to clean it up. Get rid of the tacky red on the tins, new belt, plugs, wires, etc.
They were sprayed while on the motor. Over spray all over the place.

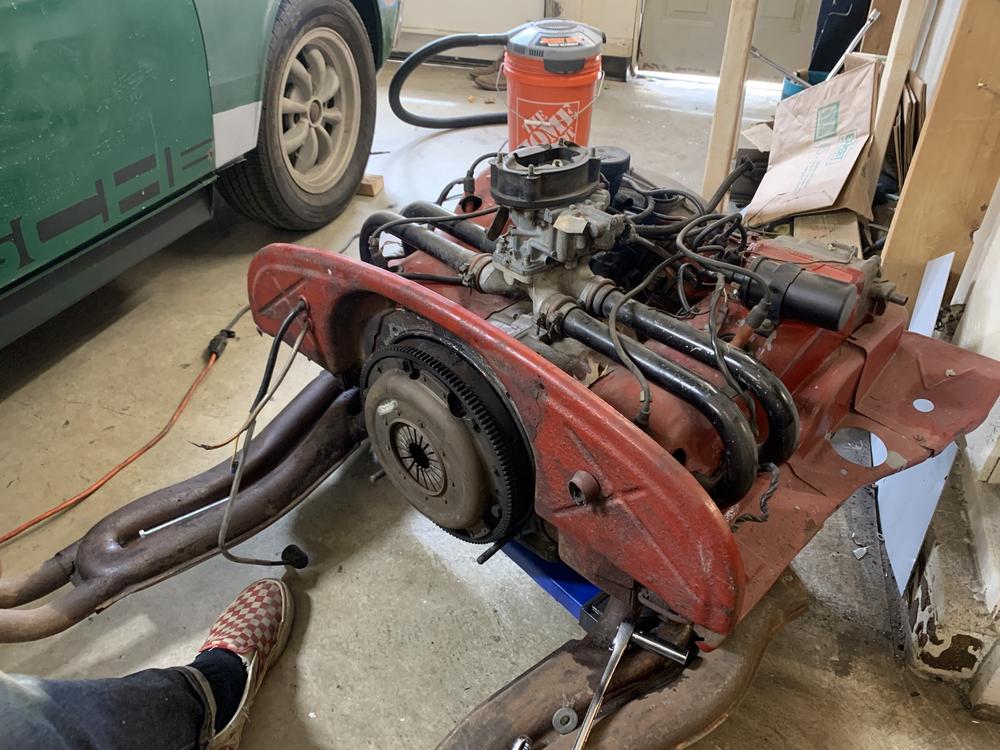
This half looks OK... besides the loose spark plug I found. Aftermarket valve cover? So someone has been in here before.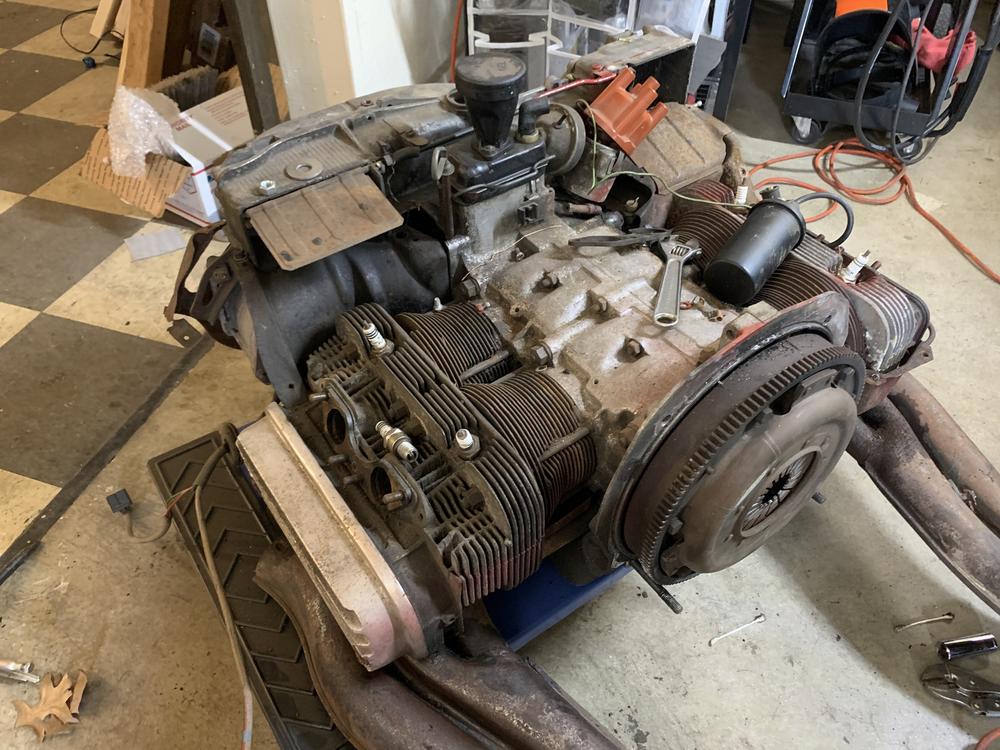
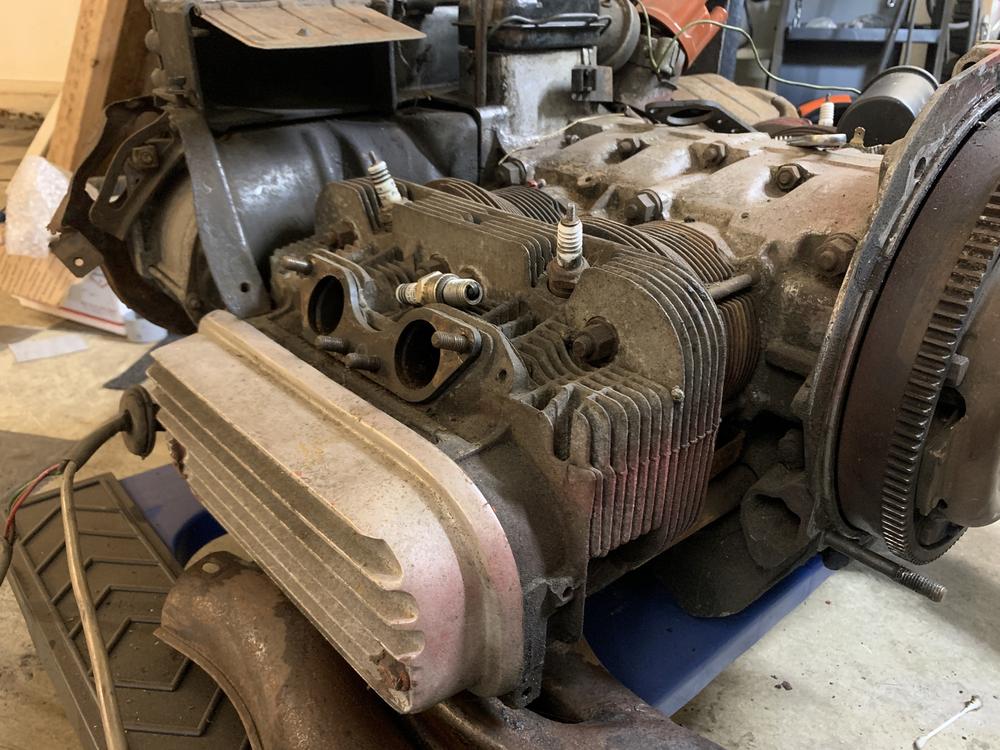
Other half looks like dog crap. 
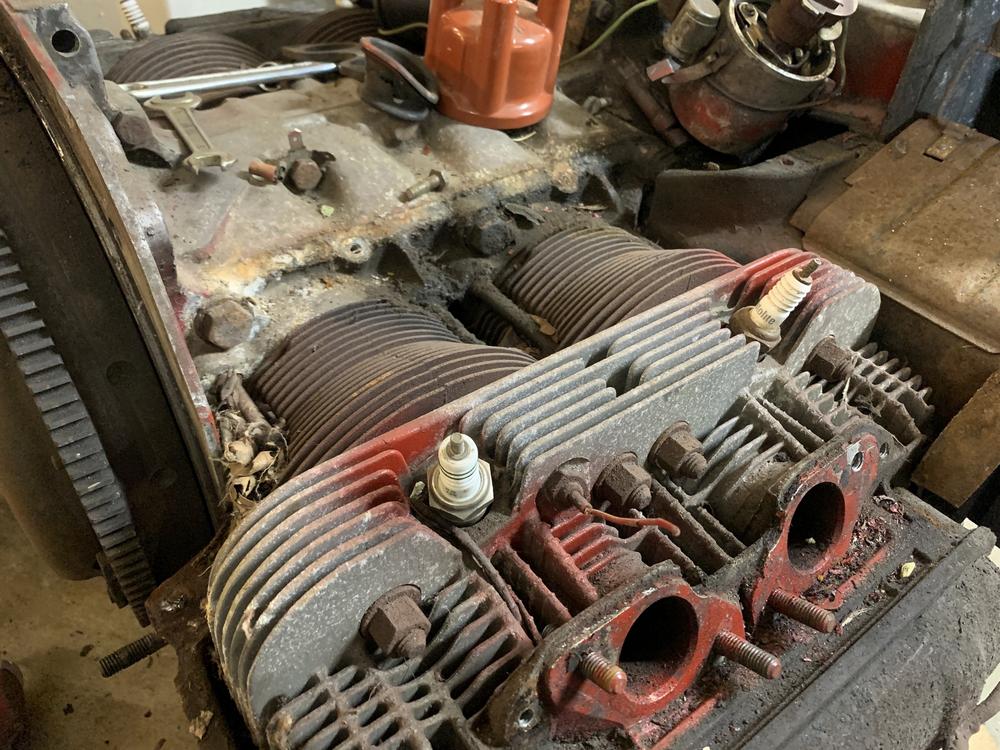
Was jammed full of leaves, feathers and gunk. No way this thing cooled right.
Photo of the valves:
Push rods. I'm assuming there was a leak here: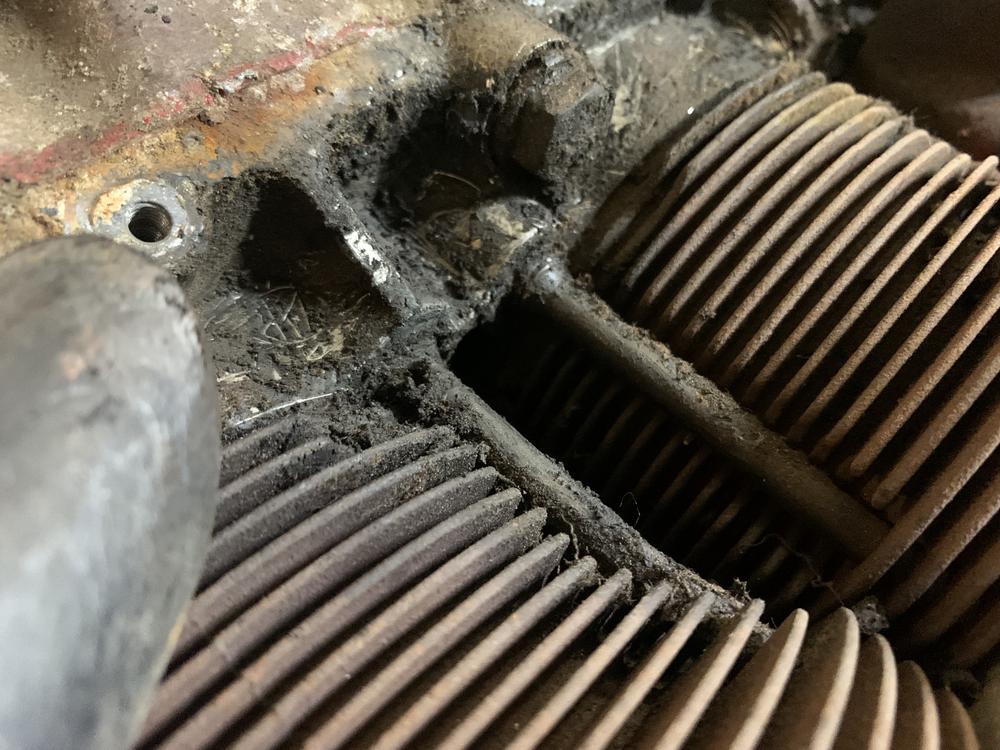
Opened valve cover: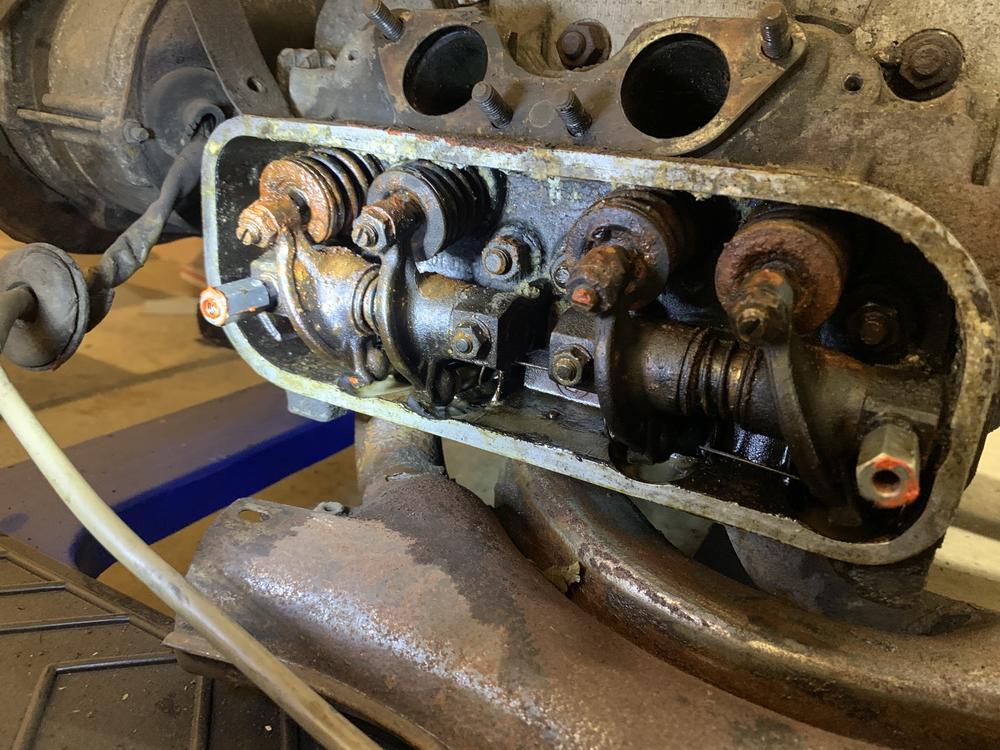
Other notes:
Motor spins great.
Plugs are clean.
1 impeller fin is cracked.
Has been sitting with oil in the pan and nothing leaks.
What am I looking at here? Is it that gnarly? I have the original motor but, it doesn't turn and has been sitting outside for 20 years with no spark plugs in. So I'm not even letting that be an option.
I am partially in the club of "run it til she pops" But if that's going to be 6 miles in...
Obviously I should do some form of a rebuild? Can I just pull the heads, clean them up, push rod seals and call it a day?
I really don't have a budget for a nice $1700+ motor build right now. Would love to have the tires on the pavement this summer.
I know fast, good and cheap cant go together here.
Posted by: BeatNavy May 20 2020, 04:20 PM
There are a ton of people more knowledgeable on engines / rebuilds than I am, but here are my thoughts:
1. It's not that bad on the outside. The head on the 3/4 side is a little scuzzy, but not that bad all that things considered, and could be considered typical IMO.
2. That valve/stem is what concerns me most. It's hard to tell how structurally sound that thing is.
3. The rocker assemblies move freely? At least some corrosion on those.
4. Those aren't the pushrods in that pic, unless I'm looking at something different. Those are cylinder studs. The cylinders have probably wept some, but that could also just be random oil / dirt that comes down from the top over time (e.g., spilling oil while filling, etc.).
5. Of the other notes, you're good on the impeller (one cracked fin in and of itself isn't an issue).
6. Painting the tins on the motor...
I think this thing will run for longer than you might think, assuming there aren't other major issues internally. Pulling the heads and resealing the cylinders wouldn't necessarily be bad, but you'll end up in a "while I'm in there" situation. 'As a minimum, change oil cooler seals, change pushrod tube seals, clean up the cylinder fins, and get stock valve covers.
If you start pulling things apart and go down the rabbit hole maybe you can start looking for a cheap set of 96mm p&c to go the 1911 route, which I have heard is pretty fun. Otherwise, it's "split the case" time.
My 1.7L hadn't run for 12 years (or more) when I got it. It had scuzz all over and around it, and once I got it running it ran pretty strong for 2 years before I swapped it for a 2056.
Posted by: Cairo94507 May 20 2020, 04:23 PM
You are doing a great job. Looking at that motor, since it is out of the car already....I say pull it apart and rebuild it. Looking at those valves alone scares me. Sorry, but better to pull it apart before it pulls itself apart.
Posted by: jaredmcginness May 20 2020, 06:10 PM
You are doing a great job. Looking at that motor, since it is out of the car already....I say pull it apart and rebuild it. Looking at those valves alone scares me. Sorry, but better to pull it apart before it pulls itself apart.
Thanks so much. Good point with that.
@http://www.914world.com/bbs2/index.php?showuser=17042 , thanks for that write up. Seriously. When this car is on the road I need to send you and a few others a 6 pack.
Thinking maybe I can get away with an "outside" end rebuild or whatever you'd call it.
I can salvage some other parts from the original motor I have if need be (valve covers, etc).
I'll look into the 1911. A quick search shows a lot of (what I presume to be?) junk $300 slip on cylinder and piston kits. If that's a typical price... and slip ons are kosher, I'm sold. haha.. But it sounds like something in a craigslist ad for a Dune Bug that doesnt run.
Down the research hole I go.
Edot: read more. Those slip ons are chinese made and definitely junk!
Posted by: mepstein May 20 2020, 06:23 PM
Hey Guys,
Took a couple days off work, while we are getting some of our main machines repaired. So I might as well work on the car...
Today's update is more of a question to see how F***ked I am.
I bought this 1.7 off a 914 guy up in Philly last year. He said its a really nice runner, no leaks. He said he put the gummy carb on there and kept the duals it had for himself...
So I finally get around to taking the tins off - I was going to clean it up. Get rid of the tacky red on the tins, new belt, plugs, wires, etc.
They were sprayed while on the motor. Over spray all over the place.
This half looks OK... besides the loose spark plug I found. Aftermarket valve cover? So someone has been in here before.
Was jammed full of leaves, feathers and gunk. No way this thing cooled right.
Photo of the valves:
Other notes:
Motor spins great.
Plugs are clean.
1 impeller fin is cracked.
Has been sitting with oil in the pan and nothing leaks.
What am I looking at here? Is it that gnarly? I have the original motor but, it doesn't turn and has been sitting outside for 20 years with no spark plugs in. So I'm not even letting that be an option.
I am partially in the club of "run it til she pops" But if that's going to be 6 miles in...
Obviously I should do some form of a rebuild? Can I just pull the heads, clean them up, push rod seals and call it a day?
I really don't have a budget for a nice $1700+ motor build right now. Would love to have the tires on the pavement this summer.
I know fast, good and cheap cant go together here.
Maybe they can. We'll talk on friday.
Posted by: sjhenry1075 May 21 2020, 12:17 AM
Awesome thread, thanks for posting! I'm not far from Baltimore, so if you ever need an extra hand (to hold a beer) I wouldn't mind helping.
Posted by: jaredmcginness May 21 2020, 06:01 AM
Awesome thread, thanks for posting! I'm not far from Baltimore, so if you ever need an extra hand (to hold a beer) I wouldn't mind helping.
Sounds good! I used to work in Millersville so I knew right about where you are.
Posted by: jaredmcginness May 22 2020, 07:46 PM
Hey guys, couple little updates.
Drove to PA today to meet a new friend @http://www.914world.com/bbs2/index.php?showuser=10825 . Totally stand up guy with some cool cars and parts. I got eyes on the beautiful new mufflers hes taking part in offering to us. Cannot wait to pick one up in a few weeks.
He set me up with a few goodies today:
A tail shift in much nicer shape than mine.
A 150 MPH speedo. I stripped down, cleaned and painted all of these gauges today. Primed and painted the bezel as well.
To be clear, this car will never go above 72mph. But nice to have 
This is how she used to look...
Probably need a new multi (gas, etc) gauge down the road. Not as shiny. But it looks great over all.
Front bumper off. Broke 3 of 4 bolts trying to remove it. Welded some BFNs (Big Fu*kin Nuts) in place and got them all unscrewed. If you squint it looks likes a GT car with Cibies..... right?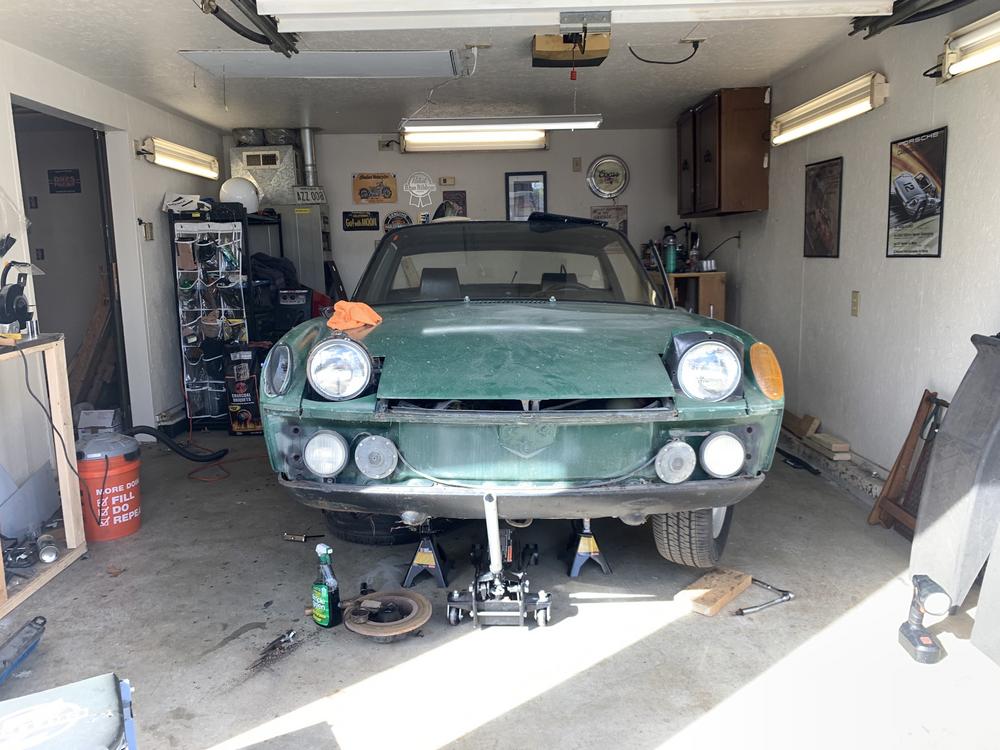
Last thing, question.... Where the heck do these two red wired eyelets go. If I touch them to power my headlights and fogs function. (woo!)
For the life of me I cannot remember where I took them off, but they are short and go must go right near the fuse block or near the ground on the wall.
Help?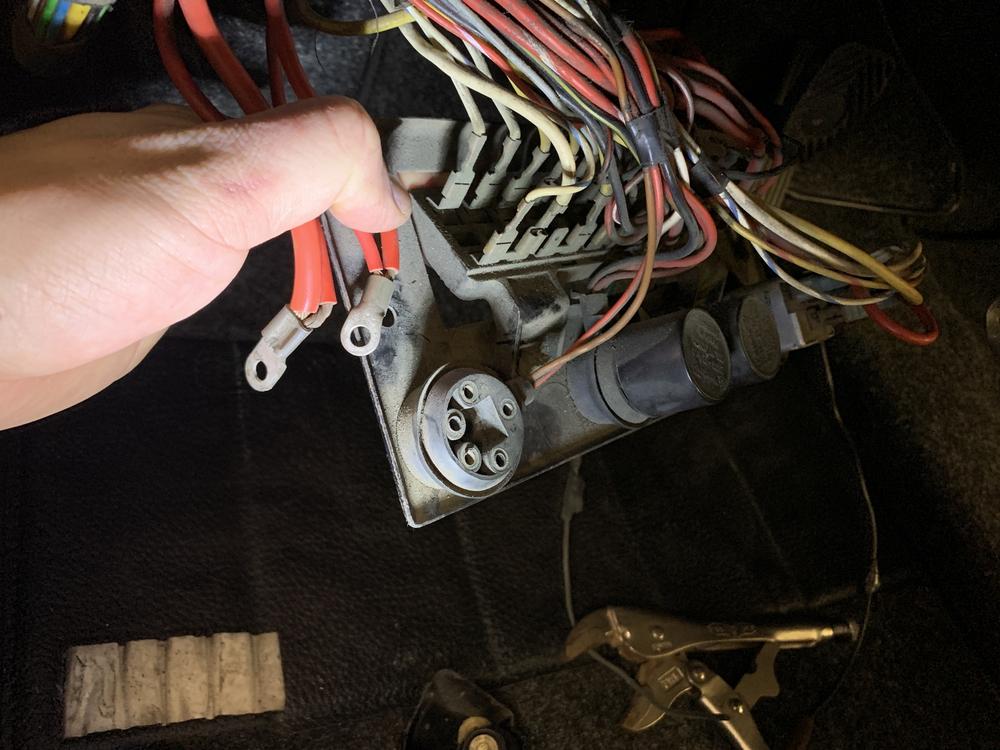
Posted by: jaredmcginness May 23 2020, 10:48 AM
Just a little thought about the motor situation I have....
- I have the original motor 1.7 numbers matching. Doesn’t turn, yet.
- I have this Red 1.7 (Pictured above) with the crud on the valves
I’ve been reading into a 1911, it seems pretty straight forward. It looks like you can go mild or big with a build like that. I’d go mild. This is still a budget build. It would be nice get have a peppier, reliable with decent MPGs
Simple being:
-Open up heads to 1.8 size, 105mm
-open up jugs and use 94 or 96mm pistons, maybe the KB P&C kits if I want to be cheap
-Replace cam with 9550, overkill... maybe Euromotorworks C grind or 86 grind cam
-42x36 valves
-I think the other main components stay the same.
-stock crank (66mm) is 1911, 71mm would be for 2056
And a few other bits, let me know if it’s anything major.
Could probably get away with $1500 on the low end, if I shop around for parts.
A plan:
Do an outer end refresh of the “red” 1.7. Pull the heads, clean everything out, if the inside looks fair, slap it back together, so I have a cruiser motor for the summer. Like Rob and a few of my local friends said “These motors can sit in a lake for 3 years and still fire up in an afternoon.”
In the meantime:
Buy an engine stand,
Strip the original, numbers matching motor
Start getting a solid list, collecting parts
Build original motor to a 1911 in the background
This gives me a way to cruise (so as the red motor is fine) and a background project. Also let’s me suffer with a 1.7 for a bit, which will make me want a bigger motor that much more.
Feels like a diary entry, thanks for reading. Any commentary is welcome. Not trying to beat a dead horse.
Posted by: jaredmcginness May 23 2020, 10:50 AM
Also, I found out those two red wires go to the brown ground block near the speaker. Thanks.
Posted by: bbrock May 23 2020, 12:42 PM
Also, I found out those two red wires go to the brown ground block near the speaker. Thanks.
Glad you figured that out. I was scratching my head. First thought was that they looked liked ground wire connections but they should NOT be red. I don't have schematics for early models but can't imagine that would be stock. Ground wires should be brown.
I like how you cleverly made sure we knew you had BFNs... like it wasn't already obvious from your build.
Posted by: jaredmcginness May 23 2020, 01:37 PM
Glad you figured that out. I was scratching my head. First thought was that they looked liked ground wire connections but they should NOT be red. I don't have schematics for early models but can't imagine that would be stock. Ground wires should be brown.
I like how you cleverly made sure we knew you had BFNs... like it was already obvious from your build.
The ground cable goes on the opposite site of of the brown block into a post with a 10mm hex. I believe both reds are stacks on top of eachother, in that brown plastic block next to the fuse panel. if someone wants to confirm. I’ll add a photo later.
And thanks
Posted by: sixnotfour May 23 2020, 01:41 PM
Brown Junction Block,,, not a ground...
Attached image(s)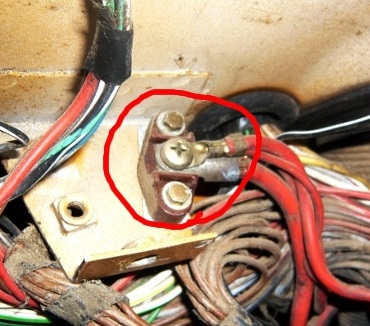
Posted by: jaredmcginness May 23 2020, 02:38 PM
Brown Junction Block,,, not a ground...
That’s the one! Thank you for adding the photo. For the life of me I couldn’t find any info. I got it sorted now, both red eyelets are double stacked on top, and the ground goes on the reverse side.
The brown plastic confused me.
I guess it’s a bit different on early cars.
Posted by: bbrock May 23 2020, 03:11 PM
I guess it’s a bit different on early cars.
Roger that! Nothing I've every seen.
Posted by: Bulldog9 May 24 2020, 07:05 AM
Great work, and project. KUDOS to you on the metal/fab work. I'm in ALexandria VA if you need a hand.
Posted by: anderssj May 24 2020, 12:49 PM
Brown Junction Block,,, not a ground...
Hi Jared,
On my car (1972), that brown junction block is made out of bakelite and also serves as an insulator; it's intended to keep those big red wires away from the car body and anything else that's grounded down there near the fuse panel (like the fuse panel itself).
IIRC, the other end of the biggest red wire is normally bolted to the terminal on the end of the positive battery cable. That wire is always "hot" whenever the battery is hooked up. The other red wires are stacked/connected via the Phillips-head screw in the center of the junction as shown in picture from sixnotfour. They distribute power to the fuse panel (fuse 11, with bridges to fuses 10 and 12), the ignition switch, and others users under the dash.
Also, I'm pretty sure that the red wire is NOT protected with any kind of fuse between the battery and the junction--unless the PO did a retrofit (unlikely).
Before hooking the battery back up you may want to check for continuity between the ends of the red wires in question and the terminal on the end of the positive battery cable to make sure which is the +12v feed, then mark it accordingly. I seem to remember somebody accidentally connecting that red +12v feed to ground and destroying their wiring harness when they reconnected the battery.
Hope this helps!
Steve A-
Posted by: jaredmcginness May 24 2020, 07:30 PM
Steve, thanks for the response. One thing I noted since connecting - my lights come on and flip up as normal... But can do so even with the key out of the ignition. I don't believe that is normal. So I screwed up something down the line.
I will check continuity, tomorrow.
And thanks @http://www.914world.com/bbs2/index.php?showuser=16283 ! Not far at all. Spent most of my life in Fairfax.
Posted by: jaredmcginness May 24 2020, 07:43 PM
Small update and more woes...
Got 3 of 4 packages from PMB Performance. Been waiting 5 or 6 weeks for this kit! Eager!
Spent the afternoon tackling my front, replacement struts, balljoints, cleaned and painted some things. Lots of simple Green...
Voila: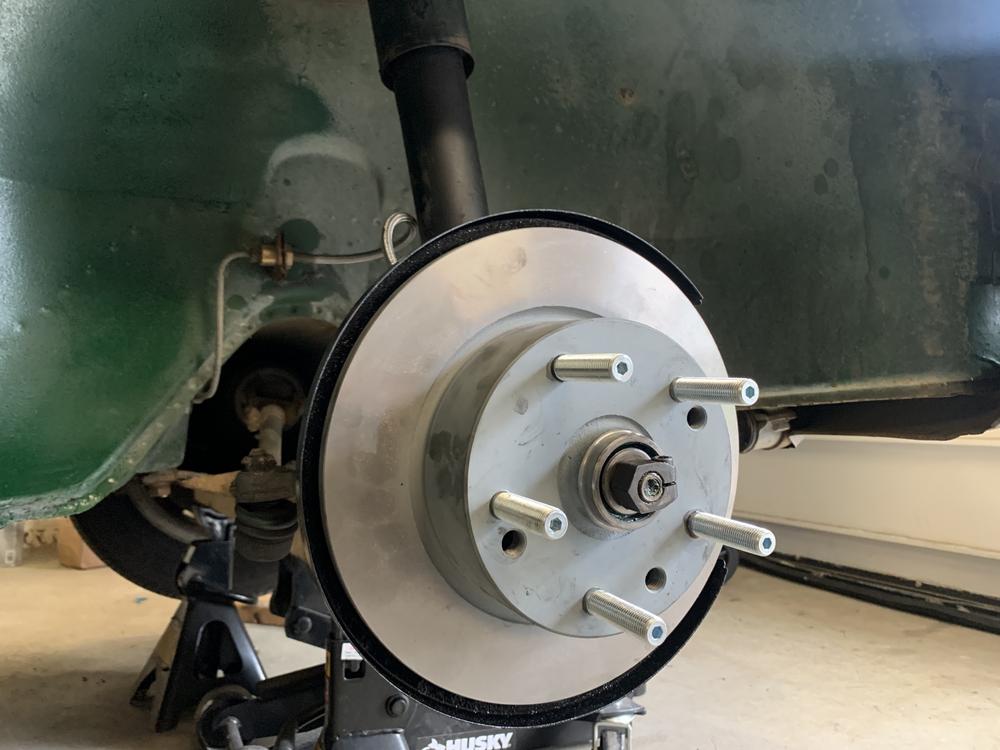
This is going to look really cool. Lowered it a hair.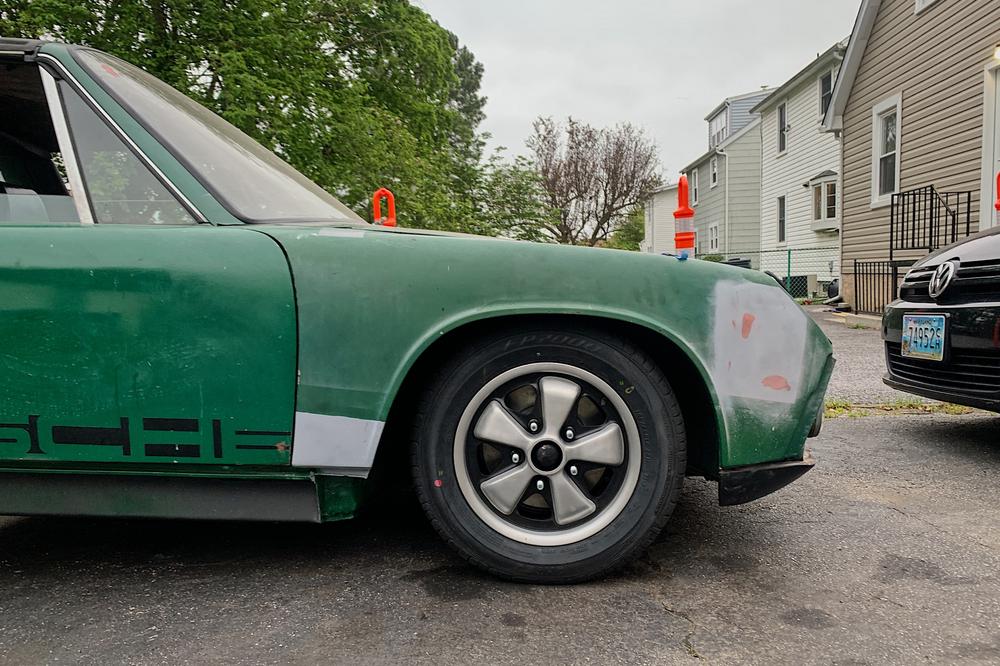
If you squint, the end goal is taking shape... 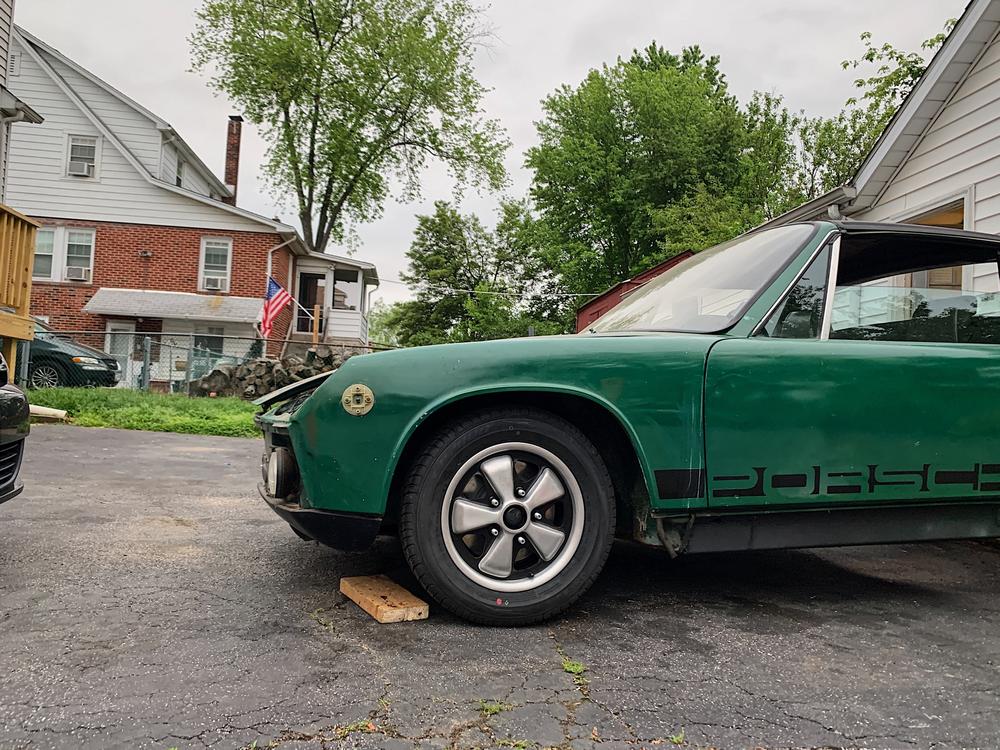
I like that low look on 14's.... I do see 15" in my future though.
Unfortunately something happened that made my passenger balljoint not seat correctly and sag down. I guess during the final torque session the BJ slipped out of the half- moon slot.
While trying to solve it, the 17mm BJ retaining bolt broke. 50 year old hardware.....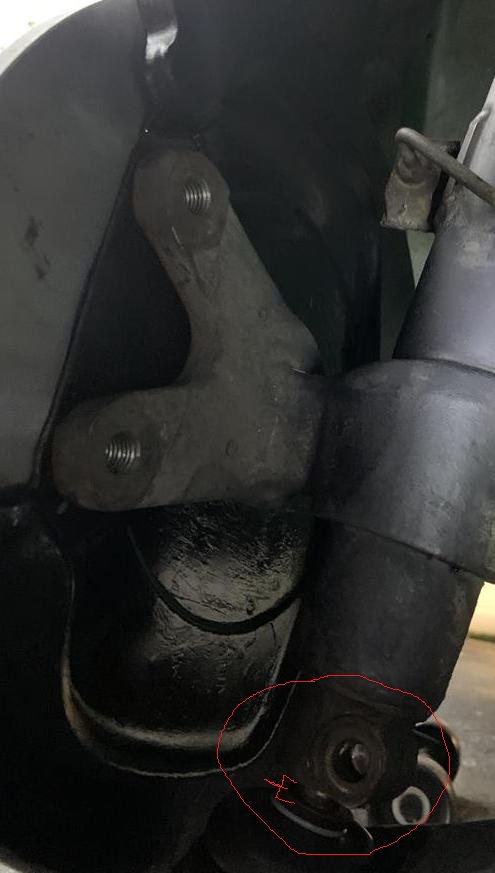
So now I will have to try and figure that one out. Hopefully I can weld a nut on the threaded section of the broken bolt and pull it out, adjust the joint and throw a new bolt in it. I don't want to have to buy a new spindle.
Hope you folks have a nice Memorial day!
Posted by: sixnotfour May 25 2020, 04:48 AM
The ball joint should be a C shape, V shape is for late style wedge bolt
Posted by: dereknlee May 26 2020, 07:18 AM
Jared - great build you have here! The car is turning out really nice. And those Fuchs: - good job. Looking forward to following this one.
-Derek
PS - love the wall art in the garage.
Posted by: jaredmcginness May 30 2020, 07:33 PM
Hey guys,
Cant win em all... Theme of today's post.
Pulled the heads off this motor: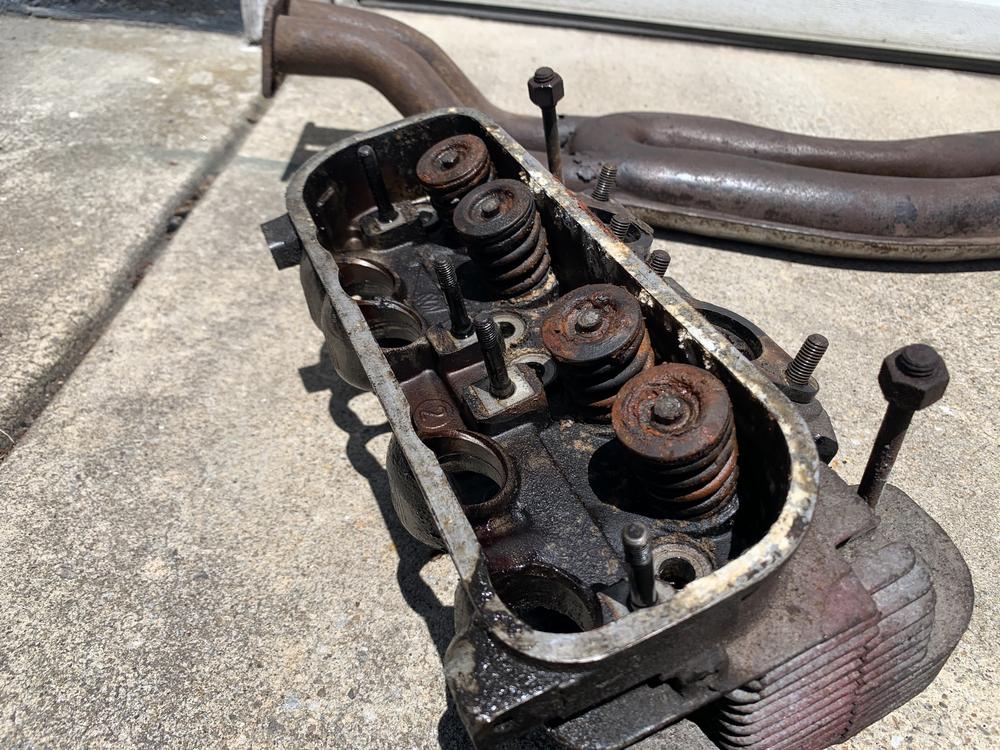
Yikes - lots of cylinder leakage. 3 out of 4.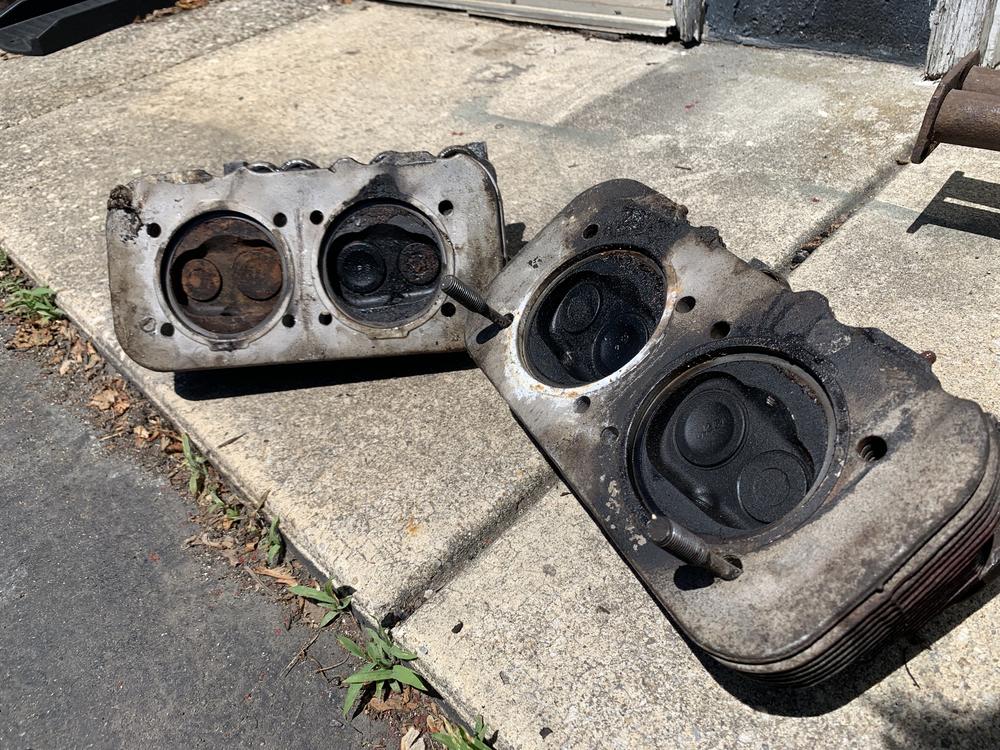
I decided to leave this to the pros and dropped these off today at a local air-cooled VW shop for a rebuild and refresh. 1 week turn around and much less expensive than a shop with a Porsche marquee on the door.
We planned on a valve job, bead blast, refresh, fly cut to 105mm registers and repair 3 exhaust stud receivers that are stripped. Tapping to M9.
Took a peek inside the case.... looks great, but the connecting rods have a powdery rusted coat? Must have had some condensation in there... brushes right off, but I don't think I can get way without splitting this case.
If I do split the case, it may be wise to have the same shop...er guy... check the case out, crank, replace bearings, etc.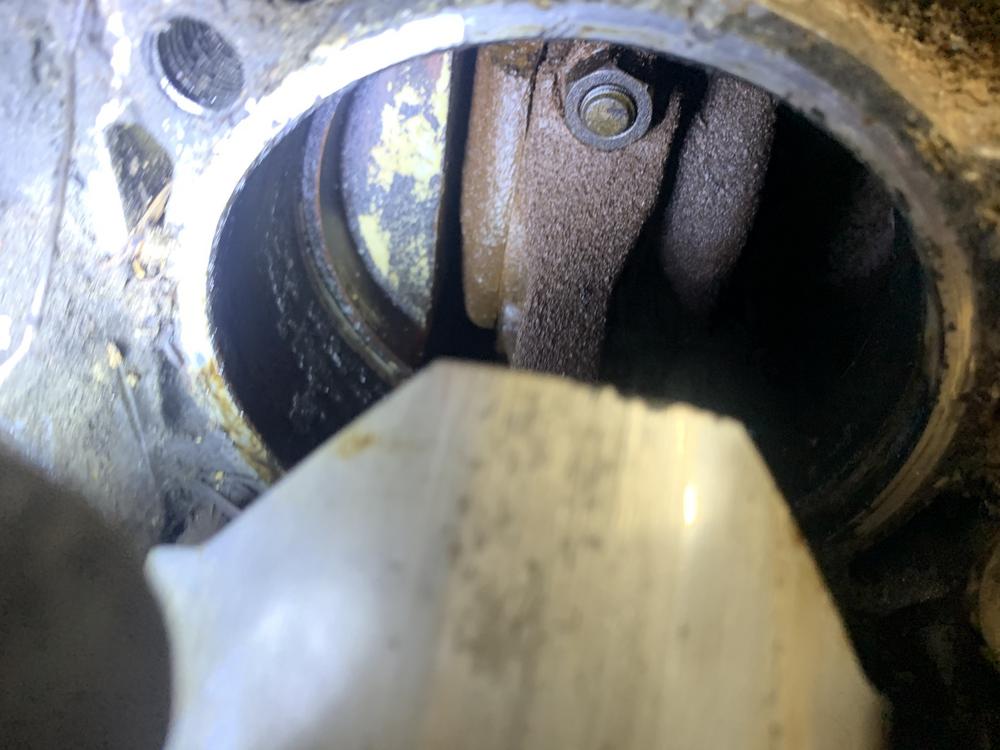
Part 2:
Before: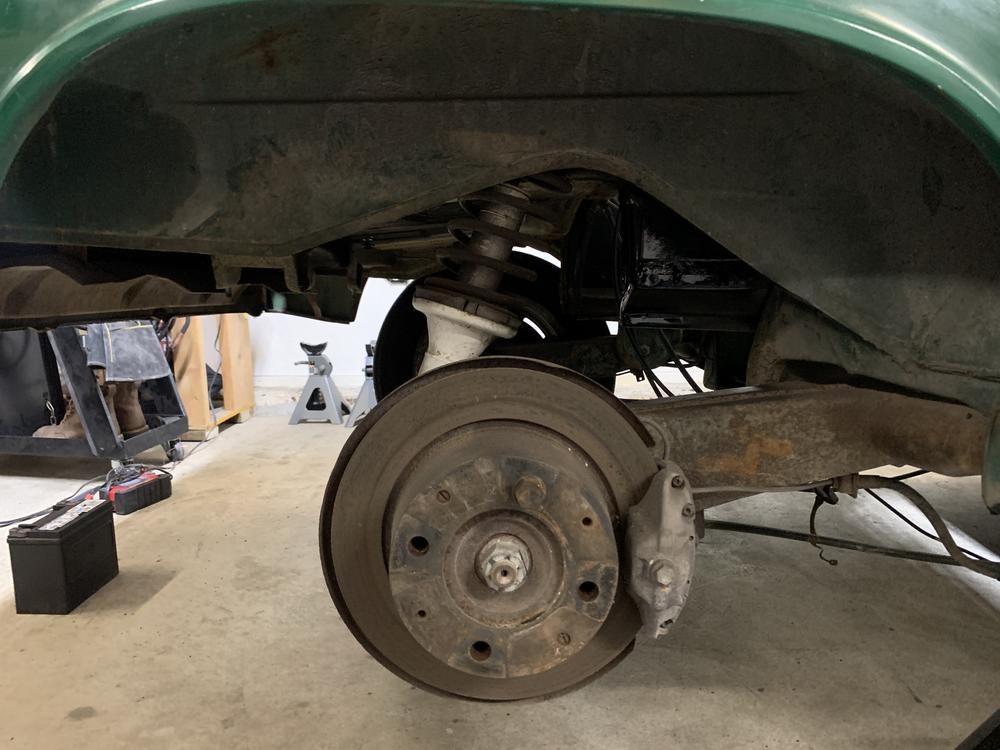
After: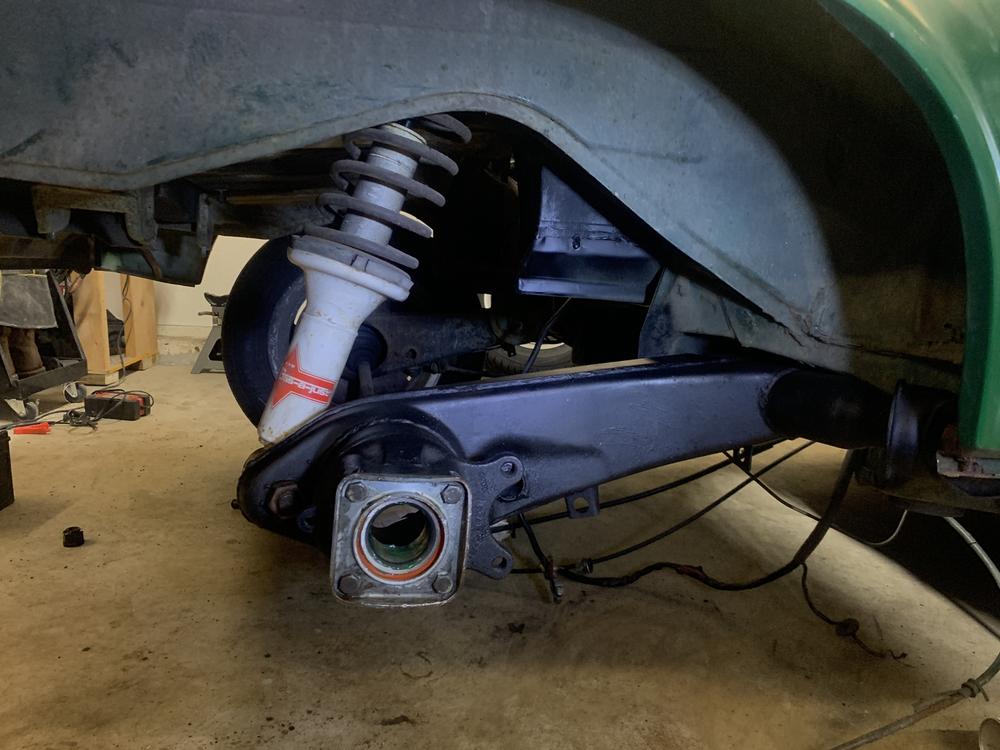
I have to say getting the rear hub and bearing out was a real bitch. This was top 5 most strenuous auto jobs I've ever done. I mentally prepped myself from readign the horror stories. it was worse. haha! Still have one side to go....
To TOP IT OFF I destroyed the new bearing when I was pressing the stub axle/hub in. All that work and it's wobbling.
I suppose I will remove both rear swing arms, take them to a shop, have someone else press out - and press in every piece. Do it right or do it twice.
I must have done 30 wheel bearings in my life and this is the one that goes bad.
Part 3:
In other news. Started rebuilding the calipers. I had a really stuck piston, used a hydraulic grease gun (Hydro is always more powerful than air!) (and safer, in this instance) attached the zerx fitting to the brake bleeder and she cruised right out.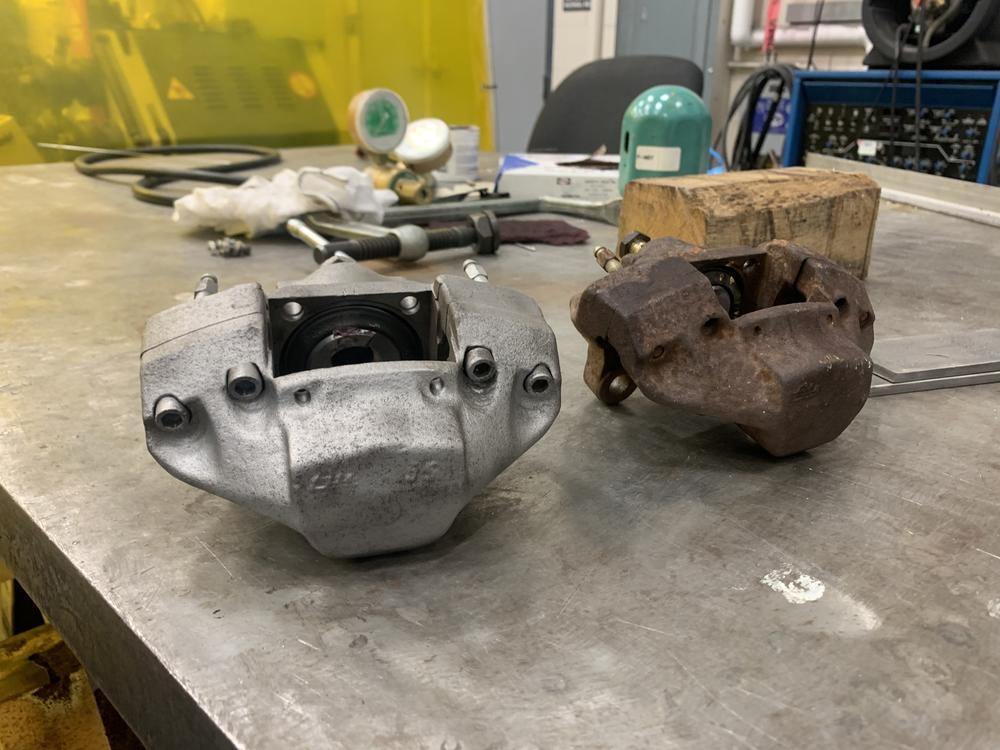
Welp.... Maybe at least we can take a peek at how these rears will look - even though I have to do all this crap again... This is what it's all about.
Posted by: mepstein May 30 2020, 07:59 PM
Did you torque the rear axle nut. It will wobble until its torqued down.
Posted by: jaredmcginness May 30 2020, 08:39 PM
Did you torque the rear axle nut. It will wobble until its torqued down.
I didn’t fully torque it. I still 2-3 threads of the nut exposed. I didn’t recall the hub wobbling at all while removing it, so as usual, I expected the worst. I’ll crank it down tomorrow.
Posted by: bbrock May 30 2020, 09:12 PM
Did you torque the rear axle nut. It will wobble until its torqued down.
I didn’t fully torque it. I still 2-3 threads of the nut exposed. I didn’t recall the hub wobbling at all while removing it, so as usual, I expected the worst. I’ll crank it down tomorrow.
And don't roll the car around until they are torqued.
This next part might just make you mad. If you do ever wind up installing rear bearings again, I highly recommend buy a cheap HF front wheel bearing kit.
It makes the bearing and hub install a piece of cake. You can see my install here:
http://www.914world.com/bbs2/index.php?s=&showtopic=307290&view=findpost&p=2696416
Posted by: jaredmcginness May 30 2020, 09:23 PM
Thanks Brent. I should have just done that.... and I was at HB today buying a bigger hammer!
Need to take a step back sometimes and think about working smarter (not harder.)
Bearing kit or not, that hub was on there ridiculously tight. I borrowed a snap on slide hammer, fixed an old rotor for mega torque - still took an hour 30, and I managed to pull the car 2 feet across the garage. I guess since the gym is closed... can’t complain about a work out.
Posted by: jaredmcginness May 31 2020, 09:30 AM
Mark saves the day, again.
Torqued the rear axle ALL the way to spec in the Haynes and the wheel spins free and smooth.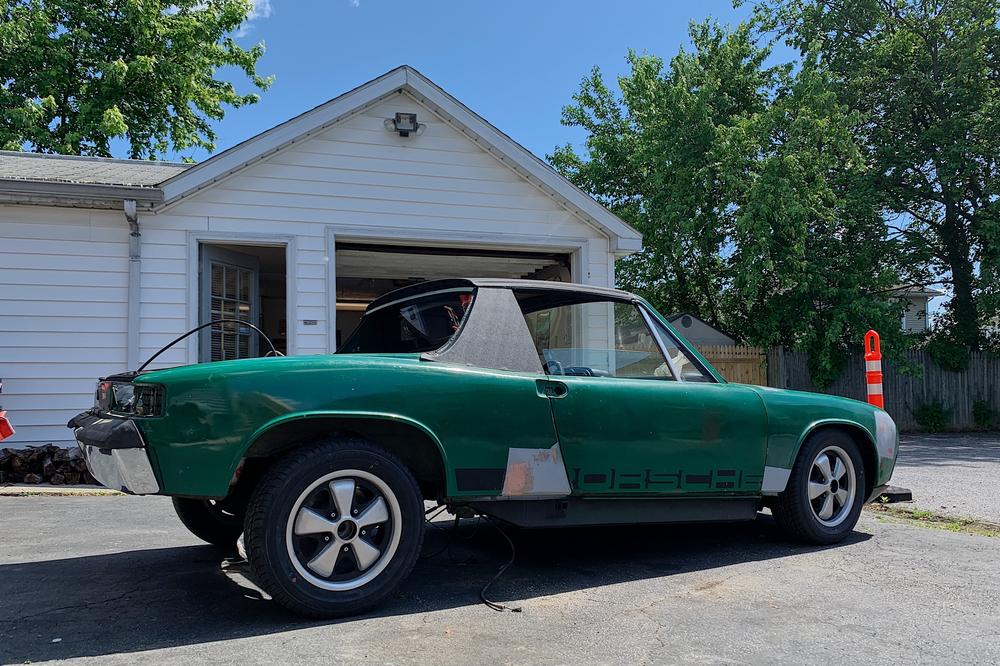
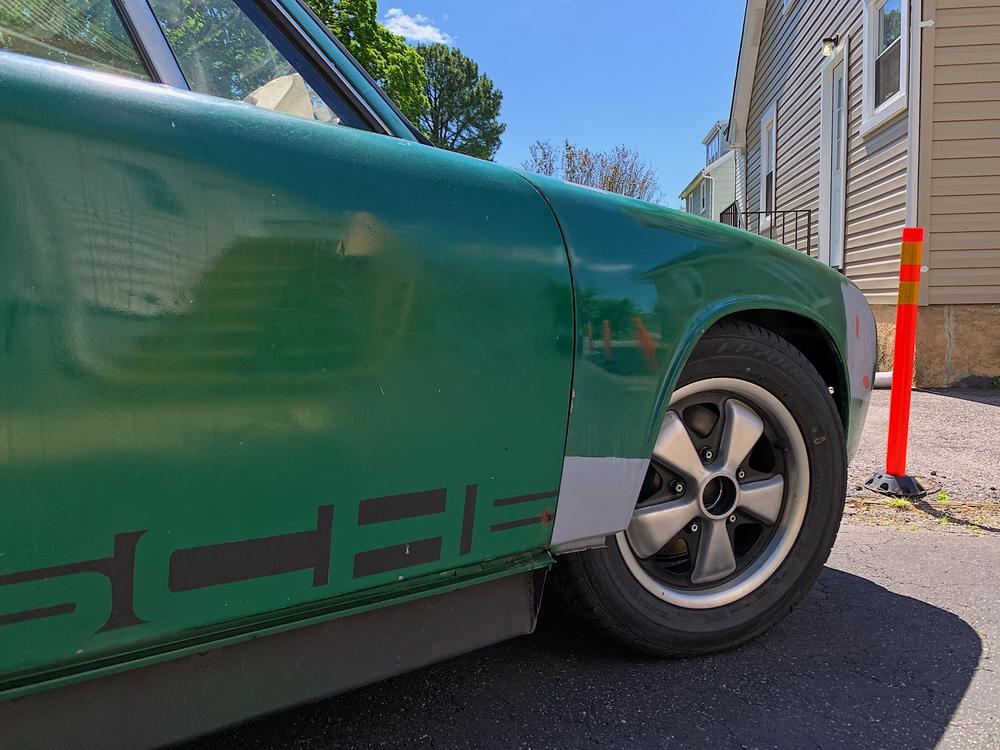
I'll tone my cursing down next time and refer to the manual
Jared
Posted by: JOEPROPER May 31 2020, 10:28 AM
More great progress! I think you will need to split the case on that engine. The rusty connecting rod looks bad...good luck.
Posted by: djway May 31 2020, 12:33 PM
Mark saves the day, again.
Torqued the rear axle ALL the way to spec in the Haynes and the wheel spins free and smooth.
I'll tone my cursing down next time and refer to the manual
Jared
My Mantra
If all else fails read directions.
Posted by: bbrock May 31 2020, 12:59 PM
I'll tone my cursing down next time and refer to the manual
Jared
It's not an either/or thing. You need both to make it work!
Posted by: jaredmcginness Jun 3 2020, 06:05 AM
Hey guys,
Couple photos from last night. I split the case, exciting.
(To recap, here was my original plan.)
-Tear down and inspect motor
- Collect parts for rebuild as 1911cc, carbed.
- Keep 66mm crank if its usable
- Replace cam if not usable with mild street
- Replace lifters (Maybe HD springs, not sure if needed)
- 96MM jugs and pistons
- Head rebuilt/bored (already at shop)
- New bearings and seals in case
With that being said, case was split for inspection last night. Lots of wear!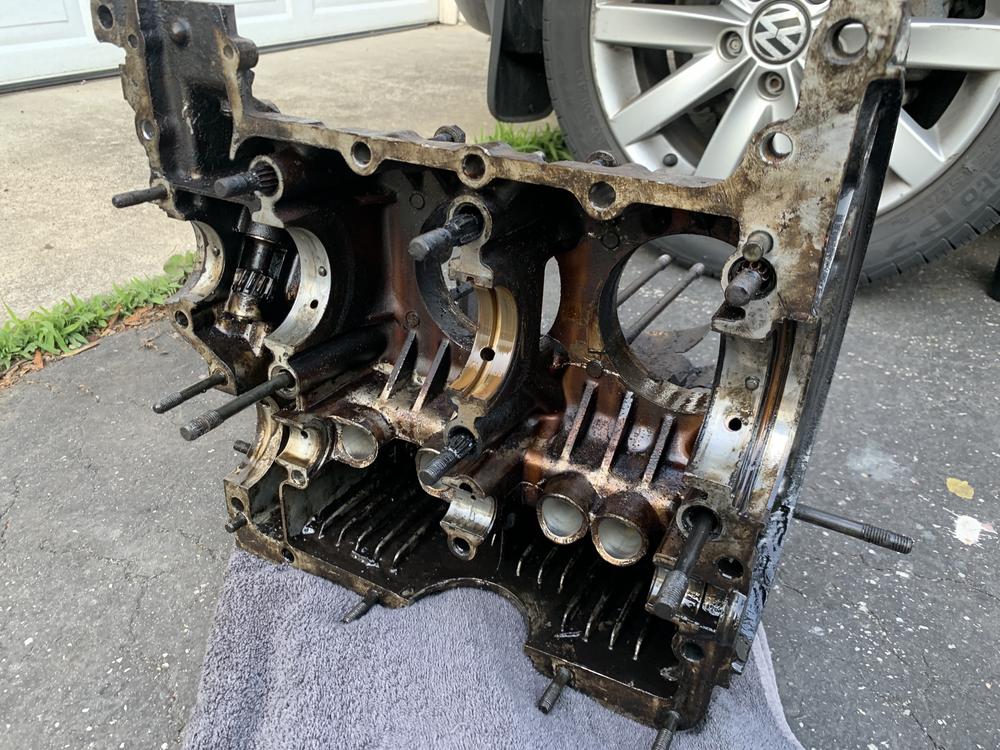
Cam looks really worn. Hard U shaped divot worn into every lobe. 5-10 of the gear teeth were... "pitted" and broken. something small probably stuck in there.
Crank, eh not sure. I need to have this inspected properly.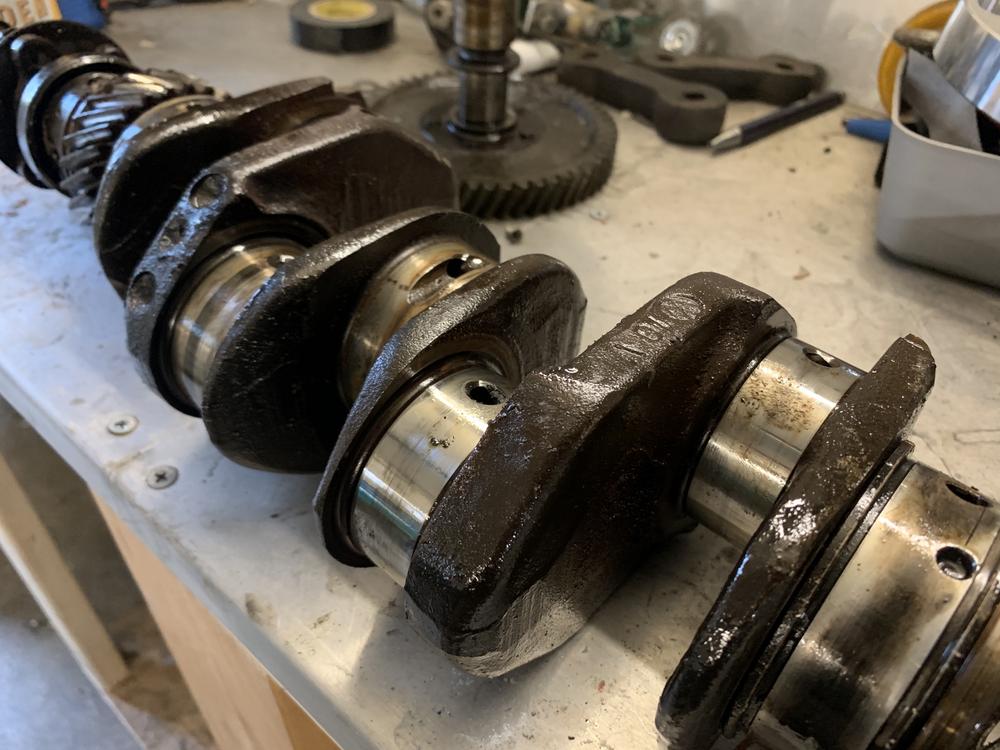
Screen is disgusting. Legitimately as thick as butter. There was some similar sludge on the bottom of the case, with fresh oil sitting on top. When I lifted the case to drain the last bits in there, some water dripped out too. Which explains the condensation and rust on the connecting rods, etc.
So I'll definitely need a replacement not rusty connecting rod set, certainly a cam (mild street options?), and a nice clean and bead blast of this case.
The photo you gotta take when you get your first aircooled case split. For the scrapbook: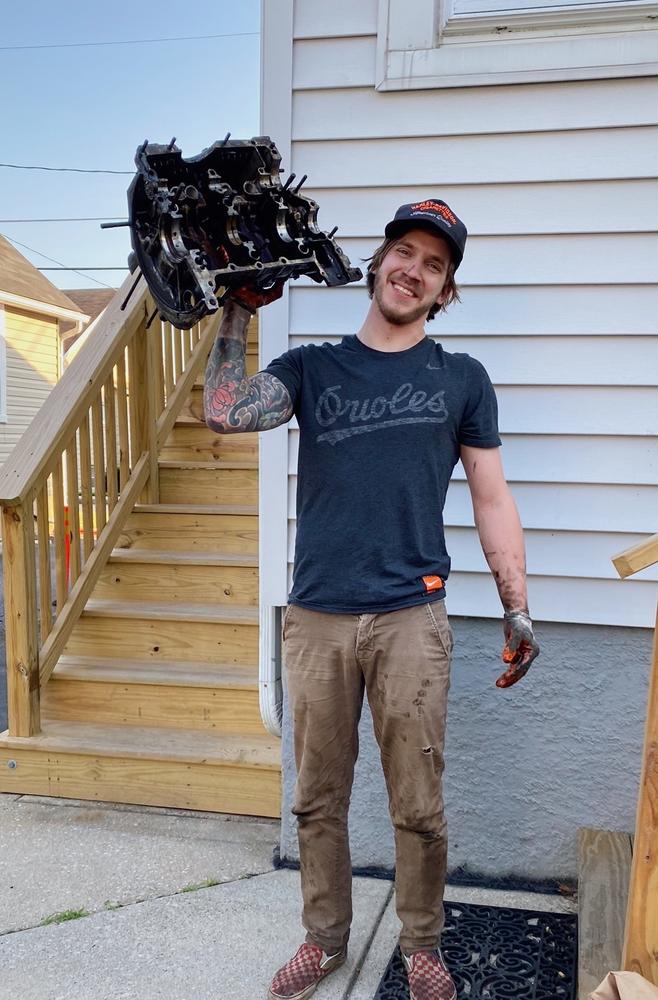
Cheers
Posted by: BeatNavy Jun 3 2020, 06:29 AM
Oh that is some nastiness on that screen
Nice job, the oil smudge on your nose is a nice touch
Might want to have your machine shop check the case, too. They can check to make sure the crank saddles are aligned (bore alignment) and that the cylinder registers are level (IIRC within .002 of each other) on each side.
Definitely disassemble, clean and inspect that oil pump (or replace). There are threads here somewhere about how the type 4 oil pump fails and what to look for.
Also, the Type 4 store sells a sealant kit that's pretty handy: https://lnengineering.com/type-4-store/type4store-products/engine-build-sealant-kit.html
They also had/have a gasket and seal kit for rebuild but I can't seem to find it just now. Their website is a bit jacked up right now.
Lots of places sell connecting rods, so hopefully you can find something rebuilt / reasonable. The H-beam are probably overkill on your budget. It starts to add up 
Posted by: jaredmcginness Jun 3 2020, 06:43 AM
Oh that is some nastiness on that screen
Nice job, the oil smudge on your nose is a nice touch
Might want to have your machine shop check the case, too.
Definitely disassemble, clean and inspect that oil pump (or replace). There are threads here somewhere about how the type 4 oil pump fails and what to look for.
Thanks!
I contacted the shop that currently has my heads and said I'd like to drop my case off for inspection, thrust cut, bearing replacement (oversized if needed), etc.
I have been reading my aircooled rebuild books, but I may actually have him do the bottom end assembly.... do it right or do it twice, right?
I'll add oil pump to the list. Victor Reinz full seal set is on my list too, Ill have to look up the sealants.... Thanks!
Posted by: BeatNavy Jun 3 2020, 06:46 AM
Also, I have some 1.7 connecting rods that came out of my running engine from a couple of years ago. I'd recommend replacing the bearings, but there yours if they can help with the rebuild cost.
Posted by: mepstein Jun 3 2020, 06:47 AM
Oh that is some nastiness on that screen
Nice job, the oil smudge on your nose is a nice touch
Might want to have your machine shop check the case, too.
Definitely disassemble, clean and inspect that oil pump (or replace). There are threads here somewhere about how the type 4 oil pump fails and what to look for.
Thanks!
I contacted the shop that currently has my heads and said I'd like to drop my case off for inspection, thrust cut, bearing replacement (oversized if needed), etc.
I have been reading my aircooled rebuild books, but I may actually have him do the bottom end assembly.... do it right or do it twice, right?
I'll add oil pump to the list. Victor Reinz full seal set is on my list too, Ill have to look up the sealants.... Thanks!
I have an extra case if you need it.
Posted by: jaredmcginness Jun 3 2020, 07:07 AM
Also, I have some 1.7 connecting rods that came out of my running engine from a couple of years ago. I'd recommend replacing the bearings, but there yours if they can help with the rebuild cost.
I’d take those, I was just looking on eBay for stock replacements.
@http://www.914world.com/bbs2/index.php?showuser=10825 I’ll let you know after case inspection. I feel this is fine and just needs a refresh. Though, eyes don’t read down to the thousandth, haha.
Posted by: BeatNavy Jun 3 2020, 11:33 AM
Also, I have some 1.7 connecting rods that came out of my running engine from a couple of years ago. I'd recommend replacing the bearings, but there yours if they can help with the rebuild cost.
I’d take those, I was just looking on eBay for stock replacements.
@http://www.914world.com/bbs2/index.php?showuser=10825 I’ll let you know after case inspection. I feel this is fine and just needs a refresh. Though, eyes don’t read down to the thousandth, haha.
They are yours. Just need to find a time/place to hook up.
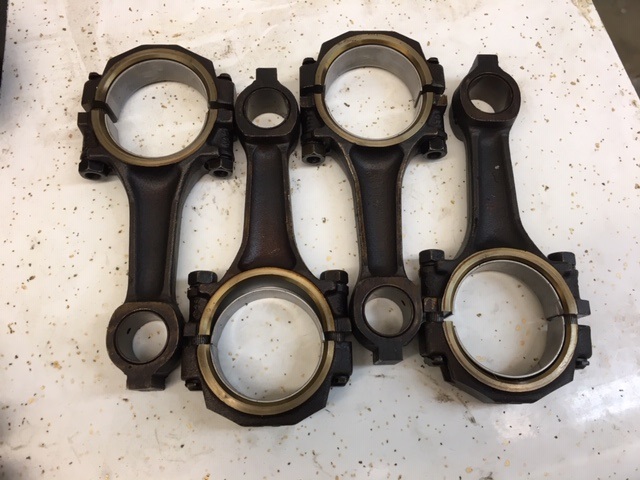
Posted by: jaredmcginness Jun 12 2020, 05:55 PM
Hey guys,
(BTW Rob, I'd love those rods, need to meet up with you soon)
Not a lot to update... stuff in waiting, ordering parts, etc.
Here's a few pics to browse through during your Saturday pancakes.
Updated my white board, since it was mostly complete - except the part about driving my car - and there still much left to do.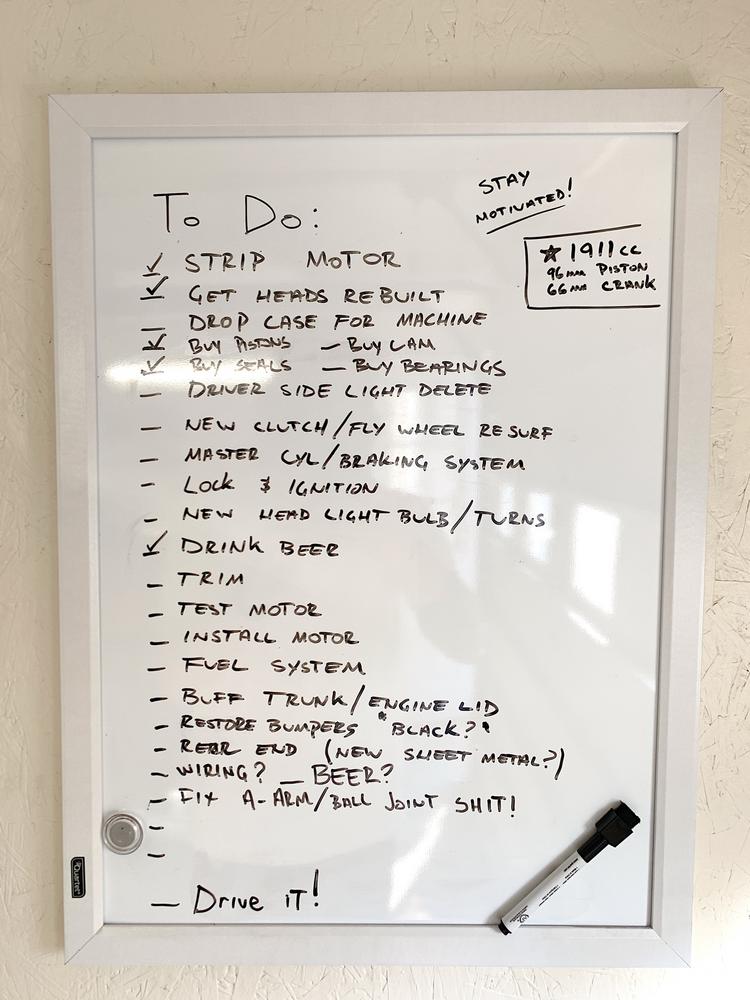
Got a clean pair of weber copies from Monte @http://www.914world.com/bbs2/index.php?showuser=16959 . Great guy and excellent packaging These should work well for me for now.
Met up with my buddy @http://www.914world.com/bbs2/index.php?showuser=10825 today and he set me up with an original early 4 ignition AND he re-keyed my door and trunk cylinders to match, massive thank you.
(also acquired the parts to fix my weird ball joint issue, will update on that later.)
I am glad to have the original part and get rid of the chincy ebay Brazil ignition.
Side question - is this enough clutch meat? Or should I just buy a Sachs kit? My nice calipers are at work.... haha, that's 3/16"
@http://www.914world.com/bbs2/index.php?showuser=16669 sent me some touch up paint, I think it will be a really solid match, once I buff my car properly.
This will be great for my wart deletes. No more primer! (and no more rustoleum hunter green )
Anything else..... ? Heads should be complete and ready for pick up on Monday or so, I will drop the case off for machine work/check then. Getting this motor under way.
I have a lot of 2 week on 2 week of work trips to the desert this summer that will slow progress down. But gotta stay with it when I can!
Sometimes I just sit there. Cant wait to drive it....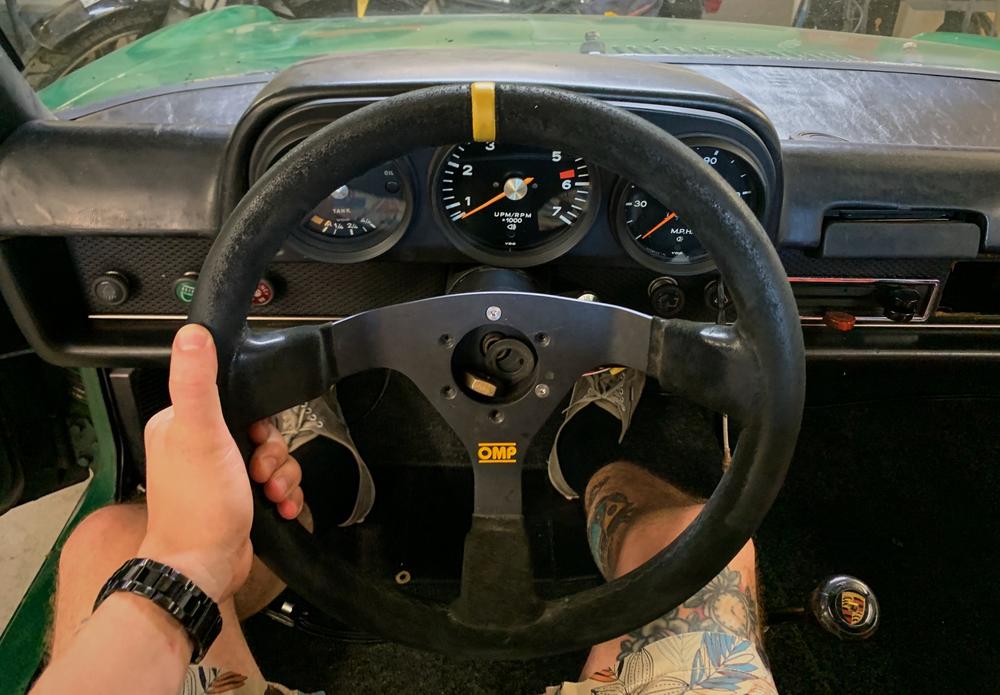
Massive thanks to everyone here and your kindness with parts, paint, advice, whatever. This is the most solid group of guys...
Posted by: BeatNavy Jun 12 2020, 06:28 PM
Glad you got the "drink beer" task accomplished Remember, that's a recurring task.
I'm pretty flexible on meeting up with those rods, and if we can't find a convenient place/time I can always mail them.
Posted by: jaredmcginness Jul 3 2020, 05:36 PM
Hey guys!
Back from a long 14 day work trip. Got a little bit done one the car.
For starters I finished the final 5 lug corner swap. I decided to do the bearings at a shop this time and not deal with slide hammers, false promises of freezing bearings and torching the receiver for an easy slide... None of that works! So press it was. No effort. 15 minutes.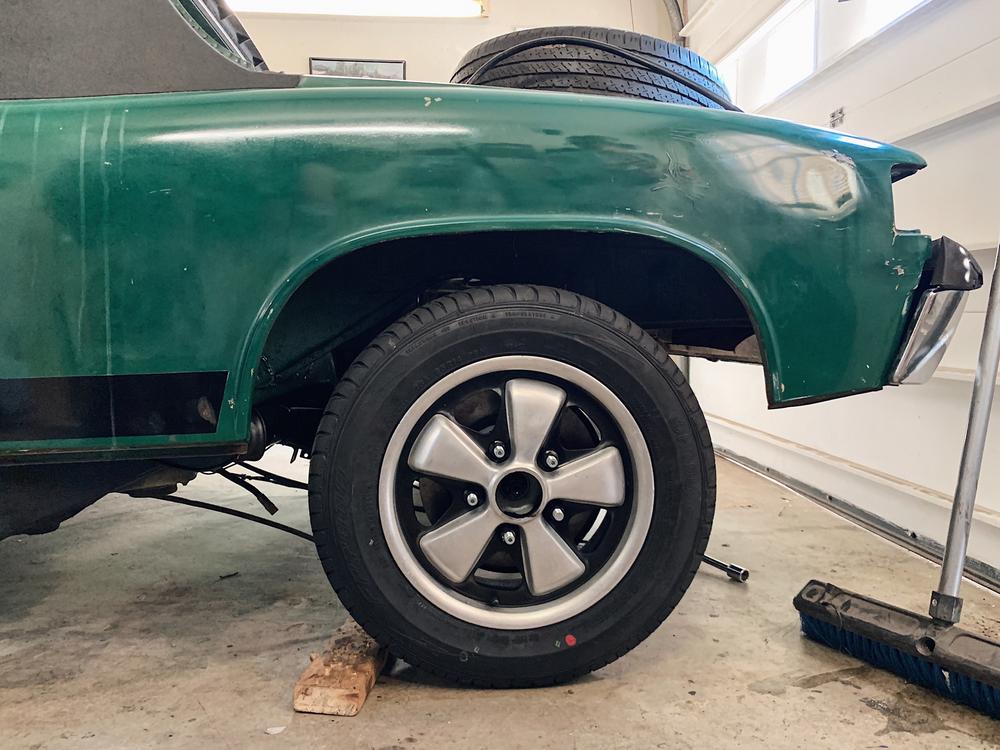
When I pulled the swing arm, I noticed this "5" painted on. I don't know what its for, but in some cases I like to keep original stuff the car came with around (except rust!)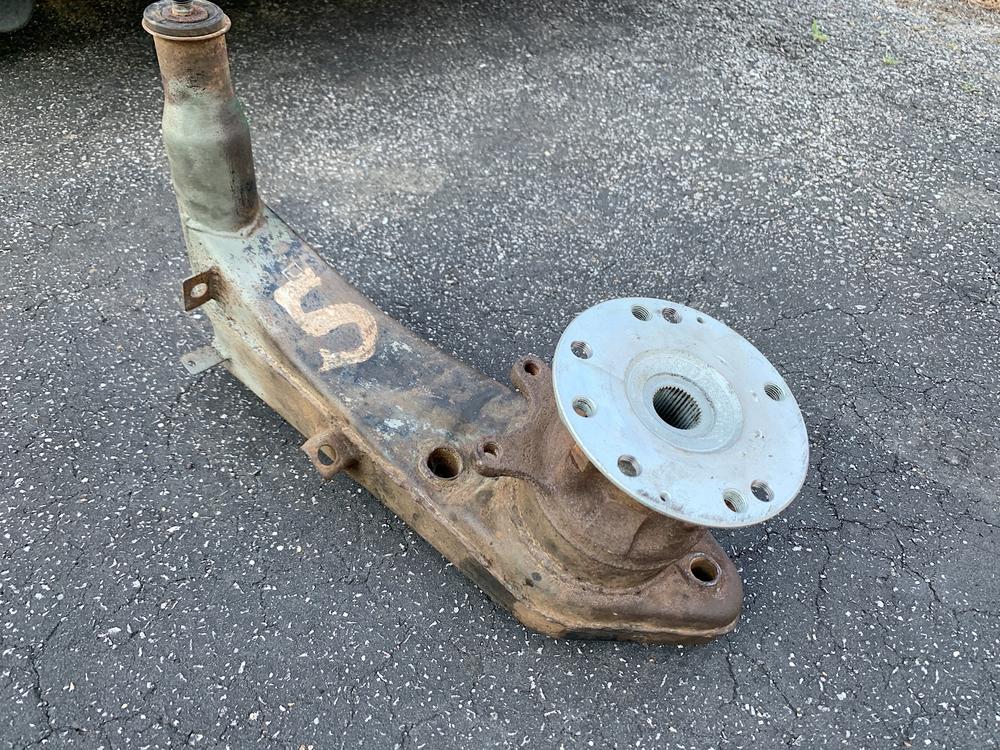
Sanded and painted the swing arm. Taped off the 5. I like it. 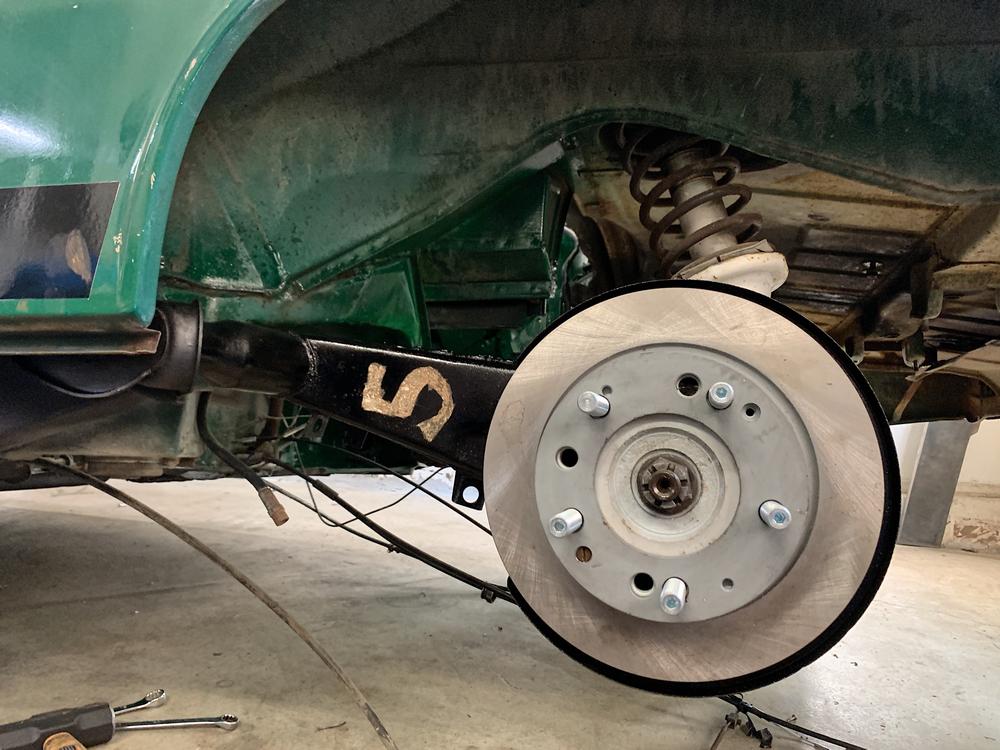
Busted my ignition switch while removing. Replaced that, installed my new key cylinder, and replaced the bulbs in the gauge cluster. Replaced door tumblers that Mepstein re-keyed for me.
Happy now I have a key that works for every door AND the ignition. For the first time in my ownership of this car, I turned the key over and lights on cluster the illuminated.
Small victories right?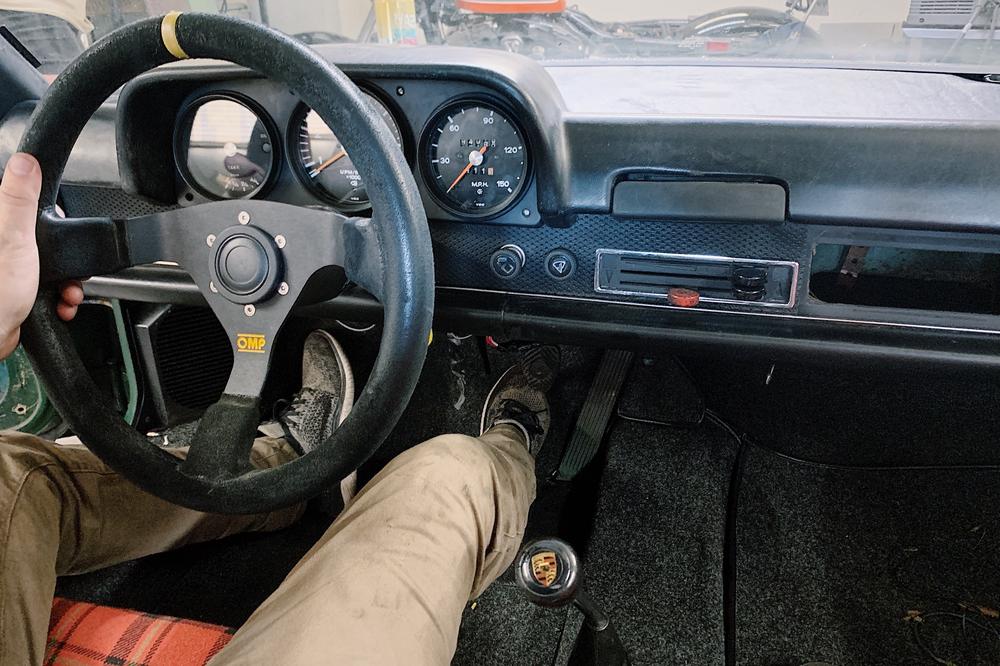
Part 2: Heads
Pulled the heads off this motor. Totally gnarly! Look at that cylinder leakage.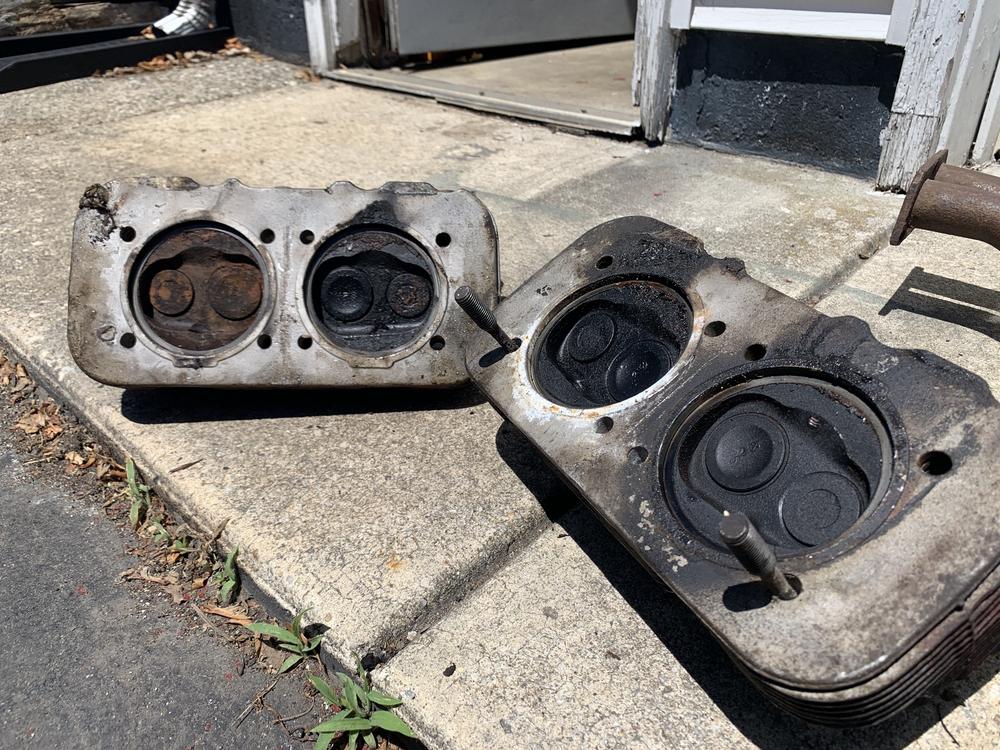

Just picked them up today. Fresh rebuild, stock valve size. Everything was (and needed) replaced. Bored out for dual HD springs and and flycut to 105mm for my 1911cc build.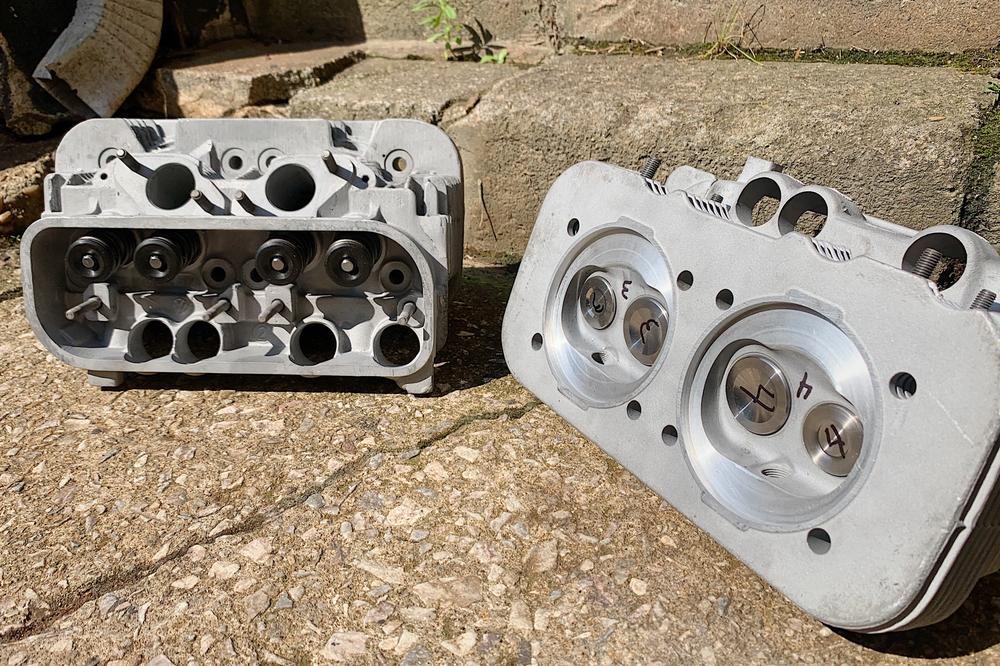
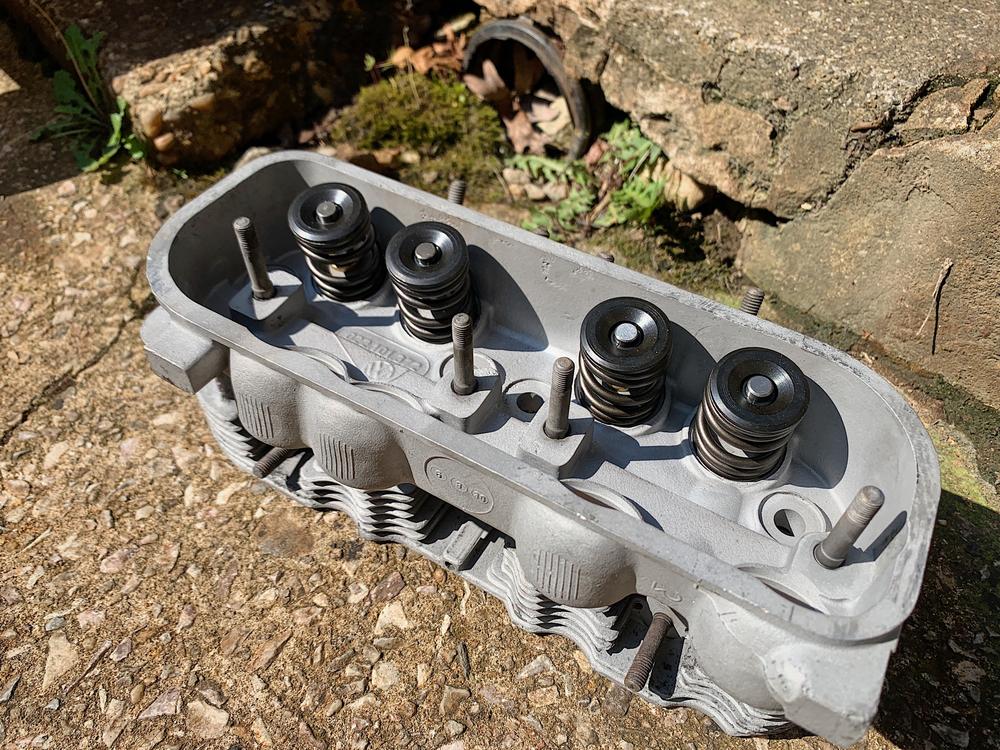
Very happy with these. Worth every penny. Cannot DIY it all!
I have already acquired:
Cam
Pistons + Cyl
Seal Kit
Lifters
Rebuilt heads and now dropped my case and crank off to get checked and assembled.
Good progress made.
Happy 4th to everyone.
Posted by: jaredmcginness Jul 18 2020, 02:52 PM
Hi all,
Havn't made an update in a while. Traveling for work sucks! Lots of little things have happened.
Went to cars and coffee today and lusted... how I wish I could afford a longhood.... Maybe I'll find the rust bucket 912 one day and give it the same treatment 
Engine case is at the builder and on the stand. Should have some nice updates this week.
I decided on 924 seatbelts.
Direct fit (for the most part). I like them, keep it in the same marquee.
I did not want to cut my early firewall for late seatbelts, and decided against the early style belts. This was a nice, inexpensive solution.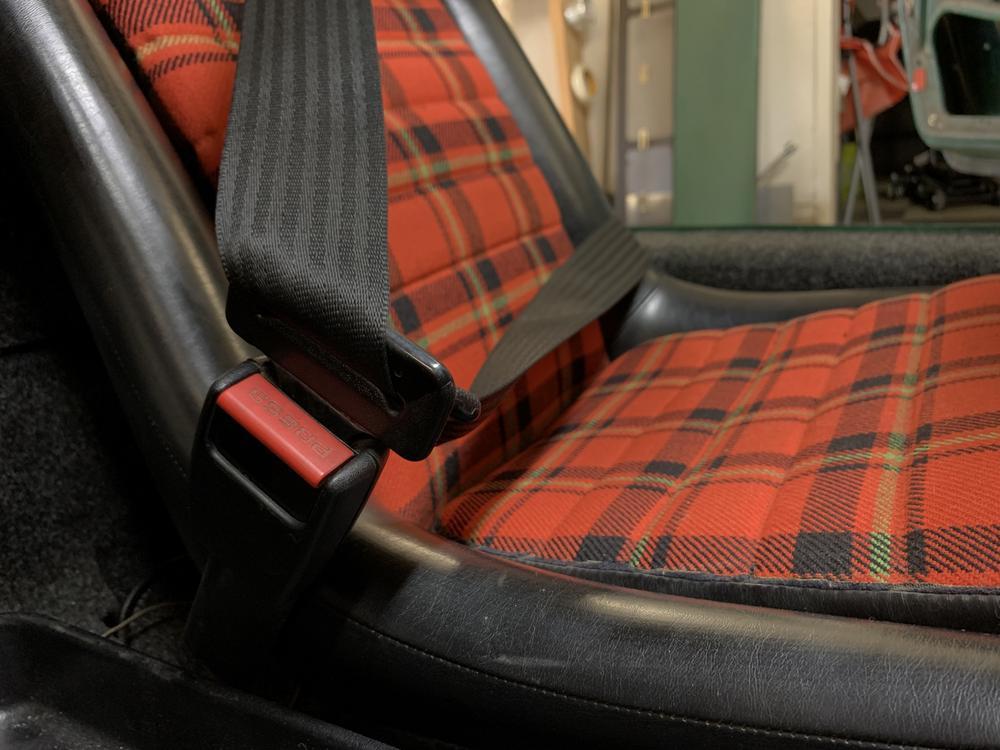
I decided to go to town on the tail section. Thanks to some advice from a few of you guys. I was going to put this off because I WANT TO DRIVE IT. But every time I look at it 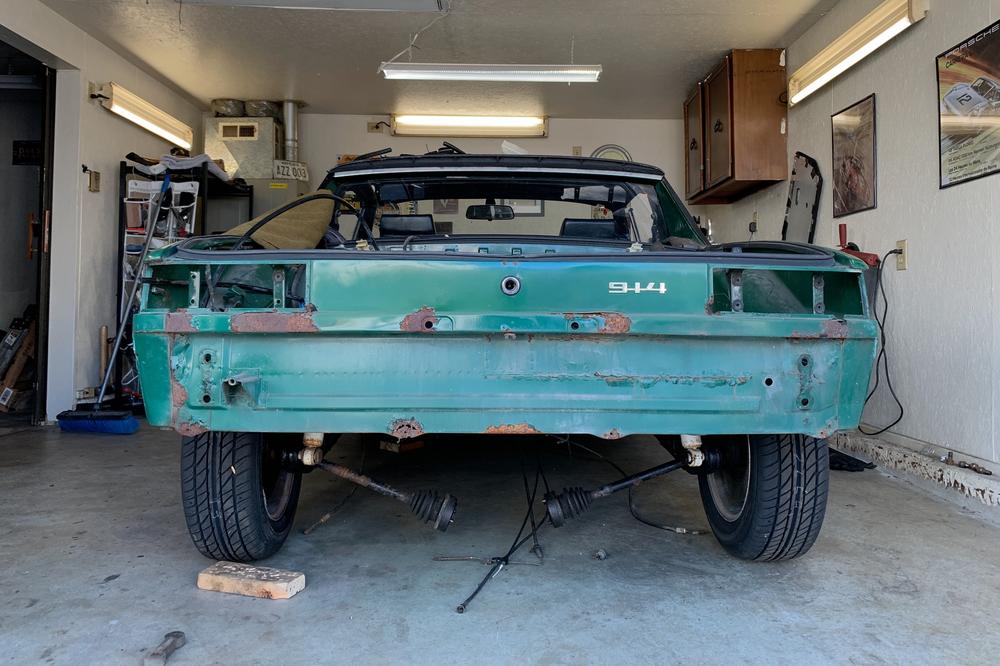
130ish spot welds to drill.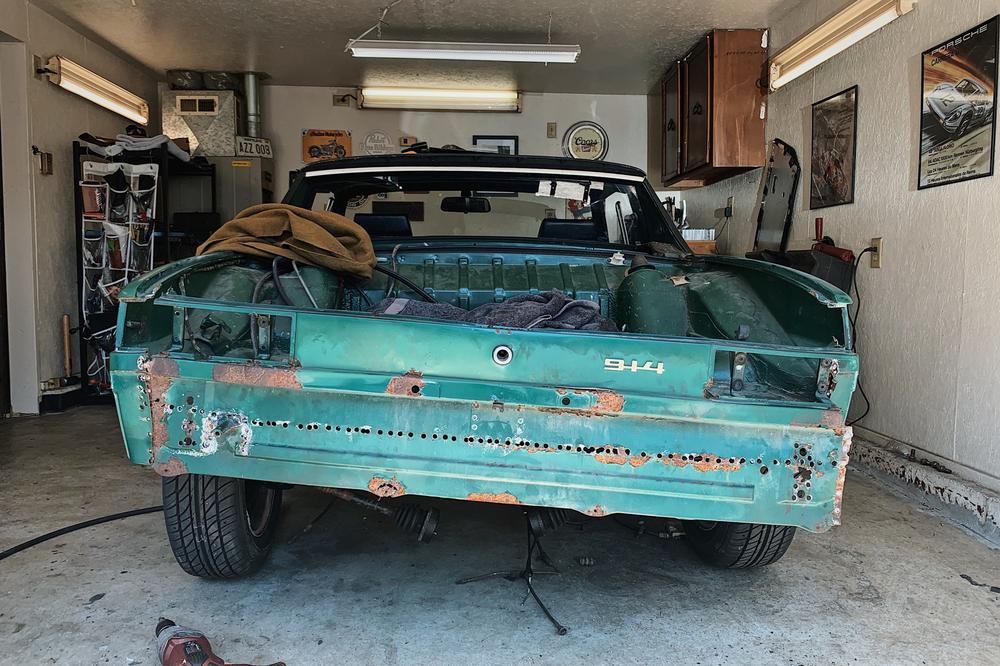

A few patches in the trunk need made, but overall its in nice shape. Just needs a hose down.
If anything, maybe good for some garage wall art.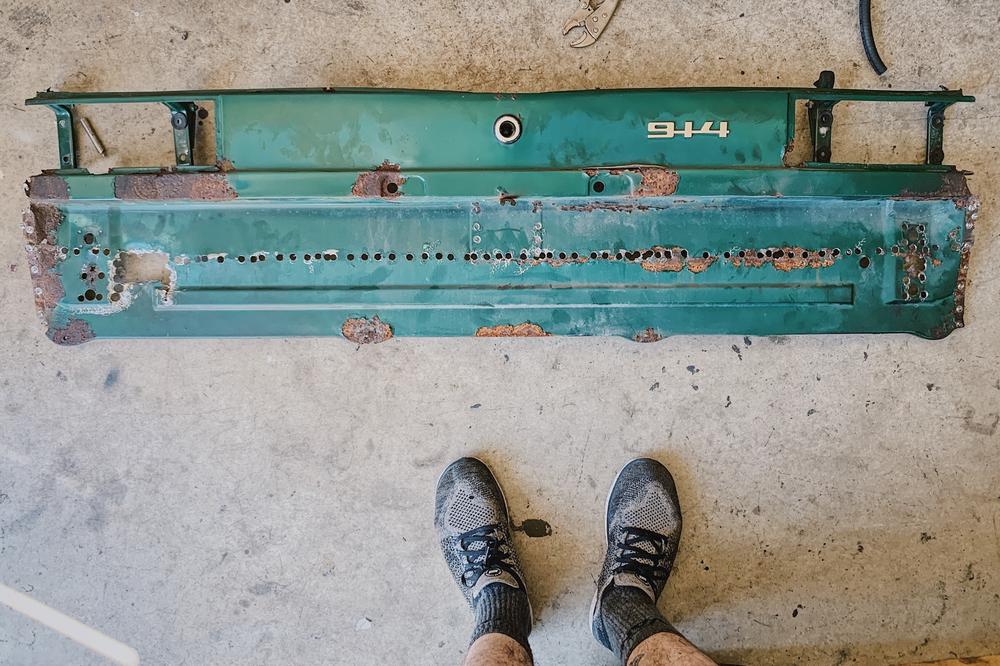
A solid and sweaty 5 hours of my Saturday. New tail arrives Tuesday.
I'll have to finagle something with that tow hook area.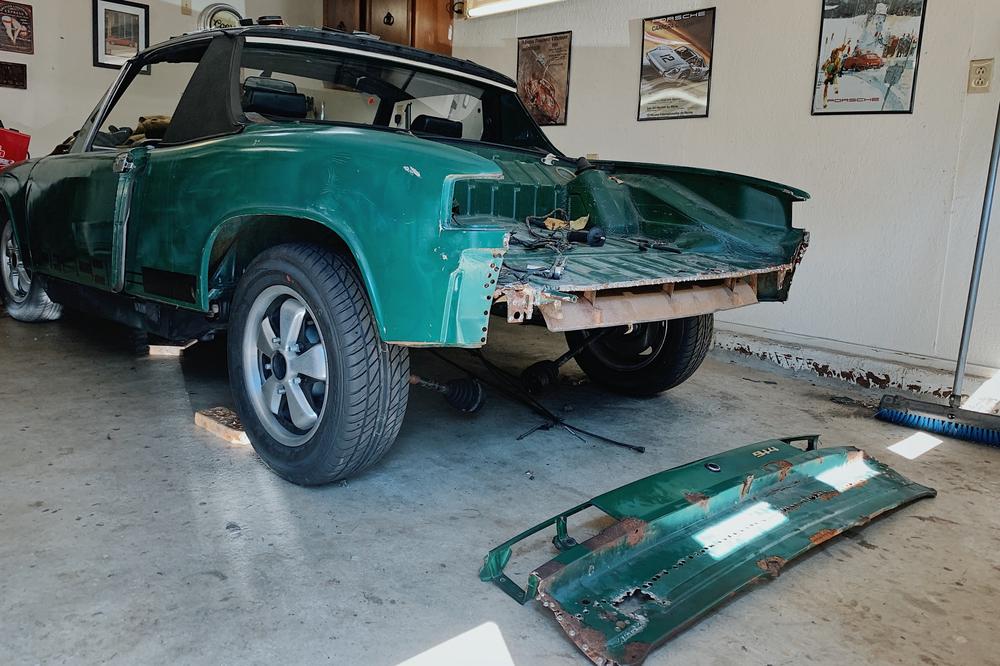
Have a great weekend!
Posted by: Cairo94507 Jul 18 2020, 04:45 PM
Posted by: nditiz1 Jul 18 2020, 04:58 PM
Excellent!
Which Cars and Coffee did you go to? Huntsville?
Posted by: jaredmcginness Jul 18 2020, 05:34 PM
Excellent!
Which Cars and Coffee did you go to? Huntsville?
Hunt Valley Horsepower. Over in Cockeysville. So probably yes. It’s unofficially going right now.
Posted by: bkrantz Jul 18 2020, 08:54 PM
Good choice to replace that rear panel.
When you fit the new one, watch the spread between the fenders. The distance from left to right fender should be constant.
Posted by: jaredmcginness Jul 18 2020, 08:59 PM
Good choice to replace that rear panel.
When you fit the new one, watch the spread between the fenders. The distance from left to right fender should be constant.
Thanks. I made that other post in Garage and read a few of your pages for tips before drilling. I will verify factory dimensions before welding. 51 and change I believe.
Posted by: jaredmcginness Jul 24 2020, 05:44 PM
Hey Ladies!
Happy Friday. Minor update, if you're bored... or is it me that's bored...
Received the new tail form Stoddard. Poorly packed and stapled directly into the metal, but I'm easy. We'll live. 6000x better than what I had.
Check it out: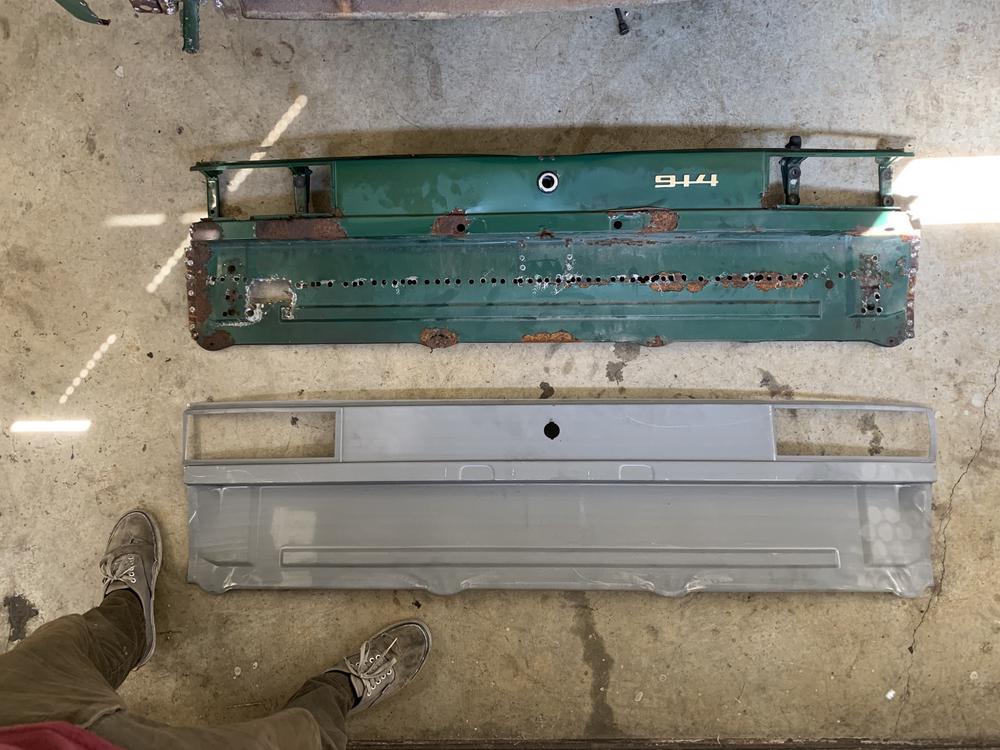
Some rust to address... same on both sides:
Repair under way, little more grinding to go...
I've said that a lot huh?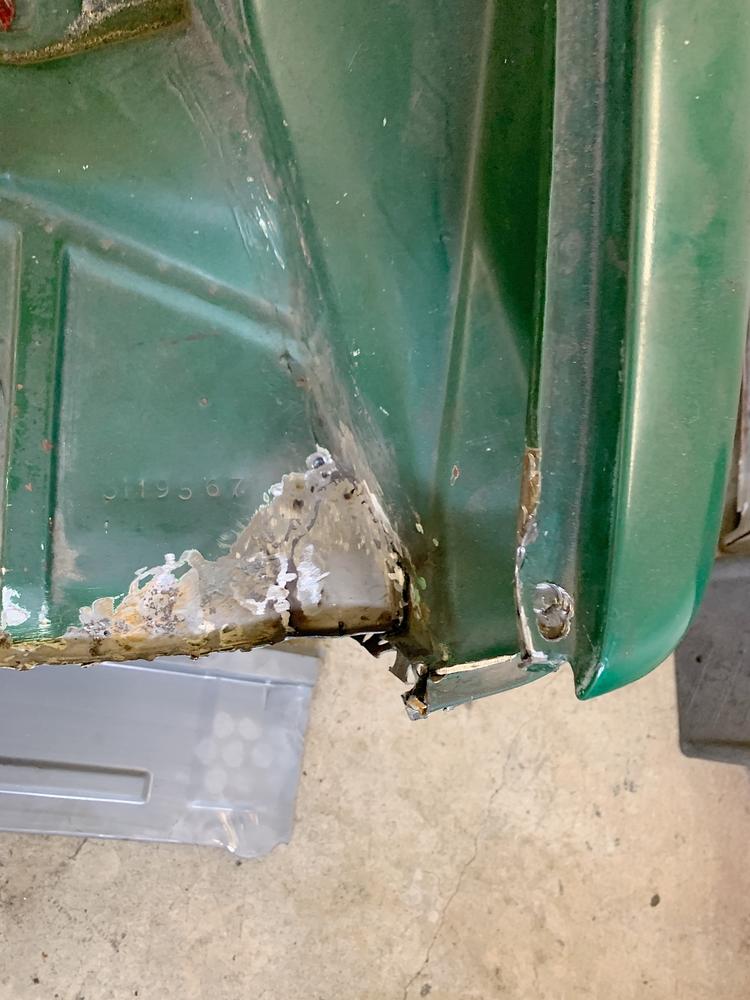
Test fit: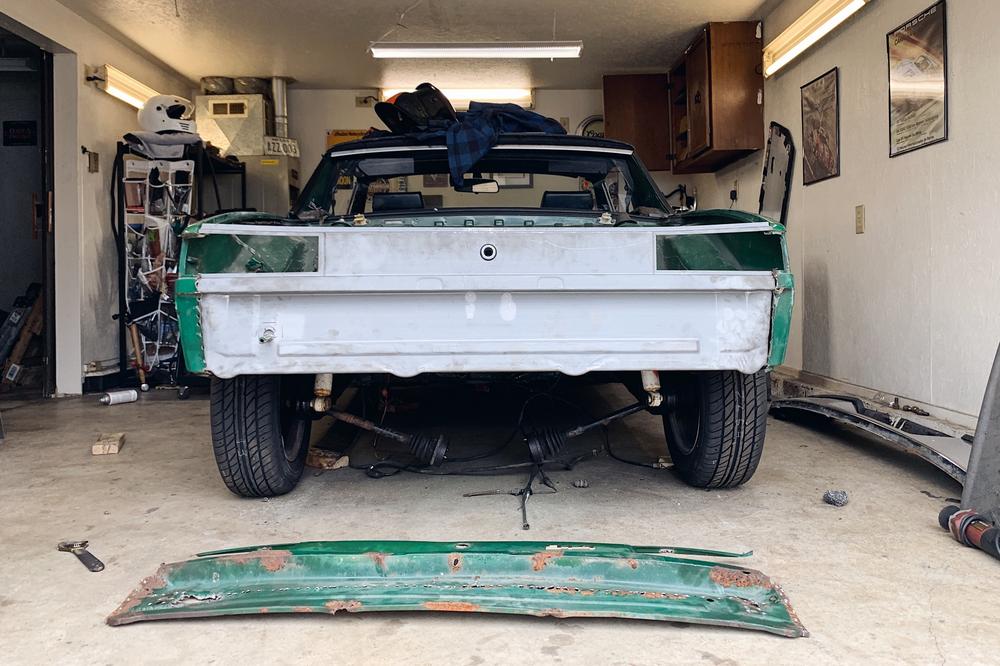
I gotta say, to me the pulling the quarters were a total pain in the ass. I believe @http://www.914world.com/bbs2/index.php?showuser=23343 said it was "minor surgery" in his build thread, I found that to be an understatement.
Tightly sandwhiched in there. Quarters have seen better days before this afternoon...
Looking decent inside. Some hammer and dol- *ahem*... 2x4 on the flange and it's looking like a smooth edge.
Lot of little parts to transfer to the new tail... as seen.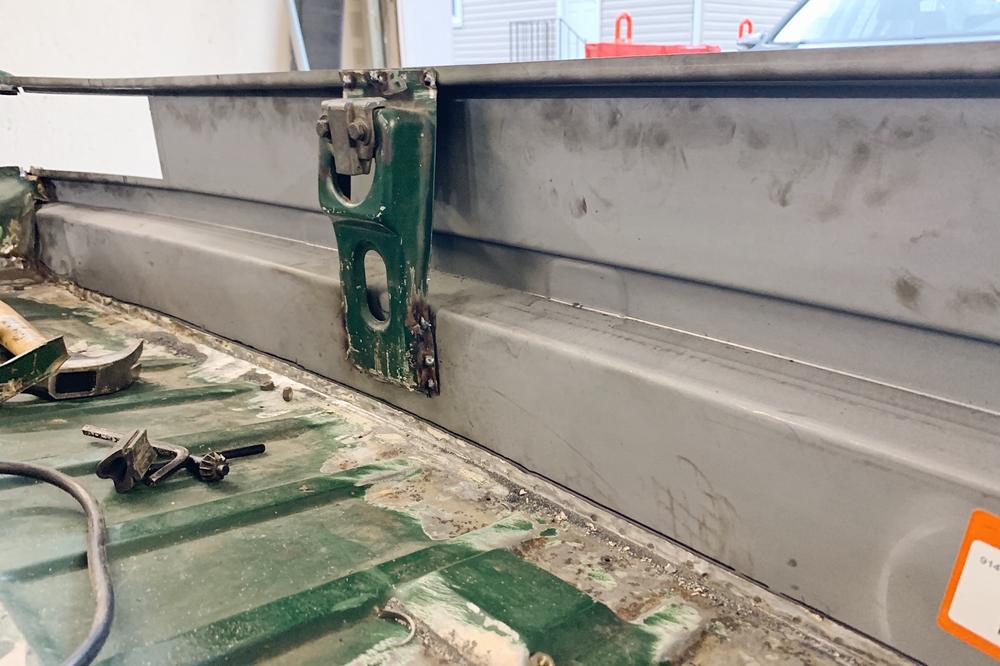
Sharpie line is marked so I have a good idea of where to drill the tail for spot welds.
Getting there good buddies: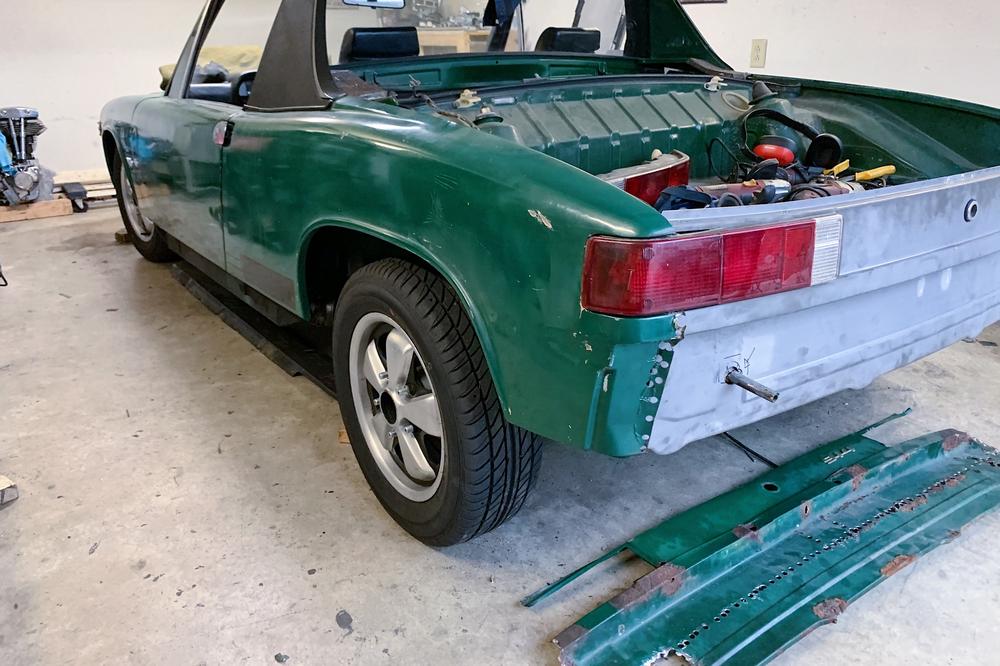
Probably have another go at it tomorrow.... some drilling, welding and body work in the sights for the weekend.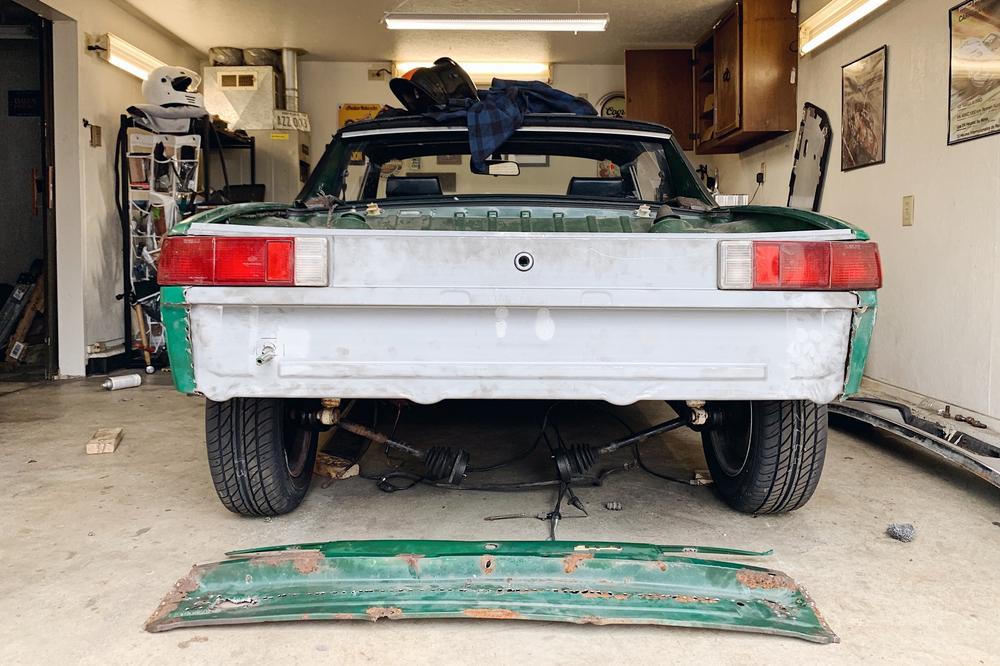
So next plan is; get the alignment (gotta shift over about 1/4" to the left)
drill spot welds, adjust the quarters to not look like , weld that mother in, Once aligned, weld the tail light brackets in. and finally, shape a new tow hook support of some kind.
Thanks for reading!
By the way: if anyone cares about side projects... I sold my '87 Harley Sportster and picked up a '79 Shovelhead 80".
Wanted to go a little bigger, wanted a kick start, want a simple, narrow 70's style chopper... you know how it goes
Winter project. Gotta get the 914 on the road before I dump a bunch of money into a scratch built Harley.
Gotta get the photo with your first big twin! Not even going to try to look like a tough guy, these are REAL heavy!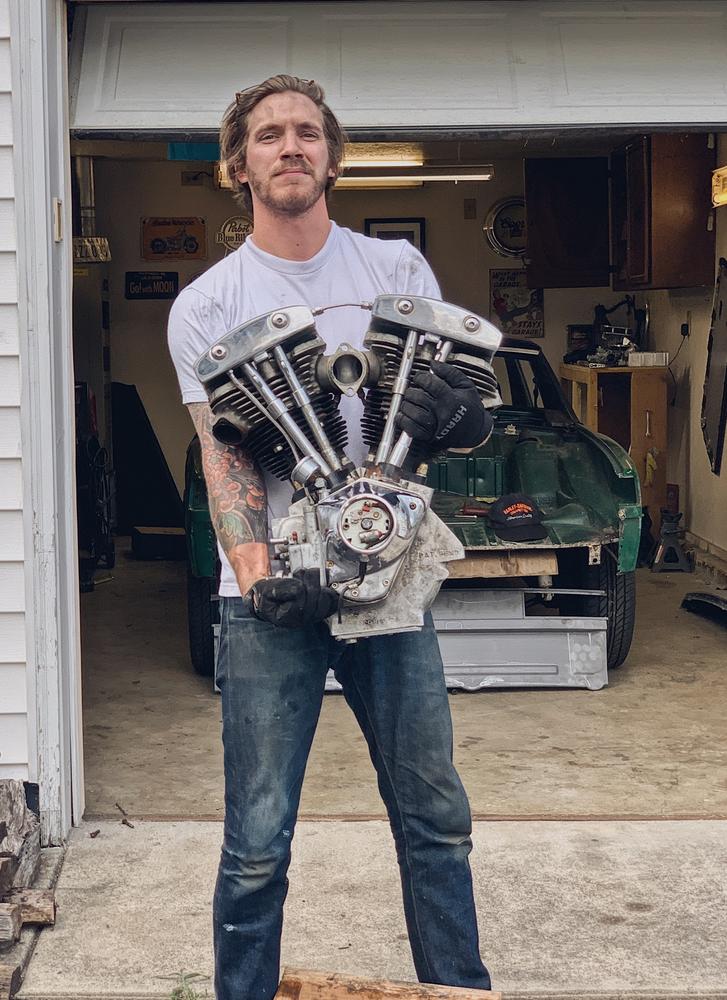
Have a nice weekend!
Posted by: sixnotfour Jul 24 2020, 06:15 PM
HOG....
Posted by: bkrantz Jul 24 2020, 09:40 PM
Looking good. One thing I figured out after a while, the upper edge of the rear panel, when viewed from the back, should make a straight line across from side to side (just like the trailing edge of the trunk lid). In your photo with the lights mounted, it looks like the ends turn up where they meet the fenders.
Posted by: jaredmcginness Jul 25 2020, 04:41 AM
Looking good. In your photo with the lights mounted, it looks like the ends turn up where they meet the fenders.
Thanks ! They are just wedged in there for now. I need to trim the edges and level it all out flat. Nothing is permanent yet.
Posted by: jaredmcginness Jul 25 2020, 05:58 PM
Here comes the most photos ever posted of a tail section.
6 hours of work today.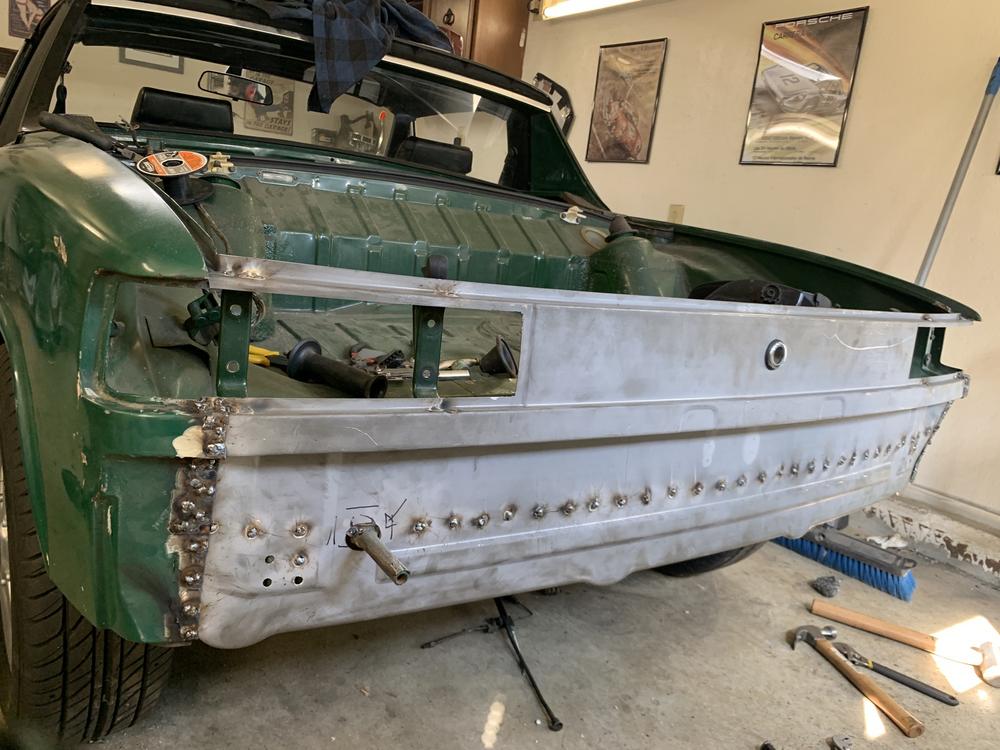
Good hour of grinding.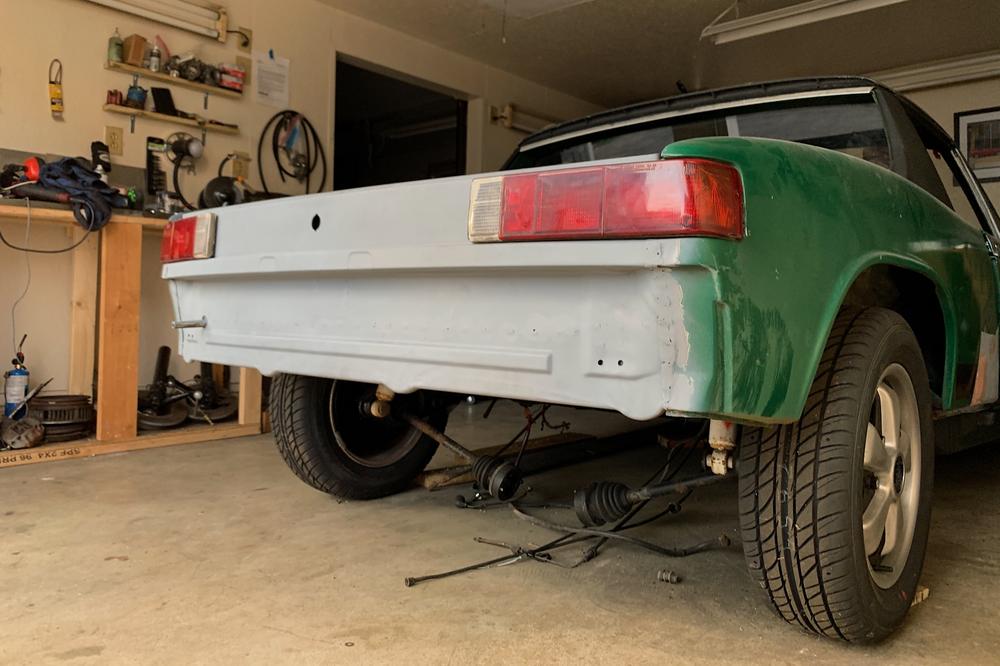
Skim coat of self-etcher.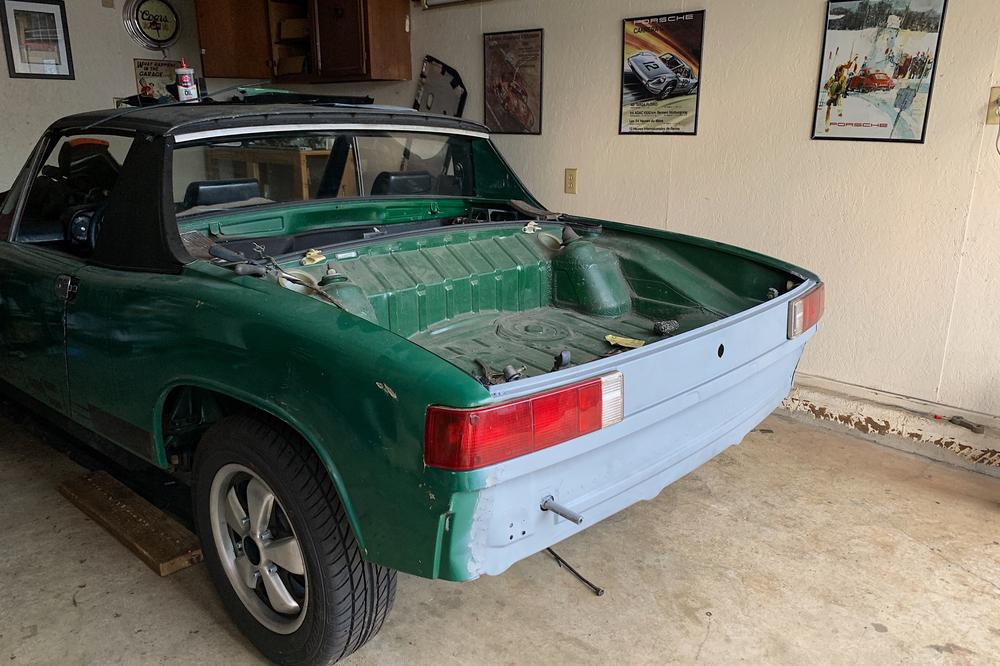
Looks pretty good! 90% there... a few holes to fill, and some shaping.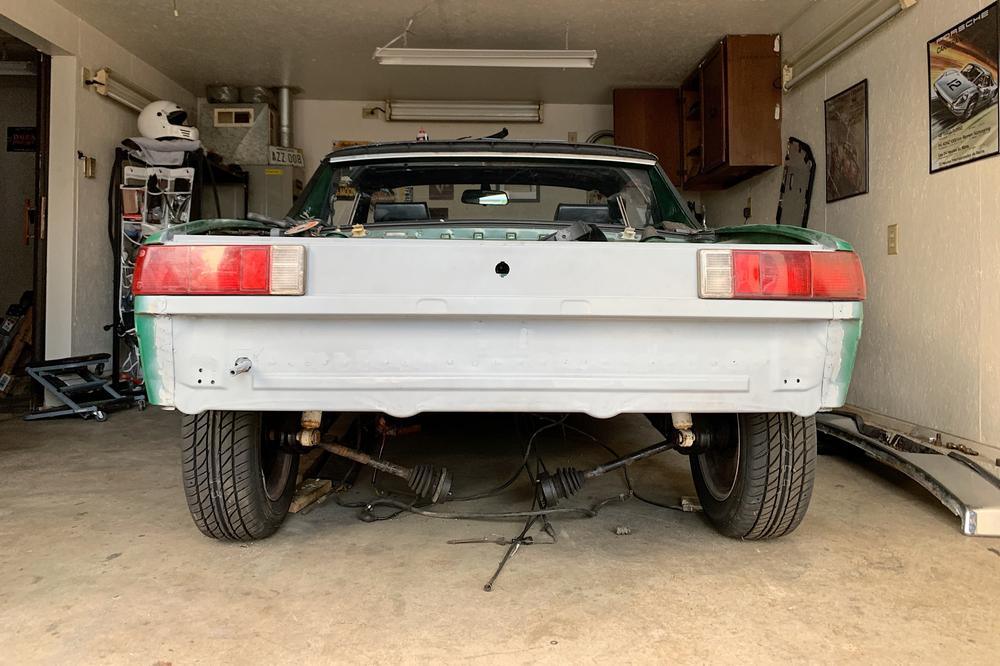
Cheers.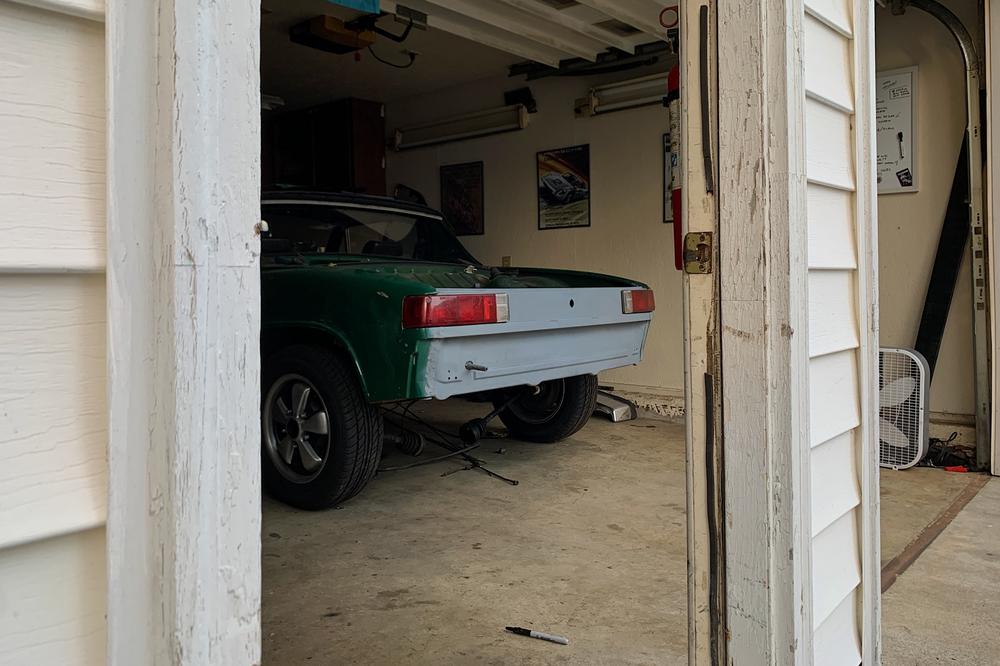
Posted by: bkrantz Jul 25 2020, 08:52 PM
That looks right--nice work.
Posted by: Cairo94507 Jul 26 2020, 06:41 AM
That looks terrific. Your car is coming right along and you will be driving in no time.
Posted by: jaredmcginness Jul 31 2020, 10:21 AM
Thanks everyone.
No huge updates from the last few days. I removed any old dirty seals, degreased and cleaned them, such a big difference. Simple green and Dawn soap,
surprisingly still pliable and nice. I will use these. Most of these were engine bay and tin seals. Here's a before and after: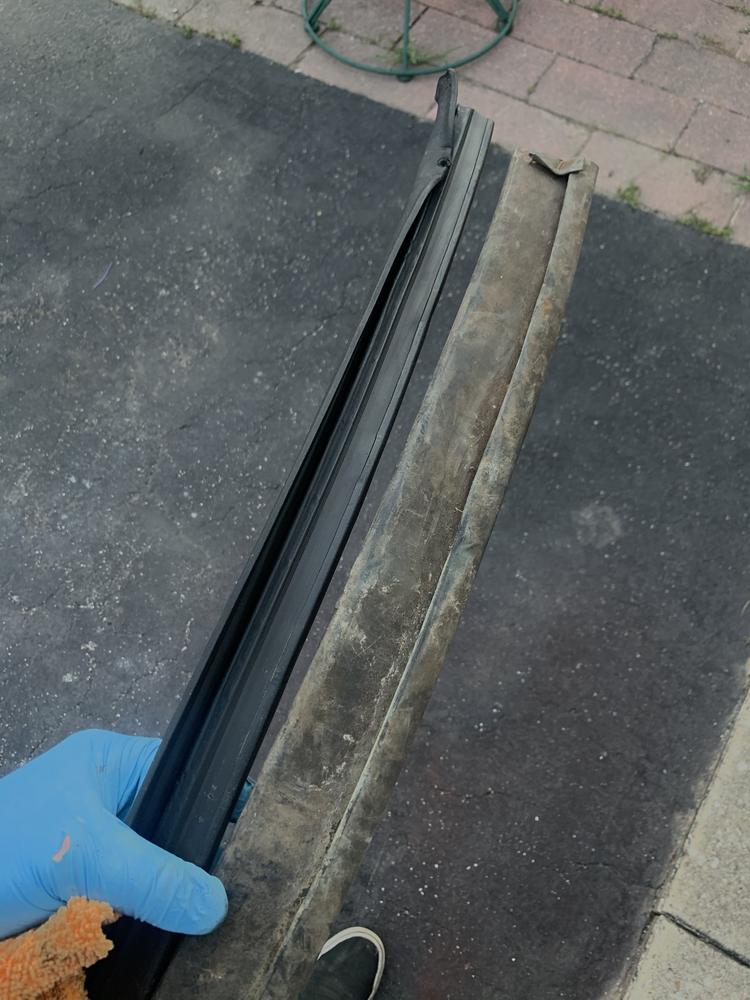
I installed a new master cylinder... I removed the lines through the trunk and installed them on a bench. I don't know how anyone could seat these inside the car.
Unless I did it incorrectly, it was a pita and required a lot of brake fluid lubricant.
My girlfriend found a great technique for popping the flares flush into the grommets. Credit where it's due, I couldn't figure it out!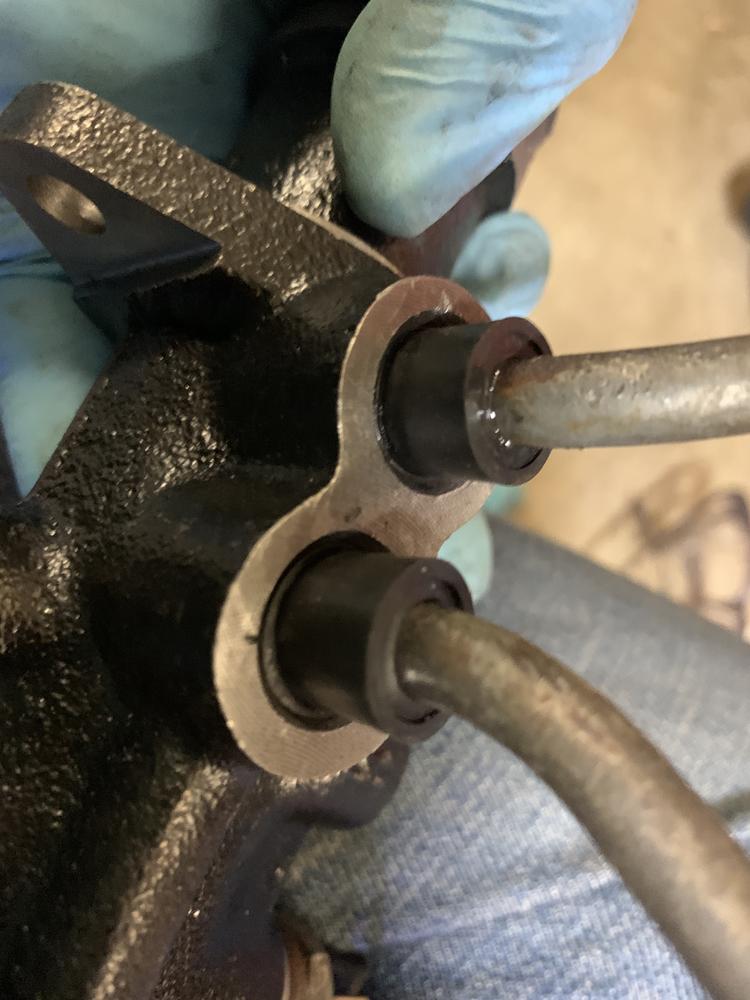
After removing from the bag, I realized I mistakenly ordered a 23mm. I'm not sure if I should try this... or nut up, toss it and put a 19mm in.
I read a few reviews from 911T guys using them with no issues on stock cars, slightly harder pedal...
I read a lot of stuff on here saying not to even try... but nothing I saw was actual practice. hmmm. I'd hate to have to install those lines again...
Other news:
My short block for the 1911cc is almost done. I delivered the oil pump the other day.
Once I CC the heads, and figure my deck height, the motor will be coming home to my garage, where I will assemble the long block! Super excited.
It was really great to be able to crank the fly wheel and see everything finally coming together.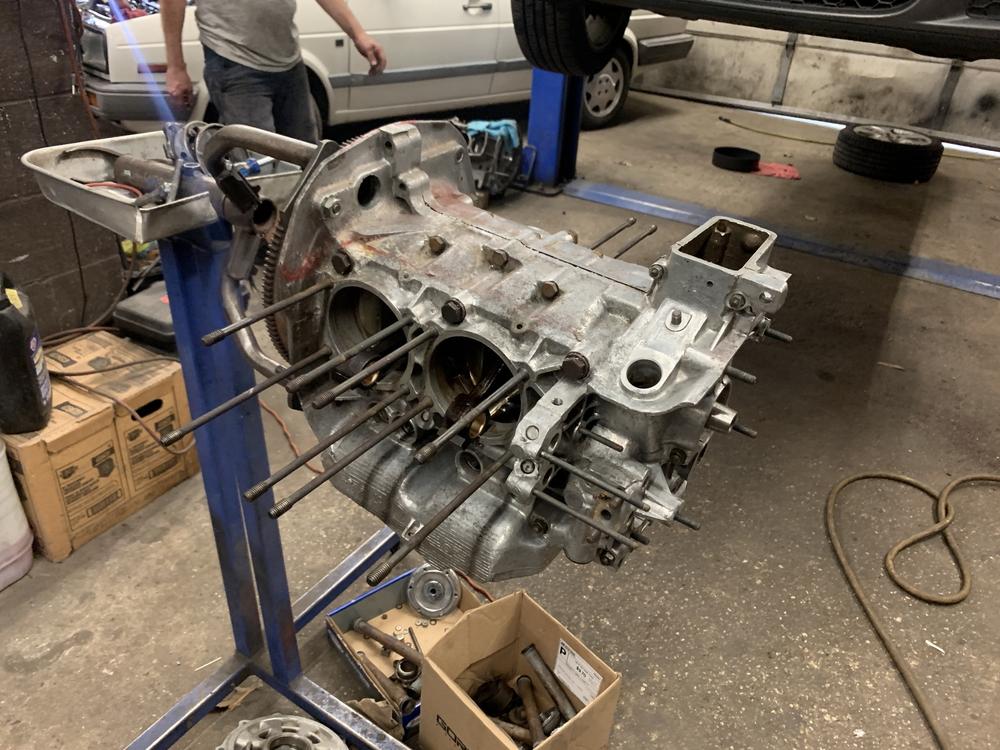
The case sure cleaned up nice from: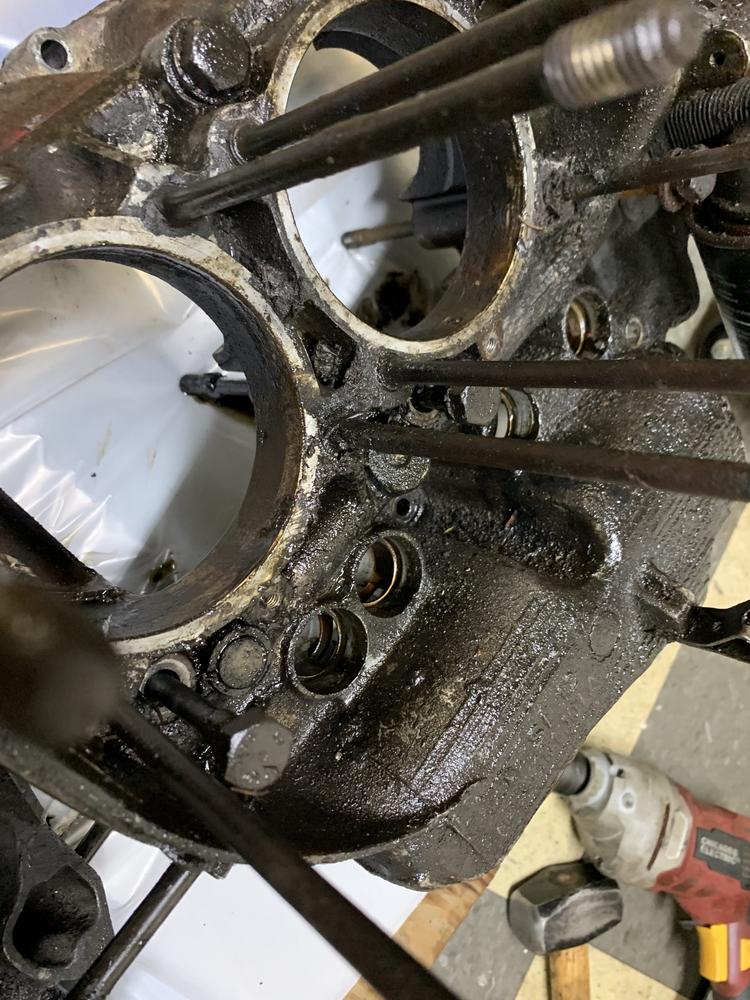
First "scratch" built motor, so eager to hear it.
My whiteboard list is getting slim, but there are about 45 small tasks I can think of... you know how it goes.
Posted by: mepstein Jul 31 2020, 01:50 PM
Don’t even try the 23 on stock brakes. You will have a super hard pedal and very little pressure at the caliper. It will be a huge step backwards.
If you need a 19mm, text me.
Posted by: jaredmcginness Jul 31 2020, 02:38 PM
Don’t even try the 23 on stock brakes.
10-4.
The car had a non leaky 19 in it already. I will inspect, and reinstall, or order a new one.
Only replaced it because I assumed it was a crusty old 17mm.
Posted by: mepstein Jul 31 2020, 02:50 PM
17mm is even better.
Posted by: jaredmcginness Aug 5 2020, 06:45 PM
August already...
Here's some stuff.
A few more hours of welding, smoothing and sanding.
I didn't replace the lower trunk section, instead I scuffed, and used my POR-15 kit. Love it or hate it... (in my opinion) the trunk was perfectly OK... A few lumps and dips, but entirely solid.
I think I like that.. the theme of this build - perfectly OK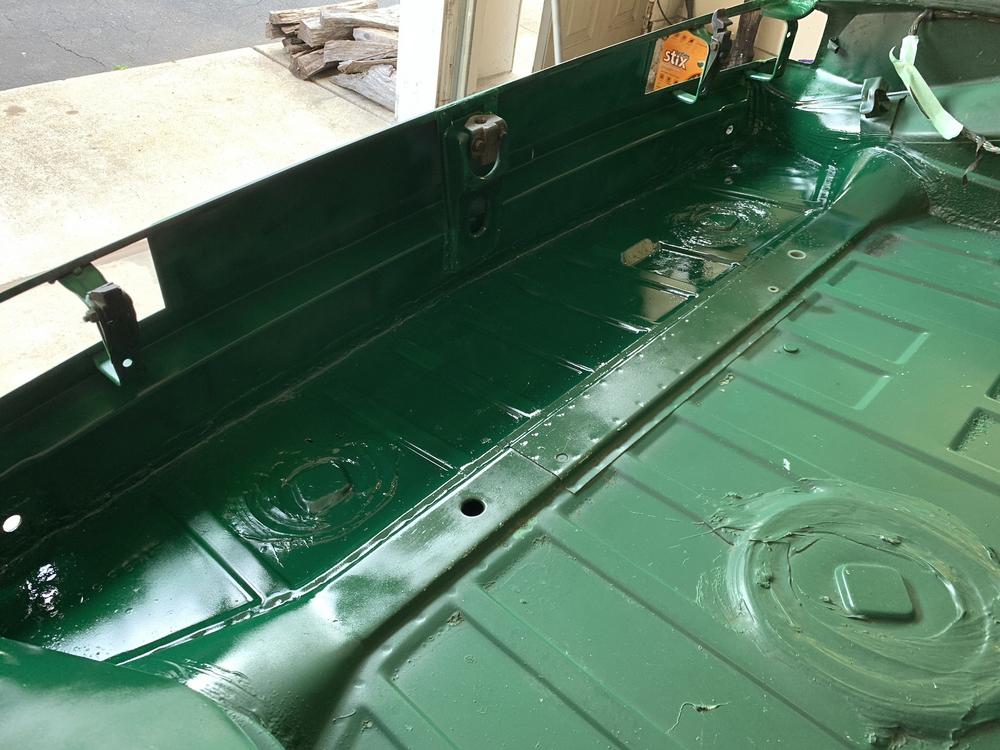
Seam seal, paint and we're good to go.
So much work just in this photo - every bracket, every spot weld,
rust repair, etc. 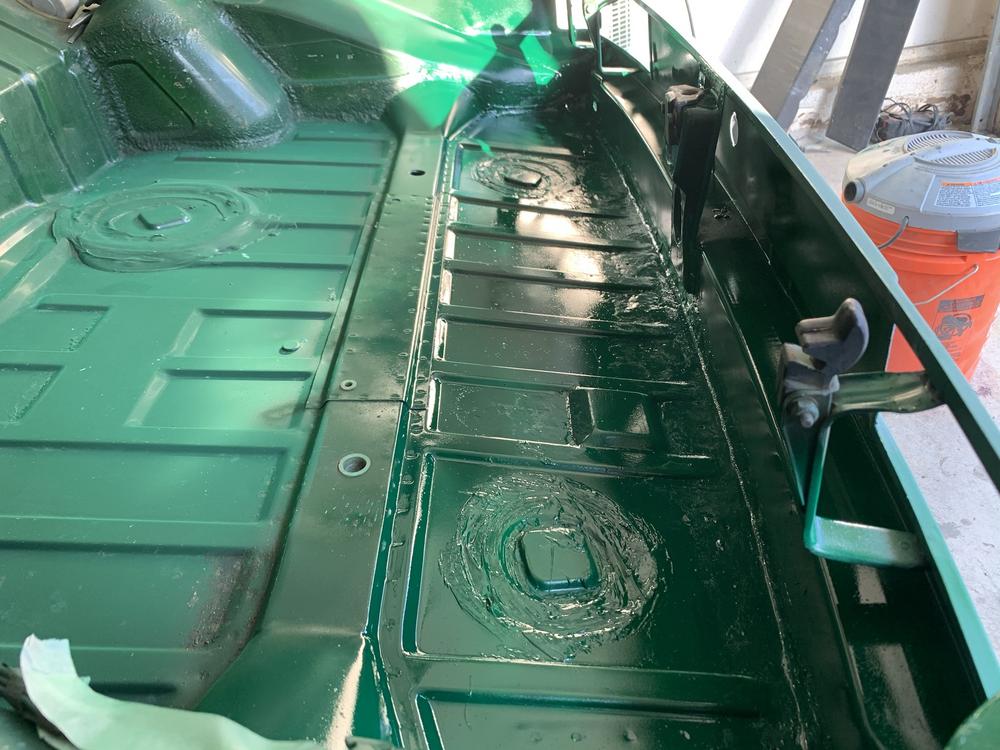
Laid some paint down. What do you think?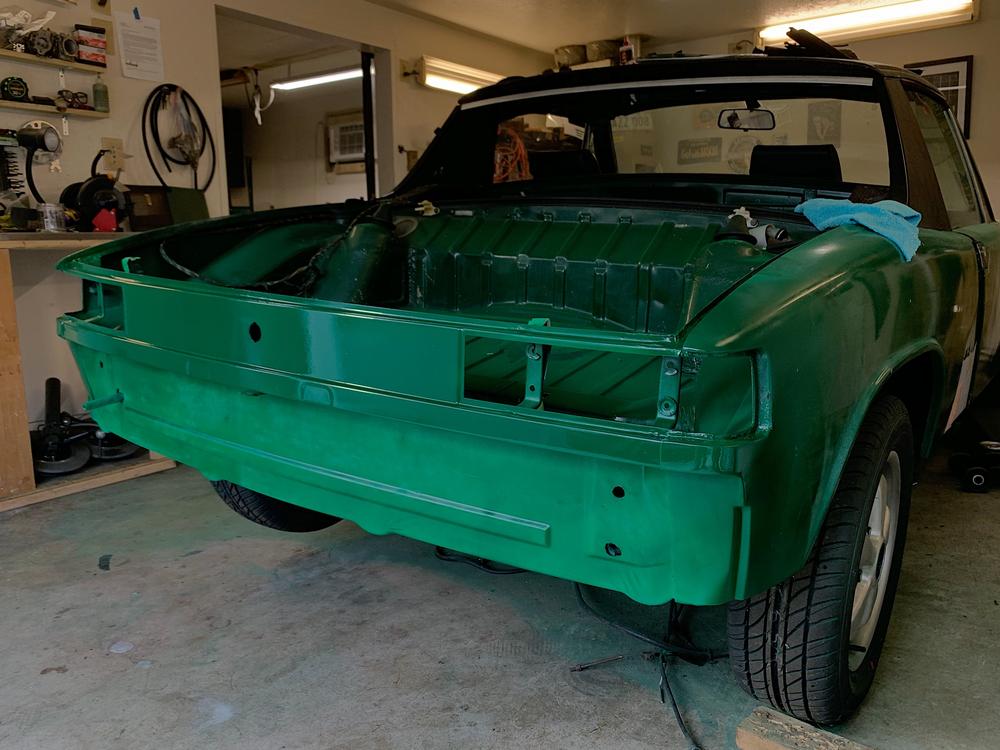
This is 4 coats. Two things to note:
1. I did not shape a tow hitch support bracket, yet.
I got eager to paint and also I'm not totally concerned about it (i almost cut it off) We'll get to it.
2. I was running low on paint, made sure to get the important parts. Two less coats under the bumper, until I can restock.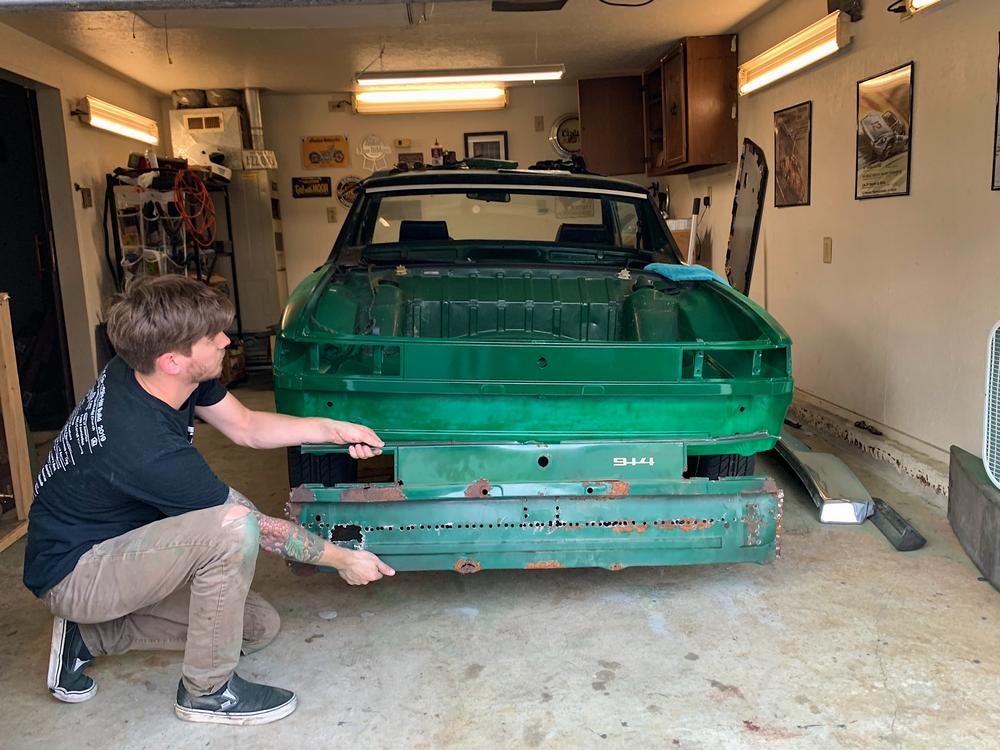
After a wet sand, I think this will turn out really nice. 
What a great change, I cannot wait to see everything assembled.
Also, grabbed my heads, P&Cs, etc etc. Short block is coming home Friday, once I get my broken dipstick tube repaired.
Then on to building the motor.
Not much else going on, I have another work trip coming in the next week, so I am trying to gun as much work as possible before Sunday.
Cheers!
Posted by: Big Len Aug 5 2020, 08:02 PM
Well done.
Posted by: bkrantz Aug 5 2020, 08:08 PM
That looks great!
Posted by: jaredmcginness Aug 6 2020, 06:38 PM
^Thanks for the comments fellas.
Anyone guess what happened in this picture? Anything missing that could have fallen Ugh.
Test fit some parts today.
Loving the look! After seeing this, I pretty sure I am not going black my bumpers. It seems wrong... Can always plastidip as a feeler.
Might add a new bumper top to my list, but... eh it's a driver for now. (of course I don't use the term driver literally  )
)
Cheers,
Jared
Posted by: mepstein Aug 6 2020, 07:02 PM
Chrome bumpers look great on the early cars. With your Fuchs, it will look very similar to a real six.
Posted by: AZBanks Aug 6 2020, 07:40 PM
This is what it would look like with a black bumper.
Attached thumbnail(s)
Posted by: jaredmcginness Aug 6 2020, 07:54 PM
Interesting, thanks for sharing.
I already blacked out most of my trim, windscreen and all. (Rusto Trim and Bumper spray - works great)
Black would look good with the period ‘71 blue plate I’ll be running.
Posted by: jaredmcginness Aug 8 2020, 04:39 PM
Hey fellas,
Leaving for another work trip to White Sands, NM tomorrow. 2 week trip, so I rushed to get some stuff done today.
Good news, my short block is complete! Man this looks so much better.
Totally satisfying to have it back together. Fresh everything. Biggest step toward the 1911.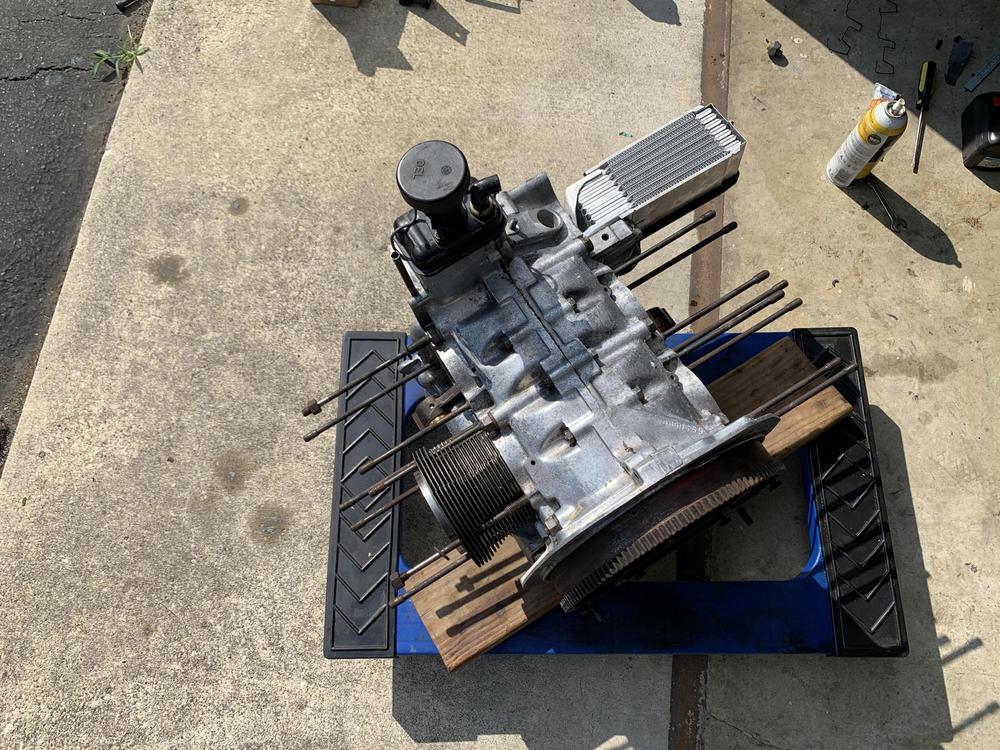
Spent a little time cleaning the case, added a new oil cooler, seals, etc.
Some of the blemishes just dont come off. But hey its 49 years old and the tins cover it up anyways.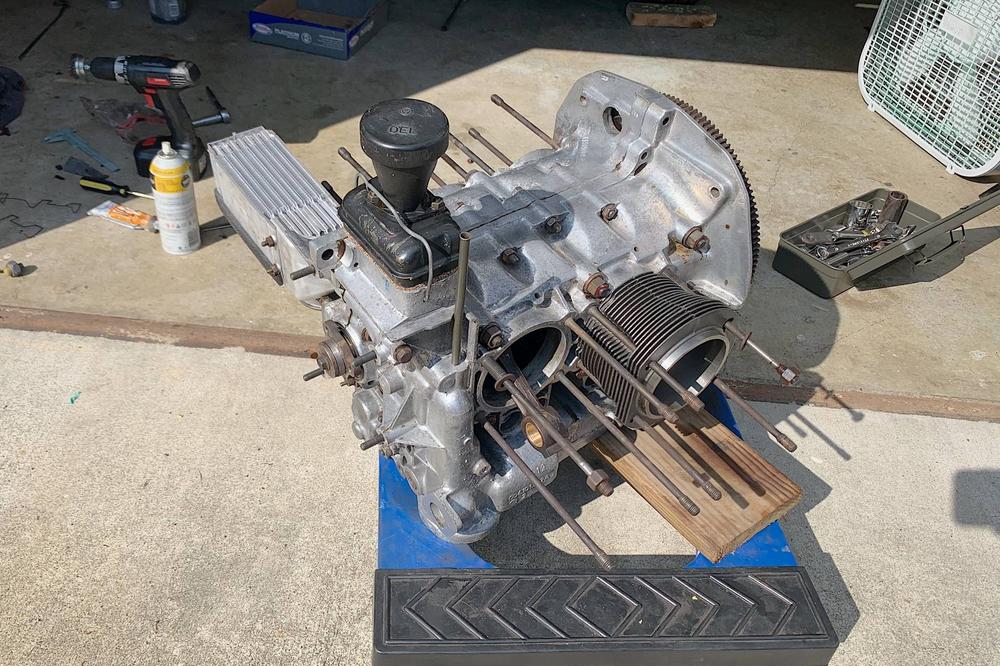
I'm really happy with it - eager to build the rest of it.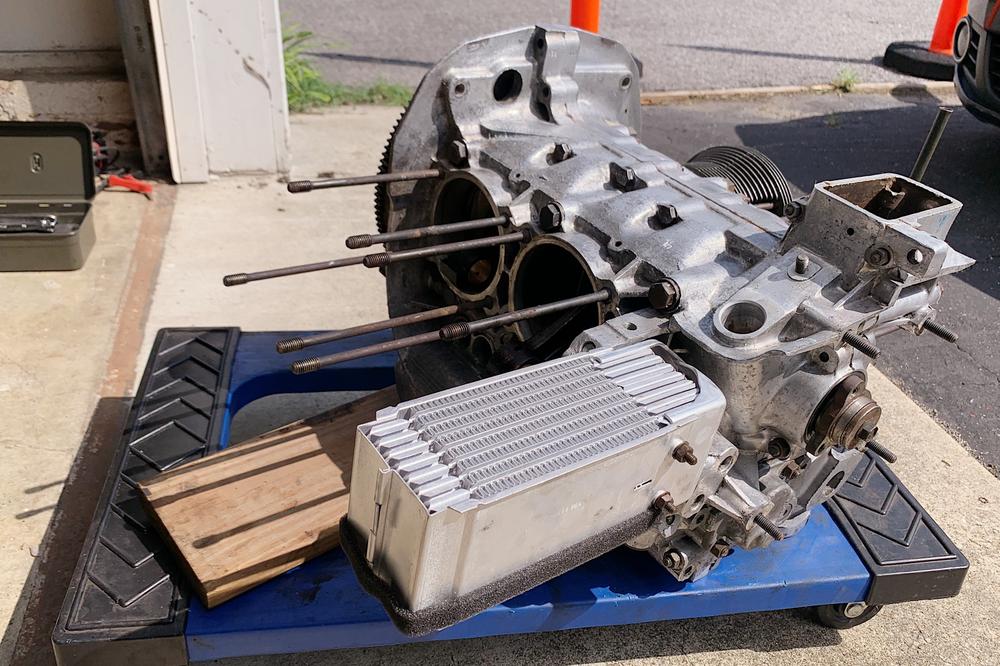
My pistons came installed, I pulled them to check the piston ring gap. I almost skipped this part...
Of course the second ring I remove snaps.
I suppose this is a sign to purchase the Hastings rings like I was instructed to.
While installing the oil cooler, I noticed the part number/serial is 1911. Weird! 
As for anything else, just cleaning, sanding and painting everything that comes out of this thing. The impeller case has been the worst.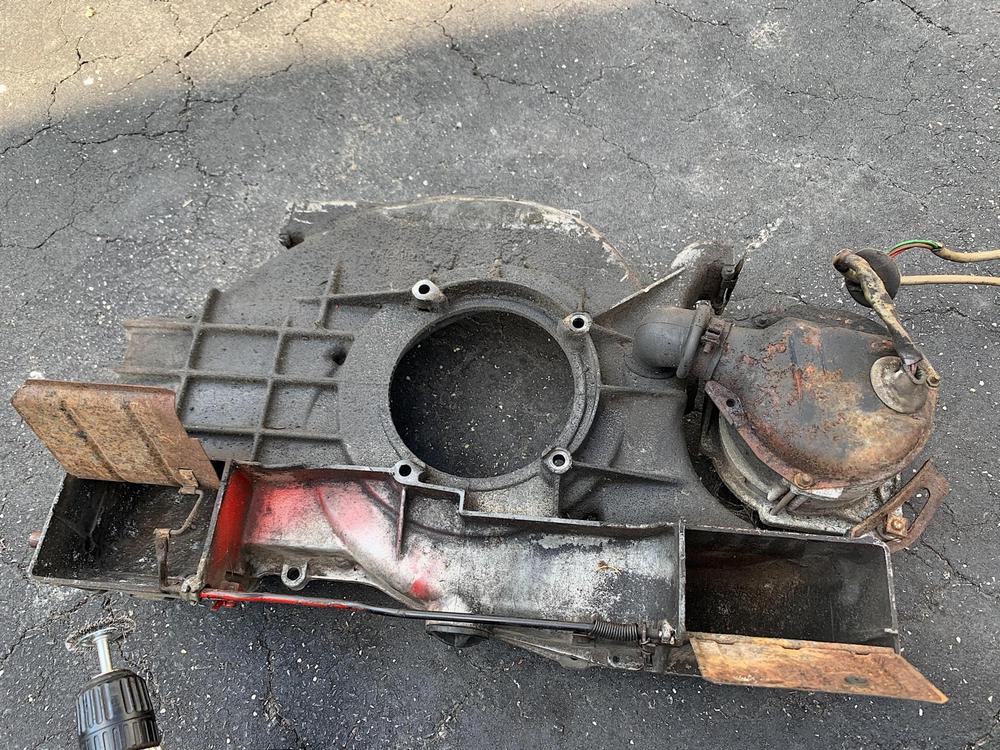
Trying to remove the red overspray from everything.
Gettin' there.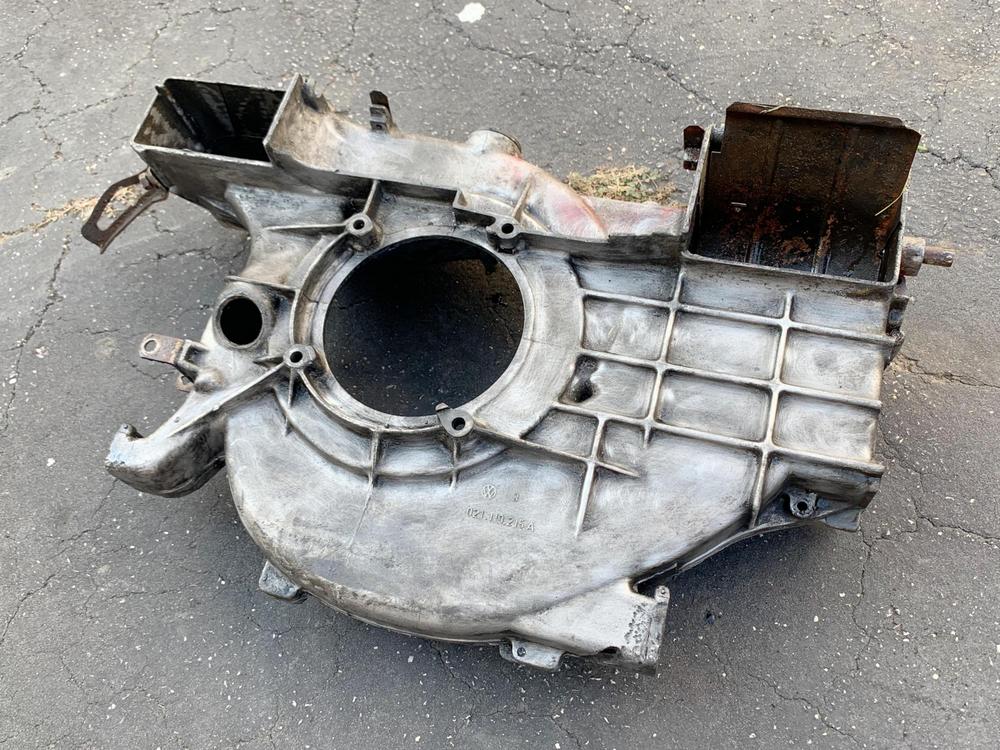
Anyone have any tips for a uniform look for these? I noticed @http://www.914world.com/bbs2/index.php?showuser=18749 has a beautiful grey one on his 2.0. Paint /powder? Will a nice VHT grey paint last on there?
Lastly, here's a cool Polaroid my girlfriend took of the green car and me. She hangs out in the garage, helps clean and passes me tools (or dodges the tools when I throw them) often.
One for the fridge:
Cheers.
Posted by: bkrantz Aug 8 2020, 09:43 PM
Remember that the fan housing is magnesium--not sure how some powder-coat processes will work.
Posted by: BeatNavy Aug 9 2020, 05:58 AM
I've got a fan shroud that's been powder coated. Turned out very nice, although I seem to recall that you need to make sure you don't coat that part that grounds the alternator. I believe you need to mask or to scratch off the paint where the bolts from the engine mount the fan housing to the case and where the alternator bolts to the housing. It is the ground path for the alternator. Otherwise, no chargy.
Big progress. Great success, Jared!
Posted by: cuddy_k Aug 9 2020, 04:32 PM
Anyone have any tips for a uniform look for these? I noticed @http://www.914world.com/bbs2/index.php?showuser=18749 has a beautiful grey one on his 2.0. Paint /powder? Will a nice VHT grey paint last on there?
If you're referring to my ravenna 2.0, I had my housing bead blasted, then shot it with rattle-can alumi-blast. My bumblebee 2.0 was shot with some sort of glossy gray paint by the PO...
Posted by: jaredmcginness Aug 9 2020, 05:45 PM
If you're referring to my ravenna 2.0, I had my housing bead blasted, then shot it with rattle-can alumi-blast. My bumblebee 2.0 was shot with some sort of glossy gray paint by the PO...
Yep, I’m referring to the bumblebee motor. As seen in your Ep. 06 Type 4 basics.
I do like the non metallic grey with matching intake runners.
Thanks!
I appreciate the tip Rob. I would have missed that.
Posted by: jaredmcginness Aug 27 2020, 07:04 PM
Hey fellas,
Home from a long desert work trip. Got a few things checked off the list.
If anyone else saw. I purchased the incorrect pistons rings. I bought 96mm Hastings rings from LN. Turns out they stock a specific size for their Keith Black pistons, and these were just a hair (.016") too tall.
Now awaiting the proper height rings (.060) from LJAircooled. The final step before long block assembly. So eager!
I am using the down to time to knock out a few things. Rebuilt my front calipers, put this off for months. Here is a before and after from blasting: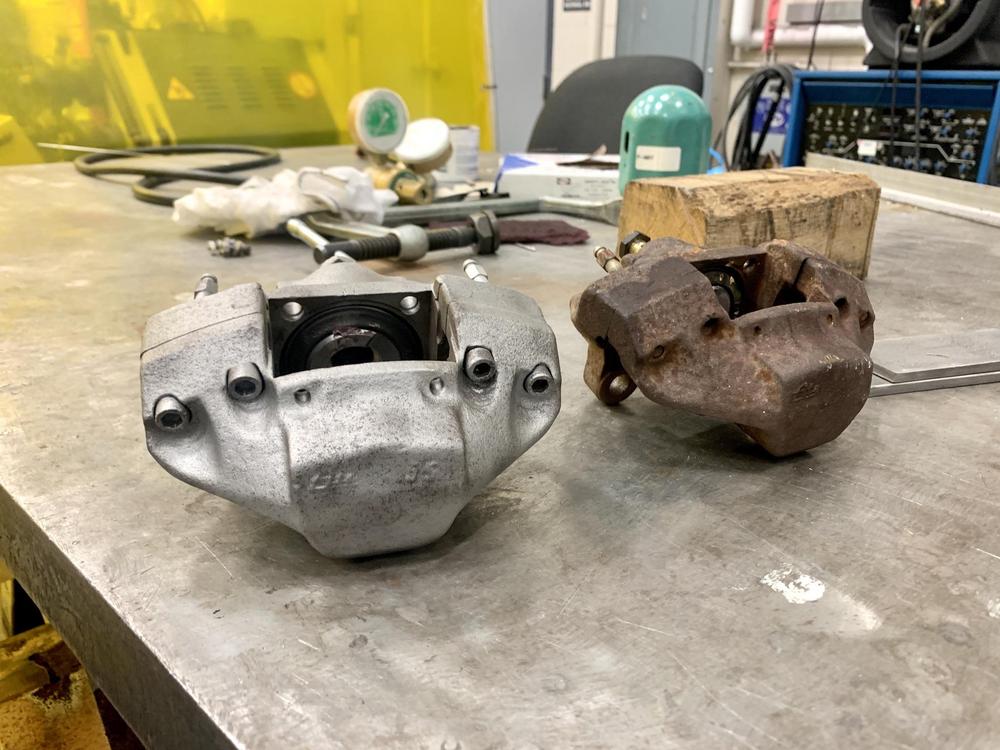
I used an ATE/FAG rebuild kit, lightly cleaned up the inside and pistons (2000grit, sanded in X pattern)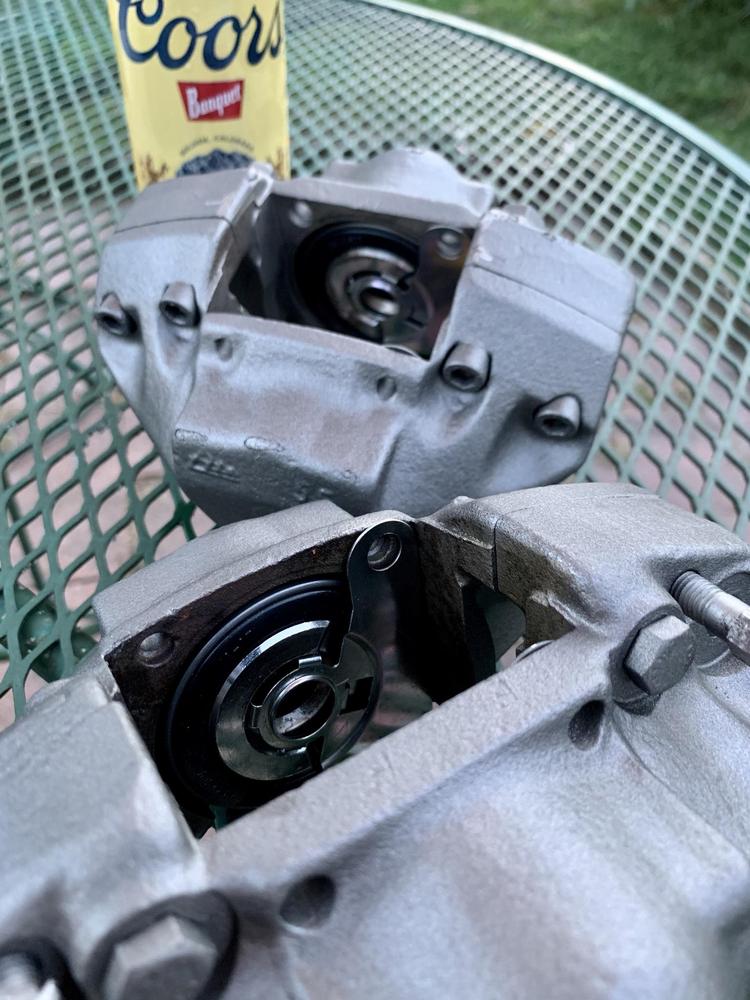
Assembled and painted with 'VHT Cast Iron 1300-2000*'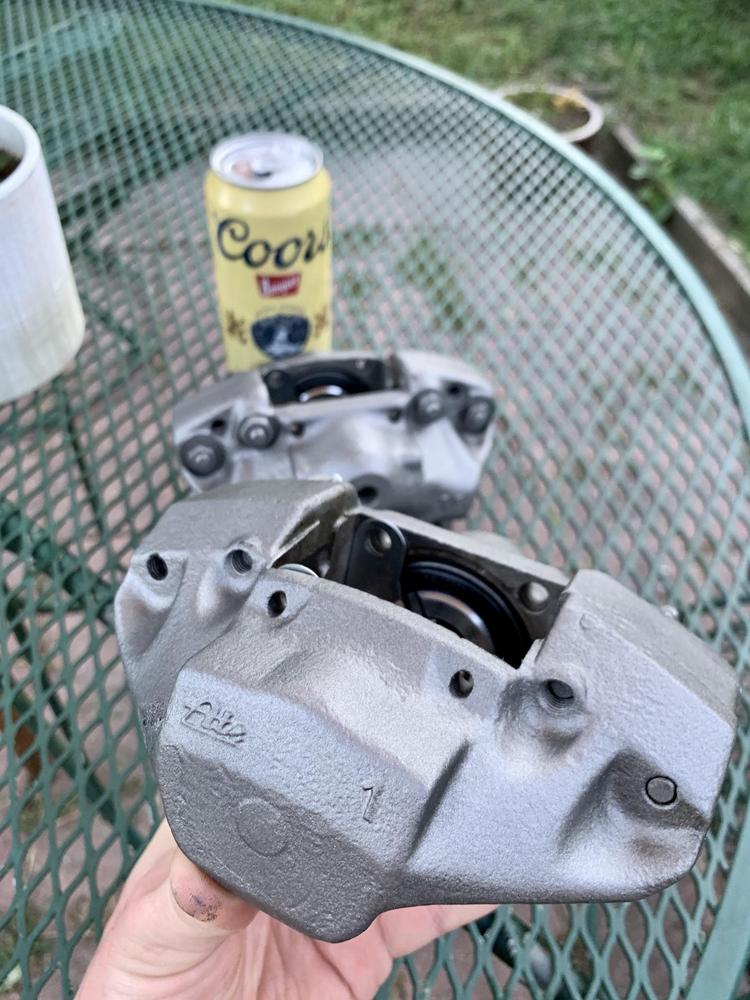
I am sure the rears will be a bit tougher.
I didn't get a photo, but I replaced my lower strut/ hub asse., ball joint/outer tie rod.
If anyone remembers, my passenger A-Arm was rubbing the inside of my fuch.
See here: 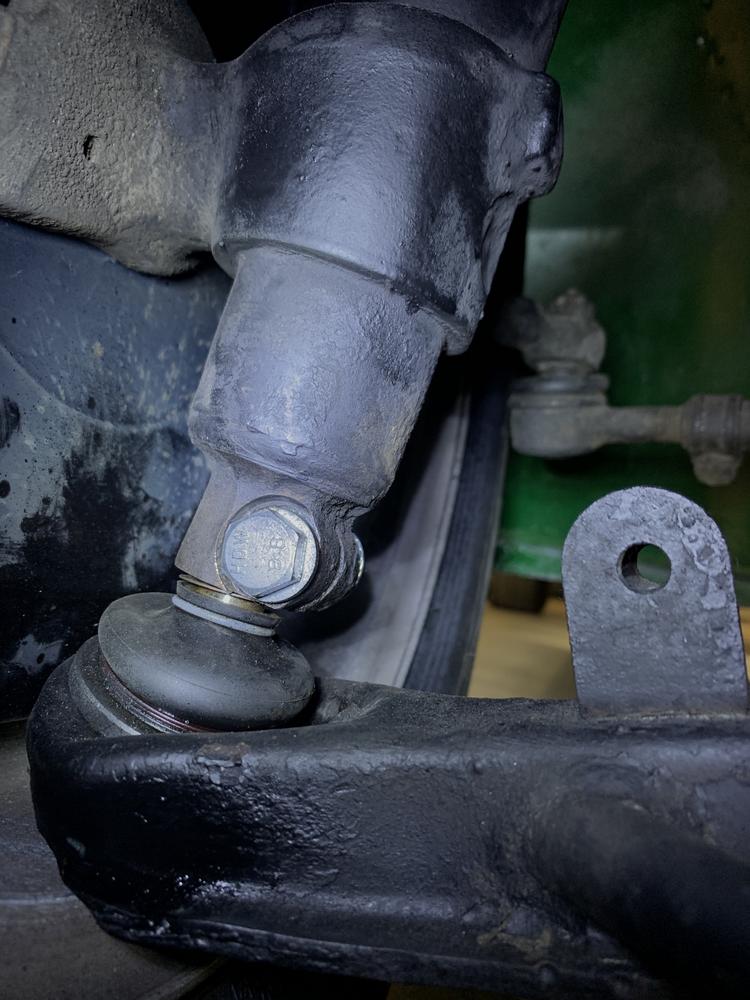
It turns out that the ball joint had wallowed the hole to an oval, making the joint "pop" down, and cause a rubbing issue. You can see the shiny post of the ball joint in that photo.
(Hint: you aren't supposed to) Apparently this is a known issue on early style struts. Remedied with the late taper style.
Regardless, our local forum superstar Mark E. set me up with some strut assemblies and they solved the issue flawlessly. No more rubbing.
Rolled the car out of the garage and snapped a few celebratory photos for a freely rolling vehicle... 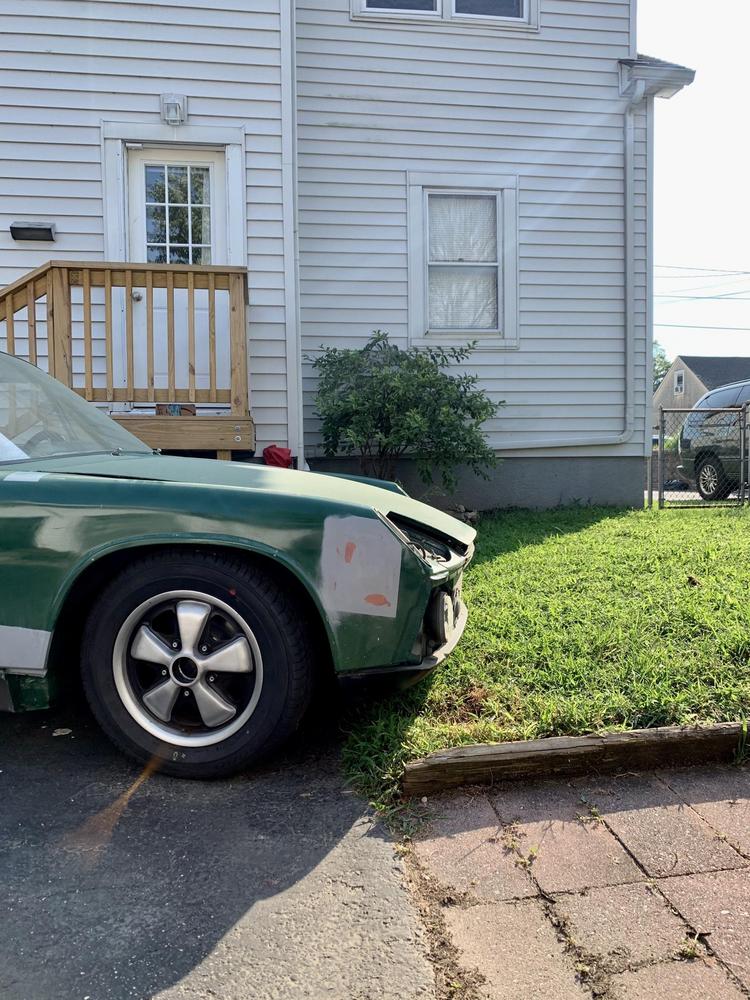
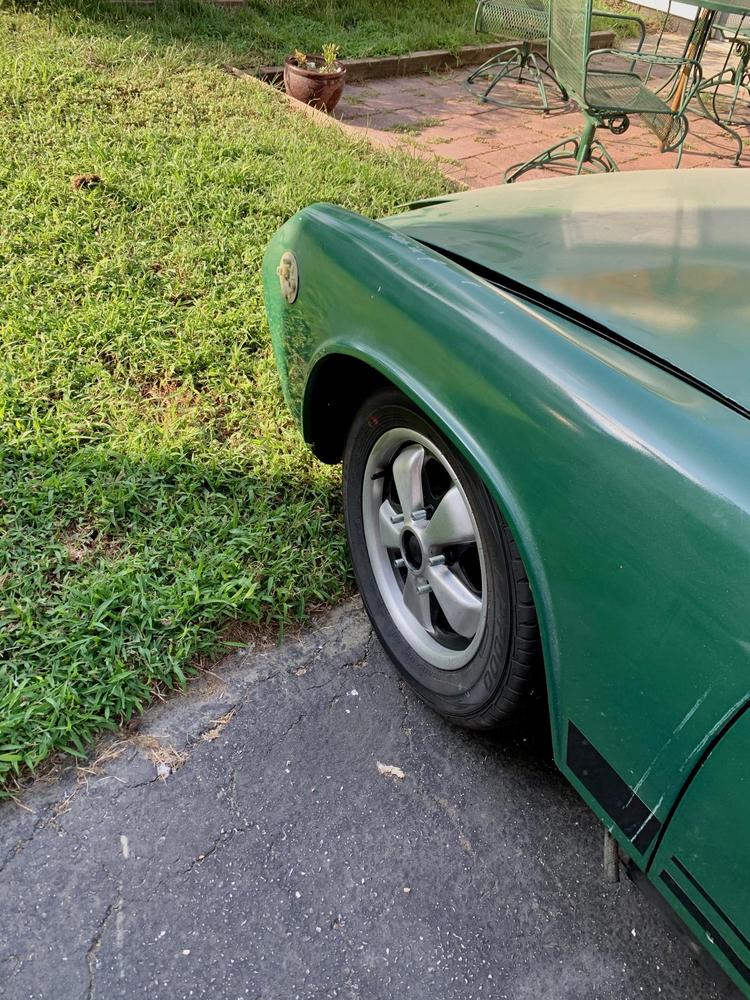
Unfortunate that I am happy that my car even ROLLS when I push it.
Have a great up coming weekend, and thanks for reading.
Jared
Posted by: mepstein Aug 27 2020, 08:44 PM
solved the issue flawlessly. No more rubbing.
I'm very happy to hear this.
Posted by: Cairo94507 Aug 28 2020, 06:17 AM
Mark is a great guy and looks out for all of us.
Posted by: jaredmcginness Aug 31 2020, 06:44 PM
Hey guys.
Cleaned some grounds, added new bulbs and plugged a lot of lights in.
This is the first time I've seen this stuff illuminated in over a year. Half of them only worked intermittently anyways.
Certainly makes it feel just a bit more like a real car when things turn on. 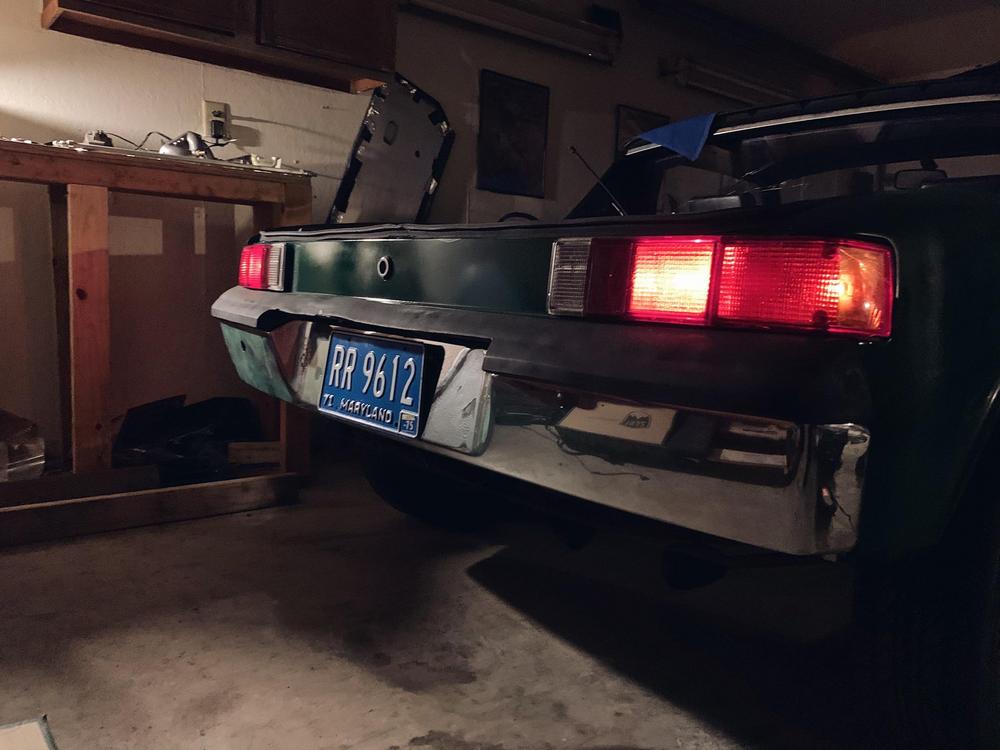
Blinkers are fighting me. They work fine, but the dash lights are being funny. They like to click once, and not function.
I get a buzz from the relay sometimes. (Probably time for a new one) Cleaned the contacts.
Both sides work if I wiggle some wires. 50 year old harness, what do you expect.
More cleaning to do while the cluster is out. 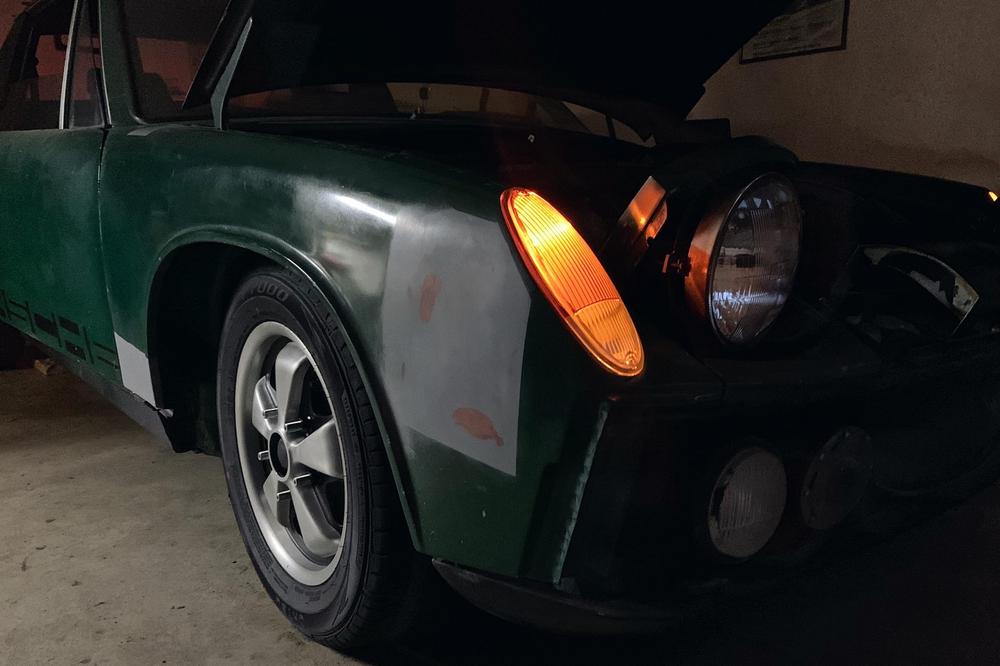
Gosh I need some paint on this thing.
Cheers.
Posted by: jaredmcginness Sep 4 2020, 05:59 PM
Hey guys,
A little under the weather over here but, got my butt to the garage today... Too eager for assembly.
Installed each piston and cylinder. I used Hastings rings on the pistons as recommended by a couple threads on here.
After a brief snafu with the wrong sizes, they were replaced and we are back in business.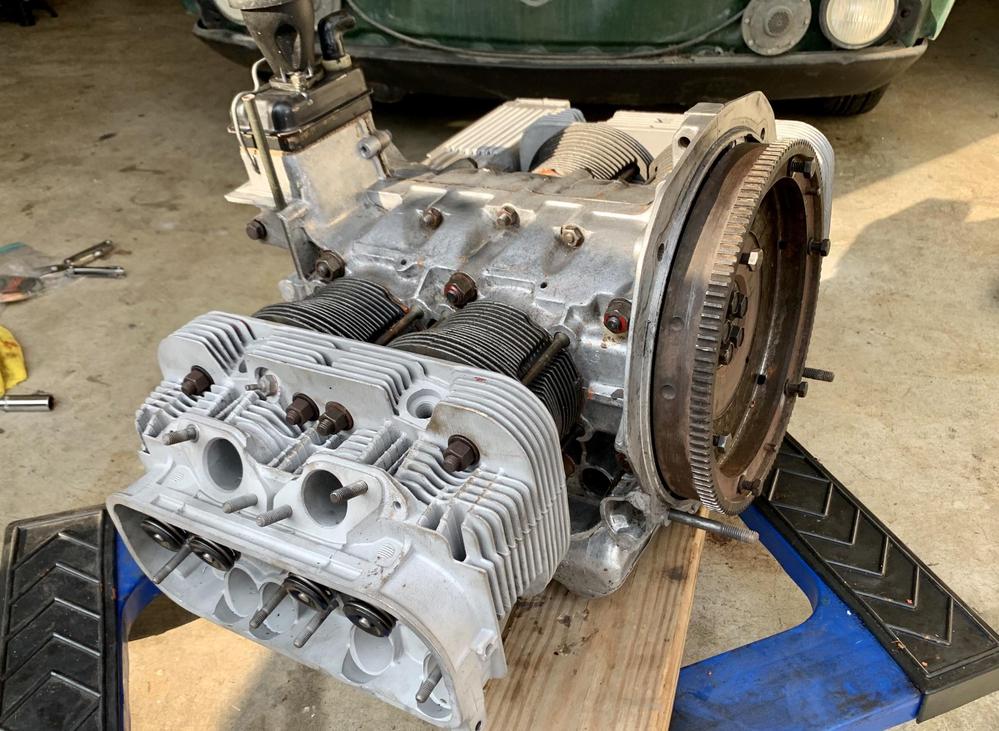
I installed and torqued the heads. Everything feels nice and smooth so far, I cranked the flywheel by hand a few rotations. 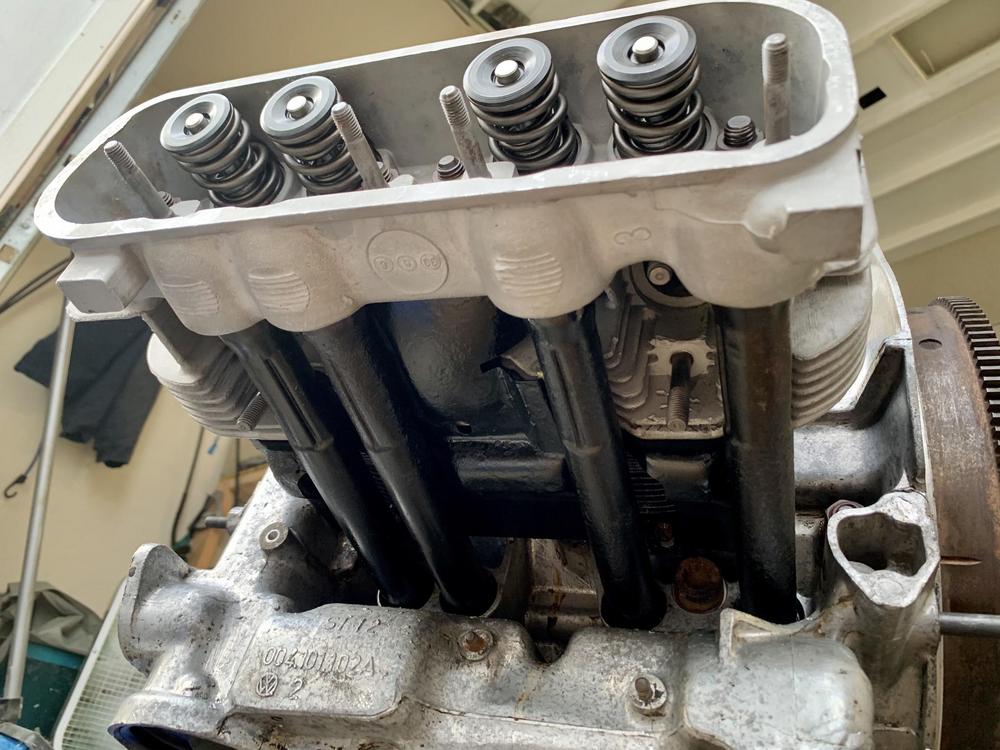
Installed the lower cylinder tin, new Scat lifters, pushrod tubes, and new seals all around.
Next time around... maybe and engine stand would be nice and not a dolly.
First time for everything.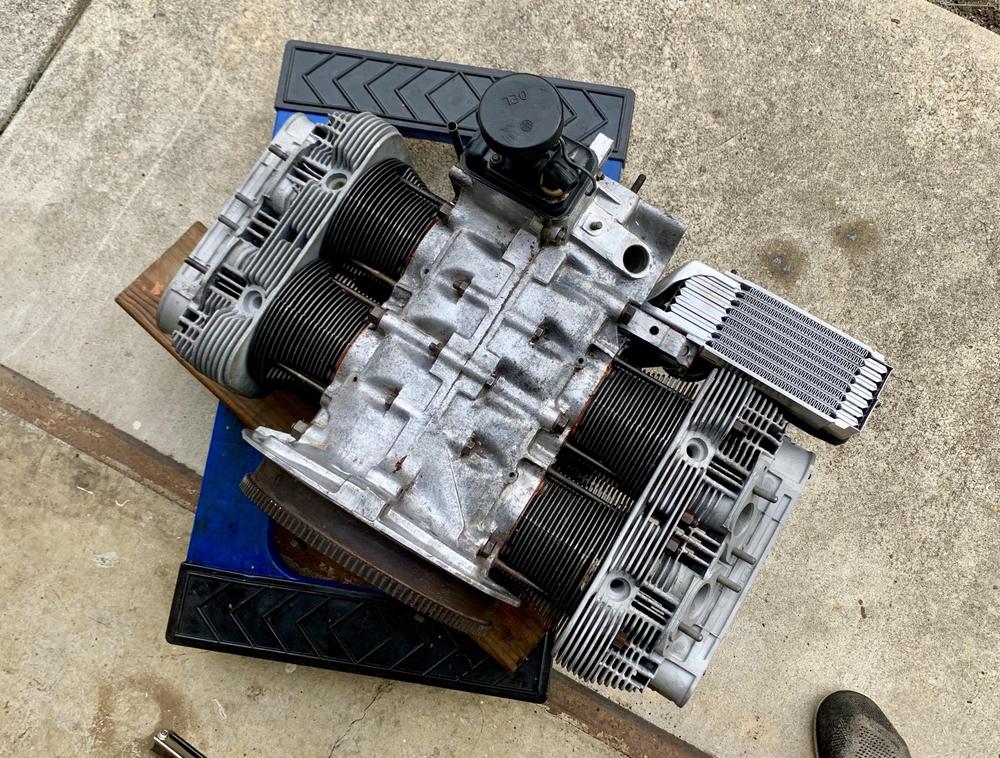
Next up is loading the head, valve covers, impeller housing, and so on so forth.
I am really happy to see it has come this far! Does not look amazing... but I've seen well running type 4's look worse.
Thanks for reading.
Jared
Posted by: jaredmcginness Sep 6 2020, 07:29 PM
Hey guys,
Another motor update and a few questions... check this out!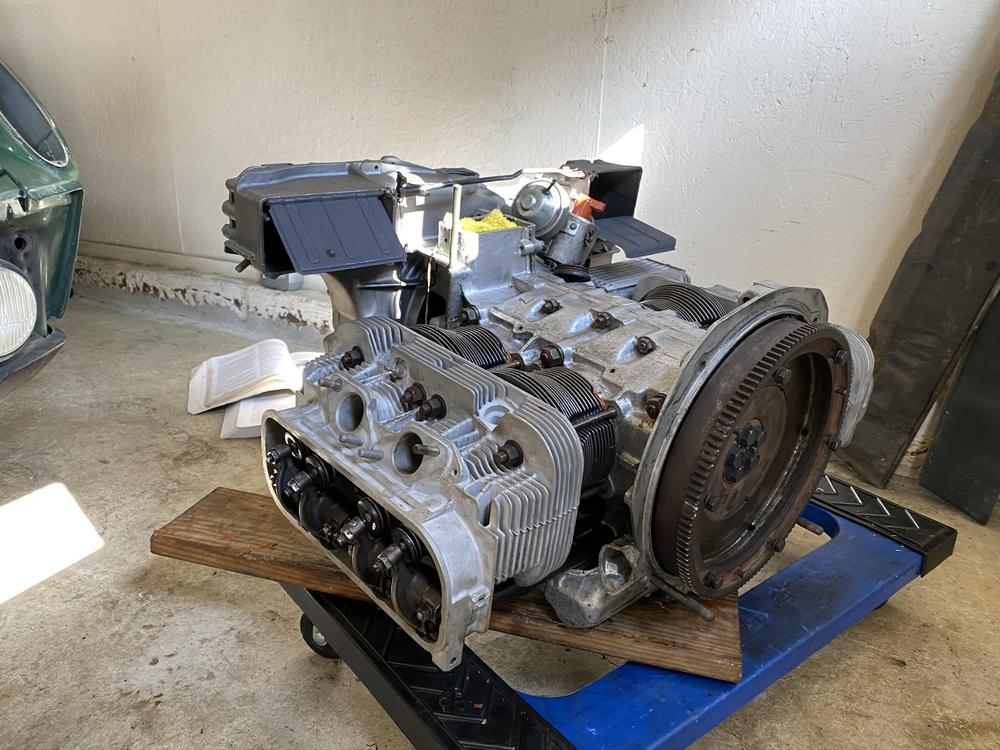
So happy to see this thing built and moving. Took a bit of time and a lot of referencing my books, manuals, The World etc....
Getting that distributor drive gear lined up properly without dropping the little washer into the case was nerve wracking.
(on that note, I'll spare you guys the story of an engine tin screw finding its way inside the case, yesterday. That was a fun 3 hours of magnets, breaking down the heads + cylinders and swearing.)
The motor was a little tough to turn once I bolted the rockers on. I didn't want to force anything... bigger cam...
I backed off the rocker adjusters to get a little more room, added the rockers one by one, oiled the pistons, etc.
Turned the fly wheel a bit more, heard a horrifying *boing* sound and it began to feel normal. I suppose one of the push rods was not seated in its cup properly, and found its home.
Again.... first rodeo.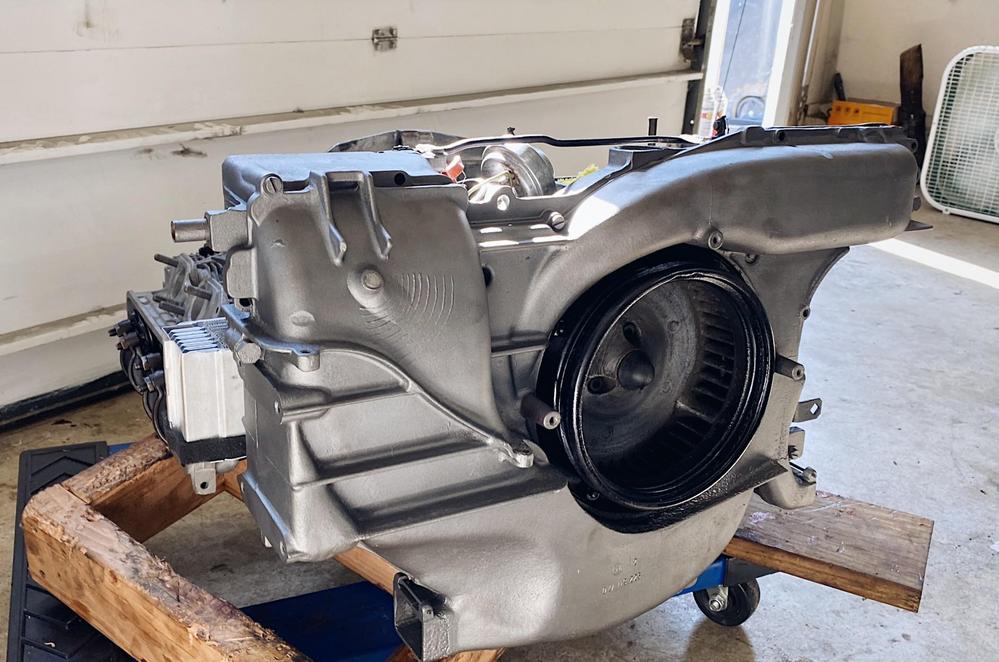
It was really helpful having a spare (my original) motor lying around to refer to nut/washer combos etc. I also pulled a few little parts like the non limiter distributor rotor, thermostat pulley, etc.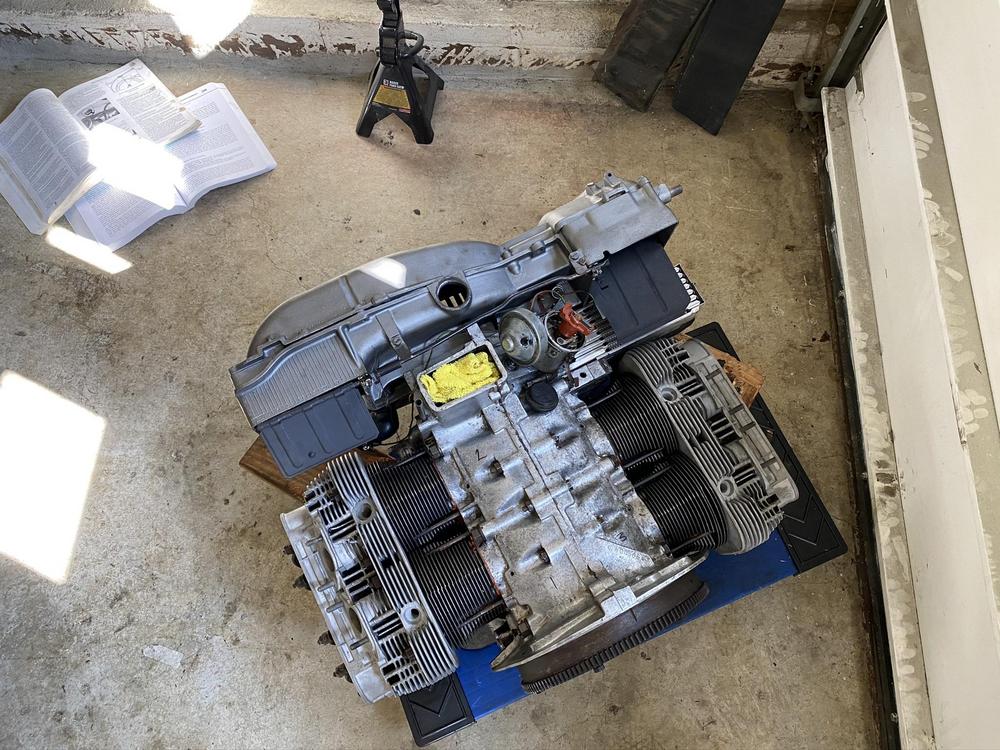
Question:
Since I have a larger cam... does the valve adjustment procedure change?
(When I set timing, the distributor was at 12*, the impeller was at TDC in the 'V', BUT my fly wheel was about 10 degrees past the TDC mark.
I believe the flywheel being off a bit is typical and nothing to sweat.)
Doing my valve adjustment, no valve seems FULLY open when I hit TDC, its about 80* off.
A method of valve adjustment that I read is called “lobe per lobe”... regardless of the TDC marks, adjustment goes like:
In firing order... Starting with #1
- Turn motor so opposite intake valve is completely open (#3)
- Adjust #1 to .006
- Turn motor again, in firing order to the next one and so on.
Is this a good method to go by? I did this earlier and the motor seems to turn smoother than ever, and building compression well.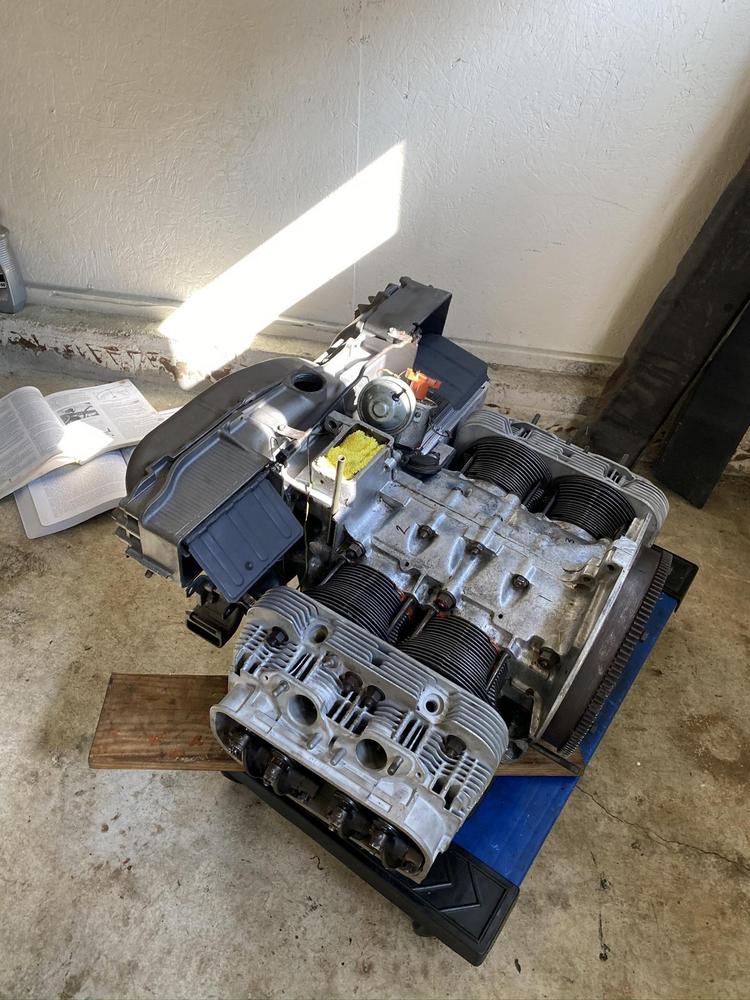
Thanks for any feedback and have a great weekend with the family + 914s!
Posted by: jaredmcginness Sep 7 2020, 09:52 AM
I made an updated and hopefully final 'To Do' list...
My previous list only had a few remaining line items like; "Test motor", and "Install motor"...
I'm afraid there is a whole list of sub tasks before any "testing" happens.
Here it is: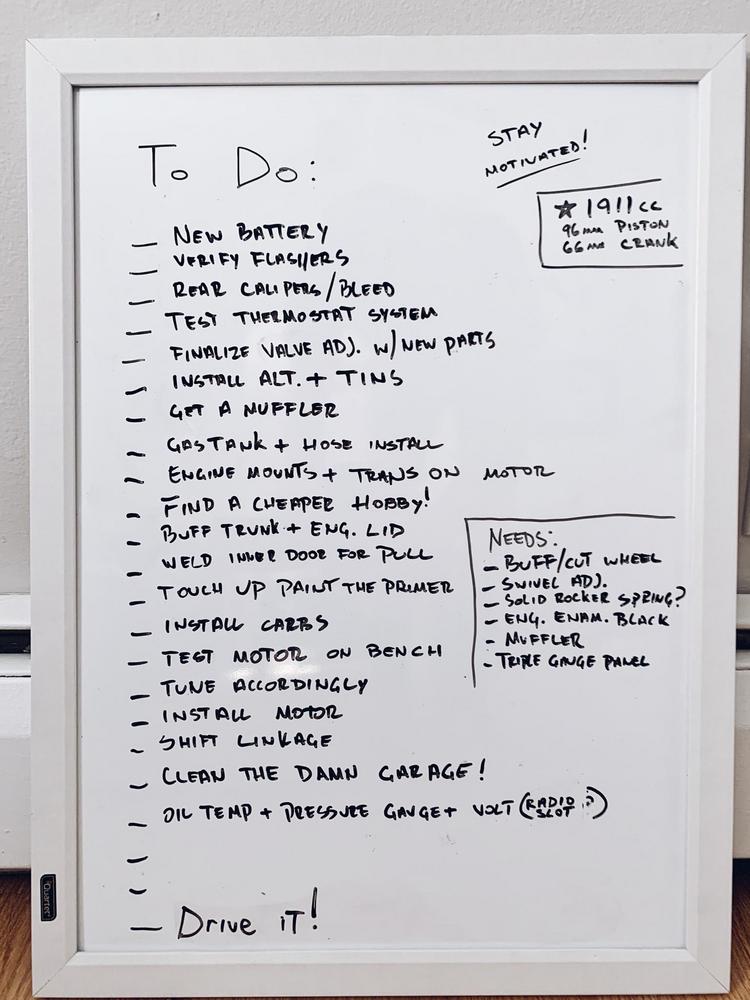
But hey..... we've made it this far.
Posted by: jaredmcginness Sep 14 2020, 06:54 AM
Hey fellas!
Happy 9/14 day!!! Today was my loose goal for getting the motor running (or driving the car)
Didn't quite make it there. The valve train upgrades I was recommended needed to do, put me off a few weeks.
We do it nice, because we do it twice.
Incoming parts are:
-911 Swivel Valve Adjusters
-Chromoly Pushrods
-HD Rocker Studs
-Solid Rocker spacers.
I got some great advice on how to proceed with this and have very intently studied Raby's Valve Train dissertation.
Other news.....
My old lady was loosely looking for a 944. I've always wanted one - I used to daily an SLC Corrado and I miss it.
We found this car about an hour north from me. Has some bad ass options, so went to tire kick and take a look. It hasn't run in almost a year, and was full of leaves and cobwebs...
I shot a lowball of about 50% and he took it on the spot no questions asked.
So unexpectedly, we now own an '88 944!
Here are the specs:
1988 Celebration Edition
1/250 - Studio Plaid - Satin Black Metallic
128,000 (we think)
Runs and shifts nice, it fired right up with a jump and I drove it home.
For clarity - paid in the range of 2k. I think that's a steal.
Has a few boy racer "mods": Sparco tow straps, white painted wheels, a DEEP dish OMP....
Luckily I found the stock wheel under some junk in the trunk. I immediately stripped that crap off.
We deeeeep cleaned it for about 4 hours. I stripped the wheels with Jasco's, sanded a bit (they are rough) and sprayed with Duplicolor Wheel Silver. Temporary fix, but not embarrassing.
The Studio plaid is absolutely gorgeous, unfortunately, as they all are, it's heavily worn. The fabric is linen material and really thin. 
I gaff taped the bolsters, so there wouldn't be much exposed foam. We'll put seat covers on in for now, maybe replace the front seats. I found the fabric in Germany, but its and arm and a leg for a yard - maybe down the road.
Issues: (pretty sure all of these are typical)
-Lots of scattered records going back to the 90's, but none for a timing belt. So it needs that ASAP at least for piece of mind
-Coolant gauge doesn't work, has a tacky SUNPRO water temp, which does work.
-Dome lights don't work
-carpet it not great
-Missing a center vent
-maybe small vacuum leak
-Both front ball joints needs replaced. Wheels wiggle a bit when jacked up.
-D window regulator is touchy.
-generally a little loose feeling, (probably the ball joints)
Had to don it with the PCA cling:
ALSO needs stockers, D90's or 16" teles.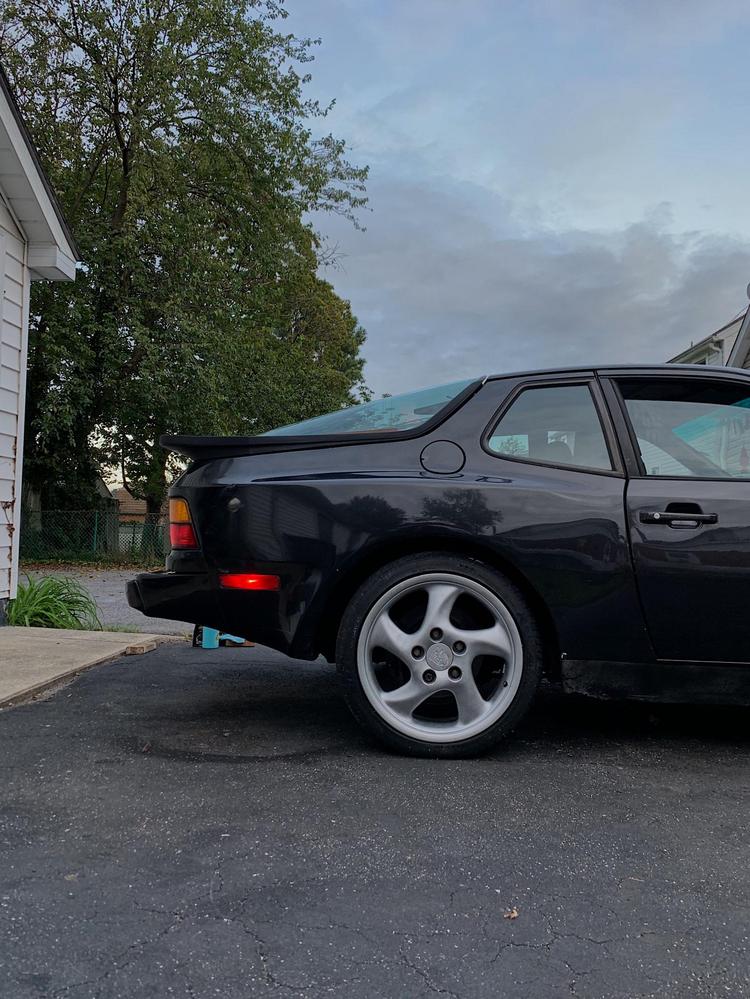
.... Sorry for the long side track... Back to your regularly scheduled 914 posts.
At least there's now 1 running Porsche at the house.
Posted by: dt4 Sep 14 2020, 07:07 AM
that's great, well found and a great price
I picked up a 924 last month over here as my winter project, its along way from rolling and running though so yours is a steal
Posted by: mepstein Sep 14 2020, 07:32 AM
An hour north is almost to my house.
If you need to borrow my ozone generator, just let me know. It can help freshen up a stale interior.
Posted by: jaredmcginness Sep 14 2020, 08:21 AM
that's great, well found and a great price
I picked up a 924 last month over here as my winter project, its along way from rolling and running though so yours is a steal
That's comforting. Good luck on yours!
An hour north is almost to my house.
If you need to borrow my ozone generator, just let me know. It can help freshen up a stale interior.
Sure is! This was up 95 in Havre De Grace, MD.
If you are going up to the Aircooled Swap, and remember to bring it, I would for sure borrow that. The Morning Fresh tree only goes so far.
Posted by: Cairo94507 Sep 14 2020, 08:41 AM
That was a great buy. Congratulations.
Posted by: mepstein Sep 14 2020, 09:18 AM
that's great, well found and a great price
I picked up a 924 last month over here as my winter project, its along way from rolling and running though so yours is a steal
That's comforting. Good luck on yours!
An hour north is almost to my house.
If you need to borrow my ozone generator, just let me know. It can help freshen up a stale interior.
Sure is! This was up 95 in Havre De Grace, MD.
If you are going up to the Aircooled Swap, and remember to bring it, I would for sure borrow that. The Morning Fresh tree only goes so far.
I won't be there but if you want it, I'll throw it in a box and send it over.
Posted by: jaredmcginness Sep 14 2020, 09:24 AM
I won't be there but if you want it, I'll throw it in a box and send it over.
I'm sure I'll see you soon. Don't need it that bad.
---
Thanks everyone! Nothing about a 944 is a sound financial investment, but you make me feel better about it.
Posted by: FlacaProductions Sep 14 2020, 09:43 AM
I had two 944 Turbo's and loved 'em with Cup 2's.
Posted by: bkrantz Sep 14 2020, 08:36 PM
Nice score. I miss my 944 that followed my first 2 914s. In fact a year ago, I was shopping for either one, when my current 914 showed up.
Posted by: djway Sep 14 2020, 11:48 PM
Have always loved that body...those hips.....
I watched the series "The Tunnel" a while back and have not been able to stop thinking about......
Great score.
Posted by: jaredmcginness Sep 22 2020, 06:51 PM
Hey guys,
Getting a bit chilly here in the garage evenings! Had to put a flannel on... I must not be working hard enough!
Small update: been awaiting a lot of parts for my valve train. Everything has finally arrived!
I had a really nice weekend at the Aircooled Swap in PA. (photos at the end of the post.)
Met up with a few guys, putting some faces to the names;
Thanks @http://www.914world.com/bbs2/index.php?showuser=2388 for the much needed trunk bracket!
and thanks to @http://www.914world.com/bbs2/index.php?showuser=18763 for the loaner Adjustable Pushrods (and advice!)
Great guys.
With all that said - and having read Raby's Novel on Valve Geometry about 7 times - I began.
I ground the 1.7 rockers about .060. Started with ~ .504 and ended with around .437 on all of them.
I counter sank them to fit the Thorsten Peiper, Made in Germany swivel feet. (I didnt go OEM, I paid $117 for these, about 1/3 the price of OE, we'll see how it goes.)
I assembled the rocker assembly, HD studs, solid spacers.
One question I am looking for a few answers on:
Spacers on the rocker assembly...
am I shooting to line the adjusters up with the valve, (by moving spacers left or right, and stacking between - see photo) before I start the geometry? ....
Line up the valve to adjuster, dead center as close as I can, then shim later at half lift if needed?
Or just assemble the rocker shaft, evenly spaced washers and shim under the studs as needed later.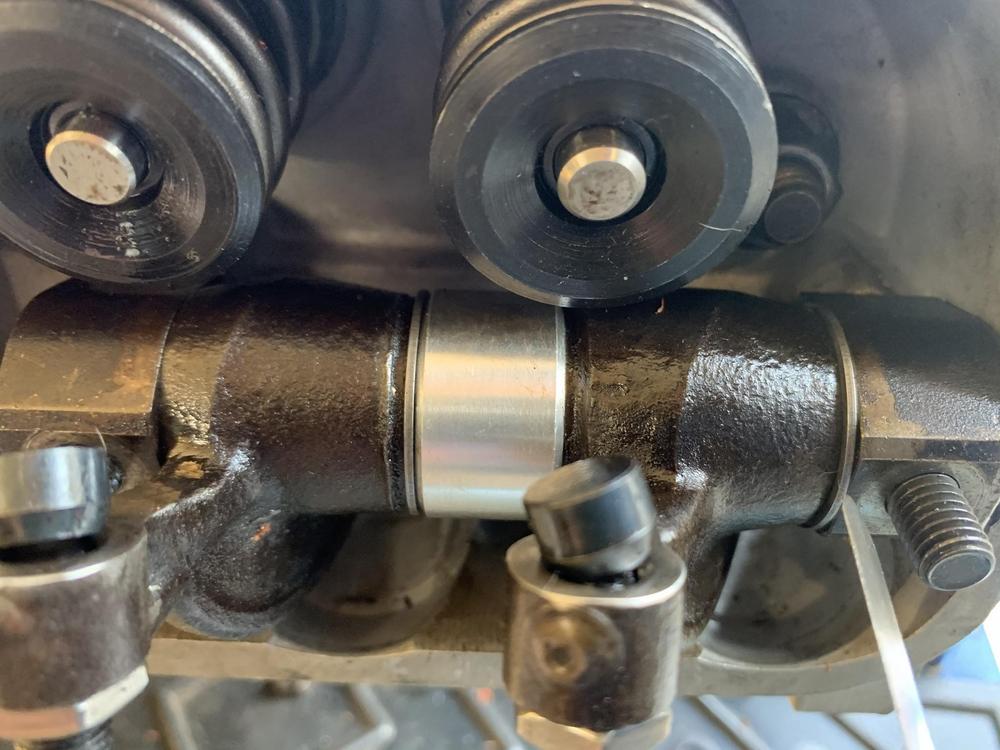
I don't have a washer between every piece in the assembly. I'm told and am thinking this is OK... yes?
For mounting my magnetic base, I made a quickie bracket. For the hole pattern, I overlayed my intake gasket, and copied with a sharpie.
I haphazardly cut it with my grinder, as I ran out of wheels... Pretty sad for a professional sheet metal mechanic. 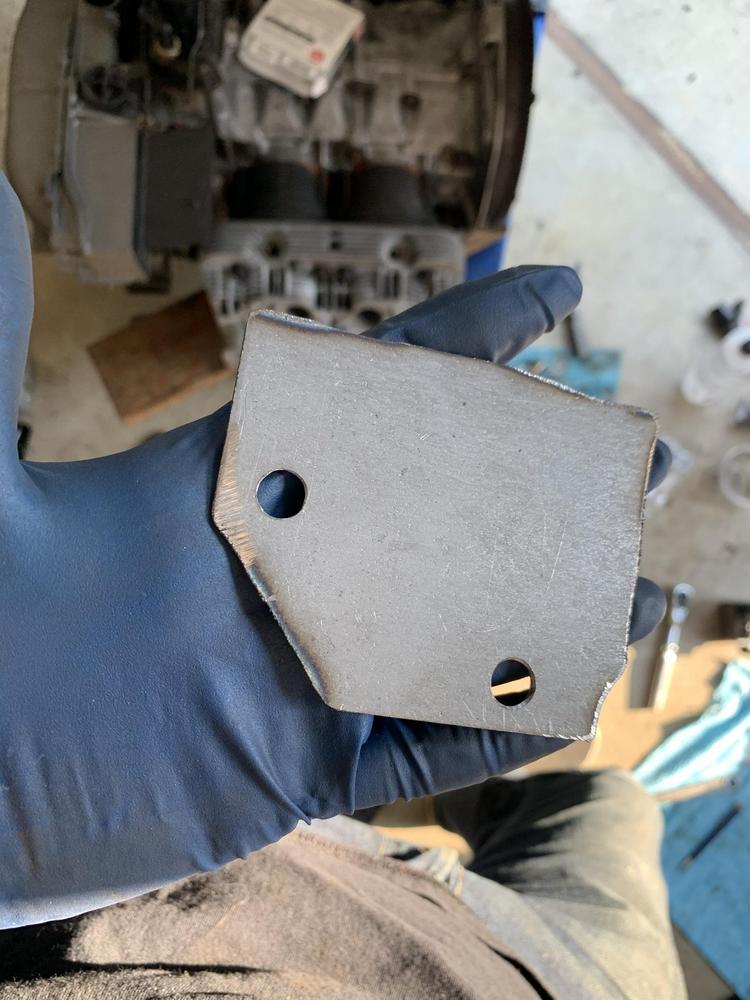
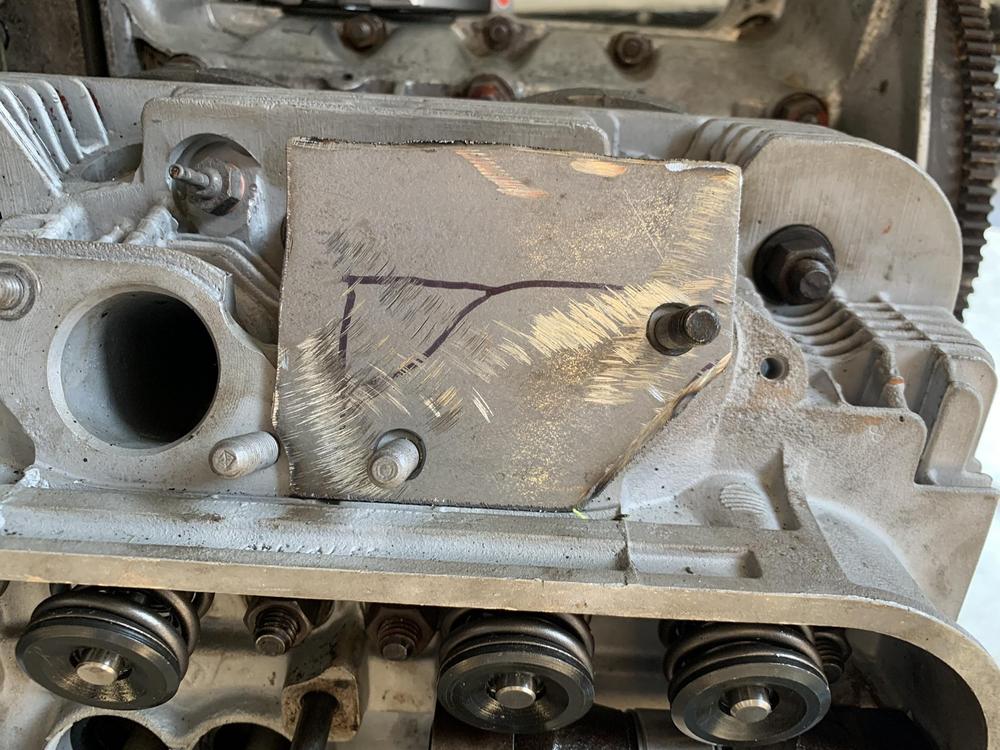
Base mounted GREAT! Super solid!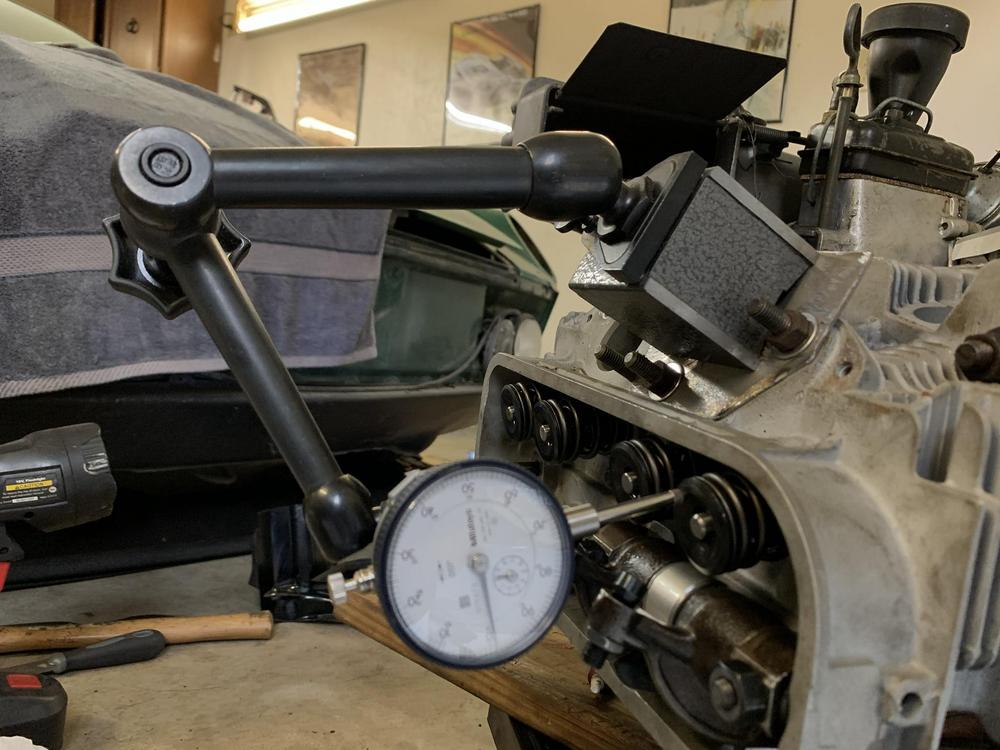
This is about as far as I got this evening...
I lined up the dial indicator. It looks pretty coliner right now. I want to get the angle dead on. Next is preload, then find full lift, and so on so forth.
---------------------
Here are a few photos from the Aircooled Swap, I found a few parts and had a great morning. Totally beautiful day.
Sand Beige is so great.
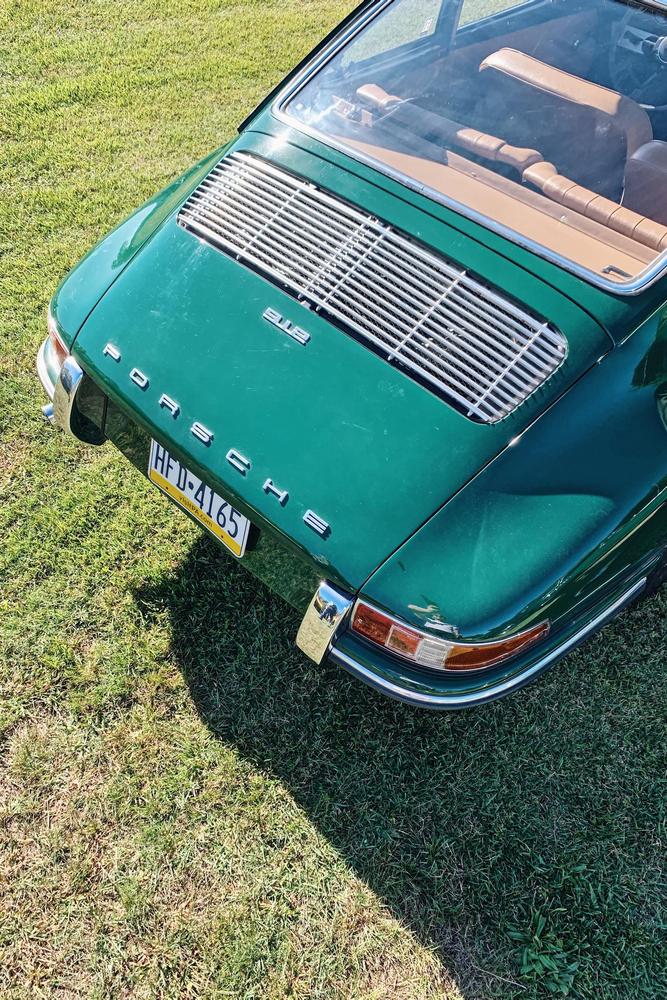
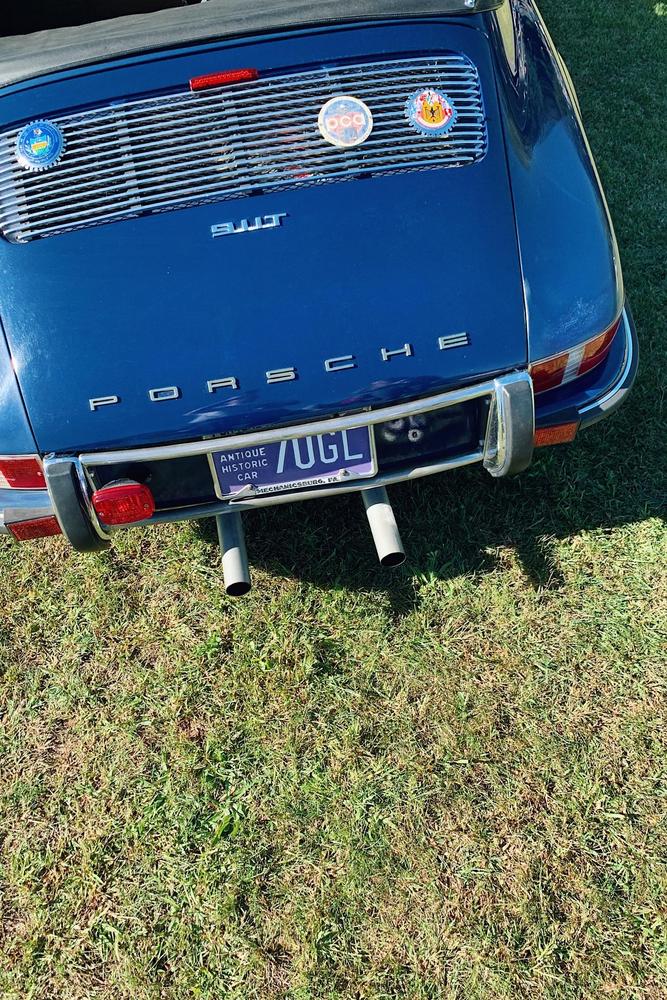
Thanks all! <3
Posted by: mda123 Oct 1 2020, 11:27 AM
Hey Jared,
New 914 owner living in NoVA here checking in to say I've read through your build thread and it's really impressive stuff. Very motivating for me to figure out my project, a '71 with no engine/trans.
I don't have any welding skills (in fact, have never welded in my life) so I'm hoping the early indications of modest rust hold up so I can get things moving. Maybe we'll cross paths one of these days.
Posted by: jaredmcginness Oct 1 2020, 06:42 PM
Fellas,
How is everyone doing? If you're like me; trying to stay off social media a bit and do your own thing. Looooots of opinions flying around right now.
So we are nearing completion on the 1911 (how many times have I said that?)
I've seen a lot of cool ideas for peoples engine test stands.
Since I've essentially built this motor on a dolly, my options are bit more limited.
I definitely need to check the vitals while breaking the motor in, preferably without the gauges rolling around on the floor and a mess of wire.
I drew this up in solid works and bent it this afternoon. 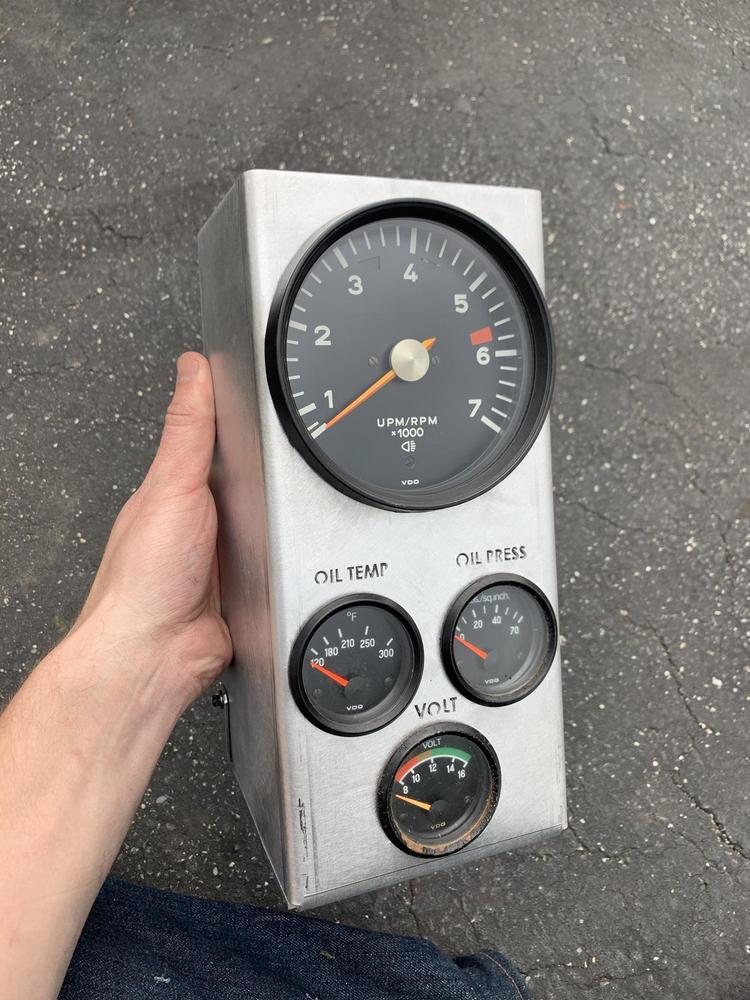
Room for everything I need to break the cam in. (ignore the vacuum gauge)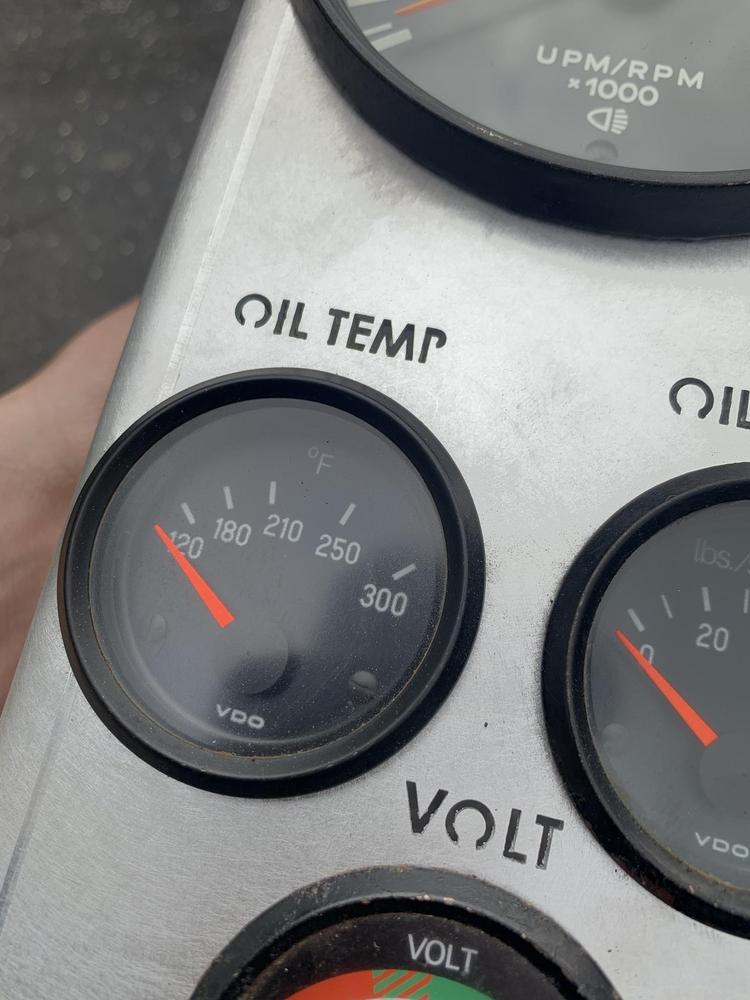
I am really happy with it. I might add some holes for a switch... but I've done a lot already maybe a screw driver will be fine for engaging the starter. 
-------
As for the car - here are a few pictures of cutting the chromoly pushrods.
I used verniers locked @ dimension to scrape a line where my pushrods should be cut. From there I used an archery cutter - $14 on amazon - to finish the job.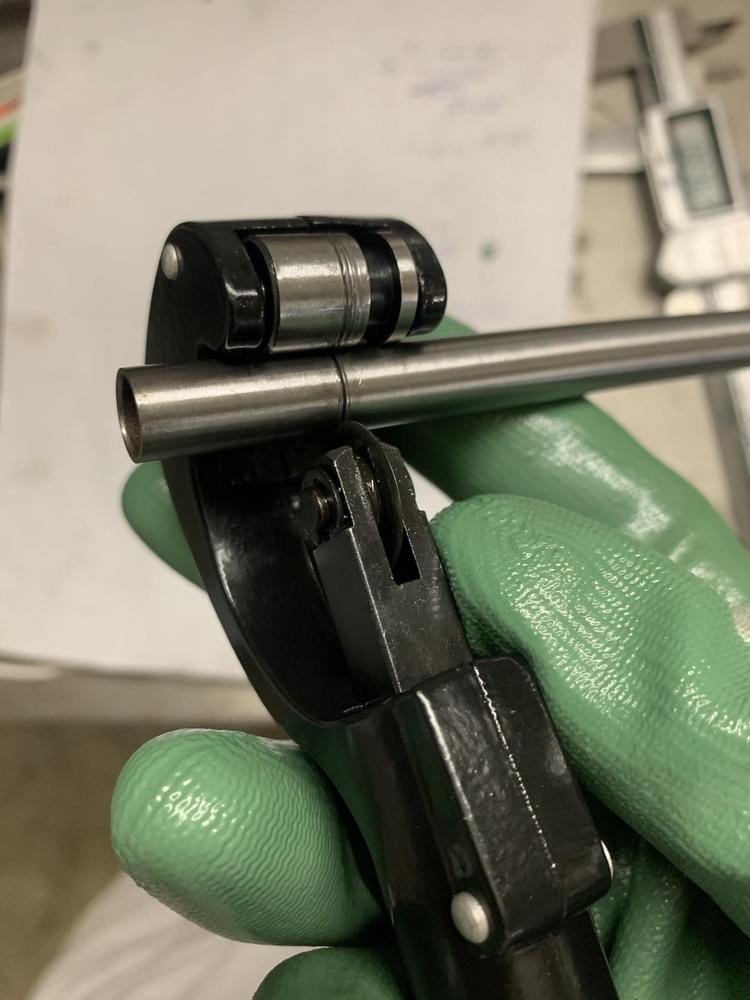
Squared up with a 90* block, checked with an angle finder and LIGHTLY belt sanded.... one tap at a time, shaving a few thou of until I got a nice tight fit in my caliper.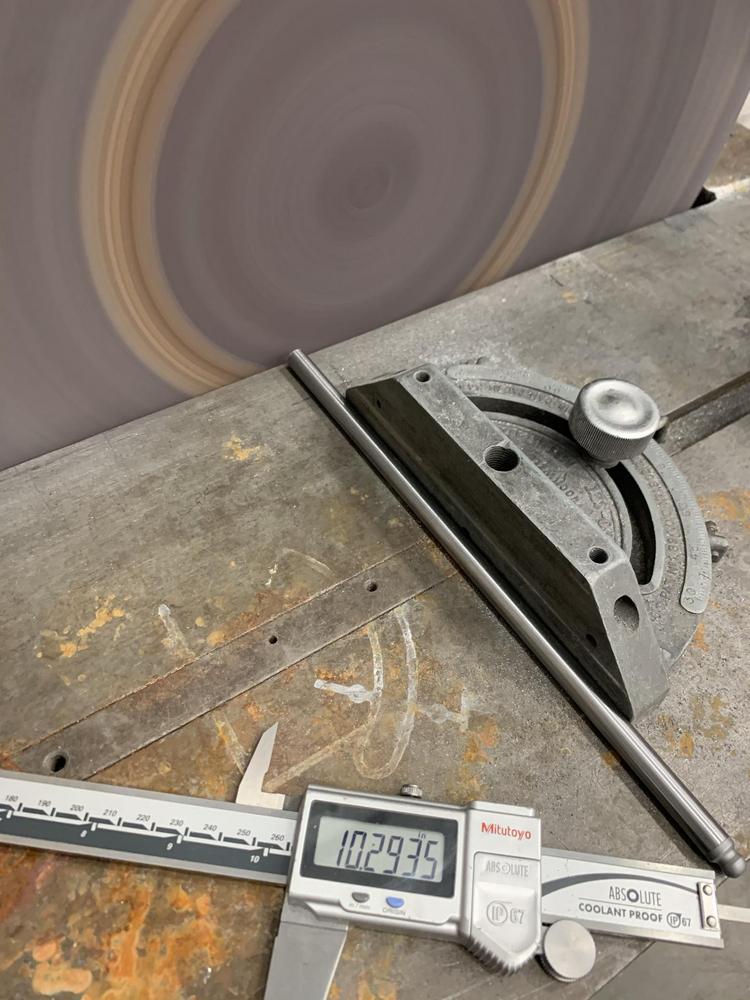
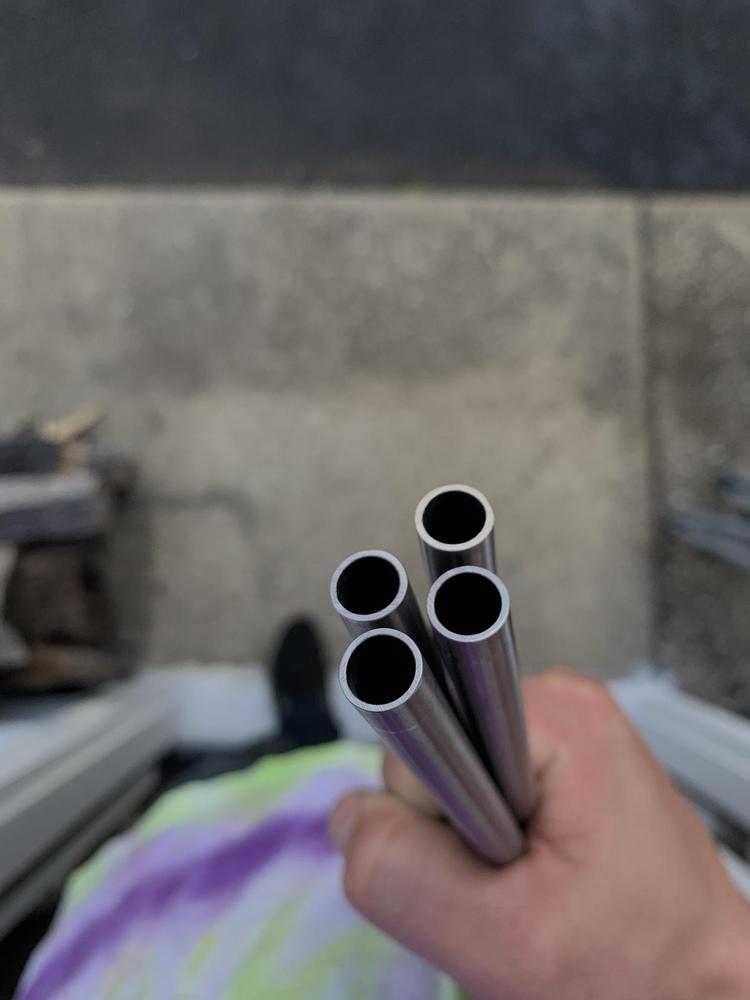
2 old lifters, a rub of light oil and a mallet. We are in. They are all within 10 thou (on the money) super stoked.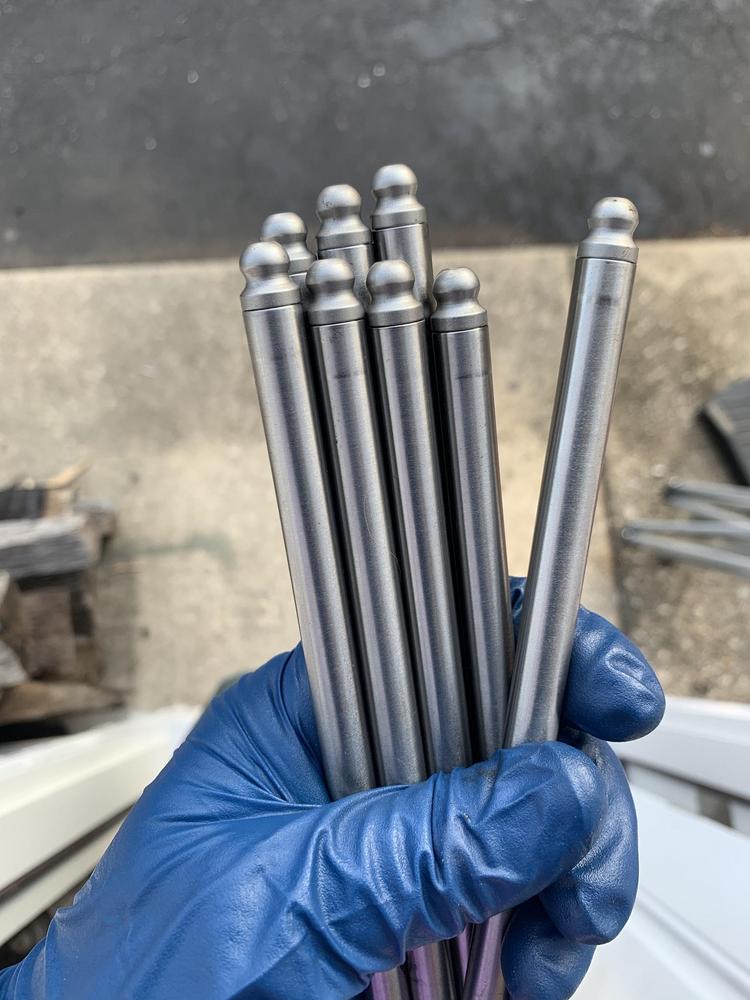
General cleaning up.... Engine mount from the old motor...
If it comes out, it gets cleaned!
Foolishly, I didnt think about installing this before the impeller housing and half of the tins... Go Jared
It all comes back off.
Installed - VHT paint on the mount bar.
This is where I stand now. 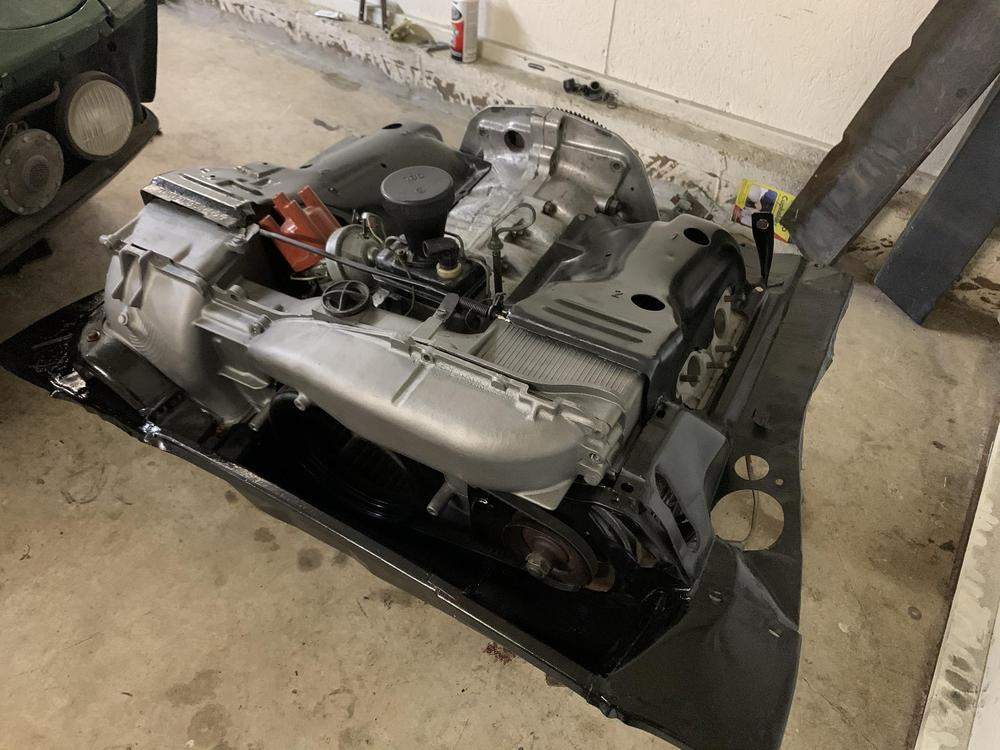
I think it has come a long way! Hopefully it turns over.
Basically left until firing:
-Remaining tins
-Carbs/fuel line
-Load with break-in oil
-Achieve oil pressure
-Plugs/Wires
.....
-Hook up my new test gauge panel and trans.
I think that is it!
Thanks for reading.
Posted by: jaredmcginness Oct 1 2020, 06:52 PM
Hey Jared,
New 914 owner living in NoVA here checking in to say I've read through your build thread and it's really impressive stuff. Very motivating for me to figure out my project, a '71 with no engine/trans.
I don't have any welding skills (in fact, have never welded in my life) so I'm hoping the early indications of modest rust hold up so I can get things moving. Maybe we'll cross paths one of these days.
Hey, thanks for the kind words. Right down the road from me.
You have found the best resource for these cars and the best group of guys. I wouldn't have much progress of any caliber without 914world.
Some things I have learned: Be willing to do things twice! This has been a lot of frustrating work. Don't be so critical of your work, learn from the mistakes and have fun. Looking back at the early pages and seeing the progress in saving this car is a great feeling.
Mig welding is simple with practice. Make a build thread with pics!
I'm sure we will meet soon, come to the local events, a lot of us show up
EDIT: I may be able to help you out with the long block from my '71, but every square inch needs gone through.
Posted by: bkrantz Oct 1 2020, 07:50 PM
More good work, Jared. Here's to a successful engine start-up.
BTW, I assume you have turned it through several revolutions by hand to check for any surprises.
Posted by: jaredmcginness Oct 1 2020, 08:03 PM
More good work, Jared. Here's to a successful engine start-up.
BTW, I assume you have turned it through several revolutions by hand to check for any surprises.
Thank you!
Oui, I have oiled the bits and turned it by hand, probably about 40 times
since the valve adjustment. The dual springs make it a bit of a work out.
Posted by: Frankvw Oct 2 2020, 01:13 AM
good luck with the rest of the build. Good to see you do such much work yourself !
Posted by: mda123 Oct 2 2020, 09:46 AM
Hey Jared,
New 914 owner living in NoVA here checking in to say I've read through your build thread and it's really impressive stuff. Very motivating for me to figure out my project, a '71 with no engine/trans.
I don't have any welding skills (in fact, have never welded in my life) so I'm hoping the early indications of modest rust hold up so I can get things moving. Maybe we'll cross paths one of these days.
Hey, thanks for the kind words. Right down the road from me.
You have found the best resource for these cars and the best group of guys. I wouldn't have much progress of any caliber without 914world.
Some things I have learned: Be willing to do things twice! This has been a lot of frustrating work. Don't be so critical of your work, learn from the mistakes and have fun. Looking back at the early pages and seeing the progress in saving this car is a great feeling.
Mig welding is simple with practice. Make a build thread with pics!
I'm sure we will meet soon, come to the local events, a lot of us show up
EDIT: I may be able to help you out with the long block from my '71, but every square inch needs gone through.
Appreciate the offer on the long block, but as of now I'm taking things one step at a time. First I'm working to identify and repair all rust, then I'll probably go about cleaning and painting damn near every part underneath the car. After that I'll start thinking more seriously about the right path for the engine, but at the moment I'm thinking a Subaru swap. I have friends with some excellent connections in Subaru world that can get parts very cheap, and I take it the swaps aren't monstrously difficult.
Made more difficult by the fact that I've got a fourth kid on the way though lol. I've got four weekends (Sundays, really) to work before baby enters the scene, so let's just say I'm expecting the project will be measured in months, if not years.
Posted by: horizontally-opposed Oct 2 2020, 10:02 AM
I gaff taped the bolsters, so there wouldn't be much exposed foam. We'll put seat covers on in for now, maybe replace the front seats. I found the fabric in Germany, but its and arm and a leg for a yard - maybe down the road.
At least there's now 1 running Porsche at the house.
Congrats on a very cool find. These are still, imo, underrated—and Studio cloth is one of Porsche's all-time coolest interiors (also imo).
Posted by: jaredmcginness Oct 5 2020, 07:18 PM
Howdy,
Spent a few hours in the garage the last few days.
I made a wiring harness for my engine test gauge panel and tied up some loose ends with the motor. Pretty much ready to add the last bits, check for oil pressure, and see if she cranks!
If you notice anything obvious missing, reach out. But I believe its all there.
Had to get the Bosch blue coil. 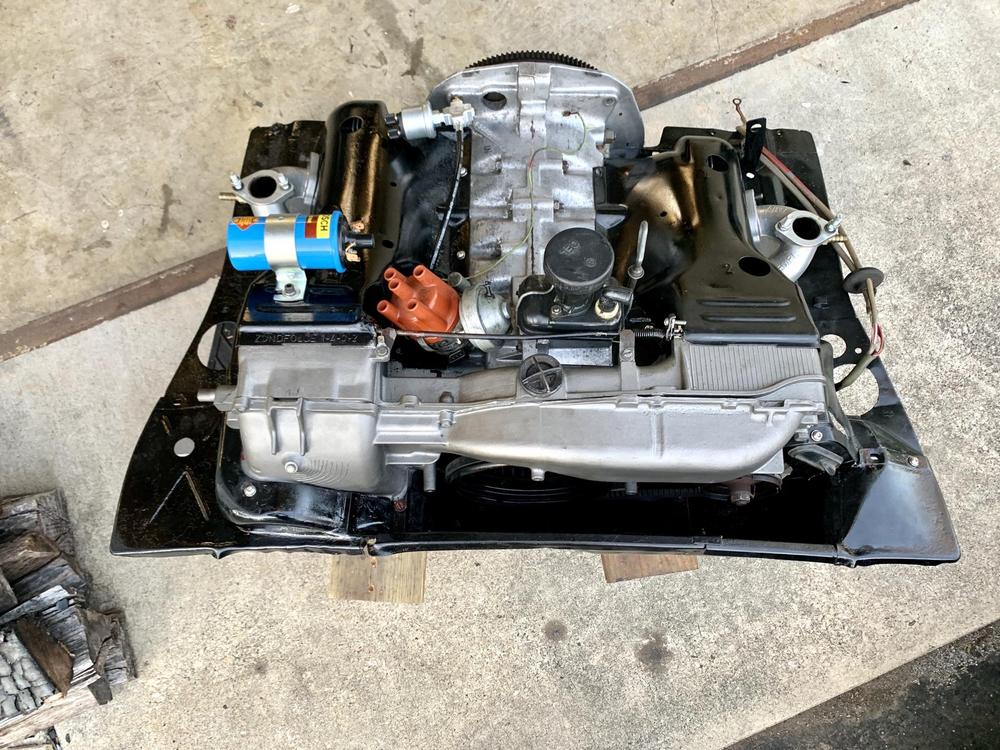
Painted (VHT 'Cast Iron") and installed the heat exchangers... Harder than you might think to mount by yourself.
I added some single barrel Weber copies I got them for great price. These came off a 2 litre.
I partially expect them to be too small and am prepared to find a set of dual barrel 40's if it will hinder the performance notably. Time will tell.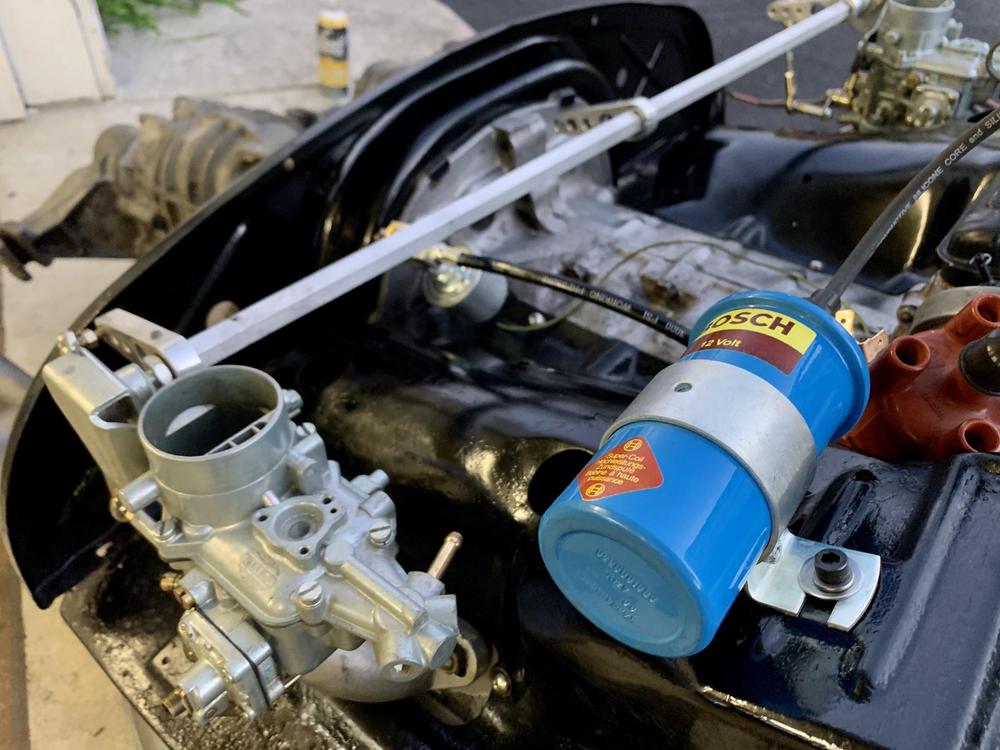
Picked up this muffler locally, while I wait on a stainless muffler to be built. This will allow me to tune the motor and such now - go for looks later.
This being me.....
There has been a long running inside joke among my friends that I am bad at oil changes... something always happens. Its mostly a joke, but still.
Only right that the first time I ever put oil in this motor the #^!$ing drain plug was out. I am 1000% certain I already put it in. But sure enough...
Glad I bent over "just to see if there was any leaks" ... cant even be mad.... a few towels and cat litter. Try again tomorrow.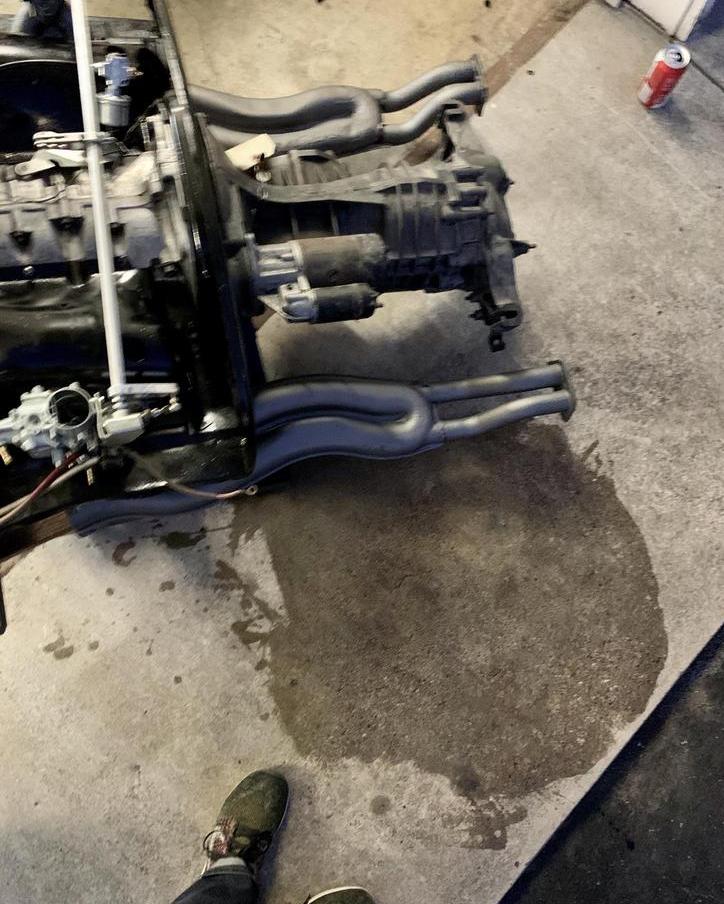
I can make it 13 pages on a build thread with fabrication, engine work, upholstery and perseverance, but cannot pour oil down a hole.
Besides the moist garage floor, this is where we stand.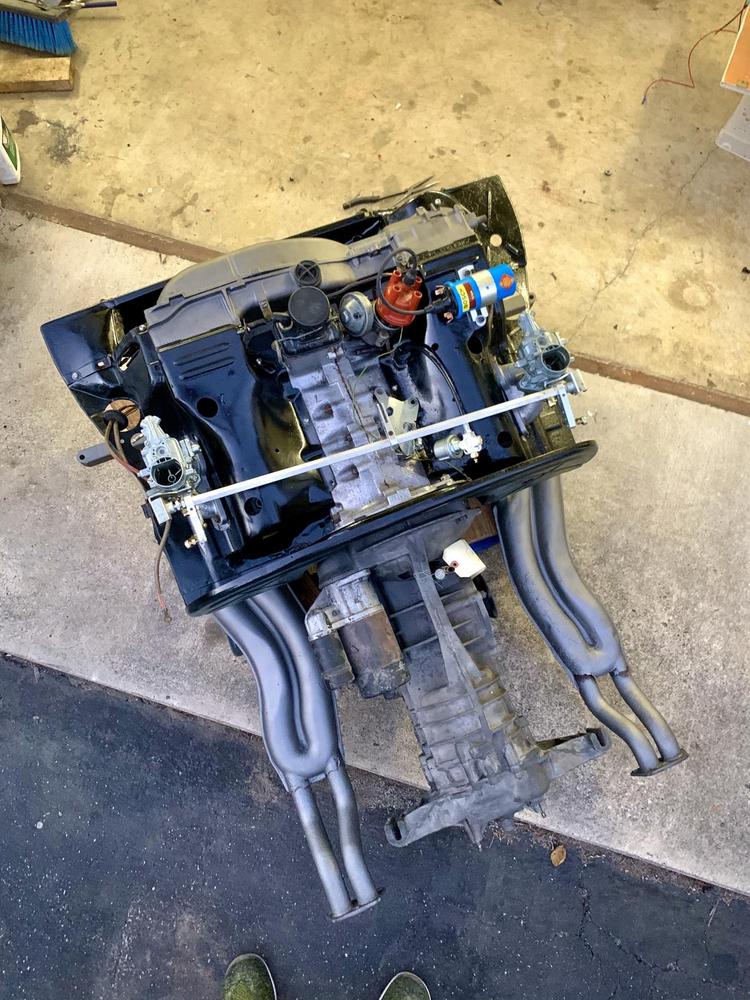
Tomorrow, I will crank the motor and try to get oil pressure (of course after I go purchase more VR1).
If so, fully attach the carbs (I am aware they are backwards in this pic). Throw on my new starter and see if I cannot get this bad mother to turn over.
Cheers,
Jared
Posted by: jaredmcginness Oct 7 2020, 10:15 AM
Got lots of little (and big) parts bolted up last night.
Wild to see how large the whole unit is.
Here it is next to the test stand: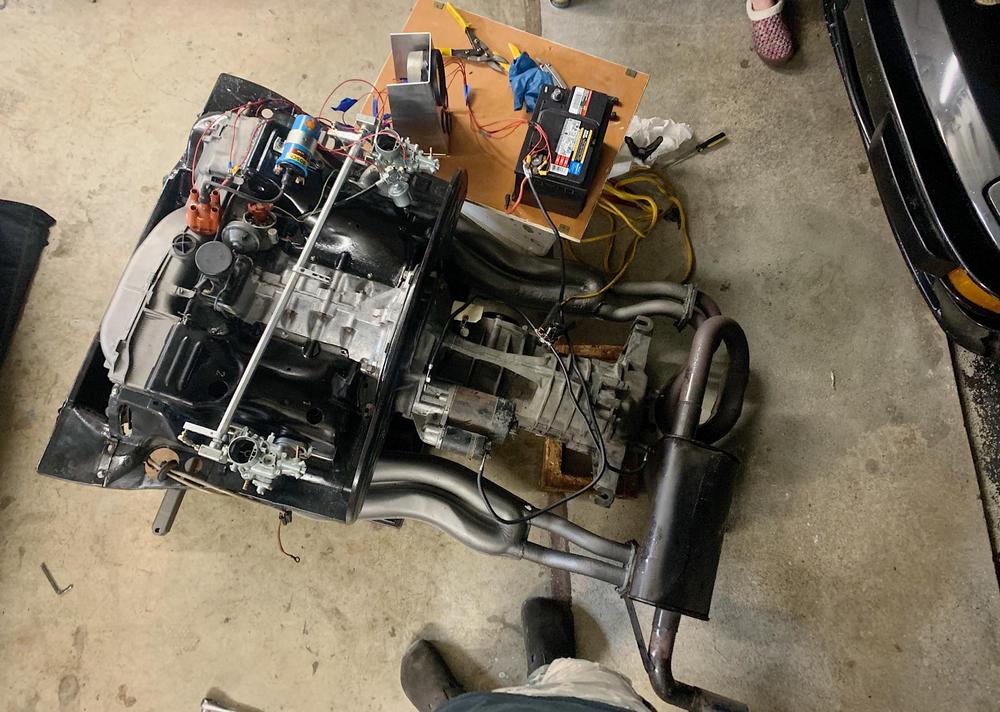
Very nervous to crank it over.... *wipes sweat from brow*
First order of business is to see if I can get any oil pressure.
Purchased a bunch of heavy duty ground cables and hooked everything up.
Configuration here is:
-No plugs
-No dizzy
-Oil filter loose (hopefully to see some pressure squirt out)
-Screw driver in hand to jump the starter connections.
Here is a video after the second crank.
https://i.imgur.com/qw3EdPf.mp4
https://www.youtube.com/watch?v=hIH7FdGkcBM&fbclid=IwAR36wUfBXlismAlMlc_vCgN6eA3aQ0HkWzZ__1twXWrR8pu1ZxBnToYYFd4&app=desktop
Dang! in 3 or 4 rotations I got oil squirting from the filter, closed that up.
Cranked again and we have pressure building up to 3 bars.... Also nice to see that all the gauges work.
I think this is very good news! I'm elate that the motor even turns under its own power.
Tonight, if there is time, I will fix up some kind of gravity feed gas tank (and filter) and see if I cannot get it fired up for the first time and break this cam in.
*(unsure if I should attempt to get running with the dual carbs or slap on the single weber, just for the break in.
Both came from running 2.0's so they should both be in the ballpark of tuning... at least the parking lot of the ball park)
ah!
Posted by: mda123 Oct 7 2020, 01:18 PM
Awesome, nice work! Seeing all of your progress makes me think I need to just take some time off of work and spend a few days wrenching. As of now, mostly confined to Sunday afternoons because of kids and such.
Posted by: nditiz1 Oct 7 2020, 02:24 PM
Nice job! Can't see the vids - youtube says private
Posted by: Gint Oct 7 2020, 05:51 PM
Those look awesome! Nice work on the entire project.
I wonder if that Jasco paint remover does any harm to the factoring anodizing? For my own reasons... Is it this stuff?
https://www.homedepot.com/p/Jasco-16-oz-Premium-Paint-and-Epoxy-Remover-Aerosol-EJPR502/308276936
Posted by: Gint Oct 7 2020, 06:03 PM
I suppose you could body filler on the hell hole there if you want it to look nicer, or, if later, you don't want it too obvious that it was repaired. But I don't think there's any "dishonor" in that repair, and in fact it is evidence of all the good work you did/are doing. OTOH, you're most interested in driving this thing
On both points. Honestly I'm excited to see young people like you appreciating our automotive history to this degree. There is nothing wrong with anything happening here. Your making me read all of this thread!
Posted by: seanpaulmc Oct 7 2020, 06:11 PM
Jared, Compliments on an outstanding build! Your car has come such a long way. I wish you miles and miles of enjoyment. Your thread is a great inspiration.
You mentioned the Blue coil and that caught my attention from something I read in another build thread at some past point in time. (Long time lurker.) Maybe it's a question really for the brain trust.
What is the thinking on mounting the coil to the tin in that location? I had read that it is prone to vibration and cracking.
Questioning this myself after reading your post today, I went and looked at the engine I pulled from my own project which shows the tin cracking in that location.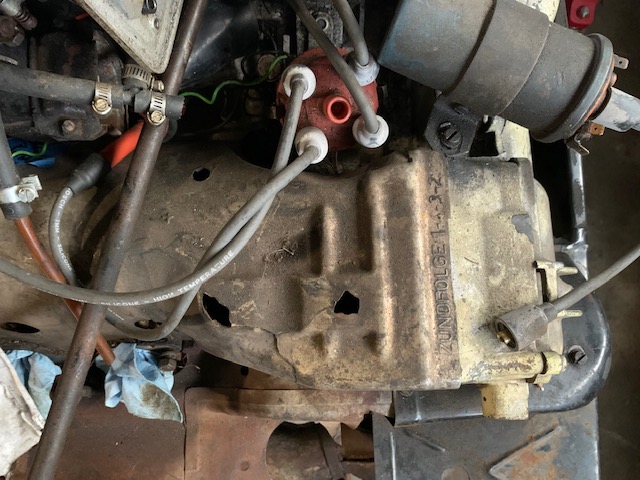
Hopefully an experienced builder can chime in with what's recommended.
Again, nice job!
Sean
Howdy,
Spent a few hours in the garage the last few days.
I made a wiring harness for my engine test gauge panel and tied up some loose ends with the motor. Pretty much ready to add the last bits, check for oil pressure, and see if she cranks!
If you notice anything obvious missing, reach out. But I believe its all there.
Had to get the Bosch blue coil.
Painted (VHT 'Cast Iron") and installed the heat exchangers... Harder than you might think to mount by yourself.
I added some single barrel Weber copies I got them for great price. These came off a 2 litre.
I partially expect them to be too small and am prepared to find a set of dual barrel 40's if it will hinder the performance notably. Time will tell.
Picked up this muffler locally, while I wait on a stainless muffler to be built. This will allow me to tune the motor and such now - go for looks later.
This being me.....
There has been a long running inside joke among my friends that I am bad at oil changes... something always happens. Its mostly a joke, but still.
Only right that the first time I ever put oil in this motor the #^!$ing drain plug was out. I am 1000% certain I already put it in. But sure enough...
Glad I bent over "just to see if there was any leaks" ... cant even be mad.... a few towels and cat litter. Try again tomorrow.
I can make it 13 pages on a build thread with fabrication, engine work, upholstery and perseverance, but cannot pour oil down a hole.
Besides the moist garage floor, this is where we stand.
Tomorrow, I will crank the motor and try to get oil pressure (of course after I go purchase more VR1).
If so, fully attach the carbs (I am aware they are backwards in this pic). Throw on my new starter and see if I cannot get this bad mother to turn over.
Cheers,
Jared
Posted by: Gint Oct 7 2020, 06:38 PM
Both came from running 2.0's so they should both be in the ballpark of tuning... at least the parking lot of the ball park)
Run what ya brung. Those single barrels should be perfectly adequate for a cam break in.
Posted by: jaredmcginness Oct 7 2020, 06:54 PM
On both points. Honestly I'm excited to see young people like you appreciating our automotive history to this degree. There is nothing wrong with anything happening here. Your making me read all of this thread!Dang fellas lots of awesome responses! Love this community. All of ya'lls info and aid have gotten me this far.
(gotta get it out of my system before its all illegal in 2035 or whatever /sarcasm)
I wonder if that Jasco paint remover does any harm to the factoring anodizing? For my own reasons... Is it this stuff?
https://www.homedepot.com/p/Jasco-16-oz-Premium-Paint-and-Epoxy-Remover-Aerosol-EJPR502/308276936
Thank you kindly @Gint ! Yes this is the stuff. It did not appear to damage the factory finish in any way. I was recommended that product... I think from the Samba. I am super pleased with it.
Run what ya brung. Those single barrels should be perfectly adequate for a cam break in.
Sounds good! Tired of unbolting things
Posted by: jaredmcginness Oct 7 2020, 07:03 PM
Nice job! Can't see the vids - youtube says private
un-privitized it, thanks for the heads up. Was trying to avoid the youtube trolls commentary.

Jared, Compliments on an outstanding build! Your car has come such a long way. I wish you miles and miles of enjoyment. Your thread is a great inspiration.
You mentioned the Blue coil and that caught my attention from something I read in another build thread at some past point in time. (Long time lurker.) Maybe it's a question really for the brain trust.
What is the thinking on mounting the coil to the tin in that location?
Hopefully an experienced builder can chime in with what's recommended.
Thank you so much @http://www.914world.com/bbs2/index.php?showuser=20649 , really kind. This has been massively rewarding to me.
To me, the blue coil is just classic. It has always stood out in books since I was young, looking at 356, beetle, and buggy engine bays. All part of the whole picture/aesthetic to me. (those might be 6 volt, but still...)
Silly but there it is.
All I know about the location is that the coil came in that location on both of my motors and is congruent with what I see on here. Both motor's tins are crack free (surprising, coming from the state of the car, ha)
(Also now that I think about it. The 2 mounting holes are tapped from the factory , with a radius that matches the coil between.
I would look forward to some professional input, mine is from from it.... I am not against moving if it is recommended. But with the lack of cracking so far, It should last a few miles
Cheers
Posted by: Gint Oct 7 2020, 08:44 PM
After reading through your entire thread (took a while!), I notice those duals are a relative unknown to you right? Possibly new, never run? Forgot what page that was on...
It might be easier during first start and break in to use the single carb setup. Initial balancing of dual carbs is a finesse operation that might be a PITA during break in.
Posted by: jaredmcginness Oct 8 2020, 10:39 AM
After reading through your entire thread (took a while!), I notice those duals are a relative unknown to you right? Possibly new, never run? Forgot what page that was on...
Thanks for checking the thread out!
I posted a carb-specific question a while back and a member here offered me his duals for a nice price. They have 5000 miles on them and were removed from a web 86 cammed 2.0.
Should be similar.... But there are a lot of variables here.
Not against throwing the single on for break in. But I'll give it a shot tonight with what is already on there.
Posted by: Gint Oct 8 2020, 11:42 AM

Posted by: jaredmcginness Oct 11 2020, 12:51 PM
Took 14 pages to get here. But we've got the first start of the 1911.
Super happy - you can tell by my ear to ear smile in the following video.
I had some ridiculous spark issues this weeekend, for those of you who saw my other thread. I could not get a consistent spark. I changed dizzys from Vacuum advance to an 009 with pertronix, much better suited for carbs.
I started from square one, took everything wiring wise off the motor, layed it all out clearly and reinstalled everything. I immediately had great spark all around.
Maybe I had a poor ground.... who knows. Do it right or do it twice.
So.... I installed my single weber. attached a 3psi low pressure fuel pump and filter to a can of fresh gas, Jumped the starter and boom. Combustion.
VIDEO HERE: https://www.youtube.com/watch?v=H8z0mJBoPSY
The motor runs about 30 seconds then cuts out. The single carb leaks a bit anyways, so I swapped back to the duals.
Unfortunately, this time around (rushing) I clipped the fuel pump to constant 12v.... it filled cylinder 3 with fuel... and no turny on the crank. (would a fuel pressure reg help with this?)
Pulled the dipstick... smells of gasoline.... SOOOOO drain the oil again, some gas was present.
I pulled:
Plugs
Valve Cover
Dipstick/Cap
Oil filter
Crank spins now.
I suppose I will let it air out for a day or two and try again. Fan is blowing on it now.
I got too excited I started losing focus and wasn't quantifying everything. Classic Jared. Hopefully no other issues arise from this. The gas was in there no more than 2 minutes until I pulled the carb (and fuel poured out)
Win some, lose some, but this was a HUGE win and really exciting. This is my first split case engine build. Hearing it run made my week (year?)
Thanks for the help getting me this far.
Jared
Posted by: jaredmcginness Oct 11 2020, 07:01 PM
Alrighty,
Purged the motor of all fluid, evaporated for several hours.
Plugs were cleaned. Two plugs (#3 and #4) had gas on them and were a bit black. But not fouled.
I squirted a teaspoon of oil down each spark plug hole to lubricate the rings.
I’ll let it sit tonight and maybe tomorrow, we should be back in business.
Bonus: here is a GIF I made of the RPM gauge working, that's nice to see.
And another video from behind the temporary exhaust. Looking back on the vids this evening and hearing the damn thing running.... I am ecstatic!
https://i.imgur.com/rEVNL2b.mp4
Cheers!
Posted by: wysri9 Oct 12 2020, 03:30 AM
What a milestone Jared! I know that feeling
Just hope yours continue to hold all the fluid in - I am about to redo pushrod tubes.....
Posted by: AZBanks Oct 12 2020, 10:20 AM
Congrats Jared.
Posted by: jaredmcginness Oct 13 2020, 06:15 PM
Hey fellas,
Trying to tie up a few loose ends before I head out to New Mexico (work) until the end of the month.
I am putting the motor stuff aside until I get bigger carbs. I had a set of 34 weber copies. Not sure why I bought them knowing I would be building a bigger motor.... better suited for someone else. Probably will list my now collection of 4 carbs on the samba.
Anyways, with the spare time, not getting my hands too dirty with the 1911, I cleaned the garage. Got some small tasks in the interior done, and finished the touch up paint on the car.
Now the 914 is "all" "one" color At least I don't have massive primer spots - especially around the passenger rear fender, which I had to cut for the hell hole operation.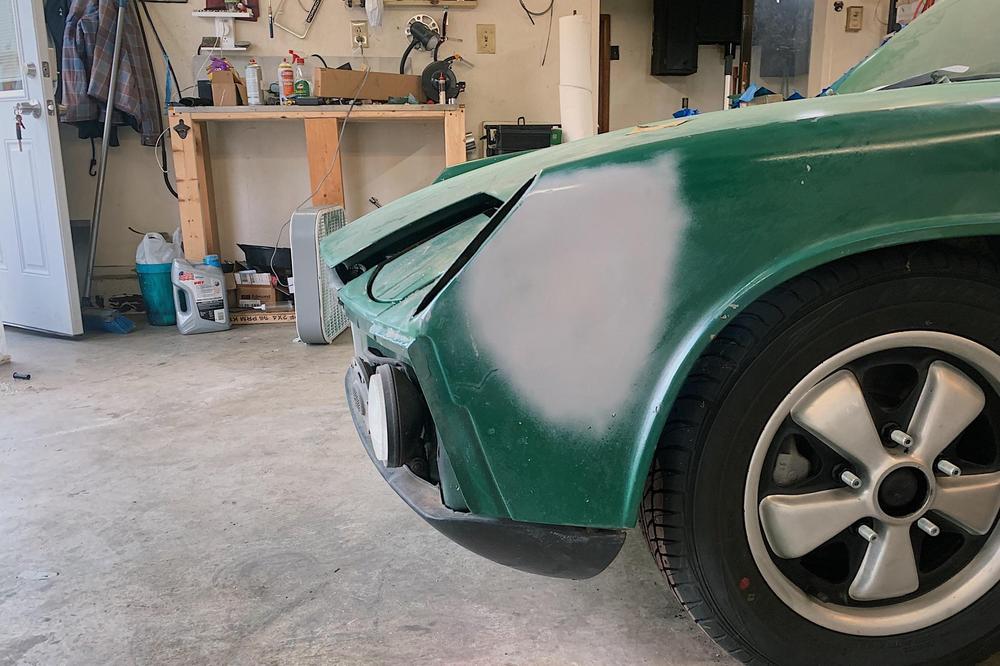
Painted... now my car has 11 shades of Irish green.
This way the people that I pass that pass me on the highway will at least know it’s supposed to be green.
I'd like to say a full block sand and respray will come this winter/spring. Just honestly the least of my worries. Driving it is more important. 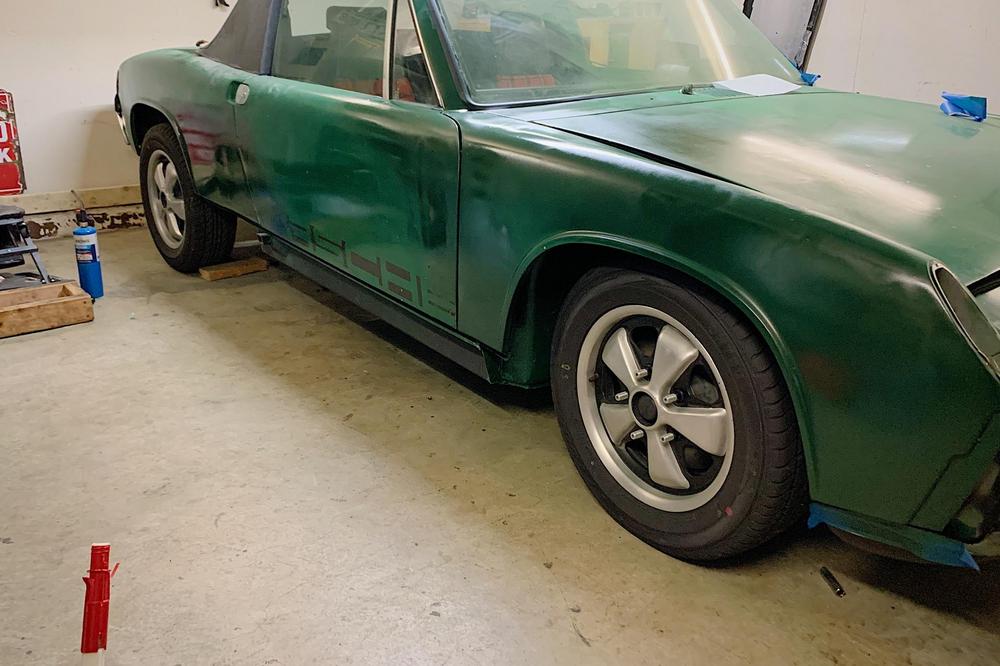
Other than that, I got some GREAT rear calipers from a world member. I am so pleased. Watched a few youtube videos on rebuilding rear calipers. Honestly, jsut want a break from all the projects. It's OK to buy something already done. 
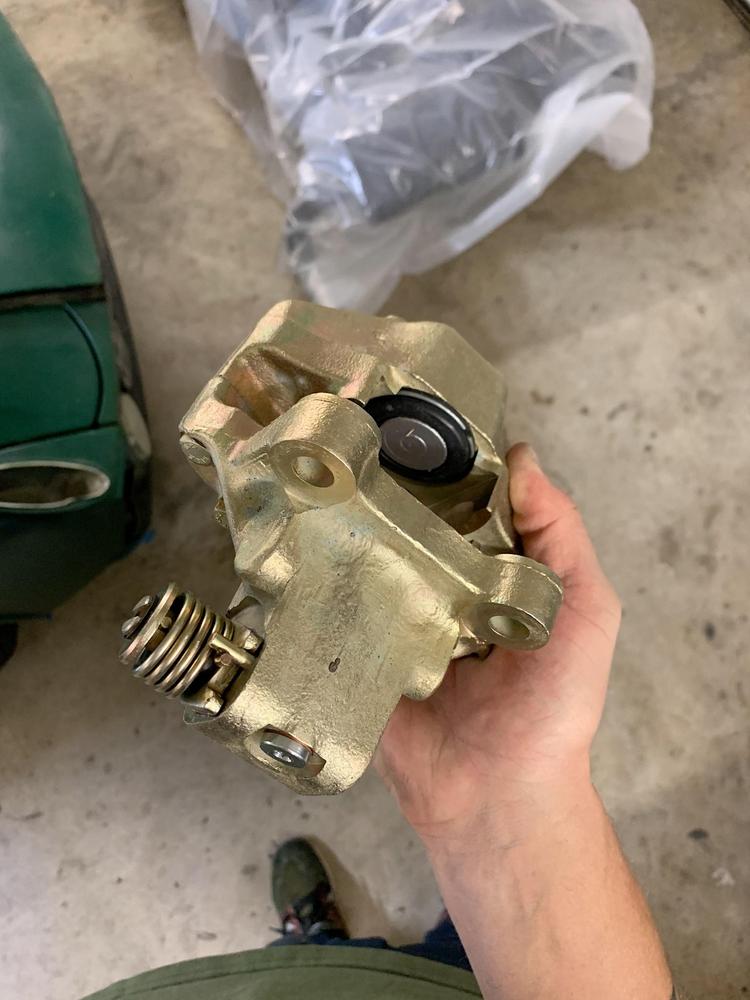
weeeew!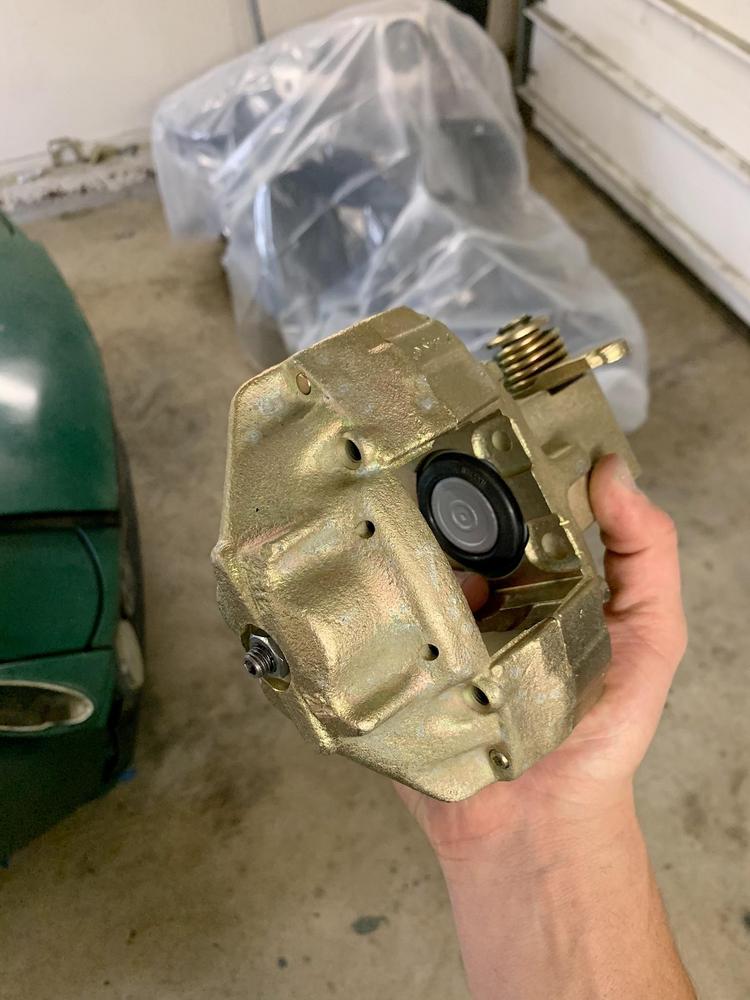
Purty!
As you can see in the background, my motor is all wrapped up for safe keeping while I am gone... Might do a few small things here and there... But I should probably change the oil in my TDI.
Cheers!
Posted by: Gint Oct 13 2020, 08:04 PM
Nice. They probably originated from PMB (guessing). Look around here and for later: http://www.pmbperformance.com/gravity-bleed.html
Posted by: jaredmcginness Nov 11 2020, 08:48 PM
Hey fellers.... been a while!
740,00 things going on. (I'm buying my first house!) (with a 2 car detached garage!)
Keeping it low key until I have the keys in my hands. I'm sure you know how it goes.
Where to start....
Since the last (first?) time I ran the motor, I decided to not use the small carbs (dual 34 ICT), and upgrade to some big guys.
I met up with @http://www.914world.com/bbs2/index.php?showuser=18763 and he set me up with a project pair of Dellorto 44's. Missing a few pieces, but I can totally work with that.
Here are the carbs after being stripped down. Top carb was soaked in GUNK for 2 days to clean it out, bottom carb is about to go in.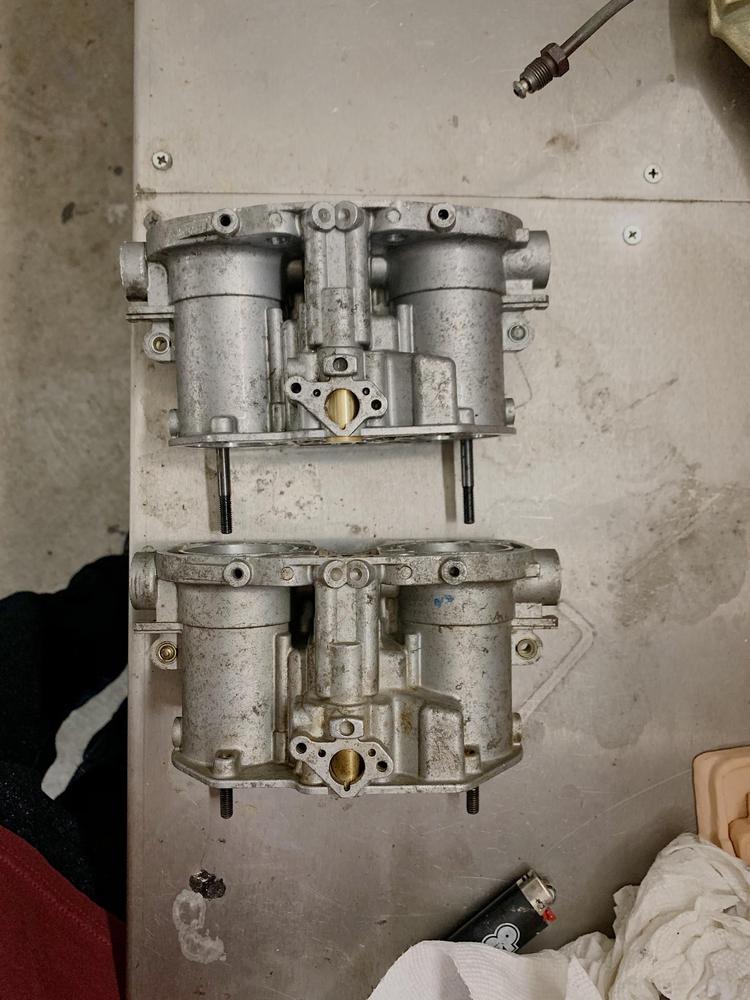
The pieces I needed arrived. Turns out all of them are NLA in the states. I found everything I needed from a guy on eBay in Italy. I can give the name if anyone needs it, he's got everything.
The remaining parts arrived from CB performance. I finished the carbs up, really not much was reused except some of the bolts and nuts.
Holy crap these are sweet.
Comparison to the pair I was going to use... 
Installed. Seriously looks really bad ass with the filters. These are some big mothers!
SO...
New oil, Brad Penn Break in... New filter. Attach the linkage and see if she fires.
https://imgur.com/gallery/UuuI6h2
Boom. The first try it fires right up. That's awesome.
Issues that I need to sort:
1 Linkage might need realigned. It seems to be binding and not allowing me to go to crazy on the throttle. I feel like it's stopping about half way.
2 It almost sounds like it's running on 3 cylinders at a higher throttle. It bogs down. Spits and backfires a lot. Runs for about 2 minutes then decides to stop.
3 Amateur - I know, but I really don't know where to begin with tuning these. Bit more here than the Harley CV that I am used to.
I backed off the idle screws about 3 turns and made a few adjustments. I need to do a lot of reading on my Weber PDFs.
4 I probably have a vacuum leak. (nothing is connected) and I certainly need a carb sync tool. But we made it this far. What's a few more days.
HERE are the specs that I built these Dellortos to. I would not be surprised if I needed to change some things. Anything stand out?
1911cc
Vent: 34
Main: 130
Idle: 60
Air: 180
Emulsion. .2
Pump jet: 35
Thanks for reading guys!
Posted by: ndfrigi Nov 11 2020, 10:54 PM
Hello Jared, try to google dual carb tuning for the basic tuning/adjustments of the main idle screw and idle mixture screw.
Posted by: nditiz1 Nov 12 2020, 07:44 AM
Way to go dude!
@http://www.914world.com/bbs2/index.php?showuser=23209 - Come back over when you get a chance I have a german sync tool you can barrow.
Essentially you should leave the linkage disconnected until the very end. You should be able to get it running and idle. Carbs are cold blooded so you may need to have the linkage setup initially to get them a little warm before disconnecting.
The sync tool is used to get both sides L/R to draw in the same amount of air. Each barrel has an air bypass adjustment which almost never needs adjusting unless each individual barrel is not in sync on the same carb. I can't remember if those were removed so you may need to actually set yours before forgetting about them. Sync L/R first, then sync them on the barrel then re-sync L/R. This cannot be done without the snail tool (unless you have a super ear to hear the amount of air draw into each side ).
Once you have a good idle and all 4 carb barrels are around the same pull then you can begin to set the air/fuel mixture. This is best used with an AFR, but you can do it with feel/hear and a timing gun with RPM readout. You start at 1 and adjust the mixture to the best running condition for that cylinder. I usually run through that cycle a few times 1-4 until I feel I have gotten the smoothest best idle out of each barrel. Sometimes this results in the idle being too high which then the idle speed screws on the side need readjusting which then results in the mixture screws needing to be readjusted. It is a vicious cycle but eventually you will have it dialed in. After all that you can re-hook to linkage and the idle should not change.
After this point you can check the linkage for "sync-ness" by giving a little throttle and checking both sides L/R for the same increase on the snail gauge. At 1500 RPM both should be the same, at 2000 they both should be the same,...etc. If one side is higher then the other then you know the butterfly on that side is opening fast than the other and it will created un-eveness and poor performance.
@http://www.914world.com/bbs2/index.php?showuser=439 - Perry Kiehl - wrote his carb sync steps on a post not too long ago on here (few months back). Webers and Dells sync procedure is pretty much the same. Also, all these things will get the engine running/revving correctly barring everything else is set correctly, timing, valves, etc.
The jetting setup can only be adjusted once the engine is installed. That is another lesson which I can help with once you are there.
Edit - be sure to plug any of those vac lines on the carbs when tuning
Posted by: jaredmcginness Nov 12 2020, 08:07 PM
Sounds great Nick, thank you. I will reach out this weekend.
I looked into buying my own this afternoon (which I will do) but shipping is 5 days out. No Dual Carb Syncrometers on Amazon Prime. Ha’
From doing some more research, it sounds like I should be able to get these carbs idling and performing no problem, before any parts swapping is needed. Like said above, re-jetting will come later.
Maybe foolish, but my only concern is running the motor too many times before cam break in. It’s been ran probably 6-7 times now at 2 minute intervals, typically no lower that 2kish RPM. So I don’t believe I’m doing any harm.
I’d love to run it for 20 minutes straight. I just need to keep it running that long.
Cheers
Posted by: jaredmcginness Nov 13 2020, 06:21 PM
Washed the car today for the second time in a year. Covered in garage dust, feels great to clean it.
I've painted the fenders and other body panels (that were primed) with touch up paint. I wet sanded most of it. It looks pretty bad.
The Irish Green touch up wasn't a great match in this batch. At least it's all green?
14 shades of green, but green.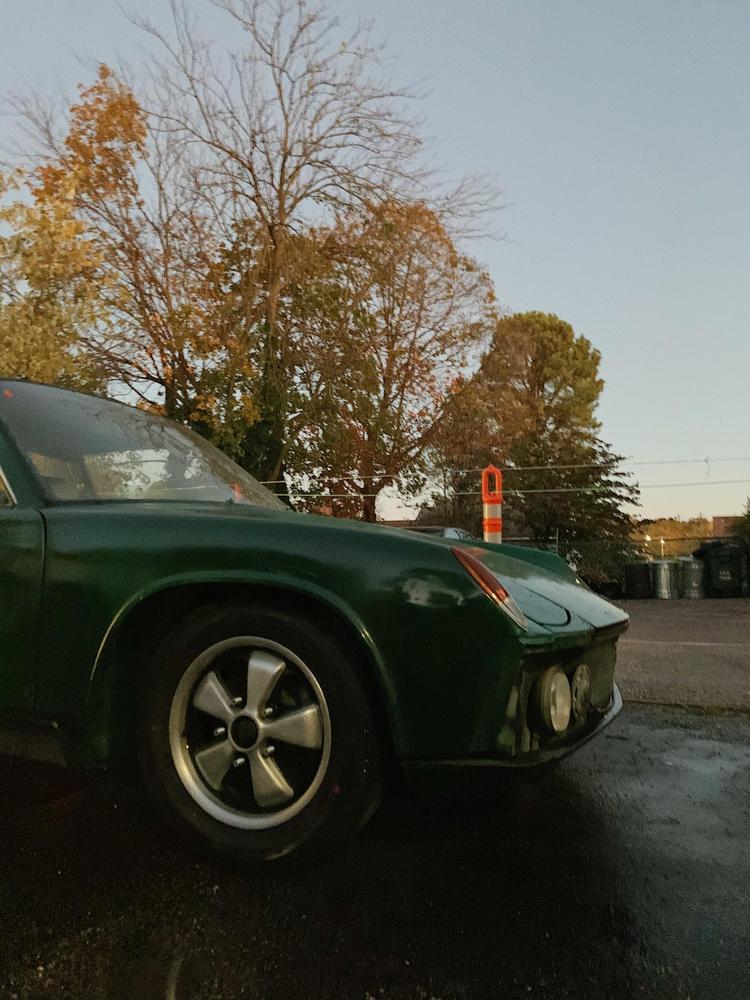
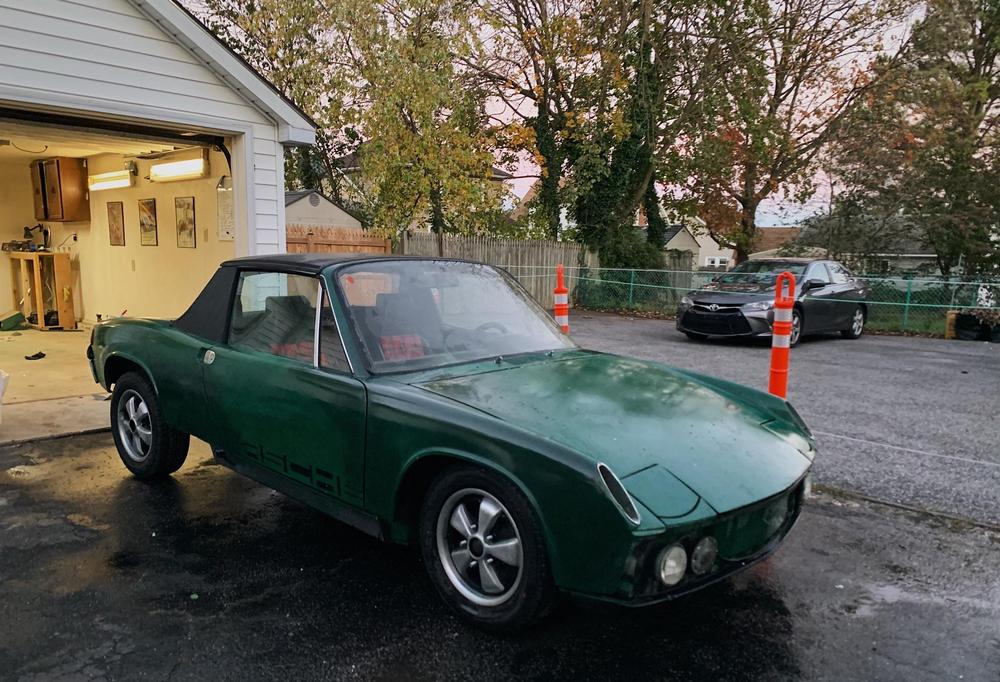
To combat this, I am toying with the idea of vinyl wrapping the car something similar to Irish Green. For the time being, I think that would look great. I really cannot afford paint right now.
This would clean the look of the car up - and be a relatively simple wrap. I have seen some good results here. (cost would be $3-500)
I ordered a few samples. There's no direct color match options. But I found something really close to 911 Irish Green.... Looks bit more like Brewster Green. See here: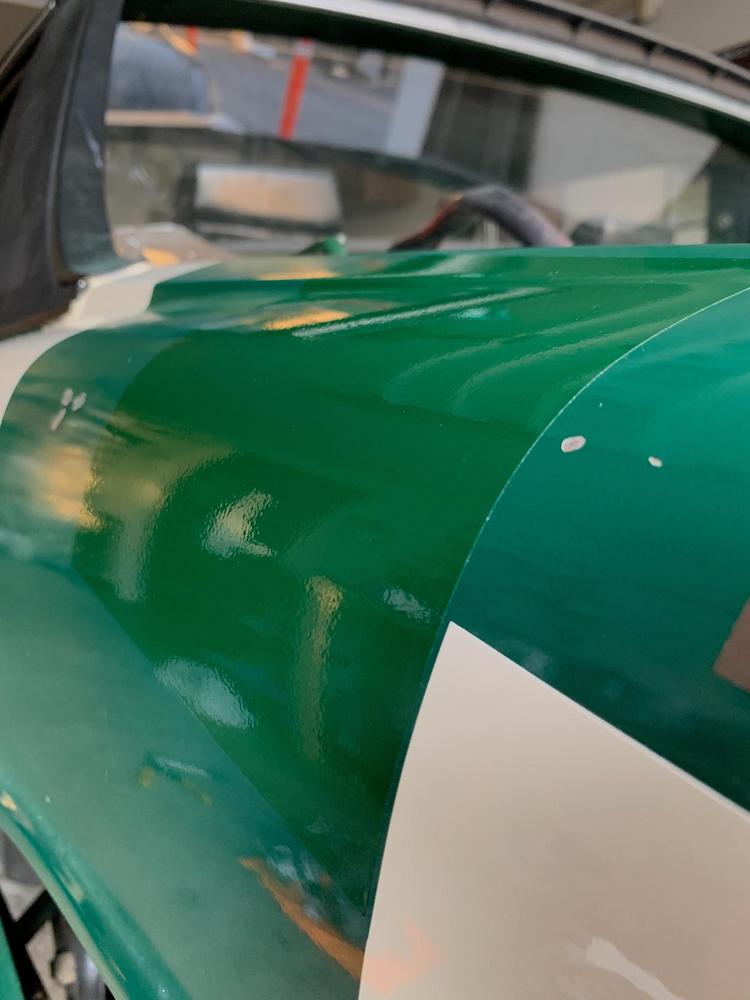
I ordered a few other samples just for $hits... (and to practice)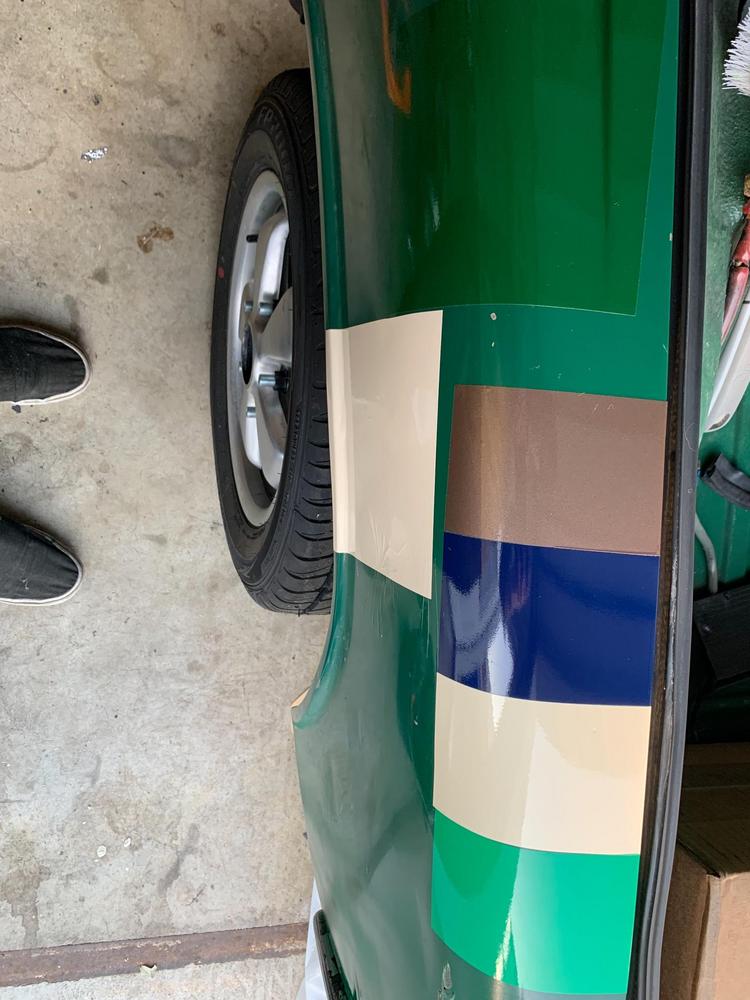
(since there is no vinyl comparible to Sepia Brown - my favorite Porsche color) The only two I really like are the two large 6x6" ones.
Gloss Dark Green and Papyrus Gloss, something between Light Ivory and Sand Beige. LOVE it.
The Papyrus would be a drastic change and totally left field... but kind of a poor choice, considering my door jambs and trunk would be green.
This is how the two colors look in the light: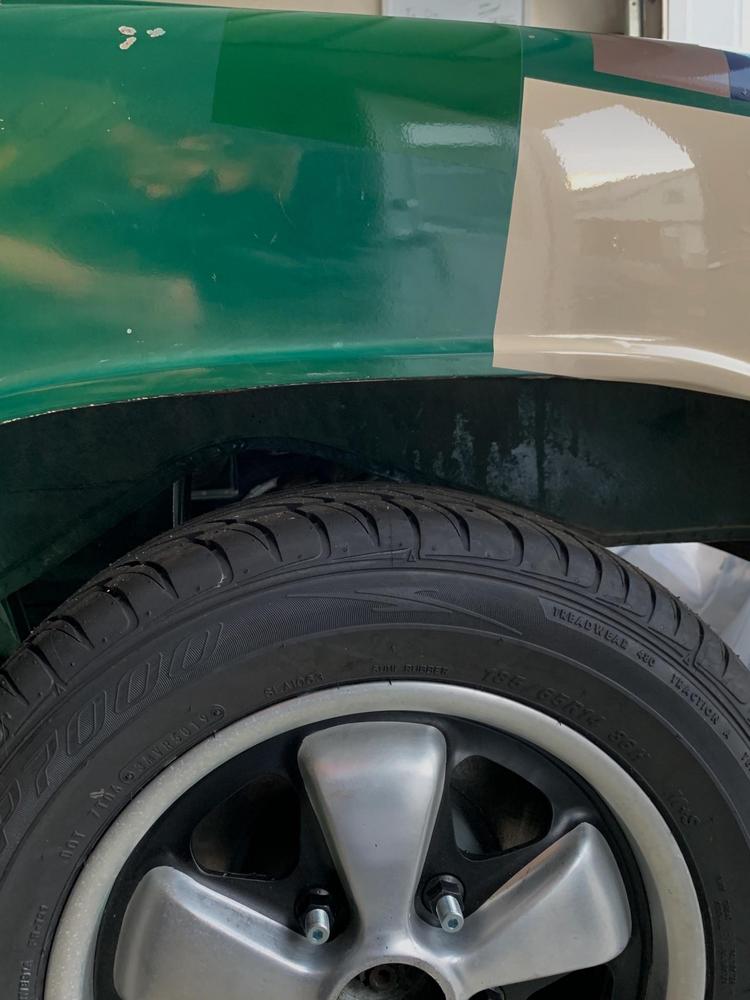
And here is a good example of how truly horrible the depth of my paint is. 20 years in the sun. 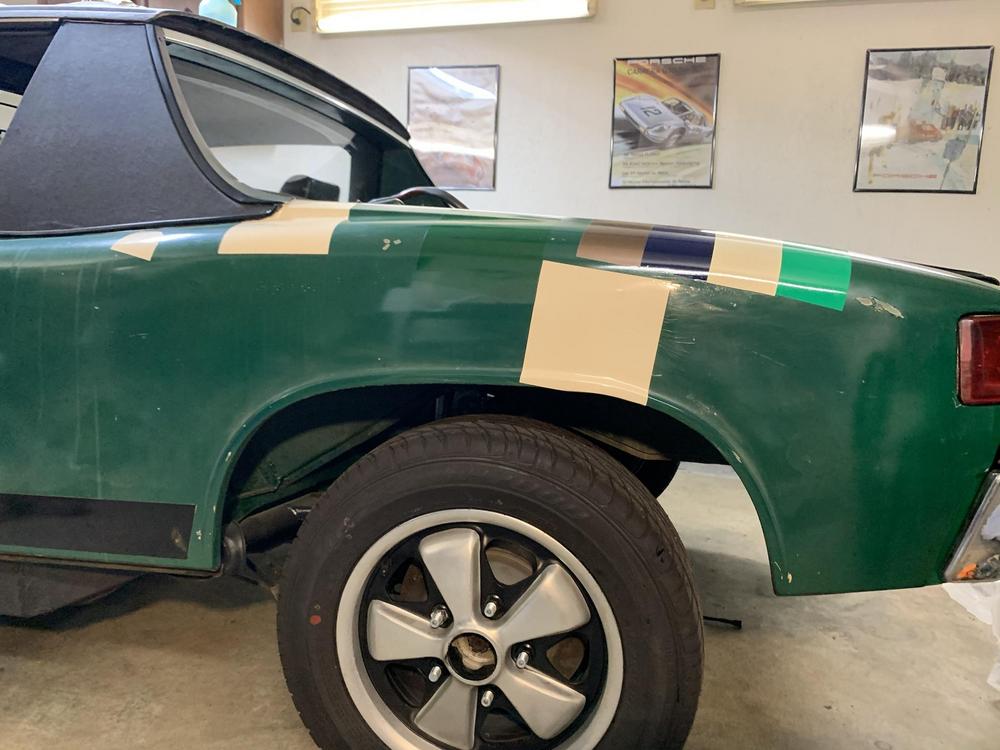
Any thoughts? Has anyone reading wrapped theirs?
Posted by: Cairo94507 Nov 13 2020, 06:26 PM
Not a real fan of wraps generally. But, given you can do this for $300 to $500 that seems like a great plan. As for the color, the dark green of course. Good luck and happy wrapping.
Posted by: mepstein Nov 13 2020, 07:20 PM
I'm a fan. It's a great home project and if you mess up, you just pull the panel and start over. Modern material is very forgiving and much easier than in the past but you need to use the good stuff. Still shouldn't be much for our little cars. I will be doing my suby build with a wrap.
The wrap institute on youtube has a lot of great tips.
Posted by: jaredmcginness Nov 13 2020, 07:38 PM
Thanks guys!
Mark, yeah among the samples I got were Avery, ORACAL and 3M. The modern 3m is nice because it has a peel off layer, so you don’t scratch/scuff while applying.
The oracal is nice as well, has a stretchy grid pattern on the back. Super tough and the heat gun removes any wrinkle in the material.
Man that papyrus is tempting... always peels off!
Posted by: jaredmcginness Nov 14 2020, 04:33 PM
Alrighty guys.
Another (to me, massive update). After a silly bump it the road with fueling, I got the 1911 running.
Like running, running.
I got everything set up on the ground again and ran her for 20 minutes at 2500 RPMs. Cam break in is COMPLETE. WOO!
I am a dummy and it was just running the float bowls dry. I assumed my fuel pump (connected to starter tab) was on constant power after actuating the starter.
https://imgur.com/gallery/haGat1M
I gave it the balls a few times. Sounds okay for now with that Bursch muffler.
Aye, something I built from the ground up, ran at least 20 minutes. Makes my week! Maybe the largest milestone of this project, next to the floors.
Next steps:
-Change oil
-Dial in carbs + sync with snail tool.
-Set timing with my new digi timing gun.
-Recheck everything 400 times... then it can go in the car I guess.
I need to start compiling a list of all the folks that helped me get this far. Everyone gets a Dunkin Gift Card and a 6 pack
Posted by: Cairo94507 Nov 14 2020, 04:53 PM
It so strange to see it sitting on the ground running like that. Congratulations.
Posted by: bkrantz Nov 14 2020, 08:13 PM
Way to go! First drive coming soon.
Posted by: kroelofsen Nov 15 2020, 02:23 AM
Great work so far! Exiting to see it run...
Posted by: krazykonrad Nov 15 2020, 02:26 PM
Posted by: jaredmcginness Nov 21 2020, 06:21 PM
Hey,
As I previously mentioned I am likely buying my first home... inspection went nicely, and the loan came out of underwriting. So things are looking pretty serious...
If all is well, I'd move on the second week of December.
No better goal than to drive the 914 to the new place by then! (It's only like a mile away, but driving it is more rewarding than towing, lets be honest.)
Got a couple hours in the garage today.
Syncd and tuned the Dellortos. I am damn close. Still spits and pops a bit at 2500rpms. Idles great at 980, and each barrel is reading 5.5 on the snail tool, so they are individually pulling the same air.
I set my timing light to 14* BTDC and hits at 1500.
12* hits at 1000ish RPM.
28* at ~3k. Does that sound about right? Currently running a pertronix, out on loan.
https://imgur.com/gallery/11H76s7
Idles nice and sounds decent. Man... feel good to hear it run.
Must be running a bit lean yet with the popping.
Other news, I got all the calipers installed.
I attached the rear trunk... which I have never had on the car. Unfortunately it has a massive dent. (the P.O. Towed the car backwards) and the trunk is out of shape and doesn't close.
I also had to weld in trunk hinges... they ripped out from that event.
See photo: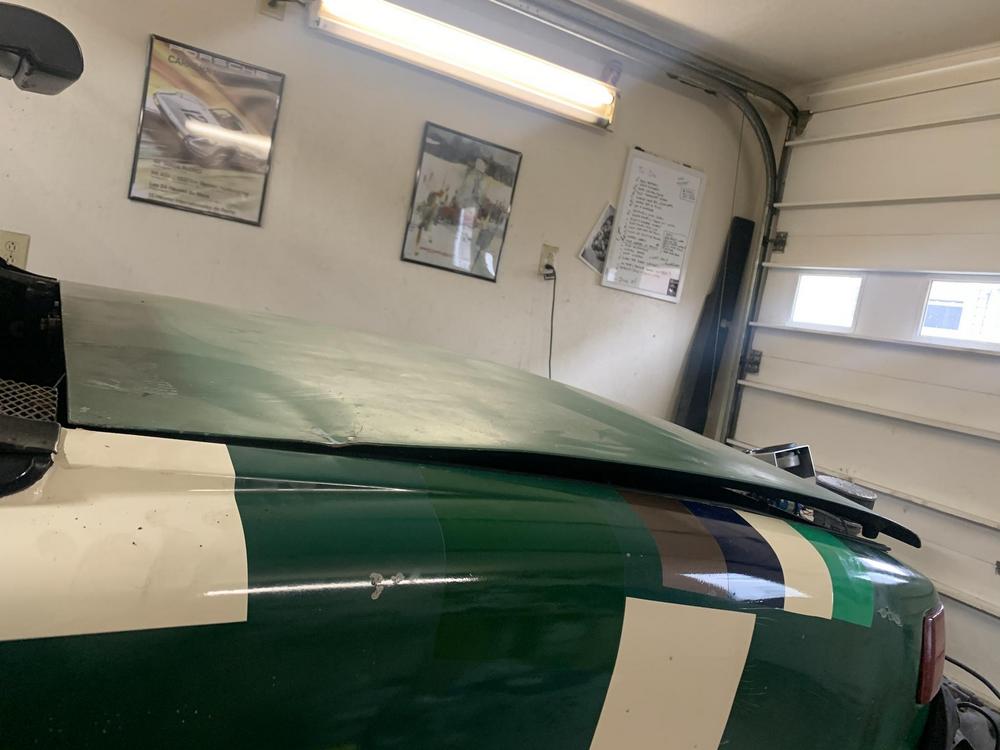
Truly ridiculous that I have to deal with something like this. But that's the nature of old cars and owners that don't care as much as we do.
I am sure we have all been there.
The list is short:
-Bleed brakes.
-Install flywheel/clutch.
-Fine tune carbs. (if I can figure that out)
-Install motor
-Clean gas tank.
-Drive 914
I think I can do all of that before December 11th, when I move.
Cheers.
Posted by: sixnotfour Nov 21 2020, 07:06 PM
your luck inlies with the irish green
Posted by: bkrantz Nov 21 2020, 09:41 PM
That bent trunk lid sucks, but glad that you did do it!
Posted by: jaredmcginness Nov 22 2020, 08:49 PM
your luck inlies with the irish green
Whether for good or bad... haha.
Quick update. Had the entire day free. Decided to make some use of it.
I needed a 17mm Allen (transmission fluid change) While there, I walked past the ATV/Motorcycle Jack...
$99 with a $15 off coupon. No brainer... Will make installing the motor much simpler, since I don't have the Tangerine plate.
Here is the motor on the new jack:
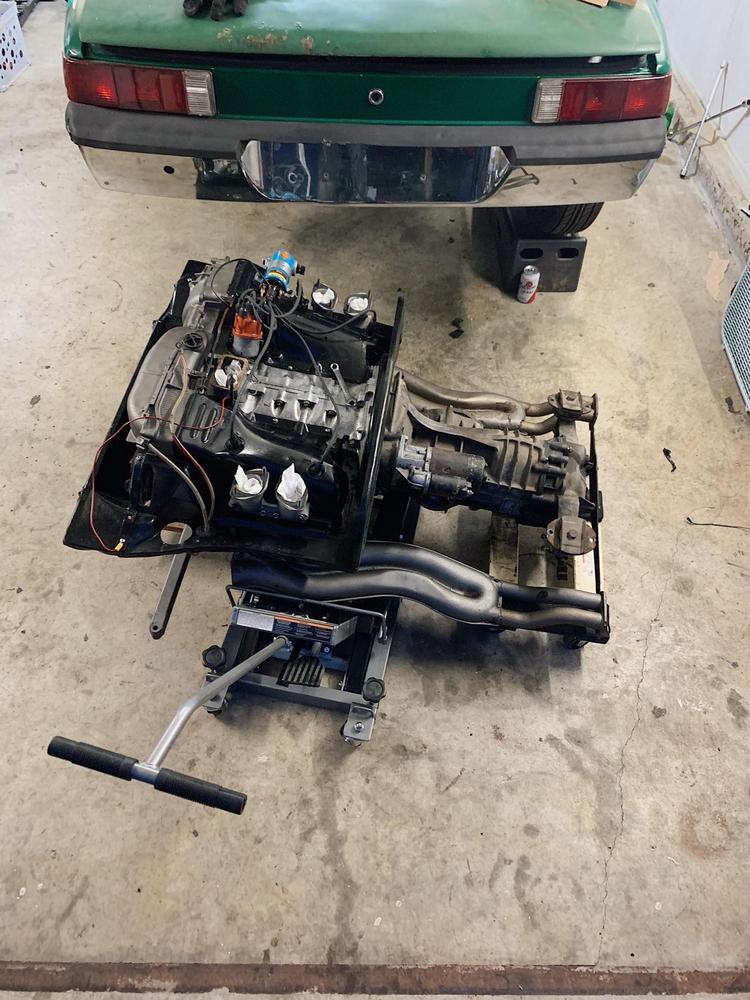
I decided today was a good a day as any to install the motor, now that I have the new lift. I
-I adjusted the valves.
-Installed the sealing rubber in the engine bay,
-removed the carbs.
-Installed the Clutch/plate.
-Changed transmission fluid.
While under the car, I noticed how nice new a lot of these things look. If it comes off you gotta treat it!
Hats off to the guys here that do nut and bolt restorations. This has been such an undertaking, hard to imagine how much more it could have been.
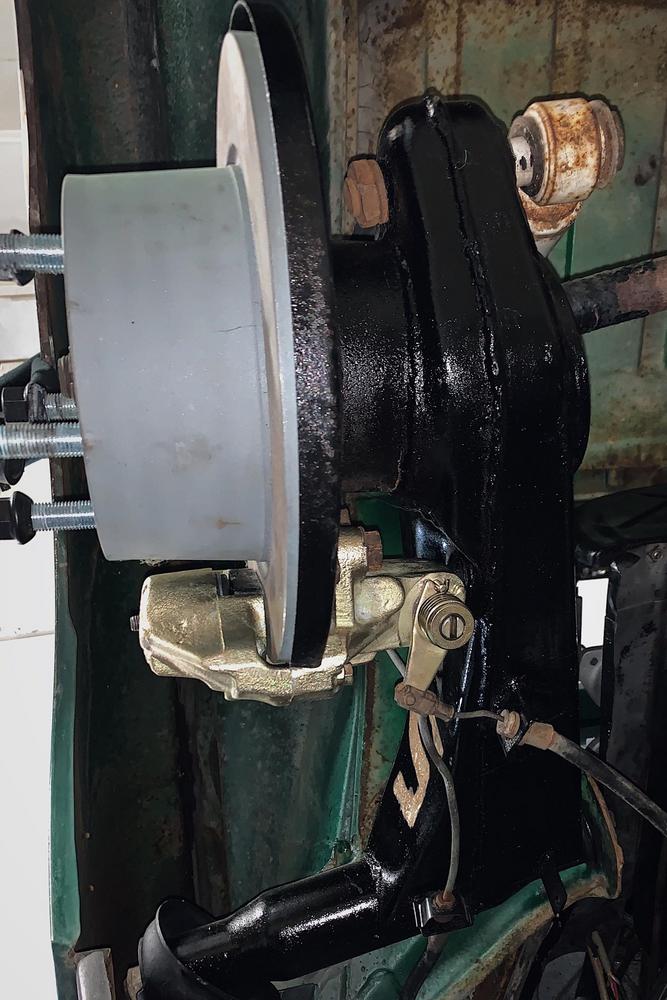
An hour later....
Yes I need rear struts, and yes I need to clean the bottom of the trans, now that I can access it.
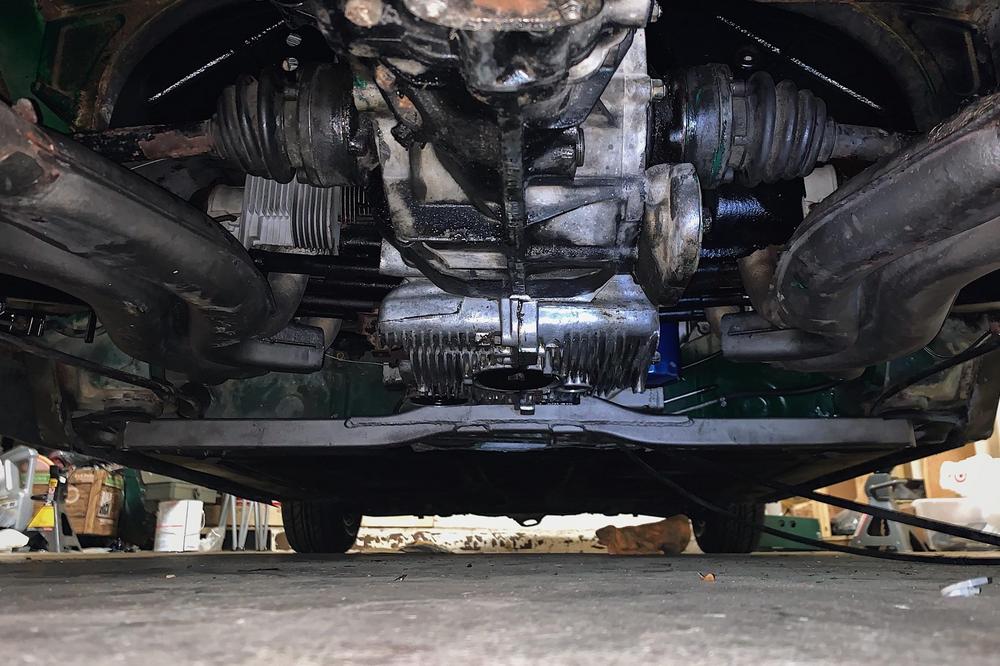
Boom.
Still ugly. But this is the first time I've had the rust repaired car/Fuchs on the ground with the motor in. Ignore the rear bonnet,
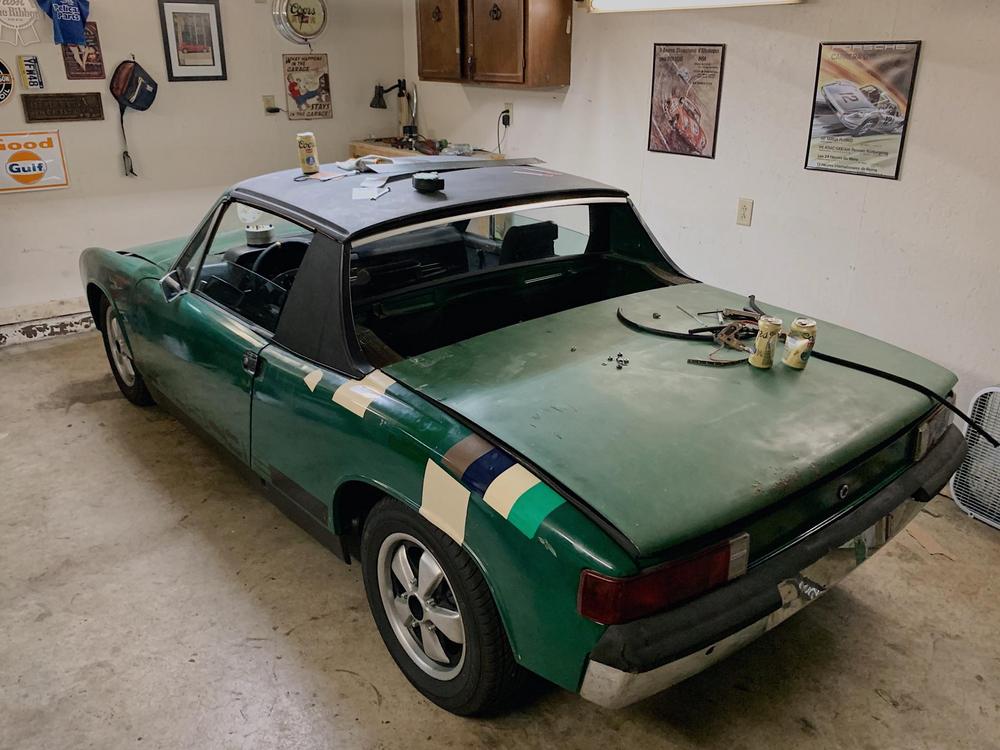

I wish it was an inch or so lower in the rear. 15" Fuchs would solve that if I decide to nut-up and pay for them. But the 14", I think, are totally respectable.
Much better than the EMPI 8 spokes I had on there. Yuck.
And now for the money shot that I am delaying showing....
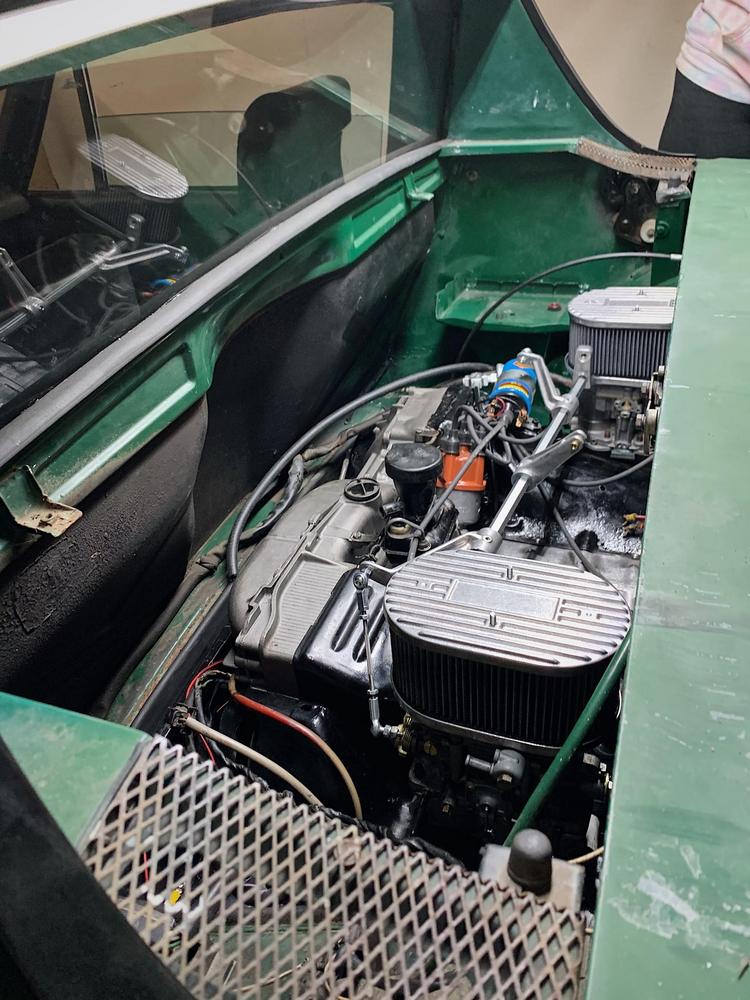
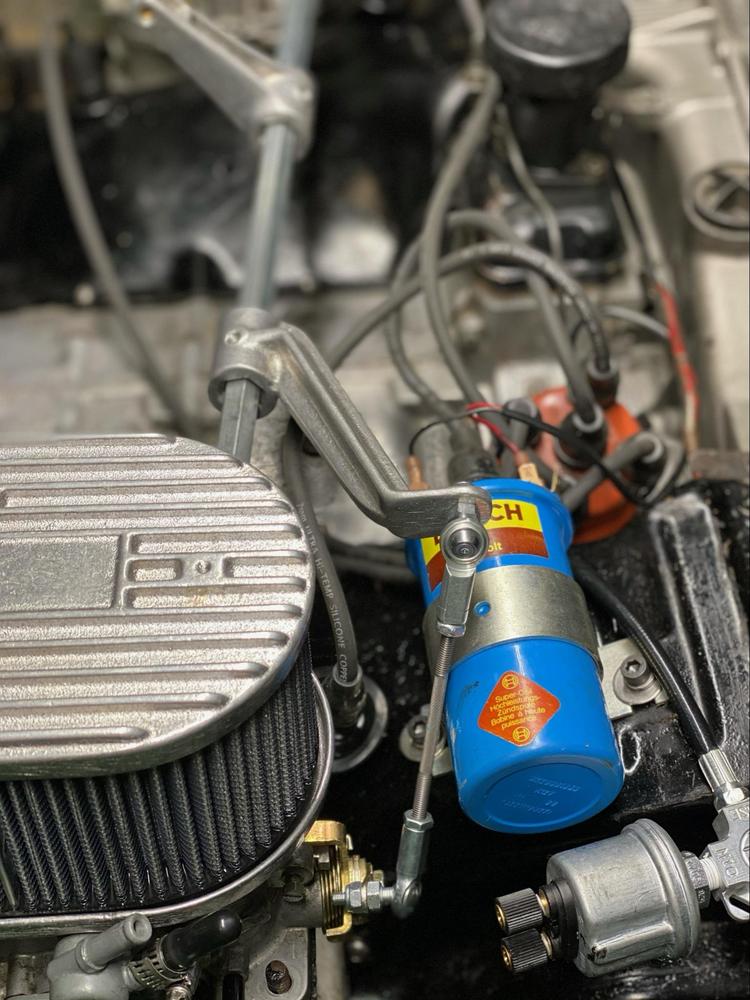
Doesn't get much more satisfying than that. After all this time. (I first pulled the motor, for rust repair, on Jan 30th of this year) Not bad for a quick an dirty turn around.
Let me see if I can dig up a photo of the motor last year...
These are the only photos I can find of the engine bay in 2019:|
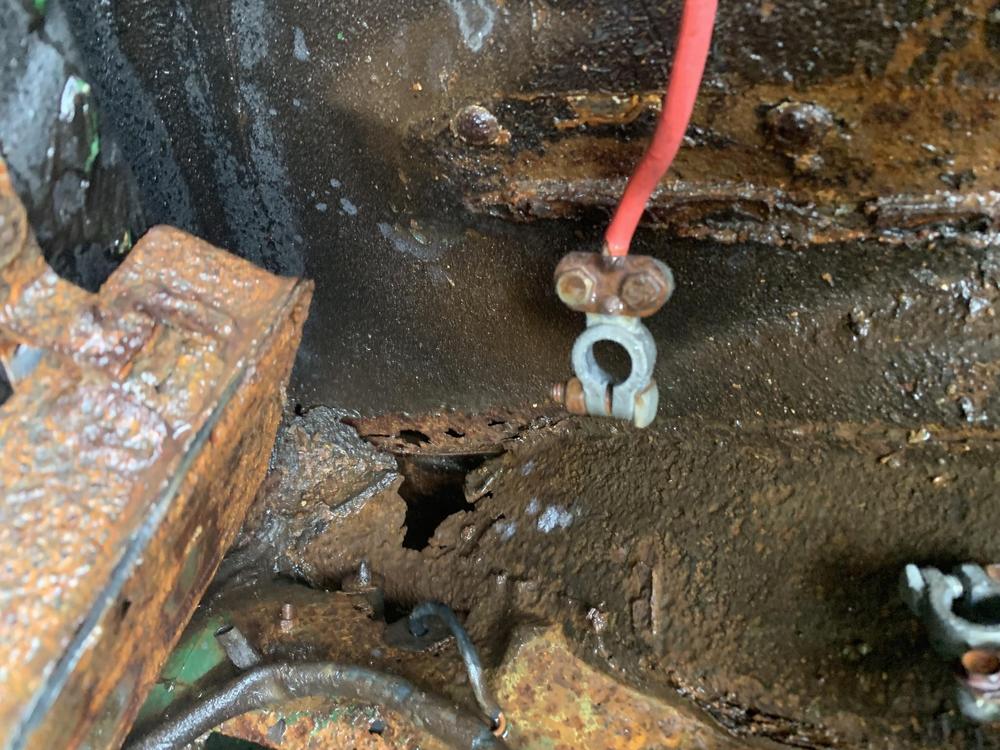
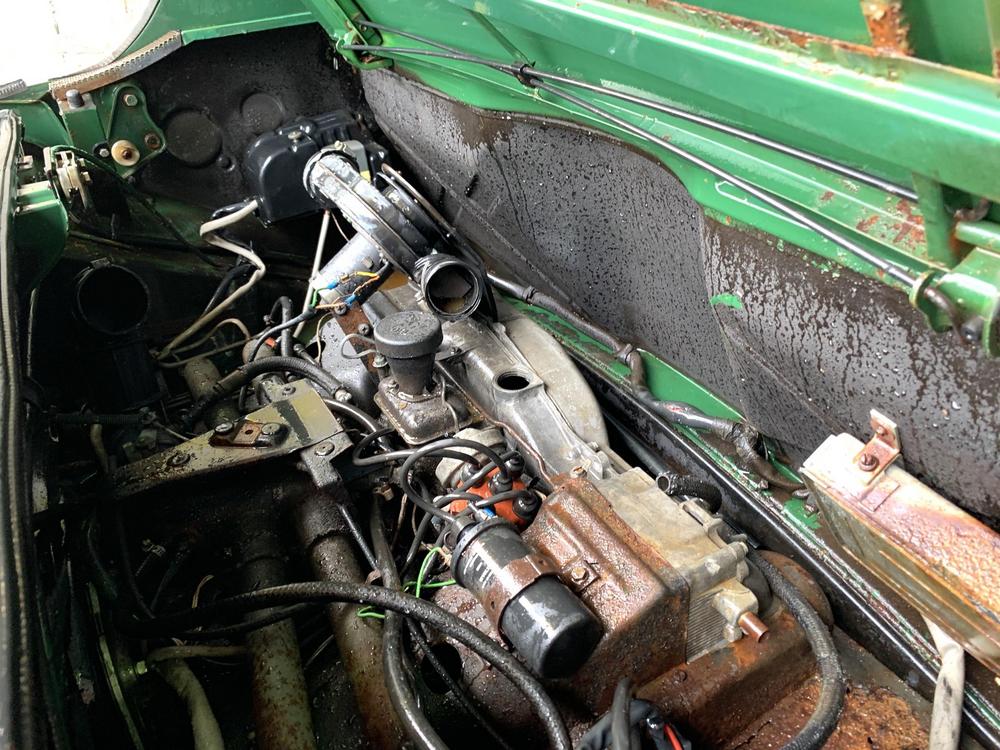
Job well done.
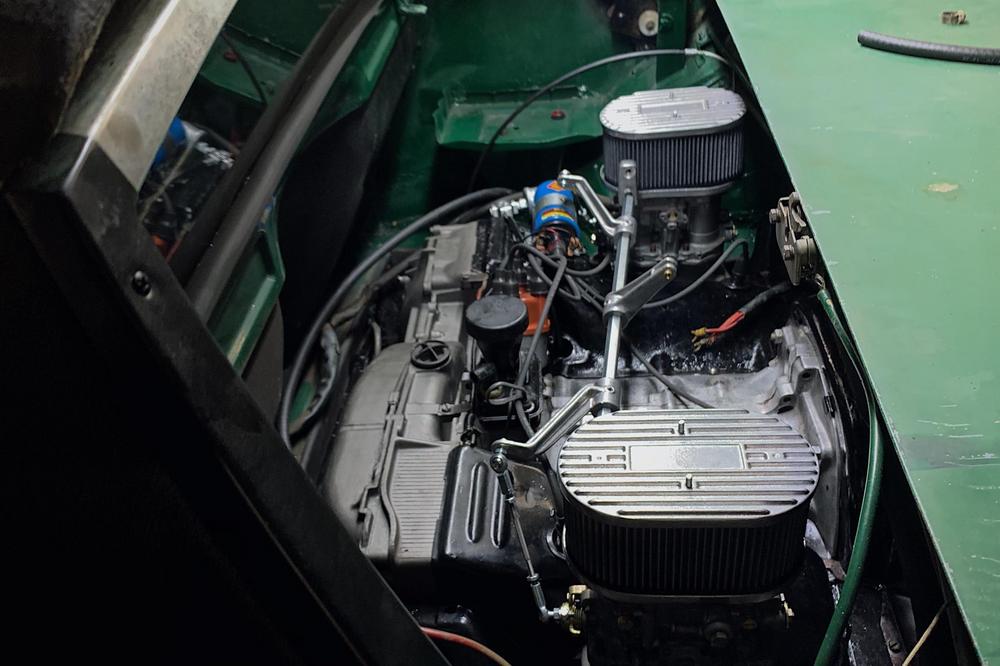
Posted by: ndfrigi Nov 22 2020, 10:40 PM
Good job and congratulations Jared! I think the rear will still go down after moving the car or after initial test drive.
Posted by: bbrock Nov 22 2020, 10:51 PM
That has to feel good!
Posted by: jaredmcginness Dec 1 2020, 08:14 PM
Gotta update here.
Motor in, as seen. I completed every-stinking-thing on my white board list, over the holiday.
Including, but not limited to:
-Brakes bled, several new brake lines.
-Wiring up a triple gauge panel (radio delete)
-Install gauge cluster
-Run new battery cables.
-Fuel lines, tank and fuel pump.
-Coat gas tank in POR15 kit
-Shift linkage + transmission fluid yattayatta
I accomplished a ton, and honestly got a bit burnt out.
Few days later I was ready to run. Fully expecting to run into more issues... I was correct;
After 3 days of chasing a no-crank gremlin (see my other thread) I found out my ignition switch was grounding out.
I installed this over a year ago and did not check my work.
If it was any more grounded than it would be named Ghandi...
Many lessons learned here, and the dialing in is not over. Always more to improve upon. In the process, i verified a lot of things, got very angry several times, and cleaned every ground on the vehicle.
Today I installed a new ignition switch. Tidied everything up, she immediately cranked and fired - for the first time in the chassis.
Technically, this is the first time I have ever turned a 914 key to a running motor. 
https://imgur.com/gallery/oPc1mBe
Calling that a day! Super happy!
Posted by: bkrantz Dec 1 2020, 08:32 PM
Nice--way to go!
Posted by: mepstein Dec 1 2020, 08:36 PM
Congrats.
Posted by: dt4 Dec 2 2020, 01:38 AM
Well done Jared
Posted by: Cairo94507 Dec 2 2020, 07:49 AM
Huge accomplishment and congratulations! You have done 3+ years worth of work in under a year. Amazing progress.
Posted by: anderssj Dec 2 2020, 11:38 AM
GREAT WORK!
Posted by: jaredmcginness Dec 2 2020, 11:57 AM
Thanks everyone!
One step closer. Also, side note, it only ran for a moment because I didn't have the fuel pump plugged in. It does run longer than that
Posted by: wysri9 Dec 2 2020, 12:39 PM
Well done! How I look forward to that day........
Posted by: MM1 Dec 2 2020, 02:36 PM
Great thread, Jared!
How did you like the HF ATV/Motorcycle Jack for the 914 drivetrain install?
Did you have the jack sideways as in your pic - or longitudinal?
I don't have the Tangerine plate either , but I do have an ATV, so I was also considering the HF ATV/Motorcycle Jack.
Posted by: porsche914rick Dec 2 2020, 03:15 PM
Posted by: jaredmcginness Dec 3 2020, 07:02 AM
How did you like the HF ATV/Motorcycle Jack for the 914 drivetrain install?
Did you have the jack sideways as in your pic - or longitudinal?
Thank you @http://www.914world.com/bbs2/index.php?showuser=22105 ,
If you have an ATV - you should definitely get an ATV jack.
Yes, I had it 90* sideways for install. Driver's rear wheel off, DS Rear jacked a bit higher. I came in at an angle and straightened it out.
For clarity, during install the ATV jack handle was sticking out where the DSR wheel was. $10 Wood dolly under the transmission.
It made it 100% easier over whatever conglomeration of jacks, stands, and 2x4's that I used to pull the motor initially.
Only complaint is the front wheels have static casters, so you kind of have to slide the wheels sideways. (I had my feet on the wall pushing, haha!) Easy swap for different casters, though.
I hope this pic helps:
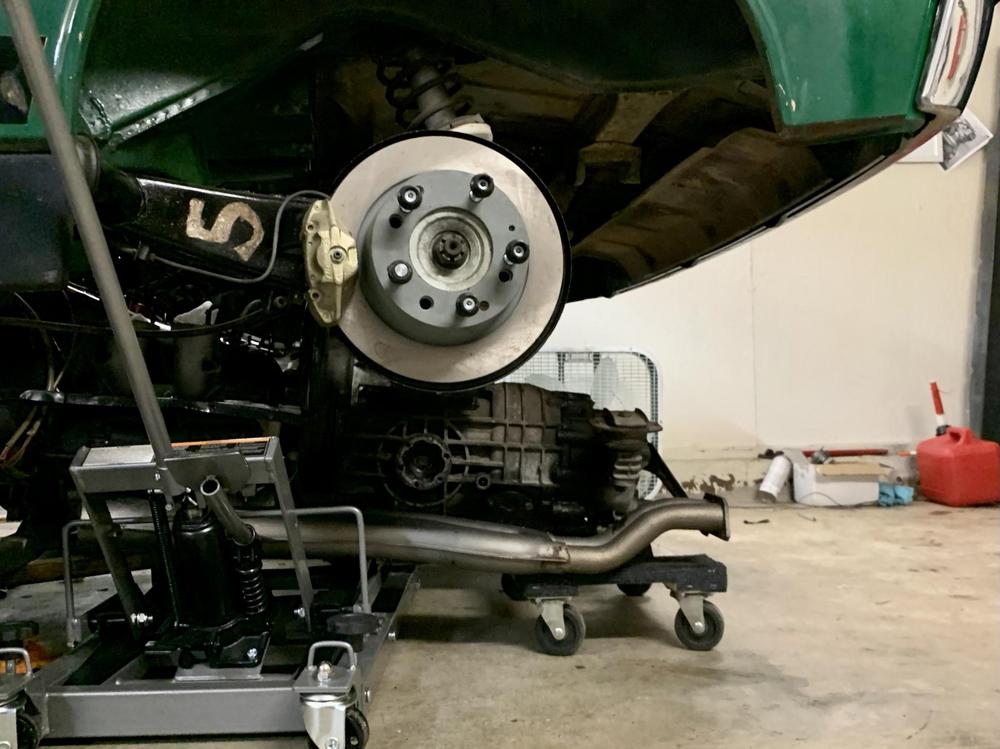
Posted by: MM1 Dec 3 2020, 11:08 AM
Thank you for the R&D report, Jared!
Posted by: jaredmcginness Dec 3 2020, 08:29 PM
Inching closer every night.
I would sincerely like to have this thing moderately operable enough to drive 1 mile by the weekend of the 11th. I have too much pride, after spending this much effort on this thing, to tow it 1 mile to my new home.
Today's only major issue - there is, of course, at least one every other day:
I tried to shift the car for the first time while on, horrible GRIND and then nothing. Goes into (I believe) every gear while off.
I know the tail shift is bad... but it at least goes into gear right?
Here's what I attempted to remedy/diagnose this:
1. I put it into 1st then turned the car on, it lurches (same with reverse)
2. I read the Haynes trouble shooting.
3. I read the John Muir shifting issues, but nothing stood out, might not apply as much, being a 914.
4. I adjusted the clutch cable tighter, three different lengths. It makes a huge difference in the pedal feel, but no different on the grind.
-The clutch and pressure plate were never separated, have tons of meat. -flywheel matched those too. (all same car)
-Shifter bushings are all brand new.
Wondering if this is a throw out bearing issue. I sure hope not.
Any thoughts?
Part 2:
I finalized some fuel pump wiring, buttoned up the interior, set the car down, and installed a triple gauge panel. Oil Pressure, Temp and Volt.
I used the 42Draft Designs Universal panel, and used it as a radio delete.
Here is a photo: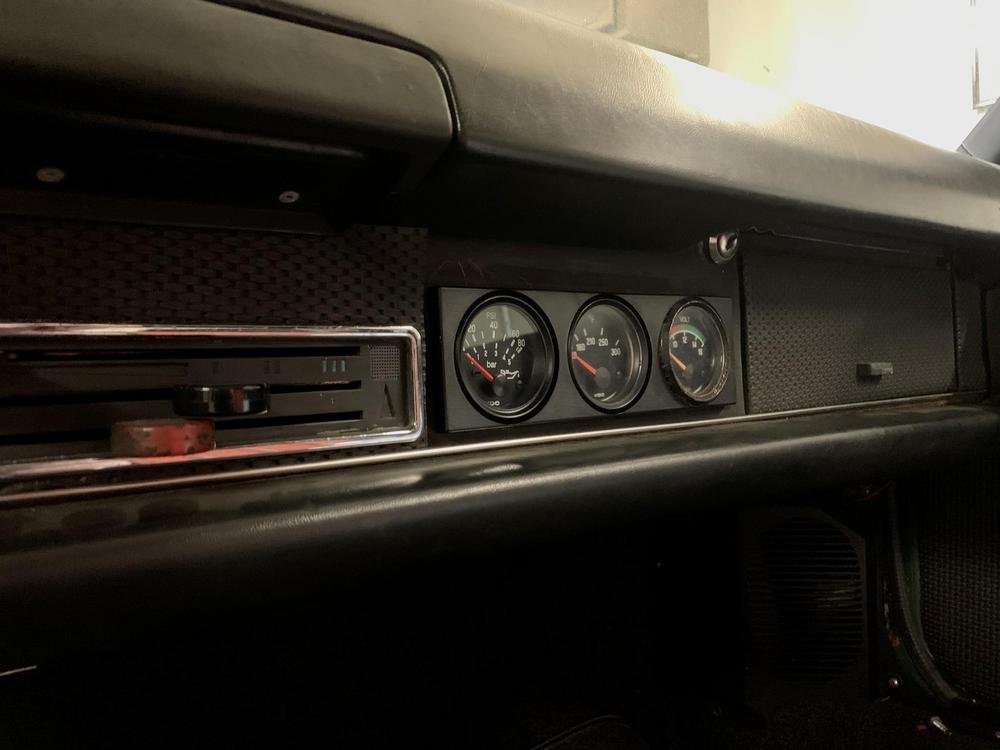
I am really happy with how the interior has turned out.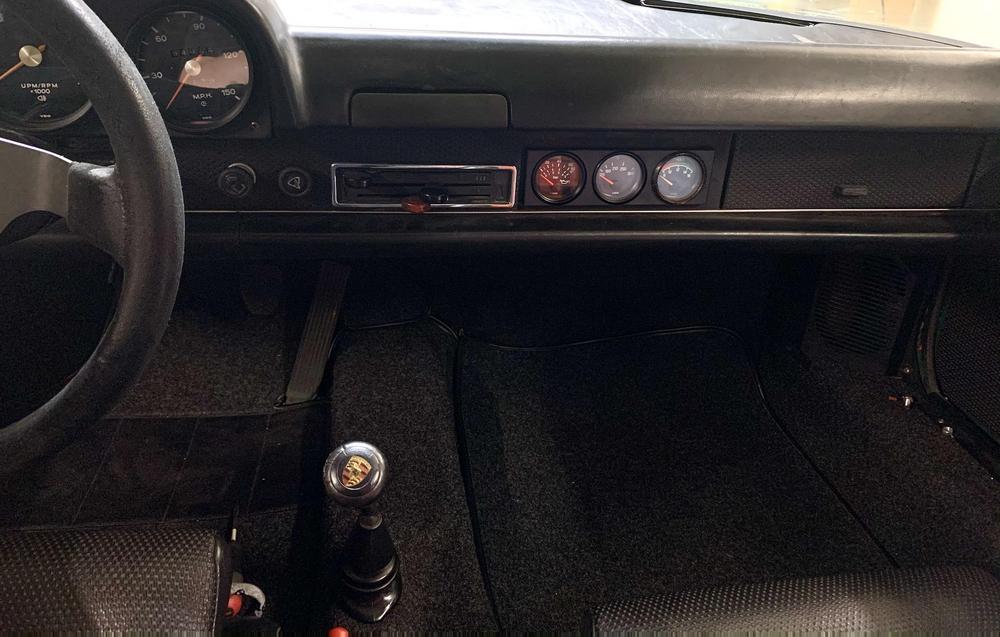
I do need to get a new voltage gauge that sits in flush, that would look correct.
Oil Temp Gauge doesn't function all the way, but gets power, gotta figure that out.
I ran the motor for a while and adjusted the carbs a bit more.
Looks like a complete car.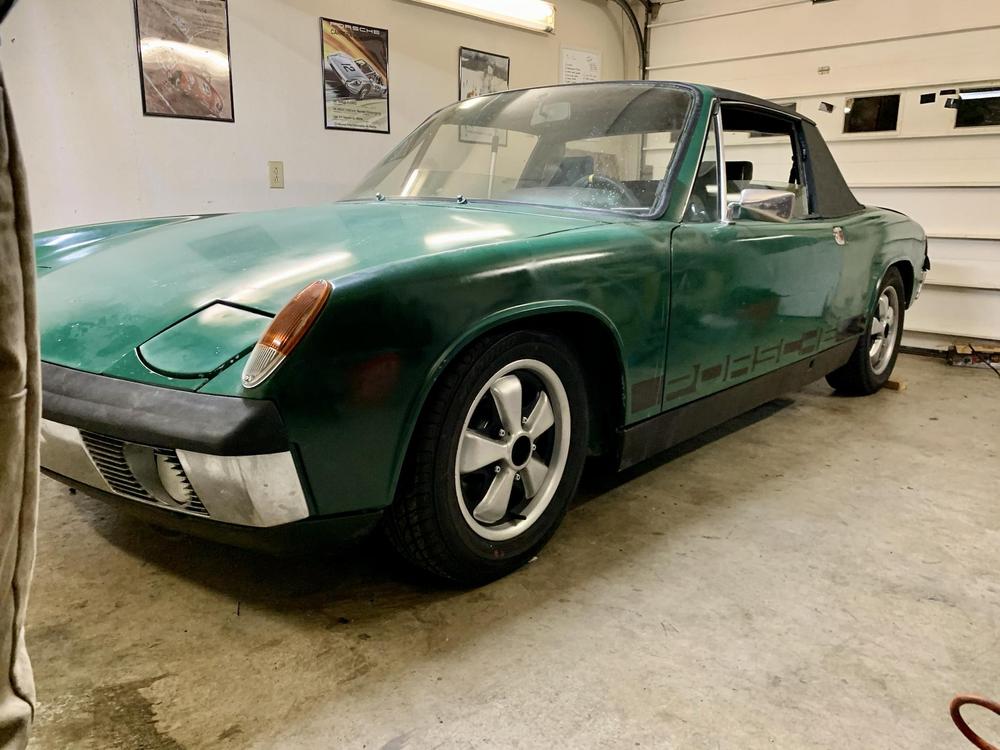
New trunk (that actually closes) courtesy of Mepstein. He'll be getting a Christmas card this year.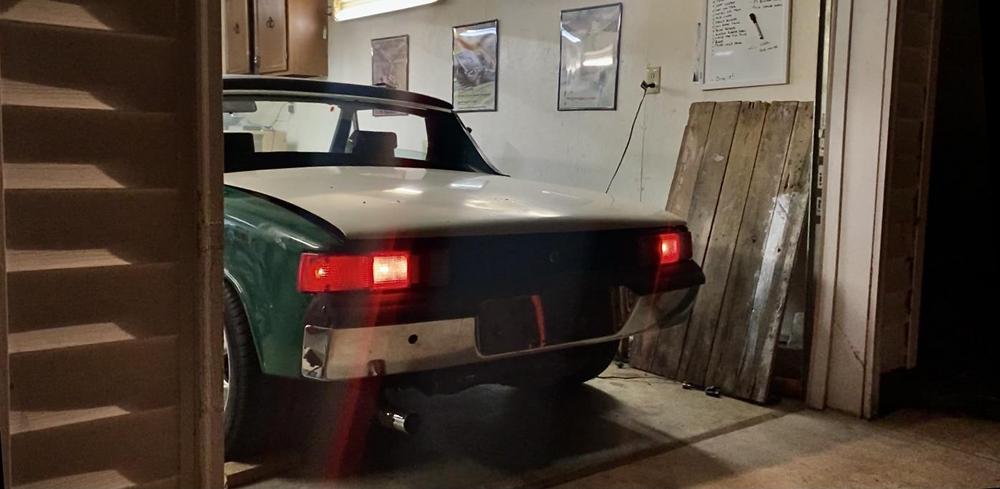
That's all for this evening.
Posted by: mepstein Dec 3 2020, 08:37 PM
I hope the lid is true. It came from an 80K mile car and while the front had a fender bender, I think the rear was good. I'm glad it's getting used and it made a little more room in the workshop.
Posted by: MM1 Dec 3 2020, 09:04 PM
“New trunk (that actually closes) courtesy of Mepstein. He'll be getting a Christmas card this year.”
Yep-methinks @http://www.914world.com/bbs2/index.php?showuser=10825 deserves a card - early this holiday season!
Posted by: mepstein Dec 3 2020, 09:16 PM
“New trunk (that actually closes) courtesy of Mepstein.
He'll be getting a Christmas card this year.”Yep-methinks @http://www.914world.com/bbs2/index.php?showuser=10825 deserves a card - early this holiday season!
I have always enjoyed having my parts end up on other members cars. Sure, some of it I sell but there are a lot of parts that aren't worth selling but end up going to good uses. The lids have been sitting around for a couple of years but now the one is getting used. I'm especially happy when stuff ends up on an east coast car. I may have a chance to see it and east coast cars need more love. They always need a rustoration in addition to everything else. Jared is a great guy. I'm glad I can help out a bit. All the people on this site give me 100X more than I could ever give back.
Posted by: Cairo94507 Dec 3 2020, 09:28 PM
Your car is looking great. I love the radio delete gauge location. If you could find some gauge pods that would angle the gauges towards the driver, all the better. I have my fingers crossed you will be driving that car to your new place.
Posted by: bbrock Dec 4 2020, 09:13 AM
New trunk (that actually closes) courtesy of Mepstein.
He'll be getting a Christmas card this year.There he goes ripping people off again (still shaking my head on that one)
. I don't think any of these resto builds get completed without a healthy dose of Mark's generosity. I know my car has hundreds of dollars worth of donated parts and services in it. Nothing but admiration and good karma. Your car is looking fantastic. I'm amazed how quickly you've been able to get to this point.
Posted by: anderssj Dec 5 2020, 09:16 AM
Today's only major issue - there is, of course, at least one every other day:
I tried to shift the car for the first time while on, horrible GRIND and then nothing. Goes into (I believe) every gear while off.
I know the tail shift is bad... but it at least goes into gear right?
Here's what I attempted to remedy/diagnose this:
1. I put it into 1st then turned the car on, it lurches (same with reverse)
2. I read the Haynes trouble shooting.
3. I read the John Muir shifting issues, but nothing stood out, might not apply as much, being a 914.
4. I adjusted the clutch cable tighter, three different lengths. It makes a huge difference in the pedal feel, but no different on the grind.
-The clutch and pressure plate were never separated, have tons of meat. -flywheel matched those too. (all same car)
-Shifter bushings are all brand new.
Wondering if this is a throw out bearing issue. I sure hope not.
Any thoughts?
Jared, is it possible that the pressure plate is rusted to the flywheel? That happened with my car some years ago, and I think the symptoms were the same. We were able to break things (
) loose without dropping the engine, but I can't remember exactly how we did it. Others here may have some tips.Steve A-
Posted by: jaredmcginness Dec 5 2020, 07:47 PM
339 days.
That is the number that it took me to bring this 914 out of its 21 year rest, back onto the road.
Last registered in Alabama in 1998.... I think it's about time to stretch her legs.
After a very brief fix with the clutch. (was stuck to the pressure plate) Thanks to excellent advice on that thread, it was quickly solved.
Verified the shifter, it basically goes into every gear (almost) every time. The only thing left to do is go for a pack a to-go tool bag + fire extinguisher,
go for a test drive and hope I have enough gas to get to thegas station. (and actually hope to get there!)
OK Reverse works... backing out of the driveway.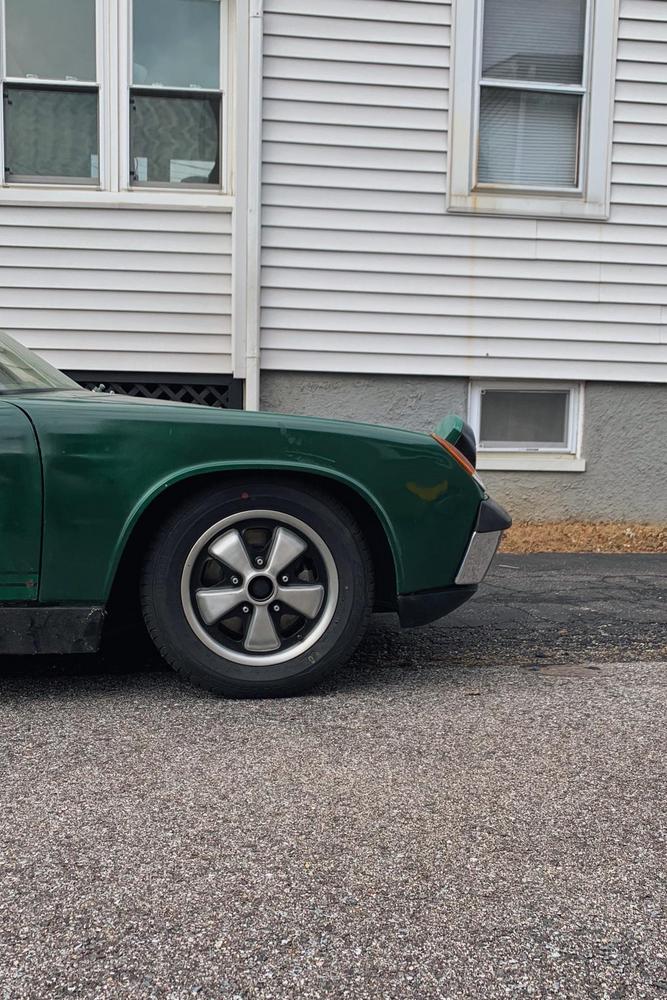
Off we go.
Girlfriend following closely with jacks and about enough prepared tools to pull the motor.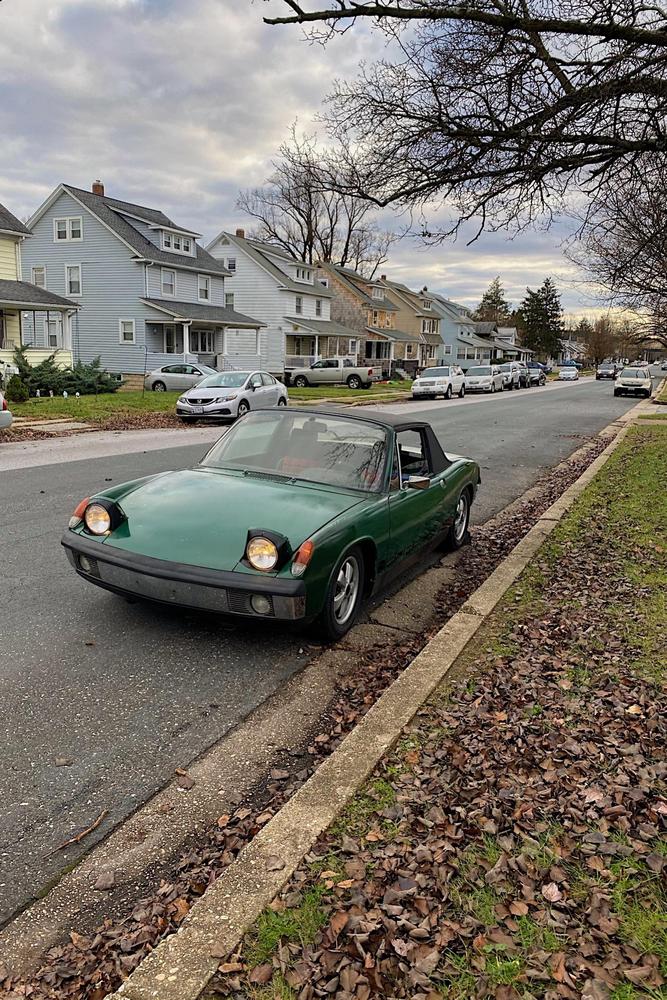
It WORKS!! I think the feeling of shifting into 2nd gear for the first time and actually cruising down the road will stick with me forever.
Here are a few photos from her 15 minute breath-of-fresh-air and re-acclimation with the road.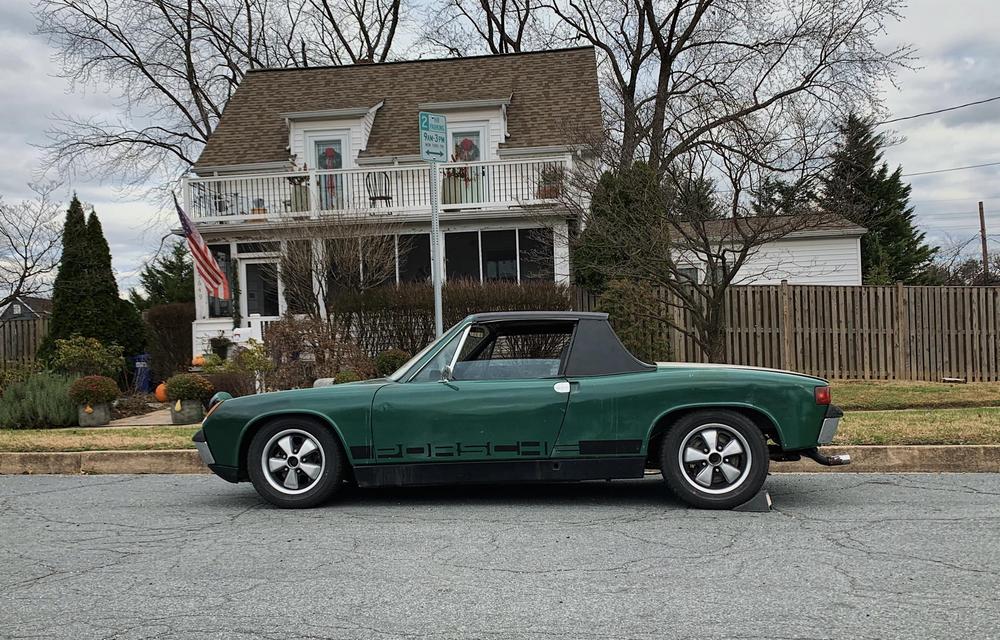
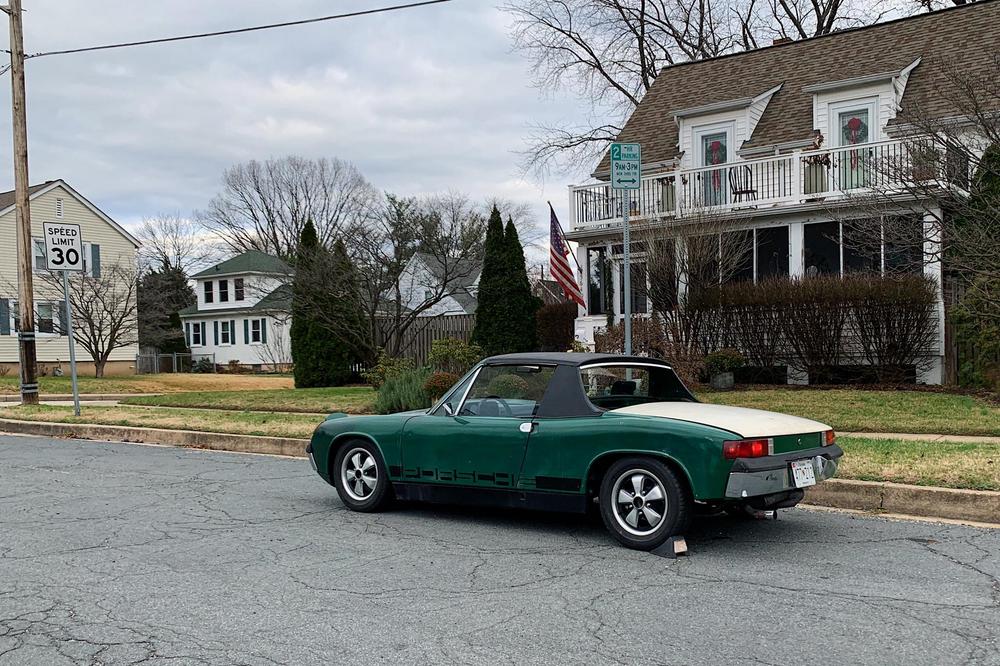
Made it to the gas station. The second I pulled in I got the classic "Dang! What year is that??" 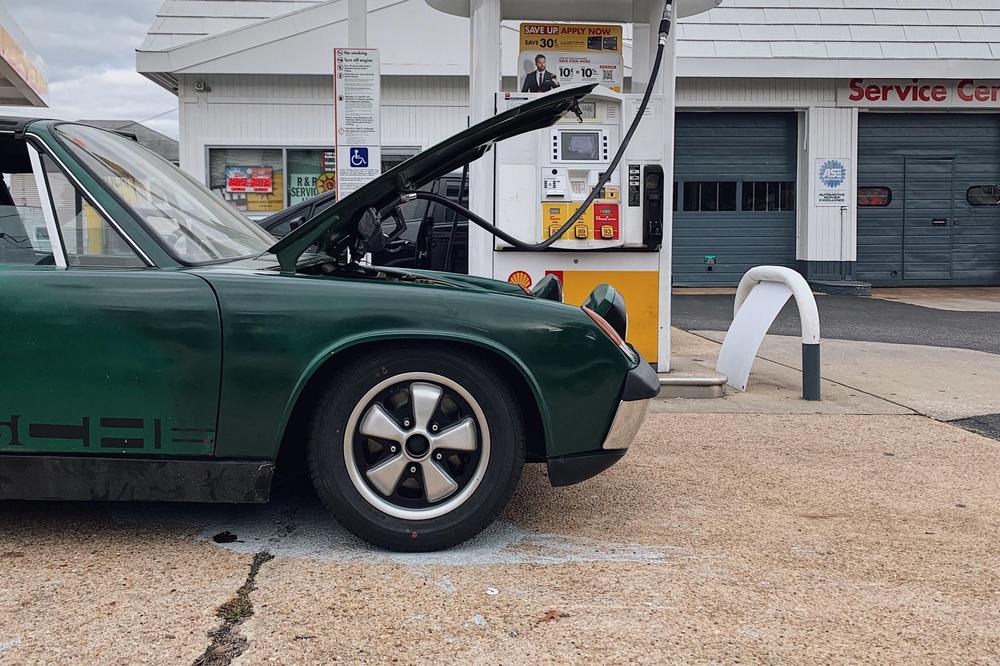

Super, super happy!
-A few things glaringly wrong; alignment is awful - to be expected.
-Shifting is definitely rough. Sometimes I think its in 1st, its in 3rd and the folks behind be at the stop light aren't happy.
-Really loud, but its missing some seals, still. Doesn't have an engine lid installed, may have an exhaust leak, and the carbs still need adjusted.
All things that don't really matter today!
While there is a long road ahead and a lot left to do, I couldn't have done any of this without you guys.
Thanks to @http://www.914world.com/bbs2/index.php?showuser=17042 , @http://www.914world.com/bbs2/index.php?showuser=23343 , @http://www.914world.com/bbs2/index.php?showuser=10825 , @http://www.914world.com/bbs2/index.php?showuser=20845 , @http://www.914world.com/bbs2/index.php?showuser=9712 , @http://www.914world.com/bbs2/index.php?showuser=207 , and @http://www.914world.com/bbs2/index.php?showuser=18763 .
JUST to name some of you guys off the top of my head. Hope I got the tags right.
You guys given, loaned and sold me parts, helped in person, answered PMs, Texts and calls with boundless advice. All for a 914!
Most importantly thank my girlfriend B for late nights, dodging the thrown tools,
learning how to spot weld, holding, handing and sanding things for me, etc. Dont find that everyday.
Built 12/70 and 50 years later exactly, on 12/20 she is back on the road.
I can finally check the one part of my list that has been there since day one!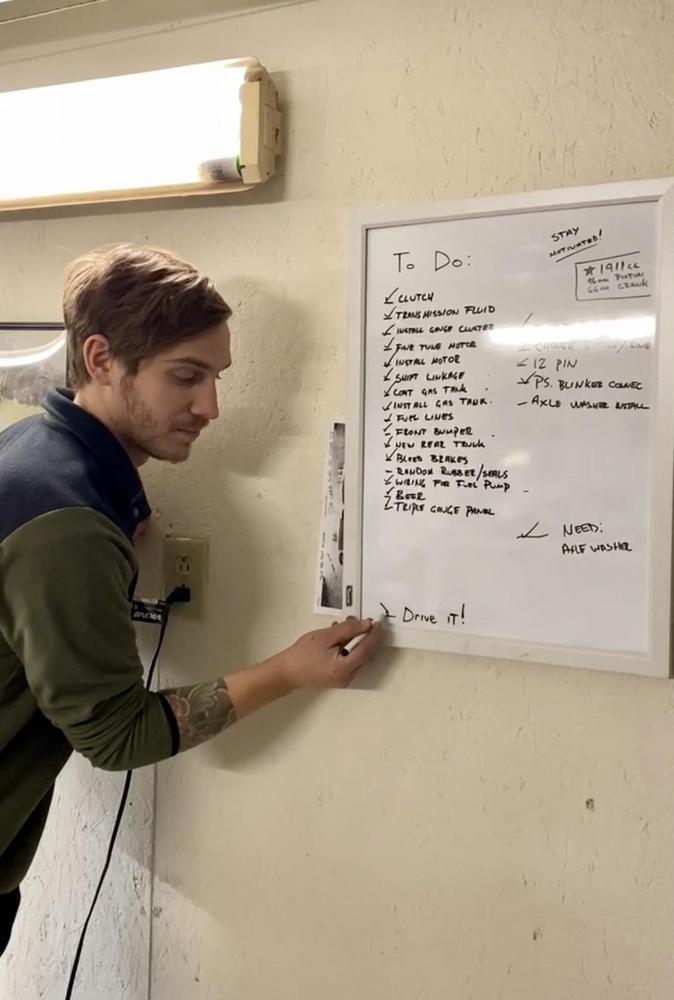
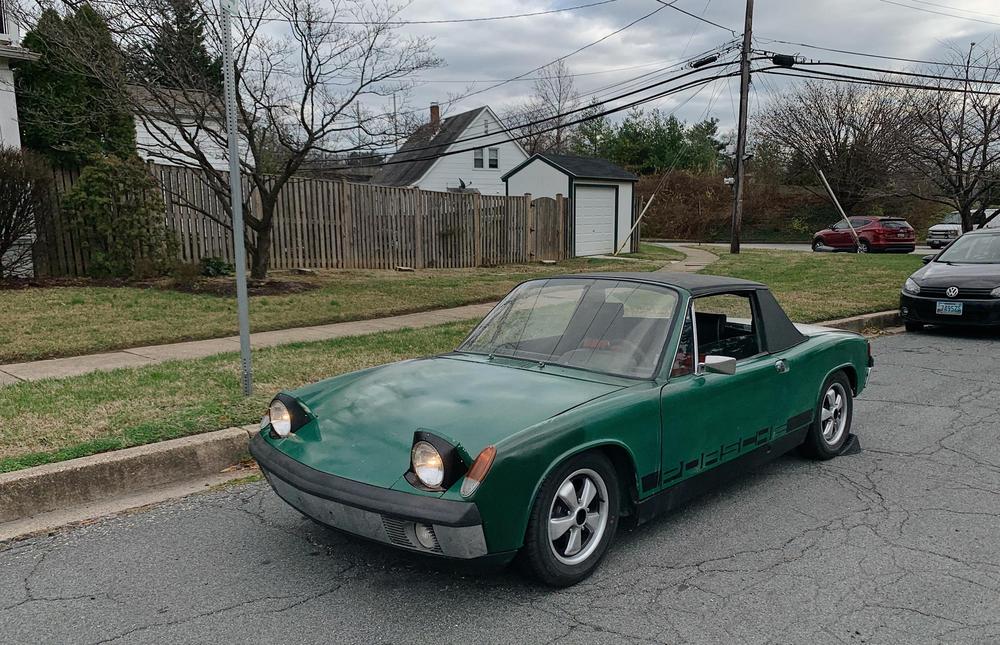
Gotta love the wheel stop, since the ebrake is not hooked up yet. A testament to a now rolling project.
Posted by: FlacaProductions Dec 5 2020, 07:58 PM
THIS!
That pic of you at the gas pump is priceless.....
Posted by: bkrantz Dec 5 2020, 08:21 PM
Congrats! It looks great.
Posted by: BeatNavy Dec 5 2020, 08:23 PM
Congrats Jared!!
Now drive it like you stole it 
Posted by: bbrock Dec 5 2020, 08:25 PM

 That is AWESOME! And in under a year. Just amazing. Be proud. Be very proud. Now go write "Drink Beer" on that white board.
Posted by: Cairo94507 Dec 5 2020, 09:51 PM
I am so happy for you. I knew you would get to drive it before your deadline. Very exciting to be able to pull into a gas station and fuel-up the first time, second time, third time, fourth time....
Posted by: ndfrigi Dec 6 2020, 01:57 AM
Congratulations Jared! And yes that smile at the pump is priceless! Plus blessing from a supportive and patient girlfriend! A lifetime partner!
Posted by: DRPHIL914 Dec 6 2020, 10:40 AM
way to go! that was a lot of work done in less than a year, you have a solid safe, running car. now enjoy the heck out of it! lots of new memories to make. enjoy!
congratulations!
Posted by: tygaboy Dec 6 2020, 10:43 AM
Congrats and GREAT job! Enjoy!
Posted by: maj75 Dec 6 2020, 06:39 PM
Amazing work! Just read entire thread. Congrats!
Posted by: jaredmcginness Dec 6 2020, 06:55 PM
Wow, thank you for the responses guys!!! Hopefully I will get a video giving it the beans soon - once I am not afraid to drive it. It really is a bit scary as is.
Posted by: ndfrigi Dec 6 2020, 07:06 PM
Just make sure you have AAA membership in case of breakdown and as long fuel lines or electrical are in good shape to avoid any fire. Enjoy this aircooled 914!
Posted by: anderssj Dec 7 2020, 02:05 PM
OUTSTANDING!
And your girlfriend B sounds like a keeper
Posted by: mda123 Dec 8 2020, 02:09 PM
Glad to see she's alive and kicking. Been really enjoyable following your journey. I've made a little progress on mine, but I'm still on the (never-ending) search for rust before anything gets put back together.
Posted by: jaredmcginness Dec 18 2020, 08:19 AM
Hey guys,
I havn't made an update in a bit. I've been insanely busy. Not much to update, but I figured I'd share some photos of the new digs.
Here is the last photo taken of my 914 at the old small garage.
(arguably the best angle of this car)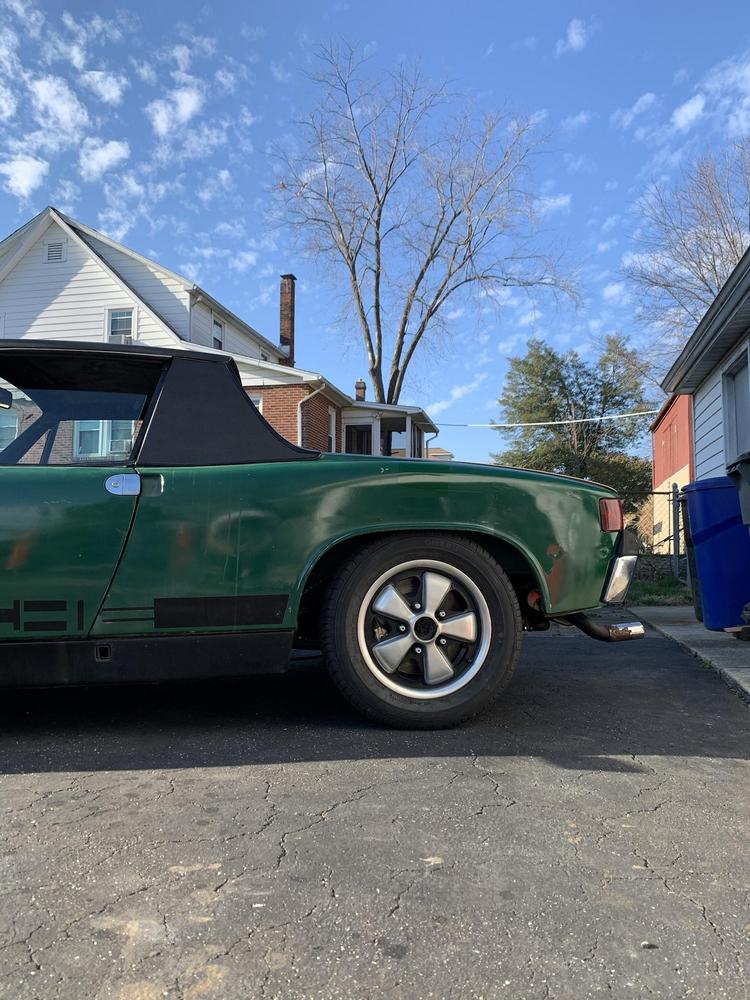
Really lucky to have been able to find a place with a garage with just enough room to repair the 914. I will miss some things about it.... but its time for an upgrade.
Here is the backyard of the new house that we bought. My last "yard" was about 12 by 9 feet, so this is overwhelming.
With a detached 2.5 (deep) car garage (maybe 3 914s if you cram ) and a separate gated entrance to the garage out back. 
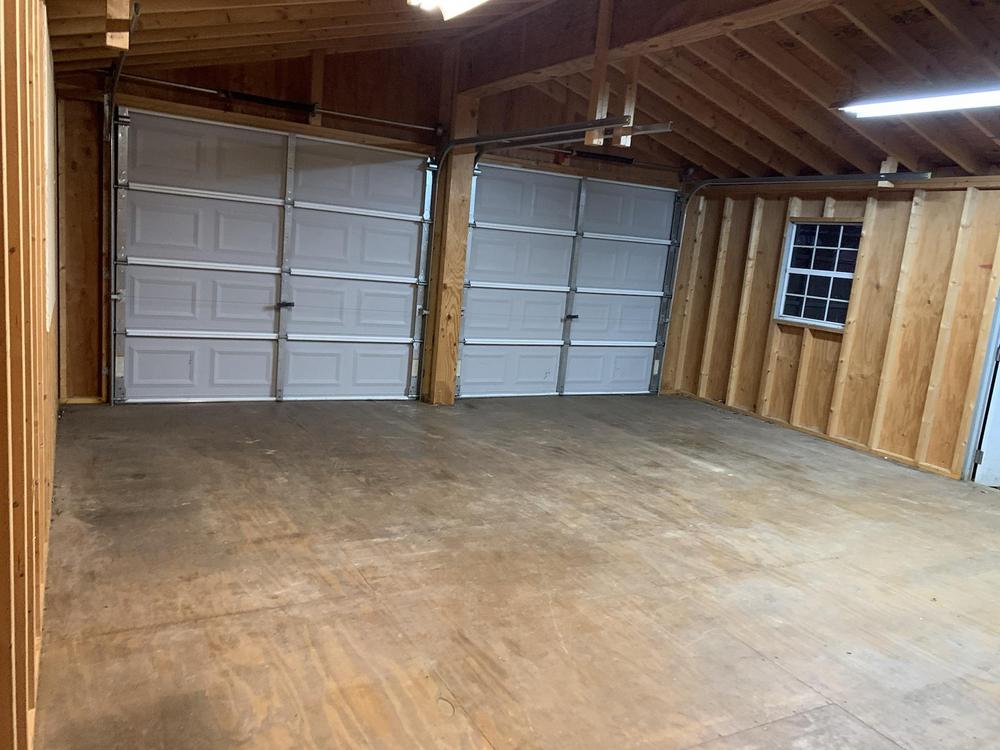
The garage is a recent build, and will need its share of work throughout the winter. It does not have dedicated electric.
So I will need to run a sub panel off the house, the floor absolutely needs some beefing up and a layer of epoxy, insulation, paint, etc.
I have my work cut out for me. BUT it is all there, I love it and I own it..
The 914 made it over! ... Barely ... It was only a mile, I ripped it the entire way, ear to ear smile (only my second time driving it - it is freezing temps here in MD).
Of COURSE, when I turn into the neighborhood it starts static idling at 3k rpm. Making a huge ruckus (sorry new neighbors!)
I coast most of the way down the block, fire it up and gun it into the garage.
Turns out the left carb linkage was stuck open at half throttle.... This is why we don't purchase the hex bar linkage folks!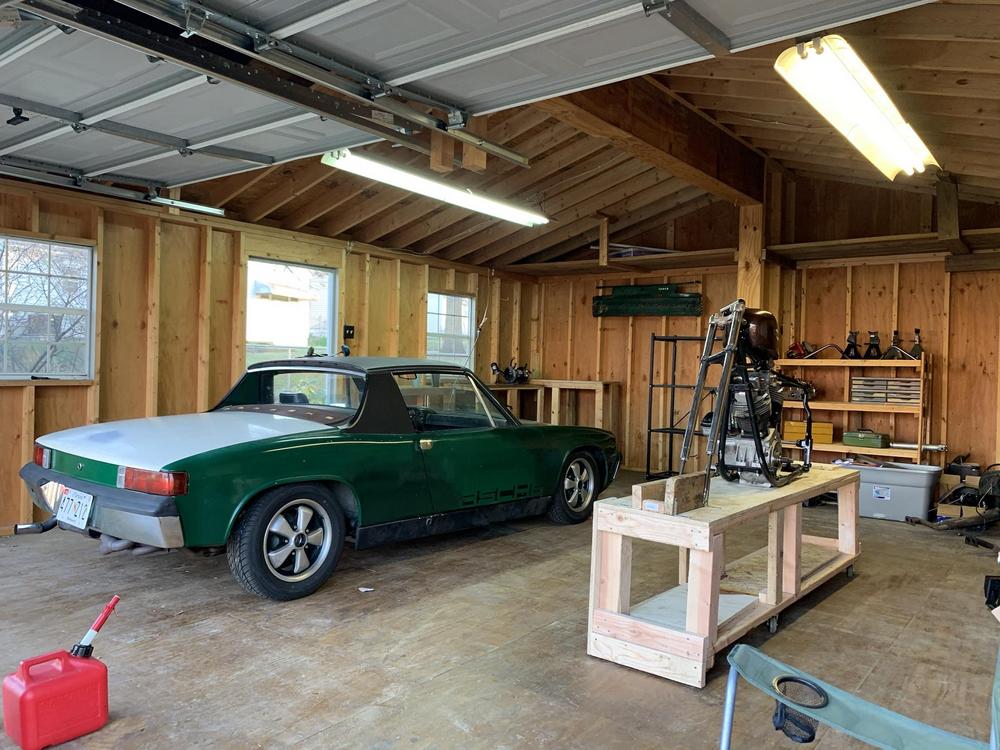
But we made it. Lord knows I was not paying for a tow several blocks, If i had to push the ***ing thing, I would. Too much pride! 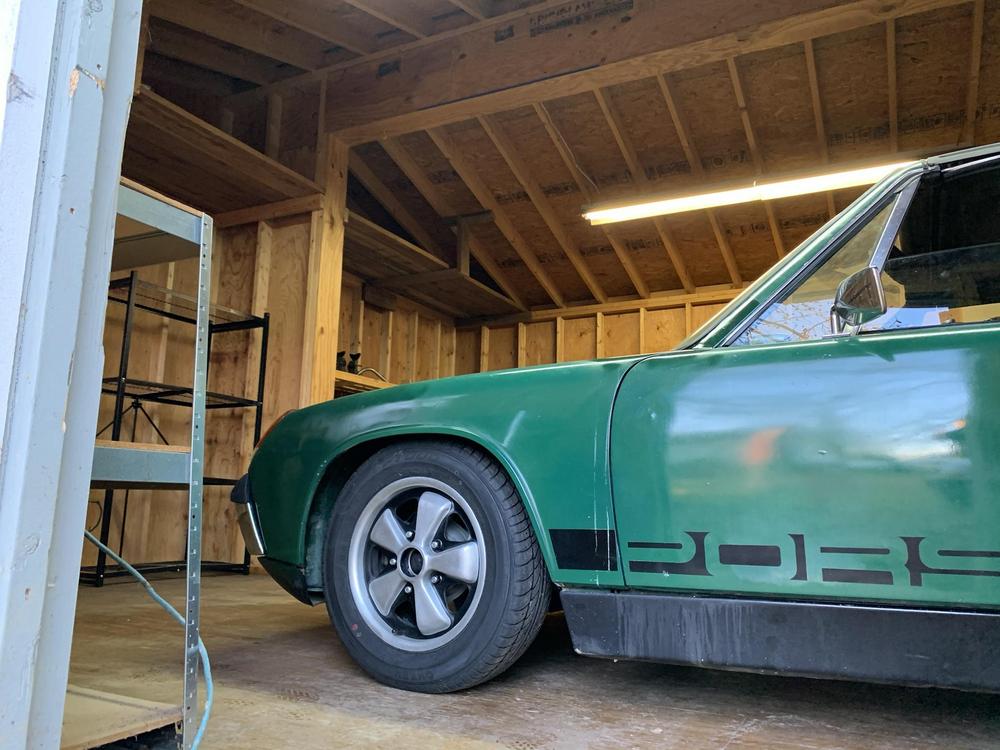
Here is a funny video of my feeble attempt to get it to it's new home:
https://imgur.com/gallery/rg2pYSb
Posted by: tygaboy Dec 18 2020, 09:37 AM
Nice! You're going to LOVE your new shop space! Just be careful: Nature abhors a vacuum and look at all that (currently) empty space...
Posted by: Jamie Dec 18 2020, 10:35 AM
Hey guys,
I havn't made an update in a bit. I've been insanely busy. Not much to update, but I figured I'd share some photos of the new digs.
Here is the last photo taken of my 914 at the old small garage.
(arguably the best angle of this car)
Really lucky to have been able to find a place with a garage with just enough room to repair the 914. I will miss some things about it.... but its time for an upgrade.
Here is the backyard of the new house that we bought. My last "yard" was about 12 by 9 feet, so this is overwhelming.
With a detached 2.5 (deep) car garage (maybe 3 914s if you cram
) and a separate gated entrance to the garage out back. The garage is a recent build, and will need its share of work throughout the winter. It does not have dedicated electric.
So I will need to run a sub panel off the house, the floor absolutely needs some beefing up and a layer of epoxy, insulation, paint, etc.
I have my work cut out for me. BUT it is all there, I love it and I own it..
The 914 made it over! ... Barely ... It was only a mile, I ripped it the entire way, ear to ear smile (only my second time driving it - it is freezing temps here in MD).
Of COURSE, when I turn into the neighborhood it starts static idling at 3k rpm. Making a huge ruckus (sorry new neighbors!)
I coast most of the way down the block, fire it up and gun it into the garage.
Turns out the left carb linkage was stuck open at half throttle.... This is why we don't purchase the hex bar linkage folks!
But we made it. Lord knows I was not paying for a tow several blocks, If i had to push the ***ing thing, I would. Too much pride!
Here is a funny video of my feeble attempt to get it to it's new home:
https://imgur.com/gallery/rg2pYSb
It appears the shop has a plywood floor, so what is under the wood? I see some insulation on your shopping list by next Christmas, so enjoy the space.
Posted by: BeatNavy Dec 18 2020, 10:43 AM
Nature abhors a vacuum and look at all that (currently) empty space...
So true. My advice is to resist the urge to fill that space as long as you can while you're doing work on this car.
Nice place. Did you move out in the country or something?
Posted by: jaredmcginness Dec 18 2020, 11:16 AM
It appears the shop has a plywood floor, so what is under the wood? I see some insulation on your shopping list by next Christmas, so enjoy the space.
It does! It was a prefab built in 2010... It's a gravel base, cemented piers, 12" spaced joints running the length, and 7/8 plywood floor.
It is really solid, but I was dissapointed to learn about the floor. The house was so perfect for us that it didnt matter.
So the work around is Epoxy. (I cannot afford a 9k concrete pour)
I need to clear the garage, add a vapor barrier, + another layer of 3/4" OSB, fill gaps, sand and epoxy.
Check out this you tube video
https://www.youtube.com/watch?v=yJL3xBUYg9o
I think is a good solution for me. I am NOT a contractor, if anyone has any better ideas for this I am all ears!
So true. My advice is to resist the urge to fill that space as long as you can while you're doing work on this car.
Nice place. Did you move out in the country or something?
Thanks for the advice @http://www.914world.com/bbs2/index.php?showuser=17042 . When I was moving, I could not believe how much stuff I was coming up with.
I set up several piles, give-away, sell, and five 30 gals of trash ( I dont need to keep all the rust sections I cut out of the car, haha)
I live in Catonsville, off 695. I moved about a mile down the road, near UMBC.
Its a corner lot in a quiet neighborhood and backs up against county property. So its super quiet.
Lucky to have found this house. We put the offer in within 10 hours of it being listed on zillow.
P.S. In that case I'll stop looking for the first $500 Bay window bus shell I find, just to put there as yard art... because I have the room
Posted by: jd74914 Dec 18 2020, 11:47 AM
It appears the shop has a plywood floor, so what is under the wood? I see some insulation on your shopping list by next Christmas, so enjoy the space.
It does! It was a prefab built in 2010... It's a gravel base, cemented piers, 12" spaced joints running the length, and 7/8 plywood floor.
It is really solid, but I was dissapointed to learn about the floor. The house was so perfect for us that it didnt matter.
So the work around is Epoxy. (I cannot afford a 9k concrete pour)
I need to clear the garage, add a vapor barrier, + another layer of 3/4" OSB, fill gaps, sand and epoxy.
More expensive, but tile would be neat over another 3/4" of subfloor. Relatively inexpensive if you get a clearance-type deal. Regardless of how you go, I'd probably go ply over OSB.
Congrats on the new house!
One more thing to work on!
Posted by: mepstein Dec 18 2020, 12:13 PM
It appears the shop has a plywood floor, so what is under the wood? I see some insulation on your shopping list by next Christmas, so enjoy the space.
It does! It was a prefab built in 2010... It's a gravel base, cemented piers, 12" spaced joints running the length, and 7/8 plywood floor.
It is really solid, but I was dissapointed to learn about the floor. The house was so perfect for us that it didnt matter.
So the work around is Epoxy. (I cannot afford a 9k concrete pour)
I need to clear the garage, add a vapor barrier, + another layer of 3/4" OSB, fill gaps, sand and epoxy.
More expensive, but tile would be neat over another 3/4" of subfloor. Relatively inexpensive if you get a clearance-type deal. Regardless of how you go, I'd probably go ply over OSB.
Congrats on the new house!
One more thing to work on! concrete board and then tile?
or foam board and then more osb/plywood and make a homemade SIP.
Attached image(s)

Posted by: jaredmcginness Dec 18 2020, 01:22 PM
concrete board and then tile?
or foam board and then more osb/plywood and make a homemade SIP.
Good idea @http://www.914world.com/bbs2/index.php?showuser=10825 , So current set up, then add a couple 4x8 of concrete board (for vapor barrier + strength) and tile directly over?
SIP would be good for strength and insulation I suppose.
Again, I am totally new to this. I'd just like to make this floor last and be able to withstand fluids, foot traffic, welding, etc. and not spend several grand to do it.
Posted by: mepstein Dec 18 2020, 01:40 PM
concrete board and then tile?
or foam board and then more osb/plywood and make a homemade SIP.
Good idea @http://www.914world.com/bbs2/index.php?showuser=10825 , So current set up, then add a couple 4x8 of concrete board (for vapor barrier + strength) and tile directly over?
SIP would be good for strength and insulation I suppose.
Again, I am totally new to this. I'd just like to make this floor last and be able to withstand fluids, foot traffic, welding, etc. and not spend several grand to do it.
I'm just throwing out some ideas but I'm no engineer so I can't do more than that.
Post on garagejournal.com and someone with more experience will be able to help.
Right now I have a big blue tarp on mine because I cleaned the floor with a pressure washer but I don't have time to attend to it. Give yourself a chance to come up with a plan.
Congrats!
If I can grab a truck I might buy some of the porcelain tile pictured. $0.50 per sq/ft is a good price and I need tile that won't show dirt.
Posted by: Jamie Dec 19 2020, 09:40 AM
Any material placed over a wooden floor must also be flexible, because the wooden subfloor under load like a car will have some flexing. A rigid top floor material like tile will crack, causing a renovation job that could have been avoided by using a flexible top material, like more plywood or OSB.
Posted by: bbrock Dec 19 2020, 10:05 AM
Any material placed over a wooden floor must also be flexible, because the wooden subfloor under load like a car will have some flexing. A rigid top floor material like tile will crack, causing a renovation job that could have been avoided by using a flexible top material, like more plywood or OSB.
You need to consider the weight of the cars. I've tiled floors over a normal solid sub-floor, over two layers of wood sub-floor, and over cement backer board over wood sub-floor and they all work find for foot traffic although I very much prefer cement backer board. For a garage floor that cars will park on, you need to either build up the floor to be rigid or stick with flexible materials throughout. I'll bet two layers of 3/4" sheet screwed and glued together with a layer of cement backer laid in thinset and screwed down would do the trick, but I'm not an engineer and it would add to cost and work.If it were my garage, I'd also be wondering if there was insulation under the existing sub-floor and if not, how hard it would be to get some under there. Lifting the sub-floor to install rigid foam between the joists and vapor barrier over them and under the first layer of sub-floor sheet might not be a horrible job if the plate was screwed down and not glued, but you'd need to weigh the cost and benefit. An insulated floor makes a big difference in comfort and cost of heating.
Again, I'm not an engineer or contractor but have built a huge barn/garage and renovated our first house that were later inspected by a structural engineered who commended me on the top notch work.
Posted by: willieg Dec 19 2020, 10:08 AM
Love the look of the shop. However, unless the joists and plywood are decay resistant/pressure treated, ultimately there will be wood rotting issues. Also, load supporting wood members should have adequate ventilation. That said, flexible vinyl tiles would be an option over the existing plywood floor. Cheap, easy to install.
Posted by: jaredmcginness Dec 19 2020, 11:38 AM
Again, I'm not an engineer or contractor but have built a huge barn/garage and renovated our first house that were later inspected by a structural engineered who commended me on the top notch work.
But that is much more experience than I! This is truly my first rodeo.
It doesn’t surprise me that someone else was giving you kudos for your first rate work.
I will need to make a price list of my options and weigh all that out.
I under stand the “do it right or do it twice” situation here. The issue I see is that this needs solved soon, while maybe temporary, building up a flexible floor, with a cement backer, and tile over that might be a good option now, that will get me through 3 or 4 years, when cement pouring might fit my budget down the road.
‘We do it nice BECAUSE we do it twice’ is my motto.
Love the look of the shop. However, unless the joists and plywood are decay resistant/pressure treated, ultimately there will be wood rotting issues. Also, load supporting wood members should have adequate ventilation. That said, flexible vinyl tiles would be an option over the existing plywood floor. Cheap, easy to install.
I agree. I was told this was pressure treasured, underneath, but I need to get in there for myself and see. I believe they are screwed down so I could pop a board up and see what I am working with.
Vinyl might be my move. I don’t think epoxy would be the best for flexibility. I see the coat cracking in time.
I made a thread on garage journal dot com. Maybe I will get some bites there as well.
Posted by: bbrock Dec 19 2020, 01:17 PM
Here's another option for getting by. Just slap on a couple coats of cheap(ish) epoxy paint or glue down a cheap sheet of vinyl and call it good while you save some pennies for a proper slab. Back in the 90s I was able to buy 2K floor epoxy at Sherwin Williams for about $30/gallon that I used on the floors of an animal laboratory facility I was managing. Those floors were exposed to daily scrubbing with strong detergents and frequently exposed to acid and wore like iron. That was over concrete but I did paint some wood stuff with it and it worked well. It was pretty flexible. Cheap and durable. Note that this was not a pour on premium epoxy coating. Just a 2 part paint that rolled on like regular paint. RESPIRATOR REQUIRED.
Posted by: bkrantz Dec 19 2020, 08:48 PM
Any material placed over a wooden floor must also be flexible, because the wooden subfloor under load like a car will have some flexing. A rigid top floor material like tile will crack, causing a renovation job that could have been avoided by using a flexible top material, like more plywood or OSB.
I also agree. If you are thinking of replacing this with concrete some day, then I suggest two steps to use the floor you have until then:
1. Make sure the plywood floor is strong enough, especially for things like jacking. If you have doubts, add another layer of ply or OSB.
2. To protect the wood, at least in the work area, get a roll of utility flooring. These are not too expensive (around $250 to $300 for a 8 x 16 ft roll) and nearly indestructible.
Posted by: jaredmcginness Dec 19 2020, 09:56 PM
Awesome. Thanks fellas. I got more info here than on Garage journal. I appreciate it getting brought up in the first place.
Last questions that I am a bit confused about.
-If I’m adding a 3/4” plywood layer now to strengthen what a I have, should I glue and screw to the existing layer?
-do I need a vapor barrier, if so what is a good choice, cement board, etc.
Options are:
-Vinyl tile (eg: Race deck) expensive, but adds; durability, attractive and strengthens.
-Roll out mat, cheaper, one solid layer, but thin.
Thanks!
Posted by: mepstein Dec 19 2020, 10:17 PM
I think the vapor barrier needs to be on the ground or at least under the first layer of ply.
Glue and screw unless you plan on removing the 2nd layer at some time. Then just screw.
If you are buying plastic floor tiles new, look at what they sell at greg smith equipment. They are 5 minutes off 95 in Newark DE and no sales tax. They have samples and are sometimes cheaper in the store than online.
If I was doing tiles, I would still do an inexpensive epoxy on the wood. Otherwise, oil and chemicals will get between the seams of the tile. It's an aircooled Porsche so...
I looked at roll flooring and got a sample. It was very thin and scratched easy. By the time I ordered enough for my 22x24 garage, I was at $1K.
Posted by: bbrock Dec 19 2020, 11:00 PM
Glue and screw (or nail) will make the stiffest floor but will a lot harder to demo later if you decide to do that. It doesn't really matter if you nail or screw if you glue the sheets together with construction adhesive. In that case, the nails or screws are really just clamping the sheets together while the adhesive dries.
I agree with Mark on the vapor barrier and would probably skip it. Instead, I'd make sure there is ventilation under the sub-floor. Foundation vents are cheap and easy to install. If you were to insulate the floor and keep the garage heated, then I would want a vapor barrier. Likewise if you ever pour a slab, you will want a vb between the ground and the slab.
I think it all just depends on how deep you want to go now and how temporary you intend the solution to be. I have a storage shed with an OSB floor on treated joists resting on a gravel pad. No insulation or vapor barrier but the shed is not heated so it doesn't matter. After 15 years it is still dry and solid.
Posted by: willieg Dec 20 2020, 12:15 AM
Buildings, by code, typically specify 40 lb live load per square foot. This is more than adequate for walking and furniture. However, if you jack up one side of a 914, you are putting over1000 lbs on a very small area. Doubling up the plywood spreads out the load over a bigger area, which is a good thing. If you double the plywood, be sure to overlap the seams of the bottom plywood with the top plywood. I think a better solution would be to pull up a couple of pieces of the plywood floor and put additional support under the floor joists, where you anticipate the jacking points will be. If the floor was constructed properly, it would have been glued and screwed, meaning you will damage the plywood sheets when you pull them up. You have the great start to an awesome shop.
Posted by: mepstein Dec 20 2020, 07:24 AM
Simplest option would be to build another building for a shop, buy more 914’s and use this one for storage. Problem solved. Your welcome.
Posted by: Jett Dec 20 2020, 10:50 AM
Great thread, and amazing save! The car looks like a lot of fun!
Congratulations on the home and garage! We bought a home three years ago and have just finished what we believe is that last “correction”.
Expect, what you inspect
Thanks for sharing!
Posted by: jaredmcginness Dec 24 2020, 10:00 AM
Hey guys,
Thanks again for all the great responses above. There is so much knowledge here.
Yesterday was about 50* and drying up a bit since the last snow. I wanted to take the car out, at least once more this year.
Drive #3: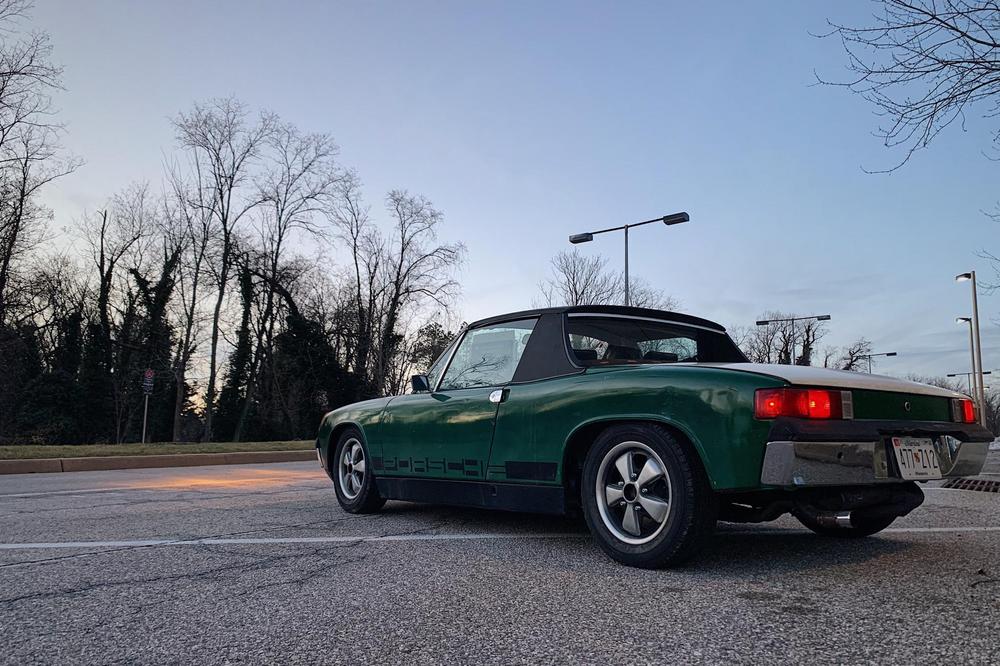
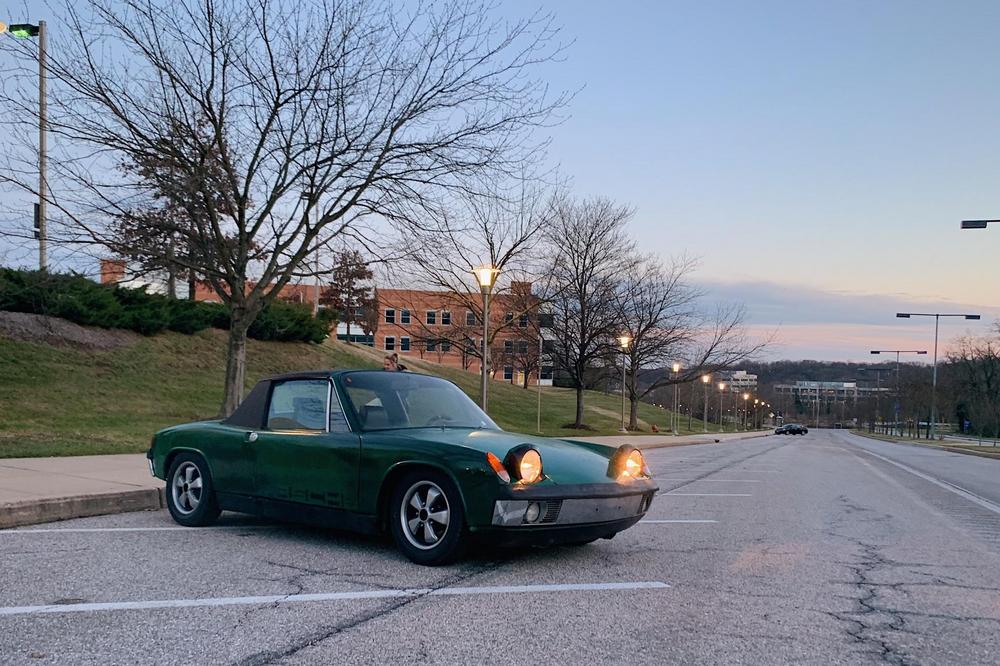
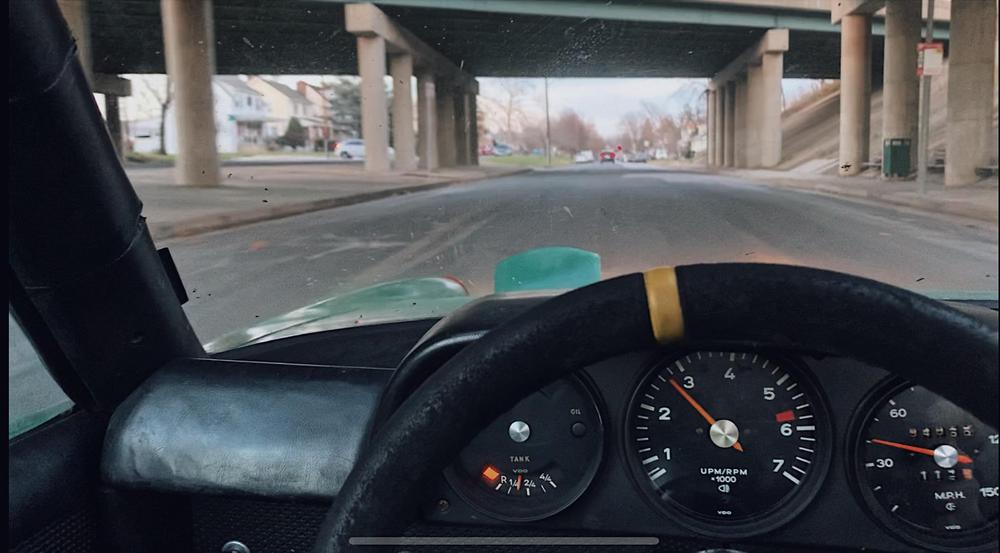
I took it around the neighborhood for a while, trying bed in the brakes a bit. I decided to nut up and take it on the highway.
I drove a few exits down i95 and took the long way home. Everything worked great.
Cruised 70mph no problem! It's slow as a dog, but a ton of fun.
I've never driven a stock 1.7 So I am not sure how to compare the 1911. I wasn't expecting much.
(I used to have an '88 Isuzu Trooper... so anything quicker than that is great... )
Things I noticed:
- Yes, my windscreen needs cleaned
- Throttle pedal... Not a lot of travel. This is normal for carbed cars right? It does not take much to get the carbs wide open, a little pedal goes a long way...
- After I stopped driving the engine bay "smoked" for about 10 minutes. I assume everything from break-in burnt off by now. I presume I have an exhaust leak at the heads.
(it is loud and I can hear a *tic tic tic tic* so I am going to go with exhaust leak)
-Last thing, is there any vacuum, evap stuff directly on the motor that I need to plug or filter? Only thing I can find is maybe add a small filter next to the oil filler cap.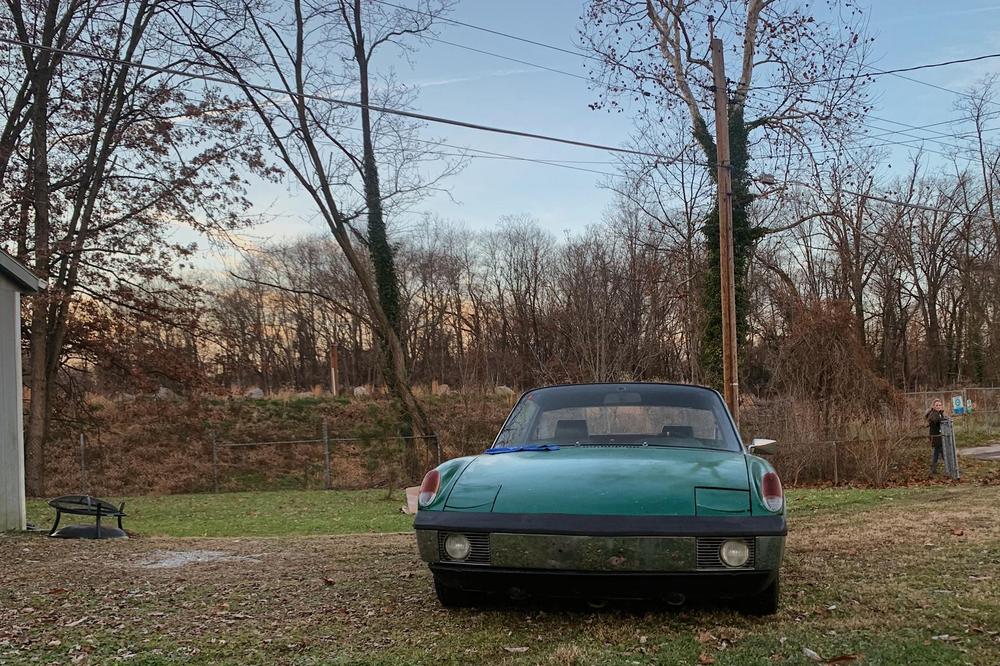
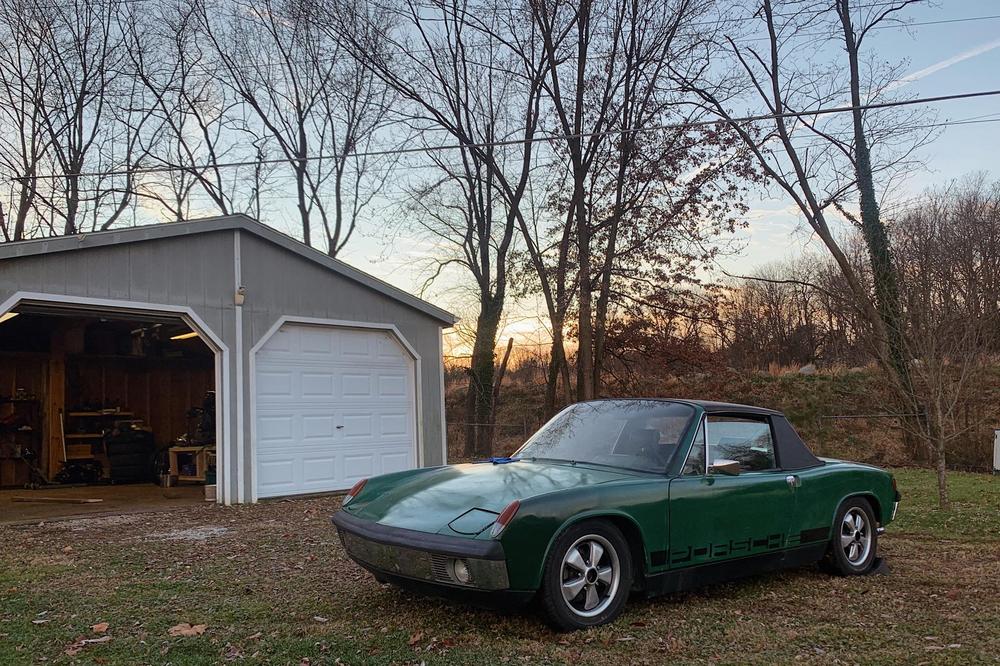
Merry Christmas
Jared
Posted by: FlacaProductions Dec 24 2020, 10:21 AM
Seriously minor detail that should be way down the list but is your reserve fuel light on? I've always believed that the gauge will lie but the light won't...
Awesome job on this - the build has been fun to read. Merry Christmas!
Posted by: tygaboy Dec 24 2020, 10:38 AM
Your journey in emojis:


Great job, Jared. Great job.
Posted by: mepstein Dec 24 2020, 11:00 AM
If you have stainless steel heat exchangers, they definitely tick.
Posted by: bkrantz Dec 24 2020, 09:58 PM
Nice going, Jared. And good to see that these cars can actually drive after serious project work.
Posted by: Cairo94507 Dec 25 2020, 09:02 AM
@http://www.914world.com/bbs2/index.php?showuser=23209 - Merry Christmas Jared. I love that you got your car back on the road and you are stretching it's wings.
It does not matter what level of restoration a car undergoes you will always have things to chase down and remedy. I am still working on little things on my car and like you I am also driving it and loving it.
It amazes me the number of people that just walk up and begin talking to me about it. The most fun is the young kids who were, of course, not around when these cars were new or even after that when you could see them all over driving around. 2 people have asked, "Is that the new Porsche?"
Enjoy every mile as it puts a smile on your face.
Michael
Posted by: sixnotfour Dec 25 2020, 10:27 AM
Great Job ,
Posted by: jaredmcginness Dec 29 2020, 05:19 PM
Seriously minor detail that should be way down the list but is your reserve fuel light on? I've always believed that the gauge will lie but the light won't...
Awesome job on this - the build has been fun to read. Merry Christmas!
Thank you! Good eye. I have 8 or 9 gallons of gas in there. The light is just always on. Maybe I have the wrong bulb plugged in... I need to look into it.
@http://www.914world.com/bbs2/index.php?showuser=23209 - Merry Christmas Jared. I love that you got your car back on the road and you are stretching it's wings.
It does not matter what level of restoration a car undergoes you will always have things to chase down and remedy. I am still working on little things on my car and like you I am also driving it and loving it.
I am loving it, excellent advice. It is easy to get caught up with the next goal and the next problem, rather than enjoying where I am at -
somewhere I have been dreaming of being for a long time!
That's one of the biggest problems I found myself having with this car's refreshment. Take a step back and enjoy it.
Next time around (912, hopefully - or another 914
) I will know to do so. Journey not the destination.
A small update: I ran the car for a while today and stuck my hand under each port on the heat exchangers...
Oh boy! A small exhaust leak under cylinder #3 and a reallly nice leak under cyl #4.
This would certainly explain the popping, wonky idle, power, etc.
When I get my new muffler in hand I will pop the exchangers off, file, reseal and use some copper goop this time.
Other news...
Santa (my girlfriend) got me these BEAUTIFUL Coco Mats for Christmas.
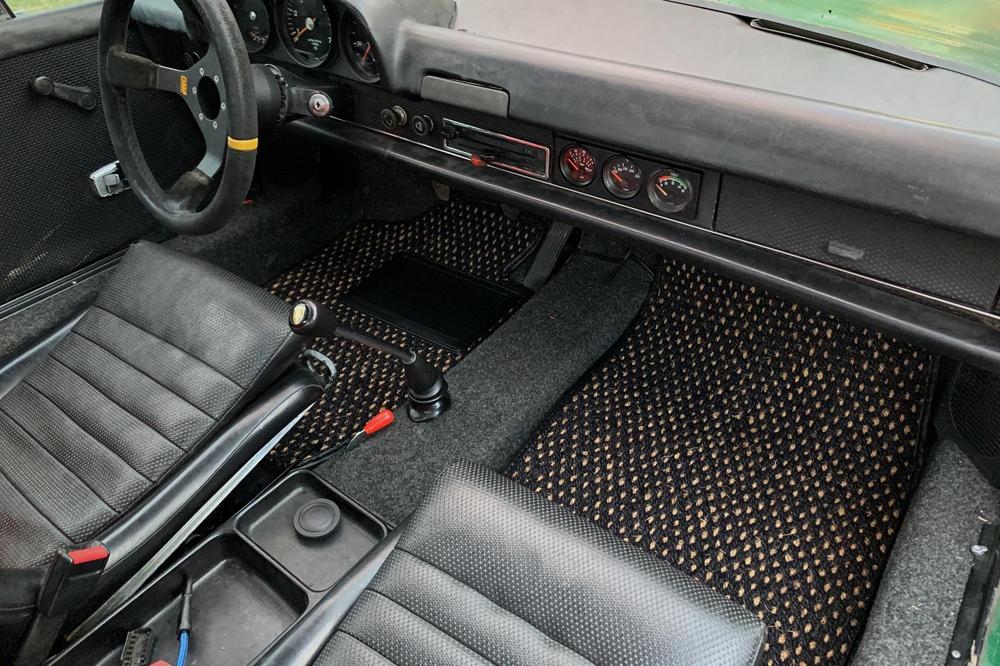
They are black/natural with the long passenger mat. Such a perfect combination and excellent choice with Irish Green.
All part of the big picture.
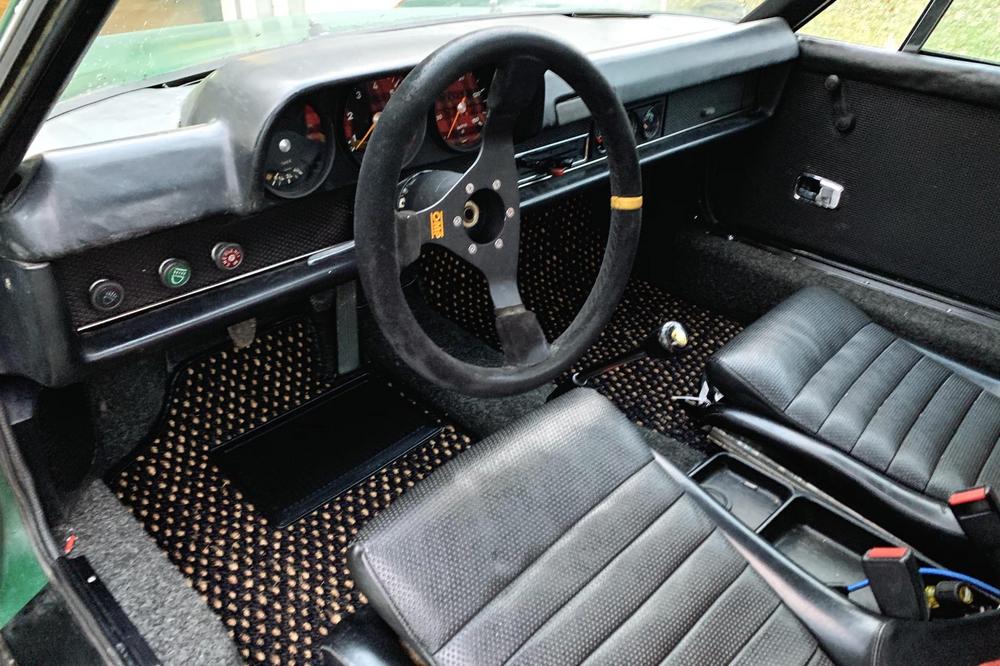
I am a lucky guy.
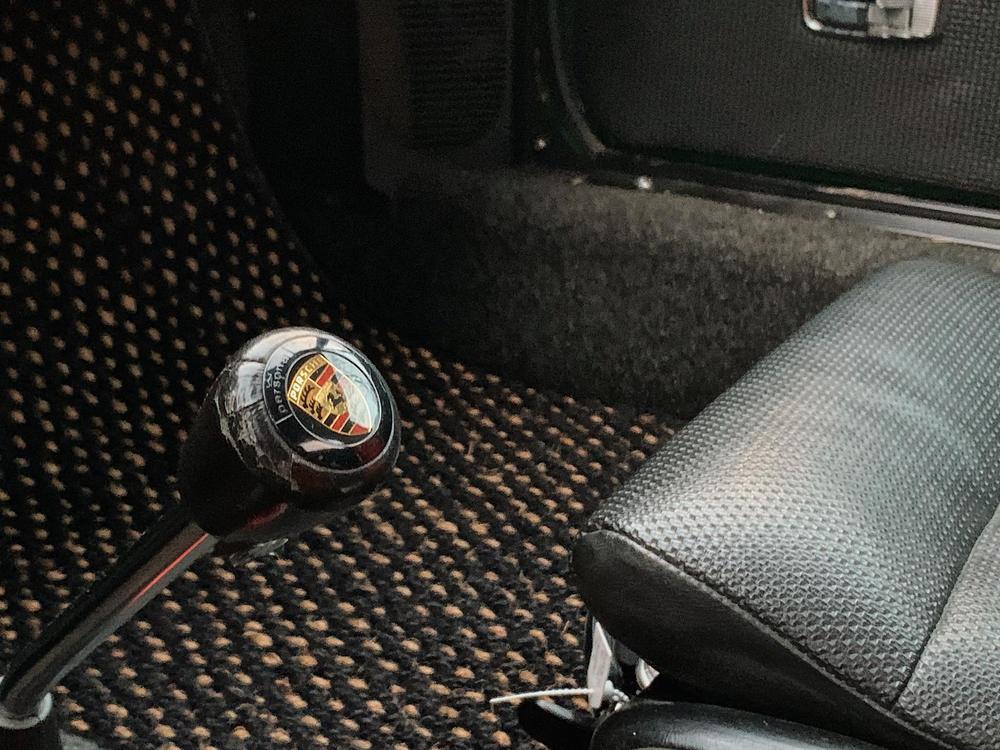
Thank you everyone for reading and participating!
Posted by: burton73 Dec 29 2020, 05:50 PM
A huge garage. You are a rich man. Congratulations
Bob B
Posted by: jaredmcginness Jan 19 2021, 06:28 AM
Hey guys,
Not much to update on here. Lot of other things goin going on right now. Figured I'd post a few updates of the interior.
I traded out my plaid seats for some black basketweave. I'll miss them and always love the story of how I found them, but couldn't do the red on green!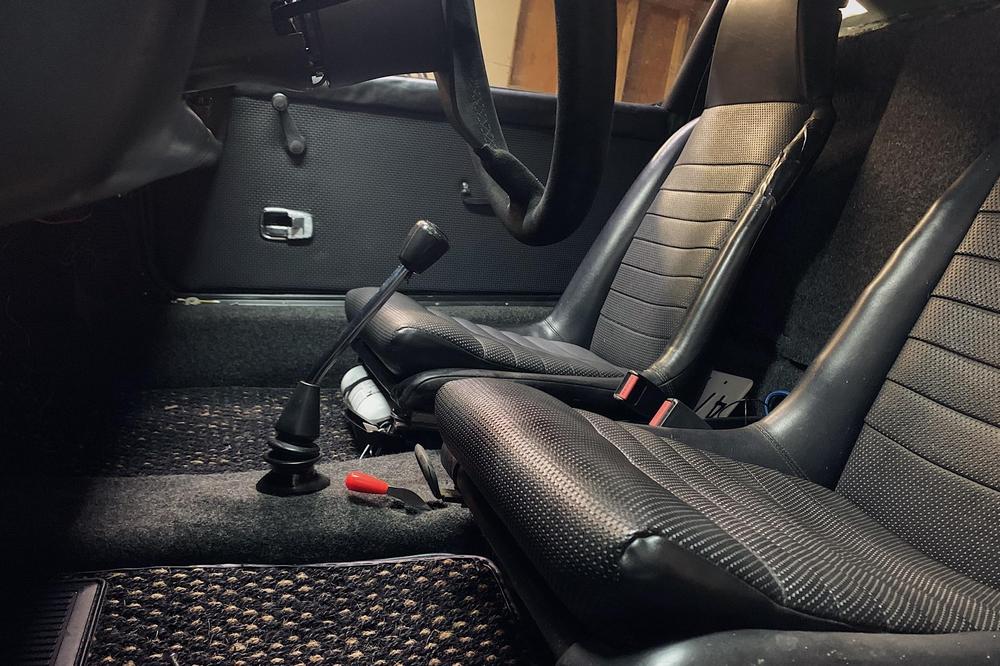
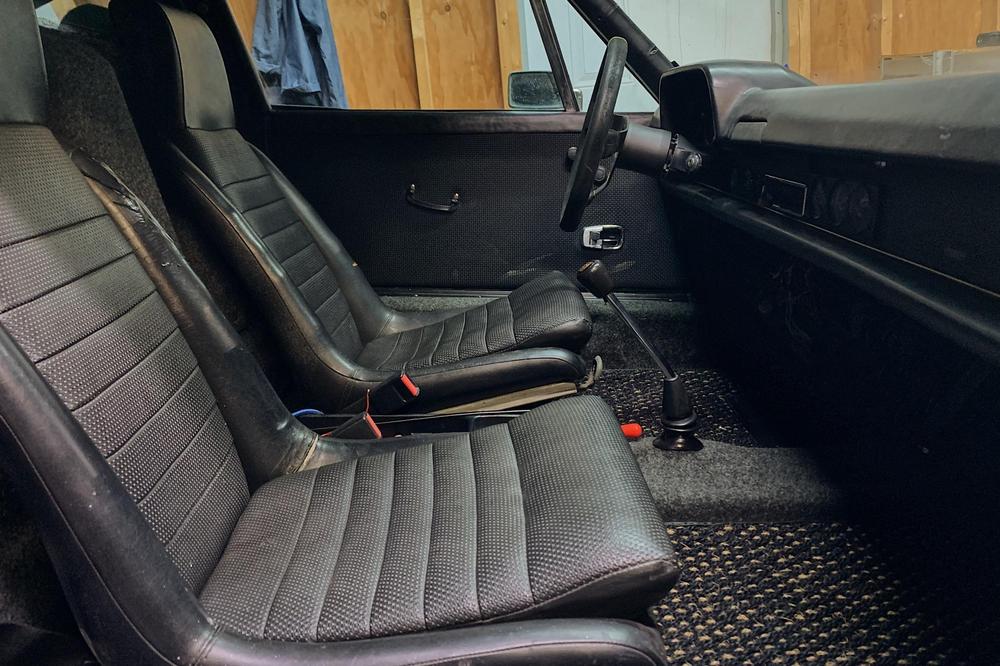
Interior is 95%... Tidying up some wiring, trimming out a few things. Still having trouble getting my oil temp gauge to work.. 2 senders, 2 gauges, good ground. Used to work, now it just will not go.
Otherwise I am waiting on a few more parts to come in a bit warmer of a day so I can take this thing out again! As we all are.
Cheers.
Posted by: mda123 Jan 19 2021, 12:47 PM
Would love to see it in person sometime (I'm in NoVA). I'm pretty much decided on doing Irish Green for my '71 resto project and could really benefit from some of your knowledge!
Posted by: jaredmcginness Jan 19 2021, 02:26 PM
Would love to see it in person sometime (I'm in NoVA). I'm pretty much decided on doing Irish Green for my '71 resto project and could really benefit from some of your knowledge!
I appreciate the comment, happy to lend some insight on any of the 4 things I know about these cars.
. I grew up in Fairfax, you're not too far out from me... I will definitely be around Katie's Cars and Coffee and such this spring. Pending this vehicle making it 30 miles without any issues.
Posted by: bbrock Jan 19 2021, 06:13 PM
I traded out my plaid seats for some black basketweave. I'll miss them and always love the story of how I found them, but couldn't do the red on green!
I feel you there! My thoughts exactly when you discovered the plaid was that they were WAY cool and how you found them even more so, but i don't think I would be able to live with them either. Kind of like that bad ass painting you see hanging in a museum but wouldn't want to have hanging in your living room.
Posted by: jaredmcginness Jan 29 2021, 06:29 AM
Good morning,
I wanted to share a few photos of the muffler I purchased from @http://www.914world.com/bbs2/index.php?showuser=9892 .
Stainless Steel Sport dual outlet muffler. This is the 1.7 heat exchanger style, mated to a 1911cc motor.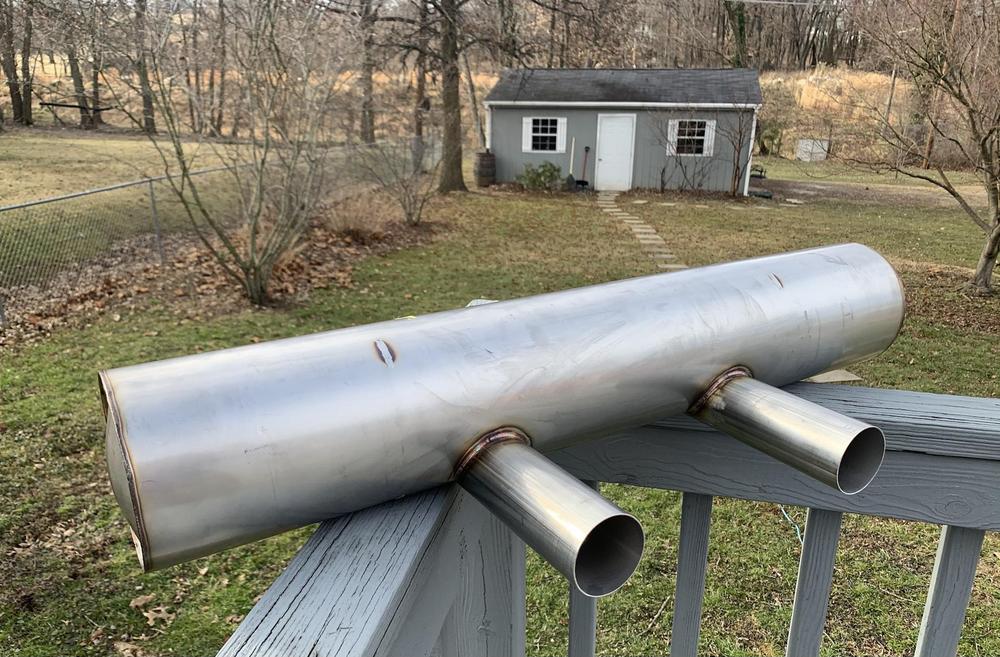
These exhausts are completely hand made in the USA, absolutely top notch work.
Years ago, I was TIG welder from a VW/Audi exhaust co. and have a lot of time seated behind stainless mufflers...
These are wonderfully crafted, appear to be made entirely from flat steel/tube and built with precision. 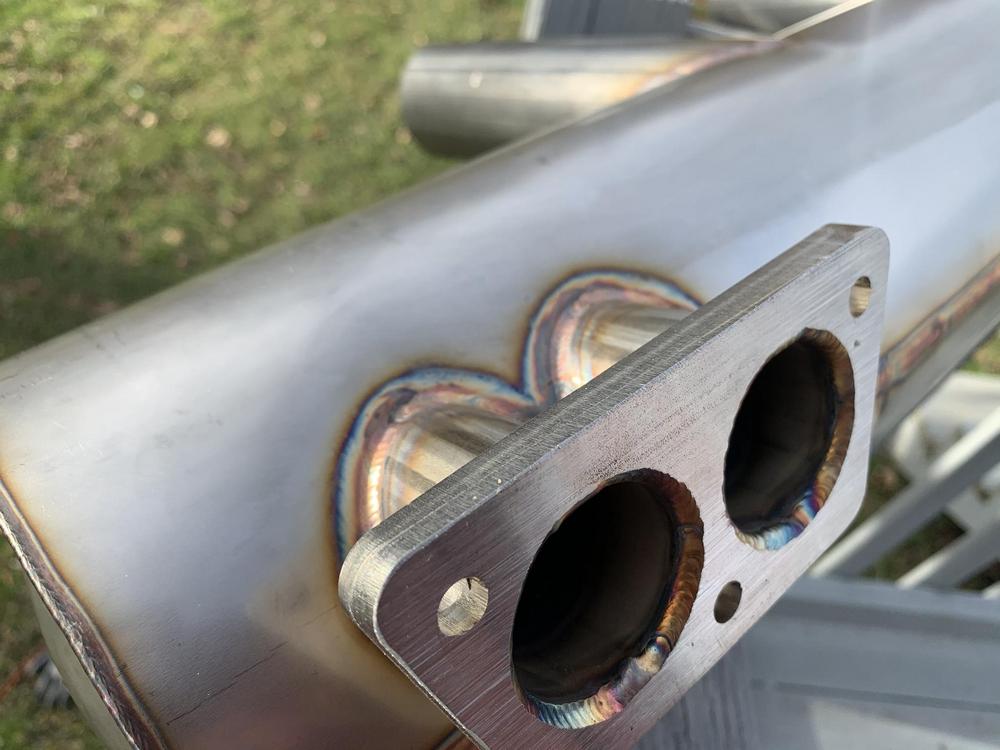
I am just really over the moon about this part. Its a bit too nice for my car. 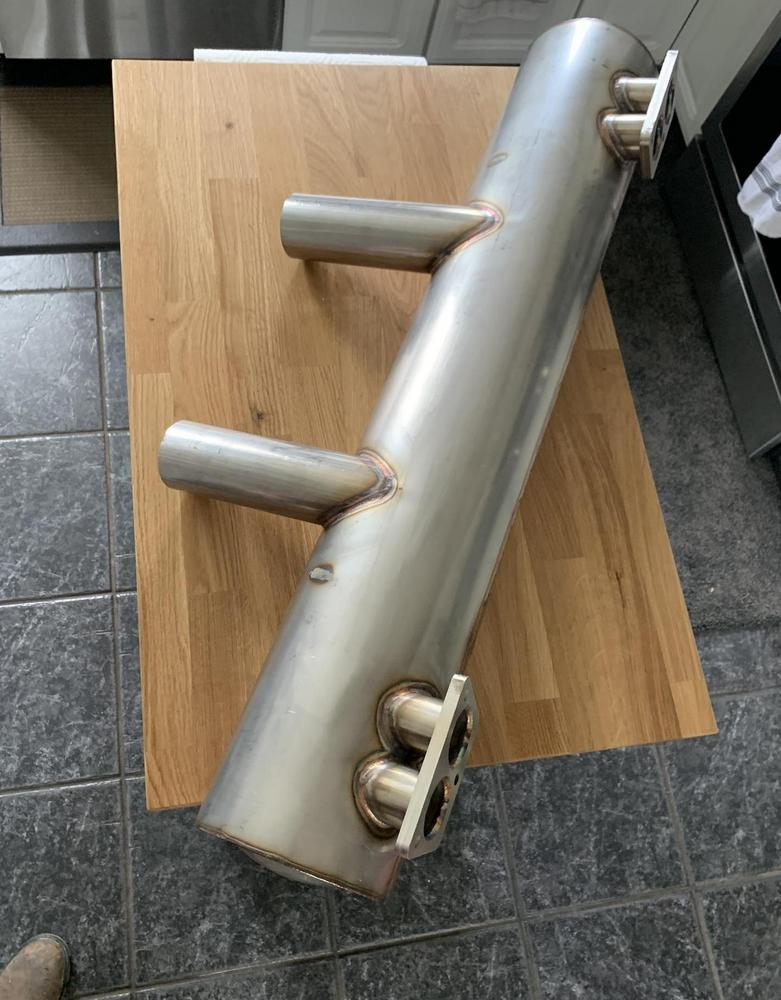
Bent up a little bracket to hold this thing in place. I made it a bit wide and the straps are canted a few degrees.
I will probably just end up buying Ben's bracket. I was just eager to make something on this car.... Its been a few months. 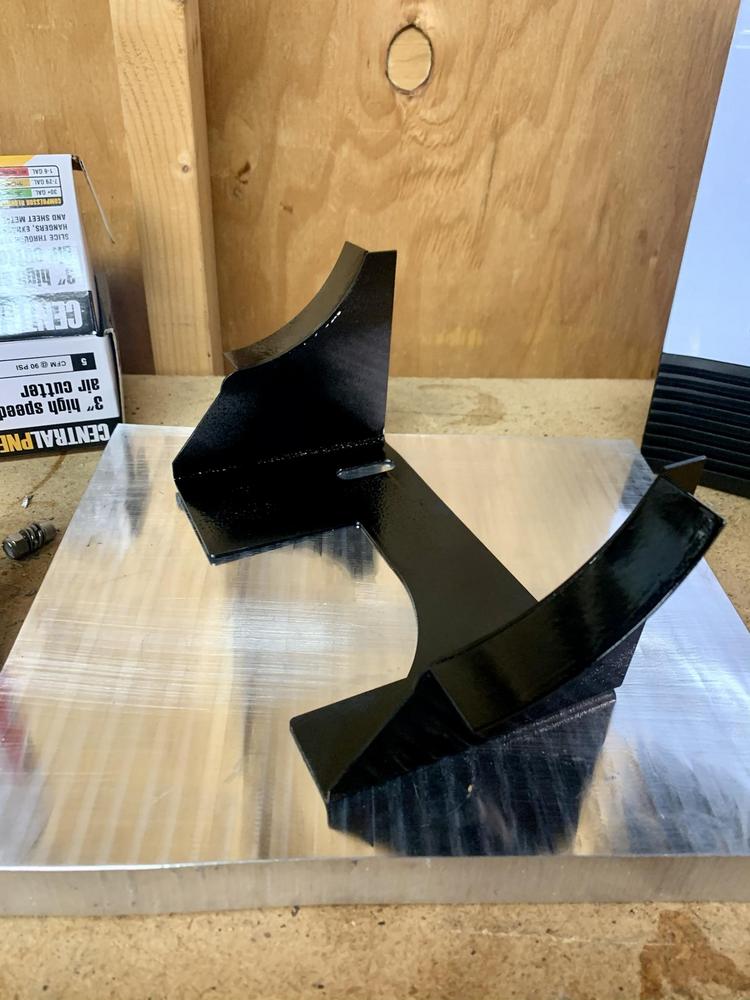
Straps are chinsy. I tried. At a minimum I need to get proper straps 911 style for the banana mufflers.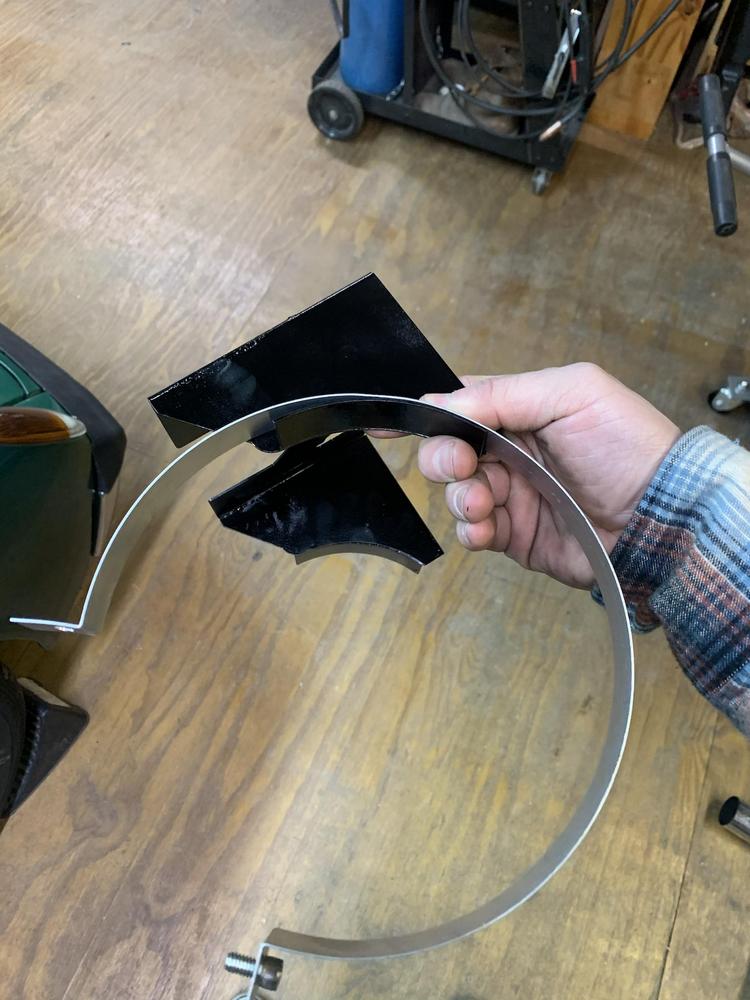
Eager to get it mounted: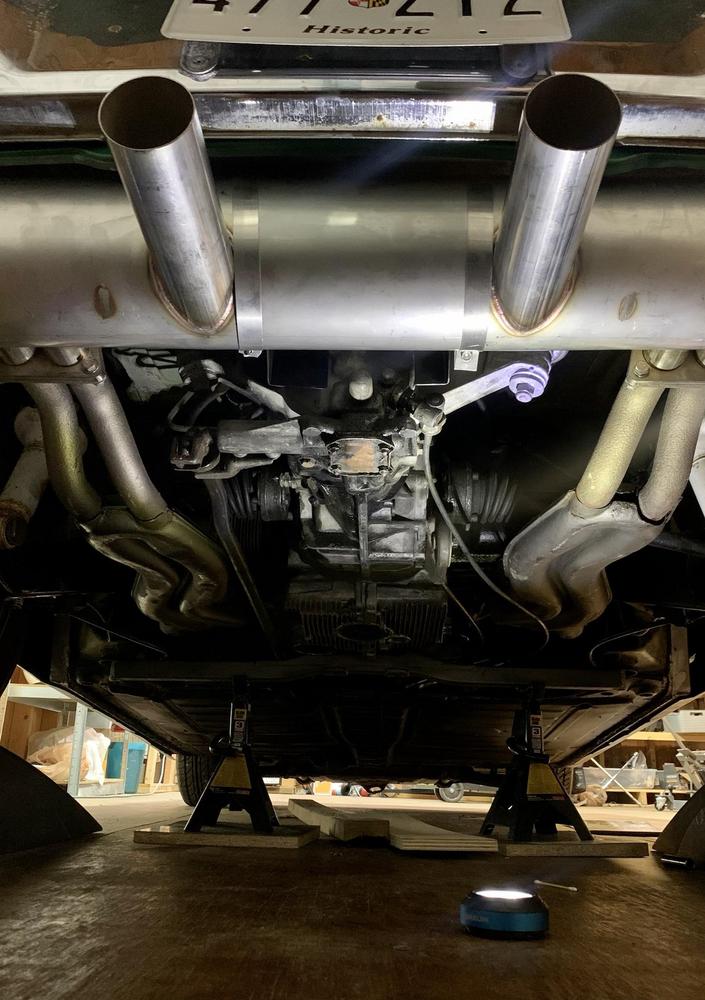
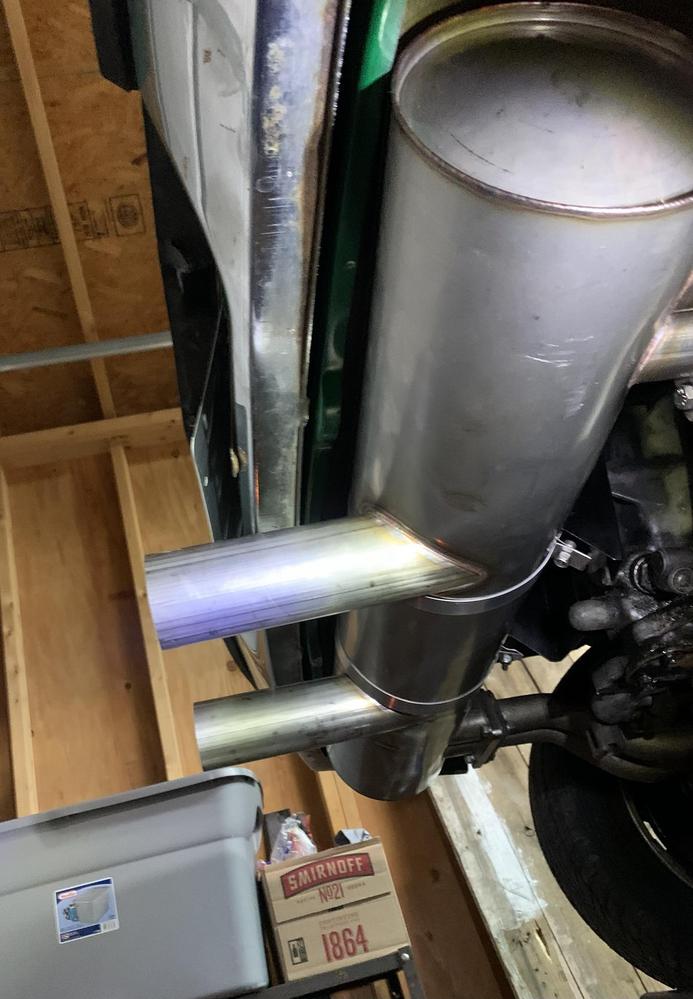
The fit up was cake. Took a few minutes.
(I also removed the heat exchangers to fix an exhaust leak @ the heads)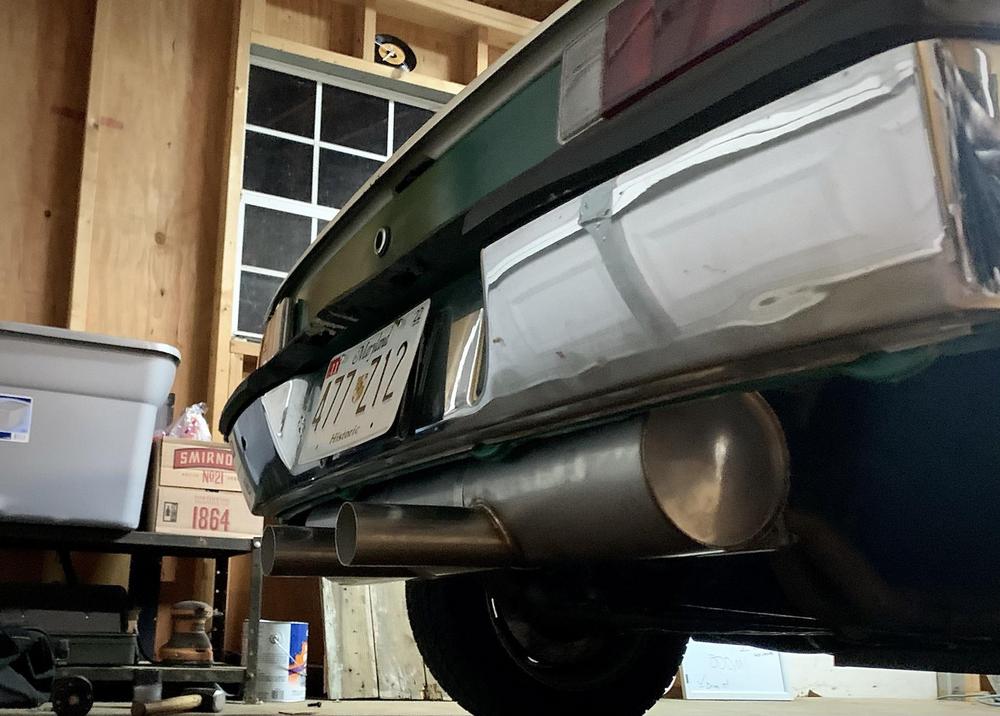
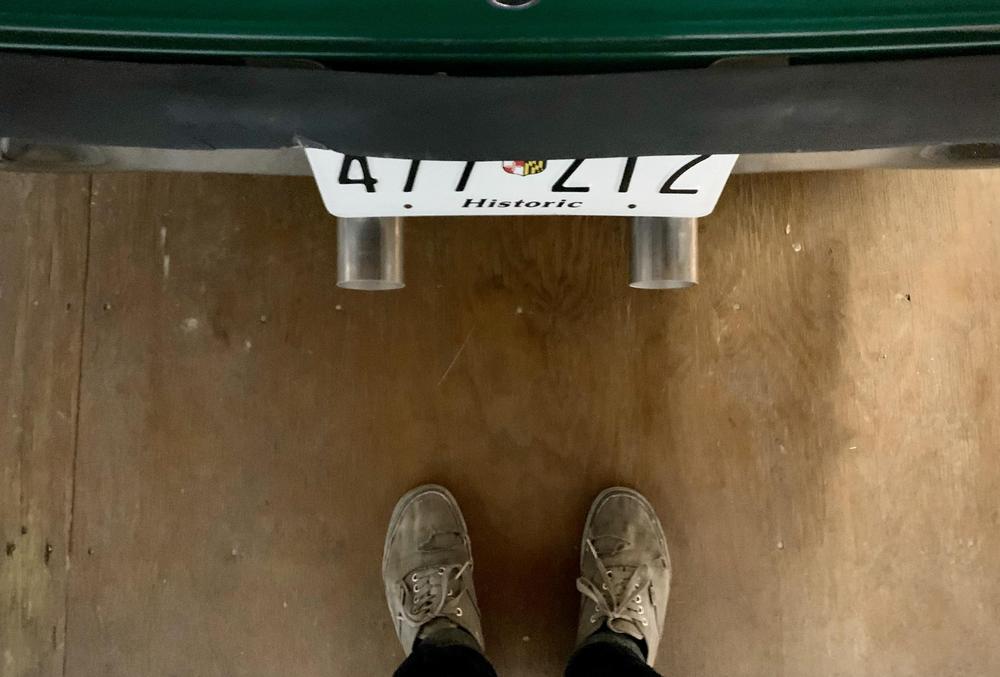
Fired the car up, sounds great. (especially with no exhaust leaks)
It was 24 degrees, so I have not taken the car out yet.
If you all would like an idling sound clip for now, I'd be happy to take one.
Jared
Posted by: mepstein Jan 29 2021, 07:36 AM
I'm very happy to hear the muffler worked well for you. If your heat exchangers are all hooked up, try to get out for a ride. A working heat system should keep you warm and comfortable, even below freezing.
Posted by: Cairo94507 Jan 29 2021, 08:47 AM
Great progress and of course, beautiful muffler. When a professional welder is impressed, that really is the highest compliment.
I have 2 of Ben's mufflers and really want to buy the GT one just to have, in case..... Then again, I also want to pick up a set of his new design heat exchangers. I just want to hang that stuff on the wall of my garage it looks so nice.
Garage Journal is a great forum and there are a lot of talented people there with great ideas and advice. I frequent that forum, although, not like I do here.
Posted by: Mayne Jan 29 2021, 11:22 AM
Great looking exhaust! I especially like the last pic looking straight down to the dual pipes; ready for business.
When you have time, I would love to hear an exhaust video clip.
Posted by: mb911 Jan 29 2021, 12:58 PM
Good morning,
I wanted to share a few photos of the muffler I purchased from @http://www.914world.com/bbs2/index.php?showuser=9892 .
Stainless Steel Sport dual outlet muffler. This is the 1.7 heat exchanger style, mated to a 1911cc motor.
These exhausts are completely hand made in the USA, absolutely top notch work.
Years ago, I was TIG welder from a VW/Audi exhaust co. and have a lot of time seated behind stainless mufflers...
These are wonderfully crafted, appear to be made entirely from flat steel/tube and built with precision.
I am just really over the moon about this part. Its a bit too nice for my car.
Bent up a little bracket to hold this thing in place. I made it a bit wide and the straps are canted a few degrees.
I will probably just end up buying Ben's bracket. I was just eager to make something on this car.... Its been a few months.
Straps are chinsy. I tried. At a minimum I need to get proper straps 911 style for the banana mufflers.
Eager to get it mounted:
The fit up was cake. Took a few minutes.
(I also removed the heat exchangers to fix an exhaust leak @ the heads)
Fired the car up, sounds great. (especially with no exhaust leaks)
It was 24 degrees, so I have not taken the car out yet.
If you all would like an idling sound clip for now, I'd be happy to take one.
Jared
Jared would love to have a sound clip of idling. I dont have a 4cyl here to hear in person.
Posted by: jaredmcginness Jan 29 2021, 04:47 PM
No problem @http://www.914world.com/bbs2/index.php?showuser=9892 . ( @http://www.914world.com/bbs2/index.php?showuser=20880 too)
I would warn you my carbs are hanging a bit (jetting?) and the idle is off, don't want that to be a reflection of the sound of your exhaust.
I ran out and took some videos.
https://imgur.com/gallery/lTjhOmp
https://imgur.com/gallery/4HoKdWW
I hope these are helpful to someone. When its warmer I will get back out and adjust my Dellortos for the 4003rd time and it should be running and sounding great.
Rear view: (I think this exhaust is really complementary of the many horizontal lines of the 914.)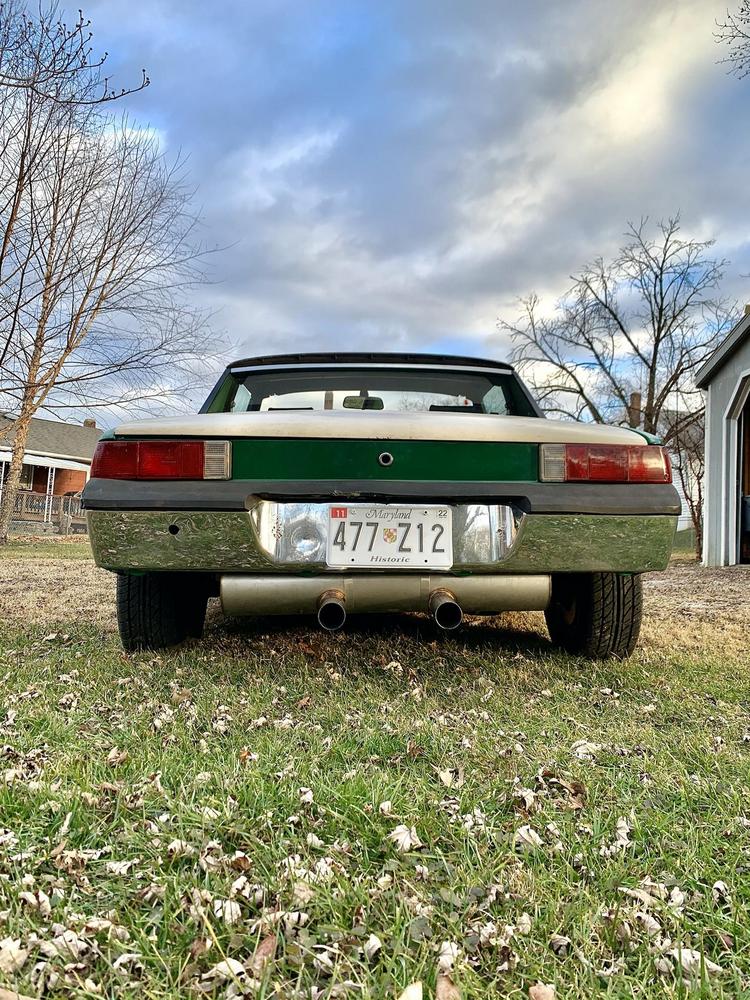
My favorite angle: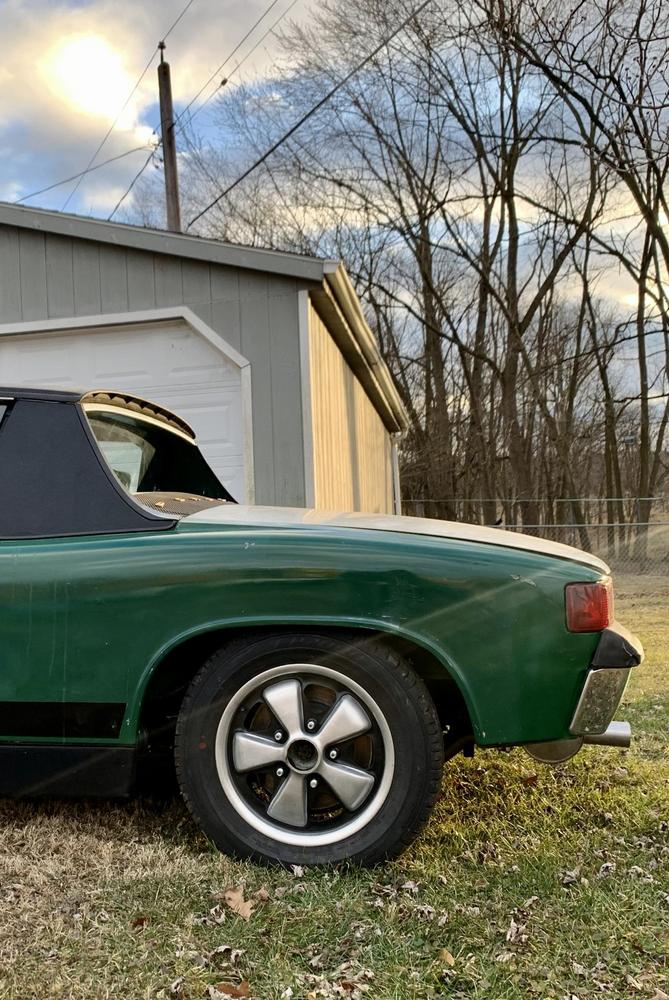
The vinyl wrap for the trunk came in as well. It will soon be green and properly aligned. Easy to be critical of your own car!
Posted by: jaredmcginness Jan 31 2021, 08:17 PM
Hey fellas,
Getting snowed in here today so I made myself usefeul.
The vinyl wrap for the trunk came in a few days ago (after sitting in a Michigan post office since November.
I am wrapping the trunk now as a "quick fix" to color match the car. If you recall a few pages - er... months - ago I laid out a few options for wrapping the car.
I decided on Avery Dark Green Gloss. It was surprisingly similar to Irish green. Enough that the average Joe wouldn't notice. I will likely do the entire car this winter.
I think it will clean it up nice. Getting paint on this car is just not in the cards right now.
Started with this:
An hour later:
I did a decent job for my first time. It's difficult and I have a few pinches. But I am happy with the result. Much easier with an extra set of hands.
After mounting, here is a comparison to the rear panel: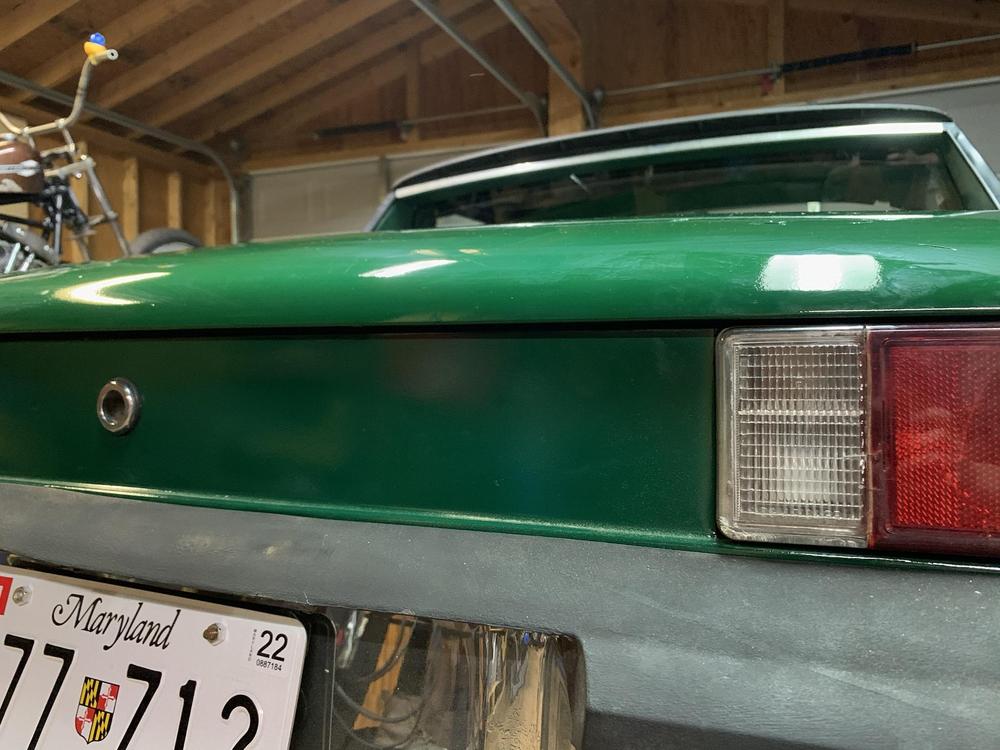
I ended up scowling here, but I really am happy with the results.
My girlfriend likes to document the big steps with my projects. Maybe we'll get a scrap book together.... but that's what this thread is for!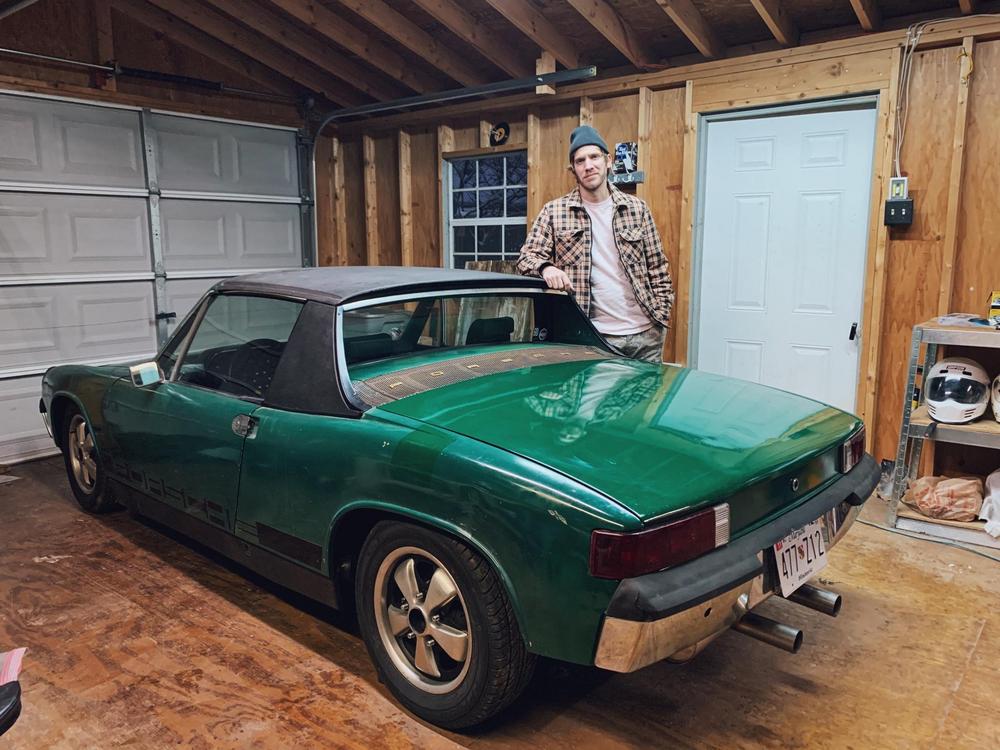
You can see that the actual paint is a bit more blue. But this is the first time I have seen the car with a green trunk mounted it actually looks complete!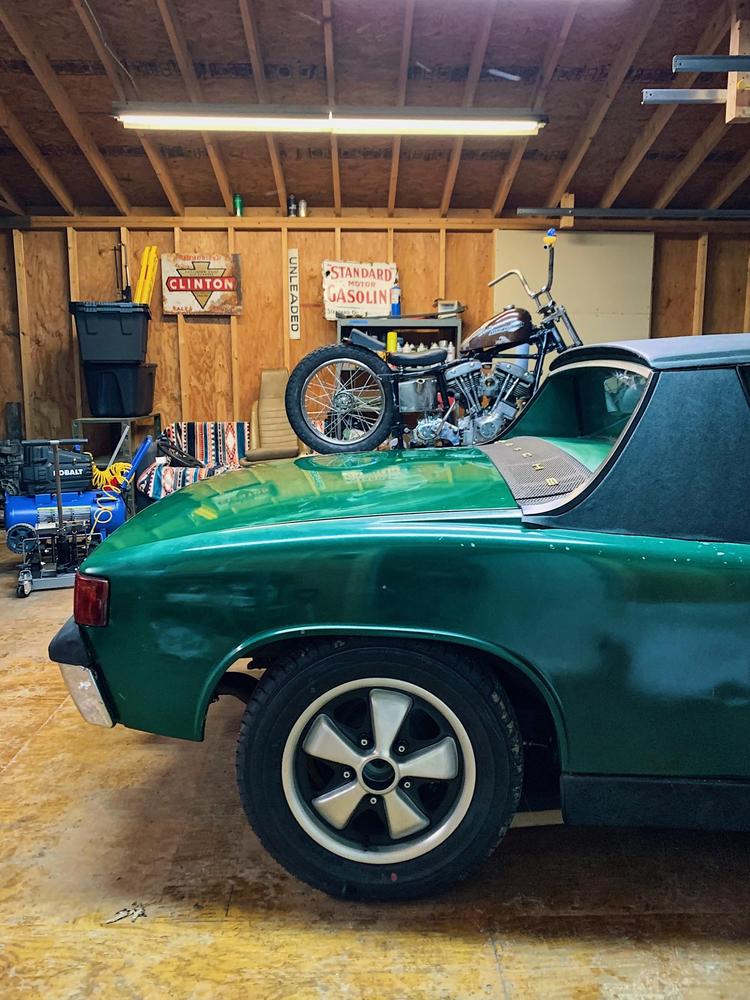
The rear end looks pretty tough. 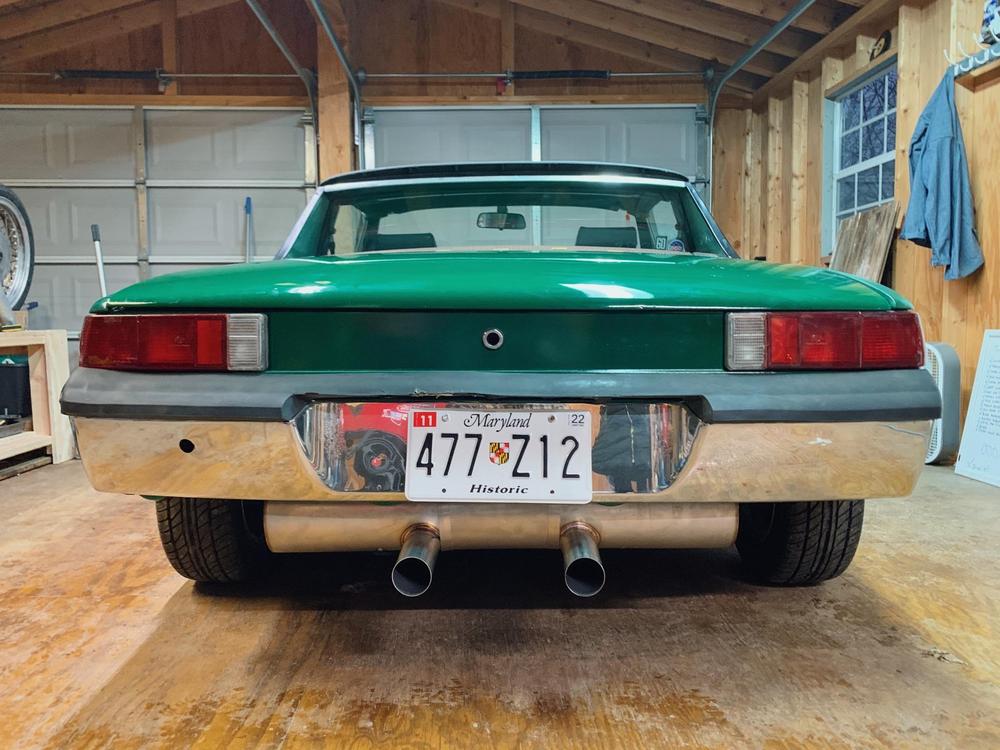
Man I love 914s!
Other news, one of my oldest friends came over to see the new house. He's always kept up with progress on this project with this.
Continually dogging me for my cheap tools (it's either tools or floor pans...)
He is a Milwaukee tool (must be nice) kind of guy. (and a bit of a snob at that.). When he arrived, he said he had second hand embarrassment for about my corded harbor freight tools...
Totally understandable, but they got me this far.
Anyways, he brought me these for a "starter kit" as a house warming gift. Totally blown away and really fortunate to have the friends that I do.
I picked up the 3/8 Ratchet this morning to complete the set. I've never used tools so nice and time saving. I am eager to get into the next rust bucket and use these.
Cheers.
Posted by: mb911 Jan 31 2021, 08:24 PM
I am a huge m18 fan. Bought the vacuum, light, 1/2" impact, 1/4" impact, drills and might buy the string trimmer next to get rid of my sthil .. oh also bought the saw.. love the wrap.. might do some of that in the future on some of my projects
Posted by: mepstein Jan 31 2021, 08:39 PM
I'm just waiting until I finish my workshop to get some M18's
Posted by: bbrock Jan 31 2021, 10:38 PM
Wow! Just wow! Great job on the wrap and that is one helluva good friend!
Posted by: jaredmcginness Mar 10 2021, 06:34 PM
Hi guys,
Been way too long! I was used to the update every 3 days, now it's been a month!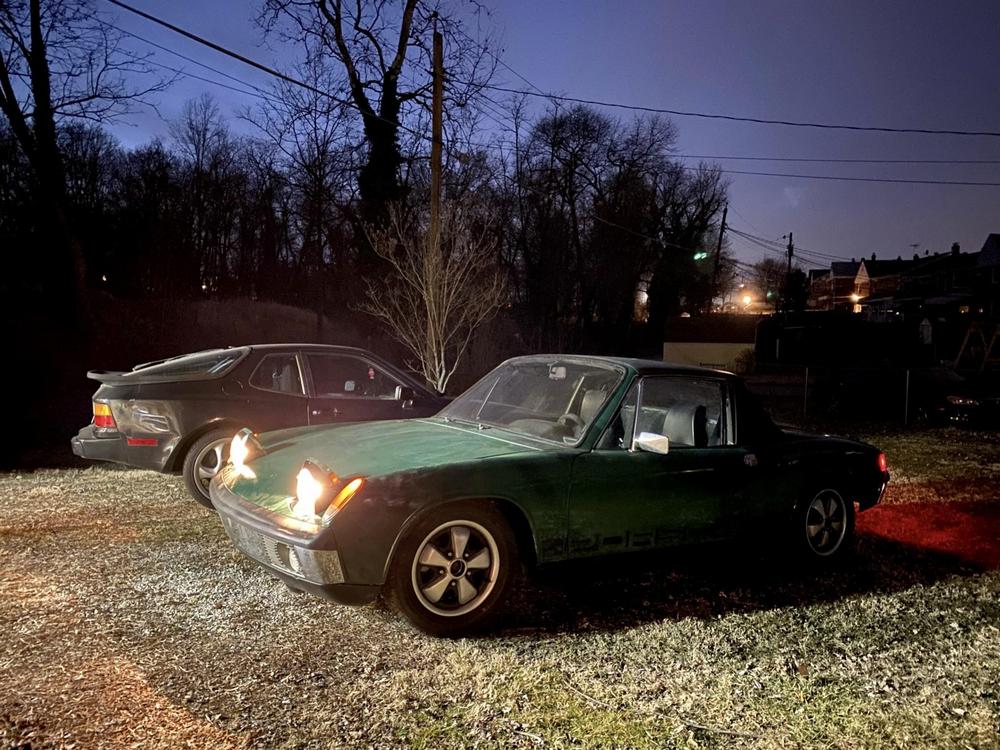
All good over here, lots of home projects that havn't allowed a lot of time for the 914, also its been really cold.
Today was beautiful. I had been waiting on some Dellorto parts from CBPerf, Held up in the mail and finally arrived today.
I popped in some smaller venturis that were graciously sent my way. Car runs much better, still a little funky. But we're getting there.
SOOOOO I took the car out for an evening drive, best it has ever ran...
UNFORTUNATELY, I was coming up to a stop sign, tried to find second (hello, tail shift...) and shifted into Reverse going about 5 mph. normal grind sound, didn't think much of it.
After the drive, I go to back into the drive way, I don't have reverse... Just makes a *Whir* sound as the motor revs. I put the 914 in R and let it roll down to driveway... It rolls freely, greeeeat.
I suppose I stripped the gear from this maneuver. Any ideas? It happened effortlessly.
I do have a spare trans to pull parts from (or just swap to).
Other stuff on the car:
I did a cool modification i found here on the forums... Since I don't run a back pad, I chopped up the ashtray a bit and fixed my little Hella light to the bottom.
Poor photo, but looks something like this: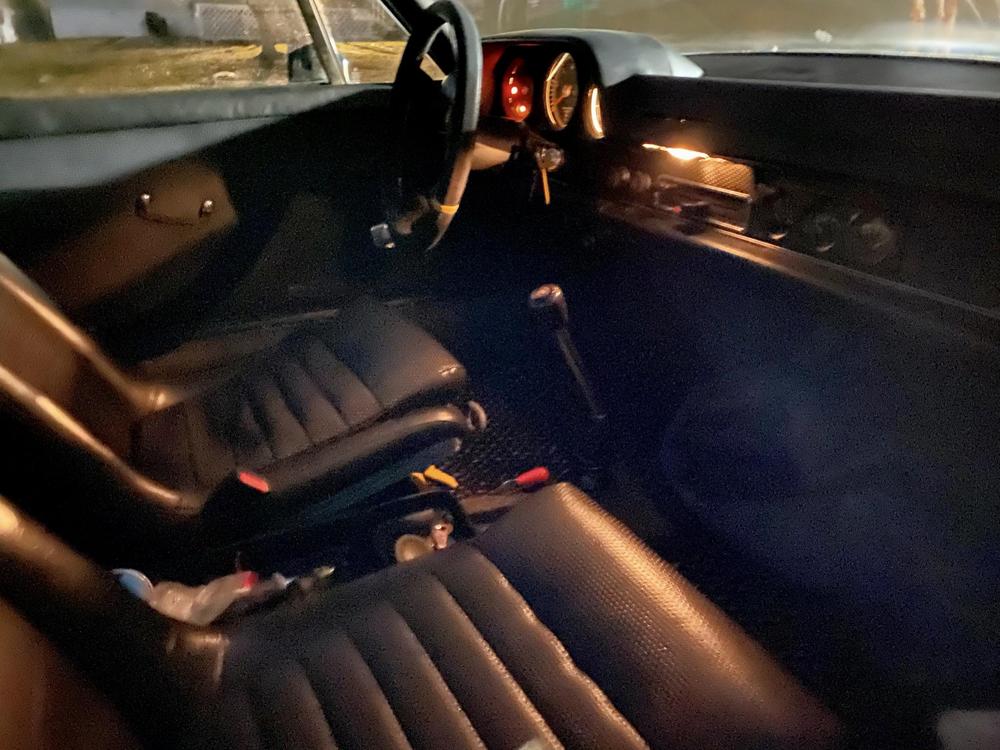
I currently have this wired to Key On position, giving it a constant ambient light, (great for the shifter in the dark)
Its faint, but nice. I can provide more photos if anyone would like to see.
A couple more photos from this evening: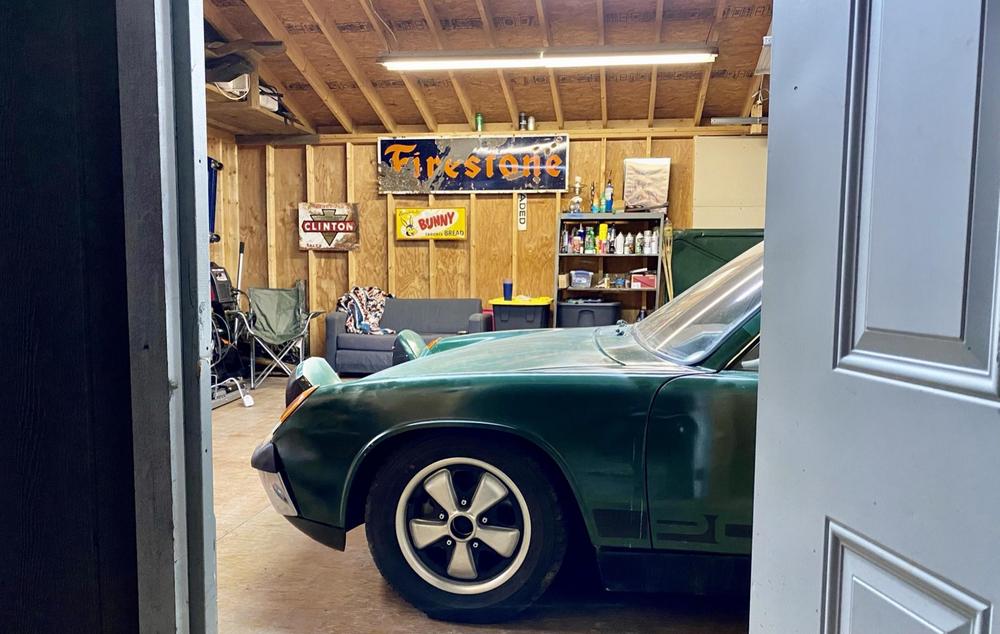
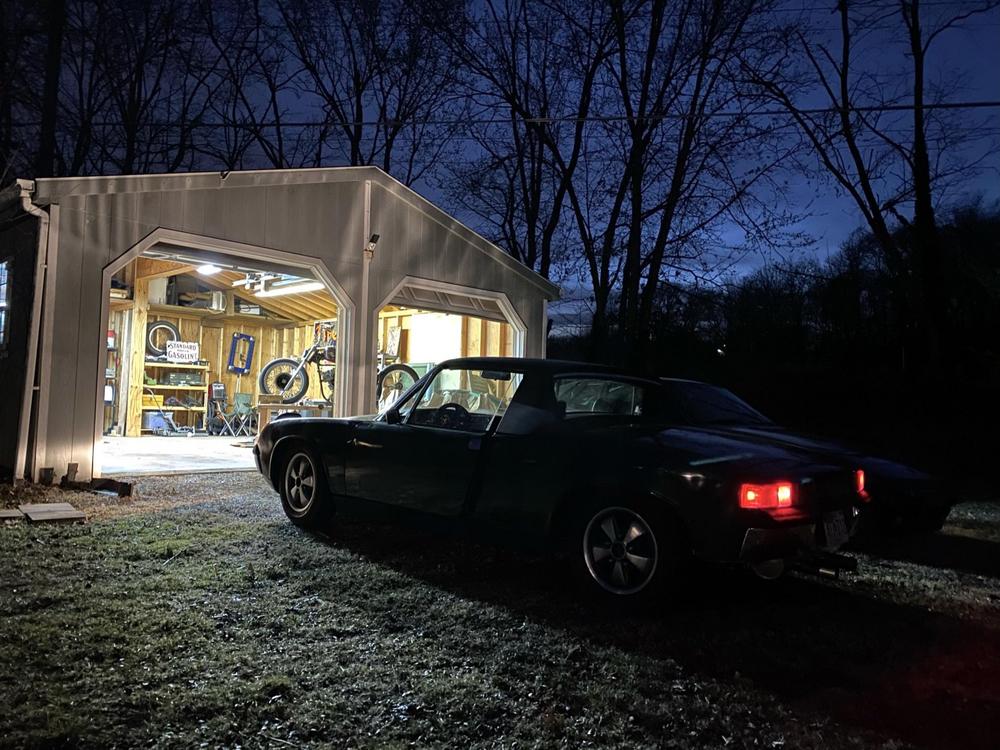
All I have for today... I so desperately wanted to finally drive this thing to work this week. Always something.
I love this car and it always bites back.
(P.S. Not that I need it, but I looked at a rusty project that should be coming home with me soon. Total dream. I think you guys will love it.)
Posted by: jaredmcginness Apr 6 2021, 09:49 AM
Hey all,
Long time no update. Not a lot of 914 stuff going on here. 10,000 other projects.
One of which, I am picking up this weekend - I think you guys will enjoy it.
Hint: its older and rustier than this 914 was.
Other hint: it's a '69 912 
Here's my car last weekend: (I put about 10 miles on it.. not much, but it's a start)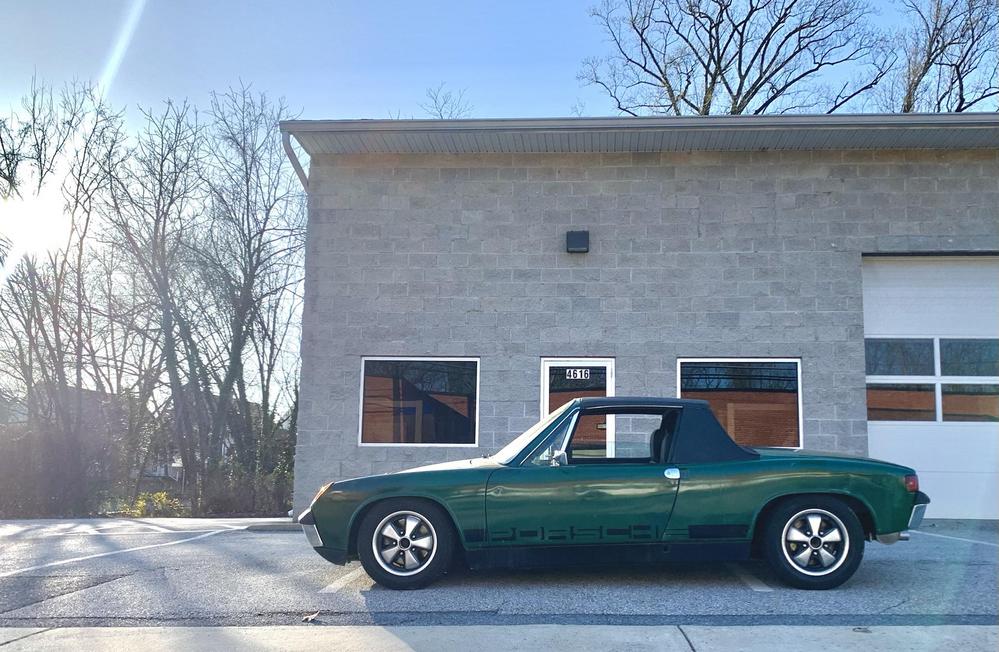

The weather has been great and I've spent some time tidying up loose ends. I cut a few corners while building this car - rushing
so I could at least drive it to the new house - some of these have come back to bite me.
Mainly:
-Shifting (tail shift) is a nightmare, gets me stuck at stoplights a lot...
-Throttle pedal is wonky and short,
-Carb linkage likes to jam itself and stick open.
Total chore to drive.
I did attack the throttle this weekend. I totally forgot I previously made a POS cable bracket out of scrap, just to get the car to move.
When I gave it some gas the bracket would tilt forward, making my pedal travel poor.
I spent a few minutes and bent up a new bracket, MUCH better.
Compare here: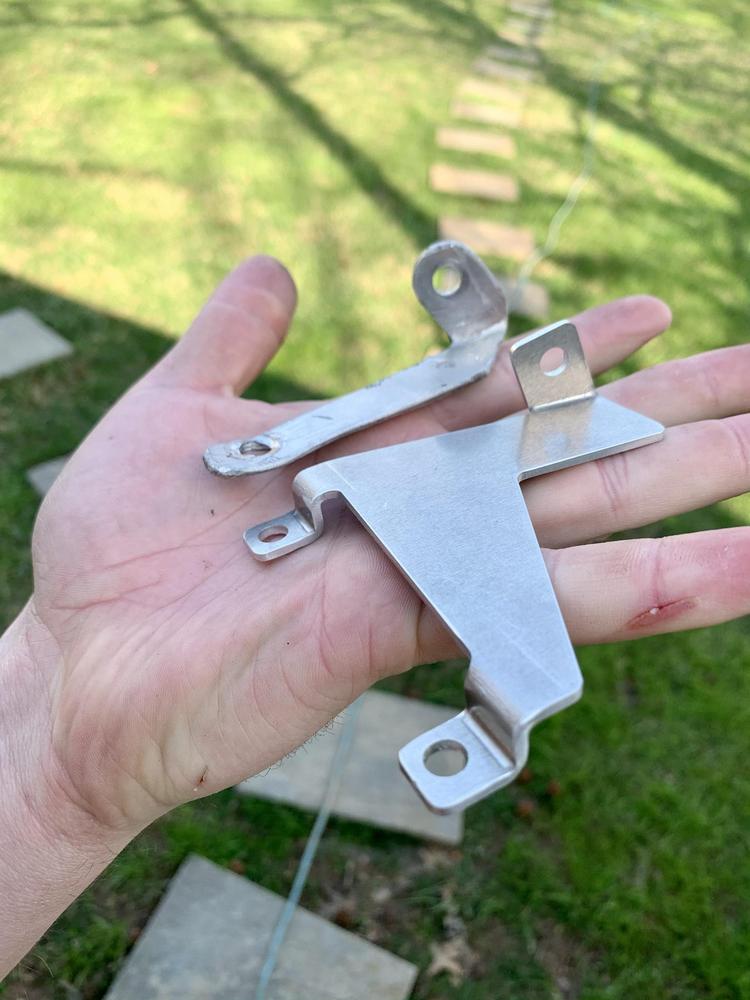
I also added a return spring, per a recommendation here, which helps bring the revs down faster.
Hopefully this will help, for now, before I order different carb linkage.
Bracket fits like a glove: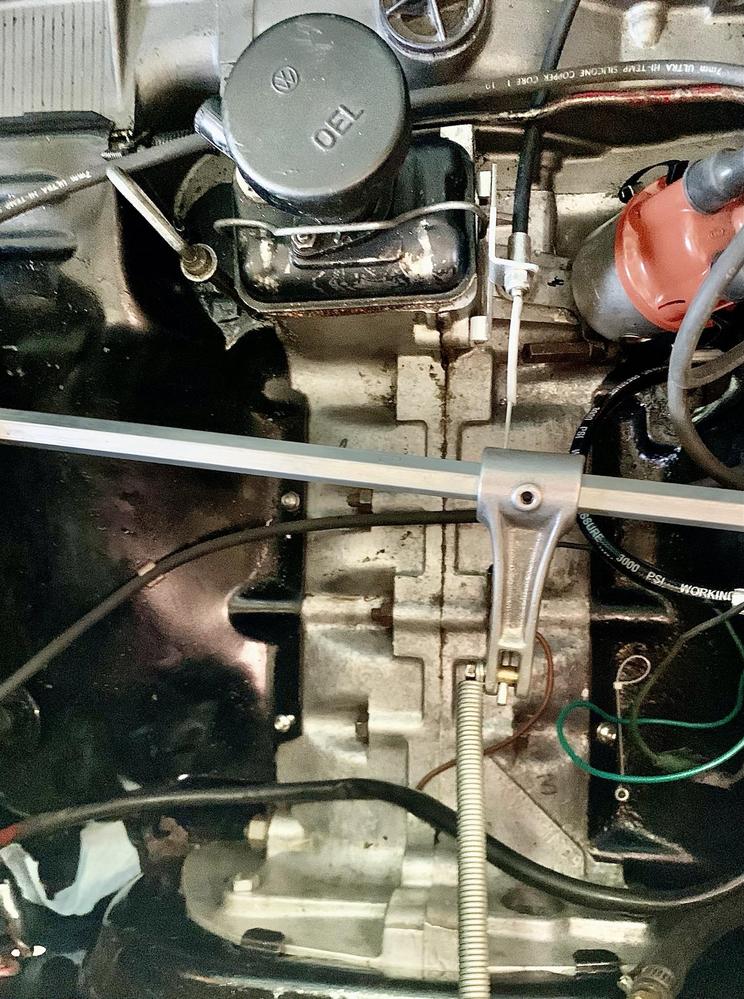
I have a busy month, but I will be looking into the transmission more, I've swapped to a different tail shift.
Feels great when its up in the air, on in the yard... Once you hit a public road, all the gears are a crapshoot. 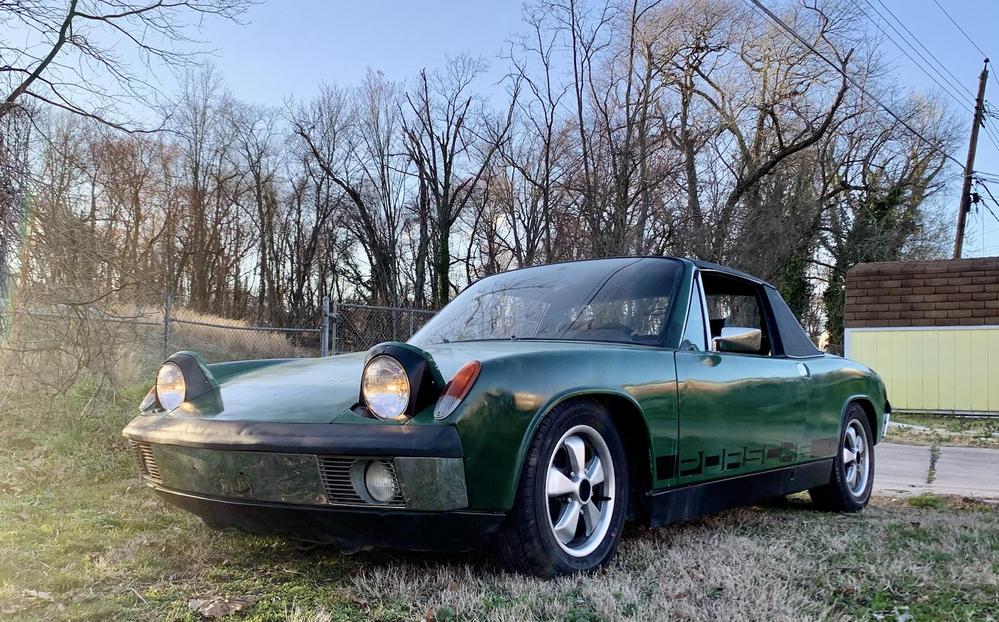
I have been enjoying the 944 a lot recently, sans a minor tire explosion. 
Perfect weather for it!
Cheers everyone, hope to see you guys at Hershey in a few weekends.
Jared
Posted by: sjhenry1075 Apr 6 2021, 11:45 AM
Hey all,
Long time no update. Not a lot of 914 stuff going on here. 10,000 other projects.
One of which, I am picking up this weekend - I think you guys will enjoy it.
Hint: its older and rustier than this 914 was.
Other hint: it's a '69 912
Here's my car last weekend: (I put about 10 miles on it.. not much, but it's a start)
The weather has been great and I've spent some time tidying up loose ends. I cut a few corners while building this car - rushing
so I could at least drive it to the new house - some of these have come back to bite me.
Mainly:
-Shifting (tail shift) is a nightmare, gets me stuck at stoplights a lot...
-Throttle pedal is wonky and short,
-Carb linkage likes to jam itself and stick open.
Total chore to drive.
I did attack the throttle this weekend. I totally forgot I previously made a POS cable bracket out of scrap, just to get the car to move.
When I gave it some gas the bracket would tilt forward, making my pedal travel poor.
I spent a few minutes and bent up a new bracket, MUCH better.
Compare here:
I also added a return spring, per a recommendation here, which helps bring the revs down faster.
Hopefully this will help, for now, before I order different carb linkage.
Bracket fits like a glove:
I have a busy month, but I will be looking into the transmission more, I've swapped to a different tail shift.
Feels great when its up in the air, on in the yard... Once you hit a public road, all the gears are a crapshoot.
I have been enjoying the 944 a lot recently, sans a minor tire explosion.
Perfect weather for it!
Cheers everyone, hope to see you guys at Hershey in a few weekends.
Jared
Looks great! Hope to see you at Cars & Coffee sometime this summer in Annapolis. How difficult was it to wrap the trunk lid? I was thinking of sanding mine down and doing a quick paint job, but would consider wrapping as well.
Posted by: jaredmcginness Apr 6 2021, 12:31 PM
Looks great! Hope to see you at Cars & Coffee sometime this summer in Annapolis. How difficult was it to wrap the trunk lid? I was thinking of sanding mine down and doing a quick paint job, but would consider wrapping as well.
Hope to see you there as well. I know they are moving it at some point because Dock St. is getting renovated (or something along those lines)
As for the lid, it took about an hour with 2 of us wrapping it. Little at a time and don't stretch/heat it too much.
It didn't come out perfect, but that is OK. At least its green.... I am planning on doing the rest of the car, my passenger side is like 7 different greens, so I would like to have it at least matching.
$320 of vinyl suits my 29 year old budget much better than $X,XXX.XX paint.
Posted by: sjhenry1075 Apr 7 2021, 12:46 PM
Looks great! Hope to see you at Cars & Coffee sometime this summer in Annapolis. How difficult was it to wrap the trunk lid? I was thinking of sanding mine down and doing a quick paint job, but would consider wrapping as well.
Hope to see you there as well. I know they are moving it at some point because Dock St. is getting renovated (or something along those lines)
As for the lid, it took about an hour with 2 of us wrapping it. Little at a time and don't stretch/heat it too much.
It didn't come out perfect, but that is OK. At least its green.... I am planning on doing the rest of the car, my passenger side is like 7 different greens, so I would like to have it at least matching.
$320 of vinyl suits my 29 year old budget much better than $X,XXX.XX paint.
$320 for the whole car or just the trunk lid? Lastly, what muffler do you have on your car?
Posted by: jaredmcginness Apr 7 2021, 01:36 PM
$320 for the whole car or just the trunk lid? Lastly, what muffler do you have on your car?
That's all the amount left it would take me to do the entire car. @http://www.914world.com/bbs2/index.php?showuser=14709 The trunk lid itself was like ~$34 of vinyl. I bought vinyl from Metrorestyling (I think its called) and did get something like 10% off.
As for the muffler, I bought this beautiful handmade dual outlet from @http://www.914world.com/bbs2/index.php?showuser=9892 . He has several different options for different motors.
Mine is stainless, 1.7 fit. The previous page has a soundclip and some more info on these. Hit him up! You wont find a nice muffler.
Posted by: bkrantz Apr 7 2021, 07:56 PM
Jared, that bracket looks great. And your hands look like mine. But like my dad told me many years ago, "skin grows back".
Posted by: bbrock Apr 7 2021, 08:06 PM
Jared, that bracket looks great. And your hands look like mine. But like my dad told me many years ago, "skin grows back".
Was thinking exactly the same thing but now I'm thinking - 29 years old and already has 3 Porsches. That kinda pisses me off
Well done sir. Posted by: mepstein Apr 7 2021, 08:20 PM
Looks great! Hope to see you at Cars & Coffee sometime this summer in Annapolis. How difficult was it to wrap the trunk lid? I was thinking of sanding mine down and doing a quick paint job, but would consider wrapping as well.
Hope to see you there as well. I know they are moving it at some point because Dock St. is getting renovated (or something along those lines)
As for the lid, it took about an hour with 2 of us wrapping it. Little at a time and don't stretch/heat it too much.
It didn't come out perfect, but that is OK. At least its green.... I am planning on doing the rest of the car, my passenger side is like 7 different greens, so I would like to have it at least matching.
$320 of vinyl suits my 29 year old budget much better than $X,XXX.XX paint.
Make sure to view the wrap institute videos on you tube. Lots of good tips and tricks.
Posted by: jaredmcginness Apr 8 2021, 05:55 AM
Jared, that bracket looks great. And your hands look like mine. But like my dad told me many years ago, "skin grows back".
Thank you! Working in a fabrication shop, yep, pretty typical. Very used to the sliced up hands, I just wont run off squeezing any fresh limes anytime soon.
Was thinking exactly the same thing but now I'm thinking - 29 years old and already has 3 Porsches. That kinda pisses me off
Well done sir. Haha! @http://www.914world.com/bbs2/index.php?showuser=20845 . Well. My priorities are obviously in all the right places
But I am enjoying myself and fortunate that I now, mostly have the space to do this stuff.
As we all know these cars are never getting cheaper or manufactured again... I don't want to hit 50 and regret not trying to live out my dream, while I could!
Doesn't come without sacrifices, though.
P.S: Worth noting that the 944 is technically my girlfriend's car (we split the cost - 2k!).
P.P.S: I try to be crafty, squeezing by on an hourly wage. The total buy in for all three of these cars was just about $5500.
Cheers!
Posted by: bbrock Apr 8 2021, 07:13 AM
Jared, that bracket looks great. And your hands look like mine. But like my dad told me many years ago, "skin grows back".
Thank you! Working in a fabrication shop, yep, pretty typical. Very used to the sliced up hands, I just wont run off squeezing any fresh limes anytime soon.
Was thinking exactly the same thing but now I'm thinking - 29 years old and already has 3 Porsches. That kinda pisses me off
Well done sir. Haha! @http://www.914world.com/bbs2/index.php?showuser=20845 . Well. My priorities are obviously in all the right places
But I am enjoying myself and fortunate that I now, mostly have the space to do this stuff.
As we all know these cars are never getting cheaper or manufactured again... I don't want to hit 50 and regret not trying to live out my dream, while I could!
Doesn't come without sacrifices, though.
P.S: Worth noting that the 944 is technically my girlfriend's car (we split the cost - 2k!).
P.P.S: I try to be crafty, squeezing by on an hourly wage. The total buy in for all three of these cars was just about $5500.
Cheers!
Nice! Full disclosure, when I was in my mid-twenties, I also had 3 Porsches. All were 914s and technically, one was my girlfriend's and now wife. We were living on poverty wages so all were cheap transportation by any standard. I paid a whopping $500 for the one that I still have. My biggest regret was that I had a Prof who offered to sell me his 356 at a really good price. Being on poverty wages and living in an apartment with no covered parking, it just wasn't possible. If only...
Enjoy the rides my friend. You deserve it.
Posted by: jaredmcginness Apr 12 2021, 06:23 AM
Hey fellas!
I wanted to share this here.
I will spare you guys a build thread, but this is the other project.
20 pages into my story... a 2 year senior sibling to my 914.
1969 "912" I say that in quotes because it is by no means an entire car.
Short story:
I took off work Friday, rented a truck from enterprise and drove a solid 12 hours to Chicago.
The next morning after a short trailer rental mishap (typical! What is a Guaranteed Reservation even good for??) I met up with the seller.
This is actually the first time I have seen the whole car. It was under snow when I looked at it two months ago.
Total piece of crap. Why am I excited?
I handed the money and loaded it up. $1600 for the bare tub (with wiring harness).
He also gave me some late fenders, a door and lid for free to help get me some core parts.
The only history I know: It sat in a junkyard from ‘95 -‘19 when the P.O bought it from GA.
The vin is not on any records.
Blank slate!
-This is originally Irish Green - GO FIGURE!
-Bits of orange and white everywhere else.
-I would like it to be Olive or Sepia one day
-I guess no fenders is a bonus, I can pick any flare I want with no qualms.
Some photos:
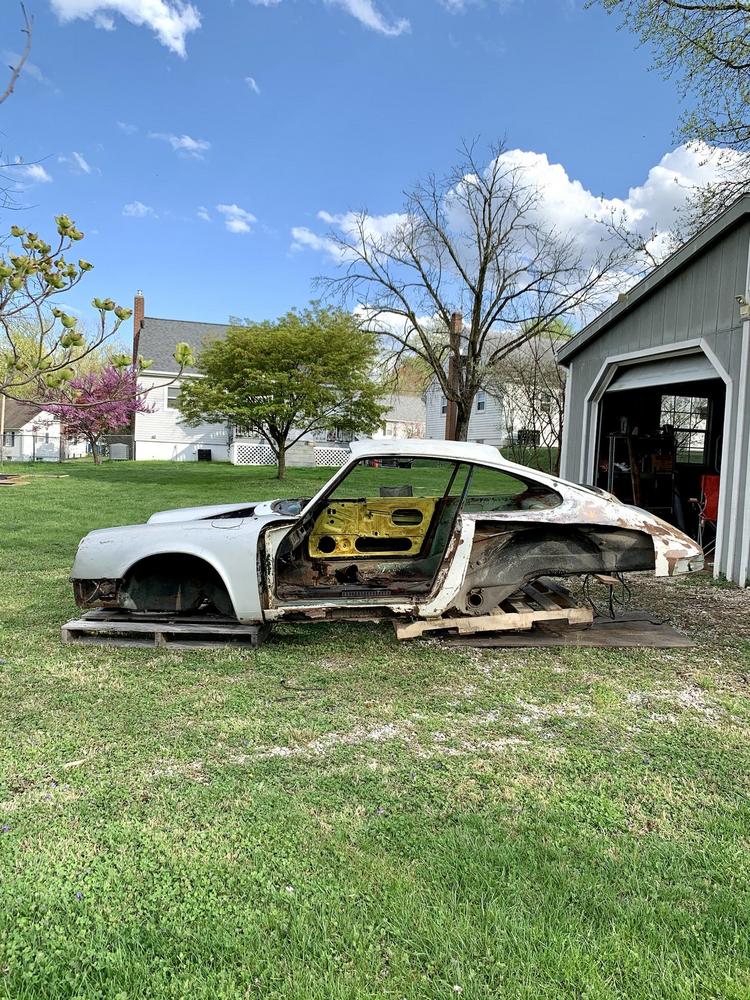
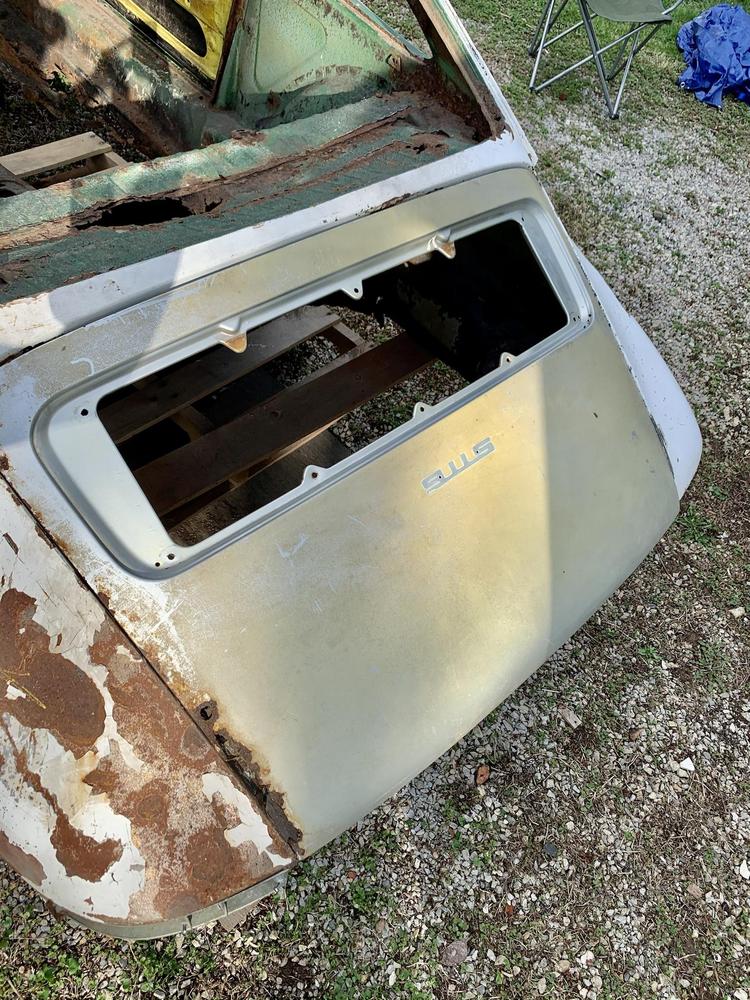

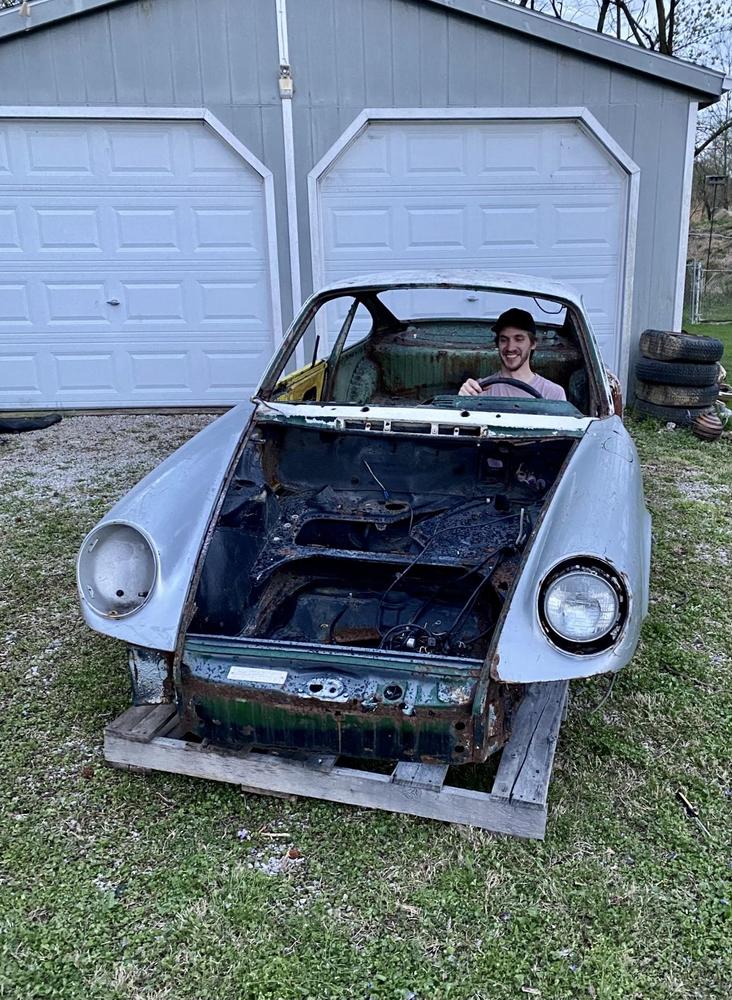
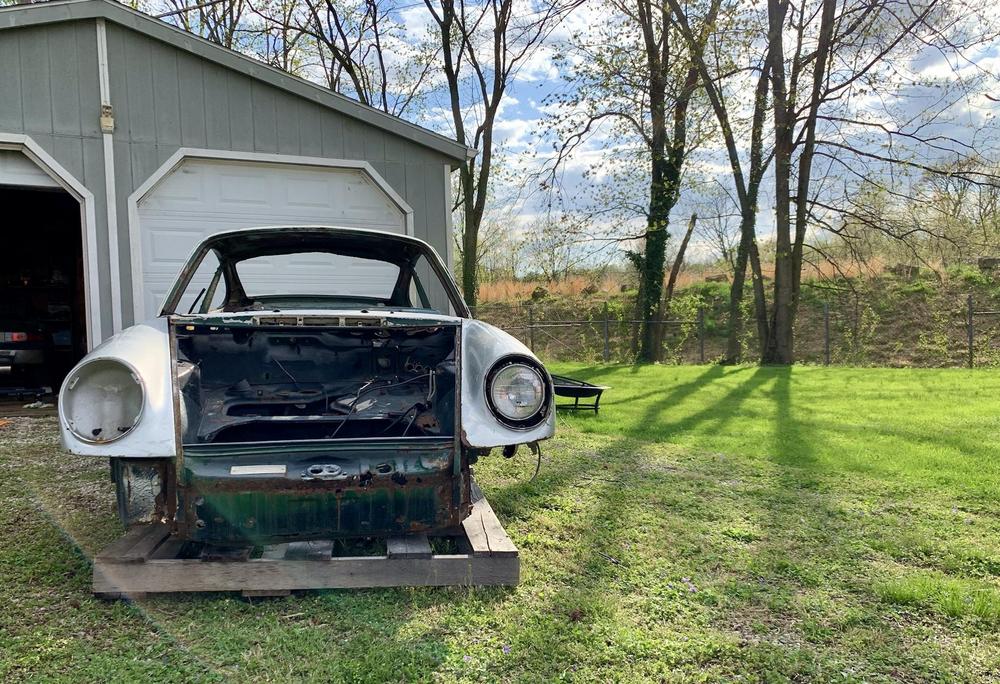
Yes, it is horrible. To be fair, the 914 was pretty bad too. I am either a sucker, or I love spending my time on this stuff. (both?)
I know even 5 years ago this would be a laughable endeavor.
I have an insane financial goal to get this thing on the road, the house is priority now. But I will try to fab as much metal stuff as I can, and put what I am learned so far on the 914 into this.
Believe that I can achieve that goal with time, patience and help from friends.
Total dream come true. I had a photo of a silver longhood on my wall as a kid, and had all the 911 hotwheels, I still do actually.
I'm ecstatic.
P.S.
(914 isn't going anywhere, will continue to improve, and have something aircooled to drive)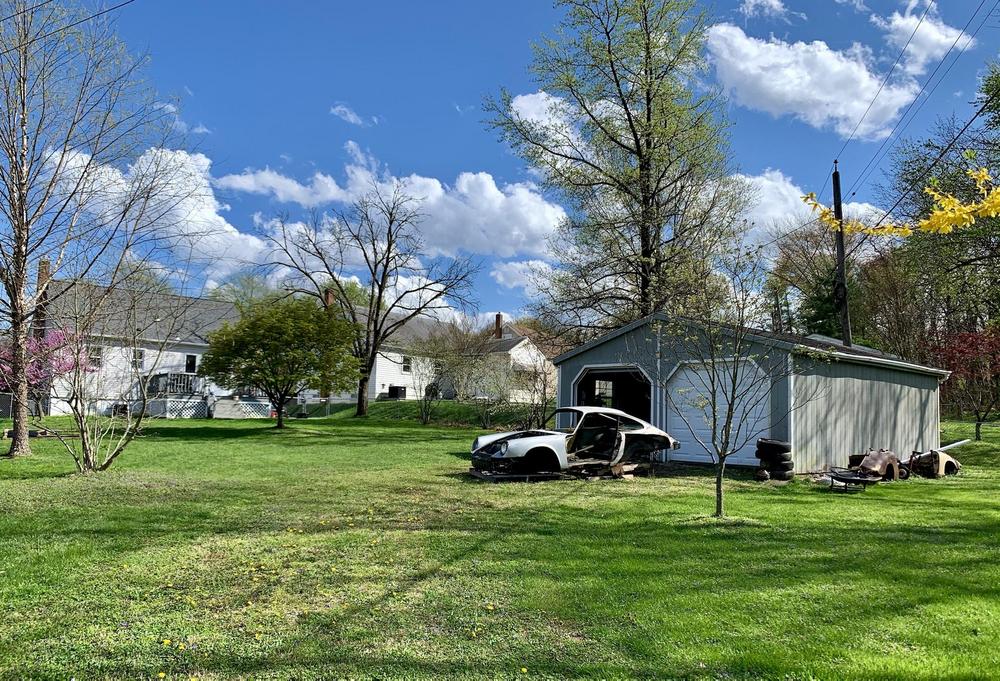
Posted by: jaredmcginness Jun 1 2021, 09:03 AM
Hey all,
Hope everyone had a nice long weekend. I took 5 days off to get some work done around the house, and on some of the projects.
Been caught up fixing lawn mowers, building gardens, house flooring, putting up walls, etc. (as well as a few work trips) which haven't allotted me a lot of time for working on car stuff.
As I left the 914 a few weeks ago. 98% there, but a few small issues preventing a smooth ride.
1. Tail shift is crappy.
2. The starter is very sluggish.
3. Carbs are never really happy.
4. Passenger window regulator fell down.
Shifter:
So for the tail shift, I realized I never checked really or put thought into the transmission mounts.
I pulled those suckers out, pretty dry, but hairline cracks all around.
My thought is. maybe the transmission is swaying in and out of alignment, causing the "stuck-in-gear" issue, or the "First is now third" issue.
I bought some 914-6 mounts from a member here, MUCH better looking, eh?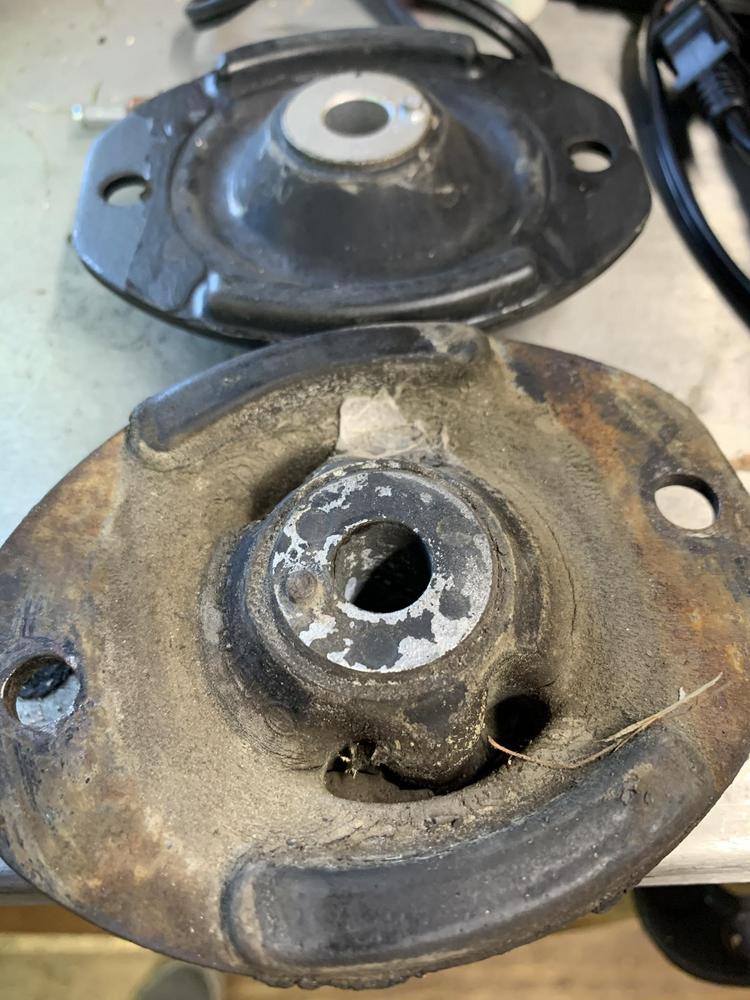
While installing this, I realized something off... When I put the motor in. I had flipped the cups that go under the rubber mount (over the transmission mount bar)
Pretty major thing? I had the cups.... cupping the radius of the mounts. This throws the alignment off by about 3/8" too low.
Fixed.
Throttle:
While messing around in the car, my throttle cable popped off. Took a look and saw the ball end lever was loose and swaying. (what a PAIN this area is to work in)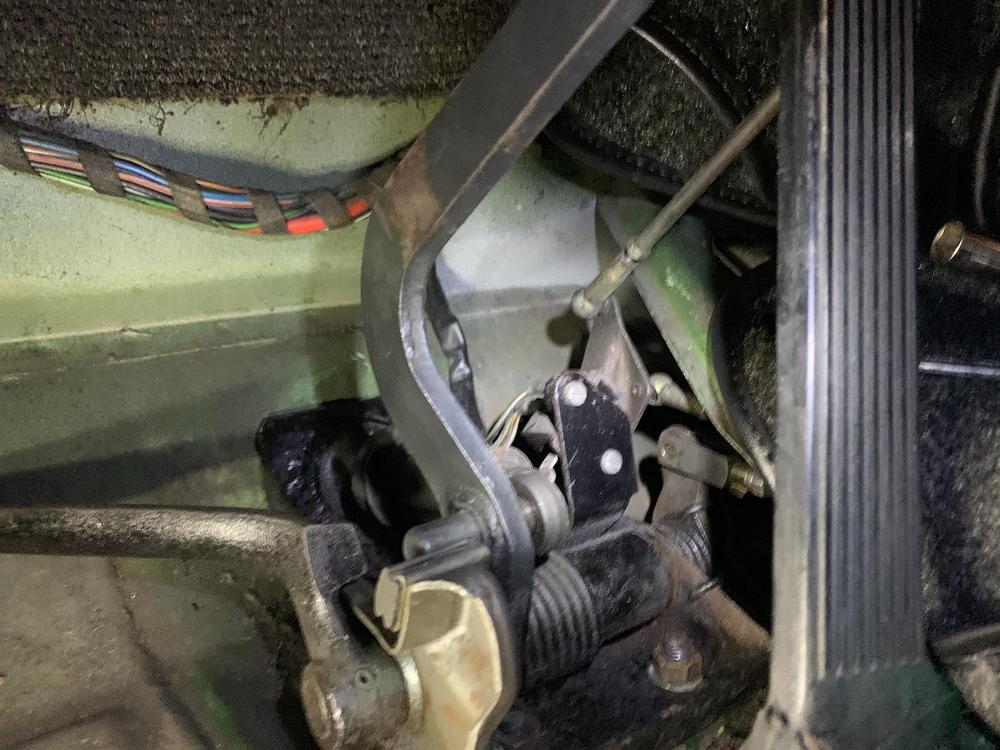
I pulled that out. Found no bushing at all.... well SOME bushing:
Took some measurements. 8mm ID, 12mm OD. I found these oil impregnated bushings on amazon, arrived next day, and was a perfect fit. Quick fix for $7.00 and I am confident it will never fail again.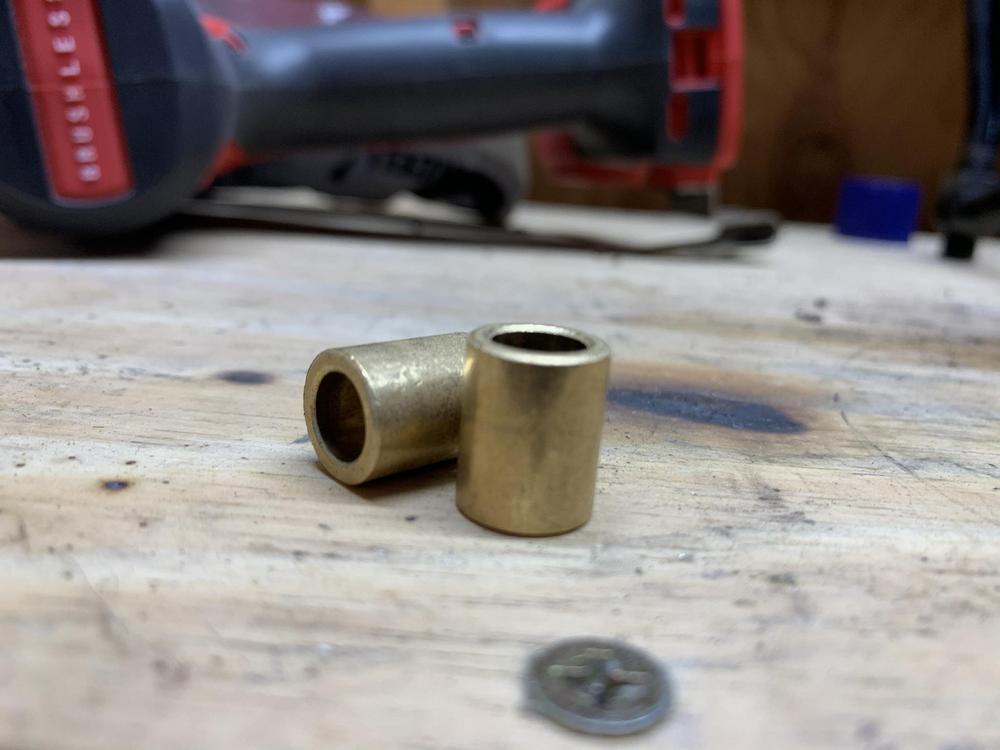
Readjusted the clutch and throttle cable and everything feels nicer than ever.
Starter:
Bought a Bosch Reman starter for $80. (Probably my first mistake) Looks really nice. Installed.... turn the key andddddddd nothing - zilch.
Manually jogged the starter and it just spins free. This is the 3rd starter I've put on this car with little to no luck.
Maybe I need to nut up and buy the $200+ unit.
Other:
Added felt to the Targa top - finally. Big difference in feel in the cabin. Quick and easy improvement.
My garage, right before I started putting up walls and insulation.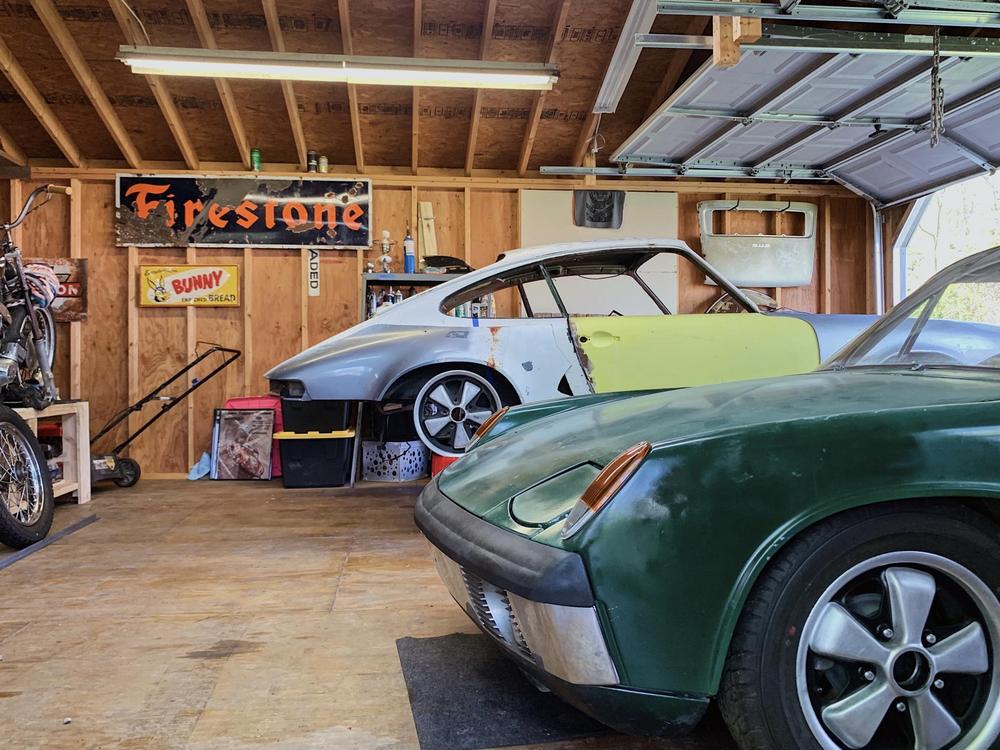
Cheers.
Posted by: jaredmcginness Jun 1 2021, 09:08 AM
This page is too long! 6 months on one page! I'd like to get it to #20. haha
Posted by: mepstein Jun 1 2021, 10:38 AM
I take my starters and alternators to a local car battery shop and have them rebuilt. Did at least 20 this way when I worked at the Porsche shop and it works really well. About $75-125. If you don’t have a local rebuilder, let me know and I will help out.
Posted by: nditiz1 Jun 1 2021, 11:06 AM
This ^ or buy one of the hi-torque starters off ebay. They run about ~140, but I really like how quick it spins up the motor to start.
Posted by: jaredmcginness Jan 21 2022, 02:16 PM
Hey all!
Hope everyone is having a great start to the new year. Here is a life and project update no one asked for!
Most importantly, I recently got engaged! A huge thank you to the "wife" for continued daily support through everything I am about to write.... haha!
914:
So I previously queried here about getting my 914 serviced. It's been "down" due to carb issues for a seriously unreasonable amount of time. (I never wanted to be one of these guys)
I brought the car to a local shop in Elkridge...
(I don't know if I should named them or not) a shop very close by with a 30 years master tech, as well as many great reviews.
I scheduled to drop the car off a month or so after the call, it serviced the following week. Nutshell, it sat and sat and sat for 8 weeks. 1 excuse after the next. No unprompted updates.
Annoyances like: "please leave the car cover on" and came by several times to find it sitting - no cover - in the rain.... Wet, new carpets.
Several calls and 8 weeks in, I sent for a truck to bring it back home. As exoected, I got the run around "I was actually doing it today!" once the truck showed up.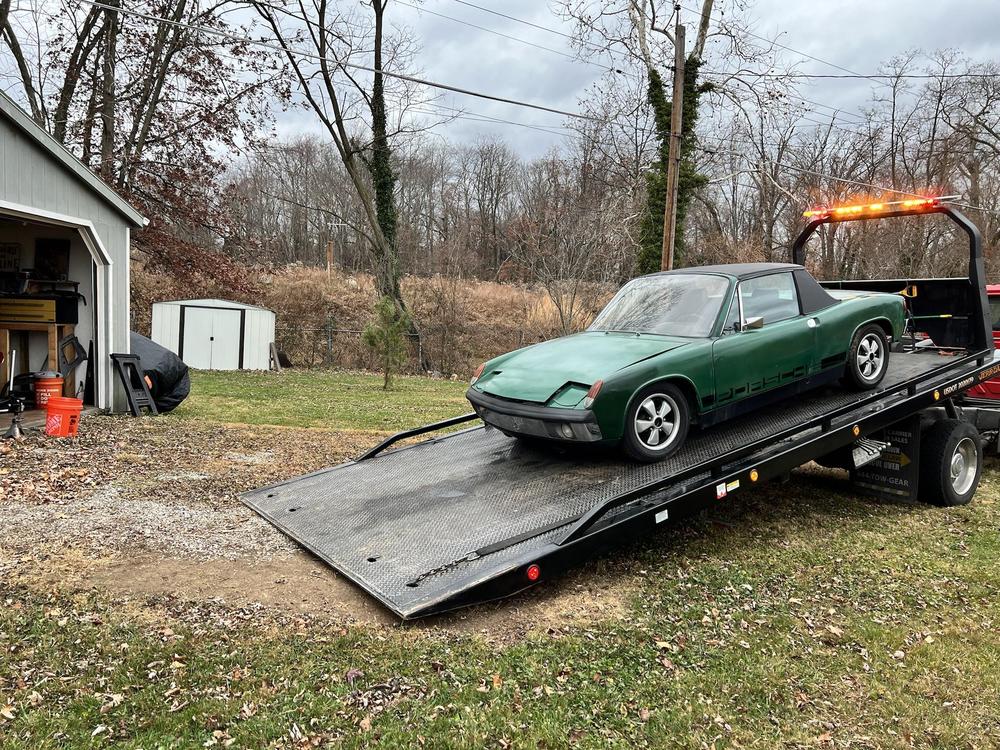
Not trying to shame the shop... I think they would rather focus on modern VW/Audi... not air-cooled, as they advertise. Probably for the best.
I was just hoping to get my car tuned up, adjusted, timed and running right. I figured it was a simple ask for a master tech.
So again, the 914 is sitting while I focus on metal work. Unfortunate, but warmer days await.
Onto some good news:
As if I need more projects. I found an incredibly, incredibly good deal on a Toyota 1971 FJ40 LandCruiser.
(one of my 'top 5' vehicles I'd own)
This is a running *cough* driving (poorly) example.
-Factory 1F inline 6,
-3 on the floor.
-0-60 in 40 minutes
Tons of rust on the rear end. Shockingly inexpensive OE replacement parts and steel.
I've already begun rust repair.
Plans:
-Replace rear 1/4s and bed.
-fix rust on hard top
-body mounts.
-factory steel wheels and a pair of seats with headrests.
-Drive it!
Photos:

Love it.
Pictured here with local celebrity @http://www.914world.com/bbs2/index.php?showuser=10825 's 912. Many hours of metal work into this body - proud to say we are starting to see the light at the end of the tunnel.
This car received my "914 treatment", although not as severe, and with a bit more experience behind the welder.
More pics can be shared if interested.
OK... Finally - I'll make this brief.
With the current used market going skyhigh, the dealership I bought my daily Golf from offered a surprising amount of money back on my TDI. 3 years into ownership.
I do love the car, but the fiance and I need something a bit bigger. Owning two 4 door VW Golfs isn't helping anyone.
In typical Jared fashion, I didn't want to just upsize to a Tiguan, old Rav4 or something boring, so I set my sights a little higher, and a little more adult (read: expensive).
Landed on this 2014 Cayenne VR6.
-Black on platinum.
-3.6l VR6 (Volkswagen engine, a true fave of mine)
-Dealer maintained.
- & Most importantly a total JOY to drive.
Solves all of our space issues. Even capable to tow up to 7800lbs. Which should be able to haul the 914, no problem. (since that will obviously never run )

I honestly regret making fun of these cars all these years. I was hooked once I drove it and smile getting behind the wheel ever morning.
Cheers!
Posted by: dstudeba Jan 21 2022, 03:10 PM
Congrats on the engagement! You have garage space for all your cars or are the 914 and 944 living outside?
Posted by: jaredmcginness Jan 21 2022, 03:36 PM
Congrats on the engagement! You have garage space for all your cars or are the 914 and 944 living outside?
Thank you! The 944 has been sold to a fella in PA that’s taking great care of it. This allotted room for the Toyota.
914 “lives” in the garage, But is under a cover right now while the FJ40 has raw metal.
(I don’t mind if that sits out side otherwise, it can get wet.)
That being said I am at my cap for space. But I do always say…. “There’s room for whatever 914s I already have +1.”
Posted by: mepstein Jan 21 2022, 03:42 PM
We are going to have to figure out a storage solution. Life is too short to have less than 10 cars.
Posted by: Cairo94507 Jan 21 2022, 03:43 PM
Congratulations on the engagement! Finding the right girl, a car girl, makes life infinitely easier.
Were it me, I would name the shop where your car sat for 8 weeks getting wet just so none of our other members go through that experience.
I also like your Cayenne. Porsche makes terrific SUVs. My wife absolutely adores her Macan GTS and... truth be told... I don't mind driving it whenever I get the keys.
Good luck getting your 914 back on the road soon.
Posted by: jaredmcginness Jan 21 2022, 04:40 PM
We are going to have to figure out a storage solution. Life is too short to have less than 10 cars.
Whole heartedly! 5 isn’t cutting cut! Congratulations on the engagement! Finding the right girl, a car girl, makes life infinitely easier.
Were it me, I would name the shop where your car sat for 8 weeks getting wet just so none of our other members go through that experience.
I also like your Cayenne. Porsche makes terrific SUVs. My wife absolutely adores her Macan GTS and... truth be told... I don't mind driving it whenever I get the keys.
Thanks so much! I’m fortunate in so many ways and very lucky to have found this woman.
That’s awesome about the Macan, I’m sure they are very similar, (have not had any wheel time) truly sitting in the lap of luxury driving this thing.
The shop is called Deutsch Wurx in Elkridge, MD. Again, I have heard good things, from folks with modern euros. But, maybe avoid with the classics.
Jared.
Posted by: tygaboy Jan 21 2022, 05:06 PM
Congrats! Welcome to the world of married (or soon to be, anyway) car guys! Seems you landed yourself a great one and at the very least, that she knows what she's getting herself into! 
Thanks for the updates and best of luck with each of your projects. And here's some motivation:
I challenge you to use the 914 to leave your reception! If that's not going to help get 'er done, I don't know what will! 
Posted by: nditiz1 Jan 21 2022, 05:55 PM
Jared, awesome news man. I'll take that FJ40 and that 912 lol.
Maybe I can swing by and help get it timed and possibly see if we can get those carbs synced correctly.
Posted by: BeatNavy Jan 21 2022, 06:07 PM
Congratulations, Jared! A good woman in your life is better than a good car. Hard to believe, I know, but it's true. But a good woman AND a good car(s) is a real blessing.
Posted by: Dion Jan 22 2022, 10:22 AM
I don’t know how I kept missing this thread.
What a fantastic build of saving that 914. Just brilliant. I admire your skills.
I Like your sense of humor and no fear of tackling these old cars. The FJ is very cool.
Congrats on the engagement!
Keep doing what your doing. Hope to meet up with you at car show in the future.
Cheers, Dion
Posted by: jaredmcginness Jan 22 2022, 10:42 PM
Jared, awesome news man. I'll take that FJ40 and that 912 lol.
Maybe I can swing by and help get it timed and possibly see if we can get those carbs synced correctly.
Thank you! You don’t want em yet!
I am going to look for another pair of carbs to try out, just to get a baseline and see if it might be something funny with one of the Dells I built. But possibly could help on a warmer day in the future.
Congratulations, Jared! A good woman in your life is better than a good car. Hard to believe, I know, but it's true.
I couldn’t agree more!
Not too far of a stretch, though, because I typically don’t have good cars!
I don’t know how I kept missing this thread.
What a fantastic build of saving that 914. Just brilliant. I admire your skills.
I Like your sense of humor and no fear of tackling these old cars. The FJ is very cool.
Congrats on the engagement!
Keep doing what your doing. Hope to meet up with you at car show in the future.
Cheers, Dion
I appreciate the kind words. Thanks for checking it out, always a blast meeting guys from the World!
Posted by: DBF Jan 23 2022, 04:31 PM
I enjoyed reading the thread. Good luck with the car projects and getting the 914 in a better state of tune.
Posted by: mb911 Jan 23 2022, 04:41 PM
Looking cool great job on everything. I get to see the updates on the 912 and your doing a great job. I feel like those days are past me now but probably wrong. Keep up the good work
Posted by: jaredmcginness Feb 7 2023, 08:31 AM
Hey fellas,
I haven't updated in who knows how long... (it was over a year!)
Still have the 914. It was actually parked up at Translog in York for that long to get some service.
It was gone for 11 months and XX days. Many times I forgot I had it! Out of sight, out of mind.
They did great work on it. Didn't need tooooo too much - despite what my wallet sees. Turns out the motor I built was great and timed perfectly. They went through he fueling and ignition systems though. I had a mismatch of fuel pressure gauges, carbs, fuel pump, etc. Also had an improperly ohmed coil. They repaired a oil leak (pushrod tubes) that I believe was my fault - probably pinched an o-ring during install.
It now runs SUPER strong.
Certainly was really thrilled to get it back and put some miles on it. Still do not have heat installed so it's been a couple of cool rides, but totally enjoyable - with gloves on.
Here are a few photos...
At drop off a year ago:
On the drive home: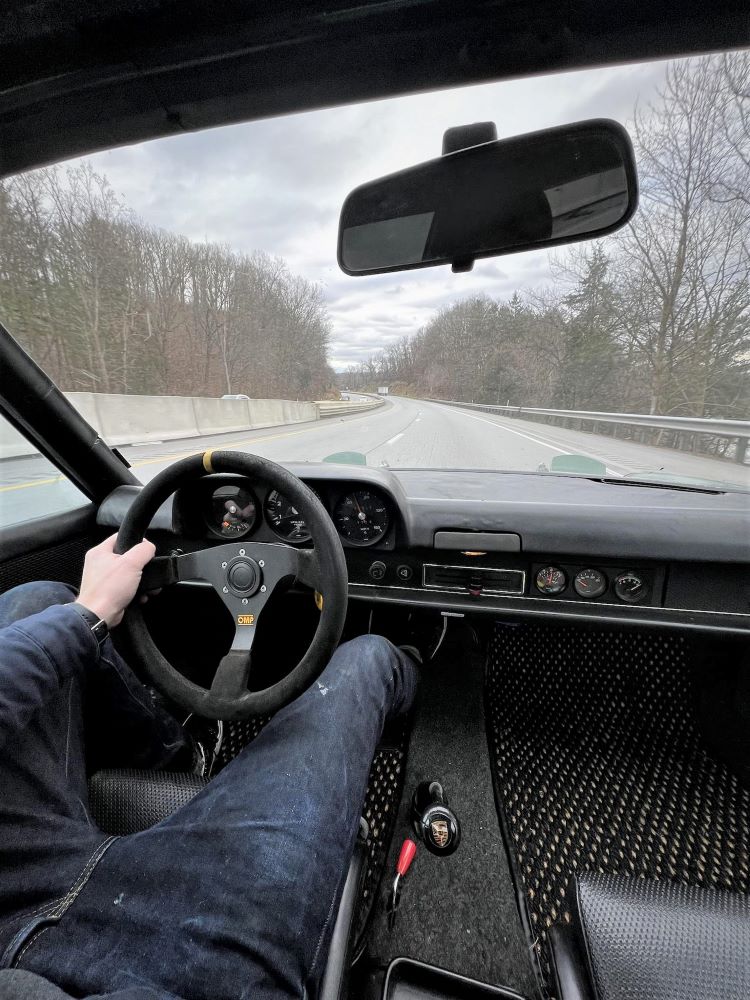
Out for a cruise: 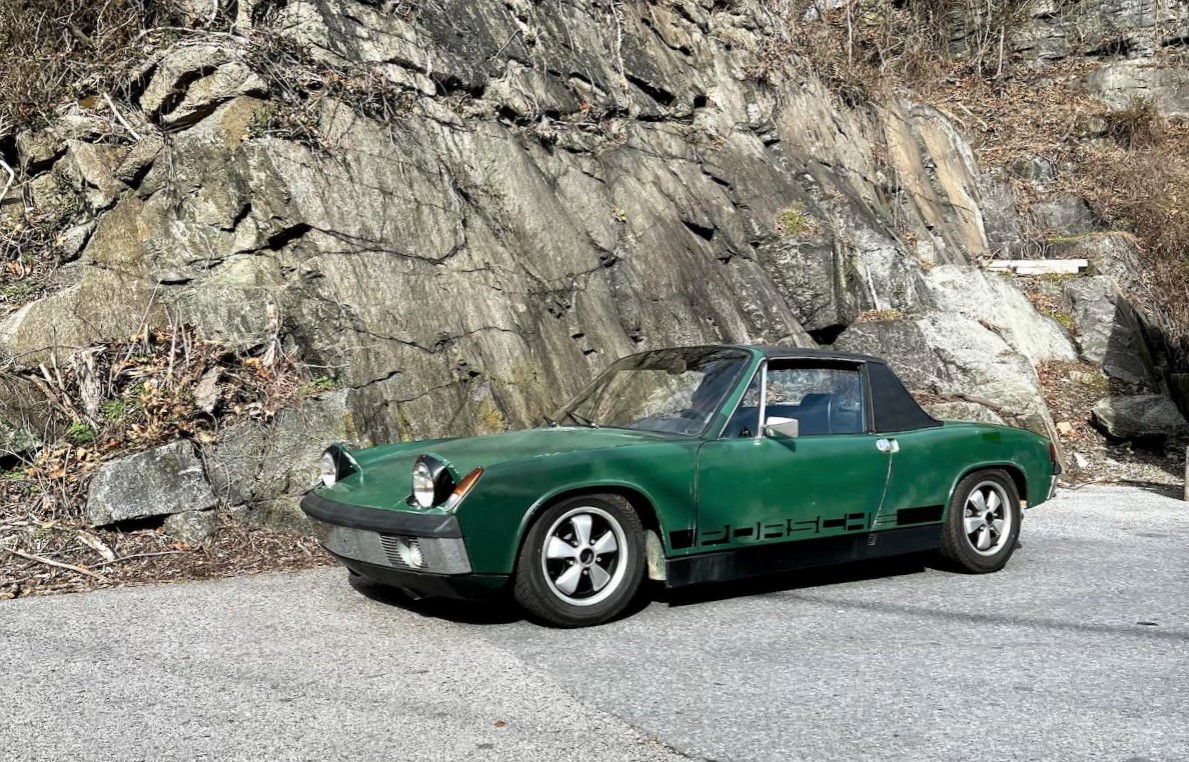
My thoughts:
Still a lot to do. Some small issues with being a 53 year old vehicle. Some seals that need replaced.... need to add a blower motor and the rest of the heat goodies.
- The motor is GREAT. Translog did a very nice job. Pulls super strong sounds really sturdy on the highway. Seriously - I am totally happy with the 1911. I can't imagine having much more in a car of this size!
That thought might wear off soon, but it's zippy and thrilling to drive.
- The transmission SUCKS, but a few hours of driving you really just get used to it.
Occasionally 1st gear is 3rd, yatta yatta. That seems to happen whenever I am at a red light while your the 1st in line, on a hill with someone behind me, etc.
- The paint is embarrassingly bad, didn't bother me a few years ago, but now, getting it back a year later its a bit of a bummer. It's not really a good patina, just several different splotchy shades of green. The passenger side is much worse, (since I had to cut into the body for the hell hole)
I do have a pal that owns a wrap shop - considering wrapping it an OE color like Olive or the same Irish Green that my rear bonnet is wrapped (I believe I talked about that in this thread 2 or so years ago.)
Would last several years and wouldn't be in the hole 3-10k that I don't have to spend on this car.
Could be out the door for less than a grand and have a 914 that's one color that I will be able to enjoy and be proud of this summer. Very tempting.
Anyways... here's two quick clips of me driving it.
Ignore that squeak! It comes and goes.
https://youtube.com/shorts/QvecTk7_35s
https://youtube.com/shorts/1oFGSOdoHgk
Thanks for reading!
Posted by: Cairo94507 Feb 7 2023, 08:51 AM
Thanks for the update. Glad you are getting some seat time. If you are going with a wrap, I would try the Olive color. Don't get me wrong, I love Irish Green, but wraps tend to be temporary, so a great opportunity to experiment with a different color.
Posted by: jaredmcginness Feb 7 2023, 10:06 AM
If you are going with a wrap, I would try the Olive color. Don't get me wrong, I love Irish Green, but wraps tend to be temporary, so a great opportunity to experiment with a different color.
Cheers @http://www.914world.com/bbs2/index.php?showuser=9712 !
The wrap shop uses Inozotek which bases most of their color off OE Porsche colors.
Mostly renamed, but for example they have Fjord Green, The pink pig color, Acid Green, Miami Blue, Olive, Ruby star, etc.
Here is the Olive I liked:

And a screen shot of their Porsche based gloss colors:
Thanks!
Posted by: Dion Feb 7 2023, 12:55 PM
Great to hear from ya. Glad the engine is sorted.
Hmmmm ,Acid Green gets my vote. Have fun!
Posted by: 930cabman Feb 7 2023, 06:45 PM
Sounds like a victory
New wife who puts up with this 914 nonsense and a running project.
Hats off
Posted by: mepstein Feb 7 2023, 07:38 PM
Jared - we can talk heater parts. Just like backdated heat on a 911, the engine blower motor doesn’t make the car hotter, it just helps send heat into the cabin at idle. I drove my 1.7 on days with temp in the teens and there was plenty of heat. I would sometimes blip the throttle at a long light but always had to throttle it back from full, once the engine was warm. The engine fan moves the heat well at anything above idle. I have a pile of heat exchanger flapper boxes so I got you covered there. I have extra heat diverter pieces in the stash.
Posted by: jaredmcginness May 8 2023, 06:30 AM
Alright guys.
My story with this car, for the time being, has come to a close.
With all the projects going on, as well as a wedding coming up frighteningly soon (surprise!) it was best to let something go.... why not sell the car that runs?? 
I had the 914 up for sale for just about a month. I showed the car to 5 or 6 people, all of which found something that didn't justify my price, mostly the paint quality.
The buyer came around, already the owner of several 914s.
He knows their quirks well and is prepared for any surprises.
It's new home is across the Bay Bridge on the eastern shore of Maryland.
The new owner actually picked this car up for him and his young, new-driver granddaughter. The family has a passion for racing and this car is supposed to be the catalyst, starting with autocross.
Apparently she has never driven a stick before - 3 hours after delivering the car I received a video OF the 16 year old driving the 914 and SCREAMING with joy!
That is AWESOME to see, someone truly thrilled - especially after 4 weeks of criticism, haha.
It wouldn't have been ME and THIS CAR if I didn't have an issue on my way down there right?? Ran out of gas!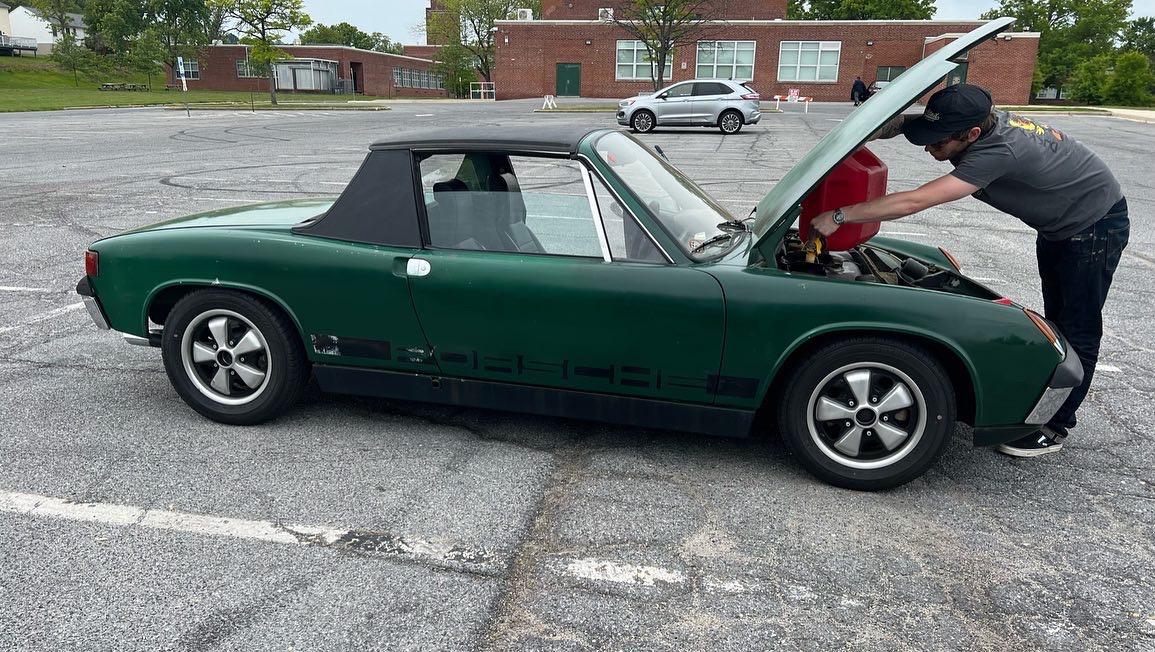
Makes for good photo OPs though.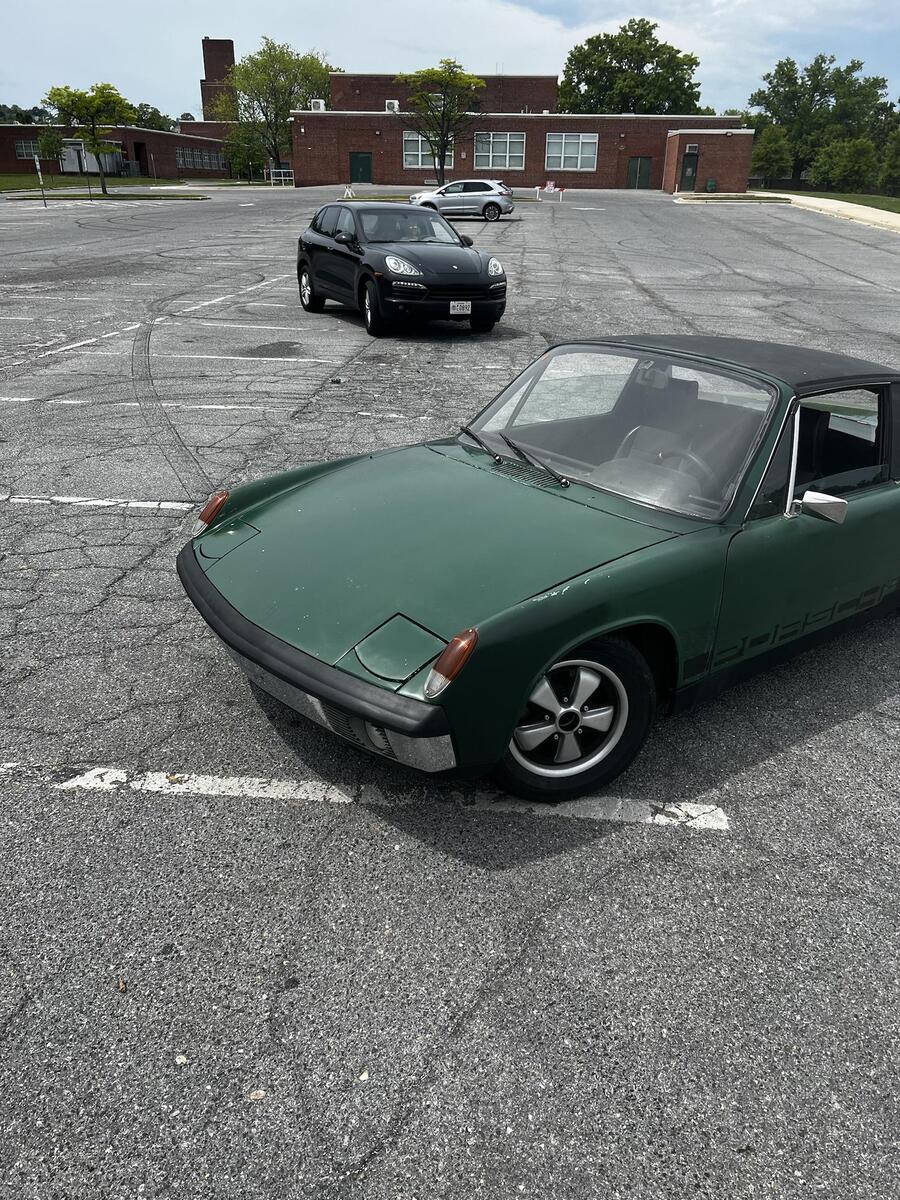
Anyways, It was other wise a fun and uneventful drive down. Happy/sad. Nice to have 1 less thing, honestly. The deal I made was.
"If you want to sell in a few years, call me first" otherwise, I'd like to find a nice original paint car in a weird color like Sepia, down the road when it makes a little more sense.
Come a long way from 4 years ago; a car just about ready to fall in half, with a seized up heart.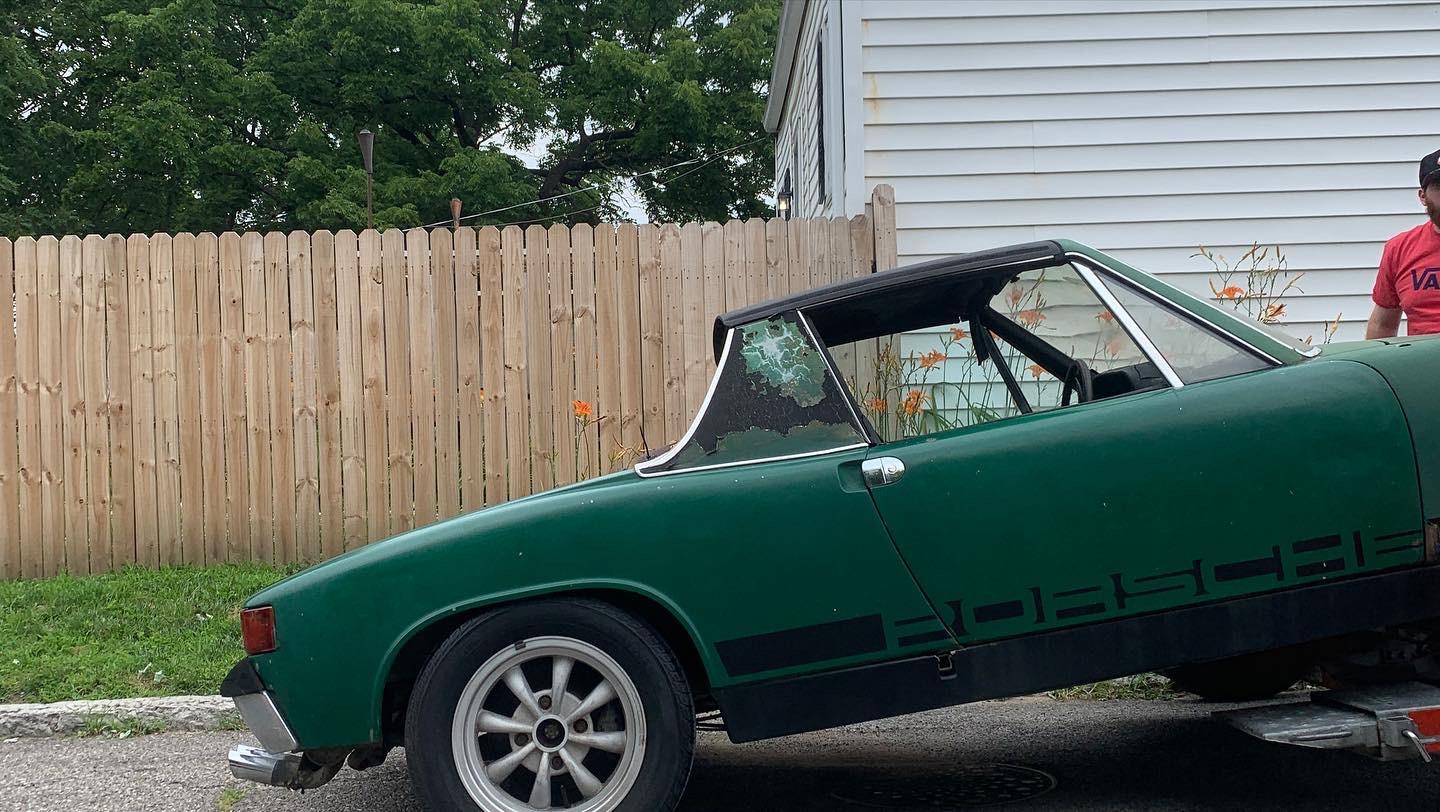
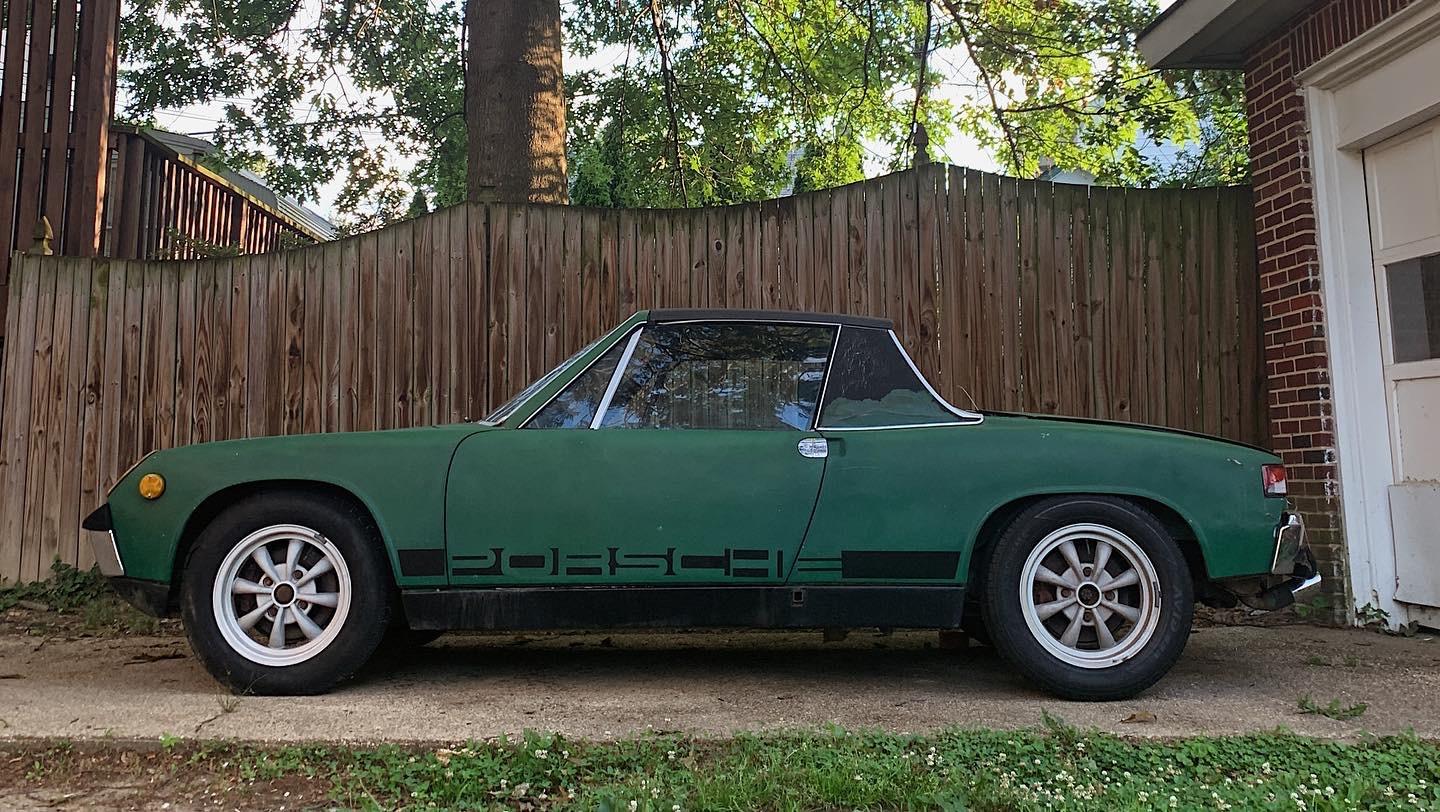
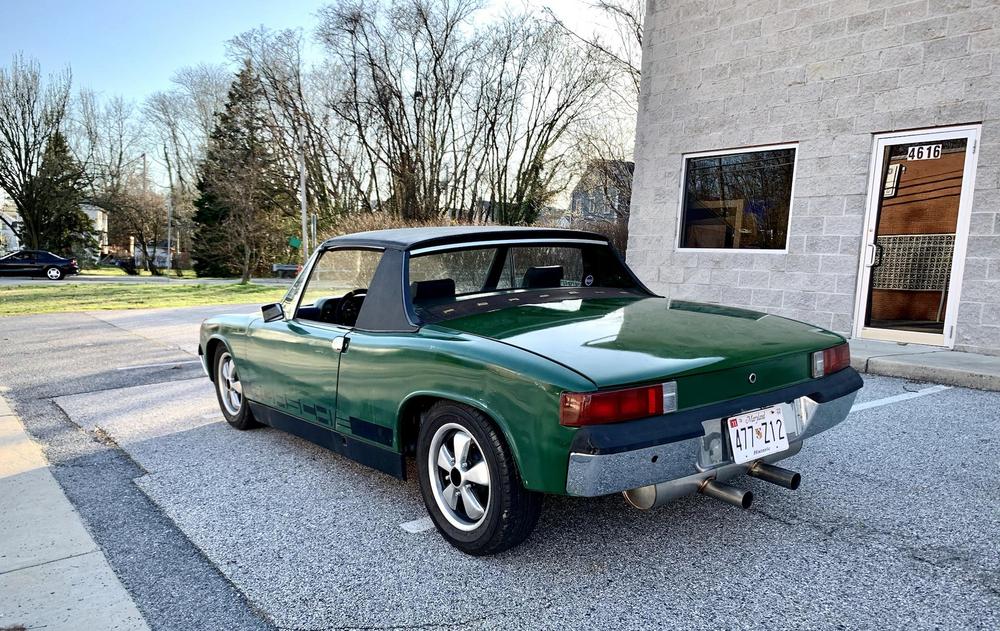
I've said it before, but thanks to all you guys for the help and countless questions and parts. I'm extremely grateful for the friendships and the opportunities that this car brought (side work, restoring more Porsches!)
I'm not going anywhere, just wont be behind the wheel of a 914 for now. I have 5 other cars to tend to.
I hope this thread has been helpful to even one person, motivating someone to try doing this work yourself. I know everyone says this, but in the greatest sense... If I can do it, anyone can.
Here's a final drive video, of me riding off into the sunset:
https://imgur.com/r1c0alU
Cheers,
Jared
Posted by: nditiz1 May 8 2023, 06:37 AM
Excellent journey Jared, it has been fun. Thanks for bringing us along for the ride.
Posted by: horizontally-opposed May 8 2023, 08:40 AM
Congrats on your engagement, and coming marriage.
Thank you for sharing your journey with this car. Love the point it got to, and have a funny response to the people picking at the paint, as someone who has picked at the paint on his own 914 and repainted it three times—I don't think I'd paint this 914. I dig its vibe, and hope I'll see it one day.
And love where this car went, and its new driver's story.
Posted by: FlacaProductions May 8 2023, 08:46 AM
Nice work - you'll be back....
Posted by: tygaboy May 8 2023, 08:52 AM
SOLD! SOLD! SOLD!
Great to hear you closed the deal. Better yet it went to a young enthusiest - we need the next generation to carry on with the carrying on around these wonderful little cars.
Keep us posted on all your other auto exploits...?
Posted by: BeatNavy May 8 2023, 10:21 AM
Congrats, Jared. I knew if was for sale when my daughter sent me a link to it from Facebook. I said..."I know that car..."
It's new home is across the Bay Bridge on the eastern shore of Maryland.
What town did it go to (PM if you like). I'll keep an eye out for it.
Posted by: nditiz1 May 8 2023, 10:40 AM
I actually thought you were the one to buy it
Posted by: BeatNavy May 8 2023, 10:54 AM
I actually thought you were the one to buy it
I just checked the garage. Nope wasn’t me
Posted by: jaredmcginness May 8 2023, 10:58 AM
SOLD! SOLD! SOLD!
Keep us posted on all your other auto exploits...?
Will do!
I have a few things currently in various stages of restoration.
The non-running/rusty stable, in no particular order:
'68 912 Light Ivory
'74 911S Targa Ice Green
'93 VW Corrado SLC Silver
'71 FJ40 Land Cruiser
'78 HD Shovelhead
As well as 2 customer cars that get more attention than the ones above.
The sale of the 914 will help fund a few things for those cars.
Congrats, Jared. I knew if was for sale when my daughter sent me a link to it from Facebook. I said..."I know that car..."
It's new home is across the Bay Bridge on the eastern shore of Maryland.
What town did it go to (PM if you like). I'll keep an eye out for it.
Awesome! It went over to the Centreville area.
Was a nice drive over, but stopped traffic, up hill, on the bay bridge in a 914 you're about to sell wasn't on my bucket list.Thank you guys!
Powered by Invision Power Board (http://www.invisionboard.com)
© Invision Power Services (http://www.invisionpower.com)