Printable Version of Topic
Click here to view this topic in its original format
914World.com _ 914World Garage _ John’s ‘73 Restoration
Posted by: Morph914 Mar 12 2020, 07:07 PM
I am more than a couple of years into my restoration of my ‘73 1.7 (now 2.0) but did not want to bore everyone with the same old stuff you have seen before. However, I am very thankful that many members here, take the time to post there work in detail. I have followed Brent’s (bbrock) post and have used many of his examples. In fact, I have adopted his idea of painting the trunks, cabin, underside first and now am doing the exterior panels. However, I do not have the cojones to paint mine myself.
I am getting close to having the car ready for paint. Once I finish this I will get the car back to a roller so I can flatbed to the paint shop. I want to use my old 4 lug Fuchs to sent to the paint shop and not my nice 5 lug Fuchs.
This is where I need advice, I sent my 4 lug hubs to PMB to be converted to 5 lug and also purchased the kit. Since I no longer have the 4 lug hubs, what would be the easiest way to accomplish this. I know Ivan purchase a pair of 4 lug hubs, just wanted to make sure I am not missing something easier.
Also, I want to know if I can install the stub axles without the axles just to get it to the paint shop. There will be no engine in the car.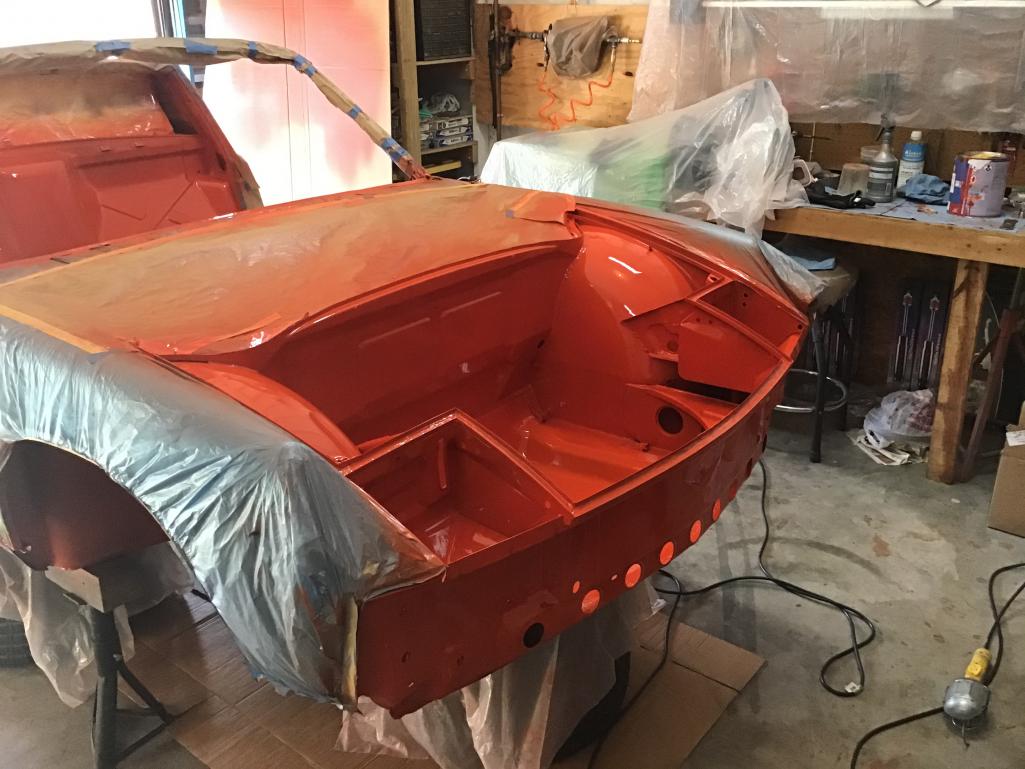
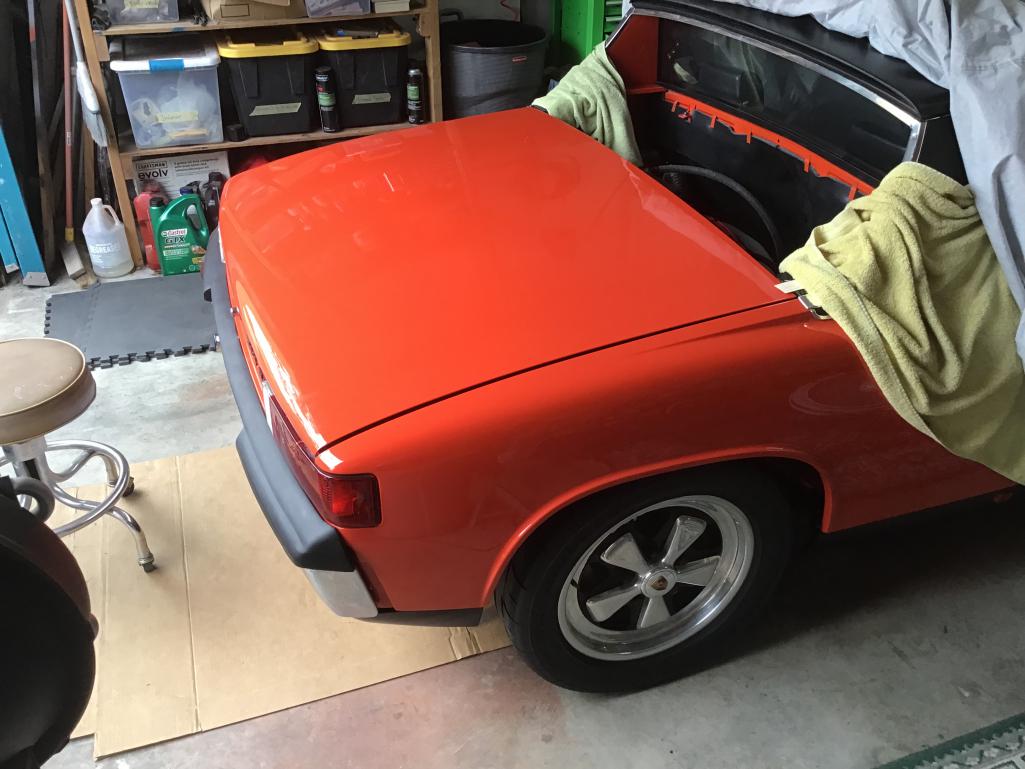
I want to use these wheels to take to the paint shop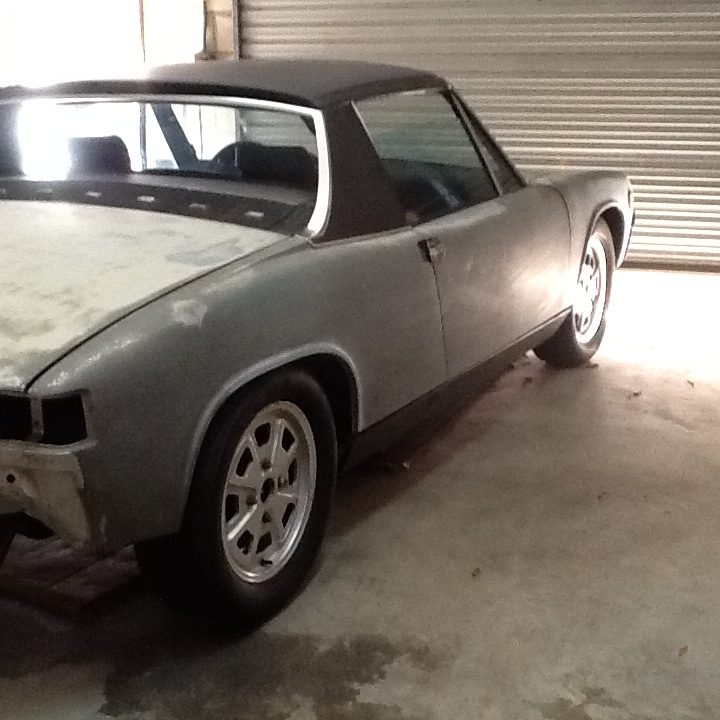
And not these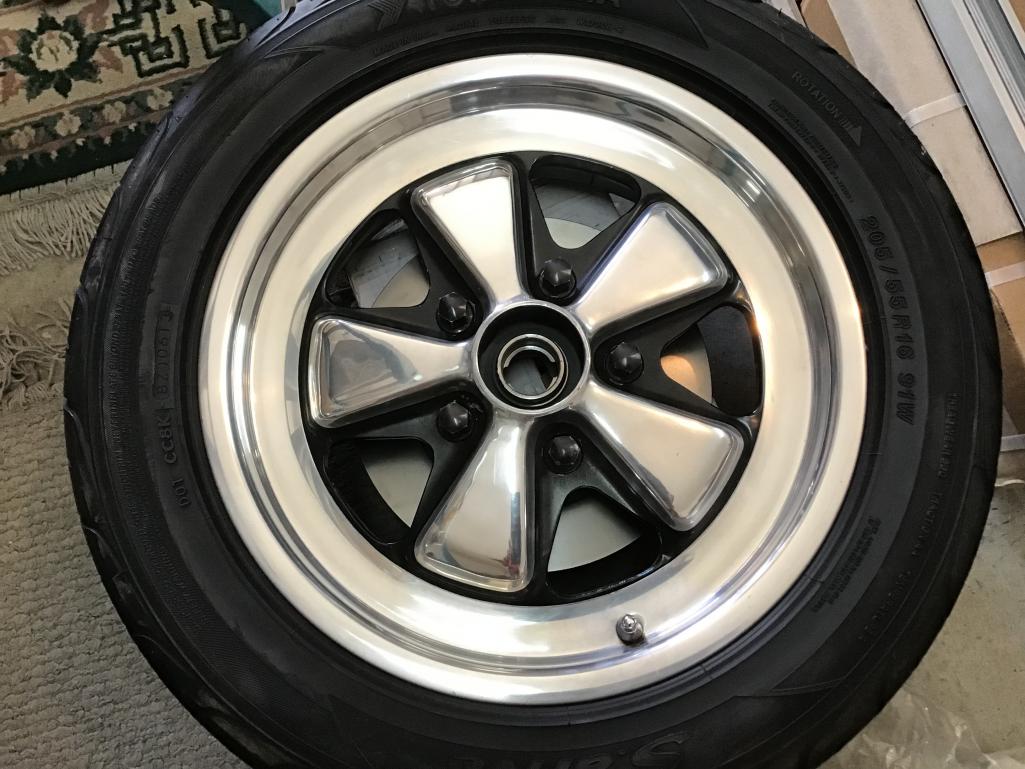
Cheers,
John
Posted by: mepstein Mar 12 2020, 10:22 PM
If you haven't installed your five lug setup yet, install the 4 lug with stubs and you'll be fine. use old bearings since you will ruin them when you pull off the hubs.
or you can find someone with an old set of trailing arms with hubs and stubs
or you can find/borrow some old five lug wheels. We use repos, spares and junk wheels for rollers and paint.
Posted by: billh1963 Mar 13 2020, 04:17 AM
I agree....don't use those 4 lug Fuchs for paint. Sell them (they are worth good money) and buy some cheap wheels from a forum member.
Another option is put on the 5 lug conversion and use a cheap set of Boxster or 996 wheels for rolling around. There are plenty out there for much less than your 4 lug Fuchs will sell for. That will also give you the option of having cheap roller wheels if you need them again in the future.
Posted by: Morph914 Mar 13 2020, 04:45 AM
Thank you, maybe some out there has some 4 lug hubs, and I’ll start looking for some cheap wheels. I have one steel wheel, so only need 3 more.
Cheers,
John
Posted by: Morph914 Sep 29 2020, 07:13 AM
I guess I will continue the build postings here instead of many new threads. I have had a hard time finding this link because I have not posted anything here in a while. Any trick to this?
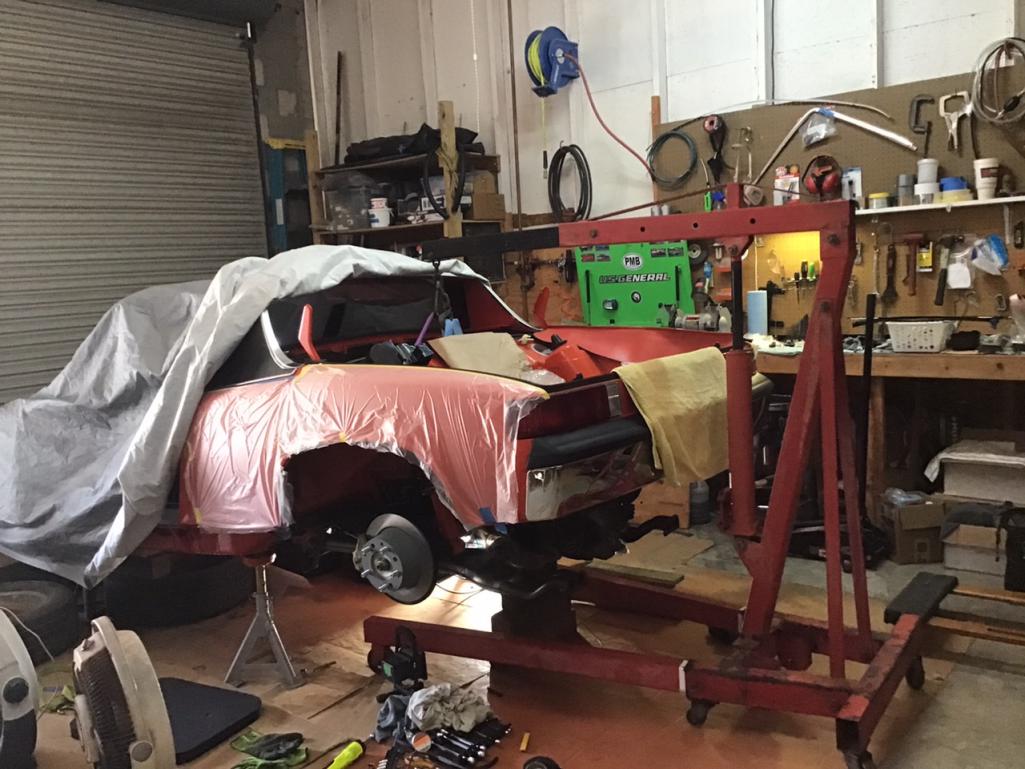
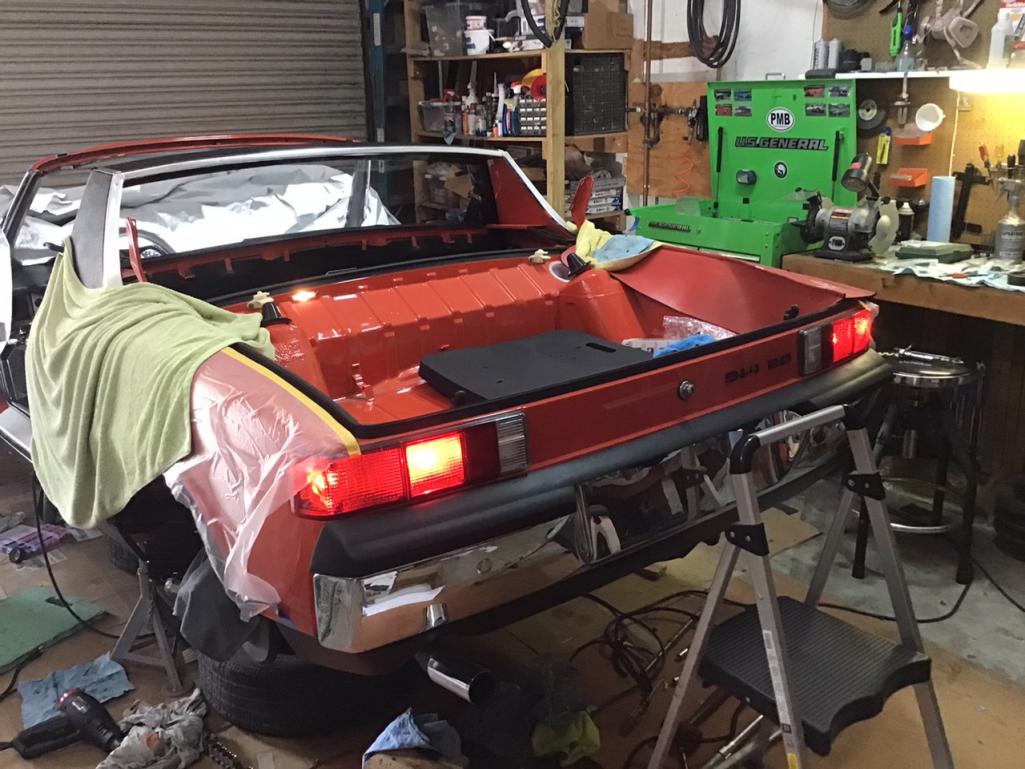
After being back from paint, it has been very rewarding to start putting it back together and seeing some light at the end of the tunnel. 
I painted everything except the exterior, including raptor on the belly with single stage.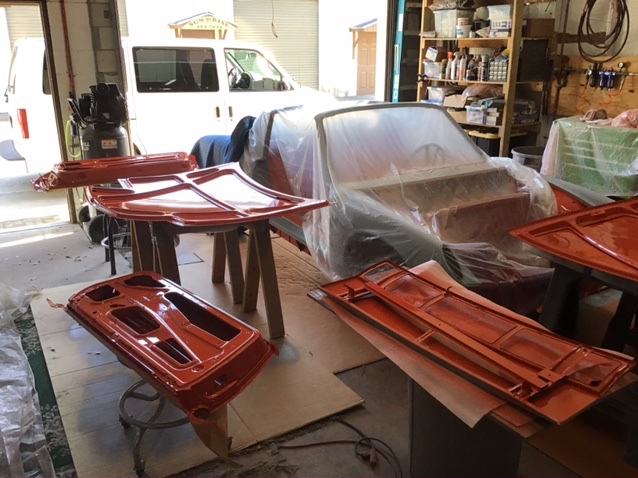
I completed all the body work and finished using 400 grit wet sanding.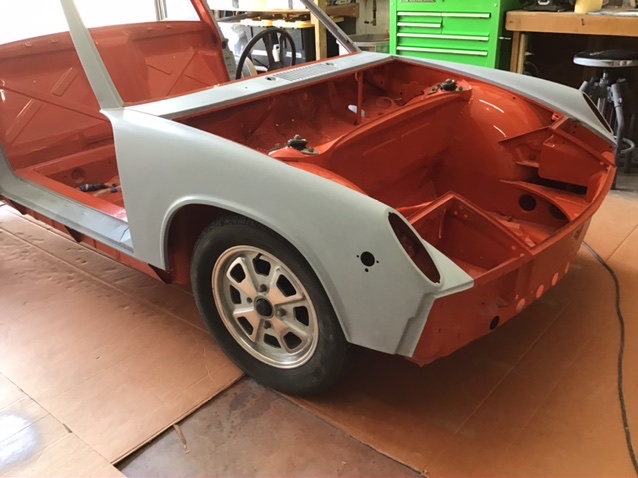
Off to the paint shop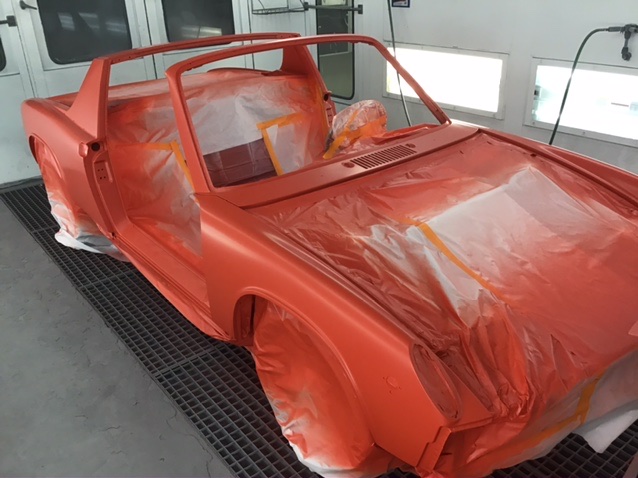
And after a few months, this is where I’m at with the car now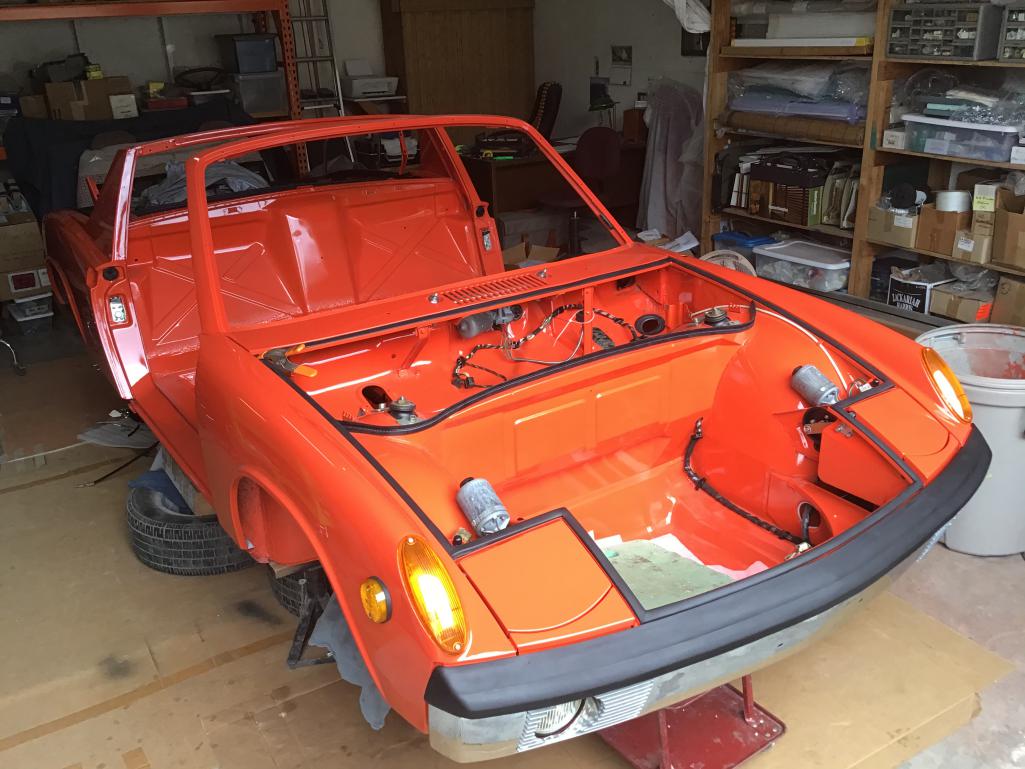
Posted by: porsche914rick Sep 29 2020, 07:32 AM

Posted by: JOEPROPER Sep 29 2020, 07:33 AM
Very nice progress. Inspiration for the reset of us! 
Posted by: mepstein Sep 29 2020, 07:37 AM
Looks amazing. 
Posted by: 76-914 Sep 29 2020, 08:17 AM
To locate your thread or comments you've made on others threads click on your member name. Then click on profile options on the right hand side of the screen. There you will have a choice of your post's or your topics.
Posted by: Cairo94507 Sep 29 2020, 08:22 AM
Very nice to see it all coming together. You are going to have a great car and lots of fun driving it around.
Posted by: PanelBilly Sep 29 2020, 10:18 AM
Everything looks so nice at this stage. Assembly is a bit challenging but fun.
Posted by: Morph914 Sep 29 2020, 02:48 PM
Thank you all for your comments.
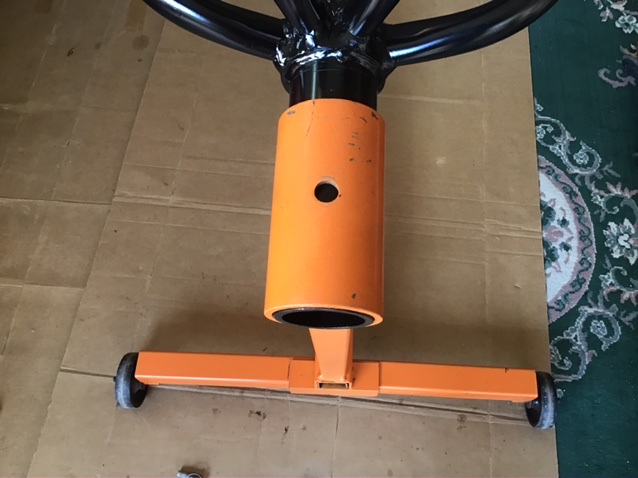
I just received this engine yoke from the Samba. I was wondering if it will be obvious where to drill the holes when I get the engine mounted to the yoke and on the stand? Or shall I drill holes at 12,3,6, and 9 o’clock? Also not sure what the attached sleeve or bushing is for 
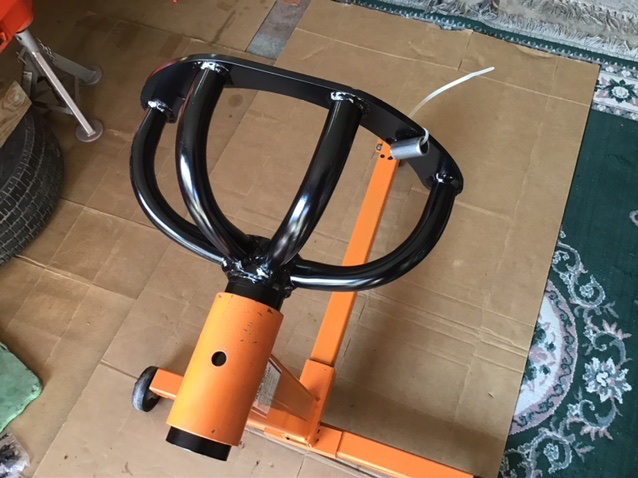
Also would like to know if there is any advantage to the yoke positioned all the way in or out flush with the edge, or somewhere in between.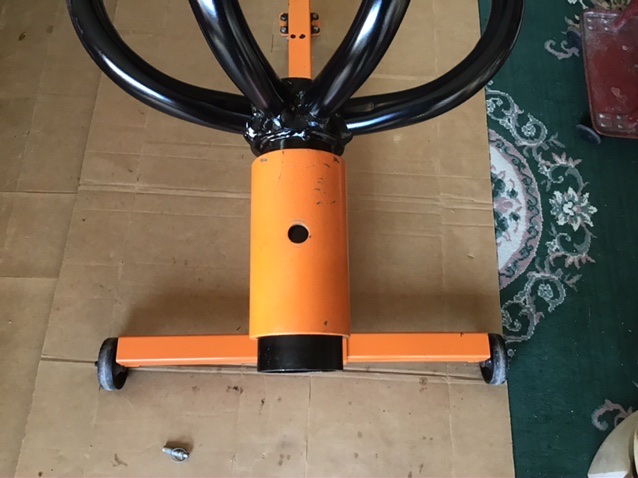
I have upgraded from 1.7 to a 2.0 and it has already been rebuilt to stock but I wanted to get it on a stand to install all the tidbits. I plan on building a big 4 with the 1.7... unless a six comes along that I cannot live without.
Thanks for your replies,
John
Posted by: mepstein Sep 29 2020, 02:54 PM
Keep the yoke all the way in. I would drill holes every 90 degrees. The hole doesn’t have to be very big. It just needs a rod or bolt to keep it from turning while you work.
Posted by: Morph914 Sep 29 2020, 04:24 PM

Keep the yoke all the way in. I would drill holes every 90 degrees. The hole doesn’t have to be very big. It just needs a rod or bolt to keep it from turning while you work.
Will do , I held the yoke up to the case where it mounts, and there is not much meat on that case to hold the weight of the engine. I will proceed with caution.
John
Posted by: nditiz1 Sep 29 2020, 05:40 PM
I have the same yoke and that's what I did. Also when you decide to go to a 6 you can use the same one 
Posted by: Morph914 Sep 30 2020, 05:29 AM
Anyone know what the zip tied sleeve/ bushing is?
Posted by: VaccaRabite Sep 30 2020, 06:05 AM
Anyone know what the zip tied sleeve/ bushing is?
A spacer for a long case stud.
Zach
Posted by: Morph914 Sep 30 2020, 09:07 AM
Anyone know what the zip tied sleeve/ bushing is?
A spacer for a long case stud.
Zach
Thank you, I figured that’s probably what it was for, but it’s nice to confirm with the almighty forum.
Posted by: Morph914 Sep 30 2020, 09:18 AM
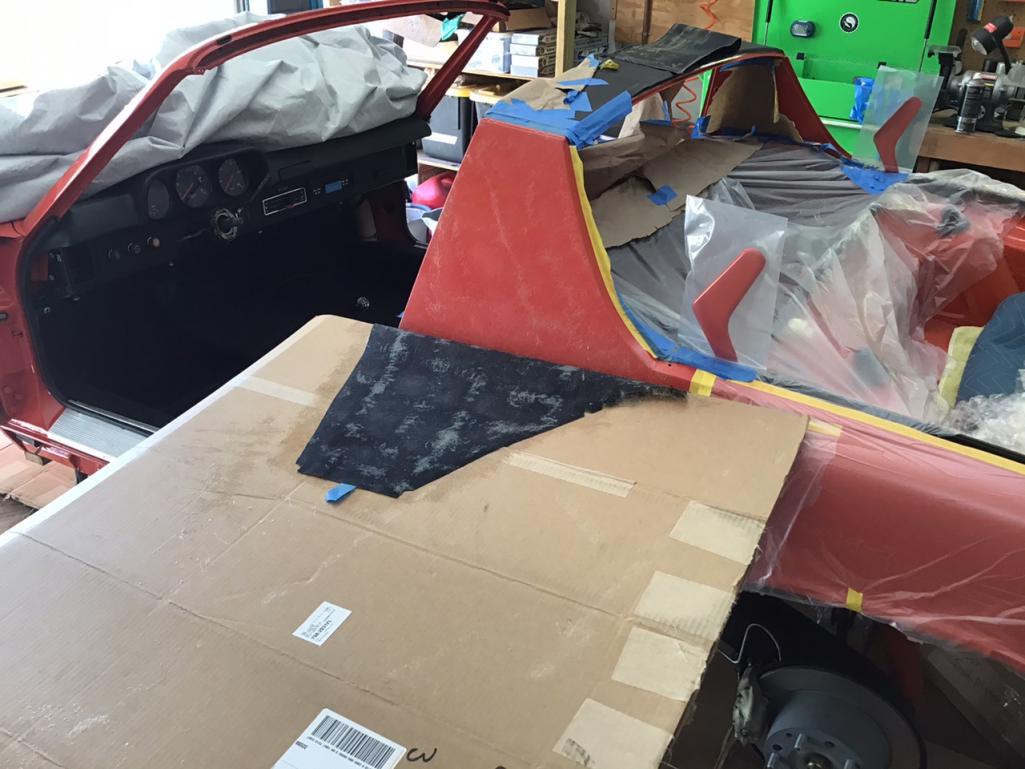
Since the weather is fantastic here today, I am working on the dash. I have installed the padding but I’m not in love with this vinyl top piece, it has too much sheen to it. I noticed in Ian’s video, his had more of a matte finish, which is desirable for low reflectivity. Both from 914 Rubber, but mine may be older. I will find out before proceeding any further.
Taped off to avoid glue where I don’t need it.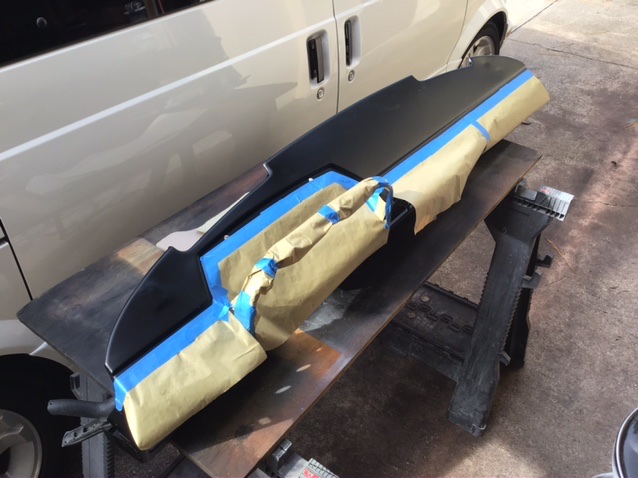
Installed some reference points and only glued half at a time.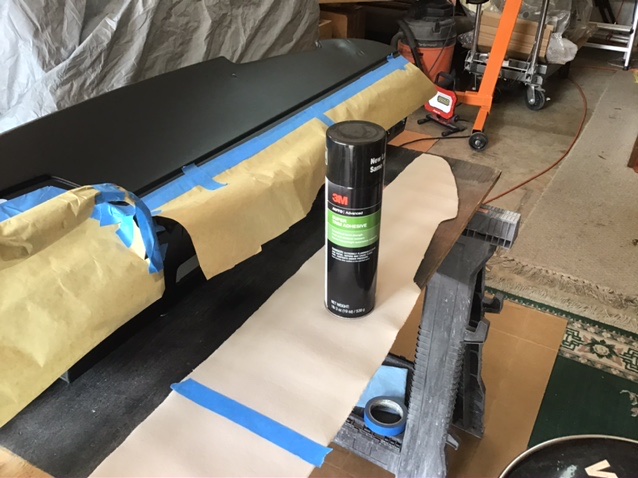
Went on well with no issues.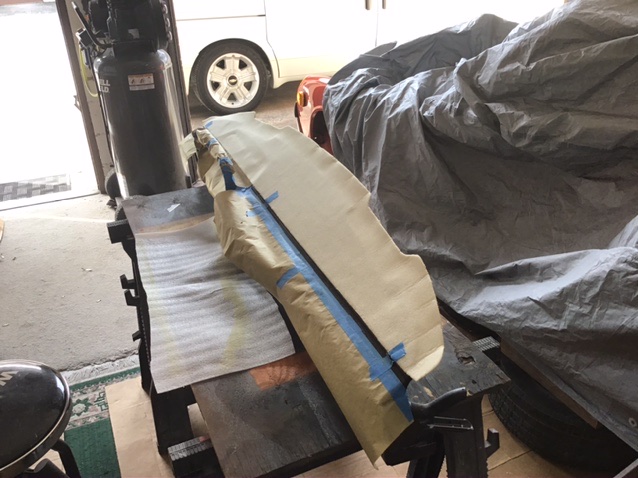
Tools of choice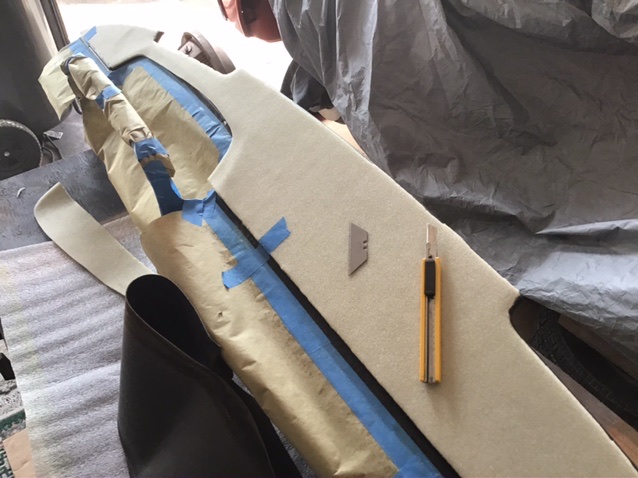
Posted by: Morph914 Sep 30 2020, 08:40 PM
I decided not to use this piece of vinyl due to the high sheen. 914 Rubber has agreed to exchange it for a different material. I will continue on with installing the new basket weave to the front of the dash.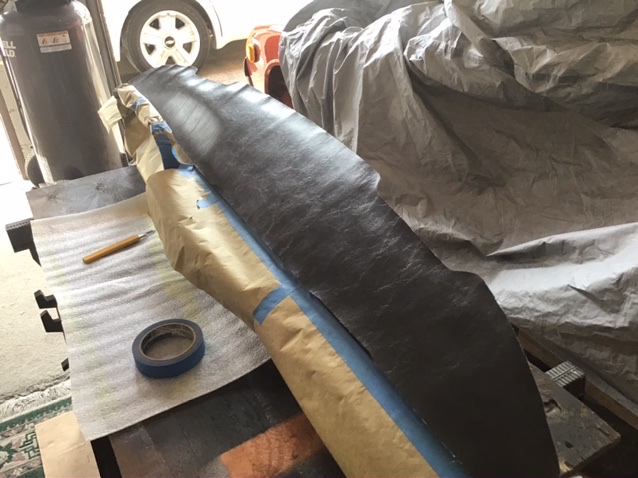
Posted by: Tdskip Sep 30 2020, 09:50 PM
Keep the updates coming please.
Posted by: Morph914 Oct 4 2020, 03:11 PM
Continuing to work on the dash, I received the 2 way tape I needed to retape the radio and glove box plates. The first attempt to place the radio plate was not successful, it was off just a bit.  You only get one shot at fitting these to the dash. For the longer plate, I had someone hold one end while I carefully placed the other. This worked out pretty well.
Today I set both the radio and glove box plates successfully 
To line up the glove box plate, I illuminated the knob holes from below to make it easier.
Done with the basket weave, and now waiting for the new vinyl top piece to come in so I can finish the top and then install the new dash top.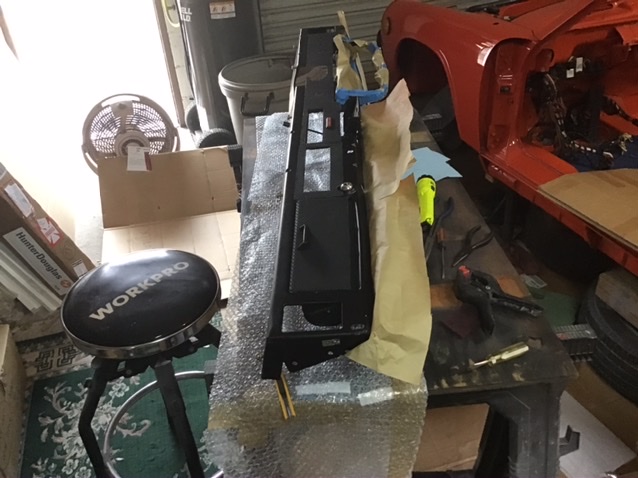
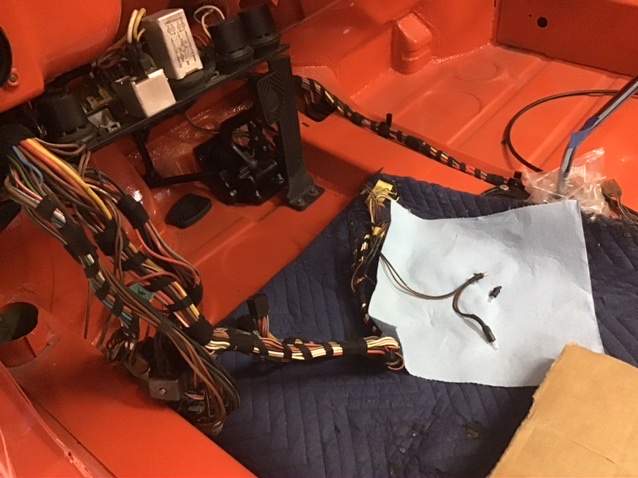
After moving the dash wiring loom around I found this light socket had come off. I believe this is one of the lights for the vent control unit.
I’m not sure how to proceed with repairing this, it looks it was soldered. 
Posted by: Morph914 Oct 5 2020, 08:28 PM
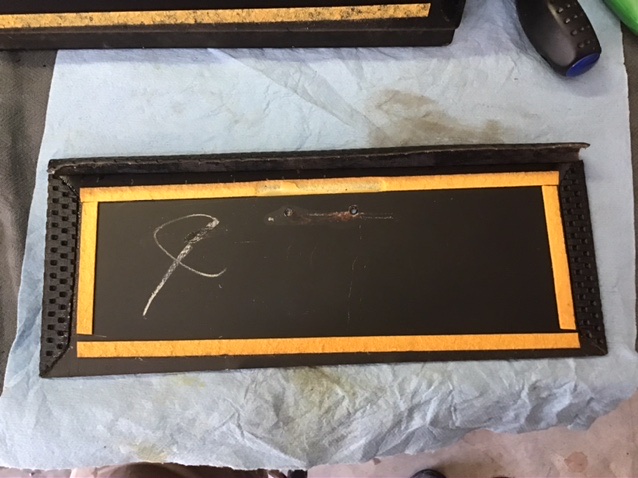
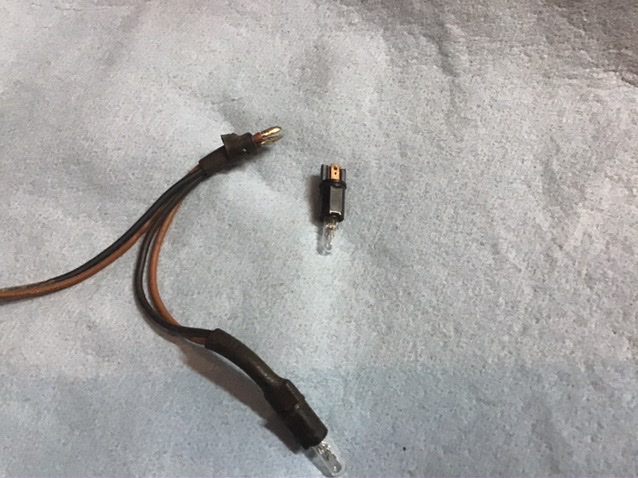
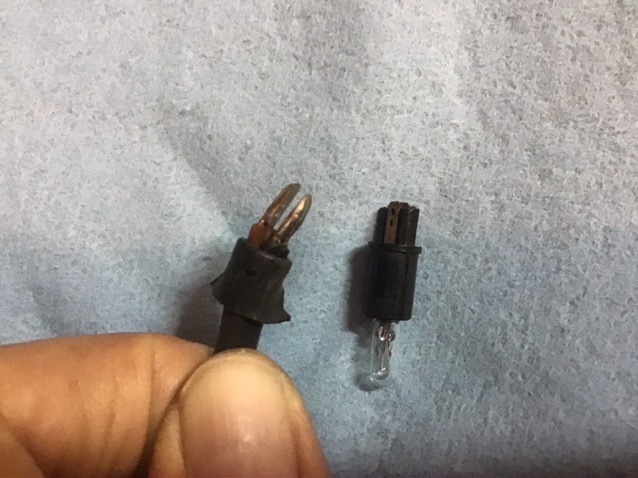
These are the rear license plate lights. As you can see, the light on the left is missing it’s ground prong, so I decided to fabricate one out of spring steel.
Posted by: Gint Oct 6 2020, 06:23 PM
Nice work!
Posted by: Morph914 Oct 8 2020, 08:23 AM
She is in! After shedding a few tears due to the scratched paint, I celebrated the small achievement of getting the air box in. 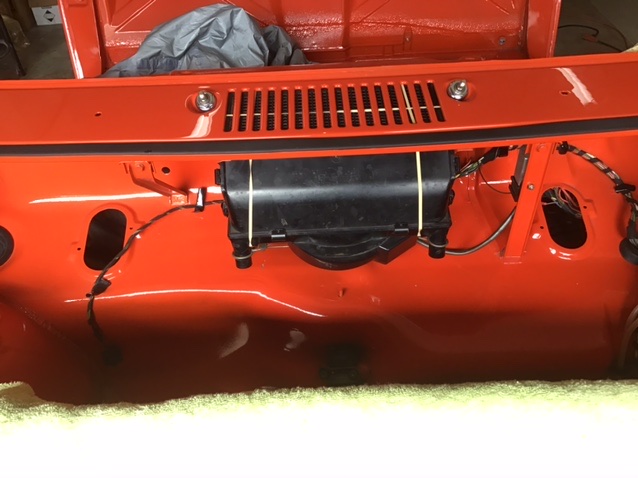
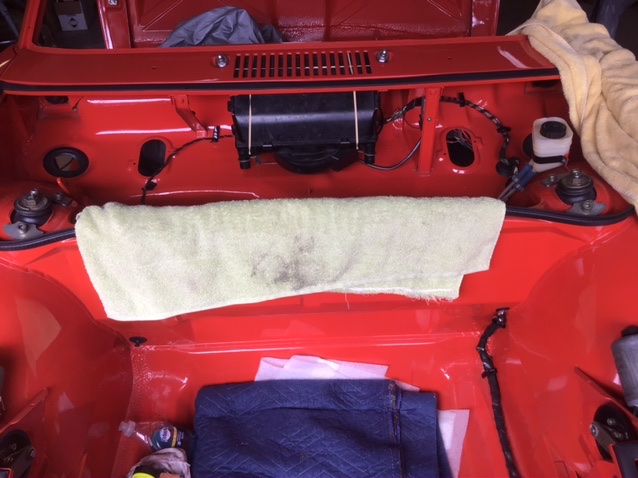
Scratched paint 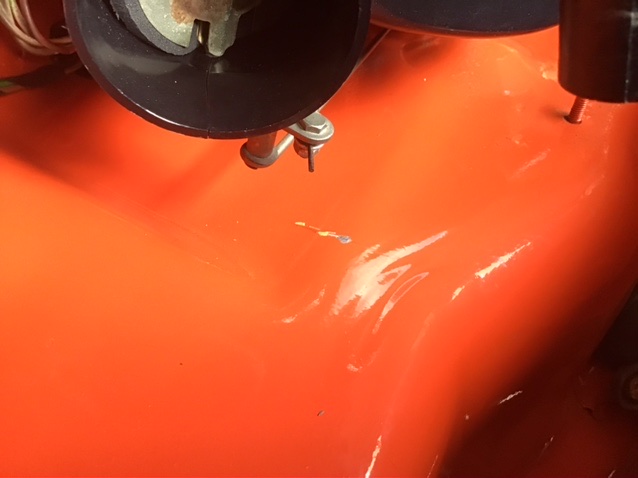
And after receiving the defroster vent seals from 914 Rubber yesterday, I will proceed with installing the remaining vent system pieces.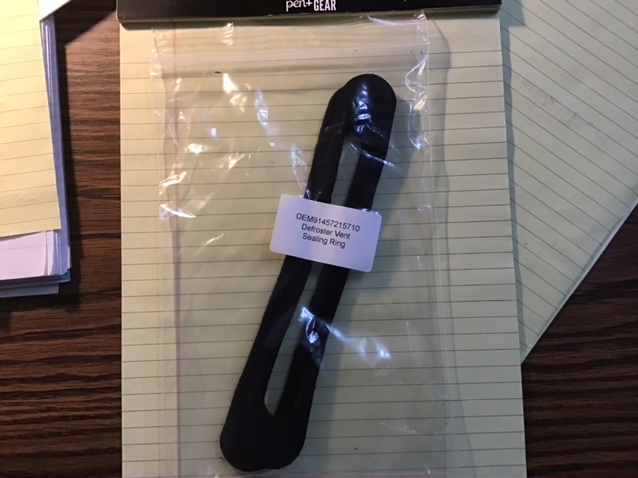
Cheers
Posted by: iankarr Oct 8 2020, 08:51 AM
nice to see the rubber bands 
Posted by: Morph914 Oct 8 2020, 06:02 PM
nice to see the rubber bands
Thanks to you and the great videos you take the time to make!
I have been referring to them frequently this week as I am finishing up my dash as well.
Cheers,
John
Posted by: Morph914 Oct 8 2020, 06:06 PM
I was able to finish with all the ducting today.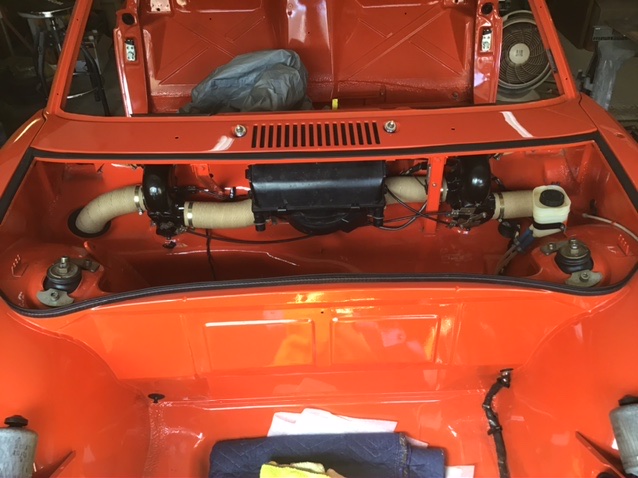
Posted by: Morph914 Oct 16 2020, 01:54 PM
I was able to get the dash top installed today. I’m pretty happy with the with the final results. I completely freshened up the dash including, basket weave on the front, padding and new vinyl on the top , and finally the dash top. All materials came from 914 Rubber.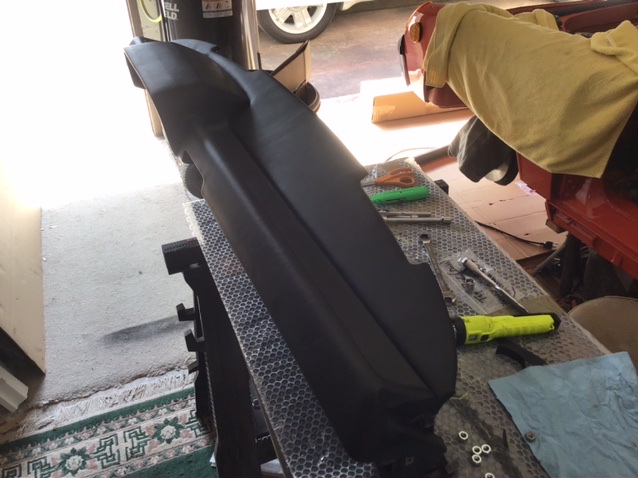
The ash trey cleaned up fairly well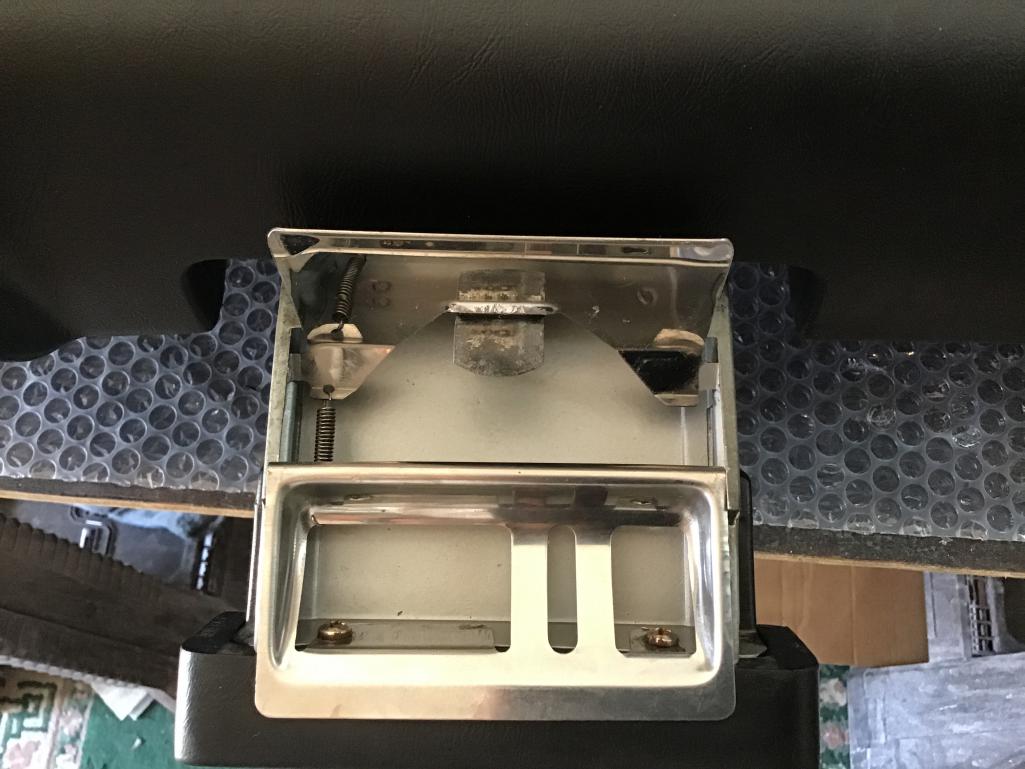
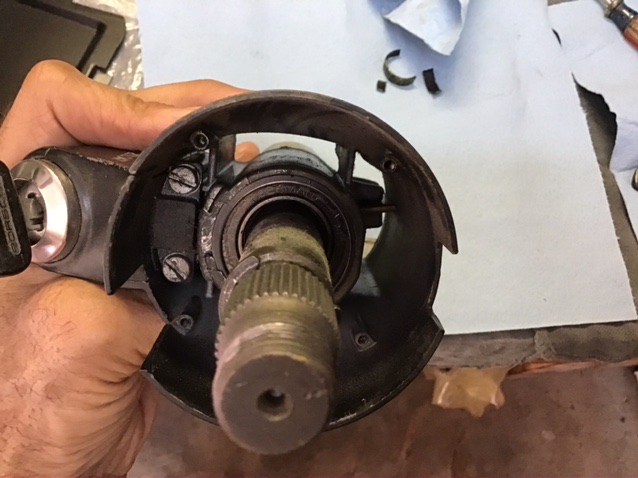
I also started working on the wiper system, and while working with the column, noticed the shaft had a lot of play, and then I noticed the plastic sleeve had come apart. Shall I just purchase the sleeve or do the bearing as well?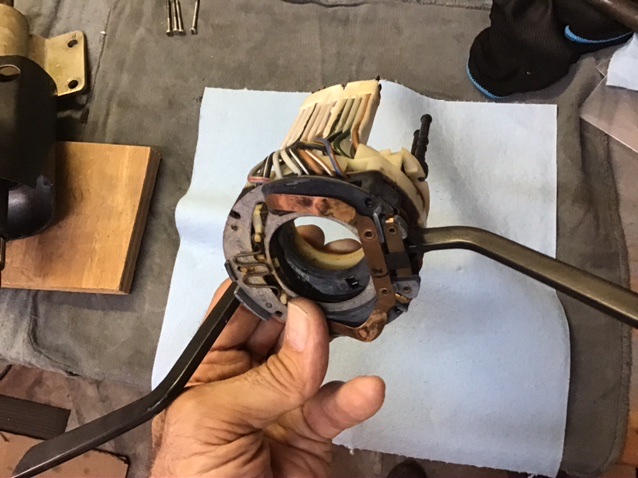
Posted by: turk22 Oct 17 2020, 07:55 PM
Progress is great, the workmanship looks top notch. It is gonna be stunning when your done, won't be long now!
Posted by: Mitox Oct 17 2020, 08:03 PM
Great work; love the attention to detail
Posted by: Cairo94507 Oct 18 2020, 06:10 AM
If you have it apart, I would do the bearing. Might as well or knowing how things happen that will go out 6 months from now.
Posted by: Jett Oct 18 2020, 08:35 AM
If you have it apart, I would do the bearing. Might as well or knowing how things happen that will go out 6 months from now.
+1 did this on two cars now, well worth the cost if the column is out.
Posted by: Morph914 Oct 18 2020, 09:23 AM
Thank you all for the kind words of encouragement. I would not have been able to get this far without all of you that have spent countless hours documenting your builds and projects.
I spend a lot of time going back and looking at other threads to learn the proper way to do things.
I will take your advice and change out the column bearing while it is apart. It appears there is a bearing at both ends, is there only one or two bearings?
Posted by: Morph914 Oct 20 2020, 06:09 PM
Today I took apart the steering column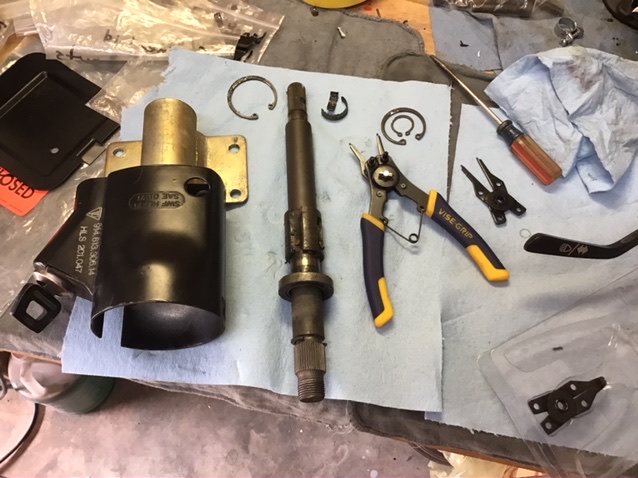
I have ordered both upper and lower bearings as they both seemed to be toast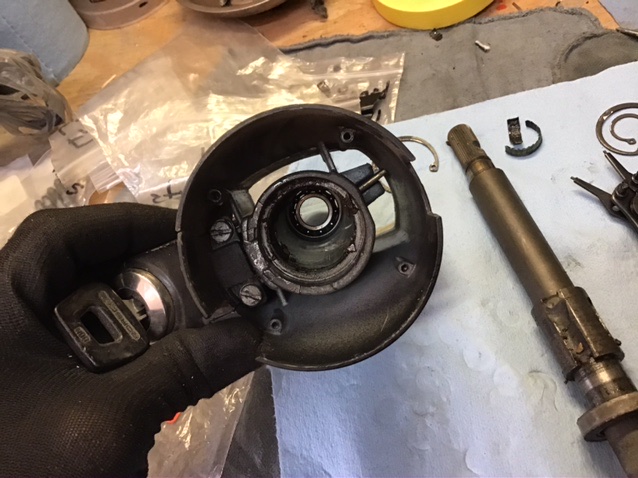
The upper bearing came right out due to the plastic inner bushing falling apart.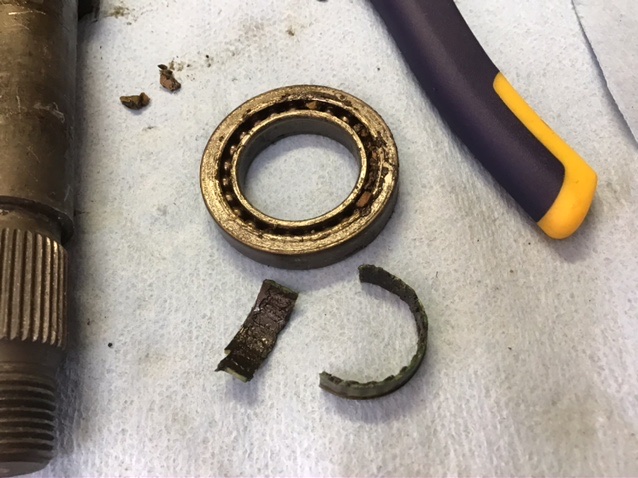
I’m thinking this is the original upper bearing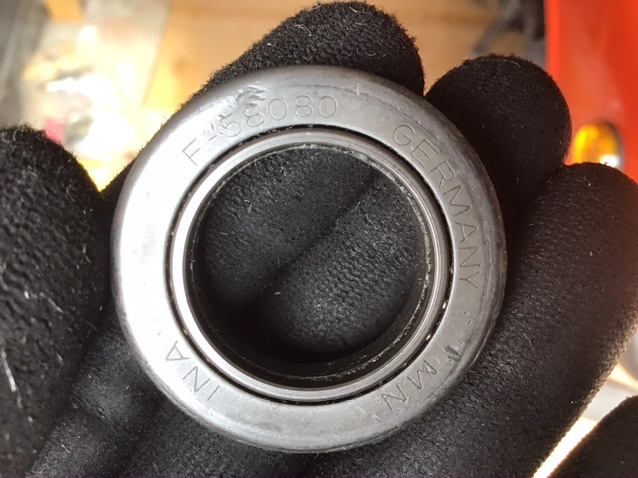
This is the lower bearing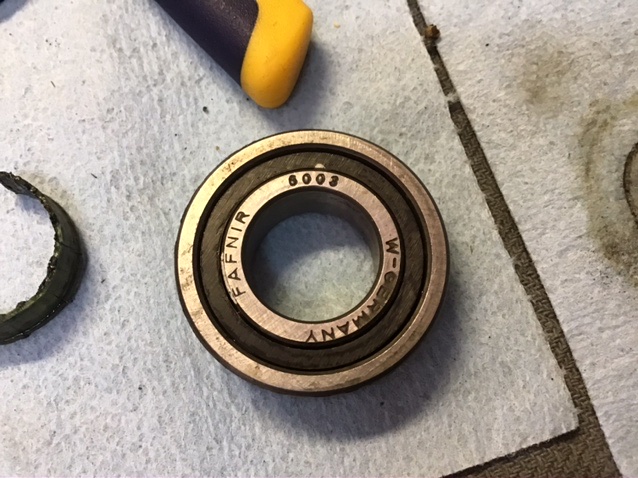
There is an inside circlip on the lower bearing so be careful if you use a punch to remove the bearing like I did from the top side.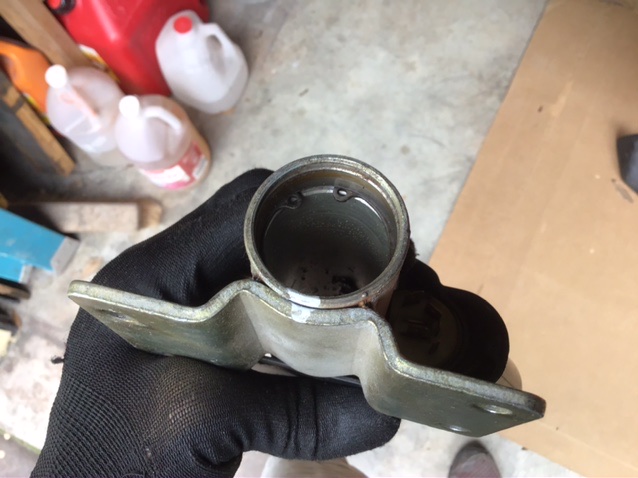
After a good cleaning, I’m waiting on parts for the reassembly.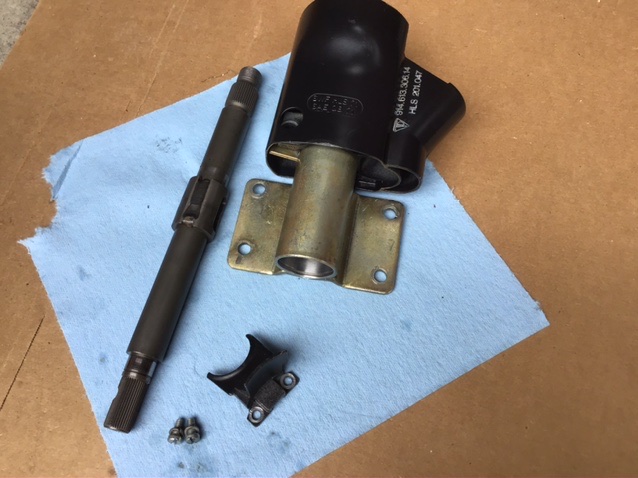
Posted by: tygaboy Oct 20 2020, 06:34 PM
John - You're doing a GREAT job on your car! I'm really enjoying the show as you get it all pulled together. Thanks for sharing!
Posted by: Morph914 Oct 20 2020, 07:37 PM
John - You're doing a GREAT job on your car! I'm really enjoying the show as you get it all pulled together. Thanks for sharing!
Thank you Sir! I’m enjoying the process. And like so many others, enjoying your build, keep up the great work

Can’t wait to get a ride in that beast!
Posted by: DRPHIL914 Oct 21 2020, 06:11 AM
John - You're doing a GREAT job on your car! I'm really enjoying the show as you get it all pulled together. Thanks for sharing!
Thank you Sir! I’m enjoying the process. And like so many others, enjoying your build, keep up the great work
Can’t wait to get a ride in that beast!
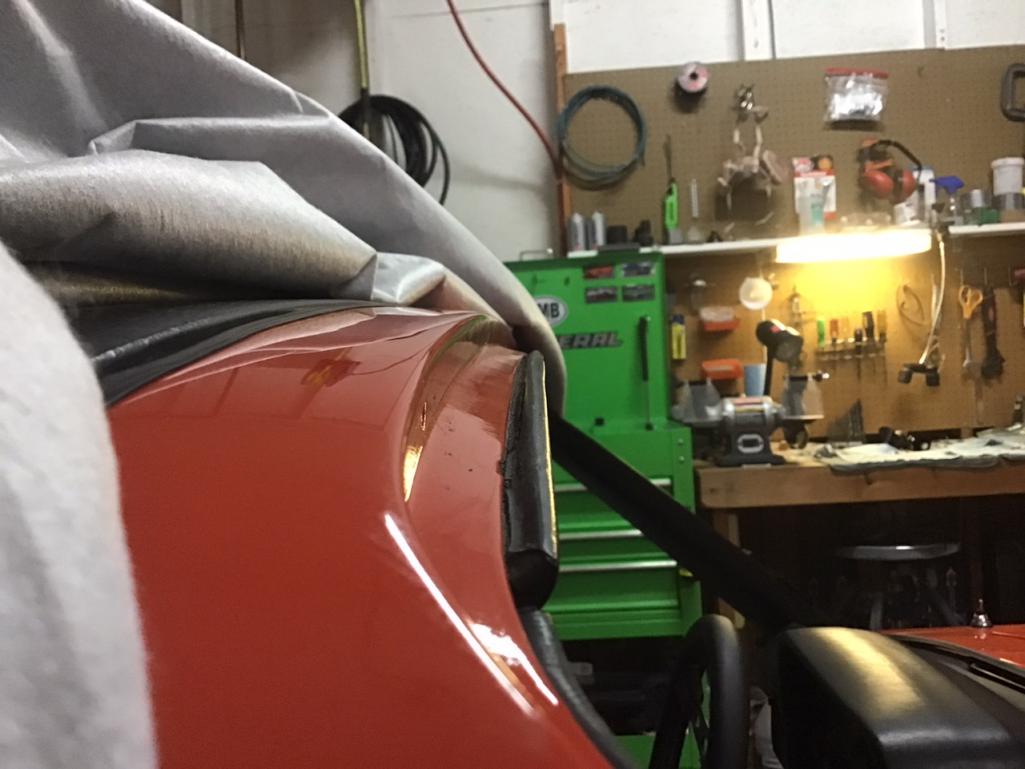
i had the same thing happen during reassembly, got a ding on my door and around the windshield while putting the trim on , i learned a few lessons about taping and paint protection, almost impossible to not get a scratch or bump at some point, its going to happen anyway right?
great job on that column ! i did the bearings a couple years ago too, they were both original and needed it badly!.
I cruise thru Jax and St. Augie once and a while and would love to stop by and take a look at your car if it works out. Might be going down to Daytona to see my daughter and son-in-law holloween weekend and go to daytona cars and coffee, so if your going to be around, let me know!
@http://www.914world.com/bbs2/index.php?showuser=20326
Posted by: Morph914 Oct 23 2020, 07:31 PM
John - You're doing a GREAT job on your car! I'm really enjoying the show as you get it all pulled together. Thanks for sharing!
Thank you Sir! I’m enjoying the process. And like so many others, enjoying your build, keep up the great work
Can’t wait to get a ride in that beast!
i had the same thing happen during reassembly, got a ding on my door and around the windshield while putting the trim on , i learned a few lessons about taping and paint protection, almost impossible to not get a scratch or bump at some point, its going to happen anyway right?
great job on that column ! i did the bearings a couple years ago too, they were both original and needed it badly!.
I cruise thru Jax and St. Augie once and a while and would love to stop by and take a look at your car if it works out. Might be going down to Daytona to see my daughter and son-in-law holloween weekend and go to daytona cars and coffee, so if your going to be around, let me know!
@http://www.914world.com/bbs2/index.php?showuser=20326
Yes, if you are in the area, I would be happy to meet a fellow teener and have you give me some advice on wheel fitment and such.
I’ll pm you my contact info.
Cheers,
John
Posted by: Morph914 Oct 23 2020, 08:14 PM
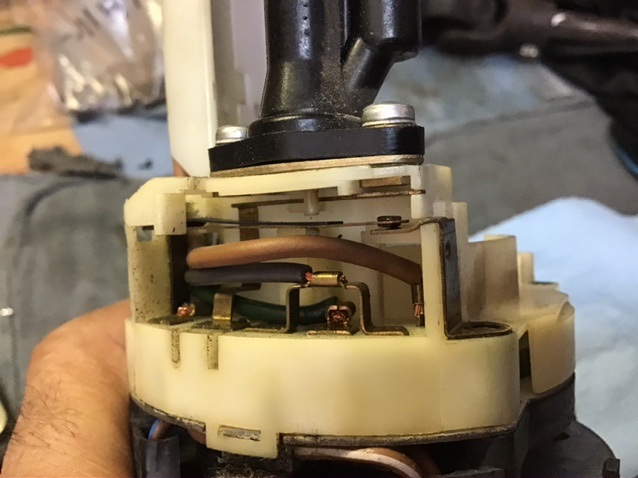
I received my carmagic switch for the windshield washer pump today. Let’s see how this baby fits.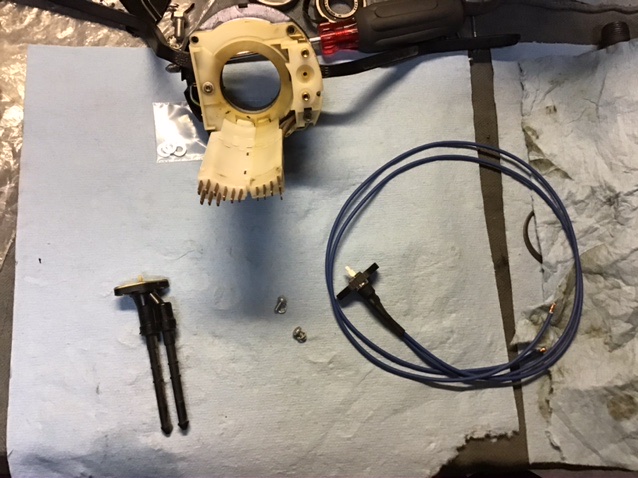
First order of business is to remove the old valve, enlarge the center hole with a 4 mm drill bit and install the new switch.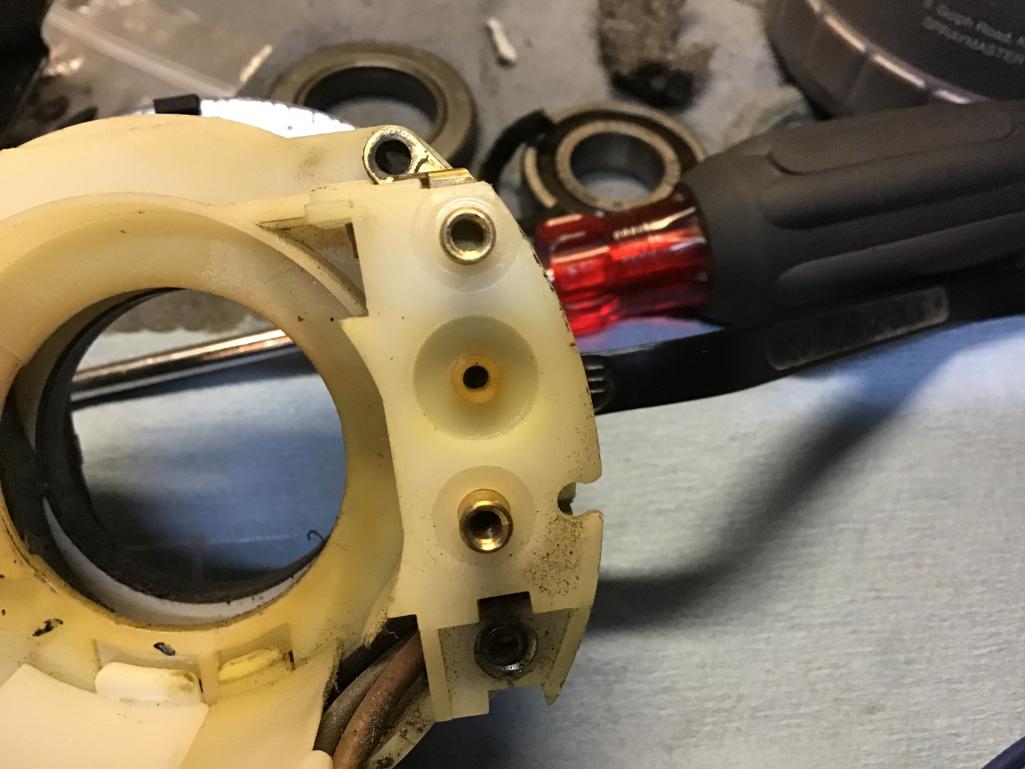
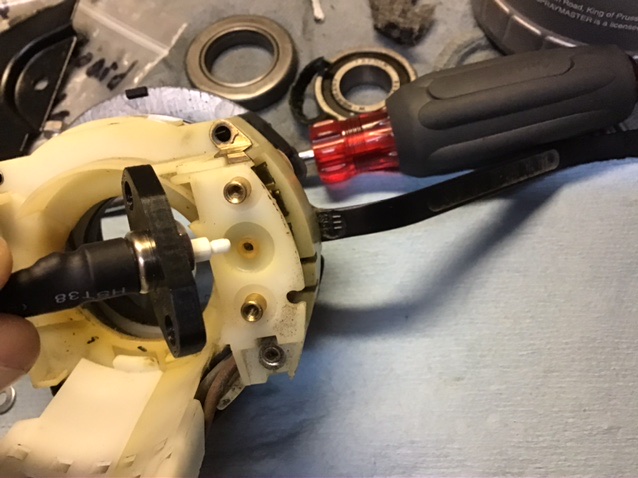
Like an idiot I forgot to take a picture of the drilled out hole, but you get the idea. Even though I was very careful when drilling, the hole ended up a bit off center so the switch would not fit until I wallowed out the holes a bit.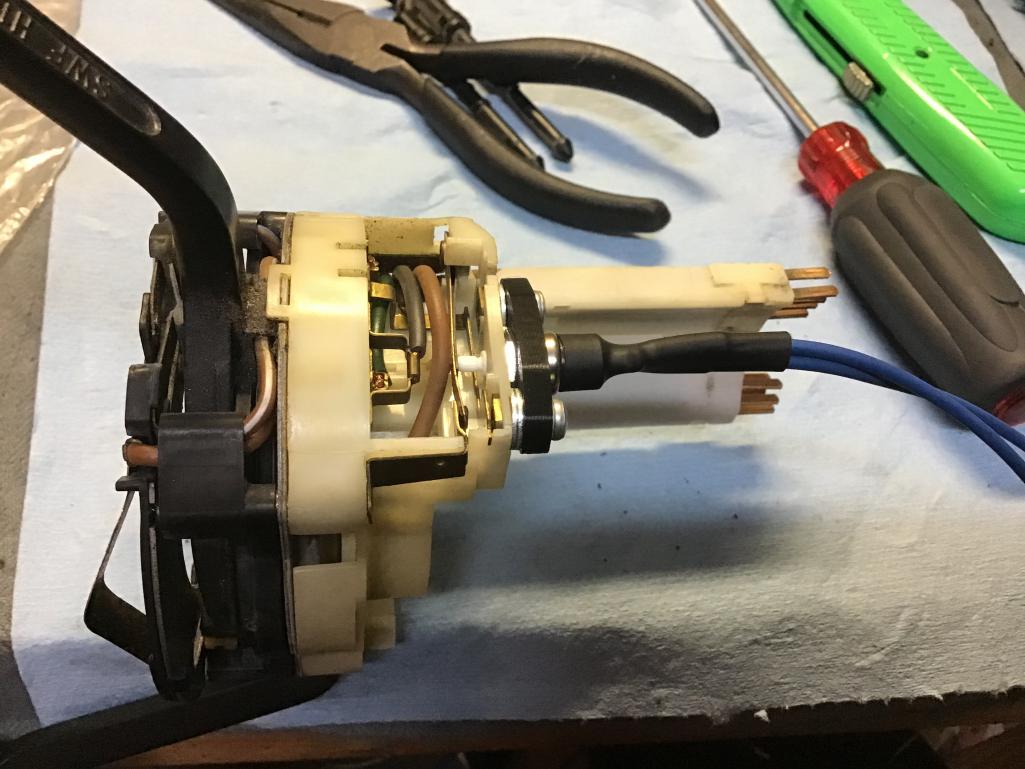
Here is where I could use some help, I have looked at the electrical schematic and not sure how to wire this. I really don’t want to add a relay if possible. Maybe someone who has done this conversion could chime in.
Thanks in advance,
John
Attached image(s)
Posted by: DRPHIL914 Oct 24 2020, 11:57 AM
![popcorn[1].gif](style_emoticons/default/popcorn[1].gif)
i will be doing this soon as well and just got my switch, and this week i got the new turn signal switch and my NOS 911 pump from @http://www.914world.com/bbs2/index.php?showuser=3457 thanks, and shout out to Mark for that. i will also need help with wiring that up.
Looks good, did you put the wheel etc all back together?
Posted by: FlacaProductions Oct 25 2020, 08:53 AM
@http://www.914world.com/bbs2/index.php?showuser=20326 - are you running that switch straight to the pump or do you have the intermittent wipe relay? if it's straight to the pump, one of those wires from the carmagic switch goes to the + side of the pump, the other goes to a switched power source at the fuse box. then the - connection on the pump goes to a ground.
Posted by: Morph914 Oct 25 2020, 05:25 PM
i will be doing this soon as well and just got my switch, and this week i got the new turn signal switch and my NOS 911 pump from @http://www.914world.com/bbs2/index.php?showuser=3457 thanks, and shout out to Mark for that. i will also need help with wiring that up.
Looks good, did you put the wheel etc all back together?
Not yet, I just received the lower column bearing, and should have the top bearing tomorrow. Always seem to be waiting on parts, so I have 3 or 4 different projects going on at the same time.
Posted by: Morph914 Oct 25 2020, 05:32 PM
@http://www.914world.com/bbs2/index.php?showuser=20326 - are you running that switch straight to the pump or do you have the intermittent wipe relay? if it's straight to the pump, one of those wires from the carmagic switch goes to the + side of the pump, the other goes to a switched power source at the fuse box. then the - connection on the pump goes to a ground.
Thank you, i think I have the intermittent option, but I have never had the pleasure of driving this car. It was not running when I purchased it.
Isn’t the relay in the picture, part of the wiper intermittent system?
Posted by: zfisher6164 Oct 28 2020, 08:42 AM
@http://www.914world.com/bbs2/index.php?showuser=20326 - are you running that switch straight to the pump or do you have the intermittent wipe relay? if it's straight to the pump, one of those wires from the carmagic switch goes to the + side of the pump, the other goes to a switched power source at the fuse box. then the - connection on the pump goes to a ground.
Thank you, i think I have the intermittent option, but I have never had the pleasure of driving this car. It was not running when I purchased it.
Isn’t the relay in the picture, part of the wiper intermittent system?
Yes that is the rely, my wipers went off everyonce in awhile then a put a new relay in and now that work like normal, a very easy fix
Posted by: Morph914 Nov 1 2020, 08:42 PM
Finally received the upper bearing for the steering column. It was more difficult to get the bearing started on the shaft than I imagined, but once started, i was able to push it down into its seat with a fair amount of pressure with my fingers.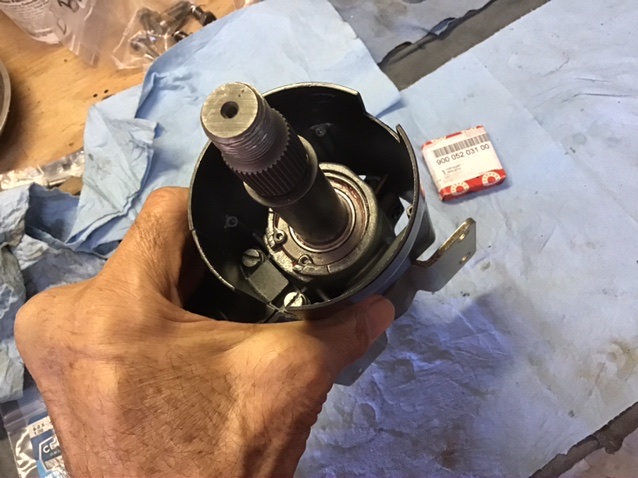
And then it was time to install the blinker/washer module into the column. I added a little protection to the new wires coming from the wiper washer switch going through the column.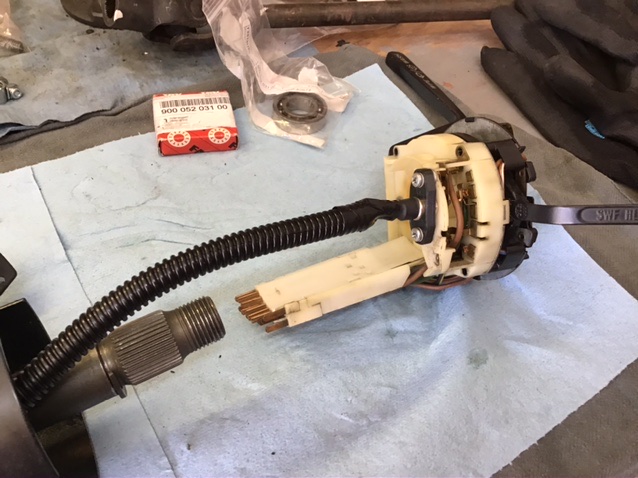
All ready for the install. 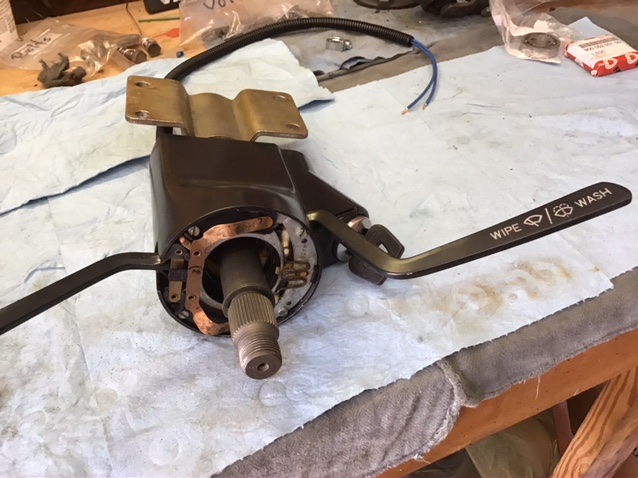
Posted by: Morph914 Nov 4 2020, 06:43 PM
I purchased this kit to clean and seal my gas tank. More pictures to come.
I am starting to work on the interior wiring and am not sure if this green and white wire goes to the heater lever or not. I accounted for all the other wires in the area that go to the 3gauge pod except a black and blue wire, but it has a small connector on it so I know it’s not for this lever. I did connect the green and white wire but when I tried to bolt the lever down it was too short. The wire loom is the only thing I did not remove from the car, so theoretically, everything should be in the same place. Hopefully someone can chime in on this.
Not sure if this is the way the wire is routed.
Posted by: djway Nov 5 2020, 01:27 AM
I don't think that is the proper routing for the wire. Check by the cross support for an opening.
Posted by: Morph914 Nov 5 2020, 12:16 PM
I don't think that is the proper routing for the wire. Check by the cross support for an opening.
Yes, I believe you are right, I should have had that wire exit the loom closer to the cross bar. After I cleaned the loom, I retapped this area and probably should have not taped over the green and white one.
I think I’ll undo some of the tape and reroute it through the side of the tunnel.
Thank you,
John
Posted by: Morph914 Nov 5 2020, 01:26 PM
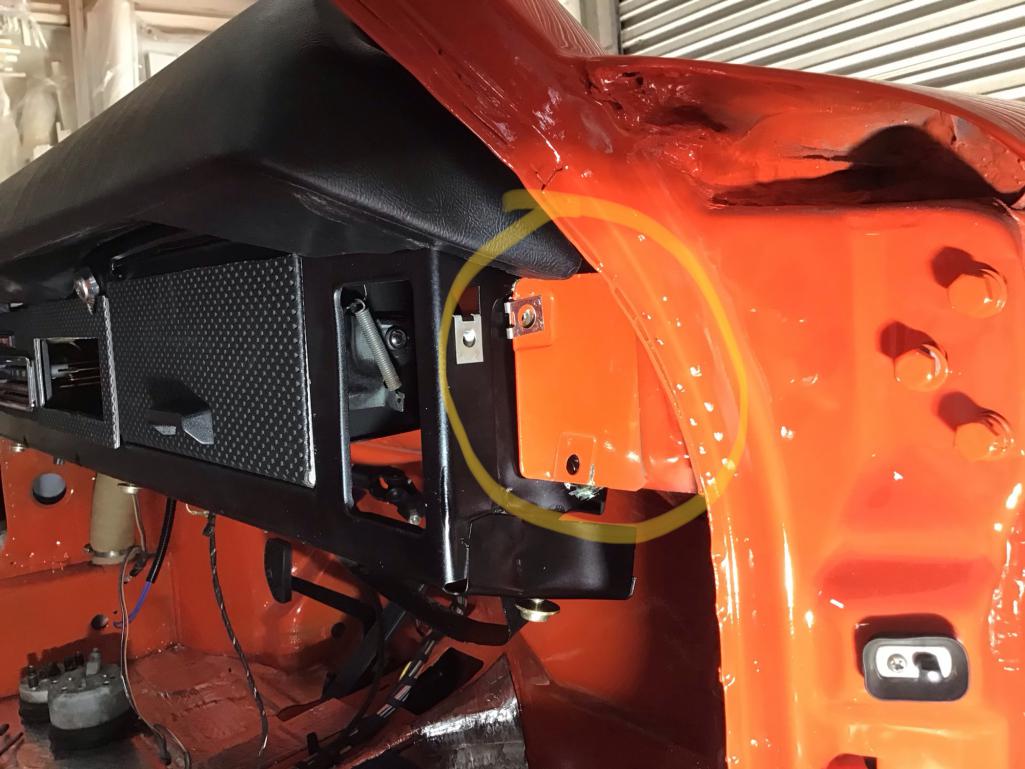
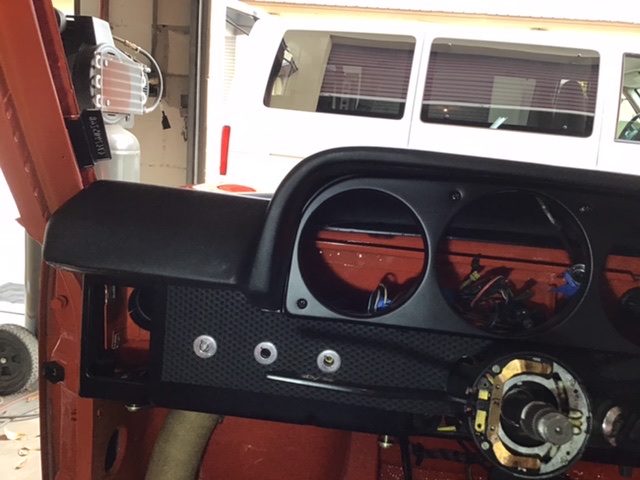
I discovered this today, after installing the dash and now connecting everything. I will now have to undo much of what I have been working on to fix this problem.
I am not sure which orientation is correct, I think the drivers side is the correct. Notice the side of the metal dash, the drivers side is on the outside and the passenger side is on the inside.  I guess it could have been worse, I could have been completely done with the dash, steering wheel, etc.
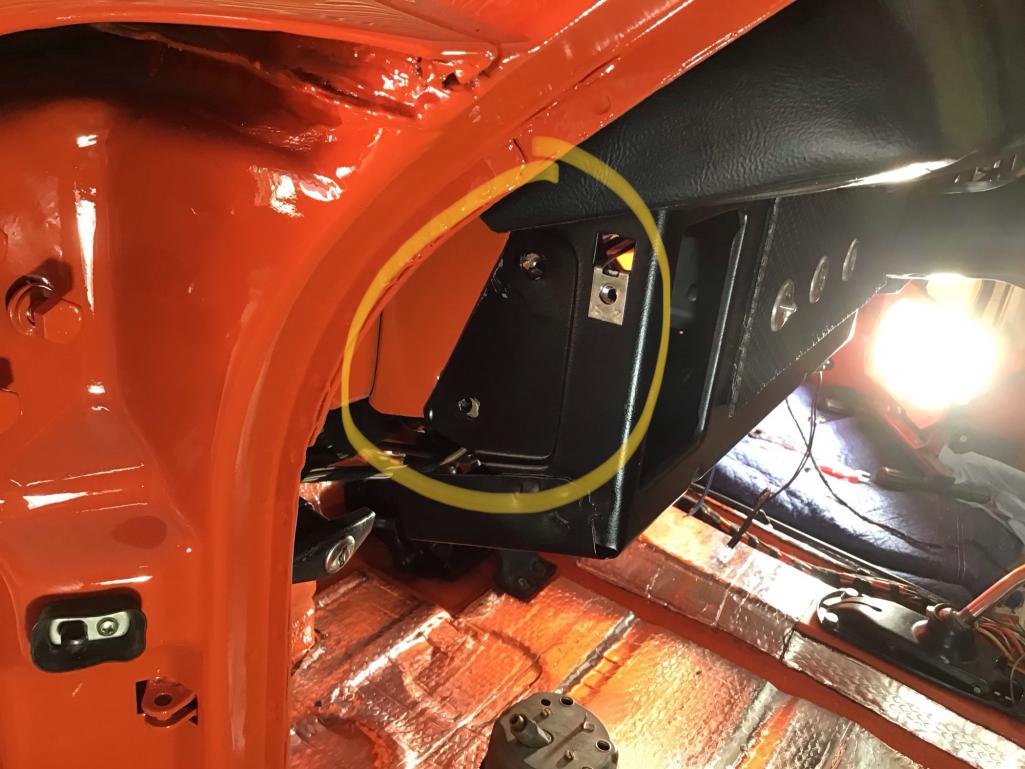
Posted by: Gint Nov 7 2020, 03:15 PM
I will now have to undo much of what I have been working on to fix this problem.I am not sure which orientation is correct, I think the drivers side is the correct. Notice the side of the metal dash, the drivers side is on the outside and the passenger side is on the inside.
I guess it could have been worse, I could have been completely done with the dash, steering wheel, etc.That is a very good question. And one I'll need an answer to at some point in the future. I'll give you a
Posted by: Morph914 Nov 11 2020, 03:58 PM
Figured it out, it has to go on the outside to tighten up. After disconnecting a bunch of stuff, I was able to positioned correctly.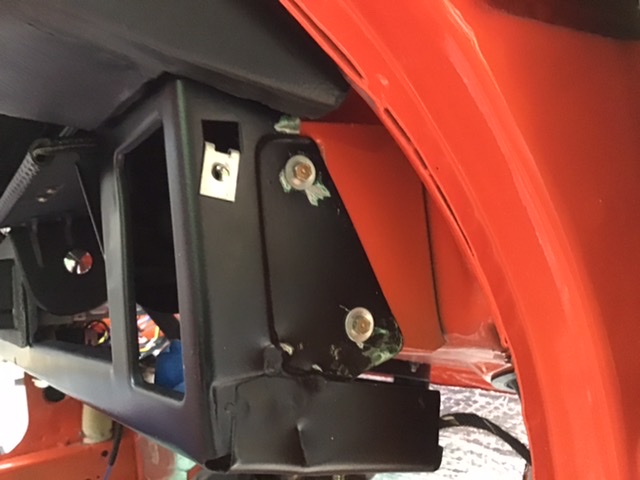

The remaining speed nut is where the bottom pad and vents fasten to.
Posted by: Morph914 Nov 11 2020, 04:26 PM
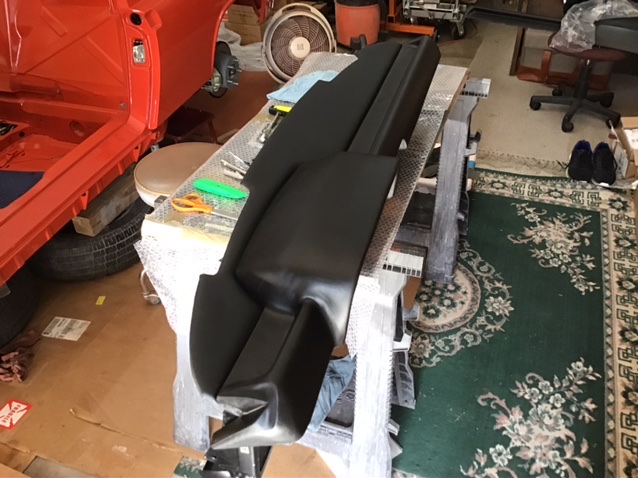
Has anyone had any issues with the 914 Rubber dash top? I have tried everything to get the ash tray gap to an acceptable amount, but no such luck. It appears to me that the mold may have been off because the horizontal area above the tray is not straight. I would be more willing to accept this if it didn’t fit so much better in the old dash top. The other thing is the left side is not sitting properly around the gauge pod. It seems to be kicked up a bit.
I know it is attached properly as I had the entire dash out for the restoration. And was able to get to everything easily to make sure it was right. This is the one piece I was hoping would put a smile on my face... not so much 
Maybe I just need to let it sit out the sun for a while???
914 Rubber has been a great resource to get this car to where it is today and where it will be in the future. I’m just frustrated in this crowning jewel piece of the interior.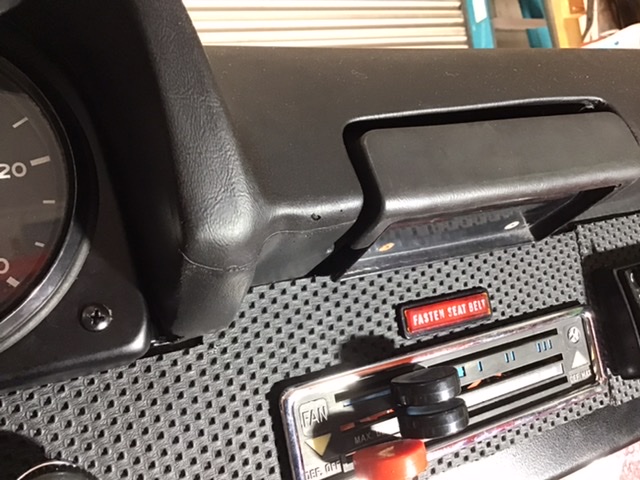
Posted by: Morph914 Dec 2 2020, 08:09 PM
I am getting ready to install the fuel pump on the engine fire wall. I was going to move it to the front near the fuel tank but have decided for now to keep it close to the original location being that the electrical is in place and can be readily connected. I was going to use riv nuts to mount it, but this requires a fairly large hole to be drilled, and I do not have the tool. What have you used to mount your pump in this area?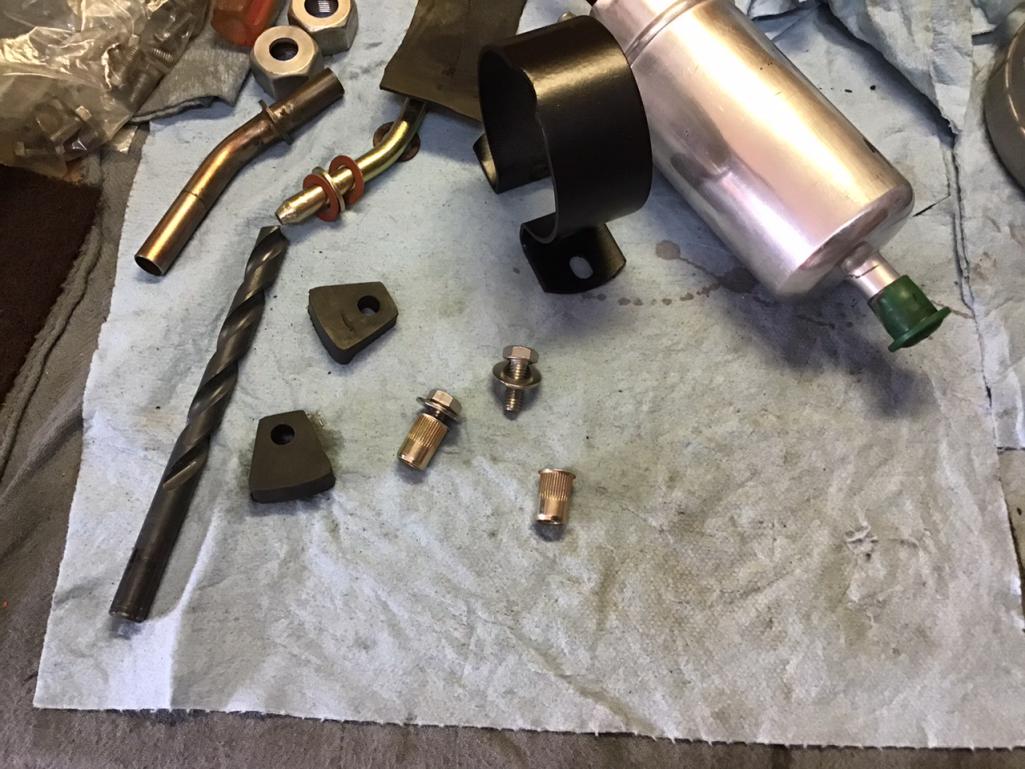
Also getting the fuel tank ready to install, I received the newly plated line that connects at the bottom of the tank, ( thanks bdstone ). His came with two gaskets or fiber washers, is this correct? If so, I need to find a new set for the larger line ( maybe Ace has these).
I plan to use the braided fuel line underneath the tank due to its flexibility, but not sure in the engine compartment, does one have an advantage over the other?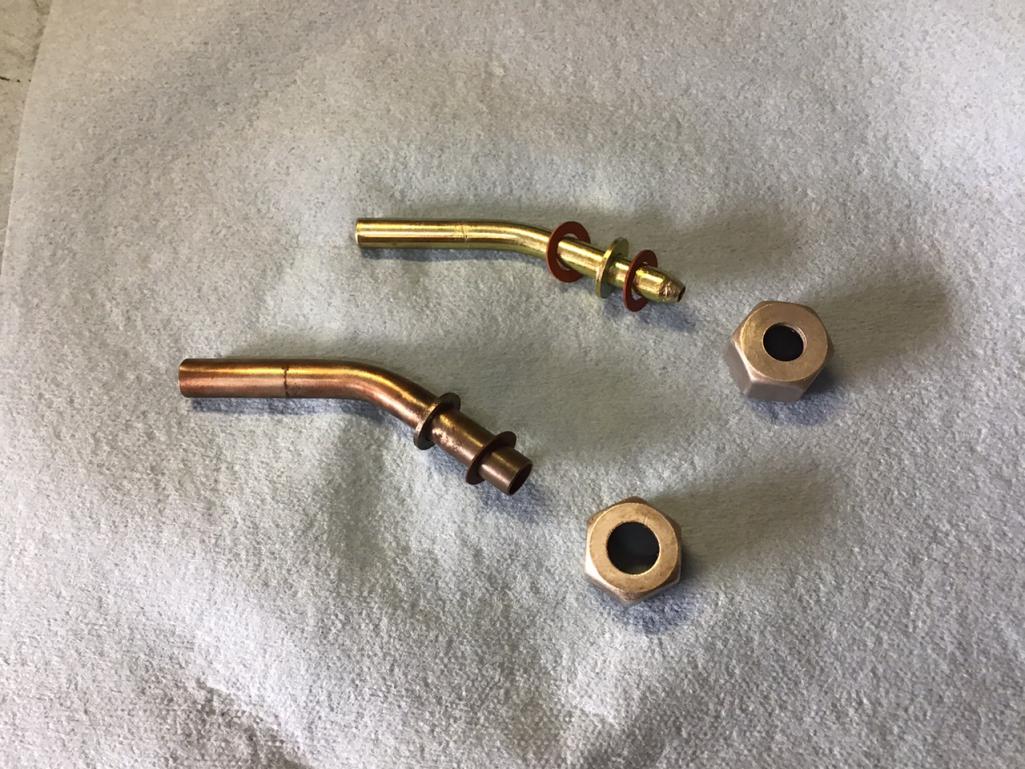
Today I was able to spend a bit of time cleaning and inspecting the transmission before I attach to the engine.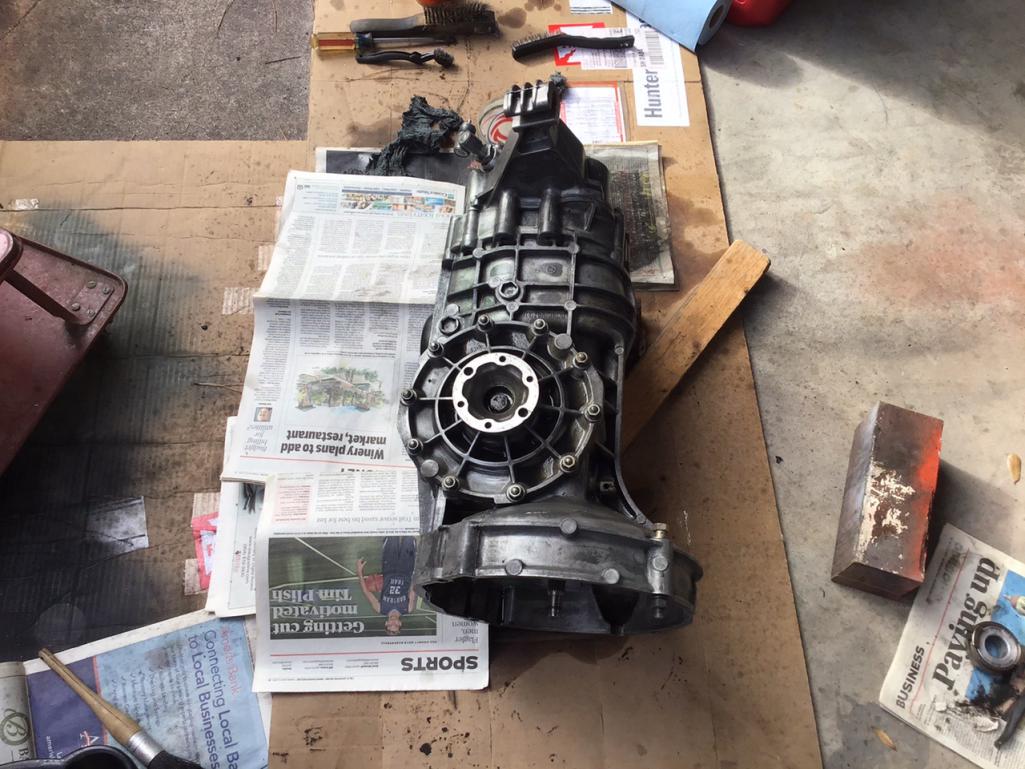
I do not know the history of this trans so I was wanting to at least reseal it before running, but now have decided to put fresh 90 wt and run it.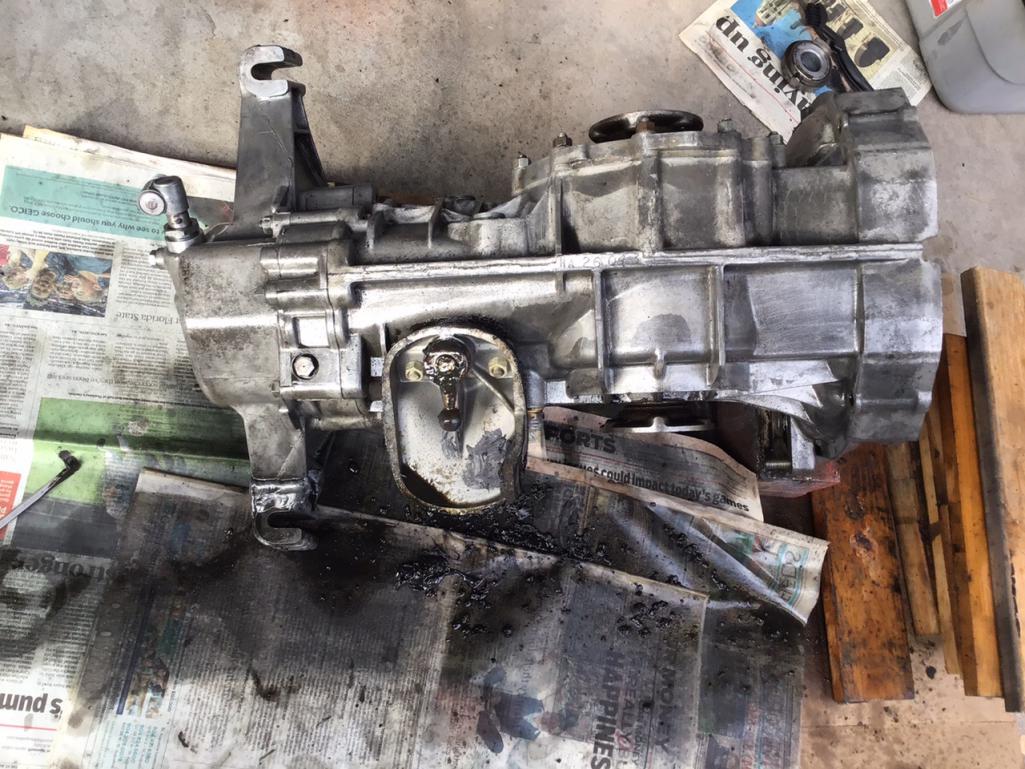
Posted by: bbrock Dec 2 2020, 09:10 PM
Has anyone had any issues with the 914 Rubber dash top? I have tried everything to get the ash tray gap to an acceptable amount, but no such luck. It appears to me that the mold may have been off because the horizontal area above the tray is not straight. I would be more willing to accept this if it didn’t fit so much better in the old dash top. The other thing is the left side is not sitting properly around the gauge pod. It seems to be kicked up a bit.
I know it is attached properly as I had the entire dash out for the restoration. And was able to get to everything easily to make sure it was right. This is the one piece I was hoping would put a smile on my face... not so much
Maybe I just need to let it sit out the sun for a while???
914 Rubber has been a great resource to get this car to where it is today and where it will be in the future. I’m just frustrated in this crowning jewel piece of the interior.
Yes! Mine is like that too. I tried adjusting the little screws on the back to raise it up but ran out of adjustment. I put it on the back burner as something to try to tackle later but it does drive me nuts every time I look at it. Also like you, the gap in the original dash was very good.
Posted by: DRPHIL914 Dec 2 2020, 10:34 PM
@http://www.914world.com/bbs2/index.php?showuser=20326 - are you running that switch straight to the pump or do you have the intermittent wipe relay? if it's straight to the pump, one of those wires from the carmagic switch goes to the + side of the pump, the other goes to a switched power source at the fuse box. then the - connection on the pump goes to a ground.
Thank you, i think I have the intermittent option, but I have never had the pleasure of driving this car. It was not running when I purchased it.
Isn’t the relay in the picture, part of the wiper intermittent system?
huh, i knew i had the option listed on the COA ans purchase paperwork but didn’t know what that thing was ans it never worked so i probably just need a new relay too- where did you buy it?
Posted by: Morph914 Dec 3 2020, 08:26 AM
Has anyone had any issues with the 914 Rubber dash top? I have tried everything to get the ash tray gap to an acceptable amount, but no such luck. It appears to me that the mold may have been off because the horizontal area above the tray is not straight. I would be more willing to accept this if it didn’t fit so much better in the old dash top. The other thing is the left side is not sitting properly around the gauge pod. It seems to be kicked up a bit.
I know it is attached properly as I had the entire dash out for the restoration. And was able to get to everything easily to make sure it was right. This is the one piece I was hoping would put a smile on my face... not so much
Maybe I just need to let it sit out the sun for a while???
914 Rubber has been a great resource to get this car to where it is today and where it will be in the future. I’m just frustrated in this crowning jewel piece of the interior.
Yes! Mine is like that too. I tried adjusting the little screws on the back to raise it up but ran out of adjustment. I put it on the back burner as something to try to tackle later but it does drive me nuts every time I look at it. Also like you, the gap in the original dash was very good.
I finally decided to go back to my old dash top as it only had two small cracks
I have nothing bad to say about 914 Rubber, as they have been a pleasure to work with. This car is 47 years old so who knows what has happened to it over the course of its existence.Although it’s a tough pill to swallow, I can’t let it deter from the project progressing. Onward!
Posted by: Morph914 Dec 3 2020, 08:33 AM
@http://www.914world.com/bbs2/index.php?showuser=20326 - are you running that switch straight to the pump or do you have the intermittent wipe relay? if it's straight to the pump, one of those wires from the carmagic switch goes to the + side of the pump, the other goes to a switched power source at the fuse box. then the - connection on the pump goes to a ground.
Thank you, i think I have the intermittent option, but I have never had the pleasure of driving this car. It was not running when I purchased it.
Isn’t the relay in the picture, part of the wiper intermittent system?
huh, i knew i had the option listed on the COA ans purchase paperwork but didn’t know what that thing was ans it never worked so i probably just need a new relay too- where did you buy it?
This was already installed on the car when I purchased it. I have seen these for sale, just can’t remember where.
I have yet to hook the wiring up other than installing a ground wire to the negative terminal of the pump. I know one of the wires from the carmagic switch goes to the positive terminal of the pump, but not sure about the other if it goes to a switched side of the fuse panel or since mine has the relay for intermittent wipers, if it goes to the brown wire off the relay.
Posted by: bbrock Dec 3 2020, 08:43 AM
@http://www.914world.com/bbs2/index.php?showuser=20326 - are you running that switch straight to the pump or do you have the intermittent wipe relay? if it's straight to the pump, one of those wires from the carmagic switch goes to the + side of the pump, the other goes to a switched power source at the fuse box. then the - connection on the pump goes to a ground.
Thank you, i think I have the intermittent option, but I have never had the pleasure of driving this car. It was not running when I purchased it.
Isn’t the relay in the picture, part of the wiper intermittent system?
huh, i knew i had the option listed on the COA ans purchase paperwork but didn’t know what that thing was ans it never worked so i probably just need a new relay too- where did you buy it?
This was already installed on the car when I purchased it. I have seen these for sale, just can’t remember where.
I have yet to hook the wiring up other than installing a ground wire to the negative terminal of the pump. I know one of the wires from the carmagic switch goes to the positive terminal of the pump, but not sure about the other if it goes to a switched side of the fuse panel or since mine has the relay for intermittent wipers, if it goes to the brown wire off the relay.
I made my own intermittent wiper harness and bought the relay on ebay. Jeff Bowlsby has a great write up on them that includes part #s to look for: https://bowlsby.net/914/WiringHarnesses/WiperIntervalRelay_Instructions.pdf
Posted by: Morph914 Dec 17 2020, 08:31 PM
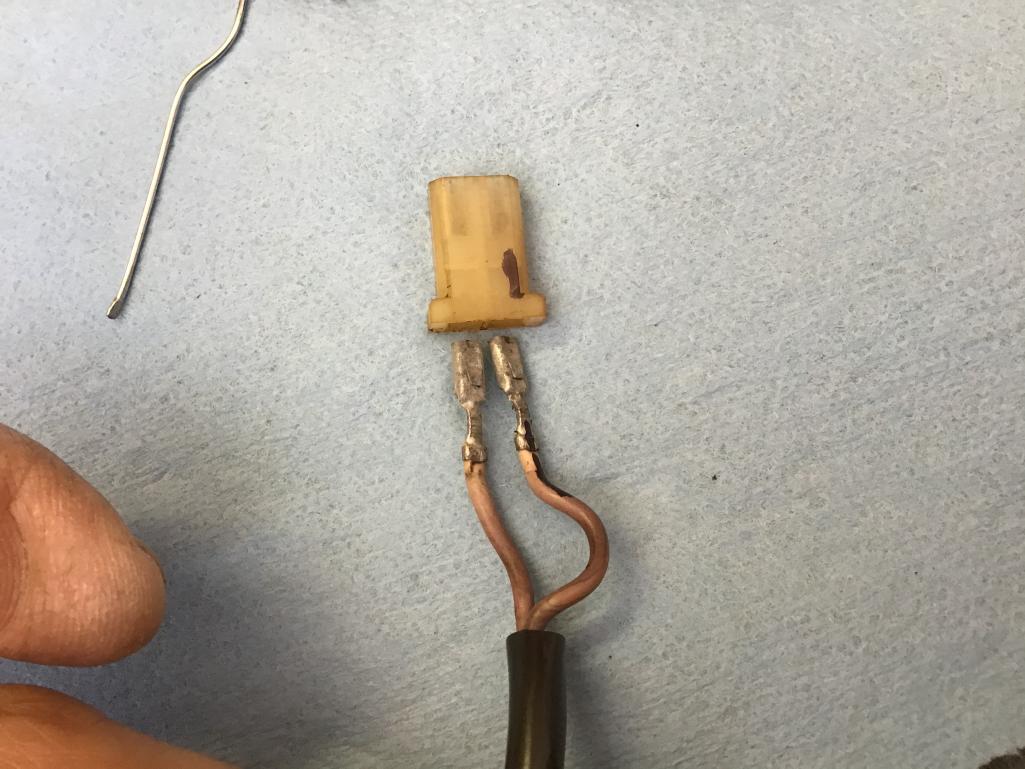
So I already have the intermittent relay on my car. I have installed the car magic switch in the column. The new washer pump has been installed under the reservoir, I have grounded the pump and run a wire to from the positive terminal of the pump up to the column, this wire will connect to one of the car magic wires, but I am not sure if the other wire goes to the switched side of the fuse panel or the intermittent relay.
Any help with this would be appreciated.
You can see the two blue carmagic wires, one of those will connect to the red wire from the washer pump. Ian am looking for direction on where the other should go.
I am trying to get all these little loose ends tied up before dropping the fuel tank in, as it is much harder to work in there with it installed.
I am using the braided fuel line under the tank as it is much more flexible. I will probably add enough extra to lift the tank out without having to remove the lines.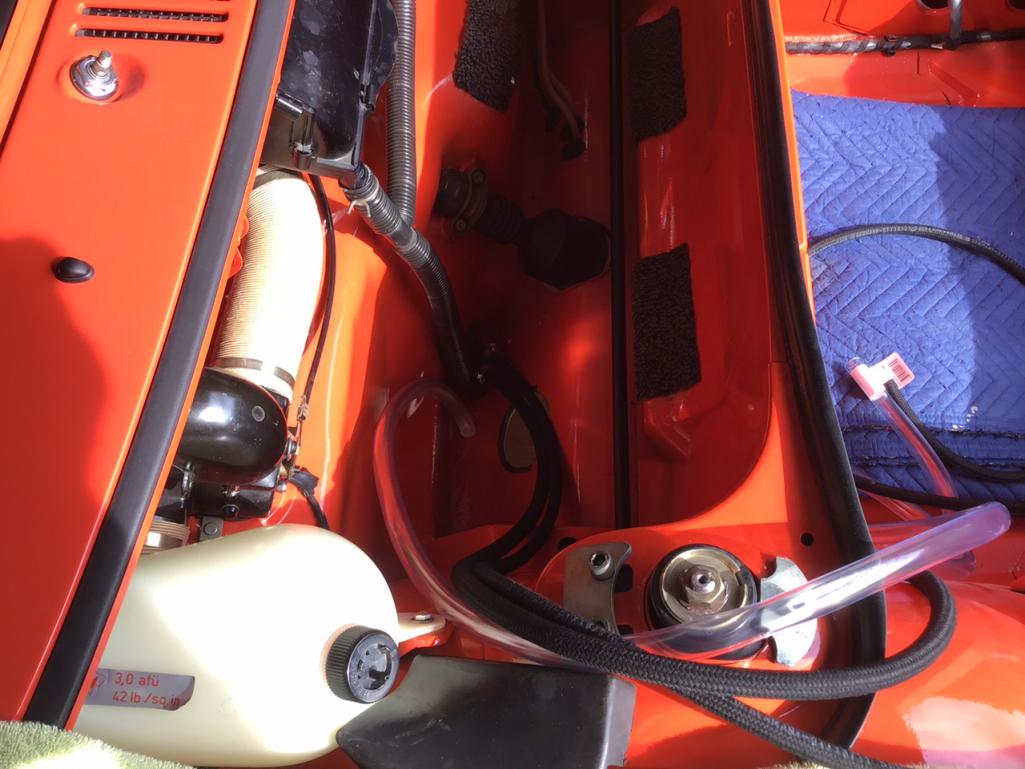
Also wondering what this hole next to the brake fluid lines is for. I don’t want to install the tank more than once if possible.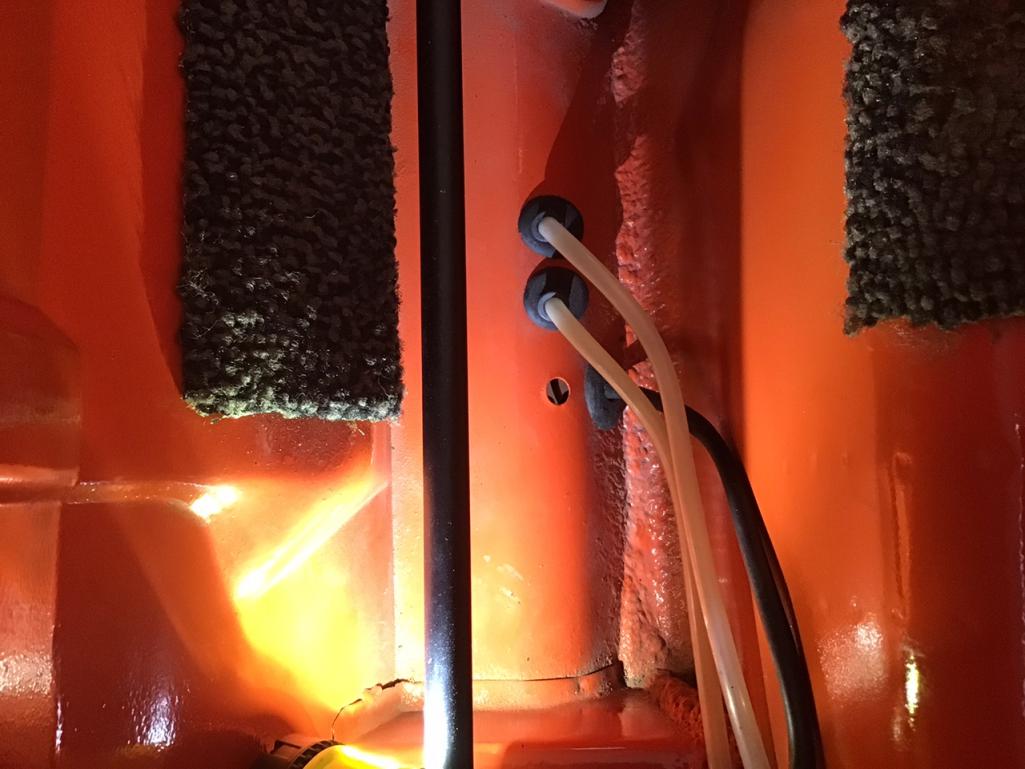
Posted by: raynekat Dec 17 2020, 09:39 PM
It's great that we have 914 Rubber.
Unfortunately on many parts they get pumped out too fast without a lot of real world test fitting.
Enter the dash top.
Mine is the same way.
I think I found out a way to get the ash tray to fit better.
Don't ask me how after all this time.
One other thing you may or may not have noticed.....
Both ends of the dash top bow up a bit such that they don't meet the lower trim all that well.
See yellow arrow in the following pic.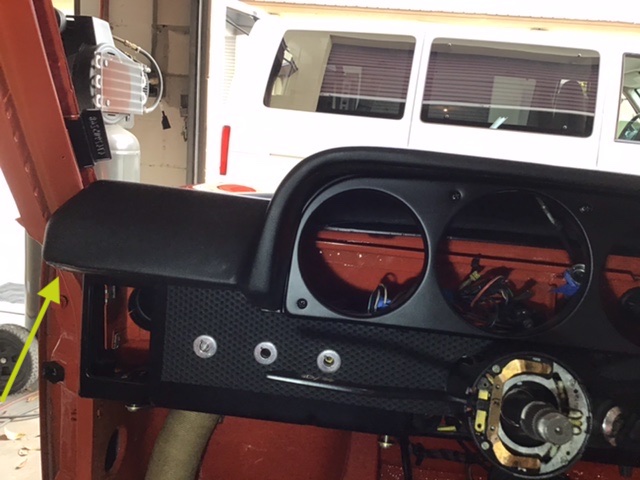
I have a big (1/4" gap) on both ends of the dash where the upper dash top meets the lower dash pieces.
It bothers me enough....that I've thought about getting the lower dash pieces reupholstered such that they come up and meet the upper dash top better.
Currently I have some kind of material in there that just fills up the gap.
Aggravating for sure.
Your car looks great.
Keep up the stellar work.
Posted by: Morph914 Dec 18 2020, 11:24 AM
It's great that we have 914 Rubber.
Unfortunately on many parts they get pumped out too fast without a lot of real world test fitting.
Enter the dash top.
Mine is the same way.
I think I found out a way to get the ash tray to fit better.
Don't ask me how after all this time.
One other thing you may or may not have noticed.....
Both ends of the dash top bow up a bit such that they don't meet the lower trim all that well.
See yellow arrow in the following pic.
I have a big (1/4" gap) on both ends of the dash where the upper dash top meets the lower dash pieces.
It bothers me enough....that I've thought about getting the lower dash pieces reupholstered such that they come up and meet the upper dash top better.
Currently I have some kind of material in there that just fills up the gap.
Aggravating for sure.
Your car looks great.
Keep up the stellar work.
Thank you for the kind words.
Regarding the dash top, I decided to remove the new one and go back to my original which was in pretty good condition.
Posted by: Morph914 Dec 23 2020, 07:22 PM
Starting to get some tidbits ready for the engine. After cleaning the fuel injection harness I decided to replace the fuel injector rubber boots. For some reason I had two black and two grey boots for the injectors. Does this signify something, perhaps odd or even cylinders? The grey boots were still in good condition so just changing the crispy black ones.
Notice the handy dandy release tool I made with a large paper clip, just a few taps with a hammer on the edge to flatten out.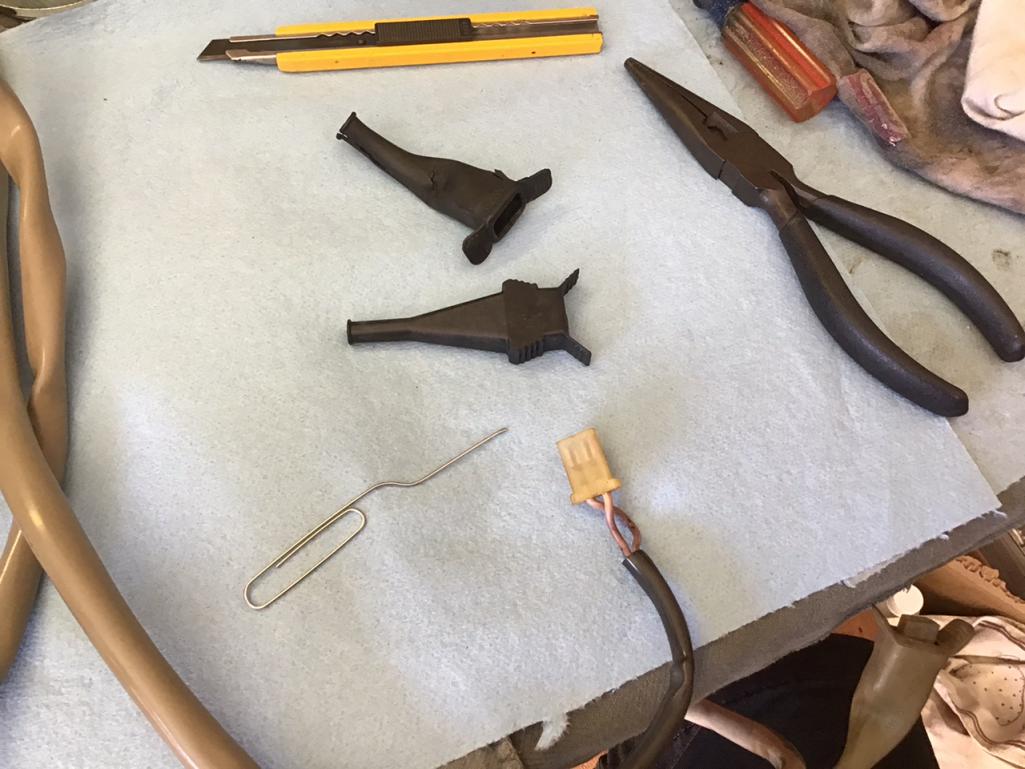
Im not sure if the wire orientation matters, but I marked one of the wires after taking it out so it would return to the same side.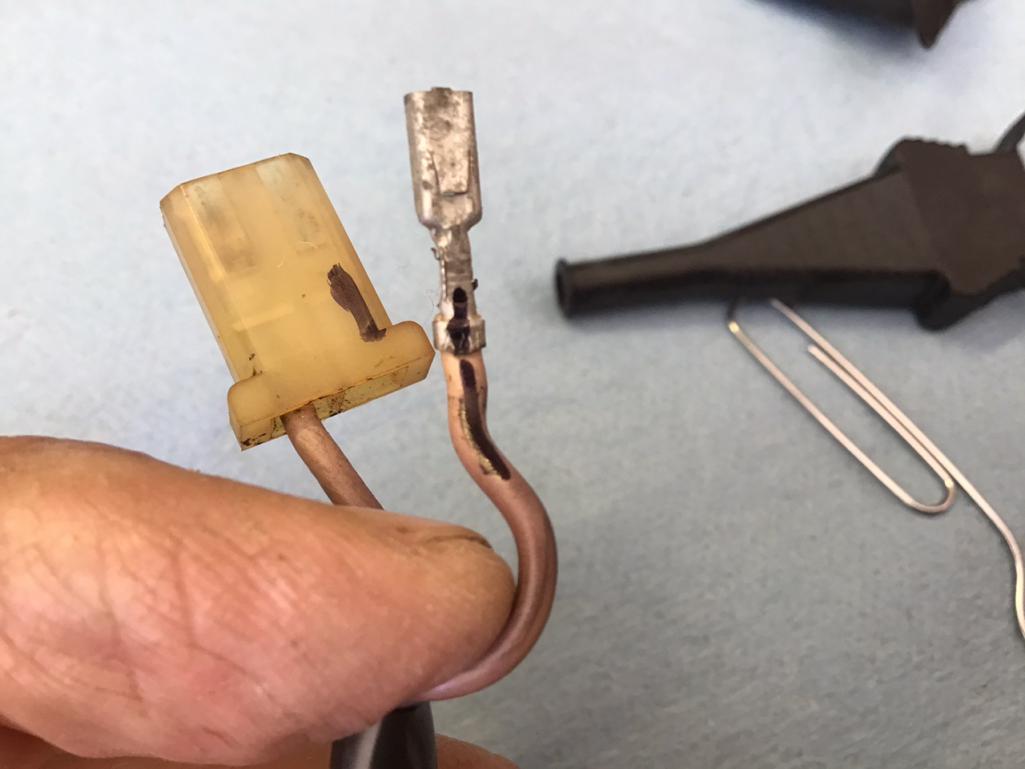
Getting the boots on were a bit of a pain, I used a bit of WD 40 to lube the boot.
After you get the wires through make sure and push the tab back up on the connector or it will not lock into place.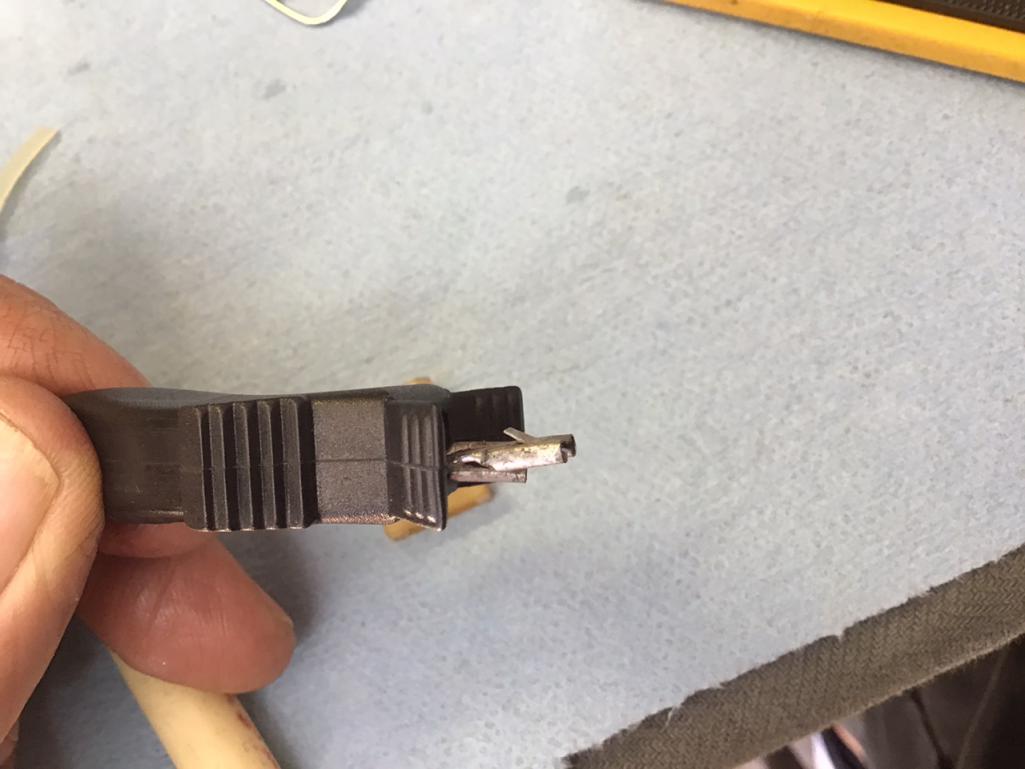
The plastic piece that fits into the injector is notched on two of the corners as if to fit into the injector in a specific manner but the injector has no such matching cut outs. Does anybody know if it matters which way these go in?
Attached thumbnail(s)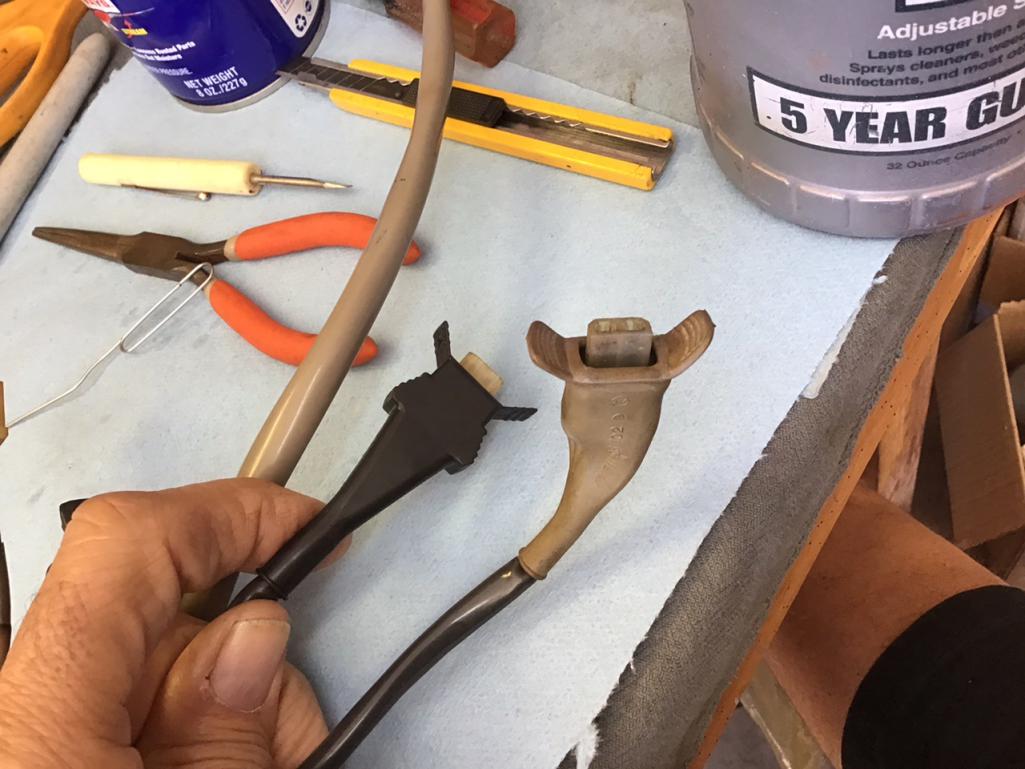
Posted by: Morph914 Jan 6 2021, 08:35 PM
After replacing some of the seals on my side shift trans yesterday, I decided today to tackle the small shift rod seal. This little bugger gave me about a 2 hour plus fight. First I tried a seal puller with no luck, too big for this small seal. I tried a small screw driver, a pick, I drilled a small hole in the top of the seal (very carefully) inserted a screw and tried to pull it out, no go. I used my Dremel tool to carefully cut two notches 180 degrees apart, and then inserted a washer into the notches and slid a long punch through the washer and tried to twist it out, no go. Next, I got the torch out and put some heat to it, tried prying again with several different tools, no go. Finally, I put it in the vise with thin wood strips to protect the part, more heat more prying and it finally gave up.
I started by pressing the roll pin out with a small bolt on one side and a socket on the other. This worked perfectly. I was careful not to press the pin all the way out, as these can be a bugger to get back in.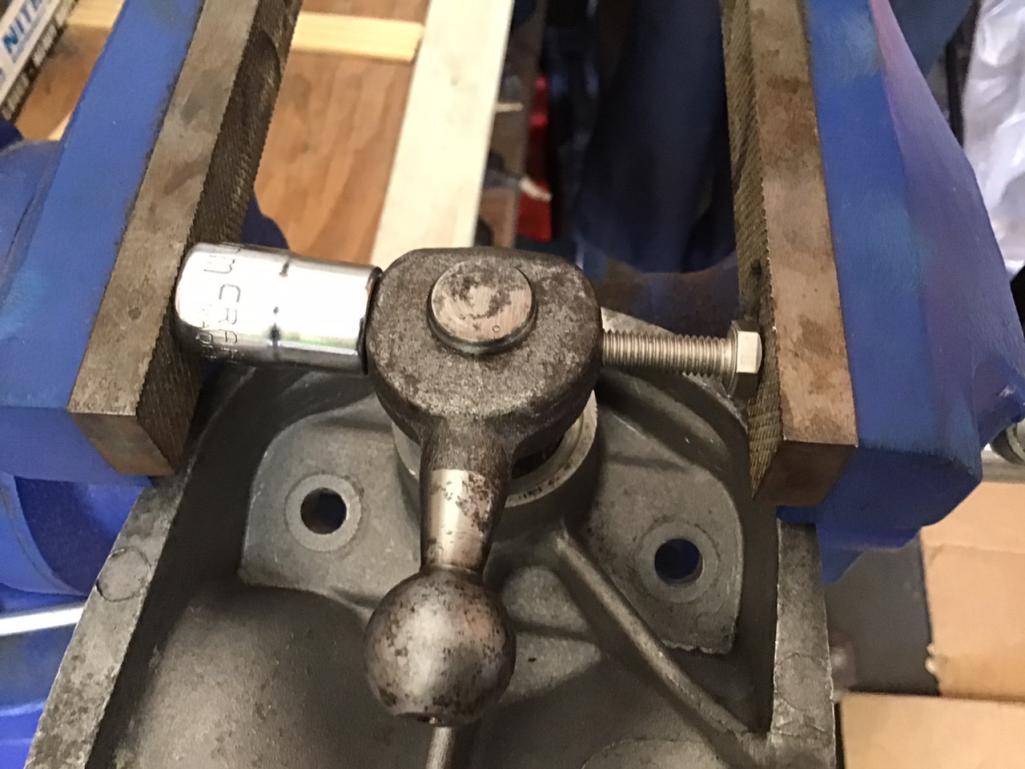
After removing the shift rod, the process of removing the old seal began.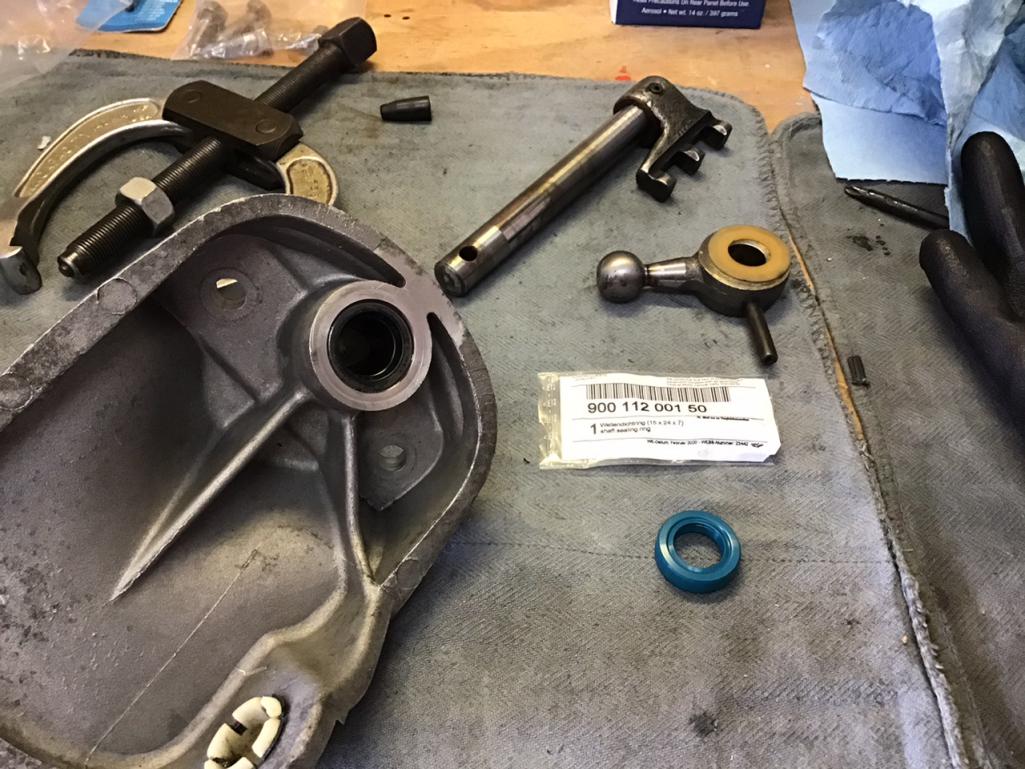
This is what was left after getting the seal out. Notice that the old one was not rubber coated on the side like the new one. Perhaps this is why it was so difficult to get out.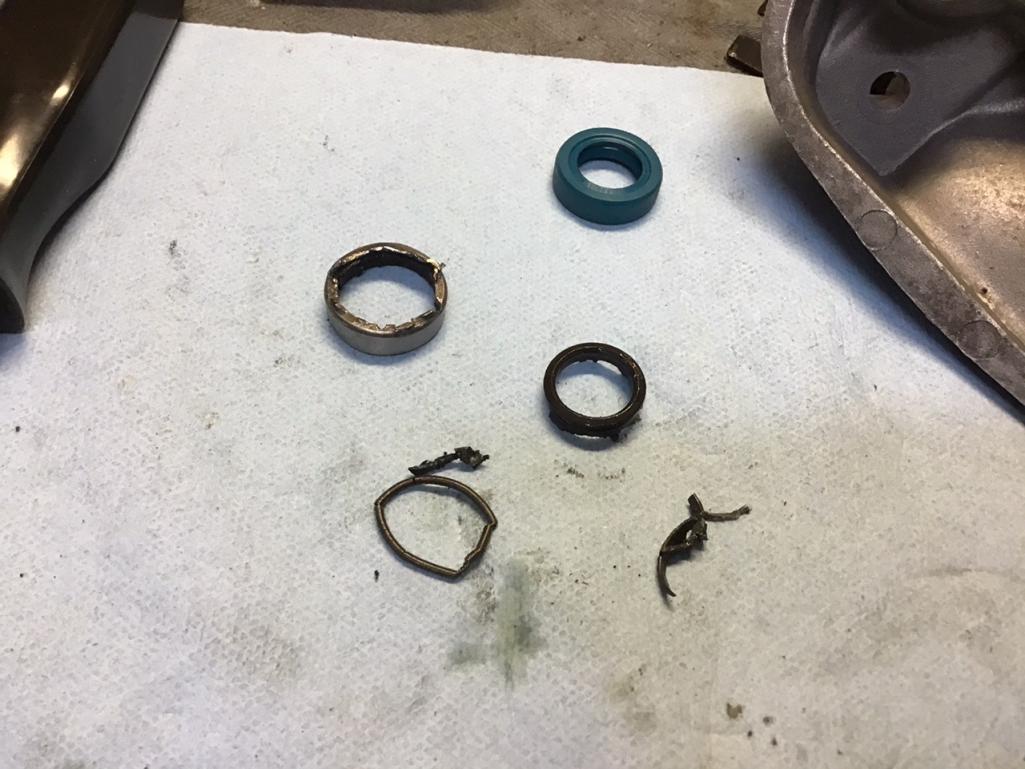
I will install the new seal tomorrow 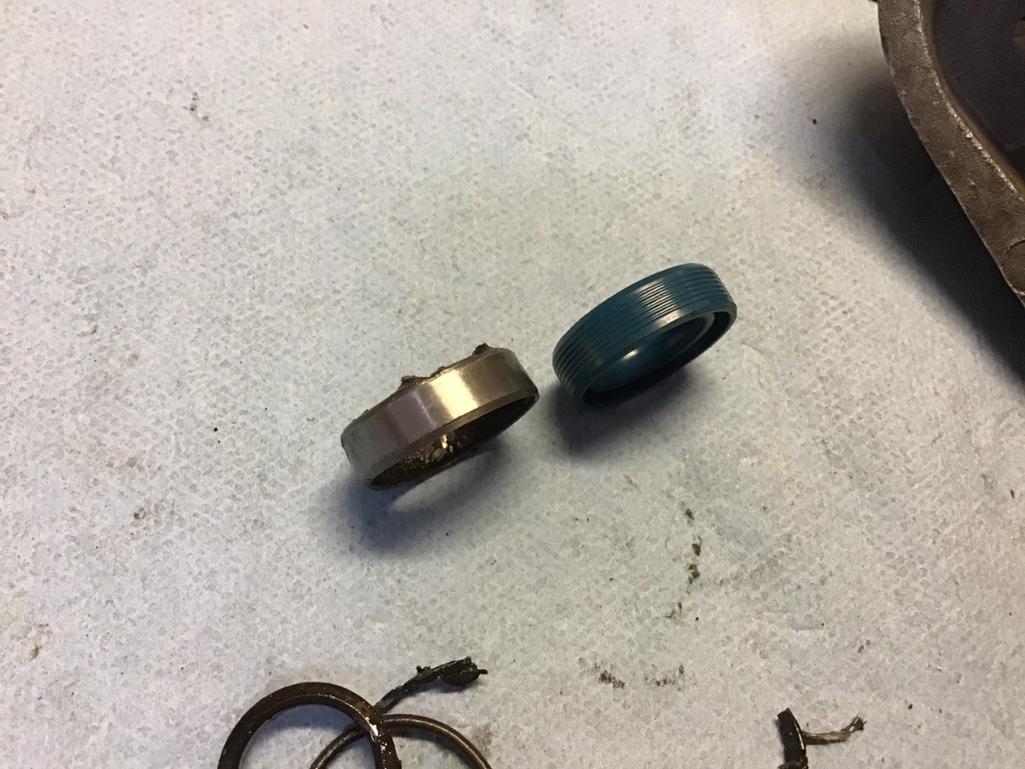
Posted by: Morph914 Jan 24 2021, 05:16 PM
Time to get the fan shroud cleaned up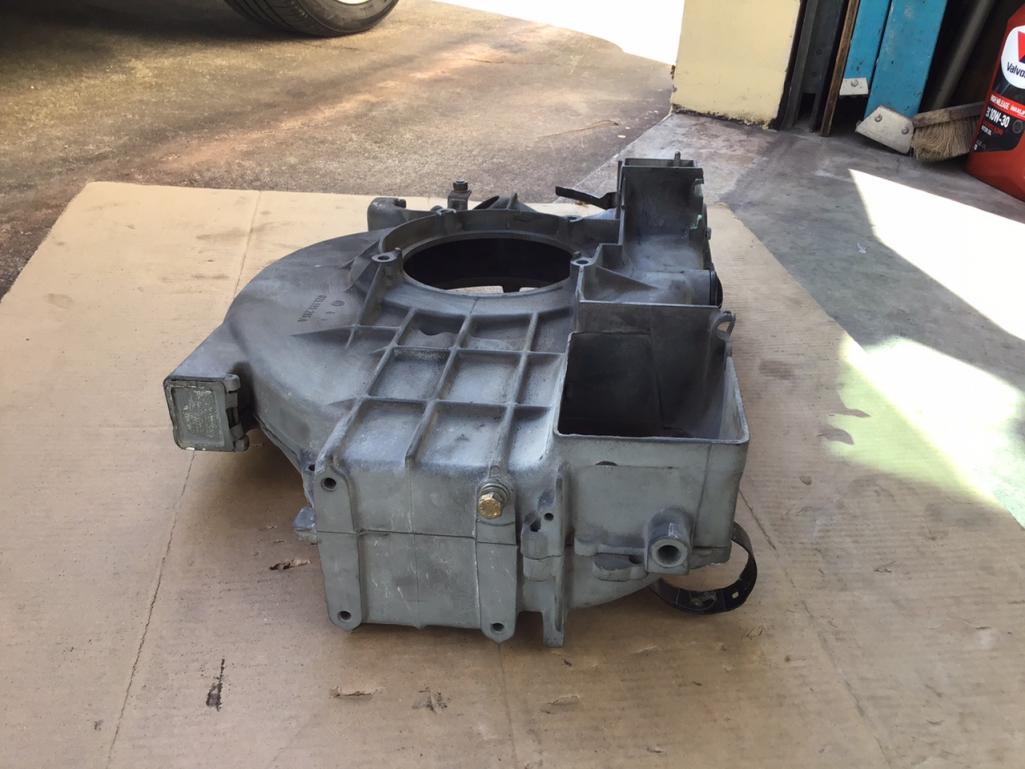
Decided to pull the trigger on the 123 Dizzy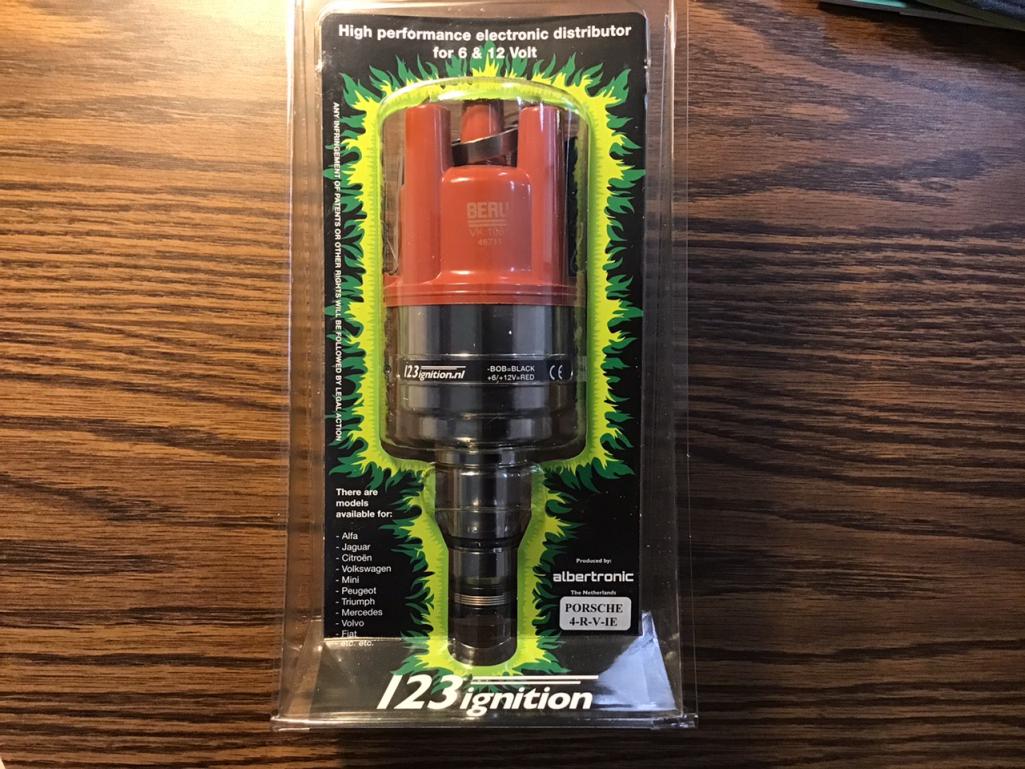
I’m trying to figure out if I have all my bits and pieces for this 2.0 L , I purchased this engine in pieces so I do not have the luxury of photos or bagging and tagging.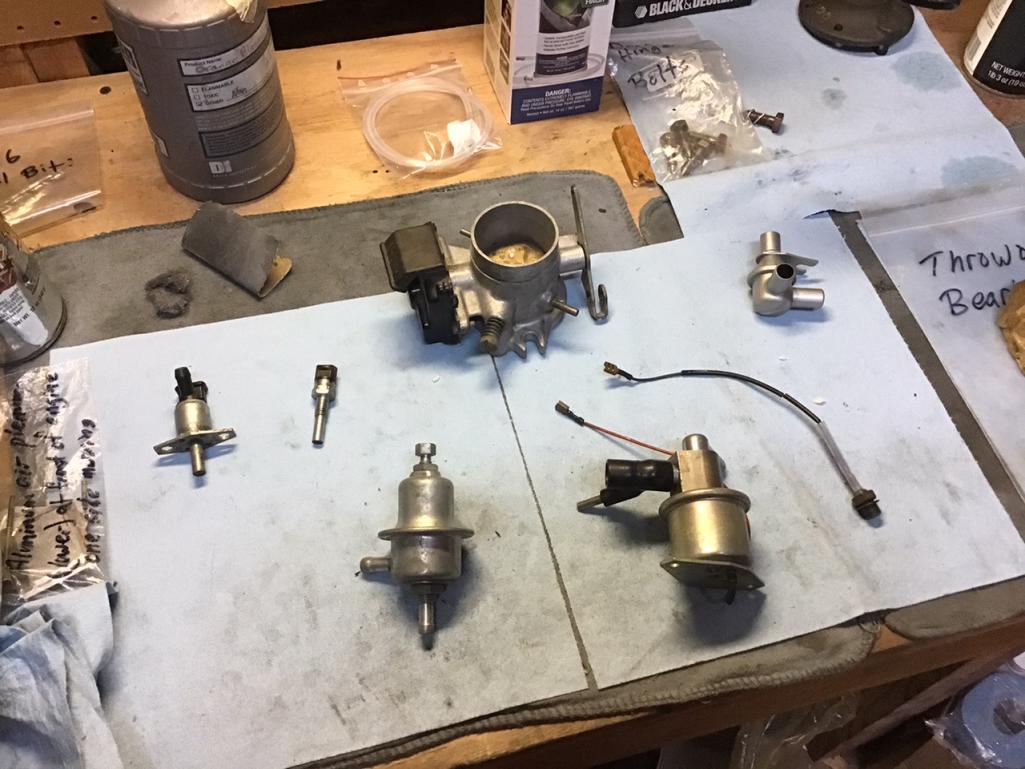
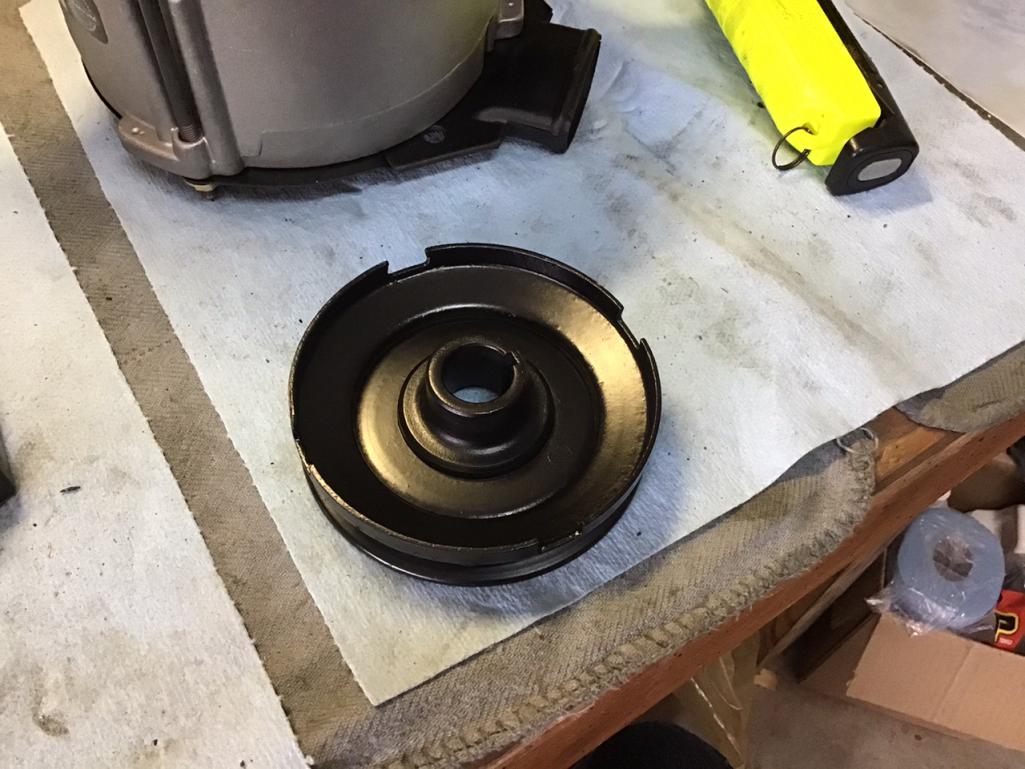
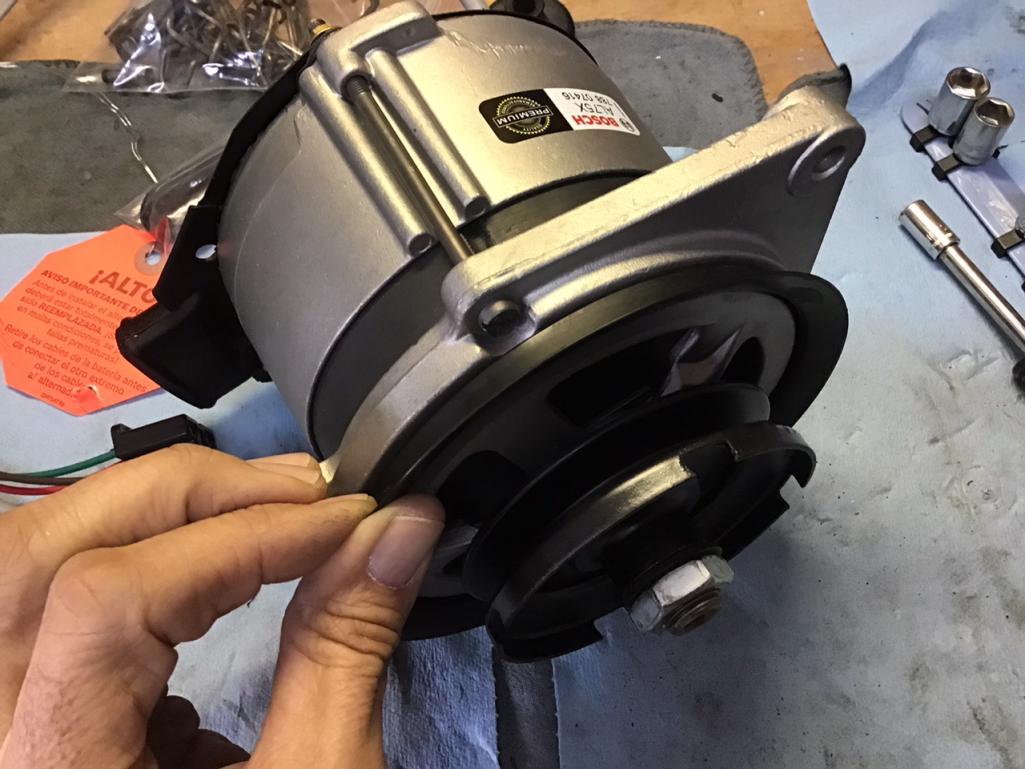
Connecting the new alternator wiring harness to the alternator. I love working with clean new parts! I will clean up the pulley and prep for paint.

Attached thumbnail(s)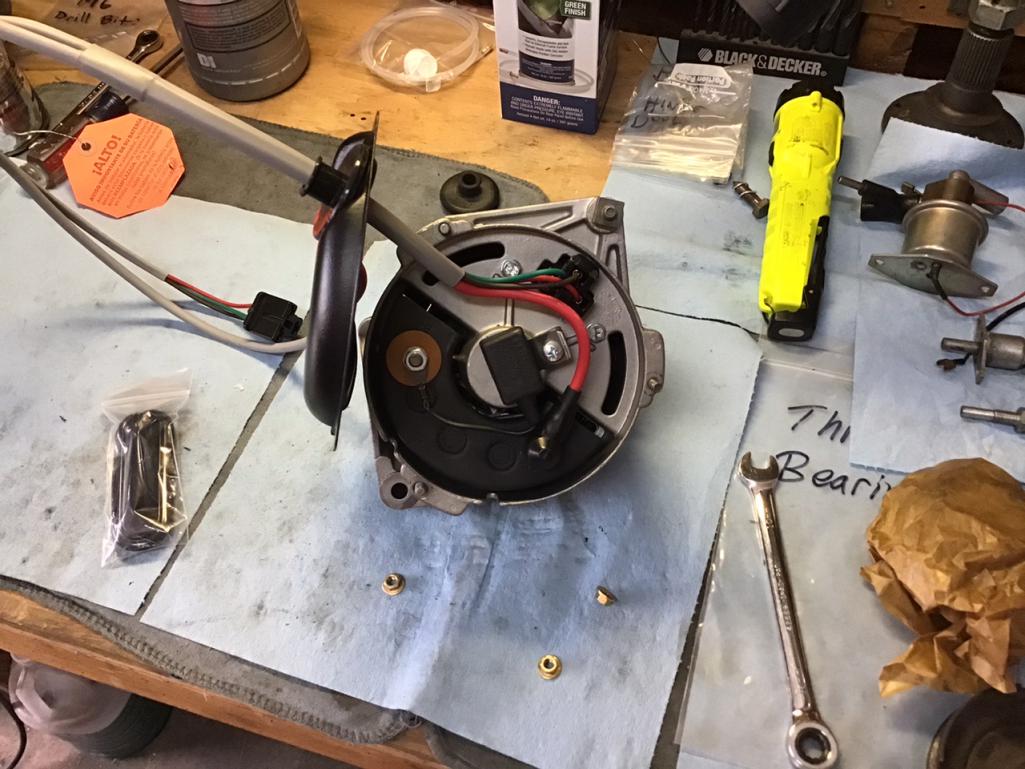
Posted by: Morph914 Jan 24 2021, 05:33 PM
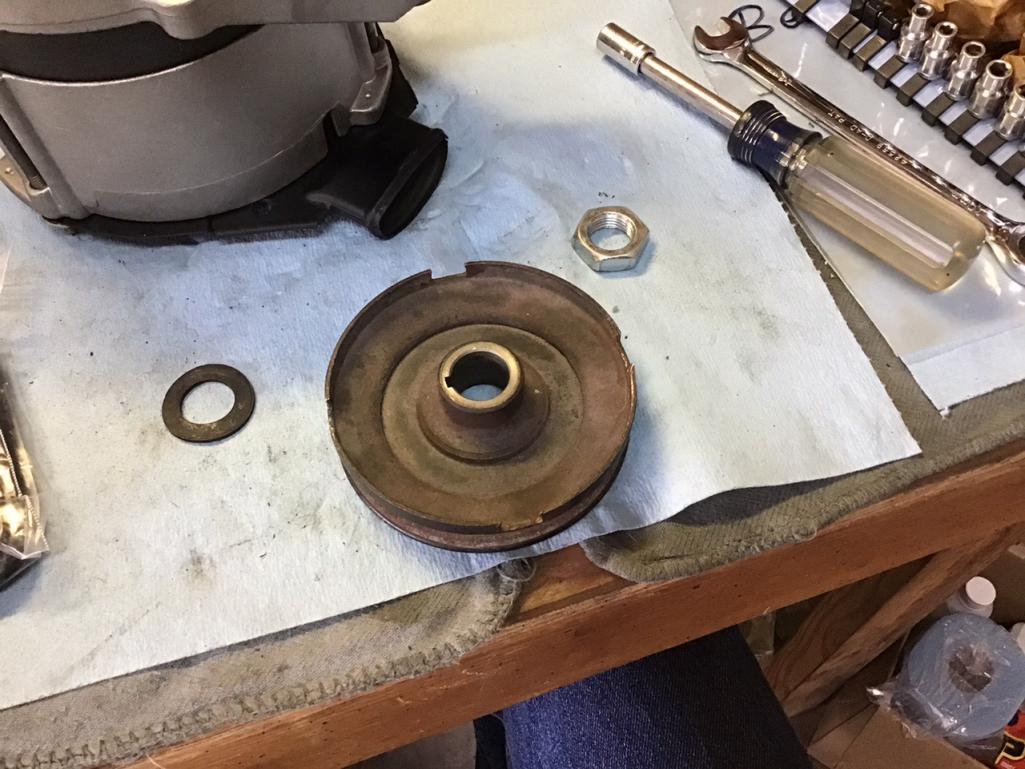
The pulley after fresh paint 
I can’t remember where this plastic piece goes, I seems to fit well here. It did not show in the book so will have to wing it as I assemble.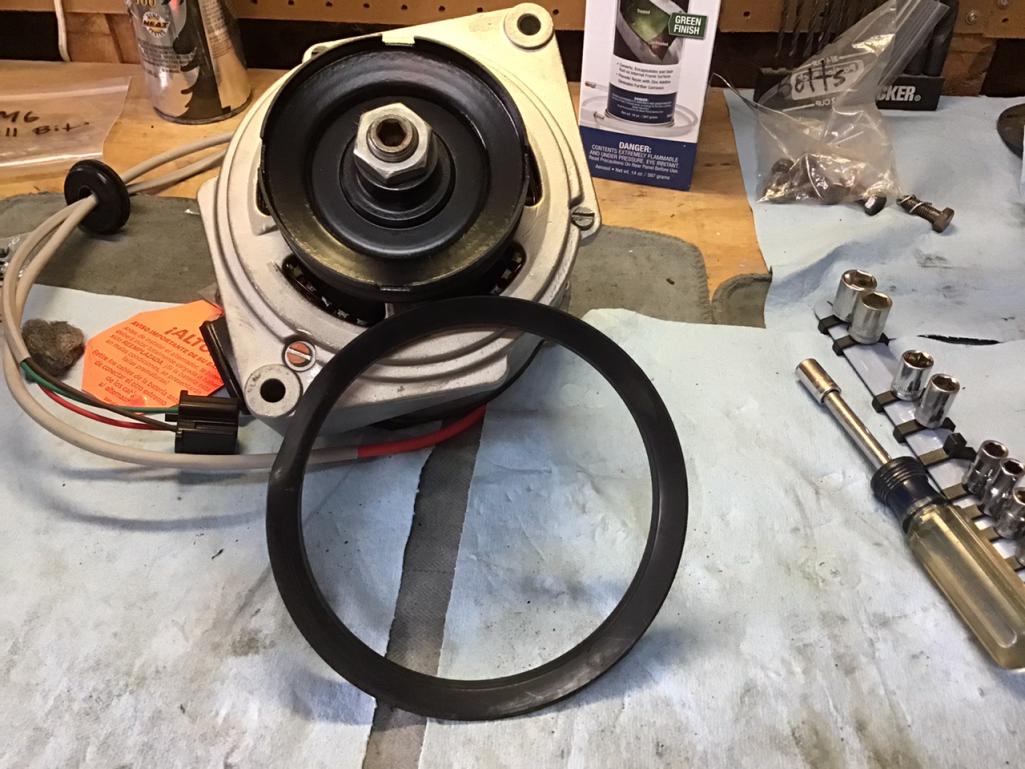
Now getting the air filter housing ready for paint, this should be the last big piece to clean and paint other than the targa top. 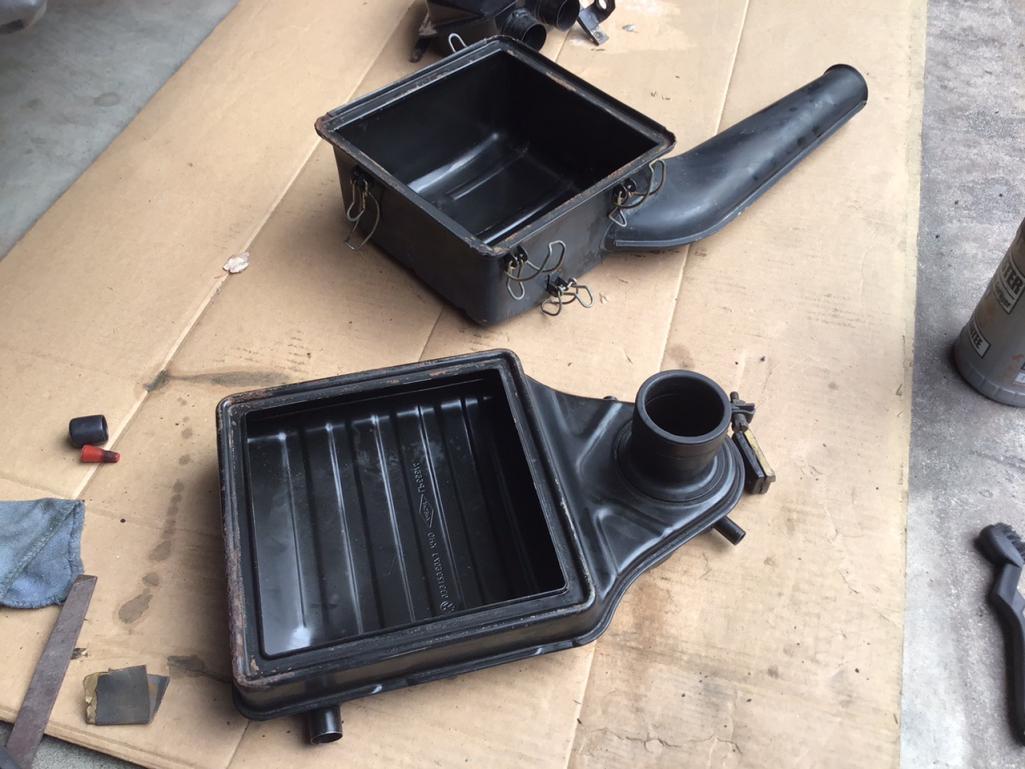
[attachmentid=777967]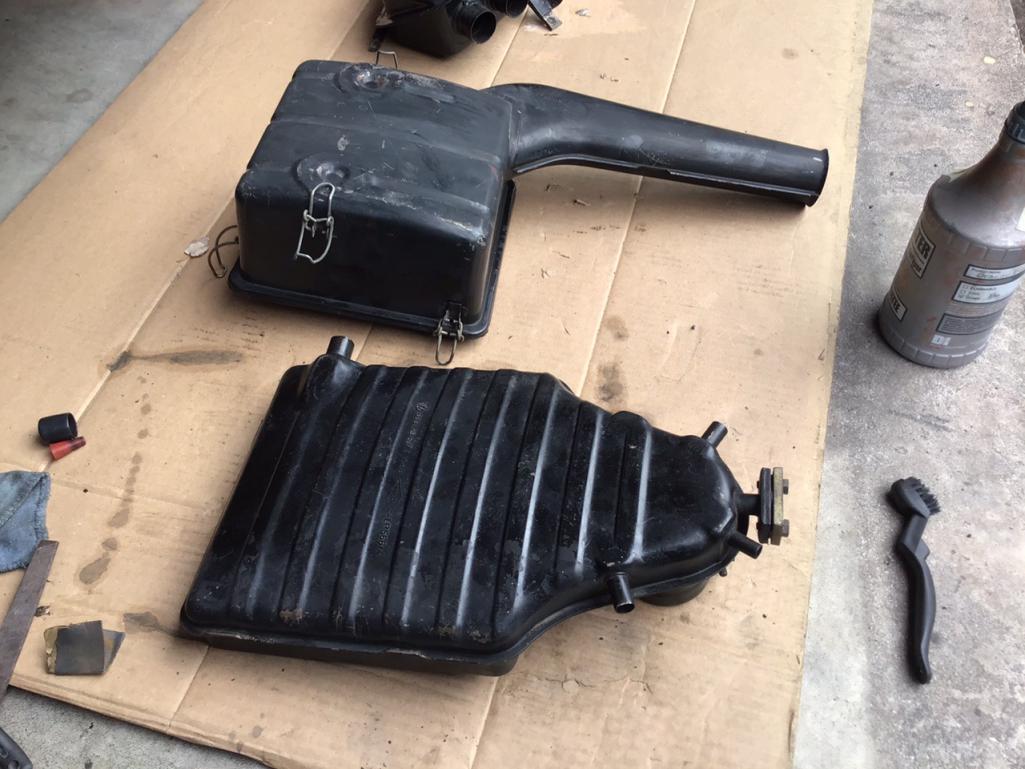
Attached thumbnail(s)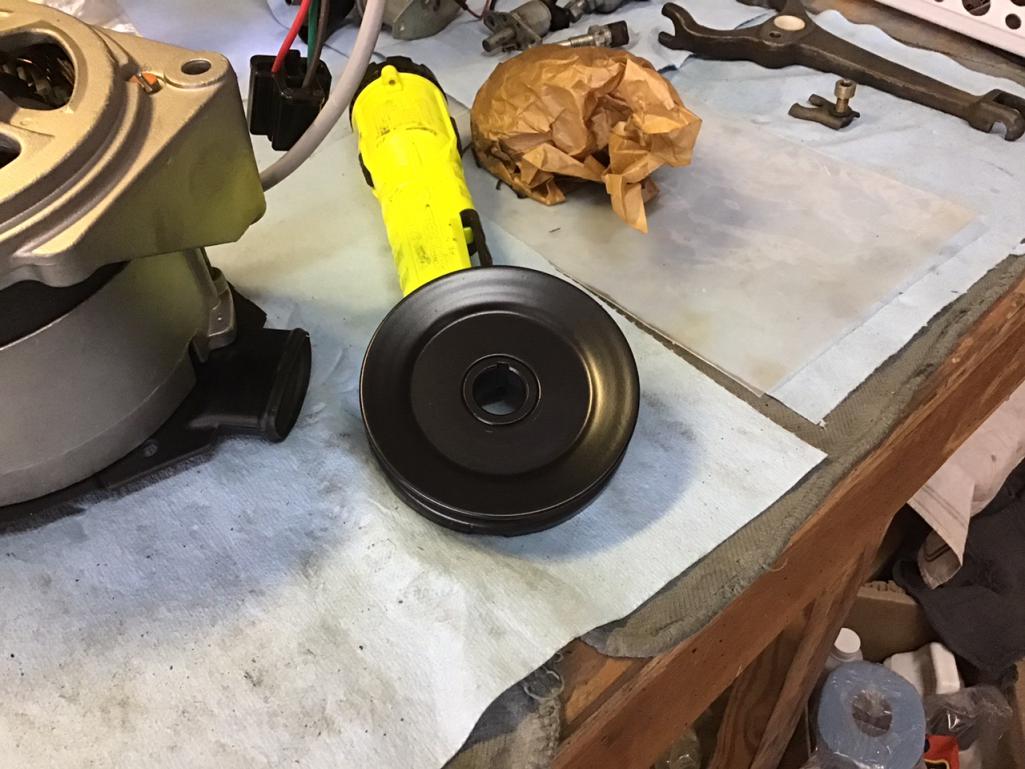
Posted by: krazykonrad Jan 25 2021, 11:31 AM
It looks like you're just a couple of steps ahead of me in the putting it back together process, so your thread is a huge help.
How did you put the new FI injector boots on without ripping or cutting them? Will the small end stretch enough to go over the connector?
Posted by: Morph914 Jan 25 2021, 01:41 PM
It looks like you're just a couple of steps ahead of me in the putting it back together process, so your thread is a huge help.
How did you put the new FI injector boots on without ripping or cutting them? Will the small end stretch enough to go over the connector?
You have to remove the wires from the plug, use a paper clip with a flattened end to remove the wires. Slide the new boot on then reconnect the wires.
Cheers,
John
Posted by: krazykonrad Jan 25 2021, 03:23 PM
Your photos make sense now. Thanks for the info. this seems like an easier project than I thought.
Posted by: Morph914 Feb 14 2021, 02:13 PM
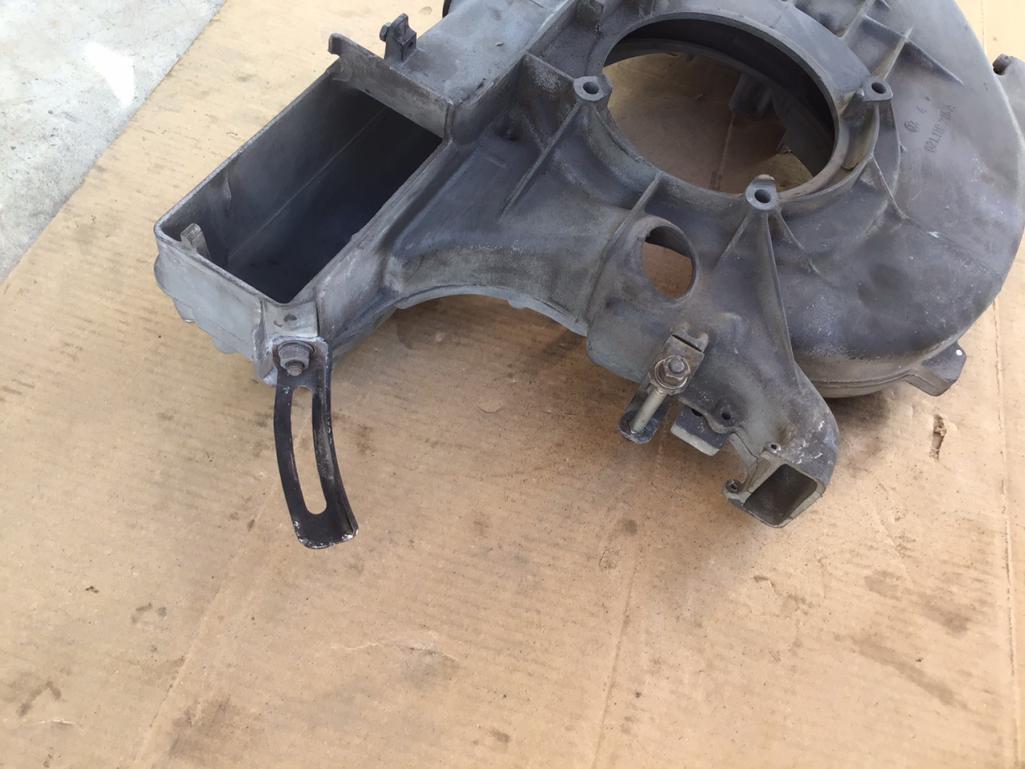
Trying to figure out if I have all my heater parts and pieces.
Also got this vacuum line kit for the 2.0L at AA, I wish it had the red lines included. I may have to use bbrocks method for changing these to the red color.
I think 914 Rubber may now be carrying the red lines...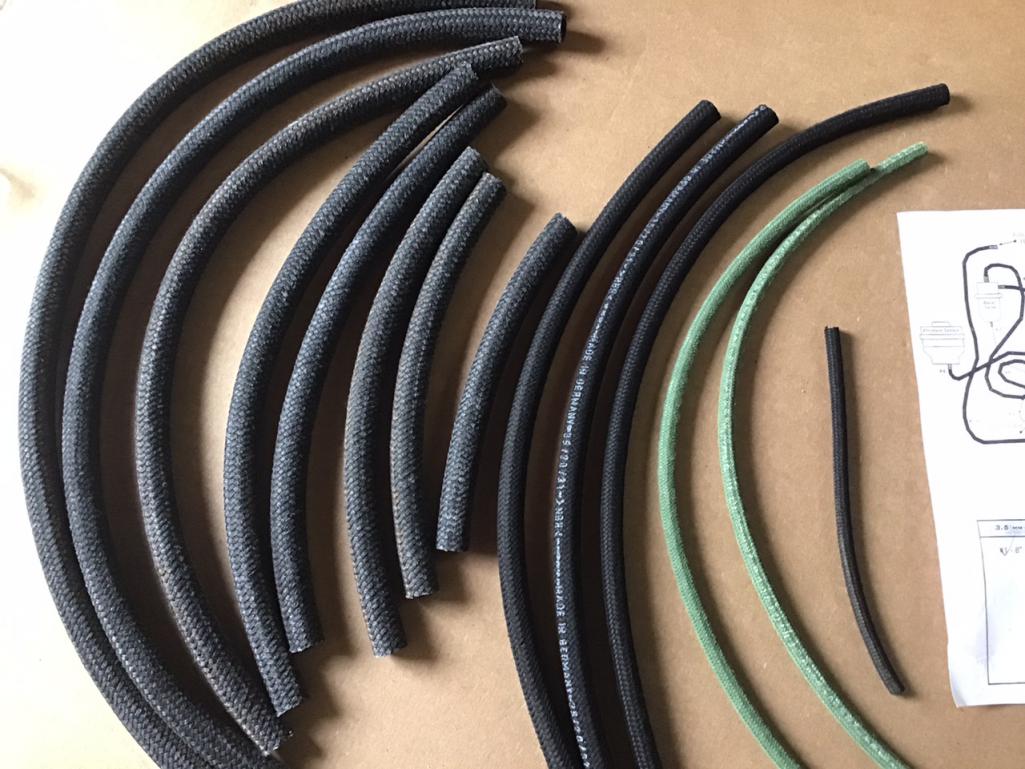
I wish this diagram was color coded so I know which lines need to be red.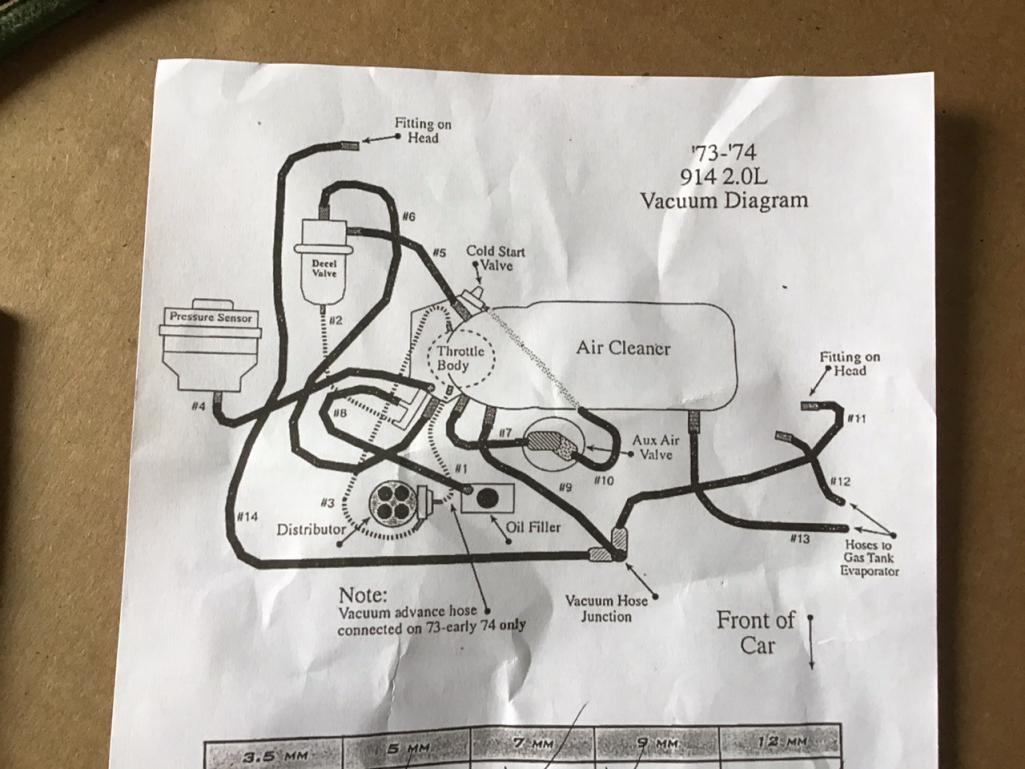
Posted by: Morph914 Feb 25 2021, 08:05 PM
Time to clean and inspect the seat belt bits and pieces.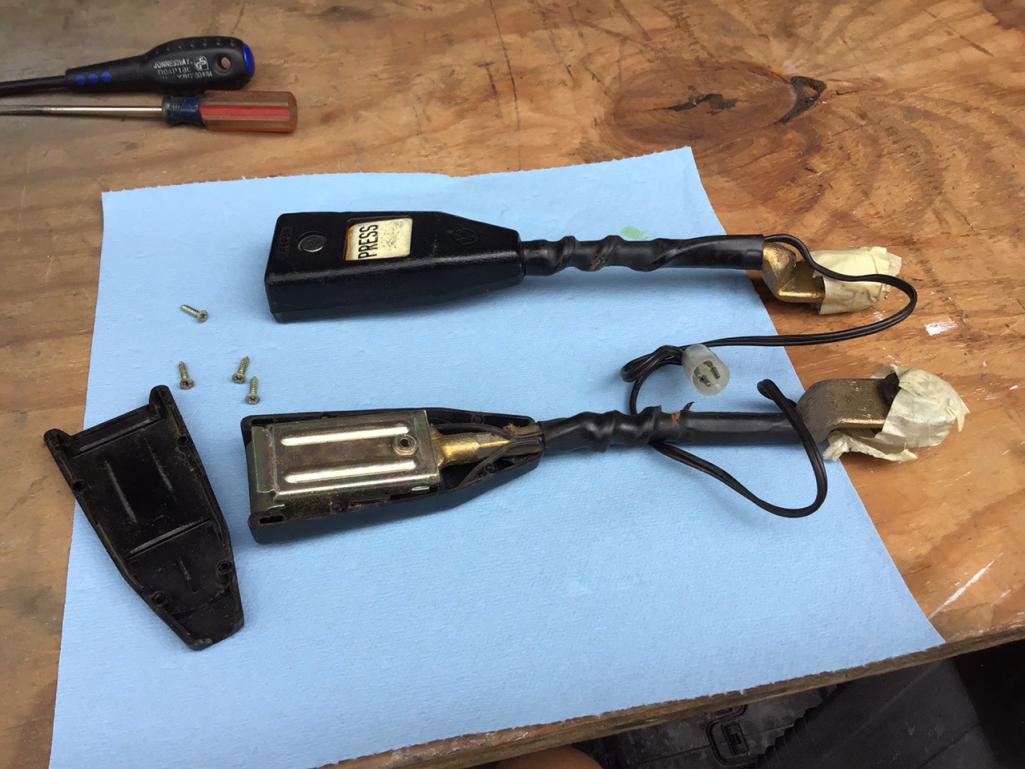
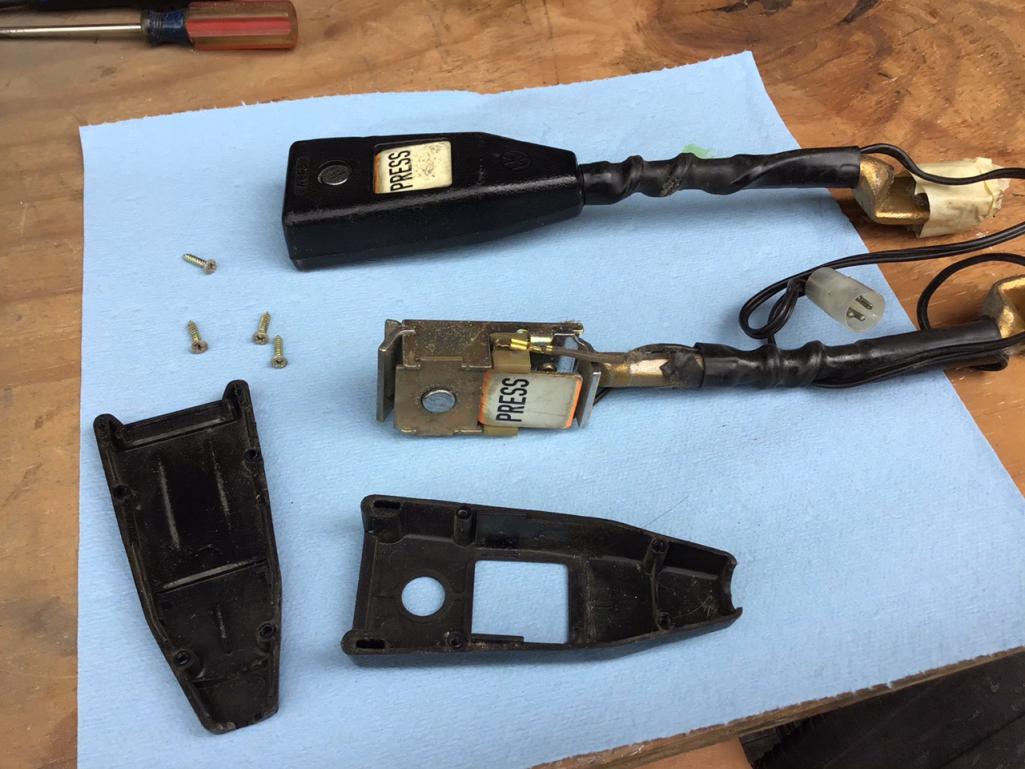
Off with the old PRESS sticker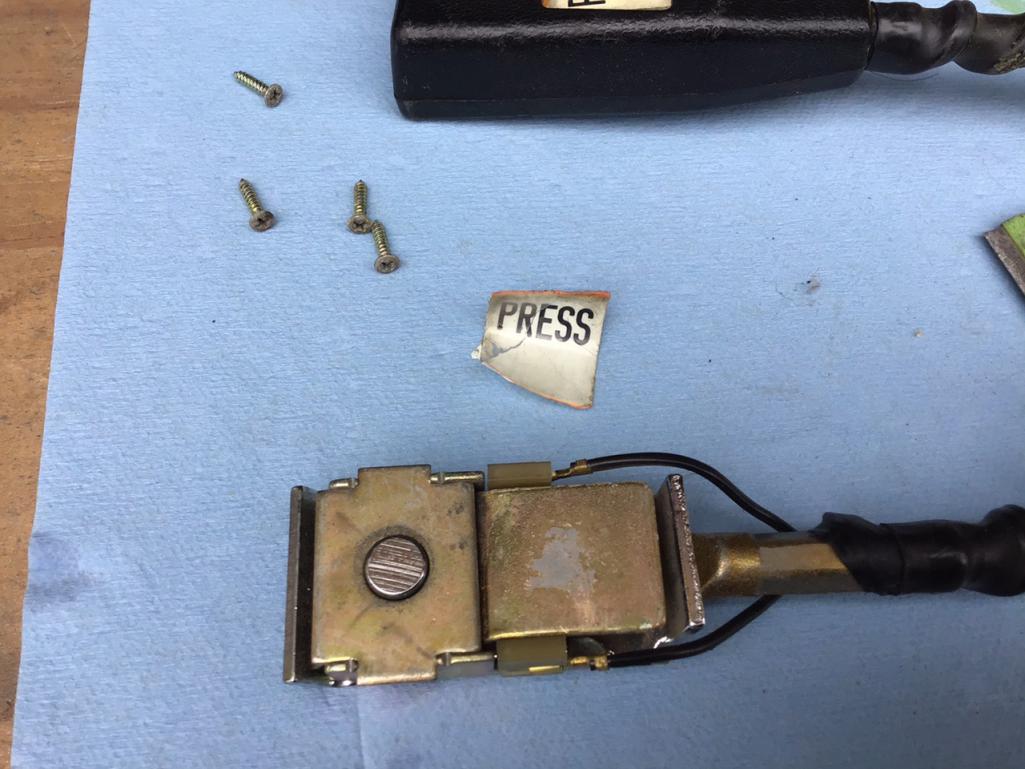
And on with the new sticker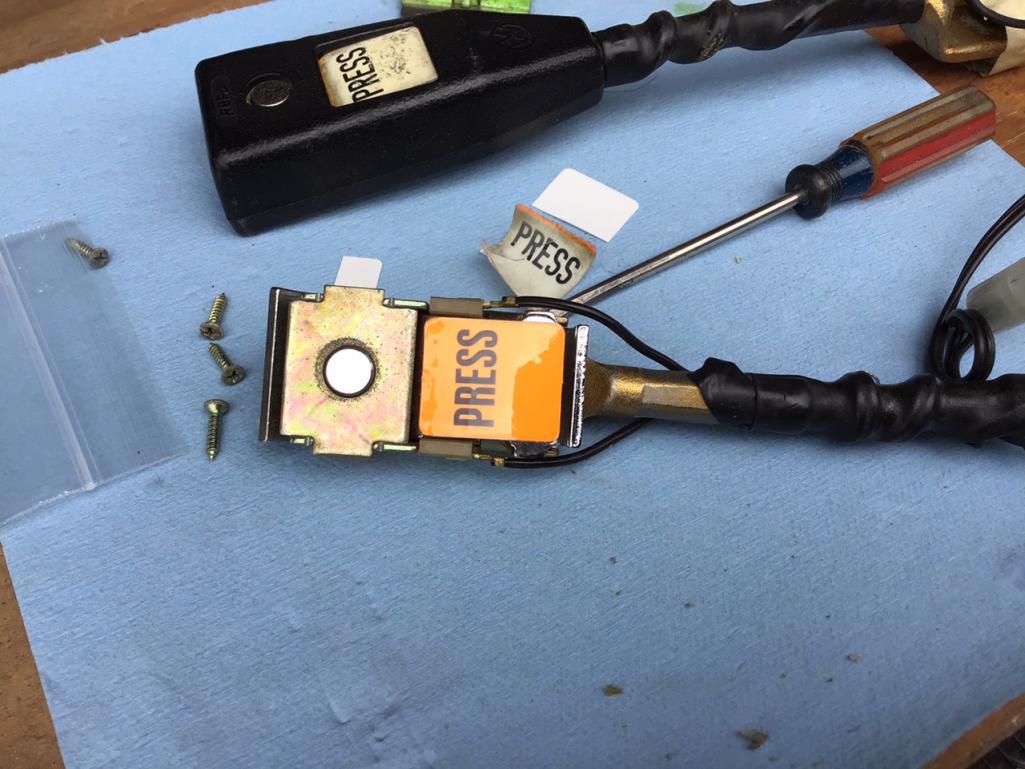
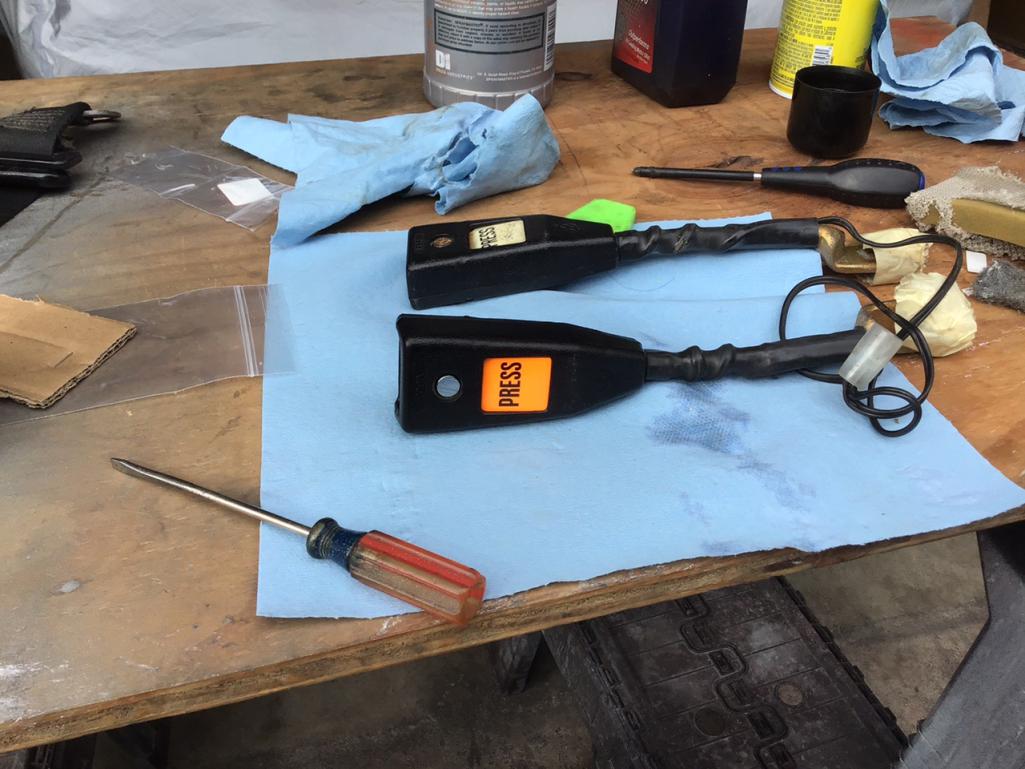
And now for the retractors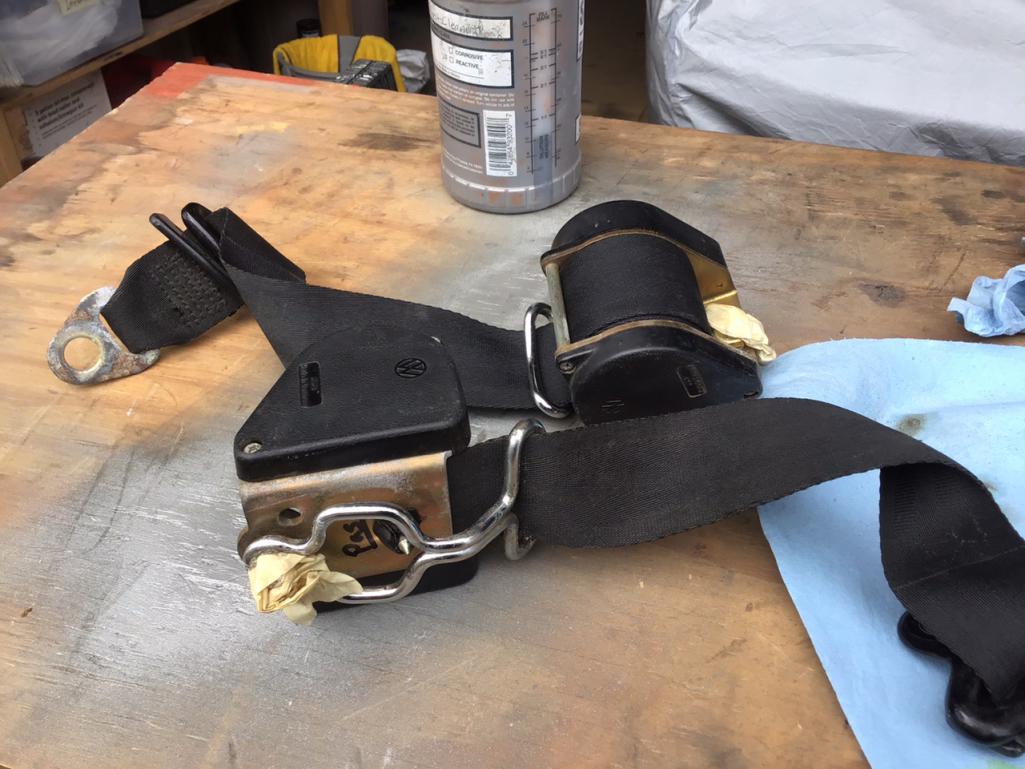
The belts seemed pretty dirty, so I decided to give them an overnight bath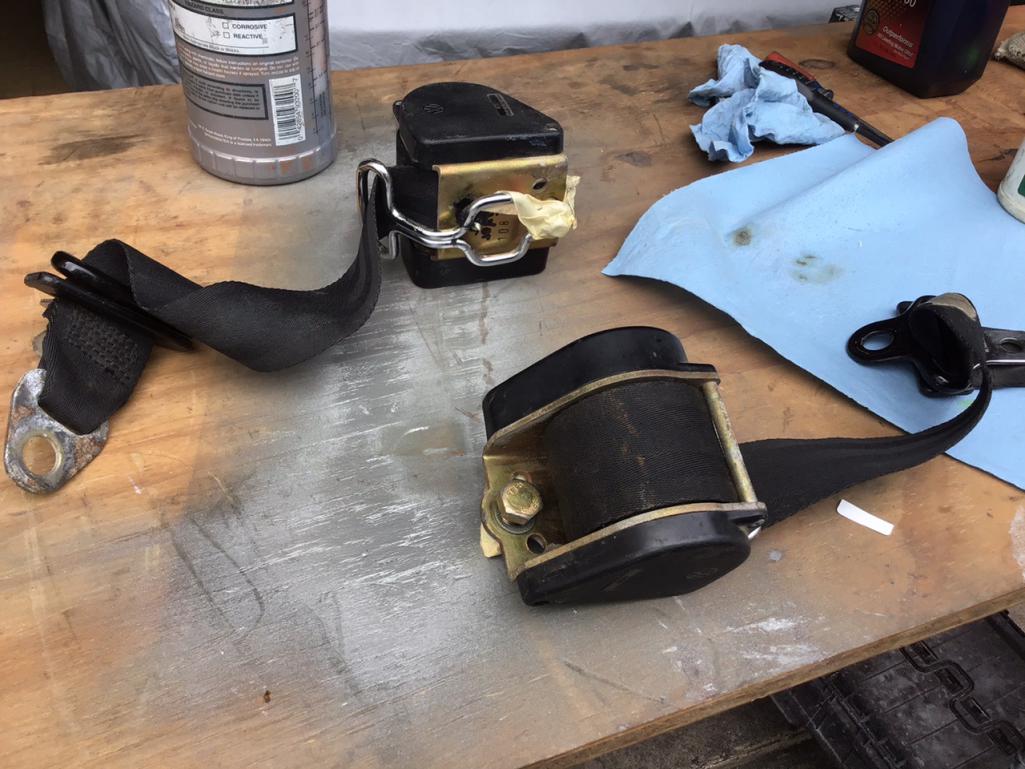
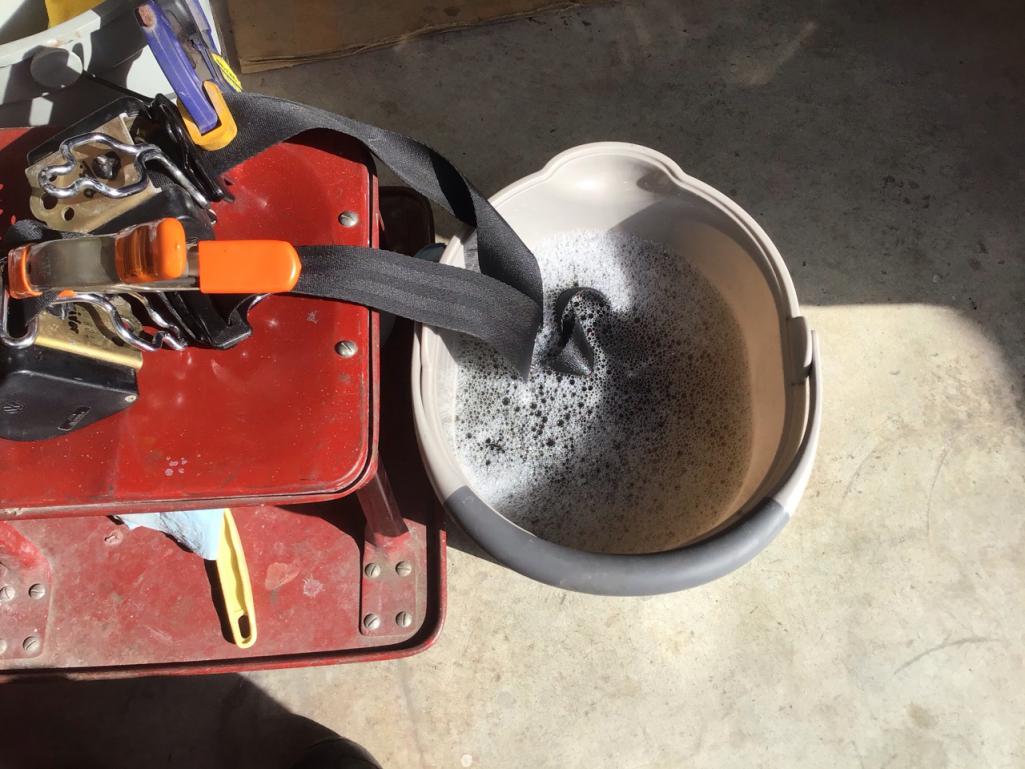
After soaking and manually agitating the water was black, so I dumped it out and soaked again in water only. The water was only slightly dirty, so I called it good. After this, I hung them up over night to dry. They seem to be working much better now.
Posted by: Morph914 Mar 2 2021, 08:36 PM
I was making fairly good progress today until my four arm engine attachment interfered with the right side tin going on.
I was able to get the alternator, some of the left side tin, the 123 distributor installed before the road block. I will need to get some kind of hoist to lift the engine off the stand so I can rotate the arm 180 degrees and then put it back on the stand. I’ll then continue with the assembly.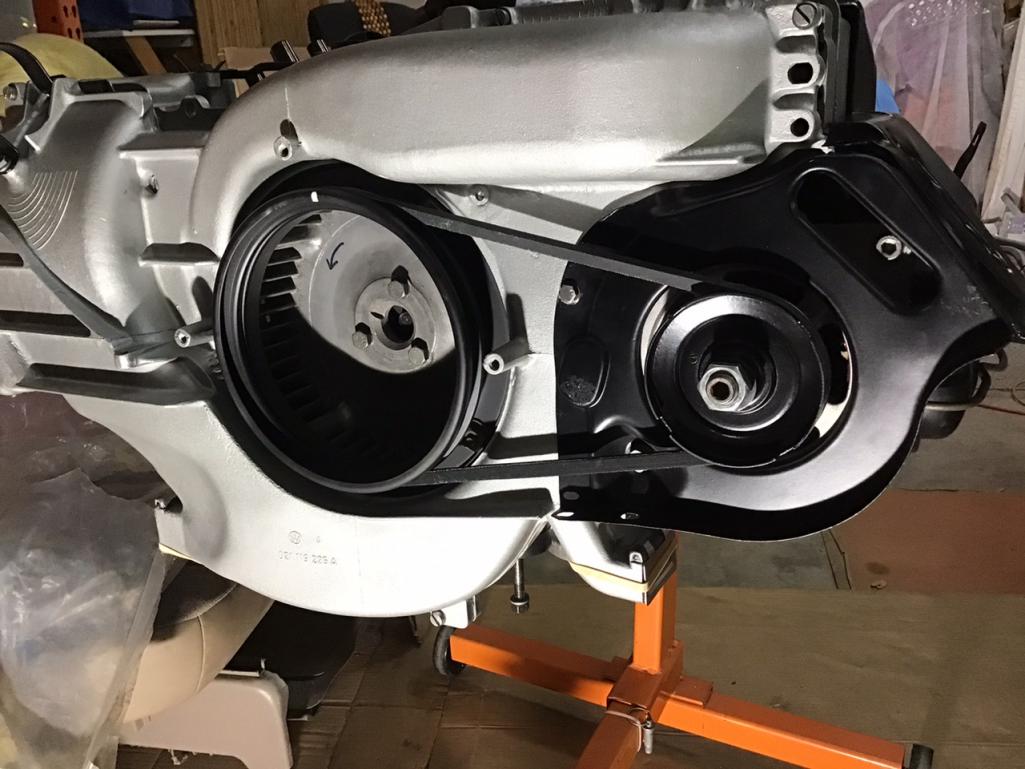
This is the part of the arm that interfered with the tin.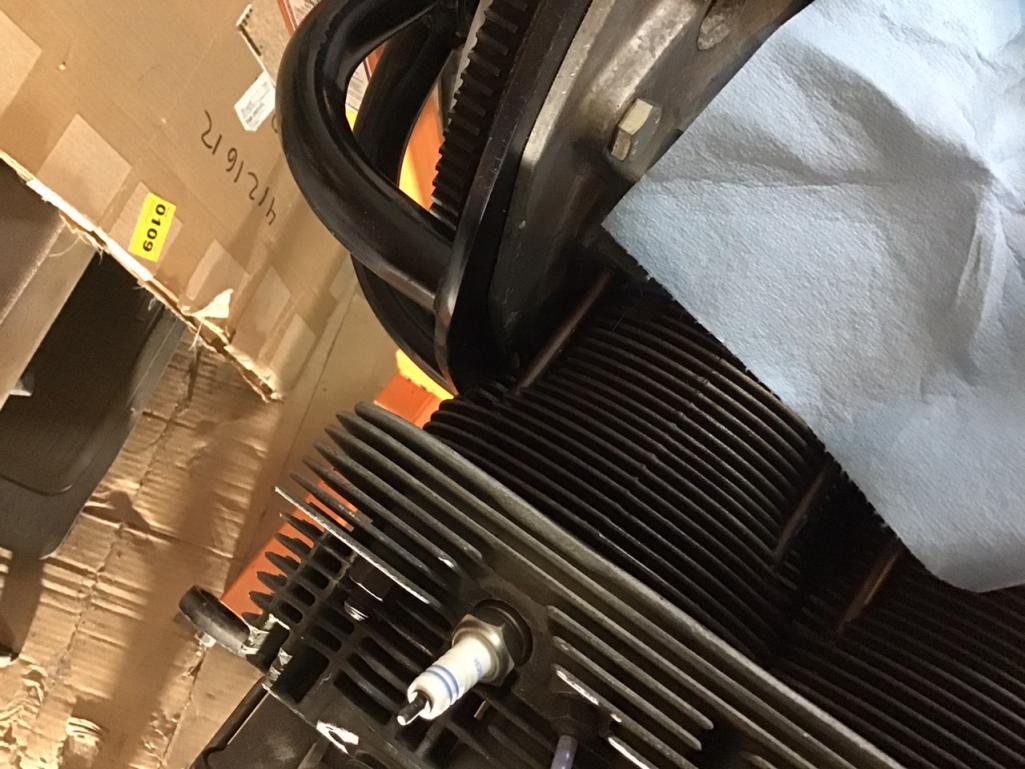
I tested the thermostat with a heat gun to make sure it works, and it was satisfying to see it work as designed.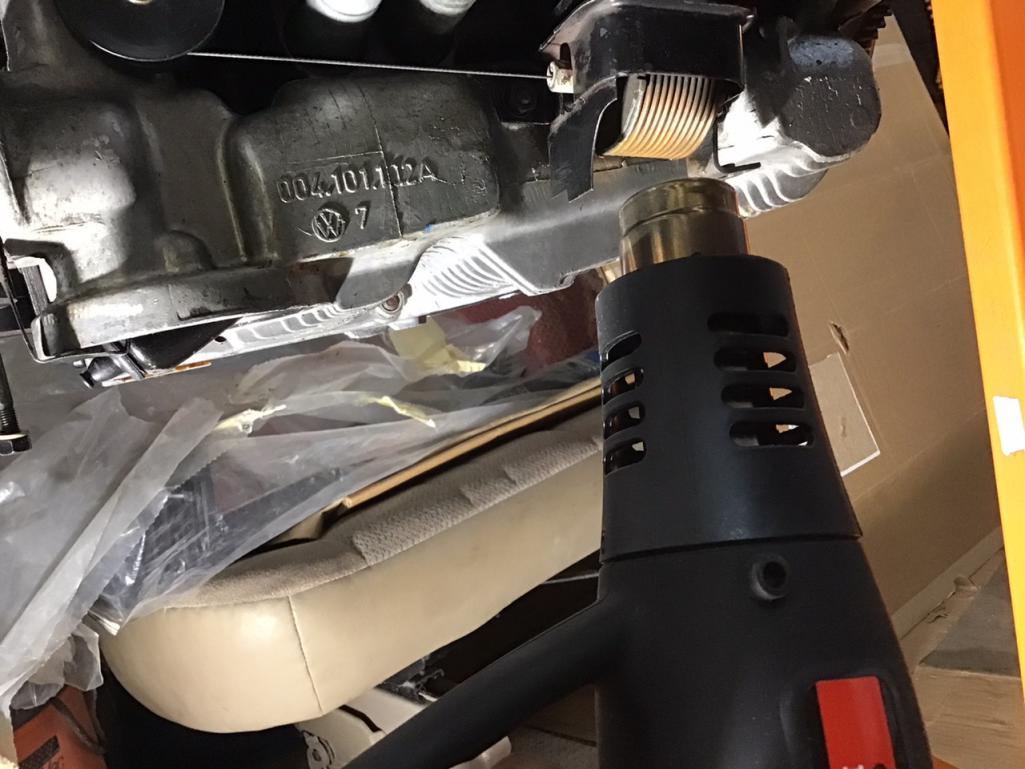
Is there any benefit to mounting the coil here versus on top of the tin? I have both mounts, so I can go either way. I kind of like this one better.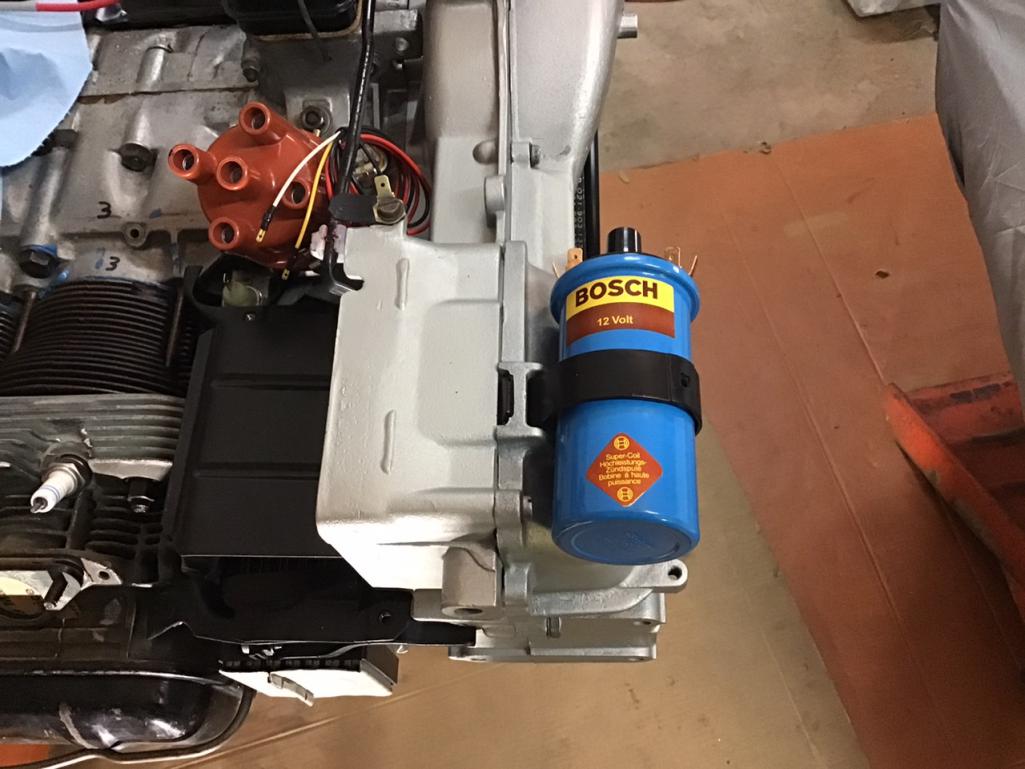
Posted by: barefoot Mar 3 2021, 07:11 AM
Is there any benefit to mounting the coil here versus on top of the tin? I have both mounts, so I can go either way. I kind of like this one better.
[/quote]
Yes, keep it on he fan shroud. All the ones mounted on the tin caused fatigue cracks as the tins are too weak to hold the coil over time. Porsche moved it there for a reason.

Posted by: anderssj Mar 3 2021, 09:50 AM
Is there any benefit to mounting the coil here versus on top of the tin? I have both mounts, so I can go either way. I kind of like this one better.
John, do you have a part number for the fan shroud coil mount?
Thanks in advance!
Steve A-
Posted by: Morph914 Mar 3 2021, 07:45 PM
Is there any benefit to mounting the coil here versus on top of the tin? I have both mounts, so I can go either way. I kind of like this one better.
John, do you have a part number for the fan shroud coil mount?
Thanks in advance!
Steve A-
I’ll check tomorrow and let you know.
Posted by: Morph914 Mar 13 2021, 08:02 PM
Started on the vinyl last week, the weather has been in the 70s with low humidity, so need to take advantage. I am trying to finish anything that needs to be painted or glued before the heat and humidity set in.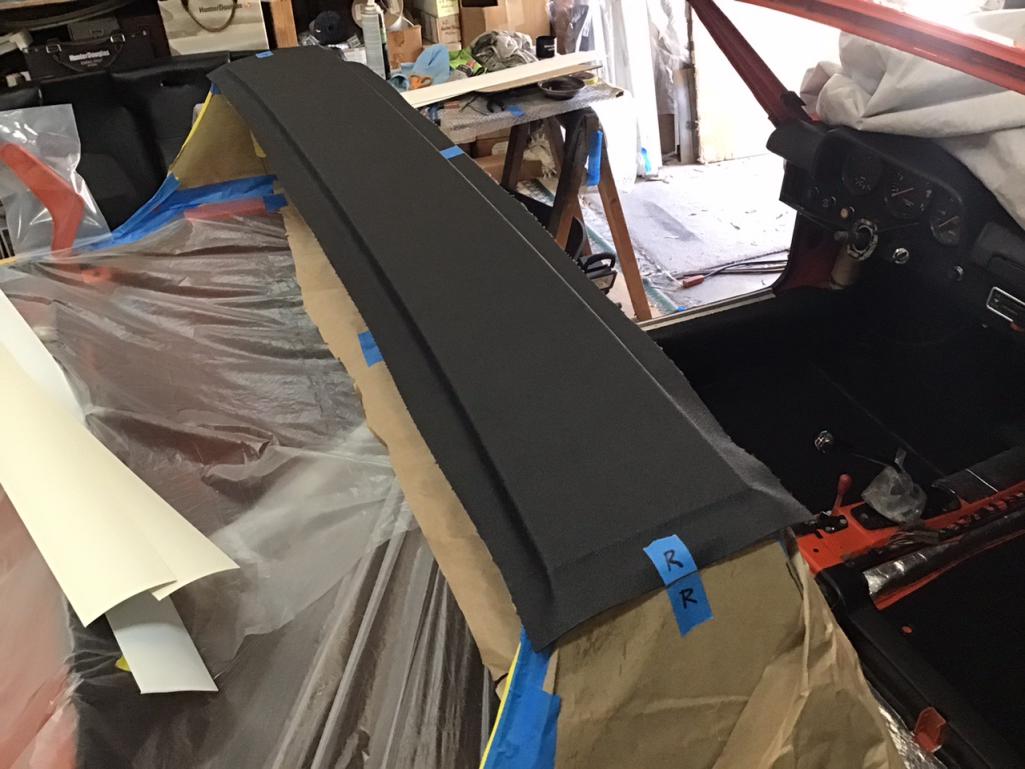
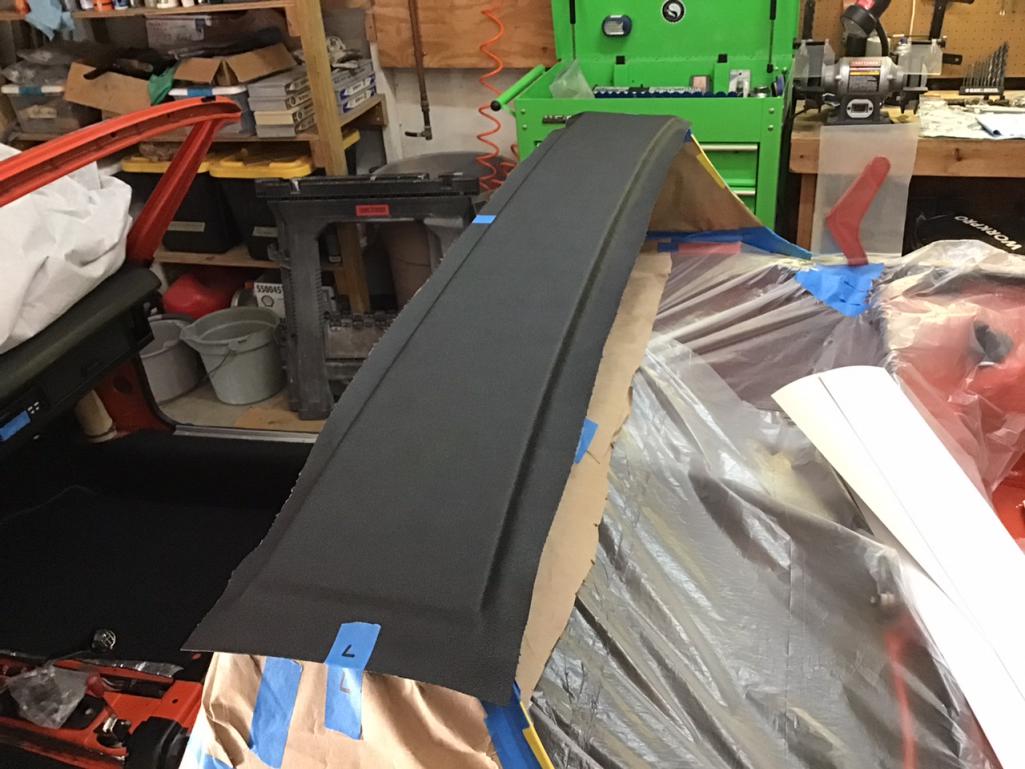
I was super stoked on how the vinyl turned out and happy to have that behind me.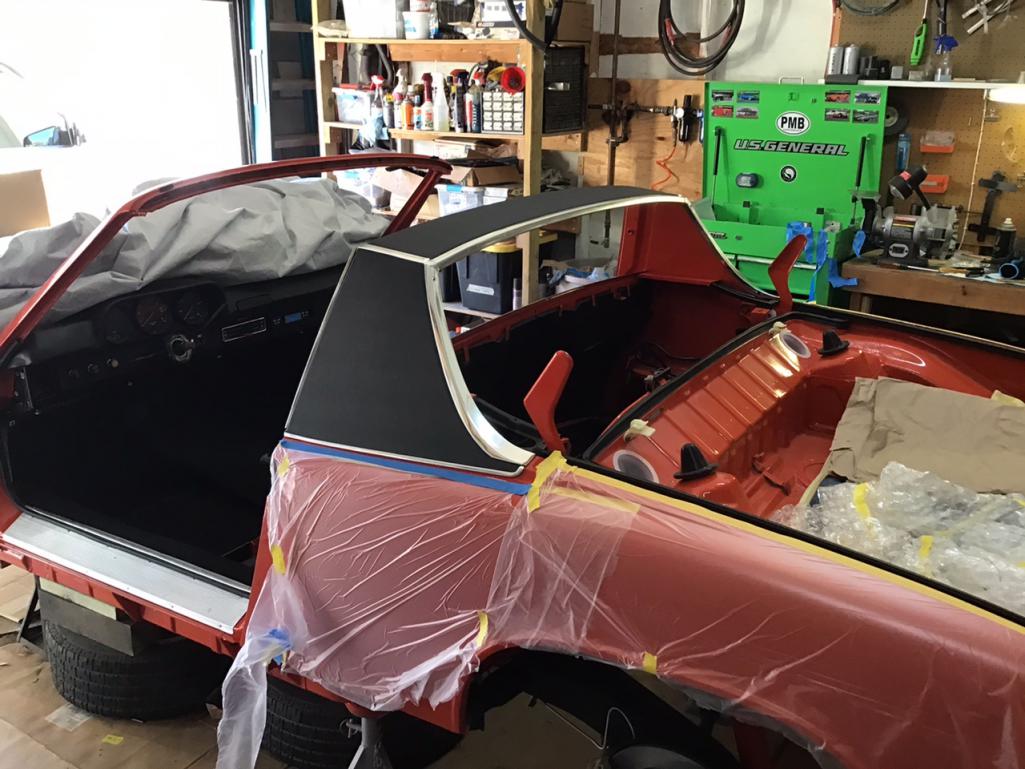
Today was rear window install day. First off I replaced the engine lid to glass seal.
Set the spacers at the bottom 
Install the butyl rope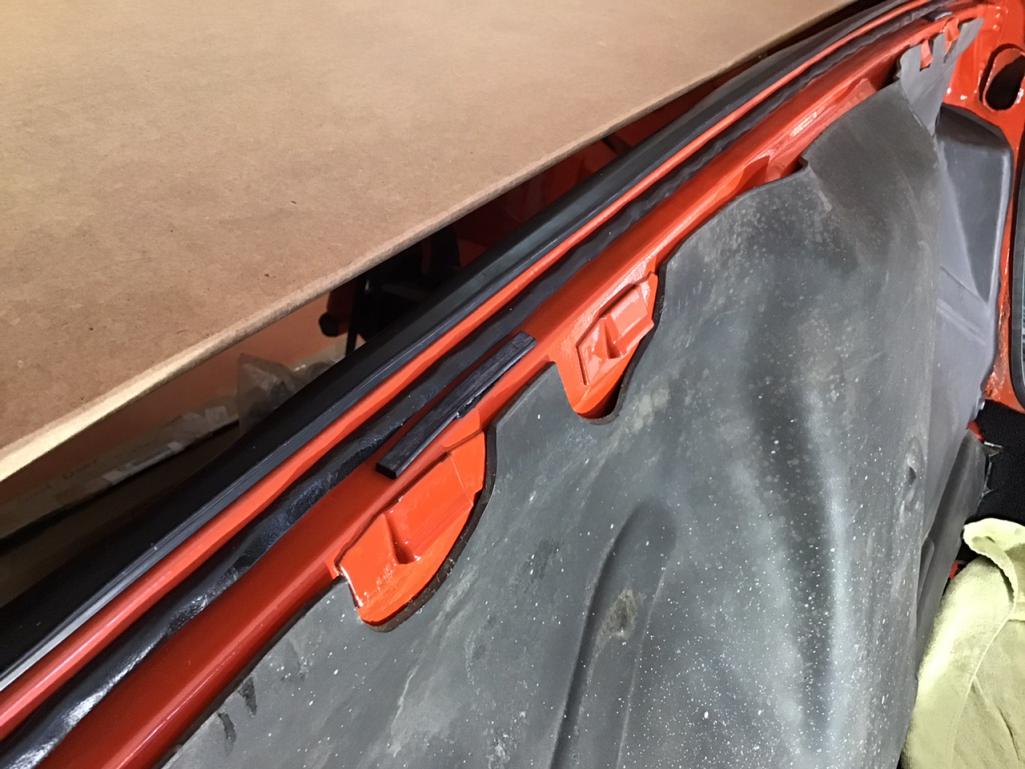
And then the glass. It went ok, but I’m not at all satisfied at this poor design of having nothing to keep the glass in place other than the butyl. I’m going to try and come up with something...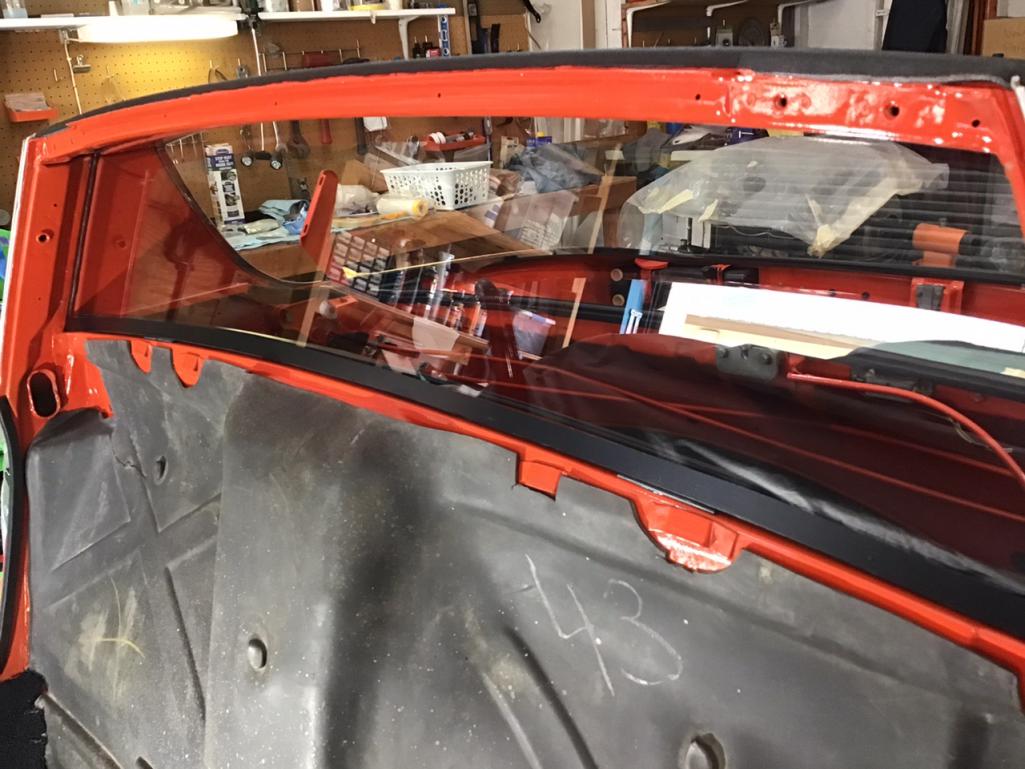
Posted by: Morph914 Mar 13 2021, 08:21 PM
Also worked on installing the vinyl on the floor
Then started fitting the carpet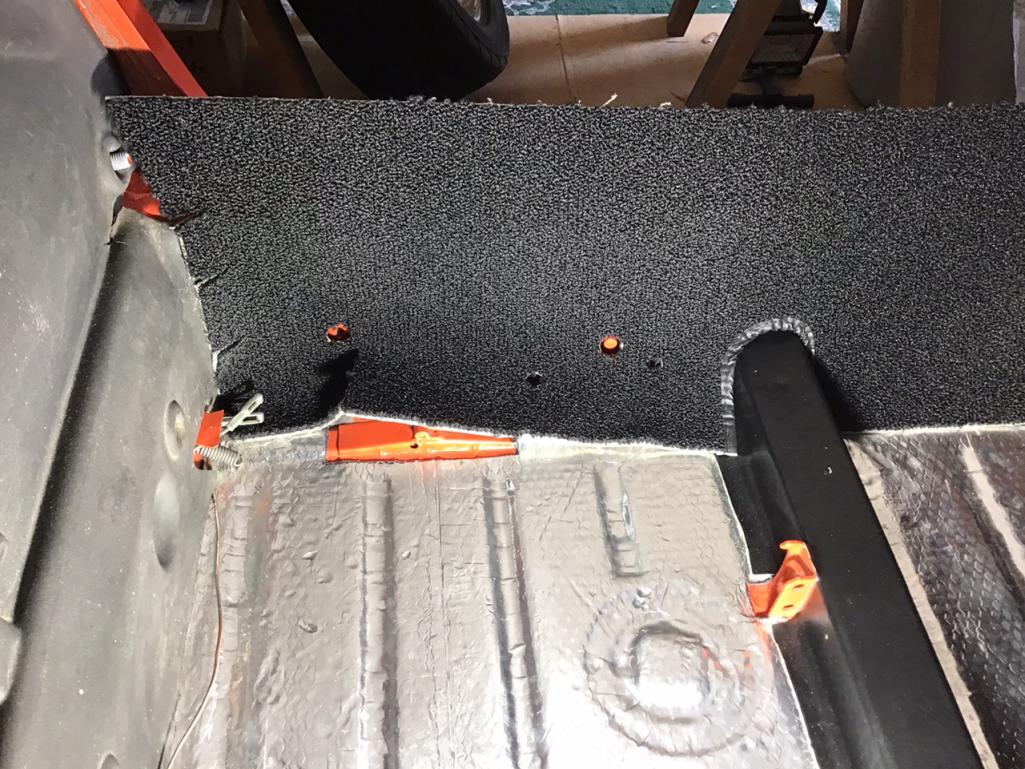
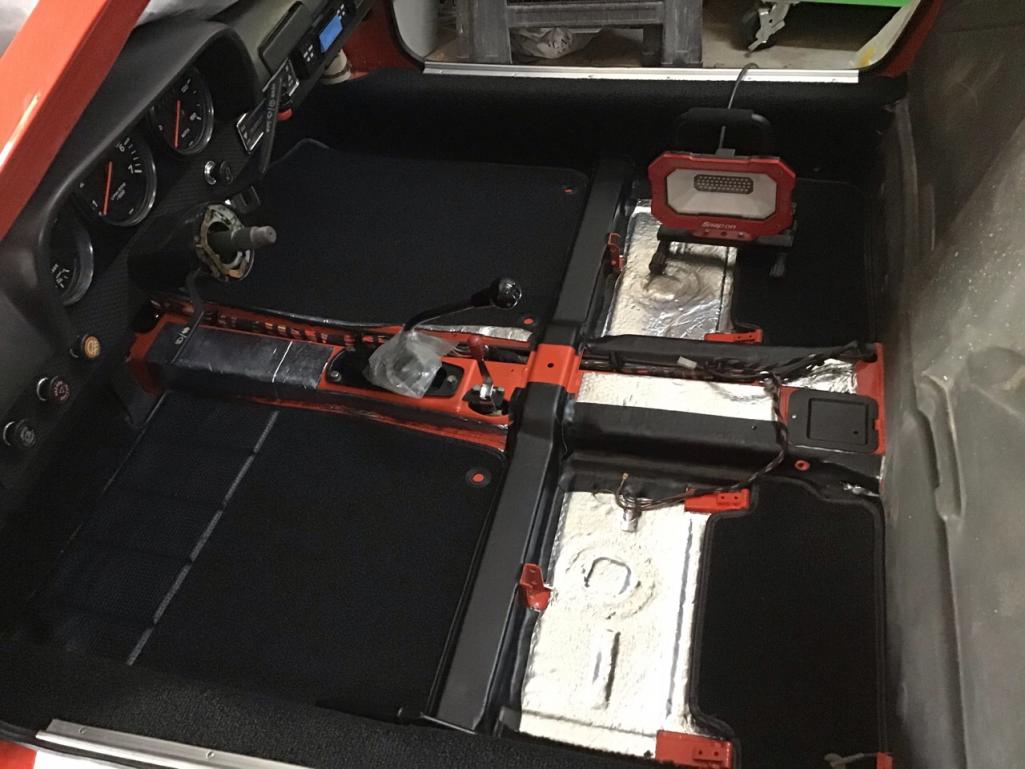
And finally the carpet strip and threshold plate. These were a bit of a challenge due to having to redrill all the holes since an inner long support kit had been installed. I’m going to leave the center consul and carpet pieces off in case I need access to the electrical after first start/test.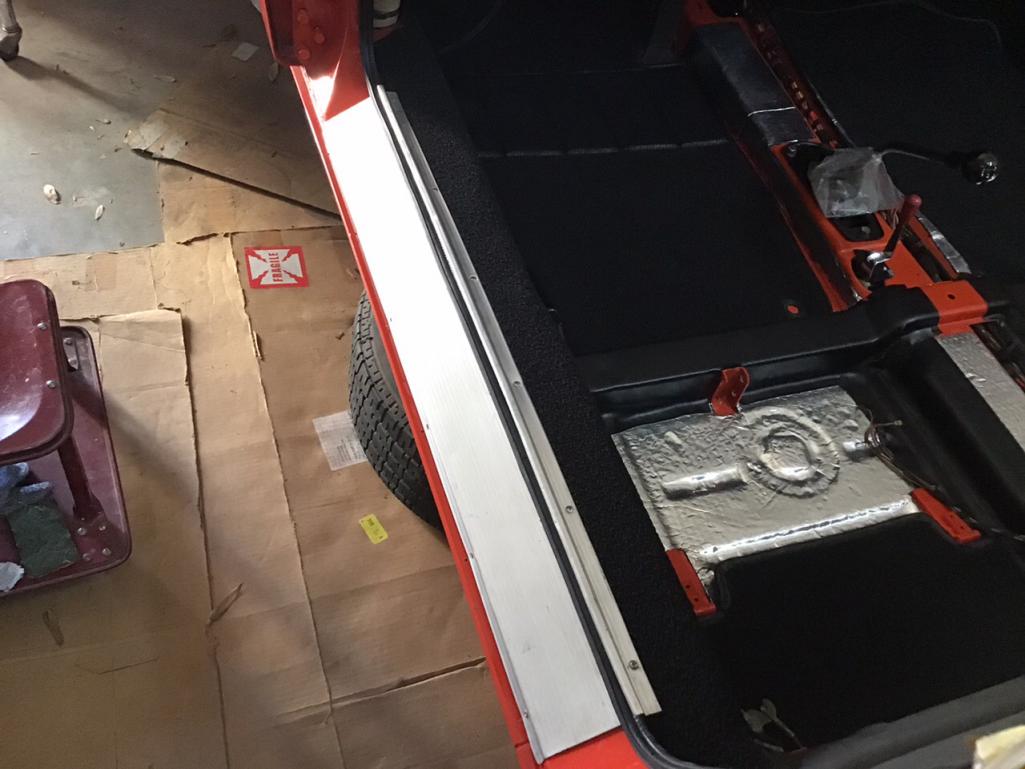
Posted by: bkrantz Mar 13 2021, 08:32 PM
Looks great! We were in sync on targa vinyl, but you leaped ahead with carpet.
Posted by: DC_neun_vierzehn Mar 13 2021, 09:44 PM
Time to clean and inspect the seat belt bits and pieces.
Off with the old PRESS sticker
And on with the new sticker
And now for the retractors
The belts seemed pretty dirty, so I decided to give them an overnight bath
After soaking and manually agitating the water was black, so I dumped it out and soaked again in water only. The water was only slightly dirty, so I called it good. After this, I hung them up over night to dry. They seem to be working much better now.
Nice touch with the new stickers. Where did you get them? And I assume you have to take them apart to remove/replace them?
Posted by: Morph914 Mar 14 2021, 08:16 AM
Time to clean and inspect the seat belt bits and pieces.
Off with the old PRESS sticker
And on with the new sticker
And now for the retractors
The belts seemed pretty dirty, so I decided to give them an overnight bath
After soaking and manually agitating the water was black, so I dumped it out and soaked again in water only. The water was only slightly dirty, so I called it good. After this, I hung them up over night to dry. They seem to be working much better now.
Nice touch with the new stickers. Where did you get them? And I assume you have to take them apart to remove/replace them?
Yes, you will have to take it apart to get the old sticker off, but this is very easy to do. As far as where I purchased, I don’t remember, they were sitting in a box for a couple of years. Either 914 Rubber, AA or Pelican I would guess has these.
Posted by: 930cabman Mar 14 2021, 09:12 AM
This is great, thanks for posting and sharing all of your information. we are several months behind your project but will use the information gained from your posts
Posted by: Morph914 Mar 15 2021, 11:58 AM
This is great, thanks for posting and sharing all of your information. we are several months behind your project but will use the information gained from your posts
You are welcome, l have also benefited from other posts in a big way, so just trying to pass it down.
Posted by: Morph914 Mar 18 2021, 07:04 PM
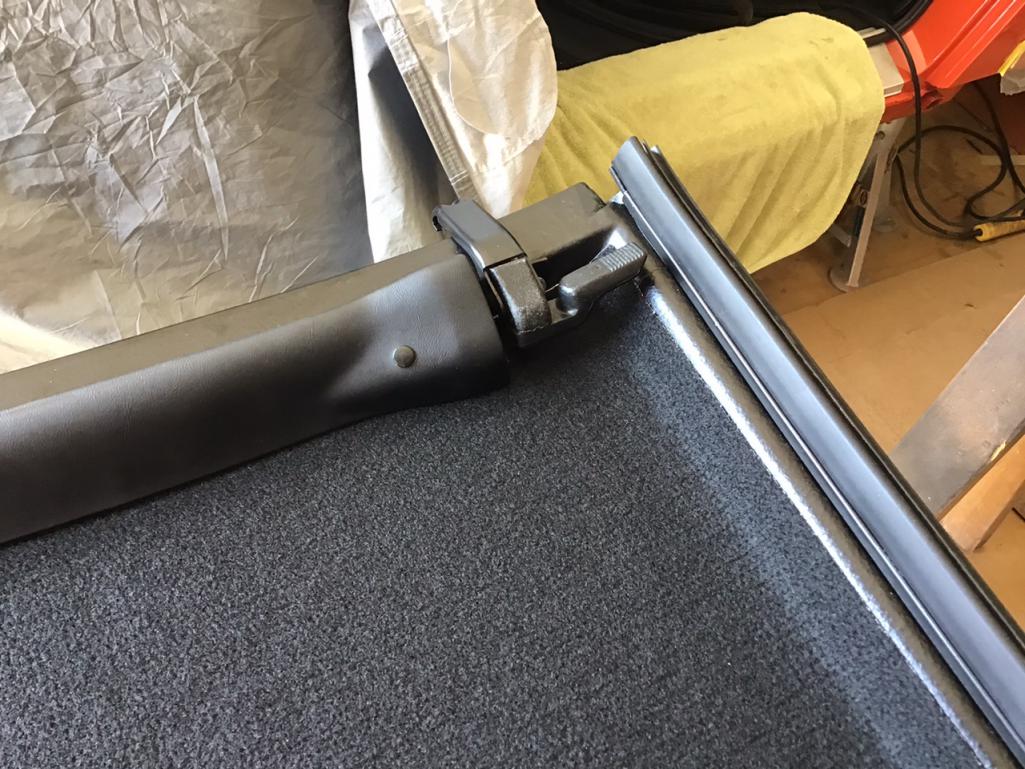
I pulled the targa top out to check the condition. It will need a complete restore. Off with all the old bits and pieces.
The short side metal pieces are not included in the new 914 Rubber seal with the fuzzy trim, so I had to dissect them off the original seal. This is not an easy task, but it was better than finding a piece of steel and and cutting, etc.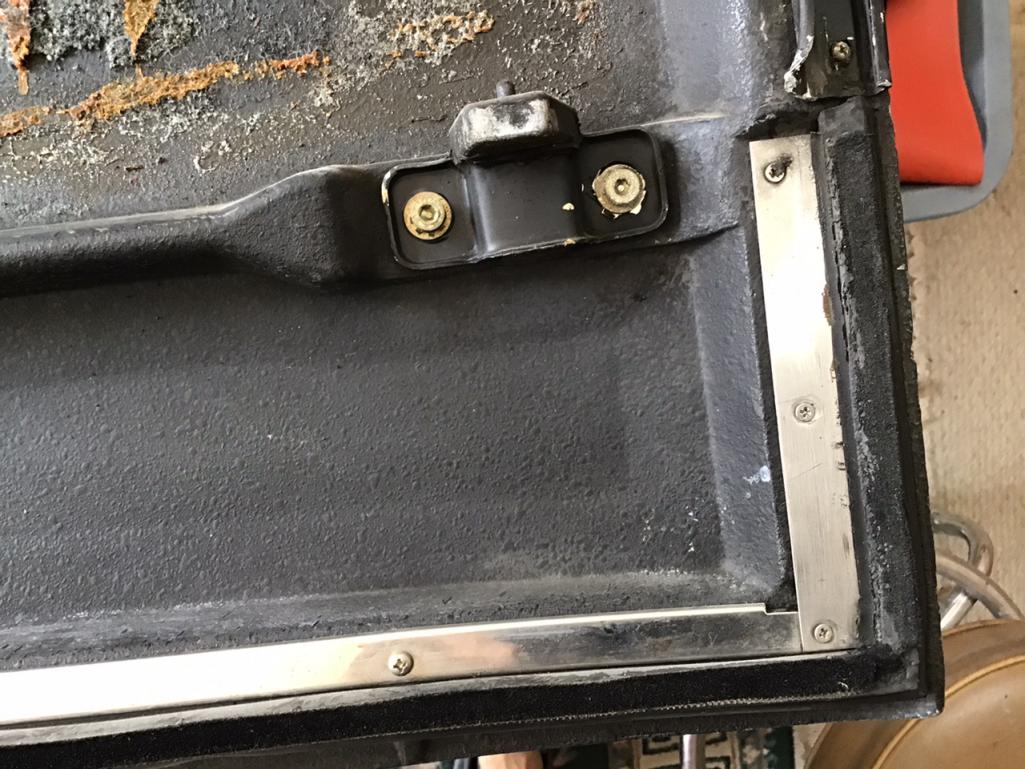
These are the harvested pieces, not great but they will do.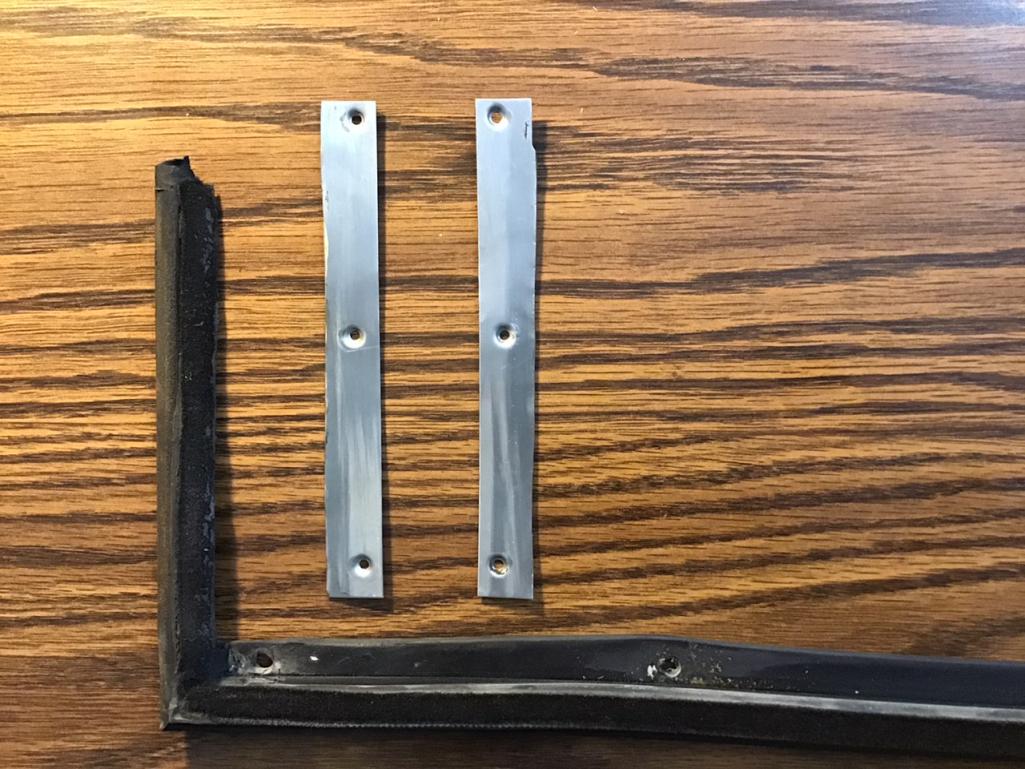
This will be its new home.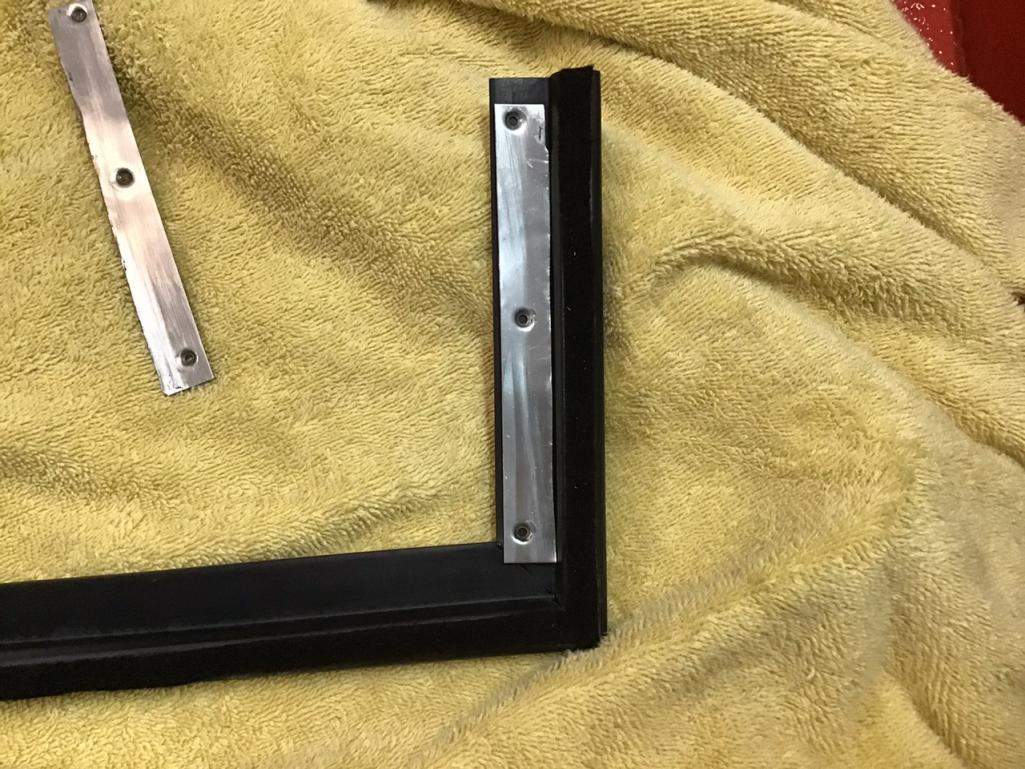
Attached thumbnail(s)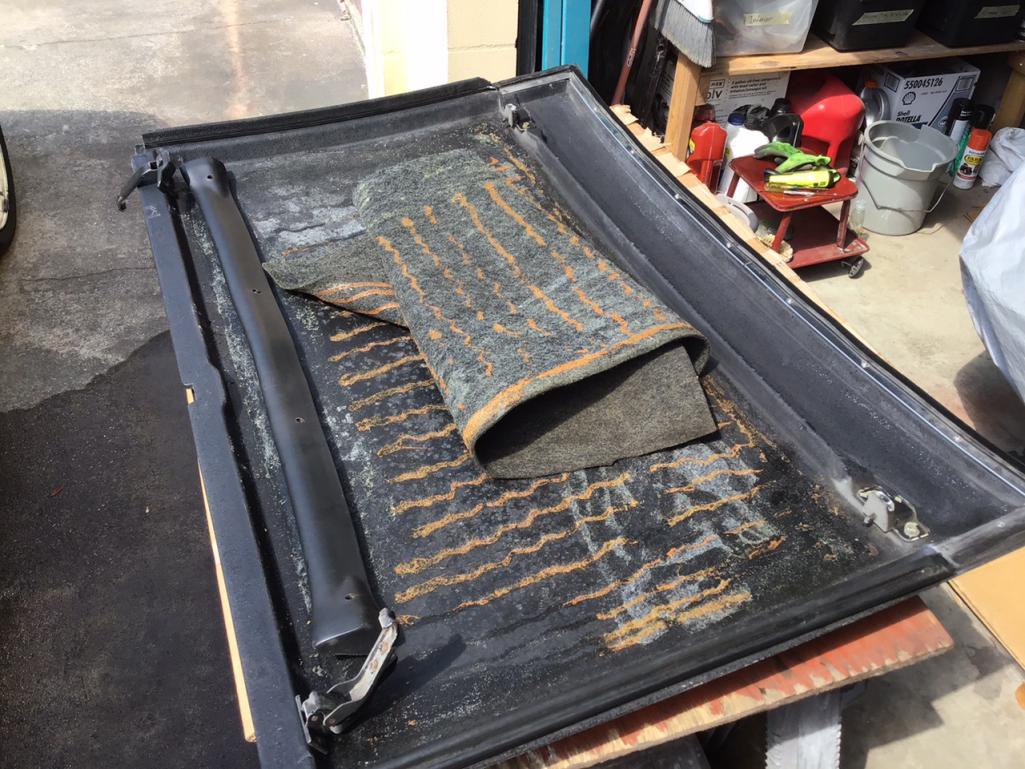
Posted by: Morph914 Mar 22 2021, 10:28 AM
Time for some window seal replacements. The new seals are from 914 Rubber.
First off was replacing the top fuzzy seal
The first thing I notice is that the original seal or fuzzy strip is much more substantial than the new one. So much so that it won’t even stay in the track, perhaps I got the wrong seals? If not I will have to use some adhesive to keep these in place.
[attachmentid=786123]
Next were the vertical seals
These seals fit nicely and are plenty long so I will trim later when I install them.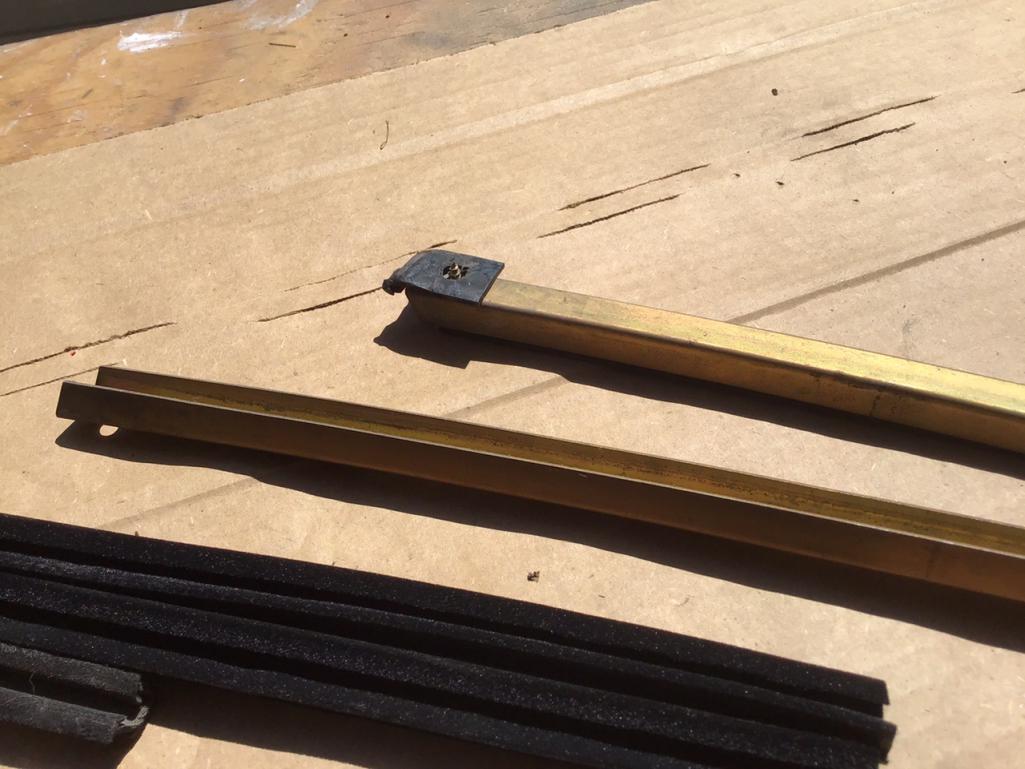
Posted by: Morph914 Apr 6 2021, 12:32 PM
Today I’m continuing with the refresh on my targa top. I will be installing the 914 Rubber headliner. First I just laid the piece in to check the fit, it looks good but I wasn’t sure if it’s supposed to be trimmed on the sides to lay flat or not. I elected to leave it the way it came, because the chances of me getting a good clean straight cut would be slim.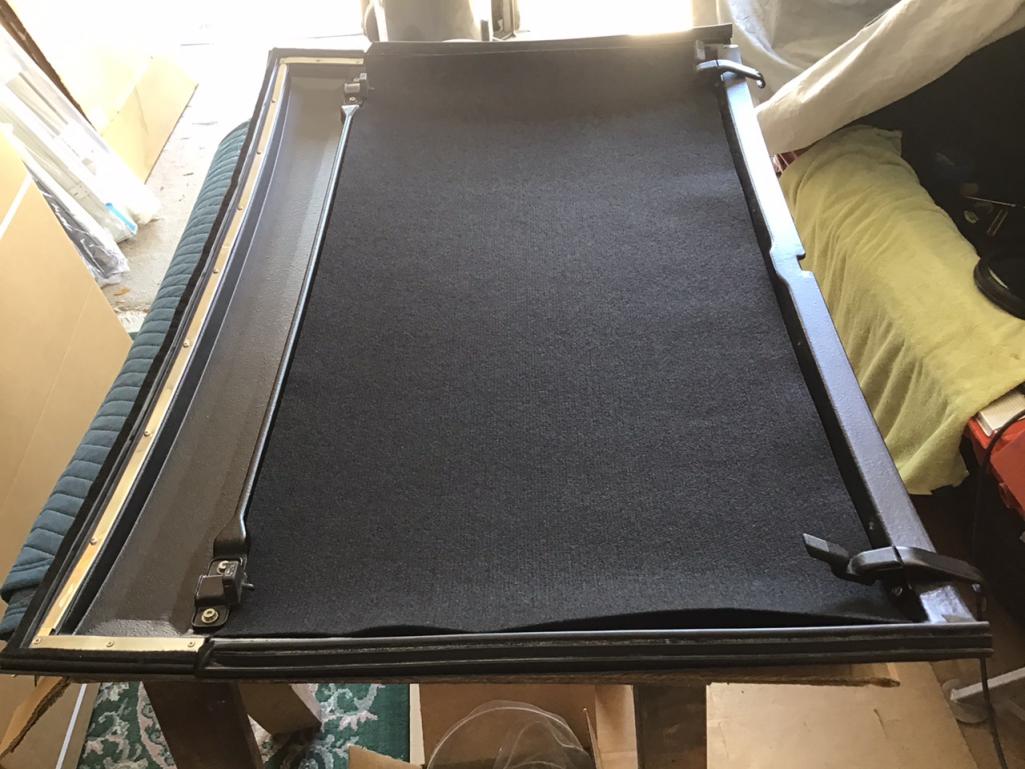
Next I masked everything off that I didn’t want adhesive on, and then applied the 3M adhesive to both surfaces in a criss cross pattern.
After waiting about 10 minutes, I had a buddy help me with getting it in straight, etc. Super stoked on how good this came out. It was a nice piece, and looks fantastic!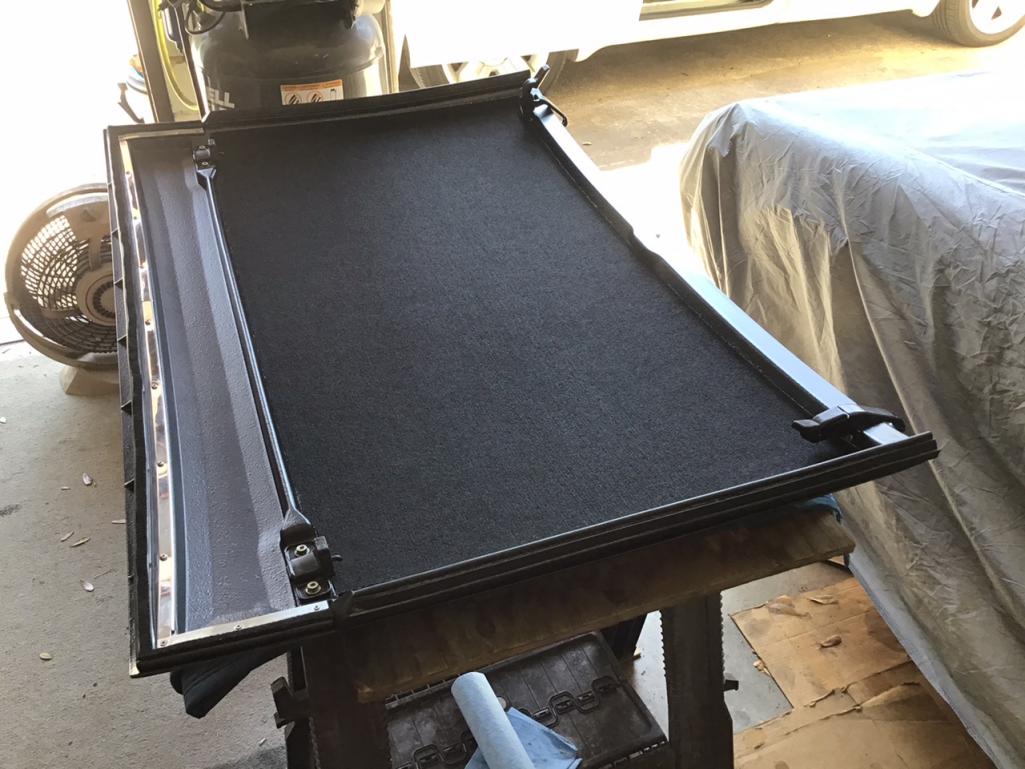
Here’s more after the front pad install.
I left the side seals a bit long and will fit the top if and when I can get my main targa seal in. Then I will trim the seals as necessary.
Happy to have this part refreshed!
Attached thumbnail(s)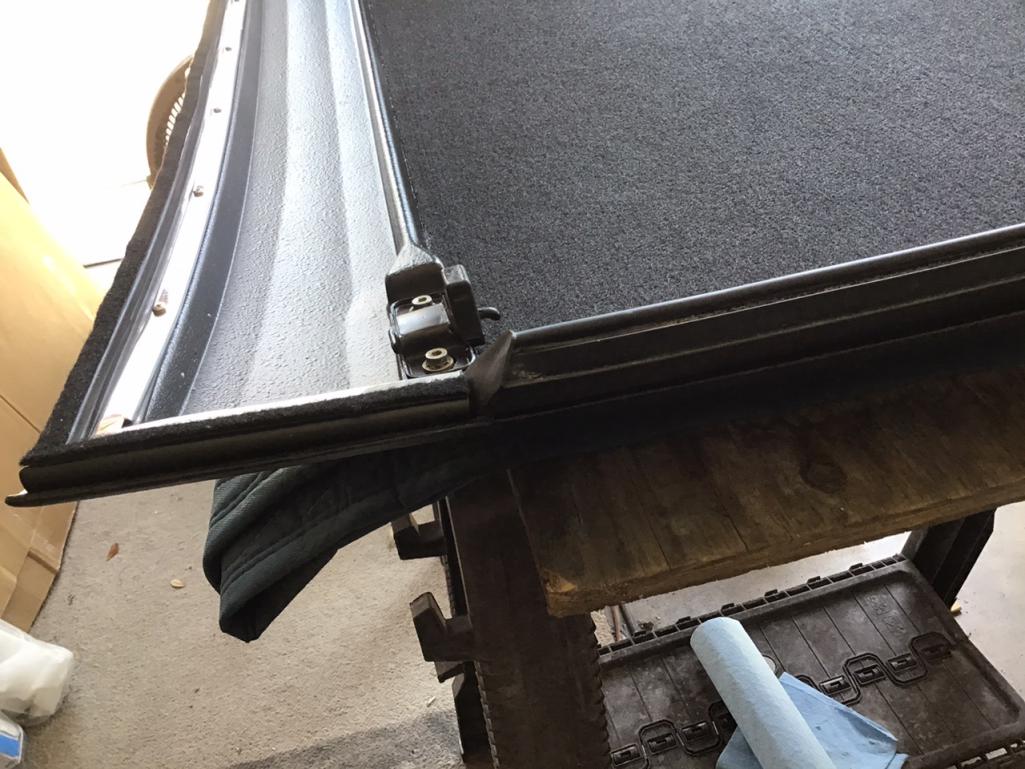
Posted by: 930cabman Apr 6 2021, 12:51 PM
+1, looks great, check another item from the list
Posted by: Morph914 Apr 17 2021, 08:34 PM
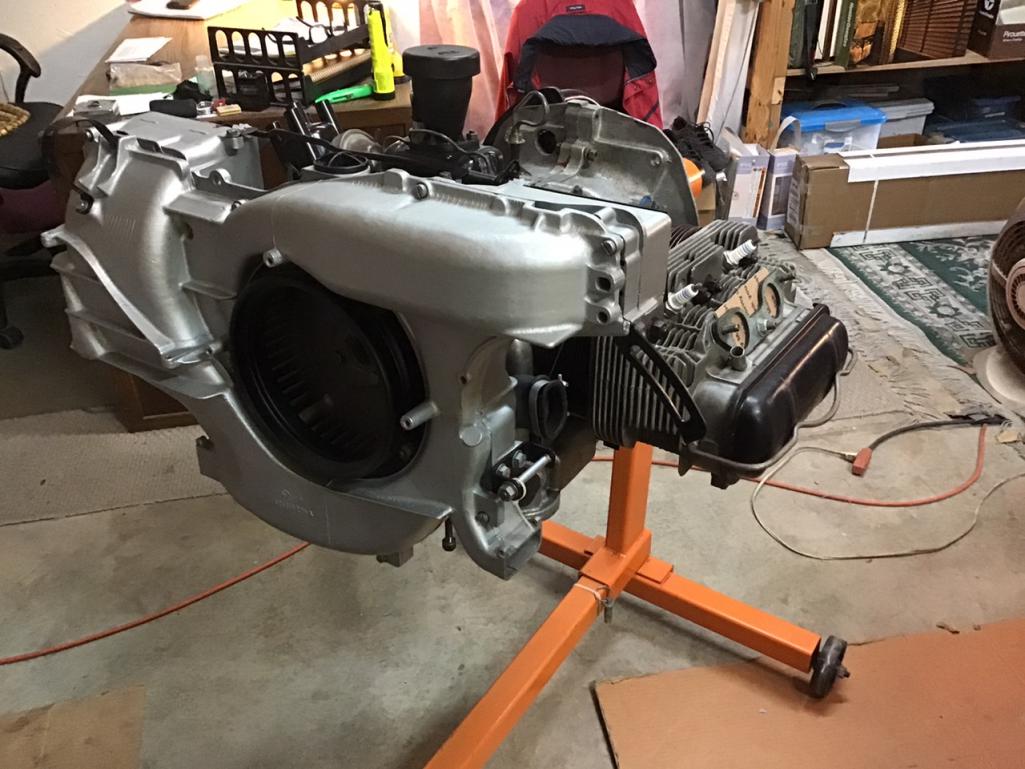
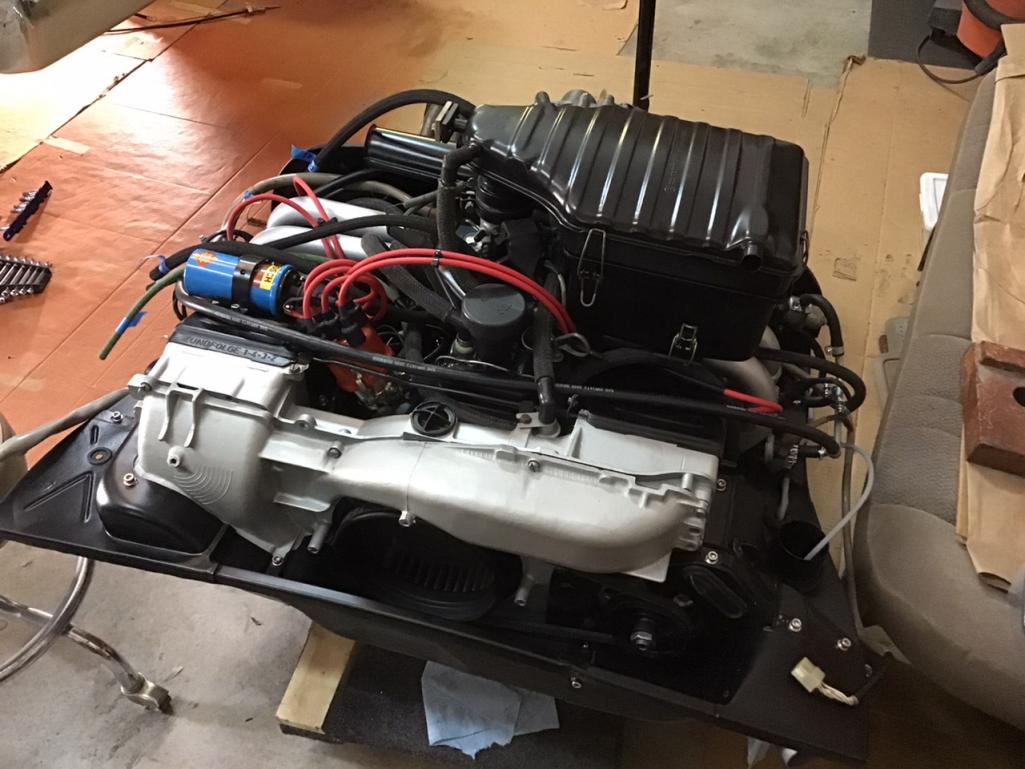
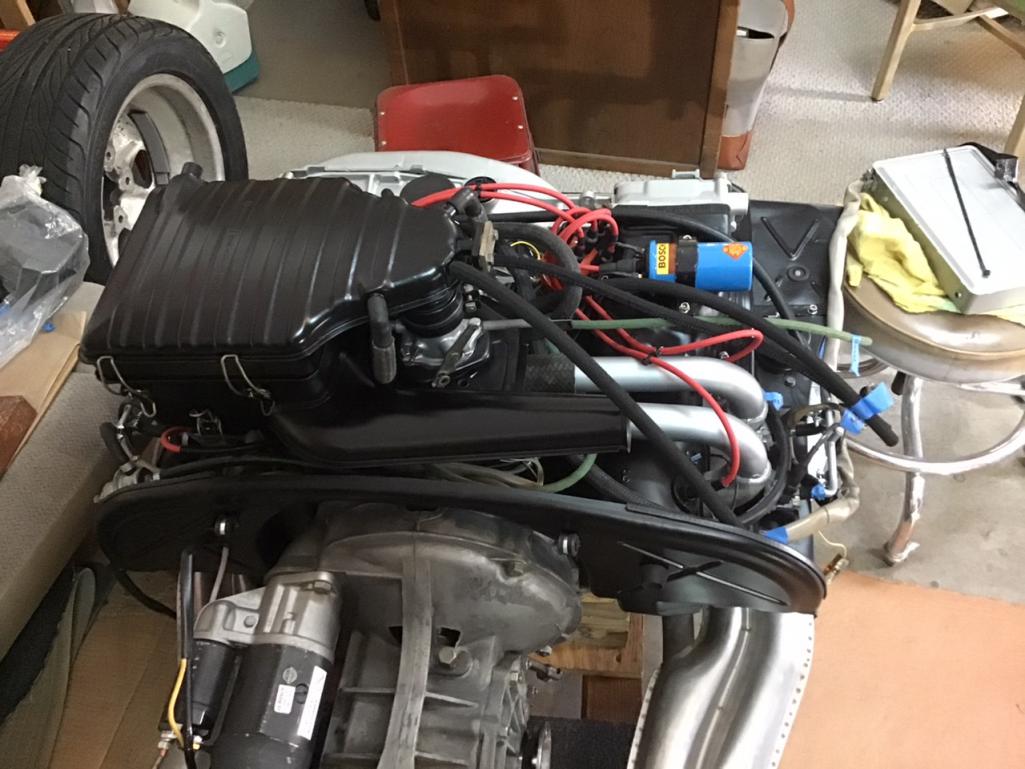
Time to get the engine off the stand so I can marry the trans to it and start putting on all the bits and pieces.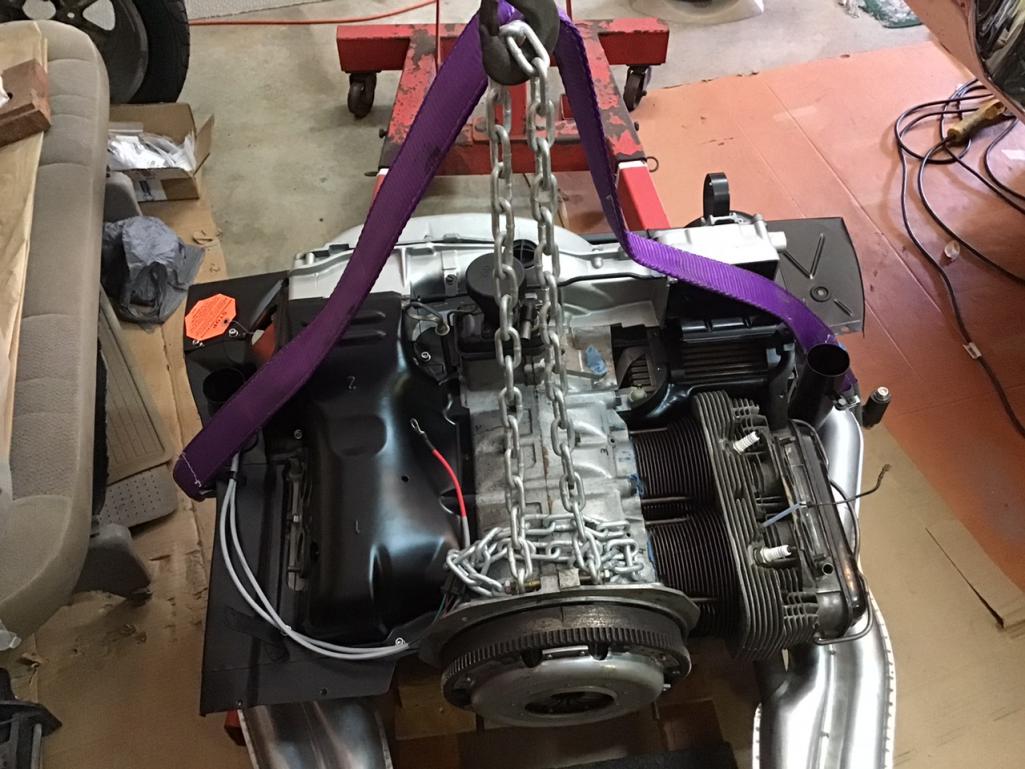
The trans meets its new mate.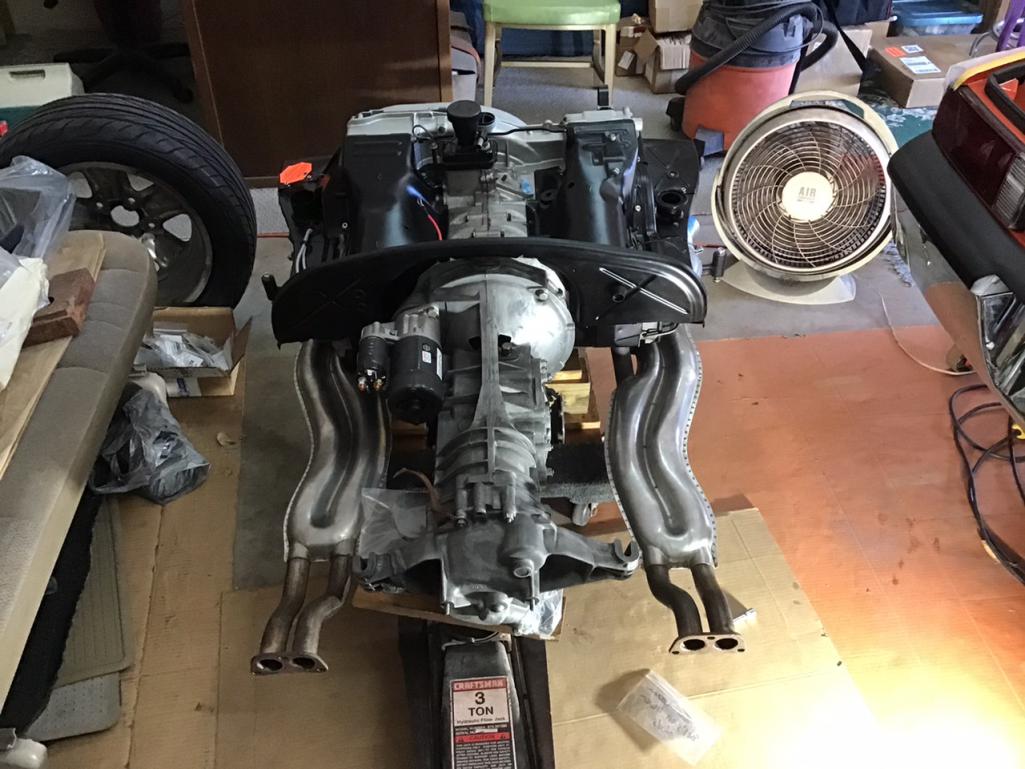
Intake runners, fuel injectors, fuel lines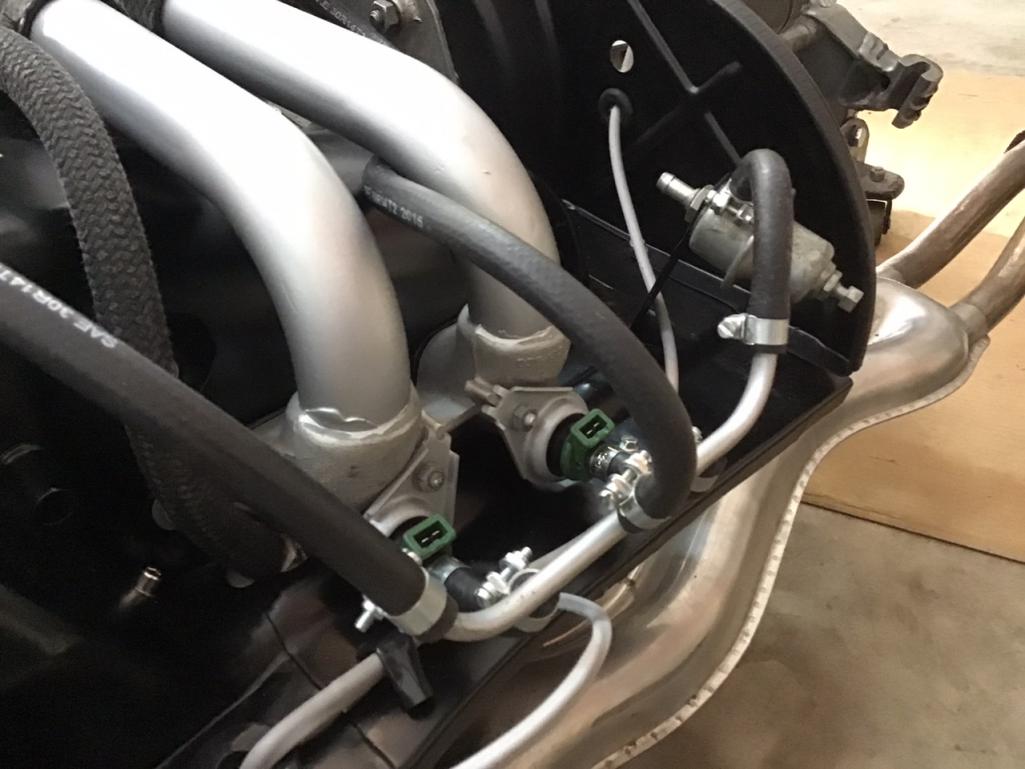
Got the 123 dizzy installed and wired to the coil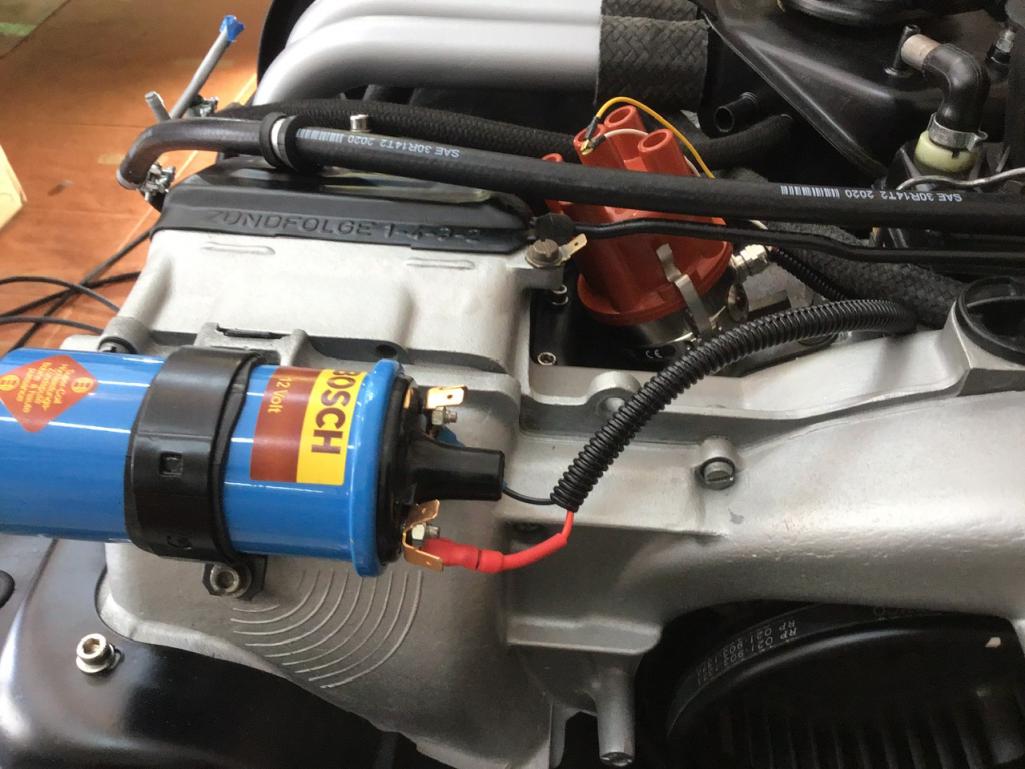
Unfortunately, I may have to relocate the coil back to the tin location due to my coil wire being too short. I prefer this location though so I might just make up a longer wire.
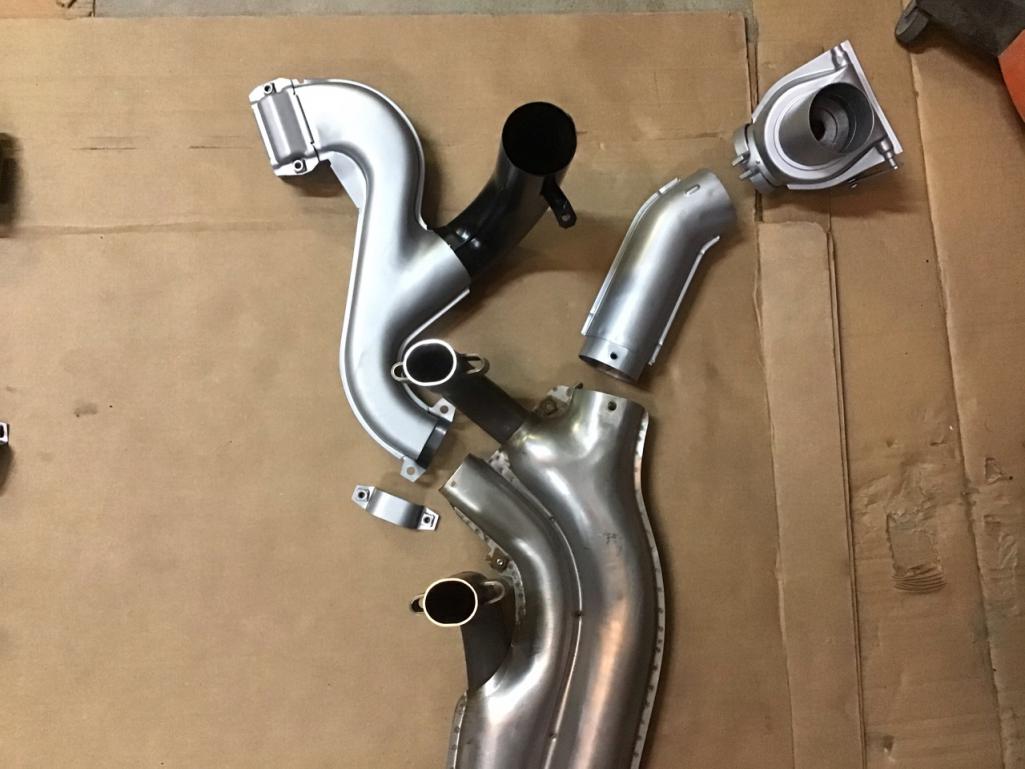
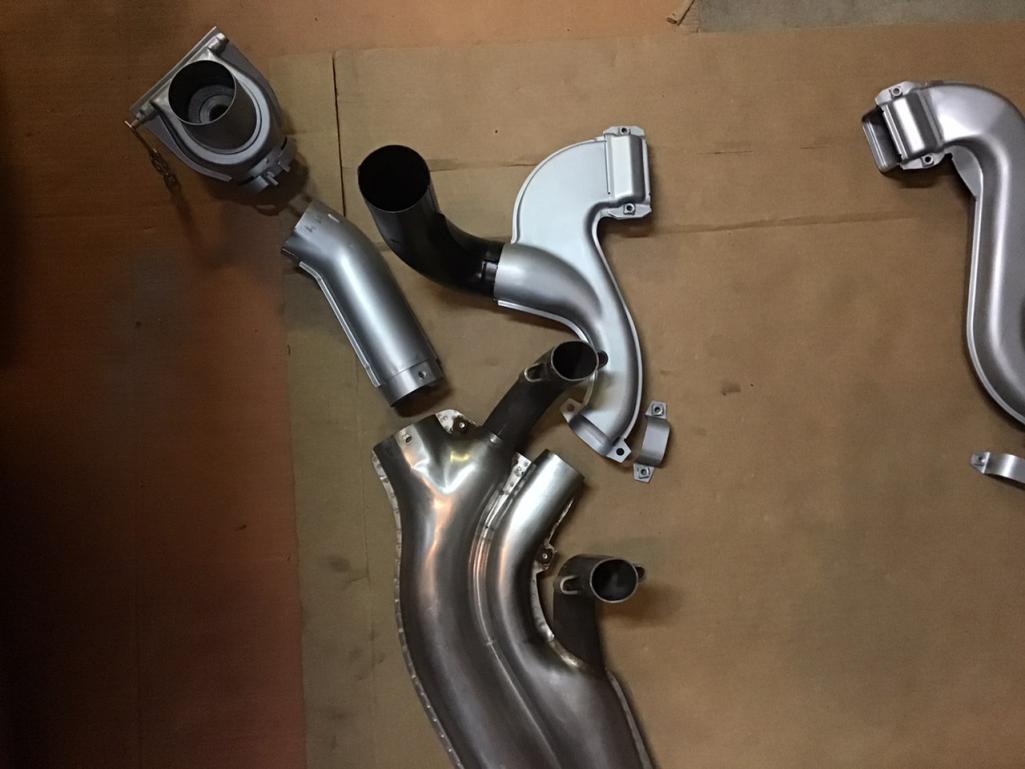
Now trying to get my vacuum lines connected. I purchased the kit from AA but having a difficult time figuring this out. I have referred to many different diagrams and they all seem to differ a bit and then the ports on my air cleaner are a bit different.
Like this big port on the back of the air cleaner, it has an ID of approx 3/4” and I believe this is where one of the lines from the charcoal canister connects, but I don’t have any hose in my kit that fits this. Is there a reducer for this stub?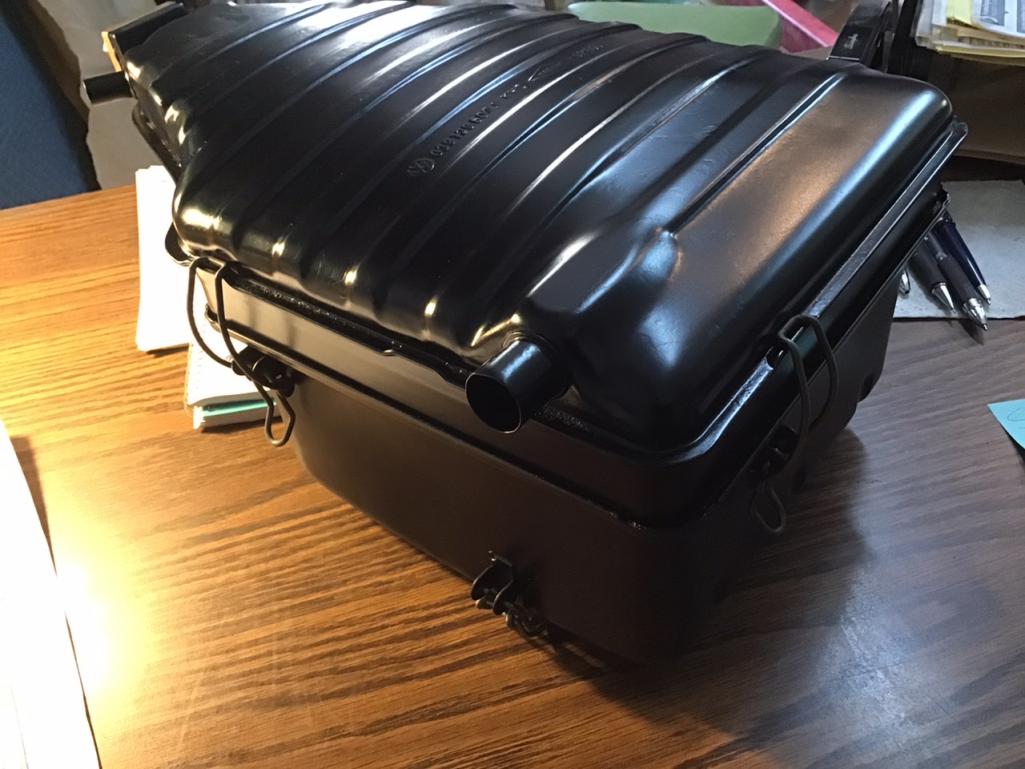
Posted by: bbrock Apr 17 2021, 08:48 PM
Looking good! You made the right call installing your HEs with the engine on the stand. I was too chicken and they were a bit of a pain to put on laying on my back with gravity working against me. Not terrible, but once I got them on, I knew they would have been just fine to install on the stand.
Posted by: Morph914 Apr 18 2021, 01:39 PM
Looking good! You made the right call installing your HEs with the engine on the stand. I was too chicken and they were a bit of a pain to put on laying on my back with gravity working against me. Not terrible, but once I got them on, I knew they would have been just fine to install on the stand.
Funny you mentioned this, I was very apprehensive to install these on the stand because it’s a lot of leverage hanging out there to possibly do damage. But the the ease of installing on the stand won out. So after the install I go to rotate the engine 180 degrees so I could take it off the stand, and guess what the damn gone HE hit the stand after 90 degrees
, what a dumb ass am I. So off came the one that gave me the least amount of trouble, turned the engine another 90 degrees and then laid on my back and installed the HE for the second time.
So all and all, if I had to do it again, I think I would go your route. The other issue was when I held my muffler up to check alignment, it was way off, so I had to loosen the HEs again to line up the muffler.
Live and learn baby!
Posted by: 930cabman Apr 18 2021, 01:50 PM
Looking good, keep the progress reports coming, inspiration for us following behind.
Thanks
Posted by: bbrock Apr 18 2021, 02:17 PM
Looking good! You made the right call installing your HEs with the engine on the stand. I was too chicken and they were a bit of a pain to put on laying on my back with gravity working against me. Not terrible, but once I got them on, I knew they would have been just fine to install on the stand.
Funny you mentioned this, I was very apprehensive to install these on the stand because it’s a lot of leverage hanging out there to possibly do damage. But the the ease of installing on the stand won out. So after the install I go to rotate the engine 180 degrees so I could take it off the stand, and guess what the damn gone HE hit the stand after 90 degrees
, what a dumb ass am I. So off came the one that gave me the least amount of trouble, turned the engine another 90 degrees and then laid on my back and installed the HE for the second time.
So all and all, if I had to do it again, I think I would go your route. The other issue was when I held my muffler up to check alignment, it was way off, so I had to loosen the HEs again to line up the muffler.
Live and learn baby!
Well that makes me feel better but sounds a lot like how my weekend has gone. Lost count of the number of times I've removed and replaced the same damn part because this need to be done first or why the hell is that gasket still on the bench? Only now it's all happening in the engine bay. Funny how time erases the memory of what a pit of horrors that is! It's an adventure!
Posted by: 930cabman Apr 18 2021, 02:30 PM
If it was easy, our kids would do it.
Lucky is the man who has that luxury, even more so his grandson/daughter
Posted by: Morph914 Apr 28 2021, 07:18 PM
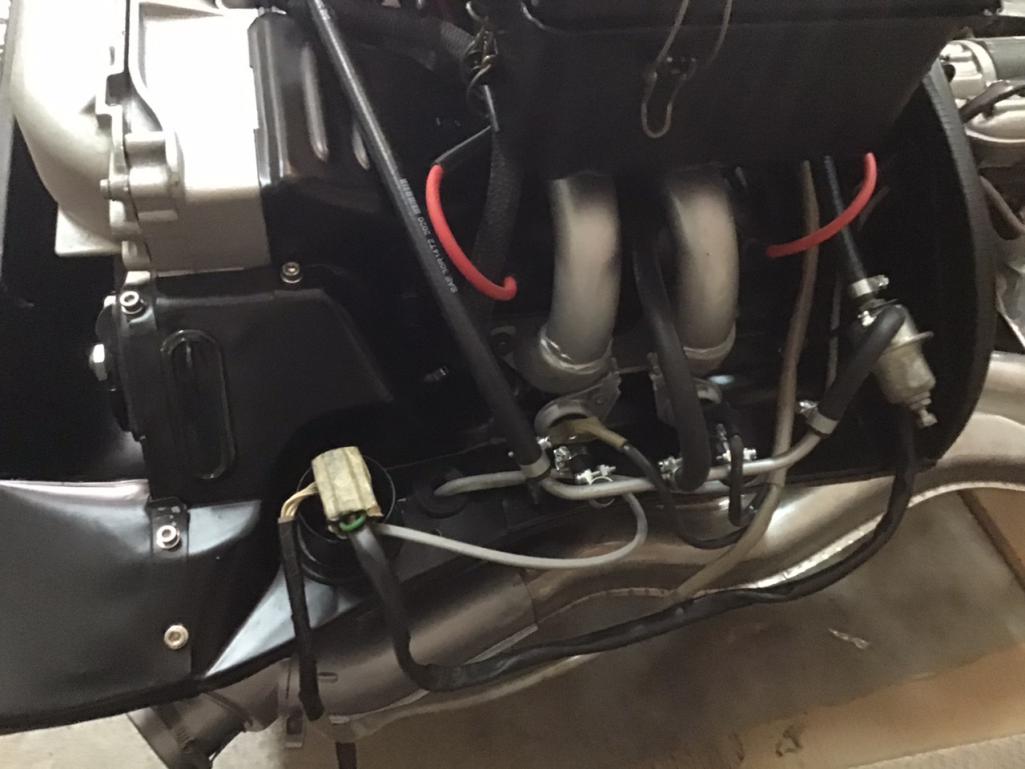
I’ve been working on the engine last couple of days. I do have a couple of questions though. First off, I connected the green vacuum hose from the throttle body to the new 123 Dizzy, I used this port because it had the same size as the one on the dizzy. The other advance/retard port that is capped off had a smaller port. I’m hoping this is right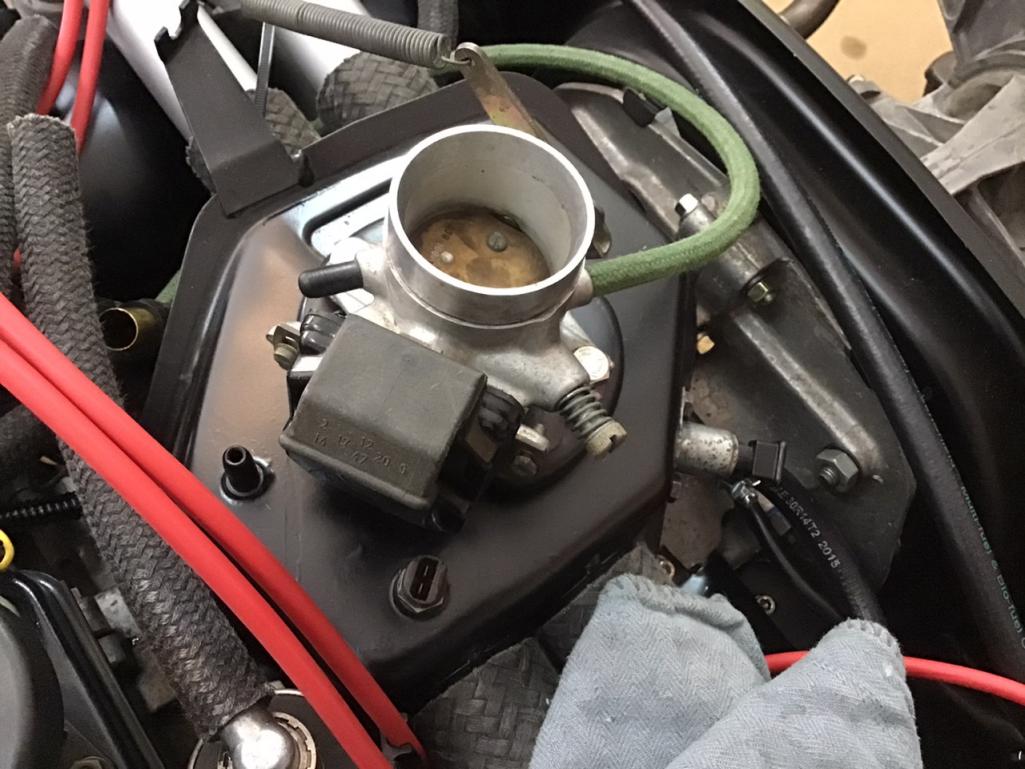
The next picture shows a splitter coming off the AAR valve, I am not using the cold start valve so not sure if I should plug this off or not.
Just about ready to put the engine in, any words of wisdom are welcome at this point. Obviously I will remove the air cleaner before stabbing the engine. I was just fitting the last of the vacuum hoses, the more I can do outside of the car the better for me and my back.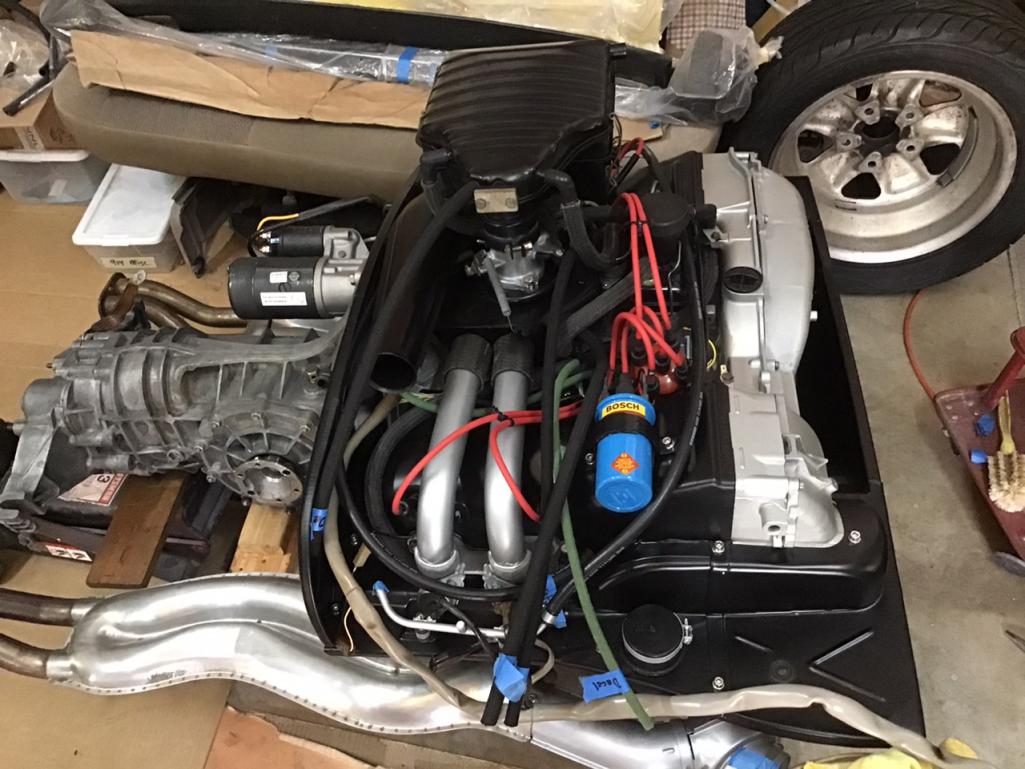

Posted by: bbrock Apr 28 2021, 09:25 PM
Looks like you have the green hose plugged into the ported vacuum side which is correct, at least the way it was originally hooked up. Some people claim the other side (manifold vacuum) is better but I tend to lean toward connecting the way it came from the factory because I don't know any better I guess.
Posted by: Dion Apr 29 2021, 04:46 AM
Car is looking fantastic! Great work. I appreciate your detailed pics.
Cheers, Dion
Posted by: bbrock Apr 29 2021, 07:31 AM
BTW, where did you get the green vacuum hose?
Posted by: Morph914 Apr 29 2021, 10:21 AM
BTW, where did you get the green vacuum hose?
It came with the Auto Atlanta vacuum line kit. Unfortunately no red hose though, and I was not up to the dying task that you were successful with.
Posted by: Morph914 Apr 29 2021, 10:28 AM
Car is looking fantastic! Great work. I appreciate your detailed pics.
Cheers, Dion
Thank you. I figure if I post pictures, you guys will help in pointing out my screw up’s
Cheers,
John
Posted by: Root_Werks Apr 29 2021, 10:43 AM
Looks clean and detailed, nice!
Posted by: 930cabman Apr 29 2021, 12:05 PM
Lookin good and thanks for posting your progress. Will you try to fire her up prior to installing into the car?
Posted by: Morph914 May 4 2021, 10:51 PM
Lookin good and thanks for posting your progress. Will you try to fire her up prior to installing into the car?
I would like to pre run before installing, but it looks like a lot of work to make this happen. So the answer is no, I’m going stab it and hope for the best.
Posted by: Morph914 May 4 2021, 11:28 PM
Finally got the engine installed, what a pain. I should have purchased the engine plate that sits on the floor jack. I had the engine on my floor jack but was not able to get it stable enough to my liking, so I put it on a four wheel dolly, rolled in under with ease and then used a cherry picker to raise into place. This was my first engine install and I will do several things differently next time. Like leaving the fuel rails and hoses off, these took a beating and made things much more difficult than they needed to be. Hopefully I didn’t cut a fuel line or worse break an injector. 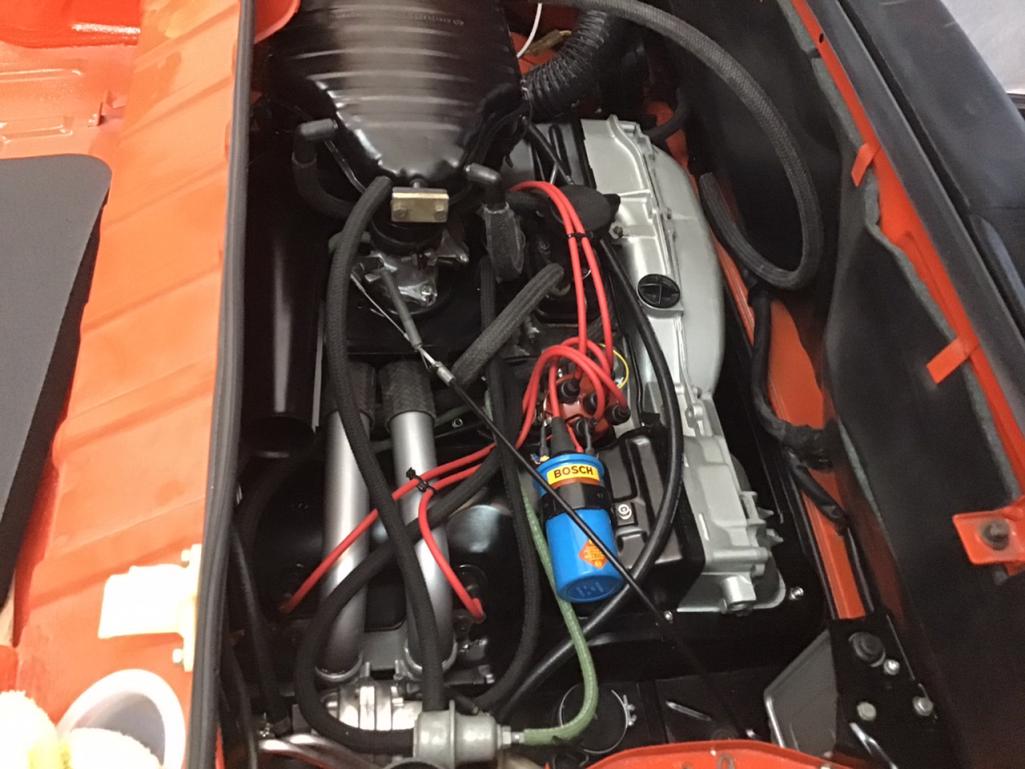

It’s bout to get real 
Then I figured I would attach the axles to the trans and this where things went south. So the rubber bellows was not lined up correctly with the bolt holes so I proceeded to try and align them and all of a sudden one of the ball bearings drops out then another. I tied to get them back in but it wasn’t going to happen. So I started removing the outer CV joint, but then while I was maneuvering it around to remove the bolts the axles pulls out and all the bearings fall out. So I have this huge mess, grease every where. Then I tried to get the CV joint out but the dowels had a good bite and we’re not letting go. Then I remembered, I had not torqued the stub axle bolt down, so I was able to easily tap it out and pull it and the attached CV joint out together. I think I spent most of the day dealing with this mess. Of course I had to clean everything up again, and I had no more grease or extra CV gaskets.
Some days are just going to get the better of you, this was one.
Posted by: kroelofsen May 5 2021, 12:40 AM
Yeb That’s one of those days when it is beter to walk away and try the next day again... Ask me how I know... 
Posted by: DRPHIL914 May 5 2021, 05:50 AM
yikes! i hear you, been there and done that too, especially with the fuel rail removal prior to install. it’s really tight with everything on there. i have done CV and this time with just transmission it was not an issue, but luck for you your stub axle was not torqued down! BTW thet motor looks great! do you think it’ll be running for the Classics opening in 2 weeks or Werks in 3?? hope to see you there!
Phil
Posted by: Morph914 May 5 2021, 07:22 PM
yikes! i hear you, been there and done that too, especially with the fuel rail removal prior to install. it’s really tight with everything on there. i have done CV and this time with just transmission it was not an issue, but luck for you your stub axle was not torqued down! BTW thet motor looks great! do you think it’ll be running for the Classics opening in 2 weeks or Werks in 3?? hope to see you there!
Phil
Hard to say, I never know how much time things are going to take. Some days a good amount of progress is made and others, not so much. I would guess probably not at the current pace.
Cheers,
John
Posted by: bbrock May 5 2021, 07:40 PM
Oh wow! I feel your pain, but did you invent any new words? Still, this is a huge accomplishment and that engine looks sublime!  I also decided to use the chassis as my engine "test stand" and don't regret it. Also, if it is any consolation, I've lost count of the number of times I've installed a 914 (or bus) engine, but after a 35 year hiatus, it was like a whole new experience again, and not in a good way. Like an idiot, I tried to stuff mine in there with carbs on. Horrible idea. You are making great progress though despite the greasy little BBs running all over the floor.
Posted by: 930cabman May 6 2021, 05:02 AM
Most (close to all) of us have real jobs and turn wrenches as a hobby and often take one step forward and several steps back. I can't recall how many flat VW engines I changed back in the '70's, but after 40+ years the motions are not quite the same.
@BB - Thanks for the heads up with regards to installing the engine with carbs attached.
Posted by: Morph914 May 13 2021, 06:27 PM
She’s alive! Well most of her.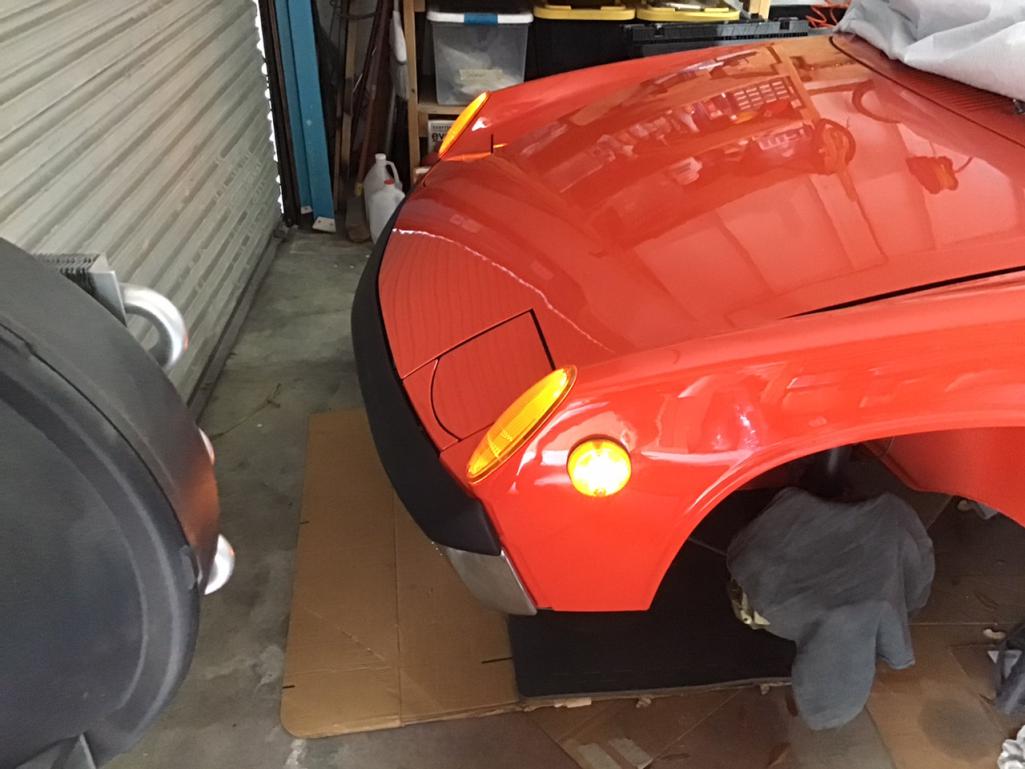
The one thing I really wanted to hear when I turned the key to the on position was the fuel pump, well, it didn’t happen. Before I put fuel in the tank and try to start, I need to figure this out. So far I have tested for power at the pump, no go. Then I ran a wire from the battery to the pump and the pump is good. I have power to the relay, and I have switched the relay for another untested unit. One of the reasons I decided to install the pump on the back fire wall (close to its original location) is because the original wiring was there and it would be easy.
The original wires had the plug for the original fuel pump cut off, so I just lengthened them a bit attached the brown to the ground and the (I think) black and red to the positive side. I guess the next step is to check the control box?
If this turns into a big hassle I may relocate it to the front where I wanted it in the first place.
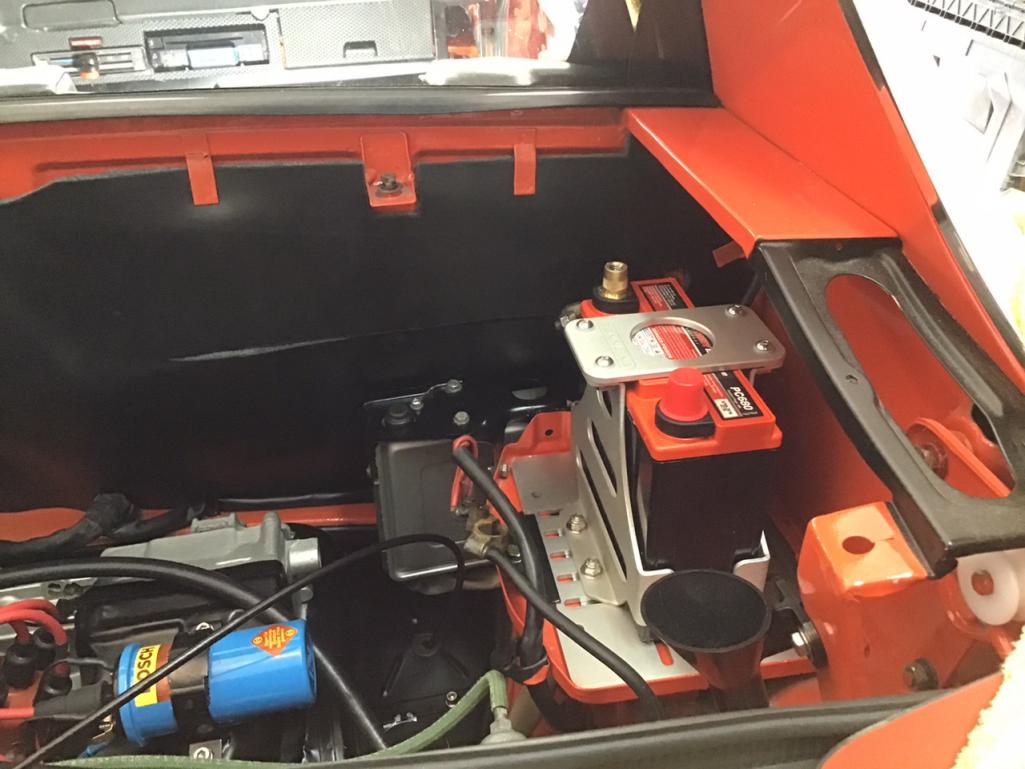
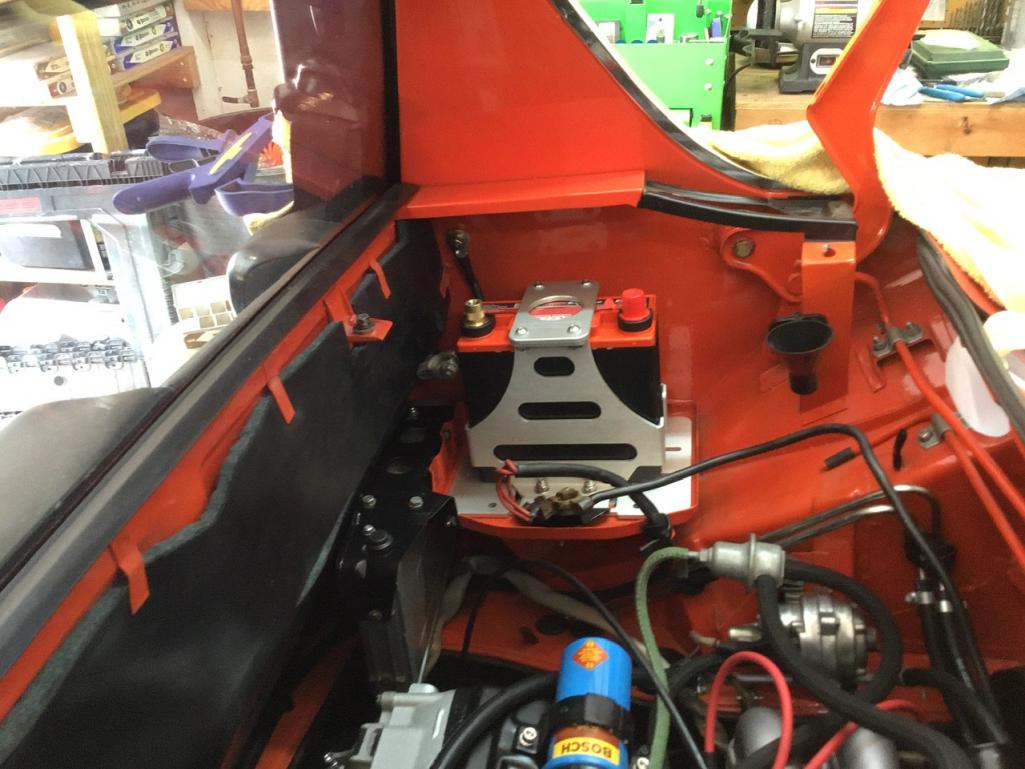
This is the battery set up I decided upon. I wasn’t keen on it at first but the weight savings was very attractive. If it doesn’t work out, look for it on the classifieds.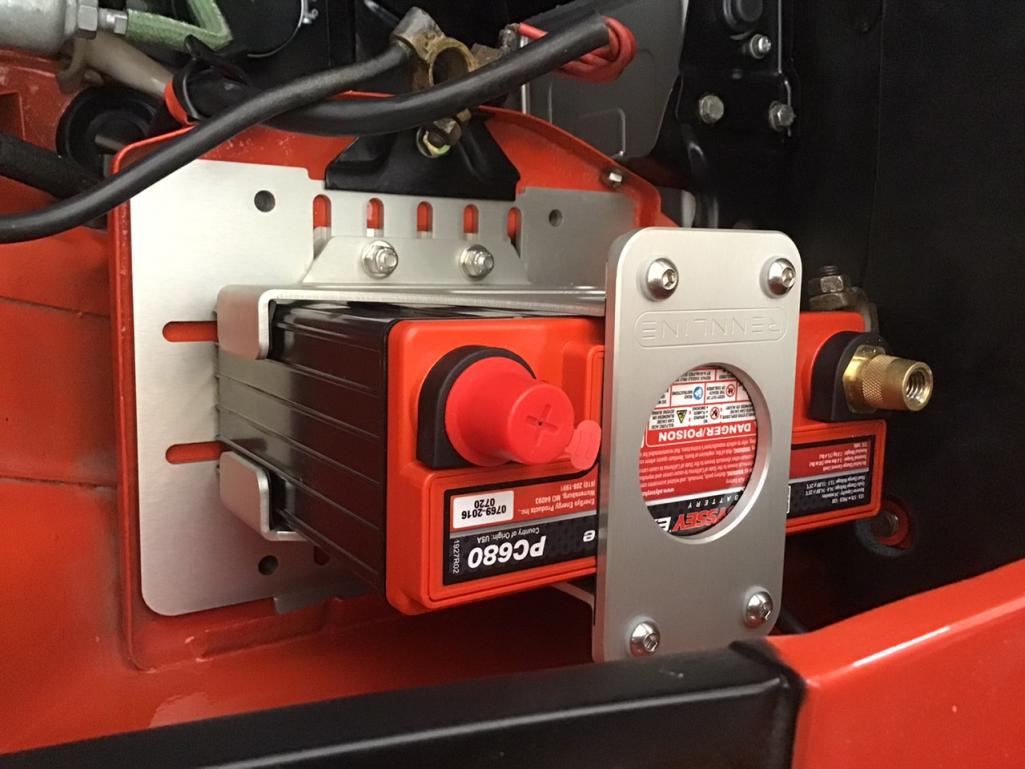
I have yet to test the headlights, I had the relays out, and ran out of time. The fog lights are not working either. So, as expected, I have some issues to work through
Posted by: bbrock May 13 2021, 07:49 PM
Another great milestone! At this rate, you'll be driving before me.
A couple thoughts on the fuel pump. First, I'd make sure there is a known GOOD relay in both the power and fuel pump sockets before digging deeper (and of course double check the fuses).
If it still won't run, you could try by-passing the ECU by wiring the pump like you would for carbs. It's a simple jumper to ground (http://www.914world.com/specs/SirAndyCarbFuelPumpRelay.php). If it runs, then your probably looking at something amiss in the ECU circuit. IIRC, the pump should run for something like 2 seconds when the key is switched on and turn off again unless the engine is started. I would also deduce from the method to trick the pump into running with an ECU, that the brain is controlling the pump by completing and breaking the ground circuit, so that would be another clue of what to look for.
I have a weird relay that refuses to work with the cover cap on. If I pry the cap off to expose the relay, it works fine. As soon as I glue the cap back on, it stops working. I've repeated this twice now with the same result. Fickle little bugger.
Posted by: rjames May 13 2021, 09:26 PM
Your CV joint story had me laughing and crying at the same time. I had the same thing happen to me a while back. You see one of those bearings fall out while you're lying on your back under the car and just have time to say oh sh*t before the rest go like dominos.
Your car looks fantastic. Great work!!
Posted by: Morph914 May 14 2021, 07:48 AM
Another great milestone! At this rate, you'll be driving before me.
A couple thoughts on the fuel pump. First, I'd make sure there is a known GOOD relay in both the power and fuel pump sockets before digging deeper (and of course double check the fuses).
If it still won't run, you could try by-passing the ECU by wiring the pump like you would for carbs. It's a simple jumper to ground (http://www.914world.com/specs/SirAndyCarbFuelPumpRelay.php). If it runs, then your probably looking at something amiss in the ECU circuit. IIRC, the pump should run for something like 2 seconds when the key is switched on and turn off again unless the engine is started. I would also deduce from the method to trick the pump into running with an ECU, that the brain is controlling the pump by completing and breaking the ground circuit, so that would be another clue of what to look for.
I have a weird relay that refuses to work with the cover cap on. If I pry the cap off to expose the relay, it works fine. As soon as I glue the cap back on, it stops working. I've repeated this twice now with the same result. Fickle little bugger.
Thank you, I will try to solve this mystery by starting with good relays per your advice. Electrical gremlins can be quite annoying. Sounds like your relay is afraid of the dark.
Posted by: Morph914 May 14 2021, 07:52 AM
Your CV joint story had me laughing and crying at the same time. I had the same thing happen to me a while back. You see one of those bearings fall out while you're lying on your back under the car and just have time to say oh sh*t before the rest go like dominos.
Your car looks fantastic. Great work!!
I’m happy to provide laughter, it is kind of funny looking back. Not so much when it happened

Cheers, and thanks for the kind words.
John
Posted by: bbrock May 14 2021, 07:56 AM
Sounds like your relay is afraid of the dark.
 That's a good one. Just another indication that I'm not right in the head is that I somewhat enjoy chasing down electrical problems. Something about the process of isolating components of the circuit to zero in on the problem pleases me. What I don't like is discovering the "problem" requires tearing out the dash to access for a 10 minute repair.
Posted by: Morph914 May 15 2021, 08:58 PM
Sounds like your relay is afraid of the dark.
That's a good one. Just another indication that I'm not right in the head is that I somewhat enjoy chasing down electrical problems. Something about the process of isolating components of the circuit to zero in on the problem pleases me. What I don't like is discovering the "problem" requires tearing out the dash to access for a 10 minute repair.I too enjoy the challenge of fixing electrical issues, the problem is, I’m not very knowledgeable when it comes to understanding the way everything works. So I will be relying heavily on the world members to get me through it.
So far, I have no power to the fuel pump, headlights work but are not popping up, and the fog lights are not working. And even though we rarely get thick fog here, I want them to work.
On a good note, my horn works, stereo works, the fresh air blower works (thank God, I did not want to have to remove and reinstall that piece), blinkers etc. So god willing, I’ll be fixing some of these issues this week, with the fuel pump having the priority so I can get this baby started.
I can’t wait to see yours out on the pavement where you can open her up.
Posted by: Morph914 May 20 2021, 12:07 PM
Still trying to sort out the lack of power to my fuel pump.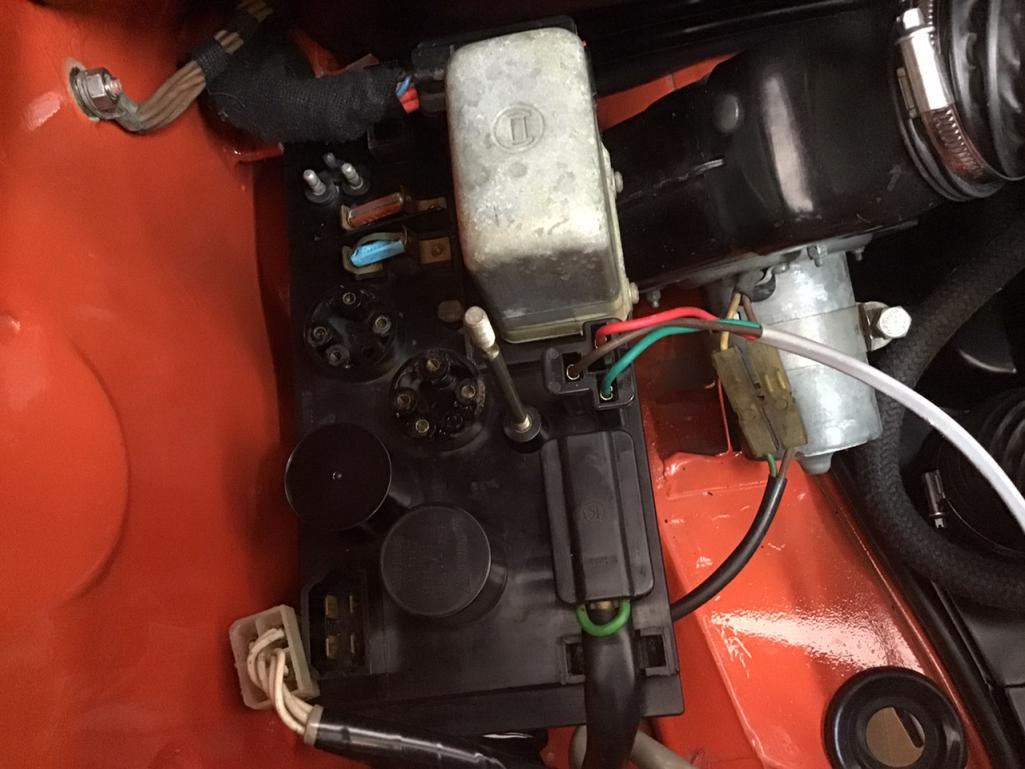
I have gone through Jeff’s fuel pump trouble shooting tests, and so far the first 7 are good, but #8 failed indicating a bad relay board. Should I stop here and replace the relay board. Or should I start testing the ECU board. I do have the ECU from the original engine (1.7)
I should fill you in on what I started with and what is currently in the car.
It had a ‘73 1.7 liter with d jet when I purchased the car. The PO ( who is reputable) posted a video of the car running, so I know everything was good several years ago. Fast forward, I purchased a 73 2.0 with the fuel injection components, and that is what is in the car now.
This is my current MPS and ECU. Are these compatible?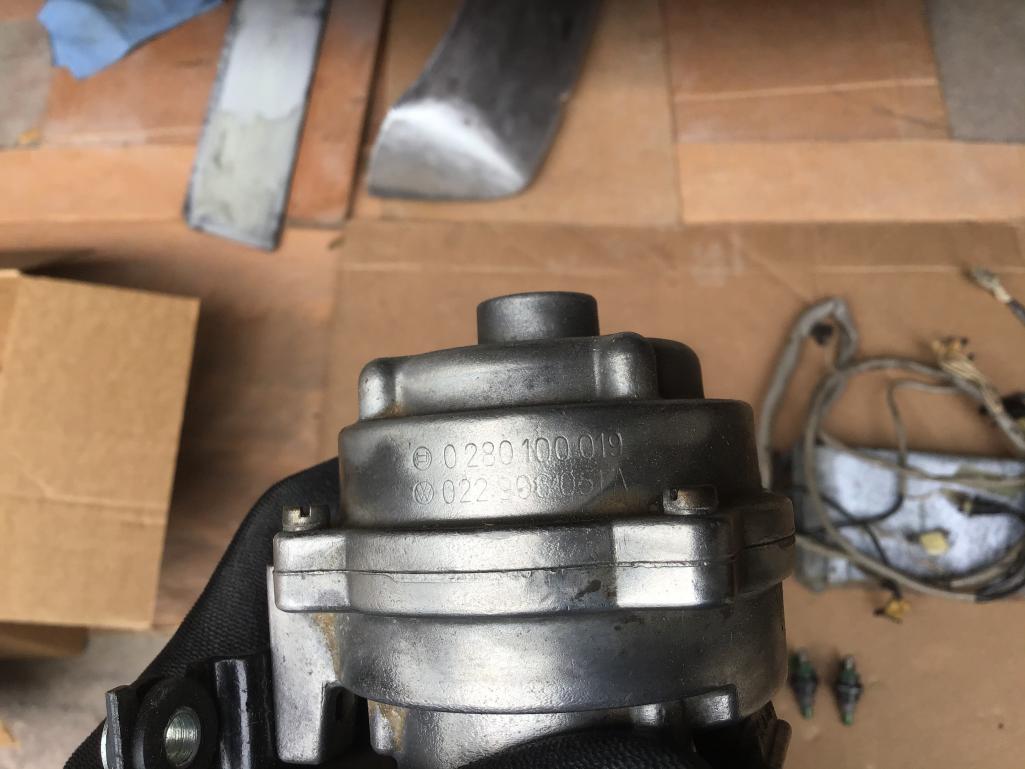
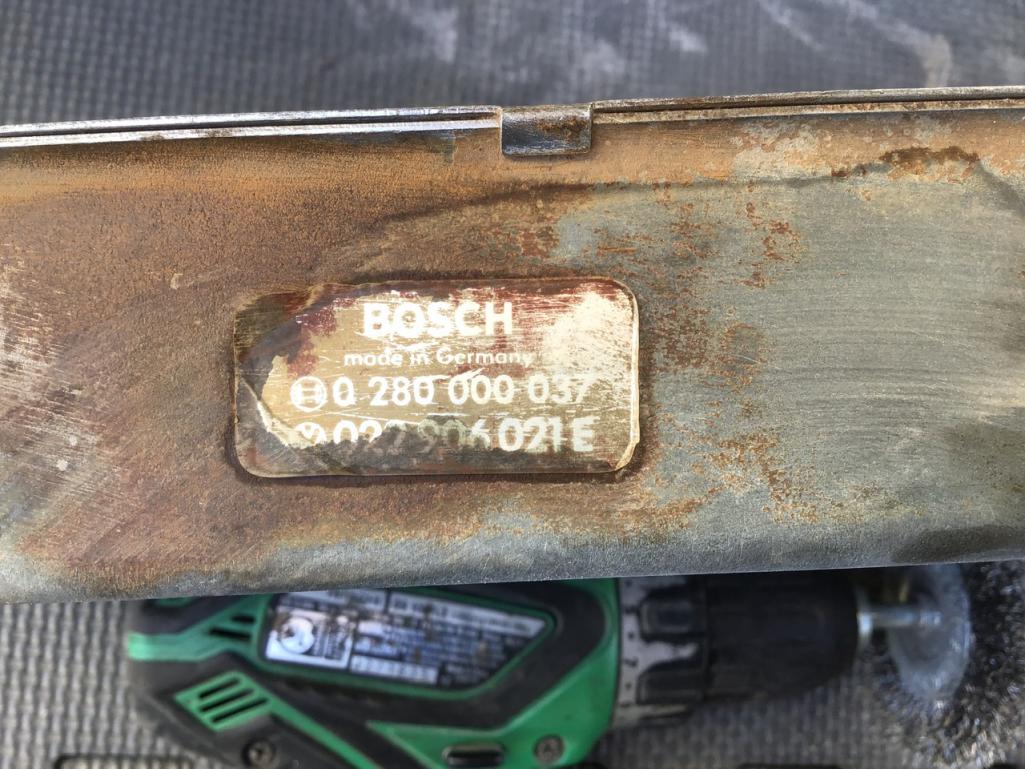
I also have this MPS off the original 1.7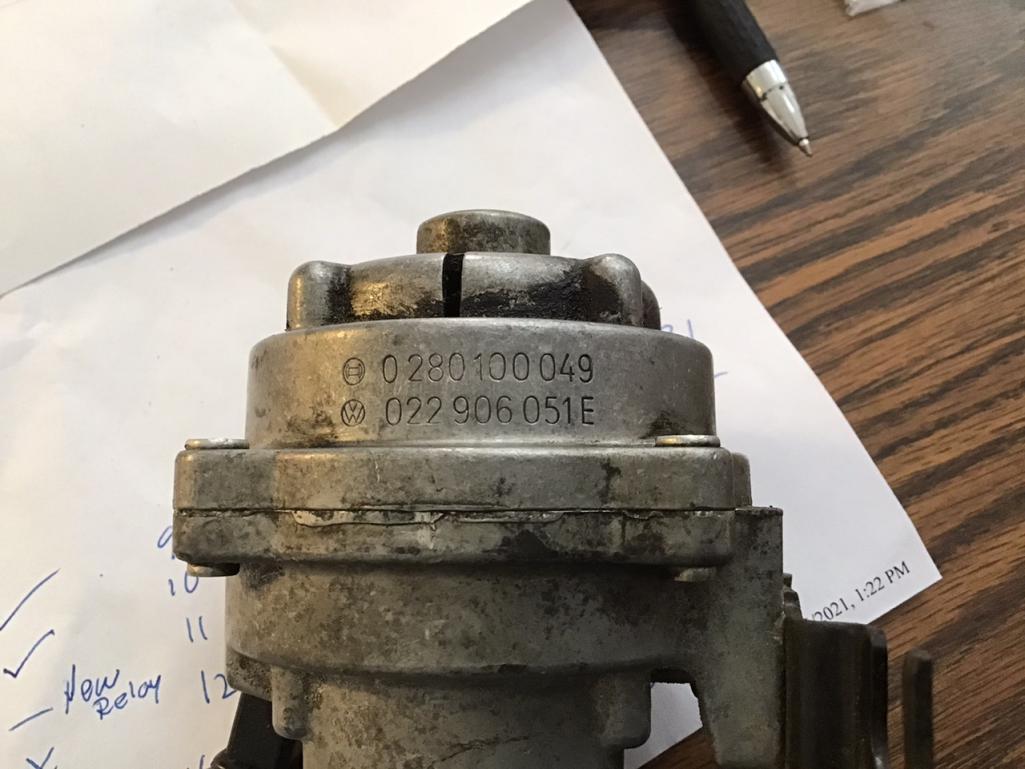
Posted by: bbrock May 20 2021, 12:30 PM
Definitely start with the relay because 1) it should be easy to test connectivity along the traces for the fuel pump, and 2) from what I understand, the relay is much more likely to go bad than the ECU.
Posted by: Morph914 May 20 2021, 07:52 PM
Definitely start with the relay because 1) it should be easy to test connectivity along the traces for the fuel pump, and 2) from what I understand, the relay is much more likely to go bad than the ECU.
I agree, I’m really hoping it’s not the ECU. It would be very difficult to replace it with all the wiring and such. I do have the extra ECU from the 1.7 if needed, and maybe I could just change the box out if need be and leave the harness in place.
Off to the classifieds to find a relay board.
Posted by: bbrock May 20 2021, 08:26 PM
Definitely start with the relay because 1) it should be easy to test connectivity along the traces for the fuel pump, and 2) from what I understand, the relay is much more likely to go bad than the ECU.
I agree, I’m really hoping it’s not the ECU. It would be very difficult to replace it with all the wiring and such. I do have the extra ECU from the 1.7 if needed, and maybe I could just change the box out if need be and leave the harness in place.
Off to the classifieds to find a relay board.
Did you test the relay board? With a schematic you should be able to test conductivity along the traces and confirm that is the problem before throwing money at it.
Posted by: Morph914 Nov 18 2021, 07:42 PM
So, after taking a break from the car during the hot humid summer, I am back at it. As previously stated, I was having an issue of no power to the fuel pump when I turned the key. After replacing the relay board still no go, so I swapped out the ECU with an extra I had and this did the trick
So now that I had power to the pump, it was time to put gas in the tank. I checked for leaks and found none, so it was time to light the fire. First I disconnected the coil wire and cranked it several times to get the oil moving. Then I hooked it up and tried to start and nothing.
I started checking to see if I had fuel to the pump, and there was not. I had a hell of a time getting the air out of the system, but after a fuel bath I was able to finally get fuel up to the injector rail. Once I had fuel to the engine she fired off immediately She ran pretty good for just having the timing close, and also idled nicely.
So after tying up some loose ends, I was ready take my first drive ever in this car.
The car was still without doors, rear trunk lid, engine lid, and the windshield. The purpose of this drive was to make sure I had a working transmission, I was not disappointed, it seem to shift smoothly into all the gears. Big relief! I did not want to install all the other pieces on the car until I knew the trans was going to work in case I had to drop the engine and trans. Less chance of getting dings or scratches if they stay stashed away under heavy padding.
So now that the drive train appears good, I am starting the install of the remaining pieces. The rear trunk lid was first. After bolting it on, I slowly lowered the lid to check alignment and latch engagement. It all looked pretty close with a small adjustment needed. When I went to push the release button, nothing happened, so I figured it was in the locked position, but after switching the position with the key, nothing. I must have put the latch together improperly Now my lid is shut and I cannot see how to get it open, what are my options? Help 
Posted by: jims914 Nov 18 2021, 08:39 PM
Hello John,
Nice build.
Thanks it gives a lot of information on the build. I am doing a 70 with a 2.0, side shift in Adriatic Blue.
Thanks again Jim
Posted by: Morph914 Nov 18 2021, 08:50 PM
Jim, you are more than welcome! This forum is the best! I was fortunate to follow several builds here to help me out in a big way. The least I could do was to give back by posting some of my work.
Good luck with your ‘70!
Cheers,
John
Posted by: pfreiburger Nov 18 2021, 10:52 PM
Really nice work, everything on your car looks great. Your write up has been appreciated as well. Looking forward to seeing it on the road.
Posted by: tygaboy Nov 19 2021, 09:09 AM
John - WOW! Your car looks wonderful! Great job and thanks for documenting.
Posted by: Morph914 Nov 19 2021, 01:13 PM
Thank you! Do you have any ideas on how to remedy getting my trunk lid open. I must have put the lock plunger in the wrong orientation after disassembling and cleaning and now I can’t open the lid.
By the way, love the new BMW. Because two projects (that I know of)were not enough…
Cheers,
John
Posted by: Dion Nov 19 2021, 01:47 PM
Morph Maybe this link has useful info : http://www.914world.com/bbs2/index.php?showtopic=207951
Posted by: Morph914 Dec 12 2021, 08:48 PM
Finally got the trunk lid open. I tried a golf club, a ratchet with several extensions added and taped to hold them together, and a brass rod with a bend on the end. What finally worked was the brass rod. After learning I could see through a couple of small holes at the top of the firewall I was able to get the brass rod back to the lock and release the latch.
This is the tool that finally worked.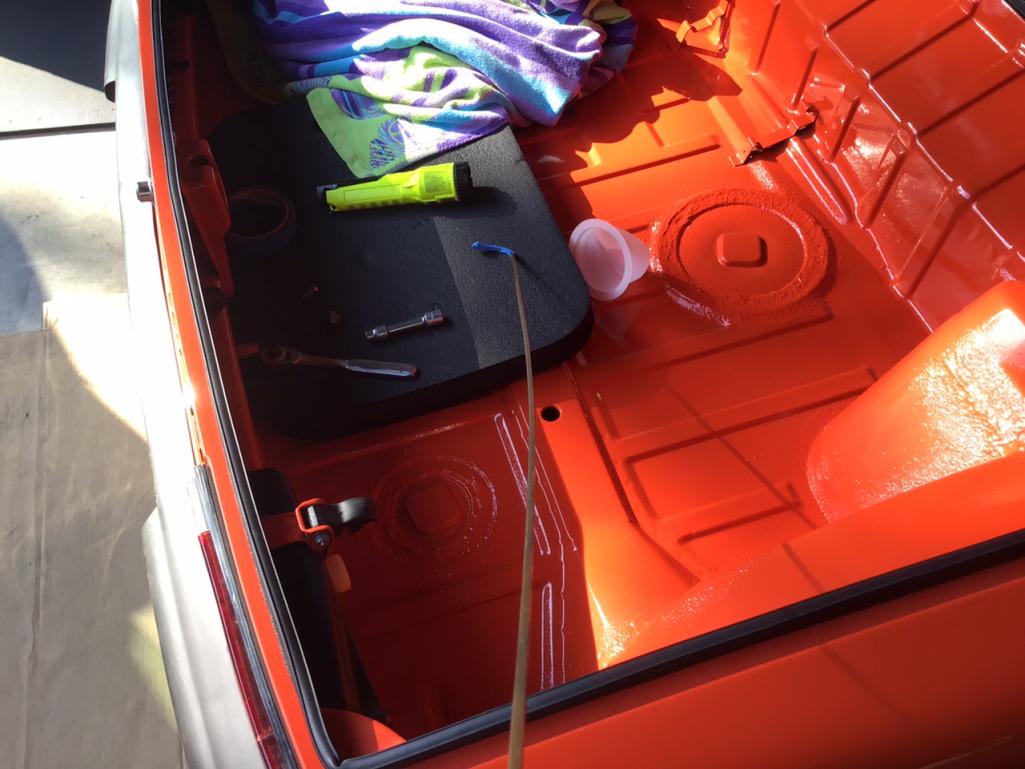
The 2 small holes at the top of the firewall made it much easier to see into the trunk.
I had the release pin 180degrees out, so when I would push it in, it was doing nothing.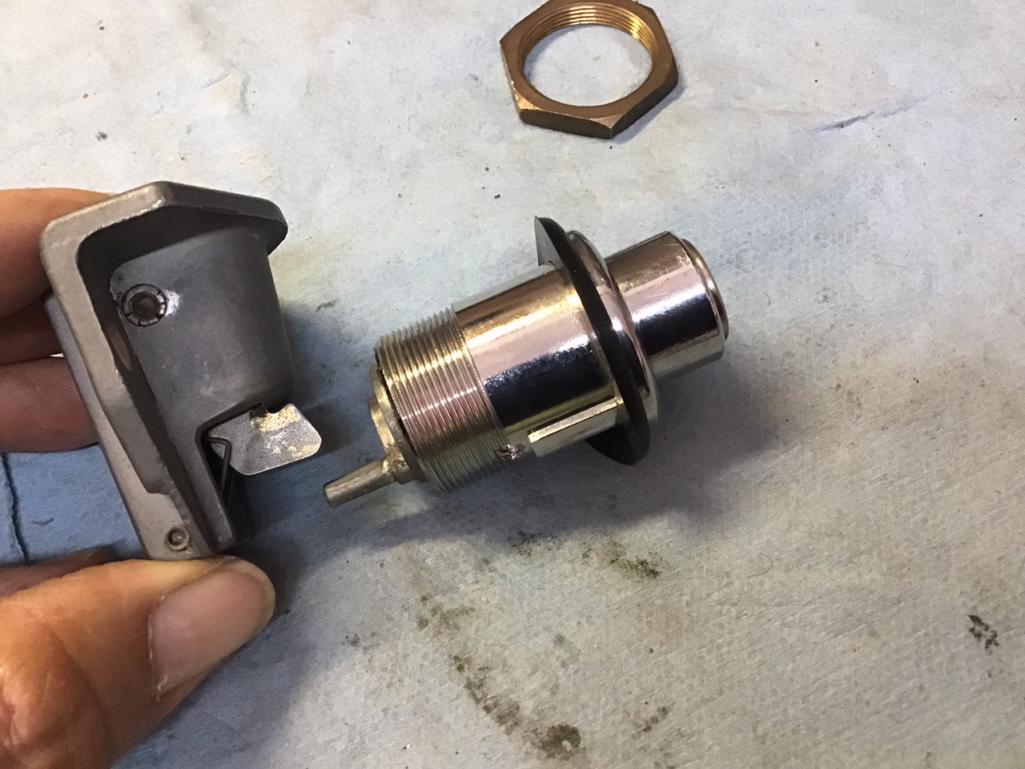
It was an easy fix after I took the lock out and flipped the release pin to the correct orientation.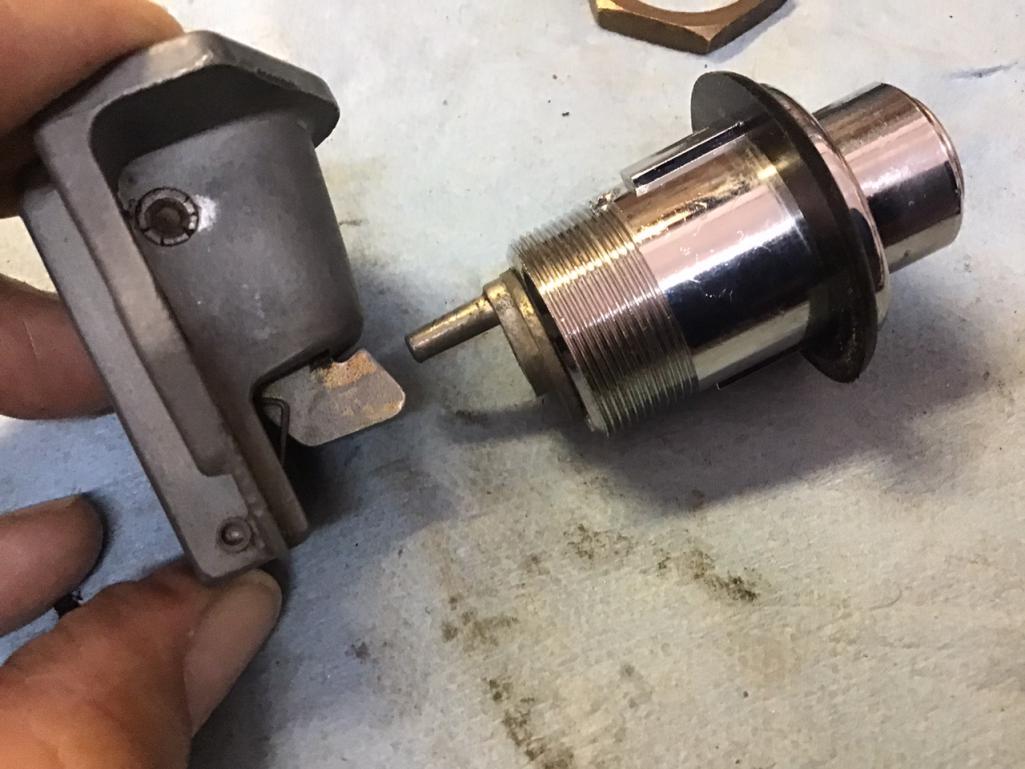
Posted by: DRPHIL914 Dec 14 2021, 04:57 PM
Finally got the engine installed, what a pain. I should have purchased the engine plate that sits on the floor jack. I had the engine on my floor jack but was not able to get it stable enough to my liking, so I put it on a four wheel dolly, rolled in under with ease and then used a cherry picker to raise into place. This was my first engine install and I will do several things differently next time. Like leaving the fuel rails and hoses off, these took a beating and made things much more difficult than they needed to be. Hopefully I didn’t cut a fuel line or worse break an injector.
It’s bout to get real
Then I figured I would attach the axles to the trans and this where things went south. So the rubber bellows was not lined up correctly with the bolt holes so I proceeded to try and align them and all of a sudden one of the ball bearings drops out
then another. I tied to get them back in but it wasn’t going to happen. So I started removing the outer CV joint, but then while I was maneuvering it around to remove the bolts the axles pulls out and all the bearings fall out. So I have this huge mess, grease every where. Then I tried to get the CV joint out but the dowels had a good bite and we’re not letting go. Then I remembered, I had not torqued the stub axle bolt down, so I was able to easily tap it out and pull it and the attached CV joint out together. I think I spent most of the day dealing with this mess. Of course I had to clean everything up again, and I had no more grease or extra CV gaskets. Some days are just going to get the better of you, this was one.
oh boy! you are in good company, i also had this happen on getting my new motor back in the car in September, ended up taking the cv out just like you did and i took it completely apart and reassmebled it before reinstalling it. It was not as bad as i thought it would be.
Car is looking great, hope to see you out and about in Jax/St. Augustine/daytona soon!! I need to come down for the next Caffeine and Octane show.
Do you have a goal date in mind for road test?
Posted by: Morph914 Dec 16 2021, 09:30 AM
I’m hoping by the end of the year. I have had a hell of a time with the doors, and glass, and getting them adjusted properly. With all new seals, things don’t fit as they used to. I’m still not happy with them.
The next thing on my list is the windshield, I have not decided if I’m going to tackle this or not. I have everything to do it, including new trim, but a bit hesitant on this task.
Cheers, and Merry Christmas!
John
Posted by: 9146C Dec 16 2021, 09:43 AM
The windshield replacement is not a particularly difficult task (having just replaced my original windshield recently...single-handed).
Assuming you've also purchased the new trim clips and spacers?
Pick up a couple of these suction cups from Harbor Freight (or similar):
https://www.harborfreight.com/4-23-in-dual-suction-cup-lifter-125-lb-57501.html
Keep in mind, there are likely fewer and fewer auto glass installers that are actually familiar with butyl tape windshield installations. You'll probably get someone doing this for the first time also.
Plenty of videos available on YouTube showing how to do this.
Posted by: DRPHIL914 Dec 16 2021, 10:00 AM
I’m hoping by the end of the year. I have had a hell of a time with the doors, and glass, and getting them adjusted properly. With all new seals, things don’t fit as they used to. I’m still not happy with them.
The next thing on my list is the windshield, I have not decided if I’m going to tackle this or not. I have everything to do it, including new trim, but a bit hesitant on this task.
Cheers, and Merry Christmas!
John
John,
I called our local porsche dealer , they have a guy that does all of the windshield installation for the dealership all new and old. I ordered my new glass from Porsche, OEM, they went by and picked it up and brought it to my house and installed it., Glass was $500($50off PCA discount) and they charged me $100 for install, since i had the butyl already too. Check with the dealership they might do the same thing , or have a name of an independent that would install it for you.
Posted by: Morph914 Dec 17 2021, 07:00 PM
The windshield replacement is not a particularly difficult task (having just replaced my original windshield recently...single-handed).
Assuming you've also purchased the new trim clips and spacers?
Pick up a couple of these suction cups from Harbor Freight (or similar):
https://www.harborfreight.com/4-23-in-dual-suction-cup-lifter-125-lb-57501.html
Keep in mind, there are likely fewer and fewer auto glass installers that are actually familiar with butyl tape windshield installations. You'll probably get someone doing this for the first time also.
Plenty of videos available on YouTube showing how to do this.
I do have all the necessary tidbits, but I do need to look into the suction cups.
When I look at the top of the windshield it appears to me that the interior trim piece is too proud to let the windshield seat properly. I’ll have to watch the videos.
Cheers,
John
Posted by: Morph914 Dec 17 2021, 07:03 PM
I’m hoping by the end of the year. I have had a hell of a time with the doors, and glass, and getting them adjusted properly. With all new seals, things don’t fit as they used to. I’m still not happy with them.
The next thing on my list is the windshield, I have not decided if I’m going to tackle this or not. I have everything to do it, including new trim, but a bit hesitant on this task.
Cheers, and Merry Christmas!
John
John,
I called our local porsche dealer , they have a guy that does all of the windshield installation for the dealership all new and old. I ordered my new glass from Porsche, OEM, they went by and picked it up and brought it to my house and installed it., Glass was $500($50off PCA discount) and they charged me $100 for install, since i had the butyl already too. Check with the dealership they might do the same thing , or have a name of an independent that would install it for you.
Phil, not a bad idea. However I am reusing my windshield so not sure if they would be willing to install my old windshield. Might be worth a call.
Posted by: Morph914 Jan 26 2022, 02:02 PM
Well it’s starting to look like a car again. I decided to tackle the windshield install, the butyl tape and glass is fairly easy. The pain started when I tried to install the trim it went well for the firs several clips, but when I got over to the passenger side near the top the glass was sitting up against the clip not allowing the trim to slide in and lock. And it was spaced evenly all the way around but there were three or four areas where the glass was up against the clip. Any way after much pain, suffering, walking away for a couple of days, a few modifications, I have the trim pretty much in, the lower corner on the driver side did not seat all the way in, but at this point I’m not willin to give it a tug to see if it’s locked in. If it’s not, a bit of driving will make it pop loose, then I will deal with it.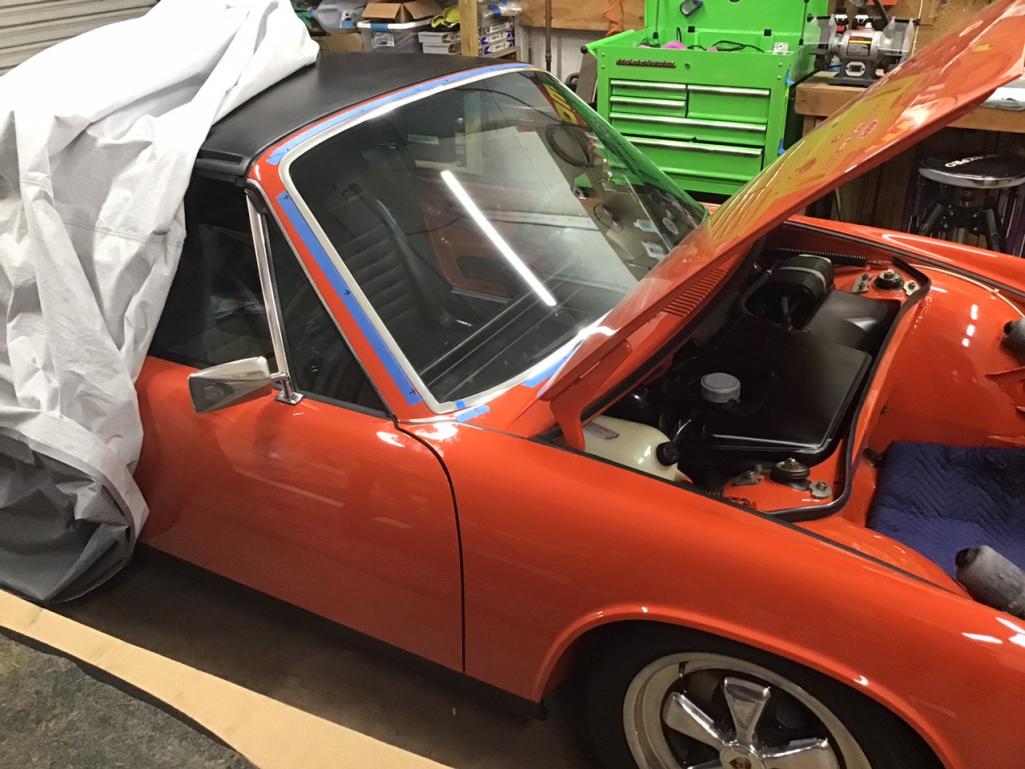
I boogered up the corner piece of the trim while trying to get it in. 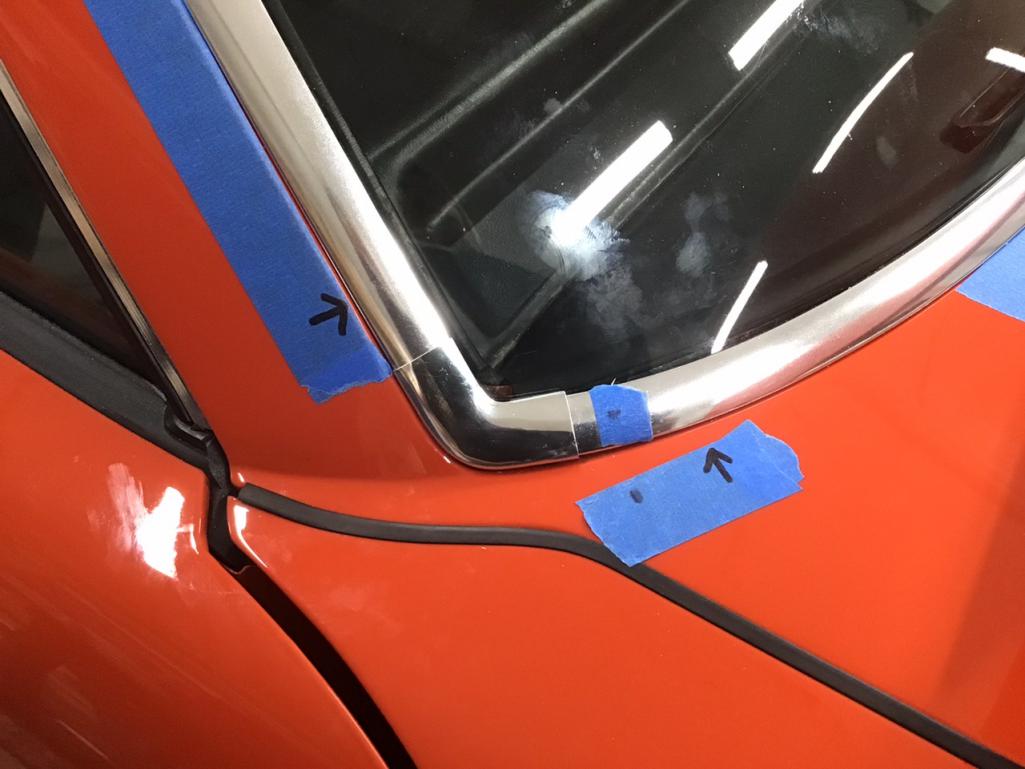
Drivers side at the bottom still not seating properly.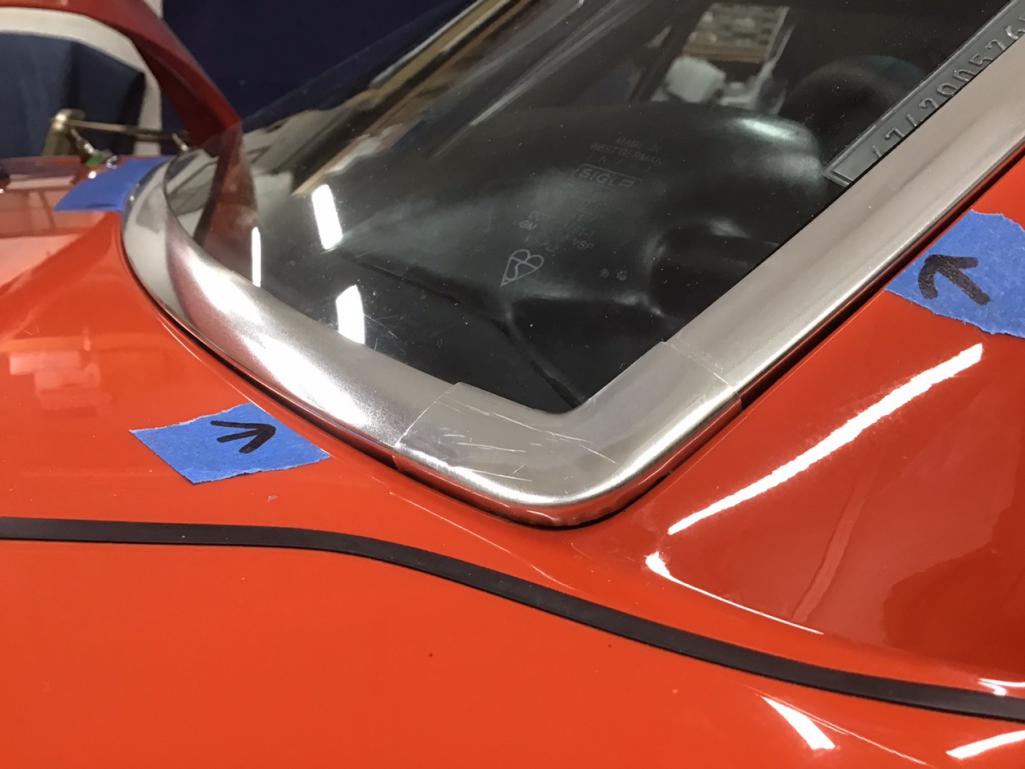
Posted by: Morph914 Jan 26 2022, 02:17 PM
I know it’s bass ackwards, but I wanted to show how I installed the new clips.
I used a deep socket to set the clip.
Then used a punch to push in the pin and lock in place.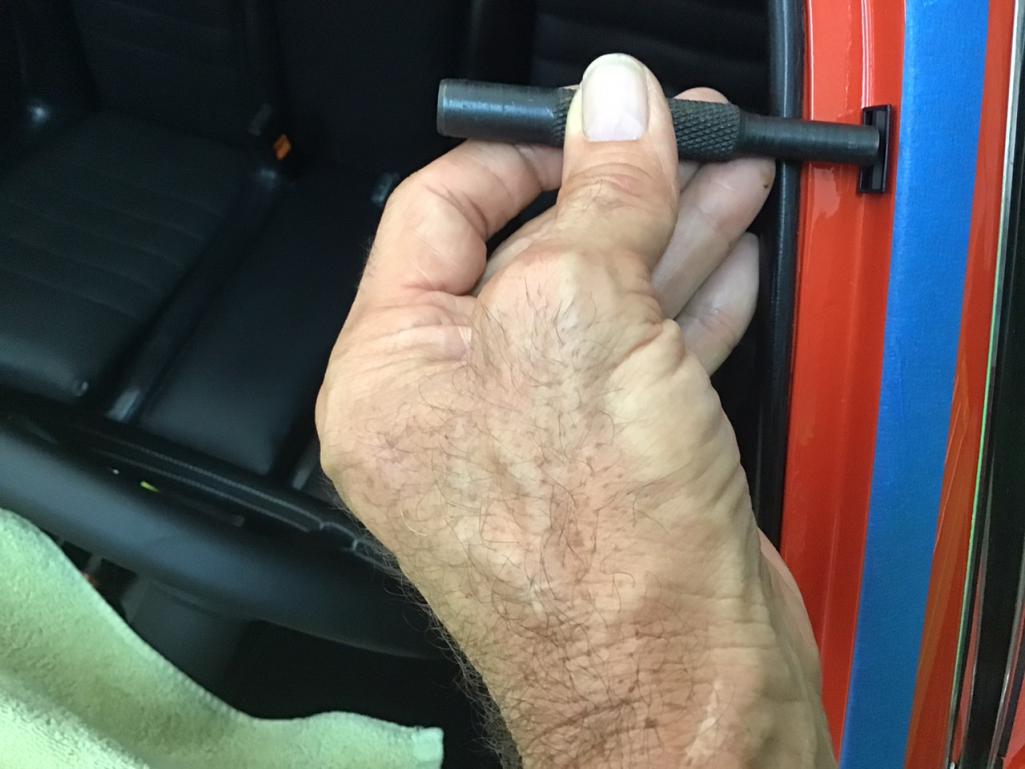
Also marked the location of all the clips so I knew where to apply the pressure when installing the trim.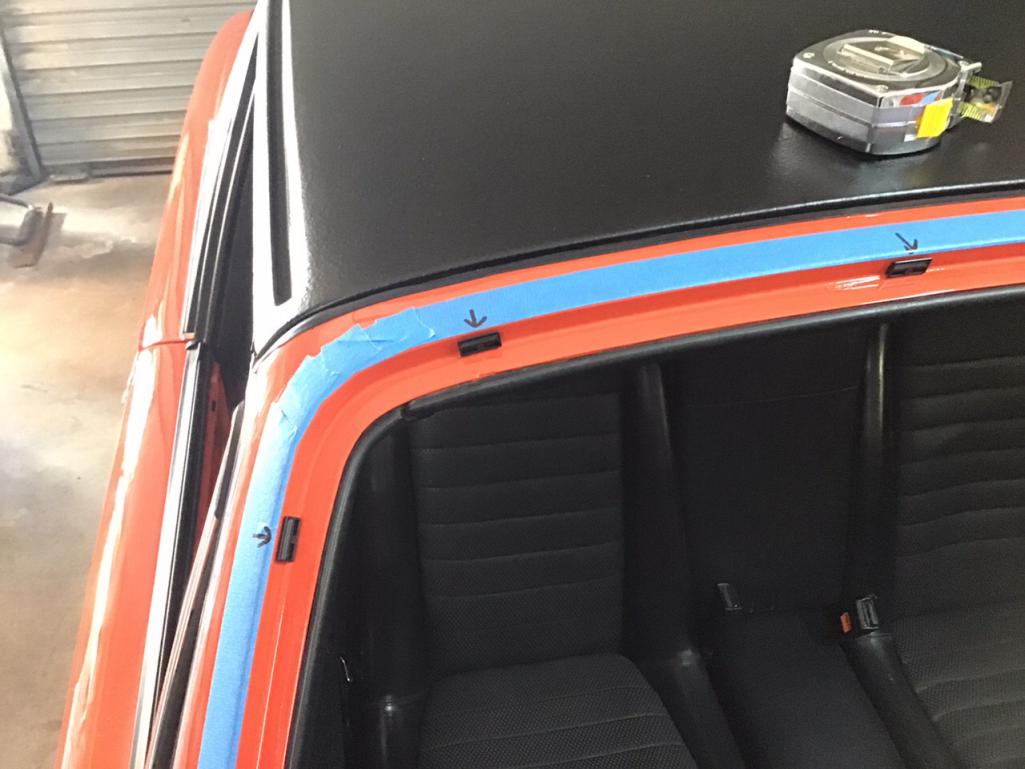
Posted by: Morph914 Jan 26 2022, 02:28 PM
I’m trying to level out the front end and lower just a bit, but I’m having a bit of a problem pulling the end caps off the torsion bars. I pulled the adjusting bolt all the way out, jacked up the car to relieve any pressure, still not budging. I then took the wheel off and tried lifting the a arm up to see if that would work, again, no luck.
The cap seems to be wedged in at the top position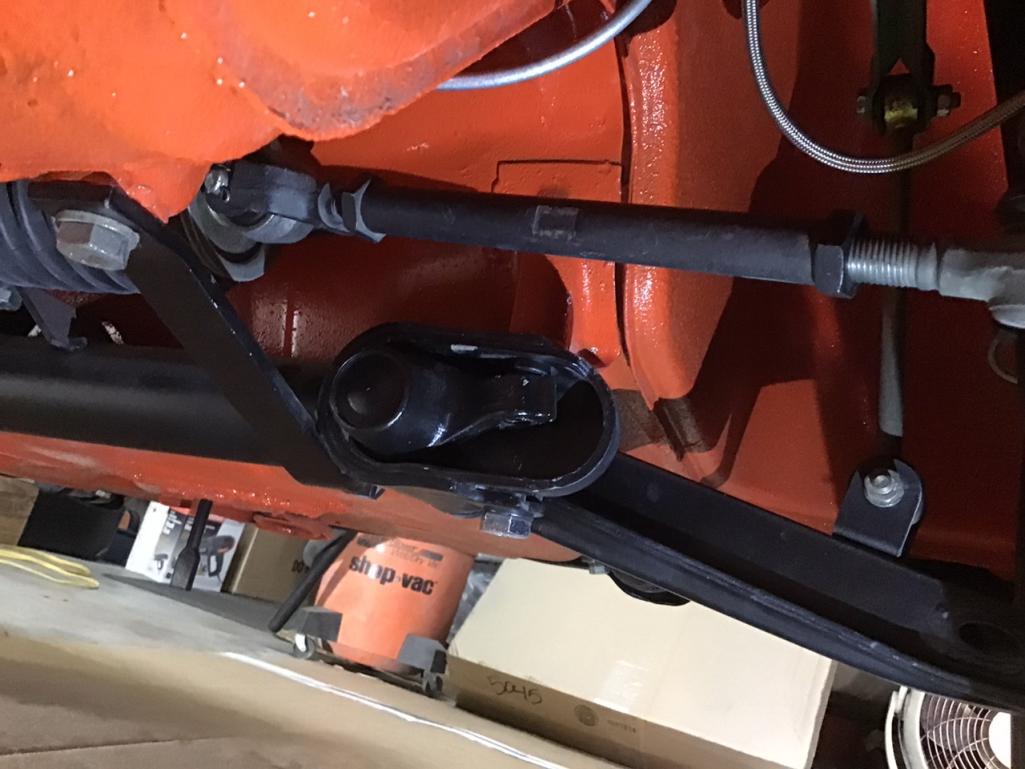
Posted by: Morph914 Jan 26 2022, 02:38 PM
Getting ready to install the felt piece in the front trunk. This is a piece from 914 Rubber, it is bigger than the original. Has anyone had experience installing this piece? Should I trim to the original size or install as is. It is difficult to know due to the contours and uneven surfaces this covers.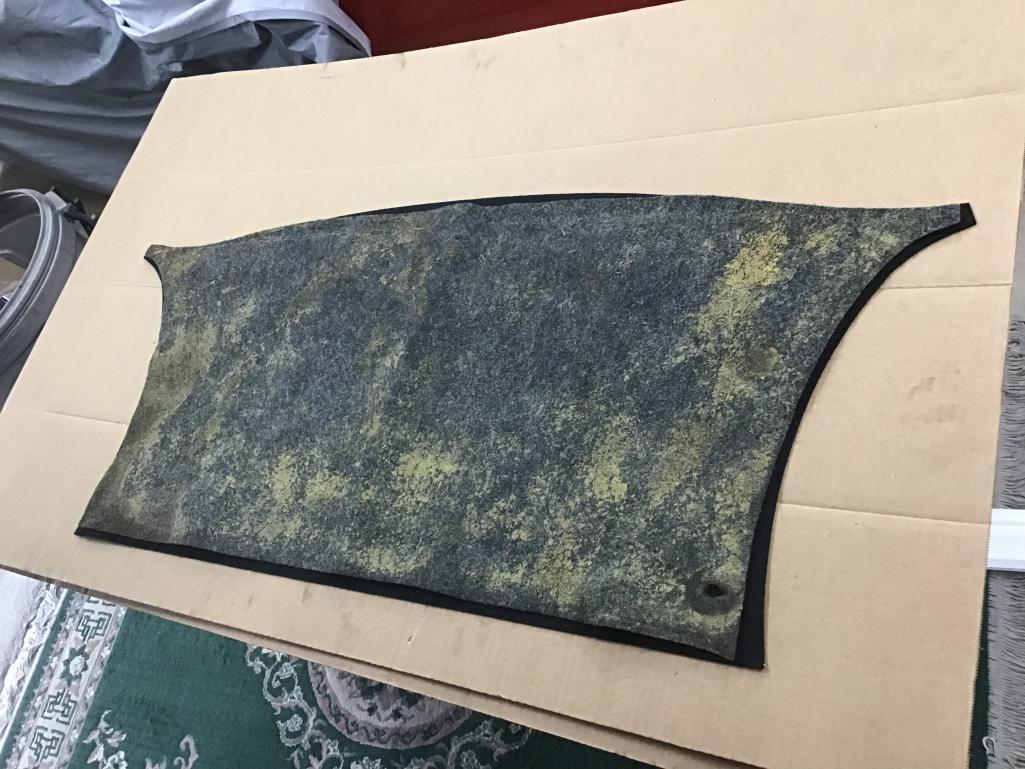
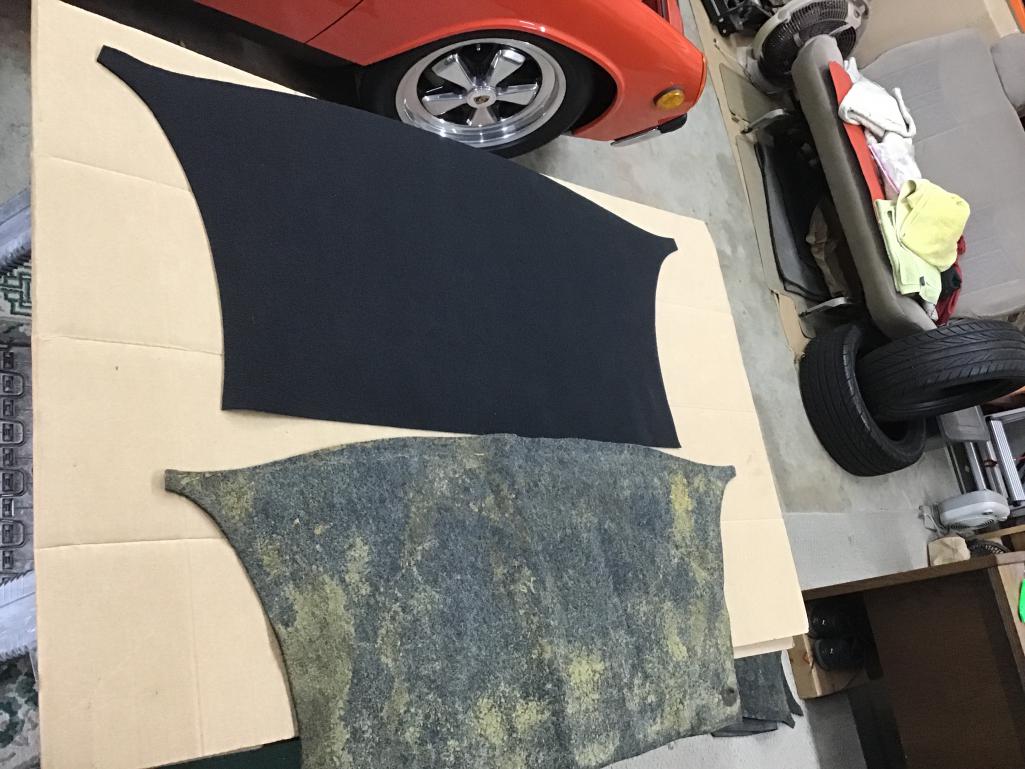
Posted by: AKFish Jan 29 2022, 09:40 PM
[quote name='Morph914' date='Jan 24 2021, 06:16 PM' post='2885395']
Time to get the fan shroud cleaned up
Fan shroud looks amazing, may I asked what you used to clean it?
Posted by: Morph914 Feb 1 2022, 02:46 PM
[quote name='AKFish' date='Jan 29 2022, 10:40 PM' post='2978327']
[quote name='Morph914' date='Jan 24 2021, 06:16 PM' post='2885395']
Time to get the fan shroud cleaned up
Fan shroud looks amazing, may I asked what you used to clean it?
[/quote]
If I remember correctly, it was solvent and various types of brushes, wax and grease remover, then painted with a ceramic silver paint.
Posted by: Morph914 Feb 1 2022, 03:07 PM
Got the felt glued on to the partition in the frunk. This was from 914 Rubber. I am mostly pleased with the results. It’s a bit tricky trying to get the felt to lay down on the top ridge. There are a couple of spots that didn’t get covered by the felt and you can see the orange paint on top, so I might try to paint these areas black.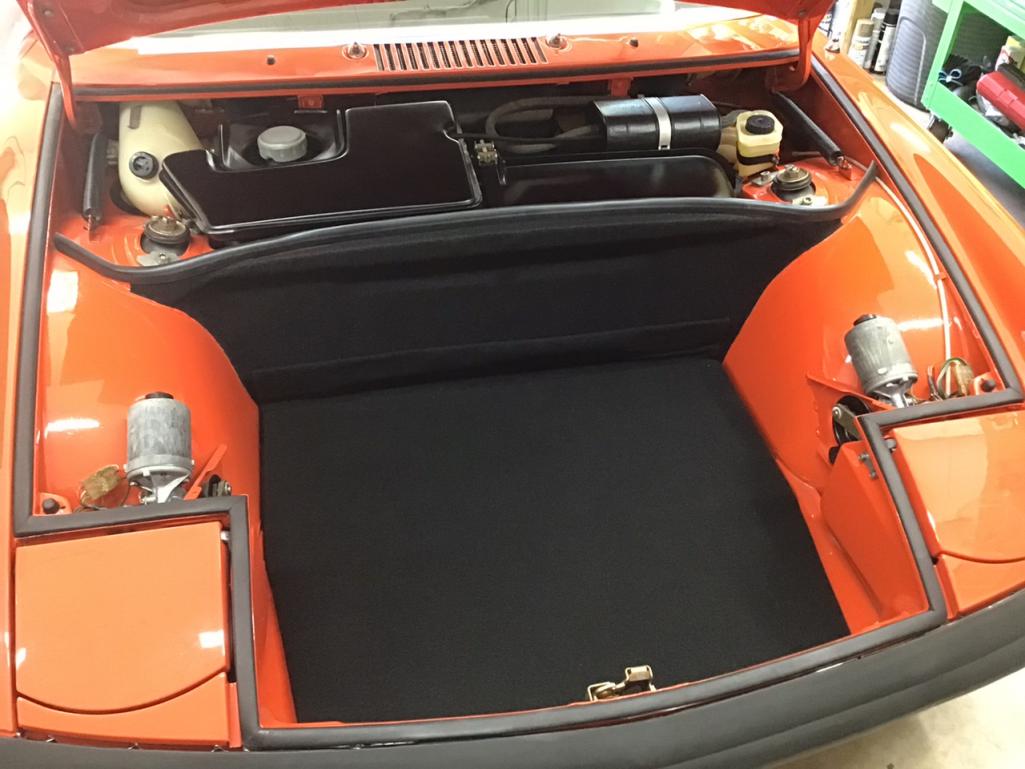
These are the two spots the felt didn’t cover.
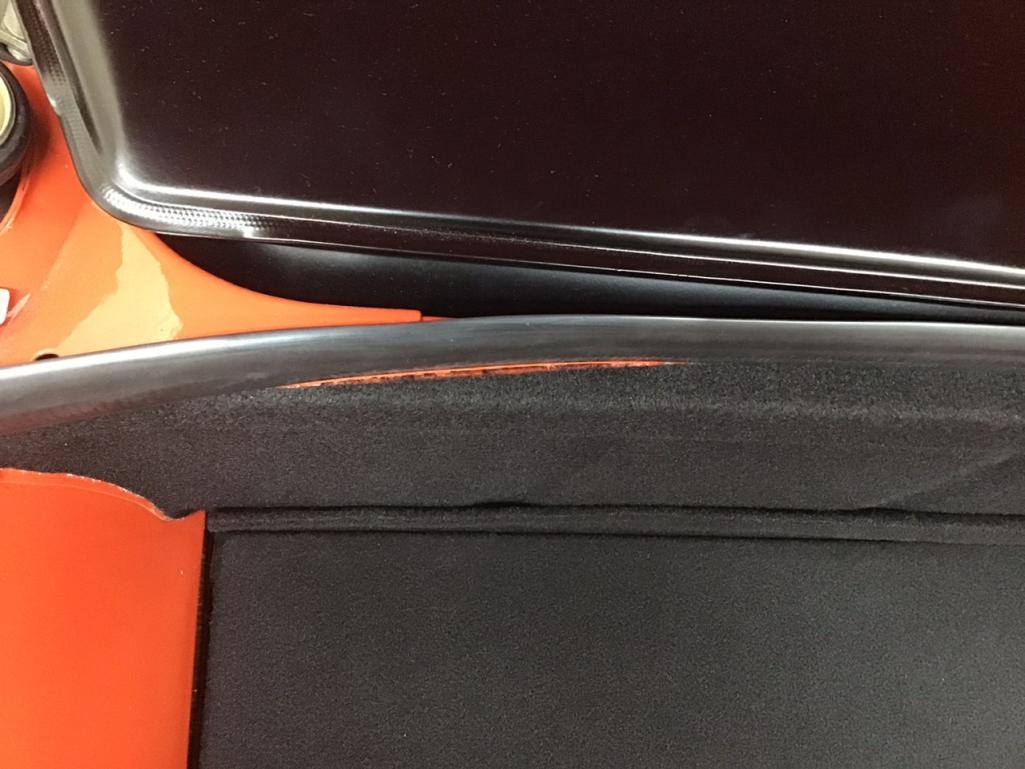
Attached thumbnail(s)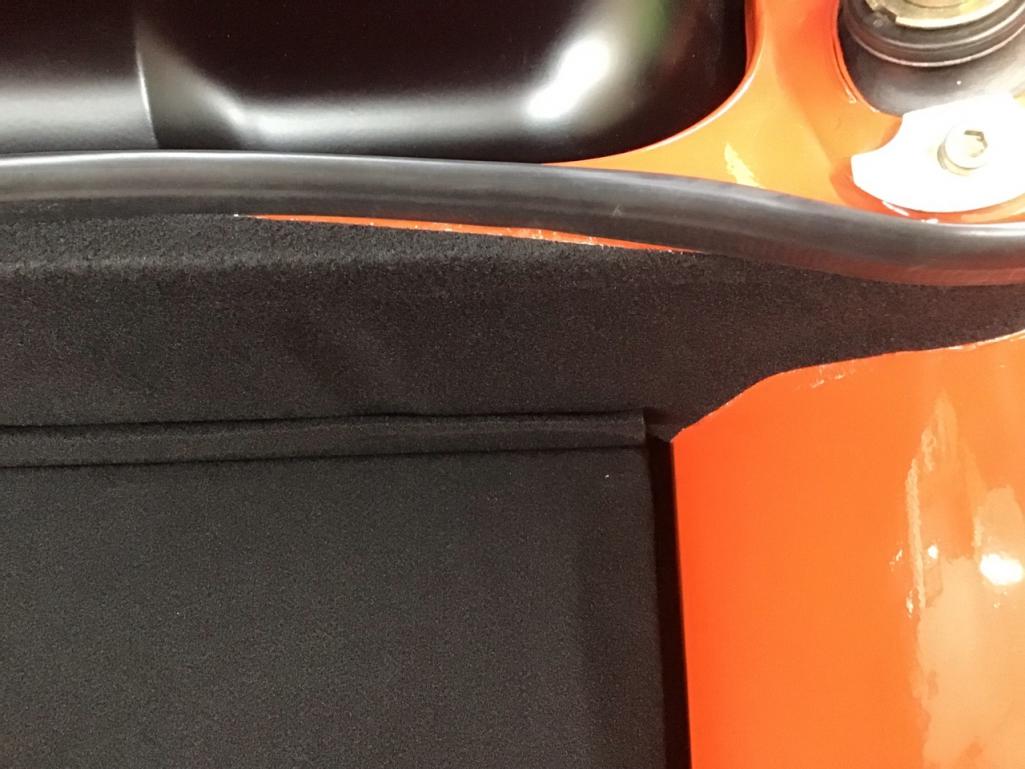
Posted by: Morph914 Feb 1 2022, 03:13 PM
Added the door manufacturer/ VIN sticker to the door jam, I looked for info on the correct location without any luck, so I just took a leap and put it where I thought it should go.
This is not a show car, so I’m not worried about it.
Posted by: mgarrison Feb 1 2022, 03:14 PM
I’m trying to level out the front end and lower just a bit, but I’m having a bit of a problem pulling the end caps off the torsion bars. I pulled the adjusting bolt all the way out, jacked up the car to relieve any pressure, still not budging. I then took the wheel off and tried lifting the a arm up to see if that would work, again, no luck.
The cap seems to be wedged in at the top position
Is your sway bar keeping the A-arm from drooping enough to take the tension off the adjuster...?
Posted by: Morph914 Feb 2 2022, 07:12 AM
I’m trying to level out the front end and lower just a bit, but I’m having a bit of a problem pulling the end caps off the torsion bars. I pulled the adjusting bolt all the way out, jacked up the car to relieve any pressure, still not budging. I then took the wheel off and tried lifting the a arm up to see if that would work, again, no luck.
The cap seems to be wedged in at the top position
Is your sway bar keeping the A-arm from drooping enough to take the tension off the adjuster...?
Could be, I’ll check into that
Posted by: DBF Feb 2 2022, 11:12 AM
Enjoyed reading your build this morning. I am putting a barn find BB back on the road, and while mine doesn't need much, I pick up bits and pieces of good advice by reading these posts. I'll be sure to get the lift device from tangerine when I put the engine back in, as well as take off the fuel rails. Thanks.
Posted by: Morph914 Feb 2 2022, 08:46 PM
Enjoyed reading your build this morning. I am putting a barn find BB back on the road, and while mine doesn't need much, I pick up bits and pieces of good advice by reading these posts. I'll be sure to get the lift device from tangerine when I put the engine back in, as well as take off the fuel rails. Thanks.
I’m happy to help, I have learned a great deal from others here so just tying to give back however I can
Cheers,
John
Powered by Invision Power Board (http://www.invisionboard.com)
© Invision Power Services (http://www.invisionpower.com)