Printable Version of Topic
Click here to view this topic in its original format
914World.com _ 914World Garage _ Freshening up an older 914-6 conversion:
Posted by: Root_Werks Mar 25 2020, 11:22 AM
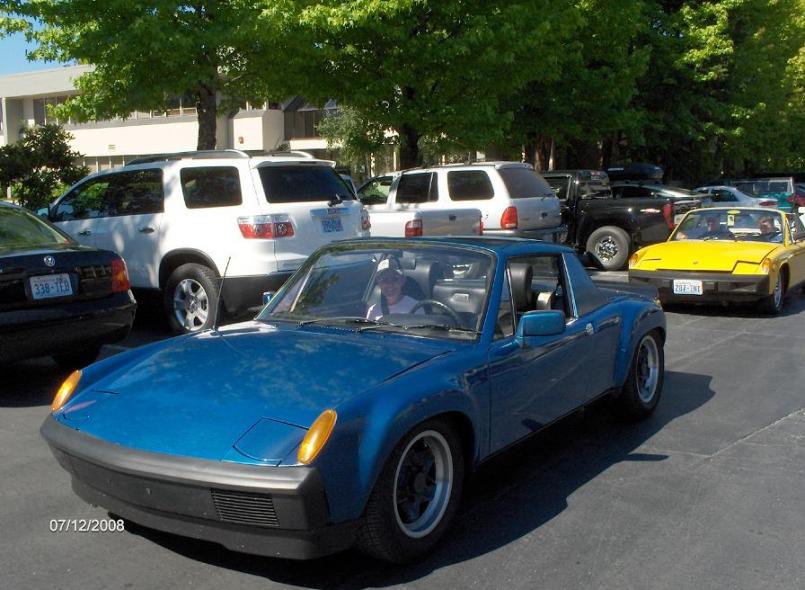
Michelle and I picked up our new to us 914-6 over the weekend. We practiced social distancing and kept safe. Two days home, 920 miles, the 914 never missed a beat.
Here's a picture at a rest stop about 30% of the way home.
Attached thumbnail(s)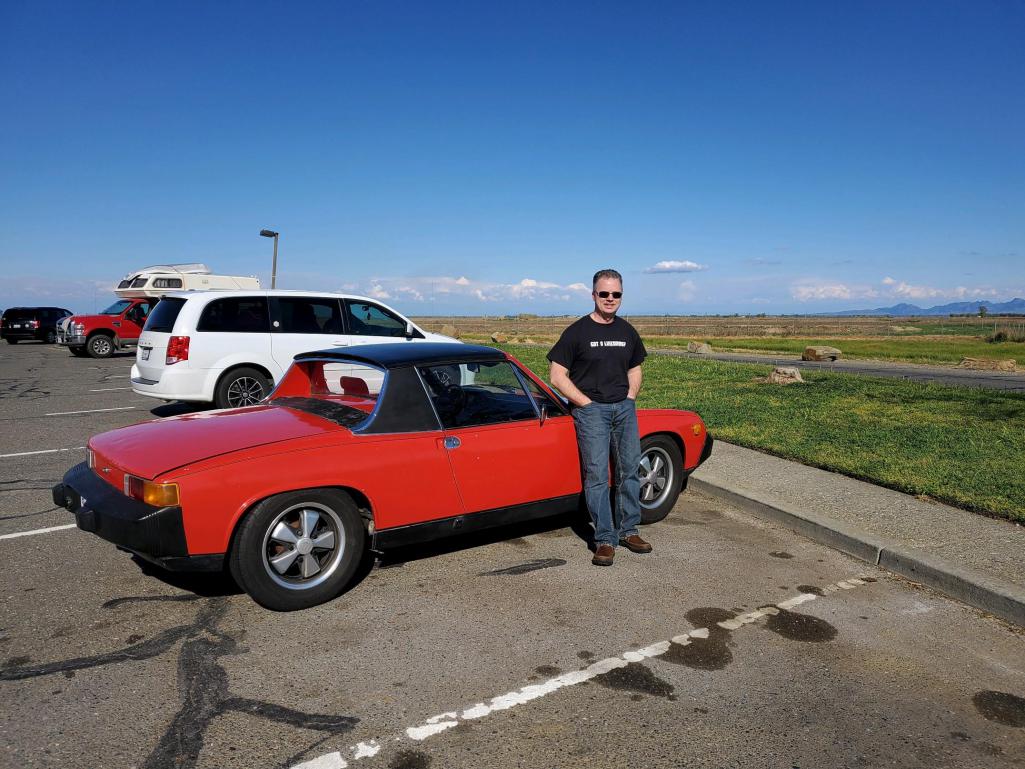
Posted by: Root_Werks Mar 25 2020, 11:26 AM
The engine is a 2.7 with CIS, Aluminum case, 993 cam towers and cams with hydro lifters. Seat of the pants has me thinking around 180hp.
The paint sucks.
BUT, I don't care, it's a solid 914 with about 3 Mayco paint jobs slathered over the original Anacona Blue. I originally thought I wouldn't repaint for a year or so, but that I won't make it that long. This thing needs to be stripped and painted correctly.
From the Sellers original Ad:
The one of a kind engine is built as a tribute to the Porsche air cooled engine design with components and improvements considered the best over the 30+ year history of the 911 engine design evolutions.
Engine approximately 5000 miles on rebuild
- 1968 early sand cast case (#3380133) bored for 2.7, oil bypass modification, oil squirters added. Work done by Ollies
- Original 911S 8.5:1 CIS pistons and Nikasil cylinders.
- 74 911S heads with 46/40 valves rebuilt by Ted Robinson at German Precision.
- 94 993 cams with keyway, 993 cam towers, 993 valve covers and 993 hydraulic lifters.
- Hydraulic chain tensioners.
- 911SC aluminum 4 rib oil pump 911-107-008-05
- Original 74 911S CIS fuel injection.
- Genuine 914-6 oil tank.
Exhaust
993 heat exchangers into dual inlet stock muffler
Wheels
Genuine Fuchs alloys, rear are deep sixes
Brakes and suspension
- Front 911S front struts, calipers and rotors with 3.5" caliper mounting
- Rear 911S calipers and rotors with drum-in-hat parking brake
- 180lb rear springs
MSD electronic ignition and distributor module.
Body in original condition except for paint. Original paint was L97B Anacona Blue Metallic. No rust.
Owned since 1987
Posted by: Tom Mar 25 2020, 11:37 AM
Dan,
Good to hear you are back in 914's. Not surprised your 914 is red. What color will the repaint be? Starting to really regret selling mine. Damn that was a solid car body wise! I sure disliked those hydraulic lifters in it tho". If it was driven every day, all was fine. But let it sit several days and clatter away for 10-15 minutes. Used to scare me how much noise they made. Do the hydros in 6s do that?
Later,
Tom
Posted by: ValcoOscar Mar 25 2020, 11:39 AM
Nice score....
Need more details and pictures PLEASE ![popcorn[1].gif](style_emoticons/default/popcorn[1].gif)
Oscar
Posted by: PanelBilly Mar 25 2020, 11:42 AM
I’d like to see how they used the 993 heat exchangers and I wish we didn’t need to deal with this coronavirus because I’d love to help you sand down that body.
Posted by: Cairo94507 Mar 25 2020, 11:47 AM
Congrats on your new car and a successful, safe trip home. Looking forward to see what you do with that baby. 
Posted by: Root_Werks Mar 25 2020, 12:09 PM
Picture of the 993 heater boxes.
The heater works really well, nice clean heat. Very good airflow.
If you look closely, notice there's no 914-6 bulkhead or cross bar. He modified the 911 bar and put mounts on the engine bay shelves. I'm eh about it, he reinforced the shelves and it looks okay. But I'm pretty certain I'll install a bulkhead mount.
Attached image(s)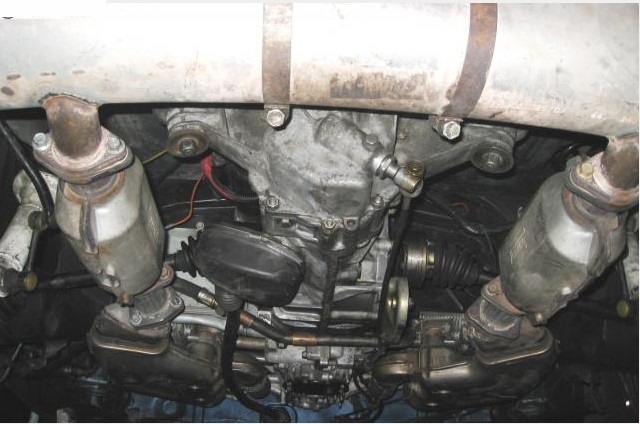
Posted by: Root_Werks Mar 25 2020, 12:59 PM

Dan,
Good to hear you are back in 914's. Not surprised your 914 is red. What color will the repaint be? Starting to really regret selling mine. Damn that was a solid car body wise! I sure disliked those hydraulic lifters in it tho". If it was driven every day, all was fine. But let it sit several days and clatter away for 10-15 minutes. Used to scare me how much noise they made. Do the hydros in 6s do that?
Later,
Tom
Lifters so far have been quiet, but I haven't let the engine sit. My Mexi Bug (2003) will clatter every once in a while if the Bug has sat for a few weeks. Oil makes a big difference. 5/40W seems to do the best.
Posted by: TravisNeff Mar 25 2020, 01:23 PM
I like it! congrats
Posted by: 914werke Mar 25 2020, 01:27 PM

Posted by: Jett Mar 25 2020, 01:35 PM
Nice car!
Posted by: Root_Werks Apr 8 2020, 09:10 AM
With building a house as my first priority, I'm not getting anything done on the 914-6 other than order up some parts here and there.
I drove it again last week and oh-boy, that is one sweet engine! With CIS, CATS and hydro-lifters, I'm certain the 2.7 isn't living up to it's potential. But it has plenty of power, very quiet and the heat works so fast and so well.
Here's a picture sitting next to my Bug:
Attached thumbnail(s)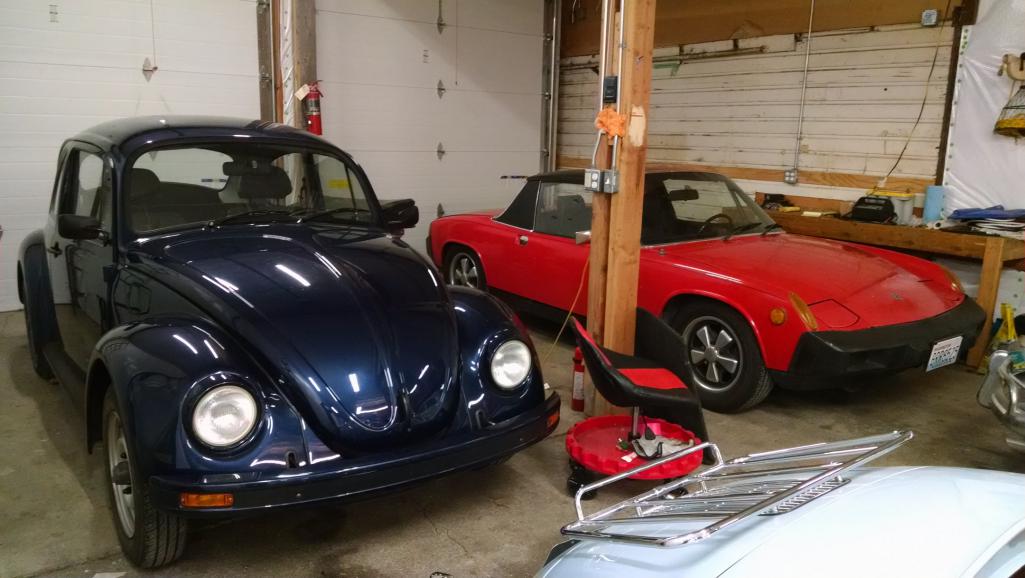
Posted by: Root_Werks Apr 8 2020, 09:24 AM
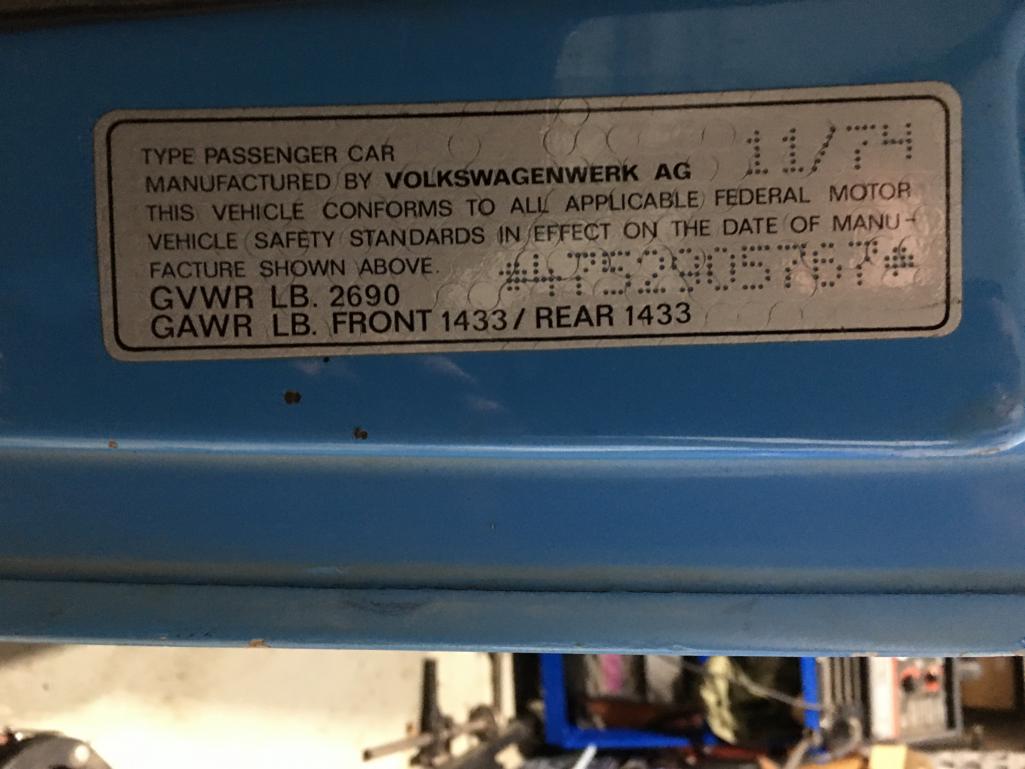
And this is why the paint/color change will happen sooner than later. Yes, you can see instead of painting red in things like trunks and door jams, there is brushed on black paint.
Looks like someone tried to clean around the VIN sticker (New on already one the way from Car-Bone.pl) and destroyed it.
I'm hoping this year I'll get the 914 stripped down and painted back to the original Anacona Blue.
Attached thumbnail(s)
Posted by: Sprout Apr 8 2020, 09:38 AM
Congratulations! Sounds like it was a great, long drive home. The original Ancona Blue would look sharp!
Posted by: IronHillRestorations Apr 8 2020, 10:42 AM
 Nice find! Sounds like a fun car with that engine in it!
Posted by: Mark Henry Apr 8 2020, 02:51 PM
Is the case aluminum? There's $10k right there!
I'd like to see more pics of the exhaust when you get them. 993 shouldn't be that bad for flow, Porsche was getting better with exhaust systems by then. That size of cats and they're away from the engine, hot but shouldn't cause issues.
Nice score, I knew you'd be back into a /6. 
Posted by: mb911 Apr 8 2020, 03:28 PM
993 heat exchangers work great.. They are not equal length but they are 1.625.. I ran these on my 911 turbo 3.2 short stroke build.. Worked really well.
I would highly recommend running the mad dog factory style bulk head mount. It allows for the most clearance every which way you look at it.
Posted by: windforfun Apr 8 2020, 03:40 PM
Congrats. You're a lucky guy!
Posted by: Root_Werks Apr 8 2020, 03:56 PM
993 heat exchangers work great.. They are not equal length but they are 1.625.. I ran these on my 911 turbo 3.2 short stroke build.. Worked really well.
I would highly recommend running the mad dog factory style bulk head mount. It allows for the most clearance every which way you look at it.
@http://www.914world.com/bbs2/index.php?showuser=9892 I already purchased your regular 914-6 bulkhead mount. Will that work with 993 HX's? If not, maybe I need to upgrade to the factory style.
Posted by: mb911 Apr 8 2020, 03:58 PM
993 heat exchangers work great.. They are not equal length but they are 1.625.. I ran these on my 911 turbo 3.2 short stroke build.. Worked really well.
I would highly recommend running the mad dog factory style bulk head mount. It allows for the most clearance every which way you look at it.
@http://www.914world.com/bbs2/index.php?showuser=9892 I already purchased your regular 914-6 bulkhead mount. Will that work with 993 HX's? If not, maybe I need to upgrade to the factory style.
Sorry I am not the producer of any engine mounts.. I would think the regular bulkhead would work. I would love to sell you a set of my 1.625 heat exchangers though not sure you really need them..
Posted by: mb911 Apr 8 2020, 03:59 PM
Maddog is the producer of engine mounts and that is whom I was talking about.
Posted by: Root_Werks Apr 8 2020, 04:46 PM
Maddog is the producer of engine mounts and that is whom I was talking about.
Ah, sorry Ben, got the user ID's crossed in my little head.
Posted by: jim_hoyland Apr 8 2020, 04:52 PM
Nice Dan,HAVE FUN 
Remember this beauty....
Attached image(s)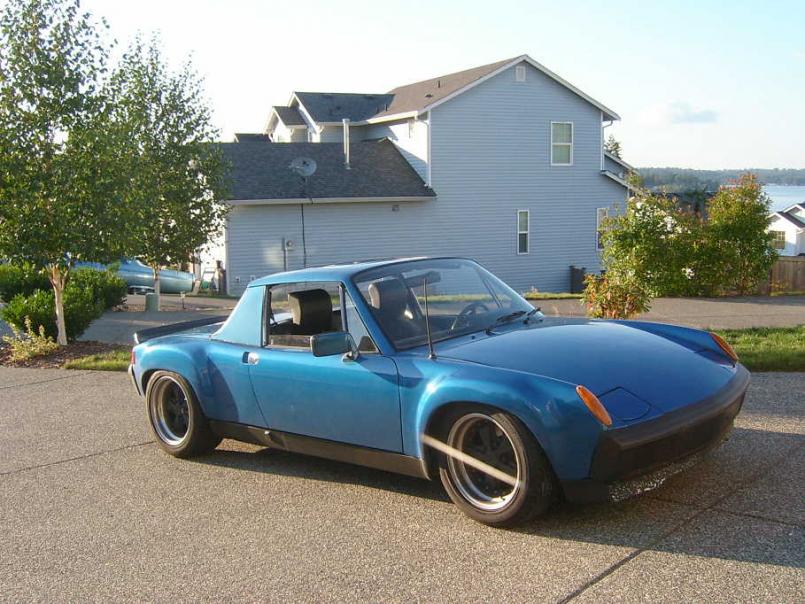
Posted by: mb911 Apr 8 2020, 04:52 PM
Maddog is the producer of engine mounts and that is whom I was talking about.
Ah, sorry Ben, got the user ID's crossed in my little head.
No problem. I am the oil line , header, heat exchanger, oil tank , muffler guy
Posted by: bigkensteele Apr 8 2020, 06:00 PM
And this is why the paint/color change will happen sooner than later. Yes, you can see instead of painting red in things like trunks and door jams, PO took some sort of paint and a brush and went to town.
He tried to clean around the VIN sticker (New on already one the way from Car-Bone.pl) and destroyed it.
I'm hoping this year I'll get the 914 stripped down and painted back to the original Anacona Blue.
Your car must be early November and mine later. Few hundred apart but still siblings I suppose. Mine is laguna blau.
Posted by: Tdskip Apr 8 2020, 06:37 PM
Belated congratulations @http://www.914world.com/bbs2/index.php?showuser=2105 !
Posted by: eric9144 Apr 8 2020, 08:46 PM
Awesome!! Congratulations @http://www.914world.com/bbs2/index.php?showuser=2105 focus on the house, don't stress the paint, drive the $hit out of it in the meantime 
Posted by: davehg Apr 9 2020, 12:53 AM
Congrats and nice to see another 2.7 conversion in the PNW.
I was curious about the engine build, sounds like you have some interesting pieces. I didn’t know you could use a 993 cam in a 2.7. And starting with an early aluminum block is nice. My mag case needed a bit of work at Ollies as they are prone to need.
From what I have gleaned from my own 2.7 build, the CIS pistons are the main holdback to getting more power. I used 2.7 Euro RS pistons for my build with a solex cam, to get more usable grunt on the street. I also had the CIS swapped for Webers and when I had the heads redone at ollies, I had ollies redrill them for a twin plug setup and used a modified Bosch distributor, with an MSD box. Hoping to get about 230-240 hp.
I used a Rich Johnston mount for my 2.7 and I am quite happy with it. Rich also sells the throttle linkage to add Weber’s or PMOs. I think he is at a914guy@aol.com. The mount required welding to the bulkhead. I also had an access bay cut into the bulkhead to make changing belts much easier without having to drop the engine.
The engine mount used for my 3.2 conversion was sort of custom but similar to the Patrick Motorsport mount.
Posted by: Root_Werks Apr 9 2020, 08:36 AM
Nice Dan,HAVE FUN
Remember this beauty....
Yup! Had no luck tracking it down. I would have tried to buy that one back, but it wasn't in the cards.
Posted by: sixnotfour Apr 9 2020, 11:21 AM
Dan, the last I heard it was at a body shop ..again...motor was sold separately,
I saw your new 914 on Samba...that engine is neato..
Posted by: Root_Werks Apr 10 2020, 11:23 AM
Dan, the last I heard it was at a body shop ..again...motor was sold separately,
I saw your new 914 on Samba...that engine is neato..
Thanks Jeff, it's the reason (engine) I bought it. The 914 itself is really solid, but the finish and attention to detail is rather sloppy. It'll be a fun project once the house it done.
Posted by: Bleyseng Apr 22 2020, 12:05 PM
a pic from awhile ago
Attached thumbnail(s)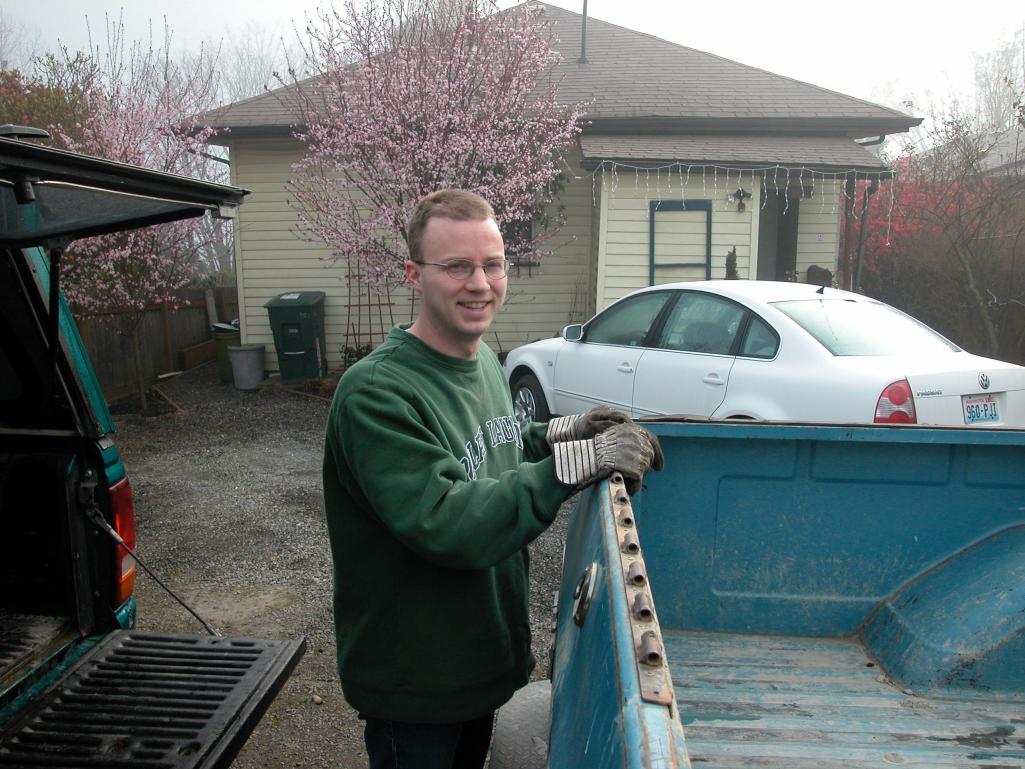
Posted by: Root_Werks Apr 22 2020, 12:23 PM
If memory serves, I believe I was picking up a solid 2.4 ROW engine from you.
Posted by: sixnotfour Apr 22 2020, 02:55 PM
HaHa, I bought a 914-6 and parts from Craig, That engine was in the parts pile...still have it....
Attached image(s)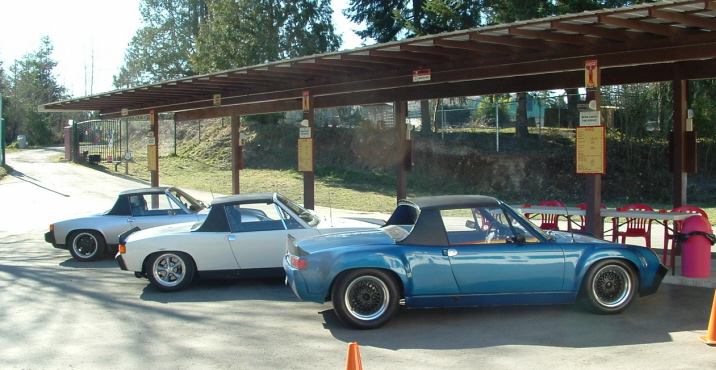
Posted by: Root_Werks Nov 27 2020, 04:10 PM
Tinkered on the 914 today, swapped bumpers and rear lid.
Attached thumbnail(s)
Posted by: Root_Werks Nov 27 2020, 05:11 PM
Found these tucked away
Attached thumbnail(s)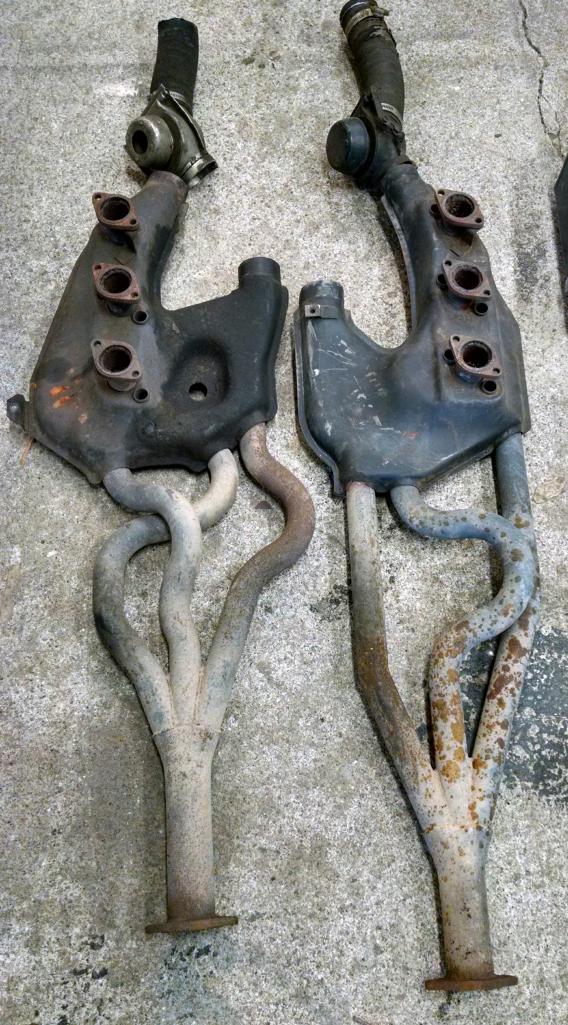
Posted by: mb911 Nov 27 2020, 05:15 PM
Score.
Posted by: Root_Werks Nov 27 2020, 10:20 PM
Score.
Totally unexpected one at that. Bought them about 12 years ago for a 914-6 conversion I did and never put them on. Wound up storing them and months turned into years. Completely forgot I had them. They are REALLY nice.
Dunno what to do with them. I really like the 993 heater boxes on this 914-6 with the dual CATS. I might clean these up and put them up for sale? Dunno?
I'm still very impressed with the mechanics on this 914-6. The engine is sweet music, the hydro lifters are so nice, the CIS provides limited power, but still packs a smooth punch with no hesitation or stinky gas smell.
Can't wait to find some time to get this 914 back to its original Blue. Spring I'm hoping.
Posted by: KELTY360 Nov 27 2020, 11:43 PM
Score.
Totally unexpected one at that. Bought them about 12 years ago for a 914-6 conversion I did and never put them on. Wound up storing them and months turned into years. Completely forgot I had them. They are REALLY nice.
Dunno what to do with them. I really like the 993 heater boxes on this 914-6 with the dual CATS. I might clean these up and put them up for sale? Dunno?
I'm still very impressed with the mechanics on this 914-6. The engine is sweet music, the hydro lifters are so nice, the CIS provides limited power, but still packs a smooth punch with no hesitation or stinky gas smell.
Can't wait to find some time to get this 914 back to its original Blue. Spring I'm hoping.
So Dan, when you get around to all that sanding and stuff to do the repaint, why don't you fly on over to the PT airport and pick me up? I'll help with all that dirty, mindless stuff and then you can drop me off back at the airport. I only live about 5 minutes away from there. I'll even buy you lunch at the Spruce Goose.
Posted by: infraredcalvin Nov 28 2020, 01:06 AM
Nice to see the 993 HEs on a 6, I’d like to see more pics of the setup. I have an extra set of them that I was just wondering if anyone has ever used on a 914.
Posted by: mb911 Nov 28 2020, 06:30 AM
Score.
Totally unexpected one at that. Bought them about 12 years ago for a 914-6 conversion I did and never put them on. Wound up storing them and months turned into years. Completely forgot I had them. They are REALLY nice.
Dunno what to do with them. I really like the 993 heater boxes on this 914-6 with the dual CATS. I might clean these up and put them up for sale? Dunno?
I'm still very impressed with the mechanics on this 914-6. The engine is sweet music, the hydro lifters are so nice, the CIS provides limited power, but still packs a smooth punch with no hesitation or stinky gas smell.
Can't wait to find some time to get this 914 back to its original Blue. Spring I'm hoping.
Hydro lifters? 993 engine?
Posted by: Root_Werks Nov 28 2020, 06:57 PM
Score.
Totally unexpected one at that. Bought them about 12 years ago for a 914-6 conversion I did and never put them on. Wound up storing them and months turned into years. Completely forgot I had them. They are REALLY nice.
Dunno what to do with them. I really like the 993 heater boxes on this 914-6 with the dual CATS. I might clean these up and put them up for sale? Dunno?
I'm still very impressed with the mechanics on this 914-6. The engine is sweet music, the hydro lifters are so nice, the CIS provides limited power, but still packs a smooth punch with no hesitation or stinky gas smell.
Can't wait to find some time to get this 914 back to its original Blue. Spring I'm hoping.
Hydro lifters? 993 engine?
993 cam caps, 964 cams, 993 lifters. I cannot take any credit for the engine. It's a $22k engine in a $5k 914 at the moment.
Posted by: Rand Nov 28 2020, 07:26 PM
Does us all good seeing this!
Posted by: Root_Werks Nov 30 2020, 09:40 AM
Score.
Totally unexpected one at that. Bought them about 12 years ago for a 914-6 conversion I did and never put them on. Wound up storing them and months turned into years. Completely forgot I had them. They are REALLY nice.
Dunno what to do with them. I really like the 993 heater boxes on this 914-6 with the dual CATS. I might clean these up and put them up for sale? Dunno?
I'm still very impressed with the mechanics on this 914-6. The engine is sweet music, the hydro lifters are so nice, the CIS provides limited power, but still packs a smooth punch with no hesitation or stinky gas smell.
Can't wait to find some time to get this 914 back to its original Blue. Spring I'm hoping.
So Dan, when you get around to all that sanding and stuff to do the repaint, why don't you fly on over to the PT airport and pick me up? I'll help with all that dirty, mindless stuff and then you can drop me off back at the airport. I only live about 5 minutes away from there. I'll even buy you lunch at the Spruce Goose.
Probably take you up on that when the time comes Marc. I really don't like body work, dust, stinky paint, yuck!
Posted by: KELTY360 Nov 30 2020, 02:04 PM
Score.
Totally unexpected one at that. Bought them about 12 years ago for a 914-6 conversion I did and never put them on. Wound up storing them and months turned into years. Completely forgot I had them. They are REALLY nice.
Dunno what to do with them. I really like the 993 heater boxes on this 914-6 with the dual CATS. I might clean these up and put them up for sale? Dunno?
I'm still very impressed with the mechanics on this 914-6. The engine is sweet music, the hydro lifters are so nice, the CIS provides limited power, but still packs a smooth punch with no hesitation or stinky gas smell.
Can't wait to find some time to get this 914 back to its original Blue. Spring I'm hoping.
So Dan, when you get around to all that sanding and stuff to do the repaint, why don't you fly on over to the PT airport and pick me up? I'll help with all that dirty, mindless stuff and then you can drop me off back at the airport. I only live about 5 minutes away from there. I'll even buy you lunch at the Spruce Goose.
Probably take you up on that when the time comes Marc. I really don't like body work, dust, stinky paint, yuck!
I’ll be the guy standing next to the runway with his thumb out.
Posted by: pete-stevers Dec 13 2020, 04:14 PM
Hey Dan!!It is great to see you back into a 914 again! When all this shit blows over It will be great to see you and the car in person!
Posted by: Root_Werks Dec 14 2020, 11:32 AM
Hey Dan!!It is great to see you back into a 914 again! When all this shit blows over It will be great to see you and the car in person!
Michelle and I sure miss our little go-to spots in Victoria and Vancouver. Be good to catch up guys someday soon.
Posted by: Root_Werks Dec 14 2020, 11:36 AM
Little update on this yet to be started project:
PO installed an MK1 ignition switch and column. Pretty ingenuous really as I have elect washer pump and intermittent wipers. Only pickle about it is using two keys, one MK1 VW key for ign and 914 key for doors and lid. I got all that sorted this weekend. Was able to rekey doors and rear lock to use the MK1 key. I even documented my wafer numbers and position so keys can be made by code. I'll see if I can rekey the front trunk and glove box next.
Posted by: pete-stevers Dec 18 2020, 11:56 PM
Hey Dan!!It is great to see you back into a 914 again! When all this shit blows over It will be great to see you and the car in person!
Michelle and I sure miss our little go-to spots in Victoria and Vancouver. Be good to catch up guys someday soon.
When the damn border opens up... This covid thing is starting to cramp my style. It makes it tougher and more expensive to get parts up here.

Posted by: Root_Werks Feb 1 2021, 10:43 AM
Sourced a nicer hood as the original hood would have required a lot of work. Thanks Rich @http://www.914world.com/bbs2/index.php?showuser=453 for the parts.
Looking worse before it'll get better with paint. Getting closer to taking it all apart for body work.
Nice to drive it over the weekend.
Attached thumbnail(s)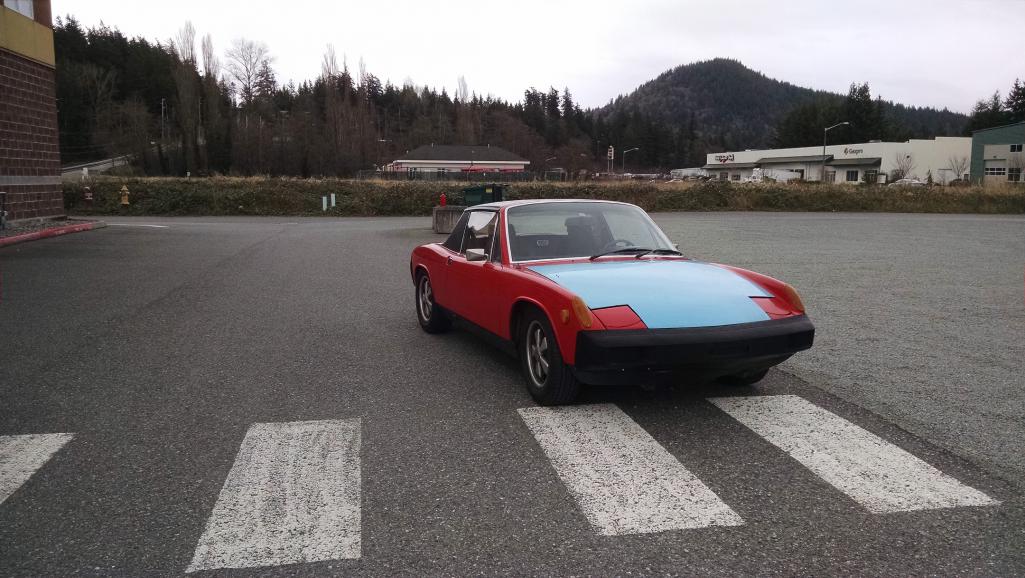
Posted by: Root_Werks Feb 1 2021, 10:51 AM
Another picture showing all the colors.
Attached thumbnail(s)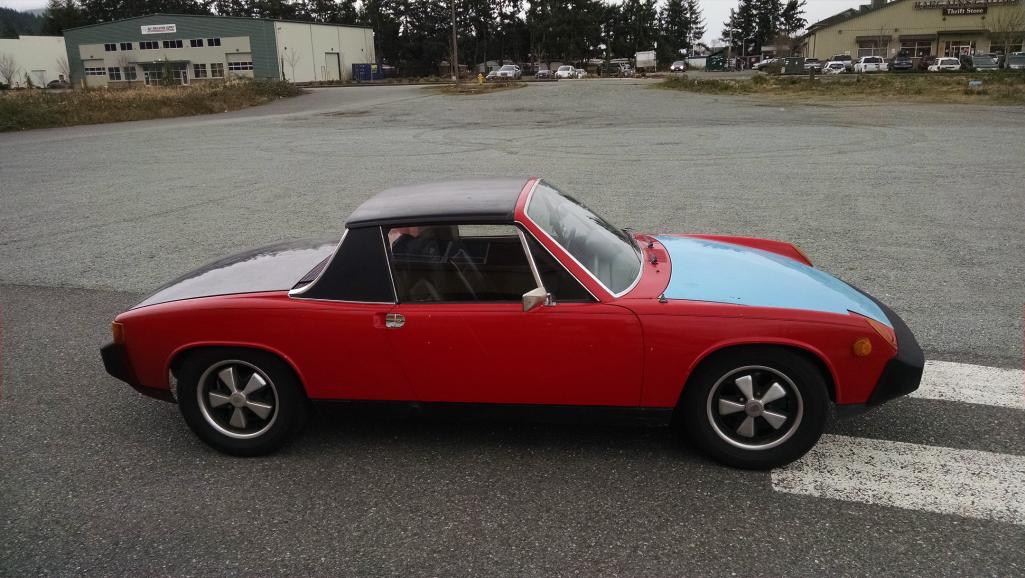
Posted by: Root_Werks Mar 8 2021, 11:20 AM
Still trying to get the 914 prepped for body work and paint.
Put on new shoes over the weekend. 16x6's all around. This is the 914's configuration, no flares or anything.
Was the first time I've had a chance to stick my head behind the wheels. Factory front and rear sway bars = kinda cool. Given this 914 was a dealer AC car, it also had a center console at one time. This was one option loaded 914 in 1975 for sure.
Want to lower it about an inch.
I continue to be impressed by the lack of rust on this 914. Everywhere I look, it's just solid.
Attached thumbnail(s)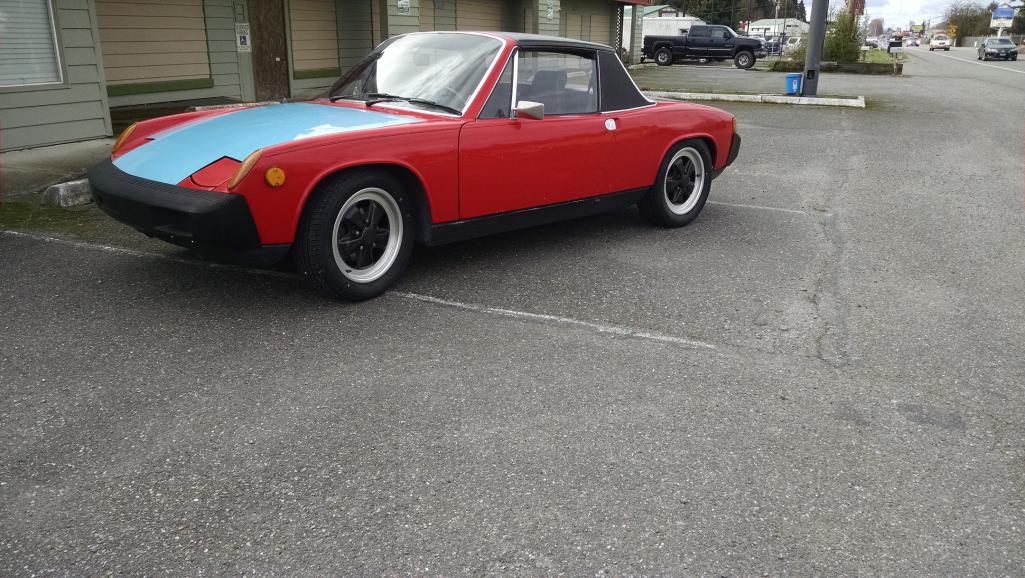
Posted by: Root_Werks Mar 19 2021, 04:59 PM
After almost exactly one year after driving the 980 miles close to home, the 914 is home.
I now have more time to actually work on it.
Today was about fixing wiring.
Installed a 911 Combo gauge, fuel gauge you can see by the cig lighter. This allowed me to remove the 4 gauges hanging below the dash.
Wiring is a little hacked up here and there. I'm making it better, but not show quality. Just ensuring everything is grounded, wire colors are mostly correct etc.
One of the more impressive things he did was install an MK1 column. Electric washers and wiper delay are part of the conversion. No complaints there!
For the moment, what a mess:
Attached thumbnail(s)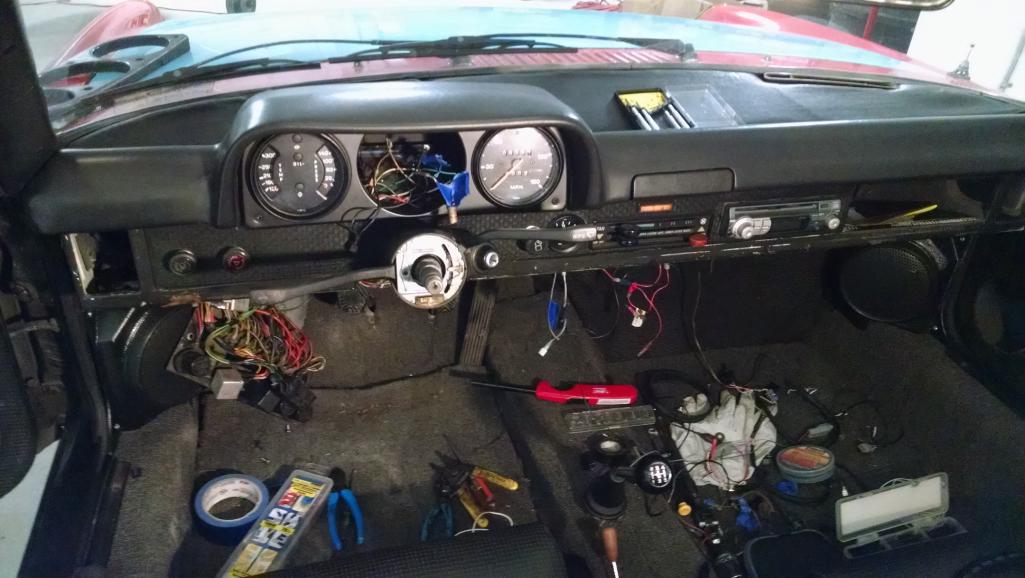
Posted by: Root_Werks Mar 19 2021, 05:01 PM
Forgot:
Swapped out the plastic 3-pod gauge face for a nice metal unit. No more ECR or CAT lights. Also installed 914-Rubber speaker pods.
This 914 needs a lot of attention.
Posted by: Cairo94507 Mar 19 2021, 06:00 PM
I like the work you are doing to that car.
Posted by: Root_Werks Mar 22 2021, 07:57 PM
Got around to welding in the trunk floor to patch up the old dealer installed AC system.
Not my cleanest welding, but doesn't need to be. Must have welded up a dozen little holes from screws used to hold in hoses and other AC related parts. Still have a few holes to plug:
Attached thumbnail(s)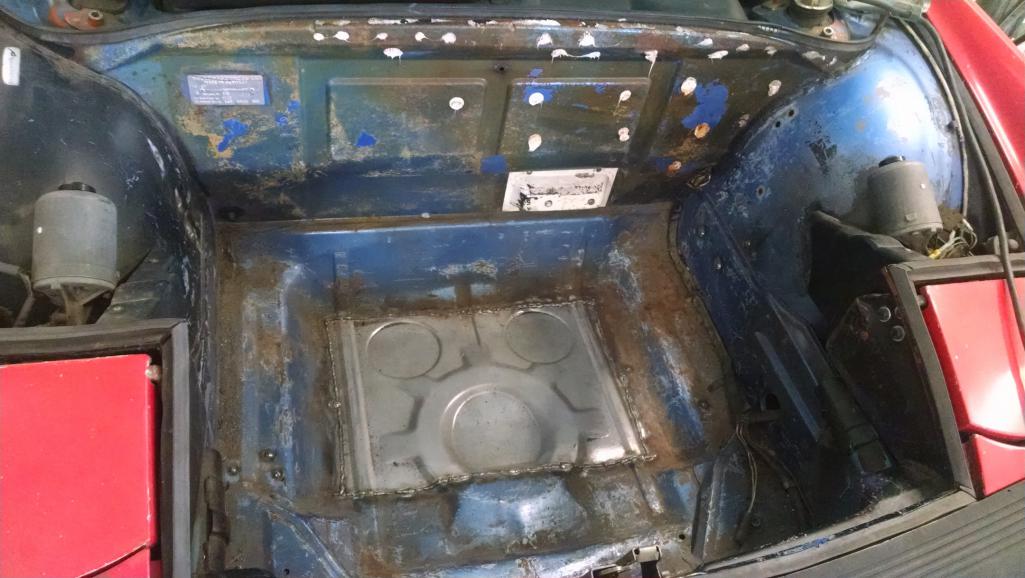
Posted by: Root_Werks Mar 22 2021, 08:01 PM
Little nervous about pulling off the passenger side cover. Gotta keep removing AC stuff and check for rust. Was very surprised to see nice clean paint! Everything is really solid. Worst rust is only a bit of surface where the AC lines pass into the front wheel well.
Gotta love a life long CA 914.
Check out how much dirt still came out.
Attached thumbnail(s)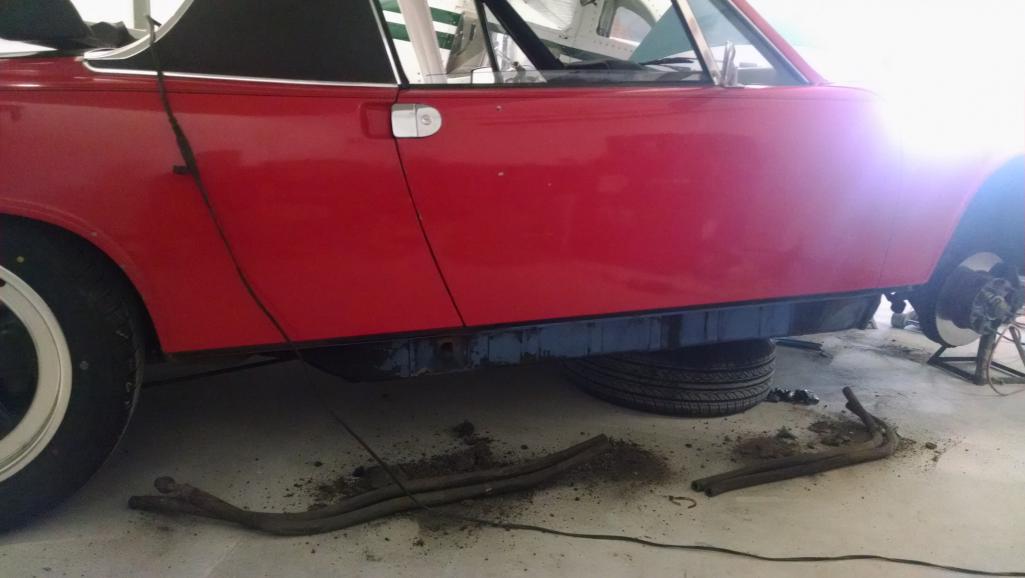
Posted by: Cairo94507 Mar 23 2021, 07:56 AM
That's amazingly clean, even for a CA car. The only reason my Six was not rusted through was it looked like the Exon Valdez inside and underneath. As bad as that was to see, it kept it from being a rust bucket.
Posted by: Root_Werks Mar 23 2021, 08:49 AM
That's amazingly clean, even for a CA car. The only reason my Six was not rusted through was it looked like the Exon Valdez inside and underneath. As bad as that was to see, it kept it from being a rust bucket.
Little similar with this 914. The whole area where you normally find rust had an oily coating on it mixed in with the dirt. It probably helped protect it! Even took a piece of weed whacker plastic string and knocked out as much as I could from the jack point drain hole. Sheese, cleaned right up!
Posted by: rhodyguy Mar 23 2021, 08:54 AM
Have you nailed down a paint guy or doing it at home?
Posted by: Root_Werks Mar 23 2021, 09:22 AM
Have you nailed down a paint guy or doing it at home?
THAT is my challenge as of late.
No, I don't want to paint. Don't have the inclination, skill or shop for it. I have a body/paint guy who did my 356 projects, but he's way over the top for this driver quality job.
If you (or anyone) knows a local place I can tow the 914 to, please let me know! I know it'll cost a few pennies and willing to invest.
It's a project, color change back to factory blue. Meaning doors and lids come off etc.
Posted by: Root_Werks Mar 24 2021, 09:57 PM
Bad pic, but better now. 944 steering wheel, wires cleaned up....better.
Attached thumbnail(s)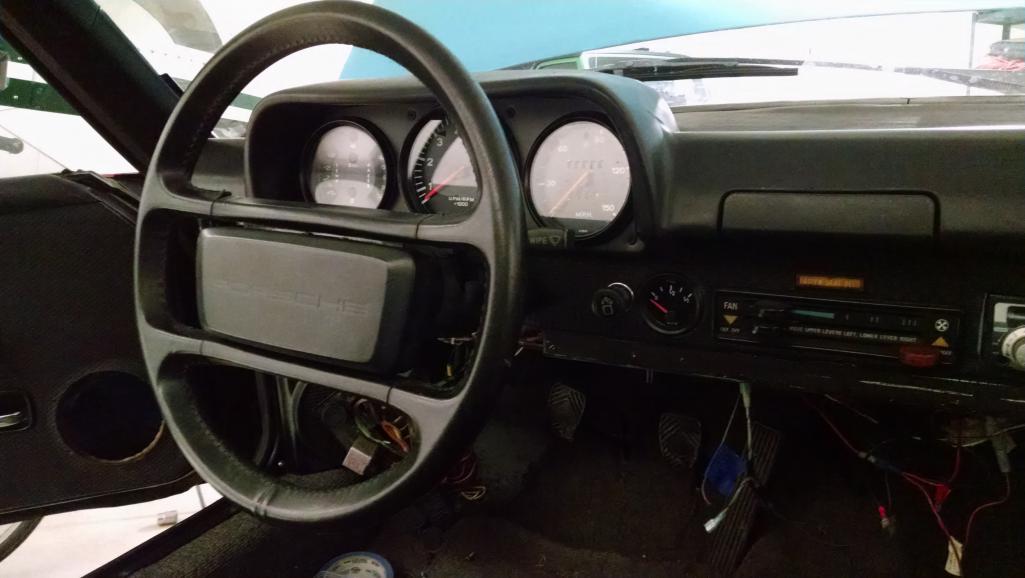
Posted by: Root_Werks Mar 24 2021, 10:01 PM
Hard to explain what it takes to undo an AC install. Example is making plugs to weld into AC line holes. So many holes to weld. Got done today which was nice.
Attached thumbnail(s)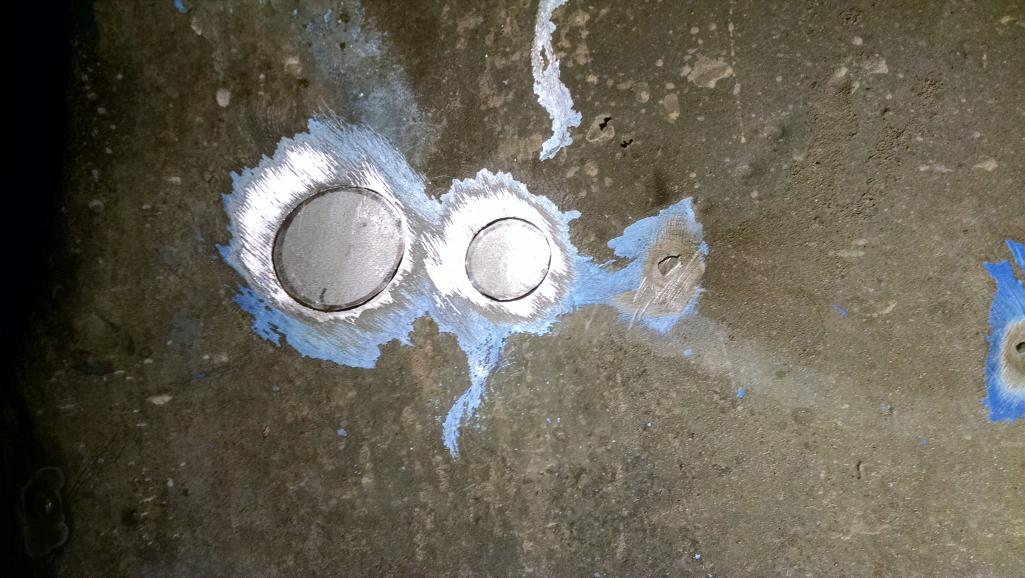
Posted by: Root_Werks Apr 3 2021, 03:35 PM
Two new eyebrows, drivers side was welded on. Ugh. Looks like a light hit/damage a long time ago. Wasn't really fixed correctly. Much better now, not perfect but a least can adjust eyebrows again.
Attached thumbnail(s)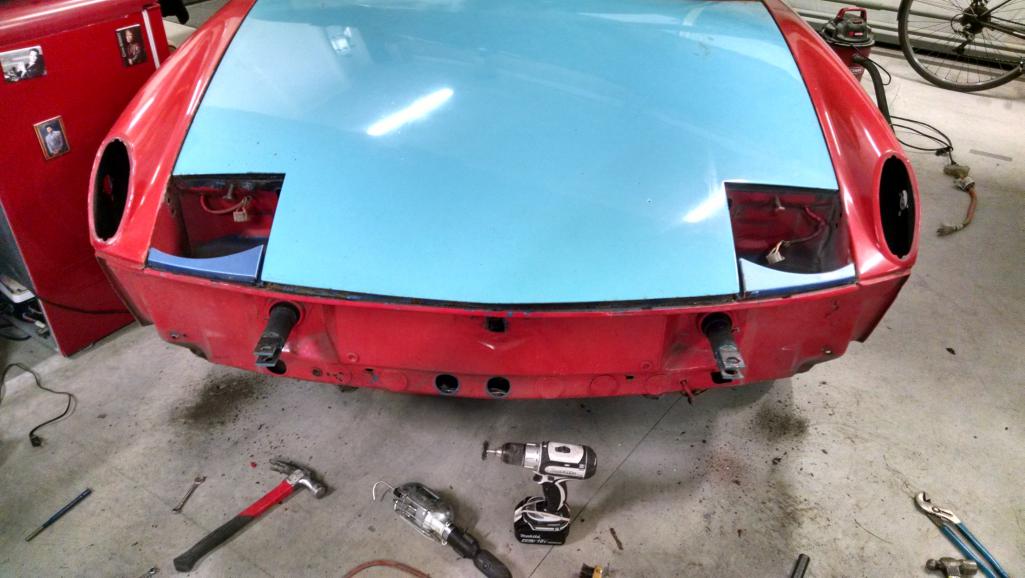
Posted by: Root_Werks Apr 3 2021, 03:36 PM
The welded brow that had to be cut out.
Note the blob welds, yuck.
Attached thumbnail(s)
Posted by: Root_Werks Apr 9 2021, 12:40 PM
Almost ready for the body/paint shop. Side markers welded up, all holes welded up that would need to be for paint.
Going back to Anacona Blue.
Attached thumbnail(s)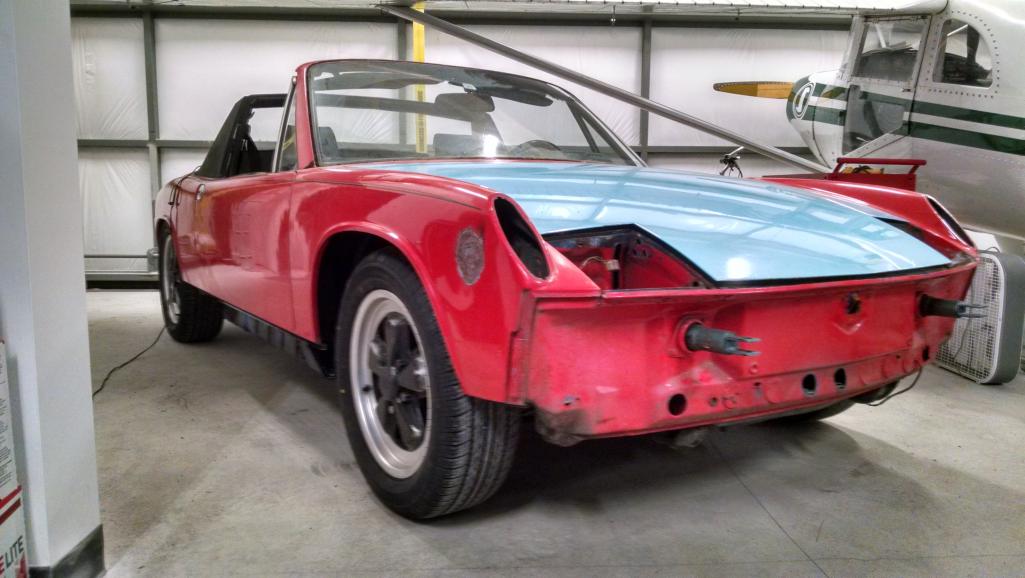
Posted by: Root_Werks Apr 9 2021, 12:42 PM
Pulled the fresh airbox out along with wiper assembly. Still need to gut the doors and remove rear taillights, easy stuff.
Fired it up and drove it up the street a bit. Trying to run it every couple of weeks even while it's taken apart like this.
Attached thumbnail(s)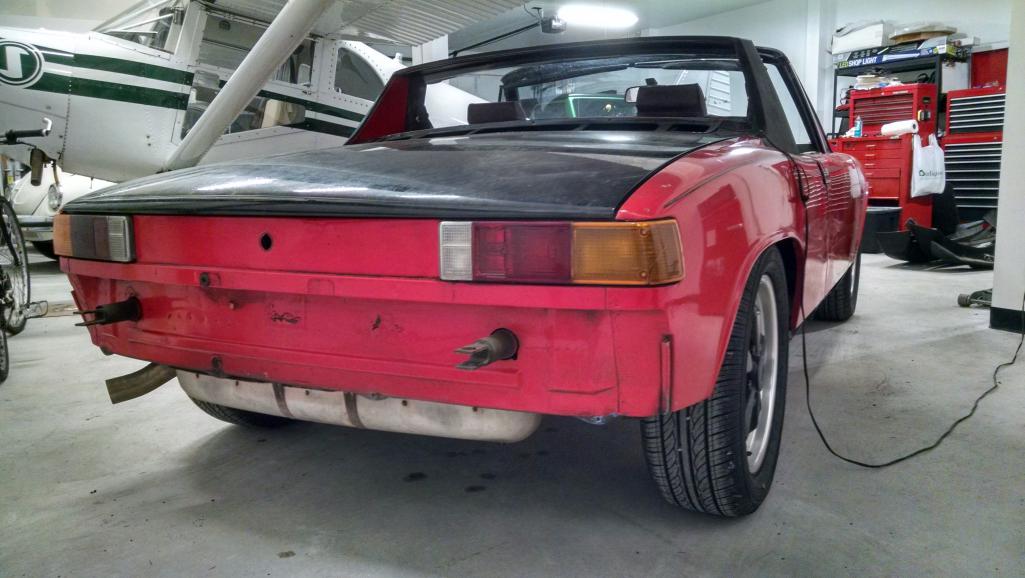
Posted by: Root_Werks Apr 9 2021, 12:45 PM
Here's another bad picture of the interior with the gauges all done, steering wheel all done and wiring finished and cleaned up. It'll get new door panels, carpet, all seals of course and probably a different or new backpad.
Was going to replace seats and dash, not now, not for a long time. They are good enough.
Attached thumbnail(s)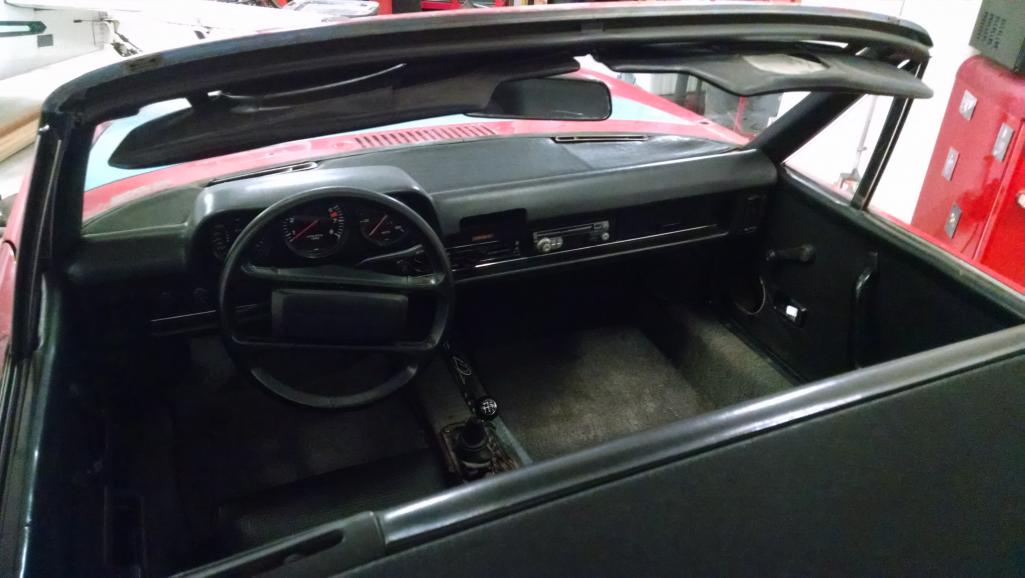
Posted by: 914werke Apr 9 2021, 01:19 PM
So you've found/decided on a paint shop?
Posted by: Root_Werks Apr 9 2021, 02:17 PM
So you've found/decided on a paint shop?
Still waiting for anyone to return a call or email. Got feelers out to 3....no 4 guys right now.
Posted by: Root_Werks Apr 27 2021, 09:27 PM
Going to correct this with a proper welded 90 turn and fitting.
Attached thumbnail(s)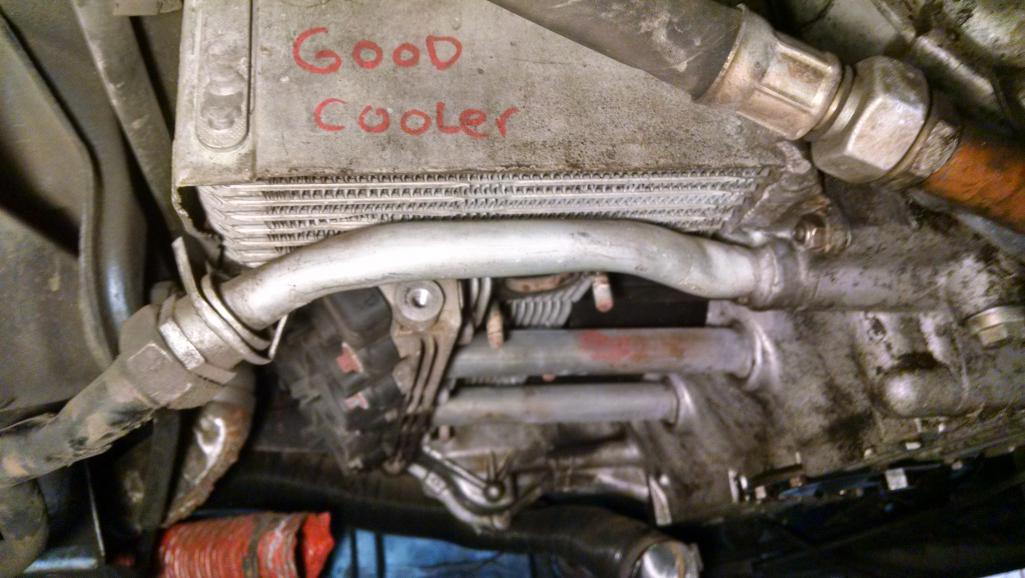
Posted by: flyer86d Apr 28 2021, 03:32 AM
I see you have a Luscombe. Very nice!
Charlie
Posted by: Root_Werks Apr 28 2021, 09:49 AM
I see you have a Luscombe. Very nice!
Charlie
Yup! Learned to fly in it, took me 14 months to pay it off and 9 years later, still flying it. Great airplane.
Posted by: Root_Werks Apr 28 2021, 09:51 AM
Well, the "Good Cooler" is going bye-bye. Getting an unmolested unit and having Ben weld up a proper 914-6 fitting.
I'll get oil lines sorted, factory 914-6 HE's on before it get's sent for paint.
Didn't want to build a 914-6, just wanted to drive one.
Posted by: mb911 Apr 28 2021, 10:01 AM
I might have missed it but are you going to chrome bumpers? Now would be the time before pain to get that all handled if so
Posted by: Root_Werks Apr 28 2021, 10:50 AM
I might have missed it but are you going to chrome bumpers? Now would be the time before pain to get that all handled if so
Was going to keep the BUB's on. I'm a rare 914 owner in the sense I like the look of the BUB's. Plus with everyone backdating 914 bumpers, BUB's are getting rare.
I'm sure I'll get
 for my choice.
Posted by: AZBanks Apr 28 2021, 01:21 PM
I see you have a Luscombe. Very nice!
Charlie
Yup! Learned to fly in it, took me 14 months to pay it off and 9 years later, still flying it. Great airplane.
My Grandpa had one when I was a kid. I loved flying in that plane.
Posted by: Root_Werks May 6 2021, 03:36 PM
Still have a couple of weeks until I tow my 914 to the body/paint guy.
Ben's working on an oil cooler and shift rod for me. Correct oil lines on the way.
AND
Bought the Koni's that were for sale. Wound up being adjustable oil filled Special D's which I was hoping for. They work perfectly, can adjust and feel a nice smooth resistance change with each adjustment. Cleaned them up a bit.
Gotta figure out what springs to use now. Stock, but cut 1 1/2 coils off or something slightly higher rate? Street car, don't want to bounce around but know I have a bit more weight with the six.
Any suggestions?
Attached thumbnail(s)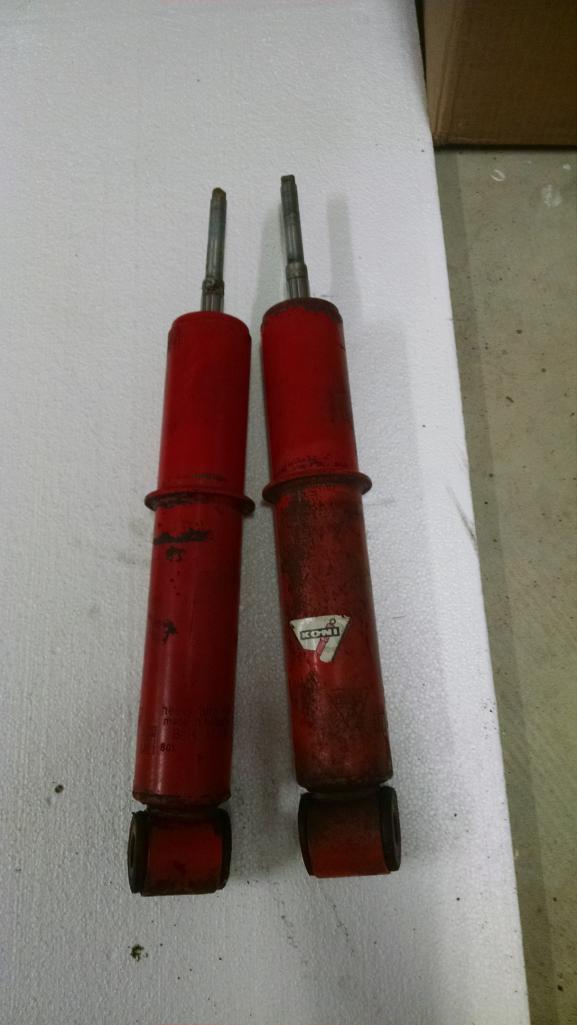
Posted by: Root_Werks May 7 2021, 09:37 AM
Removed the rear window, it was silly-coned in from both sides. Took about 45 minutes to get out. Another hour of clean up to do. Oye.
Noted the Dynamat on the firewall, kinda neat.
Attached thumbnail(s)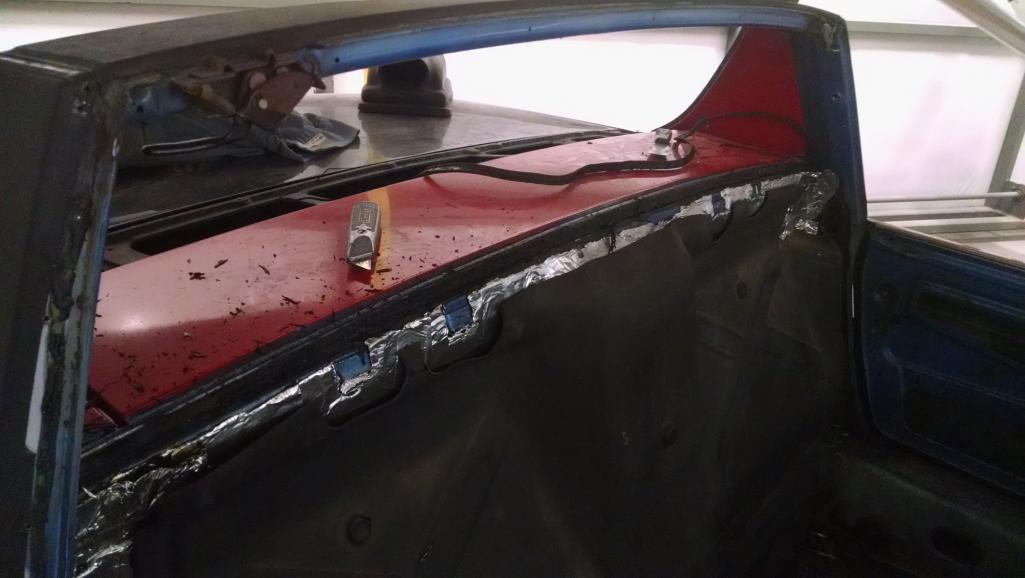
Posted by: Root_Werks May 7 2021, 09:39 AM
I was pretty certain I'd have to replace the backpad based on general condition of the vinyl and quality of installation until I noticed it was a fiberglass unit!
I'll want to recover it or at least re-stretch the vinyl. Something to make it look better, but still very cool!
Attached thumbnail(s)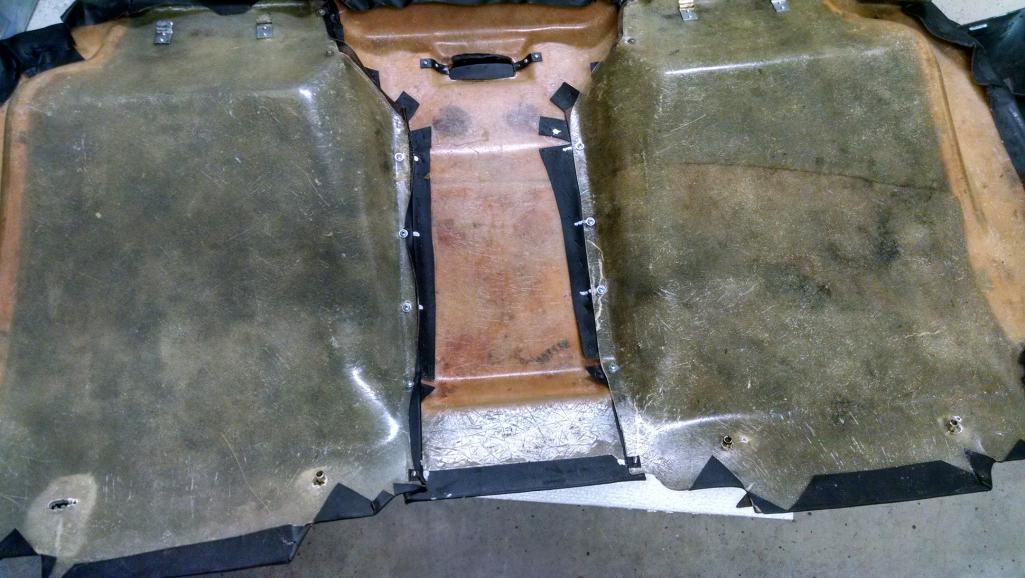
Posted by: boxstr May 7 2021, 09:03 PM
Dan, good evening. Glad to see that you are still around. I lost track of you for a while. Let me know if you are coming down to Portland anytime soon, I would love to get together.
Craig at Camp
Posted by: Root_Werks May 11 2021, 08:59 AM
Dan, good evening. Glad to see that you are still around. I lost track of you for a while. Let me know if you are coming down to Portland anytime soon, I would love to get together.
Craig at Camp
Will do Craig, looking forward to making some fun road trips once this 914 is back on the road.
Posted by: horizontally-opposed May 11 2021, 09:12 AM
Still have a couple of weeks until I tow my 914 to the body/paint guy.
Ben's working on an oil cooler and shift rod for me. Correct oil lines on the way.
AND
Bought the Koni's that were for sale. Wound up being adjustable oil filled Special D's which I was hoping for. They work perfectly, can adjust and feel a nice smooth resistance change with each adjustment. Cleaned them up a bit.
Gotta figure out what springs to use now. Stock, but cut 1 1/2 coils off or something slightly higher rate? Street car, don't want to bounce around but know I have a bit more weight with the six.
Any suggestions?
Nice score on the Koni rears. Have a pair waiting for a rebuild.
Highly recommend 140lb springs for a street car you'll drive hard from time to time. Installed 140s back in the 1990s, and never looked back. Car rode beautifully, and handled great too. Wondered about a need to move to 160s with a six conversion, but the 140s are still great.
Posted by: Root_Werks May 11 2021, 09:17 AM
Still have a couple of weeks until I tow my 914 to the body/paint guy.
Ben's working on an oil cooler and shift rod for me. Correct oil lines on the way.
AND
Bought the Koni's that were for sale. Wound up being adjustable oil filled Special D's which I was hoping for. They work perfectly, can adjust and feel a nice smooth resistance change with each adjustment. Cleaned them up a bit.
Gotta figure out what springs to use now. Stock, but cut 1 1/2 coils off or something slightly higher rate? Street car, don't want to bounce around but know I have a bit more weight with the six.
Any suggestions?
Nice score on the Koni rears. Have a pair waiting for a rebuild.
Highly recommend 140lb springs for a street car you'll drive hard from time to time. Installed 140s back in the 1990s, and never looked back. Car rode beautifully, and handled great too. Wondered about a need to move to 160s with a six conversion, but the 140s are still great.
Exactly the feedback I was hoping someone would provide, thanks! Was debating on getting 100lb springs, but worried they'd be a little soft. I prefer a slightly higher spring rate and lower dampening rate for street use.
Posted by: Root_Werks May 13 2021, 10:02 AM
Pulled the engine to redo some things and replace some pieces. Have the time, might as well.
For those interested, check out the homemade mount. It's a modified 911 crossbar. The system relies on sheet metal shelf to support not just the engine. I'll remove all this and install a bulkhead mount.
Engine and cross bar:
Attached thumbnail(s)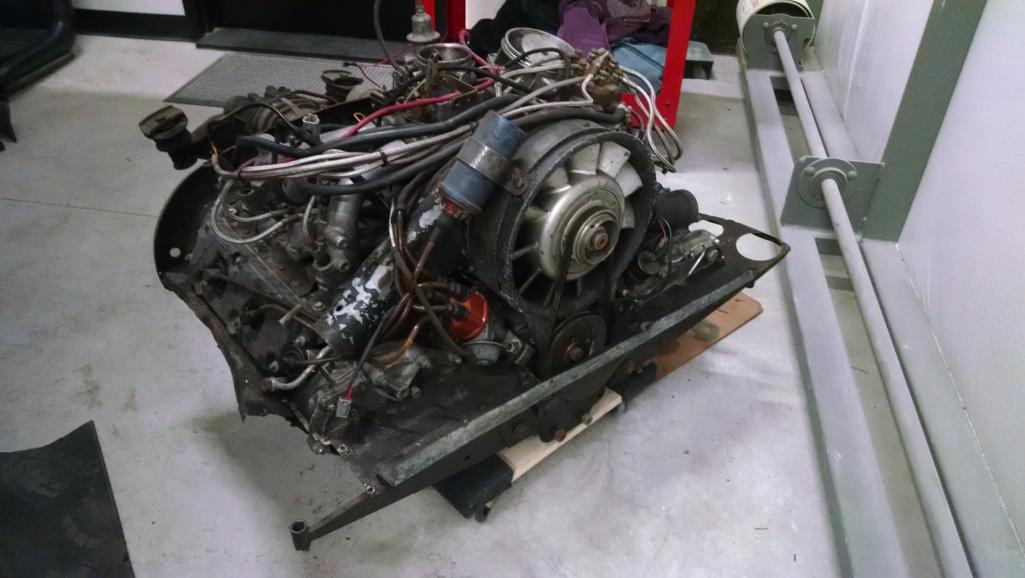
Posted by: Root_Werks May 13 2021, 10:03 AM
Inside the engine bay, you can see the mount plates. Everything added looks like 3/16" plate steel.
There are so many holes drilled in the 914 everywhere. 
Attached thumbnail(s)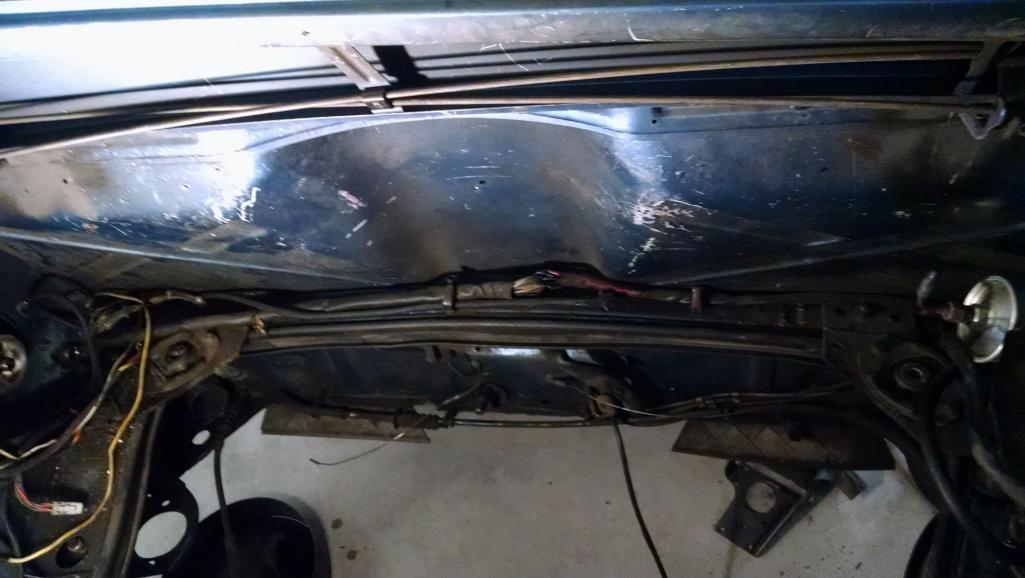
Posted by: Root_Werks May 13 2021, 10:06 AM
Had to Dremel, cold chisel and grind for a bit of time. Tried hard not to damage any original metal, but still wound up tearing good metal off the firewall (no, that's not a rusted area).
Lots of holes to weld up:
Attached thumbnail(s)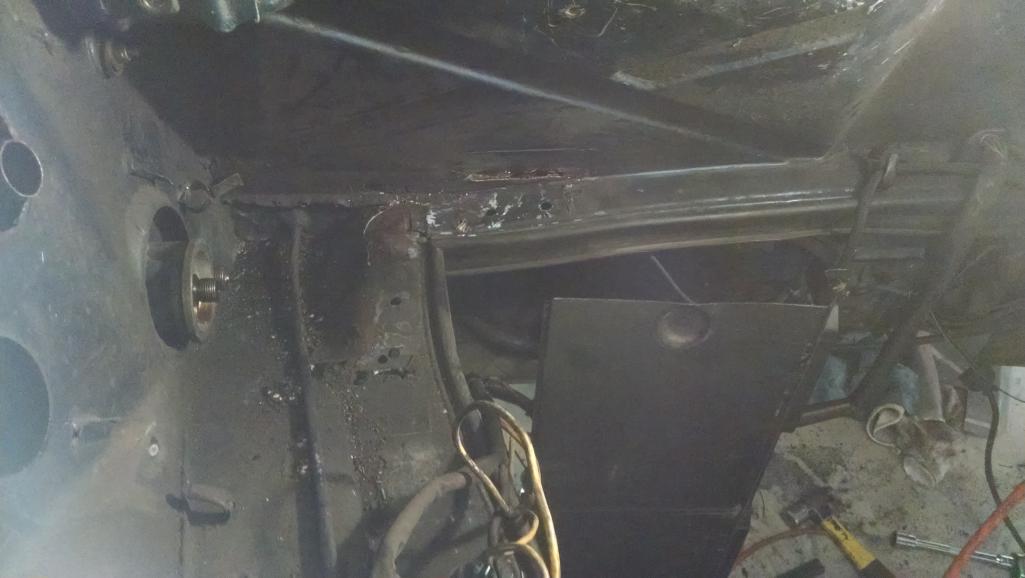
Posted by: Root_Werks May 13 2021, 10:07 AM
The pieces from the constructed mount:
Attached thumbnail(s)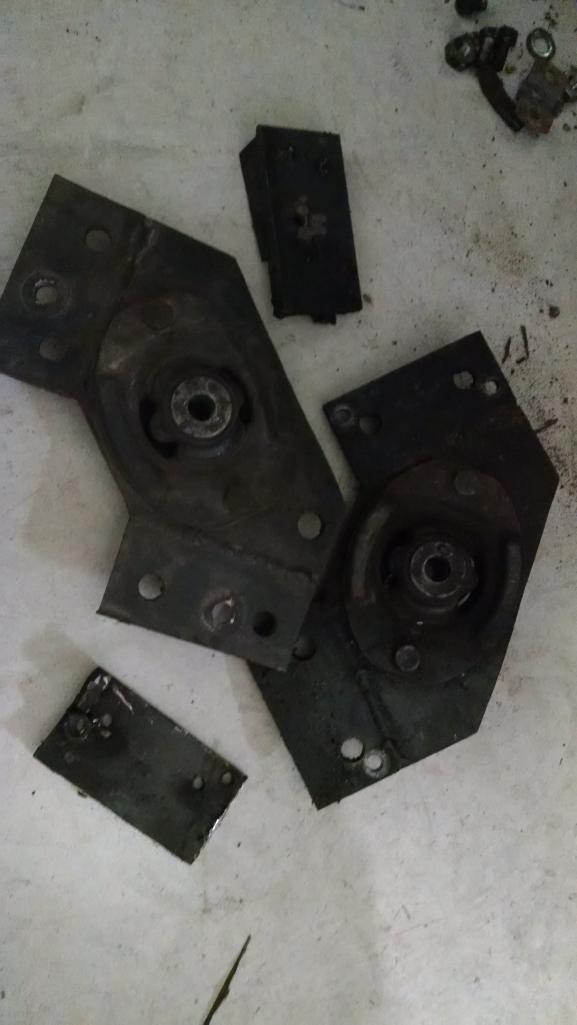
Posted by: Root_Werks May 13 2021, 10:08 AM
Maddogs mount welded in place, sorry for the fuzzy picture:
Attached thumbnail(s)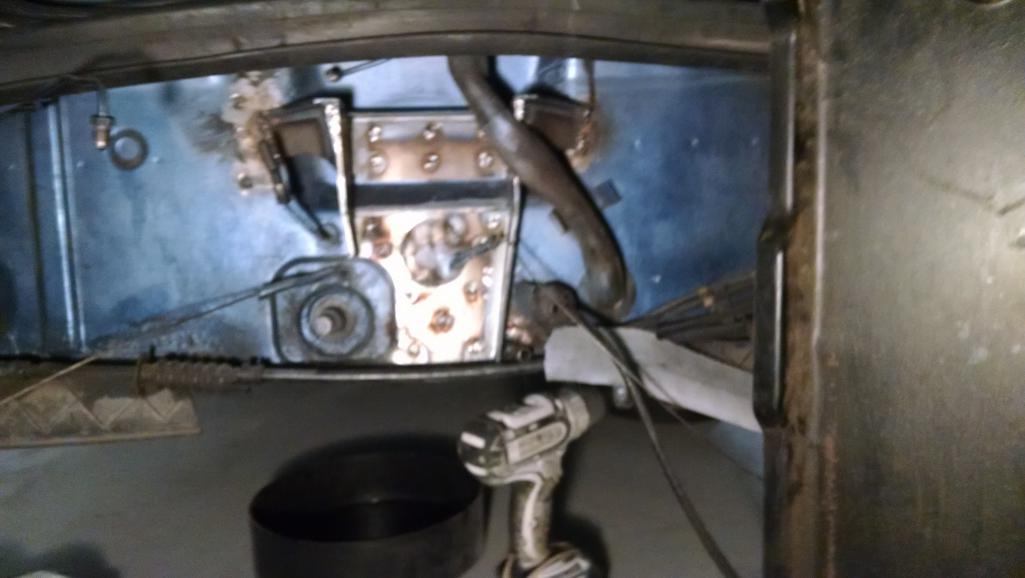
Posted by: Root_Werks May 19 2021, 03:49 PM
Another fuzzy picture, dang, gotta figure out what's up with my phone.
Found rust and will take care of that while I'm here.
Looks like a long term window leak in combo with plugged drain hole. It's very localized which is good. But still sucks I gotta cut it out and patch it.
Attached thumbnail(s)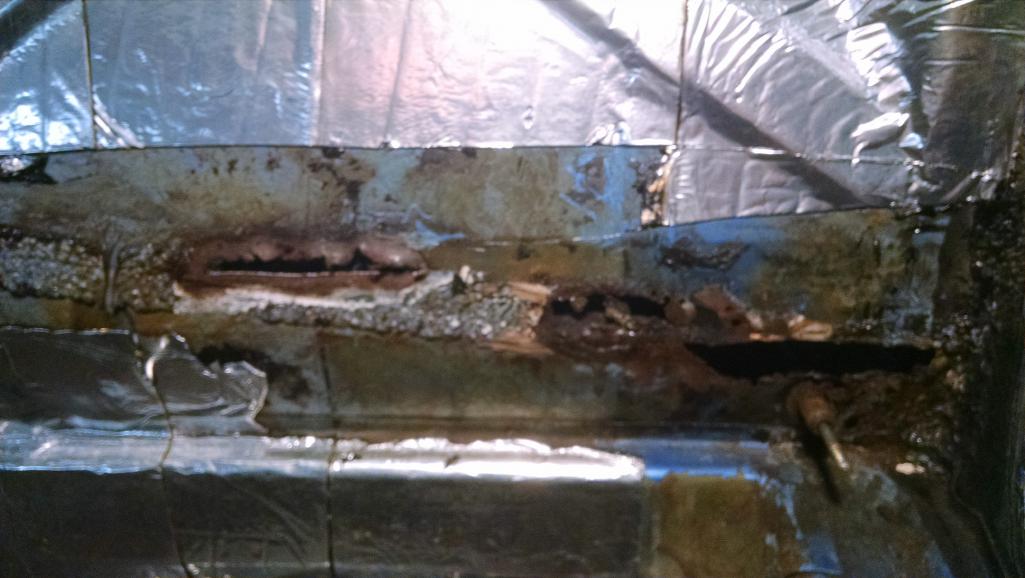
Posted by: Root_Werks May 20 2021, 03:06 PM
Done enough with the engine bay. Lots and lots of welding, grinding, cleaning etc.
I'm not fixing the oversized 914-6 oil tank holes. They are what they are.
Attached thumbnail(s)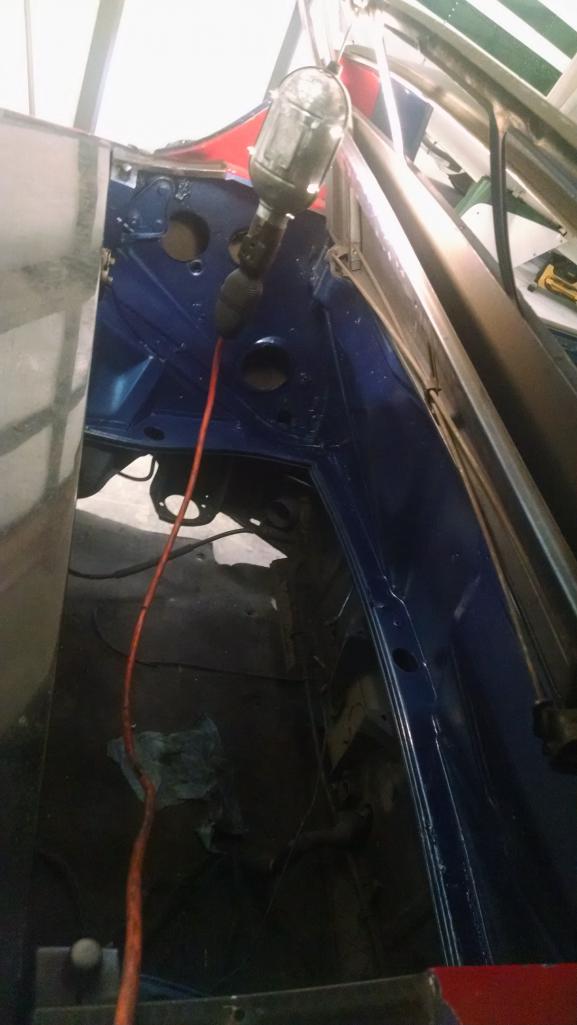
Posted by: Root_Werks May 20 2021, 03:10 PM
Found a color in spray can that was sort of close to the Anacona Blue. This isn't that type of 914 that it matters if the color is a bit off. Going to drench it all again with a third coat and call it good.
Found fiberglass patching which had to cut out and replace with metal. Also had to put rear trunk springs back in and remove the shock trunk kit along with welding up holes.
This was a former AC car, there was was a lot of patch work already done. It was so-so, tried to clean it up a bit.
Hoping I can get the engine back in with all the correct 914-6 conversion, cleaned up wiring, oil lines, factory heater boxes and much more before it goes off to paint.
We'll see, I have about another week or so.
Attached thumbnail(s)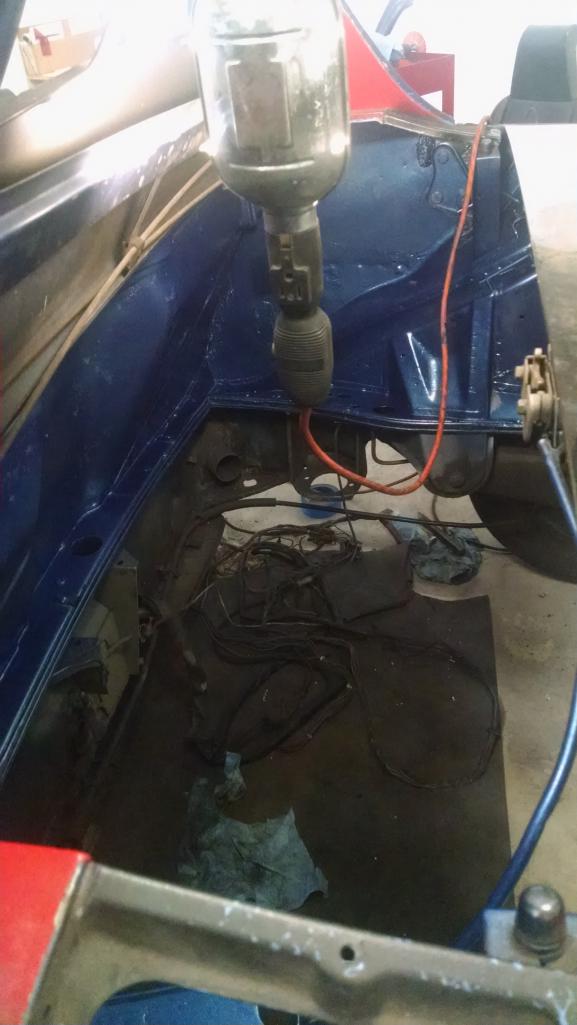
Posted by: Root_Werks May 26 2021, 08:43 AM
Moved the Brake Pressure Regulator, new lines from PMB made that pretty easy. Worked on cleaning up wiring, it was pretty messy. Around the engine still is.
You can see a patch on the engine shelf to the right were the dealer AC once was. I left most of that stuff alone. It's not perfect, but it's solid and just fine.
Getting closer to installing the engine. Waiting on SS fuel lines.
Attached thumbnail(s)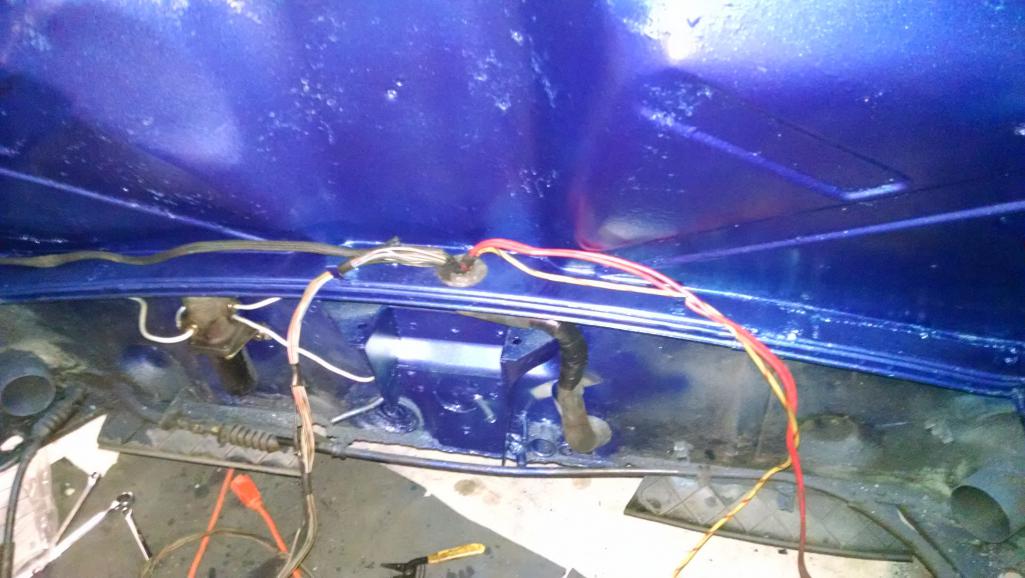
Posted by: Root_Werks Jun 9 2021, 10:00 PM
Started installing MD's inner long stiffening kit. Totally forgot how much work it is. Note the little RV jacks to keep door gaps as perfect as possible:
Attached thumbnail(s)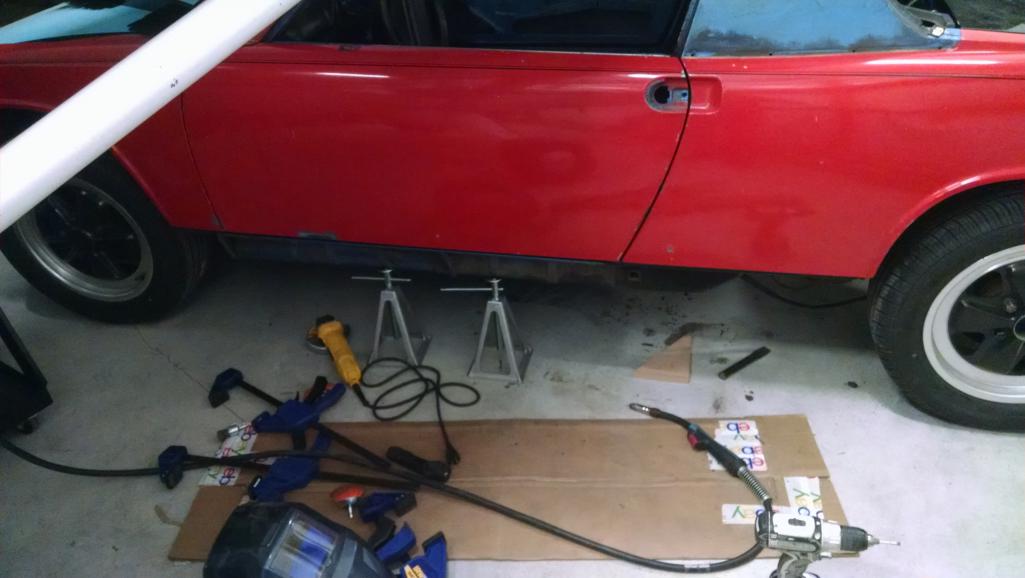
Posted by: Root_Werks Jun 9 2021, 10:04 PM
Hardest part is keeping metal tight against long. Lots of clamping, clean and weld a few holes, move to next etc. Takes a long time.
Attached thumbnail(s)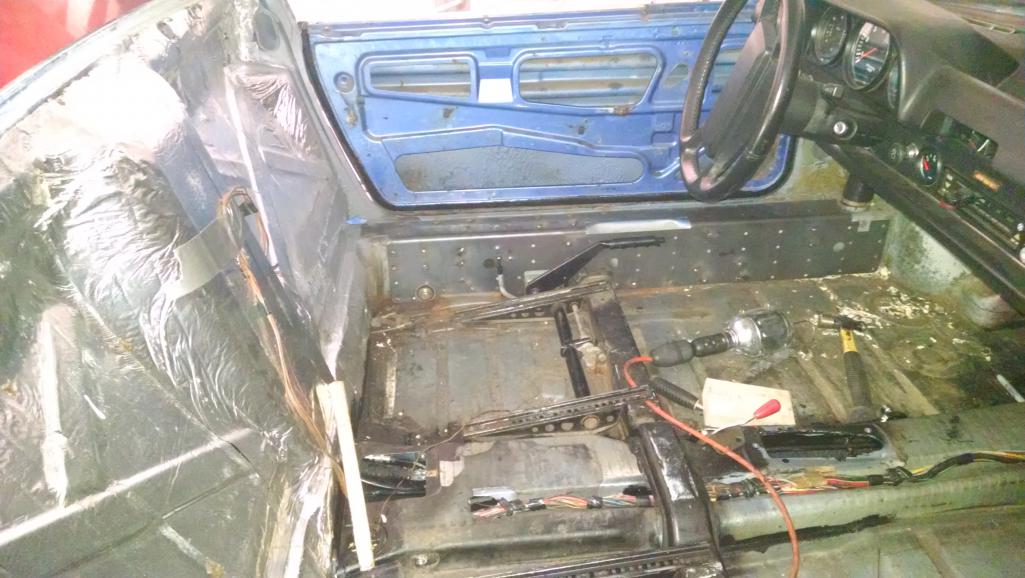
Posted by: nditiz1 Jun 10 2021, 05:29 AM
Can you provide more pics of your regulator relocation and PMB lines?
I am now on my second set of PMB lines. They sent me a plug and T fitting to use with the early style location. The center line they provided is not long enough to get to the new location unless I add another coupler to the line coming out of the firewall. Looks like you mounted yours vertically and have no T fitting.
Posted by: Root_Werks Jun 10 2021, 08:46 AM
Can you provide more pics of your regulator relocation and PMB lines?
I am now on my second set of PMB lines. They sent me a plug and T fitting to use with the early style location. The center line they provided is not long enough to get to the new location unless I add another coupler to the line coming out of the firewall. Looks like you mounted yours vertically and have no T fitting.
PMB sent me an early "kit" which had all hard lines. I wound up using a line that was probably intended for something else.
I started by installing the L & R caliper hardlines. Figured they would determine where the regulator would sit. Then I sorted through the remaining hard lines until I found one that was long enough to bend to meet the mounted regulator.
It was a PITA pulling whatever line I used in and out of the tunnel making small bends until it fit nicely.
Also had to rotate the mounting bracket on the regulator 180. Wound up making a little jig from wood, putting the regulator in a vise so I wouldn't have to worry about breaking a good seal on the halves.
Posted by: Root_Werks Jun 11 2021, 09:44 AM
Finished up the inner longitudinal stiffening kit installation last night. This is the 3rd or 4th one of these installed and I've learned a bit each time. Still took me 6-7 hours to do, but it's totally worth it. The reduction in body flex is dramatic when doing the "but test".
I also remember how much less cowl shake there would be when going over bumps or RR track crossings. Very excited to have this done.
914 goes off to paint on the 26th. I think I'll be ready with time to spare.
Attached thumbnail(s)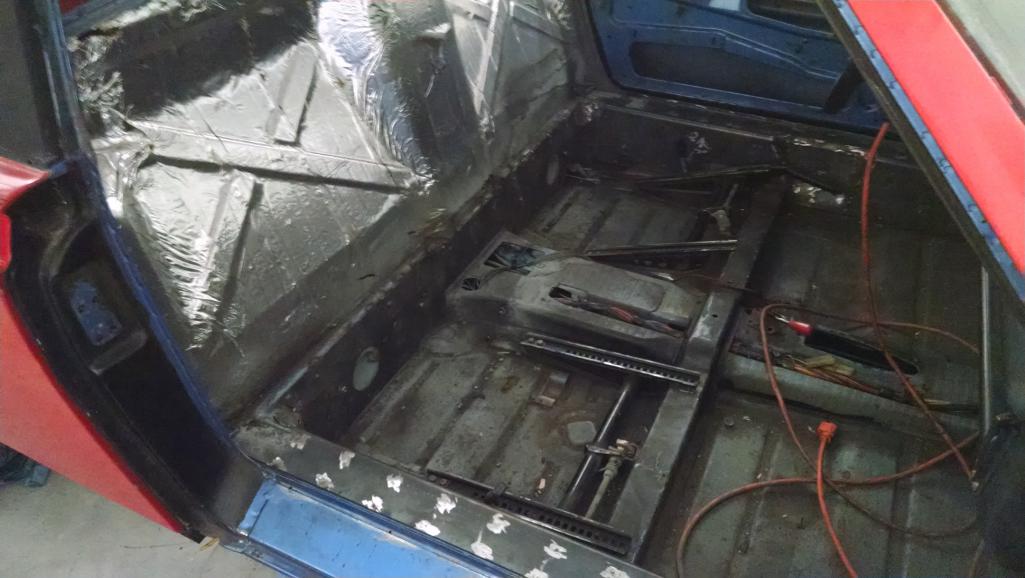
Posted by: Root_Werks Jun 11 2021, 12:01 PM
Quick shot of the new Hi-Torque starter, ground cable, correctly modified cooler from Ben and part of actual repo 914-6 engine tin. Whole engine needs re-wired. The wiring is correct, but messy, really messy. Maybe I can clean it up? On this, starting from scratch might be easier. I'll have time once the 914 goes in for paint.
Attached thumbnail(s)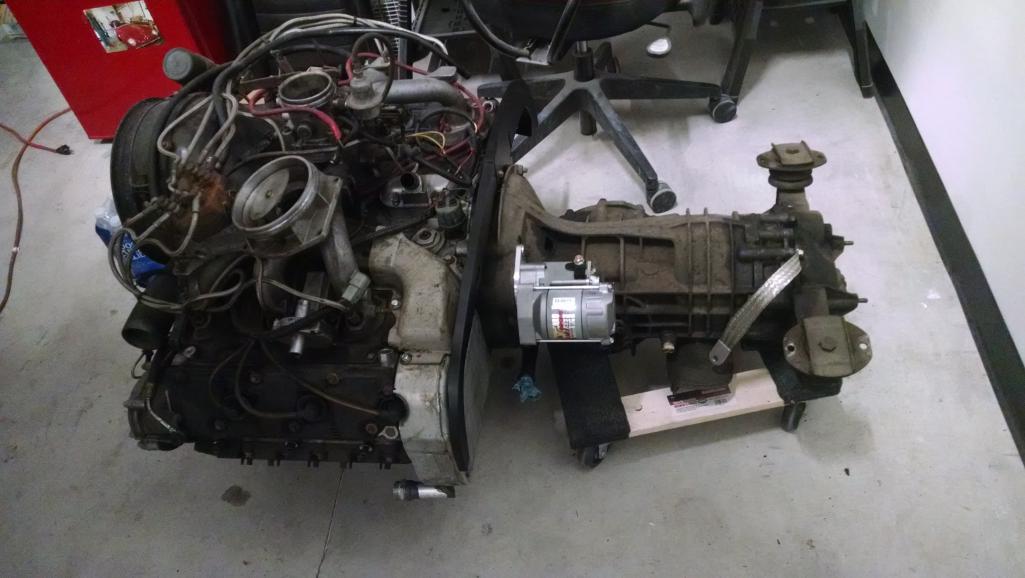
Posted by: rjames Jun 11 2021, 03:05 PM
Nice progress, Dan. Looking forward to seeing the car after the paint job!
Posted by: Root_Werks Jun 11 2021, 03:34 PM
Nice progress, Dan. Looking forward to seeing the car after the paint job!
Me too! Gonna cost, but will be worth it.
Posted by: PanelBilly Jun 13 2021, 12:59 AM
Get one of these bolts with the Allen head for the top of the starter. With an wobble extension you’ll be able to remove the starter after the engine is installed. I paid $4 for one of them but it’s well worth the couple of dollars to save me from trying to use the claw foot wrench to remove the OEM bolt. 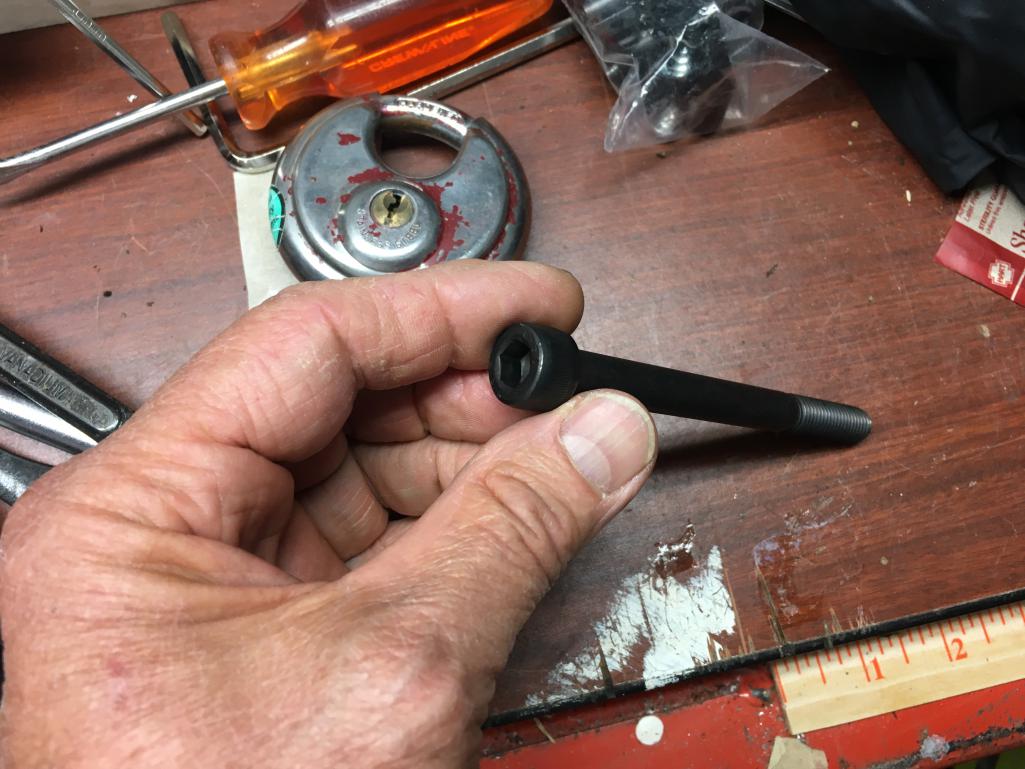
Posted by: Root_Werks Jun 24 2021, 05:04 PM
Engine/trans back in, left the axels off since I'm flat towing to the Paint guy this weekend! Finally!
Using the time to get as much done and back together as possible. Wiring cleaned up, fuel system is better and installed the fuel tank evap system. Fuel tank is still out for now, but ran the new line through the tunnel, found a very good used can and perfect mounting spot.
Very excited to finally get this off to body shop and paint.
Attached thumbnail(s)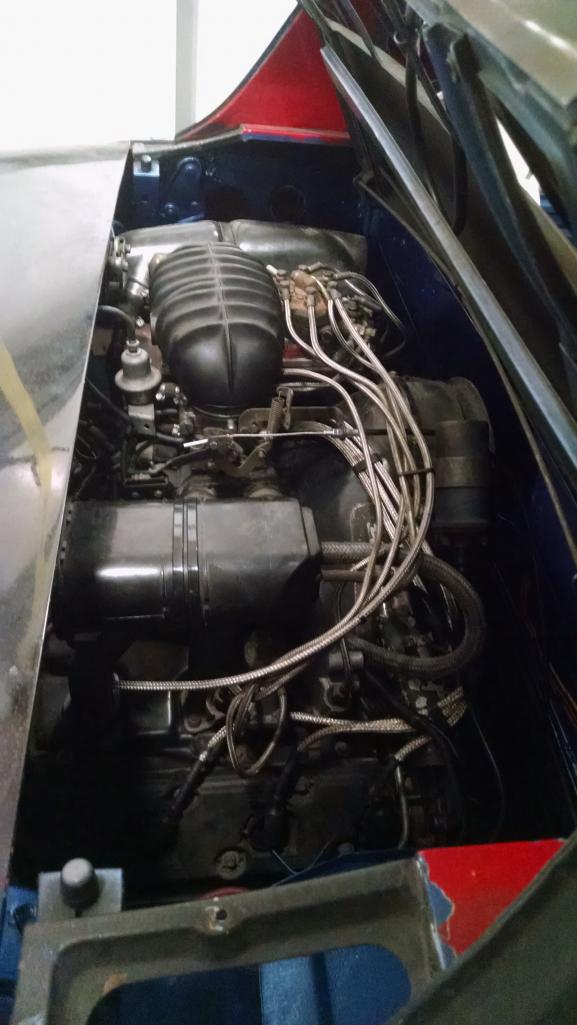
Posted by: KELTY360 Jun 24 2021, 05:11 PM
Nice progress but I thought you were getting it painted without the engine installed. Looking forward to seeing you and Michelle on Saturday.
Posted by: Root_Werks Jun 24 2021, 05:25 PM
Nice progress but I thought you were getting it painted without the engine installed. Looking forward to seeing you and Michelle on Saturday.
Waffled back and forth about it. Bottom line is the engine bay isn't nice enough to sand, smooth and paint due to welding, cutting for dealer AC etc. Fixed as much as I could within reason, spray bombed it and done.
Left out things like the oil tank so he has access to inner fender. Trunks and door jams will get painted.
See you Saturday!
Posted by: Root_Werks Jun 24 2021, 05:31 PM
914Werks tow bar with lights all ready to go:
Attached thumbnail(s)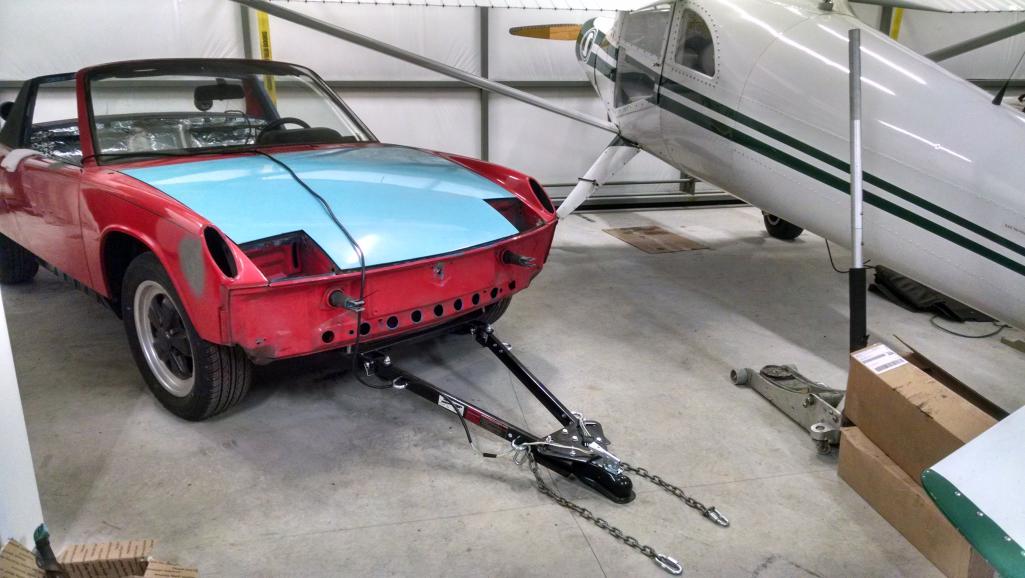
Posted by: Root_Werks Jun 24 2021, 05:34 PM
Shaded by an airplane wing, but can see the inner long kit cleaned and painted.
Ran all my cables, new SS fuel lines and evap hose. While everything was out of the tunnel, I cleaned as best I could, poured paint in the tunnel and jacked one end up really high until paint puddled at the other end. Then reversed the process until paint pooled back at the original end. Then stuck modified long stemmed paint brush as far as I could and just smooshed paint everywhere.
Dried for a week, then installed all new stuff.
Attached thumbnail(s)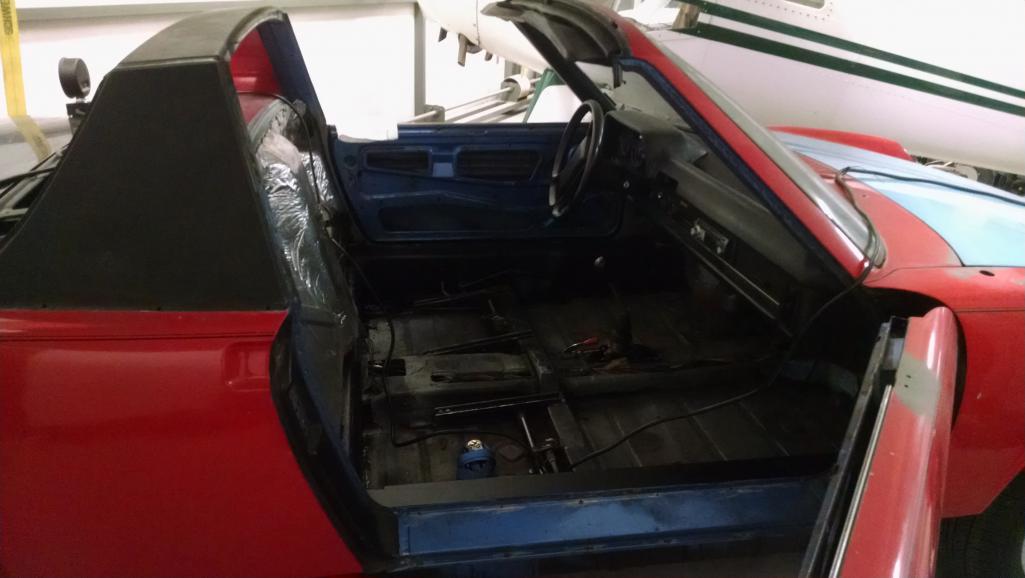
Posted by: Root_Werks Jun 26 2021, 08:16 AM
Off we go to our paint guy!
Attached thumbnail(s)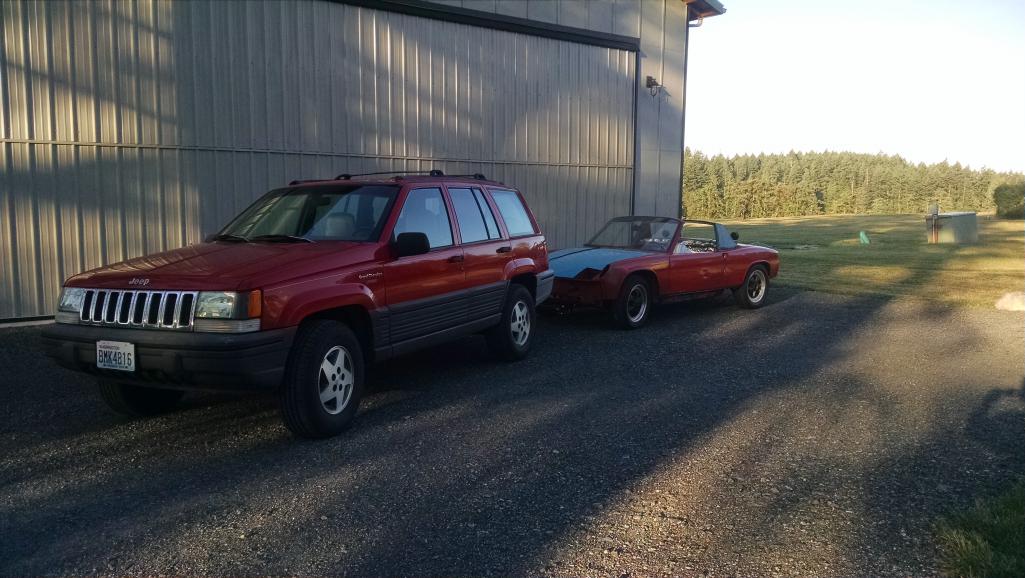
Posted by: sixnotfour Jun 26 2021, 11:35 AM
cis / EFI
https://www.bitzracing.com/products/Partial_EFI_KIT/
Posted by: Root_Werks Jun 27 2021, 10:15 AM
cis / EFI
https://www.bitzracing.com/products/Partial_EFI_KIT/
Been eyeballing this for a while. Kinda like the period correct CIS for now.
Posted by: mb911 Jun 27 2021, 10:33 AM
cis / EFI
https://www.bitzracing.com/products/Partial_EFI_KIT/
I did that kit on my 3.2 ss turbo build. Ended up using a 3.2 intake but the kit worked great
Posted by: 914werke Jun 27 2021, 12:55 PM
That ECU looks to be an MS1 box?
Posted by: Root_Werks Jun 27 2021, 04:09 PM
Took two different ferries to get to the paint shop.
Attached thumbnail(s)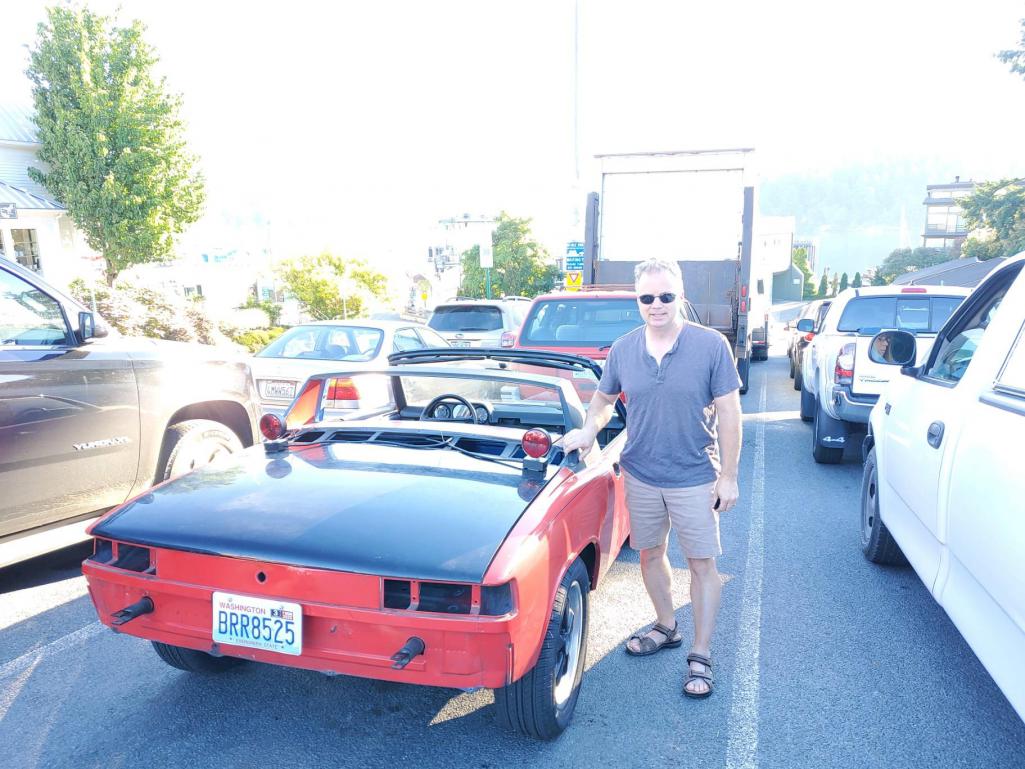
Posted by: Root_Werks Jun 27 2021, 04:10 PM
Second ferry ride.
Attached thumbnail(s)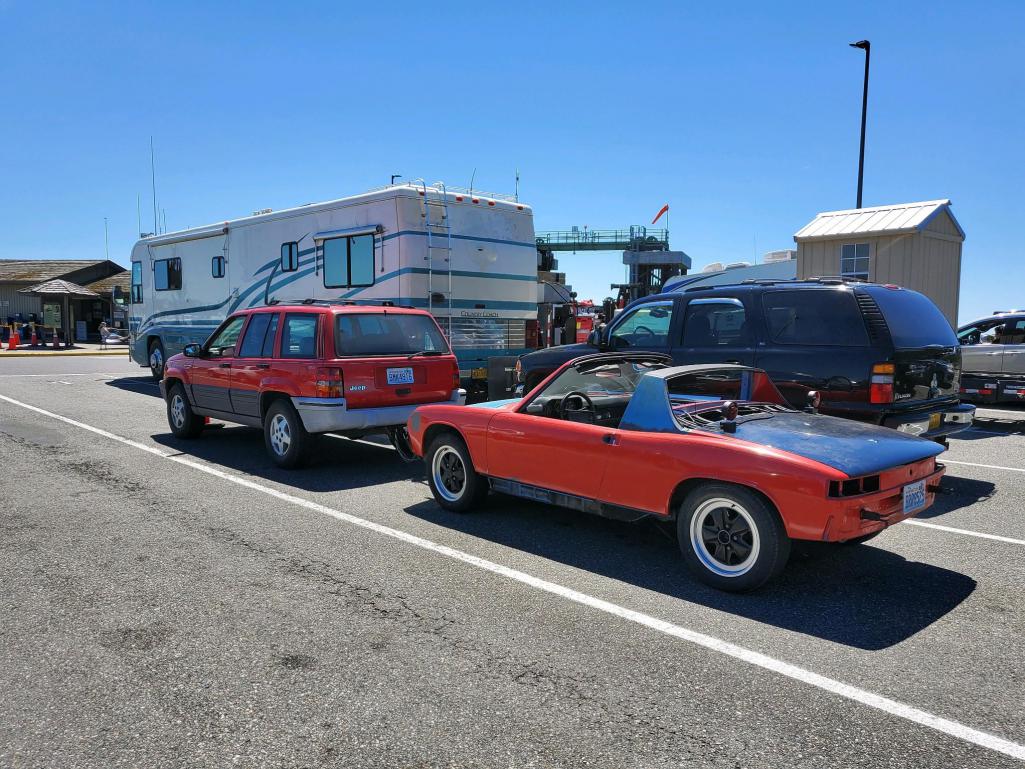
Posted by: sixnotfour Jun 27 2021, 04:49 PM
Damn Dan,, my mom lives in kingston,, I hate the ferry... Lookin Good
Posted by: Root_Werks Jun 28 2021, 08:36 AM
Damn Dan,, my mom lives in kingston,, I hate the ferry... Lookin Good
Thanks!
Port Ludlow, that's where the paint guy is. Finding guys who still do body and paint is getting really hard.
Was a fun day, had lunch with Marc, stayed the night in LaConner and headed back the following afternoon. His 914 still looks AMAZING!
Yes, the Ferry system is Love/Hate. Gets you places, but not always when they say. Ferries Saturday were all good, the last one going home Sunday was hell. 3.5 hours sitting in a car. Canceled trips, running late etc.
It's why most of the time we fly on/off the island. That red Jeep normally sits at an airport on the mainland. Freedom to come and go as we please.
Posted by: Root_Werks Nov 24 2021, 11:06 AM
Been a while since last update.
My paint guy had to bug out of the job due to things that were not his doing. He helped me source another shop to pick up where he left off and yesterday it was on it's way to another body shop....again.
At this point, hoping for Spring 2022 to get the 914 back all painted.
Attached image(s)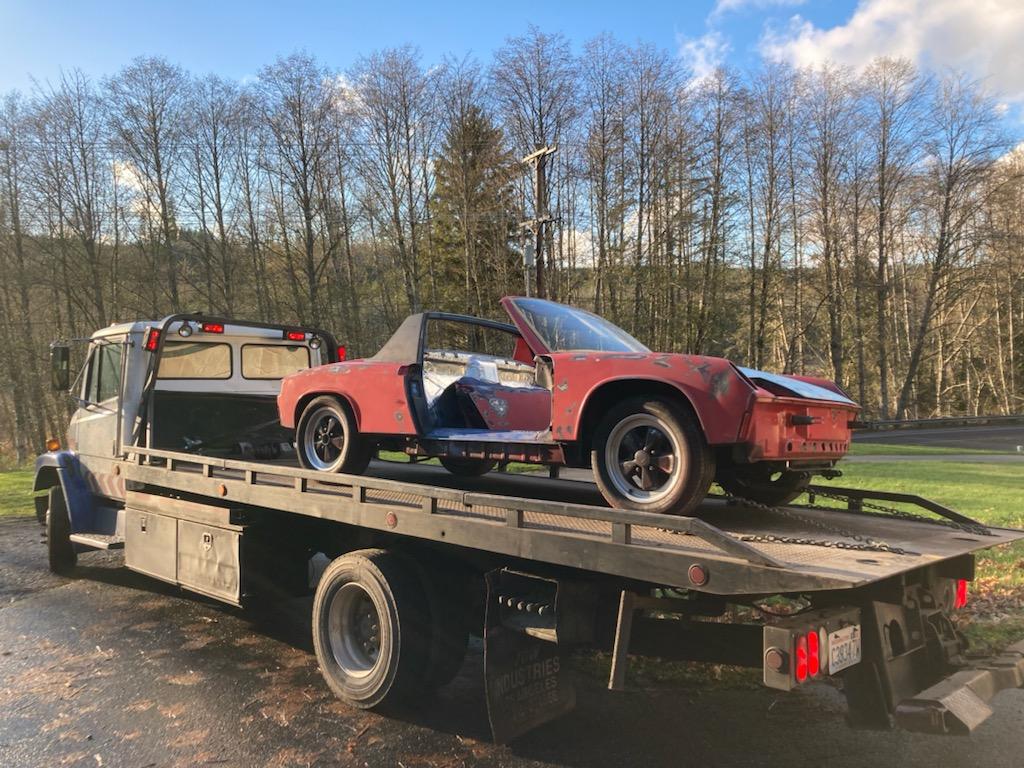
Posted by: Root_Werks Nov 24 2021, 11:09 AM
With the 914 gone, I've decided to use the time to swap out the tranny on my Bug. Putting in one of the 4:12 Freeway Flyers from Strictly Foreign. It's been more than a few years since I pulled a Bug engine.
Attached thumbnail(s)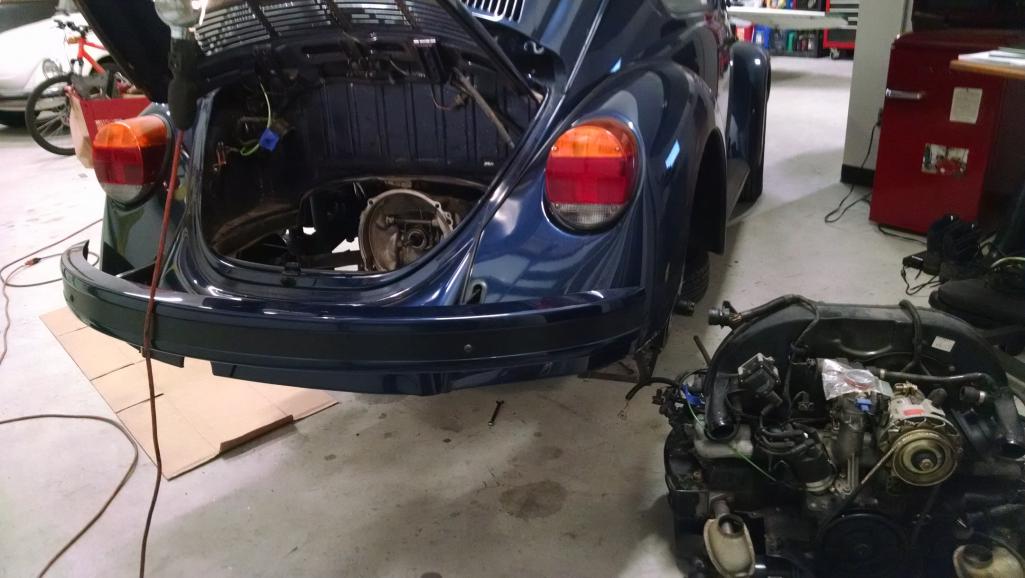
Posted by: Root_Werks Nov 24 2021, 11:10 AM
Swapping axels:
Attached thumbnail(s)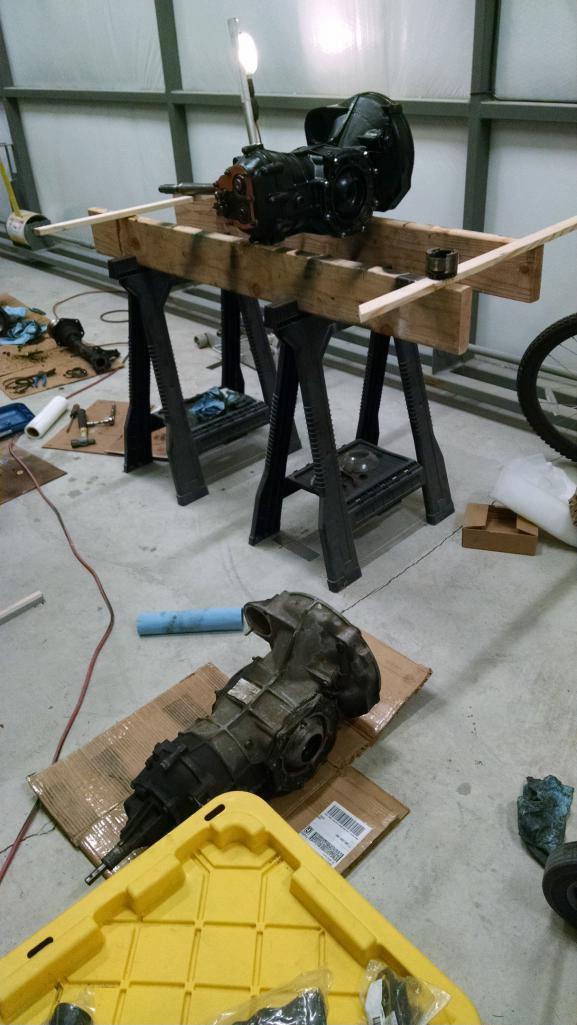
Posted by: Root_Werks Feb 16 2022, 06:42 PM
Got a couple of pictures of the paint progress. Told another block sand, prime then paint. 2-3 weeks until finished:
Attached thumbnail(s)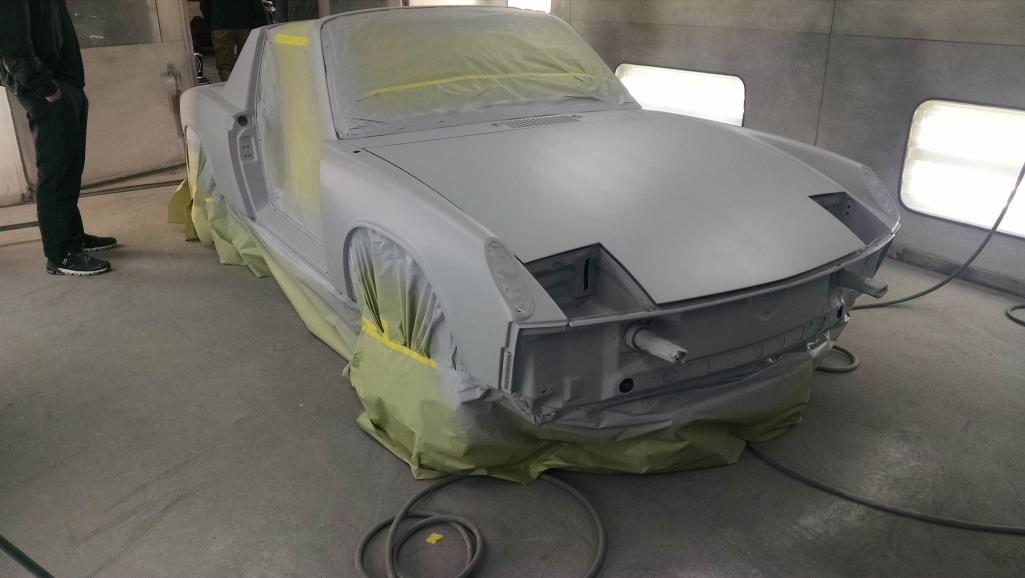
Posted by: Root_Werks Feb 16 2022, 06:46 PM
Had to remind them to paint the underside of both lids. Importance of keeping in touch with a paint shop that's pretty far away. They weren't planning on it!
Painting the trunks don't really care about, but don't want to open a lid and see a different color. That woulda been an oops!
Attached thumbnail(s)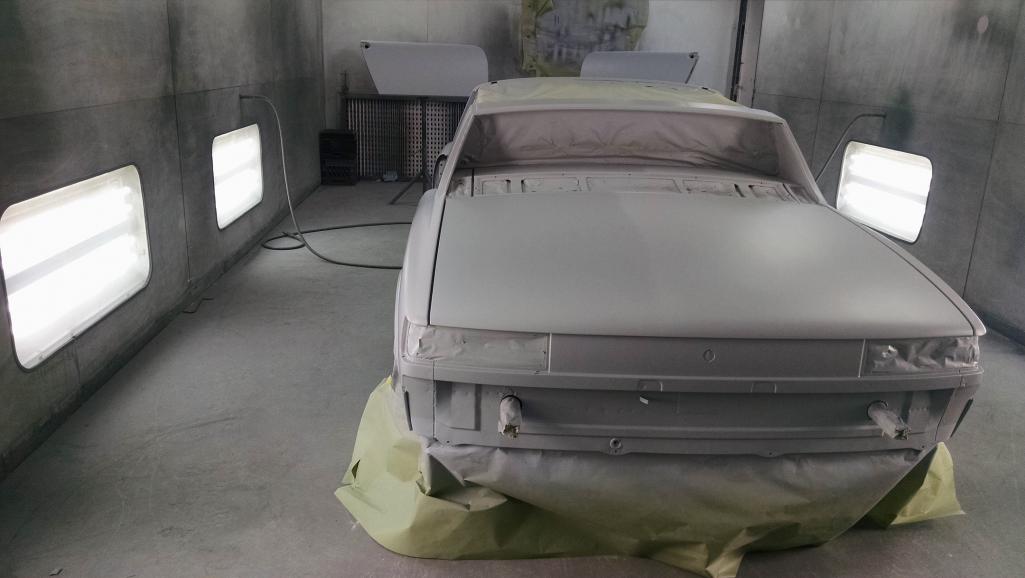
Posted by: rjames Feb 16 2022, 07:36 PM

Posted by: rhodyguy Feb 16 2022, 08:51 PM
WOW. What does a car on a trailer and a tow rig cost to get on the boat?
Posted by: Root_Werks Feb 16 2022, 09:17 PM
WOW. What does a car on a trailer and a tow rig cost to get on the boat?
Can't recall?
Really looking forward to getting the 914 home and maybe even back on the road for the summer.
Posted by: KELTY360 Feb 17 2022, 02:13 PM
WOW. What does a car on a trailer and a tow rig cost to get on the boat?
Actually two boats; one to get off the island and another to get over to the peninsula.
Looking good Dan!
Posted by: jim_hoyland Feb 17 2022, 06:34 PM
Nice Looking forward to the finished car
Posted by: Dion Feb 18 2022, 06:04 AM
Can’t wait to see it in paint Dan. Looking good. Nice you caught the trunk lids needing attention in time. That’s quite a logistical scenario getting it to and fro your home.
Posted by: Root_Werks Mar 9 2022, 03:42 PM
Picked up the 914 today! Looks wonderful and will post a few more pics later.
Attached thumbnail(s)
Posted by: KELTY360 Mar 9 2022, 06:10 PM
I can verify. Looks great in the morning sun!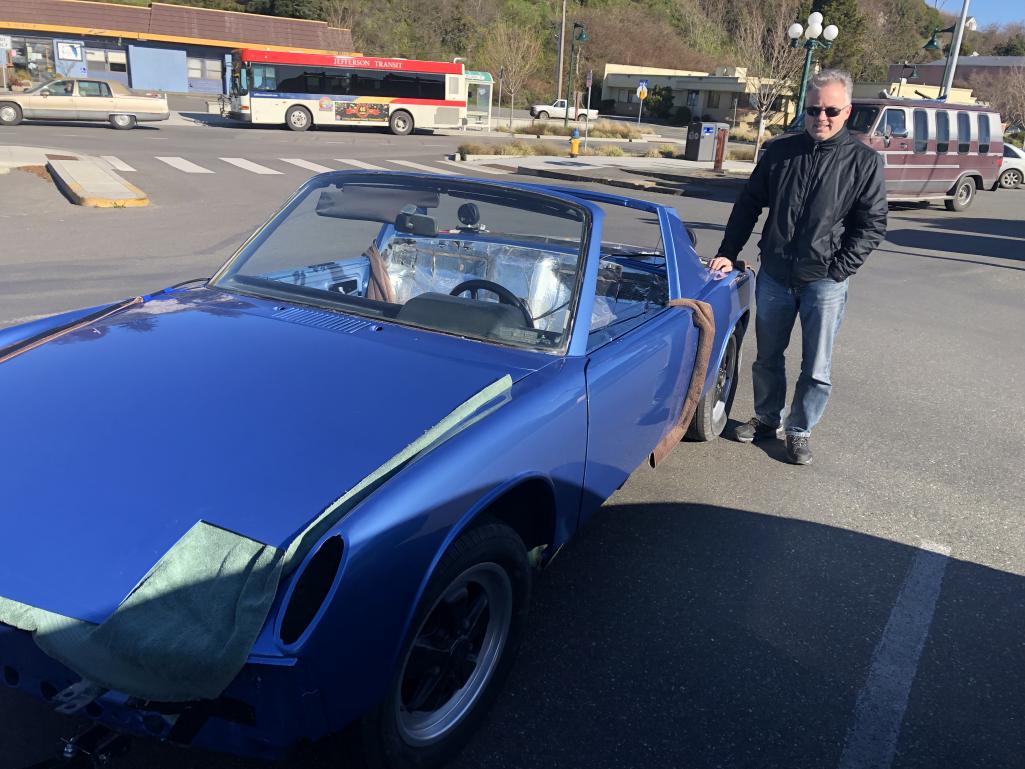
Posted by: Dion Mar 9 2022, 06:49 PM
Hey! Congrats Dan. That looks great. What blue is that? Is that the “Ancona” ? (spelling¿) Appears nice and
deep. Bet your well pleased.
Posted by: Root_Werks Mar 9 2022, 10:50 PM
My hair is getting so gray.
Shop painted both trunks and cleaned them up better than I would have expected. I didn't have them paint the fuel tank area. It just needs to be cleaned up which I can do.
Attached thumbnail(s)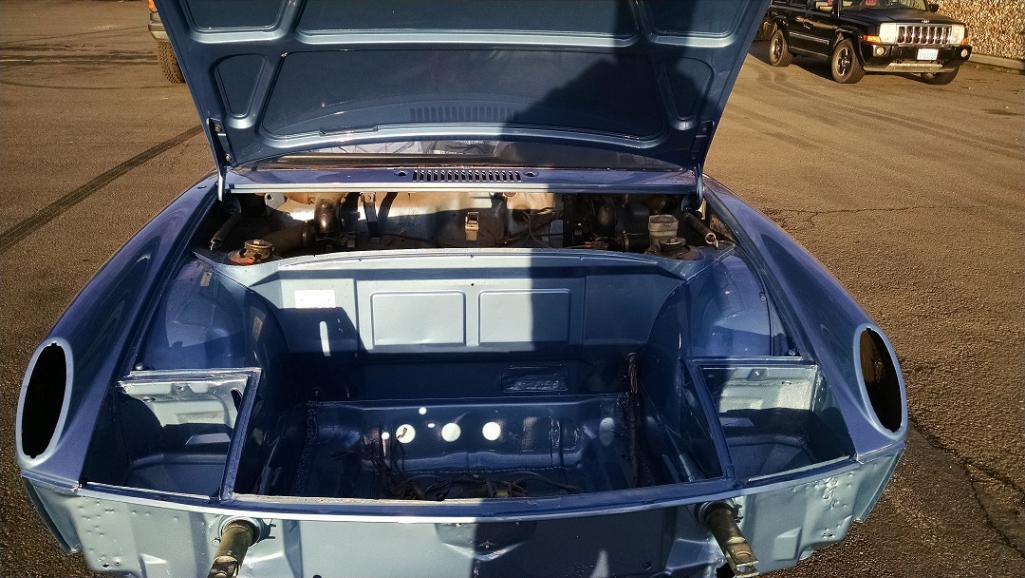
Posted by: Root_Werks Mar 9 2022, 10:53 PM
Sorry for the sun glare on this shot, I should have opened the rear trunk. It's really nice!
Made it home fine and starting to sift through 4 boxes of 914Rubber gaskets and parts. Already found a few missing pieces I NEED before I can start the 914 again.
Attached thumbnail(s)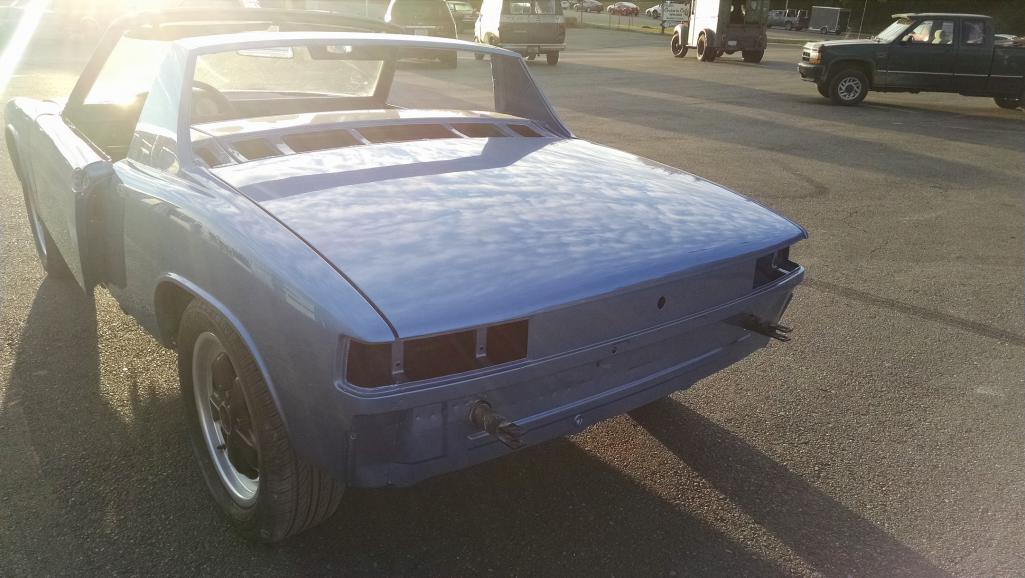
Posted by: Root_Werks Mar 9 2022, 10:57 PM
Hey! Congrats Dan. That looks great. What blue is that? Is that the “Ancona” ? (spelling¿) Appears nice and
deep. Bet your well pleased.
Yup! Anacona Blue, L97B I think? It's the 914's original color.
Super excited, getting this 914 painted was an adventure. The shop stayed within my budget and completed the project fairly quickly considering they got it from another shop.
Two ferries over, crashed at a hotel, 7AM the next morning I was there. Two ferries back and it's home after 8 months gone for paint.
Posted by: TRS63 Mar 10 2022, 06:35 AM
Looking really good 
Antoine
Posted by: mate914 Mar 10 2022, 06:46 AM
Looks great! Carful with that fresh paint....
Matt 
Posted by: Cairo94507 Mar 10 2022, 08:16 AM
Huge milestone in your build; that is a terrific color. Be very careful during assembly.
Posted by: Superhawk996 Mar 10 2022, 08:37 AM
Nice color. I really like blue vehicles.
Posted by: Root_Werks Mar 11 2022, 09:36 AM
Rear trunk:
Attached thumbnail(s)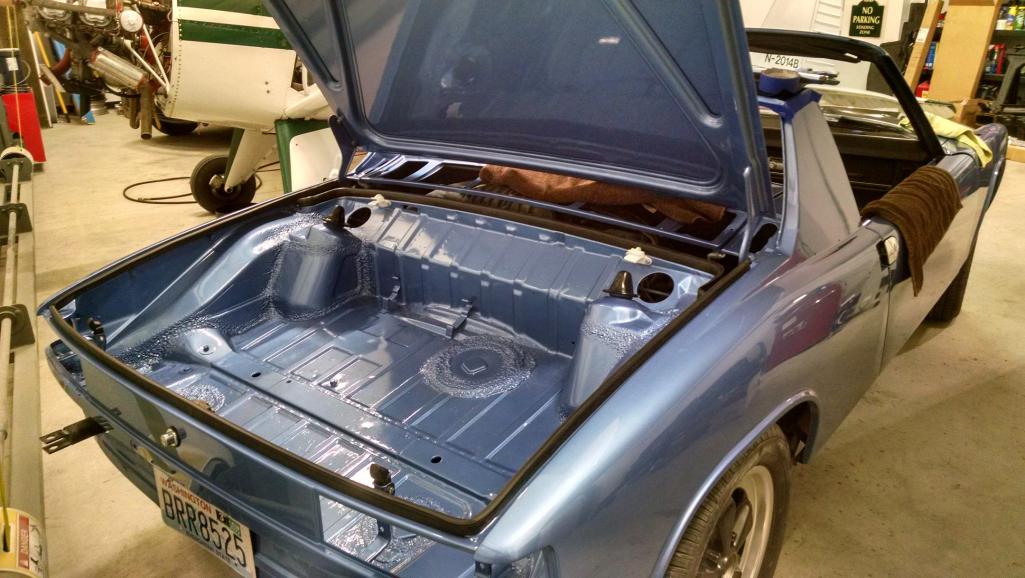
Posted by: Root_Werks Mar 11 2022, 09:38 AM
Before I can put the oil tank in, have to install vinyl and trim. Mainly the little nut that holds the sail panel trim in place.
Got the oil tank back in last night and started on the oil lines. Getting closer to starting the engine after 8 months. Also installed all main body gaskets, doors and trunks.
Have a growing list of things I forgot to order.
Attached thumbnail(s)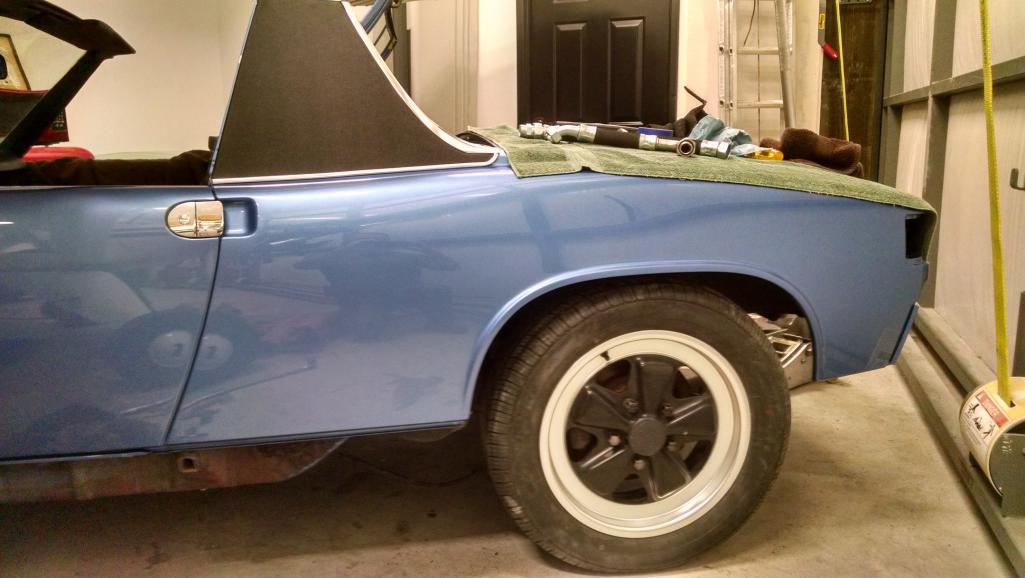
Posted by: tygaboy Mar 11 2022, 09:38 AM
Dang! That looks great! 
Posted by: Root_Werks Mar 14 2022, 09:41 PM
Trying to focus on things that need to get done so I can start the engine. Tackled most of the front trunk area. Fuel tank will be next. I DO NOT ever want to install a fresh air box again. New grill and seals make the finished product really nice. What a PITA to put back in, adjust and ensure paint doesn't get scratched.
Attached thumbnail(s)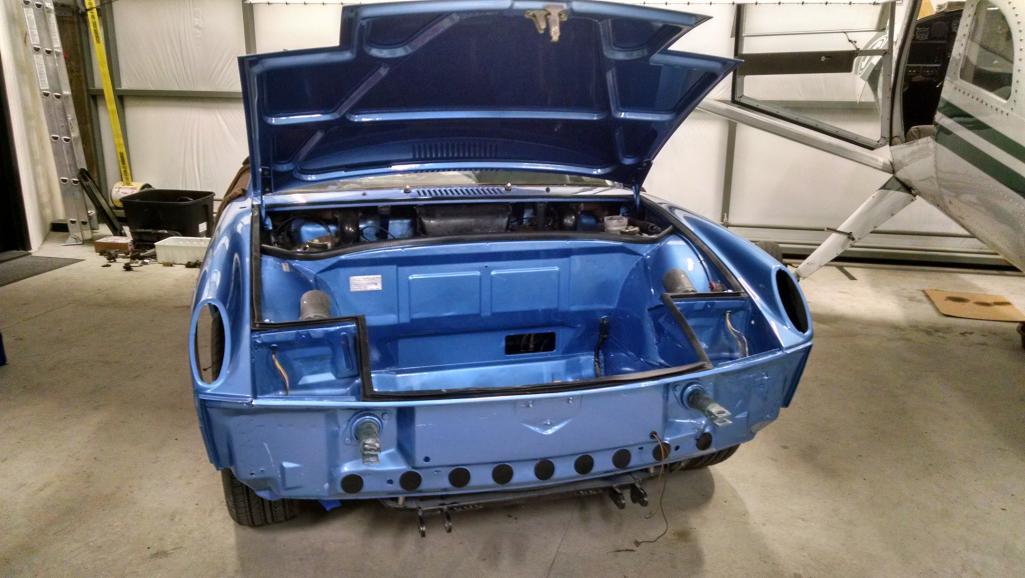
Posted by: Root_Werks Mar 14 2022, 09:44 PM
So many boxes of new parts and I still make lists of things I missed.
Attached thumbnail(s)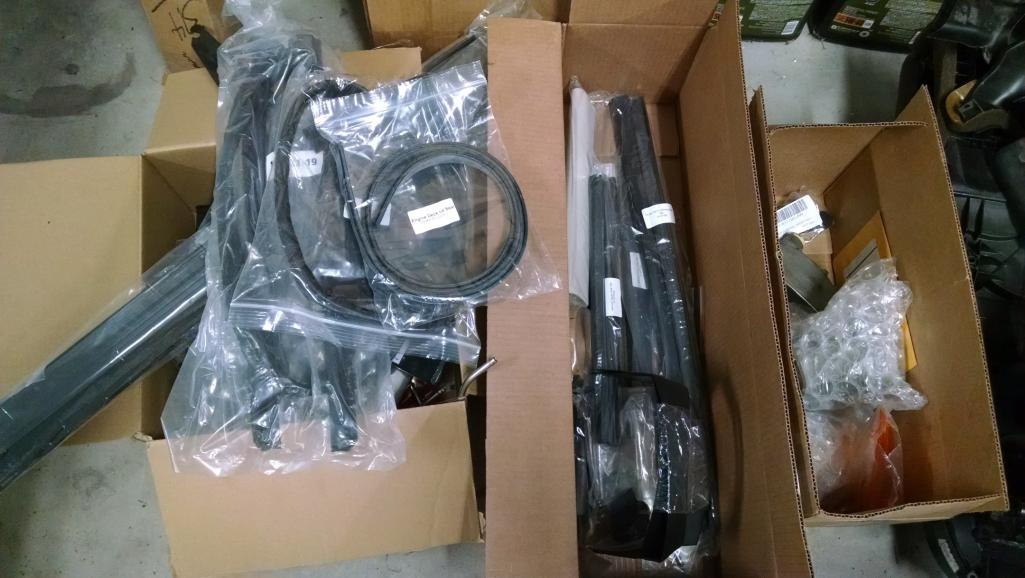
Posted by: Cairo94507 Mar 15 2022, 07:41 AM
Making terrific progress.
Posted by: IronHillRestorations Mar 15 2022, 07:57 AM
This really looks good great Dan!!
Posted by: Dion Mar 15 2022, 07:57 AM
That really is a great colour! Re-assembly with new rubber seals, fun!!
Yeah ,don’t want to revisit fresh air box assembly, ever.
Looking awesome.
Posted by: Root_Werks Mar 15 2022, 08:33 AM
Thanks everyone! So excited to have my 914 back and all one color. It'll be nice to finish this up, drive and give my checkbook a break.
Posted by: DRPHIL914 Mar 15 2022, 12:00 PM
Trying to focus on things that need to get done so I can start the engine. Tackled most of the front trunk area. Fuel tank will be next. I DO NOT ever want to install a fresh air box again. New grill and seals make the finished product really nice. What a PITA to put back in, adjust and ensure paint doesn't get scratched.
So many boxes of new parts and I still make lists of things I missed.
That really is a great colour! Re-assembly with new rubber seals, fun!!
Yeah ,don’t want to revisit fresh air box assembly, ever.
Looking awesome.
 exactly my thoughts, what a great color!!! beauty for sure, it will be well worth all the work and effort you have into it. you may not have planned on this when you got this, but now it will be what you wanted it to be!
Posted by: Root_Werks Mar 17 2022, 09:22 AM
Progress stalled a bit yesterday in the path to starting the engine. I forgot the exhaust studs on a 2.7 are to long for barrel nuts. I don't want to stack washers so ordered up 12 correct length studs.
Attached thumbnail(s)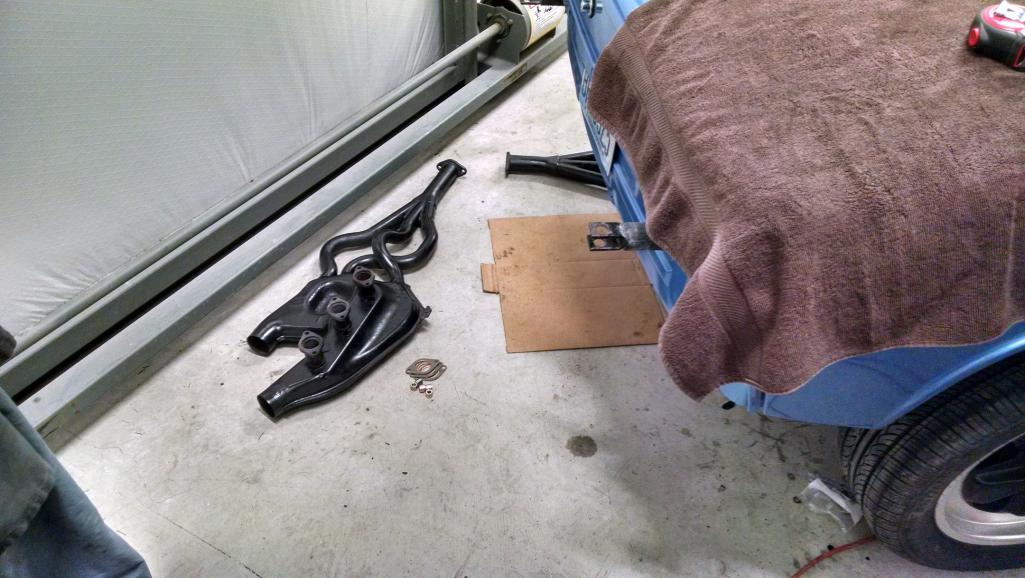
Posted by: Root_Werks Mar 17 2022, 09:26 AM
Provided some time to get headlight frames and lids installed. Pretty happy with gaps.
New lenses sure help with new paint.
Attached thumbnail(s)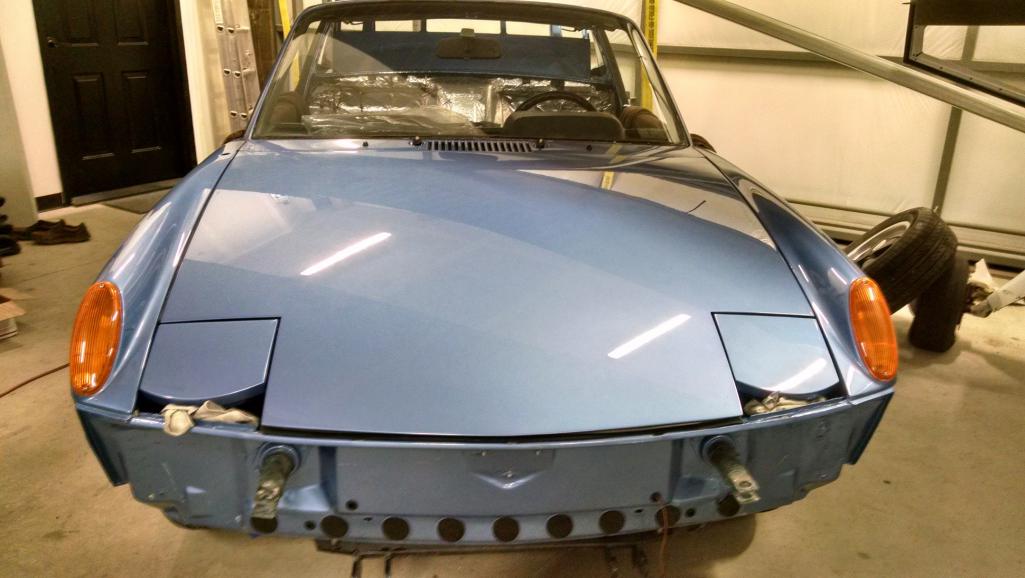
Posted by: Root_Werks Mar 17 2022, 09:30 AM
Thanks all for the comments and encouragement! Correct this isn't the project I wanted to get into, but it'll turn out the way I want in the end.
Posted by: mepstein Mar 17 2022, 10:25 AM
Fresh paint makes it look fantastic!
Posted by: BillJ Mar 17 2022, 11:34 AM
Wonderful color. I really like blue on these cars.
Posted by: rjames Mar 17 2022, 01:02 PM
Thanks all for the comments and encouragement! Correct this isn't the project I wanted to get into, but it'll turn out the way I want in the end.
Gaps look damn near perfect from the picture.
Such a great color! Can't wait to see this one finished. Congrats, Dan!
Posted by: Root_Werks Mar 18 2022, 09:43 AM
Last night got all new lights installed and working. New taillight housings and lenses, didn't know reverse lights were so bright!
Dropped some oil in the tank and cranked over the engine. Oil pressure built up very quickly.
I LOVE the High-TQ starter! Holy turnover Batman, it really spins the engine over with authority!
If I get the proper length exhaust studs shortly, hoping to fire this up next week.
Posted by: Root_Werks Mar 25 2022, 09:36 AM
Need a little help on this one; 914-6 Heater boxes installed last night, even connected the flappers and tubes.
The muffler seems to sit in the correct position, the muffler seam is roughly in line with the bottom of the body, but the tailpipe is really low. As-in, doesn't even exit through the valence.
I forgot to take a picture last night, but it's the same as it's always been.
Is this just a tailpipe thing? Or do I need to get a different muffler? I can reweld the tailpipe, but I think the muffler is SS.
Thoughts? Sarcastic comments? 
Attached image(s)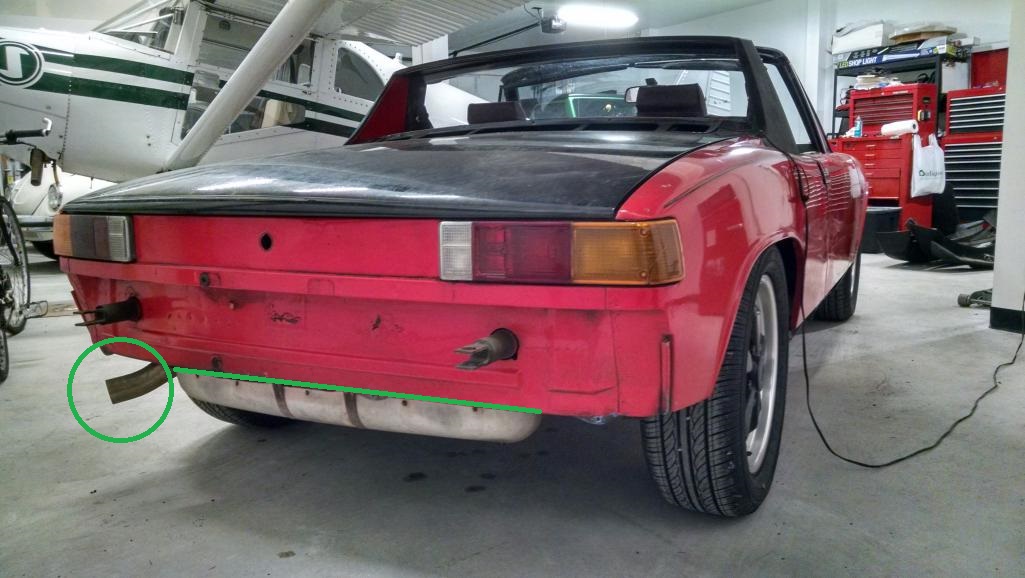
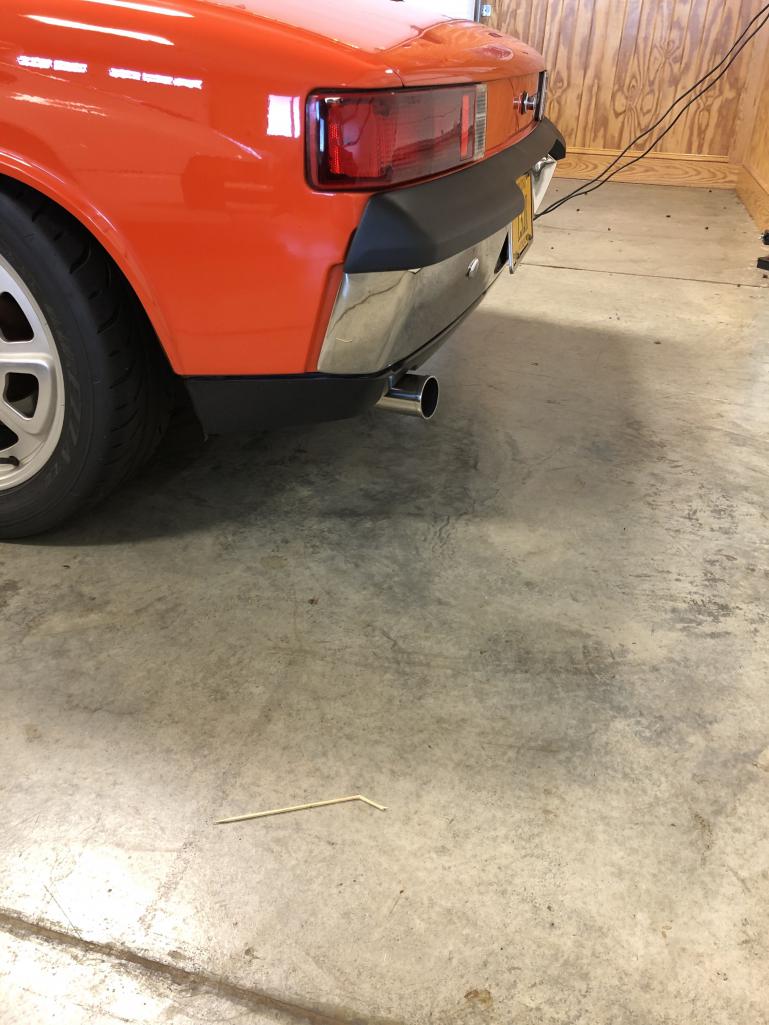
Posted by: Root_Werks Mar 25 2022, 09:41 AM
Snagged a picture from @http://www.914world.com/bbs2/index.php?showuser=23007 thread (thanks!).
Looks like my muffler position is correct, but my tailpipe is weird. Ugh, I'll have to see about fixing that.
WTF? Why would someone use a tailpipe configured like that?
Here's how it should be:
Attached image(s)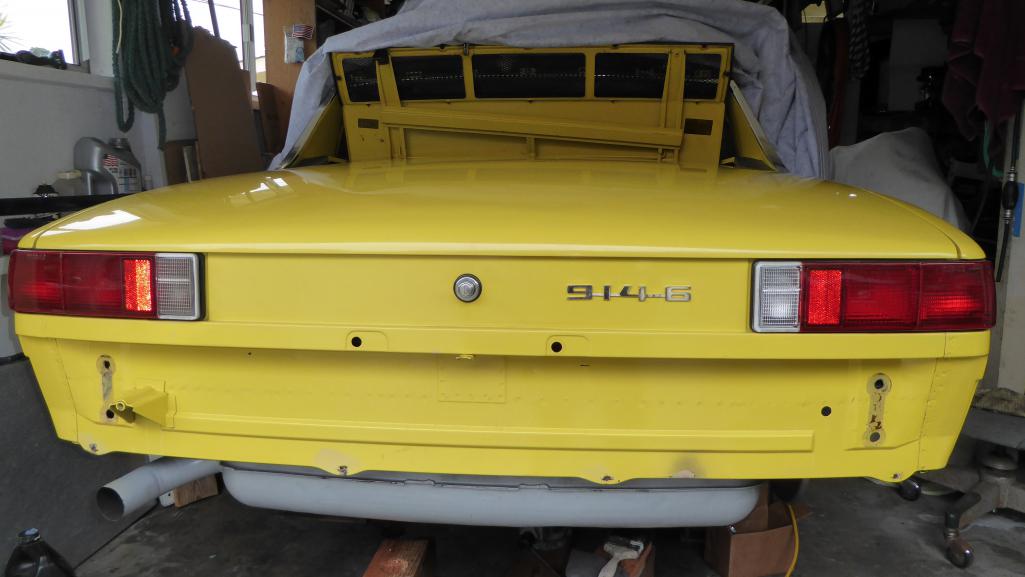
Posted by: DBF Mar 25 2022, 09:13 PM
Enjoyed reading the thread about your project. The car looks great. Good luck on the quest to getting it back on the road.
Posted by: mb911 Mar 26 2022, 05:45 AM
The muffler is likely off an 74 and up 911. The tail pipe comes out at a different angle.
Posted by: Root_Werks Mar 26 2022, 11:44 AM
The muffler is likely off an 74 and up 911. The tail pipe comes out at a different angle.
Thanks Ben, that makes sense. Mufflers aren't cheap so I'll likely just cut and weld the tip to be correct.
It's getting close to starting the engine.
Punch list to start:
Install fuel tank and pump
Install filter and accumulator assembly
Find new/better home for MSD 6A box
I think that's it, would be nice to hear it run again.
Posted by: mb911 Mar 26 2022, 05:20 PM
The muffler is likely off an 74 and up 911. The tail pipe comes out at a different angle.
Thanks Ben, that makes sense. Mufflers aren't cheap so I'll likely just cut and weld the tip to be correct.
It's getting close to starting the engine.
Punch list to start:
Install fuel tank and pump
Install filter and accumulator assembly
Find new/better home for MSD 6A box
I think that's it, would be nice to hear it run again.
Yup cut the tail pipe and you will be all set. PS I might be in the muffler business again in the not to distant future.
Posted by: Root_Werks Mar 26 2022, 09:23 PM
Slowly knocked out a bit of the punch list to starting.
Fuel tank and fuel pump are back in with new lines.
Here's another Trunk pic.
You can see the fuel pump waiting for a cover with fresh paint to dry.
Bleed the brakes.
Fabbed up a mount for the fuel filter and accumulator. It'll mount roughly where the 4cyl MPS mounted. This now frees up space to mount the MSD 6A box where the 4cyl ECU mounted, yay!
There's a chance I might just light this thing up tomorrow! 
Attached thumbnail(s)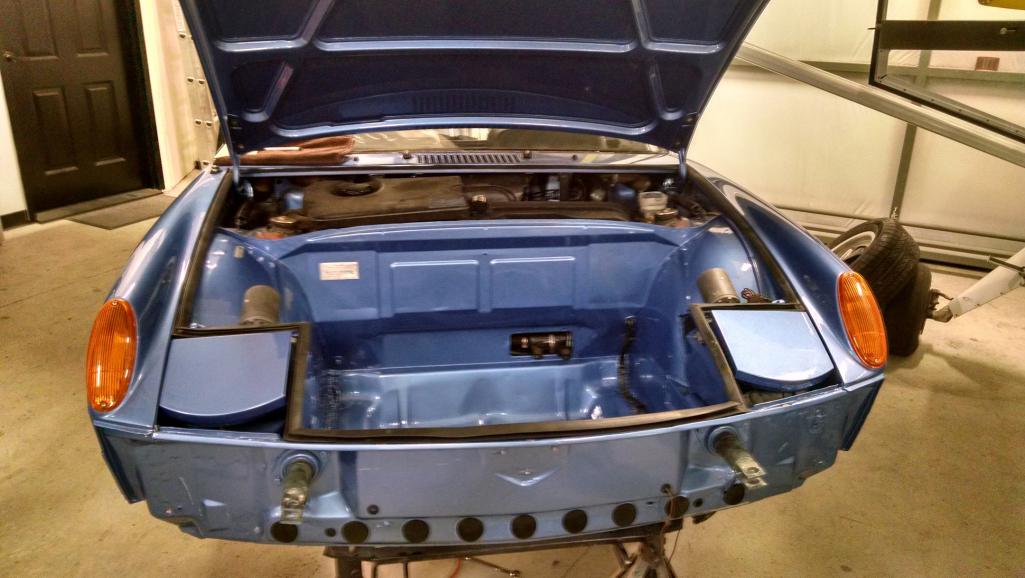
Posted by: KELTY360 Mar 27 2022, 10:33 AM
Slowly knocked out a bit of the punch list to starting.
Fuel tank and fuel pump are back in with new lines.
Here's another Trunk pic.
You can see the fuel pump waiting for a cover with fresh paint to dry.
Bleed the brakes.
Fabbed up a mount for the fuel filter and accumulator. It'll mount roughly where the 4cyl MPS mounted. This now frees up space to mount the MSD 6A box where the 4cyl ECU mounted, yay!
There's a chance I might just light this thing up tomorrow!
Posted by: Root_Werks Mar 27 2022, 06:08 PM
One downside of living on an Island is lack of supplies at times. I didn't realize I ran out of the high pressure fuel line = ugh. Both parts stores are closed on Sunday. I'll get back at it tomorrow.
Meantime, finished the headlight install and adjust. This takes a bunch of time just in it of itself. New H4 headlights and surounds, everything turned out really nice.
Attached thumbnail(s)
Posted by: Root_Werks Mar 27 2022, 06:11 PM
Also forgot I bought one of the protector blankets, this thing rocks! I've been using old bath towels this whole time.
Starting the engine is coming up soon. It'll be nice to get the 914 off jackstatnds if just for a little bit.
Attached thumbnail(s)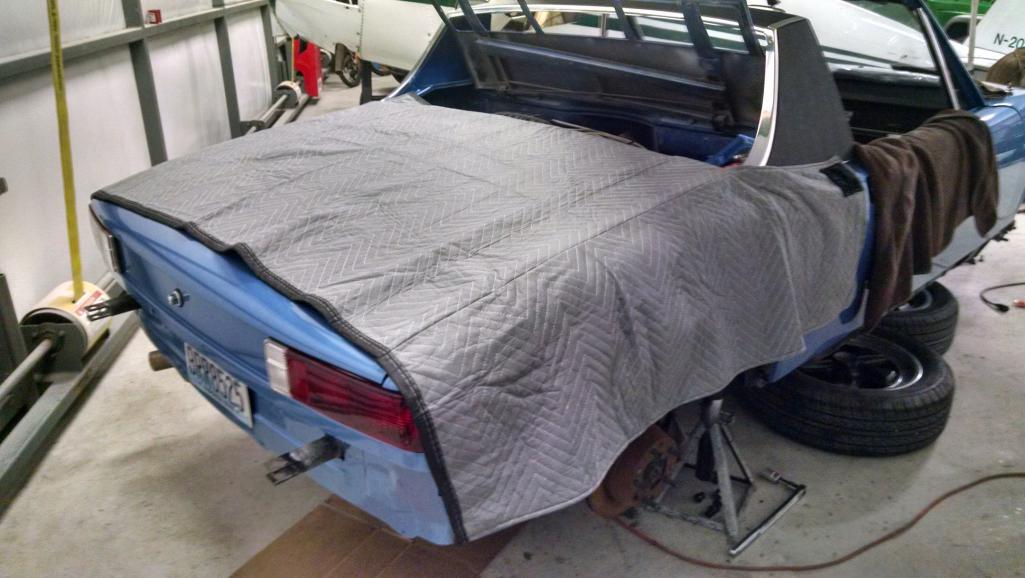
Posted by: burton73 Mar 27 2022, 06:15 PM
Dan,
Your car is looking great. I love the blue
Bob B
Posted by: sixnotfour Mar 27 2022, 06:18 PM
Lookin Good Dan... I like blue too
Posted by: Root_Werks Mar 27 2022, 06:20 PM
Dan,
Your car is looking great. I love the blue
Bob B
Thanks Bob! My 1976 914-6 Steel Top was Anacona Blue. It also started life as a 4cyl I converted to a six with narrow body and 16x6's that looked almost exactly like this 914-6. I'm basically building the 914 I had almost 20 years ago again. Always liked the look with the late bumpers, period correct Fuchs and stock 914 body and trim.
-Dan
Posted by: 76-914 Mar 27 2022, 07:01 PM
I like the late bumpers too. And I like the chrome ones too. Having driven both I swear, or in my mind at least, the car with late style bumpers handles better on the Hi Way. Is that a 140 in your hanger?
Posted by: Root_Werks Mar 27 2022, 09:52 PM
I like the late bumpers too. And I like the chrome ones too. Having driven both I swear, or in my mind at least, the car with late style bumpers handles better on the Hi Way. Is that a 140 in your hanger?
Luscombe 8A, bought from a friend of mine years ago. Probably never sell it until I can't fly anymore.
Posted by: Root_Werks Mar 27 2022, 09:53 PM
Lookin Good Dan... I like blue too
Thanks Jeff, a bit of a blast from the past for me.
Posted by: Root_Werks Mar 28 2022, 07:58 PM
It lives! Fired up today and let warm up a bit. Checked for leaks, noting a little oil coming from the rear main seal. Didn't do that before and hoping it goes away with time. Oil and fuel lines all seem good.
I put a set of the Beru ignition wires on and one of them won't click or lock onto the spark plug. Frustrating. Got a bit of popping and farting, has been sitting for 9 months. Needs to be driven.
Posted by: Root_Werks Mar 29 2022, 09:17 AM
Last night was able to get the bumper installed and used LE valance from @http://www.914world.com/bbs2/index.php?showuser=453 which looks great. Also installed a set of driving lights. Was pleased the wires were all there and plugged straight into the stock 914 harness. I have a proper switch and hoping the rest of the addition of driving lights goes so smooth.
1970's Porsche driving lights are not light, adding those to the bumper really gave me a workout when installing!
Also getting tired of working on the 914 under the wing. I've bumped my head a hundred times. It'll be nice to get it off jackstands and over to a clearer part of the hangar.
Attached thumbnail(s)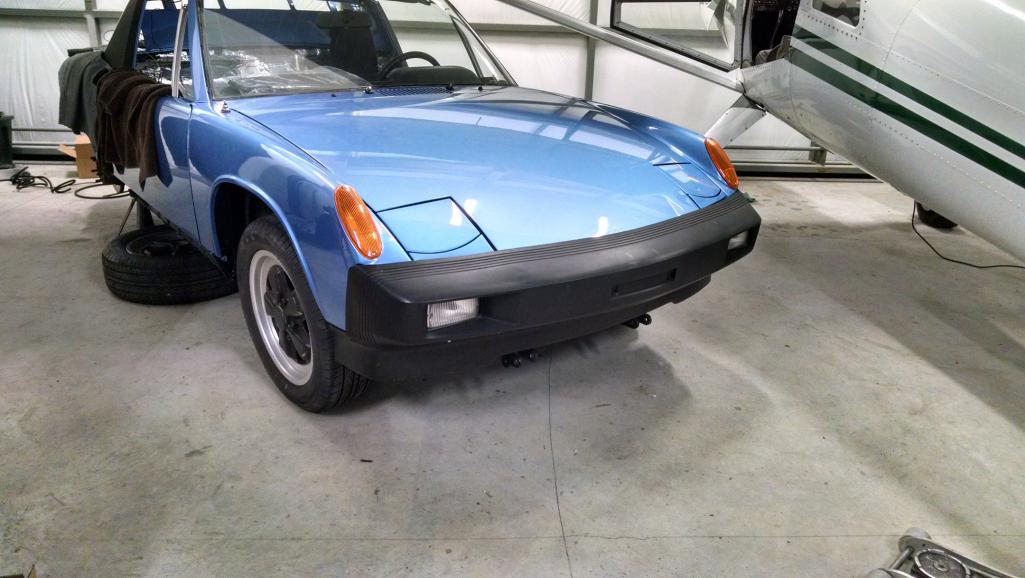
Posted by: Dion Mar 29 2022, 10:25 AM
You had it fired up ?! That’s awesome! It’s coming along nicely…. and quickly. Glad you sorted the CIS fuel set up.
Posted by: Root_Werks Mar 30 2022, 03:04 PM
First drive in 9 months and it was glorious! Lifters quieted down right away, ran just as it did before.
There's a bunch to do still for sure, but it drives again! SO looking forward to making a few events this summer with the 914.
Attached thumbnail(s)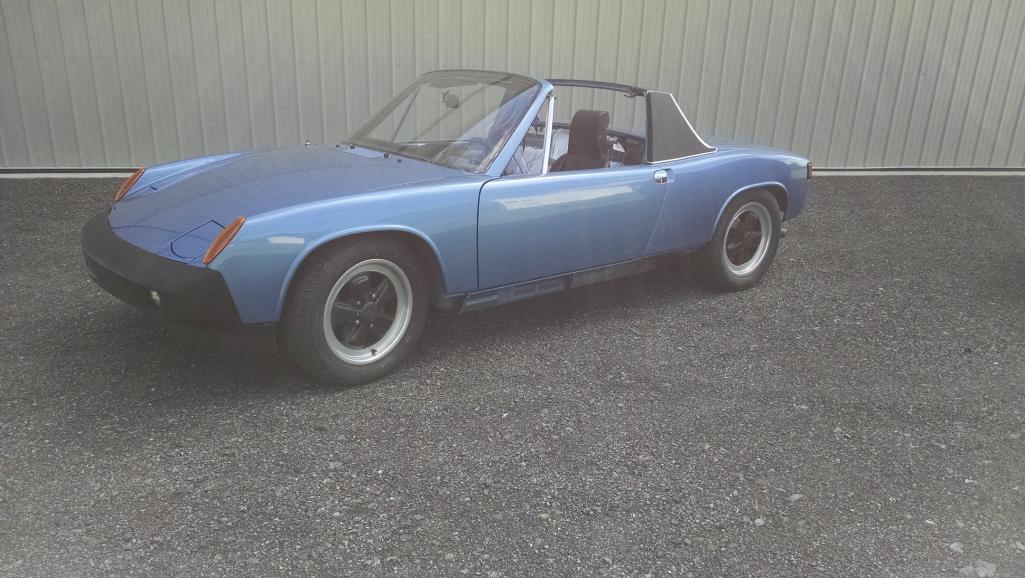
Posted by: Cairo94507 Mar 30 2022, 03:09 PM
Amazing time-line. Glad to see it running and looking so beautiful.
Posted by: Root_Werks Apr 6 2022, 05:00 PM
Put some miles on the 914 today. Heater works very well.
Swapped out the rear KYB's that came on the 914 for a set of oil filled Koni's = Much better! Running 100lb W springs which is just fine with me.
I have 140's and 180's I'll probably sell now.
Attached thumbnail(s)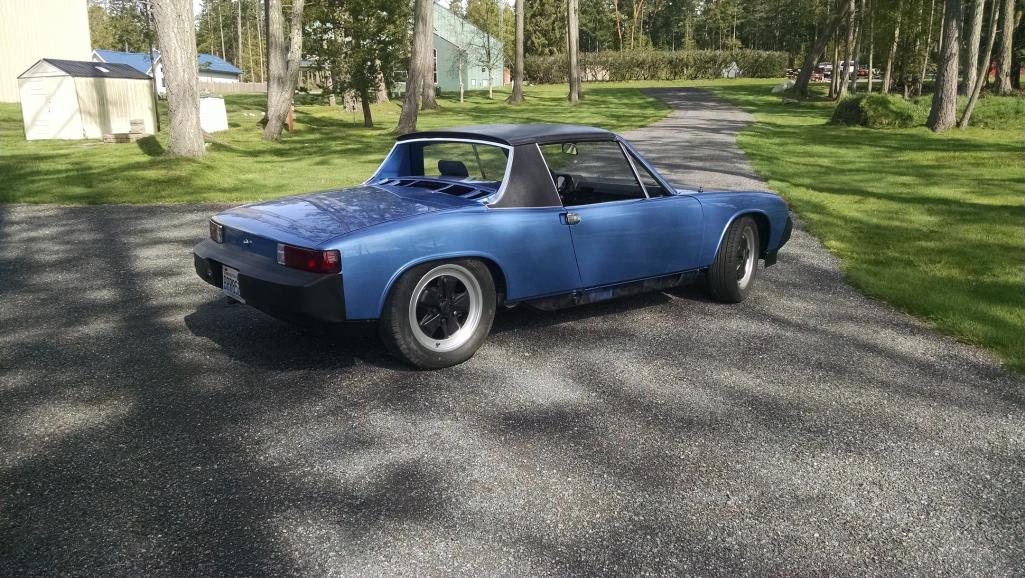
Posted by: Root_Werks Apr 6 2022, 05:03 PM
I should have taken another picture or two after the rockers were installed. Picked them up from the powder coater today and they look really nice. Really helps to complete the outside of the 914.
Still to do:
Waiting on orders from 914Rubber so I can finish installing door glass.
Replace windshield and trim, have both new.
Install engine grill
Should I leave under the grill body color or is it supposed to be black?
I still need to buy carpet, mats and seat kits. Those may have to wait a while.
Attached thumbnail(s)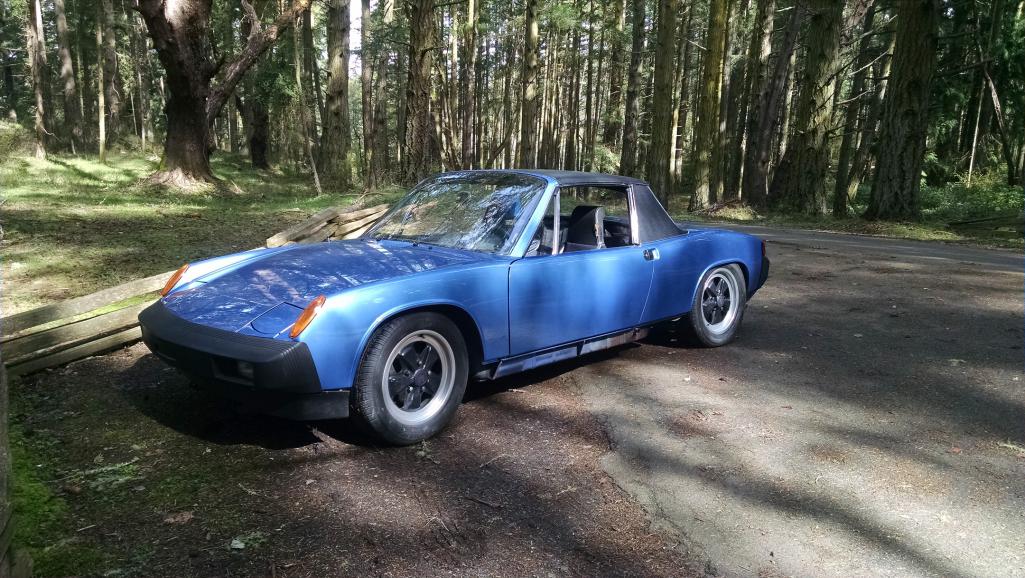
Posted by: mb911 Apr 6 2022, 07:29 PM
I should have taken another picture or two after the rockers were installed. Picked them up from the powder coater today and they look really nice. Really helps to complete the outside of the 914.
Still to do:
Waiting on orders from 914Rubber so I can finish installing door glass.
Replace windshield and trim, have both new.
Install engine grill
Should I leave under the grill body color or is it supposed to be black?
I still need to buy carpet, mats and seat kits. Those may have to wait a while.
What seat kits are you looking for? I have a new set of hounds tooth that I will not be using.
PM if you want details.
Posted by: TRS63 Apr 6 2022, 10:41 PM
Good times when it's back on the road ! Enjoy!
Antoine
Posted by: Root_Werks Apr 14 2022, 09:55 AM
Got door windows installed and mostly adjusted. Still a little tweaking to do. Hands and mostly thumb still hurt a day later from installing all the rubber seals. I don't know any other way than to insert one side, then slowly tuck with screw driver 3-4mm at a time. Takes forever, but turns out nice.
Going to install the new windshield and trim shortly. I ordered new trim from Stoddard and was happy it wasn't folded. Came in a huge box with lots of packing material.
Attached thumbnail(s)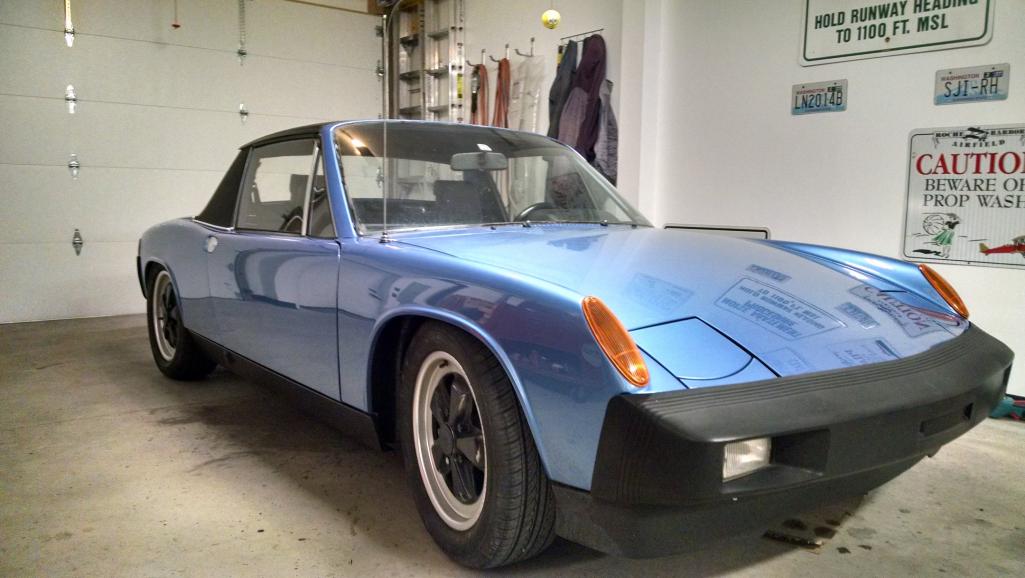
Posted by: Root_Werks Apr 20 2022, 05:13 PM
Turning attention to interior a bit more. Using VW Bus door pulls which I've done in the past. Roughly 6 1/4" between holes in the handle seem to give a good spacing so the handle isn't pulled too tight or the loop isn't too tall. About 1 3/8" off the original square hole. Just move the square speed nut thing and done.
Not planning on using any of the factory pulls or door pockets. I like these, very simple and strong.
Attached thumbnail(s)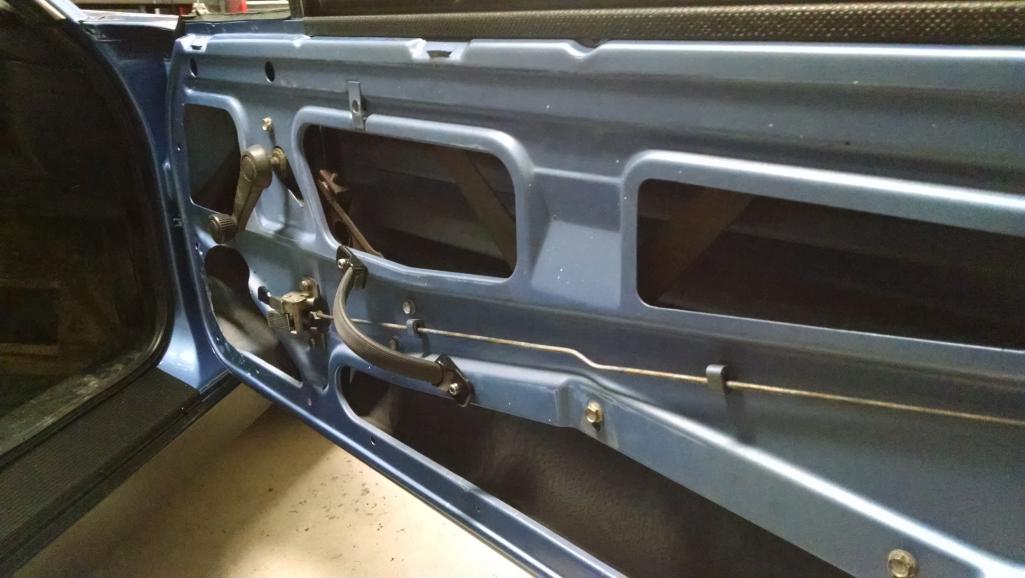
Posted by: Root_Werks Apr 21 2022, 08:55 AM
I goofed on two things with door panels:
Didn't realize 914Rubber pre-punched some of the holes through the vinyl. Super cool, but had to use two little plastic plugs.
I put the interior handles on the wrong side. You don't realize how hard it is to get your finger under the handle to open the door when you come from the bottom instead of the top = oops!
Easy fixes and happy with the nice, clean look:
Attached thumbnail(s)
Posted by: Root_Werks Apr 21 2022, 03:45 PM
Snapping on door panels and laying down carpet is one thing, actually trying to stretch material and make it look good requires skills I may not have.
Just using Duct tape to stretch the new vinyl which works amazingly well. On the fence if I should start gluing, or just find a shop and have them do it?
Anyone have any tips or tricks?
Attached thumbnail(s)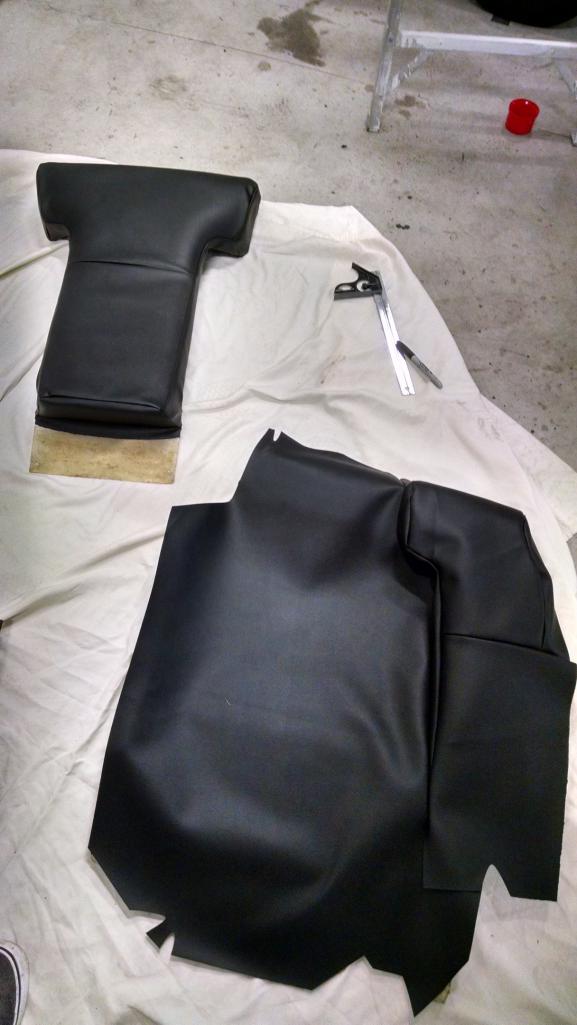
Posted by: Root_Werks Apr 21 2022, 03:47 PM
This seems to be the limit of my skill:
Attached thumbnail(s)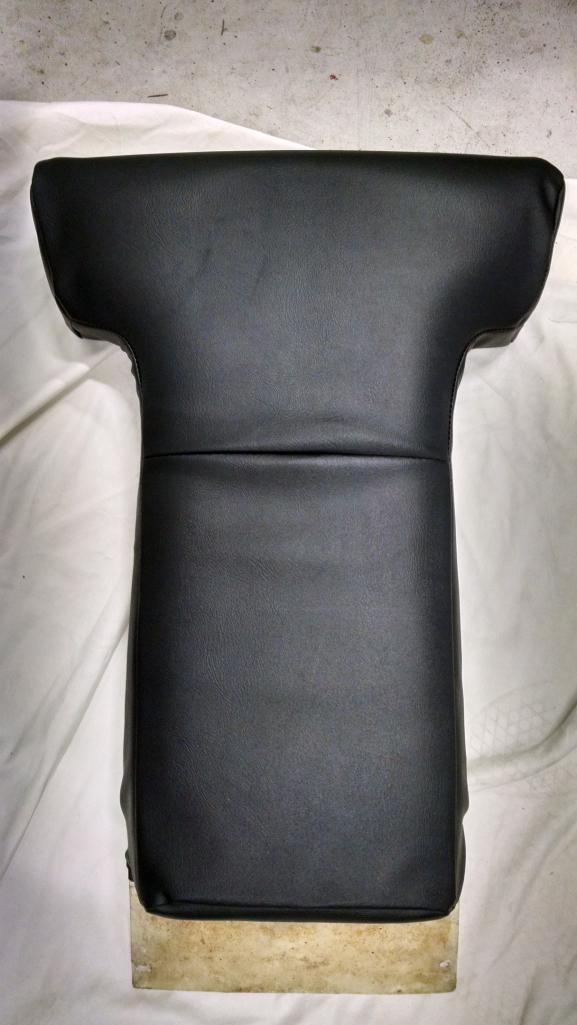
Posted by: PanelBilly Apr 21 2022, 04:16 PM
Put the material in a box with a small space heater and let it warm up. Stretches much better then. Roll the fabric over your thump and pull 3”-5” at a time and staple. Having a commercial stapler makes it much easier. Next time you do this let me know and I’ll loan you mine.
Posted by: Root_Werks Apr 21 2022, 04:49 PM
Put the material in a box with a small space heater and let it warm up. Stretches much better then. Roll the fabric over your thump and pull 3”-5” at a time and staple. Having a commercial stapler makes it much easier. Next time you do this let me know and I’ll loan you mine.
Good tips, thanks! This is a fiberglass backing, don't think staples will work. PO glued the edges which did work well.
I didn't think about getting the vinyl warm. The shop is basically outside temp which is probably making things a lot harder.
Posted by: 914werke Apr 21 2022, 04:59 PM
steam!
Posted by: sportlicherFahrer Apr 22 2022, 09:35 AM
3M 90 Hi-Strength spray adhesive is your friend for gluing that stuff down. Spray both surfaces, wait a few minutes for it to film over, and then mate surfaces with slight pressure. Stuff held great when I reskinned my seats.
Posted by: Root_Werks May 1 2022, 01:31 PM
Still waiting on parts for the next can of worms - replacing the windshield.
Figured I'd clean, paint and install the wiper arms. Why not?
I didn't notice this until I went to install the drivers arm.
Anyone take a guess what's not correct?
Attached thumbnail(s)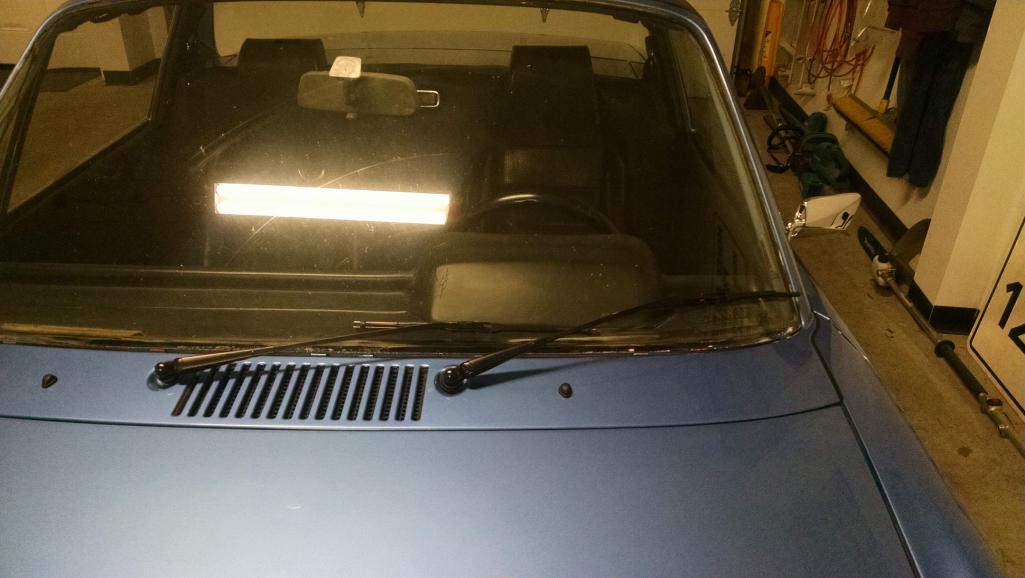
Posted by: scallyk9 May 1 2022, 02:02 PM
Uh, driver side wiper is on passenger side and visa-versa. Check the workshop manual for the correct placement and factory spec on outer tip of passenger wiper blade in inner edge of driver side blade. I think it is 22 or 25 mm. Passenger side outer tip sits higher.
Posted by: Root_Werks May 1 2022, 07:47 PM
Two passenger arms, poor pics, sorry about that. Pet peeve of mine, most install reverse.
Posted by: Root_Werks May 5 2022, 04:35 PM
@http://www.914world.com/bbs2/index.php?showuser=20845
Thank you for the cupholder/ashtray detials:
http://www.914world.com/bbs2/index.php?showtopic=307290&st=1800&p=2880139&#entry2880139
I think I'm pretty close to done. I messed up the carrier/guide part that mounts to the dash. Sort of goofed up the ashtray as well, but think I salvaged it. Got a used carrier/guide on the way ( thank you @http://www.914world.com/bbs2/index.php?showuser=453 ). Once I get that, I'll finalize the fit and epoxy the cover on the cupholder:
Attached thumbnail(s)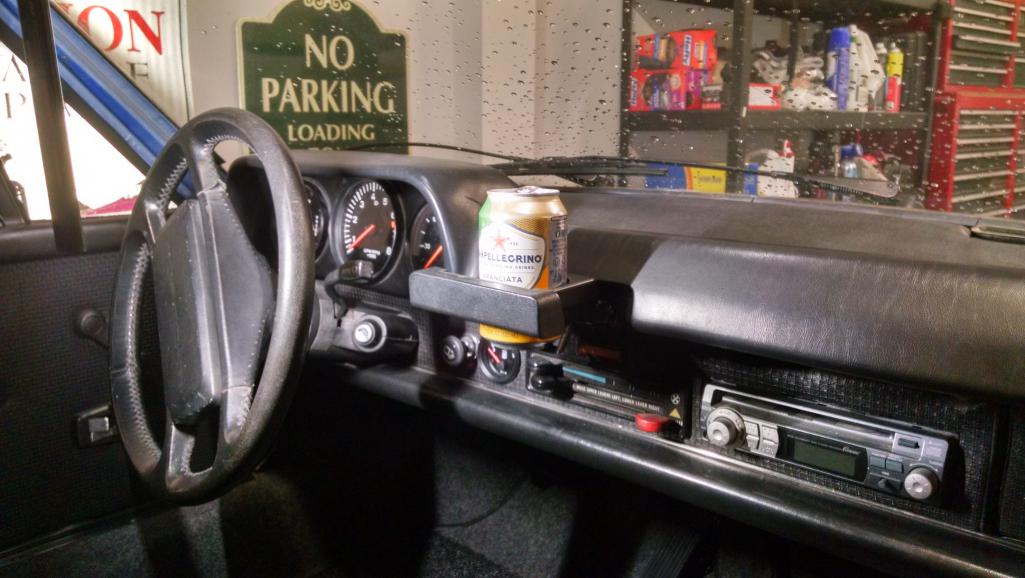
Posted by: Root_Werks May 5 2022, 04:37 PM
Pretty happy with the fit. Lots of Dremeling away little bit at a time, test and repeat until the ashtray cover sits nicely.
Do we need an "Ashtray/Cupholder" thread?
Attached thumbnail(s)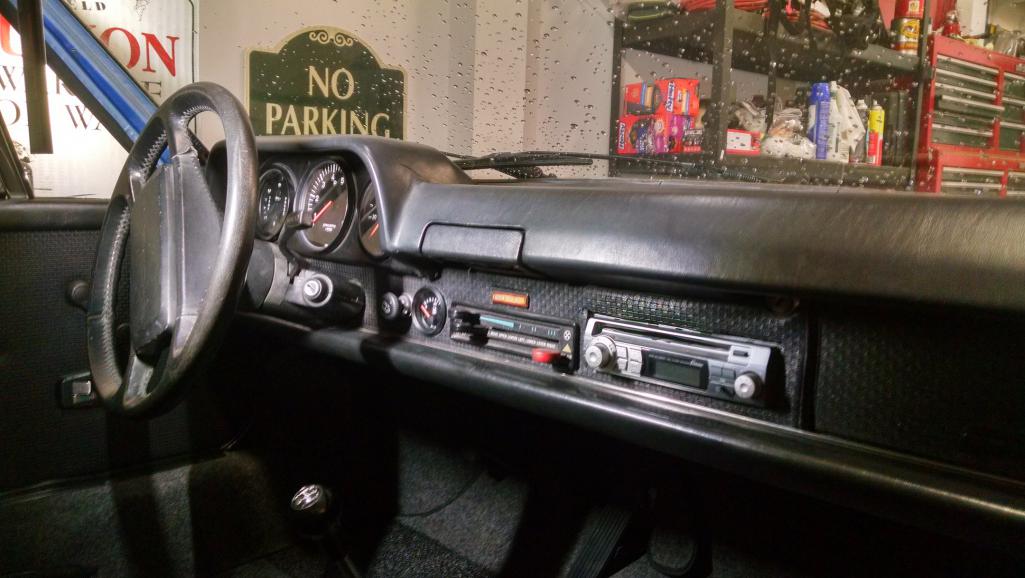
Posted by: autopro May 5 2022, 06:37 PM
Pretty happy with the fit. Lots of Dremeling away little bit at a time, test and repeat until the ashtray cover sits nicely.
Do we need an "Ashtray/Cupholder" thread?
That's great! This is definitely something that I will want to do with mine. Keep up the great work.
Posted by: bbrock May 10 2022, 12:41 PM
That looks GREAT! Any tips for improvement to pass along? I still need to make one more and am going to try rivets instead of welding for the carrier parts.
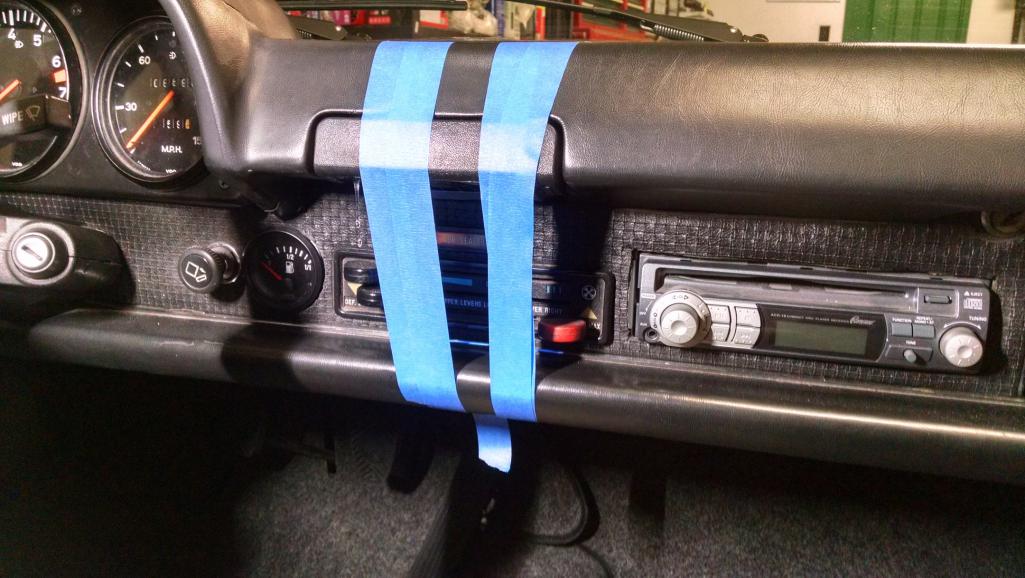
Posted by: Root_Werks May 12 2022, 11:35 AM
That looks GREAT! Any tips for improvement to pass along? I still need to make one more and am going to try rivets instead of welding for the carrier parts.
Brent,
Not really anything to improve. I did have to add little tabs as the carrier (former ashtray) would push back too far. Had to experiment how to stop it. Also wound up grinding a lot off the Audi holder face. It stuck out too far.
Here's a shot with epoxy finally showing the end of the little project. The ashtray cap actually fit on pretty snug, but gooped epoxy to ensure it didn't fall off.
Attached thumbnail(s)
Posted by: Root_Werks May 17 2022, 10:08 AM
Pulled the windshield last night. I'm lucky the paint around the edges and where the butyl tape sits is almost perfect. Both the painter and myself forgot to remove the windshield before paint. So I just got lucky.
You can also see what a terrible job I did on the backpad. Yuck! The seats are at a shop getting redone. I might see if the shop can redo the backpad as well.
Lesson, when you don't have the skill to do something correctly, get someone who does.
Attached thumbnail(s)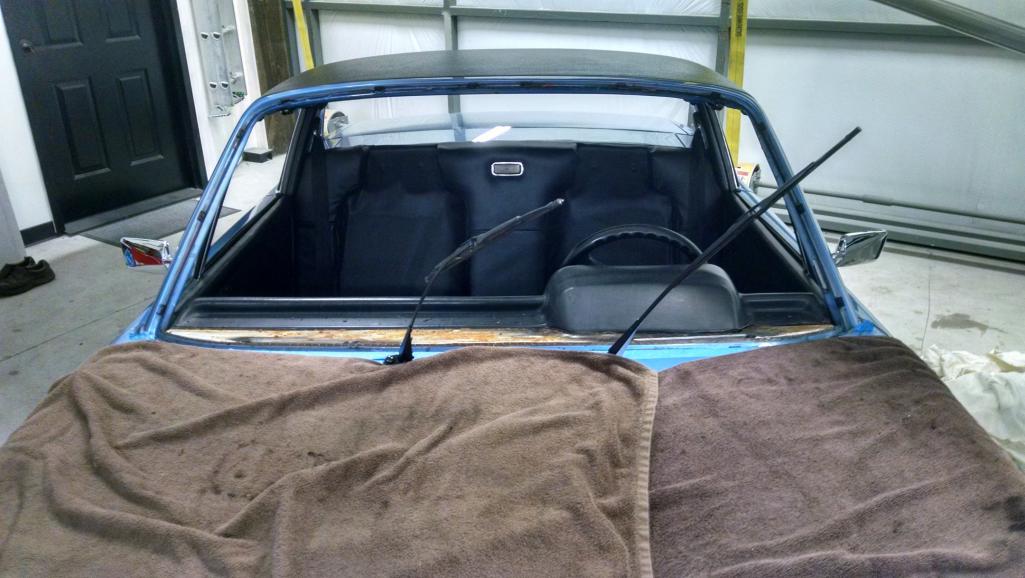
Posted by: Root_Werks May 18 2022, 04:40 PM
Installed new dash vinyl and pad along with new rubber trim strip:
Attached thumbnail(s)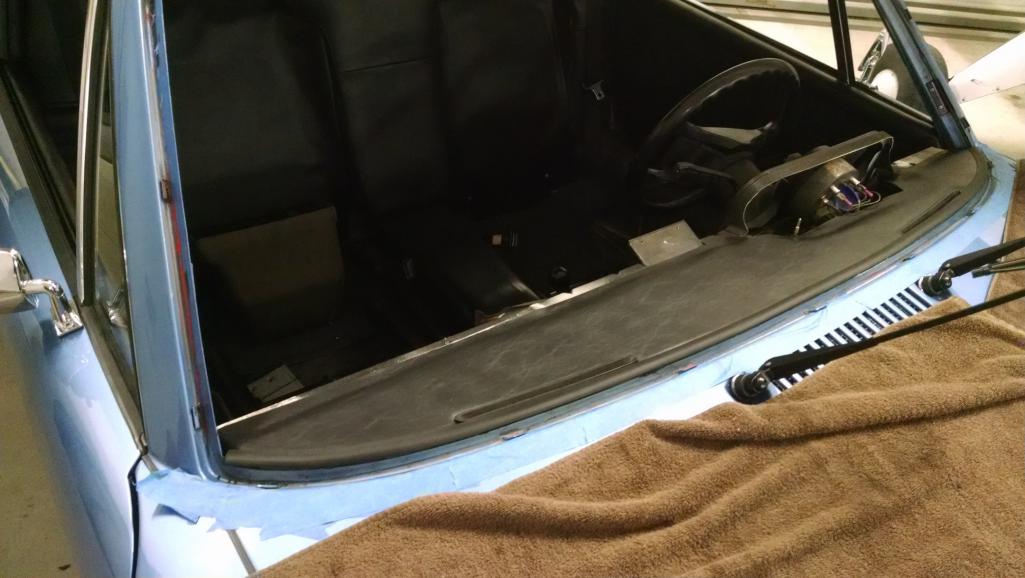
Posted by: Root_Werks May 18 2022, 04:43 PM
Installed new windshield.
It's about 58 degrees in the shop so you can see I set a radiant heater in the 914. I learned many years ago not to force glass on or off butyl. The glass is perfectly set side to side and top to bottom (you can maybe see spacers on the bottom). Going to let things warm up a bit, gently exfoliate the glass a little deeper into the butyl and install the new trim.
I'm not putting the old dash back in. Hoping @http://www.914world.com/bbs2/index.php?showuser=3348 gets the new run of dash tops ready soon.
Attached thumbnail(s)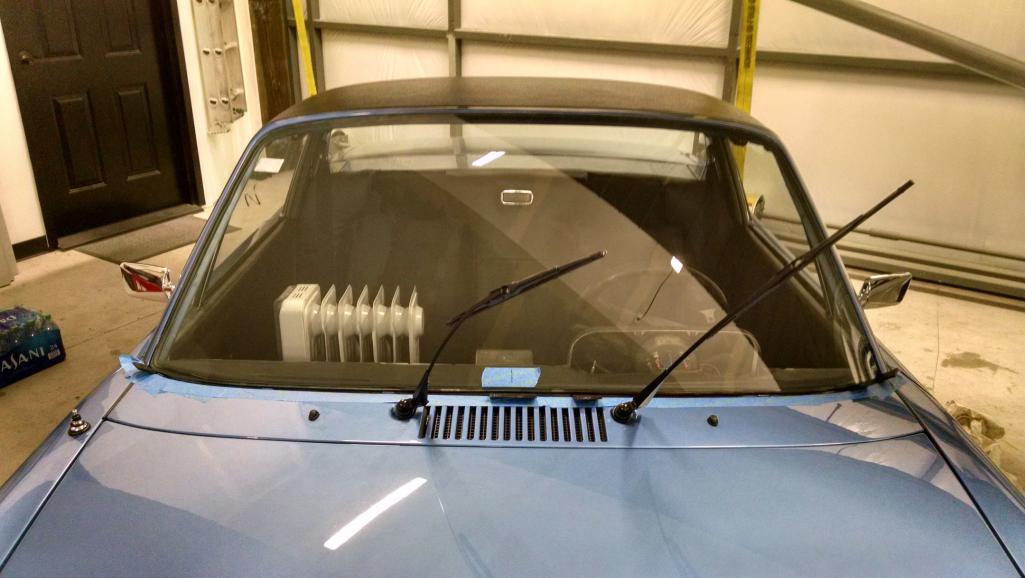
Posted by: autopro May 18 2022, 04:59 PM
It's good that you were able to get the dash vinyl without having to take the whole thing out. Looking very nice, like you say hopefully you will be able to get the new dash soon, that will really make your interior look great. Good job on the das and windshield
Posted by: raynekat May 18 2022, 08:15 PM
Install engine grill
Should I leave under the grill body color or is it supposed to be black?
Your car looks great.
To me, the black paint under the engine bay grills is one of those small details that sets off a really well done restoration. It's needed.
JMHO
Posted by: TRS63 May 19 2022, 12:06 AM
Great progress here, thanks for sharing them !
Antoine
Posted by: Root_Werks May 19 2022, 08:57 AM
Thanks guys! Appreciate the comments, keeps me going. 
This morning, ta-da! Trim installed.
Attached thumbnail(s)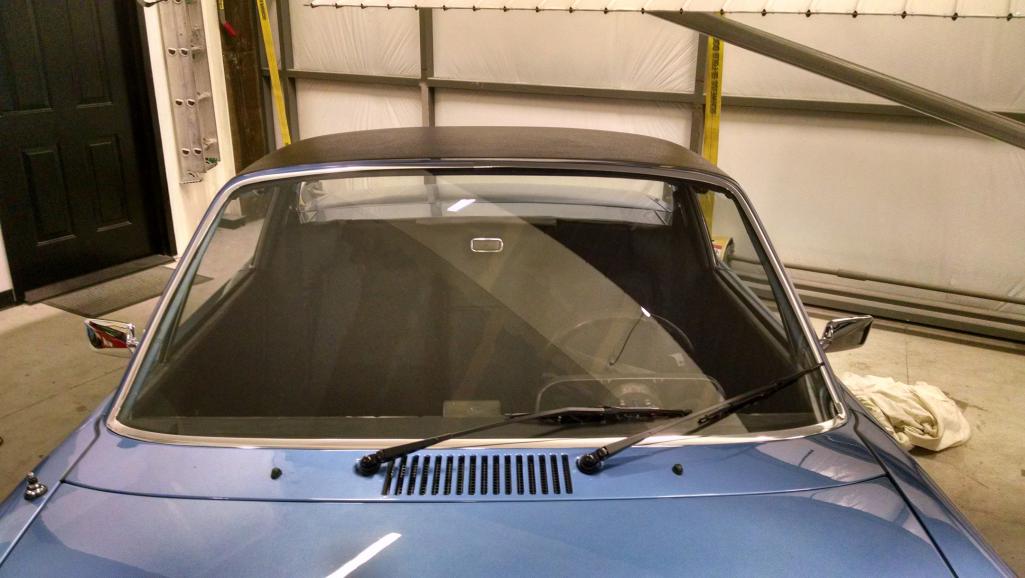
Posted by: mepstein May 19 2022, 12:05 PM
I pre warm the vinyl with a heat gun and then when it's glued down, warm it again to relax it into shape. Heat will get out the wrinkles. Just go easy and keep the heat gun moving all the time.
Posted by: Root_Werks Jun 2 2022, 02:49 PM
@http://www.914world.com/bbs2/index.php?showuser=9892
Thank you again for the muffler literally off your 914. I really like your early "quiet" version of the muffler. The fit and finish are top notch! Love the exhaust note.
Now I have to decide whether to cut/weld the exhaust tip to exit out the stock 4cyl notch, or buy a blank rear valance.
Attached thumbnail(s)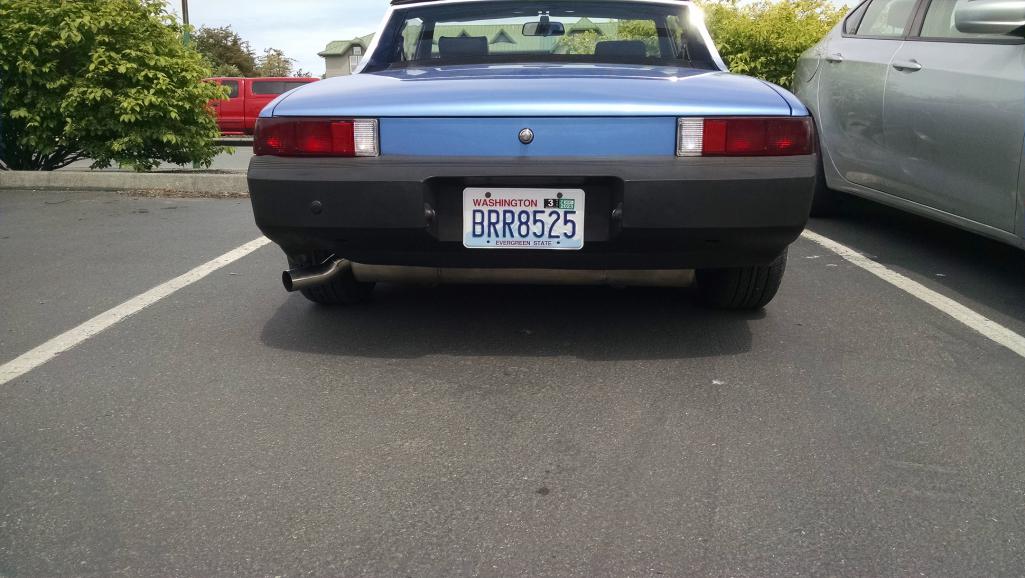
Posted by: Root_Werks Jun 2 2022, 02:51 PM
Closer shot of the tip:
Would be easy to orient the tip out the notch.
Attached thumbnail(s)
Posted by: bbrock Jun 2 2022, 03:03 PM
Install engine grill
Should I leave under the grill body color or is it supposed to be black?
Your car looks great.
To me, the black paint under the engine bay grills is one of those small details that sets off a really well done restoration. It's needed.
JMHO
And if you want to really do it right, the black paint should be brushed on rather than sprayed. You'd be surprised how many people have looked at my car and commented on those brush strokes as a sign of fine craftsmanship. The answer is zero. Zero people have commented 
Posted by: 914werke Jun 2 2022, 03:14 PM
Are you gonna put any script back on the tail?
Posted by: Root_Werks Jun 2 2022, 04:57 PM
Are you gonna put any script back on the tail?
No, if someone doesn't know what it is, eh.
Posted by: Cairo94507 Jun 3 2022, 06:49 AM
That looks very nice and would look even better if you cut and orient the tip to come out the stock location. I don't believe there is a better exhaust product made for our cars than what Ben was producing. I have his 6 cylinder 2/1 quiet muffler boxed and in storage while I run his little bit louder muffler on my car. It sounds terrific.
Posted by: Root_Werks Jun 13 2022, 12:11 PM
Knowing any older 914 is never truly a completed project, I am willing to say this one is pretty much done. Got seats back from the shop, 914Rubber kits look nice.
Super happy to have this completed before Summer really settles in. Time to drive and enjoy:
Attached thumbnail(s)
Posted by: Root_Werks Jun 13 2022, 12:13 PM
Nice drive today, I think most everything has been shaken out. As many know, when so much is taken apart and put back together, there's always that "oops!" forgot to tighten that bolt or install that clip etc.
Attached thumbnail(s)
Posted by: Root_Werks Jun 13 2022, 12:16 PM
Continued testing of the super cool ashtray/coffee cup holder. Works great! Interior really needs a good detailing since paint and assembly.
Probably won't post much more to this thread as the "Refresh" of a 914-6 conversion has been completed.
Thanks everyone here for all the support. 9 years absent a 914 and feels good to be back in the drivers seat.
Attached thumbnail(s)
Posted by: eric9144 Jun 13 2022, 03:19 PM

Posted by: autopro Jun 14 2022, 09:37 AM
Congratulations on a great looking car. It's always nice to see a car get finished and enjoyed, you should be proud
Posted by: Root_Werks Oct 25 2022, 03:18 PM
Installed an engine bay pad and took for a test drive today:
http://www.914world.com/bbs2/index.php?showtopic=361863&st=20
I have a fear of the six fan sucking in the pad, but seems to have installed very well. All the little tabs and push pin thingies in place. It helped quiet things down for sure.
Nice drive today, the rain has certain come back.
Attached thumbnail(s)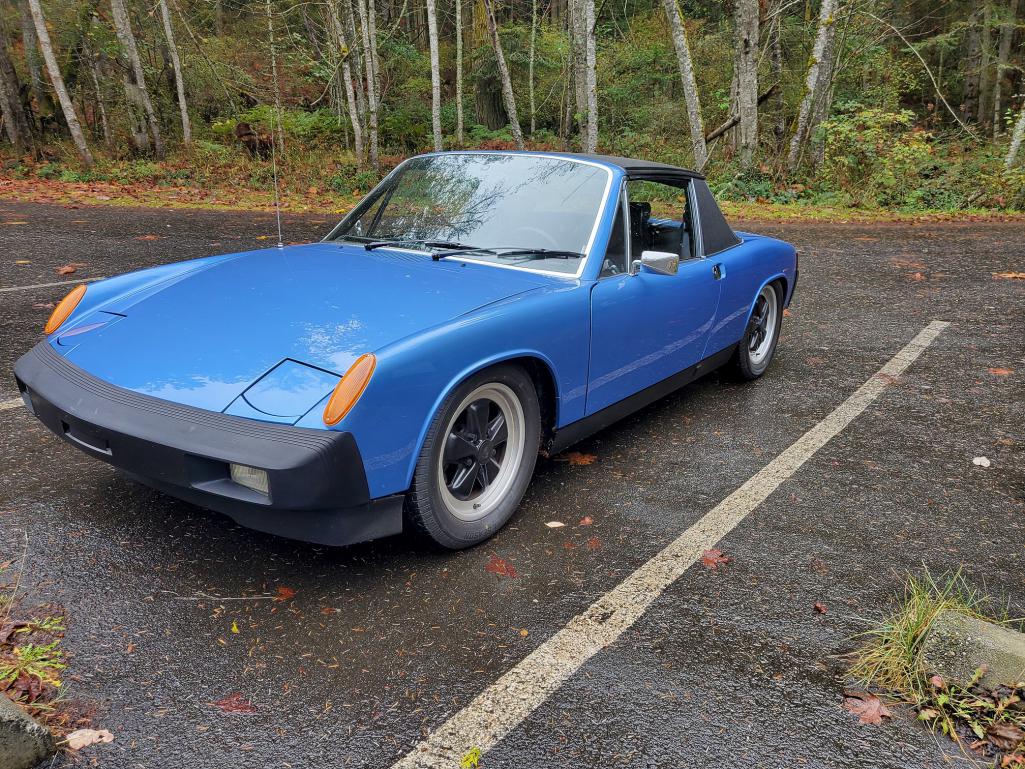
Posted by: mb911 Oct 25 2022, 03:53 PM
Installed an engine bay pad and took for a test drive today:
http://www.914world.com/bbs2/index.php?showtopic=361863&st=20
I have a fear of the six fan sucking in the pad, but seems to have installed very well. All the little tabs and push pin thingies in place. It helped quiet things down for sure.
Nice drive today, the rain has certain come back.
Careful with that. We did some testing on a local conversion that ran a good 30 degrees warmer with a pad installed
Posted by: sithot Oct 26 2022, 06:38 PM
Muffler Ideas:
Photos of a SCART 914 muffler on my '73 2.0. Only muffler I've experienced that doesn't sound like a Type IV/VW...whatever. Great sound.
Here's the 6 version: https://scart.com/en/porsche/914-6/79
I have these on 2 911's as well. These also sound like nothing sold anywhere else. No drone and the nastiest shriek around 3,800 rpm as it comes on. Not loud at all. Drive it all day and you won't be tired of noise. It only makes noise when you push the LOUD pedal.
Construction 2nd to none. Downside is that they are pricey. After all the mufflers I've bought and sold or put away these are the only keepers.
Arling Wang was my source here in the US. https://www.rstrada.com
Good guy, very helpful.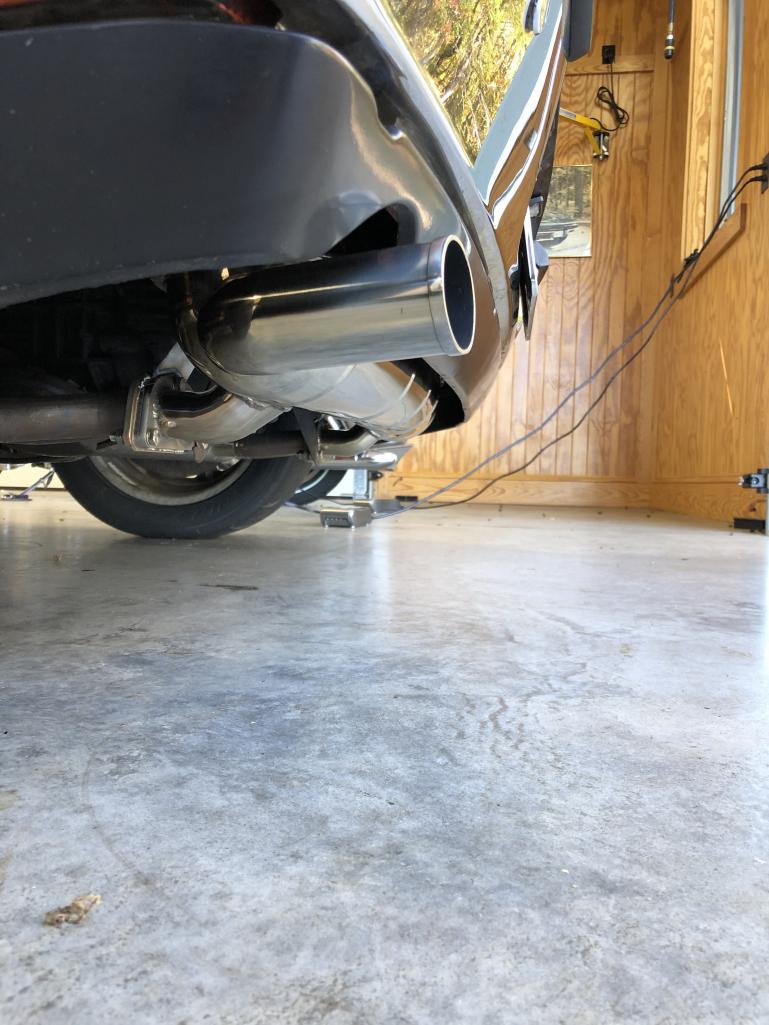
Posted by: Root_Werks Mar 23 2023, 10:05 AM
Hard to believe it's been three years since we originally picked up the 914 and drove 900+ miles home. Very glad I was able to find another 914, let alone a six conversion in a color I really wanted. Was sort of a long road to get the six where I wanted it, but the end result has been pretty great.
Last summer I didn't get a chance to take the 914 anywhere. It's been an island 914 since it was painted. Need to fix that, take it on adventurous road trips.
Got to drive it yesterday, drive it so little I mark when I do on the calendar.
Attached thumbnail(s)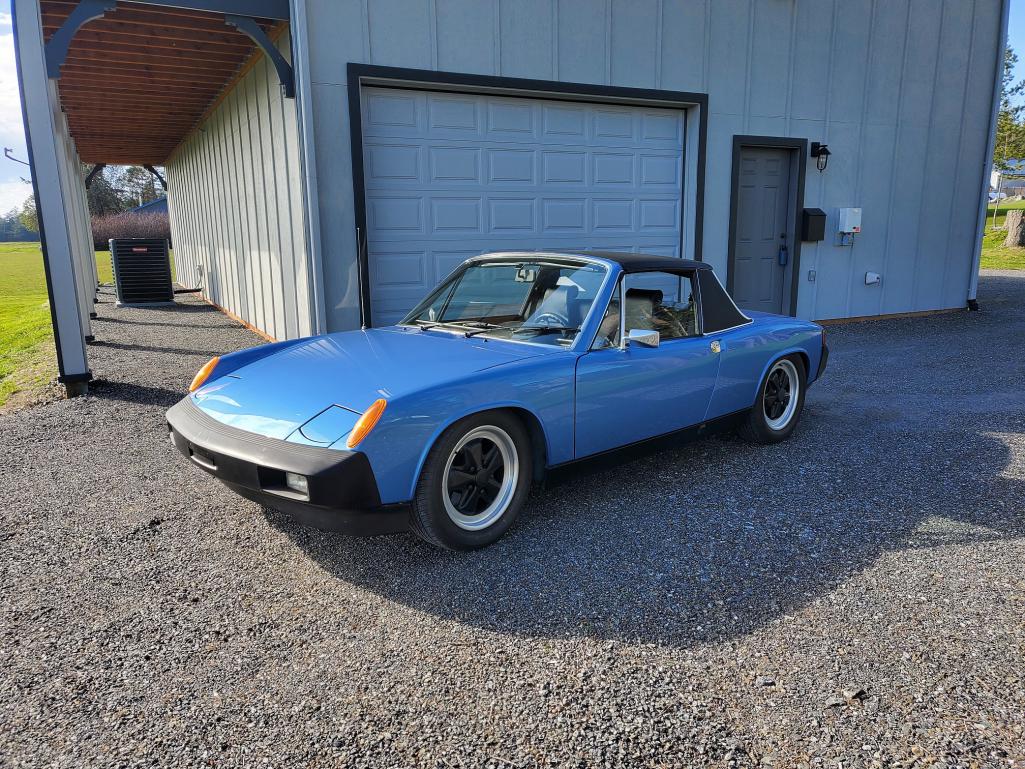
Posted by: 914werke Mar 23 2023, 10:33 AM
Well there is WCR RRC or R66 ..?
Posted by: Root_Werks Mar 23 2023, 11:08 AM
Well there is WCR RRC or R66 ..?
Trying for something like that. Problem is 3 jobs and island life. We're taking some steps to get back on the mainland and even possibly retire = more time for my toys. Last 2-3 years have been work, work, work. Hardly putting any miles on cars and even fewer hours on the airplane.
Time for a life change.
Posted by: TROJANMAN Mar 27 2023, 07:39 AM
Hard to believe it's been three years since we originally picked up the 914 and drove 900+ miles home. Very glad I was able to find another 914, let alone a six conversion in a color I really wanted.
Looks like a real sleeper

Posted by: Root_Werks Jan 11 2024, 04:03 PM
One of the rear sway bar bushings blew out (old and cracked). I could hear the "clunk, clunk" while driving.
Bought new bushings and rear sway bar tab kit. I knew the PO simply drilled holes through the trunk floor and long bolts (yuck).
Honestly, little embarrassed I didn't do this BEFORE painting the 914.
The 75-76' later bumper 914's use a slightly different kit. The plate with Nuts welded on is flat (no step needed).
I don't know if I needed the extra metal square thingies as this is boxed for the bumper shocks? Covered up two of the holes anyway.
What was removed and would be installed:
Attached thumbnail(s)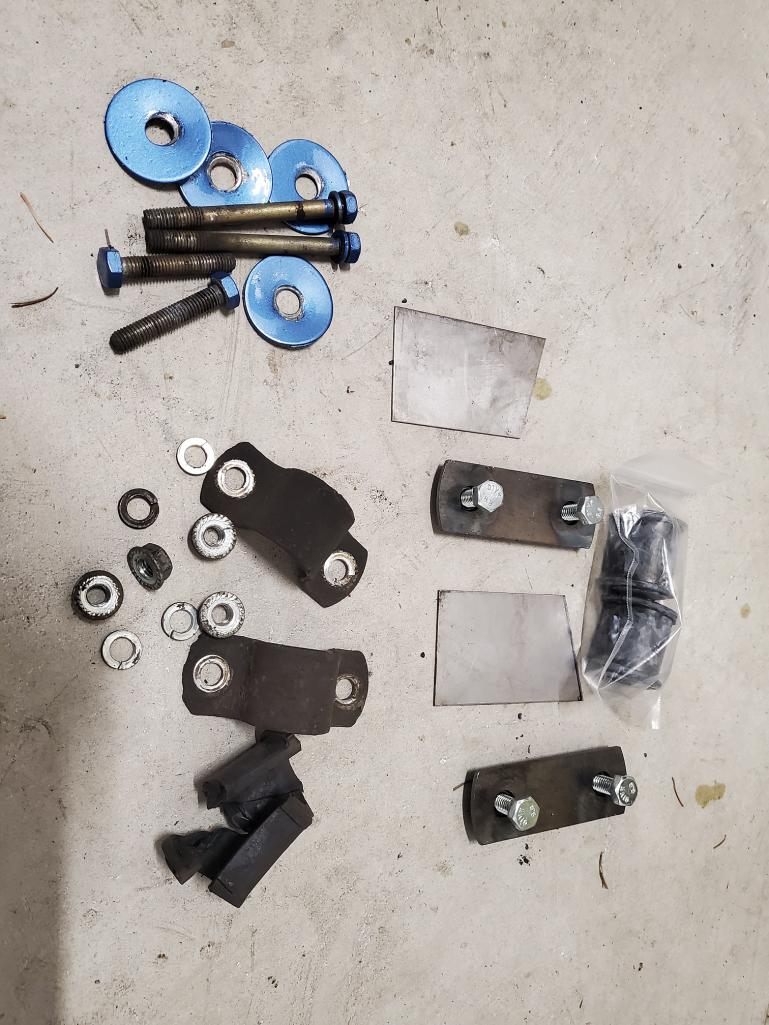
Posted by: Root_Werks Jan 11 2024, 04:07 PM
Shot of the trunk, had left over paint I used to touch it up. Turned out nice.
Again, don't know if I needed these extra metal supports on a later 914, figured it couldn't hurt.
No more "clunk, clunk" while driving!
Attached thumbnail(s)
Powered by Invision Power Board (http://www.invisionboard.com)
© Invision Power Services (http://www.invisionpower.com)