Printable Version of Topic
Click here to view this topic in its original format
914World.com _ 914World Garage _ Tube Chassis Subaru Engine build
Posted by: tazz9924 Apr 4 2020, 11:27 PM
Heres the quick break down: My old car got totaled on the side of the road, i got a good settlement out of it and with the money im building A tube frame chassis 914 with Porsche Boxster suspension and a subaru turbo motor.
The goals:
(Disclaimer some of these are really down the road and may not make the initial version 2.0, maybe 2.1 or so on and so forth. They are also goals so weather or not i achieve them, it’s something to shoot for.)
Tube frame chassis, all made of DOM tube and when all when the car is fully built it should weigh 1600 ish lbs.
The motor: It will have a subaru turbo motor. The initial version will see a 2.0 just so i can start having fun but eventually it’ll be a hybrid 2.5 making 400whp
The suspension: It will all be porsche boxster same with the brakes so it should handle all the power and lack of weight im throwing at it.
The body: It will be all fiberglass panels dzused on with the exception of the A pillar which will be a stock piece from a 914 but it will retain a vin tag. The only other stock 914 related thing will be pop up headlights which will be retained.
Aero: This thing will have an extreme aero package. From the smooth underbelly with large rear diffuser and front splitter to canards and a chassis mounted rear wing, This “car” WILL have a presence like little else.
Interior: Skip... JK this thing will have a digital dash, k tuned shifter, willwood pedal cluster, and a plaid racing seat. Thats about it, passenger seat is seen as optional at this point.
So hopefully this should be good, i dont have much time, even in the covid 19 world we currently find ourselves in right now. It may not be a fast paced build but the goal is to have a roller by june... So lets get to building!
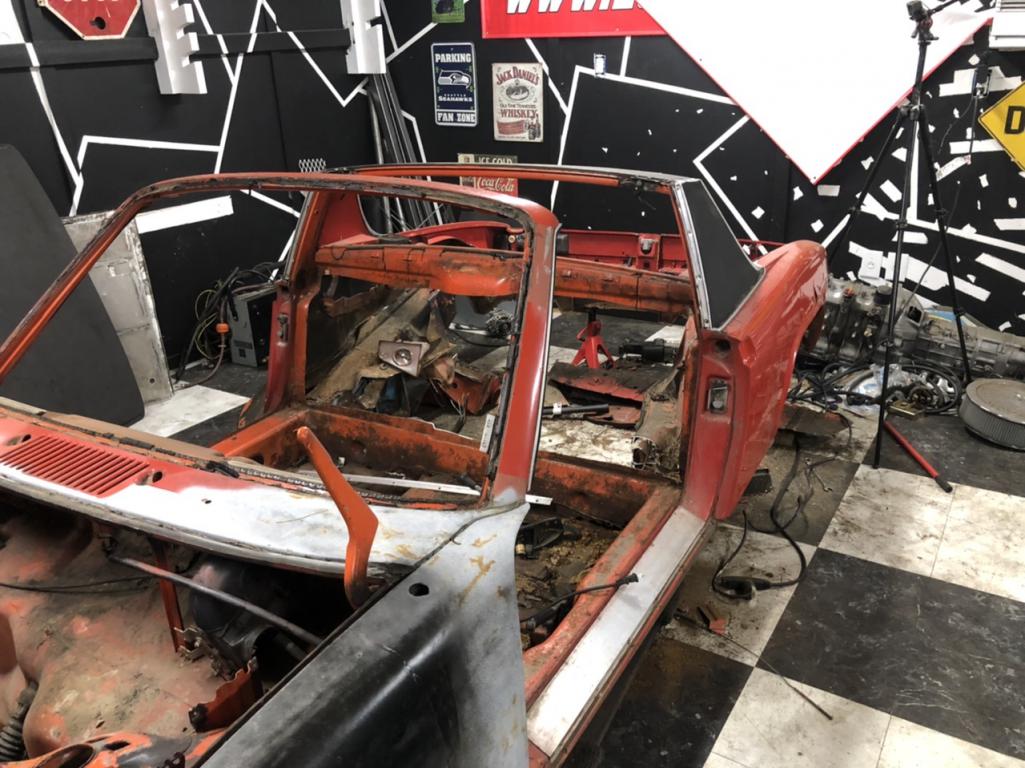
OG car: 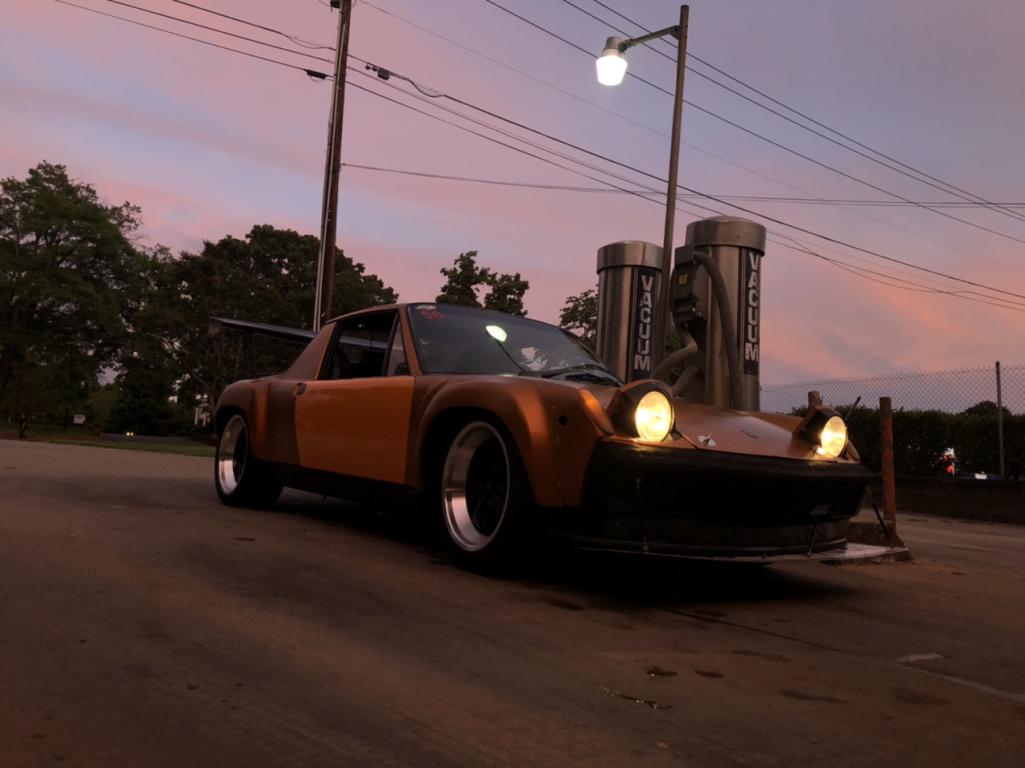
The Crash: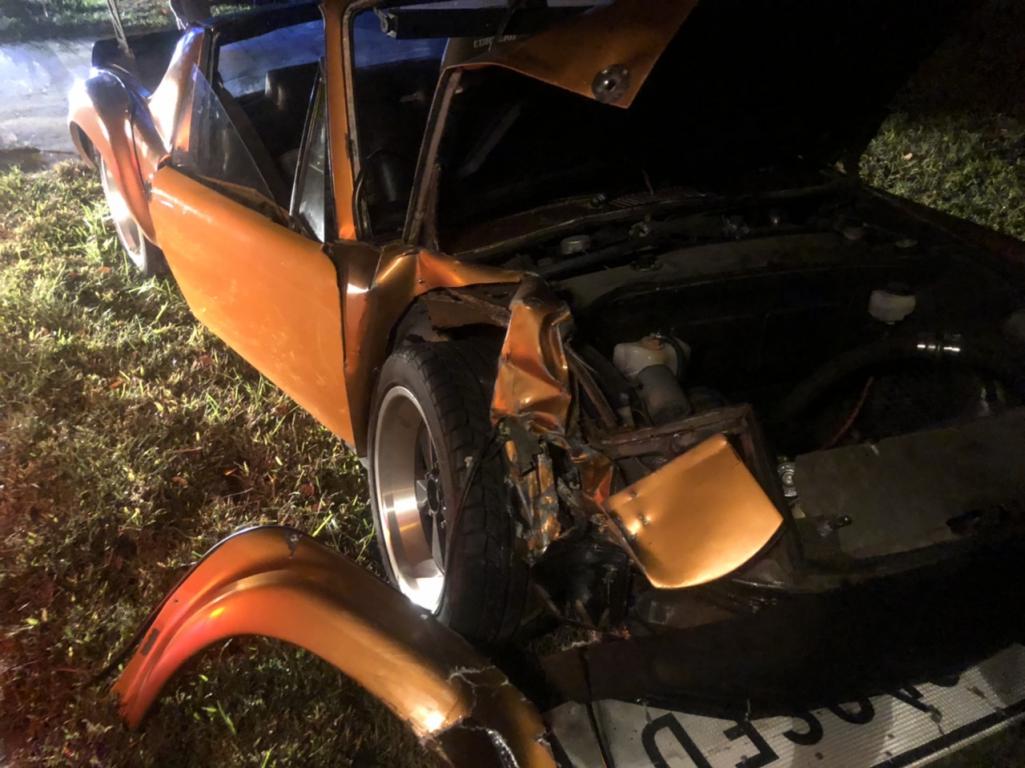
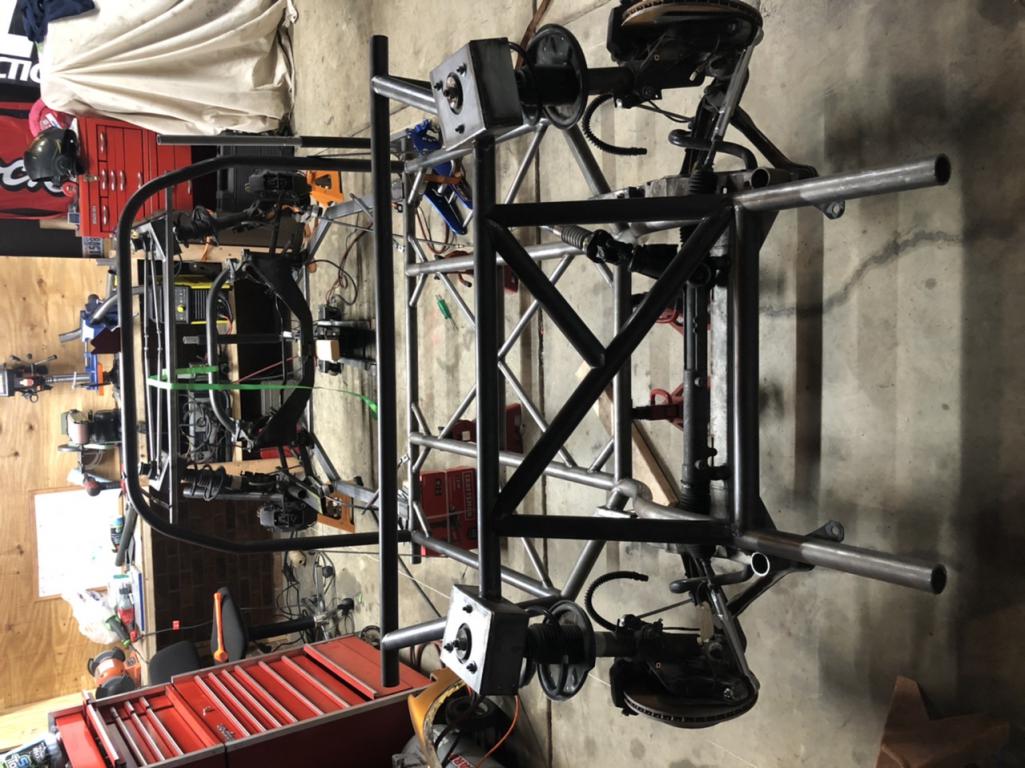
Whats Left: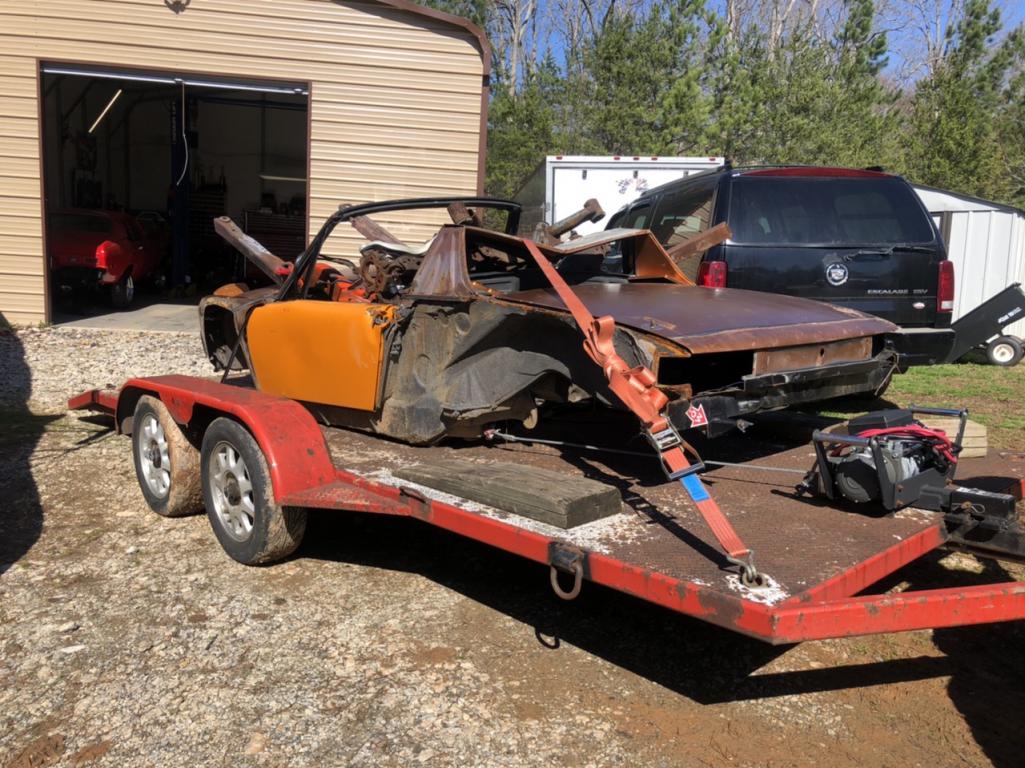
I dont have many parts left, I took all the good parts off sold what i could and kept what i needed.
Posted by: tazz9924 Apr 5 2020, 08:52 AM
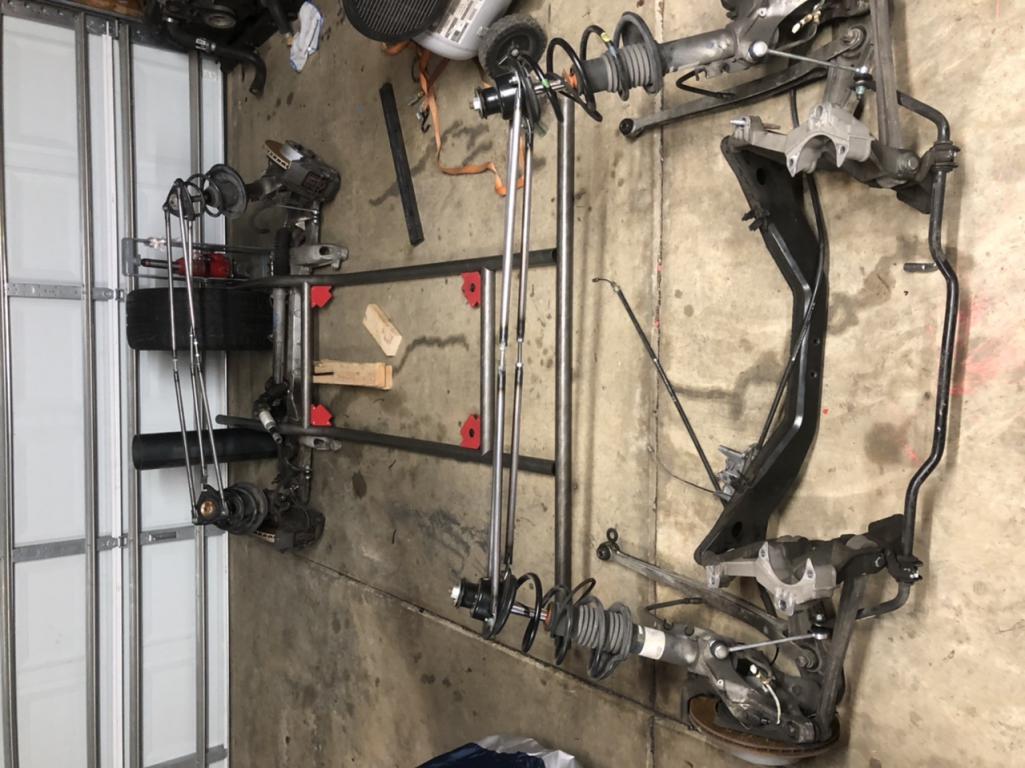
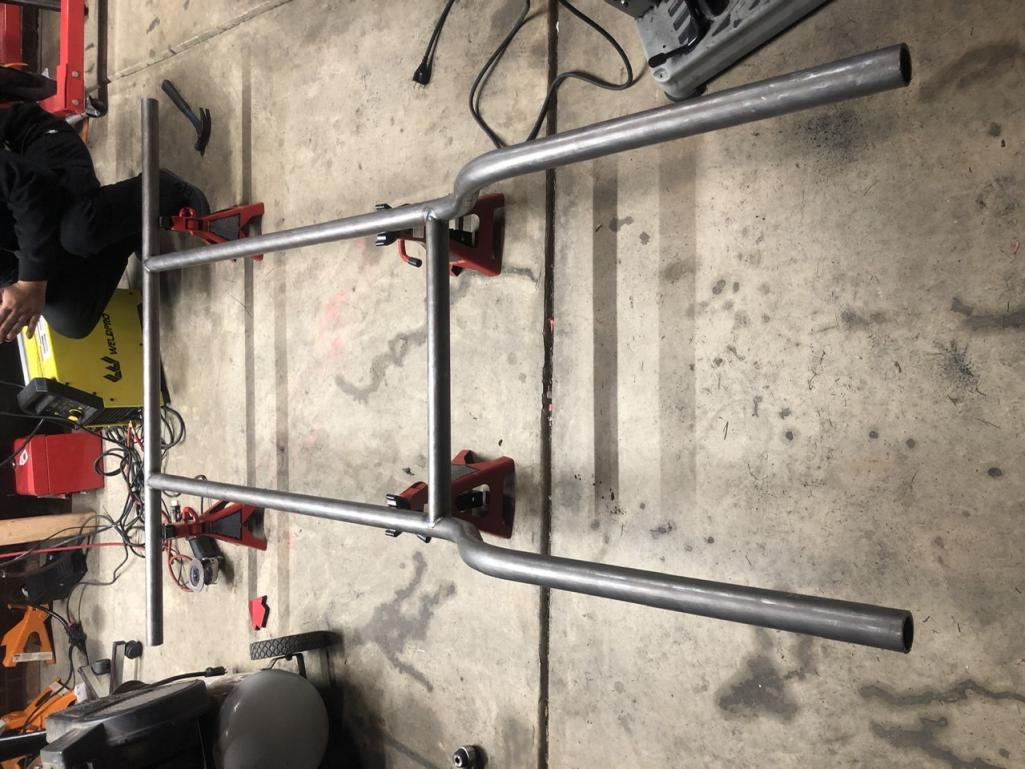
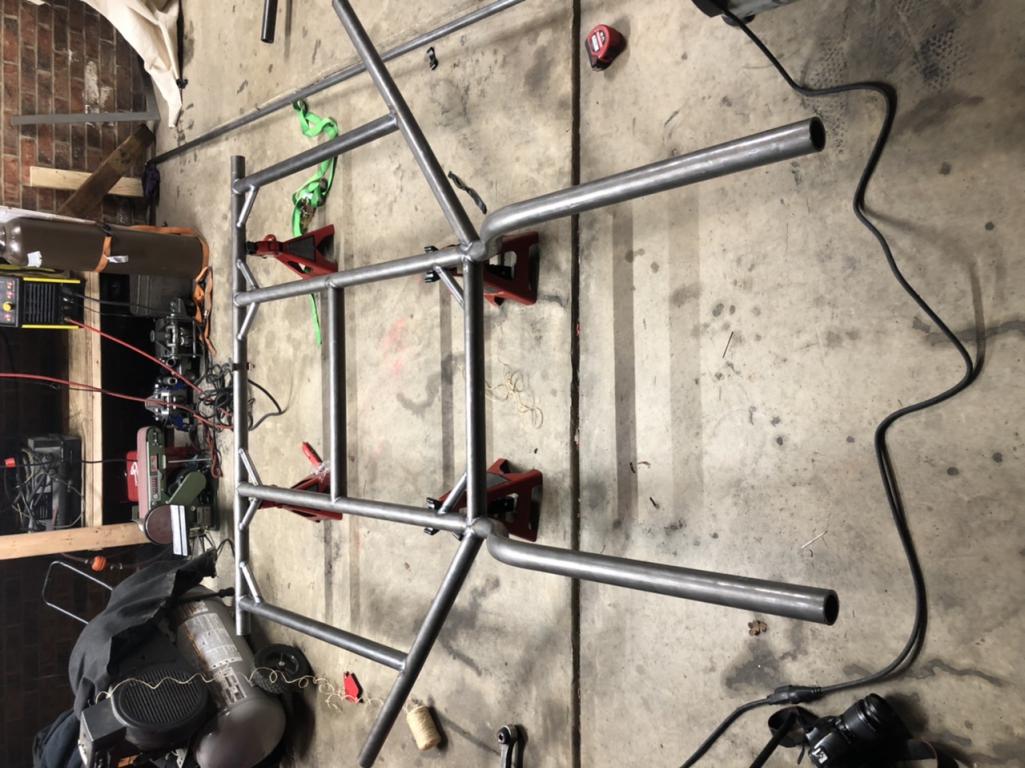
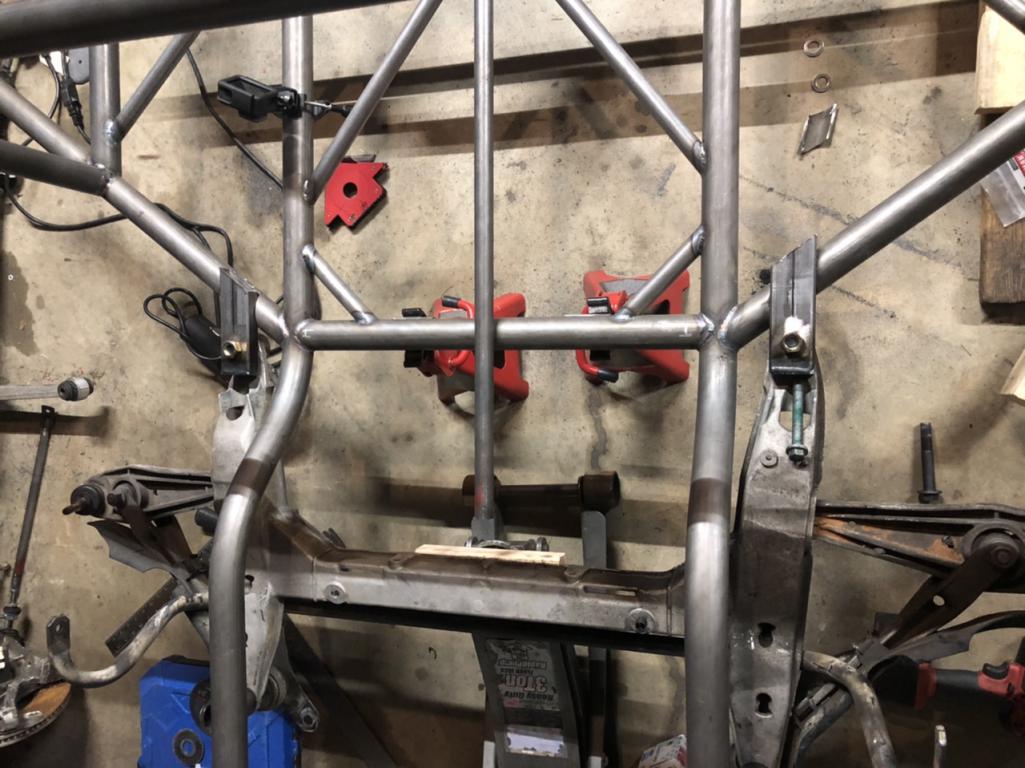
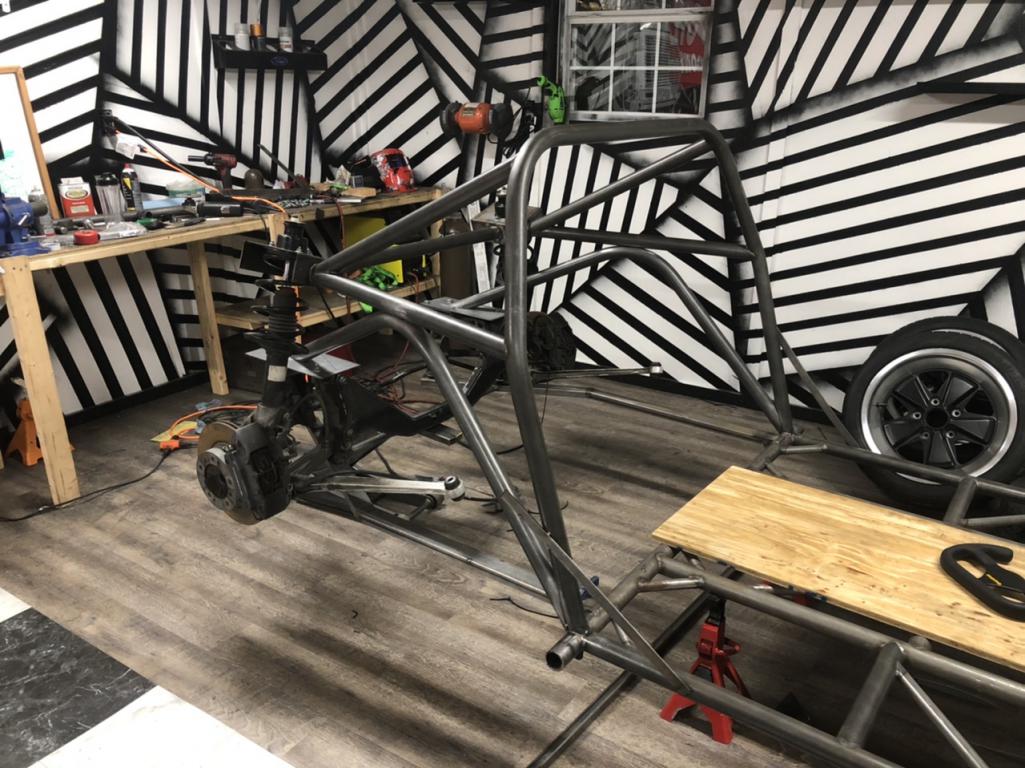
First step is the main frame rails. i bent these up and took way too long but they are within a 64th of an inch of each other and are dead flat. 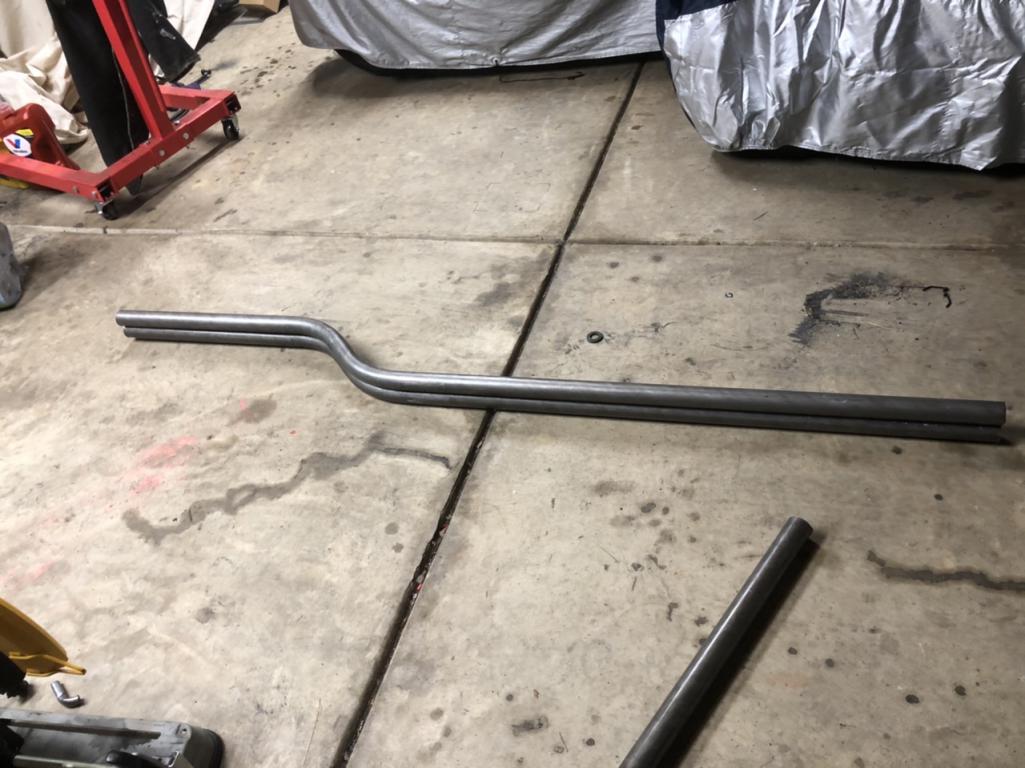
Next I needed to mock it up to find my width which is 22” inside to inside. I also wanted to see what it was gonna look like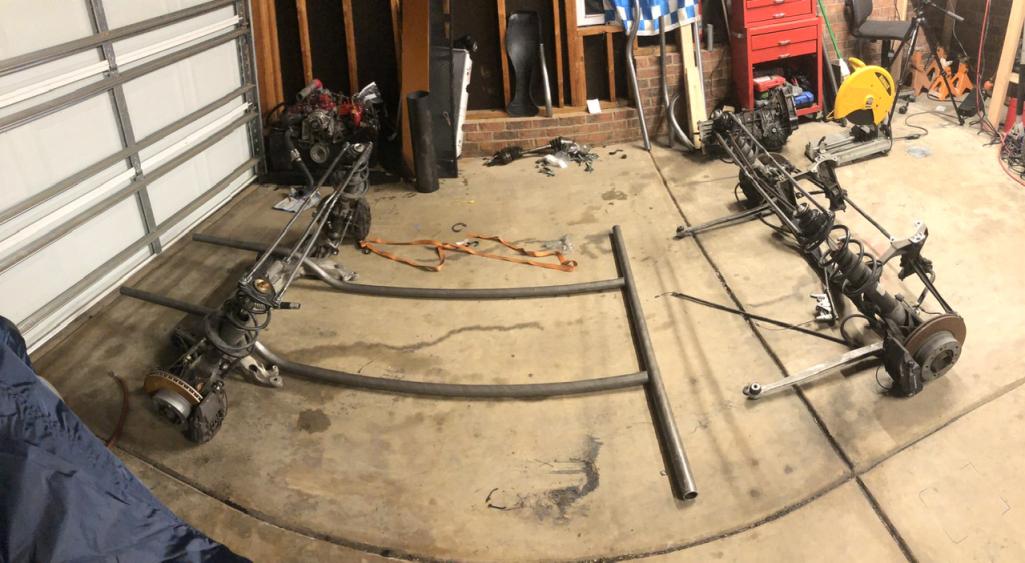
Posted by: gereed75 Apr 5 2020, 10:41 AM
Interesting. Have been contemplating a similar midengine build using boxster suspension. Will be interested to see how this goes together!
Posted by: Mueller Apr 5 2020, 12:51 PM
Subscribed!
Posted by: cali914 Apr 5 2020, 12:58 PM
i like 
Posted by: tazz9924 Apr 5 2020, 07:26 PM
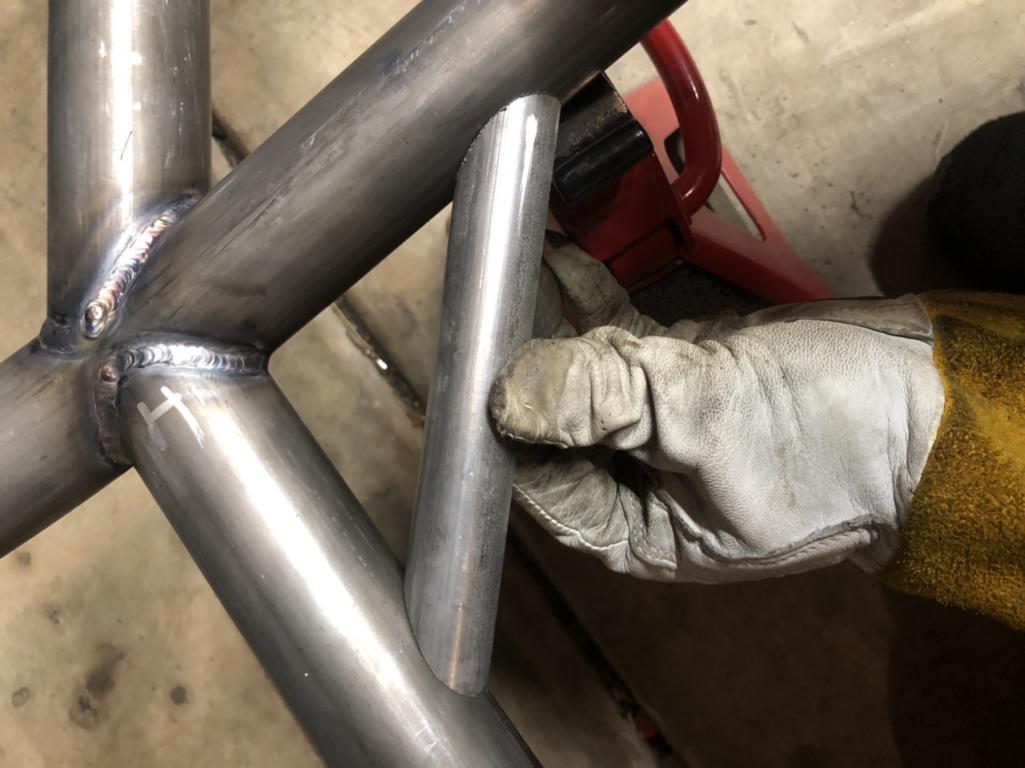
Began welding the main bit of the chassis together. Fairly decent welds, im still getting used to the hand controls instead of a pedal to make it more simple to weld while on the floor. 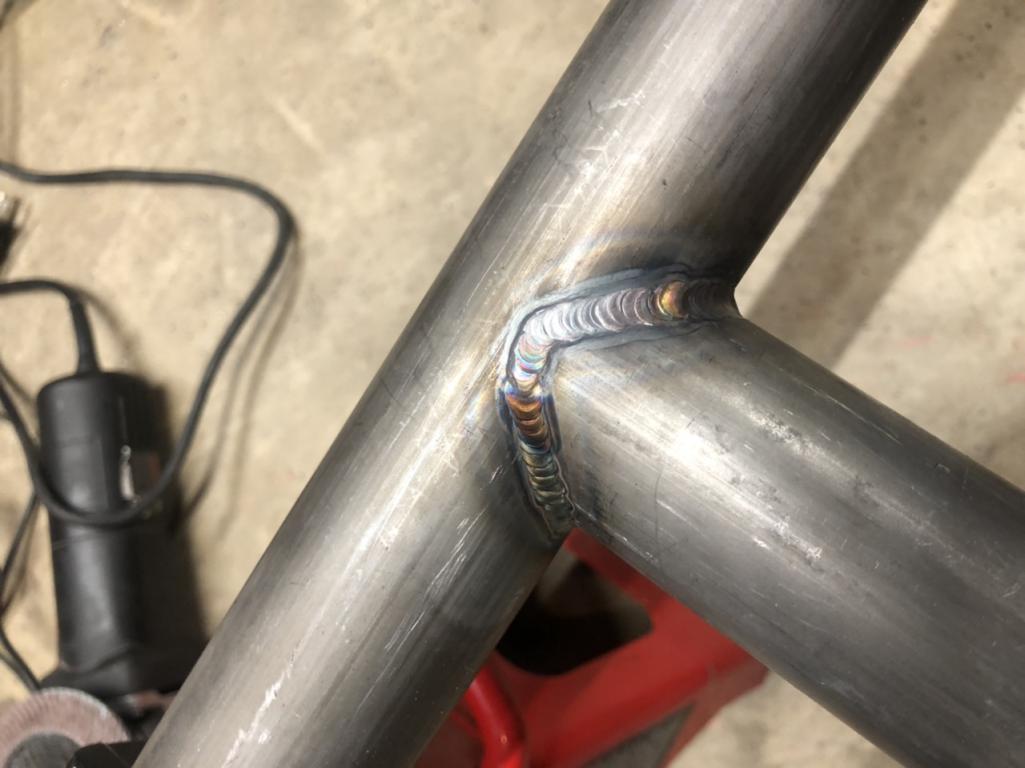
Damn pictures keep rotating, i even turn them in my phone but no luck.
Posted by: Andyrew Apr 5 2020, 09:02 PM
This will be a great build!!!! Are you going to document it on the YT channel?
Posted by: Tbrown4x4 Apr 6 2020, 02:59 AM
Loved your old car. It'll be great watching this!
Posted by: tazz9924 Apr 6 2020, 05:45 AM

This will be a great build!!!! Are you going to document it on the YT channel?
I certainly will!
Posted by: gereed75 Apr 6 2020, 06:28 AM
What do you call your tube channel?
Posted by: jmitro Apr 6 2020, 06:42 AM
very cool!
Posted by: tygaboy Apr 6 2020, 08:44 AM
![popcorn[1].gif](style_emoticons/default/popcorn[1].gif)


Posted by: tazz9924 Apr 6 2020, 12:28 PM
What do you call your tube channel?
Ziptied, a place where u can see me do dumb things with cars.
https://m.youtube.com/channel/UCwkC6muunVD72SHwE9ZoXeA
Posted by: tazz9924 Apr 6 2020, 09:03 PM
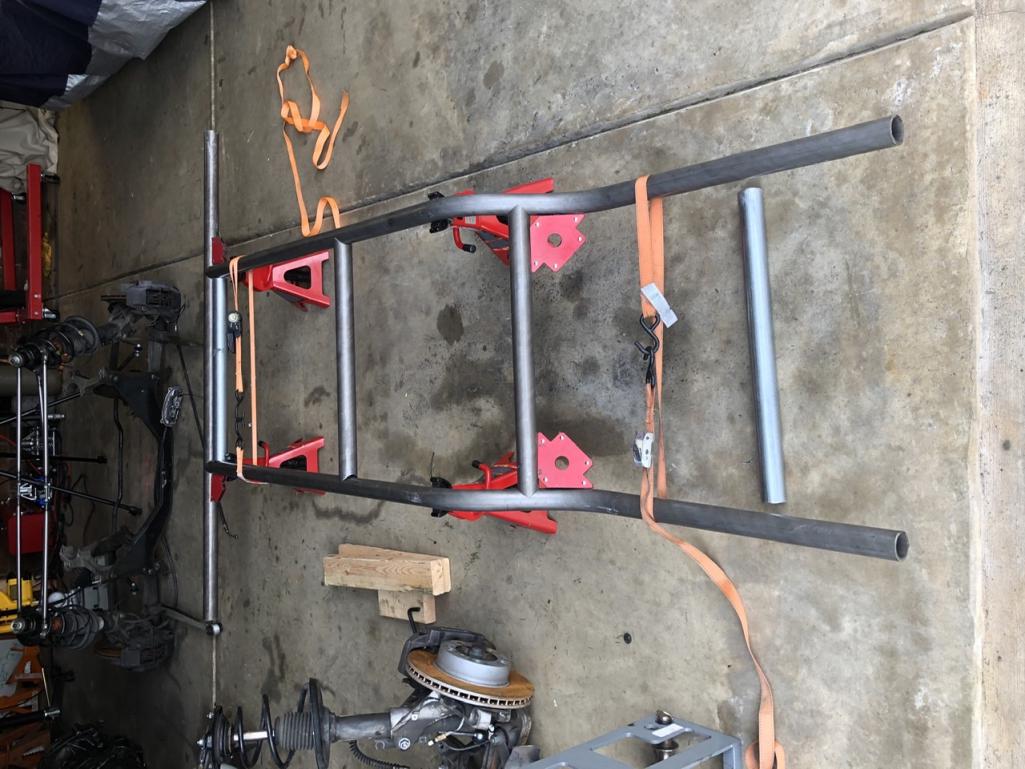
Spent the day adding in the wings of the chassis under where the driver and passenger(?) sits and honing in my tube bender. Turns out my bending die is advertised as a 7” radius but in reality its an 8.125” radius (which made me waste some good metal to find out). More on what i was bending tomorrow when im done. 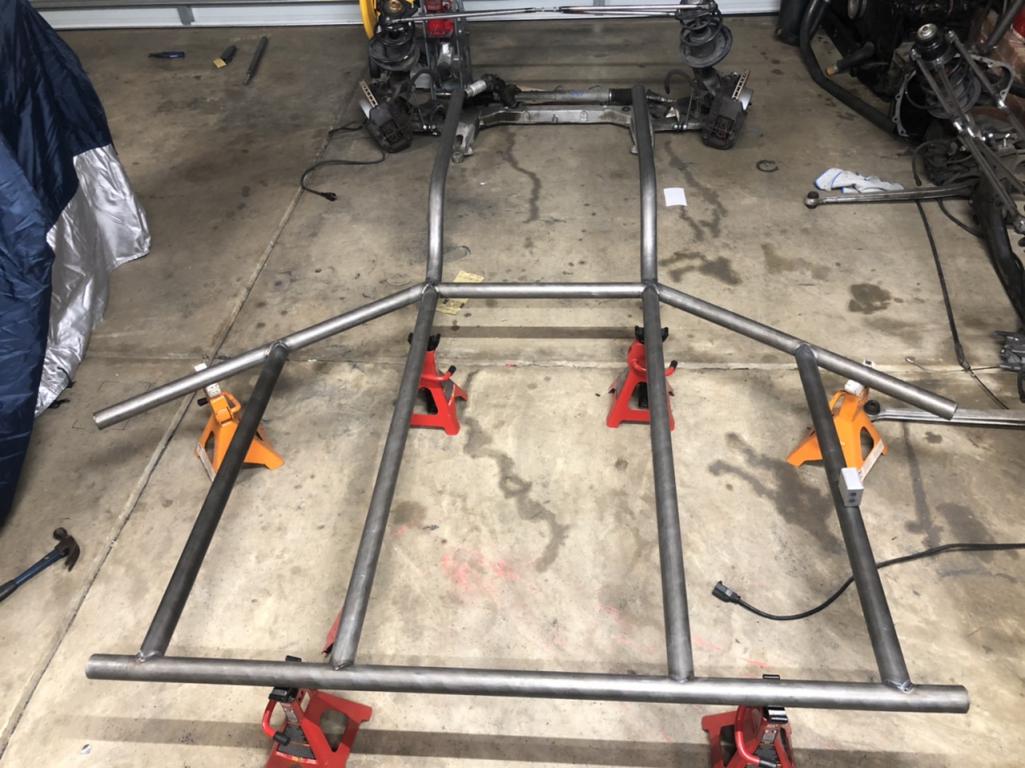
Posted by: Mueller Apr 7 2020, 08:46 AM
Looks great so far.
Have you measured the floor jacks to ensure same height or not grossly off?
Posted by: Andyrew Apr 7 2020, 05:37 PM
This will be a great build!!!! Are you going to document it on the YT channel?
I certainly will!

I miss those things
Posted by: tazz9924 Apr 7 2020, 05:59 PM
Looks great so far.
Have you measured the floor jacks to ensure same height or not grossly off?
Yep i welded them in place to ensure the same height and to dissuade me from using them on something else. Also made them level because without much weight on them they dont sit flat.
Posted by: rgalla9146 Apr 7 2020, 06:27 PM
Looks great so far.
Have you measured the floor jacks to ensure same height or not grossly off?
Yep i welded them in place to ensure the same height and to dissuade me from using them on something else. Also made them level because without much weight on them they dont sit flat.
the floor is flat too ?
garage floors are not exactly a surface plate.
looks are deceiving.
Posted by: Andyrew Apr 7 2020, 07:47 PM
Flat and straight enough is flat and straight enough for a home build  I'm sure he can build enough adjustability into the mounts to correct any twist in the chassis.
Posted by: tazz9924 Apr 7 2020, 08:48 PM
Flat and straight enough is flat and straight enough for a home build
I'm sure he can build enough adjustability into the mounts to correct any twist in the chassis.Correct however i regularly check measurements and after a good amount of welding .35 degrees is all the twist so far. My garage floor is absolutely not flat but once all the welding is done im gonna shim the stands to level it out. Too bad a chassis table is so damn big and expensive.... next time i guess.
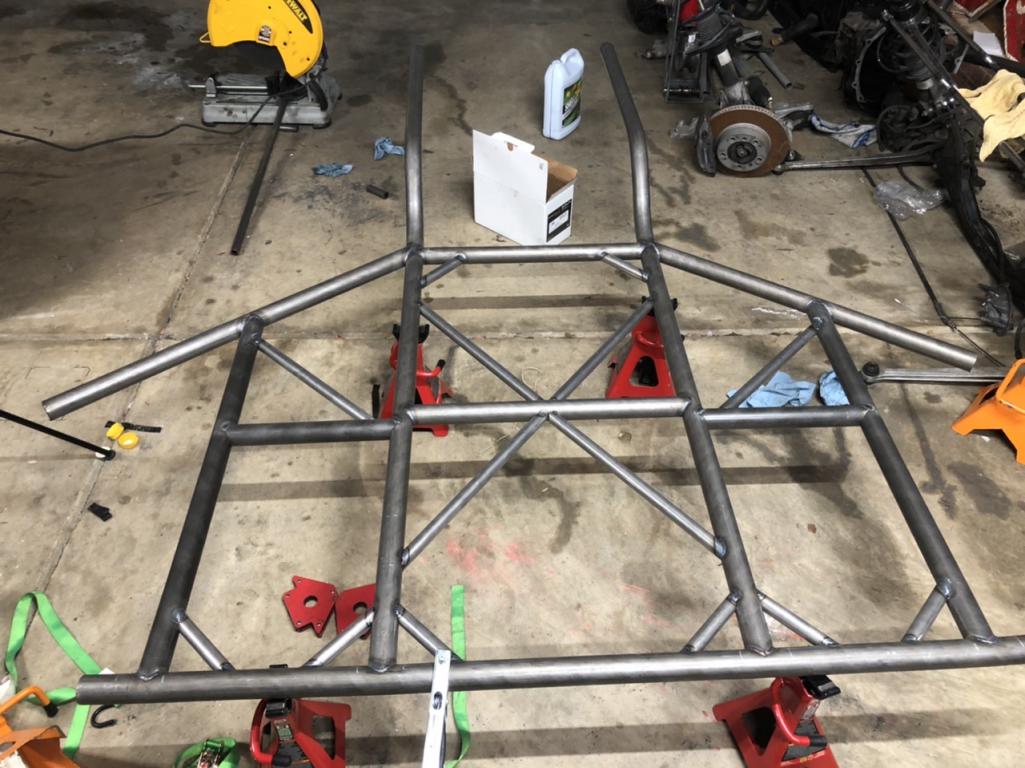
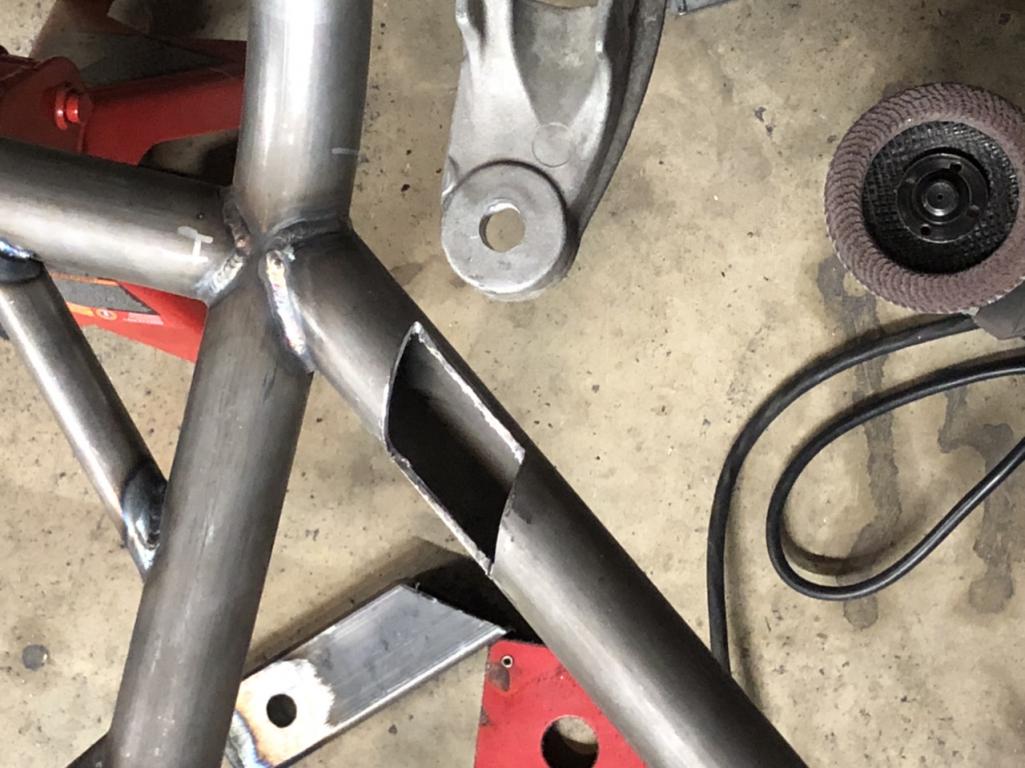
Posted by: tazz9924 Apr 7 2020, 08:53 PM
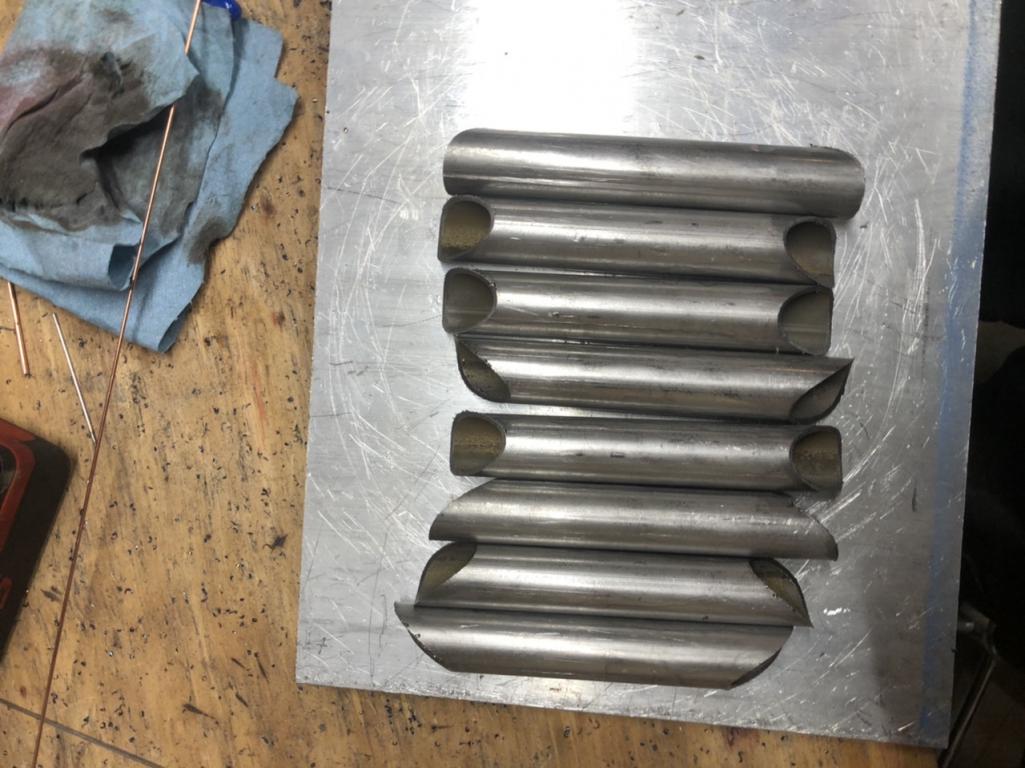
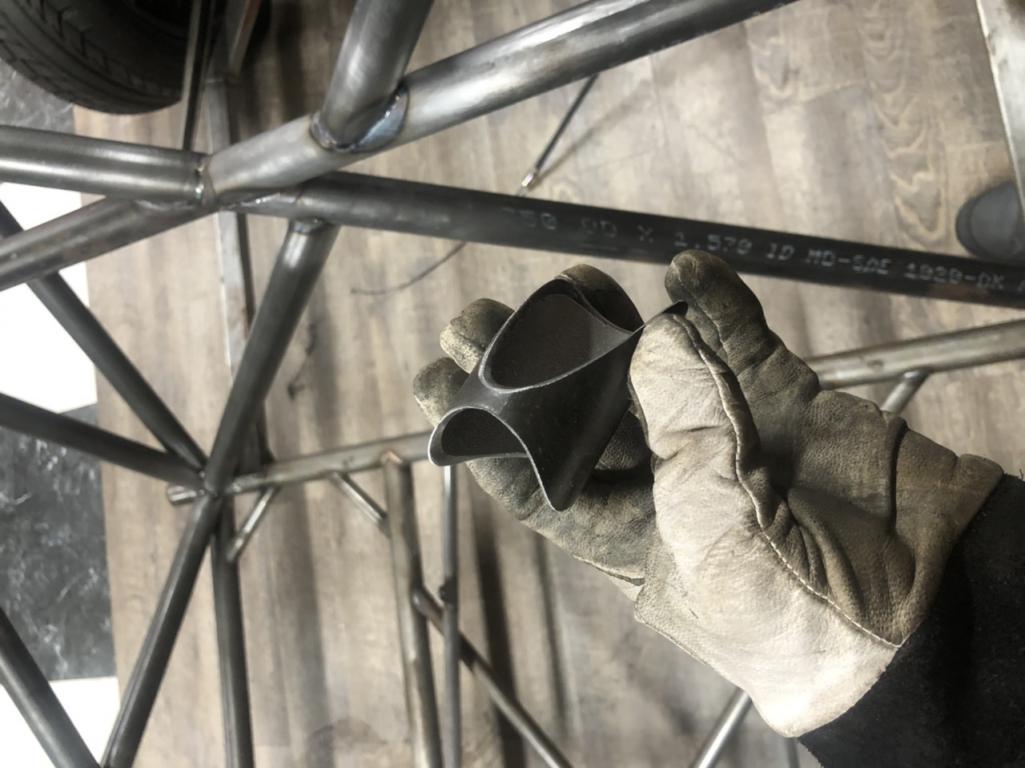
Built a lot of gussets, i really badly wanted them to sit flush with the bottom of the floor but after an hour and a half of trial and error, i found it cannot be done on 90 degree joints with my tube notcher as is. I wanted the gussets to double as mounts to the floor pan but ill have to fab up separate mounts for that  They gussets fit pretty good and i made all 8 in 30 minutes after that whole debacle. Now to weld in!
Posted by: tazz9924 Apr 8 2020, 09:23 PM
Not a big day but got some of the gussets added in. I also added the middle bar back into the floor now that i know where center is.
Posted by: Andyrew Apr 9 2020, 12:49 AM
What’s the body concept going to be? Are you sticking to 914 or boxster chassis dimensions?
Love the progress
Posted by: 911GT2 Apr 9 2020, 01:26 AM
Lover your welding!

Posted by: tazz9924 Apr 9 2020, 05:54 AM
What’s the body concept going to be? Are you sticking to 914 or boxster chassis dimensions?
Love the progress
914 wheelbase, but based on what im seeing both front and rear are gonna be wiiiidddee.
It looks like the outside edge of the brake rotor is the same width as a stock 914 bodie give or take a little.
Posted by: Andyrew Apr 9 2020, 02:21 PM
Remember their wheel offset is way different than the 914s, plus the track width is a few inches wider.
You should be fine with a decently flared body.
Posted by: sixnotfour Apr 9 2020, 03:04 PM
Boxster with 914 body for reference
http://www.914world.com/bbs2/index.php?showtopic=332830
Attached image(s)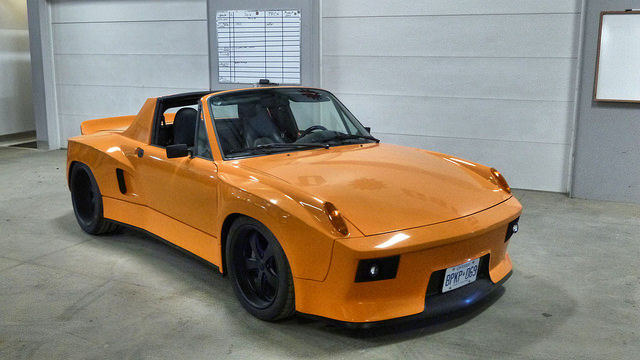
Posted by: tazz9924 Apr 9 2020, 04:32 PM
Remember their wheel offset is way different than the 914s, plus the track width is a few inches wider.
You should be fine with a decently flared body.
if i used normal tire widths
Posted by: tazz9924 Apr 9 2020, 04:34 PM
Boxster with 914 body for reference
http://www.914world.com/bbs2/index.php?showtopic=332830
I want it to end up a lot shorter than that which may mean a couple bumps in the body maybe. A sacrifice im willing to make.
Posted by: URY914 Apr 9 2020, 05:56 PM
I have one word of advice: Triangulation.
Posted by: tazz9924 Apr 9 2020, 06:18 PM
I have one word of advice: Triangulation.
Ahh but it is the word of the day with the new additions to the floor!
Posted by: Mueller Apr 9 2020, 06:35 PM
What’s the body concept going to be? Are you sticking to 914 or boxster chassis dimensions?
Love the progress
914 wheelbase, but based on what im seeing both front and rear are gonna be wiiiidddee.
It looks like the outside edge of the brake rotor is the same width as a stock 914 bodie give or take a little.
I've seen a 993 rear suspension in a 914 that the owner narrowed the subframe assembly(pics someplace around here)
Posted by: tazz9924 Apr 9 2020, 07:13 PM
What’s the body concept going to be? Are you sticking to 914 or boxster chassis dimensions?
Love the progress
914 wheelbase, but based on what im seeing both front and rear are gonna be wiiiidddee.
It looks like the outside edge of the brake rotor is the same width as a stock 914 bodie give or take a little.
I've seen a 993 rear suspension in a 914 that the owner narrowed the subframe assembly(pics someplace around here)
Ive thought about it but im not too worried about width. As low and wide as i can go is my goal... but not scraping the asphalt more like as wide as reasonable and as wide as i can afford.
Posted by: tazz9924 Apr 10 2020, 08:08 PM
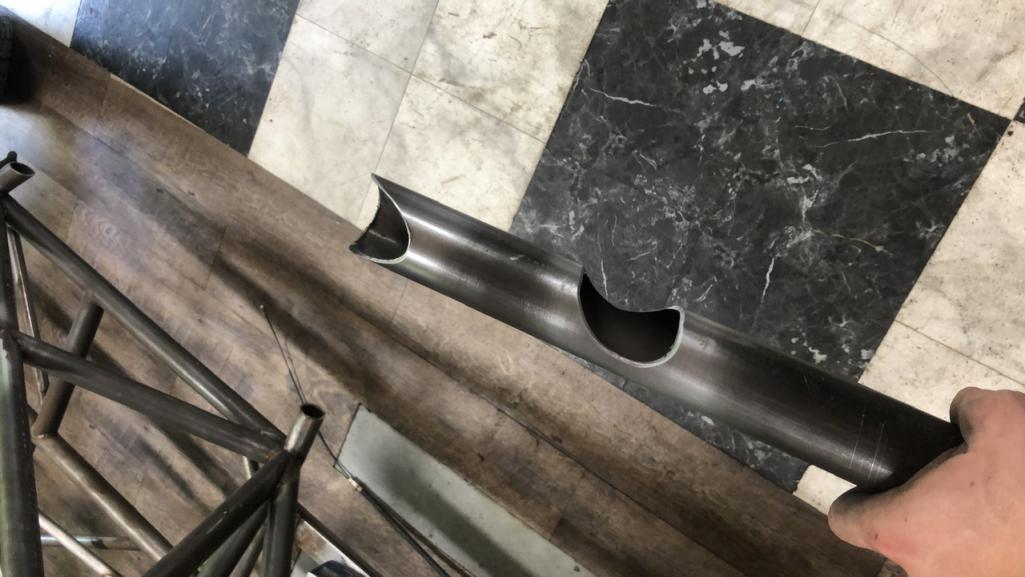
Got the last of the welding that is possible on my current tig cup, i was gonna get the right cup today but it was damn good friday. The last of the tight welds will wait till monday. I also finally got the main hoop bent and notched. It still needs a little work to get it right because its a little wide. i may tighten a couple bends a degree or so to bring it next to perfect. Nothing serious. But it’ll wait till tomorrow like the dash bar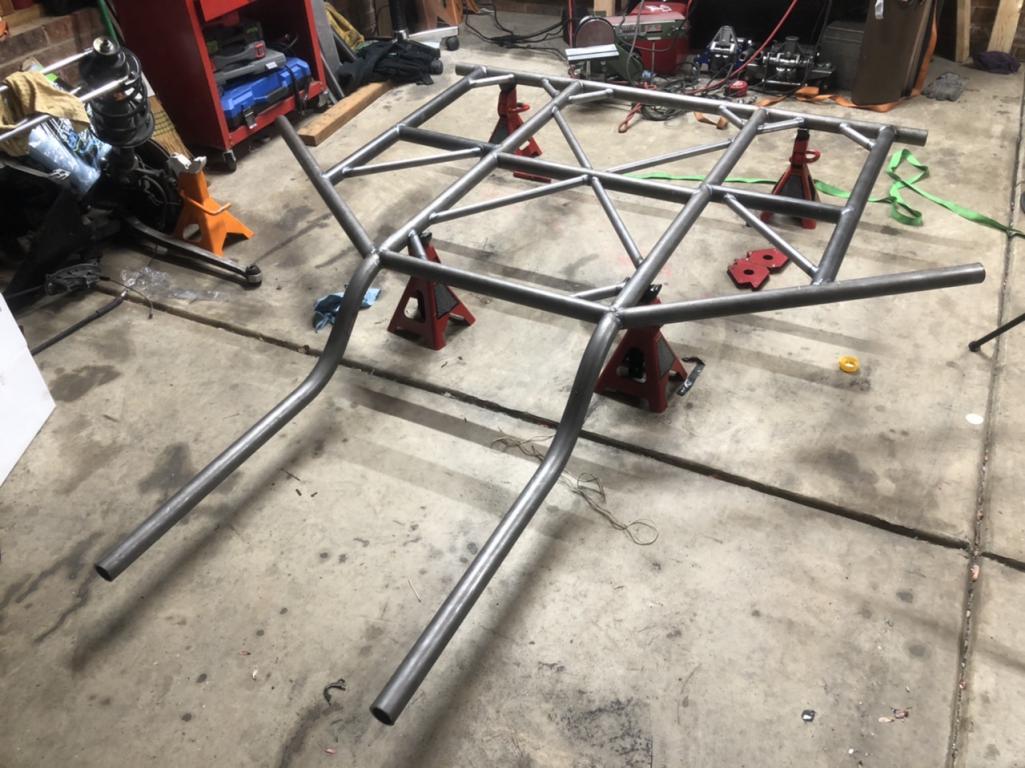
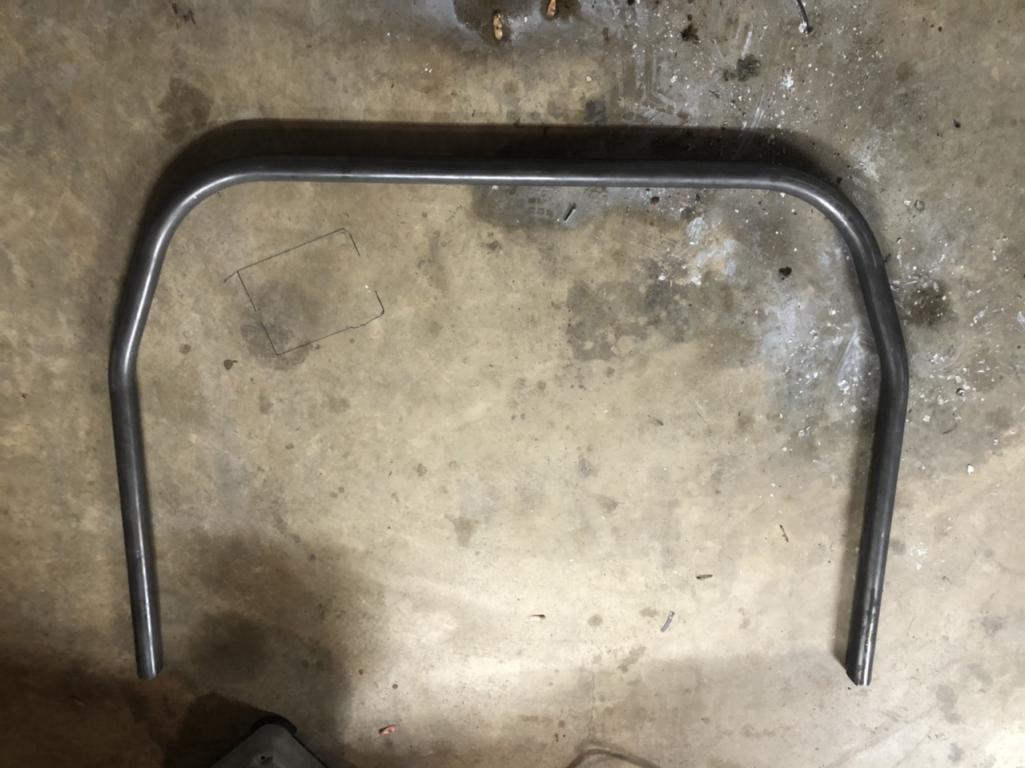
Posted by: tazz9924 Apr 11 2020, 09:42 PM
Finally building in 3d, got the main hoop finish notched and welded on!
[attachmentid=738839]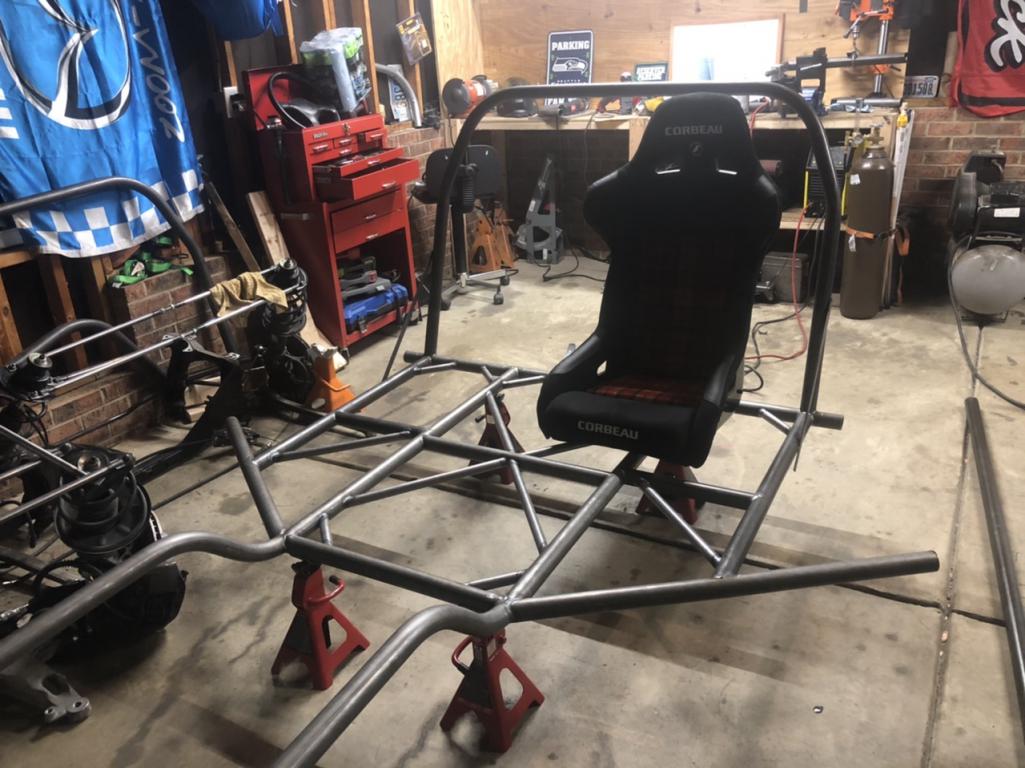
Killed the drill finally, i was trying to notch dash bars... Craftsman Warranty..?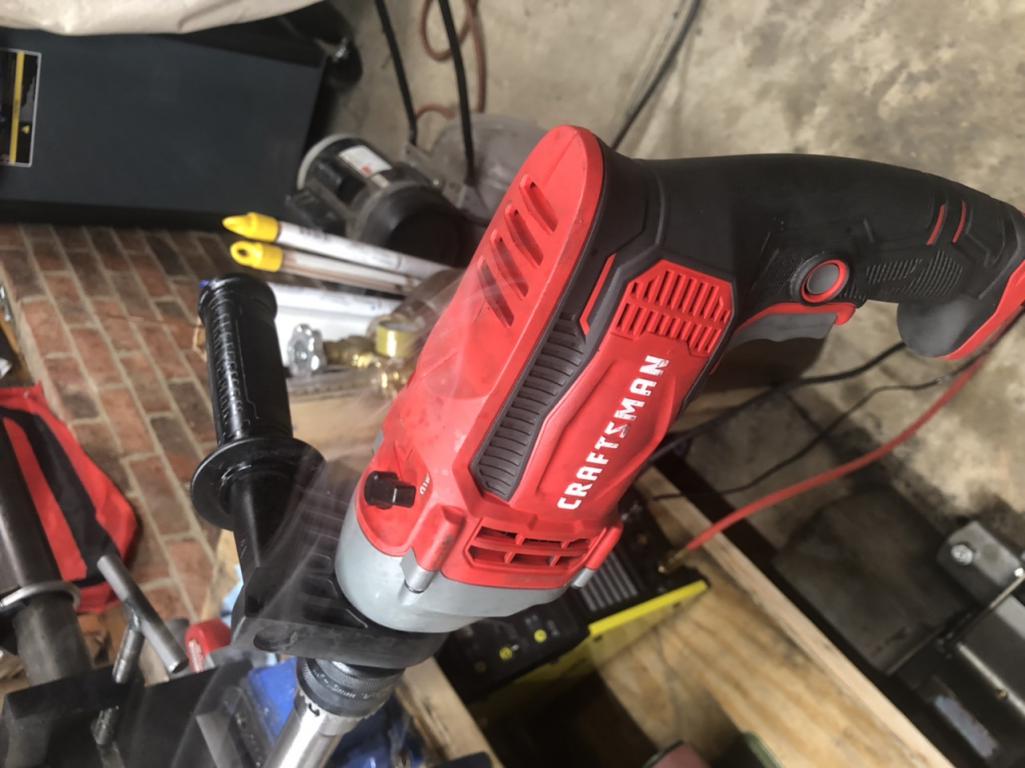
Posted by: maf914 Apr 12 2020, 06:55 AM
Craftsman warranty? Good luck with that. What was the original warranty? Head for Lowe's and see what they say. Let us know what happens if you pursue it. I have plenty of Craftsman tools and no Sears nearby. Good luck.
Posted by: ClayPerrine Apr 12 2020, 07:36 AM
Craftsman warranty? Good luck with that. What was the original warranty? Head for Lowe's and see what they say. Let us know what happens if you pursue it. I have plenty of Craftsman tools and no Sears nearby. Good luck.
The "Craftsman tools warranty" died when Sears sold off the Craftsman name. The new stuff is no where near the quality it used to be, and even Sears (if you can find one) doesn't honor the warranty for the old stuff.
Posted by: Andyrew Apr 12 2020, 08:37 AM
I hear Ace and Lowe's still exchange them. Craftsman as a brand is not dead... Just Sears.
Posted by: tygaboy Apr 12 2020, 09:13 AM
Imagine if we had professional sportscasters, I'm thinking those "quiet talker/golf types", doing commentary as these builds were happening...
Post #2: "Interesting... He's gone with round tube for his main chassis frame. Let's see what he comes up with as a way to attach the floor."
Post #6: He's about to post some close ups of his TIG work and, and... NICE! Looking like a proper stack of dimes! I can barely hear over the roar of the Gallery! And those cheers are well deserved. Brilliant work, simply brilliant! He's setting some pretty high expectations.
Post #19: "...flat and straight enough for a home build." Fair advice from @http://www.914world.com/bbs2/index.php?showuser=172 . We've seen others spend WAAAY too much time messing about on the last 5% of something when they could have been on to more valuable work.
Post #21: He's showing solid consistency on those corner braces. OH! And there's the comment about attaching the floor! Well, we can look forward to watching him solve for this. Given the work quality so far, I'm sure this will work out just fine.
Post #36-39: Classic! All the fabulous custom fabrication and they're focused on a drill warranty!
Tazz - Keep up the great work. Your build pace and quality are impressive! I can't wait to see this come to life!
Chris
Posted by: tazz9924 Apr 12 2020, 11:22 AM
Imagine if we had professional sportscasters, I'm thinking those "quiet talker/golf types", doing commentary as these builds were happening...
Post #2: "Interesting... He's gone with round tube for his main chassis frame. Let's see what he comes up with as a way to attach the floor."
Post #6: He's about to post some close ups of his TIG work and, and... NICE! Looking like a proper stack of dimes! I can barely hear over the roar of the Gallery! And those cheers are well deserved. Brilliant work, simply brilliant! He's setting some pretty high expectations.
Post #19: "...flat and straight enough for a home build." Fair advice from @http://www.914world.com/bbs2/index.php?showuser=172 . We've seen others spend WAAAY too much time messing about on the last 5% of something when they could have been on to more valuable work.
Post #21: He's showing solid consistency on those corner braces. OH! And there's the comment about attaching the floor! Well, we can look forward to watching him solve for this. Given the work quality so far, I'm sure this will work out just fine.
Post #36-39: Classic! All the fabulous custom fabrication and they're focused on a drill warranty!
Tazz - Keep up the great work. Your build pace and quality are impressive! I can't wait to see this come to life!
Chris
Dang i appreciate it! the comment on post 19 seems like it may have hit a little close to home for you
 Ill figure out something with the floor. I work with pro mods at work and they just use dzus’s to hold the panels in. I dont think ill go that route but i do expect some pretty large sheets of aluminum coming my way. I might have you make some brackets on that plasma table
Posted by: sixnotfour Apr 12 2020, 12:16 PM
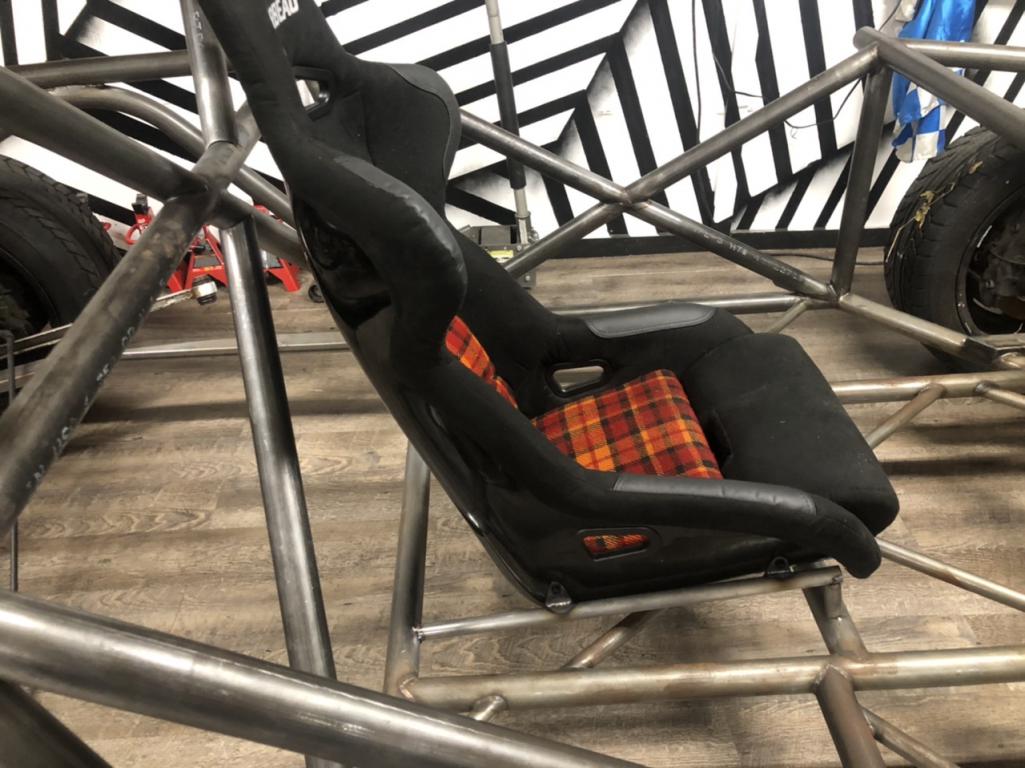
in my 914 my seat is on the floor in the back and 3 inches up in the front..
Yours with the tube dia. plus seat tilt, you be sitting pretty high? Im 6ft
Great project
Oh ya same seat..
Posted by: tazz9924 Apr 12 2020, 01:30 PM
in my 914 my seat is on the floor in the back and 3 inches up in the front..
Yours with the tube dia. plus seat tilt, you be sitting pretty high? Im 6ft
Great project
no its not bad, i sat in it already and my head doesn’t poke out the top even with a helmet, and thats without tilt
Posted by: tygaboy Apr 12 2020, 10:08 PM
Dang i appreciate it! the comment on post 19 seems like it may have hit a little close to home for you
Ill figure out something with the floor. I work with pro mods at work and they just use dzus’s to hold the panels in. I dont think ill go that route but i do expect some pretty large sheets of aluminum coming my way. I might have you make some brackets on that plasma table Well, yes, I am talking about myself in that comment re: post #19!

I'd be happy to fab some brackets for you. Just let me know.
Posted by: ClayPerrine Apr 13 2020, 07:21 AM
I think it is kind of telling that this tube framed 914 is starting it's life on jackstands!

Seriously, this is some beautiful work.
Clay
Posted by: tazz9924 Apr 13 2020, 09:14 PM
I started work on the dash bar and uprights today. I know its not a traditional design for the dash bar but ive seen enough examples of it to be comfortable with its integrity. It also allows me to accelerate my build and wait till i get the a pillar to build the upper half of the cage. In other news the craftsman drill crisis has been solved. Lowes wouldn’t warranty it and due to another serious crisis, craftsman is closed, so i bought another drill and put a protection plan on it... lowes will waranty that drill in about a week
Other Other news there officially will be a bump in the hood. The strut top is around 2” higher than the cowl sooo itll get a vent or something, im thinking like the ones on a charger daytona idk

Posted by: sixnotfour Apr 14 2020, 05:13 AM
http://www.914world.com/bbs2/index.php?showtopic=206845&st=240#
Posted by: tazz9924 Apr 14 2020, 06:03 AM
http://www.914world.com/bbs2/index.php?showtopic=206845&st=240#
Exactly, but please end my suffering if i turn it into a face
Posted by: Andyrew Apr 14 2020, 04:27 PM
Someone is going low low I take it? I like the idea of hiding it in fender vents. Probably make some rounded contoured RSR style vents...
@http://www.914world.com/bbs2/index.php?showuser=19241 could whip up some CNC cut pieces if you CAD drew it
Posted by: tazz9924 Apr 14 2020, 05:22 PM
Someone is going low low I take it? I like the idea of hiding it in fender vents. Probably make some rounded contoured RSR style vents...
@http://www.914world.com/bbs2/index.php?showuser=19241 could whip up some CNC cut pieces if you CAD drew it
My main goal is for it not to be bulky and tall like a rebodied boxster i want it short andto have correct proportions for a 914
Posted by: tazz9924 Apr 19 2020, 07:50 PM
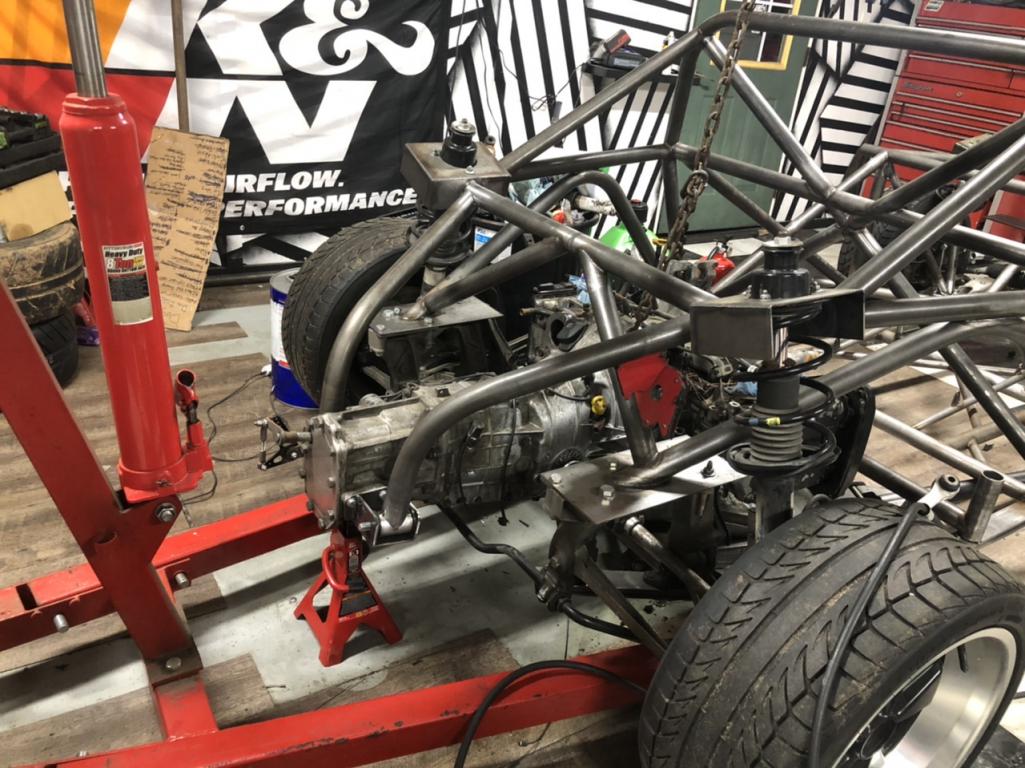
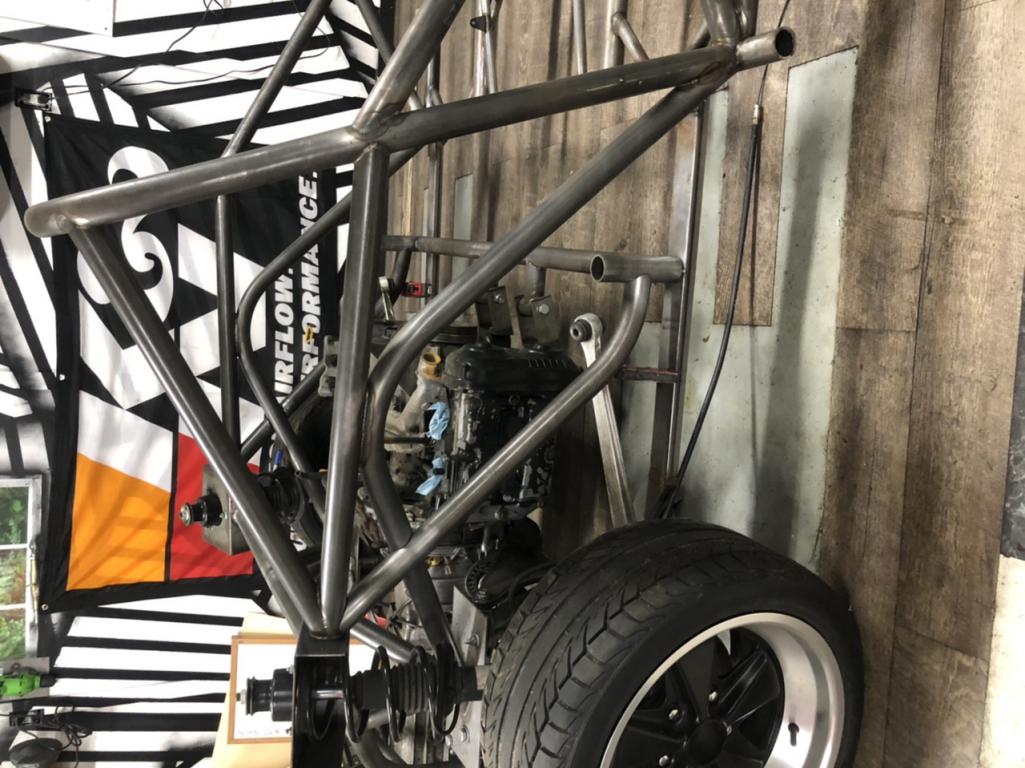
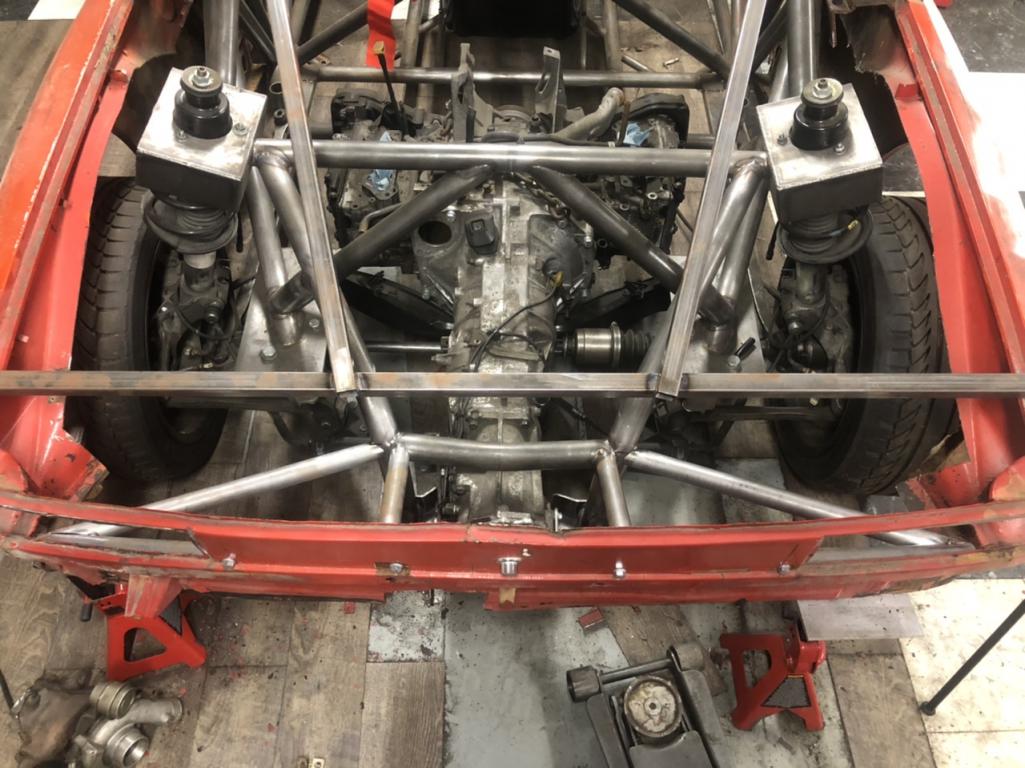
Ok update: I was out of town for a couple days and was nearly dead from exhaustion for the next day and a half. So progress stopped for a bit, but now ive made some good progress! I built some cups to mount the subframes, they came out good but i ran out of gas almost immediately afterward. Then i put the subframe up in place and found my guess on the bars that could run into the wheels dont! and the mounting seems easy for the subframe in the front. I also took a scrap bar from a failed main hoop and it looks pretty good to me.  Tomorrow im gonna take the struts off because they’re being a pain in the ass and it will make it considerably easier to deal with.
Really obscure question does anyone have a boxster they can jack up to tell me the control arm angle in full droop? If not ill have to figure it out somehow, i have the angle while loaded on the ground.
Subframe cups: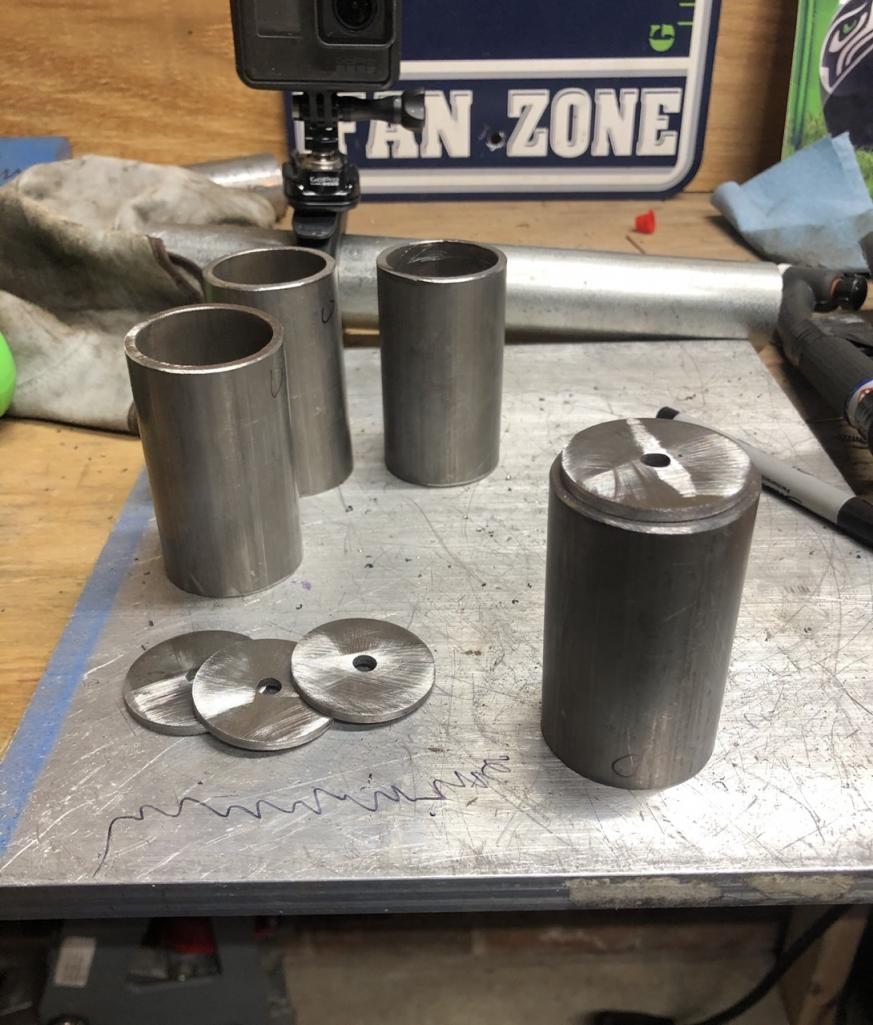

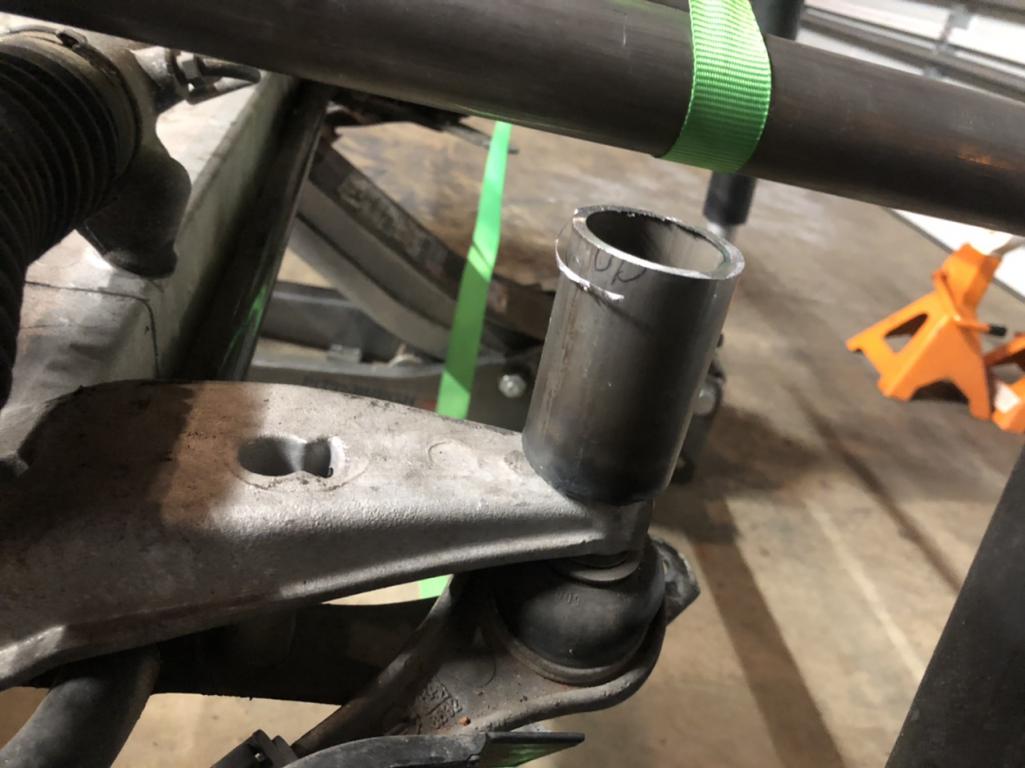
Scrap Bar strut tower: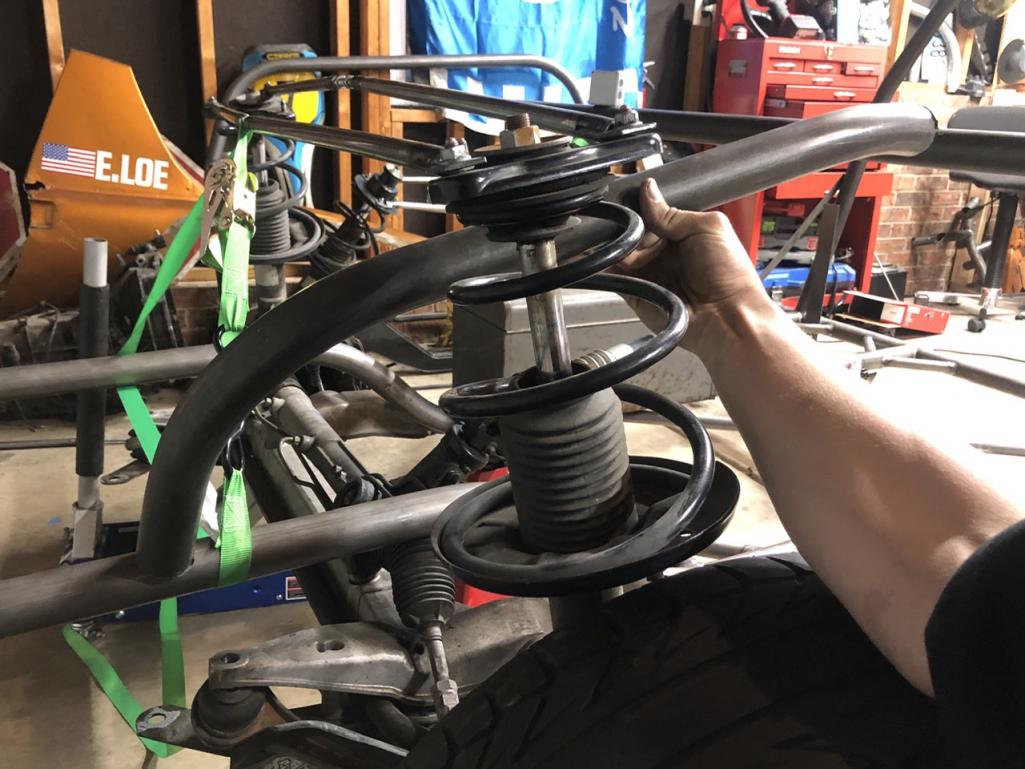
With a wheel on: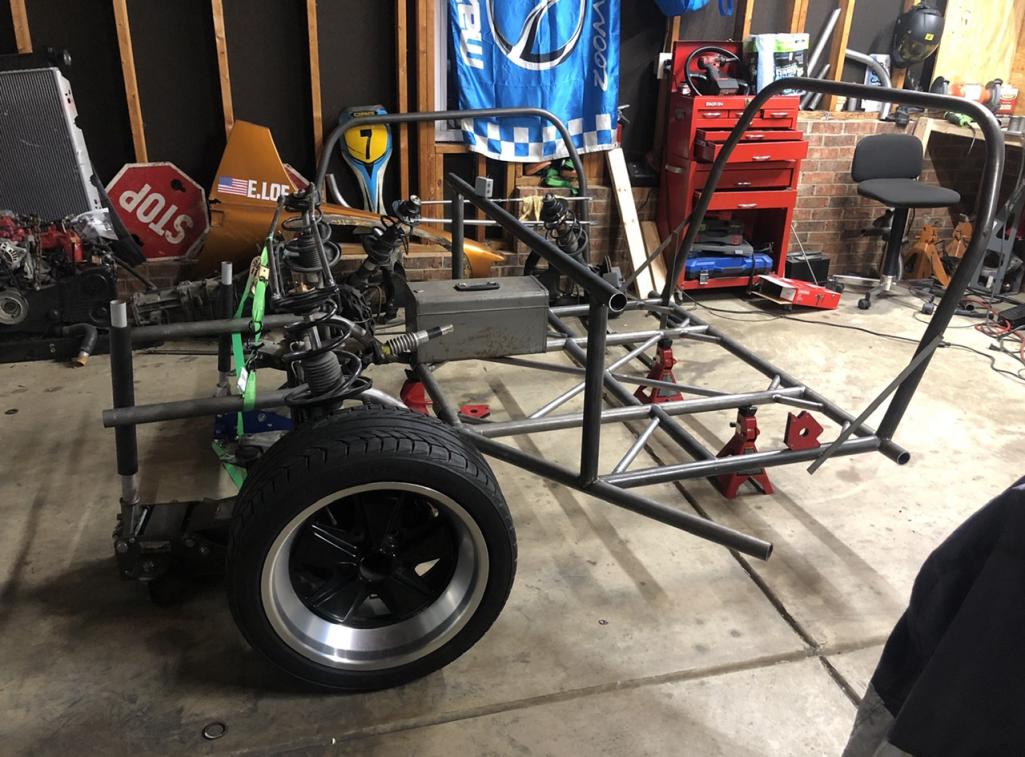
Posted by: tazz9924 Apr 24 2020, 09:50 PM
I finally got the fiberglass ive been waiting for since before the corona outbreak. I picked it up from greyhound today (side note: dont ever ship greyhound, you pick up your porsche parts from a gas station in the ghetto)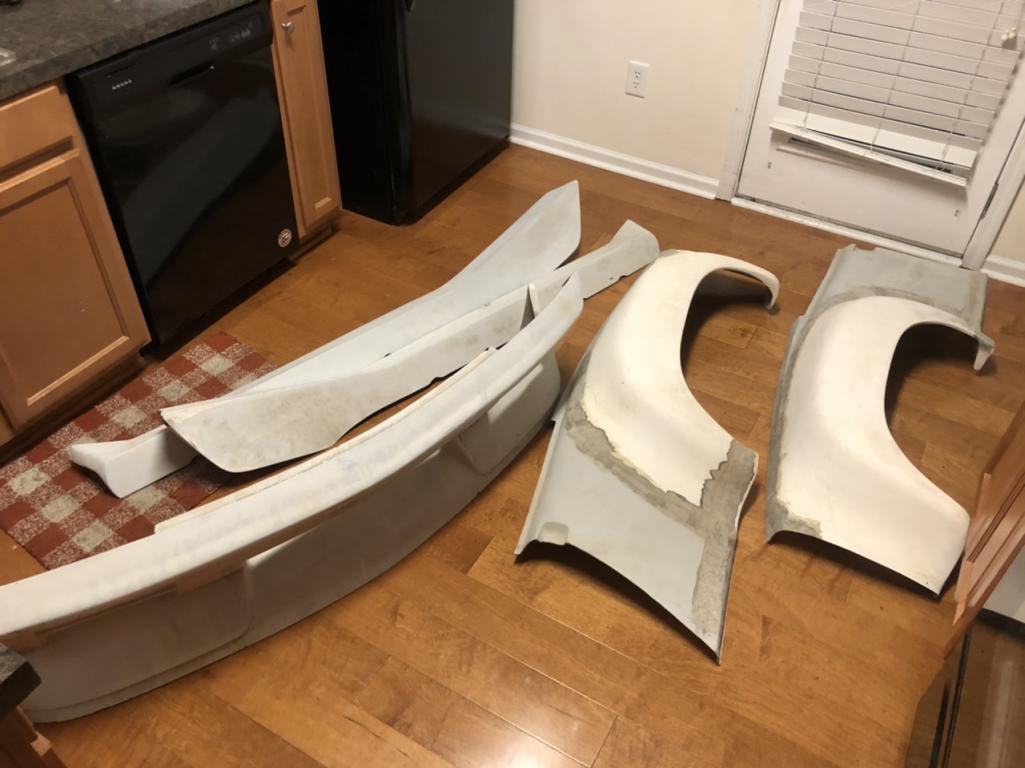
This was the biggest box ive ever received, i WAS gonna pick it up with my kei car, Honda beat but i listened to reason and took a volvo.... wise choice. 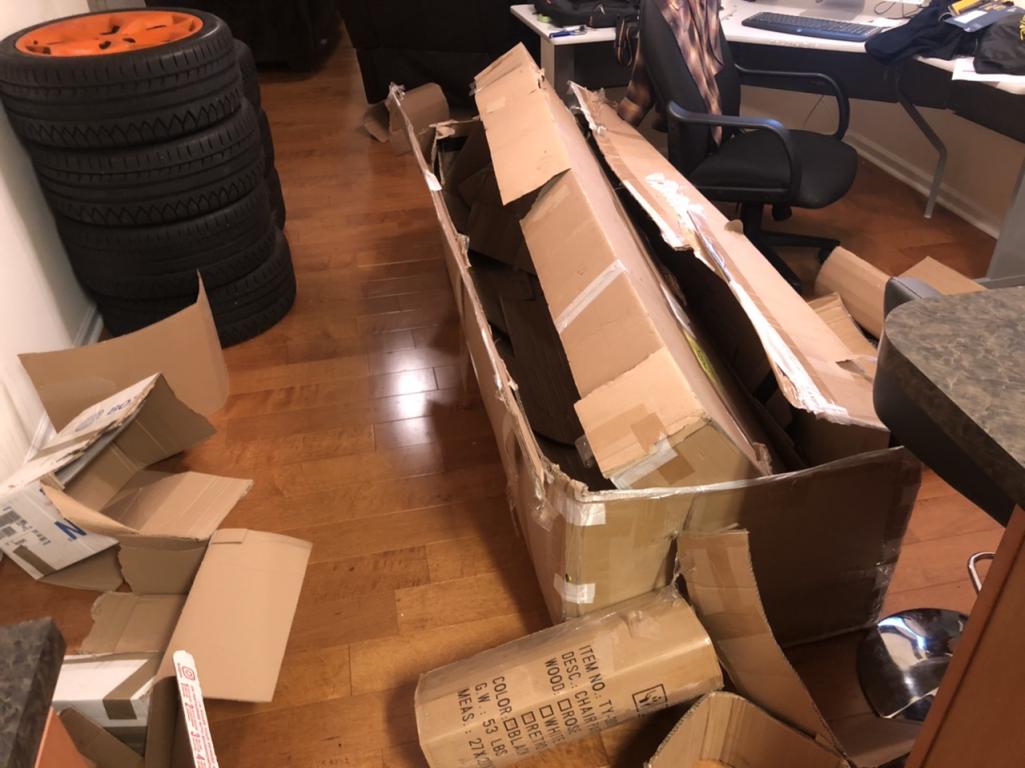
Everything is a bit rough.. especially the fenders but i can make it work. The front bumper is decent enough to make me happy, and i knew the side skirts were wrong buying this stuff but oh well. I think they’re sheridan skirts if anyone needs them let me know, they are in good condition. Add it to the fiberglass stockpile in my attic. 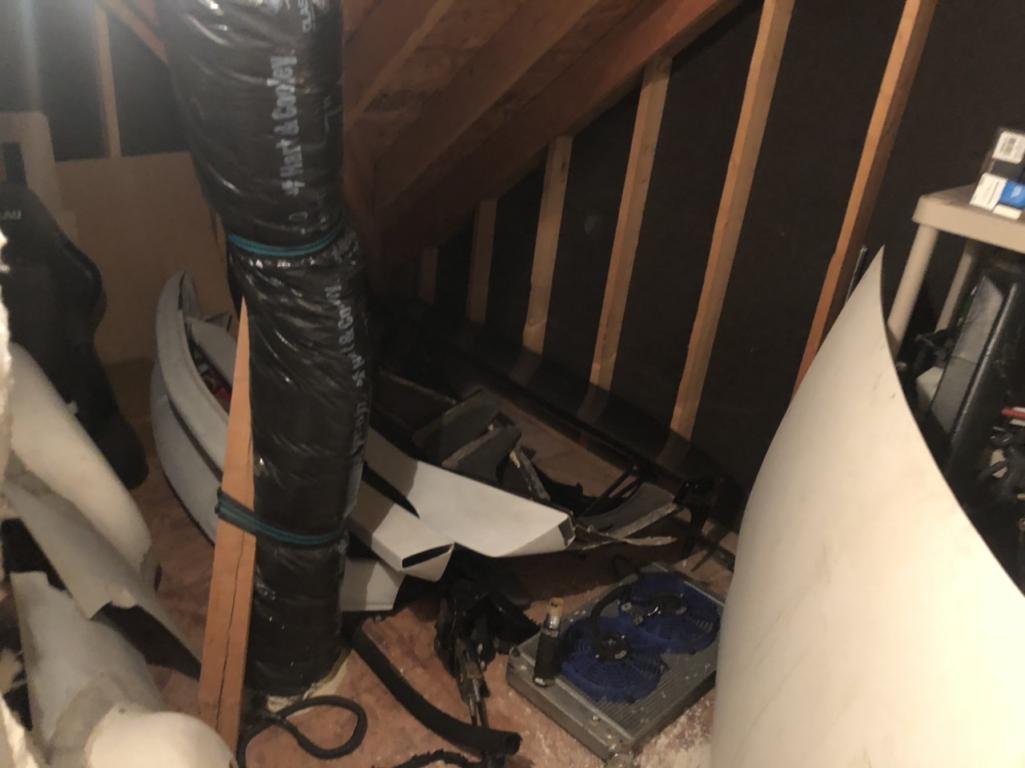
Posted by: tazz9924 Apr 28 2020, 09:21 PM
I was delayed a few days because i was waiting for bolts but im back at least for a little. I measured and measured again until i got the subframe nice and square so i could make decent lines to cut into my chassis. 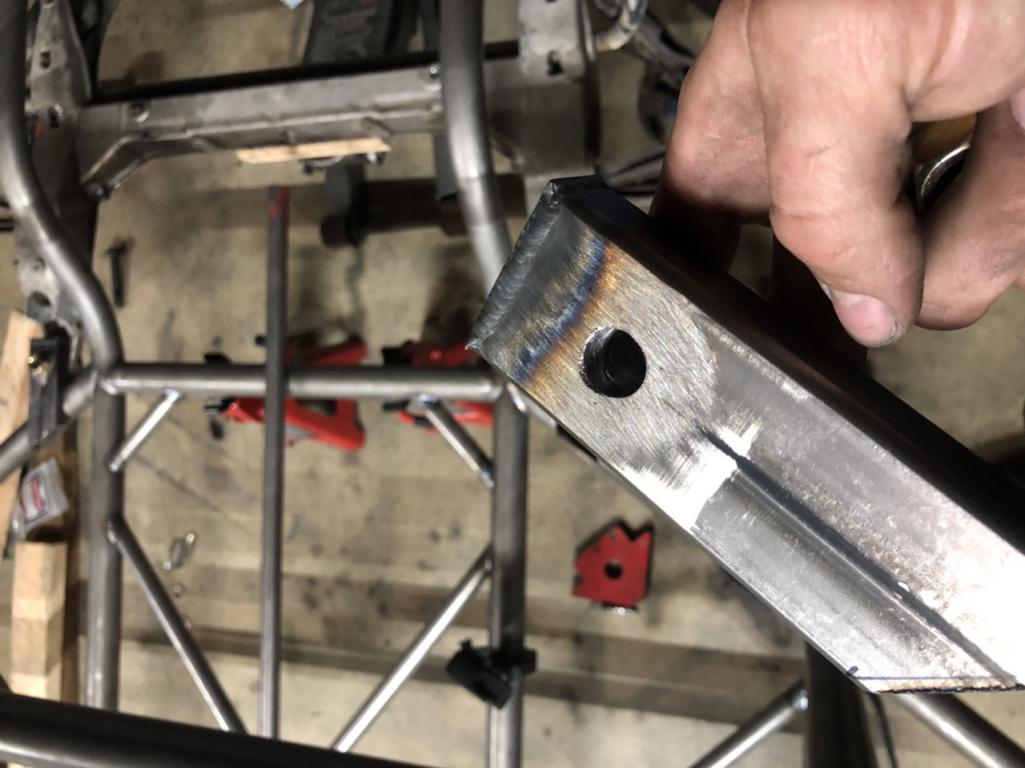
Posted by: Andyrew Apr 29 2020, 01:27 AM
Welds look nice!
BTDT on the greyhound in the ghetto... About the only way to ship BIG items though for normal people money..
Posted by: tazz9924 Apr 29 2020, 05:55 AM
Welds look nice!
BTDT on the greyhound in the ghetto... About the only way to ship BIG items though for normal people money..
oh i know, but it was a very funny experience but ill spring for freight next time. that way it wont take a month and a half and i can stay in the comfort of my own home
Posted by: jd74914 Apr 29 2020, 09:39 AM
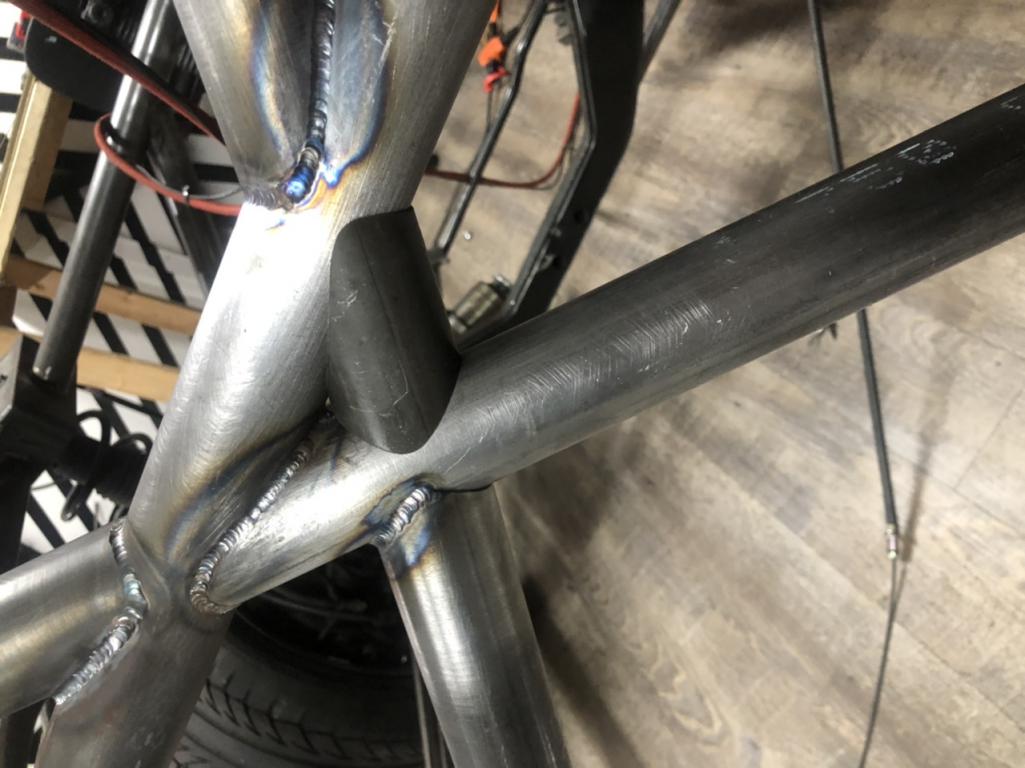
What's this holding? If it's seeing any real load and not heavily gusseted you're likely going to rip the tube in the HAZ outside of the weld. BTDT. Sometimes gussets don't even do too much.
The welds look nice!

I know you're going along a pretty good clip but below are some pro-tips*:
1) Get a second regulator and purge the ID of the tube frame when you full weld it. Quality will be much higher.
2) Clean the inside of the tubing with a pipe cleaner.
3) Drywall mesh does a really good job of cleaning mill scale off without loading up. A quick pass of the wire brush in one direction afterwards takes care of the rest.
4) For any coped tubes going into a tube without air connection (like your gussets), drill a small hole so 1) gases expanding inside don't cause your pool to blow out at you near closing the weld and 2) you can purge.
5) If you use 4130 or any other high carbon steel, be sure to normalize the weld HAZ to keep it from cracking under use. You can do this with a torch (instructions in Engineer to Win IIRC).
*Not a pro welder, but I've welded 5? (can't remember the full count now
) full tube framed formula cars and a bunch of semi-tubed cars.
Posted by: jd74914 Apr 29 2020, 09:48 AM
I have one word of advice: Triangulation.
What you did isn't really triangulation from an engineering sense. You made triangles, but they don't connect to the nodes so all you really did was put all of your tubes in bending vs. making the structure a two-force type truss member. That misses out on a lot of stiffness.
The spots you've done on the floor don't really matter, especially when you rivet on an actual floor because that shear plate will take care of any bending more efficiently than triangles. When you do to suspension bracing really try to make sure all of the nodes are braced directly with tubing running right in them. With properly triangulated nodes you don't need the coped tube gussets (you can put "tacos" if you want, but they really aren't necessary).
Rudy's build is a great example of good node structure with practical considerations for being a "914." His is a better inspiration than formula cars since it also incorporates the practicality of a car.
http://www.914world.com/bbs2/index.php?s=&showtopic=206845&view=findpost&p=2361501
I'm not trying to be a dick, but rather provide constructive criticism from someone who has been there...please don't take above as me trashing your project, your work looks great!
Posted by: tazz9924 Apr 29 2020, 11:49 AM
I have one word of advice: Triangulation.
What you did isn't really triangulation from an engineering sense. You made triangles, but they don't connect to the nodes so all you really did was put all of your tubes in bending vs. making the structure a two-force type truss member. That misses out on a lot of stiffness.
The spots you've done on the floor don't really matter, especially when you rivet on an actual floor because that shear plate will take care of any bending more efficiently than triangles. When you do to suspension bracing really try to make sure all of the nodes are braced directly with tubing running right in them. With properly triangulated nodes you don't need the coped tube gussets (you can put "tacos" if you want, but they really aren't necessary).
Rudy's build is a great example of good node structure with practical considerations for being a "914." His is a better inspiration than formula cars since it also incorporates the practicality of a car.
http://www.914world.com/bbs2/index.php?s=&showtopic=206845&view=findpost&p=2361501
I'm not trying to be a dick, but rather provide constructive criticism from someone who has been there...please don't take above as me trashing your project, your work looks great!
Noted! i understand what your saying, in my design it is a major part. The floor design i took from a trusted source, and i misinterpreted what u meant. Love the detailed responses though!
Posted by: tazz9924 May 6 2020, 12:05 PM
I continued mounting the front subrame. Still sitting perfect. In the future once i get some more metal on this thing im going to reinforce the mounting points because as they stand, they are week. More to come!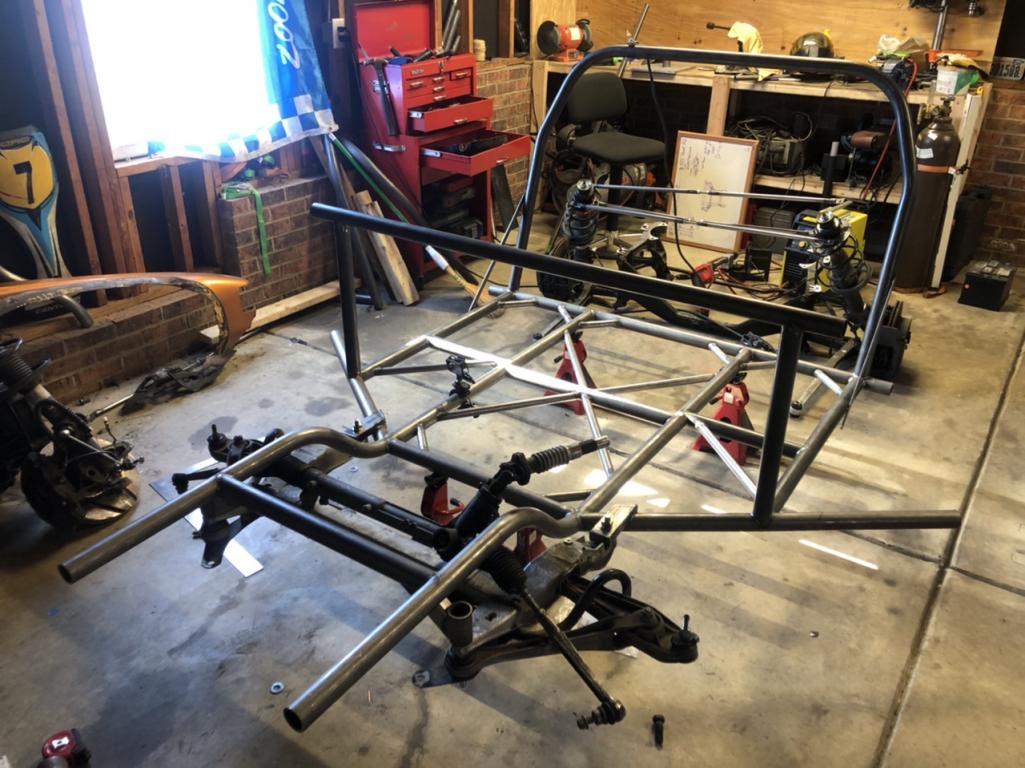
Posted by: tygaboy May 6 2020, 04:02 PM
Holy Moley! That bad boy will be a roller soon! 
Come to my shop and help me build my tube chassis...
Posted by: tazz9924 May 6 2020, 06:35 PM
Holy Moley! That bad boy will be a roller soon!
Come to my shop and help me build my tube chassis...
@http://www.914world.com/bbs2/index.php?showuser=19241 ill need a plane ticket and Perdiem

Posted by: tazz9924 May 10 2020, 12:44 PM
Finally! im done welding up the front subframe in place... for now. It’ll get a little more reinforcement in the future but now i must cleanse myself of the hatred that was welding the front mounts up. Now on to mounting those front struts!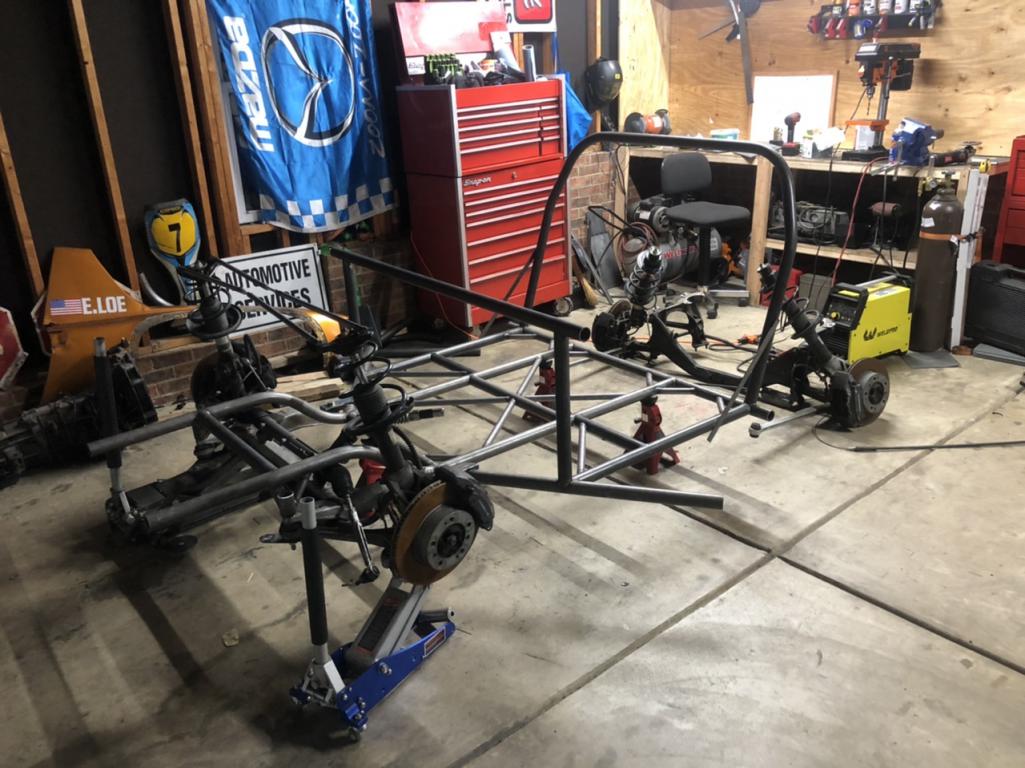
Posted by: tazz9924 May 13 2020, 09:56 PM
Made my strut tops! Ill be honest i was very excited about making these because i knew they could look good.. and they do! I would’ve preferred to bend the steel instead of having weld joints but i was assured of its strength so ill take it. 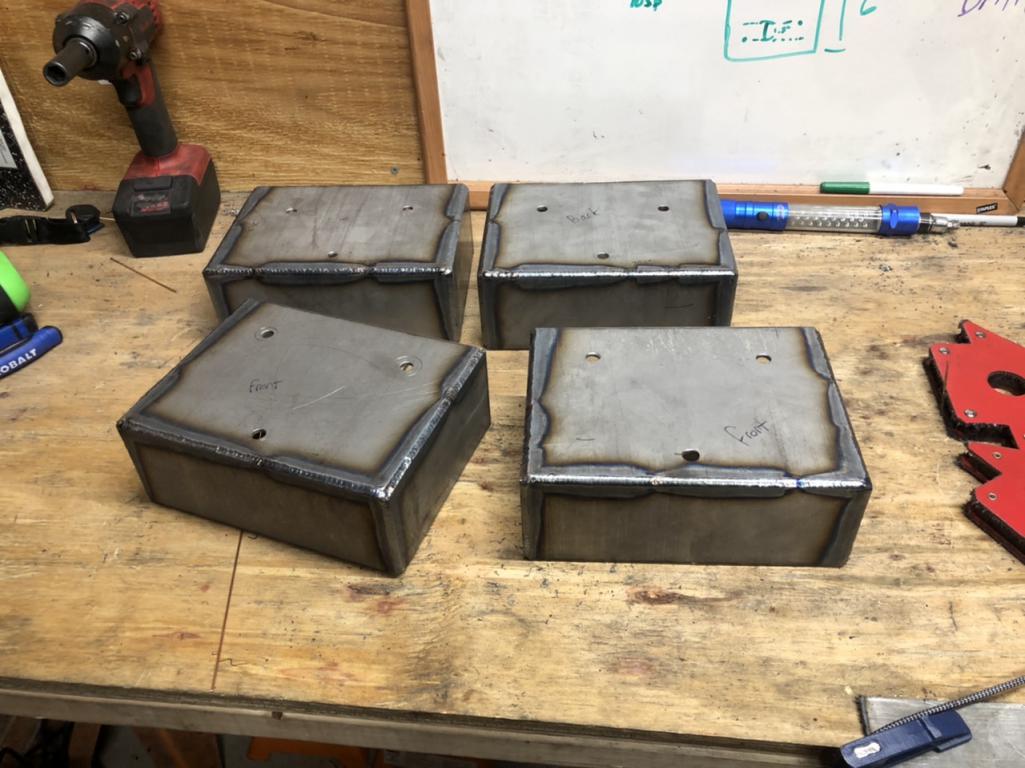
Posted by: 914forme May 14 2020, 05:59 AM
They will be plenty strong as the top plate is taking the majority of the force. The other forces will be applied at the attachment points, depending on your plans for attachment, you may need to add something down the sides to transfer the loads.
Liking the progress, and the fact it is a down and dirty build.
Posted by: tazz9924 May 15 2020, 11:45 PM
major progress.
I cut the holes in the strut tops to allow for the strut to pass through.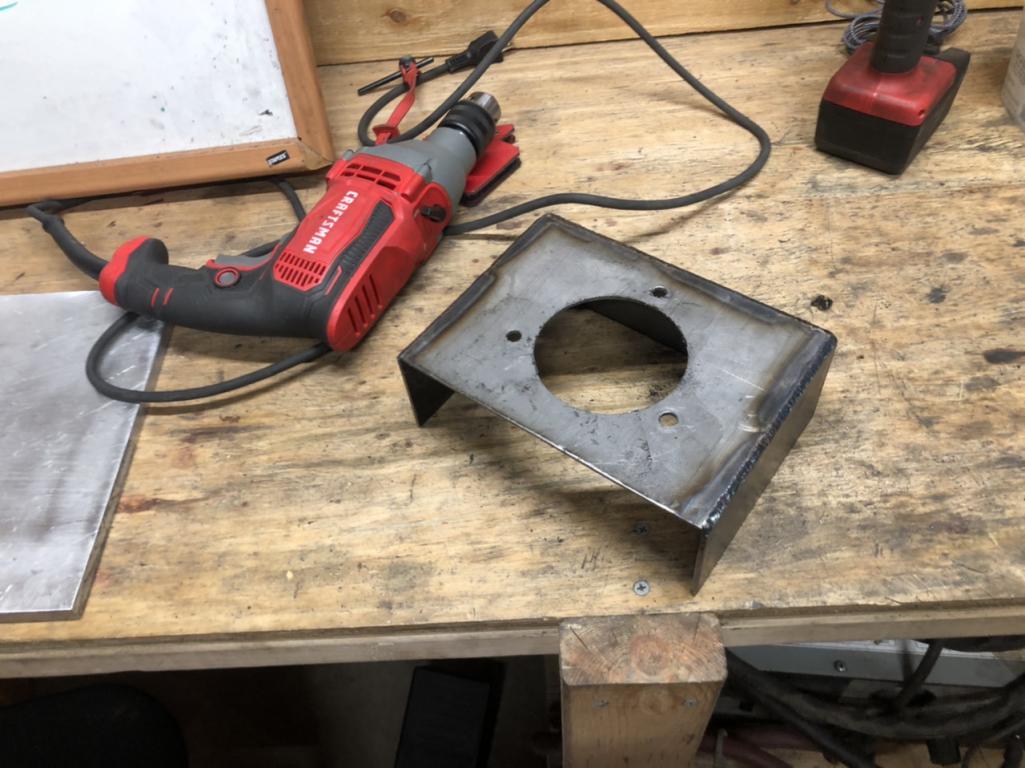
Next i welded in what ill call: The bar that links my struts together and is critical to my camber. I used quite a bit of scaffolding to make sure it was setup right. I used actual measurements from a boxster to space the struts correctly. One of the complaints of the boxster is you cant get enough camber from it stock. I added 1/4” of strut top negative camber. Its not much but i should be able to get a little more out of it if need be. The control arm angle was a point of contention for me. I couldnt find a boxsters control arm angle at full droop, so i... i eye balled it.. intelligently. i know it should be around 1 degree up at ride height, which from what ive read stock ride height is where the strength of this suspension lies. I settled on 20 degrees at full droop. I figure the car will settle an inch when it sets on the ground which will bring it somewhere close to where it should be. This car will have adjustable suspension so i can tune in the control arm angle as needed. It also sets the strut tops fairly low, which is a plus in my book. 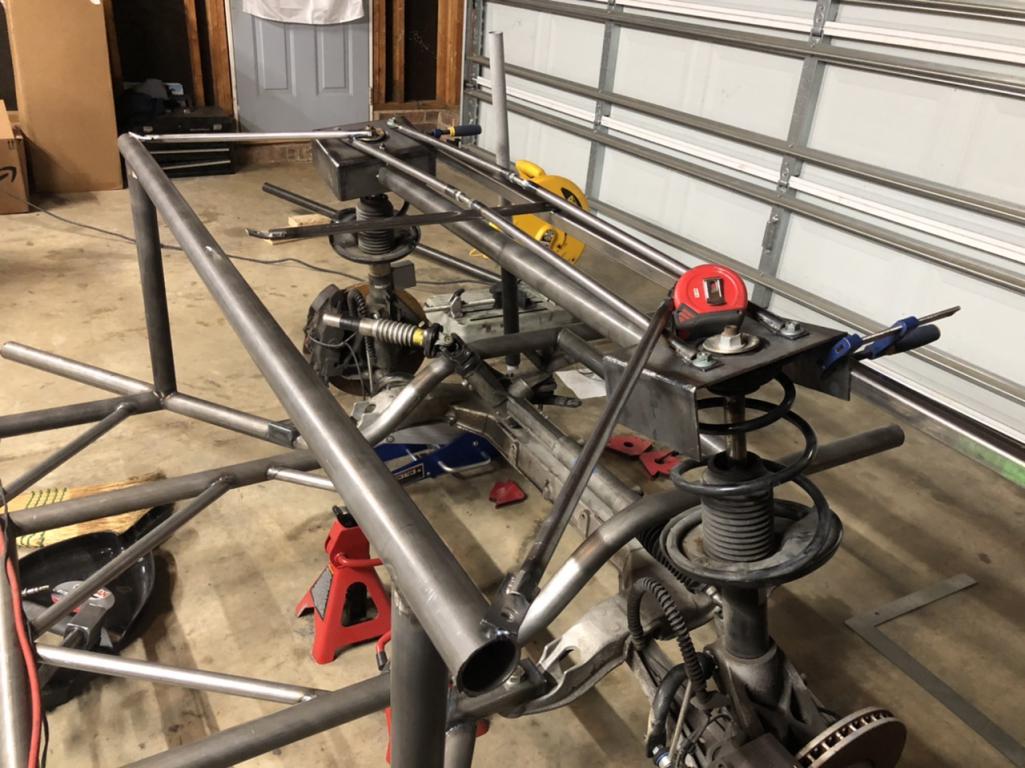
Once i finished the; The bar that links my struts together and is critical to my camber bar I then moved onto caster. I matched the caster i measured on a boxster and matched it with two temporary bars. now onto bigger and better things!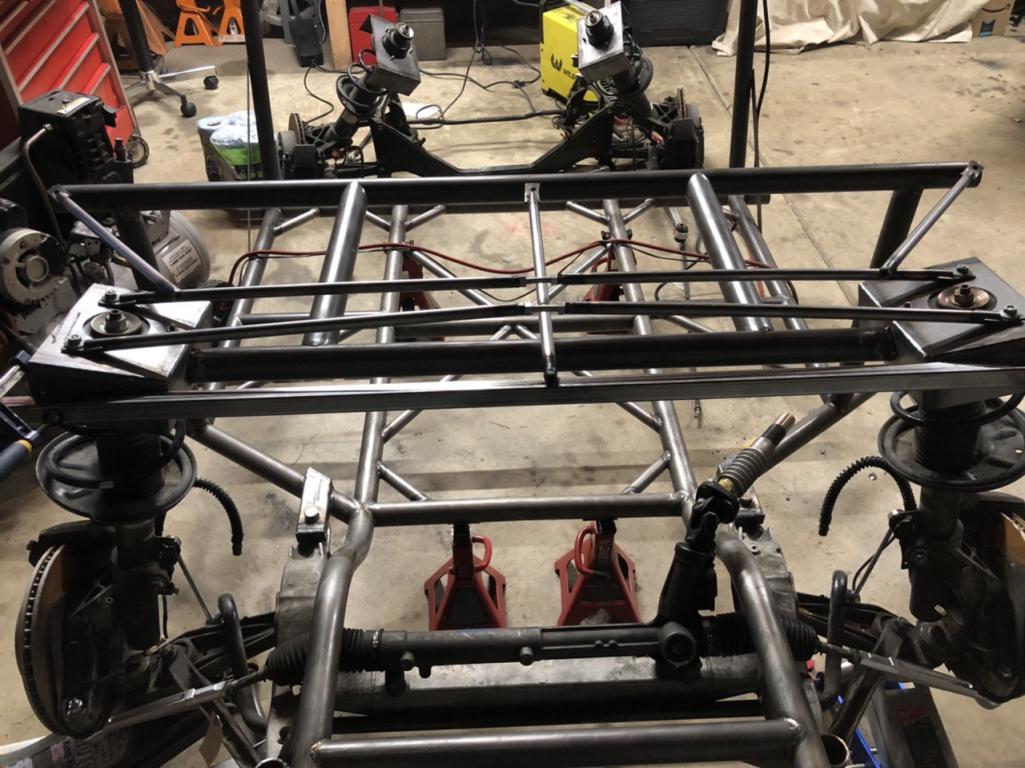
Posted by: tygaboy May 16 2020, 07:29 AM
Isn't it fun triple double checking all the measurements and questioning your assumptions over and over? Are you laying in bed each night rethinking how you're going to design and build that next section? 
You're making great progress! Can't wait to see more.
Posted by: Andyrew May 16 2020, 08:13 AM
WOO solid progress!
You should throw your video's in this build thread when your done with them.
Posted by: tazz9924 May 16 2020, 08:57 AM
WOO solid progress!
You should throw your video's in this build thread when your done with them.
I totally spaced on that!
If you want to see my beautiful(?) face actually working on this, here’s the link to my video: https://m.youtube.com/watch?v=tO0ksx4SHTo
Posted by: tazz9924 May 16 2020, 08:57 AM
Isn't it fun triple double checking all the measurements and questioning your assumptions over and over? Are you laying in bed each night rethinking how you're going to design and build that next section?
You're making great progress! Can't wait to see more.
Oh god its all i do!
Posted by: JOEPROPER May 16 2020, 09:30 AM
Nice video.
Posted by: 76-914 May 16 2020, 12:08 PM
Probably the fastest build yet.
Posted by: sb914 May 16 2020, 12:25 PM
I love the video!! Keep them coming.
Posted by: tazz9924 May 17 2020, 09:44 PM
More bars went in today, but not every day goes smooth even when you get in a groove. First i made the bars that go from the dash bar to the struts, easy enough. Some complex angles that aren’t immediately obvious but some flap dish work and its all good. 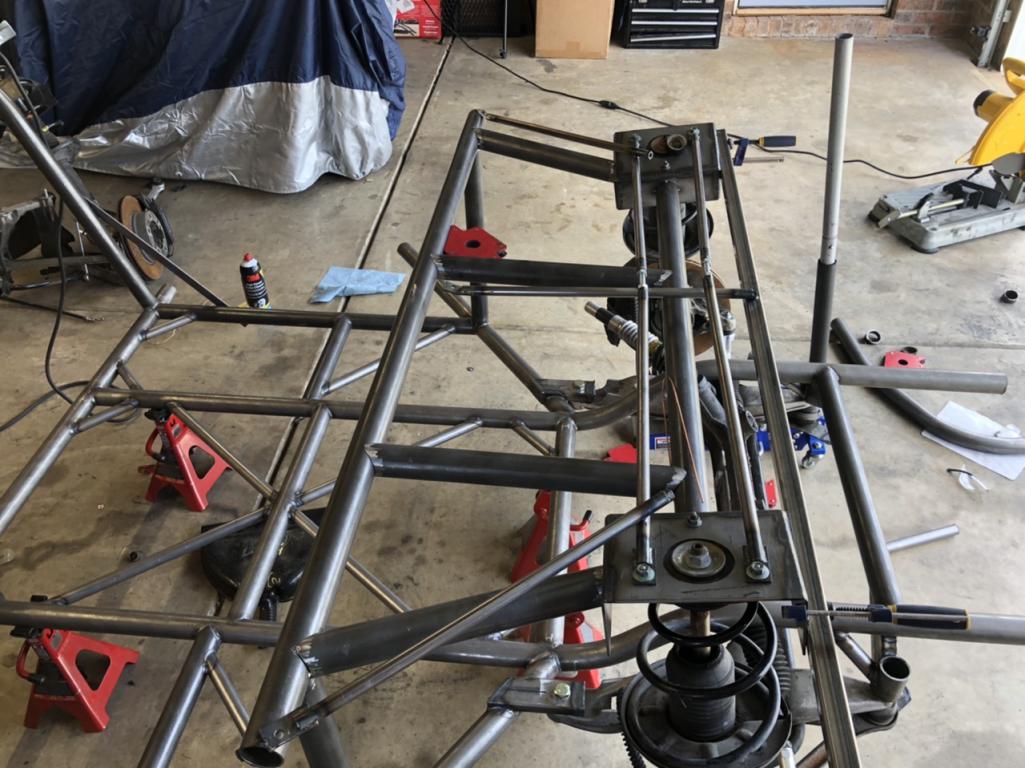
Next came the bars the go from the main chassis rails to the: The tube critical for my camber and attatching both struts. These bars were a pain! First i tried to link it up with the bar that attatches the two chassis rails. No Beans. 4 try’s down the road i gave up on that pipe dream (get it) and moved them back two inches and bingo! i even got to reuse a mistake bar. 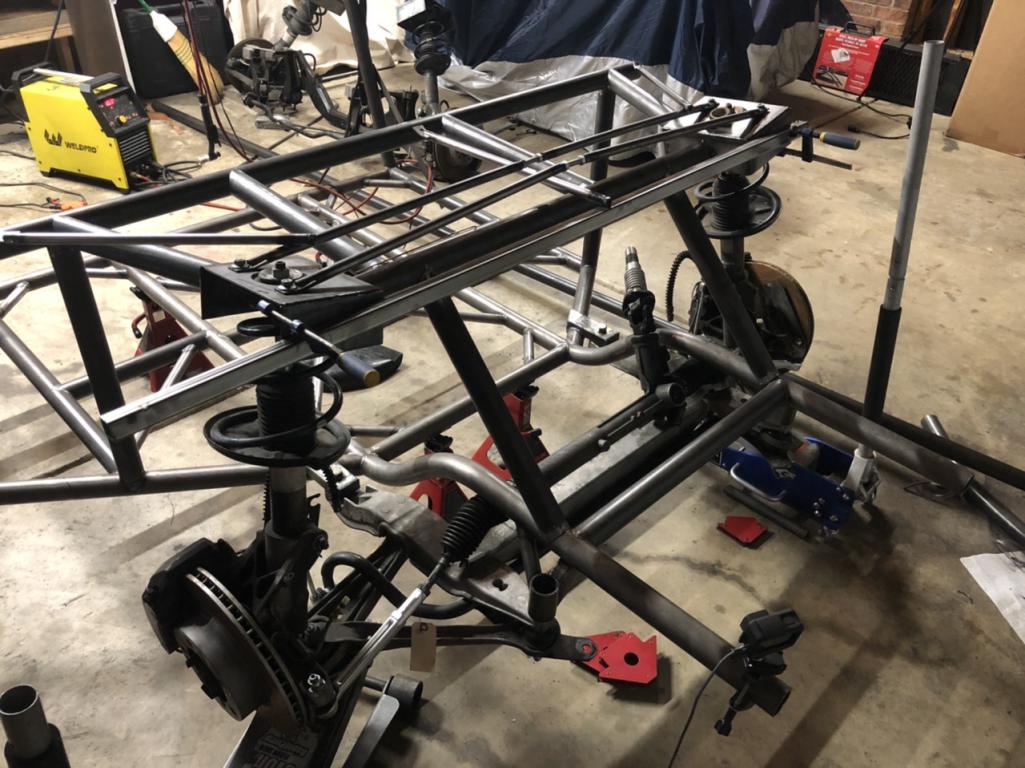
I then attempted to notch up a triangulation bar for the front section but i messed up three times on the same bar. I learned from my mistakes but dang i really wanted to start finish welding 
I did notice this thing looks like a teenager in that old school head gear, braces things. Do people still get those?
Posted by: tazz9924 May 18 2020, 09:55 PM
I can finally sleep tonight. I got that diagonal bar in with major troubles. Three attempts and a lot of hammer blows and its in.
Attached thumbnail(s)
Posted by: tazz9924 May 22 2020, 10:23 PM
I figured id give a little update. My last couple days have been anger inducing ive made little progress despite putting in a fair bit of time. Sometimes thats just the way it goes. I made a little subframe that’s mostly so i can align up the rear suspension. Im highly considering changing/redoing that again in the future, maybe tubular next time idk.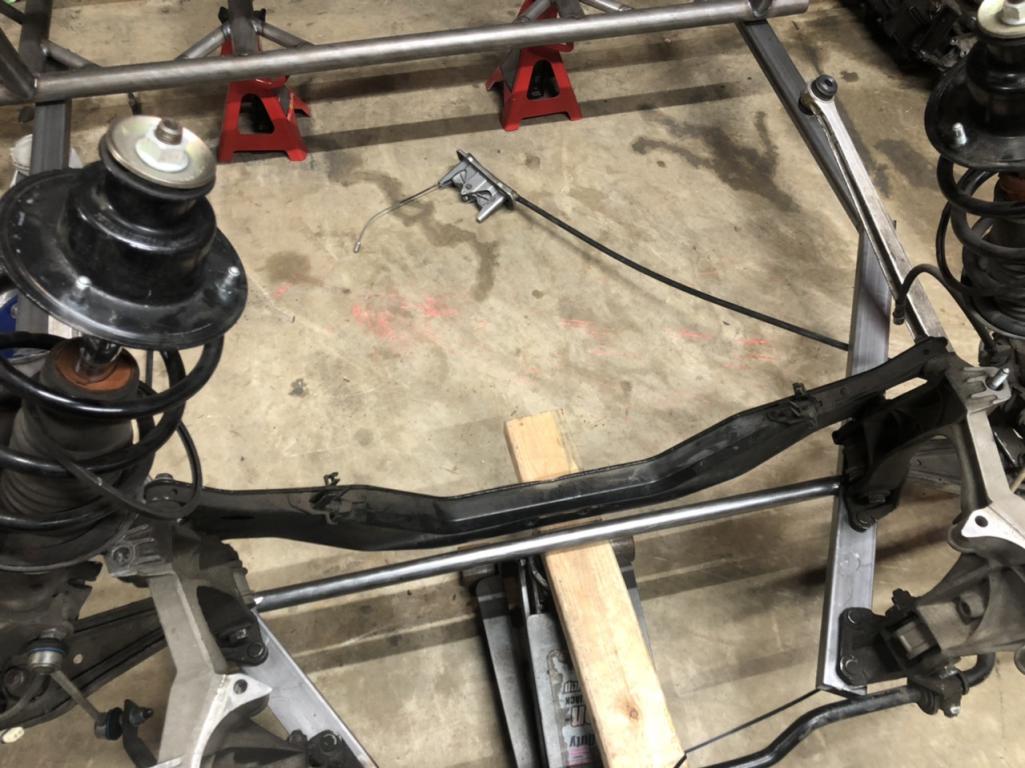
It however will serve its purpose as tomorrow i embark on finally mounting that rear suspension and making my car whole!.... a little teaser: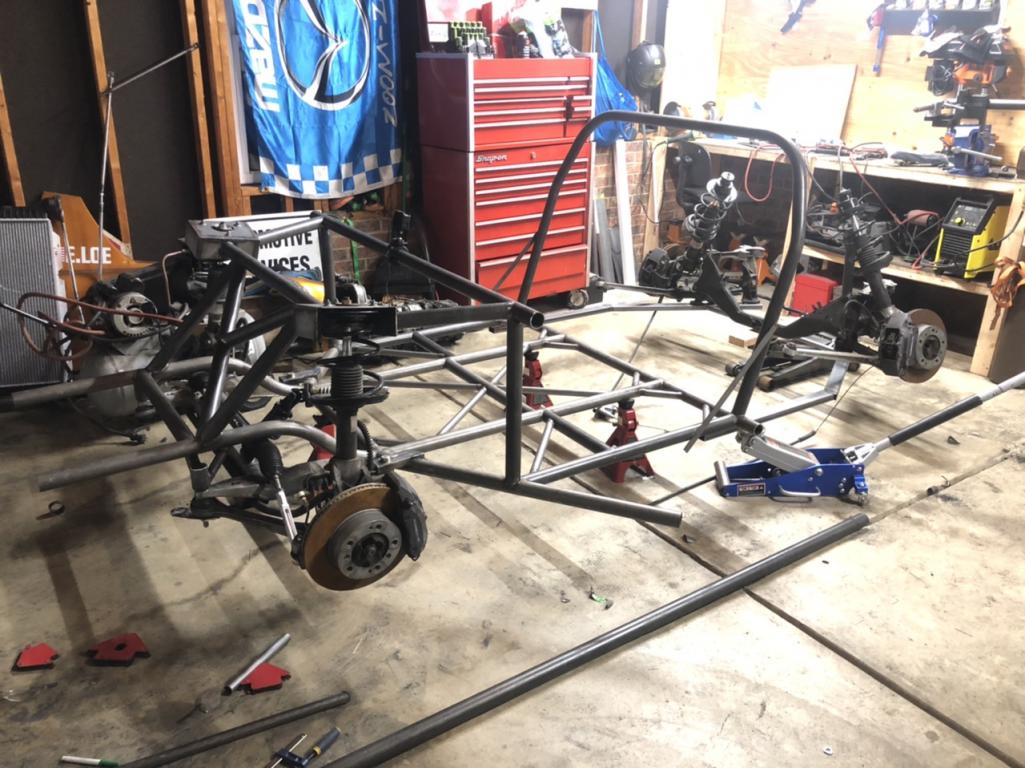
Posted by: 76-914 May 23 2020, 09:38 AM
Posted by: Andyrew May 23 2020, 08:57 PM
Good work! Fast progress! Keep it moving while you have the energy!
Posted by: 911GT2 May 24 2020, 02:46 AM
I figured id give a little update. My last couple days have been anger inducing ive made little progress despite putting in a fair bit of time. Sometimes thats just the way it goes. I made a little subframe that’s mostly so i can align up the rear suspension. Im highly considering changing/redoing that again in the future, maybe tubular next time idk.
My advice to you, step away sometimes.
I know this from experience, from building my buggy that when it feels anger inducing or like you're making little progress to something else for a while.
Let your project sit for a couple of days and get back on it when you feel motivated again.
You can't do quality work when you're frustrated. And you end up doing it twice.
Ask me how I know.
Posted by: tazz9924 May 24 2020, 08:03 AM
I figured id give a little update. My last couple days have been anger inducing ive made little progress despite putting in a fair bit of time. Sometimes thats just the way it goes. I made a little subframe that’s mostly so i can align up the rear suspension. Im highly considering changing/redoing that again in the future, maybe tubular next time idk.
My advice to you, step away sometimes.
I know this from experience, from building my buggy that when it feels anger inducing or like you're making little progress to something else for a while.
Let your project sit for a couple of days and get back on it when you feel motivated again.
You can't do quality work when you're frustrated. And you end up doing it twice.
Ask me how I know.
I know, i got a deadline because i have to move soon and id like it to roll asap. The little subframe was not of the utmost importance for the drivability of this car so i let myself do it frustrated. I cant wait to be done with this move and get a normal life back
Posted by: tazz9924 May 25 2020, 06:31 AM
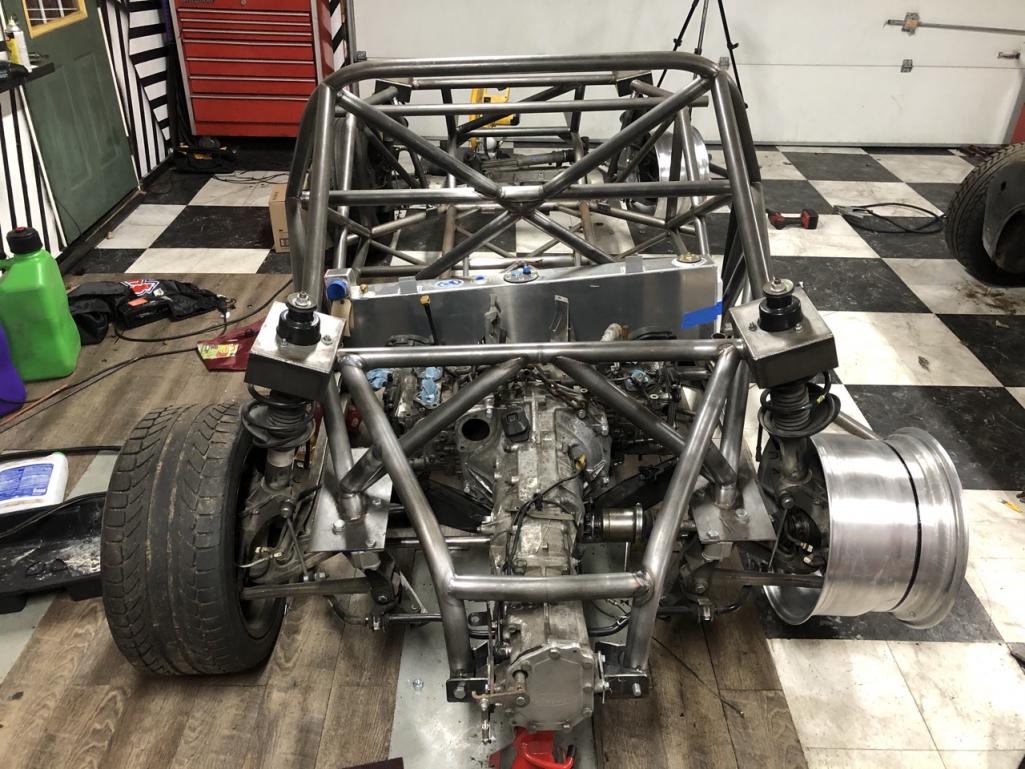
Sunday was a big day. After spending most of the day outside in the garage i completed a lot of things i needed done. First i made some spacers and mounting plates for the rear subframe mount. Some plasma cutter and like an hour of grinding later and they came out great. (i forgot to take a picture) Next i made up a ( shaped bar to connect those plates together, made another one of those fancy camber bars that go between the struts. I lined it all up and tacked it together and presto! Our first picture. 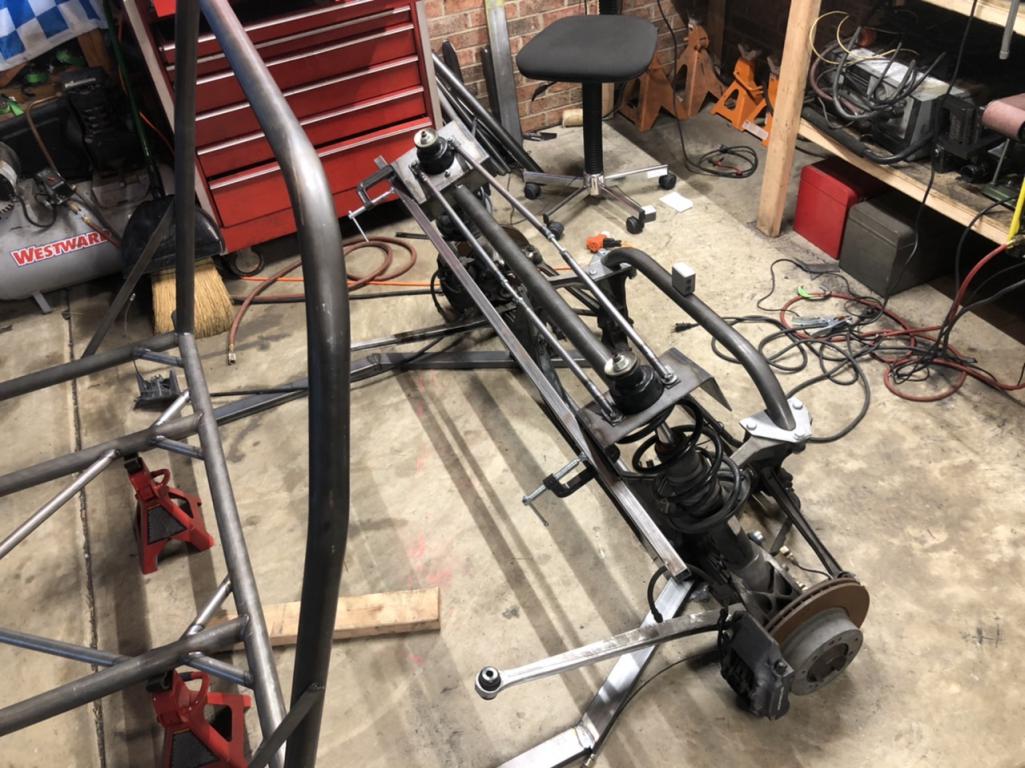
I decided that i needed to change the subframe i already built and didn’t like, so i did. I made it slightly thinner which helped it fit between the main hoop better and cut it to length which helps with the wheelbase issue. 
Now came the moment i had been waiting for; Time to put it all together and line it up. First i used a trusty ratchet strap to align the rear stuts to their proper angle. Simultaneously i had the subframe up on a jack with a piece of wood to balance it. I used my other jack, a new drill in a box, lots of scrap metal, and some card board to set the subframe height at the chassis. Its ghetto but it worked. I then got the correct rake of rear subframe. 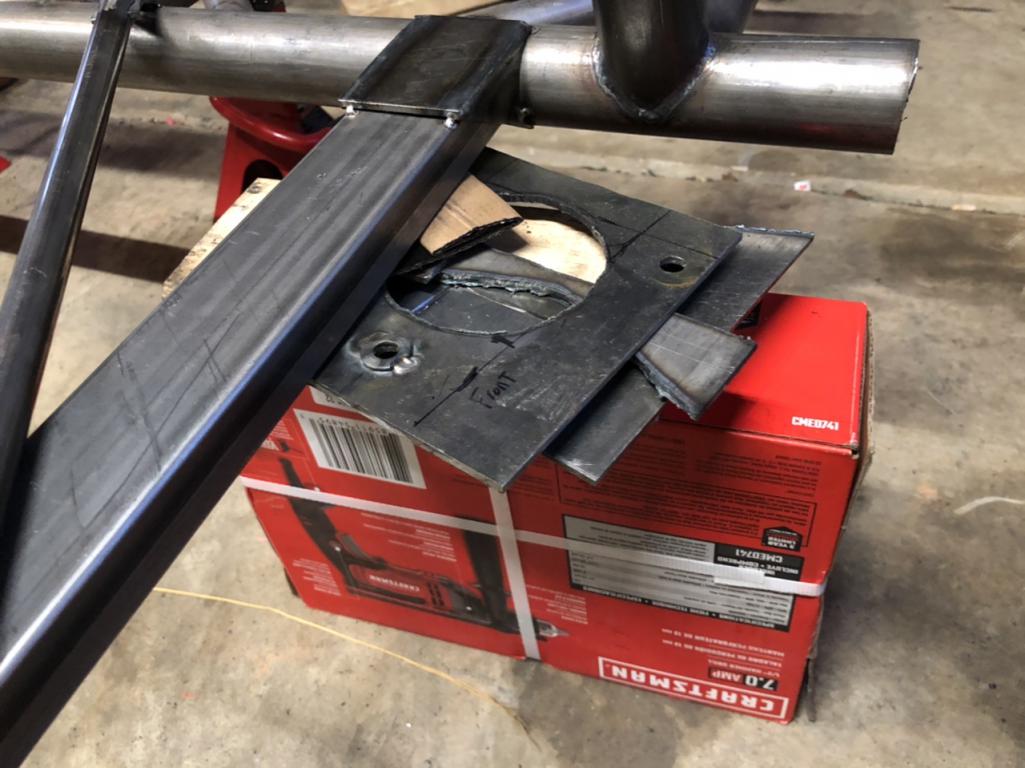
Next i setup a string alignment setup to make sure the subframe was center left to right. At some point i had to sit down and stare at it because this took like two hours to line up. But finally i got to tack everything in place and thats where we are now!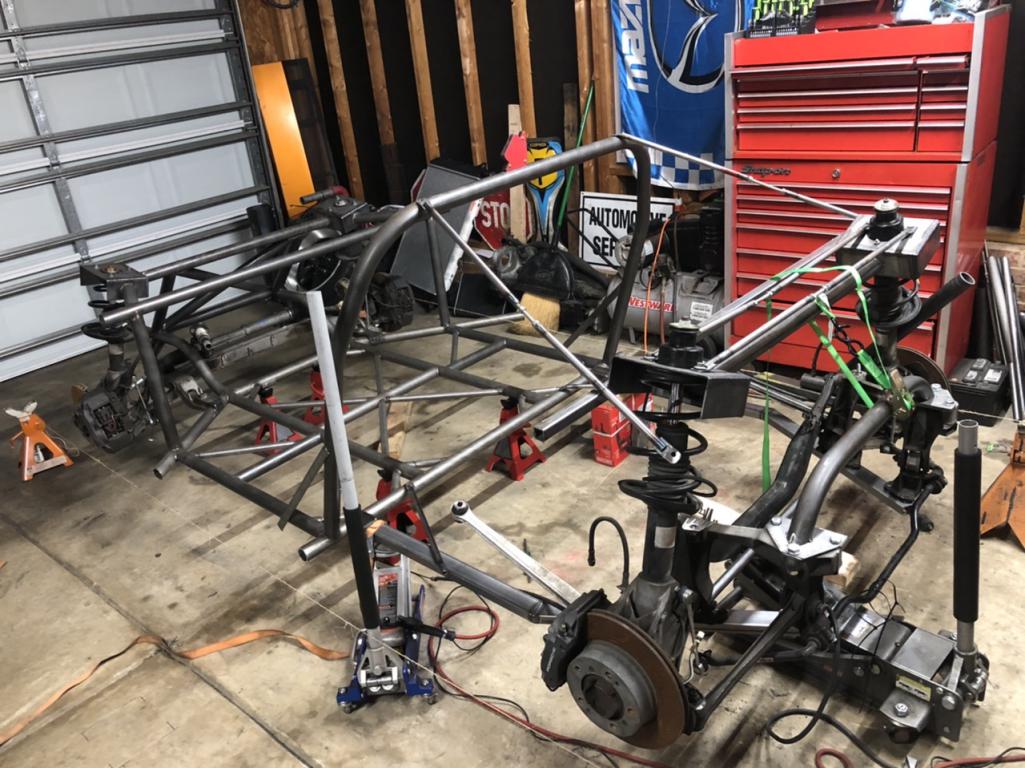
Posted by: tazz9924 Jun 3 2020, 06:35 AM
Quick update: i picked up my doner car today! I put it in my nee trendy looking shop 
And next to my daily driver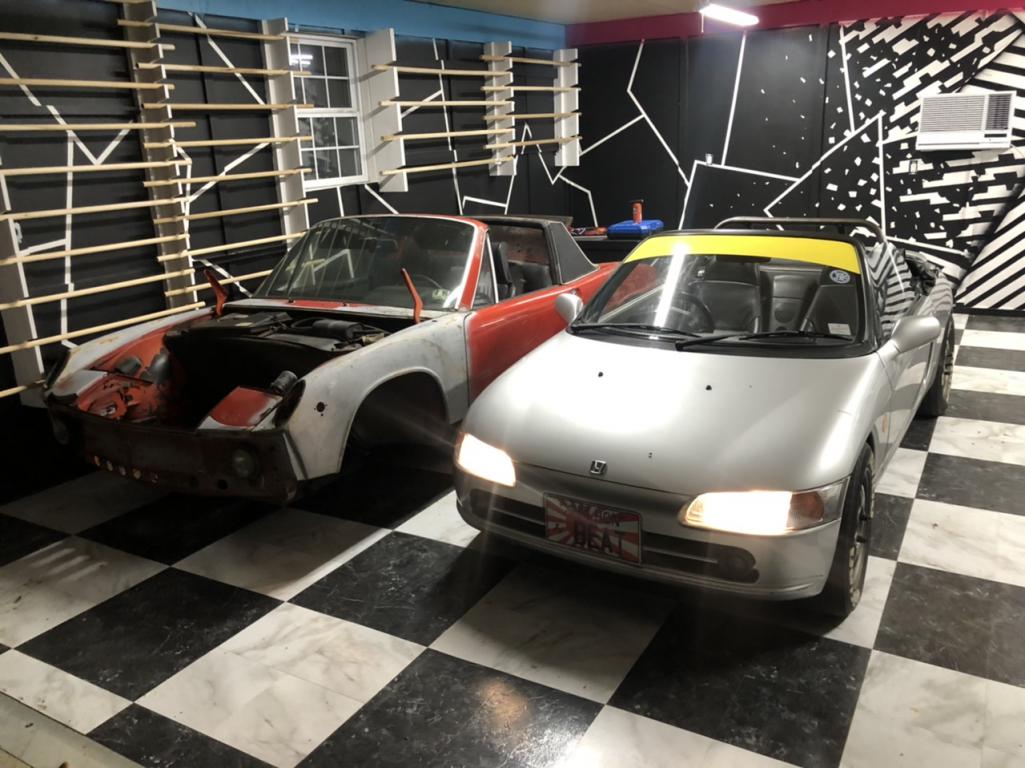
Posted by: tazz9924 Jun 21 2020, 07:55 PM
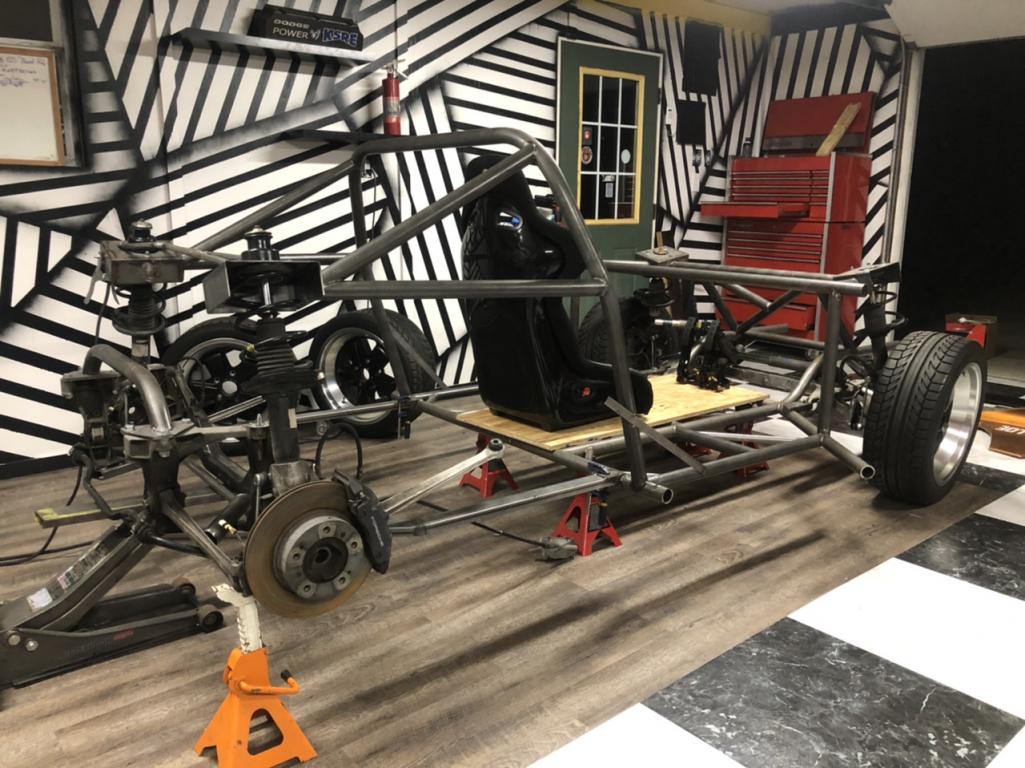
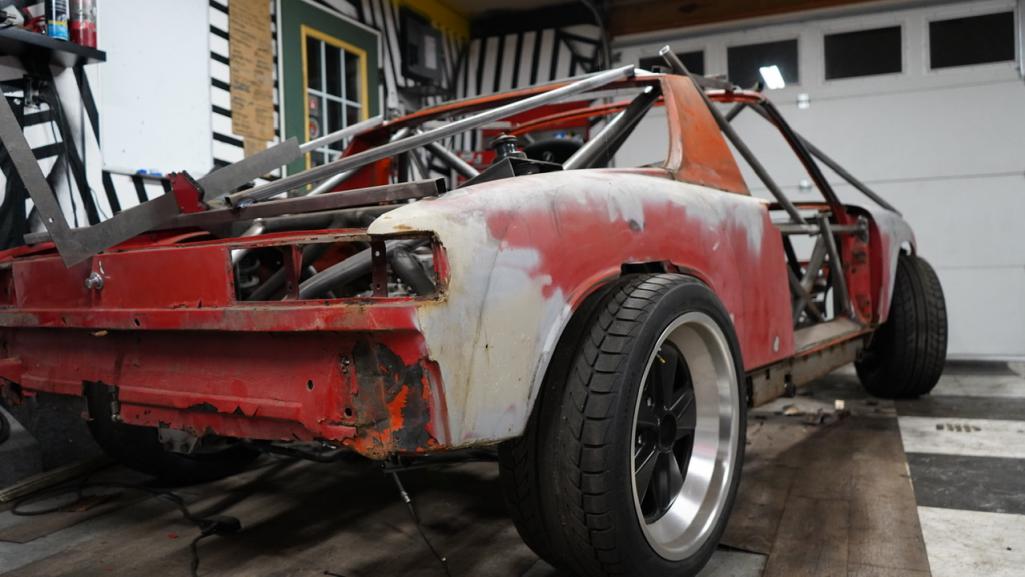
A lot of progress! ill be brief because im tired but i basically reversed a week of work by cutting the back half apart allowing me to move houses. Next i set up my garage and car and got to work. I leveled the chassis and began work on the rear suspension in many many frustrating hours of work paid off by being able to sut back and look at what ive done. 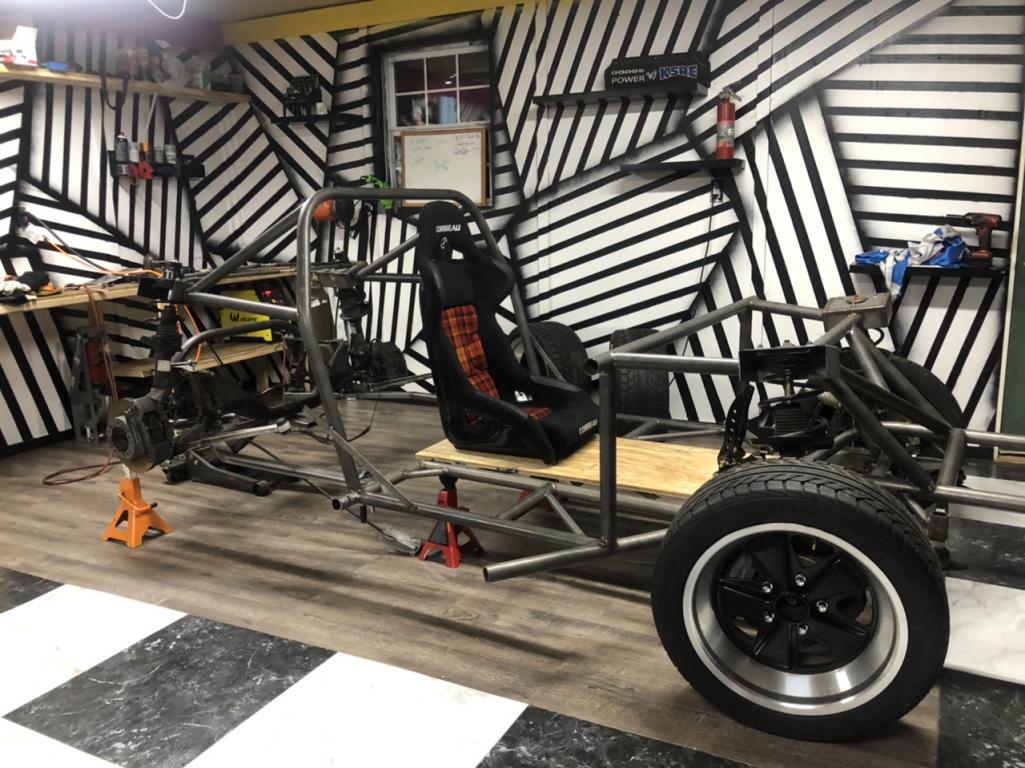
Posted by: bkrantz Jun 21 2020, 09:37 PM
I get dizzy looking at the tubing angles in front of those "creative" wall designs. Are you sure things are straight?
Posted by: Andyrew Jun 22 2020, 10:09 AM
Sweet! Love the progress!
Posted by: Andyrew Jun 22 2020, 10:09 AM
Also that Beat is Sweet!!!
Posted by: tazz9924 Jun 22 2020, 12:13 PM
I get dizzy looking at the tubing angles in front of those "creative" wall designs. Are you sure things are straight?
Oh i know! i had to put up a shelf and i was totally convinced it wasn’t level, it drove me crazy
Posted by: tazz9924 Jun 22 2020, 09:16 PM
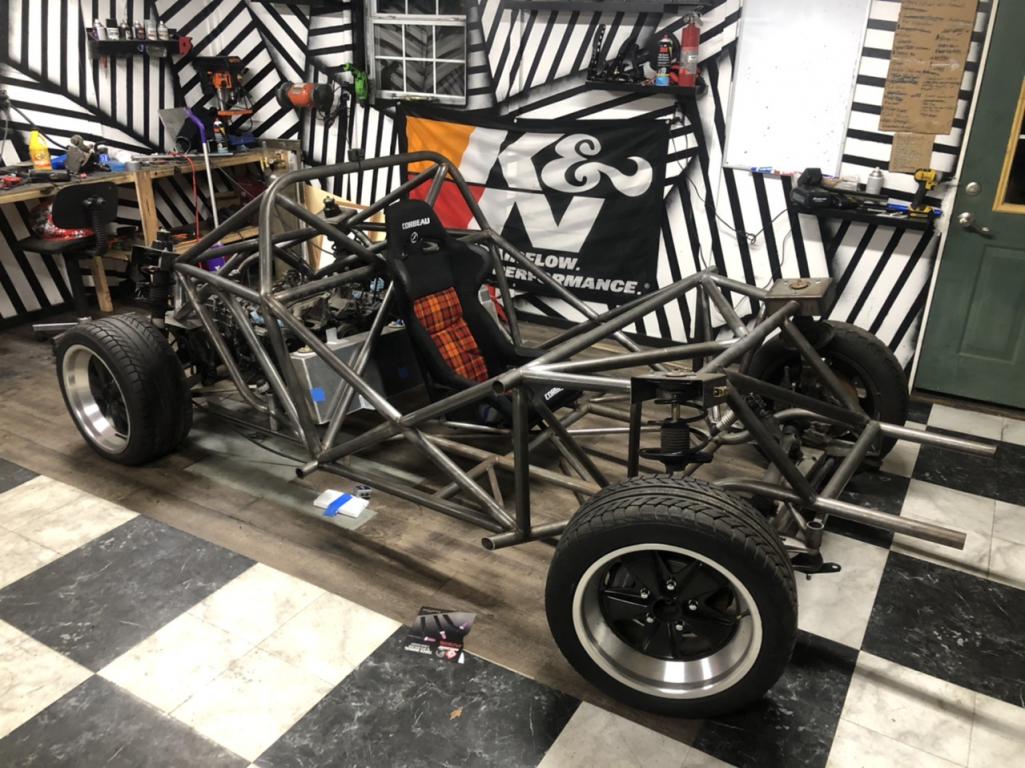
Its a roller kinda! I added a strut bar on the back and let the jack rip. Unfortunately i still need to “mount” the subframe. At the very least better, because as it rolls its held by hopes and dreams. But hey its celebration time 
Two of the bars are temporary that are on the subframe btw. 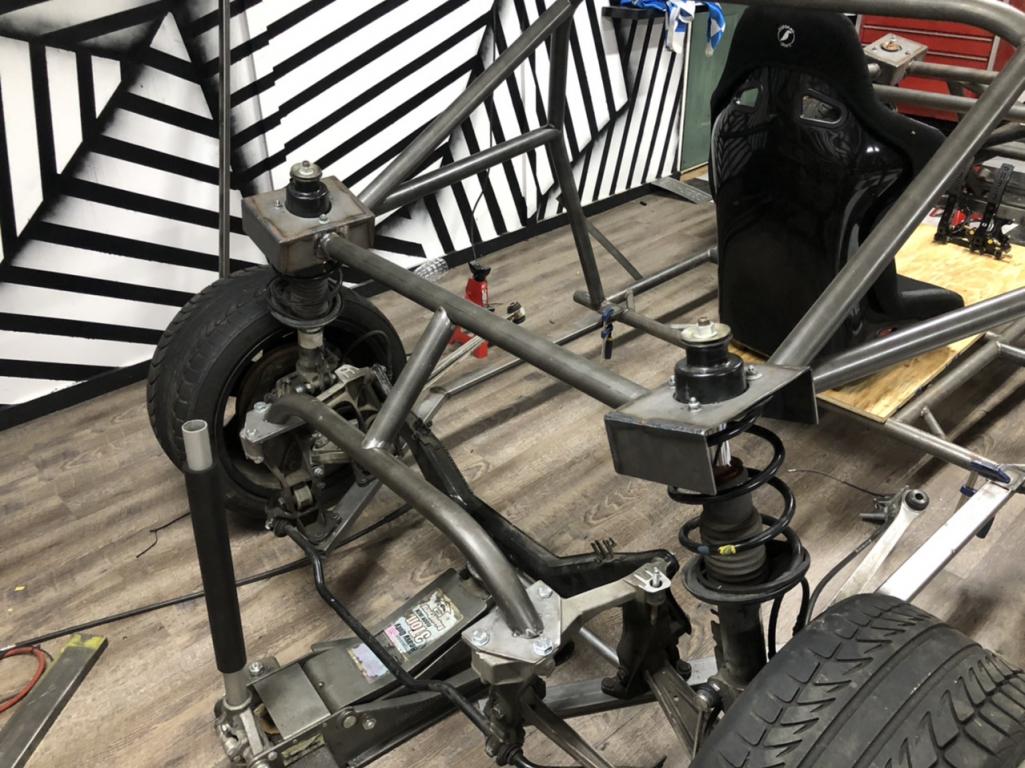
Posted by: Carbon-14 Jun 23 2020, 04:20 AM
Observations from afar,
looking forward to the 914 skins, suitably modified to be sleek, a stiff chassis to allow competitive performance.
Subaru power, should go, like.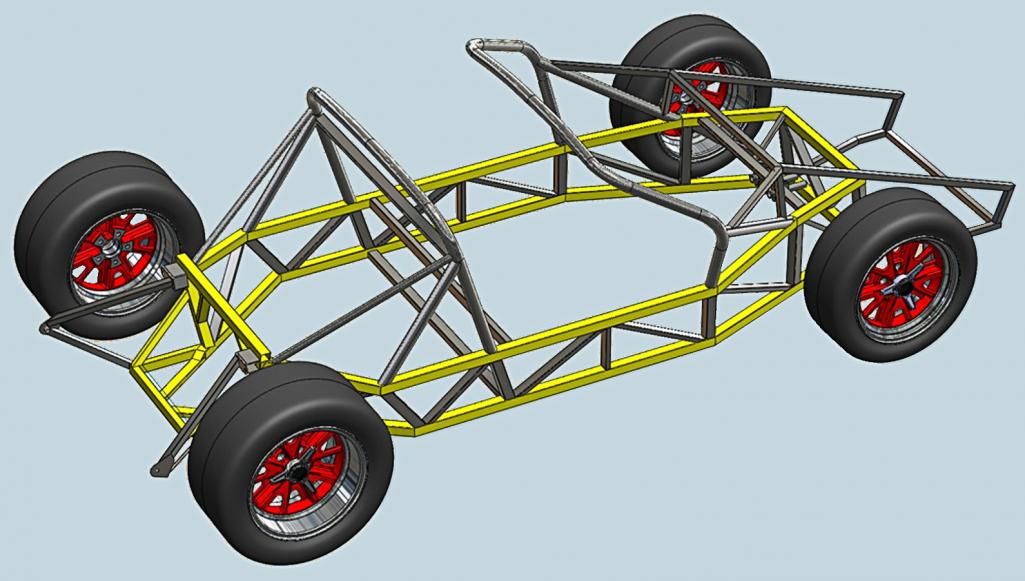
SolidWorks or a similar cad sw.
Basically, a GT40 replica's tube chassis, modelled in balsa, or Z88 fea, to plan the performance and weight.
https://www.google.com/search?q=tube+chassis+design+basics&source=lnms&tbm=isch&sa=X&ved=2ahUKEwiLk-Tr0pfqAhUih-AKHbLHBwoQ_AUoAXoECBAQAw&biw=1540&bih=746
https://fem-heroes.org/example-structural-elements-for-the-design-of-a-tubular-frame/
https://www.youtube.com/watch?time_continue=22&v=SQw9DFo8R5A&feature=emb_logo
https://www.ansys.com/about-ansys/advantage-magazine/volume-xiii-issue-1-2019/framing-a-lighter-stronger-race-car
Posted by: Carbon-14 Jun 23 2020, 04:26 AM
Those new fangled jackstands have me wishing they were wired shut, to insure they don't collapse, snafu.
Be safe.
Posted by: tazz9924 Jun 23 2020, 06:11 AM
Those new fangled jackstands have me wishing they were wired shut, to insure they don't collapse, snafu.
Be safe.
They arent the harbor freight ones, they are some amazon brand. So hopefully death isnt close?
Posted by: tazz9924 Jun 23 2020, 06:13 AM
Observations from afar,
looking forward to the 914 skins, suitably modified to be sleek, a stiff chassis to allow competitive performance.
Subaru power, should go, like.
SolidWorks or a similar cad sw.
Basically, a GT40 replica's tube chassis, modelled in balsa, or Z88 fea, to plan the performance and weight.
https://www.google.com/search?q=tube+chassis+design+basics&source=lnms&tbm=isch&sa=X&ved=2ahUKEwiLk-Tr0pfqAhUih-AKHbLHBwoQ_AUoAXoECBAQAw&biw=1540&bih=746
https://fem-heroes.org/example-structural-elements-for-the-design-of-a-tubular-frame/
https://www.youtube.com/watch?time_continue=22&v=SQw9DFo8R5A&feature=emb_logo
https://www.ansys.com/about-ansys/advantage-magazine/volume-xiii-issue-1-2019/framing-a-lighter-stronger-race-car
The rear section looks quite similar to what i have planed. I just have to change it a bit because i dont have any good mounting spots on the subframe to allow me to do that exactly.
Posted by: Carbon-14 Jun 23 2020, 07:53 AM
https://www.youtube.com/watch?v=ct7vmJkbt60
Information overloading, to determine the rigidity and weight of the chassis, from Maserati birdcage, to Porsche 918.
Lighter, stronger, stiffer, faster, quicker, all the factors of a homebuilt -14. Have mig, will travel.
https://www.caelinux.com/CMS3/
https://openscholarship.wustl.edu/cgi/viewcontent.cgi?article=1073&context=mems411
http://www.vintageperformancemotorcars.com/completed%20frame.htm
https://www.code-aster.org/V2/spip.php?article912
https://www.finiteelementanalysis.com.au/featured/guest-blog-curtin-motorsport/
.
Posted by: tazz9924 Jun 26 2020, 08:39 PM
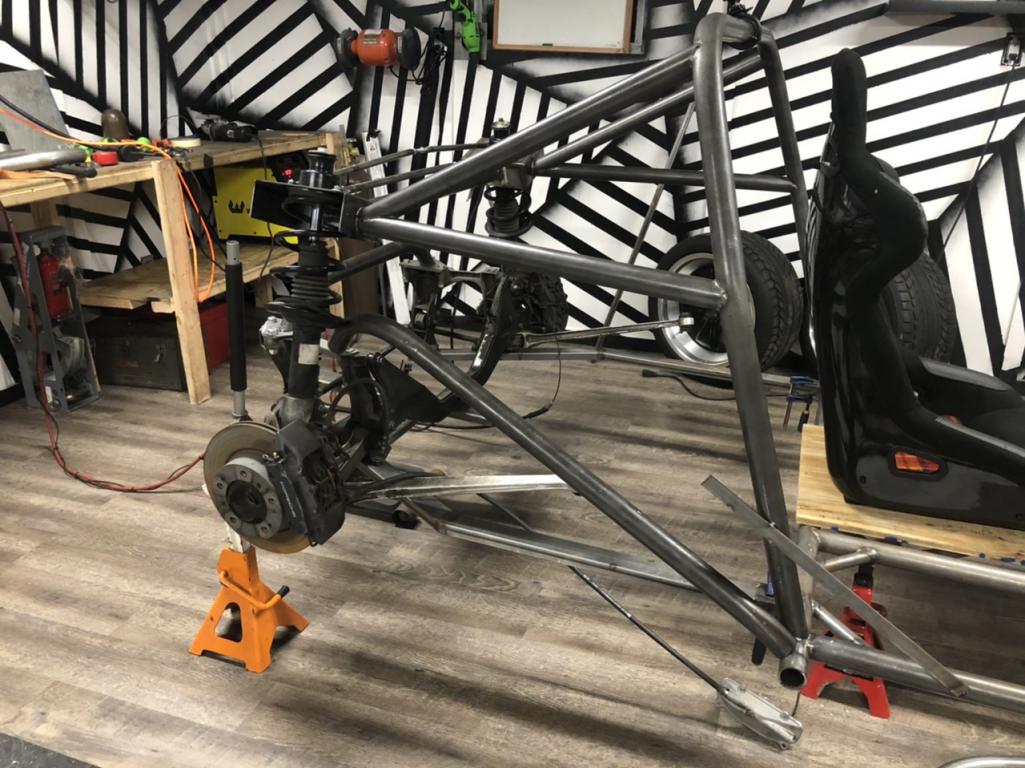
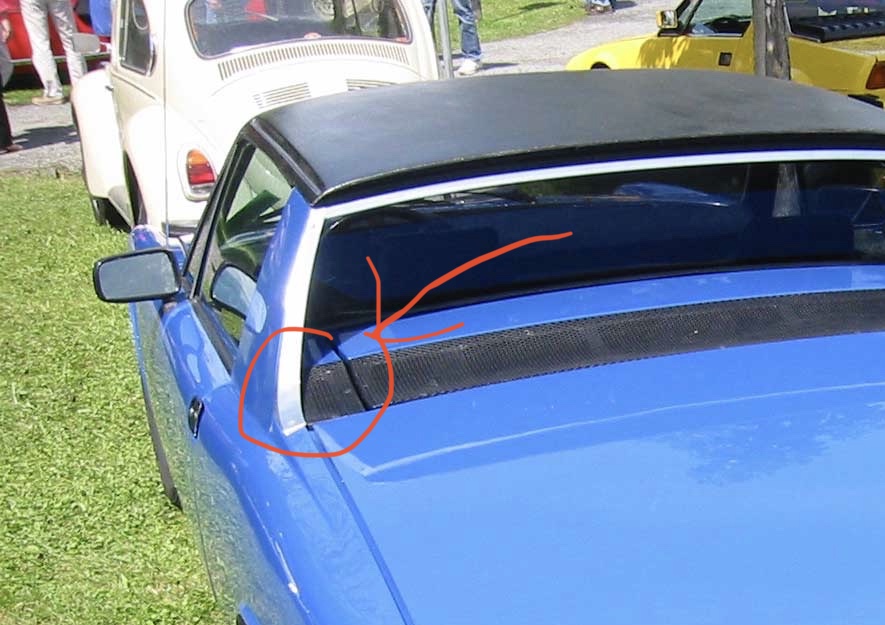
Ill admit im a little stumped... Call it: i want to make the best decision but require the input of others to feel comfortable. So i need to mount the rear subframe but unlike most of the stages so far this to me seems less obvious. My big issue is how to best mount it when the mounting plate is 90 degrees to the direction my bars are coming at. Heres a picture of what im dealing with: (the red highlights are the subframes mounting spots)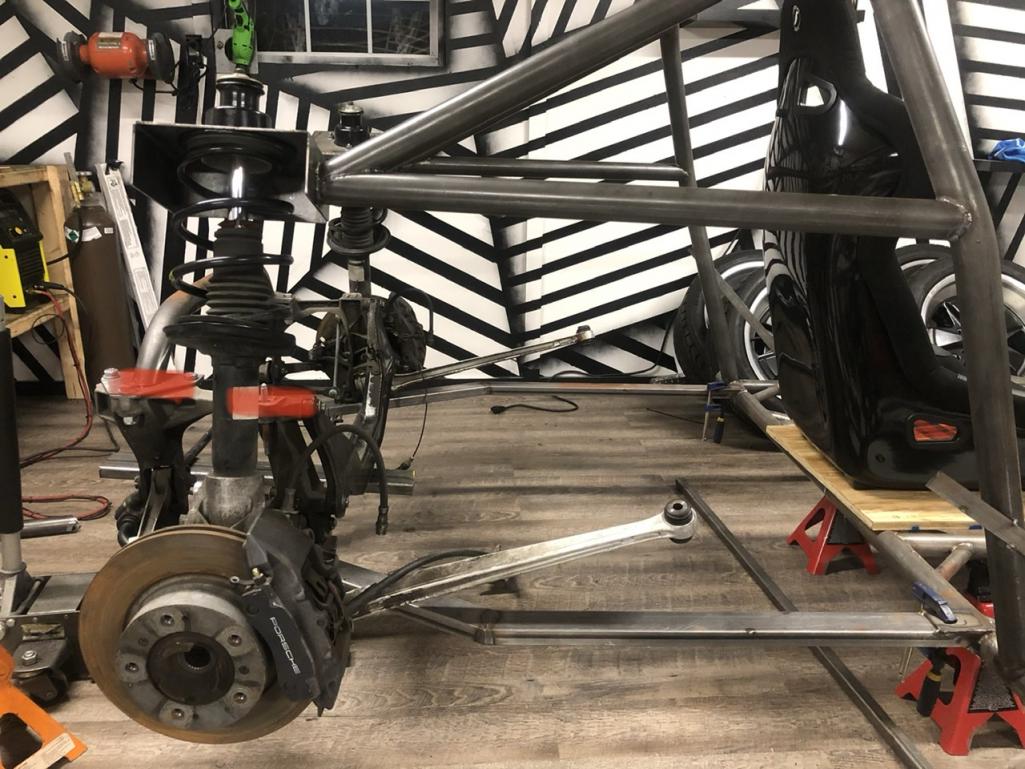
I also have a nifty drawing showing where the trans will sorta sit when its on: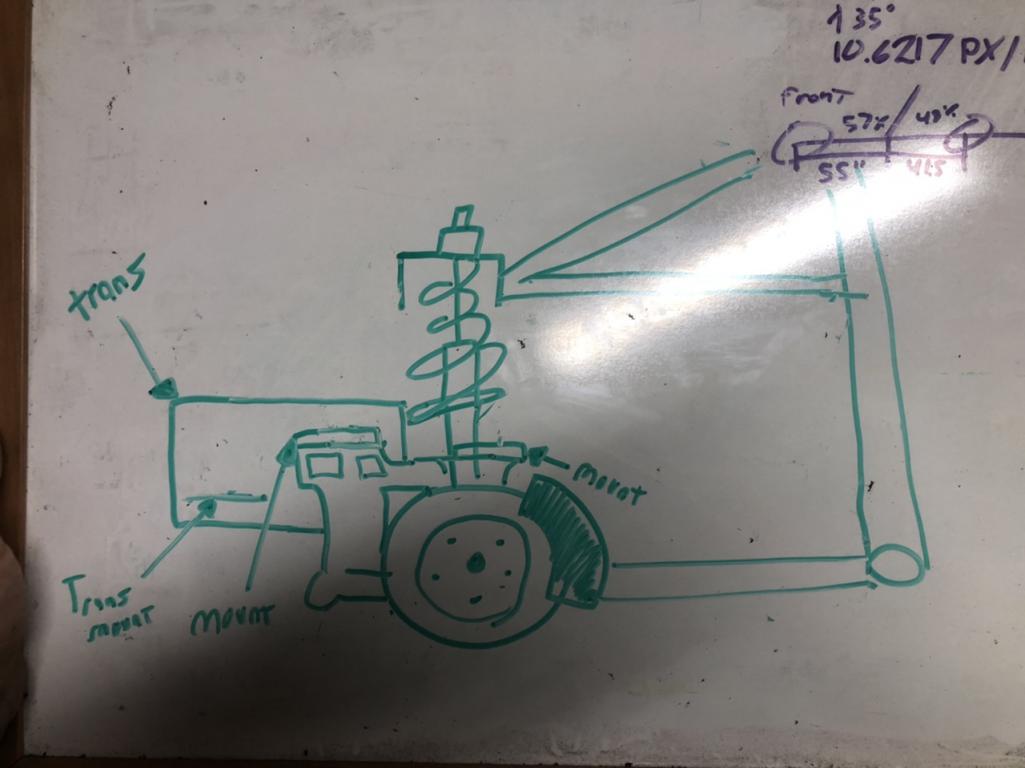
My initial reaction is to add a bent tube meeting up with the bottom of the main hoop and some tubes linking the bar above it with the bent tube shown:
Alternatively i could add a tube with just a 90 bend in it meeting up maybe 6 inches lower than the parallel bar above it kinda like this with some more reinforcement tubes:
This is my dilema, any input is appreciated. Even just linking someone engineeringly minded would help my cause!
@http://www.914world.com/bbs2/index.php?showuser=24238 ?
Posted by: 76-914 Jun 26 2020, 10:41 PM
Ill admit im a little stumped... Call it: i want to make the best decision but require the input of others to feel comfortable. So i need to mount the rear subframe but unlike most of the stages so far this to me seems less obvious. My big issue is how to best mount it when the mounting plate is 90 degrees to the direction my bars are coming at. Heres a picture of what im dealing with: (the red highlights are the subframes mounting spots)
I also have a nifty drawing showing where the trans will sorta sit when its on:
My initial reaction is to add a bent tube meeting up with the bottom of the main hoop and some tubes linking the bar above it with the bent tube shown:
Alternatively i could add a tube with just a 90 bend in it meeting up maybe 6 inches lower than the parallel bar above it kinda like this with some more reinforcement tubes:
This is my dilema, any input is appreciated. Even just linking someone engineeringly minded would help my cause!
@http://www.914world.com/bbs2/index.php?showuser=24238 ?
Pm curbandgutter. I was just talking to him about your car. He is finished with his tube frame build. Well that portion any way. His is stretched and widened. Rudy is his name @http://www.914world.com/bbs2/index.php?showuser=15637
Posted by: Carbon-14 Jun 26 2020, 11:07 PM
https://www.youtube.com/watch?v=MjkLr9CWlHk
https://robotics.ee.uwa.edu.au/theses/2011-REV-SAE-SpaceFrame-Waterman.pdf
The references noted are good reads to get a handle on building a stiff chassis, like the racers of the past seventy years. Compromises and assumed risk are some of the factors in welding up the frame, testing it's strength and performance on the skid pad. There is an incredible wealth of information and examples and now, available software to simulate and stress test the cages, chassis, and suspensions.
The answers to all the questions are there, and for sure it's all been tried before.
For casual street use, a less substantial box would be enough, a racing cage would of course be much more robust, heavier and neccessarily torsionally stiffer, some survivability built in. Twelve hundred horsepower turbo engine in an 1800 lb racecar would be very quick, if kept under control, while racing.
Looking forward to the solutions and installations of the drivetrain and suspension.
https://www.youtube.com/watch?v=iIKHocge9Sc
Posted by: tazz9924 Jun 28 2020, 05:55 PM
I have an easily digestible build up date in the form of a youtube video!
https://www.youtube.com/watch?v=5jXG65IEicw
I also have a good regular update coming up!
Posted by: EdwardBlume Jun 28 2020, 09:47 PM
Damn this thread is sexy! 
Posted by: andrewb Jun 29 2020, 07:37 AM
I always love the famous 'can do' attitude of you Americans. No surprise that there have been so many amazing achievements that depended on guts and determination.
I was already gobsmacked (that's a good old English word) when this thread started that someone could just kick off with a bare garage floor and build a tubeframe chassis from nothing. Just for kicks he then moves to a psychedelic chamber - to make it even harder ??
And then the welding mask comes off .................and he's young enough to be ....I dunno, I give up. Utmost respect to you Elliott - how you've achieved those skills and depths of understanding in such a short time I'll never know. I wonder what you'll be achieving in 10 more years. Keep it up.
Regards
Andrew
Posted by: tazz9924 Jun 29 2020, 11:39 AM
I always love the famous 'can do' attitude of you Americans. No surprise that there have been so many amazing achievements that depended on guts and determination.
I was already gobsmacked (that's a good old English word) when this thread started that someone could just kick off with a bare garage floor and build a tubeframe chassis from nothing. Just for kicks he then moves to a psychedelic chamber - to make it even harder ??
And then the welding mask comes off .................and he's young enough to be ....I dunno, I give up. Utmost respect to you Elliott - how you've achieved those skills and depths of understanding in such a short time I'll never know. I wonder what you'll be achieving in 10 more years. Keep it up.
Regards
Andrew
I appreciate the kind words, you have a good one!
Posted by: tazz9924 Jun 29 2020, 11:43 AM
Ok this is the last update for probably a couple weeks because i have to go racing in wyoming, but, i settled on a design to tie in the rear subframe. This involved one tube bend and then notched in three places. I didn’t know if id like it going in, but it came out killer. Thanks to my chassis builder friend who suggested the idea, then helped me build it!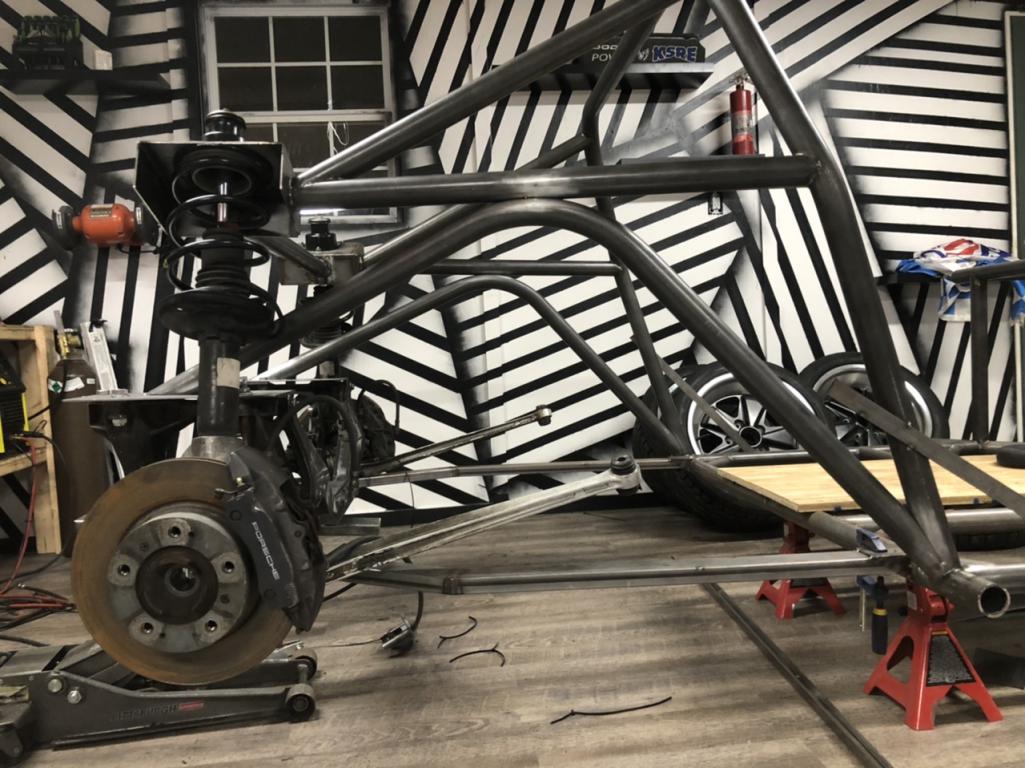
Posted by: rhodyguy Jun 29 2020, 02:02 PM
Are you back in Tacoma?
Posted by: tazz9924 Jun 29 2020, 07:08 PM
Are you back in Tacoma?
No NC i wont be back till december
Posted by: tazz9924 Aug 2 2020, 06:35 PM
Just something quick; i added some tubes out the back to link the subframe and the struts together. Oh and im finally back from my trip to wyoming!
Attached thumbnail(s)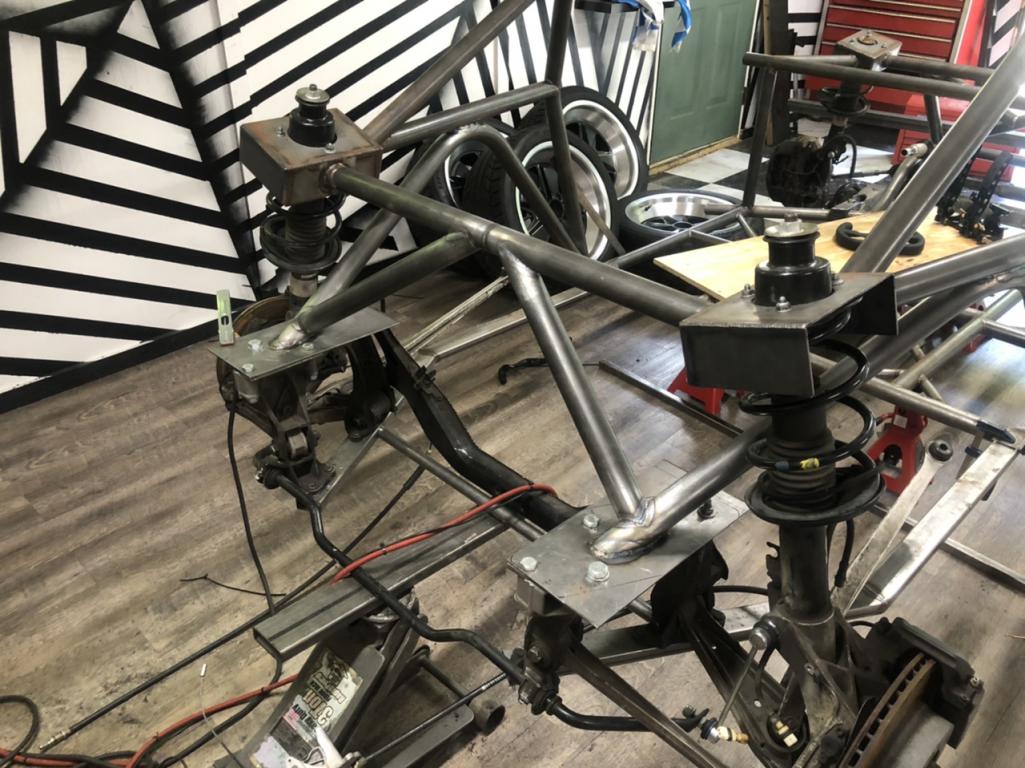
Posted by: tazz9924 Aug 6 2020, 09:11 PM
After a day of side projects, I came back today and finished the main tube of the door bars. they turned out great!
Attached thumbnail(s)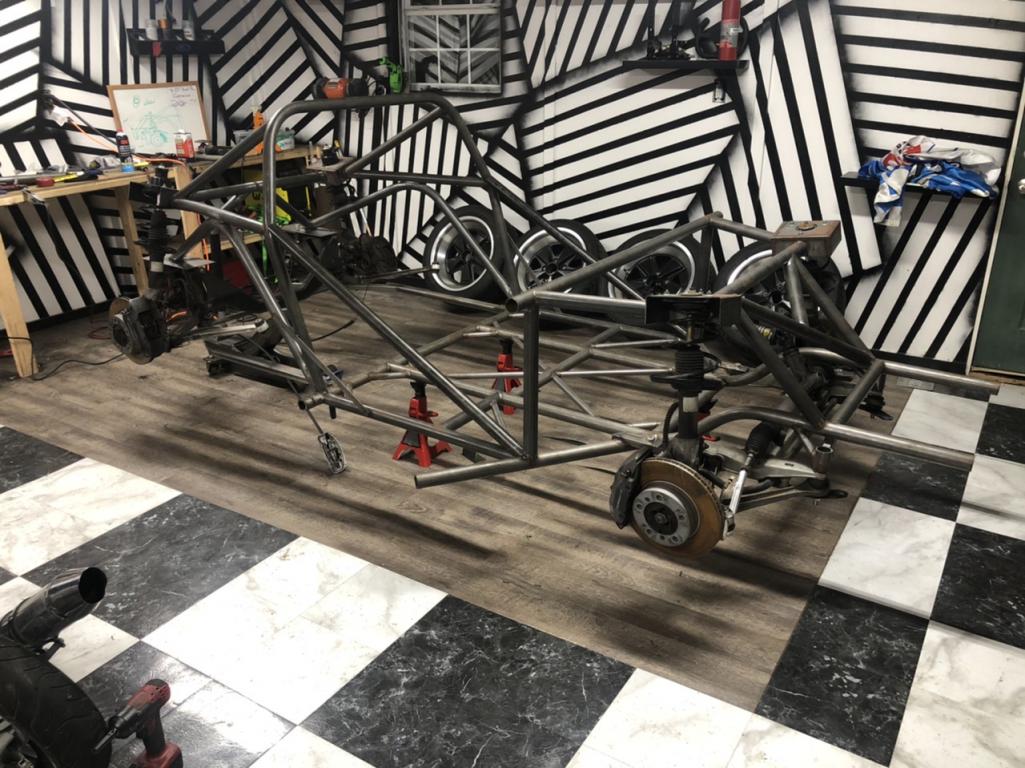
Posted by: tazz9924 Aug 7 2020, 09:54 PM
Short day, finished notching passenger side(?) door bar. Did i mention i plan on this being a single seater?
Attached thumbnail(s)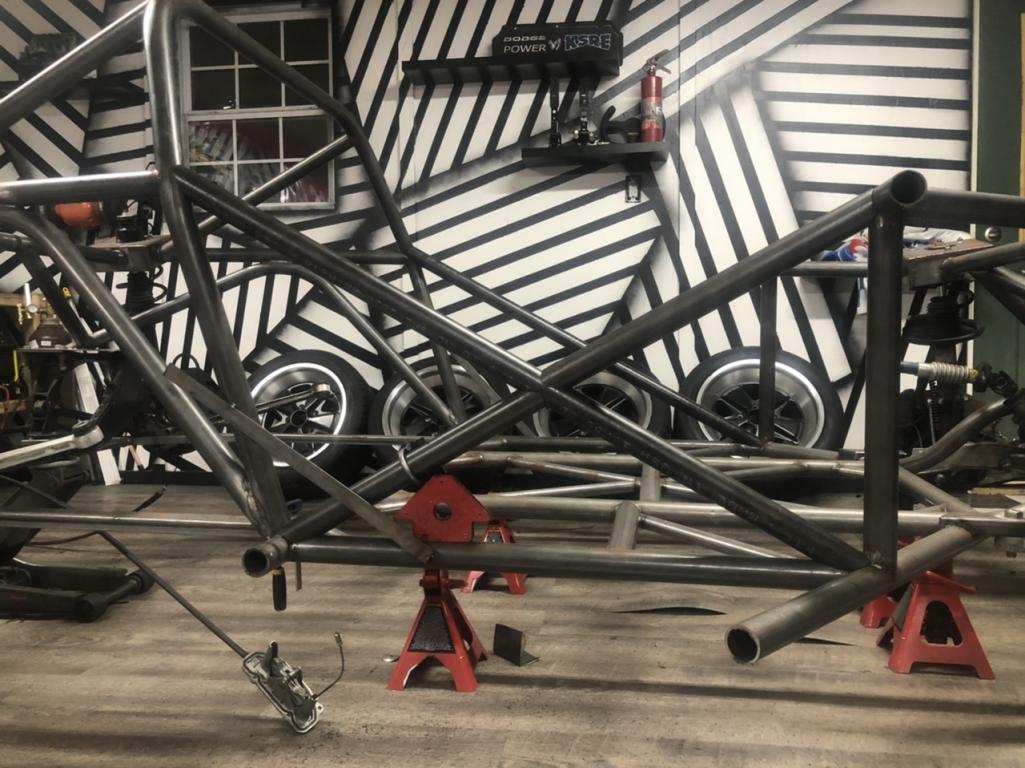
Posted by: tazz9924 Aug 8 2020, 08:43 PM
Keeping up the daily updates, i built the other half of the door bars and i started welding in the bars! I mocked up the a pillar (i held up two bars) and i seemed to forget how small the window is on these cars. Even worse is i plan on putting an anti crush bar that goes from the floor by your feet to the tip of the a pillar so in a roll over the A pillar doesn’t fold in. Anyway point is its gonna be a little hard to get into no matter what you do I THINK, small race car syndrome.
Attached thumbnail(s)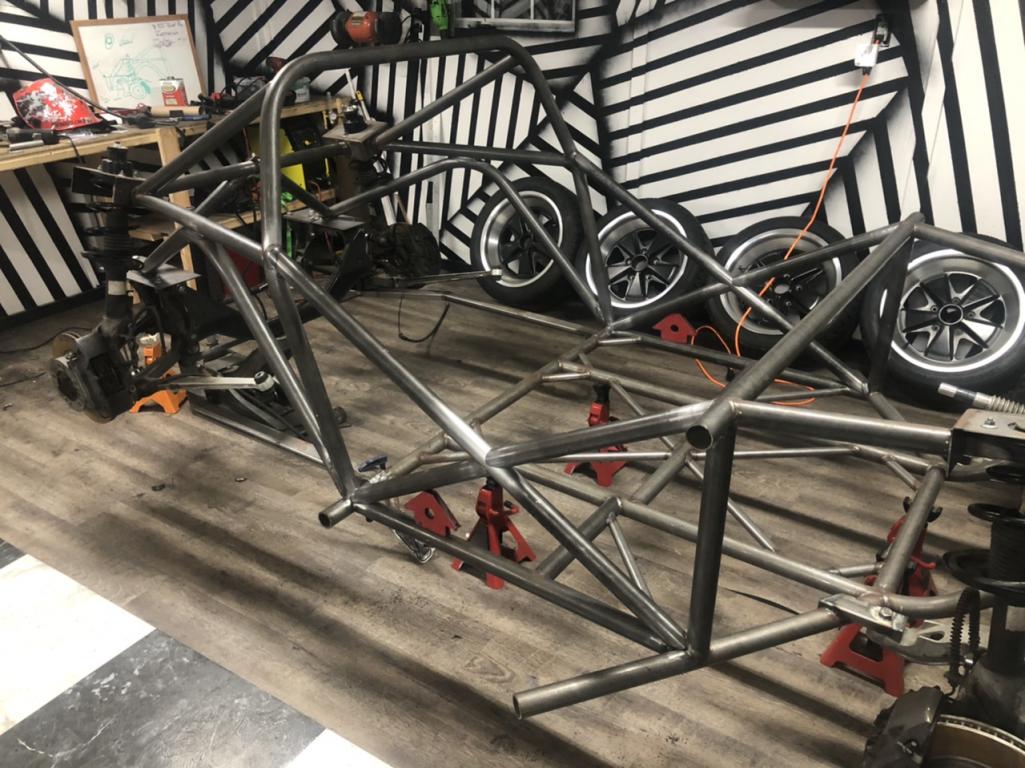
Posted by: djway Aug 9 2020, 12:31 AM
Tubular, Totally...
Posted by: tazz9924 Aug 9 2020, 09:02 PM
Finished welding on the door bars and my god was it a struggle for no good reason, it was just one of those days where you touch the tungsten non stop. It turned out really good so im not worried about it. ¯\_(ツ)_/¯
I set it back on its wheels because it felt like the right thing to do... and it was.
Attached thumbnail(s)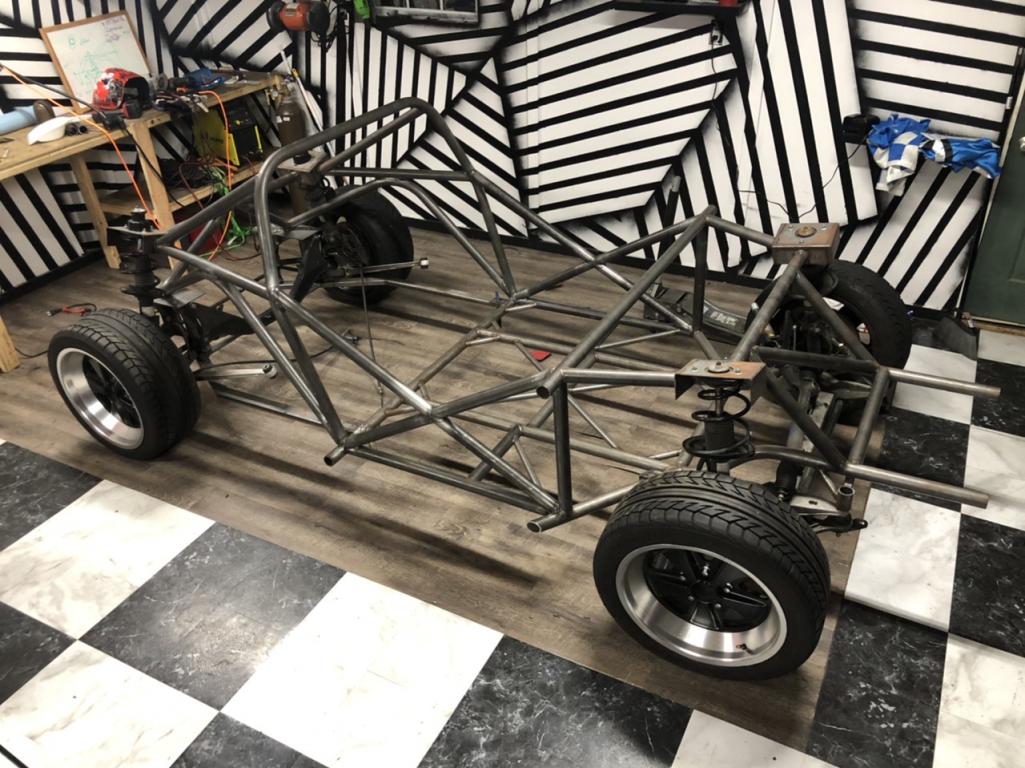
Posted by: tazz9924 Aug 12 2020, 12:23 PM
I got the old ej off of its sketchy perch and onto an engine stand. I gave it a much needed gunk treatment and undressed it  to make it easier to mock into place
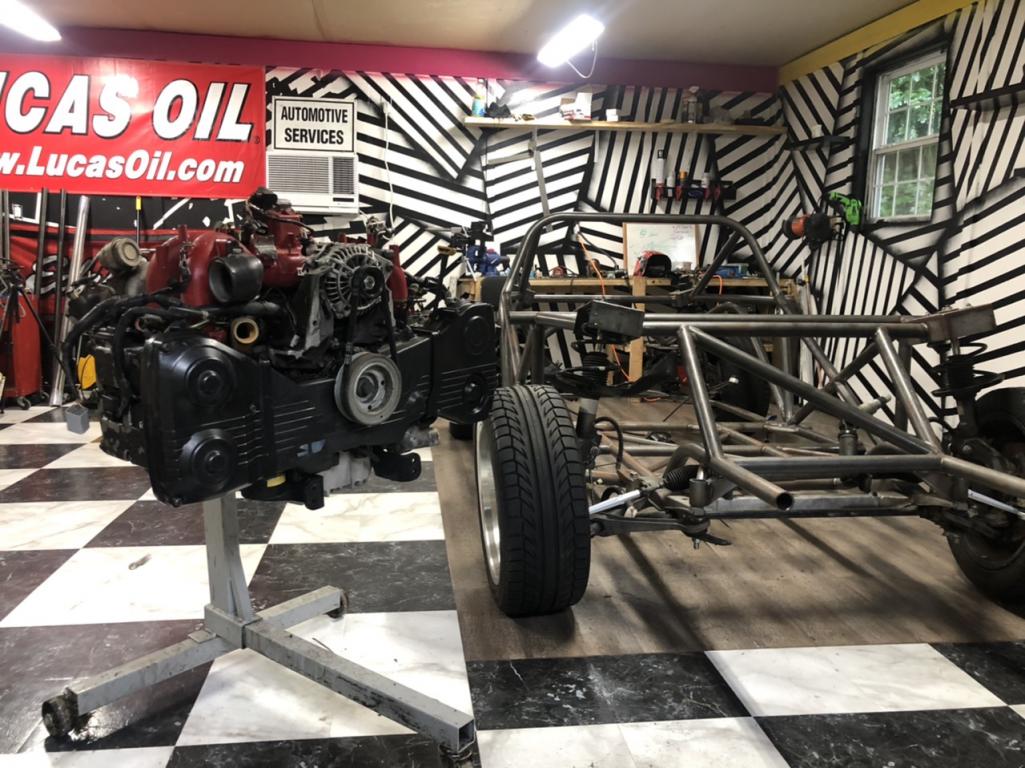
Sketch perch: (ps that tool box its on is called a stack on, which i think i did to its full potential)
Attached thumbnail(s)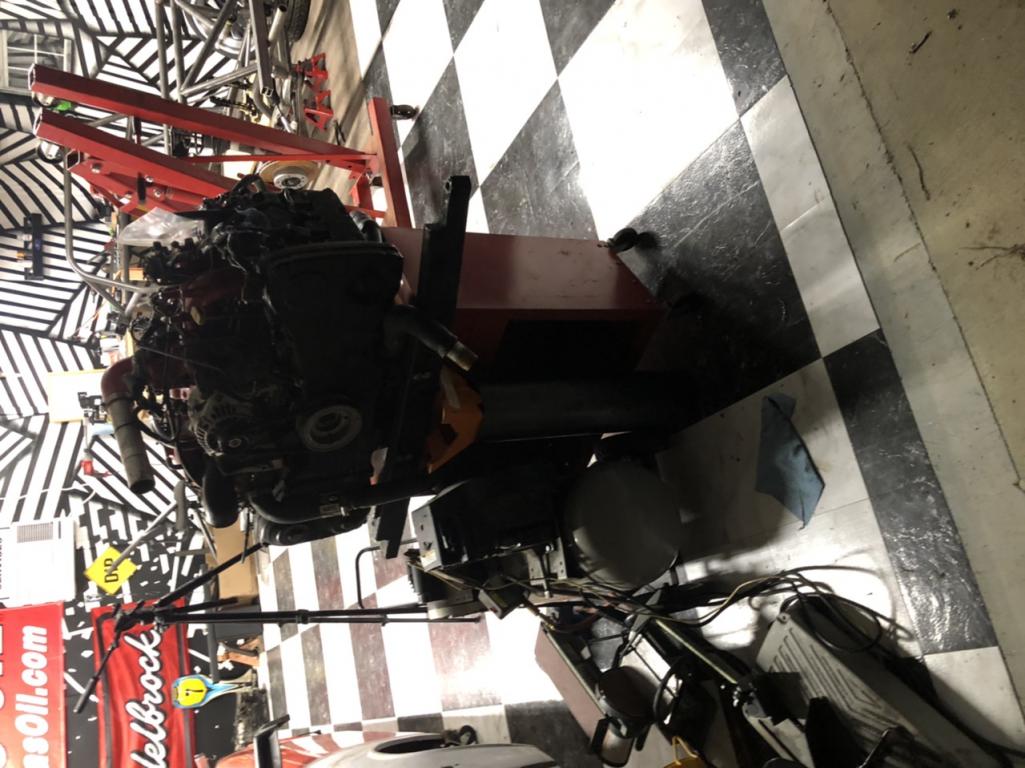
Posted by: Andyrew Aug 13 2020, 02:38 PM
Woot! Great progress!
Posted by: tazz9924 Sep 5 2020, 12:50 PM
Hey im back from nebraska and i had a goodie waiting for me! Its a boyd welding fuel tank designed for a factory5 818. It came with an aeromotive 340 fuel pump, a 90-0 level sensor and a roll over valve. it sits so good here since the fron is no longer a good spot for the fuel. Im in love with it!!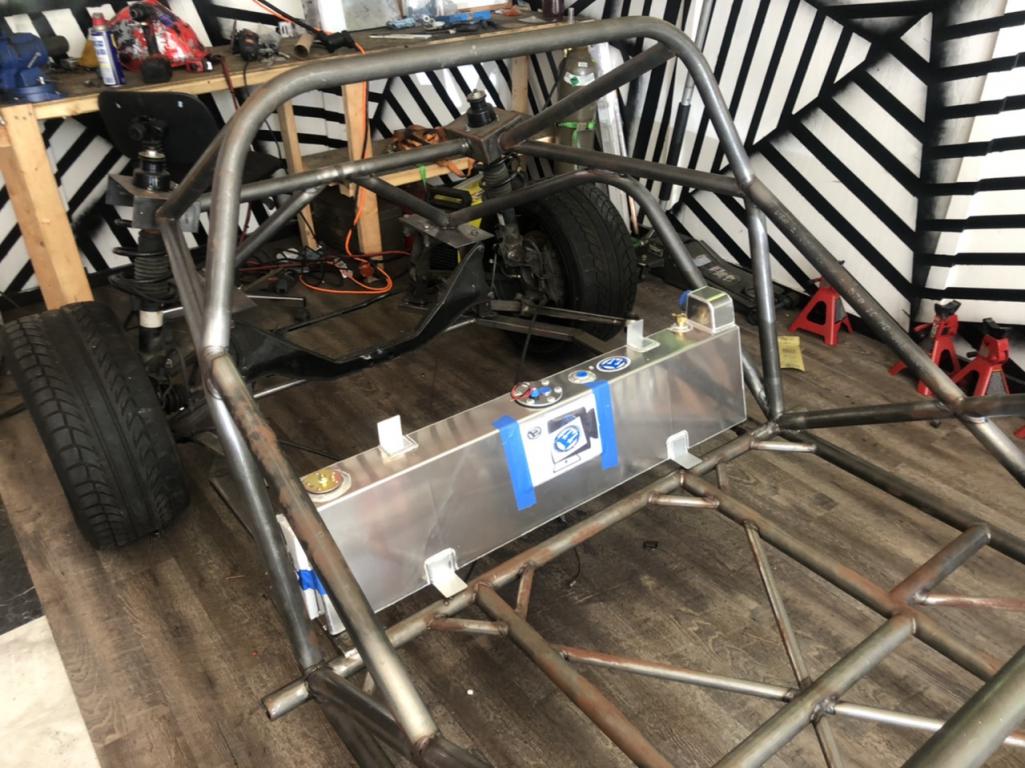
Posted by: tygaboy Sep 5 2020, 01:08 PM
Wow, nice! Looks like it was made just for your build.
Posted by: tazz9924 Sep 5 2020, 02:40 PM
Wow, nice! Looks like it was made just for your build.
I know! I knew my insane amount of research would pay off

Posted by: 76-914 Sep 5 2020, 03:24 PM
So how will you access the inlet? Open the door and slide the psg seat forward?
Posted by: Andyrew Sep 5 2020, 10:22 PM
Very cool tank!! Im curious about the fill port as well.
Posted by: 76-914 Sep 5 2020, 11:35 PM
Oh. I see it now. It’s on the right side behind drivers seat. An 1.5” blue barbed fitting. So you run some fuel hose to wherever you locate the fuel spout. Duh
Posted by: tazz9924 Sep 6 2020, 01:05 AM
Oh. I see it now. It’s on the right side behind drivers seat. An 1.5” blue barbed fitting. So you run some fuel hose to wherever you locate the fuel spout. Duh
Yep u got it, i figure the filler neck will come out around here
Attached image(s)
Posted by: tazz9924 Sep 6 2020, 01:17 AM
I spent way too much time planning and making a harness bar. First i set in my seat on a piece of wood, figured out my recline angle and the harness angle (about 10* sfi say 0 to -20 so im good i figure) and where that would land height wise on the main hoop. I then subtracted the height of the wood and the bar it was sitting on because i will almost literally be on the floor.
So now i know how high to make the bar... but oh boy was notching the bar a fun experience  I think i discovered a 4th demension because this tube notch was so complex it would have stephen hawking lost. I made two dumby pieces so i could get the notch “right” I then made a template by wrapping paper around the tube and tracing. I cut out my shape, applied it to the real deal. Many hours later and here’s the tacked in product.
Ignore the bar looking low, the seat is back at n the wood for testing purposes 
Posted by: tazz9924 Sep 6 2020, 08:07 PM
Added one and a half of the legs on the x brace before i ran out of tube. The intersection looks funky because i had to make the harness bar land a little north of the intersection. Nothing a nice taco plate cant fix! I also gave the car a nice rub down in wd40. This typhoon of a summer we’ve had, my raw metal car didn’t take it lightly. 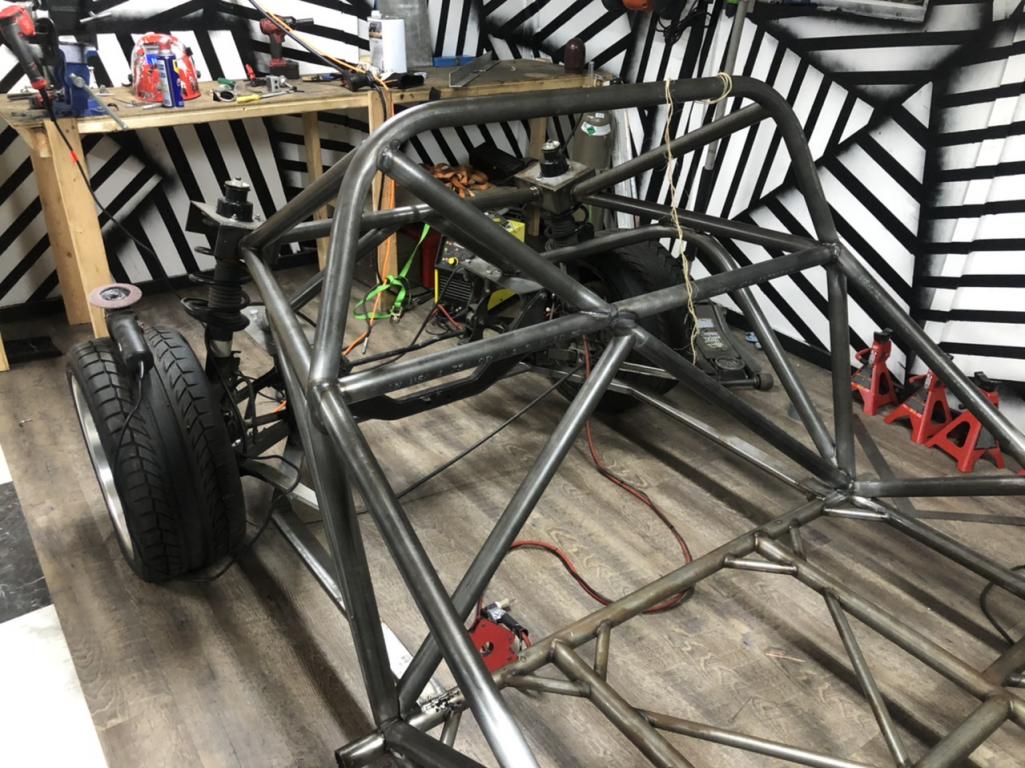
You also can see how well the harnesses line up with the seat in its place
Attached thumbnail(s)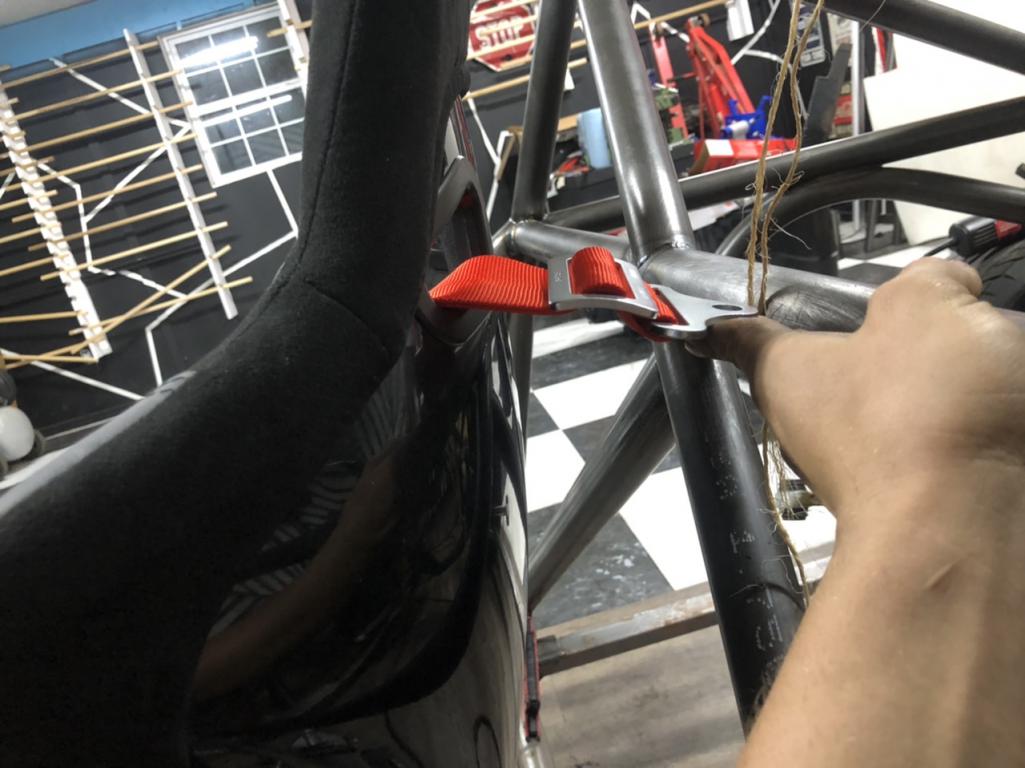
Posted by: tazz9924 Sep 11 2020, 10:56 PM
Update for the week: I continued my work on the x bar for the main hoop and got all but a 2 inch piece im dreading  . I also added seat mounts, i made them out of some 3/4 tube and handy dandy universal tabs. I also had to cut out two of my floor gussets but i think ill live. And i must say i LOVE how i sit in this car, it’s exactly the way i wanted it. Now for some pedals and a floor
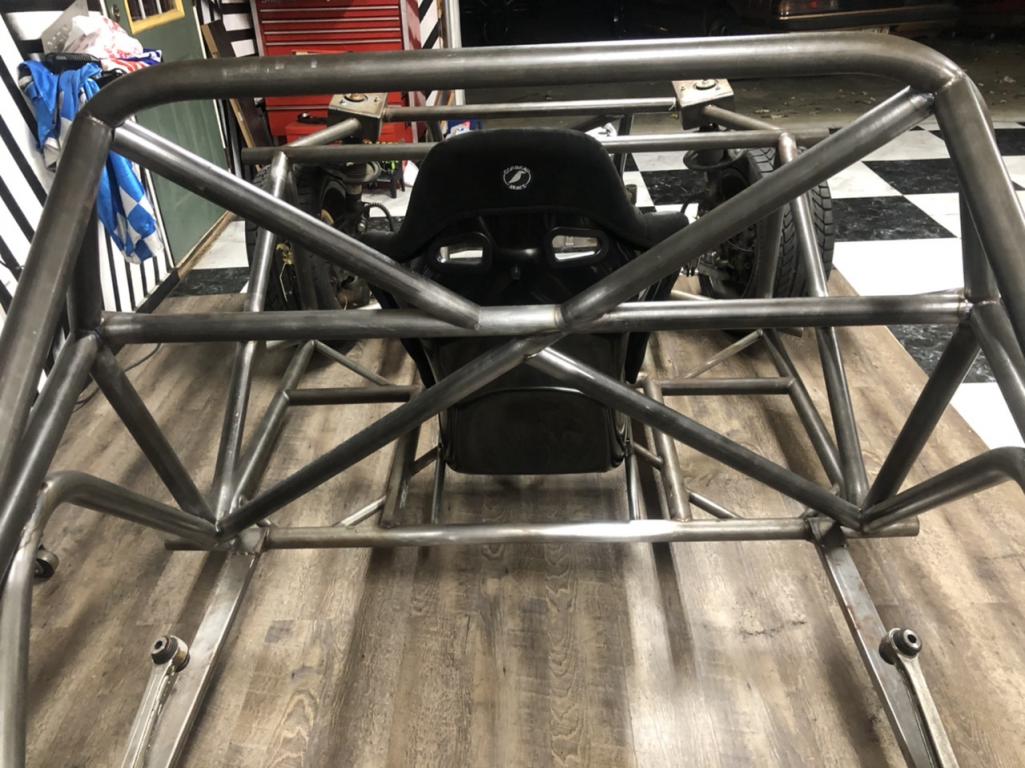
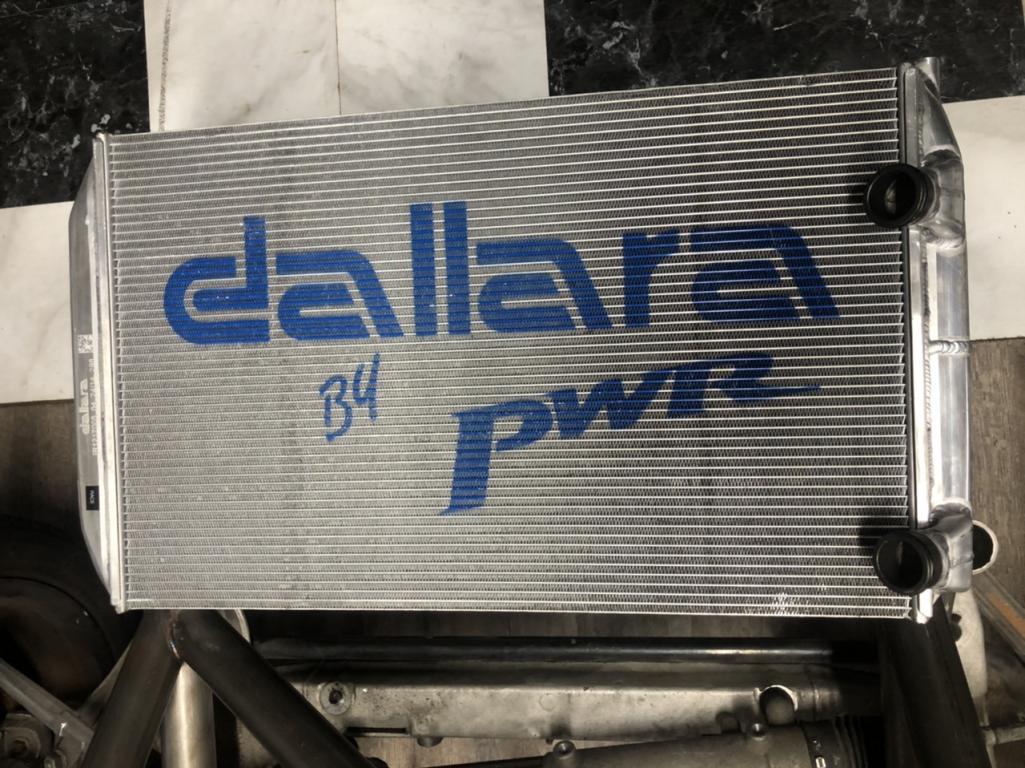
Speaking of pedals i got a set of wilwood .75 master cylinders for the brakes. Their throw seems a bit short but it might be the same as the one i was gonna buy. They are a light set i bought at the used nascar parts store. I also got a used dallara radiator from a team penske indy car So you could say things are getting serious. 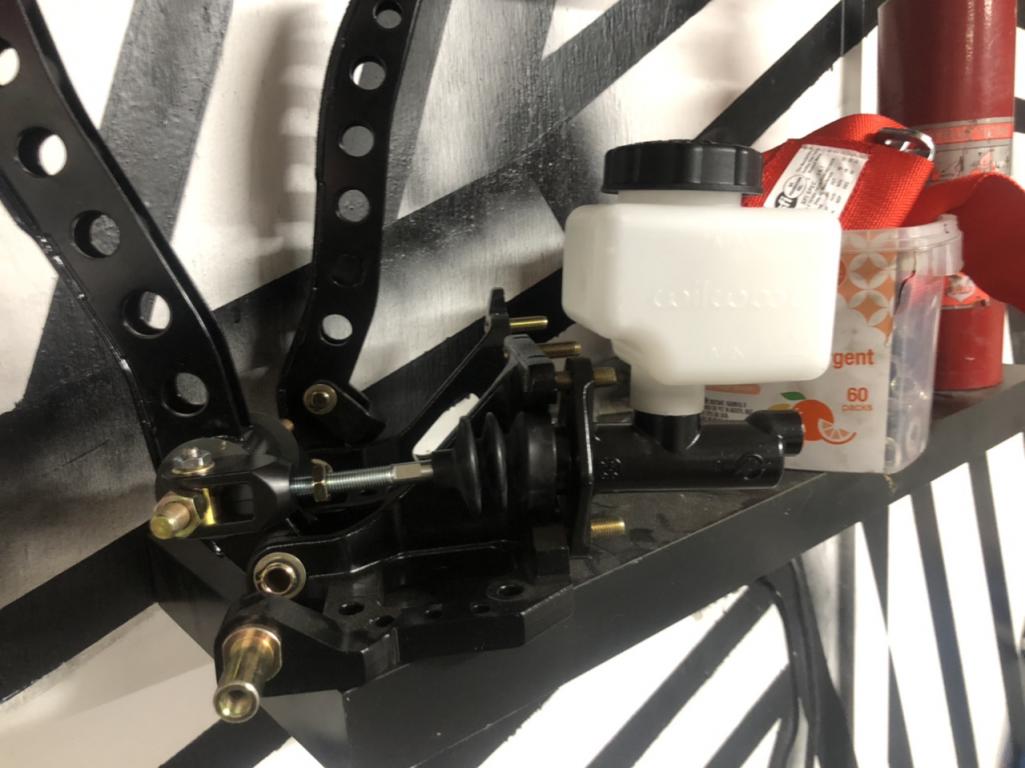
Posted by: andrewb Sep 12 2020, 02:41 AM
Elliott, I know you know what you're doing far more than I ever will but, just for the sake of symmetry, can you put a bit of tube in here please. Thanks, Andrew. 
Posted by: tazz9924 Sep 12 2020, 06:18 AM
@http://www.914world.com/bbs2/index.php?showuser=11762 Yeah thats the 2 inch piece ive been dreading. its too short to fit in my knotcher in a normal way that isn’t dangerous. Ill fix it this weekend because its been bugging me too
Posted by: tygaboy Sep 12 2020, 09:06 AM
What about doing a taco plate in lieu of that 2" piece? Size it so you could add them all around that node set for extra strength and some style points?
I get that may not be as strong as adding the tube. Just throwing the idea out there - and you can feel free to throw it out , too!
Keep up the great work!
Posted by: andrewb Sep 12 2020, 09:40 AM
That's a relief Elliott - knew you wouldn't let us down.
What about doing a taco plate in lieu of that 2" piece?
Something's obviously got lost in the transatlantic translation - I don't even know what a taco plate is. I tried Google but now I just feel hungry.
Posted by: tygaboy Sep 12 2020, 09:53 AM
Ha! Good one. Taco plate = sheet wrapped 180 that ends up looking like a taco shell.
Attached image(s)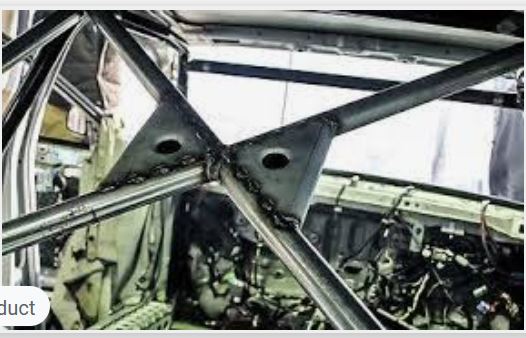
Posted by: tazz9924 Sep 12 2020, 11:30 AM
Ha! Good one. Taco plate = sheet wrapped 180 that ends up looking like a taco shell.
ive got some taco plans, and taco plate plans as well. Im thinking on top of the harness bar, do people put bars inside taco plates? I kinda just wanna throw the sheet metal on there for style points
Posted by: tygaboy Sep 12 2020, 04:34 PM
Ha! Good one. Taco plate = sheet wrapped 180 that ends up looking like a taco shell.
ive got some taco plans, and taco plate plans as well. Im thinking on top of the harness bar, do people put bars inside taco plates? I kinda just wanna throw the sheet metal on there for style points
While it couldn't hurt, remember, a typical taco plate would have an OD (at the base of the taco) = the OD of the tubing you're using. So strictly speaking, if you had a tube there, the taco would need to have an ID = tube OD and would be 1 material thickness greater than the rest of the tubes - unless you went with a smaller OD tube under it.
Posted by: tazz9924 Sep 12 2020, 06:25 PM
That's a relief Elliott - knew you wouldn't let us down.
What about doing a taco plate in lieu of that 2" piece?
Something's obviously got lost in the transatlantic translation - I don't even know what a taco plate is. I tried Google but now I just feel hungry.
@http://www.914world.com/bbs2/index.php?showuser=11762 Fixed it! almost killed my drill though
Posted by: tazz9924 Sep 12 2020, 09:40 PM
Besides finishing the x bar I also made up the bars to reinforce the front end and subframe mounts and i think it came out well. Tomorrow is a full day of welding because ive put a good bit of welding off on various things and projects so i probably wont have anything to report unless some massive insect comes into my garage (which is becoming scarily common)
Attached thumbnail(s)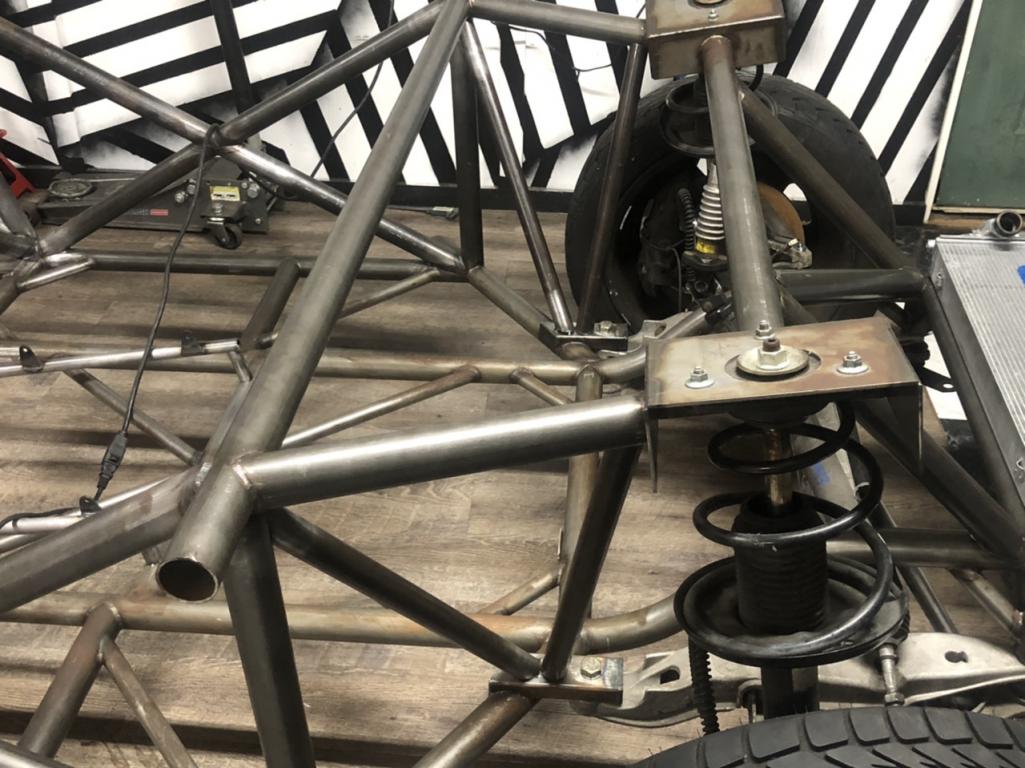
Posted by: andrewb Sep 12 2020, 10:34 PM
Ha! Good one. Taco plate = sheet wrapped 180 that ends up looking like a taco shell.
A picture paints a thousand words ! Thank you - understood as soon as i saw it. I wonder what we call them over here ?
EDIT : For your information, and just to complete our mutual education, in the UK we appear to call that kind of part a gusset. Which ironically is also that small black triangular part you see over to the left in my avatar.
Posted by: andrewb Sep 12 2020, 10:38 PM
Then your drill almost died in a good cause - that little piece is a work of art all on its own. Even Tygaboy must be jealous ?
Carry on with the artistry, thank you.
Posted by: tazz9924 Oct 26 2020, 08:46 PM
The time has come to mate the motor to the chassis. At this point it’s sitting on the engine hoist. I need to remove the exhaust to allow it to sit a little further back (to meet the axle), which can only mean one thing; Custom headers. I planned on doing it anyway but if your gonna twist my arm... might as well. Another consideration is how low i can get it to sit and while i cant get the cylinder heads nearly scraping the ground like id like to, its really not bad and i think the fact it’s sitting 10’ in the air is throwing off my inner collin chappman. I highly doubt i go dry sump especially on a stock block like i plan but you never know what the future holds. Glad to be back again for the time being. 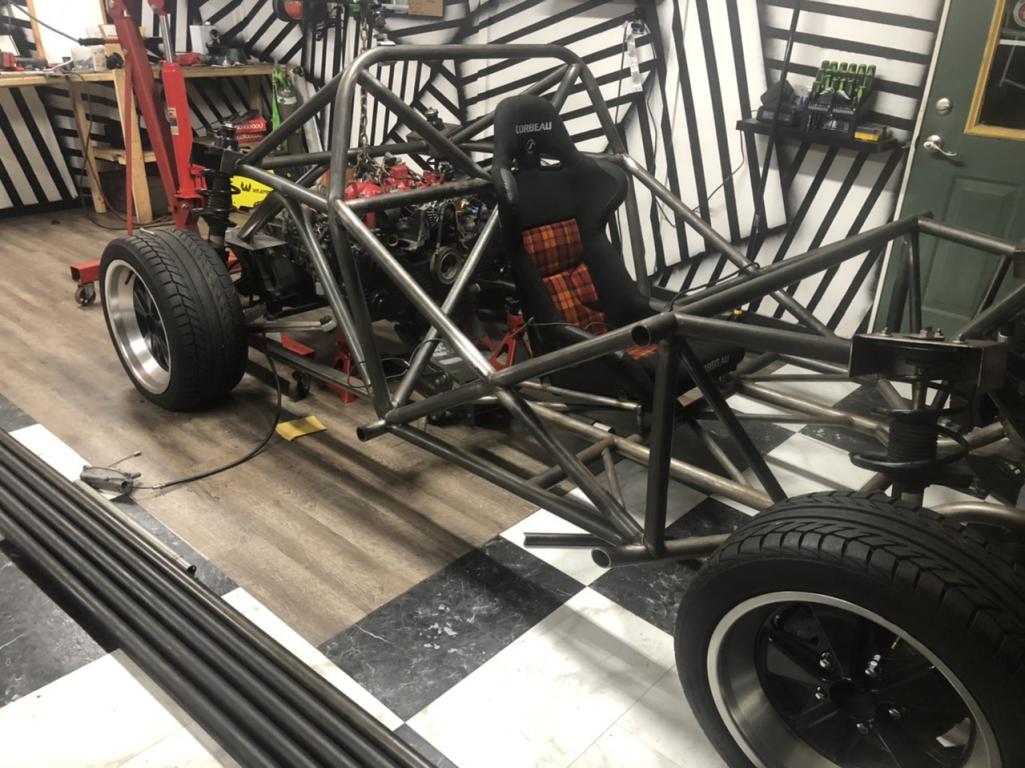
Attached thumbnail(s)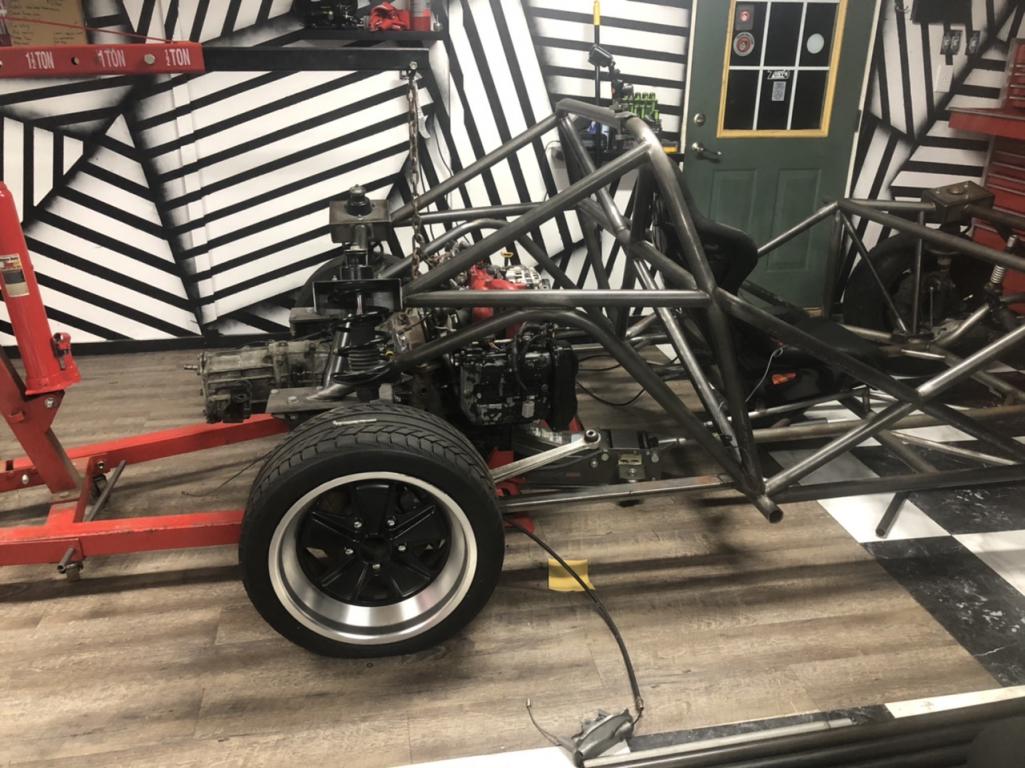
Posted by: tazz9924 Mar 5 2021, 11:40 PM
Been a while again but back at it! I set the engine back in the car and got the front mounts tacked in place, and began work on the trans mounts. I really like the passenger side. its nice and compact. Ignore the butchered version of ians shifter linkage i will rebuild it i have the technology!
Ps ill also include some photos of what took me so long to get back to this build. 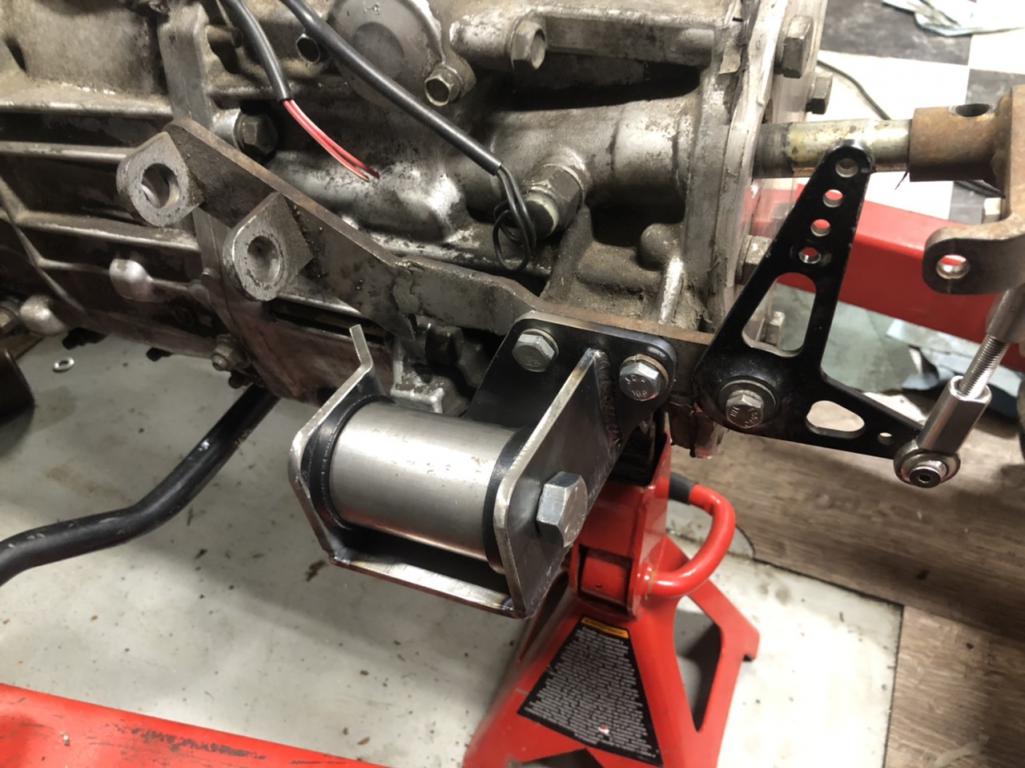
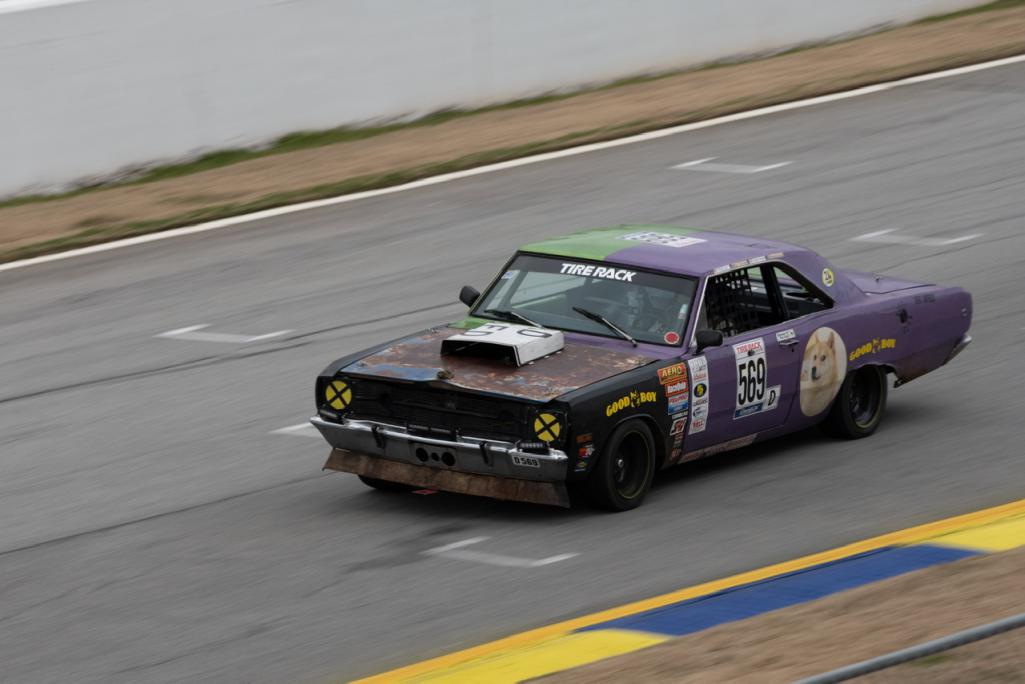

good times at chump car roaf atlanta, built my 68 dart, finished just in time. got 88 laps out on track, finished 69th. Would’ve done better if my radiator (imagine that oil cooler in the fan shroud but bigger and full of water) didn’t get clogged with rust and squirrel nuts. But i had a blast and honestly i think 69th fits the car.
Posted by: flyer86d Mar 6 2021, 05:40 AM
Very cool! I like the Dart.
Charlie
Posted by: tazz9924 Mar 10 2021, 08:46 PM
Alright i continued my adventure into mounting the trans. I built up the other mount and bent some tubes and knotched them to hook up to the trans. It’ll take some reinforcement to make it right but its a good start!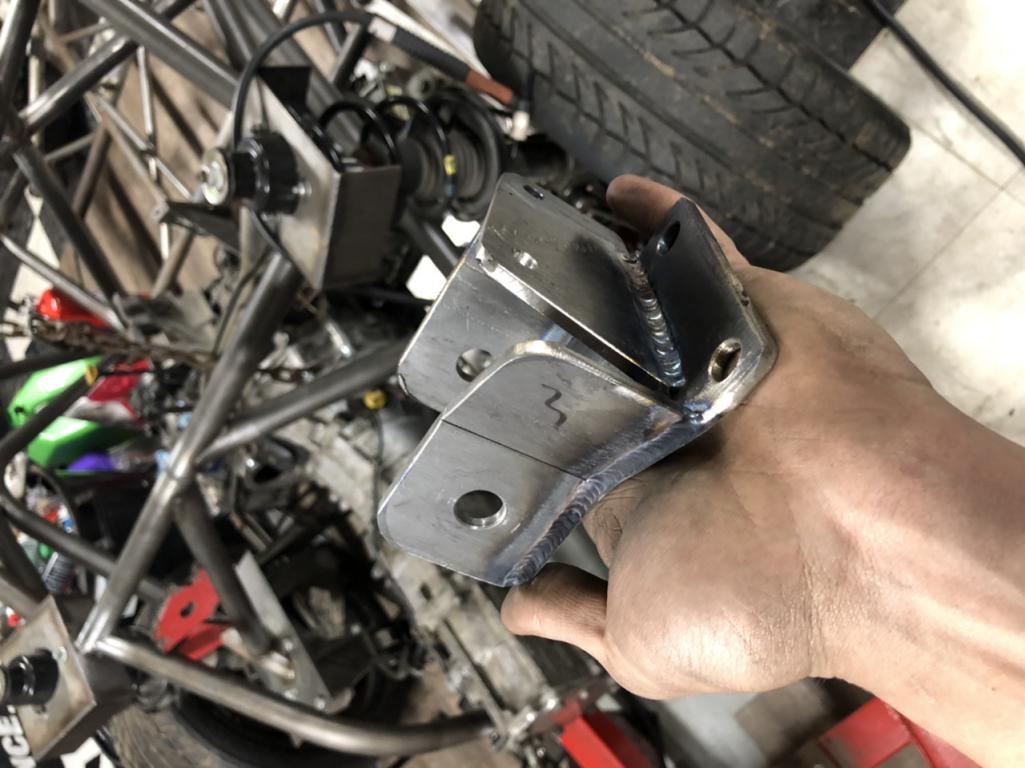
Posted by: Andyrew Mar 11 2021, 08:28 AM
Killer welds!
I have been meaning to watch the Doge episode....
Posted by: tazz9924 Mar 14 2021, 08:11 PM
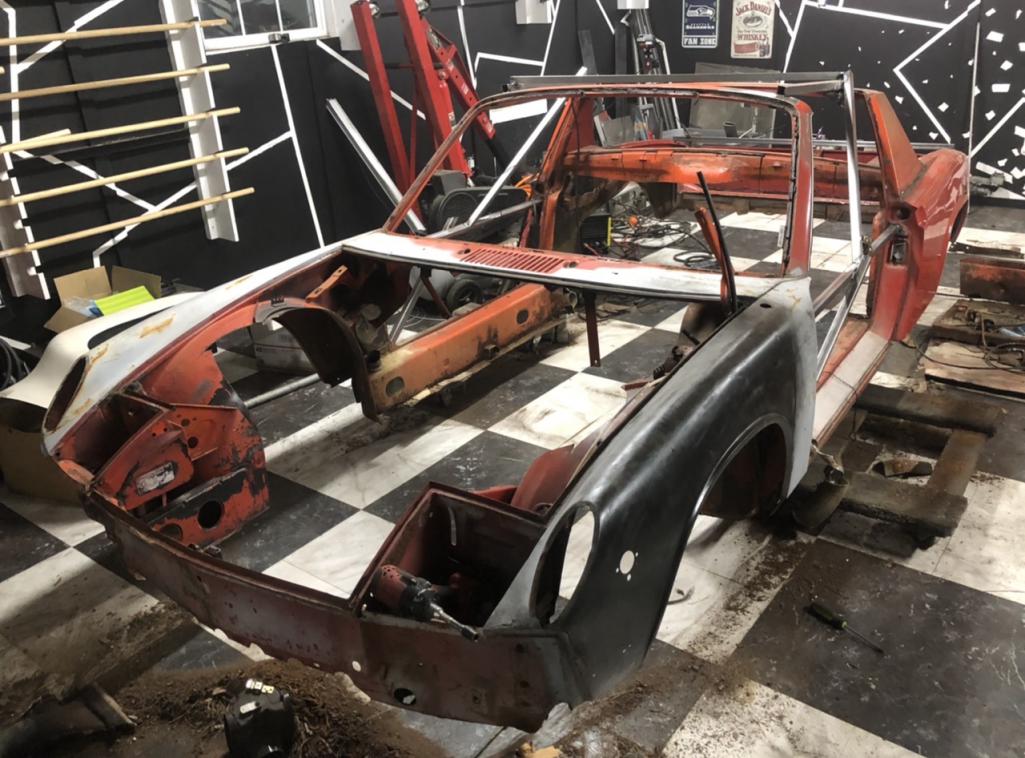
So i took a few hours out of my day off today to “enjoy myself” and cut the 914 body apart. I left the garage today injured and highly just considering cutting the body in half. Now everyone knows the middle of the stock 914 body is where you need all the strength so when you sit in it, it doesn’t turn into a metal kinder egg with a human prize in the middle. This is still the case in my world but differently because the front half and the rear half of the chassis will want to bend their separate ways when i remove all of their structure. And i do mean all of it. the entire long will be cut out to allow the body to drop around the door bars. so that brings me to a dilema: Cut it in half square it upon the chassis and make those door gaps good. or make some dental style head gear to make it work and remain in one piece. Let me know what you think!
For reference the black line is where i have to cut to fit around the chassis and the yellow is the long. 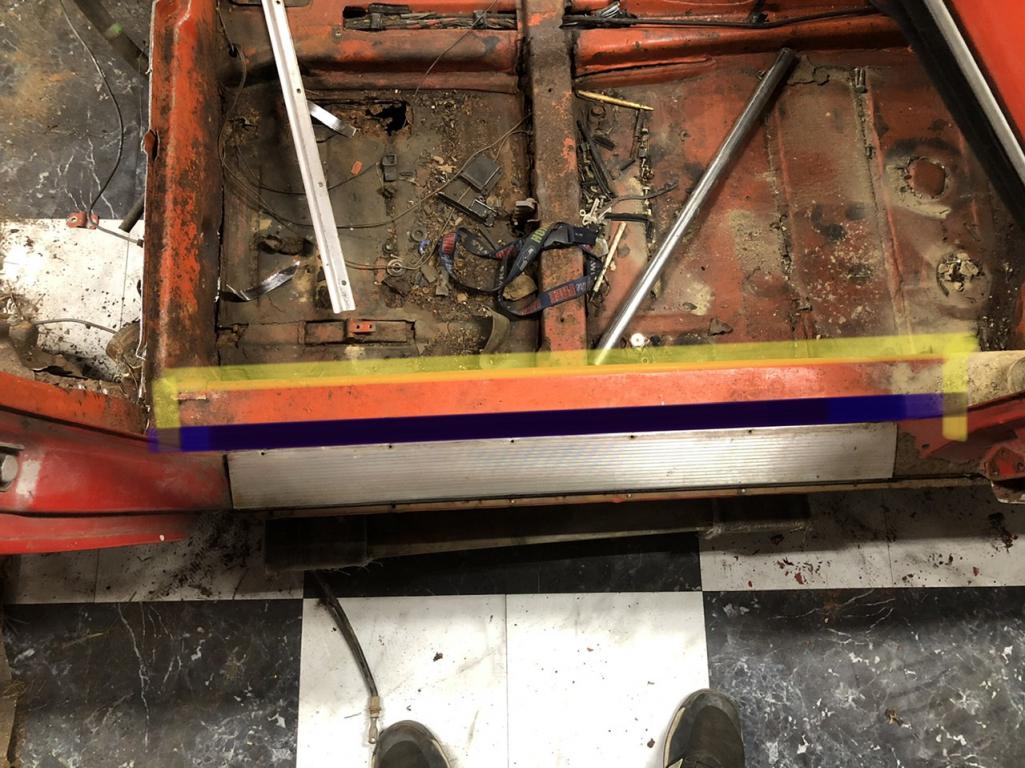
Posted by: Andyrew Mar 15 2021, 10:30 AM
I'd say just cut the outer skin out and mount the pieces together on the flat ground getting the right gaps. The hoods will give you spacing for the right width.
Are you really going to make it a door slammer?
Posted by: tazz9924 Mar 15 2021, 12:02 PM
I'd say just cut the outer skin out and mount the pieces together on the flat ground getting the right gaps. The hoods will give you spacing for the right width.
Are you really going to make it a door slammer?
Do you mean doors open and close? yes, i figure why not
Posted by: 914forme Mar 15 2021, 01:50 PM
Me being a bit crazy, this is how I would do it. Orange tubes can be small 1"x1" stuff, and fairly thin walled, or what ever you have. Trianglulate the heck out of it, high to low. Top bar from factory roll bar to A pillar just helps keep it square. Other Option would be put a steel roof on it.
Then I would cut the logs out via otter skin, and then weld it back over the tub you could build out some gussets and it would look stock. If you wanted you could add AN fittings to the tubes running down the logs and run coolant or oil down them. If DOM bursts you have an issue.
Some will say galvanic corrosion will be an issue, but just add a replaceable zinc anode and replace it every few years. Most coolant mixtures will have corrosion inhibitors, you can just keep it fresh and call it a day.
Back to the diagram.
Just modify the locations to not hit your current structures.
the green bars could be turn buckles you use to get your door gaps set, then weld in the rest to hold the gap and keep it from twisting.
Posted by: tazz9924 Mar 15 2021, 05:48 PM
Me being a bit crazy, this is how I would do it. Orange tubes can be small 1"x1" stuff, and fairly thin walled, or what ever you have. Trianglulate the heck out of it, high to low. Top bar from factory roll bar to A pillar just helps keep it square. Other Option would be put a steel roof on it.
Then I would cut the logs out via otter skin, and then weld it back over the tub you could build out some gussets and it would look stock. If you wanted you could add AN fittings to the tubes running down the logs and run coolant or oil down them. If DOM bursts you have an issue.
Some will say galvanic corrosion will be an issue, but just add a replaceable zinc anode and replace it every few years. Most coolant mixtures will have corrosion inhibitors, you can just keep it fresh and call it a day.
Back to the diagram.
Just modify the locations to not hit your current structures.
the green bars could be turn buckles you use to get your door gaps set, then weld in the rest to hold the gap and keep it from twisting.
Those are extremely good lines! This is basically my other idea visualized, it’s probably worth trying before i go the extreme route. Ill maybe begin giving it a shot tomorrow. Just gotta borrow one of those foul mig welders.
Posted by: Curbandgutter Mar 16 2021, 11:51 AM
Hello Tazz9924 that's a lot of work that you've accomplished in such a short time. I'm also doing a tube steel chassis but with 996 suspension. I'm pretty much complete on my chassis and have moved on to body work. I'm trying to understand which way you are headed? Are you going to gut the inside of the 914 and "sleeve" it over the tube steel frame? I was wondering how did you get the suspension alignment locations from the donor car. I'm interested to know specifically in the vertical direction since they are not on a flat plane, at least not on the 996 suspension. On the 996 the front and rear suspension cradles have tilt to them that affects the entire suspension geometry. I don't know if that is the case on the 993. Also, do you know if your front struts are going to be able to clear the bottom of the front hood. I know that they didn't on mine. The rears were not a problem on my build but the fronts are. I'm removing my Mc Phersons on the front of mine. That is what I will tackle once the body work is done. Good luck with your build!!
Posted by: tazz9924 Mar 16 2021, 06:27 PM
Hello Tazz9924 that's a lot of work that you've accomplished in such a short time.
I'm also doing a tube steel chassis but with 996 suspension. I'm pretty much complete on my chassis and have moved on to body work. I'm trying to understand which way you are headed? Are you going to gut the inside of the 914 and "sleeve" it over the tube steel frame? I was wondering how did you get the suspension alignment locations from the donor car. I'm interested to know specifically in the vertical direction since they are not on a flat plane, at least not on the 996 suspension. On the 996 the front and rear suspension cradles have tilt to them that affects the entire suspension geometry. I don't know if that is the case on the 993. Also, do you know if your front struts are going to be able to clear the bottom of the front hood. I know that they didn't on mine. The rears were not a problem on my build but the fronts are. I'm removing my Mc Phersons on the front of mine. That is what I will tackle once the body work is done. Good luck with your build!! Its 986 suspension actually, i basically went about it like this. I went out and measured a stock boxsters suspension geometry; strut bolt hole spacing subframe angles etc. Anything i could measure. I then transferred it in 3d space to everything you see here. The only assumption i made was full droop control arm angle. I looked a pictures and basically had to guess. If i set them too low compared to stock thats ok because ill use coil overs to level the control arms. Will it work? idk we figure that out. As far as the body goes im going to hollow it out remove all the structure and place it on top. I expect bits to hang out a little but ill find ways of coping with it (pods maybe). i can also set the body up a little higher and get good chassis hiding results. But safe to say it was a pain getting to this point, ill keep pushing!
Posted by: Andyrew Mar 17 2021, 11:17 AM
Seems like a lot of work hollowing out that body for what is only going to be extra weight.
Even if you do plan to make it a door slammer, I say just skin the panels and put them in place. Your going to be making adjustments along the chassis anyways. You could weld some flat bar to the skin to keep it aligned just for laying it in place and cut the welds off when your done.
dzuts fasten the panels on and call it a day Lighter, Simpler, easier for doing work on the chassis or replacing pieces later.
Posted by: tazz9924 Mar 17 2021, 01:29 PM
Seems like a lot of work hollowing out that body for what is only going to be extra weight.
Even if you do plan to make it a door slammer, I say just skin the panels and put them in place. Your going to be making adjustments along the chassis anyways. You could weld some flat bar to the skin to keep it aligned just for laying it in place and cut the welds off when your done.
dzuts fasten the panels on and call it a day
Lighter, Simpler, easier for doing work on the chassis or replacing pieces later.well ill need the A pillar and headlight buckets, by the time im done it will mostly be skin but im using whatever will be left to hold the body in place temporarily. Shouldnt be a big deal
Posted by: tazz9924 Mar 17 2021, 01:30 PM
whoops
Posted by: Andyrew Mar 17 2021, 02:43 PM
Seems like a lot of work hollowing out that body for what is only going to be extra weight.
Even if you do plan to make it a door slammer, I say just skin the panels and put them in place. Your going to be making adjustments along the chassis anyways. You could weld some flat bar to the skin to keep it aligned just for laying it in place and cut the welds off when your done.
dzuts fasten the panels on and call it a day
Lighter, Simpler, easier for doing work on the chassis or replacing pieces later.well ill need the A pillar and headlight buckets, by the time im done it will mostly be skin but im using whatever will be left to hold the body in place temporarily. Shouldnt be a big deal
Well you made quick work of the rolling chassis, im sure you'll do the same for the body
Posted by: 2mAn Mar 18 2021, 04:55 PM
What a crazy plan!... Love the progress
Posted by: tazz9924 Mar 18 2021, 07:41 PM
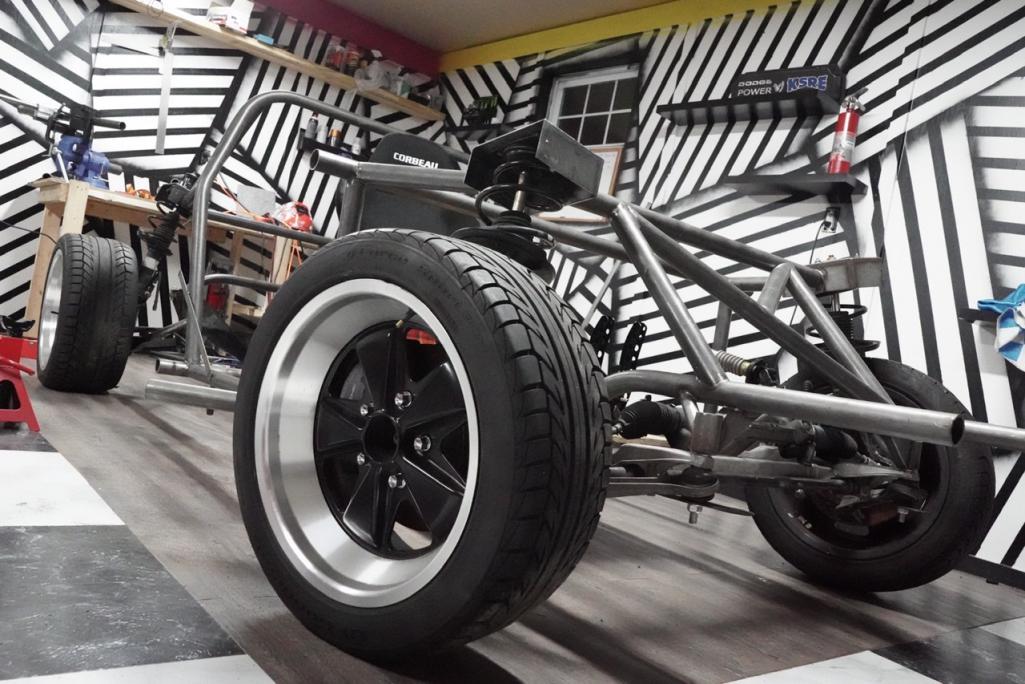
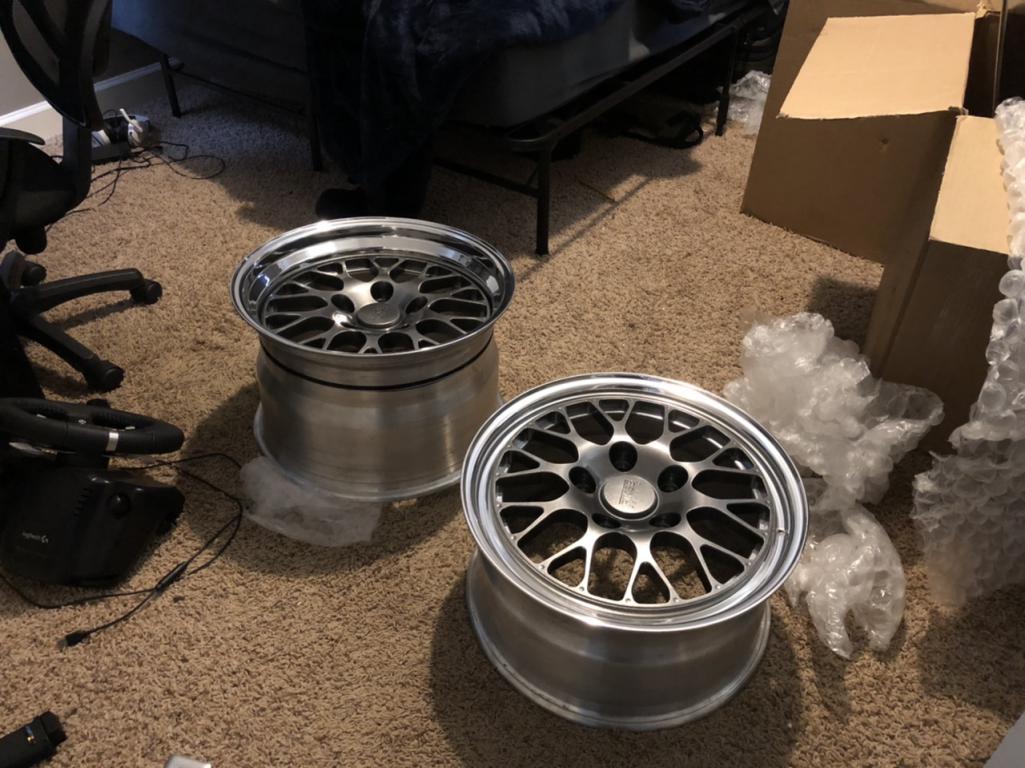
Just got some new wheels test fit on. I got a good deal on some fiske fm10s. 17x9 front 17x11 rear. i figure some 305-315s are in store for the rear!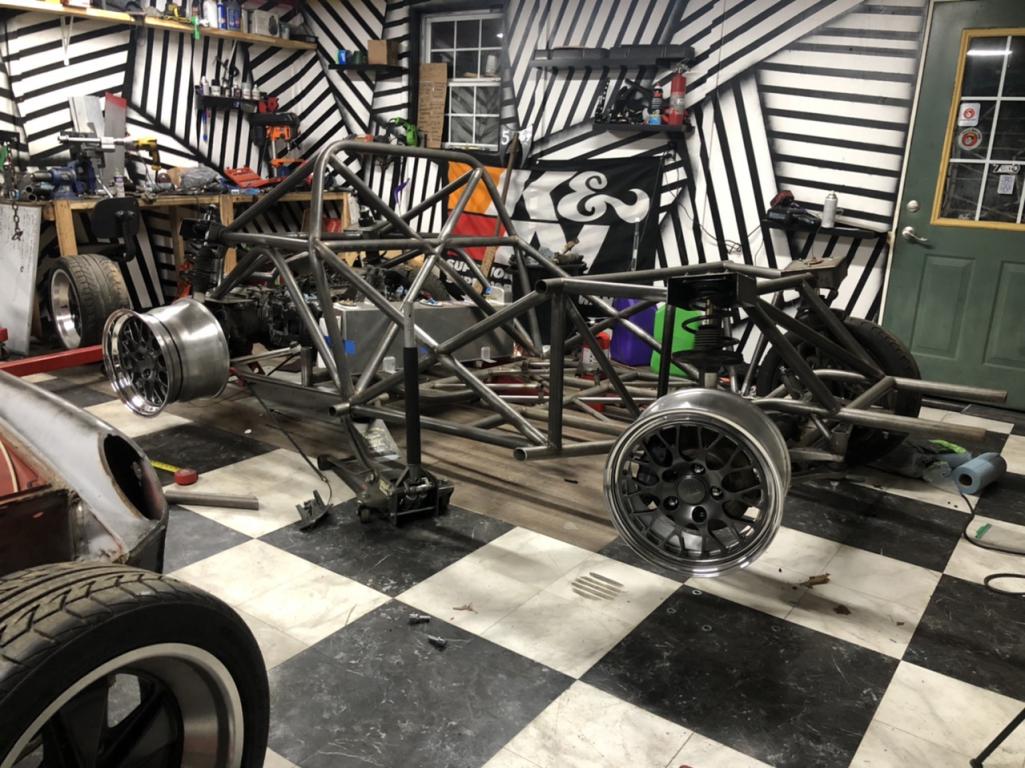
Posted by: Andyrew Mar 18 2021, 09:25 PM
Love them! Looks like the tires might touch the coils?
Posted by: tazz9924 Mar 18 2021, 09:36 PM
Love them! Looks like the tires might touch the coils?
Yeah also they dont like the hub so im going to use a 1” spacer
Posted by: Retroracer Mar 19 2021, 09:58 AM
Looks good!!
As a side note, if you're going to drop the standard 914 body over that, you might need to roll the fenders a little to prevent rubbing..
- Tony
Posted by: tazz9924 May 2 2021, 08:26 PM
Finally back at it! i made some tubes ive been R and D-ing in my head for months. They came out well even though they are very complex. I really put some mileage on that grinder today!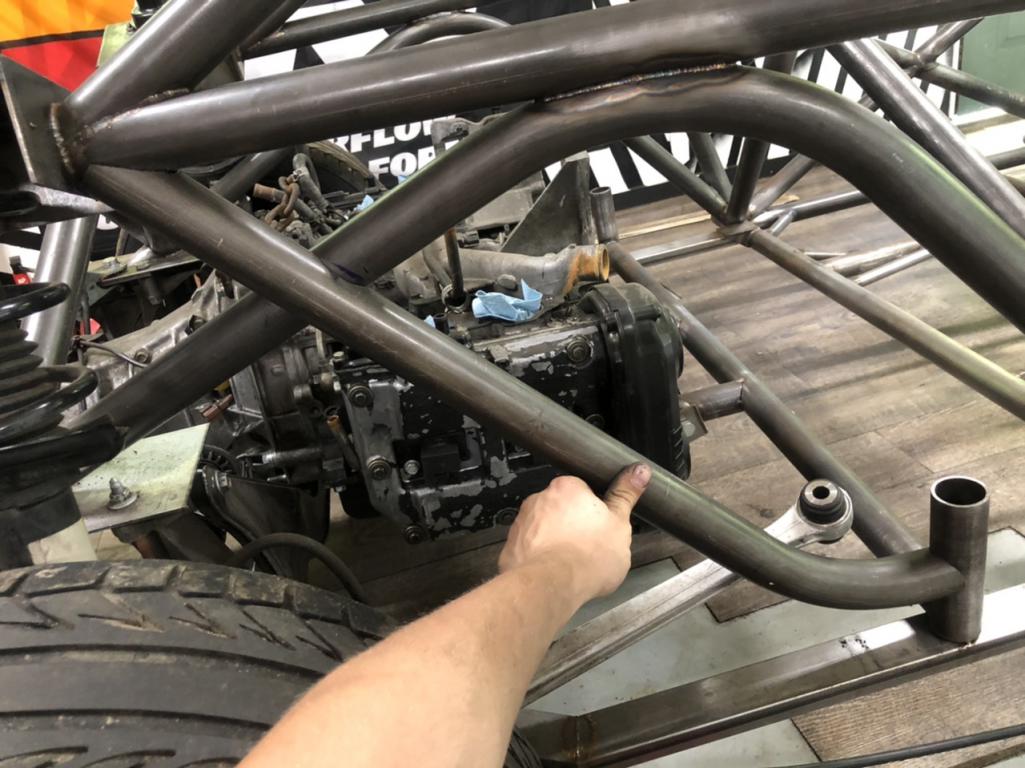
Posted by: tygaboy May 3 2021, 07:51 AM
Nice, nice work on the chassis fab. I know the challenges you faced getting those tubes to fit. You dun guut!
I really enjoy seeing your high quality, well thought out design and fab. Keep up the great work!
(Or, take a break and come out here to help me with the RacerBenz cage!)
Posted by: tazz9924 May 3 2021, 10:30 AM
(Or, take a break and come out here to help me with the RacerBenz cage!)
I wish! but we both need to work on our 914s!
Posted by: tazz9924 May 3 2021, 09:11 PM
Just added some of the last of the main tubes before i get the body on! Now it’s about welding everything i can see, removing the motor and trans, and welding the rest. Add in some front strut tubes i just now remembered then its body time!!!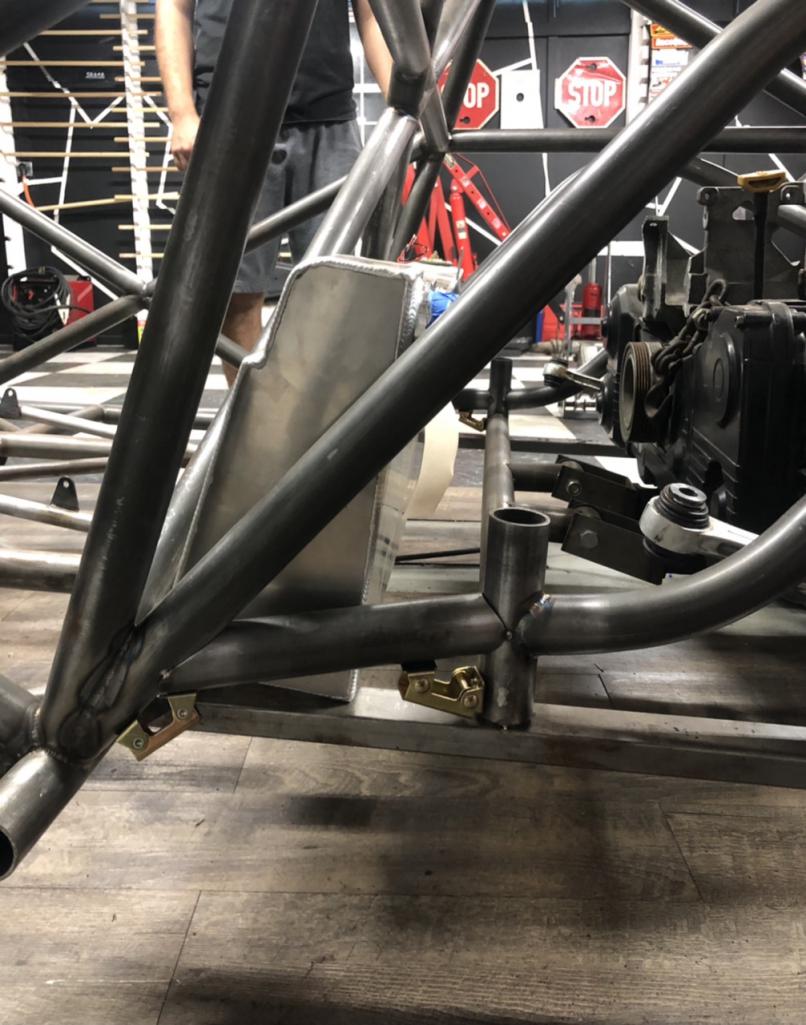
Posted by: tazz9924 May 6 2021, 08:02 PM
I added in the tubes i mentioned in the front apron area. I stared at it for a good two hours to make sure it looked as good as possible. This caused me to no longer like the front end. It doesn’t have visual flow, i referred to it as a mullet chassis; Buisness in the front, Party in the back. That being said i took a step back, installed my seat and i love the whole chassis again. This is a process im sure many are familiar with. 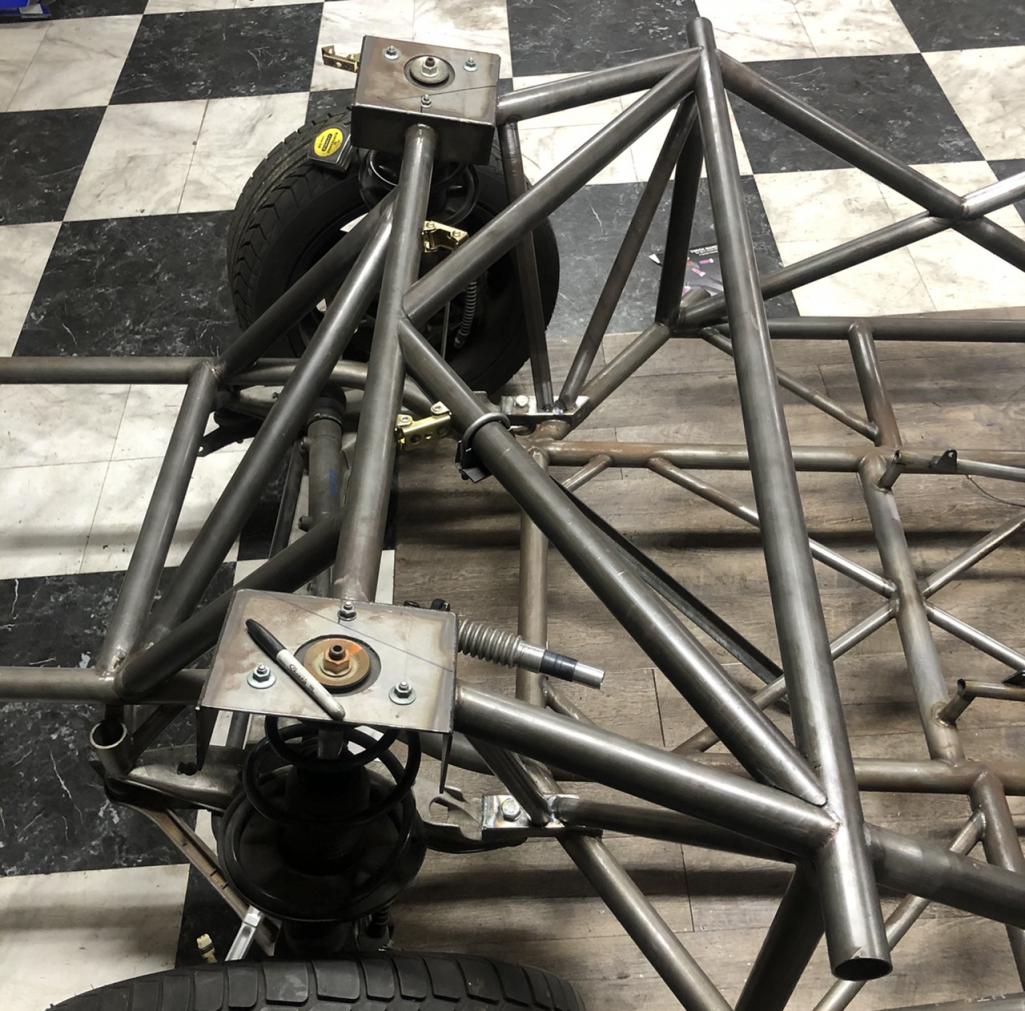
Posted by: 76-914 May 7 2021, 08:25 AM
What are your projected GVW differences?
Posted by: tazz9924 May 7 2021, 05:38 PM
What are your projected GVW differences?
GVW, gross vehicle weight? As in weight distribution? or the difference between my original goal weight and likely actual?
Weight distribution surely isnt great now but there are more componets i need to install forward of the cg than behind it. I can lift the front of the chassis in a dead lift kinda way as it sits. but the ride height being so high in the front makes it easier too. I figure 45% front is realistic. The best thing here though, is mass centralization as most weight is between the axles. Total weight i still believe 1800 is the number. as far as things go it will be lacking lots of regular things and if i put it on a diet with loads of fiberglass 1700s is possible.
Posted by: tazz9924 May 22 2021, 10:02 PM
I reinforced the body and gave it the good ole sawzall treatment. I hate this tool but the utility is undeniable. On the other hand the chassis is just about rust free now!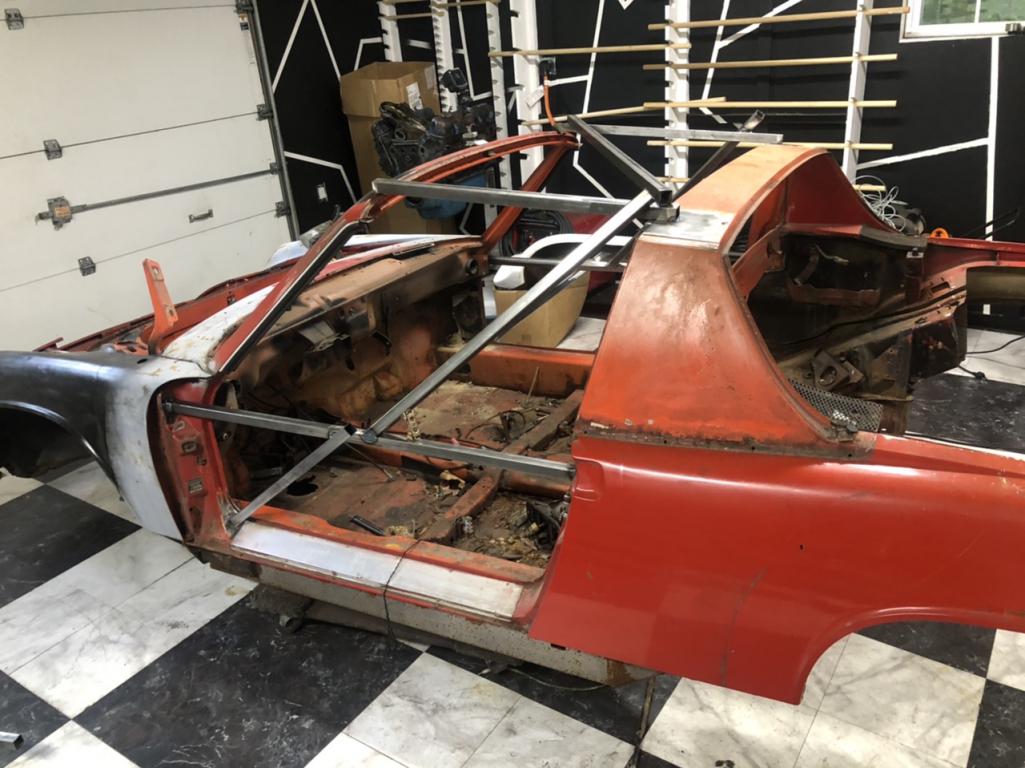
Posted by: 76-914 May 23 2021, 08:49 AM
What are your projected GVW differences?
GVW, gross vehicle weight? As in weight distribution? or the difference between my original goal weight and likely actual?
Weight distribution surely isnt great now but there are more componets i need to install forward of the cg than behind it. I can lift the front of the chassis in a dead lift kinda way as it sits. but the ride height being so high in the front makes it easier too. I figure 45% front is realistic. The best thing here though, is mass centralization as most weight is between the axles. Total weight i still believe 1800 is the number. as far as things go it will be lacking lots of regular things and if i put it on a diet with loads of fiberglass 1700s is possible.
Wow! That ought to go like a scalded ass ape. At such a light weight I'm guessing you're going with big sticky tires. Keep posting your progress.
Posted by: tazz9924 May 23 2021, 11:50 AM
What are your projected GVW differences?
GVW, gross vehicle weight? As in weight distribution? or the difference between my original goal weight and likely actual?
Weight distribution surely isnt great now but there are more componets i need to install forward of the cg than behind it. I can lift the front of the chassis in a dead lift kinda way as it sits. but the ride height being so high in the front makes it easier too. I figure 45% front is realistic. The best thing here though, is mass centralization as most weight is between the axles. Total weight i still believe 1800 is the number. as far as things go it will be lacking lots of regular things and if i put it on a diet with loads of fiberglass 1700s is possible.
Wow! That ought to go like a scalded ass ape. At such a light weight I'm guessing you're going with big sticky tires. Keep posting your progress.
I do believe 305 or 315 r888’s are what the doctor orders
Posted by: tazz9924 May 23 2021, 08:38 PM
Body is about to go on! I think im going to try setting it on tomorrow. It drops directly down on to the chassis, and by our backstrain-o-meter we figure i got the body down to about 120 lbs. Its really no problem for two guys but we will see how that goes. Im glad i got this car instead of anyone else because i would NOT want to restore this. It had rust everywhere from hell hole, to driver speaker pod of all places. I was the perfect guy for this car because i kept none of that gross orangy brown stuff.
Attached thumbnail(s)
Posted by: tazz9924 Jun 2 2021, 09:04 PM
The Body Is On! ....kinda. i finally got a couple people together to set the body on top. it is neither mounted nor sitting in the right spot. it needs to go forward 2.5” it should fit up very good! obviously there are a couple “visual issues” the strut tops certainly poke through but i think it will just add to the crazy look! 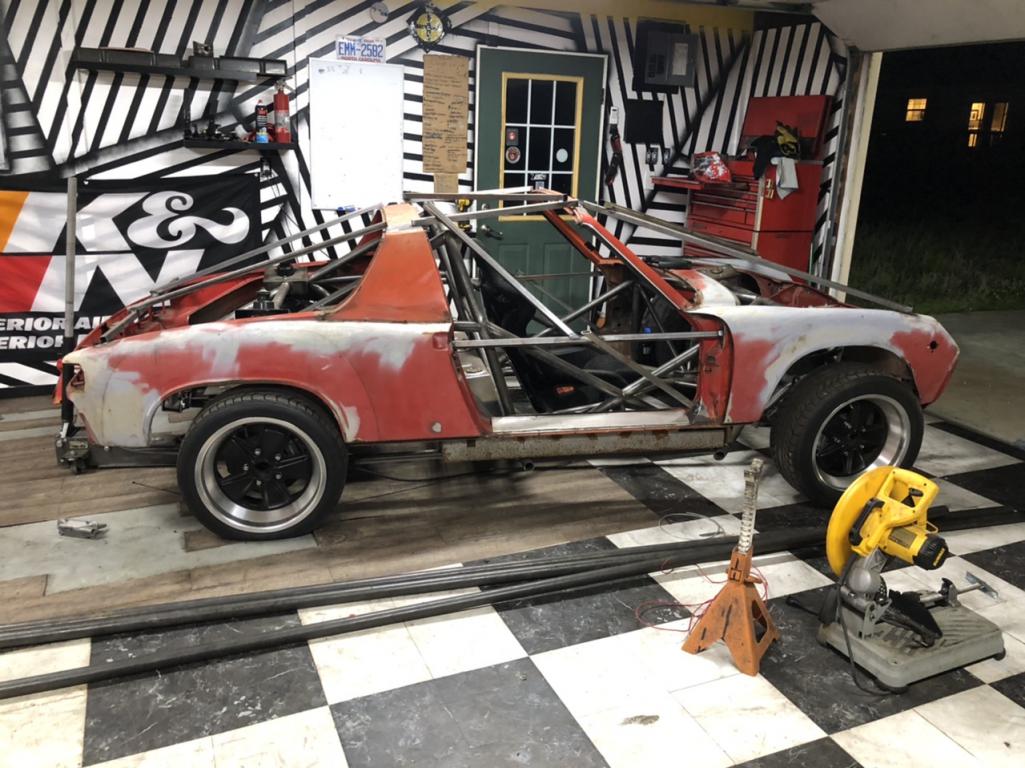
And a bonus, to whoever wanted to know what a 914 gasser looks like, here you go:
Posted by: 76-914 Jun 3 2021, 07:22 AM
Great work. More pic's.
Posted by: Andyrew Jun 3 2021, 07:28 AM
Keep on trimming!! You've got a good 50lbs of excess 914 there you can cut out
Posted by: FourBlades Jun 3 2021, 07:30 AM
This is an awesome creation, I love it.
You are a fabrication genius!
You have made a lot of progress in a short time.
John
Posted by: tygaboy Jun 3 2021, 07:53 AM
Forget Gasser - too easy. You need to go full Funny Car and make it so the whole body tilts up.
(Follow me for more great design and fabrication ideas! )
Seriously, you're making great progress. I hope I get to meet you and see your mad creation some day.
Posted by: tazz9924 Jun 3 2021, 08:39 AM
Keep on trimming!! You've got a good 50lbs of excess 914 there you can cut out
dont tempt me...
Posted by: tazz9924 Jun 3 2021, 08:43 AM
Forget Gasser - too easy. You need to go full Funny Car and make it so the whole body tilts up.
(Follow me for more great design and fabrication ideas!
)Seriously, you're making great progress. I hope I get to meet you and see your mad creation some day.
That would be sweet. body should be fairly removable to allow for powder coating anyway. Also i wouldn’t be apposed to a cross country trip for a good meet up but that is a ways off.
Posted by: tazz9924 Jun 23 2021, 11:55 PM
Just got some nice pictures, i have a video coming out on it today!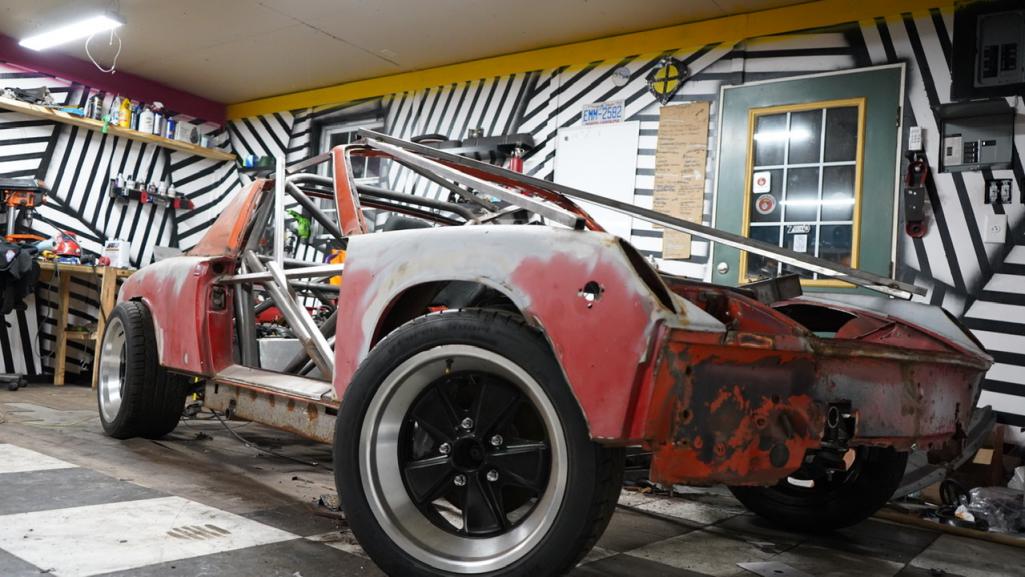
Posted by: tazz9924 Jun 24 2021, 01:27 PM
I made a new video to summarize about the last year. Ive been on the road racing all year but i think ive made great progress!
https://www.youtube.com/watch?v=9UQoJtfPj9E
Posted by: Retroracer Jun 24 2021, 04:31 PM
Excellent video!! Love some of the time lapse sequences. Cool build!
- Tony
Posted by: tazz9924 Aug 10 2021, 08:46 PM
Long time no see! racing season is in full swing and i havent been home for more than a couple days at a time. But things have happened; First i bought my engine!  Its an ej25 from iag. Its their stage 2 tuff block. Its a brand new block, sti crank rods, pistons rod bolts. Its been honed and balanced, along with all the good stuff! All in its good for 675hp but it wont see that much... yet. Its a pretty piece and ive already got some goodies for it hiding around here.
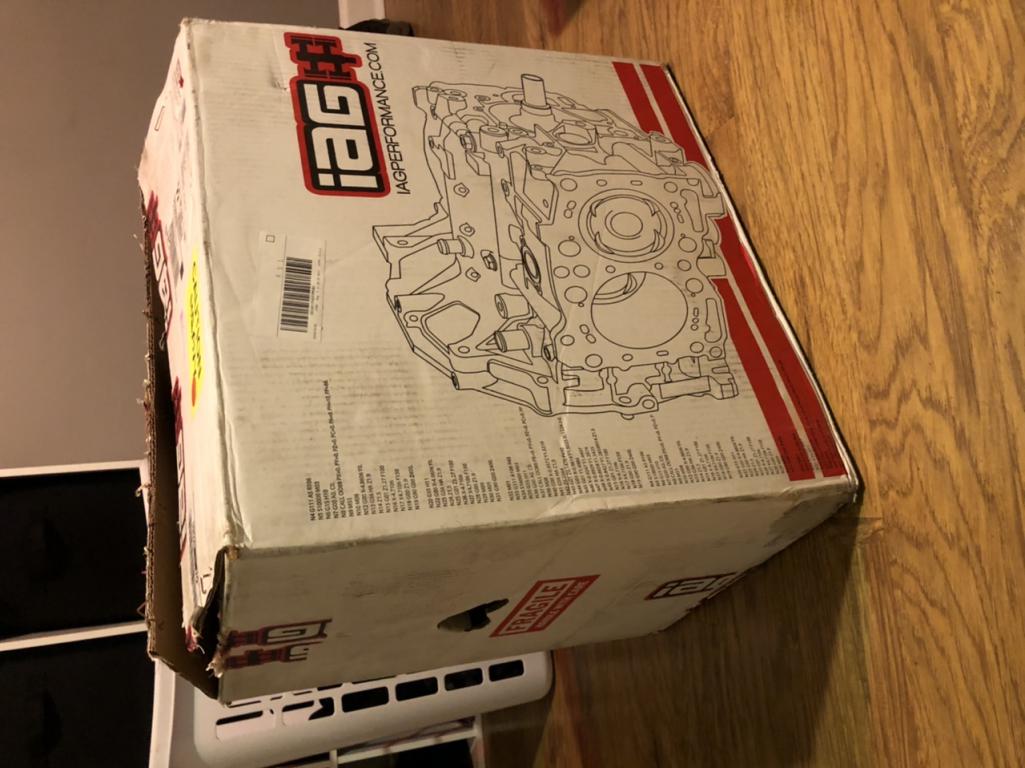
Always impressed how much power you can get out of something so small: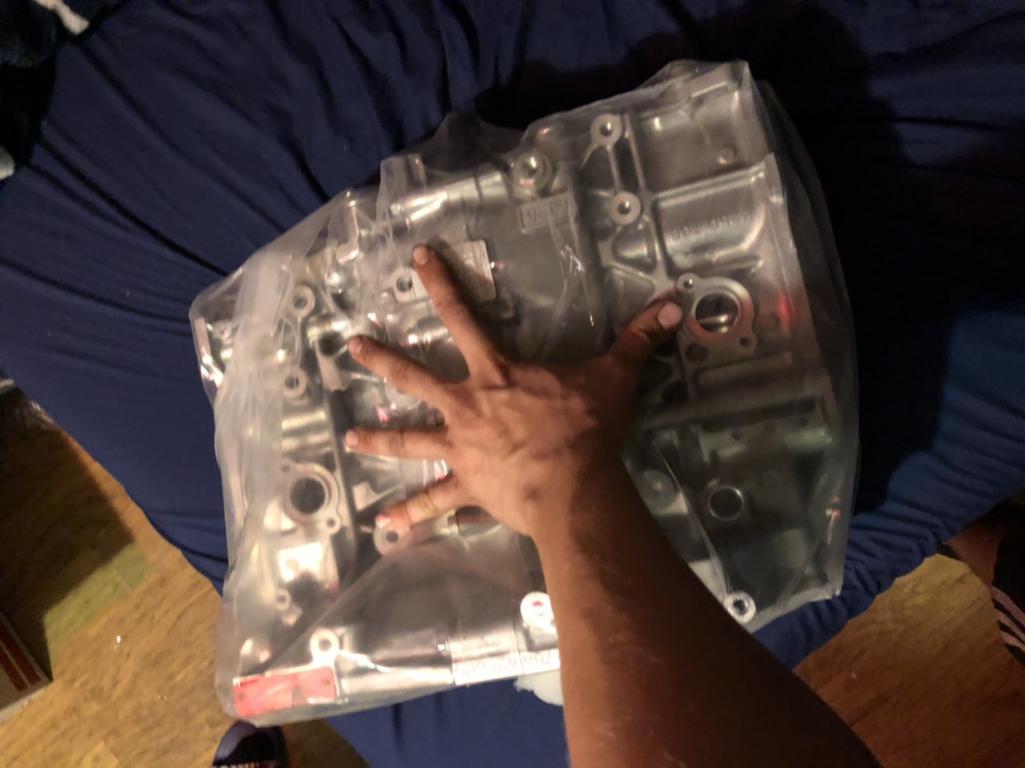
Today i leveled and aligned the body so i can work on mounting it finally. of course it took way longer than it should but it is done. Tomorrow is a big day!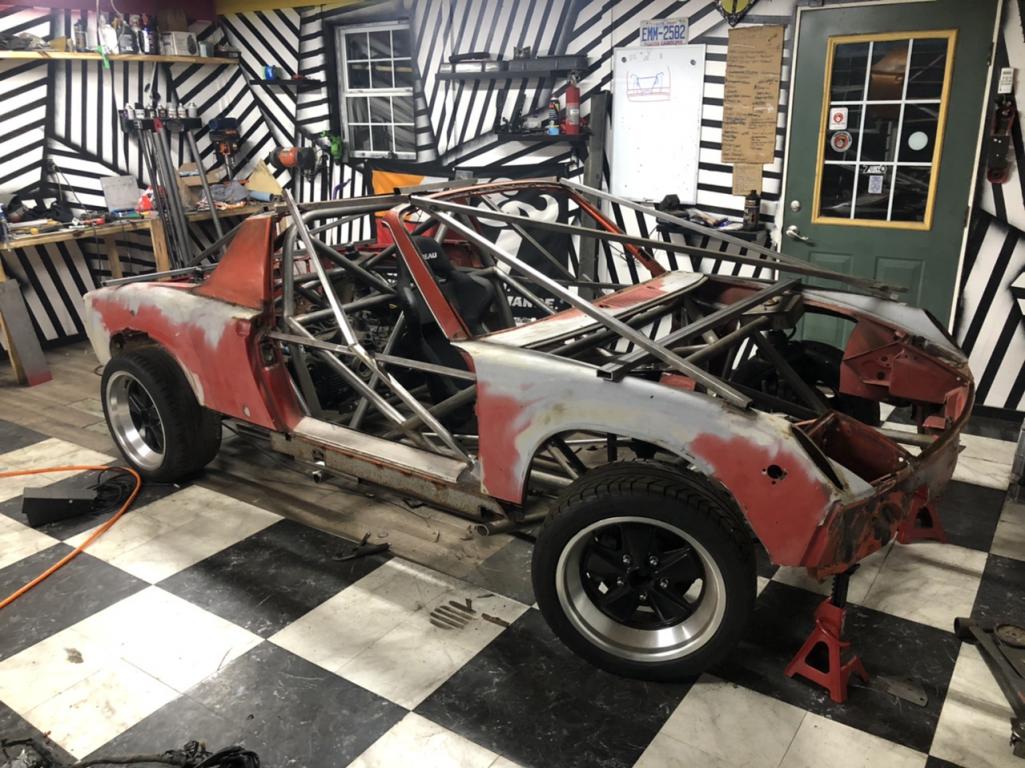
Posted by: sixnotfour Aug 10 2021, 08:56 PM
REDRUM it...
Attached image(s)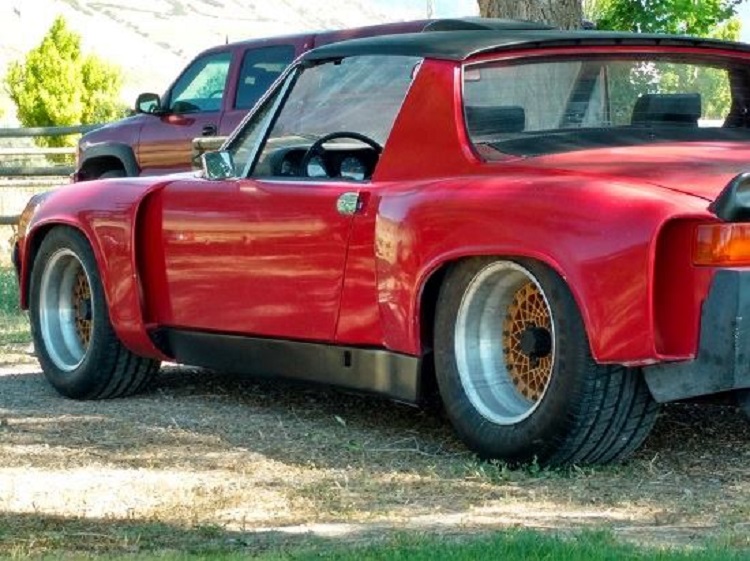
Posted by: Front yard mechanic Aug 10 2021, 08:58 PM
I like it 
Posted by: Cairo94507 Aug 11 2021, 07:14 AM
Wow! Amazing skills. I really enjoyed the video and the progress of the chassis and body. That motor is going to be epic in that car. Looking forward to seeing more work.
Posted by: 76-914 Aug 11 2021, 10:04 AM
The build is now in the fun stage.
Posted by: tazz9924 Aug 11 2021, 10:25 AM
The build is now in the fun stage.
Finally!
Posted by: tazz9924 Aug 11 2021, 10:26 AM
REDRUM it...
i may do something similar on the rear fenders
Posted by: tazz9924 Aug 14 2021, 11:36 PM
Started working on mounting the body, made a rear bumper bar. I took a piece of 1-1/4” tube and slip rolled it to about an inch of deflection so it sat fairly nice under the tail lights. Added tabs and presto! A little job but it came out good. Tomorrow should see loads of work.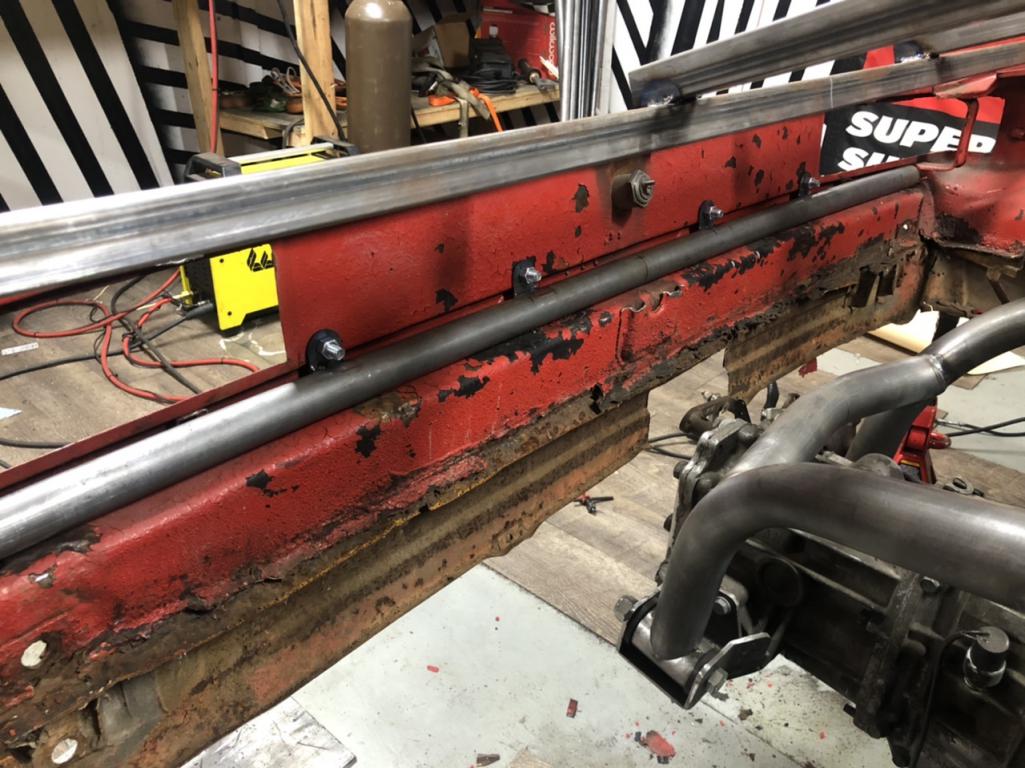
Ps you can see how rusty this thing is oh well it doesn’t trouble me
Posted by: tazz9924 Aug 17 2021, 07:21 PM
Got the rear bumper tacked up, it’s looking pretty mean and ready for double duty as a diffuser mount
Things took longer than expected because i had to go through a few design iterations before settling on this, and i really like it!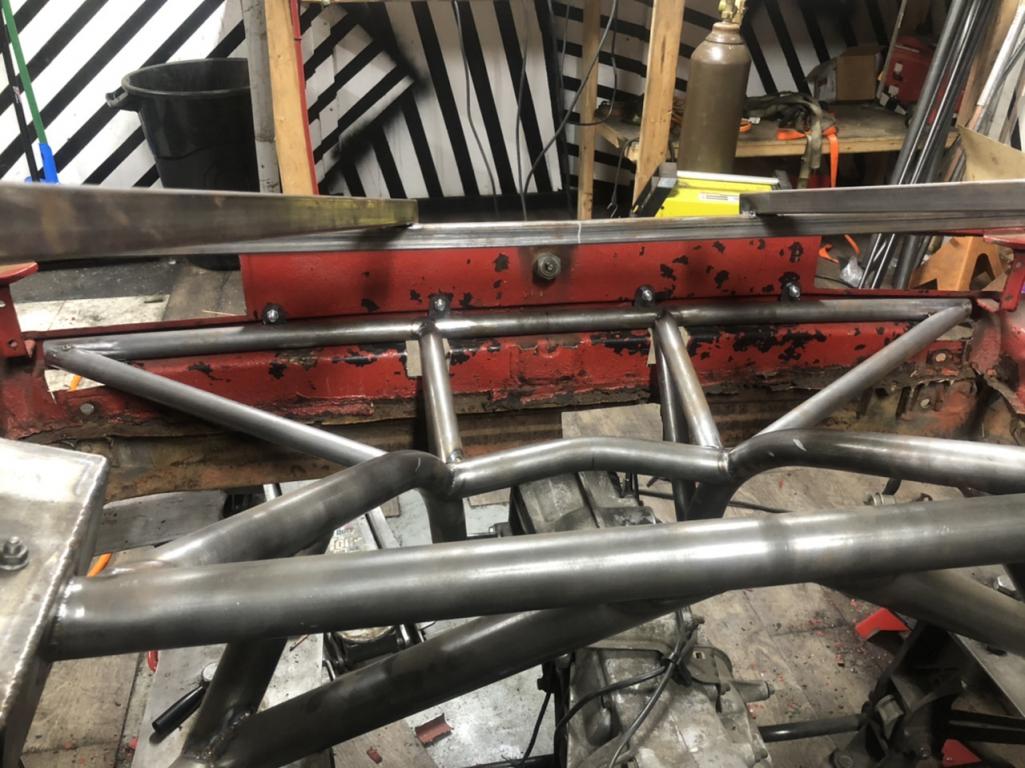
Posted by: FL 000 Aug 17 2021, 07:37 PM
I can’t believe how fast you have gotten to this point. Any kind of schedule you are working towards for getting it on the road? Won’t be long at the pace you are going
Posted by: tazz9924 Aug 17 2021, 07:47 PM
I can’t believe how fast you have gotten to this point. Any kind of schedule you are working towards for getting it on the road? Won’t be long at the pace you are going
I don’t find my pace that fast, though that may be self critical. im hoping by next june to hopefully have it running, but engine parts aren’t cheap and neither is anything else. But ill just do what i can.
Posted by: tazz9924 Aug 20 2021, 10:31 PM
Got the pedals in! i decided that im going to mount all the things that make me smile this weekend: pedals, wheel, gas tank and maybe shifter. so we’ll see how things progress!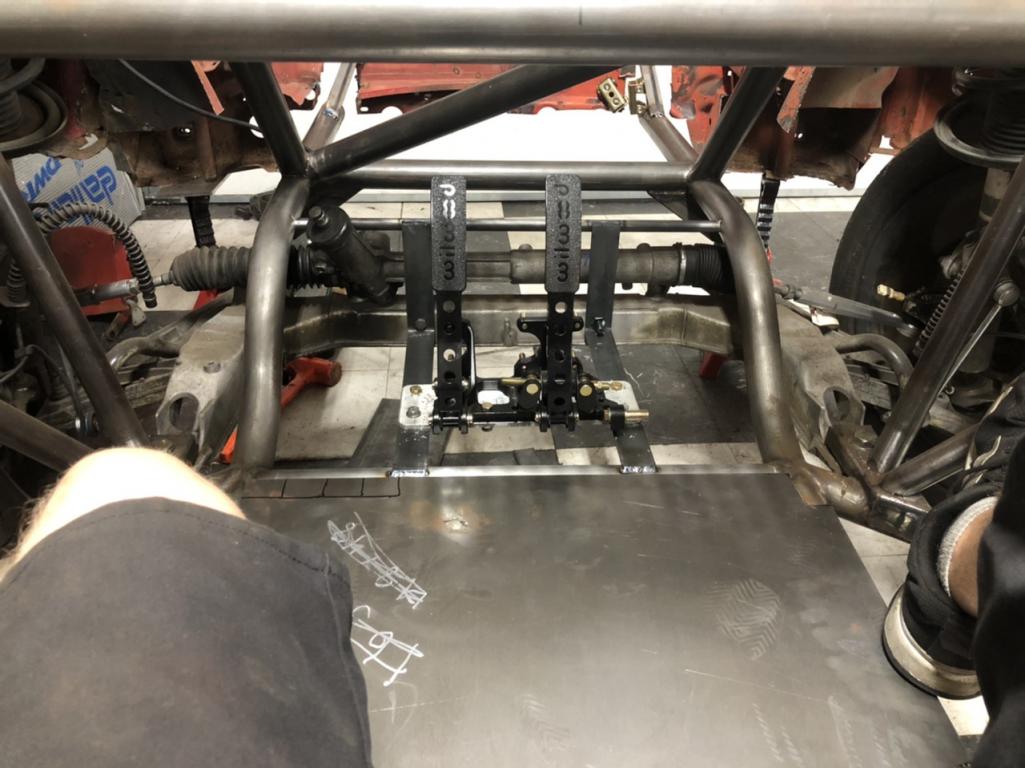
Posted by: tazz9924 Aug 21 2021, 11:31 PM
Brought my steering wheel into work today and used the bridgeport to put the bolt pattern of the quick release hub into the wheel. It felt very high stakes but it all worked out in the end, plus i learned more about triangles 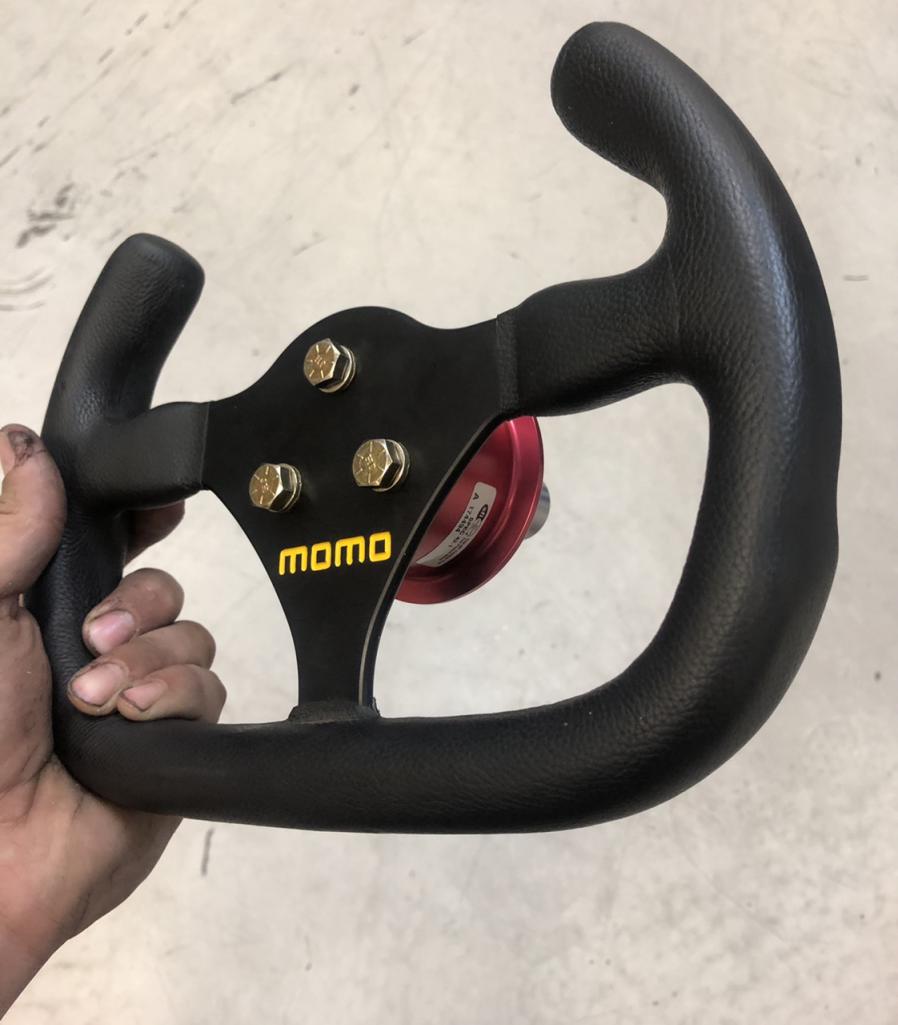
Posted by: Andyrew Aug 22 2021, 08:36 AM
Boy that is a Tiny wheel!
Love the progress buddy!
Posted by: tazz9924 Aug 22 2021, 09:44 AM
Boy that is a Tiny wheel!
Love the progress buddy!
Yes it is! just a little smaller than my daily drivers wheel so i should be ok
Posted by: tazz9924 Aug 22 2021, 09:28 PM
Did some major steering system work! I made it to the point where it is free from binding and all that good stuff, but i need one more steering shaft bearing to prevent it from telescoping but it looks good and thats half the battle
I also took the time to knotch the tubes to allow the gas tank to sit nicely in it’s little hovel. That was driving my ocd up a wall looking at it crooked. 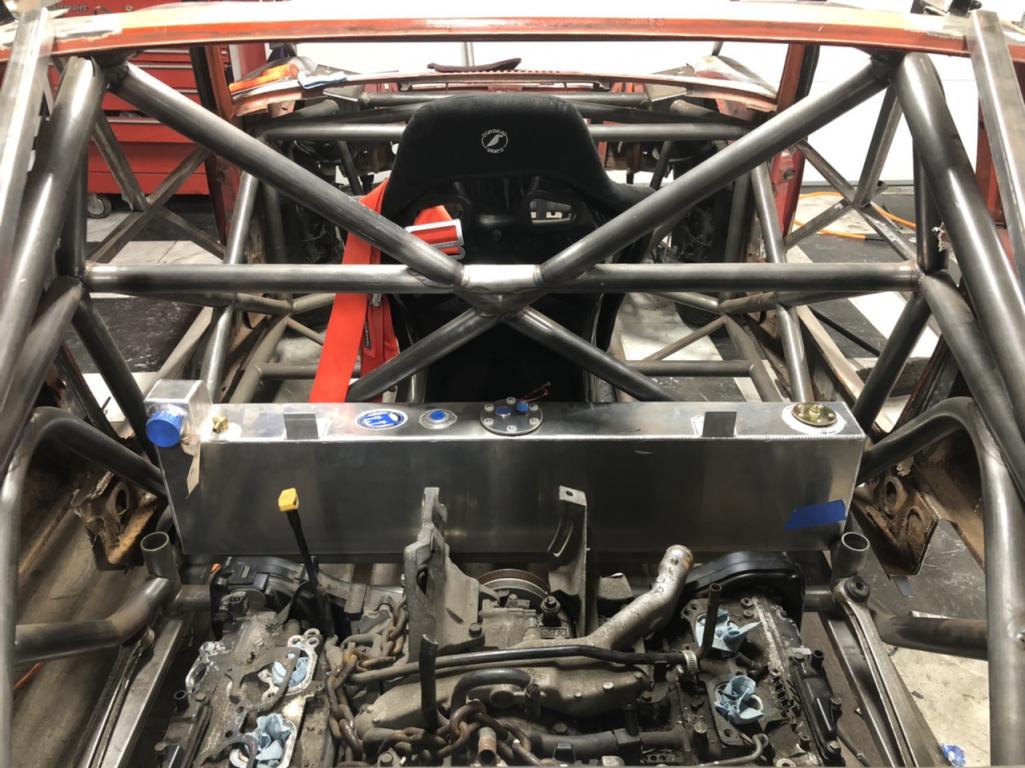
Posted by: tazz9924 Aug 23 2021, 08:50 PM
Better refined the steering system today and got it tacked together enough to actually turn the wheels!! Man will this thing be cool. I still need to reinforce the steering heim joints to fully eliminate play but as a proof of concept i am extremely happy. 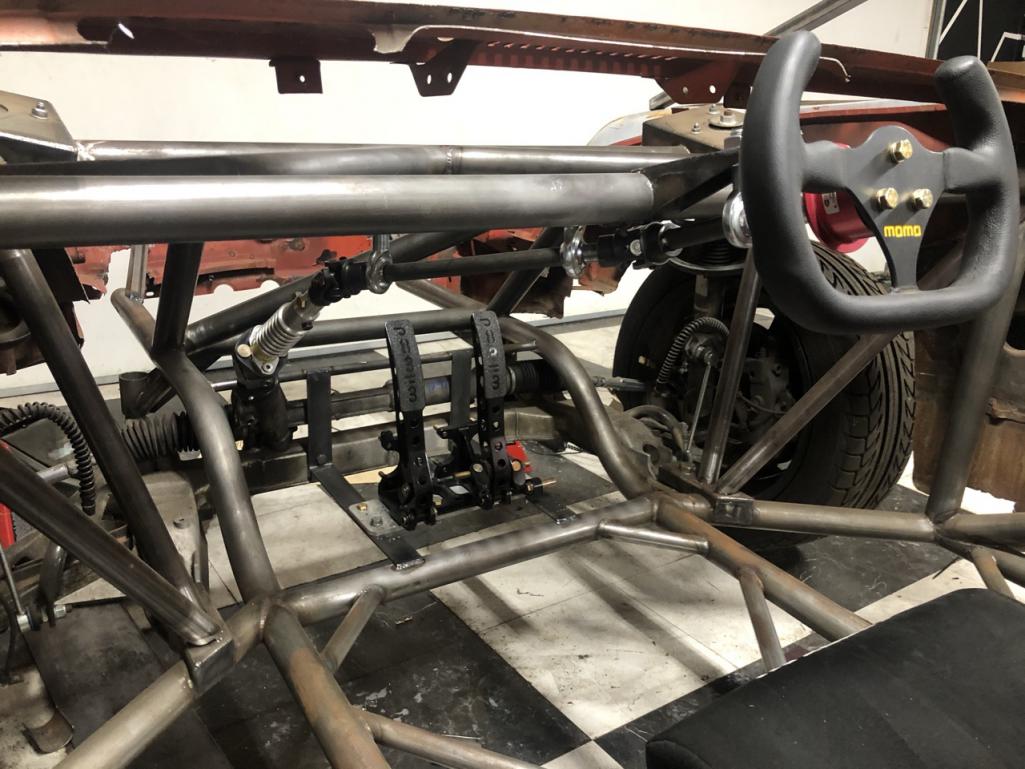
Posted by: tazz9924 Aug 26 2021, 05:25 PM
Made a video of recent progress for those of us who dont like to read forums!
(if any of us are actually like that...)
https://www.youtube.com/watch?v=-mvzjtbU10E
Posted by: tazz9924 Sep 14 2021, 10:16 PM
Over the last two days i built the A pillar bars. Each bar has 3 bends and 5 notches. 4 notches were completely hand made but by the time its done it felt like all 5 were hand done. im quite happy with how they turned out, as always i was very worried about the feasibility of it to only make it happen nicely! Next comes the roof bars!!!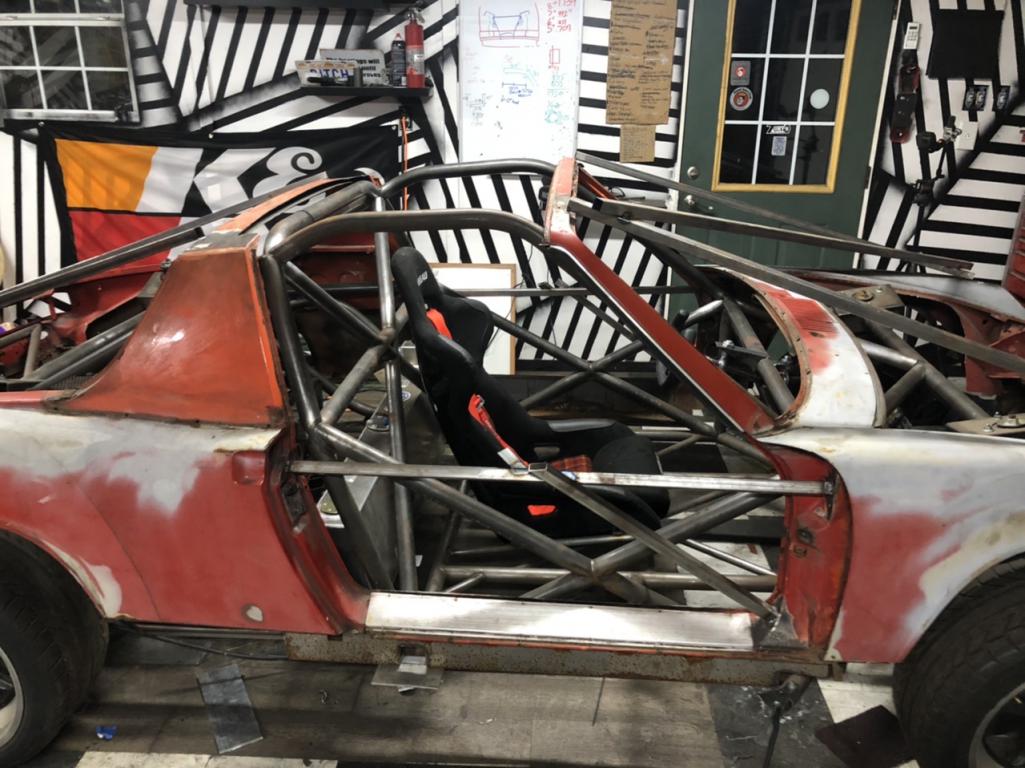
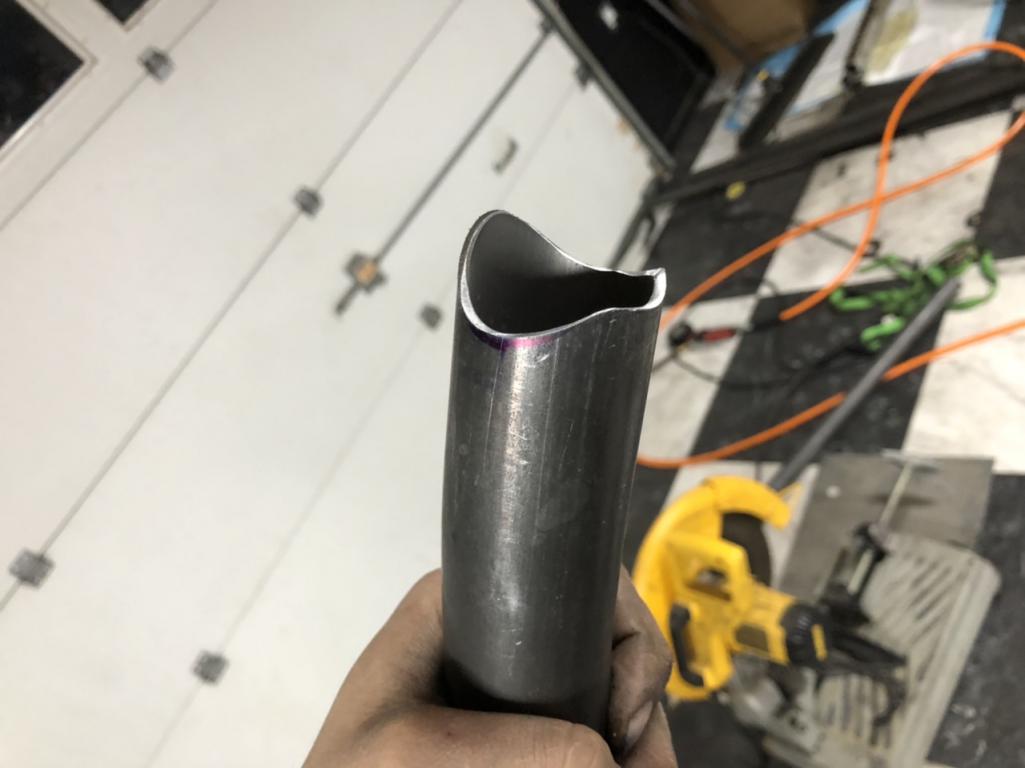
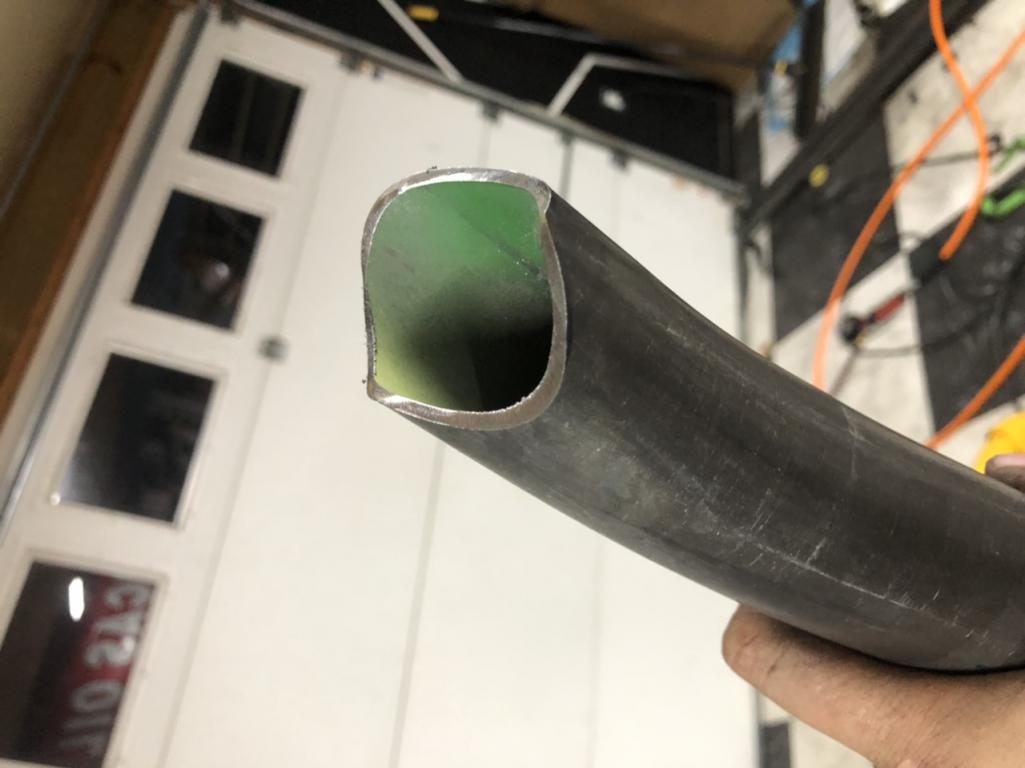
I also made a home made tubing un-bender.... Its ghetto but it worked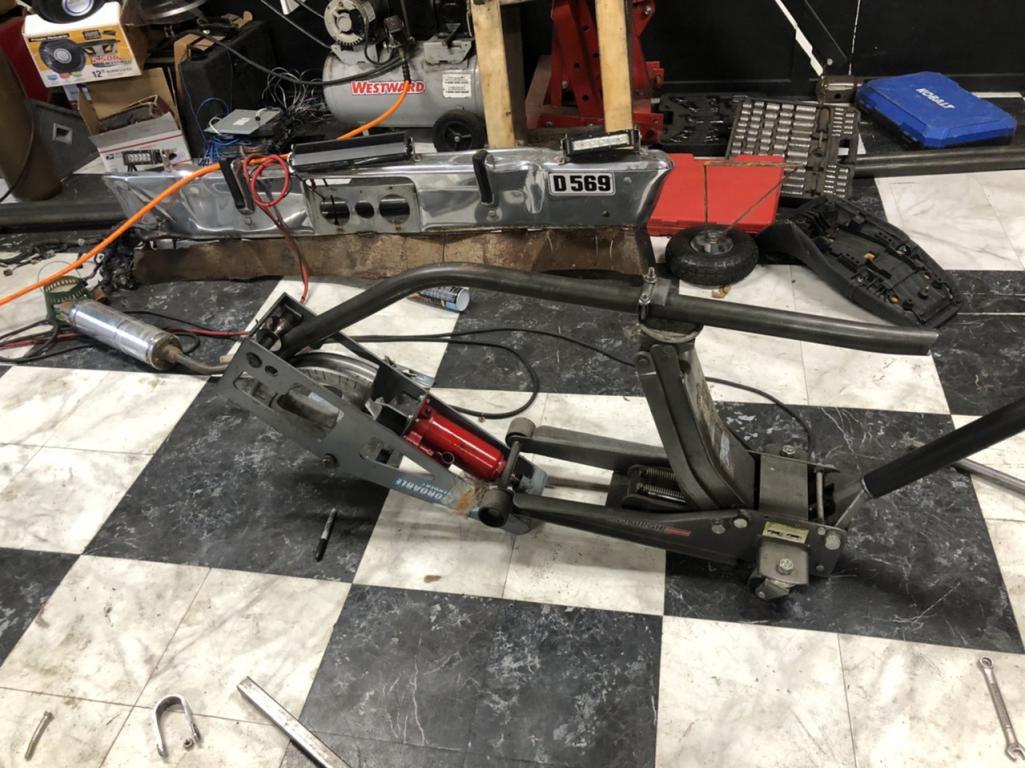
Posted by: tygaboy Sep 14 2021, 11:00 PM
Dude! I feel you on those multi-angle miters AND the unbending! Dealing with some of that very same stuff on my RacerBenz build.
But man! You are moving right along.
Love the center seating set up, too.
Posted by: tazz9924 Sep 15 2021, 06:25 AM
Dude! I feel you on those multi-angle miters AND the unbending! Dealing with some of that very same stuff on my RacerBenz build.
But man! You are moving right along.
Love the center seating set up, too.
Thank you! I figured you knew the pain
Posted by: tazz9924 Sep 15 2021, 09:43 PM
Made a very good fitting eyebrow bar, it sits a little under an 1/8” from the windshield frame with a 6* bend in the center. I also worked on some other tubes so hopefully its a big update tomorrow!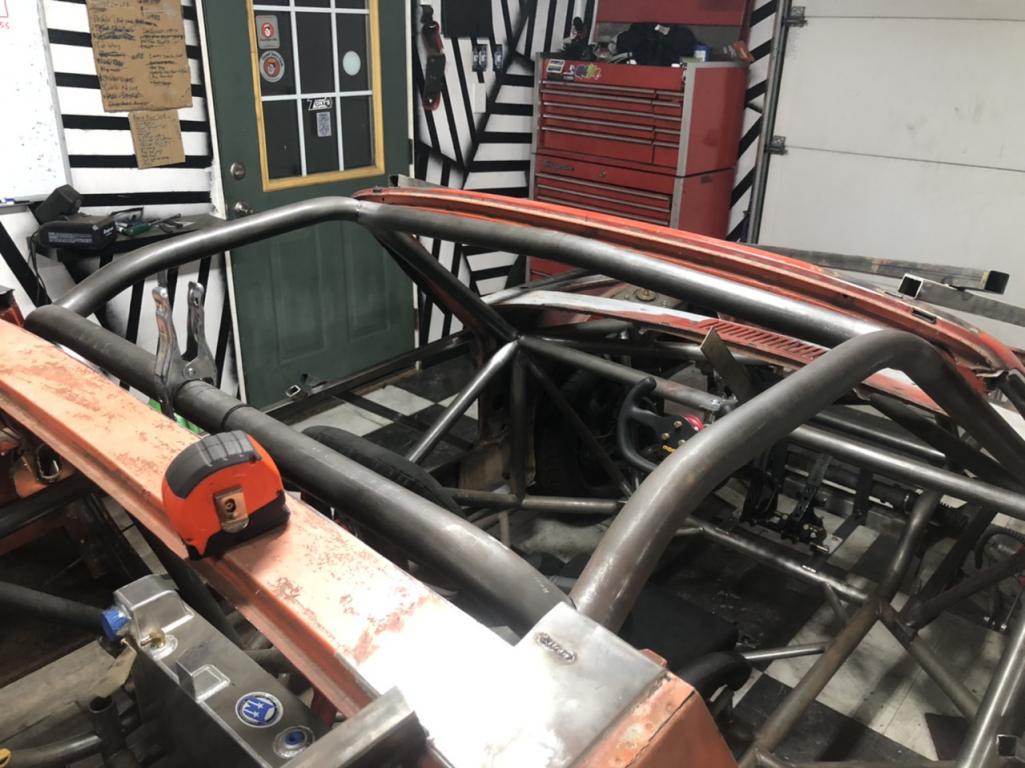
Posted by: tazz9924 Sep 16 2021, 10:48 PM
Didn’t get everything i wanted done today but i did get quite a bit! I made the roof V to protect my squishy bits from above, while still allowing me easy and quick exit from the vehicle. I also completed one of the FIA bars that extend from the footwell to the upper bend on the A pillar bar. I had my doubts about it because of driver egress concerns but its really not an issue. Once i get that done its gusset time and a little special piece? maybe we’ll see!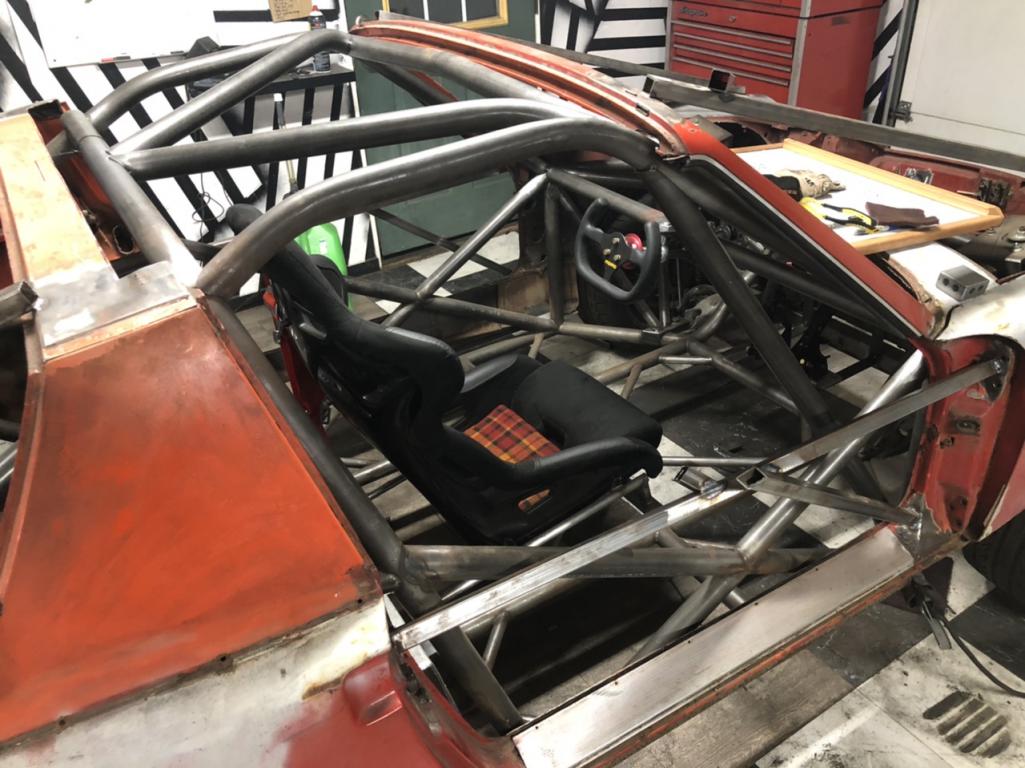
Posted by: tazz9924 Sep 17 2021, 10:54 PM
Finished the other fia bar and started mounting of the windshield!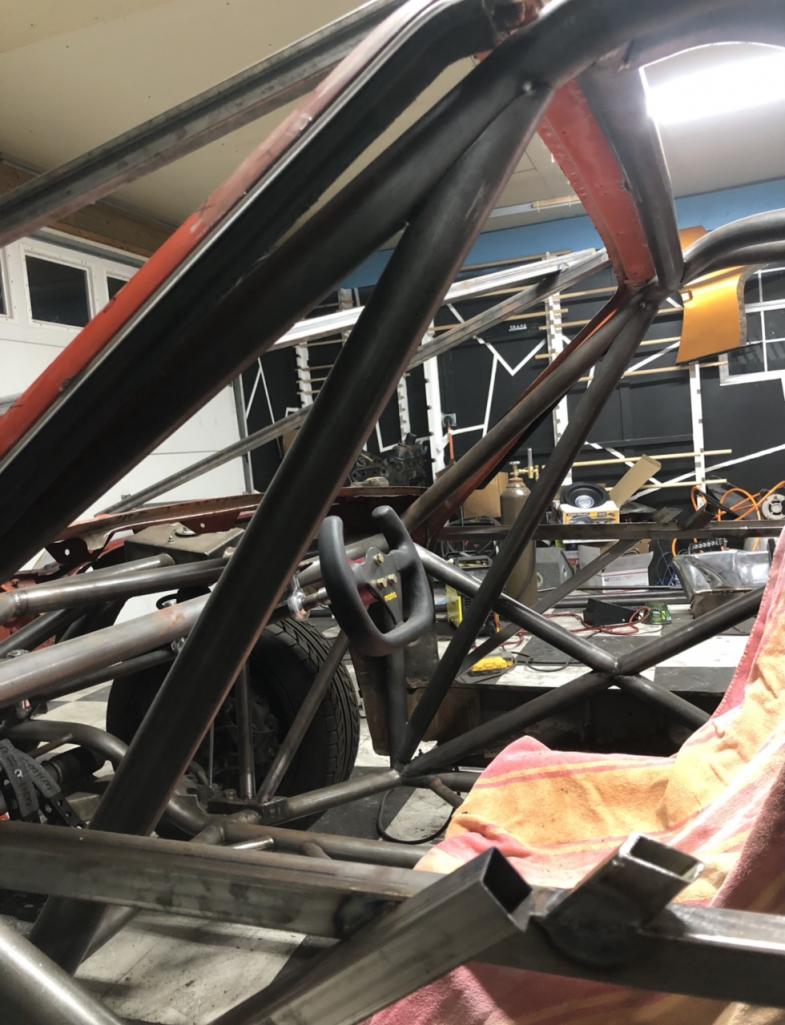
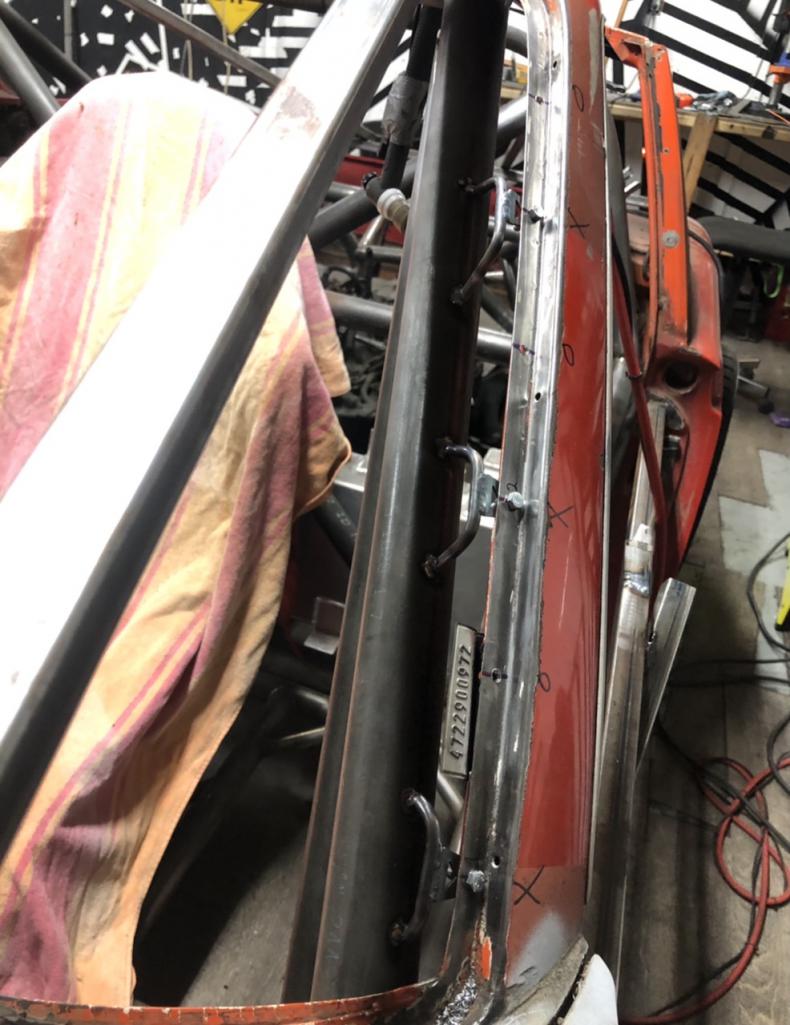
Posted by: 76-914 Sep 18 2021, 10:35 AM
You're definitely "on a mission" and killing it! Bet you take a "1st drive" before the end of this year. Stay after it.
Posted by: tazz9924 Sep 18 2021, 01:06 PM
You're definitely "on a mission" and killing it! Bet you take a "1st drive" before the end of this year. Stay after it.
Unfortunately its unlikely. im working on it like an animal right now because tuesday i leave for 6 weeks
the racing industry is ridiculous but its fun so you must make sacrifices. That being said ill save up a load of money for fun parts!
Posted by: tazz9924 Sep 18 2021, 10:44 PM
Began work in the off center console... you know because its not in the center exactly thats where i am. Its some 1” tubing bent at 30 degrees but when placed together it looks really cool and i already added the spot for my shifty!
Attached thumbnail(s)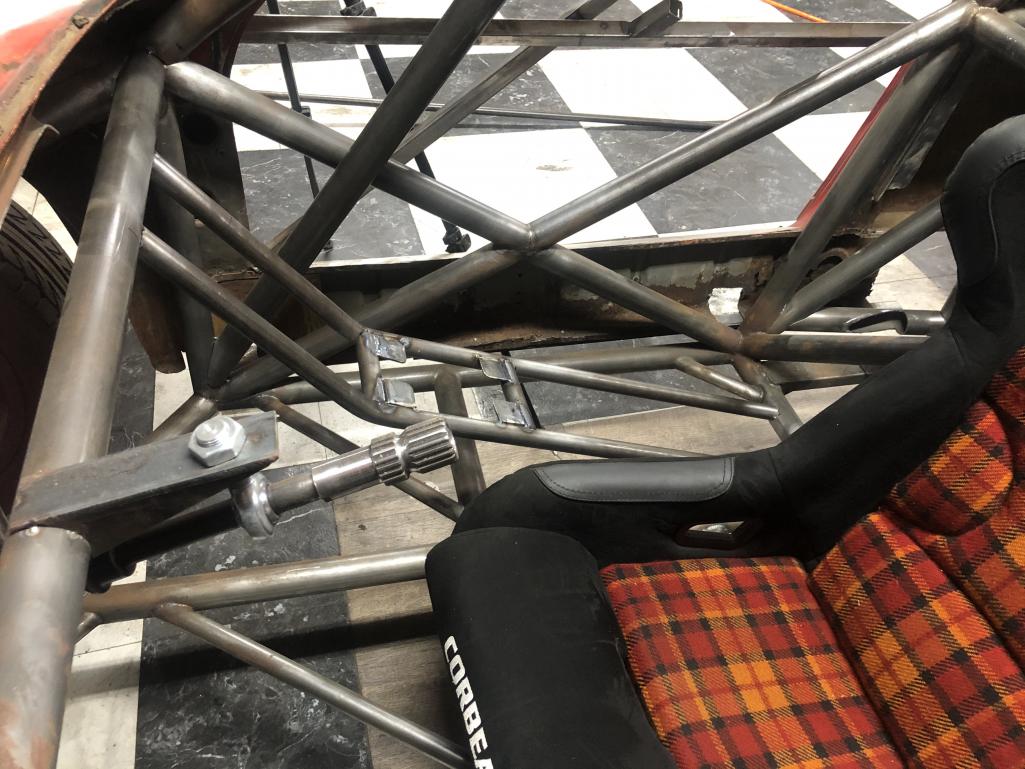
Posted by: tazz9924 Sep 19 2021, 10:30 PM
did a lil bit of reinforcement for the off center console and bolted in my K-tuned shifter. I finally have all the haptic stuff installed and i have no complaints!
Attached thumbnail(s)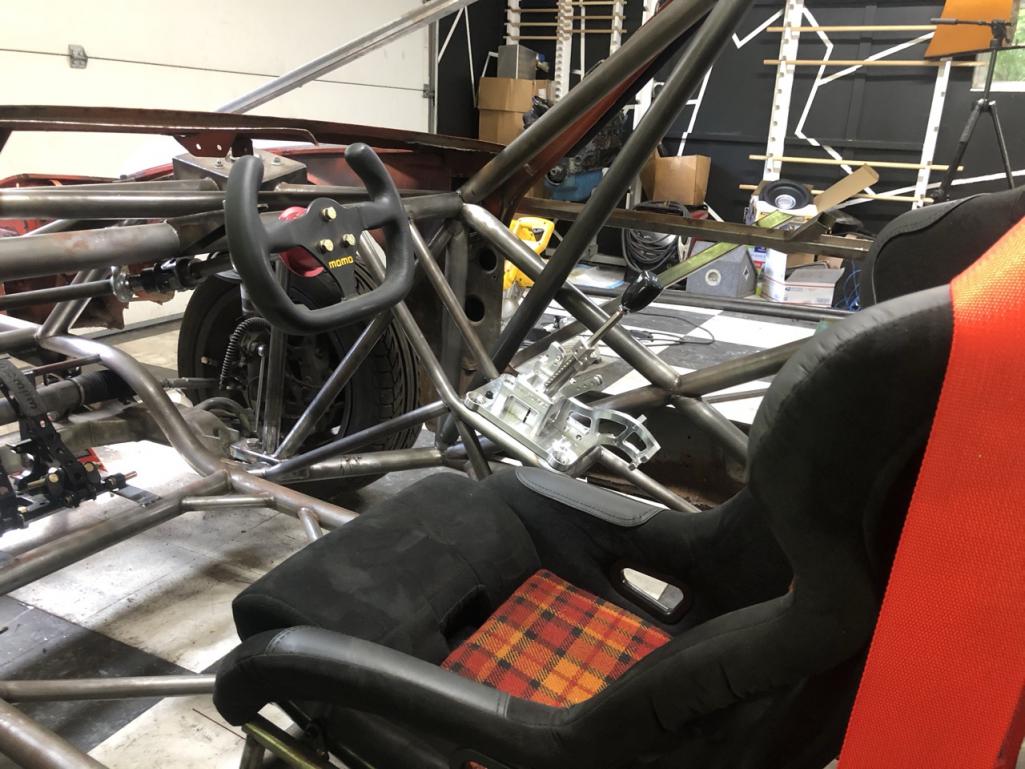
Posted by: mgp4591 Sep 20 2021, 12:00 AM
You're definitely "on a mission" and killing it! Bet you take a "1st drive" before the end of this year. Stay after it.
Unfortunately its unlikely. im working on it like an animal right now because tuesday i leave for 6 weeks
the racing industry is ridiculous but its fun so you must make sacrifices. That being said ill save up a load of money for fun parts!Okay, the info about the racing season and the NC location finally answered some questions in my mind...I was wondering how you developed your skills in engineering and fabrication. Your build is amazing and I'm looking forward to your progress when you get back to it! And stay safe!
Posted by: tazz9924 Sep 20 2021, 11:41 AM
You're definitely "on a mission" and killing it! Bet you take a "1st drive" before the end of this year. Stay after it.
Unfortunately its unlikely. im working on it like an animal right now because tuesday i leave for 6 weeks
the racing industry is ridiculous but its fun so you must make sacrifices. That being said ill save up a load of money for fun parts!Okay, the info about the racing season and the NC location finally answered some questions in my mind...I was wondering how you developed your skills in engineering and fabrication. Your build is amazing and I'm looking forward to your progress when you get back to it! And stay safe!
Im actually in an engine shop not a fab shop, my skills are mostly home grown. but believe me it doesn’t hurt working in racing when it comes to acquiring skills.
Posted by: tazz9924 Sep 20 2021, 11:48 AM
You're definitely "on a mission" and killing it! Bet you take a "1st drive" before the end of this year. Stay after it.
Unfortunately its unlikely. im working on it like an animal right now because tuesday i leave for 6 weeks
the racing industry is ridiculous but its fun so you must make sacrifices. That being said ill save up a load of money for fun parts!Okay, the info about the racing season and the NC location finally answered some questions in my mind...I was wondering how you developed your skills in engineering and fabrication. Your build is amazing and I'm looking forward to your progress when you get back to it! And stay safe!
This is the day job:
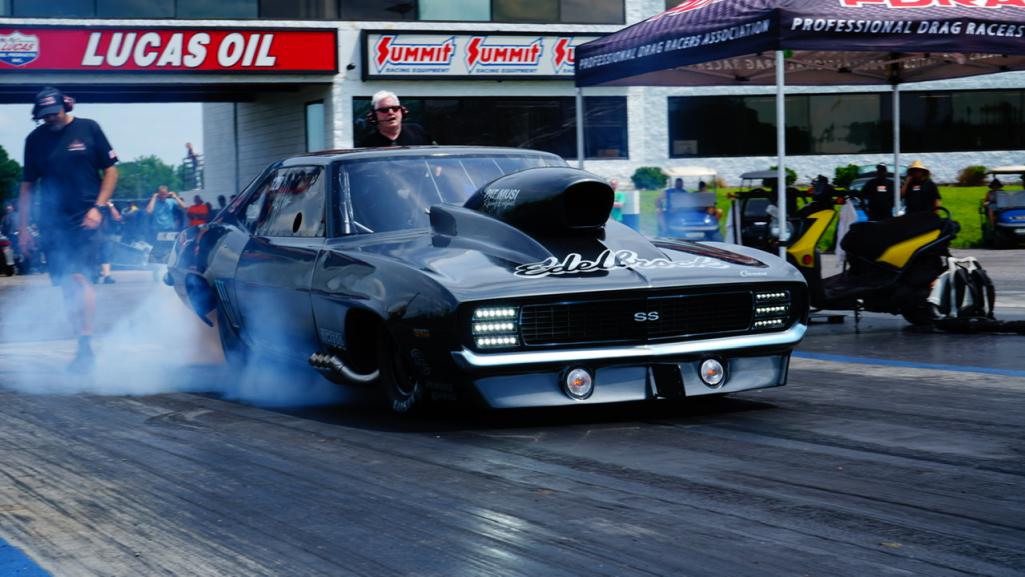
Posted by: djway Sep 20 2021, 10:42 PM
A few years back I built a pro mod cuda......in scale
Looks like a fun day job
Posted by: tazz9924 Sep 21 2021, 10:31 AM
A few years back I built a pro mod cuda......in scale
Looks like a fun day job
I like it! always been curious how this is done, maybe one day if i slow down
Posted by: djway Sep 21 2021, 10:43 PM
A few years back I built a pro mod cuda......in scale
Looks like a fun day job
I like it! always been curious how this is done, maybe one day if i slow down
Honestly full scale is easier.......and you can drive it

Posted by: tazz9924 Sep 25 2021, 08:48 PM
New video today!
https://www.youtube.com/watch?v=yTlpSpwLTFc
Posted by: sixnotfour Sep 25 2021, 10:19 PM
wow
Posted by: Mayne Sep 26 2021, 07:04 AM
Fantastic! The shifter structure looks great with kind of a modern super car geometry to it. The wheels seem like positive offset (would have expected more dish). Are you planning to run them inboard a bit for body clearance? Amazing vision and execution as always!
Posted by: tygaboy Sep 26 2021, 08:58 AM
Love this whole thing. Great videos, interesting content. I only wish I had something to add but you clearly have everything well in hand.
Oh wait, I do have something to say: Don't say I didn't warn you about MIG splatter adding some patina to your seat! 

Keep up the spectacular work.
Posted by: tazz9924 Sep 26 2021, 04:57 PM
Love this whole thing. Great videos, interesting content. I only wish I had something to add but you clearly have everything well in hand.
Oh wait, I do have something to say: Don't say I didn't warn you about MIG splatter adding some patina to your seat!
Keep up the spectacular work.
I dont own a mig welder actually. not once has one been used on this car. Now that everything is where it should be the seat will come back out and into storage for a bit. I want to lower the seating position some more too for head clearence. not that it isn’t currently acceptable but i want it better.
Posted by: 76-914 Sep 26 2021, 05:36 PM
Post the YouTube link, pls.
Posted by: tygaboy Nov 9 2021, 01:58 PM
@http://www.914world.com/bbs2/index.php?showuser=18779 - your extra special custom made parts are ready! Well, except I didn't final drill the holes. They're plasma cut to .2" diameter but a quick pass with a 1/4" drill and you should be set to use a 6mm bolt.
OK if I leave that to you? Assuming so, I'll get them in the mail in the next day or so.
Attached image(s)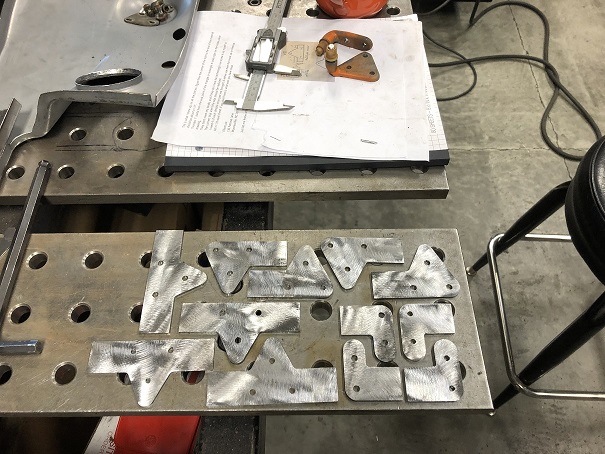
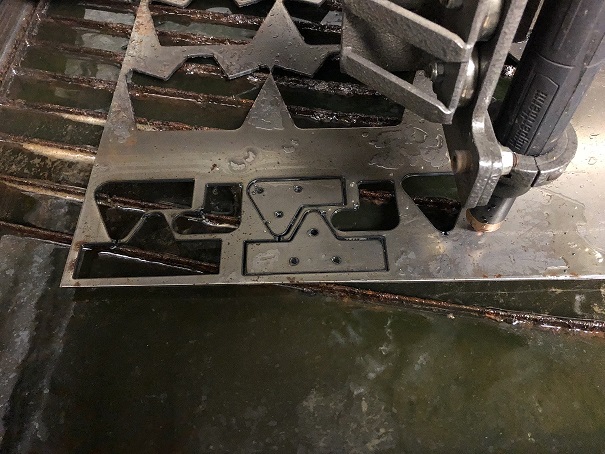
Posted by: mepstein Nov 9 2021, 03:34 PM
Wow. I had no idea you were so young. Amazing job!
I was just down your way buying another motorcycle.
Posted by: tazz9924 Nov 9 2021, 06:23 PM
@http://www.914world.com/bbs2/index.php?showuser=18779 - your extra special custom made parts are ready! Well, except I didn't final drill the holes. They're plasma cut to .2" diameter but a quick pass with a 1/4" drill and you should be set to use a 6mm bolt.
OK if I leave that to you? Assuming so, I'll get them in the mail in the next day or so.
Looking good! well on my way to preserving those flippy lights!
Posted by: tazz9924 Nov 25 2021, 07:50 AM
Finally starting to get back at it after a long work trip. I started off fixing some fust in whats left of the longs. i cut out the offending spots and welded in new american steel. ...hopefully it’ll last longer this time and mostly ground down the welds. some i couldn’t reach just yet but so far so good. onto the Driver(?) side.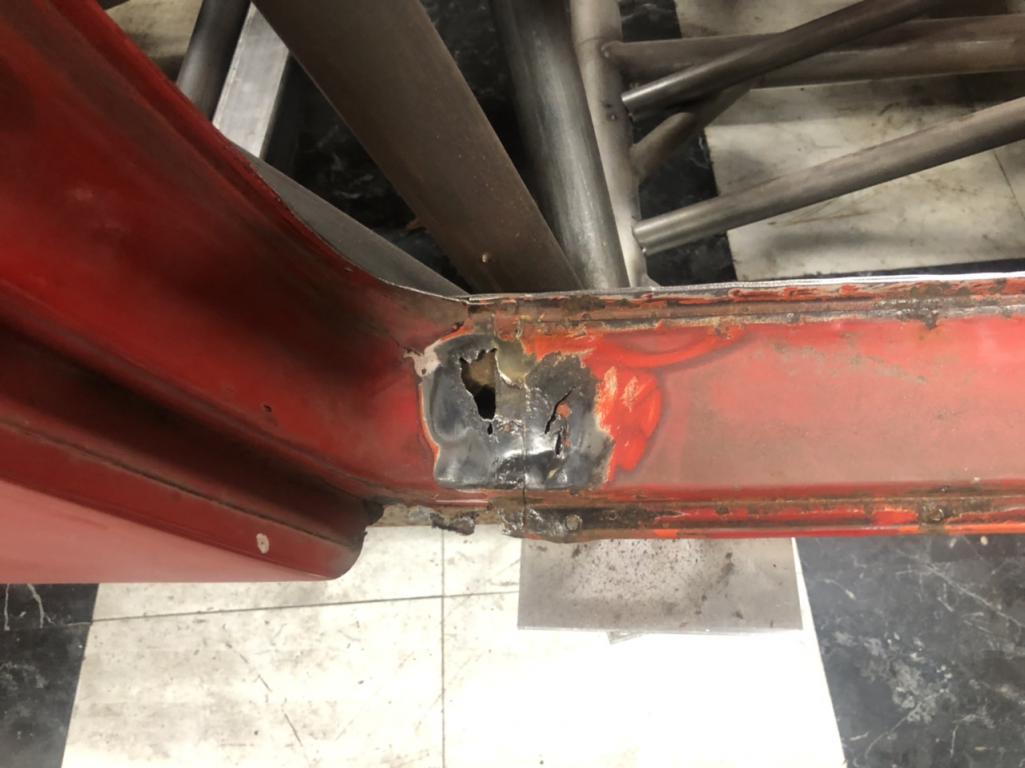
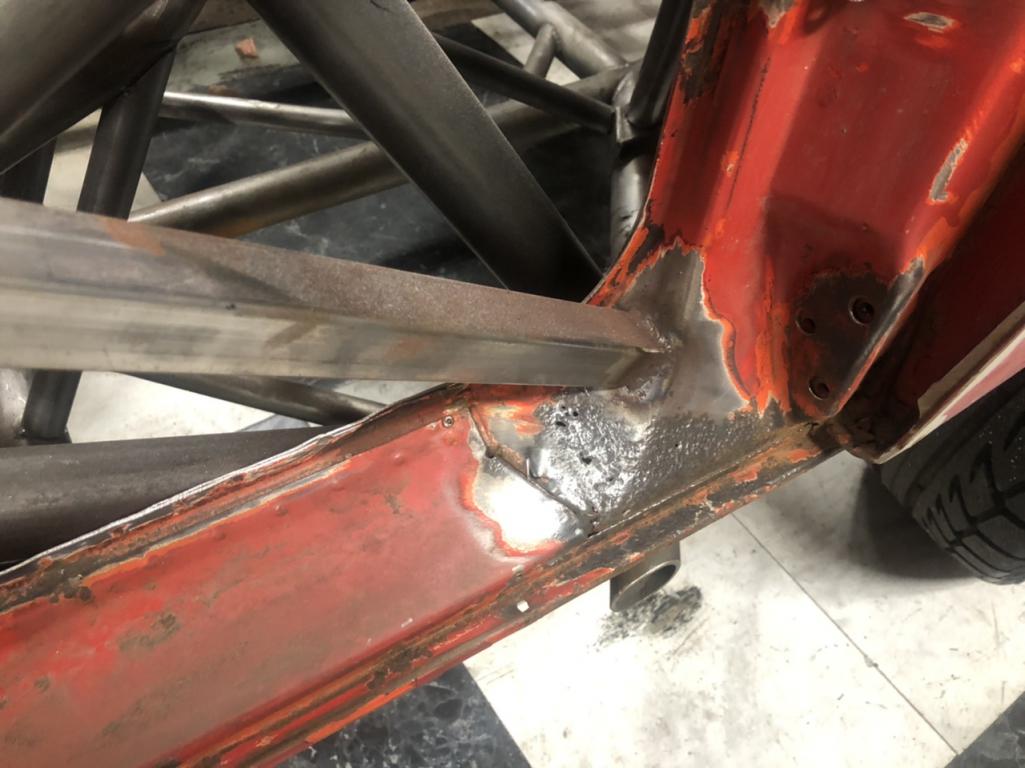
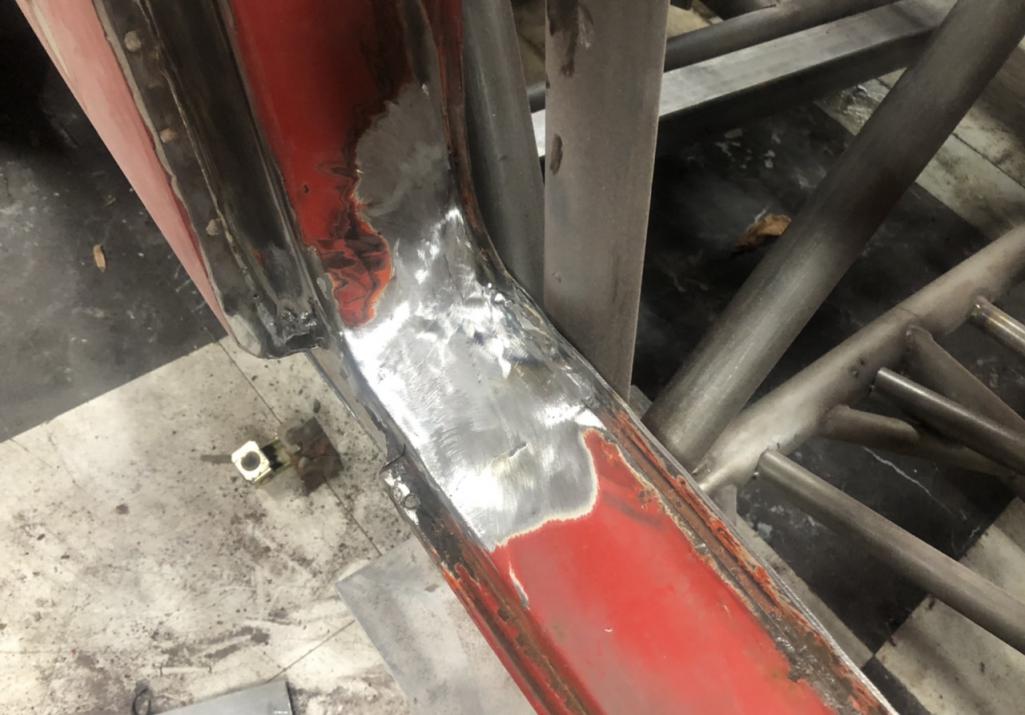
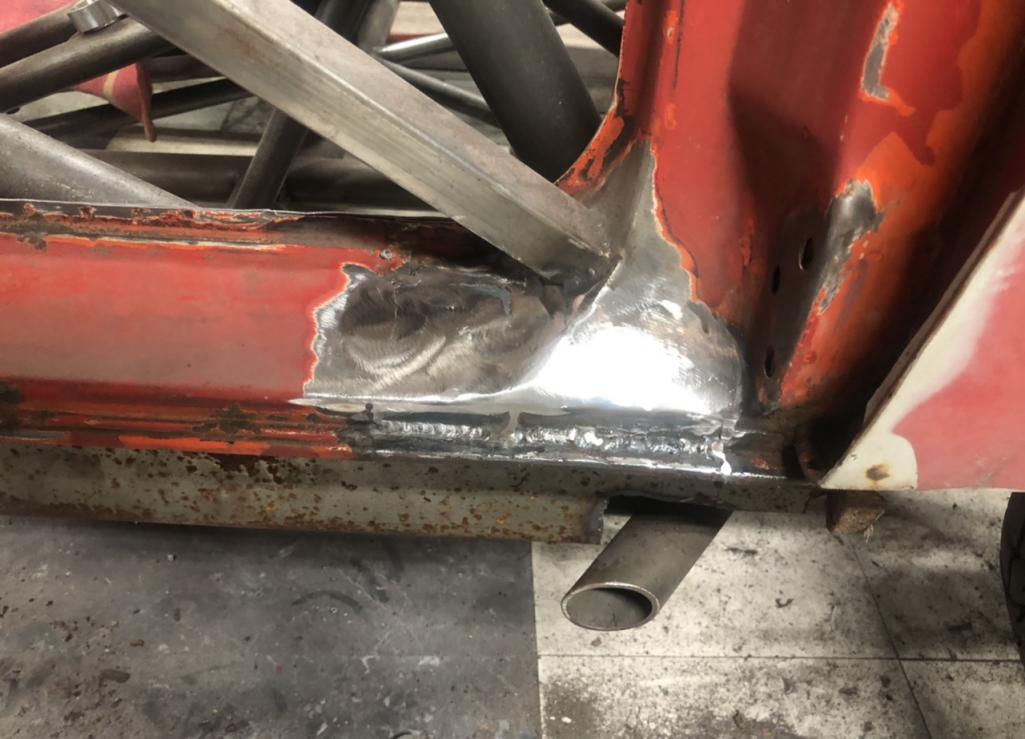
Posted by: tazz9924 Nov 30 2021, 11:26 PM
Cut out those gross ugly longs i hear you guys talk about (and to a greater extent have nightmares about). What was left was totally un needed so i cut it all out and i worked on installing my stands. So you can still walk, stand, crawl,complain about how low the car is over, and fall over, all over the door sills. i really like how it looks too!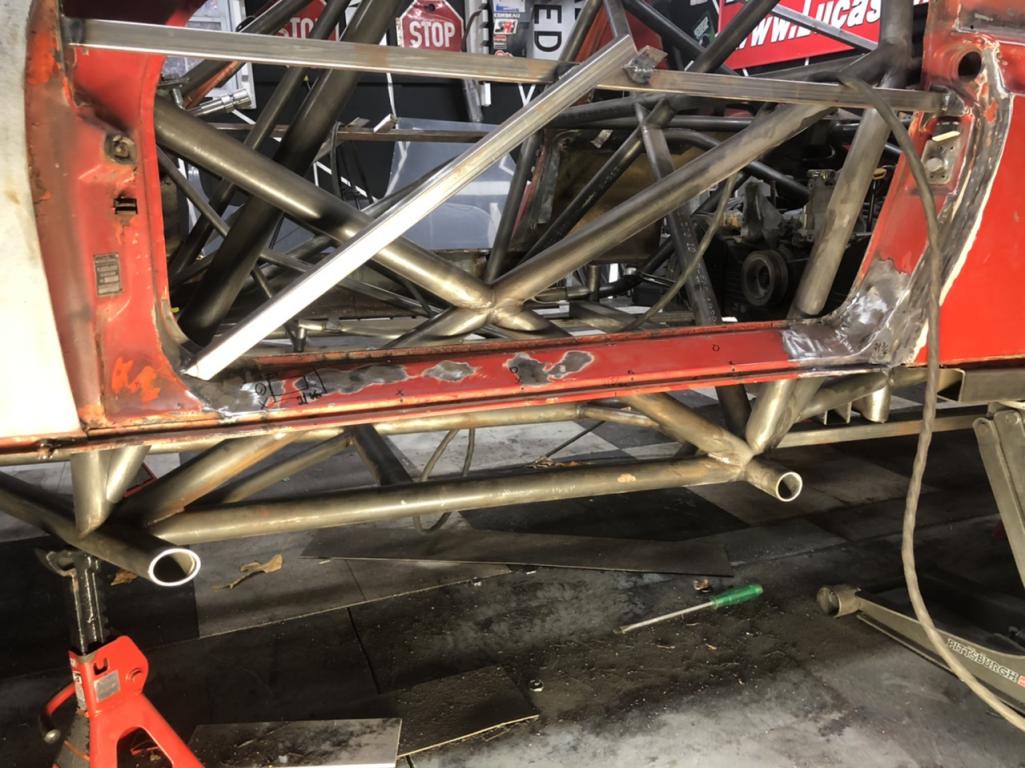
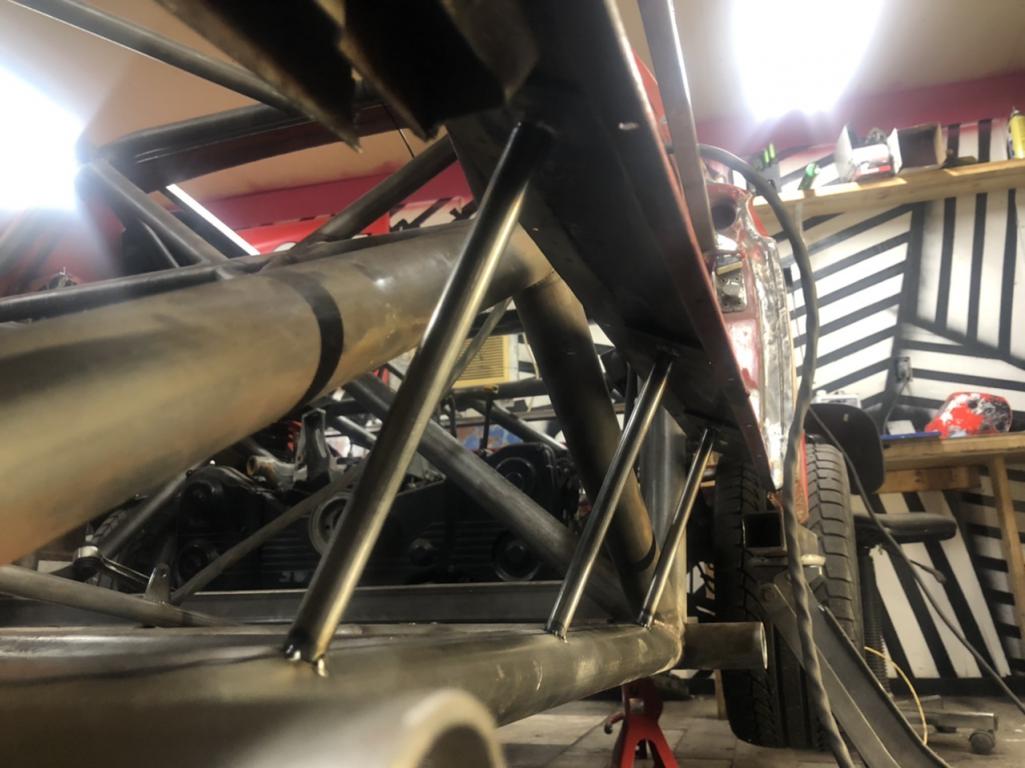
Posted by: tygaboy Dec 1 2021, 09:33 AM
For us oldies:
Dude! That is totally tubular!
Seriously, wicked cool build. I simply HAVE to find a way to get back there, meet you and see your build.
Posted by: tazz9924 Dec 1 2021, 01:44 PM
For us oldies:
Dude! That is totally tubular!
Seriously, wicked cool build. I simply HAVE to find a way to get back there, meet you and see your build.
Any time! but if its soon i have to hurry up and get something done!
Posted by: tazz9924 Dec 1 2021, 10:47 PM
Finished up the other side of the rockers, removed the last little tight spot in the steering and oh yeah: Removed the front springs so it doesn’t sit up all stupid. The good news is my control arm angle on the front is gonna be dead nuts. its a little high now believe it or not but it needs to come down about an inch or two. Right now the control arm is angled down slightly so to make it level it needs to go lower oh and btw i cut the passenger side spring in like 5 pieces to get it out. Ill need a custom strut to get the hight i need so i dont feel bad. 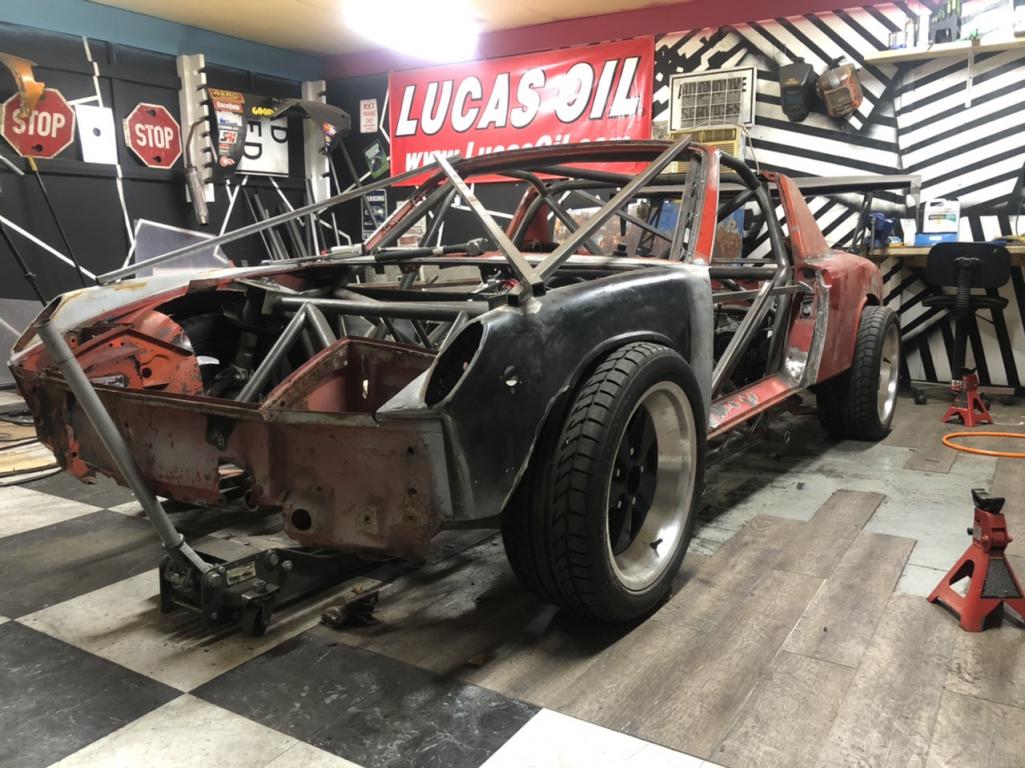
Posted by: tazz9924 Dec 2 2021, 10:18 PM
Got down to making my temporary jig for the flip up lights. @http://www.914world.com/bbs2/index.php?showuser=19241 made me the brackets on the plasma table, and they installed right in! I then used my chance to finally remove the head gear off the front of the body. I gave the hood a test fit and i wont need much/if any bump in the hood to clear the strut towers Things have honestly gone very good lately and im working to keep the gas pressed. 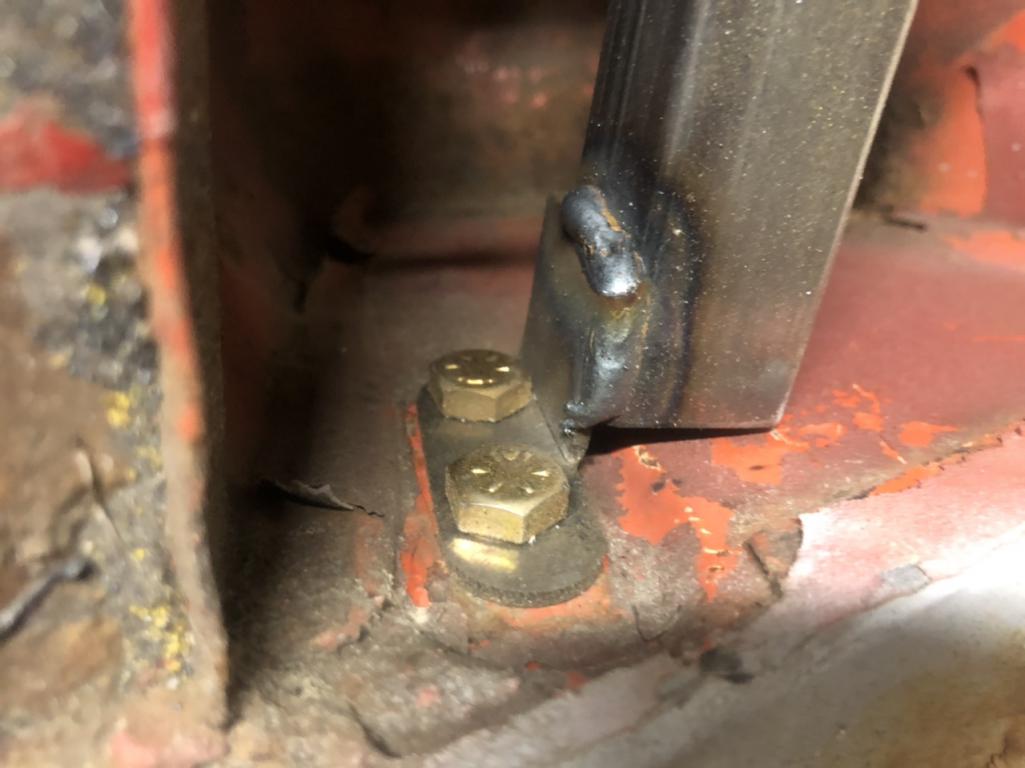

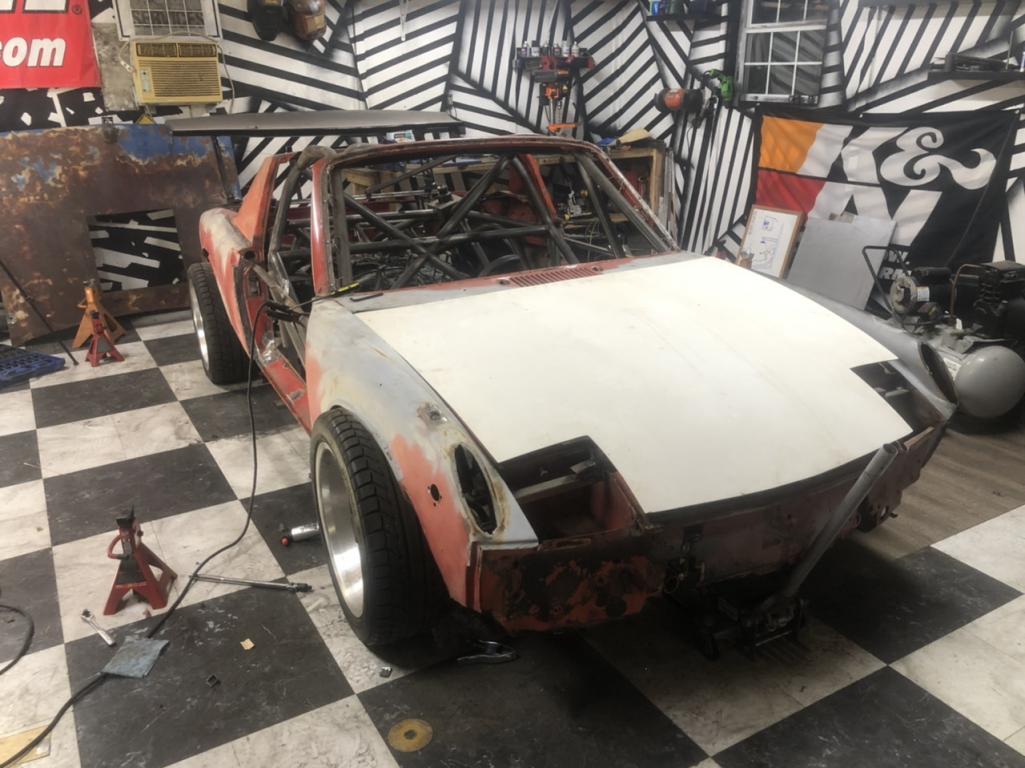
Posted by: tazz9924 Feb 5 2022, 10:35 PM
I am so happy to be back! i have been so busy lately almost everything in life has been on the back burner. In December i raced my dodge again with 24 hours of lemons at road atlanta and won the Heroic fix trophy. Ill link the video down below. Then i went home for christmas for 10 days, returned to work for one day before goin go to south texas to shoot a TV show for 6 weeks. Now im finally back! And im going to start with some house cleaning (literally and figuratively).
I bought a sheridan one ish piece front end for mark at 914 and wow is this a beautiful piece! Sheridan parts have been a dream of mine for a long time. I may be still a kid to most but when i was a kid i looked up to the sheridan race cars. I also recently picked up some rear wide body panels and a couple other goodies while i was in texas and they will be here soon. 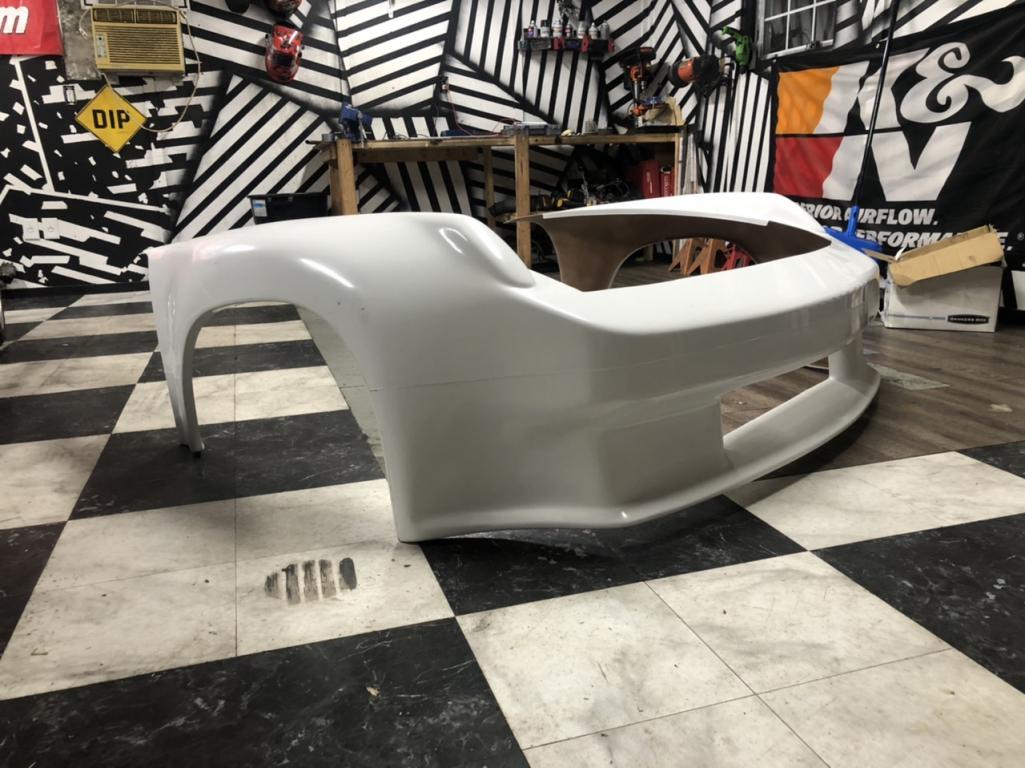
Tomorrow is a day of work ive looked forward to for a long time. This should get pretty good here soon.
Lemons video:
https://m.youtube.com/watch?v=oJOKdhoDLME&t=992s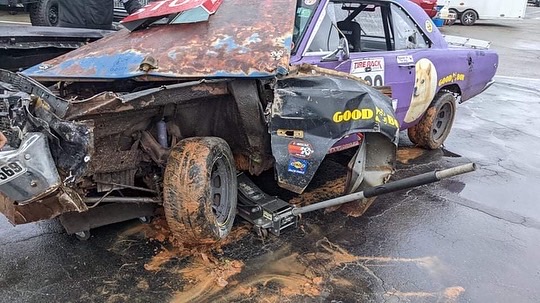
Posted by: 76-914 Feb 5 2022, 10:48 PM
Can't see it. Where in south TX?
Posted by: tazz9924 Feb 5 2022, 10:51 PM
Can't see it. Where in south TX?
Harlingen-Mcallen
Posted by: tazz9924 Feb 5 2022, 11:27 PM
Can't see it. Where in south TX?
i gave up and did it the lazy way

Posted by: mgp4591 Feb 6 2022, 01:41 AM
I am so happy to be back! i have been so busy lately almost everything in life has been on the back burner. In December i raced my dodge again with 24 hours of lemons at road atlanta and won the Heroic fix trophy. Ill link the video down below. Then i went home for christmas for 10 days, returned to work for one day before goin go to south texas to shoot a TV show for 6 weeks. Now im finally back! And im going to start with some house cleaning (literally and figuratively).
I bought a sheridan one ish piece front end for mark at 914 and wow is this a beautiful piece! Sheridan parts have been a dream of mine for a long time. I may be still a kid to most but when i was a kid i looked up to the sheridan race cars. I also recently picked up some rear wide body panels and a couple other goodies while i was in texas and they will be here soon.
Tomorrow is a day of work ive looked forward to for a long time. This should get pretty good here soon.
Lemons video:
https://m.youtube.com/watch?v=oJOKdhoDLME&t=992s
That's some heroic pit work there! I cringed a bit when I saw the Dart Sport roof and what had been done to the car but you guys made it glorious anyway... Congratulations!
Posted by: tazz9924 Feb 6 2022, 11:10 AM
I am so happy to be back! i have been so busy lately almost everything in life has been on the back burner. In December i raced my dodge again with 24 hours of lemons at road atlanta and won the Heroic fix trophy. Ill link the video down below. Then i went home for christmas for 10 days, returned to work for one day before goin go to south texas to shoot a TV show for 6 weeks. Now im finally back! And im going to start with some house cleaning (literally and figuratively).
I bought a sheridan one ish piece front end for mark at 914 and wow is this a beautiful piece! Sheridan parts have been a dream of mine for a long time. I may be still a kid to most but when i was a kid i looked up to the sheridan race cars. I also recently picked up some rear wide body panels and a couple other goodies while i was in texas and they will be here soon.
Tomorrow is a day of work ive looked forward to for a long time. This should get pretty good here soon.
Lemons video:
https://m.youtube.com/watch?v=oJOKdhoDLME&t=992s
That's some heroic pit work there! I cringed a bit when I saw the Dart Sport roof and what had been done to the car but you guys made it glorious anyway... Congratulations!
Thank you! i feel bad sometimes but then i think about how much i love the car and the fact i got it for free.
Posted by: tazz9924 Feb 6 2022, 08:15 PM
I cut the nose off the car so i can fit up the sheridan nose on for testing and smile reasons. and i really like the way it looks with all the factory sheet metal cut out. it feels really racecar like with the nose cut off. 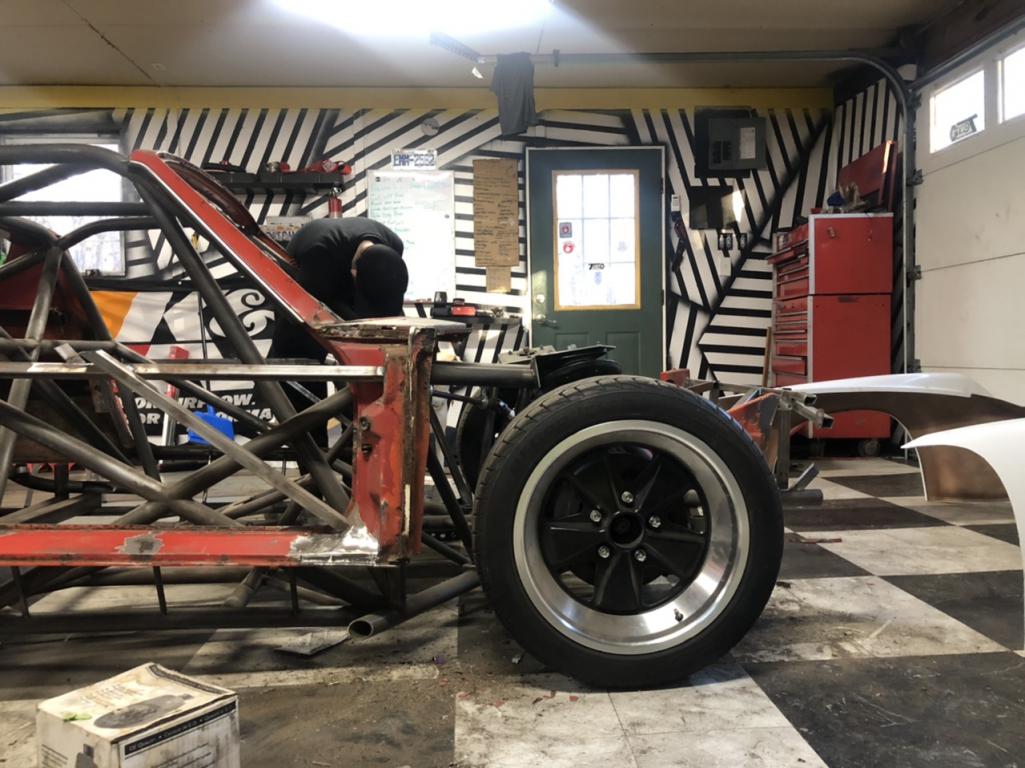
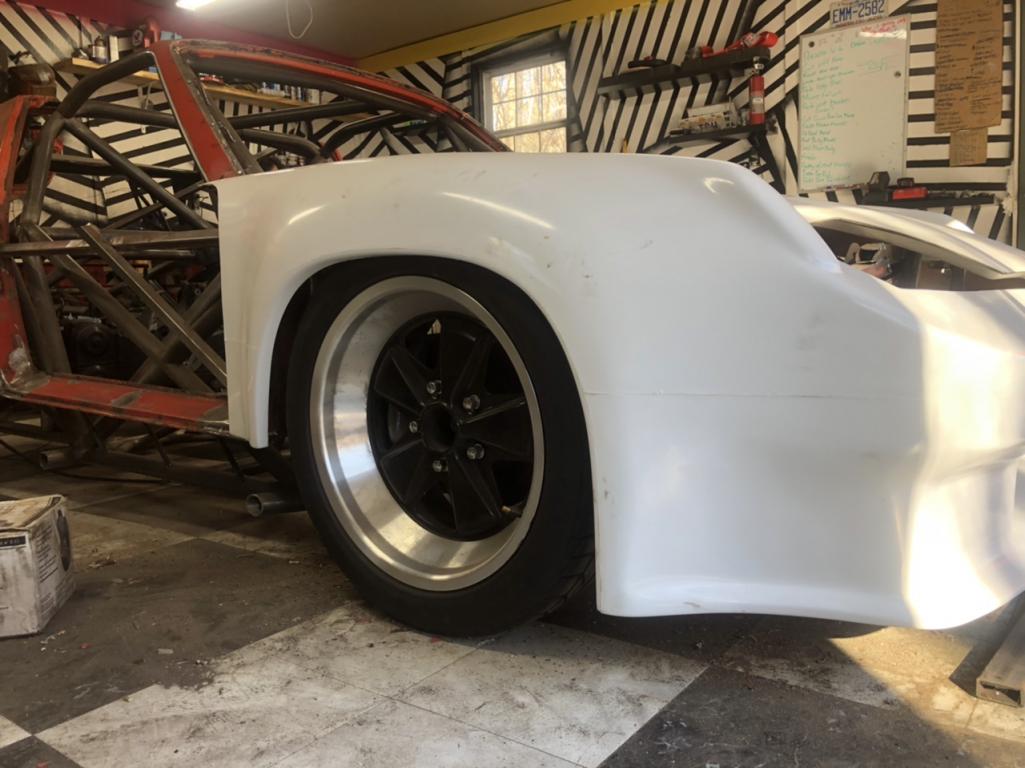
Posted by: 76-914 Feb 6 2022, 11:20 PM
You wrecked it twice?
Posted by: mgp4591 Feb 7 2022, 01:12 AM
You wrecked it twice?
Not him personally, but yeah...
Posted by: tazz9924 Feb 7 2022, 07:28 AM
You wrecked it twice?
rough weekend but it was awesome. i live for the repairs, the race wouldn’t be as interesting if i came back and said: “yup we all got 2 stints, no issues” Instead i can say HOLY CRAP! look what we did!
not saying i mean for it to happen, chaos just follows me.
Posted by: Superhawk996 Feb 7 2022, 07:40 AM
You wrecked it twice?
rough weekend but it was awesome. i live for the repairs, the race wouldn’t be as interesting if i came back and said: “yup we all got 2 stints, no issues” Instead i can say HOLY CRAP! look what we did!
not saying i mean for it to happen, chaos just follows me.
LOL! Lemons video reminds me of the good old days 30 years ago crewing for anyone that would let me. You haven't done body work until you've used a phone book and a sledgehammer!
Great tube frame build! Inspiring.
Posted by: tazz9924 Feb 7 2022, 11:38 AM
You wrecked it twice?
rough weekend but it was awesome. i live for the repairs, the race wouldn’t be as interesting if i came back and said: “yup we all got 2 stints, no issues” Instead i can say HOLY CRAP! look what we did!
not saying i mean for it to happen, chaos just follows me.
LOL! Lemons video reminds me of the good old days 30 years ago crewing for anyone that would let me. You haven't done body work until you've used a phone book and a sledgehammer!
Great tube frame build! Inspiring.
Thank you!
Posted by: tazz9924 Feb 7 2022, 02:08 PM
Got to work cutting out some tubing i have began to hate the look of. The tubes that go from the main chassis rail to near the shock towers got removed. Instead i will be welding in a tube that will go from the front cross bar to the shock tower. It will probably make more sense when its in so trust me this is for the best. 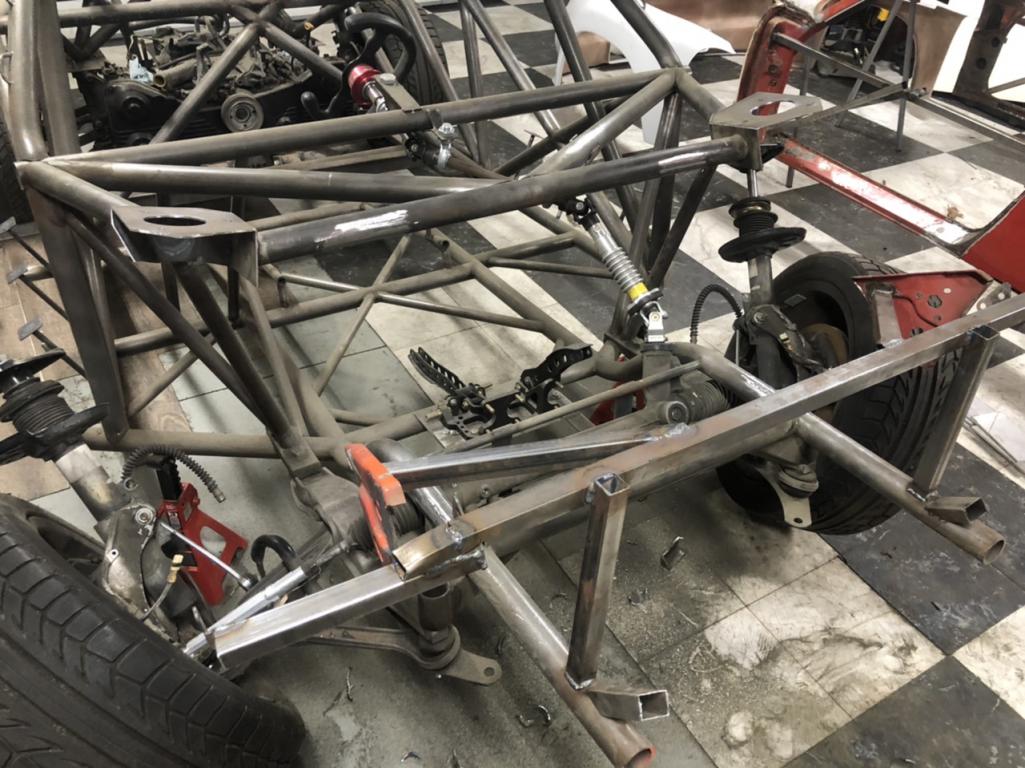
Posted by: tazz9924 Feb 8 2022, 11:05 PM
Finished up the front end minus some welding and i think it turned out great! the shock towers look good, so now on to the rear.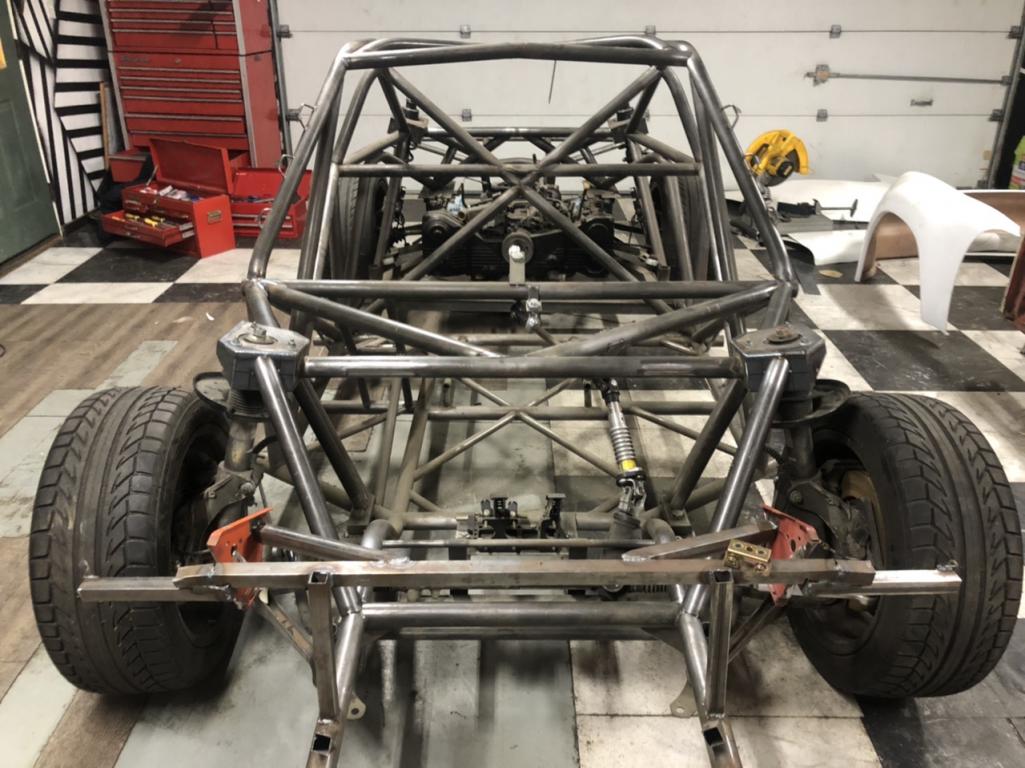

Posted by: tygaboy Feb 9 2022, 11:00 AM
So.
F-ing.
COOL!
Just awesome... I'm jealous so happy for you it's turning out the way you want.
Posted by: tazz9924 Feb 15 2022, 08:45 PM
I have a new video out on my build! I honestly think its my best work video wise, and i hope you enjoy it!
https://youtu.be/CtjIzfFIdKQ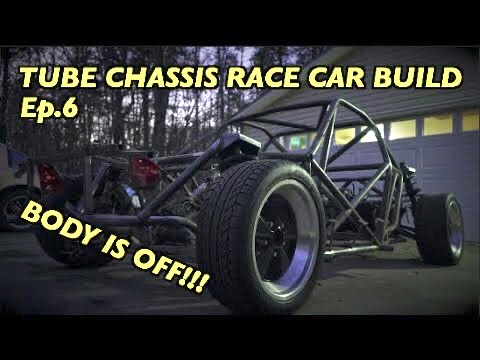
Posted by: 76-914 Feb 15 2022, 10:11 PM
Great video but more importantly a great build. I like the last profile shot when you are exclaiming "I really love it". You can clearly see the 914 outline in you're tubular -should I say tubular Dude?- build. Keep up the excellent build and looking forward to more pic's n video's.
Posted by: tazz9924 Feb 16 2022, 07:26 AM
Great video but more importantly a great build. I like the last profile shot when you are exclaiming "I really love it". You can clearly see the 914 outline in you're tubular -should I say tubular Dude?- build. Keep up the excellent build and looking forward to more pic's n video's.
Thank you so much! And yes, tubular does apply
Posted by: tazz9924 Feb 20 2022, 10:10 PM
Worked on installing the flippy lights among some smaller stuff. And so far so good! thanks again @http://www.914world.com/bbs2/index.php?showuser=19241 for the brackets, saved me a butt load of time!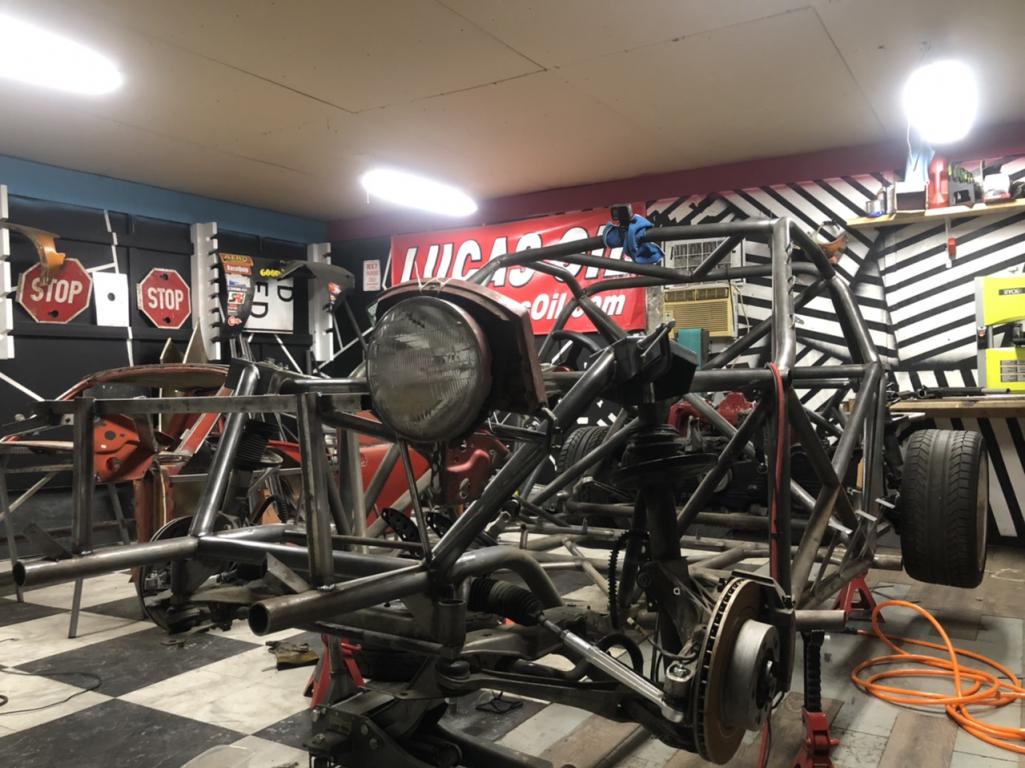
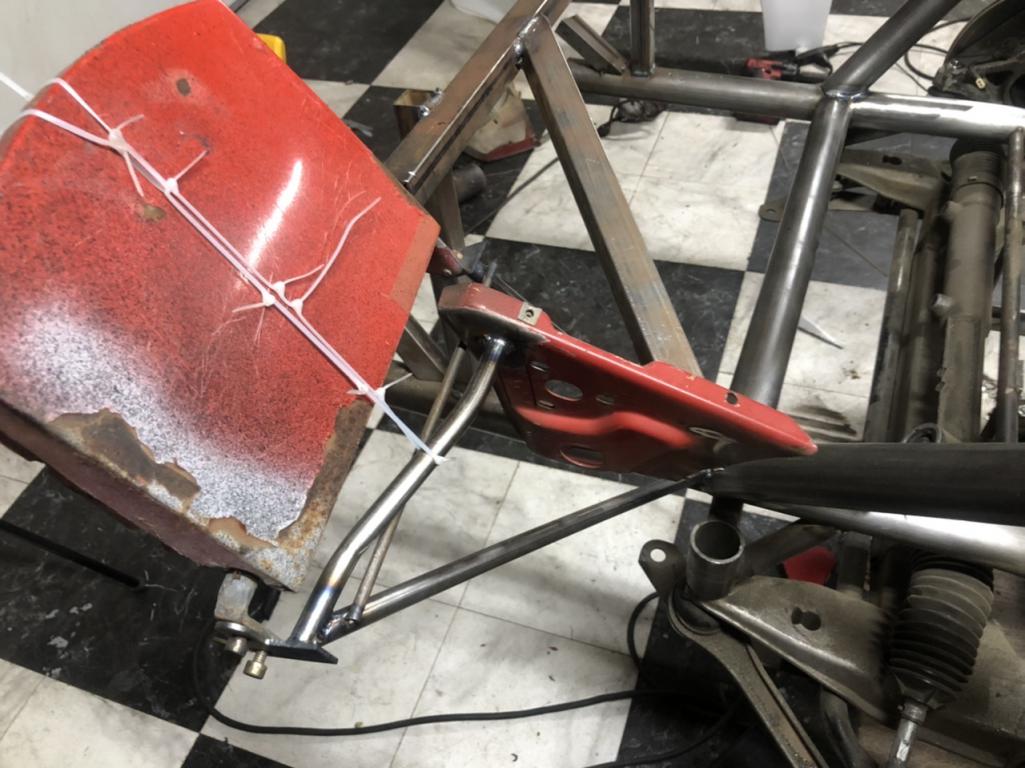
Posted by: tazz9924 Feb 24 2022, 09:26 PM
Built a replacement subframe for the rear suspension to allow my to fit my headers in there. I need extra space for a larger diameter tube than standard to allow for HP room to grow. I also think this has a better cleaner look for the car. 
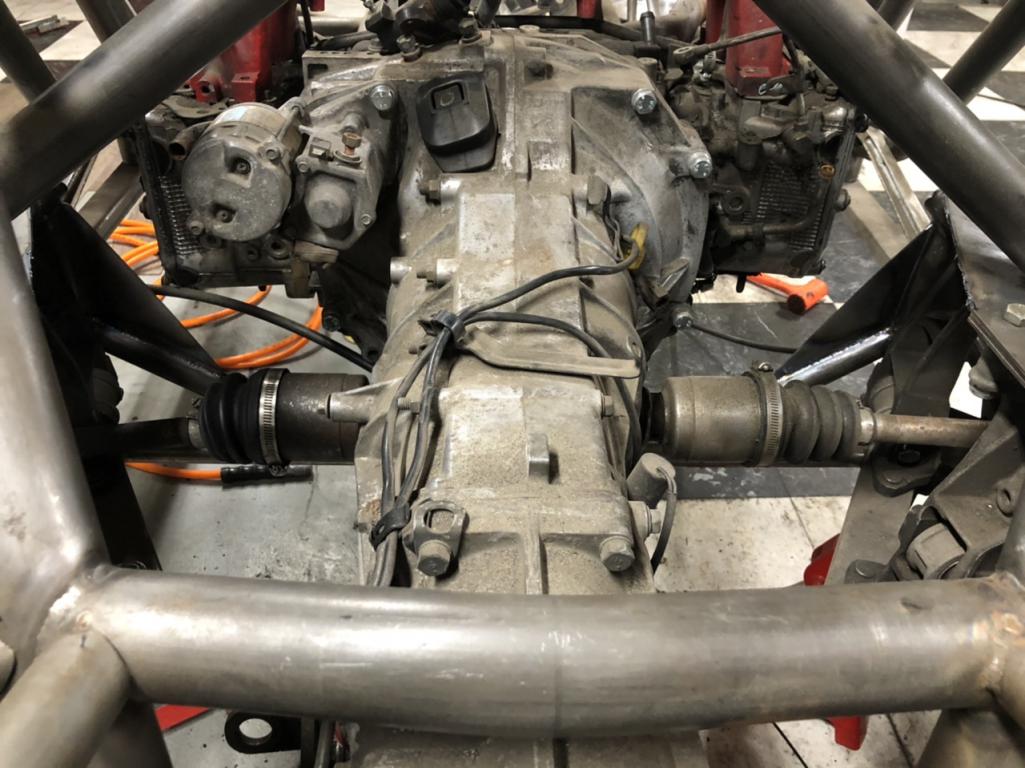
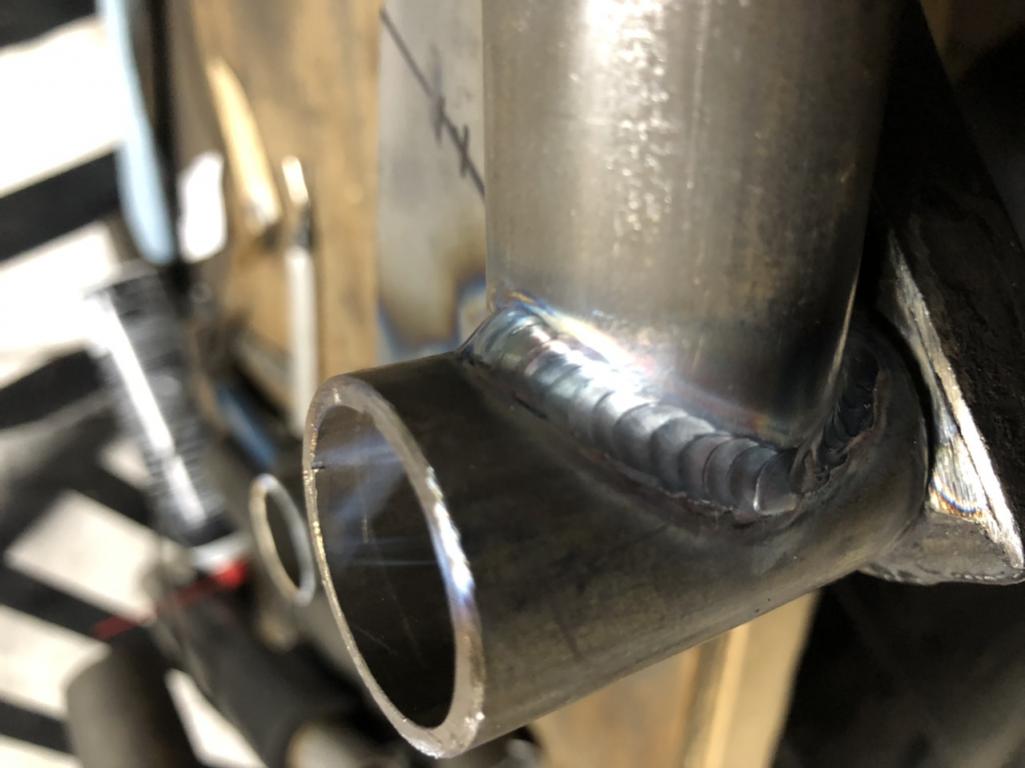
Posted by: djway Feb 24 2022, 10:56 PM
Love the welds
Posted by: tazz9924 Feb 25 2022, 10:02 PM
Now both of the flippy lights are in and getting ready to popup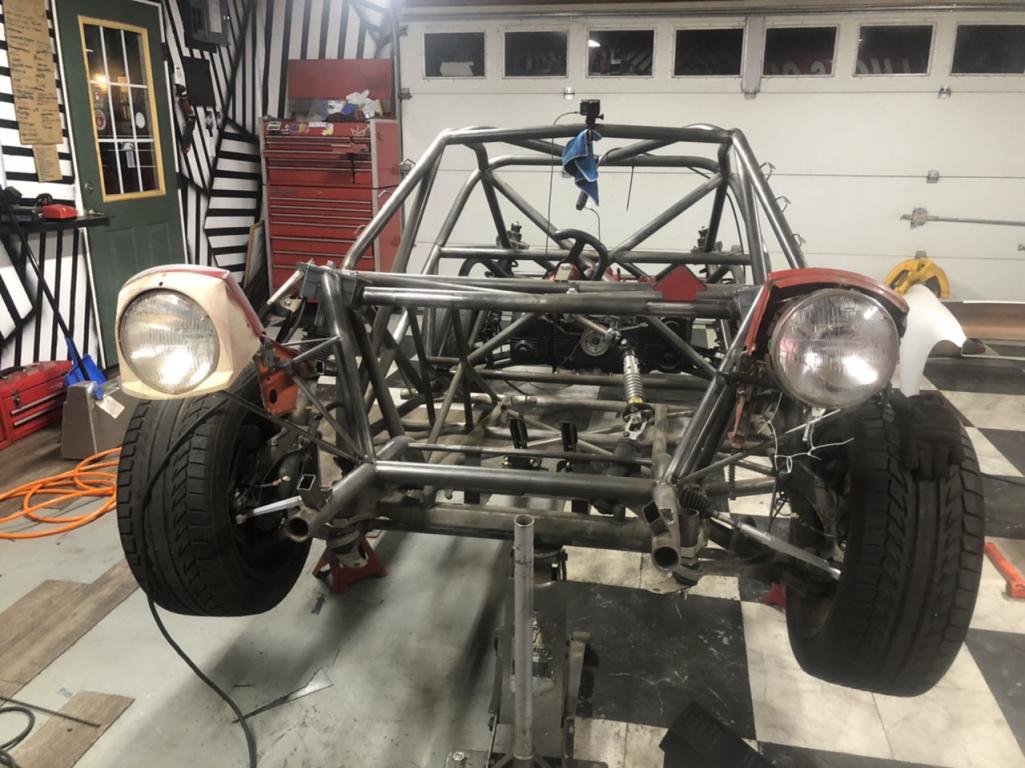
Posted by: tazz9924 Feb 25 2022, 10:02 PM
Love the welds
Posted by: tazz9924 Apr 25 2022, 09:02 PM
Im back again this time hopefully for a while… we will see but i have a lot to do!
Todays work has been on starting to mount the nose and splitter. My solution is going to be mount it like our cars at work where the nose is completely removable, so that will look cool. (more on this later)
Ive grown to require what ever big tubes i put on the car must be fancy in some way. so i decided to flow with the line of the tube that comes down from the strut tower. So far so good, i had no ear plugs or safety glasses at hand today so ill notch the tubes tomorrow!
Also you will be seeing some cad, laser cut parts and a lot of cool other parts in the near future!
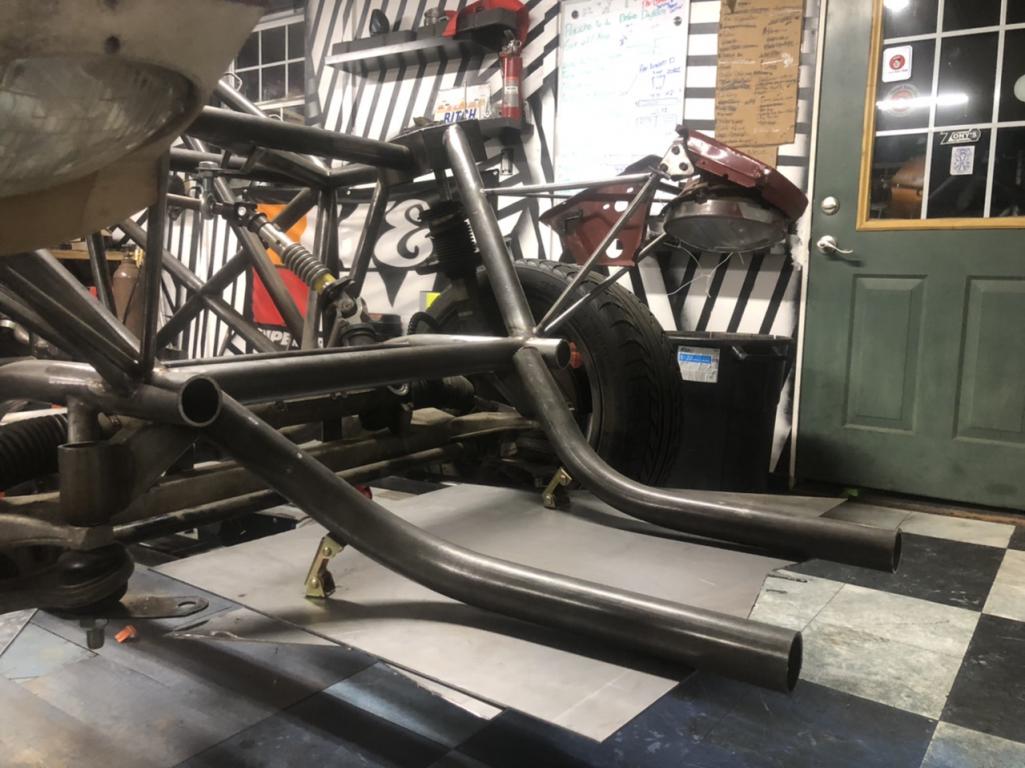
Posted by: mepstein Apr 25 2022, 09:15 PM
I'm guessing "work" is a nascar shop?
Posted by: tazz9924 Apr 25 2022, 09:23 PM
promod drag racing. all the noses come off and everything is easy to work on. i am now spoiled and dont want to touch regular cars anymore that being said i own too many of them!
Posted by: tazz9924 Apr 26 2022, 10:52 PM
Got the tubes notched and a tube between the two. All nice and straight with tight gaps at the intersections.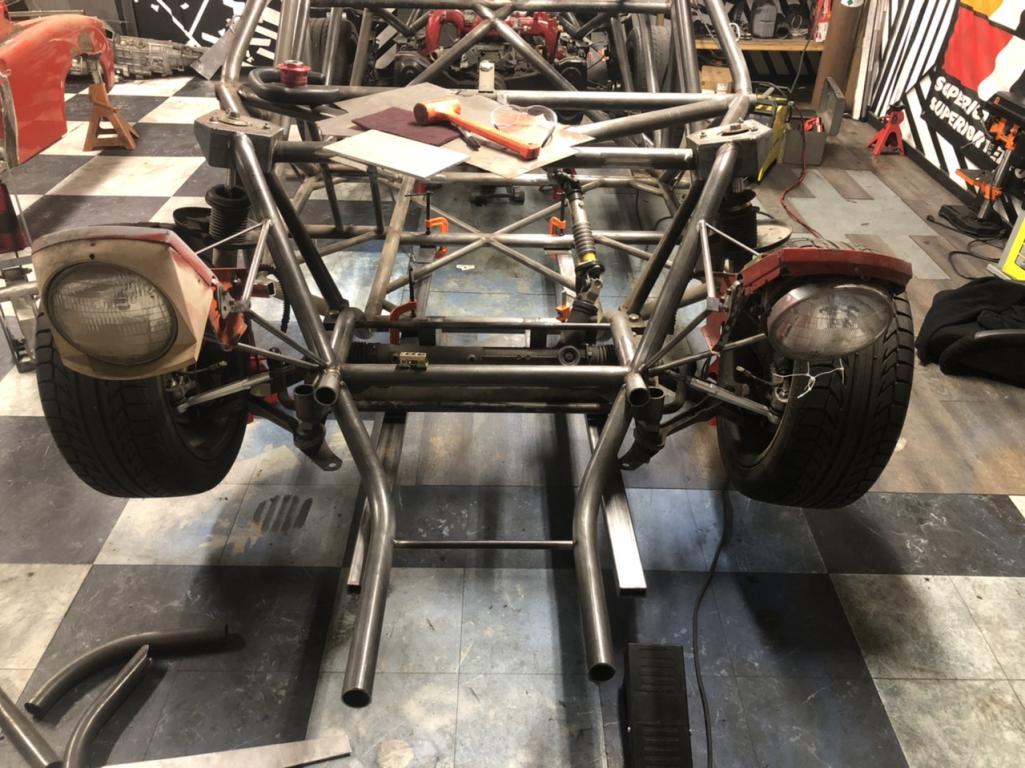
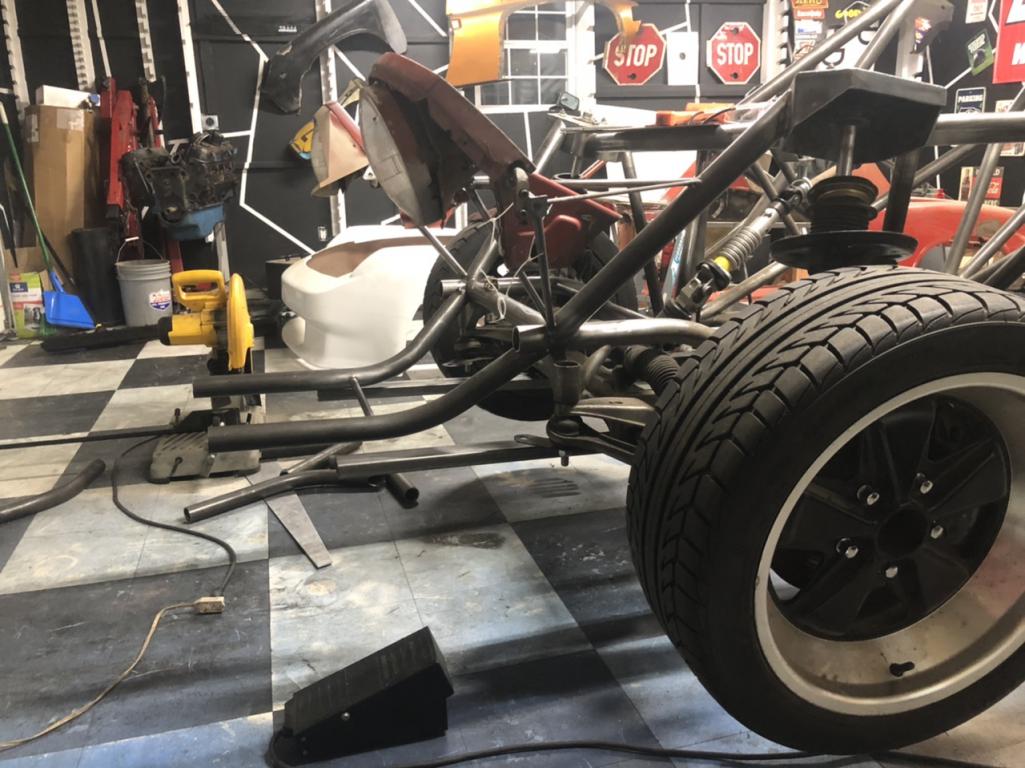
Posted by: Mayne Apr 27 2022, 06:21 AM
Nice work! I love watching this project evolve.
Posted by: tygaboy Apr 27 2022, 08:40 AM
Wish I lived closer. It'd be fun to watch and/or be your shop helper.
Posted by: tazz9924 Apr 27 2022, 12:45 PM
Wish I lived closer. It'd be fun to watch and/or be your shop helper.
Oh the minutia we would tackle would be glorious, we wouldnt ever get anything done!
Posted by: tazz9924 Apr 28 2022, 10:42 PM
So this is the detail orientation ive been talking about. I downloaded fusion 360 and with a free personal use license from there i designed many pieces that have been on my mind for some time now. I made things from wing uprights to steering shaft brackets, to the mounts for my fuel cell and more! I went crazy for at least a week and i still have a ton more things to design. From there i sent all my designs to a company called sendcutsend who laser cuts all the parts out. And you get a great little package LIKE THIS: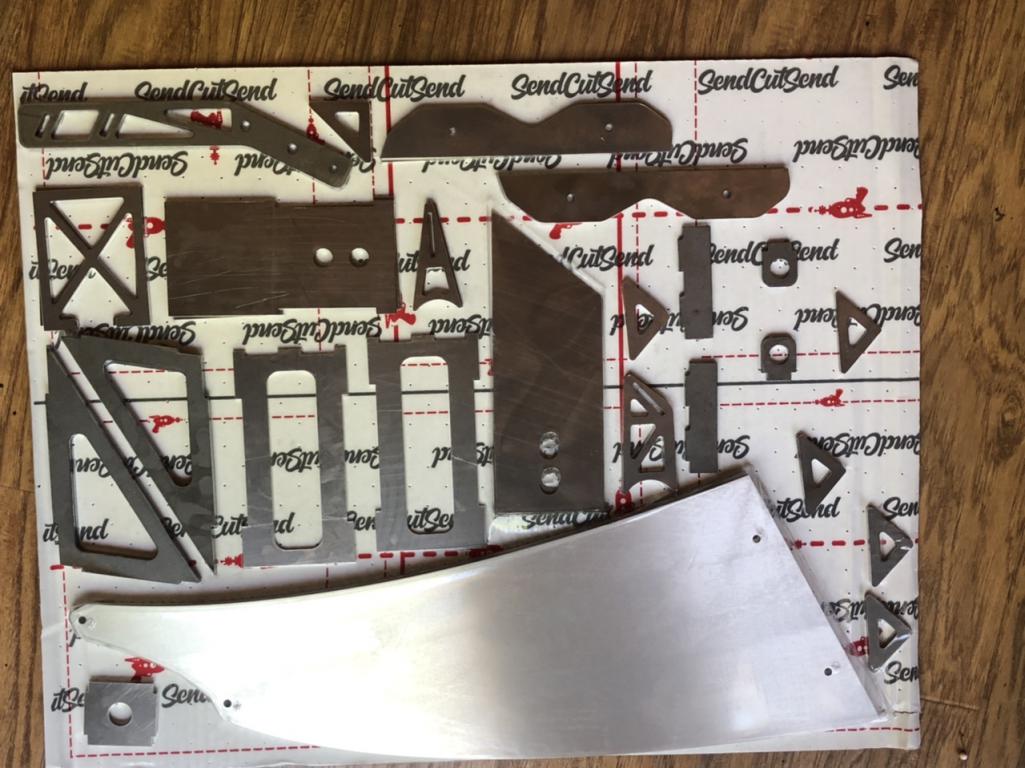
I made a lot of these with a tab and slot design so with no welding done yet, they stick together pretty well: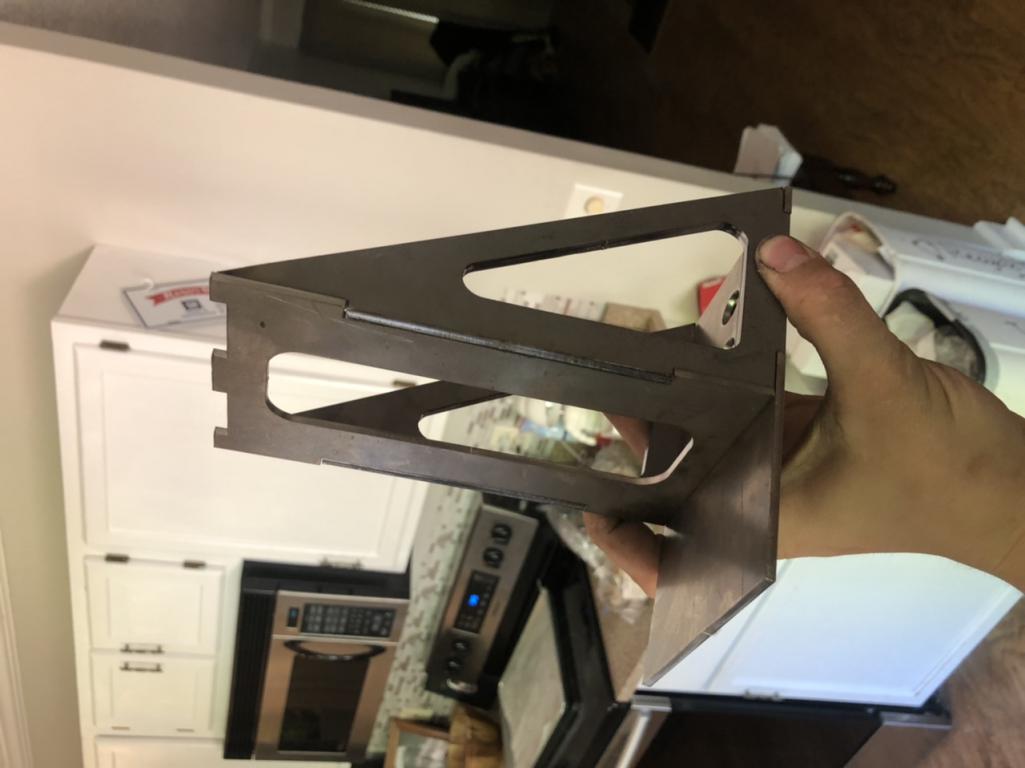
More details to come!
Posted by: tygaboy Apr 29 2022, 08:46 AM
SendCutSend is very cool stuff. Be proud you're able to "get it done in one". I'd be worried they'd ban me for making them cut every part at least 3 times.
Gotta say, it make the plasma cut stuff look a bit tatty...
I'm looking forward to seeing all these puzzle pieces come together! Nice stuff, keep it coming.
Posted by: tazz9924 May 2 2022, 11:53 AM
So ive assembled a lot of my parts and im really liking the results! The first parts on my list were my fuel cell mounts, and my fancy revised shifter bracket. The original was a modified version of the coldwater one that allows me to use off the shelf cables from a website i have to remember. Results look very good. I also finally got the fuel cell mounted up in place which has been an area of great stress, but the road forward seems clear!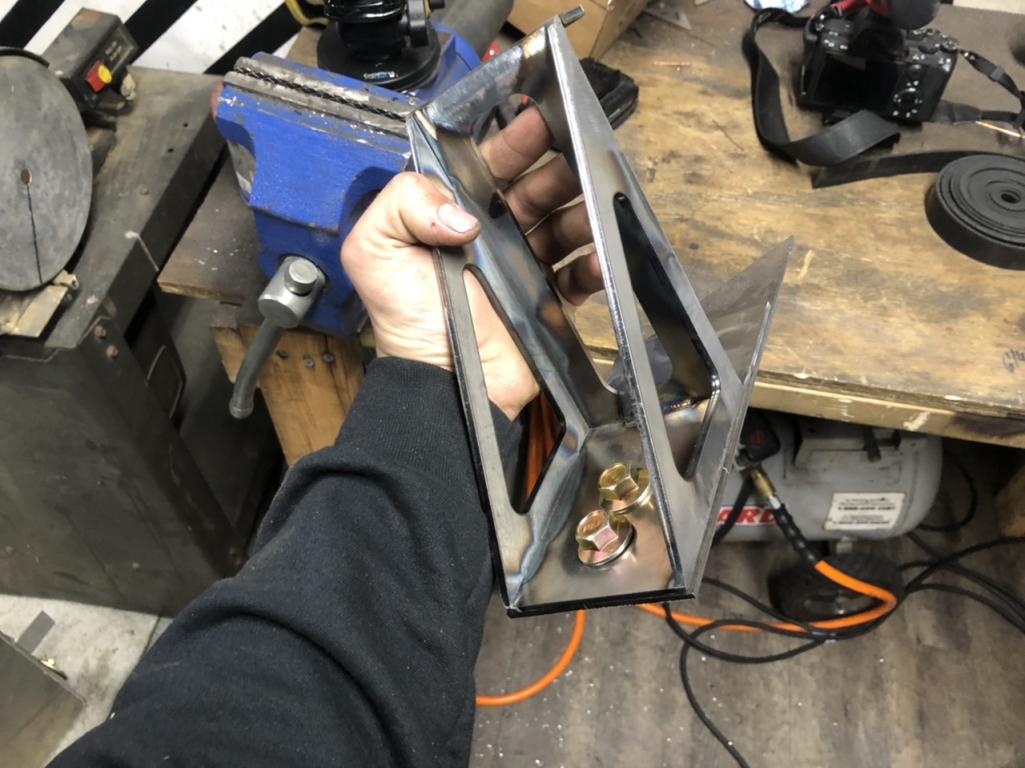
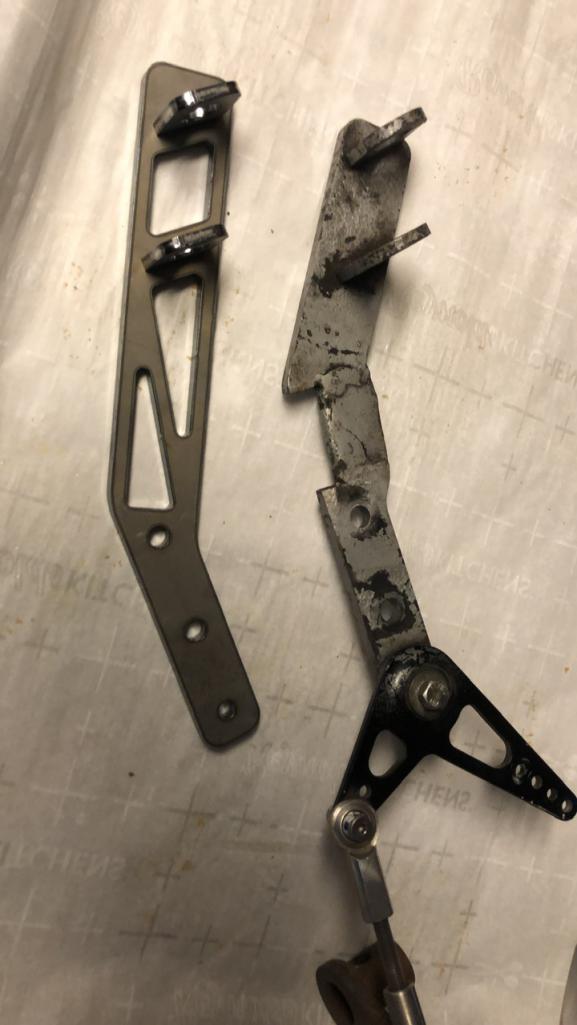
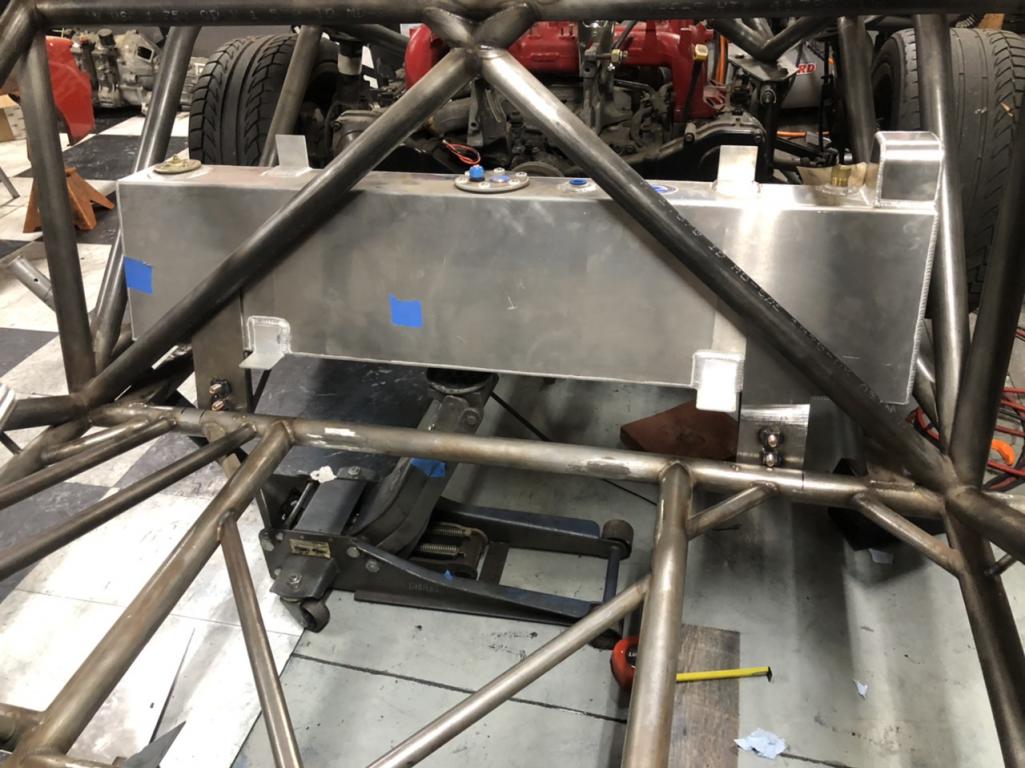
Also a fun ps, i bought a lawnmower, so instead of working on the porsche on sunday i decided to see just how good i can make it wheelie. The results speak for themselves 
Posted by: tazz9924 May 4 2022, 09:54 PM
Re-did my temporary steering supports with a little sendcutsend action and it turned out great! 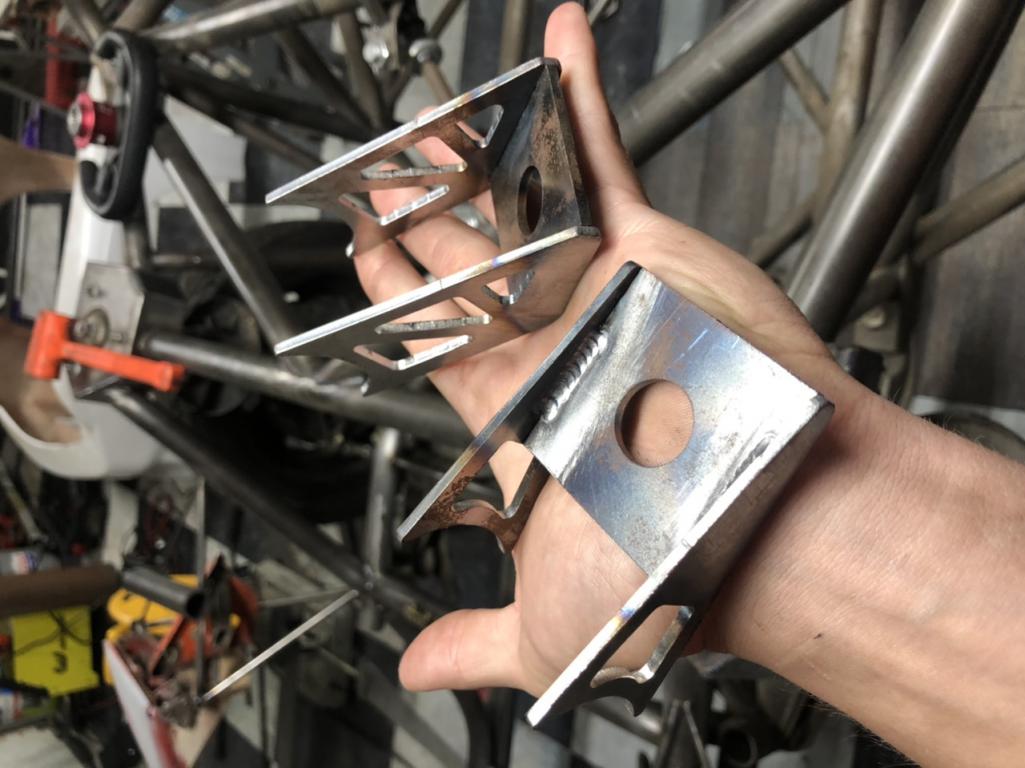
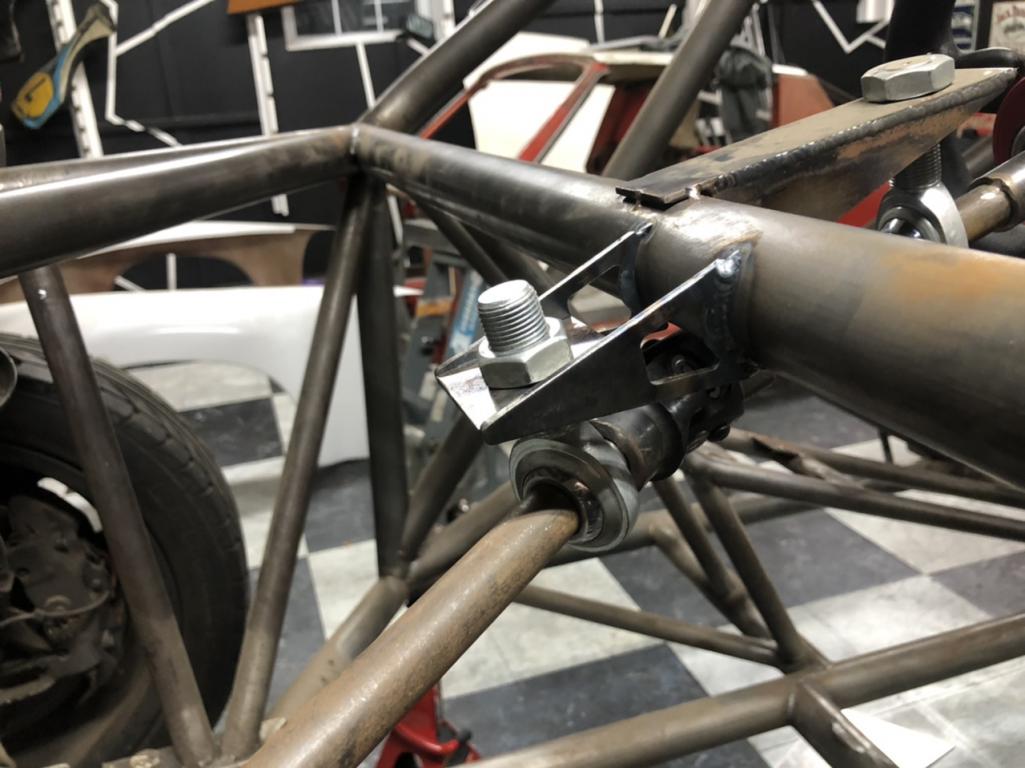
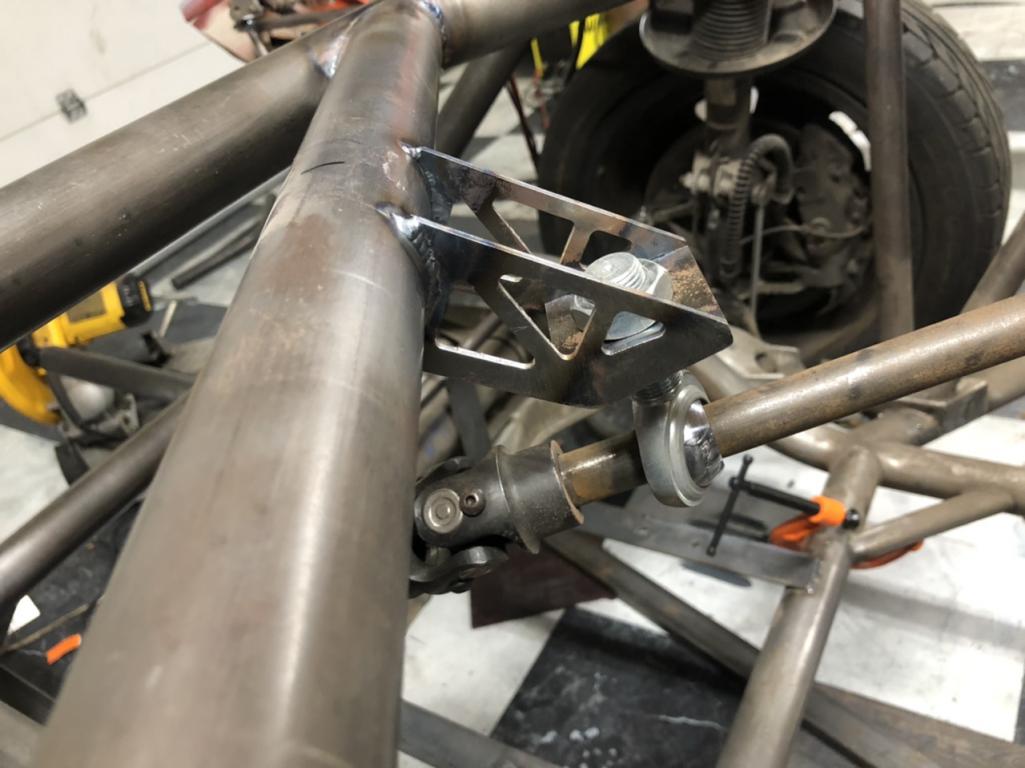
Posted by: tazz9924 Jun 13 2022, 05:10 PM
Its been a while again since ive posted but bot for a lack of working on the car as ive gotten some big stuff accomplished, in my eyes at least..
I got the wing installed, its a 9lives racing dual element, though it currently sits as a single element wing. Once its all together it’ll make 700lbs of downforce at 150mph but ill have plenty more to accommodate that. The rear will get some more reinforcements to keep the bumper from bending. I’ll sprinkle some more posts sharing what else i have finished recently!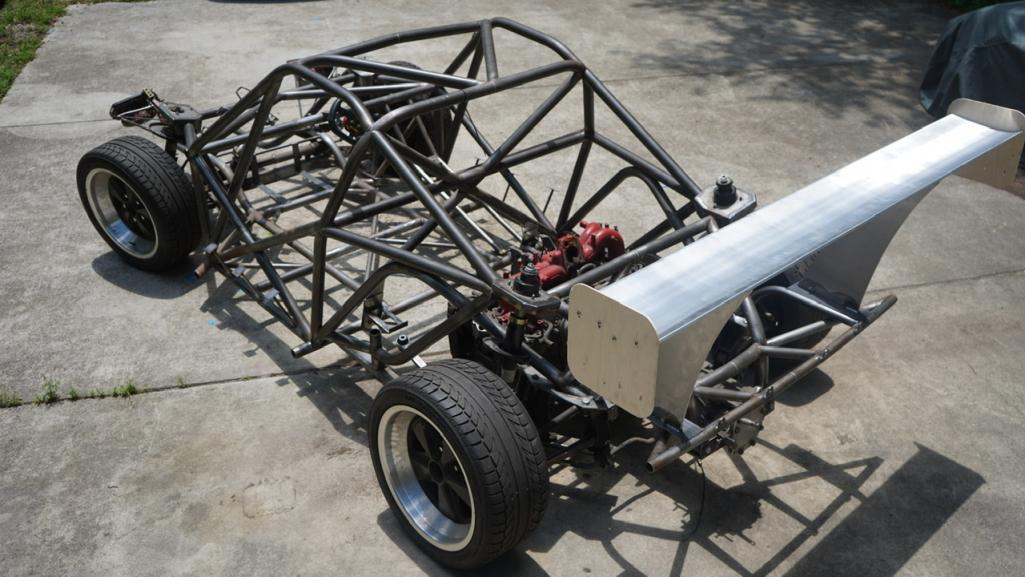
Posted by: tygaboy Jun 13 2022, 05:49 PM
That's a fair bit of rear downforce. I'm assuming there are plans for a rear diffuser and a splitter up front? Anything you can share at this point?
Looks killer, btw! Keep up the crazy-awesome work.
Posted by: tazz9924 Jun 13 2022, 06:20 PM
That's a fair bit of rear downforce. I'm assuming there are plans for a rear diffuser and a splitter up front? Anything you can share at this point?
Looks killer, btw! Keep up the crazy-awesome work.
Yeah the rear of the chassis has been made in such a way to maximize diffuser space, the front will have a sizeable front splitter with splitter diffusers which i learned about a few months ago and already picked up a set. They work the same way as a diffuser at the back but vents to the area between the tire and the chassis. Supposedly it increases front downforce a lot.. But i am but a monkey with a computer and a welder
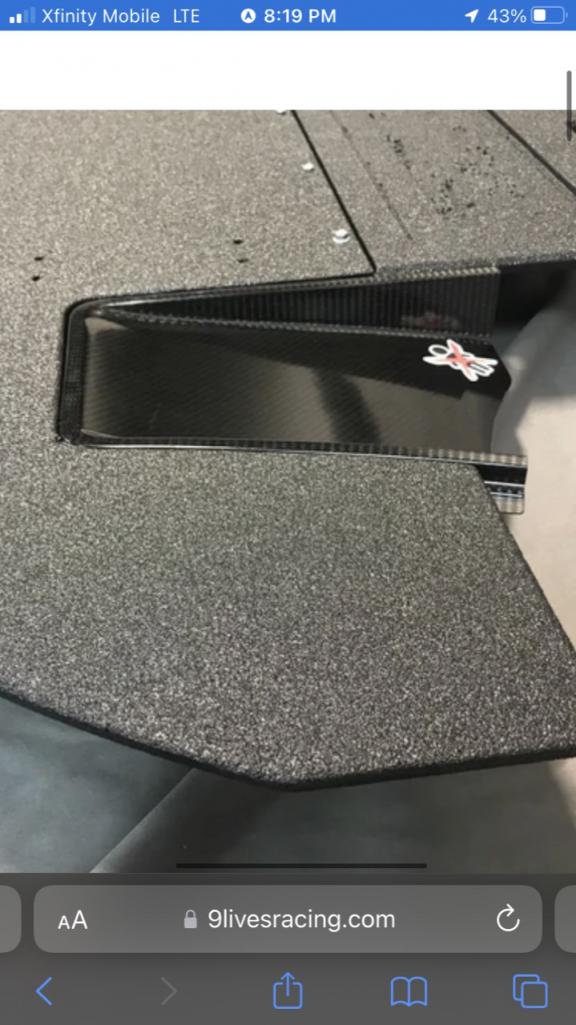
-splitter diffuser, not mine. im too cheap for carbon usually
Posted by: Rider914 Jun 14 2022, 11:23 AM
So ive assembled a lot of my parts and im really liking the results! The first parts on my list were my fuel cell mounts, and my fancy revised shifter bracket. The original was a modified version of the coldwater one that allows me to use off the shelf cables from a website i have to remember. Results look very good. I also finally got the fuel cell mounted up in place which has been an area of great stress, but the road forward seems clear!
Also a fun ps, i bought a lawnmower, so instead of working on the porsche on sunday i decided to see just how good i can make it wheelie. The results speak for themselves
I think I randomly ran across that lawnmower video on youtube the other week and left a thumbs up and comment. Small world lol...
Posted by: tazz9924 Jun 14 2022, 11:47 AM
So ive assembled a lot of my parts and im really liking the results! The first parts on my list were my fuel cell mounts, and my fancy revised shifter bracket. The original was a modified version of the coldwater one that allows me to use off the shelf cables from a website i have to remember. Results look very good. I also finally got the fuel cell mounted up in place which has been an area of great stress, but the road forward seems clear!
Also a fun ps, i bought a lawnmower, so instead of working on the porsche on sunday i decided to see just how good i can make it wheelie. The results speak for themselves
I think I randomly ran across that lawnmower video on youtube the other week and left a thumbs up and comment. Small world lol...
haha its much appreciated! it was a good day
Posted by: tazz9924 Jun 16 2022, 01:50 PM
New video out today, summing up some of the work you haven’t seen, ill post more stuff over the next couple days.
Link: https://m.youtube.com/watch?v=l_-cIcCmUYg
Posted by: Front yard mechanic Jun 16 2022, 02:13 PM
Just do it
Posted by: tazz9924 Jun 16 2022, 02:29 PM
Just do it
Thats what im sayin!
Posted by: 76-914 Jun 16 2022, 02:49 PM
Subscribed.
Posted by: tazz9924 Jun 19 2022, 04:02 PM
Im working to mount the nose and making so that it’s removable, basically for the fun of it. I started with these little .050 chromoly plates and formed them to the front end and clecko’d them on (no picture yet)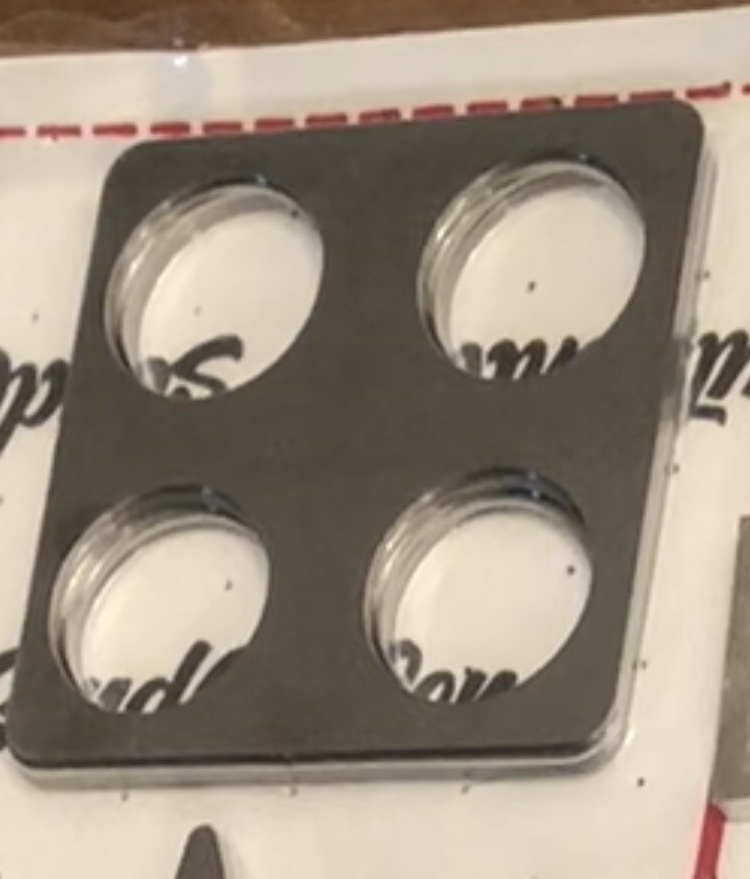
I then ran a 1/2” .050 rod between the two plates and welded them together. The front of the chassis was shortened and i welded in these hooks. No matter how i took the picture they look really funny because they are angled in. When im back next week ill take a good picture of them. There will be a fair amount more connections to the nose to keep it in place but for now i can say the nose is on! 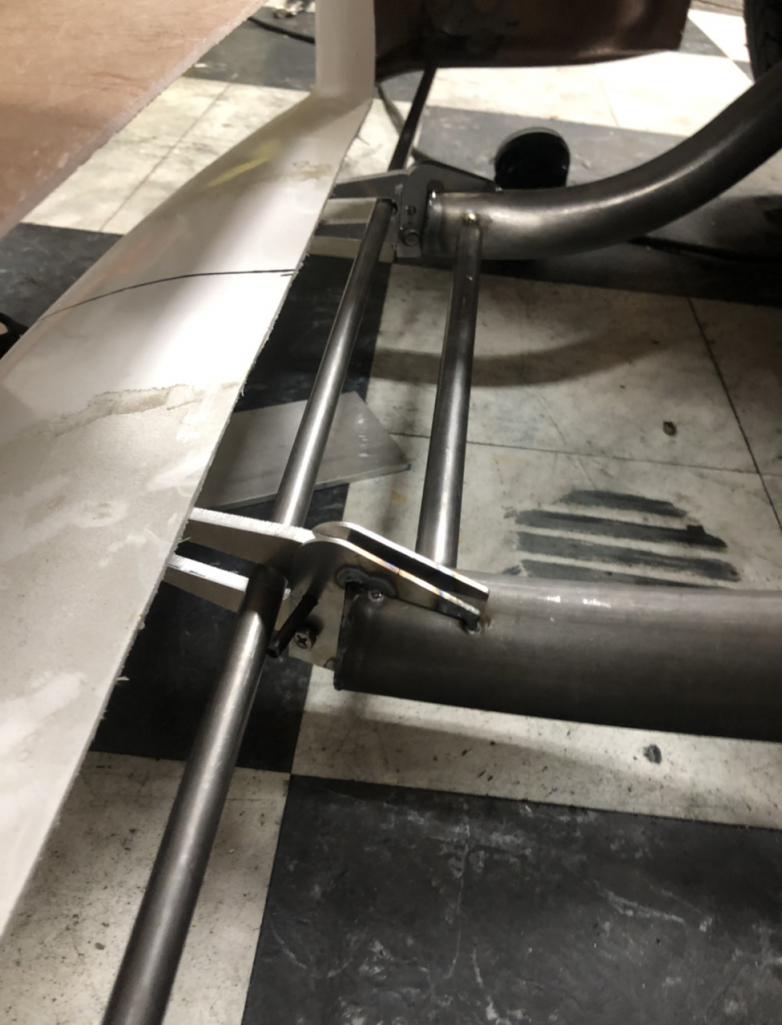
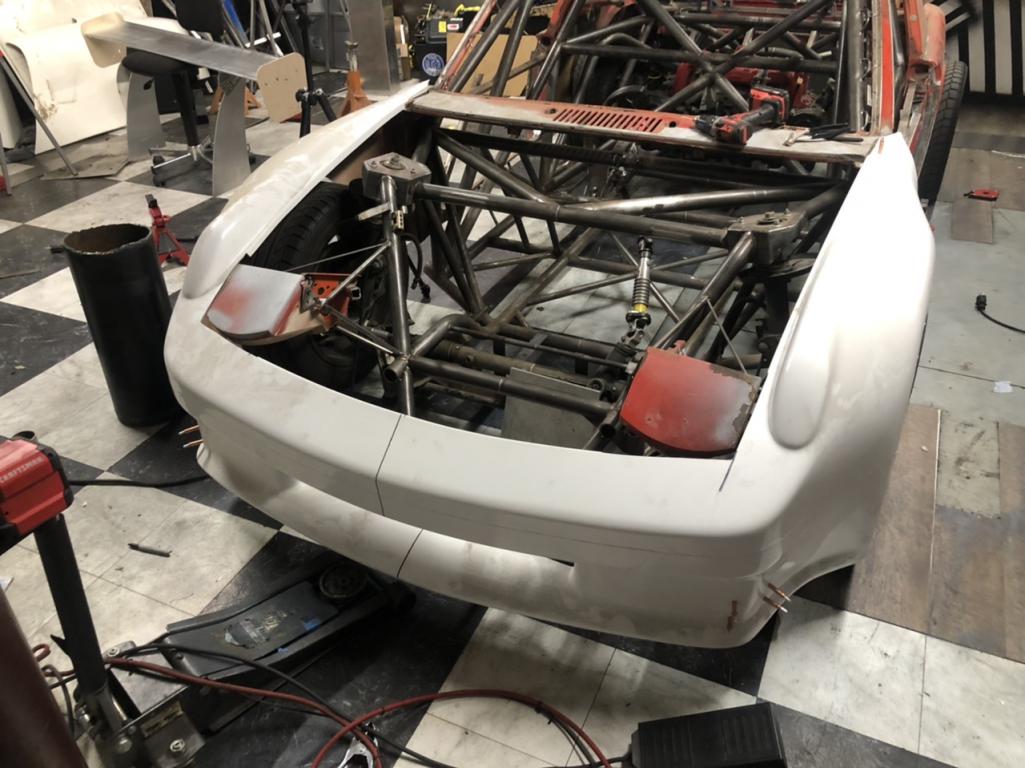
Posted by: tazz9924 Jul 2 2022, 10:26 PM
Finally got all of my parts together, (or so i thought till today) and i started building my turbo header! I waited 7 months on my exhaust housing while having all this stainless sitting on my shelf. Looking at me. Judging me. But today i set out on this adventure with my friend guido who brought one of the fanciest tools ive seen. More on that later but for now, marvel at most of what we got finished tonight. Admire the piece we came up with to hold the exhaust housing at just the right height to show off the spinning turbo out the back. Its just a 6” piece of square tube with a v band welded to it. Im excited if you cant tell. 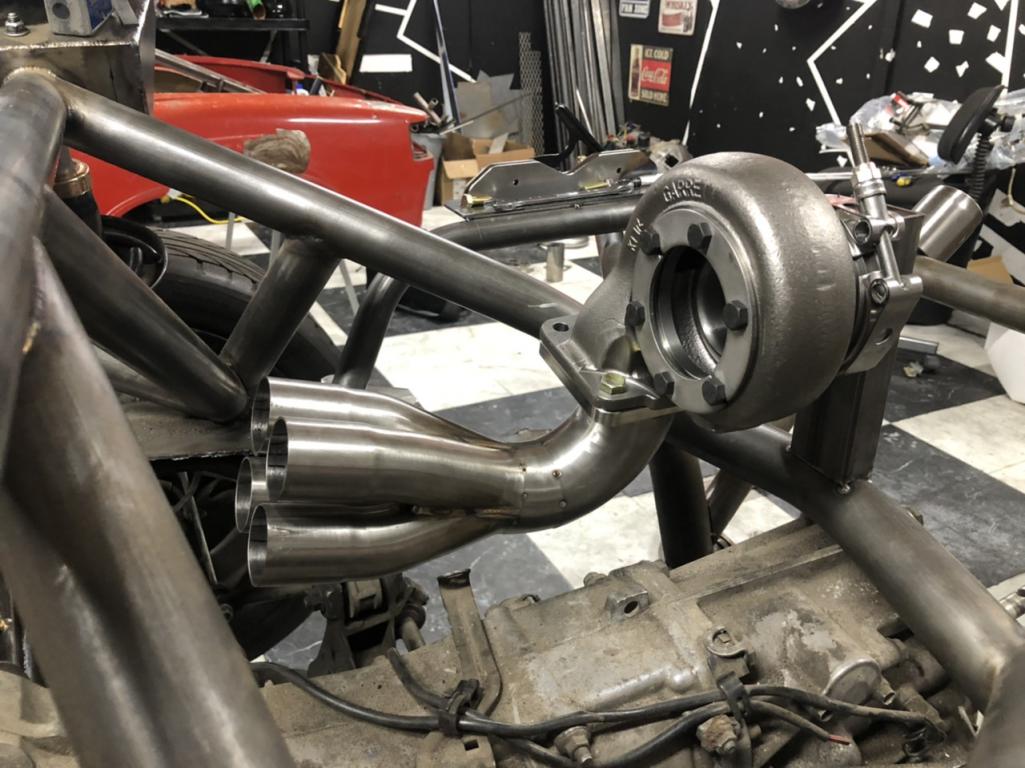
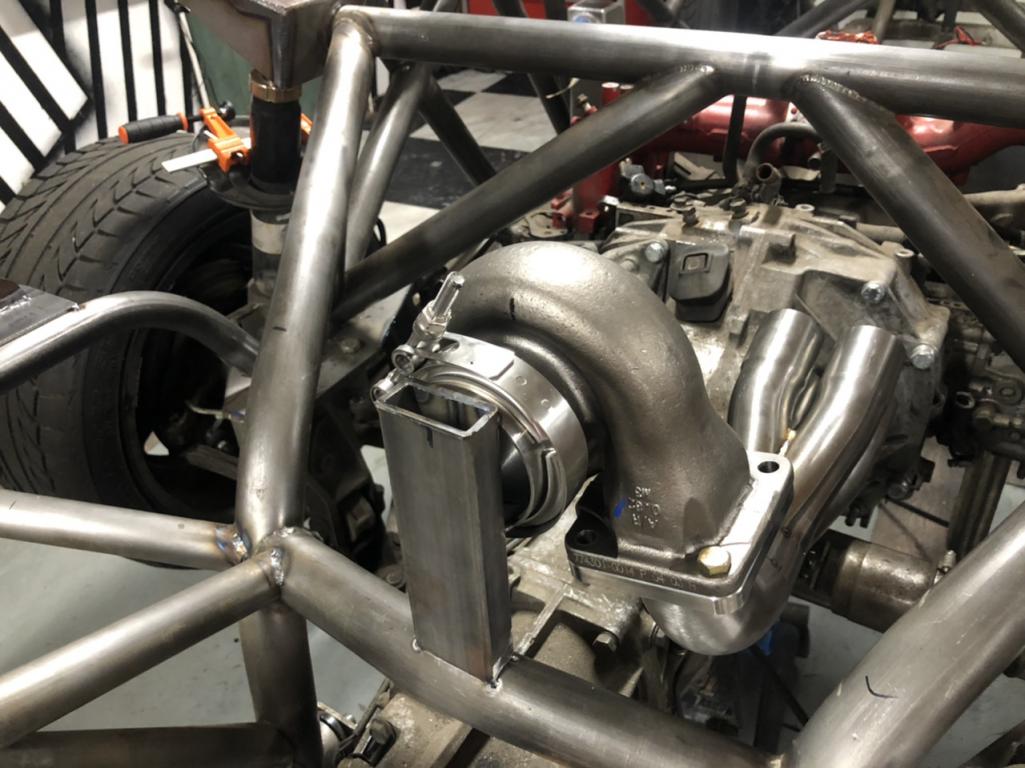
Posted by: mgp4591 Jul 3 2022, 01:32 AM
That's some amazing stuff you've got going on there. What exhaust will you be running after the wastegate?
Posted by: tazz9924 Jul 3 2022, 07:23 AM
That's some amazing stuff you've got going on there. What exhaust will you be running after the wastegate?
a tube about 12” long, it goes from round to oval and will exit exactly where the lock is. You will see the turbo spinning through it. the wastegate will het mounted in the 2.5” bend and exit right next to the oval
Posted by: 76-914 Jul 3 2022, 07:48 AM
Im working to mount the nose and making so that it’s removable, basically for the fun of it. I started with these little .050 chromoly plates and formed them to the front end and clecko’d them on (no picture yet)
I then ran a 1/2” .050 rod between the two plates and welded them together. The front of the chassis was shortened and i welded in these hooks. No matter how i took the picture they look really funny because they are angled in. When im back next week ill take a good picture of them. There will be a fair amount more connections to the nose to keep it in place but for now i can say the nose is on!
Wow, It's beginning to look like a real car! 2 questions. !; does it matter if the exhaust tubing is equal length with the turbo? 2; I'm impressed that the headlamp covers ended up in the correct position with the shell. Did you mount the shell to get the headlamp location or approximate the location then jiggle the shell about to fit? I hope to see this car at one of our events one day.
Posted by: tazz9924 Jul 3 2022, 06:39 PM
Im working to mount the nose and making so that it’s removable, basically for the fun of it. I started with these little .050 chromoly plates and formed them to the front end and clecko’d them on (no picture yet)
I then ran a 1/2” .050 rod between the two plates and welded them together. The front of the chassis was shortened and i welded in these hooks. No matter how i took the picture they look really funny because they are angled in. When im back next week ill take a good picture of them. There will be a fair amount more connections to the nose to keep it in place but for now i can say the nose is on!
Wow, It's beginning to look like a real car! 2 questions. !; does it matter if the exhaust tubing is equal length with the turbo? 2; I'm impressed that the headlamp covers ended up in the correct position with the shell. Did you mount the shell to get the headlamp location or approximate the location then jiggle the shell about to fit? I hope to see this car at one of our events one day.
It does matter that the exhaust is equal length. it makes the turbo spool more equally. That being said mine will be unequal length to preserve the suby rumble. as far as the headlights, i mounted the shell make a jig for there positions and cut out the original structure. the headlights are very close but they need a little fanangling to make them right, but it won’t be so bad. cant wait for the day to go to a meet!
Posted by: tazz9924 Jul 4 2022, 02:22 PM
Got the passenger(?) side all mocked up and its a very good look but im not sure that im satisfied completely so it may change a bit but for now heres a very good look at what is going on!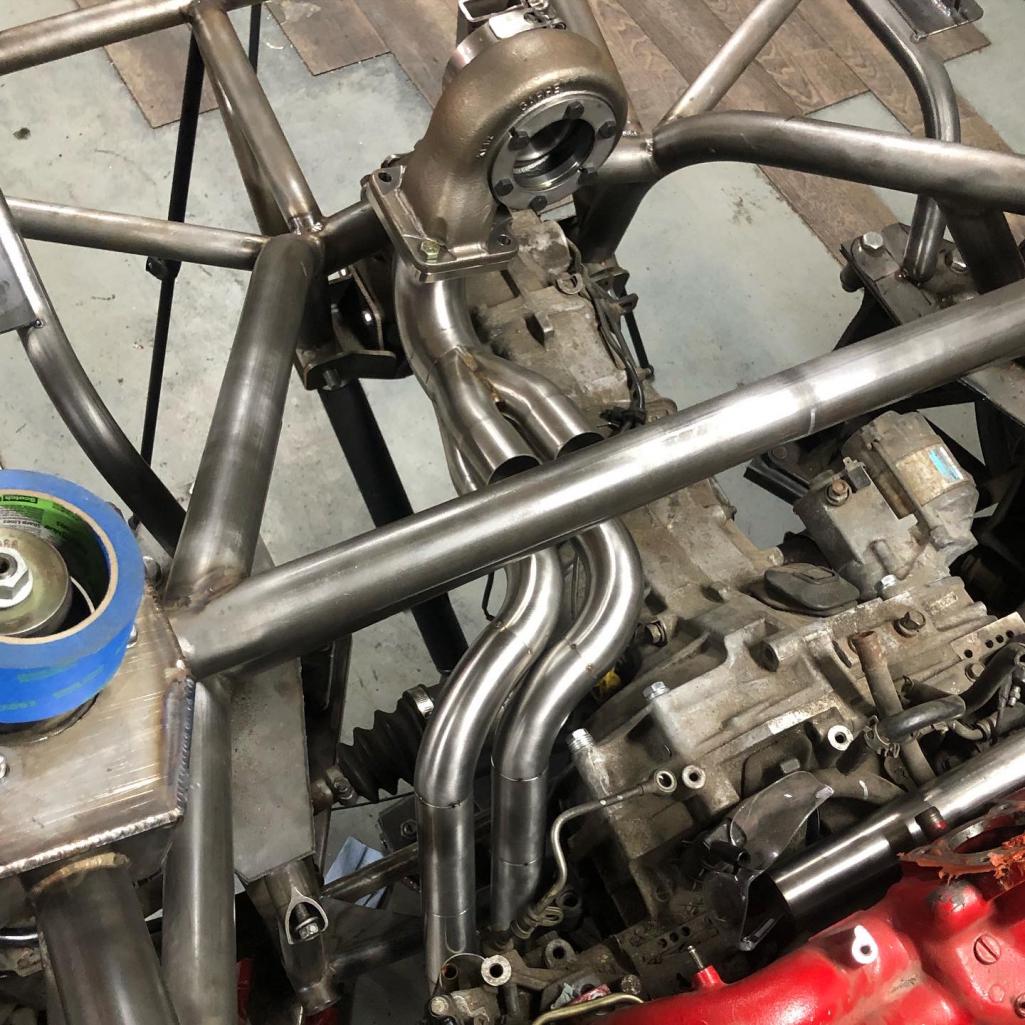
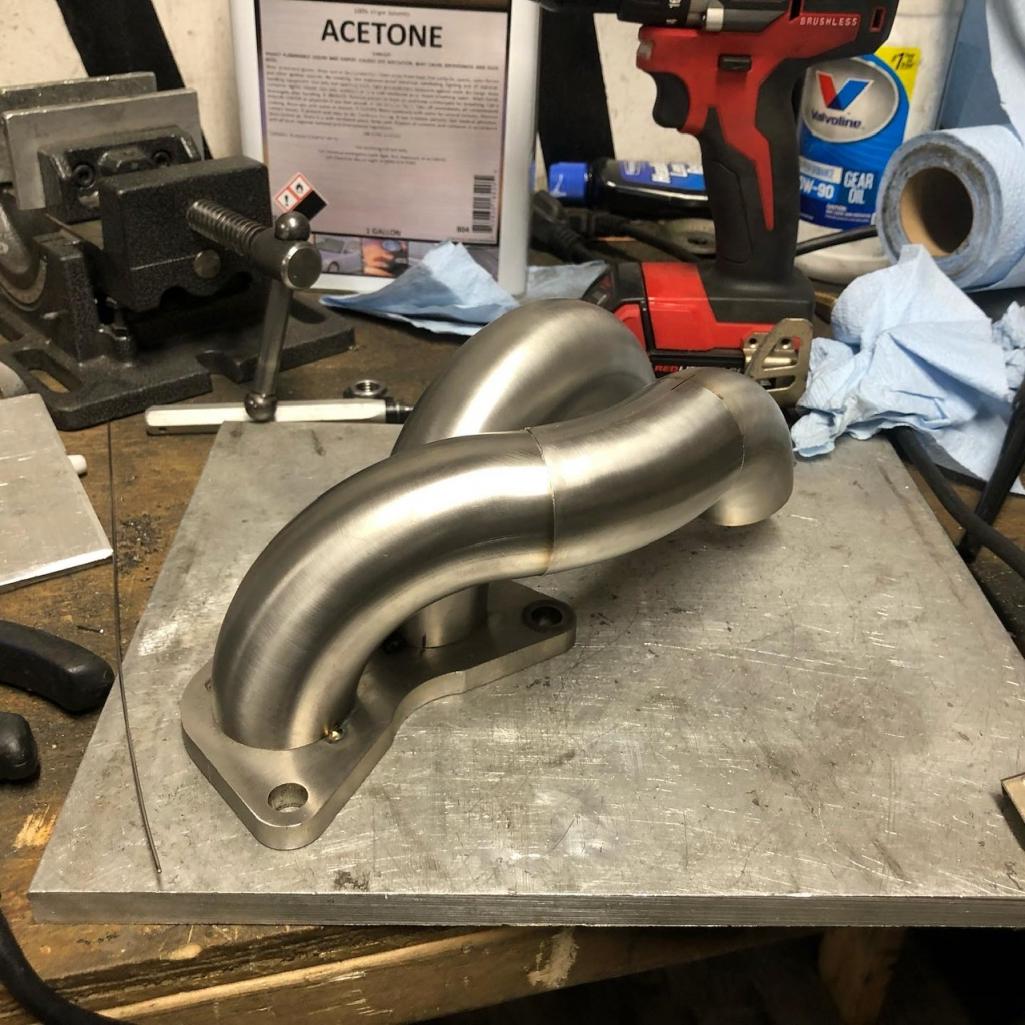
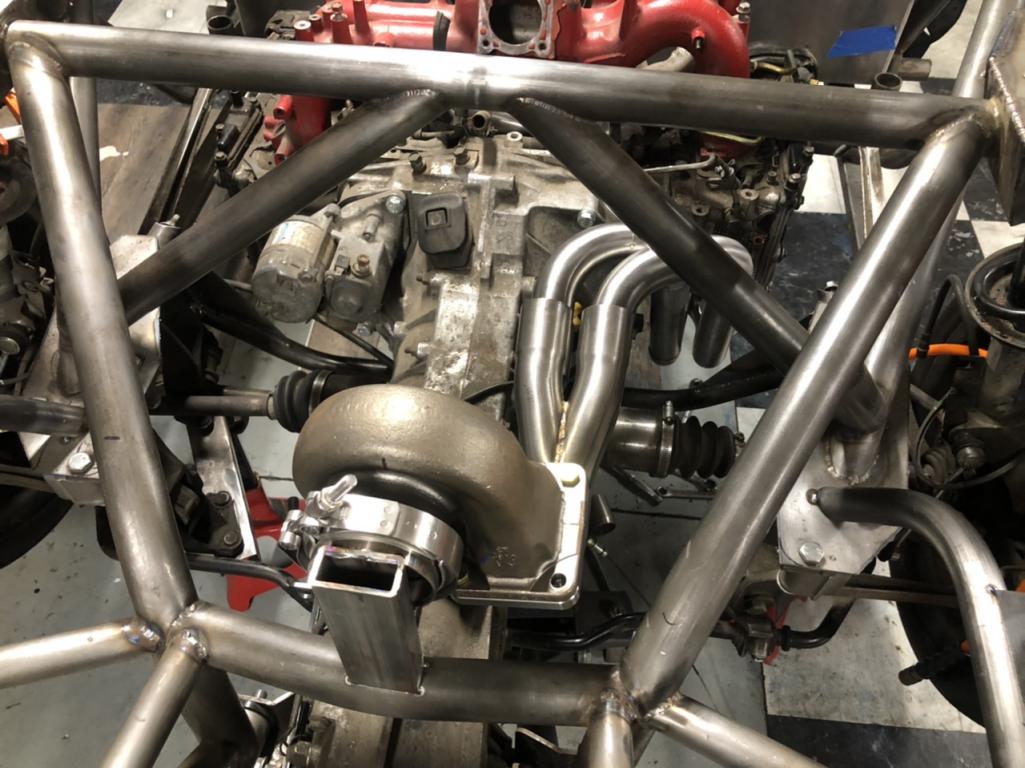
Posted by: tazz9924 Jul 4 2022, 02:25 PM
The other side will have to wait till i get some tight radius 1-3/4 tube so this is how it will sit for a bit.
Posted by: tazz9924 Jul 9 2022, 03:47 PM
Another video! im on a porsche roll and this time im building stainless turbo headers. There’s plenty to learn here so go check it out!
https://m.youtube.com/watch?v=AY2EPce4rE8
Attached image(s)
Posted by: tygaboy Jul 10 2022, 08:35 AM
Wonderful detail work on the tube fitting. That's gonna look killer.
And I'm I a weirdo because I find it oddly satisfying to watch quality workmanship as it happens?
Good thing we don't live closer to one another - I'd be sneaking into your shop all the time to ogle the fab porn.
Posted by: tazz9924 Jul 11 2022, 01:43 PM
Wonderful detail work on the tube fitting. That's gonna look killer.
And I'm I a weirdo because I find it oddly satisfying to watch quality workmanship as it happens?
Good thing we don't live closer to one another - I'd be sneaking into your shop all the time to ogle the fab porn.
Describing what im doing as quality is such a good compliment since ive been THAT previous owner my whole life it feels! ive turned a new leaf
Posted by: tazz9924 Jul 11 2022, 01:45 PM
I began work on the other side of the header, the start isnt comlpex to make but everything after this point is a little tricky. Its a long distance to the finish but ive been brainstorming all day! more to come…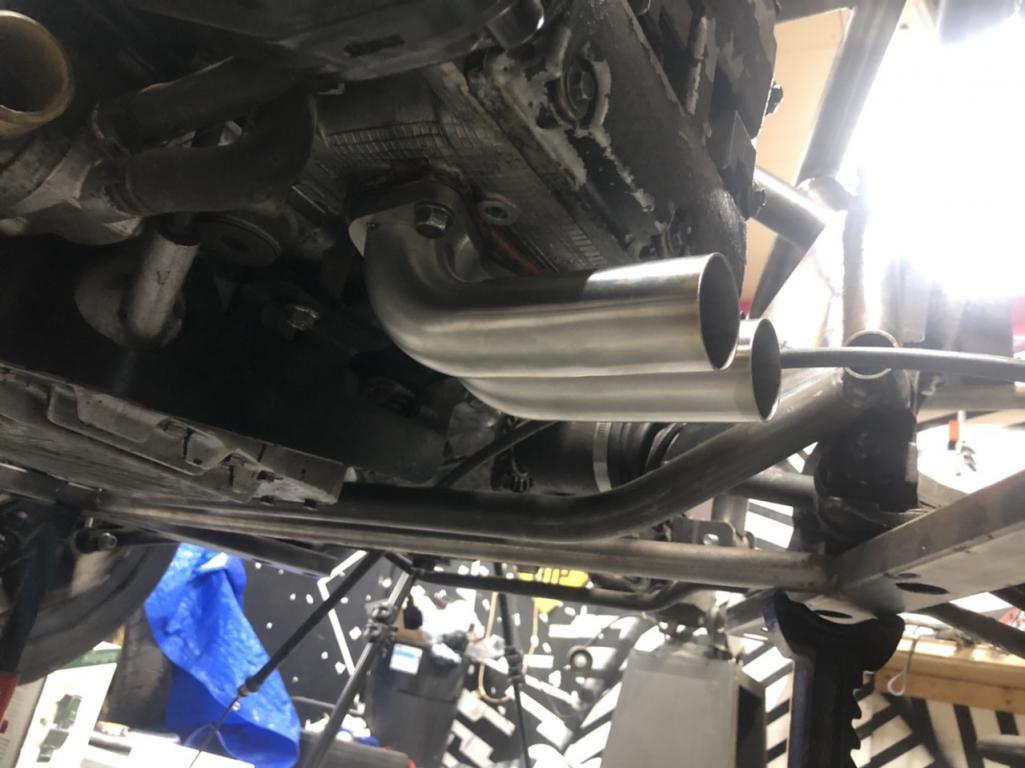
Posted by: tazz9924 Jul 23 2022, 05:22 PM
I forgot to update the last week because of just how busy ive been but there is a new video. It was exclusively edited after midnight to make it happen but it is here!
It sums up all the recent work but i will post pictures later of the progress.
Link: https://m.youtube.com/watch?v=I2f44Y_QBbg
Attached image(s)
Posted by: tazz9924 Jul 24 2022, 05:32 PM
Progress pictures, any questions welcome!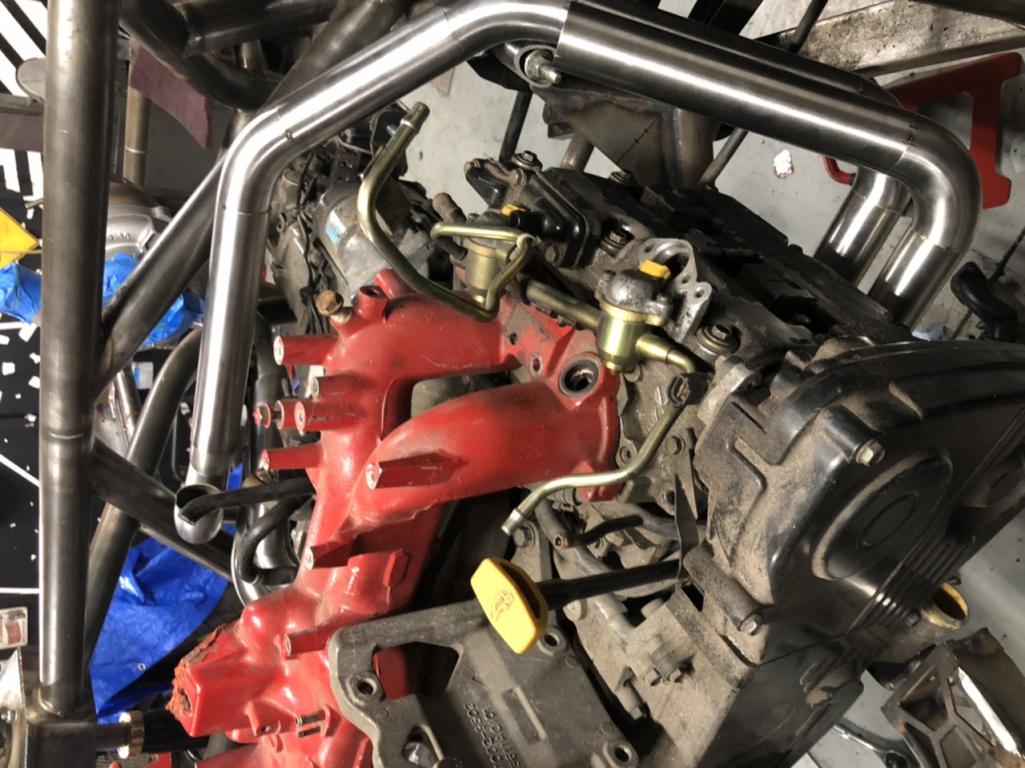
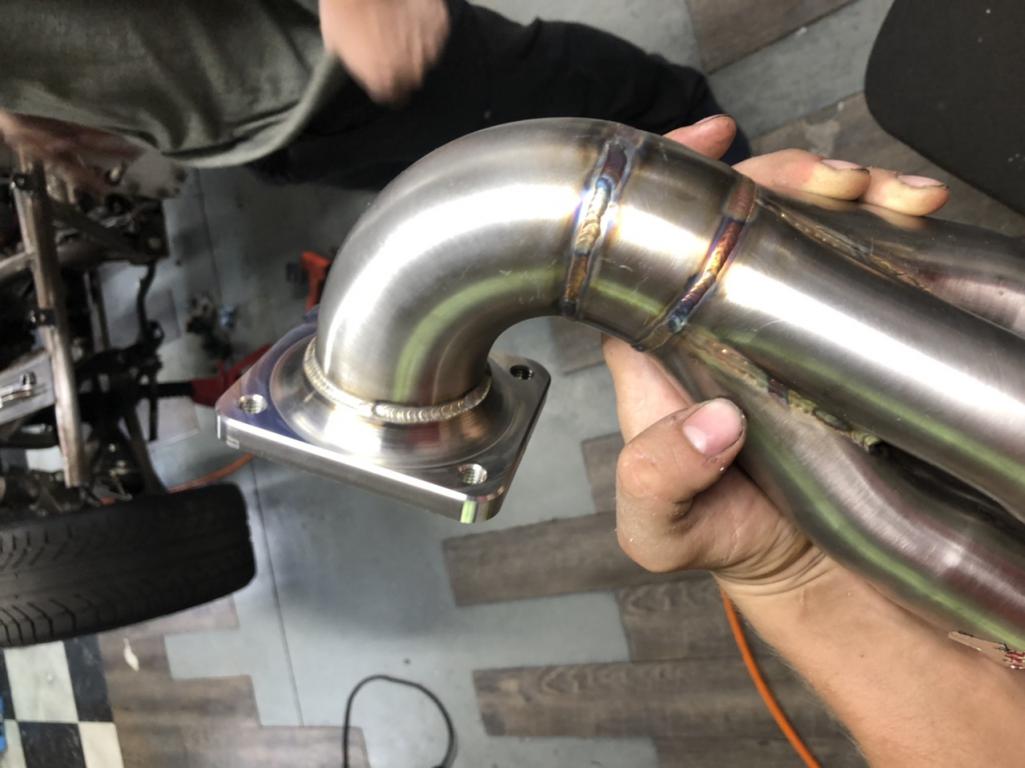
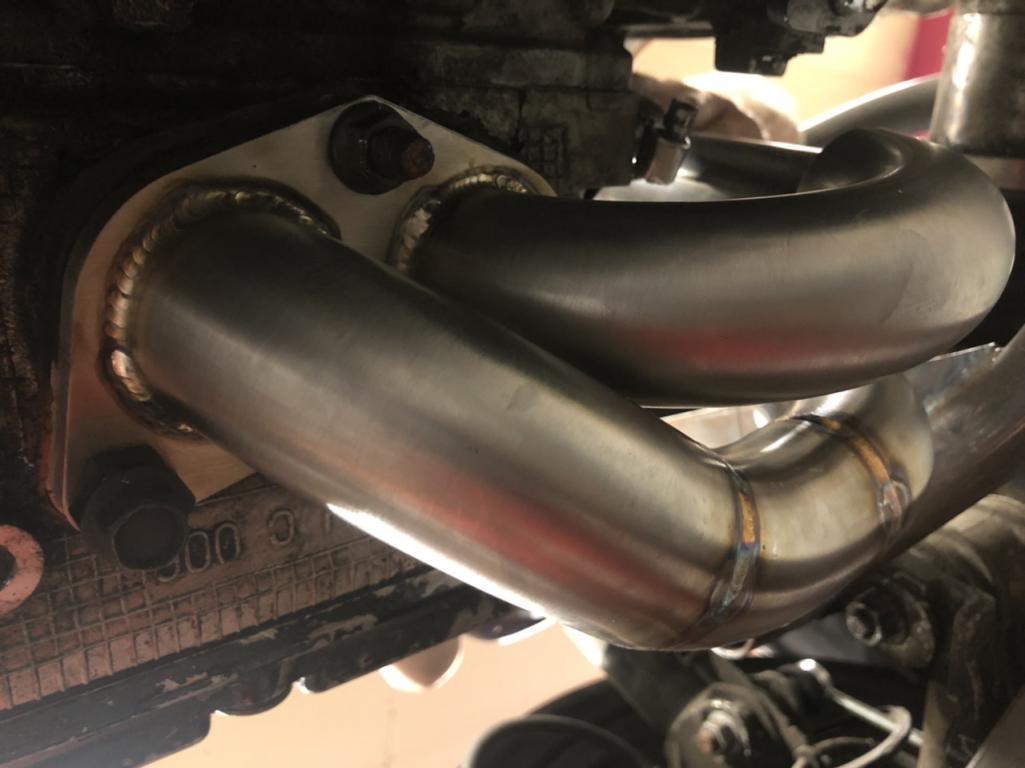
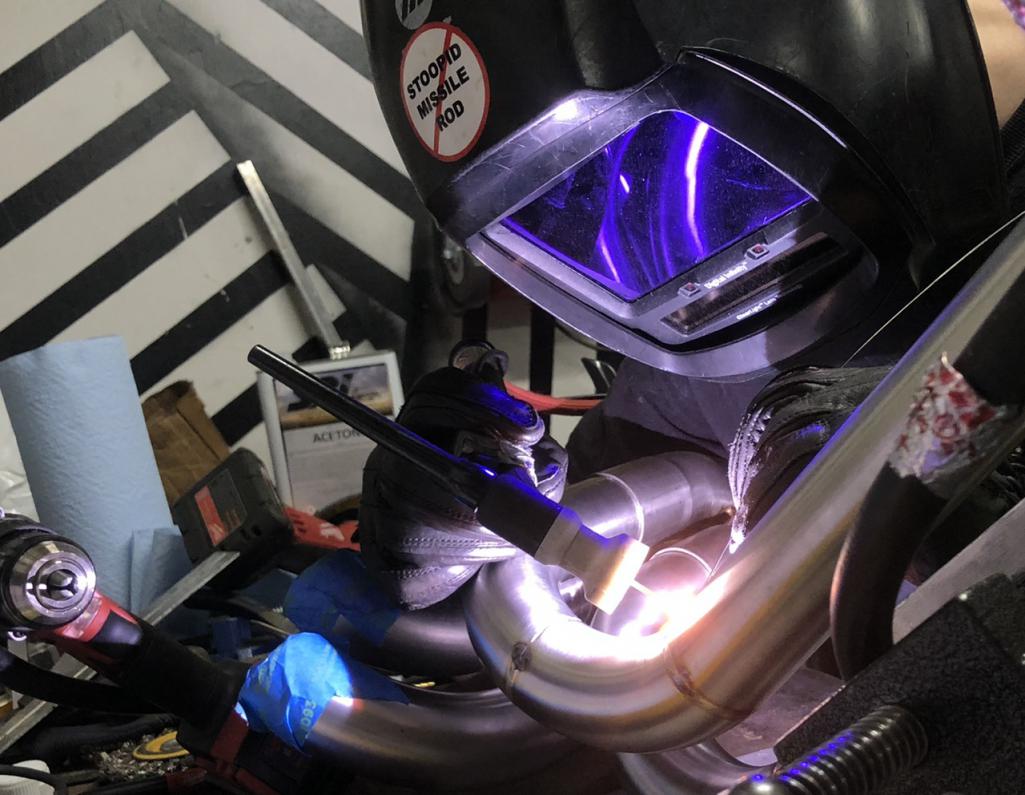
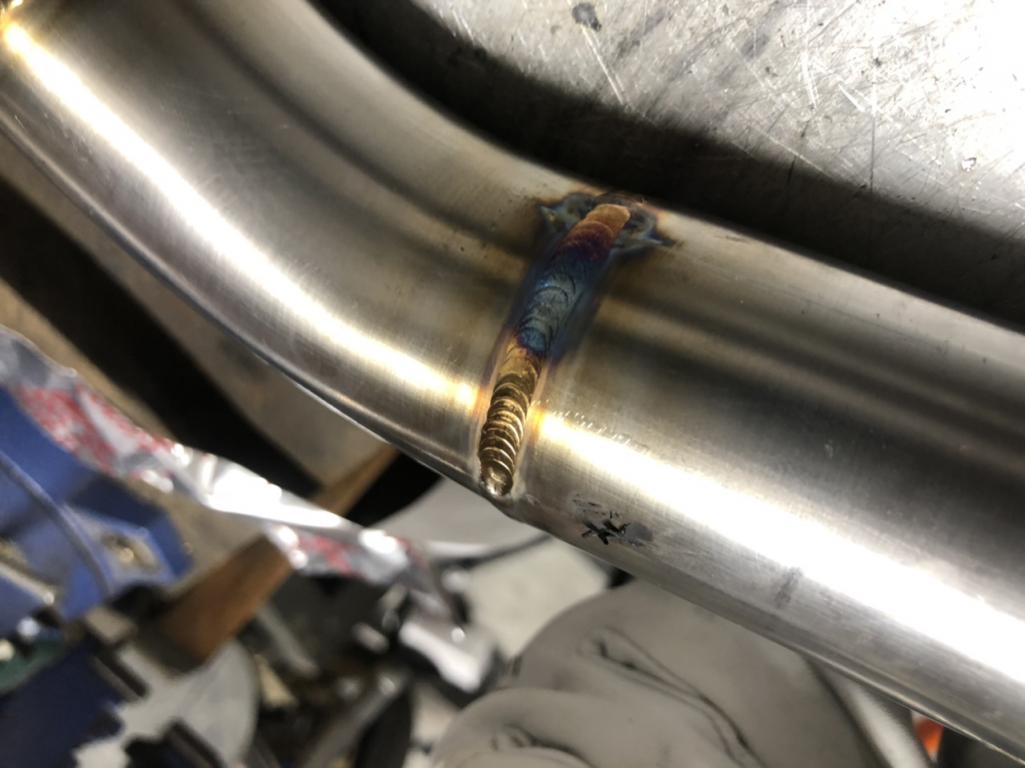
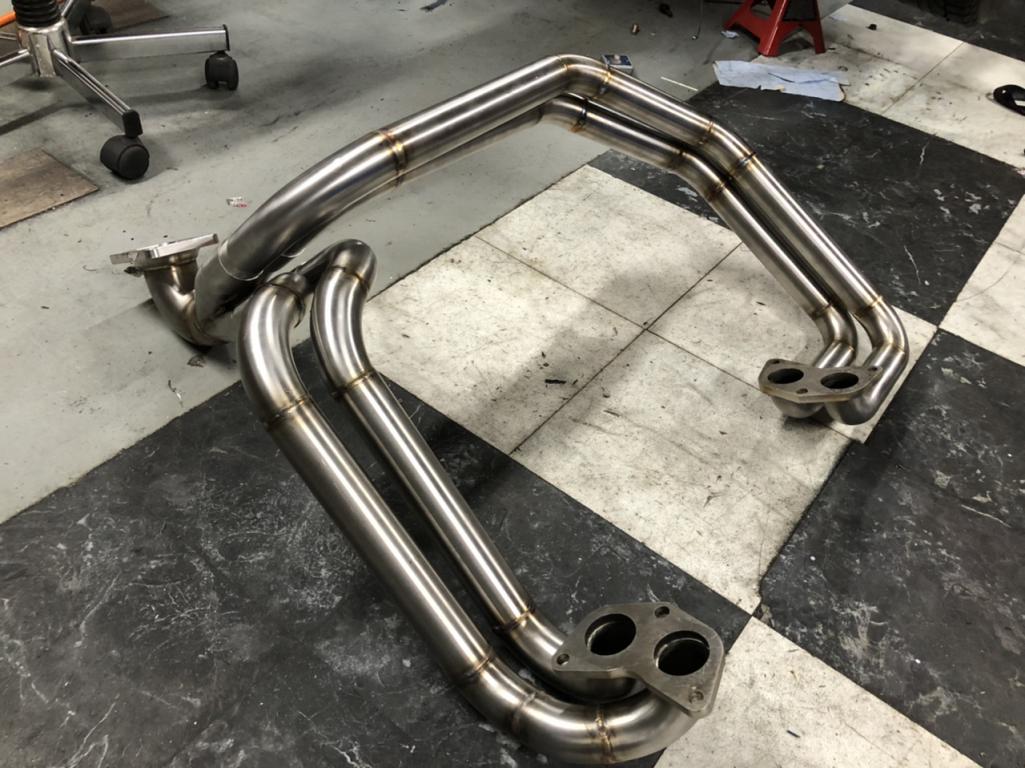
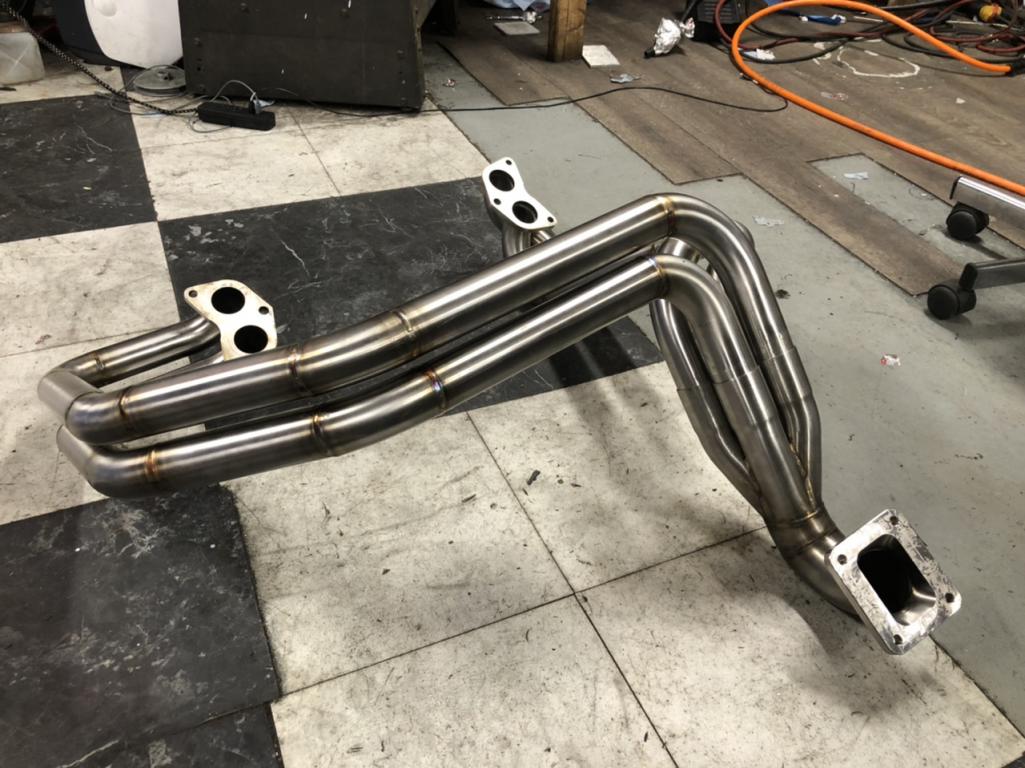
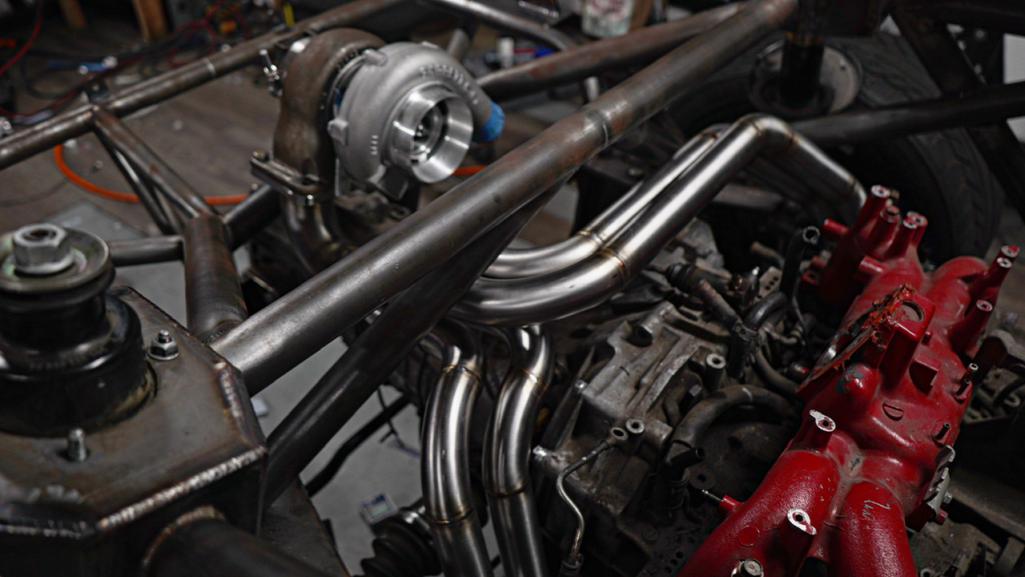
Ps i cant believe i got this many pictures in one post
Posted by: tygaboy Jul 24 2022, 06:00 PM
Lovely. Nice job.
Posted by: mgp4591 Jul 25 2022, 12:09 AM
That's some great work man! My stuff is strictly Roadkill Garage but it works... can't wait to see it in person one day and check out the detail and engineering of it all. Keep it up!
Posted by: tazz9924 Jul 25 2022, 04:32 AM
That's some great work man! My stuff is strictly Roadkill Garage but it works... can't wait to see it in person one day and check out the detail and engineering of it all. Keep it up!
Roadkill garage is my other car, only recently has this new leaf been half turned over.
Posted by: tazz9924 Aug 11 2022, 06:32 PM
Nothing new done to the car to report but in the background some things have happened. Ive turned my attention to getting it running either by the end of the year (no 24hours of lemons) or my birthday in april. This means buying a lot of eye wateringly expensive parts #1-2-3 are all purchased now though which is known as a start.
1,The block i purchased early this year i think. that was quite expensive.
2,The heads i just sent to get ported, chamber matched and overall redone with good valvetrain. It should be good for up to 700 hp but i dont need that running through my head. Get it running damn it!
3, The ECU. I decided on getting a Haltech Elite 1500 with their premium harness. This will allow me to do whatever i want, when i want. From simply running the motor to good ole Anti Lag.
All of this combined has nuked the rest of the projects budget… for now. On top of racing season just getting back into full swing again, updates will be in frequent but, as frequent as i can. Hope everyone is doing well!
Here’s a recent photo:
Attached thumbnail(s)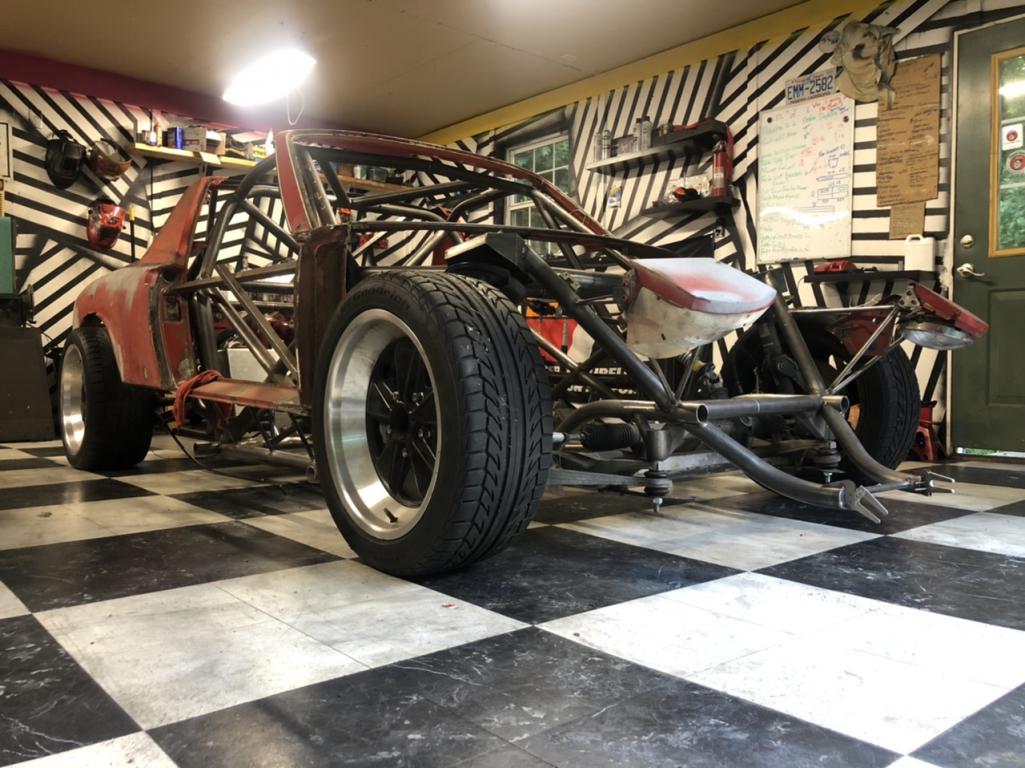
Posted by: tazz9924 Sep 19 2022, 09:56 PM
Added new tubes for the seat so it’s adjustable and at a better height to keep my noggin from hitting asphalt. im very happy to see the plaid back. 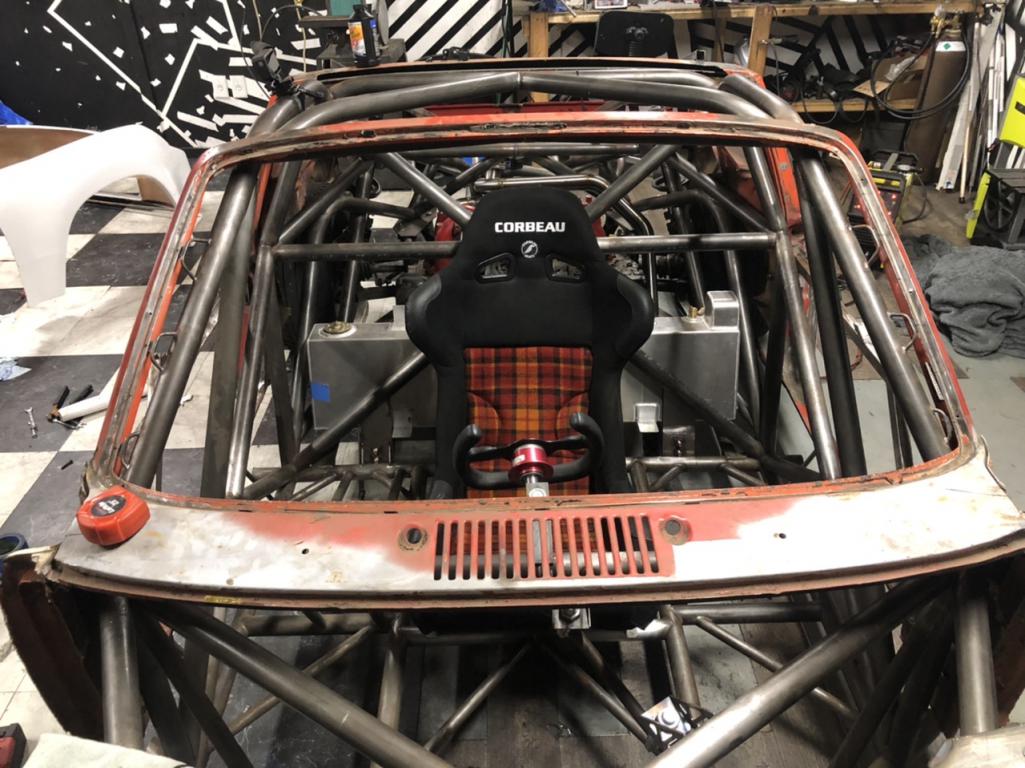
Posted by: tazz9924 Sep 24 2022, 04:49 PM
I need the help of the peanut gallery. I’ve thought long and hard about how to mount this fuel cell. The bottom i got down pretty well, but the top is giving my brain troubles. I want the fuel cell to go up into a mount that keeps it from moving up, and side to side without being: dangerous, heavy, or needlessly complicated. Every option is on the table but no single option seems to fit the bill perfectly. So i have come here for help from some of the more experienced minds. Not mine thats caught in a traffic jam of my own doing, so im open to suggestions!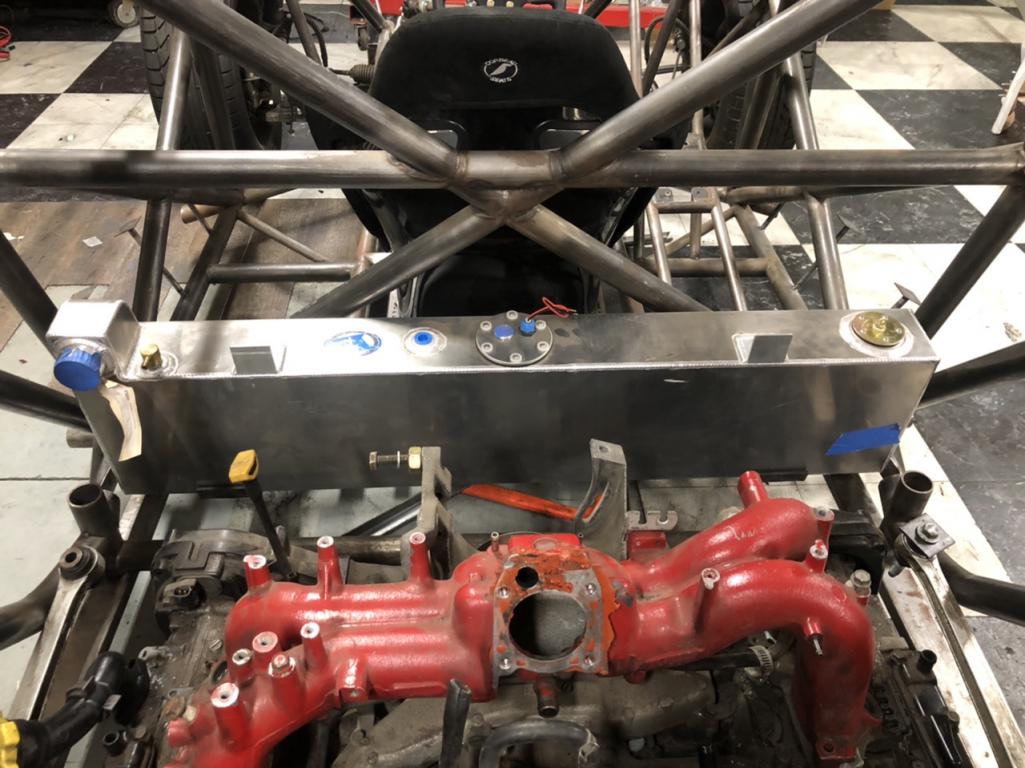
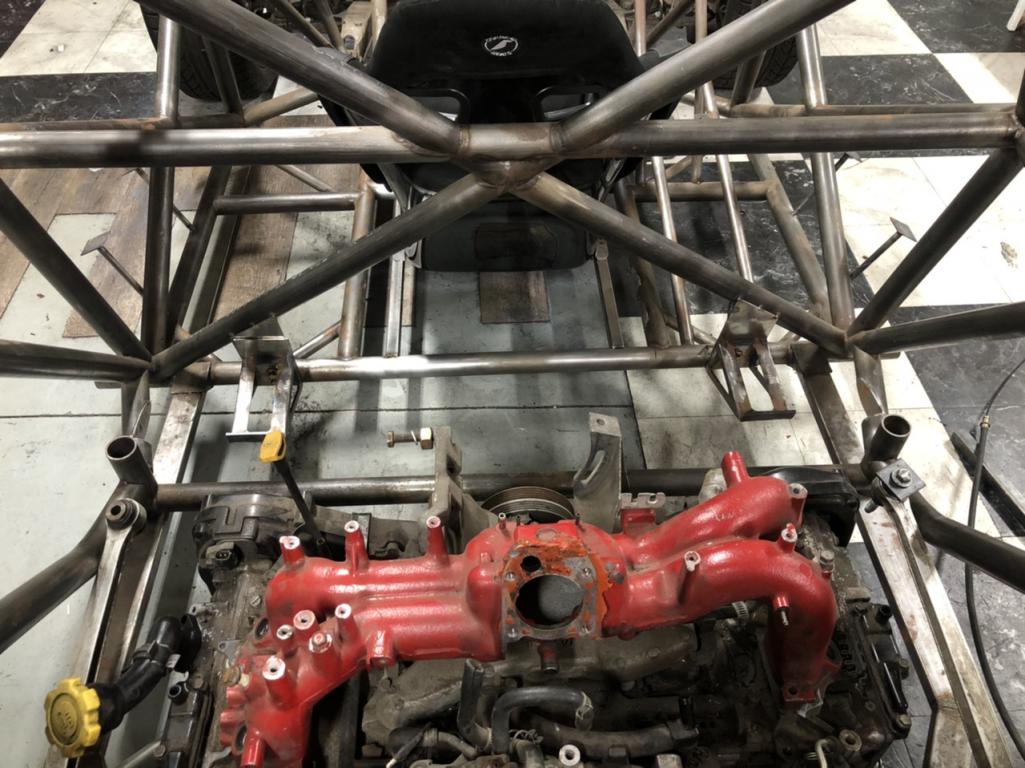
Posted by: tygaboy Sep 24 2022, 07:15 PM
It's always a bit dicey to recommend without seeing it in real life and understanding possible interference issues, but:
Is there no way to run two straps up, over and back down? Maybe extend the vertical front and back edges of the two cradles with a horizontal spot for the strap fastener. MS Paint hack, sorry.
That or add tabs to the cell and the chassis?
Attached image(s)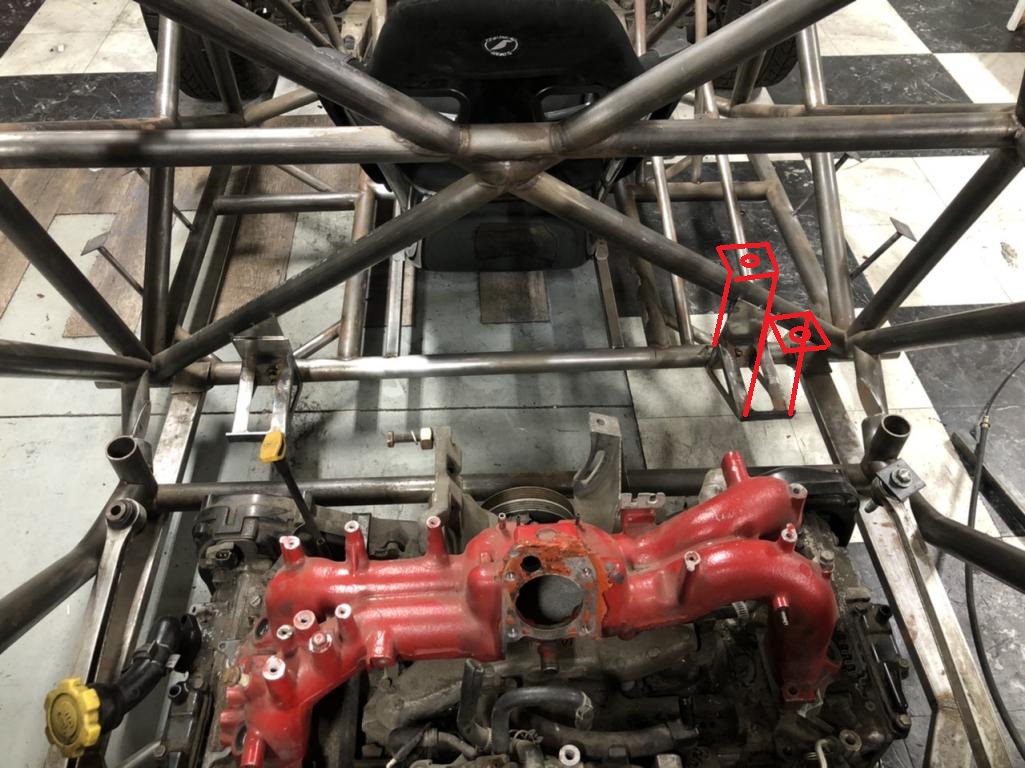
Posted by: tazz9924 Oct 2 2022, 09:52 AM
I redid my rear bumper. When you have a plan in your head often times the space you think you had, doesn’t exist. So when i added the tubes for the wing mount, it completely changed the look of the rear bumper. So i cut out unnecessary tubes, and replaced it with lighter more direct reinforcements. I also added reinforcement to the back half of the frame to connect it to the subframe. All together i think it is slightly heavier than before but also way more rigid. I can also look at it A little more will be added to smooth out the look rather than make it strong but that is todays task.
Ive also spent a fair amount of time just welding the chassis together, and im happy to report im a much better welder thanks to the header build! Sometimes it takes getting out of your comfort zone/learn a new process to really refine what you’ve done a bunch of times.
Posted by: tazz9924 Oct 4 2022, 07:10 AM
The last couple days have been dedicated to welding and welding only. I want to start adding sheet metal to this baby here soon so having the chassis ready is a priority. I have now poured countless ours into this and i still feel im getting better every day. The thing i hate about it though is my critical mind. The moment i weld it im like “hell yeah!” but then i want to show everyone a picture i just cant do it, its not perfect!
So here’s a couple i still kinda like: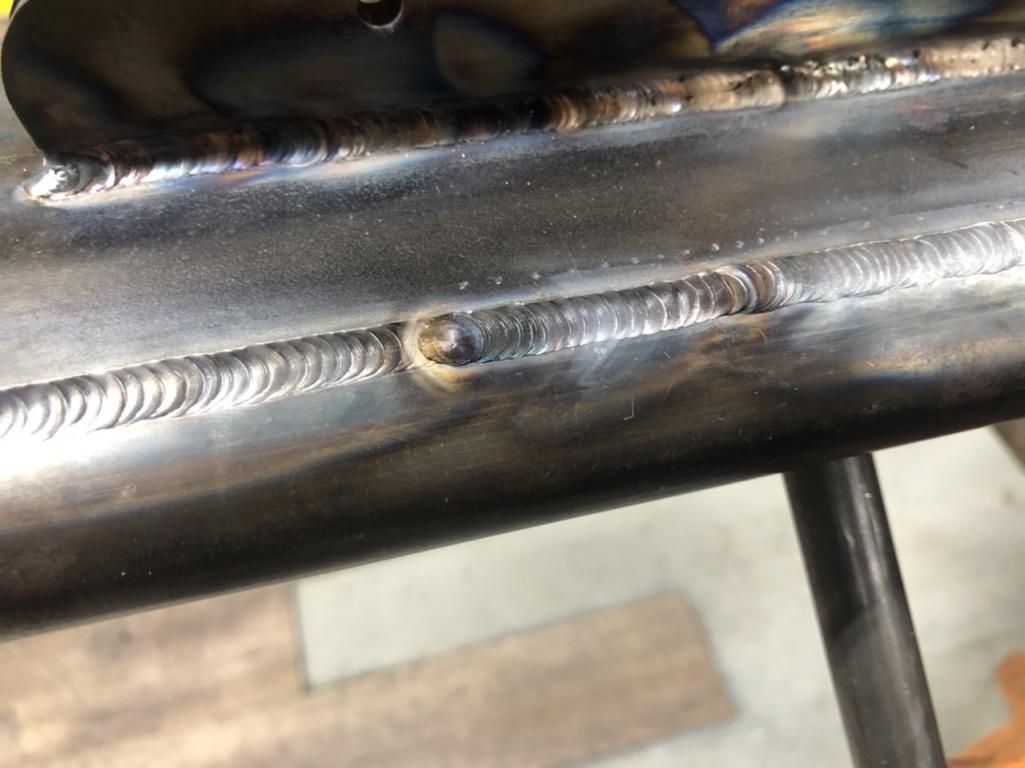
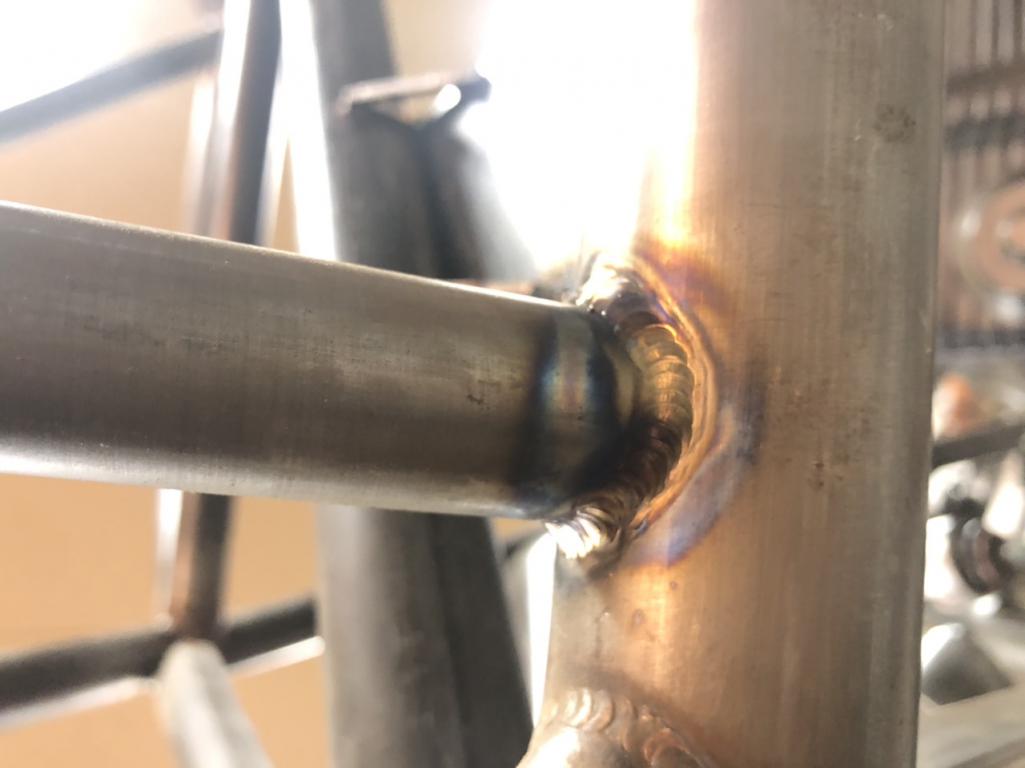
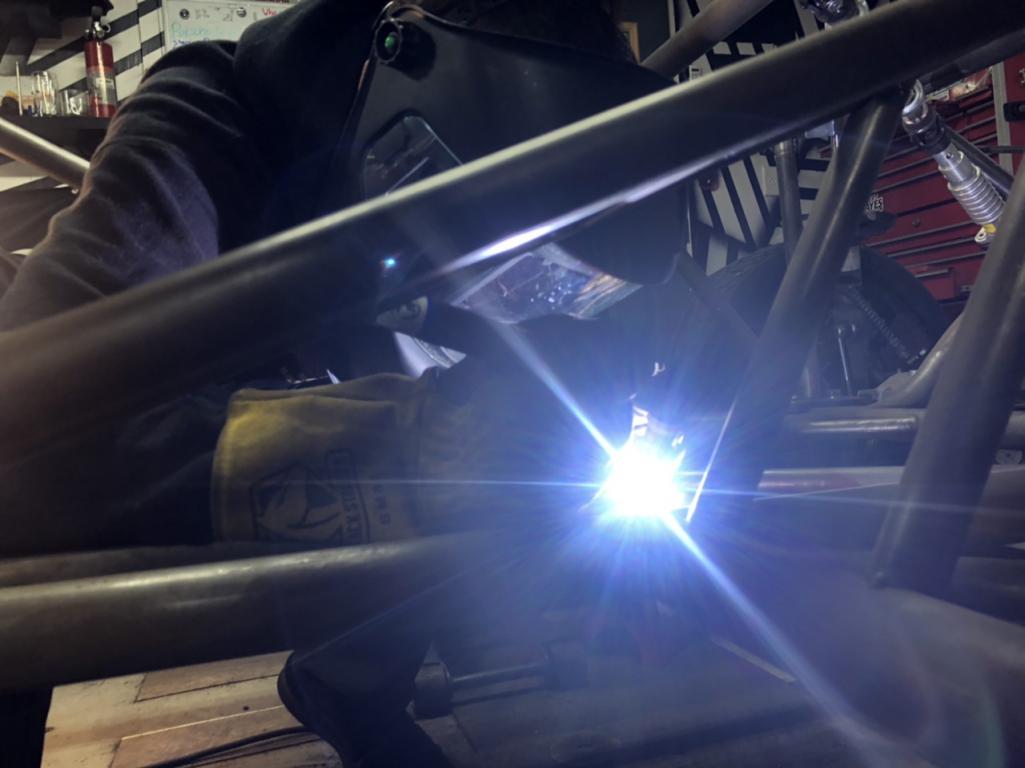
Posted by: tygaboy Oct 4 2022, 07:44 AM
Your practice is paying off, big time. 
That said, in the best "do as I say, not as I do" tone I can muster:
Remember, it's about a strucurally solid joint, not weld porn.
(OK, so maybe a little about the porn part!)
I'd say "Keep up the great work" but I already know you will. Super job, can't hardly wait to see more.
Posted by: tazz9924 Oct 4 2022, 10:20 AM
Your practice is paying off, big time. That said, in the best "do as I say, not as I do" tone I can muster:
Remember, it's about a strucurally solid joint, not weld porn.
(OK, so maybe a little about the porn part!)
I'd say "Keep up the great work" but I already know you will. Super job, can't hardly wait to see more.
I agree, but i am a sucker for weld porn… But thank you!
Posted by: tazz9924 Oct 9 2022, 11:39 AM
I finally finished welding the chassis! Three bottles of gas, countless filler rods and three skin burns later it is done. I know the chassis is entirely made of metal, but you don’t realize how much welding there really is 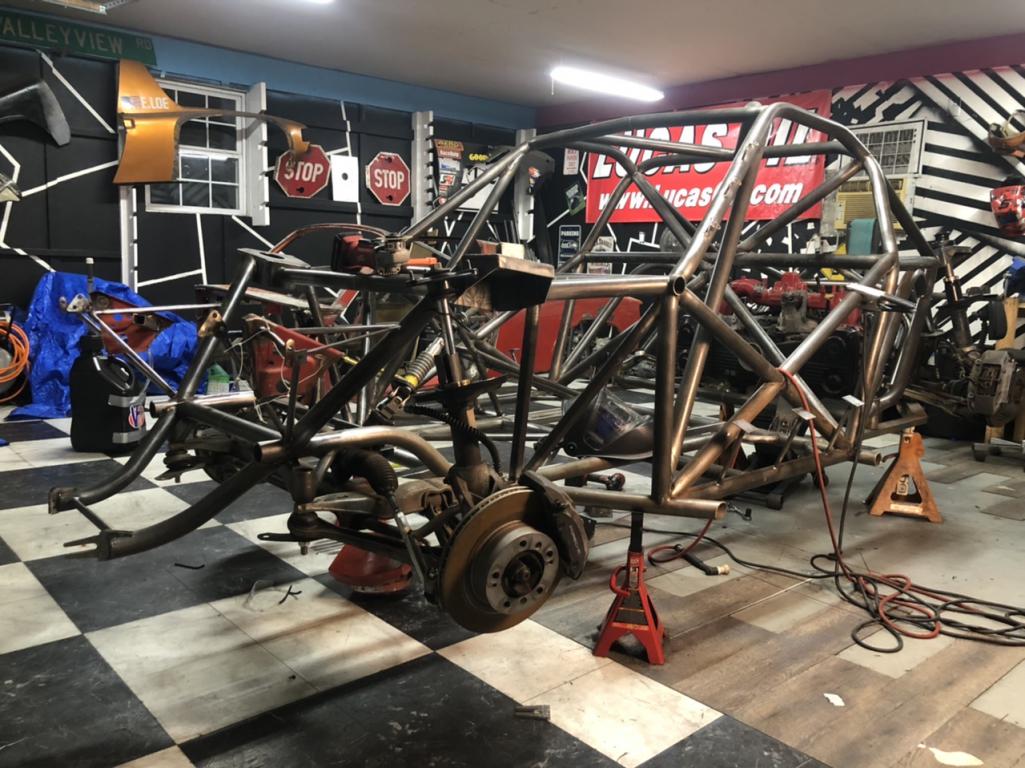
I also got to finally branch out and do some other stuff too. I finally redid my steering column bracket, I was wholly unsatisfied with my first go of it. So despite just welding it in now, this was actually my first project in CAD. I sent it out to send cut send and they cut it out and bent it and i couldn’t be happier! it totally changes to look of the interior despite being small. I still need to readjust the steering shaft and weld it up but maybe a today job. 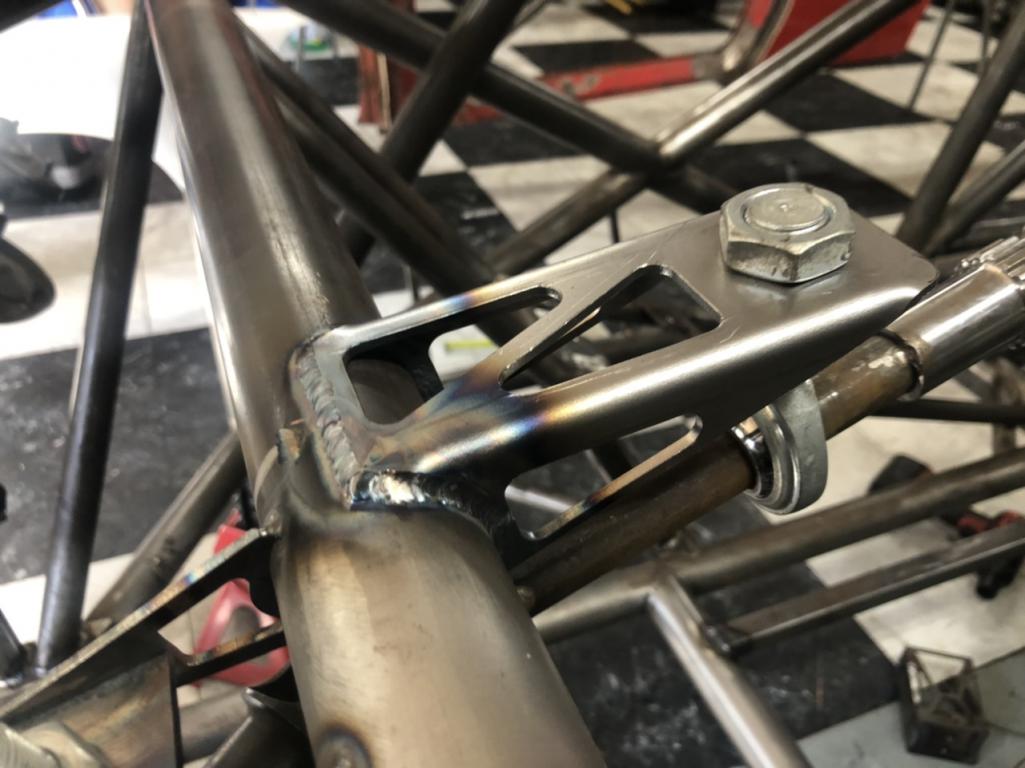
Posted by: tazz9924 Oct 11 2022, 08:20 PM
Spent time doing little gussets for the main cage. Simple and highly rewarding. I imagine this job wouldve taken me many many more hours to do just 12 months ago. Its nice to see my skills impoving.
Now almost all of the structural tube is in! The only thing i have left is two removable braces that go from the roof to the rear strut towers. Im exceedingly thankful for this. my next steps are:
Fuel tank mount (i think i have a plan)
Firewall (most of a plan)
And get it running (poor plan)
Of course a lot of little things in between.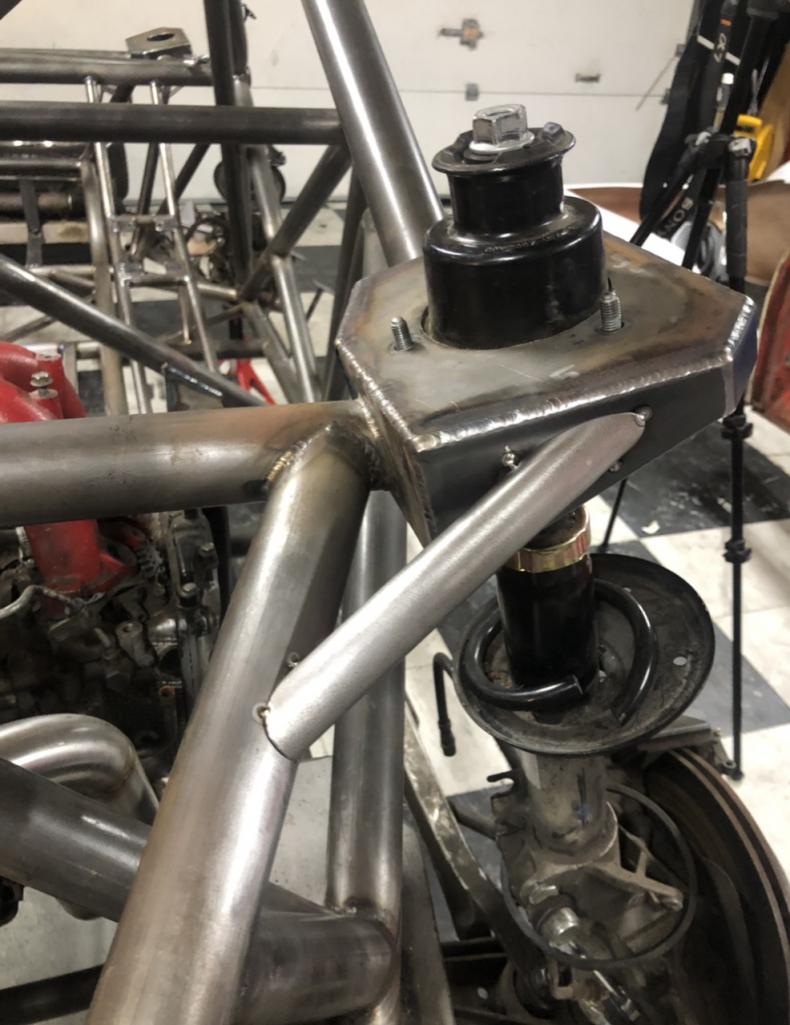
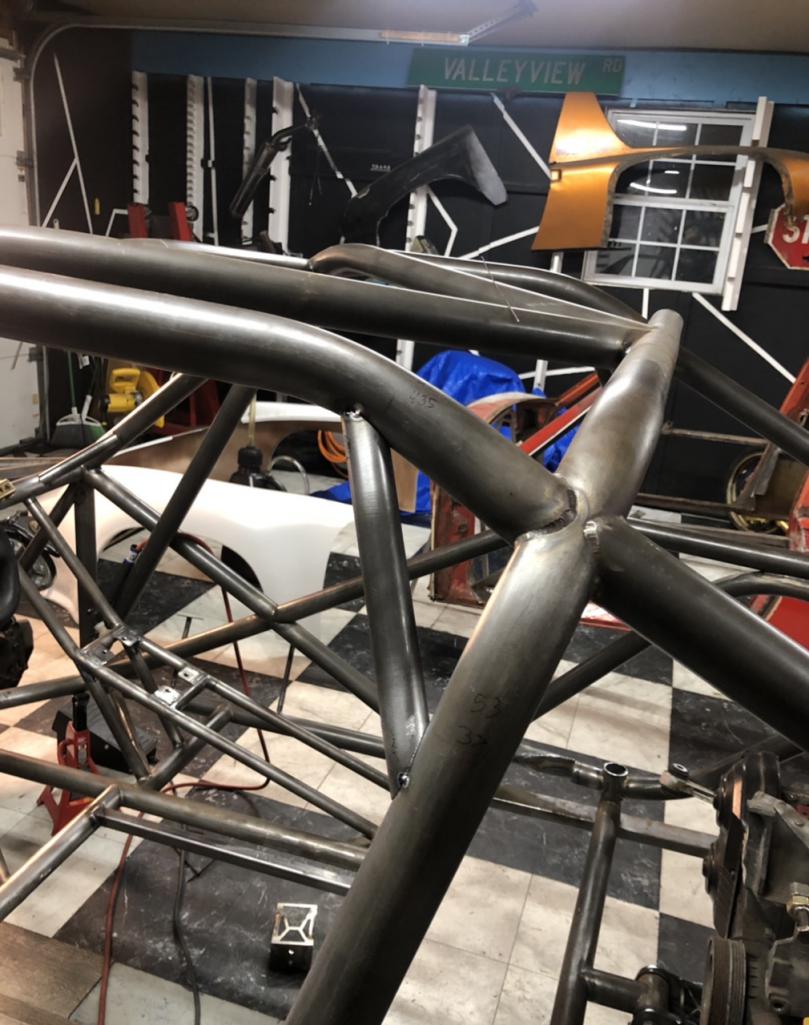
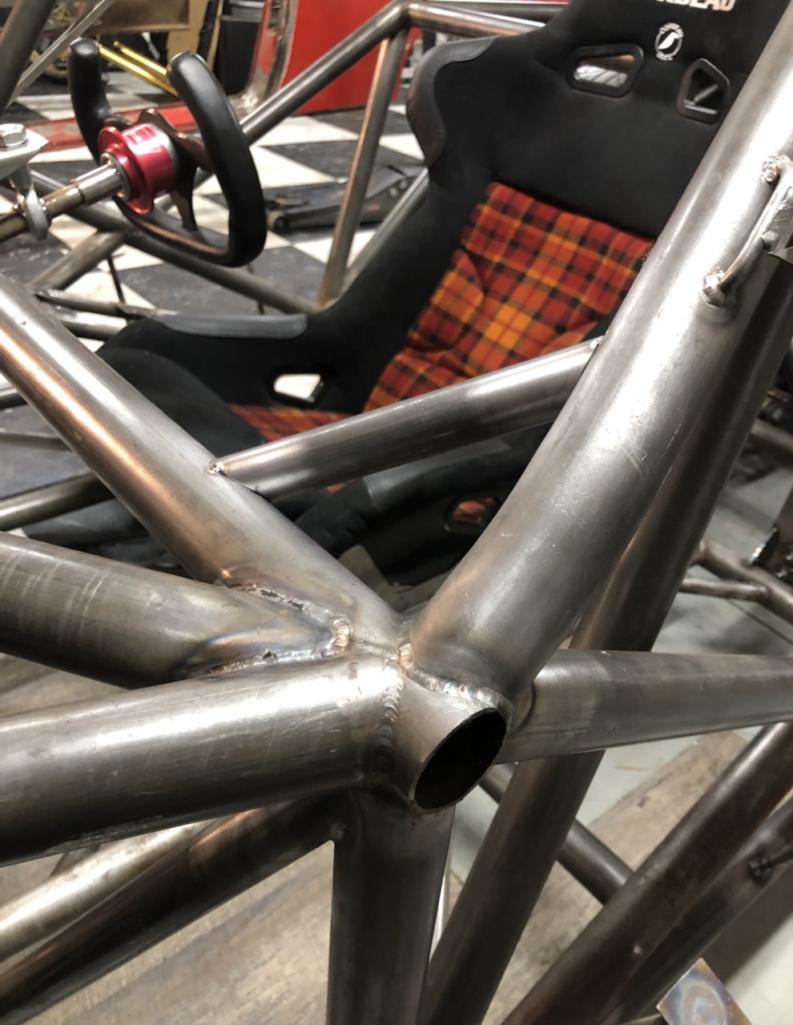
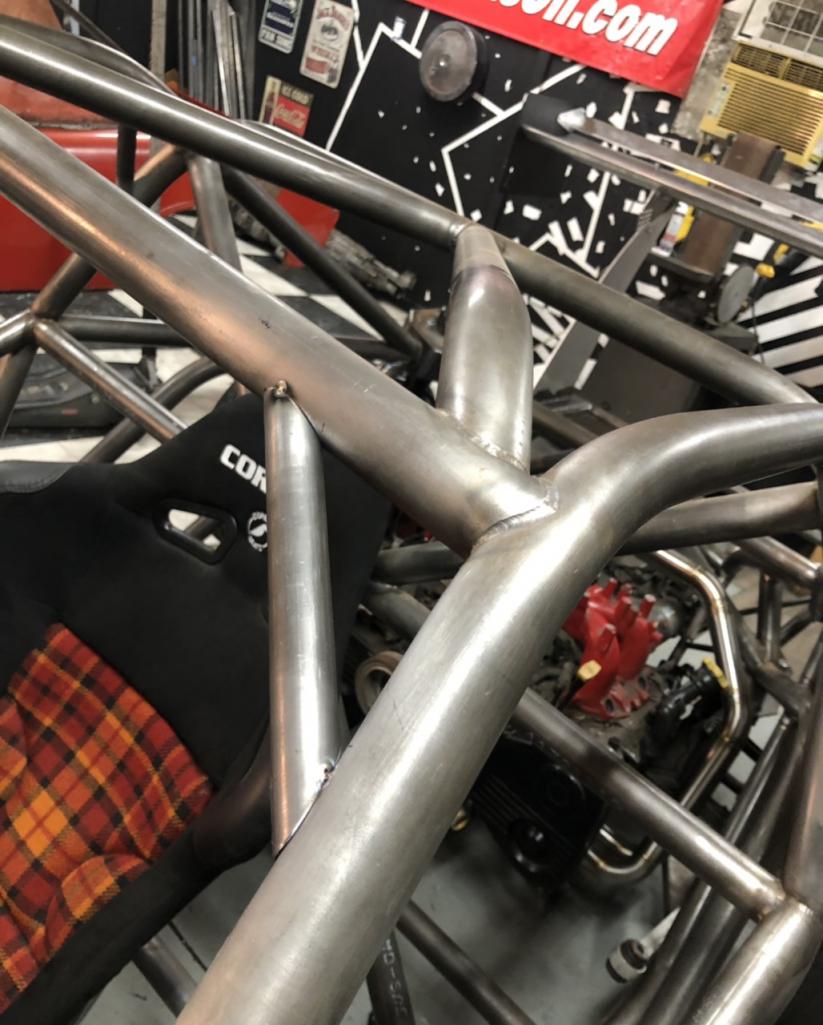
Posted by: mgp4591 Oct 12 2022, 03:52 PM
Yes indeed....I've done the math and that's officially a LOT of welding! Makes my hands hurt just looking at it all...and yet your welds continue to get better!
Posted by: tazz9924 Oct 12 2022, 05:52 PM
Yes indeed....I've done the math and that's officially a LOT of welding! Makes my hands hurt just looking at it all...and yet your welds continue to get better!
It hurt my hands a lot too, my problem is when im almost done and its a good weld ill keep feeding the minuscule piece of filler rod into a 3000* pool of molten metal until you can measure the rod in fractions of an inch. Half the time my hand is so hot, i send my glove flying halfway across the room after a good weld.
Posted by: tazz9924 Oct 16 2022, 03:17 PM
Something i forgot to mention i finally got my heads for the engine, They are a set of ej20 heads i had ported and chamber matched to an ej25 bore. It also has upgraded valves and springs now too so hopefully ill be able to push the rpm all the way to 8000! Headgamez did all the work and it all turned out really good!
This was a photo as they were getting done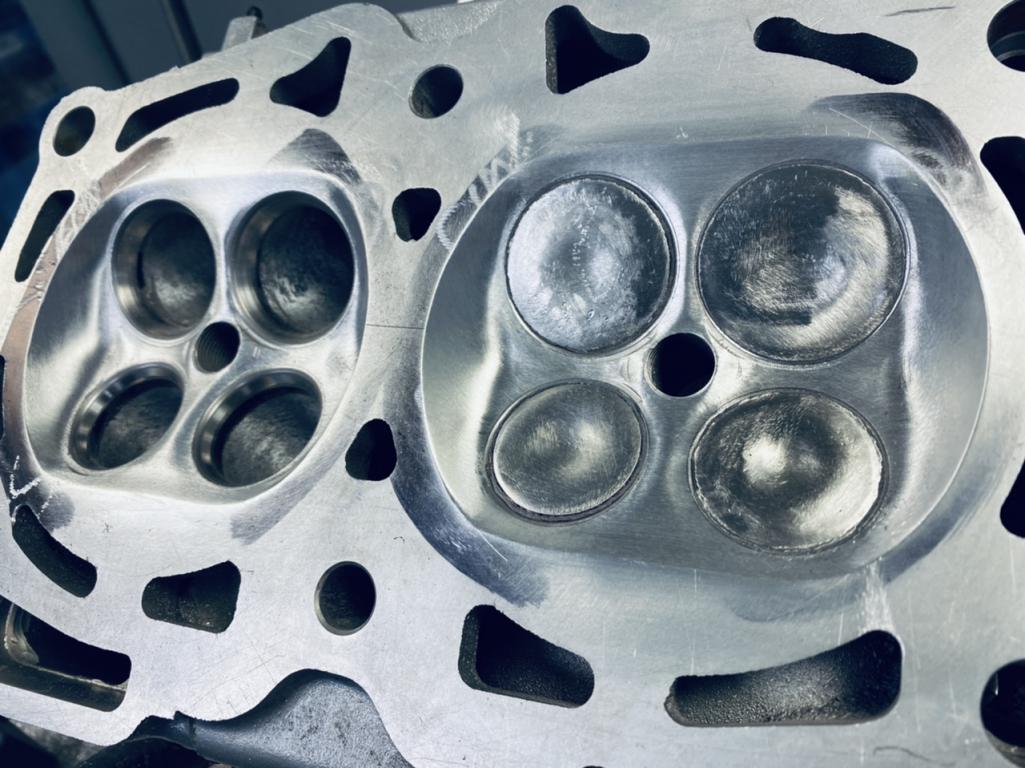
Posted by: tazz9924 Oct 19 2022, 04:58 PM
A new video is out today summarizing the stuff you have and haven’t seen:
https://m.youtube.com/watch?v=ZIAmvm3EpjM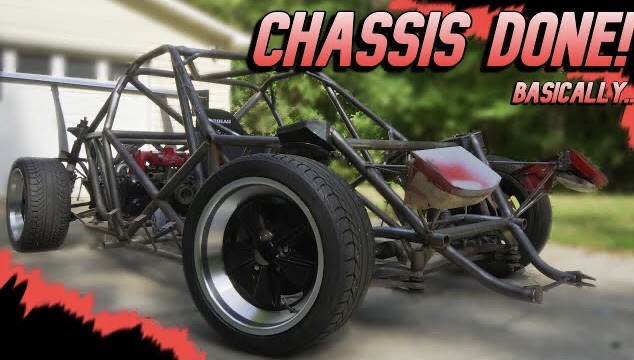
Posted by: tazz9924 Nov 6 2022, 08:04 AM
been a while for some reason, but body is back on, im test fitting things again so i just wanted to share a picture! More work is getting done today so updates on the way!
Attached thumbnail(s)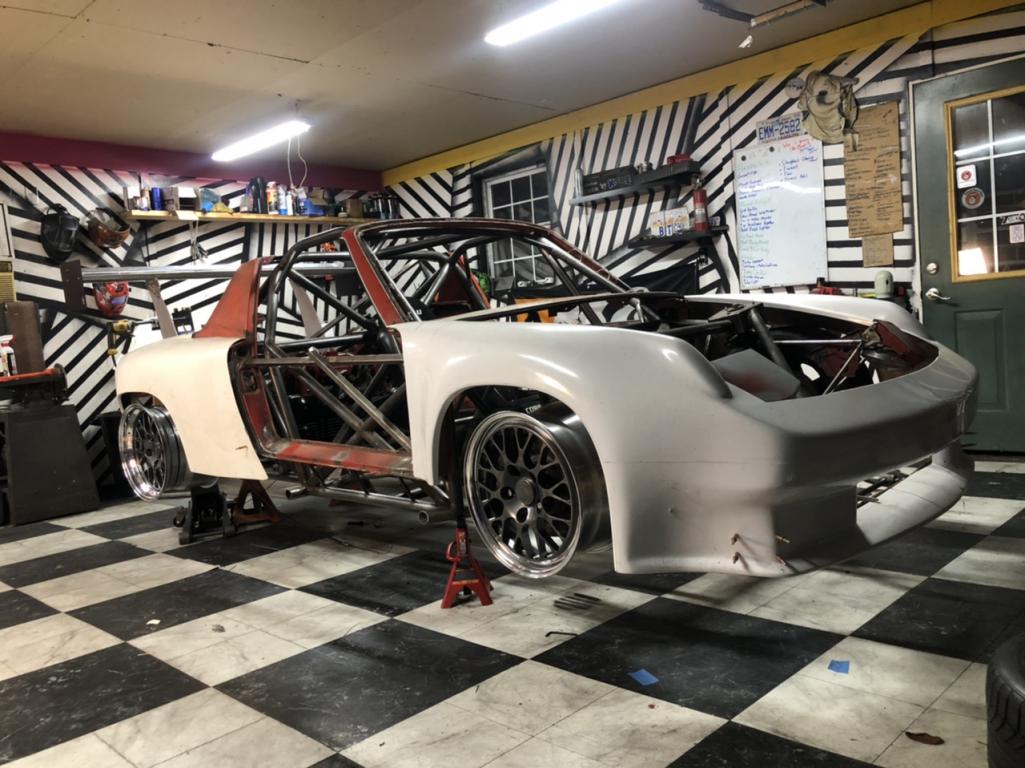
Posted by: 76-914 Nov 6 2022, 09:59 AM
Looking good. Those wheels are a nice touch.
Posted by: sb914 Nov 6 2022, 10:30 AM

Posted by: Mayne Nov 6 2022, 02:14 PM
been a while for some reason, but body is back on, im test fitting things again so i just wanted to share a picture! More work is getting done today so updates on the way!
Oh yeah, that’s right, it is going to be a 914! JK, amazing work as always.
Posted by: tazz9924 Feb 2 2023, 01:13 PM
I have a new video out:
https://m.youtube.com/watch?v=wJEV9NaB2u4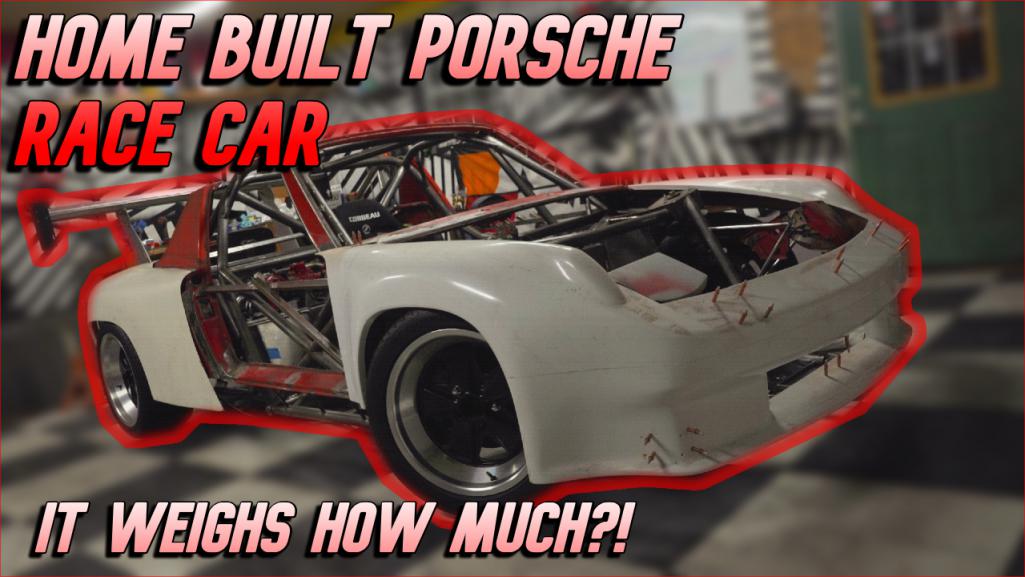
There has been a lot of progress, though all ive done is lurk around here quietly. So there will be some good progress photos over the weekend!
Posted by: Lilchopshop Feb 3 2023, 07:57 AM
Amazing skills! Videos are fantastic too!
Posted by: Mayne Feb 3 2023, 02:32 PM
Saw the video before I saw your post here. Excellent work as always! Like you, I was a bit surprised the weight came in that high, and I'm sure you'll add lightness. But you can also just add horsepower!
Posted by: tazz9924 Feb 4 2023, 03:43 PM
Ok so catch up time! I guess ill start with the firewall, its made of .024 steel. Everything was sheared out then bead rolled and bent. It makes for very pretty and strong panels. Welding sheet metal to a much thicker tubing is... a difficult process. However it can be made far easier with silicone bronze filler rod. Mig welders i have no advice. It melts like butter and seems to take a whole lot of heat relative to standard steel. And walla: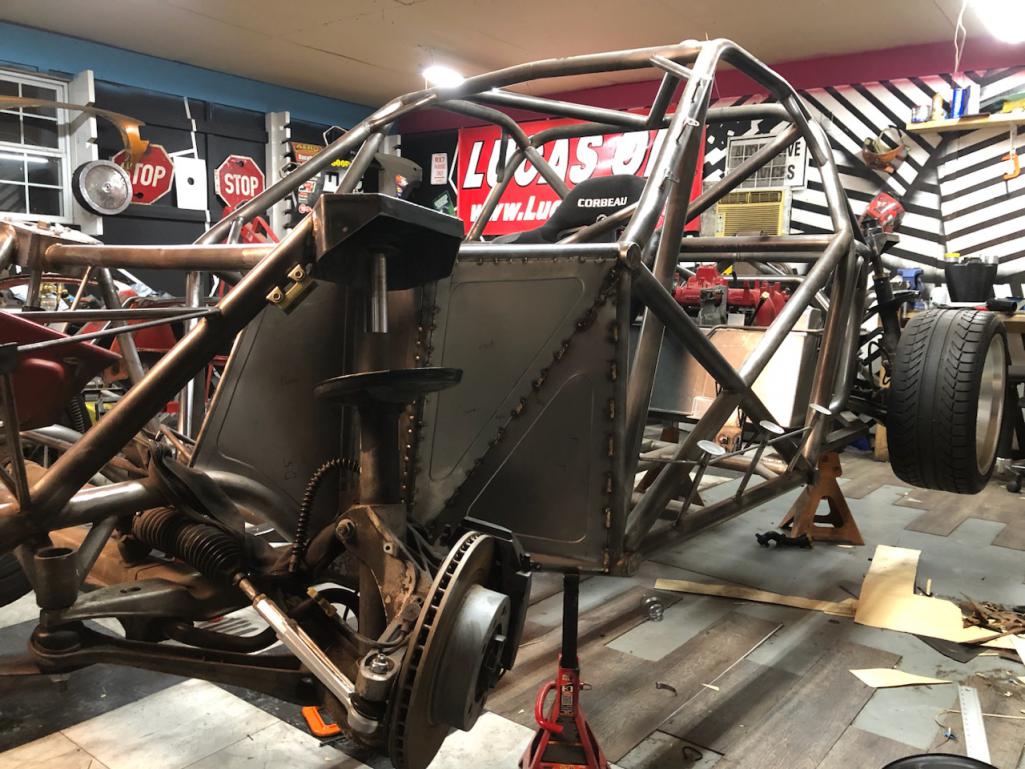
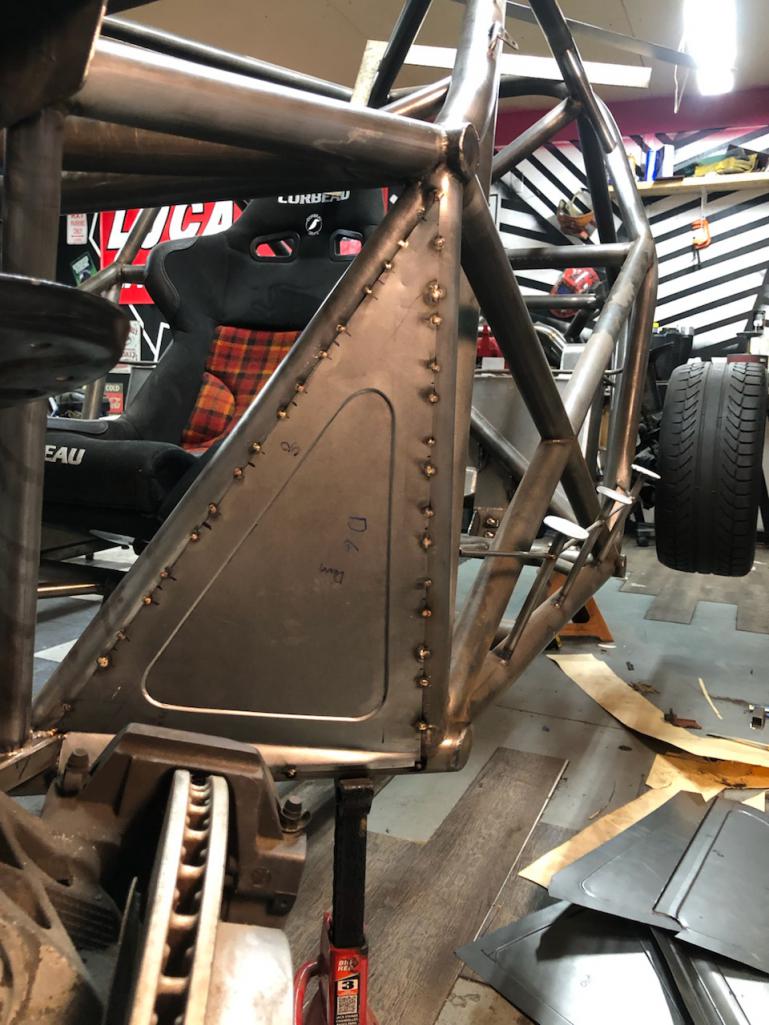
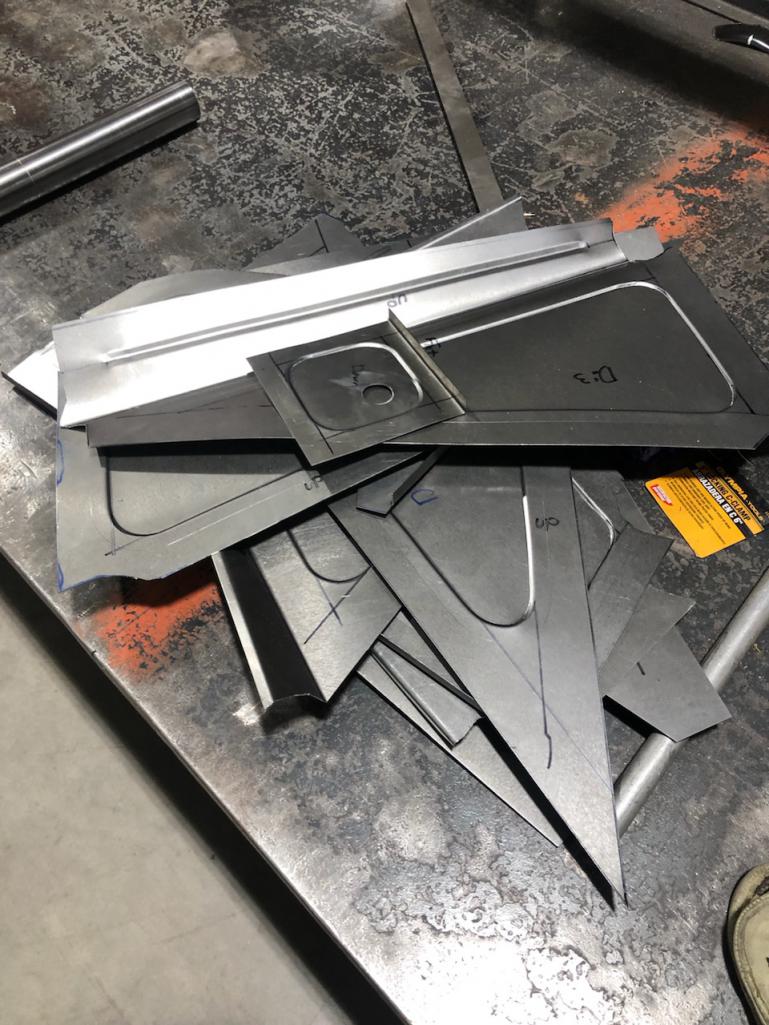
Posted by: tazz9924 Feb 4 2023, 03:47 PM
Saw the video before I saw your post here. Excellent work as always! Like you, I was a bit surprised the weight came in that high, and I'm sure you'll add lightness. But you can also just add horsepower!
Yeah im suprised but also not suprised. I Dont Know What Im Doing But im trying to. Everything is built a bit heavier than necessary, and less than efficient. I obviously hoped for less but the bed i made is the bed ill lay in. I can make a lot of things very light, and it should still get me in the range where people say: man thats light.
Posted by: tazz9924 Feb 5 2023, 10:28 AM
Next up i mounted the intercooler. I chose a mishimoto water to air intercooler, its rated for 500hp which should get the job done perfectly. It’s important to not “over intercool” the engine. It can create more lag, pressure drops etc. But i mounted it using fancy rubber washer/grommet i got from mcmaster carr. The whole unit is very stiff but is still isolated with rubber. 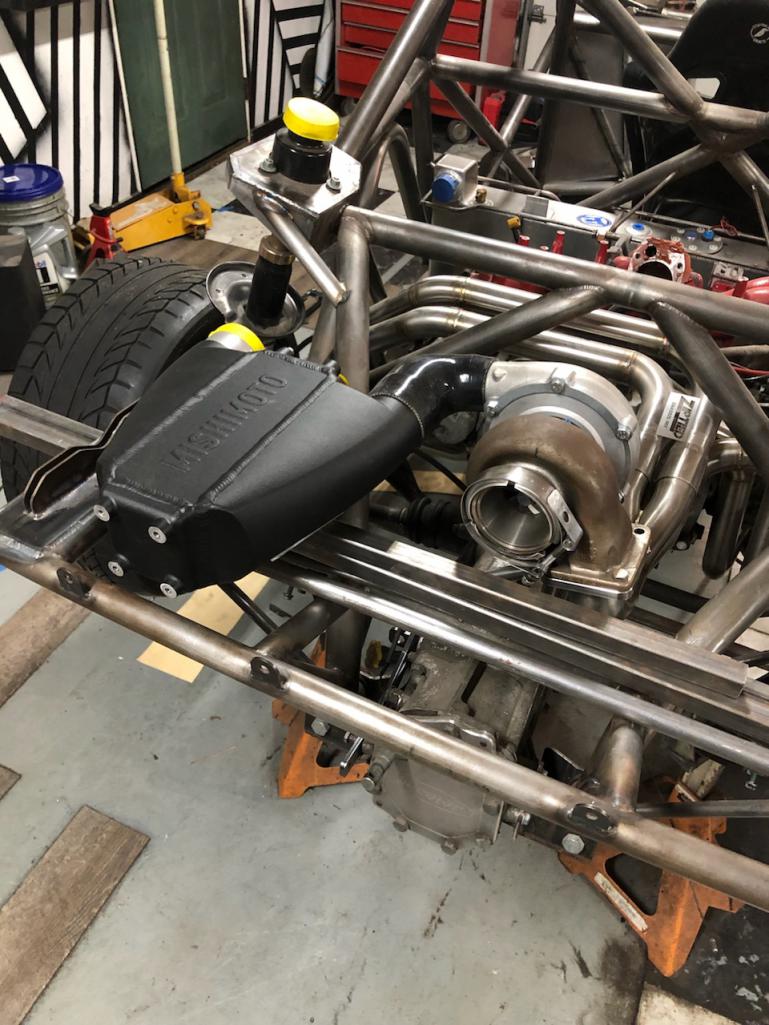

Posted by: mepstein Feb 5 2023, 12:00 PM
I saw the video. Great work. I’m really not surprised about the weight. That’s a lot of tubing. Still, perfect can be the enemy of good so congrats on getting it built.
Posted by: rhodyguy Feb 5 2023, 12:26 PM
That’s a BIG turbocharger.
Posted by: tazz9924 Feb 6 2023, 11:18 AM
Next up is a simple one, the exhaust. Its only three parts: vband, 3” round tube, and 3” round to oval. I set the length to barely come out of the body to prevent major carbon build up. Tacked it all and back purged it. My tube prep is so good that i can weld the tubes together without any filler rod. The flange will get some but thats to be expected. Next up is the wastegate!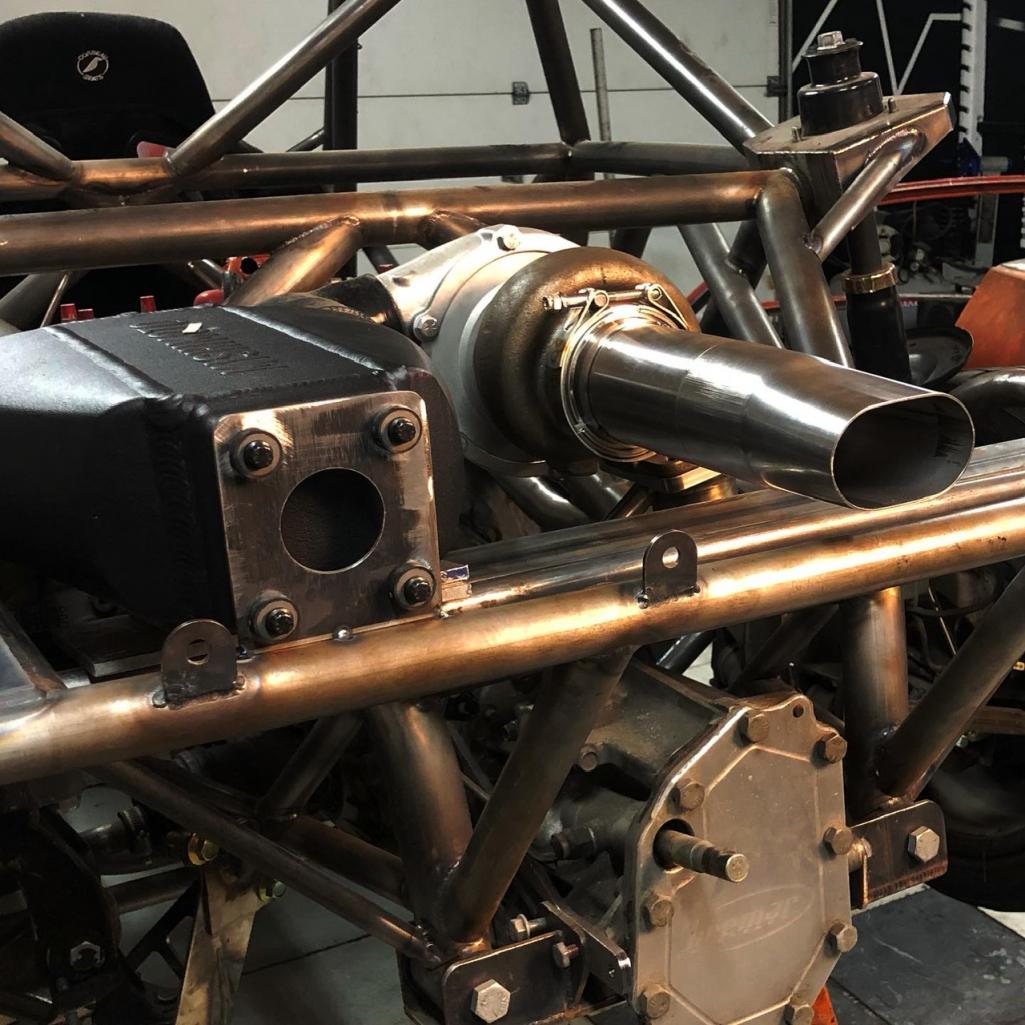
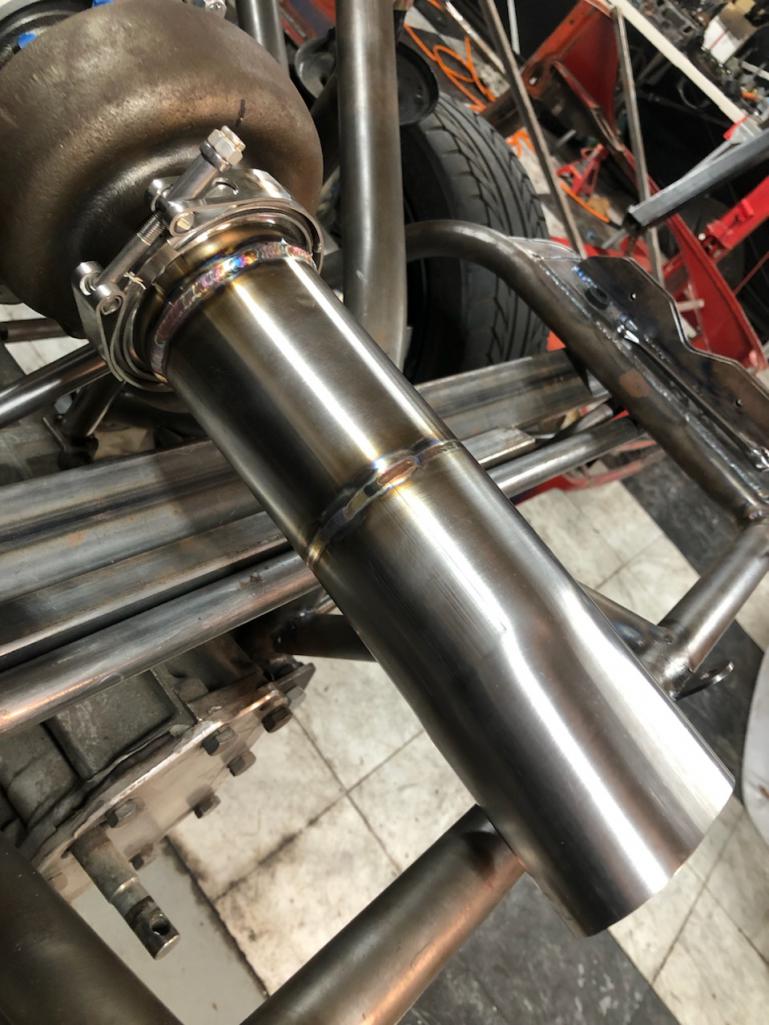
Posted by: tygaboy Feb 6 2023, 11:32 AM
Lovely. And I know what it takes to do that level of work... Not easy! Great job! 
Posted by: tazz9924 Feb 7 2023, 02:56 PM
Next is my favorite piece so far! i had to add the wastegate to the collector. This was done in a way to prioritize flow to the wastegate for better boost regulation. This also meant i get to add the screamer pipe to the back end as well.
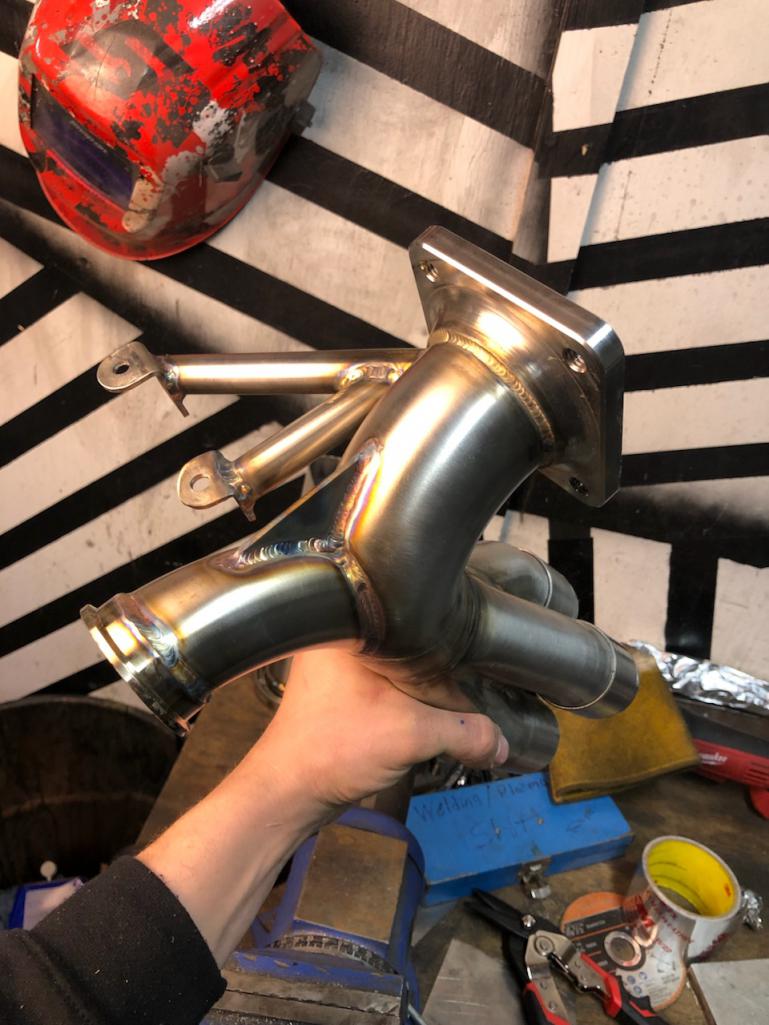
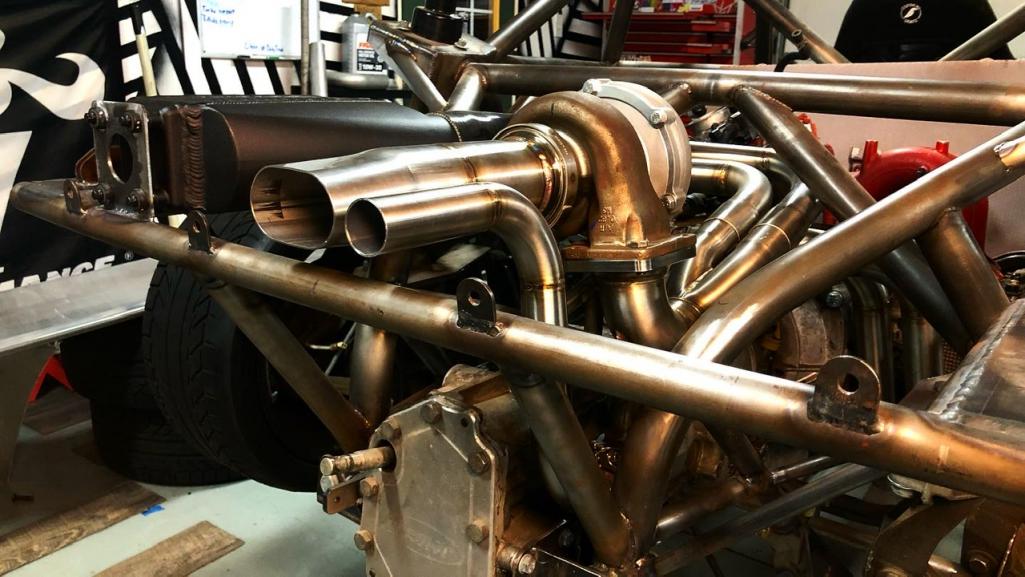
Posted by: tazz9924 Feb 7 2023, 02:57 PM
Lovely. And I know what it takes to do that level of work... Not easy! Great job!
why thank you! I must say i have used your work as inspiration quite a bit myself!
Posted by: tazz9924 Feb 14 2023, 06:58 AM
Then it was on to the intercooler pipe. I have never welded aluminum before, but i sure gave it a good try! i practiced for about 2 hours before finally taking the plunge. I dont have photos of during the process but i can say the design was very simple and i added a tial blow off valve, and i polished the pipe. Overall im very proud of the results. 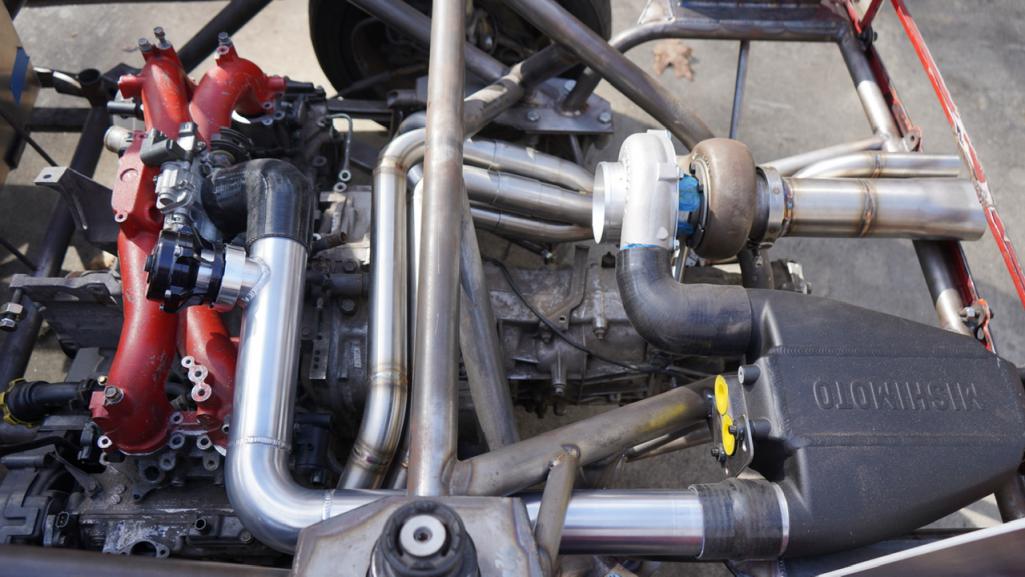
Posted by: tazz9924 Feb 16 2023, 05:08 PM
New video out today! It’s shorter due to me being busy but i enjoy it.
https://m.youtube.com/watch?v=v75D_SBEFTY&feature=youtu.be
Posted by: tygaboy Feb 16 2023, 06:31 PM
You're going to love messing with that PMU. I love what they allow you to do... I expect LOTS of details, when you get to the wiring stuff. Keep up the great work.
Posted by: tazz9924 Feb 16 2023, 08:14 PM
You're going to love messing with that PMU. I love what they allow you to do... I expect LOTS of details, when you get to the wiring stuff. Keep up the great work.
Can do! Ive wanted one since the moment i saw one, except the racepak one was too expensive. Then haltech came around. Details should be plentiful
Posted by: tazz9924 Feb 17 2023, 07:20 AM
Now lets kickback with some good pictures. 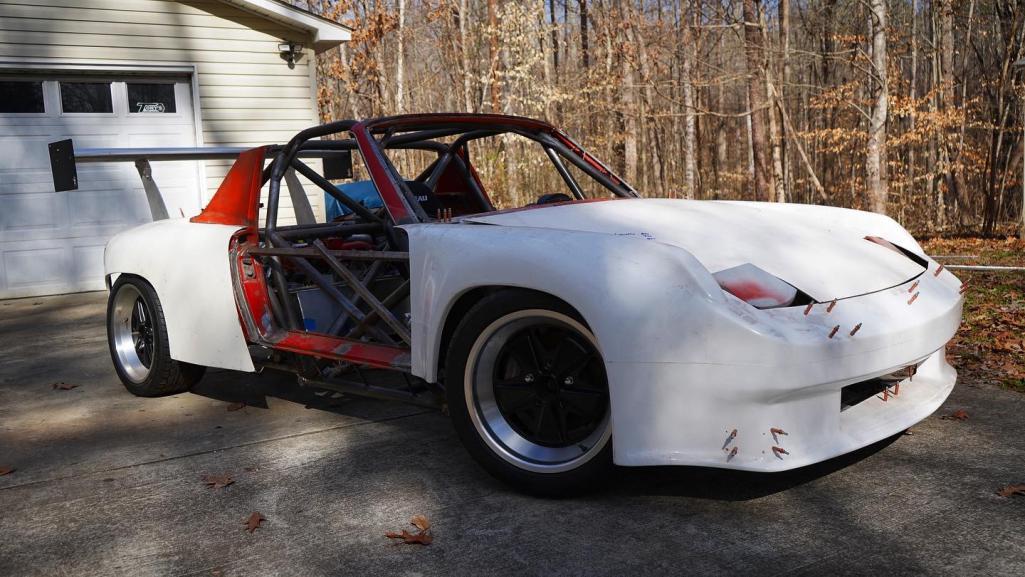
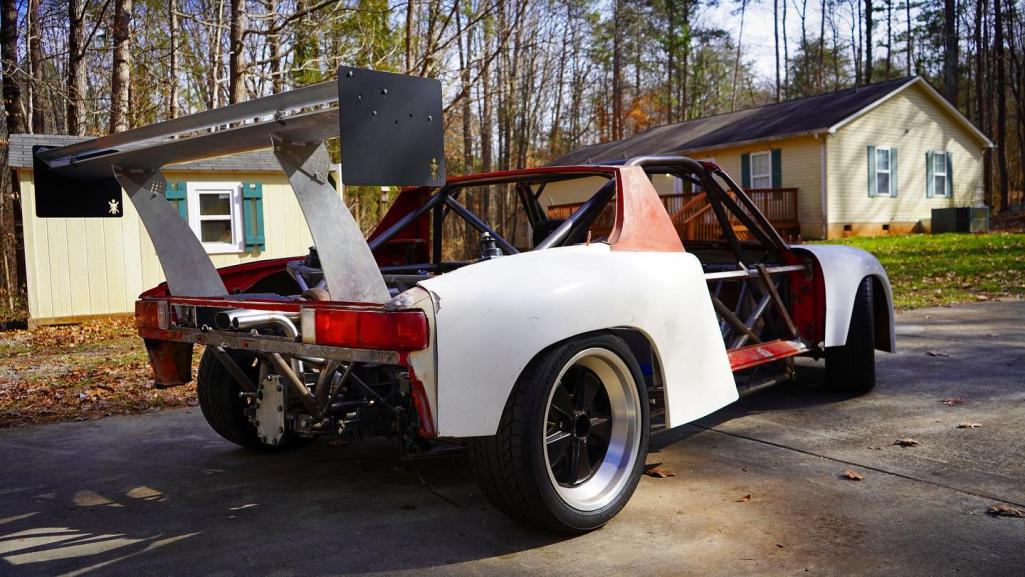
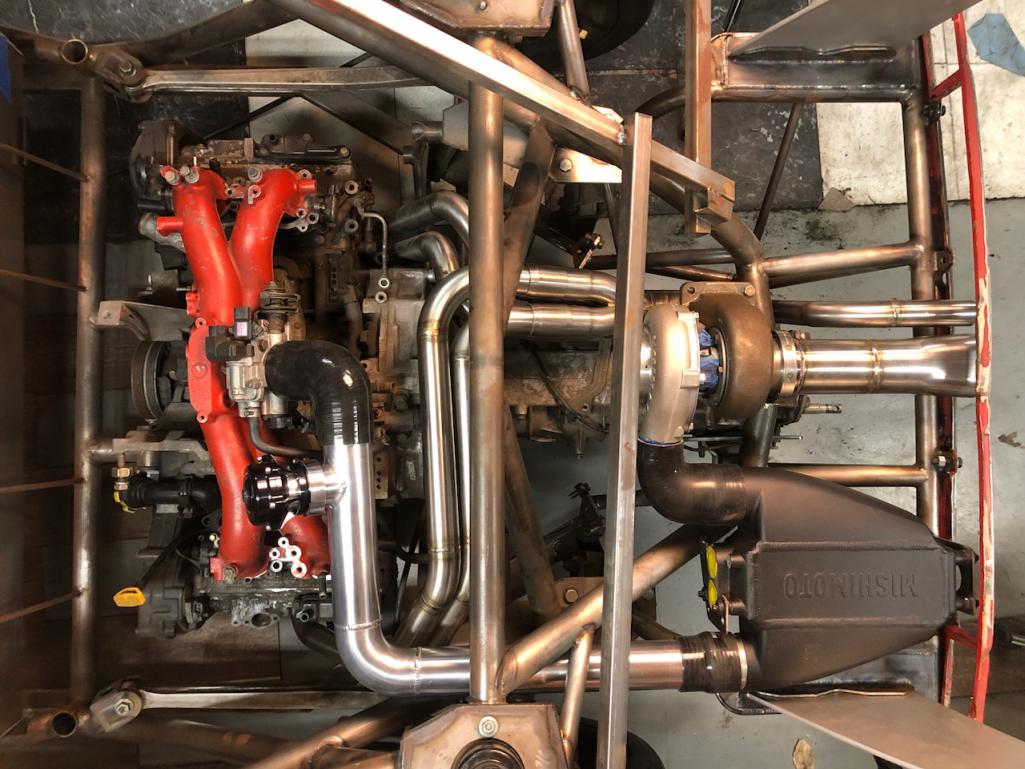
Everything is kinda free floating in the last picture, when securely attached everything will be parallel..
Posted by: tazz9924 Mar 12 2023, 10:20 AM
Ive done a lot lately but its been little bits everyday until i realized im way further along then the forum. So as a little taste, ive been baffling my small car performance oil pan. I know nothing about this process but now im done so i figured it out i guess. I went from paper template in a diamond shape around the pick up. transferred it to aluminum, grabbed some aluminum piano hinge and slotted holes in the panels. the two were then welded together with a little limiter on it (keeps the doors from closing too slowly) then it was all added to the pan and we have a product im very proud of. 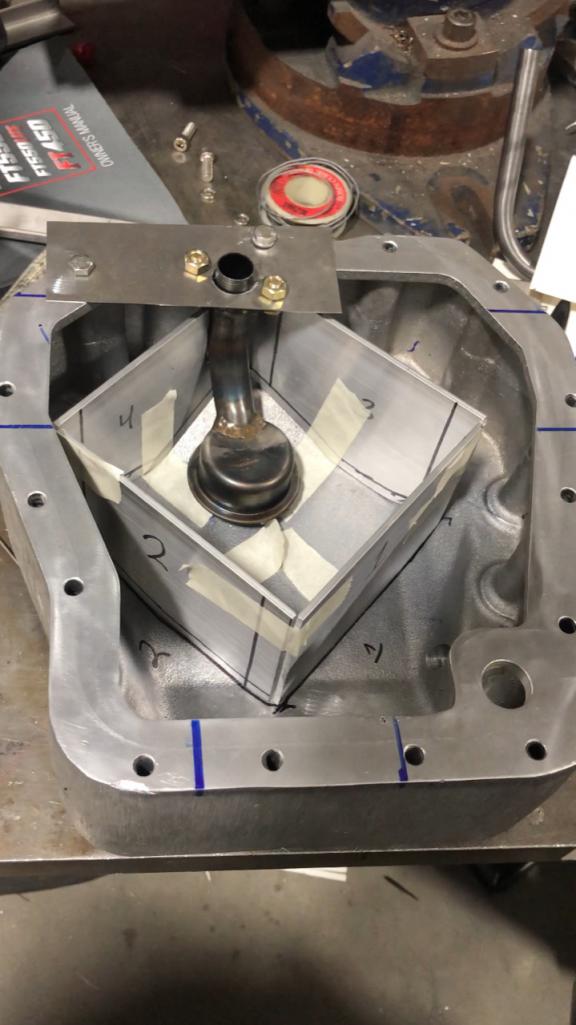
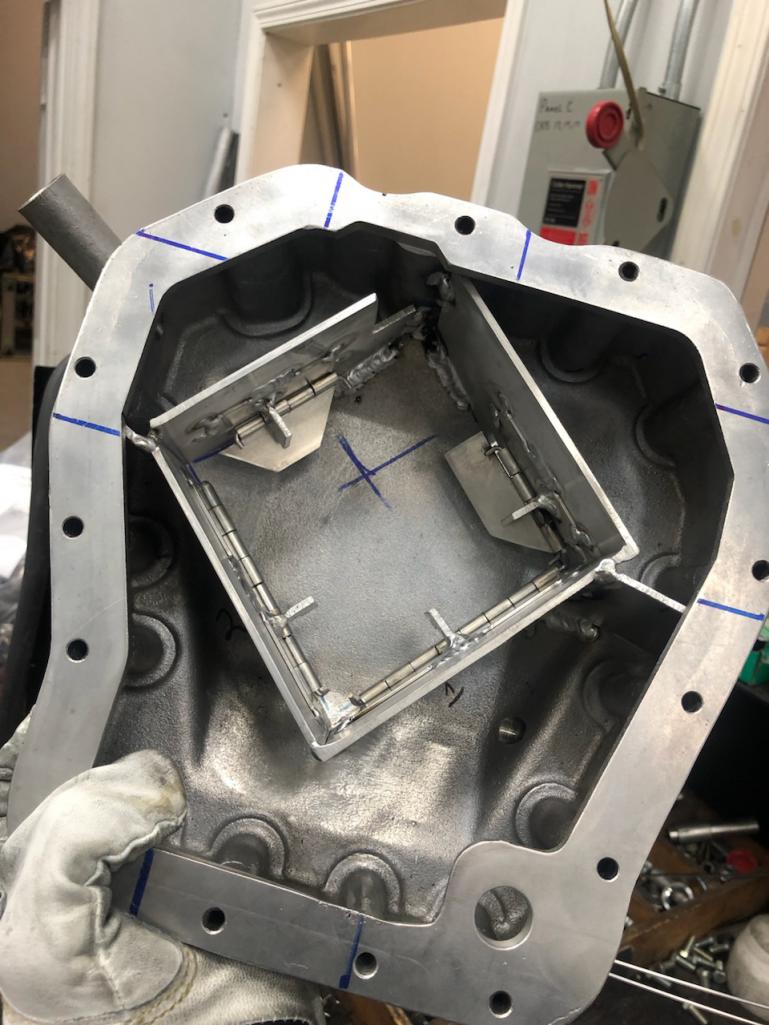
Posted by: tazz9924 Mar 16 2023, 12:50 PM
Engine build is now! I have been holding out a bit but i’ll detail it here shortly
https://m.youtube.com/watch?v=LNzClvdOtoI&feature=youtu.be
Posted by: tazz9924 Mar 17 2023, 02:59 PM
Engine build is now! I have been holding out a bit but i’ll detail it here shortly
https://m.youtube.com/watch?v=LNzClvdOtoI&feature=youtu.be
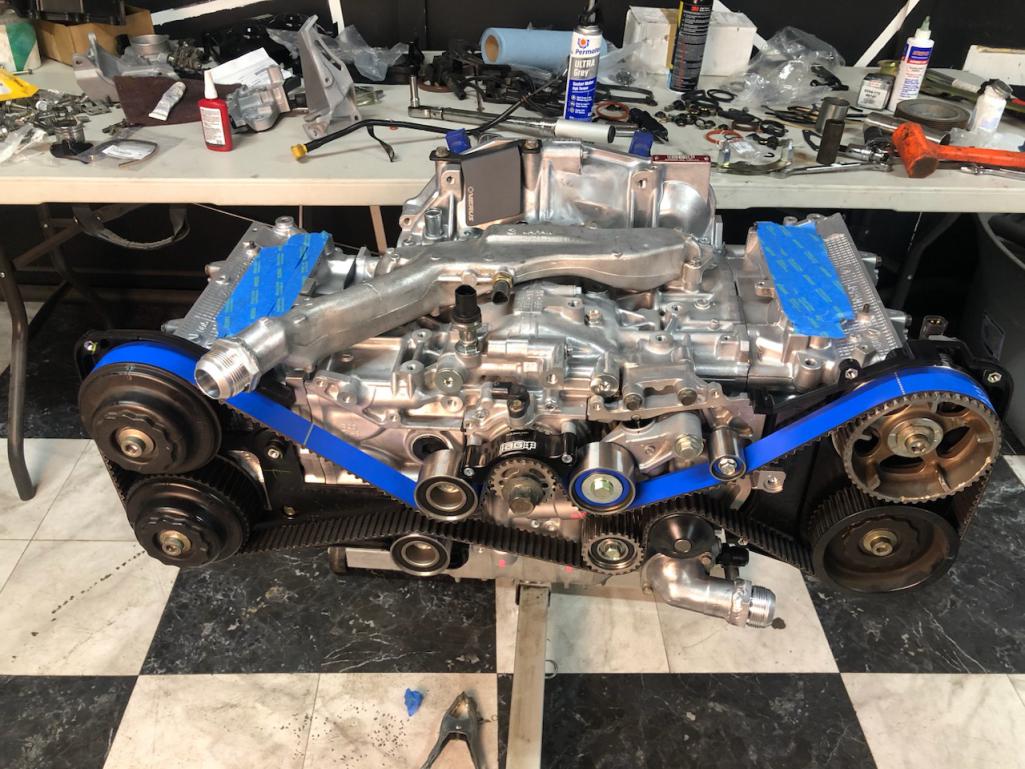
This is the motor in question, a b e a utiful piece from japan. It features 2.5 liter displacement, ej20 heads, forged internals, everything AN, not a single rubber hose, and its an animal.
Ive been nickel and dimed do death by this thing but im back from the dead to do it all again. The results speak for themselves
Posted by: tazz9924 May 14 2023, 07:46 PM
I had a long couple months getting my dodge race ready and nearly finished on the podium, but now im on to the porsche for a bit. Recently i took all the suspension off the car to do some finish welding and make the engine install and firewall install easier. speaking of which; the firewall!
A lot of firewall work has been done to get it ready for wiring and liquid lines. Im using so much filler rod on this stuff but at least it comes out nice.
Also for some reason i get too lazy to post stuff on the car. Call it busy or lazy or something else, but i do get work done on it constantly so progress hasn’t stopped. 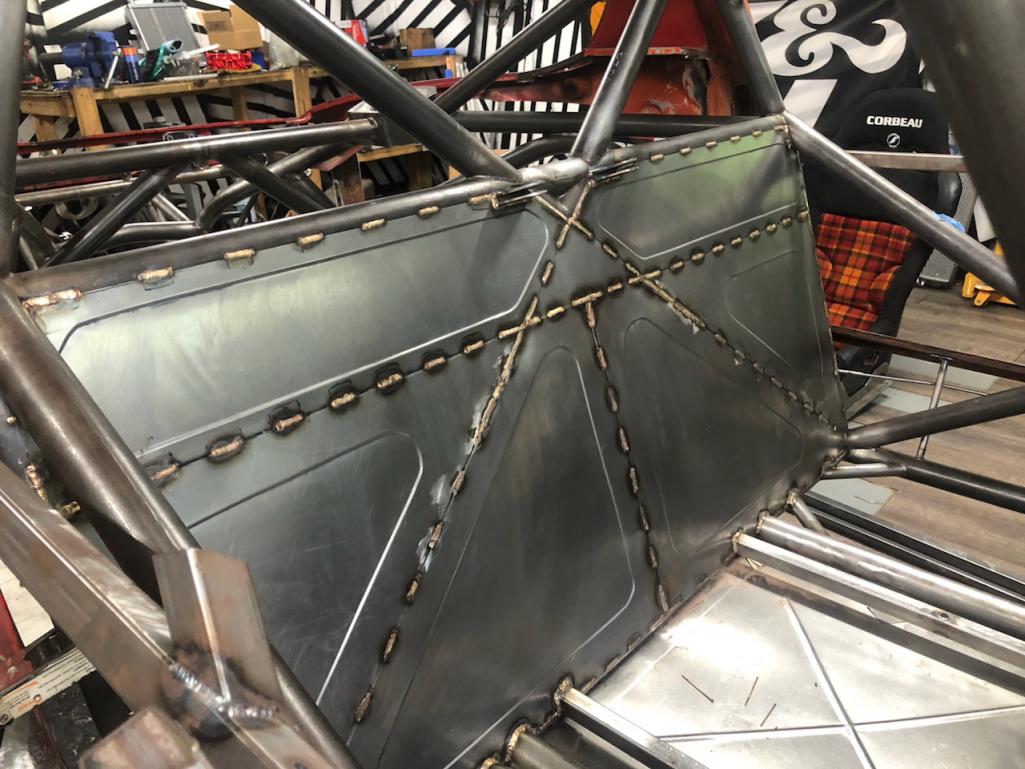
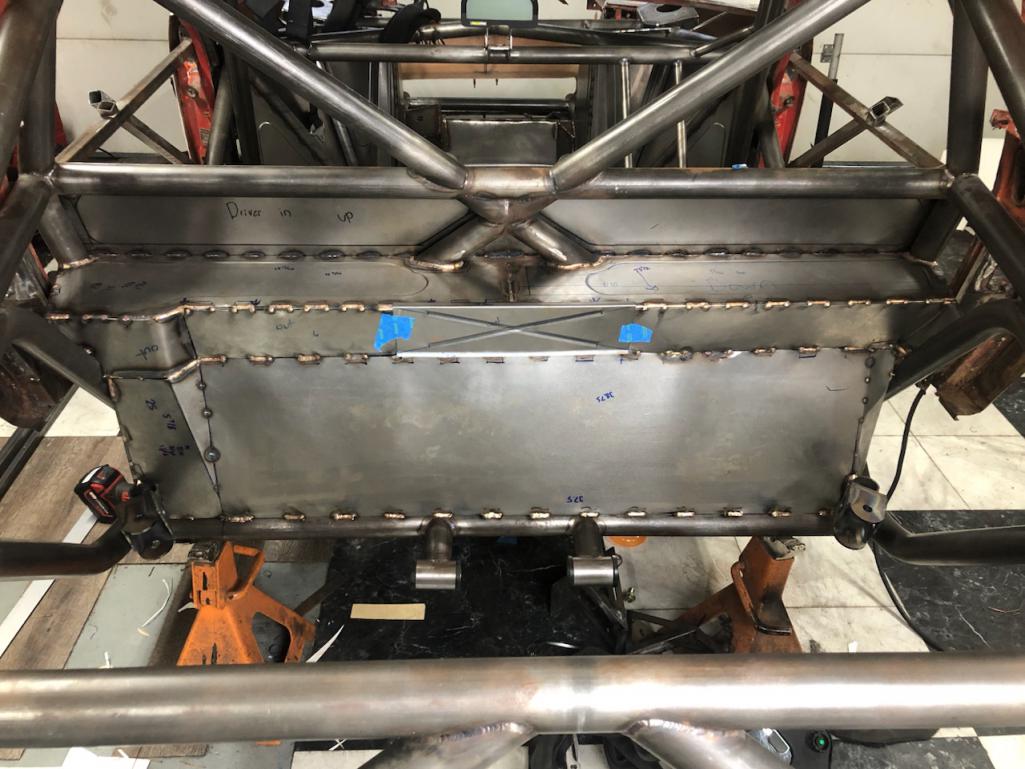
Posted by: tazz9924 May 22 2023, 08:57 PM
I put the new engine in for not the last time, but the last time before it starts.. i think. For now im using the stock clutch flywheel and trans until im ready to get serious and make real power, not putting around the neighborhood. Im quite pleased with how clean it looks in there along with the firewall and all!
Attached thumbnail(s)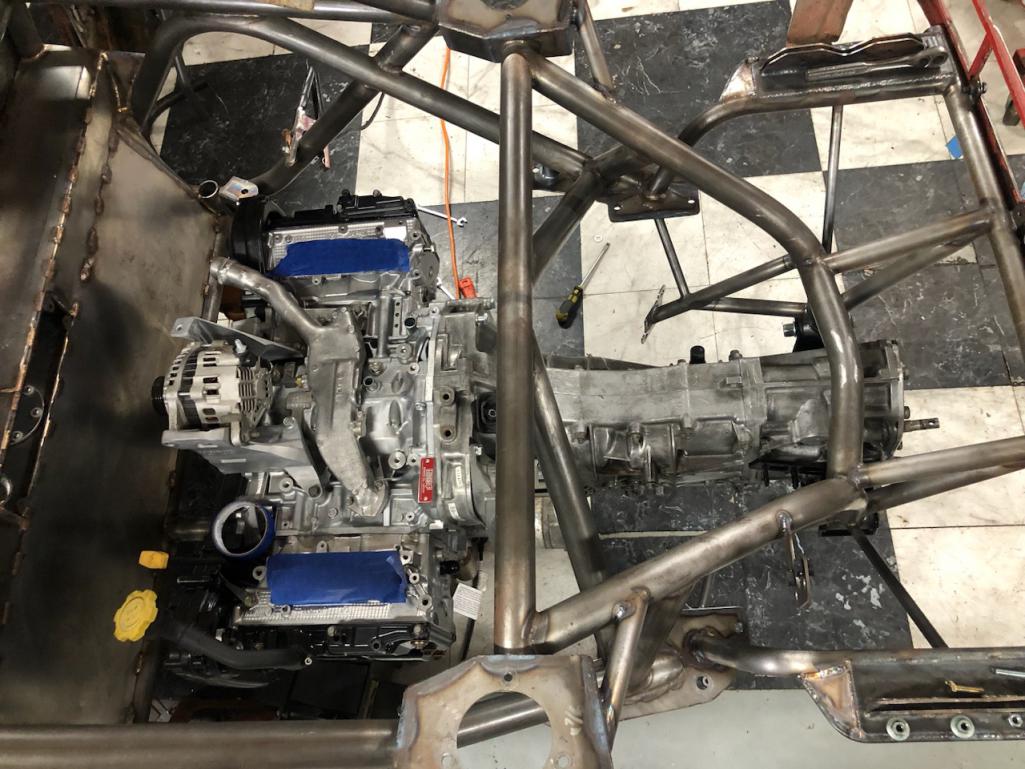
Posted by: tazz9924 May 26 2023, 09:05 AM
current state:
Attached thumbnail(s)
Posted by: tazz9924 May 31 2023, 07:27 AM
headers and intake are on, getting very close to hoses and wiring!
Attached thumbnail(s)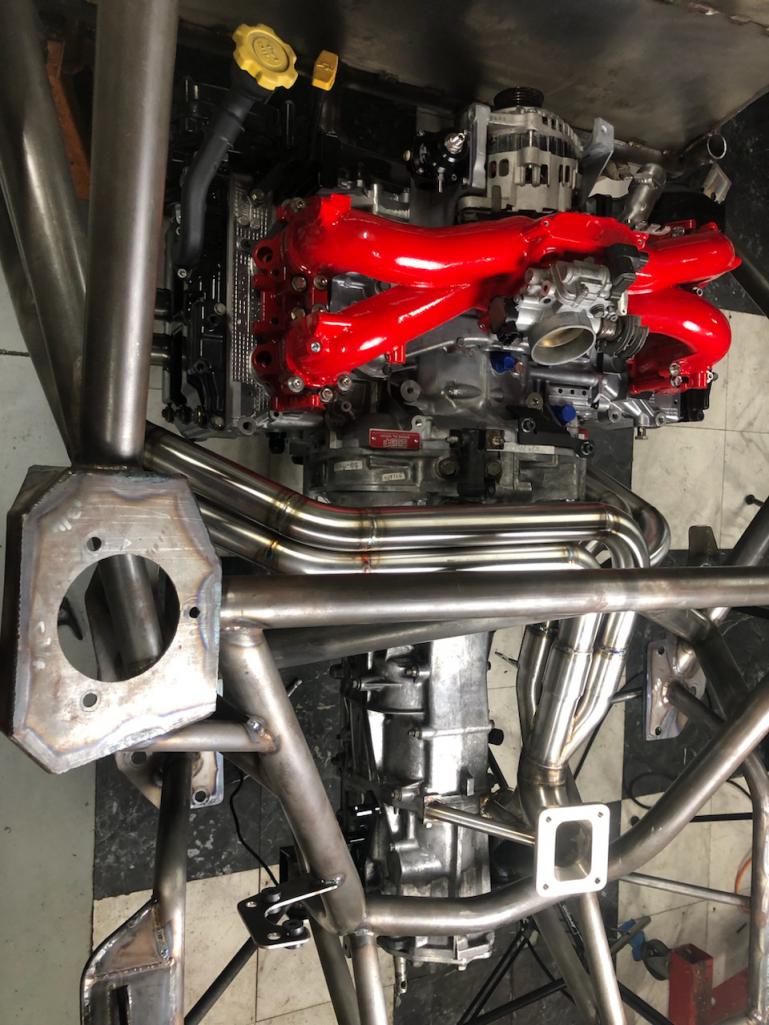
Posted by: tygaboy May 31 2023, 07:42 AM
All the thinking, all the decisions, all the work, all the clean up. Then you post pics and get zero response... Welcome to the world of "out there" modifications!
Know that many are watching and all are in awe.
Keep up the great work!
Posted by: 76-914 May 31 2023, 10:09 AM
I was out of the country and too cheap to respond. But I was watching.
Posted by: tazz9924 May 31 2023, 12:10 PM
All the thinking, all the decisions, all the work, all the clean up. Then you post pics and get zero response... Welcome to the world of "out there" modifications!
Know that many are watching and all are in awe.
Keep up the great work!
I appreciate it! Still working wether anyone watches or not!
Posted by: PanelBilly Jun 1 2023, 12:42 AM
I’m watching too
Posted by: tazz9924 Jun 6 2023, 12:27 PM
New video out now! i put too much time into this one, but 1:30am me said it was pretty good. either way, see what youve missed!
https://m.youtube.com/watch?v=3vR68NzQk4g
Attached image(s)
Posted by: BillJ Jun 6 2023, 03:20 PM
Mad skills yo
Posted by: tygaboy Jun 6 2023, 04:30 PM
Coming right along!
Posted by: rhodyguy Jun 6 2023, 07:31 PM
I remember that car in my driveway. Looks different for sure.
Posted by: tazz9924 Jun 7 2023, 06:34 AM
I remember that car in my driveway. Looks different for sure.
out here in north carolina?
Posted by: rhodyguy Jun 7 2023, 06:39 AM
No. Pierce County/Tacoma. Or you had a dif car then.
Posted by: tazz9924 Jun 7 2023, 01:02 PM
No. Pierce County/Tacoma. Or you had a dif car then.
That one got totalled, hit by a guy not paying attention ¯\_(ツ)_/¯ This is a new to me body, thats somehow worse
Posted by: tazz9924 Jul 25 2023, 05:54 AM
Been working a lot lately on the wiring harness. There are a ton of wires that go into a car, im learning this as i add them all in from scratch. Luckily im using a pdm so i dont have to wire in a ton of relays and everything is computer controlled and communicates through CAN. The other thing ive learned is how god dang expensive wiring stuff is. I’ve probably spent about 1000 on just supplies. Not to mention the ecu and pdm. I must say so far ive been completely impressed with everything ive got from haltech. They have a wealth of information for subaru stuff, their products are good, and their tuning program is easy to use. In fact i already have the base map made for it
getting this motor started is the priority and its close. 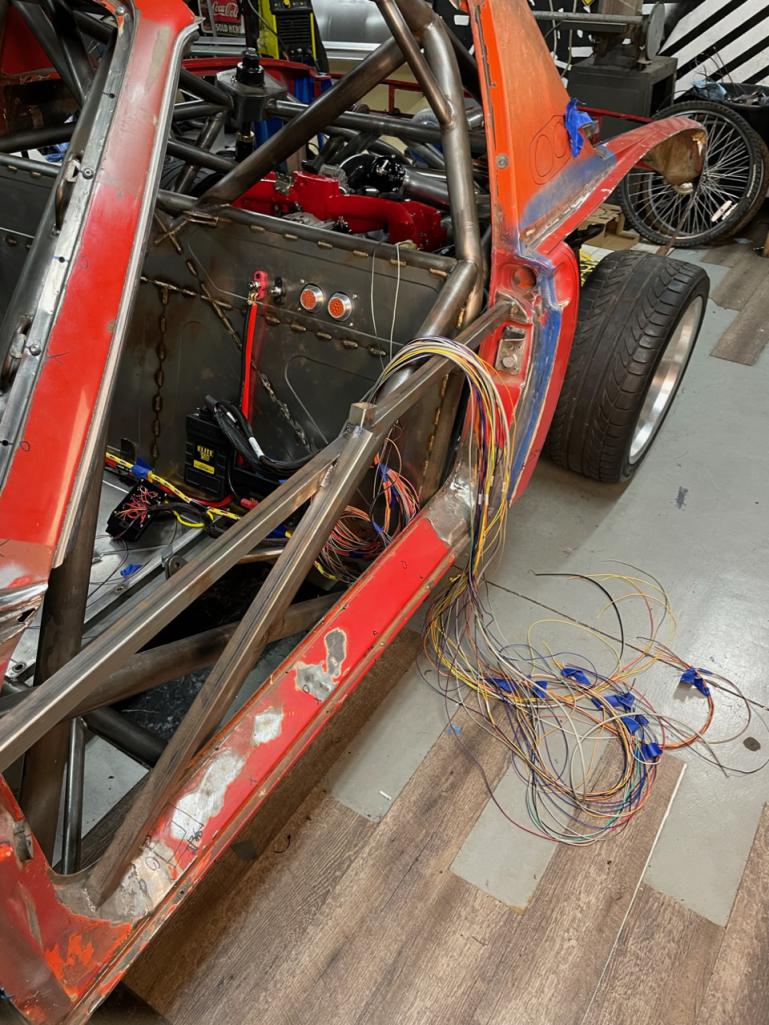
Here you can see i made a mock up harness out of rope and labeled all the connectors so i can simply make up the engine harness outside the car in the comfort of a chair. 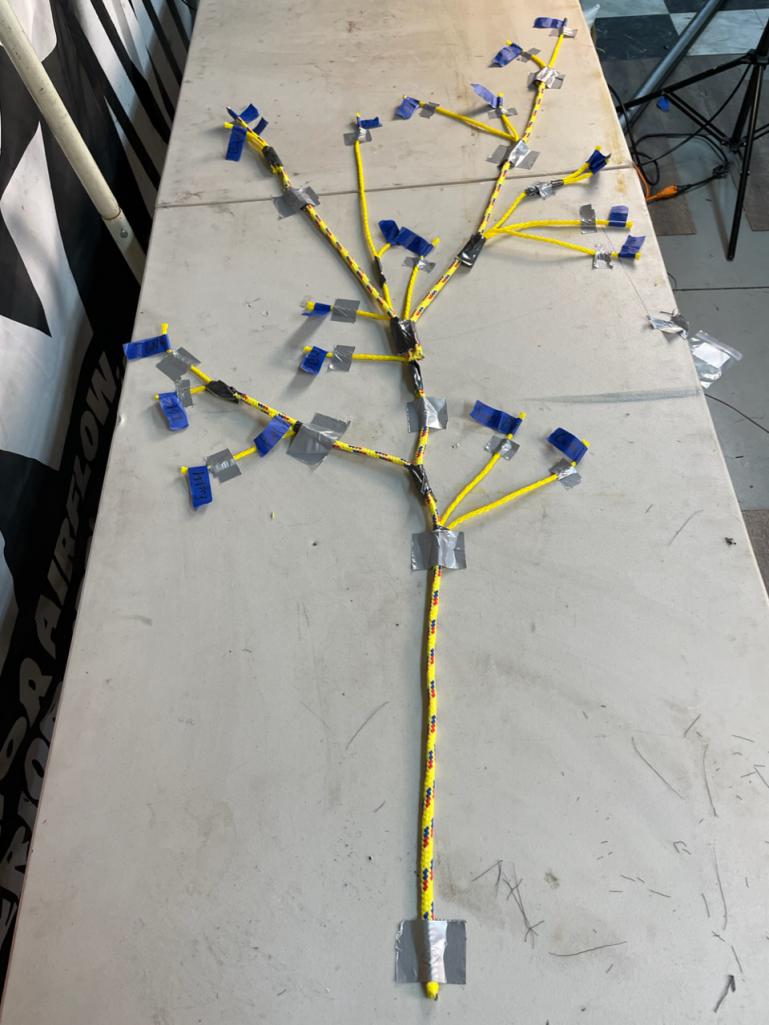
Posted by: tygaboy Jul 25 2023, 07:34 AM
I actually found I really enjoyed doing my harness build. Hope you do, too. And I hear you on the "not cheap" part. But best not to scrimp on stuff that can cause reliability issues... and worse.
Looking forward to seeing the finished product!
Posted by: tazz9924 Jul 25 2023, 11:35 AM
I actually found I really enjoyed doing my harness build. Hope you do, too. And I hear you on the "not cheap" part. But best not to scrimp on stuff that can cause reliability issues... and worse.
Looking forward to seeing the finished product!
It is super enjoyable! Wiring scares most people but i am learning so much its hard to not like it. Its a very mental task… i like those.
Posted by: tazz9924 Jul 29 2023, 07:54 PM
I finished my engine harness! This was a huge step i wanted to make. I knew nothing about wiring to start but with enough time research and money i made my dream a reality. I hit all the notes i wanted to: Shrink boots, DR-25 heat shrink, yellow labels, and nice to look at!
I started with the previously stated rope harness, laid out the wires on top and split them up, ran all the grounds and heatshrunk it. Then it was down to installing the connectors with all the wires in the correct position (hope you checked before using $70 in heatshrink), and adding pins and plugs. Does that sound easy? Well it wasn’t but it sure was fun from plan to execution, it was a cool task that keeps you busy!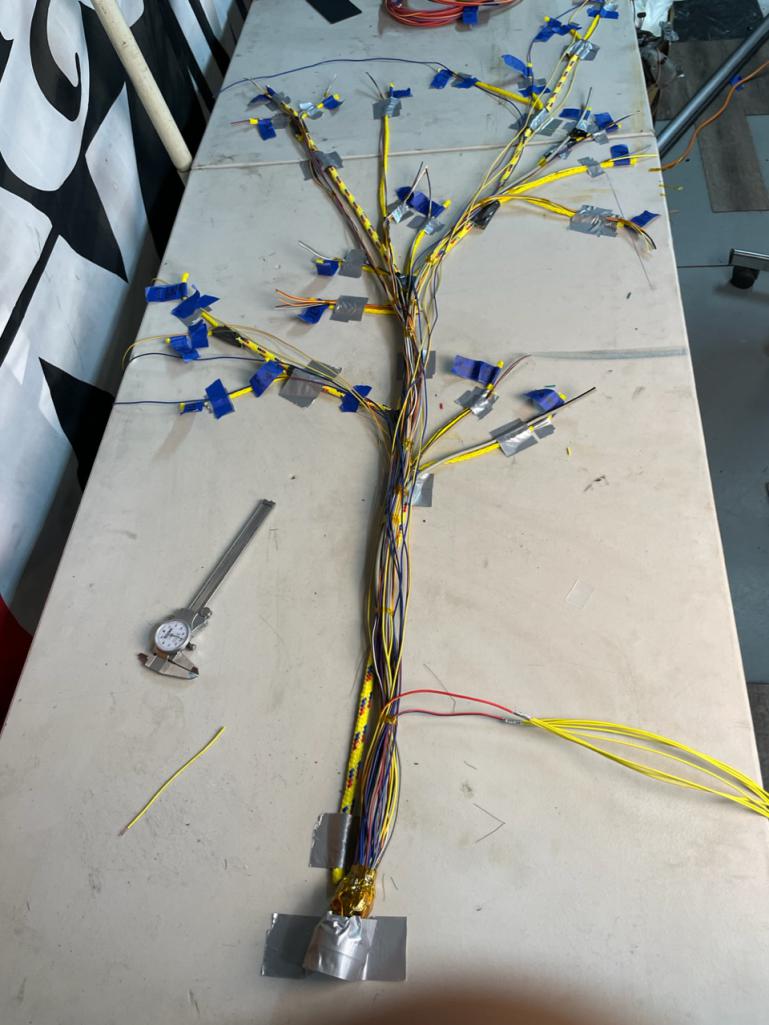
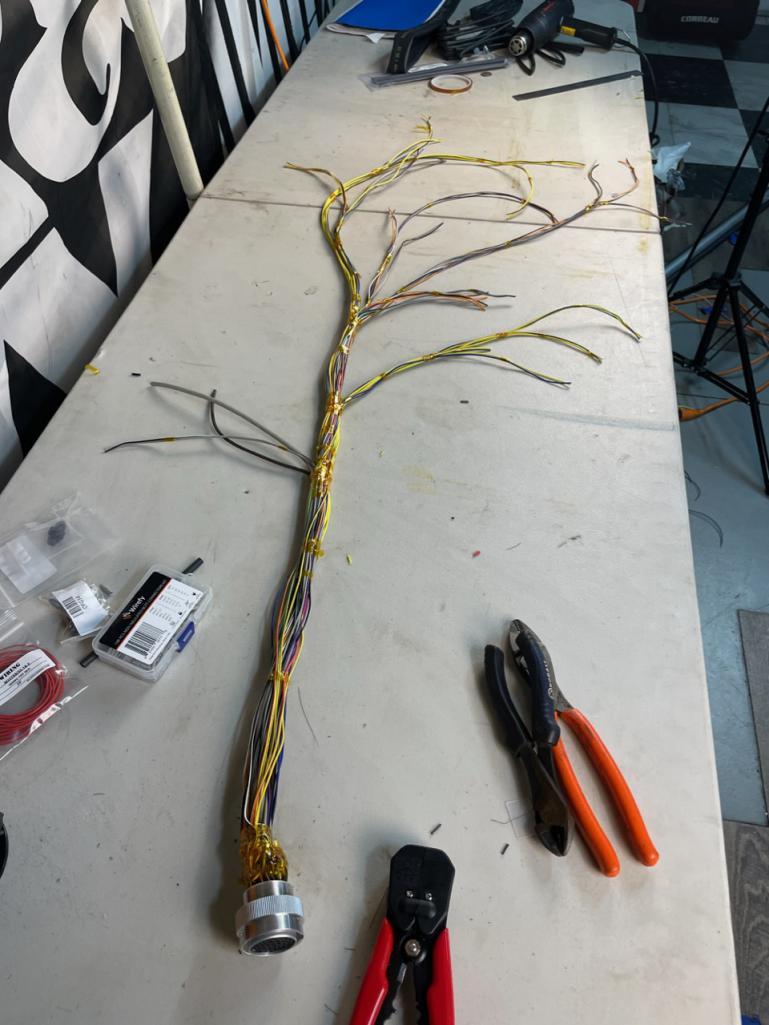
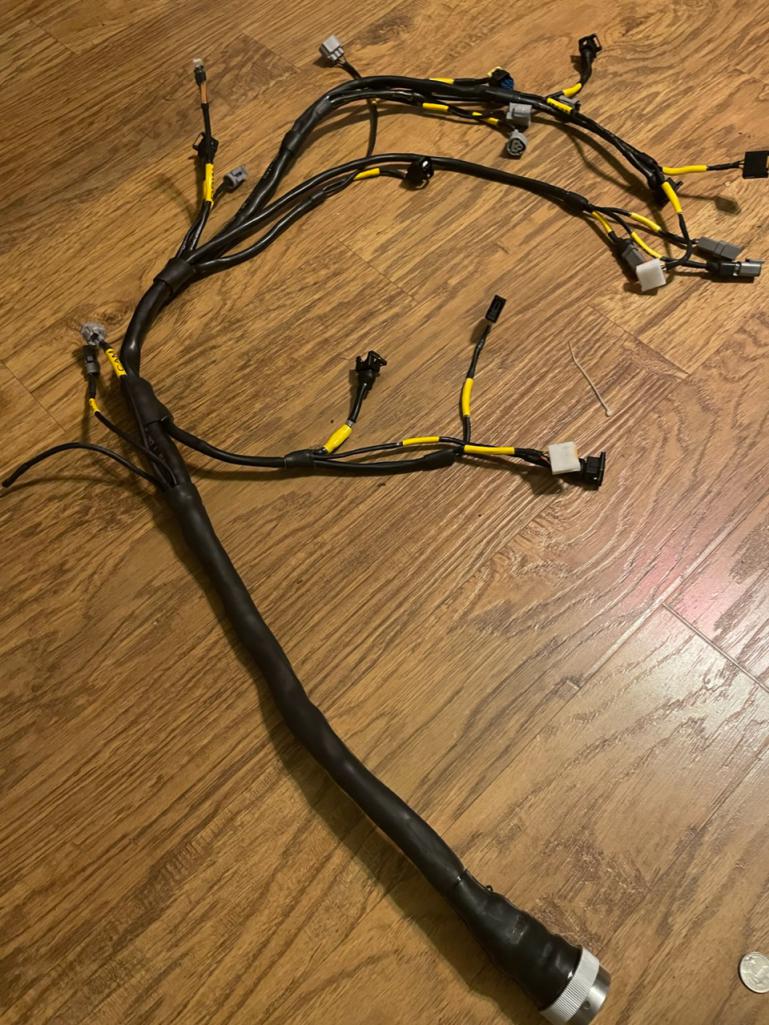
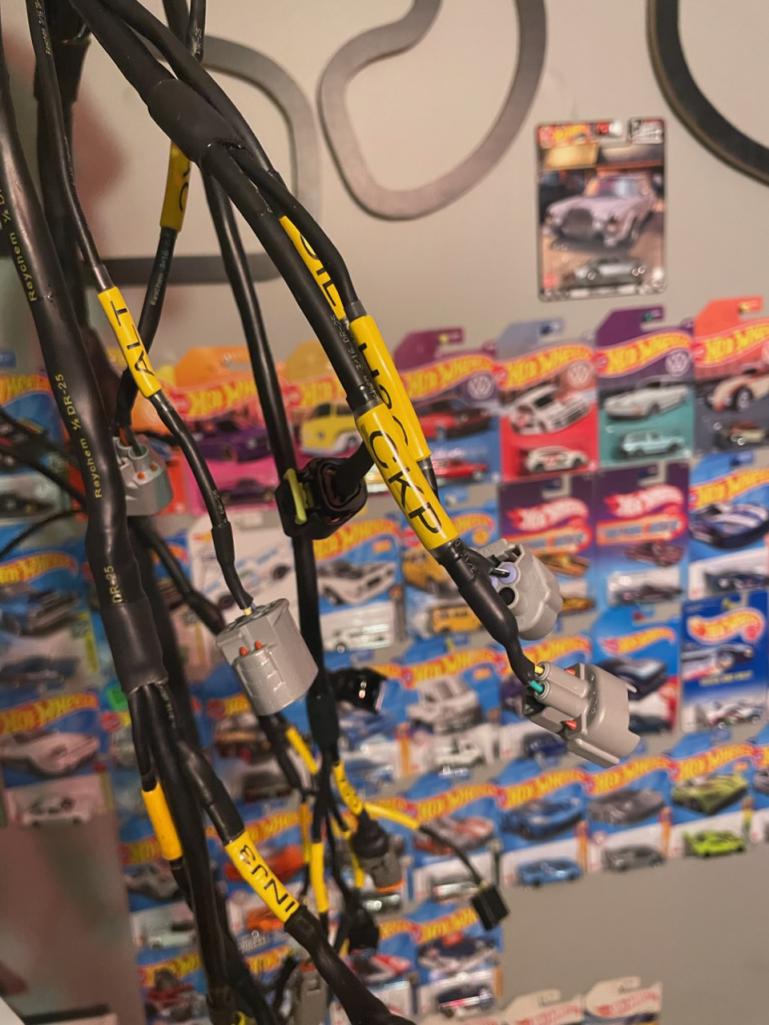
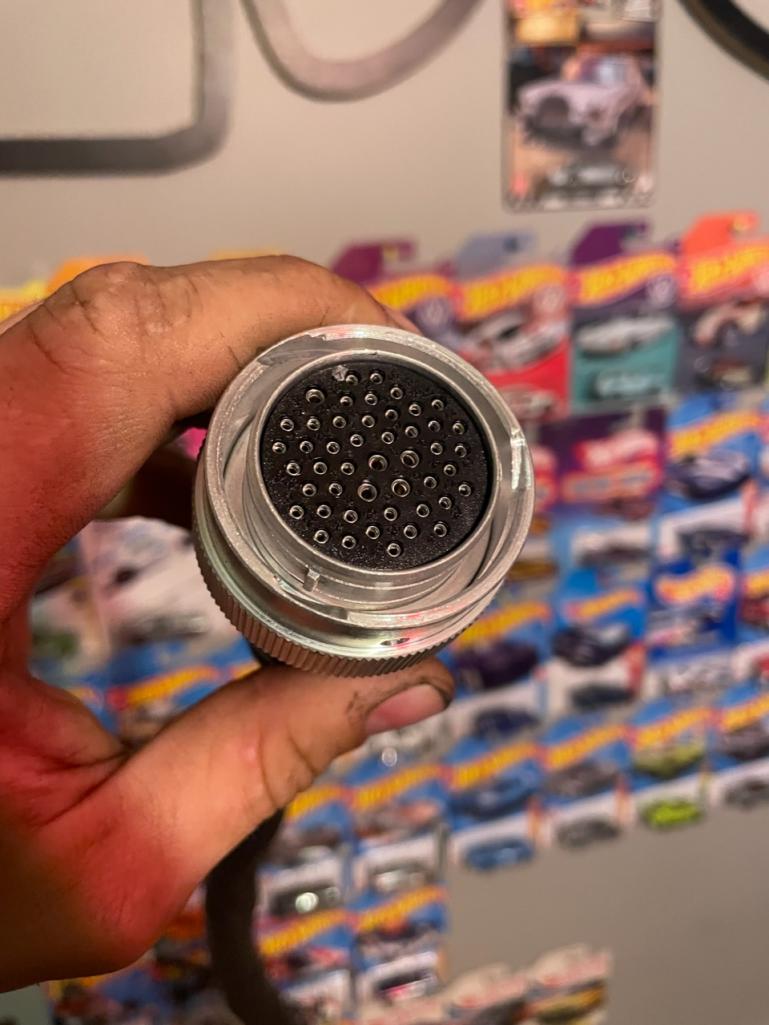
Posted by: East coaster Jul 30 2023, 05:33 AM
Nice work! I’ll be needing to do mine soon. Is that all shrink wrap or is there tape wrap also?
Posted by: tazz9924 Jul 30 2023, 06:41 AM
Nice work! I’ll be needing to do mine soon. Is that all shrink wrap or is there tape wrap also?
No tape wrap or electrical tape whatsoever just kapton. Its a clear yellowish real thin tape to bundle wires.
Posted by: tygaboy Jul 30 2023, 07:34 AM
Approved!
Posted by: tazz9924 Jul 30 2023, 09:44 AM
Approved!
This means a lot, thank you!
Posted by: 76-914 Aug 1 2023, 08:00 AM
So did you give it the Electric Cool-Aid Acid Test, yet? 
Posted by: tazz9924 Aug 11 2023, 03:35 PM
I added controls to the center stack, including kill switch and a haltech CAN keypad. The key pad is absolutely sweet! With 4 wires i could control anything on the car. Ive chosen 13-15 inputs so far but i see it as a chance to expand a bit.
Attached thumbnail(s)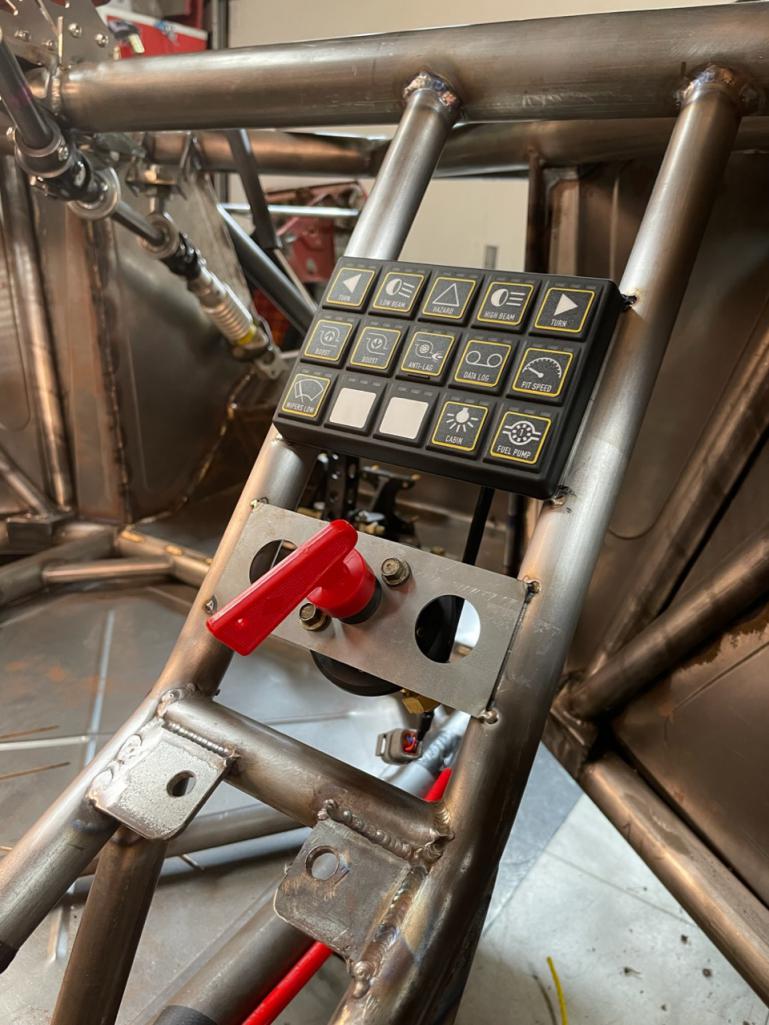
Posted by: tazz9924 Aug 11 2023, 03:36 PM
So did you give it the Electric Cool-Aid Acid Test, yet?
I am unfamiliar with such tests
Posted by: 76-914 Aug 11 2023, 03:59 PM
So did you give it the Electric Cool-Aid Acid Test, yet?
I am unfamiliar with such tests
Literary license in this case. Your car is a trip......have you tried it yet? https://en.wikipedia.org/wiki/The_Electric_Kool-Aid_Acid_Test
Posted by: rhodyguy Aug 12 2023, 09:41 AM
Do you have to take it all apart to paint the chassis?
Posted by: tazz9924 Aug 12 2023, 10:00 AM
Do you have to take it all apart to paint the chassis?
Yeah im going to have it powder coated. For now im just giving it repeated coates of wd40 to keep it from rusting. Normally you would finish the chassis then install everything but i dont yet know when im done with the chassis. Besides a full assembly would just be like adult legos.
Posted by: tazz9924 Aug 12 2023, 10:02 AM
So did you give it the Electric Cool-Aid Acid Test, yet?
I am unfamiliar with such tests
Literary license in this case. Your car is a trip......have you tried it yet? https://en.wikipedia.org/wiki/The_Electric_Kool-Aid_Acid_Test
Haha you would think
Posted by: tazz9924 Aug 14 2023, 02:42 PM
Got a lot of the interior harnesses pinned and protected. There are a ton of wires between the pdm and ecu and going all directions its hard to keep it clean looking but as far as start up goes this is good for now. I may further reduce and what not from here but at the very least it will get a couple 90 degree heat shrink boots. The wire covering here is expandable braid, and i can definitely say you can see a difference between cheap and quality braid. The quality stuff stays together and doesn’t fray as easily. Burning the ends on either gives good results though!
Attached thumbnail(s)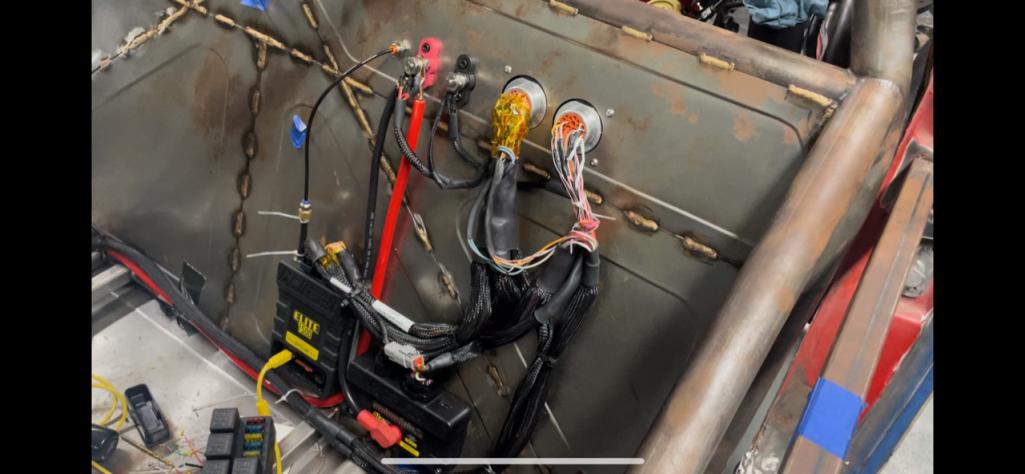
Posted by: tazz9924 Aug 17 2023, 12:37 PM
Small bit but i like the result; i took an old catch can that had only pipe threads cut into each end. So i cut a major hole in the top and welded in a screw on cap. It went from beat up old catch can and gave it a new lease on life. It will be the fill point for ghe radiator up front.
Attached thumbnail(s)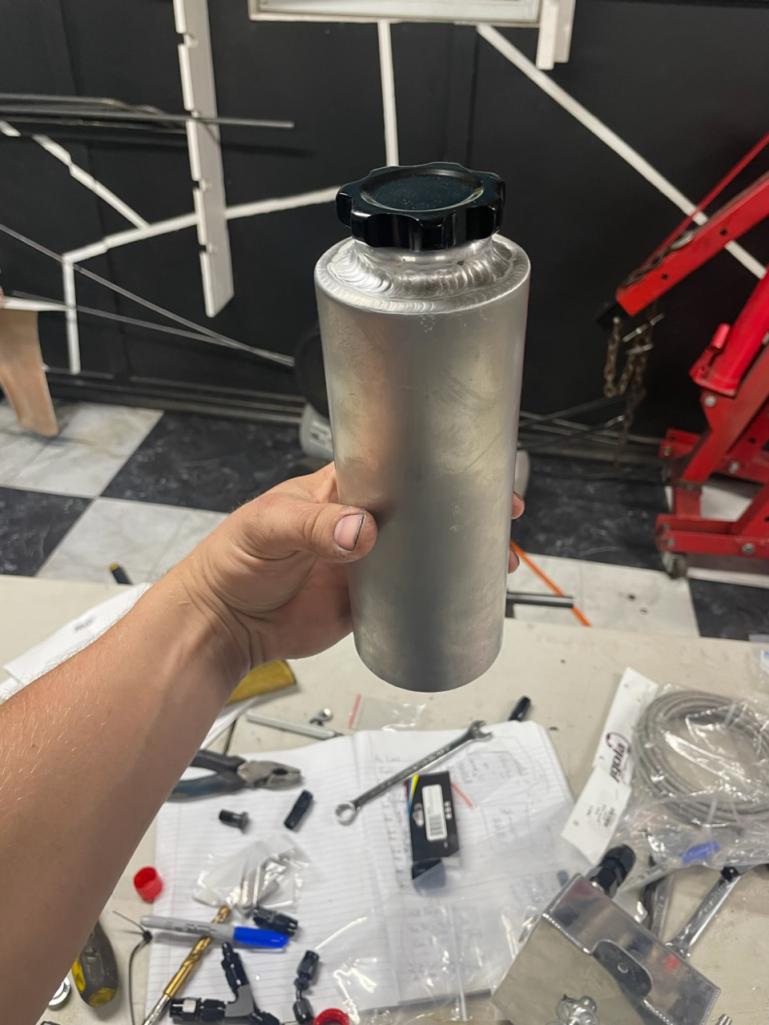
Posted by: 76-914 Aug 17 2023, 04:17 PM
That looks great. Nice job and great welds. Now stop posting pics of your Al welds before I convince myself that I need a TIG set up. 
Posted by: tazz9924 Aug 26 2023, 10:13 AM
New video is out now! Its a start of the major recent progress. 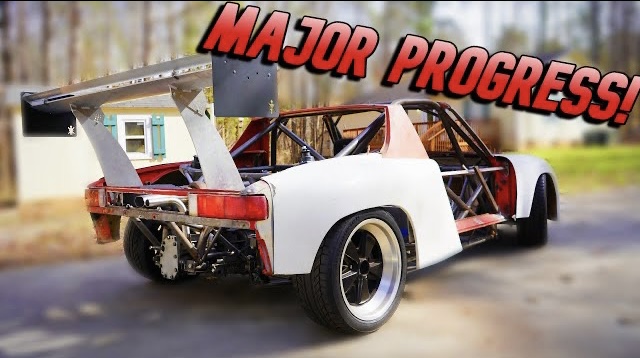
https://m.youtube.com/watch?v=BP7GlwrCcjo
Posted by: 76-914 Aug 26 2023, 10:17 AM
Can't wait to watch it; tonight. Too much to do today.
Posted by: 76-914 Aug 26 2023, 11:45 PM
Great vid, Kid. What an accomplishment. Looking forward to seeing some action video's.
Posted by: tazz9924 Aug 27 2023, 01:11 AM
Great vid, Kid. What an accomplishment. Looking forward to seeing some action video's.
Thank you so much! I hope action is going to happen sooner rather than later
Posted by: tazz9924 Nov 24 2023, 06:17 PM
Again ive been skittish around here but progress never stops. IT STARTS! All the time and work have turned into something. Too much to sum up except for this wonderful video (wink wink) https://m.youtube.com/watch?v=RK_otIQ7iJc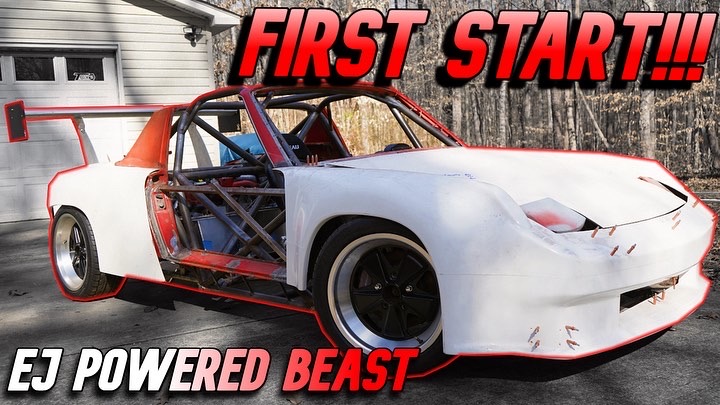
Ill post some nice photos later of some progress!
Posted by: Front yard mechanic Nov 24 2023, 06:45 PM
Weeeeee
Posted by: 76-914 Nov 25 2023, 09:25 AM
Bingo! Why didn't she fire off the first go around? Only one question; is that 2" rubber 1/4 bend fuel rated? Looking forward to the next video.
Posted by: tazz9924 Nov 25 2023, 09:54 PM
Bingo! Why didn't she fire off the first go around?
Only one question; is that 2" rubber 1/4 bend fuel rated? Looking forward to the next video. Overboost cut is the reason it didn’t fire, it thought that atmospheric pressure was too much because i gave it no parameters. What are you referring to when you say 2” rubber?
Posted by: 76-914 Nov 26 2023, 09:45 AM
Bingo! Why didn't she fire off the first go around?
Only one question; is that 2" rubber 1/4 bend fuel rated? Looking forward to the next video. Overboost cut is the reason it didn’t fire, it thought that atmospheric pressure was too much because i gave it no parameters. What are you referring to when you say 2” rubber?
The piece that is used to extend gas tank fill tube.
Posted by: FL000 Nov 26 2023, 02:24 PM
That thing is a beast! Awesome to see how far you have come with it.
Posted by: tazz9924 Nov 26 2023, 05:28 PM
Bingo! Why didn't she fire off the first go around?
Only one question; is that 2" rubber 1/4 bend fuel rated? Looking forward to the next video. Overboost cut is the reason it didn’t fire, it thought that atmospheric pressure was too much because i gave it no parameters. What are you referring to when you say 2” rubber?
The piece that is used to extend gas tank fill tube.
Yep it’s designed to be a filler hose. Wasn’t cheap as such
Posted by: tazz9924 Feb 4 2024, 09:13 AM
Ive got a new update video! So give it a look, ill be posting update pictures ive been taken lately. Im going to try changing my approach here a little bit. 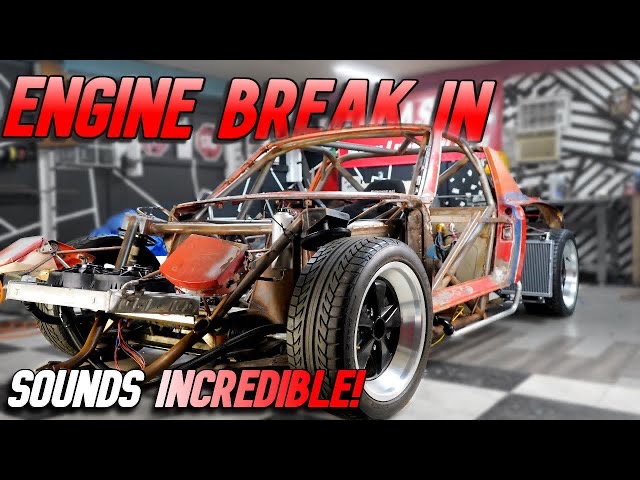
https://m.youtube.com/watch?v=7TQwcEfTY_A&feature=youtu.be
Posted by: burton73 Feb 4 2024, 11:02 AM
@http://www.914world.com/bbs2/index.php?showuser=18779
Love the work on your car and the video makes it happen just like I was working in your garage with you but without the smoke from cutting and startup filling my lungs.
Great job on everything.
Bob B
Posted by: tazz9924 Feb 4 2024, 02:03 PM
@http://www.914world.com/bbs2/index.php?showuser=18779
Love the work on your car and the video makes it happen just like I was working in your garage with you but without the smoke from cutting and startup filling my lungs.
Great job on everything.
Bob B
I was a little woozy afterwards, a good CO high. But thank you!
Posted by: tazz9924 Feb 15 2024, 07:24 PM
Did pedals yesterday. The wilwood clusters are super trick!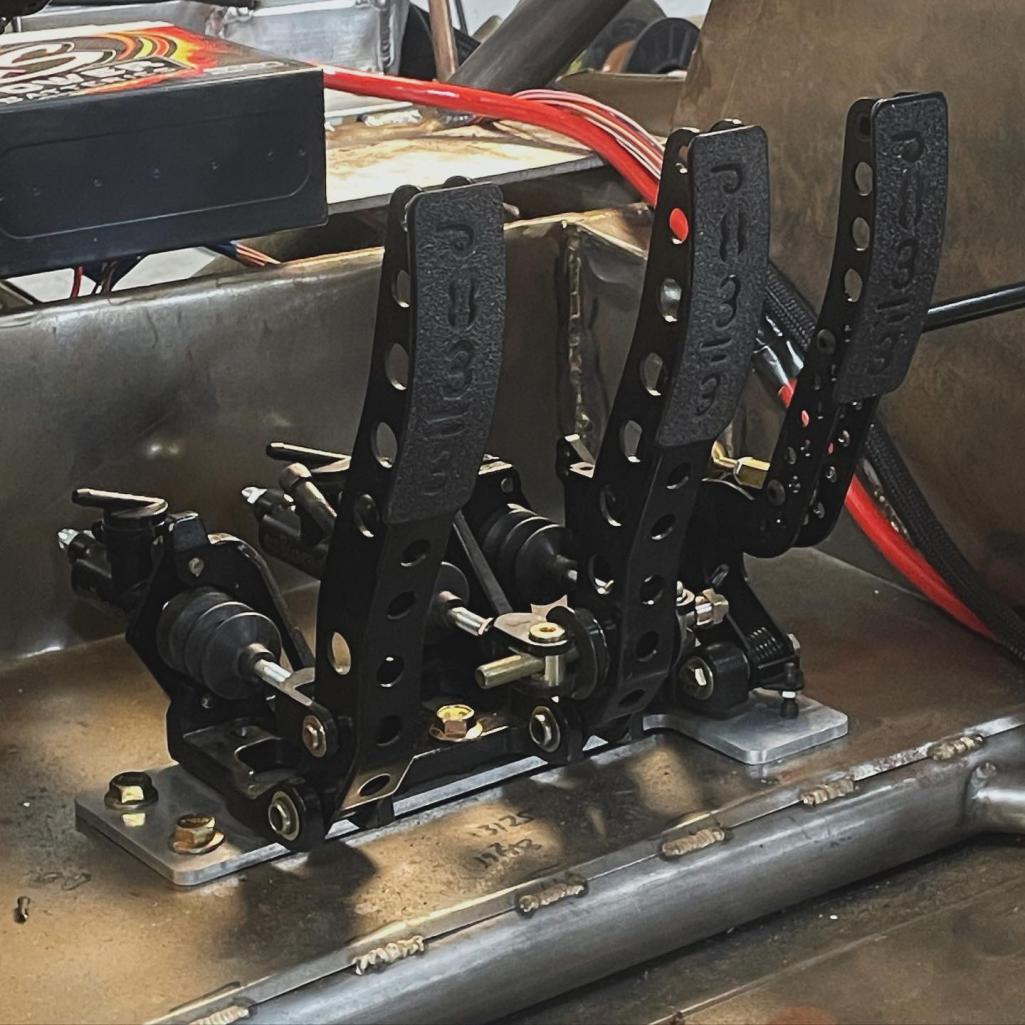
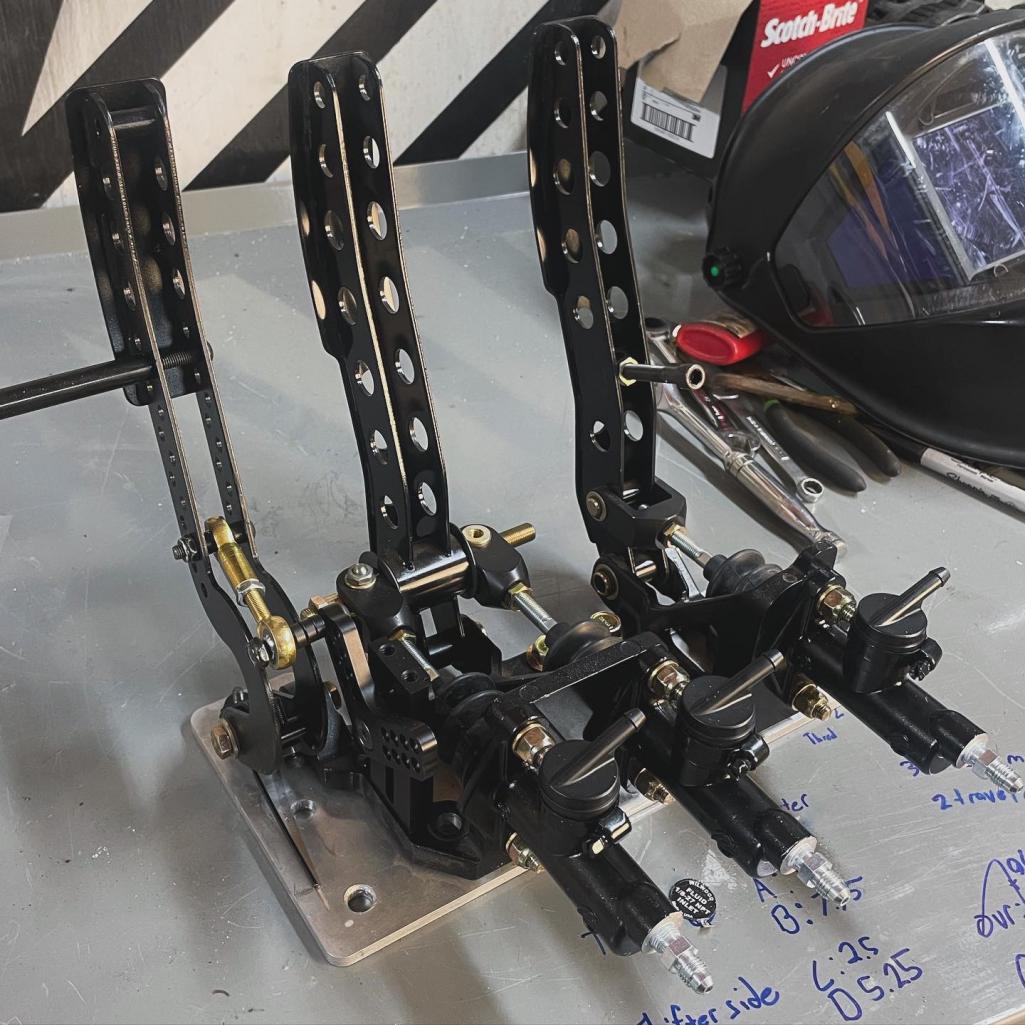
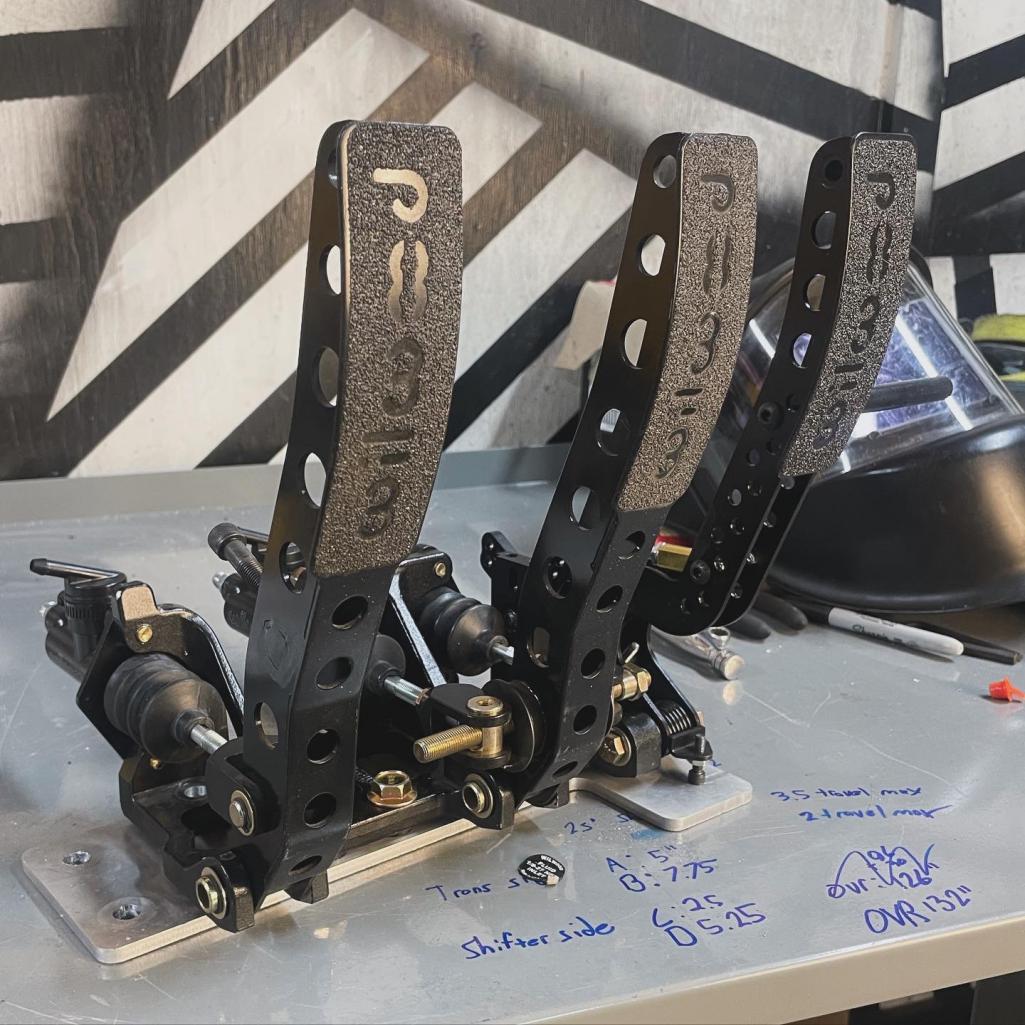
Posted by: 76-914 Feb 16 2024, 09:48 AM
Could the reservoirs be inverted if one wanted to hang vs stand the cluster?
Posted by: tazz9924 Feb 17 2024, 04:06 PM
Could the reservoirs be inverted if one wanted to hang vs stand the cluster?
This one is specifically designed to be floor mounted but there a slightly different part number that’s meant to be hung
Posted by: tazz9924 Feb 17 2024, 04:09 PM
I added removable braces that go from the roof to the shock towers. I used tube adapters from mc mastercarr and some heim joints to allow we to preload them and also remove them for service 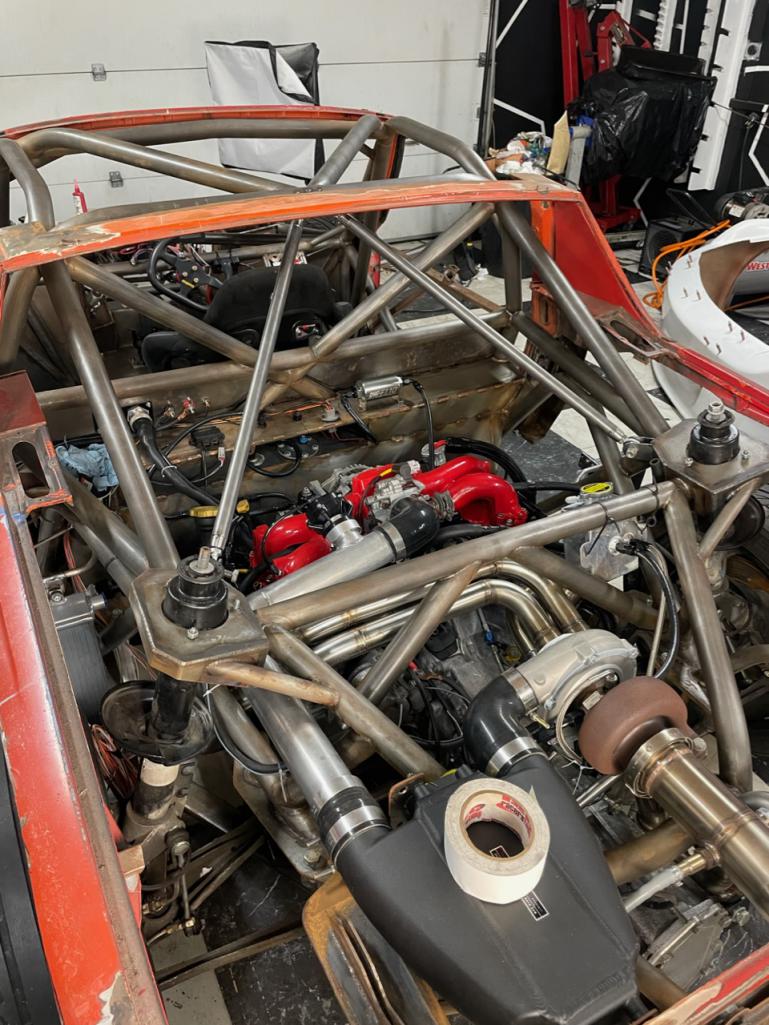
Posted by: tazz9924 Feb 18 2024, 10:30 PM
Recent work has been dedicated to the brakes, and thus I finally got to run all the stainless brake and clutch lines and it came out very clean!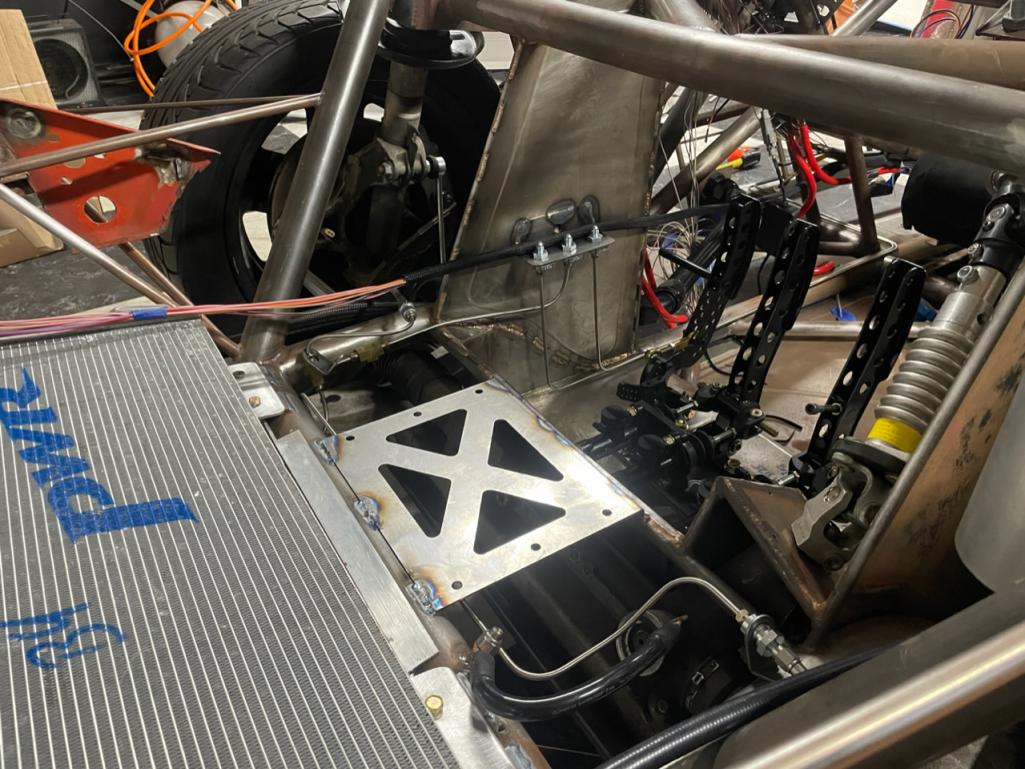
Posted by: mgp4591 Feb 18 2024, 11:08 PM
Super clean work! I'm usually cleaning up my lines after the fact...
Posted by: tazz9924 Feb 23 2024, 12:16 PM
Another new video! This time detailing some details and the brake lines check it out!:
https://m.youtube.com/watch?v=SFCqnHGqsto&feature=youtu.be
Attached image(s)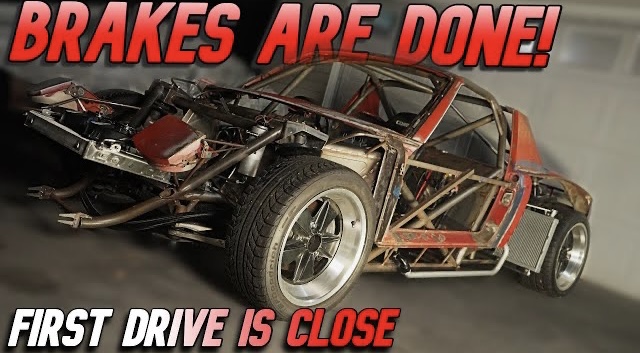
Posted by: tazz9924 Feb 26 2024, 11:59 PM
Been making a custom set of mock up axles. These will see very limited driving and such but they should be plenty strong but im no engineer. Boxster outer subaru inner.
Attached thumbnail(s)
Posted by: tazz9924 Feb 27 2024, 08:40 PM
Decided it was time to change steering wheels on this beast in preparation for the first drive. Something a little more… wild. Its a tad bigger than before to allow it to steer a bit easier along with mounts for my buttons.
Attached thumbnail(s)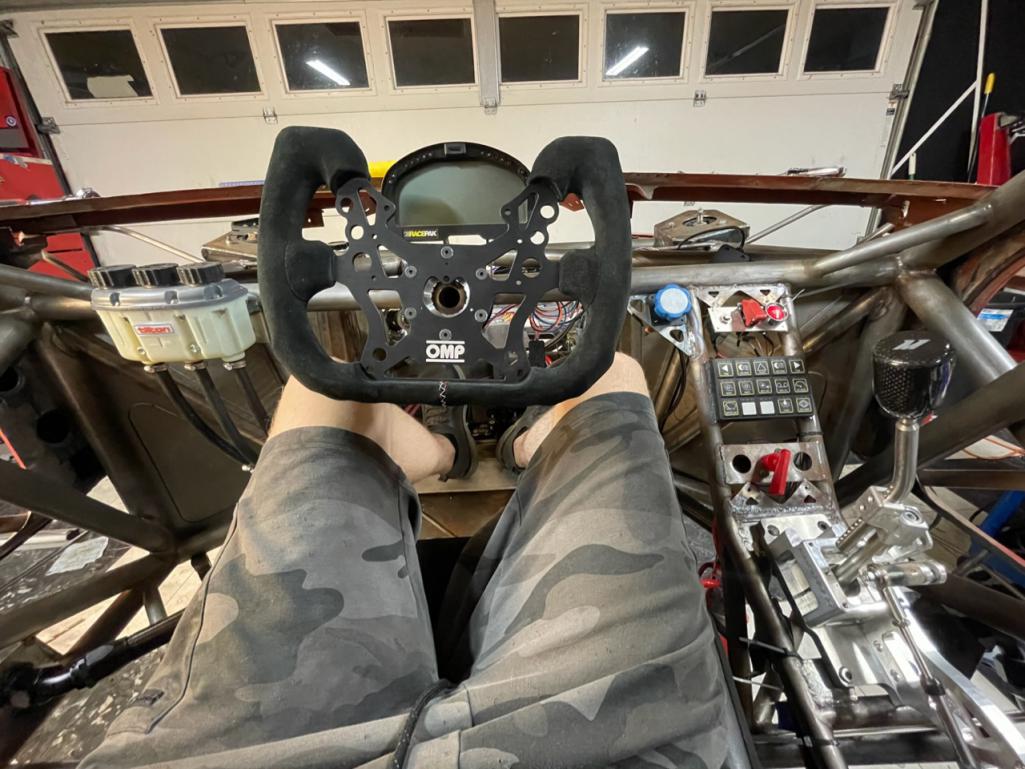
Posted by: 76-914 Feb 28 2024, 08:27 AM
Been making a custom set of mock up axles. These will see very limited driving and such but they should be plenty strong but im no engineer. Boxster outer subaru inner.
This will be interesting!
Posted by: tygaboy Feb 28 2024, 09:54 AM
Decided it was time to change steering wheels on this beast in preparation for the first drive. Something a little more… wild. Its a tad bigger than before to allow it to steer a bit easier along with mounts for my buttons.
Mmmmmm... steering wheel buttons.....
Posted by: jd74914 Feb 28 2024, 03:54 PM
Been making a custom set of mock up axles. These will see very limited driving and such but they should be plenty strong but im no engineer. Boxster outer subaru inner.
It'll be interesting to see how those hold up. I've had best success with both sides of the axles pressed into a tube with two "fishmouths" on it so the welds are at 45 degrees to the axle circumference. That reduces the shear load and adds a component of bending which is a lot easier to handle. Done the way you show I've had a weld break and one side of axle free rotate (not dangerous in any way). But every case is different.
Posted by: tazz9924 Feb 28 2024, 11:29 PM
Been making a custom set of mock up axles. These will see very limited driving and such but they should be plenty strong but im no engineer. Boxster outer subaru inner.
It'll be interesting to see how those hold up. I've had best success with both sides of the axles pressed into a tube with two "fishmouths" on it so the welds are at 45 degrees to the axle circumference. That reduces the shear load and adds a component of bending which is a lot easier to handle. Done the way you show I've had a weld break and one side of axle free rotate (not dangerous in any way). But every case is different.
Yeah its less than ideal. Eventually ill have the driveshaft shop make a real set but this will get the car off the jacks. The axles basically pressed into the collar so at least they will be balanced.
Posted by: tazz9924 Mar 7 2024, 07:39 AM
I “finished” the shift linkage. Everything looks great, it goes in every gear but theres one major issue: 1st is on the right and fifth is on the left  . I didn’t mess up, not totally. The original shifter in my old car id from an mr2 and I thought id be fancy and get a k tuned shifter. This was a bad idea because apparently the k tuned shifter pulls the cable when you move the stick to the right instead of pushing it like the mr2. So maybe a good cable shift mechanism (minus cables) and a subaru cv to 914 stock cv custom axle will be fir sale soon
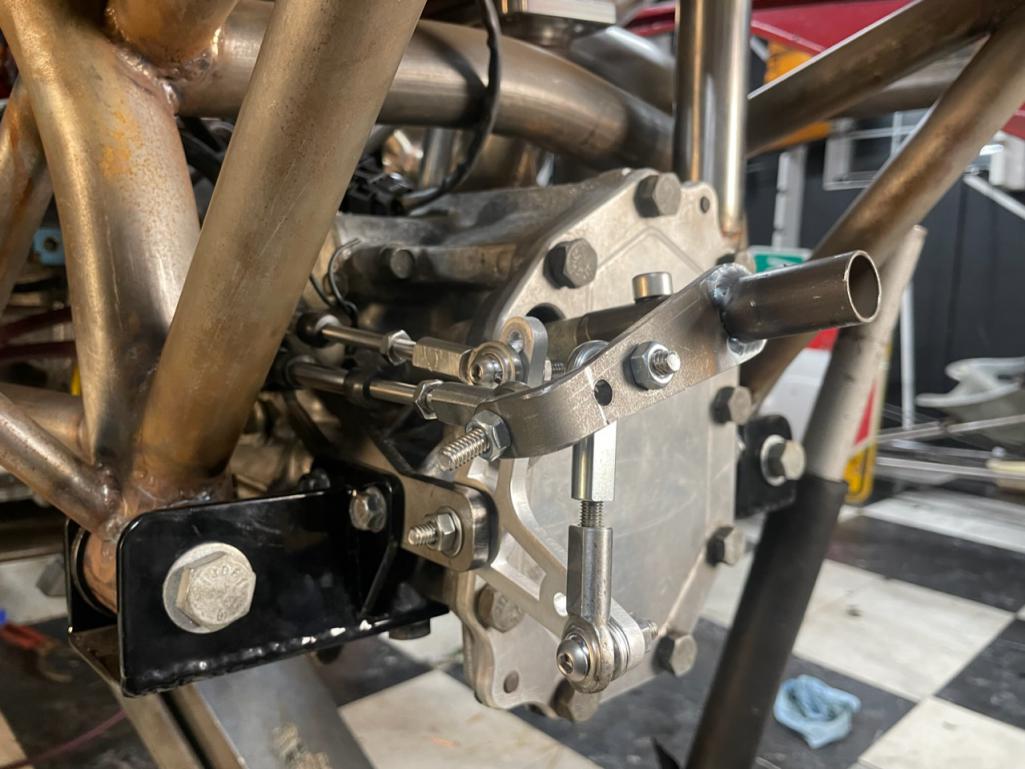
Attached thumbnail(s)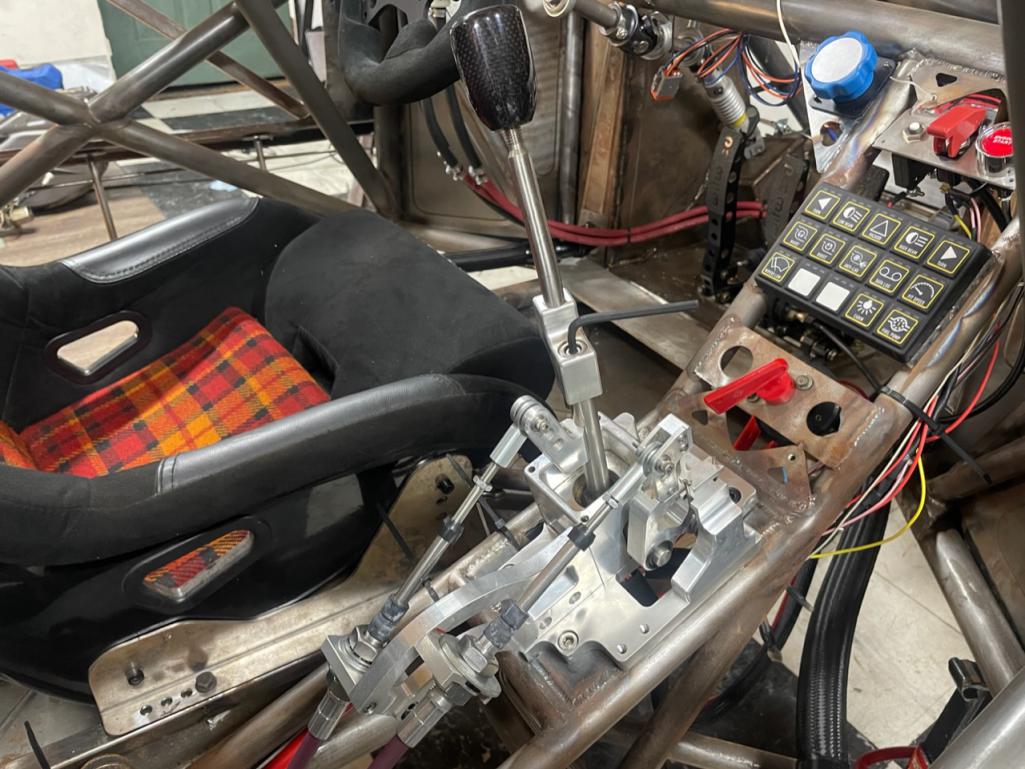
Posted by: Blown59 Mar 8 2024, 01:31 PM
I “finished” the shift linkage. Everything looks great, it goes in every gear but theres one major issue: 1st is on the right and fifth is on the left
. I didn’t mess up, not totally. The original shifter in my old car id from an mr2 and I thought id be fancy and get a k tuned shifter. This was a bad idea because apparently the k tuned shifter pulls the cable when you move the stick to the right instead of pushing it like the mr2. So maybe a good cable shift mechanism (minus cables) and a subaru cv to 914 stock cv custom axle will be fir sale soonThank you for being the guinea pig, I was just looking at those shift boxes on ebay the other night and almost pulled the trigger on one. I wasnt sure how it would fare being designed for the front wheel drive Honda.
Posted by: tazz9924 Mar 16 2024, 07:04 AM
New video out now, i drove this thing for the first time ever!!!
https://m.youtube.com/watch?v=xXef8oGk5cI&feature=youtu.be
Attached image(s)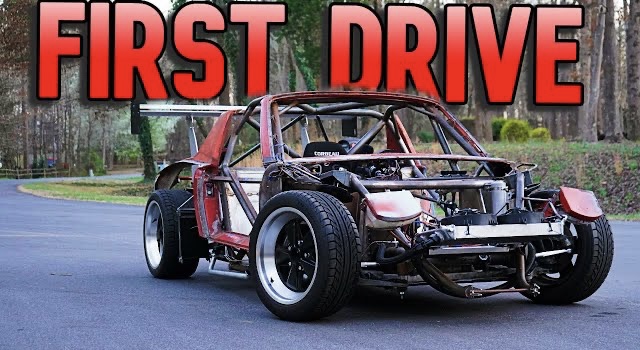
Posted by: mate914 Mar 16 2024, 07:35 AM
New video out now, i drove this thing for the first time ever!!!
https://m.youtube.com/watch?v=xXef8oGk5cI&feature=youtu.be
Looks scary without seatbelts. Where will you be driving that thing, race track only?

Matt
Posted by: sb914 Mar 16 2024, 07:42 AM
So awesome! Leave the body panels off. Mad max style!
Posted by: East coaster Mar 16 2024, 07:58 AM
Congrats on first drive!
Posted by: 76-914 Mar 16 2024, 08:01 AM
Congratulations.
Posted by: tygaboy Mar 16 2024, 08:40 AM
Typical 914 swap guy: Uses adjutable wrench as a hammer...
OK, seriously:
Posted by: tazz9924 Mar 16 2024, 12:11 PM
New video out now, i drove this thing for the first time ever!!!
https://m.youtube.com/watch?v=xXef8oGk5cI&feature=youtu.be
Looks scary without seatbelts. Where will you be driving that thing, race track only?
Matt
Yep for the most part. It does have mounts for belts i just didn’t install them yet.
Posted by: tazz9924 Mar 16 2024, 12:12 PM
So awesome! Leave the body panels off. Mad max style!
It does look mean like that doesn’t it
Posted by: tazz9924 Mar 16 2024, 12:12 PM
Typical 914 swap guy: Uses adjutable wrench as a hammer...
OK, seriously:
We in the business call them adjustable hammers.
Posted by: rick 918-S Mar 17 2024, 10:31 AM
Nice project.
Posted by: tazz9924 Aug 17 2024, 07:07 AM
Progress has been… bumpy lately. Since my good friend past away, and racing two cars at the same time at Sebring my motivation to do anything tanked. With that being said i have done many good things to the car, starting with headlights. 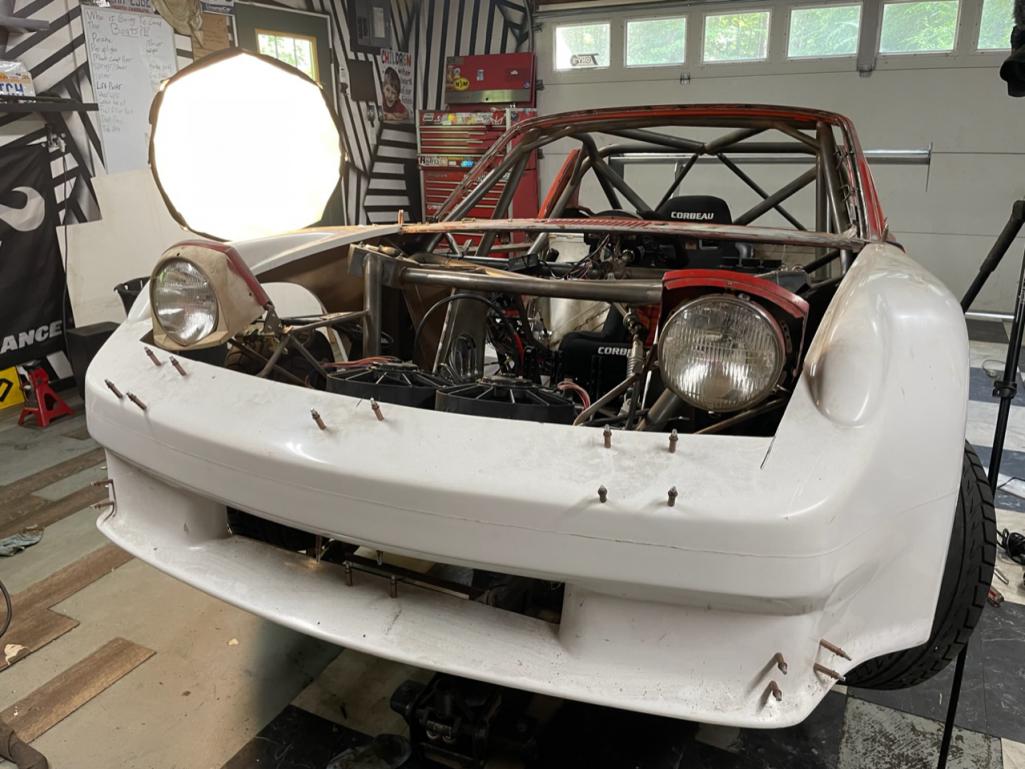
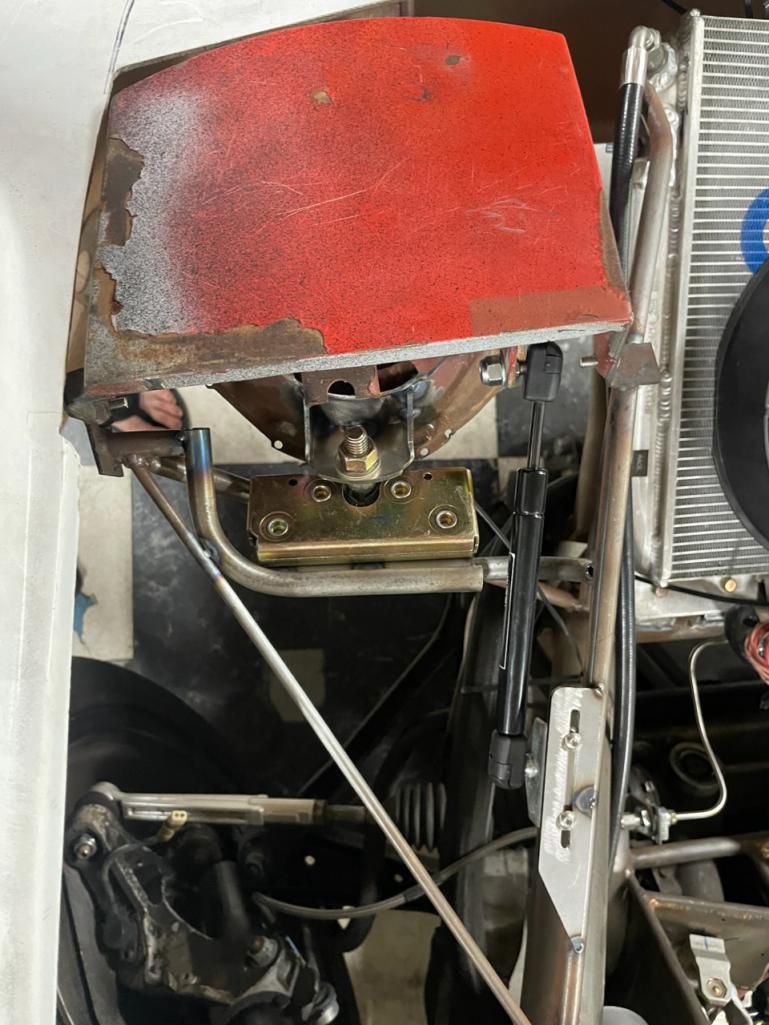
I used a very short gas strut to lift the light itself and i used a door latch catch to keep the lights down. I used laser cut parts to slot everything and leave everything totally adjustable. It will eventually be activated by a pull cable but that gets to wait till after powder coat. Its just one of those things that make me smile
Posted by: 76-914 Aug 17 2024, 10:04 AM
Progress has been… bumpy lately. Since my good friend past away, and racing two cars at the same time at Sebring my motivation to do anything tanked. With that being said i have done many good things to the car, starting with headlights.
I used a very short gas strut to lift the light itself and i used a door latch catch to keep the lights down. I used laser cut parts to slot everything and leave everything totally adjustable. It will eventually be activated by a pull cable but that gets to wait till after powder coat. Its just one of those things that make me smile
The door latch was a clever idea. Sorry about your buddy passing. Did you make a new video update yet?
Posted by: tazz9924 Aug 17 2024, 11:49 PM
Progress has been… bumpy lately. Since my good friend past away, and racing two cars at the same time at Sebring my motivation to do anything tanked. With that being said i have done many good things to the car, starting with headlights.
I used a very short gas strut to lift the light itself and i used a door latch catch to keep the lights down. I used laser cut parts to slot everything and leave everything totally adjustable. It will eventually be activated by a pull cable but that gets to wait till after powder coat. Its just one of those things that make me smile
The door latch was a clever idea. Sorry about your buddy passing. Did you make a new video update yet?
In the next few days.
Posted by: tazz9924 Aug 19 2024, 07:48 AM
I also got some used tires to mount up on my fikse rims. Amazingly i bought a set in the exact sizes i wanted so its a perfect mock up. 275 fronts 315 rears. Meat. Neat. 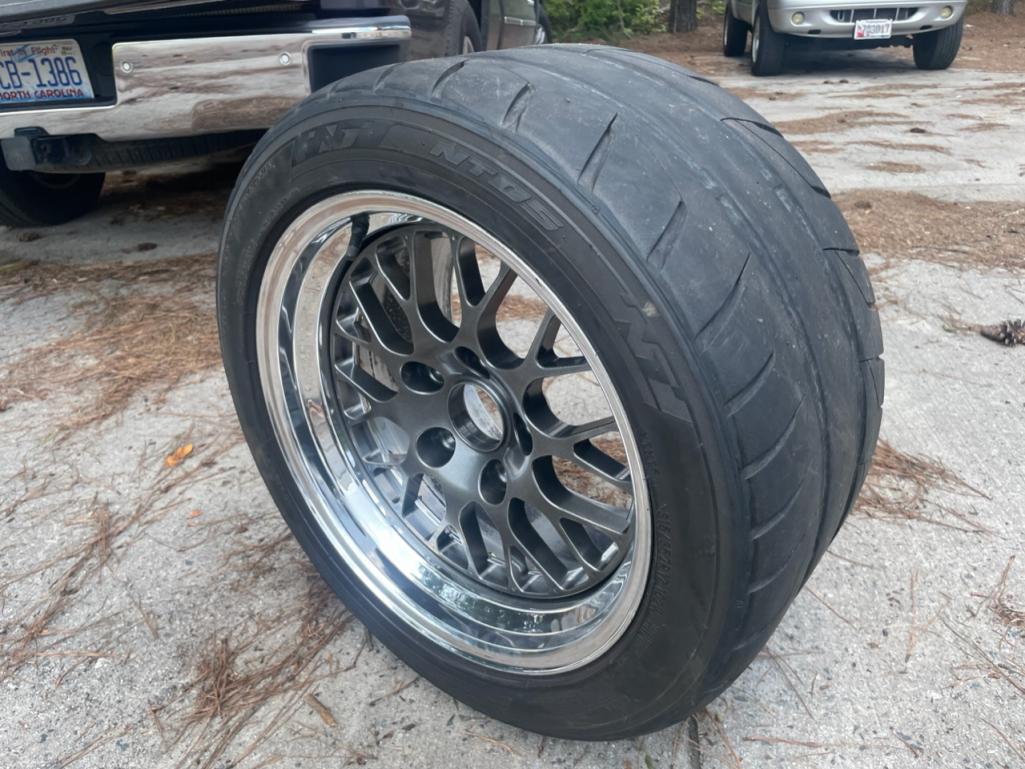
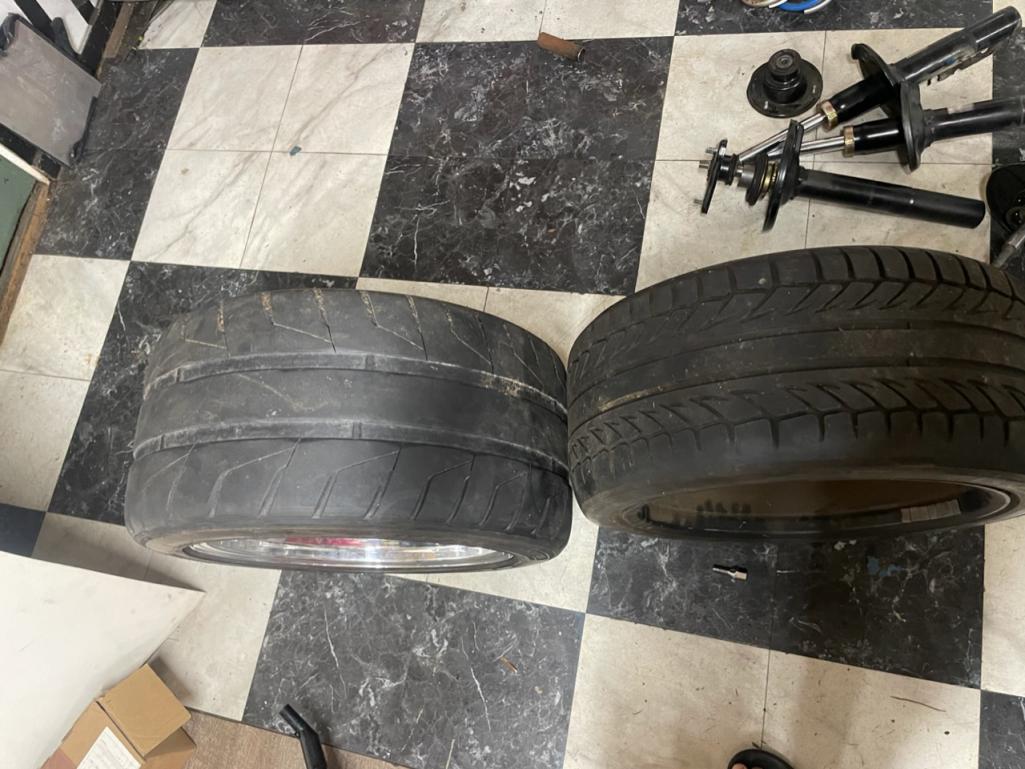
Comparing old rear 245s to 315, this is a comically big tire.
Posted by: sb914 Aug 19 2024, 07:55 AM
Always loved those rims
Posted by: tazz9924 Aug 22 2024, 10:41 AM
New video out now!
https://m.youtube.com/watch?v=17muES6Ex1s&feature=youtu.be
Posted by: mgp4591 Aug 22 2024, 01:43 PM
Nice video! The details keep coming from your build and I like your vision, especially the headlights...gotta keep those. And sorry to hear about losing your friend...that's never easy. Clearing your head by getting back to work is good therapy. Keep sane my friend!
Posted by: FL000 Aug 22 2024, 08:42 PM
Sorry to hear about your friend.
Somehow I missed your video and update March and was wondering about the build. Congrats! That thing will be a beast. Love those Fikse wheels and have been contemplating using the same for years.
Posted by: tazz9924 Aug 25 2024, 04:08 PM
Got the body sandblasted and epoxy primed. It seems odd because now i have to repair the rust, but in North Carolina the humidity is so high it will flash rust. So now i get to hate life haha
Attached thumbnail(s)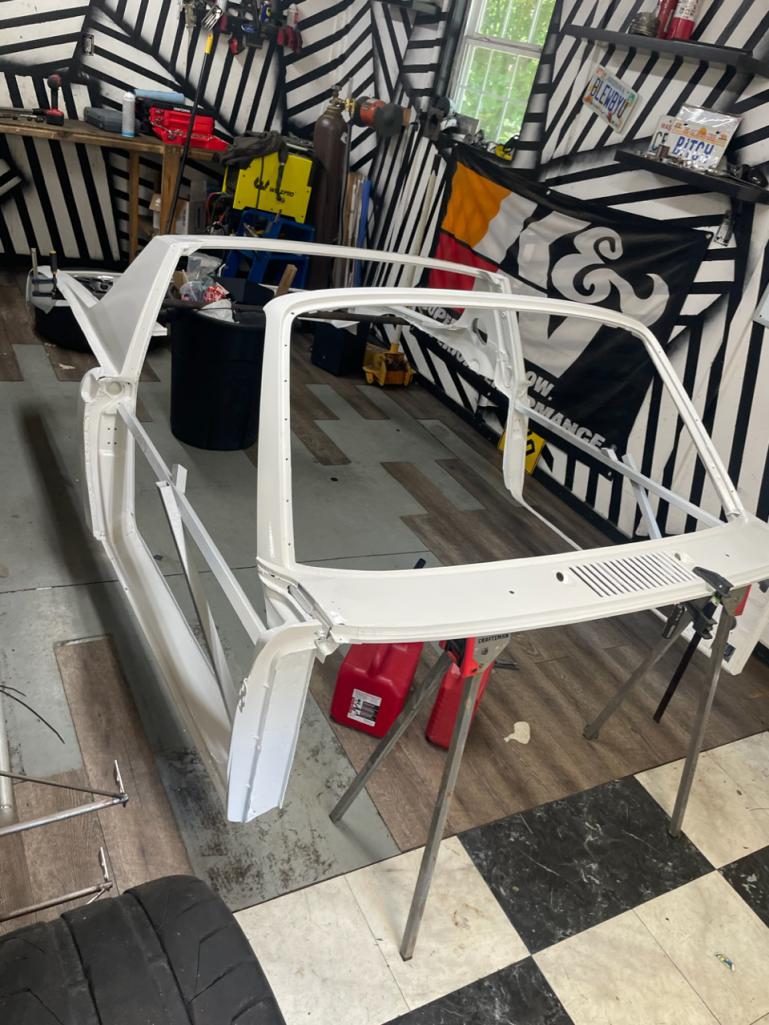
Posted by: 76-914 Aug 26 2024, 09:33 AM
Got the body sandblasted and epoxy primed. It seems odd because now i have to repair the rust, but in North Carolina the humidity is so high it will flash rust. So now i get to hate life haha
It's like that in Texas as well. It will happen within a few hours!
In SoCal you get a little rust wherever your hands touch the metal if not wiped clean.
Posted by: tazz9924 Sep 21 2024, 05:58 PM
New video out now showing off all my aero upgrades as of recently!
https://m.youtube.com/watch?v=evsqNCcwY1Y
Attached image(s)
Posted by: tygaboy Sep 22 2024, 03:02 PM
Epic-level ideation and fabrication/execution. I wish I'd started doing this stuff when I was your age, Elliot. I wonder what else you'll come up with as you continue on with what's clearly your passion.
Fab on, brother, fab on.
Posted by: tazz9924 Feb 2 2025, 10:17 AM
Its been a while but work has been on going! I got a ton of work done and even more to come as i try and get this car to powdercoat at the end of the month. I got some bug changes this time and a big announcement at the end so check it out!!!!
https://m.youtube.com/watch?v=mexZk4XQRn8&feature=youtu.be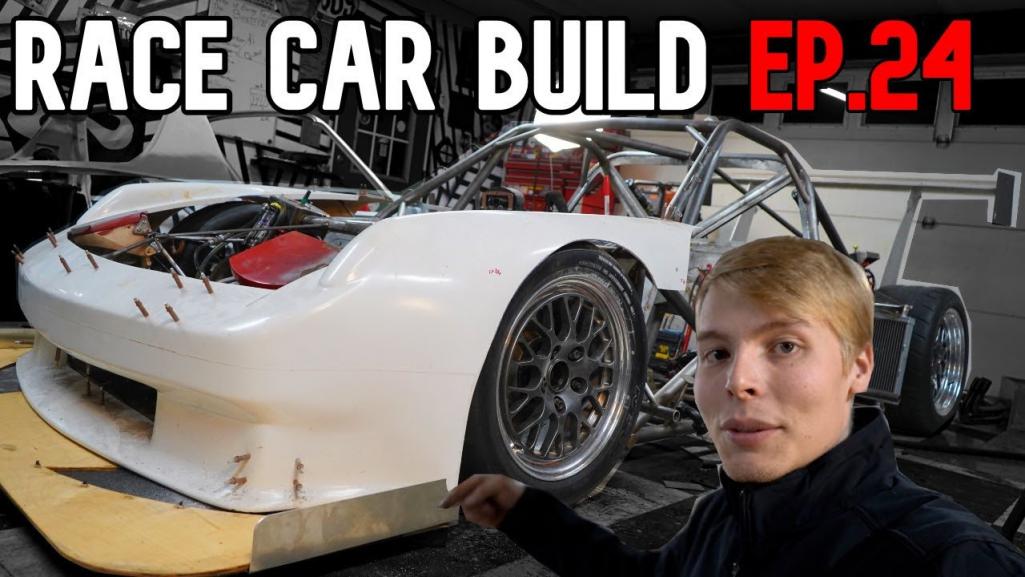
Posted by: tygaboy Feb 2 2025, 11:49 AM
Does the work.
Comes up with something better.
Cuts out the perfectly good work.
Does the work over.
My kind of dude!
Posted by: tazz9924 Feb 2 2025, 12:05 PM
Does the work.
Comes up with something better.
Cuts out the perfectly good work.
Does the work over.
My kind of dude!
I want to redo everything but sometimes you have to know when good enough is enough
Posted by: tazz9924 Apr 19 2025, 02:23 PM
I totally missed posting about episode 25 but 26 is out now! But first some catch up photos 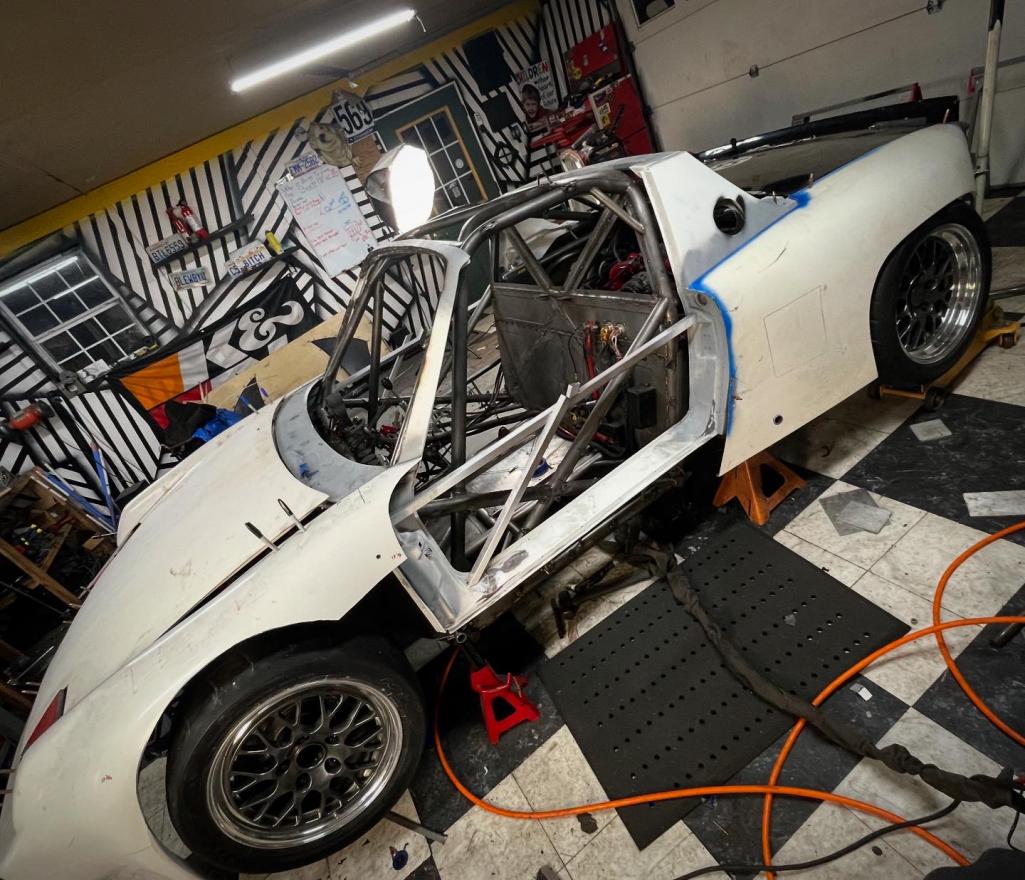
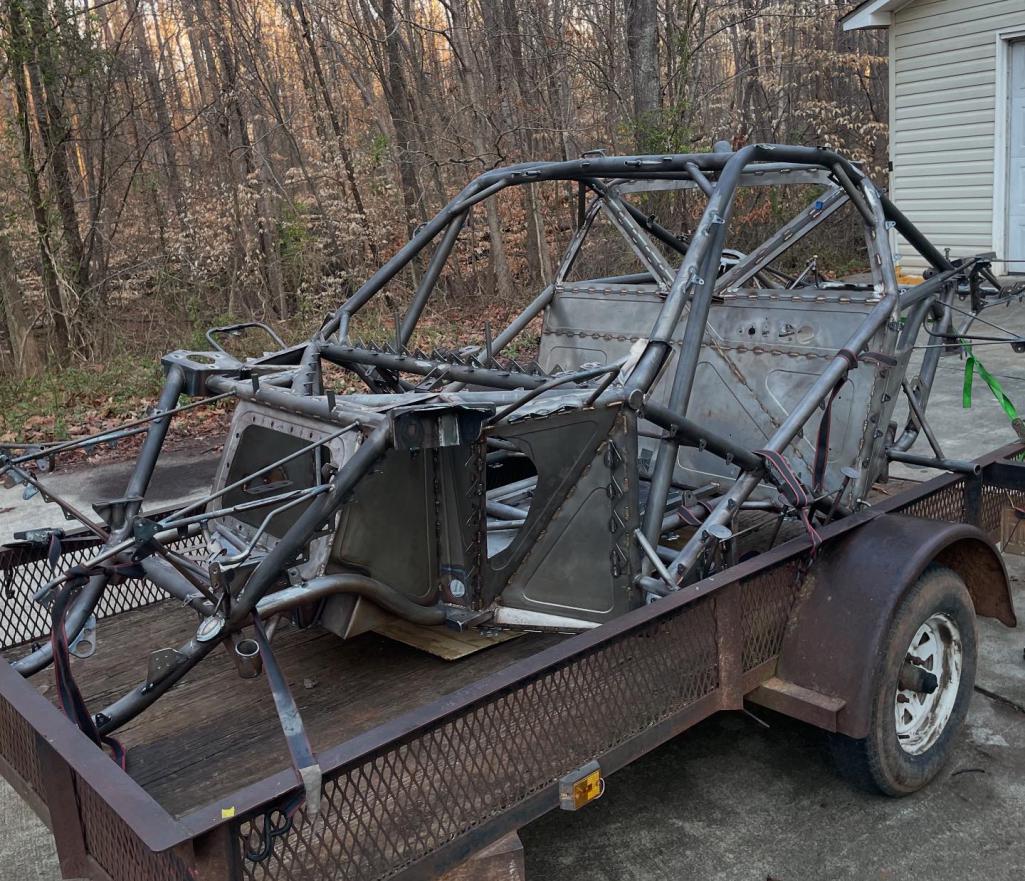
Posted by: tazz9924 Apr 19 2025, 02:24 PM
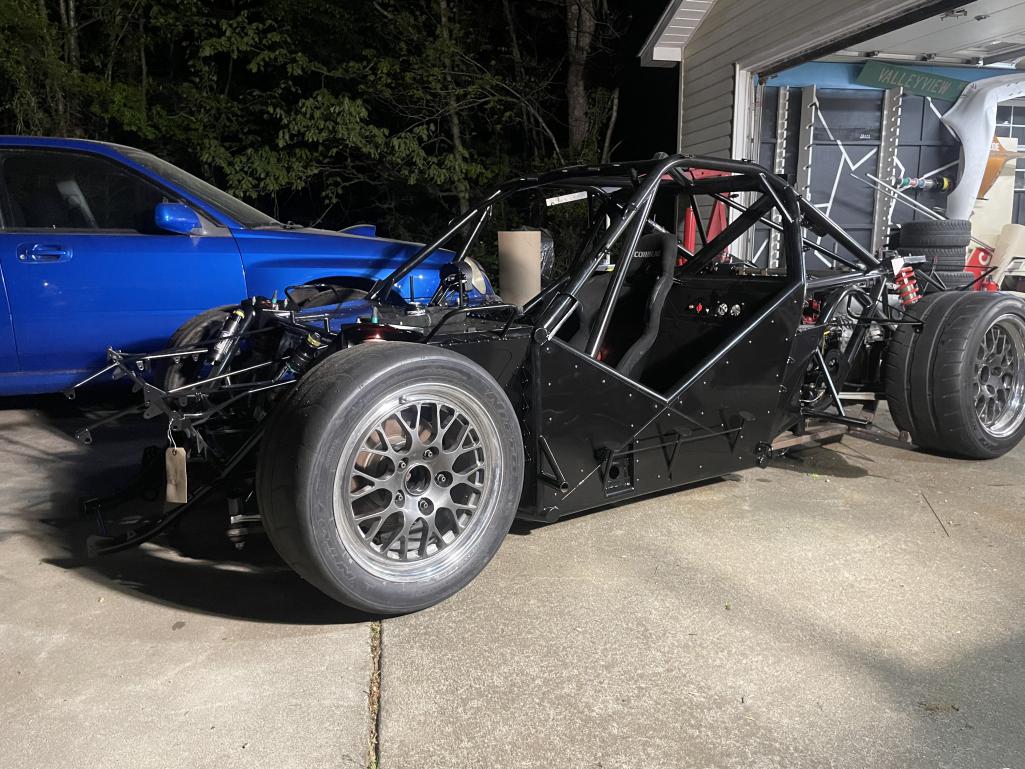
Posted by: tazz9924 Apr 19 2025, 02:25 PM
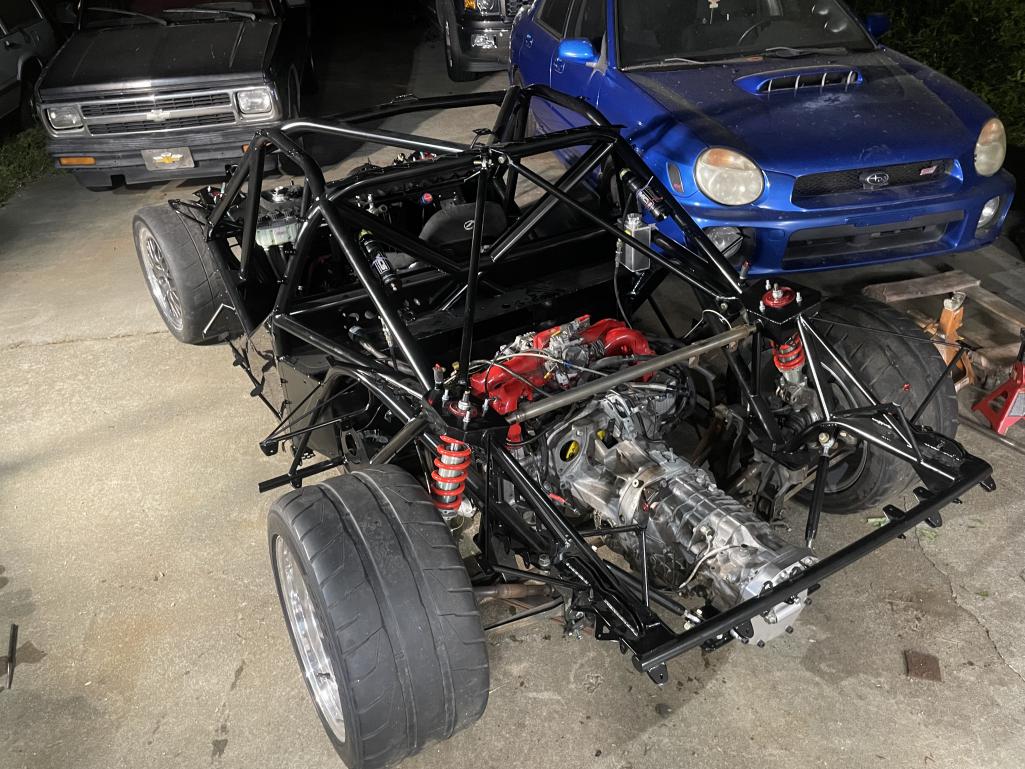
Posted by: tazz9924 Apr 19 2025, 02:26 PM
Watch it here: https://m.youtube.com/watch?v=VXVetkqmk34&pp=0gcJCX4JAYcqIYzv
Attached thumbnail(s)
Posted by: slowrodent Apr 20 2025, 09:08 AM
Just astounding...
Posted by: sb914 Apr 20 2025, 09:52 AM
love watching his videos!
Posted by: FL000 Apr 20 2025, 11:51 AM
Just killer
Posted by: tazz9924 May 24 2025, 06:58 PM
Another video out now! I really apologize that i basically only make videos not forum posts these days. I feel like im pretty stretched out on time day to day. But at least im working on the car!
https://m.youtube.com/watch?v=KVJ7z5NCV6M&feature=youtu.be
Posted by: tazz9924 Jun 13 2025, 10:22 AM
New video out now! More carbon work, more splitter and some fiberglass. Im really proud of this video so check it out now!
https://m.youtube.com/watch?v=p6VBnJ4LtxU&feature=youtu.be
Attached thumbnail(s)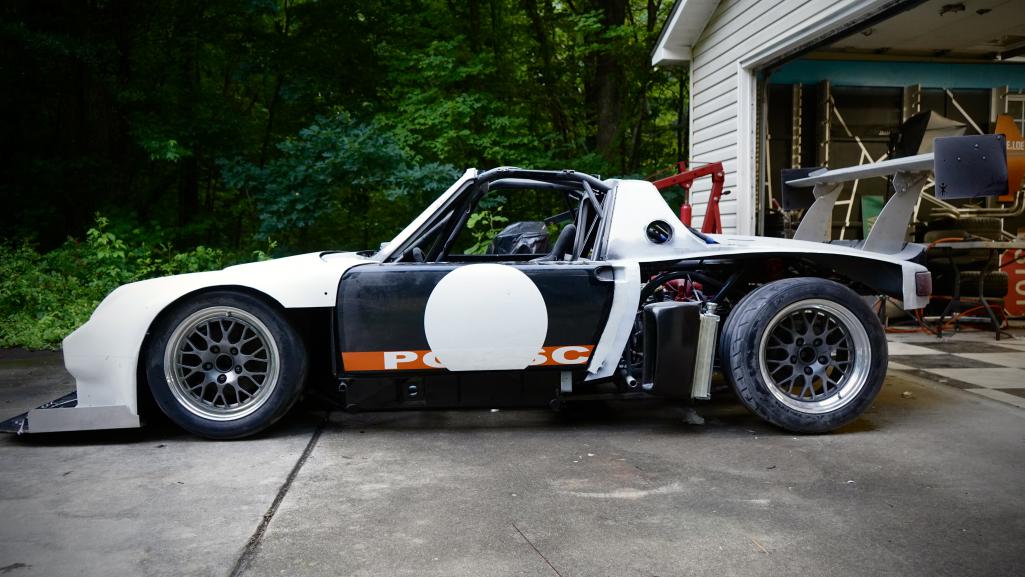
Posted by: 76-914 Jun 13 2025, 06:38 PM
Beautiful build man. Stay after it. Looking forward to some numbers. Spoiler alert: It's probably going to end up on the positive side of $10 ounce!
Posted by: tazz9924 Jun 14 2025, 05:33 PM
$5 an oz i think would be about right when its done. If its $10 ive made more money than i thought!
Posted by: rick 918-S Jun 14 2025, 06:24 PM
Nice work.
Posted by: tazz9924 Jun 23 2025, 10:20 PM
Been very itchy lately, all the fiberglass work has been messy but very rewarding and as such have made a ton of progress like actually working doors! The inner door mechanism needs to be extended slightly to interact with the outer handle more but its a good start and they close good. I also fixed the headlight surrounds eye brow area too. 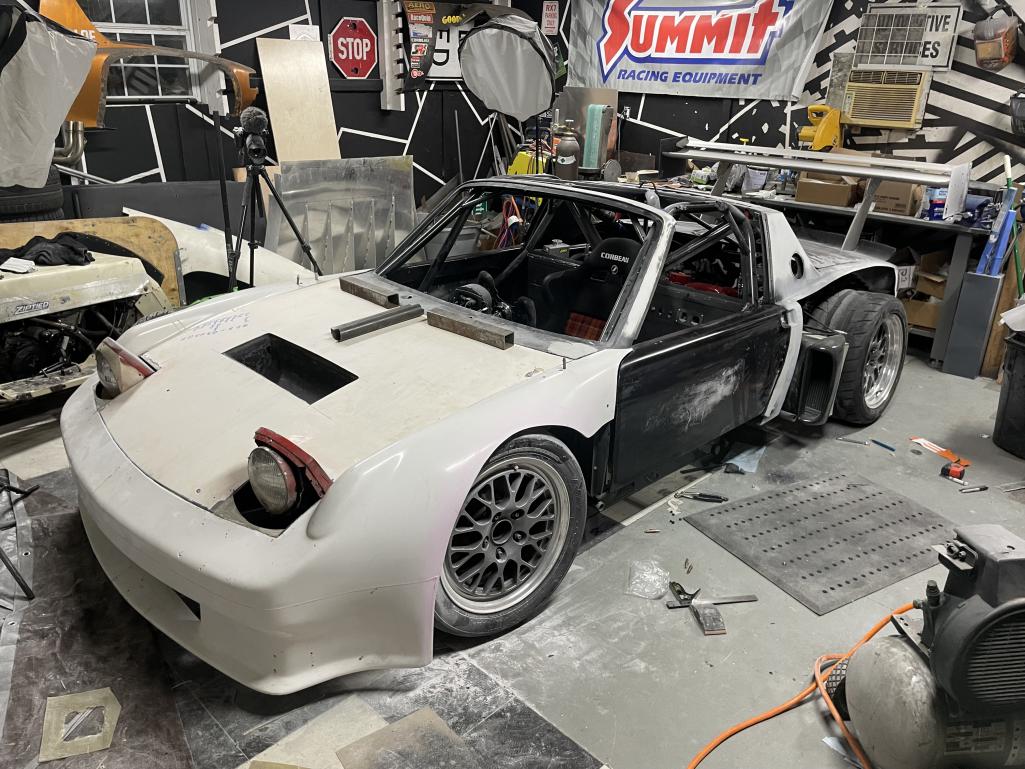
Posted by: East coaster Jun 24 2025, 05:37 AM
Looks great, baby powder is your friend when doing glass work!
Posted by: 76-914 Jun 24 2025, 09:38 AM
Looks great, baby powder is your friend when doing glass work!
As is a pair of your wife's old nylon stockings.
Posted by: tazz9924 Jun 24 2025, 09:46 PM
Looks great, baby powder is your friend when doing glass work!
As is a pair of your wife's old nylon stockings.
No wife to steal from. We itch like real men.
Posted by: tazz9924 Jun 24 2025, 09:50 PM
I got a couple things done tonight, and its all based on trying to get to the point i can make fender liners. This time it was removing the pinch weld in the wheel well by the door hinge and cutting holes in the hood for tire clearance under load. I didn’t want to cut these holes for visual reasons but maybe ill style them up!
Attached thumbnail(s)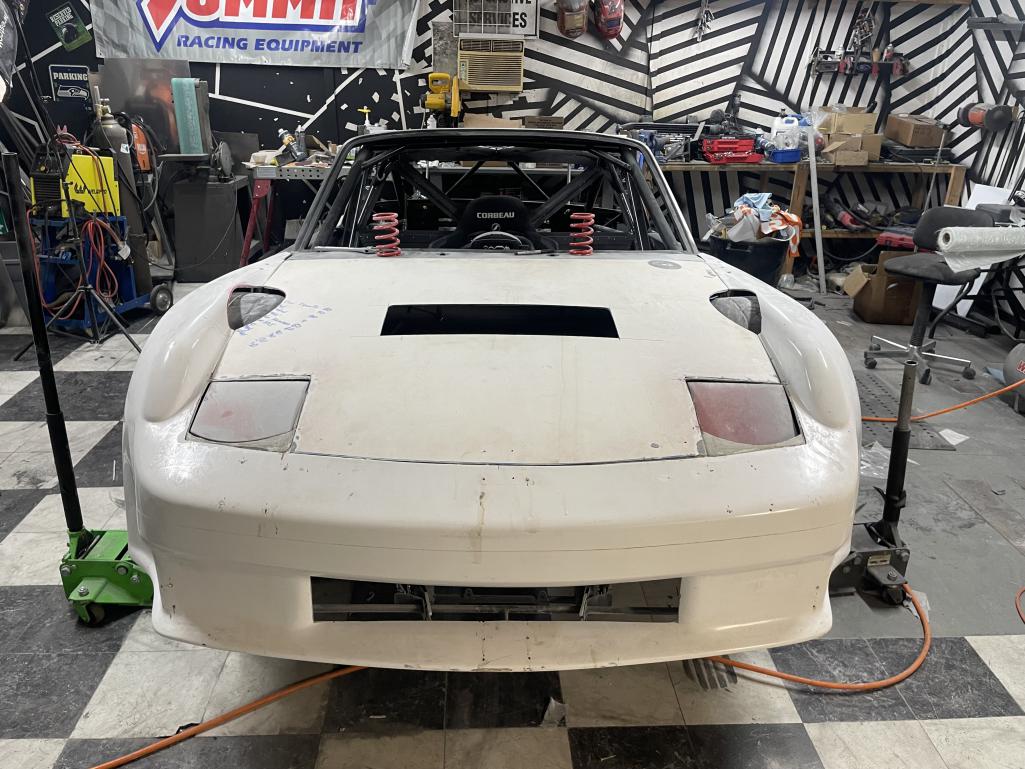
Posted by: mgp4591 Jun 24 2025, 10:23 PM
LeMans hypercar look!
Posted by: sixnotfour Jun 25 2025, 07:21 AM
Pikes Peak..Jeff MacPherson
https://www.theautopian.com/this-pikes-peak-porsche-914-may-have-the-worst-car-eyes-placement-ive-ever-seen/
Posted by: tazz9924 Jun 26 2025, 05:24 PM
Pikes Peak..Jeff MacPherson
https://www.theautopian.com/this-pikes-peak-porsche-914-may-have-the-worst-car-eyes-placement-ive-ever-seen/
If i did this livery commit me
Posted by: Millerwelds Jun 26 2025, 05:51 PM
GT3 RS vents
Posted by: tazz9924 Jun 29 2025, 10:14 PM
Added some caps to cover the tires. I couldn’t make lmp1 style tire cutouts to look right so i spent the time and made some out of fiberglass. At the same time i also cut holes in the bumper for the splitter support cables. Idk why but it seems stiffer now and im plenty pleased with the current sate of the splitter. 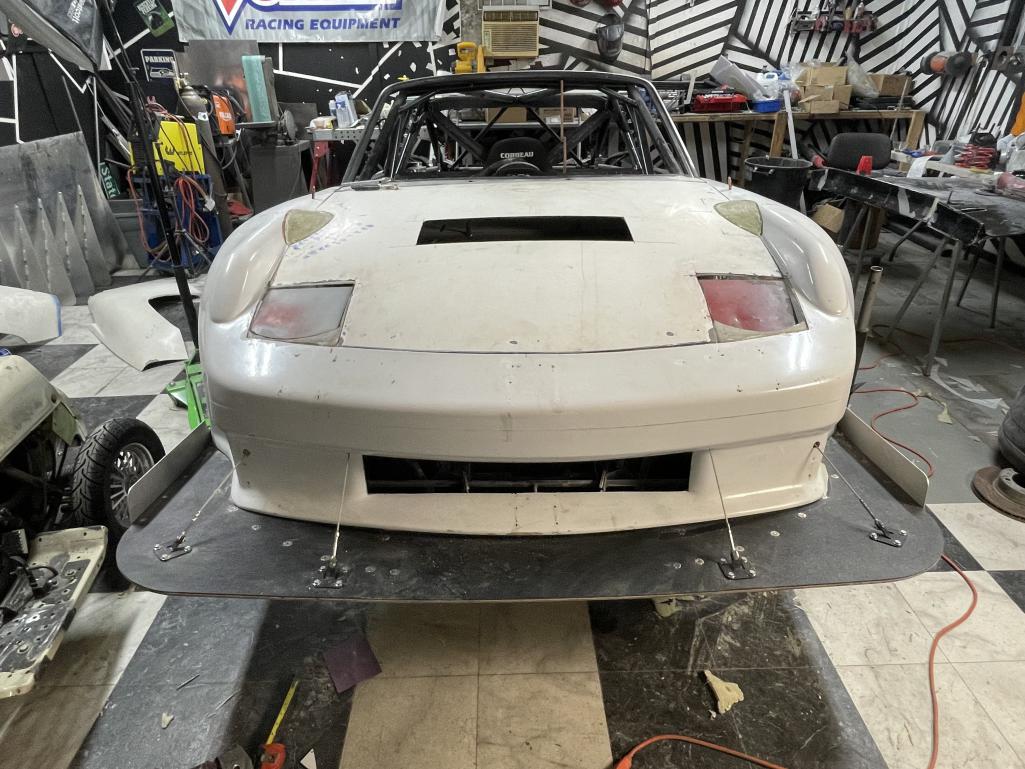
Posted by: tazz9924 Jun 29 2025, 10:21 PM
Todays mayhem was instead makeimg fender liners and that was a much bigger undertaking. The wheel well was completely covered in masking tape then glassed over. I went through an entire gallon of polyester resin and a good portion ended up on me but it does look cool for two layers.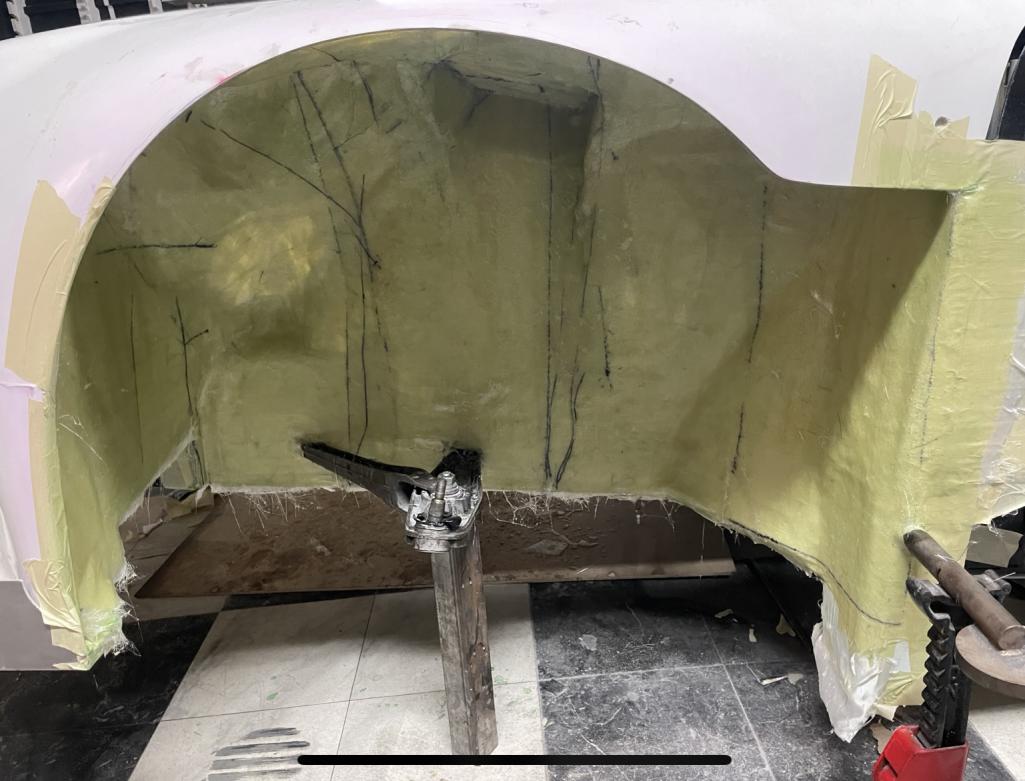
Posted by: mgp4591 Jun 29 2025, 10:49 PM
Added some caps to cover the tires. I couldn’t make lmp1 style tire cutouts to look right so i spent the time and made some out of fiberglass. At the same time i also cut holes in the bumper for the splitter support cables. Idk why but it seems stiffer now and im plenty pleased with the current sate of the splitter.
Looking good! Maybe venting the tire covers at the rear would relieve any undue pressure?
Posted by: tazz9924 Jun 30 2025, 08:36 AM
Added some caps to cover the tires. I couldn’t make lmp1 style tire cutouts to look right so i spent the time and made some out of fiberglass. At the same time i also cut holes in the bumper for the splitter support cables. Idk why but it seems stiffer now and im plenty pleased with the current sate of the splitter.
Looking good! Maybe venting the tire covers at the rear would relieve any undue pressure?
I will more than likely vent them further out. It just doesn’t look right on the little covers i made
Posted by: tazz9924 Jul 2 2025, 07:32 AM
The rear fenders are about a half inch too narrow so i did the extra long step and stuffed a bunch of spacer behind the wheel opening and made a set of slightly extra wide rear fender molds. I also extended the bottom a few inches so it actually goes all the way to the floor as this chassis is about 2” taller than stock to fit the suspension under the hoods
Attached thumbnail(s)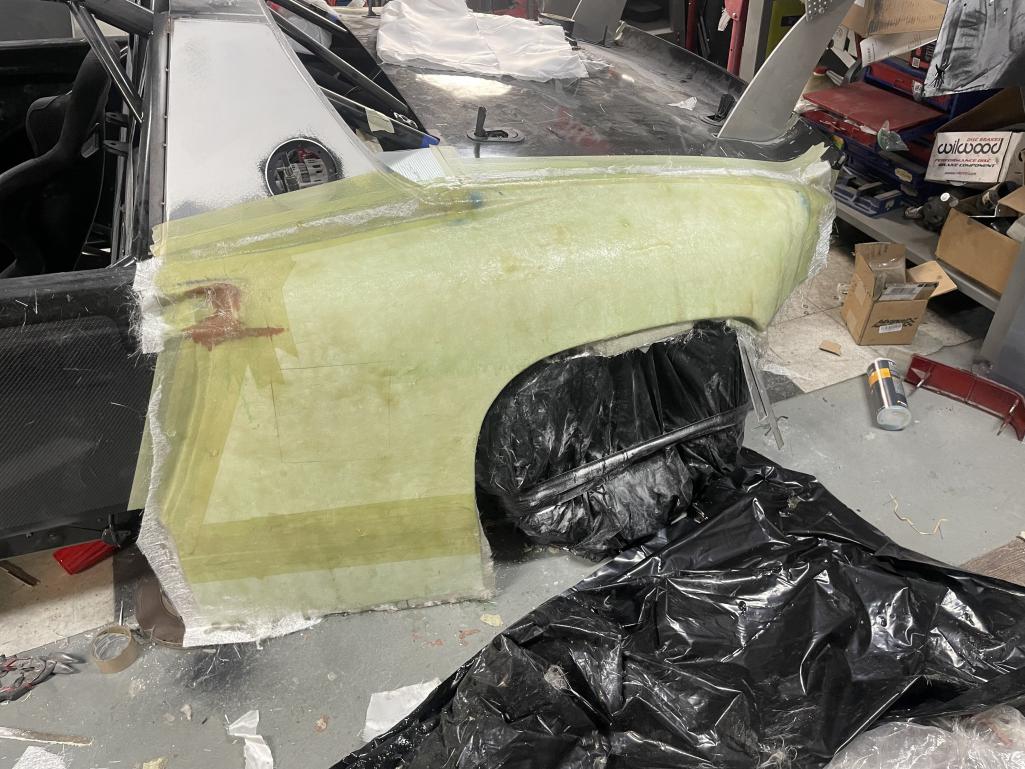
Posted by: tazz9924 Jul 6 2025, 09:02 AM
New video out now!
https://m.youtube.com/watch?v=9Fnk6j9nbI8
Posted by: FL000 Jul 7 2025, 05:30 PM
Curious why you did the fender/hood cutout for front tire clearance. Do you expect the tires to move that high while driving? Seemed high but hard to tell from the video.
Cheers, and enjoy watching the progress.
Posted by: tazz9924 Jul 7 2025, 06:01 PM
Curious why you did the fender/hood cutout for front tire clearance. Do you expect the tires to move that high while driving? Seemed high but hard to tell from the video.
Cheers, and enjoy watching the progress.
They definitely could. There was only about an inch or maybe a little more to the top of the tire, so i didn’t want to find out after paint.
Powered by Invision Power Board (http://www.invisionboard.com)
© Invision Power Services (http://www.invisionpower.com)