Printable Version of Topic
Click here to view this topic in its original format
914World.com _ 914World Garage _ Derek’s Willow Green, ‘72 914
Posted by: dereknlee May 24 2020, 11:26 PM
Inspired by others on this forum, this thread will document the restoration of my 1972 914 1.7.
I bought it in summer of 2008. It was supposed to be my daily driver that I would make minor improvements to while keeping it drivable. There was a memorable couple of weeks where I was using it for my commute in the winter, with no heat (heat ducting/valves removed for paint), and then the ignition switch went out and so I was parking at the top of hills until I got that figured out/fixed. I don't know how 914s got on my radar or what drew me to this car. Le Mans was, and is, one of my favorite movies - so I thought 1970s Porsches were cool. 911s were a bit out of reach, so I guess the 914 was the next closest option.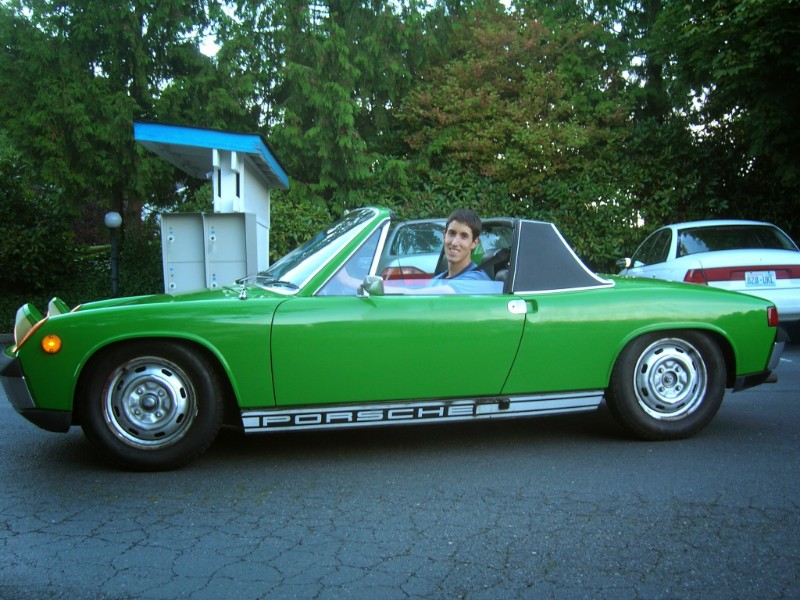
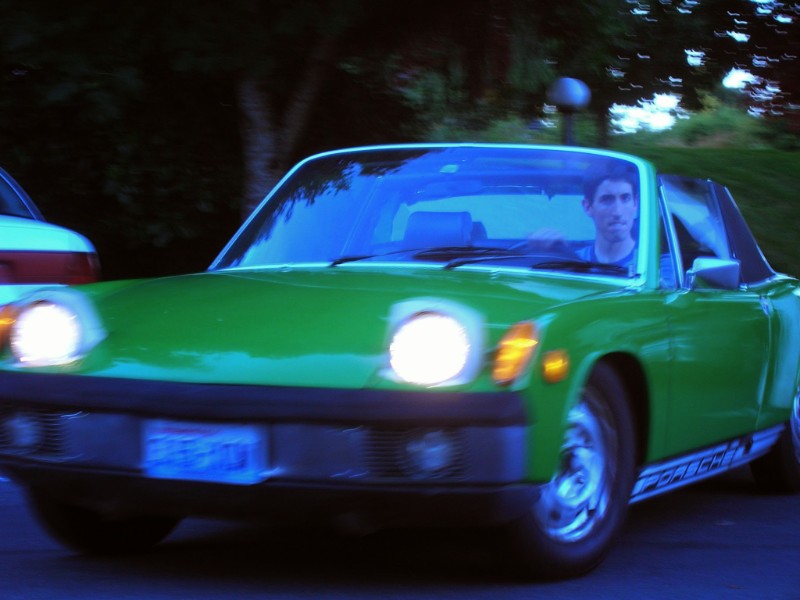
[Side note, cell phone camera technology has come a long way since 2008....and these pictures make me feel old.]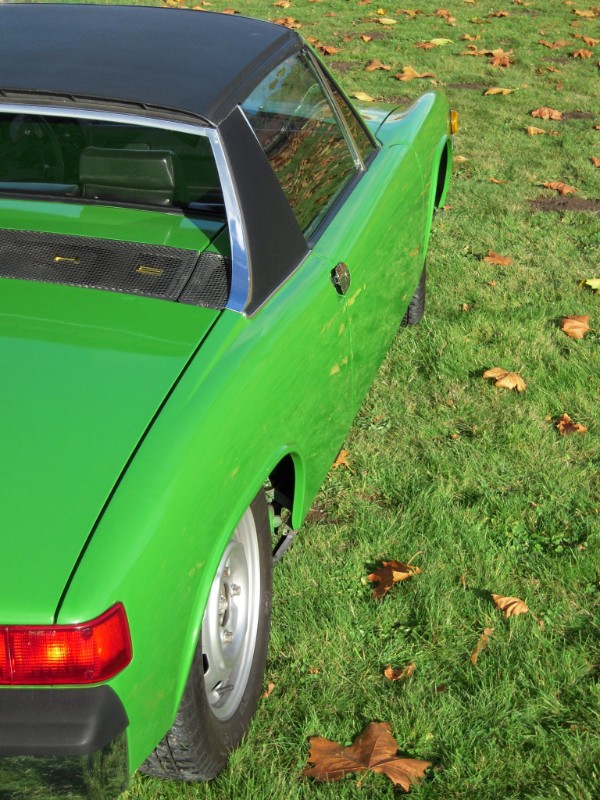
The plan for this car to be a daily driver changed (not so much by choice) when I bought a house in the fall, and upgraded from apartment carport to an actual garage. I set aside a couple weeks to drop the engine and tend to some oil leaks, and of course - discovered rust. The car hasn’t driven since (12 years as of this writing).
The worst of the rust was in the hell hole. I bought a MIG welder and did a fair job of patching things up. I also attacked the rust at the driverside jack point and in the rear trunk.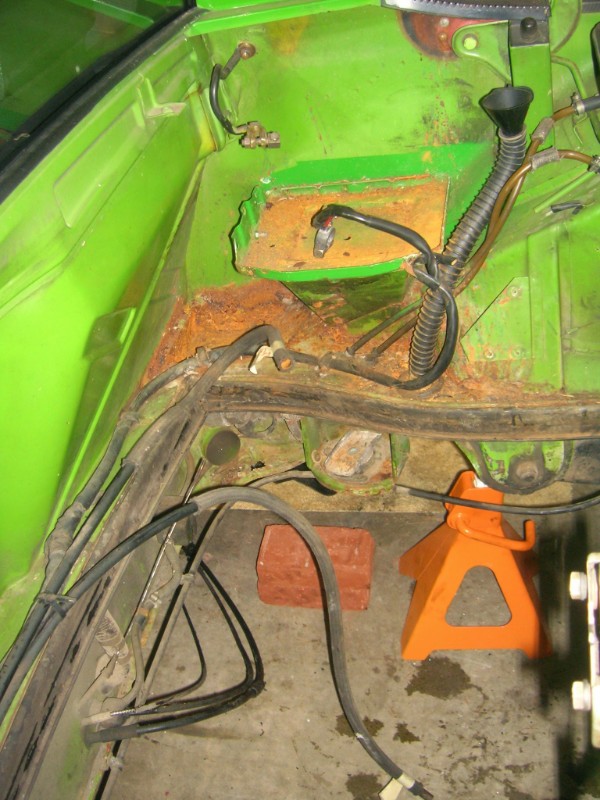
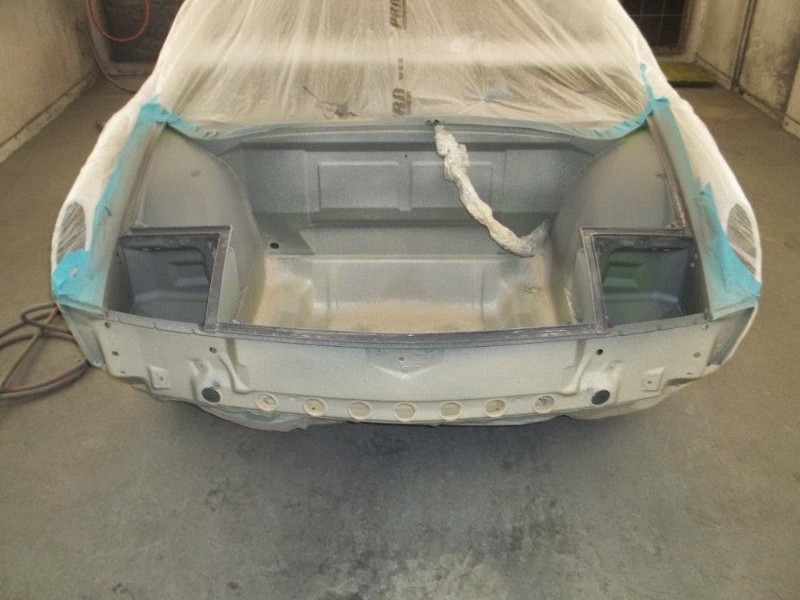
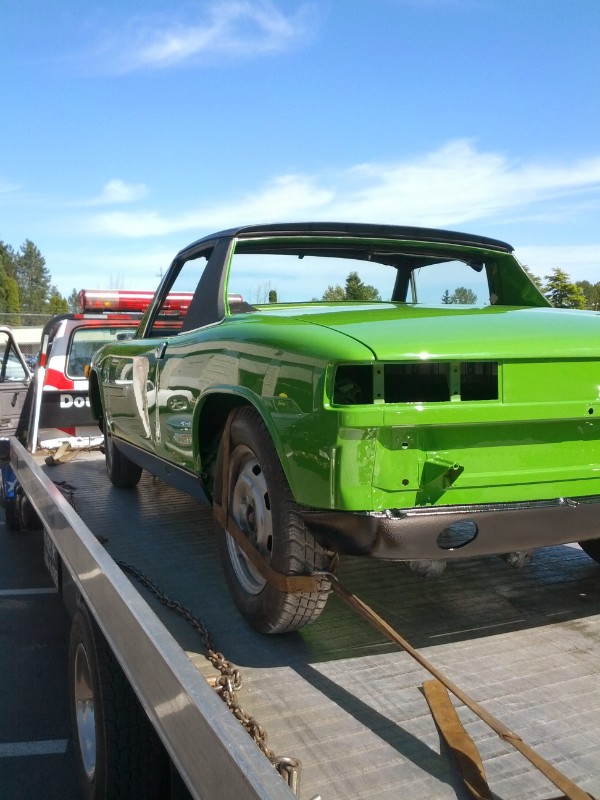
Then the house remodeling got serious. The car sat for four years before I decided I wasn’t going to learn body work and the car deserved better. I hired Eurotech Bodywerkes to finish the rust repair and repaint the car. When I bought it, the car had been re-sprayed (and poorly masked) in a John Deer green. The plan was to go back to the factory color: willow green.
Eurotech found more rust in the doors, so it got new doors. They also fit factory sway bars. They fixed miscellaneous rust all over the place, filled dings, re-sealed the seams, installed a new battery tray, stripped the underside, fitted new rocker panel valances, restored the old front and rear valences and then laid down a very pretty paint job. The cabin and front tank bay are the only areas with original paint.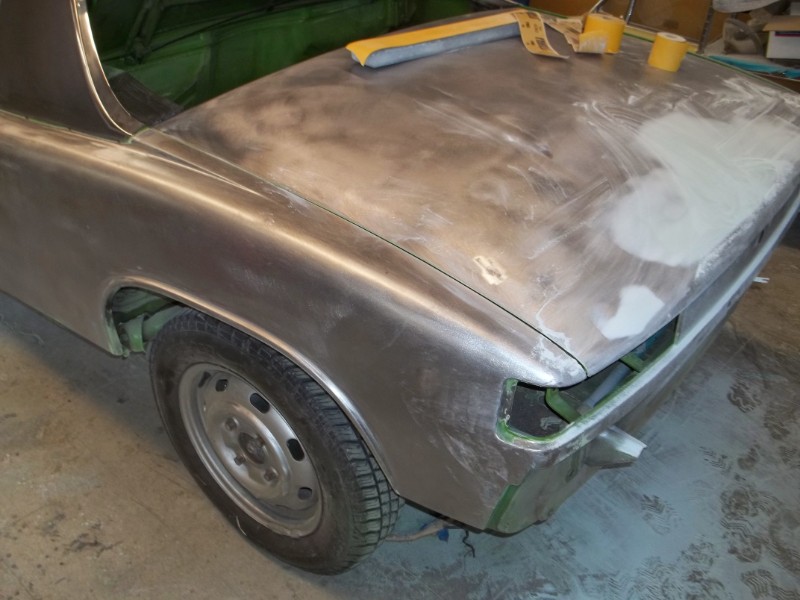
At the same time I had the engine rebuilt by NW connecting rod into a 2ish L displacement (not sure as of this writing whether it is a 1911 or 2056) with a carb cam. The plan was to fit dual Webers (more on that later). I also had the transmission rebuilt to fix a chronic 1st gear grind. And I had some parts re-plated.
And then the car sat for six more years while I permitted and built/finished an addition to the house, as well as picked up some sports to occupy my time.
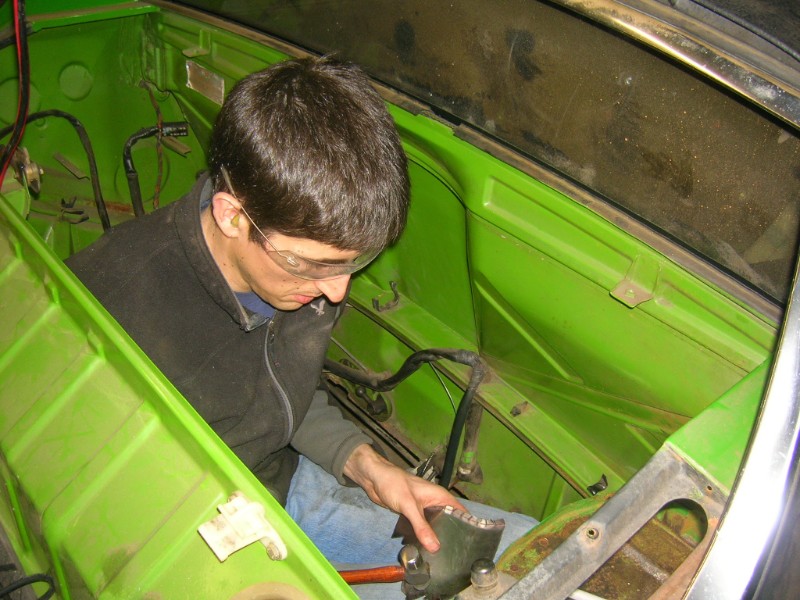
Spring forward to Dec 2018, and a freshly separated shoulder from a cycling crash. I started working on the 914 again. Re-sealed the tank (the kits available for this are amazing). 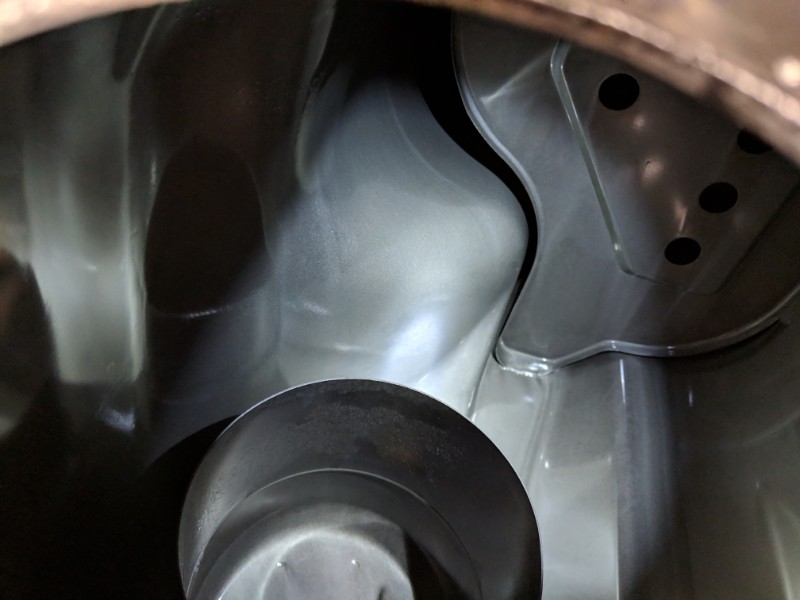
And refurbed the wiring loom in the front trunk: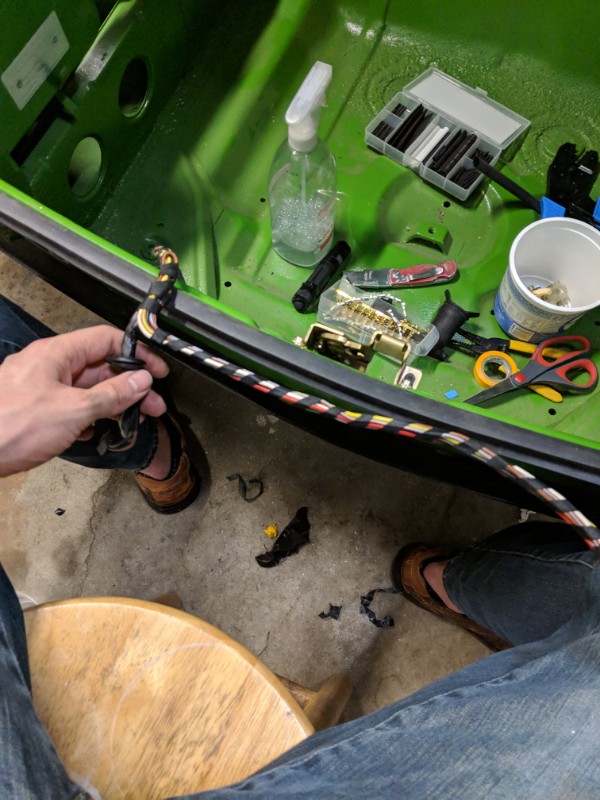
...before getting side-tracked again by a Vanagon. The Vanagon was a 2018 acquisition that suddenly needed a motor replacement in 2019, following a catastrophic failure that occurred a few days after this picture was taken.
Which brings us to the current covid quarantine times and cancelled vanagon trips. But on the bright side, work has restarted on the 914 again.  Will this be the final push that sees the car on the road? Track record says no, but only time will tell.
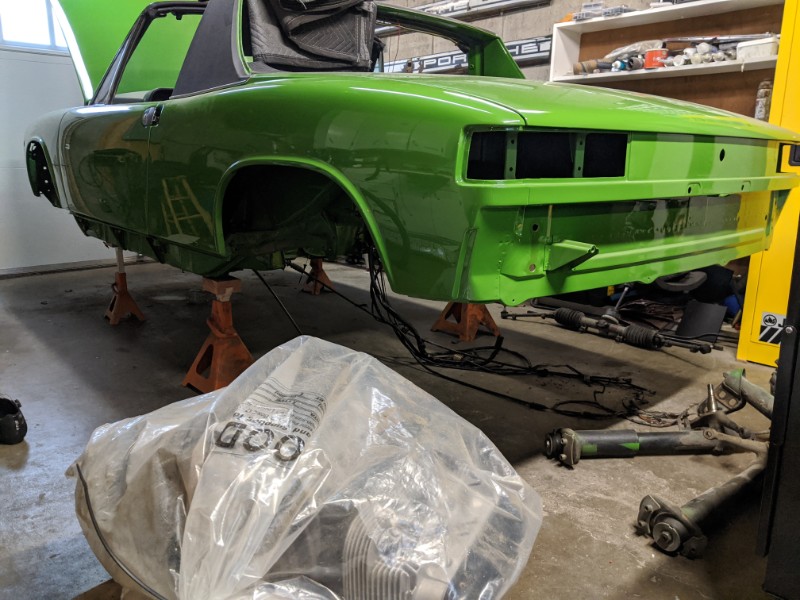
I will add additional posts to document progress. But at the outset I’d like to state my intentions with the project I would like this to be a stock 914  - at least outwardly. This presents a dilemma relative to my current 2L engine. I'd like to coax as much performance out of the engine and 1.7 L Djet system as I can. But a new cam is in order to even consider that, and as long as the engine is coming apart then I can re-think heads and displacement - with the aim to go as big as possible without ditching everything for a 2.0 L Djet or going microsquirt.
-Derek
Posted by: dereknlee May 24 2020, 11:35 PM
On to recent progress. In March I picked up where I had left off and got the headlight assemblies installed and working. I also fitted and re-terminated some of the turn signal wires (Vanagon experience has been a confidence boost).
Next I removed all the suspension and brakes. BTW, a cheap HF press made removing the trailing arm pivots a breeze - no heat required. Rear bearings on the other hand, not fans of the press.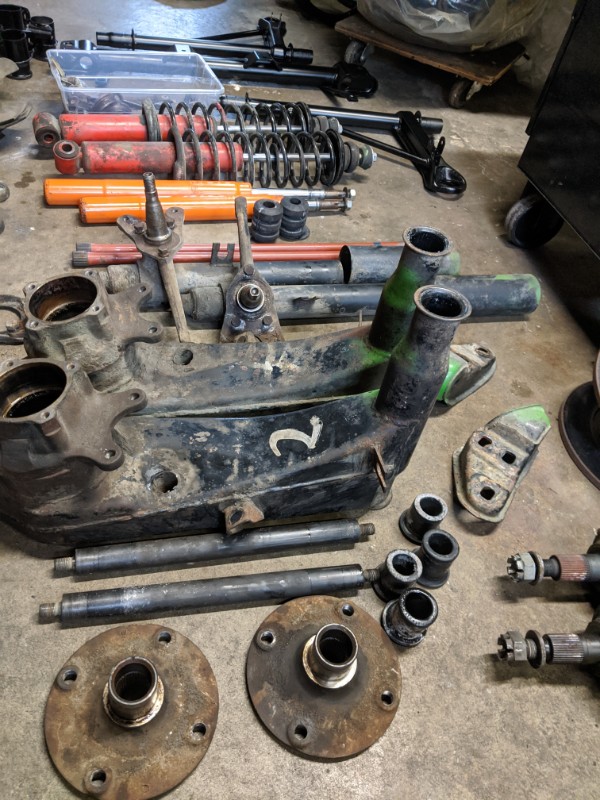
I bead blasted most everything. 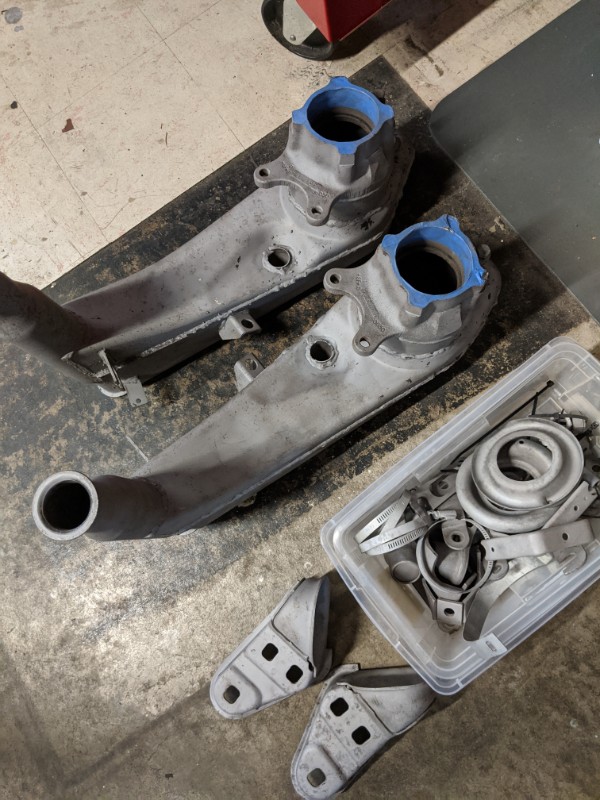
Then started on rehabbing and repainting. Supension parts getting VHT ‘epoxy’ satin black (paint seems way too soft to be epoxy, hoping it will harden up in time). This paint seems to do best when the final coat is laid down very thick, and allowed to dry flat. 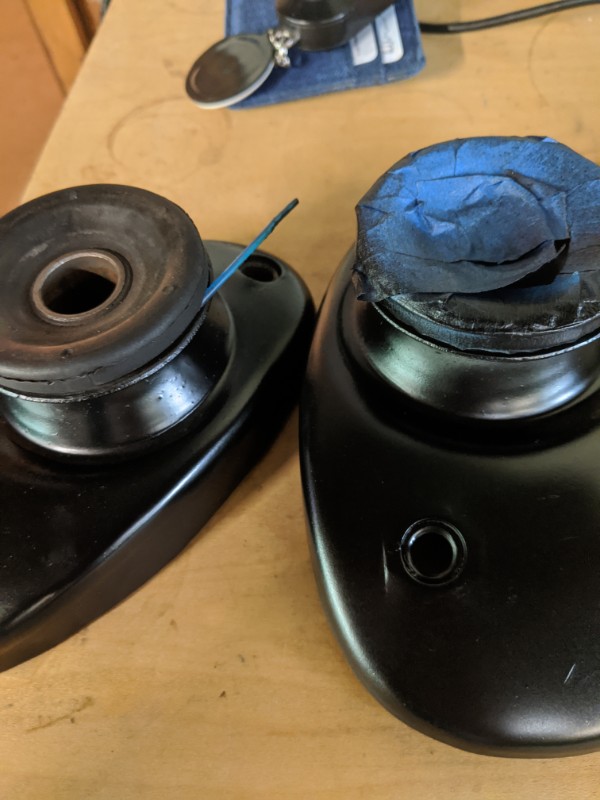
Before I can make too much more progress I need to order a bunch of parts: bearings, rotors, bushings, refinished brake calipers, etc. I also need to get a bunch of parts re-plated. Which leads to my next post…
Posted by: dereknlee May 24 2020, 11:44 PM
I have accumulated a batch of parts that need to be replated. There are a couple local shops that support the aerospace industry that can do yellow chromate conversion coatings. But when I returned to the one that had plated some parts for me in the past they turned me away (don’t like small jobs, don’t like car parts). I found another shop that will take my parts, it won’t be cheap. I see where they are coming from - cost of doing business.
But an internet search for DIY plating lead me tohttp://www.southsandia.com/forum/website/zincplating.html. This site made it look easy, and inexpensive: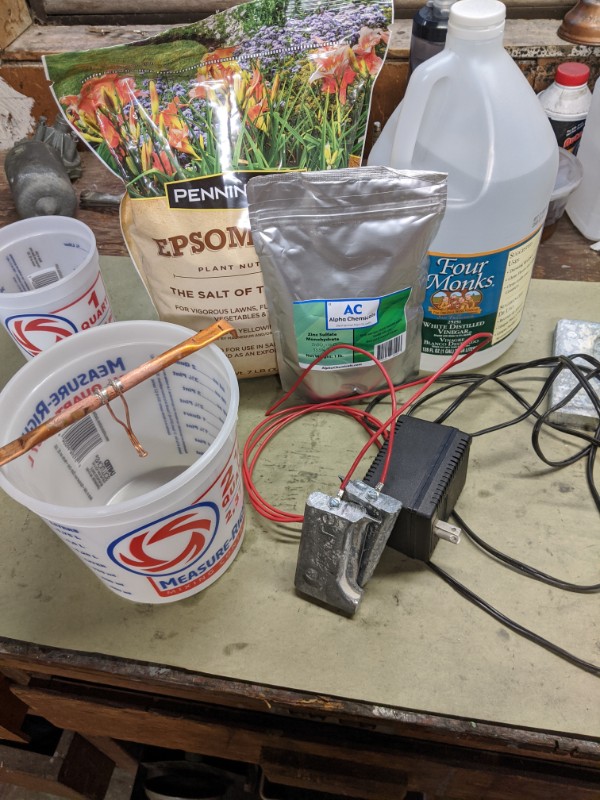
Turns out it is actually easy to get decent results: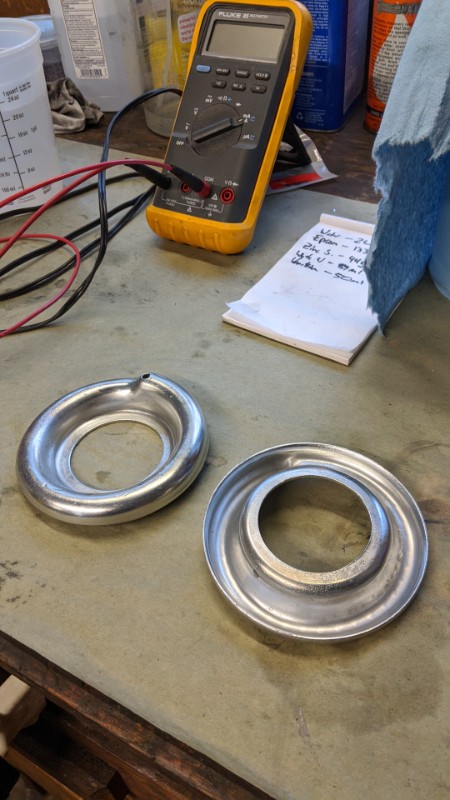
The next step is to chromate the parts. Surprising what you can get on eBay, sodium dichromate is on the way.
I still may hire out a plating batch for the appearance items. But having the ability to refinish rusty parts that were originally plated really satisfies that particular/peculiar part of my brain that wants to return this thing to near stock. Hiring plating in small batches is cost prohibitive, and the only other alternative would be to paint, so I am eager to find a recipe that works.
Today's progress included cleaning up these turn signal assemblies (brackets and studs were very rusty, but look good enough after plating):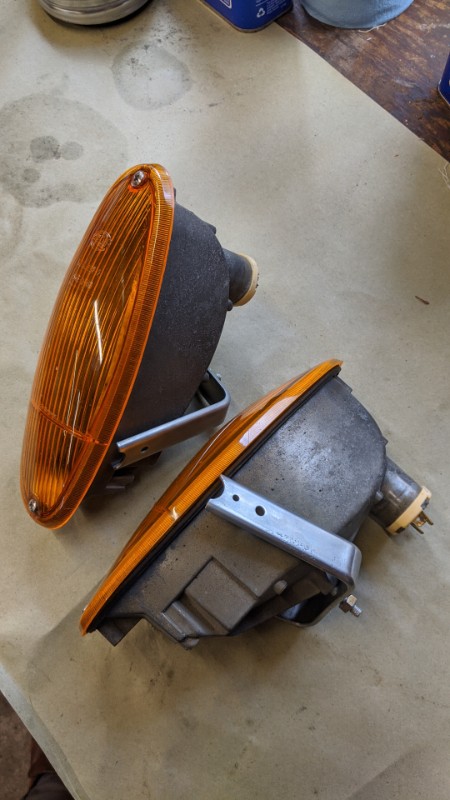
Repainting the Koni rear shocks (not really happy with the color match, photos to follow when assembled). Painting miscellaneous suspension parts, and dissembling one of the rear axles.
-Derek
Posted by: Cairo94507 May 24 2020, 11:58 PM
Hi Derek- Wow. Great work and color. You are going to have one beautiful 914. Keep at it and you will be driving that baby before you know it.  Michael
Posted by: wysri9 May 25 2020, 02:49 AM
Great story which many of us can relate to......lovely work too. She will be stunning when she's done! 
Posted by: luft May 25 2020, 04:59 AM

Great story which many of us can relate to......lovely work too. She will be stunning when she's done!
okay relate to yes, getting started is another story.
Derek keep it up, love to follow your progress.
BTW is you'r Westfalia back on the road?
Posted by: Big Len May 25 2020, 06:05 AM
Following......
Posted by: gereed75 May 25 2020, 07:15 AM
Nice thread. Nice work. Nice car
Git er done! You deserve it.
Nice to see the 914 still serving as an “entry level” Porsche
Posted by: tygaboy May 25 2020, 07:16 AM
Nice work. Your car looks great!
Curious: which tank sealer did you use?
Posted by: dereknlee May 25 2020, 08:27 AM
Thanks all for the encouragement!
The tank sealant was KBS coatings tank sealing system. Never having been through the process before it was amazing to see the tank go from rusty and crusty to sparkling clean with no elbow grease.
Before: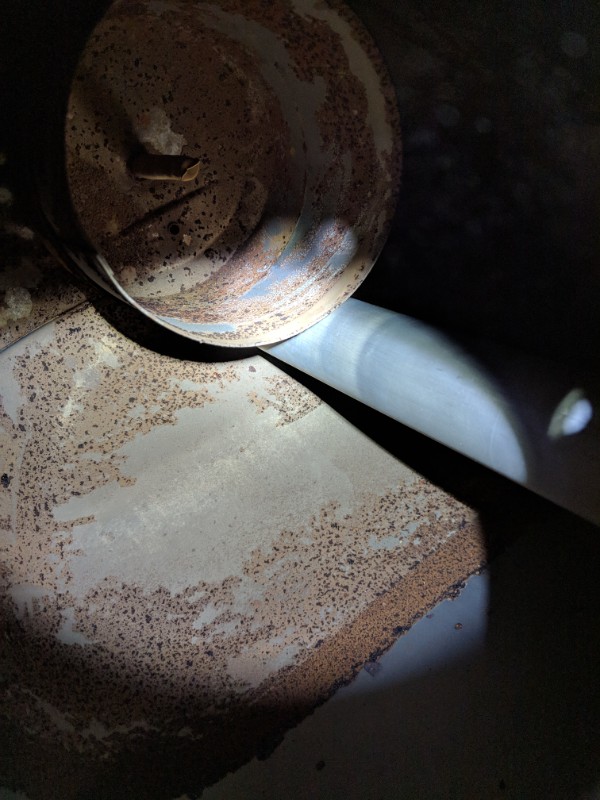
During: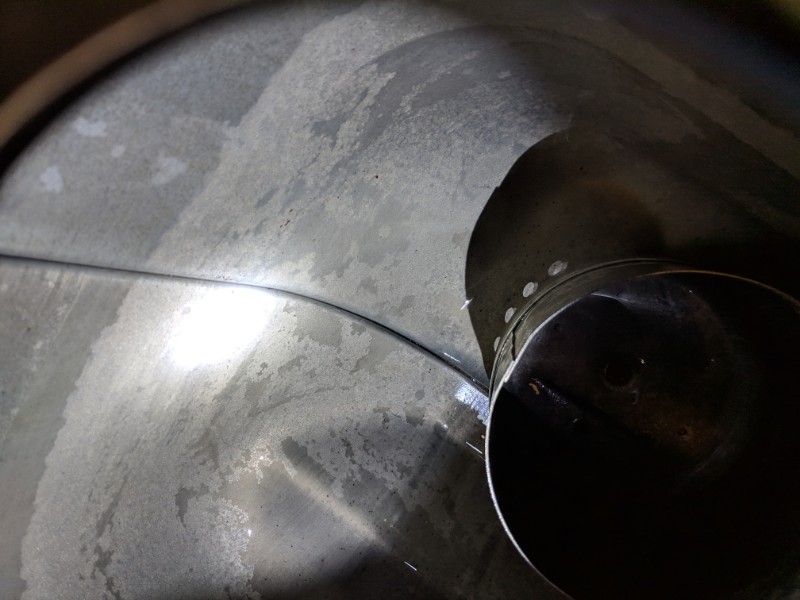
After:
Yep the Vanagon is back on the road. The engine blew in Arches NP in mid April of last year. I put a GoWesty 2.2L in about a month later. 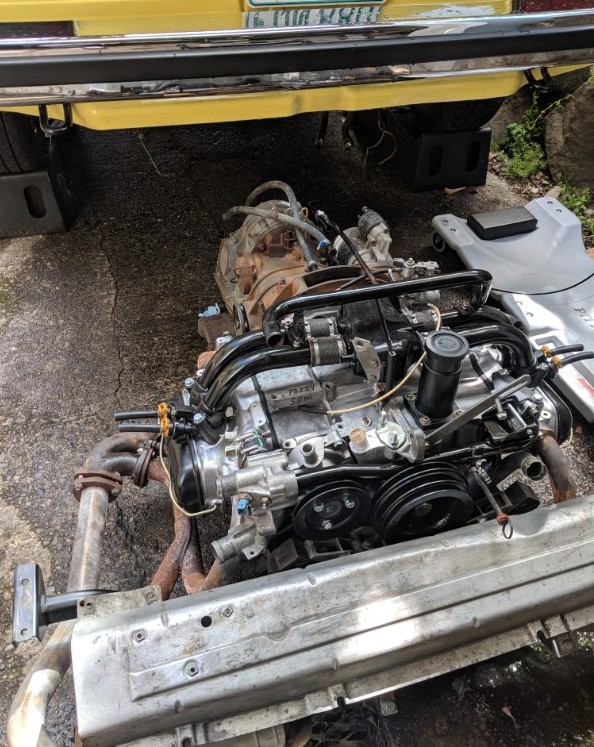
After spending a bit of time in a shop for the intial startup (oil in the coolant system turned that into a bigger job than anticipated), we were back on the road by June.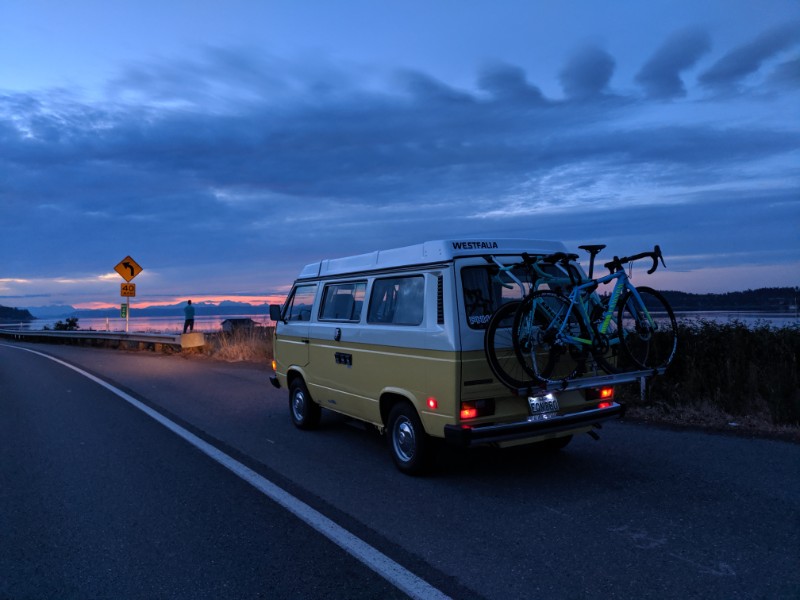
This February I replaced the peeling/cracked headliner, which was the last major project on the van's to do list. 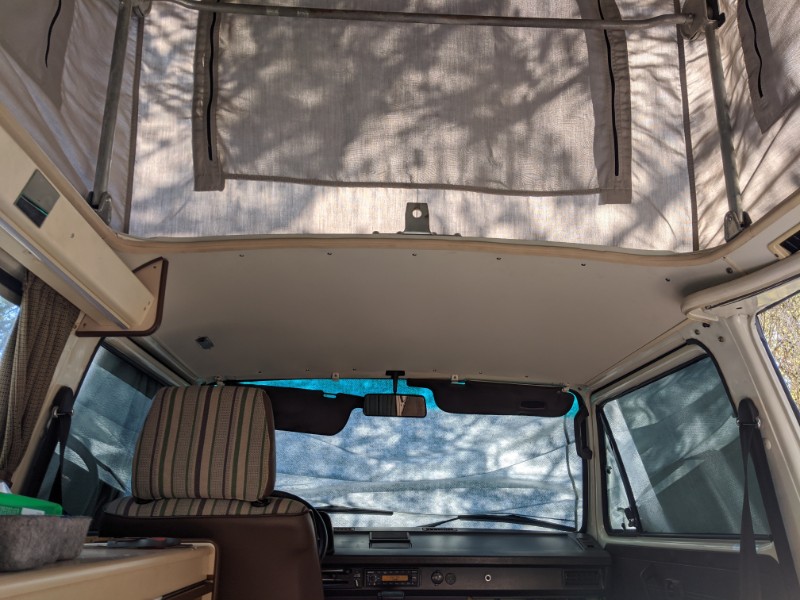
We were supposed to do a road trip to Yosemite starting 2 weeks ago, but all those reservations were cancelled by 'rona.
-Derek
Posted by: dereknlee May 25 2020, 07:46 PM
Today I disassembled the other rear axle and degreased all the parts. Then washed all the tools I handled in the process - what a goopy mess. CV joints wear looks okay. They are Loebros. Who knows when they will be on the road next so I'll re-grease them, put on new boots, and move along. I cleaned up the axles primed and painted in gloss black. Need to buy some yellow enamel to re-create the original marks on the axles.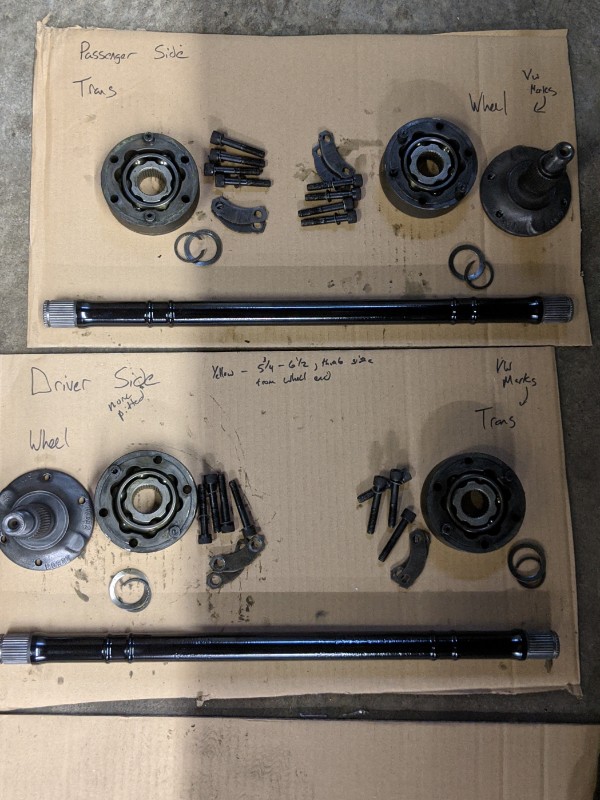
One end of each spring was rusty, so I hit those sections with the wire wheel and then sprayed more gloss black.
Earlier this weekend I stripped the Koni shocks and yesterday I painted them in a VHT chevy red orange. I'm not happy with the color match, too orange. I tested a few other shades of orange and red today but they weren't right either, so I'm just going to live with it. I pressed the bushings back in and best part of all: applied the stickers. My philosophy on these is similar to the CV joints - it is easy enough to change out in the future and they aren't obviously bad, so I'll clean up rather than replacing.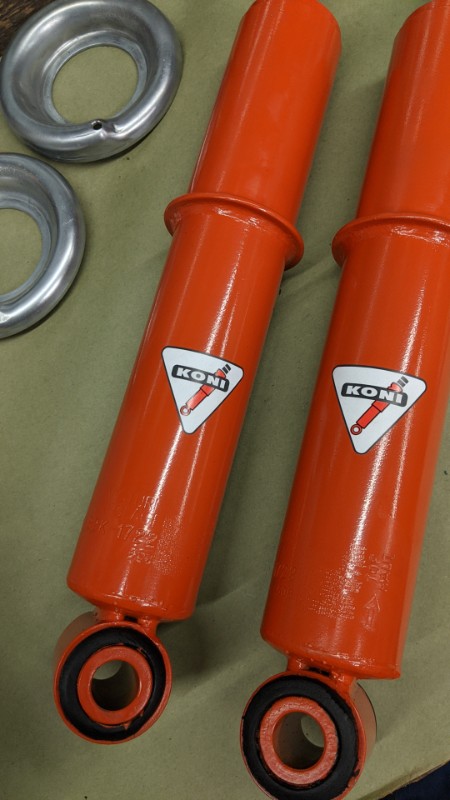
-Derek
Posted by: bkrantz May 25 2020, 08:01 PM
Keep up the momentum, Derek!
Posted by: billh1963 May 26 2020, 06:17 AM
Great work! Looking forward to seeing more progress
Posted by: jaredmcginness May 26 2020, 06:43 AM
Awesome work and thread. The fresh willow paint looks fantastic!
Curious for more info about that engine build? What carb cam and P&C's did you go with?
Keep it up!
Posted by: dereknlee May 26 2020, 07:23 AM
Awesome work and thread. The fresh willow paint looks fantastic!
Curious for more info about that engine build? What carb cam and P&C's did you go with?
Keep it up!
Thanks! I posted about my self-imposed engine conundrum http://www.914world.com/bbs2/index.php?showtopic=345061&hl= The plan was for dual Weber 40 IDFs, with a Webcam 86 (00-152) and 96 mm pistons. But I've changed my mind since having the engine built up this way and will be changing over to something that is more FI friendly (what that is exactly is TBD).
-Derek
Posted by: VaccaRabite May 26 2020, 08:02 AM
When I finally get around to installing my flares and need to repaint the car, I think I'm going to change to willow green over Conda green, though I like both.
Zach
Posted by: gereed75 May 26 2020, 08:15 AM
Do what Mark said at the end of the other thread. The bigger 2.0 liter throttle body will give you the appropriately sized induction core for a stock looking but modern EFI. My opinion is that it would perform well ( Not wasting the money already spent) and not detract from future value.
Not sure about the cams, but my question there would be “if I went with the “modern D-Jet” build described above, exactly what would I really be giving up using the current cam”. I guess some performance and some drivability. Maybe Mark could postulate
Easy for me to say from 2500 miles away. I am sure that Mark would help you getting it together. Good luck
Posted by: rjames May 26 2020, 10:16 AM
Hey, I also live in Shoreline. Curious where you're at. I'm across the street from the community center. Would love to see your car when things return to normal. I'm also a cyclist, so we have that in common, too.
Keep up the great work!
Posted by: mbseto May 26 2020, 01:44 PM
Nice work! Watching with interest...
Posted by: dereknlee May 26 2020, 05:58 PM
When I finally get around to installing my flares and need to repaint the car, I think I'm going to change to willow green over Conda green, though I like both.
Zach
Both good options! When I bought the car I did almost no research so it was just 'green'. After staring at these cars for a bit I am a big fan of the bright colors like signal orange and canary yellow. So I really lucked out to be able to turn it back to this bright factory color.
Do what Mark said at the end of the other thread. The bigger 2.0 liter throttle body will give you the appropriately sized induction core for a stock looking but modern EFI. My opinion is that it would perform well ( Not wasting the money already spent) and not detract from future value.
Not sure about the cams, but my question there would be “if I went with the “modern D-Jet” build described above, exactly what would I really be giving up using the current cam”. I guess some performance and some drivability. Maybe Mark could postulate
Easy for me to say from 2500 miles away. I am sure that Mark would help you getting it together. Good luck
Thanks for the advice. Not tearing the engine apart to change the cam would be a huge plus. I would like to use the stock fuel injection with only bolt on changes. Anything I chose will have a learning curve to it, and once I've climbed it and gotten comfortable with it I won't want to change. So I'd prefer to go through all that now with the factory system.
Hey, I also live in Shoreline. Curious where you're at. I'm across the street from the community center. Would love to see your car when things return to normal. I'm also a cyclist, so we have that in common, too.
Keep up the great work!
Hello! I just down the street from Shorewood HS. Would be great to meet up - will send you a PM.
-Derek
Posted by: flat4guy May 26 2020, 08:53 PM
Owning a Willow Green 914 as well I am enjoying this thread.
Posted by: djway May 26 2020, 10:28 PM
Car is looking good.
When I was looking into cams a while back for FI I learned two things
HEAT yada yada yada
VACUUM yada yada yada
something about the overlap in the carb cams does not sit well with the FI. I believe it was more so with D Jet than L Jet. The Web 73 was a much as anyone suggested for FI.
Posted by: dereknlee May 26 2020, 10:42 PM
Thanks guys. When I spoke with Webcam they said the same about the 73 grind being their go to.
Most of my evening's work was cleaning up hardware and painting suspension bits. But I did want to share my attempt to phosphate etch some hardware following the steps outlined http://www.southsandia.com/forum/website/phosphate_etching.html I began room temperature etchant, that did nothing. I don't have a hot plate but I do have an old coffee maker, so I dug that out and used the keep warm function to heat the etchant. That had a dramatic effect. Results were okay, need to keep experimenting with metal prep, time and temperature. I'm hoping thrift shops open soon so I can get a hot plate.
Here's a bolt in process.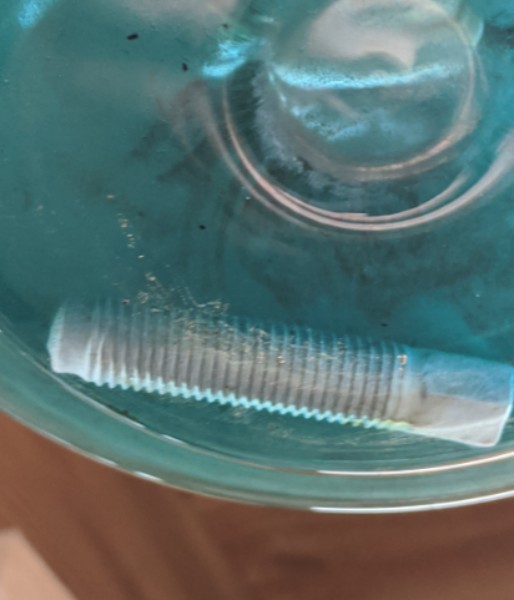
And here it is after rinsing and wiping down with oil, with a bare un-treated bolt on the right to show the color difference.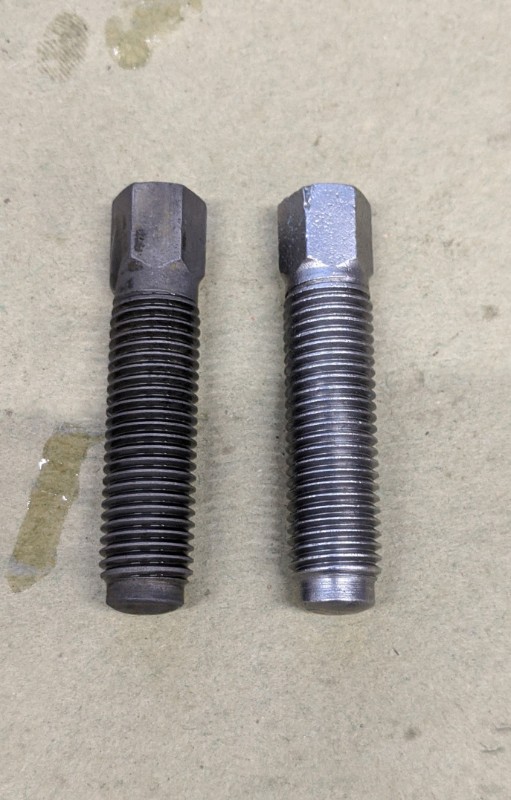
-Derek
Posted by: bbrock May 27 2020, 08:17 AM
Hi Derek, I am loving your thread! Thanks for posing the link to the black phosphate etching process. I've been using CopyCad's black chromate bath with good results. It produces a black iridescent finish and works easily at room temp. Neat to see the black phosphae process in practice. Keep up the great work!
Posted by: dereknlee Jun 1 2020, 10:47 PM
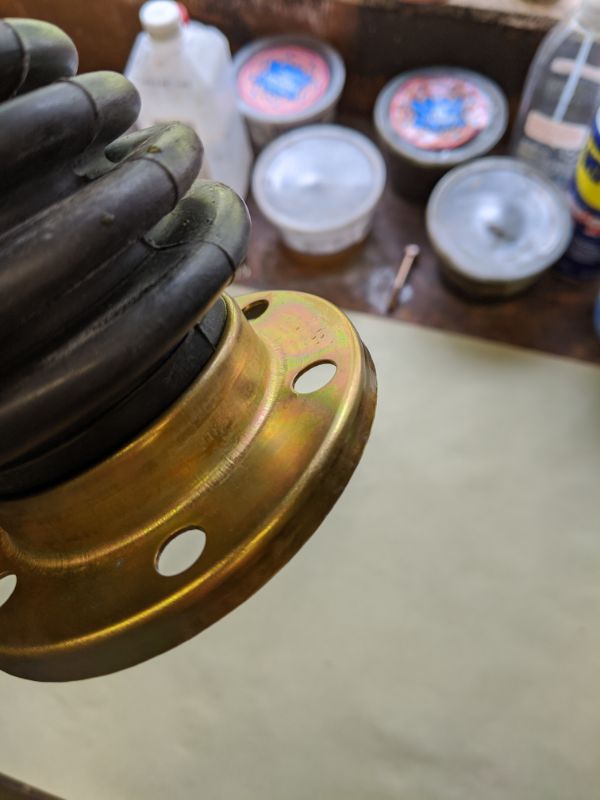
Bit of a frustrating weekend, so I needed an easy win - which tonight was re-assembling the rear shocks. 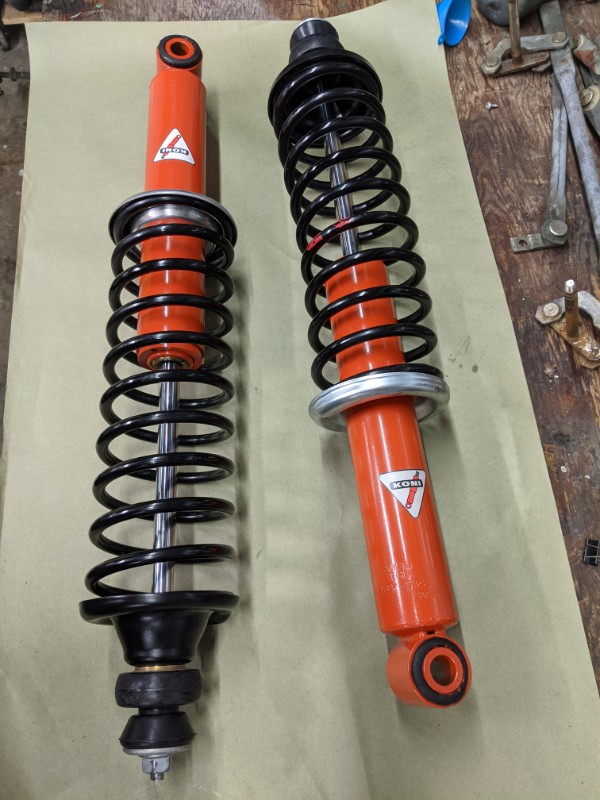
This weekend I built version 2.0 of my plating setup. Very happy with the zinc plating results. 
The frustration came with my attempts at a yellow chromate conversion coating. I've found a couple different DIY formulations that I used as a starting point. I experimented with changing the acidity and concentration of sodium dichromate. On the second day I finally had a mix that was adhering to the parts through a light rinse, color was a bit orange:
But the color quickly turned brown during drying. Today when I lightly buffed the parts to remove brown deposits there was almost no color left (seat adjuster piece is commercially done to show the color contrast).
I've got a couple more things I'll try this week, but if results don't change I think I'll just call it quits for now and get these parts professionally plated.
-Derek
Posted by: bbrock Jun 2 2020, 07:59 AM
I wish I had space to spread my setup out a little more like you have. Very nice! Even using the CopyCad yellow chromate solution (which I highly recommend), I found it a little finicky and was definitely the trickiest part of all the plating I did. A few things I gleaned from searches that helped me were:
- heat the chromate bath with an aquarium heater. It doesn't stick well when cold.
- if you use brightener in the zinc bath, try reducing it for yellow parts. I use the CopyCad brightener with I love but have a tendency to overuse because it can give a beautiful near chrome finish. It interferes with conversion coatings though.
- dip the part in 10% HCl acid just until it is about to fizz, then rinse, and go immediately to the chromate. Apparently the zinc needs to be fresh and soft for the chromate to stick well.
- dip the part just long enought to get a light straw color when it comes out of the bath and rinse. Too thick of a coating tended to just rub off later rather than bond to the part.
-After rinse, dry the part with compressed air on very low pressure (just a couple psi). It should darken and turn iridescent right away. Parts that didn't never dried right and I learned to just clean them in HCL and try again. Quick drying also eliminated problems with the coatings splitting as they dried i my cool shop temps.
Loving the progress!
Posted by: Chris H. Jun 2 2020, 09:21 AM
Looking great so far! Of all the great 914 colors...Willow Green is one I could stare at all day.
Posted by: dereknlee Jun 2 2020, 07:12 PM
@http://www.914world.com/bbs2/index.php?showuser=20845 Thank you for the advice! That gives me hope and a few more things to try. Much appreciated!
I had a terrarium heater attached to my main chromate mix thinking that a little warmth might help - but I never measured the temperature. That heater doesn't draw much power, so it took a long time to cause the container to feel warm. I noticed that as the day went on adhesion got better and better, but I was changing too many other variables to attribute it to any one thing - maybe the mix was finally getting warm enough to work.
Do you find that the process is very sensitive to residue or cleanliness of the part? I picked up that it was important for the parts going into chromate to pass a water break test. But it seemed no matter what solvent or detergent/water /rinse I could not get the water to sheet on the freshly plated parts - it always beaded up. Maybe the light etch you recommend will help (whether or not water break is necessary).
I might have to break down and buy some of the Casewell supplies - they do seem highly regarded. I was looking at that Sunday night but saw shipments are on a two week delay. I would really like to get a homebrew mix to work - videos on youtube lead me to believe that it is possible and can produce good results- but I wish there was a greater body of knowledge available on the methods.
-Derek
Posted by: dereknlee Jun 2 2020, 07:12 PM
Looking great so far! Of all the great 914 colors...Willow Green is one I could stare at all day.
Me too.
Posted by: bbrock Jun 2 2020, 09:52 PM
@http://www.914world.com/bbs2/index.php?showuser=20845 Thank you for the advice! That gives me hope and a few more things to try. Much appreciated!
I had a terrarium heater attached to my main chromate mix thinking that a little warmth might help - but I never measured the temperature. That heater doesn't draw much power, so it took a long time to cause the container to feel warm. I noticed that as the day went on adhesion got better and better, but I was changing too many other variables to attribute it to any one thing - maybe the mix was finally getting warm enough to work.
Do you find that the process is very sensitive to residue or cleanliness of the part? I picked up that it was important for the parts going into chromate to pass a water break test. But it seemed no matter what solvent or detergent/water /rinse I could not get the water to sheet on the freshly plated parts - it always beaded up. Maybe the light etch you recommend will help (whether or not water break is necessary).
I might have to break down and buy some of the Casewell supplies - they do seem highly regarded. I was looking at that Sunday night but saw shipments are on a two week delay. I would really like to get a homebrew mix to work - videos on youtube lead me to believe that it is possible and can produce good results- but I wish there was a greater body of knowledge available on the methods.
-Derek
I'm going to tag @http://www.914world.com/bbs2/index.php?showuser=15382 on this because he's been DIY plating too and gotten more consistently good results than me. He's also done both epsom salt and Caswell zinc baths. Also, don't get the idea I have this all figured out. I'm still learning and have failures, but did get to where I was mostly succeeding with the yellow chromate.
On the chromate temp, I shot for around 90F. I think I read that on the Caswell forum. My understanding was that the water break test was for the zinc plating. I know if the parts weren't perfectly clean and grease free, the zinc plating would fail. After the zinc I would immediately rinse the part in distilled water, then a brief dip in 5% HCl, then into a separate bucket of distilled, then finally to the chromate. My thinkining was if the part was clean enough to get a good zinc plate, it should still be clean for the chromate.
I'm with you on wanting the home brew but in the end, I couldn't resist the simplicity of just diluting the Caswell products per instructions. There is still a learning curve and art to it. Right now I have a contaminated zinc bath I think from plating cast iron. I need to figure out the best way to filter it if possible.
Posted by: doug_b_928 Jun 3 2020, 05:02 PM
As Brent said I've used both epsom salt/vinegar and Caswell baths. The epsom salt/vinegar bath takes the yellow chromate very well but it's a bit more work and the result is not nearly as bright/shiny as the Caswell. The former looks good until you see the latter (which comes out like jewellery). I don't follow all of rules (I don't heat and I just clean with a degreaser by hand after blasting), but have had mostly good results so far (with the exception of some of the stubborn seatbelt parts--I think the problem may have been that the parts were too cold). I started plating with the epsom salt/vinegar bath and then moved up to the Caswell system. I'm keeping the epsom salt/vinegar bath for any parts that I'm concerned might contaminate the Caswell bath. Also, if I need to plate anything that's too big for the container I use for my Caswell bath I can always make a large batch of the epsom salt. In short, it's good to have/use both. But I do recommend getting the Caswell materials. It's money well spent IMHO.
Posted by: dereknlee Jun 3 2020, 10:43 PM
I may have to give caswell a try. I am happy with my epsom salt/vinegar/zinc sulfate results, but if I had a better setup I bet my standards would be raised.
This evening I tried heating a chromate mix that had previously not worked at all for me (ran off parts without any color change). I heated it to 90 degrees and what do you know - it took to the parts! It worked so much better that I could reduce the dunk time to 10-20 seconds and the color was improved. Still not vibrant and no iridescence, but a step in the right direction.
I then made up a new small chromate batch using distilled water (had been using tap until that point). I iterated about 10 times, gradually working up the acidity and sodium dichromate levels. The compressed air suggestion really helped the cycle time. Can't say I found the right ratio yet, but I learned some things and have some ideas for things to try. Keeping track of everything in a google doc so I can re-trace my steps when (if) I do find something that works.
Thanks for the suggestions - helped a bunch!
-Derek
Posted by: dereknlee Jun 4 2020, 10:37 PM
Continued with the chromate bath development this evening. Acidity seems to be the key. Finally getting better color with a hint of iridescence. Still a bit too brown though. I'm going to keep increasing acidity and see what changes.
Bottom results are some parts from last Sunday that left me super disappointed, numbers should be taken with a grain of salt. The precision improves in the more recent results, top two being from this evening. 
-Derek
Posted by: Spoke Jun 4 2020, 10:47 PM
Car looks great. Nice chemistry set too.
Posted by: dereknlee Jun 7 2020, 08:56 PM
Plating update, and some actual car progress later on below.
I have settled on a chromate formula that I like, the measurement precision isn't super tight - but it doesn't seem to matter that much if concentrations are up or down from these values by a bit (like 5 ml/L on the acid, 50+ g/L for the sodium):
Sodium Dichromate Dihydrate - 210 g/L
Hydrochloric (muriatic) Acid - 24 ml/L
Temperature - 70F
Exposure - 4-6 seconds
I plated a batch of parts on Saturday afternoon, let them bake for 3-4 hours. Had a few minor issues with adhesion (too much current I think). And also had a lot of trouble getting the plating in to tight corners (creases in spring clips, corner of bearing plates).
Sunday morning I ran the dichromate treatment. Backing off on the temperature from 90F to 70F helped keep the color from developing to as orange/brown (like the front sway bar bracket backing plates). My takeaway from today is that I need to work on surface finish and brightness of the basic zinc plate. The parts with the worst plate quality (bearing retainers and sway bar links) had the worst color after chromate. I dipped some new CV joint boots that were commercially done, bright zinc to begin with, and they turned out the best of any parts I did - with minimal prep too. So I plan to get some brightener and dial in my process for larger parts. Still far from perfect, if I see better results with brightener/practice I may strip some down and try again. But for now: good enough for the girls I go out with. These parts of course would have turned out better had I taken them to the pros, but being able to plate parts in small batches as the need arises - or turn bright/blue bolts yellow has me pretty stoked.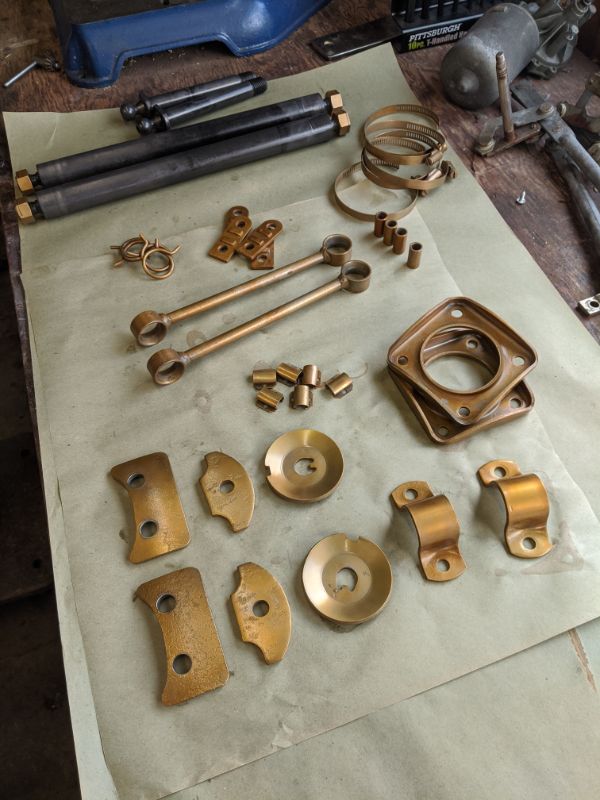
On to what feels more like actual car progress:
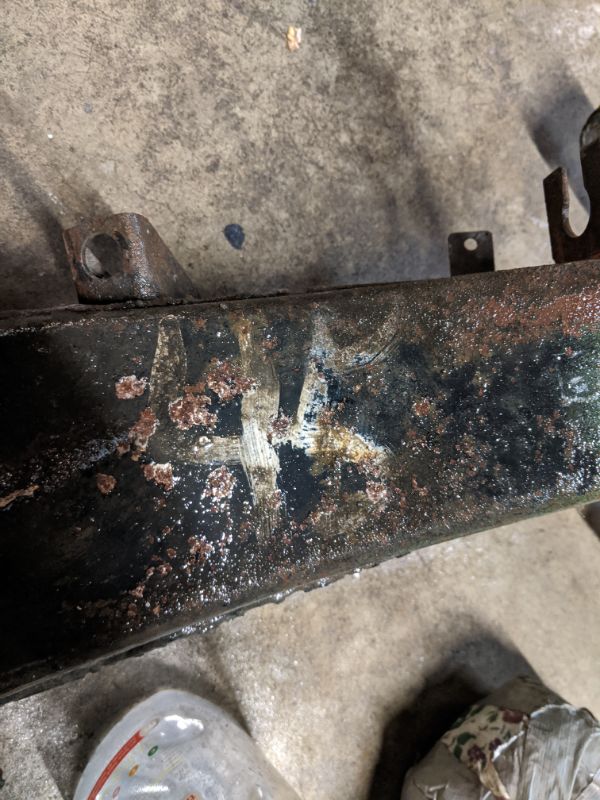
Thanks to @http://www.914world.com/bbs2/index.php?showuser=10825 I have a replacement driverside strut housing. As to why I needed one, long story short is some PO decided to take an 15/32 drill to the pinch bolt cross hole to make a wedge bolt ball joint "work". And the ball joint bore was ovalized. Contemplated a oversize helicoil, but thanks to Mark - that wasn't necessary (and wouldn't have fixed the wallerd bore anyway). However, the brake hose bracket didn't match what was on my struts and having the driverside not match the passenger side just won't do, so:
As received:
Trashed housing meet Mr. Grinder: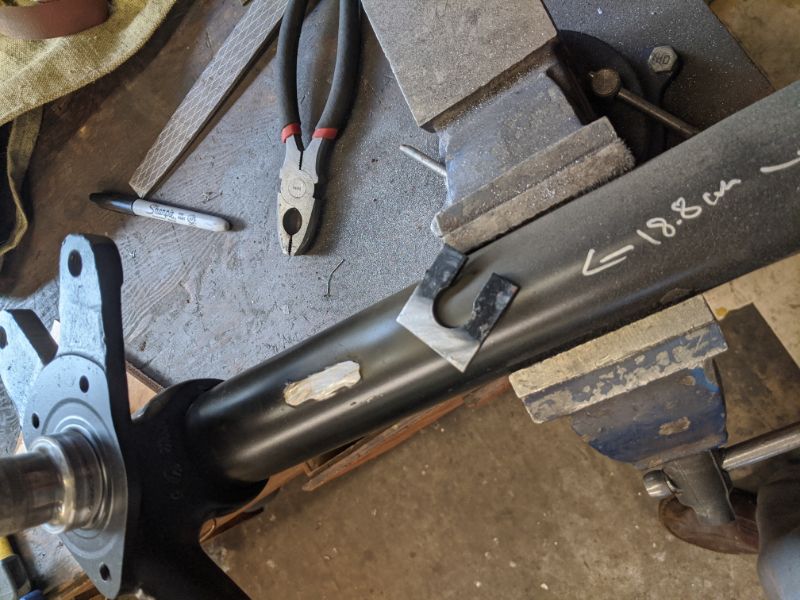
Weld into place (adjusting for skewed cut):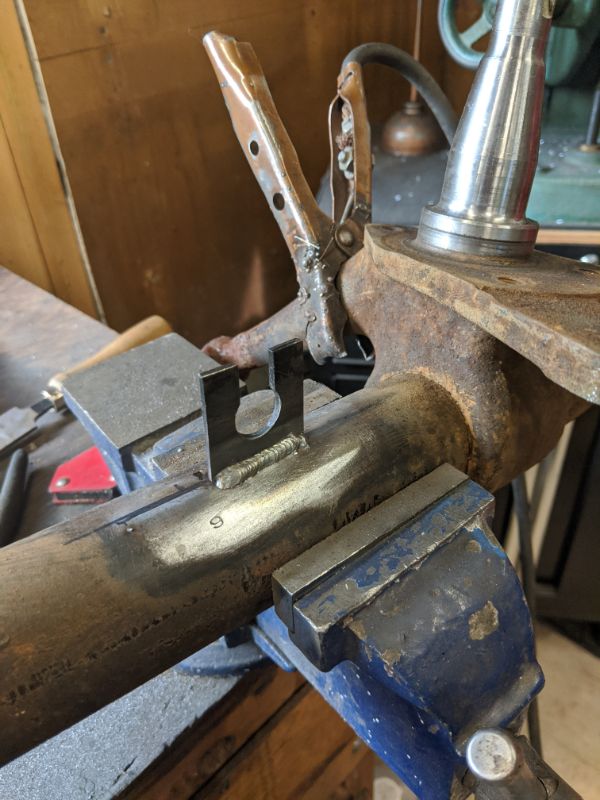
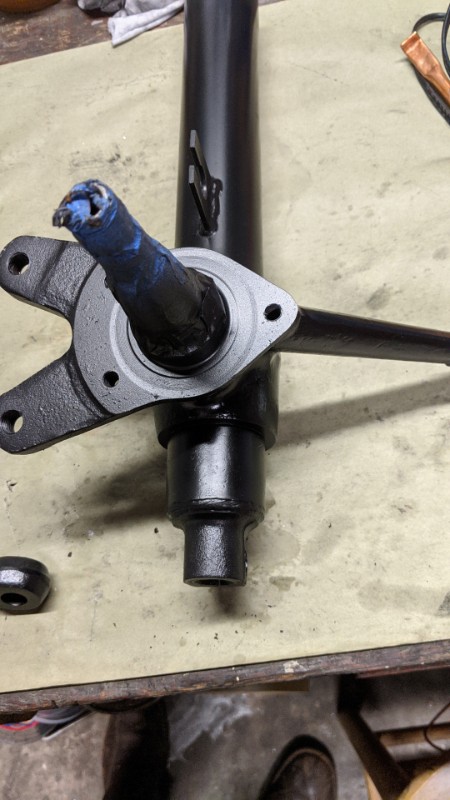
So now it is ready for bead blast and paint to match the other side. Thanks again Mark!
Also got the cleaned up trailing arm pivots installed with new 914rubber bushings. That went a lot better than expected.
-Derek
Posted by: ben*james Jun 7 2020, 09:17 PM
Derek -
Great thread. Nice to see all the work and the solid outcomes. Keep it up. Inspirational!
Posted by: bbrock Jun 7 2020, 09:46 PM
Nice work overall and great progress on the plating! If you haven't seen this, it's worth watching this guy's vid on epsom salt plating method. Even for those of you not interested in plating, there is a priceless bit about 12:55 or so in. Anyway, he talks about polishing after the zinc to shine the parts up before chromate. The Caswell bath with brightener comes out almost like chrome so no need to polish. Of course, you pay for it.
And on the baking, this is worth a read but the important stuff is on page 20: http://www.boltcouncil.org/files/HydrogenEmbrittlementInSteelFasteners-Brahimi.pdf Upshot is that you only need to worry about embrittlement or baking for hardware higher than grade 10.
I was never able to figure out how to get plating into some of those interior corners. Rotating and repositioning the piece during plating helped, but some pieces are just stubborn. I think that's where the real art comes in.
Keep up the great work!
https://www.youtube.com/watch?v=UF-lhfpwlMs
Posted by: dereknlee Jun 7 2020, 10:09 PM
Thanks Ben! Your car is 
Brent,
Thanks for the link re not needing to baking mild steel parts. Good to know.
That was one of the videos I watched in the lead up to this. I found the youtube videos both inspiring and frustrating - they get great results but I can't figure out how. They either don't say what they are using for the chromate mix, or the formulas they throw out didn't work for me. One of the videos that comes up as a top result claims to get good results with 1/6th the acid content that I'm using (but they said they add acid when it stops working - so who really knows what they have). I adopted the rinsing technique from the video you linked to, but after doing a bunch of parts I was diluting my mix so much as to have a non-trivial effect on concentration, so now I have a separate bucket for rinsing.
Caswell brightener is on order.
-Derek
Posted by: PanelBilly Jun 7 2020, 10:11 PM
Everything looks so good. Don't worry if the colors aren't perfect. I wish this home bound event would end soon, so I could help
Posted by: dereknlee Jun 7 2020, 10:46 PM
Everything looks so good. Don't worry if the colors aren't perfect. I wish this home bound event would end soon, so I could help
Thanks Billy! I'd love to host a meeting of the PNW braintrust - bbq season will start July 5 and I am happy to provide all the Ranier and Fremont beers necessary to fuel thoughtful discussion!
Posted by: dereknlee Jun 9 2020, 09:59 PM
Installed new control arm bushings. The last one was the most difficult. I smudged the paint trying to remove after it went wonky. Quick shot of paint and then this evening it came around to my way of thinking.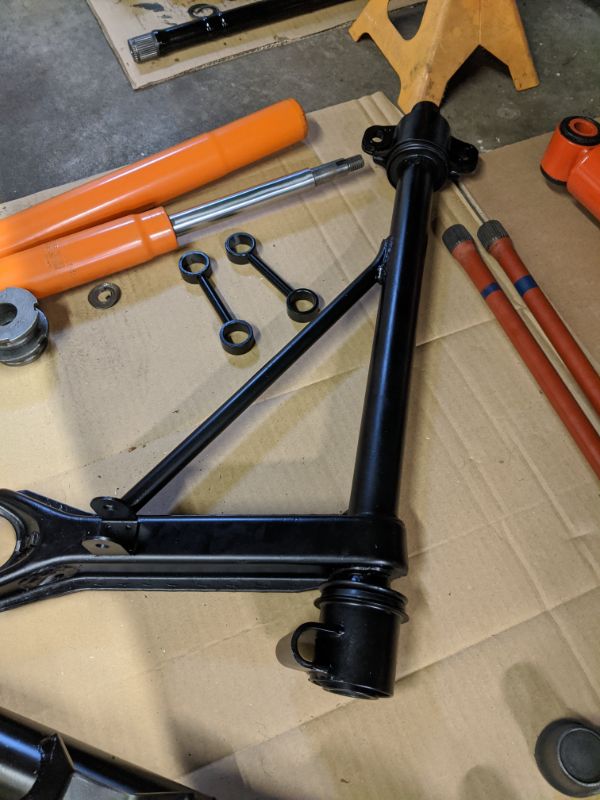
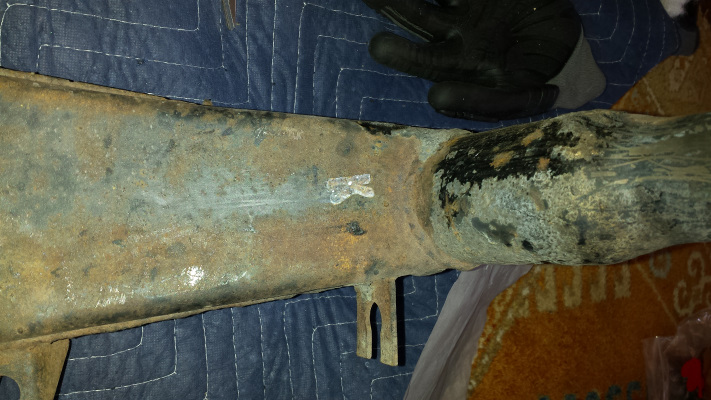
The old bushings were pretty shot, not that re-using was in the cards. But this explains the torsion bar wear spots.
Spent some time with the blast cabinet. Dozen or so parts ready for paint or plating. Strut housing cleaned up real nice and got a couple coats of paint on it, noticed a run right as I thought I was applying the final coat - every dang time!
Meanwhile, it's been like Christmas around here with all the packages arriving. 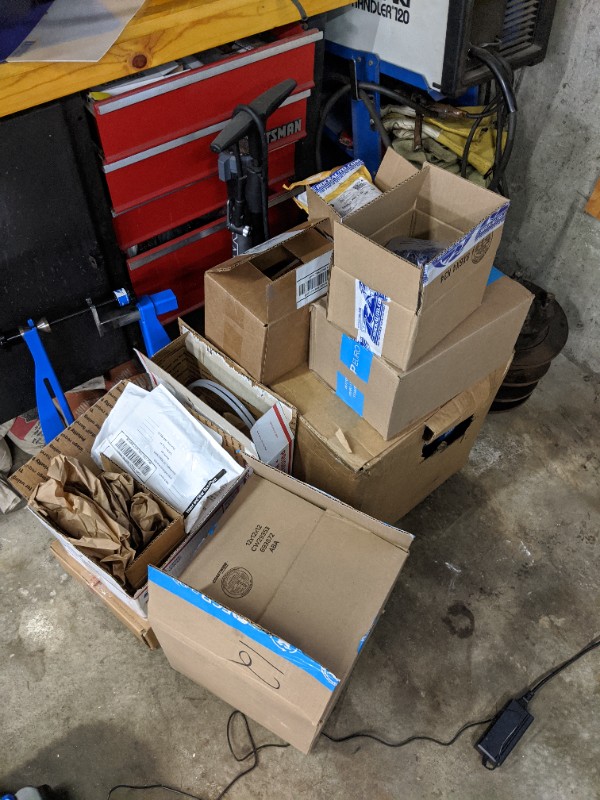
-Derek
Posted by: kroelofsen Jun 10 2020, 12:41 AM
Nice work, did it myself a few weeks ago. Now ready to get installed.
Posted by: dereknlee Jun 10 2020, 10:16 PM
Got the rear bearings installed, and then spent some time trying to replicate the white paint numbers from photographs taken before they were sand blasted. Had to call in my wife as my penmanship terrible and apparently even worse holding a paint brush. One of the more silly aspects of this project, but fun: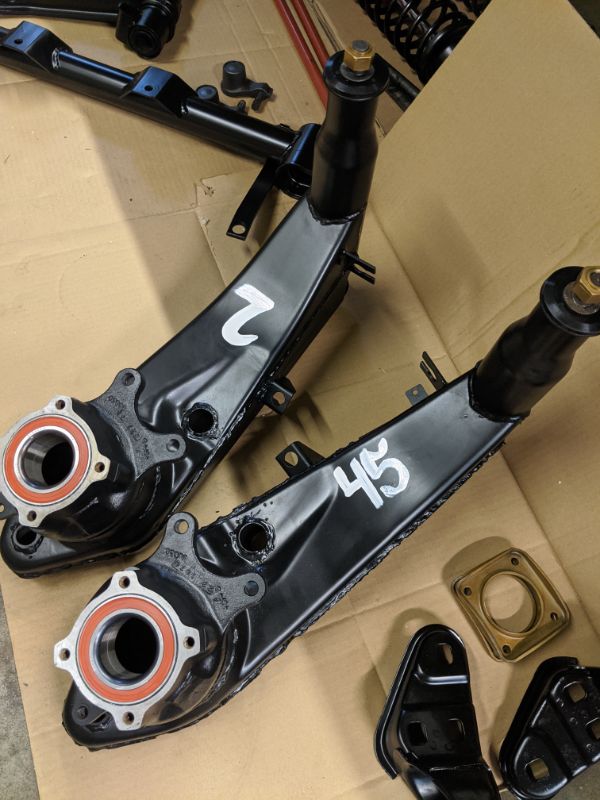
I'd say she did a good job: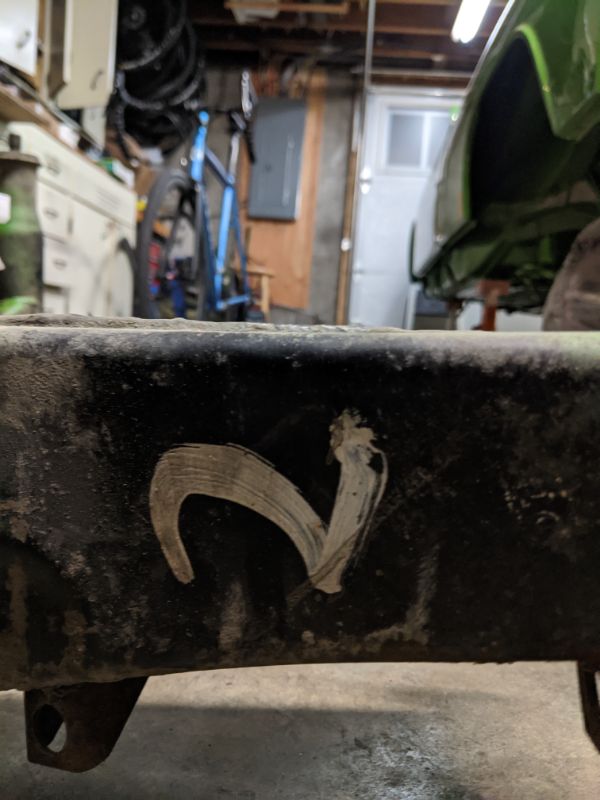
I wonder what the factory worker who slapped on these numbers would think if they saw how much effort went in to trying to duplicate what they did. 
-Derek
Posted by: bbrock Jun 11 2020, 08:24 AM
I wonder what the factory worker who slapped on these numbers would think if they saw how much effort went in to trying to duplicate what they did.
-Derek
Love it! From a fellow

Posted by: dereknlee Jun 13 2020, 10:45 PM
Looks good Brent! I assume these were some sort of QA stamp or other assembly process indicator?
Steering rack feels pretty good, but the tie rod ends were tired. Made up a a wrench to remove the big threaded washers to get to this point.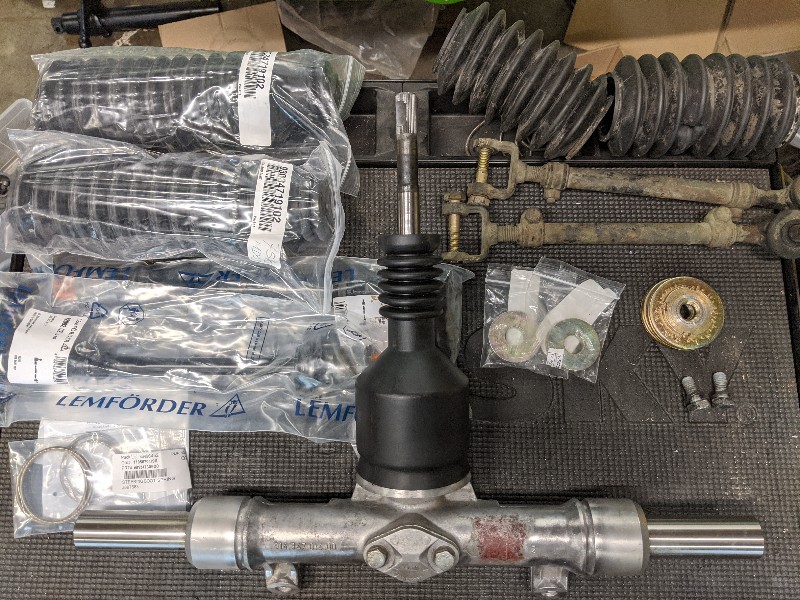
And then learned I need to make another wrench to install the tie rods. Great. Got it done though.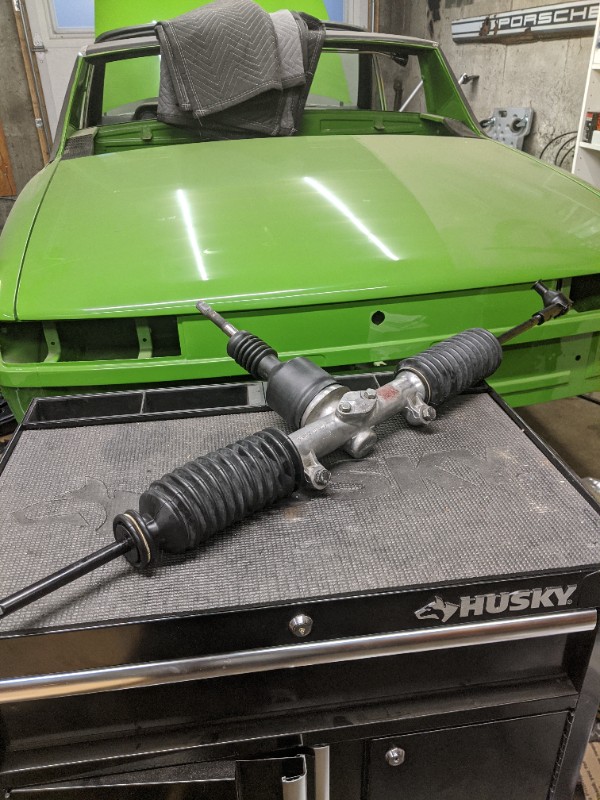
Turbo tie rod ends were a concession on originality, but I figured I might as well - cost differential was small and it's a bolt on improvement.
Not pictured was more adventures in plating. The front sway bar bushings mounts are proving to be a real bear because they are pitted and have a bunch of tight corners. Ended up taking a pencil anode and moving it around by hand in 1/2" of electrolyte bath to 'paint' the corners. Worked better than anything else I tried, but the results are still not that great to look at.
-Derek
Posted by: JamesM Jun 14 2020, 02:34 AM
Love it! From a fellow
Here is one for you then...
Posted by: bbrock Jun 14 2020, 11:16 AM
Love it! From a fellow
Here is one for you then...
Love it! I'm a little jealous of the personal touch yours got beyond the usual "K" stamps.
Posted by: dereknlee Jun 14 2020, 08:05 PM
Whoever wielded the K stamp worked on a lot of cars! It would be interesting to have the meaning of these inscrutable marks explained.
Not a lot of progress to report today. Sway bar bushing mounts took way too long to finish, sway bar arms aren't going to be any easier. While I am questioning a bit why I didn't just pay to have all this done, loving how easy it is to turn bright zinc gold.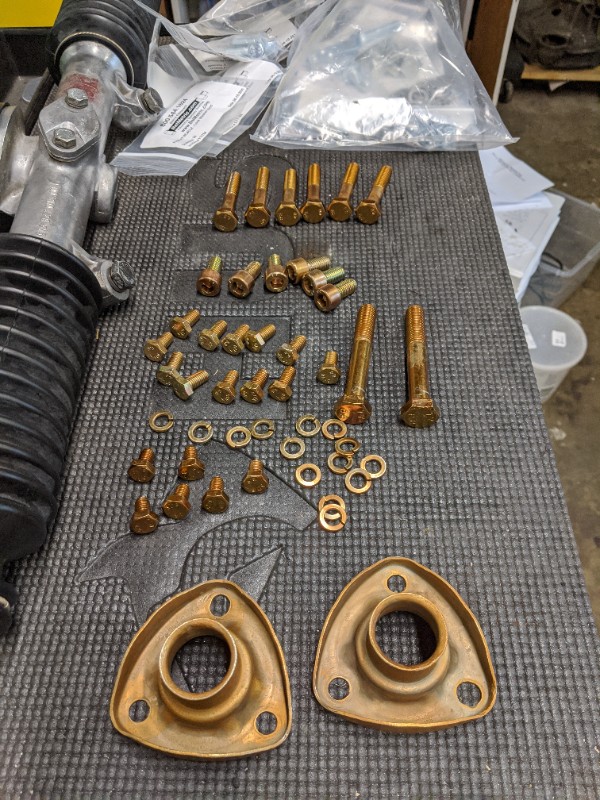
-Derek
Posted by: flat4guy Jun 14 2020, 08:53 PM
Love reading your thread - makes me feel lazy with my car. Great job so far.
Posted by: dereknlee Jun 14 2020, 10:25 PM
Love reading your thread - makes me feel lazy with my car. Great job so far.
Glad you're enjoying the updates, I'm having fun with it. Don't mistake the last months progress for any sort of industriousness on my part. The car hasn't driven since 2008, so time averaged I have been super lazy on this project.
-Derek
Posted by: dereknlee Feb 25 2024, 09:23 PM
Been a busy few years, but sadly not on the 914. It's once again covered in dust. This fall I picked up a Honda C70 passport that was in pretty rough shape and got it back running and looking good again.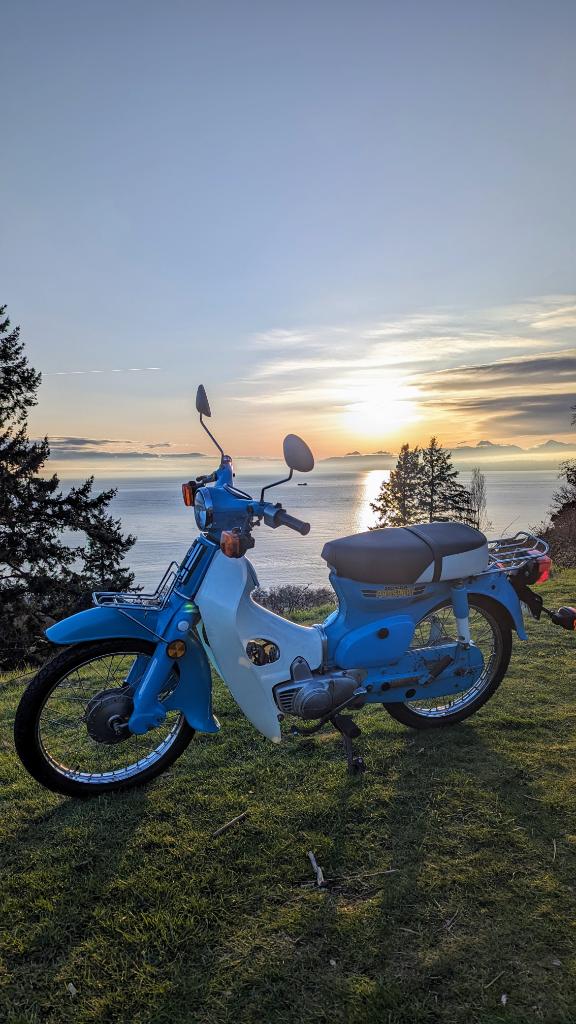
I had so much fun working evenings and weekends on that bike. It was a good mix of mechanical tasks and cosmetic work. But I knew that I'd enjoy working on the 914 just as much. It's easier for me to lose momentum on the 914 because of the scale, and also because I care so much more about getting it just right. But there is only one way to eat an elephant, so I'm back at it.
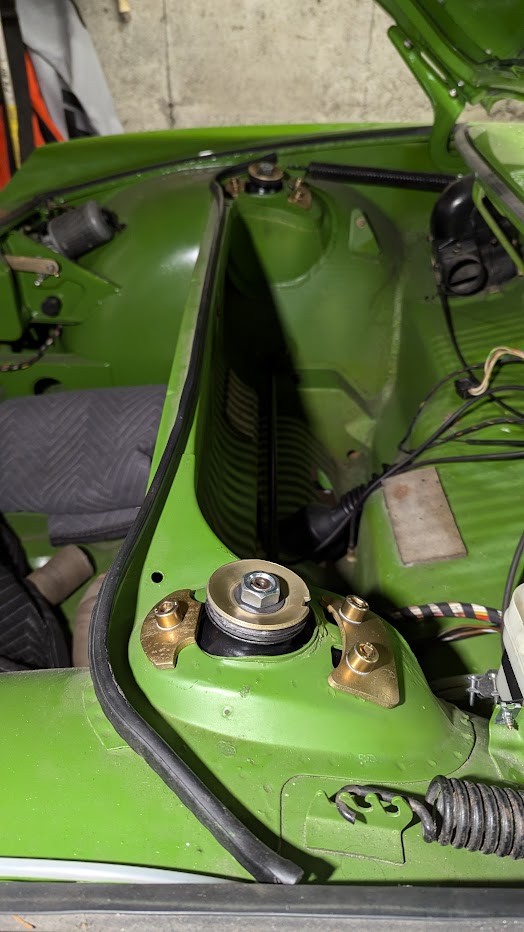
Its strange reading some of the earlier posts or digging through the boxes of parts, because I have almost no memory of some of it. But all this time what has been front of mind are two leftover washers from the wiper mechanism install. They aren't called out in the PET, but I remember figuring out a few years back where they went and making a mental note to install them. Fortunately, the airbox wasn't fully installed and the posts can be maneuvered out of the hood without removing the dash bolt. So today, the washers are in and my brain can rest easy.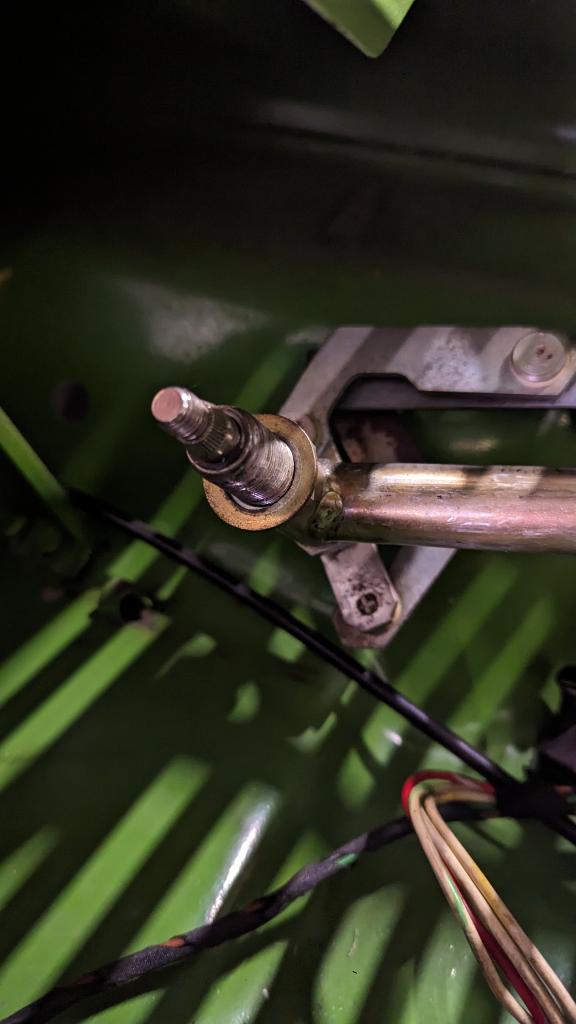
I also rekeyed the ignition, front and rear hood keys using a set of wafers that must have arrived from keys4classics about the time I stopped working on the project. I have no record of the original key code for my car, and know it was re-keyed at some point. So I bought a set of oem keys on ebay, then ordered wafers to fit that code - so that all the locks match a known baseline. I vaguely remembered that there was something wrong with my ignition lock mechanism, and found that I had sourced a donor (another "problem" as this project stretches on - I don't know what parts I already have lying around). So now, after 3 years, the ignition cylinder is back in the car. Also got the rear trunk mechanism re-assembled and installed.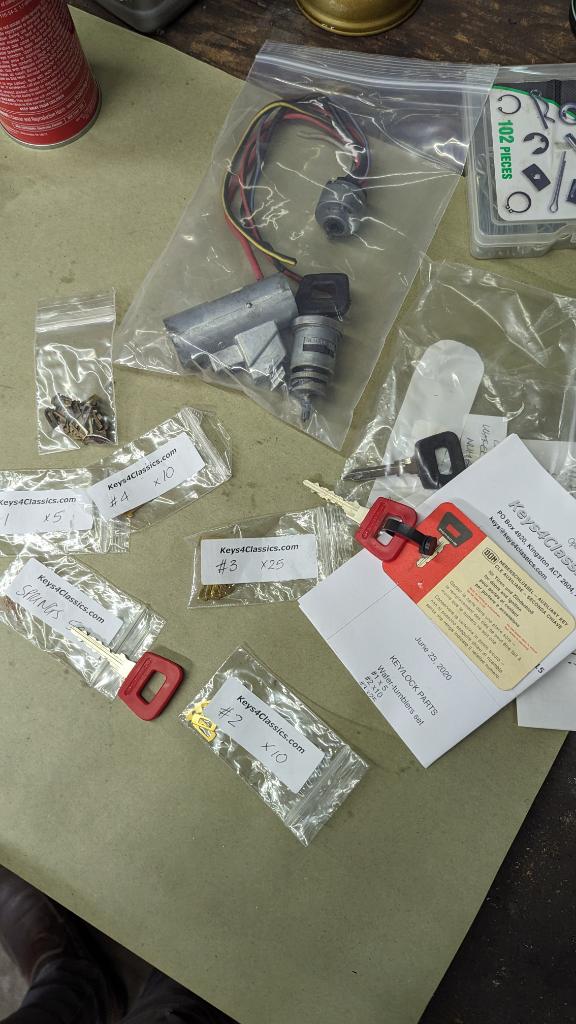
With the rekeyed release handle, I installed a new cable for the front hood release. On my first attempt a few years ago, with 914rubber supplied wire and housing, I had introduced some bends in the line that I then blamed for the very high pull force required to release the latch. So this time I was very careful, and used a new oem cable assembly. But even with a cable that I am sure has no deformation, it still requires very high cable force to release.
A final item on my mind has been a mistake I made removing a stuck bearing from one of the wheel hubs. Circumstances are hazy, but I know i had to cut it off, and clumsily ended up cutting into the machined surface. I blended it with a file and at the time thought it wasn't too bad - and looking at it today it isn't as deep as I recall. But still, wondering if it is worth finding a replacement - or would it be fine running as is? 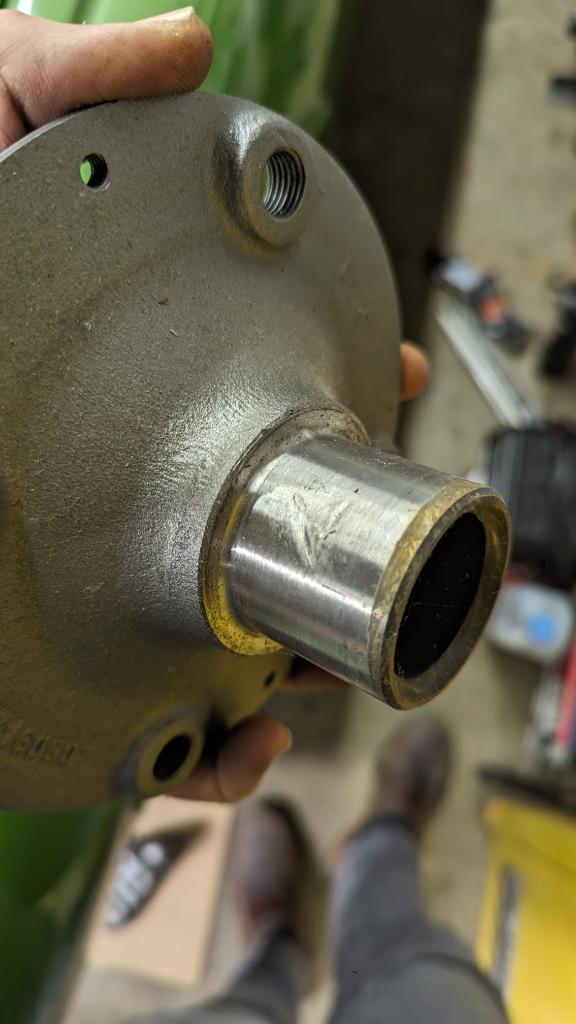
-Derek
Posted by: dereknlee Nov 27 2024, 10:41 PM
Don't recall what specifically stalled out progress earlier this year, but I am back working on the front suspension and having fun. Steering track, A arms, stabilizers and new (to my car) sway bar are all in. Amazing how much difference this makes in the number of parts laying about.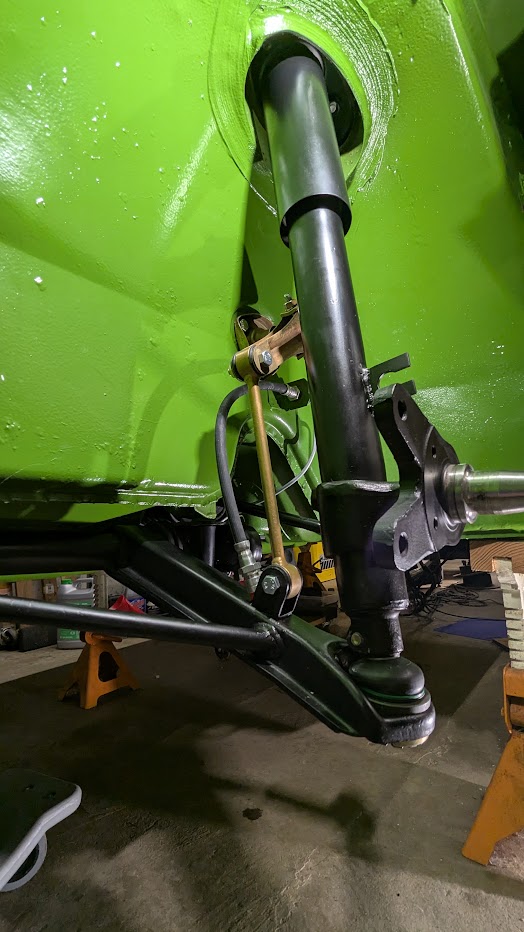
If progress continues the car will be ready to sit on tires again before long (by my standards at least). The old steel wheels were rusty and had been repainted. So I decided to have them sand blasted and I'm in the process of re-painting them. I will be taking them back to the factory - all black except for a silver ring around on the front side. The spare was left alone (pictured) so I am leaving it as is (obv, new rubber when the car is drivable). Looks like the car came with 155R15 Michelin ZX tires. Considering Michelin XZX 165R15 and Vredestein Sprint Classic 155R15. Will probably go with Michelin for originality, but wish they made a modern classic in 155 (other than the X). 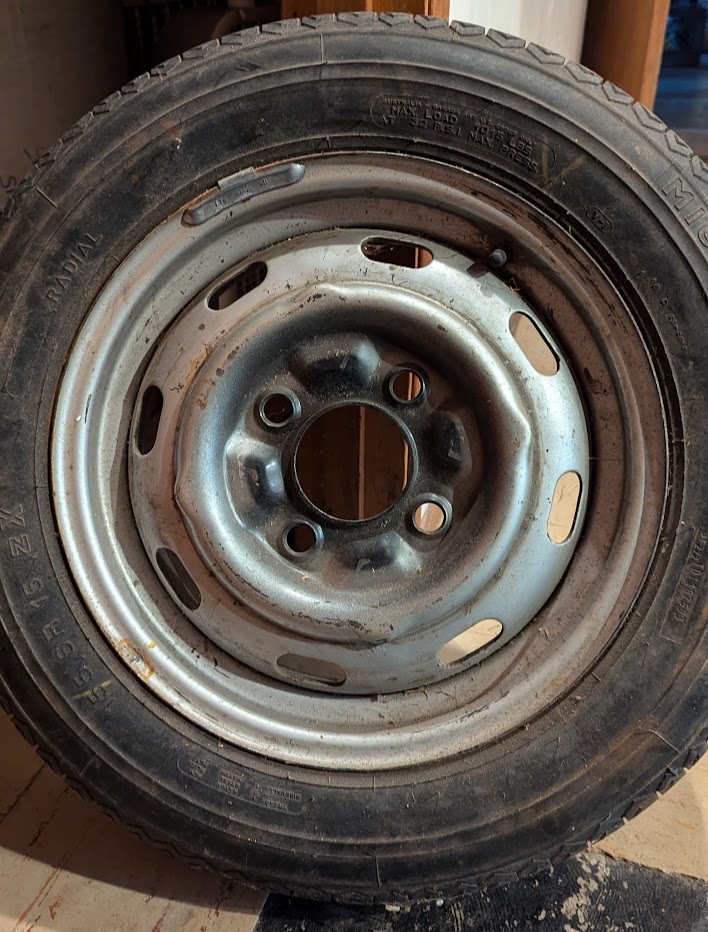
-Derek
Posted by: dereknlee Dec 8 2024, 09:49 PM
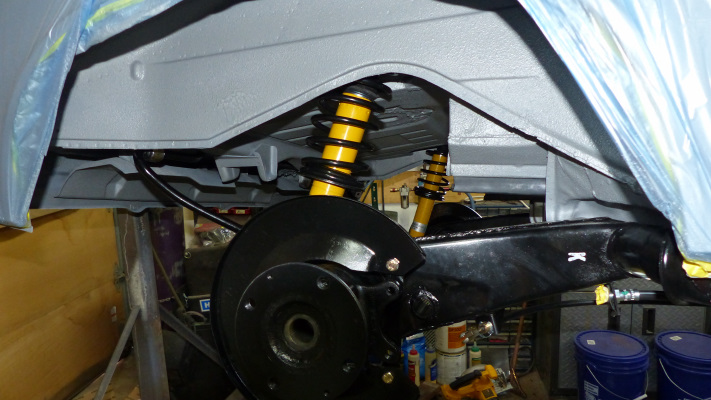
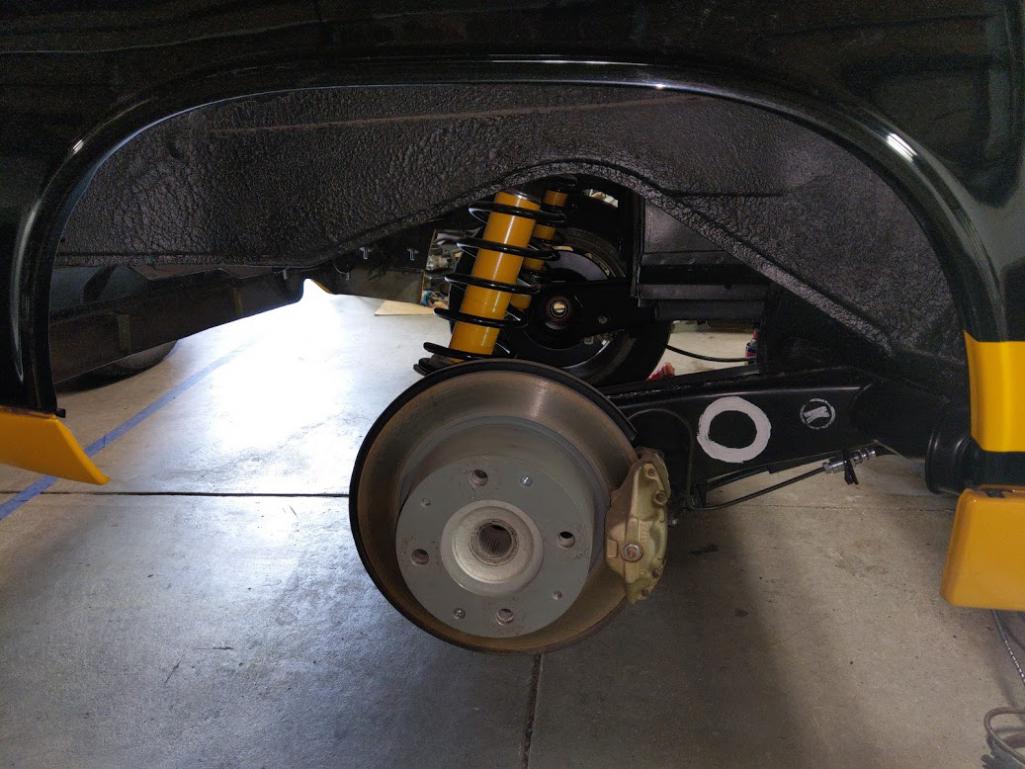
Front suspension and brakes are done.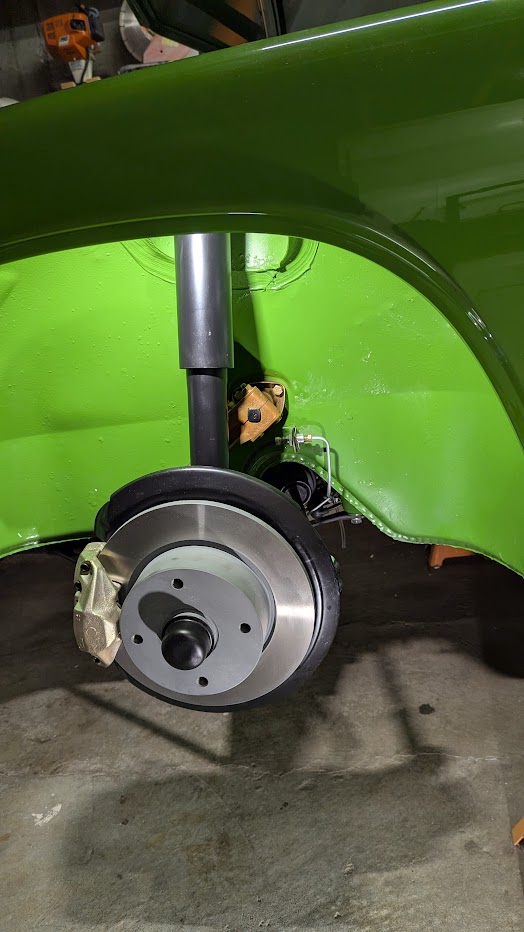
On to the rear. I have been disappointed with the brake line set I purchased from Stoddard a few years back.
-The line between the MC and tunnel was unusable (too short).
-The line between the tunnel elbow and brake pressure reducer in the rear is to long.
-The long passenger-side line in the rear has too much length in the final 90 bend going into the hose bracket so that I can't position the hose anywhere near where it needs to be to install the clip.
-The kit did not have the brake lines needed to connect to the front brakes from the hoses on the struts (just had the lines for use with banjo fittings).
Hoping to salvage some of the lines after retrieving my bubble flare kit in a week or so.
Anyway, wheels are partway done - black paint is curing. Got some Michelin XZX 165s in a black Friday sale. Will post process photos when finished.
On a compete tangent, the leather wrap on my steering wheel is cracked and most of the thread is gone. 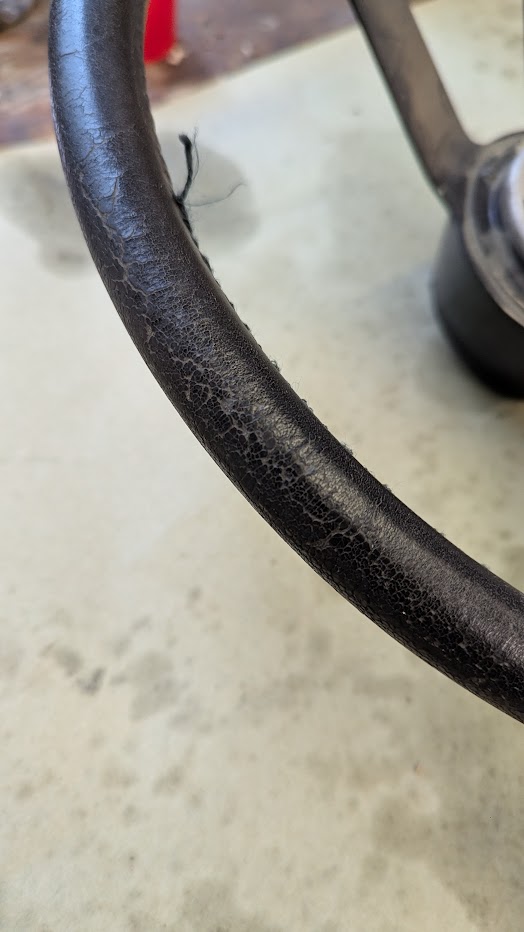
I'd planned on one day sending it out to a professional for a recover when the car was nearing a drivable state. But I watched a few videos on leather restoration and figure there is nothing to lose. So I've ordered the paint and finisher, and started sanding the cracked areas. Nothing to look at yet, but will share the outcome - good or bad.
Posted by: dereknlee Jan 30 2025, 11:52 PM
So since December I have made progress on a few fronts:
Wheels are done painting and ready to have tires mounted.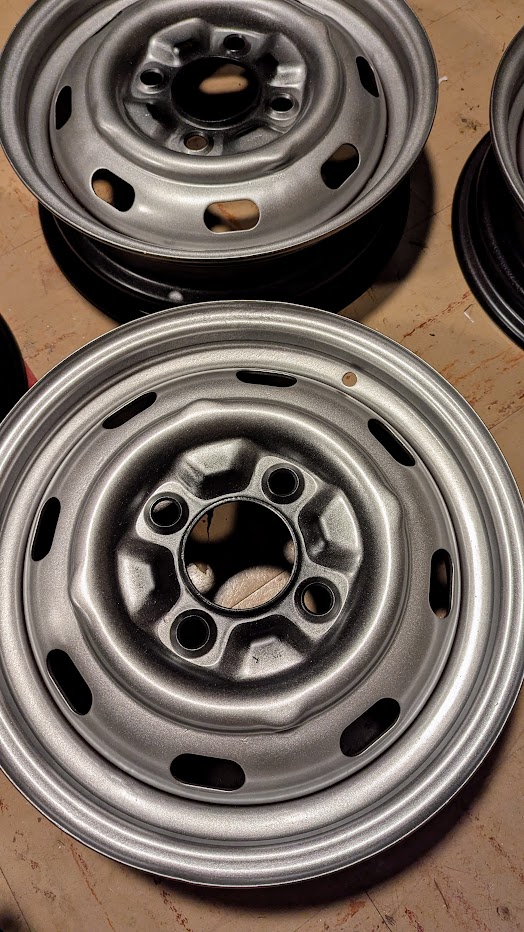
The 'cnc' brake line kit continued to disappoint, but I got all the lines in the rear installed. Only one of the five lines didn't need to be cut and re-flared to fit. My brake line flare kit was an estate sale find and initially I couldn't get it to make a flare, it would just push the line down in the die. To solve that problem I:
-chased the die threads with a tap.
-annealed the end of each line with a propane torch.
-used a liberal amount of anti-seize.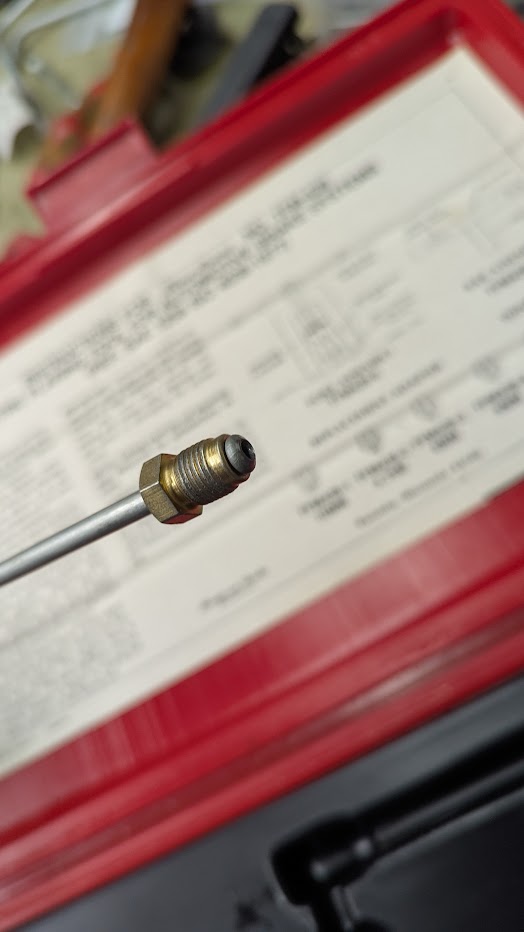
Once brake lines were fit, I installed the suspension. I found the hubs pressed in very easily using my bicycle headset press. 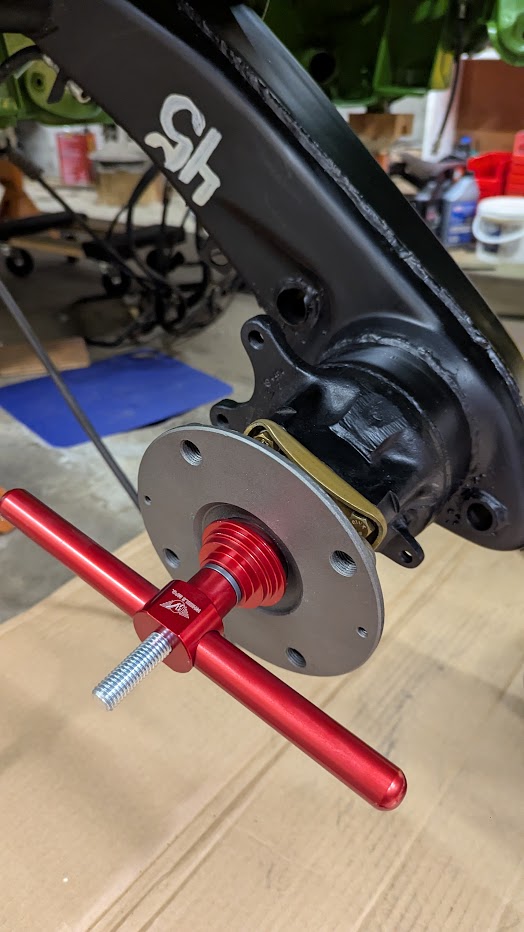
Obvious in retrospect, but I think the best order of operations for fitting the sway arm links is to press them onto the trailing bolt first (off the car, in a press) then install the bolt and press the bushing onto the sway bar ball with a C-clamp.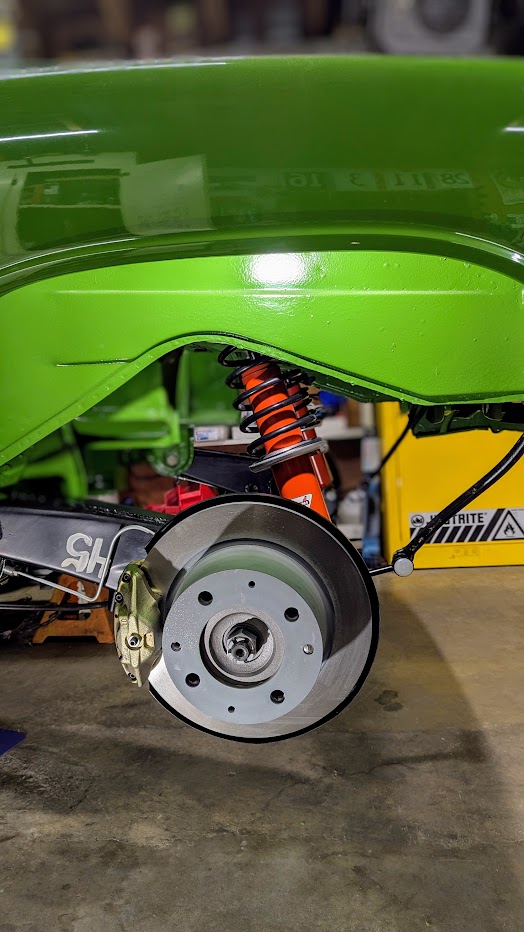
I still need to get some parking brake boots and clips.
Steering wheel refurb is coming along nicely. I have sanded and repainted and I am very impressed with how much better the leather looks. Waiting on the proper thread to arrive so I can re-do the stitching. That will be tedious. In the mean time, I might start cleaning up aft wiring harness and getting it re-routed through the chassis - would be nice to get it off the floor.
-Derek
Posted by: jd74914 Jan 31 2025, 08:52 AM
Clever use of a headset press!
Posted by: Cairo94507 Jan 31 2025, 08:55 AM
Excellent work Derek.
Posted by: dereknlee Feb 2 2025, 11:36 PM
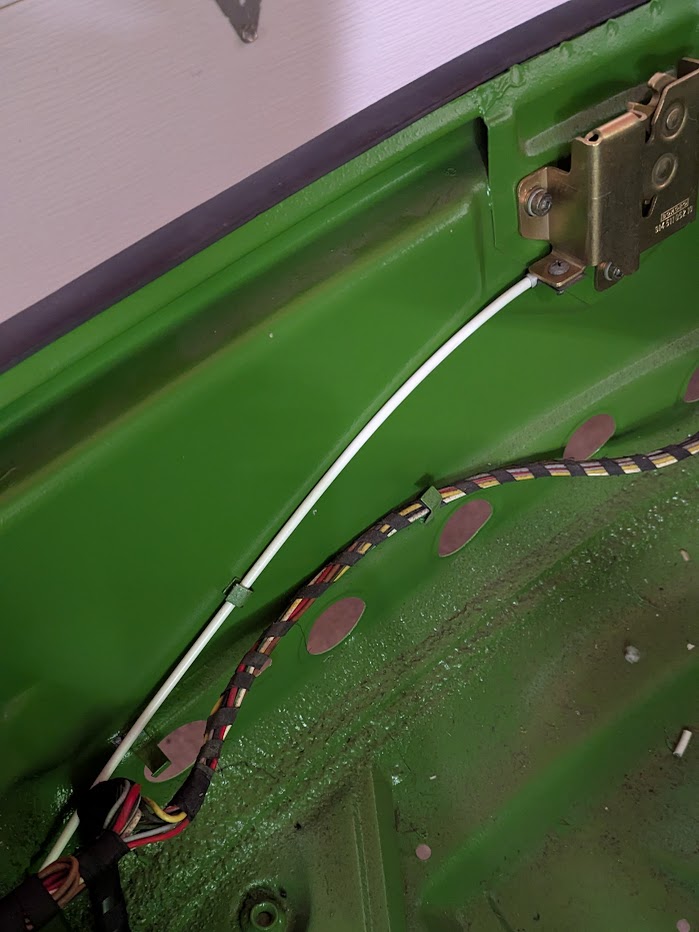
Rear wire bundle is re-taped and routed back through the engine bay and trunk (though clamps are loose so I can reposition if needed). I'm not confident that my tape work at the top of the snorkel matches how it was done at the factory. I didn't find many pictures on here of what it is supposed to look like, but it matches the tape that I removed.
Before / After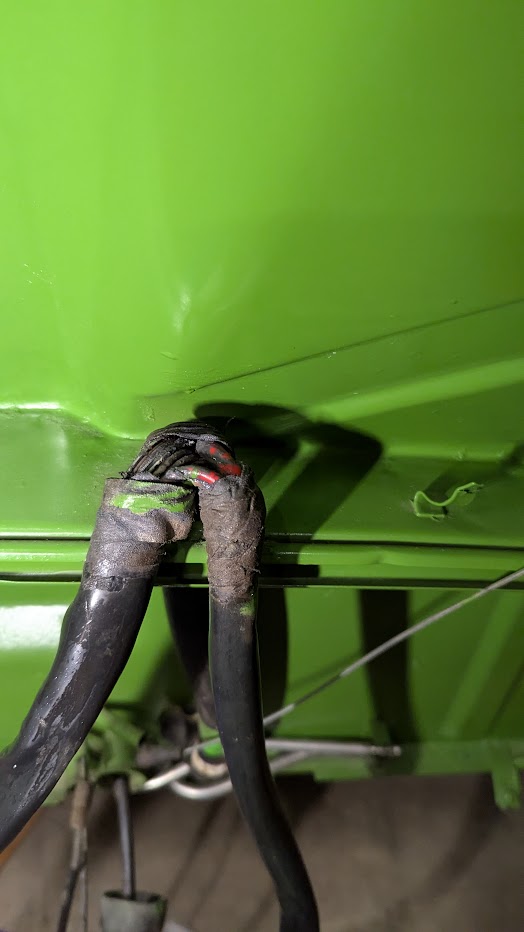 /
/ 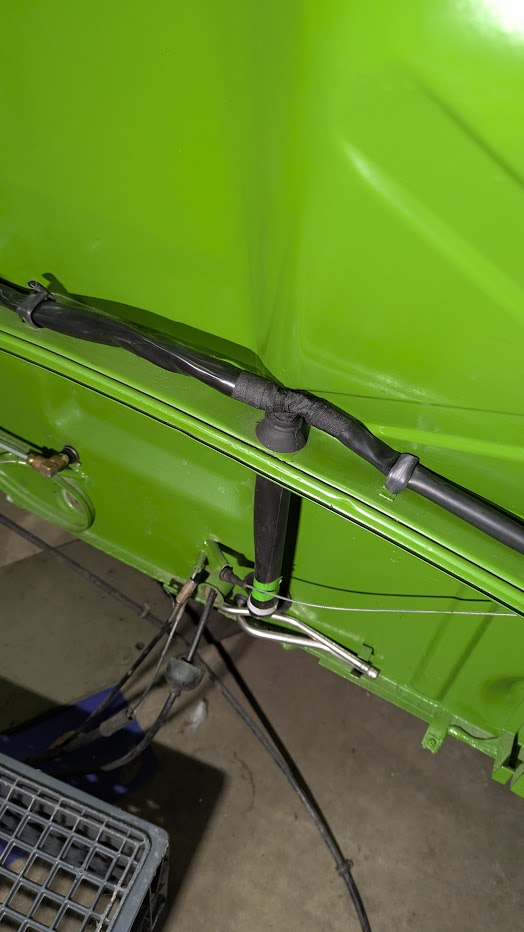
I also cleaned the bundle and re-wrapped the spiral tape.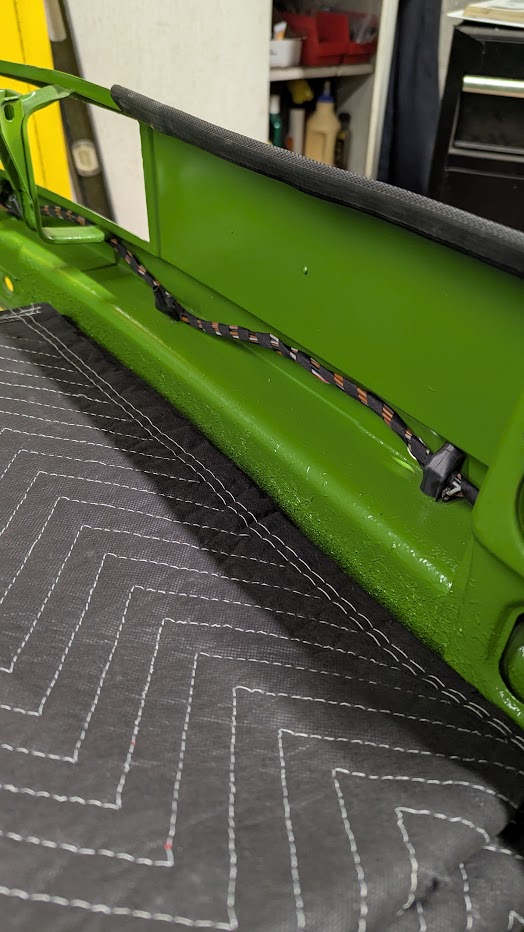
When I started the rust repairs in ~2009 I chipped out some areas of seam sealer in the engine compartment chasing rust. I've had a tube of 3M seam sealer or almost as long. Today I finally opened it up and tried my hand at duplicating the factory brush patterns. 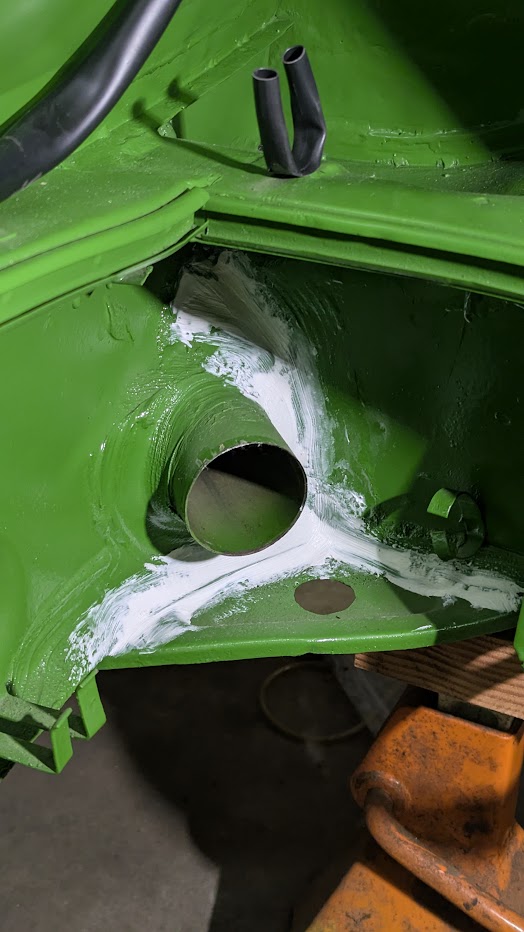
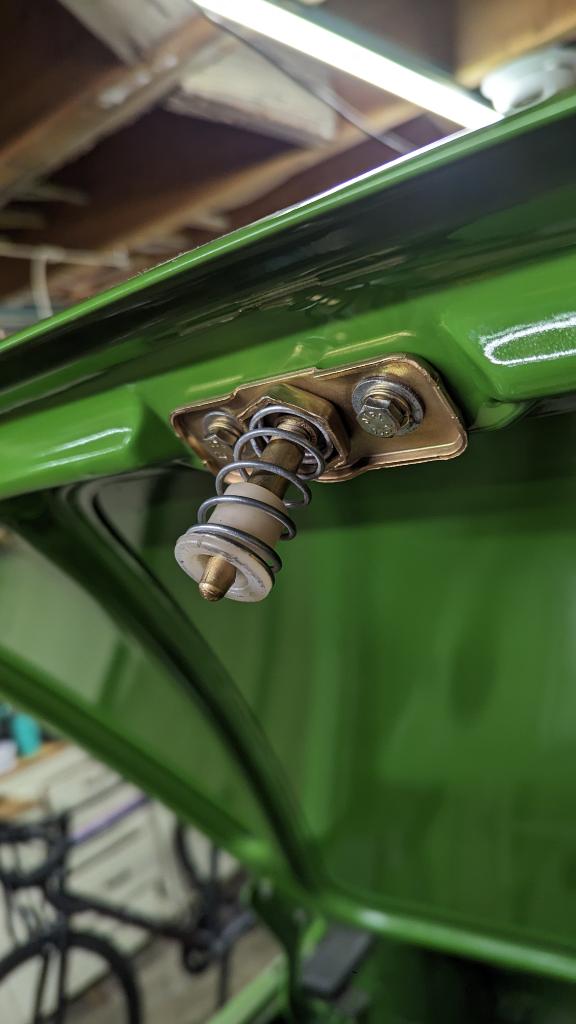
While the seam sealer dried I started installing the rear trunk lid torsion bars. Need to order the M10 wave washers and one plastic roller before I can finish there. I struggled a bit just to get the torsion bars back in the car, I don't relish getting them torqued into position.
Posted by: Dion Feb 3 2025, 07:28 AM
Nice to see you back at it. Looks great.
Posted by: dereknlee Mar 5 2025, 10:10 PM
Few weeks of progress update:
After collecting the requisite wave washer and nylon roller, I faced my fears and got the trunk torsion springs installed. Took a couple evenings but was without major incident. Painted the fasteners (not shown I also painted the seam sealer pictured in an earlier post). Cleaned up the old trunk seals, installed them, then got the trunk lid installed and aligned.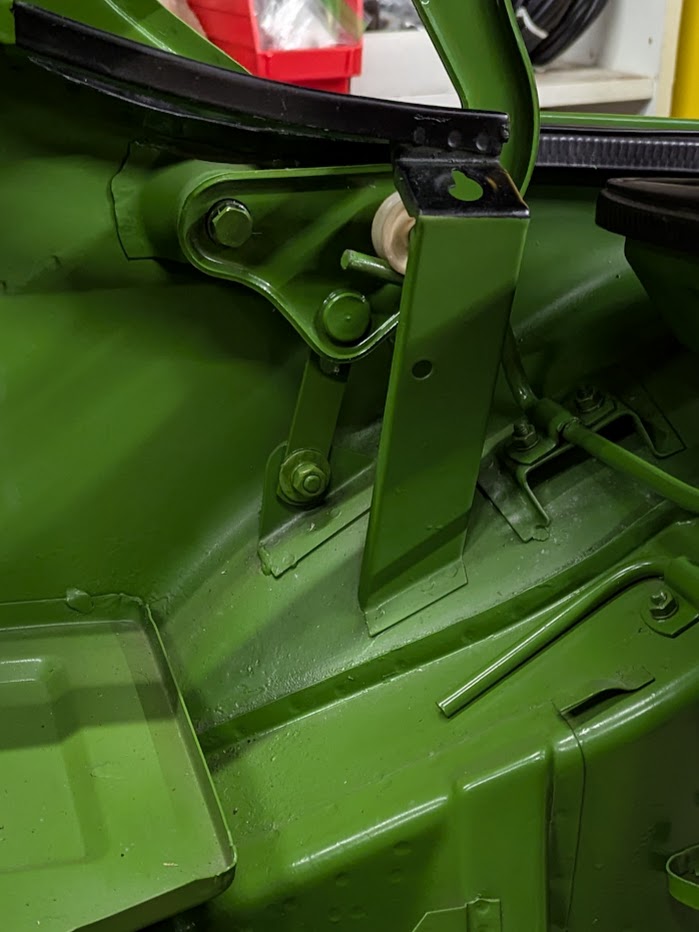
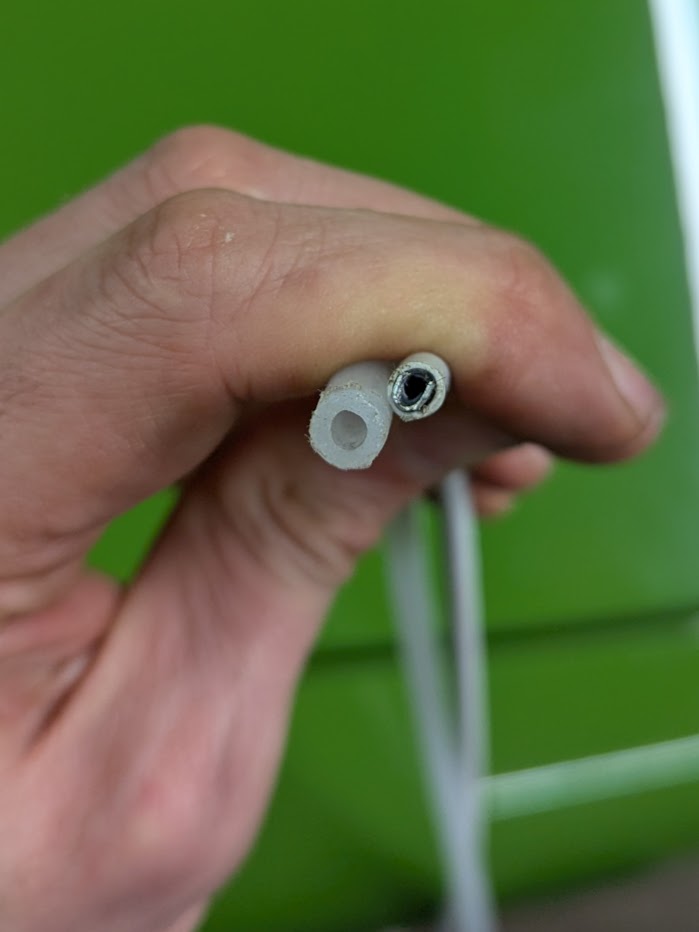
I've mentioned before how I was disappointed with the front hood release guide tube offerings in the aftermarket. It was way too flexible, so I had to practically plant a foot on the dash to apply enough force to release the hood. Plus it was translucent and not white. So I looked around for alternatives, and settled on bicycle brake line housing. Comes in white, metal liner takes compression loads, ID is correct. I got some for a couple bucks off ali-express as a proof of concept and installed it tonight. It is so much better! I measured the pull force at 30 lbs, which was surprising - qualitatively the hood now releases easily with one hand. Currently I am using a bicycle cable stop to keep the housing from sliding into the guide tube that passes through the dash. I'd like to get some nylon and machine a stop, like what the original had. I no longer have my original guide tube, but the brake cable has a smaller OD than the aftermarket tube. I had to slide a small piece of brake reservoir drain line on the end of the housing so that the P-clamp on the release mechanism would grip.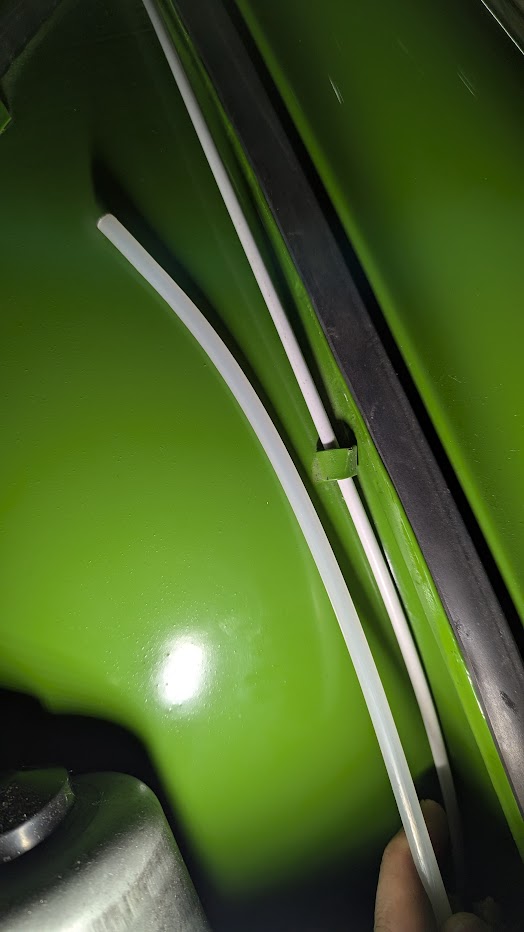
(cripes! need to vaccum out the dust!)
So now the front and rear lids are both fully operable!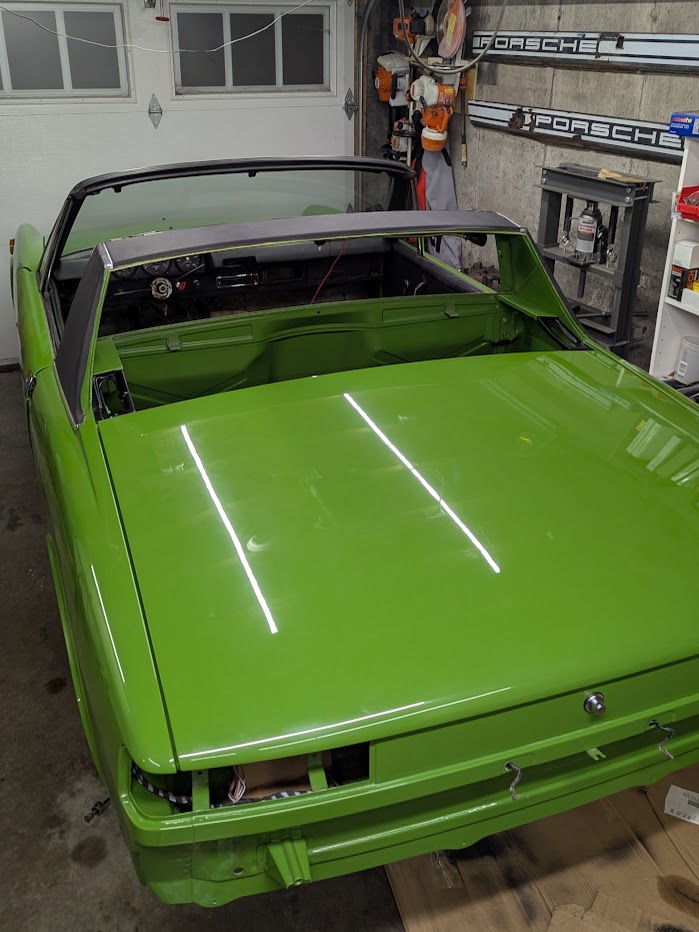
Also got new rubber mounted on the re-painted wheels.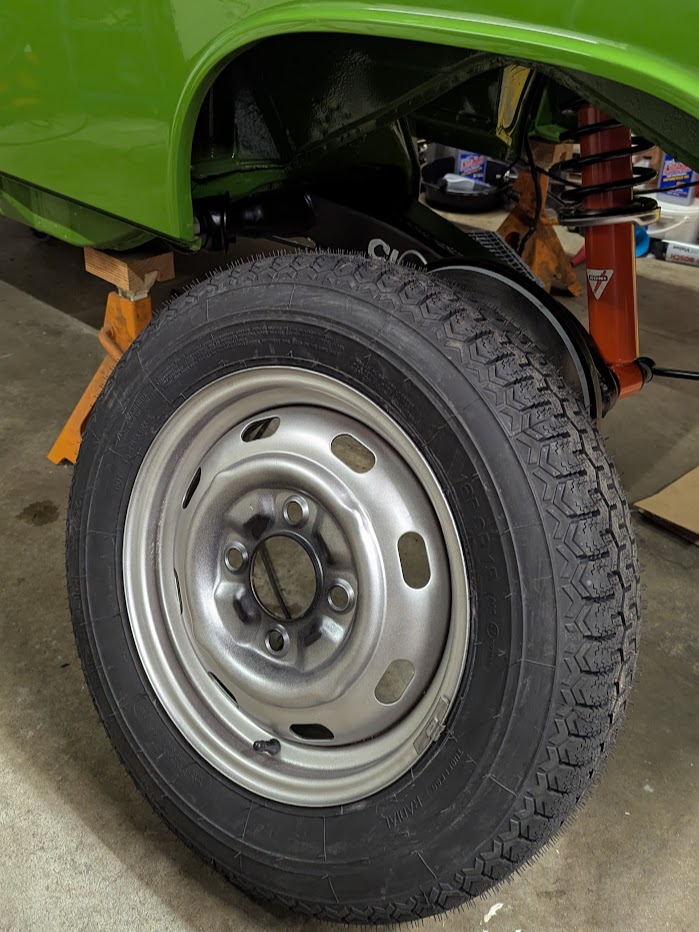
Next I think I will be returning to wiring. Rear signal assembly seals should arrive from 914 rubber in the next few days, which will establish the final position of that harness. Have some DAPO wire repairs to make in the cabin.
-Derek
Posted by: Cairo94507 Mar 6 2025, 09:53 AM
Coming along nicely.
Posted by: friethmiller Mar 6 2025, 09:57 AM
![popcorn[1].gif](style_emoticons/default/popcorn[1].gif)
Posted by: dereknlee Apr 26 2025, 06:36 AM
Couple months of slow progress:
- I re-assembled the horn using slotted screws purchased from zoro. Wish I had started shopping there sooner. Belmetric has been my go-to, but shipping costs are a bit high. Got 100 screws for $5 from zoro. The horn and fog lights were the last of the exterior lights/lenses to be re-installed.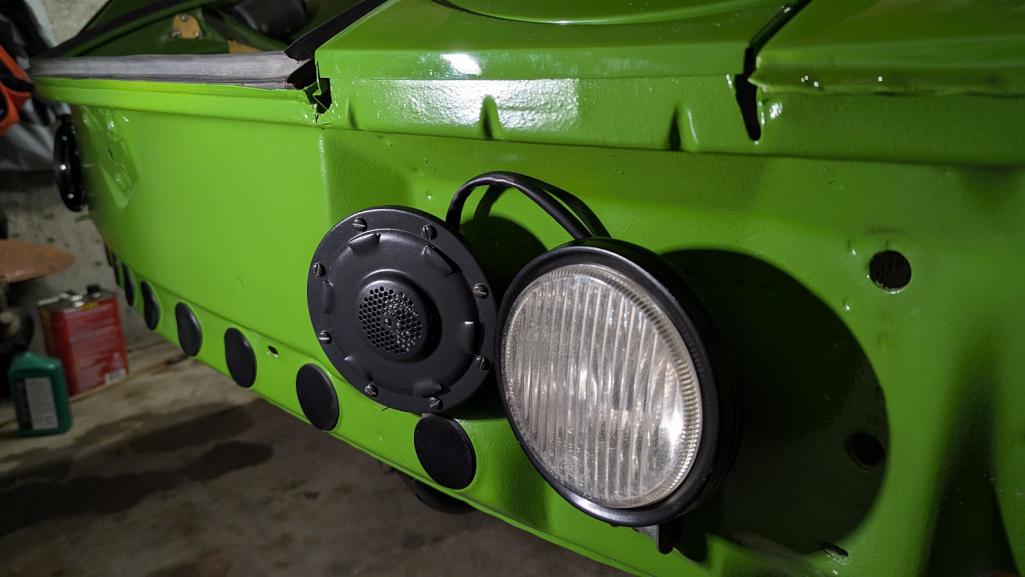
Next was cabin wiring. After viewing a 'Watch Wes Work' video where he re-spliced 40 wires in a wire bundle that someone had drilled through, I was convinced I needed to start using better butt splice connectors. So I got yet another crimping tool and an assortment of non-insulated butt connectors. Really happy with them, the crimps are strong and with just a layer of heat shrink applied after install they are slimmer than anything else I have tried.
There were a handful of wires leftover from a PO radio or security system. In the process of untangling and removing those connections I found that they had tapped into the instrument backlight circuit, which was being powered by a replacement jumper wire from the headlight switch because it looks like the original wire had shorted and melted. I got a short section of black with blue stripe wire and re-ran the wire from the switch to the dash. There were also a questionable repair to another melted wire on the switch that I replaced. I re-taped the bundle and re-installed the headlight switch.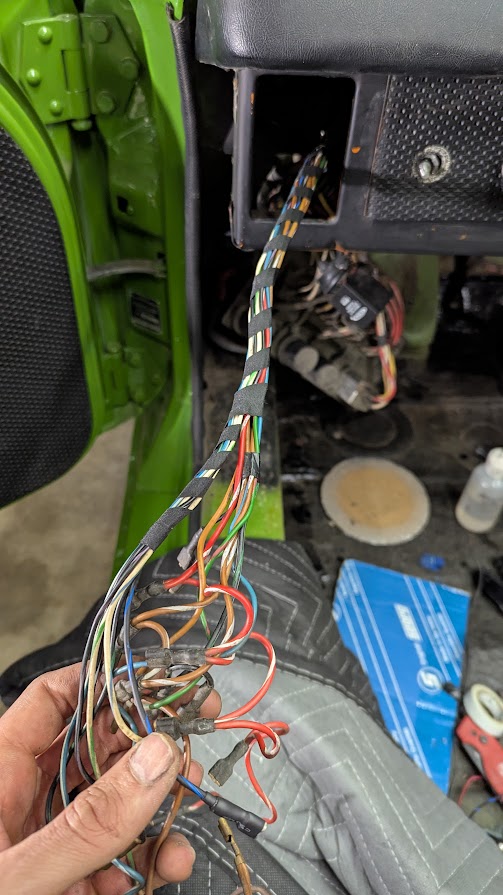
While I had the instruments out, I soaked the instrument panel sheet metal in evapo rust and then repainted it. I am pretty sure I re-painted this back in 2008 after I bought the car. Just goes to show that rust never sleeps. Hopefully by dissolving all the rust and using a good primer I will have slowed it down.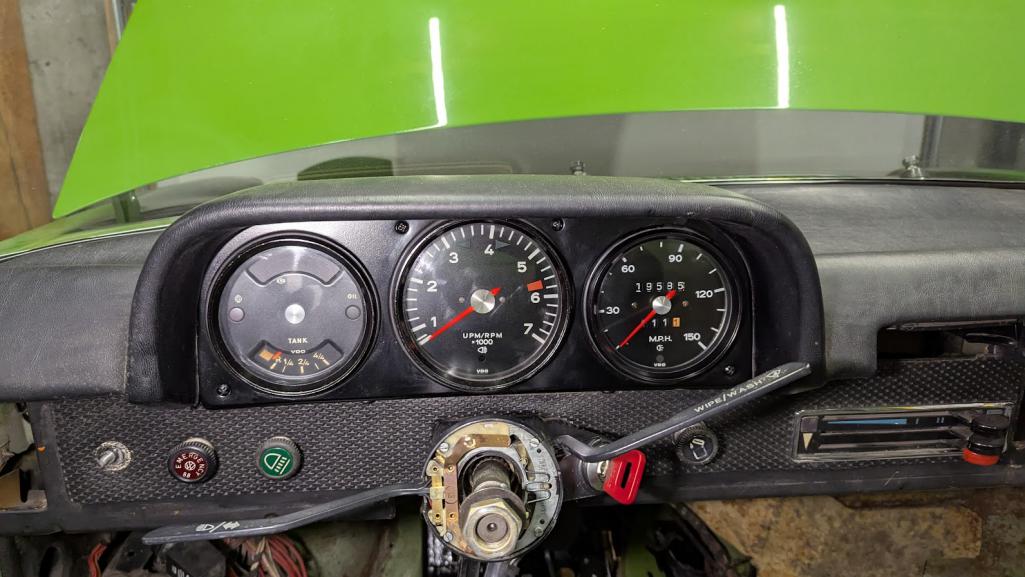
Next was bumper and valance install. This would have been fast except for the surprising amount of unique fasteners and rubber spacers that I had to acquire. After receiving more 914 rubber and belmetric orders I had everything I needed. I have a 'snowplow' rear valance that I bought off craigslist years ago for $100. The paint shop re finished it for me, along with the front valance and rocker covers. I was told it was a 914-6 valance when I bought it, but I am not sure. Shouldn't have any problem recouping my investment if it turns out to be for a -6.
I went to install the brake pads and while the rears went in fine (after drilling out one tab) the front are too thick. Guess that will teach me to do more research before buying parts from rockauto. Installed the parking brake lever.
Brakes were necessary because it is time to move the car to a new home (not selling it, just storing it at another property). I lowered it down onto the fresh tires and rolled it out of the garage. The last time it rolled through that door was May 2013 when I got it back from paint. I rented a trailer and towed it to its new home where it also got a wash. Finally get to show off the re-chromed front bumper with license plate holes deleted. Not the best chrome job in the world, but I think I paid $600 at the time and felt really guilty about spending that much. Now I am kicking myself for not having the rear bumper done as well (it has holes from nerf bars, a couple dings, etc.).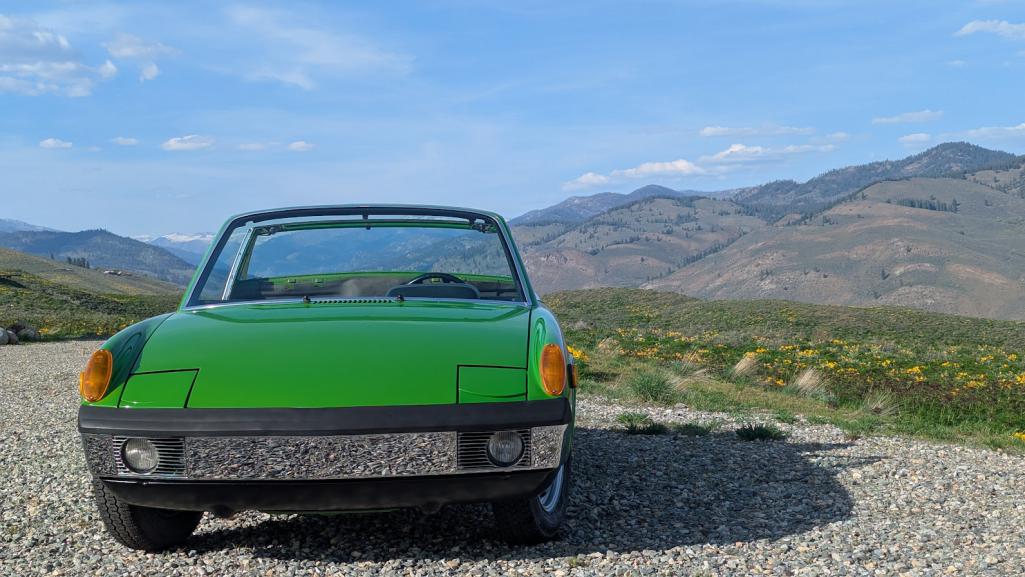
As if progress could slow any more, the move of the car likely signals another pause in work on the 914. There are two big projects that I need to spend most of my time on. Getting the car out of the garage (and all the associated parts in the basement) clears up room to work in and is one less distraction*. But time will tell, maybe I can sneak in some progress here and there.
-Derek
(*given the pace of progress it is entirely fair to question whether the 914 has really been that much of a distraction in my life)
Posted by: rick 918-S Apr 26 2025, 07:54 AM
Damn!
Posted by: slowrodent Apr 26 2025, 08:04 AM
very very nice job! now take some time and enjoy it!
Powered by Invision Power Board (http://www.invisionboard.com)
© Invision Power Services (http://www.invisionpower.com)