Printable Version of Topic
Click here to view this topic in its original format
914World.com _ 914World Garage _ Stripped exhaust stud on fresh rebuilt heads
Posted by: djway Jul 5 2020, 01:40 AM
Soooooo
I am installing the exhaust manifolds today, using the nice little copper coated exhaust nuts from Bel Metric and at the point the self locking threads encounter the stud, the stud just starts turning.
Little effort to pull it out and the stud is clean, no material in the threads.
Now mind you that these heads have just been rebuilt and fixing exhaust studs was on the to do list and the cost was substantial to me.
Then the fireworks went off... 

As the great poet Eric Burdon said in the song PC3
"I rattled so long
And rattled so obscene
The ground did shake
And disturbed the Queen..."
This is the motor in my Notchback and it has taken too long to squeeze that puppy in there so this fix is going to be in site.
Is it an optical illusion or are the studs at an angle? ie not perpendicular to the ground?
I ordered some EZLOCK solid inserts and I will make a drill guide that will bolt onto the other stud.
Apologies to the neighbors 
Posted by: bdstone914 Jul 5 2020, 05:24 AM
@http://www.914world.com/bbs2/index.php?showuser=19266
No picture.
I have a cut off head exchanger end to use as a drill guide if you need it to drill out to a larger size and use an oversize stud.
Sorry to hear that.
Bruce
Posted by: JamesM Jul 5 2020, 01:07 PM

using the nice little copper coated exhaust nuts from Bel Metric and at the point the self locking threads encounter the stud, the stud just starts turning.
One of the reasons i stopped using any sort of lock nut on the exhaust studs. If they dont pull the studs when installing they absolutely will when removing.
These have been my go-to nut for a few years now:
http://vwparts.aircooled.net/ACN-Flanged-Racing-Intake-and-Exhaust-Nut-8-x-10mm-p/acn-nuts.htm
Another tip that not everyone seems to know is never use anything more than a single hand on a small 1/4" driver when installing the exhaust as its makes it more difficult to over torque them (it takes a surprisingly small amount of torque to strip the heads). Also anneal the copper rings before installation. Most leaks are caused by misalignment of the heat exchangers, not the nuts being to loose.
Sorry to hear of you troubles though, I have been in that position a few times with 914s over the years. Last time was on a car i discovered a previous "fix" from a PO that after they stripped the head they replaced the stud with an oversized allen head bolt and even cut half the mounting flange off the heat exchanger to make it fit. knowing from multiple past experiences what a PITA dealing with stripped heads in the car can be i just wound up swapping the whole motor.
On the plus side, that timecert should be a hell of a lot stronger. Another option depending on how much meat is left in the bore and if you can find them are the 8mm-10mm step studs. I have used a couple of those in the past with good results.
Posted by: 914Mike Jul 7 2020, 12:19 AM
[quote name='JamesM' date='Jul 5 2020, 11:07 AM' post='2831179' Another option depending on how much meat is left in the bore and if you can find them are the 8mm-10mm step studs. I have used a couple of those in the past with good results.
[/quote]
Those used to be available in 9mm as well. Just found one that was pulled out (threads still full of aluminum) and replaced with a 10mm one.
Those 10mm flange nuts look nice, I may have to try those. One thing about the stock nuts that you won't get with those is the brass threads inside, steel outside. A little anti-seize and they will never get stuck on the studs.
Posted by: djway Jul 7 2020, 10:27 PM
Thanks to Bruce Stone for the exhaust manifold end piece.
At first I drilled it out and used it to guide the drill when drilling into the head. I then drilled it out further and used it to guide the tap. Here is a picture of the insert in place so you can see how big it is relative to the surrounding area. This is on the case side of the head.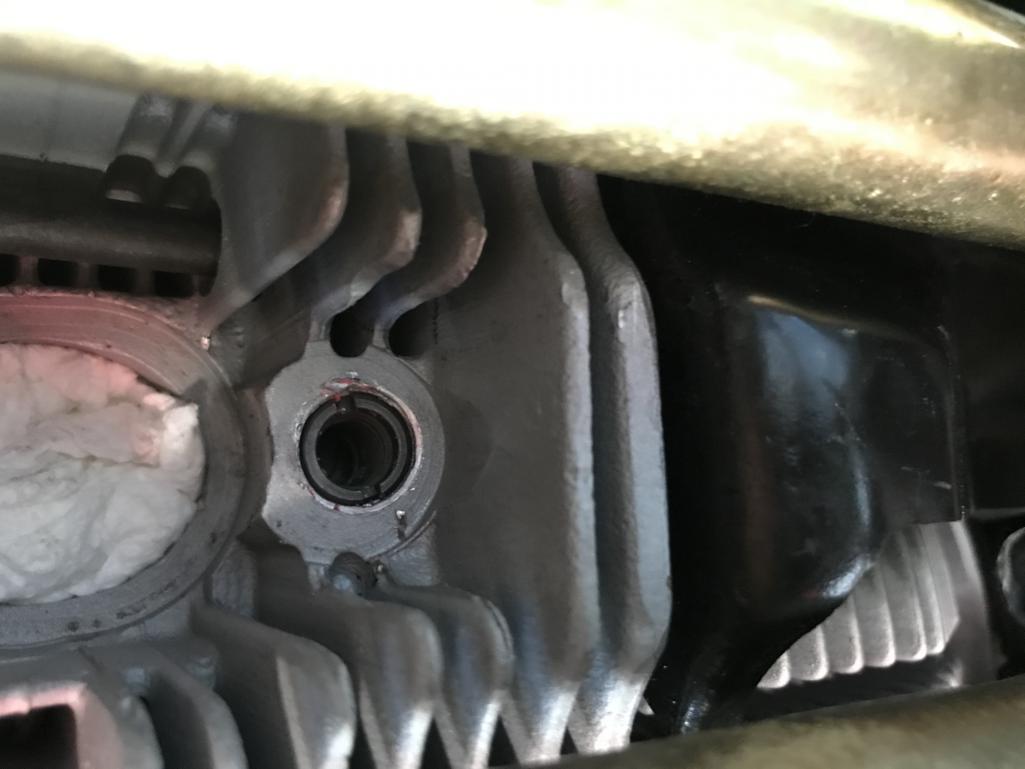
So far I have only tightened it with one hand fairly tight but all feel snug so far.
Posted by: bdstone914 Jul 7 2020, 10:37 PM
@http://www.914world.com/bbs2/index.php?showuser=19266
' date='Jul 7 2020, 09:27 PM' post='2831927']
Thanks to Bruce Stone for the exhaust manifold end piece.
At first I drilled it out and used it to guide the drill when drilling into the head. I then drilled it out further and used it to guide the tap. Here is a picture of the insert in place so you can see how big it is relative to the surrounding area. This is on the case side of the head.
So far I have only tightened it with one hand fairly tight but all feel snug so far.
[/quote]
Looks good so far.
You going to test it with the jig part first?
The threaded insert needs to in with more torque than the head stud so it wont back out.
Posted by: djway Jul 8 2020, 01:00 AM
I peened the head so it can’t back out. Insert has an epoxy in the threads.
Exhaust manifold went on fine.
Posted by: djway Jul 9 2020, 12:12 AM
All nuts now at 14lbs. On to the next item.
Posted by: Rikyrat Jul 9 2020, 09:39 AM
I did that too, I was torquing the bolts down, but did not realize that the torque wrench did not lock, all of a sudden the stud is going round and round.
Looked at the torque setting, it was 200 in/lbs, just a little excessive. LOL
Posted by: djway Jul 9 2020, 11:51 PM
I did that too, I was torquing the bolts down, but did not realize that the torque wrench did not lock, all of a sudden the stud is going round and round.
Looked at the torque setting, it was 200 in/lbs, just a little excessive. LOL
I would not have been as mad but these heads had just been rebuilt, fixing all studs was the first request, and this stud was barely in there. I will assume someone set it in there and forgot to check. It required only two fingers on the wrench to spin everything so it had not been repaired.
Posted by: IronHillRestorations Jul 11 2020, 07:16 AM
Flange nuts are good, locking flange nuts are not. In a pinch, I've run a tap down locking ones
Posted by: 914werke Jul 11 2020, 09:54 AM
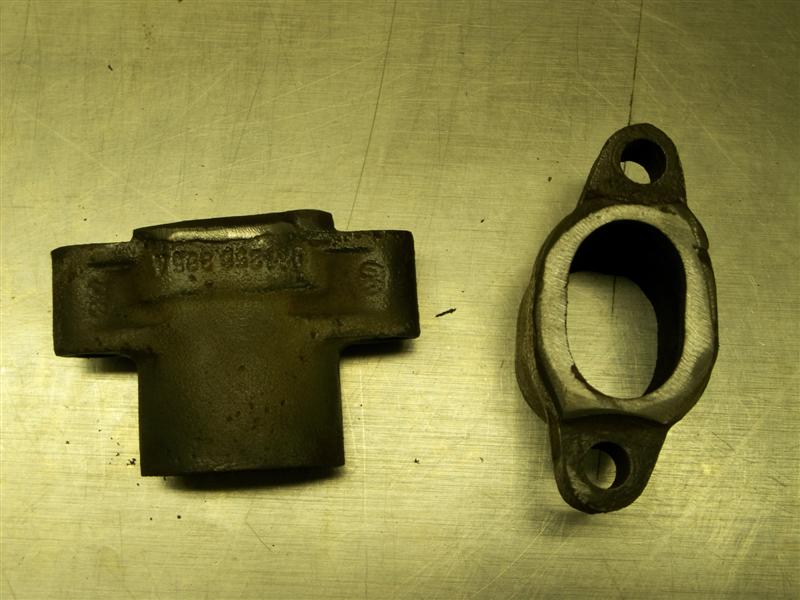
I have a cut off head exchanger end to use as a drill guide if you need it to drill out to a larger size and use an oversize stud. Sorry to hear that. Bruce
Sharp minds think alike
 I used a 1.7L cast flange & drilled it out for the drill guides
Attached image(s)
Powered by Invision Power Board (http://www.invisionboard.com)
© Invision Power Services (http://www.invisionpower.com)