Printable Version of Topic
Click here to view this topic in its original format
914World.com _ 914World Garage _ Under trunk oil cooler install
Posted by: ottox914 Aug 4 2020, 08:38 PM
When my 914 was turbo'd, I had an additional cooler under the trunk and it did a fantastic job of keeping oil temps reasonable. When that motor died, (see sig links for that sad story) I put in a 2.0, and removed the cooler as I didn't think I needed it. With the "hot" 2056 I built, I decided the cooler was a good idea again. Except that it was damaged while in storage. So I started over.
And here is the project.
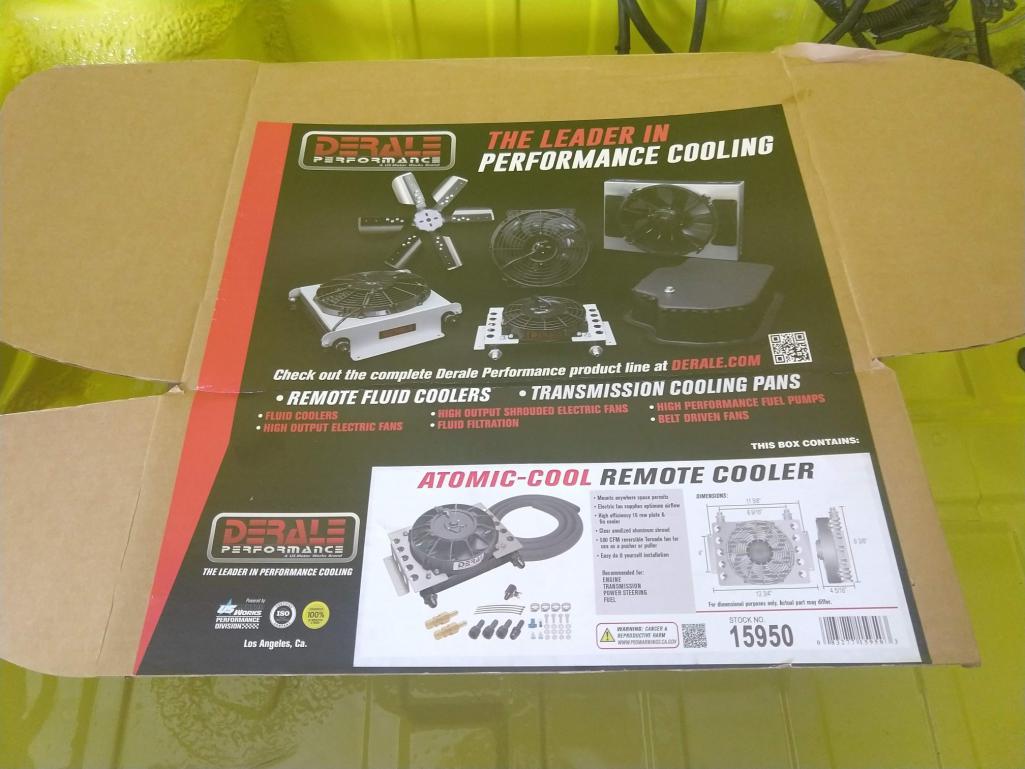
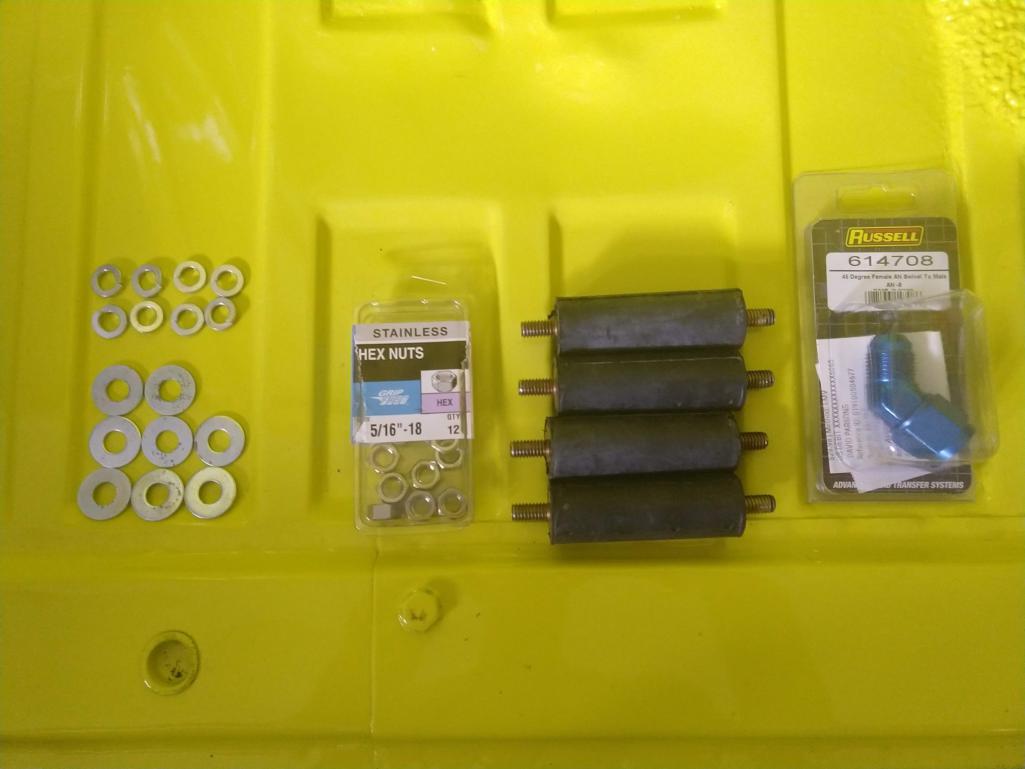
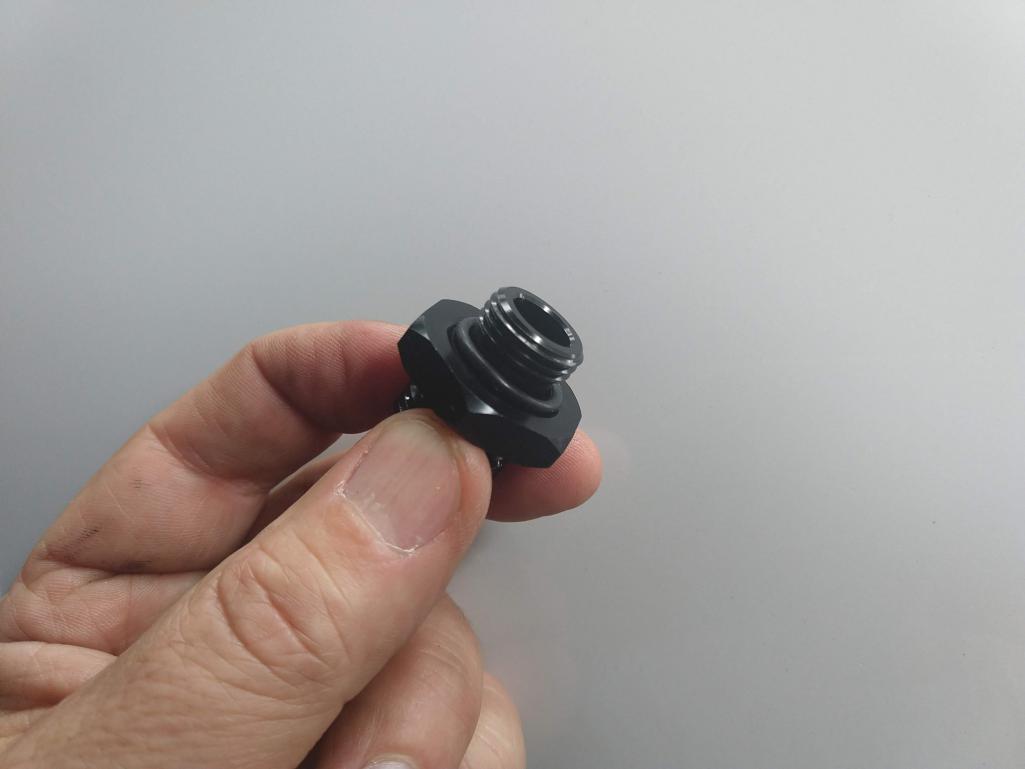
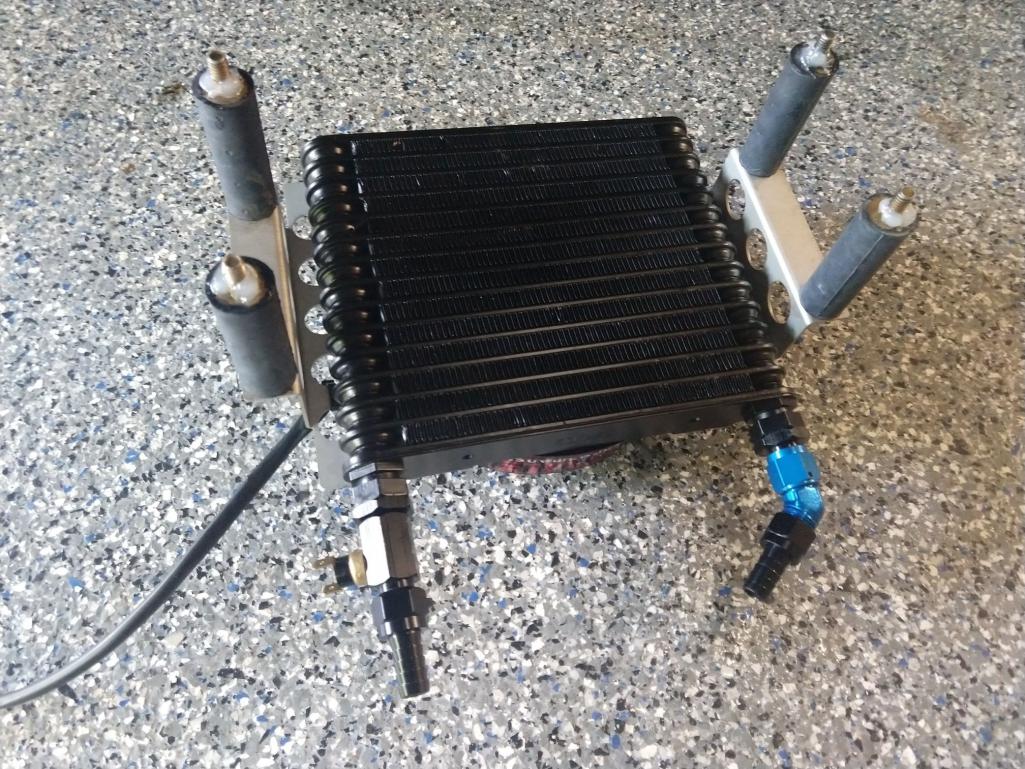
First you need a willing participant. Enter my 2056 powered 1973 914. I bought a cooler kit from summit. It had almost everything I would need. I also bought some 3" isolation mounts from McMaster Carr, and got screwed on the shipping. My advise would be to order with a real person, rather than online. On line orders get a message of "shipping will be added to your order" I never saw a shipping amount till the parts arrived. Lesson learned. I also bought a -8 male/female 45 degree swivel fitting. Kinda $$, but worth it to make everything fit that much better.
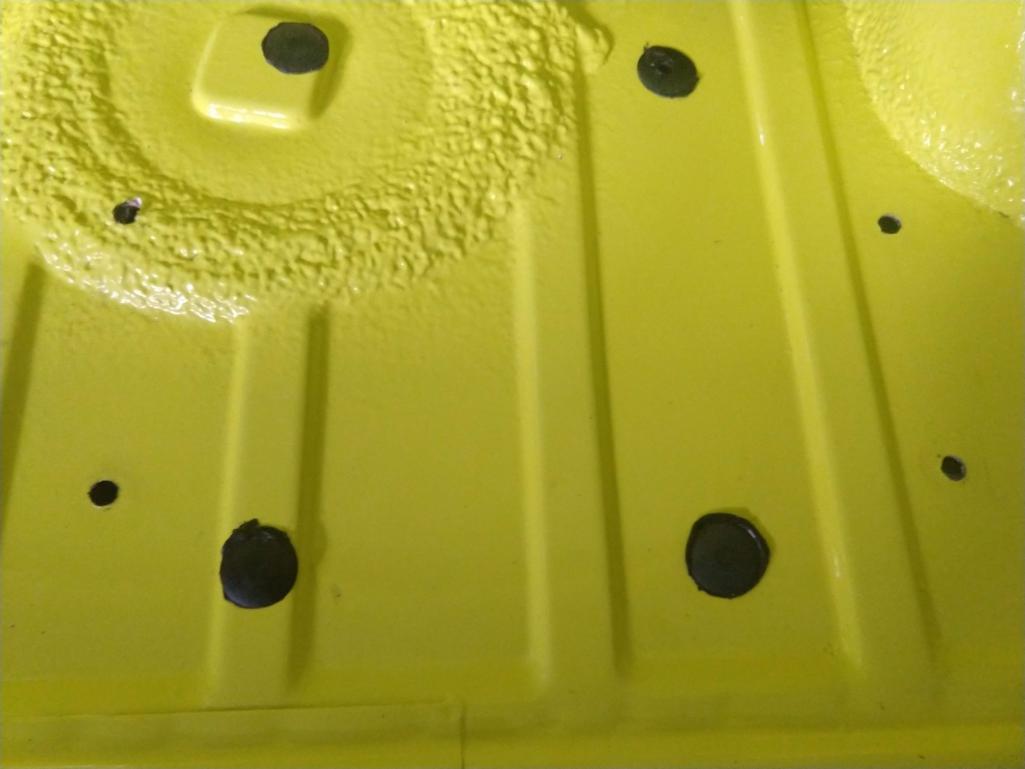
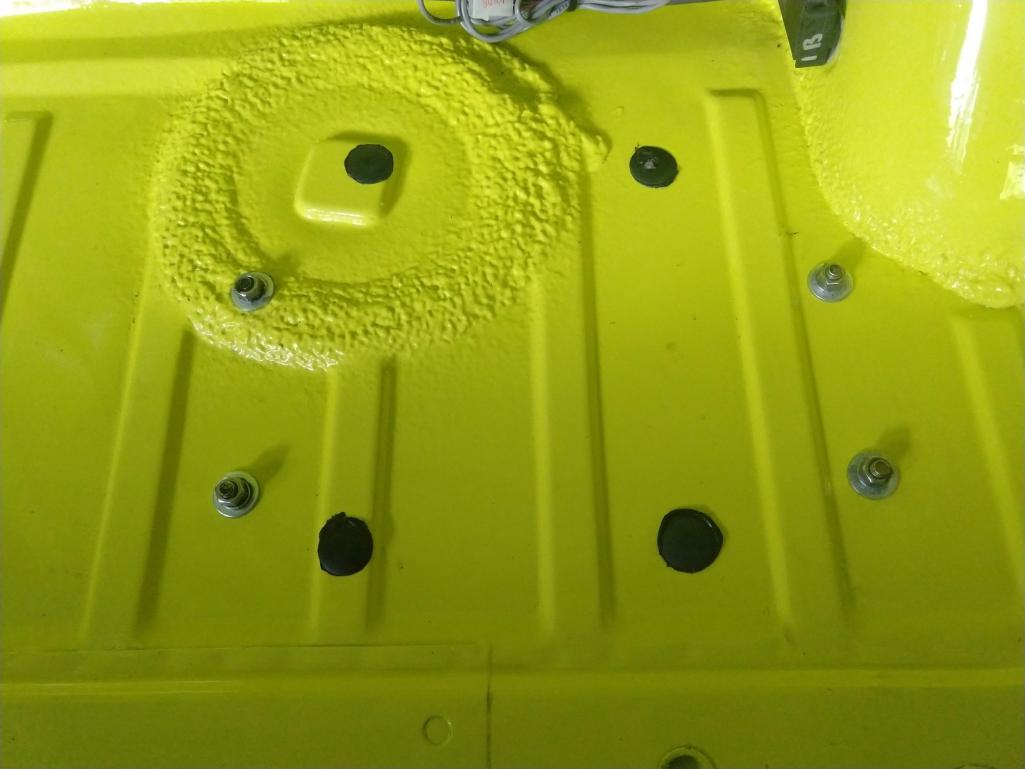
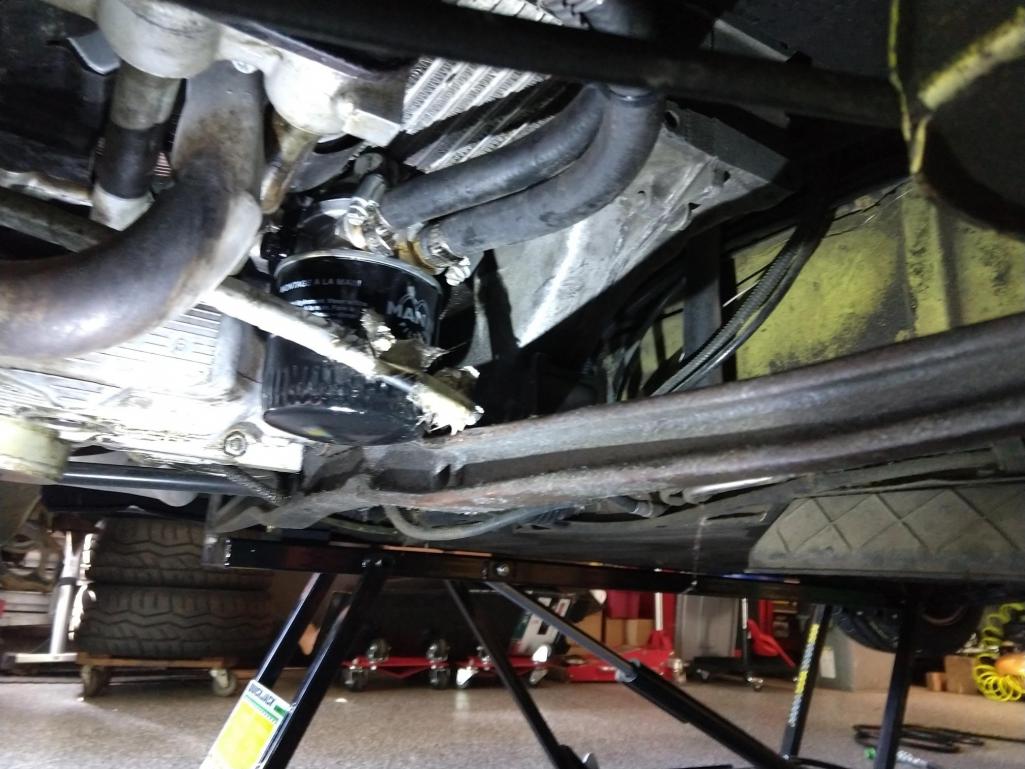
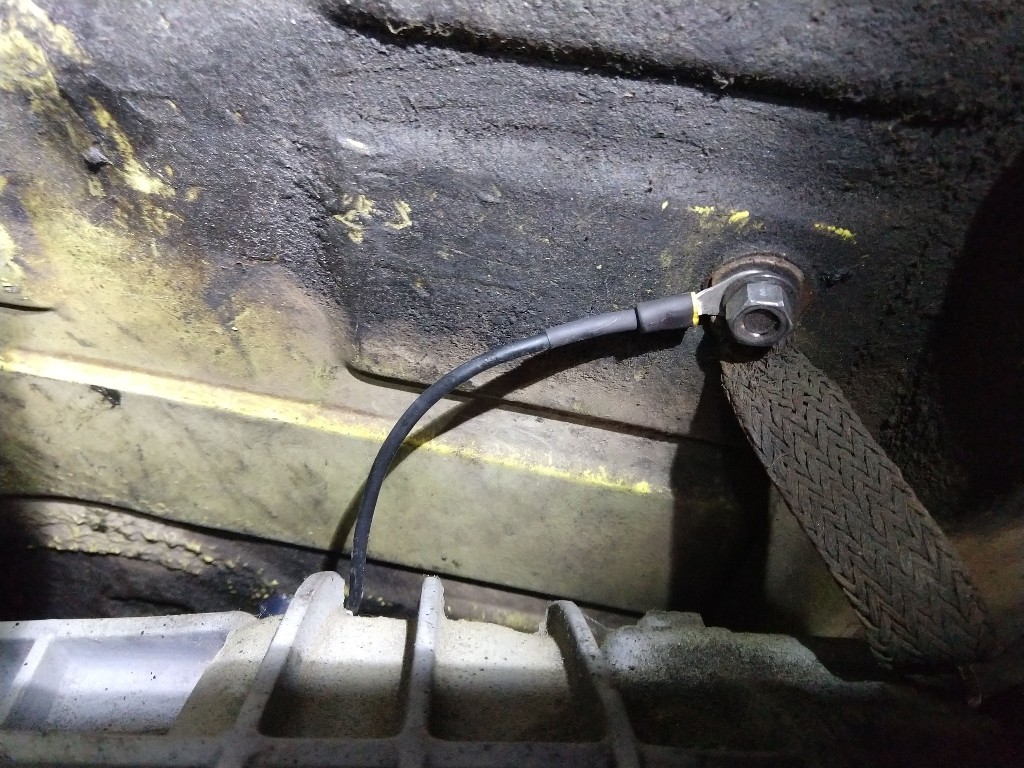
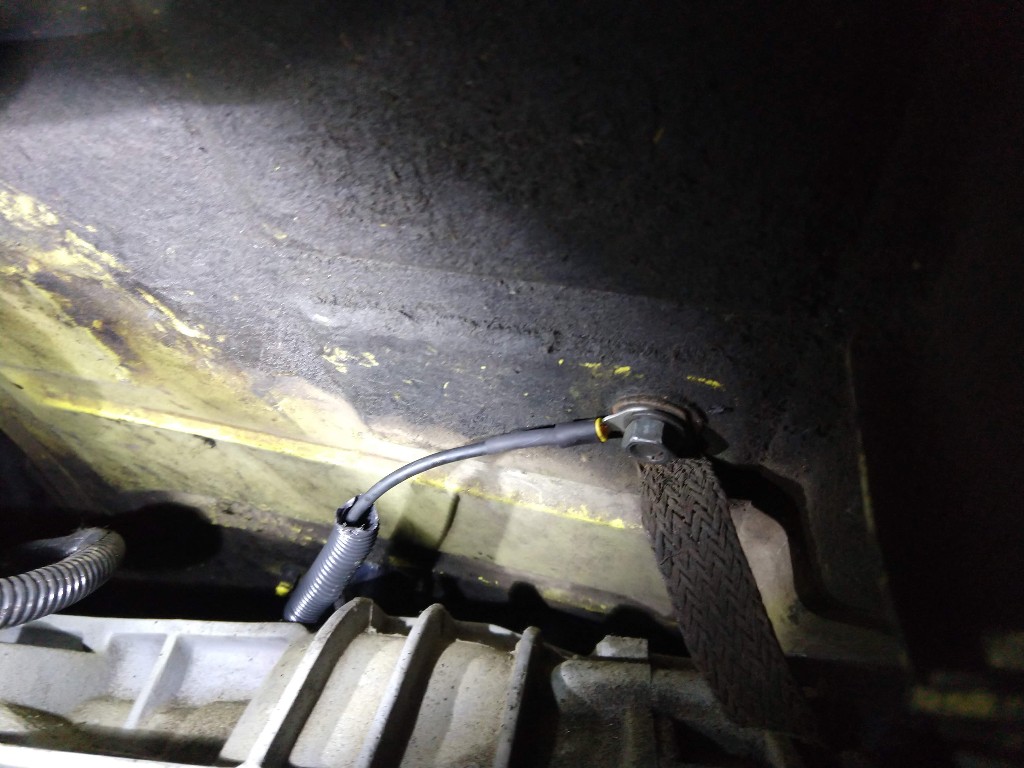
You can see where the old cooler was. Sadly the new cooler would not fit these same hole locations. So I'd have to cut into that sweet, freshly painted trunk. Ugh. 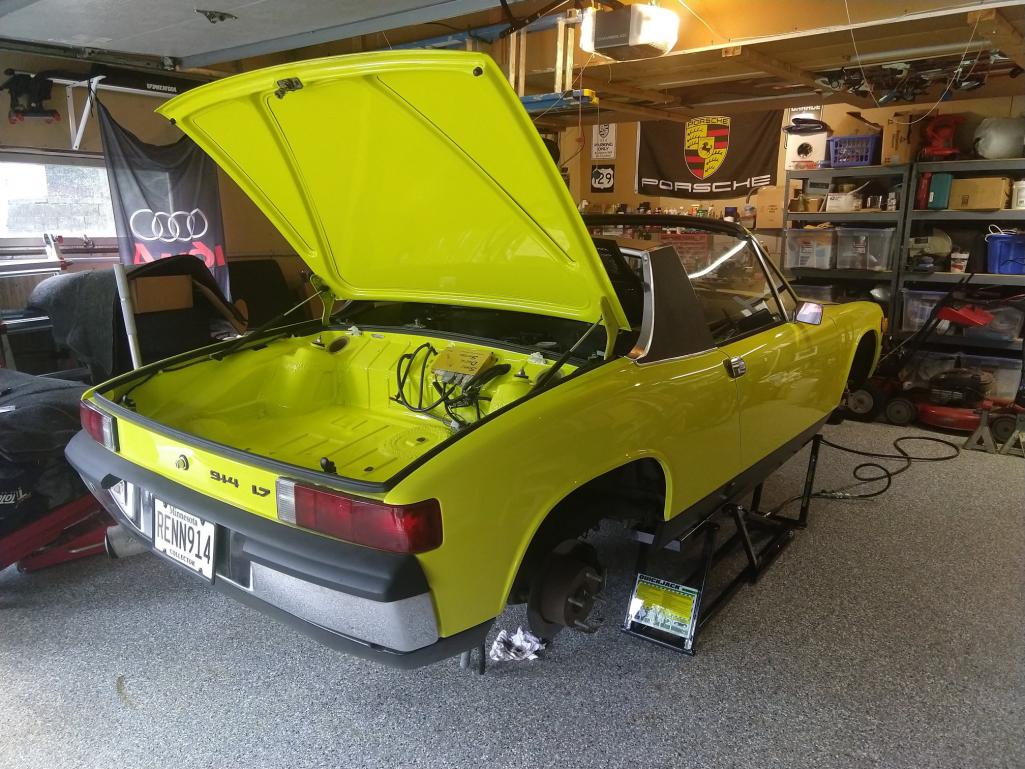
[attachmentid=755966]
Attached thumbnail(s)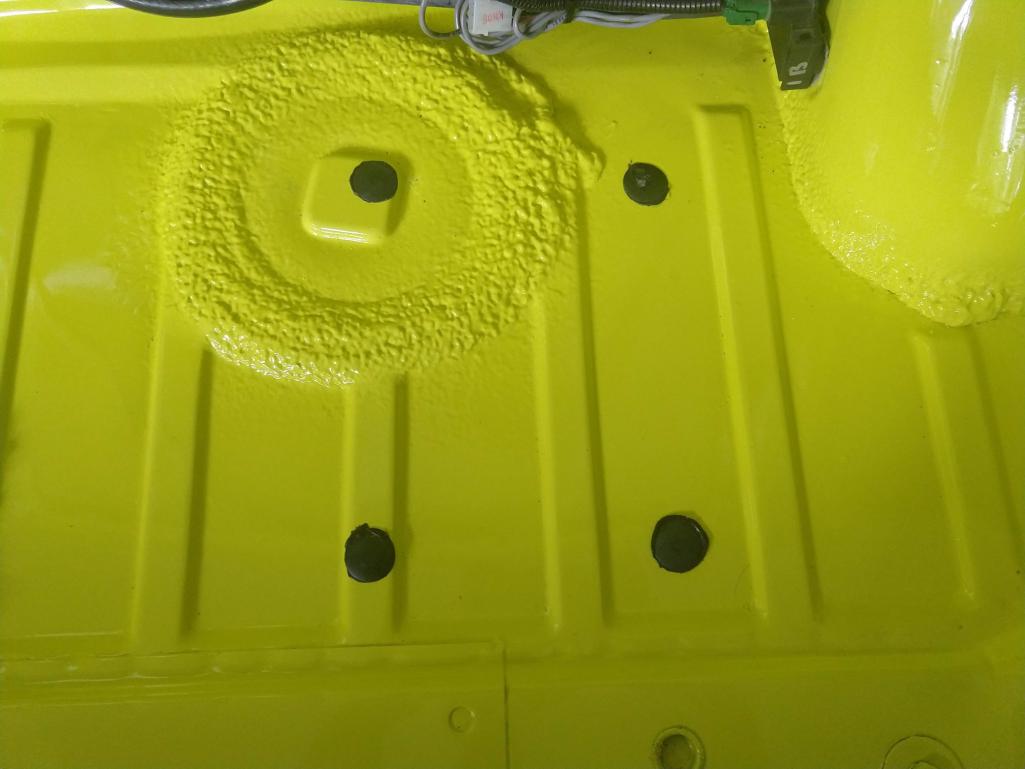
Posted by: ottox914 Aug 4 2020, 08:50 PM
The black pieces came with the kit, the blue one was the special bit I had to buy. There is a cooler to -an adapter that needs to go on first. That one has a rubber o-ring seal, and I needed to crank it down to prevent any leaks. Next on the inlet to the cooler, which would be the hot out from the engine, came the adapter with temp sensor, and after that the hose barb end. I just used the common, rubber hose that came in the kit rather than get some of the fancy barb ends and hose that connect w/out a clamp. On the other side of the cooler, the adapter went in, the 45 degree swivel fitting was next, and then the hose barb end. As the 45 degree fitting would swivel, I could off set the angle of the connection for better routing of the hoses, one on top of the other. You'll see what I mean later. Be sure to correctly tighten the -an fittings. To much brute force can damage them, and there is a right and wrong way to do this. 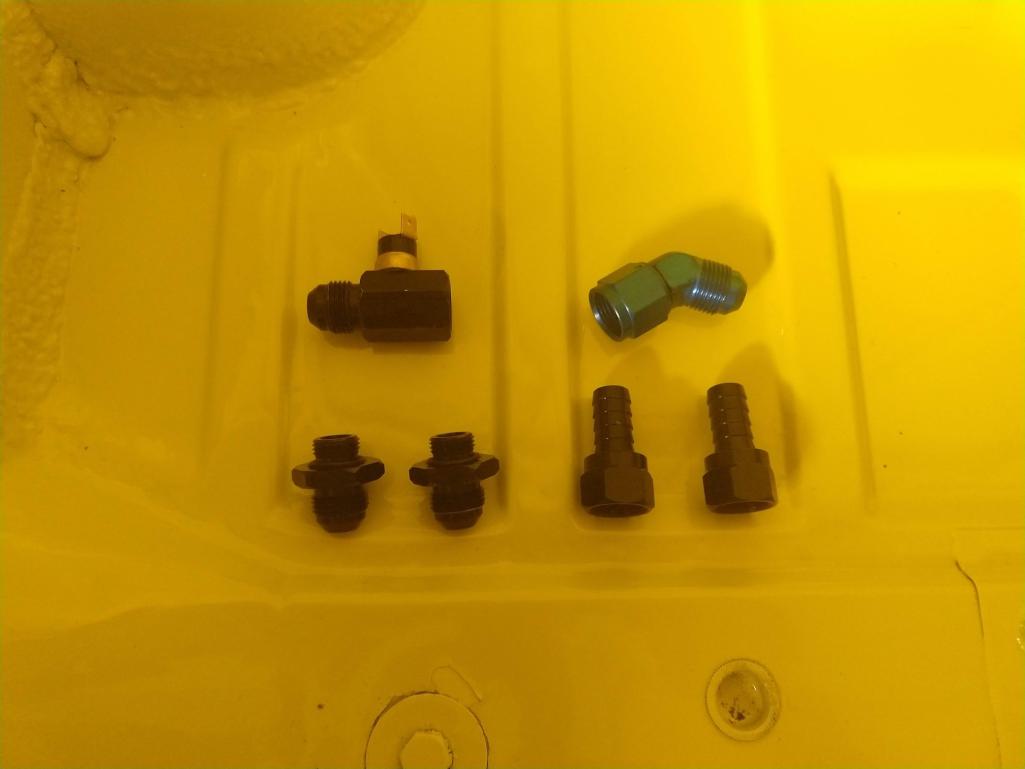
Posted by: ottox914 Aug 4 2020, 08:59 PM
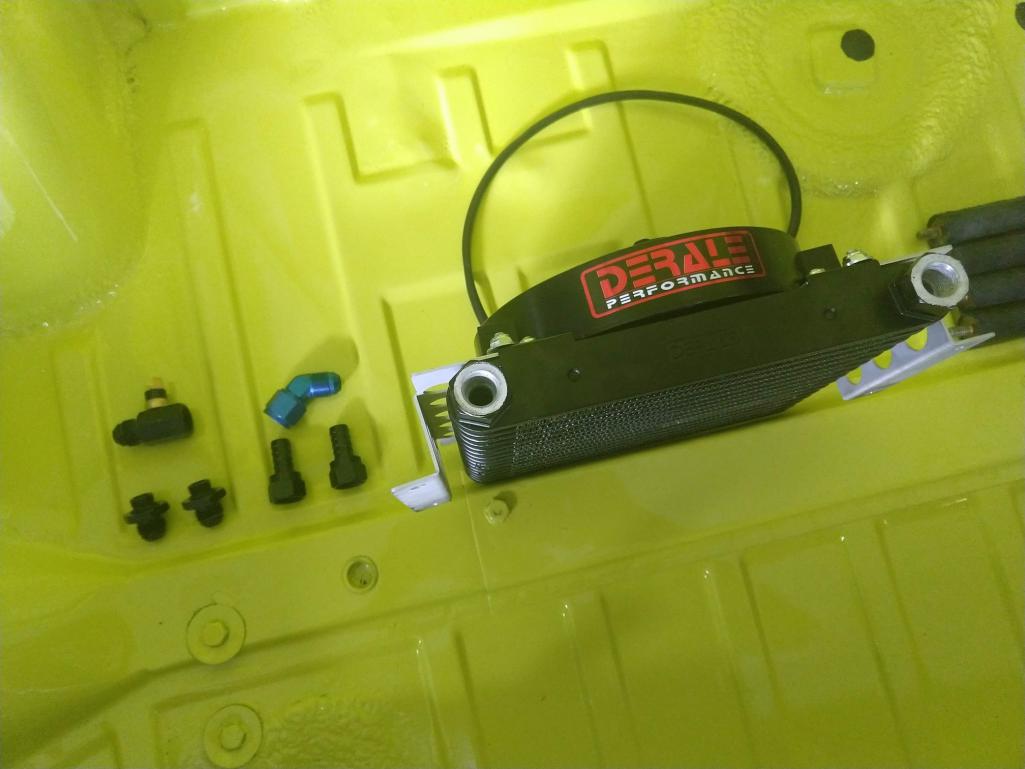
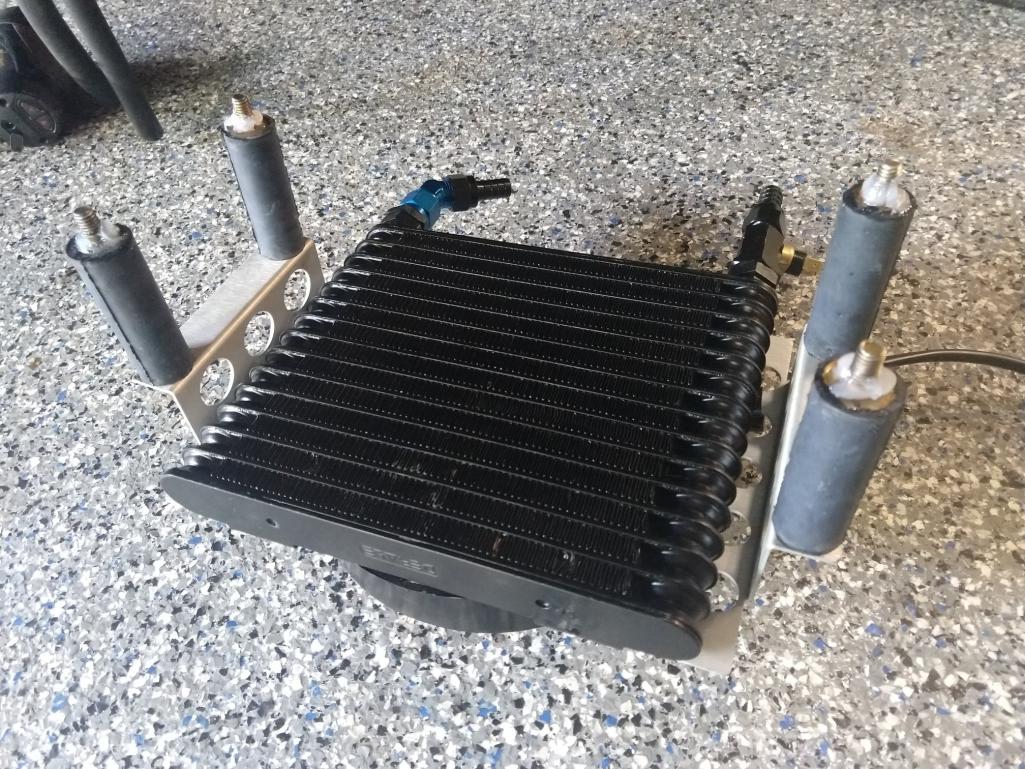
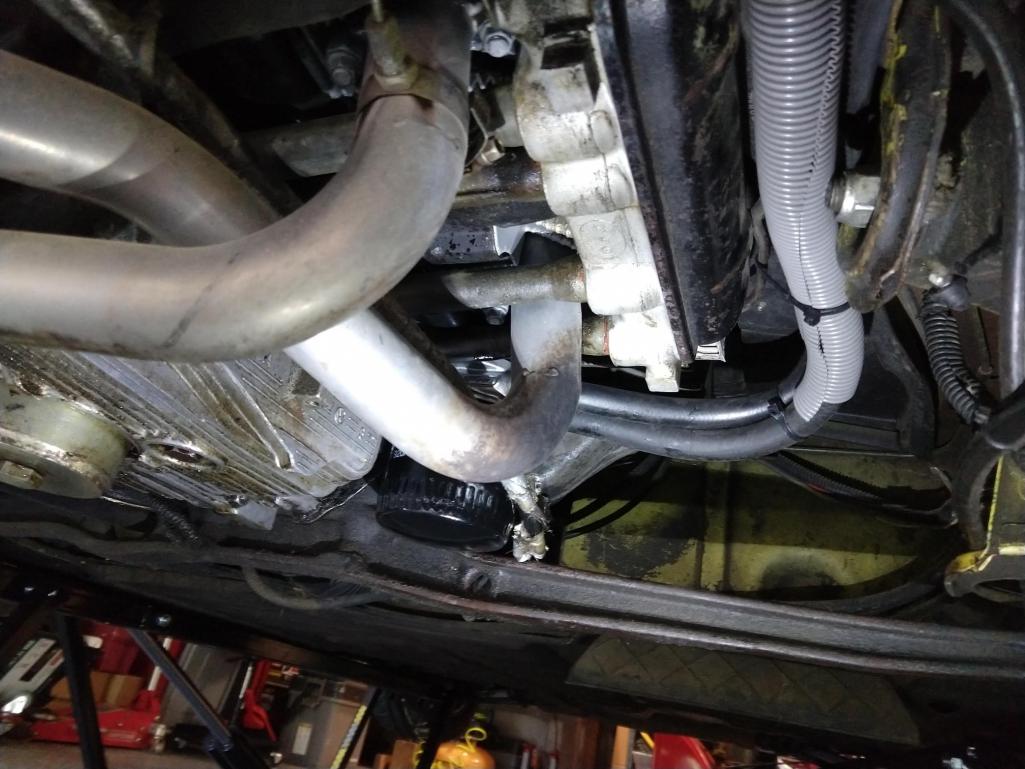
Finished product ready for install. Prior to the install I put the leads from the fan to the battery to be sure which ones to use for power and ground, to have the fan run as a "puller". Before mounting the stand offs, I placed the assembled unit under the trunk and lined things up. I made one a mark at one corner, and drilled a pilot hole up into the trunk. Painful. I could then set the cooler in the trunk, mark the holes, and drill in comfort, rather than upside down. More pain, as that nice new paint was chopped up by the drill bits. I added the standoffs to the cooler, put some sealant on the tops of them, and installed the cooler from the bottom up, while my assistant put some sealant, a large washer, lock washer, and nut on in the trunk to secure the cooler. 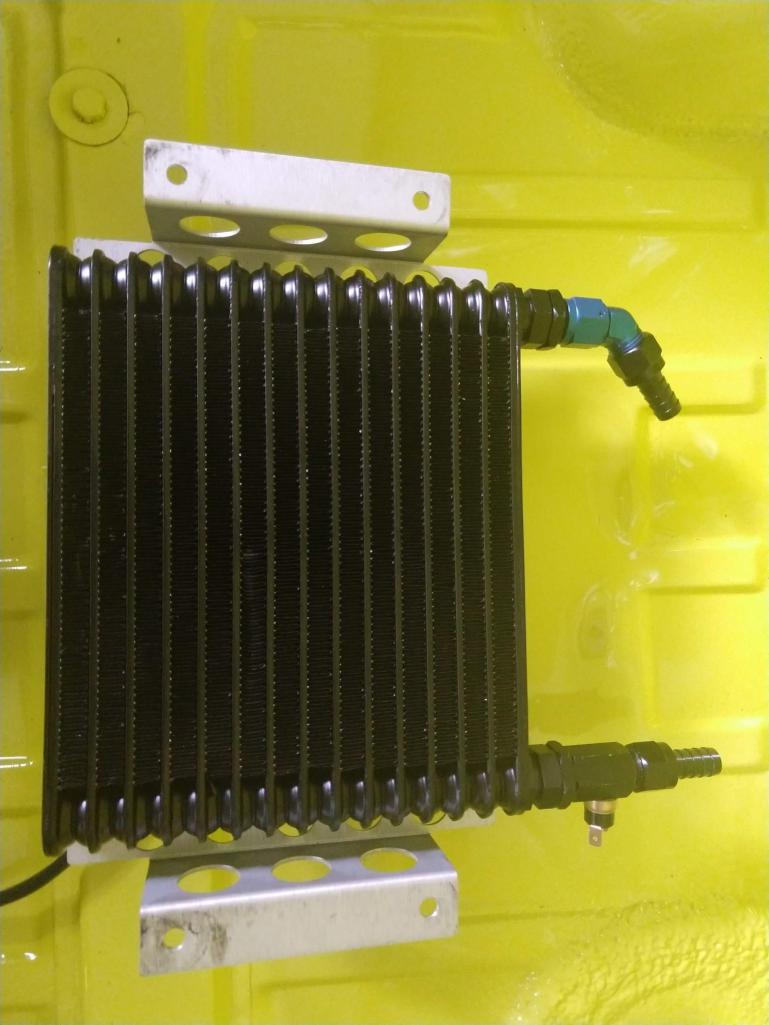
Posted by: ottox914 Aug 4 2020, 09:18 PM
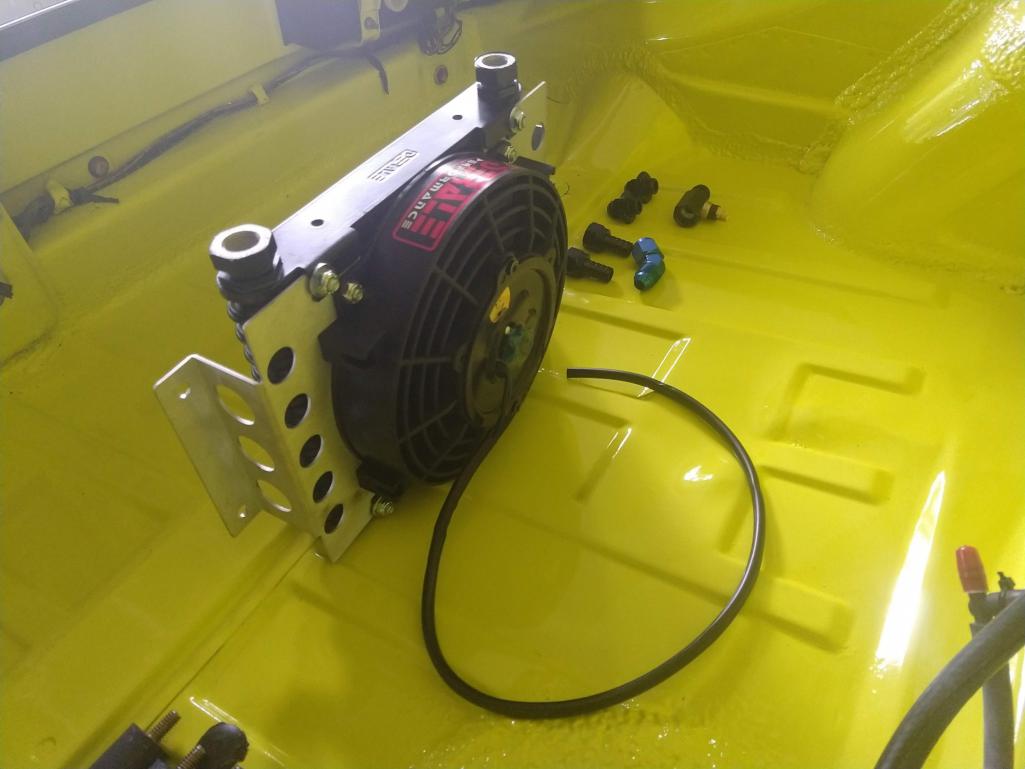
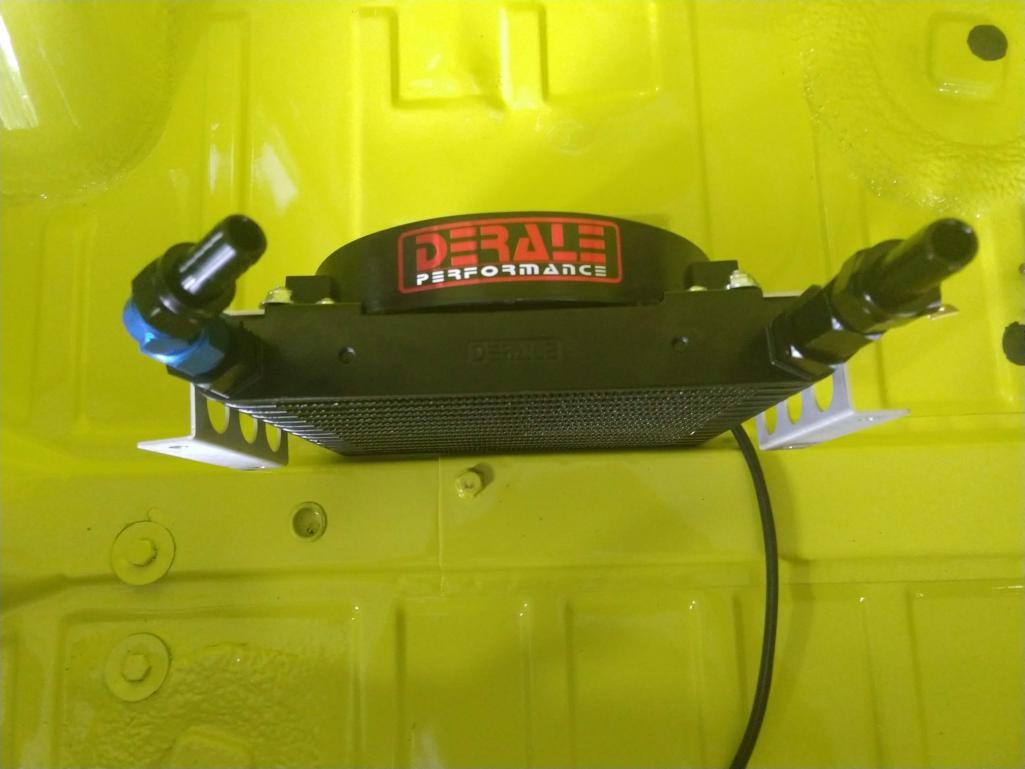
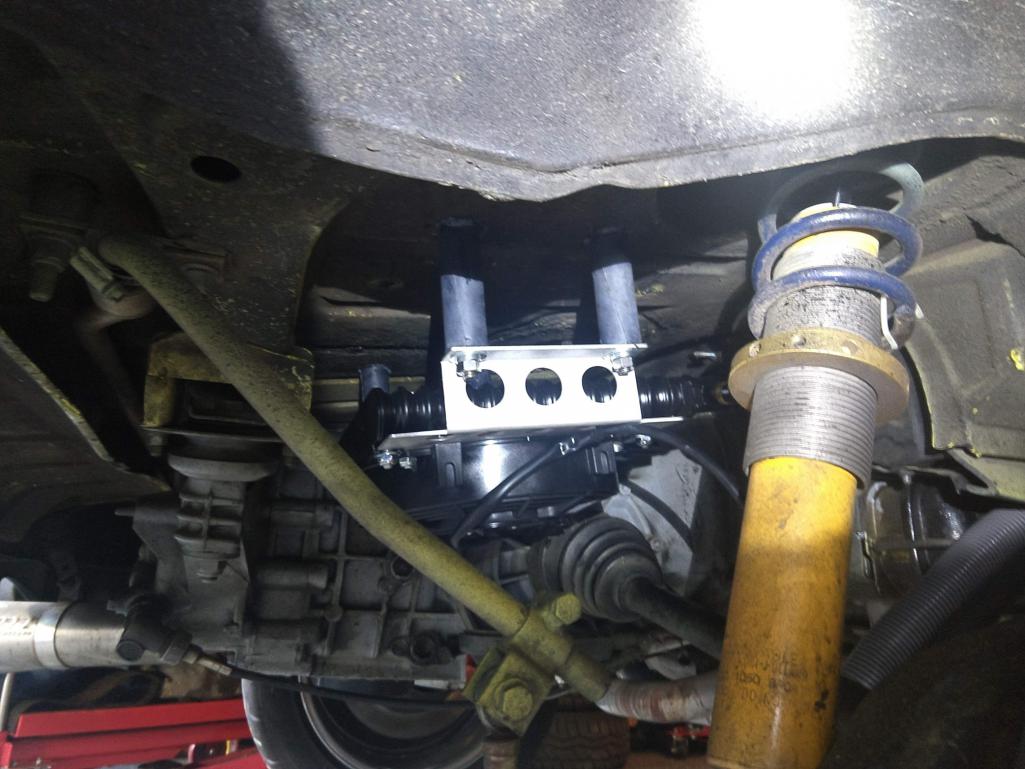
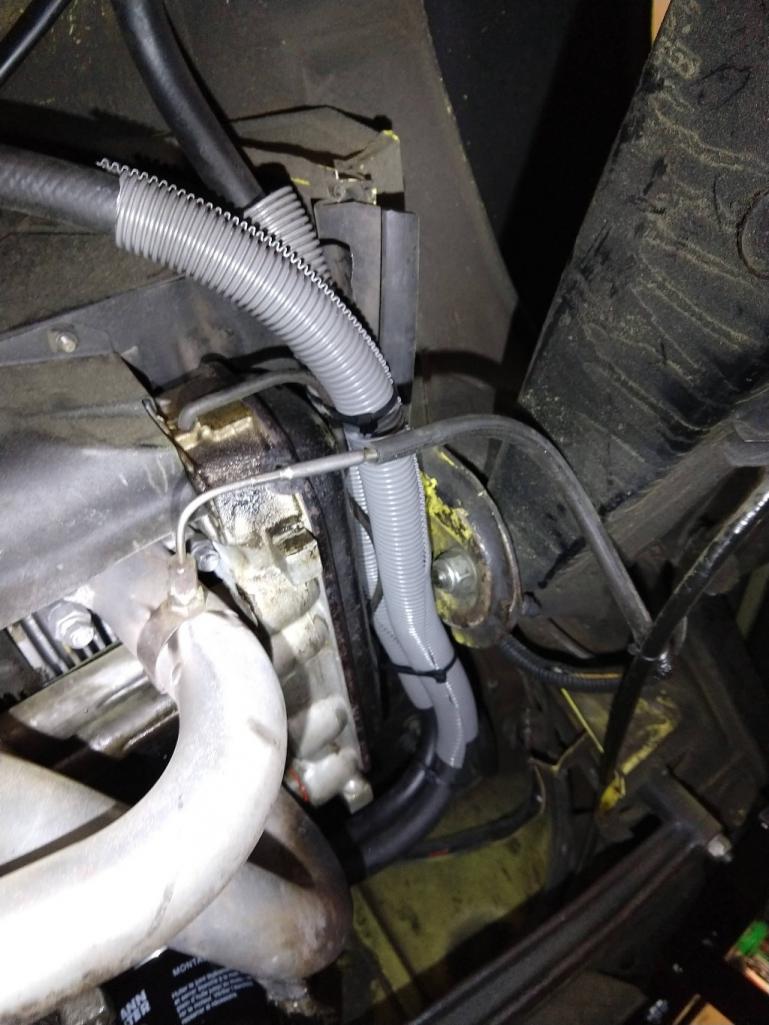
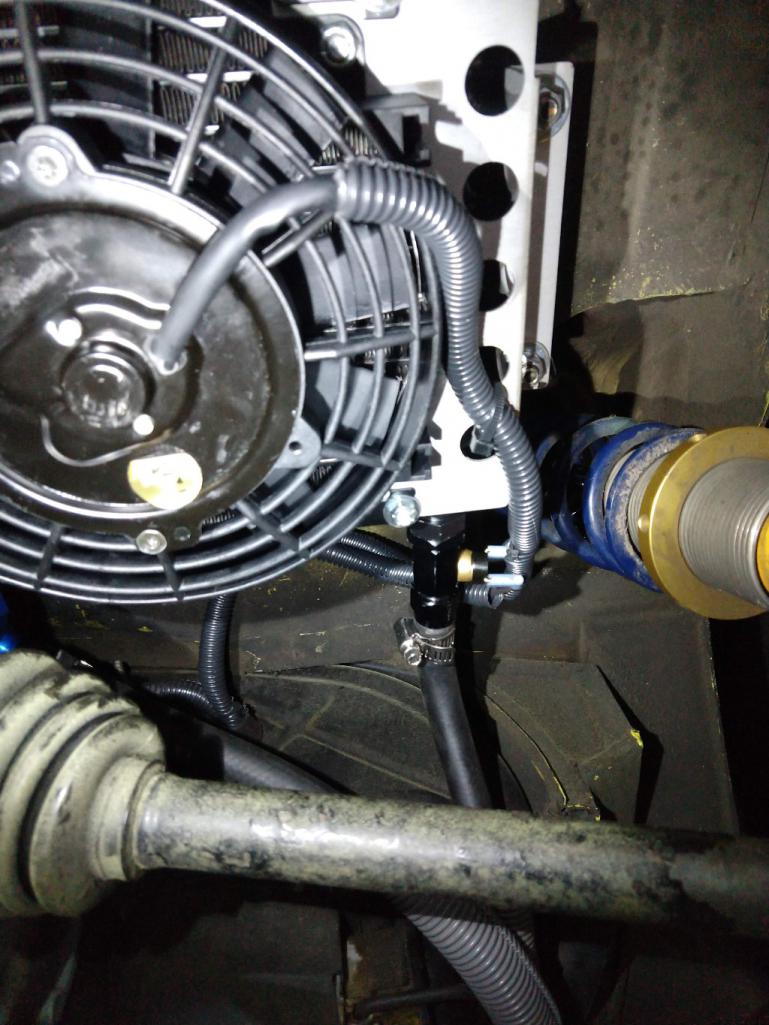
Some pics of the completed install, and I'll tell you right now, it all fits. The perspective of some of the pics has it looking like everything is going to rub, but none of it does. To get the oil to the cooler I used a pretty standard sandwich plate adapter with a thermostat built in. I made sure the line out of the sandwich plate, t-stat side, was the line that went into the cooler where the fan switch sensor was located. There are a couple of other pics to show the routing of the hose, from the sandwich plate back to the cooler. At the cooler you can see how the 45 degree swivel fitting allowed a smoother hose routing without binding. Also note I placed the cooler in line with the supply hose from the sandwich plate, hoping to avoid as much strain on the fan switch sensor mount on the cooler as I could.
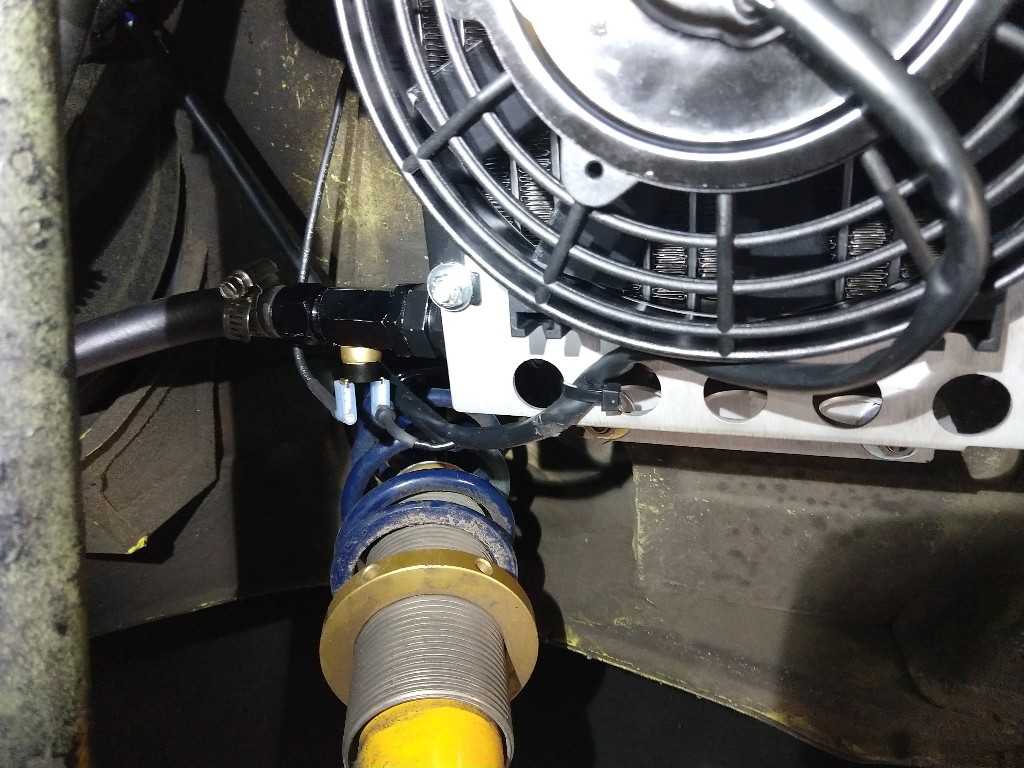
I added shielding to the hose lines and the wiring, because why not? I colored outside the lines on the wiring for the fan. The directions has the power being switched thru the temp sensor. I would prefer the power to be a direct connection to the motor. So I chose to switch the ground thru the sensor. I ran a wire from the trans ground strap lug to one side of the temp sensor, and the ground from the motor to the other side. As I noted before, I pretested the motor to be sure to get the right wires in the right spots. I used a flag style connector to the temp sensor to streamline the wire runs. For the fan power, I added a key switched relay with a 20 amp fuse. The fan notes indicated it would pull almost 15 amps at start up, but ran on much less.
The fan tilts up slightly at the hose connections due to the slope of the trunk floor. I have not noted any air lock sort of situations. I also would say that a 2" stand off would have been plenty, but they were quite a bit more $$ than the 3" for some reason. But again, the 3" made for some nice even hose runs, which I like the idea of.
Does it cool? Does it cool! On one of the hottest and most humid days of the summer, I took it out for a proving run. Temps never got over 200, where in the past I'd expect to see 220-230. CHT's remain as expected, EGT's are in line as well. I'd say a win all around. 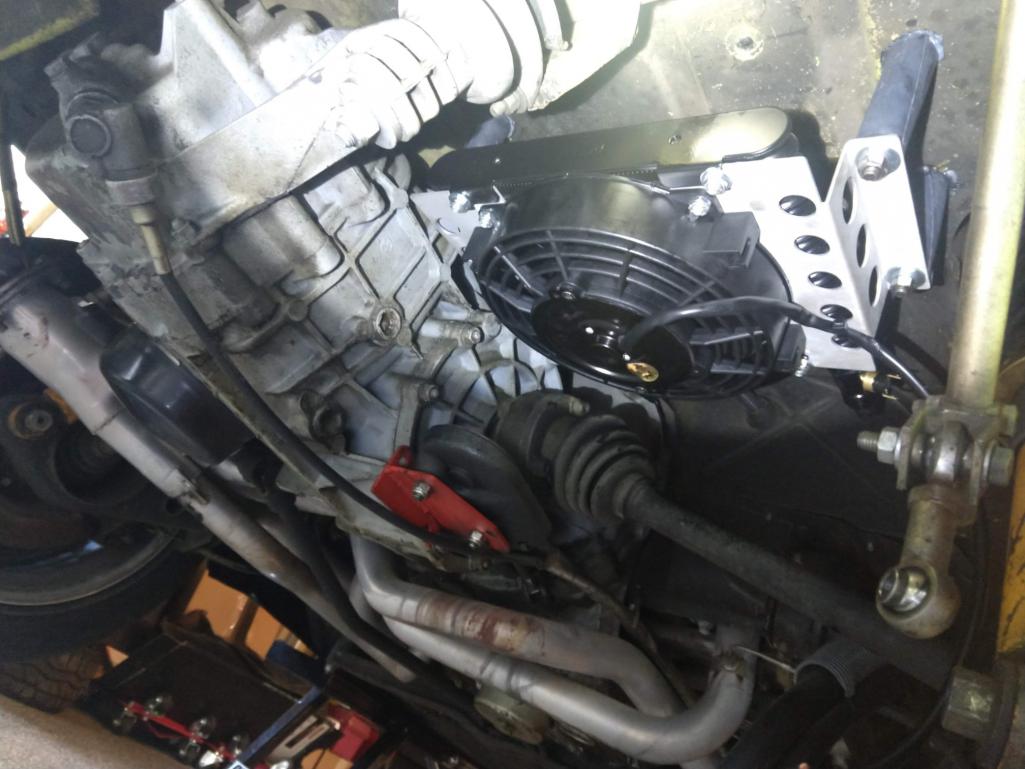


A few more pics to follow tomorrow.
Posted by: Frankvw Aug 5 2020, 01:00 AM
although I am not going this route myself, it is interesting to see and I want to compliment you with the post, explanation and clear pics. Thanks !
Posted by: Cairo94507 Aug 5 2020, 06:04 AM
Very nicely done and excellent write-up too. 
Posted by: Tdskip Aug 5 2020, 07:04 AM
Thanks for the write up and well documented steps/pictures.
Wonder what engine capacity this is good up to? 2.4 or 2.7L?
Posted by: crash914 Aug 5 2020, 05:00 PM
I like the new style clutch cable mount. Mine is the old style and hangs down...time to give Chris a call!
Posted by: 913B Aug 5 2020, 11:19 PM
My compliments also to you for the excellent write-up, I too am not in the market for a cooler right now, but good to have your write up for the future. I always thought oil coolers had to be mounted in the front trunk for ram air, but I assume it does the job for your size motor. So the sandwich plate adapter with the thermostat built-in will only send oil to the cooler when it reaches a certain temp? I assume any additional cooling is good for a 2056, but not necessary if your motor wasn't so 'hot'?
Sorry for the noob questions, just learning.
Posted by: ottox914 Aug 7 2020, 12:17 PM
Finally, the rest of the pics, showing ground wiring, loom shielding, flag terminals, and the end product. 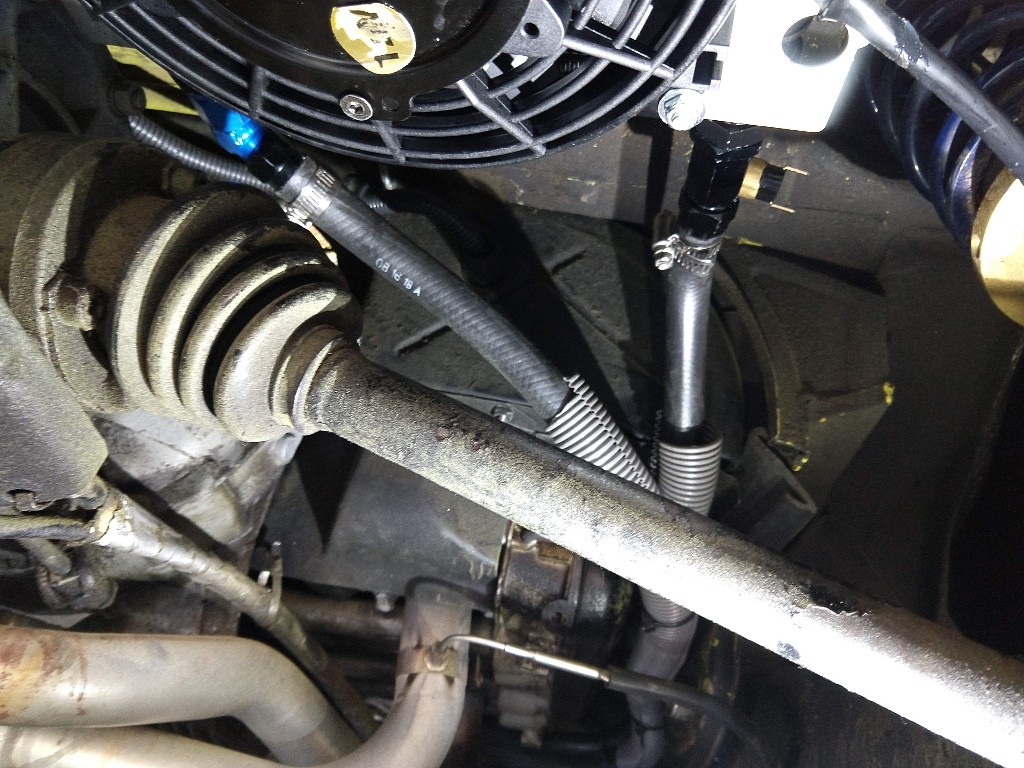
Posted by: ClayPerrine Aug 7 2020, 06:13 PM
Where did you put the relay??? You should never run the load of a fan through the thermo switch. It will eventually burn out from the amp load and the fan will come on and stay on.
I always wire the relay to receive power from the battery positive post on the starter. That makes it completely independent of the rest of the electrical system. The fan will continue to run after the car is off until the thermo switch temp drops below the set point.
Posted by: ottox914 Aug 7 2020, 09:17 PM

Where did you put the relay??? You should never run the load of a fan through the thermo switch. It will eventually burn out from the amp load and the fan will come on and stay on.
I always wire the relay to receive power from the battery positive post on the starter. That makes it completely independent of the rest of the electrical system. The fan will continue to run after the car is off until the thermo switch temp drops below the set point.
Relay is in the engine compartment. I agree, running power thru that dinky thermo switch is asking for trouble.
I added a 4 fuse accessory fuse box that is powered directly from the battery. The SDS ecu, coil pack, fuel pump, and now oil cooler fan each get a fused line directly from the battery, that goes to 4 key switched relays, that power each of the electrical additions to the car.
Your suggestion of wiring would allow the fan to run on after the car was shut down, and so long as the thermo switch did not fail closed, it would turn off eventually. My set up will turn off with the car. I feel a little safer about that, such as at an autocross, where if the fan came on and stayed on, I'd have a dead battery by the time my run group came up again. I see merit in both wiring set ups.
Posted by: Tdskip Aug 8 2020, 05:56 AM
So what engine size/capacity would this nicely done and documented set up work for?
“It depends”.
Yes, understood, but best hunch?
Thanks for the write up @http://www.914world.com/bbs2/index.php?showuser=1438
Posted by: ottox914 Aug 8 2020, 07:03 AM
So what engine size/capacity would this nicely done and documented set up work for?
“It depends”.
Yes, understood, but best hunch?
Thanks for the write up @http://www.914world.com/bbs2/index.php?showuser=1438
I'm gonna stick with "it depends". Not the answer you were looking for, but thats it. If you search for under trunk oil cooler installs you will find them on a variety of engine sizes.
Use seems to me to be a bigger factor. If you do open track days, time trials, or similar activities, front mount all the way. Lots of air flow, and you'll need all that cooling for a 20 min session with your foot flat to the floor. Trunk mount will not get it done.
There are lots of under trunk mount coolers, many smaller than this one, and not fan assisted, that provide enough additional cooling to be worth the effort. My 2056 runs about 9.5cr, not a huge cam, but much more aggressive than stock, a header exhaust and ITB's, with some HAM heads. It made 138hp. The stock cooler was fine for autocross, and highway driving up to about 60mph. Above 65mph on the highway for a sustained trip, temps would creep up to 230+. At an autocross on a 95 degree day with lots of midwest humidity, a 70 second run would get me up around or over 200, but temps would drop down on the way back to grid.
So I added the cooler for some safety at the autocross, and the ability to go 70-80mph on the way to and from the event. On another one of those 95 degree massive midwest humidity days, I took the car out for a little back roads testing, hammering it hard. Temps never hit 200 for more than just a second or 2. So for my use, this is a very good option.
Would it cool a 2.3, 2.5, 2.7 big 4 cyl motor? I don't have any idea about how much heat those put into the oil, and how much heat the cooler can remove from the system. Do the big engines have iron or nickies for cyls? Stock or a/m cooling? Where do you live? At altitude or not? Pleasure, autocross, track day?
Depending on what you consider a safe oil temp, I'd think this set up could handle more motor. If it takes an unusually hot day with hooligan driving for my motor to hit 195, a less stressful day and reasonable driving should allow more cooling capacity for a bigger motor. And if your thoughts on safe oil temps are, say, 220 rather than 200, you would have even more room for more motor with this set up.
So there's your best guess. It still depends.
Powered by Invision Power Board (http://www.invisionboard.com)
© Invision Power Services (http://www.invisionpower.com)