Printable Version of Topic
Click here to view this topic in its original format
914World.com _ 914World Garage _ Trailing arm bushings
Posted by: Porschef Sep 5 2020, 02:37 PM
There’s a pretty good chance I may be removing these on Labor(!) day, is there a recommended/preferred tutorial for this procedure? I’ve seen a YouTube video or two, but they’re not as descriptive as I’d hoped for. This’ll be my first rodeo...
I don’t know what’s happened to the search feature but it ain’t what it used to be.
Thanks in advance all.
Posted by: mgp4591 Sep 5 2020, 03:09 PM

There’s a pretty good chance I may be removing these on Labor(!) day, is there a recommended/preferred tutorial for this procedure? I’ve seen a YouTube video or two, but they’re not as descriptive as I’d hoped for. This’ll be my first rodeo...
I don’t know what’s happened to the search feature but it ain’t what it used to be.
Thanks in advance all.
Are you planning on a rebuild or just removing them?
Posted by: 76-914 Sep 5 2020, 03:21 PM
There’s a pretty good chance I may be removing these on Labor(!) day, is there a recommended/preferred tutorial for this procedure? I’ve seen a YouTube video or two, but they’re not as descriptive as I’d hoped for. This’ll be my first rodeo...
I don’t know what’s happened to the search feature but it ain’t what it used to be.
Thanks in advance all.
Use google to search. Type in "trailing arm bushing replacement" (or similar phrase) and add "in 914world.com"

Posted by: bkrantz Sep 5 2020, 09:04 PM
I used a hydraulic press to remove my old bushings, and put new ones in. See my rebuild thread.
Posted by: Porschef Sep 6 2020, 06:34 AM
Going for a rebuild; I know I have a bad bearing and I’m hoping new bushings eliminate a clunk.
Thanks all
Posted by: mepstein Sep 6 2020, 07:30 AM
I used a hydraulic press to remove my old bushings, and put new ones in. See my rebuild thread.
I just bought the harbor freight 20 ton model. I had one at the shop I used to work and could always drive there to use it but for $150 it is convenient to have one at home.
Posted by: aharder Sep 6 2020, 09:12 AM
Ian Karr has a Youtube of removal and replacement for the 914Rubber bushings.
It worked pretty good for me.
https://www.youtube.com/watch?v=qa-apYYIjlg
Posted by: Montreal914 Sep 6 2020, 10:08 AM
Ian Karr has a Youtube of removal and replacement for the 914Rubber bushings.
It worked pretty good for me.
https://www.youtube.com/watch?v=qa-apYYIjlg
That video is for the front A-arm, I believe the OP is looking for the rear trailing arms...
Posted by: aharder Sep 6 2020, 10:22 AM
Ian Karr has a Youtube of removal and replacement for the 914Rubber bushings.
It worked pretty good for me.
https://www.youtube.com/watch?v=qa-apYYIjlg
That video is for the front A-arm, I believe the OP is looking for the rear trailing arms...
Mybad....
I found this for the rear, another one I followed.
https://www.youtube.com/watch?v=0as7HlXDj6M
https://www.youtube.com/watch?v=481k4MSsnfs
Posted by: bdstone914 Sep 6 2020, 12:51 PM
@http://www.914world.com/bbs2/index.php?showuser=12152
' date='Sep 5 2020, 01:37 PM' post='2848766']
There’s a pretty good chance I may be removing these on Labor(!) day, is there a recommended/preferred tutorial for this procedure? I’ve seen a YouTube video or two, but they’re not as descriptive as I’d hoped for. This’ll be my first rodeo...
I don’t know what’s happened to the search feature but it ain’t what it used to be.
Thanks in advance all.
[/quote]
I heat up the trailing arm around th he bushing until it starts to smoke. Then use a gear puller to push the shaft in easy the bushing. Then go to the other end and push the shaft back thru that bushing.
Installing rubber bushings is a lot harder.
Posted by: iankarr Sep 6 2020, 08:15 PM
Rear trailing arm video coming soon...waiting for my “studio” (the bumblebee) to get back from paint...
Posted by: 914werke Sep 7 2020, 12:44 PM
The DIY links posted above aren't the best approach. if you are hammering into place a poly bushing, dont expect much from your rear suspension.
Is there yet a OE rubber offering that isnt vulcanized in place?
Posted by: Montreal914 Sep 7 2020, 01:33 PM
I got a set of 914Rubber with the group buy not too long ago. I haven't installed them yet. But they are rubber.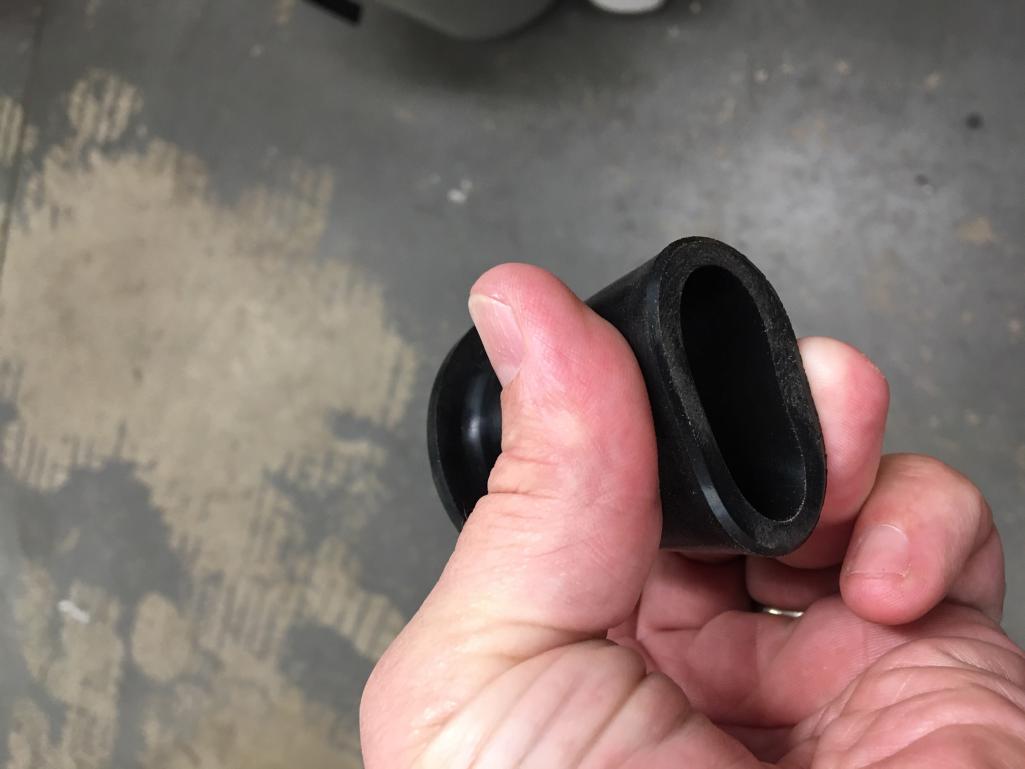
Posted by: Porschef Sep 8 2020, 07:36 AM
Rear trailing arm video coming soon...waiting for my “studio” (the bumblebee) to get back from paint...
![popcorn[1].gif](style_emoticons/default/popcorn[1].gif)
Yes, I’ll also be using the ones from 914Rubba
Posted by: bbrock Sep 8 2020, 07:51 AM
I got a set of 914Rubber with the group buy not too long ago. I haven't installed them yet. But they are rubber.
Me too. Elephant Racing also sells a rubber bushing kit but they don't come cheap: https://www.elephantracing.com/porsche/914/bushings-bearings-for-914/rubber/
Posted by: Porschef Sep 8 2020, 01:57 PM
I got a set of 914Rubber with the group buy not too long ago. I haven't installed them yet. But they are rubber.
Me too. Elephant Racing also sells a rubber bushing kit but they don't come cheap: https://www.elephantracing.com/porsche/914/bushings-bearings-for-914/rubber/
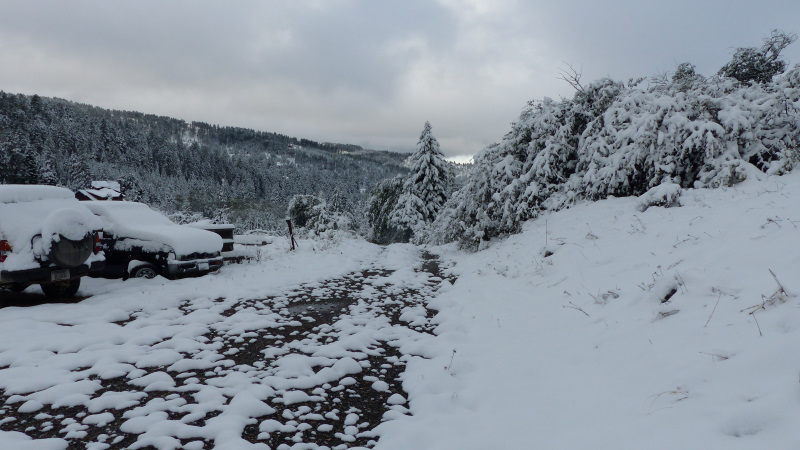
Is it true y’all had some snow already?
Posted by: bbrock Sep 8 2020, 03:12 PM
I got a set of 914Rubber with the group buy not too long ago. I haven't installed them yet. But they are rubber.
Me too. Elephant Racing also sells a rubber bushing kit but they don't come cheap: https://www.elephantracing.com/porsche/914/bushings-bearings-for-914/rubber/
Is it true y’all had some snow already?
Fake news! This was the view at our place this morning. Could pass for Hawaii.

Posted by: Montreal914 Sep 8 2020, 09:40 PM
I got a set of 914Rubber with the group buy not too long ago. I haven't installed them yet. But they are rubber.
Me too. Elephant Racing also sells a rubber bushing kit but they don't come cheap: https://www.elephantracing.com/porsche/914/bushings-bearings-for-914/rubber/
Is it true y’all had some snow already?
Actually, our weekend was burning hot at 108F.
And now the Bobcat fire is burning the San Gabriel mountains...


Posted by: bbrock Sep 8 2020, 10:13 PM
That's the crazy thing. We had the Bridger Foothills Fire burning just a few miles from us since Friday as it was hot, dry, and windy. We were just outside the evac zone but I have one friend who lost her house and many who were evacuated. Another friend had the fire burn to her front door step but somehow the house was spared while all her neighbor's homes burned. Then on Monday, the weather turned and snow damped the fire. It is warming up this week but they are hoping they can contain it if it flares up. Crazy weekend but that is Montana.
Posted by: 914werke Oct 23 2020, 01:33 PM
Uh...back on track

So I need to do a Trail arm rebuild for a customer & I looked up the offerings
ER are indeed pricey at near $400 for their "Kit" only..
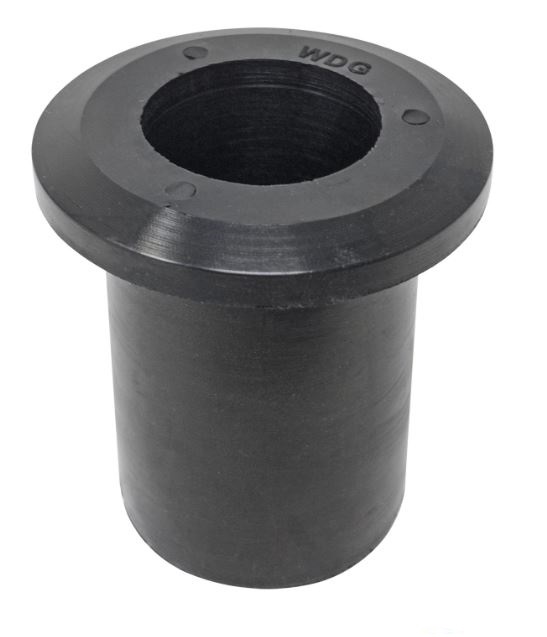
Rubber lists an item for bush'es only, but no description & the pic doesn't look like a rubber part
more like a poly part?
Posted by: 914_teener Oct 23 2020, 02:01 PM
I've done these and you need to think about how it functions and how it was designed.
The replacements "bushings" orginally do not function as how the swing arm was orginally designed. My opinion since I did not design them.
Originally the rubber is vulcanized into the control arm with the metal rod through it. Sorry don't have the PET as reference. The arm acts more torsionally and as a damper for vibration. I just think this was a cheaper way of doing it. Addtionally.....check the swing arm first to make sure they aren't bent...I'm sure you probably already know this .
Over time this rubbercompound deteriorates and cracks putting the torsional load onto the mounting nut or attachment point (the slotted 17MM nut if IIRC). This will and does oval that hole out.
Now...the replacements since they are not vulcanized into the shaft act more like true bushings. When I replaced mine I realized that they are a compromise to the design.
I would suggest the hardest coumpound possible without sacraficing dampening. Since the shaft will now rotate through it's degrees of freedom which are compound by the way, I put zerk fittings around the arm and cut sprial grooves into the inside edge of the bushings.
I deemed the Elephant ones to hard in durometer for my liking. Other opinions may vary. If you can bend that outside flange I'd think those too soft and maybe an issue to align the car. IMHO.
At the time Eric at PMB just started selling them and those worked out ok. Now I think Mark at 914 Rubber may sell the very same ones.
Good luck....I did all the rear bearings since I took both control arms off and the hubs and the CV's. Well worth doing all of them and never worried about the rear suspension after that.
I wrote a thread on this....probably six years ago...scary.
Posted by: Montreal914 Oct 23 2020, 02:01 PM
@http://www.914world.com/bbs2/index.php?showuser=453 Here's another angle on the ones I got from 914Rubber group buy. Exactly like the one you pictured.  Looks rubbery to me
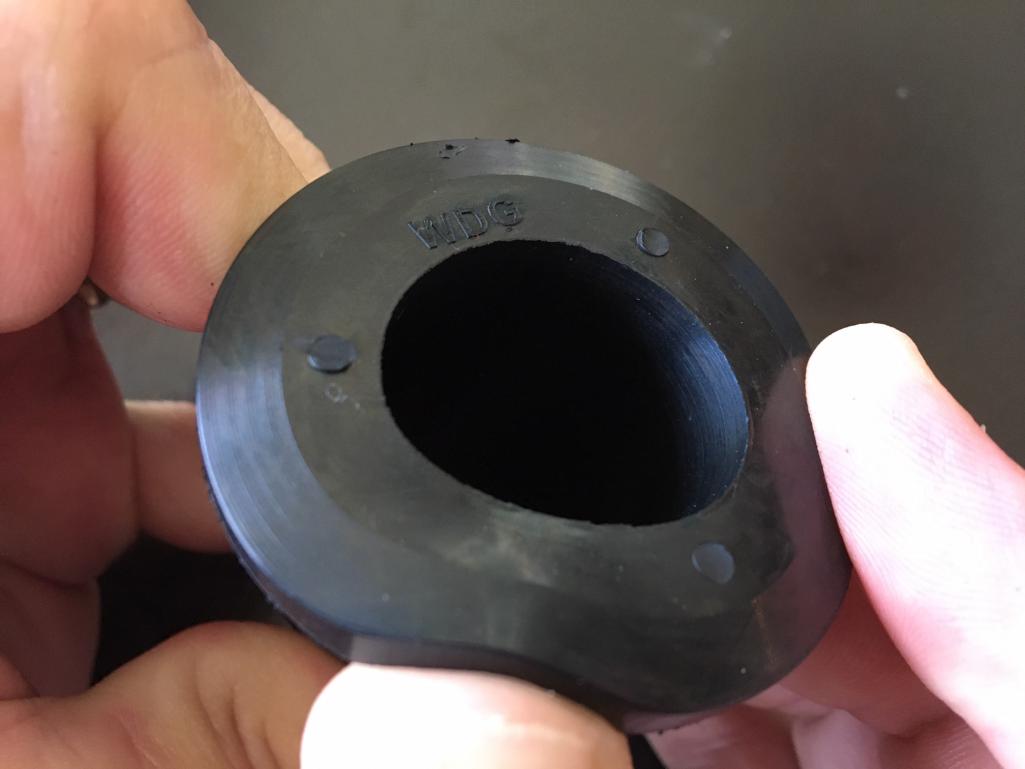
Posted by: 914werke Oct 23 2020, 02:33 PM
Thanks for the confirmation. Was hard to tell from the image.
@http://www.914world.com/bbs2/index.php?showuser=9489 Ive also done installations identical to your description and in fact considered this the only option up to this point for renewing those bushes.
Some precision is necessary & indeed the durometer (density/elasticity) is important, although I disagree, If youve done this job you'll find the OE rubber bushes aren't actually vulcanized to the shafts. If they were the only way to remove them would be to burn them off /clean.
Regardless, ER sells a "kit" with proprietary (& patent pending!) tools to accomplish ~
Im curious anyone BTDT?
I imagine installing those soft(er) rubber units is somewhat tricky?
Posted by: 914_teener Oct 23 2020, 02:51 PM
Thanks for the confirmation. Hard to tell from the image.
@http://www.914world.com/bbs2/index.php?showuser=9489 Ive also done installations identical to your description and in fact considered this the only option up to this point for renewing those bushes.
Some precision is necessary & indeed the durometer (density/elasticity) is important, although I disagree, If youve done this job you'll find the OE rubber bushes aren't actually vulcanized to the shafts. If they were the only way to remove them would be to burn them off /clean.
Regardless, ER sells a "kit" with proprietary (& patent pending!) tools to accomplish ~
Im curious anyone BTDT?
I imagine installing those soft(er) rubber units is somewhat tricky?
Well...I'll agree with you on the less expensive solution as a compromise. Elephant has bonifide engineers...I'm only a civil...they have ME's and Tarrett himself is an ME and their stuff is super nice if your customer wants something like that and wants to pay for it.
I'll respectfully disagree with your disagreement on getting the shaft out and how they did it at the factory.
I think Kent @http://www.914world.com/bbs2/index.php?showuser=9964 made a set of tools that frankly were ingenious for a plumber that worked great. Think he used the stuff (bushings) thatMark sells IIRC.
Good luck.
Edit:
Ah I will recind my snark disagreement with this caviat:
Orginally I notion that they used a vulcanizing tool fixture for the shaft. This speeded manufacturing and assured the aspect of the arm and shaft. In essence for manufacuring purposes. Probably and due to the degrees of freedom that they knew that it...the shaft...may easily rotate if it needed to.
If the rubber deteriorated in the cars life cycle...say 15 years...you'd get the whole assembly..not a bushing because that aint how it was manufactured.
What they never counted on or designed was these little cars lasting 50 plus years and hence never sold a part like this.
So we agree.
Posted by: 914werke Oct 23 2020, 05:18 PM

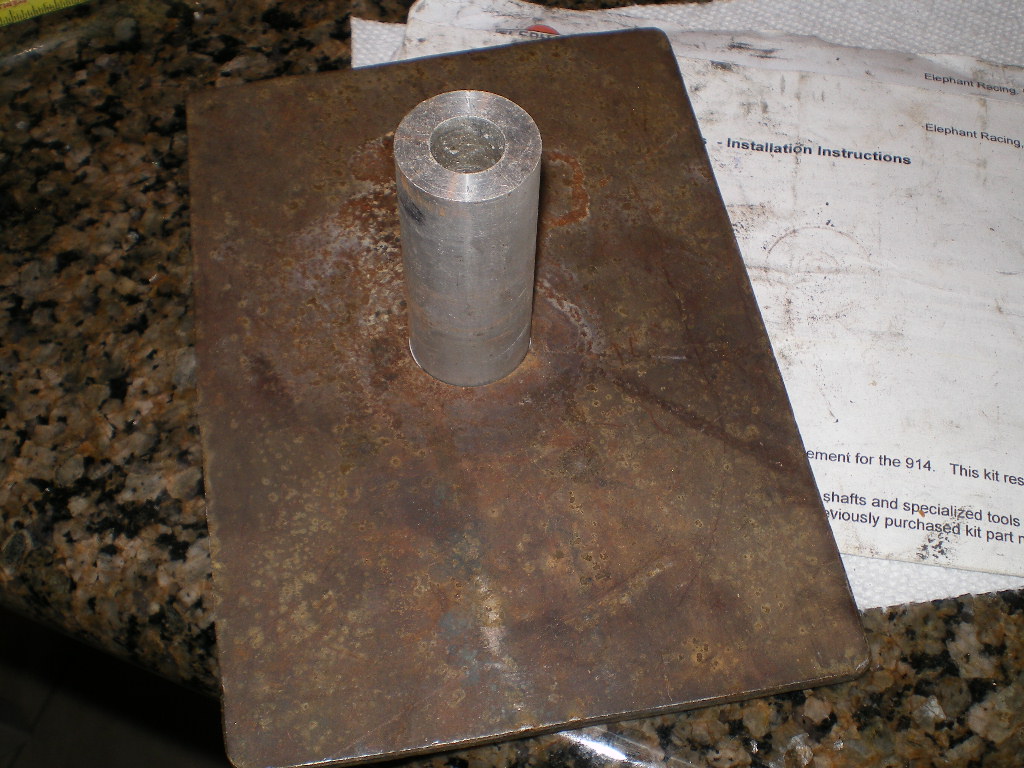
Posted by: 76-914 Oct 23 2020, 07:34 PM
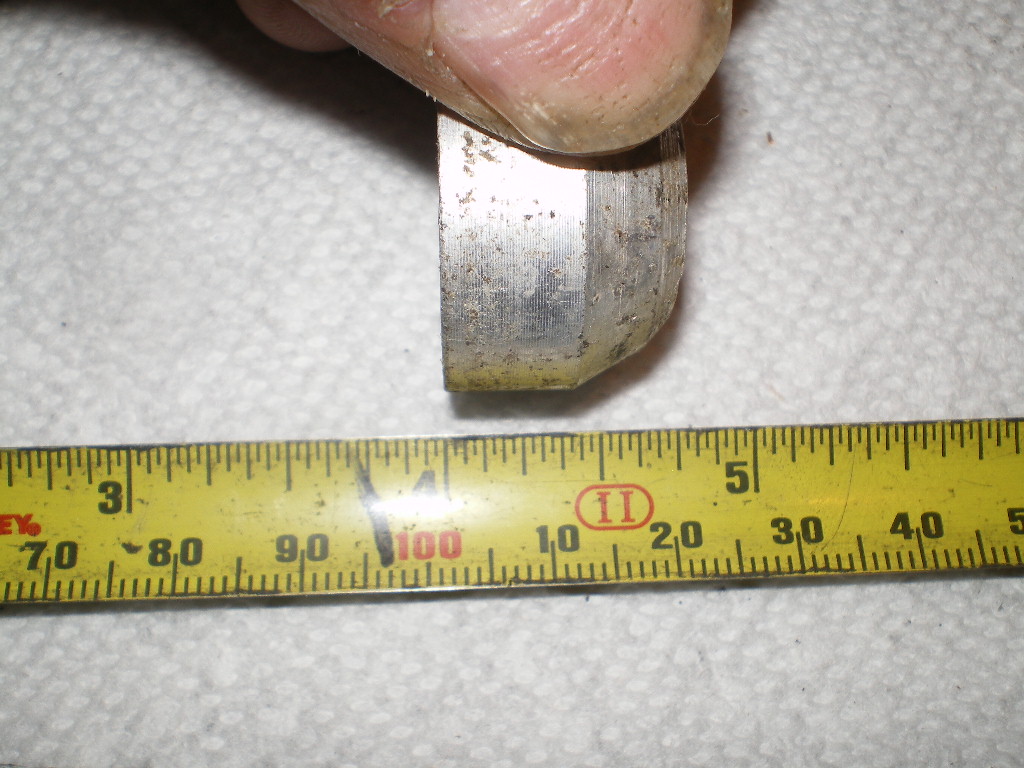
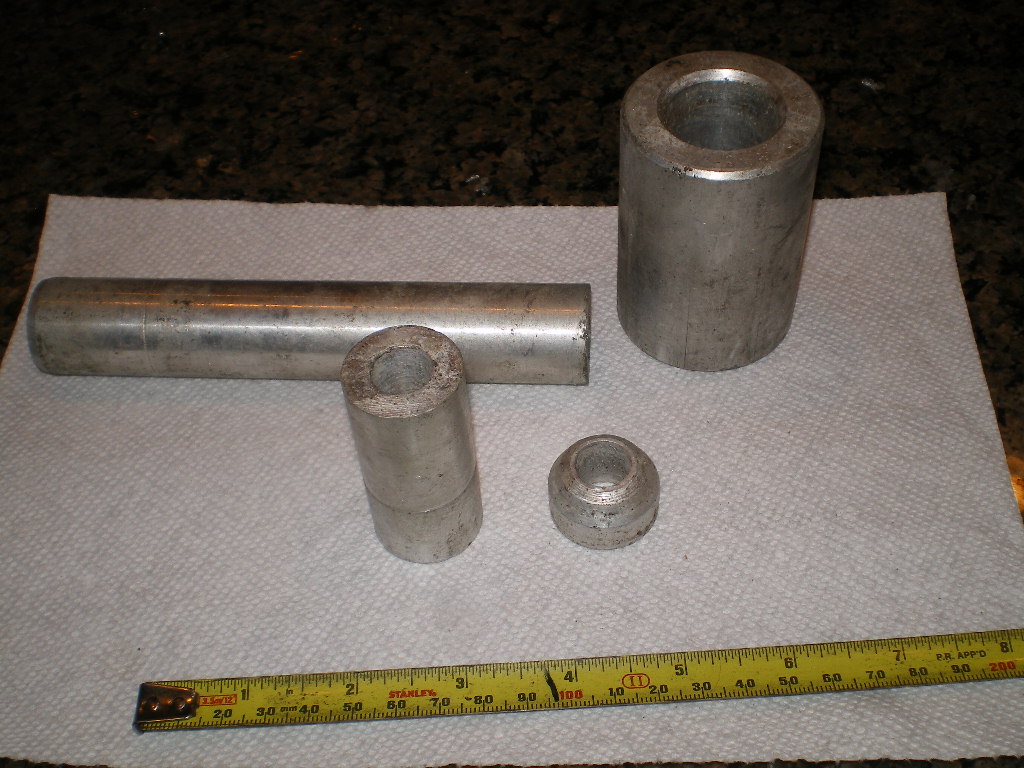
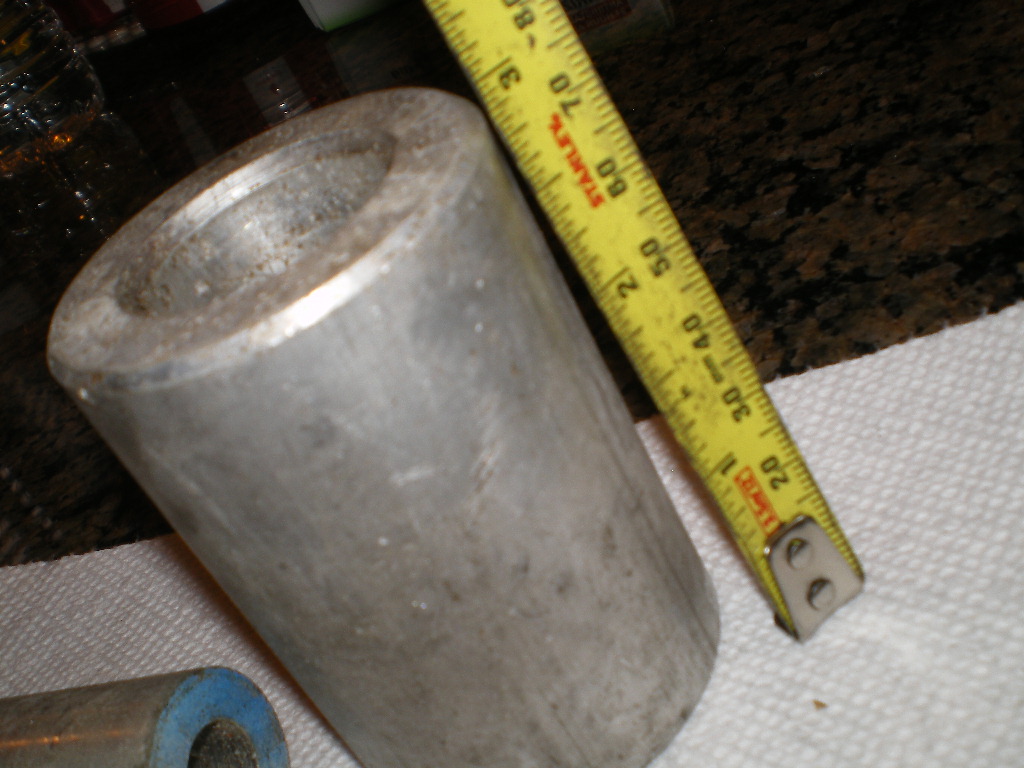
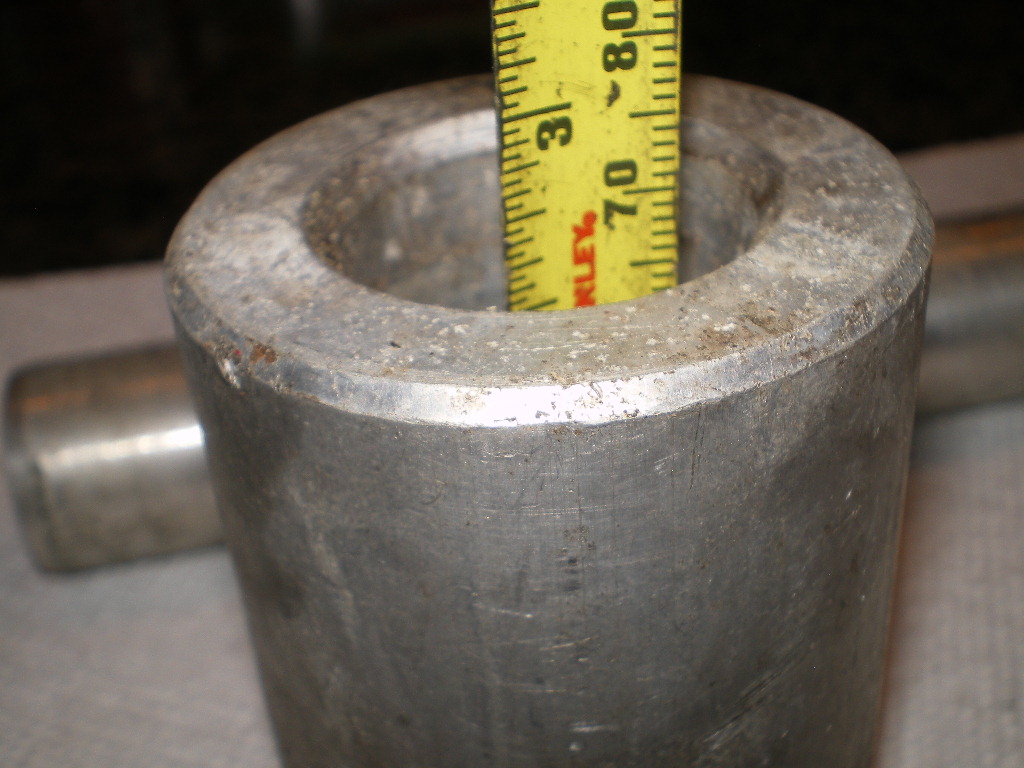
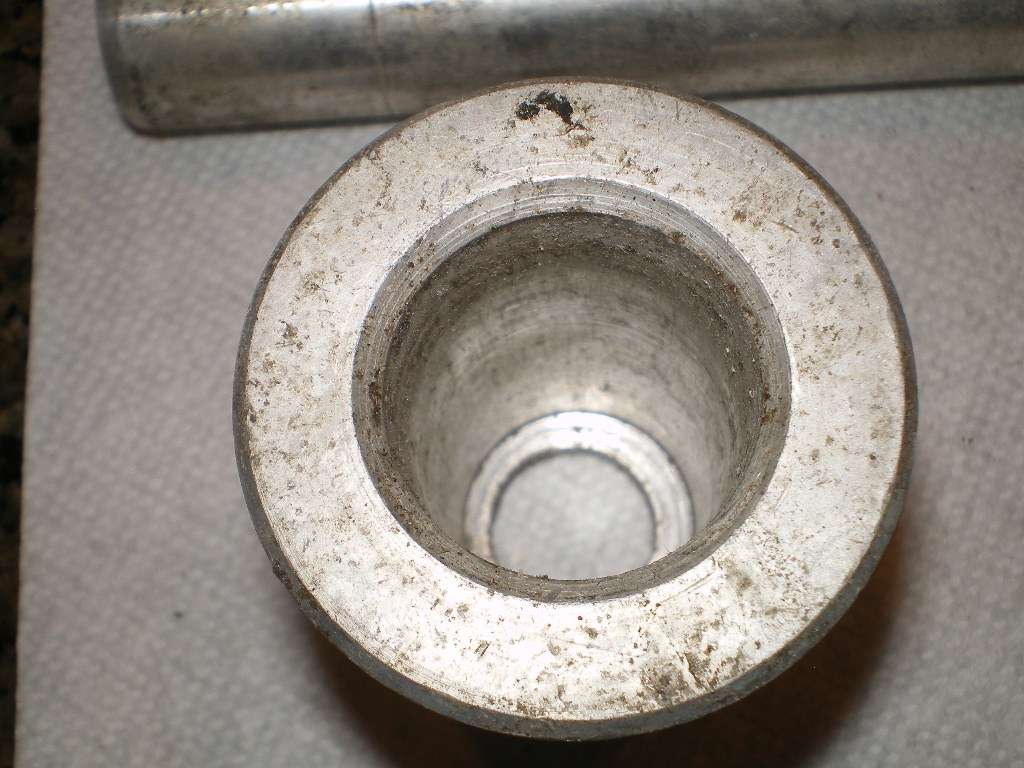
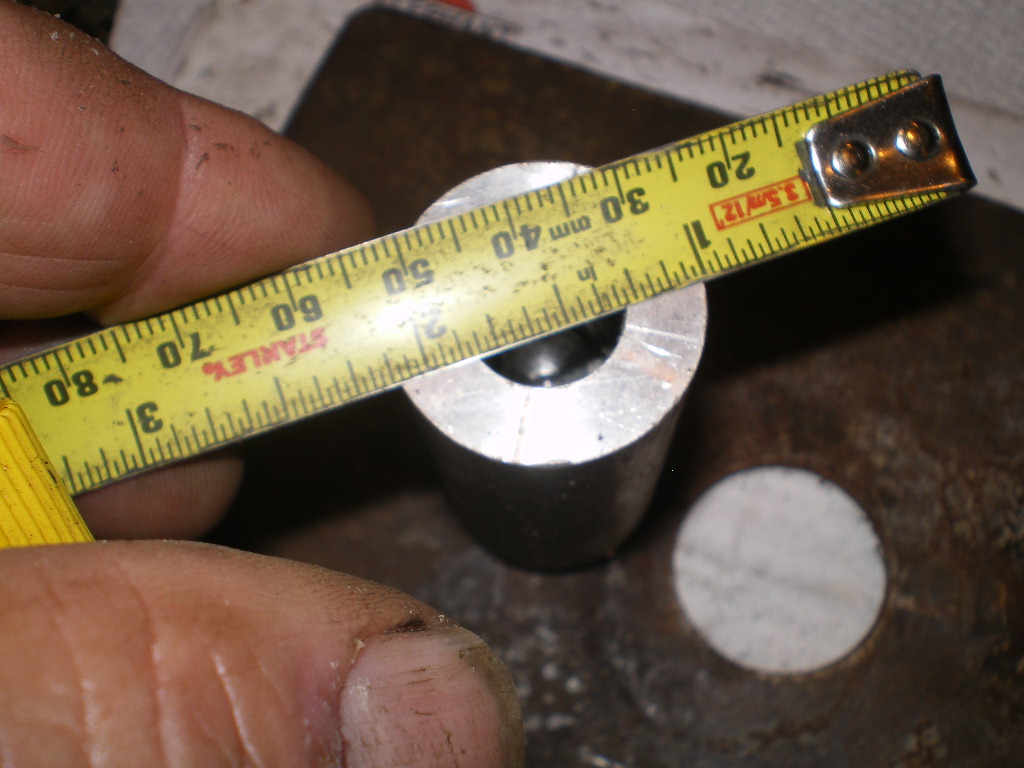
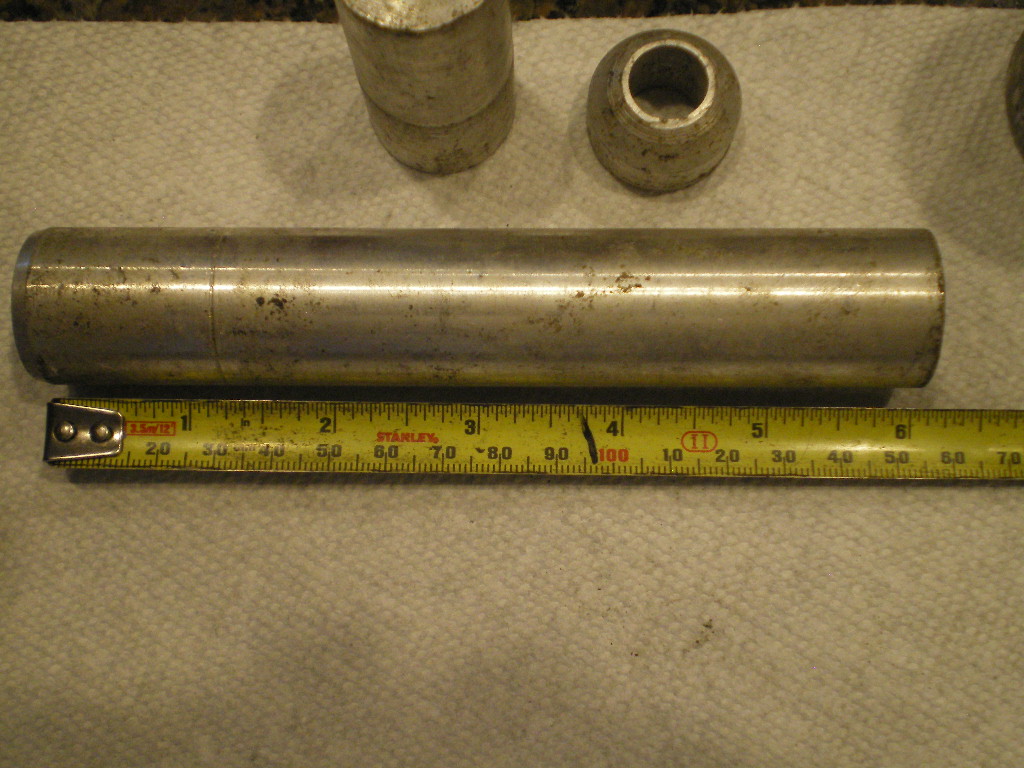
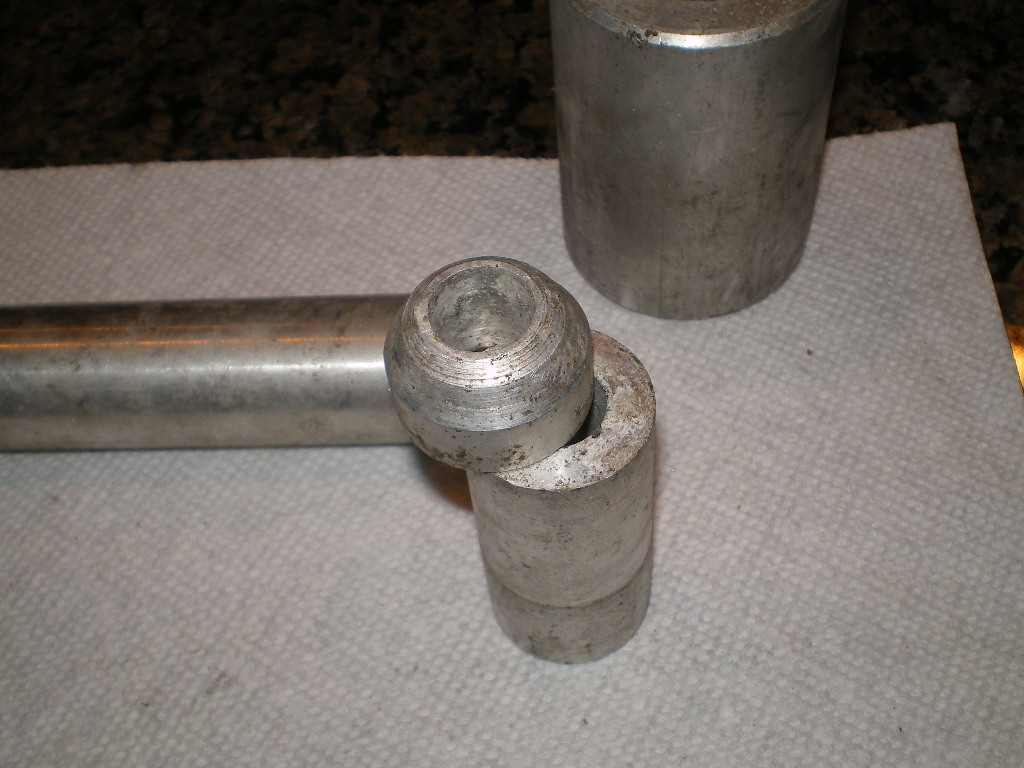
I can't even remember what I had for breakfast but I'll try. I basically duplicated ER's tooling except I made some longer rods. I can tell from these pic's that the 914rubber isn't nearly as stiff as the ER product. After mistakingly installing the urethane bushings I didn't want to take a chance so I went with the ER product but with the bushings only. Another member gave me the dimensions of the tools and I turned some scrap 6061 round stock with small variations. Look at the pics for dimensions. The rods are the same diameter as the shaft. 1st install one of the bushings in the trailing arm w/o any lubricant on the outer part. The nemesis here is that the rubber bushings grab and want to tuck inside with the shaft. No sense in lubing the outside which would only make it easier for the bushing to move inwards. Now insert the copper (or whatever material you have) tube in from the other end. It's wide enough to slide over the shaft and with the end shaped as an octagon it covers the thickness of the bushing. Ideally you would turn some stock with the same I.D. as the shafts O.D. & the shafts O.D. the same as the rubber bushings O.D. The length of this copper tube is important. When the octagon end is butted against the bushing that you just installed into the drop arm the other end will be flush with the edge of the drop arms sleeve. Next Lub the shaft and inside of the bushing then place the drop arm on the bench press with the shaft pointing up and the other end of the copper tube on a flat plate. Press the shaft in adding lube as needed. Once it has about 4-5" remaining out flip it over and place that little "bullit" nose cone on the shaft with that short extension and install the other bushing. The inside end of the bushing should just come to rest on that little bullet piece so it won't fall off when you flip it over. The metal plate has a hole drilled in the center and it's diameter is just a 1/16" larger than the shaft. Place that plate on your bench press. Now put the 2nd bushing on it and continue pressing the shaft until it protrudes through the hole drilled in the plate. You may need to press the shaft from one end and then the other to get both bushings flat and not bulging out . The fit is so tight that when I installed the drop arm on the car and tightened it down I positioned the drop arm at the 1/2 way point of it's travel. I don't know and I'm not an engineer but I believe the grip of these rubber bushings, when installed, is a key part of this cars suspension. The big round barrel piece and the long slim rod are the pieces supplied with the bushings. Neither one of them were much use to me. Maybe if the fit was more loose they'd have been fine.
Attached image(s)

Posted by: 914werke Oct 23 2020, 07:39 PM
 gotta make some tools
Posted by: Mikey914 Oct 24 2020, 09:28 AM
As you all know these cars were built inexpensively. The seats were actually tube thar the threaded ends were welded to. These welds often have pinholes that allow water into the tube and they can rust from the inside out. This is why we made the shafts with the tube. Elephant made the tube also but at a non stock diameter. This means for a proper fit you must use their shafts with their bushings.
We made ours to be separate send alone products.
No they were not a vulcanized part.
In making these we started with a delrin bushing as we wanted to make a tight tolerance part to press in. What we found after doing 4 sets was there was a lot of variation in condition as well as tolerances
Rubber (like factory ) really was the best option.
The problem is that the 1st side fits nicely and when you go to install the 2nd side you are fighting the air you are compressing into the cylinder of the arm. It can be done, but drilling and tapping a hole for a zerk fitting allows it to vent. That or a plug.
I hope this helps anyone thinking of doing these.
Its not a technical install but requires some patience, as well as tools.
Posted by: 76-914 Oct 24 2020, 12:23 PM
Thanks for the confirmation. Hard to tell from the image.
@http://www.914world.com/bbs2/index.php?showuser=9489 Ive also done installations identical to your description and in fact considered this the only option up to this point for renewing those bushes.
Some precision is necessary & indeed the durometer (density/elasticity) is important, although I disagree, If youve done this job you'll find the OE rubber bushes aren't actually vulcanized to the shafts. If they were the only way to remove them would be to burn them off /clean.
Regardless, ER sells a "kit" with proprietary (& patent pending!) tools to accomplish ~
Im curious anyone BTDT?
I imagine installing those soft(er) rubber units is somewhat tricky?
Well...I'll agree with you on the less expensive solution as a compromise. Elephant has bonifide engineers...I'm only a civil...they have ME's and Tarrett himself is an ME and their stuff is super nice if your customer wants something like that and wants to pay for it.
I'll respectfully disagree with your disagreement on getting the shaft out and how they did it at the factory.
I think Kent @http://www.914world.com/bbs2/index.php?showuser=9964 made a set of tools that frankly were ingenious for a plumber that worked great. Think he used the stuff (bushings) thatMark sells IIRC.
Good luck.
Edit:
Ah I will recind my snark disagreement with this caviat:
Orginally I notion that they used a vulcanizing tool fixture for the shaft. This speeded manufacturing and assured the aspect of the arm and shaft. In essence for manufacuring purposes. Probably and due to the degrees of freedom that they knew that it...the shaft...may easily rotate if it needed to.
If the rubber deteriorated in the cars life cycle...say 15 years...you'd get the whole assembly..not a bushing because that aint how it was manufactured.
What they never counted on or designed was these little cars lasting 50 plus years and hence never sold a part like this.
So we agree.
Nope, I used ER bushings.
Powered by Invision Power Board (http://www.invisionboard.com)
© Invision Power Services (http://www.invisionpower.com)