Printable Version of Topic
Click here to view this topic in its original format
914World.com _ 914World Garage _ my battery tray and hell hole
Posted by: pt_700 Sep 26 2020, 03:18 PM
given the caliber of 914 stewardship here, i kind of already know...
i'm in the midst of installing a "new to me" 1.7. not intended to be the "end all, be all" powertrain, this is more of a "tide me over" until i do my long intended small block conversion. as expected, i'm doing a lot of "while i'm in there..." work.
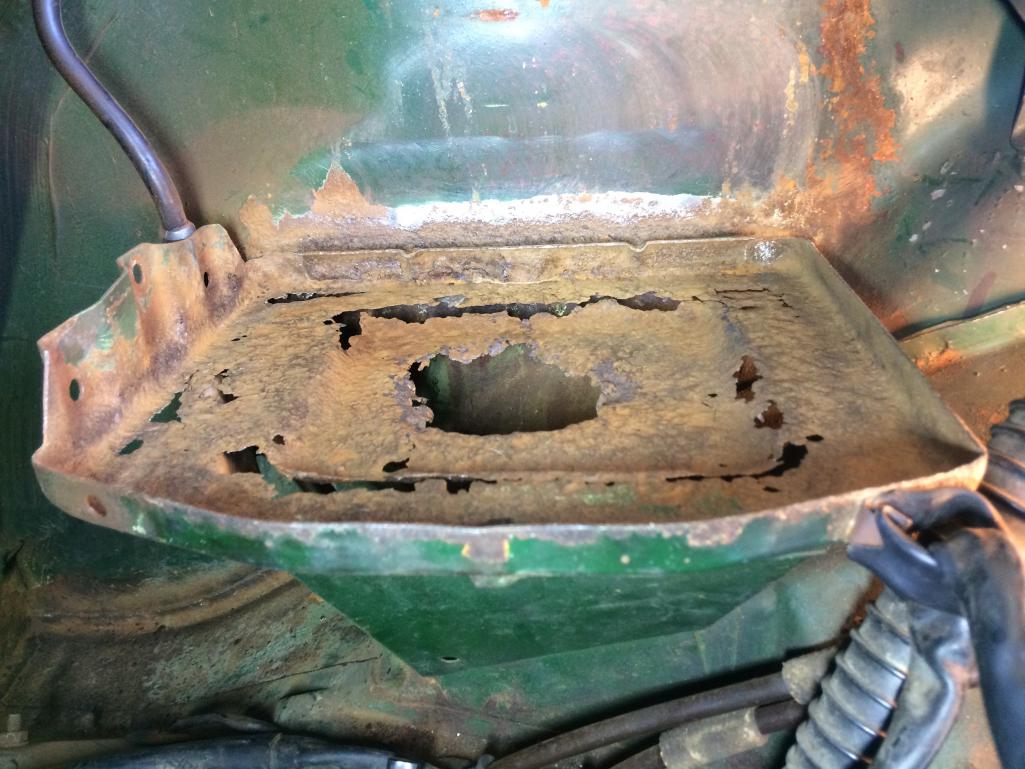
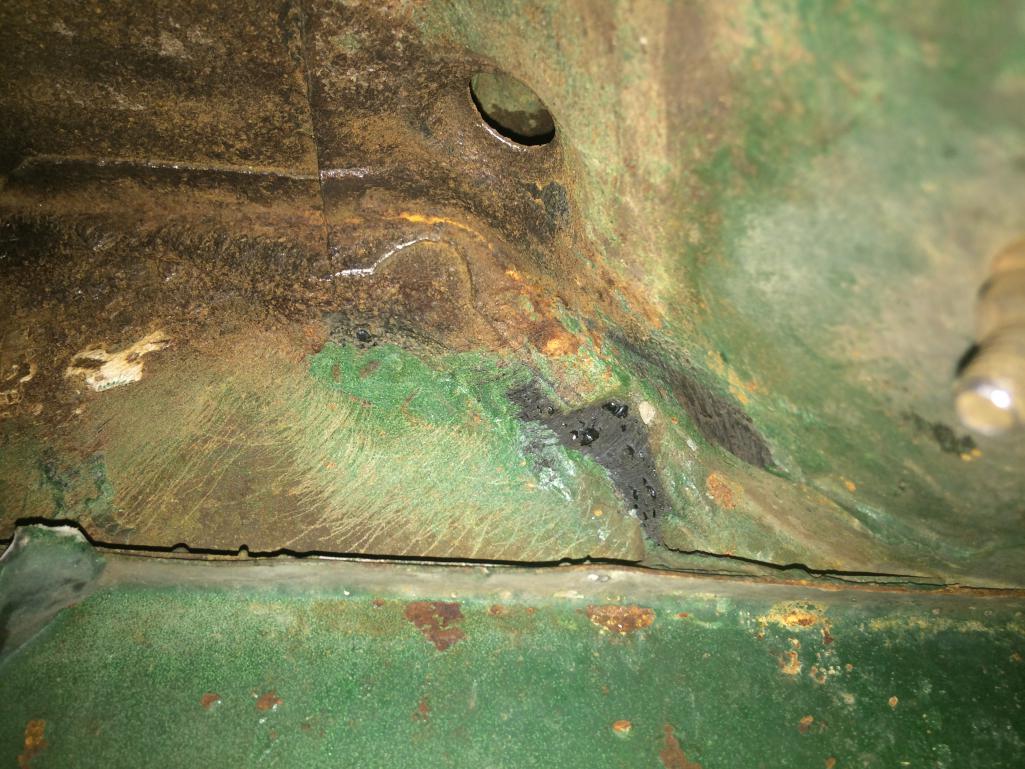
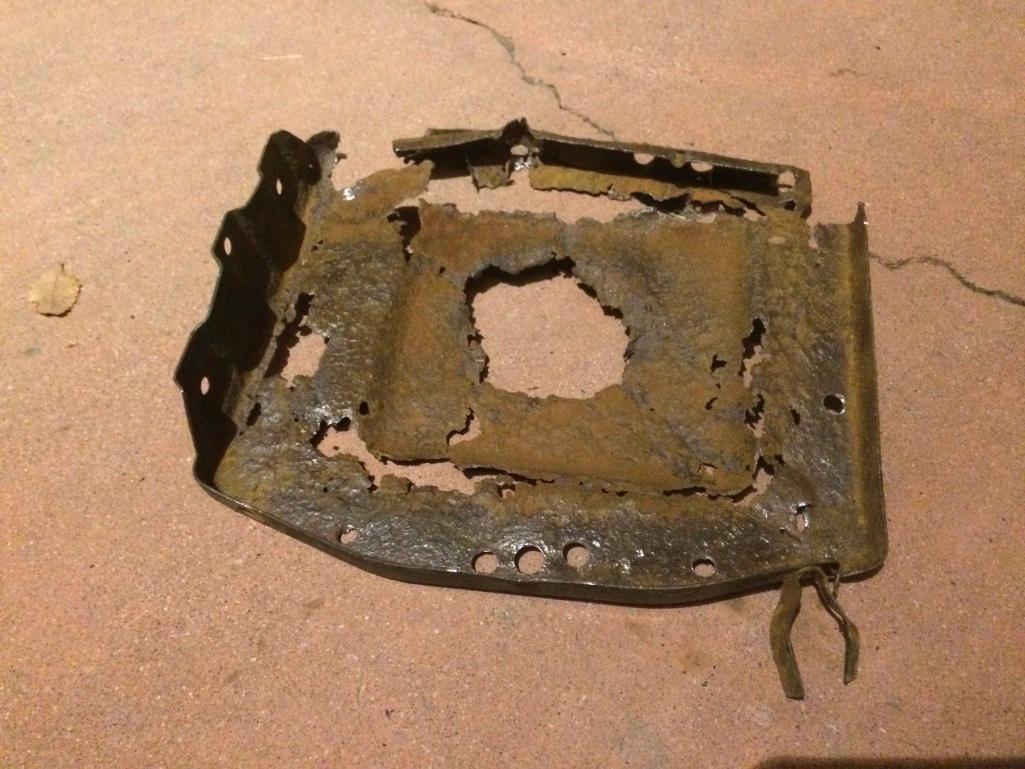
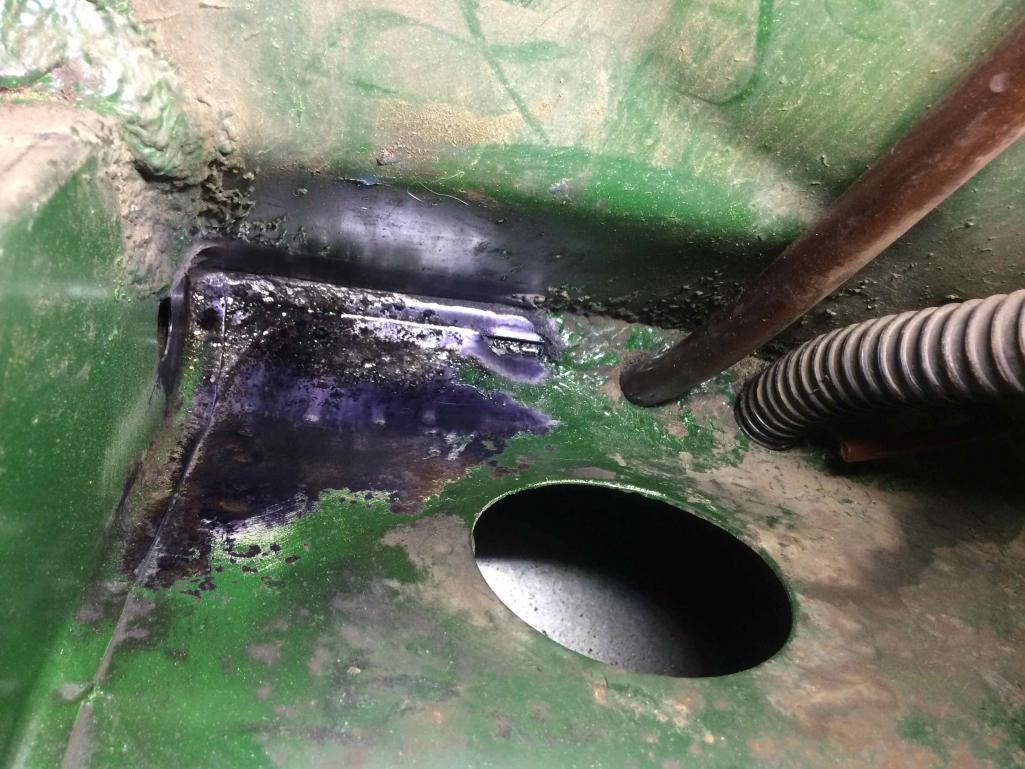
after taking a wire wheel to my battery tray and hell hole, there's more of "less" in the former, while the later is still solid. battery tray support is also still solid. tray itself feels solid, i've been using it as a step to get in and out of the engine bay to do things like body to motor mount bar brackest, upgrade firewall shifter bushing, fuel lines (while i'm in there stuff) etc...
is replacing the battery tray an "i can't believe you haven't done this already?!", or can i put it off a few more years (until the engine upgrade) with rust treatment? the car will almost never see rain, will be driven very occasionally and lives in a garage. anybody have a battery go "walkabout" while driving due to such a tray?
if i'm convinced i should replaced the battery tray now, what's a ballpark figure for that welding job? i have a few friends that weld but, it's a bit more of a favor than i'm comfortable asking, unless my favor balance was well into the black... these particular friends have already helped me way more than i've been able to help them, my conscience dictates monetary payment.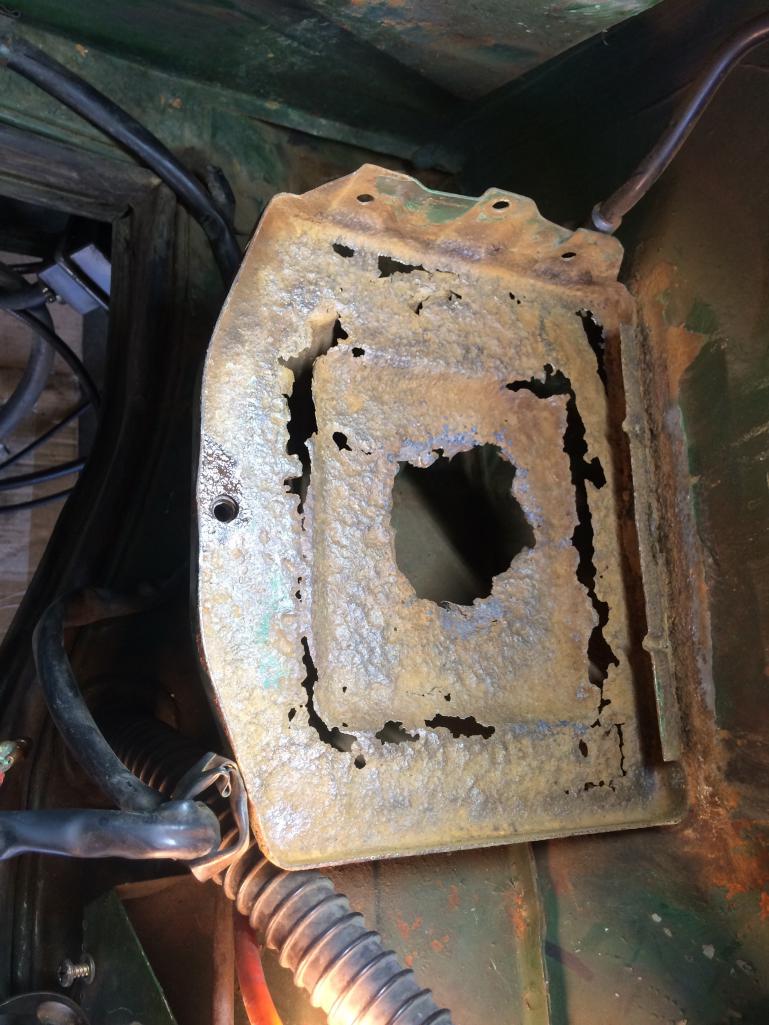
Posted by: 914Sixer Sep 26 2020, 05:56 PM
Really nice, simple battery tray replacement. 
Posted by: BillC Sep 26 2020, 07:22 PM
I would replace the battery tray, especially while the engine is out.
If you remove rest of the old tray and pre-fit the new one -- including drilling holes for plug welds -- your friend should be able to weld in the new tray in less than half an hour.
Posted by: Coondog Sep 26 2020, 07:27 PM
Consider yourself lucky....... 
Posted by: bkrantz Sep 26 2020, 08:32 PM
One other option: surgically remove the old tray, leaving the inner fender wall and the support intact. Then install a new tray bolted to the fender wall and support. Others have done this before so that the tray is removable.
Posted by: cary Sep 26 2020, 10:28 PM
Be careful removing / detaching tray from the wall. You have some degradation, but it looks like its still solid enough to weld too. But be careful.
Posted by: Superhawk996 Sep 27 2020, 08:42 AM
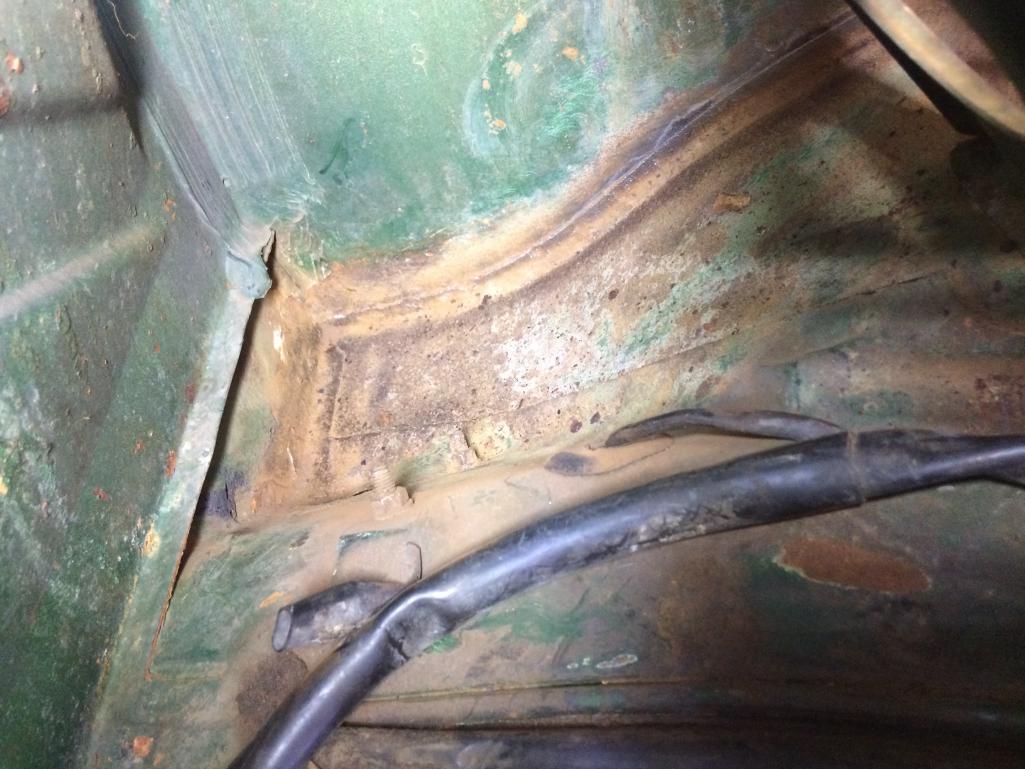
Not sure if it is just shadowing but I think I see two small black pinholes on the firewall (left side in the hell hole pocket). 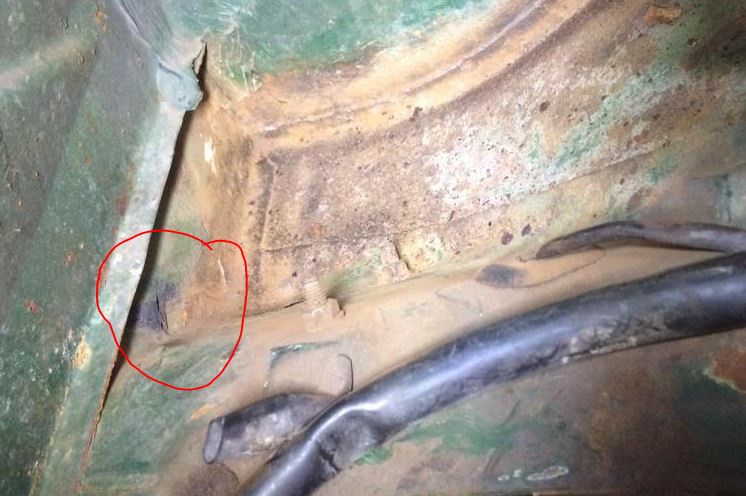
Check carefully.
When pinholes start here, they allow water to enter the cabin. That in turn leads to floorpan rust inside the cabin.
If there are pinholes, I wouln't get into deep metal work at this point. Clean, neutralize with Ospho or similar, cover with seam sealer, paint to match.
Posted by: pt_700 Sep 27 2020, 11:25 AM
thankfully superhawk, those are just shadows, it's all still solid.
thanks all for convincing me to do right by my 914. i'll order a tray and have reached out to an old friend who has a welding business to see if he is (or knows somebody) who could use a little job.

Not sure if it is just shadowing but I think I see two small black pinholes on the firewall (left side in the hell hole pocket).
Check carefully.
When pinholes start here, they allow water to enter the cabin. That in turn leads to floorpan rust inside the cabin.
If there are pinholes, I wouln't get into deep metal work at this point. Clean, neutralize with Ospho or similar, cover with seam sealer, paint to match.
Posted by: Tdskip Sep 27 2020, 11:28 AM
Are you sure those are shadows? Think @http://www.914world.com/bbs2/index.php?showuser=22428 found an issue.
Posted by: rjames Sep 27 2020, 11:39 AM
Like others have said, just remove the battery tray. It doesn't look like you'll need to remove the support, just the tray. But... with Superhawk. Those aren't shadows. Have you looked at the entire firewall behind the passenger seat and the longs on this car yet?
Posted by: ndfrigi Sep 27 2020, 01:04 PM
thankfully superhawk, those are just shadows, it's all still solid.
thanks all for convincing me to do right by my 914. i'll order a tray and have reached out to an old friend who has a welding business to see if he is (or knows somebody) who could use a little job.
Not sure if it is just shadowing but I think I see two small black pinholes on the firewall (left side in the hell hole pocket).
Check carefully.
When pinholes start here, they allow water to enter the cabin. That in turn leads to floorpan rust inside the cabin.
If there are pinholes, I wouln't get into deep metal work at this point. Clean, neutralize with Ospho or similar, cover with seam sealer, paint to match.
For battery tray, I think Jeffery ( @http://www.914world.com/bbs2/index.php?showuser=20991 ) has one for sale.
Posted by: VaccaRabite Sep 27 2020, 06:35 PM
Just get the part from Restoration Design.
The parts are EXCELLENT. I have one of them in my own car.
Zach
Posted by: pt_700 Sep 27 2020, 10:37 PM
tray's been ordered from restoration designs.
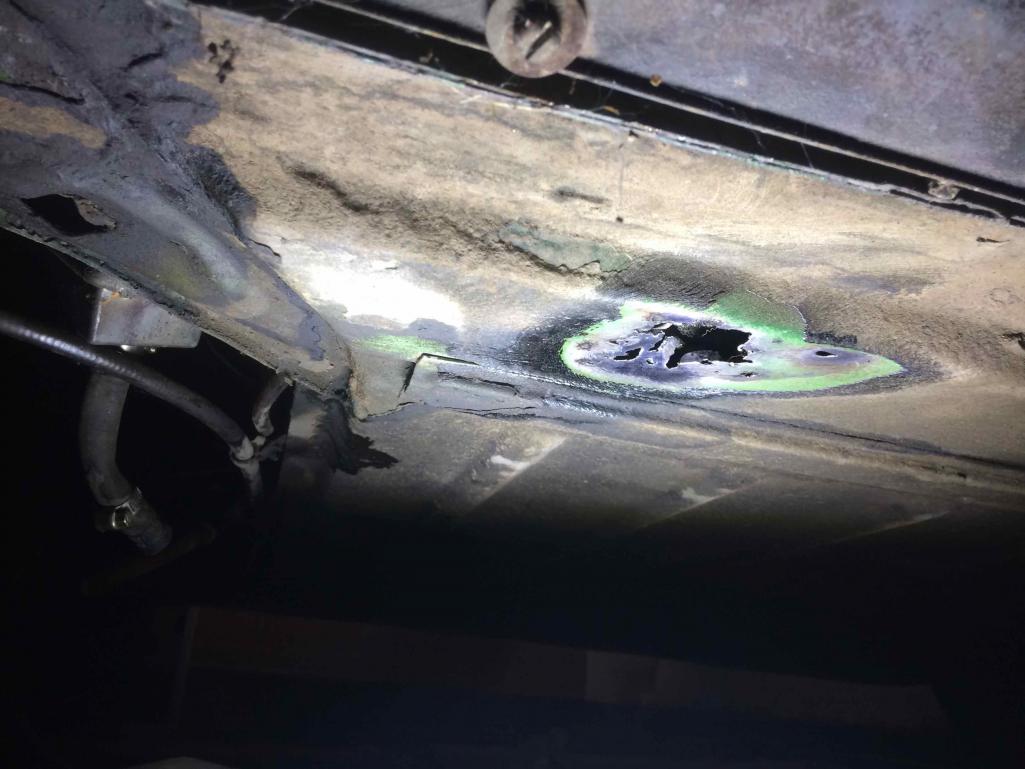
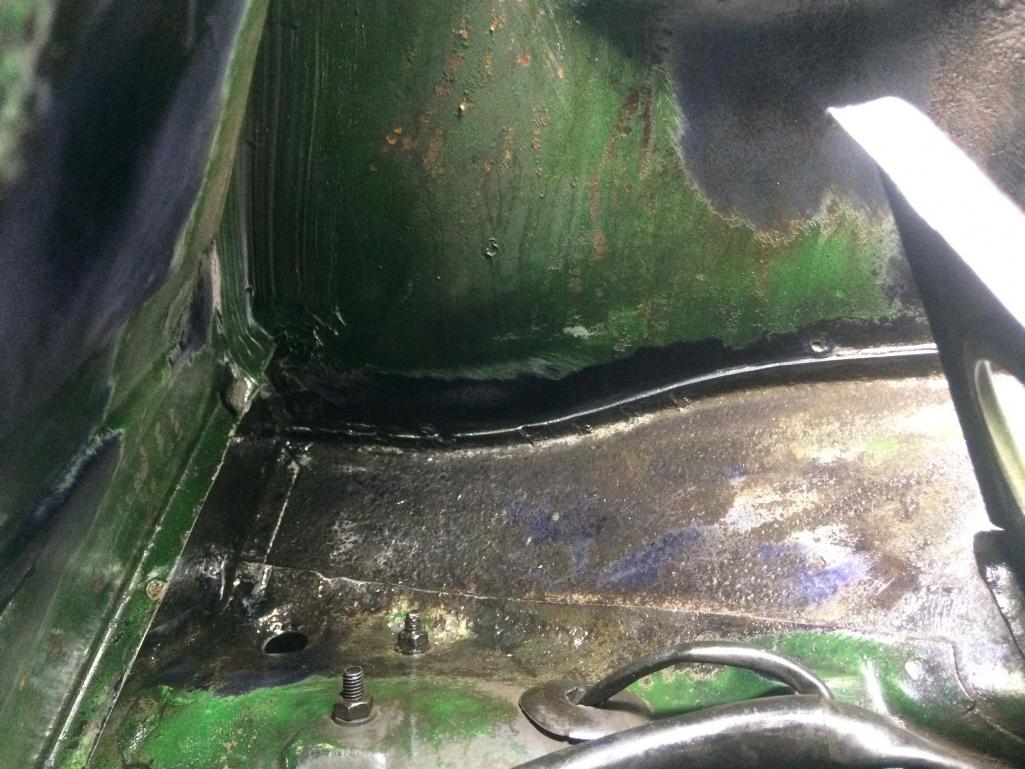
i appreciate the concern about the possible pin holes. here's a better pic (sorry for the orientation). seems i missed a bit of seam sealer when having at it with my wire wheel... after i cleaned up, i realized my right angle cordless drill might have allowed me a bit more access...
at some point, i'll get to the interior and have a closer look at the firewall and floorpans. please understand, i'm a blue collar schmuck and have a limited budget and even more limited time to enjoy my 914 (not to mention several other old machines in the stable, all needing my attention...). i'm often in awe of the caliber of work many of you are able to put into you cars. my car's destined to be a "driver" while in my stewardship. i endeavor to leave someone else a good foundation when i can no longer enjoy her!
Posted by: ctc911ctc Sep 29 2020, 03:25 PM
You have no idea how lucky you are!
Posted by: Frankvw Sep 30 2020, 12:51 AM
in case you are going for the 'top-tray-only' replacement, I hope you shoot some pics to show us. Good you have people around you that that can help with the welding !
Good luck with the work .
Posted by: Tdskip Sep 30 2020, 07:03 AM
tray's been ordered from restoration designs.
i appreciate the concern about the possible pin holes. here's a better pic (sorry for the orientation). seems i missed a bit of seam sealer when having at it with my wire wheel... after i cleaned up, i realized my right angle cordless drill might have allowed me a bit more access...
at some point, i'll get to the interior and have a closer look at the firewall and floorpans. please understand, i'm a blue collar schmuck and have a limited budget and even more limited time to enjoy my 914 (not to mention several other old machines in the stable, all needing my attention...). i'm often in awe of the caliber of work many of you are able to put into you cars. my car's destined to be a "driver" while in my stewardship. i endeavor to leave someone else a good foundation when i can no longer enjoy her!
No need to apologize for being a real human, and it is your car to do with as best you can / as you see fit.
Wire brushing everything and repeated soaking with phosphoric acid won’t cost more than $20 and will help preserve that area.
Posted by: malcolm2 Sep 30 2020, 07:13 AM
My 2 cents on the rust.... Some people like the stuff, so people hate it. I have precisely followed the directions for POR15 with their Cleaner, their Metal Ready and the Paint. No issues. That stuff turns to a super hard coating. I used it on this exact same spot. Patched a VW gas tank with it and some fiberglass mat.
Looking at your pictures, I think POR was made for this exact problem.
Good Luck.
Posted by: Superhawk996 Sep 30 2020, 08:34 AM
I'd love for that hell hole to have been my starting point.
Great job confirming the shadows.
You've got a great starting point that won't be too hard to fix up.
Posted by: rjames Sep 30 2020, 10:15 AM
My 2 cents on the rust.... Some people like the stuff, so people hate it. I have precisely followed the directions for POR15 with their Cleaner, their Metal Ready and the Paint. No issues. That stuff turns to a super hard coating. I used it on this exact same spot. Patched a VW gas tank with it and some fiberglass mat.
Looking at your pictures, I think POR was made for this exact problem.
Good Luck.
If used properly it works very well. Too many people just apply POR15 without any prep and then complain that the product doesn't work.
Posted by: mlindner Sep 30 2020, 10:18 AM
Last replace with a gel battery/ non-acid.
Posted by: sholman5 Sep 30 2020, 10:30 AM
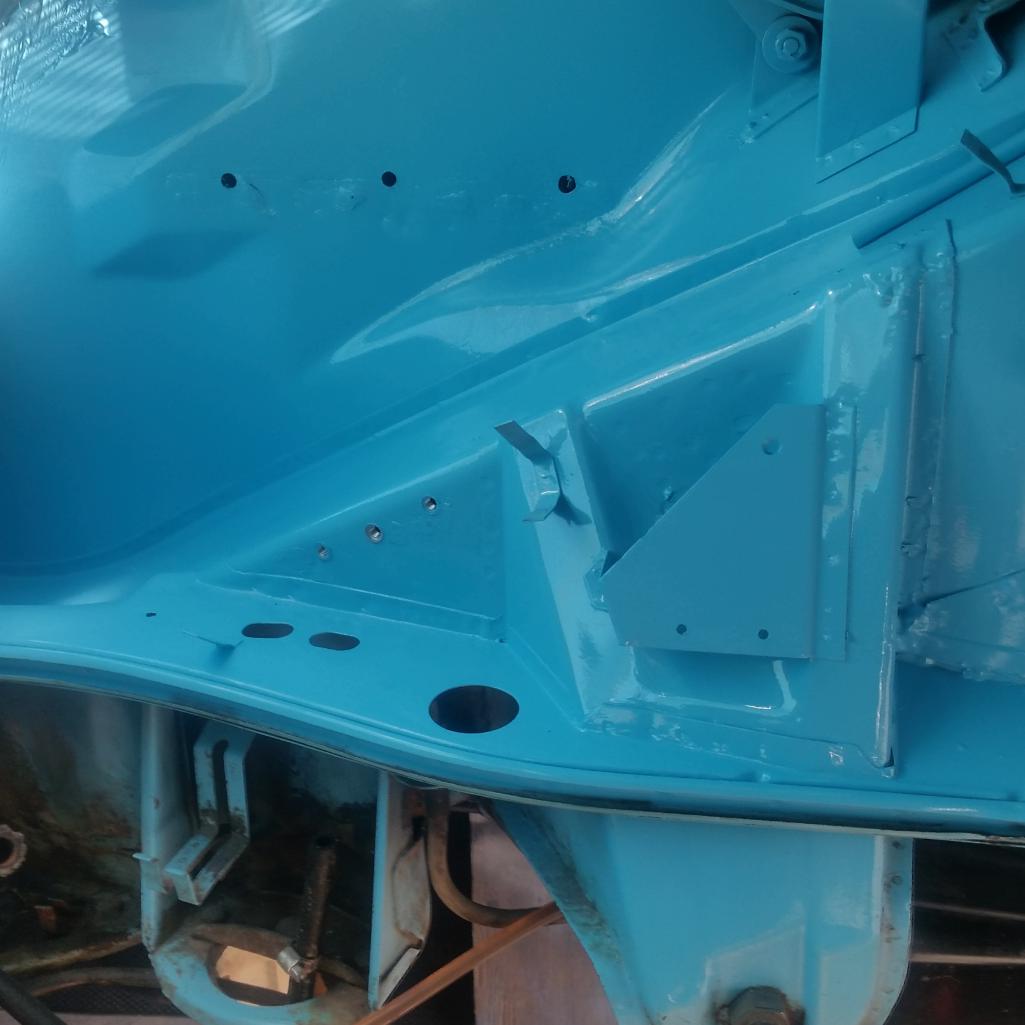
Instead of welding the tray and support in place. Installed inserts to secure the support and drilled holes thru the the tray and wall. Tray bolts to the support via battery hold down.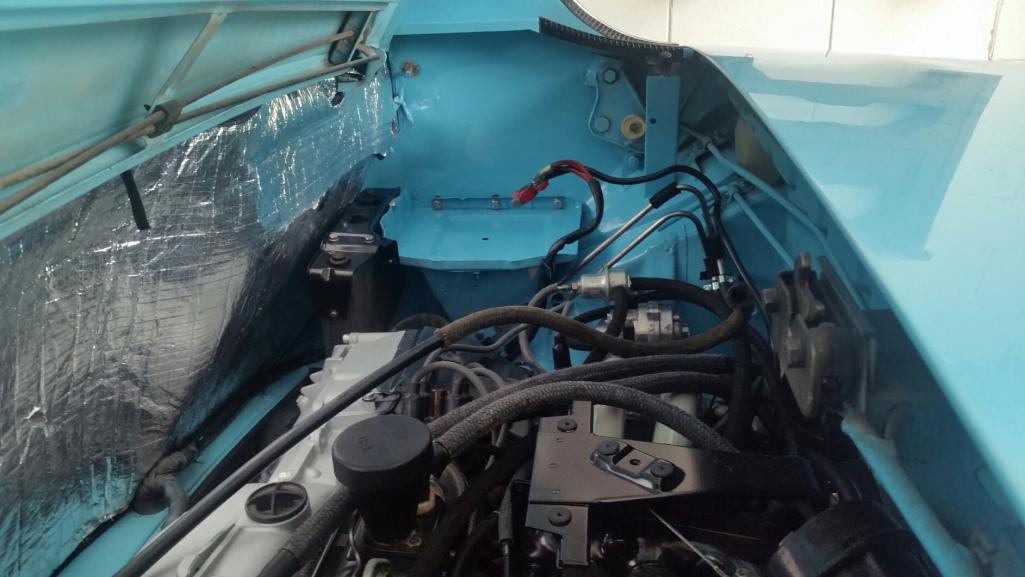
Posted by: pt_700 Sep 30 2020, 11:39 AM
i'm liking the idea of a bolt in tray and or supports. would sure make accessing the area for cleanup easier...
in order to remove both cleanly, do i simply locate & drill out the spot welds? is there access to the backsides as seen above in the rear wheel well?
Posted by: Frankvw Sep 30 2020, 11:45 AM
wow, great result to show for !!!!
Did you carefully 'dremel' out the old leftovers of the old batterytray ?
What kind of inserts did you use so the bolts could be used later ?
Thanks for your updates and feedback !
Posted by: sholman5 Sep 30 2020, 02:52 PM
i'm liking the idea of a bolt in tray and or supports. would sure make accessing the area for cleanup easier...
in order to remove both cleanly, do i simply locate & drill out the spot welds? is there access to the backsides as seen above in the rear wheel well?
wow, great result to show for !!!!
Did you carefully 'dremel' out the old leftovers of the old batterytray ?
What kind of inserts did you use so the bolts could be used later ?
Thanks for your updates and feedback !
I used a spot weld bit to remove the tray and support and ground down the spot weld. Then attached the tray to the support with a bolt that would usually secure the battery to the tray. Set the tray and support in position in the engine compartment. I pre drilled three holes at the back of the tray and the lower tab of the support. Marked the holes on the side wall of the engine compartment and the rail structure.
For the tray I used the largest bolts possible, you can access the rear wheel well to put the nuts on and tighten them. The holes in the structure rail for the support depends on the size of the inserts used. Luckily for me a friend had a complete set of different size also the tool used to insert and crush the insert. I also put 2 rubber washers on every bolt used as a spacer in between the support and rail structure and tray and side wall.
Hope this helps.
Posted by: Frankvw Oct 1 2020, 04:12 AM
Yes that helps !!
"For the tray I used the largest bolts possible, you can access the rear wheel well to put the nuts on and tighten them"
I was not aware I could reach in there all that way up. So, that is great info.
Your tray-area looks great again !
Posted by: pt_700 Oct 1 2020, 10:08 PM
so, you can't get behind where you bolted the support and you had to use some sort of threaded insert, installed from the engine compartment side?
could you point me towards that product, please?
i really appreciate your pointers on this!
Posted by: mtndawg Oct 1 2020, 10:36 PM
I’ve done a bolt down battery tray in 2 cars. Looks really nice.
Attached image(s)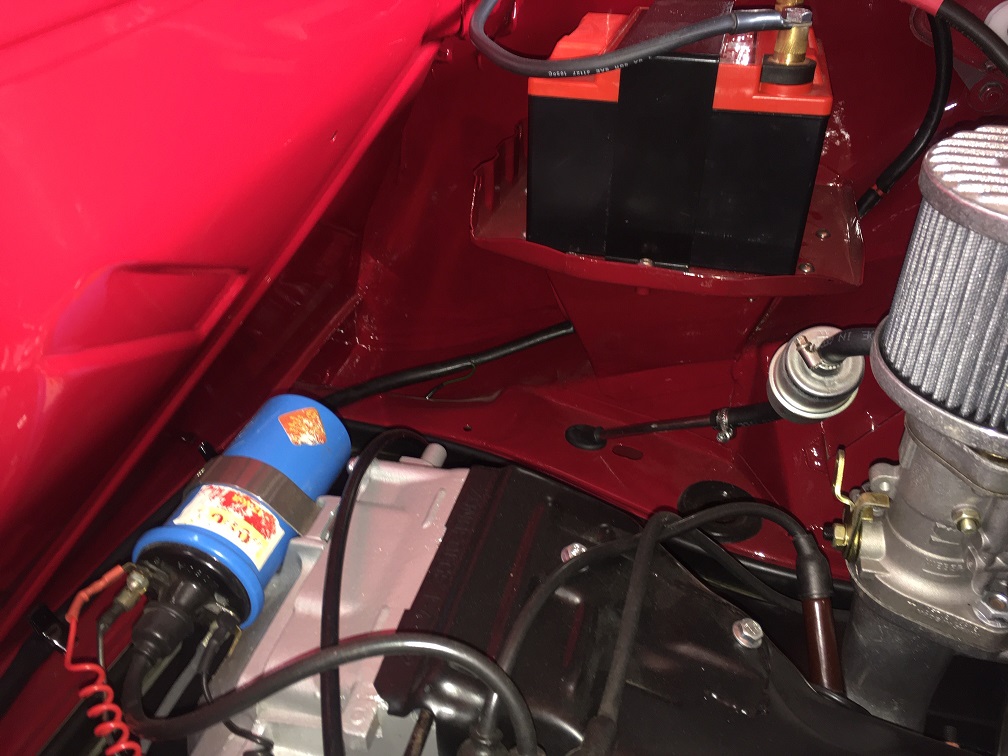
Posted by: pt_700 Oct 6 2020, 12:11 PM
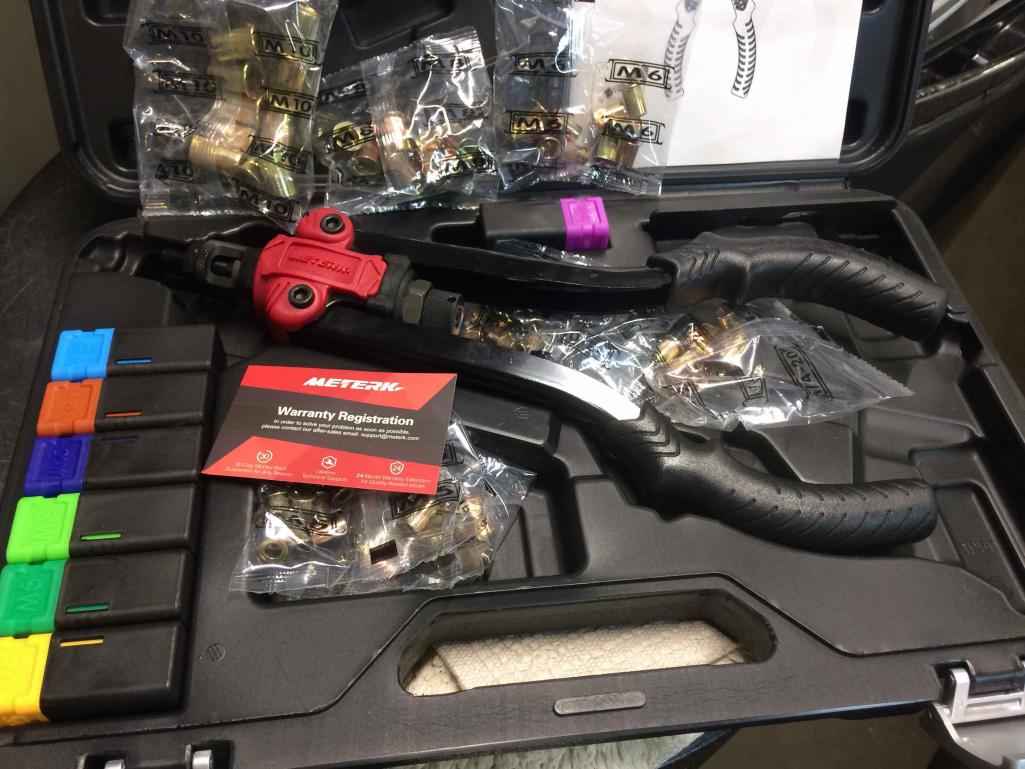
nutsert is one of the products (rivetnuts too). like a threaded rivet.
learn something new almost every day or yet another toy / tool to buy, ha ha!
https://www.ebay.com/b/Nutsert/183908/bn_7023259115
Posted by: pt_700 Oct 16 2020, 09:59 PM
finally some progress on this, intervening was the power steering rack on my '83 accord (53k miles!) which sprung a rather large leak, forcing me to learn steering rack replacement but, i digress... let's just say the drive to the alignment shop a few miles away on city streets was "interesting"...
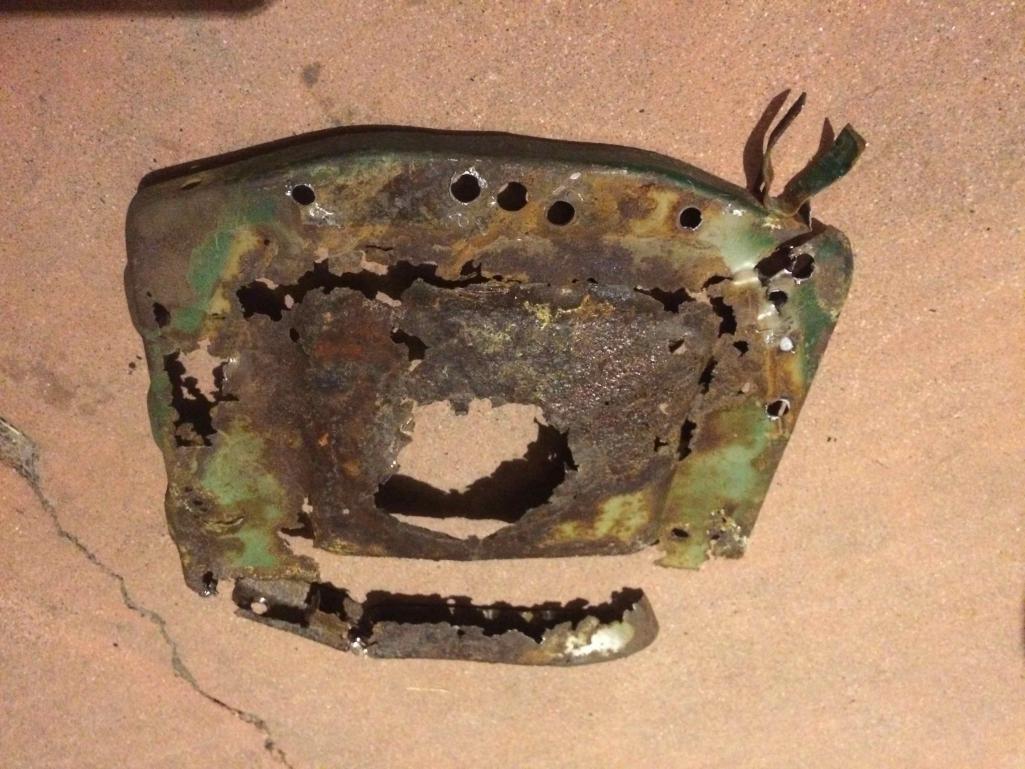
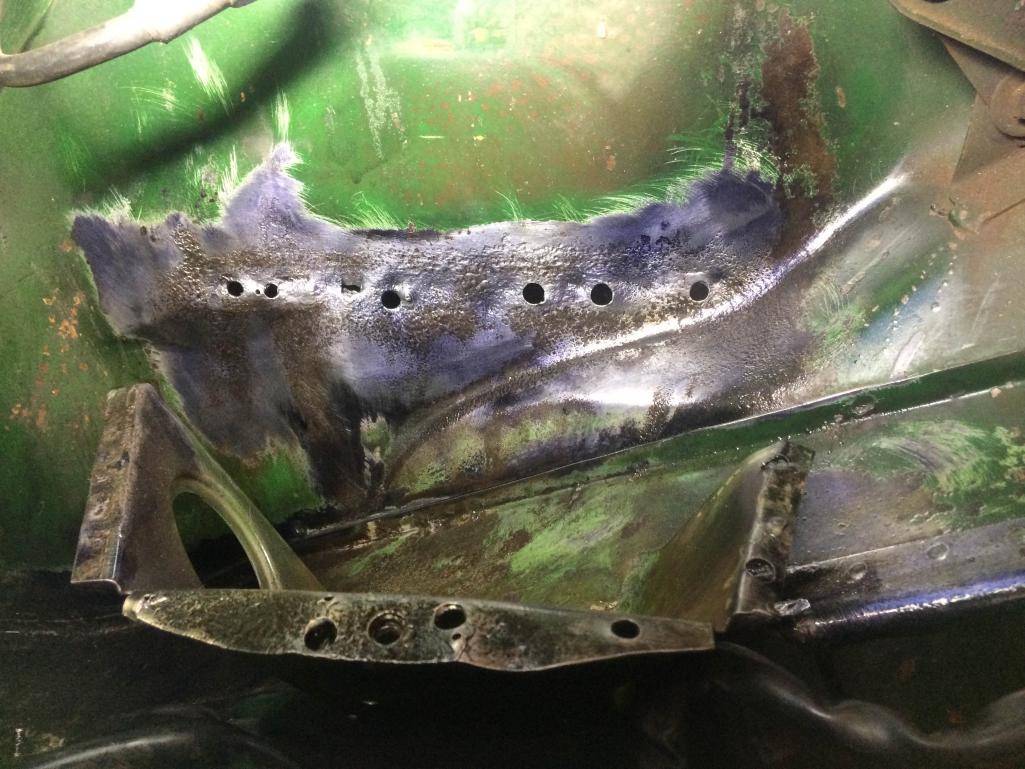
probably shoulda called in experienced help on this but, the rusty battery tray's out. i was contemplating even sharing this (not my best work) but, figure it might be a lesson to someone else. i had a helluva time figuring out (i mean missing) where the spot welds were. easy enough to see the little dimples on clean sheet metal but, i was kinda drillin' blind here. after going at it with a wire brush on my cordless drill, i used a permetex product that sprays on in 2-3 light coats as clear, turning black where it finds rust (pics taken several hours later).
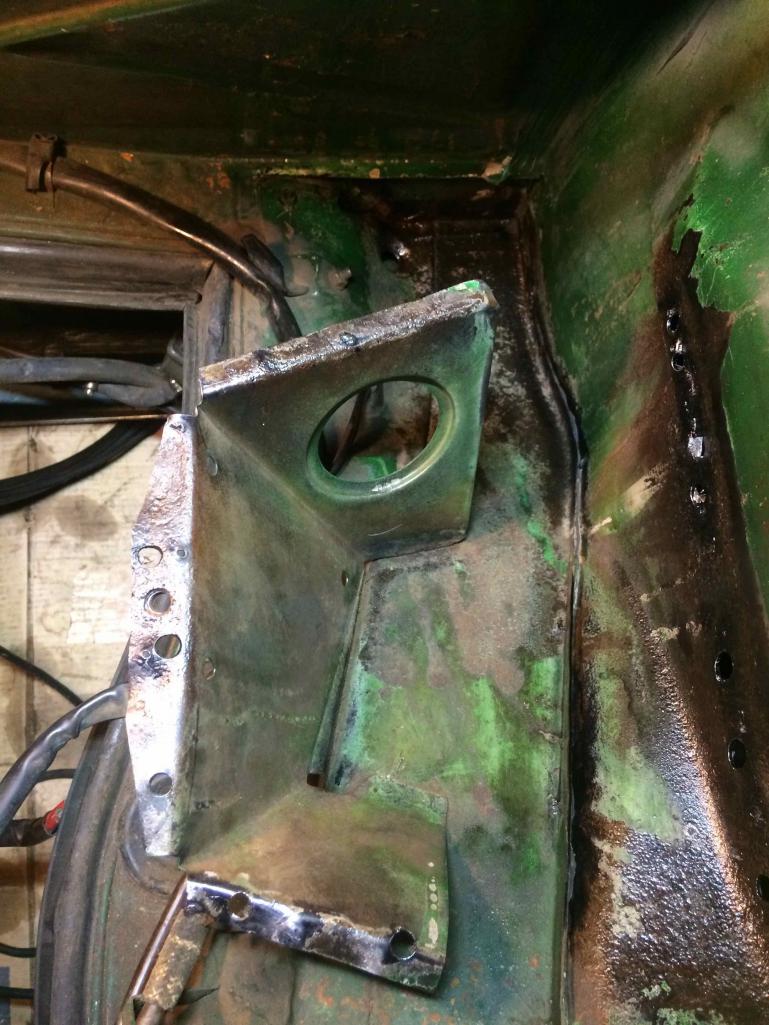
as you can see, i decided on a hybrid bolt in, given the condition of the support and my bumbling attempts on removal of just the tray...
i guess i'll use the holes i've already made to mark the new tray and carefully drill. debating if i want to use the threaded inserts that came with my new toy or just regular bolts as there's decent access.

Posted by: Superhawk996 Oct 17 2020, 06:53 AM
Glad to see you're getting after it and that the metal is pretty solid in Hell Hole. You're really lucky on that account.
Hard to tell from pictures but it seems like you still have quite a bit of corrosion there. I've found that when I apply Ospho or Metal Prep it helps to let it turn black and dry. Then go back and wire wheel it again. Wear a respirator. That digs out more of the rust that Ospho neutralized, and then reapply again. Sometimes I do this 2 -3 times if the rust and pitting was deep.
Eventually you'll find that when you appply the rust neuatralizer that you're not getting nearly as much blackening (rust conversion) meaning there is very little active rust actually left down in the pitting that is getting neutralized.
Posted by: Tdskip Oct 17 2020, 07:21 AM
Glad to see you're getting after it and that the metal is pretty solid in Hell Hole. You're really lucky on that account.
Hard to tell from pictures but it seems like you still have quite a bit of corrosion there. I've found that when I apply Ospho or Metal Prep it helps to let it turn black and dry. Then go back and wire wheel it again. Wear a respirator. That digs out more of the rust that Ospho neutralized, and then reapply again. Sometimes I do this 2 -3 times if the rust and pitting was deep.
Eventually you'll find that when you appply the rust neuatralizer that you're not getting nearly as much blackening (rust conversion) meaning there is very little active rust actually left down in the pitting that is getting neutralized.
Exactly how I do it - takes some time but you need to do 3 or 4 cycles like that to make sure the metal is clean. There will always be more rust under the black spots on the first couple passes.
@http://www.914world.com/bbs2/index.php?showuser=11430 thanks for the update and no need to afford anything! You are getting it done.
Posted by: mlindner Oct 17 2020, 08:05 AM
PT 700, using revnuts...make sure they fit very tight to the hole you drill. And second, to clean up hell hole buy a cheap HF extended grinder, then cut off the 1/4 shaft on the wire wheel and drill out to fit. Work great for cleaning up tight areas like that and in inner fender. I used it on the entire bottom of my car. Best, Mark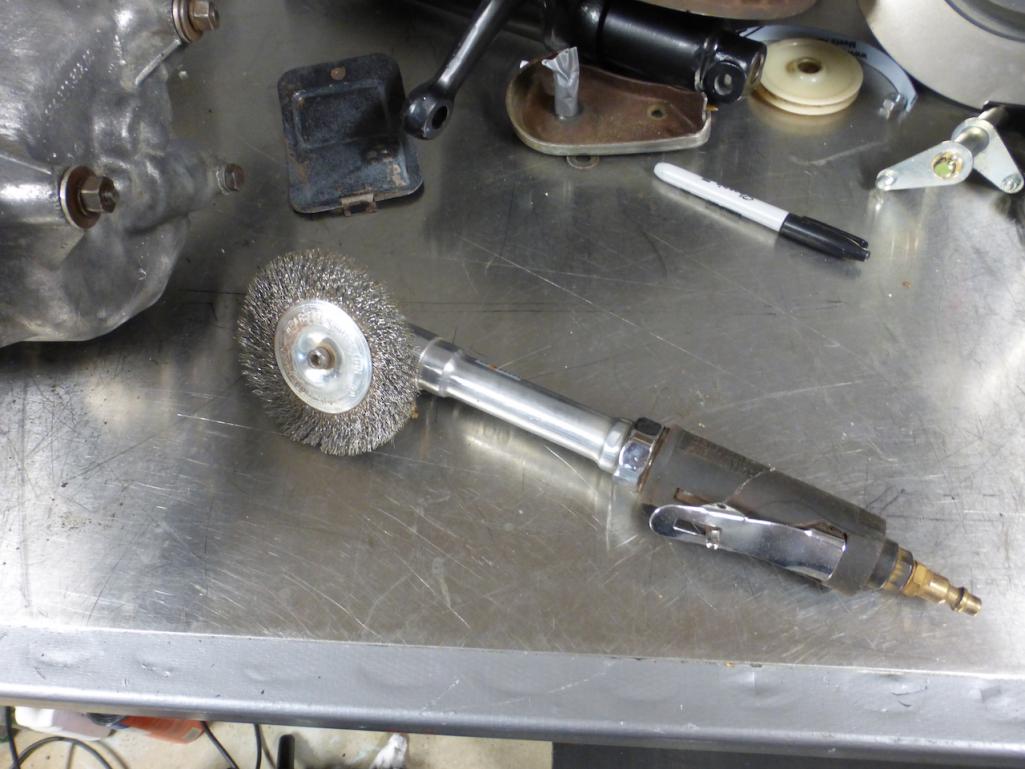
Posted by: pt_700 Oct 17 2020, 11:25 AM
thanks for the tips! i'll get back in there for another round or two of wire wheel.
Posted by: pt_700 Oct 18 2020, 10:51 PM
one small step forward, two steps back... not unexpected on a 50 year old, semi-neglected car...
round 2 of wire wheel / rust treatment on the hell hole yielded much reddish dust and a similar amount of black where i'd sprayed the rust treatment. i'm hoping a new to me toy (flexible attachment for my drill to wire wheel) will allow me to get into there better. i like that right angle air grinder @http://www.914world.com/bbs2/index.php?showuser=13770 has, might this be the project that drives me to pneumatic?
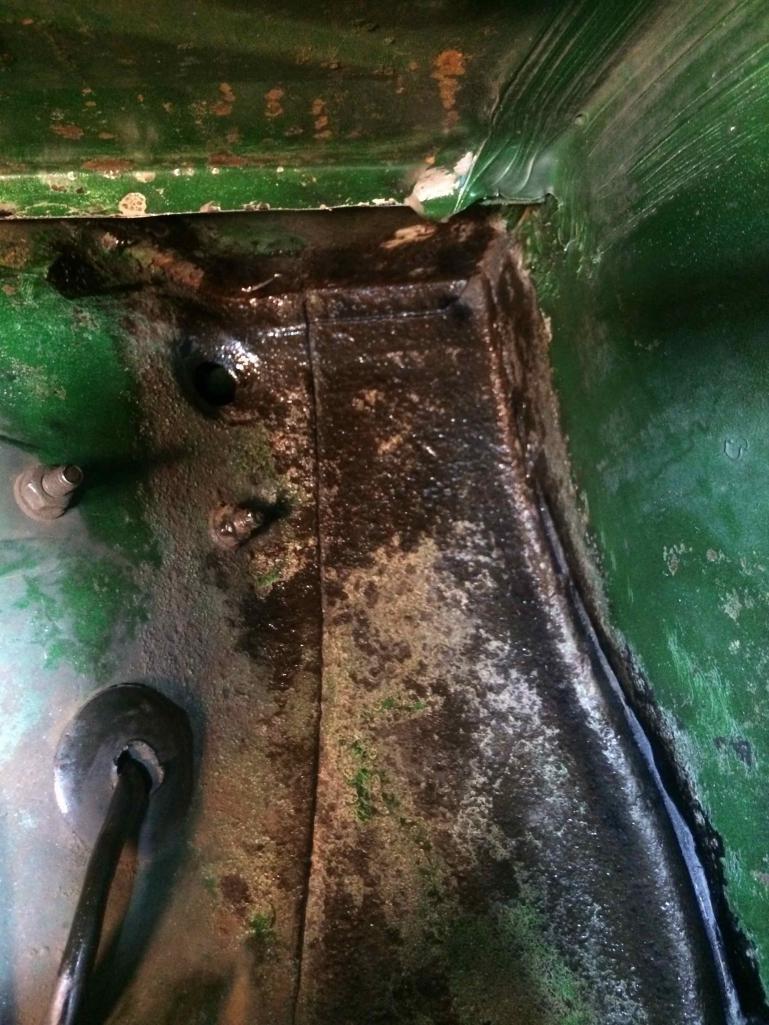
while i wait for that new toy, i decided to install tangerine racing fuel lines. "while i was in there", i found 2 new rust spots. @http://www.914world.com/bbs2/index.php?showuser=22428 called it, i have a perforation in my floor, under the passenger seat. i've elected to clean up the bottom, spray some rust treatment through the hole and put it on my growing "to do" list... the other spot was under the fuel tank. anyone else notice the gap seen in the last picture to the left of the fuel overflow tube? the splash tray under the steering rack was a bit bent, perhaps from an encounter with a wrecker many years ago..
having seen much worse repaired here, i know i'm fortunate. like hearing "yes, it's cancer but, having caught it early, it's very treatable...".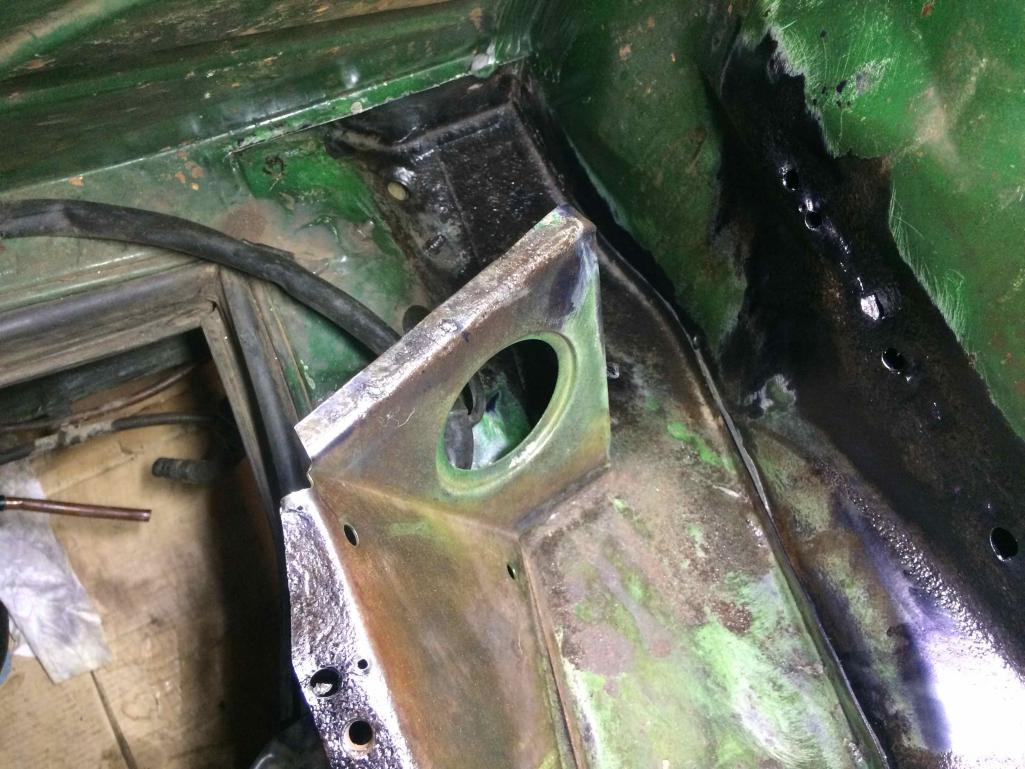
Posted by: sholman5 Oct 19 2020, 03:09 AM
Last picture. It is a drain for any moisture that would happen to find it's way down there, mine has it also.
Posted by: Superhawk996 Oct 19 2020, 06:27 AM
having seen much worse repaired here, i know i'm fortunate. like hearing "yes, it's cancer but, having caught it early, it's very treatable...".
That is the right attitude. These cars all rust from the inside out and it's always pretty well hidden in the beginning. Some just rust faster than others.
If you didn't have pin holes in that Hell Hole, it isn't uncommon for leaks either at window and glass seals to have allowed water in the cabin. On my car which is much further gone than what you have, I have some pinholes in the rear firewall behind the factory engine pad. Notorious rust spot. On my car, I also have a few pin holes in the driver side firewall / hell hole right about where I thought the shadows were on your car. All these can let water in the cabin. You'd be amazed at how much water can come though a tiny pin hole!
You're doing the right stuff. Catch it while you can, neutralize it, seal and paint. You're second round of treatment in the hell hole looks like you've neuatralized way more rust. Good job!
That small slit under the gas tank is indeed there on all cars - for drainage as previously stated. It often gets clogged and then doesn't drain properly. Yours looks pretty good.
Posted by: pt_700 Oct 19 2020, 08:18 AM
thanks gents! at the time i discovered that i thought the rubber boot over the steering was just old brittle and out of place. this morning at 3am, my mind morphed it into unibody damage from that tow... still a bit suspicious of the alignment of the shaft as it enters the rack. the rack is up against the top of the hole, rather than centered. when that wrecker went underneath the front end to grab the wheels, it pushed the spare tire well in slightly. at the time, easy fix - i just stepped inside.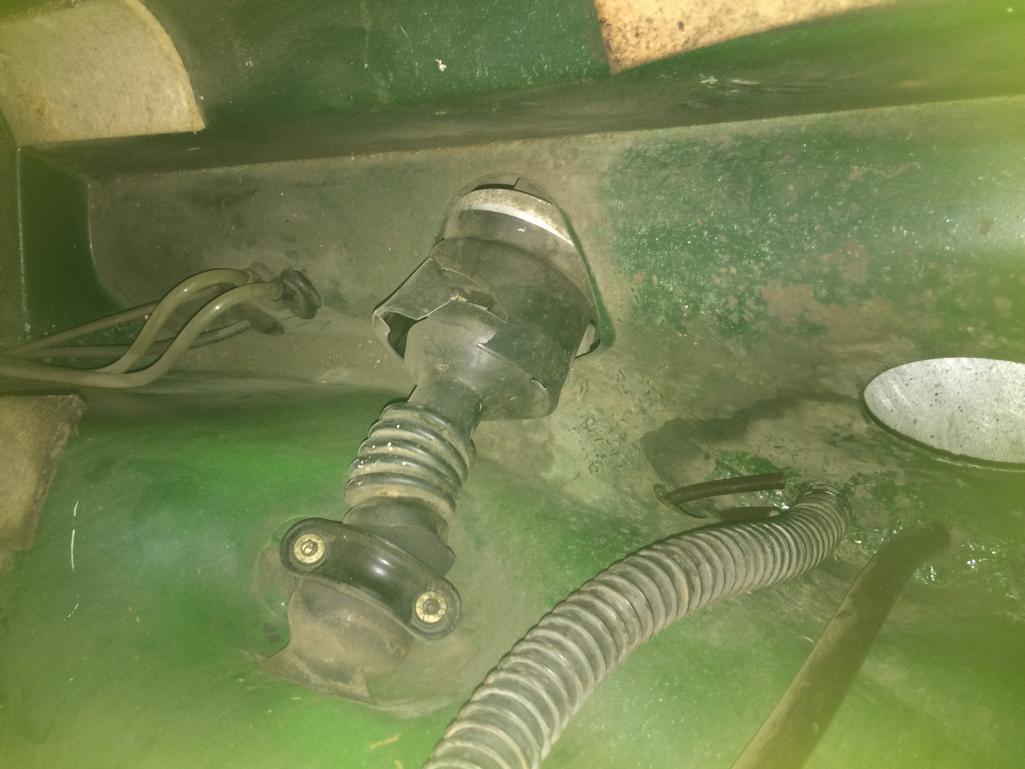
Posted by: pt_700 Nov 6 2020, 06:30 PM
took a few weeks off from the 914 while working on other project around the house. have some time on my hands, someone in the department tested positive for covid and i started feeling mild symptoms. have to take a few days off while waiting for test results...
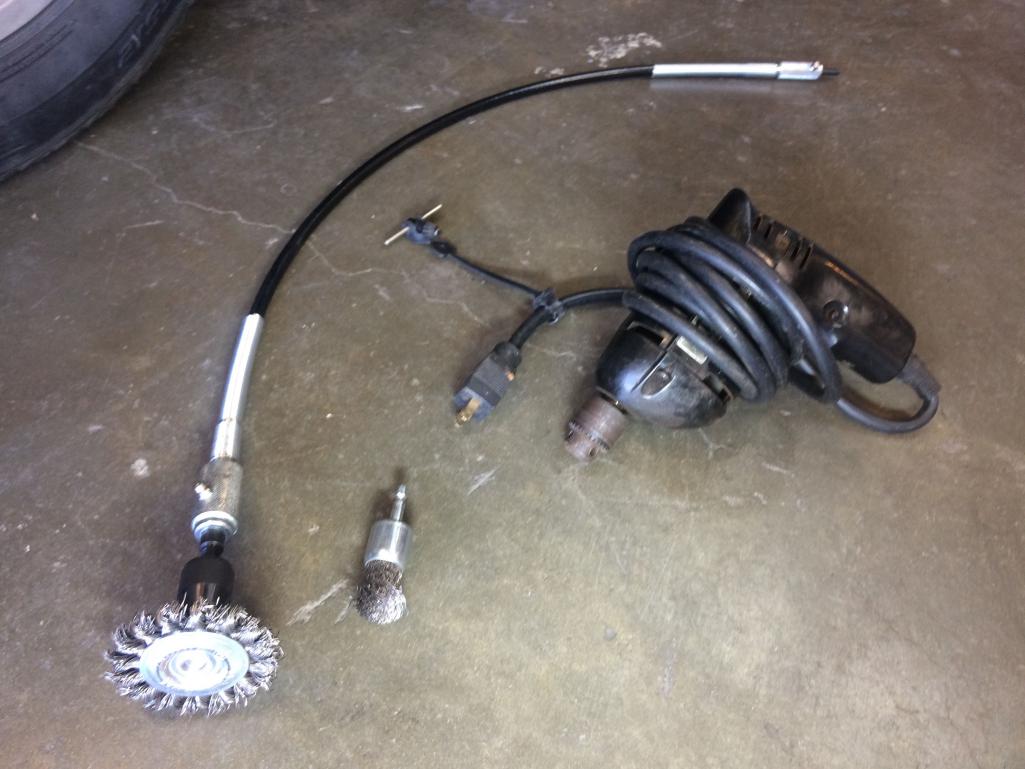
went back to grinding the rust with some different tools. found a more aggressive wire wheel, a flexible drill attachment and the smallest drill in the toolbox. that flexible attachment's pretty handy but, it sure heats up...
not a lot of black there, the angle of the light / camera does no favors. i'll take another look tomorrow but, will probably call this good enough and start putting things back together.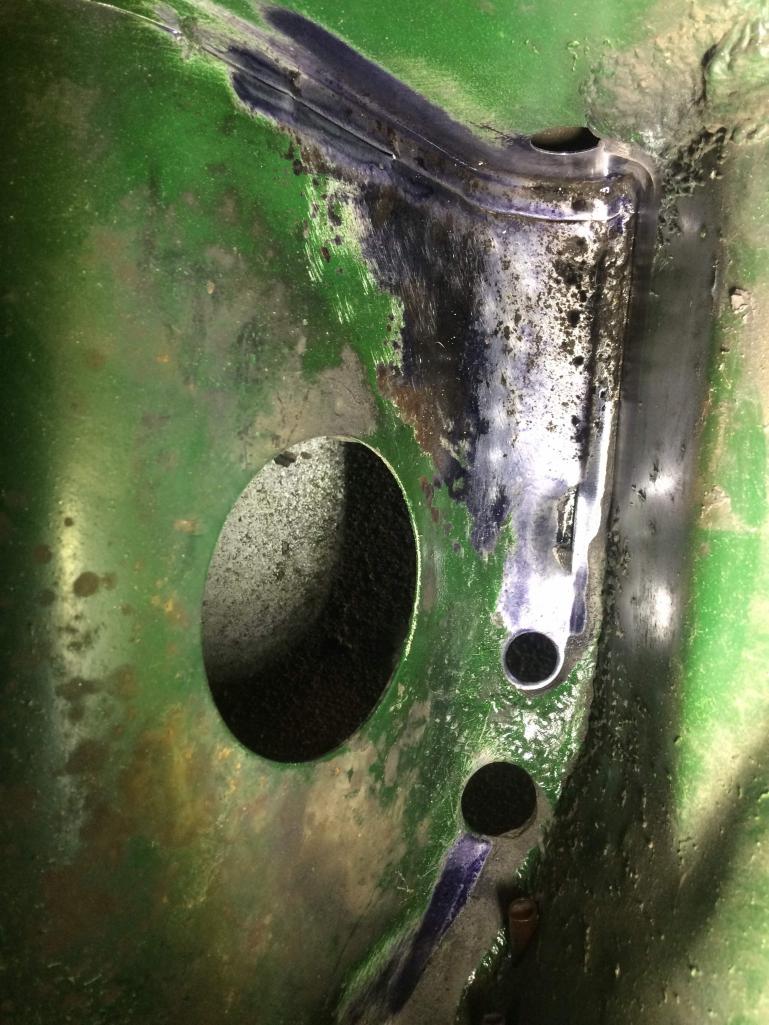
Posted by: seanpaulmc Nov 6 2020, 07:05 PM
Thank you for posting this. Love seeing the tools! Trying to work up the courage to dig into mine. Yours is in much better shape by comparison.
Thanks again.
Powered by Invision Power Board (http://www.invisionboard.com)
© Invision Power Services (http://www.invisionpower.com)