Printable Version of Topic
Click here to view this topic in its original format
914World.com _ 914World Garage _ Restoration thread for original 914/6
Posted by: michel richard Jul 13 2005, 07:28 PM
So,
I bought an original 914-6 tub and a couple of mountains of parts in Alabama, and I got them back home. The thread relating that story is here: http://www.914world.com/bbs2/index.php?act=ST&f=2&t=34268&hl=original+6
Now, I have to restore it, and I figure that doing a build thread like others have done may be interesting to members, and may be motivating for me. So here it goes.
I got two things done since I got the car home.
1) I built a rotisserie as per AA plans, except I did not put the diagonals on. The drawings and instructions are here:
http://www.autoatlanta.com/tech/rotisserie_build.html
The steel turned out to be more expensive than I thought, but now that it's built, I realize how useful it's going to be.
2) I got my paperwork organized.
Went to the SAAQ (our dmv) on Saturday, near my house. Lady really gave me the runaround, because I don't have a title (Alalbama does'nt issue titles for cars built before '75).
Tried another office today. This lady actually pulled out the procedures manual. Went to the section on importing US cars and Titles. No luck, until she stumbled a section "exemptions". Lo and behold, the first subsection was titled "Alabama" i.e. the first state in alphabetical order ! Sure enough it said "no title required for cars pre-1975-model-year"
I was pleasantly surprised - this is a manual, in French, in Quebec !
Within minutes, I had a license plate ! although I obviously need to get a technical inspection done before I can drive the car on the road.
3) Next step will be to take care of the old paint and the light rust. Spoke to someone nearby who can sandblast it. His advice was to sandblast, except for the "thin" parts, hoods etc . . . which he said would "wave", and to use stripper on those. I've real all the threads about media blasting, sandblasting, dipping etc . . . but I'm tempted to do it his way, to a large extent because it seems to be what's available locally.
I'll update the thread as progress is made.
Michel Richard
Attached image(s)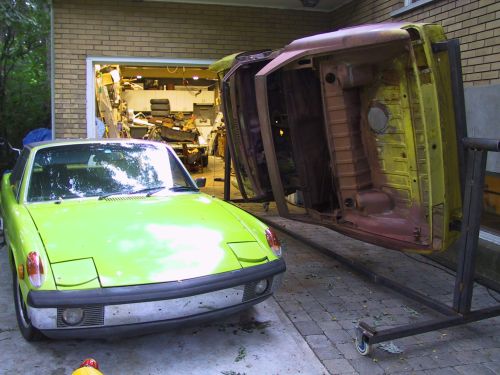
Posted by: SirAndy Jul 13 2005, 08:36 PM

schweet! another one saved ...
make sure you post lots-o-pics along they way ...
 Andy
Andy
Posted by: serge914 Jul 13 2005, 08:42 PM
Congratulation Michel. If my count is ok that is your third 914, plus that Europa in the background. 
I sure will follow that thread...
Posted by: Dead Air Jul 13 2005, 09:56 PM
Will it be ready for Mark's Por/Volks Festival? 
Posted by: Quebecer Jul 14 2005, 06:35 AM
Hi Michel,
How many Canadian dollars to build the rotisserie, if I may ask?
Where will you be getting your blasting done?
I've been looking around for such a place around Montreal, but haven't found any yet.
Is it expensive?
I was actually considering building a temporary garage within my garage to do it myself.
Good luck with your project, I'll be following it closely. 
Posted by: michel richard Jul 14 2005, 06:43 AM
I bought the steel new to build the rotisserie. Total was about C$250. Did the welding myself.
To do the sandblasting, I found a place in Saint Constant, if I remember correctly, or near there. The gentleman suggested I bring the car on the rotisserie, but I'm a little concerned about that. He said the cost would be something like C$500 for the sandblasting, and another equal amount to spray epoxy primer on.
Coordinates of that shop are at home. I'll be able to dig them up over the weekend.
Michel
Posted by: michel richard Jul 14 2005, 06:45 AM
| QUOTE (Dave Eddy @ Jul 13 2005, 07:56 PM) |
| Will it be ready for Mark's Por/Volks Festival? |
Maybe not . . . ;-)
I should come with the green car, though, or with the truck and a bunch of parts.
Michel
Posted by: Verruckt Jul 14 2005, 06:46 AM
Michel
Could you tell me what the height is of that setup when the car is on it's side completely vertical? I have garage issues. Looks like you have about a foot of clearance between the center brace and the car?
Posted by: michel richard Jul 14 2005, 06:49 AM
Kurt,
I'll only be able to measure over the weekend, but I will do it. I made my rig a little higher than the AA drawings, because I intend to weld some flares on. FWIW, I can roll it in and out of my garage, the way it is, with an inch or two to spare . . . won't work with the flares on !
I may have made it a little high.
Michel
Posted by: davep Jul 14 2005, 07:01 AM
A very good start. I'd be careful about sandblasting and acid dipping though. Sand is a poor media except for heavy parts. Glass bead is much better for the thin parts. Walnut shell is good for fine parts and aluminum finishing. There is plastic media as well, and I have heard of ground up buttons. CO2 is also possible. You sort of have to carefully choose the media to suit the part. Acid dipping can be useful, but be very careful of assembled parts. Doors and lids with seams are poor choices. Especially the lids where there is foam hidden in cavities. You will never get all the acid out.
Posted by: michel richard Jul 16 2005, 12:39 PM
| QUOTE (Verruckt @ Jul 14 2005, 04:46 AM) |
| Michel Could you tell me what the height is of that setup when the car is on it's side completely vertical? I have garage issues. Looks like you have about a foot of clearance between the center brace and the car? |
Kut,
I was'nt able to directly measure the height of the setup, but I measured my garage door at 81 inches, and the car slips in, vertical, with less than an inch of clearance, at the top.
However, the clearance between the fenders and the brace is currently 9.5 or 10 inches, which is undoubtedly more than is really needed. This is with the center of the pivot 42 inches above the bar. I may actually lower it myself.
HTH
Michel
Posted by: michel richard Jul 16 2005, 12:41 PM
I fixed the rust holes in the front floor. I missed one, and I may just braze a small patch over it.
The bigger patch is steel I cut out of a junk front floor Jon sold to me with the car.
Posted by: michel richard Jul 16 2005, 12:42 PM
oops
Attached image(s)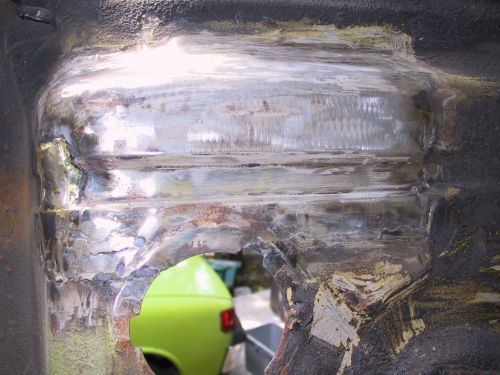
Posted by: michel richard Jul 16 2005, 12:43 PM
There was another area near the very front of the floor that neded a little work. I used some common sheet steel and fabricated a patch.
Attached image(s)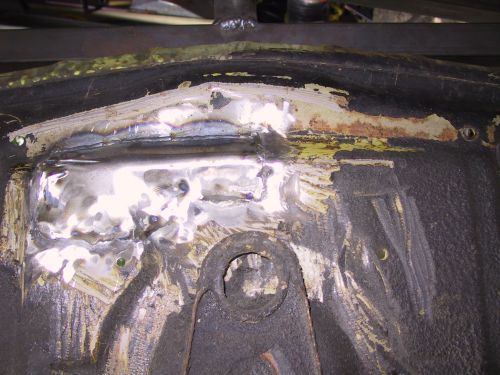
Posted by: michel richard Jul 16 2005, 12:44 PM
Not real pretty, but it's an area that really won't show much.
Attached image(s)
Posted by: michel richard Jul 16 2005, 12:49 PM
One Saturday morning, and the rust holes are pretty much fixed !
I also drilled through one of the three bolts that hold left hand side rear radius arm to the body. The one bolt snapped when Jon was removing it. I think I managed to save the thread, but I may end up using a longer bolt and a nut on top, just to be sure. But that's some ways down the road.
The main concern right now is getting the car media or sand blasted and primered.
Michel Richard
Posted by: Travis Neff Jul 16 2005, 02:52 PM
Great thread!!
Posted by: michel richard Jul 17 2005, 11:43 AM
I figure it might be easier to follow the resto if I put some of the things in "chapters". Plus it helps my own motivation by helping toi break down the project in discrete sub-projects.
Part "un" of headlight bucket repair:
http://www.914world.com/bbs2/index.php?act=ST&f=2&t=35090
Michel
Posted by: michel richard Jul 17 2005, 01:50 PM
Here is part "deux" of the headlight bucket repair. Thanks for looking.
http://www.914world.com/bbs2/index.php?act=ST&f=2&t=35100
Michel
Posted by: michel richard Aug 1 2005, 04:45 PM
Small update, sorry no pics.
Today was a half day at work.
So I ran home and built a little dolly that I could drop the tub onto, from the rotisserie. Once on the dolly, had a tow truck pick the car up to take it to a place that will dry-ice blast it.
Here's a link to the process.
http://www.pctriumph.com/section%20englais/pages_a/pctriumph_a.html
The French language site is actually a little better.
http://www.pctriumph.com/
Apparently, the process leaves no residue because the ice sublimates as it hits the metal. Also, it does'nt heat the parts and therefore does not cause warpage. It actually sligthly cools the parts.
The proof will be in the pudding. It's supposed to be done by Friday. After that, the tub will move to a paint shop, for primer. I may also have the interior painted, so I can start assembly before the flares go on and the exterior gets smoothed and painted.
Should have pics when the car is back.
Michel
Posted by: davep Aug 1 2005, 07:21 PM
That sounds like the ideal process. It will be very interesting to see the results.
Posted by: Porsche Rescue Aug 1 2005, 07:52 PM
I have absolutely nothing to say. Just want to be on the thread so I don't miss anything. Keep up the good work.
Posted by: michel richard Aug 1 2005, 08:03 PM
| QUOTE (Porsche Rescue @ Aug 1 2005, 05:52 PM) |
| I have absolutely nothing to say. Just want to be on the thread so I don't miss anything. Keep up the good work. |
Cool
Posted by: Quebecer Aug 2 2005, 06:49 AM
Very interesting process that Dry Ice Blasting.
Have you seen the process being used?
Good to know that it exists in this area.
Can't wait to see the results...
Posted by: michel richard Aug 2 2005, 12:01 PM
Have'nt seen the process in action.
I delivered my front struts, A-arms and trailing arms over lunch today. Owner still confirmed it would all be done by Friday, though the work had'nt started.
M
Posted by: Quebecer Aug 9 2005, 05:43 AM
Any news? 
We're holding our breath here... 
Posted by: davep Aug 9 2005, 03:30 PM
 Having trouble holding my breath!
Posted by: balljoint Aug 9 2005, 03:39 PM
 Me too. C'mon Michel, depeche toi.
Posted by: michel richard Aug 13 2005, 12:40 PM
Took a week holiday, away from the house and the teener. Just my wife and I; had a great time. Just got back, an hour ago.
When we left last Saturday, the tub was not done, but the shop manager said on teh phone they had started. I always get a little nervous when suppliers start missing deadlines. In any event, I have next week off too, so I'll be able to go to the shop and see how much has been done.
And I got a new battery for the camera, so I'll be able to take pictures over there.
And I stripped the MFI off the engine in the car that's running and put some PMOs on. That'll be the next update, hopefully tomorrow.
Michel
Posted by: michel richard Aug 14 2005, 09:57 AM
I changed from MFI to PMO carbs in the car that's currently running, the gree one. Put pictures of the completed installation here:
http://www.914world.com/bbs2/index.php?act=ST&f=2&t=36529
Posted by: michel richard Aug 14 2005, 01:34 PM
At the same time, I started working on the exhaust. I want to get the final exhaust configuration before the PMOs get dialed-in.
Here's the thread.
http://www.914world.com/bbs2/index.php?act=ST&f=2&t=36543
Posted by: Quebecer Aug 15 2005, 05:42 AM
Good work on the carbs and exhaust, can't wait to see the rest, specially the tub!
Keep it up!
Posted by: michel richard Aug 15 2005, 04:30 PM
My wife took this picture the day after I got back from Alabama. Sorting through the stuff. It was on film and I just scanned it .
Michel
Attached image(s)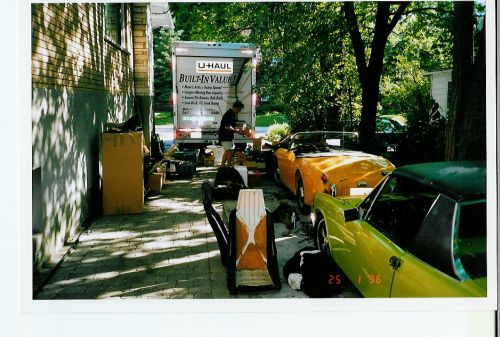
Posted by: michel richard Aug 15 2005, 04:50 PM
Forgot to say: spoke to the dry ice blasting shop today. The manager said that the car would be done by Wednesday. He also said the hoods and doors had a lot of bondo on them. I knew they were not from the same car as the tub . . . Minor disapointment. Anxious to see how it all turns out.
I've bought other doors be fore, all were painted, and they had bondo too.
I'm beginning to think that if a door or hood is sold apart from the car it belongs to, it's because the car was in such bad shape that the detachable body panels (i.e. door, hood) also had a lot of "history".
Just my experience.
Michel
Posted by: balljoint Aug 15 2005, 07:06 PM
I have found bondo, and lots of it even under the original paint on hoods and rear decklids. Old looking dark red bondo too, I figured the parts just weren't perfect from the start. No big deal.
I am really interested to hear and see more about this dry ice process. For example, with all that fog created by the sublimation of the CO2, what kind of music do they play? And do they use strobe lights? 
Posted by: serge914 Aug 15 2005, 07:09 PM
I love that pic with the BugEye. You must have quite a reputation in the neighberhood with all those strange cars.
I saw a 914 on a trailler last friday on the 40 near Repentigny, was it your car?
If not, we might get a new member soon.
Posted by: michel richard Aug 15 2005, 07:28 PM
| QUOTE (serge914 @ Aug 15 2005, 05:09 PM) |
I saw a 914 on a trailler last friday on the 40 near Repentigny, was it your car? If not, we might get a new member soon. |
I hope not ! then somebody would be running away with it !
Not sure what portion of Quebec 914 owners are on the board .
Posted by: Quebecer Aug 17 2005, 06:50 AM
| QUOTE (serge914 @ Aug 15 2005, 05:09 PM) |
| I love that pic with the BugEye. You must have quite a reputation in the neighberhood with all those strange cars. I saw a 914 on a trailler last friday on the 40 near Repentigny, was it your car? If not, we might get a new member soon. |
It's funny cause I had my car on a trailer (friday Aug. 5th) on the 640, not too far from Repentigny.
I finally got it home, I'll probably be starting a thread soon as well.
Can't wait to get started...

Sorry for the slight Hijack Michel.
Posted by: michel richard Aug 17 2005, 03:48 PM
Another chapter in the engine saga. This one is actually related to the PMO install.
Please see:
http://www.914world.com/bbs2/index.php?act=ST&f=2&t=36705
Posted by: michel richard Aug 18 2005, 09:30 AM
Went to the dry-ice blasting shop, today. They are done with the "parts" i.e the doors, the hoods etc . . . and are working on the tub. The underside is pretty much done, from what I could see. I spoke to the guy doing the actual cleaning and he says they found very little rust. I saw a few small holes, pencil size on the trunk floors, but that was it. I may find more when it's home.
The dry ice is not very agressive and they've been using stripper first, then the blasting. Here's a shot of the stripper stewing in the front trunk:
Attached image(s)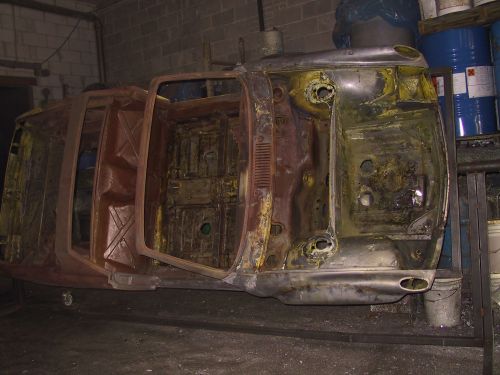
Posted by: michel richard Aug 18 2005, 09:35 AM
And the actual blasting. The blue-gray cloud to the right of the area being blasted is the CO2 ice turning to a gas. In the picture, the operator is blasting an area that was cleaned previously, and there is absolutely nothing being thrown off the car, i.e. no residue from the blasting itself.
One concern, though, is that the blasting "gun" is pretty big and cumbersome, and I'm not sure how it's going to work out in some of the more out-of-the-way spots on the tub.
BTW the process is noisy as hell. No way I could have gotten close if they had'nt given me a pair of ear plugs.
Michel Richard
Attached image(s)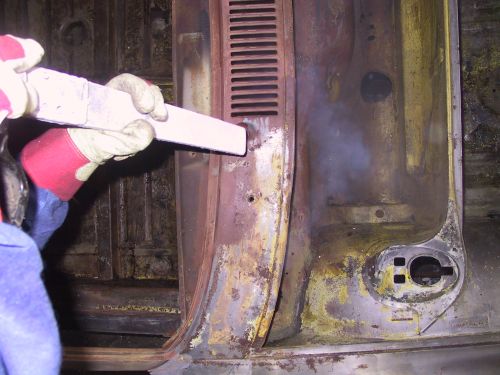
Posted by: michel richard Aug 29 2005, 06:01 PM
CO2 blasting is done. Here are pics of the tub on August 29, 2005:
Attached image(s)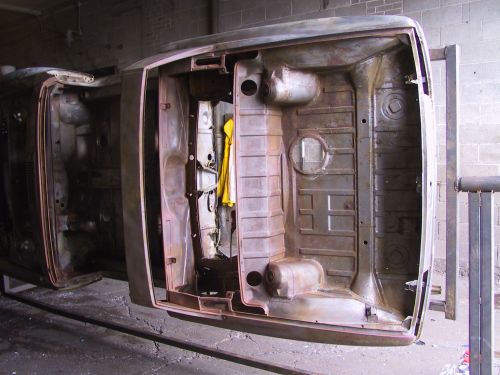
Posted by: michel richard Aug 29 2005, 06:02 PM
That was the top, from the rear, obviously. Now the rear half, from the bottom:
Attached image(s)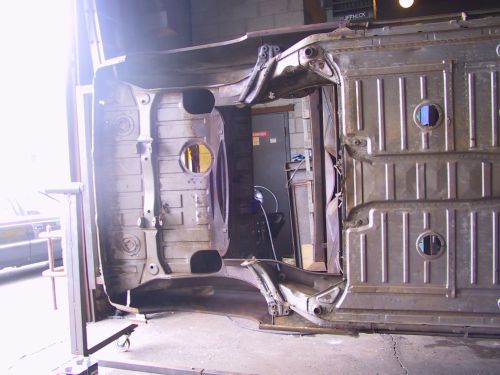
Posted by: michel richard Aug 29 2005, 06:03 PM
And the front half, from the bottom:
Attached image(s)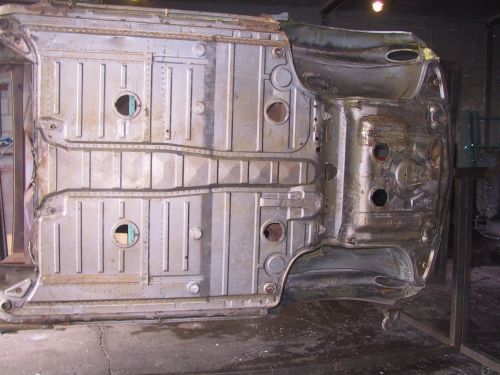
Posted by: michel richard Aug 29 2005, 06:14 PM
The good news is that the floor pans under the passenger compartment, the longitudinals, inside and outside, the center tunnel and the bulkheads are all in very good shape.
Once again, I'm North of the US Northeast (in Montreal) which means I've never ever come close to seeing a stripped 914 that looks as good as this one. Any '70 914 that was used in the winter, here, must've been rustier than this in 1973 !
The bad news is that there is a little more rust than I expected: I should really be replacing both the front and rear trunk floors . . . although I might be able to repair the rear.
If I can find a front trunk floor, new or used, I'll be well on my way.
As for the dry ice blasting, I'm a little disapointed right now. It looks like the process is'nt quite strong enough to really clean everything. It did get rid of most of the rust but the body man who came and looked at the frame this afternoon said a lot more work would be needed before the tub could be ready for primer and paint, even disregarding the need to fix the trunks.
So it looks like I'll have the tub primered, so it doe'nt rust anymore while I chase trunk floors and fix them. I'll then need to remove the primer, really prep the steel and primer again.
Sure sounds like a lot of work, but I'm not sure I have a lot of choice.
Posted by: LongARM Aug 29 2005, 06:42 PM
nice progress .....good find
we need to bring more 6,s across the border...
lol
Posted by: michel richard Aug 30 2005, 06:11 PM
The tub is back home. This is the rig that I threw together to make it possible to have the car towed. It turns out that the bodyman had not gotten around to shooting the car with primer when I showed up today, to take the car back.
So the plan is now to fix the front trunk as well as I can and then to use POR 15 to prepare the tub. That will mean super-thorough cleaning, etching, then the paint. At least it's something I've done in the past, so I should be OK.
Attached image(s)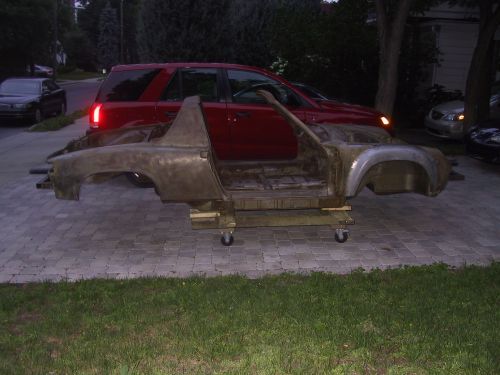
Posted by: michel richard Aug 30 2005, 06:13 PM
Only one flare in the previous shot ! OH well, more to come. And here are the hoods, the doors and the dash. Under those are the trailing arms, the A-arms, teh front struts and other misc parts. I should mostly be working with clean parts, which will hopefully help things along.
Attached image(s)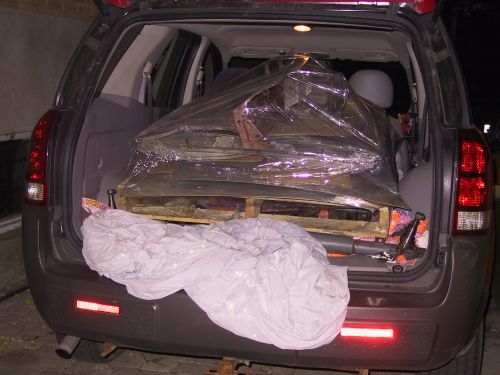
Posted by: michel richard Sep 3 2005, 10:20 AM
Before I put the tub back up on the rotisserie, I shortened the latter, a little bit. The center of the swing axis is now 35.5 inches above the top of the longitudinal bar.
Unfortunately that's a little bit short. The corner of the windshield frame fouls the bar:
Attached image(s)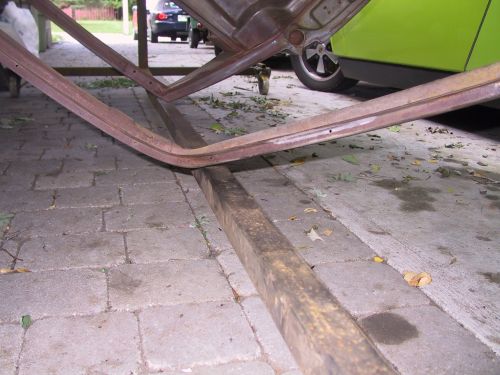
Posted by: michel richard Sep 3 2005, 10:21 AM
. . . Even if the flared fender clears.
Attached image(s)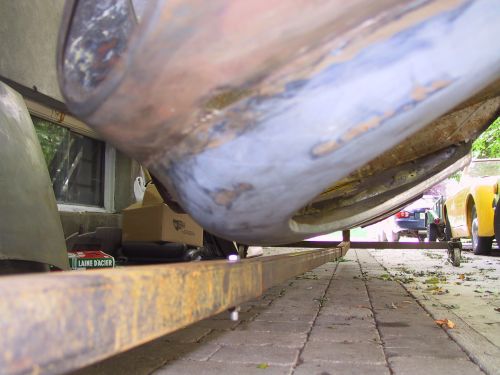
Posted by: michel richard Sep 3 2005, 10:27 AM
I remember reading elsewhere that the rollbar corner was the problem. Obviously, it depends on exactly how everything is mounted. My rollbar clears by about an inch.
So, I am now able to report that the minimum height, when building a rotisserie, is somewhere around 37 inches.
I'm not too concerned, in my case. It just means that I have to be careful which way I turn the car. Even then, when it fouls, there's enough flex in everything that a slight push gets the windshield frame across.
And I can already tell that having the car lower will make a big difference.
Cheers
Posted by: michel richard Oct 2 2005, 06:49 PM
Quite a bit of progress made since th last update. I spent a couple of weekends stripping the rest of the car. The guys who dry-ice blasted it took most of the junk off the car, but there was still a lot left. I went through two gallons of stripper.
Then a thorough wash, etching, and POR - 15.
I sprayed the first coat on, but the stuff is pretty nasty and I got some pretty strong complaints about the smell, so I painted the second coat on. I did the "interior" portions of the car only i.e. the cabin, the engine compartment, the trunks, the fuel tank compartment, plus the underside.
The hoods and the exterior I will leave to my bodyman and the products he is familiar with and he likes.
Here is how the lower engine compartment loolked like when I got he car:
Attached image(s)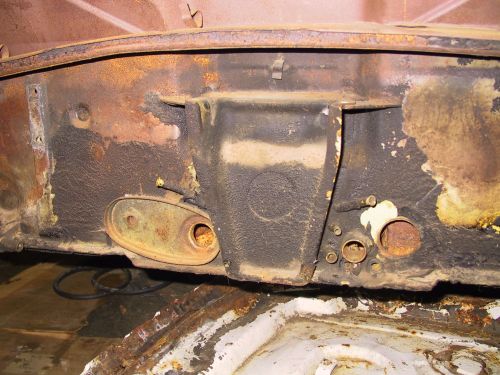
Posted by: michel richard Oct 2 2005, 06:50 PM
The same area just before paint (POR - 15, actually)
Attached image(s)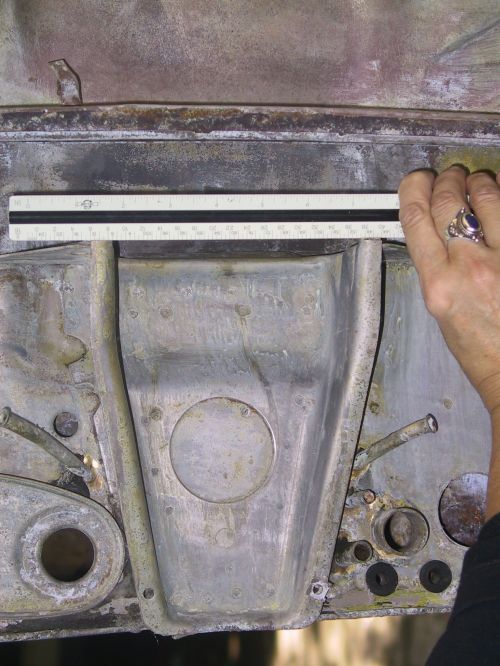
Posted by: michel richard Oct 2 2005, 06:51 PM
And after the POR -15
Attached image(s)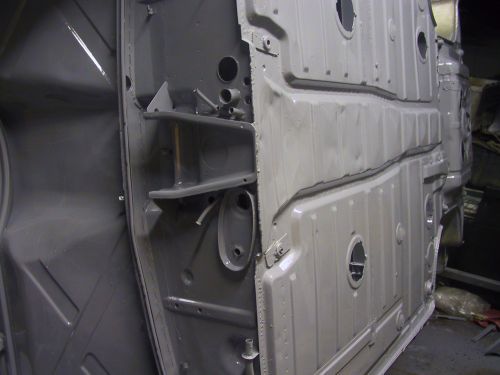
Posted by: michel richard Oct 2 2005, 06:53 PM
I added a sub-thread with a bunch of pictures of the original engine mount, in case it helps anyone.
http://www.914world.com/bbs2/index.php?act=ST&f=2&t=39205
Posted by: Gint Oct 2 2005, 08:25 PM
It's a decent tub though. Looks good Michel.
Posted by: db9146 Oct 2 2005, 08:53 PM
Dry ice blastinng is a new approach I have not heard of here in the southeast. When I have inquired locally, the shops have been talking about soda blasting (baking soda). My brother-in-law had the engine compartment of a Mustang he is working on blasted and was very pleased with the results. The clean up was easy, it left no residue, and it really took care of the junk that covered the metal.
Just thought I'd mention another alternative.
Looks like you are ready to go with your tub. Congrats...looks good.
Posted by: michel richard Oct 15 2005, 12:45 PM
had the tub towed to a bodyshop not far from my house. The plan is to have the interior and the underside painted, so that I can start assembling. Final paint of the exterior body will be done when the bodyman has more time, over the winter.
The tub was towed on the rotisserie, on a flatbed. Glad we did'nt go too far. I'll make sure I get a picture when the truck returns on Monday.
The painter is very friendly and he called me over to his shop around noon today (Saturday) to make sure the color is right, It's Conda green. I can now say it will be visible from quite a distance ! It's a very bright color.
Here's the car in the paintbooth, on October 15, 2005.
Cheers.
Michel
Attached image(s)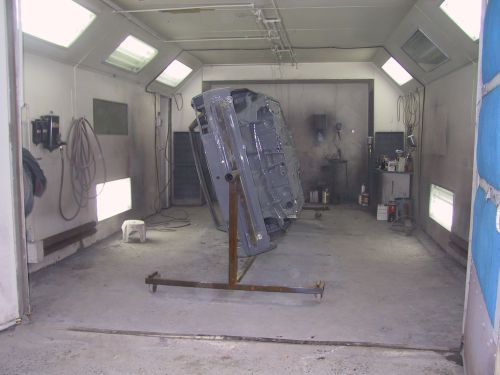
Posted by: michel richard Oct 15 2005, 12:48 PM
I also dug up a couple of pictures of the car that were shot before I bought the car, in Jon Lowe's garage.
Here's one:
Attached image(s)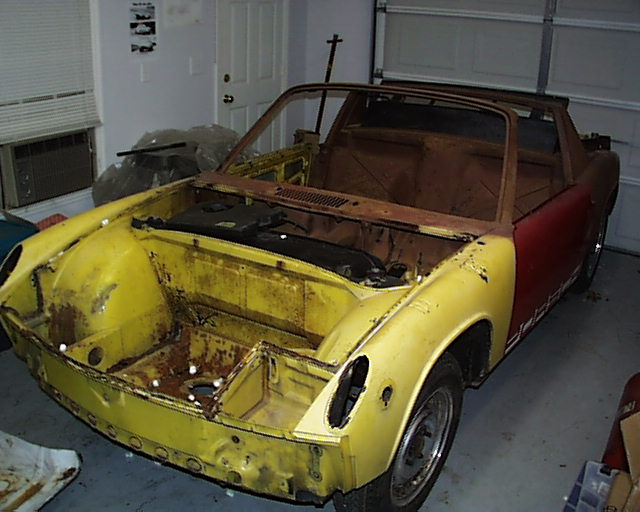
Posted by: michel richard Oct 17 2005, 05:27 PM
The first stage of the paint is done: the interior, the trunks, the engine compartment and the underside are painted !
Here is the car being picked up at the body shop, on the rotisserie !
Attached image(s)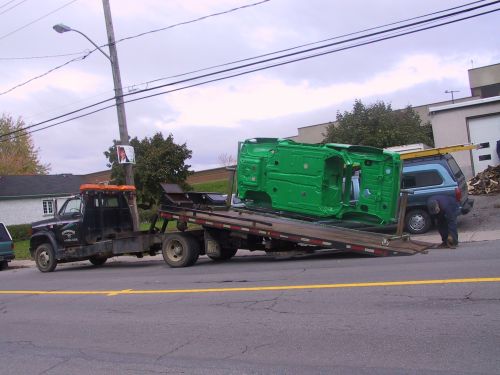
Posted by: michel richard Oct 17 2005, 05:28 PM
On its way !
If I had to do it again, I would brace the vertical members on the rotisserie. I suppose it was fine for a short trip, but I was really nervous.
Attached image(s)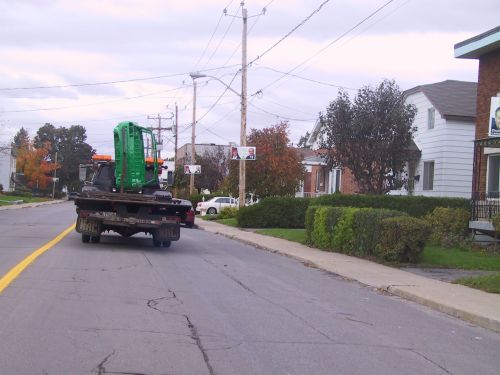
Posted by: michel richard Oct 17 2005, 05:31 PM
And back at home.
The Ravenna green car is now stripped and the tub should be picked up by my buyer on Wednesday. The conda green tub is ready to roll into the garage.
The body man said he may be ready to take the car back in a couple of weeks, which is much quicker than I thought. Doing two trips may not have been necessary, then, but at least I can now start dealing with a number of things, since the inside is painted.
Michel
Attached image(s)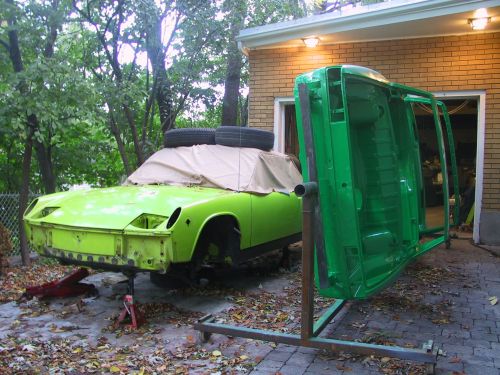
Posted by: michel richard Oct 17 2005, 07:12 PM
All excited, and I started putting the wring through. First thing is to feed the trunk that goes to the rear of the car through the center tunnel, from the very front of the tunnel.
Here I'm feeding it. You don't see my kind daughter on the other side, gently pulling. We put a messenger on the multi-wire plug that goe to the relay board, and that helped a lot.
Attached image(s)
Posted by: michel richard Oct 17 2005, 07:13 PM
Main trunk to the rear in place.
Time to go watch some football !
Attached image(s)
Posted by: sixnotfour Oct 18 2005, 01:19 AM
Damn,
Posted by: serge914 Oct 18 2005, 06:47 AM
It look so nice and clean, why dont you just leave it like that and put it in display in your livingroom ?
Posted by: michel richard Oct 19 2005, 07:16 PM
Ravenna green car is gone !
Mike Galloway from Ontario came and got it today, with a tow dolly. It was pouring rain.
He showed up at my house when I was still at the office and it was 15 - 20 minutes before I could make it home. House was empty. Mike started preparing the 914 for the tow, as it was in the driveway. A neighbor called the cops ! and they arrived promptly. I was there a few minutes later, showed id, and all was settled. There was a house that was robed a few years ago on my street, thieves showed up with a moving truck.
Oh well.
In any event, had a good time with the Ravenna green teener, even if I did not have it very long. It made two ECRs.
Here's Mike towing it home, I'm taking the picture on my way back to the office.
Attached image(s)
Posted by: michel richard Oct 19 2005, 07:20 PM
Made a bit of progress on the wiring: I installed the fuse panel. I can't figure out where the two big red wires that are hanging connect to. Any ideas ?
Attached image(s)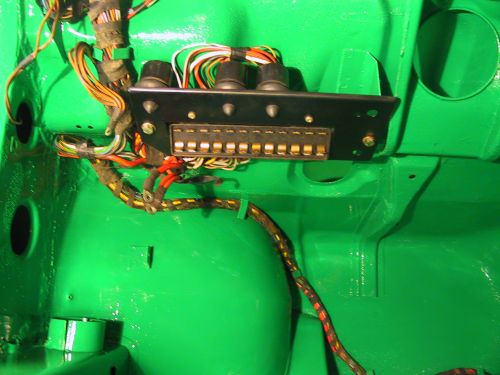
Posted by: michel richard Oct 19 2005, 07:22 PM
Oh, and I realized that I fed the wiring bundle that goes to th rear wrong. It should go above the very front part of the center tunnel. Means I have to pull it out and re-feed it.
I'm sure it's not the last time I have to re-do a job.
Attached image(s)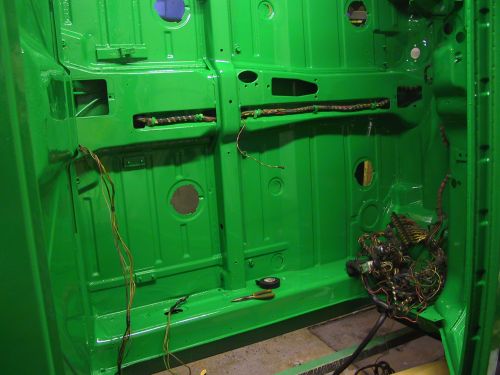
Posted by: swl Oct 19 2005, 07:34 PM
Really nice work Michel. Keep the pictures coming they are inspiring.
Posted by: michel richard Oct 26 2005, 06:29 PM
I started a separate thread to find help figuring out what was what with the red wires and got these very good responses:
http://www.914world.com/bbs2/index.php?act=ST&f=2&t=40080&hl=
Then, I was not able to find the appropriate part in my stash, so I decided to make one. I found a piece of hard rubber at one of the good local hardware stores and managed to machine these pieces:
Attached image(s)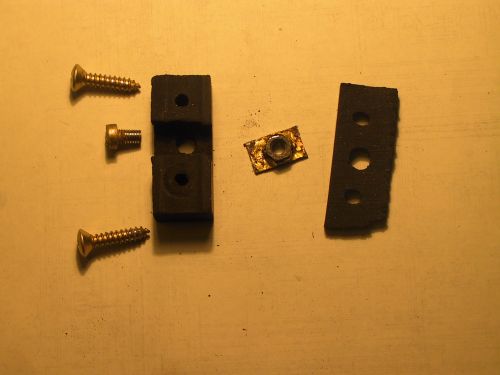
Posted by: michel richard Oct 26 2005, 06:30 PM
The picture is not the best, but the parts can be seen better here, as installed:
Attached image(s)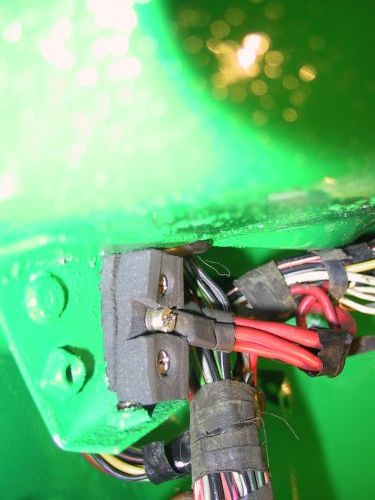
Posted by: michel richard Oct 26 2005, 06:33 PM
The bracket that's painted green is the one that holds the fuse panel to the tub.
Posted by: michel richard Oct 27 2005, 09:07 PM
I then started to look at the wiring to the steering column and quickly hit a roadblock when I looked at the wiper stalk connections. I started another thread and quickly resolved the issue, with some generous help.
See:
http://www.914world.com/bbs2/index.php?act=ST&f=2&t=40446
Posted by: michel richard Oct 29 2005, 05:37 PM
I put the steel sub-dash in, today. I used contact cement to glue the dash material on, then used a very sharp kitchen nife to open holes in the material (I managed to get the knife back in the kitchen before I got into any trouble). Here's how it looks:
Attached image(s)
Posted by: michel richard Oct 29 2005, 05:40 PM
In the previous shot, you may notice a gray splotch in the passenger footwell: I managed to get some work done on the remaining "tub" issues. More on that tomorrow. Also, the switch buttons for the fog lights and the driving ligths are not correct for a 914/6.
I replaced them with what I believe are the correct itmes a few minutes after taking the previous shot. Here's a close-up.
Attached image(s)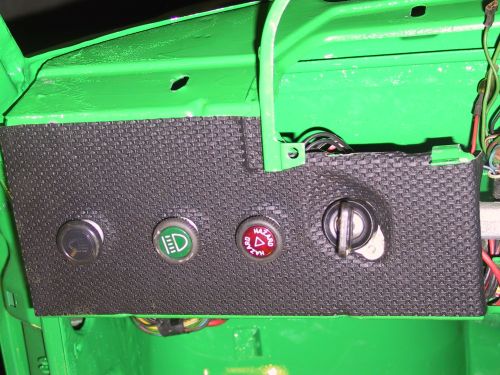
Posted by: michel richard Oct 29 2005, 05:43 PM
The ignition switch installation is still temporary. The final installation can only be made after the steering column is in.
Posted by: Verruckt Oct 30 2005, 07:05 AM
Awesome work, keep it up! It's guys like you that make guys like me look bad!
Posted by: sixnotfour Oct 30 2005, 11:46 AM
You didnt get the factory dash tin facia pieces and 2 eyebrow plastic pieces that fit around steering colum?
Just wondering incase there in a box.
Attached image(s)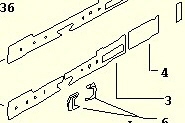
Posted by: michel richard Oct 30 2005, 02:34 PM
Jeff,
I was wondering about the facia, but no, I don't have the tin pieces. I think I have the eyebrow pieces kicking around somewhere, though. There is quite a gap in the dashboard, and in my simple mind the gap was going to be covered by the "eyebrow pieces". Guess I'm going to have to figure something out.
Please keep the comments coming, your help is invaluable.
In any event, I got a lot of welding done today, and the "tub" issues are now pretty much taken care of. I welded rear swaybar mounts:
Attached image(s)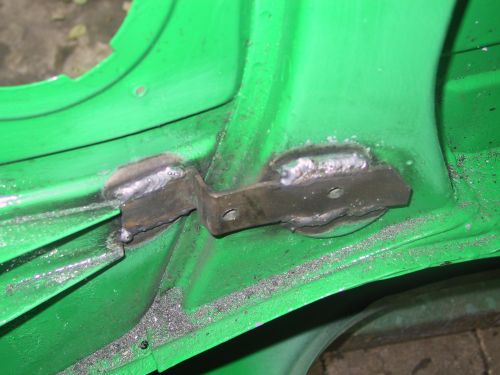
Posted by: michel richard Oct 30 2005, 02:45 PM
I put the passenger-side headlight bucket back in, but it still needs a little work. Pictures to follow. Also, I need to drill holes in the tub for a front swaybar, but that's fairly minor.
In addition, I put together a series of pictures detailing the steering column, except for the "tin pieces" and the eyebrows.
I put the pictures in a separate thread:
http://www.914world.com/bbs2/index.php?act=ST&f=2&t=40618&st=0&#entry527712
Cheers
Now going to have a beer and watch some football.
Posted by: brp914 Oct 30 2005, 03:47 PM
learn from my mistake. I replaced my dash face material. Then for the next few years, the #9 fuse would occasionally blow. Then, alt lite would faintly lite. pushing brake pedal would cause alt. to glow bright and gauges would go to zero. long story short, found that putting turn signal to right would blow fuse. 'Nother long story short, found that when I installed emergency flasher switch, one of the + tabs on the switch was shorting to the dash frame.
Posted by: michel richard Oct 30 2005, 04:42 PM
Okay, brp, I will make sure I'm ok in that regard.
Jeff, I went through my boxes and I don't think I have either the facia or the eyebrow pieces.
I see in my Pet that the "eyebrow" piece is a 914 part number. Do you have a picture of it ? do you know how different it is from a 911 part ?
As to the facia, I'm tempted to see if I can fab something up to fill the hole in the sub-dash, to be covered by the eyebrow pieces.
TIA
Michel
Posted by: sixnotfour Oct 30 2005, 05:13 PM
911's have no eyebrows
Attached image(s)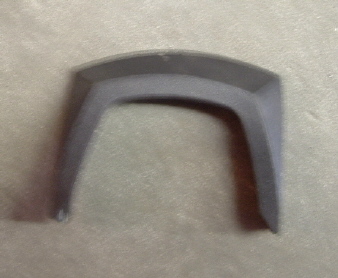
Posted by: michel richard Oct 30 2005, 08:01 PM
That part looks rarer than hen's teeth. Been through my boxes, don't see anything like it. I do have some ideas, though . . .
I did find a couple of rear window defrost switches, and I am able to confirm that the switch itself has the same part number as the fog light switch.
The two buttons were'nt exactly the same though. I prefer the one on the right, with the thinner symbol.
Cheers
Posted by: sixnotfour Oct 30 2005, 08:08 PM
| QUOTE |
| That part looks rarer than hen's teeth. Been through my boxe, don't see anything like it. I do have some ideas, though |
I bought a 914-6 steering colum and had to dig these out of the guys trash can, he didnt think I wanted them

Posted by: michel richard Oct 30 2005, 08:12 PM
forgot to put the picture
Attached image(s)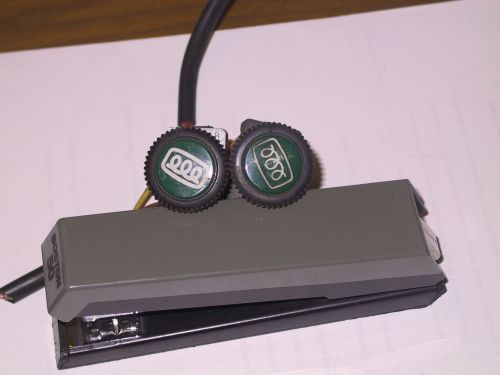
Posted by: michel richard Oct 30 2005, 08:13 PM
| QUOTE (sixnotfour @ Oct 30 2005, 06:08 PM) | ||
I bought a 914-6 steering colum and had to dig these out of the guys trash can, he didnt think I wanted them |
That prolly means you don't have spares, does'nt it ? Thanks for the picture but it's not quite in focus. Can you re-take it, perhaps with a ruler ?
Posted by: Porsche Rescue Oct 30 2005, 08:30 PM
About 4 years ago I got a pair of those from ???Aase, formerly of Aase brothers. I think he had them on Ebay. I asked if he had any more a couple of years ago and he said "no". Keep your antennae out and you will score a pair sooner or later. But they will be a challenge.
Posted by: michel richard Nov 1 2005, 09:17 PM
I decided to tackle a few more things on the tub. I started the discussion about them in another thread, by mistake. Here's the link. I'll continue in this thread, tomorrow.
http://www.914world.com/bbs2/index.php?act=ST&f=2&t=40719&st=0&#entry529632
Posted by: michel richard Nov 2 2005, 07:09 PM
More things done on the tub tonight:
I worked a little more on preparing the driver side long: I cut out most of the threshold plate supports. This may seem radical, but I found that what's left seems be largely enough to keep the plate stiff.
Posted by: michel richard Nov 2 2005, 07:10 PM
Oops,
Attached image(s)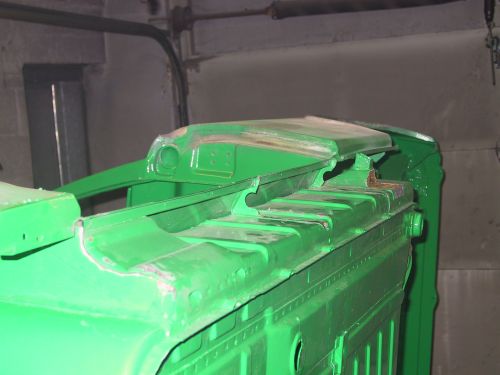
Posted by: michel richard Nov 2 2005, 07:10 PM
And put the holes in for the front swaybar:
Attached image(s)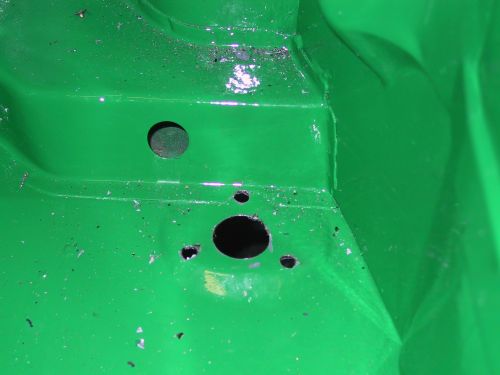
Posted by: michel richard Nov 2 2005, 07:13 PM
Remaining jobs are to cut holes in the font left inder fender and inner long to make room for the oil lines to pass, and to cut an inspection port in the firewall, and to POR 15 all the newly exposed metal.
That will all get done over the weekend.
Cheers
Michel
Posted by: serge914 Nov 2 2005, 07:28 PM
Dont worry, we all keep an eye on you.
Posted by: michel richard Nov 5 2005, 07:39 PM
I did some work on the oil line routing:
http://www.914world.com/bbs2/index.php?act=ST&f=2&t=40932
And put an inspection port in the firewall:
http://www.914world.com/bbs2/index.php?act=ST&f=2&t=40931
As to the steering column, I'm not sure I will end up using the following, but the current reasonning is that I need to fill-in some of the area around the steering column, on the dashboard, so I made the following piece:
Attached image(s)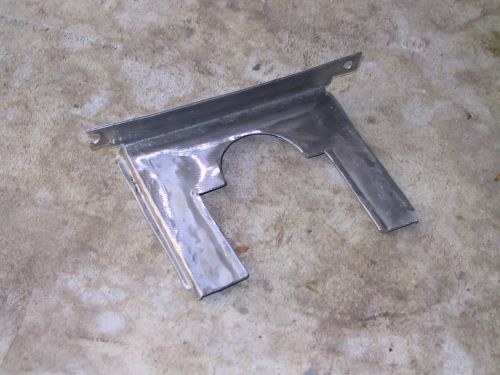
Posted by: michel richard Nov 5 2005, 07:39 PM
And installed like so:
Attached image(s)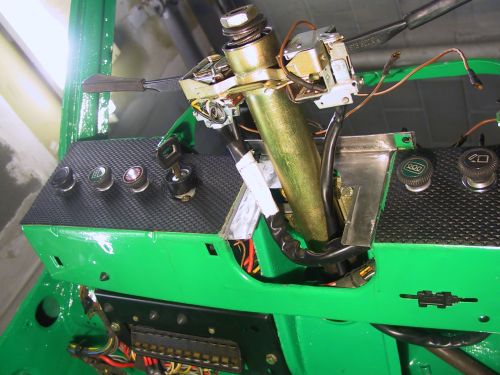
Posted by: michel richard Nov 5 2005, 07:40 PM
and so:
Attached image(s)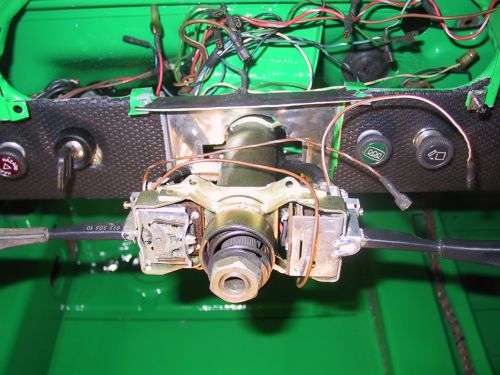
Posted by: michel richard Nov 5 2005, 07:44 PM
The little wings on the side hook up behind the steel sub-dash, the piece's face rests on the steering column support and the top "wings" on the piece will be retained by the same screws that hold the instrument facia.
The plan is to glue some dashboard face material to this, and then to fabricate a pair of the "eyebrow" pieces. We'll see how it turns out. I'm experimenting in public, here !
Michel
Posted by: michel richard Nov 6 2005, 05:24 PM
There's always one more thing that needs to be done. One of the hinges for the driver's seat had come off; I fabricated one real quick and welded it in.
Attached image(s)
Posted by: Root_Werks Nov 7 2005, 08:44 AM
Another cool resto thread! Sweet!
Posted by: cantley914 Nov 9 2005, 09:22 PM
| QUOTE (michel richard @ Jul 16 2005, 10:49 AM) |
| One Saturday morning, and the rust holes are pretty much fixed ! I also drilled through one of the three bolts that hold left hand side rear radius arm to the body. The one bolt snapped when Jon was removing it. I think I managed to save the thread, but I may end up using a longer bolt and a nut on top, just to be sure. But that's some ways down the road. The main concern right now is getting the car media or sand blasted and primered. Michel Richard |
Michel,
Looks like you`ve got in your hands a nice project!
For the broken rear radius arm bolts, I had the same problem with mine and I did just what you stated you would do. I drilled the broken bolt, removed the plastic cap on top and inserted a longer bolt and put a lock washer and nut. It barely shows and does the job.
Also when you get a chance, drop-moi un e-mail
Cantley914@videotron.ca
Good luck , I`ll follow your thread
Steph
Posted by: michel richard Nov 19 2005, 09:53 PM
Have'nt done much over the past two weeks. I'm waiting for a n oil cooler to come, so I can start fabbing the necessary air ducting up front. And I'll be picking up some oil system components tomorrow: a 1969 911S oil filter console and external oil thermostat, to be part of my GT-style oil system.
On the GT cars, there is a spacer between the oil filter console and the oil tank. Armando Serrano actually has detailed drawings of this part on his site:
http://www.pbase.com/9146gt/image/23035926
And since it's a 914/6 GT only part, I figured my chances of finding one were close to nil. It's a simple part, however, and I had some aluminum stock in the shop, so I fabed the part. I'm quite happy with the result.
Attached image(s)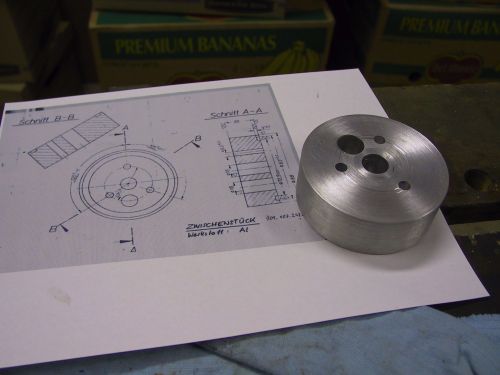
Posted by: swl Nov 20 2005, 06:56 AM
You must have quite a shop to have a block of aluminum like that just laying around! Nice work
Posted by: michel richard Nov 21 2005, 09:09 PM
Got a couple more parts, I should be able to make some progress on the oil cooling system. I'm now pretty much commited to a GT style layout:
Got an oil tank console from a 1969 911S. The spacer above fits between this part and the oil tank. It's a magnesium part and it's a little mangled, but I'm pretty sure I can make it work.
Attached image(s)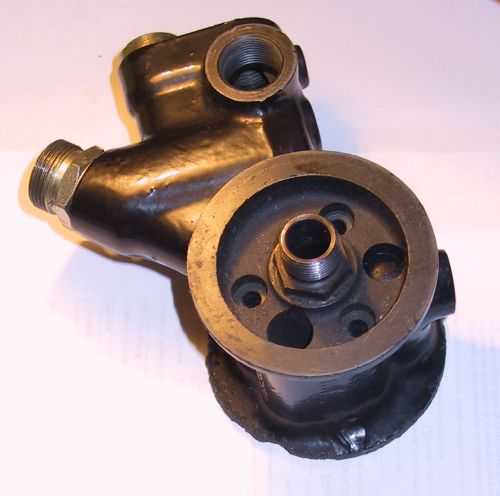
Posted by: michel richard Nov 21 2005, 09:12 PM
In addition, an external thermostat, also from a 911S of 1969. It appears that the 914/6 GT actually used a 917 part for this application, and this thermostat will need to be modified a little bit. The third hard part of the system is a oil pressure bypass valve, for lack of a better word, I hope to be able to fabricate that part too, but it will certainly be much more of a project than the spacer above.
Attached image(s)
Posted by: ein 6er Dec 7 2005, 05:51 PM
| QUOTE (michel richard @ Nov 5 2005, 05:39 PM) |
| I did some work on the oil line routing: http://www.914world.com/bbs2/index.php?act=ST&f=2&t=40932 And put an inspection port in the firewall: http://www.914world.com/bbs2/index.php?act=ST&f=2&t=40931 As to the steering column, I'm not sure I will end up using the following, but the current reasonning is that I need to fill-in some of the area around the steering column, on the dashboard, so I made the following piece: |
hey michel!!
i'm really enjoying following your progress. if you decide to use the metal plates for the dash face basketweave, i have some repros of the "eyebrow" trim pieces.
doug
Posted by: michel richard Dec 11 2005, 11:44 AM
Doug,
I missed your post, somehow. I'm interested in your repro eyebrow pieces. I'll pm you.
Long time since the last update. I'm waiting for on oil cooler to arrive, I need it to make sure I cut the tub correctly in the front trunk. And until I've built the shrouding for the front oil cooler, I can't take the car to the paint shop.
So I've been working on some parts for the oil system.
The GT cars had a special wide mouth filler neck and I decided I would fabricate a reproduction. What it's supposed to look like is shown here:
http://www.pbase.com/9146gt/image/22496247
and installed in the car:
http://www.pbase.com/9146gt/image/22265244
and:
http://www.pbase.com/9146gt/image/22265243
I had this cap, from a British car, I think:
Attached image(s)
Posted by: michel richard Dec 11 2005, 11:47 AM
So I started from that and ended with this:
Not the prettiest, but it should work.
I'm also in the process of fabricating a pop-off valve, the one that attaches to the fitting right under the cap, on the neck. I think it's a part that was used on a few racing models. I assume it's horrendously expensive, and it's not too complicated. More on that to follow.
Cheers,
Attached image(s)
Posted by: michel richard Dec 20 2005, 07:23 PM
I started a separate thread to cover the engine work; see:
http://www.914world.com/bbs2/index.php?act=ST&f=2&t=43047
Michel
Posted by: michel richard Dec 23 2005, 05:40 PM
| QUOTE (ein 6er @ Dec 7 2005, 03:51 PM) | ||
hey michel!! i'm really enjoying following your progress. if you decide to use the metal plates for the dash face basketweave, i have some repros of the "eyebrow" trim pieces. doug |
A message to all:
Doug sent me the "eyebrow" pieces he had, FOC. He would not even take shipping expenses.
This board is full of good people.
Michel Richard
Posted by: michel richard Dec 23 2005, 07:43 PM
And here they are:
Attached image(s)
Posted by: michel richard Dec 23 2005, 08:08 PM
Also made some progress on the oil system. I posted a picture of the oil filler neck above; I'll POR15 it this weekend. I'm also pretty much done with the pop-off valve, adjusting the pop-off pressure is what remains. Pictures of that part over the weekend too.
I've started another thread to solicit opinions on my plans for an oil radiator. Please see:
http://www.914world.com/bbs2/index.php?act=ST&f=2&t=43179&st=0&#entry564046
Cheers.
Posted by: michel richard Dec 27 2005, 11:57 AM
I added a separate thread with several pictures of the progress I have made on the oil system. See:
http://www.914world.com/bbs2/index.php?act=ST&f=2&t=43300&st=0&#entry565660
Posted by: michel richard Jan 4 2006, 06:59 PM
Spent a bunch of money today !
1) Bought a complete twin plug ignition system off the bird board. Picture is below.
2) I bought a Mazda 2nd generation oil cooler that I plan to have modified, to use as my front oil cooler. It was cheap. The expense is going to be the modifications and the elecrostatic, or electroaccoustic cleaning (whatever it's called)
3) Bought front and rear GT replica hoods from Getty Design, as well as front and back bumpers, front valance, rockers, and oil cooler shroud.
Phew . . .
Attached image(s)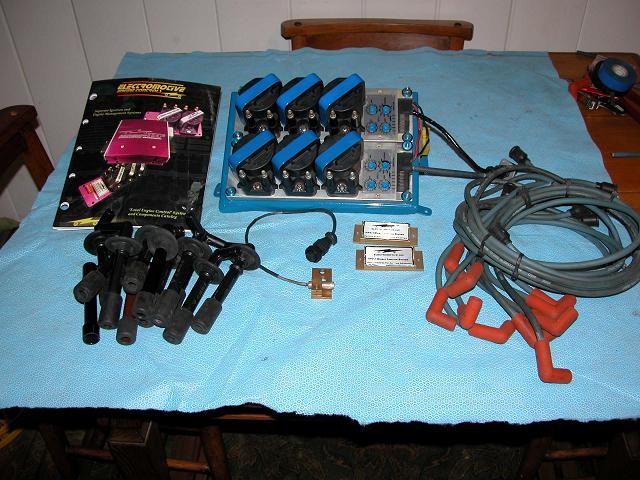
Posted by: joea9146 Jan 4 2006, 07:25 PM
The easy part is spending the money.... The hard part is putting it all together.
But I am sure u will get it done. Keep up the Good work.
Posted by: michel richard Jan 4 2006, 07:38 PM
Joe,
Thanks for your usual kind thoughts.
Speaking of the hard part. I spent the new year's weekend fabricating some hard oil lines to fit under the driver side rocker panel.
I had been thinking about alternatives for these lines for a long time. The originals are brass. I found a local source for brass tubing but the minimum order was pretty big and it was expensive. Amando Serrano mentions on his site that reporductions are available for US$ 800. I figured I could organize something for less, especially considering likely shipping charges for such a bulky item, across the continent and a border.
I looked into having them made locally, but no one had real interest in such a project.
And I like the satisfaction of making things myself even if the end product is not always exactly up to commercial standards.
So, I started by making some aluminum dies out of spare stock that I had. I turned these out of 4 inch stock. ( I often visit a local recycling yard to see what raw metal they have). I turned out a piece full round, then sawed the round turning into three separate dies, two of which are here.
Attached image(s)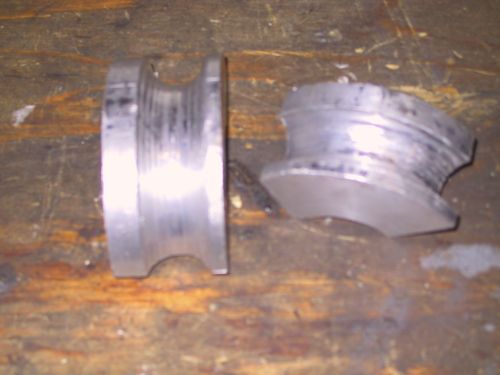
Posted by: michel richard Jan 4 2006, 07:44 PM
I then bought some 1 inch diameter 1/16 wall round tubing in 4 foot sections at the local hardware store. I found I could bend the tubing fairly easily by clamping it between the dies on my bench top vise, bending a little, moving the dies, bending a little more etc . . .
There's quite a few bends involved. I made front and back sections, and mig welded them together, then I ground the welds flat.
Here's an overall view of the lines:
Attached thumbnail(s)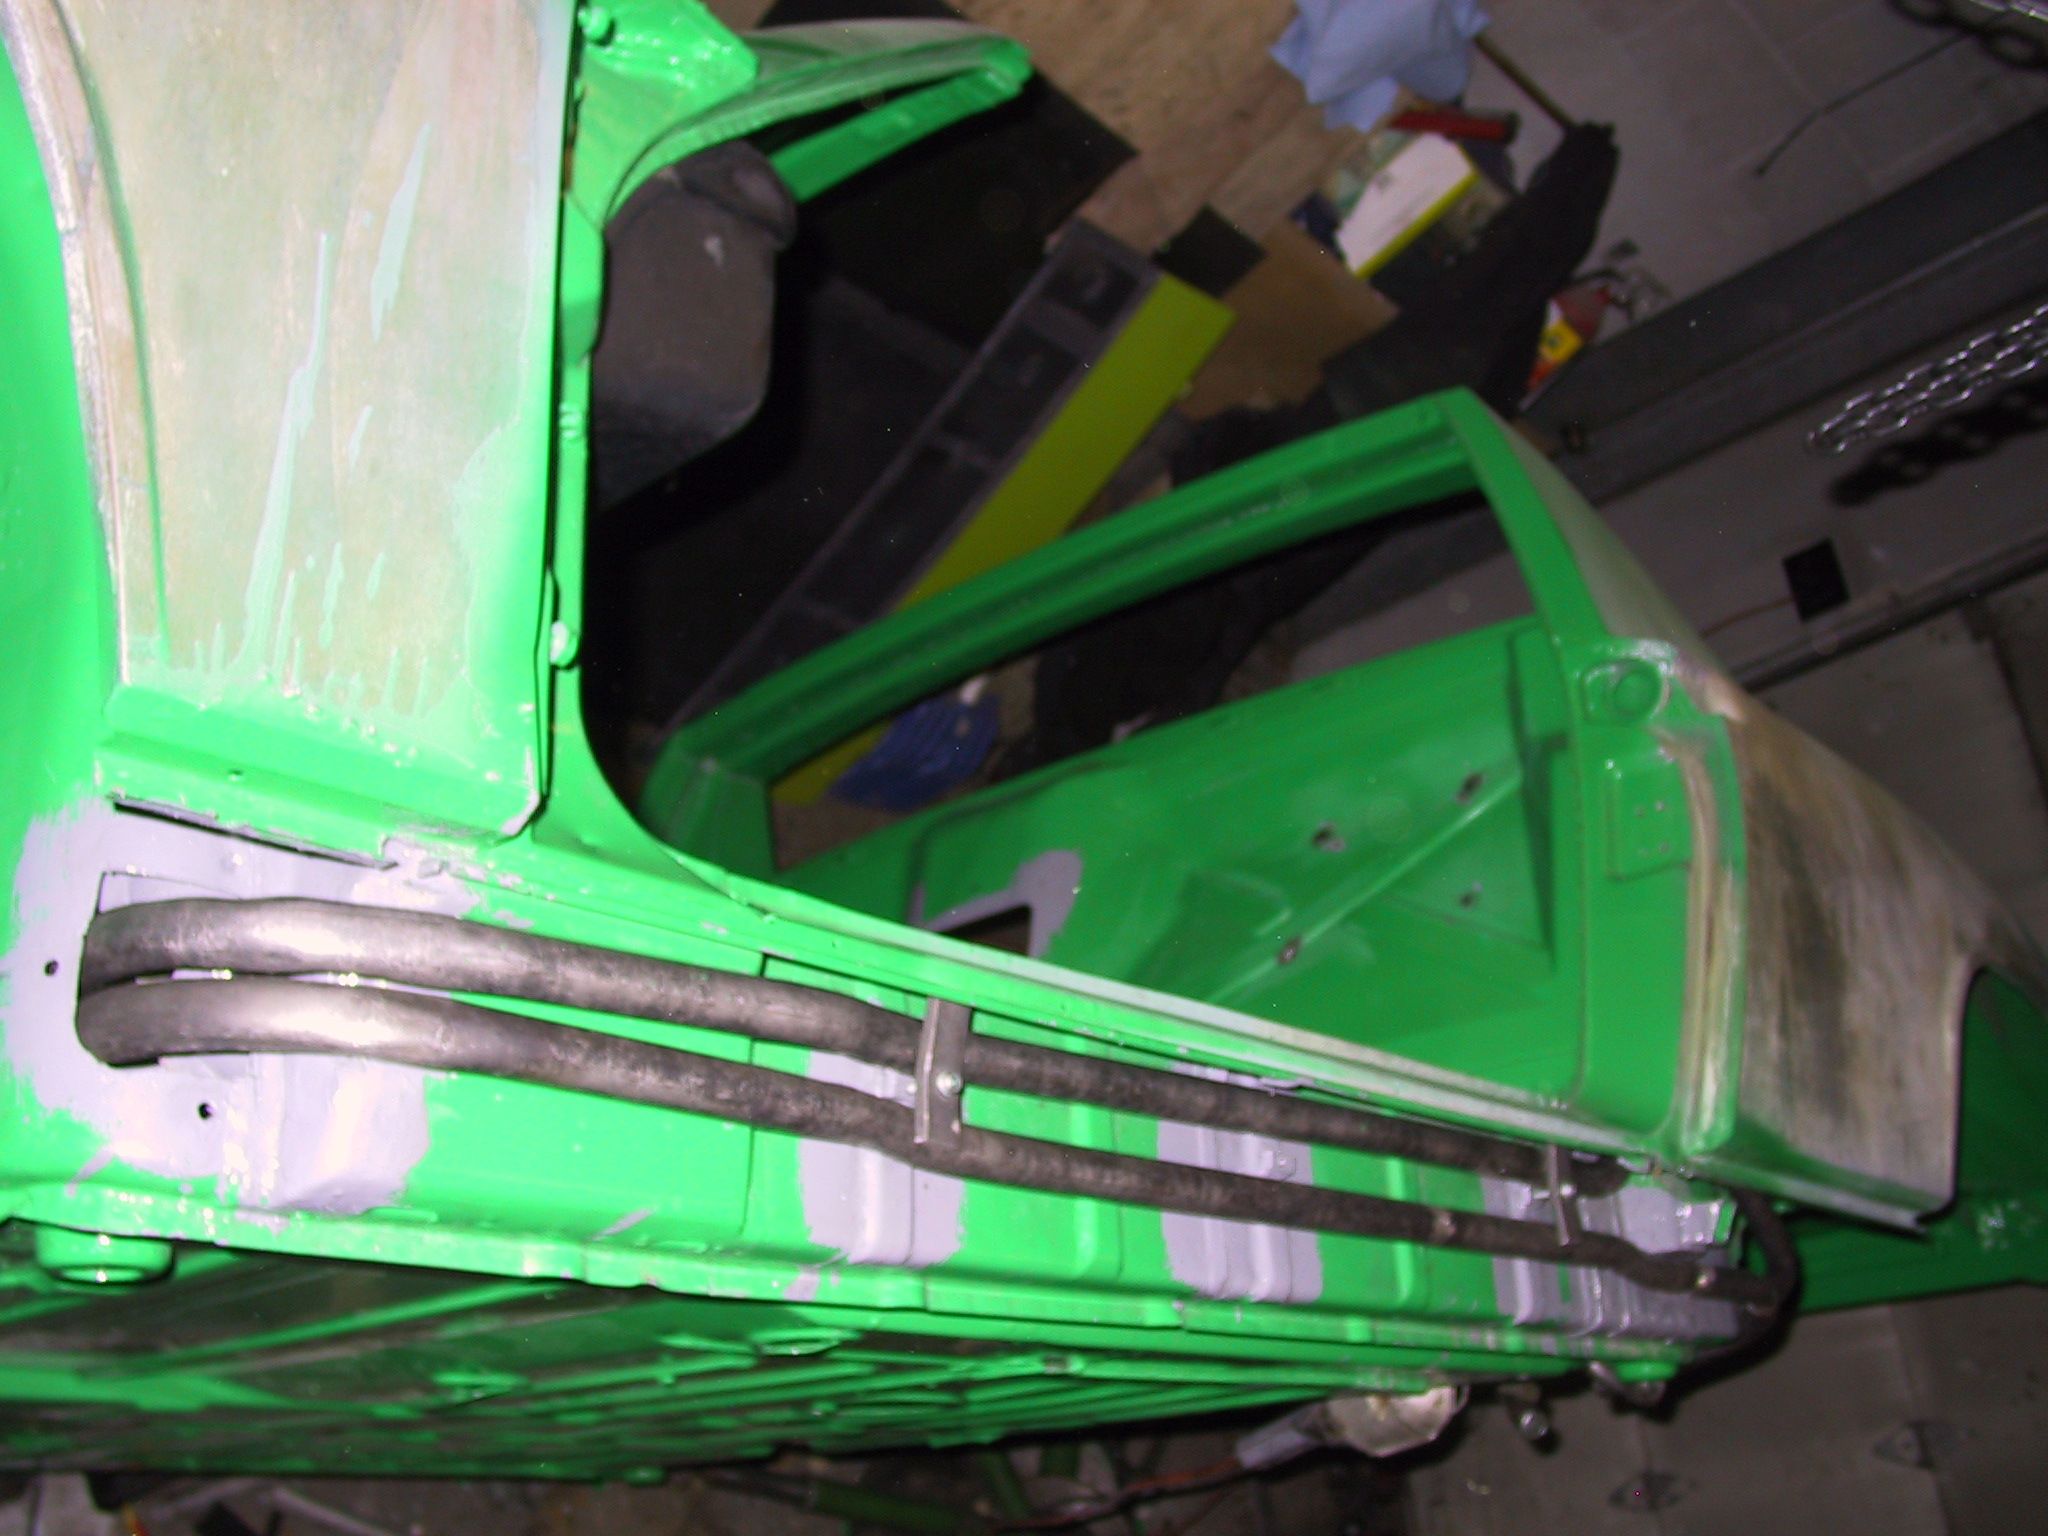
Posted by: michel richard Jan 4 2006, 07:46 PM
Sorry for the large pic in the previous post, I forgot to shrink it.
In any event, some of the bends came out quite nice:
Attached image(s)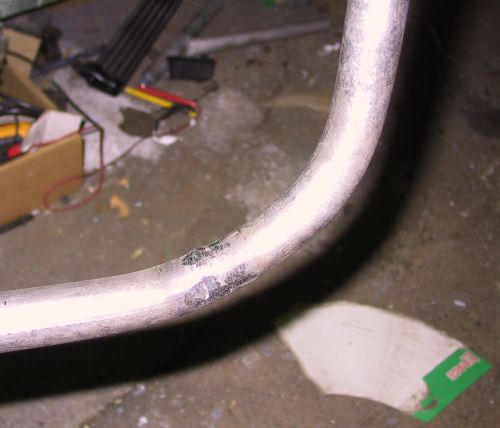
Posted by: michel richard Jan 4 2006, 07:47 PM
While others have slight kinks. I plan to use these as they are:
Attached image(s)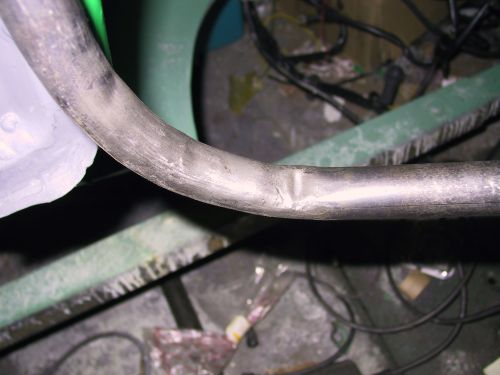
Posted by: michel richard Jan 4 2006, 07:48 PM
So far, I've used clamps I made from simple flat stock. Not sure what I'll do in the end.
Attached image(s)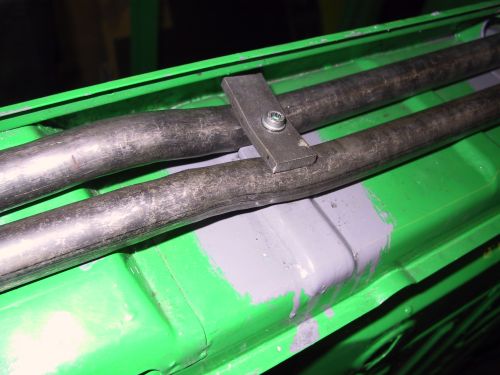
Posted by: michel richard Jan 4 2006, 08:00 PM
The exact shape and positioning of the lines is quite finicky, I found, in terms of getting the outer rocker cover to fit correctly.
I still need to weld some end fittings on the lines. I'm pretty sure I know a place where I can find fittings with the proper 30 x 1.5 thread. (mm)
Finally the other big challenge will be to get the inside of the lines spotlessly clean. I plan to use lots of mineral spirits and a brush that I'll run through the lines, then to coat the inside with POR-15 fuel tank prep material, after further proper paint prep. The temperature rating of the Por-15 stuff is at least twice what the oil temp is ever likely to reach. I'll probably coat the exterior with regular POR-15 paint.
The steel (as opposed to brass) and all the POR-15 are likely to reduce the cooling capacity of the lines themselves, but I figure that that function can't have been a huge factor to start with, in this particular application, since these oil lines see very little airflow under the outer rocker covers. The situation of the early 911 oil lines was quite different in this regard. Besides, one of the good things about living in Canada is that oil cooling systems don't need to be nearly as efficient here !
Got good news from the body shop, the tub is likely to go back for installation of the remaining flares, and for final paint in one or two weeks. After that, assembly begins in earnest, but it'll be nerve wracking !
Cheers
Michel Richard
Posted by: joea9146 Jan 4 2006, 09:04 PM
| QUOTE (michel richard @ Jan 4 2006, 10:00 PM) |
| I still need to weld some end fittings on the lines. I'm pretty sure I know a place where I can find fittings with the proper 30 x 1.5 thread. (mm) |
These guys have all kind of Metric fittings also AN and Standard to Metric conversions.
If u do not see what u need on there website give them a call
http://www.batinc.net/mocal.htm
http://64.202.180.37/files/metric.pdf
Posted by: michel richard Jan 4 2006, 09:07 PM
Thanks Joe.
Posted by: michel richard Jan 14 2006, 01:09 PM
I decided to pay my bodyman a visit earlier today. He was in, and said he was real close to taking my car in. Talked about it a little more, phoned the tow truck and bang, the tub is back in his shop to have the flares welded on and the exterior of the body finished and painted. The fiberglass parts I bought from Getty design should be delivered pretty soon, directly to him.
So, the tub is at the body shop, and the engine is at the mechanic's shop !
Things will slow down a bit at my end, I'll build the halfshafts, build the rear trailing arms, build the split rear calipers, finish a lot of stuff on the oil system etc . . .
Cheers
Posted by: michel richard Jan 15 2006, 08:48 PM
I started a separate thread concerning the modification of my original /6 rear calipers.
Here:
http://www.914world.com/bbs2/index.php?act=ST&f=2&t=44359&st=0&#entry580331
Thanks for looking.
Posted by: michel richard Jan 22 2006, 08:50 PM
I put the brakes away while waiting for some parts to come through the mail. Ran into a small issue with the CV joints that I have. Once again, I started a separate thread on that issue.
http://www.914world.com/bbs2/index.php?act=ST&f=2&t=44749&st=0&#entry586204
Cheers.
Posted by: michel richard Jan 23 2006, 07:49 PM
I received a Mazda RX7 oil cooler that I will modify to use in the front of the car. I started a separate thread about that part of the project. See:
http://www.914world.com/bbs2/index.php?act=ST&f=2&t=44825&hl=
Thanks for looking.
Posted by: michel richard Jan 31 2006, 07:48 PM
A lot of parts I ordered in ove the past few weeks have started arriving. A bunch of engine parts from EBS, including a 7R case, shuffle pinned, time certed and quite nice,
Attached image(s)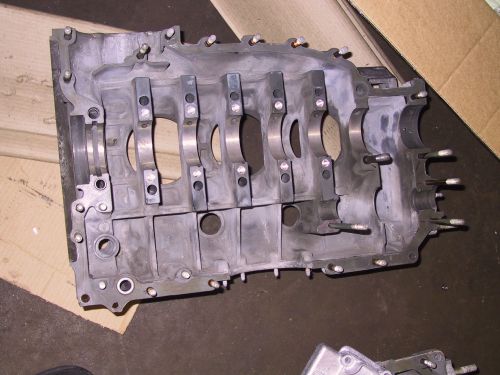
Posted by: michel richard Jan 31 2006, 07:49 PM
Here's the other half, with lower turbo valve covers. The covers will need to be machined to take the extra set of spark plugs:
Attached image(s)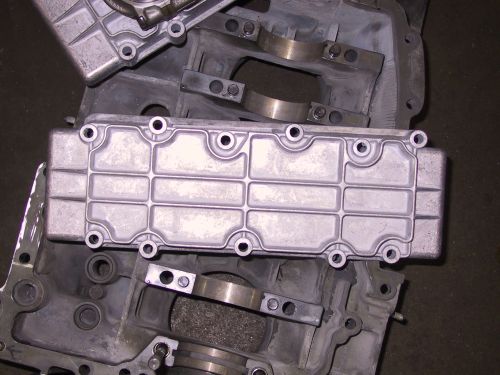
Posted by: michel richard Jan 31 2006, 07:50 PM
2.0 rods, rebushed etc . . .
Attached image(s)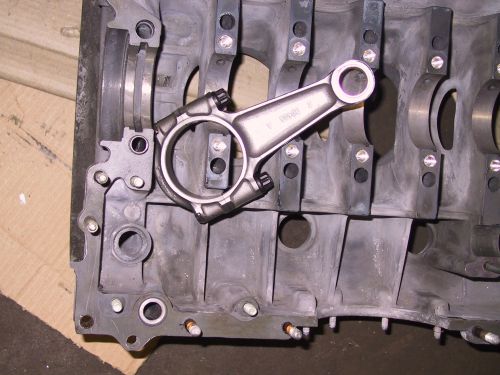
Posted by: michel richard Jan 31 2006, 07:52 PM
ARP bolt in the previous picture.
Plus, I got a bunch of ignition stuff. I would have liked to use a big 12 plug distributor, for the vintage look, but they're very expensive (even the recent alternatives) and can't b as reliable as this electronic system. Here's the coils:
Attached image(s)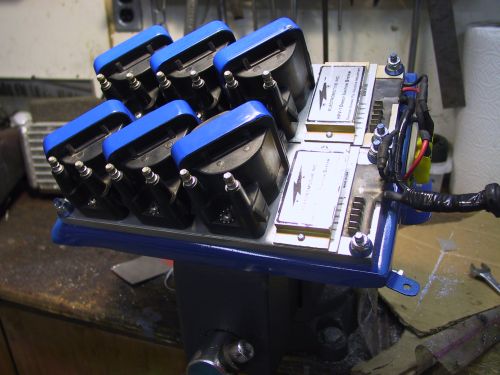
Posted by: michel richard Jan 31 2006, 07:52 PM
and the trigger wheel:
Attached image(s)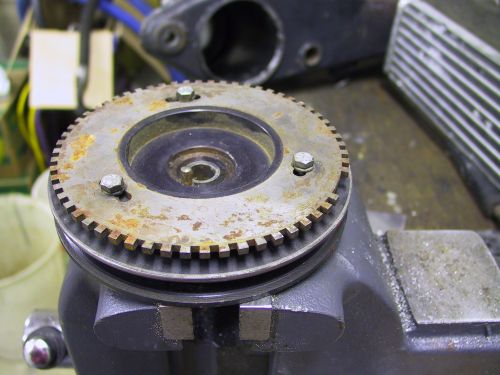
Posted by: michel richard Jan 31 2006, 07:53 PM
Here's the detailed id of the system:
Attached image(s)
Posted by: swl Feb 1 2006, 06:11 AM
I gotta see this project some day Michel! You've got some pretty innovative stuff going on.
Posted by: michel richard Feb 1 2006, 10:50 AM
Steve, thank you. As soon as the engine is broken in I'm driving the car to Toronto, for a day or two on business. A stop in Kingston would only be natural.
Looking forward to it, it'll mean I've got a good runner on my hands.
Michel
Posted by: swl Feb 1 2006, 08:46 PM
Sounds good! Plan a dinner or something. BTW if you have another good chassis hook it up behind and drag it down! lol. I'm finding way too much rust in my poor old baby.
Posted by: michel richard Feb 18 2006, 02:18 PM
Gratuitous pic of one of my new pistons.
It's a JE piston, 10.5 to 1 (nominal) compression, 90mm.
Not a whole lot going on on the project, waiting for the tub to be flared and painted.
Attached image(s)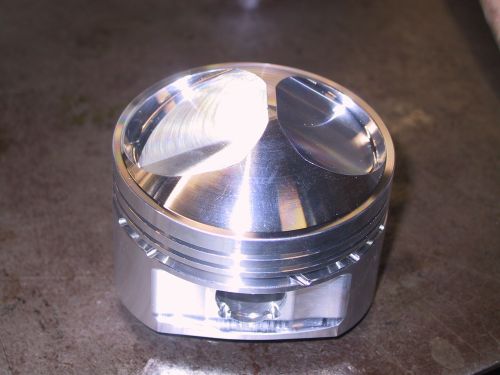
Posted by: michel richard Mar 8 2006, 04:21 PM
Body shop man is taking his time, because he's a one-or-two-man shop, and he's currently alone. But he's ok, even if he's not fast. I took a couple of days off work and he let me work on my car, in his shop. I want to put in a front oil cooler in the GT way, so I did that.
First, you make some holes in the tub. This requires a good set a cojones.
Attached image(s)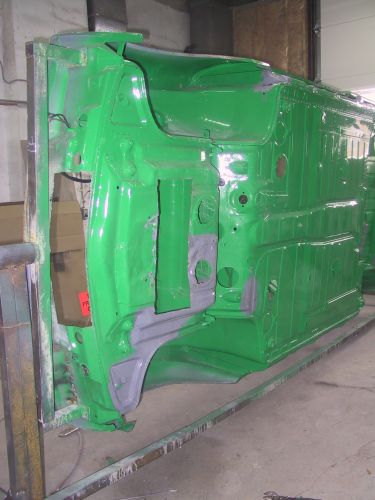
Posted by: michel richard Mar 8 2006, 04:21 PM
front hole:
Posted by: michel richard Mar 8 2006, 04:22 PM
oops,
Attached image(s)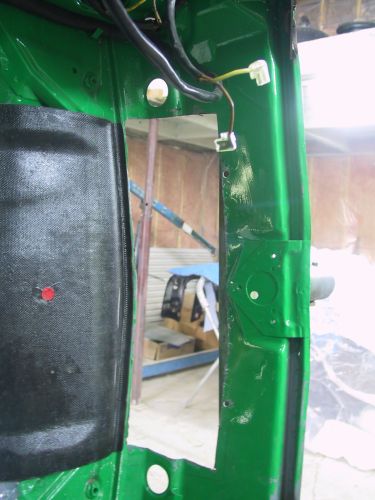
Posted by: michel richard Mar 8 2006, 04:22 PM
And the bottom hole:
Attached image(s)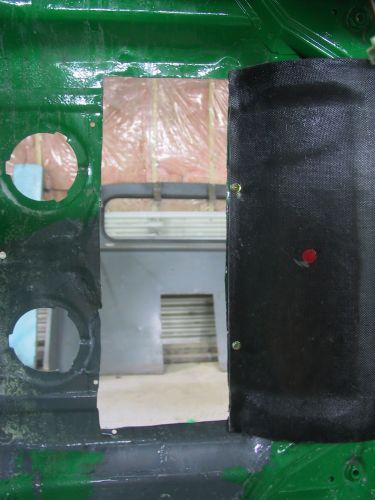
Posted by: michel richard Mar 8 2006, 04:25 PM
Because this means taking some metal out, and because it makes sense, I added a reinforcement across the tub. It anchors to the A-arm pick ups in the front. The welding is a little chunky, but that's just me, plus I was welding some pretty thick stuff to some thin sheet, and through to the A-arm bolt plates, on the underside of the tub. I'm satisfied it's strong, if not pretty.
Attached image(s)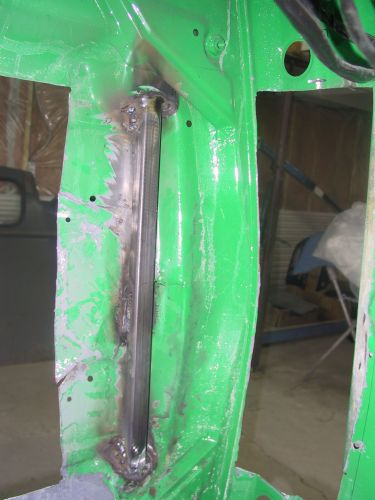
Posted by: michel richard Mar 8 2006, 04:26 PM
Finally, a shot of the cooler shroud, as installed.
Attached image(s)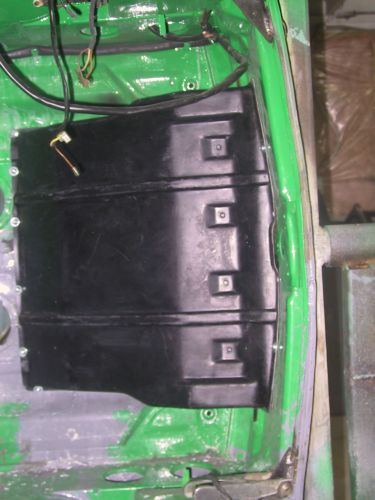
Posted by: michel richard Mar 8 2006, 04:27 PM
The two-piece shroud is from Getty design, in fiberglass.
Michel
Posted by: Root_Werks Mar 8 2006, 04:49 PM
I love that green on a 914.
Posted by: michel richard Mar 8 2006, 05:50 PM
When my sister-in-law saw the green at Christmas, she burst out with "Uglyyyyy". I like it too, but it may not be unanimous. She tried to catch herself afterwards with comments about 1970 colors being "different" etc . . .
A lot of the family ended up gently poking fun at her for having been un-polite at the hosts.
It was fun.
Michel
Posted by: carr914 Mar 8 2006, 06:50 PM
Michel, your sister in law must be American, we can be really rude sometimes. Great work on the car, I'm really enjoying seeing your progress. I'm GREEN with envy.
T.C.
Posted by: michel richard Mar 8 2006, 07:49 PM
And I'm considering the addition of a transmission oil cooler, just because it would be kind of cool (Hehehe).
The factory did it in at least a few cases, and used a sportomatic oil pump to circulate the oil. I explored those pumps in another thread:
http://www.914world.com/bbs2/index.php?act=ST&f=2&t=46939&hl=sporto
There's a number of pictures of the setup on Armando Serrano's site:
http://www.pbase.com/9146gt/factory_original_9146_gt_parts_901_gearbox
Here's what I received in the mail:
Attached image(s)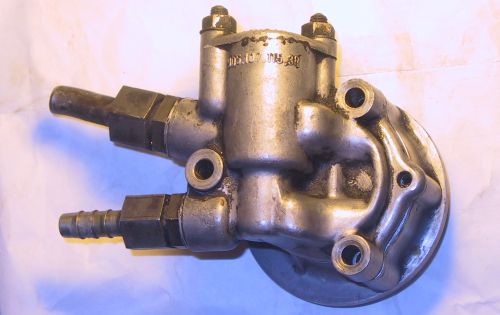
Posted by: michel richard Mar 8 2006, 07:50 PM
And another.
It's a neat pump, it bolts right to the cam carrier, or over the MFI belt pulley, if used and it has a built-in pressure relief valve.
Cheers
Attached image(s)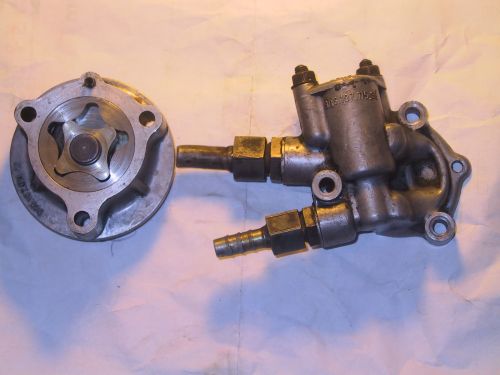
Posted by: michel richard Mar 8 2006, 08:06 PM
In the Serrano link, two posts up, notice how the clutch is the "pull type" (or push, I can never remember, anyways, the reverse of what most of our teeners have).
See also these pictures:
http://www.pbase.com/9146gt/porsche_gearboxes_901_external_lubrication_kit
Attached image(s)
Posted by: michel richard Mar 10 2006, 08:12 PM
went to a machine shop to have some work done on the Mazda oil cooler. See the progress on this thread:
http://www.914world.com/bbs2/index.php?act=ST&f=2&t=44825
I also had them weld a tab to the back of the oil thermostat so it can properly fixed to another tab that I will add to the engine compartment. Here's how the thermostat looks now:
Attached image(s)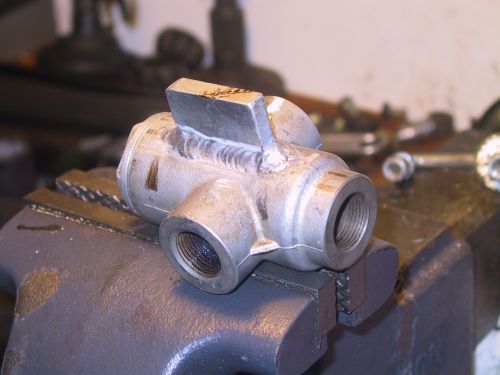
Posted by: michel richard Mar 10 2006, 08:13 PM
I'll obviously need to trim the tab on the thermostat and make a couple of bolt holes on it.
Posted by: michel richard Mar 12 2006, 04:34 PM
I am adding a dog-ear reinforcement strut, and have started a separate thread about that:
http://www.914world.com/bbs2/index.php?act=ST&f=2&t=47833&st=0&#entry631125
Posted by: michel richard Mar 12 2006, 04:37 PM
Here is what it should look like (picture form Armando Serrano's site):
Attached image(s)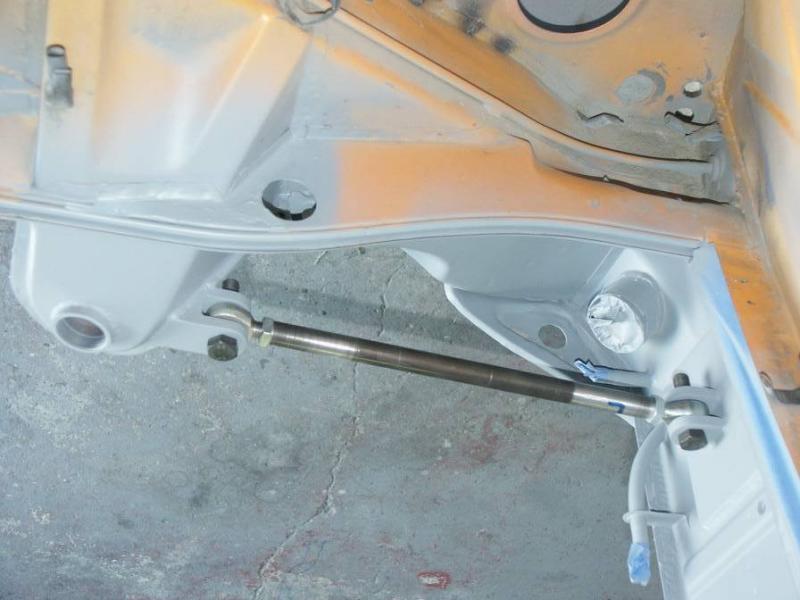
Posted by: michel richard Mar 14 2006, 02:30 PM
Very good news, the bodyshop started work on the tub. trial fitted the flares and the rockers. I'll have to build supports of some sort so they can fit the bumpers.
Passenger side:
Attached image(s)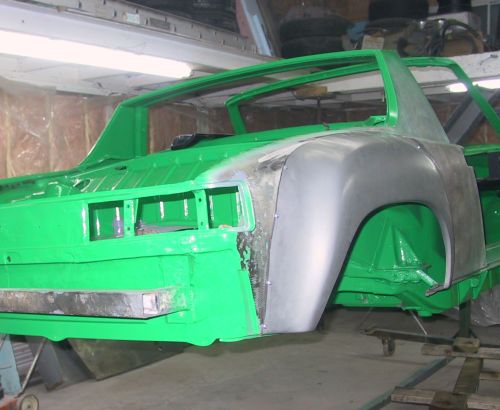
Posted by: michel richard Mar 14 2006, 02:31 PM
And driver side. This is very good news.
Attached image(s)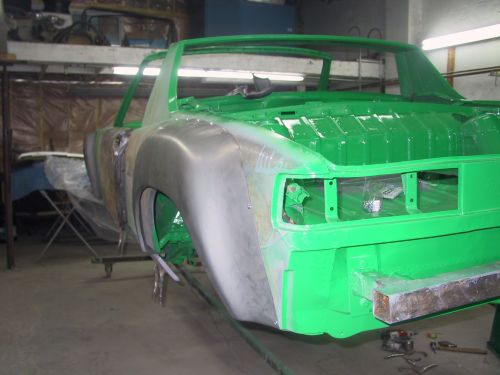
Posted by: michel richard Mar 24 2006, 07:40 PM
Several things accomplished since the last update. I went to the bodyshop last Tuesday, over lunch hour. I had managed to stop at my house on the way and had changed into some jeans.
Proceeded to the shop and I welded a bracket to hold the external oil thermostat to the side of the engine compartment, I also welded some brackets to the lower front engine compartment firewall where I will bolt twin fuel pumps, and I welded the front towing eye to the underside of the front trunk area (foward of the stock position because of the oil cooler vents)
Today, Friday march 24, 2006, I returned once again to the shop. The car is being made ready for primer. Here's a picture. I told Sylvain, that it would really be nice to have the finished product back by the long Easter weekend, so that I might begin assembling at that point. He was non-commital since he just got an accident car to work on, which will divert him from my tub.
Thanks for looking.
Attached image(s)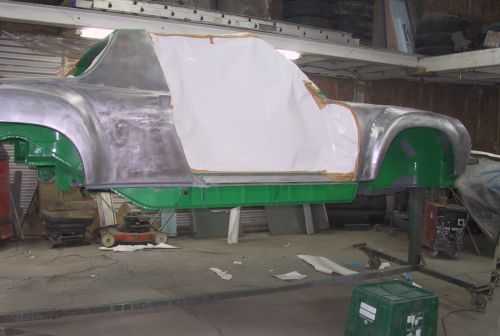
Posted by: michel richard Mar 25 2006, 11:30 PM
I put a little work on a transmission oil cooling and circulation system today. You may find out about the first baby steps here:
http://www.914world.com/bbs2/index.php?act=ST&f=2&t=48753
Cheers.
Posted by: michel richard Apr 18 2006, 04:12 PM
This is how the tub looks on April 18, 2006. The hoods, the bumpers, the front valence, the little eyebrows (whatever they're called) the lights, all the panels are being fitted. It should be in the paint booth within a very few days.
Once again, this is not a purist's car: it's going to look good (I hope) but a thin coat of filler will get there a lot quicker and cheaper than a gazillion hours of metal shaping.
I've been working on GT style mechanical headlight raisers, and I think they're going to come out ok. More on that later.
Attached image(s)
Posted by: ChicagoPete Apr 18 2006, 06:23 PM
Michel, Who made the front lid you are using? Looks to be pretty good quality, all the balsa is in the right location.
Peter
Posted by: michel richard Apr 18 2006, 06:58 PM

Michel, Who made the front lid you are using? Looks to be pretty good quality, all the balsa is in the right location.
Peter
Peter,
I got all my fiberglass from Getty Design, and I've been happy with the quality. All that's been required is minor tweeking of the bumpers and the front valence. Actually, Sylvain, the bodyman, phoned today saying he thought the rear bumper was all wrong, probably wrong model . . .
Went to the shop, and figured out he was not mounting it in exactly the right spot and there was a bit of grinding that was required, which was not obvious. Once we saw that, the bumper ended up in very nearly the final location within a half hour.
The hoods needed zero grinding or glass work, it was simply matter of adjusting the hinges and bolts.
It turns out the tub had been tapped in the right rear corner, at one point, and repairs were not really great. The shop probably needed two full days to pull everything back to where it should be. Once that was done, the rear hood fit very well.
Michel
Posted by: michel richard Apr 29 2006, 08:17 PM
Tub is now in primer. Progress has been a little slower than I would have hoped, but it's certainly coming along. With a little luck, it'll be back home in two week's time.
Thinking about Ms L.
Michel
Attached image(s)
Posted by: michel richard Jun 3 2006, 07:40 PM
Long time since the last update.
The tub has spent a couple of weeks just sitting as the body shop went through some personnel changes.
I did drive by the bodyshop today, and had someone let me in, even if it was officially closed. The windshield surround and the roll bar are now done, painted and cleared ! as are the headlight covers and the eyebrow pieces.
The tub is in the paintbooth, which means it more or less needs to be finished before any other car in that shop gets done.
I hope to get it back by next week, June 9. Stay tuned.
Still thinking of Ms L.
Posted by: Quebecer Jun 5 2006, 06:44 AM
Can't wait to see the finished product ! 
What color did you decide on?
Posted by: michel richard Jun 5 2006, 09:10 AM
It's going to be Conda Green.
Should have it later this week.
Posted by: michel richard Jun 11 2006, 07:17 AM
Started a separate thread to show pictures of the tub, painted conda green.
http://www.914world.com/bbs2/index.php?showtopic=53676
Posted by: michel richard Jul 21 2006, 07:17 PM
After a month without posting, I added a few pictures to the reassembly sub-thread.
http://www.914world.com/bbs2/index.php?showtopic=53676&st=40
Michel
Posted by: michel richard Jul 28 2006, 07:07 PM
Finally got the new engine. Here are the details:
http://www.914world.com/bbs2/index.php?showtopic=57462
Posted by: michel richard Jul 30 2006, 06:34 PM
Started a separate thread to ask about a colour scheme:
http://www.914world.com/bbs2/index.php?showtopic=57594&pid=741549&st=0&#entry741549
Posted by: michel richard Sep 27 2006, 06:48 PM
Getting close to done, after 15 months, so I added a "almost done" thread (yeah, right) . . .
http://www.914world.com/bbs2/index.php?showtopic=61313&st=0&gopid=782158&#entry782158
Posted by: michel richard Nov 28 2006, 01:34 PM
Just to make sure I loop the loop on this one, here's the thread on getting my tags.
http://www.914world.com/bbs2/index.php?showtopic=64386&st=0&p=821011&#entry821011
I think I will now take a break from this project. Over the winter, as time is available, I will try to put some GT door panels together, and I will try to source GT or GT-like seats. I may try to build GT-like seat rails.
Finally, in the spring, I will have at least one dyno session to fine-tune timing and jetting of the carbs. I will definitely post results. I may also strip some of the interior and put a rollbar in, to really have the racing look.
As it is now, I've driven the car to work for a week. I have a short list of little things that need fixing, but the car performs very well. I can't wait for the engine to be broken in, so that I can really start revving it !
Michel
Powered by Invision Power Board (http://www.invisionboard.com)
© Invision Power Services (http://www.invisionpower.com)