Printable Version of Topic
Click here to view this topic in its original format
914World.com _ 914World Garage _ Another GT Look-a-Likey Project thread
Posted by: john77 Oct 1 2020, 04:04 PM
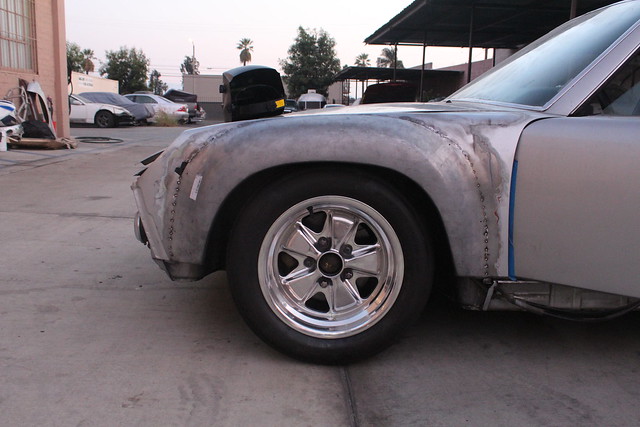
Started the process of GT flaring my car this week. 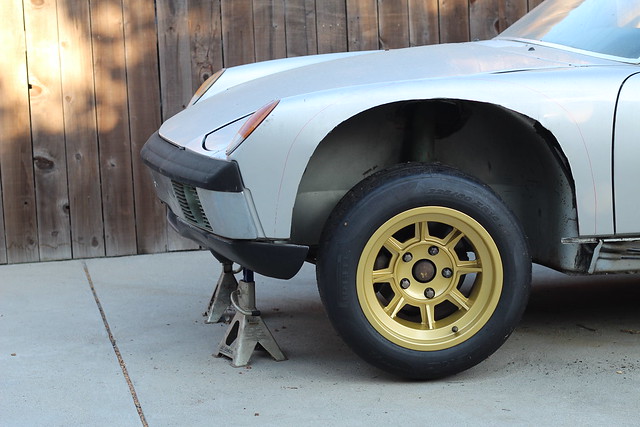
The plan is to weld all four flares on first, then widen the rears to fit 9s, and in the process strip the car panel by panel for a repaint.
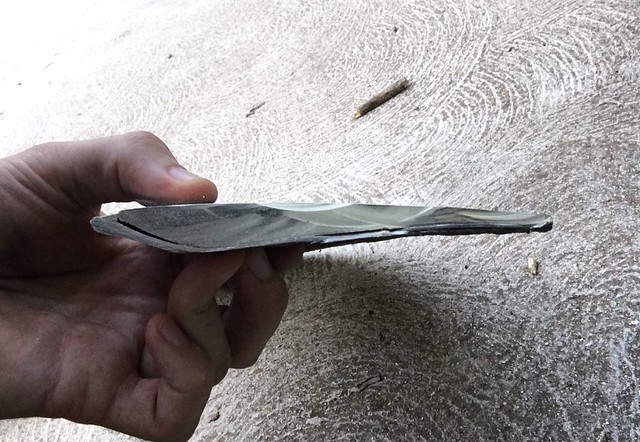
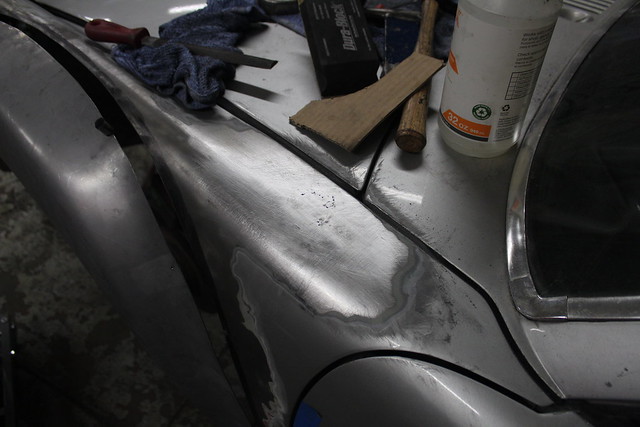
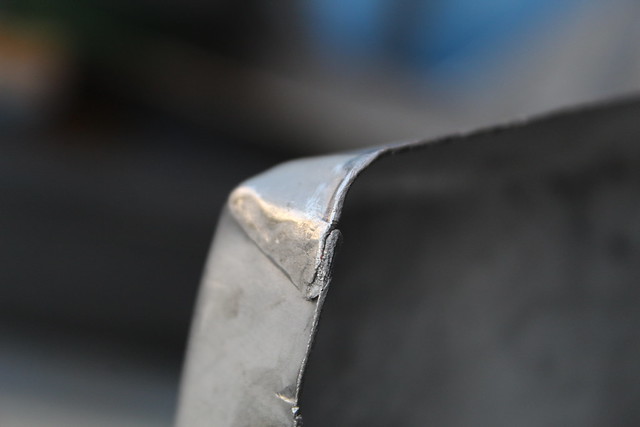
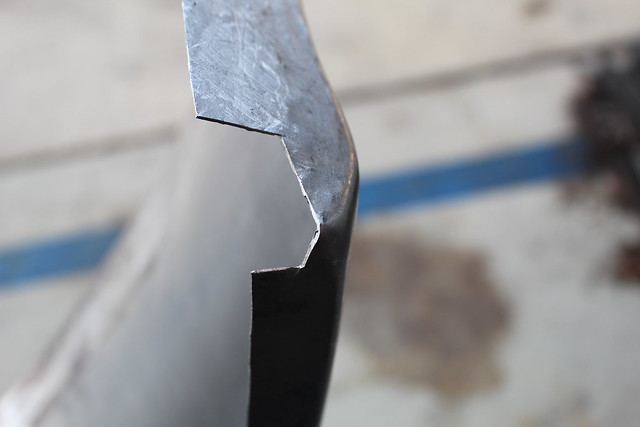
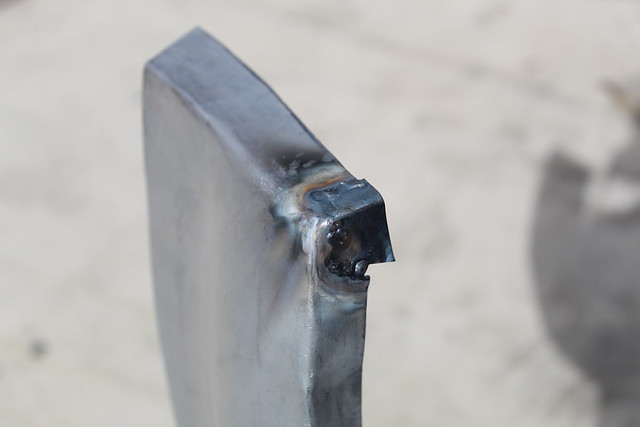
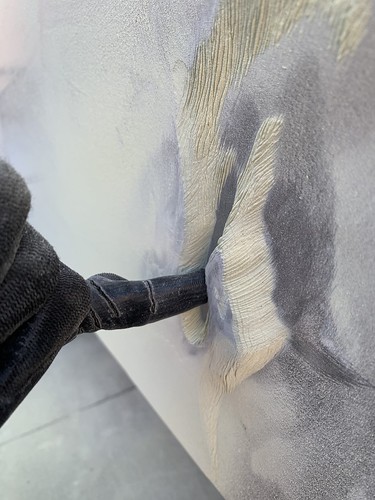
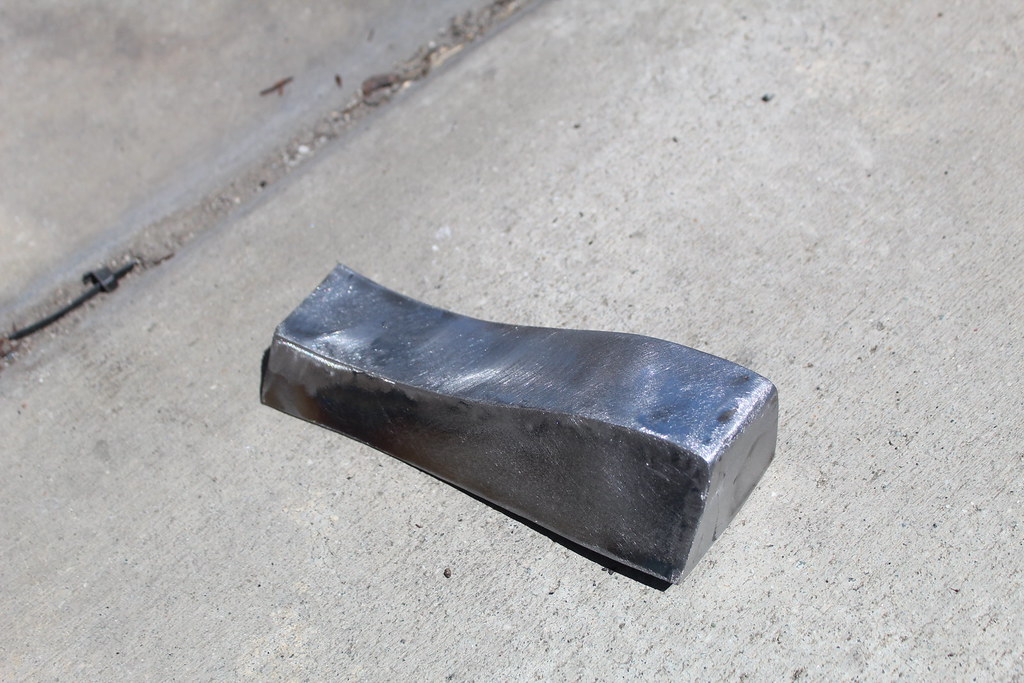
The rear arches had been pulled at some point in the 90s to fit 7s, and I knew they'd gone to town with bondo to smooth the driver's side out because there was a crack. The picture below is a cross section cut through the arch once I removed it... that's 0.5 inches of bondo right there 
After making the initial rough cuts it dawned on me I'm probably going to need to remove the rear quarter oil tank to give me enough clearance to tig weld the flare on the front and back.
I can only see one bolt, inside the engine bay - is that the only thing holding the tank in place?
Also, dumb question, can I remove the tank without having to drain my engine oil first? I didn't think this far ahead and only changed my oil last month 
Posted by: Luke M Oct 1 2020, 05:14 PM
If it's a factory 914-6 oil tank there's 3 mount points. Two M8 nuts towards the top and a large nut 21 mm I believe at the bottom fitting that the return line goes to.
You will have to drain the oil from the tank in order to remove it. No way around that.
Posted by: mepstein Oct 1 2020, 05:32 PM

If it's a factory 914-6 oil tank there's 3 mount points. Two M8 nuts towards the top and a large nut 21 mm I believe at the bottom fitting that the return line goes to.
You will have to drain the oil from the tank in order to remove it. No way around that.

Posted by: john77 Oct 1 2020, 05:38 PM
Thanks Luke.
There aren't any markings on it, but I think it's a Patrick Motorsports tank.
I just noticed a second nut nearer the firewall that could be holding it in place too. I guess I'll just undo them when the time comes to weld the flare on and figure it out from there.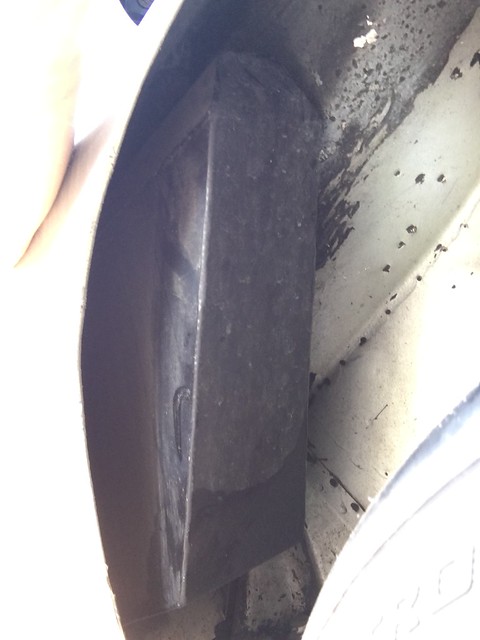

I'm a bit of a dunce when it comes to engines. I always thought the oil drained out of the tank and just sat in the bottom of the engine when it wasn't running, hence I was wondering if I could just remove the tank without draining the engine. Now I know better 
If it's a factory 914-6 oil tank there's 3 mount points. Two M8 nuts towards the top and a large nut 21 mm I believe at the bottom fitting that the return line goes to.
You will have to drain the oil from the tank in order to remove it. No way around that.
Posted by: Luke M Oct 1 2020, 05:46 PM
I'm not sure how the PMS tank mounts at the return line end. Yes, the two bolts that you marked need to be removed along with the filler neck, vent hose, oil filter/console (if it has one) suction line and return line.
Posted by: mlindner Oct 2 2020, 04:18 AM
Hi John, don't know if you have this for GT fender placement. It is in inches. Mark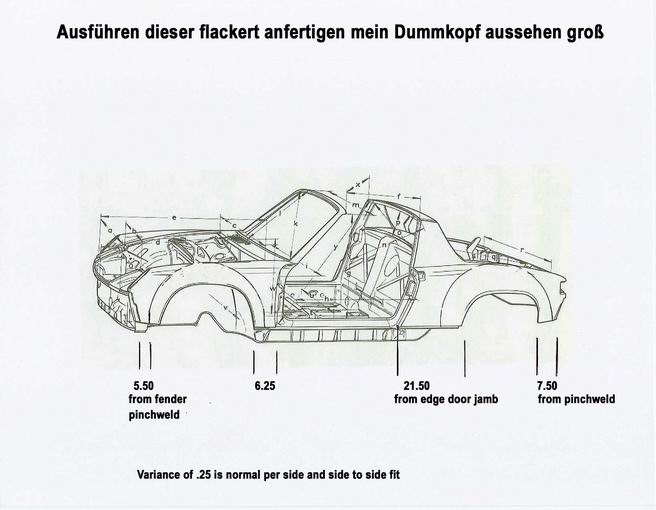
Posted by: john77 Oct 2 2020, 07:43 AM
I don’t, this is perfect! Thanks Mark. Will be a lot more accurate than me eyeballing it.
Hi John, don't know if you have this for GT fender placement. It is in inches. Mark
Posted by: mlindner Oct 2 2020, 07:54 AM
And should be flush or flat on top. Best, Mark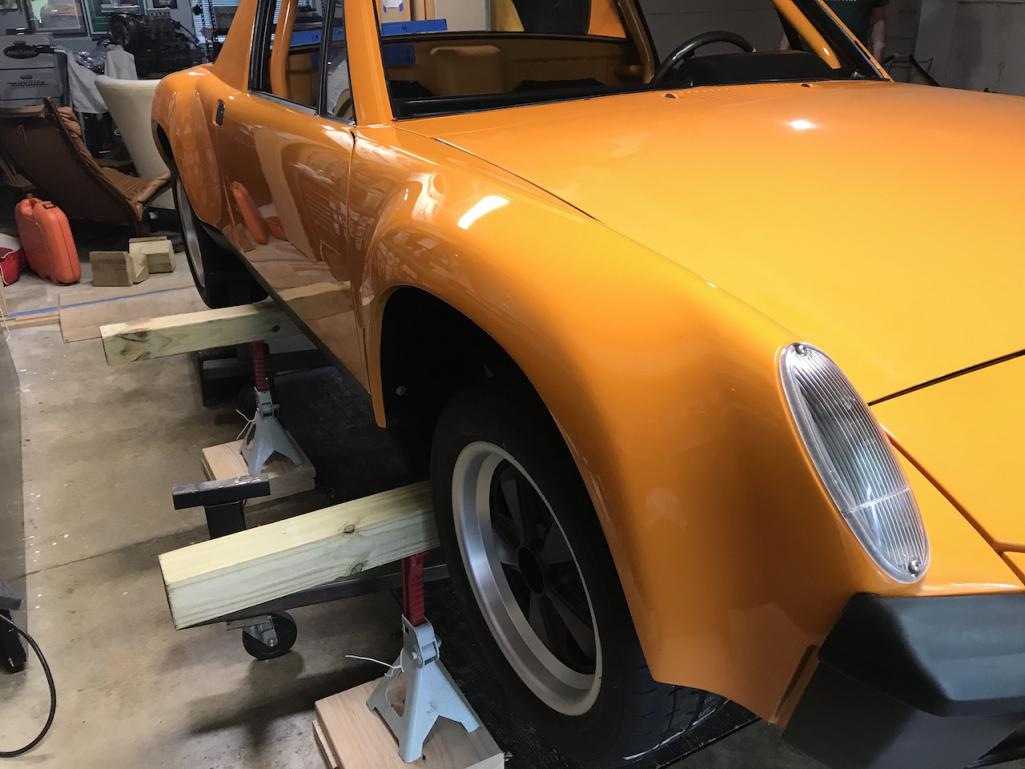
Posted by: john77 Oct 2 2020, 12:16 PM
@http://www.914world.com/bbs2/index.php?showuser=13770 am I measuring from the correct place?
With the flare rough fitted up to the fender I have it 6.25 from the door jamb but the other measurement, from the pinch weld to the front of the arch is also 6.25 inches.
https://photos.app.goo.gl/FnqXA4yqPfkgVRGu7
https://photos.app.goo.gl/EeGV13o5H3bPzEaq9
Posted by: mepstein Oct 2 2020, 01:20 PM
Front right is passenger
Right and left is always as if you are sitting in car.
Posted by: john77 Oct 2 2020, 01:47 PM
You’d think that, right? But after rough fitting, the flare marked “front right” only fits on the driver side.
Front right is passenger
Right and left is always as if you are sitting in car.
Posted by: mb911 Oct 2 2020, 05:18 PM
What you going to use for rockers? Don't forget that is an important part of the mock up..
Posted by: mepstein Oct 2 2020, 05:43 PM
You’d think that, right? But after rough fitting, the flare marked “front right” only fits on the driver side.
Front right is passenger
Right and left is always as if you are sitting in car.
Well I know that but I can't speak to the flare being mislabeled.
Posted by: john77 Oct 2 2020, 05:59 PM
@http://www.914world.com/bbs2/index.php?showuser=10825 Sorry, wasn’t having a pop at you, I appreciate you chiming in. You’re probably right on the mislabelling. A little frustrating as the measurements didn’t seem to match up either. I’ll just have to triple check when I’m doing the rears.
You’d think that, right? But after rough fitting, the flare marked “front right” only fits on the driver side.
Front right is passenger
Right and left is always as if you are sitting in car.
Well I know that but I can't speak to the flare being mislabeled.
Posted by: john77 Oct 2 2020, 06:00 PM
@http://www.914world.com/bbs2/index.php?showuser=10825 Sorry, wasn’t having a pop at you, I appreciate you chiming in. You’re probably right on the mislabelling. A little frustrating as the measurements didn’t seem to match up either but I got there in the end. I’ll just have to triple check when I’m doing the rears.
You’d think that, right? But after rough fitting, the flare marked “front right” only fits on the driver side.
Front right is passenger
Right and left is always as if you are sitting in car.
Well I know that but I can't speak to the flare being mislabeled.
Posted by: john77 Oct 2 2020, 06:05 PM
I was thinking that as I was cutting the fender 
Plan is to strip the rocker panels that came off the car, weld up the cracks and then make my own extensions. That way I can get the gaps right even if my flare welding leaves a little to be desired.
What you going to use for rockers? Don't forget that is an important part of the mock up..
Posted by: mepstein Oct 2 2020, 06:47 PM
@http://www.914world.com/bbs2/index.php?showuser=10825 Sorry, wasn’t having a pop at you, I appreciate you chiming in. You’re probably right on the mislabelling. A little frustrating as the measurements didn’t seem to match up either but I got there in the end. I’ll just have to triple check when I’m doing the rears.
You’d think that, right? But after rough fitting, the flare marked “front right” only fits on the driver side.
Front right is passenger
Right and left is always as if you are sitting in car.
Well I know that but I can't speak to the flare being mislabeled.
All good. Just make sure before you weld.

Ben/MB911 makes some very nice rocker ends.
Attached image(s)

Posted by: mlindner Oct 4 2020, 09:26 AM
John77, Ben (mb911) has already made the ends for you. They are pretty complex so you only need to weld them on to match the flares final position. Mepstein also has Bens flared rocker ends. Best, Mark
Posted by: john77 Oct 4 2020, 10:11 AM
Thanks Mark.
@http://www.914world.com/bbs2/index.php?showuser=9892 , definitely want a set of these if they’re available Ben - I’ll pm you. [EDIT: Ignore that, found your website and ordered a set.]
John77, Ben (mb911) has already made the ends for you. They are pretty complex so you only need to weld them on to match the flares final position. Mepstein also has Bens flared rocker ends. Best, Mark
Posted by: Tdskip Oct 4 2020, 12:01 PM
Thanks Mark.
@http://www.914world.com/bbs2/index.php?showuser=9892 , definitely want a set of these if they’re available Ben - I’ll pm you. [EDIT: Ignore that, found your website and ordered a set.]
John77, Ben (mb911) has already made the ends for you. They are pretty complex so you only need to weld them on to match the flares final position. Mepstein also has Bens flared rocker ends. Best, Mark
Good decision, worth the time saved even before factoring in the risk of messing it up.
Posted by: mb911 Oct 4 2020, 12:03 PM
Thanks guys. I will build up a set for you..
Posted by: john77 Oct 9 2020, 03:23 PM
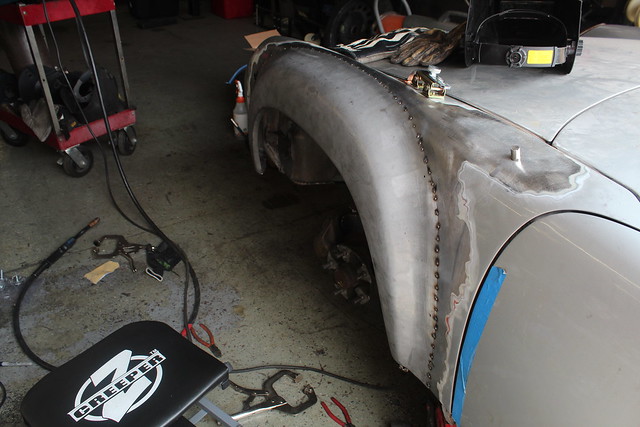
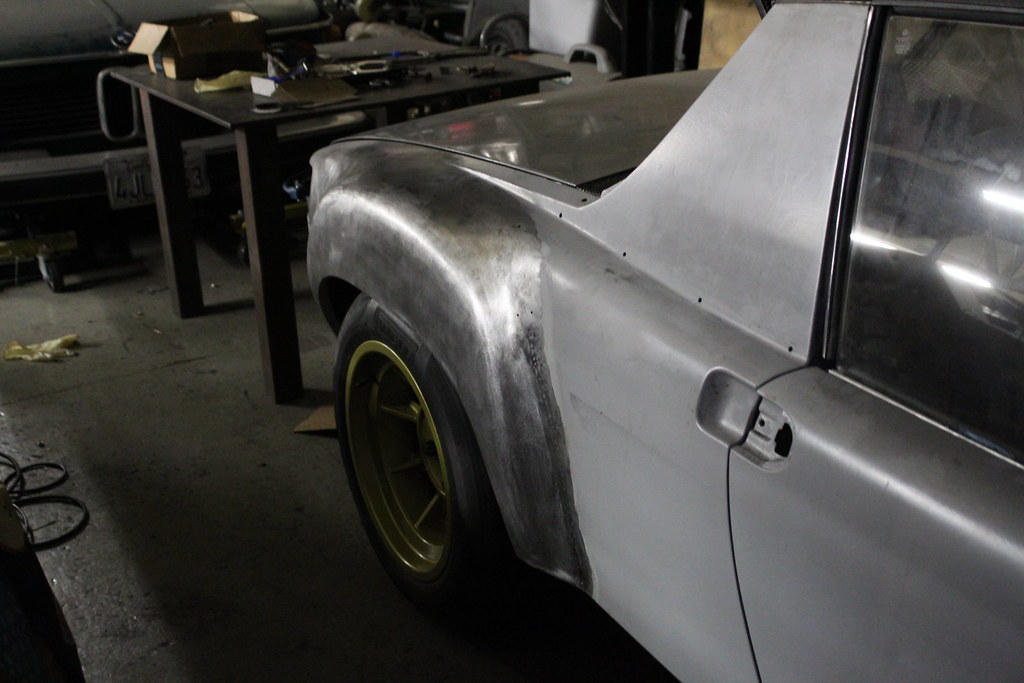
Got the first flare fitted after marking and trimming the arch to make a nice tight butt joint for when I tig weld, but then got sidetracked by the predictable "while you're in there".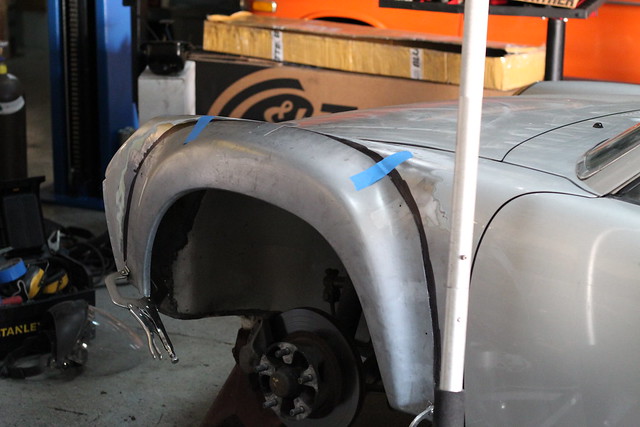

While I had easy access thanks to the the arch being cut out I decided to strip the wheel wells back to bare metal. Was pleased to find mostly clean sheet metal.
My plan is to treat the bare metal with SEM rust mort and then seam sealer where needed and a couple of coats of POR15. I know not everyone loves that stuff, but I've done it on a couple of cars and never had a problem.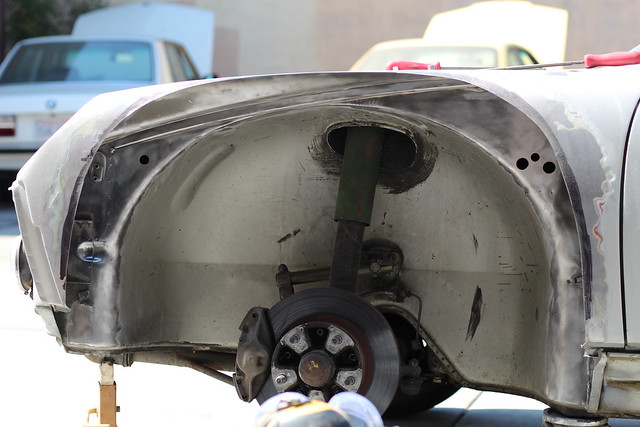
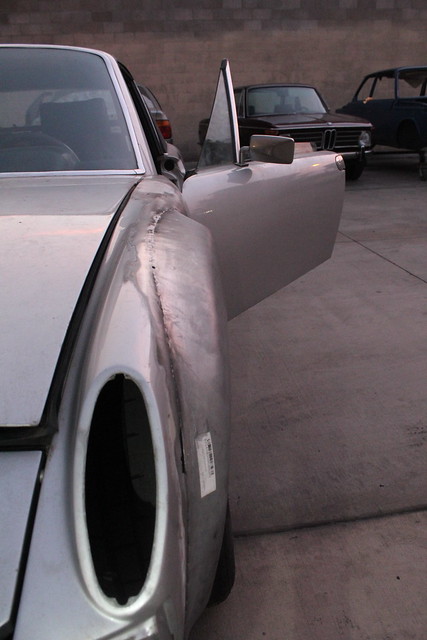
As I was stripping the fender I also found a complete mess where someone had plugged the antenna hole. They basically but a patch of metal behind the hole, welded the two together from the topside and then coated the whole thing with a generous layer of bondo (which appears to be a running theme on this car).
The most impressive part was they didn't bother treating or painting the patch inside the fender, so it was a sheet of thick rust slowly rotting the fender metal above it 
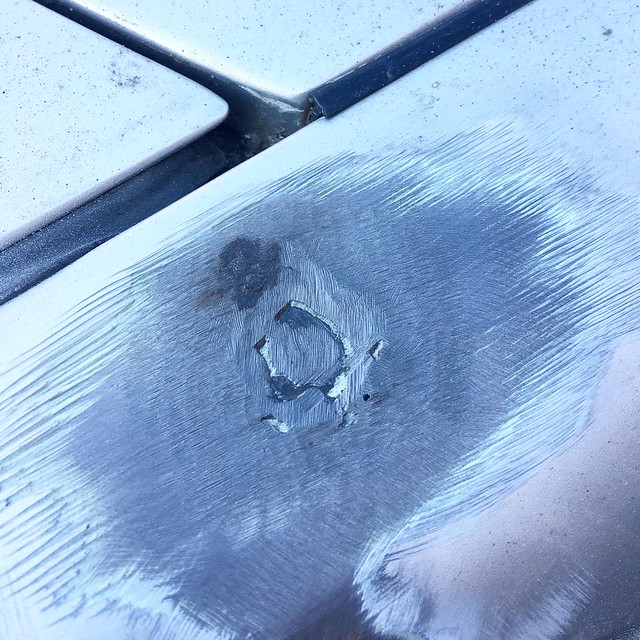
Attacked it with a hole saw...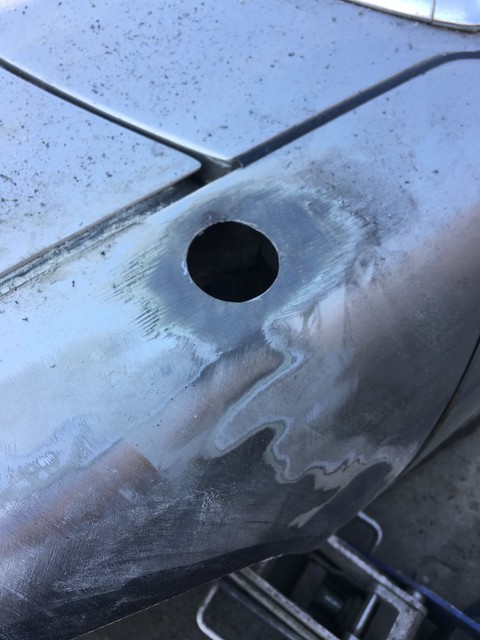
Here's what the back of the patch looked like.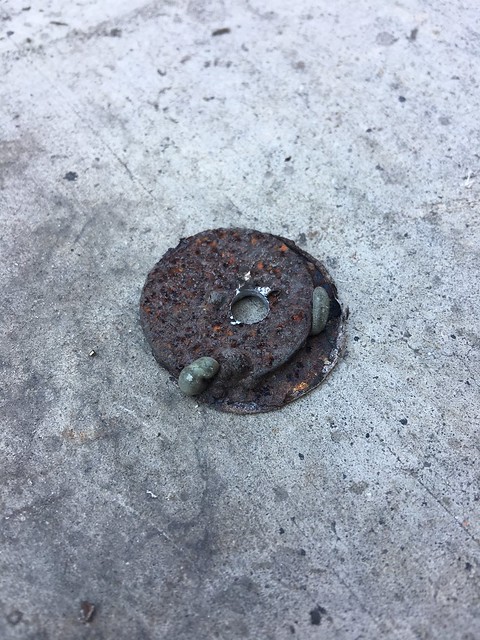
I cut a new patch and tacked it in place.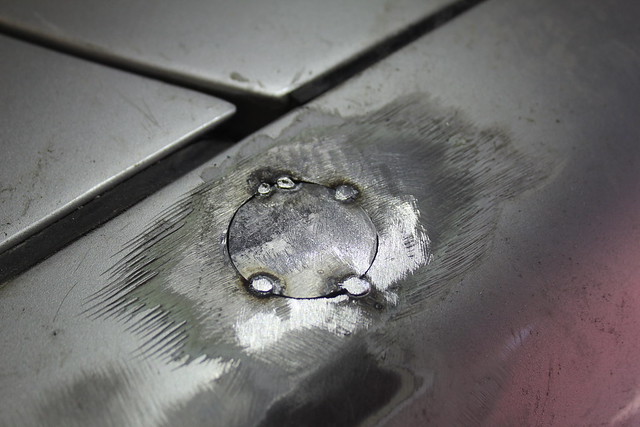
And then once it was welded I metal finished the weld. It's not perfect, but it's a hell of a lot better than how it was.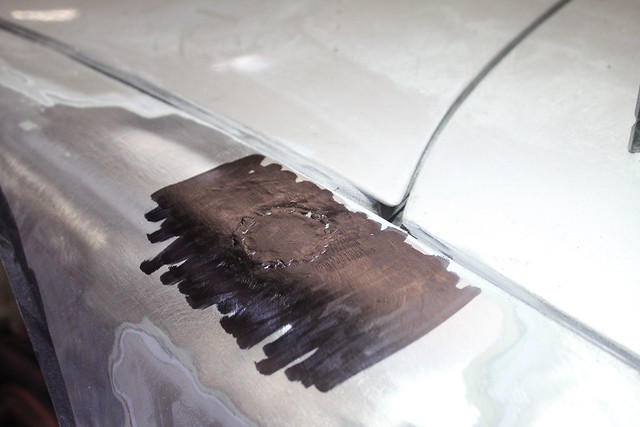
Posted by: Cairo94507 Oct 10 2020, 06:01 AM
Nice save on the antenna hole. That rust would have consumed the entire fender. Flare placement looks good too.
Posted by: Tdskip Oct 10 2020, 06:44 AM
Thanks for the updates, please keep the, coming.
Posted by: mb911 Oct 10 2020, 06:48 AM
Nice job.. I had to do the same thing on my car..
Posted by: john77 Oct 11 2020, 11:28 AM
Thanks guys
Posted by: john77 Oct 11 2020, 12:41 PM
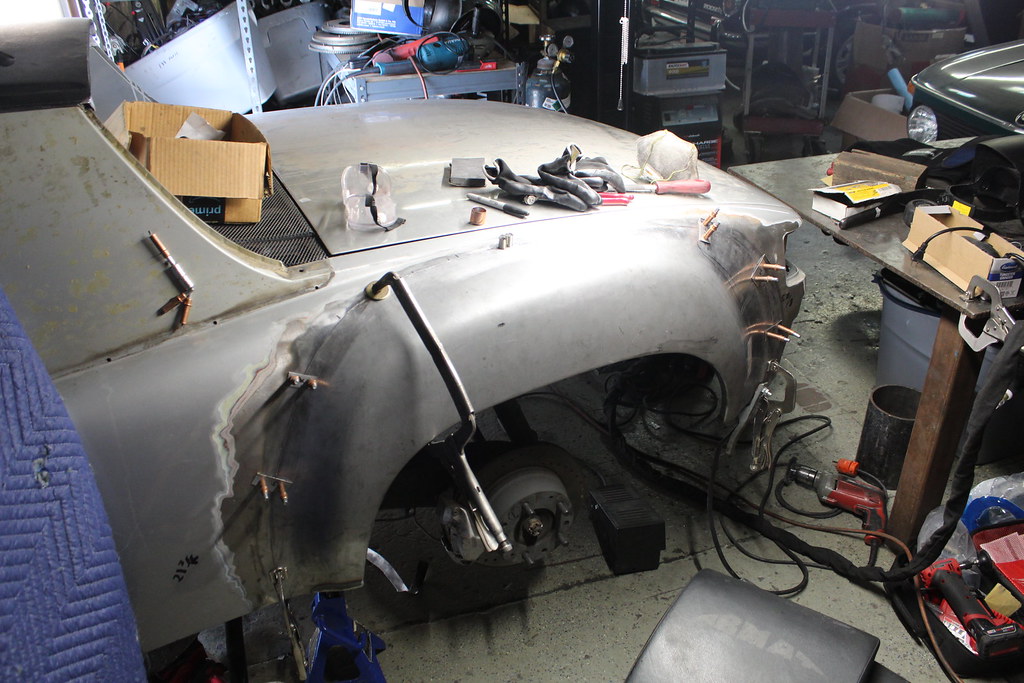
Saturday's progress:
3 years ago I took a metal shaping class at Wray Schelin's ProShaper shop in Charlton, MA. That was the first time I ever did any kind of sheet metal work, and the first time I picked up a tig welder. I learned a ton of fundamentals in those 4 days, and Wray also taught us his method for getting a tight fit all the way along long butt joints, so...
All in it took me about 3 hours to get the butt joint tight.
First I rough cut the shape of the flare out of the fender, about an inch away from the final cut. Then I cover the fender where the flare will overlap with black sharpie - that's the black strip you can see in this pic.
Then I mount the flare in its final position on top of the fender using clamps and drilled holes with clecos where clamps won't reach.
Then I scribe a line with a really sharp point along the edge of the flare. This leaves a really fine line scribed into the black sharpie telling me exactly how much metal I need to cut.
Then I cut as close as I can to that line using my nibblers (unlike hand shears they don't bend the sheet metal).
Then I go all the way along the seam with a hand file and file away any remaining material tight to the scribed line.
It's ridiculously laborious, and if this was my job not a hobby it wouldn't be cost effective, but by the time I'm done I have a super tight fit all the way along the butt joint between the flare and fender.
Now, all of that said, my tig welding is a little hit and miss. No matter how tight my joint is I have an incredible ability to blow a hole in one out of every five of my tig tack welds. Which means I then have to go back and fix every fifth tack... which adds a load more time, and quite frankly drives me nuts.
So I decided to use the mig to tack the flare instead, every other inch, in sequence one after the other to make sure the seam stayed tight all the way along and I could correct any distortion if it occurred.
All in it took me 75 tack welds to get the flare in place.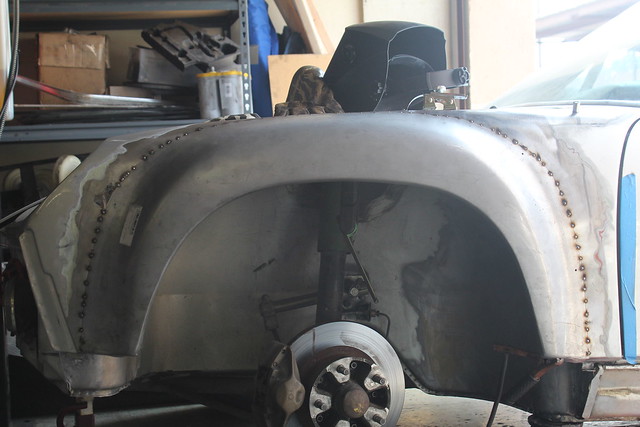
Once the tacks were all done I knocked the top off each of them with my cheapo harbor freight hand held belt sander and then started to tig weld the inch long sections between the mig welds, jumping around from section to section so not to build up too much heat.
By starting the tig weld pool on the mig tack that let's me reduce the size of the mig tack further.
All in I managed to tig 2/3rds of the flare before I ran out of time. I'll finish up the rest of the weld and metal finish it this week.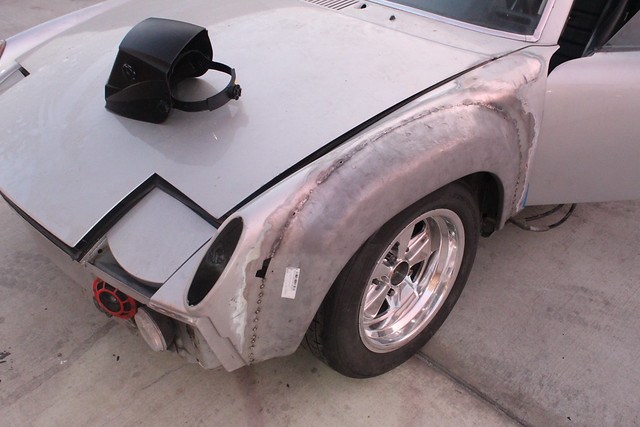
The hole by the where the turn signal barnacle used to be was where I found more patch work from the antenna hole butcher and another rusty patch. I had to chop it out too, but the plan is to patch that hole once the flare's welded in place.
Posted by: john77 Oct 11 2020, 12:41 PM
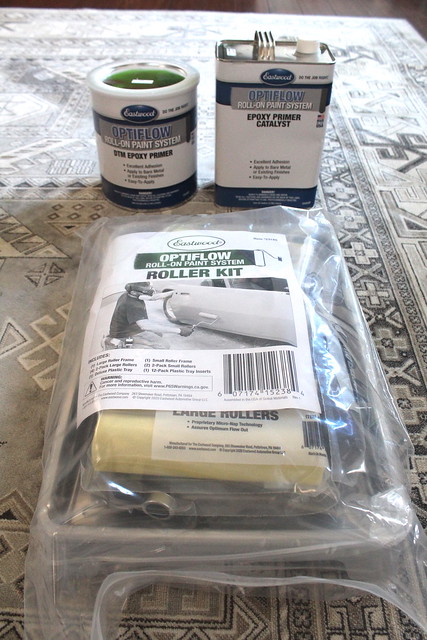
Got home from the shop on Saturday night to find a delivery on my doorstep.
Once the flares are done I'm planning to take my entire car back to bare metal and do a complete color change.
I have experience spray painting, but my spray gun got stolen by a meth head and the compressor at the shop took a  , so I was trying to figure out the best way to get it done without leaving the metal exposed for too long. Which is when I stumbled on this roll on stuff from Eastwood.
An auto paint channel I follow on youtube did a review and he seemed pretty impressed so I figured I'd give it a shot.
https://www.youtube.com/watch?v=hnNVQvTSE6I
The main appeal was that it will allow me to work panel by panel without having to mask the car or move it into a makeshift booth (that, plus I don't even have the equipment to spray right now). So once the first flare's done I'll strip the rest of the paint off the fender, paint the entire fender with the roll on epoxy, and then be good to move on to the next one.
Then, once all the flares are done, I'll strip the doors, hood, deck lid, frunk, trunk, one by one and epoxy them as I go until eventually the entire car's in epoxy.
With the car completely sealed up with epoxy I can then figure out what I want to do regarding color without having to think about that right now which will probably overwhelm me into doing nothing... and mean my car's off the road for months.
Right now I'm thinking I'll get Eastwood's roll on primer surfacer to go on top of the epoxy, and sand and prep the car straight myself so it's ready for basecoat/clear, at which point I may pay a shop to finish it.
Although that may change, depending on my circumstances - I may end up getting a new compressor and gun and do the base/clear myself as I have another project car that will eventually need paint too, so the reinvestment in the equipment may be worth it. Plus the meth head no longer works at the shop where I rent space to work on my cars so, you know, there's that.
I'll keep this thread updated on how the roll on epoxy turns out.
Posted by: ri914 Oct 11 2020, 08:53 PM
Got home from the shop on Saturday night to find a delivery on my doorstep.
Once the flares are done I'm planning to take my entire car back to bare metal and do a complete color change.
I have experience spray painting, but my spray gun got stolen by a meth head
and the compressor at the shop took a , so I was trying to figure out the best way to get it done without leaving the metal exposed for too long. Which is when I stumbled on this roll on stuff from Eastwood.An auto paint channel I follow on youtube did a review and he seemed pretty impressed so I figured I'd give it a shot.
https://www.youtube.com/watch?v=hnNVQvTSE6I
The main appeal was that it will allow me to work panel by panel without having to mask the car or move it into a makeshift booth (that, plus I don't even have the equipment to spray right now). So once the first flare's done I'll strip the rest of the paint off the fender, paint the entire fender with the roll on epoxy, and then be good to move on to the next one.
Then, once all the flares are done, I'll strip the doors, hood, deck lid, frunk, trunk, one by one and epoxy them as I go until eventually the entire car's in epoxy.
With the car completely sealed up with epoxy I can then figure out what I want to do regarding color without having to think about that right now which will probably overwhelm me into doing nothing... and mean my car's off the road for months.
Right now I'm thinking I'll get Eastwood's roll on primer surfacer to go on top of the epoxy, and sand and prep the car straight myself so it's ready for basecoat/clear, at which point I may pay a shop to finish it.
Although that may change, depending on my circumstances - I may end up getting a new compressor and gun and do the base/clear myself as I have another project car that will eventually need paint too, so the reinvestment in the equipment may be worth it. Plus the meth head no longer works at the shop where I rent space to work on my cars so, you know, there's that.
I'll keep this thread updated on how the roll on epoxy turns out.
Very nice work. Impressive!
Posted by: john77 Oct 11 2020, 09:30 PM
Thanks!
Your workshop looks amazing. Is it a home/hobby set up or work related?
Got home from the shop on Saturday night to find a delivery on my doorstep.
Once the flares are done I'm planning to take my entire car back to bare metal and do a complete color change.
I have experience spray painting, but my spray gun got stolen by a meth head
and the compressor at the shop took a , so I was trying to figure out the best way to get it done without leaving the metal exposed for too long. Which is when I stumbled on this roll on stuff from Eastwood.An auto paint channel I follow on youtube did a review and he seemed pretty impressed so I figured I'd give it a shot.
https://www.youtube.com/watch?v=hnNVQvTSE6I
The main appeal was that it will allow me to work panel by panel without having to mask the car or move it into a makeshift booth (that, plus I don't even have the equipment to spray right now). So once the first flare's done I'll strip the rest of the paint off the fender, paint the entire fender with the roll on epoxy, and then be good to move on to the next one.
Then, once all the flares are done, I'll strip the doors, hood, deck lid, frunk, trunk, one by one and epoxy them as I go until eventually the entire car's in epoxy.
With the car completely sealed up with epoxy I can then figure out what I want to do regarding color without having to think about that right now which will probably overwhelm me into doing nothing... and mean my car's off the road for months.
Right now I'm thinking I'll get Eastwood's roll on primer surfacer to go on top of the epoxy, and sand and prep the car straight myself so it's ready for basecoat/clear, at which point I may pay a shop to finish it.
Although that may change, depending on my circumstances - I may end up getting a new compressor and gun and do the base/clear myself as I have another project car that will eventually need paint too, so the reinvestment in the equipment may be worth it. Plus the meth head no longer works at the shop where I rent space to work on my cars so, you know, there's that.
I'll keep this thread updated on how the roll on epoxy turns out.
Very nice work. Impressive!
Posted by: Cairo94507 Oct 12 2020, 07:35 AM
Nice work and progress. I hate thieves- let's hope he gets arrested at some point so he can't victimize anyone else.
I vote for getting a new spray gun and compressor if you can swing it. It will make the job much easier.
Posted by: john77 Oct 12 2020, 10:03 PM
Thanks. I'd love to paint it myself if I can. The nice thing about the roll on epoxy is it gives me a bit of breathing room to seal up all the sheet metal before I have to make that decision.
Nice work and progress. I hate thieves- let's hope he gets arrested at some point so he can't victimize anyone else.
I vote for getting a new spray gun and compressor if you can swing it. It will make the job much easier.
Posted by: john77 Oct 12 2020, 10:21 PM
I'm going to be getting a new front valance to match the shape of the flares, but I have a problem...
The driveway up the side of my house to my garage in the back is pretty steep, and the valance I have on the car now scrapes across the sidewalk as I hit the bottom of the driveway.
I'm wondering if there's a way I can make the valance quick release, so I can take it off when I drive in and out of my house? But not so quick release that it flies off on the 405  Dzus fasteners maybe?
Has anyone done this?
Posted by: Mayne Oct 13 2020, 06:07 AM
Great work! I noticed in your first post that you plan to widen the rear flares for 9 inch wheels. I was under the impression that nines can work with the standard rear GT flares. Obviously tire size has a lot to do with it, but just wondering how you arrived at that decision. Cheers!
Posted by: Cairo94507 Oct 13 2020, 07:10 AM
Keep a 4x4 post near your driveway and drop it into the gutter area so it reduces the drop off gradually. Or there are a lot of gutter slope/driveway rubber devises available to change the slope so it is an easy rise.
Posted by: john77 Oct 13 2020, 09:41 AM
@http://www.914world.com/bbs2/index.php?showuser=20880 I always loved the look of the privateer 914GTs running mismatched wheels with fuchs in the front and beefy minilites in the rear. But I decided to switch it up a little and run 8 inch fuchs in the front and 9 inch Group 4 campagnolos in the rear.
After speaking to 914Dave who runs the 8 inch group 4 wheels all round (see his car of the month) he told me because of the offset he had to trim the fender lip to 1/8th of an inch AND machine a tiny amount off the mounting pad on the wheel so they would fit.
So going with 9s, I figure I’ll need to widen the flare.
Great work! I noticed in your first post that you plan to widen the rear flares for 9 inch wheels. I was under the impression that nines can work with the standard rear GT flares. Obviously tire size has a lot to do with it, but just wondering how you arrived at that decision. Cheers!
Posted by: john77 Oct 13 2020, 09:51 AM
@http://www.914world.com/bbs2/index.php?showuser=9712
The problem isn't so much the gutter, more that the entire car is on an incline as it meets the sidewalk. So with the rear elevated, the nose just grinds into the abruptly level concrete.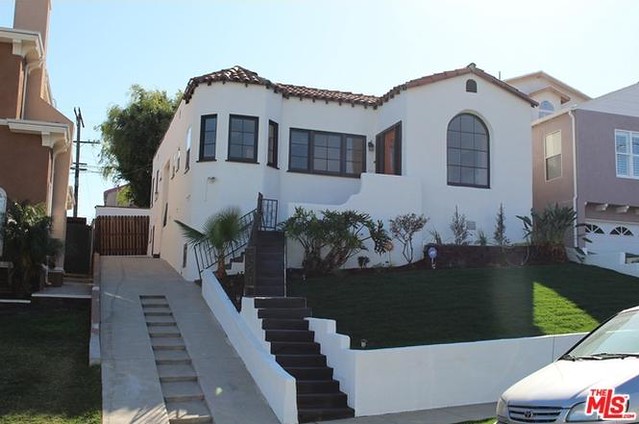
That said, the ramp idea could be a smarter alternative. Thanks, I'll look into it.
Keep a 4x4 post near your driveway and drop it into the gutter area so it reduces the drop off gradually. Or there are a lot of gutter slope/driveway rubber devises available to change the slope so it is an easy rise.
Posted by: PanelBilly Oct 13 2020, 10:18 AM
EST to fold the lip back. That will give you a bit more room and a nice finished look. Best to do this before you have the car all primed and ready to paint, unlike what I did....
Posted by: john77 Oct 13 2020, 10:29 AM
Ha, I feel your pain. It never even occurred to me to wait until I bought the valance before I fitted up the front flares so I could make sure they matched up perfectly - for some reason all I was focused on was the rockers So that should be fun once I get the valance...
Anyway, maybe I'm having a brain fart, but can you elaborate on what EST is? Maybe a picture would help.
EST to fold the lip back. That will give you a bit more room and a nice finished look. Best to do this before you have the car all primed and ready to paint, unlike what I did....
Posted by: sixnotfour Oct 13 2020, 02:04 PM
15x9 245/50 lips folded up,,,my other 914, are widen 1.5
Attached thumbnail(s)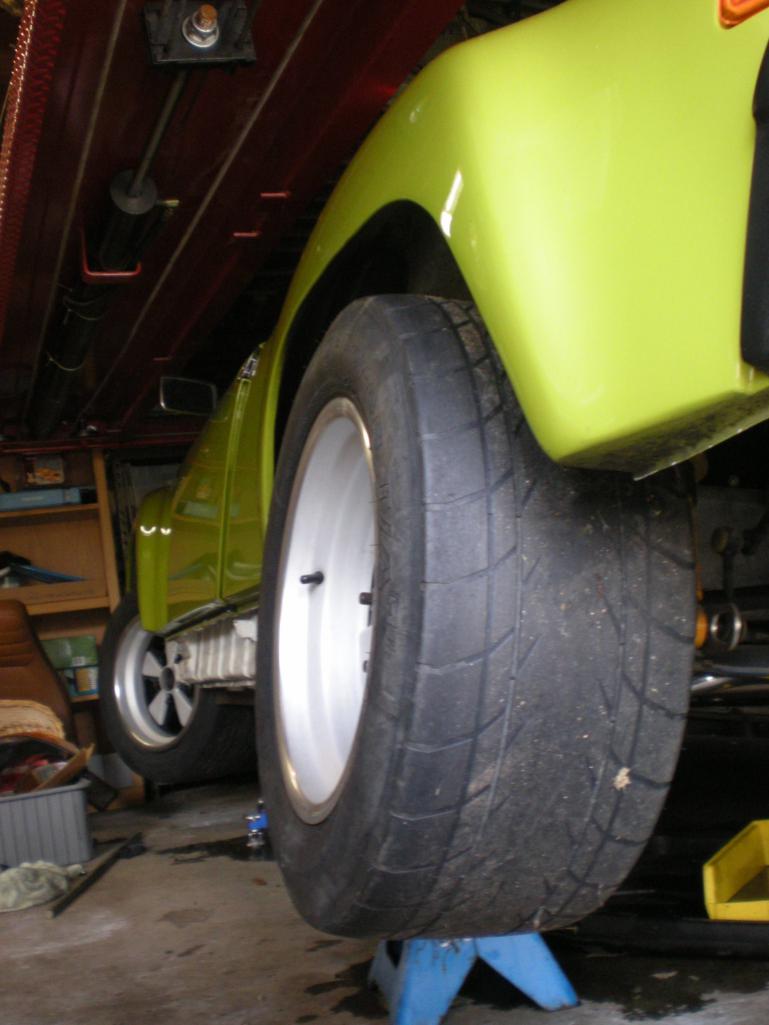
Attached image(s)
Posted by: john77 Oct 13 2020, 04:57 PM
Ahhh, okay, now I see what PanelBilly meant. I had the "removable valance" question on my brain and thought he meant that 
I just reread the conversation I had with @http://www.914world.com/bbs2/index.php?showuser=1262 and I misspoke, he's running 9s in the back just like I will be.
He told me he had to have .100” machined off the mounting surface and the fender lip cut down to about 1/8”, and they only just fit with 1/16" clearance.
Maybe it's because the offset is different from fuchs, i don't know.
Either way, it looks like I'll have to get the mounting face machined down .100" or somehow widen the flare a little to get them to fit.
One option I was thinking about was using my shrinker/stretcher on the lip to stretch them a little and then english wheeling out the flat face of the flare to give them a little more shape. Although I'm a little hesitant to alter the original shape of them too much.
15x9 245/50 lips folded up,,,my other 914, are widen 1.5
Posted by: John Oct 13 2020, 09:38 PM
I run 9x16 on all 4 corners on the track car and have for more than 30 years. I never machined any wheels. I have had several sets and they all fit. Of course, these flares have been on the car since 1983-ish. I fully expect to be able to do the same with my current project (flares I bought in a group buy back in 2004-2005)
Posted by: john77 Oct 13 2020, 10:02 PM
@http://www.914world.com/bbs2/index.php?showuser=1615 Were any of those sets Group 4 Campagnolos? This is literally what I’ve been told by someone who’s running the exact same wheels I plan to run. Maybe the offset is different.
I run 9x16 on all 4 corners on the track car and have for more than 30 years. I never machined any wheels. I have had several sets and they all fit. Of course, these flares have been on the car since 1983-ish. I fully expect to be able to do the same with my current project (flares I bought in a group buy back in 2004-2005)
Posted by: 914dave Oct 16 2020, 07:39 PM
9 x 16 have a more favorable offset than the 9 x 15.
Posted by: john77 Oct 16 2020, 09:44 PM
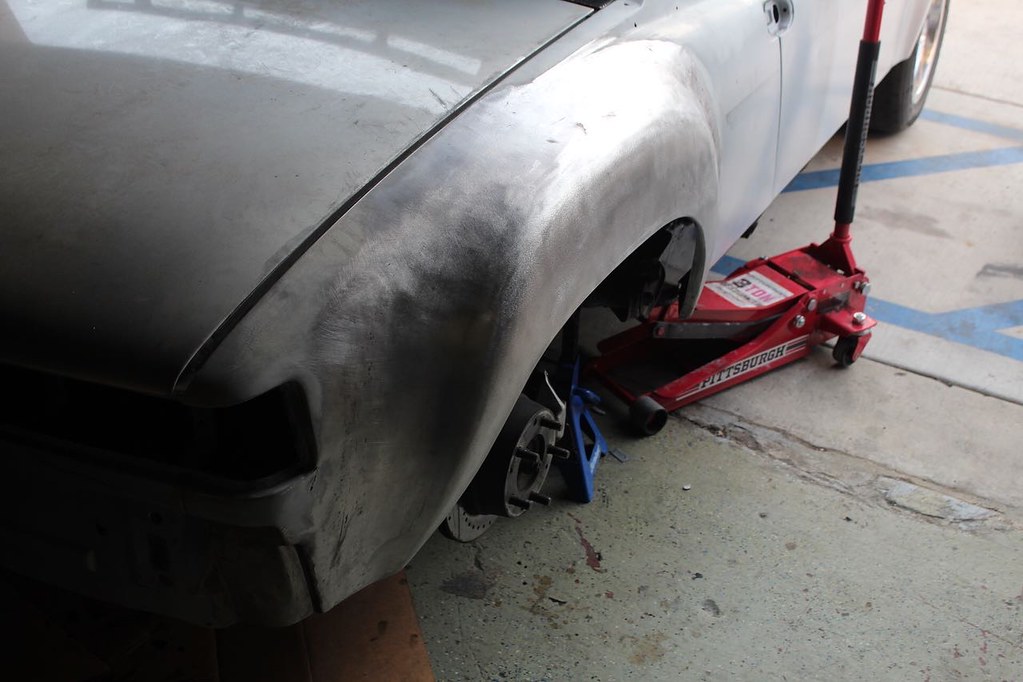
Slowly making progress metal finishing the weld on the first flare today.
Can someone tell me, as the flare comes off the top of the fender and starts to roll down toward where the turn signal barnacle would be, is that supposed to flow into the flare with a smooth transition (pink) or is it more like an abrupt crease (yellow)?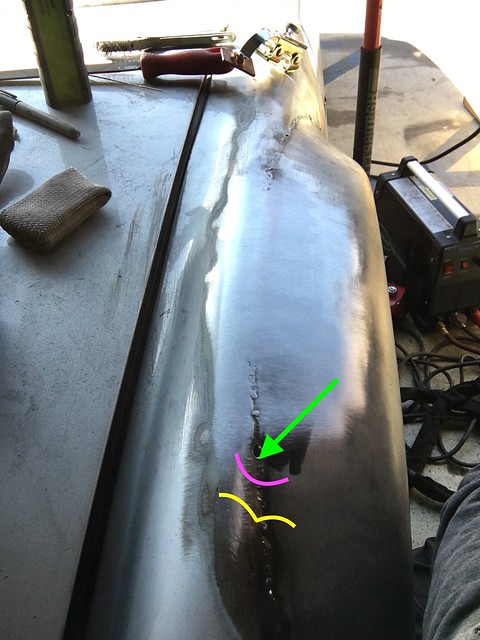
Posted by: Literati914 Oct 16 2020, 09:57 PM
@http://www.914world.com/bbs2/index.php?showuser=17027
Wow I was surprised to read your thread and come across someone else willing to roll paint onto their car !!  . I have my project car (which is outdoors/unprotected) in epoxy primer now after stripping it down to bare metal, then rolling it on with 4" rollers from Home Depot (don't laugh). The thing is, I expected a good amount of orange peal - which I got, 'cause I plan on blocking it down (filler work was done before the epoxy). Then I plan to roll on polyester primer surfacer (2K high build primer).. and block it down too. My time is free, so..
But that brings me to a consideration that I wonder if you'd thought about.. and that is, while the epoxy primer creates a sort of hard shell that doesn't easily/quickly soak up moisture - the 2K high build would. So you'd want to be ready to spray once you get the 2K blocked down straight. But nothing says it couldn't be sprayed a panel at a time.
I hate to admit this but I've actually even thought about rolling on the UA single stage paint that I'll be using. I mean, I do have the compressor and spray equipment but if you plan to wet sand the entire car anyway.. I'm not sure it wouldn't work  . The advantages for me being that I would not have to invest in purchasing and putting up a temporary garage to shoot in, seal it, purchase exhaust fans, etc. Also, the lack of highly aerosol-ed paint may not smell as bad and get the attention of fewer pissed off neighbors. Not to mention, may be less hazardous to me - I don't completely trust the respirator/masks (though I'd still wear one) - and professional paint is dangerous stuff. But, I have not decided against spraying either. So I will be getting an idea of it's feasibility by rolling it on the under-side of the car, wheel wells and longs first. I know this is probably crazy, but we'll see before going all in on the visible parts of the car. Anyway, your project is coming along nicely, keep it up
Posted by: john77 Oct 17 2020, 12:04 AM
@http://www.914world.com/bbs2/index.php?showuser=7222
The roll on epoxy I have is 2K and, if Eastwood’s to be believed, is self-leveling. As long as I prep the metal correctly I don’t see orange peel being an issue.
My plan is to only do epoxy so I don’t have to worry about moisture. I’ll only do primer surfacer and block when I’m ready for color/clear.
Can you sand color? I was under the impression if you do you have to do another coat or it will show through the clear.
@http://www.914world.com/bbs2/index.php?showuser=17027
Wow I was surprised to read your thread and come across someone else willing to roll paint onto their car !!
. I have my project car (which is outdoors/unprotected) in epoxy primer now after stripping it down to bare metal, then rolling it on with 4" rollers from Home Depot (don't laugh). The thing is, I expected a good amount of orange peal - which I got, 'cause I plan on blocking it down (filler work was done before the epoxy). Then I plan to roll on polyester primer surfacer (2K high build primer).. and block it down too. My time is free, so.. But that brings me to a consideration that I wonder if you'd thought about.. and that is, while the epoxy primer creates a sort of hard shell that doesn't easily/quickly soak up moisture - the 2K high build would. So you'd want to be ready to spray once you get the 2K blocked down straight. But nothing says it couldn't be sprayed a panel at a time.
I hate to admit this but I've actually even thought about rolling on the UA single stage paint that I'll be using. I mean, I do have the compressor and spray equipment but if you plan to wet sand the entire car anyway.. I'm not sure it wouldn't work
. The advantages for me being that I would not have to invest in purchasing and putting up a temporary garage to shoot in, seal it, purchase exhaust fans, etc. Also, the lack of highly aerosol-ed paint may not smell as bad and get the attention of fewer pissed off neighbors. Not to mention, may be less hazardous to me - I don't completely trust the respirator/masks (though I'd still wear one) - and professional paint is dangerous stuff. But, I have not decided against spraying either. So I will be getting an idea of it's feasibility by rolling it on the under-side of the car, wheel wells and longs first. I know this is probably crazy, but we'll see before going all in on the visible parts of the car. Anyway, your project is coming along nicely, keep it up Posted by: campbellcj Oct 17 2020, 07:54 AM
I'm going to be getting a new front valance to match the shape of the flares, but I have a problem...
The driveway up the side of my house to my garage in the back is pretty steep, and the valance I have on the car now scrapes across the sidewalk as I hit the bottom of the driveway.
I'm wondering if there's a way I can make the valance quick release, so I can take it off when I drive in and out of my house? But not so quick release that it flies off on the 405
Dzus fasteners maybe?Has anyone done this?
Mine is set up as semi-quick release - I used two dzus fasteners on the L/R sides but ended up using screws w/ nutserts in front for added security. It comes on/off within a couple mins unless I have the brake ducts connected, for which I haven't yet figured out a quick-release setup. I did this for trailer ramp clearance many years ago.
Posted by: Literati914 Oct 17 2020, 10:32 AM
@http://www.914world.com/bbs2/index.php?showuser=7222
..block when I’m ready for color/clear.
Can you sand color? I was under the impression if you do you have to do another coat or it will show through the clear.
Ok so you're using base and clear, the clear would be wet sanded not the color .. and for that reason rolling paint on may be even less of a good idea - might not work out so great if the color is lumpy and the clear as well. It may be doable though with a single stage, we'll see. Good luck with your project.
Posted by: john77 Feb 1 2021, 02:21 PM
Can't believe I started this in October - I've been making slow progress so figured I'd post an update.
Right now I have both front flares on and epoxied, and the wheel wells stripped to bare metal and painted with POR15.
Everything's taking longer than expected though because it turns out the entire car was covered in a thick layer of bondo, and as I'm stripping it I'm finding a bunch of stuff. Luckily, it wasn't hiding any terrible rot, just some bad previous "repairs" that I'm having to correct as I go along.
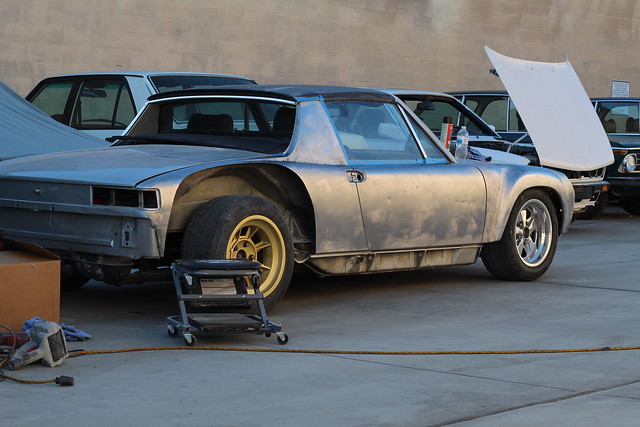
To give an idea of how much bondo, this was the passenger rear quarter after I'd stripped most of it off, and it appears the entire car is like this: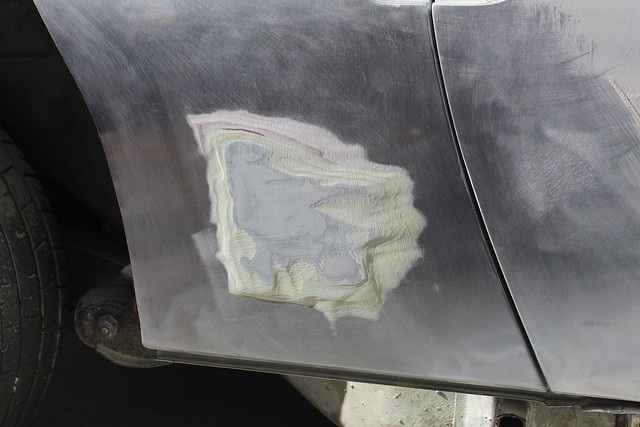
Posted by: john77 Feb 1 2021, 02:35 PM
I'm really happy with the way the passenger side front flare turned out, which means I'll probably end up circling back to get the driver side up to the same level of finish. The transitions from the fender into the flare all flow nicely and should need a minimal amount of filler.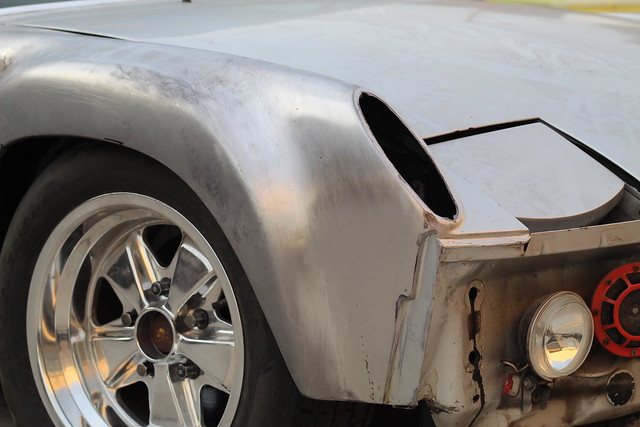

After stripping the door I found some previous damage that had been repaired pretty badly. There were two drill holes (I'm assuming they were made to pull a dent) that were then just left and filled with filler.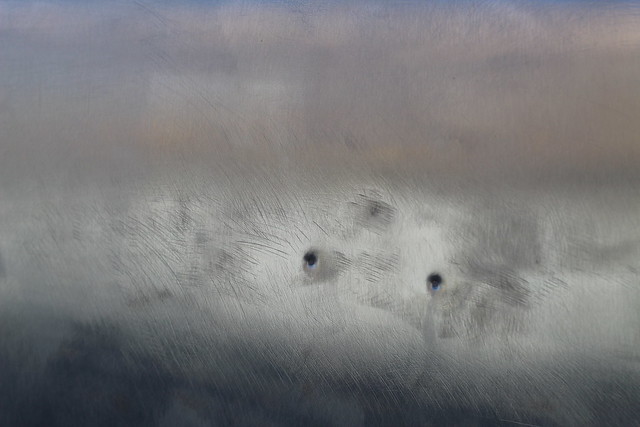
Because of the crash support behind the skin I'm not 100% sure how to deal with this one. The door skin is pretty lumpy and it may make more sense to find a replacement door - I've epoxied it for now and will figure out what the best fix is once the time comes.
Posted by: john77 Feb 1 2021, 03:03 PM
This is how the car sits right now. Both front fenders are in epoxy, and I also stripped the entire passenger side down to bare metal and epoxied that too.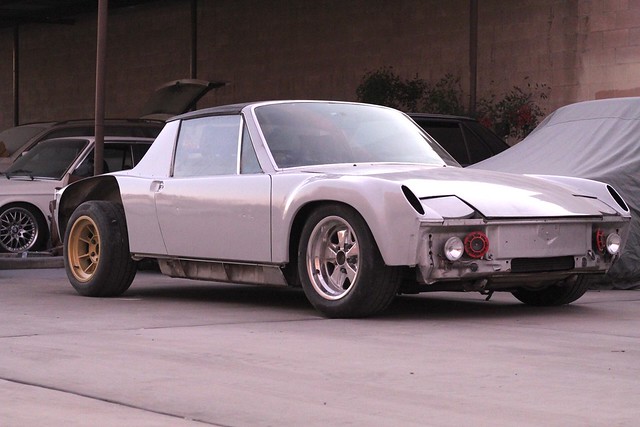
The rear flares had some imperfections at the bottom of the arches where the stamping had crushed metal on top of metal, so I spent a couple of hours this weekend cutting out and patching those.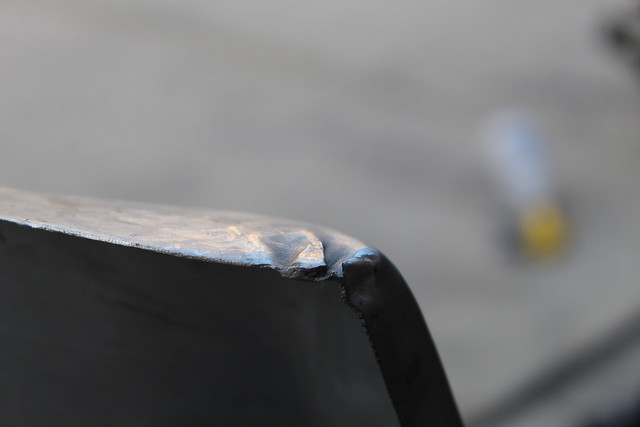
I'm still pretty new to tig so I turned a copper pipe cap into a heat sink to help me with blow through if the butt weld gaps aren't tight enough.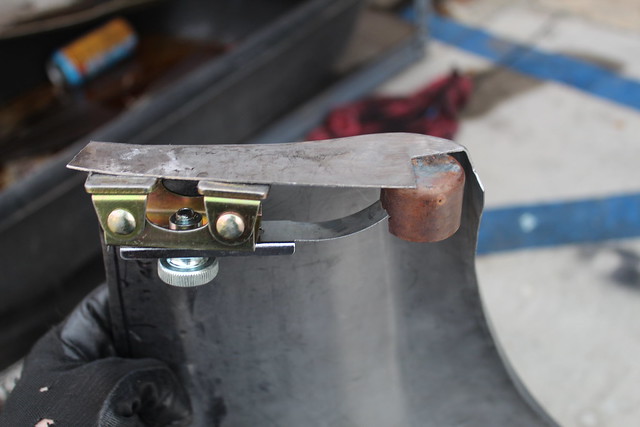
I'm hoping to start welding on the first rear flare next weekend.
Posted by: john77 Jun 3 2021, 02:33 PM
I finally got the flares finished, can't believe it's 8 months since I started this thread. I mean, I can, because everything takes me way longer than I think, but still...
The car is going to be in epoxy for a while while I get other random projects done like making a custom front grille, fog light grilles, redoing my engine GT engine lid, making a new oil cooler shroud, and most importantly replacing the hammered sh*t door skins with new FG door skins.
The driver's side door was certainly a highlight so far. To look at the car you never would have known there was bondo on it, yet somehow this survived 20+ years without cracking and I ended up using a hammer and chisel to remove it.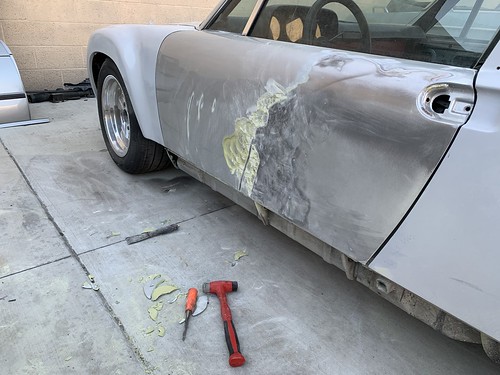
Posted by: john77 Jun 3 2021, 02:39 PM
Some other stuff I got done...
Stripped all 4 wheel wells and then prepped with rust mort, painted with POR15, and then coated with Raptor bedliner.
I know a people either love or hate POR15 but I've found the trick with it is that you always have to etch the metal first as it absolutely hates bare metal and that's when it peels off in sheets.
For the Raptor, I just waited an hour until the POR15 was still a tiny bit tacky and they rolled it on with a low nap roller - I had the spray gun but couldn't be bother with masking everything up to stop overspray, and the instructions say you can just mix it up and paint it on too.
So far, no issues, and it's solid as a rock.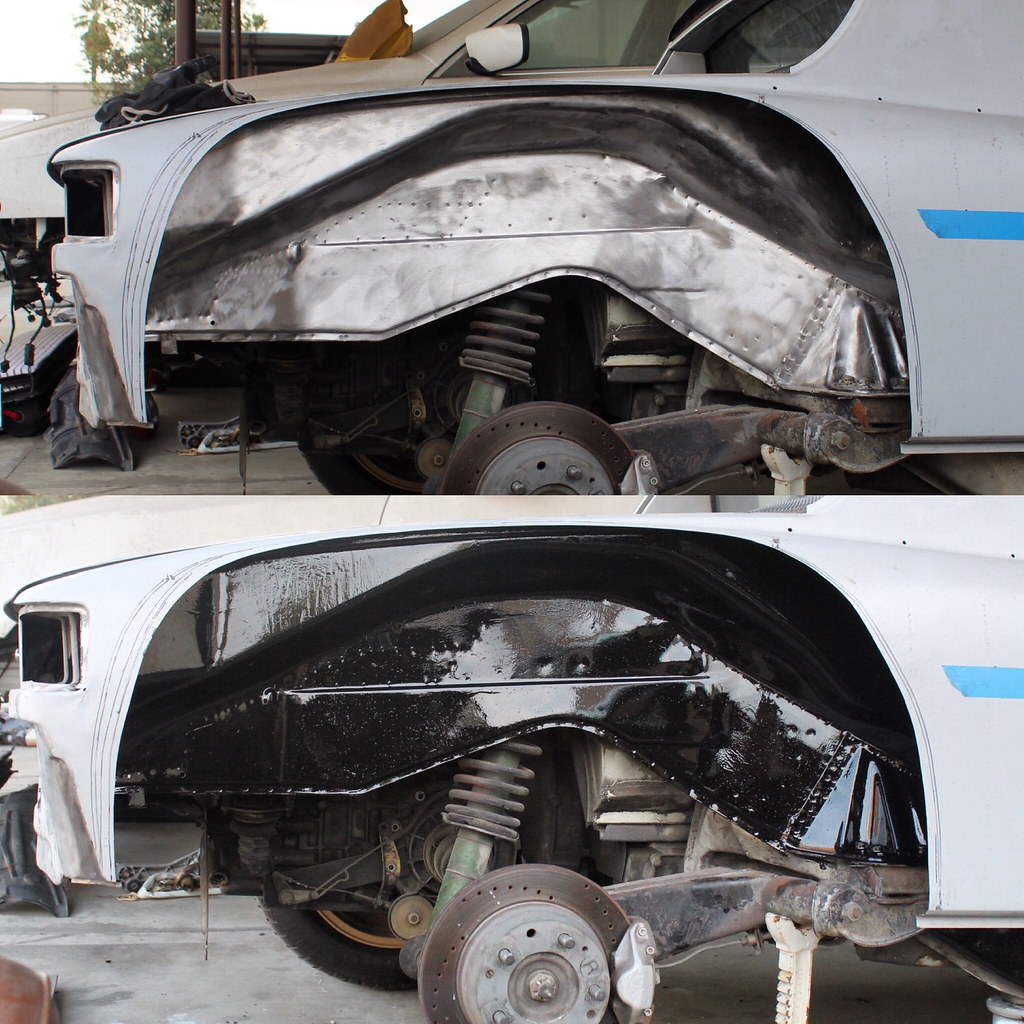
Posted by: john77 Jun 3 2021, 02:42 PM
This was the state of the driver door after I'd removed all of the bondo - yes, they just bondo'd over what I'm guessing are holes that were drilled to use a dent puller
I epoxied them because I'm not sure how long they'll be like this, but I have FG door skins on order to replace them. So completely stripping the doors down to their shells is in my future at some point.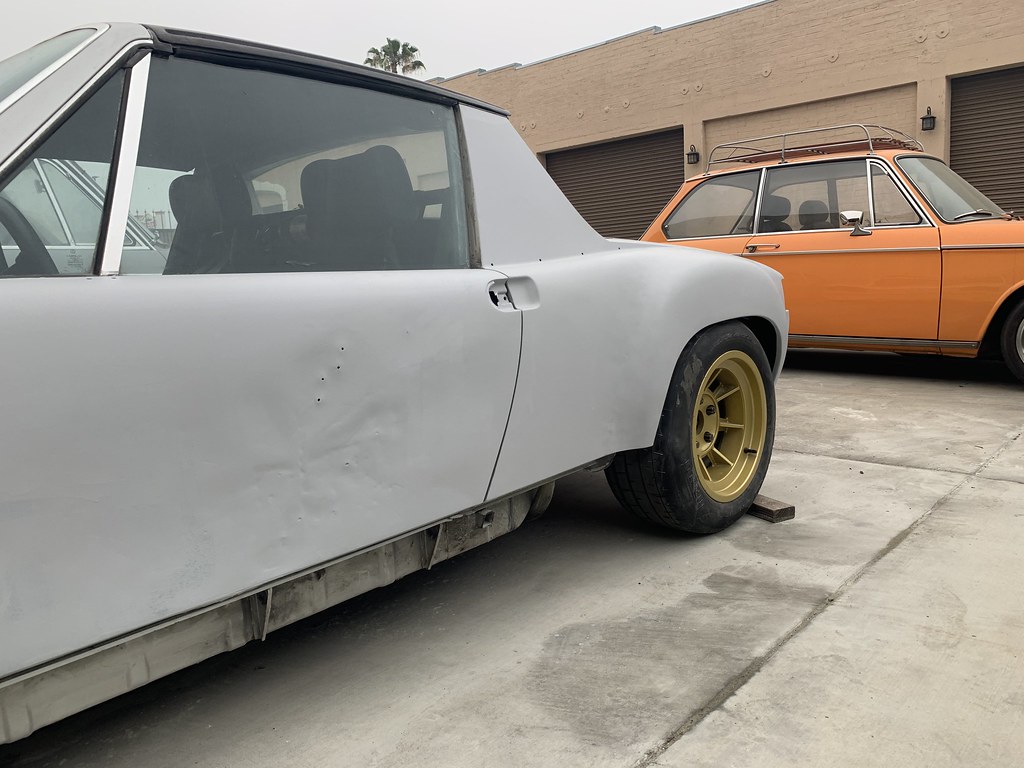
Posted by: john77 Jun 3 2021, 02:51 PM
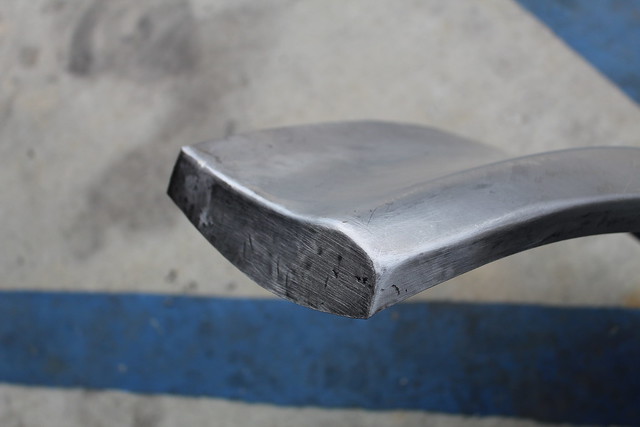
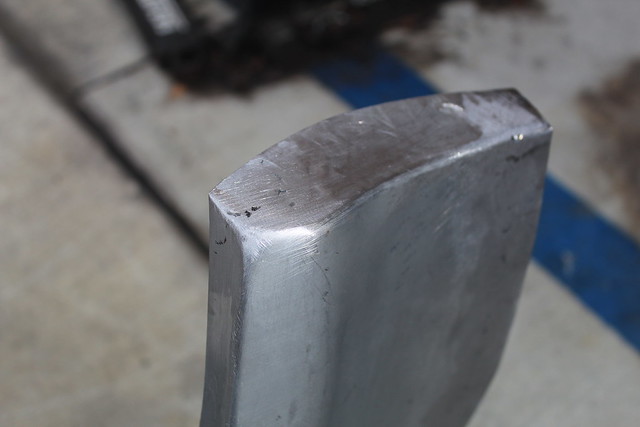
The bottoms of the flares didn't run in a straight line with the bottom edge of the fender, instead they slightly sloped down.
This was going to be an issue if I wanted a consistent gap between the top of the rocker and the rear fender once it was flared, so I decided to chop the ends off and remake them straight.
I probably could have just made a few cuts, hammered the edge straight and rewelded them, but getting a really sharp line like the bottom of the fender would have been tough, and sometimes I like to make more work for myself. 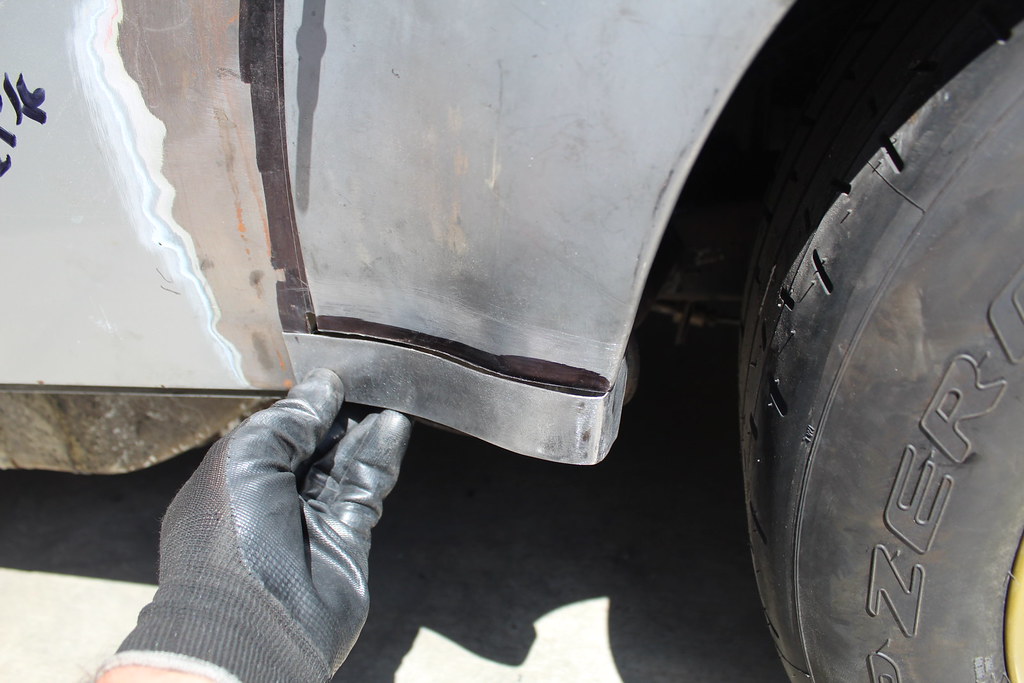
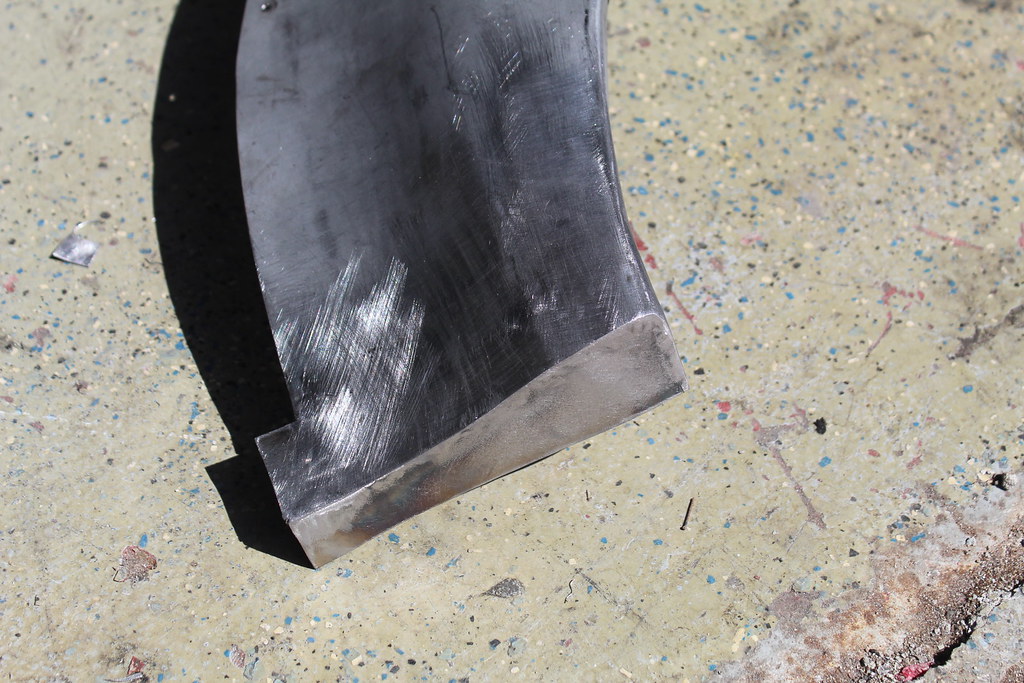
This is one done and test fitted to the car.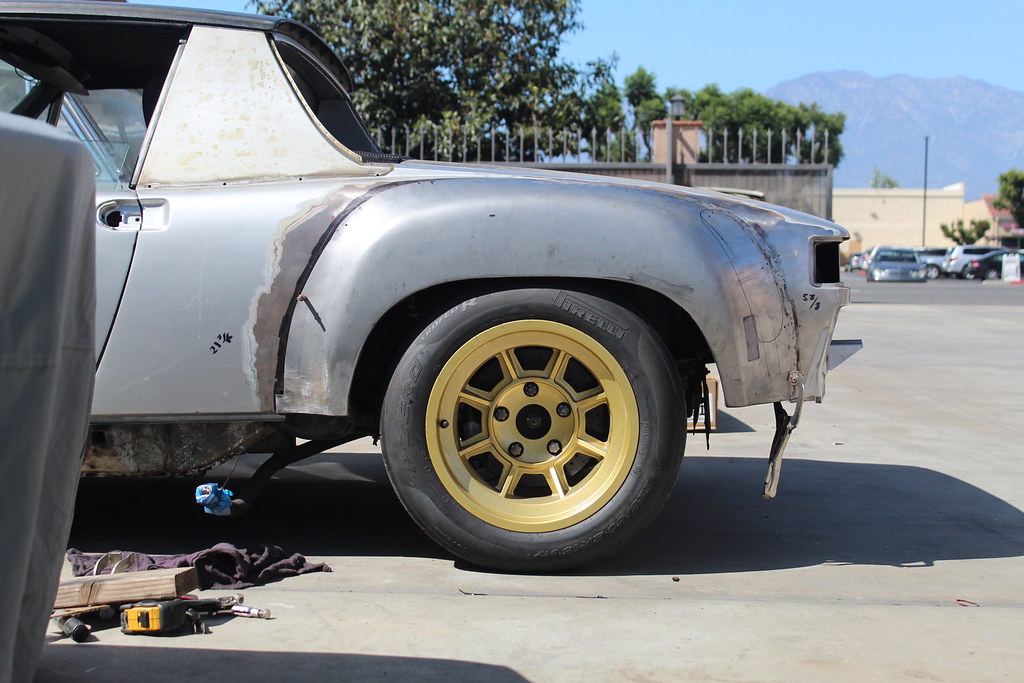
Posted by: john77 Jun 3 2021, 03:11 PM
I was inspired by another member (can't remember who, sorry) to make some adjustable brackets for the FG bumpers.
The fit of the original brackets was not good, plus once I clamped the ones flat to the back of the front bumper the angle was completely wrong and made it impossible to screw them through the original mounting holes in the front of the car.
So I made two pieces - one out of the FG bracket with a channel so it could be slid forwards and backwards, and a second piece out of aluminum L that mounted to the car.
Fixing the FG part to the back of the bumper in the right place still took some work, but here's how I did it:
I mounted the brackets to the car and then offered the bumpers up to them so they mated flat to the back of the bumper and were in the correct position..
Then I put tape inside the bumper where the brackets would mount and sprayed a thin layer of insulating foam...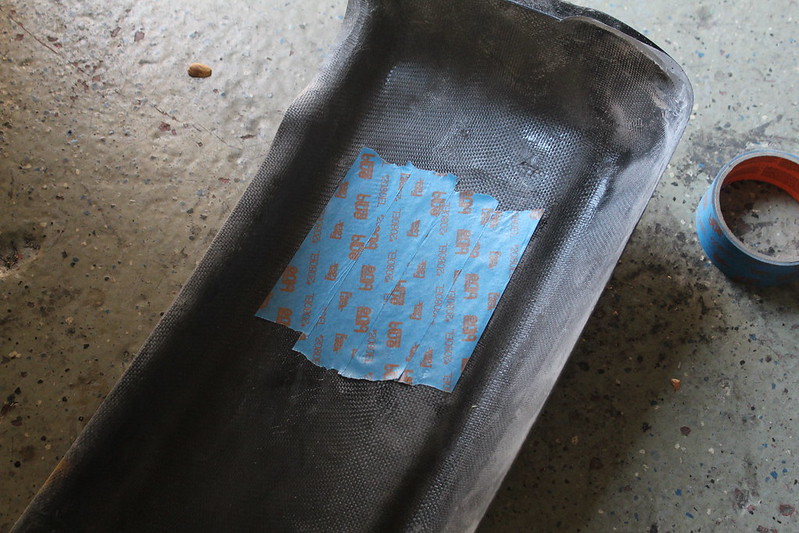
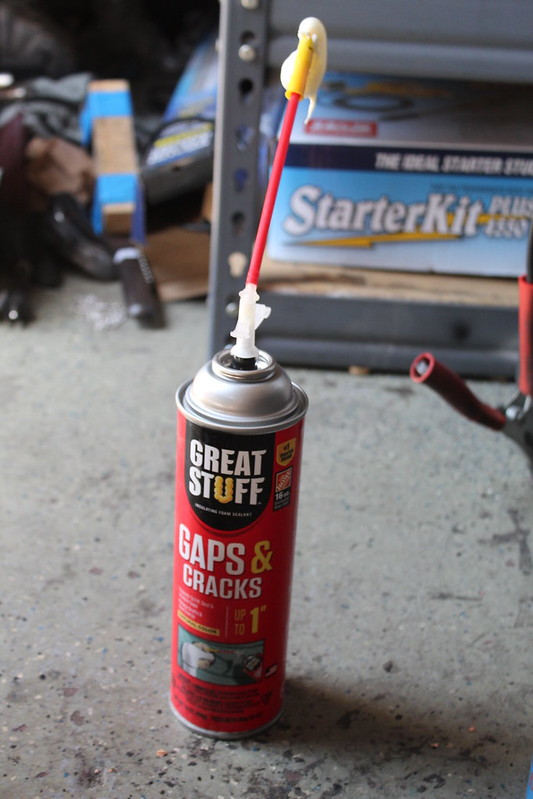
I then waited a few minutes for the foam to start to set and then lifted the bumper up to the brackets and held it in place for a few minutes.
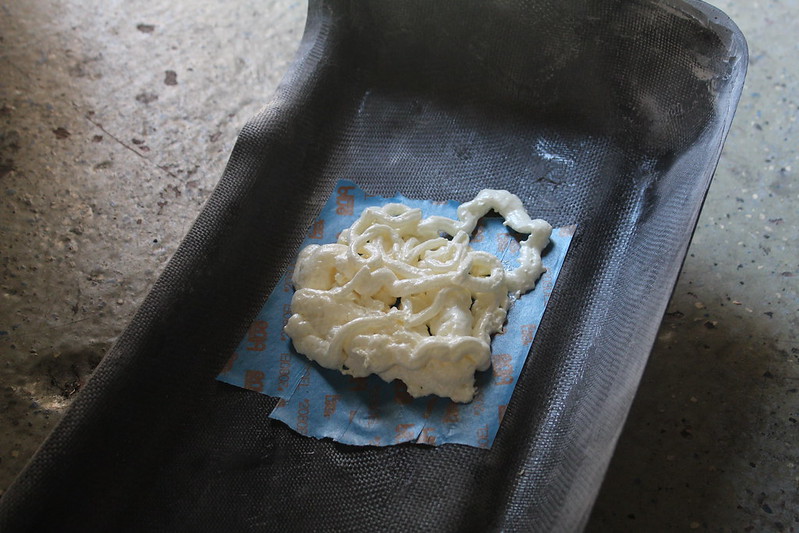
I didn't get a picture of the result, but basically the foams sets with an imprint in it of exactly where the bracket needs to be mounted.
You can then cut away the rest of the tape/foam, use a sharpie to mark around the tape that's left (i.e. where the bracket will go) and then chuck the last bit of tape away. This leaves you with a clean surface to fiberglass the bracket too.
Here's the brackets mounted to the front bumper (I used a hydraulic press to widen the angle of the aluminum L on the front bumper brackets so the mated up to the FG pieces properly):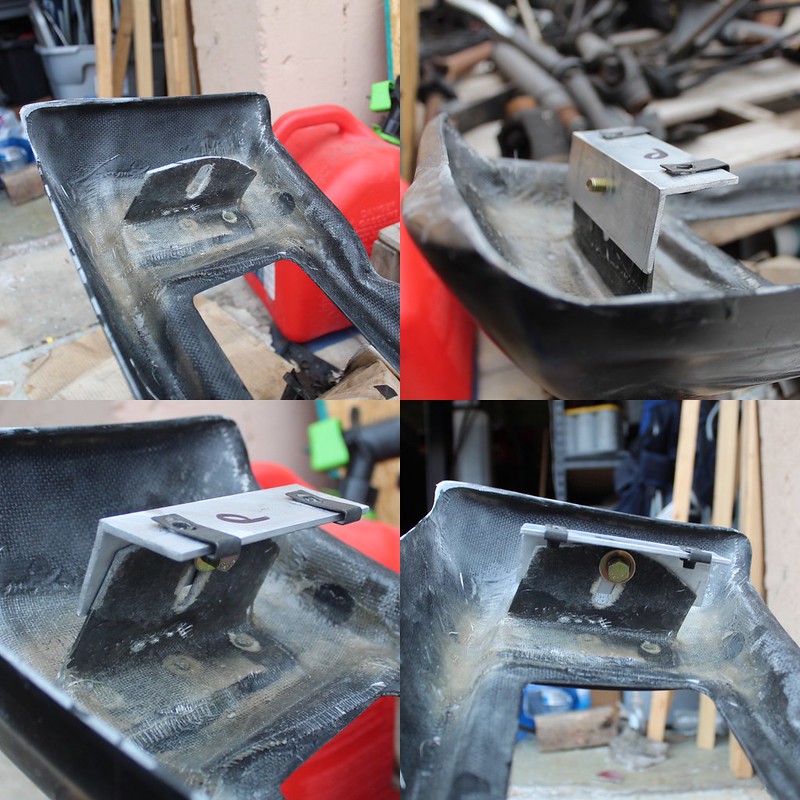
And the front bumper on the car. They need a little fine tuning, but overall I'm pretty happy with the fit.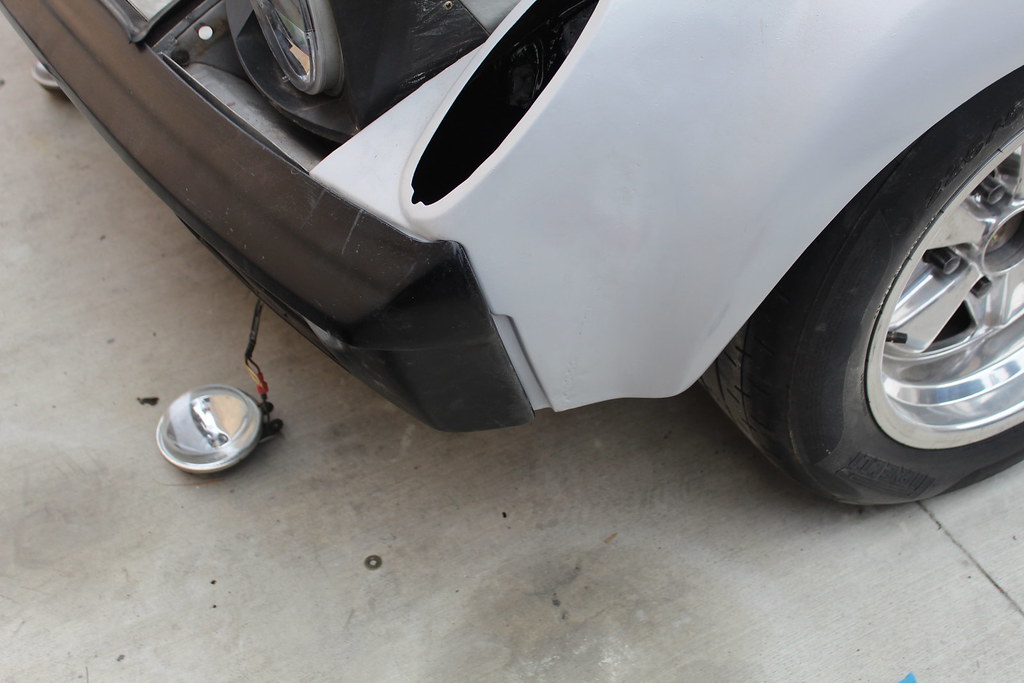
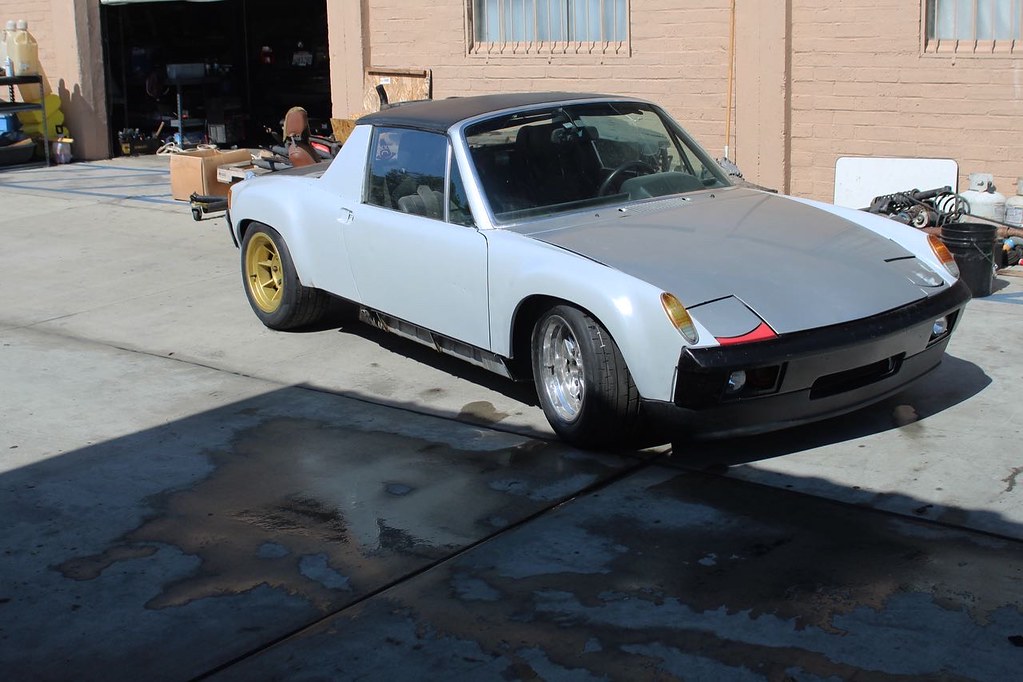
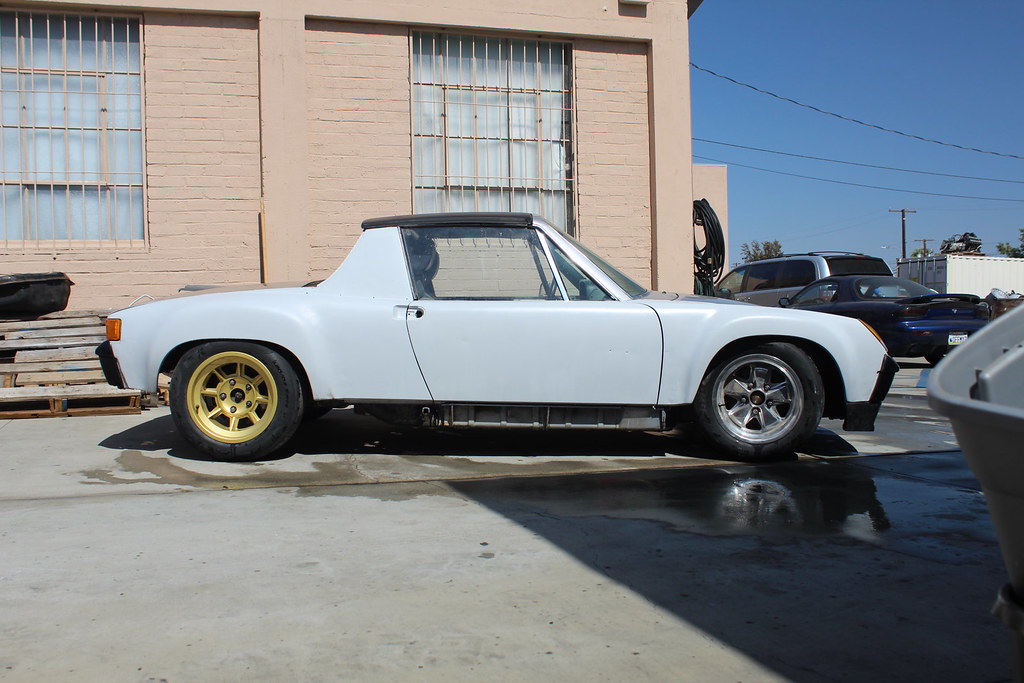
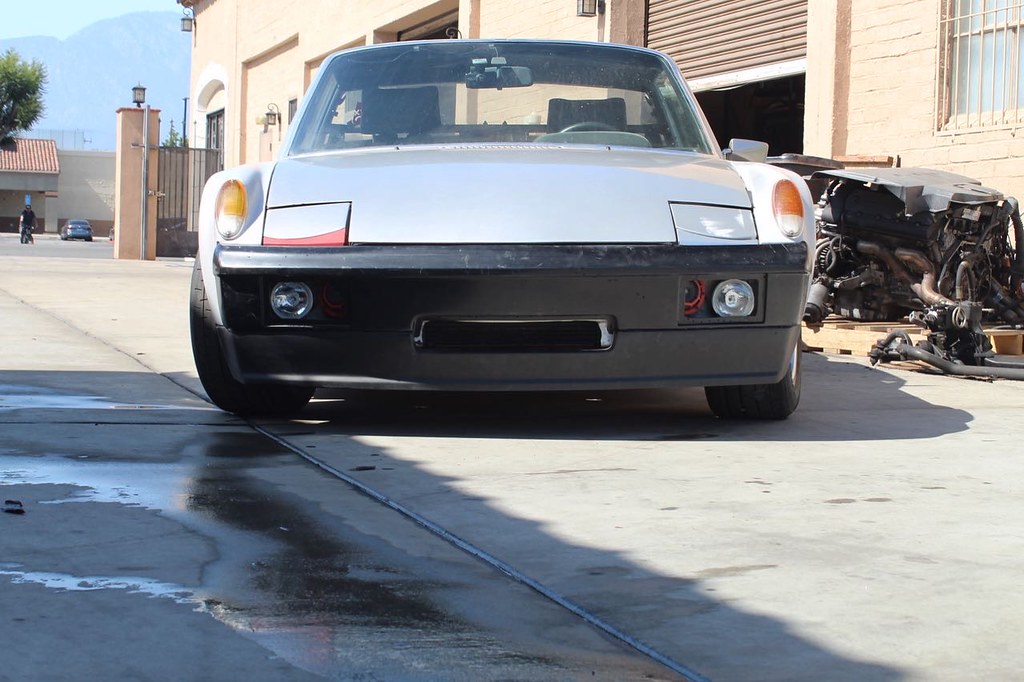
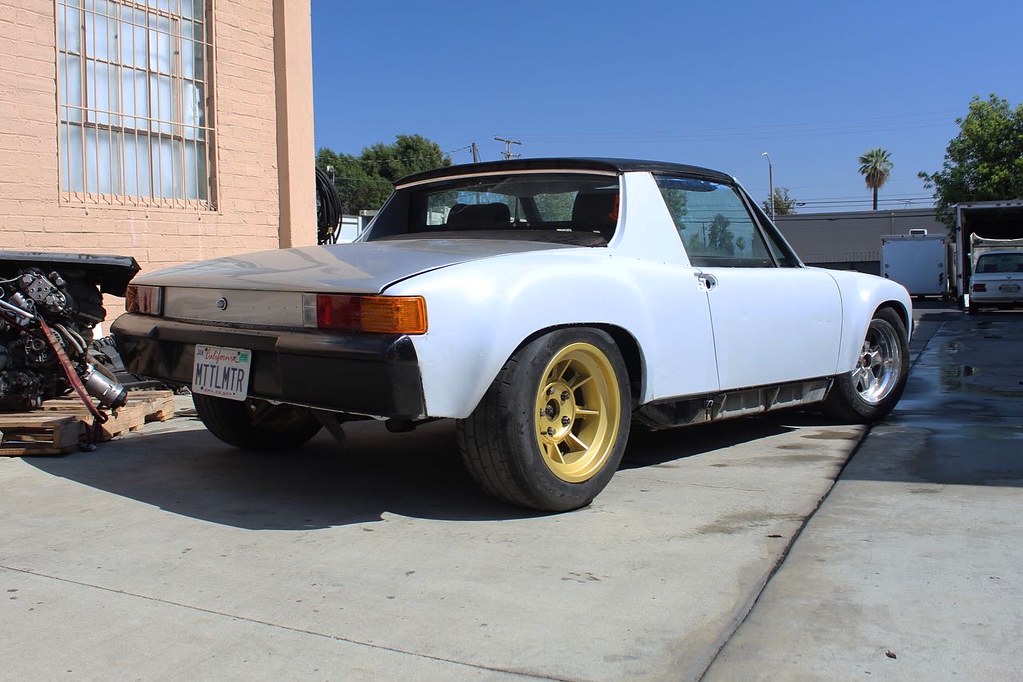
Posted by: john77 Jun 3 2021, 03:23 PM
One last post for now, here's are some pics the flares being fitted and the car as it sits right now with the bumpers and Patrick Motorsport air dam fitted.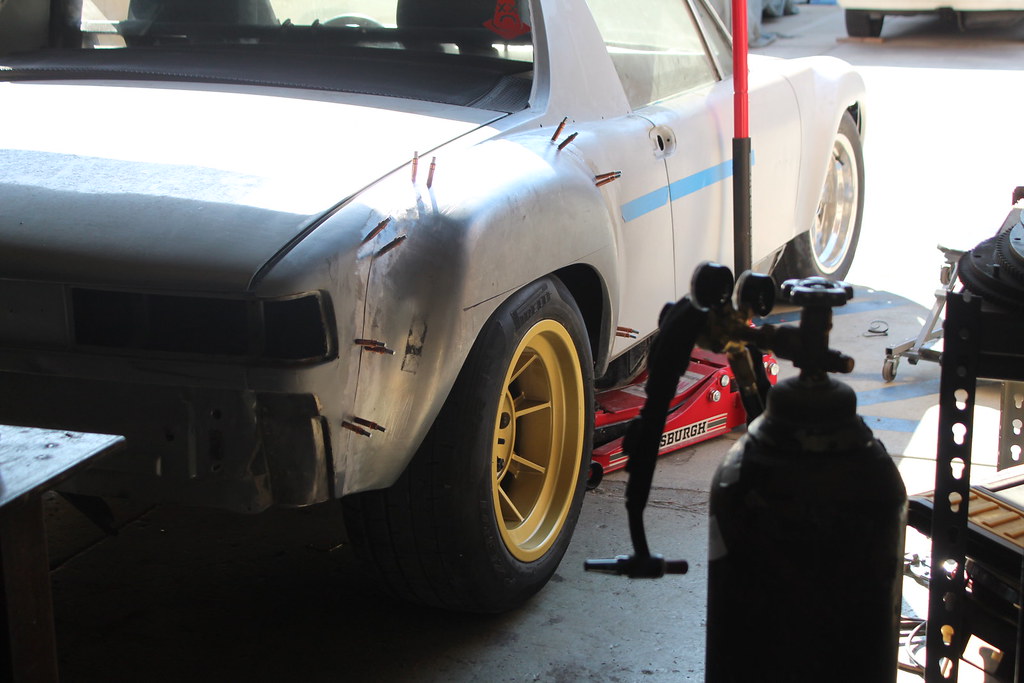
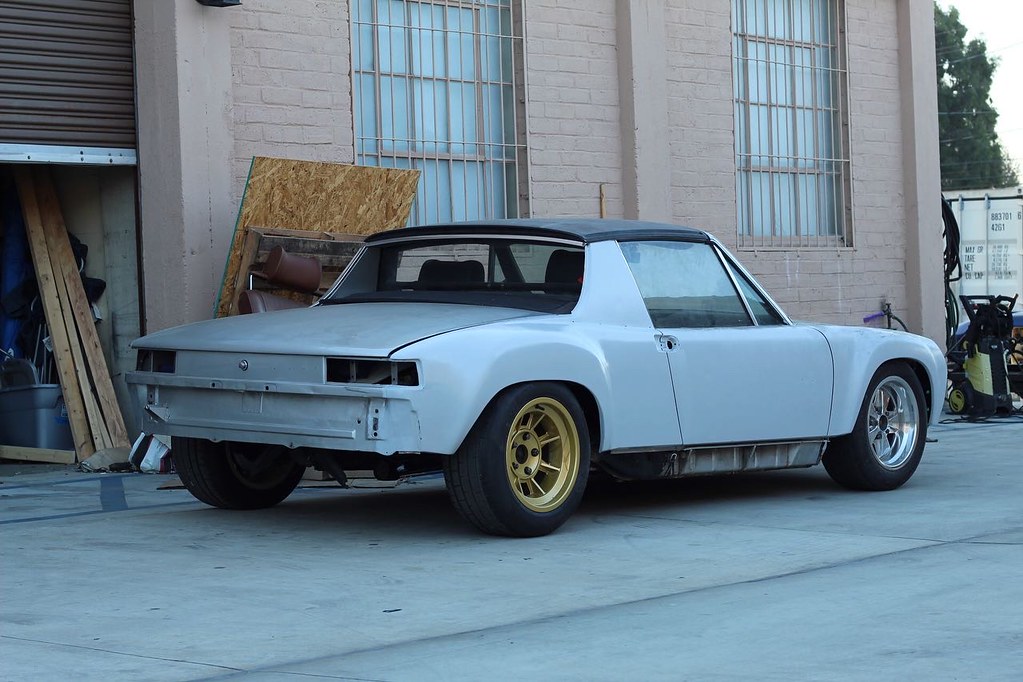
Posted by: john77 Jun 3 2021, 03:26 PM
Posted by: gereed75 Jun 3 2021, 04:34 PM
Wow. Looking really good!
Posted by: PanelBilly Jun 3 2021, 05:07 PM
Watching you do this brings back so many memories. Almost makes me want to build another one, but NO. I'm just going to drive the one I have and enjoy it. Keep posting the process so I can live it again without getting my hands dirty
Posted by: john77 Jun 3 2021, 05:09 PM
Thanks!
Plan is to enjoy driving it for a few months while I work on some other bits and then do filler and paint.
Wow. Looking really good!
Posted by: john77 Jun 3 2021, 05:15 PM
Haha, I hear you.
It was a lot more work than I expected just to get it this far. Every project I do seems to start out small, and then next thing I know my car's been off the road for six months.
The next couple of projects on this should be more fun though as I'll still be able to drive the car as I'm doing them.
Watching you do this brings back so many memories. Almost makes me want to build another one, but NO. I'm just going to drive the one I have and enjoy it. Keep posting the process so I can live it again without getting my hands dirty
Posted by: infraredcalvin Jun 3 2021, 10:23 PM
Wow, great work so far, very inspiring. Keep it up, bit by bit it’ll come together.
BTW: love the gold group 5s!
Posted by: john77 Jul 17 2021, 03:45 PM
Thanks!
Wow, great work so far, very inspiring. Keep it up, bit by bit it’ll come together.
BTW: love the gold group 5s!
Posted by: john77 Jul 17 2021, 04:10 PM
My new airdam won't clear from the street up my driveway ramp, or from the sidewalk up my actual, very steep driveway.
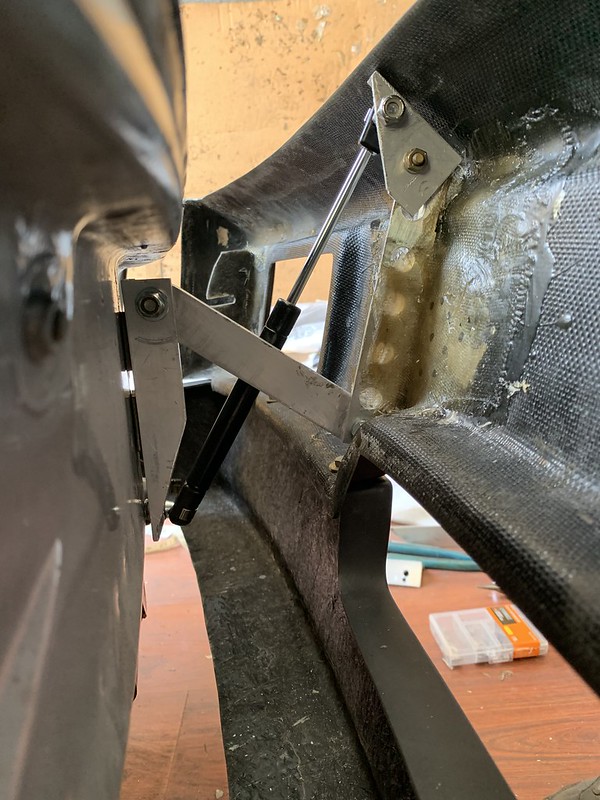
So I made a pair of aluminum hinges with gas struts that mount to the bumper and the front of the car, and raise the entire bumper and airdam high enough to clear the driveway.
There are two hinges, one either side of the air cooler opening. Getting the geometry correct so the struts fit behind the bumper when it's down, and the hinges opened parallel to each other and didn't bind took a little time but I'm pretty happy with how this is working.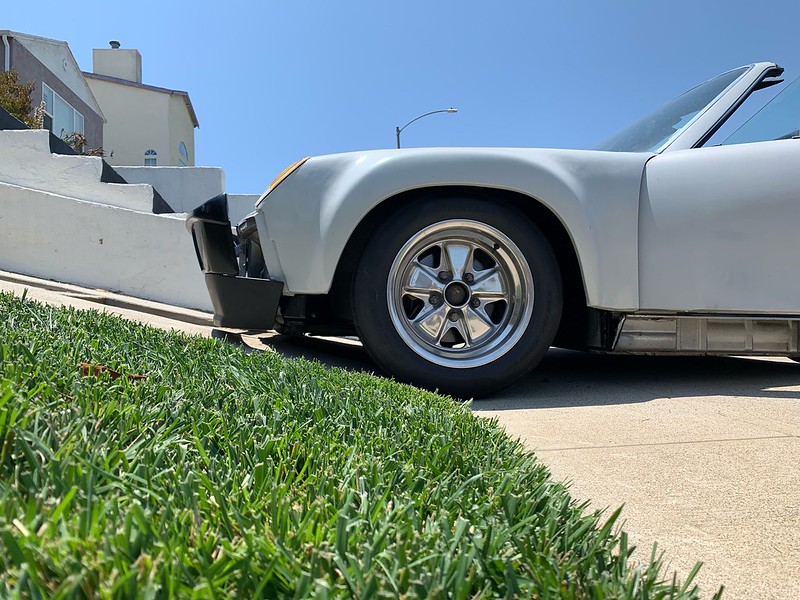
 [/url]
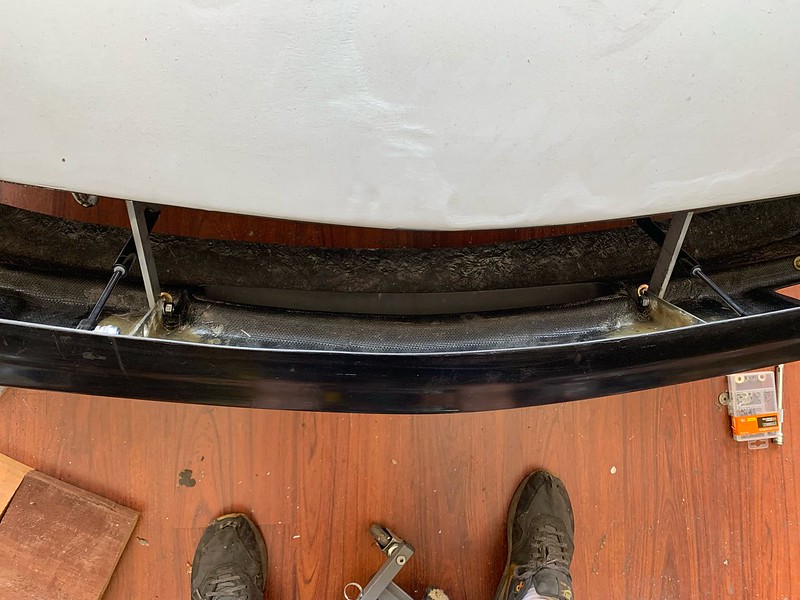
https://youtu.be/2-kCouPsnUk
https://youtu.be/MTm9F0asvDU
These hinges are just phase one. Next step is securing the bumper to the car with a handful of different types of dzus quick release fasteners in different locations so I can quickly undo them by hand, raise the bumper, and drive up my driveway without having to take the entire thing on and off every time I want to park in my garage.
Posted by: Maltese Falcon Jul 17 2021, 04:46 PM
I think that your approach is as severe as my neighbor...his just adds a little corkscrew coming up to the house .The gt3rs is a stiff one !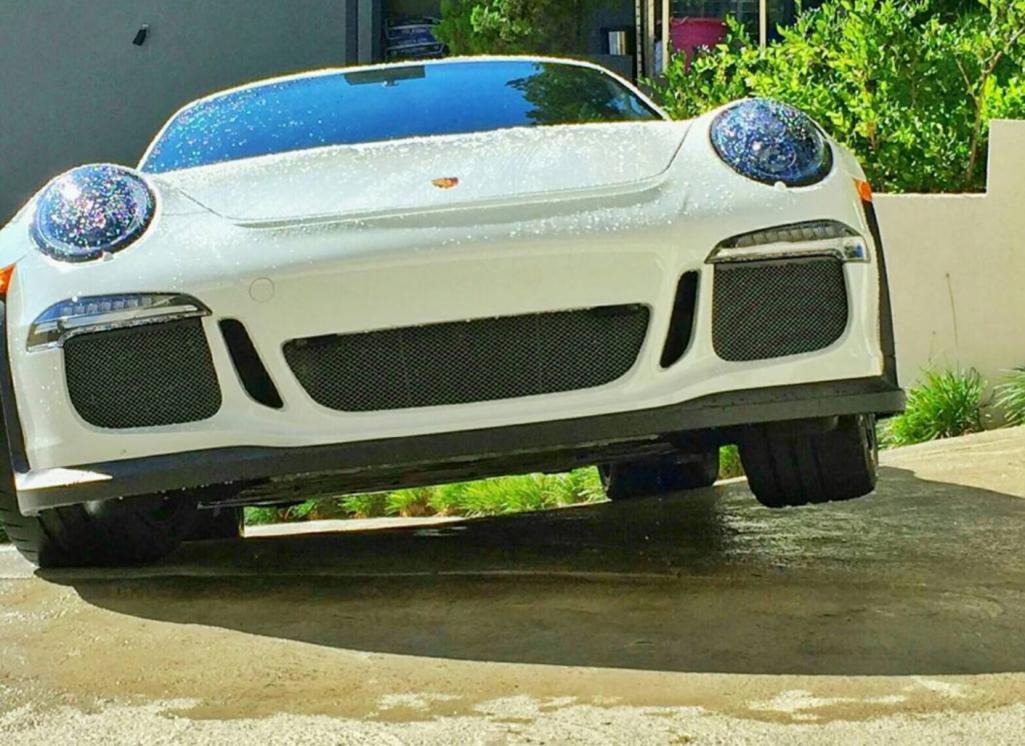
Posted by: rhodyguy Jul 17 2021, 04:50 PM
Nice fix to an unfixable situation.
Posted by: john77 Jul 17 2021, 05:32 PM
Thanks man.
Nice fix to an unfixable situation.
@Maltese_Falcon GT3 RS is a nice problem for him to have
Posted by: Maltese Falcon Jul 17 2021, 07:16 PM
Thanks man.
Nice fix to an unfixable situation.
@Maltese_Falcon GT3 RS is a nice problem for him to have
Julian's RS also has a factory front-lift option for driveways...but still not enough. He snakes it up or down the uphill curve, that's when she lifts a corner.
He offered the use of his rear quarter inlet scoops, when I was designing the fit (same oe parts) to graft on to the 8gtt >>great neighbor indeed
Posted by: bbrock Jul 17 2021, 07:32 PM
Just awesome!  That's the kind of crazy I really admire.
Posted by: john77 Jul 17 2021, 09:39 PM
Thanks Brent!
There’s so much over-engineering left to come yet too
Just awesome!
That's the kind of crazy I really admire. Powered by Invision Power Board (http://www.invisionboard.com)
© Invision Power Services (http://www.invisionpower.com)