Printable Version of Topic
Click here to view this topic in its original format
914World.com _ 914World Garage _ Modify your rear valance for custom exhaust tips
Posted by: tygaboy Oct 30 2020, 11:00 AM
Robert, my buddy @http://www.914world.com/bbs2/index.php?showuser=3898 has a cool, dual exhaust muffler on his big 4, wanted to run the rear valance and asked if I could help him make that happen. I've got to do this same sort of modification on my valance so figured "what better way to develop the skill than by practicing on someone else's car?" 

I figured I'd give the hammer form approach a go. Apologies for not documenting as the work occurred and not taking pics along the way but you'll get the idea.
Anyway, here's how we did it:
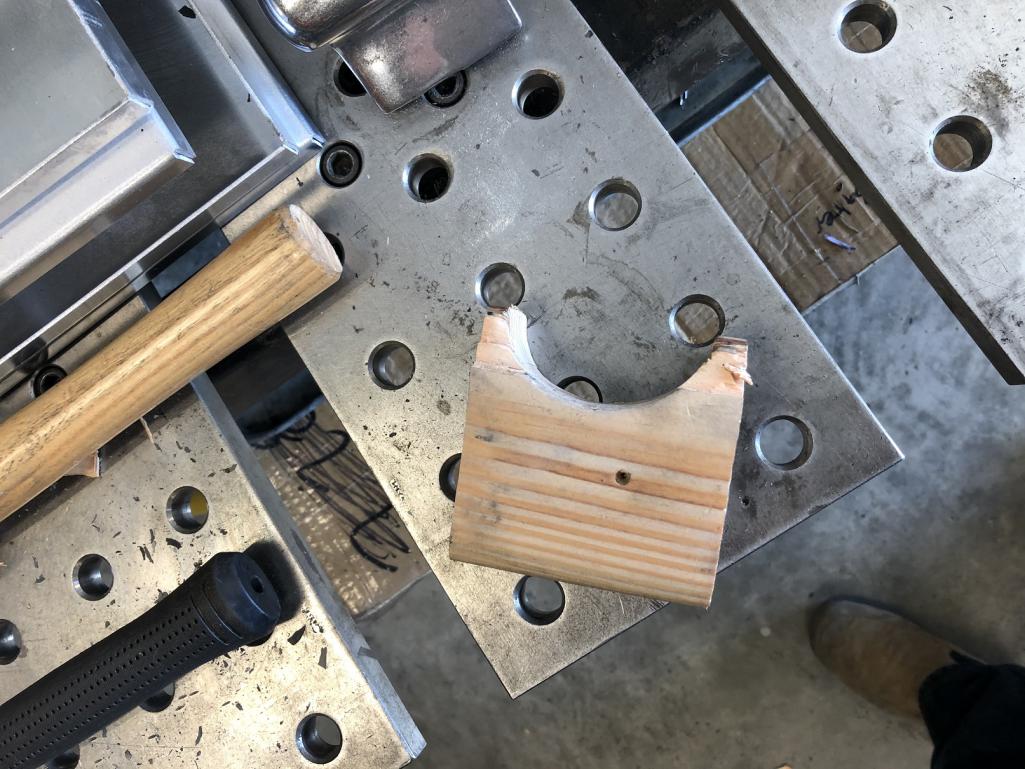
First, I used a template tool and copied the shape of the valance and the desired shape of the opening onto a block of wood. I bit of time with a band saw and sander and I had the hammer form.
Lesson learned: don't use a regular ol' 2x4. It barely made it through the process! Again, this pic is after all the hammering and you can see the carnage. Hardwood next time.
Attached thumbnail(s)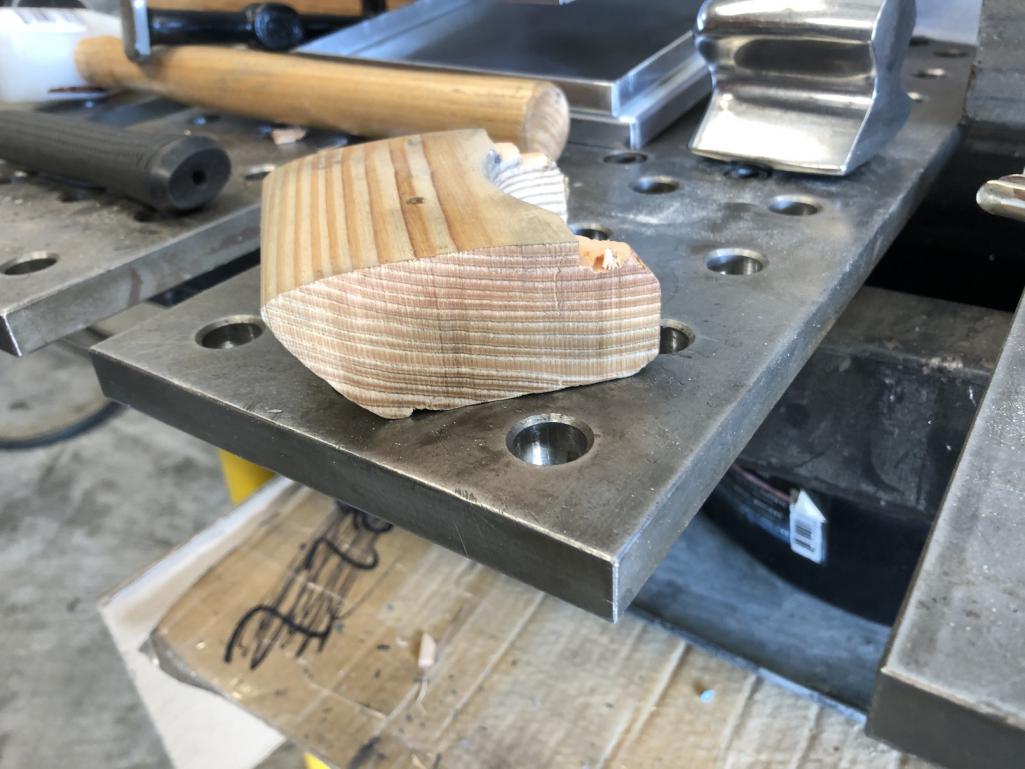
Posted by: tygaboy Oct 30 2020, 11:06 AM
Next, Robert marked where he wanted to cut outs and I removed the "appropriate" amount of material.
As mentioned, no pics of this but I used snips to cut out the opening, leaving enough material to hammer in a return that would match the factory return along the lower edge of the valance. Leave more than you think you'll need since the excess can be sanded away once things are hammered into place.
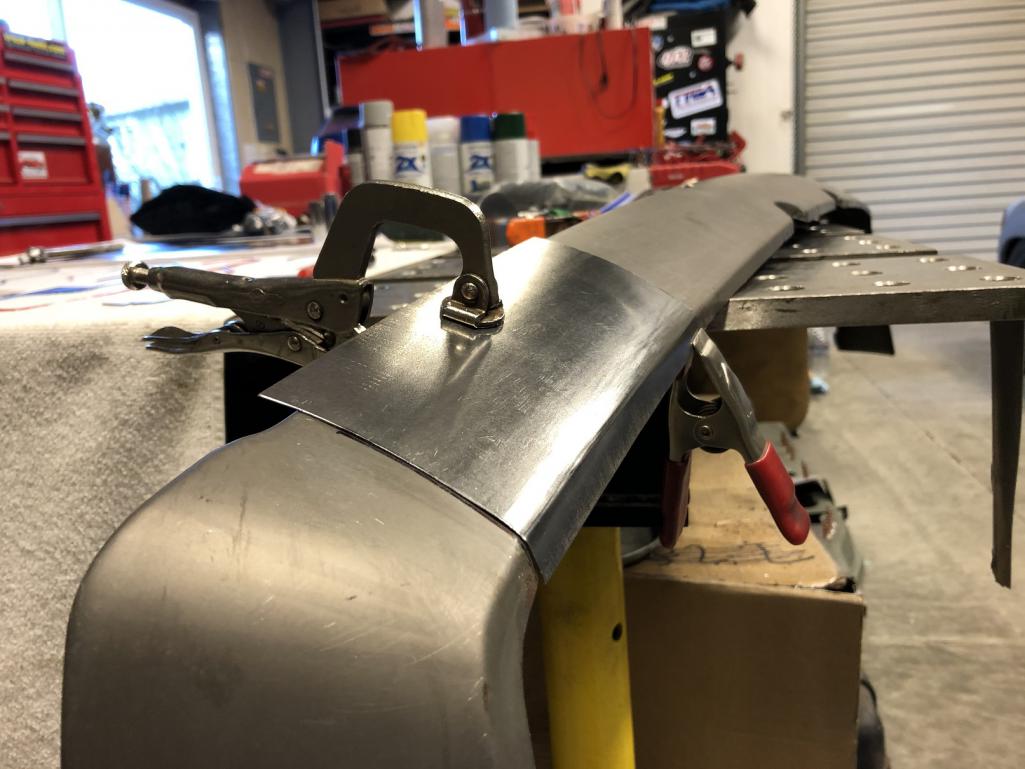
Then, the hammer form gets positioned in the valance and clamped in place. I used vice grip C-clamps like those pictured.
Attached thumbnail(s)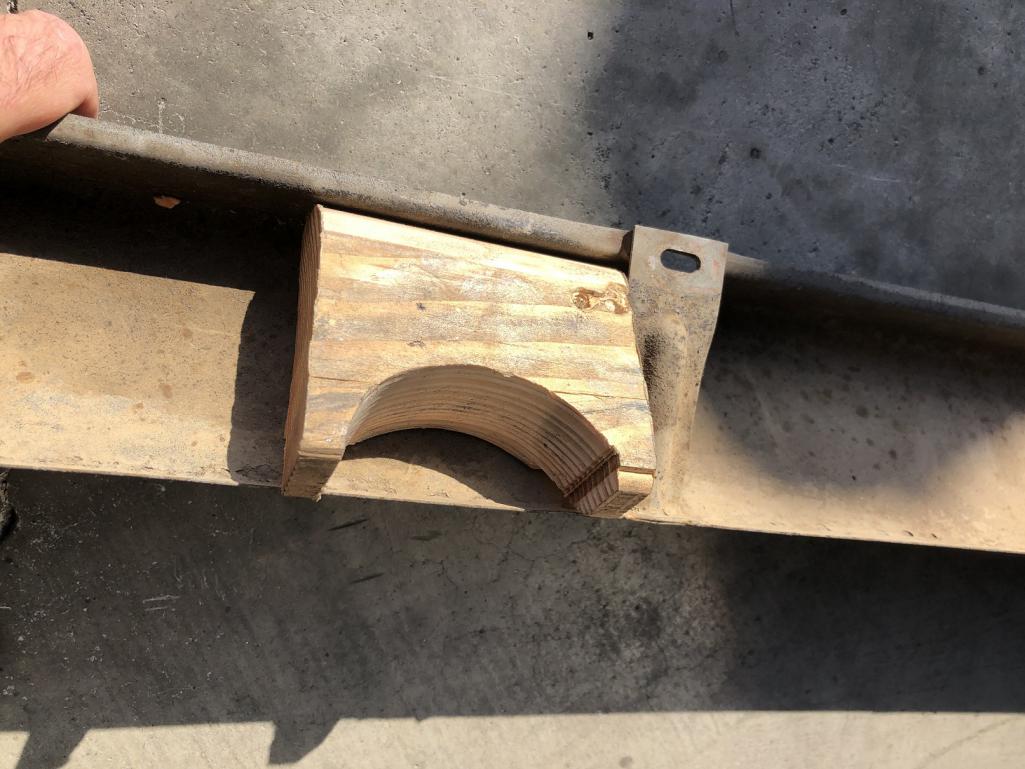
Attached image(s)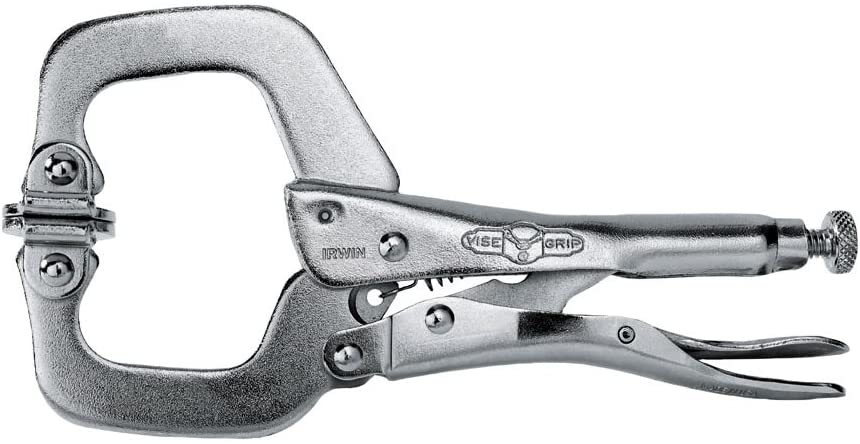
Posted by: tygaboy Oct 30 2020, 11:09 AM
I used a nylon mallet to hammer the material into the form, creating the opening and the return. Here's the unpainted result, on Robert's car.
He'll have it painted and we'll post those pics, too.
Also, I'll update this with more and better "in process" pics when I do this mod to my valance.
Attached thumbnail(s)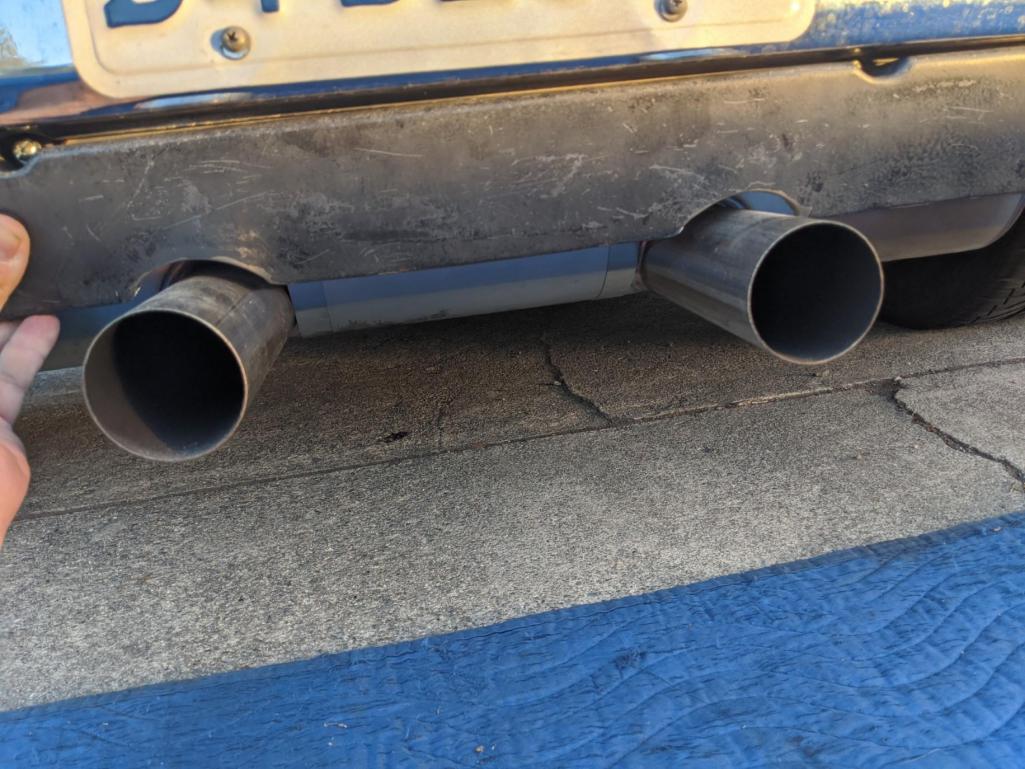
Posted by: 914werke Oct 30 2020, 11:28 AM
what about filling in the OE notch?
Posted by: mb911 Oct 30 2020, 11:28 AM
Chris thats a nice approach.. What I have done in the past is make the cut out then shear a strip of the appropriate width and thickness steel for the lip and fuse the edge with TIG then blend quickly with a roloc scotch brite.. Thats basically what I do on the GT bumper modifications I do for folks.
Posted by: slowrodent Oct 30 2020, 11:58 AM
Very nicely done and quite applicable to my car. I look forward to the "in progress" pics...
Posted by: tygaboy Oct 30 2020, 11:58 AM

what about filling in the OE notch?
@http://www.914world.com/bbs2/index.php?showuser=453 - Robert didn't want to do that, at least not yet. On mine, I'll fab a filler piece and weld it in.
Posted by: steuspeed Oct 30 2020, 12:13 PM
I want dual exhaust like that for my outlaw 2.0. What muffler is it?
Posted by: DRPHIL914 Oct 30 2020, 12:30 PM
I want dual exhaust like that for my outlaw 2.0. What muffler is it?
looks like mb911's new GT style twin pipe muffler, been considering this myself, but have to source a different set of HE, sell my current set up and have someone else do this to my valance for me as i dont have a welder or access to one here at the present time.... but those muffers are a work of art!
Posted by: mbseto Oct 30 2020, 12:46 PM
Nice. Love those quick satisfying jobs.
Posted by: mb911 Oct 30 2020, 01:01 PM
I want dual exhaust like that for my outlaw 2.0. What muffler is it?
looks like mb911's new GT style twin pipe muffler, been considering this myself, but have to source a different set of HE, sell my current set up and have someone else do this to my valance for me as i dont have a welder or access to one here at the present time.... but those muffers are a work of art!
Gonna have 1.7/1.8 ones shortly
Posted by: Cairo94507 Oct 30 2020, 03:21 PM
Chris @http://www.914world.com/bbs2/index.php?showuser=19241 - very nicely handled.
My personal opinion, yeah- no one cares (according to my wife) - is the rear of the cars just look unfinished w/o a rear valance installed. I don't care if it's a deep or shorty valance, the car needs one to look correct from the side and rear.
On my last Six I had the GT style muffler and I filled the stock hole and then added the two for the pipes and thought it looked darn near factory correct. 

Posted by: tygaboy Nov 11 2020, 10:19 PM
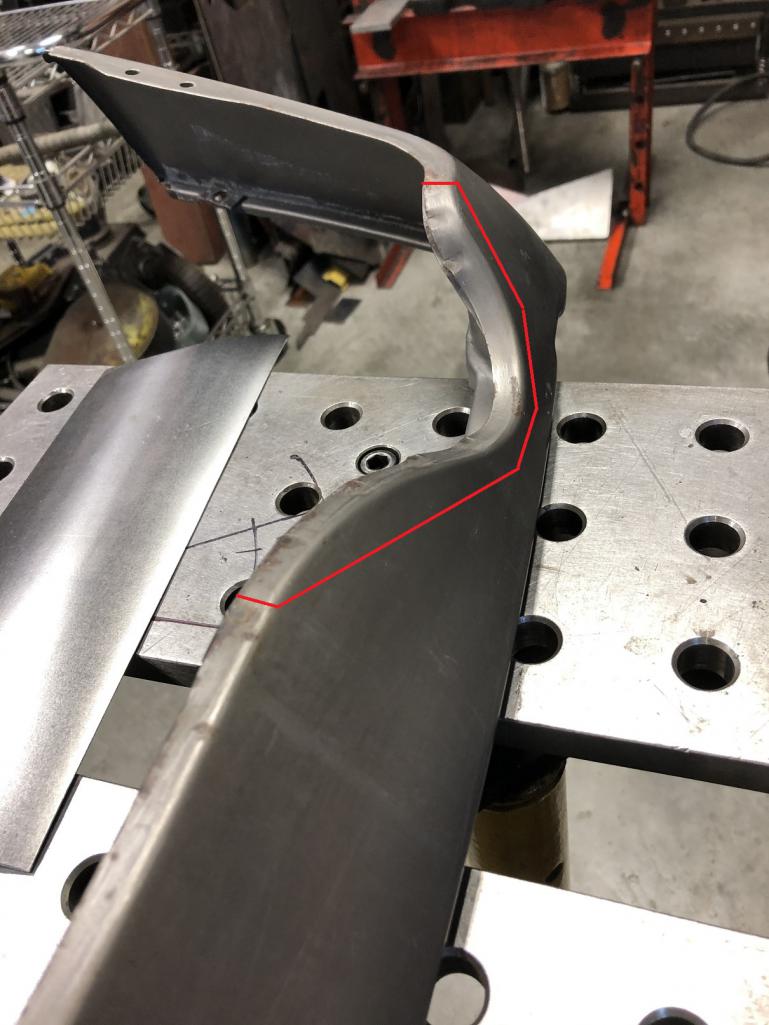
Back to working up the patch panel to close off the stock opening. @http://www.914world.com/bbs2/index.php?showuser=453 , you'd asked about this earlier.
First, I wanted to get the top-to-bottom profile but not any side-to-side curve.
A neat trick is that if you put an inner tube around the upper anvil of the English wheel, it only curves the material left/right vs creating a compound curve. I've pulled the inner tube a bit off center, just to make it obvious it's there.
In the next couple pics, you can see the left/right (top to bottom of the part) curve but how the length stays straight.
Attached thumbnail(s)

Posted by: tygaboy Nov 11 2020, 10:21 PM
Here's the area to close off and a test fit of the profile so far. I'll cut out the stock opening, trim the panel to fit and butt weld it in place.
Attached thumbnail(s)
Posted by: tygaboy Nov 11 2020, 10:23 PM
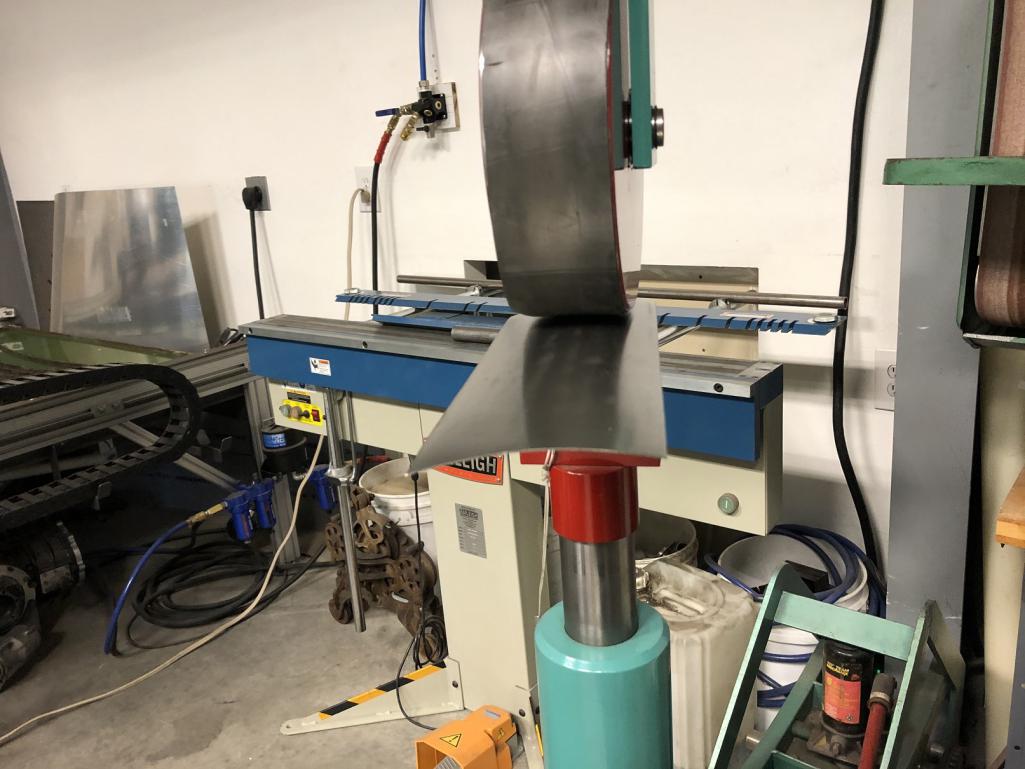
Next, I needed to tip the return. Since the panel was already curved, it couldn't go in the brake so I used the bead roller. I just needed to figure out the best die to get as close as I could to the radius on the valance.
Attached thumbnail(s)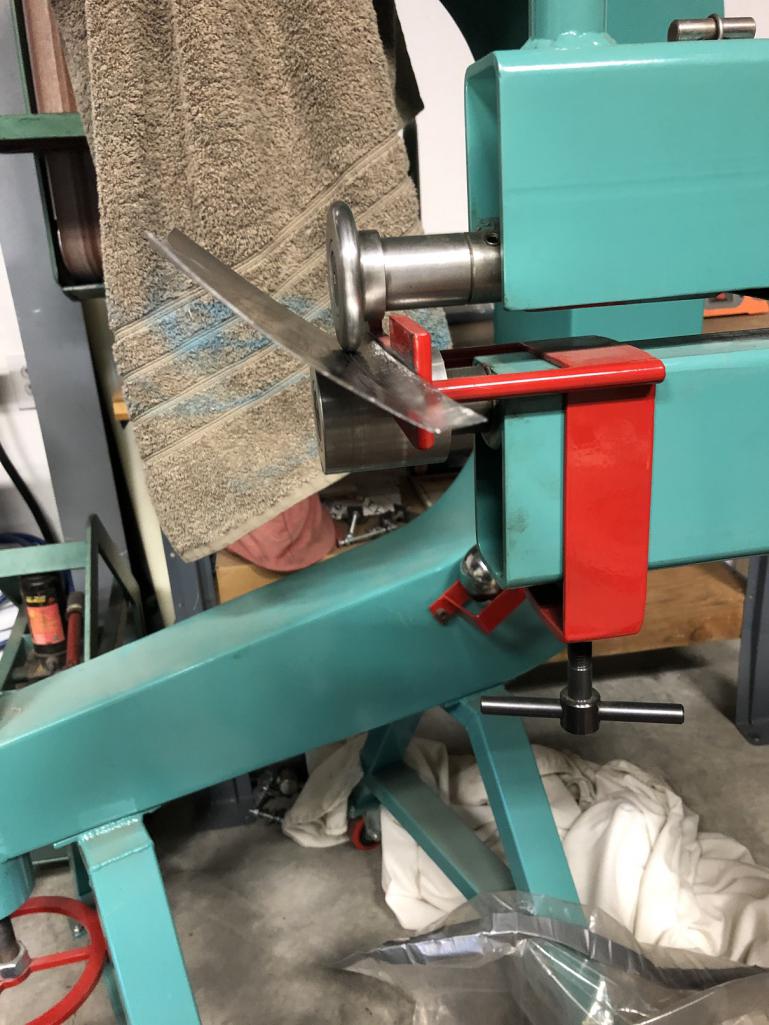
Posted by: tygaboy Nov 11 2020, 10:26 PM
Then I used the shrinker to get the side-to-side curve. You can see the marks it leaves on the return.
Here are a few shots of the fit at this stage. It's essentially where it needs to be. Now I need to work out where I want to cut the valance to remove the stock opening, trim this panel to fit, make any final adjustments and weld it in.
Attached thumbnail(s)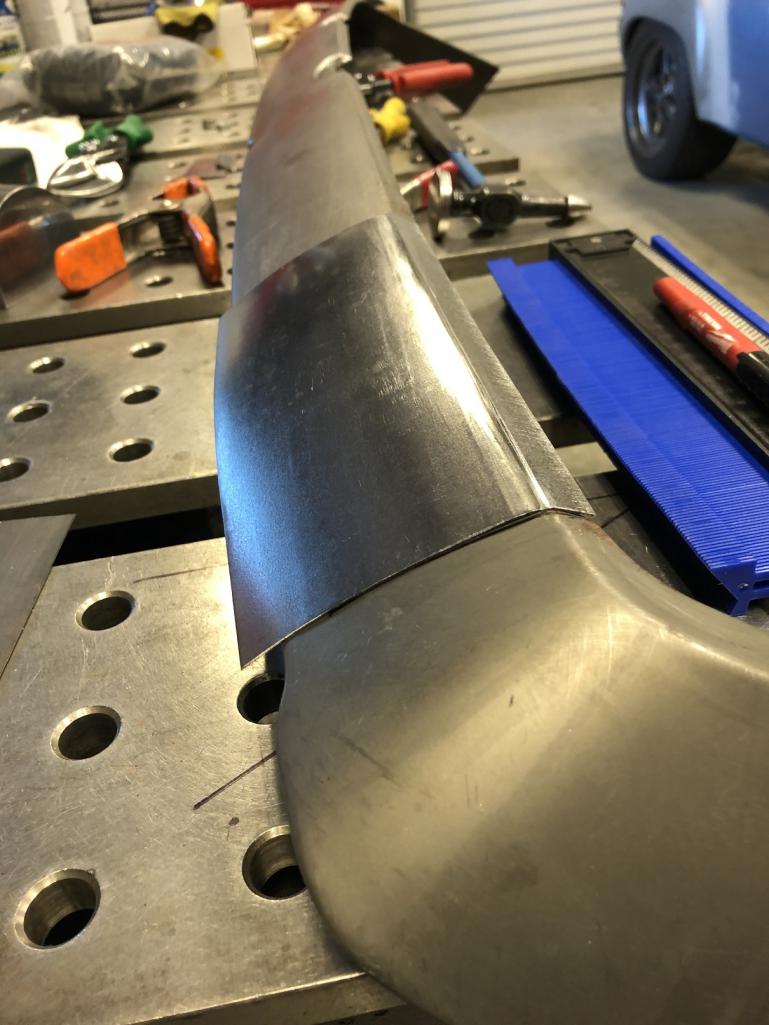
Posted by: cary Nov 12 2020, 08:54 AM
Nice work ..............
Posted by: AZBanks Nov 12 2020, 10:17 AM
I'm curious why you are making such a big patch and not just patching the small area of the original opening.
Posted by: Cairo94507 Nov 12 2020, 10:31 AM
I think that is going look like a pipe never exited in that location. Very clean job.
Posted by: tygaboy Nov 12 2020, 11:08 AM
I'm curious why you are making such a big patch and not just patching the small area of the original opening.
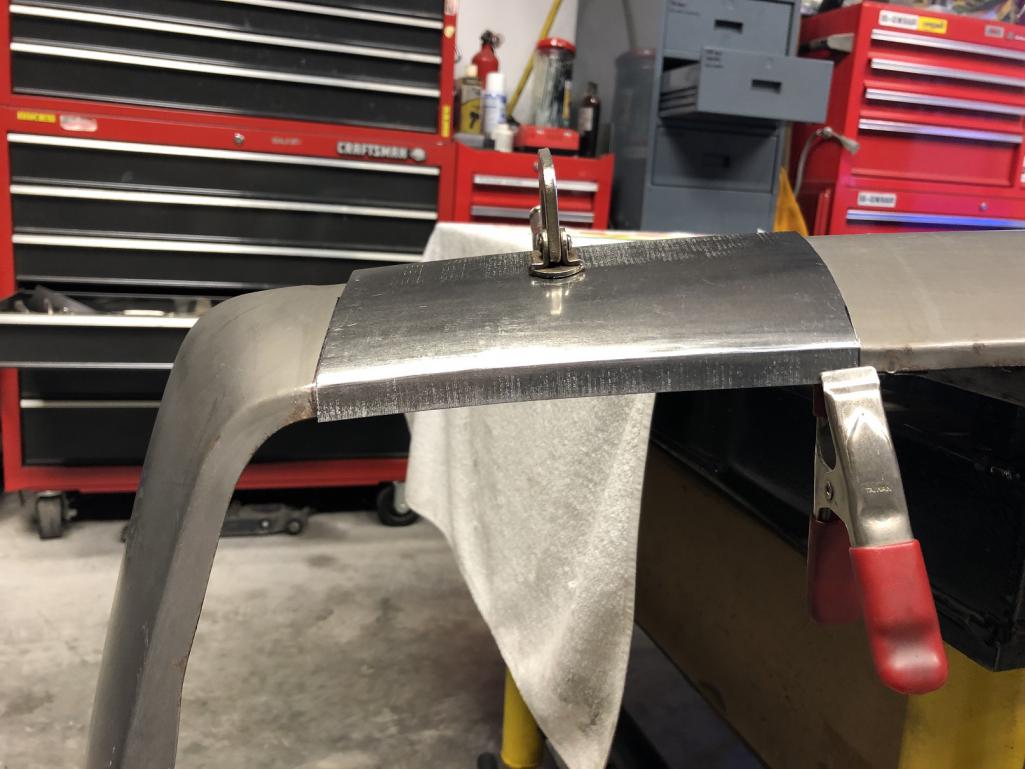
@http://www.914world.com/bbs2/index.php?showuser=5245 - It's common - and far easier, especially with smaller parts, to shape a larger piece then cut it to size. I'll slice out the stock opening about like this pic, fit the new panel, scribe the cut opening shape onto the panel and trim it to fit the opening.
Attached thumbnail(s)
Posted by: 76-914 Nov 12 2020, 11:12 AM
Very nice, Chris. Has anyone ever told you that you have some nice toys? 
Posted by: tygaboy May 13 2021, 08:58 AM
Finally getting around to posting the completion of this little project:
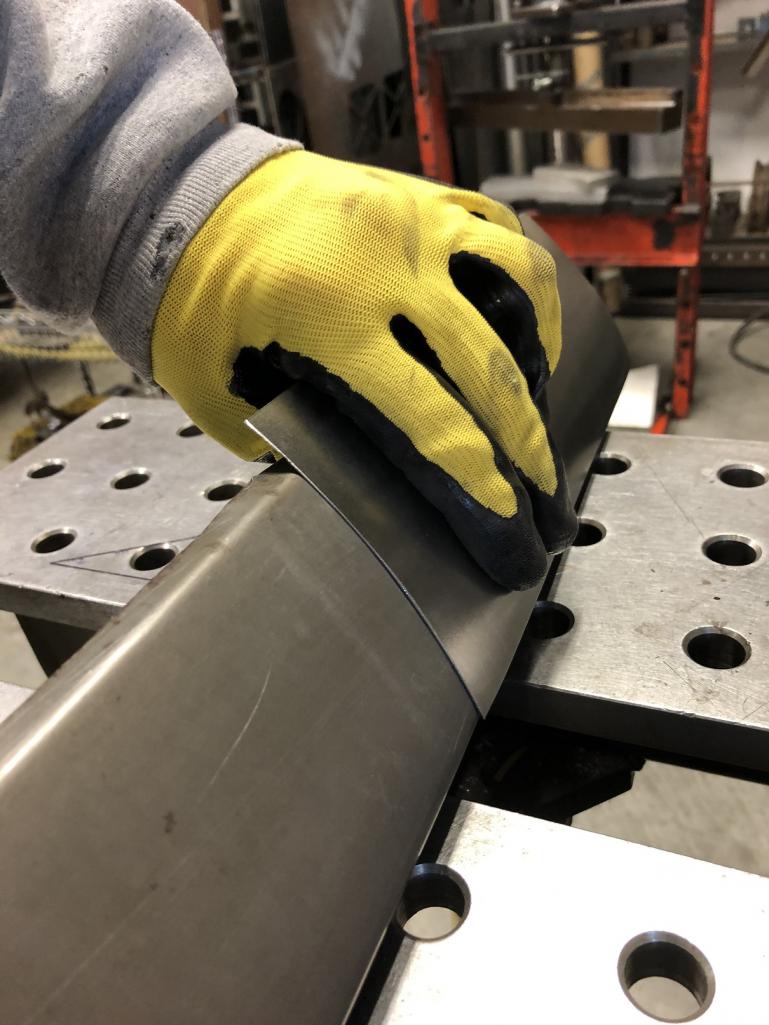
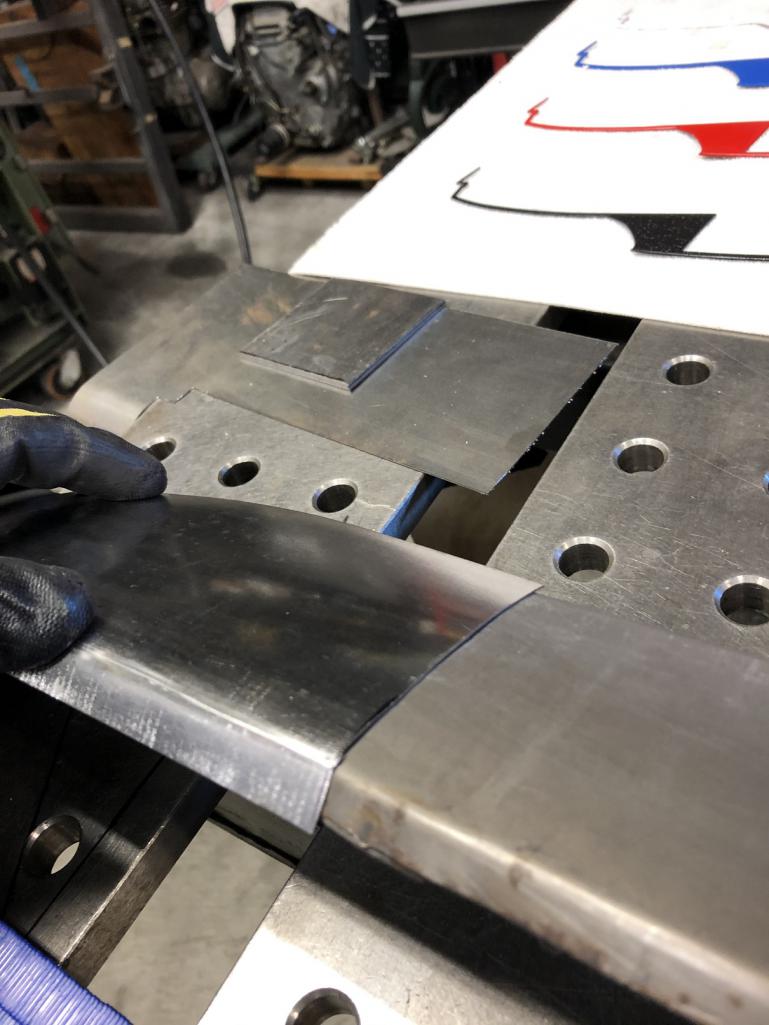
After trimming the overlapping areas that were created when forming the returns, I was able to find a perfectly sized chunk of round stock and used it as a hammer form to tune the openings to their final shape.
Then is it was a bit of TIG to close up the cuts/gaps in the returns. Metal work done!
Attached thumbnail(s)


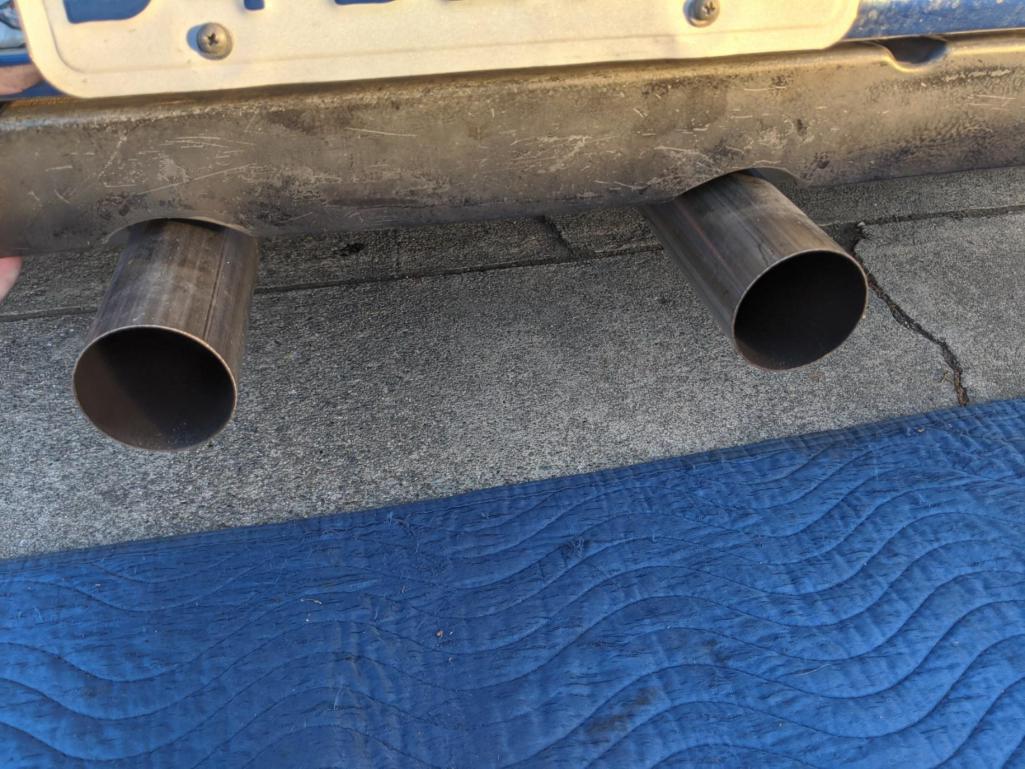
Posted by: tygaboy May 13 2021, 09:01 AM
@http://www.914world.com/bbs2/index.php?showuser=20897 Mark worked his paint magic and @http://www.914world.com/bbs2/index.php?showuser=3898 Robert is now sporting his zippy new valance that nicely compliments @http://www.914world.com/bbs2/index.php?showuser=9892 Ben's beautiful muffler.
I got to learn and try out a couple new shaping techniques so it was a win-win-win little project!
Attached thumbnail(s)
Posted by: Cairo94507 May 13 2021, 09:41 AM
That is absolutely perfect! I love the GT muffler with the modified valance.
Posted by: BuddyV May 13 2021, 09:58 AM
BIG thanks to Chris @http://www.914world.com/bbs2/index.php?showuser=19241 for creating this valance.
No.... it wasn't quick and easy. Chris has mad skills combined with an exacting eye. He made forms, pounded metal, used hammers that were made of various materials...... knocked it out of the park.
I decided to NOT patch the stock exhaust cutout because I sometimes swap out this beautiful dual SS exhaust for a stock 2.0 exhaust. Why? Well...... my aging ears "usually" love the roar of this the dual tip exhaust...... but on few occasions I have NEEDED a break...... takes 10 minutes to swap exhausts. Plus, if you know my car, you know that I like making things just a bit different. If it looks like it came from the factory, I will eventually change a small part of the design.
Glad I kept the stock opening. Makes you look twice.
Mark @http://www.914world.com/bbs2/index.php?showuser=20897 then offered to paint it! Took the valance to bare metal, repaired imperfections, primer, saning, primer, sanding..... paint.... sanding.... piant. WOW!
SO.... WTF did I do in this process? Well, I guesstimated where the cut outs would go..... and let me tell you, I was NOT sure of my template. I eyeballed it. Luckily, I was just about dead on. 
Don't ask how I widened and attached the sides to my flared fenders..... its embarrassingly simple and caveman-ish and simple to remove/attach. (but looks bitchin!)
Big thanks to Chris and Mark.
Posted by: DRPHIL914 May 14 2021, 09:49 AM
BIG thanks to Chris @http://www.914world.com/bbs2/index.php?showuser=19241 for creating this valance.
No.... it wasn't quick and easy. Chris has mad skills combined with an exacting eye. He made forms, pounded metal, used hammers that were made of various materials...... knocked it out of the park.
I decided to NOT patch the stock exhaust cutout because I sometimes swap out this beautiful dual SS exhaust for a stock 2.0 exhaust. Why? Well...... my aging ears "usually" love the roar of this the dual tip exhaust...... but on few occasions I have NEEDED a break...... takes 10 minutes to swap exhausts. Plus, if you know my car, you know that I like making things just a bit different. If it looks like it came from the factory, I will eventually change a small part of the design.
Glad I kept the stock opening. Makes you look twice.
Mark @http://www.914world.com/bbs2/index.php?showuser=20897 then offered to paint it! Took the valance to bare metal, repaired imperfections, primer, saning, primer, sanding..... paint.... sanding.... piant. WOW!
SO.... WTF did I do in this process? Well, I guesstimated where the cut outs would go..... and let me tell you, I was NOT sure of my template. I eyeballed it. Luckily, I was just about dead on.
Don't ask how I widened and attached the sides to my flared fenders..... its embarrassingly simple and caveman-ish and simple to remove/attach. (but looks bitchin!)
Big thanks to Chris and Mark.
i will eventually try and emulate this with a metal valance but for now i ordered a fiberglass one from 914rubber, its in , with no cut outs so i can modify the center for my center twin tips. I still have my single out left side OEM ones that will keep if i want to swap, because this twin center tip is bitchin but loud.
so for now just a quick cut out for my center twin tip will do, - that should be next week, for now and t his weekend's show, no valance!!! just bare naked showing off...


but for a proper metal one i will have to get someone with mad skills like this to do one for me...

Posted by: Morph914 May 14 2021, 11:04 AM
Nice work as always Chris! And second all the nice toys...
Powered by Invision Power Board (http://www.invisionboard.com)
© Invision Power Services (http://www.invisionpower.com)