Printable Version of Topic
Click here to view this topic in its original format
914World.com _ 914World Garage _ Engine drop
Posted by: dumbjim Nov 18 2020, 10:51 PM
Are there any good step by step tutorials that explaine how to drop your engine in your home garage without a lift? Thanks in advance
Posted by: Tdskip Nov 18 2020, 10:52 PM
Some on YouTube.
Try here too;
http://914world.com/bbs2/index.php?showtopic=241697
Posted by: AAZCD Nov 18 2020, 11:05 PM
I followed Ian Karr's DIY on Youtube the first time I did it. Clear and well presented.
https://youtu.be/FMesGrjgcvg
I also printed up a checklist from Pelican Parts to follow along in case I missed anything.
http://www.pelicanparts.com/techarticles/914_engine_drop/914_engine_drop.pdf
from here: https://www.pelicanparts.com/techarticles/914_engine_drop/914_engine_drop.htm
I'm a total 914 newb and it was pretty easy that way.
Posted by: iankarr Nov 18 2020, 11:58 PM
Glad the video is still helping people. Please be safe...and if you're using jackstands, make sure they're the pin-type (not ratcheting). Enjoy!
Posted by: Mcraneiowa Nov 19 2020, 07:08 AM

Are there any good step by step tutorials that explaine how to drop your engine in your home garage without a lift? Thanks in advance
Here are the steps I followed.for removing my Porsche 914 Engine
For the second time this summer I have removed the powertrain from my Porsche 914. The first time I followed another set of directions, which I feel were vital to getting the engine out and not running into problems along the way.
My thought process for removing the engine was to work in sections, from side to side, then underneath followed by dropping the engine.
Starting The Process
- I jacked my car up and used two jack stands on each side in case one failed. I did not jack up the front of the car. I removed the rear wheels but it is not necessary to do. I did, as I felt it gave me more room to work.
Starting on the Passenger Side
- Disconnected the connections to the battery.
- Disconnected the + (positive) lead group of wires and took the wire that runs to the starter and the wire that runs to the double relay and separated from the rest as these two follow the engine. (11MM socket)
- Removed the bolt holding the double relay to the side of the engine compartment. I found the plug connections on my newer double relay aren’t as tight and can work lose. The connections in my case are zip tied for the connections in order for the relay to maintain solid contact. (10MM socket)
- Unplugged the wire connection from the resistor block located under the battery tray rather than remove it from the car. I have been told after many years the wires in the resistor block can break from the resistors and have to be fixed, I thought then why bother it!
- Removed the fuel injection hose connections from the injectors (to make sure when I drop the engine, I didn’t snag them and rip the engine compartment seal.
- Disconnected the incoming fuel line from the body and moved the whole fuel rail assembly on top of the engine When you reinstall, if fuel hoses are old or questionable this will prove helpful prior to replacing since its already partially apart.
- Disconnected accelerator cable from engine and pushed it through tin opening to be under the car.
- Reached under the wheel well and slid the engine seal back as it is designed to grab the bottom side of the metal engine tray and if old will likely rip when lowering the engine. On a side note, I replaced mine earlier this summer when I had lowered the engine the first time, since I didn’t do this step then.
- Disconnected the heater box cable on passenger side and then the drivers side.
Drivers Side Process
- Removed air box assembly by unplugging the wired connection from the AFM
- Removed associated hoses for air box and hoses to charcoal canister.
- Unplugged electrical connections from circuit board. Starting with the pin connector, the yellow wire and the three wire connection that goes to the alternator. You do not need to remove the rest since they run with the car body.
- Disconnected the return fuel line from pressure regulator and took the long fuel hose, wound it up and zip tied it to the engine bay up and out of the way.
- Disconnected the fuel rail from the injectors and pressure regulator and put the fuel rail up on top of engine so it would be out of the way when I dropped the engine.
- Reached up underneath and pulled the engine seal from the underside of the engine tin like I did on the other side to prevent from ripping it when I lowered the engine.
- Covered all fuel openings with plastic caps (or electrical tape) to prevent any contamination from entering the openings.
Under The Car
- Disconnected speedo cable
- Disconnected Clutch cable and made sure to get both cables out of the way so that I could place them forward of the engine compartment. This way they are out of the way when I lower the engine.
- Disconnected ground strap (10MM socket)
- Disconnected shift linkage at transmission (4.5mm Allen wrench) and from engine firewall (4.5mm Allen wrench) Be sure not to strip these cone screws. I had one stripped at gearbox so I took a star point socket of similar size and slightly tapped in into the opening to that it could grab the cone screw and be removed. I will need to replace that damaged cone screw.
Note – the shift linkage bar will likely not come out as it may be tucked up and to high to remove. In my case, it was, so I removed as I lowered my engine.
- Disconnected the axles from the transmission. Be sure not to use a hex fitting as these require a star bit to remove. I purchased my set on Amazon for about $12. They work great. I did not remove the axles. I tied mine up. When I lowered the engine I had to be sure to pay attention that they were not getting caught on any engine components.
- Removed the transmission mounts from the body of the car, this way they don’t catch n the way down. Use second jack to support transmission.
At this point everything should be disconnected that needs to be disconnected.
- Place a portable hydraulic jack under the cross member for the engine and raise it until it is snug under the engine support
- Removed the cross member bolts one side at a time and replace with all thread rod with double nuts on top side to keep from backing out. My rods are about 15” long but you could use as short as 12”. Once both sides are done, I left the hydraulic jack under the mount and used my second jack for the transmission at the rear of the car. If you only had one jack this process could still be used with the jack used at the transmission towards the rear and you could thread the nuts down the rod with a wrench. Two jacks allowed me to lower the engine a few inches at a time and hand thread the nuts each time a few inches just in case the jack would ever slip, the rods would catch the engine. It also kept the engine level and didn’t have to worry about the engine slipping ofF a jack stand on the way down!
- I keep the transmission and engine pretty even throughout the Lowering process. Once I get it close enough to use my dollies (2) (picked up at Harbor Freight for about $20.00 each, as I use the heavier ones) I can place one under the engine making sure to miss vital components that you wouldn’t want a lot of weight to sit on and one at the transmission with the same thoughts about missing things that could break with that weight sitting on it.
Since the car is already 2/3 of the way jacked up, at this point I raised the passenger side car support jack as high as the jack could go and slowly slide the engine/transaxle out making sure not to catch on the axles or rear shroud at the back of the car. Once out it’s pretty easy to replace the wheels, remove the jacks and slowly roll the car out of the way.
The whole process, was about 3.5 hours. I know several people say they get it done in about two hours, but I was capturing this information and really not in much of a hurry. Good luck and if anyone reads this and notices I may have omitted a step in my process, please let me know. I want safety as my first concern and to not tear up components in the process. Good luck. Mike
Posted by: Ansbacher Nov 19 2020, 12:40 PM
If you're a chicken, like me, use RAMPS and chalk the front wheels. Also, ABSOLUTELY purchase the Tangerine Racing engine plate for your jack!
Ansbacher
Posted by: VaccaRabite Nov 19 2020, 02:07 PM
ABSOLUTELY purchase the Tangerine Racing engine plate for your jack!

This is the best advise you will get. Buy the engine lifting plate. If you have a tuna can, Chris make one with the cutout for the can. No problem.
Engine drops are easy, and when push comes to shove its 4 bolts holding it in there.
From the top (car on the ground):
Clamp and remove fuel from the tunnel to the engine.
Remove electric leads that run from the engine to the chassis.
unhook the throttle and push it (gently) out of the way.
Now jack up the car as high as it will go. Use jackstands and block your front wheels. You want a sold 20 inches from the back of the car to the ground.
Exhaust come off first. I remove the exhaust hanger first and let the muffler rest on some jack stands. And then do the exchangers and take everything out as one unit.
Undo the clutch cable.
Then the axles unbolt from the transmission. Put bags over the CVs to keep grease from going EVERYWHERE.
Now remove the shift rod from the firewall to the transmission.
Now get the ground strap on top of the transmission, and if you have a solinoid near your starter there is a ground and a power lead that needs to come loose.
With the jack and lifting plate under the engine, undo the big 4 bolts.
SLOWLY lower the engine or risk finding the tensile strength of the electric wire you missed along the way.
Never worry about how long it takes. It takes as long as it takes. if you don't have stuck bolts you can do this in about 4-5 hours the first time. If you do have stuck bolts or nuts (probably exhaust) then it ay take longer while you figure it out.
Zach
Posted by: TX914 Nov 19 2020, 06:40 PM
Definitely agree; get the Tangerine Lift Plate. I’ve used the furniture cart method in the past but the Tangerine plate on a good floor Jack is superior. And you can lift the motor at any time after it’s out to do odd jobs (just put some 2x4s under the crossbar to rest it on)
Posted by: TX914 Nov 19 2020, 08:04 PM
Put everything you take off in containers so you don’t lose anything and label if any doubt. After several days with the engine out you will forget things! Also, Plan to spend half your time cleaning stuff.
Posted by: AZBanks Nov 19 2020, 08:54 PM
I agree on the Tangerine Engine Plate. (TEP)
I modified TEP to make it work better with my floor jack. I also modified the stock floor jack plate. The floor jack plate was originally mounted to the jack in a way that wasn't meant to be removed. I modified it to be removable so I can swap the TEP.
The hole where the original plate mounted was not big enough for the solid cylinder stick down from the bottom of the TEP. I enlarged it to fit the TEP cylinder and then dirlled, cut and shaped the TEP cylinder to fit over the hoirizontal bar in the floor jack.
The pictures should tell the story better than words. I wish I had pictures before the modifications.
Original jack plate with black rubber insert.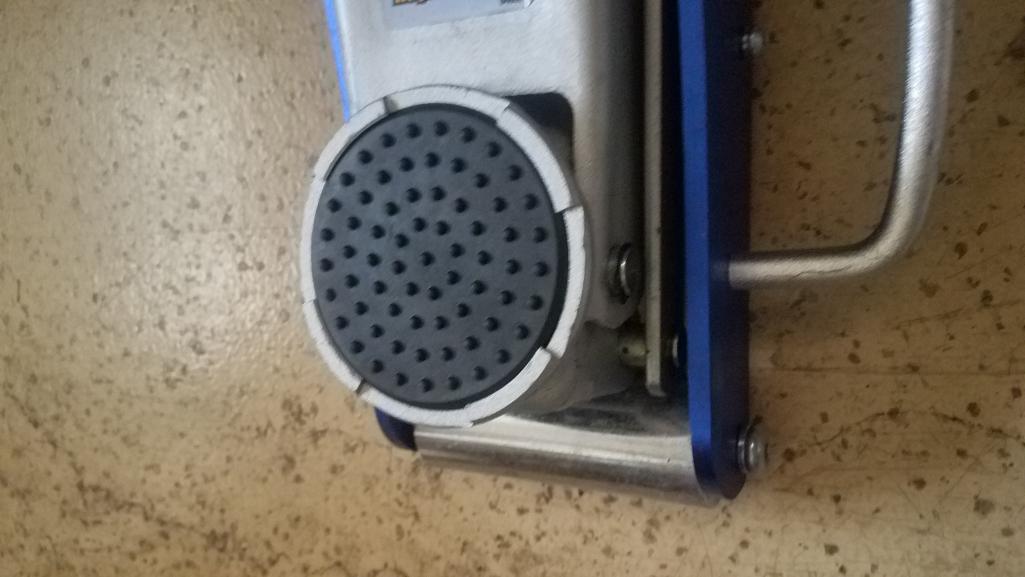
Posted by: AZBanks Nov 19 2020, 08:55 PM
modified plate mount to slide over horizontal bar
Attached thumbnail(s)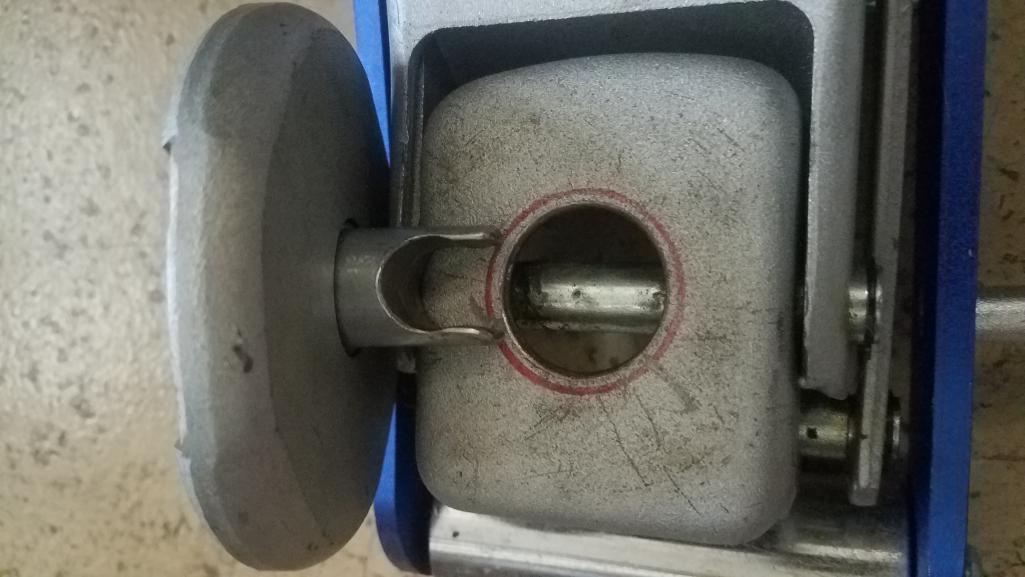
Posted by: AZBanks Nov 19 2020, 08:57 PM
Modified TEP to fit over horizontal bar and larger hole in jack
Attached thumbnail(s)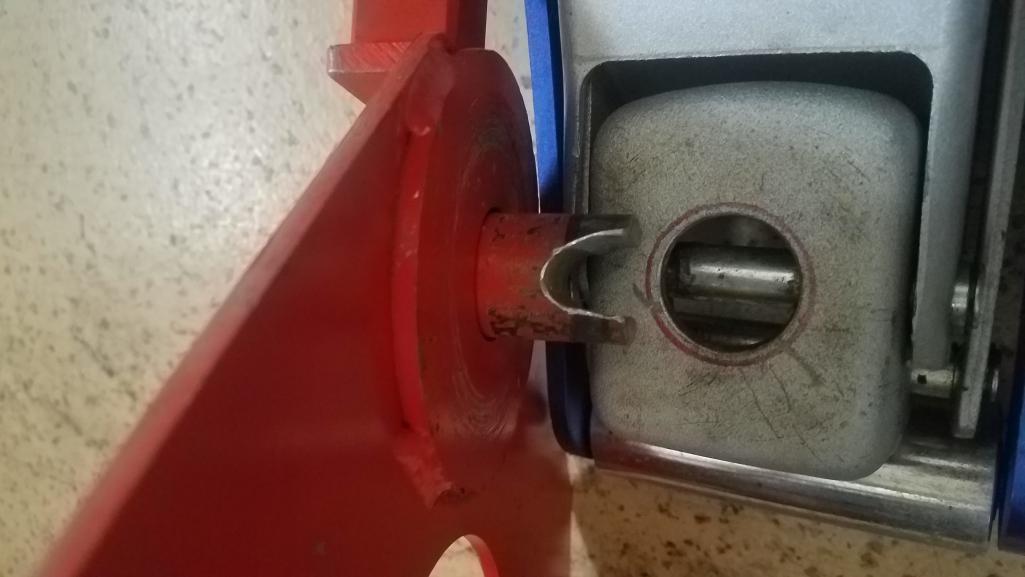
Posted by: AZBanks Nov 19 2020, 08:58 PM
TEP on floor jack. ROCK Solid!
Attached thumbnail(s)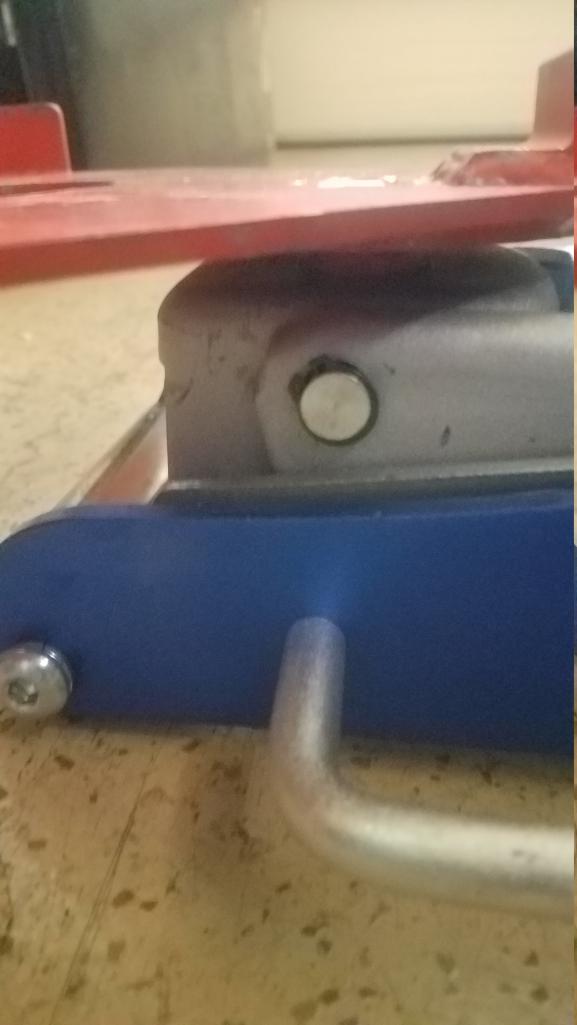
Posted by: AZBanks Nov 19 2020, 09:01 PM
Put everything you take off in containers so you don’t lose anything and label if any doubt. After several days with the engine out you will forget things! Also, Plan to spend 90% of your time cleaning stuff.
FIFY
Dropping the motor doesn't take much time. It is the cleaning of all the old oil, dirt, and grease that takes 90% of the time the first time you do this job.
If you stay up on the maintenance and don't let it get filthy again, you can drop it in a couple hours the next time.
These are specifically designed to be written on so they are great for storing small parts you take off.
https://www.amazon.com/Lansinoh-Breastmilk-Breastfeeding-Directly-Essentials/dp/B006XISCNA/ref=sr_1_4?dchild=1&keywords=breastmilk+bags&qid=1605841634&sr=8-4
Posted by: TX914 Nov 19 2020, 10:04 PM
TEP on floor jack. ROCK Solid!
That’s nice work @http://www.914world.com/bbs2/index.php?showuser=5245 . My craftsman jack had a similar horizontal pin that would not allow the TEF to sit down in the hole. I removed the pin and got a couple of carefully measured bolts to us in its place. That was a tip from Chris at Tangerine.
Posted by: AZBanks Nov 20 2020, 01:15 AM
TEP on floor jack. ROCK Solid!
That’s nice work @http://www.914world.com/bbs2/index.php?showuser=5245 . My craftsman jack had a similar horizontal pin that would not allow the TEF to sit down in the hole. I removed the pin and got a couple of carefully measured bolts to us in its place. That was a tip from Chris at Tangerine.
I had not spoken to Chris but I had the same general idea about replacing the pin with bolts. I was just worried about the jack losing some structural rigidity by replacing the solid pin. I can't see a real reason why it would but I decided to err on the side of caution.
Posted by: Stltri Nov 20 2020, 09:38 AM
TEP on floor jack. ROCK Solid!
That’s nice work @http://www.914world.com/bbs2/index.php?showuser=5245 . My craftsman jack had a similar horizontal pin that would not allow the TEF to sit down in the hole. I removed the pin and got a couple of carefully measured bolts to us in its place. That was a tip from Chris at Tangerine.
Can you provide the Craftsman jack model number? Most new floors jacks including all the Harbor Freight ones do not have a hole big enough to accomodate the Tangerine Plate bottom bar.
Posted by: TX914 Nov 20 2020, 10:56 AM
Can you provide the Craftsman jack model number? Most new floors jacks including all the Harbor Freight ones do not have a hole big enough to accomodate the Tangerine Plate bottom bar.
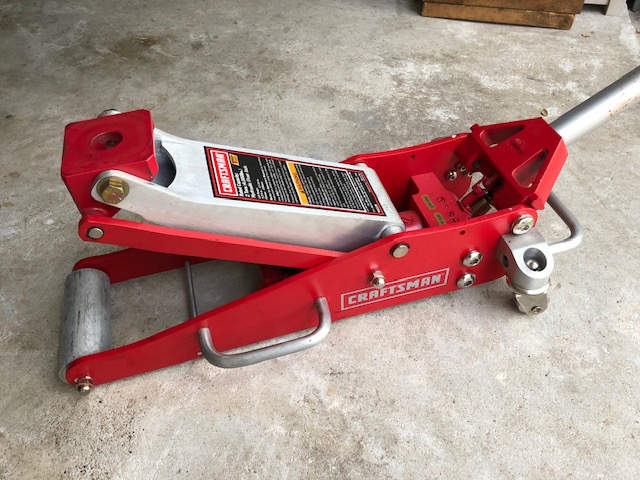
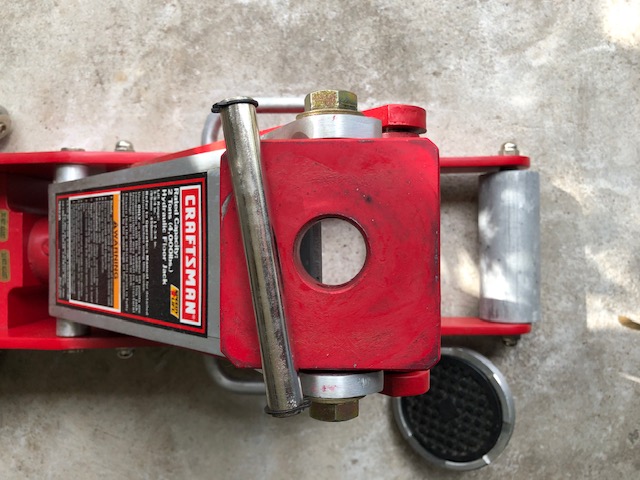
@http://www.914world.com/bbs2/index.php?showuser=18622 , I'm using a Craftsman 2-ton model 50239 - aluminum and fairly low profile. Perfect for the 914 but a little lite for my 4x4. Pictured also are the bolts I'm using in place of the pin for the Tangerine plate - 9/16 12-1 1/2G8 I believe with a nylon washer, but check. Could not get a nut on the back side so I hammered the threads flat on the upper portion so they would not move with weight on them. Worked fine.
Attached image(s)
Posted by: ChrisFoley Nov 20 2020, 11:04 AM
Can you provide the Craftsman jack model number? Most new floors jacks including all the Harbor Freight ones do not have a hole big enough to accomodate the Tangerine Plate bottom bar.
The HF jacks have a removable swivel plate that is held in place by a big allen shoulder screw (hidden under the rubber pad). My newer engine lift plates are designed to be held in place with that shoulder screw.
Posted by: Stltri Nov 20 2020, 11:52 PM
Can you provide the Craftsman jack model number? Most new floors jacks including all the Harbor Freight ones do not have a hole big enough to accomodate the Tangerine Plate bottom bar.
@http://www.914world.com/bbs2/index.php?showuser=18622 , I'm using a Craftsman 2-ton model 50239 - aluminum and fairly low profile. Perfect for the 914 but a little lite for my 4x4. Pictured also are the bolts I'm using in place of the pin for the Tangerine plate - 9/16 12-1 1/2G8 I believe with a nylon washer, but check. Could not get a nut on the back side so I hammered the threads flat on the upper portion so they would not move with weight on them. Worked fine.
Thanks. Looks like a discontinued Craftsman model, not sure which ones will accomodate the bottom bar, which I have on my Tangerine plate. Like Chris said, the newer version does not have the bottom bar but instead can be bolted on most newer floor jacks.
Posted by: ChrisFoley Nov 21 2020, 01:54 PM
I discovered a neat way to make an adapter for the original style lift plate, using a 914 part.
A rear wheel flange is close to the right size to start, and can easily be altered in a lathe to make a swivel base that can be screwed onto a jackpad.
Posted by: Wyvern Nov 21 2020, 02:24 PM
I used the Pelican step by step and the checklist .
This is the furniture dolly method and it worked GREAT.
Powered by Invision Power Board (http://www.invisionboard.com)
© Invision Power Services (http://www.invisionpower.com)