Printable Version of Topic
Click here to view this topic in its original format
914World.com _ 914World Garage _ DIY: Dansk Fuel Tank Mod
Posted by: BillJ Jan 26 2021, 03:20 PM
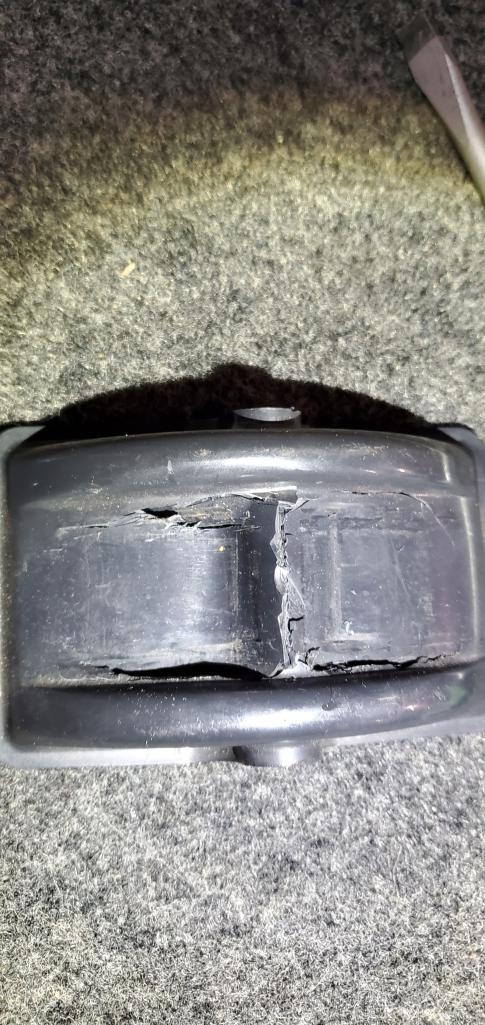
When i got my new fuel tank from Dansk it turns out that the rib that runs along the top of the tank is too tall for the mounting strap and guide. This means that when you tighten it down it does a beautiful job of destroying your plastic guide.
Attached thumbnail(s)
Posted by: BillJ Jan 26 2021, 03:26 PM
A fix is trim off some of the material under the guide but before you hit the weld. Start by marking where the ends of the plastic guide land then taking the tank out. 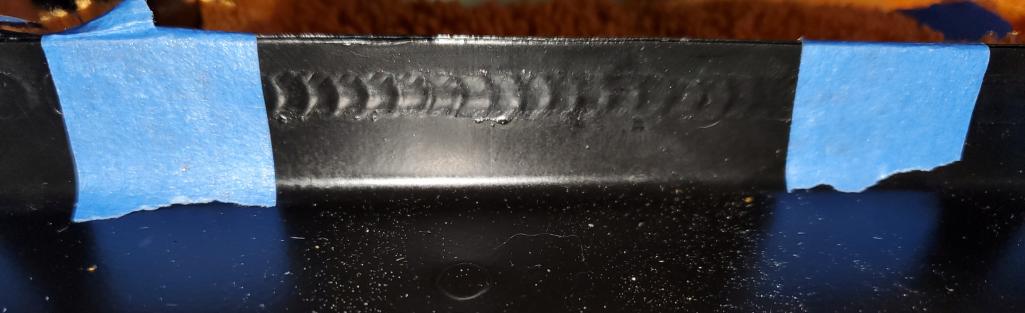
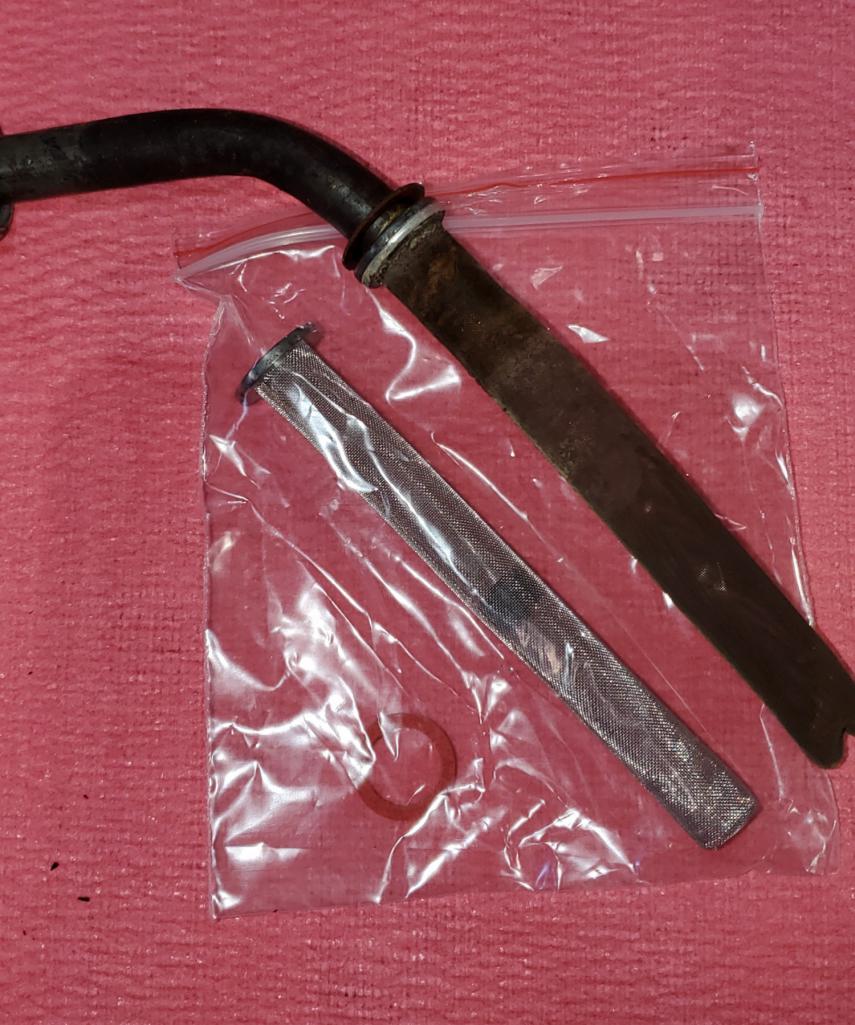
You should also replace the fuel filter screen that sits inside the tank if you havent already. I hadnt yet and bought a new one prior to putting fuel in the new tank. It was really brittle.and rusty. It tore to pieces taking it off.
Attached thumbnail(s)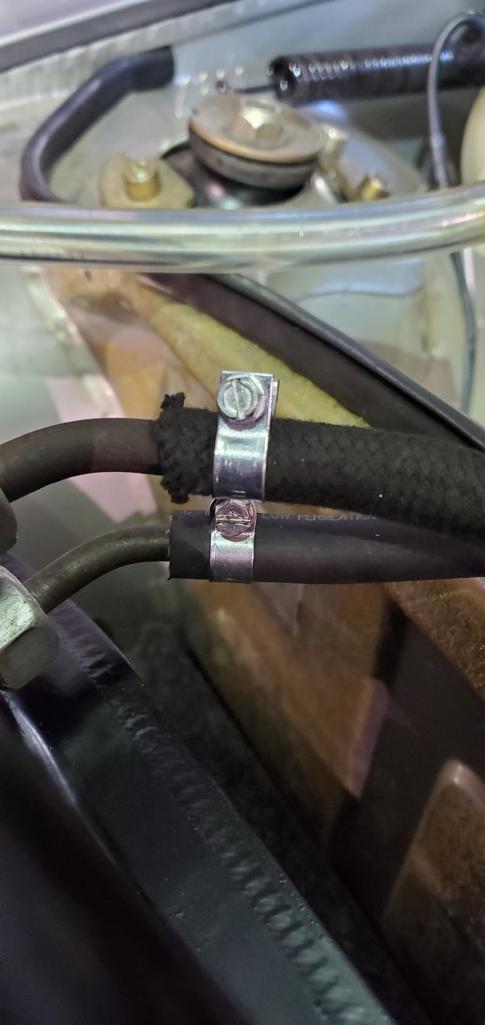

Posted by: aturboman Jan 26 2021, 03:31 PM
Had the same experience with my Dansk tank.
Since the car getting the repro tank isn’t concourse I shimmed the strap bridge with a couple thick pieces of flat rubber pad on each side to raise it enough to clear the taller seam. It’s hardly seen when installed. I did this because I already had my tank and everything else installed and painted and didn’t want to cut metal.
Posted by: BillJ Jan 26 2021, 03:38 PM
Next, using a cutting wheel in my case, carefully remove about 10mm or so of material off the rib. Just go slow. 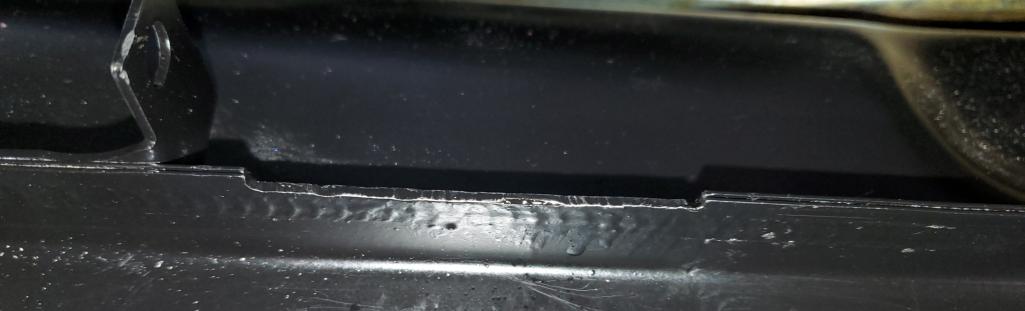
Once complete paint the exposed metal to prevent rust. Your car has enough already from the factory 
Then reassemble and take care to put the hoses back properly. I marked mine to make sure i did that right. Always use fuel line clamps. This is fuel. 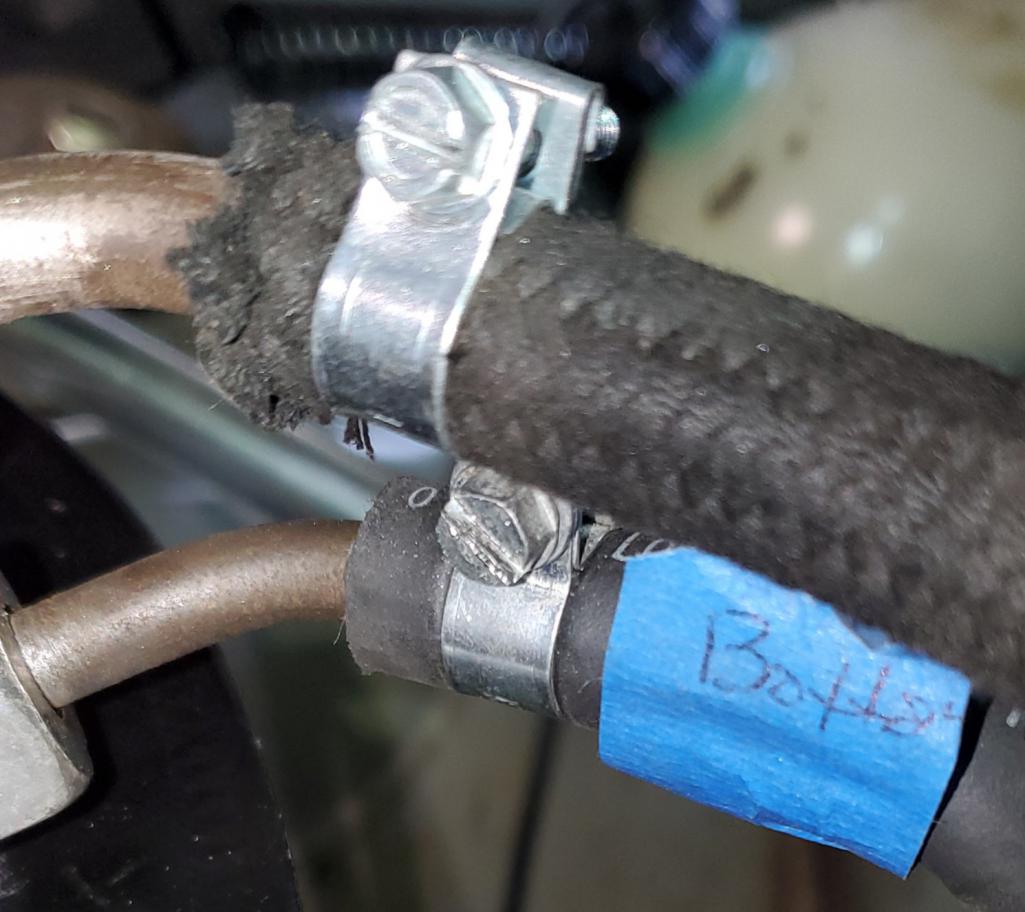
Install tank and enjoy a secure fuel tank. Hope this helps people to tackle this easy project. For me the growing amount of junk inside the old tank made this new tank a no brainer compared to hours of cleaning, sealing, and hoping it worked with the old tank.
Attached thumbnail(s)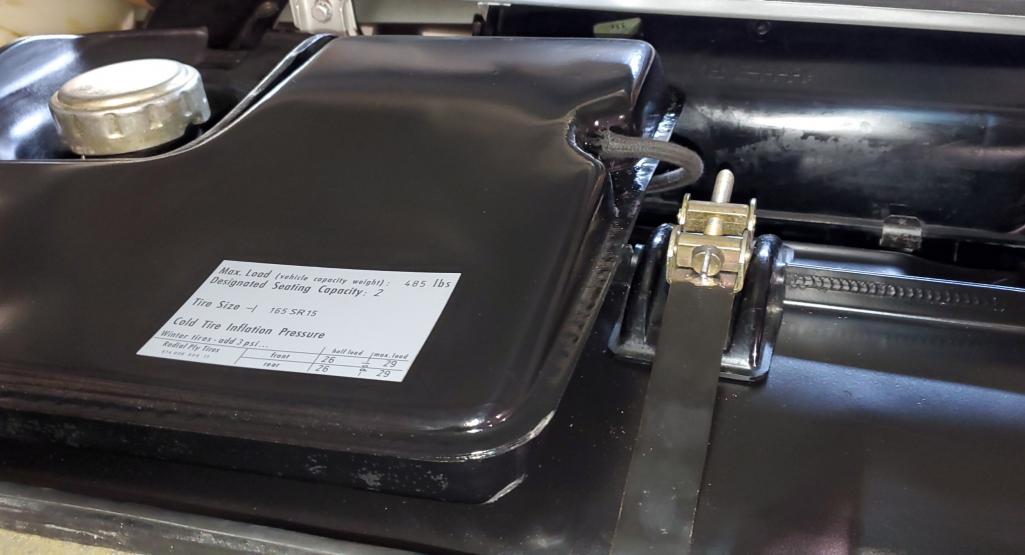
Posted by: BillJ Jan 26 2021, 03:45 PM
I will say you could probably do this with the tank still installed. I am just a chicken when it comes to fuel and hot sparks and metal. Also please note this is not intended to suggest YOU do this, just to illustrate how I did it.
Posted by: 914Sixer Jan 27 2021, 08:08 PM
What about gluing some rubber pads on to the plastic mount on both sides?
Piece of factory style carpet?
Posted by: raynekat Jan 27 2021, 09:53 PM

What about gluing some rubber pads on to the plastic mount on both sides?
Piece of factory style carpet?
Always a couple of ways to "skin a cat."
I think that would work as well, and a bit simpler to execute.
Posted by: BillJ Jan 27 2021, 10:59 PM
Of course if you do this to the tank when you first get it then you are just triming the rib and installing. Just showing an option and helping inform.
Powered by Invision Power Board (http://www.invisionboard.com)
© Invision Power Services (http://www.invisionpower.com)