Printable Version of Topic
Click here to view this topic in its original format
914World.com _ 914World Garage _ What Have I Done
Posted by: mteovr Feb 16 2021, 04:48 PM
Hello 914World -
This is Michael, also known as "That naive guy who bought a Porsche 914 project car to bring back to life while documenting the process on YouTube and HotCars.com."
https://www.youtube.com/watch?v=J-3nypC_odI&t=27s
https://www.youtube.com/watch?v=J-3nypC_odI
I've been lurking here on 914World for about a month since I bought the pile of parts. Happy to find so much knowledge and camaraderie, you've already provided me with optimism and inspiration in spades.
As you can see from the video and some of my articles, if you feel inclined to take a look, I clearly need professional help. And I mean both mechanically and psychologically, which is why I'm hoping to rely on the similarly afflicted fans of Porsche's maligned mid-engined masterpiece.
All alliteration aside (or not), glad to be here and please stop me if I'm doing something wrong before I hurt myself or others!
Thanks
Posted by: Superhawk996 Feb 16 2021, 05:05 PM

The good news is that you have a hoist. You're also working basically outdoors in sunny CA. Car is reasonably rust free.
Things could be a whole lot worse. 
Posted by: ndfrigi Feb 16 2021, 05:13 PM
Welcome to 914world. Sorry replied to your youtube and mentioned 914world which you are already registered here.
For sure you will get a lots of help here.
Posted by: Cairo94507 Feb 16 2021, 05:25 PM
That looks like a pretty nice car to start with. I think I would leave it on the lift and hose that thing down with Simple Green or some other degreaser and then agitate with a brush and spray it down again and then use a power washer to get as much crud as possible off then re-assess the chassis. But overall you seem to be pretty familiar with these cars, save for a couple items.
Definitely make sure the chassis is solid and any rust you may find is addressed before anything else is done. Keep posting pics/videos and people will be glad to make recommendations. No shortage of opinions on this site. 
Posted by: mark04usa Feb 16 2021, 05:30 PM
Enjoyed your video. Looks like a good solid car so far.
"WS washer reservoir" is shift linkage cover at firewall.
Horn contact is missing, and the rubber horn spring is perished. Looks like Koni shocks in rear...front shocks leaking...
Lots to do for a very worthy car.
Posted by: Jonathan Livesay Feb 16 2021, 05:47 PM

Hello 914World -
This is Michael, also known as "That naive guy who bought a Porsche 914 project car to bring back to life while documenting the process on YouTube and HotCars.com."
https://www.youtube.com/watch?v=J-3nypC_odI&t=27s
I've been lurking here on 914World for about a month since I bought the pile of parts. Happy to find so much knowledge and camaraderie, you've already provided me with optimism and inspiration in spades.
As you can see from the video and some of my articles, if you feel inclined to take a look, I clearly need professional help. And I mean both mechanically and psychologically, which is why I'm hoping to rely on the similarly afflicted fans of Porsche's maligned mid-engined masterpiece.
All alliteration aside (or not), glad to be here and please stop me if I'm doing something wrong before I hurt myself or others!
Thanks
If nobody else told you yet that other motor crossbar is what you need if you go with the sideshift trans. Also a different shift linkage from lever to trans. some of which it looks like came with the newer trans. If you're going to be working under the car on the lift I would pull those drive axles out otherwise you will for sure hit your head on one at some point, ask me how I know. If you are going to roll it around much or tow it anywhere take the stub axles off the ends of the axles and push them through the hubs, without them the wheels are only held on by the wheelbearings. Where in LA are you?
Posted by: mepstein Feb 16 2021, 06:02 PM
Posted by: Coondog Feb 16 2021, 06:09 PM
Did you shoot that video at Vince's shop in Hesperia ?
Posted by: ValcoOscar Feb 16 2021, 06:10 PM
Great start, gave your video 
Keep up the momentum
O
Posted by: iankarr Feb 16 2021, 06:52 PM
Fun video! Subscribed and looking forward to your adventures.
Welcome to the addiction. Seriously. Just wait!
Posted by: bandjoey Feb 16 2021, 07:31 PM
looks like the interior cabin light is one of the most sought after parts on the 914  White switch and chrome
Overall a good project car looks like Will enjoy following.
Posted by: bkrantz Feb 16 2021, 08:49 PM
You car looks pretty good. Welcome to the asylum.
Oh, and nice color!
Posted by: bbrock Feb 16 2021, 08:58 PM
Love the video. You say the car looks rough, I see a dream project car. Nice! A couple things. You need to pull the rocker cover panels off before you can declare victory over any major rust issues but so far it looks really clean. Also, the floor pans are covered with tar mats that can hide rust. You'll need to remove that tar before you know if the floor is truly rust free. Again, looking at the bottom, I think you are in great shape. Finally, those bondo bubbles are little pieces of history. Common body repair practice in the 70s and 80s was to swiss cheese panels full of holes so the bondo would "key" in. It is a nightmare for future rust problems and loads of fun to weld all those holes shut. I lost count how many I welded up on my car.
Looking forward to seeing this progress 
Posted by: Charles Freeborn Feb 16 2021, 09:07 PM
Good solid core car. Form a strategy based on money then break it down by priority and category (looks, performance, etc)
Send all the calipers to PMB, get in touch with 914 Rubber for all the trim and some of the mechanical bits, the trans to Dr. Evil and consider having the engine work done by European Motorworks. For your first one it's best to have the core mechanicals done by a pro and follow along. Then, after you've seen how they work tackle one on your own.
Your biggest engine decision is going to be if you stick with the 4 bolt heads or drop the cash for 3 bolt 2.0 type. You've already got the carbs, so with 3 bolt heads, a decent cam and fresh p/c's you'll have a nice runner.
Posted by: mteovr Feb 17 2021, 10:47 AM
Thanks all for the comments and advice already!
Since I filmed the vid, have done much more internet sleuthing, deduced the extra engine crossbar is for the side-shift conversion, and already planning to have the calipers rebuilt by PMB.
Placed a few orders with 914Rubber for interior and bushings and etcs, planning to have the motor and side-shift trans rebuilt by pros, especially as unsure what all is going on in there and absolutely zero records from previous owner.
@http://www.914world.com/bbs2/index.php?showuser=3086 Freeborn - excellent to learn about European Motorworks, will contact them immediately. My priority is getting the mechanicals sorted balancing between budget and performance as much as possible. Then move on to cosmetics and correctness over time. For the engine rebuild, had been previously debating Brothers VW Machine Shop in Ontario or BajaWorx in Yucca Valley. For transaxle was planning to drive it down to California Motorsports in Havasu. Trying to keep it as local as possible, but do you know where Dr. Evil might be located?
@http://www.914world.com/bbs2/index.php?showuser=10805 - great to know about the shift linkage cover and horn, have ordered new shocks all around, plus mounts, bushings, etc for the rear to get that done before the drivetrain returns.
@Jonathan Livesay - already tugged out one of the axles in the vid. That was entirely unexpected, though, you shoulda seen my face! But good advice for the stubs, will get on that ASAP, thank you.
@http://www.914world.com/bbs2/index.php?showuser=19195 - no, but I'm close to Hesperia and there's someone on Craigslist selling lots of 914 parts there, perhaps this is Vince? In the plans to get in touch.
@http://www.914world.com/bbs2/index.php?showuser=20845 - don't like the sound of that, uh oh!
@all - the warm welcome helps a lot and please keep the advice coming. I'm an absolute amateur and this will no doubt take much longer and cost much more than expected, so anything and everything that can save me headaches is greatly appreciated.
Posted by: bbrock Feb 17 2021, 10:55 AM
@http://www.914world.com/bbs2/index.php?showuser=20845 - don't like the sound of that, uh oh!
Ha! I wouldn't lose any sleep. So far the car looks fantastic and if you had major repair work to do, it would already be obvious. My prediction is the worst you are likely to find on that car is maybe a jack point or two to repair or replace (no big deal) and a few spots of rust bubbling under the floor tar that can be treated and sealed before they grow into a larger problem. If it was already bad, I think you'd be seeing some evidence on the bottom side.
One other thing from your vid. Those positive battery cables are actually stock. They are the power supplies for the main harness. You are missing the large positive cable with traditional lead clamp from battery to starter. Those mystery cables bolt to the side of the lead clamp via a little terminal block. 914Rubber sells repros of the block.
You should be dancing a jig for having a 914 that solid to work on!

Posted by: PanelBilly Feb 17 2021, 11:40 AM
You've got a great car for starting a restoration. There's work to be done and a fair amount of checks to write, but the core car looks great to me. Its too bad that its already been taken apart and you don't have the benefit of seeing how things originally fit, but there's plenty of photos on this site to help guide the assembly. Take a close look at the sail panels where they meet the body for rust. Little bubbles on the outside are likely larger rust areas on the inside. You need to look up from the wheelwell and its a bit tight, but with a good light you should be able to check it out
and Welcome to the World
Posted by: Mikey914 Feb 17 2021, 11:53 AM
Looks pretty rust free. That will cut your restoration time and cost in half.
Posted by: mteovr Feb 17 2021, 05:42 PM
@http://www.914world.com/bbs2/index.php?showuser=20845 - don't like the sound of that, uh oh!
Ha! I wouldn't lose any sleep. So far the car looks fantastic and if you had major repair work to do, it would already be obvious. My prediction is the worst you are likely to find on that car is maybe a jack point or two to repair or replace (no big deal) and a few spots of rust bubbling under the floor tar that can be treated and sealed before they grow into a larger problem. If it was already bad, I think you'd be seeing some evidence on the bottom side.
One other thing from your vid. Those positive battery cables are actually stock. They are the power supplies for the main harness. You are missing the large positive cable with traditional lead clamp from battery to starter. Those mystery cables bolt to the side of the lead clamp via a little terminal block. 914Rubber sells repros of the block.
You should be dancing a jig for having a 914 that solid to work on!
The jack points are obviously hard to show when the car's up on the lift but amazingly, they're all pretty pristine. It's truly wild how some things on the car are in great shape and some aren't. The battery cables and block/clamp unit could very well be in the parts pile somewhere, will have to scour the web for what they actually look like. So far a perfunctory Googling doesn't ring any bells. But can't trust my memory...
Also, any advice on a solvent for the floor mat tar? Or just a good scrubbing?
@all - I'm keeping every and all suggestions as a list in a spreadsheet, so please, keep 'em coming!
Posted by: mteovr Feb 17 2021, 05:45 PM
Oh, and I split time between Santa Monica and the high desert near Pearblossom...
Which will only contribute to extensive confusion, work delays, and my typical pastime of hoarding parts bought online and then installing in bunches. Oh boy.
Posted by: Superhawk996 Feb 17 2021, 06:11 PM
Also, any advice on a solvent for the floor mat tar? Or just a good scrubbing?
If it is absolutely solidily adhered to the sheetmetal I wouldn't disturb it. However, that is rarely the case as @http://www.914world.com/bbs2/index.php?showuser=20845 alluded to.
If if needs to come off due to rust underneath it will either come off in big chunks easily with a putty knife, or it won't, and you'll be hating life.
Trying to disolve it with chemicals like laquer thinner is a huge mess. Heating it with a propane torch is a huge stinky mess. I've heard of some freezing it (bags of ice) and smacking it so it cracks delaminates. Never tried it personally.
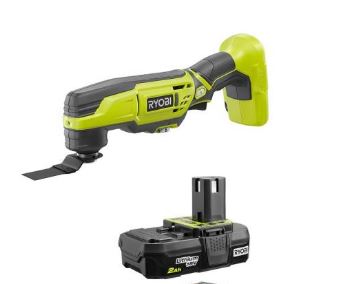
Personally, I've found best tool is vibratory multi-tool with a wide scraper blade. Something like this. HF has cheaper version of both the tool and blades. Still takes hours of work.
Posted by: 930cabman Feb 17 2021, 06:14 PM
Looks pretty rust free. That will cut your restoration time and cost in half.
True and True. With your savings you can do a /6 conversion.
Welcome aboard
Posted by: Jonathan Livesay Feb 17 2021, 06:31 PM
The jack points are obviously hard to show when the car's up on the lift but amazingly, they're all pretty pristine. It's truly wild how some things on the car are in great shape and some aren't. The battery cables and block/clamp unit could very well be in the parts pile somewhere, will have to scour the web for what they actually look like. So far a perfunctory Googling doesn't ring any bells. But can't trust my memory...
Also, any advice on a solvent for the floor mat tar? Or just a good scrubbing?
@all - I'm keeping every and all suggestions as a list in a spreadsheet, so please, keep 'em coming!
If none of the floor looks worse than what I could see in the video and there's no rust spots visible from underneath (when it's on the lift take an awl or icepick to any suspect looking areas of the floor pan from underneath) I would be tempted to leave the tar stuff in place. Unless you need to do any rust repair why remove the original soundproofing material (which is a lot of work) only to then replace it with new soundproofing material?
This isn't it exactly but what you are looking for for the battery + clamp is something like this. https://www.stoddard.com/91461131100.html.html
Posted by: Coondog Feb 17 2021, 06:38 PM
Oh, and I split time between Santa Monica and the high desert near Pearblossom...
Which will only contribute to extensive confusion, work delays, and my typical pastime of hoarding parts bought online and then installing in bunches. Oh boy.
Yes, Vince lives in Wrightwood but his shop is in Hesperia. He is a great guy and his parts are very reasonable. Just need to give him a little time as he has several conex box’s full of parts.
Posted by: bbrock Feb 17 2021, 07:57 PM
Also, any advice on a solvent for the floor mat tar? Or just a good scrubbing?
It can be a tough call whether to remove the tar but here is why I would always remove for an extensive resto. My floor was rusted badly and it was obvious by looking from the bottom the floor would need replaced. But notice the rust forming at the bottom of the bead channel to the left of the drain plug.
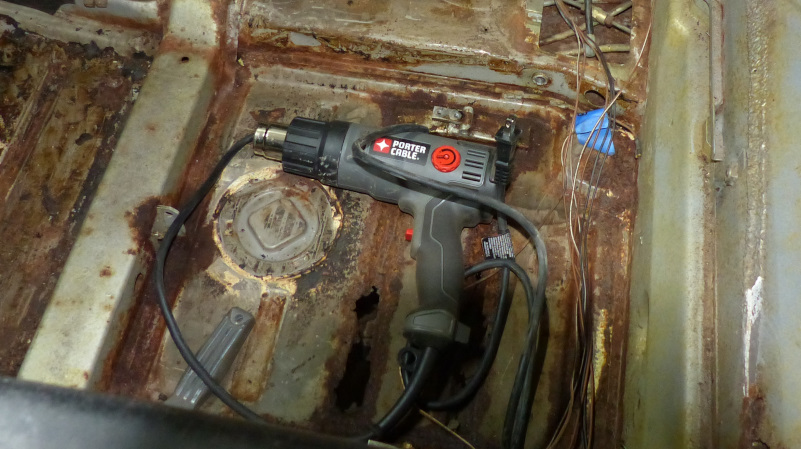
That area looked solid from the bottom of the car and the tar looked pristine and well-adhered on top. However, removing the tar revealed surface rust forming underneath. I cannot say if the same kind of surface rust would be found in a car with a fully solid floor, or how long it would have taken for that surface rust to cause any problems. But with the amount of time I spent restoring the car, removing the tar and knowing I was starting with a clean floor would have been worth the minimal time spent even if the floor was otherwise pristine. A plus is it gives an excuse to replace the tar with a modern constrained layer sound deadening product like Noico.
The best way I've heard for removing the tar is to toss dry ice on the floor and bust the tar up with a hammer. @http://www.914world.com/bbs2/index.php?showuser=24031 has hands down the best video you will ever see on the subject (notice the rust under her tar too):
https://www.youtube.com/watch?v=5CkzsJjp6yI
I went a different route and it wasn't bad. I used a heat gun and putty knife but you don't want to melt the tar. Instead, you just warm it up enough you can pry it off with a putty knife. When you get the temp right, it comes up in big flakes.
Posted by: flipb Feb 17 2021, 08:31 PM
Welcome to the madness, @http://www.914world.com/bbs2/index.php?showuser=25115
I commented on your IG post a while back about the site. Your teener looks like it'll clean up pretty well. You can look forward to the indelible grin you'll have driving it one day with the added satisfaction of having gotten it serviceable through your own sweat equity.
Posted by: bkrantz Feb 17 2021, 08:37 PM
Looks pretty rust free. That will cut your restoration time and cost in half.
True, Mark, but that misses out on the true 914 restoration fun.

Posted by: Charles Freeborn Feb 17 2021, 09:56 PM
Thanks all for the comments and advice already!
Since I filmed the vid, have done much more internet sleuthing, deduced the extra engine crossbar is for the side-shift conversion, and already planning to have the calipers rebuilt by PMB.
Placed a few orders with 914Rubber for interior and bushings and etcs, planning to have the motor and side-shift trans rebuilt by pros, especially as unsure what all is going on in there and absolutely zero records from previous owner.
@http://www.914world.com/bbs2/index.php?showuser=3086 Freeborn - excellent to learn about European Motorworks, will contact them immediately. My priority is getting the mechanicals sorted balancing between budget and performance as much as possible. Then move on to cosmetics and correctness over time. For the engine rebuild, had been previously debating Brothers VW Machine Shop in Ontario or BajaWorx in Yucca Valley. For transaxle was planning to drive it down to California Motorsports in Havasu. Trying to keep it as local as possible, but do you know where Dr. Evil might be located?
@http://www.914world.com/bbs2/index.php?showuser=10805 - great to know about the shift linkage cover and horn, have ordered new shocks all around, plus mounts, bushings, etc for the rear to get that done before the drivetrain returns.
@Jonathan Livesay - already tugged out one of the axles in the vid. That was entirely unexpected, though, you shoulda seen my face! But good advice for the stubs, will get on that ASAP, thank you.
@http://www.914world.com/bbs2/index.php?showuser=19195 - no, but I'm close to Hesperia and there's someone on Craigslist selling lots of 914 parts there, perhaps this is Vince? In the plans to get in touch.
@http://www.914world.com/bbs2/index.php?showuser=20845 - don't like the sound of that, uh oh!
@all - the warm welcome helps a lot and please keep the advice coming. I'm an absolute amateur and this will no doubt take much longer and cost much more than expected, so anything and everything that can save me headaches is greatly appreciated.
Ask George at European about trans work too. He'll know.
Or, here's a thread about 914 boxes with Dr. Evil contact, etc.
http://www.914world.com/bbs2/index.php?showtopic=257269
Posted by: TINKERGINEERING Feb 24 2021, 11:44 AM
Good Luck!
In the end a heat gun and a putty knife. should have tried that first. definitely wasn't as much fun though!
Posted by: TINKERGINEERING Feb 24 2021, 11:44 AM
Also, any advice on a solvent for the floor mat tar? Or just a good scrubbing?
It can be a tough call whether to remove the tar but here is why I would always remove for an extensive resto. My floor was rusted badly and it was obvious by looking from the bottom the floor would need replaced. But notice the rust forming at the bottom of the bead channel to the left of the drain plug.
That area looked solid from the bottom of the car and the tar looked pristine and well-adhered on top. However, removing the tar revealed surface rust forming underneath. I cannot say if the same kind of surface rust would be found in a car with a fully solid floor, or how long it would have taken for that surface rust to cause any problems. But with the amount of time I spent restoring the car, removing the tar and knowing I was starting with a clean floor would have been worth the minimal time spent even if the floor was otherwise pristine. A plus is it gives an excuse to replace the tar with a modern constrained layer sound deadening product like Noico.
The best way I've heard for removing the tar is to toss dry ice on the floor and bust the tar up with a hammer. @http://www.914world.com/bbs2/index.php?showuser=24031 has hands down the best video you will ever see on the subject (notice the rust under her tar too):
https://www.youtube.com/watch?v=5CkzsJjp6yI
I went a different route and it wasn't bad. I used a heat gun and putty knife but you don't want to melt the tar. Instead, you just warm it up enough you can pry it off with a putty knife. When you get the temp right, it comes up in big flakes.
Thanks it was fun!!
Posted by: mrholland2 Feb 24 2021, 04:40 PM
Also, any advice on a solvent for the floor mat tar? Or just a good scrubbing?
It can be a tough call whether to remove the tar but here is why I would always remove for an extensive resto. My floor was rusted badly and it was obvious by looking from the bottom the floor would need replaced. But notice the rust forming at the bottom of the bead channel to the left of the drain plug.
That area looked solid from the bottom of the car and the tar looked pristine and well-adhered on top. However, removing the tar revealed surface rust forming underneath. I cannot say if the same kind of surface rust would be found in a car with a fully solid floor, or how long it would have taken for that surface rust to cause any problems. But with the amount of time I spent restoring the car, removing the tar and knowing I was starting with a clean floor would have been worth the minimal time spent even if the floor was otherwise pristine. A plus is it gives an excuse to replace the tar with a modern constrained layer sound deadening product like Noico.
The best way I've heard for removing the tar is to toss dry ice on the floor and bust the tar up with a hammer. @http://www.914world.com/bbs2/index.php?showuser=24031 has hands down the best video you will ever see on the subject (notice the rust under her tar too):
https://www.youtube.com/watch?v=5CkzsJjp6yI
I went a different route and it wasn't bad. I used a heat gun and putty knife but you don't want to melt the tar. Instead, you just warm it up enough you can pry it off with a putty knife. When you get the temp right, it comes up in big flakes.
So this is ultimately cool. One of the (if not the) currently youngest members is now an example for a new member on how to do stuff. . I don't know about y'all, but I think that's terrific!!
Posted by: bbrock Feb 24 2021, 05:52 PM
Good Luck!
In the end a heat gun and a putty knife. should have tried that first. definitely wasn't as much fun though!
It wouldn't have been as much fun for us either! I love all your vids, but that one is my favorite.
Powered by Invision Power Board (http://www.invisionboard.com)
© Invision Power Services (http://www.invisionpower.com)