Printable Version of Topic
Click here to view this topic in its original format
914World.com _ 914World Garage _ Just another newbie opening a can of worms
Posted by: Galen May 25 2021, 03:20 PM
Episode 1: The Beginning
This whole saga started when I saw the nose of a 914 sitting in my neighbor's garage. I asked Keith about it, but he told me he had just sold it. About 6 months later, Keith told me the buyer never came through and asked if I wanted it. Of course I did.
I paid Keith $2,500 and we literally pushed it from his house to mine. It had been off the road in his garage for over 10 years. He did turn the engine over every once in a while. When I got it, it turned over easily by hand.
Here it is as I got it in May of 2020.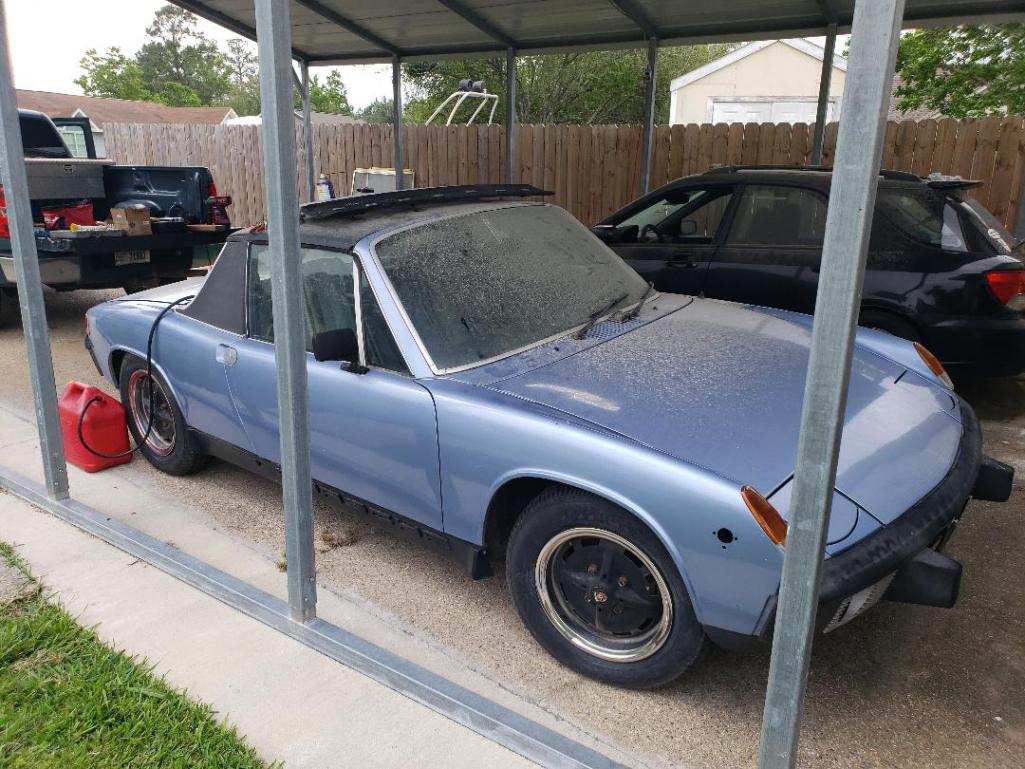
And the engine shot. It is a 2.0 liter that he had rebuilt just before parking it. 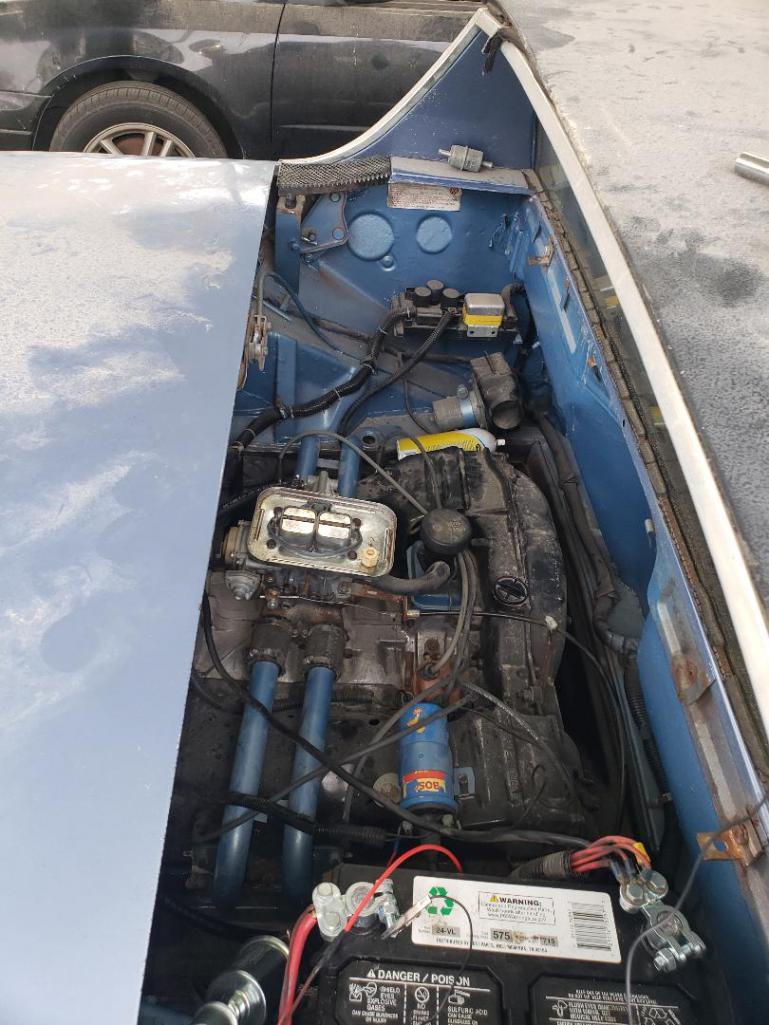
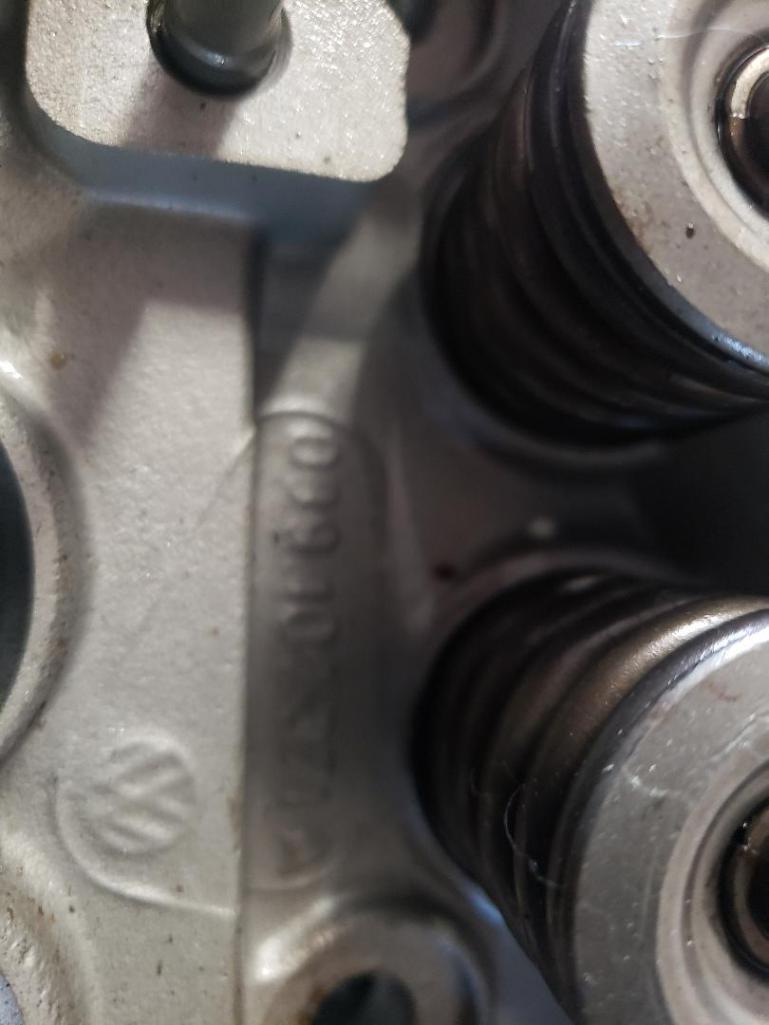
Here is the block number.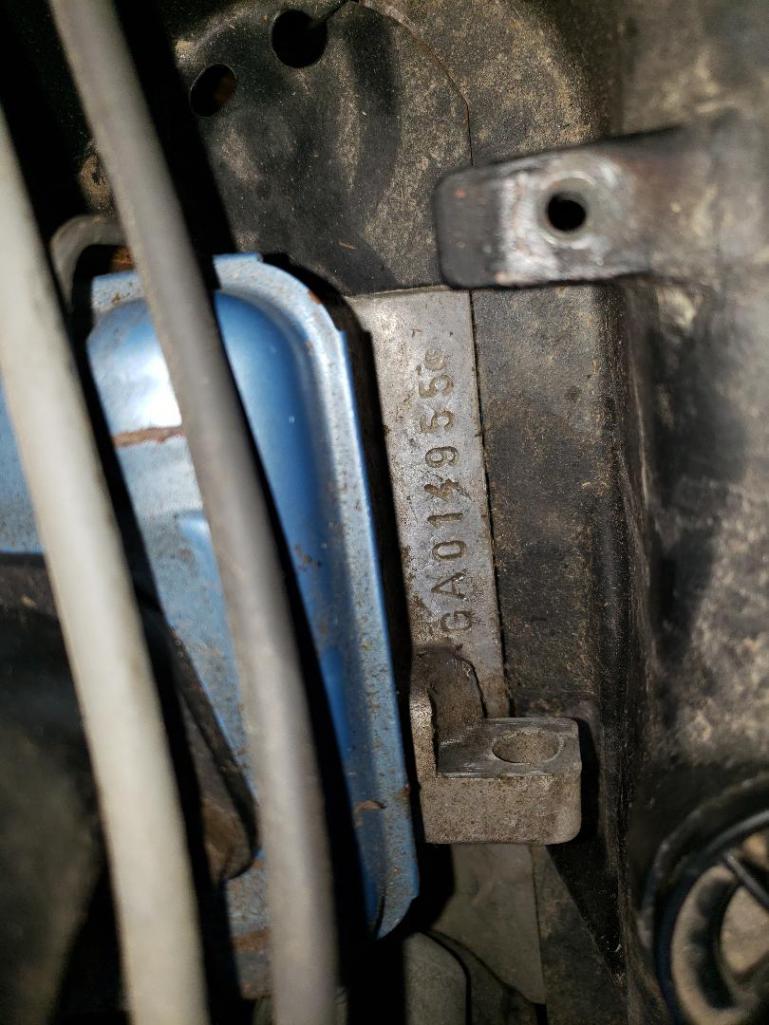
We added fuel and a battery and were able to get it to start right up.
Here it sat for most of the summer until early October when I wanted to get it ready for Cruising the Coast down here in Biloxi. I moved it to my shop where I could do minor things to get it running. It seems I was overly optimistic.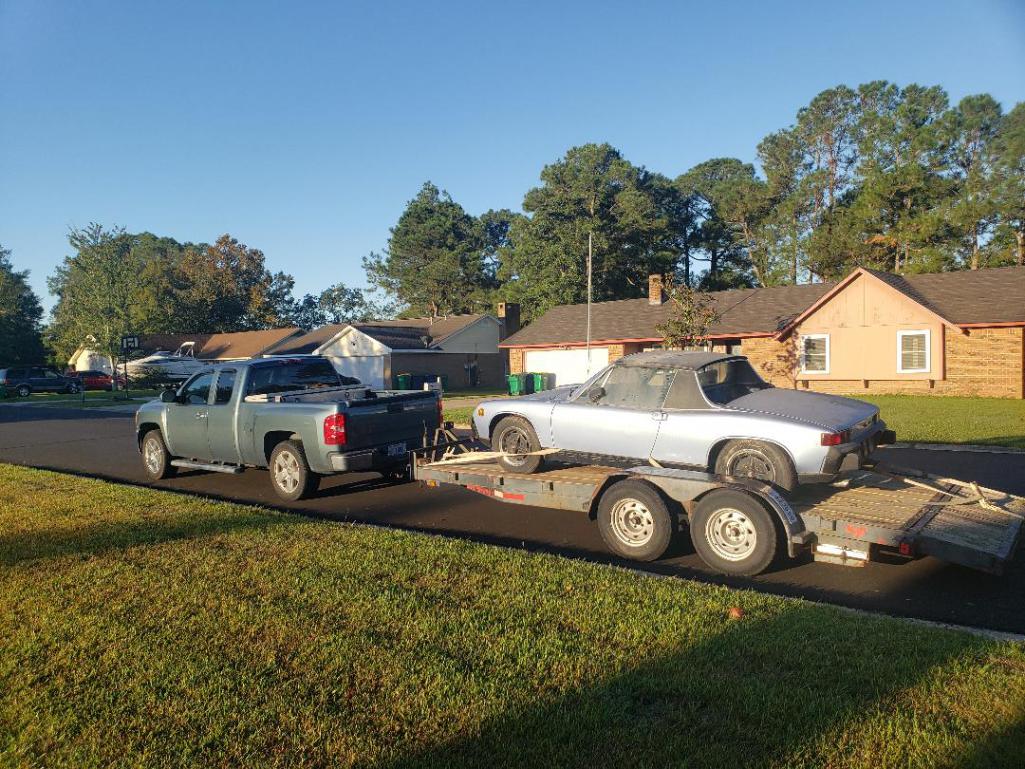
And here is it's new home for the last 6 months!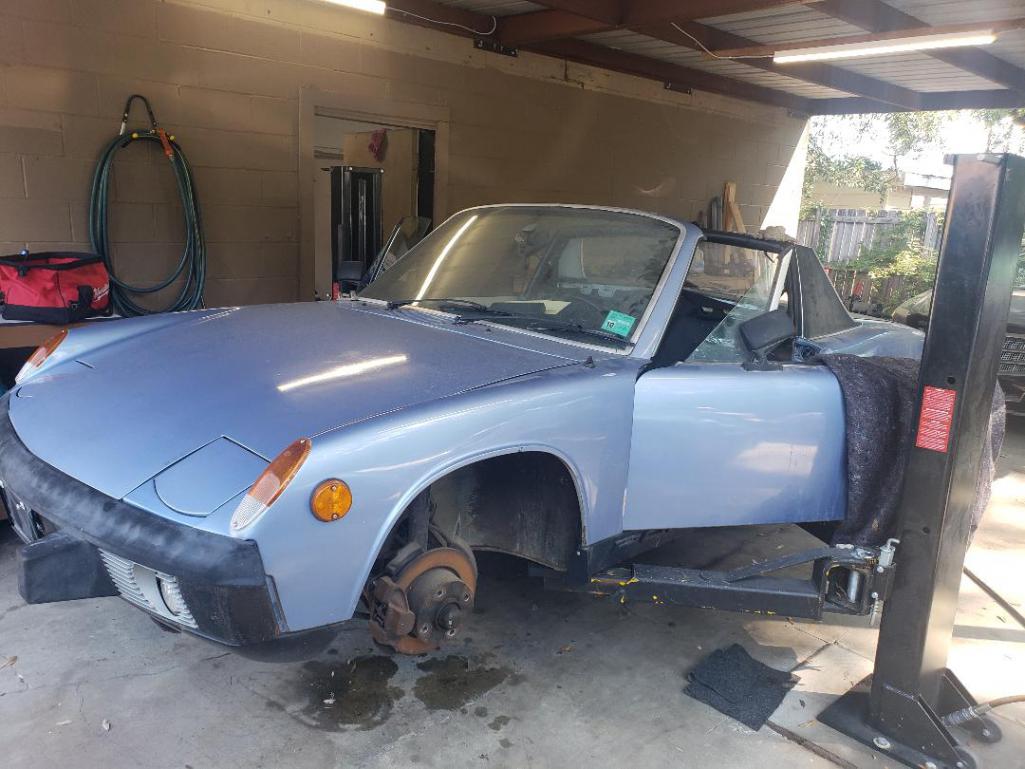
And, the story will continue when I have a chance to post.
Galen
Posted by: Root_Werks May 25 2021, 04:01 PM
Love the color!
Posted by: mepstein May 25 2021, 04:22 PM

Posted by: Coondog May 25 2021, 04:44 PM

Love the color!
2nd that

Posted by: 930cabman May 25 2021, 04:55 PM
Welcome aboard and great find.
She looks like Marathon Blue.
First drive?
Posted by: bbrock May 25 2021, 05:15 PM
This whole saga started when I saw the nose of a 914 sitting in my neighbor's garage...
Best pick up line for this group I've ever read

![popcorn[1].gif](style_emoticons/default/popcorn[1].gif)
Posted by: Front yard mechanic May 25 2021, 06:48 PM
Not sure weather you should thank Kieth or curse him  enjoy
enjoy
Posted by: Mikey914 May 25 2021, 06:55 PM
Welcome to the sickness!
At least you found a good therapy group here (or enablers)
Posted by: SO.O.C914er May 25 2021, 07:17 PM
welcome to the mid-engine madness and enjoy the journey!
Posted by: mrholland2 May 25 2021, 07:34 PM
I'm still looking for the worms. 
Posted by: StarBear May 25 2021, 07:53 PM
Welcome  ! Sweet ride. Another 914 soul saved.
Posted by: 914-300Hemi May 25 2021, 08:03 PM
Welcome to the addiction. Looks like a great project.
Posted by: krazykonrad May 26 2021, 07:30 AM
You've come to the right place.
Posted by: Big Len May 26 2021, 08:29 AM
You have a lift, so that's half the battle. Good luck.
Posted by: Puebloswatcop May 26 2021, 08:35 AM
Man, You really scored a good looking car. Welcome to 914 Madness.
Posted by: Galen May 26 2021, 08:39 AM
Episode 2: Finding the can
My neighbor had told me that there was some fiberglass in the floorboard of the car, but it wasn't until I put the car in the air that I saw the extent of the damage. 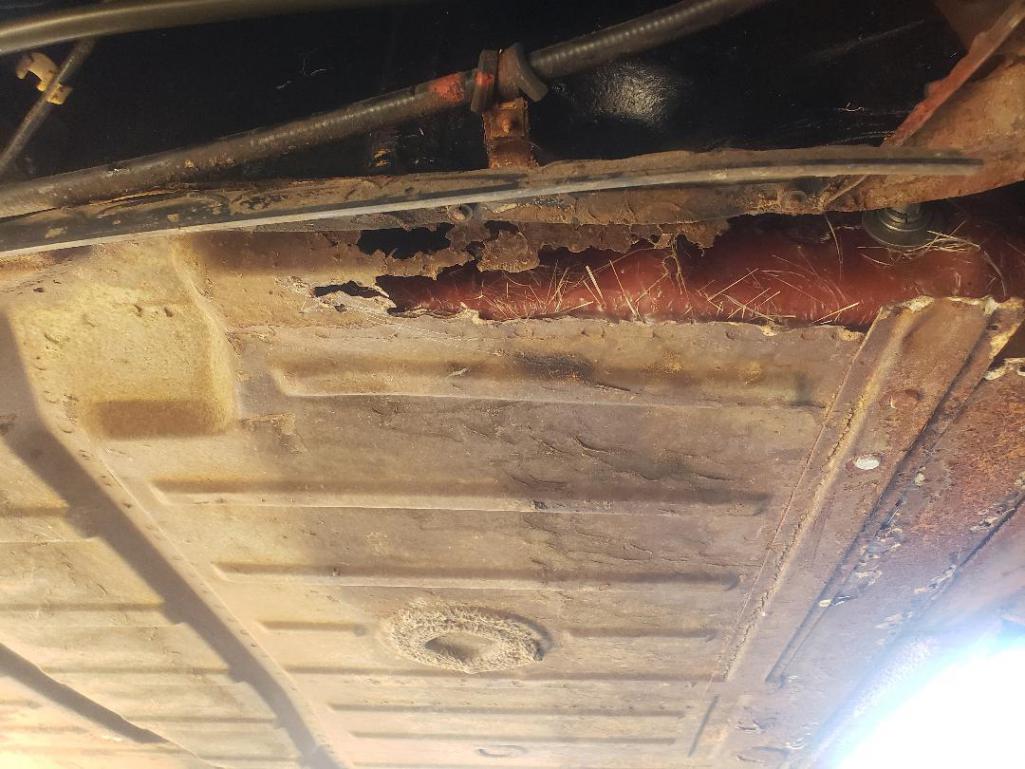
It was at this point that I had the moral dilemma of opening up the can of worms and removing the fiberglass or ignore it and get the car ready to drive. Well, I opened that can!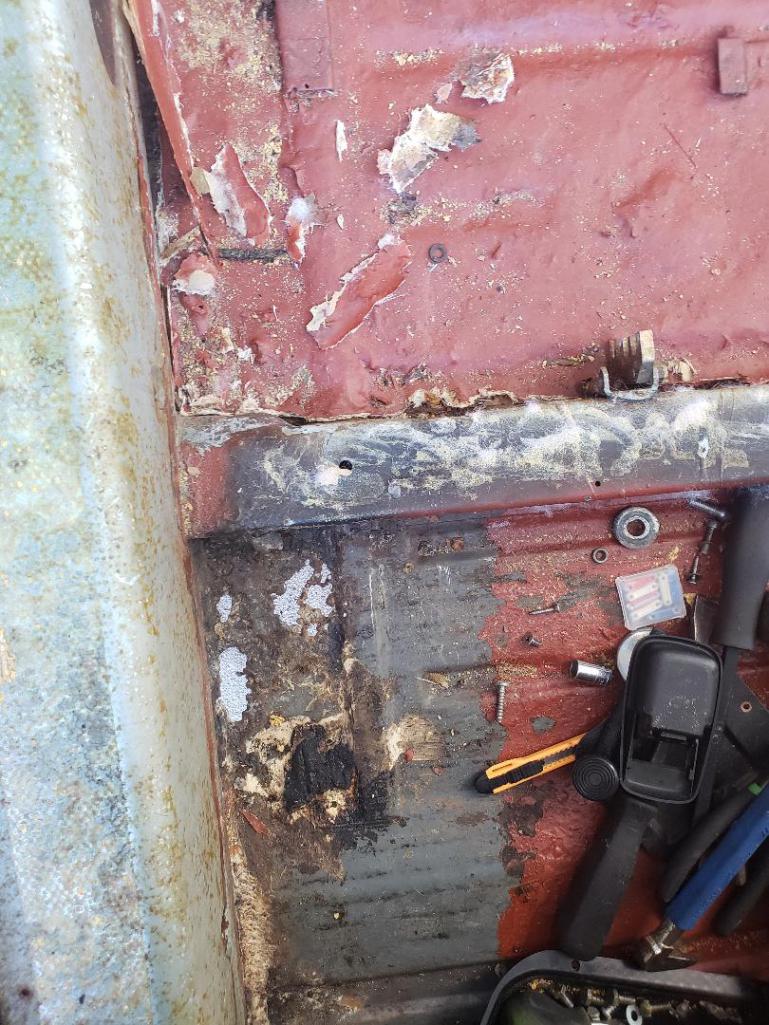
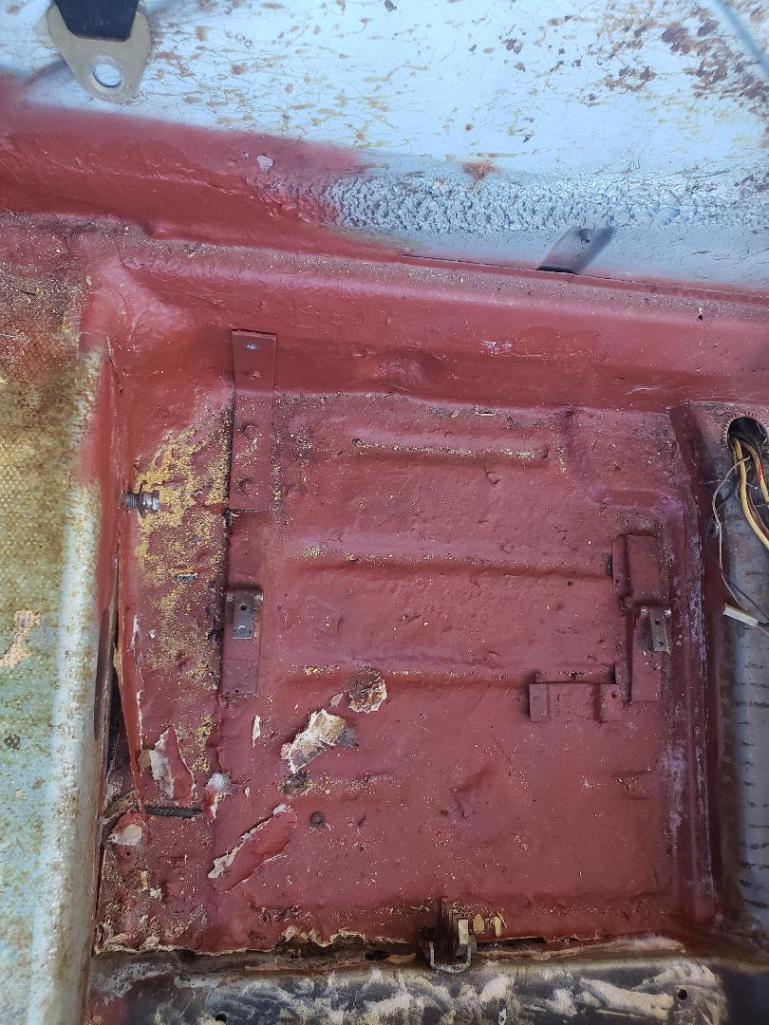
Notice the 90 degree bracket to hold the floor up to the back wall of the cabin. In all fairness, the fiberglass held up pretty well.
Posted by: Root_Werks May 26 2021, 08:51 AM
Fiberglass, oye, found a little bit in the engine bay on my 914. Removed it all, patched the metal with metal. It'll be some work, but worth it.
Posted by: Galen May 26 2021, 08:59 AM
Episode 3: Visiting the Hell Hole(s)
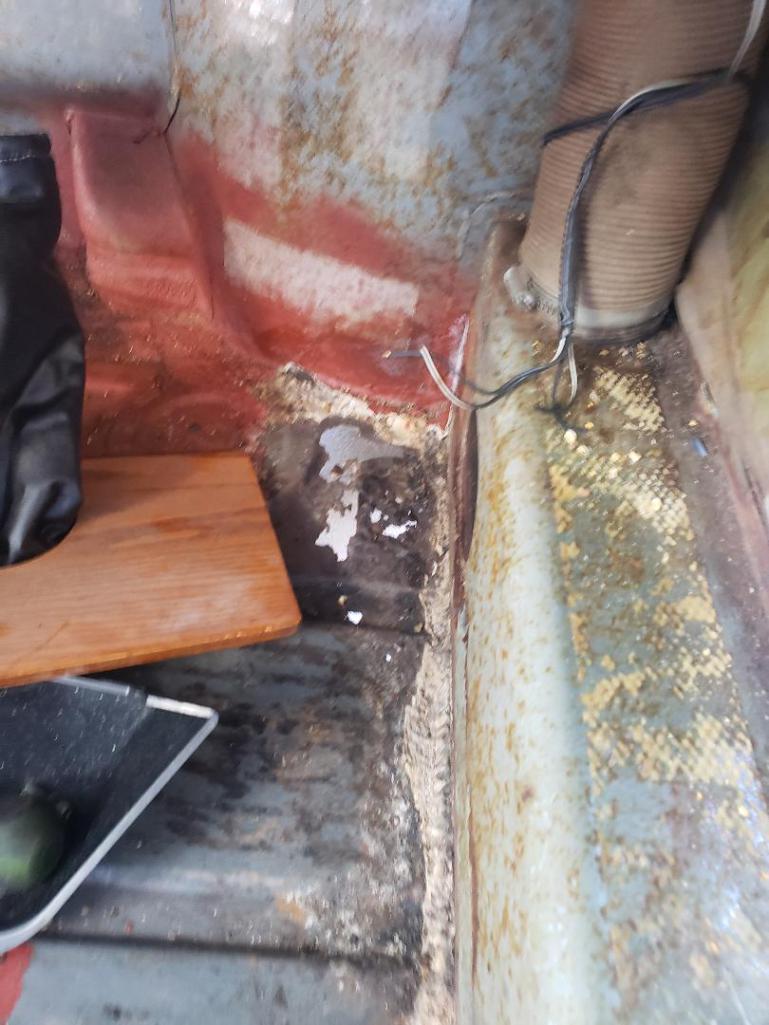
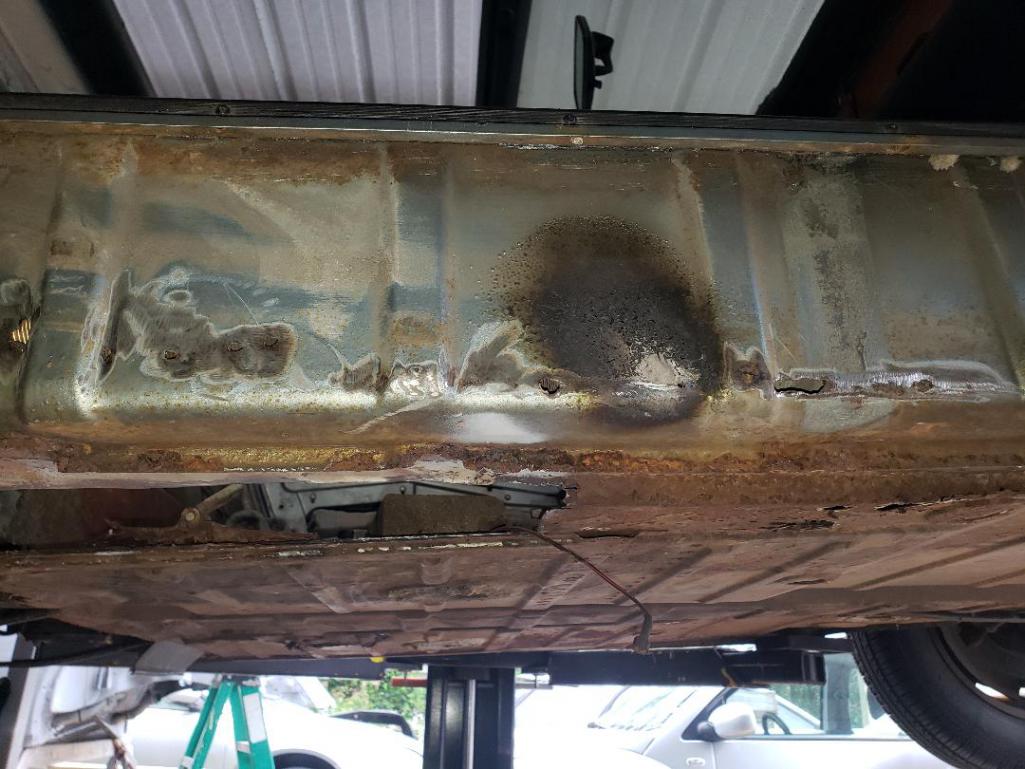
Once I assessed the cabin of my 914, next was to check out the hell holes...as both sides had some rot. Here is what I discovered on the driver's side.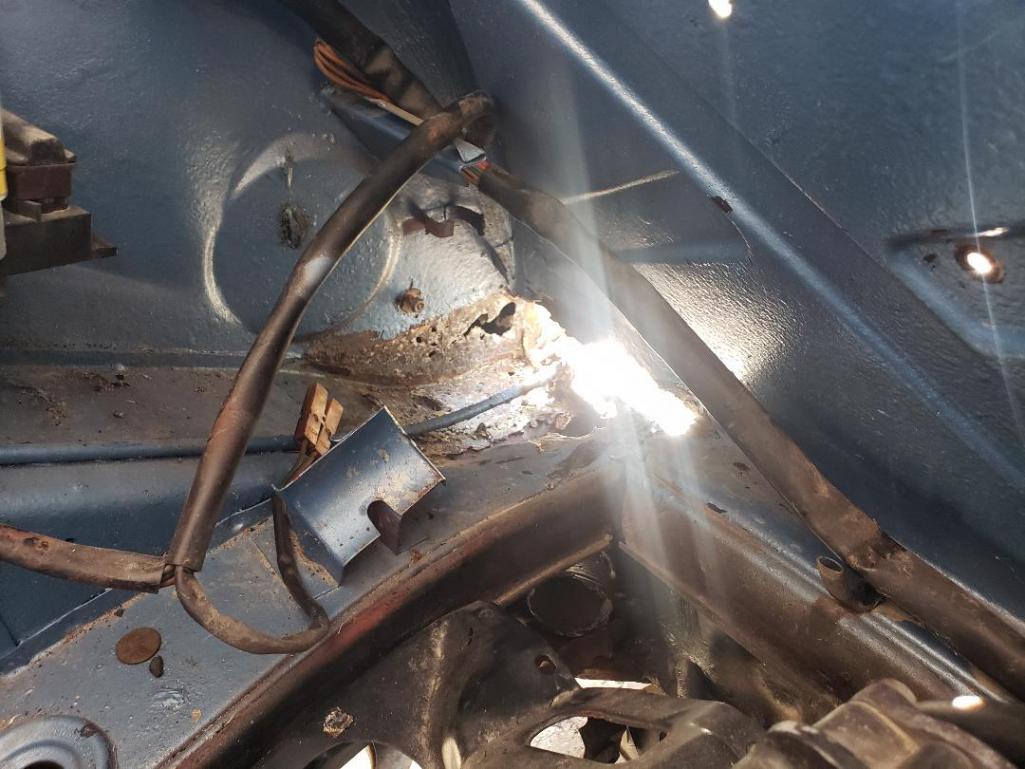
And the back wall in the cabin was also rotted.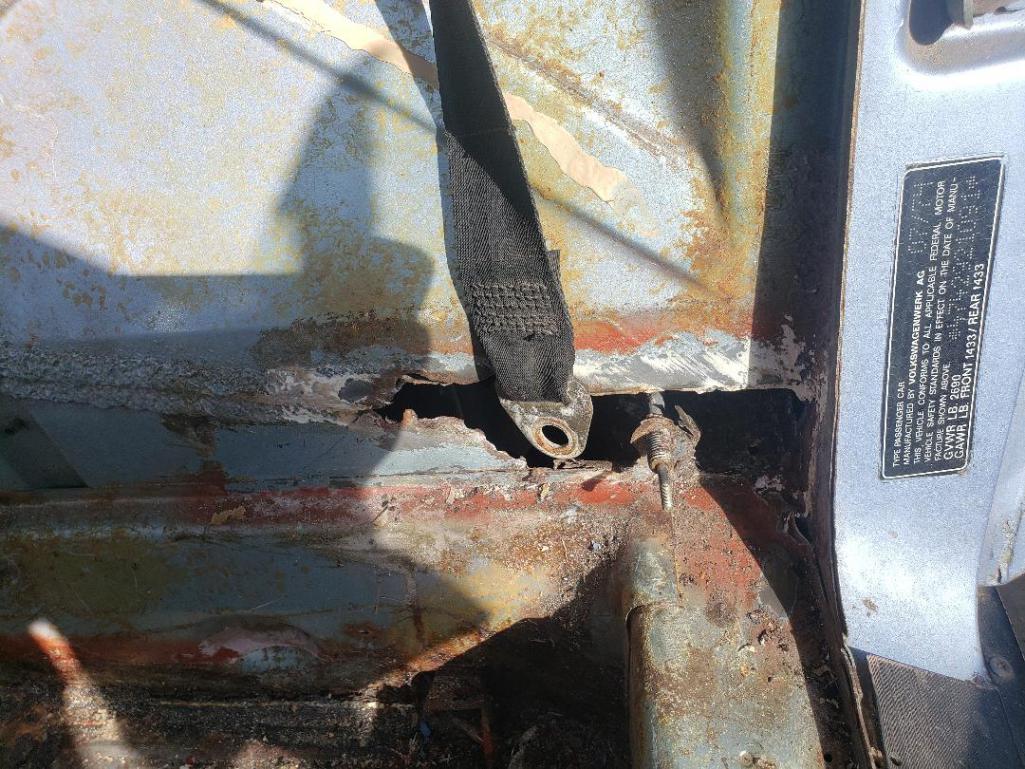
Finally, the shot you all have been waiting for! Passenger side hell hole! Notice the fiberglass residue that I had to remove to find the extent of the damage.
Well, looks like it is time for me to break out the welder. In fact, it was around now that I decided to purchase a plasma cutter. I bought the cheapest one on Amazon...and if you are purchasing one, be sure to get pilot arc...I forgot. Mine works on 110 just fine, but there are times I wished I had 220 available.
Posted by: Galen May 26 2021, 09:25 AM
Episode 4: Making room in engine bay
In order to have room to work in the engine bay, engine and transmission had to go. When I bought the car, Keith had told me that the engine had been rebuilt just prior to it being parked in 2000, but didn't know much else since he paid a shop to do it.
He originally told me it was a 1.8, but after learning a little about type 4s, I found that the intake used 3 studs and it was a GA block...meaning a 2.0.
Here are some shots of the head after I pulled it off.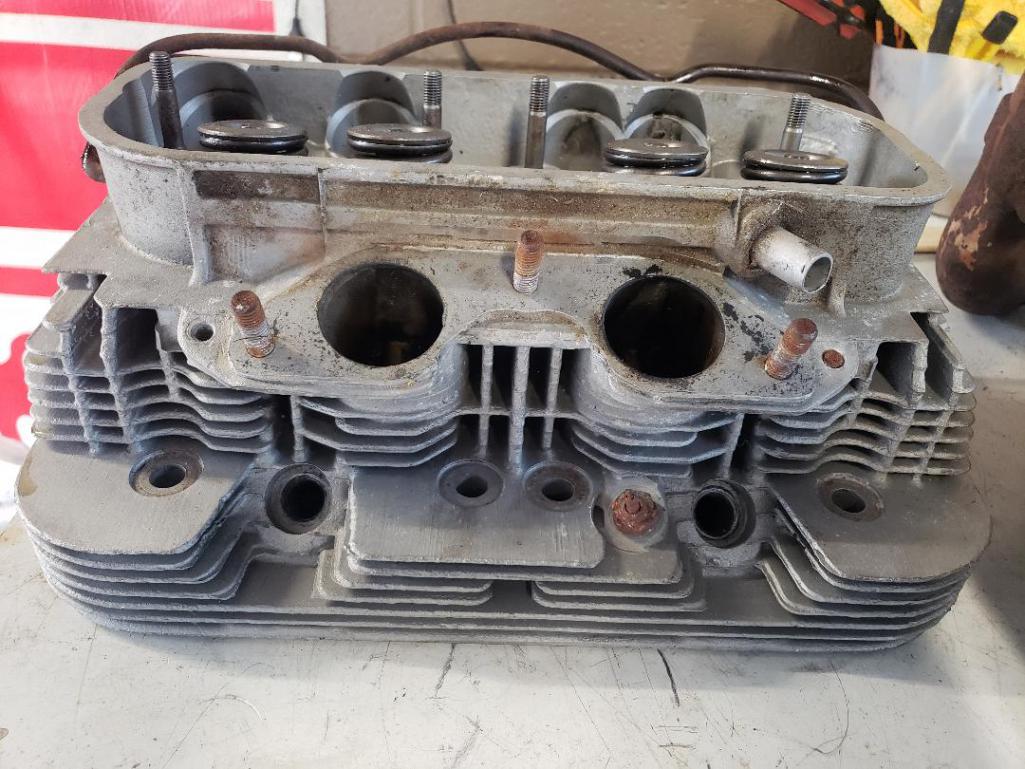
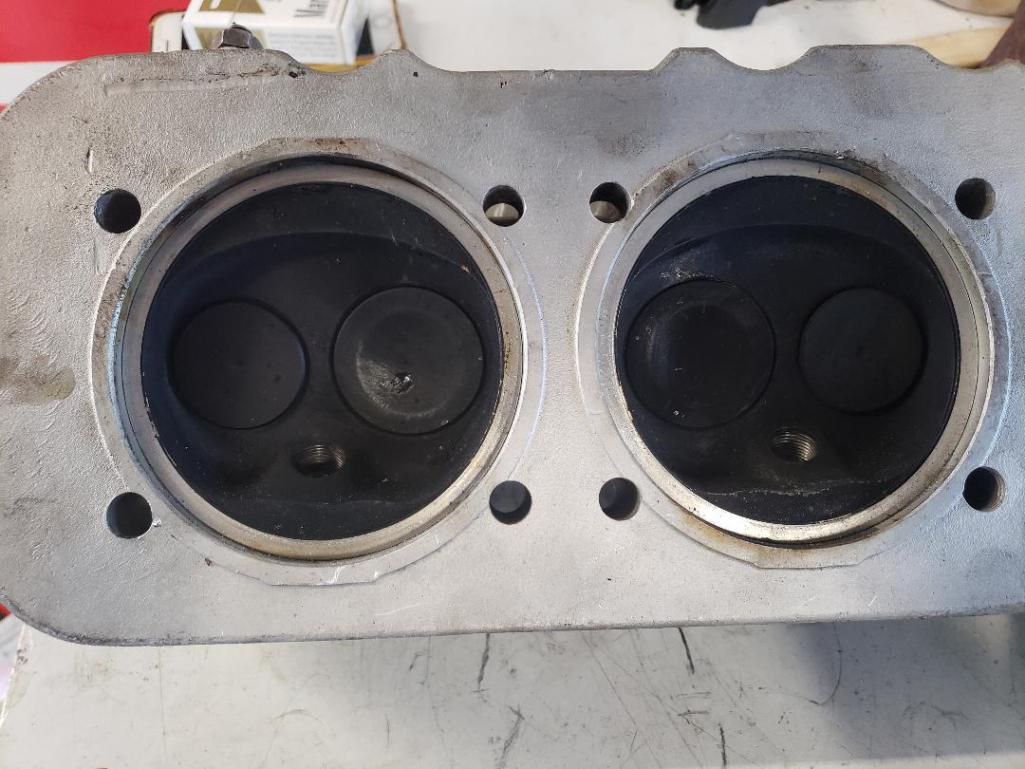
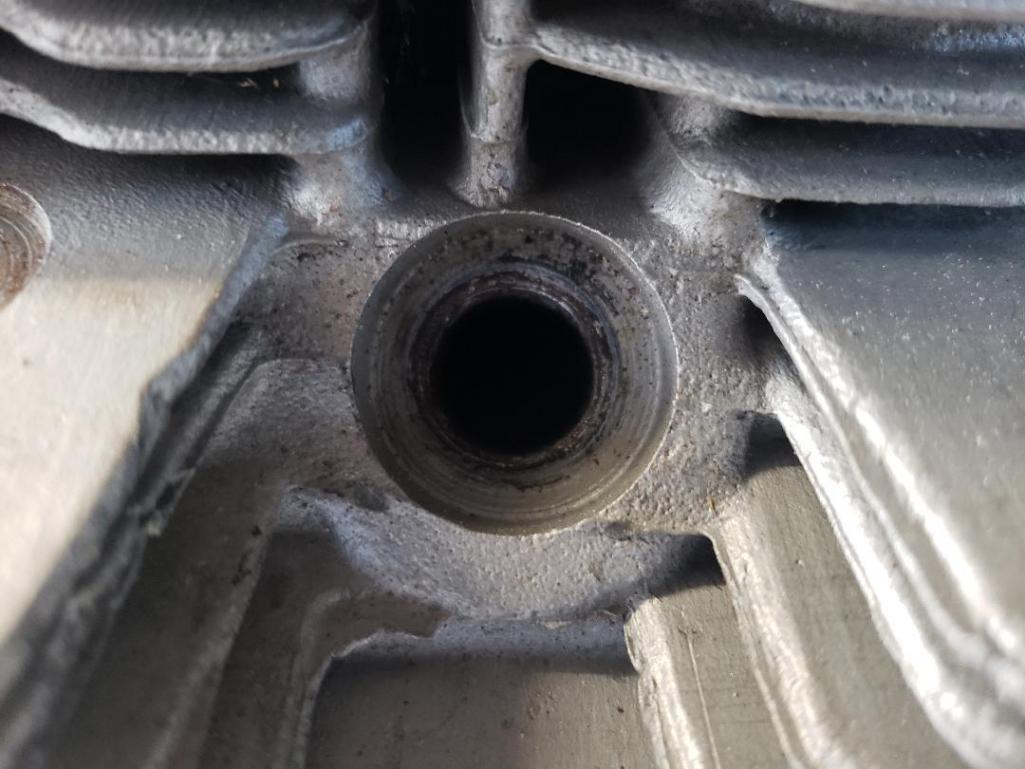
From what I had read, the 2.0 heads like to crack around the spark plug holes. All 4 were perfect.
The cylinders also looked brand new. I measured the bore and stroke, but it has been too long for me to remember what they were. The numbers were consistent with a 2.0 engine.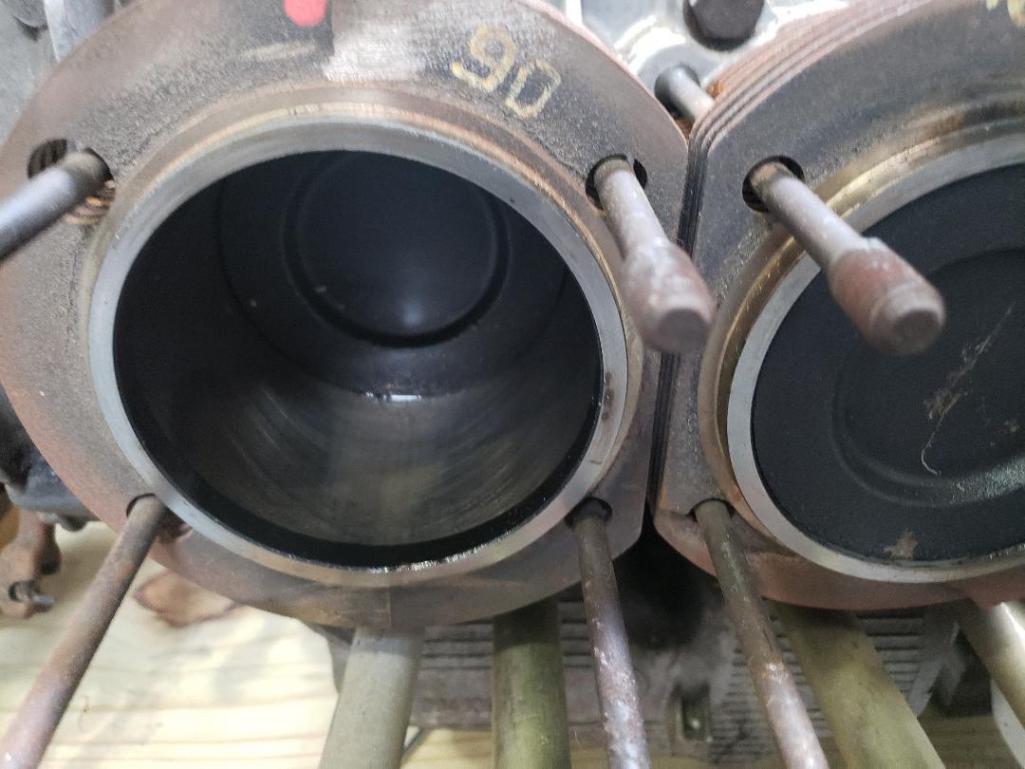
I also purchased a set of Spanish Weber 40s to replace the single Weber that came on the engine.
Next step....playing with metal!
Galen
Edit: I found a pic of us pulling the engine.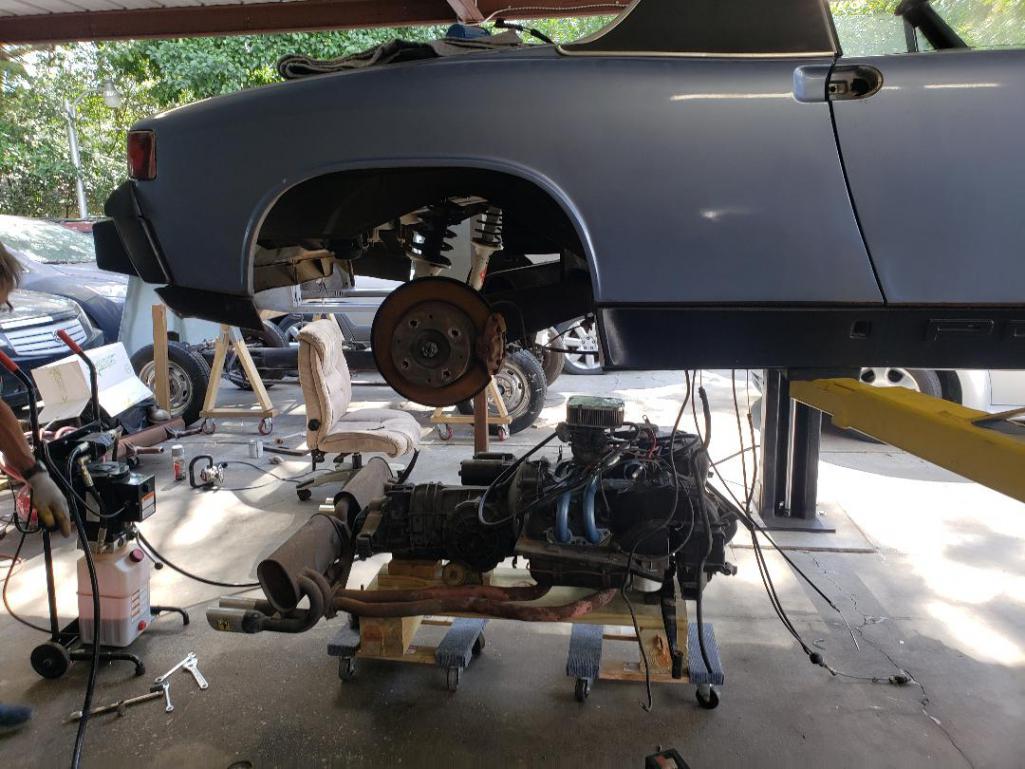
Posted by: Mikey914 May 26 2021, 09:31 AM
You are on the right path. Fortunately the metal is available.
Posted by: Root_Werks May 26 2021, 09:33 AM
You are on the right path. Fortunately the metal is available.
Common areas = metal is made!
That patch around the engine release handle, I had to do almost the same patch. Mine was covered in fiberglass. LUCKY, mine was only around that part.
Posted by: Galen May 26 2021, 10:29 AM
Episode 5: Assessing previous repairs
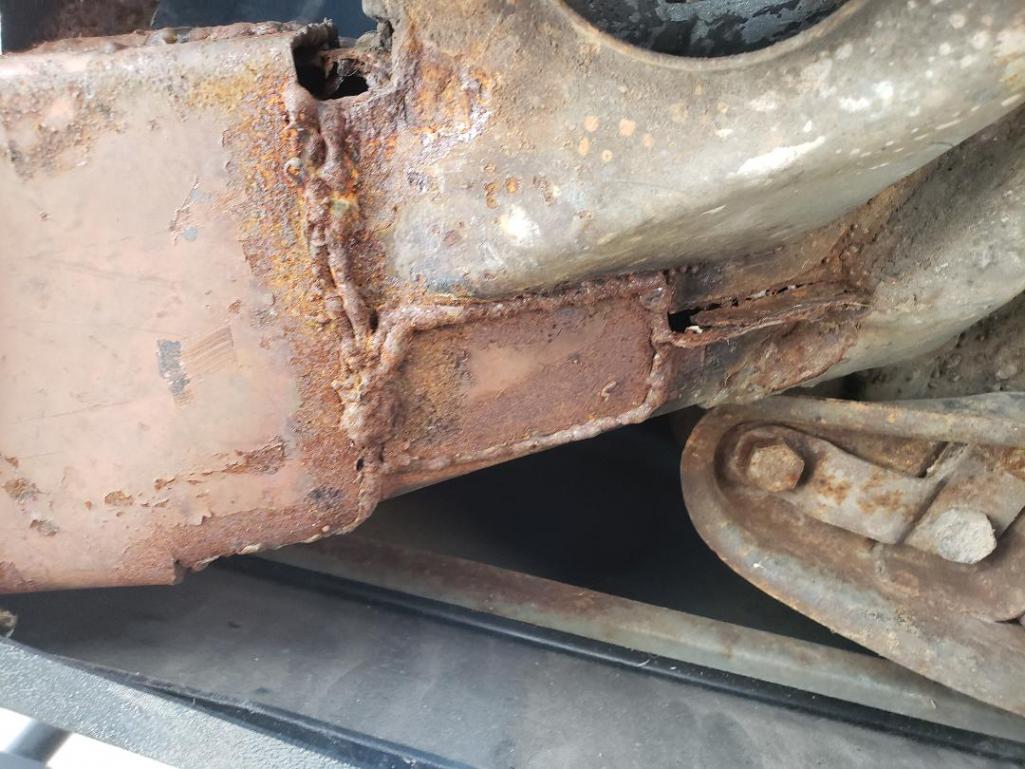
The frame had been repaired in the past by previous shops or owners. While the work wasn't pretty, it is functional. I decided that I would work around most of the repairs, making changes where I deemed necessary. This will never be a high dollar car, so form definitely follows function.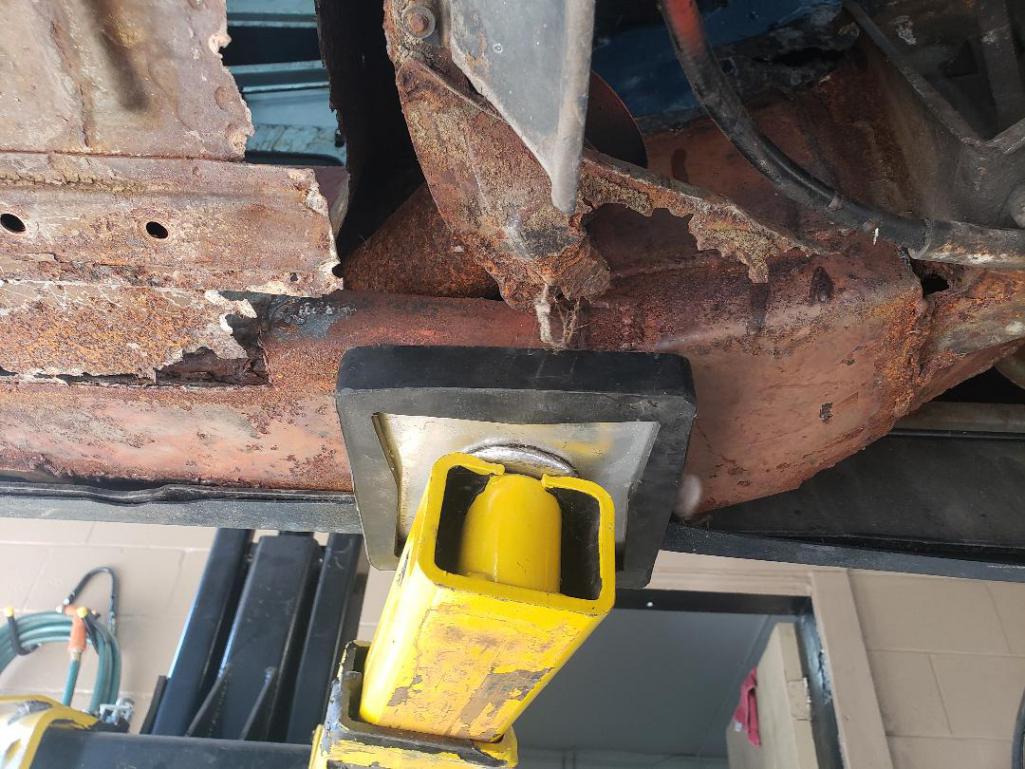

It seems that I see a lot of people give grief to previous owners and repairs. I am just the opposite. I remember when these cars weren't worth anything, and it amazes me that someone loved this car enough to do any repairs at all. While the repairs weren't up to my standards, they were functional, and kept this car from being a long forgotten sardine can!
P.S. Some of my repairs will not reach some of your standards. I haven't welded in about 20 years, and am having to reteach myself, along with trying to weld on metal thinner than an aluminum can.
Galen
Posted by: Galen May 26 2021, 02:36 PM
Episode 6: Let the cuttin and weldin begin!
Step one for me was to cut out a little piece of metal and run to the sheet metal shop and pick up a 4'x4' piece of sheet metal of slightly greater thickness. I believe my sheet is 16 gauge...but I am getting old and forgetful. Now, time to tackle an easy hole to get my feet wet. I forgot to take pics of the fabrication of some patches, but here are the results.
Before
After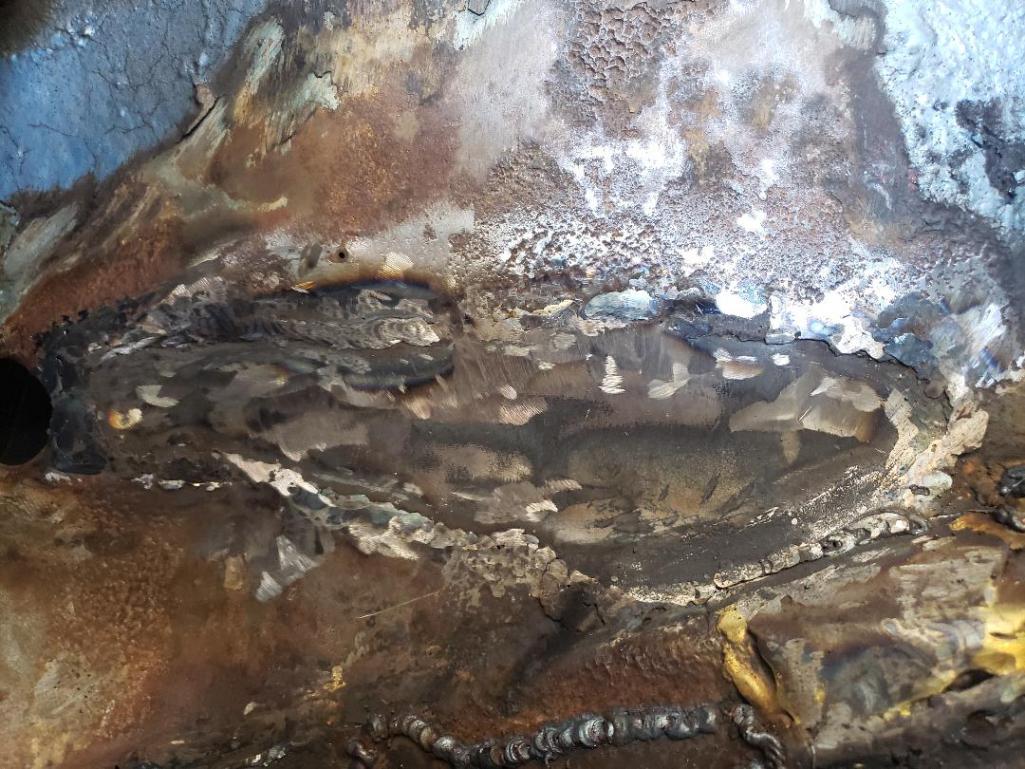
Before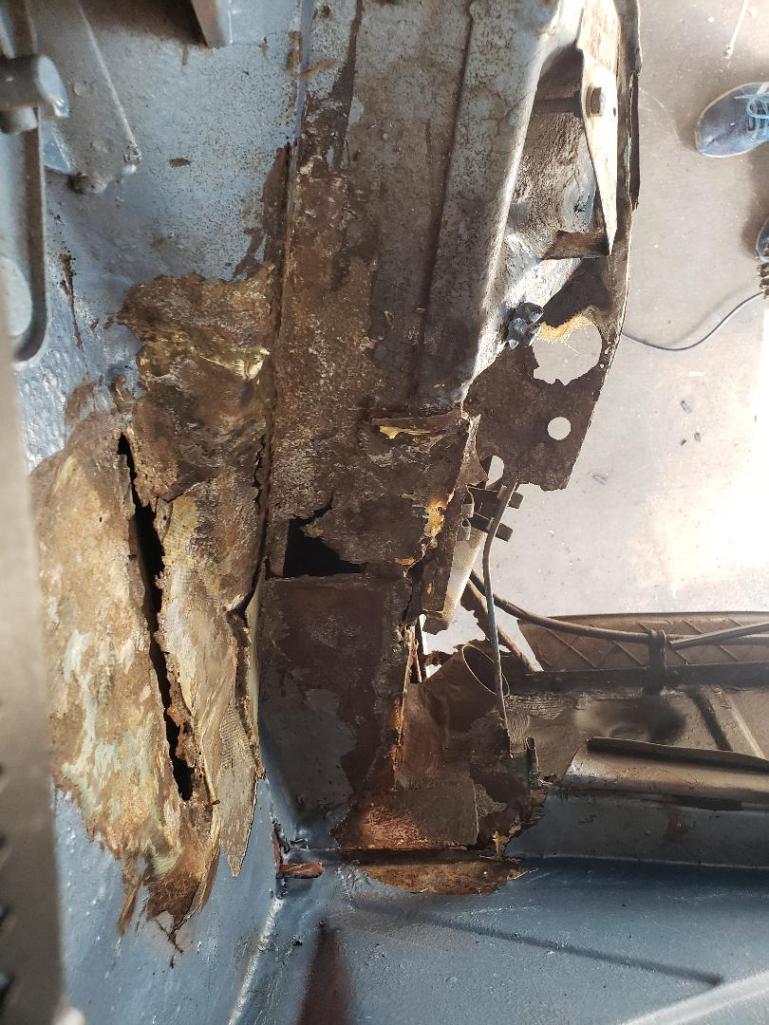
During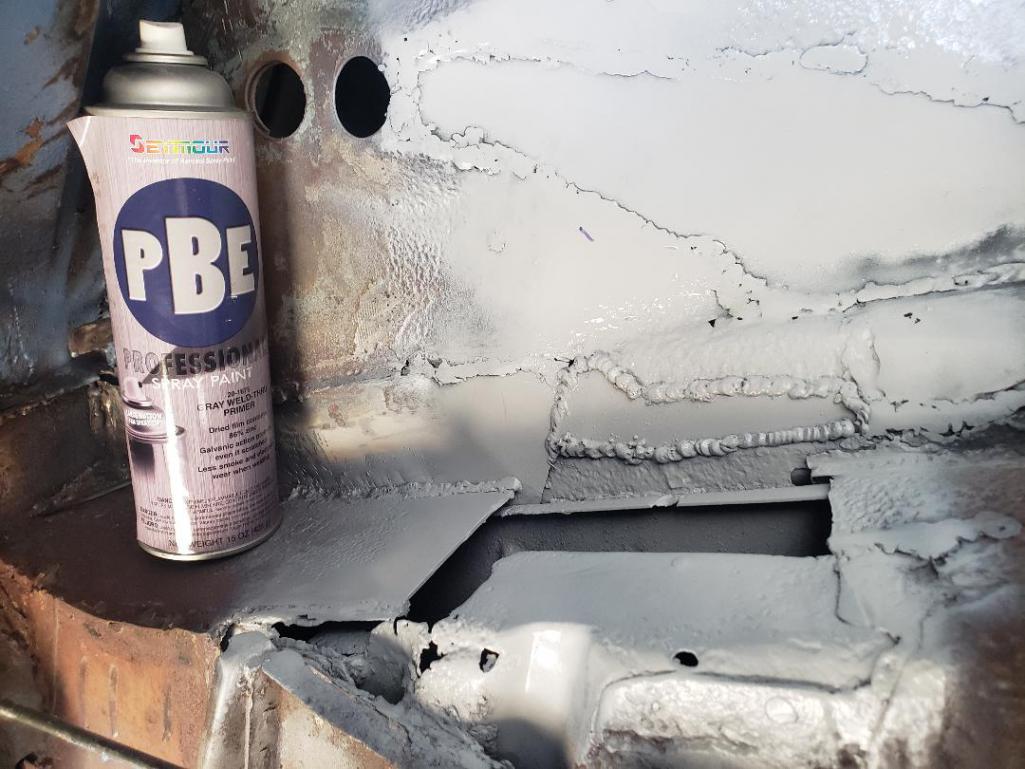
After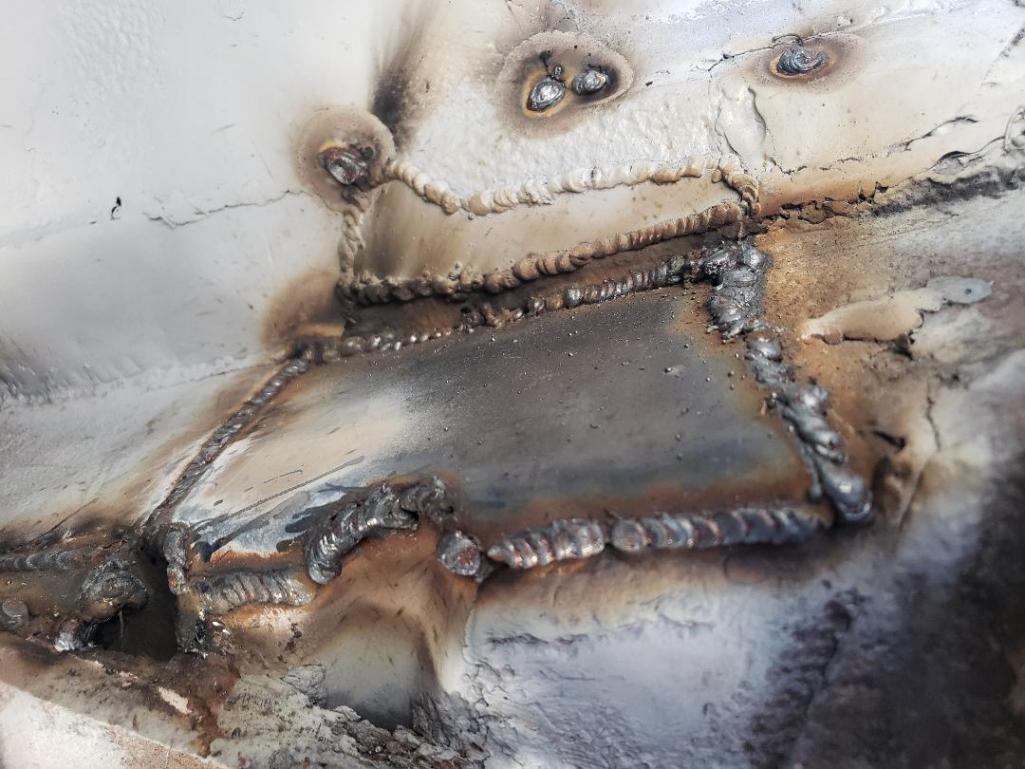
Back wall of passenger side. The square patch in back was a repair that was there before I started. I did alter it, but felt it was better left in place.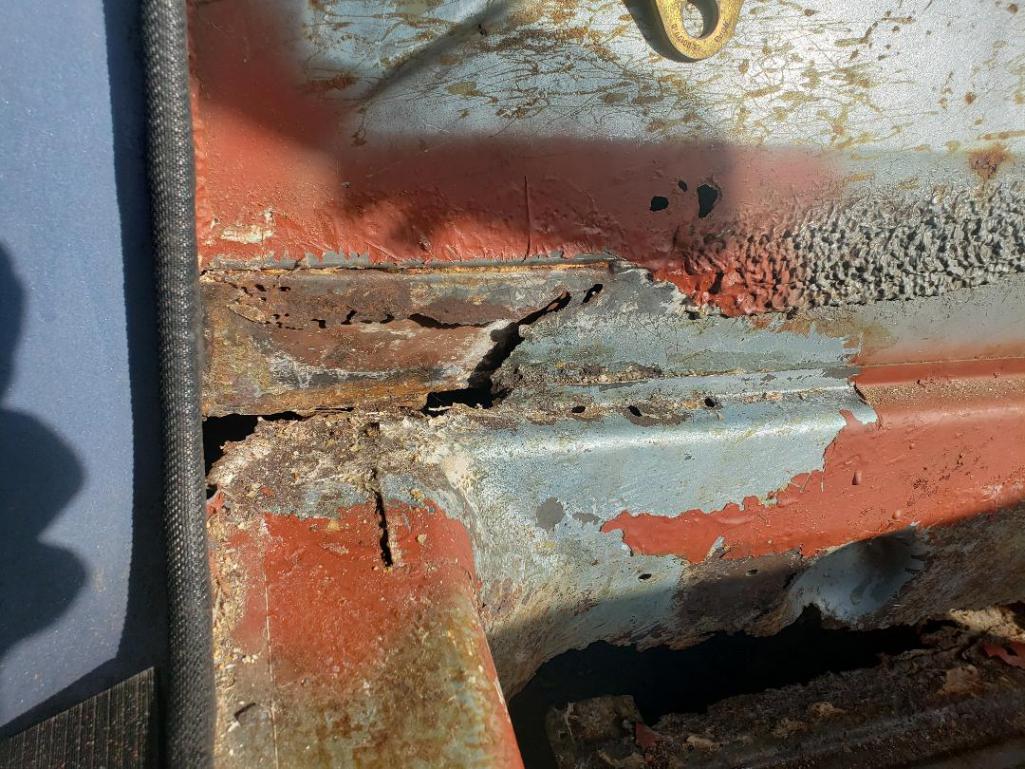
Rust cut out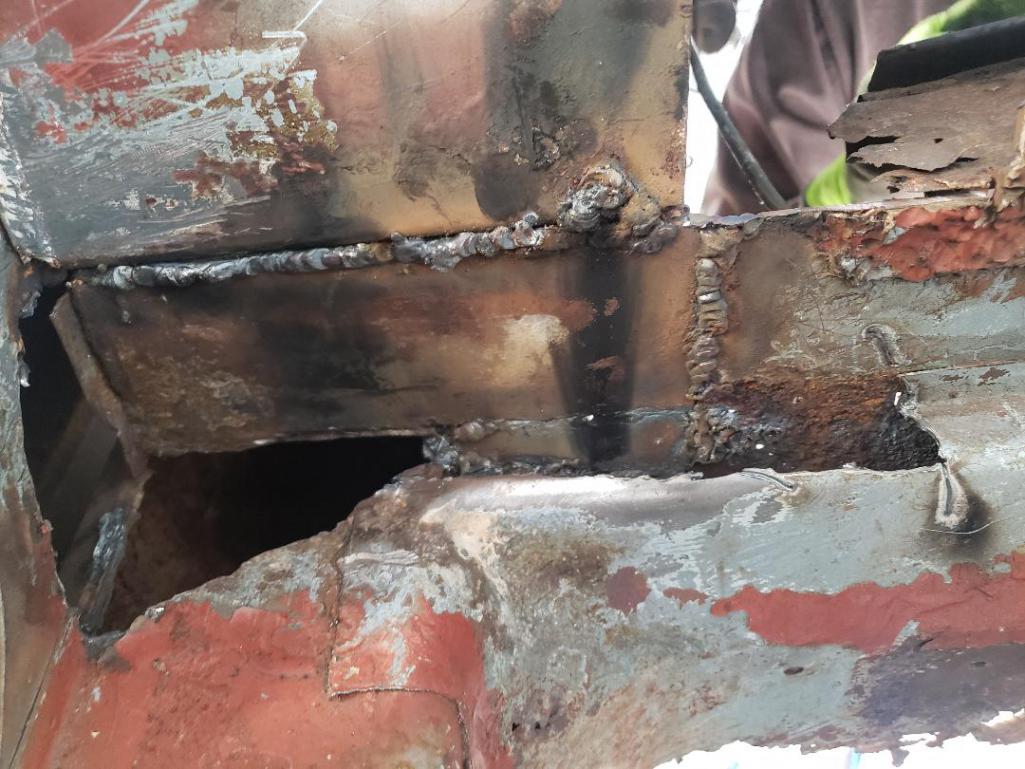
Making a templet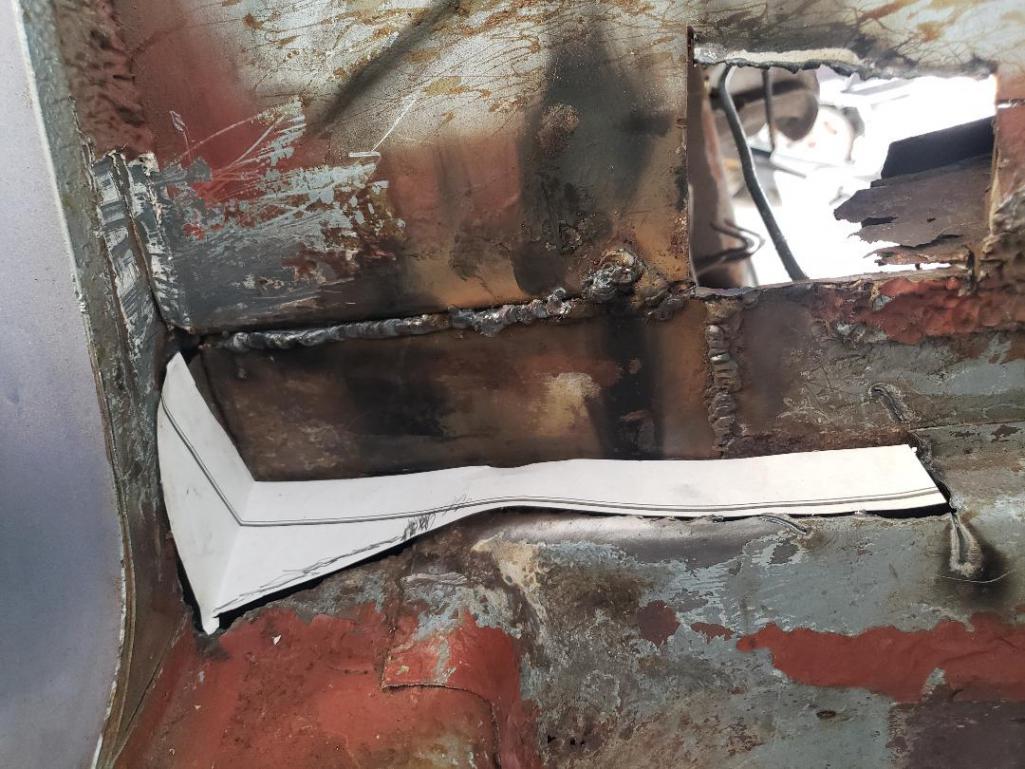
Copying templet using weld through primer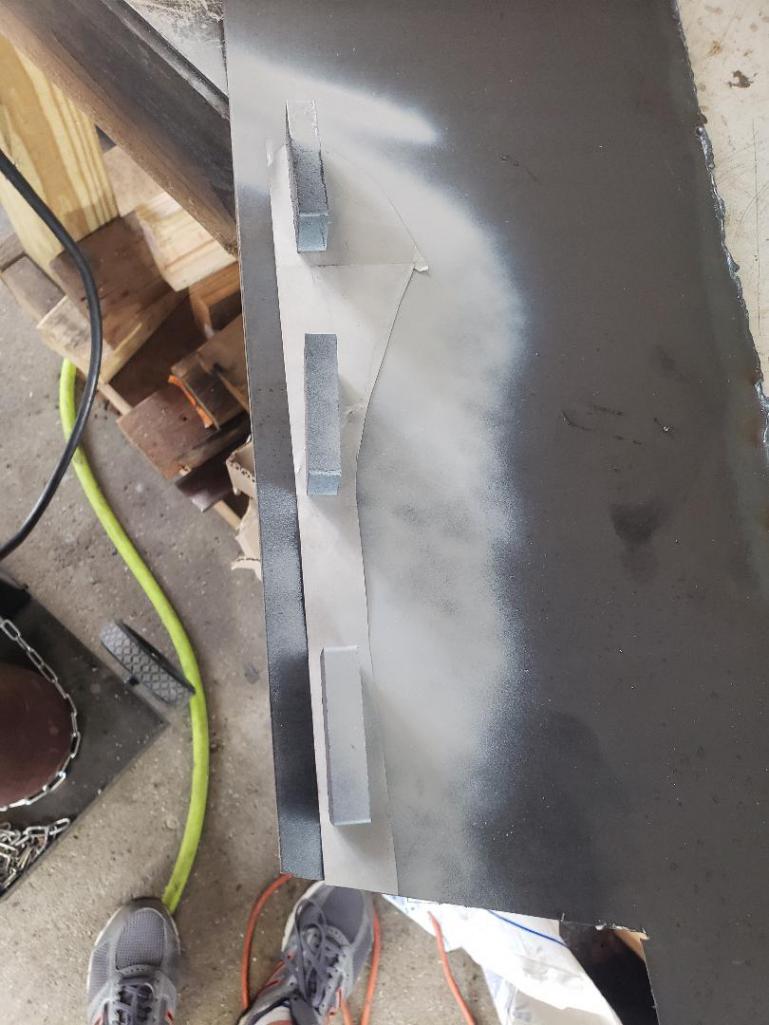
And grinding and bending to fit. There is a lot of grinding, checking, grinding more, checking more.....involved!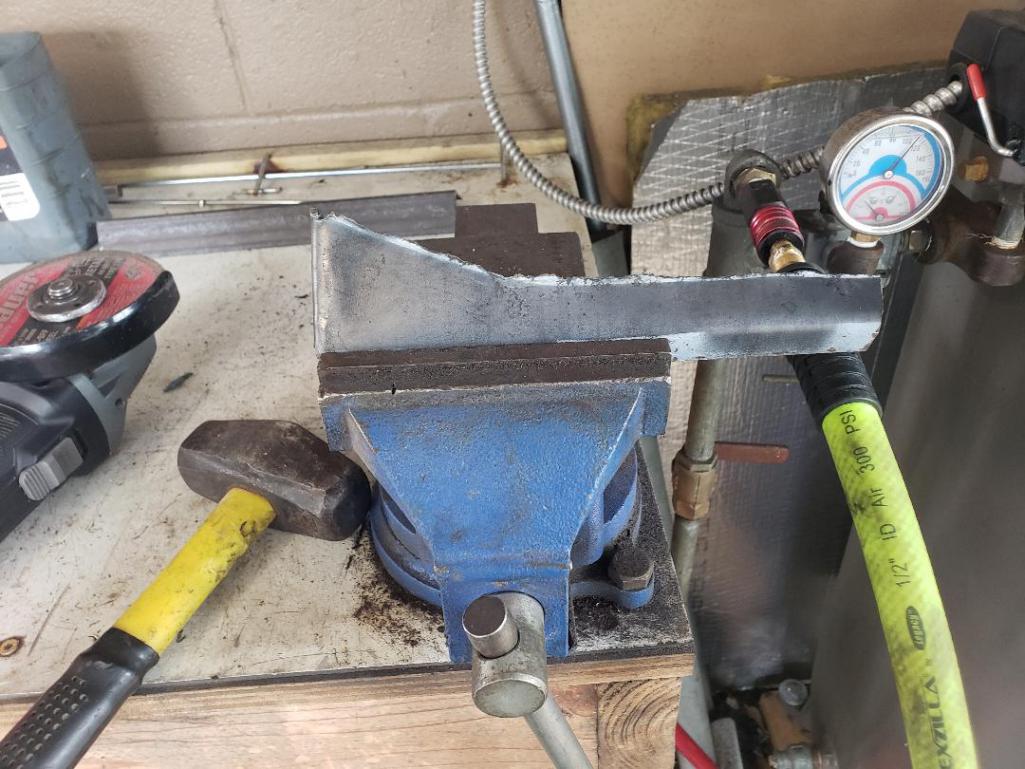
I have basically chosen a rust or missing spot per day and repaired to the best of my ability.
Until I have time to post again
Galen
Posted by: Superhawk996 May 26 2021, 03:24 PM
My neighbor had told me that there was some fiberglass in the floorboard of the car, but it wasn't until I put the car in the air that I saw the extent of the damage.
Been there done that with my project
Hopefully you have the time and patience to do the proper repairs the right way. You are off to a good start!
It's a long road but don't underestimate the amount of structure that the box section (made from inner and outer bulkhead) at the bottom of the bulkhead provides to tie the longitudinals to one another.
Thanks for working to save another one!
Posted by: Galen May 27 2021, 02:46 PM
Episode 7: The long on the passenger side
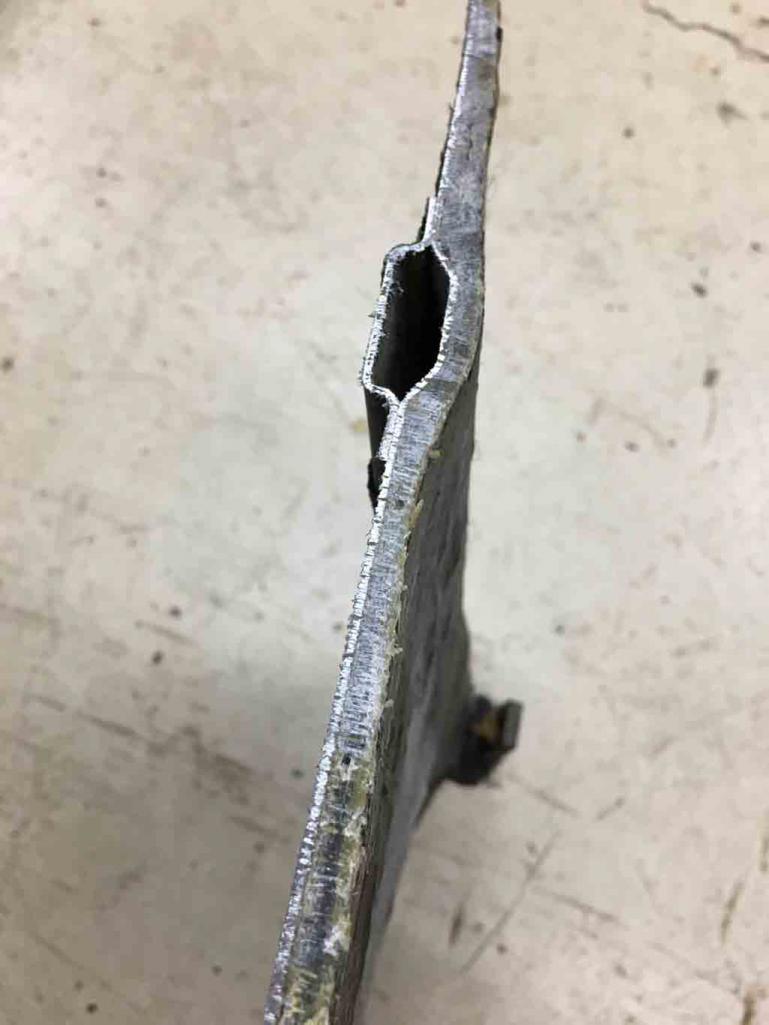
For the longest time, I assumed that the longs were good under the side skirts. I had the car on my lift in such a way that I could not take the skirts off. I repositioned the car and removed the skirts. While I saw a little bubbling, it didn't look that bad. There was a previous repair along the back, but it seemed functional and I decided to leave it. When I started poking at the bubbles, this is what I found.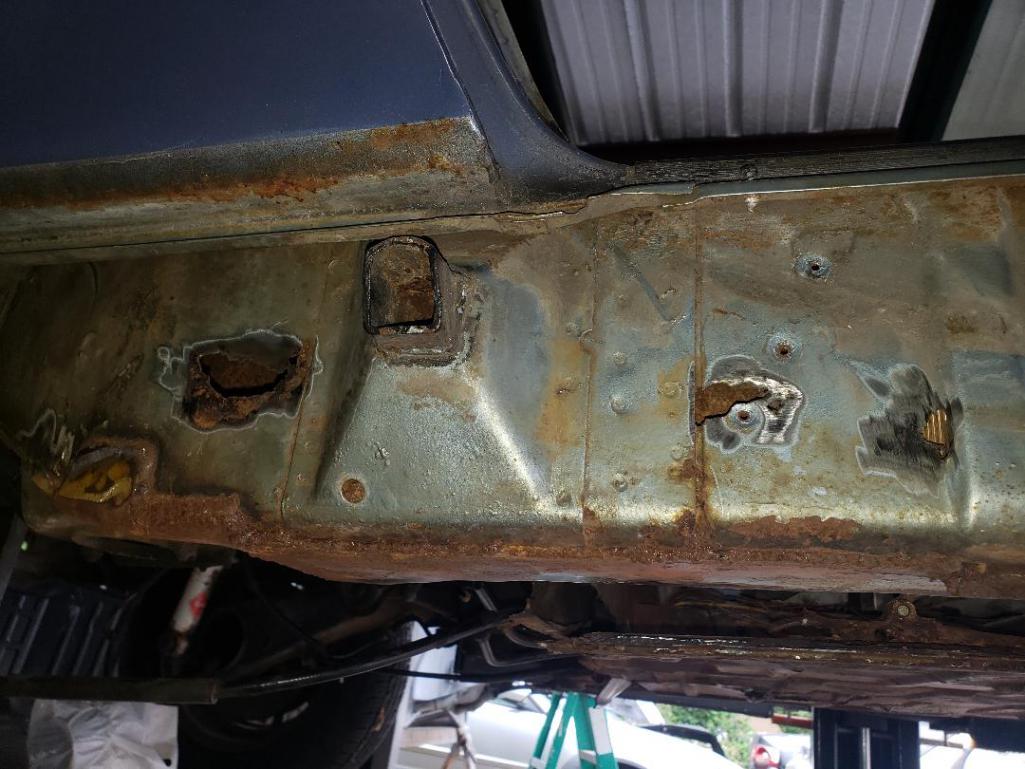
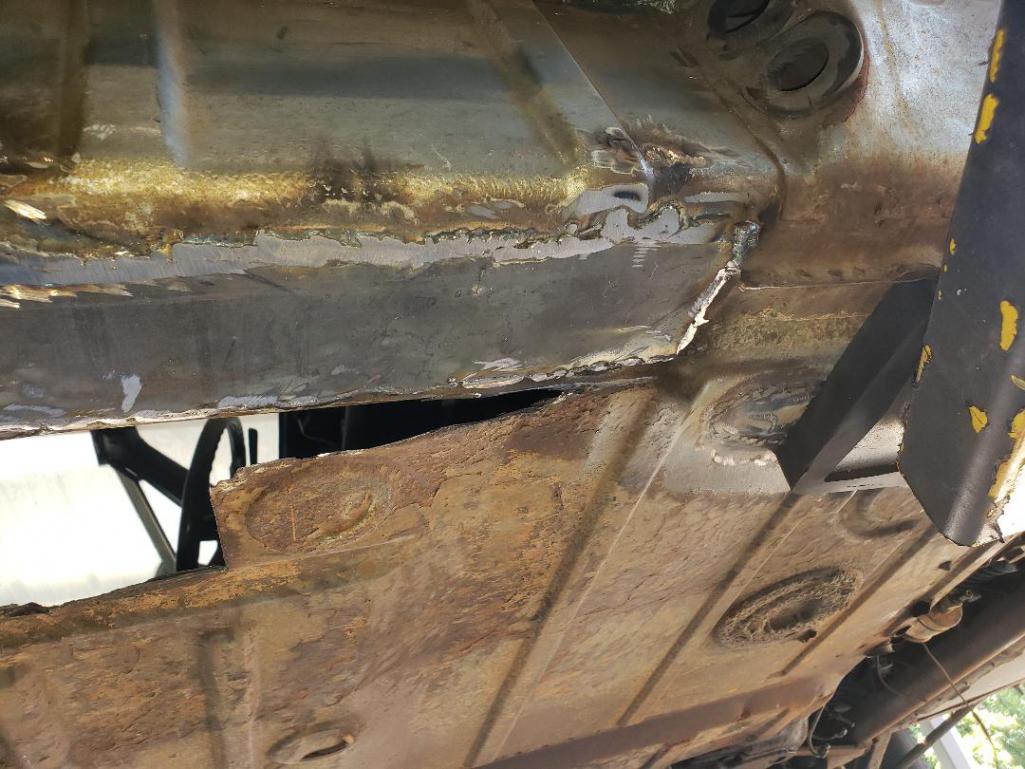
I decided to remove the jack point to inspect behind it. Since I am sure they are never used it won't be going back on.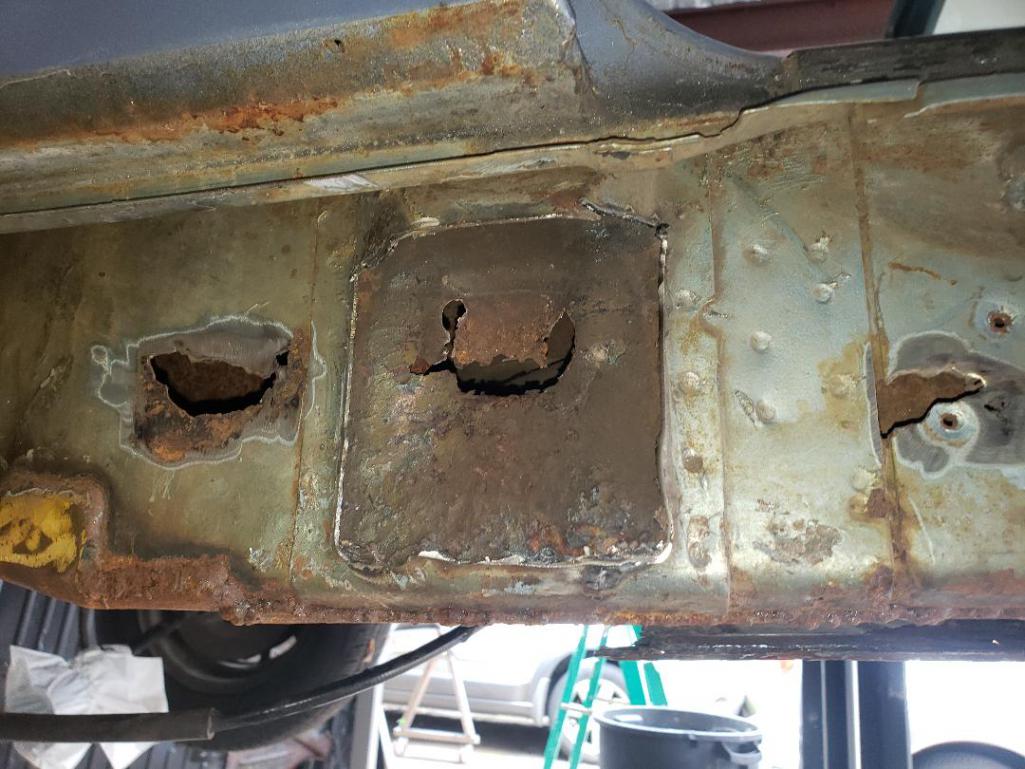
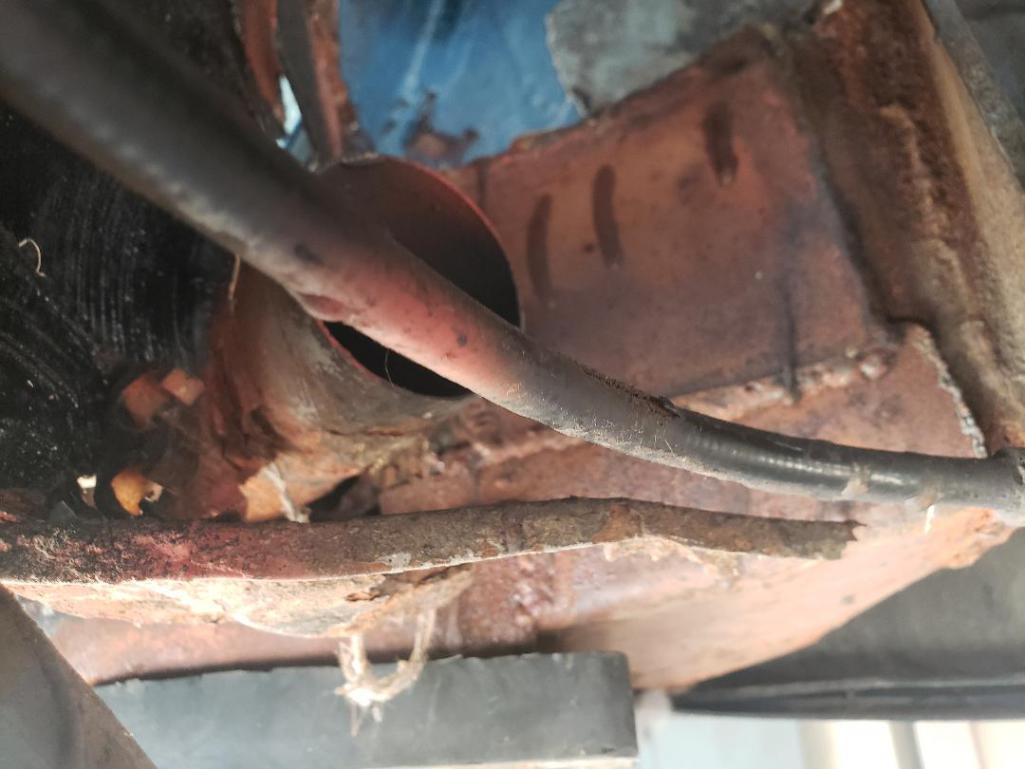
I cut out as much rust as possible, and here is what I had.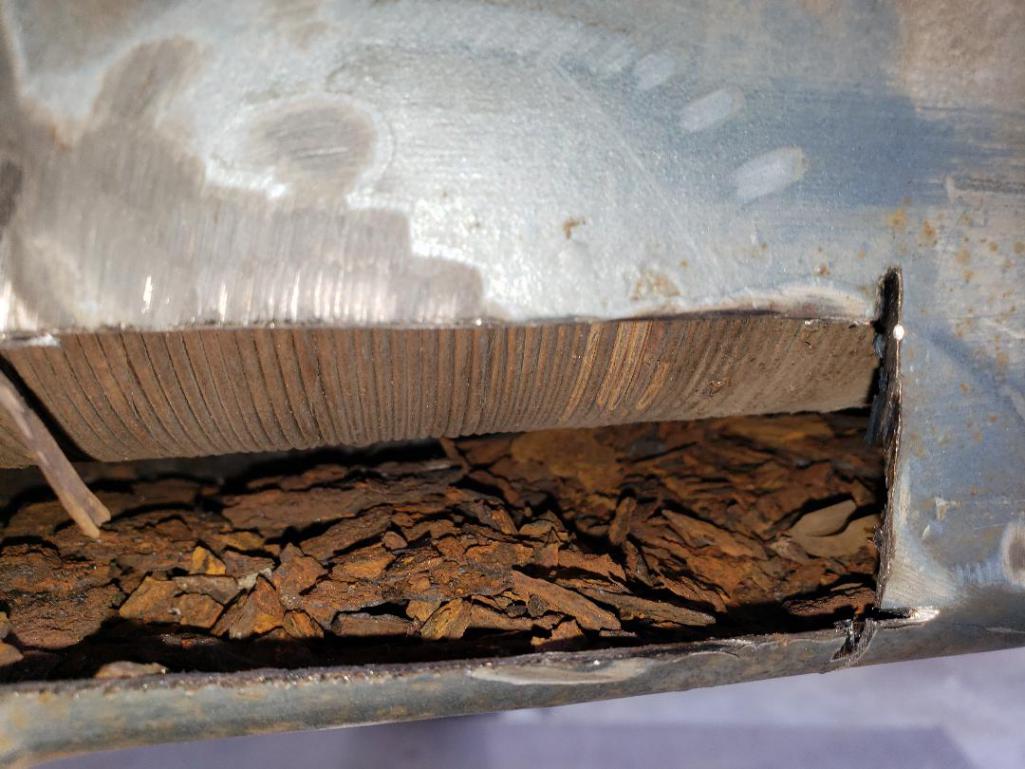
There was literally no original metal on the bottom of the back half of the long. All that was there was the previous repair.
I made patches and welded them in. 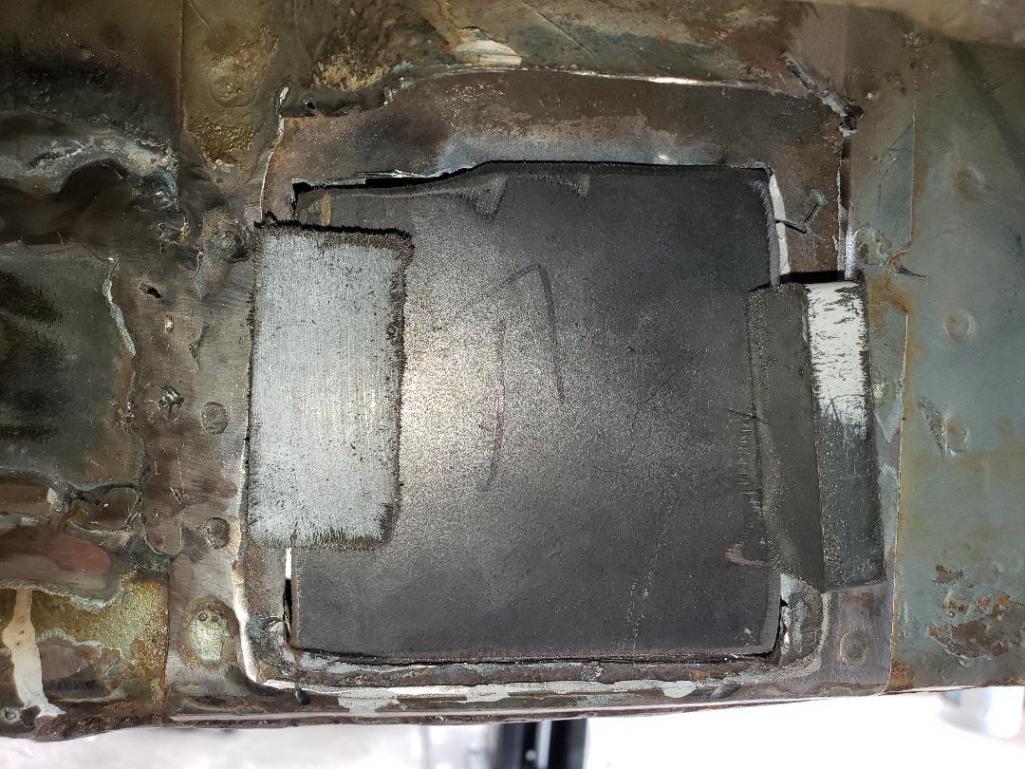
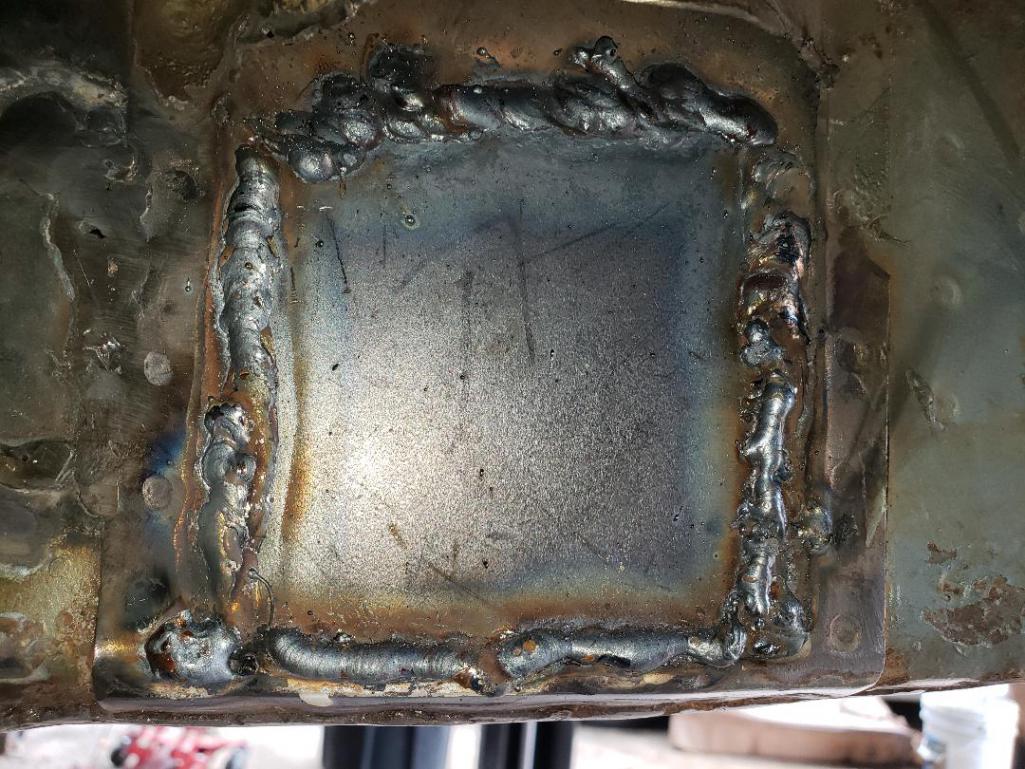
I felt the entire bottom of the long was weak, so I replaced it all. I did patch into the existing repair.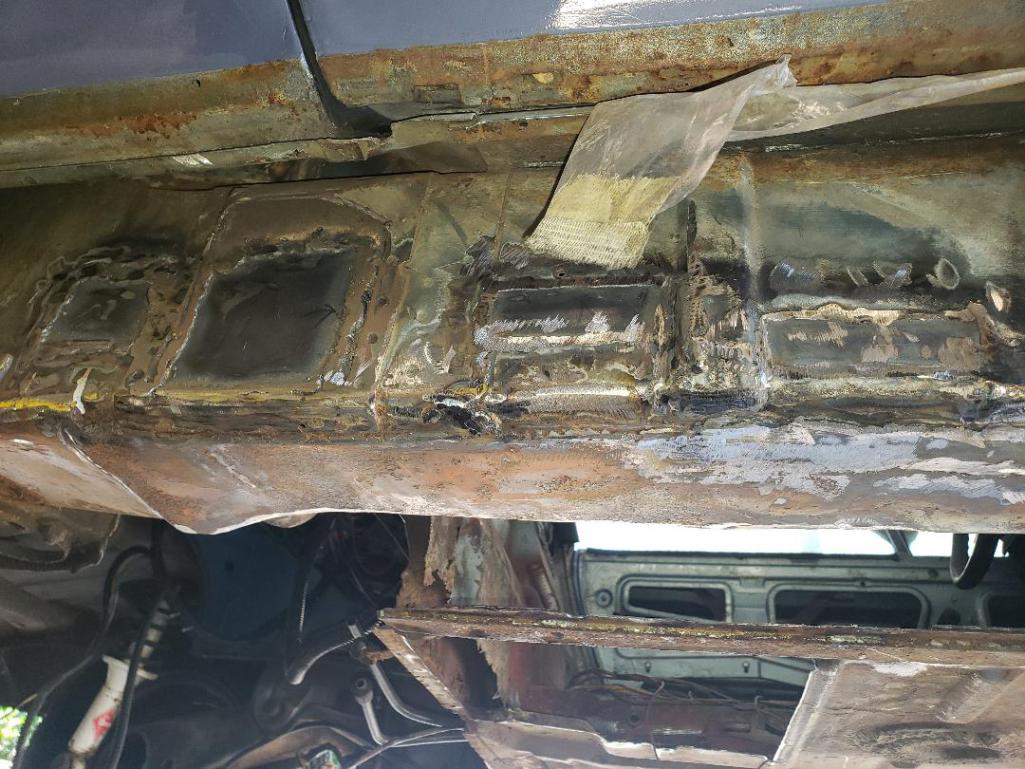

Next up, I plan on playing with the floor.
Galen
Posted by: MM1 May 27 2021, 03:50 PM
Good job for gettin' in there and tackling the issues - looking forward to more . . .
Powered by Invision Power Board (http://www.invisionboard.com)
© Invision Power Services (http://www.invisionpower.com)