Printable Version of Topic
Click here to view this topic in its original format
914World.com _ 914World Garage _ Heat/Defrost Mixer Valve Removal
Posted by: jim_hoyland Sep 8 2021, 07:19 AM
How is that valve removed from under the cowling. My plan is to pull the gas tank for better access first; then replace the driver side heat/defrost valve. The re-install the control cables.
Any tips will be appreciated…
( see sample photo, not my car )
Attached image(s)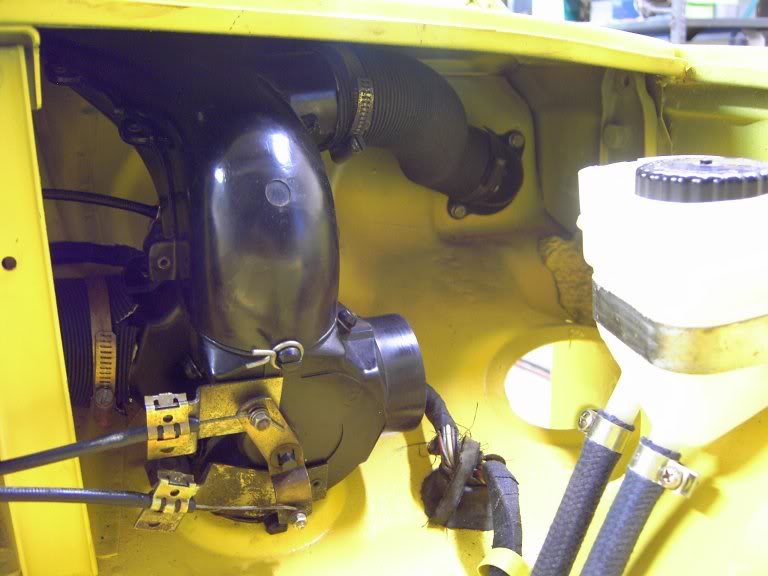
Posted by: barefoot Sep 8 2021, 07:46 AM
This might help: Be very careful
https://914electric.wordpress.com/2011/03/18/take-the-heat/
Posted by: jim_hoyland Sep 8 2021, 09:20 AM

This might help: Be very careful
https://914electric.wordpress.com/2011/03/18/take-the-heat/
Thanks, that’s an excellent explanation of where each cable goes; I’m looking for tips on removing the driver side valve with the defroster nozzle attached
Posted by: 914werke Sep 8 2021, 10:14 AM
Jim not really possible. At least Ive never been able to accomplish it

The valve protrudes down through the sheetmetal of the cowl so you have to seperate the valve from the vent by removing the spring clips x2.
BE VERY CAREFUL,
The bakealite /plastic is old & fragile & the .5 posts on either piece that those clip surround, aren't supported well & snap easily. The front one is fairly easy to do but the back one will test your mettle.

Posted by: IronHillRestorations Sep 8 2021, 10:44 AM
+1 on extreme care with old plastic parts.
You also want to ID the cables and where they connect before you take them off. My first (personal) restoration, I didn't do that and the ventilation controls were not correct for years.
Posted by: jim_hoyland Sep 8 2021, 11:51 AM
No problem with the cables: they are sorted out.I am going to pull the mixer, the black valve that sits under the cowling on the driver side. Somewhere I read it’s attached from inside the cabin as well as from the trunk area…
Posted by: 914werke Sep 8 2021, 12:16 PM
Correct, under the dash are a pair of ovid vents. Those mate to the valve that protrudes through the cowl.
Posted by: barefoot Sep 8 2021, 02:08 PM
In re-installing mine, I ground a chamfer on the front bottom of the mixer valve & was able to install with the defrost duct attached. Also remove the little brace next to the mixer & push up on the cowl with a helper.
Posted by: jim_hoyland Sep 8 2021, 03:36 PM
In re-installing mine, I ground a chamfer on the front bottom of the mixer valve & was able to install with the defrost duct attached. Also remove the little brace next to the mixer & push up on the cowl with a helper.
Thanks, will do; did it come out easier than the re-install?
I am pulling the fuel tank to gain access and leaving the fresh air into as ke box in place
Posted by: jim_hoyland Sep 14 2021, 04:15 PM
Got the valve out, came out pretty easy. The hard part was removing the clips that hold the cable. I’m hoping I can reassemble the valve with deforest nozzle and reattach the cables. Tight fit !
Any tips ?
I did unscrew the bolt to the post.
Attached thumbnail(s)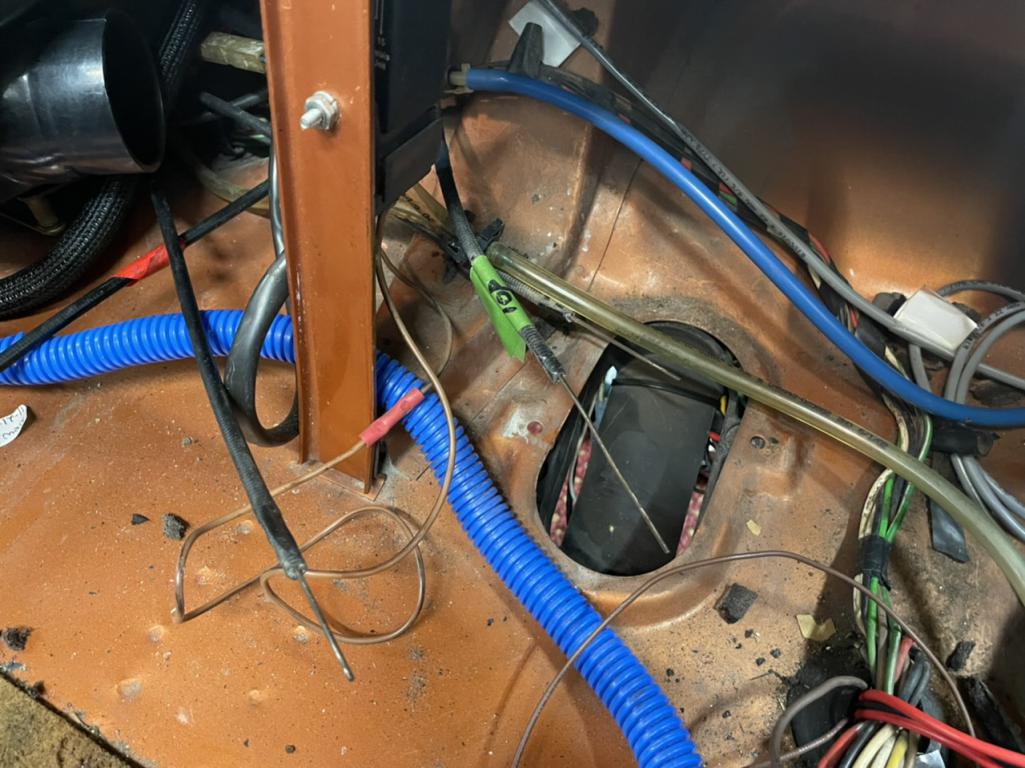
Posted by: 914_teener Sep 14 2021, 04:19 PM
Hey Jim.......
I'm in Moab for the next week but I did this one time by myself.
Putting that back on is probably a two person job.
I'd be happy to help you if you like but I'd be back in Cali next week. Let me know.
And....It is harder to get back in then take out unfortunately.
Rob
Posted by: jim_hoyland Sep 14 2021, 06:34 PM
Hey Jim.......
I'm in Moab for the next week but I did this one time by myself.
Putting that back on is probably a two person job.
I'd be happy to help you if you like but I'd be back in Cali next week. Let me know.
And....It is harder to get back in then take out unfortunately.
Rob
Thanks Rob. That’s gonna help( Bob Duffy has volunteered. I won’t try doing it solo.
Posted by: PanelBilly Sep 14 2021, 09:52 PM
If I can remember correctly fly I attached the control wires before I bolted the unit to the car.
Posted by: DRPHIL914 Sep 15 2021, 12:11 PM
How is that valve removed from under the cowling. My plan is to pull the gas tank for better access first; then replace the driver side heat/defrost valve. The re-install the control cables.
Any tips will be appreciated…
( see sample photo, not my car )
Jim why are you pulling it out, for cleaning or replacing seals and cables?
Phil
Posted by: jim_hoyland Sep 16 2021, 04:04 AM
How is that valve removed from under the cowling. My plan is to pull the gas tank for better access first; then replace the driver side heat/defrost valve. The re-install the control cables.
Any tips will be appreciated…
( see sample photo, not my car )
Jim why are you pulling it out, for cleaning or replacing seals and cables?
Phil
I wasn’t able to get window defrost heat, only floor heat on the driver side. Removal of the valve showed the heat-side flapper was broken in half. How that happened ? No idea.
Posted by: Rob-O Sep 16 2021, 05:00 PM
Beyond the loosening of the two bolts that hold the cowl down, you may also want to remove the four nuts under the cowl that hold the dash on. Then inside the car there are two screws in the area by the door (believe knee pad has to come out to access those) to the sides of the vents (assuming a post ‘72 built car). One other bolt under the dash around the heat/vent controls and the whole dash could be moved quite a bit.
Once the dash is moved upwards (or removed completely) it’s amazing how much space there is in that area. It allows you to tilt that mix valve up without the defrost vent hitting the dash or the bottom part of the valve getting caught in the hole in the firewall.
Posted by: jim_hoyland Sep 16 2021, 05:35 PM
Beyond the loosening of the two bolts that hold the cowl down, you may also want to remove the four nuts under the cowl that hold the dash on. Then inside the car there are two screws in the area by the door (believe knee pad has to come out to access those) to the sides of the vents (assuming a post ‘72 built car). One other bolt under the dash around the heat/vent controls and the whole dash could be moved quite a bit.
Once the dash is moved upwards (or removed completely) it’s amazing how much space there is in that area. It allows you to tilt that mix valve up without the defrost vent hitting the dash or the bottom part of the valve getting caught in the hole in the firewall.
Good Tip !
Powered by Invision Power Board (http://www.invisionboard.com)
© Invision Power Services (http://www.invisionpower.com)